
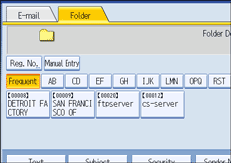
You can browse computers on the network for the destination folder, and then specify the path.
![]() Press [Manual Entry].
Press [Manual Entry].
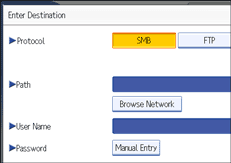
![]() Press [SMB].
Press [SMB].
![]() Press [Browse Network] under the path name field.
Press [Browse Network] under the path name field.
Domains or workgroups on the network appear.
If the message “Cannot find the specified path. Please check the settings.” appears, see "Troubleshooting When Using the Scanner Function", Troubleshooting.
![]() Select the domain or workgroup in which the destination folder is located.
Select the domain or workgroup in which the destination folder is located.
![]() Select the client computer that has the destination folder.
Select the client computer that has the destination folder.
If you cannot find the computer you are looking for, press [Up One Level] and browse that level.
If authentication is required to access the selected computer, the authentication screen appears. To authenticate, enter the user name and password.
![]() Select the destination folder.
Select the destination folder.
When the selected folder has sub-folders, the sub-folders list appears.
If you cannot find the destination folder, press [Up One Level], and then search for the folder at that level.
![]() Press [OK] twice.
Press [OK] twice.
![]()
If authentication is required to access the folder, the login screen appears. Enter the user name and password.
If you change the protocol after entering the path name, user name, or password, a confirmation message appears.
Up to 100 computers or shared folders can be displayed.
The machine may fail to transfer the file if you do not have the write privileges for the shared folder or there is not enough free hard disk space.
You can register the path to the destination in the machine' address book. For details, see "Registering the Path to the Selected Destination in the Address Book".