42 43
Boutons et descriptions
" La couleur et la forme du produit peuvent varier en fonction du modèle.
44
Boutons Descriptions
TV Permet d'allumer et d'éteindre le téléviseur.
SOURCE Permet de changer la source.
STB
Permet de démarrer et d'arrêter le boîtier du décodeur satellite ou le câble connecté au
téléviseur. Pour cela, le Smart Touch Control doit être configuré comme une télécommande
universelle.
w=v Permet de régler le volume.
VOICE Démarrez Reconnaissance vocale. Pour énoncer une commande vocale, maintenez le
bouton VOICE enfoncé, puis énoncez la commande vocale.
MUTE / AD : Permet d'activer et de désactiver le son du téléviseur.
Permet de changer la chaîne.
MORE
Permet d'afficher le panneau de la télécommande virtuelle à l'écran. Le panneau de la
télécommande virtuelle comprend un panneau numérique, un panneau de configuration
de la lecture et de la couleur ainsi qu'un panneau d'accès rapide. Utilisez le Touch Pad pour
sélectionner des nombres et des boutons.
Touchpad
Faites glisser votre doigt sur le Touch Pad comme vous le feriez sur le Touch Pad d'un
ordinateur portable, afin de déplacer la sélection affichée à l'écran. Pour sélectionner un
élément, appuyez sur le Touch Pad.
a, b, {, } Les touches de couleur fonctionnent différemment suivant l'action exécutée par le
téléviseur.
RETURN / EXIT Permet de revenir au menu précédent.
SMART HUB
Permet de démarrer le Smart Hub. Lorsqu'une application est en cours d'exécution, le fait
d'appuyer sur le bouton provoque la fermeture cette application.
GUIDE
Permet d'afficher la programmation de chaque chaîne numérique, y compris les heures
d'émissions. Permet également de définir les fonctions Programmer visionnage ou
Programmer enregistrement en appuyant avec le Touch Pad sur l'émission programmée.
44 45
Fonctions spécifiques
Maintenez une pression sur les boutons du Smart Touch Control suivants pour accéder à différentes fonctions
spécifiques.
Boutons Descriptions
MUTE / AD : Maintenez ce bouton enfoncé pour sélectionner Description audio et Sous-titres. (En
fonction du pays ou de la région.)
Touch Pad
Lorsque vous regardez la télévision, maintenez appuyé le Touch Pad pour afficher la Liste
CH à l'écran. Vous pouvez également appuyer sur le Touch Pad pendant moins 2 secondes
lorsqu'une application est en cours d'exécution afin d'accéder à ses fonctionnalités
masquées. (Disponible uniquement avec certaines applications.)
RETURN / EXIT
Permet de démarrer et d'arrêter le boîtier du décodeur satellite ou le câble connecté au
téléviseur. Pour cela, le Smart Touch Control doit être configuré comme une télécommande
universelle.
MORE Appuyez longuement sur le Touch Pad pour sélectionner facilement une fonction souhaitée
(par exemple MENU(m), TOOLS(T), INFO(`), etc.).
Bouton { Maintenez appuyé le bouton { tout en regardant la télévision pour afficher des
informations sur le programme actuel.
46
Touch Pad
Vous pouvez effectuer plusieurs actions avec le Touch Pad. Accédez à Didacticiel (Menu à l'écran > Système >
Gest. périph. > Paramètres Smart Touch Control > Didacticiel) pour afficher à l'écran un guide d'utilisation du
Smart Touch Control. Essayer
Faire glisser
Faites glisser un doigt sur le Touch Pad dans la direction souhaitée. Déplacez la sélection ou le pointeur dans la
direction vers laquelle le doigt se déplace.
Appuyez sur
Appuyez sur le Touch Pad. Cette action a pour effet de choisir l'élément sélectionné.
46 47
Mouvement rapide
Faites un mouvement rapide sur le Touch Pad dans la direction souhaitée. Cette action a pour effet de déplacer la
sélection ou de faire défiler l'écran en fonction de la direction et de la vitesse du geste.
Maintenez appuyé
Lorsque vous regardez la télévision, maintenez appuyé le Touch Pad pour afficher la Liste CH à l'écran. Vous
pouvez également appuyer sur le Touch Pad pendant moins 2 secondes lorsqu'une application est en cours
d'exécution afin d'accéder à ses fonctionnalités masquées. (Disponible uniquement avec certaines applications.)
Appuyez et déplacez
Appuyez sur le Touch Pad, faites glisser votre sélection à l'aide de votre doigt, puis relâchez. Cette action a pour
effet de déplacer l'élément Web sélectionné dans une page Web ou votre emplacement actuel sur une carte.
48
Défilement haut/bas
Faites défiler vers le haut/bas sur l'un des bords du Touch Pad. Cette action a pour effet de faire défiler une page
web ou une liste vers le haut/bas. Cette fonctionnalité de défilement permet ainsi de répondre aux besoins des
droitiers comme des gauchers.
Défilement gauche/droite
Déplacez votre doigt horizontalement sur la ligne projetée dans le haut du Touch Pad. Vous pouvez faire défiler
horizontalement une liste horizontale ou le panneau Smart Hub.
48 49
Changement de chaîne par la saisie de chiffres
Lorsque vous regardez la télévision, appuyez sur la ligne saillante sur le côté gauche ou droit du Touchpad
pour afficher la fenêtre de saisie numérique sur l'écran. Appuyez sur le numéro de la chaîne que vous souhaitez
regarder. Le numéro reconnu est affiché à l'écran et le téléviseur affiche la chaîne correspondante. Il est toutefois
possible que le chiffre saisi ne soit pas correctement reconnu par le téléviseur. Consultez le guide ci-dessous pour
vérifier que vos saisies numériques sont correctement reconnues.
Guide de saisie numérique
Consultez les schémas ci-dessous lorsque vous saisissez des valeurs numériques. Cependant, si vous ne suivez pas
les procédures affichées ci-dessous, il est possible que le téléviseur ne reconnaisse pas votre saisie.
Réglage du Touch Pad
Menu à l'écran > Système > Gest. périph. > Paramètres Smart Touch Control > Sensibilité Essayer
Vous pouvez régler la sensibilité du Touch Pad du Smart Touch Control. Définissez la Sensibilité pour régler la
sensibilité et rendre son utilisation plus pratique.
Affichage du bandeau d'état et de notification
Appuyez sur le bouton MORE du Smart Touch Control, puis sélectionnez STATUS sur le panneau de configuration
virtuel pour afficher la bannière d'état et de notification située en haut de l'écran. Reportez-vous au bandeau "Etat
et Notification" pour plus d'informations.
50
Recommandations
Appuyez sur le bouton RECOMM. / SEARCH, puis sélectionnez Recommandé dans la liste affichée en bas de l'écran.
Ceci permet d'afficher le programme en cours de diffusion ou programmé, et les recommandations de l'application.
Sélectionnez un programme en cours de diffusion pour accéder à la chaîne correspondante, ou un programme
prévu à la diffusion pour configurer les paramètres de la fonction Programmer visionnage ou Programmer
enregistrement. Reportez-vous à la section "Informations sur les programmes recommandés" pour plus
d'informations.
Sélectionnez une application à lancer. Samsung Apps démarre si l'application sélectionnée n'est pas installée sur le
téléviseur. Reportez-vous à la section "Samsung Apps" pour plus d'informations.
Historique
Appuyez sur le bouton RECOMM. / SEARCH (ou HISTORY/SEARCH), puis sélectionnez Historique dans la liste
affichée en bas de l'écran. Cette action a pour effet d'afficher une liste interactive des chaînes, du contenu
multimédia et des applications auxquels vous avez récemment accédés.
Supprimer des données de l'historique
Menu à l'écran > Fonctions Smart > Suppr. historique visionnage > Historique
Vous pouvez supprimer les informations de l'historique concernant les chaînes, les contenus et les applications
consultés récemment.
Recherche
Appuyez deux fois sur le bouton RECOMM. / SEARCH (ou HISTORY/SEARCH). Entrez des critères pour rechercher
de nombreuses applications et leur contenu sur le téléviseur, mais aussi effectuer des recherches sur le Web. Ce
bouton permet de basculer entre Recommandé et Rech..
50 51
Utilisation de la télécommande virtuelle
Appuyez sur le bouton MORE pour afficher le panneau de télécommande virtuelle à l'écran. Le panneau de
télécommande virtuelle comprend un panneau numérique, un panneau de configuration de la lecture et un
panneau d'accès rapide. Utilisez le Touch Pad pour sélectionner des nombres et des boutons. Maintenez le bouton
MORE appuyé. Un panneau d'accès rapide du panneau de la télécommande virtuelle apparaît. Vous pouvez
facilement sélectionner les boutons à l'écran.
Modification du panneau de configuration de la télécommande virtuelle
Sélectionnez le panneau numérique, le panneau de configuration de la lecture ou le panneau d'accès rapide à
afficher à l'écran.
Utilisez le Touch Pad pour continuer à déplacer la sélection vers la gauche ou vers la droite. Le panneau est modifié
lorsque la sélection est déplacée au delà du côté le plus à gauche ou le plus à droite.
La fonction de défilement gauche/droite du Touch Pad permet de modifier facilement le panneau.
Changer la position du panneau de la télécommande virtuelle
Appuyez sur le bouton MORE du Smart Touch Control. Le panneau de la télécommande virtuelle s'affiche à l'écran.
Maintenez appuyé le Touch Pad pendant une seconde. Les utilisateurs peuvent changer la position du panneau de
la télécommande virtuelle affiché à l'écran.
Utilisation du panneau numérique
Utilisez le panneau numérique pour entrer des chiffres sur un écran clavier ou une page Web, ou pour changer de
chaîne lorsque vous regardez la télévision. Le fait de changer de chaîne en utilisant le pavé numérique entraîne une
mémorisation, qui vous permet de revenir facilement aux chaînes précédentes.
Utilisation du panneau de configuration de la lecture
Le panneau de configuration de la lecture permet de mettre en pause, d'effectuer un retour ou une avance rapide,
de passer à un autre fichier et bien plus encore, tout en profitant d'un contenu multimédia.
Utilisation du panneau d'accès rapide
Accédez rapidement aux boutons INFO, MENU et e-Manual. Cependant, la disponibilité de ces boutons varie selon
le mode de fonctionnement du Smart Touch Control (téléviseur uniquement, télécommande universelle, etc.).
Réglage de la télécommande virtuelle
Menu à l'écran > Système > Gest. périph. > Paramètres Smart Touch Control > Taille télécommande à l'écran
Essayer
Vous pouvez redimensionner la télécommande virtuelle. Si les touches de la télécommande virtuelle sont trop
petites, agrandissez la fenêtre de la télécommande avant d'utiliser la télécommande virtuelle.
52
Config téléc universelle
Menu à l'écran > Système > Gest. périph. > Config téléc universelle Essayer
Ce téléviseur dispose d'une fonctionnalité de télécommande universelle qui vous permet de contrôler des
décodeurs câble, lecteurs Blu-ray, systèmes home cinéma et autres périphériques externes tiers raccordés à
l'appareil. Vous pouvez également utiliser la fonction Anynet+ (HDMI-CEC) pour commander des périphériques
externes Samsung à l'aide de la télécommande du téléviseur sans devoir préalablement effectuer de configuration
supplémentaire. Pour plus d'informations, reportez-vous à la section "Anynet+ (HDMI-CEC)".
Connexion du CABLE D'EXTENSION IR
Conservez une distance minimale de 5 cm entre le CABLE D'EXTENSION IR et le périphérique externe, comme
indiqué dans l'illustration. Placez le CABLE D'EXTENSION IR en face du récepteur de signal de télécommande du
périphérique externe. Il ne doit y avoir aucun obstacle entre le dispositif d'extension IR et le périphérique externe.
S'il y en a, ils produisent des interférences avec le signal de la télécommande.
" La couleur et le design du câble d'extension IR peuvent varier en fonction du modèle.
Ajout du périphérique externe
11 Allumez le périphérique externe pour lequel vous voulez configurer la fonction de télécommande universelle,
puis appuyez sur SOURCE pour afficher l'écran Source.
22 Sélectionnez Config téléc universelle en haut de l'écran. Cette action lance le processus de configuration de
la télécommande universelle.
33 Suivez les instructions affichées à l'écran pour la Config téléc universelle. Si elle ne réagit pas normalement,
configurez la télécommande en entrant manuellement le numéro du modèle.
52 53
Utilisation de la télécommande universelle
En configurant la fonction de télécommande universelle pour un connecteur sur lequel un périphérique externe
est déjà connecté, vous pouvez utiliser le Smart Touch Control en tant que télécommande universelle en envoyant
simplement les signaux d'entrée au connecteur correspondant.
Gestion de périphérique externe enregistré
Dans l'écran Config téléc universelle, sélectionnez un périphérique externe enregistré. Les options disponibles sont
les suivantes :
● Config. de la source
Modifier le connecteur d'entrée du téléviseur auquel le périphérique externe est raccordé.
● Désactivation sync.
Configurer le périphérique externe pour qu'il s'éteigne lors de l'extinction du téléviseur.
● Renommer
Renommer le périphérique externe enregistré (longueur maximale de 15 caractères).
● Supprimer
Supprimer le périphérique externe enregistré.
54
Saisie de texte à l'aide du clavier à l'écran
Un clavier s'affiche à l'écran quand vous devez saisir du texte (pour entrer un mot de passe de réseau, vous
connecter à votre compte Samsung, etc.). Il vous permet de saisir le texte à l'aide de la télécommande.
Saisie de texte à l'aide du clavier QWERTY
Utilisez le clavier QWERTY comme un clavier normal. Sélectionnez simplement les lettres souhaitées pour les
entrer.
Fonctionnalités supplémentaires
Sélectionnez l'icône du clavier pour accéder aux fonctionnalités suivantes :
● Langue
Sélectionnez une langue dans la liste.
● Texte suggéré
Active ou désactive la fonctionnalité Texte recommandé. L'activation de la fonctionnalité Texte recommandé
a pour effet d'afficher des recommandations de mots basées sur les caractères déjà saisis. Par exemple,
pour saisir le mot "Internet", il vous suffit d'entrer "In", puis de sélectionner "Internet" dans la liste des mots
recommandés.
● Prévoir prochaine lettre
Active ou désactive la fonctionnalité Prédiction de texte. L'activation de la fonctionnalité Prédiction de texte
vous évite de devoir chercher et sélectionner des touches de caractère. En revanche, cette fonctionnalité
est limitée aux mots précédemment ajoutés au dictionnaire. Par exemple, pour saisir le mot "Internet",
sélectionnez "I". Un mot prédit s'affiche à côté de la touche I. Sélectionnez simplement ce mot pour entrer
"Internet".
54 55
Interaction INTELLIGENTE
Ce téléviseur est doté d'une fonction d'interaction INTELLIGENTE qui reconnaît la voix, les actions et le visage
de l'utilisateur, et permet de faire fonctionner le téléviseur sans utiliser la télécommande. Les fonctionnalités de
commande par mouvement et de reconnaissance faciale nécessitent l'installation sur le téléviseur d'une caméra TV,
vendue séparément. Lorsque vous installez la caméra TV, assurez-vous que le téléviseur est connecté à Internet
afin qu'il puisse télécharger le logiciel requis pour la commande par mouvement. L'Interaction INTELLIGENTE
permet de configurer les paramètres et d'accéder aux fonctionnalités facilement. Il faut environ 15 secondes pour
que la reconnaissance vocale et la détection des mouvements soient activées après l'allumage du téléviseur.
– Il se peut que les fonctions de commande par mouvement et de reconnaissance faciale ne soient pas
disponibles dans toutes les régions.
– Certaines fonctionnalités de Samsung Smart Hub peuvent ne pas être disponibles sans l'acceptation expresse
de la collecte et de l'utilisation d'informations personnelles.
[ En cas de connexion de la caméra TV à des modèles de téléviseur Samsung de 2013, veillez à bien la brancher
sur le port USB spécifié du téléviseur. Les autres ports USB ne sont pas pris en charge pour cela.
Précautions
Reconnaissance faciale
Cet appareil enregistre des images miniatures des visages des utilisateurs durant le processus de Login facial.
La connexion au Smart Hub à l'aide de la reconnaissance faciale peut être moins sécurisée que l'utilisation d'un
identifiant et d'un mot de passe.
Utilisation de la caméra TV
Dans certaines circonstances et sous certaines législations, l'utilisation de la caméra TV peut engager votre
responsabilité juridique. Il se peut que la législation locale prescrive certaines obligations en matière de protection
des personnes, des données personnelles et de la libre circulation de ces dernières, voire d'autres lois (y compris
pénales) régissant la vidéosurveillance sur le lieu de travail ou ailleurs.
En utilisant la caméra TV, l'utilisateur s'engage à ne pas l'utiliser (i) dans des lieux où les caméras sont généralement
interdites (par exemple, salles de bain, vestiaires ou cabines d'essayage), (ii) de manière irrespectueuse de la vie
privée des personnes ou (iii) en violation des lois, réglementations et règlements en vigueur.
Si vous utilisez une caméra, commencez par vérifier si un autocollant est apposé au dos de celle-ci.
Avant de régler l'angle de la caméra TV, retirez l'autocollant.
Lorsque vous n'utilisez pas la caméra, faites pivoter son objectif vers le bas et immobilisez-le. Cela permet d'éviter
tout fonctionnement accidentel ou involontaire de la caméra.
Interaction intelligente
56
Commande par mouv.
La commande par mouvement utilise la caméra. L'utilisateur doit donc se trouver dans la plage de reconnaissance
de cette dernière. Le champ de vision de la caméra varie en fonction du niveau de luminosité ambiante et d'autres
facteurs. Avant d'utiliser la commande par mouvement pour déterminer la plage de reconnaissance de la caméra,
exécutez un Test environnement Commande par mouv.. L'utilisateur peut ressentir une certaine fatigue physique
après une utilisation prolongée de la commande par mouvement.
Reconnaissance vocale
Reconnaissance vocale n'est pas disponible dans toutes les langues, tous les dialectes ou toutes les régions. Les
performances varient en fonction de la langue choisie, du volume de la voix et du niveau de bruit ambiant de
l'environnement immédiat.
La saisie de texte vocale requiert l'accord par l'utilisateur de la politique de confidentialité des conversations de
l'application d'un tiers et de fournir à Samsung l'adresse MAC de l'utilisateur ainsi que d'autres données à caractère
personnel.
La saisie de texte vocale permet aux utilisateurs d'entrer du texte à l'aide de commandes vocales plutôt que
d'une souris, d'un clavier ou d'une télécommande. Cette fonction est particulièrement utile pour effectuer des
recherches, surfer et utiliser des applications nécessitant la saisie de texte.
56 57
Reconnaissance vocale
Menu à l'écran > Fonctions Smart > Reconnaissance vocale Essayer
Reconnaissance vocale
Reconnaissance vocale Activé
Langues UK English
Voix TV
Didacticiel reconnaissance vocale
" L'image affichée peut varier en fonction du modèle.
Reconnaissance vocale vous permet d'accéder à des fonctions spécifiques du téléviseur et de les contrôler par
commandes vocales. Pour la reconnaissance précise des commandes vocales, prononcez clairement les mots et
les phrases dans la langue sélectionnée dans Langues. L'horloge du téléviseur doit être réglée avant d'utiliser la
Reconnaissance vocale. Réglez la fonction Horloge (Menu à l'écran > Système > Heure > Horloge).
Appuyez sur le bouton VOICE, puis prononcez le mot/la phrase de commande à 10 ou 15 cm du microphone
situé sur le Smart Touch Control. Il se peut que les commandes ne soient pas reconnues si vous parlez trop bas ou
trop haut. Le niveau de volume optimal est d'environ 60 dB (par exemple : 60 dB : conversation générale, 70 dB :
sonnerie de téléphone).
" Cette fonctionnalité est disponible uniquement sur les séries LED 6330 et plus.
58
Environnement d'utilisation
Le taux de reconnaissance vocale varie en fonction du volume/signal, de la prononciation et de l'environnement
ambiant (son du téléviseur et bruit ambiant).
Didacticiel reconnaissance vocale
Menu à l'écran > Fonctions Smart > Reconnaissance vocale > Didacticiel reconnaissance vocale Essayer
Cette procédure vous permet de vous familiariser avec les principes de base de l'utilisation de la Reconnaissance
vocale. Exécutez Didacticiel reconnaissance vocale ou activez Reconnaissance vocale, puis dites "Guide-moi".
" En fonction du pays ou de la région.
Activation de Reconnaissance vocale
Appuyez sur VOICE pour exécuter la Reconnaissance vocale. Dites une commande. Vous pouvez utiliser la
Reconnaissance vocale pour commander le téléviseur. Essayer
Si Reconnaissance vocale ne fonctionne pas, vérifiez que l'option Reconnaissance vocale (Menu à l'écran >
Fonctions Smart > Reconnaissance vocale > Reconnaissance vocale) a bien été activée. Pour utiliser la fonction
Reconnaissance vocale, Reconnaissance vocale doit être défini sur Activé.
" Lorsque Reconnaissance vocale est activé, il se peut que le téléviseur s'allume automatiquement en raison d'un signal
parasite.
" En fonction du pays ou de la région.
58 59
Utilisation de base de la Reconnaissance vocale
Vous pouvez utiliser les commandes suivantes n'importe quand lorsque la Reconnaissance vocale est active :
● All Voice Commands : dites "Guide-moi", puis "Afficher tout" pour afficher la liste complète des commandes
vocales par catégorie. Dites le nom d'une catégorie.
● Available Voice Commands : dites "Guide-moi". Une liste des commandes vocales de base disponibles dans
l'état actuel s'affiche.
● Fonctions de base du téléviseur
– Réglage du volume : dites "Augmenter volume" ou "Baisser volume".
– Changement de chaîne : dites "Chaîne suivante" ou "Chaîne précédente".
– Eteindre : dites "Eteindre la TV".
– Moving the Focus : dites "Mise au point gauche", "Mise au point droite", "Mise au point haut" ou "Mise
au point bas" pour déplacer la sélection. Cependant, ces commandes peuvent uniquement être utilisées
dans des situations où la sélection peut être déplacée.
– Sélectionner élément : dites "Sélectionner".
● Commandes intelligentes
La liste des mots associés au Smart Hub dans l'état actuel est affichée comme suit : "Smart Hub",
"Applications", "Mes Réseaux"
● Applications et services
La liste des mots associés aux applications et services disponibles dans l'état actuel est affichée comme suit :
"Explore 3D", "Web Browser", "Samsung Apps"
Seules les commandes vocales prédéfinies sont reconnues. Les commandes vocales disponibles peuvent varier en
fonction de la version du logiciel.
Paramètres de la Reconnaissance vocale
Menu à l'écran > Fonctions Smart > Reconnaissance vocale
● Langue : permet de sélectionner une langue pour Reconnaissance vocale. Essayer
● Voix TV : permet d'activer/désactiver les réactions vocales du téléviseur à vos commandes de Reconnaissance
vocale et de choisir une voix d'homme ou de femme.
" Cette fonction n'est pas prise en charge dans certaines régions.
60
Commandes de Reconnaissance vocale interactive
La fonction Reconnaissance vocale interactive vous permet de régler les fonctionsEnr. Programmé et Rappel
programme, d'accéder à la VOD, de rechercher et de lancer des applications, ainsi que d'exécuter diverses
commandes sans avoir à mémoriser de commande ou de mot-clé spécifique. Par exemple, la commande "Eteindre
le téléviseur dans 30 minutes" indique au téléviseur de se mettre hors tension après 30 minutes (Veille).
Activez la fonction Reconnaissance vocale interactive et énoncez une commande. Voir les exemples ci-dessous :
● Lorsque vous ne savez pas sur quelle chaîne est diffusé un programme particulier :
"Lis ".
● Lorsque vous souhaitez obtenir des informations sur un genre particulier :
"Quelles émissions *** (genre) sont diffusées aujourd'hui ?"
● Lorsque vous voulez regarder un programme avec un acteur particulier ou réalisé par un réalisateur
particulier :
"Recherche des programmes avec *** (membre de la distribution)." / "Montre-moi des réalisations de *** (nom
du réalisateur)."
● Lorsque vous voulez obtenir plus d'informations sur le programme que vous regardez :
"Quelle est la distribution de ce programme ?" / "Quel est le titre de ce programme ?"
● Lorsque vous voulez obtenir des recommandations de programmes :
"Recommande-moi un programme à regarder ce soir." / "Y a-t-il des émissions dignes d'intérêt aujourd'hui ?"
● Lorsque vous voulez commander le téléviseur :
"Règle le volume sur 10." / "Passe à la chaîne **."
Désactivation de la fonction Reconnaissance vocale
Pour désactiver la fonction Reconnaissance vocale, dites "Ferme la Reconnaissance vocale".
60 61
Commande par mouv.
Menu à l'écran > Fonctions Smart > Commande par mouv. Essayer
Commande par mouv.
Commande par mouv. Activé
Guide animé des mouvements Arrêt
Vitesse curseur Moyen
Test environnement Commande par mouv.
Didacticiel contrôle par mouvement
" L'image affichée peut varier en fonction du modèle.
Utilisez la commande par mouvements pour changer de chaîne, régler le volume, déplacer le pointeur et contrôler
d'autres fonctions du téléviseur.
Il se peut que certaines applications ne prennent pas en charge la commande par mouvements.
Environnement d'utilisation
Les utilisateurs doivent se trouver à une distance comprise entre 1,5 m et 4 m de la caméra. La plage de
reconnaissance réelle peut varier en fonction de l'angle de la caméra et d'autres facteurs.
La commande par mouvements dépend de la caméra TV. Elle ne fonctionne donc pas si la caméra est orientée vers
le haut ou le bas. Réglez correctement l'angle de la caméra. N'orientez pas la caméra directement en direction du
soleil ou d'une autre source lumineuse, et n'obstruez pas son champ.
Pour que la caméra puisse détecter les mouvements de l'utilisateur, ce dernier doit se détacher de l'arrière-plan.
La luminosité ambiante appropriée est comprise entre 50 et 500 lux (par exemple, 100 lux : salle de bains, 400 lux :
salon).
Lors de l'utilisation de la commande par mouvements, évitez toute exposition directe à la lumière du soleil.
Pour évaluer la place de reconnaissance de la caméra avant d'utiliser la commande par mouvements, exécutez un
Test environnement Commande par mouv..
62
Test environnement Commande par mouv.
Menu à l'écran > Fonctions Smart > Commande par mouv. > Test environnement Commande par mouv.
Exécutez ce test avant d'utiliser la commande par mouvements pour vérifier qu'elle fonctionne correctement.
11 Exécutez un Test environnement Commande par mouv. et sélectionnez Démarrer à une distance de 1,5 m
à 4 m du téléviseur. Une lumière reflétée sur l'écran du téléviseur peut gêner l'utilisation de la fonction
Commande par mouv..
22 Réglez l'angle de la caméra de façon à ce que vous apparaissiez à l'intérieur du carré affiché à l'écran. Après
avoir réglé l'angle de la caméra, faites bouger lentement une main de gauche à droite. Déployez la main en
tournant la paume en direction du téléviseur. Lorsque le téléviseur détecte l'action, un curseur en forme de
flèche s'affiche à l'écran. En cas d'échec, réessayez.
Didacticiel sur la commande par mouvement
Menu à l'écran > Fonctions Smart > Commande par mouv. > Didacticiel contrôle par mouvement
Une manière amusante et simple de découvrir la fonction Commande par mouv.. Lancez la fonction Commande par
mouv. puis suivez les instructions du guide.
Activation de la commande par mouvements
Menu à l'écran > Fonctions Smart > Commande par mouv. > Commande par mouv. Essayer
Levez la main en tournant la paume en direction du téléviseur. Restez immobile quelques secondes, puis faites
bouger lentement votre main d'un côté vers l'autre, à trois ou quatre reprises. Une fois votre main détectée, la
commande par mouvement est activée, et un pointeur s'affiche à l'écran.
" Lorsque votre main sort de la plage de reconnaissance de la caméra TV, la commande par mouvements est désactivée. Il
vous suffit de lever la main dans un délai de 3 secondes pour la réactiver.
62 63
Utilisation des commandes par mouvements de base
Les commandes par mouvements disponibles peuvent varier en fonction de l'opération exécutée à cet instant par
le téléviseur.
● Navigation pointage : déplace le curseur vers la position souhaitée.
● Exécuter / Sélectionner : la fermeture du poing permet de sélectionner une option ou d'exécuter une
commande. Le maintien du poing fermé équivaut à maintenir la pression sur un bouton de télécommande.
● Retour : un cercle décrit avec la main dans le sens contraire des aiguilles d'une montre permet de revenir au
menu précédent.
● Retourner les écrans : maintenez la paume de votre main à la verticale tout en effectuant un geste de
balayage vers la gauche ou la droite, pour changer les écrans Smart Hub.
● Défilement d'une page web : lorsque vous affichez une page web, serrez le poing, puis déplacez-le vers le
haut / le bas pour faire faire défiler la page vers le haut / le bas.
Options de commande par mouvements
Menu à l'écran > Fonctions Smart > Commande par mouv.
● Guide animé des mouvements
Affiche un Guide animé des mouvements lors de la détection d'un mouvement de l'utilisateur.
● Vitesse curseur
Définit la vitesse du pointeur utilisé dans Commande par mouv..
64
Ecran Commande par mouv.
Composition de l'écran lorsque vous regardez la télévision
Lorsque vous démarrez la Commande par mouv. en regardant la télévision, l'écran affiche les icônes suivantes.
Icône Description
/ Permet de régler le volume.
Permet d'activer et de désactiver le son du téléviseur.
/ Permet de changer la chaîne.
Permet de vérifier les informations sur le programme recommandé et les heures de
diffusion. Sélectionnez un programme dans la liste pour consulter des informations
détaillées sur ce dernier.
Permet de lancer Smart Hub.
Pour accéder à une chaîne, entrez son numéro à l'aide du panneau numérique. Le panneau
de contrôle de lecture associé aux boutons de couleur à l'écran vous permet de contrôler
un fichier multimédia en cours de lecture.
Permet de changer de source.
Permet d'éteindre le téléviseur.
64 65
Composition de l'écran Smart Hub
Lorsque vous démarrez la Commande par mouv. en utilisant Smart Hub, l'écran affiche les icônes suivantes.
Icône Description
/ Permet de régler le volume. Cette commande peut seulement être utilisée à partir de Mes
Programmes.
Permet d'activer et de désactiver le son du téléviseur. Cette commande peut seulement
être utilisée à partir de Mes Programmes.
/ Permet de changer la chaîne. Cette commande peut seulement être utilisée à partir de
Mes Programmes.
Permet de revenir au menu précédent.
Permet de vérifier les informations sur le programme recommandé et les heures de
diffusion. Sélectionnez un programme dans la liste pour consulter des informations
détaillées sur ce dernier.
Pour accéder à une chaîne, entrez son numéro à l'aide du panneau numérique. Le panneau
de contrôle de lecture associé aux boutons de couleur à l'écran vous permet de contrôler
un fichier multimédia en cours de lecture.
Permet de changer de source.
Permet d'éteindre le téléviseur.
66
Récupération des icônes sur l'écran
Lorsque vous utilisez la Commande par mouv. avec le Smart Hub, les icônes disparaissent automatiquement après
deux secondes d'inactivité. Pour les afficher de nouveau, déplacez le pointeur vers l'un des trois bords, comme
affiché ci-dessous (en bleu), puis laissez-le là pendant une seconde. Les icônes apparaîtront de nouveau à l'écran.
Icône Description
① / / / /
② / /
③ /
66 67
Reconnaissance faciale
Les utilisateurs peuvent enregistrer leur visage et se connecter à leurs comptes Smart Hub à l'aide de la
fonctionnalité de reconnaissance faciale. Il est possible d'enregistrer un visage par compte. Selon le niveau de
luminosité ambiante et le teint de l'utilisateur, le téléviseur reconnaît le visage de ce dernier plus au moins aisément.
Reportez-vous à la section "Compte Samsung" pour plus d'informations.
[ En cas de connexion de la caméra TV à des modèles de téléviseur Samsung de 2013, veillez à bien la brancher
sur le port USB spécifié du téléviseur. Les autres ports USB ne sont pas pris en charge pour cela.
Environnement d'utilisation
● L'utilisateur doit se trouver à une distance comprise entre 1,5 m et 4 m de la caméra. La plage de
reconnaissance réelle peut varier en fonction de l'angle de la caméra et d'autres facteurs.
● La luminosité ambiante appropriée est comprise entre 50 et 500 lux (100 lux : salle de bains, 400 lux : salon)
● La fonction de reconnaissance faciale peut reconnaître jusqu'à 5 utilisateurs différents en même temps.
● Il est possible que le téléviseur distingue mal les jumeaux et les personnes dont les visages se ressemblent.
Gardez à l'esprit les informations suivantes lorsque vous utilisez la reconnaissance faciale :
● Ne cachez pas votre visage en portant un chapeau, des lunettes de soleil ou vos cheveux.
● La caméra doit pouvoir voir l'ensemble du visage de l'utilisateur. Evitez les ombres sur votre visage. Les
ombres empêchent la caméra de reconnaître votre visage avec précision.
● Gardez une expression aussi neutre que possible. De même, fermez votre bouche, tout en arborant une
expression neutre.
● Lors de votre connexion à votre compte Samsung, l'expression de votre visage doit être identique à celle que
vous arboriez durant le processus d'enregistrement.
68
Enregistrement du visage
Pour enregistrer un visage, un login Smart Hub est requis. Connectez-vous au Smart Hub. Si vous n'avez pas de
compte, créez-en un.
11 Ouvrez le menu Fonctions Smart > Compte Samsung > Modifier profil et sélectionnez Enreg. visage.
22 Lisez les instructions, sélectionnez OK, puis entrez le mot de passe du compte Samsung.
33 Sélectionnez l'option Prendre photo ; votre visage apparaît à l'écran. Ajustez-le pour qu'il se trouve
exactement dans le cadre rouge en pointillés. Le visage est enregistré lorsque le cadre devient vert. Si
l'opération échoue, sélectionnez Réessayer.
" La caméra doit pouvoir voir l'ensemble du visage de l'utilisateur. Evitez les ombres sur votre visage. Les ombres
empêchent la caméra de reconnaître votre visage avec précision.
" Gardez une expression aussi neutre que possible. De même, fermez votre bouche, tout en arborant une expression
neutre.
" Il est préférable d'activer la case à cocher en regard de l'option Je souhaite également entrer un mot de passe
pour plus sécurité. L'utilisateur sera alors obligé d'entrer le mot de passe lors de la connexion à l'aide de la
reconnaissance faciale.
44 Sélectionnez Enregistrer pour terminer.
Login par reconnaissance faciale
Sélectionnez Reconnaissance faciale, puis Démarrer dans la fenêtre de connexion. Le téléviseur reconnaît
automatiquement le visage d'un utilisateur. En cas d'échec, réessayez. Si l'option de saisie de mot de passe a été
activée sous Modifier profil, vous devez également entrer votre mot de passe pour vous connecter au Smart Hub.
" La caméra doit pouvoir voir l'ensemble du visage de l'utilisateur. Evitez les ombres sur votre visage. Les ombres
empêchent la caméra de reconnaître votre visage avec précision.
" Gardez une expression aussi neutre que possible. De même, fermez votre bouche, tout en arborant une expression
neutre.
" En cas de réussite de la reconnaissance, le téléviseur se connecte automatiquement au Smart Hub. Si le téléviseur
reconnaît plus d'un visage enregistré, la liste des comptes correspondants s'affiche. Sélectionnez le compte approprié. La
reconnaissance d'un visage non enregistré entraîne l'affichage d'un avertissement.
68 69
Utilisation de dispositifs périphériques
Gest. périph.
Paramètres clavier
Paramètres souris
Paramètres Smart Touch Control
Config téléc universelle
" L'image affichée peut varier en fonction du modèle.
Il est possible de contrôler ce téléviseur à l'aide d'un clavier et d'une souris au lieu d'une télécommande.
Ces dispositifs périphériques rendent l'utilisation du téléviseur plus facile et pratique.
Certains modèle ne prennent pas en charge les claviers et souris de classe HID USB.
" Il se peut que certains claviers ne prennent pas en charge cette fonction.
Connexion d'un clavier
Menu à l'écran > Système > Gest. périph. > Paramètres clavier Essayer
Pour faciliter la saisie de texte, connectez un clavier au téléviseur. Pour utiliser un clavier USB, branchez le câble de
ce dernier sur le port USB du téléviseur. Si vous disposez d'un clavier Bluetooth, couplez-le à l'aide de la fonction
Bluetooth du téléviseur.
● Sélectionner clavier
Indiquez le clavier à utiliser. Vous ne pouvez utiliser qu'un seul clavier à la fois. Essayer
● Ajouter un clavier Bluetooth
Affichez la liste des claviers Bluetooth à portée. Sélectionnez le clavier à utiliser.
" Cette fonctionnalité est disponible uniquement avec les séries LED 6330 et plus.
● Options clavier
Configurez la langue, le type et d'autres paramètres de base du clavier. Essayer
Utilisation du clavier
Pour commander le téléviseur, utilisez les touches de clavier suivantes.
● Touche fléchée (déplace la sélection), Windows (m), Menu (TOOLS), Entrée (Sélection et activation), ESC
(RETURN), Chiffres (Chiffres)
● F1 (a), F2 (b), F3 ({), F4 (}), F5 ( ), F6 (bouton SOURCE), F7 (bouton CH LIST), F8 (bouton MUTE), F9/
F10 (Y), F11/F12 (< P >)
● Haut de page / Bas de page : permet de faire défiler une page Web vers le haut ou vers le bas.
70
Connexion d'une souris
Menu à l'écran > Système > Gest. périph. > Paramètres souris Essayer
Connectez une souris au téléviseur, puis cliquez avec le bouton droit pour afficher l'écran Accéder à. Vous pouvez
ensuite utiliser le menu à l'écran, Smart Hub et d'autres fonction du téléviseur à l'aide de la souris, comme vous le
feriez sur un ordinateur.
Pour utiliser une souris USB, branchez le câble de cette dernière sur le port USB du téléviseur. Si vous disposez
d'une souris Bluetooth, couplez-le à l'aide de la fonction Bluetooth du téléviseur.
● Sélectionner souris
Indiquez la souris à utiliser. Vous ne pouvez utiliser qu'une seule souris à la fois. Essayer
● Aj. souris Bluetooth
Affichez la liste des souris Bluetooth à portée. Sélectionnez la souris à utiliser.
" Cette fonctionnalité est disponible uniquement avec les séries LED 6330 et plus.
● Options de souris
Configurez les affectations des boutons, la vitesse du pointeur et d'autres paramètres de base de la souris.
Essayer
Utilisation d'une souris
● Bouton gauche : permet de sélectionner et d'activer.
● Bouton droit : affiche l'écran d'accès incluant des options telles que Arrêt, Menu à l'écran, Smart Hub et
Outils.
● Molette de la souris : permet de faire défiler une page Web vers le haut ou vers le bas.
71
Visionnement du téléviseur
Diffusion
Recherche automatique
Antenne Hertzien
Liste des chaînes
Guide
Gestionnaire prog.
Modifier la chaîne
Modif. favoris
" L'image affichée peut varier en fonction du modèle.
Utilisez cette fonctionnalité pour afficher plus facilement le guide et les informations des programmes. Toutefois,
ces fonctionnalités sont indisponibles si vous regardez la télévision en utilisant un décodeur câble ou un récepteur
satellite.
Informations sur les programmes
Sélectionnez la touche INFO de la télécommande standard ou virtuelle tout en regardant la télévision pour afficher
des informations sur le programme en cours.
Des informations sur les programmes ne sont toutefois disponibles que pour les chaînes numériques. Pour pouvoir
accéder aux informations sur les programmes, vous devez avoir réglé préalablement l'horloge du téléviseur.
Pour régler l'horloge, accédez à Heure (Menu à l'écran > Système > Heure > Horloge). Les informations sur les
programmes peuvent varier en fonction du type de signal entrant, voire être totalement indisponibles pour
certains programmes.
Appuyez sur le Touch Pad lorsque l'écran des informations sur le programme est affiché pour lancer
l'enregistrement du programme en cours. Par ailleurs, faites glisser votre doigt vers la gauche ou la droite sur le
Touch Pad pour consulter les autres programmes ou appuyez sur le Touch Pad pour définir le réglage Rappel de
programme ou Enr. Programmé pour le programme sélectionné.
" Maintenez appuyé le bouton { tout en regardant la télévision pour afficher des informations sur le programme actuel.
Changement de signal de diffusion
Menu à l'écran > Diffusion > Antenne Essayer
Choisissez l'antenne dont vous voulez recevoir les signaux de diffusion numérique.
Guide
Menu à l'écran > Diffusion > Guide Essayer
permet d'afficher la programmation de chaque chaîne numérique, y compris les horaires d'émissions. Vous
pouvez consulter les programmes, ainsi que configurer les fonctions Programmer visionnage ou Programmer
enregistrement. Appuyez sur GUIDE pour lancer.
Changement de chaîne
Pour accéder directement à une chaîne, sélectionnez-la dans le Guide.
72
Enregistrement du programme en cours de diffusion
Mettez en surbrillance un programme en cours de diffusion, puis sélectionnez le bouton INFO sur la télécommande
standard ou le panneau de la télécommande virtuelle. L'écran d'informations apparaît. Sélectionnez Enregistrer.
Enregistrer est uniquement disponible pour le programme en cours de diffusion.
Changement de catégorie
Appuyez sur le bouton b pour changer la liste des chaînes.
Quick Navigation
Appuyez sur le bouton a. Une fenêtre contextuelle s'affiche. Faites glisser votre doigt vers la gauche ou la droite
sur le Touch Pad pour déplacer la sélection de vingt-quatre heures en arrière ou en avant. Vous pouvez ainsi
naviguer plus rapidement entre les horaires de programmation. Toutefois, la sélection ne peut pas être effectuée à
une heure antérieure à l'heure actuelle.
Pour les séries LED 4500 - 6300
Appuyez sur le bouton a. Une fenêtre contextuelle s'affiche. Appuyez sur la touche fléchée gauche ou droite pour
déplacer la sélection de deux heures en arrière ou en avant, ce qui vous permet de naviguer plus rapidement entre
les horaires de programmation. Toutefois, la sélection ne peut pas être effectuée à une heure antérieure à l'heure
actuelle.
Programmer visionnage
Sélectionnez un programme que vous souhaitez regarder, puis actionnez la touche INFO de la télécommande
virtuelle ou standard pour afficher l'écran d'informations détaillées. Dans cet écran, sélectionnez Programmer
visionnage pour configurer l'option Programmer visionnage. Programmer visionnage est disponible uniquement
pour les programmes qui n'ont pas encore été diffusés. Pour afficher la liste des programmes réservés, appuyez
sur le bouton {, puis accédez à l'écran Gestionnaire prog..
Programmer enregistrement
Sélectionnez un programme que vous souhaitez regarder, puis le bouton INFO sur la télécommande standard ou le
panneau de la télécommande virtuelle pour afficher l'écran d'informations détaillées. Programmer enregistrement
est disponible uniquement pour les programmes qui n'ont pas encore été diffusés. Pour afficher la liste des
programmes réservés, appuyez sur le bouton {, puis accédez à l'écran Gestionnaire prog..
Consultation des informations sur les programmes
Mettez en surbrillance un programme, puis appuyez sur le bouton INFO. Cela a pour effet d'afficher des
informations détaillées sur le programme en surbrillance. Les informations sur les programmes peuvent varier en
fonction du type de signal entrant, voire être totalement indisponibles pour certains programmes.
72 73
Liste des chaînes
Menu à l'écran > Diffusion > Liste des chaînes Essayer
Lorsque vous regardez la télévision, ouvrez la Liste des chaînes pour changer de chaîne ou consulter les
programmes diffusés sur d'autres chaînes numériques. Maintenez appuyé le Touch Pad pendant 2 secondes.
L'écran Liste des chaînes s'affiche.
Les icônes de l'écran Liste des chaînes signifient ce qui suit :
● : chaîne analogique
● : chaîne favorite
● : chaîne réservée pour visionnage programmé
● : chaîne réservée pour enregistrement programmé
● : chaîne verrouillée
Changement de chaîne
Sélectionnez une chaîne à laquelle vous voulez accéder directement. Pour faire défiler la liste rapidement, utilisez
les boutons haut et bas de sélection des chaînes. La sélection se déplace vers le haut et le bas de la liste dans une
page.
Tri
(Chaînes numériques uniquement)
Faites glisser votre doigt vers la gauche sur le Touch Pad ou appuyez sur la touche fléchée gauche de la
télécommande.
Modifie l'ordre des chaînes classées par nom ou par numéro.
74
Genre
Faites glisser votre doigt vers la gauche sur le Touch Pad ou appuyez sur la touche fléchée gauche de la
télécommande, puis sélectionnez Genre. Sélectionnez le genre de chaîne de télévision souhaité.
La fonction Genre ne peut être utilisée que lorsque le mode canal de la liste des chaînes est défini sur Chaînes
ajoutées. Les chaînes ajoutées doivent toutefois inclure des informations sur le genre.
Pour les séries LED 4500 - 6300
Appuyez sur la touche fléchée gauche de la télécommande et Genre.
Changement de signal de diffusion
Faites glisser votre doigt vers la gauche sur le Touch Pad ou appuyez sur la touche fléchée gauche de la
télécommande, puis sélectionnez un signal de diffusion. Cette action a pour effet de changer instantanément la
source du signal.
Pour les séries LED 4500 - 6300
Appuyez sur la touche fléchée droite de la télécommande et sélectionnez un signal de diffusion. Cette action a
pour effet de changer instantanément la source du signal.
Changement de liste des chaînes
Faites glisser votre doigt sur la droite du Touch Pad ou appuyez sur la touche fléchée droite de la télécommande,
puis passez à la liste Chaînes ajoutées ou Favoris. Toutefois, vous ne pouvez sélectionner la liste Favoris que si elle
contient au moins une chaîne. Si aucune chaîne n'y a été ajoutée précédemment, sélectionnez Modif. favoris, puis
ajoutez des chaînes à partir de l'écran Modif. favoris.
Pour les séries LED 4500 - 6300
Appuyez sur la touche fléchée droite de la télécommande et basculez vers la liste Chaînes ajoutées ou Favoris.
Toutefois, vous ne pouvez sélectionner la liste Favorites que si elle contient au moins une chaîne. Si aucune chaîne
n'y a été ajoutée précédemment, sélectionnez Modif. favoris, puis ajoutez des chaînes à partir de l'écran Modif.
favoris.
74 75
Programmer visionnage
Méthode 1 : Menu à l'écran > Diffusion > Gestionnaire prog. Essayer
Méthode 2 : Sélectionnez le bouton GUIDE de la télécommande standard ou virtuelle pour activer l'écran Guide,
puis appuyez sur le bouton {.
Diffusion
Recherche automatique
Antenne Hertzien
Liste des chaînes
Guide
Gestionnaire prog.
Modifier la chaîne
Modif. favoris
" L'image affichée peut varier en fonction du modèle.
Configurez le téléviseur pour afficher une chaîne ou un programme spécifiques à une heure et une dates
déterminées. Avant de programmer le visionnage du téléviseur, vérifiez que la date et l'heure sont configurées
correctement sous le menu Menu à l'écran > Système > Heure > Horloge.
L'icône s'affiche à côté des programmes dont le visionnage est programmé.
Programmation du visionnage de chaîne numérique
Vous pouvez programmer le visionnage d'émissions de chaînes numériques à l'aide des options suivantes :
● Guide
● Informations sur les programmes
Guide
Le Guide vous permet de sélectionner un programme à regarder.
Informations sur les programmes
Sélectionnez la touche INFO de la télécommande standard ou virtuelle pour afficher des informations sur le
programme en cours. Dans l'écran d'informations sur le programme, faites glisser votre doigt vers la droite ou
la gauche sur le Touch Pad ou appuyez sur la touche gauche / droite de la télécommande pour sélectionner un
programme qui n'a pas encore été diffusé et configurez l'option Programmer visionnage.
76
Programmation du visionnage de chaîne analogique
Vous pouvez configurer la fonction Programmer visionnage pour des émissions de chaînes analogiques en
spécifiant la date et l'heure.
11 Exécutez Gestionnaire prog., puis sélectionnez Programme. Un menu contextuel s'affiche. Sélectionnez
Programmer visionnage pour continuer.
22 Spécifiez les options Antenne, Canal, Répétition et Heure de début de ce programme, puis sélectionnez OK
pour terminer.
Annulation d'un visionnage programmé
Pour annuler le visionnage programmé d'une émission spécifique, sélectionnez le programme dans l'écran
Gestionnaire prog.. Un menu contextuel s'affiche. Sélectionnez l'option Supprimer pour annuler.
Modifier la liste des programmes
Sélectionnez une entrée de l'écran Gestionnaire prog., puis, dans le menu contextuel, sélectionnez l'option Editer.
Modifiez les paramètres de l'entrée sélectionnée.
76 77
Programmer enregistrement
Méthode 1 : Menu à l'écran > Diffusion > Gestionnaire prog.
Méthode 2 : Sélectionnez le bouton GUIDE de la télécommande standard ou virtuelle pour activer l'écran Guide,
puis appuyez sur le bouton { pour activer l'écran Gestionnaire prog. et enfin sélectionnez Programme. Un menu
contextuel s'affiche. Sélectionnez Programmer enregistrement pour confirmer.
Diffusion
Recherche automatique
Antenne Hertzien
Liste des chaînes
Guide
Gestionnaire prog.
Modifier la chaîne
Modif. favoris
" L'image affichée peut varier en fonction du modèle.
Cette TV peut enregistrer des programmes en cours et futurs sur un périphérique de stockage USB afin de les
visionner ultérieurement sans recourir à une périphérique d'enregistrement externe.
L'option Programmer enregistrement est disponible uniquement avec les chaînes numériques. L'icône
s'affiche à côté des chaînes et programmes dont l'enregistrement est programmé.
Vous pouvez regarder des enregistrements en sélectionnant Progr. TV enreg. parmi Mes Programmes ou Mes
Contenus.
Précautions
● Pour pouvoir programmer un enregistrement, vous devez avoir réglé préalablement l'horloge du téléviseur.
Pour régler l'Horloge, accédez à Menu à l'écran > Système > Heure > Horloge.
● Les enregistrements étant protégés par gestion des droits numériques (DRM), ils ne peuvent pas être lus sur
un ordinateur ou un autre téléviseur. En outre, vous ne pouvez pas lire ces fichiers sur votre téléviseur en cas
de remplacement de son circuit vidéo.
● Il est recommandé d'utiliser un disque dur USB tournant à une vitesse minimale de 5 400 tpm. Toutefois, les
disques durs USB de type RAID ne sont pas pris en charge.
● La capacité totale d'enregistrement peut varier en fonction de la quantité d'espace disponible sur le disque
dur et du niveau de qualité d'enregistrement.
● La fonction Programmer enregistrement nécessite au minimum 100 Mo d'espace libre sur le périphérique de
stockage USB. L'enregistrement s'arrête si l'espace de stockage disponible chute sous la barre de 50 Mo en
cours d'enregistrement.
● Si l'espace de stockage disponible chute sous la barre de 500 Mo pendant l'exécution des fonctions
d'enregistrement programmé et Timeshift, seul l'enregistrement est arrêté.
● La durée d'enregistrement maximale est de 360 minutes.
● Les paramètres du téléviseur s'appliquent lors de la lecture d'enregistrements et de l'utilisation de la fonction
Timeshift.
78
● En cas de modification du signal d'entrée en cours d'enregistrement, l'écran affiché est vide jusqu'à ce que le
basculement soit effectué. L'enregistrement reprend, mais le bouton est indisponible.
● Avant de pouvoir enregistrer, vous devez effectuer un Test de perf. du périph. sur le périphérique de
stockage USB connecté au téléviseur. Un test de performance du périphérique peut être effectué à partir de
Guide intelligent ou Mes Contenus. Si l'enregistrement a été sélectionné à partir du Guide ou de la fonction
Infos sur le programme et que le périphérique de stockage USB a échoué au Test de perf. du périph., le
téléviseur lance une opération Formater le périphérique, puis effectue un nouveau Test de perf. du périph..
● Lors de l'utilisation de la fonction d'enregistrement, l'enregistrement réel peut commencer une seconde ou
deux après l'heure spécifiée.
● Si la fonction Programmer enregistrement est en cours d'exécution au même moment qu'un enregistrement
sur un périphérique externe compatible HDMI-CEC, la fonction Programmer enregistrement est prioritaire.
● La connexion d'un périphérique USB d'enregistrement a pour effet de supprimer automatiquement les
fichiers Timeshift et d'enregistrement sauvegardés de façon anormale.
● Si l'une des options Progr. désact. ou Hors ten. auto a été définie, le téléviseur remplace le paramétrage si un
enregistrement est en cours au moment spécifié, et s'éteint à la fin de l'enregistrement.
Configuration de périphérique d'enregistrement dédié
Après avoir connecté un périphérique de stockage externe, ce dernier doit être configuré en tant que périphérique
de programmes TV enregistrés dédié avant de pouvoir utiliser les fonctions Programmer enregistrement et
TimeShift (Décalage dans le temps).
Plug & Play
11 Appuyez sur , puis lancez Smart Hub. Sélectionnez Progr. TV enreg. en bas de l'écran Mes Programmes
ou Mes Contenus pour afficher une liste des périphériques connectés. Sélectionnez le périphérique à utiliser.
Une fenêtre contextuelle s'affiche.
22 Sélectionnez l'option Oui. L'écran Formatage périph. vous permet de formater le périphérique pour un
système compatible avec l'enregistrement vidéo. Notez que le formatage du périphérique a pour effet
d'effacer toutes les données existantes.
33 Une fois le formatage terminé, testez le périphérique pour voir s'il prend en charge les fonctions
d'enregistrement et Timeshift. Après avoir effectué le test, le périphérique est prêt à être utilisé avec les
fonctions Programmer enregistrement et TimeShift (Décalage dans le temps). Un échec du test indique
que le périphérique sélectionné ne peut pas être utilisé en tant que périphérique d'enregistrement dédié.
Sélectionnez un autre périphérique.
78 79
Gestion de périphérique d'enregistrement dédié
Gérez le périphérique de stockage externe configuré en tant que périphérique d'enregistrement dédié.
11 Appuyez sur , puis lancez Smart Hub. Sélectionnez Progr. TV enreg. en bas de l'écran Mes Programmes ou
Mes Contenus pour afficher une liste des périphériques connectés. Pour afficher la liste des fichiers stockés
sur le périphérique d'enregistrement dédié, sélectionnez ce dernier.
22 Sélectionnez Options dans le haut de l'écran, puis Gérer périphérique.
L'écran Gérer périphérique affiche les options suivantes :
● Formater le périphérique : formate le périphérique de stockage externe pour un système compatible avec
l'enregistrement vidéo.
● Vérifier périphérique: vérifie si le périphérique de stockage externe utilise un système compatible avec
l'enregistrement vidéo.
● Test de perf. du périph. : teste le périphérique de stockage externe pour voir s'il prend en charge les fonctions
d'enregistrement et de Timeshift.
● Périph. enregistr. défaut : si plusieurs périphériques de stockage externes sont raccordés au téléviseur, vous
pouvez en désigner un à utiliser par défaut avec les fonctions d'enregistrement et Timeshift.
Enregistrement de programmes
Les options disponibles pour l'enregistrement de programmes sont les suivantes :
● Enregistrement instantané
● Guide
● Informations sur les programmes
● Heure et date spécifiées
Pour enregistrer le programme en cours de diffusion, sélectionnez le bouton sur la télécommande standard
ou sur le panneau de la télécommande virtuelle, puis définissez la durée d'enregistrement de votre choix.
Guide
Dans Guide, sélectionnez un programme en cours de diffusion, puis sélectionnez le bouton INFO sur la
télécommande standard ou le panneau de la télécommande virtuelle. Vous pouvez enregistrer le programme
sélectionné. Vous pouvez également programmer l'enregistrement pour enregistrer un programme diffusé plus
tard. Cette fonction est uniquement disponible pour les chaînes numériques.
80
Informations sur les programmes
Sélectionnez le bouton INFO sur la télécommande standard ou le panneau de la télécommande virtuelle. L'écran
d'informations du programme que vous regardez s'affiche. Une fois sur cet écran, appuyez sur le Touch Pad. Vous
pouvez alors enregistrer le programme. Vous pouvez également programmer un enregistrement en maintenant
votre doigt appuyé sur le Touch Pad tout en le faisant glisser vers la gauche ou la droite, et ainsi sélectionner un
programme diffusé plus tard. Cette fonction est uniquement disponible pour les chaînes numériques.
Pour les séries LED 4500 - 6300
Appuyez sur le bouton INFO lorsque vous êtes sur un programme dont l'horaire est valable pour l'enregistrer.
Appuyez sur le bouton l ou r de la télécommande et sélectionnez un programme prévu à la diffusion afin de
planifier son enregistrement.
Heure et date spécifiées
11 Exécutez Gestionnaire prog., puis sélectionnez Programme. Un menu contextuel s'affiche. Sélectionnez
Programmer enregistrement pour confirmer.
22 Spécifiez les options Antenne, Canal, Répétition, Heure de début et Heure de fin de ce programme, puis
sélectionnez OK pour terminer.
Annulation de la fonction Programmer enregistrement
Pour annuler l'enregistrement programmé d'une émission spécifique, sélectionnez le programme dans l'écran
Gestionnaire prog.. Un menu contextuel s'affiche. Sélectionnez l'option Supprimer pour annuler.
Modification de la liste de programmation
Sélectionnez une entrée de l'écran Gestionnaire prog., puis, dans le menu contextuel, sélectionnez l'option Editer.
Modifiez les paramètres de l'entrée sélectionnée.
80 81
Lecture d'un programme enregistré
Appuyez sur , puis lancez Smart Hub. Sélectionnez Progr. TV enreg. en bas de l'écran Guide intelligent ou Mes
Contenus. Pour afficher la liste des enregistrements disponibles, sélectionnez le périphérique de stockage externe
contenant les programmes enregistrés. Essayer
Sélectionnez un programme dans la liste, ou appuyez sur ∂ pour lire le programme sélectionné. Lors de la
lecture des fichiers, utilisez la télécommande ou les boutons de commande à l'écran. Pour afficher les boutons de
commande à l'écran, appuyez sur le Touch Pad ou sur TOOLS. Pour les masquer, appuyez sur RETURN.
Pour en sortir, sélectionnez le bouton ∫ sur la télécommande standard ou le panneau de la télécommande virtuelle,
ou appuyez sur le bouton RETURN.
Changement de mode de visionnage
Sélectionnez Afficher en haut de la liste, puis sélectionnez un mode de visionnage. La liste est triée dans l'ordre
correspondant au mode de visionnage sélectionné.
Visionnage filtré
Sélectionnez Filtrer en haut de la liste, puis sélectionnez un filtre. Seuls les programmes enregistrés correspondant
au filtre sélectionné sont énumérés.
Création de liste de lecture
Dans la liste Options en haut de l'écran, sélectionnez Lire élém. sél.. Sélectionnez les programmes à lire, puis
Lecture. Vous pouvez créer une sélection. Toutefois, si la liste est en mode Aperçu dossier, vous pouvez
sélectionner des enregistrements uniquement à l'intérieur du même dossier. Pour ajouter à la sélection des
programmes d'autres dossiers, changez de mode d'affichage.
Verrouillage et déverrouillage d'enregistrement
Dans la liste Options en haut de l'écran, sélectionnez Verrouil.. Sélectionnez les programmes à verrouiller, puis
Verrouil.. Cela a pour effet de verrouiller tous les programmes sélectionnés.
Pour déverrouiller un programme, accédez à la liste Options en haut de l'écran, puis sélectionnez Déverr..
Sélectionnez les programmes à déverrouiller, puis Déverr.. Cela a pour effet de déverrouiller tous les programmes
sélectionnés.
82
Suppression de programmes enregistrés
Dans la liste Options en haut de l'écran, sélectionnez Supprimer. Sélectionnez les programmes à supprimer, puis
Supprimer. Cela a pour effet de supprimer tous les programmes sélectionnés.
Renommer
Dans la liste Options en haut de l'écran, sélectionnez Renommer. Sélectionnez le programme à renommer. Entrez le
nouveau nom à l'aide du clavier, puis sélectionnez Terminé pour achever de renommer le programme. La longueur
maximale du nouveau nom est de 29 caractères.
Gestion de périphérique
Désignez un périphérique raccordé au téléviseur en tant que périphérique d'enregistrement dédié.
Lecture d'un autre programme
● Sélectionnez le bouton € / ‚ à l'écran.
● Sélectionnez le bouton Rech. à l'écran, puis Rech. titres.
Recherche de programme
● Faites glisser votre doigt vers la gauche ou la droite sur le Touch Pad. Faites avancer ou reculer la lecture de
10 secondes.
● Appuyez sur † / …. Vous pouvez accélérer ou ralentir la vitesse de lecture jusqu'à 7 fois. Pour rétablir la
vitesse de lecture normale, appuyez sur ∂. Vous pouvez également appuyer sur … lorsque la lecture est
suspendue afin d'en réduire la vitesse (1/8, 1/4, 1/2). La lecture lente ne prend pas en charge l'audio et ne
fonctionne que vers l'avant.
● Appuyez sur ∑ pour figer l'écran, puis sur ∑ pour faire avancer la vidéo suspendue image par image. L'audio
n'est pas pris en charge quand la vidéo est suspendue.
● Sélectionnez Rech. dans les boutons de contrôle de l'écran, puis sélectionnez Rech. scène. Vous pouvez lire le
fichier à partir d'une scène particulière. Cette fonction n'est pas disponible dans les cas suivants.
– Les miniatures de scène ne sont pas créées.
– Seul le son est enregistré.
– La durée d'enregistrement est inférieure à 60 secondes.
● Sélectionnez le bouton Rech. à l'écran, puis Rech. barre de temps. Vous pouvez lire le fichier à partir d'une
scène particulière. Cette fonction n'est pas disponible dans les cas suivants.
● Sélectionnez le bouton € à l'écran. Cela lance la lecture de la vidéo à partir du début.
82 83
Paramètres supplémentaires de lecture de programme enregistré
● Répétition
Sélectionnez le bouton Répétition à l'écran. Cette action modifie le mode de répétition. L'option Rép. 1X
répète uniquement le programme actuel, tandis que l'option Répét. tout répète tous les programmes
contenus dans le dossier.
● Format de l'image
Sélectionnez le bouton Format de l'image à l'écran, puis le format d'image.
● Récepteur
Sélectionnez le bouton Récepteur à l'écran, puis la puissance du récepteur.
● Mode Image
Sélectionnez le bouton Paramètres à l'écran, puis sélectionnez Mode Image. Sélectionner le réglage du Mode
Image.
● Mode Son
Sélectionnez le bouton Paramètres à l'écran, puis sélectionnez Mode Son. Sélectionner le réglage du Mode
Son.
● Langue audio
Sélectionnez le bouton Paramètres à l'écran, puis sélectionnez Langue audio. Sélectionnez l'option Langue
audio. Toutefois, cette option est disponible uniquement pour les vidéos en streaming prenant en charge
plusieurs formats audio.
● Param. de sous-titre
Sélectionnez le bouton Paramètres à l'écran, puis sélectionnez Param. de sous-titre. Sélectionnez l'option
Param. de sous-titre.
● Informations
Dans le bouton Contrôle d'écran, sélectionnez Paramètres et Informations. Vous pouvez afficher des
informations plus détaillées sur le programme en cours.
84
Timeshift
Timeshift enregistre temporairement le programme en cours. Cette fonctionnalité permet aux utilisateurs de
suspendre et de reprendre le visionnage d'un programme en direct, ainsi que de reculer ou d'avancer la lecture.
Toutefois, la fonction Timeshift est disponible uniquement pour les chaînes numériques. En outre, l'activation de la
fonction Timeshift n'entraîne la désactivation que de certaines fonctions dans le menu Diffusion.
Précautions
● Les enregistrements étant protégés par gestion des droits numériques (DRM), ils ne peuvent pas être lus sur
un ordinateur ou un autre téléviseur. En outre, vous ne pouvez pas lire ces fichiers sur votre téléviseur en cas
de remplacement de son circuit vidéo.
● Le temps de lecture maximal disponible pour la fonction Timeshift est de 90 minutes.
● La fonction Timeshift n'est pas disponible pour les chaînes verrouillées.
● Il est recommandé d'utiliser un disque dur USB tournant à une vitesse minimale de 5 400 tpm. Toutefois, les
disques durs USB de type RAID ne sont pas pris en charge.
● Avant de pouvoir utiliser la fonction Test de perf. du périph., vous devez effectuer un Timeshift sur le
périphérique de stockage USB connecté au téléviseur. Vous pouvez utiliser la fonction de diagnostic Test de
perf. du périph. en sélectionnant l'option Progr. TV enreg. du Mes Programmes ou Mes Contenus.
● Test de perf. du périph. doit être effectué sur le périphérique de stockage USB connecté à la TV avant de
pouvoir utiliser la fonction Timeshift. Vous pouvez démarrer le Test de perf. du périph. depuis Menu à l'écran
> Smart Hub > Mes Programmes ou Mes Contenus > Progr. TV enreg..
● La capacité totale d'enregistrement peut varier en fonction de la quantité d'espace disponible sur le disque
dur et du niveau de qualité d'enregistrement.
● Les paramètres du téléviseur s'appliquent lors de la lecture d'enregistrements et de l'utilisation de la fonction
Timeshift.
● La connexion d'un périphérique USB d'enregistrement a pour effet de supprimer automatiquement les
fichiers Timeshift et d'enregistrement sauvegardés de façon anormale.
● La fonction Timeshift peut s'arrêter automatiquement une fois la capacité maximale atteinte.
● La fonction Timeshift nécessite au minimum 1,5 Go d'espace libre sur le périphérique de stockage USB.
● Un lancement d'application, un basculement vers une chaîne analogique ou un changement d'état du
téléviseur en mode ne prenant pas en charge la fonction Timeshift a automatiquement pour effet d'arrêter
cette dernière. La fonction Timeshift reprend en cas de nouvelle sélection d'une chaîne numérique sur le
téléviseur.
84 85
Activation de la fonction Timeshift
Pour activer la fonction Timeshift, appuyez sur ∂ pendant que vous regardez la télévision. La barre de progression
de la fonction Timeshift s'affiche à l'écran.
Les boutons de commande de la fonction Timeshift et leurs fonctions sont les suivants :
● † / … : permet de modifier la vitesse de lecture en la multipliant jusqu'à 7. Pour revenir à la vitesse de lecture
normale, appuyez sur le bouton ∂.
● Faites glisser votre doigt vers la gauche ou la droite sur le Touch Pad. Faites avancer ou reculer la lecture de
10 secondes.
● ∫ : lors du visionnement d'un segment à l'aide de la fonction Timeshift, revient à la vitesse normale. Pour
désactiver la fonction Timeshift et revenir au visionnement en temps réel, appuyez sur ce bouton.
● ∑ : fige l'image à l'écran. En état de pause, appuyez sur le bouton ∑ pour avancer d'une image à la fois. Le son
est indisponible quand le téléviseur est en état de pause en mode Timeshift, et le visionnement image par
image n'est possible que vers l'avant. Pour reprendre la lecture à 1/4 de la vitesse normale quand le téléviseur
est en pause, appuyez sur le bouton † / ….
86
Téléviseur 3D
Menu à l'écran > Image > 3D Essayer
3D
Mode 3D
Perspective 3D 0
Profondeur 5
Modification G/D Image G/D
3D → 2D Arrêt
" L'image affichée peut varier en fonction du modèle.
Ce téléviseur est compatible 3D. Pour une expérience de visionnement optimale, les utilisateurs doivent porter des
lunettes actives 3D Samsung.
La distance de visualisation 3D idéale doit être au moins trois fois supérieure à la hauteur de l'écran. Il est
également recommandé de s'asseoir de manière à ce que les yeux soient au niveau de l'écran.
" Cette fonctionnalité est disponible uniquement sur les séries LED 6330 et plus.
Précautions
Avant de regardez la télévision en 3D, lisez attentivement les informations relatives à la sécurité et à la protection
de la santé.
Reportez-vous à la section "Précautions relatives à la fonction 3D" pour plus d'informations.
Conseils
● Les images 3D gauche et droite peuvent initialement être superposées lors de l'allumage du téléviseur.
Quelques instants sont nécessaires pour que l'affichage soit optimisé et que le chevauchement disparaisse.
● En cas de proximité avec un autre appareil ou produit électronique 3D sous tension, il peut arriver que les
lunettes actives 3D ne fonctionnent pas correctement. En cas de problème, placez les autres appareils
électroniques le plus loin possible des lunettes actives 3D
● La disponibilité de vidéo 3D en Full HD dépend généralement de la qualité du contenu.
86 87
Activation du mode 3D
Menu à l'écran > Image > 3D > Mode 3D Essayer
Choisissez un mode 3D conforme au signal d'entrée. Les modes 3D peuvent varier en fonction du signal d'entrée.
Certains contenus 3D peuvent varier selon le mode 3D préféré. Dans ce cas, modifiez le mode 3D voulu pour
regarder un programme. Sélectionnez un mode 3D parmi les modes 3D disponibles en fonction du signal d'entrée.
Les modes 3D peuvent varier en fonction du signal d'entrée.
● Arrêt : désactive l'affichage en 3D.
● Normal : convertit des images normales en images 3D. Certains formats d'images ne sont pas compatibles
avec ce mode.
● G/D : fractionne une image simple en images gauche et droite se chevauchant pour créer l'effet 3D.
● H/B : fractionne une image simple en images haute et basse se chevauchant pour créer l'effet 3D.
Les résolutions prises en charge par le téléviseur peuvent varier en fonction du mode 3D. Reportez-vous à la
section "Résolutions 3D compatibles" pour plus d'informations.
Réglage des effets 3D
Plusieurs réglages sont possibles pour rendre le contenu 3D plus agréable à regarder.
● Perspective 3D
Règle la perspective 3D. Essayer
● Profondeur
Règle la profondeur 3D. Cette option ne peut pas être utilisée si le mode 3D est défini sur "image" (G/D) ou
"image" (H/B). Essayer
● Modification G/D
Intervertit les images gauche et droite. Essayer
● 3D → 2D
Convertit les images 3D en images normales. Cette fonction n'est pas disponible si le mode 3D est défini sur
(Normal) ou (Arrêt). Essayer
88
PIP
Menu à l'écran > Image > PIP
Image
Format de l'image
3D
PIP Arrêt
Paramètres avancés
Options d'image
Image désactivée
Appliquer mode Image Toutes sources
" L'image affichée peut varier en fonction du modèle.
Lors de la lecture d'une vidéo en 2D à partir d'un périphérique externe relié au téléviseur, vous pouvez toujours
regarder la télévision dans une fenêtre incrustée. Ouvrez le menu Image et sélectionnez PIP. Activez PIP et
définissez toutes les options nécessaires. La fonction PIP est disponible uniquement quand les fonctionnalités
Smart Hub ou la télévision en 3D sont actives. L'extinction de la télévision quand la fonction PIP est active a pour
effet de désactiver automatiquement cette dernière.
● PIP : active ou désactive la fonction PIP.
● Antenne : sélectionne le signal de diffusion de la sous-image de la fonction PIP.
● Canal : sélectionne le canal de sous-image de la fonction PIP.
● Taille : sélectionne la taille de sous-image de la fonction PIP.
● Position : sélectionne la position de sous-image de la fonction PIP.
● Sélection du son : sélectionne la source audio.
" Jouer ou utiliser la fonctionnalité de karaoké sur l'écran d'accueil peut entraîner une dégradation de la qualité de
l'image PIP.
" Pour regarder la télévision sous la forme d'une image incrustée, la source de l'écran principal doit être définie sur
Composant ou HDMI. La fenêtre PIP prend en charge uniquement les signaux TV.
88 89
Etalonnage d'écran analogique
Paramètres chaînes
Pays (zone) English
Recherche manuelle
Réglage fin
Transf. liste chaînes
Supprimer profil opérateur CAM
Système satellite
" L'image affichée peut varier en fonction du modèle.
Les images analogiques peuvent présenter un aspect tremblant ou parasité. Si c'est le cas, vous pouvez régler
finement le signal ou réduire les parasites pour éclaircir l'image.
Réglage fin
Menu à l'écran > Diffusion > Paramètres chaînes > Réglage fin Essayer
Eclaircissez les images tremblantes. Réglez finement l'image jusqu'à ce qu'elle soit claire, puis sélectionnez
Enregistrer ou Fermer. Pour réinitialiser le réglage fin, sélectionnez l'option Réinit.. Cette option est disponible
uniquement pour les diffusions analogiques.
Sous-titres
Menu à l'écran > Diffusion > Sous-titres Essayer
Diffusion
Paramètres chaînes
Sous-titres Arrêt
Options audio
Contrôle Parental Autor. tout
Langue du télétexte ----
Interface commune
Verr. chaîne Activé
" L'image affichée peut varier en fonction du modèle.
Affichez les sous-titres des émissions numériques et analogiques qui les prennent en charge.
90
Affichage des sous-titres
Menu à l'écran > Diffusion > Sous-titres Essayer
Affichez les sous-titres. Les sous-titres s'affichent quand vous choisissez une émission qui les prend en charge.
Définit l'affichage des sous-titres sur Activé ou Arrêt.
● Mode sous-titre Essayer
Définit le Mode sous-titre.
● Langue des sous-titres Essayer
Définit la langue des sous-titres.
" Les sous-titres de DVD sont disponibles uniquement quand la source est raccordée à un connecteur d'entrée
externe du téléviseur.
Options de sous-titre
Menu à l'écran > Diffusion > Sous-titres
Sélectionnez un mode de sous-titrage. La liste des modes peut varier en fonction de l'émission.
● Sous-titre principal Essayer
Définit la langue principale des sous-titres.
● Sous-titre secondaire Essayer
Définit la langue secondaire des sous-titres.
Modification de la langue du télétexte
Menu à l'écran > Diffusion > Langue du télétexte Essayer
Utilisez cette option pour définir la langue du télétexte.
91
Paramètres d'image de base
Menu à l'écran > Image
Les paramètres d'image de base modifient l'aspect de l'image affichée à l'écran.
Modification du mode image
Menu à l'écran > Image > Mode Image Essayer
Image
Mode Image Standard
• Rétroéclairage 14
• Contraste 100
• Luminosité 45
• Netteté 50
• Couleur 50
• Teinte (V/R) V50 R50
" L'image affichée peut varier en fonction du modèle.
Choisissez le mode image optimal pour vos conditions de visionnement du téléviseur. En cas de connexion à un
ordinateur au moyen du câble HDMI vers DVI, seuls les modes Standard et Loisirs sont disponibles.
● Dynamique
Ce mode augmente la luminosité de l'écran. Il est particulièrement adapté aux environnements lumineux.
● Standard
Il s'agit du mode par défaut.
● Naturel
Ce mode est utile pour réduire la fatigue oculaire. Il est disponible uniquement sur les téléviseurs LED.
● Cinéma
Ce mode réduit la luminosité de l'écran et le rend moins éblouissant. Il convient pour des pièces sombres,
pour regarder des films et en cas de fatigue oculaire.
● Loisirs
Ce mode améliore la netteté des images pour une expérience de visionnement plus dynamique. Il est
disponible uniquement lorsque le téléviseur est raccordé à un ordinateur à l'aide d'un câble HDMI vers DVI.
92
Qualité de l'image
Menu à l'écran > Image
Choisissez un Mode Image, puis sélectionnez les options suivantes pour afficher un curseur permettant de régler
le paramètre correspondant. Les valeurs réglées sont appliquées à la source en cours, et restent effectives lors de
la sélection de source suivante. En cas de connexion à un ordinateur au moyen d'un câble HDMI vers DVI, seules les
options de réglage Couleur et Teinte (V/R) sont disponibles.
Pour les séries LED 4500 - 6300
Choisissez un Mode Image, puis sélectionnez les options suivantes pour afficher un curseur permettant de régler
le paramètre correspondant. Réglez la valeur en appuyant sur la touche fléchée gauche/droite et modifiez le
paramètre en appuyant sur la touche fléchée haut/bas. Les valeurs réglées sont appliquées à la source en cours, et
restent effectives lors de la sélection de source suivante. En cas de connexion à un ordinateur au moyen d'un câble
HDMI vers DVI, seules les options de réglage Couleur et Teinte (V/R) sont disponibles.
● Rétroéclairage
Règle la luminosité de pixels individuels. La réduction de la luminosité se traduit par une moindre
consommation d'énergie. Cette option est disponible uniquement sur les téléviseurs LED.
● Lum. Cellules
Règle la luminosité de l'écran. La réduction de la luminosité se traduit par une moindre consommation
d'énergie. Cette option est disponible uniquement sur les téléviseurs plasma.
● Contraste
Règle le contraste de l'écran. Essayer
● Luminosité
Règle la luminosité globale. Essayer
● Netteté
Rend les contours des objets plus ou moins nets. Essayer
● Couleur
Règle la saturation globale des couleurs. Essayer
● Teinte (V/R)
Règle les proportions de vert et de rouge. Augmentez la valeur de vert pour saturer les verts, et celle de
rouge pour saturer les rouges. Essayer
Application du réglage de qualité d'image actuel à une autre entrée
Menu à l'écran > Image > Appliquer mode Image
Vous pouvez appliquer le réglage de qualité d'image que vous avez configuré pour le téléviseur à tous les
périphériques externes connectés au téléviseur.
Pour appliquer ce réglage à tous les périphériques externes connectés au téléviseur, sélectionnez Toutes sources.
Pour ne l'appliquer qu'à l'entrée actuelle, sélectionnez Source actuelle.
" Cette fonction peut uniquement appliquer les valeurs Rétroéclairage / Lum. Cellules, Contraste, Luminosité, Netteté,
Couleur et Teinte (V/R).
92 93
Format de l'image
Menu à l'écran > Image > Format de l'image > Format de l'image Essayer
La plupart des programmes TV et des vidéos sont affichés en plein écran, mais certains programmes et certaines
vidéos ne seront pas adaptés à l'écran. Dans ce cas, les utilisateurs peuvent changer la taille de l'image. Cependant,
les options de taille disponibles peuvent varier, selon la source vidéo. Reportez-vous à la section "Format de l'image
et signal d'entrée" pour plus d'informations.
● 16:9 Auto
Règle automatiquement le format de l'image sur le rapport largeur/hauteur 16:9.
● 16:9
Règle l'image sur le format d'écran large 16:9.
● Zoom large
Agrandit l'image à un format supérieur à 4:3. Une image agrandie peut être déplacée vers le haut et le bas.
● Zoom
Agrandit les images 16:9 dans le sens vertical pour les adapter à la taille de l'écran. Une image agrandie peut
être déplacée vers le haut et le bas.
● 4:3
Règle l'image sur le mode de base 4:3.
[ Ne laissez pas le téléviseur en mode 4:3 pendant une période prolongée. Les bordures foncées affichées sur
le pourtour de l'écran, peuvent entraîner un phénomène de rémanence. Ce phénomène peut apparaitre sur
les téléviseurs LED et plasma. (brûlure d'écran : ce phénomène peut apparaitre sur les téléviseurs plasma.)
Ce problème n'est pas couvert par la garantie.
● Adapter à l’écran
Affiche l'image entière sans découpe.
● Vue intell. 1
Réduit une image 16:9 de 50%. Cette option est disponible uniquement sur les téléviseurs LED et en mode
HDMI.
● Vue intell. 2
Réduit une image 16:9 de 25%. Cette option est disponible uniquement sur les téléviseurs LED et en mode
HDMI ou DTV.
94
Position écran
Menu à l'écran > Image > Format de l'image > Zoom/Position Essayer
Il est possible de régler la position de l'écran si l'option Format de l'image est définie sur Zoom large, Zoom.
Zoom est disponible lorsque Format de l'image est défini sur Zoom large.
11 Pour régler la position de l'écran, sélectionnez Zoom/Position, puis Zoom/Position dans la fenêtre
contextuelle.
22 Utilisez les touches fléchées pour régler la position de l'écran, puis sélectionnez Position et Fermer.
Sélectionnez Réinit. pour réinitialiser la position de l'écran.
Pour les séries LED 4500 - 6300
11 Pour régler la position de l'écran, sélectionnez Position, puis Position dans la fenêtre contextuelle.
22 Appuyez sur les touches fléchées de la télécommande pour déplacer l'écran. Ensuite, sélectionnez Position
puis Fermer. Sélectionnez Réinit. pour réinitialiser la position de l'écran.
Taille d'écran 4:3
Menu à l'écran > Image > Format de l'image > Taille d'écran 4:3 Essayer
Disponible uniquement lorsque le format de l'image est défini sur 16:9 Auto. Vous pouvez définir le format d'image
souhaité sur 4:3 WSS (Wide Screen Service) ou sur le format d'origine. Chaque pays européen impose une taille
d'image distincte.
" Non disponible en mode Composant ou HDMI.
Image désactivée
Menu à l'écran > Image > Image désactivée
Eteint l'écran et diffuse uniquement le son. Pour rallumer l'écran, appuyez sur n'importe quel bouton. (A l'exception
du bouton de réglage du volume)
Réinitialisation de l'image
Menu à l'écran > Image > Réinit. param. img Essayer
Réinitialisez les valeurs par défaut pour tous les paramètres du Mode Image actif. Cette action n'a aucune incidence
sur les autres modes image.
94 95
Paramètres avancés
Menu à l'écran > Image > Paramètres avancés Essayer
Paramètres avancés
Contraste Dyn. Moyen
Nuance de noir Arrêt
Carnation 0
RVB uniquement Arrêt
Espace de couleur Natif
Balance blancs
Balance Blancs 10p Arrêt
" L'image affichée peut varier en fonction du modèle.
Utilisez l'option Paramètres avancés pour régler avec précision la manière dont les images s'affichent sur le
téléviseur. L'option Paramètres avancés est disponible uniquement lorsque le Mode Image est défini sur Standard
ou Cinéma. Lorsque le téléviseur est connecté à un ordinateur au moyen d'un câble HDMI vers DVI, seules les
options Balance blancs et Gamma peuvent être réglées.
● Contraste Dyn.
Règle automatiquement le contraste de l'écran. Utilisez cette option pour obtenir le paramètre de contraste
optimal. Essayer
● Nuance de noir
Règle la profondeur de couleur noire. Essayer
● Carnation
Règle le niveau de rouge pour les couleurs de peau. Essayer
● RVB uniquement
Règle séparément les niveaux de rouge, vert et bleu. Essayer
● Espace de couleur
Règle la gamme de couleurs pouvant être rendues à l'écran. L'option Auto. règle automatiquement l'espace
colorimétrique en fonction du signal d'entrée, et l'option Natif applique une gamme plus large que le signal
d'entrée. L'option Personnalisé permet à l'utilisateur de régler manuellement une gamme pour la couleur
désirée parmi les couleurs du signal d'entrée. Essayer
● Balance blancs
Règle la température des couleurs de sorte que les objets blancs apparaissent blancs et que la couleur
d'ensemble de l'image paraisse naturelle. Réglez l'éclat de chaque couleur à l'aide du menu Aj. et la luminosité
à l'aide du menu Régla. Pour restaurer les valeurs par défaut, sélectionnez l'option Réinit.. Essayer
96
● Balance Blancs 10p
Règle la balance des blancs en ajustant la luminosité des éléments rouge, vert et bleu par intervalles de
10 points. Cette option est disponible uniquement lorsque l'option Mode Image est définie sur Cinéma. Elle
n'est pas prise en charge par certains périphériques externes. Cette fonctionnalité est disponible uniquement
sur les téléviseurs LED. Essayer
● Gamma
Règle l'intensité des couleurs primaires. Essayer
● Mire Expert
Affiche des modèles d'étalonnage des couleurs à l'écran sans utiliser de générateur de modèle ni de filtre
distinct. L'option Mire 1 permet d'étalonner le contraste, et l'option Mire 2 d'étalonner la couleur et la
saturation des couleurs. Si le menu à l'écran disparaît ou si un autre menu est activé durant l'étalonnage de
l'écran, cette option enregistre les modifications apportées jusque là, puis désactive automatiquement ce
menu. Cette fonctionnalité est activée uniquement en mode Composant et HDMI. Essayer
● Lumin./Mouvement
Règle la luminosité de l'image en fonction des mouvements à l'écran afin de réduire la consommation
d'énergie. Cette fonctionnalité est disponible uniquement lorsque l'option Mode Image est définie sur
Standard, et n'est pas disponible en mode 3D. En outre, le réglage des options Contraste ou Luminosité
désactive automatiquement cette fonctionnalité. Essayer
96 97
Options d'image
Menu à l'écran > Image > Options d'image Essayer
Options d'image
Nuance Coul. Standard
Digital Clean View Auto.
Filtre Bruit MPEG Auto.
Niv. noir HDMI Bas
Mode Film Arrêt
Motion Plus Standard
Optimiseur noir Arrêt
" L'image affichée peut varier en fonction du modèle.
L'option Options d'image permet d'améliorer la qualité de l'image. En cas de connexion du téléviseur à un
ordinateur au moyen d'un câble HDMI vers DVI, il est possible de modifier uniquement l'option Nuance Coul..
● Nuance Coul.
Règle la nuance des couleurs. Ce paramètre s'applique à un Mode Image individuel. En cas de modification
du Mode Image, le paramètre correspondant s'applique automatiquement. Si le Mode Image est défini sur
Dynamique, les seuls choix possibles sont Froide et Standard. Essayer
● Digital Clean View
Réduit les images statiques ou fantômes dues à des signaux faibles. La couleur bleue indique le meilleur signal
possible.
L'option Visualisation auto affiche la puissance du signal à l'écran. Cette fonctionnalité est disponible
uniquement sur les chaînes ATV. Essayer
● Filtre Bruit MPEG
Réduit le bruit MPEG et améliore la qualité vidéo. Essayer
● Niv. noir HDMI
Cette option est uniquement disponible pour une entrée vidéo via un câble HDMI. Elle permet de réduire
le phénomène de rémanence qui peut se produire lorsque vous regardez une vidéo à partir d'un appareil
externe. Choisissez l'un des niveaux de noir. Essayer
● Mode Film
Optimise la qualité de l'image pour les films. Sélectionnez ce mode pour regarder des films. Cette
fonctionnalité est disponible uniquement lors du visionnement du téléviseur ou quand le signal d'entrée est
AV, Composant (480i, 1080i) ou HDMI (1080i). Essayer
98
● Motion Plus
(En fonction des modèles)
Cette fonction supprime l'effet de flou et les tremblements des scènes très animées. Si vous sélectionnez
Personnalisé, vous pouvez configurer l'image rémanente ainsi que le taux de suppression de tremblement de
l'image, et vous pouvez afficher une image plus nette via la fonction Mouvement net LED.
" L'écran Info du téléviseur affiche la résolution et la fréquence du signal entrant (60 Hz), et non la fréquence générée
par le téléviseur pour l'image affichée à l'aide de la fonction Motion Plus.
" Si des parasites apparaissent sur l'écran, configurez l'option Motion Plus sur Arrêt. Si l'option Motion Plus est
définie sur Personnalisé, vous pouvez définir les valeurs Réduction de flou, Réduc. vibrations, Mouvement net LED
et Réinit. manuellement.
– Réduction de flou : règle le niveau de réduction du flou à partir des sources vidéo.
– Réduc. vibrations : règle le niveau de réduction des vibrations à partir des sources vidéo lors de la lecture
de films.
– Mouvement net LED : supprime les traînées des scènes rapides avec beaucoup de mouvements, ce qui
rend l'image plus claire.
– Réinit. : rétablit les valeurs par défaut pour tous les paramètres personnalisés.
" Lorsque la fonction Motion Plus est en cours d'exécution, sélectionnez le bouton INFO de la télécommande
standard ou virtuelle pour afficher la résolution et la fréquence du signal vidéo entrant (60 Hz). La fréquence
affichée ne correspond pas à celle de l'image affichée par le téléviseur lorsque l'option Motion Plus est activée.
● Optimiseur noir
(En fonction des modèles)
En mode Cinéma, cette fonction assombrit les zones inférieure et supérieure de l'image pour une expérience
vidéo plus immersive.
98 99
Calibrage de l'affichage à l'écran
Réglage Automatique
Menu à l'écran > Image > Réglage Automatique
Permet de régler automatiquement les paramètres de fréquence, de position et de syntonisation fine de l'image en
mode PC.
" Disponible uniquement en mode PC.
" Cette option est disponible uniquement sur le modèle LED 5400.
Réglage écran PC
Menu à l'écran > Image > Réglage écran PC
" Disponible uniquement en mode PC.
" Cette option est disponible uniquement sur le modèle LED 5400.
● Régl. Base / Regl. Préc : élimine ou réduit les parasites sur l'image. Si vous ne pouvez pas éliminer ces parasites
par une syntonisation fine, utilisez la fonction Régl. Base pour régler la fréquence (Regl. Base) au mieux, puis
effectuez de nouveau une syntonisation fine. Une fois les parasites réduits, réajustez l'image pour l'aligner
avec le centre de l'écran.
● Position : permet de régler la position de l'écran du PC à l'aide des boutons directionnels (u / d / l / r).
● Réinitialiser Image : permet de rétablir les paramètres d'image par défaut.
100
Utilisation de votre produit comme écran d'ordinateur (PC)
Saisie des paramètres vidéo (instructions basées sur Windows 7)
Pour que votre produit fonctionne correctement en tant qu'écran d'ordinateur, vous devez saisir les paramètres
vidéo adéquats.
" Il est possible qu'en fonction de votre version de Windows et de votre carte vidéo, la procédure d'utilisation de votre PC
soit légèrement différente de celle présentée ici.
" Cependant, les informations de base restent identiques et s'appliquent dans la plupart des cas. Dans le cas contraire,
contactez le fabricant de votre ordinateur ou votre revendeur Samsung.
" Cette option est disponible uniquement sur le modèle LED 5400.
11 Dans le menu Démarrer de Windows, cliquez sur "Panneau de configuration".
22 Dans la fenêtre "Panneau de configuration", cliquez sur "Apparence et thèmes". Une boîte de dialogue
s'affiche.
33 Cliquez sur "Affichage". Une autre boîte de dialogue s'affiche.
44 Cliquez sur l'onglet "Paramètres" dans la boîte de dialogue.
– Sous l'onglet Paramètres, réglez la résolution (taille de l'écran) adéquate. La résolution optimale pour ce
produit est de 1920 x 1080.
– S'il existe une option de fréquence verticale dans votre boîte de dialogue des paramètres d'affichage,
sélectionnez "60" ou "60 Hz". Sinon, cliquez sur "OK" et quittez la boîte de dialogue.
100 101
Paramètres audio de base
Menu à l'écran > Son
Son
Mode Son Standard
Effet sonore
Audio 3D Bas
Paramètres haut-parleur
Paramètres supplém.
Réinit. son
" L'image affichée peut varier en fonction du modèle.
Les paramètres du son permettent de modifier le mode son, d'activer ou de désactiver le son surround, de régler
l'égaliseur et d'optimiser le son du téléviseur.
Modification du mode son
Menu à l'écran > Son > Mode Son Essayer
Les modes son permettent d'effectuer des réglages au niveau de la sortie de son. Toutefois, ils sont disponibles
uniquement en cas d'utilisation de haut-parleurs externes.
● Standard
Il s'agit du mode son normal.
● Musique
Ce mode accentue la musique normale par rapport aux voix.
● Cinéma
Ce mode est étalonné de manière à offrir une qualité de son optimale pour les films.
● Voix claire
Ce mode accentue les voix.
● Amplifier
Ce mode augmente l'intensité globale des sons aigus pour améliorer l'écoute. Il est conçu pour les personnes
malentendantes.
● Stade
Cette option est automatiquement sélectionnée lorsque le mode Sports est activé sous le menu Fonctions
Smart.
102
Réglage des paramètres du son
Menu à l'écran > Son > Effet sonore Essayer
Les effets sonores permettent de modifier les sons diffusés par le téléviseur. Ces options sont uniquement
disponibles lorsque Sélection Haut-parleur est défini sur Haut-parleur TV et lorsque Mode Son est défini sur
Standard.
● DTS TruSurround
Produit un son analogue à celui d'une salle de cinéma ou de concert. Essayer
● DTS TruDialog
Accentue l'intensité des voix afin de rendre les dialogues plus audibles. Essayer
● Egaliseur
Règle la balance entre les haut-parleurs et ajuste la plage des fréquences. Sélectionnez Réinit. pour
réinitialiser les paramètres. Essayer
Volume auto
Menu à l'écran > Son > Paramètres haut-parleur > Volume auto Essayer
Chaque station ayant ses propres conditions de diffusion, le volume peut fluctuer en cas de changement de chaîne.
La fonction Volume auto règle automatiquement le volume d'une chaîne en réduisant ou augmentant la puissance
sonore. L'option Normal applique un niveau de volume normal, tandis que l'option Nuit applique un niveau de
volume légèrement inférieur au niveau Normal, et est idéal pour regarder la télévision pendant la nuit. Pour pouvoir
contrôler le volume d'un périphérique source connecté, désactivez la fonction Volume auto. En cas d'utilisation
de la fonction Volume auto avec un périphérique source, il se peut que le contrôle du volume de ce dernier ne
fonctionne pas correctement.
Type installation TV
Menu à l'écran > Son > Paramètres haut-parleur > Type installation TV Essayer
Ce téléviseur peut produire un son légèrement différent selon la manière dont il est installé. Sélectionnez soit
Support, soit Fixation murale.
Audio 3D
Menu à l'écran > Son > Audio 3D Essayer
Ce téléviseur peut produire un son plus immersif pour les vidéos en 3D. Lorsque vous regardez une vidéo en 3D,
ouvrez le menu Son, choisissez Audio 3D, puis un niveau de son 3D.
Réinitialisation du son
Menu à l'écran > Son > Réinit. son Essayer
Cette option rétablit les valeurs par défaut pour tous les paramètres de son.
102 103
Paramètres haut-parleur
Si le signal audio du téléviseur est envoyé à un périphérique externe tel qu'un système home cinéma, vous pouvez
choisir les haut-parleurs à utiliser, et effectuer des réglages pour éliminer les échos liés à la vitesse de décodage.
Sélection Haut-parleur
Menu à l'écran > Son > Paramètres haut-parleur > Sélection Haut-parleur Essayer
Son
Mode Son Standard
Effet sonore
Audio 3D Bas
Paramètres haut-parleur
Paramètres supplém.
Réinit. son
" L'image affichée peut varier en fonction du modèle.
Vous pouvez choisir les haut-parleurs à utiliser parmi les différents haut-parleurs disponibles. Choisissez-en un
dans la liste des haut-parleurs. Pour utiliser simultanément les haut-parleurs du téléviseur et ceux du récepteur AV,
définissez cette option sur Haut-parleur TV. Si vous observez un décalage entre les deux sons, choisissez n'importe
quel haut-parleur autre que le Haut-parleur TV afin de désactiver les haut-parleurs du téléviseur.
" L'utilisation des haut-parleurs externes désactive le bouton du volume et la fonction Muet. Certaines autres options de
Son sont également désactivées.
Paramètres supplém.
Menu à l'écran > Son > Paramètres supplém. Essayer
Configurez des paramètres supplémentaires pour optimiser la sortie audio.
Niveau Audio DTV
Menu à l'écran > Son > Paramètres supplém. > Niveau Audio DTV Essayer
(Chaînes numériques uniquement)
Le téléviseur ne peut pas contrôler librement le volume du son numérique envoyé au récepteur AV. Cette fonction
vous permet de définir le volume du son numérique au niveau souhaité.
" Selon le type de signal de diffusion, les options MPEG / HE-AAC peuvent être définies sur une valeur comprise entre
-10 dB et 0 dB.
" Pour augmenter ou réduire le volume, réglez ces valeurs entre 0 et -10.
104
Sortie audio numér.
Menu à l'écran > Son > Paramètres supplém. > Sortie audio numér. Essayer
La SMART TV est un téléviseur compatible SPDIF. La technologie SPDIF (Sony Philips Digital InterFace) produit une
sortie audio numérique pour des haut-parleurs et divers périphériques numériques tels que des récepteurs A/V ou
des systèmes home cinéma. Elle a pour effet de réduire les interférences et les distorsions de son.
● Format Audio
Sélectionne le format de sortie audio numérique (SPDIF). Les formats de sortie audio numérique (SPDIF)
disponibles peuvent varier en fonction de la source d'entrée.
● Retard Audio
Ce paramètre permet de corriger le décalage de synchronisation entre les pistes audio et vidéo lors du
visionnement de la télévision en écoutant le son sur un périphérique audio numérique. L'activation de cette
fonctionnalité a pour effet d'afficher un curseur permettant de régler le décalage jusqu'à 250 ms.
Comp Dolby Digital
Menu à l'écran > Son > Paramètres supplém. > Comp Dolby Digital Essayer
Certains programmes de télévision numérique fournissent le son Dolby 5.1. Ce téléviseur convertit le son Dolby en
son stéréo de façon à pouvoir émettre le son par ses haut-parleurs. Vous pouvez choisir entre deux méthodes. RF
permet de produire un meilleur son à des volumes plus bas, et Line est adapté aux volumes plus élevés.
Connexion d'un appareil audio Samsung
Menu à l'écran > Son > Paramètres haut-parleur > Paramètres SoundShare
Pour un son encore meilleur et plus clair, branchez le téléviseur sur un appareil audio Samsung. Cette fonction est
disponible pour les appareils audio Samsung qui prennent en charge la fonction SoundShare.
Pairez l'appareil audio Samsung au moyen de la fonction Bluetooth du téléviseur. Pour en savoir plus sur le pairage,
reportez-vous au mode d'emploi de l'appareil audio Samsung.
" Cette fonctionnalité est disponible uniquement avec les séries LED 6330 et plus.
● Ajouter nv. périph.
Permet d'activer/désactiver SoundShare. Les signaux de connexion de nouveaux périphériques sont ignorés
s'ils sont hors tension.
● Liste des périph. audio Samsung
Permet d'afficher une liste d'appareils audio Samsung pairés. Sélectionnez un appareil pour afficher ses
options de menu. Activez/désactivez l'appareil audio ou retirez-le de la liste.
104 105
Horloge et programmateur
Système
Configuration
Langue des menus English
Heure
Gest. périph.
Solution Eco
Temps protection auto 2 heures
Service de diffusion de données Désactiver
" L'image affichée peut varier en fonction du modèle.
L'horloge et le programmateur permettent de programmer l'utilisation du téléviseur de manière plus simple et
plus efficace. Une fois l'horloge réglée, vous pouvez sélectionner le bouton INFO de la télécommande standard ou
virtuelle pour vérifier l'heure actuelle. Vous devez régler l'horloge après chaque coupure de l'alimentation.
Réglage de l'heure
Menu à l'écran > Système > Heure > Horloge Essayer
Réglez l'horloge automatiquement ou manuellement.
Auto.
Téléchargez automatiquement l'heure exacte à partir d'une chaîne numérique. Pour pouvoir activer cette option,
un câble d'antenne doit être relié au téléviseur. La précision des informations d'heure reçues peut varier en
fonction de la chaîne et du signal. Définissez le Mode Horloge sur Auto..
Décalage horaire
Menu à l'écran > Système > Heure > Horloge > Décalage horaire Essayer
Si l'heure définie est incorrecte, vous pouvez régler la fonction Décalage horaire pour ajuster la différence heure
par heure de -12 à +12 heures. La fonction Décalage horaire est modifiable uniquement lorsque Heure est définie
sur Auto. et qu'elle est définie par le bais d'un réseau.
L'heure actuelle sera définie par le biais d'un réseau si le téléviseur ne parvient pas à recevoir les informations de
temps, y compris le signal de diffusion de la part des chaînes de télévision. (par exemple, en cas d'utilisation d'un
décodeur, récepteur satellite, etc.)
Manuel
Entrez l'heure manuellement. Définissez le Mode Horloge sur Manuel puis sélectionnez Réglage Horloge pour
entrer l'heure et la date.
Réglage Horloge: permet de définir la Date et l'Heure actuelles. Essayer
Fuseau Horaire : sélectionne votre fuseau horaire.
" Cette fonction n'est disponible que si le Mode Horloge est défini sur Auto.
106
Heure d'été : activer ou désactive la fonction Heure d'été.
" Cette fonction n'est disponible que si le Mode Horloge est défini sur Auto.
GMT : sélectionne votre fuseau horaire.
" Cette fonction est disponible lorsque l'option Pays est définie sur Autres.
Veille
Menu à l'écran > Système > Heure > Veille Essayer
Cette fonction éteint automatiquement le téléviseur après une période prédéfinie. Vous pouvez régler le
programmateur jusqu'à 180 minutes par incréments de 30 minutes.
Progr. activ.
Menu à l'écran > Système > Heure > Progr. activ. Essayer
Réglez l'option Progr. activ. pour que le téléviseur s'allume automatiquement à l'heure choisie. Vous ne pouvez
pas définir simultanément plus de trois paramètres pour l'option Progr. activ. Pour que l'option Progr. activ.
fonctionne, l'horloge doit être réglée.
● Configuration
Pour spécifier la période, utilisez les touches fléchées gauche et droite. Pour spécifier les jours de la semaine,
utilisez l'option Manuel.
● Heure
Spécifie l'heure d'allumage.
● Volume
Spécifie le volume lors de l'allumage du téléviseur.
106 107
● Source
Sélectionne une source de signal dans la liste. Spécifiez une chaîne ou une source à afficher lors de l'allumage
du téléviseur. Pour pouvoir spécifier un périphérique USB, il faut que ce dernier soit connecté au téléviseur.
Pour pouvoir lire du contenu multimédia à partir d'une source HDMI ou Composant telle qu'un lecteur DVD
ou Blu-ray, il faut que celle-ci soit allumée et le contenu en cours de lecture lors de l'allumage du téléviseur.
● Antenne
Pour sélectionner un signal de diffusion, définissez l'option Source sur TV.
● Canal
Pour sélectionner une chaîne, définissez l'option Source sur TV.
● Musique / Photo
Pour spécifier un dossier de périphérique USB contenant des fichiers de musique et d'image, définissez
l'option Source sur USB. La sélection de fichiers de musique et d'image a pour effet de lire la musique en
affichant les images simultanément.
" Cette fonctionnalité n'opère pas correctement si le périphérique USB sélectionné ne contient pas de fichiers
multimédia ou si aucun dossier n'est spécifié.
" Le diaporama ne démarre pas si le périphérique USB ne contient qu'un seul fichier d'image.
" Vous ne pouvez pas sélectionner des dossiers dont le nom est long.
" Utilisez toujours des noms de dossier différents pour plusieurs périphériques USB.
" Utilisez une clé USB ou un lecteur de cartes multiformat. Il se peut que la fonction Progr. activ. ne fonctionne pas
avec certains périphériques USB, lecteurs MP3 ou lecteurs multimédias portables alimentés par batterie, si leur
reconnaissance par le téléviseur prend trop de temps.
Progr. désact.
Menu à l'écran > Système > Heure > Progr. désact. Essayer
Définissez l'option Progr. désact. pour éteindre automatiquement le téléviseur à une heure spécifique. Vous ne
pouvez pas définir simultanément plus de trois paramètres pour l'option Progr. désact. Pour que l'option Progr.
désact. fonctionne, l'horloge doit être réglée.
● Configuration
Pour spécifier la période, utilisez les touches fléchées gauche et droite. Pour spécifier les jours de la semaine,
utilisez l'option Manuel.
● Heure
Définit l'heure d'extinction automatique du téléviseur.
108
Protection et entretien de l'écran
Système
Configuration
Langue des menus English
Heure
Gest. périph.
Solution Eco
Temps protection auto 2 heures
Service de diffusion de données Désactiver
" L'image affichée peut varier en fonction du modèle.
Plusieurs fonctions intégrées vous aident à prolonger la durée de vie du téléviseur et à réduire sa consommation
d'énergie.
Solution Eco
Menu à l'écran > Système > Solution Eco Essayer
L'option Solution Eco règle le niveau de luminosité du téléviseur et évite toute surchauffe pour réduire la
consommation globale d'énergie.
● Contrôle 0,00 W
Lorsque cette fonction est activée, le voyant lumineux situé en bas du téléviseur se met en mode veille. Cette
option est disponible uniquement sur le modèle LED 6200/ LED 6270.
● Mode éco.
Pour réduire la consommation d'énergie du téléviseur, sélectionnez un paramètre de luminosité dans la liste.
Essayer
● Capteur Eco
Cette option permet de régler automatiquement le niveau de luminosité du téléviseur en fonction du niveau
de lumière ambiante de la pièce afin de réduire la consommation d'énergie. Si le capteur Eco a réglé le
niveau de luminosité de l'écran, vous pouvez régler le niveau minimal de luminosité de l'écran en ajustant
le paramètre Rétro-écl. min ou Lum. cellules min. (selon les modèles). Si le Capteur Eco est activé et si la
valeur Image ou Rétroéclairage (selon les modèles) du menu Lum. Cellules est modifiée, le Capteur Eco est
automatiquement désactivé. Essayer
● Veille si aucun signal
Sélectionnez une heure dans la liste. Si aucun signal n'est reçu durant la période spécifiée, le téléviseur coupe
automatiquement l'alimentation pour réduire la consommation d'énergie. Essayer
● Hors ten. auto
Si le téléviseur est resté allumé pendant quatre heures sans interaction de l'utilisateur, il s'éteint
automatiquement pour éviter une surchauffe. Essayer
108 109
Protec brûl. écran
Menu à l'écran > Système > Protec brûl. écran
Cette fonctionnalité est disponible uniquement sur les téléviseurs plasma.
Afin de réduire le risque de brûlure d'écran, le téléviseur utilise la technologie de prévention de brûlure d'écran
Modif. pixel
Modif. pixel déplace légèrement l'image à l'écran afin d'éviter l'utilisation excessive de certains éléments et la sousutilisation
d'autres. Le paramètre de durée Modif. pixel permet de programmer la durée, en minutes, séparant les
mouvements de l'image.
Le téléviseur est également doté de ces fonctions de protection de brûlure d'écran supplémentaires :
● Modif. pixel
● Temps protection auto
● Défilement
● Gris de bord
Modif. pixel
Menu à l'écran > Système > Protec brûl. écran > Modif. pixel
Configurez le téléviseur pour qu'il déplace très légèrement les pixels sur l'écran plasma dans le sens vertical ou
horizontal afin d'éviter l'apparition d'images résiduelles.
La valeur Modif. pixel peut varier selon le format du moniteur et le mode. Elle n'est pas disponible en mode Adapter
à l’écran.
Paramètres :
● Horizontal : les paramètres disponibles sont : 0 – 4 (pixels), Réglages optimaux pour TV/AV/Composant/
HDMI : 4
● Vertical : les paramètres disponibles sont : 0 – 4 (pixels), Réglages optimaux pour TV/AV/Composant/HDMI :
4
● Heure (minutes) : 1 – 4 min, Réglages optimaux pour TV/AV/Composant/HDMI : 4 min
Temps protection auto
Menu à l'écran > Système > Protec brûl. écran > Temps protection auto
Si l'écran affiche une image fixe pendant une certaine période, le téléviseur active l'économiseur d'écran pour
éviter la formation d'images fantômes.
110
Défilement
Menu à l'écran > Système > Protec brûl. écran > Défilement
Cette fonction permet d'éviter le phénomène de rémanence en illuminant tous les pixels de l'écran à plasma suivant
un modèle défini. Utilisez cette fonction lorsque des images résiduelles ou des symboles apparaissent à l'écran, en
particulier lorsqu'une image fixe est restée affichée pendant une longue période.
La fonction de suppression d'images résiduelles doit être exécutée pendant environ une heure pour supprimer
efficacement les images résiduelles. Si l'image résiduelle n'est pas éliminée la première fois, répétez l'opération.
Pour annuler cette opération, appuyez sur n'importe quel bouton.
Gris de bord
Menu à l'écran > Système > Protec brûl. écran > Gris de bord
Cette fonction permet de sélectionner les couleurs des barres latérales affichées par le téléviseur lorsque le format
d'écran est défini sur 4:3. La couleur par défaut est le gris.
Temps protection auto
Menu à l'écran > Système > Temps protection auto Essayer
Sélectionnez une heure dans la liste. Si une image fixe est restée affichée à l'écran pendant une période spécifiée,
le téléviseur active automatiquement la fonction Protec brûl. écran pour éviter la formation d'images fantômes.
Cette fonctionnalité est disponible uniquement sur les téléviseurs LED.
110 111
Mot de passe
Système
Solution Eco
Temps protection auto 2 heures
Service de diffusion de données Désactiver
Général
Modifier PIN
Anynet+ (HDMI-CEC) Activé
DivX® Vidéo à la demande
" L'image affichée peut varier en fonction du modèle.
Ce téléviseur exige un mot de passe pour déverrouiller les chaînes et réinitialiser ses paramètres par défaut.
Modification du mot de passe
Menu à l'écran > Système > Modifier PIN Essayer
Modifiez le mot de passe du téléviseur.
11 Exécutez Modifier PIN, puis entrez le mot de passe actuel dans le champ approprié. Le mot de passe par
défaut est 0000 (pour la France et l'Italie : "1-1-1-1").
22 Saisissez un nouveau mot de passe, puis saisissez-le de nouveau pour le confirmer. La modification du mot de
passe est terminée.
● Si vous avez oublié le code PIN, appuyez sur les touches dans l'ordre suivant pour redéfinir le code sur
"0-0-0-0" : (pour la France et l'Italie : "1-1-1-1")
Pour la télécommande standard : En mode veille : MUTE → 8 → 2 → 4 → POWER (activé).
Pour le Smart Touch Control : Lorsque le téléviseur s'allume : MUTE → Augmenter volume → RETURN
→ Baisser volume → RETURN → Augmenter volume → RETURN.
Contrôle Parental
Menu à l'écran > Diffusion > Contrôle Parental Essayer
(En fonction du pays)
L'option Contrôle Parental bloque les programmes dont la classification est supérieure au niveau souhaité. Elle est
utile pour contrôler les programmes regardés par les enfants. Elle ne fonctionne pas avec des programmes diffusés
par des sources externes telles que des lecteurs DVD ou des fichiers USB.
Ce code PIN est obligatoire pour regarder un programme bloqué.
L'option Contrôle Parental n'est pas disponible en mode Composant ou HDMI.
112
Fonctionnalités supplémentaires
Système
Configuration
Langue des menus English
Heure
Gest. périph.
Solution Eco
Temps protection auto 2 heures
Service de diffusion de données Désactiver
" L'image affichée peut varier en fonction du modèle.
De nombreux éléments sont disponibles pour personnaliser le téléviseur en fonction des préférences de chacun.
Modification de la langue du menu
Menu à l'écran > Système > Langue des menus Essayer
Sélectionnez une langue de menu dans la liste.
Mode Jeu
Menu à l'écran > Système > Général > Mode Jeu Essayer
Le Mode Jeu optimise les paramètres du téléviseur pour l'utilisation de jeux vidéo sur une console telle que
PlayStation™ ou Xbox™. Avant d'utiliser le Mode Jeu, lisez les informations suivantes.
Précautions et restrictions
● Le Mode Jeu ne peut pas être utilisé pour un visionnement normal du téléviseur.
● Avant d'activer le Mode Jeu, connectez la console de jeu. Autrement, il se peut que la qualité de l'image soit
altérée.
● Le Mode Jeu peut entraîner un tremblement de certaines images.
● L'activation du Mode Jeu a pour effet de définir automatiquement l'option Mode Image sur Standard et
l'option Mode Son sur Cinéma.
● Lorsque vous avez fini de jouer, déconnectez la console et désactivez le Mode Jeu avant de brancher un
autre périphérique externe.
112 113
BD Wise
Menu à l'écran > Système > Général > BD Wise
La connexion d'un lecteur DVD ou Blu-ray, ou d'un système home cinéma Samsung prenant en charge la fonction
BD Wise vous permet de profiter des couleurs les plus riches et de la meilleure qualité d'image possible. L'activation
de la fonction BD Wise optimise automatiquement la résolution du téléviseur. Cette fonctionnalité est disponible
uniquement lorsque le périphérique externe est connecté au moyen d'un câble HDMI.
" Cette fonction est disponible uniquement sur les modèles de la série LED 6200 et supérieures.
Transparence menu
Menu à l'écran > Système > Général > Transparence menu Essayer
Réglez la transparence de l'écran de menu.
Retour son
Menu à l'écran > Système > Général > Retour son Essayer
Réglez le volume du retour son ou désactivez-le totalement. Le retour son est un signal audio émis lorsque vous
déplacez le point de mire ou opérez une sélection.
Verrouillage du panneau
Menu à l'écran > Système > Général > Verr. Touches Essayer
Permet de verrouiller ou déverrouiller toutes les touches. Les touches du panneau frontal sont situées à l'arrière
du téléviseur. Elles permettent de sélectionner des options, de changer de chaîne et de régler le volume.
114
Logo de démarrage
Menu à l'écran > Système > Général > Affich. logo Essayer
Activez ou désactivez l'affichage du logo lors du démarrage du téléviseur.
Anti-clignot.
Menu à l'écran > Système > Général > Anti-clignot. Essayer
Modifiez la fréquence d'énergie pour le câble afin d'arrêter le clignotement de la caméra.
" Cette fonction est disponible lorsque la caméra TV est connectée au téléviseur.
DivX® Vidéo à la demande
Menu à l'écran > Système > DivX® Vidéo à la demande Essayer
Pour pouvoir lire des vidéos protégées par gestion des droits numériques (DRM) DivX, le produit doit être
enregistré. Visitez le site Web DivX et enregistrez le code affiché à l'écran.
115
Smart Hub
Menu à l'écran > Fonctions Smart > Ouvrir Smart Hub Essayer
Smart Hub est l'élément principal de Samsung Smart TV. Cette fonctionnalité transforme le téléviseur en centre
de divertissement multifonctions. Grâce à Smart Hub, les utilisateurs peuvent surfer sur le Web, télécharger des
applications et rester en contact avec leurs proches via des services de réseaux sociaux. Ils peuvent en outre
profiter des fichiers Mes Contenus stockés sur des périphériques de stockage externes.
Pour lancer Smart Hub, appuyez sur . Choisissez un service au moyen des icônes affichées dans le haut de
l'écran.
● Mes Réseaux
Regardez les dernières vidéos sur YouTube et les vidéos que vos amis et vous avez publiées sur Facebook
et Twitter. Vous pouvez également passer des appels visio avec vos amis en utilisant la caméra TV (vendue
séparément).
● Mes Applications
Le service Samsung Apps offre un vaste éventail de contenus d'actualités, de sports, d'informations météo et
de jeux, gratuits et payants, que vous pouvez directement télécharger pour en profiter sur votre téléviseur.
● Mes Programmes
(En fonction du pays)
Consultez la liste des programmes en cours de diffusion et diffusés prochainement, et regardez des
programmes télévisés enregistrés.
● Mon Vidéo Club
(En fonction du pays)
Vous pouvez acheter et regarder des films et programmes TV sans devoir utiliser de périphérique externe
séparé.
● Mes Contenus
Lisez des fichiers Mes Contenus à partir d'un périphérique de stockage externe, ou regardez des vidéos
enregistrées.
Utilisez les touches † ou … pour changer les écrans Smart Hub.
Accords requis pour l'utilisation de Smart Hub
Menu à l'écran > Fonctions Smart > Conditions d'utilisation & politique
Lisez attentivement les conditions d'utilisation de Smart Hub, puis décidez si vous les acceptez ou non. Les
utilisateurs ne peuvent pas profiter entièrement de Smart Hub tant que ces conditions n'ont pas été acceptées.
116
Compte Samsung
Menu à l'écran > Fonctions Smart > Compte Samsung
Créez un compte Samsung pour profiter de tous les avantages de Smart Hub. Vous pouvez définir un compte
pour chaque membre de votre foyer afin de lui permettre d'accéder à son compte Facebook, Twitter, etc. Vous
devez également définir un compte Samsung et enregistrer une carte de crédit pour télécharger des applications
payantes et louer ou acheter des films.
Compte Samsung
Connex.
Modifier profil
Associer comptes du service
Supprimer comptes de la TV
Créer compte
Conditions d'utilisation
Polit. confid.
" L'image affichée peut varier en fonction du modèle.
Création d'un compte Samsung
Menu à l'écran > Fonctions Smart > Compte Samsung > Créer compte > Créer un compte Samsung
Dans l'écran de connexion, sélectionnez Créer compte, puis suivez les instructions.
" Une fois votre compte Samsung créé, un e-mail de confirmation est envoyé à l'adresse e-mail entrée comme ID. Ouvrez le
message et cliquez sur le bouton de confirmation pour finaliser le processus de définition d'un compte Samsung.
Création d'un compte Samsung en utilisant un compte Facebook
Menu à l'écran > Fonctions Smart > Compte Samsung > Créer compte > Créer un compte Samsung avec Facebook
Le fait d'utiliser un compte Facebook simplifie la création d'un compte Samsung. Lorsqu'un compte Samsung est
créé en utilisant un compte Facebook, le compte Facebook est également enregistré sur le téléviseur.
Conditions générales, politique de confidentialité
Menu à l'écran > Fonctions Smart > Compte Samsung > Conditions d'utilisation / Polit. confid.
Lisez attentivement les conditions d'utilisation du Compte Samsung. Vous pouvez ensuite choisir de les accepter
ou non. Les utilisateurs ne peuvent pas profiter entièrement du Compte Samsung tant que ces conditions n'ont
pas été acceptées. Vous ne pouvez toutefois afficher l'intégralité des conditions d'utilisation qu'après vous être
connecté à votre compte Samsung. Vous pourrez utiliser celui-ci une fois les conditions d'utilisation acceptées.
116 117
Connexion
Menu à l'écran > Fonctions Smart > Compte Samsung > Connex.
Utilisez votre compte Samsung pour vous connecter à Smart Hub. Entrez vos ID et mot de passe, puis sélectionnez
Connex..
L'option Se souvenir de mon MDP vous permet de vous connecter sans devoir entrer votre mot de passe à
chaque fois. Cochez-la pour l'activer. Activez l'option Connexion auto pour pouvoir vous connecter à Smart Hub
automatiquement.
Si vous avez oublié votre mot de passe, sélectionnez l'option Réinit. mot de passe pour recevoir par e-mail des
instructions concernant sa réinitialisation.
Association de comptes Samsung à d'autres comptes
Menu à l'écran > Fonctions Smart > Compte Samsung > Associer comptes du service
L'association de votre compte Samsung à d'autres comptes vous permet de vous connecter automatiquement
aux comptes de service associés lorsque vous vous connectez à votre compte Samsung. Par exemple, vous
pouvez télécharger l'application Facebook et associer votre compte Facebook à votre compte Samsung. Ensuite,
la connexion à votre compte Samsung a pour effet de vous connecter aussi automatiquement à votre compte
Facebook.
Connectez-vous à votre compte Samsung et sélectionnez Associer compte du service pour voir une liste des
applications nécessitant des informations de connexion.
● Enreg. compte de service : sélectionnez une application, puis l'option Enregistrer, puis entrez l'ID et le mot de
passe.
● Editer : vous pouvez modifier un compte enregistré. Sélectionnez une application, puis sélectionnez Editer et
entrez l'ID et le mot de passe du nouveau compte.
● Supprimer : sélectionnez une application pour laquelle un compte a été enregistré, puis sélectionnez
Désinscrire.
Gestion des comptes
Menu à l'écran > Fonctions Smart > Compte Samsung
Le menu Compte Samsung vous permet de gérer votre compte Samsung. Vous ne pouvez utiliser cette fonction
qu'après vous être connecté à votre compte Samsung.
● Modifier profil : vous pouvez modifier les informations utilisateur de base, ajouter une photo et enregistrer
les données de votre carte de crédit.
● Supprimer comptes de la TV : le compte Samsung permettant de vous connecter à Smart Hub est
automatiquement enregistré sur le téléviseur. Vous pouvez supprimer les informations de votre compte des
comptes enregistrés sur le téléviseur.
118
Réinitialisation de Smart Hub
Menu à l'écran > Fonctions Smart > Réinitialiser Smart Hub
Il est possible de supprimer des comptes Samsung et tout ce qui est associé, notamment les applications, à partir
du téléviseur. Entrez le mot de passe lorsque vous accédez à ce menu.
Pour utiliser à nouveau Smart Hub entièrement après sa réinitialisation, vous devez accepter les conditions. Ouvrez
le menu Système, sélectionnez Configuration, puis suivez le processus de configuration initiale.
Une fois Smart Hub réinitialisé, vous devez à nouveau lire et accepter le contrat de service avant de l'utiliser.
Exécutez Configuration (Système > Configuration) à nouveau.
Recherche
Les utilisateurs peuvent rechercher de nombreuses applications et leur contenu aussi bien sur le téléviseur que sur
le Web.
Recherche de mots clés
Appuyez sur le bouton RECOMM. / SEARCH (ou HISTORY/SEARCH). La liste apparaît au bas de l'écran. Appuyez de
nouveau sur le bouton RECOMM. / SEARCH (ou HISTORY/SEARCH). Entrez des critères de recherche à l'aide du
clavier qui apparaît à l'écran, puis sélectionnez Terminé. Une liste des résultats de recherche apparaît. Sélectionnez
l'élément souhaité dans la liste des résultats de recherche. La page de l'élément sélectionné apparaît.
Définition de l'étendue de la recherche
Appuyez sur l'icône sur l'écran de résultats de la recherche. Les utilisateurs peuvent définir la plage de
recherche de leur choix dans la liste d'étendue.
Lorsque Recommandation de mots clés est sélectionné, des mots suggérés apparaissent au-dessus du clavier à
l'écran lors de la saisie de critères de recherche.
Mode Sport
Menu à l'écran > Fonctions Smart > Mode Sport Essayer
Pour une expérience optimale de visionnement des émissions sportives, activez le mode Sports. Toutefois,
l'activation du mode Sports désactive les options du menu Image, Son et Diffusion. En désactivant le mode Sports,
vous rétablissez les réglages Image et Son antérieurs.
118 119
Etat et Notification
Une fenêtre de notification s'affiche en haut de l'écran quand des messages importants concernant des mises
à jour d'application et des connexions au compte Samsung sont disponibles. Cette fenêtre de message informe
l'utilisateur sur l'état de fonctionnement du téléviseur.
Configuration de la Commande par mouv.
Activez ou désactivez les fonctions Commande par mouv. du bandeau d'état et de notification. Vous pouvez
également effectuer le Test environnement Commande par mouv..
Configuration de compte Samsung
Pour gérer votre compte Samsung, sélectionnez Mon compte dans le bandeau de notification et d'état.
Configuration du réseau
Pour configurer le réseau, sélectionnez Paramètres réseau dans le bandeau d'état et de notification.
Notifications
Menu à l'écran > Fonctions Smart > Notifications
Si vous avez manqué des messages d'alarme affichés sur le téléviseur, vous pouvez les afficher via le menu
Notifications . Vous pouvez également voir les notifications dans Notifications (Menu à l'écran > Fonctions Smart >
Notifications). Toutefois, l'élément Notifications est disponible uniquement si vous avez des notifications non lues.
Essayer
En sélectionnant une notification dans la liste, vous pouvez aisément effectuer les actions correspondantes. Pour
supprimer toutes les notifications, sélectionnez Supprimer tout.
En sélectionnant Notification service, Web Browser affiche la page Web de notification du site Web Samsung.
120
Mes Réseaux
Mes Réseaux
Choix des amis A la une Amis Appel visio
" L'image affichée peut varier en fonction du modèle.
Regardez les dernières vidéos sur YouTube et les vidéos que vos amis et vous avez publiées sur Facebook
et Twitter. Vous pouvez également passer des appels visio avec vos amis en utilisant la caméra TV (vendue
séparément).
Il se peut que ce service ne soit pas disponible dans certains pays ou régions.
Paramètres Social
Menu à l'écran > Fonctions Smart > Paramètres Social Essayer
Vérification de l'installation d'applications
Pour pouvoir utiliser la fonctionnalité de réseaux sociaux, vous devez avoir installé certaines applications sur le
téléviseur. Si une application sélectionnée n'est pas installée sur le téléviseur, vous devez commencer par l'installer.
Association d'un service à un compte Samsung
Les comptes de réseaux sociaux doivent avant tout être associés au compte Samsung d'un utilisateur. Si vous
n'avez pas de compte de réseau social pour un service particulier, créez-en un en accédant au site Web de ce
service.
120 121
Visionnement de vidéos
Pour afficher une liste de vidéos, sélectionnez Choix des amis ou A la une au bas de l'écran Social. Sélectionnez une
vidéo dans la liste pour voir les informations la concernant, puis sélectionnez Lire.
Profil d'ami
Pour afficher la liste de vos amis Facebook et Twitter, sélectionnez l'option Amis au bas de l'écran Mes Réseaux.
Sélectionnez un ami dans la liste. Le profil de l'ami sélectionné s'affiche, avec ses informations de base et
publications.
Appel vidéo d'un ami
Sélectionnez Appel visio au bas de l'écran Mes Réseaux. Cela a pour effet de lancer Skype et d'afficher une liste
d'amis. Sélectionnez un ami à appeler.
Filtres
Pour utiliser cette fonction, connectez-vous à un compte Samsung. Sélectionnez Choix des amis ou Amis et Appel
visio dans l'écran Mes Réseaux. Pour réorganiser la liste, utilisez l'option de filtre en haut de l'écran. Sélectionnez
un filtre. Cette option ne fonctionne cependant pas dans la liste A la une.
122
Mes Applications
Mes Applications
Plus d'applis
" L'image affichée peut varier en fonction du modèle.
Le service Samsung Apps offre un vaste éventail de contenus d'actualités, de sports, d'informations météo et
de jeux, gratuits et payants, que vous pouvez directement télécharger pour en profiter sur votre téléviseur.
Commencez par vérifier le réseau et vous assurer que le téléviseur est connecté à Internet. Pour pouvoir utiliser le
service Apps, vous devez connecter votre téléviseur à Internet.
Il se peut que ce service ne soit pas disponible dans certains pays ou régions.
Précautions
● En raison des caractéristiques des produits proposés sur Samsung Smart Hub, ainsi que des limitations
quant au contenu disponible, il se peut que certains services, fonctionnalités et applications ne soient pas
disponibles sur tous les appareils ou dans toutes les régions. Certaines fonctionnalités proposées sur Smart
Hub peuvent également nécessiter des frais d'adhésion ou des périphériques supplémentaires. Pour plus
d'informations sur des périphériques spécifiques et la disponibilité de certains contenus, visitez le site http://
www.samsung.com. La disponibilité des services et contenus est sujette à modification sans préavis.
● Samsung Electronics ne peut en aucun cas être tenu responsable de toute interruption du service Smart Hub
causée par le fournisseur de service.
● Il est possible que les services d'application soient uniquement fournis en anglais, et le contenu disponible
peut varier selon la région.
● Pour plus d'informations sur les applications, visitez le site Web du fournisseur de services concerné.
● Une connexion Internet instable peut occasionner des retards ou des interruptions. En outre, certaines
applications peuvent s'arrêter automatiquement en fonction de l'environnement réseau. Si cela se produit,
vérifiez votre connexion Internet, puis réessayez.
● Des services et mises à jour d'applications peuvent devenir disponibles.
● Le contenu des applications est sujet à modification par le fournisseur de services sans préavis.
● Les détails du service peuvent varier en fonction de la version de micrologiciel de l'utilisateur.
● Le mode d'utilisation d'une application peut varier dans ses versions ultérieures. Dans ce cas, exécutez le
didacticiel de application ou visitez le site Web du fournisseur de services.
122 123
Installation des applications de base
Installation des applications standard
Lorsque Smart Hub démarre pour la première fois et que l'écran Mes Applications se charge, le téléviseur
télécharge et installe automatiquement les applications de base correspondant au réseau sur lequel votre
téléviseur est connecté. Les types d'applications de base peuvent varier en fonction du lieu où vous utilisez votre
téléviseur.
Lancement d'une application
Accédez à l'écran Applications de Smart Hub, puis sélectionnez les applis de l'écran Plus d'applis situées au bas
de l'écran. La liste des applications installées sur le téléviseur s'affiche. Vous pouvez y sélectionner l'application
à lancer. Sélectionnez le Afficher (coin supérieur droit de l'écran) pour réorganiser la liste des applications
téléchargées par Date téléchargement, Ouvert récemment ou Titre.
Samsung Apps
Le service Samsung Apps offre diverses applications d'actualités, de sports, de météo et de jeu, gratuites et
payantes. Samsung Apps vous permet de rechercher des applications, et de les installer directement sur le
téléviseur. Lisez et acceptez les conditions d'utilisation, puis parcourez les catégories ou recherchez directement
des applications. Essayer
Recherche d'applications
Recherchez des applications par leur nom. Dans l'écran Samsung Apps, sélectionnez Samsung Apps pour afficher le
clavier. Saisissez le nom de l'application, puis sélectionnez Terminé.
Installation d'applications
Sélectionnez l'application à installer pour afficher un écran contenant des informations détaillées la concernant.
Pour installer l'application choisie, sélectionnez Téléch.. Avant d'installer des applications payantes, vous devez
les acheter. Avant d'acheter des applications payantes, visitez le site Web Samsung Apps TV à l'adresse http://
tv.samsungapps.com, puis rechargez votre compte avec App Cash.
124
Gestion des applications
Vous pouvez personnaliser l'écran Mes applis. Vous pouvez aussi gérer les applications installées et configurer les
paramètres de mise à jour d'application.
Modif mes applis
Déplacez des applications vers Mes applis. Accédez à l'écran Plus d'applis, sélectionnez Options, puis Modif mes
applis. Vous pouvez personnaliser l'écran Mes applis.
Modification de l'ordre
Dans l'écran Modif mes applis, sélectionnez les applications que vous souhaitez réorganiser, changez l'ordre, puis
appuyez sur le Touch Pad ou le bouton E.
Suppression d'applications
Supprimez les applications non utilisées de la liste d'applications Mes applis. Les applications supprimées sont
déplacées vers la liste des applications téléchargées.
Dans l'écran Modif mes applis, sélectionnez les applications à supprimer, puis déplacez-les sur la première ou
la dernière ligne de la liste Mes applis. Un "X" apparaît au-dessus ou en dessous des icônes des applications
sélectionnées. Déplacez les applications en direction du "X". Une fenêtre contextuelle s'affiche. Dans cette fenêtre,
sélectionnez Oui pour supprimer les applications sélectionnées de la liste Mes applis.
Dans l'écran Modif mes applis, sélectionnez Tout supprimer pour supprimer toutes les applications de la liste Mes
applis.
Ajout d'applications
Les applications installées sur le téléviseur mais qui n'apparaissent pas dans la liste Mes applis peuvent être ajoutées
à la liste.
Dans la liste des applications téléchargées située en haut de l'écran Modif mes applis, sélectionnez les applications à
ajouter. Les applications sélectionnées sont ajoutées à la liste Mes applis.
124 125
Suppression d'applications
Supprimez des applications installées sur votre téléviseur. La suppression d'une application a pour effet de
supprimer toutes les données qui y sont associées. Accédez à l'écran Plus d'applis, sélectionnez Options, puis
Supprimer. Sélectionnez toutes les applications à supprimer. Sélectionnez toutes les applications à désinstaller,
sélectionnez Supprimer, puis YES dans la fenêtre contextuelle. Vous ne pouvez pas supprimer les applications
grisées.
" Vous pouvez réinstaller gratuitement des applications supprimées à partir de Samsung Apps.
Gestion des dossiers d'applications
Créez des dossiers et gérez les applications par groupes. Accédez à l'écran Plus d'applis, sélectionnez Options, puis
Créer dossier. Entrez un nom pour le nouveau dossier.
Sélectionnez Options pour renommer le dossier ou déplacer des applications vers ce dernier.
Verrouillage et déverrouillage d'application
Verrouillez ou déverrouillez des applications. Accédez à l'écran Plus d'applis, sélectionnez Options, puis Verr /
Déverr. Entrez le mot de passe, puis sélectionnez les applications à verrouiller. Un symbole de verrou s'affiche sur
les applications sélectionnées. Pour déverrouiller une application, sélectionnez-la de nouveau.
Mise à jour d'application
Lorsque l'application requiert une mise à niveau vers la dernière version, sélectionnez Mes Applications puis Plus
d'applis. Sur l'écran Plus d'applis, sélectionnez MàJ applis, puis sélectionnez l'application dans la liste. L'application
commence la mise à jour vers sa dernière version. Cependant, MàJ applis apparaît uniquement à l'écran lorsque la
mise à jour est requise.
Configuration de la mise à jour automatique d'applications
Pour mettre à jour les applications automatiquement, sélectionnez Options dans l'écran Plus d'applis, puis MàJ
applis. Les applications sont alors mises à jour automatiquement dès que des mises à jour sont disponibles.
126
Fitness
Fitness est une application qui vous aide à rester en forme. Créez un profil, configurez un programme
d'entraînement, puis commencez à vous entraîner en suivant un régime structuré. Avant d'utiliser l'application
Fitness, lisez et acceptez ses conditions d'utilisation. Essayer
[ Avant l'entraînement, échauffez-vous et effectuez quelques étirements. Si vous ressentez de la fatigue, des
vertiges, des douleurs, ou avez le souffle court, arrêtez immédiatement l'entraînement.
Création d'un profil
Pour créer un profil, suivez les instructions affichées à l'écran et entrez les informations requises.
Kids
Cette application englobe un programme de lancement rapide et une liste recommandée d'applications et de
contenus adaptés aux enfants. Elle comprend également certains services non encore installés sur votre téléviseur.
Elle vous permet de télécharger sur votre téléviseur des applications et du contenu destinés aux enfants. Certains
services sont payants. Essayer
Sur l'écran Kids, sélectionnez le bouton TOOLS sur la télécommande standard ou le panneau de la télécommande
virtuelle. L'écran de liste s'affiche. Dans la liste, sélectionnez Vidéo didacticiel. Vous verrez alors une vidéo de
présentation, disponible à tout moment, fournissant de plus amples informations sur Kids.
126 127
Web Browser
est une application de navigation sur le Web. Elle vous permet de surfer sur Internet à l'aide de votre téléviseur
comme vous le feriez sur un ordinateur, et même de regarder la télévision en même temps. Toutefois, l'expérience
de navigation peut différer de celle vécue sur un ordinateur. Pour faciliter la navigation sur le Web, servez-vous
d'un clavier et d'une souris. Essayer
Social Networks
Partagez vos idées et commentaires concernant un programme à l'antenne via les services de réseaux sociaux.
L'application Social Networks regroupe des services de réseaux sociaux tels que Twitter, Facebook, Google Talk et
NateOn sur un seul écran. Elle vous permet même de publier des messages et commentaires comme vous le feriez
à l'aide d'un ordinateur. Avant d'utiliser Social Networks, vous devez lier votre compte Samsung à votre compte de
réseau social.
Pour plus d'informations sur cette application, visitez son site Web.
Liaison de comptes de service
Liez vos services de réseaux social (Twitter, Facebook, Google Talk, NateOn, etc.) à votre compte Samsung. Lancez
Social Networks, sélectionnez un service de réseau social, puis enregistrez le compte que vous avez sur ce dernier.
Une fois les comptes liés, vous pouvez utiliser les boutons au bas de l'écran pour accéder aux services de
réseau social enregistrés. Vous pouvez actualiser vos flux, publier des commentaires et même modifier le mode
d'affichage.
3D Explorer
3D Explorer est un service VoD 3D vous permettant de visionner des bandes-annonces de DreamWorks, des
concerts et vidéo-clips d'artistes coréens célèbres, des récits pour enfants, du contenu éducatif, des documentaires
IMAX HD et bien d'autres contenus en 3D.
128
Paramètres applis
Menu à l'écran > Fonctions Smart > Paramètres applis Essayer
Configurez les applications installées sur votre téléviseur.
Téléscrip. auto
Menu à l'écran > Fonctions Smart > Paramètres applis > Téléscrip. auto
Configurez les téléscripteurs sélectionnés pour affichage automatique lors de l'allumage du téléviseur. Un
téléscripteur est un service permettant d'afficher à l'écran des cours d'actions, des actualités et des bulletins
météo en temps réel. L'activation du service Ticker affiche des informations à jour pendant que vous regardez la
télévision. Dans la liste Téléscrip. auto, sélectionnez les applications à exécuter. Si une application sélectionnée
n'est pas installée sur le téléviseur, vous devez commencer par l'installer.
Paramètres de la Push Notifications
Menu à l'écran > Fonctions Smart > Paramètres applis > Paramètres de notification Push
Activez ou désactiver les notifications Push d'applications. Les Paramètres de notification Push sont affichés
sur l'écran pendant que vous regardez la télévision. Vous pouvez alors les sélectionner pour obtenir plus
d'informations.
Connexion Internet TV
Menu à l'écran > Fonctions Smart > Paramètres applis > Connexion Internet TV
L'application Channel-Bound Apps peut être utilisée en regardant une chaîne prenant en charge des applications
pour les services de données du programme en cours.
Propriétés
Menu à l'écran > Fonctions Smart > Paramètres applis > Propriétés
Vous pouvez afficher la version des applications et le numéro de série du téléviseur. Vous pouvez également
consulter la capacité de mémoire totale et disponible du téléviseur.
128 129
Mes Programmes
Mes
Guide Time Line View Progr. TV enreg.
" L'image affichée peut varier en fonction du modèle.
Lorsque vous regardez la télévision, une liste de programmes recommandés sur d'autres chaînes s'affiche à l'écran.
Celle-ci vous permet de changer de chaîne et de consulter des informations supplémentaires sur les programmes
recommandés, telles que le temps restant avant leur diffusion. Vous pouvez également lancer la fonction Progr. TV
enreg. pour regarder des programmes enregistrés.
Certaines fonctions de Smart Hub nécessitent un accès à Internet. Selon le fournisseur d'accès, la langue, le
dialecte et le pays utilisés dans vos réglages, il est possible que ces fonctions ne soient pas disponibles.
Lorsque cette Smart TV est connectée à Internet, elle dispose alors de la fonction "Mes Programmes", qui
recommande les programmes diffusés pour le téléviseur en fonction de leur popularité ou de vos préférences
personnelles. Pour sélectionner votre fournisseur de programmes préféré, entrez votre code postal et faites votre
choix dans la liste qui s'affiche.
" Les recommandations liées aux informations sur les chaînes et les programmes du Mes Programmes peuvent varier de
celles des programmes réels selon les fournisseurs de services et les émissions.
130
Param. Sur la TV
Menu à l'écran > Fonctions Smart > Param. Sur la TV
Personnalisez l'écran On TV.
Config Sur la TV
Définissez un type de support de diffusion et des stations de télévision pour l'écran On TV, en suivant les
instructions à l'écran.
Avis recommandation
Lorsque cette fonction est activée et que l'une des émissions de télévision populaires que l'utilisateur regarde
souvent est diffusée à cet instant, le téléviseur l'en informe.
Méthode recommandat.
Choisissez d'afficher les programmes télévisés à suivre selon vos préférences ou la popularité générale.
Blocage Cont. adulte
Une fois cette fonction activée, les programmes télévisés pour adultes ne sont plus répertoriés dans l'écran Mes
Programmes.
130 131
Dém. auto
Menu à l'écran > Fonctions Smart > Param. Sur la TV > Dém. auto
Vous pouvez configurer Mes Programmes pour qu'il démarre automatiquement lors de la mise sous tension du
téléviseur.
Visionnement d'un programme recommandé diffusé
Sélectionnez un programme dans la partie droite de l'écran. Cette action entraîne un changement de chaîne.
Informations sur les programmes recommandés
La liste suivante affiche les informations et les heures de diffusion des programmes recommandés non encore
diffusés. Sélectionnez un programme dans la liste pour voir des informations supplémentaires à son sujet et
accéder aux options suivantes :
● Passer : passe à la chaîne diffusant le programme sélectionné.
● Programmateur : Configurez un événement Programmer visionnage.
● Voir du contenu connexe : Vous pouvez voir une liste de contenus en lien avec le programme. L'écran détaillé
de l'élément sélectionné apparaît lorsque vous sélectionnez un élément parmi la liste.
● Partager : indique que vous aimez ou n'aimez pas le programme sélectionné, ou partage des informations le
concernant via un service de réseau social.
Activation du Guide
Pour lancer le Guide, sélectionnez Guide au bas de l'écran.
Recommandations de programmes par heure
Pour afficher des recommandations de programmes aux différentes heures de la journée, sélectionnez Vue
Chronologie au bas de l'écran.
Visionnement de programmes enregistrés
Pour lancer Progr. TV enreg., sélectionnez Progr. TV enreg. au bas de l'écran.
132
Mon Vidéo Club
Mon Vidéo Club
Favoris Recommandé Films Séries télé Acheté
" L'image affichée peut varier en fonction du modèle.
Utilisez la fonction Mon Vidéo Club pour acheter et visionner des films et programmes TV sans lecteur DVD/Bluray.
Mon Vidéo Club est un agrégateur de contenu qui permet aux utilisateurs de profiter des films et programmes
TV proposés par diverses applications. Il est toutefois possible que certaines options Mon Vidéo Club ne soient pas
disponibles selon le contenu auquel vous essayez d'accéder ou de votre région.
Ouvrez le Smart Hub et accédez à Mon Vidéo Club.
Les options suivantes sont disponibles au bas de l'écran Mon Vidéo Club.
Il est possible que ce service soit entièrement ou partiellement indisponible dans certains pays ou régions.
Sous-menus au bas de l'écran principal
● Favoris : définissez et modifiez votre liste favorite de films et programmes TV.
● Recommandé : suggestions spécifiques en fonction de la période de l'année ou de certains événements.
● Films : les films sont classés selon les rubriques Nouveautés, Le plus populaire et Genre.
● Séries télé : les programmes TV sont classés selon les rubriques Nouveautés, Le plus populaire et Genre.
● Acheté : liste distincte des vidéos à la demande déjà achetées.
132 133
Liste de recommandations personnalisées
A la première utilisation de l'option Mon Vidéo Club ou si vous n'êtes pas connecté à votre compte Samsung, les
films et programmes TV inédits et populaires sont affichés dans la liste Recommendation. Vous pouvez essayer la
liste de recommandations personnalisées, qui donne des recommandations sur la base du contenu consulté via la
fonction Mon Vidéo Club.
Visionnage d'un contenu
11 Sélectionnez un film ou un programme TV. Des informations détaillées sur votre sélection apparaissent à
l'écran.
22 Sélectionnez l'option Regarder maintenant. La liste des applications proposant le contenu sélectionné est
affichée.
33 Comparez le prix, la qualité d'image, le fournisseur, l'option de location/d'achat et les autres options de
visualisation, puis sélectionnez l'application qui vous convient. Les informations détaillées sur l'application
sélectionnée sont affichées. Si l'application sélectionnée n'est pas installée sur le téléviseur, vous pouvez
installer celle-ci en lançant Samsung Apps.
44 Achetez le contenu à partir de l'écran d'informations détaillées sur l'application, puis lancez celui-ci. Le
processus d'achat réel peut varier selon l'application. Certaines applications peuvent nécessiter une
connexion et/ou la saisie d'informations de paiement.
Verr. classif. VOD
Menu à l'écran > Fonctions Smart > Verr. classif. VOD
Lancez Verr. classif. VOD et entrez votre code PIN pour limiter l'accès aux contenus achetés selon leur évaluation.
Cette fonction empêche les enfants ou d'autres personnes de regarder certains types de contenus.
Divers
Dans l'écran des informations détaillées sur le contenu, vous pouvez enregistrer l'élément comme favori, lui ajouter
une mention J'aime ou Je n'aime pas, et partager des informations sur l'élément via les services de réseaux sociaux.
134
Mes Contenus
Mes Contenus
Photos Vidéos Musique Progr. TV enreg. Tout le contenu
" L'image affichée peut varier en fonction du modèle.
Ouvrez Smart Hub et sélectionnez Mes Contenus.
Profitez des fichiers photo, vidéo et audio stockés sur un périphérique de stockage externe directement sur
votre téléviseur. Avant de connecter un périphérique de stockage externe au téléviseur, sauvegardez les fichiers
importants. Samsung décline toute responsabilité en relation avec la perte ou l'endommagement de fichiers.
" Il se peut que ce service ne soit pas disponible dans certains pays ou régions.
" Lorsque vous utilisez une souris pour passer à l'écran précédent, cliquez sur le coin supérieur gauche de l'écran.
Restrictions
● Prend en charge uniquement les périphériques USB MSC (Mass Storage Class). MSC désigne une classe de
périphériques de stockage de masse. Les types de périphériques MSC incluent les lecteurs de disque dur
externes, les lecteurs de cartes Flash et les caméras numériques (les concentrateurs USB ne sont pas pris
en charge). Les périphériques de ce type doivent être connectés directement au port USB du téléviseur. Il
se peut que le téléviseur ne puisse pas reconnaître le périphérique USB ou lire les fichiers qui y sont stockés,
si ce dernier est raccordé au téléviseur au moyen d'un câble d'extension USB. Ne déconnectez pas le
périphérique USB tant qu'un transfert de fichiers est en cours.
● Pour connecter un lecteur de disque dur externe, utilisez le port USB (HDD). Nous vous recommandons
d'utiliser un lecteur de disque dur externe avec l'adaptateur d'alimentation qui lui est propre.
● Certains périphériques audio et caméras numériques ne sont pas compatibles avec le téléviseur.
● Si plusieurs périphériques USB sont connectés au téléviseur, il se peut que ce dernier ne puisse en reconnaître
que certains, voire aucun. Il se peut que les périphériques USB utilisant une puissance élevée (500 mA ou 5 V)
ne soient pas pris en charge.
● Les systèmes de fichiers pris en charge sont FAT, exFAT et NTFS.
● Le tri des fichiers en mode Aperçu dossier permet d'afficher jusqu'à 1000 fichiers par dossier. Toutefois, si le
périphérique USB contient plus de 8000 fichiers et dossiers, il se peut que certains d'entre eux ne soient pas
accessibles.
● Le mode de connexion PTP n'est entièrement disponible qu'avec des appareils photo numériques. Lorsque
vous connectez un smartphone ou une tablette au téléviseur à l'aide du mode PTP, cet appareil risque de ne
pas être reconnu.
134 135
Formats de fichiers pris en charge
Ce téléviseur peut lire les types de fichiers suivants. Pour plus d'informations, reportez-vous à la section "Formats
de sous-titres et de contenu multimédia, et Codec".
● Photos : bmp, jpg, mpo, png
● Musique : aac, flac, m4a, mpa, mp3, ogg, wma
● Vidéo : 3gp, avi, asf, flv, m2ts, mkv, mov, mp4, mpg, mts, svi, ts, tp, trp, vob, vro, webm, wmv
● Sous-titres : ass, psb, smi, srt, ssa, sub, ttxt, txt
Avec les fichiers .avi, .mkv et .mp4, le téléviseur prend en charge les sous-titres imbriqués.
" Il se peut que le téléviseur ne puisse pas lire certains fichiers, en fonction de leur codage.
Connexion de périphérique USB
Branchez le périphérique USB sur le port USB du téléviseur. Lisez les fichiers multimédias stockés comme suit :
● La connexion d'un périphérique USB au téléviseur allumé entraîne l'affichage d'une fenêtre contextuelle.
Sélectionnez le type de fichier multimédia à lire.
● Accédez à Mes Contenus en haut de l'écran Smart Hub. Sélectionnez le type de fichier multimédia à lire, puis
le périphérique USB contenant les fichiers.
● Sélectionnez le périphérique USB dans l'écran Source. Une fenêtre contextuelle s'affiche. Sélectionnez le type
de fichier multimédia à lire.
Retrait de périphérique USB
Appuyez sur SOURCE pour accéder à l'écran Source. Sélectionnez le périphérique USB que vous souhaitez
supprimer, puis sélectionnez Outils en haut de l'écran. Pour retirer le périphérique USB sélectionné en toute
sécurité, sélectionnez Retirer USB dans la liste.
Lire tout le contenu sur un périphérique de stockage
Vous pouvez lire Tout le contenu enregistré sur un périphérique de stockage indépendamment du type de contenu
(Mes Contenus). Essayer
Sélectionnez l'option Tout le contenu dans l'écran Mes Contenus. Vous pouvez lire tout le contenu enregistré sur
un périphérique de stockage indépendamment du type de contenu (Mes Contenus).
Effacement de la dernière liste de lecture
Menu à l'écran > Fonctions Smart > Suppr. historique visionnage > Mes Contenus
L'écran Mes Contenus affiche des miniatures de fichiers multimédias récemment lus. La sélection d'une miniature
entraîne la lecture du fichier multimédia.
136
Utilisation d'appareils de stockage externes en réseau
Ce téléviseur peut afficher directement des fichiers multimédias depuis des périphériques stockage Web, des
ordinateurs et des périphériques compatibles DLNA connectés via un réseau. Pour afficher des fichiers multimédias
figurant sur un périphérique de stockage externe, il faut que ce dernier soit compatible DLNA et connecté au
même réseau que le téléviseur.
Par exemple, vous pouvez afficher les fichiers multimédias archivés sur votre smartphone ou stockage Web comme
suit :
● Envoyez une demande de lecture de contenu multimédia au téléviseur à partir d'un smartphone ou d'un
ordinateur.
● Etablissez un lien entre le téléviseur et un ordinateur/smartphone/stockage Web, puis lisez les fichiers
multimédias.
● Utilisez un smartphone pour envoyer au téléviseur une demande de lecture des fichiers multimédias
enregistrés sur un ordinateur, ou un ordinateur pour demander la lecture des fichiers multimédias archivés
sur un smartphone.
● Connectez-vous à votre compte Samsung, puis lisez les fichiers multimédias archivés sur votre stockage Web.
" Il se peut que le téléviseur ne puisse pas lire certains fichiers multimédias archivés sur un périphérique de stockage
externe en réseau, en fonction de leur résolution et de leur format. Il se peut également que certaines fonctions ne
soient pas disponibles.
" Il se peut que la lecture de certains fichiers soit saccadée. Dans ce cas, utilisez un périphérique de stockage USB.
Accédez à Mes Contenus en haut de l'écran Smart Hub. Sélectionnez le type de fichier multimédia, puis le
périphérique sur lequel il figure. Le dossier et la liste des fichiers du périphérique de stockage externe sélectionné
sont affichés.
136 137
Autorisation des connexions de périphériques DLNA
Menu à l'écran > Réseau > Paramètres AllShare
En sélectionnant Partage de contenu depuis Paramètres AllShare, vous affichez une liste des périphériques de
stockage externes connectés au même réseau que le téléviseur. Sélectionnez un périphérique pour autoriser sa
connexion au téléviseur. Vous pouvez lire des fichiers multimédias uniquement à partir de périphériques autorisés
à se connecter au téléviseur. Cette fonction est disponible pour tous les périphériques DLNA DMC. Vous pouvez
également envoyer une demande de lecture de fichier multimédia à partir d'un périphérique externe non encore
autorisé à se connecter au téléviseur, puis accepter la connexion quand vous y êtes invité.
AllShare
AllShare facilite la récupération et la lecture de fichiers multimédias à partir d'ordinateurs et de périphériques
compatibles DLNA. Toutefois, AllShare PC doit être installé sur les ordinateurs, et les périphériques mobiles doivent
prendre en charge AllShare. Pour plus d'informations, visitez le portail de service et contenu de Samsung (http://
content.samsung.com).
" Vous risquez de rencontrer des problèmes de compatibilité en tentant de lire des fichiers multimédias via un serveur
DLNA d'un autre fabricant.
Exportation de contenu
Dans la liste Options en haut de l'écran, sélectionnez Envoyer. Sélectionnez tous les fichiers vidéo à exporter, puis
Envoyer. Cette action exporte les fichiers sélectionnés vers un autre périphérique de stockage. Les couplages
possibles pour l'exportation de fichier sont les suivants :
Périphérique source Périphérique cible
Périphérique USB Périphérique DLNA, SugarSync, Dropbox, SkyDrive, Ndrive
ou appareil mobile
Caméra Périphérique DLNA
Périphérique DLNA Périphérique USB
SugarSync, Dropbox, SkyDrive, Ndrive Périphérique USB
Appareil mobile Périphérique USB
138
Lecture de fichiers vidéo
Sélectionnez le fichier vidéo dans la liste, ou appuyez sur ∂ pour lire la vidéo. Contrôlez la lecture de la vidéo à
l'aide de la télécommande ou des boutons affichés à l'écran. Appuyez sur le Touch Pad ou sur le bouton E de la
télécommande standard pour afficher les boutons de contrôle de l'écran. Pour les masquer, appuyez sur RETOUR.
Pour arrêter la lecture, appuyez sur ∫ ou sur RETOUR. Essayer
Modification du mode d'affichage
Dans l'écran Liste des fichiers, sélectionnez Afficher dans le coin supérieur droit de l'écran et choisissez une
catégorie. La liste des fichiers est triée par catégorie choisie.
Création de liste de lecture
Dans la liste Options en haut de l'écran, sélectionnez Lire élém. sél., spécifiez les fichiers vidéo à lire, puis
sélectionnez Lecture. Cela a pour effet de créer une liste de lecture. Si la liste s'affiche en mode Aperçu dossier,
seuls les fichiers contenus dans le dossier actuel peuvent être sélectionnés. Pour sélectionner des fichiers dans
d'autres dossiers, changez de mode d'affichage.
Ouverture d'un autre fichier
● Sélectionnez le bouton € / ‚ à l'écran.
● Sélectionnez le bouton à l'écran, puis sélectionnez Rech. titres.
138 139
Parcours de vidéo
Faites glisser votre doigt vers la gauche ou la droite sur le Touch Pad. Faites avancer ou reculer la lecture de
10 secondes.
● Appuyez sur † / …. Cela a pour effet de modifier la vitesse de lecture jusqu'à 300 %. Pour rétablir la vitesse
de lecture normale, appuyez sur ∂. Vous pouvez également suspendre la lecture de la vidéo, puis appuyer sur
… pour réduire la vitesse de lecture (à 1/8, 1/4 ou 1/2 de la vitesse normale). La lecture lente ne prend pas en
charge l'audio et ne fonctionne que vers l'avant.
● Appuyez sur ∑ pour figer l'écran, puis sur ∑ pour faire avancer la vidéo suspendue image par image. L'audio
n'est pas pris en charge quand la vidéo est suspendue.
● Sélectionnez le bouton Rech. à l'écran, puis Rech. scène. Cela vous permet d'accéder à une scène de la vidéo.
Si les informations de la page d’index sont corrompues ou ne sont pas prises en charge, vous ne pourrez pas
utiliser la fonction Rech. scène.
● Sélectionnez le bouton Rech. à l'écran, puis Rech. barre de temps. Cela vous permet d'accéder à un intervalle
de temps de la vidéo.
● Sélectionnez le bouton € à l'écran. Cela lance la lecture de la vidéo à partir du début.
Affichage des sous-titres
Si le périphérique de stockage externe contient un fichier de sous-titrage du même nom que le fichier vidéo en
cours de lecture, vous pouvez choisir d'afficher les sous-titres. Pour afficher les sous-titres, sélectionnez le bouton
Paramètres à l'écran, puis sélectionnez Param. de sous-titre.
Si les sous-titres ne s'affichent pas correctement, essayez de modifier le paramètre d'encodage. Si les sous-titres
ne correspondent pas aux images vidéo, réglez la synchronisation. Si les sous-titres sont trop petits, augmentez la
taille de la police.
140
Paramètres supplémentaires de lecture de fichiers vidéo
● Répétition
Sélectionnez le bouton Mode Répétition à l'écran. Cette action modifie le mode de répétition. L'option Rép.
1X répète uniquement le fichier actuel, tandis que l'option Répét. tout répète tous les fichiers contenus dans
le dossier.
● Format de l'image
Sélectionnez le bouton Format de l'image, puis le format d'image.
● Pivoter
Appuyez sur le bouton Pivoter pour faire pivoter la vidéo actuelle de 90 degrés dans le sens des aiguilles
d'une montre.
● Récepteur
Sélectionnez le bouton Récepteur, puis allumez le récepteur AV.
● Mode Image
Sélectionnez le bouton Paramètres à l'écran, puis sélectionnez Mode Image. Sélectionnez un mode image.
● Mode Son
Sélectionnez le bouton Paramètres à l'écran, puis sélectionnez Mode Son. Sélectionnez un mode son.
● Langue audio
Sélectionnez le bouton Paramètres à l'écran, puis sélectionnez Langue audio. Sélectionnez une langue audio.
Toutefois, cette option est disponible uniquement pour les vidéos en streaming prenant en charge plusieurs
formats audio.
● Informations
Sélectionnez le bouton Paramètres à l'écran, puis Informations pour afficher des informations détaillées sur
la vidéo en cours de lecture.
140 141
Lecture de fichiers audio
Sélectionnez le fichier audio dans la liste, ou appuyez sur ∂ pour lire le son. Pour arrêter la lecture, appuyez sur ∫
ou sur RETOUR. Essayer
Modification du mode d'affichage
Dans l'écran Liste des fichiers, sélectionnez Afficher dans le coin supérieur droit de l'écran et choisissez une
catégorie. La liste des fichiers est triée par catégorie choisie.
Création de liste de lecture
Dans la liste Options en haut de l'écran, sélectionnez Lire élém. sél., spécifiez les fichiers audio à lire, puis
sélectionnez Lecture. Cela a pour effet de créer une liste de lecture. Si la liste s'affiche en mode Aperçu dossier,
seuls les fichiers contenus dans le dossier actuel peuvent être sélectionnés. Pour sélectionner des fichiers dans
d'autres dossiers, changez de mode d'affichage.
Parcours d'audio
● Appuyez sur † / …. Cela a pour effet de parcourir le fichier par incréments de 10 secondes.
● Appuyez sur ∑. Cela a pour effet de suspendre la lecture du fichier audio.
Ouverture d'un autre fichier
● Sélectionnez le bouton € / ‚ à l'écran.
● Sélectionnez un fichier dans la liste de lecture.
Paramètres supplémentaires de lecture de fichiers audio
● Répétition
Sélectionnez le bouton Répétition à l'écran. Cette action modifie le mode de répétition. L'option 1 musique
répète uniquement le fichier actuel, tandis que l'option Tous répète tous les fichiers contenus dans la liste de
lecture.
● Aléatoire
Sélectionnez le bouton Aléatoire à l'écran. Choisissez entre la lecture normale et la lecture aléatoire.
● Récepteur
Sélectionnez le bouton Récepteur, puis allumez le récepteur AV.
● Mode Son
Sélectionnez le bouton Mode Son à l'écran. Sélectionnez un mode son.
● Informations
Dans la liste de lecture, sélectionnez le bouton INFO de la télécommande virtuelle pour afficher des
informations détaillées sur le fichier sélectionné.
142
Lecture de photos
Pour afficher une photo à l'écran, sélectionnez-la dans la liste. Contrôlez l'affichage des photos à l'aide de
la télécommande ou des boutons affichés à l'écran. Appuyez sur le Touch Pad ou sur le bouton E de la
télécommande standard pour afficher les boutons de contrôle de l'écran. Pour les masquer, appuyez sur RETOUR.
Pour arrêter la lecture, appuyez sur ∫ ou sur RETOUR. Essayer
Modification du mode d'affichage
Dans l'écran Liste des fichiers, sélectionnez Afficher dans le coin supérieur droit de l'écran et choisissez une
catégorie. La liste des fichiers est triée par catégorie choisie.
Diaporama
● Dans la liste Options en haut de l'écran, sélectionnez Diaporama. Vous pouvez afficher toutes les photos de la
liste sous la forme d'un diaporama.
● Appuyez sur ∂ dans la liste.
● Pour lancer le diaporama, appuyez sur ∂ ou sélectionnez le bouton Lancer le diaporama à l'écran.
Paramètres du diaporama
● Vit. diaporama : appuyez sur † / … ou sélectionnez le bouton Paramètres du diaporama à l'écran, puis
Vitesse.
● Effet du diaporama : sélectionnez le bouton Paramètres du diaporama à l'écran, puis Effets.
Création de liste de lecture
Dans la liste Options en haut de l'écran, sélectionnez Lire élém. sél., spécifiez les photos à lire, puis sélectionnez
Lecture. Cela a pour effet de créer une liste de lecture. Si la liste s'affiche en mode Aperçu dossier, seuls les fichiers
contenus dans le dossier actuel peuvent être sélectionnés. Pour sélectionner des fichiers dans d'autres dossiers,
changez de mode d'affichage.
Ouverture d'un autre fichier
● Appuyez sur l / r.
● Sélectionnez le bouton Précédent/Suivant à l'écran.
Fond musical
Activez la lecture de musique en arrière-plan durant un diaporama. Toutefois, tous les fichiers audio doivent
figurer sur le même périphérique de stockage.
Sélectionnez le bouton Fond musical à l'écran quand une photo y est affichée ou un diaporama en cours de lecture.
Sélectionnez les fichiers audio à écouter, puis Lecture. Pour lire les fichiers selon un ordre aléatoire, sélectionnez
Aléatoire.
142 143
Mini-lecteur
Vous pouvez contrôler la musique lors de l'affichage de photos avec une musique de fond. Sélectionnez Fond
musical dans les boutons de contrôle de l'écran, puis sélectionnez Mini-lecteur. Vous pouvez suspendre la lecture
ou passer au morceau suivant ou précédent.
Paramètres supplémentaires de lecture de fichiers photo
● Zoom : sélectionnez le bouton Zoom à l'écran. Vous pouvez effectuer un zoom avant jusqu'à 4 x.
● Pivoter : sélectionnez le bouton Pivoter à l'écran. Cette action a pour effet de faire pivoter la photo active de
90 degrés dans le sens des aiguilles d'une montre.
● Récepteur : sélectionnez le bouton Récepteur, puis allumez le récepteur AV.
● Mode Image : sélectionnez le bouton Paramètres à l'écran, puis Mode Image. Sélectionnez un mode image.
● Mode Son : sélectionnez le bouton Paramètres à l'écran, puis Mode Son. Sélectionnez un mode son. Cette
option n'est cependant pas disponible en cas de lecture de musique en arrière-plan.
● Informations : sélectionnez le bouton Paramètres à l'écran, puis Informations pour afficher des informations
détaillées sur la vidéo en cours de lecture.
144
Anynet+ (HDMI-CEC)
Cette Smart TV prend en charge Anynet+ (HDMI-CEC), une fonctionnalité permettant de contrôler aisément
des périphériques externes Samsung connectés au téléviseur. Anynet+ (HDMI-CEC) vous permet d'utiliser la
télécommande du téléviseur pour contrôler tous les périphériques Samsung compatibles connectés au téléviseur.
Toutefois, Anynet+ (HDMI-CEC) fonctionne uniquement avec la télécommande, et non avec les touches affichées à
l'écran.
Précautions
● Cette fonctionnalité ne prend pas en charge les produits d'autres fabricants.
● Les périphériques Anynet+ doivent être connectés au téléviseur à l'aide d'un câble HDMI. Certains câbles
HDMI ne sont pas compatibles avec Anynet+ (HDMI-CEC). Dans ce cas, vous devez remplacer le câble HDMI.
● Il se peut que la télécommande du téléviseur ne fonctionne pas dans certaines situations. Dans ce cas,
sélectionnez de nouveau le périphérique Anynet+.
● Anynet+ (HDMI-CEC) fonctionne uniquement avec des périphériques externes prenant en charge Anynet+
(HDMI-CEC), et uniquement si ces derniers sont en mode veille ou allumés.
● Anynet+ (HDMI-CEC) peut contrôler jusqu'à 12 périphériques externes compatibles (jusqu'à 3 du même
type). Toutefois, avec certains systèmes home cinéma, le nombre de systèmes contrôlables est limité à un.
● Un système home cinéma doit être connecté au téléviseur à l'aide d'un câble HDMI, et un câble optique prend
uniquement en charge l'audio canal 2. En revanche, le home cinéma est capable de prendre en charge l'audio
canal 5.1 en provenance de diffusions numériques.
● Pour écouter de l'audio canal 5.1 d'un périphérique externe, connectez ce dernier au téléviseur à l'aide d'un
câble HDMI, et le connecteur de sortie audio numérique du périphérique directement au système home
cinéma.
144 145
Configuration d'Anynet+ (HDMI-CEC)
Menu à l'écran > Système > Anynet+ (HDMI-CEC) Essayer
Activez ou désactivez Anynet+ (HDMI-CEC).
● Anynet+ (HDMI-CEC)
Active ou désactive Anynet+ (HDMI-CEC). La désactivation désactive toutes les fonctionnalités liées à
Anynet+. Essayer
● Arrêt automatique
Eteint tous les périphériques externes quand le téléviseur est éteint. Certains périphériques ne prennent pas
en charge cette option. Essayer
Utilisation d'Anynet+ (HDMI-CEC)
Vous pouvez contrôler des périphériques externes à l'aide de la télécommande du téléviseur.
Basculement entre des appareils Anynet+
11 Sélectionnez la touche TOOLS de la télécommande standard ou virtuelle pour afficher la liste. Dans la liste,
sélectionnez Anynet+ (HDMI-CEC). Un écran de sélection d'appareil s'affiche.
22 Sélectionnez un périphérique, puis attendez que le basculement soit effectué. Ce processus peut prendre
jusqu'à 2 minutes et ne peut pas être annulé une fois entamé.
" Vous pouvez également basculer vers un autre périphérique Anynet+ (HDMI-CEC) en sélectionnant son nom dans
la liste Source. Vous ne pouvez cependant pas utiliser Anynet+ (HDMI-CEC) si un connecteur d'entrée connecté est
sélectionné.
146
Menu de périphérique Anynet+ (HDMI-CEC)
Une fois le téléviseur connecté au périphérique sélectionné, vous pouvez accéder au menu de ce dernier à l'aide
de la télécommande du téléviseur. Sélectionnez la touche TOOLS de la télécommande standard ou virtuelle pour
afficher la liste. Dans la liste, sélectionnez Anynet+ (HDMI-CEC). Les options suivantes du périphérique Anynet+
s'affichent. Les options Anynet+ affichées peuvent varier en fonction du périphérique externe.
● Voir télévision
Sélectionnez cette option pour faire basculer le mode de la télécommande vers le téléviseur.
● Liste d'appareils
Affiche la liste des appareils Anynet+ (HDMI-CEC) connectés au téléviseur. Pour modifier un périphérique,
sélectionnez-le dans la liste.
● (Périphérique connecté) Menu
Affichez le menu du périphérique connecté. Si le périphérique cible est un lecteur DVD, le menu DVD s'affiche.
● (Périphérique connecté) Outils
Affichez la liste des fonctions fréquemment utilisées disponibles pour le périphérique. Si le périphérique cible
est un lecteur DVD, le menu de lecture DVD s'affiche. Certains périphériques externes ne prennent pas en
charge cette option.
● (Périphérique connecté) Menu titre
Affichez le menu de titres du périphérique connecté. Si le périphérique cible est un lecteur DVD, le menu de
titres DVD s'affiche. Certains périphériques externes ne prennent pas en charge cette option.
● Récepteur
Ecoutez le son du périphérique externe connecté sur un récepteur AV tel qu'un système home cinéma, au lieu
des haut-parleurs du téléviseur. Cette option est disponible uniquement si un récepteur AV est connecté au
téléviseur. Il se peut que le menu ne s'affiche pas avec les récepteurs prenant uniquement en charge le son.
ARC
La fonction ARC permet la sortie du son numérique uniquement à l'aide d'un câble HDMI. Elle n'est cependant
disponible qu'avec des récepteurs AV prenant en charge la technologie ARC.
Pour utiliser la fonction ARC, activez-la à partir du menu du périphérique Anynet+ (HDMI-CEC) Récepteur.
146 147
Mise en miroir d'écrans d'appareils mobiles sur le téléviseur
Le téléviseur peut afficher les écrans d'appareils mobiles. Vous pouvez utiliser les fonctionnalités suivantes pour
apprécier des fichiers vidéo, photo et audio stockés sur des appareils mobiles directement sur votre téléviseur.
● Le menu Réplication de l'écran vous permet d'afficher l'écran d'un appareil mobile sur le téléviseur.
Réplication de l'écran
Menu à l'écran > Réseau > Paramètres AllShare > Réplication de l'écran
Cette option vous permet d'afficher les écrans de vos appareils mobiles sur votre téléviseur via une connexion sans
fil. Toutefois, la Réplication de l'écran est uniquement disponible avec les périphériques mobiles qui prennent en
charge AllShare Cast. Pour plus d'informations, rendez-vous sur le site Web du fabricant de votre appareil mobile.
En fonction des conditions du réseau, des pertes de niveau de l'écran ou du son peuvent se produire lorsque la
fonction Réplication de l'écran est activée.
" Cette fonctionnalité n'est pas disponible pour la série LED 5300.
Connexion d'un périphérique mobile
Exécutez la fonction Réplication de l'écran (Menu à l'écran > Réseau > Paramètres AllShare > Réplication de
l'écran). Vous pouvez également appuyer sur le bouton SOURCE, puis sélectionner Réplication de l'écran dans la
liste source. Après avoir exécuté la fonction Réplication de l'écran, exécutez la fonction Réplication sur l'appareil
mobile. Le téléviseur se connecte à l'appareil mobile, et l'utilisateur peut afficher l'écran de l'appareil mobile
connecté sur le téléviseur.
148
Assistance
Plusieurs systèmes intégrés ont été conçus en vue d'aider l'utilisateur et de fournir une assistance pour le
téléviseur.
Gestion à distance
Menu à l'écran > Assistance > Gestion à distance Essayer
Assistance
Gestion à distance
e-Manual (Résolution des problèmes)
Diagnost. auto.
Mise à jour du logiciel
Mode Utilisation Util. domicile
Contacter Samsung
" L'image affichée peut varier en fonction du modèle.
Si vous avez besoin d'aide concernant l'utilisation de votre téléviseur, cette fonctionnalité permet à Samsung
Electronics de diagnostiquer l'appareil à distance. Pour pouvoir l'utiliser, vous devez avoir lu et accepté le contrat
de service. Ensuite, un technicien de Samsung Electronics diagnostiquera, réparera et mettra à jour votre
téléviseur à distance. Ces fonctions ne sont toutefois disponibles que lorsque votre téléviseur est connecté à
Internet.
Qu'est que l'assistance à distance ?
Le service d'assistance à distance de Samsung vous permet de bénéficier de l'aide personnalisée d'un technicien de
Samsung en mesure d'effectuer à distance les actions suivantes :
● Diagnostiquer votre téléviseur
● Régler les paramètres du téléviseur à votre place
● Réinitialiser les paramètres par défaut de votre téléviseur
● Installer les mises à jour de micrologiciel recommandées
148 149
Comment cela fonctionne-t-il ?
Pour bénéficier d'une intervention à distance du service technique de Samsung sur votre téléviseur, rien de plus
simple.
Contactez le centre d'appel de Samsung
pour demander une assistance à
distance.
Ouvrez le menu de votre téléviseur, puis
accédez à la section Assistance.
Sélectionnez l'option Gestion à distance,
puis communiquez le code PIN à l'agent.
Ce dernier aura alors accès à votre
téléviseur. Et voilà !
150
e-Manual
Menu à l'écran > Assistance > e-Manual (Résolution des problèmes)
Ce téléviseur intègre un manuel d'utilisation électronique. Il s'agit d'un guide complet sur l'utilisation de votre
Samsung SMART TV. Reportez-vous à la section "Affichage de l'e-Manual" pour plus d'informations.
Diagnost. auto.
Menu à l'écran > Assistance > Diagnost. auto. Essayer
Votre téléviseur est capable de diagnostiquer automatiquement des problèmes d'image, de son et de signal. La
fonction de diagnostic automatique offre les options suivantes :
● Test de l'image
● Test du son
● Vérif. environnement Commande par mouv.
● Informations de signal
● Réinit.
Test de l'image
Menu à l'écran > Assistance > Diagnost. auto. > Test de l'image Essayer
Le Test de l'image affiche une image haute définition permettant d'examine les défauts.
Si l'image de test ne s'affiche pas ou si elle est altérée par des parasites ou des déformations, cela signifie que le
téléviseur a peut-être un problème. Contactez le centre d'appel de Samsung pour obtenir de l'aide. Si l'image de
test s'affiche correctement, le problème est peut-être dû à l'équipement externe. Vérifiez les connexions. Si le
problème persiste, vérifiez l'intensité du signal ou reportez-vous au manuel d'utilisation du périphérique externe.
150 151
Test du son
Menu à l'écran > Assistance > Diagnost. auto. > Test du son Essayer
Cette option permet d'utiliser la mélodie intégrée pour rechercher d'éventuels problèmes de son.
Si les haut-parleurs du téléviseur ne diffusent aucune mélodie, vérifiez si l'option Sélection Haut-parleur est définie
sur Haut-parleur TV, puis réessayez. Si le problème persiste, il se peut que le téléviseur soit défaillant. Contactez
le centre d'appel de Samsung pour obtenir de l'aide. Si vous entendez la mélodie, il se peut que l'équipement
externe soit défaillant. Vérifiez les connexions. Si le problème persiste, reportez-vous au manuel d'utilisation du
périphérique externe.
Vérif. environnement Commande par mouv.
Menu à l'écran > Assistance > Diagnost. auto. > Vérif. environnement Commande par mouv. Essayer
Testez les niveaux de luminosité et de bruit ambiants pour découvrir s'ils conviennent à l'utilisation de l'interaction
INTELLIGENTE.
Informations de signal
Menu à l'écran > Assistance > Diagnost. auto. > Informations de signal Essayer
Les informations de signal ont trait au signal de chaîne numérique et à son intensité. Les utilisateurs peuvent régler
l'antenne pour augmenter l'intensité du signal et recevoir des chaînes HD. Cette option est disponible uniquement
pour les chaînes numériques.
Réinit.
Menu à l'écran > Assistance > Diagnost. auto. > Réinit. Essayer
Cette option permet de rétablir les valeurs par défaut de tous les paramètres, à l'exception des paramètres
du réseau. Sélectionnez Réinitialiser, entrez le code PIN lorsque vous y êtes invité, puis sélectionnez Oui. Tous
les paramètres sont réinitialisés. Le téléviseur s'éteint et se rallume automatiquement, puis affiche l'écran
Configuration. Pour plus d'informations sur la réinitialisation du téléviseur, consultez le manuel d'utilisation.
152
Mise à jour du logiciel
Menu à l'écran > Assistance > Mise à jour du logiciel Essayer
Vérifiez la version du logiciel de votre téléviseur et mettez-le à niveau si nécessaire.
[ Ne mettez PAS le téléviseur hors tension tant que la procédure de mise à niveau n'est pas terminée. Une fois
la mise à niveau du logiciel terminée, le téléviseur s'éteint et se rallume automatiquement. Après une mise à
niveau du logiciel, tous les réglages audio et vidéo sont réinitialisés.
Vous pouvez mettre à niveau le logiciel comme suit :
● MàJ maintenant
● Mise à jour auto
● Gérer les chaînes satellites (lorsque l'antenne est définie sur Satellite)
MàJ maintenant
Menu à l'écran > Assistance > Mise à jour du logiciel > MàJ maintenant Essayer
Une mise à niveau en ligne télécharge et installe le logiciel nécessaire directement à partir d'Internet. Configurez le
téléviseur pour qu'il se connecte à un réseau, puis assurez-vous qu'il peut accéder à Internet.
Mise à jour manuelle
Téléchargez le dernier fichier de mise à jour depuis le site Web Samsung. Décompressez le fichier et copiez-le dans
le répertoire racine d'un lecteur flash. Insérez le lecteur flash dans l'un des ports USB du téléviseur pour installer la
mise à jour.
152 153
Mise à jour auto
Menu à l'écran > Assistance > Mise à jour du logiciel > Mise à jour auto Essayer
Cette option met à niveau le téléviseur lorsqu'il est en mode veille. En mode veille, bien que le téléviseur semble
éteint, il a toujours accès à Internet. Cela lui permet de se mettre à niveau automatiquement lorsqu'il n'est pas
utilisé. Etant donné que les processus internes du téléviseur sont actifs, il se peut que l'écran émette une faible
lueur. Cette situation peut perdurer pendant plus d'une heure, jusqu'à ce que le téléchargement du logiciel soit
terminé. Avant d'activer cette option, vérifiez la configuration du réseau et la connexion Internet.
Paramètres de la mise à niveau en mode veille
Spécifiez le moment auquel la mise à niveau doit avoir lieu. Ce téléviseur peut être réglé pour vérifier et installer
régulièrement les mises à jour. Choisissez l'une des plages horaires prédéfinies.
Gérer les chaînes satellites (lorsque l'antenne est définie sur Satellite)
Gérez les téléchargements de logiciels via une chaîne satellite.
Mode d'utilisation
Menu à l'écran > Assistance > Mode Utilisation Essayer
Sélectionnez le mode d'utilisation du téléviseur. Si ce dernier est en Util. magasin, cette option vous permet de
modifier le mode. Le Util. magasin est réservé à un usage en magasin. En Util. magasin, certaines fonctions sont
désactivées et le téléviseur se réinitialise automatiquement après un certain temps.
Informations de support
Menu à l'écran > Assistance > Contacter Samsung Essayer
Si votre téléviseur ne fonctionne pas correctement ou si vous avez besoin d'informations concernant la mise à
niveau du logiciel, consultez la section ci-dessous. Elle contient des informations utiles sur le produit ainsi que des
instructions concernant la manière de vous procurer le logiciel le plus récent.
154
Service de diffusion de données
Cette fonction n'est disponible qu'en Italie.
Permet à l'utilisateur d'utiliser les informations (texte, images fixes, illustrations, documents, logiciels, etc.)
transmises via un média de diffusion.
Service données auto
Menu à l'écran > Système > Service données auto
Indique s'il convient ou non d'exécuter automatiquement le service de diffusion de données. La fonction Service
données auto exécute automatiquement le service de diffusion de données sans intervention de l'utilisateur.
" Si une autre fonction secondaire est en cours d'exécution, la fonction Service données auto risque de ne pas opérer.
Utilisation du Service de diffusion de données
Si la chaîne que vous regardez offre des services de diffusion de données, vous pouvez profiter de ces derniers en
sélectionnant a avec votre télécommande.
" Les informations de service de diffusion de données fournies peuvent varier selon le programme.
" Pendant l'utilisation d'un service de diffusion de données, selon ce dernier, il se peut que le changement de chaîne à l'aide
des boutons numériques ne soit pas possible.
11 Utilisez votre télécommande pour sélectionner a. Sélectionnez le service souhaité.
" Si l'option Service données auto est définie sur Activé, le service de diffusion de données s'exécute
automatiquement en affichant une bannière de chargement. Dans ce cas, la fonction a n'opère pas.
22 Utilisez votre télécommande pour sélectionner a. L'écran du service de diffusion de données s'affiche.
33 A l'aide de votre télécommande, passez à une option souhaitée sur l'écran du service de diffusion de données,
puis sélectionnez OK. Le service sélectionné démarre.
" Si le bouton de couleur d'une fonction s'affiche à l'écran, vous pouvez exécuter cette dernière en la sélectionnant.
44 Si vous sélectionnez EXIT, le service de diffusion de données se ferme.
154 155
Principaux boutons du Service de diffusion de données et leurs fonctions
● a (Service de diffusion de données)
Affiche la liste du Service de diffusion de données et démarre immédiatement ce dernier.
● RETOUR
Revient à l'écran précédent.
● Bouton de couleur
Exécute les fonctions correspondant à chaque image de bouton de couleur affichée à l'écran pendant
l'utilisation du Service de diffusion de données.
" Les actions peuvent varier selon le fournisseur de services.
● Symboles
Vous pouvez entrer du texte à l'aide des chiffres et des lettres imprimés sur et au-dessus des touches
numériques de la télécommande. Si vous utilisez les touches numériques de la télécommande une à une dans
l'espace vierge où se situe le curseur dans l'écran de saisie de texte, les lettres, chiffres ou caractères spéciaux
correspondants s'affichent. Par exemple, si vous appuyez rapidement à plusieurs reprises sur la touche 3, les
lettres affectées (D, E et F) et le chiffre 3 s'affichent successivement.
● TEXTE
Bascule en mode télétexte ou revient à l'écran précédent.
" Les actions peuvent varier selon le fournisseur de services.
● u / d / l / r
Déplace le menu Service de diffusion de données vers le haut, le bas, la gauche et la droite.
● OK
Exécute une option sélectionnée.
● EXIT
Arrête un l'exécution du Service de diffusion de données.
156
HbbTV
Cette fonction n'est pas prise en charge dans tous les pays.
La fonction HbbTV vous permet d'accéder à des services proposés par des fournisseurs de divertissement, des
fournisseurs en ligne et des fabricants CE.
" Dans certains pays, la fonction HbbTV est un service de diffusion de données.
" Ce service est peut-être pris en charge dans d'autres pays.
" Certaines stations de diffusion ne prennent pas en charge la fonction HbbTV.
11 Par défaut, la fonction HbbTV est désactivée. Pour l'utiliser, accédez à l'option Menu à l'écran > Système >
Service de diffusion de données, puis définissez-la sur Activer. (En fonction du pays)
22 La fonction HbbTV n'est pas disponible lorsque la fonction Timeshift est en cours d'exécution ou une vidéo
enregistrée en cours de lecture.
33 En fonction de la station de diffusion ou du fournisseur de l'application, une application sur le HbbTV peut
temporairement ne pas fonctionner correctement.
44 Une application est disponible sur le HbbTV uniquement lorsque le réseau de télévision est connecté à un
réseau externe. L'état du réseau peut entraîner un dysfonctionnement de l'application.
55 Si la chaîne en cours de diffusion est compatible avec les modes de saisie de texte HbbTV et non-HbbTV,
activez le TTX en sélectionnant le bouton TTX deux fois.
● Lorsque l'écran indique (avec a, etc.) que le HbbTV est en cours d'accès, procédez comme suit.
● Sélectionnez TTX avec votre télécommande une fois pour choisir le mode de saisie de texte HbbTV.
● Sélectionnez TTX avec votre télécommande deux fois pour choisir le mode de saisie de texte non-HbbTV.
156 157
Connexion à une fente de carte de visionnement TV
Pour connecter la carte d'interface commune (CI CARD), procédez comme
suit :
Utilisation de la carte d'interface commune "CI ou CI+"
Pour pouvoir regarder des chaînes payantes, vous devez avoir inséré la carte d'interface commune "CI ou CI+".
" Mettez le téléviseur hors tension pour connecter ou déconnecter une carte d'interface commune.
● Si vous ne l'insérez pas, certaines chaînes affichent le message "Signal brouillé".
● Les informations de pairage contenant un numéro de téléphone, l'ID de la carte d'interface commune "CI ou
CI+", l'ID de l'hôte et d'autres informations s'affichent après 2 ou 3 minutes. Si un message d'erreur s'affiche,
contactez votre fournisseur de services.
● Une fois la configuration des informations sur les canaux terminée, le message "Updating Completed"
s'affiche, indiquant que la liste des chaînes est à jour.
" Vous devez vous procurer une carte d'interface commune "CI ou CI+" auprès d'un fournisseur local de diffusion par
câble.
" Pour extraire la carte d'interface commune "CI ou CI+", tirez-la précautionneusement. Une chute pourrait en effet
l'endommager.
" Insérez la carte d'interface commune "CI ou CI+" dans le sens indiqué sur celle-ci.
" L'emplacement de la fente COMMON INTERFACE peut varier en fonction du modèle.
" La carte d'interface commune "CI ou CI+" n'est pas prise en charge dans certains pays et certaines régions ; vérifiez
auprès de votre revendeur agréé.
" Si vous rencontrez des problèmes, contactez le fournisseur de services.
" Insérez la carte CI ou CI+ qui prend en charge les paramètres actuels de l'antenne. L'image sera déformée, voire
invisible.
158
Pour connecter l'adaptateur de carte d'interface commune (CI), procédez
comme suit :
" Il est conseillé de connecter l'adaptateur avant l'installation du montage mural ou d'insérer la carte d'interface commune
"CI ou CI+".
" Mettez le téléviseur hors tension pour connecter ou déconnecter un adaptateur de carte CI.
11 Insérez l'adaptateur de carte CI dans les deux trous du produit 1.
" Deux trous sont présents à l'arrière du téléviseur. Ils sont situés à proximité du port COMMON INTERFACE.
22 Insérez l'adaptateur de carte CI dans le port COMMON INTERFACE du produit 2.
33 Insérez la carte CI ou CI+.
[ Il est conseillé d'insérer la carte CI avant de fixer le téléviseur en position murale. En effet, son insertion peut
s'avérer difficile après le montage. N'insérez la carte qu'après avoir fixé le module CI sur le téléviseur. Il est
plus difficile de fixer le module si la carte est déjà insérée.
158 159
Utilisation de la carte d'interface commune "CI ou CI+"
Pour pouvoir regarder des chaînes payantes, vous devez avoir inséré la carte d'interface commune "CI ou CI+".
● Si vous ne l'insérez pas, certaines chaînes affichent le message "Signal brouillé".
● Les informations de pairage contenant un numéro de téléphone, l'ID de la carte d'interface commune "CI ou
CI+", l'ID de l'hôte et d'autres informations s'affichent après 2 ou 3 minutes. Si un message d'erreur s'affiche,
contactez votre fournisseur de services.
● Une fois la configuration des informations sur les canaux terminée, le message "Updating Completed"
s'affiche, indiquant que la liste des chaînes est à jour.
" Vous devez vous procurer une carte d'interface commune "CI ou CI+" auprès d'un fournisseur local de diffusion par
câble.
" Pour extraire la carte d'interface commune "CI ou CI+", tirez-la précautionneusement. Une chute pourrait en effet
l'endommager.
" Insérez la carte d'interface commune "CI ou CI+" dans le sens indiqué sur celle-ci.
" L'emplacement de la fente COMMON INTERFACE peut varier en fonction du modèle.
160
Fonction Télétexte
(En fonction du pays)
La page d'index du télétexte contient des instructions sur l'utilisation du service. Pour que les informations
du télétexte s'affichent correctement, la réception des chaînes doit être stable. Autrement, des informations
pourraient manquer ou certaines pages ne pas s'afficher.
" Vous pouvez changer de page de télétexte en appuyant sur les boutons numériques de la télécommande.
/ Télétexte activé / mixte / désactivé : active le mode Télétexte pour la chaîne choisie. Appuyez deux fois sur
ce bouton pour superposer le Télétexte à l'émission en cours de diffusion. Appuyez une nouvelle fois sur le bouton
pour quitter le télétexte.
8 Mémoriser : enregistre les pages de télétexte.
4 Taille : affiche le télétexte sur moitié supérieure de l'écran en caractères deux fois plus grands. Pour afficher le
texte dans la moitié inférieure de l'écran, appuyez une nouvelle fois sur ce bouton. Pour rétablir l'affichage normal,
appuyez dessus une fois de plus.
9 En attente : arrête l'affichage sur la page en cours, au cas où plusieurs pages secondaires suivraient
automatiquement. Pour annuler, appuyez de nouveau sur ce bouton.
Boutons de couleur (rouge, vert, jaune, bleu) : si la société de diffusion utilise le système FASTEXT, les différents
sujets traités dans la page de télétexte disposent d'un code couleur, et peuvent être sélectionnés à l'aide des
boutons colorés de la télécommande. Appuyez sur la couleur correspondant au sujet de votre choix. Une nouvelle
page avec code couleur s'affichée. Les éléments peuvent être sélectionnés de la même manière. Pour afficher la
page précédente ou suivante, sélectionnez le bouton de couleur correspondant.
0 Mode : sélectionne le mode Télétexte (LISTE/FLOF). Si vous appuyez sur ce bouton alors que le mode LISTE
est sélectionné, le mode d'enregistrement de liste est activé. Dans ce mode, vous pouvez enregistrer une page
télétexte dans une liste à l'aide du bouton 8 (mémoriser).
1 Page secondaire : affiche la page secondaire disponible.
2 Page haut : affiche la page suivante du télétexte.
3 Page bas : affiche la page précédente du télétexte.
6 Index : afficher, à tout moment, la page d'index (sommaire) du télétexte.
5 Afficher : affiche le texte masqué (par exemple, réponses à un questionnaire). Appuyez de nouveau sur ce
bouton pour rétablir le mode d'affichage normal.
7 Annuler : réduit l'écran du télétexte pour le superposer à celui de l'émission en cours.
160 161
Page de télétexte type
Partie Contenu
A Numéro de la page sélectionnée.
B Identité de la chaîne de diffusion.
C Numéro de la page actuelle ou indications de recherche.
D Date et heure.
E Texte.
F Informations sur l'état. Informations FASTEXT.
162
Verrou antivol Kensington
Un verrou Kensington est un dispositif physique permettant de protéger le téléviseur contre le vol. Repérez la
fente Kensington à l'arrière du téléviseur. Une icône K figure à côté de celle-ci. Enroulez le câble du verrou autour
d'un objet trop lourd pour être emporté, puis faites-le passer dans la fente du verrou Kensington du téléviseur. Le
verrou est vendu séparément.
La méthode d'utilisation d'un verrou Kensington peut varier en fonction du modèle de téléviseur. Pour plus
d'informations, consultez le manuel d'utilisation du verrou Kensington.
Résolution de l'affichage
Vous pouvez aussi sélectionner l'une des résolutions standard figurant dans la colonne Résolution. Le téléviseur
règlera automatiquement la résolution choisie.
Après avoir connecté un ordinateur au téléviseur, définissez la résolution de l'écran pour le téléviseur sur
l'ordinateur. La résolution optimale est de 1920 x 1080 à 60 Hz. Si vous définissez une autre résolution que celles
présentées dans le tableau ci-dessous, il est possible que le téléviseur n'affiche rien. Veuillez définir la résolution
correctement en vous reportant au manuel d'utilisation de l'ordinateur ou de sa carte graphique.
IBM
Résolution Fréquence
standard
Fréquence
horizontale
(kHz)
Fréquence
verticale
(Hz)
Fréquence
d'horloge pixels
(MHz)
Polarité
synchronisée
(H/V)
720 x 400 70Hz 31.469 70.087 28.322 -/+
MAC
Résolution Fréquence
standard
Fréquence
horizontale
(kHz)
Fréquence
verticale
(Hz)
Fréquence
d'horloge pixels
(MHz)
Polarité
synchronisée
(H/V)
640 x 480 67Hz 35.000 66.667 30.240 -/-
832 x 624 75Hz 49.726 74.551 57.284 -/-
1152 x 870 75Hz 68.681 75.062 100.000 -/-
162 163
VESA DMT
Résolution Fréquence
standard
Fréquence
horizontale
(kHz)
Fréquence
verticale
(Hz)
Fréquence
d'horloge pixels
(MHz)
Polarité
synchronisée
(H/V)
640 x 480 60Hz 31.469 59.940 25.175 -/-
640 x 480 72Hz 37.861 72.809 31.500 -/-
640 x 480 75Hz 37.500 75.000 31.500 -/-
800 x 600 60Hz 37.879 60.317 40.000 +/+
800 x 600 72Hz 48.077 72.188 50.000 +/+
800 x 600 75Hz 46.875 75.000 49.500 +/+
1024 x 768 60Hz 48.363 60.004 65.000 -/-
1024 x 768 70Hz 56.476 70.069 75.000 -/-
1024 x 768 75Hz 60.023 75.029 78.750 +/+
1152 x 864 75Hz 67.500 75.000 108.000 +/+
1280 x 720 60Hz 45.000 60.000 74.250 +/+
1280 x 800 60Hz 49.702 59.810 83.500 -/+
1280 x 1024 60Hz 63.981 60.020 108.000 +/+
1280 x 1024 75Hz 79.976 75.025 135.000 +/+
1366 x 768 60Hz 47.712 59.790 85.500 +/+
1440 x 900 60Hz 55.935 59.887 106.500 -/+
1600 x 900 RB 60Hz 60.000 60.000 108.000 +/+
1680 x 1050 60Hz 65.290 59.954 146.250 -/+
1920 x 1080 60Hz 67.500 60.000 148.500 +/+
164
Format de l'image et signal d'entrée
Format de l'image Signal d'entrée
16/9 auto ATV, EXT, AV, DTV (576i/p, 720p), DTV (1080i, 1080p)
16:9 ATV, EXT, AV, DTV (576i/p, 720p, 1080i, 1080p), Composant (480i/p, 576i/p, 720p, 1080i, 1080p),
HDMI (480i/p, 576i/p, 720p, 1080i, 1080p)
Zoom large,
Zoom
ATV, EXT, AV, DTV (576i/p, 720p, 1080i, 1080p), Composant (480i/p, 576i/p, 720p, 1080i, 1080p),
HDMI (480i/p, 576i/p, 720p, 1080i, 1080p)
4:3 ATV, EXT, AV, DTV (576i/p, 720p, 1080i, 1080p), Composant (480i/p, 576i/p, 720p, 1080i, 1080p),
HDMI (480i/p, 576i/p, 720p, 1080i, 1080p)
Smart View 1 HDMI (480i/p, 576i/p, 720p, 1080i, 1080p)
Smart View 2 DTV (576i/p, 720p, 1080i, 1080p), HDMI (480i/p, 576i/p, 720p, 1080i, 1080p)
Adapter à l'écran DTV (1080i, 1080p), Composant (1080i, 1080p), HDMI (720p, 1080i, 1080p)
Le paramètre Format de l'image est appliqué à la source actuelle, et la valeur Format de l'image appliquée reste
effective lors de la sélection de source suivante.
Résolutions 3D compatibles
Les spécifications suivantes s'appliquent uniquement à un format d'image 16:9.
HDMI
Format 3D : G/D, H/B
Résolution Fréquence (Hz)
1280 x 720p 50 / 59.94 / 60
1920 x 1080i 50 / 59.94 / 60
1920 x 1080p 23.98 / 24 / 25 / 29.97 / 30 / 50 / 59.94 / 60
Format 3D : Frame Packing
Résolution Fréquence (Hz)
1280 x 720p 50 / 59.94 / 60
1920 x 1080i 50 / 59.94 / 60
1920 x 1080p 23.98 / 24 / 25 / 29.97 / 30
164 165
Composant
Résolution Fréquence (Hz)
1280 x 720p 50 / 59.94 / 60
1920 x 1080i 50 / 59.94 / 60
1920 x 1080p 23.98 / 24 / 25 / 29.97 / 30 / 50 / 59.94 / 60
Chaîne numérique
Résolution Fréquence (Hz)
1280 x 720p 50 / 59.94 / 60
1920 x 1080i 50 / 59.94 / 60
1920 x 1080p 25
Vidéos/Photos
Reportez-vous à la section "Formats de sous-titres et de contenu multimédia, et Codec" pour plus d'informations.
Ordinateur via HDMI
La résolution optimale de l'écran d'ordinateur est 1920 x 1080. Seuls les téléviseurs LED peuvent convertir
un écran d'ordinateur 2D en 3D. Si la résolution n'est pas correctement réglée, il se peut que l'affichage 3D et
l'affichage plein écran ne soient pas disponibles.
166
Formats de sous-titres et de contenu multimédia, et Codec
Sous-titres
Externes
Nom Extension de fichier
Texte MPEG-4 synchronisé .ttxt
SAMI .smi
SubRip .srt
SubViewer .sub
Micro DVD .sub ou .txt
SubStation Alpha .ssa
Advanced SubStation Alpha .ass
Powerdivx .psb
Interne
Nom Conteneur
Xsub AVI
SubStation Alpha MKV
Advanced SubStation Alpha MKV
SubRip MKV
Texte MPEG-4 synchronisé MP4
166 167
Résolutions d'image prises en charge
Extension de fichier Type Résolution
*.jpg
*.jpeg JPEG 15360 x 8640
*.png PNG 4096 x 4096
*.bmp BMP 4096 x 4096
*.mpo MPO 15360 x 8640
Formats de fichier audio pris en charge
Extension de
fichier Type Codec Commentaires
*.mp3 MPEG MPEG1 Audio Layer 3
*.m4a
*.mpa
*.aac
MPEG4 AAC
*.flac FLAC FLAC Prend en charge jusqu'au canal 2
*.ogg OGG Vorbis Prend en charge jusqu'au canal 2
*.wma WMA WMA
WMA 10 Pro prend en charge jusqu'au canal 5.1.
L'audio sans perte WMA n'est pas pris en charge.
Prend en charge jusqu'au profil M2
*.wav wav wav
*.mid
*.midi midi midi type 0 et type 1 sont pris en charge.
*.ape ape ape
168
Codec vidéo
Extension
de fichier Conteneur Codec vidéo Résolution
Fréquence
d'images (i/
s)
Débit
binaire
(Mbit/s)
Codec audio
*.avi Divx 3.11 / 4 / 5 / 6
*.mkv
*.asf
MPEG4 SP/ASP
*.wmv
*.mp4
AVI
MKV
H.264 BP/MP/HP
AC3
LPCM
*.3gp
*.vro
ASF
MP4
Motion JPEG
1920x1080
(WMV v7,v8,
ADPCM(IMA, MS)
AAC
*.mpg
*.mpeg
3GP
MOV
Microsoft MPEG-4 v3 MSMPEG4 v3:
1280x720) 6~30 30
HE-AAC
WMA
*.ts
*.tp
FLV
VRO Window Media Video v7,v8,v9
DD+
MPEG(MP3)
*.trp
*.mov
TS
SVAF
MPEG2
*.flv
*.vob
MPEG1
*.svi
*.m2ts
VP6 640x480 4
MVC 24/25/30 60
*.webm WebM VP8 1920x1080 6~30 20 Vorbis
168 169
Codecs vidéo
Autres restrictions
Les codecs peuvent ne pas fonctionner correctement en cas de problème avec les données de contenu.
Des problèmes de lecture peuvent survenir si une erreur est présente dans le contenu ou sur le support.
Il se peut que le son ou la vidéo ne fonctionne pas si le débit binaire/la fréquence d'images standard du contenu est
supérieur(e) aux normes de compatibilité du téléviseur.
Si la table d'index est incorrecte, la fonction de recherche (saut) n'est pas disponible.
La lecture d'une vidéo sur une connexion réseau risque d'être saccadée en raison des vitesses de transmission des
données.
Il est possible que certains périphériques USB/appareils photo numériques ne soient pas compatibles avec le
lecteur.
Décodeurs vidéo
● Prise en charge jusqu'à la norme H.264 niveau 4.1 (pas de prise en charge des normes FMO/ASO/RS)
● Les normes VC1/AP L4 ne sont pas prises en charge.
● Tous les codecs vidéo à l'exception de WMV v7, v8, MSMPEG4 v3, MVC et VP6 :
Inférieur à 1280 x 720 : 60 images max.
Supérieur à 1280 x 720 : 30 images max.
● La norme GMC n'est pas prise en charge.
● Prise en charge des modes SVAF "Top/Bottom" (Haut/Bas) et "Left/Right" (Gauche/Droite) uniquement.
● Prise en charge des spécifications Blu-ray/DVD MVC uniquement.
Décodeurs audio
● Le codec WMA 10 Pro prend en charge jusqu'aux canaux 5.1. Prend en charge jusqu'au profil M2 (sauf mode
LBR de M0).
● L'audio sans perte WMA n'est pas pris en charge.
● Le codec Vorbis est pris en charge jusqu'à deux canaux.
● Le codec DD+ est pris en charge jusqu'aux canaux 5.1.
170
Précautions relatives à la fonction 3D
ATTENTION
INFORMATIONS IMPORTANTES SUR LA SECURITE ET LA PROTECTION DE LA SANTE CONCERNANT LES
IMAGES EN 3D. LISEZ LES AVERTISSEMENTS SUIVANTS AVANT QUE VOUS OU VOTRE ENFANT N'UTILISIEZ LA
FONCTION 3D.
● Des adultes doivent régulièrement vérifier que tout se passe bien pour les enfants qui utilisent la fonction 3D.
Si un enfant vous dit qu'il a les yeux fatigués ou qu'il ressent des maux de tête, des vertiges ou des nausées, ne
le laissez pas continuer à regarder la télévision en 3D et faites-le se reposer.
● N'utilisez pas les lunettes 3D à d'autres fins comme lunettes de vue, de soleil ou de protection, etc.
● Certaines personnes peuvent être victimes de vertiges, nausées et maux de tête lorsqu'elles regardent la
télévision en 3D. Si vous présentez l'un de ces symptômes, arrêtez immédiatement de regarder la télévision
en 3D, retirez les lunettes 3D et reposez-vous un moment.
● Le fait de regarder des images 3D pendant une période prolongée peut causer une fatigue oculaire. Si vous
ressentez une fatigue oculaire, arrêtez immédiatement de regarder la télévision en 3D, retirez les lunettes 3D
et reposez-vous un moment.
● N'utilisez pas la fonction 3D ou les lunettes 3D lorsque vous marchez ou vous vous déplacez. Si vous utilisez
la fonction 3D ou les lunettes 3D actives en vous déplaçant, vous pouvez vous blesser en trébuchant, en
chutant et/ou en percutant des objets.
170 171
CONSIGNES DE SECURITE
Les consignes de sécurité ci-dessous visent à garantir votre sécurité et à éviter tout endommagement du produit.
Lisez-les attentivement afin d'utiliser correctement le produit.
● Ne posez pas le produit à des endroits exposés à la lumière directe du soleil, à la chaleur, au feu ou à l'eau.
Cela pourrait engendrer un dysfonctionnement du produit ou provoquer un incendie.
● N'exercez pas de pression sur les lunettes 3D. Veillez à ne pas faire tomber ou plier le produit. Cela pourrait
engendrer un dysfonctionnement.
● N'utilisez que les piles standard spécifiées. Lors du remplacement des piles, insérez-les de manière à respecter
les polarités (+, -). Vous risqueriez en effet d'endommager les piles ou de provoquer un incendie, de vous
blesser ou de polluer l'environnement en raison d'une fuite de liquide provenant de la pile.
● Conservez la pile usagée hors de portée des enfants afin qu'ils ne l'avalent pas par accident. Consultez
immédiatement un médecin en cas d'ingestion de la pile.
● Lors du nettoyage du produit, ne vaporisez pas directement de l'eau ou du nettoyant sur la surface du
produit. La vaporisation d'eau ou de nettoyant directement sur les lunettes peut provoquer un incendie ou
une décharge électrique, endommager la surface du produit ou entraîner le décollement des étiquettes de la
surface du produit.
● N'utilisez pas de produits chimiques contenant de l'alcool, des solvants ou des agents tensio-actifs, ni des
produits chimiques tels que la cire, du benzène, du diluant, de l'insectifuge, du lubrifiant ou des solutions
détergentes. Ils risqueraient de décolorer ou de craqueler la surface du produit et les étiquettes pourraient
se décoller.
● Etant donné que la surface du produit et les lentilles peuvent facilement être rayées, utilisez un chiffon doux
propre lorsque vous les nettoyez. Avant de procéder au nettoyage, secouez bien le chiffon afin d'éliminer
toute particule étrangère.
● Ne démontez, réparez ou modifiez jamais les lunettes 3D vous-même. N'utilisez pas les lunettes si elles sont
en panne ou cassées.
● Veillez à ne pas vous blesser les yeux avec la monture des lunettes 3D lorsque vous les portez.
172
GARANTIE
Ce produit Samsung est garanti contre les défauts de matériel et de fabrication pendant la durée de la période
indiquée dans le tableau (voir tableau de période de garantie pour le pays) à compter de la date d'achat. Si vous
avez besoin d'un service de garantie, renvoyez le produit auprès du revendeur du produit. Les services aprèsvente
agréés Samsung se conforment aux dispositions de garantie pendant la période de garantie. Pour plus
d'informations, contactez votre service après-vente agréé le plus proche.
PROCEDURE DE DEMANDE DE BENEFICE DE LA GARANTIE
Pour demander le bénéfice de la garantie, vous devez contacter le centre Samsung pendant la période de garantie
pour expliquer les problèmes que vous rencontrez avec le produit. S'il est nécessaire de le réparer ou de le
remplacer, vous obtiendrez un numéro de bénéfice de la garantie et l'adresse d'un service après-vente agréé.
Si vous recevez un numéro de bénéfice de la garantie, vous devez envoyer le produit au service après-vente agréé
renseigné accompagné des éléments suivants pour bénéficier de sa réparation ou de son remplacement :
● une copie de votre carte de garantie complétée ou, si vous l'avez déjà fournie à Samsung, votre nom, adresse
et numéro de téléphone ;
● votre reçu, facture ou ticket de caisse original comme preuve d'achat du produit neuf ;
● votre numéro de bénéfice de la garantie.
Samsung procédera ensuite à la réparation ou au remplacement du produit, puis vous le renverra aux
coordonnés fournies.
CONDITIONS DE GARANTIE
11 La garantie est valable uniquement si la procédure de demande de bénéfice de la garantie est respectée.
22 Les obligations de Samsung sont limitées à la réparation ou au remplacement du produit ou de la pièce
défectueuse à ses propres frais.
33 Les réparations de garantie doivent être effectuées par les services après-vente agréés Samsung. Aucun
remboursement ne sera effectué pour des réparations réalisées par des revendeurs ou services aprèsvente
non agréés par Samsung ; de même, aucune réparation ou dommage causé au produit lors de telles
réparations ne sera couvert par la garantie.
44 Ce produit ne peut être considéré comme étant défectueux dans sa fabrication ou son matériel pour la
simple raison qu'il doit être adapté aux normes de sécurité et aux normes techniques locales ou nationales
en vigueur dans des pays autres que le pays pour lequel le produit a été originalement conçu et fabriqué. La
présente garantie ne couvre ni ne rembourse une telle adaptation, pas plus que les dommages qui pourraient
en résulter.
172 173
55 La garantie ne s'applique pas aux produits endommagés ou défectueux à la suite de l'un des événements
suivants :
● accident, mauvaise manipulation, abus ;
● incapacité à utiliser ce produit dans des conditions normales ;
● utilisation de pièces qui ne sont pas fabriquées ou vendues par Samsung ;
● modification sans l'autorisation écrite de Samsung ;
● dommage résultant du transport, d'une négligence, d'une surtension ou d'une panne de courant ;
● dommage causé par la foudre, l'eau, un incendie ou une catastrophe naturelle ;
● usure ou déchirure normale ;
● différences de méthodes de diffusion ou de normes concernant les produits suivant les pays.
66 Cette garantie est valable pour toute personne ayant acquis légalement le produit durant sa période de
garantie.
77 AUCUN ELEMENT DE CES CONDITIONS DE GARANTIE NE DOIT PERMETTRE D'EXCLURE OU DE LIMITER
LA RESPONSABILITE DE SAMSUNG EN CAS DE DECES OU DE BLESSURE CORPORELLE CAUSE PAR LA
NEGLIGENCE ETABLIE DE SAMSUNG, A MOINS QU'UNE TELLE LIMITATION OU EXCLUSION NE SOIT
AUTORISEE PAR LA LOI EN VIGUEUR.
88 A L'EXCEPTION DE LA RESPONSABILITE DE SAMSUNG NE POUVANT PAS ETRE EXCLUE NI LIMITEE
LEGALEMENT, SAMSUNG NE SAURAIT ETRE TENUE RESPONSABLE DES EVENEMENTS SUIVANTS : TOUT
DOMMAGE INDIRECT, ACCIDENTEL, SPECIAL OU INDUIT, LES PERTES OU DEPENSES ; LA PERTE DE PROFIT,
D'UTILISATION OU DE DONNEES ; TOUT DOMMAGE A LA CLIENTELE, A LA REPUTATION OU LA PERTE
COMMERCIALE, RESULTANT DIRECTEMENT OU INDIRECTEMENT DE L'ACHAT, DE L'UTILISATION OU DE LA
VENTE DU PRODUIT, QUE SAMSUNG AIT ETE OU NON INFORMEE OU CONSCIENTE DE LA POSSIBILITE DE
TELS DOMMAGES, PERTES OU DEPENSES.
99 A L'EXCEPTION DE LA RESPONSABILITE DE SAMSUNG NE POUVANT PAS ETRE EXCLUE OU LIMITEE
LEGALEMENT, LA RESPONSABILITE DE SAMSUNG LIEE AUX DISPOSITIONS DE CETTE GARANTIE OU A
L'ACHAT, L'UTILISATION OU LA VENTE DE CE PRODUIT NE SAURAIT EXCEDER LE PRIX DU PRODUIT NEUF.
111 SAUF DISPOSITION CONTRAIRE DANS CETTE GARANTIE, TOUS LES TERMES, CONDITIONS ET GARANTIES
SOUS-ENTENDUS PAR LE STATUT OU D'UNE AUTRE MANIERE SONT EXCLUS DANS LA MESURE PERMISE
PAR LA LOI.
111 Les conditions de garantie ci-dessus n'affectent en rien vos droits légaux en tant que consommateur ou
autre.
174
Licence
DivX Certified® to play DivX® video up to HD 1080p, including premium content.
DivX®, DivX Certified® and associated logos are trademarks of Rovi Corporation or its subsidiaries and are used under
licence.
ABOUT DIVX VIDEO: DivX® is a digital video format created by DivX, LLC, a subsidiary of Rovi Corporation. This is an official
DivX Certified® device that plays DivX video. Visit divx.com for more information and software tools to convert your files into
DivX videos.
ABOUT DIVX VIDEO-ON-DEMAND: This DivX Certified® device must be registered in order to play purchased DivX Video-onDemand
(VOD) movies. To obtain your registration code, locate the DivX VOD section in your device setup menu. Go to vod.
divx.com for more information on how to complete your registration.
Covered by one or more of the following U.S. patents: 7,295,673; 7,460,668; 7,515,710; 7,519,274
Manufactured under a licence from U.S. Patent No’s: 5,956,674, 5,974,380, 5,978,762, 6,487,535, 6,226,616, 7,212,872,
7,003,467, 7,272,567, 7,668,723, 7,392,195, 7,930,184, 7,333,929 and 7,548,853. DTS, the Symbol, and DTS and the
Symbol together are registered trademarks & DTS Premium Sound | 5.1 is a trademark of DTS, Inc. ©2012 DTS, Inc. All Rights
Reserved.
Manufactured under a licence from U.S. Patent No’s: 6,285,767, 8,027,477, 5,319,713, 5,333,201, 5,638,452, 5,771,295,
5,970,152, 5,912,976, 7,200,236, 7,492,907, 8,050,434, 7,720,240, 7,031,474, 7,907,736 and 7,764,802. DTS, the Symbol,
and DTS and the Symbol together are registered trademarks & DTS Studio Sound is a trademark of DTS, Inc. ©2012 DTS, Inc.
All Rights Reserved.
174 175
Fabriqué sous licence de Dolby Laboratories.
Dolby et le symbole du double D sont des marques de Dolby Laboratories.
The terms HDMI and HDMI High-Definition Multimedia Interface, and the HDMI Logo are trademarks or registered trademarks
of HDMI Licensing LLC in the United States and other countries.
Marque commerciale : Rovi et Rovi Guide sont des marques commerciales de Rovi Corporation et/ou de ses filiales.
Licence : Le système Rovi Guide est fabriqué sous licence de Rovi Corporation et/ou de ses filiales.
Brevet : Le système Rovi Guide est protégé par des brevets et demandes de brevet déposées aux États-Unis, Europe et
d'autres pays y compris un ou plusieurs des brevets des États-Unis 6,396,546; 5,940,073; 6,239,794 émis à Rovi Corporation
et/ou ses filiales.
Déni de responsabilité : Rovi Corporation et/ou ses filiales et sociétés affiliées ne pourront être tenus responsables de
l'exactitude ou de la disponibilité des informations relatives au programme ou d'autres données dans le système Rovi Guide et
ne peuvent garantir la disponibilité du service dans votre région. En aucun cas Rovi Corporation et/ou ses filiales et sociétés
affiliées ne pourront être tenus responsables des dommages liés à l'exactitude ou la disponibilité des informations relatives au
programme ou d'autres données dans le système Rovi Guide.
Avis concernant les Licences libres
En cas d'utilisation d'un logiciel libre (Open Source), les licences correspondantes sont disponibles dans le menu du
produit.
176
Ecran
Si vous rencontrez un problème d'écran, exécutez un Test de l'image (Menu à l'écran > Assistance > Diagnost.
auto. > Test de l'image) pour le diagnostiquer. Si le test ne permet pas d'identifier le problème, il se peut que ce
dernier soit lié à un périphérique externe ou à l'intensité du signal.
Problème rencontré avec
le téléviseur Solution possible
Connexions de
composants/couleur
d'écran
Si les couleurs affichées sur votre téléviseur Samsung sont incorrectes ou si l'affichage
en noir et blanc est désactivé, exécutez un Diagnost. auto. (Menu à l'écran > Assistance >
Diagnost. auto. > Test de l'image).
Si les résultats du test sont négatifs, vérifiez les points suivants :
Les connecteurs d'entrée vidéo du téléviseur sont-ils correctement reliés aux connecteurs
de sortie vidéo du périphérique externe ?
Vérifiez également les autres connexions. Si le téléviseur est connecté à un périphérique
externe à l'aide d'un câble composant, vérifiez si les fiches Pb, Pr et Y sont branchées sur les
connecteurs appropriés.
Luminosité de l'écran
Si les couleurs affichées sur votre téléviseur Samsung TV sont correctes, mais un peu trop
sombres ou trop lumineuses, commencez par essayer de régler les paramètres suivants.
Accédez à Image, puis modifiez les paramètres Rétroéclairage/Lum. Cellules (pour les
modèles concernés), Contraste, Luminosité, Netteté, Couleur, Teinte (V/R) et autres
paramètres de réglage de la qualité.
Motion Plus/Flou
Si vous pensez qu'il existe un flou ou une ombre parasite sur les images affichées à l'écran de
votre téléviseur, vous pouvez corriger le problème à l'aide de la fonction Motion Plus (Menu
à l'écran > Image > Options d'image > Motion Plus).
Mise sous tension non
souhaitée
Si votre téléviseur Samsung semble s'éteindre tout seul, essayez de désactiver certaines
fonctions d'économie d'énergie. Vérifiez si le Veille (Menu à l'écran > Système > Heure >
Veille) est activé. Après une certaine période d'inactivité, le Veille éteint automatiquement
le téléviseur pour économiser l'énergie. Si le programme de mise en veille n'est pas activé,
vérifiez si l'option Veille si aucun signal (Menu à l'écran > Système > Solution Eco > Veille si
aucun signal) ou Hors ten. auto (Menu à l'écran > Système > Solution Eco > Hors ten. auto)
est activée.
Si votre PC est connecté au téléviseur, vérifiez les paramètres d'alimentation du PC.
Vérifiez si le cordon d'alimentation secteur est branché correctement sur la prise murale et
sur le téléviseur.
Lorsque vous regardez la télévision à partir d'une connexion avec câble ou antenne, le
téléviseur s'éteint après 10 à 15 minutes s'il ne reçoit aucun signal.
Problèmes lors de la mise
sous tension
Lors de la mise sous tension du téléviseur, le récepteur AV de télécommande clignote à 5
reprises avant que l'écran s'allume.
Si vous rencontrez des problèmes lors de la mise sous tension de votre téléviseur Samsung,
vous pouvez vérifier un certain nombre de choses avant d'appeler le centre de service.
Si le cordon d'alimentation est correctement connecté et si la télécommande fonctionne
normalement, le problème provient peut-être du branchement au câble de l'antenne, ou
de l'alimentation du décodeur câble ou du récepteur satellite. Vérifiez la connexion de
l'antenne ou mettez sous tension le décodeur câble ou le récepteur satellite.
Impossibilité de trouver
un canal
Exécutez une Configuration (Menu à l'écran > Système > Configuration) ou un Recherche
automatique (Menu à l'écran > Diffusion > Recherche automatique).
176 177
Problème rencontré avec
le téléviseur Solution possible
Qualité d'image moins
bonne que dans le
magasin
Les affichages en magasin sont tous réglés sur des chaînes HD (haute définition)
numériques.
Si vous êtes équipé d'un décodeur câble/boîtier analogique, procédez à une mise à niveau
vers un décodeur numérique. Utilisez des câbles HDMI ou Composant pour bénéficier d'une
qualité d'image HD (haute définition).
De nombreuses chaînes HD sont mises à niveau à partir d'un contenu SD (définition
standard). Recherchez une chaîne qui diffuse un vrai contenu HD.
Abonnés au câble/satellite : essayez les chaînes HD figurant dans la liste des canaux.
Connexion de l'antenne hertzienne/câblée : essayez les chaînes HD après avoir procédé à
un réglage automatique.
Réglez la résolution de sortie vidéo du décodeur câble ou du récepteur satellite sur 1080i
ou 720p.
Veillez à respecter la distance minimale recommandée (basée sur la taille et la définition du
signal) entre vous et le téléviseur.
Image déformée
La compression de contenu vidéo peut engendrer une déformation de l'image, en particulier
pour les mouvements rapides comme le sport et les films d'action.
Un signal faible ou de mauvaise qualité peut également entraîner une déformation de
l'image. Il ne s'agit pas d'un problème lié au téléviseur.
Utiliser un téléphone portable à proximité du téléviseur (moins d'un mètre) peut être source
de parasites visuels sur les chaînes analogiques et numériques.
Couleur incorrecte ou
manquante
Si vous utilisez une connexion Composant, vérifiez si câbles sont connectés aux prises
adéquates. Des raccordements lâches ou incorrects peuvent engendrer des problèmes au
niveau de la couleur ou un écran vide.
Couleur de qualité
médiocre ou image pas
assez lumineuse
Accédez à Image puis réglez les paramètres Mode Image, Luminosité, Netteté, Couleur, ainsi
que d'autres paramètres de réglage de l'image.
Vérifiez si le Mode éco. (Menu à l'écran > Système > Solution Eco > Mode éco.) est activé.
Essayez de réinitialiser l'image. (Menu à l'écran > Image > Réinit. param. img)
Ligne pointillée sur le
pourtour de l'écran
Si l'option Format de l'image indique Adapter à l’écran, réglez-la sur 16:9.
Changez la résolution du décodeur câble ou du récepteur satellite.
Image en noir et blanc Si vous utilisez une entrée AV composite, connectez le câble vidéo (jaune) à la prise
composant verte du téléviseur.
Couleur incorrecte ou
manquante
Si vous utilisez une connexion Composant, vérifiez si les câbles sont connectés aux prises
adéquates. Des raccordements lâches ou incorrects peuvent engendrer des problèmes au
niveau de la couleur ou un écran vide.
Lorsque vous changez
de chaîne, l'image se fige,
est déformée ou s'affiche
avec un décalage.
Si le téléviseur est connecté à un décodeur câble, essayez de réinitialiser ce dernier.
(Débranchez puis rebranchez le cordon d'alimentation secteur, puis patientez jusqu'au
redémarrage du décodeur câble. Cette opération peut prendre jusqu'à 20 minutes.)
Réglez la résolution de sortie du décodeur câble sur 1080i ou 720p.
178
Son
Si vous rencontrez un problème avec les haut-parleurs du téléviseur, exécutez un Test du son (Menu à l'écran >
Assistance > Diagnost. auto. > Test du son) pour le diagnostiquer. Si le système audio fonctionne correctement, le
problème de son peut provenir de la source ou du signal.
Problème rencontré avec le
téléviseur Solution possible
Aucun son ou son trop
faible lorsque le niveau du
volume est au maximum
Vérifiez le volume du périphérique (décodeur câble ou récepteur satellite, DVD, Blu-ray,
etc.) connecté à votre téléviseur.
Image correcte mais pas de
son
Accédez à Son, puis définissez l'option Sélection Haut-parleur sur Haut-parleur TV.
Si vous utilisez un périphérique externe, vérifiez son option de sortie audio. (Par exemple,
il se peut que vous deviez changer l'option audio de votre décodeur câble en HDMI si
celui-ci est relié au téléviseur à l'aide d'un câble HDMI).
Si vous utilisez un câble DVI vers HDMI, un câble audio distinct est requis.
Si votre téléviseur est équipé d'une prise casque, assurez-vous qu'aucun périphérique n'y
est connecté.
Redémarrez le périphérique connecté en débranchant puis rebranchant son câble
d'alimentation.
Si vous utilisez un périphérique externe, assurez-vous que les câbles audio sont raccordés
aux prises d'entrée audio appropriées du téléviseur.
Son bizarre émis par les
haut-parleurs
Assurez-vous que le câble audio est branché sur le connecteur audio approprié du
périphérique externe.
Pour les connexions à un réseau câblé ou hertzien, vérifiez les informations du signal. Un
niveau de signal faible peut provoquer une distorsion du son.
Exécutez un Diagnost. auto. (Menu à l'écran > Assistance > Diagnost. auto. > Test du son).
178 179
Téléviseur 3D
Problème rencontré avec le
téléviseur Solution possible
Dysfonctionnement des
lunettes actives 3D
Vérifiez si les lunettes sont allumées.
En cas de proximité avec un autre appareil ou produit électronique 3D sous tension, il
peut arriver que les lunettes actives 3D ne fonctionnent pas correctement.
En cas de problème, placez les autres appareils électroniques le plus loin possible des
lunettes actives 3D
Aspect incorrect des
images 3D
La distance de visualisation 3D idéale doit être au moins trois fois supérieure à la hauteur
de l'écran.
Il est également recommandé de s'asseoir de manière à ce que les yeux soient au niveau de
l'écran.
Epuisement rapide des piles
des lunettes 3D.
Eteignez les lunettes 3D lorsque vous ne les utilisez pas. Si vous les laissez allumées, les
piles s'épuisent plus vite.
Branchement
Connexion antenne (Hertzien / Câble / Satellite)
Problème rencontré avec le
téléviseur Solution possible
Pas de réception de chaîne
Vérifiez si le câble coaxial est fermement connecté.
Effectuez une Recherche automatique (Menu à l'écran > Diffusion > Recherche
automatique) pour ajouter toutes les chaînes disponibles à la liste.
Vérifiez que l'antenne est positionnée correctement.
Absence de sous-titres sur
les chaînes numériques
Accédez à Sous-titres (Menu à l'écran > Diffusion > Sous-titres), puis modifiez le
paramètre Mode sous-titre.
Certaines chaînes diffusent pas de données de sous-titrage.
Image déformée
La compression de contenu vidéo peut engendrer une déformation de l'image. C'est le cas
en particulier pour les mouvements rapides comme le sport et les films d'action.
Un signal faible peut également entraîner une déformation de l'image. Il ne s'agit pas d'un
problème lié au téléviseur.
180
Connexion d'un ordinateur
Problème rencontré avec le
téléviseur Solution possible
Message "Mode non pris en
charge"
Réglez la résolution de sortie du PC de sorte qu'elle corresponde à une résolution prise en
charge par le téléviseur.
La vidéo fonctionne
correctement, mais il n'y a
pas de son.
Si vous utilisez une connexion HDMI, vérifiez le paramètre de sortie audio sur le PC.
Si vous utilisez un câble DVI vers HDMI, un câble audio distinct est requis.
Mise en réseau
Problème rencontré avec le
téléviseur Solution possible
Echec de la connexion au
réseau sans fil Assurez-vous que le téléviseur est connecté à un routeur IP sans fil.
Echec de la mise à jour du
logiciel sur le réseau
Vérifiez l'état de la connexion réseau.
Si le téléviseur n'est pas connecté à un réseau, connectez-le.
La mise à niveau n'a pas lieu si vous avez déjà la dernière version du logiciel.
180 181
Divers
Problème rencontré avec le
téléviseur Solution possible
Téléviseur chaud
Si vous regardez la télévision pendant une période prolongée, le téléviseur chauffe.
La chaleur dégagée est dissipée par des fentes d'aération ménagées le long de la
partie supérieure du téléviseur. Toutefois, suite à une utilisation prolongée, la partie
inférieure peut sembler chaude au toucher. Les enfants regardant la télévision doivent
être surveillés en permanence par un adulte afin d'éviter qu'ils touchent le téléviseur.
Cette chaleur n'est cependant pas liée à un défaut du téléviseur, et n'affecte en rien son
fonctionnement.
Non-affichage de l'image
en plein écran
Des barres noires apparaissent de part et d'autre de l'écran des chaînes HD lors de
l'affichage de contenu SD (4:3) mis à niveau.
Des barres noires apparaissent en haut et en bas de l'écran lorsque vous visionnez des
films dont le format d'image diffère de celui du téléviseur.
Réglez le format d'image de votre périphérique externe ou celui du téléviseur sur Plein
écran.
Message "Mode non pris en
charge"
Vérifiez les résolutions prises en charge par le téléviseur et réglez la résolution de sortie
du périphérique externe en conséquence.
Option Sous-titre du menu
du téléviseur grisée.
Le menu Sous-titres est inaccessible si vous avez sélectionné une source reliée au
téléviseur via le connecteur HDMI ou Composant. La fonction Sous-titre du périphérique
externe doit également être activée.
Odeur de plastique Cette odeur est normale et disparaîtra peu à peu.
Option Informations de
signal du téléviseur non
activée dans Diagnost.
auto..
Vérifiez si la chaîne sélectionnée est numérique.
L'option Informations de signal est disponible uniquement avec les chaînes numériques.
Téléviseur penchant sur le
côté Retirez la base du support du téléviseur et réassemblez-la.
Menu Diffusion grisé.
Le menu Diffusion est disponible uniquement quand l'option Source est définie sur TV.
Le menu Diffusion est inaccessible quand le téléviseur utilise un décodeur câble ou un
récepteur satellite.
Perte des paramètres après
30 minutes ou chaque
extension du téléviseur
Si l'option Mode Utilisation est définie sur Util. magasin, les paramètres audio et vidéo du
téléviseur sont automatiquement réinitialisés toutes les 30 minutes.
Réglez l'option Mode Utilisation (Menu à l'écran > Assistance > Mode Utilisation) sur Util.
domicile.
Perte intermittente du
signal audio ou vidéo
Vérifiez les connexions des câbles et reconnectez-vous.
Cette perte peut résulter de l'utilisation de câbles trop rigides ou épais.
Veillez à ce que les câbles soient suffisamment souples pour une utilisation à long terme.
En cas d'installation du téléviseur en position murale, nous vous recommandons d'utiliser
des câbles munis de connecteurs à 90 degrés.
Présence de petites
particules sur
l'encadrement du téléviseur
Elles font partie de la conception du produit et ne constituent pas un défaut.
Menu PIP indisponible La fonctionnalité PIP est disponible uniquement lorsque vous utilisez une source HDMI ou
Composant.
POP (bandeau publicitaire
interne du téléviseur)
affiché à l'écran
Réglez l'option Mode Utilisation (Menu à l'écran > Assistance > Mode Utilisation) sur Util.
domicile.
182
Problème rencontré avec le
téléviseur Solution possible
Emission de craquements
La dilatation et la contraction du boîtier du téléviseur peuvent entraîner l'émission de
bruits de craquement. Cela n'indique pas un dysfonctionnement du produit. Vous pouvez
utiliser le téléviseur en toute sécurité.
Emission d'un
bourdonnement
Votre téléviseur utilise des circuits de commutation à grande vitesse et des niveaux élevés
de courant électrique. Selon le niveau de luminosité sélectionné, il peut sembler un peu
plus bruyant qu'un téléviseur classique.
L'appareil a fait l'objet de procédures de contrôle de qualité rigoureuses, conformes à nos
exigences élevées en matière de performances et de fiabilité.
L'émission d'un bruit discret par le téléviseur est un phénomène normal ne pouvant pas
constituer un motif recevable d'échange ou de remboursement.
Problème de rémanence de
l'image (brûlure)
Ce problème affecte uniquement les téléviseurs plasma. Des brûlures d'écran peuvent
résulter uniquement d'une utilisation pendant une période prolongée ou de l'affichage
d'un format d'écran 4:3.
Les téléviseurs plasma sont équipés de la technologie de réduction des brûlures d'écran
Modif. pixel. Cette dernière permet de réduire les brûlures d'écran.
Pour ce faire, elle déplace légèrement l'image dans les sens vertical et horizontal.
Pour éviter les brûlures d'écran, utilisez l'option Protec brûl. écran (Système > Protec
brûl. écran).
182 183
Service de diffusion de données
Problème rencontré avec
le téléviseur Solution possible
Pourquoi des messages
s'affichent-ils alors que
je n'ai pas sélectionné
l'option Service de
diffusion de données ?
Si l'option Service données auto est définie sur Activé, des messages s'affichent
automatiquement lorsque vous regardez une émission prenant en charge le Service de
diffusion de données. Si l'émission ne prend pas en charge le Service de diffusion de données,
aucun message ne s'affiche.
Si vous ne voulez pas recevoir de messages du Service de diffusion de données, désactivez
l'option Service données auto.
Comment masquer les
messages du Service de
diffusion de données ?
Pour masquer les messages, appuyez sur le bouton EXIT. Si vous ne voulez pas recevoir de
messages du Service de diffusion de données, désactivez l'option Service données auto.
Comment utiliser le
Service de diffusion de
données ?
L'activation de l'option Service données auto entraîne l'affichage automatique de messages
chaque fois que vous regardez une émission prenant en charge le Service de diffusion de
données. Vous pouvez appuyer sur les boutons correspondants affichés à l'écran pour
accéder à d'autres fonctionnalités et fonctions proposées par cette émission.
Qu'est-ce qu'un service
interactif et comment
fonctionne-t-il ?
Les services Interactifs incluent les enquêtes, les quiz, les demandes de billets, les achats
de produits et d'autres interactions entre téléspectateurs et chaînes de télévision.
Généralement, pour pouvoir profiter des services interactifs proposés par un diffuseur, vous
devez créer un compte auprès de ce dernier et vous y connecter. Les services interactifs
sont disponibles uniquement lorsque le téléviseur est connecté à Internet. En outre, pour
pouvoir accéder au commerce télévisé, vous devez disposer d'un certificat.
Copiez le certificat de l'ordinateur sur un appareil USB, puis connectez ce dernier au
téléviseur (Les services interactifs ne sont pas encore proposés. Leur date de lancement
réelle varie en fonction du diffuseur.)
Un message indique
"Réception", mais aucun
changement ne se
produit.
Cela indique qu'une erreur s'est produite lors de la réception des données. Un message
d'erreur d'exécution s'affiche également à l'écran. Dans ce cas, réessayez.
Rien ne s'affiche à l'écran
après le lancement du
Service de diffusion de
données.
Il se peut que le Service de diffusion de données soit en cours d'initialisation ou que le signal
ait été coupé par le diffuseur.
184
Programmer enregistrement / Timeshift
Problème rencontré avec
le téléviseur Solution possible
Le téléviseur ne parvient
pas à reconnaître le
périphérique USB ou les
fonctions Formater le
périphérique, le Vérifier
périphérique et le Test
de perf. du périph.
échouent.
Consultez le manuel d'utilisation du périphérique USB pour voir s'il est possible d'y
enregistrer des données.
Vérifiez si le périphérique USB est verrouillé.
Vérifiez si le périphérique USB a été formaté lors de sa connexion à un ordinateur.
Le formatage d'un périphérique USB après sa connexion au téléviseur peut entraîner un
problème de formatage. Si les actions Test de perf. du périph. ou Formater le périphérique
ont échoué, il y a peut-être un problème avec le périphérique USB ou ses spécifications.
Essayez d'utiliser un autre périphérique USB.
Message indiquant la
nécessité de formater
le périphérique de
stockage USB
Vérifiez si le périphérique USB est verrouillé.
Utilisez la fonction de récupération USB pour récupérer le périphérique.
L'option Programmer
enregistrement est
inutilisable.
Vérifiez si un périphérique USB est connecté au téléviseur.
Vérifiez si la chaîne est numérique et enregistrable. L'enregistrement s'arrête
automatiquement si le signal devient trop faible. La fonction Timeshift ne fonctionne pas si
l'espace de stockage du périphérique USB est insuffisant.
Affichage d'un
message d'échec du
test de performance
et de Programmer
enregistrement, puis
arrêt de l'opération de la
fonction Timeshift.
Ce problème peut se produire en cas d'utilisation d'un périphérique de stockage USB peu
performant ne prenant pas en charge l'enregistrement. Il est recommandé d'utiliser un
disque dur USB tournant à une vitesse minimale de 5 400 tpm. Toutefois, les disques durs
USB de type RAID ne sont pas pris en charge.
184 185
Anynet+ (HDMI-CEC)
Problème rencontré avec
le téléviseur Solution possible
Non-fonctionnement
d'Anynet+
Vérifiez si le périphérique est compatible Anynet+. Le système Anynet+ ne prend en charge
que les périphériques compatibles Anynet+.
Vous ne pouvez connecter qu'un seul périphérique externe au Récepteur.
Vérifiez si le cordon d'alimentation du périphérique Anynet+ est connecté correctement.
Vérifiez les connexions par câble du périphérique Anynet+.
Accédez au menu Système, puis vérifiez si l'option Anynet+ (HDMI-CEC) est définie sur
Activé.
Vérifiez si la télécommande du téléviseur est en mode TV.
Vérifiez si la télécommande est compatible avec Anynet+.
Anynet+ peut de ne pas fonctionner sans certaines circonstances. (Recherche de chaînes,
utilisation de Smart Hub ou Configuration, etc.)
Si vous avez débranché puis rebranché le câble HDMI, recommencez la recherche de
périphériques ou éteignez, puis rallumez votre téléviseur.
Démarrage d'Anynet+
Assurez-vous que le périphérique Anynet+ est correctement connecté au téléviseur, puis
accédez au menu Système pour voir si l'option Anynet+ (HDMI-CEC) est définie sur Activé.
Après vérification, sélectionnez le bouton TOOLS de la télécommande standard ou virtuelle
pour afficher la liste. Dans la liste, sélectionnez Anynet+ (HDMI-CEC).
Fermeture d'Anynet+ Sélectionnez Voir télévision dans le menu Anynet+.
Sélectionnez un périphérique non Anynet+ dans Source.
Message "Connexion
à Anynet+" ou
"Déconnexion
d'Anynet+" affiché à
l'écran
Vous ne pouvez pas utiliser la télécommande lorsque vous configurez Anynet+ ou changez
de mode d'affichage. La télécommande n'est utilisable qu'après configuration d'Anynet+ ou
changement de mode d'affichage.
Non-fonctionnement du
périphérique Anynet+ Vous ne pouvez pas utiliser la fonction de lecture pendant la Configuration.
Périphérique connecté
non affiché
Vérifiez si le périphérique est compatible avec Anynet+.
Vérifiez si le câble HDMI est connecté correctement.
Accédez au menu Système, puis vérifiez si l'option Anynet+ (HDMI-CEC) est définie sur
Activé.
Lancez une nouvelle recherche de périphériques Anynet+.
Les périphériques Anynet+ doivent être connectés au téléviseur à l'aide d'un câble HDMI.
Vérifiez si le périphérique est branché à votre téléviseur à l'aide d'un câble HDMI. Certains
câbles HDMI ne sont pas compatibles avec Anynet+.
En cas d'interruption de la connexion résultant d'une déconnexion du câble HDMI ou d'une
panne de courant, effectuez une nouvelle recherche de périphériques.
Non-émission du son par
le récepteur
Connectez le téléviseur au récepteur à l'aide d'un câble optique .
La fonction ARC permet la sortie du son numérique via le port HDMI (ARC).
Elle n'est cependant accessible que lorsque le téléviseur est connecté à un récepteur audio
compatible.
186
Mes Contenus
Problème rencontré avec
le téléviseur Solution possible
Impossibilité de lire
certains fichiers
Ce problème peut se poser avec des fichiers à débit binaire élevé. La plupart des fichiers sont
lisibles, mais il se peut que vous rencontriez des problèmes avec les fichiers à débit binaire
élevé.
Mes Applications
Problème rencontré avec
le téléviseur Solution possible
Contenu de certaines
applications affiché
uniquement en anglais ;
changement de langue
La langue du contenu d'une application diffère parfois de celle de l'interface utilisateur. La
possibilité de changer de langue dépend du fournisseur de services.
Non-fonctionnement
de certains services
d'application
Contactez le fournisseur de services.
Consultez la section d'aide du site Web du fournisseur de services de l'application.
Réinitialisation des Informations personnelles et des
paramètres du téléviseur
Type de réinitialisation Navigation Description
Réinitialisation
des paramètres du
téléviseur
Menu à l'écran > Assistance
> Diagnost. auto. > Réinit.
Réinitialise tous les paramètres (Image, Son, Diffusion et Ouvrir
Smart Hub, etc), à l'exception des paramètres réseau, aux
réglages d'usine.
Réinitialisation de
Smart Hub
Menu à l'écran > Fonctions
Smart > Réinitialiser Smart
Hub
Réinitialise toutes les informations enregistrées relatives aux
comptes Samsung et liées aux comptes de service, ainsi que les
contrats de service et applications Smart Hub.
186 187
Web Browser
11 Sélectionnez l'option Web Browser. L'écran de navigation peut varier d'un ordinateur à l'autre.
22 Le navigateur Web n'est pas compatible avec les applications Java.
33 Vous ne pouvez pas télécharger de fichiers. Si vous tentez de télécharger un fichier, un message d'erreur
s'affiche.
44 Il se peut que le navigateur Web ne puisse pas accéder à certain sites.
55 La lecture de vidéos Flash peut être restreinte.
66 Le commerce électronique pour les achats en ligne n'est pas pris en charge.
77 Sur les sites Web affichant des fenêtres déroulantes, le défilement de celles-ci peut altérer l'affichage des
caractères.
88 ActiveX n'est pas pris en charge.
99 Certaines options sont inaccessibles en mode Navig. ac lien (passez en mode Navig. avec pointeur).
111 Le nombre de polices prises en charge est limité. Il se peut que certains symboles et caractères ne s'affichent
pas correctement.
111 La réaction aux impulsions de la télécommande et l'affichage à l'écran peuvent être retardés lors du
chargement d'une page Web.
111 Le téléchargement d'une page Web peut être retardé ou totalement suspendu avec certains systèmes
d'exploitation.
111 La fonction copier/coller n'est pas prise en charge.
111 Lors de la rédaction d'un e-mail ou d'un simple message, il se peut que certaines fonctions telles que la taille
de police et la sélection de couleur ne soient pas disponibles.
111 Le nombre de signets et la taille des fichiers journaux pouvant être sauvegardés sont limités.
111 Le nombre de fenêtres pouvant être ouvertes simultanément varie en fonction des conditions de recherche
et du modèle de téléviseur.
111 La vitesse de navigation sur le Web dépend de l'environnement réseau.
188
111 La lecture de vidéo incorporée désactive automatiquement la fonction PIP. Il se peut que la lecture d'une
vidéo ne commence pas après désactivation de la fonction PIP. Dans ce cas, vous devez recharger la page.
111 Le navigateur Web prend en charge uniquement les fichiers audio .mp3.
222 Le navigateur Web prend en charge un format de fichier spécifique pour l'importation et l'exportation de
signets (format compatible : Netscape-bookmark file- 1)
222 Les informations relatives à l'arborescence des dossiers ne sont pas incluses lors de l'importation et de
l'exportation de signets.
222 L'exportation de signets vers un périphérique USB connecté au téléviseur enregistre ces derniers dans un
dossier nommé "Samsung Smart TV Bookmark".
222 Si l'option Horloge (Menu à l'écran > Système > Heure > Horloge) n'est pas activée, l'historique de navigation
n'est pas sauvegardé.
222 L'ordre d'enregistrement de l'historique de navigation est de l'entrée la plus récente à l'entrée la plus
ancienne, les entrées les plus anciennes étant remplacées avant les plus récentes.
222 Selon les types de codecs vidéo/audio pris en charge, il peut être impossible de lire certains fichiers vidéo et
audio durant une lecture Flash.
222 Un changement soudain de la luminosité de l'image dans une fenêtre vidéo peut avoir une incidence sur celle
de l'écran. Ce problème affecte uniquement les téléviseurs plasma.
222 Il se peut que certaines sources vidéo provenant de fournisseurs de services de diffusion en continu optimisés
pour PC ne soient pas lues correctement sur notre navigateur Web propriétaire.
222 L'utilisation du clavier QWERTY affiché sur l'écran désactive automatiquement la fonction PIP (sauf lors de la
saisie d'une URL).
www.samsung.com
User Manual
SM-N910C, SM-N910CQ
SM-N910F, SM-N910G
SM-N910H
English (EU). 10/2014. Rev.1.1
2
Table of Contents
Read me first
Getting started
7 Package contents
8 Device layout
10 S Pen
13 Using the SIM or USIM card and
battery
16 Charging the battery
19 Using a memory card
21 Turning the device on and off
21 Locking and unlocking the screen
Basics
22 Using the touchscreen
25 Home screen layout
28 Notification and quick settings panels
30 Opening apps
30 Installing or uninstalling apps
32 Entering text
34 Screen capture
34 Using the dictionary
35 My Files
36 Power saving feature
37 Viewing help information
S Pen features
38 Air command
39 Action memo
41 Smart select
42 Image clip
43 Screen write
44 S Note
51 Scrapbook
51 Using the S Pen
Motions & usability features
55 Motions and gestures
58 Multi window
63 One-handed operation
64 Increasing touchscreen sensitivity
Personalising
65 Managing the Home and All apps
screens
67 Setting wallpaper and ringtones
68 Changing the screen lock method
69 My Places
72 Finger Scanner
77 Private mode
Table of Contents
3
113 Music
115 Video
117 Internet
118 Voice Recorder
120 Clock
122 Calculator
122 Dropbox
123 Flipboard
123 Smart Remote
125 Evernote
126 PEN.UP
127 Google apps
Connecting with other
devices
129 Quick Connect
131 Bluetooth
133 Wi-Fi Direct
134 NFC
137 Screen Mirroring
139 MirrorLink
140 Mobile printing
Device & data manager
141 Updating the device
142 Transferring files between the device
and a computer
143 Backing up and restoring data
143 Performing a data reset
78 Easy mode
79 Transferring data from your previous
device
80 Setting up accounts
Phone & contacts
82 Phone
85 Contacts
Messages & email
87 Messages
88 Email
Camera & gallery
90 Camera
99 Gallery
Safety assistance
102 Emergency mode
103 Send help messages
Useful apps
104 Car mode
106 S Finder
107 S Planner
109 S Health
111 S Voice
Table of Contents
4
Settings
144 An introduction
144 Configuring settings
144 QUICK SETTINGS
145 NETWORK CONNECTIONS
149 DEVICE
154 PERSONALISATION
156 SYSTEM
160 APPLICATIONS
Accessibility
161 About Accessibility
161 Using the Home key to open
accessibility menus
161 Voice feedback (TalkBack)
167 Vision
169 Hearing
171 Dexterity and interaction
174 Answering or ending calls
174 Using single tap mode
174 Managing accessibility settings
Troubleshooting
5
Read me first
Please read this manual before using the device to ensure safe and proper use.
• Descriptions are based on the device’s default settings.
• Some content may differ from your device depending on the region, service provider, or
device’s software.
• Content (high quality content) that requires high CPU and RAM usage will affect the
overall performance of the device. Apps related to the content may not work properly
depending on the device’s specifications and the environment that it is used in.
• Samsung is not liable for performance issues caused by apps supplied by providers other
than Samsung.
• Samsung is not liable for performance issues or incompatibilities caused by edited
registry settings or modified operating system software. Attempting to customise the
operating system may cause the device or apps to work improperly.
• Software, sound sources, wallpapers, images, and other media provided with this device
are licensed for limited use. Extracting and using these materials for commercial or other
purposes is an infringement of copyright laws. Users are entirely responsible for illegal
use of media.
• You may incur additional charges for data services, such as messaging, uploading and
downloading, auto-syncing, or using location services depending on your data plan. For
large data transfers, it is recommended to use the Wi-Fi feature.
• Default apps that come with the device are subject to updates and may no longer be
supported without prior notice. If you have questions about an app provided with
the device, contact a Samsung Service Centre. For user-installed apps, contact service
providers.
• Modifying the device’s operating system or installing softwares from unofficial sources
may result in device malfunctions and data corruption or loss. These actions are violations
of your Samsung licence agreement and will void your warranty.
Read me first
6
Instructional icons
Warning: situations that could cause injury to yourself or others
Caution: situations that could cause damage to your device or other equipment
Notice: essential information for using the device, functional limitations of using the
device, usage charge information, or legal notices
Note: notes, usage tips, or additional information
7
Getting started
Package contents
Check the product box for the following items:
• Device
• Battery
• Quick start guide
• The items supplied with the device and any available accessories may vary
depending on the region or service provider.
• The supplied items are designed only for this device and may not be compatible
with other devices.
• Appearances and specifications are subject to change without prior notice.
• You can purchase additional accessories from your local Samsung retailer. Make
sure they are compatible with the device before purchase.
• Use only Samsung-approved accessories. Using unapproved accessories may cause
the performance problems and malfunctions that are not covered by the warranty.
• Availability of all accessories is subject to change depending entirely on
manufacturing companies. For more information about available accessories, refer
to the Samsung website.
Getting started
8
Device layout
Microphone
Back key
Multipurpose jack
Proximity/Light/Gesture
sensor
Front camera
Power key
Touchscreen
Recents key
Microphone
Home key (Fingerprint
recognition sensor)
LED indicator
Speaker
Headset jack
Main antenna
Microphone
Volume key
NFC antenna (on the
battery)
Rear camera
Flash
Back cover
Loud speaker
S Pen
Infrared port
GPS antenna
Getting started
9
• Do not cover the antenna area with your hands or other objects. This may cause
connectivity problems or drain the battery.
• Using a Samsung-approved screen protector is recommended. Unapproved screen
protectors may cause the sensors to malfunction.
• Do not allow water to contact the touchscreen. The touchscreen may malfunction
in humid conditions or when exposed to water.
Keys
Key Function
Power
• Press and hold to turn the device on or off.
• Press to turn on or lock the screen.
Recents
• Tap to open the list of recent apps.
• Tap and hold to access additional options for the current
screen.
Home
• Press to turn on the screen while the screen is locked.
• Press to return to the Home screen.
• Press twice to launch S Voice.
• Press and hold to launch Google.
Back • Tap to return to the previous screen.
Volume • Press to adjust the device volume.
Getting started
10
S Pen
S Pen button
S Pen nib
Tweezers
Name Functions
S Pen nib
• Use the S Pen to write, draw, or perform touch actions on the
screen.
• Hover the S Pen over items on the screen to access additional
S Pen features, such as Air Button and the air view feature.
S Pen button
• Hover the S Pen over the screen and press the S Pen button to
display the air command features.
• While pressing and holding the S Pen button, drag the S Pen over
items to select them.
Tweezers • Remove the S Pen nib with the tweezers when replacing the nib.
Getting started
11
Removing the S Pen
When you remove the S Pen from the slot, the device launches Action memo or displays the
air command features depending on the S Pen detachment option setting.
To change the setting, open the All apps screen and tap Settings → S Pen → Detachment
options.
Replacing the S Pen nib
If the nib is dull, replace it with a new one.
1 Firmly hold the nib with the tweezers and remove it.
Getting started
12
2 Insert a new nib into the S Pen.
Be careful not to pinch your fingers with the tweezers.
• Do not reuse old nibs. Doing so may cause the S Pen to malfunction.
• Do not press the nib excessively when inserting the nib into the S Pen.
• Do not insert the round end of the nib into the S Pen. Doing so may cause damage
to the S Pen or your device.
• If the S Pen is not working properly, take it to a Samsung Service Centre.
• If you use the S Pen at sharp angles on the screen, the device may not recognise
the S Pen actions. Do not bend or apply excessive pressure with the S Pen while
using it.
• The Recents key and the Back key can be used with the S Pen.
• For more information about the S Pen, visit the Samsung website.
Getting started
13
Using the SIM or USIM card and battery
Installing the SIM or USIM card and battery
Insert the SIM or USIM card provided by the mobile telephone service provider, and the
included battery.
• Only microSIM cards work with the device.
• Some LTE services may not be available depending on the service provider. For
more information about service availability, contact your service provider.
1 Remove the back cover.
Be careful not to damage your fingernails when you remove the back cover.
Do not bend or twist the back cover excessively. Doing so may damage the cover.
Getting started
14
2 Insert the SIM or USIM card with the gold-coloured contacts facing downwards.
• Do not insert a memory card into the SIM card slot. If a memory card happens to
be lodged in the SIM card slot, take the device to a Samsung Service Centre to
remove the memory card.
• Use caution not to lose or let others use the SIM or USIM card. Samsung is not
responsible for any damages or inconveniences caused by lost or stolen cards.
3 Insert the battery with the battery’s gold-coloured contacts properly aligned with the
device’s contacts.
2
1
Getting started
15
4 Replace the back cover.
Removing the SIM or USIM card and battery
1 Remove the back cover.
2 Pull out the battery.
3 Press the SIM or USIM card with your finger, and then pull it out.
Getting started
16
Charging the battery
Using the battery charger
Charge the battery before using it for the first time or before using it after it has been unused
for an extended period.
Use only Samsung-approved chargers, batteries, and cables. Unapproved chargers or
cables can cause the battery to explode or damage the device.
• If the battery is completely discharged, the device cannot be turned on
immediately when the charger is connected. Allow a depleted battery to charge for
a few minutes before turning on the device.
• Using a power source other than the USB power adaptor, such as a computer, may
result in a slower charging speed due to a lower electric current.
Connect the USB cable to the USB power adaptor, and then plug the end of the USB cable
into the multipurpose jack.
Connecting the charger improperly may cause serious damage to the device. Any
damage caused by misuse is not covered by the warranty.
• If the device receives an unstable power supply while charging, the touchscreen
may not function. If this happens, unplug the charger from the device.
• While charging, the device and the charger may heat up. This is normal and should
not affect the device’s lifespan or performance. If the battery gets hotter than usual,
the charger may stop charging.
• If the device is not charging properly, take the device and the charger to a
Samsung Service Centre.
Getting started
17
After fully charging, disconnect the device from the charger. First unplug the charger from the
device, and then unplug it from the electric socket.
Do not remove the battery before removing the charger. This may damage the
device.
To save energy, unplug the charger when not in use. The charger does not have a
power switch, so you must unplug the charger from the electric socket when not in
use to avoid wasting power. The charger should remain close to the electric socket
and easily accessible while charging.
Reducing the battery consumption
Your device provides various options that help you conserve battery power.
• When you are not using the device, switch to sleep mode by pressing the Power key.
• Activate power saving mode.
• Close unnecessary apps using the task manager.
• Deactivate the Bluetooth feature when not in use.
• Deactivate the Wi-Fi feature when not in use.
• Deactivate auto-syncing of apps.
• Decrease the backlight time.
• Decrease the screen brightness.
• When the battery power is low, the battery icon appears empty.
• If you use multiple apps at once, network apps, or apps that need a connection
to another device, the battery will drain quickly. To avoid disconnecting from the
network or losing power during a data transfer, always use these apps after fully
charging the battery.
• The device can be used while it is charging, but it may take longer to fully charge
the battery.
Getting started
18
Fast charging
The device has a built-in fast charging feature. You can use this feature to charge the battery
more quickly while the device or its screen is turned off.
About Fast charging
• Fast charging uses battery charging technology that charges the battery faster by
increasing the charging power. The device supports Samsung’s Adaptive fast charging
feature and Qualcomm Quick Charge 2.0.
• To use Fast charging on your device, connect it to a battery charger that supports
Adaptive fast charging or Quick Charge 2.0.
Increasing the charging speed
To increase the charging speed, turn the device or its screen off when you charge the battery.
• While charging the battery when the device is turned off, the icon appears on the
screen.
• While charging the battery when the device’s screen is turned on, a pop-up window
appears requesting you to turn the screen off. Turn off the screen to increase the charging
speed.
• You cannot use the built-in fast charging feature when you charge the battery
using a standard battery charger.
• If the device heats up or the ambient air temperature rises, the charging speed may
decrease automatically. This is a normal operating condition to prevent damage to
the device.
Getting started
19
Using a memory card
Installing a memory card
Your device accepts memory cards with maximum capacities of 128 GB. Depending on the
memory card manufacturer and type, some memory cards may not be compatible with your
device.
• Some memory cards may not be fully compatible with the device. Using an
incompatible card may damage the device or the memory card, or corrupt the data
stored in it.
• Use caution to insert the memory card right-side up.
The device supports the FAT and the exFAT file systems for memory cards. When
inserting a card formatted in a different file system, the device asks to reformat the
memory card.
1 Remove the back cover.
2 Insert a memory card with the gold-coloured contacts facing downwards.
3 Replace the back cover.
• Frequent writing and erasing of data shortens the lifespan of memory cards.
• When inserting a memory card into the device, the memory card’s file directory
appears in the My Files → SD card folder.
Getting started
20
Removing the memory card
Before removing the memory card, first unmount it for safe removal.
On the Home screen, tap Apps → Settings → Storage → Unmount SD card.
1 Remove the back cover.
2 Pull out the memory card.
3 Replace the back cover.
Do not remove the memory card while the device is transferring or accessing
information. Doing so can cause data to be lost or corrupted or damage to the
memory card or device. Samsung is not responsible for losses that result from the
misuse of damaged memory cards, including the loss of data.
Formatting the memory card
A memory card formatted on a computer may not be compatible with the device. Format the
memory card on the device.
On the Home screen, tap Apps → Settings → Storage → Format SD card → Format SD
card → Erase everything.
Before formatting the memory card, remember to make backup copies of all
important data stored in the memory card. The manufacturer’s warranty does not
cover loss of data resulting from user actions.
Getting started
21
Turning the device on and off
Press and hold the Power key for a few seconds to turn on the device.
When you turn on your device for the first time or after performing a data reset, follow the onscreen
instructions to set up your device.
To turn off the device, press and hold the Power key, and then tap Power off.
Follow all posted warnings and directions from authorised personnel in areas where
the use of wireless devices is restricted, such as aeroplanes and hospitals.
Locking and unlocking the screen
Pressing the Power key turns off the screen and locks it. Also, the screen turns off and
automatically locks if the device is not used for a specified period.
To unlock the screen, press the Power key or the Home key and swipe in any direction.
You can change the screen lock method and utilise additional security features. Refer to
Changing the screen lock method for more information.
22
Basics
Using the touchscreen
• Do not allow the touchscreen to come into contact with other electrical devices.
Electrostatic discharges can cause the touchscreen to malfunction.
• To avoid damaging the touchscreen, do not tap it with anything sharp or apply
excessive pressure to it with your fingertips.
• The device may not recognise touch inputs close to the edges of the screen, which
are outside of the touch input area.
• Leaving the touchscreen idle for extended periods may result in afterimages
(screen burn-in) or ghosting. Turn off the touchscreen when you do not use the
device.
Tapping
To open an app, to select a menu item, to press an on-screen button, or to enter a character
using the keyboard on the screen, tap it with your finger or the S Pen.
Basics
23
Tapping and holding
Tap and hold an item or the screen for more than 2 seconds to access available options.
Dragging
To move an item, tap and hold it and drag it to the target position.
Double-tapping
Double-tap on a webpage or image to zoom in. Double-tap again to return.
Basics
24
Swiping
Swipe to the left or right on the Home screen or the All apps screen to view other panels.
Swipe upwards or downwards to scroll through a webpage or a list of items, such as contacts.
Spreading and pinching
Spread two fingers apart on a webpage, map, or image to zoom in a part. Pinch to zoom out.
Basics
25
Home screen layout
Home screen
The Home screen is the starting point for accessing all of the device’s features. It displays
widgets, shortcuts to apps, and more. Widgets are small apps that launch specific app
functions to provide information and convenient access on your Home screen.
To view other panels, swipe to the left or right, or tap one of the screen indicators at the
bottom of the screen.
To customise the Home screen, refer to Managing the Home screen.
A widget
An app A folder
Screen indicators
Favourite apps
All apps screen icon
Basics
26
Home screen options
On the Home screen, tap and hold an empty area, or pinch your fingers together to access
the available options. Customise the Home screen by adding, deleting, or rearranging Home
screen panels. You can also set the Home screen wallpaper, add widgets to the Home screen,
and more.
Flipboard Briefing
Use this feature to view the latest articles in various categories. You can get up to date on
news that interests you using this feature.
1 On the Home screen, tap or swipe to the right to open Flipboard Briefing.
2 Tap GET STARTED when launching this feature for the first time.
3 Swipe upwards to browse articles in each news category.
To deactivate Flipboard Briefing, tap and hold an empty area on the Home screen.
Then, tap Home screen settings and deselect Flipboard Briefing.
Basics
27
All apps screen
The All apps screen displays icons for all apps, including newly installed apps.
On the Home screen, tap Apps to open the All apps screen. To view other panels, swipe to the
left or right, or select a screen indicator at the bottom of the screen.
To customise the All apps screen, refer to Managing the All apps screen.
Indicator icons
Indicator icons appear on the status bar at the top of the screen. The icons listed in the table
below are most common.
Icon Meaning
No signal
Signal strength
Roaming (outside of normal service area)
GPRS network connected
EDGE network connected
UMTS network connected
HSDPA network connected
HSPA+ network connected
/ LTE network connected (for models that support LTE service)
Wi-Fi connected
Bluetooth feature activated
GPS activated
Call in progress
Missed call
Smart stay feature activated
Connected to computer
No SIM or USIM card
Basics
28
Icon Meaning
New text or multimedia message
Alarm activated
S Pen detached
Mute mode activated
Vibration mode activated
Flight mode activated
Error occurred or caution required
Battery power level
The status bar may not appear at the top of the screen in some apps. To display the
status bar, drag down from the top of the screen.
Notification and quick settings panels
Using the notification panel
When you receive new notifications, such as messages or missed calls, indicator icons appear
on the status bar. To see more information about the icons, open the notification panel and
view the details.
To open the notification panel, drag the status bar downwards. To close the notification panel,
drag the bar from the bottom of the screen upwards.
Basics
29
You can use the following functions on the notification panel.
Launch Settings.
Launch S Finder.
Tap a notification and perform
various actions.
Clear all notifications.
Adjust the brightness.
View all quick setting buttons.
Activate or deactivate options.
Tap and hold a button to view
more detailed settings.
Launch Quick Connect.
Rearranging quick setting buttons
To rearrange quick setting buttons on the notification panel, tap → , tap and hold an
item, and then drag the item to another location.
Using the quick settings panel
You can activate or deactivate some features on the notification panel. To activate or
deactivate more features, open the quick settings panel.
To open the quick settings panel, drag the status bar downwards using two fingers.
Alternatively, tap on the notification panel. To close the quick settings panel, drag the bar
from the bottom of the screen upwards.
Tap the buttons on the quick settings panel to activate or deactivate features. You can access
more detailed setting options when you tap and hold a button.
Basics
30
Opening apps
On the Home screen or the All apps screen, select an app icon to open it.
To open the list of recently used apps, tap and select an app window to open it.
Closing an app
Tap → , and then tap End next to an app to close it. To close all running apps, tap End
all. Alternatively, tap → .
Installing or uninstalling apps
Samsung GALAXY Apps
Use this app to purchase and download apps.
Tap GALAXY Apps on the All apps screen.
This app may not be available depending on the region or service provider.
Installing apps
Browse apps by category or tap to search for a keyword.
Select an app to view information about it. To download free apps, tap Free. To purchase and
download apps where charges apply, tap the button that shows the app’s price.
To change the auto update settings, tap → Settings → Auto update apps, and
then select an option.
Play Store
Use this app to purchase and download apps.
Tap Play Store on the All apps screen.
Basics
31
Installing apps
Browse apps by category or tap to search for a keyword.
Select an app to view information about it. To download free apps, tap INSTALL. To purchase
and download apps where charges apply, tap the price and follow the on-screen instructions.
To change the auto update settings, tap → SETTINGS → Auto-update apps, and
then select an option.
Managing apps
Uninstalling or disabling apps
To disable default apps, open the All apps screen and tap → Uninstall/disable apps. The
icon appears on the apps that you can disable. Select an app and tap Disable.
To uninstall downloaded apps, open the All apps screen, tap → Downloaded apps → →
Uninstall, select an app, and then tap Uninstall. Alternatively, on the All apps screen, tap
Settings → Application manager, select an app, and then tap Uninstall.
Enabling apps
On the All apps screen, tap → Show disabled apps, select apps, and then tap Done.
Alternatively, on the All apps screen, tap Settings → Application manager, scroll to
DISABLED, select an app, and then tap Enable.
Hiding apps
Hide apps that you do not want to see on the All apps screen.
On the All apps screen, tap → Hide apps.
To display hidden apps, tap → Show hidden apps.
• Hiding apps: Hide apps from the All apps screen only. You can continue to use
hidden apps.
• Disabling apps: Disable selected default apps that cannot be uninstalled from the
device. You cannot use disabled apps.
• Uninstalling apps: Uninstall downloaded apps.
Basics
32
Entering text
Keyboard layout
A keyboard appears automatically when you enter text to send messages, create memos, and
more.
Text entry is not supported in some languages. To enter text, you must change the
input language to one of the supported languages.
Break to the next line.
Suggested keywords
Delete a preceding character.
Enter punctuation marks.
Enter uppercase. For all caps, tap
it twice.
Switch to handwriting mode. Enter a space.
Changing the input language
Tap and hold , tap → Select input languages, and then select the languages to use.
When you select two or more languages, you can switch between the input languages by
swiping to the left or right on the space key.
Changing the keyboard layout
Tap and hold , tap , select a language under INPUT LANGUAGES, and then select a
keyboard layout to use.
On 3x4 keyboard, a key has three or four characters. To enter a character, tap the
corresponding key repeatedly until the desired character appears.
Basics
33
Using additional keyboard functions
Tap and hold to use various functions. Other icons may appear instead of the icon
depending on the last function that was used.
• : Enter text by voice.
Change the language.
Open the keyboard.
Start or pause entering text by
voice.
• : Switch to handwriting mode.
Switch to the standard keyboard.
Switch between number mode
and character mode.
This feature may not be available depending on the region or service provider.
• : Add an item from the clipboard.
• : Change the keyboard settings.
• : Enter emoticons.
• : Switch to the floating keyboard. You can move the keyboard to another location by
dragging .
Switch to the standard keyboard.
Basics
34
Copying and pasting
1 Tap and hold over text.
2 Drag or to select the desired text, or tap Select all to select all text.
3 Tap Copy or Cut.
The selected text is copied to the clipboard.
4 Place the cursor where the text is to be inserted and tap → Paste.
To paste text that you have previously copied, tap Clipboard and select the text.
Screen capture
Capture a screenshot while using the device.
Press and hold the Home key and the Power key simultaneously. The image is saved in the
Screenshots folder. To open the folder, open the All apps screen and tap Gallery → →
Album → Screenshots. After capturing a screenshot, you can edit the image and share it
with others.
You can also capture screenshots using other methods. Refer to Palm swipe to capture for
more information.
It is not possible to capture a screenshot while using some apps.
Using the dictionary
Look up definitions for words while using certain features, such as when browsing webpages.
1 Tap and hold over a word that you want to look up.
If the word you want to look up is not selected, drag or to select the desired text.
Basics
35
2 Tap Dictionary.
If a dictionary is not preinstalled on the device, follow the on-screen instructions to install
one.
3 View the definition.
To view more definitions, tap . In the detailed view, tap to add the word to your
favourite words list or tap Search Web to use the word as a search term.
In the detailed view, tap to view more options.
My Files
Access and manage various files stored in the device or in other locations, such as cloud
storage services.
Using My Files
Tap My Files on the All apps screen.
Access additional options.
View the download history.
Search for files or folders.
View files stored in the memory
card.
View files by category.
View files stored in the device.
Basics
36
Power saving feature
Power saving mode
Save the battery power by limiting the device’s functions.
On the All apps screen, tap Settings → Power saving → Power saving mode, and then tap
the Power saving mode switch to activate it. Alternatively, open the quick settings panel and
tap Power saving to activate it.
Select from the following options:
• Restrict background data: Prevent apps that are running in the background from using a
mobile data connection.
• Restrict performance: Limit various options, such as turning off the backlight for the
Recents key and the Back key.
• Greyscale mode: Display colours on the screen as grey tones.
Ultra power saving mode
Use this mode to extend the device’s battery power. In ultra power saving mode, the device
performs the following:
• Displays colours on the screen as grey tones.
• Restricts the available apps to essential and selected apps only.
• Deactivates the mobile data connection when the screen turns off.
• Deactivates the Wi-Fi and Bluetooth features.
1 On the All apps screen, tap Settings → Power saving → Ultra power saving mode, and
then tap the Ultra power saving mode switch to activate it.
Alternatively, open the quick settings panel and tap U. power saving to activate it.
2 Read and agree to the terms and conditions, and then tap OK.
Basics
37
3 Read the on-screen information about the mode and tap Enable.
To deactivate ultra power saving mode, tap → Disable ultra power saving mode →
Disable.
The estimated maximum standby time shows the time remaining before the battery
power runs out if the device is not used. Standby time may vary depending on your
device settings and operating conditions.
Viewing help information
To view help information to learn how to use the device and apps, open the All apps screen
and tap Settings → Help.
To view help information for an app while you are using the app, tap → Help.
Some apps may not include help information.
38
S Pen features
Air command
Remove the S Pen from the slot, or hover the S Pen over any part of the screen and press the
S Pen button to access four useful features.
With the air command features, you can perform various actions.
Image clip
Screen write
Action memo
Smart select
• Action memo: Write memos quickly and link actions to them. You can make calls,
send messages, search the web, and more. Refer to Action memo for more information.
• Smart select: Collect content quickly. Refer to Smart select for more information.
• Image clip: Draw around an area of the screen you want to save or share. Refer to
Image clip for more information.
• Screen write: Capture, edit, and write memos on screenshots, and then share them.
Refer to Screen write for more information.
If this feature is not activated, open the All apps screen, tap Settings → S Pen → Air
command, and then tap the Air command switch to activate it.
S Pen features
39
Action memo
Open the Action memo pad and create memos to perform various actions using the written
or drawn information.
1 On the air command panel, tap Action memo.
2 Write or draw a memo.
3 Tap .
The entire memo will be selected. If you want to use specific information from the
memo, tap the outside of the selected area to deselect the memo and draw around the
information to use it.
Access additional options.
Adjust the size of the memo pad.
Erase the memo.
Write a memo or change the pen
colour.
Edit the memo as S Note file.
Available functions for the
selected memo information
Select an input.
Save the memo.
Discard the memo.
Add the memo as a widget to
the Home screen.
S Pen features
40
4 Select an app to use with the selected memo information.
The selected app will launch from Action memo.
Search for a location.
Create a task.
Send a message.
Create a contact.
Make a call.
Search the web.
Send an email.
Viewing memos
On the Action memo screen, tap → View action memo list. Select a memo to view and edit
it.
Adding Action memo widgets on the Home screen
After composing a memo, tap and hold , and then drag the memo to an empty area on the
Home screen. An Action memo widget is added to the Home screen and you can view and
edit the memo.
Editing a memo as S Note file
While composing a memo, tap to open S Note and edit the memo in it. The same pen
colour that you were using in Action memo will be applied in S Note.
S Pen features
41
Smart select
Collect the desired area of content appearing on the screen with the S Pen. You can collect
content from webpages or music and videos during playback.
1 When there is content you want to collect, such as a part of a webpage, open the air
command panel and tap Smart select.
2 Drag the S Pen across the content you want to collect.
Save in Scrapbook
Share via
Collect
3 Select an option to use with the collected item.
• : Save the item in Scrapbook.
• : Share the item with others.
• : Extract text from the item. You can copy the extracted text to the clipboard or
insert it into messages, notes, and more.
Extract text.
• : Save the item in the collected items list to collect more content.
S Pen features
42
Collecting multiple items
Tap to add content to your collected items list to use it later. To collect additional content,
tap on the collected items pop-up window.
To view collected items, tap the collected items pop-up window. You can share, delete, or
save multiple items at once. To individually select an item in the collected items list, tap and
hold an item.
To delete the collected items, tap and hold the collected items list pop-up window,
and then drag it to Delete at the top of the screen.
Image clip
Use the S Pen to draw a closed shape around the area you want to save or share. You can crop
part of an image.
1 When there is content you want to capture, such as a part of an image, open the air
command panel and tap Image clip.
2 Draw around an area to select it with the S Pen.
Reshape the selected area by selecting a shape icon on the toolbar, or tap to
automatically reshape the selected area.
S Pen features
43
3 Select an option to use with the selected area.
• : Save the selected area in Scrapbook.
• : Share the selected area with others.
Screen write
Capture screenshots to write or draw on them.
1 When there is content you want to capture, such as a part of a webpage, open the air
command panel and tap Screen write.
The current screen is automatically captured and the editing toolbar appears on the
screen.
2 Write a memo on the screenshot.
3 Select an option to use with the screenshot.
• : Share the screenshot with others.
• : Save the screenshot. To view the saved screenshot, open the All apps screen and
tap Gallery → → Album → Screenshots.
It is not possible to capture a screenshot while using some apps.
S Pen features
44
S Note
An introduction
Create custom notes by recording your thoughts and ideas. You can insert multimedia files
and create Photo notes.
Starting S Note
1 Tap S Note on the All apps screen.
Alternatively, on the Home screen, tap in the S Note widget.
2 Read the on-screen information about the app and tap Next.
3 Select cover styles and tap Next.
4 Select a default note template and tap Next.
5 Select an account to sync your notes with and tap Start.
If you are not signed in to the selected account, follow the on-screen instructions to sign
in to the account.
If you sync your notes with an account, you can view them on other devices by
registering the account on other devices.
S Pen features
45
Using the S Note widget
You can launch some S Note features directly from the S Note widget.
On the Home screen, tap an icon in the S Note widget.
Launch S Note. Insert a voice memo.
Create a note in
handwriting mode.
Create a Photo note.
Create a note in text
mode.
Creating notes
1 Tap S Note on the All apps screen.
Alternatively, on the Home screen, tap in the S Note widget.
2 Tap .
3 Compose a note.
Tap to write or draw on the screen, or tap to enter text using the keyboard.
Handwriting mode
Eraser mode Save
Text mode
Undo/Redo
Selection mode
More options
Photo note
S Pen and finger mode/S Pen
only mode
Add page
S Pen features
46
Changing the pen settings
When writing or drawing on the screen, tap once more to change the pen type, line
thickness, or pen colour.
Open the preset pen profiles list.
Save the current setting as a pen
profile.
Change the line thickness.
Change the pen colour.
Change the pen type.
Select a new colour using the
colour picker.
Fountain pen Calligraphy pen
Using the line eraser
1 Tap .
2 Tap an area to erase.
The whole line on the area will be erased. The line eraser can erase your S Note line by
line.
• To only erase the area you touch with the S Pen, tap once more and deselect Erase
line by line. You can adjust the size of the eraser by dragging the size adjustment bar.
• To clear the note, tap Clear all.
Even with a smaller eraser, you may still not be able to precisely erase the intended
part.
S Pen features
47
Editing handwritten notes
Edit handwritten notes using various editing options, such as cutting, moving, resizing, or
transforming.
1 When there is handwriting or a drawing on the note, tap .
2 Tap or draw a line around the input to select and edit it.
To move the input to another location, select the input, and then drag it to a new
location.
To resize the input, select the input and drag the frame handle.
3 Use one of the following options:
• : Change the input properties, such as layout, size, colour, or thickness.
• : Refine or convert handwriting or drawings.
• : Cut out the input. To paste it to another location, tap and hold the location, and
then tap Paste.
• : Copy the input. To paste it to another location, tap and hold the location, and then
tap Paste.
• : Delete the input.
Magnified handwriting mode
Tap → Show Magnified note and drag the magnifier frame to an area. The area in the
magnifier frame appears in the magnified window at the bottom of the screen. You can
precisely enter or correct the handwriting.
S Pen features
48
Sketch recording
You can record your actions while composing a note.
1 Tap → Record sketching.
2 Tap and write or draw a note.
Your actions are recorded in real time.
3 To stop recording, tap again.
Tap to view the recording.
Creating Photo notes
Create notes by taking photos of content from various sources, such as handwritten text or
drawings. You can apply the Photo note effect to make it easier to view text from a photo by
deleting the background.
Using auto mode
1 On the All apps screen, tap S Note → → .
Alternatively, on the Home screen, tap on the S Note widget.
2 Fit the edges of a subject inside the preview screen.
Turn the flash on or off.
Detected subject
Open Gallery.
Change the shooting mode.
Show or hide viewfinder guides.
Take a photo.
S Pen features
49
3 When the border around the subject turns blue, tap to take a photo.
The device automatically applies the Photo note effect to the photo and inserts it into S
Note.
4 Edit the note.
With the Photo note effect
Without the Photo note effect
Using manual mode
1 On the Photo note preview screen, tap to switch to manual mode.
2 Tap to take a photo. Or, tap to select a photo saved in the device.
3 Drag the edges of the frame to select a section, and then tap .
4 Edit sections to insert into S Note.
Drag the frame around the section to adjust the size of a recognised section.
Delete the section.
Drag the frame around the
section to adjust the size.
Manually add a section to be
recognised.
Enable or disable the Photo note
effect.
5 Tap to insert the selected sections into the note.
S Pen features
50
Editing Photo notes
Edit sections inserted into S Note.
1 Tap and hold a section and tap Convert to edit.
The text image on the section will be vectorised and transformed into coloured lines for
you to edit.
2 Tap and draw a line around the section you want to edit.
3 Select an editing option.
• : Change the input properties, such as layout, size, colour, or thickness.
• : Cut out the input. To paste it to another location, tap and hold the location, and
then tap Paste.
• : Copy the input. To paste it to another location, tap and hold the location, and then
tap Paste.
• : Delete the input.
Creating notes with voice memos
1 On the All apps screen, tap S Note → → → Insert → Voice memo.
Alternatively, on the Home screen, tap in the S Note widget.
2 Read the terms and conditions and tap Agree.
3 Read the on-screen information about using this feature and tap OK.
4 Tap to start recording.
5 Speak into the microphone.
Your voice will be converted into text.
6 Tap to insert the converted text into the note.
If the voice memo system language does not match the language you are speaking,
the device will not recognise your voice. To change the voice memo system language,
open the All apps screen and tap Voice Recorder → → Settings → Language.
S Pen features
51
Scrapbook
Collect content from various sources to create your own digital scrapbook. While viewing
webpages or videos, you can select and add a desired area to scrapbooks.
This app may not be available depending on the region or service provider.
Viewing scrapbooks
When you launch this app for the first time or restart it after performing a data reset, read and
agree to the terms and conditions, and then set a sync option.
1 Tap Scrapbook on the All apps screen.
2 Tap to select a category and select a scrapbook.
If there is a link below the scrapbook content, tap the link to go to the source.
3 Tap to edit it.
You can add a title, text, memos, or tags to the scrapbook.
4 Tap Save to save the changes.
Using the S Pen
An introduction
Write, draw, or perform touch actions with the S Pen. You can easily access additional features
by pressing the S Pen button.
S Pen features
52
Air view
Hover over an item on the screen with the S Pen to perform various functions.
Previewing information
Point at the screen to preview content or view information in a pop-up window.
Using Air Button
Hovering the S Pen over items in some apps, such as Gallery and Video, will display Air
Button on the preview window. You can perform various actions directly from the preview
window using Air Button.
Air Button
If this feature is not activated, open the All apps screen, tap Settings → S Pen → Air
view, and then tap the Air view switch to activate it.
S Pen features
53
Pen Select
While pressing and holding the S Pen button, drag the S Pen over text or item lists to select
multiple items or text. You can also copy and paste the selected items or text into another
app or share them with others.
Direct pen input
Fill in forms and write messages using your handwriting with the S Pen.
Writing in text fields
1 Hover the S Pen over a text field.
2 Tap to open the handwriting field.
S Pen features
54
3 Write with the S Pen.
When composing a message in Messages, tap at the top of the handwriting field to
switch to drawing mode. A drawing will be inserted into the message as an attachment.
4 When you are finished, tap .
Writing in apps
You can write directly on the screen with the S Pen when using some features and apps. For
example, you can enter numbers on the dialling keypad or set an alarm time by writing on
the handwriting field with the S Pen.
If this feature is not activated, open the All apps screen, tap Settings → S Pen →
Direct pen input, and then tap the Direct pen input switch to activate it.
55
Motions & usability features
Motions and gestures
Excessive shaking or impact on the device may result in unintended inputs. Control
motions properly.
Direct call
While viewing call, message, or contact details, pick up and hold the device to your ear to
make a call.
If this feature is not activated, open the All apps screen, tap Settings → Motions and
gestures → Direct call, and then tap the Direct call switch to activate it.
Motions & usability features
56
Smart alert
If you have missed calls or new messages, the device will vibrate when you pick it up.
This feature may not work if the screen is turned on or the device is not on a flat
surface.
If this feature is not activated, open the All apps screen, tap Settings → Motions and
gestures → Smart alert, and then tap the Smart alert switch to activate it.
Mute/Pause
Placing palm on screen
Cover the screen with your palm to mute incoming calls or alarms.
Motions & usability features
57
Turning device over
Turn the device over to mute incoming calls or alarms.
If this feature is not activated, open the All apps screen, tap Settings → Motions and
gestures → Mute/Pause, and then tap the Mute/Pause switch to activate it.
Palm swipe to capture
Place the side of your hand on the screen and swipe it across the screen from the right to the
left or vice versa to capture a screenshot. To view the saved screenshot, open the All apps
screen and tap Gallery → → Album → Screenshots. After capturing a screenshot, you can
edit the image and share it with others.
It is not possible to capture a screenshot while using some apps.
If this feature is not activated, open the All apps screen, tap Settings → Motions and
gestures → Palm swipe to capture, and then tap the Palm swipe to capture switch
to activate it.
Motions & usability features
58
Multi window
An introduction
Multi window lets you run two apps at the same time in a split screen. You can also run
multiple apps at the same time in pop-up windows.
Split screen Multi window
Some apps, such as Calculator and Contacts, can only be launched in pop-up
windows when you drag them from the Multi window tray to the screen.
1 Tap and hold to open the Multi window tray.
2 Tap and hold an app icon and drag it from the tray to the screen. Then, drag another app
icon to a new location on the screen.
Apps marked with the icon can be launched in separate windows on the screen at the
same time. Tap an app marked with the icon and drag it to a new location to open the
app in both windows. To simultaneously launch the app in a pop-up window, tap the app
and tap .
Motions & usability features
59
Launching Multi window from the list of recent apps
1 Tap .
2 Swipe upwards or downwards and tap to launch an app in Multi window.
3 Select another app to launch in Multi window.
Using Multi window options
When you use Multi window apps, select an app window and tap the circle between the app
windows to access the following options:
Motions & usability features
60
• : Switch locations between Multi window apps.
• : Drag and drop text or copied images from one window to another. Tap and hold an
item in the selected window and drag it to a location in another window.
• : Switch to a floating icon.
• : Switch to the full screen view.
• : Close the window.
Sharing content between app windows
You can easily share content between apps, such as Email and Internet, by dragging and
dropping it.
Some apps may not support this feature.
1 Launch Email and Internet in Multi window.
You can also launch them in pop-up windows.
2 Tap the circle between the app windows, and then tap .
3 Tap and hold text or an image in the Internet window and drag it to a location in the
Email window.
The selected item will be inserted into the Email window.
Motions & usability features
61
Adjusting the window size
Drag the circle between the app windows up or down to adjust the size of the windows.
If Multi window is not activated, open the All apps screen, tap Settings → Multi
window, and then tap the Multi window switch to activate it. Alternatively, open the
quick settings panel and tap Multi window to activate it.
Pop-up Multi window
1 On the All apps screen, launch an app to use in a pop-up window.
2 Drag down diagonally from either end of the top edge.
The app screen will appear in a pop-up window.
Switch to a floating icon.
Close the window.
Switch to the full screen
view.
Move content.
Motions & usability features
62
Moving or closing pop-up windows
To move a pop-up window, tap the circle on a window and drag it to a new location.
To close the window, tap the circle at the top of the window and tap .
Launching pop-up windows from the split screen Multi window
1 On the split screen Multi window, tap an app window to launch it in a pop-up window.
2 Tap and hold the circle between the app windows.
The selected app will launch in a pop-up window.
Launching pop-up windows from the Multi window tray
Tap and hold to open the Multi window tray. Tap an app icon in the Multi window tray to
launch it in a pop-up window.
If Multi window is not activated, open the All apps screen, tap Settings → Multi
window, and then tap the Multi window switch to activate it. Alternatively, open the
quick settings panel and tap Multi window to activate it.
Motions & usability features
63
One-handed operation
An introduction
You can switch to one-handed operation mode to conveniently operate the device with one
hand.
On the All apps screen, tap Settings → Display and wallpaper → One-handed operation.
Reducing the screen size
Tap Reduce screen size and tap the Reduce screen size switch to activate it.
To switch to one-handed operation mode, hold the device in one hand. Then, quickly drag
your thumb from the edge of the screen to the centre of the screen and back again.
Motions & usability features
64
One-handed input
Tap One-handed input and tap the One-handed input switch to activate it.
Tap or to adjust the position of the dialling keypad, in-call buttons, and other input
panels for easy one-handed access.
Side key panel
Tap Side key panel and tap the Side key panel switch to activate it.
Use your device more easily with one hand by having the Recents key, the Home key, and the
Back key and other selected functions as buttons at the side of the screen.
Increasing touchscreen sensitivity
Use this feature to operate the screen while wearing gloves.
On the All apps screen, tap Settings → Display and wallpaper, and then tick Increase touch
sensitivity. Alternatively, open the quick settings panel and tap Touch sensitivity to activate
it.
• Use leather gloves for better recognition while touching the screen. Other types of
material may not be recognised.
• This feature may not work properly when you are using S view.
For best results, tap the screen firmly while wearing gloves.
65
Personalising
Managing the Home and All apps screens
Managing the Home screen
Adding items
Tap and hold an app or a folder from the All apps screen, and then drag it to the Home screen.
To add widgets, tap and hold an empty area on the Home screen, tap Widgets, tap and hold a
widget, and then drag it to the Home screen.
Moving and removing an item
Tap and hold an item on the Home screen, and then drag it to a new location.
To move the item to another panel, drag it to the side of the screen.
You can also move frequently used apps to the shortcuts area at the bottom of the Home
screen.
To remove an item, tap and hold the item. Then, drag it to Remove at the top of the screen.
Creating a folder
1 On the Home screen, tap and hold an app, and then drag it to Create folder at the top of
the screen.
2 Enter a folder name.
3 Tap , select the apps to move to the folder, and then tap Done.
Personalising
66
Managing panels
On the Home screen, tap and hold an empty area to add, move, or remove a panel.
To add a panel, swipe to the left, and then tap .
To move a panel, tap and hold a panel preview, and then drag it to a new location.
To remove a panel, tap and hold a panel preview, and then drag it to Remove at the top of
the screen.
To set a panel as the main Home screen, tap .
Managing the All apps screen
Changing the sorting method
On the All apps screen, tap → Sort by and select a sorting method.
Moving items
On the All apps screen, tap → Edit. Tap and hold an item and drag it to a new location.
To move the item to another panel, drag it to the side of the screen.
To move an item to a new panel, drag it to Create page at the top of the screen.
Creating folders
1 On the All apps screen, tap → Create folder.
Alternatively, tap → Edit, tap and hold an app, and then drag it to Create folder at the
top of the screen.
2 Enter a folder name.
3 Tap , tick the apps to move to the folder, and then tap Done.
Personalising
67
Setting wallpaper and ringtones
Setting wallpaper
Set an image or photo stored in the device as wallpaper for the Home screen or the locked
screen.
1 On the Home screen, tap and hold an empty area, and then tap Wallpapers.
Alternatively, on the All apps screen, tap Settings → Display and wallpaper →
Wallpaper.
2 Select a screen to change or apply wallpaper to.
3 Swipe to the left or right and select from images displayed at the bottom of the screen.
To select photos taken by the device’s camera or other images, tap From Gallery.
If you are setting the locked screen’s wallpaper, you can select images from various
wallpaper categories.
4 Tap Set as wallpaper or Save.
The selected image will be set as the wallpaper for the Home screen or the locked screen.
Setting a Dynamic lock screen
Use this feature to set the locked screen’s wallpaper to change automatically based on your
settings, your location and weather, and your interests.
1 On the Home screen, tap and hold an empty area, and then tap Wallpapers.
Alternatively, on the All apps screen, tap Settings → Display and wallpaper →
Wallpaper.
2 Tap Lock screen.
Personalising
68
3 Select a wallpaper option.
• From Gallery: Select images from Gallery. The device will display the images on the
locked screen at the interval you set.
• Live weather: The device will display high quality images on the locked screen based
on the time, weather, and your location information.
• My interests: Select categories that interest you. The device will display high quality
images on the locked screen based on your interests.
• You may incur additional charges when using this feature.
• This feature may not work properly depending on your region.
Changing ringtones
Change ringtones for incoming calls and notifications.
On the All apps screen, tap Settings → Sound.
To set a ringtone for incoming calls, tap Ringtones, select a ringtone, and then tap Done. To
use a song stored in the device or in your account as a ringtone, tap Add.
To set a ringtone for notifications, tap Notifications, select a ringtone, and then tap Done.
Changing the screen lock method
You can change the way that you lock the screen to prevent others from accessing your
personal information.
On the All apps screen, tap Settings → Lock screen → Screen lock, and then select a screen
lock method. The device requires an unlock code whenever unlocking it.
If the unlock code is forgotten, take the device to a Samsung Service Centre to reset it.
Personalising
69
Pattern
Draw a pattern by connecting four dots or more, and then draw the pattern again to verify it.
Set a backup PIN to unlock the screen when you forget the pattern.
PIN
A PIN consists of numbers only. Enter at least four numbers, and then enter the password
again to verify it.
Password
A password consists of characters and numbers. Enter at least four characters including
numbers and symbols, and then enter the password again to verify it.
Fingerprint
Register your fingerprints to unlock the screen. Refer to Finger Scanner for more information.
My Places
Quickly access useful features associated with your frequently visited places by automatically
recognising your location.
Personalising
70
Adding a My Places widget
To add the widget, tap and hold an empty area on the Home screen, tap Widgets, tap and
hold the My Places widget, and then drag it to the Home screen.
Select a category to set location
information and preferences.
Setting place information
When you visit a place with preset location information, the device automatically recognises
your location and displays shortcuts to preset features. The device also applies the settings
that you set for the place.
1 On the My Places widget, select a place to set location information and shortcuts. For
example, tap Home to set location information for your home.
Your current location will appear under Address. To automatically search for your location
again, tap or Get location information.
To manually search for a location, enter an address or a keyword in the search field and
tap .
Ensure that the device is connected to a Wi-Fi or mobile network to automatically
search for your current location.
Personalising
71
2 Tap Next.
3 On the Manage shortcuts screen, tap or to add or delete shortcuts to various apps
and features.
4 Tap OK.
The My Places widget with your location settings will appear on the Home screen. To
change additional settings, such as sound mode or Wi-Fi network settings, tap →
Custom settings.
Setting additional place information
1 On the My Places widget, tap .
2 Tap and select another place from the places list.
To add more places to the list, tap Manage places → .
3 Tap or Get location information to automatically search for your current location.
To manually search for a location, enter an address or a keyword in the search field and
tap .
Personalising
72
4 Tap Save.
5 Tap or add or delete shortcuts to various app and features.
6 Tap .
When you visit an added place, your preset location settings will appear on the My Places
widget. To change additional settings, such as sound mode or Wi-Fi network settings, tap
→ Custom settings.
Finger Scanner
An introduction
In order for fingerprint recognition to function, your fingerprint information needs to be
registered and stored in your device. After registering, you can set the device to use your
fingerprint for the features below:
• Screen lock
• Web sign-in
• Verify Samsung account
• Pay with PayPal
This feature may not be available depending on the region or service provider.
For better fingerprint recognition
When you scan your fingerprints on the device, be aware of the following conditions that
may affect the feature’s performance:
• The Home key contains a fingerprint recognition sensor. Ensure that the Home key is not
scratched or damaged by metal objects, such as coins, keys, and necklaces.
• The screen protector supplied with the device may cause the fingerprint recognition
sensor to malfunction. Remove the screen protector to improve fingerprint sensitivity.
• Ensure that the fingerprint recognition area and your fingers are clean and dry.
Personalising
73
• The device may not recognise fingerprints that are affected by wrinkles or scars.
• The device may not recognise fingerprints from small or thin fingers.
• To improve recognition performance, register fingerprints of the hand used most often to
perform tasks on the device.
• Do not drag your finger too quickly or slowly. Drag your finger at a moderate speed to
allow the device to recognise it.
• In dry environments, static electricity can build up in the device. Avoid using this feature
in dry environments or before using the feature, discharge static electricity by touching a
metal object.
Registering fingerprints
If you bend your finger or use a fingertip, the device may not recognise your
fingerprints.
1 On the All apps screen, tap Settings → Finger Scanner → Fingerprint manager.
2 Read the on-screen information and tap OK.
3 Place your finger on the fingerprint recognition area at the bottom centre of the screen.
Personalising
74
4 Tap and hold the screen in the fingerprint recognition area, and then drag your finger
downwards over the Home key.
Repeat this action using the same finger until the fingerprint is registered.
5 Tap Done to finish scanning your fingerprint. Or, tap Register to register an additional
fingerprint.
6 When a screen appears requesting to register a backup password, enter the backup
password, and then tap Continue.
7 Enter the backup password again to verify it, and then tap OK.
You can use the backup password instead of scanning your fingerprints.
8 When a fingerprint lock pop-up window appears, tap OK. You can use your fingerprints to
unlock the screen.
Personalising
75
Deregistering fingerprints
You can deregister your fingerprints using the fingerprint manager.
1 On the All apps screen, tap Settings → Finger Scanner → Fingerprint manager.
2 Scan a registered fingerprint, or tap and enter the backup password.
3 Tap → Select.
4 Tick fingerprints to deregister and tap .
Changing the backup password
You can change the password that you use as an alternative to scanning your fingerprints.
1 On the All apps screen, tap Settings → Finger Scanner → Change backup password.
2 Scan a registered fingerprint, or tap and enter the backup password.
3 Enter a new password and tap Continue.
4 Enter the password again and tap OK.
Verifying the Samsung account password
Use fingerprints to verify your Samsung account password. You can use a fingerprint instead
of entering your password, for example, when you purchase content from GALAXY Apps.
On the All apps screen, tap Settings → Finger Scanner → Verify Samsung account, and
then tap the Verify Samsung account switch to activate it. Enter your Samsung account
password and tap Confirm.
Personalising
76
Using fingerprints to sign in to accounts
You can use your fingerprints to sign in to webpages that support password saving.
1 On the All apps screen, tap Settings → Finger Scanner → Web sign-in, and then tap the
Web sign-in switch to activate it.
2 Open a webpage that you want to sign in to with a fingerprint.
3 Enter your user name and password, and then tap the webpage’s sign in button.
4 Tick Sign in using your fingerprints and tap Remember.
You can use your fingerprint to verify your account and password to sign in to the
webpage.
Using fingerprints for purchases via PayPal
You can make purchases by scanning your fingerprints.
This feature may not be available depending on the region or service provider.
1 On the All apps screen, tap Settings → Finger Scanner → Pay with PayPal.
2 Tick FIDO Ready™ support and PayPal, and then tap Install.
3 When the installation is complete, tap Link PayPal account.
4 Follow the on-screen instructions to sign in to your PayPal account and register your
fingerprints.
Personalising
77
Private mode
An introduction
Hide personal content in your device to prevent others from accessing it.
In private mode, you can hide items in Gallery, Video, Music, Voice Recorder, My Files, and S
Note.
Setting up private mode
1 On the All apps screen, tap Settings → Private mode.
2 Read the on-screen information and tap Next.
3 Read the on-screen information about using this feature and tap Next.
4 Tap Start, select a private mode access method, and then follow the on-screen
instructions to complete the setup.
When the screen lock pop-up window appears after the setup, tap OK to change the
screen lock method or tap Skip.
Private mode is activated and the icon appears on the status bar.
Hiding content
1 On the All apps screen, launch an app to hide items.
2 Select an item and tap → Move to Private.
If private mode is not activated, proceed to the next steps.
3 Read the on-screen information and tap OK.
4 Follow the on-screen instructions to enter the preset private mode access code.
The selected items will be moved to the private folder and disappear from the screen.
If you hide an item when private mode is not activated, private mode will be enabled
while the selected item is moved to the private folder and will be disabled again once
the transfer is complete.
Personalising
78
Viewing hidden content
You can only view hidden items when private mode is activated.
1 On the All apps screen, tap Settings → Private mode, and then tap the Private mode
switch to activate it.
Alternatively, open the quick settings panel and tap Private mode to activate it.
2 Follow the on-screen instructions to enter the preset private mode access code.
3 On the All apps screen, tap My Files → Private.
All items moved in private mode appear on the screen.
Unhiding content
1 In the private folder, select items to unhide.
2 Tap → Remove from Private.
3 Select a folder to move the items to.
The items will be moved to the selected folder.
Easy mode
Easy mode provides an easier user experience by using a simpler layout and bigger icons on
the Home screen.
Switching to easy mode
1 On the All apps screen, tap Settings → Easy mode → Easy mode.
2 Tick apps to apply a simpler layout.
3 Tap Done.
Personalising
79
Returning to standard mode
Swipe to the left on the Home screen and tap Easy settings → Easy mode → Standard
mode → Done.
Transferring data from your previous device
Using backup accounts
You can transfer backup data from your previous device to your new device using your
Google or Samsung account. Refer to Backing up and restoring data for more information.
Using Samsung Smart Switch
You can transfer data of the previous device to a new device via Smart Switch. Visit
www.samsung.com/smartswitch for more information.
Samsung Smart Switch is not supported on some devices or computers.
Using Smart Switch Mobile
Use this app to transfer data from your previous iPhone or Android device to your new device.
You can download the app from GALAXY Apps or Play Store.
1 On your device, tap Smart Switch Mobile.
2 On your device, select an option depending on the previous device type and follow the
on-screen instructions.
If the previous device is an Android device, ensure that the Smart Switch Mobile app is
installed on the device. Refer to the help for more information.
Personalising
80
Using Smart Switch with computers
Use this feature to import a backup of your data (from selected manufacturer’s
mobile devices) from a computer to your device. You can download the app from
www.samsung.com/smartswitch.
1 Back up data from a previous device to the computer. For more information, contact the
device’s manufacturer.
2 On the computer, launch Smart Switch.
3 Connect your current device to the computer using the USB cable.
4 On the computer, click the manufacturer of the previous device and follow the on-screen
instructions to transfer data to your device.
Using Samsung Kies
Import a backup of your data from your computer via Samsung Kies to restore data on your
device. You can also back up data to the computer via Samsung Kies. Refer to Connecting
with Samsung Kies for more information.
Setting up accounts
Adding accounts
Some apps used on your device require a registered account. Create accounts to have the
best experience with your device.
1 On the All apps screen, tap Settings → Accounts → Add account.
2 Select an account service.
3 Follow the on-screen instructions to complete the account setup.
To sync content with your accounts, select an account and tick items to sync.
Personalising
81
Removing accounts
On the All apps screen, tap Settings → Accounts, select an account name under MY
ACCOUNTS, select the account to remove, and then tap → Remove account.
Registering Samsung accounts
You need a Samsung account when using some Samsung apps. You can back up or restore
data saved in the device to your Samsung account. Register your Samsung account to the
device to conveniently use Samsung services.
1 On the All apps screen, tap Settings → Accounts → Add account.
2 Tap Samsung account.
3 Tap Sign in.
4 Enter your account’s email address and password, and then tap Sign in.
Once your Samsung account has been registered, you can use apps requiring your Samsung
account without the sign in procedure.
82
Phone & contacts
Phone
An introduction
Make or answer voice and video calls.
Making calls
1 Tap Phone on the All apps screen.
2 Tap Keypad and enter a phone number.
3 Tap to make a voice call, or tap to make a video call.
Access additional options.
Add the number to the contacts
list.
Preview the phone number.
View favourite contacts.
Delete a preceding character.
View the contacts list.
View call and message logs.
Enter the number using the
keypad.
Phone & contacts
83
Making calls from call logs or contacts list
Tap Logs or Contacts, and then swipe to the right on a contact or a phone number to make a
call.
Making calls from the favourites list
Select a contact and tap to add the contact to the favourite contacts list.
Open the Favourites screen and select a contact to call.
Making an international call
1 Tap Keypad.
2 Tap and hold 0 until the + sign appears. Enter the country code, area code, and phone
number, and then tap .
Phone & contacts
84
Receiving calls
Answering a call
When a call comes in, drag outside the large circle.
Rejecting a call
When a call comes in, drag outside the large circle.
Missed calls
If a call is missed, the icon appears on the status bar. Open the notification panel to view
the list of missed calls. Alternatively, on the All apps screen, tap Phone → Logs to view
missed calls.
• To send a message when rejecting an incoming call, drag the reject message bar
upwards.
• To create various rejection messages, open the All apps screen and tap Phone →
→ Settings → Call → Call rejection → Rejection messages → .
Options during calls
During a voice call
The following actions are available:
• : Increase the volume.
• Add call: Dial a second call.
• Keypad: Open the keypad.
• End call: End the current call.
• Speaker: Activate or deactivate the speakerphone. When using the speakerphone, speak
into the microphone at the top of the device and keep the device away from your ears.
• Mute: Turn off the microphone so that the other party cannot hear you.
• Bluetooth: Switch to a Bluetooth headset if it is connected to the device.
Phone & contacts
85
During a video call
Tap the screen to use the following options:
• Switch: Switch between the front and rear cameras.
• Mute: Turn off the microphone so that the other party cannot hear you.
• End call: End the current call.
Video calling with dual camera mode will be provided for up to 3 minutes. After
3 minutes the device will turn off the rear camera for optimal performance.
Contacts
An introduction
Create new contacts or manage contacts on the device.
Adding contacts
Moving contacts from other devices
You can move contacts from other devices to your device. Refer to Transferring data from
your previous device for more information.
Creating contacts manually
1 On the All apps screen, tap Contacts → Contacts.
2 Tap and select a storage location.
Phone & contacts
86
3 Enter contact information.
• : Add an image.
• / : Add or delete a contact field.
4 Tap Save.
To add a phone number to the contacts list from the keypad, tap Keypad, enter the number,
and then tap Add to Contacts.
To add a phone number to the contacts list from received calls or messages, tap Logs, and
then tap a contact’s image.
Searching for contacts
On the All apps screen, tap Contacts → Contacts.
Use one of the following search methods:
• Scroll up or down the contacts list.
• Drag a finger along the index at the right side of the contacts list to scroll through it
quickly.
• Tap the search field at the top of the contacts list and enter search criteria.
Once a contact is selected, take one of the following actions:
• : Add to favourite contacts.
• / : Make a voice or video call.
• : Compose a message.
• : Compose an email.
87
Messages & email
Messages
An introduction
Send text messages (SMS) or multimedia messages (MMS) and view messages by
conversation.
Sending messages
You may incur additional charges for sending messages when you are roaming.
1 Tap Messages on the All apps screen.
2 Tap .
3 Add recipients and enter a message.
Access additional options.
Enter a message.
Select contacts from the
contacts list.
Enter emoticons.
Enter recipients.
Attach files.
Send the message.
4 Tap to send the message.
Messages & email
88
Viewing messages
Messages are grouped into message threads by contact.
You may incur additional charges for receiving messages when you are roaming.
1 Tap Messages on the All apps screen.
2 On the messages list, select a contact.
3 View your conversation.
In the message detail view, tap to view more options.
Email
An introduction
Add your email accounts to receive emails and reply to them.
Setting up email accounts
1 Tap Email on the All apps screen.
Set up an email account when opening Email for the first time.
2 Enter the email address and password, and then tap Next.
To manually register a company email account, tap Manual setup.
3 Follow the on-screen instructions to complete the setup.
To set up another email account, tap → Manage accounts → .
If you have more than one email accounts, you can set one as the default account. Tap →
Manage accounts → → Set default account.
Messages & email
89
Sending emails
1 Tap Email on the All apps screen.
2 Tap at the bottom of the screen to compose a message.
3 Add recipients and enter a message.
4 Tap to send the message.
Reading emails
1 Tap Email on the All apps screen.
2 On the messages list, tap a message to read.
90
Camera & gallery
Camera
An introduction
Take photos and record videos using various modes and settings.
Basic shooting
You can take photos or record videos. View your photos and videos in Gallery.
Tap Camera on the All apps screen.
Camera etiquette
• Do not take photos or record videos of other people without their permission.
• Do not take photos or record videos where legally prohibited.
• Do not take photos or record videos in places where you may violate other people’s
privacy.
Camera & gallery
91
Taking photos or recording videos
1 Tap the image on the preview screen where the camera should focus.
2 Tap to take a photo or tap to record a video.
Change camera
settings.
Switch between the
front and rear
cameras.
HDR (Rich tone)
Start recording a
video.
Take a photo.
Display current
mode.
Change the
shooting mode.
View photos and
videos you have
captured.
Launching Camera on the locked screen
To quickly take photos of special moments, launch Camera on the locked screen.
1 On the locked screen, drag outside the large circle.
2 Tap the image on the preview screen where the camera should focus.
3 Tap to take a photo or tap to record a video.
This feature may not be available depending on the region or service provider.
• Spread two fingers apart on the screen to zoom in, and pinch to zoom out.
• To capture an image from the video while recording, tap .
• To change the focus while recording a video, tap where you want to focus. To focus
on the centre of the screen, tap .
Camera & gallery
92
Selfie
Automatically taking self-portraits
When you are taking photos with the front camera, place your finger on the sensor or use
voice commands to automatically take a photo without tapping the shutter button.
1 Tap Camera on the All apps screen.
2 Tap to switch to the front camera for self-portraits.
3 Face the front camera lens.
4 Place your finger on the sensor at the back of the device, and then lift it to take a photo of
yourself. You can also say “Smile”, “Cheese”, “Capture”, or “Shoot” to take a photo. To record
a video, say “Record video.”
Camera & gallery
93
Wide selfie
Take a wide self-portrait to include more people in the photo and avoid leaving people out.
1 Tap Camera on the All apps screen.
2 Tap to switch to the front camera for self-portraits.
3 Tap MODE → Wide selfie.
4 Face the front camera lens.
5 Place your finger on the sensor at the back of the device, and then lift it to take a photo of
yourself. You can also say “Smile”, “Cheese”, “Capture”, or “Shoot” to take a photo. To record
a video, say “Record video.”
6 Slowly swivel the device left and then right to take a wide self-portrait.
The device will take additional photos when the blue frame moves to each end of the
white frame.
• Make sure to keep the blue frame inside the viewfinder window.
• The subjects should remain still while taking wide self-portraits.
• The resolution of a photo may be affected by lighting conditions.
• The top and bottom parts of the image displayed on the preview screen may be
cut out of the photo depending on the shooting conditions.
Camera & gallery
94
HDR (Rich tone)
Take photos with rich colours and reproduce details even in bright and dark areas.
1 Tap Camera on the All apps screen.
2 Tap to switch to the rear camera.
3 Tap on the preview screen.
The icon will change to .
4 Tap to take a photo.
Without effect With effect
Shooting modes
Take photos using various shooting modes.
Tap Camera on the All apps screen.
Auto
Use this mode to allow the camera to evaluate the surroundings and determine the ideal
mode for the photo.
On the preview screen, tap MODE → Auto.
Camera & gallery
95
Rear-cam selfie
Use this mode to take self-portraits using the rear camera.
1 On the preview screen, tap MODE → Rear-cam selfie.
2 Drag or adjust the frame to set the face detection area.
3 Compose your shot with the rear camera lens facing you.
4 Listen to the beeps to guide you as you adjust the composition.
When your face is positioned inside the face detection area, the camera emits a warning
tone, beeps for a few seconds, and then automatically takes a photo.
Selective focus
Use the out-of-focus effect to make specific objects stand out in a photo.
1 On the preview screen, tap MODE → Selective focus.
2 Tap the image on the preview screen where the camera should focus.
3 Tap to take a photo.
4 Tap the preview thumbnail at the bottom right of the preview screen.
5 Tap and select one of the following:
• Near focus: Make the subject stand out and blur the background around the subject.
• Far focus: Blur the subject and make the background stand out around the subject.
• Pan focus: Make the subject and its background stand out.
Camera & gallery
96
6 Tap .
• It is recommended that you position subjects within 50 cm of the device. Position
the subject that you want to focus on close to the device.
• When taking photos, ensure there is sufficient distance between the subject
and the background. The distance should be more than three times the distance
between the device and the subject.
• The quality of photos taken by the device can be affected in the following
conditions:
– The device or the subject is moving.
– There is strong background light, low levels of light, or you are taking photos
indoors.
– The subject or background has no pattern, or consists of a plain colour.
Panorama
Take a series of photos horizontally or vertically and then stitch them together to create a
wide scene.
On the preview screen, tap MODE → Panorama.
Manage modes
Select the shooting modes to appear on the mode selection screen or change the order of
them.
1 On the preview screen, tap MODE → Manage modes.
2 Tick the modes to add to the modes list.
• Beauty face: Take a photo with lightened faces for gentler images.
• Shot & more: Take a series of photos and modify them by applying various effects
using the shooting modes.
• Virtual tour: Take photos in a space by moving forward or rotating left or right to
capture different angles of the space.
• Dual Camera: Use the front and rear camera at the same time to capture a photo or
record a video from both cameras simultaneously.
Camera & gallery
97
Downloading modes
Download more shooting modes from GALAXY Apps.
On the preview screen, tap MODE → Download.
• To get the best shots using panorama mode, follow these tips:
– Move the camera slowly in one direction.
– Keep the image within the frame on the camera’s viewfinder.
– Avoid taking photos of indistinct backgrounds, such as an empty sky or a plain
wall.
• You can record videos in dual camera mode for up to 5 minutes in Full HD and up
to 10 minutes in HD or VGA.
• While recording videos in dual camera mode, sound is recorded by the internal
microphone.
Camera settings
On the preview screen, tap .
The available options may vary depending on the mode and which camera is being
used.
• : Activate or deactivate the flash.
• : Set the number of photos to take when taking photos with the front camera.
• : Select the length of the delay before the camera automatically takes a photo.
• : Select a filter effect to use when taking photos or recording videos. To download
more effects, tap Download. To change the order of effects or hide effects from the list,
tap Manage effects.
• : Select a resolution for photos. Using a higher resolution will result in higher quality
photos, but they will take up more memory.
Camera & gallery
98
To access additional camera settings, open the preview screen and tap → .
• Beauty face: Set the device to take a photo with lightened faces for gentler images.
• Exposure value: Change the exposure value. This determines how much light the
camera’s sensor receives. For low-light situations, use a higher exposure.
• ISO: Select an ISO value. This controls camera light sensitivity. Low values are for
stationary or brightly lit objects. Higher values are for fast-moving or poorly lit objects.
However, higher ISO settings can result in noise in photos.
• White balance: Select an appropriate white balance, so images have a true-to-life colour
range.
• Metering modes: Select a metering method. This determines how light values are
calculated. Centre-weighted measures background light in the centre of the scene. Spot
measures the light value at a specific location. Matrix averages the entire scene.
• HDR (Rich tone): Use this to take photos with rich colours and reproduce details even in
bright and dark areas.
• Tap to take pics: Tap the image on the preview screen to take photos.
• Video size: Select a resolution for videos. Using a higher resolution will result in higher
quality photos, but they will take up more memory.
• Recording mode: Change the recording mode.
• Video stabilisation: Activate anti-shake to reduce or eliminate blurriness resulting from
camera shake while recording a video.
• Location tags: Attach a GPS location tag to the photo.
• To improve GPS signals, avoid shooting in locations where the signal may be
obstructed, such as between buildings or in low-lying areas, or in poor weather
conditions.
• Your location may appear on your photos when you upload them to the Internet.
To avoid this, deactivate the location tag setting.
• Storage location: Select the memory location for storage.
• Save as flipped: Invert the image to create a mirror-image of the original scene, when
taking photos with the front camera.
• Grid lines: Display viewfinder guides to help composition when selecting subjects.
• Voice control: Set the device to take photos or record videos with voice commands.
Camera & gallery
99
• The volume key: Set the device to use the Volume key to control the shutter or zoom
function.
• Review pics/videos: Set the device to show photos or videos after capturing them.
• Reset settings: Reset the camera settings.
• : View help information for using the camera.
Gallery
An introduction
View and manage photos and videos stored in the device.
Viewing images or videos
1 Tap Gallery on the All apps screen.
2 Select an image or a video.
Video files show the icon on the preview thumbnail. To play a video, tap .
More options
Delete
Edit
Move to the previous screen.
Share via
Change player
Image and video preview
thumbnails
To hide or show the menu bar and the preview thumbnails, tap the screen.
Camera & gallery
100
Viewing content stored in other devices
Search for content stored in other devices and view it on your device.
Accessing content stored in Samsung Link devices
To use this feature, sign in to your Samsung account. Refer to Registering Samsung accounts
for more information.
On the Gallery main screen, tap and select a device in REGISTERED DEVICES to access
content. You can view content from devices that are registered to Samsung link. Visit
link.samsung.com for more information.
• Ensure that the registered devices are turned on and connected to a Wi-Fi or
mobile network.
• You may incur additional charges when you access content stored in other devices
via the mobile network.
Accessing content stored in nearby devices
Search for nearby devices via Wi-Fi, Wi-Fi Direct, or a mobile hotspot to view content stored in
them on your device.
1 On the All apps screen, tap Settings → NFC and sharing → Nearby devices, and then
tap the Nearby devices switch to activate it.
2 On the Gallery main screen, tap .
3 Select a device in NEARBY DEVICES.
You can view images and videos from other devices that have the content sharing feature
activated.
Camera & gallery
101
Deleting images or videos
Deleting an image or a video
Select an image or a video and tap at the top of the screen.
Deleting multiple images and videos
1 On the Gallery main screen, tap and hold an image or a video to delete.
Alternatively, tap → Select.
2 Tick the images or videos to delete.
3 Tap at the top of the screen.
You can also tap → Delete, tick the images or videos to delete, and then tap Done to delete
multiple items.
102
Safety assistance
Emergency mode
Emergency mode changes the screen to grey tones to reduce battery consumption. Some
apps and functions will be restricted.
Activating emergency mode
1 On the All apps screen, tap Settings → Safety assistance → Emergency mode and tap
the Emergency mode switch to activate it.
Alternatively, press and hold the Power key, and then tap Emergency mode.
2 Read and agree to the terms and conditions and tap OK.
3 Read the on-screen information and tap Enable.
Add more apps to use.
Make an emergency call.
Remaining battery power and
estimated battery standby time
Turn on the flash.
Send your current location Make a call.
information in a message.
Browse the Internet.
Access additional options.
Sound alarms.
The estimated maximum standby time shows the time remaining before the battery
power runs out if the device is not used. Standby time may vary depending on your
device settings and operating conditions.
Safety assistance
103
Deactivating emergency mode
To deactivate emergency mode, tap → Disable Emergency mode → Disable. Alternatively,
press and hold the Power key, and then tap Emergency mode → Disable.
Send help messages
In an emergency situation, quickly press the Power key three times. The device sends
messages to your primary contacts. The messages include your location information. To use
this feature, register your primary contacts first.
Adding primary contacts
1 On the All apps screen, tap Settings → Safety assistance.
2 Tap Manage primary contacts → Create primary contact.
3 Tap Create contact and enter contact information or tap Select from contacts to add an
existing contact as a primary contact.
Setting help messages
1 On the All apps screen, tap Settings → Safety assistance.
2 Tap Send help messages, and then tap the Send help messages switch to activate it.
3 Read and agree to the terms and conditions, and then tap OK.
To send help messages with audio recordings or photos, tick Send sound recording or
Send pictures.
The Send pictures option may not be available depending on the region or service
provider.
104
Useful apps
Car mode
An introduction
Use this mode to control the device while you are driving. You can listen to messages and
music by using voice commands and without touching the device.
Do not look at the screen or perform functions with your hands while driving.
• Navigation maps, your current location, and other navigational data may differ
from actual location information. You should always pay attention to road
conditions, traffic, and any other factors that may affect your driving. Follow all
safety warnings and regulations while driving.
• You may incur additional charges when using the navigation feature.
• This mode may not be available depending on the region or service provider.
• This mode is not supported in some languages.
Starting car mode
When you register a vehicle to your device, you can listen to the sound from the device via
the car’s speakers. You can also set the device to activate car mode automatically when it
connects to the vehicle, and more.
When running this app for the first time, follow the on-screen instructions to complete the
setup.
1 Open the quick settings panel and tap Car mode to activate it.
Useful apps
105
2 Follow the on-screen instructions to complete the setup.
When the Bluetooth permission request window appears, tap Yes to allow a vehicle to
search for your device and connect them via Bluetooth.
• Before registering your vehicle, start the vehicle and turn on the radio.
• While you are registering a vehicle to the device, place the device near the vehicle.
Registering more vehicles
Tap → Settings → My cars → .
Using car mode menus
Use car mode menus using voice commands to make calls, send messages, navigate to
places, or play music. You can also tap each menu icons on the screen.
1 Open the quick settings panel and tap Car mode to activate it.
Access additional
options.
Car mode menus
Activate the voice
command feature.
Open the menu
screen.
2 On the car mode main screen say “Hi Galaxy.”
3 When the icon appears, say a voice command to launch the desired menu.
You can also use quick voice commands. To view examples of quick voice commands, tap
→ Example commands.
Useful apps
106
Using the navigation feature
Select a location precisely by tapping and holding your finger on the map. Or, use a voice
command to navigate to a destination.
1 Open the quick settings panel and tap Car mode to activate it.
2 On the car mode main screen, say “Hi Galaxy.”
3 Say “Navigation”.
4 Say a keyword or the address for the location.
The device will automatically begin guiding you to the location.
S Finder
An introduction
Search for a wide variety of content with a keyword.
Searching for content
Open the notification panel and tap S Finder.
Enter a keyword in the search field or tap and say a keyword.
To get more refined results, tap the filter buttons under the search field, and then select a tag.
Setting search categories
You can set search categories to search for content in specific search fields.
Tap → Settings → Select search category and tick categories.
Useful apps
107
Managing the search history
Your past searches are saved automatically. To delete a search history item, tap next to an
item.
To set the device to not save the search history, tap → Settings, and deselect Use search
history.
S Planner
An introduction
Manage your schedule by entering upcoming events or tasks in your planner.
Creating events or tasks
1 Tap S Planner on the All apps screen.
2 Tap or double-tap a date.
If the date already has saved events or tasks in it, tap the date and tap .
3 Tap the top left of the screen to select either event or task and enter details.
• Add event: Set a start and end date for an event. You can set an optional repeat
setting.
• Add task: Add a task to do on a specific date. You can set an optional priority setting.
Useful apps
108
Enter a title.
Attach a map showing the
location of the event.
Set a reminder for the event.
Add more details.
Select a calendar to use or sync
with.
Select an item.
Set a start and end date for the
event.
4 Tap Save to save the event or task.
Syncing events and tasks with your accounts
On the S Planner main screen, tap → Sync now to sync events and tasks with your accounts.
To add accounts to sync with, tap → Calendars → Add account. Then, select an account
to sync with and sign in. When an account is added, a green circle is displayed next to the
account name.
To change an account’s syncing option, open the All apps screen, tap Settings → Accounts,
and then select an account service.
Useful apps
109
S Health
An introduction
S Health helps you manage your wellness and fitness. Set fitness goals, check your progress,
and keep track of your overall wellness and fitness.
Starting S Health
When running this app for the first time or restart it after performing a data reset, follow the
on-screen instructions to complete the setup.
1 Tap S Health on the All apps screen.
2 Follow the on-screen instructions to complete the setup.
Based on your physical statistics, the device calculates your standard basal metabolic
rate (BMR) and recommends a daily calorie intake. The recommendation may not be
accurate for all ages, body compositions, or nutritional needs.
S Health main screen
You can view the key information from S Health menus and use shortcuts to directly access S
Health menus.
Tap S Health on the All apps screen. Tap → Main screen.
To access more information about S Health functions, open the S Health main screen
and tap → Help.
Useful apps
110
Additional information
• The purpose for such data collection is limited to providing the service that you have
requested, including providing additional information to enhance your wellness, back
up/sync data, data analysis and statistics or to develop and provide better services.
(But if you sign in to your Samsung account from S Health, your data may be saved on
the server for data backup purposes.) Personal information may be stored until the
completion of such purposes. You can delete personal data stored by S Health by using
the Reset data option in the Settings menu. To delete any data you have shared with
social networks or transferred to storage devices, you must delete them separately.
• You assume full responsibility for the inappropriate use of data shared on social networks
or transmitted to others. Use caution when sharing your personal data with others.
• If the device is connected to measuring devices, verify the communication protocol to
confirm proper operation. If you use a wireless connection, such as Bluetooth or ANT+,
the device may be affected by electronic interference from other devices. Avoid using the
device near other devices that transmit radio waves.
• The content used in the S Health app may vary depending on the software version of
the app. The services provided with the app are subject to change or the cancellation of
support without prior notice.
• Available S Health functions and services may vary depending on the local laws and
regulations in your region.
• Some functions of S Health may not be provided depending on your region.
• S Health functions are intended for fitness and informational purposes only and is not
intended for use in the diagnosis of disease or other conditions, or in the cure, mitigation,
treatment, or prevention of disease.
Useful apps
111
S Voice
An introduction
Perform various tasks simply by speaking.
Starting S Voice
1 Tap S Voice on the All apps screen.
Alternatively, press the Home key twice.
This app may not be available depending on the region or service provider.
2 Follow the on-screen instructions to complete the setup.
3 View the tutorial or tap Start to skip the tutorial.
Setting the language
Tap → Settings → Language, and then select a language.
The selected language is applied to S Voice only, not to the language displayed on
the device.
Using S Voice
1 Tap S Voice on the All apps screen.
Alternatively, press the Home key twice.
When S Voice is launched, the device begins voice recognition.
2 Say a voice command.
If the device recognises the command, the device will perform the corresponding action.
To repeat a voice command or say a different command, tap .
Useful apps
112
Tips for better voice recognition
• Speak clearly.
• Speak in quiet places.
• Do not use offensive or slang words.
• Avoid speaking in dialectal accents.
The device may not recognise your commands or may perform unwanted commands
depending on your surroundings or how you speak.
Waking up S Voice in standby mode
If S Voice is not used for a certain period, it automatically switches to standby mode. Tap the
microphone icon or say “Hi Galaxy” to the device to resume voice recognition.
Changing the wake-up command
You can change the wake-up command from “Hi Galaxy.” The wake-up command is used to
resume voice recognition when the device is in standby mode.
Tap → Settings → Voice wake-up → Set wake-up command.
Using wake-up commands on the locked screen
On the locked screen, you can use various functions with preset wake-up commands.
Tap → Settings → Voice wake-up → Wake up while locked.
Useful apps
113
Music
An introduction
Listen to music sorted by category and customise playback settings.
Playing music
Tap Music on the All apps screen.
Select a song to play.
Add the song to a playlist.
Skip to the next song. Tap and
hold to fast-forward.
Pause and resume playback.
Access additional options.
Change the repeat mode.
Skip to the previous song. Tap
and hold to rewind.
Turn on shuffle.
Open the playlist.
Search for other devices to play
the file on.
Set the file as your favourite
song.
Adjust the volume.
Useful apps
114
Playing music stored in other devices
Search for music stored in other devices and play it on your device.
Tap Music on the All apps screen.
Accessing music stored in Samsung Link devices
To use this feature, sign in to your Samsung account. Refer to Registering Samsung accounts
for more information.
On the Music main screen, tap Devices and select a device in REGISTERED DEVICES to access
and play music. You can play songs from devices that are registered to Samsung link. Visit
link.samsung.com for more information.
• Ensure that the registered devices are turned on and connected to a Wi-Fi or
mobile network.
• You may incur additional charges when you access content stored in other devices
via the mobile network.
Accessing music stored in nearby devices
Search for nearby devices via Wi-Fi, Wi-Fi Direct, or a mobile hotspot to play music stored in
them on your device.
1 On the All apps screen, tap Settings → NFC and sharing → Nearby devices, and then
tap the Nearby devices switch to activate it.
2 On the Music main screen, tap Devices.
3 Select a device in NEARBY DEVICES to access and play music.
You can play songs from other devices that have the content sharing feature activated.
Useful apps
115
Video
An introduction
Watch videos stored in the device and customise playback settings.
Playing videos
Tap Video on the All apps screen.
Select a video to play.
Change screen ratio.
Rewind or
fast-forward by
dragging the bar.
Search for other
devices to play the
file on.
Skip to the previous
video. Tap and hold
to move backwards
quickly.
Skip to the next
video. Tap and hold
to move forwards
quickly.
Access additional
options.
Switch to the
pop-up video player.
Pause and resume
playback.
Adjust the volume.
Drag your finger up or down on the left side of the playback screen to adjust the brightness,
or drag your finger up or down on the right side of the playback screen to adjust the volume.
To rewind or fast-forward, drag your finger left or right on the playback screen.
Useful apps
116
Playing videos stored in other devices
Search for videos stored in other devices and play them on your device.
Tap Video on the All apps screen.
Accessing videos stored in Samsung Link devices
To use this feature, sign in to your Samsung account. Refer to Registering Samsung accounts
for more information.
On the Video main screen, tap Devices and select a device in REGISTERED DEVICES to access
and play the video. You can play videos from devices that are registered to Samsung link. Visit
link.samsung.com for more information.
• Ensure that the registered devices are turned on and connected to a Wi-Fi or
mobile network.
• You may incur additional charges when you access content stored in other devices
via the mobile network.
Accessing videos stored in nearby devices
Search for nearby devices via Wi-Fi, Wi-Fi Direct, or a mobile hotspot to play videos stored in
them on your device.
1 On the All apps screen, tap Settings → NFC and sharing → Nearby devices, and then
tap the Nearby devices switch to activate it.
2 On the Video main screen, tap Devices.
3 Select a device in NEARBY DEVICES to access and play the video.
You can play videos from other devices that have the content sharing feature activated.
Useful apps
117
Internet
Browse the Internet to search for information and bookmark your favourite webpages to
access them conveniently.
Browsing webpages
1 Tap Internet on the All apps screen.
2 Tap the address field. To change the search engine, tap the search engine icon next to the
web address field.
3 Enter the web address or a keyword, and then tap Go. To search the web by voice, tap .
To view the toolbars, drag your finger downwards slightly on the screen.
Read an article in reading mode.
Bookmark the current webpage.
Open the homepage.
Move to the previously visited
page.
View bookmarked webpages.
Access additional options.
Open the webpage window
manager.
Refresh the current webpage.
View saved pages.
Useful apps
118
Voice Recorder
An introduction
Use different recording modes for various situations, such as in an interview or a meeting. The
device can convert your voice to text and distinguish between sound sources.
Recording voice memos
1 Tap Voice Recorder on the All apps screen.
2 Tap to start recording. Speak into the microphone.
Tap to pause recording. To cancel recording, tap .
While recording a voice memo, tap to insert a bookmark.
Display the list of voice memos.
Change the recording mode.
Access additional options.
Start recording.
Scroll through available
recording modes.
Current recording mode
3 Tap to finish recording.
Useful apps
119
Changing the recording mode
Tap to select a mode from the list.
• Normal: This is the normal recording mode.
• Interview: The microphone is sensitive to sounds from two directions. In this mode, both
the top and the bottom of the device pick up equal amounts of sound. Voice memos
recorded in this mode appear with the icon next to them.
• Meeting: The microphone is sensitive to sounds from various directions. Voice memos
recorded in this mode appear with the icon next to them.
• Voice memo: The device records your voice and simultaneously converts it to on-screen
text. For best results, keep the device near your mouth and speak loudly and clearly in a
quiet place. Voice memos recorded in this mode appear with the icon next to them.
If the voice memo system language does not match the language you are speaking,
the device will not recognise your voice. Before using this feature, tap → Settings →
Language to set the voice memo system language.
Playing selected voice memos
When you review interview or meeting recordings, you can mute or unmute certain sound
sources in the recording.
1 Tap Voice Recorder on the All apps screen.
2 Tap and select a voice memo recorded in meeting mode.
3 To mute certain sound sources, tap for the corresponding direction that sound is to be
muted.
The icon will change to and the sound will be muted.
Unmuted sound source
Muted sound source
Useful apps
120
Clock
An introduction
Set alarms, check the current time in many cities around the world, time an event, or set a
specific duration.
Alarm
On the All apps screen, tap Clock → Alarm.
Setting alarms
1 Tap .
2 Set an alarm time, select the days on which the alarm will repeat, and then set other
various alarm options.
3 Tap Save.
The saved alarm is added to the alarms list.
4 To activate or deactivate alarms, tap next to the alarm in the alarms list.
Stopping alarms
Drag outside the large circle to stop an alarm. If you have previously enabled the snooze
option, drag outside the large circle to repeat the alarm after a specified length of time.
Deleting alarms
Tap → Delete, select alarms, and then tap Done.
Useful apps
121
World clock
On the All apps screen, tap Clock → World clock.
Creating clocks
Tap and enter a city name or select a city from the cities list or globe.
To apply summer time, tap and hold a clock, and then tap .
Deleting clocks
Tap → Select, select clocks, and then tap .
Stopwatch
1 On the All apps screen, tap Clock → Stopwatch.
2 Tap Start to time an event.
To record lap times while timing an event, tap Lap.
3 Tap Stop to stop timing.
To clear lap times, tap Reset. To restart the timing, tap Resume.
Timer
1 On the All apps screen, tap Clock → Timer.
2 Set the duration, and then tap Start.
3 Drag outside the large circle when the timer goes off.
Useful apps
122
Calculator
Perform simple or complex calculations.
Using the calculator
Tap Calculator on the All apps screen.
Rotate the device to landscape orientation to display the scientific calculator. If Screen
rotation is disabled, tap → Scientific calculator.
To see the calculation history, tap to hide the keypad.
To clear the history, tap → Clear history.
Dropbox
Use this app to save and share files with others via Dropbox cloud storage. When you save
files to Dropbox, your device automatically syncs with the web server and any other devices
that have Dropbox installed.
This app may not be available depending on the region or service provider.
Tap Dropbox on the All apps screen.
When you launch this app for the first time or restart it after performing a data reset, follow
the on-screen instructions to finish the setup.
On the Dropbox main screen, use the following functions:
• : Upload or open files. Tap → Upload here to upload files.
• : View the uploaded images or videos. Tap to share or delete files, or create albums.
• : Open files in the favourites list.
• : View notifications.
Useful apps
123
Flipboard
Use this app to view live social network updates and news in a personalised magazine format.
Tap Flipboard on the All apps screen.
This app may not be available depending on the region or service provider.
When you launch this app for the first time or restart it after performing a data reset, follow
the on-screen instructions to finish the setup.
On the Flipboard main screen, select from various news articles and subscriptions.
Smart Remote
An introduction
Use this app to connect to TVs, set-top boxes, or projectors and use the device as a remote
control.
Useful apps
124
Starting Smart Remote
1 Tap Smart Remote on the All apps screen.
2 Tap Select country or region and select a country, region, and broadcast service.
3 Tap Personalise, tick your favourite genres and sports, and then tap Next.
4 Tap Age or Gender to set your profile, and then tap Done.
5 Tap → Continue.
6 Select the TV brand.
To connect the device to a projector and use the device as a remote control, tap I have a
projector.
7 Ensure that the device’s infrared port is facing the TV and tap TV. Then, tap Yes, this code
1 works if the device turns on the TV.
If the device does not turn on the TV, tap Send this code 1 again or No, test next code 2,
and then repeat this until the TV recognises the signal.
8 Select a channel source.
Using the device as a remote control
You can turn the TV on or off, browse channels, or adjust the volume level on the TV using the
device as a remote control.
1 Tap Smart Remote on the All apps screen.
2 Select a category at the top of the screen.
3 Face the device’s infrared port to the TV, select a TV programme, and then tap WATCH ON
TV.
The selected programme will be shown on the connected TV.
Useful apps
125
4 Tap to change the channel or the volume.
The remote control panel appears on the screen.
Turn the TV on or off.
TV control menus
Additional functions
Access additional options.
Setting programme reminders
1 Select a TV programme that is currently not broadcasting.
2 Tap REMIND ME to set an alarm to remind you of the TV programme’s start time.
Evernote
Use this app to create, sync, and share multimedia notes. You can add tags to the notes, or
sort the notes into a notebook so that you can efficiently manage your ideas.
Tap Evernote on the All apps screen.
Sign in to your Evernote account. If you do not have one, create an Evernote account. Follow
the on-screen instructions to complete the setup.
This app may not be available depending on the region or service provider.
Useful apps
126
Composing notes
You can create a note using images, voice recordings, and other attachments.
On the Evernote main screen, tap New note.
While composing a note, use the following options:
• : Set a reminder to the note.
• : Attach files or use additional options.
• : Take a photo and attach it to the note.
• : Access additional options.
Deleting notes
On the notes list, tap and hold a note, and then tap Delete.
PEN.UP
Use this app to post and share your sketches drawn with the S Pen.
Tap PEN.UP on the All apps screen.
When you launch this app for the first time or restart it after performing a data reset, tap Sign
up or Sign in at the top of the screen. Then, follow the on-screen instructions to complete the
setup.
Posting your artwork
On the PEN.UP main screen, tap . Add your sketch, enter details, and then tap .
Viewing artwork
On the PEN.UP main screen, select a post. Tap → Save artwork to download the artwork to
your device. The artwork is saved in the PEN.UP folder. To open the folder, open the All apps
screen and tap Gallery → → Album → PEN.UP.
You can only download artwork tagged as wallpaper.
Useful apps
127
Google apps
Google provides entertainment, social network, and business apps. You may require a Google
account to access some apps. Refer to Setting up accounts for more information.
To view more app information, open the each app’s main screen and tap → Help.
Some apps may not be available or may be labelled differently depending on the
region or service provider.
Chrome
Search for information and browse webpages.
Google Mail
Send or receive emails via the Google Mail service.
Google+
Share your news and follow updates that your family, friends, and others share. You can also
back up your photos and videos, and more.
Maps
Find your location on the map, search for locations, and view location information for various
places.
Play Music
Discover, listen to, and share music on your device.
Play Movies & TV
Watch videos stored on your device and download various content to watch from the Play
Store.
Play Books
Download various books from Play Store and read them.
Useful apps
128
Play Newsstand
Read news and magazines that interest you in one convenient location.
Play Games
Download games from Play Store and play them with others.
Drive
Store your content on the cloud, access it from anywhere, and share it with others.
YouTube
Watch or create videos and share them with others.
Photos
Manage photos, albums, and videos that you have saved on the device and uploaded to
Google+.
Hangouts
Chat with your friends individually or in groups and use images, emoticons, and video calls
while you are chatting.
Google
Search quickly for items on the Internet or your device.
Voice Search
Search quickly for items by saying a keyword or phrase.
Google Settings
Configure settings for some features provided by Google.
129
Connecting with other devices
Quick Connect
An introduction
Automatically search for nearby devices and quickly connect to them.
• When connecting to a device that does not support the Quick connect feature,
ensure that Wi-Fi Direct or the Bluetooth feature is activated.
• Connection methods may vary depending on the type of connected devices or the
shared content.
• Device name may vary depending on the Bluetooth devices to pair with. For
example, the device name can be shown as BT MAC.
Connecting to other devices
When you launch this app for the first time or restart it after performing a data reset, follow
the on-screen instructions to finish the setup.
1 Open the notification panel and tap Quick Connect.
When the panel opens, the Wi-Fi and the Bluetooth features are activated automatically
and the device searches for nearby devices.
2 Select a device from the list and connect to it by following the on-screen instructions.
The next steps may vary depending on the connected device.
To allow nearby devices to search for your device and connect to it, tap → Set device
visibility → Make your device visible, and then select an option.
Connecting with other devices
130
Re-searching for devices
If the desired device does not appear in the list, search for the device.
Tap and select the device from the list of detected devices.
Deactivating the Quick connect feature
To deactivate the Quick connect feature, drag downwards from the top of the screen.
Alternatively, tap .
Sharing content
Share content with the connected devices.
1 Open the notification panel and tap Quick Connect.
2 Select a device from the list of detected devices.
3 Select a media category.
4 Select the content to share and tap Done.
Your device sends the content to the connected device.
Connecting with other devices
131
Bluetooth
An introduction
Use Bluetooth to exchange data or media files with other Bluetooth-enabled devices.
• Samsung is not responsible for the loss, interception, or misuse of data sent or
received via Bluetooth.
• Always ensure that you share and receive data with devices that are trusted
and properly secured. If there are obstacles between the devices, the operating
distance may be reduced.
• Some devices, especially those that are not tested or approved by the Bluetooth
SIG, may be incompatible with your device.
• Do not use the Bluetooth feature for illegal purposes (for example, pirating copies
of files or illegally tapping communications for commercial purposes).
Samsung is not responsible for the repercussion of illegal use of the Bluetooth
feature.
Pairing with other Bluetooth devices
1 On the All apps screen, tap Settings → Bluetooth, tap the Bluetooth switch to activate
it, and then tap Scan.
The detected devices are listed.
2 Select a device to pair with.
If your device has paired with the device before, tap the device name without confirming
the auto-generated passkey.
If the device you want to pair with is not in the list, request that the device turns on its
visibility option. Refer to the other device’s user manuals.
3 Accept the Bluetooth connection request on both devices to confirm.
Connecting with other devices
132
Sending and receiving data
Many apps support data transfer via Bluetooth. You can share data, such as contacts or media
files, with other Bluetooth devices. The following actions are an example of sending an image
to another device.
Sending an image
1 Tap Gallery on the All apps screen.
2 Select an image.
3 Tap → Bluetooth, and then select a device to transfer the image to.
If the device you want to pair with is not in the list, request that the device turns on its
visibility option.
4 Accept the Bluetooth connection request on the other device.
Receiving an image
When another device sends you an image, accept the Bluetooth connection request. The
received image is saved in the Download folder. To open the folder, open the All apps screen
and tap Gallery → → Album → Download.
Unpairing Bluetooth devices
1 On the All apps screen, tap Settings → Bluetooth.
The device displays the paired devices in the list.
2 Tap next to the device name to unpair.
3 Tap Unpair.
Connecting with other devices
133
Wi-Fi Direct
An introduction
Wi-Fi Direct connects devices directly via a Wi-Fi network without requiring an access point.
Connecting to other devices
1 On the All apps screen, tap Settings → Wi-Fi, and then tap the Wi-Fi switch to activate it.
2 Tap → Wi-Fi Direct.
The detected devices are listed.
If the device you want to connect to is not in the list, request that the device turns on its
Wi-Fi Direct feature.
3 Select a device to connect to.
To connect to multiple devices, tap → Multi-connect.
4 Accept the Wi-Fi Direct connection request on the other device to confirm.
Sending and receiving data
You can share data, such as contacts or media files, with other devices. The following actions
are an example of sending an image to another device.
Sending an image
1 Tap Gallery on the All apps screen.
2 Select an image.
3 Tap → Wi-Fi Direct, and then select a device to transfer the image to.
4 Accept the Wi-Fi Direct connection request on the other device.
If the devices are already connected, the image will be sent to the other device without
the connection request procedure.
Connecting with other devices
134
Receiving an image
When another device sends you an image, accept the Wi-Fi Direct connection request. If
the devices are already connected, the image will be received on your device without the
connection request procedure. The received image is saved in the Download folder. To open
the folder, open the All apps screen and tap Gallery → → Album → Download.
Ending the device connection
1 On the All apps screen, tap Settings → Wi-Fi.
2 Tap → Wi-Fi Direct.
The device displays the connected devices in the list.
3 Tap End connection → OK to disconnect the devices.
NFC
An introduction
Your device allows you to read near field communication (NFC) tags that contain information
about products. You can also use this feature to make payments and buy tickets for
transportation or events after downloading the required apps.
The battery contains a built-in NFC antenna. Handle the battery carefully to avoid
damaging the NFC antenna.
Using the NFC feature
Use the NFC feature to send images or contacts to other devices, and read product
information from NFC tags. If you insert a SIM or USIM card that has a payment feature, you
can use the device to make payments conveniently.
1 On the All apps screen, tap Settings → NFC and sharing → NFC, and then tap the NFC
switch to activate it.
Alternatively, open the quick settings panel and tap NFC to activate it.
Connecting with other devices
135
2 Place the NFC antenna area on the back of your device near an NFC tag.
The information from the tag appears.
Ensure that the device’s screen is unlocked. Otherwise, the device will not read NFC
tags or receive data.
Making a purchase with the NFC feature
Before you can use the NFC feature to make payments, you must register for the mobile
payment service. To register or get more information about the service, contact your service
provider.
1 On the All apps screen, tap Settings → NFC and sharing → NFC, and then tap the NFC
switch to activate it.
Alternatively, open the quick settings panel and tap NFC to activate it.
2 Touch the NFC antenna area on the back of your device to the NFC card reader.
3 Tap Tap and pay and select an app to set the default payment app.
The payment services list may not include all available payment apps.
Connecting with other devices
136
Sending data
Allow data exchange when your device’s NFC antenna touches the other device’s NFC
antenna.
1 On the All apps screen, tap Settings → NFC and sharing → NFC, and then tap the NFC
switch to activate it.
Alternatively, open the quick settings panel and tap NFC to activate it.
2 Tap Android Beam or S Beam and tap the Android Beam or the S Beam switch to
activate it.
• Android Beam: Send data via Bluetooth.
• S Beam: Send data via Wi-Fi Direct. This feature is optimal for large data transfers.
3 Select an item and touch the other device’s NFC antenna to your device’s NFC antenna.
4 When Touch to beam. appears on the screen, tap your device’s screen to send the item.
• Do not send copyright-protected data via S Beam. Doing so may violate copyright
laws. Samsung is not responsible for any liabilities caused by the illegal use of
copyrighted data.
• If both devices try to send data simultaneously, the file transfer may fail.
Connecting with other devices
137
Screen Mirroring
An introduction
Use this feature to connect your device to a large screen with an AllShare Cast dongle or
HomeSync and then share your contents.
Screen Mirroring
-enabled devices
(AllShare Cast dongle
and HomeSync)
• This feature may not be available depending on the region or service provider.
• Some files may be buffered during playback, depending on the network
connection.
• If you specify a Wi-Fi frequency, AllShare Cast dongles or HomeSync may not be
detected or connected.
Connecting with other devices
138
Viewing content on a TV
Before you connect a TV to your device, connect the TV and the screen mirroring-enabled
device. To set up the connection, refer to the device’s user manual. The following actions are
an example of viewing content on a TV connected via an AllShare Cast dongle.
1 Connect the screen mirroring-enabled device to the TV using an HDMI cable.
2 On the TV, select a connection mode, such as HDMI mode, to connect an external device.
3 On the All apps screen, tap Settings → NFC and sharing → Screen Mirroring.
The detected devices are listed.
4 Select a device to connect to. Your device’s screen appears on the TV screen.
If you connect the device for the first time, tap and hold the dongle’s name in the list and
enter the PIN shown on the TV screen.
5 Open or play a file, and then control the display with the keys on your device.
Ending the Screen Mirroring connection
On the All apps screen, tap Settings → NFC and sharing → Screen Mirroring, and then tap
the Screen Mirroring switch to deactivate it.
• To save energy, deactivate this feature when not in use.
• If you play videos or games on a TV, select an appropriate TV mode to get the best
experience.
Connecting with other devices
139
MirrorLink
Connect your device to a vehicle to control your device’s MirrorLink apps on the vehicle’s
head unit monitor.
Your device is compatible with vehicles that support MirrorLink version 1.1 or higher.
Connecting your device to a vehicle via MirrorLink
When using this feature for the first time, connect the device to a Wi-Fi or mobile network.
1 Pair your device with a vehicle via Bluetooth.
Refer to Pairing with other Bluetooth devices for more information.
2 Connect your device to the vehicle using a USB cable.
When they are connected, access your device’s MirrorLink apps on the head unit monitor.
Ending the MirrorLink connection
Unplug the USB cable from your device and the vehicle.
Connecting with other devices
140
Mobile printing
An introduction
Connect the device to a printer via Wi-Fi or Wi-Fi Direct, and print images or documents.
Some printers may not be compatible with the device.
Adding printer plug-ins
Add printer plug-ins for printers you want to connect the device to.
1 On the All apps screen, tap Settings → NFC and sharing → Printing → Download plugin.
2 Search for a printer plug-in in Play Store.
3 Select a printer plug-in and install it.
4 Select the printer plug-in and tap the switch at the top right of the screen to activate it.
The device searches for printers that are connected to the same Wi-Fi network as your
device.
To add printers manually, tap → Add printer → .
To change print settings, tap → Settings.
Printing content
While viewing content, such as images or documents, tap → Print, and then select a printer.
141
Device & data manager
Updating the device
The device can be updated to the latest software.
Updating over the air
The device can be directly updated to the latest software by the firmware over-the-air (FOTA)
service.
On the All apps screen, tap Settings → About device → Software updates → Update now.
Tick Auto update to automatically check for available updates. To download updates
only when a Wi-Fi connection is activated, tick Wi-Fi only.
Updating with Samsung Kies
Connect the device to a computer and update the device to the latest software.
1 On the computer, download the latest version of Samsung Kies from the Samsung
website.
2 On the computer, launch Samsung Kies and connect the device to the computer using a
USB cable.
3 Follow the on-screen instructions to update the device.
• Do not turn off the computer or disconnect the USB cable while the device is
updating.
• While updating the device, do not connect other media devices to the computer.
Doing so may interfere with the update process. Before updating, disconnect all
other media devices from the computer.
Device & data manager
142
Transferring files between the device and a
computer
Move audio, video, image, or other types of files from the device to the computer, or vice
versa.
Do not disconnect the USB cable from the device when you are transferring files.
Doing so may cause data loss or device damage.
The devices may not connect properly if they are connected via a USB hub. Directly
connect the device to the computer’s USB port.
Connecting as a media device
1 Connect the device to the computer using the USB cable.
2 Open the notification panel, and then tap Connected as a media device → Media
device (MTP).
Tap Camera (PTP) if your computer does not support Media Transfer Protocol (MTP) or
not have any appropriate driver installed.
3 Transfer files between your device and the computer.
Connecting with Samsung Kies
Samsung Kies is a computer app that manages media contents and personal information
with Samsung devices.
1 On the computer, download the latest version of Samsung Kies from the Samsung
website.
2 On the computer, launch Samsung Kies and connect the device to the computer using a
USB cable.
3 Transfer files between your device and the computer.
Refer to the Samsung Kies help for more information.
Device & data manager
143
Backing up and restoring data
Keep your personal information, app data, and settings safe on your device. You can back up
your sensitive information to a backup account and access it later. You must sign in to your
Google or Samsung account to back up or restore data.
Using a Google account
1 Tap Settings on the All apps screen.
2 Tap Backup and reset and tick Back up my data.
3 Tap Backup account and select an account as the backup account.
Using a Samsung account
On the All apps screen, tap Settings → Accounts → Samsung account → Backup, tick the
items to back up, and then tap Back up now → Back up. To set the device to automatically
back up data, tick Auto back up.
• To restore data using a Google account, open the All apps screen, tap Settings
→ Backup and reset, and then tick Automatic restore. When you reinstall apps,
backed up settings and data will be restored.
• To restore data using a Samsung account, open the All apps screen and tap
Settings → Accounts → Samsung account → Restore. Current data will be
deleted from the device to restore the selected items.
Performing a data reset
Delete all settings and data on the device. Before performing a factory data reset, ensure you
back up all important data stored on the device. Refer to Backing up and restoring data for
more information.
On the All apps screen, tap Settings → Backup and reset → Factory data reset → Reset
device → Erase everything. The device automatically restarts.
144
Settings
An introduction
Customise settings for a wide range of functions and apps. You can make your device more
personalised by configuring various setting options.
Configuring settings
Tap Settings on the All apps screen to access the Settings screen.
To search for settings by entering keywords, tap .
You can change the view mode from list view to separate tabs. Tap → View as →
Tab view.
QUICK SETTINGS
Create a list of frequently used settings.
Tap → Edit quick settings. Tick items to add or deselect items to remove, and then tap
Done.
Settings
145
NETWORK CONNECTIONS
Wi-Fi
Activate the Wi-Fi feature to connect to a Wi-Fi network and access the Internet or other
network devices.
Your device uses a non-harmonised frequency and is intended for use in all European
countries. The WLAN can be operated in the EU without restriction indoors, but
cannot be operated outdoors.
1 On the Settings screen, tap Wi-Fi, and then tap the Wi-Fi switch to activate it.
2 Select a network from the Wi-Fi networks list.
Networks that require a password appear with a lock icon.
3 Tap Connect.
Adding Wi-Fi networks
If the desired network does not appear in the Wi-Fi networks list, you can add it manually.
1 Tap Add Wi-Fi network at the bottom of the list.
2 Enter the network name in Network SSID.
3 Select the security type.
4 Enter the password if it is not an open network, and then tap Connect.
Settings
146
Using Smart network switch
Use this feature to maintain a stable network connection when you browse webpages,
download content, and more.
On the Settings screen, tap Wi-Fi, and then tick Smart network switch.
The device automatically switches from a Wi-Fi network to a mobile network when the
current Wi-Fi network is weak or unstable. When the Wi-Fi network signal becomes strong, the
device switches from the mobile network back to the Wi-Fi network.
• Turn off Wi-Fi to save the battery when not in use.
• Once the device connects to a Wi-Fi network, the device will reconnect to that
network each time it is available without requiring a password. To prevent the
device connecting to the network automatically, select it from the list of networks
and tap Forget.
Bluetooth
Activate the Bluetooth feature to exchange information over short distances.
On the Settings screen, tap Bluetooth, and then tap the Bluetooth switch to activate it.
Tap to view more options.
Tethering and Mobile hotspot
Use the device as a mobile hotspot to share the device’s mobile data connection with other
devices if an Internet connection is unavailable. Connections can be made via Wi-Fi, USB, or
Bluetooth.
On the Settings screen, tap Tethering and Mobile hotspot.
You may incur additional charges when using this feature.
• Mobile hotspot: Use the mobile hotspot to share the device’s mobile data connection
with computers or other devices.
Settings
147
• USB tethering: Use USB tethering to share the device’s mobile data connection with
a computer via USB. When connected to a computer, the device is used as a wireless
modem for the computer.
• Bluetooth tethering: Use Bluetooth tethering to share the device’s mobile data
connection with computers or other devices via Bluetooth.
Using the mobile hotspot
Use your device as a mobile hotspot to share your device’s mobile data connection with other
devices.
1 On the Settings screen, tap Tethering and Mobile hotspot → Mobile hotspot.
2 Tap the Mobile hotspot switch to activate it.
The icon appears on the status bar. Other devices can find your device in the Wi-Fi
networks list.
To set a password for the mobile hotspot, tap → Configure hotspot and select the level
of security. Then, enter a password and tap Save.
3 On the other device’s screen, search for and select your device from the Wi-Fi networks
list.
4 On the connected device, use the device’s mobile data connection to access the Internet.
Flight mode
This disables all wireless functions on your device. You can use only non-network services.
On the Settings screen, tap Flight mode.
Data usage
Keep track of your data usage amount and customise the settings for the limitation.
On the Settings screen, tap Data usage.
• Mobile data: Set the device to use data connections on any mobile network.
• Set mobile data limit: Set a limit for mobile data usage.
• Data usage cycle: Set a monthly reset date to monitor data usage between periods.
Tap to view more options.
Settings
148
Location
Change settings for location information permissions.
On the Settings screen, tap Location, and then tap the Location switch to activate it.
• Mode: Select a method to collect your location data.
• RECENT LOCATION REQUESTS: View which apps request your current location
information and their battery usage.
• LOCATION SERVICES: View the location services your device is using.
• My places: Save your favourite locations for use with apps that require location
information. Your device will provide relevant information and services by recognising
saved locations using Maps, Wi-Fi, or Bluetooth.
NFC and sharing
Change the settings for various sharing features.
On the Settings screen, tap NFC and sharing.
• NFC: Change settings for using the NFC feature. Refer to NFC for more information.
• Nearby devices: Change the settings for sharing content with nearby devices. All devices
must support Wi-Fi Direct or be connected to the same Wi-Fi network or a mobile
hotspot.
• Printing: Configure settings for printer plug-ins installed on the device. You can search
for available printers or add one manually to print files. Refer to Mobile printing for more
information.
• Screen Mirroring: Activate the screen mirroring feature to share your display with others.
Refer to Screen Mirroring for more information.
• MirrorLink: Use the MirrorLink feature to control your device’s MirrorLink apps on the
vehicle’s head unit monitor. Refer to MirrorLink for more information.
Settings
149
More networks
Customise settings to control networks.
On the Settings screen, tap More networks.
• Download booster: Set the device to download files larger than 30 MB, faster via
Wi-Fi and mobile networks simultaneously. A stronger Wi-Fi signal will provide a faster
download speed.
• This feature may not be supported by some devices.
• You may incur additional charges when downloading files via the mobile network.
• When you download large files, the device may heat up. If the device exceeds a set
temperature, the feature will turn off.
• If network signals are unstable, the speed and performance of this feature may be
affected.
• If the Wi-Fi and mobile network connections have significantly different data
transfer speeds, the device may use only the fastest connection.
• This feature supports Hypertext Transmission Protocol (HTTP) 1.1 and Hypertext
Transmission Protocol Secure (HTTPS). The feature cannot be used with other
protocols, such as FTP.
• Default messaging app: Select the default app to use for messaging.
• Mobile networks: Configure your mobile network settings.
• VPN: Set up and connect to virtual private networks (VPNs).
DEVICE
Sound
Change settings for various sounds on the device.
On the Settings screen, tap Sound.
• Sound mode: Set the device to use sound mode or silent mode.
• Volume: Adjust the volume level for call ringtones, music and videos, system sounds, and
notifications.
Settings
150
• Vibration intensity: Adjust the force of the vibration notification.
• Ringtones: Add or select a ringtone for incoming calls.
• Vibrations: Add or select a vibration pattern.
• Notifications: Select a ringtone for events, such as incoming messages.
• Vibrate when ringing: Set the device to vibrate and play a ringtone for incoming calls.
• Dialling keypad tone: Set the device to sound when you tap the buttons on the keypad.
• Touch sounds: Set the device to sound when you select an app or option on the
touchscreen.
• Screen lock sound: Set the device to sound when you lock or unlock the touchscreen.
• Haptic feedback: Set the device to vibrate when you tap keys.
• Sound when tapped: Set the device to sound when a key is touched.
• Vibrate when tapped: Set the device to vibrate when a key is touched.
Display and wallpaper
Change the display settings.
On the Settings screen, tap Display and wallpaper.
• Brightness: Set the brightness of the display.
• Wallpaper: Change the wallpaper settings for the Home screen and the locked screen.
• Font: Change the font size and type.
• One-handed operation: Activate one-handed operation mode for your convenience
when using the device with one hand. Refer to One-handed operation for more
information.
• Screen rotation: Set the content to rotate automatically when the device is turned.
• Smart stay: Set the device to prevent the display backlight from turning off while you are
looking at the display.
• Screen timeout: Set the length of time the device waits before turning off the display’s
backlight.
• Screen mode: Change the screen mode.
Settings
151
• Auto adjust screen tone: Set the device to save power by adjusting the brightness of the
display.
• Daydream: Set the device to launch a screensaver when the device is charging or
connected to a desktop dock.
• LED indicator: Set the device to turn the LED indicator on or off.
• Touch key light duration: Set the duration that the Recents key and the Back key’s
backlight remains on.
• Increase touch sensitivity: Set the device to allow use of the touchscreen with gloves on.
Depending on the type of material you wear while touching the device, some
commands may not be recognised.
Lock screen
Change the settings for the locked screen.
On the Settings screen, tap Lock screen.
• Screen lock: Change the screen lock method. The following options may vary depending
on the screen lock method selected.
• Show information: Change settings for the items displayed on the locked screen.
• Camera shortcut: Set the device to show the camera shortcut on the locked screen.
This feature may not be available depending on the region or service provider.
• Action memo on lock screen: Set the device to launch Action memo when you doubletap
the locked screen with the S Pen while pressing and holding the S Pen button.
• Unlock effect: Select an effect that you see when you unlock the screen.
Settings
152
Multi window
Set the device to use Multi window.
On the Settings screen, tap Multi window, and then tap the Multi window switch to activate
it.
• Open in multi window view: Set the device to activate the Multi window feature when
you open files from My Files, Video, or attachments in messages.
• Pop-up view shortcut: Set the device to display the app screen in a pop-up window
when you drag down diagonally from either end of the top edge of the screen.
Notification panel
Rearrange the quick setting buttons displayed on the notification panel.
On the Settings screen, tap Notification panel.
S Pen
Change the settings for using the S Pen.
On the Settings screen, tap S Pen.
• Air command: Set the device to display the air command features when you hover the
S Pen over the screen and press the S Pen button.
• Air view: Activate the air view feature to perform various actions with the S Pen.
• Pointer: Set the device to display the S Pen pointer when hovering the S Pen over the
screen.
• Direct pen input: Set the device to display the handwriting field icon when hovering the
S Pen over a text input field.
• S Pen alerts: Set the device to display a pop-up alert and emit a sound if you walk when
the touchscreen is off and S Pen is removed from the device.
• Disable pen detection: Set the screen not to respond when inserting or removing the
S Pen.
Settings
153
• S Pen sound: Set the device to make writing sounds when you write or draw on the
screen with the S Pen.
• S Pen vibration feedback: Set the device to vibrate when you write or draw on the
screen with the S Pen.
• Detachment options: Set the device to automatically launch Action memo or display
the air command features when the S Pen is removed from the slot.
• Attach/detach sound: Set the device to emit a sound when the S Pen is inserted or
removed from the slot.
• Attach/detach vibration: Set the device to vibrate when the S Pen is inserted or removed
from the slot.
Motions and gestures
Activate the motion recognition feature and change the settings that control motion
recognition on your device.
On the Settings screen, tap Motions and gestures.
• Direct call: Set the device to make a voice call by picking up and holding the device near
your ear while viewing call, message, or contact details.
• Smart alert: Set the device to alert you if you have missed calls or new messages when
you pick up the device.
• Mute/Pause: Set the device to mute incoming calls or alarms when you cover the screen
with your palm or turn the device over.
• Palm swipe to capture: Set the device to capture a screenshot when you swipe your
hand to the left or right across the screen.
Settings
154
PERSONALISATION
Accounts
Add your Samsung and Google accounts, or other accounts, to sync with.
On the Settings screen, tap Accounts.
Cloud
Change sync, backup, and restore settings for your Samsung and Dropbox accounts.
On the Settings screen, tap Cloud.
Backup and reset
Change the settings for managing settings and data.
On the Settings screen, tap Backup and reset.
• Back up my data: Set the device to back up settings and app data to the Google server.
• Backup account: Set up or edit your Google backup account.
• Automatic restore: Set the device to restore settings and app data when the apps are
reinstalled on the device.
• Factory data reset: Reset settings to the factory default values and delete all data.
Easy mode
Set the device to easy mode.
On the Settings screen, tap Easy mode.
• Standard mode: Set the device to standard mode.
• Easy mode: Set the device to easy mode.
• EASY APPLICATIONS: Select apps to apply simpler layouts.
Accessibility
Use this feature to improve accessibility to the device. Refer to About Accessibility for more
information.
On the Settings screen, tap Accessibility.
Settings
155
Blocking mode
Select which notifications will be blocked or set to allow notifications for calls from specified
contacts in blocking mode.
On the Settings screen, tap Blocking mode, and then tap the Blocking mode switch to
activate it.
Private mode
Set the device to prevent others from accessing your personal content by activating private
mode. Refer to Private mode for more information.
On the Settings screen, tap Private mode, and then tap the Private mode switch to activate
it.
• Private mode access type: Set or change the unlock method to activate private mode.
• Auto disable: Set the device to exit private mode automatically when the screen turns
off.
Finger Scanner
Register your fingerprint to the device to secure the device or sign in to your Samsung
account. Refer to Finger Scanner for more information.
On the Settings screen, tap Finger Scanner.
• Fingerprint manager: Register or delete fingerprint information.
• Change backup password: Set a backup password to use if the device does not
recognise your fingerprint.
• Screen lock: Change the screen lock method.
• Web sign-in: Set the device to verify registered accounts using fingerprints.
• Verify Samsung account: Set the device to verify your Samsung account with
fingerprints.
• Pay with PayPal: Set the device to verify your PayPal account and to authorise purchases
using your fingerprints.
This feature may not be available depending on the region or service provider.
Settings
156
SYSTEM
Language and input
Change the settings for text input. Some options may not be available depending on the
selected language.
On the Settings screen, tap Language and input.
• Language: Select a display language for all menus and apps.
• Default: Select a default keyboard type for text input.
• Samsung keyboard: Change the Samsung keyboard settings. To access the setting
options, tap .
The available options may vary depending on the region or service provider.
• Google voice typing: Change the voice input settings. To access the setting options, tap
. Tick this option to use voice input for entering text.
• Language: Select a language for handwriting recognition. You can search for files
containing handwriting in the selected language.
• Voice search: Change the voice search settings.
• Text-to-speech options: Change the text-to-speech settings.
• Notification readout: Set the device to read aloud notifications when you have incoming
calls, messages, or events.
• Pointer speed: Adjust the pointer speed for the mouse or trackpad connected to your
device.
Date and time
Access and alter the following settings to control how the device displays the time and date.
On the Settings screen, tap Date and time.
If the battery remains fully discharged or removed from the device, the time and date
is reset.
• Automatic date and time: Automatically update the time and date when moving across
time zones.
Settings
157
• Set date: Set the current date manually.
• Set time: Set the current time manually.
• Automatic time zone: Set the device to receive time zone information from the network
when you move across time zones.
• Select time zone: Set the home time zone.
• Use 24-hour format: Display time in 24-hour format.
• Select date format: Select a date format.
Safety assistance
Activate the Safety assistance features.
On the Settings screen, tap Safety assistance.
• Emergency mode: Set the device to activate emergency mode and reduce battery
consumption by using basic functions, such as calling. Refer to Emergency mode for
more information.
• Geo News: Set the device to receive notifications for severe weather conditions. To use
this feature, you need to download and install the required app.
• Send help messages: Set the device to send help messages by pressing the Power
key three times. You can also send sound recordings along with the message to the
recipients. Refer to Send help messages for more information.
• Manage primary contacts: Add or edit the recipients for help messages.
Accessories
Change the accessory settings.
On the Settings screen, tap Accessories.
• Dock sound: Set the device to play a sound when your device is connected to or
removed from a desktop dock.
• Audio output: Select a sound output format to use when connecting your device to
HDMI devices. Some devices may not support the surround sound setting.
Settings
158
Power saving
Activate power-saving mode and change the settings for power-saving mode. Refer to Power
saving feature for more information.
On the Settings screen, tap Power saving.
• Power saving mode: Activate power-saving mode and change the settings for powersaving
mode.
• Ultra power saving mode: Extend standby time and reduce battery consumption by
displaying a simpler layout and allowing limited access to an app.
The estimated maximum standby time shows the time remaining before the battery
power runs out if the device is not used. Standby time may vary depending on your
device settings and operating conditions.
• Fast charging: Set the device to use the fast charging feature. Refer to Fast charging for
more information.
• Display battery percentage: Set the device to display the percentage of the battery
remaining on the status bar.
Storage
View memory information for your device.
On the Settings screen, tap Storage.
Formatting a memory card permanently deletes all data from it.
The actual available capacity of the internal memory is less than the specified
capacity because the operating system and default apps occupy part of the memory.
The available capacity may change when you update the device.
Settings
159
Security
Change settings for securing the device and the SIM or USIM card.
On the Settings screen, tap Security.
• Device administrators: View device administrators installed on the device. You can allow
device administrators to apply new policies to the device.
• Unknown sources: Set the device to allow the installation of apps from unknown
sources.
• Verify apps: Set the device to check the apps for harmful content before installing them.
• Encrypt device: Set a password to encrypt data saved on the device. You must enter the
password each time you turn on the device.
Encrypting data may take more than an hour. Before encrypting data, connect the
charger to fully charge the battery and do not unplug it until data encryption is
complete.
• Encrypt external SD card: Set the device to encrypt files on a memory card.
If you reset your device to the factory defaults with this setting enabled, the device
will not be able to read your encrypted files. Disable this setting before resetting the
device.
• Remote controls: Set the device to allow control of your lost or stolen device remotely
via the Internet. To use this feature, you must sign in to your Samsung account.
• SIM change alert: Activate or deactivate the Find my mobile feature which helps locate
the device when lost or stolen.
• Go to website: Access the Find my mobile website (findmymobile.samsung.com). You
can track and control your lost or stolen device from the Find my mobile website.
• Reactivation lock: Set the device to require your Samsung account after the device has
been reset to prevent others from reactivating the device.
• Set up SIM card lock: Change the SIM card lock settings.
• Make passwords visible: Set the device to display passwords as they are entered.
• Security policy updates: Set the device to check and download security updates.
Settings
160
• Send security reports: Set the device to automatically send the updated security reports
to Samsung.
• Storage type: Set a storage type for credential files.
• Trusted credentials: Use certificates and credentials to ensure secure use of various apps.
• Install from device storage: Install encrypted certificates stored in the internal memory.
• Clear credentials: Erase the credential contents from the device and reset the password.
Help
View help information to learn how to use the device and apps or configure important
settings.
On the Settings screen, tap Help.
About device
Access device information, edit the device name, or update device software.
On the Settings screen, tap About device.
APPLICATIONS
Application manager
View and manage the apps on your device.
On the Settings screen, tap Application manager.
Default applications
Select a default setting for using apps.
On the Settings screen, tap Default applications.
Application settings
Customise app settings.
On the Settings screen, tap Application settings.
161
Accessibility
About Accessibility
Improve accessibility with features that make the device easier to use for users who have
impaired vision, hearing, and reduced dexterity.
On the All apps screen, tap Settings → Accessibility.
Using the Home key to open accessibility menus
You can access the following accessibility menus by pressing the Home key three times
quickly.
• Accessibility
• TalkBack
• Negative colours
• Interaction control
On the All apps screen, tap Settings → Accessibility → Direct access, and then tap the
Direct access switch to activate it. Then, select an accessibility menu to open when you press
the Home key three times quickly.
Voice feedback (TalkBack)
Activating TalkBack
When you activate TalkBack, the device reads aloud the text on the screen or selected
features.
1 On the All apps screen, tap Settings → Accessibility → Vision → TalkBack.
2 Tap the TalkBack switch to activate it.
Accessibility
162
3 Tap OK. The device will start voice feedback.
Some features are not available while you are using TalkBack.
Deactivating TalkBack
1 On the All apps screen, tap Settings → Accessibility → Vision → TalkBack.
2 Tap the TalkBack switch and tap anywhere on the screen twice quickly.
3 Tap OK and tap anywhere on the screen twice quickly. The device will stop voice
feedback.
Controlling the screen with finger gestures
You can use various finger gestures to control the screen while you are using TalkBack.
• Exploring the screen: Place a finger on the screen and move your finger to explore the
screen. Select and hold on an item and the device reads aloud the item. When you
release your finger, the item under your finger is selected.
• Selecting items: Tap an item to select it. Or, select and hold on an item while exploring
the screen, and then release your finger.
• Opening the selected item: While selected items are read aloud, when you hear the item
you want, release your finger from the item. Then, tap anywhere on the screen twice
quickly.
• Selecting the previous item: Quickly swipe upwards or to the left on the screen with one
finger.
• Selecting the next item: Quickly swipe downwards or to the right on the screen with one
finger.
• Scrolling the lists: Swipe upwards or downwards using two fingers.
• Returning to the previous page: Swipe to the right using two fingers.
• Moving to the next page: Swipe to the left using two fingers.
Accessibility
163
• Unlocking the screen: Swipe in any direction within the locked screen area using two
fingers.
• Opening the notification panel: Drag the top of the screen downwards using two fingers.
• Opening the quick settings panel: Drag the top of the screen downwards using three
fingers.
You can configure finger gesture settings for TalkBack in Manage gestures. Refer to
Configuring finger gesture settings for more information.
Configuring finger gesture settings
When using TalkBack, you can use finger gestures to perform various actions, such as
returning to the previous screen, opening the Home screen, and more. Configure finger
gestures before using them.
Configuring settings for vertical gestures
You can use two-part vertical gestures by dragging your finger upwards and downwards from
the bottom of the screen, or vice versa.
On the All apps screen, tap Settings → Accessibility → Vision → TalkBack → Settings →
Manage gestures → Two-part vertical gestures. Then, select one of the following features:
• Move to the first and last items on screen: When you drag your finger upwards and
then downwards on the screen, the first item at the top of the screen is selected. When
you drag your finger downwards and then upwards on the screen, the last item at the
bottom of the screen is selected.
• Cycle through reading granularities: When you drag your finger upwards and then
downwards on the screen, the reading unit changes. The reading unit changes to page,
paragraph, line, word, character, and default. When you drag your finger downwards and
then upwards on the screen, the reading units change in reverse order.
Configuring settings for shortcut gestures
You can change shortcut gestures or assign features to empty shortcuts.
On the All apps screen, tap Settings → Accessibility → Vision → TalkBack → Settings →
Manage gestures. Select a gesture, and then assign a feature to it.
Accessibility
164
Pausing TalkBack
Open the global contextual menu by dragging your finger downwards and then to the right
on the screen without releasing it. When you select Pause feedback at the top left of the
screen, TalkBack pauses.
Adding and managing image labels
You can assign labels to images on the screen. The device reads aloud the labels when the
images are selected. Add labels to unlabelled images by using the local contextual menu.
Open the local contextual menu by dragging your finger upwards and then to the right on
the screen without releasing it. Tap and hold the screen and draw a circle around the menu
with your finger to explore the menus. When you hear the add label menu, release your finger
to add labels.
To view the labels, open the All apps screen and tap Settings → Accessibility → Vision →
TalkBack → Settings → Manage customised labels.
Configuring settings for TalkBack
Configure settings for TalkBack for your convenience.
On the All apps screen, tap Settings → Accessibility → Vision → TalkBack → Settings.
• Speech volume: Adjust the volume level for voice feedback.
• Use pitch changes: Set the device to read aloud text at a low pitch when it is entered
using a keyboard.
• Keyboard echo: Set the device to read aloud a word that you enter using a keyboard
when you tap the space key.
• Speak when screen is off: Set the device to provide voice feedback when the screen is
turned off.
• Use proximity sensor: Set the device to pause voice feedback when you place your hand
over the sensor at the top of the device.
• Shake to start continuous reading: Set the device to read aloud the text displayed on
the screen when you shake the device. You can select from various shaking speeds.
Accessibility
165
• Speak caller ID: Set the device to read the caller’s name aloud when you have an
incoming call.
• Vibration feedback: Set the device to vibrate when you explore the screen.
• Sound feedback: Set the device to emit a sound when you control the screen, such as
scrolling the screen, and more.
• Focus speech audio: Set the device to turn the media volume down when the device
reads an item aloud.
• Sound volume: Adjust the volume that sound is played when you touch the screen to
control it. This feature is available when Sound feedback is selected.
• Explore by touch: Set the device to read aloud the items under your finger.
• Automatically scroll lists: Set the device to automatically scroll through the rest of the
list not displayed on the screen and read the items aloud.
• Single-tap selection: Set the device to open the selected item by tapping it once.
• Launch “Explore by touch” tutorial: View the tutorial about using the Explore by touch
feature.
• Manage gestures: Assign actions to perform using finger gestures. Refer to Configuring
finger gesture settings for more information.
• Manage customised labels: View the labels you added.
• Resume from suspend: Select a method to resume voice feedback when TalkBack is
paused.
• Developer settings: Set options for app development.
Using the device with the screen turned off
Set the device to turn the screen off at all times to keep the content on your screen private.
The screen does not turn on when you press the Home key or tap the screen. Currently
activated features do not turn off when the screen is off.
On the All apps screen, tap Settings → Accessibility → Vision, and then tick Dark screen.
You can activate or deactivate this feature by pressing the Power key twice.
Accessibility
166
Reading passwords aloud
Set the device to read the password aloud when you enter the password while TalkBack is
activated.
On the All apps screen, tap Settings → Accessibility → Vision, and then tick Speak
passwords.
Setting text-to-speech features
Change the settings for text-to-speech features used when TalkBack is activated, such as
languages, speed, and more.
On the All apps screen, tap Settings → Accessibility → Vision → Text-to-speech options,
and then use the following functions:
• Samsung text-to-speech engine / Google Text-to-speech engine: Select an engine for
the text-to-speech feature.
• Speech rate: Select a speed for the text-to-speech feature.
• Listen to an example: Listen to the spoken text for an example. If the device cannot read
examples aloud, tap → Install voice data to download and install voice data for the
text-to-speech feature.
• Default language status: View the status of the current language set for the text-to
speech feature.
Entering text using the keyboard
To display the keyboard, tap the text input field, and then tap anywhere on the screen twice
quickly.
When you touch the keyboard with your finger, the device reads aloud the character keys
under your finger. When you hear the character you want, release your finger from the screen
to select it. The character is entered and the device reads the text aloud.
If Rapid key input is not activated, release your finger from the character you want, and then
tap anywhere on the screen twice quickly. To activate the rapid key input feature, open the All
apps screen, tap Settings → Accessibility → Vision, and then tick Rapid key input.
Accessibility
167
Entering additional characters
Tap and hold a key on the keyboard to enter additional characters available for the key. A
pop-up window appears above the key showing available characters. To select a character,
drag your finger on the pop-up window until you hear the character you want, and release it.
Vision
Changing the font size
Use this feature to change the font size. Setting the font size to Huge may not be available in
some apps.
On the All apps screen, tap Settings → Accessibility → Vision → Font size.
Magnifying the screen
Use this feature to magnify the screen and to zoom in on a specific area.
On the All apps screen, tap Settings → Accessibility → Vision → Magnification gestures,
and then tap the Magnification gestures switch to activate it.
• Zooming in and out: Quickly tap the screen three times to zoom in on a specific area.
Quickly tap the screen three times again to return to the normal view.
• Exploring the screen by scrolling: Drag two or more fingers across the magnified screen.
• Adjusting zoom ratio: Pinch two or more fingers on the magnified screen or spread them
apart.
You can also temporarily magnify the screen by tapping the screen three times and holding.
While holding the screen, drag your finger to explore the screen. Release your finger to return
to the normal view.
• Keyboards on the screen cannot be magnified.
• When this feature is activated, the performance of some apps, such as Phone and
Calculator, may be affected.
Accessibility
168
Hover zoom
Use this feature to magnify content shown on the screen by hovering a pen over it.
On the All apps screen, tap Settings → Accessibility → Vision → Hover zoom, and then tap
the Hover zoom switch to activate it.
Drag the zoom percentage bar to the left or right or tap Magnifier size to change the
magnifier settings.
When this feature is activated, you cannot use some other features, such as the air
command, air view, direct pen input, and TalkBack features.
Setting notification reminders
Use this feature to alert you to notifications that you have not checked at the interval.
On the All apps screen, tap Settings → Accessibility → Vision → Notification reminder, and
then tap the Notification reminder switch to activate it.
To set an interval between alerts, tap Reminder interval.
Reversing the display colours
Use this feature to improve screen visibility and to help users recognise text on the screen
more easily.
On the All apps screen, tap Settings → Accessibility → Vision, and then tick Negative
colours.
Colour adjustment
Use this feature to adjust how colours are displayed on the screen if you have difficulty in
distinguishing colours. The device changes the colours into more recognisable colours.
On the All apps screen, tap Settings → Accessibility → Vision → Colour adjustment, and
then tap the Colour adjustment switch to activate it. Follow the on-screen instructions to
complete the colour adjustment procedure.
Accessibility
169
Hearing
Setting flash notification
Set the flash to blink when you have incoming calls, new messages, or notifications.
On the All apps screen, tap Settings → Accessibility → Hearing, and then tick Flash
notification.
Turning off all sounds
Set the device to mute all device sounds, such as media sounds, and the caller’s voice during
a call.
On the All apps screen, tap Settings → Accessibility → Hearing, and then tick Turn off all
sounds.
Caption settings
On the All apps screen, tap Settings → Accessibility → Hearing → Samsung subtitles (CC)
or Google subtitles (CC), and then tap the Samsung subtitles (CC) or the Google subtitles
(CC) switch to activate it.
Select an option for configuring the caption settings.
Adjusting the sound balance
Set the device to adjust the sound balance when using a headset.
1 Connect a headset to the device and wear it.
2 On the All apps screen, tap Settings → Accessibility → Hearing → Sound balance.
3 Drag the adjustment bar to the left or right and adjust the sound balance, and then tap
Set.
Accessibility
170
Mono audio
Mono output combines stereo sound into one signal that is played through all headset
speakers. Use this if you have a hearing impairment or if a single earbud is more convenient.
On the All apps screen, tap Settings → Accessibility → Hearing, and then tick Mono audio.
Sound detectors
Set the device to vibrate when it detects your doorbell or a baby crying.
Baby crying detector
1 On the All apps screen, tap Settings → Accessibility → Hearing → Sound detectors →
Baby crying detector and tap the switch to activate it.
2 Read the on-screen information and tap OK.
3 Tap to start using the baby crying detector.
The device will vibrate when it detects sound and the alert will be saved as a log.
Doorbell detector
1 On the All apps screen, tap Settings → Accessibility → Hearing → Sound detectors →
Doorbell detector and tap the switch to activate it.
2 Read the on-screen information and tap OK.
3 Tap to make a recording of your doorbell. When you are finished recording, tap Next.
4 Tap and ring your doorbell to check if it is recorded correctly. When the device detects
the doorbell sound, tap OK.
To change the doorbell sound, tap → Change doorbell sound.
When the doorbell detector is set up, tap to start using the doorbell detector. The device
will vibrate when it detects the doorbell sound.
Accessibility
171
Changing the alert settings
Tap → Settings to use the following options:
• Vibration intensity: Adjust the force of the vibration notification.
• Vibrations: Change the vibration pattern.
• Flash notification: Set the flash to blink when detecting sound.
Auto haptic
When the auto haptic feature is activated, the device will vibrate with the sound when
playing music, watching videos, or playing games. It will also vibrate when buttons are
tapped in supported apps.
On the All apps screen, tap Settings → Accessibility → Hearing, and then tick Auto haptic.
Some apps may not support this feature.
Dexterity and interaction
Assistant menu
Displaying the assistive shortcut icon
Set the device to display the assistive shortcut icon for accessing apps, features, and settings.
You can easily control the device by tapping the assistive menus in the icon.
1 On the All apps screen, tap Settings → Accessibility → Dexterity and interaction →
Assistant menu.
2 Tap the Assistant menu switch to activate it, and then tap OK to enable single tap mode.
The assistive shortcut icon appears at the bottom right of the screen.
3 Tap Dominant hand to move the assistive shortcut icon to a convenient location.
Accessibility
172
Accessing assistive menus
The assistive shortcut icon appears as a floating icon for easy access to the assistive menus
from any screen.
When you tap the assistive shortcut icon, the icon expands slightly and the assistive menus
appear on the icon. Tap the up or down arrow to move to other panels or swipe upwards or
downwards to select other menus.
Using the cursor
On the assistive menu, tap Cursor. You can control the screen using small finger movements
on the touch area. Drag your finger on the touch area to move the cursor. Also, tap the screen
to select items under the cursor.
Use the following options:
• / : Select an item or scroll left or right on the screen.
• / : Scroll up or down the screen.
• : Move the touch area to another location.
• : Magnify the area where the cursor is located.
• : Close the touch area.
To change the cursor settings, open the All apps screen, tap Settings → Accessibility →
Dexterity and interaction → Assistant menu. Then, customise settings in TOUCHPAD AND
CURSOR SETTINGS.
Using enhanced assistive menus
Set the device to display enhanced assistive menus for selected apps.
On the All apps screen, tap Settings → Accessibility → Dexterity and interaction →
Assistant menu → Assistant plus, tap the Assistant plus switch to activate it, and then select
apps.
Accessibility
173
Turning on the screen with the air gesture feature
Use the air gesture feature to turn on the screen by moving your hand above the sensor
at the top of the device. You can turn on the screen without pressing a key. When you use
this feature, place the device on a flat surface or hold the device securely to prevent it from
moving.
On the All apps screen, tap Settings → Accessibility → Dexterity and interaction → Air
wake up, and then tap the Air wake up switch to activate it.
Setting tap and hold delay options
Set the recognition time for tapping and holding the screen.
On the All apps screen, tap Settings → Accessibility → Dexterity and interaction → Tap
and hold delay, and then select an option.
Interaction control
Activate interaction control mode to restrict the device’s reaction to inputs while using apps.
1 On the All apps screen, tap Settings → Accessibility → Dexterity and interaction →
Interaction control.
2 Tap the Interaction control switch to activate it.
3 Press and hold the Home key and the Volume key down simultaneously while using an
app.
4 Adjust the size of the frame or draw a line around an area that you want to restrict.
5 Tap Done.
The device displays the restricted area. The restricted area will not react when you touch
it and the devices hard keys will be disabled.
To deactivate interaction control mode, press and hold the Home key and the Volume key
down simultaneously.
Accessibility
174
Answering or ending calls
Change the method of answering or ending calls.
On the All apps screen, tap Settings → Accessibility → Answering and ending calls.
Select the desired method.
Using single tap mode
When an alarm sounds or a call comes in, tap the button to stop the alarm or answer the call
instead of dragging the button.
On the All apps screen, tap Settings → Accessibility, and then tick Single tap mode.
Managing accessibility settings
Saving accessibility settings in a file
Export the current accessibility settings in a file.
On the All apps screen, tap Settings → Accessibility → Manage accessibility → Import/
Export, select an export option, and then tap OK.
Importing an accessibility settings file
Import an accessibility settings file and update the current settings.
On the All apps screen, tap Settings → Accessibility → Manage accessibility → Import/
Export, and then select an import option. Select a file to import and tap Done → OK. The
accessibility settings will be updated according to the imported file.
Sharing accessibility settings files
Share accessibility settings files with others via email, Wi-Fi Direct, Bluetooth, and more.
On the All apps screen, tap Settings → Accessibility → Manage accessibility → Share via.
Then, select the accessibility files and tap Done. Select a sharing method and follow the onscreen
instructions to share the files.
175
Troubleshooting
Before contacting a Samsung Service Centre, please attempt the following solutions. Some
situations may not apply to your device.
When you turn on your device or while you are using the device, it
prompts you to enter one of the following codes:
• Password: When the device lock feature is enabled, you must enter the password you set
for the device.
• PIN: When using the device for the first time or when the PIN requirement is enabled, you
must enter the PIN supplied with the SIM or USIM card. You can disable this feature by
using the Lock SIM card menu.
• PUK: Your SIM or USIM card is blocked, usually as a result of entering your PIN incorrectly
several times. You must enter the PUK supplied by your service provider.
• PIN2: When you access a menu requiring the PIN2, you must enter the PIN2 supplied with
the SIM or USIM card. For more information, contact your service provider.
Your device displays network or service error messages
• When you are in areas with weak signals or poor reception, you may lose reception. Move
to another area and try again. While moving, error messages may appear repeatedly.
• You cannot access some options without a subscription. For more information, contact
your service provider.
Your device does not turn on
• When the battery is completely discharged, your device will not turn on. Fully charge the
battery before turning on the device.
• The battery may not be inserted properly. Insert the battery again.
• Wipe both gold-coloured contacts and insert the battery again.
Troubleshooting
176
The touchscreen responds slowly or improperly
• If you attach a protective cover or optional accessories to the touchscreen, the
touchscreen may not function properly.
• If you are wearing gloves, if your hands are not clean while touching the touchscreen,
or if you tap the screen with sharp objects or your fingertips, the touchscreen may
malfunction.
• The touchscreen may malfunction in humid conditions or when exposed to water.
• Restart your device to clear any temporary software bugs.
• Ensure that your device software is updated to the latest version.
• If the touchscreen is scratched or damaged, visit a Samsung Service Centre.
Your device freezes or has fatal errors
If your device freezes or hangs, you may need to close apps or reinsert the battery and turn
on the device to regain functionality. If your device is frozen and unresponsive, press and hold
the Power key and the Volume key down simultaneously for more than 7 seconds to restart it.
If this does not solve the problem, perform a factory data reset. On the All apps screen, tap
Settings → Backup and reset → Factory data reset → Reset device → Erase everything.
Before performing the factory data reset, remember to make backup copies of all important
data stored in the device.
If the problem is still not resolved, contact a Samsung Service Centre.
Calls are not connected
• Ensure that you have accessed the right cellular network.
• Ensure that you have not set call barring for the phone number you are dialling.
• Ensure that you have not set call barring for the incoming phone number.
Others cannot hear you speaking on a call
• Ensure that you are not covering the built-in microphone.
• Ensure that the microphone is close to your mouth.
• If using a headset, ensure that it is properly connected.
Troubleshooting
177
Sound echoes during a call
Adjust the volume by pressing the Volume key or move to another area.
A cellular network or the Internet is often disconnected or audio
quality is poor
• Ensure that you are not blocking the device’s internal antenna.
• When you are in areas with weak signals or poor reception, you may lose reception. You
may have connectivity problems due to issues with the service provider’s base station.
Move to another area and try again.
• When using the device while moving, wireless network services may be disabled due to
issues with the service provider’s network.
The battery icon is empty
Your battery is low. Recharge or replace the battery.
The battery does not charge properly (For Samsung-approved
chargers)
• Ensure that the charger is connected properly.
• If the battery terminals are dirty, the battery may not charge properly or the device may
turn off. Wipe both gold-coloured contacts and try charging the battery again.
• The batteries in some devices are not user-replaceable. To have the battery replaced, visit
a Samsung Service Centre.
The battery depletes faster than when first purchased
• When you expose the battery to very cold or very hot temperatures, the useful charge
may be reduced.
• Battery consumption increases when you use messaging features or some apps, such as
games or the Internet.
• The battery is consumable and the useful charge will get shorter over time.
Troubleshooting
178
Your device is hot to the touch
When you use apps that require more power or use apps on your device for an extended
period of time, your device may feel hot to the touch. This is normal and should not affect
your device’s lifespan or performance.
Error messages appear when launching the camera
Your device must have sufficient available memory and battery power to operate the camera
app. If you receive error messages when launching the camera, try the following:
• Charge the battery or replace it with a battery that is fully charged.
• Free some memory by transferring files to a computer or deleting files from your device.
• Restart the device. If you are still having trouble with the camera app after trying these
tips, contact a Samsung Service Centre.
Photo quality is poorer than the preview
• The quality of your photos may vary, depending on the surroundings and the
photography techniques you use.
• If you take photos in dark areas, at night, or indoors, image noise may occur or images
may be out of focus.
Error messages appear when opening multimedia files
If you receive error messages or multimedia files do not play when you open them on your
device, try the following:
• Free some memory by transferring files to a computer or deleting files from your device.
• Ensure that the music file is not Digital Rights Management (DRM)-protected. If the file is
DRM-protected, ensure that you have the appropriate licence or key to play the file.
• Ensure that the file formats are supported by the device. If a file format is not supported,
such as DivX or AC3, install an app that supports it. To confirm the file formats that your
device supports, visit www.samsung.com.
Troubleshooting
179
• Your device supports photos and videos captured with the device. Photos and videos
captured by other devices may not work properly.
• Your device supports multimedia files that are authorised by your network service
provider or providers of additional services. Some content circulated on the Internet,
such as ringtones, videos, or wallpapers, may not work properly.
Another Bluetooth device is not located
• Ensure that the Bluetooth wireless feature is activated on your device.
• Ensure that the Bluetooth wireless feature is activated on the device you wish to connect
to.
• Ensure that your device and the other Bluetooth device are within the maximum
Bluetooth range (10 m).
If the tips above do not solve the problem, contact a Samsung Service Centre.
A connection is not established when you connect the device to a
computer
• Ensure that the USB cable you are using is compatible with your device.
• Ensure that you have the proper driver installed and updated on your computer.
• If you are a Windows XP user, ensure that you have Windows XP Service Pack 3 or higher
installed on your computer.
• Ensure that you have Samsung Kies or Windows Media Player 10 or higher installed on
your computer.
Your device cannot find your current location
GPS signals may be obstructed in some locations, such as indoors. Set the device to use Wi-Fi
or a mobile network to find your current location in these situations.
Troubleshooting
180
Data stored in the device has been lost
Always make backup copies of all important data stored in the device. Otherwise, you cannot
restore data if it is corrupted or lost. Samsung is not responsible for the loss of data stored in
the device.
A small gap appears around the outside of the device case
• This gap is a necessary manufacturing feature and some minor rocking or vibration of
parts may occur.
• Over time, friction between parts may cause this gap to expand slightly.
Copyright
Copyright © 2014 Samsung Electronics
This manual is protected under international copyright laws.
No part of this manual may be reproduced, distributed, translated, or transmitted in any form
or by any means, electronic or mechanical, including photocopying, recording, or storing
in any information storage and retrieval system, without the prior written permission of
Samsung Electronics.
Trademarks
• SAMSUNG and the SAMSUNG logo are registered trademarks of Samsung Electronics.
• Bluetooth® is a registered trademark of Bluetooth SIG, Inc. worldwide.
• Wi-Fi®, Wi-Fi Protected Setup™, Wi-Fi CERTIFIED Passpoint™, Wi-Fi Direct™, Wi-Fi
CERTIFIED™, and the Wi-Fi logo are registered trademarks of the Wi-Fi Alliance.
• All other trademarks and copyrights are the property of their respective owners.
www.samsung.com
User Manual
English (EU). 01/2015. Rev.1.0
SM-N910C
SM-N910F
SM-N910H
SM-N910CQ
SM-N910G
SM-N910U
2
Table of Contents
Read me first
Getting started
7 Package contents
8 Device layout
10 S Pen
13 Using the SIM or USIM card and
battery
16 Charging the battery
19 Using a memory card
21 Turning the device on and off
21 Locking and unlocking the screen
Basics
22 Using the touchscreen
25 Home screen layout
28 Notification and quick settings panels
30 Opening apps
30 Installing or uninstalling apps
32 Entering text
34 Screen capture
34 Using the dictionary
35 My Files
36 Power saving feature
37 Viewing help information
S Pen features
38 Air command
39 Action memo
41 Smart select
42 Image clip
43 Screen write
44 S Note
51 Scrapbook
51 Using the S Pen
Motions & usability features
55 Motions and gestures
58 Multi window
63 One-handed operation
64 Increasing touchscreen sensitivity
Personalising
65 Managing the Home and All apps
screens
67 Setting wallpaper and ringtones
68 Changing the screen lock method
69 My Places
72 Finger Scanner
77 Private mode
Table of Contents
3
113 Music
115 Video
117 Internet
118 Voice Recorder
120 Clock
122 Calculator
122 Dropbox
123 Flipboard
123 Smart Remote
126 Evernote
127 PEN.UP
127 Google apps
Connecting with other
devices
130 Quick Connect
132 Bluetooth
134 Wi-Fi Direct
135 NFC
138 Screen Mirroring
140 MirrorLink
141 Mobile printing
Device & data manager
142 Updating the device
143 Transferring files between the device
and a computer
144 Backing up and restoring data
144 Performing a data reset
78 Easy mode
79 Transferring data from your previous
device
80 Setting up accounts
Phone & contacts
82 Phone
85 Contacts
Messages & email
87 Messages
88 Email
Camera & gallery
90 Camera
99 Gallery
Safety assistance
102 Emergency mode
103 Send help messages
Useful apps
104 Car mode
106 S Finder
107 S Planner
109 S Health
111 S Voice
Table of Contents
4
Settings
145 An introduction
145 Configuring settings
145 Quick settings
146 Connections
150 Device
154 Personalisation
156 System
161 Applications
Accessibility
162 About Accessibility
162 Using the Home key to open
accessibility menus
162 Voice feedback (TalkBack)
168 Vision
170 Hearing
172 Dexterity and interaction
175 Answering or ending calls
175 Using single tap mode
175 Managing accessibility settings
Troubleshooting
5
Read me first
Please read this manual before using the device to ensure safe and proper use.
• Descriptions are based on the device’s default settings.
• Some content may differ from your device depending on the region, service provider, or
device’s software.
• Content (high quality content) that requires high CPU and RAM usage will affect the
overall performance of the device. Apps related to the content may not work properly
depending on the device’s specifications and the environment that it is used in.
• Samsung is not liable for performance issues caused by apps supplied by providers other
than Samsung.
• Samsung is not liable for performance issues or incompatibilities caused by edited
registry settings or modified operating system software. Attempting to customise the
operating system may cause the device or apps to work improperly.
• Software, sound sources, wallpapers, images, and other media provided with this device
are licensed for limited use. Extracting and using these materials for commercial or other
purposes is an infringement of copyright laws. Users are entirely responsible for illegal
use of media.
• You may incur additional charges for data services, such as messaging, uploading and
downloading, auto-syncing, or using location services depending on your data plan. For
large data transfers, it is recommended to use the Wi-Fi feature.
• Default apps that come with the device are subject to updates and may no longer be
supported without prior notice. If you have questions about an app provided with
the device, contact a Samsung Service Centre. For user-installed apps, contact service
providers.
• Modifying the device’s operating system or installing softwares from unofficial sources
may result in device malfunctions and data corruption or loss. These actions are violations
of your Samsung licence agreement and will void your warranty.
Read me first
6
Instructional icons
Warning: situations that could cause injury to yourself or others
Caution: situations that could cause damage to your device or other equipment
Notice: essential information for using the device, functional limitations of using the
device, usage charge information, or legal notices
Note: notes, usage tips, or additional information
7
Getting started
Package contents
Check the product box for the following items:
• Device
• Battery
• Quick start guide
• The items supplied with the device and any available accessories may vary
depending on the region or service provider.
• The supplied items are designed only for this device and may not be compatible
with other devices.
• Appearances and specifications are subject to change without prior notice.
• You can purchase additional accessories from your local Samsung retailer. Make
sure they are compatible with the device before purchase.
• Use only Samsung-approved accessories. Using unapproved accessories may cause
the performance problems and malfunctions that are not covered by the warranty.
• Availability of all accessories is subject to change depending entirely on
manufacturing companies. For more information about available accessories, refer
to the Samsung website.
Getting started
8
Device layout
Microphone
Back key
Multipurpose jack
Proximity/Light/Gesture
sensor
Front camera
Power key
Touchscreen
Recents key
Microphone
Home key (Fingerprint
recognition sensor)
LED indicator
Speaker
Headset jack
Main antenna
Microphone
Volume key
NFC antenna (on the
battery)
Rear camera
Flash
Back cover
Loud speaker
S Pen
Infrared port
GPS antenna
Getting started
9
• Do not cover the antenna area with your hands or other objects. This may cause
connectivity problems or drain the battery.
• Using a Samsung-approved screen protector is recommended. Unapproved screen
protectors may cause the sensors to malfunction.
• Do not allow water to contact the touchscreen. The touchscreen may malfunction
in humid conditions or when exposed to water.
Keys
Key Function
Power
• Press and hold to turn the device on or off.
• Press to turn on or lock the screen.
Recents
• Tap to open the list of recent apps.
• Tap and hold to access additional options for the current
screen.
Home
• Press to turn on the screen while the screen is locked.
• Press to return to the Home screen.
• Press twice to launch S Voice.
• Press and hold to launch Google.
Back • Tap to return to the previous screen.
Volume • Press to adjust the device volume.
Getting started
10
S Pen
S Pen button
S Pen nib
Tweezers
Name Functions
S Pen nib
• Use the S Pen to write, draw, or perform touch actions on the
screen.
• Hover the S Pen over items on the screen to access additional
S Pen features, such as Air Button and the air view feature.
S Pen button
• Hover the S Pen over the screen and press the S Pen button to
display the air command features.
• While pressing and holding the S Pen button, drag the S Pen over
items to select them.
Tweezers • Remove the S Pen nib with the tweezers when replacing the nib.
Getting started
11
Removing the S Pen
When you remove the S Pen from the slot, the device launches Action memo or displays the
air command features depending on the S Pen detachment option setting.
To change the setting, open the All apps screen and tap Settings → S Pen → Detachment
options.
Replacing the S Pen nib
If the nib is dull, replace it with a new one.
1 Firmly hold the nib with the tweezers and remove it.
Getting started
12
2 Insert a new nib into the S Pen.
Be careful not to pinch your fingers with the tweezers.
• Do not reuse old nibs. Doing so may cause the S Pen to malfunction.
• Do not press the nib excessively when inserting the nib into the S Pen.
• Do not insert the round end of the nib into the S Pen. Doing so may cause damage
to the S Pen or your device.
• If the S Pen is not working properly, take it to a Samsung Service Centre.
• If you use the S Pen at sharp angles on the screen, the device may not recognise
the S Pen actions. Do not bend or apply excessive pressure with the S Pen while
using it.
• The Recents key and the Back key can be used with the S Pen.
• For more information about the S Pen, visit the Samsung website.
Getting started
13
Using the SIM or USIM card and battery
Installing the SIM or USIM card and battery
Insert the SIM or USIM card provided by the mobile telephone service provider, and the
included battery.
• Only microSIM cards work with the device.
• Some LTE services may not be available depending on the service provider. For
more information about service availability, contact your service provider.
1 Remove the back cover.
Be careful not to damage your fingernails when you remove the back cover.
Do not bend or twist the back cover excessively. Doing so may damage the cover.
Getting started
14
2 Insert the SIM or USIM card with the gold-coloured contacts facing downwards.
• Do not insert a memory card into the SIM card slot. If a memory card happens to
be lodged in the SIM card slot, take the device to a Samsung Service Centre to
remove the memory card.
• Use caution not to lose or let others use the SIM or USIM card. Samsung is not
responsible for any damages or inconveniences caused by lost or stolen cards.
3 Insert the battery with the battery’s gold-coloured contacts properly aligned with the
device’s contacts.
2
1
Getting started
15
4 Replace the back cover.
Removing the SIM or USIM card and battery
1 Remove the back cover.
2 Pull out the battery.
3 Press the SIM or USIM card with your finger, and then pull it out.
Getting started
16
Charging the battery
Using the battery charger
Charge the battery before using it for the first time or before using it after it has been unused
for an extended period.
Use only Samsung-approved chargers, batteries, and cables. Unapproved chargers or
cables can cause the battery to explode or damage the device.
• If the battery is completely discharged, the device cannot be turned on
immediately when the charger is connected. Allow a depleted battery to charge for
a few minutes before turning on the device.
• Using a power source other than the USB power adaptor, such as a computer, may
result in a slower charging speed due to a lower electric current.
Connect the USB cable to the USB power adaptor, and then plug the end of the USB cable
into the multipurpose jack.
Connecting the charger improperly may cause serious damage to the device. Any
damage caused by misuse is not covered by the warranty.
• If the device receives an unstable power supply while charging, the touchscreen
may not function. If this happens, unplug the charger from the device.
• While charging, the device and the charger may heat up. This is normal and should
not affect the device’s lifespan or performance. If the battery gets hotter than usual,
the charger may stop charging.
• If the device is not charging properly, take the device and the charger to a
Samsung Service Centre.
Getting started
17
After fully charging, disconnect the device from the charger. First unplug the charger from the
device, and then unplug it from the electric socket.
Do not remove the battery before removing the charger. This may damage the
device.
To save energy, unplug the charger when not in use. The charger does not have a
power switch, so you must unplug the charger from the electric socket when not in
use to avoid wasting power. The charger should remain close to the electric socket
and easily accessible while charging.
Reducing the battery consumption
Your device provides various options that help you conserve battery power.
• When you are not using the device, switch to sleep mode by pressing the Power key.
• Activate power saving mode.
• Close unnecessary apps using the task manager.
• Deactivate the Bluetooth feature when not in use.
• Deactivate the Wi-Fi feature when not in use.
• Deactivate auto-syncing of apps.
• Decrease the backlight time.
• Decrease the screen brightness.
• When the battery power is low, the battery icon appears empty.
• If you use multiple apps at once, network apps, or apps that need a connection
to another device, the battery will drain quickly. To avoid disconnecting from the
network or losing power during a data transfer, always use these apps after fully
charging the battery.
• The device can be used while it is charging, but it may take longer to fully charge
the battery.
Getting started
18
Fast charging
The device has a built-in fast charging feature. You can use this feature to charge the battery
more quickly while the device or its screen is turned off.
About Fast charging
• Fast charging uses battery charging technology that charges the battery faster by
increasing the charging power. The device supports Samsung’s Adaptive fast charging
feature and Qualcomm Quick Charge 2.0.
• To use Fast charging on your device, connect it to a battery charger that supports
Adaptive fast charging or Quick Charge 2.0.
Increasing the charging speed
To increase the charging speed, turn the device or its screen off when you charge the battery.
• While charging the battery when the device is turned off, the icon appears on the
screen.
• While charging the battery when the device’s screen is turned on, a pop-up window
appears requesting you to turn the screen off. Turn off the screen to increase the charging
speed.
• You cannot use the built-in fast charging feature when you charge the battery
using a standard battery charger.
• If the device heats up or the ambient air temperature rises, the charging speed may
decrease automatically. This is a normal operating condition to prevent damage to
the device.
Getting started
19
Using a memory card
Installing a memory card
Your device accepts memory cards with maximum capacities of 128 GB. Depending on the
memory card manufacturer and type, some memory cards may not be compatible with your
device.
• Some memory cards may not be fully compatible with the device. Using an
incompatible card may damage the device or the memory card, or corrupt the data
stored in it.
• Use caution to insert the memory card right-side up.
The device supports the FAT and the exFAT file systems for memory cards. When
inserting a card formatted in a different file system, the device asks to reformat the
memory card.
1 Remove the back cover.
2 Insert a memory card with the gold-coloured contacts facing downwards.
3 Replace the back cover.
• Frequent writing and erasing of data shortens the lifespan of memory cards.
• When inserting a memory card into the device, the memory card’s file directory
appears in the My Files → SD card folder.
Getting started
20
Removing the memory card
Before removing the memory card, first unmount it for safe removal.
On the Home screen, tap Apps → Settings → Storage → Unmount SD card.
1 Remove the back cover.
2 Pull out the memory card.
3 Replace the back cover.
Do not remove the memory card while the device is transferring or accessing
information. Doing so can cause data to be lost or corrupted or damage to the
memory card or device. Samsung is not responsible for losses that result from the
misuse of damaged memory cards, including the loss of data.
Formatting the memory card
A memory card formatted on a computer may not be compatible with the device. Format the
memory card on the device.
On the Home screen, tap Apps → Settings → Storage → Format SD card → FORMAT SD
CARD → ERASE EVERYTHING.
Before formatting the memory card, remember to make backup copies of all
important data stored in the memory card. The manufacturer’s warranty does not
cover loss of data resulting from user actions.
Getting started
21
Turning the device on and off
Press and hold the Power key for a few seconds to turn on the device.
When you turn on your device for the first time or after performing a data reset, follow the onscreen
instructions to set up your device.
To turn off the device, press and hold the Power key, and then tap Power off.
Follow all posted warnings and directions from authorised personnel in areas where
the use of wireless devices is restricted, such as aeroplanes and hospitals.
Locking and unlocking the screen
Pressing the Power key turns off the screen and locks it. Also, the screen turns off and
automatically locks if the device is not used for a specified period.
To unlock the screen, press the Power key or the Home key and swipe in any direction.
You can change the screen lock method and utilise additional security features. Refer to
Changing the screen lock method for more information.
22
Basics
Using the touchscreen
• Do not allow the touchscreen to come into contact with other electrical devices.
Electrostatic discharges can cause the touchscreen to malfunction.
• To avoid damaging the touchscreen, do not tap it with anything sharp or apply
excessive pressure to it with your fingertips.
• The device may not recognise touch inputs close to the edges of the screen, which
are outside of the touch input area.
• Leaving the touchscreen idle for extended periods may result in afterimages
(screen burn-in) or ghosting. Turn off the touchscreen when you do not use the
device.
Tapping
To open an app, to select a menu item, to press an on-screen button, or to enter a character
using the keyboard on the screen, tap it with your finger or the S Pen.
Basics
23
Tapping and holding
Tap and hold an item or the screen for more than 2 seconds to access available options.
Dragging
To move an item, tap and hold it and drag it to the target position.
Double-tapping
Double-tap on a webpage or image to zoom in. Double-tap again to return.
Basics
24
Swiping
Swipe to the left or right on the Home screen or the All apps screen to view other panels.
Swipe upwards or downwards to scroll through a webpage or a list of items, such as contacts.
Spreading and pinching
Spread two fingers apart on a webpage, map, or image to zoom in a part. Pinch to zoom out.
Basics
25
Home screen layout
Home screen
The Home screen is the starting point for accessing all of the device’s features. It displays
widgets, shortcuts to apps, and more. Widgets are small apps that launch specific app
functions to provide information and convenient access on your Home screen.
To view other panels, swipe to the left or right, or tap one of the screen indicators at the
bottom of the screen.
To customise the Home screen, refer to Managing the Home screen.
A widget
An app A folder
Screen indicators
Favourite apps
All apps screen icon
Basics
26
Home screen options
On the Home screen, tap and hold an empty area, or pinch your fingers together to access
the available options. Customise the Home screen by adding, deleting, or rearranging Home
screen panels. You can also set the Home screen wallpaper, add widgets to the Home screen,
and more.
Flipboard Briefing
Use this feature to view the latest articles in various categories. You can get up to date on
news that interests you using this feature.
1 On the Home screen, tap or swipe to the right to open Flipboard Briefing.
2 Tap START READING when launching this feature for the first time.
3 Swipe upwards to browse articles in each news category.
To deactivate Flipboard Briefing, tap and hold an empty area on the Home screen.
Then, tap Home screen settings and deselect Flipboard Briefing.
Basics
27
All apps screen
The All apps screen displays icons for all apps, including newly installed apps.
On the Home screen, tap Apps to open the All apps screen. To view other panels, swipe to the
left or right, or select a screen indicator at the bottom of the screen.
To customise the All apps screen, refer to Managing the All apps screen.
Indicator icons
Indicator icons appear on the status bar at the top of the screen. The icons listed in the table
below are most common.
Icon Meaning
No signal
Signal strength
Roaming (outside of normal service area)
GPRS network connected
EDGE network connected
UMTS network connected
HSDPA network connected
HSPA+ network connected
/ LTE network connected (for models that support LTE service)
Wi-Fi connected
Bluetooth feature activated
GPS activated
Call in progress
Missed call
Smart stay feature activated
Connected to computer
No SIM or USIM card
Basics
28
Icon Meaning
New text or multimedia message
Alarm activated
S Pen detached
Vibration mode activated
Flight mode activated
Error occurred or caution required
Battery power level
The status bar may not appear at the top of the screen in some apps. To display the
status bar, drag down from the top of the screen.
Notification and quick settings panels
Using the notification panel
When you receive new notifications, such as messages or missed calls, indicator icons appear
on the status bar. To see more information about the icons, open the notification panel and
view the details.
To open the notification panel, drag the status bar downwards. To close the notification panel,
swipe upwards on the screen.
Basics
29
You can use the following functions on the notification panel.
Launch Settings.
Launch S Finder.
Tap a notification and perform
various actions.
Clear all notifications.
Adjust the brightness.
View all quick setting buttons.
Activate or deactivate options.
Tap and hold a button to view
more detailed settings.
Launch Quick Connect.
Rearranging quick setting buttons
To rearrange quick setting buttons on the notification panel, tap → , tap and hold an
item, and then drag the item to another location.
Using the quick settings panel
You can activate or deactivate some features on the notification panel. To activate or
deactivate more features, open the quick settings panel.
To open the quick settings panel, drag the status bar downwards using two fingers.
Alternatively, tap on the notification panel. To close the quick settings panel, swipe
upwards on the screen.
Tap the buttons on the quick settings panel to activate or deactivate features. You can access
more detailed setting options when you tap and hold a button.
Basics
30
Opening apps
On the Home screen or the All apps screen, select an app icon to open it.
To open the list of recently used apps, tap and select an app window to open it.
Closing an app
Tap → , and then tap END next to an app to close it. To close all running apps, tap END
ALL. Alternatively, tap → .
Installing or uninstalling apps
Samsung GALAXY Apps
Use this app to purchase and download apps.
Tap GALAXY Apps on the All apps screen.
This app may not be available depending on the region or service provider.
Installing apps
Browse apps by category or tap to search for a keyword.
Select an app to view information about it. To download free apps, tap Install. To purchase
and download apps where charges apply, tap the button that shows the app’s price.
To change the auto update settings, tap → Settings → Auto update apps, and
then select an option.
Play Store
Use this app to purchase and download apps.
Tap Play Store on the All apps screen.
Basics
31
Installing apps
Browse apps by category or tap to search for a keyword.
Select an app to view information about it. To download free apps, tap INSTALL. To purchase
and download apps where charges apply, tap the price and follow the on-screen instructions.
To change the auto update settings, tap → Settings → Auto-update apps, and
then select an option.
Managing apps
Uninstalling or disabling apps
To disable default apps, open the All apps screen and tap → Uninstall/disable apps. The
icon appears on the apps that you can disable. Select an app and tap DISABLE.
To uninstall downloaded apps, open the All apps screen, tap → Downloaded apps → →
Uninstall, select an app, and then tap UNINSTALL. Alternatively, on the All apps screen, tap
Settings → Application manager, select an app, and then tap UNINSTALL.
Enabling apps
On the All apps screen, tap → Show disabled apps, select apps, and then tap DONE.
Alternatively, on the All apps screen, tap Settings → Application manager, scroll to
DISABLED, select an app, and then tap ENABLE.
Hiding apps
Hide apps that you do not want to see on the All apps screen.
On the All apps screen, tap → Hide apps.
To display hidden apps, tap → Show hidden apps.
• Hiding apps: Hide apps from the All apps screen only. You can continue to use
hidden apps.
• Disabling apps: Disable selected default apps that cannot be uninstalled from the
device. You cannot use disabled apps.
• Uninstalling apps: Uninstall downloaded apps.
Basics
32
Entering text
Keyboard layout
A keyboard appears automatically when you enter text to send messages, create memos, and
more.
Text entry is not supported in some languages. To enter text, you must change the
input language to one of the supported languages.
Break to the next line.
Delete a preceding character.
Enter punctuation marks.
Enter uppercase. For all caps, tap
it twice.
Switch to handwriting mode. Enter a space.
Changing the input language
Tap and hold , tap → Select input languages, and then select the languages to use.
When you select two or more languages, you can switch between the input languages by
swiping to the left or right on the space key.
Changing the keyboard layout
Tap and hold , tap , select a language under Input languages, and then select a
keyboard layout to use.
On 3x4 keyboard, a key has three or four characters. To enter a character, tap the
corresponding key repeatedly until the desired character appears.
Basics
33
Using additional keyboard functions
Tap and hold to use various functions. Other icons may appear instead of the icon
depending on the last function that was used.
• : Enter text by voice.
Change the language.
Open the keyboard.
Start or pause entering text by
voice.
• : Switch to handwriting mode.
Switch to the standard keyboard.
Switch between number mode
and character mode.
This feature may not be available depending on the region or service provider.
• : Add an item from the clipboard.
• : Change the keyboard settings.
• : Enter emoticons.
• : Switch to the floating keyboard. You can move the keyboard to another location by
dragging the tab.
Switch to the standard keyboard.
Basics
34
Copying and pasting
1 Tap and hold over text.
2 Drag or to select the desired text, or tap Select all to select all text.
3 Tap Copy or Cut.
The selected text is copied to the clipboard.
4 Place the cursor where the text is to be inserted and tap → Paste.
To paste text that you have previously copied, tap Clipboard and select the text.
Screen capture
Capture a screenshot while using the device.
Press and hold the Home key and the Power key simultaneously. The image is saved in the
Screenshots folder. To open the folder, open the All apps screen and tap Gallery → →
Album → Screenshots. After capturing a screenshot, you can edit the image and share it
with others.
You can also capture screenshots using other methods. Refer to Palm swipe to capture for
more information.
It is not possible to capture a screenshot while using some apps.
Using the dictionary
Look up definitions for words while using certain features, such as when browsing webpages.
1 Tap and hold over a word that you want to look up.
If the word you want to look up is not selected, drag or to select the desired text.
Basics
35
2 Tap Dictionary.
If a dictionary is not preinstalled on the device, follow the on-screen instructions to install
one.
3 View the definition.
To view more definitions, tap . In the detailed view, tap to add the word to your
favourite words list or tap SEARCH WEB to use the word as a search term.
In the detailed view, tap to view more options.
My Files
Access and manage various files stored in the device or in other locations, such as cloud
storage services.
Using My Files
Tap My Files on the All apps screen.
Access additional options.
View the download history.
Search for files or folders.
View files stored in the device.
View files by category.
Basics
36
Power saving feature
Power saving mode
Save the battery power by limiting the device’s functions.
On the All apps screen, tap Settings → Power saving → Power saving mode, and then tap
the Power saving mode switch to activate it. Alternatively, open the quick settings panel and
tap Power saving to activate it.
Select from the following options:
• Restrict background data: Prevent apps that are running in the background from using a
mobile data connection.
• Restrict performance: Limit various options, such as turning off the backlight for the
Recents key and the Back key.
• Greyscale mode: Display colours on the screen as grey tones.
Ultra power saving mode
Use this mode to extend the device’s battery power. In ultra power saving mode, the device
performs the following:
• Displays colours on the screen as grey tones.
• Restricts the available apps to essential and selected apps only.
• Deactivates the mobile data connection when the screen turns off.
• Deactivates the Wi-Fi and Bluetooth features.
1 On the All apps screen, tap Settings → Power saving → Ultra power saving mode, and
then tap the Ultra power saving mode switch to activate it.
Alternatively, open the quick settings panel and tap U. power saving to activate it.
2 Read and agree to the terms and conditions, and then tap OK.
Basics
37
3 Read the on-screen information about the mode and tap ENABLE.
To deactivate ultra power saving mode, tap → Disable ultra power saving mode →
DISABLE.
The estimated maximum standby time shows the time remaining before the battery
power runs out if the device is not used. Standby time may vary depending on your
device settings and operating conditions.
Viewing help information
To view help information to learn how to use the device and apps, open the All apps screen
and tap Settings → Help.
To view help information for an app while you are using the app, tap → Help.
Some apps may not include help information.
38
S Pen features
Air command
Remove the S Pen from the slot, or hover the S Pen over any part of the screen and press the
S Pen button to access four useful features.
With the air command features, you can perform various actions.
Image clip
Screen write
Action memo
Smart select
• Action memo: Write memos quickly and link actions to them. You can make calls,
send messages, search the web, and more. Refer to Action memo for more information.
• Smart select: Collect content quickly. Refer to Smart select for more information.
• Image clip: Draw around an area of the screen you want to save or share. Refer to
Image clip for more information.
• Screen write: Capture, edit, and write memos on screenshots, and then share them.
Refer to Screen write for more information.
If this feature is not activated, open the All apps screen, tap Settings → S Pen → Air
command, and then tap the Air command switch to activate it.
S Pen features
39
Action memo
Open the Action memo pad and create memos to perform various actions using the written
or drawn information.
1 On the air command panel, tap Action memo.
2 Write or draw a memo.
3 Tap .
The entire memo will be selected. If you want to use specific information from the
memo, tap the outside of the selected area to deselect the memo and draw around the
information to use it.
Access additional options.
Adjust the size of the memo pad.
Erase the memo.
Write a memo or change the pen
colour.
Edit the memo as S Note file.
Available functions for the
selected memo information
Select an input.
Save the memo.
Discard the memo.
Add the memo as a widget to
the Home screen.
S Pen features
40
4 Select an app to use with the selected memo information.
The selected app will launch from Action memo.
Search for a location.
Create a task.
Send a message.
Create a contact.
Make a call.
Search the web.
Send an email.
Viewing memos
On the Action memo screen, tap → View action memo list. Select a memo to view and edit
it.
Adding Action memo widgets on the Home screen
After composing a memo, tap and hold , and then drag the memo to an empty area on the
Home screen. An Action memo widget is added to the Home screen and you can view and
edit the memo.
Editing a memo as S Note file
While composing a memo, tap to open S Note and edit the memo in it. The same pen
colour that you were using in Action memo will be applied in S Note.
S Pen features
41
Smart select
Collect the desired area of content appearing on the screen with the S Pen. You can collect
content from webpages or music and videos during playback.
1 When there is content you want to collect, such as a part of a webpage, open the air
command panel and tap Smart select.
2 Drag the S Pen across the content you want to collect.
Save in Scrapbook
Share via
Collect
3 Select an option to use with the collected item.
• : Save the item in Scrapbook.
• : Share the item with others.
• : Extract text from the item. You can copy the extracted text to the clipboard or
insert it into messages, notes, and more.
Extract text.
• : Save the item in the collected items list to collect more content.
S Pen features
42
Collecting multiple items
Tap to add content to your collected items list to use it later. To collect additional content,
tap on the collected items pop-up window.
To view collected items, tap the collected items pop-up window. You can share, delete, or
save multiple items at once. To individually select an item in the collected items list, tap and
hold an item.
To delete the collected items, tap and hold the collected items list pop-up window,
and then drag it to Delete at the top of the screen.
Image clip
Use the S Pen to draw a closed shape around the area you want to save or share. You can crop
part of an image.
1 When there is content you want to capture, such as a part of an image, open the air
command panel and tap Image clip.
2 Draw around an area to select it with the S Pen.
Reshape the selected area by selecting a shape icon on the toolbar, or tap to
automatically reshape the selected area.
S Pen features
43
3 Select an option to use with the selected area.
• : Save the selected area in Scrapbook.
• : Share the selected area with others.
Screen write
Capture screenshots to write or draw on them.
1 When there is content you want to capture, such as a part of a webpage, open the air
command panel and tap Screen write.
The current screen is automatically captured and the editing toolbar appears on the
screen.
2 Write a memo on the screenshot.
3 Select an option to use with the screenshot.
• : Share the screenshot with others.
• : Save the screenshot. To view the saved screenshot, open the All apps screen and
tap Gallery → → Album → Screenshots.
It is not possible to capture a screenshot while using some apps.
S Pen features
44
S Note
An introduction
Create custom notes by recording your thoughts and ideas. You can insert multimedia files
and create Photo notes.
Starting S Note
1 Tap S Note on the All apps screen.
Alternatively, on the Home screen, tap in the S Note widget.
2 Read the on-screen information about the app and tap NEXT.
3 Select cover styles and tap NEXT.
4 Select a default note template and tap NEXT.
5 Select an account to sync your notes with and tap START.
If you are not signed in to the selected account, follow the on-screen instructions to sign
in to the account.
If you sync your notes with an account, you can view them on other devices by
registering the account on other devices.
S Pen features
45
Using the S Note widget
You can launch some S Note features directly from the S Note widget.
On the Home screen, tap an icon in the S Note widget.
Launch S Note. Insert a voice memo.
Create a note in
handwriting mode.
Create a Photo note.
Create a note in text
mode.
Creating notes
1 Tap S Note on the All apps screen.
Alternatively, on the Home screen, tap in the S Note widget.
2 Tap .
3 Compose a note.
Tap to write or draw on the screen, or tap to enter text using the keyboard.
Handwriting mode
Eraser mode Save
Text mode
Undo/Redo
Selection mode
More options
Photo note
S Pen and finger mode/S Pen
only mode
Add page
S Pen features
46
Changing the pen settings
When writing or drawing on the screen, tap once more to change the pen type, line
thickness, or pen colour.
Open the preset pen profiles list.
Save the current setting as a pen
profile.
Change the line thickness.
Change the pen colour.
Change the pen type.
Select a new colour using the
colour picker.
Fountain pen Calligraphy pen
Using the line eraser
1 Tap .
2 Tap an area to erase.
The whole line on the area will be erased. The line eraser can erase your S Note line by
line.
• To only erase the area you touch with the S Pen, tap once more and deselect Erase
line by line. You can adjust the size of the eraser by dragging the size adjustment bar.
• To clear the note, tap CLEAR ALL.
Even with a smaller eraser, you may still not be able to precisely erase the intended
part.
S Pen features
47
Editing handwritten notes
Edit handwritten notes using various editing options, such as cutting, moving, resizing, or
transforming.
1 When there is handwriting or a drawing on the note, tap .
2 Tap or draw a line around the input to select and edit it.
To move the input to another location, select the input, and then drag it to a new
location.
To resize the input, select the input and drag the frame handle.
3 Use one of the following options:
• : Change the input properties, such as layout, size, colour, or thickness.
• : Refine or convert handwriting or drawings.
• : Cut out the input. To paste it to another location, tap and hold the location, and
then tap Paste.
• : Copy the input. To paste it to another location, tap and hold the location, and then
tap Paste.
• : Delete the input.
Magnified handwriting mode
Tap → Show Magnified note and drag the magnifier frame to an area. The area in the
magnifier frame appears in the magnified window at the bottom of the screen. You can
precisely enter or correct the handwriting.
S Pen features
48
Sketch recording
You can record your actions while composing a note.
1 Tap → Record sketching.
2 Tap and write or draw a note.
Your actions are recorded in real time.
3 To stop recording, tap again.
Tap to view the recording.
Creating Photo notes
Create notes by taking photos of content from various sources, such as handwritten text or
drawings. You can apply the Photo note effect to make it easier to view text from a photo by
deleting the background.
Using auto mode
1 On the All apps screen, tap S Note → → .
Alternatively, on the Home screen, tap on the S Note widget.
2 Fit the edges of a subject inside the preview screen.
Turn the flash on or off.
Detected subject
Open Gallery.
Change the shooting mode.
Show or hide viewfinder guides.
Take a photo.
S Pen features
49
3 When the border around the subject turns blue, tap to take a photo.
The device automatically applies the Photo note effect to the photo and inserts it into S
Note.
4 Edit the note.
With the Photo note effect
Without the Photo note effect
Using manual mode
1 On the Photo note preview screen, tap to switch to manual mode.
2 Tap to take a photo. Or, tap to select a photo saved in the device.
3 Drag the edges of the frame to select a section, and then tap .
4 Edit sections to insert into S Note.
Drag the frame around the section to adjust the size of a recognised section.
Delete the section.
Drag the frame around the
section to adjust the size.
Manually add a section to be
recognised.
Enable or disable the Photo note
effect.
5 Tap to insert the selected sections into the note.
S Pen features
50
Editing Photo notes
Edit sections inserted into S Note.
1 Tap and hold a section and tap Convert to edit.
The text image on the section will be vectorised and transformed into coloured lines for
you to edit.
2 Tap and draw a line around the section you want to edit.
3 Select an editing option.
• : Change the input properties, such as layout, size, colour, or thickness.
• : Cut out the input. To paste it to another location, tap and hold the location, and
then tap Paste.
• : Copy the input. To paste it to another location, tap and hold the location, and then
tap Paste.
• : Delete the input.
Creating notes with voice memos
1 On the All apps screen, tap S Note → → → Insert → Voice memo.
Alternatively, on the Home screen, tap in the S Note widget.
2 Read the terms and conditions and tap AGREE.
3 Read the on-screen information about using this feature and tap OK.
4 Tap to start recording.
5 Speak into the microphone.
Your voice will be converted into text.
6 Tap to insert the converted text into the note.
If the voice memo system language does not match the language you are speaking,
the device will not recognise your voice. To change the voice memo system language,
open the All apps screen and tap Voice Recorder → → Settings → Language.
S Pen features
51
Scrapbook
Collect content from various sources to create your own digital scrapbook. While viewing
webpages or videos, you can select and add a desired area to scrapbooks.
This app may not be available depending on the region or service provider.
Viewing scrapbooks
When you launch this app for the first time or restart it after performing a data reset, read and
agree to the terms and conditions, and then set a sync option.
1 Tap Scrapbook on the All apps screen.
2 Tap to select a category and select a scrapbook.
If there is a link below the scrapbook content, tap the link to go to the source.
3 Tap to edit it.
You can add a title, text, memos, or tags to the scrapbook.
4 Tap SAVE to save the changes.
Using the S Pen
An introduction
Write, draw, or perform touch actions with the S Pen. You can easily access additional features
by pressing the S Pen button.
S Pen features
52
Air view
Hover over an item on the screen with the S Pen to perform various functions.
Previewing information
Point at the screen to preview content or view information in a pop-up window.
Using Air Button
Hovering the S Pen over items in some apps, such as Gallery and Video, will display Air
Button on the preview window. You can perform various actions directly from the preview
window using Air Button.
Air Button
If this feature is not activated, open the All apps screen, tap Settings → S Pen → Air
view, and then tap the Air view switch to activate it.
S Pen features
53
Pen Select
While pressing and holding the S Pen button, drag the S Pen over text or item lists to select
multiple items or text. You can also copy and paste the selected items or text into another
app or share them with others.
Direct pen input
Fill in forms and write messages using your handwriting with the S Pen.
Writing in text fields
1 Hover the S Pen over a text field.
2 Tap to open the handwriting field.
S Pen features
54
3 Write with the S Pen.
When composing a message in Messages, tap at the top of the handwriting field to
switch to drawing mode. A drawing will be inserted into the message as an attachment.
4 When you are finished, tap .
Writing in apps
You can write directly on the screen with the S Pen when using some features and apps. For
example, you can enter numbers on the dialling keypad or set an alarm time by writing on
the handwriting field with the S Pen.
If this feature is not activated, open the All apps screen, tap Settings → S Pen →
Direct pen input, and then tap the Direct pen input switch to activate it.
55
Motions & usability features
Motions and gestures
Excessive shaking or impact on the device may result in unintended inputs. Control
motions properly.
Direct call
While viewing call, message, or contact details, pick up and hold the device to your ear to
make a call.
If this feature is not activated, open the All apps screen, tap Settings → Motions and
gestures → Direct call, and then tap the Direct call switch to activate it.
Motions & usability features
56
Smart alert
If you have missed calls or new messages, the device will vibrate when you pick it up.
This feature may not work if the screen is turned on or the device is not on a flat
surface.
If this feature is not activated, open the All apps screen, tap Settings → Motions and
gestures → Smart alert, and then tap the Smart alert switch to activate it.
Mute/Pause
Placing palm on screen
Cover the screen with your palm to mute incoming calls or alarms.
Motions & usability features
57
Turning device over
Turn the device over to mute incoming calls or alarms.
If this feature is not activated, open the All apps screen, tap Settings → Motions and
gestures → Mute/Pause, and then tap the Mute/Pause switch to activate it.
Palm swipe to capture
Place the side of your hand on the screen and swipe it across the screen from the right to the
left or vice versa to capture a screenshot. To view the saved screenshot, open the All apps
screen and tap Gallery → → Album → Screenshots. After capturing a screenshot, you
can edit the image and share it with others.
It is not possible to capture a screenshot while using some apps.
If this feature is not activated, open the All apps screen, tap Settings → Motions and
gestures → Palm swipe to capture, and then tap the Palm swipe to capture switch
to activate it.
Motions & usability features
58
Multi window
An introduction
Multi window lets you run two apps at the same time in a split screen. You can also run
multiple apps at the same time in pop-up windows.
Split screen Multi window
Some apps, such as Calculator and Contacts, can only be launched in pop-up
windows when you drag them from the Multi window tray to the screen.
1 Tap and hold to open the Multi window tray.
2 Tap and hold an app icon and drag it from the tray to the screen. Then, drag another app
icon to a new location on the screen.
Apps marked with the icon can be launched in separate windows on the screen at the
same time. Tap an app marked with the icon and drag it to a new location to open the
app in both windows. To simultaneously launch the app in a pop-up window, tap the app
and tap .
Motions & usability features
59
Launching Multi window from the list of recent apps
1 Tap .
2 Swipe upwards or downwards and tap to launch an app in Multi window.
3 Select another app to launch in Multi window.
Using Multi window options
When you use Multi window apps, select an app window and tap the circle between the app
windows to access the following options:
Motions & usability features
60
• : Switch locations between Multi window apps.
• : Drag and drop text or copied images from one window to another. Tap and hold an
item in the selected window and drag it to a location in another window.
• : Switch to a floating icon.
• : Switch to the full screen view.
• : Close the window.
Sharing content between app windows
You can easily share content between apps, such as Email and Internet, by dragging and
dropping it.
Some apps may not support this feature.
1 Launch Email and Internet in Multi window.
You can also launch them in pop-up windows.
2 Tap the circle between the app windows, and then tap .
3 Tap and hold text or an image in the Internet window and drag it to a location in the
Email window.
The selected item will be inserted into the Email window.
Motions & usability features
61
Adjusting the window size
Drag the circle between the app windows up or down to adjust the size of the windows.
If Multi window is not activated, open the All apps screen, tap Settings → Multi
window, and then tap the Multi window switch to activate it. Alternatively, open the
quick settings panel and tap Multi window to activate it.
Pop-up Multi window
1 On the All apps screen, launch an app to use in a pop-up window.
2 Drag down diagonally from either end of the top edge.
The app screen will appear in a pop-up window.
Switch to a floating icon.
Close the window.
Switch to the full screen view.
Move content.
Motions & usability features
62
Moving or closing pop-up windows
To move a pop-up window, tap the circle on a window and drag it to a new location.
To close the window, tap the circle at the top of the window and tap .
Launching pop-up windows from the split screen Multi window
1 On the split screen Multi window, tap an app window to launch it in a pop-up window.
2 Tap and hold the circle between the app windows.
The selected app will launch in a pop-up window.
Launching pop-up windows from the Multi window tray
Tap and hold to open the Multi window tray. Tap an app icon in the Multi window tray to
launch it in a pop-up window.
If Multi window is not activated, open the All apps screen, tap Settings → Multi
window, and then tap the Multi window switch to activate it. Alternatively, open the
quick settings panel and tap Multi window to activate it.
Motions & usability features
63
One-handed operation
An introduction
You can switch to one-handed operation mode to conveniently operate the device with one
hand.
On the All apps screen, tap Settings → Display and wallpaper → One-handed operation.
Reducing the screen size
Tap Reduce screen size and tap the Reduce screen size switch to activate it.
To switch to one-handed operation mode, hold the device in one hand. Then, quickly drag
your thumb from the edge of the screen to the centre of the screen and back again.
Motions & usability features
64
One-handed input
Tap One-handed input and tap the One-handed input switch to activate it.
Tap or to adjust the position of the dialling keypad, in-call buttons, and other input
panels for easy one-handed access.
Side key panel
Tap Side key panel and tap the Side key panel switch to activate it.
Use your device more easily with one hand by having the Recents key, the Home key, and the
Back key and other selected functions as buttons at the side of the screen.
Increasing touchscreen sensitivity
Use this feature to operate the screen while wearing gloves.
On the All apps screen, tap Settings → Display and wallpaper, and then tick Increase touch
sensitivity. Alternatively, open the quick settings panel and tap Touch sensitivity to activate
it.
• Use leather gloves for better recognition while touching the screen. Other types of
material may not be recognised.
• This feature may not work properly when you are using S view.
For best results, tap the screen firmly while wearing gloves.
65
Personalising
Managing the Home and All apps screens
Managing the Home screen
Adding items
Tap and hold an app or a folder from the All apps screen, and then drag it to the Home screen.
To add widgets, tap and hold an empty area on the Home screen, tap Widgets, tap and hold a
widget, and then drag it to the Home screen.
Moving and removing an item
Tap and hold an item on the Home screen, and then drag it to a new location.
To move the item to another panel, drag it to the side of the screen.
You can also move frequently used apps to the shortcuts area at the bottom of the Home
screen.
To remove an item, tap and hold the item. Then, drag it to Remove at the top of the screen.
Creating a folder
1 On the Home screen, tap and hold an app, and then drag it to Create folder at the top of
the screen.
2 Enter a folder name.
3 Tap , select the apps to move to the folder, and then tap DONE.
Personalising
66
Managing panels
On the Home screen, tap and hold an empty area to add, move, or remove a panel.
To add a panel, swipe to the left, and then tap .
To move a panel, tap and hold a panel preview, and then drag it to a new location.
To remove a panel, tap and hold a panel preview, and then drag it to Remove at the top of
the screen.
To set a panel as the main Home screen, tap .
Managing the All apps screen
Changing the sorting method
On the All apps screen, tap → Sort by and select a sorting method.
Moving items
On the All apps screen, tap → Edit. Tap and hold an item and drag it to a new location.
To move the item to another panel, drag it to the side of the screen.
To move an item to a new panel, drag it to Create page at the top of the screen.
Creating folders
1 On the All apps screen, tap → Create folder.
Alternatively, tap → Edit, tap and hold an app, and then drag it to Create folder at the
top of the screen.
2 Enter a folder name.
3 Tap , tick the apps to move to the folder, and then tap DONE.
Personalising
67
Setting wallpaper and ringtones
Setting wallpaper
Set an image or photo stored in the device as wallpaper for the Home screen or the locked
screen.
1 On the Home screen, tap and hold an empty area, and then tap Wallpapers.
Alternatively, on the All apps screen, tap Settings → Display and wallpaper →
Wallpaper.
2 Select a screen to change or apply wallpaper to.
3 Swipe to the left or right and select from images displayed at the bottom of the screen.
To select photos taken by the device’s camera or other images, tap From Gallery.
If you are setting the locked screen’s wallpaper, you can select images from various
wallpaper categories.
4 Tap SET AS WALLPAPER or SAVE.
The selected image will be set as the wallpaper for the Home screen or the locked screen.
Setting a Dynamic lock screen
Use this feature to set the locked screen’s wallpaper to change automatically based on your
settings, your location and weather, and your interests.
1 On the Home screen, tap and hold an empty area, and then tap Wallpapers.
Alternatively, on the All apps screen, tap Settings → Display and wallpaper →
Wallpaper.
2 Tap Lock screen.
Personalising
68
3 Select a wallpaper option.
• From Gallery: Select images from Gallery. The device will display the images on the
locked screen at the interval you set.
• Live weather: The device will display high quality images on the locked screen based
on the time, weather, and your location information.
• My interests: Select categories that interest you. The device will display high quality
images on the locked screen based on your interests.
• You may incur additional charges when using this feature.
• This feature may not work properly depending on your region.
Changing ringtones
Change ringtones for incoming calls and notifications.
On the All apps screen, tap Settings → Sounds and notifications.
To set a ringtone for incoming calls, tap Ringtones, select a ringtone, and then tap OK. To use
a song stored in the device or in your account as a ringtone, tap ADD.
To set a ringtone for notifications, tap Notification ringtone, select a ringtone, and then tap
OK.
Changing the screen lock method
You can change the way that you lock the screen to prevent others from accessing your
personal information.
On the All apps screen, tap Settings → Lock screen → Screen lock, and then select a screen
lock method. The device requires an unlock code whenever unlocking it.
If the unlock code is forgotten, take the device to a Samsung Service Centre to reset it.
Personalising
69
Pattern
Draw a pattern by connecting four dots or more, and then draw the pattern again to verify it.
Set a backup PIN to unlock the screen when you forget the pattern.
PIN
A PIN consists of numbers only. Enter at least four numbers, and then enter the password
again to verify it.
Password
A password consists of characters and numbers. Enter at least four characters including
numbers and symbols, and then enter the password again to verify it.
Fingerprint
Register your fingerprints to unlock the screen. Refer to Finger Scanner for more information.
My Places
Quickly access useful features associated with your frequently visited places by automatically
recognising your location.
Personalising
70
Adding a My Places widget
To add the widget, tap and hold an empty area on the Home screen, tap Widgets, tap and
hold the My Places widget, and then drag it to the Home screen.
Select a category to set location
information and preferences.
Setting place information
When you visit a place with preset location information, the device automatically recognises
your location and displays shortcuts to preset features. The device also applies the settings
that you set for the place.
1 On the My Places widget, select a place to set location information and shortcuts. For
example, tap Home to set location information for your home.
Your current location will appear under Address. To automatically search for your location
again, tap .
To manually search for a location, enter an address or a keyword in the search field and
tap .
Ensure that the device is connected to a Wi-Fi or mobile network to automatically
search for your current location.
Personalising
71
2 Tap NEXT.
3 On the Manage shortcuts screen, tap MANAGE → or to add or delete shortcuts to
various apps and features.
4 Tap OK.
The My Places widget with your location settings will appear on the Home screen. To
change additional settings, such as sound mode or Wi-Fi network settings, tap →
Custom settings.
Setting additional place information
1 On the My Places widget, tap .
2 Tap and select another place from the places list.
To add more places to the list, tap MANAGE PLACES → .
3 Tap or GET LOCATION INFORMATION to automatically search for your current
location.
To manually search for a location, enter an address or a keyword in the search field and
tap .
Personalising
72
4 Tap SAVE.
5 Tap or to add or delete shortcuts to various app and features.
6 Tap .
When you visit an added place, your preset location settings will appear on the My Places
widget. To change additional settings, such as sound mode or Wi-Fi network settings, tap
→ Custom settings.
Finger Scanner
An introduction
In order for fingerprint recognition to function, your fingerprint information needs to be
registered and stored in your device. After registering, you can set the device to use your
fingerprint for the features below:
• Screen lock
• Web sign-in
• Verify Samsung account
• Pay with PayPal
This feature may not be available depending on the region or service provider.
For better fingerprint recognition
When you scan your fingerprints on the device, be aware of the following conditions that
may affect the feature’s performance:
• The Home key contains a fingerprint recognition sensor. Ensure that the Home key is not
scratched or damaged by metal objects, such as coins, keys, and necklaces.
• The screen protector supplied with the device may cause the fingerprint recognition
sensor to malfunction. Remove the screen protector to improve fingerprint sensitivity.
• Ensure that the fingerprint recognition area and your fingers are clean and dry.
Personalising
73
• The device may not recognise fingerprints that are affected by wrinkles or scars.
• The device may not recognise fingerprints from small or thin fingers.
• To improve recognition performance, register fingerprints of the hand used most often to
perform tasks on the device.
• Do not drag your finger too quickly or slowly. Drag your finger at a moderate speed to
allow the device to recognise it.
• In dry environments, static electricity can build up in the device. Avoid using this feature
in dry environments or before using the feature, discharge static electricity by touching a
metal object.
Registering fingerprints
If you bend your finger or use a fingertip, the device may not recognise your
fingerprints.
1 On the All apps screen, tap Settings → Finger Scanner → Fingerprint manager.
2 Read the on-screen information and tap OK.
3 Place your finger on the fingerprint recognition area at the bottom centre of the screen.
Personalising
74
4 Tap and hold the screen in the fingerprint recognition area, and then drag your finger
downwards over the Home key.
Repeat this action using the same finger until the fingerprint is registered.
5 Tap DONE to finish scanning your fingerprint. Or, tap REGISTER to register an additional
fingerprint.
6 When a screen appears requesting to register a backup password, enter the backup
password, and then tap CONTINUE.
7 Enter the backup password again to verify it, and then tap OK.
You can use the backup password instead of scanning your fingerprints.
8 When a fingerprint lock pop-up window appears, tap OK. You can use your fingerprints to
unlock the screen.
Personalising
75
Deregistering fingerprints
You can deregister your fingerprints using the fingerprint manager.
1 On the All apps screen, tap Settings → Finger Scanner → Fingerprint manager.
2 Scan a registered fingerprint, or tap and enter the backup password.
3 Tap → Select.
4 Tick fingerprints to deregister and tap .
Changing the backup password
You can change the password that you use as an alternative to scanning your fingerprints.
1 On the All apps screen, tap Settings → Finger Scanner → Change backup password.
2 Scan a registered fingerprint, or tap and enter the backup password.
3 Enter a new password and tap CONTINUE.
4 Enter the password again and tap OK.
Verifying the Samsung account password
Use fingerprints to verify your Samsung account password. You can use a fingerprint instead
of entering your password, for example, when you purchase content from GALAXY Apps.
On the All apps screen, tap Settings → Finger Scanner → Verify Samsung account, and
then tap the Verify Samsung account switch to activate it. Enter your Samsung account
password and tap CONFIRM.
Personalising
76
Using fingerprints to sign in to accounts
You can use your fingerprints to sign in to webpages that support password saving.
1 On the All apps screen, tap Settings → Finger Scanner → Web sign-in, and then tap the
Web sign-in switch to activate it.
2 Open a webpage that you want to sign in to with a fingerprint.
3 Enter your user name and password, and then tap the webpage’s sign in button.
4 Tick Sign in using your fingerprints and tap REMEMBER.
You can use your fingerprint to verify your account and password to sign in to the
webpage.
Using fingerprints for purchases via PayPal
You can make purchases by scanning your fingerprints.
This feature may not be available depending on the region or service provider.
1 On the All apps screen, tap Settings → Finger Scanner → Pay with PayPal.
2 Tick FIDO Ready™ support and PayPal, and then tap INSTALL.
3 When the installation is complete, tap LINK MY ACCOUNT.
4 Follow the on-screen instructions to sign in to your PayPal account and register your
fingerprints.
Personalising
77
Private mode
An introduction
Hide personal content in your device to prevent others from accessing it.
In private mode, you can hide items in Gallery, Video, Music, Voice Recorder, My Files, and S
Note.
Setting up private mode
1 On the All apps screen, tap Settings → Private mode.
2 Read the on-screen information and tap NEXT.
3 Read the on-screen information about using this feature and tap NEXT.
4 Tap START, select a private mode access method, and then follow the on-screen
instructions to complete the setup.
When the screen lock pop-up window appears after the setup, tap OK to change the
screen lock method or tap SKIP.
Private mode is activated and the icon appears on the status bar.
Hiding content
1 On the All apps screen, launch an app to hide items.
2 Select an item and tap → Move to Private.
If private mode is not activated, proceed to the next steps.
3 Read the on-screen information and tap OK.
4 Follow the on-screen instructions to enter the preset private mode access code.
The selected items will be moved to the private folder and disappear from the screen.
If you hide an item when private mode is not activated, private mode will be enabled
while the selected item is moved to the private folder and will be disabled again once
the transfer is complete.
Personalising
78
Viewing hidden content
You can only view hidden items when private mode is activated.
1 On the All apps screen, tap Settings → Private mode, and then tap the Private mode
switch to activate it.
Alternatively, open the quick settings panel and tap Private mode to activate it.
2 Follow the on-screen instructions to enter the preset private mode access code.
3 On the All apps screen, tap My Files → Private.
All items moved in private mode appear on the screen.
Unhiding content
1 In the private folder, select items to unhide.
2 Tap → Remove from Private.
3 Select a folder to move the items to.
The items will be moved to the selected folder.
Easy mode
Easy mode provides an easier user experience by using a simpler layout and bigger icons on
the Home screen.
Switching to easy mode
1 On the All apps screen, tap Settings → Easy mode → Easy mode.
2 Tick apps to apply a simpler layout.
3 Tap DONE.
Personalising
79
Returning to standard mode
Swipe to the left on the Home screen and tap Easy settings → Easy mode → Standard
mode → DONE.
Transferring data from your previous device
Using backup accounts
You can transfer backup data from your previous device to your new device using your
Google or Samsung account. Refer to Backing up and restoring data for more information.
Using Samsung Smart Switch
You can transfer data of the previous device to a new device via Smart Switch. Visit
www.samsung.com/smartswitch for more information.
Samsung Smart Switch is not supported on some devices or computers.
Using Smart Switch Mobile
Use this app to transfer data from your previous device to your new device. You can
download the app from GALAXY Apps or Play Store.
1 On your device, tap Smart Switch Mobile.
2 On your device, select an option depending on the previous device type and follow the
on-screen instructions.
If the previous device is an Android device, ensure that the Smart Switch Mobile app is
installed on the device. Refer to the help for more information.
Personalising
80
Using Smart Switch with computers
Use this feature to import a backup of your data (from selected manufacturer’s
mobile devices) from a computer to your device. You can download the app from
www.samsung.com/smartswitch.
1 Back up data from a previous device to the computer. For more information, contact the
device’s manufacturer.
2 On the computer, launch Smart Switch.
3 Connect your current device to the computer using the USB cable.
4 On the computer, click the manufacturer of the previous device and follow the on-screen
instructions to transfer data to your device.
Using Samsung Kies
Import a backup of your data from your computer via Samsung Kies to restore data on your
device. You can also back up data to the computer via Samsung Kies. Refer to Connecting
with Samsung Kies for more information.
Setting up accounts
Adding accounts
Some apps used on your device require a registered account. Create accounts to have the
best experience with your device.
1 On the All apps screen, tap Settings → Accounts → Add account.
2 Select an account service.
3 Follow the on-screen instructions to complete the account setup.
To sync content with your accounts, select an account and tick items to sync.
Personalising
81
Removing accounts
On the All apps screen, tap Settings → Accounts, select an account, and then tap →
Remove account.
Registering Samsung accounts
You need a Samsung account when using some Samsung apps. You can back up or restore
data saved in the device to your Samsung account. Register your Samsung account to the
device to conveniently use Samsung services.
1 On the All apps screen, tap Settings → Accounts → Add account.
2 Tap Samsung account.
3 Tap SIGN IN.
4 Enter your account’s email address and password, and then tap SIGN IN.
Once your Samsung account has been registered, you can use apps requiring your Samsung
account without the sign in procedure.
82
Phone & contacts
Phone
An introduction
Make or answer voice and video calls.
Making calls
1 Tap Phone on the All apps screen.
2 Tap Keypad and enter a phone number.
3 Tap to make a voice call, or tap to make a video call.
Access additional options.
Add the number to the contacts
list.
Preview the phone number.
View favourite contacts.
Delete a preceding character.
View the contacts list.
View call and message logs.
Enter the number using the
keypad.
Phone & contacts
83
Making calls from call logs or contacts list
Tap Logs or Contacts, and then swipe to the right on a contact or a phone number to make a
call.
Making calls from the favourites list
Select a contact and tap to add the contact to the favourite contacts list.
Open the Favourites screen and select a contact to call.
Making an international call
1 Tap Keypad.
2 Tap and hold 0 until the + sign appears. Enter the country code, area code, and phone
number, and then tap .
Phone & contacts
84
Receiving calls
Answering a call
When a call comes in, drag outside the large circle.
Rejecting a call
When a call comes in, drag outside the large circle.
Missed calls
If a call is missed, the icon appears on the status bar. Open the notification panel to view
the list of missed calls. Alternatively, on the All apps screen, tap Phone → Logs to view
missed calls.
• To send a message when rejecting an incoming call, drag the reject message bar
upwards.
• To create various rejection messages, open the All apps screen and tap Phone →
→ Settings → Call → Call rejection → Rejection messages → .
Options during calls
During a voice call
The following actions are available:
• : Increase the volume.
• Add call: Dial a second call.
• Keypad: Open the keypad.
• End call: End the current call.
• Speaker: Activate or deactivate the speakerphone. When using the speakerphone, speak
into the microphone at the top of the device and keep the device away from your ears.
• Mute: Turn off the microphone so that the other party cannot hear you.
• Bluetooth: Switch to a Bluetooth headset if it is connected to the device.
Phone & contacts
85
During a video call
Tap the screen to use the following options:
• Switch: Switch between the front and rear cameras.
• Mute: Turn off the microphone so that the other party cannot hear you.
• End call: End the current call.
Video calling with dual camera mode will be provided for up to 3 minutes. After
3 minutes the device will turn off the rear camera for optimal performance.
Contacts
An introduction
Create new contacts or manage contacts on the device.
Adding contacts
Moving contacts from other devices
You can move contacts from other devices to your device. Refer to Transferring data from
your previous device for more information.
Creating contacts manually
1 On the All apps screen, tap Contacts → Contacts.
2 Tap and select a storage location.
Phone & contacts
86
3 Enter contact information.
4 Tap SAVE.
To add a phone number to the contacts list from the keypad, tap Keypad, enter the number,
and then tap Add to Contacts.
To add a phone number to the contacts list from received calls or messages, tap Logs, and
then tap a contact’s image.
Searching for contacts
On the All apps screen, tap Contacts → Contacts.
Use one of the following search methods:
• Scroll up or down the contacts list.
• Drag a finger along the index at the right side of the contacts list to scroll through it
quickly.
• Tap the search field at the top of the contacts list and enter search criteria.
Once a contact is selected, take one of the following actions:
• : Add to favourite contacts.
• / : Make a voice or video call.
• : Compose a message.
• : Compose an email.
87
Messages & email
Messages
An introduction
Send text messages (SMS) or multimedia messages (MMS) and view messages by
conversation.
Sending messages
You may incur additional charges for sending messages when you are roaming.
1 Tap Messages on the All apps screen.
2 Tap .
3 Add recipients and enter a message.
Access additional options.
Enter a message.
Select contacts from the
contacts list.
Enter emoticons.
Enter recipients.
Attach files.
Send the message.
4 Tap to send the message.
Messages & email
88
Viewing messages
Messages are grouped into message threads by contact.
You may incur additional charges for receiving messages when you are roaming.
1 Tap Messages on the All apps screen.
2 On the messages list, select a contact.
3 View your conversation.
In the message detail view, tap to view more options.
Email
An introduction
Add your email accounts to receive emails and reply to them.
Setting up email accounts
1 Tap Email on the All apps screen.
Set up an email account when opening Email for the first time.
2 Enter the email address and password, and then tap NEXT.
To manually register a company email account, tap MANUAL SETUP.
3 Follow the on-screen instructions to complete the setup.
To set up another email account, tap → MANAGE ACCOUNTS → .
If you have more than one email accounts, you can set one as the default account. Tap →
MANAGE ACCOUNTS → → Set default account.
Messages & email
89
Sending emails
1 Tap Email on the All apps screen.
2 Tap at the bottom of the screen to compose a message.
3 Add recipients and enter a message.
4 Tap to send the message.
Reading emails
1 Tap Email on the All apps screen.
2 On the messages list, tap a message to read.
90
Camera & gallery
Camera
An introduction
Take photos and record videos using various modes and settings.
Basic shooting
You can take photos or record videos. View your photos and videos in Gallery.
Tap Camera on the All apps screen.
Camera etiquette
• Do not take photos or record videos of other people without their permission.
• Do not take photos or record videos where legally prohibited.
• Do not take photos or record videos in places where you may violate other people’s
privacy.
Camera & gallery
91
Taking photos or recording videos
1 Tap the image on the preview screen where the camera should focus.
2 Tap to take a photo or tap to record a video.
Change camera
settings.
Switch between the
front and rear
cameras.
HDR (Rich tone)
Start recording a
video.
Take a photo.
Change the
shooting mode.
View photos and
videos you have
captured.
Launching Camera on the locked screen
To quickly take photos of special moments, launch Camera on the locked screen.
1 On the locked screen, drag outside the large circle.
2 Tap the image on the preview screen where the camera should focus.
3 Tap to take a photo or tap to record a video.
This feature may not be available depending on the region or service provider.
• Spread two fingers apart on the screen to zoom in, and pinch to zoom out.
• To capture an image from the video while recording, tap .
• To change the focus while recording a video, tap where you want to focus. To focus
on the centre of the screen, tap .
Camera & gallery
92
Selfie
Automatically taking self-portraits
When you are taking photos with the front camera, place your finger on the sensor or use
voice commands to automatically take a photo without tapping the shutter button.
1 Tap Camera on the All apps screen.
2 Tap to switch to the front camera for self-portraits.
3 Face the front camera lens.
4 Place your finger on the sensor at the back of the device, and then lift it to take a photo of
yourself. You can also say “Smile”, “Cheese”, “Capture”, or “Shoot” to take a photo. To record
a video, say “Record video.”
Camera & gallery
93
Wide selfie
Take a wide self-portrait to include more people in the photo and avoid leaving people out.
1 Tap Camera on the All apps screen.
2 Tap to switch to the front camera for self-portraits.
3 Tap MODE → Wide selfie.
4 Face the front camera lens.
5 Place your finger on the sensor at the back of the device, and then lift it to take a photo of
yourself. You can also say “Smile”, “Cheese”, “Capture”, or “Shoot” to take a photo. To record
a video, say “Record video.”
6 Slowly swivel the device left and then right to take a wide self-portrait.
The device will take additional photos when the blue frame moves to each end of the
white frame.
• Make sure to keep the blue frame inside the viewfinder window.
• The subjects should remain still while taking wide self-portraits.
• The resolution of a photo may be affected by lighting conditions.
• The top and bottom parts of the image displayed on the preview screen may be
cut out of the photo depending on the shooting conditions.
Camera & gallery
94
HDR (Rich tone)
Take photos with rich colours and reproduce details even in bright and dark areas.
1 Tap Camera on the All apps screen.
2 Tap to switch to the rear camera.
3 Tap on the preview screen.
The icon will change to .
4 Tap to take a photo.
Without effect With effect
Shooting modes
Take photos using various shooting modes.
Tap Camera on the All apps screen.
Auto
Use this mode to allow the camera to evaluate the surroundings and determine the ideal
mode for the photo.
On the preview screen, tap MODE → Auto.
Camera & gallery
95
Rear-cam selfie
Use this mode to take self-portraits using the rear camera.
1 On the preview screen, tap MODE → Rear-cam selfie.
2 Drag or adjust the frame to set the face detection area.
3 Compose your shot with the rear camera lens facing you.
4 Listen to the beeps to guide you as you adjust the composition.
When your face is positioned inside the face detection area, the camera emits a warning
tone, beeps for a few seconds, and then automatically takes a photo.
Selective focus
Use the out-of-focus effect to make specific objects stand out in a photo.
1 On the preview screen, tap MODE → Selective focus.
2 Tap the image on the preview screen where the camera should focus.
3 Tap to take a photo.
4 Tap the preview thumbnail at the bottom right of the preview screen.
5 Tap and select one of the following:
• Near focus: Make the subject stand out and blur the background around the subject.
• Far focus: Blur the subject and make the background stand out around the subject.
• Pan focus: Make the subject and its background stand out.
Camera & gallery
96
6 Tap .
• It is recommended that you position subjects within 50 cm of the device. Position
the subject that you want to focus on close to the device.
• When taking photos, ensure there is sufficient distance between the subject
and the background. The distance should be more than three times the distance
between the device and the subject.
• The quality of photos taken by the device can be affected in the following
conditions:
– The device or the subject is moving.
– There is strong background light, low levels of light, or you are taking photos
indoors.
– The subject or background has no pattern, or consists of a plain colour.
Panorama
Take a series of photos horizontally or vertically and then stitch them together to create a
wide scene.
On the preview screen, tap MODE → Panorama.
Manage modes
Select the shooting modes to appear on the mode selection screen or change the order of
them.
1 On the preview screen, tap MODE → Manage modes.
2 Tick the modes to add to the modes list.
• Beauty face: Take a photo with lightened faces for gentler images.
• Shot & more: Take a series of photos and modify them by applying various effects
using the shooting modes.
• Virtual tour: Take photos in a space by moving forward or rotating left or right to
capture different angles of the space.
• Dual Camera: Use the front and rear camera at the same time to capture a photo or
record a video from both cameras simultaneously.
Camera & gallery
97
Downloading modes
Download more shooting modes from GALAXY Apps.
On the preview screen, tap MODE → Download.
• To get the best shots using panorama mode, follow these tips:
– Move the camera slowly in one direction.
– Keep the image within the frame on the camera’s viewfinder.
– Avoid taking photos of indistinct backgrounds, such as an empty sky or a plain
wall.
• You can record videos in dual camera mode for up to 5 minutes in Full HD and up
to 10 minutes in HD or VGA.
• While recording videos in dual camera mode, sound is recorded by the internal
microphone.
Camera settings
On the preview screen, tap .
The available options may vary depending on the mode and which camera is being
used.
• : Activate or deactivate the flash.
• : Select the length of the delay before the camera automatically takes a photo.
• : Select a filter effect to use when taking photos or recording videos. To download
more effects, tap Download. To change the order of effects or hide effects from the list,
tap Manage effects.
• : Select a resolution for photos. Using a higher resolution will result in higher quality
photos, but they will take up more memory.
Camera & gallery
98
To access additional camera settings, open the preview screen and tap → .
• Beauty face: Set the device to take a photo with lightened faces for gentler images.
• Exposure value: Change the exposure value. This determines how much light the
camera’s sensor receives. For low-light situations, use a higher exposure.
• ISO: Select an ISO value. This controls camera light sensitivity. Low values are for
stationary or brightly lit objects. Higher values are for fast-moving or poorly lit objects.
However, higher ISO settings can result in noise in photos.
• White balance: Select an appropriate white balance, so images have a true-to-life colour
range.
• Metering modes: Select a metering method. This determines how light values are
calculated. Centre-weighted measures background light in the centre of the scene. Spot
measures the light value at a specific location. Matrix averages the entire scene.
• HDR (Rich tone): Use this to take photos with rich colours and reproduce details even in
bright and dark areas.
• Tap to take pics: Tap the image on the preview screen to take photos.
• Video size: Select a resolution for videos. Using a higher resolution will result in higher
quality photos, but they will take up more memory.
• Video stabilisation: Activate anti-shake to reduce or eliminate blurriness resulting from
camera shake while recording a video.
• Location tags: Attach a GPS location tag to the photo.
• To improve GPS signals, avoid shooting in locations where the signal may be
obstructed, such as between buildings or in low-lying areas, or in poor weather
conditions.
• Your location may appear on your photos when you upload them to the Internet.
To avoid this, deactivate the location tag setting.
• Storage location: Select the memory location for storage.
• Save as flipped: Invert the image to create a mirror-image of the original scene, when
taking photos with the front camera.
• Grid lines: Display viewfinder guides to help composition when selecting subjects.
• Voice control: Set the device to take photos or record videos with voice commands.
Camera & gallery
99
• The volume key: Set the device to use the Volume key to control the shutter or zoom
function.
• Review pictures: Set the device to show photos after capturing them.
• Reset settings: Reset the camera settings.
• : View help information for using the camera.
Gallery
An introduction
View and manage photos and videos stored in the device.
Viewing images or videos
1 Tap Gallery on the All apps screen.
2 Select an image or a video.
Video files show the icon on the preview thumbnail. To play a video, tap .
More options
Delete
Edit
Move to the previous screen.
Share via
Change player
Image and video preview
thumbnails
To hide or show the menu bar and the preview thumbnails, tap the screen.
Camera & gallery
100
Viewing content stored in other devices
Search for content stored in other devices and view it on your device.
Accessing content stored in Samsung Link devices
To use this feature, sign in to your Samsung account. Refer to Registering Samsung accounts
for more information.
On the Gallery main screen, tap and select a device in Registered devices to access
content. You can view content from devices that are registered to Samsung link. Visit
link.samsung.com for more information.
• Ensure that the registered devices are turned on and connected to a Wi-Fi or
mobile network.
• You may incur additional charges when you access content stored in other devices
via the mobile network.
Accessing content stored in nearby devices
Search for nearby devices via Wi-Fi, Wi-Fi Direct, or a mobile hotspot to view content stored in
them on your device.
1 On the All apps screen, tap Settings → NFC and sharing → Nearby devices, and then
tap the Nearby devices switch to activate it.
2 On the Gallery main screen, tap .
3 Select a device in Nearby devices.
You can view images and videos from other devices that have the content sharing feature
activated.
Camera & gallery
101
Deleting images or videos
Deleting an image or a video
Select an image or a video and tap at the top of the screen.
Deleting multiple images and videos
1 On the Gallery main screen, tap and hold an image or a video to delete.
Alternatively, tap → Select.
2 Tick the images or videos to delete.
3 Tap at the top of the screen.
You can also tap → Delete, tick the images or videos to delete, and then tap DONE to delete
multiple items.
102
Safety assistance
Emergency mode
Emergency mode changes the screen to grey tones to reduce battery consumption. Some
apps and functions will be restricted.
Activating emergency mode
1 On the All apps screen, tap Settings → Safety assistance → Emergency mode and tap
the Emergency mode switch to activate it.
Alternatively, press and hold the Power key, and then tap Emergency mode.
2 Read and agree to the terms and conditions and tap OK.
3 Read the on-screen information and tap ENABLE.
Sound alarms.
Add more apps to use.
Make an emergency call.
Remaining battery power and
estimated battery standby time
Turn on the flash.
Send your current location Make a call.
information in a message.
Browse the Internet.
Access additional options.
The estimated maximum standby time shows the time remaining before the battery
power runs out if the device is not used. Standby time may vary depending on your
device settings and operating conditions.
Safety assistance
103
Deactivating emergency mode
To deactivate emergency mode, tap → Disable Emergency mode → DISABLE.
Alternatively, press and hold the Power key, and then tap Emergency mode → DISABLE.
Send help messages
In an emergency situation, quickly press the Power key three times. The device sends
messages to your primary contacts. The messages include your location information. To use
this feature, register your primary contacts first.
Adding primary contacts
1 On the All apps screen, tap Settings → Safety assistance.
2 Tap Manage primary contacts → Create primary contact.
3 Tap Create contact and enter contact information or tap Select from contacts to add an
existing contact as a primary contact.
Setting help messages
1 On the All apps screen, tap Settings → Safety assistance.
2 Tap Send help messages, and then tap the Send help messages switch to activate it.
3 Read and agree to the terms and conditions, and then tap OK.
To send help messages with audio recordings or photos, tick Send sound recording or
Send pictures.
The Send pictures option may not be available depending on the region or service
provider.
104
Useful apps
Car mode
An introduction
Use this mode to control the device while you are driving. You can listen to messages and
music by using voice commands and without touching the device.
Do not look at the screen or perform functions with your hands while driving.
• Navigation maps, your current location, and other navigational data may differ
from actual location information. You should always pay attention to road
conditions, traffic, and any other factors that may affect your driving. Follow all
safety warnings and regulations while driving.
• You may incur additional charges when using the navigation feature.
• This mode may not be available depending on the region or service provider.
• This mode is not supported in some languages.
Starting car mode
When you register a vehicle to your device, you can listen to the sound from the device via
the car’s speakers. You can also set the device to activate car mode automatically when it
connects to the vehicle, and more.
When running this app for the first time, follow the on-screen instructions to complete the
setup.
1 Open the quick settings panel and tap Car mode to activate it.
Useful apps
105
2 Follow the on-screen instructions to complete the setup.
When the Bluetooth permission request window appears, tap YES to allow a vehicle to
search for your device and connect them via Bluetooth.
• Before registering your vehicle, start the vehicle and turn on the radio.
• While you are registering a vehicle to the device, place the device near the vehicle.
Registering more vehicles
Tap MORE → Settings → My cars → ADD.
Using car mode menus
Use car mode menus using voice commands to make calls, send messages, navigate to
places, or play music. You can also tap each menu icons on the screen.
1 Open the quick settings panel and tap Car mode to activate it.
Access additional
options.
Car mode menus
Activate the voice
command feature.
Open the menu
screen.
2 On the car mode main screen say “Hi Galaxy.”
3 When the icon appears, say a voice command to launch the desired menu.
You can also use quick voice commands. To view examples of quick voice commands, tap
MORE → Example commands.
Useful apps
106
Using the navigation feature
Select a location precisely by tapping and holding your finger on the map. Or, use a voice
command to navigate to a destination.
1 Open the quick settings panel and tap Car mode to activate it.
2 On the car mode main screen, say “Hi Galaxy.”
3 Say “Navigation”.
4 Say a keyword or the address for the location.
The device will automatically begin guiding you to the location.
S Finder
An introduction
Search for a wide variety of content with a keyword.
Searching for content
Open the notification panel and tap S Finder.
Enter a keyword in the search field or tap and say a keyword.
To get more refined results, tap the filter buttons under the search field, and then select a tag.
Setting search categories
You can set search categories to search for content in specific search fields.
Tap → Settings → Select search category and tick categories.
Useful apps
107
Managing the search history
Your past searches are saved automatically. To delete a search history item, tap next to an
item.
To set the device to not save the search history, tap → Settings, and deselect Use search
history.
S Planner
An introduction
Manage your schedule by entering upcoming events or tasks in your planner.
Creating events or tasks
1 Tap S Planner on the All apps screen.
2 Tap or double-tap a date.
If the date already has saved events or tasks in it, tap the date and tap .
3 Tap the top left of the screen to select either event or task and enter details.
• Add event: Set a start and end date for an event. You can set an optional repeat
setting.
• Add task: Add a task to do on a specific date. You can set an optional priority setting.
Useful apps
108
Enter a title.
Attach a map showing the
location of the event.
Set a reminder for the event.
Add more details.
Select a calendar to use or sync
with.
Select an item.
Set a start and end date for the
event.
4 Tap SAVE to save the event or task.
Syncing events and tasks with your accounts
On the S Planner main screen, tap → Sync now to sync events and tasks with your accounts.
To add accounts to sync with, tap → Calendars → Add account. Then, select an account
to sync with and sign in. When an account is added, a green circle is displayed next to the
account name.
To change an account’s syncing option, open the All apps screen, tap Settings → Accounts,
and then select an account service.
Useful apps
109
S Health
An introduction
S Health helps you manage your wellness and fitness. Set fitness goals, check your progress,
and keep track of your overall wellness and fitness.
Starting S Health
When running this app for the first time or restart it after performing a data reset, follow the
on-screen instructions to complete the setup.
1 Tap S Health on the All apps screen.
2 Follow the on-screen instructions to complete the setup.
Based on your physical statistics, the device calculates your standard basal metabolic
rate (BMR) and recommends a daily calorie intake. The recommendation may not be
accurate for all ages, body compositions, or nutritional needs.
S Health main screen
You can view the key information from S Health menus and use shortcuts to directly access S
Health menus.
Tap S Health on the All apps screen. Tap → Main screen.
To access more information about S Health functions, open the S Health main screen
and tap → Help.
Useful apps
110
Additional information
• The purpose for such data collection is limited to providing the service that you have
requested, including providing additional information to enhance your wellness, back
up/sync data, data analysis and statistics or to develop and provide better services.
(But if you sign in to your Samsung account from S Health, your data may be saved on
the server for data backup purposes.) Personal information may be stored until the
completion of such purposes. You can delete personal data stored by S Health by using
the Reset data option in the Settings menu. To delete any data you have shared with
social networks or transferred to storage devices, you must delete them separately.
• You assume full responsibility for the inappropriate use of data shared on social networks
or transmitted to others. Use caution when sharing your personal data with others.
• If the device is connected to measuring devices, verify the communication protocol to
confirm proper operation. If you use a wireless connection, such as Bluetooth or ANT+,
the device may be affected by electronic interference from other devices. Avoid using the
device near other devices that transmit radio waves.
• The content used in the S Health app may vary depending on the software version of
the app. The services provided with the app are subject to change or the cancellation of
support without prior notice.
• Available S Health functions and services may vary depending on the local laws and
regulations in your region.
• Some functions of S Health may not be provided depending on your region.
• S Health functions are intended for fitness and informational purposes only and is not
intended for use in the diagnosis of disease or other conditions, or in the cure, mitigation,
treatment, or prevention of disease.
Useful apps
111
S Voice
An introduction
Perform various tasks simply by speaking.
Starting S Voice
1 Tap S Voice on the All apps screen.
Alternatively, press the Home key twice.
This app may not be available depending on the region or service provider.
2 Follow the on-screen instructions to complete the setup.
3 View the tutorial or tap START to skip the tutorial.
Setting the language
Tap → Settings → Language, and then select a language.
The selected language is applied to S Voice only, not to the language displayed on
the device.
Using S Voice
1 Tap S Voice on the All apps screen.
Alternatively, press the Home key twice.
When S Voice is launched, the device begins voice recognition.
2 Say a voice command.
If the device recognises the command, the device will perform the corresponding action.
To repeat a voice command or say a different command, tap .
Useful apps
112
Tips for better voice recognition
• Speak clearly.
• Speak in quiet places.
• Do not use offensive or slang words.
• Avoid speaking in dialectal accents.
The device may not recognise your commands or may perform unwanted commands
depending on your surroundings or how you speak.
Waking up S Voice in standby mode
If S Voice is not used for a certain period, it automatically switches to standby mode. Tap the
microphone icon or say “Hi Galaxy” to the device to resume voice recognition.
Changing the wake-up command
You can change the wake-up command from “Hi Galaxy.” The wake-up command is used to
resume voice recognition when the device is in standby mode.
Tap → Settings → Voice wake-up → Set wake-up command.
Using wake-up commands on the locked screen
On the locked screen, you can use various functions with preset wake-up commands.
Tap → Settings → Voice wake-up → Wake up while locked.
Useful apps
113
Music
An introduction
Listen to music sorted by category and customise playback settings.
Playing music
Tap Music on the All apps screen.
Select a song to play.
Add the song to a playlist.
Skip to the next song. Tap and
hold to fast-forward.
Pause and resume playback.
Access additional options.
Change the repeat mode.
Skip to the previous song. Tap
and hold to rewind.
Turn on shuffle.
Open the playlist.
Search for other devices to play
the file on.
Set the file as your favourite
song.
Adjust the volume.
Useful apps
114
Playing music stored in other devices
Search for music stored in other devices and play it on your device.
Tap Music on the All apps screen.
Accessing music stored in Samsung Link devices
To use this feature, sign in to your Samsung account. Refer to Registering Samsung accounts
for more information.
On the Music main screen, tap DEVICES and select a device in Registered devices to access
and play music. You can play songs from devices that are registered to Samsung link. Visit
link.samsung.com for more information.
• Ensure that the registered devices are turned on and connected to a Wi-Fi or
mobile network.
• You may incur additional charges when you access content stored in other devices
via the mobile network.
Accessing music stored in nearby devices
Search for nearby devices via Wi-Fi, Wi-Fi Direct, or a mobile hotspot to play music stored in
them on your device.
1 On the All apps screen, tap Settings → NFC and sharing → Nearby devices, and then
tap the Nearby devices switch to activate it.
2 On the Music main screen, tap DEVICES.
3 Select a device in Nearby devices to access and play music.
You can play songs from other devices that have the content sharing feature activated.
Useful apps
115
Video
An introduction
Watch videos stored in the device and customise playback settings.
Playing videos
Tap Video on the All apps screen.
Select a video to play.
Change screen ratio.
Rewind or
fast-forward by
dragging the bar.
Search for other
devices to play the
file on.
Skip to the previous
video. Tap and hold
to move backwards
quickly.
Skip to the next
video. Tap and hold
to move forwards
quickly.
Access additional
options.
Switch to the
pop-up video player.
Pause and resume
playback.
Adjust the volume.
Drag your finger up or down on the left side of the playback screen to adjust the brightness,
or drag your finger up or down on the right side of the playback screen to adjust the volume.
To rewind or fast-forward, drag your finger left or right on the playback screen.
Useful apps
116
Playing videos stored in other devices
Search for videos stored in other devices and play them on your device.
Tap Video on the All apps screen.
Accessing videos stored in Samsung Link devices
To use this feature, sign in to your Samsung account. Refer to Registering Samsung accounts
for more information.
On the Video main screen, tap DEVICES and select a device in Registered devices to access
and play the video. You can play videos from devices that are registered to Samsung link. Visit
link.samsung.com for more information.
• Ensure that the registered devices are turned on and connected to a Wi-Fi or
mobile network.
• You may incur additional charges when you access content stored in other devices
via the mobile network.
Accessing videos stored in nearby devices
Search for nearby devices via Wi-Fi, Wi-Fi Direct, or a mobile hotspot to play videos stored in
them on your device.
1 On the All apps screen, tap Settings → NFC and sharing → Nearby devices, and then
tap the Nearby devices switch to activate it.
2 On the Video main screen, tap DEVICES.
3 Select a device in Nearby devices to access and play the video.
You can play videos from other devices that have the content sharing feature activated.
Useful apps
117
Internet
Browse the Internet to search for information and bookmark your favourite webpages to
access them conveniently.
Browsing webpages
1 Tap Internet on the All apps screen.
2 Tap the address field. To change the search engine, tap the search engine icon next to the
web address field.
3 Enter the web address or a keyword, and then tap Go. To search the web by voice, tap .
To view the toolbars, drag your finger downwards slightly on the screen.
Read an article in reading mode.
Bookmark the current webpage.
Open the homepage.
Move to the previously visited
page.
View bookmarked webpages.
Access additional options.
Open the webpage window
manager.
Refresh the current webpage.
View saved pages.
Useful apps
118
Voice Recorder
An introduction
Use different recording modes for various situations, such as in an interview or a meeting. The
device can convert your voice to text and distinguish between sound sources.
Recording voice memos
1 Tap Voice Recorder on the All apps screen.
2 Tap to start recording. Speak into the microphone.
Tap to pause recording. To cancel recording, tap .
While recording a voice memo, tap to insert a bookmark.
Display the list of voice memos.
Change the recording mode.
Access additional options.
Start recording.
Scroll through available
recording modes.
Current recording mode
3 Tap to finish recording.
Useful apps
119
Changing the recording mode
Tap to select a mode from the list.
• Normal: This is the normal recording mode.
• Interview: The microphone is sensitive to sounds from two directions. In this mode, both
the top and the bottom of the device pick up equal amounts of sound. Voice memos
recorded in this mode appear with the icon next to them.
• Meeting: The microphone is sensitive to sounds from various directions. Voice memos
recorded in this mode appear with the icon next to them.
• Voice memo: The device records your voice and simultaneously converts it to on-screen
text. For best results, keep the device near your mouth and speak loudly and clearly in a
quiet place. Voice memos recorded in this mode appear with the icon next to them.
If the voice memo system language does not match the language you are speaking,
the device will not recognise your voice. Before using this feature, tap → Settings →
Language to set the voice memo system language.
Playing selected voice memos
When you review interview or meeting recordings, you can mute or unmute certain sound
sources in the recording.
1 Tap Voice Recorder on the All apps screen.
2 Tap and select a voice memo recorded in meeting mode.
3 To mute certain sound sources, tap for the corresponding direction that sound is to be
muted.
The icon will change to and the sound will be muted.
Unmuted sound source
Muted sound source
Useful apps
120
Clock
An introduction
Set alarms, check the current time in many cities around the world, time an event, or set a
specific duration.
Alarm
On the All apps screen, tap Clock → Alarm.
Setting alarms
1 Tap .
2 Set an alarm time, select the days on which the alarm will repeat, and then set other
various alarm options.
3 Tap DONE.
The saved alarm is added to the alarms list.
4 To activate or deactivate alarms, tap next to the alarm in the alarms list.
Stopping alarms
Drag outside the large circle to stop an alarm. If you have previously enabled the snooze
option, drag outside the large circle to repeat the alarm after a specified length of time.
Deleting alarms
Tap → Select, select alarms, and then tap .
Useful apps
121
World clock
On the All apps screen, tap Clock → World clock.
Creating clocks
Enter a city name or select a city from the globe, and then tap .
To apply summer time, tap , tap and hold a clock, and then tap .
Deleting clocks
Tap → Select, select clocks, and then tap .
Stopwatch
1 On the All apps screen, tap Clock → Stopwatch.
2 Tap START to time an event.
To record lap times while timing an event, tap LAP.
3 Tap STOP to stop timing.
To clear lap times, tap RESET. To restart the timing, tap RESUME.
Timer
1 On the All apps screen, tap Clock → Timer.
2 Set the duration, and then tap START.
3 Drag outside the large circle when the timer goes off.
Useful apps
122
Calculator
Perform simple or complex calculations.
Using the calculator
Tap Calculator on the All apps screen.
Rotate the device to landscape orientation to display the scientific calculator. If Screen
rotation is disabled, tap → Scientific calculator.
To see the calculation history, tap to hide the keypad.
To clear the history, tap → CLEAR HISTORY.
Dropbox
Use this app to save and share files with others via Dropbox cloud storage. When you save
files to Dropbox, your device automatically syncs with the web server and any other devices
that have Dropbox installed.
This app may not be available depending on the region or service provider.
Tap Dropbox on the All apps screen.
When you launch this app for the first time or restart it after performing a data reset, follow
the on-screen instructions to finish the setup.
On the Dropbox main screen, use the following functions:
• : Upload or open files. Tap → Upload here to upload files.
• : View the uploaded images or videos. Tap to share or delete files, or create albums.
• : Open files in the favourites list.
• : View notifications.
Useful apps
123
Flipboard
Use this app to view live social network updates and news in a personalised magazine format.
Tap Flipboard on the All apps screen.
This app may not be available depending on the region or service provider.
When you launch this app for the first time or restart it after performing a data reset, follow
the on-screen instructions to finish the setup.
On the Flipboard main screen, select from various news articles and subscriptions.
Smart Remote
An introduction
Use this app to connect to TVs, set-top boxes, or projectors and use the device as a remote
control.
Useful apps
124
Starting Smart Remote
1 Tap Smart Remote on the All apps screen.
2 Tap START.
3 Select a country, region, and broadcast service.
The available TV programmes appear.
Using the device as a remote control
You can turn the TV on or off, browse channels, or adjust the volume level on the TV using the
device as a remote control.
1 Tap Smart Remote on the All apps screen.
2 Tap → Next.
3 Select the TV brand.
4 Ensure that the device’s infrared port is facing the TV and tap Button 1. Then, tap YES if
the device turns on the TV.
If the device does not turn on the TV, tap NO, and then repeat this until the TV recognises
the signal.
Useful apps
125
5 Select a channel source.
Turn the TV on or off.
TV control menus
Additional functions
Access additional options.
Watching TV using the device
Select a TV programme from the list of available programmes to watch on the connected TV.
1 Tap Smart Remote on the All apps screen.
2 Tap JUST FOR YOU, TV SHOWS, MOVIES, or SPORTS.
3 Select a TV programme and tap WATCH ON TV.
The selected programme will be shown on the connected TV.
4 Tap to change channels or adjust the volume.
The remote control panel appears on the screen.
Setting programme reminders
1 Select a TV programme that is currently not broadcasting.
2 Tap REMIND ME to set an alarm to remind you of the TV programme’s start time.
Useful apps
126
Evernote
Use this app to create, sync, and share multimedia notes. You can add tags to the notes, or
sort the notes into a notebook so that you can efficiently manage your ideas.
Tap Evernote on the All apps screen.
Sign in to your Evernote account. If you do not have one, create an Evernote account. Follow
the on-screen instructions to complete the setup.
This app may not be available depending on the region or service provider.
Composing notes
You can create a note using images, voice recordings, and other attachments.
On the Evernote main screen, tap New note.
While composing a note, use the following options:
• : Set a reminder to the note.
• : Attach files or use additional options.
• : Take a photo and attach it to the note.
• : Access additional options.
Deleting notes
On the notes list, tap and hold a note, and then tap Delete.
Useful apps
127
PEN.UP
Use this app to post and share your sketches drawn with the S Pen.
Tap PEN.UP on the All apps screen.
When you launch this app for the first time or restart it after performing a data reset, tap Sign
up or Sign in at the top of the screen. Then, follow the on-screen instructions to complete the
setup.
Posting your artwork
On the PEN.UP main screen, tap . Add your sketch, enter details, and then tap .
Viewing artwork
On the PEN.UP main screen, select a post. Tap → Save artwork to download the artwork to
your device. The artwork is saved in the PEN.UP folder. To open the folder, open the All apps
screen and tap Gallery → → Album → PEN.UP.
You can only download artwork tagged as wallpaper.
Google apps
Google provides entertainment, social network, and business apps. You may require a Google
account to access some apps. Refer to Setting up accounts for more information.
To view more app information, open the each app’s main screen and tap → Help.
Some apps may not be available or may be labelled differently depending on the
region or service provider.
Chrome
Search for information and browse webpages.
Gmail
Send or receive emails via the Google Mail service.
Useful apps
128
Google+
Share your news and follow updates that your family, friends, and others share. You can also
back up your photos and videos, and more.
Maps
Find your location on the map, search for locations, and view location information for various
places.
Play Music
Discover, listen to, and share music on your device.
Play Movies & TV
Watch videos stored on your device and download various content to watch from the Play
Store.
Play Books
Download various books from Play Store and read them.
Play Newsstand
Read news and magazines that interest you in one convenient location.
Play Games
Download games from Play Store and play them with others.
Drive
Store your content on the cloud, access it from anywhere, and share it with others.
YouTube
Watch or create videos and share them with others.
Useful apps
129
Photos
Manage photos, albums, and videos that you have saved on the device and uploaded to
Google+.
Hangouts
Chat with your friends individually or in groups and use images, emoticons, and video calls
while you are chatting.
Google
Search quickly for items on the Internet or your device.
Voice Search
Search quickly for items by saying a keyword or phrase.
Google Settings
Configure settings for some features provided by Google.
130
Connecting with other devices
Quick Connect
An introduction
Automatically search for nearby devices and quickly connect to them.
• When connecting to a device that does not support the Quick connect feature,
ensure that Wi-Fi Direct or the Bluetooth feature is activated.
• Connection methods may vary depending on the type of connected devices or the
shared content.
• Device name may vary depending on the Bluetooth devices to pair with. For
example, the device name can be shown as BT MAC.
Connecting to other devices
When you launch this app for the first time or restart it after performing a data reset, follow
the on-screen instructions to finish the setup.
1 Open the notification panel and tap Quick Connect.
When the panel opens, the Wi-Fi and the Bluetooth features are activated automatically
and the device searches for nearby devices.
2 Select a device from the list and connect to it by following the on-screen instructions.
The next steps may vary depending on the connected device.
To allow nearby devices to search for your device and connect to it, tap → Set device
visibility → Make your device visible, and then select an option.
Connecting with other devices
131
Re-searching for devices
If the desired device does not appear in the list, search for the device.
Tap and select the device from the list of detected devices.
Deactivating the Quick connect feature
To deactivate the Quick connect feature, drag downwards from the top of the screen.
Alternatively, tap .
Sharing content
Share content with the connected devices.
1 Open the notification panel and tap Quick Connect.
2 Select a device from the list of detected devices.
3 Select a media category.
4 Select the content to share and tap DONE.
Your device sends the content to the connected device.
Connecting with other devices
132
Bluetooth
An introduction
Use Bluetooth to exchange data or media files with other Bluetooth-enabled devices.
• Samsung is not responsible for the loss, interception, or misuse of data sent or
received via Bluetooth.
• Always ensure that you share and receive data with devices that are trusted
and properly secured. If there are obstacles between the devices, the operating
distance may be reduced.
• Some devices, especially those that are not tested or approved by the Bluetooth
SIG, may be incompatible with your device.
• Do not use the Bluetooth feature for illegal purposes (for example, pirating copies
of files or illegally tapping communications for commercial purposes).
Samsung is not responsible for the repercussion of illegal use of the Bluetooth
feature.
Pairing with other Bluetooth devices
1 On the All apps screen, tap Settings → Bluetooth, tap the Bluetooth switch to activate
it, and then tap SCAN.
The detected devices are listed.
2 Select a device to pair with.
If your device has paired with the device before, tap the device name without confirming
the auto-generated passkey.
If the device you want to pair with is not in the list, request that the device turns on its
visibility option. Refer to the other device’s user manuals.
3 Accept the Bluetooth connection request on both devices to confirm.
Connecting with other devices
133
Sending and receiving data
Many apps support data transfer via Bluetooth. You can share data, such as contacts or media
files, with other Bluetooth devices. The following actions are an example of sending an image
to another device.
Sending an image
1 Tap Gallery on the All apps screen.
2 Select an image.
3 Tap → Bluetooth, and then select a device to transfer the image to.
If the device you want to pair with is not in the list, request that the device turns on its
visibility option.
4 Accept the Bluetooth connection request on the other device.
Receiving an image
When another device sends you an image, accept the Bluetooth connection request. The
received image is saved in the Download folder. To open the folder, open the All apps screen
and tap Gallery → → Album → Download.
Unpairing Bluetooth devices
1 On the All apps screen, tap Settings → Bluetooth.
The device displays the paired devices in the list.
2 Tap next to the device name to unpair.
3 Tap Unpair.
Connecting with other devices
134
Wi-Fi Direct
An introduction
Wi-Fi Direct connects devices directly via a Wi-Fi network without requiring an access point.
Connecting to other devices
1 On the All apps screen, tap Settings → Wi-Fi, and then tap the Wi-Fi switch to activate it.
2 Tap → Wi-Fi Direct.
The detected devices are listed.
If the device you want to connect to is not in the list, request that the device turns on its
Wi-Fi Direct feature.
3 Select a device to connect to.
4 Accept the Wi-Fi Direct connection request on the other device to confirm.
Sending and receiving data
You can share data, such as contacts or media files, with other devices. The following actions
are an example of sending an image to another device.
Sending an image
1 Tap Gallery on the All apps screen.
2 Select an image.
3 Tap → Wi-Fi Direct, and then select a device to transfer the image to.
4 Accept the Wi-Fi Direct connection request on the other device.
If the devices are already connected, the image will be sent to the other device without
the connection request procedure.
Connecting with other devices
135
Receiving an image
When another device sends you an image, accept the Wi-Fi Direct connection request. If
the devices are already connected, the image will be received on your device without the
connection request procedure. The received image is saved in the Download folder. To open
the folder, open the All apps screen and tap Gallery → → Album → Download.
Ending the device connection
1 On the All apps screen, tap Settings → Wi-Fi.
2 Tap → Wi-Fi Direct.
The device displays the connected devices in the list.
3 Tap END CONNECTION → OK to disconnect the devices.
NFC
An introduction
Your device allows you to read near field communication (NFC) tags that contain information
about products. You can also use this feature to make payments and buy tickets for
transportation or events after downloading the required apps.
The battery contains a built-in NFC antenna. Handle the battery carefully to avoid
damaging the NFC antenna.
Using the NFC feature
Use the NFC feature to send images or contacts to other devices, and read product
information from NFC tags. If you insert a SIM or USIM card that has a payment feature, you
can use the device to make payments conveniently.
1 On the All apps screen, tap Settings → NFC and sharing → NFC, and then tap the NFC
switch to activate it.
Alternatively, open the quick settings panel and tap NFC to activate it.
Connecting with other devices
136
2 Place the NFC antenna area on the back of your device near an NFC tag.
The information from the tag appears.
Ensure that the device’s screen is unlocked. Otherwise, the device will not read NFC
tags or receive data.
Making a purchase with the NFC feature
Before you can use the NFC feature to make payments, you must register for the mobile
payment service. To register or get more information about the service, contact your service
provider.
1 On the All apps screen, tap Settings → NFC and sharing → NFC, and then tap the NFC
switch to activate it.
Alternatively, open the quick settings panel and tap NFC to activate it.
2 Touch the NFC antenna area on the back of your device to the NFC card reader.
3 Tap Tap and pay and select an app to set the default payment app.
The payment services list may not include all available payment apps.
Connecting with other devices
137
Sending data
Allow data exchange when your device’s NFC antenna touches the other device’s NFC
antenna.
1 On the All apps screen, tap Settings → NFC and sharing → NFC, and then tap the NFC
switch to activate it.
Alternatively, open the quick settings panel and tap NFC to activate it.
2 Tap Android Beam or S Beam and tap the Android Beam or the S Beam switch to
activate it.
• Android Beam: Send data via Bluetooth.
• S Beam: Send data via Wi-Fi Direct. This feature is optimal for large data transfers.
3 Select an item and touch the other device’s NFC antenna to your device’s NFC antenna.
4 When Touch to beam. appears on the screen, tap your device’s screen to send the item.
• Do not send copyright-protected data via S Beam. Doing so may violate copyright
laws. Samsung is not responsible for any liabilities caused by the illegal use of
copyrighted data.
• If both devices try to send data simultaneously, the file transfer may fail.
Connecting with other devices
138
Screen Mirroring
An introduction
Use this feature to connect your device to a large screen with an AllShare Cast dongle or
HomeSync and then share your contents.
Screen Mirroring
-enabled devices
(AllShare Cast dongle
and HomeSync)
• This feature may not be available depending on the region or service provider.
• Some files may be buffered during playback, depending on the network
connection.
• If you specify a Wi-Fi frequency, AllShare Cast dongles or HomeSync may not be
detected or connected.
Connecting with other devices
139
Viewing content on a TV
Before you connect a TV to your device, connect the TV and the screen mirroring-enabled
device. To set up the connection, refer to the device’s user manual. The following actions are
an example of viewing content on a TV connected via an AllShare Cast dongle.
1 Connect the screen mirroring-enabled device to the TV using an HDMI cable.
2 On the TV, select a connection mode, such as HDMI mode, to connect an external device.
3 On the All apps screen, tap Settings → NFC and sharing → Screen Mirroring.
The detected devices are listed.
4 Select a device to connect to. Your device’s screen appears on the TV screen.
If you connect the device for the first time, tap and hold the dongle’s name in the list and
enter the PIN shown on the TV screen.
5 Open or play a file, and then control the display with the keys on your device.
Ending the Screen Mirroring connection
On the All apps screen, tap Settings → NFC and sharing → Screen Mirroring.
• To save energy, deactivate this feature when not in use.
• If you play videos or games on a TV, select an appropriate TV mode to get the best
experience.
Connecting with other devices
140
MirrorLink
Connect your device to a vehicle to control your device’s MirrorLink apps on the vehicle’s
head unit monitor.
Your device is compatible with vehicles that support MirrorLink version 1.1 or higher.
Connecting your device to a vehicle via MirrorLink
When using this feature for the first time, connect the device to a Wi-Fi or mobile network.
1 Pair your device with a vehicle via Bluetooth.
Refer to Pairing with other Bluetooth devices for more information.
2 Connect your device to the vehicle using a USB cable.
When they are connected, access your device’s MirrorLink apps on the head unit monitor.
Ending the MirrorLink connection
Unplug the USB cable from your device and the vehicle.
Connecting with other devices
141
Mobile printing
An introduction
Connect the device to a printer via Wi-Fi or Wi-Fi Direct, and print images or documents.
Some printers may not be compatible with the device.
Adding printer plug-ins
Add printer plug-ins for printers you want to connect the device to.
1 On the All apps screen, tap Settings → NFC and sharing → Printing → Download plugin.
2 Search for a printer plug-in in Play Store.
3 Select a printer plug-in and install it.
4 Select the printer plug-in and tap the switch at the top right of the screen to activate it.
The device searches for printers that are connected to the same Wi-Fi network as your
device.
To add printers manually, tap → Add printer → .
To change print settings, tap → Settings.
Printing content
While viewing content, such as images or documents, tap → Print, and then select a printer.
142
Device & data manager
Updating the device
The device can be updated to the latest software.
Updating over the air
The device can be directly updated to the latest software by the firmware over-the-air (FOTA)
service.
On the All apps screen, tap Settings → About device → Software updates → Update now.
Tick Auto update to automatically check for available updates. To download updates
only when a Wi-Fi connection is activated, tick Wi-Fi only.
Updating with Samsung Kies
Connect the device to a computer and update the device to the latest software.
1 On the computer, download the latest version of Samsung Kies from the Samsung
website.
2 On the computer, launch Samsung Kies and connect the device to the computer using a
USB cable.
3 Follow the on-screen instructions to update the device.
• Do not turn off the computer or disconnect the USB cable while the device is
updating.
• While updating the device, do not connect other media devices to the computer.
Doing so may interfere with the update process. Before updating, disconnect all
other media devices from the computer.
Device & data manager
143
Transferring files between the device and a
computer
Move audio, video, image, or other types of files from the device to the computer, or vice
versa.
Do not disconnect the USB cable from the device when you are transferring files.
Doing so may cause data loss or device damage.
The devices may not connect properly if they are connected via a USB hub. Directly
connect the device to the computer’s USB port.
Connecting as a media device
1 Connect the device to the computer using the USB cable.
2 Open the notification panel, and then tap Connected as a media device → Media
device (MTP).
Tap Camera (PTP) if your computer does not support Media Transfer Protocol (MTP) or
not have any appropriate driver installed.
3 Transfer files between your device and the computer.
Connecting with Samsung Kies
Samsung Kies is a computer app that manages media contents and personal information
with Samsung devices.
1 On the computer, download the latest version of Samsung Kies from the Samsung
website.
2 On the computer, launch Samsung Kies and connect the device to the computer using a
USB cable.
3 Transfer files between your device and the computer.
Refer to the Samsung Kies help for more information.
Device & data manager
144
Backing up and restoring data
Keep your personal information, app data, and settings safe on your device. You can back up
your sensitive information to a backup account and access it later. You must sign in to your
Google or Samsung account to back up or restore data.
Using a Google account
1 Tap Settings on the All apps screen.
2 Tap Backup and reset and tick Back up my data.
3 Tap Backup account and select an account as the backup account.
Using a Samsung account
On the All apps screen, tap Settings → Accounts → Samsung account → Backup, tick the
items to back up, and then tap BACK UP NOW → BACK UP. To set the device to automatically
back up data, tick Auto back up.
• To restore data using a Google account, open the All apps screen, tap Settings
→ Backup and reset, and then tick Automatic restore. When you reinstall apps,
backed up settings and data will be restored.
• To restore data using a Samsung account, open the All apps screen and tap
Settings → Accounts → Samsung account → Restore. Current data will be
deleted from the device to restore the selected items.
Performing a data reset
Delete all settings and data on the device. Before performing a factory data reset, ensure you
back up all important data stored on the device. Refer to Backing up and restoring data for
more information.
On the All apps screen, tap Settings → Backup and reset → Factory data reset → RESET
DEVICE → ERASE EVERYTHING. The device automatically restarts.
145
Settings
An introduction
Customise settings for a wide range of functions and apps. You can make your device more
personalised by configuring various setting options.
Configuring settings
Tap Settings on the All apps screen to access the Settings screen.
To search for settings by entering keywords, tap .
You can change the view mode from list view to separate tabs. Tap → View as →
Tab view.
Quick settings
Create a list of frequently used settings.
Tap → Edit quick settings. Tick items to add or deselect items to remove, and then tap
DONE.
Settings
146
Connections
Wi-Fi
Activate the Wi-Fi feature to connect to a Wi-Fi network and access the Internet or other
network devices.
Your device uses a non-harmonised frequency and is intended for use in all European
countries. The WLAN can be operated in the EU without restriction indoors, but
cannot be operated outdoors.
1 On the Settings screen, tap Wi-Fi, and then tap the Wi-Fi switch to activate it.
2 Select a network from the Wi-Fi networks list.
Networks that require a password appear with a lock icon.
3 Tap CONNECT.
Adding Wi-Fi networks
If the desired network does not appear in the Wi-Fi networks list, you can add it manually.
1 Tap Add Wi-Fi network at the bottom of the list.
2 Enter the network name in Network SSID.
3 Select the security type.
4 Enter the password if it is not an open network, and then tap CONNECT.
Settings
147
Using Smart network switch
Use this feature to maintain a stable network connection when you browse webpages,
download content, and more.
On the Settings screen, tap Wi-Fi, and then tick Smart network switch.
The device automatically switches from a Wi-Fi network to a mobile network when the
current Wi-Fi network is weak or unstable. When the Wi-Fi network signal becomes strong, the
device switches from the mobile network back to the Wi-Fi network.
• Turn off Wi-Fi to save the battery when not in use.
• Once the device connects to a Wi-Fi network, the device will reconnect to that
network each time it is available without requiring a password. To prevent the
device connecting to the network automatically, select it from the list of networks
and tap FORGET.
Bluetooth
Activate the Bluetooth feature to exchange information over short distances.
On the Settings screen, tap Bluetooth, and then tap the Bluetooth switch to activate it.
Tap to view more options.
Tethering and Mobile hotspot
Use the device as a mobile hotspot to share the device’s mobile data connection with other
devices if an Internet connection is unavailable. Connections can be made via Wi-Fi, USB, or
Bluetooth.
On the Settings screen, tap Tethering and Mobile hotspot.
You may incur additional charges when using this feature.
• Mobile hotspot: Use the mobile hotspot to share the device’s mobile data connection
with computers or other devices.
Settings
148
• USB tethering: Use USB tethering to share the device’s mobile data connection with
a computer via USB. When connected to a computer, the device is used as a wireless
modem for the computer.
• Bluetooth tethering: Use Bluetooth tethering to share the device’s mobile data
connection with computers or other devices via Bluetooth.
Using the mobile hotspot
Use your device as a mobile hotspot to share your device’s mobile data connection with other
devices.
1 On the Settings screen, tap Tethering and Mobile hotspot → Mobile hotspot.
2 Tap the Mobile hotspot switch to activate it.
The icon appears on the status bar. Other devices can find your device in the Wi-Fi
networks list.
To set a password for the mobile hotspot, tap → Configure hotspot and select the level
of security. Then, enter a password and tap SAVE.
3 On the other device’s screen, search for and select your device from the Wi-Fi networks
list.
4 On the connected device, use the device’s mobile data connection to access the Internet.
Flight mode
This disables all wireless functions on your device. You can use only non-network services.
On the Settings screen, tap Flight mode.
Data usage
Keep track of your data usage amount and customise the settings for the limitation.
On the Settings screen, tap Data usage.
• Mobile data: Set the device to use data connections on any mobile network.
Tap to view more options.
Settings
149
Location
Change settings for location information permissions.
On the Settings screen, tap Location, and then tap the Location switch to activate it.
• Mode: Select a method to collect your location data.
• Recent location requests: View which apps request your current location information
and their battery usage.
• Location services: View the location services your device is using.
• My places: Save your favourite locations for use with apps that require location
information. Your device will provide relevant information and services by recognising
saved locations using Maps, Wi-Fi, or Bluetooth.
NFC and sharing
Change the settings for various sharing features.
On the Settings screen, tap NFC and sharing.
• NFC: Change settings for using the NFC feature. Refer to NFC for more information.
• Nearby devices: Change the settings for sharing content with nearby devices. All devices
must support Wi-Fi Direct or be connected to the same Wi-Fi network or a mobile
hotspot.
• Printing: Configure settings for printer plug-ins installed on the device. You can search
for available printers or add one manually to print files. Refer to Mobile printing for more
information.
• Screen Mirroring: Activate the screen mirroring feature to share your display with others.
Refer to Screen Mirroring for more information.
• MirrorLink: Use the MirrorLink feature to control your device’s MirrorLink apps on the
vehicle’s head unit monitor. Refer to MirrorLink for more information.
Settings
150
More networks
Customise settings to control networks.
On the Settings screen, tap More networks.
• Download booster: Set the device to download files larger than 30 MB, faster via
Wi-Fi and mobile networks simultaneously. A stronger Wi-Fi signal will provide a faster
download speed.
• This feature may not be supported by some devices.
• You may incur additional charges when downloading files via the mobile network.
• When you download large files, the device may heat up. If the device exceeds a set
temperature, the feature will turn off.
• If network signals are unstable, the speed and performance of this feature may be
affected.
• If the Wi-Fi and mobile network connections have significantly different data
transfer speeds, the device may use only the fastest connection.
• This feature supports Hypertext Transmission Protocol (HTTP) 1.1 and Hypertext
Transmission Protocol Secure (HTTPS). The feature cannot be used with other
protocols, such as FTP.
• Default messaging app: Select the default app to use for messaging.
• Mobile networks: Configure your mobile network settings.
• VPN: Set up and connect to virtual private networks (VPNs).
Device
Sounds and notifications
Change settings for various sounds on the device.
On the Settings screen, tap Sounds and notifications.
• Sound mode: Set the device to use sound mode or silent mode.
• Vibration intensity: Adjust the force of the vibration notification.
Settings
151
• Vibrate when ringing: Set the device to vibrate and play a ringtone for incoming calls.
• Ringtones: Add or select a ringtone for incoming calls.
• Vibrations: Add or select a vibration pattern.
• Notification ringtone: Select a ringtone for events, such as incoming messages.
Display and wallpaper
Change the display settings.
On the Settings screen, tap Display and wallpaper.
• Brightness: Set the brightness of the display.
• Wallpaper: Change the wallpaper settings for the Home screen and the locked screen.
• Font: Change the font size and type.
• One-handed operation: Activate one-handed operation mode for your convenience
when using the device with one hand. Refer to One-handed operation for more
information.
• Screen rotation: Set the content to rotate automatically when the device is turned.
• Smart stay: Set the device to prevent the display backlight from turning off while you are
looking at the display.
• Screen timeout: Set the length of time the device waits before turning off the display’s
backlight.
• Screen mode: Change the screen mode.
• Auto adjust screen tone: Set the device to save power by adjusting the brightness of the
display.
• Daydream: Set the device to launch a screensaver when the device is charging or
connected to a desktop dock.
• LED indicator: Set the device to turn the LED indicator on or off.
• Touch key light duration: Set the duration that the Recents key and the Back key’s
backlight remains on.
• Increase touch sensitivity: Set the device to allow use of the touchscreen with gloves on.
Depending on the type of material you wear while touching the device, some
commands may not be recognised.
Settings
152
Lock screen
Change the settings for the locked screen.
On the Settings screen, tap Lock screen.
• Screen lock: Change the screen lock method. The following options may vary depending
on the screen lock method selected.
• Show information: Change settings for the items displayed on the locked screen.
• Camera shortcut: Set the device to show the camera shortcut on the locked screen.
This feature may not be available depending on the region or service provider.
• Action memo on lock screen: Set the device to launch Action memo when you doubletap
the locked screen with the S Pen while pressing and holding the S Pen button.
• Unlock effect: Select an effect that you see when you unlock the screen.
Multi window
Set the device to use Multi window.
On the Settings screen, tap Multi window, and then tap the Multi window switch to activate
it.
• Open in split screen view: Set the device to activate the Multi window feature when you
open files from My Files, Video, or attachments in messages.
• Pop-up view shortcut: Set the device to display the app screen in a pop-up window
when you drag down diagonally from either end of the top edge of the screen.
Notification panel
Rearrange the quick setting buttons displayed on the notification panel.
On the Settings screen, tap Notification panel.
Settings
153
S Pen
Change the settings for using the S Pen.
On the Settings screen, tap S Pen.
• Air command: Set the device to display the air command features when you hover the
S Pen over the screen and press the S Pen button.
• Air view: Activate the air view feature to perform various actions with the S Pen.
• Pointer: Set the device to display the S Pen pointer when hovering the S Pen over the
screen.
• Direct pen input: Set the device to display the handwriting field icon when hovering the
S Pen over a text input field.
• S Pen alerts: Set the device to display a pop-up alert and emit a sound if you walk when
the touchscreen is off and S Pen is removed from the device.
• Disable pen detection: Set the screen not to respond when inserting or removing the
S Pen.
• S Pen sound: Set the device to make writing sounds when you write or draw on the
screen with the S Pen.
• S Pen vibration feedback: Set the device to vibrate when you write or draw on the
screen with the S Pen.
• Detachment options: Set the device to automatically launch Action memo or display
the air command features when the S Pen is removed from the slot.
• Attach/detach sound: Set the device to emit a sound when the S Pen is inserted or
removed from the slot.
• Attach/detach vibration: Set the device to vibrate when the S Pen is inserted or removed
from the slot.
Settings
154
Motions and gestures
Activate the motion recognition feature and change the settings that control motion
recognition on your device.
On the Settings screen, tap Motions and gestures.
• Direct call: Set the device to make a voice call by picking up and holding the device near
your ear while viewing call, message, or contact details.
• Smart alert: Set the device to alert you if you have missed calls or new messages when
you pick up the device.
• Mute/Pause: Set the device to mute incoming calls or alarms when you cover the screen
with your palm or turn the device over.
• Palm swipe to capture: Set the device to capture a screenshot when you swipe your
hand to the left or right across the screen.
Personalisation
Accounts
Add your Samsung and Google accounts, or other accounts, to sync with.
On the Settings screen, tap Accounts.
Cloud
Change sync, backup, and restore settings for your Samsung and Dropbox accounts.
On the Settings screen, tap Cloud.
Backup and reset
Change the settings for managing settings and data.
On the Settings screen, tap Backup and reset.
• Back up my data: Set the device to back up settings and app data to the Google server.
• Backup account: Set up or edit your Google backup account.
Settings
155
• Automatic restore: Set the device to restore settings and app data when the apps are
reinstalled on the device.
• Factory data reset: Reset settings to the factory default values and delete all data.
Easy mode
Set the device to easy mode.
On the Settings screen, tap Easy mode.
• Standard mode: Set the device to standard mode.
• Easy mode: Set the device to easy mode.
• Easy applications: Select apps to apply simpler layouts.
Accessibility
Use this feature to improve accessibility to the device. Refer to About Accessibility for more
information.
On the Settings screen, tap Accessibility.
Private mode
Set the device to prevent others from accessing your personal content by activating private
mode. Refer to Private mode for more information.
On the Settings screen, tap Private mode, and then tap the Private mode switch to activate
it.
• Private mode access type: Set or change the unlock method to activate private mode.
• Auto disable: Set the device to exit private mode automatically when the screen turns
off.
Settings
156
Finger Scanner
Register your fingerprint to the device to secure the device or sign in to your Samsung
account. Refer to Finger Scanner for more information.
On the Settings screen, tap Finger Scanner.
• Fingerprint manager: Register or delete fingerprint information.
• Change backup password: Set a backup password to use if the device does not
recognise your fingerprint.
• Screen lock: Change the screen lock method.
• Web sign-in: Set the device to verify registered accounts using fingerprints.
• Verify Samsung account: Set the device to verify your Samsung account with
fingerprints.
• Pay with PayPal: Set the device to verify your PayPal account and to authorise purchases
using your fingerprints.
This feature may not be available depending on the region or service provider.
System
Language and input
Change the settings for text input. Some options may not be available depending on the
selected language.
On the Settings screen, tap Language and input.
• Language: Select a display language for all menus and apps.
• Default: Select a default keyboard type for text input.
• Samsung keyboard: Change the Samsung keyboard settings.
The available options may vary depending on the region or service provider.
Settings
157
• Google voice typing: Change the voice input settings.
• Language: Select a language for handwriting recognition. You can search for files
containing handwriting in the selected language.
• Text-to-speech options: Change the text-to-speech settings.
• Notification readout: Set the device to read aloud notifications when you have incoming
calls, messages, or events.
• Pointer speed: Adjust the pointer speed for the mouse or trackpad connected to your
device.
Date and time
Access and alter the following settings to control how the device displays the time and date.
On the Settings screen, tap Date and time.
If the battery remains fully discharged or removed from the device, the time and date
is reset.
• Automatic date and time: Automatically update the time and date when moving across
time zones.
• Set date: Set the current date manually.
• Set time: Set the current time manually.
• Automatic time zone: Set the device to receive time zone information from the network
when you move across time zones.
• Select time zone: Set the home time zone.
• Use 24-hour format: Display time in 24-hour format.
• Select date format: Select a date format.
Settings
158
Safety assistance
Activate the Safety assistance features.
On the Settings screen, tap Safety assistance.
• Emergency mode: Set the device to activate emergency mode and reduce battery
consumption by using basic functions, such as calling. Refer to Emergency mode for
more information.
• Geo News: Set the device to receive notifications for severe weather conditions. To use
this feature, you need to download and install the required app.
• Send help messages: Set the device to send help messages by pressing the Power
key three times. You can also send sound recordings along with the message to the
recipients. Refer to Send help messages for more information.
• Manage primary contacts: Add or edit the recipients for help messages.
Accessories
Change the accessory settings.
On the Settings screen, tap Accessories.
• Dock sound: Set the device to play a sound when your device is connected to or
removed from a desktop dock.
• Audio output: Select a sound output format to use when connecting your device to
HDMI devices. Some devices may not support the surround sound setting.
Power saving
Activate power-saving mode and change the settings for power-saving mode. Refer to Power
saving feature for more information.
On the Settings screen, tap Power saving.
• Power saving mode: Activate power-saving mode and change the settings for powersaving
mode.
• Ultra power saving mode: Extend standby time and reduce battery consumption by
displaying a simpler layout and allowing limited access to an app.
The estimated maximum standby time shows the time remaining before the battery
power runs out if the device is not used. Standby time may vary depending on your
device settings and operating conditions.
Settings
159
• Fast charging: Set the device to use the fast charging feature. Refer to Fast charging for
more information.
• Display battery percentage: Set the device to display the percentage of the battery
remaining on the status bar.
Storage
View memory information for your device.
On the Settings screen, tap Storage.
Formatting a memory card permanently deletes all data from it.
The actual available capacity of the internal memory is less than the specified
capacity because the operating system and default apps occupy part of the memory.
The available capacity may change when you update the device.
Security
Change settings for securing the device and the SIM or USIM card.
On the Settings screen, tap Security.
• Device administrators: View device administrators installed on the device. You can allow
device administrators to apply new policies to the device.
• Unknown sources: Set the device to allow the installation of apps from unknown
sources.
• Encrypt device: Set a password to encrypt data saved on the device. You must enter the
password each time you turn on the device.
Encrypting data may take more than an hour. Before encrypting data, connect the
charger to fully charge the battery and do not unplug it until data encryption is
complete.
• Encrypt external SD card: Set the device to encrypt files on a memory card.
If you reset your device to the factory defaults with this setting enabled, the device
will not be able to read your encrypted files. Disable this setting before resetting the
device.
Settings
160
• Remote controls: Set the device to allow control of your lost or stolen device remotely
via the Internet. To use this feature, you must sign in to your Samsung account.
• SIM change alert: Activate or deactivate the Find my mobile feature which helps locate
the device when lost or stolen.
• Go to website: Access the Find my mobile website (findmymobile.samsung.com). You
can track and control your lost or stolen device from the Find my mobile website.
• Reactivation lock: Set the device to require your Samsung account after the device has
been reset to prevent others from reactivating the device.
• Set up SIM card lock: Change the SIM card lock settings.
• Make passwords visible: Set the device to display passwords as they are entered.
• Security policy updates: Set the device to check and download security updates.
• Send security reports: Set the device to automatically send the updated security reports
to Samsung.
• Storage type: Set a storage type for credential files.
• Trusted credentials: Use certificates and credentials to ensure secure use of various apps.
• Install from device storage: Install encrypted certificates stored in the internal memory.
• Clear credentials: Erase the credential contents from the device and reset the password.
Help
View help information to learn how to use the device and apps or configure important
settings.
On the Settings screen, tap Help.
About device
Access device information, edit the device name, or update device software.
On the Settings screen, tap About device.
Settings
161
Applications
Application manager
View and manage the apps on your device.
On the Settings screen, tap Application manager.
Default applications
Select a default setting for using apps.
On the Settings screen, tap Default applications.
Application settings
Customise app settings.
On the Settings screen, tap Application settings.
162
Accessibility
About Accessibility
Improve accessibility with features that make the device easier to use for users who have
impaired vision, hearing, and reduced dexterity.
On the All apps screen, tap Settings → Accessibility.
Using the Home key to open accessibility menus
You can access the following accessibility menus by pressing the Home key three times
quickly.
• Accessibility
• TalkBack
• Negative colours
• Interaction control
On the All apps screen, tap Settings → Accessibility → Direct access, and then tap the
Direct access switch to activate it. Then, select an accessibility menu to open when you press
the Home key three times quickly.
Voice feedback (TalkBack)
Activating TalkBack
When you activate TalkBack, the device reads aloud the text on the screen or selected
features.
1 On the All apps screen, tap Settings → Accessibility → Vision → TalkBack.
2 Tap the TalkBack switch to activate it.
Accessibility
163
3 Tap OK. The device will start voice feedback.
Some features are not available while you are using TalkBack.
Deactivating TalkBack
1 On the All apps screen, tap Settings → Accessibility → Vision → TalkBack.
2 Tap the TalkBack switch and tap anywhere on the screen twice quickly.
3 Tap OK and tap anywhere on the screen twice quickly. The device will stop voice
feedback.
Controlling the screen with finger gestures
You can use various finger gestures to control the screen while you are using TalkBack.
• Exploring the screen: Place a finger on the screen and move your finger to explore the
screen. Select and hold on an item and the device reads aloud the item. When you
release your finger, the item under your finger is selected.
• Selecting items: Tap an item to select it. Or, select and hold on an item while exploring
the screen, and then release your finger.
• Opening the selected item: While selected items are read aloud, when you hear the item
you want, release your finger from the item. Then, tap anywhere on the screen twice
quickly.
• Selecting the previous item: Quickly swipe upwards or to the left on the screen with one
finger.
• Selecting the next item: Quickly swipe downwards or to the right on the screen with one
finger.
• Scrolling the lists: Swipe upwards or downwards using two fingers.
• Returning to the previous page: Swipe to the right using two fingers.
• Moving to the next page: Swipe to the left using two fingers.
Accessibility
164
• Unlocking the screen: Swipe in any direction within the locked screen area using two
fingers.
• Opening the notification panel: Drag the top of the screen downwards using two fingers.
• Opening the quick settings panel: Drag the top of the screen downwards using three
fingers.
You can configure finger gesture settings for TalkBack in Manage gestures. Refer to
Configuring finger gesture settings for more information.
Configuring finger gesture settings
When using TalkBack, you can use finger gestures to perform various actions, such as
returning to the previous screen, opening the Home screen, and more. Configure finger
gestures before using them.
Configuring settings for vertical gestures
You can use two-part vertical gestures by dragging your finger upwards and downwards from
the bottom of the screen, or vice versa.
On the All apps screen, tap Settings → Accessibility → Vision → TalkBack → SETTINGS →
Manage gestures → Two-part vertical gestures. Then, select one of the following features:
• Move to the first and last items on screen: When you drag your finger upwards and
then downwards on the screen, the first item at the top of the screen is selected. When
you drag your finger downwards and then upwards on the screen, the last item at the
bottom of the screen is selected.
• Cycle through reading granularities: When you drag your finger upwards and then
downwards on the screen, the reading unit changes. The reading unit changes to page,
paragraph, line, word, character, and default. When you drag your finger downwards and
then upwards on the screen, the reading units change in reverse order.
Configuring settings for shortcut gestures
You can change shortcut gestures or assign features to empty shortcuts.
On the All apps screen, tap Settings → Accessibility → Vision → TalkBack → SETTINGS →
Manage gestures. Select a gesture, and then assign a feature to it.
Accessibility
165
Pausing TalkBack
Open the global contextual menu by dragging your finger downwards and then to the right
on the screen without releasing it. When you select Pause feedback at the top left of the
screen, TalkBack pauses.
Adding and managing image labels
You can assign labels to images on the screen. The device reads aloud the labels when the
images are selected. Add labels to unlabelled images by using the local contextual menu.
Open the local contextual menu by dragging your finger upwards and then to the right on
the screen without releasing it. Tap and hold the screen and draw a circle around the menu
with your finger to explore the menus. When you hear the add label menu, release your finger
to add labels.
To view the labels, open the All apps screen and tap Settings → Accessibility → Vision →
TalkBack → SETTINGS → Manage customised labels.
Configuring settings for TalkBack
Configure settings for TalkBack for your convenience.
On the All apps screen, tap Settings → Accessibility → Vision → TalkBack → SETTINGS.
• Speech volume: Adjust the volume level for voice feedback.
• Use pitch changes: Set the device to read aloud text at a low pitch when it is entered
using a keyboard.
• Keyboard echo: Set the device to read aloud a word that you enter using a keyboard
when you tap the space key.
• Speak when screen is off: Set the device to provide voice feedback when the screen is
turned off.
• Use proximity sensor: Set the device to pause voice feedback when you place your hand
over the sensor at the top of the device.
• Shake to start continuous reading: Set the device to read aloud the text displayed on
the screen when you shake the device. You can select from various shaking speeds.
Accessibility
166
• Speak caller ID: Set the device to read the caller’s name aloud when you have an
incoming call.
• Vibration feedback: Set the device to vibrate when you explore the screen.
• Sound feedback: Set the device to emit a sound when you control the screen, such as
scrolling the screen, and more.
• Focus speech audio: Set the device to turn the media volume down when the device
reads an item aloud.
• Sound volume: Adjust the volume that sound is played when you touch the screen to
control it. This feature is available when Sound feedback is selected.
• Explore by touch: Set the device to read aloud the items under your finger.
• Automatically scroll lists: Set the device to automatically scroll through the rest of the
list not displayed on the screen and read the items aloud.
• Single-tap selection: Set the device to open the selected item by tapping it once.
• Launch “Explore by touch” tutorial: View the tutorial about using the Explore by touch
feature.
• Manage gestures: Assign actions to perform using finger gestures. Refer to Configuring
finger gesture settings for more information.
• Manage customised labels: View the labels you added.
• Resume from suspend: Select a method to resume voice feedback when TalkBack is
paused.
• Developer settings: Set options for app development.
Using the device with the screen turned off
Set the device to turn the screen off at all times to keep the content on your screen private.
The screen does not turn on when you press the Home key or tap the screen. Currently
activated features do not turn off when the screen is off.
On the All apps screen, tap Settings → Accessibility → Vision, and then tick Dark screen.
You can activate or deactivate this feature by pressing the Power key twice.
Accessibility
167
Reading passwords aloud
Set the device to read the password aloud when you enter the password while TalkBack is
activated.
On the All apps screen, tap Settings → Accessibility → Vision, and then tick Speak
passwords.
Setting text-to-speech features
Change the settings for text-to-speech features used when TalkBack is activated, such as
languages, speed, and more.
On the All apps screen, tap Settings → Accessibility → Vision → Text-to-speech options,
and then use the following functions:
• Samsung text-to-speech engine / Google Text-to-speech engine: Select an engine for
the text-to-speech feature.
• Speech rate: Select a speed for the text-to-speech feature.
• Listen to an example: Listen to the spoken text for an example. If the device cannot read
examples aloud, tap → Install voice data to download and install voice data for the
text-to-speech feature.
• Default language status: View the status of the current language set for the text-to
speech feature.
Entering text using the keyboard
To display the keyboard, tap the text input field, and then tap anywhere on the screen twice
quickly.
When you touch the keyboard with your finger, the device reads aloud the character keys
under your finger. When you hear the character you want, release your finger from the screen
to select it. The character is entered and the device reads the text aloud.
If Rapid key input is not activated, release your finger from the character you want, and then
tap anywhere on the screen twice quickly. To activate the rapid key input feature, open the All
apps screen, tap Settings → Accessibility → Vision, and then tick Rapid key input.
Accessibility
168
Entering additional characters
Tap and hold a key on the keyboard to enter additional characters available for the key. A
pop-up window appears above the key showing available characters. To select a character,
drag your finger on the pop-up window until you hear the character you want, and release it.
Vision
Changing the font size
Use this feature to change the font size. Setting the font size to Huge may not be available in
some apps.
On the All apps screen, tap Settings → Accessibility → Vision → Font size.
Magnifying the screen
Use this feature to magnify the screen and to zoom in on a specific area.
On the All apps screen, tap Settings → Accessibility → Vision → Magnification gestures,
and then tap the Magnification gestures switch to activate it.
• Zooming in and out: Quickly tap the screen three times to zoom in on a specific area.
Quickly tap the screen three times again to return to the normal view.
• Exploring the screen by scrolling: Drag two or more fingers across the magnified screen.
• Adjusting zoom ratio: Pinch two or more fingers on the magnified screen or spread them
apart.
You can also temporarily magnify the screen by tapping the screen three times and holding.
While holding the screen, drag your finger to explore the screen. Release your finger to return
to the normal view.
• Keyboards on the screen cannot be magnified.
• When this feature is activated, the performance of some apps, such as Phone and
Calculator, may be affected.
Accessibility
169
Hover zoom
Use this feature to magnify content shown on the screen by hovering a pen over it.
On the All apps screen, tap Settings → Accessibility → Vision → Hover zoom, and then tap
the Hover zoom switch to activate it.
Drag the zoom percentage bar to the left or right or tap Magnifier size to change the
magnifier settings.
When this feature is activated, you cannot use some other features, such as the air
command, air view, direct pen input, and TalkBack features.
Setting notification reminders
Use this feature to alert you to notifications that you have not checked at the interval.
On the All apps screen, tap Settings → Accessibility → Vision → Notification reminder, and
then tap the Notification reminder switch to activate it.
To set an interval between alerts, tap Reminder interval.
Reversing the display colours
Use this feature to improve screen visibility and to help users recognise text on the screen
more easily.
On the All apps screen, tap Settings → Accessibility → Vision, and then tick Negative
colours.
Colour adjustment
Use this feature to adjust how colours are displayed on the screen if you have difficulty in
distinguishing colours. The device changes the colours into more recognisable colours.
On the All apps screen, tap Settings → Accessibility → Vision → Colour adjustment, and
then tap the Colour adjustment switch to activate it. Follow the on-screen instructions to
complete the colour adjustment procedure.
Accessibility
170
Hearing
Setting flash notification
Set the flash to blink when you have incoming calls, new messages, or notifications.
On the All apps screen, tap Settings → Accessibility → Hearing, and then tick Flash
notification.
Turning off all sounds
Set the device to mute all device sounds, such as media sounds, and the caller’s voice during
a call.
On the All apps screen, tap Settings → Accessibility → Hearing, and then tick Turn off all
sounds.
Caption settings
On the All apps screen, tap Settings → Accessibility → Hearing → Samsung subtitles (CC)
or Google subtitles (CC), and then tap the Samsung subtitles (CC) or the Google subtitles
(CC) switch to activate it.
Select an option for configuring the caption settings.
Adjusting the sound balance
Set the device to adjust the sound balance when using a headset.
1 Connect a headset to the device and wear it.
2 On the All apps screen, tap Settings → Accessibility → Hearing → Sound balance.
3 Drag the adjustment bar to the left or right and adjust the sound balance, and then tap
SET.
Accessibility
171
Mono audio
Mono output combines stereo sound into one signal that is played through all headset
speakers. Use this if you have a hearing impairment or if a single earbud is more convenient.
On the All apps screen, tap Settings → Accessibility → Hearing, and then tick Mono audio.
Sound detectors
Set the device to vibrate when it detects your doorbell or a baby crying.
Baby crying detector
1 On the All apps screen, tap Settings → Accessibility → Hearing → Sound detectors →
Baby crying detector and tap the switch to activate it.
2 Read the on-screen information and tap OK.
3 Tap to start using the baby crying detector.
The device will vibrate when it detects sound and the alert will be saved as a log.
Doorbell detector
1 On the All apps screen, tap Settings → Accessibility → Hearing → Sound detectors →
Doorbell detector and tap the switch to activate it.
2 Read the on-screen information and tap OK.
3 Tap to make a recording of your doorbell. When you are finished recording, tap NEXT.
4 Tap and ring your doorbell to check if it is recorded correctly. When the device detects
the doorbell sound, tap OK.
To change the doorbell sound, tap → Change doorbell sound.
When the doorbell detector is set up, tap to start using the doorbell detector. The device
will vibrate when it detects the doorbell sound.
Accessibility
172
Changing the alert settings
Tap → Settings to use the following options:
• Vibration intensity: Adjust the force of the vibration notification.
• Vibrations: Change the vibration pattern.
• Flash notification: Set the flash to blink when detecting sound.
Auto haptic
When the auto haptic feature is activated, the device will vibrate with the sound when
playing music, watching videos, or playing games. It will also vibrate when buttons are
tapped in supported apps.
On the All apps screen, tap Settings → Accessibility → Hearing, and then tick Auto haptic.
Some apps may not support this feature.
Dexterity and interaction
Assistant menu
Displaying the assistive shortcut icon
Set the device to display the assistive shortcut icon for accessing apps, features, and settings.
You can easily control the device by tapping the assistive menus in the icon.
1 On the All apps screen, tap Settings → Accessibility → Dexterity and interaction →
Assistant menu.
2 Tap the Assistant menu switch to activate it, and then tap OK to enable single tap mode.
The assistive shortcut icon appears at the bottom right of the screen.
3 Tap Dominant hand to move the assistive shortcut icon to a convenient location.
Accessibility
173
Accessing assistive menus
The assistive shortcut icon appears as a floating icon for easy access to the assistive menus
from any screen.
When you tap the assistive shortcut icon, the icon expands slightly and the assistive menus
appear on the icon. Tap the up or down arrow to move to other panels or swipe upwards or
downwards to select other menus.
Using the cursor
On the assistive menu, tap Cursor. You can control the screen using small finger movements
on the touch area. Drag your finger on the touch area to move the cursor. Also, tap the screen
to select items under the cursor.
Use the following options:
• / : Select an item or scroll left or right on the screen.
• / : Scroll up or down the screen.
• : Move the touch area to another location.
• : Magnify the area where the cursor is located.
• : Close the touch area.
To change the cursor settings, open the All apps screen, tap Settings → Accessibility →
Dexterity and interaction → Assistant menu. Then, customise settings in Touchpad and
cursor settings.
Using enhanced assistive menus
Set the device to display enhanced assistive menus for selected apps.
On the All apps screen, tap Settings → Accessibility → Dexterity and interaction →
Assistant menu → Assistant plus, tap the Assistant plus switch to activate it, and then select
apps.
Accessibility
174
Turning on the screen with the air gesture feature
Use the air gesture feature to turn on the screen by moving your hand above the sensor
at the top of the device. You can turn on the screen without pressing a key. When you use
this feature, place the device on a flat surface or hold the device securely to prevent it from
moving.
On the All apps screen, tap Settings → Accessibility → Dexterity and interaction → Air
wake up, and then tap the Air wake up switch to activate it.
Setting tap and hold delay options
Set the recognition time for tapping and holding the screen.
On the All apps screen, tap Settings → Accessibility → Dexterity and interaction → Tap
and hold delay, and then select an option.
Interaction control
Activate interaction control mode to restrict the device’s reaction to inputs while using apps.
1 On the All apps screen, tap Settings → Accessibility → Dexterity and interaction →
Interaction control.
2 Tap the Interaction control switch to activate it.
3 Press and hold the Home key and the Volume key down simultaneously while using an
app.
4 Adjust the size of the frame or draw a line around an area that you want to restrict.
5 Tap DONE.
The device displays the restricted area. The restricted area will not react when you touch
it and the devices hard keys will be disabled.
To deactivate interaction control mode, press and hold the Home key and the Volume key
down simultaneously.
Accessibility
175
Answering or ending calls
Change the method of answering or ending calls.
On the All apps screen, tap Settings → Accessibility → Answering and ending calls.
Select the desired method.
Using single tap mode
When an alarm sounds or a call comes in, tap the button to stop the alarm or answer the call
instead of dragging the button.
On the All apps screen, tap Settings → Accessibility, and then tick Single tap mode.
Managing accessibility settings
Saving accessibility settings in a file
Export the current accessibility settings in a file.
On the All apps screen, tap Settings → Accessibility → Manage accessibility → Import/
Export, and then select an export option.
Importing an accessibility settings file
Import an accessibility settings file and update the current settings.
On the All apps screen, tap Settings → Accessibility → Manage accessibility → Import/
Export, and then select an import option. Select a file to import and tap DONE → OK. The
accessibility settings will be updated according to the imported file.
Sharing accessibility settings files
Share accessibility settings files with others via email, Wi-Fi Direct, Bluetooth, and more.
On the All apps screen, tap Settings → Accessibility → Manage accessibility → Share via.
Then, select the accessibility files and tap Done. Select a sharing method and follow the onscreen
instructions to share the files.
176
Troubleshooting
Before contacting a Samsung Service Centre, please attempt the following solutions. Some
situations may not apply to your device.
When you turn on your device or while you are using the device, it
prompts you to enter one of the following codes:
• Password: When the device lock feature is enabled, you must enter the password you set
for the device.
• PIN: When using the device for the first time or when the PIN requirement is enabled, you
must enter the PIN supplied with the SIM or USIM card. You can disable this feature by
using the Lock SIM card menu.
• PUK: Your SIM or USIM card is blocked, usually as a result of entering your PIN incorrectly
several times. You must enter the PUK supplied by your service provider.
• PIN2: When you access a menu requiring the PIN2, you must enter the PIN2 supplied with
the SIM or USIM card. For more information, contact your service provider.
Your device displays network or service error messages
• When you are in areas with weak signals or poor reception, you may lose reception. Move
to another area and try again. While moving, error messages may appear repeatedly.
• You cannot access some options without a subscription. For more information, contact
your service provider.
Your device does not turn on
• When the battery is completely discharged, your device will not turn on. Fully charge the
battery before turning on the device.
• The battery may not be inserted properly. Insert the battery again.
• Wipe both gold-coloured contacts and insert the battery again.
Troubleshooting
177
The touchscreen responds slowly or improperly
• If you attach a protective cover or optional accessories to the touchscreen, the
touchscreen may not function properly.
• If you are wearing gloves, if your hands are not clean while touching the touchscreen,
or if you tap the screen with sharp objects or your fingertips, the touchscreen may
malfunction.
• The touchscreen may malfunction in humid conditions or when exposed to water.
• Restart your device to clear any temporary software bugs.
• Ensure that your device software is updated to the latest version.
• If the touchscreen is scratched or damaged, visit a Samsung Service Centre.
Your device freezes or has fatal errors
If your device freezes or hangs, you may need to close apps or reinsert the battery and turn
on the device to regain functionality. If your device is frozen and unresponsive, press and hold
the Power key and the Volume key down simultaneously for more than 7 seconds to restart it.
If this does not solve the problem, perform a factory data reset. On the All apps screen,
tap Settings → Backup and reset → Factory data reset → RESET DEVICE → ERASE
EVERYTHING. Before performing the factory data reset, remember to make backup copies of
all important data stored in the device.
If the problem is still not resolved, contact a Samsung Service Centre.
Calls are not connected
• Ensure that you have accessed the right cellular network.
• Ensure that you have not set call barring for the phone number you are dialling.
• Ensure that you have not set call barring for the incoming phone number.
Others cannot hear you speaking on a call
• Ensure that you are not covering the built-in microphone.
• Ensure that the microphone is close to your mouth.
• If using a headset, ensure that it is properly connected.
Troubleshooting
178
Sound echoes during a call
Adjust the volume by pressing the Volume key or move to another area.
A cellular network or the Internet is often disconnected or audio
quality is poor
• Ensure that you are not blocking the device’s internal antenna.
• When you are in areas with weak signals or poor reception, you may lose reception. You
may have connectivity problems due to issues with the service provider’s base station.
Move to another area and try again.
• When using the device while moving, wireless network services may be disabled due to
issues with the service provider’s network.
The battery icon is empty
Your battery is low. Recharge or replace the battery.
The battery does not charge properly (For Samsung-approved
chargers)
• Ensure that the charger is connected properly.
• If the battery terminals are dirty, the battery may not charge properly or the device may
turn off. Wipe both gold-coloured contacts and try charging the battery again.
• The batteries in some devices are not user-replaceable. To have the battery replaced, visit
a Samsung Service Centre.
The battery depletes faster than when first purchased
• When you expose the battery to very cold or very hot temperatures, the useful charge
may be reduced.
• Battery consumption increases when you use messaging features or some apps, such as
games or the Internet.
• The battery is consumable and the useful charge will get shorter over time.
Troubleshooting
179
Your device is hot to the touch
When you use apps that require more power or use apps on your device for an extended
period of time, your device may feel hot to the touch. This is normal and should not affect
your device’s lifespan or performance.
Error messages appear when launching the camera
Your device must have sufficient available memory and battery power to operate the camera
app. If you receive error messages when launching the camera, try the following:
• Charge the battery or replace it with a battery that is fully charged.
• Free some memory by transferring files to a computer or deleting files from your device.
• Restart the device. If you are still having trouble with the camera app after trying these
tips, contact a Samsung Service Centre.
Photo quality is poorer than the preview
• The quality of your photos may vary, depending on the surroundings and the
photography techniques you use.
• If you take photos in dark areas, at night, or indoors, image noise may occur or images
may be out of focus.
Error messages appear when opening multimedia files
If you receive error messages or multimedia files do not play when you open them on your
device, try the following:
• Free some memory by transferring files to a computer or deleting files from your device.
• Ensure that the music file is not Digital Rights Management (DRM)-protected. If the file is
DRM-protected, ensure that you have the appropriate licence or key to play the file.
• Ensure that the file formats are supported by the device. If a file format is not supported,
such as DivX or AC3, install an app that supports it. To confirm the file formats that your
device supports, visit www.samsung.com.
Troubleshooting
180
• Your device supports photos and videos captured with the device. Photos and videos
captured by other devices may not work properly.
• Your device supports multimedia files that are authorised by your network service
provider or providers of additional services. Some content circulated on the Internet,
such as ringtones, videos, or wallpapers, may not work properly.
Another Bluetooth device is not located
• Ensure that the Bluetooth wireless feature is activated on your device.
• Ensure that the Bluetooth wireless feature is activated on the device you wish to connect
to.
• Ensure that your device and the other Bluetooth device are within the maximum
Bluetooth range (10 m).
If the tips above do not solve the problem, contact a Samsung Service Centre.
A connection is not established when you connect the device to a
computer
• Ensure that the USB cable you are using is compatible with your device.
• Ensure that you have the proper driver installed and updated on your computer.
• If you are a Windows XP user, ensure that you have Windows XP Service Pack 3 or higher
installed on your computer.
• Ensure that you have Samsung Kies or Windows Media Player 10 or higher installed on
your computer.
Your device cannot find your current location
GPS signals may be obstructed in some locations, such as indoors. Set the device to use Wi-Fi
or a mobile network to find your current location in these situations.
Troubleshooting
181
Data stored in the device has been lost
Always make backup copies of all important data stored in the device. Otherwise, you cannot
restore data if it is corrupted or lost. Samsung is not responsible for the loss of data stored in
the device.
A small gap appears around the outside of the device case
• This gap is a necessary manufacturing feature and some minor rocking or vibration of
parts may occur.
• Over time, friction between parts may cause this gap to expand slightly.
Copyright
Copyright © 2014 Samsung Electronics
This manual is protected under international copyright laws.
No part of this manual may be reproduced, distributed, translated, or transmitted in any form
or by any means, electronic or mechanical, including photocopying, recording, or storing
in any information storage and retrieval system, without the prior written permission of
Samsung Electronics.
Trademarks
• SAMSUNG and the SAMSUNG logo are registered trademarks of Samsung Electronics.
• Bluetooth® is a registered trademark of Bluetooth SIG, Inc. worldwide.
• Wi-Fi®, Wi-Fi Protected Setup™, Wi-Fi CERTIFIED Passpoint™, Wi-Fi Direct™, Wi-Fi
CERTIFIED™, and the Wi-Fi logo are registered trademarks of the Wi-Fi Alliance.
• All other trademarks and copyrights are the property of their respective owners.
French. 03/2015. Rev.1.0 www.samsung.com
Mode d’emploi
SM-N910C
SM-N910F
SM-N910H
2
Table des matières
À lire avant utilisation
Démarrage
7 Contenu du coffret
8 Présentation de l’appareil
10 S Pen
13 Installer la carte SIM ou USIM et la
batterie
16 Charger la batterie
19 Utiliser une carte mémoire
21 Allumer et éteindre l’appareil
21 Verrouiller et déverrouiller l’écran
Fonctions de base
22 Utiliser l’écran tactile
25 Disposition de l’écran d’accueil
28 Volets des raccourcis et de paramétrage
rapide
30 Ouvrir des applications
30 Installer ou désinstaller des applications
32 Saisir du texte
34 Capture d’écran
34 Utiliser le dictionnaire
35 Mes fichiers
36 Fonctions d’économie d’énergie
37 Afficher les informations d’aide
Fonctions du S Pen
38 Air Command
39 Action memo
41 Sélection intelligente
42 Image clip
43 Capture
44 S Note
51 Scrapbook
51 Utiliser le S Pen
Reconnaissance des
mouvements et maniabilité
55 Mouvements et gestes
58 Fenêtres multiples
63 Opération à une main
64 Augmenter la sensibilité de l’écran tactile
Personnaliser votre appareil
65 Gérer l’écran d’accueil et les écrans
d’applications
67 Définir un fond d’écran et des sonneries
68 Changer la méthode de verrouillage de
l’écran
69 Mes lieux
72 Lecteur d’empreintes
77 Mode Privé
Table des matières
3
113 Musique
115 Vidéo
117 Internet
118 Enregistreur vocal
120 Horloge
122 Calculatrice
122 Dropbox
123 Flipboard
123 Smart Remote
126 Evernote
127 PEN.UP
127 Applications Google
Établir une connexion avec
d’autres appareils
130 Connexion rapide
132 Bluetooth
134 Wi-Fi Direct
135 NFC
138 Screen Mirroring
140 MirrorLink
141 Utiliser la fonction d’impression mobile
Gestionnaire d’appareils et
de données
142 Mettre à jour l’appareil
143 Transférer des fichiers entre l’appareil et
un ordinateur
144 Sauvegarder et restaurer des données
144 Réinitialiser les données
78 Mode simplifié
79 Transférer des données depuis votre
ancien appareil
80 Paramétrer des comptes
Téléphone et contacts
82 Téléphone
85 Contacts
Messages et e-mails
87 Messages
88 Email
Appareil photo et Galerie
90 Appareil photo
99 Galerie
Assistance sécurité
102 Mode Urgence
103 Envoyer des messages d’aide
Applications utiles
104 Mode Voiture
106 S Finder
107 S Planner
109 S Health
111 S Voice
Table des matières
4
Paramètres
145 Introduction
145 Configurer les paramètres
145 Paramètres rapides
146 Connexions
150 Appareil
154 Personnalisation
156 Système
161 Applications
Accessibilité
162 À propos des menus Accessibilité
162 Utiliser la touche Accueil pour ouvrir les
menus d’accessibilité
162 Informations orales (TalkBack)
168 Vue
170 Audition
172 Dextérité et interaction
175 Prendre ou mettre fin à des appels
175 Utiliser le mode à appui unique
175 Gérer les paramètres d’accessibilité
Dépannage
5
À lire avant utilisation
Veuillez lire attentivement ce mode d’emploi, afin de pouvoir utiliser votre appareil correctement et
en toute sécurité.
• Les descriptions sont basées sur les paramètres par défaut de votre appareil.
• En fonction de votre zone géographique, de votre opérateur ou de la version logicielle, certains
contenus peuvent différer par rapport à votre appareil.
• Les contenus de qualité élevée nécessitant une forte utilisation du processeur et de la RAM
peuvent avoir une incidence sur les performances générales de l’appareil. Les applications en
rapport avec ces contenus peuvent ne pas fonctionner correctement selon les caractéristiques
de l’appareil et les conditions d’utilisation.
• Samsung ne peut être tenu responsable des problèmes de performance relatifs aux applications
fournies par des prestataires autres que Samsung.
• Samsung ne peut être tenu responsable des problèmes de performance ou des incompatibilités
découlant de la modification des paramètres de registre par l’utilisateur. Toute tentative de
personnalisation du système d’exploitation peut entraîner des problèmes de fonctionnement de
l’appareil ou de ses applications.
• Les logiciels, sons, fonds d’écran, images ainsi que les autres contenus multimédia fourni(e)s
avec cet appareil sont concédés sous licence et leur usage est soumis à une utilisation limitée.
L’extraction et l’utilisation de ces éléments à des fins commerciales ou autres constituent
une infraction au regard des lois sur les droits d’auteur. Les utilisateurs sont entièrement
responsables de toute utilisation illégale d’un contenu multimédia.
• Les services de données tels que l’envoi ou la réception de messages, le téléchargement ou
le chargement de données, la synchronisation automatique ou l’utilisation de services de
localisation peuvent occasionner des frais supplémentaires, en fonction de l’offre à laquelle vous
avez souscrit dans le cadre de votre forfait. Pour les transferts de données volumineux, il est
recommandé d’utiliser la fonction Wi-Fi.
• Les applications fournies par défaut avec l’appareil peuvent être modifiées ou ne plus être
disponibles, et ce, sans préavis. Si vous avez des questions à propos d’une application fournie
avec l’appareil, contactez un centre de service après-vente Samsung. Pour les applications
installées par l’utilisateur, contactez les opérateurs.
• Toute modification du système d’exploitation de l’appareil ou installation de logiciels non
officiels peut entraîner des dysfonctionnements et corrompre vos données. Ces actions
constituent des violations de l’accord de licence Samsung et annuleront votre garantie.
À lire avant utilisation
6
Icônes
Avertissement : situations susceptibles de vous blesser ou de blesser autrui
Attention : situations susceptibles d’endommager votre appareil ou d’autres équipements
Avis : informations essentielles concernant l’utilisation de l’appareil, les limites
fonctionnelles de son utilisation, sa charge d’utilisation ou des avis légaux
Remarque : remarques, conseils d’utilisation ou informations complémentaires
7
Démarrage
Contenu du coffret
Vérifiez le contenu du coffret et assurez-vous que tous les éléments suivants sont présents :
• Appareil
• Batterie
• Guide de prise en main rapide
• Les éléments fournis avec l’appareil et les accessoires disponibles peuvent varier en
fonction de votre zone géographique ou de votre opérateur.
• Les accessoires fournis ont été spécialement conçus pour votre appareil et peuvent ne
pas fonctionner avec d’autres appareils.
• L’aspect et les caractéristiques du produit peuvent faire l’objet de modifications sans
préavis.
• Vous pouvez acheter d’autres accessoires auprès de votre revendeur Samsung. Avant
tout achat, assurez-vous qu’ils sont compatibles avec votre appareil.
• Utilisez exclusivement des accessoires homologués par Samsung. L’utilisation
d’accessoires non homologués peut entraîner des problèmes de performances, ainsi que
des dysfonctionnements non couverts par la garantie.
• La disponibilité de l’ensemble des accessoires dépend entièrement des fabricants. Pour
plus d’informations sur la disponibilité des accessoires, consultez le site Web Samsung.
Démarrage
8
Présentation de l’appareil
Microphone
Touche Retour
Connecteur à fonctions
multiples
Capteur de proximité/
luminosité/mouvements
Objectif avant
Touche Marche/Arrêt
Écran tactile
Touche Applications
récentes
Microphone
Touche Accueil (lecteur
d’empreintes)
Témoin lumineux
Haut-parleur
Prise audio 3,5 mm
Antenne principale
Microphone
Touche de volume
Antenne NFC (sur la
batterie)
Objectif arrière
Flash
Cache arrière
Haut-parleur
S Pen
Port infrarouge
Antenne GPS
Démarrage
9
• Ne recouvrez pas la zone autour de l’antenne avec vos mains ou tout autre objet. Cela
peut entraîner des problèmes de connectivité ou décharger la batterie.
• L’utilisation d’une protection d’écran agréée Samsung est recommandée. Les protections
d’écran non agréées peuvent provoquer un dysfonctionnement des capteurs.
• Évitez de mettre l’écran tactile en contact avec de l’eau. L’humidité ou le contact avec l’eau
peut provoquer des dysfonctionnements de l’écran tactile.
Touches
Touche Fonction
Marche/Arrêt
• Maintenir cette touche enfoncée pour allumer ou éteindre
l’appareil.
• Appuyer sur cette touche pour allumer ou verrouiller l’écran.
Applications
récentes
• Appuyer sur cette touche pour ouvrir la liste des applications
récentes.
• Maintenir cette touche enfoncée pour accéder à des options
supplémentaires dans l’écran actuel.
Accueil
• Appuyer sur cette touche pour allumer l’écran lorsqu’il est
verrouillé.
• Appuyer sur cette touche pour revenir à l’écran d’accueil.
• Appuyer deux fois sur cette touche pour lancer l’application S
Voice.
• Maintenir cette touche enfoncée pour lancer la fonction de
recherche Google.
Retour • Appuyer sur cette touche pour revenir à l’écran précédent.
Volume • Appuyer sur cette touche pour régler le volume de l’appareil.
Démarrage
10
S Pen
Touche S Pen
Pointe du S Pen
Pince
Touche/Port Fonctions
Pointe du S Pen
• Utiliser le S Pen pour écrire, dessiner ou réaliser des actions tactiles sur
l’écran.
• Survoler des éléments à l’écran à l’aide du S Pen pour accéder à des
fonctions S Pen supplémentaires comme la fonction Air View.
Touche S Pen
• Survoler l’écran à l’aide du S Pen et appuyer sur la touche S Pen pour
afficher les fonctions Air Command.
• Tout en maintenant la touche S Pen enfoncée, faire glisser le S Pen sur
des éléments pour les sélectionner.
Pince • Ôter la pointe du S Pen à l’aide de la pince pour la remplacer.
Démarrage
11
Retirer le S Pen
Lorsque vous retirez le S Pen de son compartiment, l’appareil lance la fonction Action memo ou
affiche les fonctions Air Command en fonction des paramètres de retrait du S Pen que vous avez
définis.
Pour modifier ce paramètre, ouvrez l’écran Applications et appuyez sur Paramètres → S Pen →
Options de retrait.
Remplacer la pointe du S Pen
Si la pointe est usée, remplacez-la par une pointe neuve.
1 Saisissez fermement la pointe avec la pince, puis tirez.
Démarrage
12
2 Insérez une nouvelle pointe dans le S Pen.
Veillez à ne pas vous pincer les doigts avec la pince.
• Ne réutilisez pas les anciennes pointes. Cela risquerait de provoquer un
dysfonctionnement du S Pen.
• N’exercez pas une pression excessive sur la pointe lorsque vous l’insérez dans le S Pen.
• N’insérez pas l’extrémité arrondie de la pointe dans le S Pen. Cela risquerait
d’endommager le S Pen ou votre appareil.
• Si le S Pen ne fonctionne pas correctement, apportez-le dans un centre de service aprèsvente
Samsung.
• Si vous utilisez le S Pen verticalement sur l’écran, il se peut que l’appareil ne reconnaisse
pas les actions du S Pen. Ne pliez pas et n’exercez pas de pression excessive sur le S Pen
lorsque vous l’utilisez.
• Les touches Applications récentes et Retour peuvent être utilisées avec le S Pen.
• Pour en savoir plus sur le S Pen, consultez le site Web de Samsung.
Démarrage
13
Installer la carte SIM ou USIM et la batterie
Installer la carte SIM ou USIM et la batterie
Insérez la carte SIM ou USIM fournie par votre opérateur, ainsi que la batterie.
• Seules les cartes microSIM sont compatibles avec cet appareil.
• La disponibilité de certains services LTE 4G dépend de votre opérateur. Pour en savoir
plus sur la disponibilité des services, contactez votre opérateur.
1 Retirez le cache arrière.
Veillez à ne pas abîmer vos ongles en retirant le cache arrière.
Évitez de plier ou de déformer excessivement le cache arrière. Vous risqueriez de
l’endommager.
Démarrage
14
2 Insérez la carte SIM ou USIM, puce orientée vers le bas.
• N’introduisez pas de carte mémoire dans le compartiment prévu pour la carte SIM. Si
une carte mémoire venait à se coincer dans le compartiment prévu pour la carte SIM,
apportez l’appareil dans un centre de service après-vente Samsung afin de la faire retirer.
• Veillez à ne pas perdre ou laisser d’autres personnes utiliser votre carte SIM ou USIM.
Samsung ne peut être tenu responsable en cas de dommage ou désagrément résultant
d’une perte ou d’un vol de carte.
3 Insérez la batterie en alignant correctement ses bornes avec celles de l’appareil.
2
1
Démarrage
15
4 Remettez le cache arrière en place.
Retirer la carte SIM ou USIM et la batterie
1 Retirez le cache arrière.
2 Retirez la batterie.
3 Appuyez sur la carte SIM ou sur la carte USIM, puis sortez-la de son compartiment.
Démarrage
16
Charger la batterie
Utiliser le chargeur de batterie
Chargez la batterie avant d’utiliser l’appareil pour la première fois ou lorsque vous ne l’avez pas
utilisé depuis un certain temps.
Utilisez uniquement des chargeurs, des batteries et des câbles homologués par Samsung.
L’utilisation de chargeurs ou de câbles non homologués peut provoquer l’éclatement de la
batterie ou endommager l’appareil.
• Si la batterie est complètement déchargée, vous ne pouvez pas allumer l’appareil,
même si le chargeur est branché. Rechargez la batterie pendant quelques minutes avant
d’allumer l’appareil.
• Si vous utilisez une source d’alimentation autre que l’adaptateur USB, comme un
ordinateur, la vitesse de chargement risque d’être ralentie.
Branchez le câble USB sur l’adaptateur USB, puis la fiche micro-USB sur le connecteur à fonctions
multiples de l’appareil.
Un branchement incorrect du chargeur peut sérieusement endommager l’appareil. Les
dégâts résultant d’une mauvaise utilisation ne sont pas couverts par la garantie.
• Lorsque l’appareil est en cours de chargement, il est possible que l’écran tactile ne
fonctionne pas en raison de l’instabilité de l’alimentation électrique. Dans ce cas,
débranchez le chargeur de l’appareil.
• Il est possible que l’appareil et le chargeur chauffent en cours de chargement. Ce
phénomène est normal et n’affecte ni la durée de vie, ni les performances de l’appareil. Si
la température de la batterie devient trop élevée, le chargement risque de s’interrompre.
• Si l’appareil ne se charge pas correctement, apportez-le, accompagné de son chargeur,
dans un centre de service après-vente Samsung.
Démarrage
17
Lorsque la batterie est complètement chargée, déconnectez l’appareil du chargeur. Pour ce faire,
débranchez d’abord le chargeur de l’appareil, puis de la prise de courant.
Ne retirez jamais la batterie avant d’avoir débranché le chargeur. Ceci pourrait endommager
l’appareil.
• Pour économiser l’énergie, débranchez le chargeur lorsque vous ne l’utilisez pas. Le
chargeur n’étant pas muni d’une touche Marche/Arrêt, vous devez le débrancher de la
prise de courant pour couper l’alimentation. L’appareil doit rester à proximité de la prise
en cours de chargement.
• Le socle de prise de courant doit être installé à proximité du matériel et doit être aisément
accessible.
Réduire la consommation d’énergie de la batterie
Votre appareil est doté de diverses options destinées à économiser l’autonomie de votre batterie.
• Lorsque vous n’utilisez pas l’appareil, désactivez l’écran tactile en appuyant sur la touche
Marche/Arrêt.
• Activez le mode économie d’énergie.
• Fermez toutes les applications fonctionnant inutilement en arrière-plan à l’aide du gestionnaire
de tâches.
• Lorsque vous n’utilisez pas la fonction Bluetooth, désactivez-la.
• Lorsque vous n’utilisez pas la fonction Wi-Fi, désactivez-la.
• Désactivez la fonction de synchronisation automatique des applications.
• Réduisez la durée du rétroéclairage de l’écran.
• Réduisez la luminosité de l’écran.
• Lorsque le niveau de charge est faible, l’icône de la batterie est vide.
• Si vous utilisez simultanément plusieurs applications, des applications réseaux ou des
applications qui nécessitent une connexion à un autre appareil, la batterie se déchargera
rapidement. Pour éviter toute déconnexion du réseau ou perte d’alimentation lors
d’un transfert de données, utilisez toujours ces applications lorsque la batterie est
parfaitement chargée.
• L’appareil peut être utilisé en cours de chargement, mais dans ce cas, le chargement
complet de la batterie risque de prendre plus de temps.
Démarrage
18
Charge rapide
L’appareil est doté d’une fonction de charge rapide intégrée. Vous pouvez utiliser cette fonction pour
charger la batterie plus rapidement si l’appareil ou l’écran est éteint.
À propos de la charge rapide
• La charge rapide utilise la technologie qui permet de recharger une batterie plus rapidement en
augmentant la puissance de charge. L’appareil est compatible avec la fonction de charge rapide
Adaptive de Samsung et l’application Qualcomm Quick Charge 2.0.
• Pour utiliser la charge rapide sur votre appareil, connectez-le à un chargeur de batterie
compatible avec la charge rapide Adaptive ou Quick Charge 2.0.
Augmenter la vitesse de chargement
Pour augmenter la vitesse de chargement, éteignez l’appareil ou son écran lorsque vous chargez la
batterie.
• Si vous chargez la batterie lorsque l’appareil est éteint, l’icône apparaît à l’écran.
• Si vous chargez la batterie lorsque l’appareil est allumé, une fenêtre contextuelle s’affiche pour
vous demander d’éteindre l’écran. Pour augmenter la vitesse de charge, éteignez l’écran.
• Vous ne pouvez pas utiliser la fonction de charge rapide intégrée si vous rechargez la
batterie à l’aide d’un chargeur de batterie standard.
• Si l’appareil chauffe ou si la température de l’air ambiant augmente, il est possible
que la vitesse de chargement diminue automatiquement. Il s’agit d’une condition de
fonctionnement normale pour protéger l’appareil.
Démarrage
19
Utiliser une carte mémoire
Installer une carte mémoire
L’appareil est compatible avec les cartes mémoire d’une capacité allant jusqu’à 128 Go. Selon
le fabricant et le modèle, certaines cartes mémoire peuvent ne pas être compatibles avec votre
appareil.
• Certaines cartes mémoire peuvent ne pas être parfaitement compatibles avec l’appareil.
L’utilisation d’une carte mémoire incompatible peut endommager l’appareil ou la carte
mémoire elle-même et corrompre les données qui y sont stockées.
• Veillez à insérer la carte mémoire du bon côté.
Seules les structures de fichiers FAT et exFAT sont compatibles avec les cartes mémoire de
l’appareil. Lorsque vous insérez une carte mémoire formatée avec une autre structure de
fichiers, l’appareil vous invite à la reformater.
1 Retirez le cache arrière.
2 Insérez la carte mémoire en orientant la puce vers le bas.
3 Remettez le cache arrière en place.
• Une trop grande fréquence des opérations d’effacement et d’écriture réduit la durée de
vie des cartes mémoire.
• Lorsque vous insérez une carte mémoire dans l’appareil, le répertoire de fichiers de la
carte mémoire apparaît dans le dossier Mes fichiers → Carte SD.
Démarrage
20
Retirer une carte mémoire
Avant de retirer la carte mémoire, vous devez au préalable la désactiver pour pouvoir la retirer en
toute sécurité.
Depuis l’écran d’accueil, appuyez sur Applis → Paramètres → Stockage → Démonter la carte SD.
1 Retirez le cache arrière.
2 Retirez la carte mémoire.
3 Remettez le cache arrière en place.
Ne retirez jamais la carte mémoire lorsque l’appareil y enregistre ou lit des informations.
Cela pourrait entraîner une perte ou une corruption des données, ou endommager la carte
mémoire ou l’appareil. Samsung ne peut être tenu responsable en cas de perte de données
résultant d’une utilisation frauduleuse ou en cas de détérioration d’une carte mémoire.
Formater une carte mémoire
Une carte mémoire ayant été formatée sur un ordinateur peut ne pas être compatible avec l’appareil.
Formatez la carte mémoire dans l’appareil.
Depuis l’écran d’accueil, appuyez sur Applis → Paramètres → Stockage → Formater la carte SD →
FORMATER LA CARTE SD → SUPPRIMER TOUT.
Avant de formater la carte mémoire, n’oubliez pas d’effectuer des copies de sauvegarde de
toutes les données importantes qui y sont stockées. La garantie du fabricant ne couvre pas
la perte de données résultant des manipulations de l’utilisateur.
Démarrage
21
Allumer et éteindre l’appareil
Pour allumer l’appareil, maintenez la touche Marche/Arrêt enfoncée pendant quelques secondes.
Si vous allumez l’appareil pour la première fois ou après l’avoir réinitialisé, suivez les instructions
affichées à l’écran pour procéder à sa configuration.
Pour éteindre l’appareil, maintenez la touche Marche/Arrêt enfoncée, puis appuyez sur Éteindre.
Respectez toutes les consignes de sécurité et directives formulées par le personnel
compétent dans les lieux où l’utilisation d’appareils mobiles est interdite, comme par
exemple dans les avions et les hôpitaux.
Verrouiller et déverrouiller l’écran
Lorsque vous appuyez sur la touche Marche/Arrêt, l’écran s’éteint et se verrouille. De même, si vous
n’utilisez pas l’appareil pendant un certain temps, l’écran s’éteint et se verrouille.
Pour déverrouiller l’écran, appuyez sur la touche Marche/Arrêt ou sur la touche Accueil et balayez
l’écran dans n’importe quelle direction.
Vous pouvez modifier la méthode de déverrouillage de l’écran et utiliser des fonctions de sécurité
supplémentaires. Pour en savoir plus, reportez-vous à la section Changer la méthode de verrouillage
de l’écran.
22
Fonctions de base
Utiliser l’écran tactile
• Évitez tout contact de l’écran tactile avec d’autres appareils électriques. Les décharges
électrostatiques peuvent provoquer des dysfonctionnements de l’écran tactile.
• Pour éviter d’endommager l’écran tactile, n’appuyez pas dessus avec un objet pointu et
n’exercez aucune pression excessive avec vos doigts.
• Il se peut que l’appareil ne reconnaisse pas la saisie tactile près des bords de l’écran, hors
de la zone de saisie dédiée.
• Si l’écran tactile reste inactif pendant une période prolongée, des images rémanentes
risquent d’apparaître (ou persistance de l’affichage). Éteignez l’écran tactile lorsque vous
n’utilisez pas l’appareil.
Appuyer
Pour ouvrir une application, sélectionner un élément de menu, appuyer sur une touche à l’écran ou
saisir un caractère sur le clavier à l’écran, appuyez sur l’écran tactile avec un doigt ou avec le S Pen.
Fonctions de base
23
Maintenir appuyé
Pour accéder aux options disponibles, maintenez votre doigt ou le S Pen appuyé sur un élément à
l’écran pendant plus de 2 secondes.
Faire glisser
Pour déplacer un élément, maintenez-y le doigt ou le S Pen appuyé et faites-le glisser vers un nouvel
emplacement.
Appuyer deux fois
Pour effectuer un zoom avant sur une page Web ou une image, appuyez deux fois sur l’écran.
Appuyez de nouveau à deux reprises sur l’écran pour annuler le zoom.
Fonctions de base
24
Balayer
Pour afficher d’autres volets, balayez l’écran d’accueil ou l’écran Applications vers la gauche ou vers la
droite. Pour parcourir une page Web ou une liste d’éléments, telle que celle de vos contacts, balayez
l’écran vers le haut ou le bas.
Écarter et rapprocher les doigts
Pour effectuer un zoom avant sur une page Web, une carte ou une image, placez deux doigts sur
l’écran et écartez-les. Rapprochez-les pour effectuer un zoom arrière.
Fonctions de base
25
Disposition de l’écran d’accueil
Écran d’accueil
L’écran d’accueil est le point de départ pour accéder à toutes les fonctions de l’appareil. Il affiche des
widgets, des raccourcis vers les applications, etc. Les widgets sont de petits outils qui permettent
d’obtenir des informations comme la météo ou l’actualité par exemple.
Pour afficher d’autres volets, balayez l’écran vers la gauche ou la droite ou appuyez sur un volet
miniature en bas de l’écran.
Pour en savoir plus sur la personnalisation de l’écran d’accueil, reportez-vous à la section Gérer l’écran
d’accueil.
Widget
Application Dossier
Volets miniatures
Applications favorites
Icône Applications
Fonctions de base
26
Options de l’écran d’accueil
Maintenez votre doigt appuyé sur une zone vide de l’écran d’acccueil ou rapprochez-y les doigts
pour accéder aux options disponibles. Personnalisez l’écran d’accueil en ajoutant, supprimant ou
réorganisant ses volets. Vous pouvez également définir le fond d’écran d’accueil, lui ajouter des
widgets, etc.
Flipboard Briefing
Utilisez cette fonction pour afficher les tout derniers articles de différentes catégories d’actualités.
Grâce à cette fonction, vous pouvez consulter les actualités qui vous intéressent.
1 Depuis l’écran d’accueil, appuyez sur ou balayez l’écran vers la droite pour ouvrir Flipboard
Briefing.
2 Si vous lancez cette fonction pour la première fois, appuyez sur COMMENCER À LIRE.
3 Pour parcourir les articles de chaque catégorie d’actualités, balayez l’écran vers le haut.
Pour désactiver Flipboard Briefing, maintenez le doigt appuyé sur une zone vide de l’écran
d’accueil. Appuyez ensuite sur Param. écran d’accueil, puis décochez la case Flipboard
Briefing.
Fonctions de base
27
Écran Applications
L’écran Applications affiche les icônes de toutes vos applications, y compris celles récemment
installées.
Depuis l’écran d’accueil, appuyez sur Applis pour ouvrir l’écran Applications. Pour afficher d’autres
volets, balayez l’écran vers la gauche ou la droite ou sélectionnez le point d’un volet en bas de l’écran.
Pour personnaliser l’écran Applications, reportez-vous à la section Gérer l’écran Applications.
Icônes d’informations
Des icônes d’informations peuvent apparaître dans la barre d’état en haut de l’écran. Les icônes
répertoriées dans le tableau ci-dessous sont les plus courantes.
Icône Signification
Aucun signal
Puissance du signal
Itinérance (hors de la zone de service normale)
Réseau GPRS connecté
Réseau EDGE connecté
Réseau UMTS connecté
Réseau HSDPA connecté
Réseau HSPA+ connecté
/ Réseau LTE connecté (pour les modèles prenant en charge le service 4G)
Wi-Fi connecté
Fonction Bluetooth activée
GPS activé
Appel en cours
Appel manqué
Fonction Smart Stay activée
Connecté à un ordinateur
Carte SIM ou USIM absente
Nouveau SMS ou MMS
Fonctions de base
28
Icône Signification
Alarme activée
S Pen détaché
Mode Vibreur activé
Mode Hors-ligne activé
Une erreur s’est produite ou votre attention est nécessaire
Niveau de charge de la batterie
Il se peut que rien ne s’affiche en haut de l’écran dans certaines applications. Pour afficher
des éléments, faites glisser votre doigt de haut en bas de l’écran.
Volets des raccourcis et de paramétrage rapide
Utiliser le volet des raccourcis
Lorsque vous recevez de nouvelles notifications, telles que des messages ou des appels manqués,
des icônes d’information apparaissent en haut de votre écran. Pour en savoir plus sur les icônes,
ouvrez le volet des raccourcis et consultez les détails.
Pour ouvrir le volet des raccourcis, faites glisser la barre d’état vers le bas. Pour refermer le volet des
raccourcis, balayez l’écran de bas en haut.
Fonctions de base
29
Vous pouvez utiliser les fonctions suivantes dans le volet des raccourcis.
Ouvrir les Paramètres.
Lancer la fonction S Finder.
Sélectionner une notification et
exécuter différentes actions.
Effacer toutes les notifications.
Régler la luminosité.
Afficher toutes les touches de
paramétrage rapide.
Activer ou désactiver des options.
Maintenir le doigt appuyé sur une
touche pour afficher les paramètres
détaillés.
Lancer Connex. rapide.
Réorganiser les touches de paramétrage rapide
Pour réorganiser les touches de paramétrage rapide dans le volet des raccourcis, appuyez sur →
, puis maintenez le doigt appuyé sur un élément et faites-le glisser vers un autre emplacement.
Utiliser le volet de paramétrage rapide
Vous pouvez activer ou désactiver certaines fonctions depuis le volet des raccourcis. Pour ce faire,
ouvrez le volet de paramétrage rapide.
Pour ouvrir le volet de paramétrage rapide, faites glisser la barre d’état vers le bas en vous servant de
deux doigts. Une autre solution consiste à appuyer sur l’icône dans le volet des raccourcis. Pour
refermer le volet de paramétrage rapide, balayez l’écran de bas en haut.
Appuyez sur les touches du volet de paramétrage rapide pour activer ou désactiver des fonctions.
Vous pouvez afficher des options de paramétrage plus détaillées en maintenant le doigt appuyé sur
une touche.
Fonctions de base
30
Ouvrir des applications
Depuis l’écran d’accueil ou l’écran Applications, appuyez sur une icône pour ouvrir l’application
correspondante.
Pour ouvrir la liste des applications récemment utilisées, appuyez sur , puis sélectionnez une
fenêtre d’application pour l’ouvrir.
Fermer une application
Appuyez sur → , puis sur FIN à côté d’une application pour la fermer. Pour fermer toutes les
applications en cours d’exécution, appuyez sur FERMER TOUT. Vous pouvez également appuyer sur
→ .
Installer ou désinstaller des applications
Samsung GALAXY Apps
Utilisez cette application pour acheter et télécharger des applications.
Appuyez sur GALAXY Apps depuis l’écran Applications.
La disponibilité de cette application dépend de votre zone géographique ou de votre
opérateur.
Installer des applications
Parcourez les applications par catégorie ou appuyez sur pour rechercher une application à l’aide
d’un mot-clé.
Sélectionnez une application pour en afficher les informations. Pour télécharger des applications
gratuites, appuyez sur Installer. Pour acheter et télécharger des applications payantes, appuyez sur
la touche qui indique le prix de l’application.
Pour modifier les paramètres de mise à jour automatique, appuyez sur → Paramètres →
Mettre à jour les applications automatiquement, puis sélectionnez une option.
Play Store
Utilisez cette application pour acheter et télécharger des applications.
Appuyez sur Play Store depuis l’écran Applications.
Fonctions de base
31
Installer des applications
Parcourez les applications par catégorie ou appuyez sur pour rechercher une application à l’aide
d’un mot-clé.
Sélectionnez une application pour en afficher les informations. Pour télécharger des applications
gratuites, appuyez sur INSTALLER. Pour acheter et télécharger des applications payantes, appuyez
sur le prix et suivez les instructions à l’écran.
Pour modifier les paramètres de mise à jour automatique, appuyez sur → Paramètres
→ Mise à jour automatique des applis, puis sélectionnez une option.
Gérer les applications
Désinstaller ou désactiver des applications
Pour désactiver des applications par défaut, ouvrez l’écran Applications, puis appuyez sur →
Désinstaller/désactiver des applications. L’icône apparaît sur les applications qu’il est possible
de désactiver. Sélectionnez une application, puis appuyez sur DÉSACTIVER.
Pour désinstaller des applications téléchargées, ouvrez l’écran Applications, puis appuyez sur →
Applications téléchargées → → Désinstaller, sélectionnez une application, puis appuyez sur
DÉSINSTALLER. Une autre solution consiste à appuyer, depuis l’écran Applications, sur Paramètres
→ Gestionnaire d’applications, à sélectionner une application, puis à appuyer sur DÉSINSTALLER.
Activer les applications désactivées
Depuis l’écran Applications, appuyez sur → Afficher les applis désactivées, sélectionnez les
applications à activer de nouveau, puis appuyez sur OK. Une autre solution consiste à appuyer,
depuis l’écran Applications, sur Paramètres → Gestionnaire d’applications, sélectionner l’onglet
DÉSACTIVÉ, une application, puis appuyer sur ACTIVER.
Masquer des applications
Vous pouvez masquer les applications que vous ne voulez pas retrouver sur l’écran Applications.
Depuis l’écran Applications, appuyez sur → Masquer applications.
Pour afficher les applications masquées, appuyez sur → Afficher les applications masquées.
• Masquer des applications : masquer des applications uniquement sur l’écran
Applications. Vous pouvez continuer à utiliser les applications masquées.
• Désactiver des applications : désactiver les applications fournies par défaut et ne
pouvant pas être désinstallées de l’appareil. Vous ne pouvez pas utiliser les applications
désactivées.
• Désinstaller des applications : désinstaller des applications téléchargées.
Fonctions de base
32
Saisir du texte
Présentation du clavier
Un clavier apparaît automatiquement lorsque vous saisissez du texte pour envoyer des messages ou
créer des mémos.
La saisie de texte est impossible dans certaines langues. Pour saisir du texte, vous devez
sélectionner une des langues prises en charge.
Passer à la ligne suivante.
Supprimer le caractère précédent.
Saisir des signes de ponctuation.
Saisir des majuscules. Pour saisir
l’ensemble de votre texte en
majuscules, appuyez deux fois sur
cette touche.
Basculer en mode de saisie
manuscrite.
Insérer un espace.
Modifier la langue de saisie
Maintenez le doigt appuyé sur l’icône , appuyez sur → Sélectionner langue de saisie, puis
sélectionnez les langues à utiliser. Si vous sélectionnez au moins deux langues, vous pouvez passer
de l’une à l’autre en balayant la touche d’espace vers la gauche ou vers la droite.
Modifier la disposition du clavier
Maintenez le doigt appuyé sur l’icône , appuyez sur , sélectionnez une langue sous Langues de
saisie, puis sélectionnez la disposition de clavier à utiliser.
Sur le Clavier 3x4, une touche correspond à trois ou quatre caractères. Pour saisir un
caractère, appuyez à plusieurs reprises sur la touche correspondante jusqu’à ce que le
caractère correspondant s’affiche.
Fonctions de base
33
Utiliser les fonctions supplémentaires du clavier
Maintenez le doigt appuyé sur l’icône pour utiliser diverses fonctions. Suivant la dernière
fonction utilisée, d’autres icônes peuvent apparaître à la place de l’icône .
• : saisir du texte en le dictant.
Changer de langue.
Ouvrir le clavier.
Démarrer ou interrompre la saisie
orale de texte.
• : basculer en mode de saisie manuscrite.
Revenir au clavier standard.
Basculer entre le mode numérique
ou le mode lettres.
La disponibilité de cette fonction dépend de votre zone géographique ou de votre
opérateur.
• : ajouter un élément du presse-papier.
• : modifier les paramètres du clavier.
• : insérer des émoticônes.
• : activer le clavier flottant. Vous pouvez déplacer le clavier en faisant glisser l’onglet à un
autre endroit.
Revenir au clavier standard.
Fonctions de base
34
Copier et coller du texte
1 Maintenez le doigt appuyé sur le texte.
2 Faites glisser l’icône ou pour sélectionner le texte voulu, ou appuyez sur Sélect. tout pour
sélectionner l’intégralité du texte.
3 Appuyez sur Copier ou sur Couper.
Le texte sélectionné est copié dans le presse-papier.
4 Placez le curseur à l’endroit où le texte doit être inséré, puis appuyez sur → Coller.
Pour coller le texte préalablement copié, appuyez sur Presse-papier, puis sélectionnez le texte.
Capture d’écran
Vous pouvez effectuer une capture d’écran en cours d’utilisation de l’appareil.
Maintenez simultanément les touches Accueil et Marche/Arrêt enfoncées. L’image est enregistrée
dans le dossier Screenshots. Pour ouvrir le dossier, ouvrez l’écran Applications et appuyez sur
Galerie → → Album → Screenshots. Après avoir réalisé une capture d’écran, vous pouvez
modifier l’image et la partager.
Il existe également d’autres méthodes pour effectuer une copie d’écran. Pour en savoir plus,
reportez-vous à la section Balayer pour capturer.
Cette fonction n’est disponible que pour certaines applications.
Utiliser le dictionnaire
Recherchez des définitions ou traductions de termes en cours d’utilisation de fonctions, par exemple
lorsque vous parcourez des pages Web.
1 Maintenez le doigt appuyé sur un terme que vous souhaitez rechercher.
Si le terme que vous souhaitez rechercher n’a pas été correctement sélectionné, faites glisser les
icônes ou pour sélectionner le texte désiré.
Fonctions de base
35
2 Appuyez sur Dictionnaire.
Si aucun dictionnaire n’est préinstallé sur l’appareil, suivez les instructions à l’écran pour en
installer un.
3 Affichez la définition.
Pour afficher davantage de définitions ou traductions, appuyez sur . Dans la vue détaillée,
appuyez sur pour ajouter le mot à votre liste de termes favoris ou appuyez sur RECHERCHE
WEB pour utiliser le terme comme critère de recherche.
Dans la vue détaillée, appuyez sur pour afficher davantage d’options.
Mes fichiers
Accédez à divers fichiers stockés sur l’appareil ou, par exemple, sur des services de stockage cloud, et
gérez-les.
Utiliser le menu Mes fichiers
Appuyez sur Mes fichiers depuis l’écran Applications.
Accéder à des options
supplémentaires.
Afficher l’historique de
téléchargement.
Rechercher des fichiers ou des
dossiers.
Afficher les fichiers stockés sur
l’appareil.
Afficher les fichiers par catégorie.
Fonctions de base
36
Fonctions d’économie d’énergie
Mode Éco. d’énergie
Préservez l’autonomie de la batterie en limitant les fonctions de l’appareil.
Depuis l’écran Applications, appuyez sur Paramètres → Économie d’énergie → Mode Éco.
d’énergie, puis faites glisser le curseur Mode Éco. d’énergie vers la droite pour activer la fonction.
Une autre solution consiste à ouvrir le volet de paramétrage rapide, puis à appuyer sur Éco. énergie
pour activer cette fonction.
Sélectionnez parmi les options suivantes :
• Restr. données arrière-plan : empêcher les applications exécutées en arrière-plan d’utiliser une
connexion de données mobiles.
• Limiter les performances : limiter diverses options, par exemple en désactivant le rétroéclairage
des touches Applications récentes et Retour.
• Mode Échelle de gris : afficher les couleurs à l’écran en nuances de gris.
Mode Ultra économie d’énergie
Utilisez cette fonction pour prolonger l’autonomie de la batterie. En mode Ultra économie d’énergie,
l’appareil se comporte comme suit :
• Elle affiche les couleurs à l’écran en nuances de gris.
• Il limite le nombre d’applications disponibles et affiche uniquement les applications
sélectionnées.
• Il désactive la connexion de données mobiles quand l’écran s’éteint.
• Il désactive les fonctions Wi-Fi et Bluetooth.
1 Depuis l’écran Applications, appuyez sur Paramètres → Économie d’énergie → Mode Ultra
économie d’énergie, puis faites glisser le curseur Mode Ultra économie d’énergie vers la droite
pour activer la fonction.
Une autre solution consiste à ouvrir le volet de paramétrage rapide, puis à appuyer sur l’option
Ultra éco énergie pour activer cette fonction.
2 Lisez et acceptez les conditions générales, puis appuyez sur OK.
Fonctions de base
37
3 Lisez les informations à l’écran concernant l’utilisation de ce mode, puis appuyez sur ACTIVER.
Pour désactiver le mode Ultra économie d’énergie, appuyez sur → Désact. Ultra économie énergie
→ DÉSACTIV.
Le délai de veille maximum estimé est le temps qu’il faut à la batterie pour se décharger
complètement lorsque l’appareil n’est pas utilisé. Le délai de veille peut varier selon les
paramètres de l’appareil et les conditions d’utilisation.
Afficher les informations d’aide
Pour afficher des informations d’aide et savoir comment utiliser l’appareil et les applications, ouvrez
l’écran Applications, puis appuyez sur Paramètres → Aide.
Pour accéder aux informations d’aide relatives à une application lorsque vous l’utilisez, appuyez sur
→ Aide.
Il est possible que certaines applications ne comportent aucune information d’aide.
38
Fonctions du S Pen
Air Command
Retirez le S Pen de son compartiment ou survolez n’importe quelle partie de l’écran à l’aide du S Pen
et appuyez sur la touche S Pen pour accéder à quatre fonctions particulièrement utiles.
Avec les fonctions Air Command, vous pouvez effectuer différentes actions.
Image clip
Capture
Action memo
Sélection intelligente
• Action memo : écrire rapidement des mémos et leur associer des actions. Vous pouvez
passer des appels, envoyer des messages, effectuer des recherches sur le Web, etc. Pour en
savoir plus, reportez-vous à la section Action memo.
• Sélection intelligente : collecter rapidement du contenu. Pour en savoir plus, reportez-vous
à la section Sélection intelligente.
• Image clip : entourer une zone de l’écran que vous souhaitez enregistrer ou partager. Pour en
savoir plus, reportez-vous à la section Image clip.
• Capture : capturer, modifier et rédiger des mémos sur des captures d’écran, puis les partager.
Pour en savoir plus, reportez-vous à la section Capture.
Si cette fonction n’est pas activée, ouvrez l’écran Applications, appuyez sur Paramètres → S
Pen → Air Command, puis faites glisser le curseur Air Command vers la droite pour activer
la fonction.
Fonctions du S Pen
39
Action memo
Ouvrez le volet Action memo et créez des mémos afin d’exécuter diverses opérations à l’aide
d’informations écrites ou dessinées.
1 Depuis le volet Air command, appuyez sur Action memo.
2 Écrivez ou dessinez un mémo.
3 Appuyez sur .
Le mémo est entièrement sélectionné. Si vous souhaitez utiliser des informations spécifiques du
mémo, appuyez en dehors de la zone sélectionnée pour désélectionner le mémo et tracez un
trait autour des informations pour les utiliser.
Accéder à des options
supplémentaires.
Ajuster la taille du pavé du mémo.
Effacer le mémo.
Rédiger un mémo ou modifier la
couleur du crayon.
Modifier le mémo sous forme de
fichier S Note.
Fonctions disponibles pour le
mémo sélectionné
Sélectionner un texte saisi.
Enregistrer le mémo.
Ignorer le mémo.
Ajouter le mémo comme widget
sur l’écran d’accueil.
Fonctions du S Pen
40
4 Sélectionnez une application à utiliser avec les informations de mémo sélectionnées.
L’application sélectionnée est lancée depuis Action memo.
Rechercher un
emplacement.
Créer une tâche.
Envoyer un message.
Créer un contact.
Passer un appel.
Effectuer des recherches sur
le Web.
Envoyer un e-mail.
Afficher des mémos
Depuis l’écran Action memo, appuyez sur → Afficher la liste des notes d’action. Sélectionnez un
mémo à afficher et modifiez-le.
Ajouter des widgets Action memo à l’écran d’accueil
Après avoir composé un mémo, maintenez le doigt appuyé sur , puis faites glisser le mémo jusqu’à
un emplacement vide de l’écran d’accueil. Un widget Action memo est ajouté à l’écran d’accueil et
vous pouvez afficher et modifier le mémo.
Modifier un mémo sous forme de fichier S Note
Lorsque vous rédigez un mémo, appuyez sur pour ouivrir S Note et utilisez cette application pour
modifier le mémo. La couleur de crayon utilisée dans Action memo est appliquée dans S Note.
Fonctions du S Pen
41
Sélection intelligente
Collectez du contenu figurant sur l’écran à l’aide du S Pen. Vous pouvez collecter des contenus
depuis des pages Web, ainsi que des contenus audio ou vidéo en cours de lecture.
1 Lorsque vous trouvez un contenu que vous souhaitez conserver, comme une portion de page
Web, ouvrez le volet Air command et appuyez sur Sélection intelligente.
2 Faites glisser le S Pen sur le contenu que vous souhaitez collecter.
Enregistrer dans
Scrapbook
Partager via
Collecter
3 Choisissez une option à utiliser avec l’élément collecté.
• : enregistrer l’élément dans Scrapbook.
• : partager l’élément avec d’autres personnes.
• : extraire du texte de l’élément. Vous pouvez copier le texte extrait dans le presse-papiers
ou l’insérer dans des messages, notes, etc.
Extraire du texte.
• : enregistrer l’élément dans la liste des éléments collectés afin de recueillir davantage
d’éléments.
Fonctions du S Pen
42
Collecter plusieurs éléments
Appuyez sur pour ajouter du contenu à votre liste d’éléments collectés afin de l’utiliser
ultérieurement. Pour recueillir davantage de contenu, appuyez sur dans la fenêtre contextuelle
des éléments collectés.
Pour afficher les éléments collectés, appuyez sur la fenêtre contextuelle correspondante. Vous
pouvez partager, supprimer ou enregistrer plusieurs éléments simultanément. Pour sélectionner
un seul élément de la liste des éléments collectés, maintenez votre doigt appuyé sur l’élément en
question.
Pour supprimer les éléments collectés, maintenez votre doigt appuyé sur la fenêtre
contextuelle des éléments collectés, puis faites-la glisser jusqu’à l’option Supprimer en haut
de l’écran.
Image clip
Utilisez le S Pen pour dessiner une forme autour de la zone à enregistrer ou partager. Vous pouvez
rogner une partie de l’image.
1 Lorsque vous trouvez un contenu que vous souhaitez conserver, comme une portion d’image,
ouvrez le volet Air command et appuyez sur Image clip.
2 Tracez un trait autour d’une zone pour la sélectionner à l’aide du S Pen.
Remodelez la zone sélectionnée en choisissant une icône de forme dans la barre d’outils ou
appuyez sur pour remodeler automatiquement la zone sélectionnée.
Fonctions du S Pen
43
3 Choisissez une option à utiliser avec la zone sélectionnée.
• : enregistrer la zone sélectionnée dans Scrapbook.
• : partager la zone sélectionnée avec d’autres personnes.
Capture
Effectuez des captures d’écran pour écrire ou dessiner dessus.
1 Lorsque vous trouvez un contenu que vous souhaitez capturer, comme une portion de page
Web, ouvrez le volet Air command et appuyez sur Capture.
L’écran affiché est automatiquement capturé et la barre d’outils d’édition apparaît à l’écran.
2 Rédigez un mémo sur la capture d’écran.
3 Choisissez une option à utiliser avec la capture d’écran.
• : partager la capture d’écran avec d’autres personnes.
• : enregistrer la capture d’écran. Pour afficher la capture d’écran enregistrée, ouvrez l’écran
Applications et appuyez sur Galerie → → Album → Screenshots.
Cette fonction n’est disponible que pour certaines applications.
Fonctions du S Pen
44
S Note
Introduction
Créez des notes personnalisées en enregistrant ce qui vous vient à l’esprit. Vous pouvez insérer des
fichiers multimédia et créer des notes photographiques.
Lancer S Note
1 Appuyez sur S Note depuis l’écran Applications.
Vous pouvez également, depuis l’écran d’accueil, appuyer sur le widget S Note.
2 Lisez les informations à l’écran concernant l’application, puis appuyez sur SUIVANT.
3 Sélectionnez des styles de couverture, puis appuyez sur SUIVANT.
4 Sélectionnez un modèle de note par défaut, puis appuyez sur SUIVANT.
5 Sélectionnez un compte avec lequel synchroniser vos notes, puis appuyez sur DÉBUT.
Si vous n’êtes pas connecté(e) au compte sélectionné, suivez les instructions à l’écran pour vous
y connecter.
Si vous synchronisez vos notes avec un compte, vous pouvez les afficher sur d’autres appareils
en enregistrant le compte sur ces appareils.
Fonctions du S Pen
45
Utiliser le widget S Note
Vous pouvez lancer certaines fonctions S Note directement depuis le widget S Note.
Depuis l’écran d’accueil, appuyez sur une icône du widget S Note.
Lancer S Note. Insérer un mémo vocal.
Créer une note en mode de
saisie manuscrite.
Créer une note
photographique
(Photo Note).
Créer une note en mode
texte.
Créer des notes
1 Appuyez sur S Note depuis l’écran Applications.
Vous pouvez également, depuis l’écran d’accueil, appuyer sur le widget S Note.
2 Appuyez sur .
3 Composez une note.
Appuyez sur pour écrire ou dessiner à l’écran ou sur pour saisir du texte à l’aide du clavier.
Mode Saisie manuscrite
Mode gomme Sauveg.
Style du texte
Annuler/Recommencer
Mode de sélection
Afficher davantage d'options
Photo Note
S Pen et doigt/S Pen uniquement
Ajouter une page
Fonctions du S Pen
46
Modifier les paramètres du crayon
Lorsque vous écrivez ou dessinez à l’écran, appuyez une fois sur pour modifier le type de crayon,
l’épaisseur du trait ou la couleur de l’encre.
Ouvrir le profil de crayon prédéfini.
Enregistrer les paramètres en cours
comme profil de crayon.
Modifier l’épaisseur de la ligne.
Modifier la couleur du crayon.
Changer de type de crayon.
Sélectionner une nouvelle couleur à
l’aide de la palette.
Stylo-plume Stylo de calligraphie
Utiliser la gomme
1 Appuyez sur .
2 Appuyez sur une zone à effacer.
Le trait entier de la zone est effacé. La gomme peut effacer votre S Note trait par trait.
• Pour effacer uniquement la zone au contact du S Pen, appuyez à nouveau sur et décochez
la case Eff. par trait. Vous pouvez régler la taille de la gomme en faisant glisser la barre de
réglage de la taille.
• Pour effacer la note, appuyez sur EFF. TOUT.
Même avec une gomme plus petite, il est possible que vous ne puissiez pas effacer
précisément la partie que vous souhaitez supprimer.
Fonctions du S Pen
47
Modifier des notes manuscrites
Modifiez les notes manuscrites à l’aide de différentes options d’édition, comme couper, déplacer,
redimensionner ou transformer.
1 Lorsque la note comporte une entrée manuscrite ou dessinée, appuyez sur .
2 Appuyez sur l’entrée ou tracez une ligne autour de celle-ci pour la sélectionner et la modifier.
Pour déplacer l’entrée vers un autre emplacement, sélectionnez-la, puis faites-la glisser vers un
nouvel emplacement.
Pour redimensionner l’entrée, sélectionnez-la, puis faites glisser les contours du cadre qui
l’entoure.
3 Utilisez l’une des options suivantes :
• : modifier les propriétés de l’entrée, telles que sa présentation, sa taille, sa couleur ou son
épaisseur.
• : affiner ou convertir l’entrée manuscrite ou dessinée.
• : couper l’entrée. Pour la coller à un autre emplacement, maintenez le doigt appuyé sur
l’emplacement, puis appuyez sur Coller.
• : copier l’entrée. Pour la coller à un autre emplacement, maintenez le doigt appuyé sur
l’emplacement, puis appuyez sur Coller.
• : supprimer l’entrée.
Mode manuscrit agrandi
Appuyez sur → Aff. note agrandie et faites glisser le cadre agrandi vers une zone. La zone du
cadre agrandi apparaît dans la fenêtre agrandie en bas de l’écran. Vous pouvez saisir ou corriger avec
précision la zone manuscrite.
Fonctions du S Pen
48
Enregistrer des esquisses
Vous pouvez enregistrer vos actions tout en composant une note.
1 Appuyez sur → Enregistrer esquisse.
2 Appuyez sur et écrivez ou dessinez une note.
Vos actions sont enregistrées en temps réel.
3 Pour arrêter l’enregistrement, appuyez de nouveau sur .
Appuyez sur pour afficher l’enregistrement.
Créer des notes photographiques (Photo Note)
Créez des notes en prenant des photos de contenus, comme du texte manuscrit ou des dessins. Vous
pouvez appliquer l’effet Photo Note afin de faciliter l’affichage du texte sur une photo en supprimant
l’arrière-plan.
Utiliser le mode automatique
1 Depuis l’écran Applications, appuyez sur S Note → → .
Une autre solution consiste, depuis l’écran d’accueil, à appuyer sur dans le widget S Note.
2 Positionnez l’élément à l’intérieur de l’écran d’aperçu.
Activer ou désactiver le flash.
Élément détecté
Ouvrir la Galerie.
Modifier le mode de prise de vue.
Afficher ou masquer les lignes
directrices de l’objectif.
Prendre une photo.
Fonctions du S Pen
49
3 Lorsque le cadre entourant l’élément devient bleu, appuyez sur pour prendre une photo.
L’appareil applique automatiquement l’effet Photo Note et l’insère dans une S Note.
4 Modifiez la note.
Avec l’effet Photo Note
Sans l’effet Photo Note
Utiliser le mode Manuel
1 Sur l’écran d’aperçu de la note photographique, appuyez sur pour passer en mode manuel.
2 Pour prendre une photo, appuyez sur . Vous pouvez également appuyer sur pour
sélectionner une photo enregistrée dans l’appareil.
3 Faites glisser les contours du cadre pour sélectionner une portion de l’élément, puis appuyez sur
.
4 Modifiez les portions à insérer dans S Note.
Faites glisser lles contours du cadre entourant lélément pour régler la taille d’une zone
reconnue.
Supprimer la portion.
Faites glisser le cadre entourant
l’élément pour régler la taille.
Ajouter manuellement une portion
pour la reconnaissance.
Activer ou désactiver l’effet Photo
Note.
5 Appuyez sur pour insérer les portions sélectionnées dans la note.
Fonctions du S Pen
50
Modifier des notes photographiques
Modifiez les portions insérées dans S Note.
1 Maintenez votre doigt appuyé sur une portion, puis appuyez sur Convertir.
L’image du texte de cette portion sera transformée en ligne colorées afin d’autoriser sa
modification.
2 Appuyez sur et tracez une ligne autour de la portion à modifier.
3 Sélectionnez une option d’édition.
• : modifier les propriétés de l’entrée, telles que sa présentation, sa taille, sa couleur ou son
épaisseur.
• : couper l’entrée. Pour la coller à un autre emplacement, maintenez le doigt appuyé sur
l’emplacement, puis appuyez sur Coller.
• : copier l’entrée. Pour la coller à un autre emplacement, maintenez le doigt appuyé sur
l’emplacement, puis appuyez sur Coller.
• : supprimer l’entrée.
Créer des notes avec des mémos vocaux
1 Depuis l’écran Applications, appuyez sur S Note → → → Insérer → Mémo vocal.
Vous pouvez également, depuis l’écran d’accueil, appuyer sur dans le widget S Note.
2 Lisez les conditions générales, puis appuyez sur ACCEPTER.
3 Lisez les informations à l’écran concernant l’utilisation de cette fonction, puis appuyez sur OK.
4 Pour commencer l’enregistrement, appuyez sur .
5 Parlez dans le microphone.
Vos paroles sont converties en texte.
6 Appuyez sur pour insérer le texte converti dans la note.
Si la langue que vous parlez n’est pas prise en charge par la fonction Enregistreur vocal,
l’appareil ne reconnaît pas vos paroles. Pour changer la langue de l’enregistreur vocal,
ouvrez l’écran Applications, puis appuyez sur Enregistreur vocal → → Paramètres →
Langue.
Fonctions du S Pen
51
Scrapbook
Collectez des contenus provenant de diverses sources afin de créer votre propre album numérique.
Lorsque vous consultez des pages Web ou visonnez des vidéos, vous pouvez sélectionner et ajouter
une zone désirée à des albums.
La disponibilité de cette application dépend de votre zone géographique ou de votre
opérateur.
Afficher des albums
Lorsque vous lancez cette application pour la première fois ou lorsque vous la redémarrez après en
avoir réinitialisé les données, lisez et acceptez les conditions générales, puis sélectionnez une option
de synchronisation.
1 Appuyez sur Scrapbook depuis l’écran Applications.
2 Appuyez sur pour sélectionner une catégorie et sélectionnez un album.
S’il existe un lien sous le contenu de l’album, appuyez dessus pour accéder à la source.
3 Appuyez sur pour modifier l’album.
Vous pouvez lui ajouter un titre, du texte, des mémos ou des légendes.
4 Appuyez sur ENREG. pour enregistrer les modifications.
Utiliser le S Pen
Introduction
Le S Pen vous permet d’écrire, de dessiner et de réaliser des opérations tactiles. Vous pouvez
facilement accéder à des fonctions supplémentaires en appuyant sur la touche S Pen.
Fonctions du S Pen
52
Air View
Survolez un élément à l’écran à l’aide du S Pen pour activer différentes fonctions.
Afficher un aperçu des informations
Pointez un élément sur l’écran avec le S Pen pour afficher un aperçu du contenu ou des informations
dans une fenêtre contextuelle.
Utiliser la touche Air
En survolant avec le S Pen les éléments de certaines applications, comme Galerie et Vidéo, vous
pouvez afficher la touche Air sur la fenêtre d’aperçu. Grâce à la touche Air, vous pouvez effectuer
différentes actions directement à partir de la fenêtre d’aperçu.
Touche Air
Si cette fonction n’est pas activée, ouvrez l’écran Applications, appuyez sur Paramètres → S
Pen → Air View, puis faites glisser le curseur Air View vers la droite pour activer la fonction.
Fonctions du S Pen
53
Effectuer une sélection à l’aide du stylet
Tout en maintenant la touche S Pen enfoncée, faites glisser le S Pen sur des listes de textes ou
d’éléments pour sélectionner plusieurs éléments ou plusieurs textes. Vous pouvez également copier
et coller les éléments ou les textes sélectionnés dans une autre application ou les partager.
Saisie S Pen
Remplissez des formulaires et rédigez des messages en écriture manuscrite à l’aide du S Pen.
Écrire dans différents champs de texte
1 Survolez un champ de texte à l’aide du S Pen.
2 Appuyez sur pour ouvrir le champ d’écriture manuscrite.
Fonctions du S Pen
54
3 Écrivez à l’aide du S Pen.
Lorsque vous rédigez un message dans Messages, appuyez sur en haut du champ d’écriture
manuscrite pour passer en mode dessin. Un dessin est inséré en pièce jointe dans le message.
4 Lorsque vous avez terminé, appuyez sur .
Écrire dans des applications
Lorsque vous utilisez certaines fonctions et applications, vous pouvez écrire directement sur l’écran
à l’aide du S Pen. Par exemple, vous pouvez composer des numéros sur le pavé de numérotation ou
définir une heure d’alarme en écrivant à l’aide du S Pen.
Si cette fonction n’est pas activée, ouvrez l’écran Applications, appuyez sur Paramètres → S
Pen → Saisie S Pen, puis sur le curseur Saisie S Pen pour activer le fonction.
55
Reconnaissance des
mouvements et maniabilité
Mouvements et gestes
Si l’appareil est soumis à des secousses ou à des chocs excessifs, cela peut entraîner un
comportement imprévu. Veillez à contrôler vos gestes.
Appel direct
Lorsque vous consultez le journal d’appels, la liste des messages ou celle des contacts, rapprochez
l’appareil de votre oreille pour passer un appel.
Si cette fonction n’est pas activée, ouvrez l’écran Applications, appuyez sur Paramètres →
Mouvements et gestes → Appel direct, puis faites glisser le curseur Appel direct vers la
droite pour activer la fonction.
Reconnaissance des mouvements et maniabilité
56
Smart Alert
Si vous avez des appels manqués ou de nouveaux messages, l’appareil vibre lorsque vous le prenez
dans la main.
Il est possible que cette fonction ne fonctionne pas si l’écran est allumé ou si l’appareil n’est
pas sur une surface plane.
Si cette fonction n’est pas activée, ouvrez l’écran Applications, appuyez sur Paramètres →
Mouvements et gestes → Smart Alert, puis faites glisser le curseur Smart Alert vers la
droite pour activer la fonction.
Muet/pause
Couvrir l’écran avec la main
Recouvrez l’écran avec la paume de votre main pour désactiver la sonnerie des appels entrants ou
des alarmes.
Reconnaissance des mouvements et maniabilité
57
Retourner l’appareil
Retournez l’appareil pour désactiver la sonnerie des appels entrants ou les alarmes.
Si cette fonction n’est pas activée, ouvrez l’écran Applications, appuyez sur Paramètres →
Mouvements et gestes → Muet/pause, puis faites glisser le curseur Muet/pause vers la
droite pour activer la fonction.
Balayer pour capturer
Placez le côté de votre main sur l’écran et faites-le glisser de droite à gauche ou inversement pour
réaliser une capture d’écran. Pour afficher la capture d’écran enregistrée, ouvrez l’écran Applications
et appuyez sur Galerie → → Album → Screenshots. Après avoir réalisé une capture d’écran,
vous pouvez modifier l’image et la partager.
Cette fonction n’est disponible que pour certaines applications.
Si cette fonction n’est pas activée, ouvrez l’écran Applications, appuyez sur Paramètres →
Mouvements et gestes → Balayer pour capturer, puis faites glisser le curseur Balayer pour
capturer vers la droite pour activer la fonction.
Reconnaissance des mouvements et maniabilité
58
Fenêtres multiples
Introduction
La fonction Multi-fenêtres vous permet d’exécuter deux applications en même temps sur un écran
partagé. Vous pouvez également exécuter simultanément plusieurs applications dans des fenêtres
contextuelles.
Partager l’écran en mode Multi-fenêtres
Certaines applications, telles que la Calculatrice et les Contacts, peuvent uniquement
être utilisées dans des fenêtres contextuelles lorsque vous les faites glisser du volet Multifenêtres
vers l’écran.
1 Maintenez le doigt appuyé sur pour ouvrir le volet Multi-fenêtres.
2 Maintenez le doigt appuyé sur une icône d’application et faites-la glisser du volet vers l’écran.
Faites ensuite glisser une autre icône d’application vers un autre endroit de l’écran.
Les applications caractérisées par l’icône peuvent être lancées simultanément dans des
fenêtres distinctes de l’écran. Appuyez sur une application caractérisée par l’icône , puis
faites-la glisser vers un autre endroit pour ouvrir l’application dans les deux fenêtres. Pour lancer
simultanément l’application dans une fenêtre contextuelle, appuyez sur l’application, puis
sur .
Reconnaissance des mouvements et maniabilité
59
Lancer le mode Multi-fenêtres depuis la liste des applications récemment
utilisées
1 Appuyez sur .
2 Balayez l’écran vers le haut ou le bas, puis appuyez sur pour lancer une application en mode
Multi-fenêtres.
3 Sélectionnez une autre application pour la lancer en mode Multi-fenêtres.
Utiliser les options Multi-fenêtres
En mode Multi-fenêtres, sélectionnez une fenêtre d’application et appuyez sur le cercle entre les
fenêtres d’applications pour accéder aux options suivantes :
Reconnaissance des mouvements et maniabilité
60
• : passer d’une application Multi-fenêtres à l’autre.
• : glisser et déposer du texte ou des images d’une fenêtre à l’autre. Maintenez le doigt appuyé
sur un élément dans la fenêtre sélectionnée et faites-le glisser vers l’autre fenêtre.
• : activer l’affichage sous forme d’icône flottante.
• : activer l’affichage plein écran.
• : fermer la fenêtre.
Partager du contenu entre des fenêtres d’applications
Vous pouvez facilement partager du contenu entre des applications comme Email et Internet par un
mouvement de glisser-déposer.
Il est possible que certaines applications ne soient pas compatibles avec cette fonction.
1 Lancez les applications Email et Internet en mode Multi-fenêtres.
Vous pouvez également les lancer dans des fenêtres contextuelles.
2 Appuyez sur le cercle situé entre les deux fenêtres d’application, puis appuyez sur .
3 Maintenez le doigt appuyé sur du texte ou une image dans la fenêtre Internet et faites glisser
l’élément vers un emplacement de la fenêtre E-mail.
L’élément sélectionné est inséré dans la fenêtre E-mail.
Reconnaissance des mouvements et maniabilité
61
Ajuster la taille des fenêtres
Faites glisser le cercle situé entre les fenêtres vers le haut ou le bas pour ajuster la taille des fenêtres.
Si le mode Multi-fenêtres n’est pas activé, ouvrez l’écran Applications, appuyez sur
Paramètres → Fenêtres multiples, puis faites glisser le curseur Fenêtres multiples vers la
droite pour activer la fonction. Une autre solution consiste à ouvrir le volet de paramétrage
rapide, puis à appuyer sur Multi fenêtres pour activer cette fonction.
Utiliser le mode Multi-fenêtres contextuelles
1 Depuis l’écran Applications, lancez une application à utiliser dans une fenêtre contextuelle.
2 Faites glisser l’écran en diagonale vers l’angle inférieur opposé ou vers l’angle supérieur opposé.
L’écran d’application apparaît dans une fenêtre contextuelle.
Activer l’affichage sous forme
d’icône flottante.
Fermer la fenêtre.
Activer l’affichage plein écran.
Déplacer le contenu.
Reconnaissance des mouvements et maniabilité
62
Déplacer ou fermer des fenêtres contextuelles
Pour déplacer une fenêtre contextuelle, appuyez sur le cercle d’une fenêtre et faites-le glisser vers un
nouvel emplacement.
Pour fermer la fenêtre, appuyez sur le cercle en haut de la fenêtre, puis sur .
Ouvrir des fenêtres contextuelles depuis l’écran partagé Multi-fenêtres
1 Depuis l’écran partagé Multi-fenêtres, appuyez sur une fenêtre d’application pour l’ouvrir dans
une fenêtre contextuelle.
2 Maintenez le doigt appuyé sur le cercle entre les fenêtres d’applications.
L’application sélectionnée apparaît dans une fenêtre contextuelle.
Ouvrir des fenêtres contextuelles depuis le volet Multi-fenêtres
Maintenez le doigt appuyé sur pour ouvrir le volet Multi-fenêtres. Appuyez sur une icône
d’application dans le volet Multi-fenêtres afin de lancer l’application dans une fenêtre contextuelle.
Si le mode Multi-fenêtres n’est pas activé, ouvrez l’écran Applications, appuyez sur
Paramètres → Fenêtres multiples, puis faites glisser le curseur Fenêtres multiples vers la
droite pour activer la fonction. Une autre solution consiste à ouvrir le volet de paramétrage
rapide, puis à appuyer sur Multi fenêtres pour activer cette fonction.
Reconnaissance des mouvements et maniabilité
63
Opération à une main
Introduction
Vous pouvez activer le mode Opération à une main pour pouvoir utiliser de façon pratique l’appareil
à l’aide d’une seule main.
Depuis l’écran Applications, appuyez sur Paramètres → Affichage et fond d’écran → Opération à
une main.
Réduire la taille de l’écran
Appuyez sur Réduire taille de l’écran, puis faites glisser le curseur Réduire taille de l’écran vers la
droite pour activer la fonction.
Pour activer le mode d’utilisation à une seule main, tenez l’appareil à une main. Ensuite, faites
rapidement glisser votre pouce du bord de l’écran jusqu’au centre, puis inversement.
Reconnaissance des mouvements et maniabilité
64
Saisie à une main
Appuyez sur Saisie à une main, puis faites glisser le curseur Saisie à une main vers la droite pour
activer la fonction.
Appuyez sur ou sur pour régler la position du pavé de numérotation, des touches d’appels et
des autres volets de saisie pour y accéder facilement d’une seule main.
Panneau touches latéral
Appuyez sur Panneau touches latéral, puis faites glisser le curseur Panneau touches latéral vers la
droite pour activer la fonction.
Simplifiez l’utilisation de l’appareil d’une seule main en plaçant les touches Applications récentes,
Accueil et Retour, ainsi que d’autres touches de fonction dans le volet des touches latérales.
Augmenter la sensibilité de l’écran tactile
Utilisez cette fonction pour pouvoir manipuler l’écran lorsque vous portez des gants.
Depuis l’écran Applications, appuyez sur Paramètres → Affichage et fond d’écran, puis cochez la
case Augmenter sensib. tactile. Une autre solution consiste à ouvrir le volet de paramétrage rapide,
puis à appuyer sur Sensib. tactile pour activer cette fonction.
• Pour une meilleure reconnaissance tactile, utilisez plutôt des gants en cuir. Certaines
autres matières peuvent ne pas être reconnues.
• Cette fonction peut ne pas fonctionner si vous utilisez S view.
Pour un résultat optimal, appuyez fermement sur l’écran lorsque vous portez des gants.
65
Personnaliser votre appareil
Gérer l’écran d’accueil et les écrans d’applications
Gérer l’écran d’accueil
Ajouter des éléments
Depuis l’écran Applications, maintenez le doigt appuyé sur une application ou un dossier, puis faitesle
glisser vers l’écran d’accueil.
Pour ajouter des widgets, maintenez le doigt appuyé sur une zone vide de l’écran d’accueil, appuyez
sur Widgets, maintenez le doigt appuyé sur un widget, puis faites-le glisser vers l’écran d’accueil.
Déplacer et supprimer un élément
Maintenez le doigt appuyé sur un élément depuis l’écran d’accueil, puis faites-le glisser jusqu’à
l’emplacement souhaité.
Pour déplacer l’élément vers un autre volet, faites-le glisser vers le bord de l’écran.
Vous pouvez également déplacer les applications fréquemment utilisées vers la zone de raccourcis
située en bas de l’écran d’accueil.
Maintenez le doigt appuyé sur l’élément à supprimer. Faites-le ensuite glisser vers l’option
Supprimer en haut de l’écran.
Créer un dossier
1 Depuis l’écran d’accueil, maintenez le doigt appuyé sur une application, puis faites-la glisser vers
l’option Créer dossier qui apparaît en haut de l’écran.
2 Saisissez un nom de dossier.
3 Appuyez sur , sélectionnez les applications à déplacer dans ce dossier, puis appuyez sur OK.
Personnaliser votre appareil
66
Gérer les volets
Maintenez le doigt appuyé sur une zone vide de l’écran d’accueil pour ajouter, déplacer ou
supprimer un volet.
Pour ajouter un volet, balayez l’écran vers la gauche, puis appuyez sur .
Pour déplacer un volet, maintenez le doigt appuyé sur son aperçu, puis faites-le glisser jusqu’à
l’emplacement souhaité.
Pour supprimer un volet, maintenez le doigt appuyé sur son aperçu, puis faites-le glisser vers l’option
Supprimer en haut de l’écran.
Pour définir un volet comme écran d’accueil principal, appuyez sur .
Gérer l’écran Applications
Changer de mode d’affichage
Depuis l’écran Applications, appuyez sur → Trier par et sélectionnez un mode d’affichage.
Déplacer des éléments
Depuis l’écran Applications, appuyez sur → Modifier. Maintenez le doigt appuyé sur l’élément à
déplacer, puis faites-le glisser jusqu’à l’emplacement souhaité.
Pour déplacer l’élément vers un autre volet, faites-le glisser vers le bord de l’écran.
Pour déplacer un élément vers un nouveau volet, faites-le glisser vers l’option Créer une page qui
s’affiche en haut de l’écran.
Créer des dossiers
1 Depuis l’écran Applications, appuyez sur → Créer dossier.
Une autre solution consiste à appuyer sur → Modifier, à maintenir le doigt appuyé sur une
application, puis à la faire glisser vers l’option Créer dossier qui apparaît en haut de l’écran.
2 Saisissez un nom de dossier.
3 Appuyez sur , cochez les applications à déplacer vers ce dossier, puis appuyez sur OK.
Personnaliser votre appareil
67
Définir un fond d’écran et des sonneries
Définir un fond d’écran
Définissez une image ou une photo enregistrée dans l’appareil comme fond de l’écran d’accueil ou
de verrouillage.
1 Maintenez le doigt appuyé sur une zone vide de l’écran d’accueil, puis appuyez sur Fonds
d’écran.
Vous pouvez également, depuis l’écran Applications, appuyer sur Paramètres → Affichage et
fond d’écran → Fond d’écran.
2 Sélectionnez un écran auquel appliquer un fond d’écran.
3 Balayez l’écran vers la gauche ou vers la droite, puis sélectionnez une image parmi celles
affichées en bas de l’écran.
Pour sélectionner des photos que vous avez prises avec l’appareil photo ou d’autres images,
appuyez sur Depuis Galerie.
Lorsque vous définissez un fond d’écran de verrouillage, vous pouvez sélectionnez des images
parmi les diverses catégories de fonds d’écran.
4 Appuyez sur DÉFINIR COMME FOND D’ÉCRAN ou sur ENREGISTRER.
L’image sélectionnée servira de fond d’écran d’accueil ou de verrouillage.
Définir un écran de verrouillage dynamique
Utilisez cette fonction pour que le fond d’écran de verrouillage change automatiquement en
fonction de vos paramètres, votre position géographique ou le temps qu’il fait, et en fonction de vos
centres d’intérêt.
1 Maintenez le doigt appuyé sur une zone vide de l’écran d’accueil, puis appuyez sur Fonds
d’écran.
Vous pouvez également, depuis l’écran Applications, appuyer sur Paramètres → Affichage et
fond d’écran → Fond d’écran.
2 Appuyez sur Écran de verrouillage.
Personnaliser votre appareil
68
3 Sélectionnez une option de fond d’écran.
• Depuis Galerie : sélectionner des images depuis la Galerie. L’appareil affiche les images sur
l’écran de verrouillage à la fréquence que vous avez définie.
• Météo tps réel : afficher des images de grande qualité sur l’écran de verrouillage en fonction
de l’heure, du temps qu’il fait et de vos informations de localisation.
• Mes intérêts : sélectionner les catégories qui vous intéressent. L’appareil affiche des images
de grande qualité sur l’écran de verrouillage en fonction de vos centres d’intérêt.
• L’utilisation de cette fonction peut entraîner des frais supplémentaires.
• Le bon fonctionnement de cette fonction dépend de votre zone géographique.
Modifier les sonneries
Modifiez les sonneries des appels entrants et des notifications.
Depuis l’écran Applications, appuyez sur Paramètres → Sons et notifications.
Pour définir une sonnerie pour les appels entrants, appuyez sur Sonneries, sélectionnez une
sonnerie, puis appuyez sur OK. Pour utiliser un morceau de musique stocké sur l’appareil ou sur l’un
de vos comptes comme sonnerie, appuyez sur AJOUTER.
Pour définir une sonnerie pour les notifications, appuyez sur Sonnerie de notification, sélectionnez
une sonnerie, puis appuyez sur OK.
Changer la méthode de verrouillage de l’écran
Vous pouvez définir une méthode de déverrouillage sécurisé de l’écran pour empêcher l’accès à vos
informations personnelles par autrui.
Depuis l’écran Applications, appuyez sur Paramètres → Écran de verrouillage → Déverrouillage de
l’écran, puis sélectionnez une méthode de déverrouillage. Pour protéger votre appareil, vous pouvez
définir un code de déverrouillage.
Si vous oubliez le code de déverrouillage, apportez l’appareil dans un centre de service
après-vente Samsung pour le réinitialiser.
Personnaliser votre appareil
69
Modèle
Dessinez un modèle en reliant au moins quatre points, puis recommencez pour valider. Définissez un
code PIN de secours pour déverrouiller l’écran en cas d’oubli du modèle.
Code PIN
Un code PIN se compose uniquement de chiffres. Saisissez au moins quatre chiffres, puis
recommencez pour valider.
Mot de passe
Un mot de passe comprend des caractères et des chiffres. Saisissez au moins quatre caractères, y
compris des chiffres et des symboles, puis recommencez pour valider.
Empreinte
Enregistrez vos empreintes digitales pour pouvoir déverrouiller l’écran. Pour en savoir plus, reportezvous
à la section Lecteur d’empreintes.
Mes lieux
Accédez rapidement à des fonctions utiles associées aux adresses que vous avez souvent visitées
grâce à la géolocalisation automatique.
Personnaliser votre appareil
70
Ajouter un widget Mes lieux
Pour ajouter le widget, maintenez le doigt appuyé sur une zone vide de l’écran d’accueil, appuyez
sur Widgets, maintenez le doigt appuyé sur le widget Mes lieux, puis faites-le glisser vers l’écran
d’accueil.
Sélectionner une catégorie pour
définir les informations de
localisation et les préférences.
Définir des informations de localisation
Lorsque vous visitez un endroit avec des informations de localisation prédéfinies, l’appareil reconnaît
automatiquement cet endroit et affiche des raccourcis pour les fonctions prédéfinies. L’appareil
applique également les paramètres définis pour cet endroit.
1 Dans le widget Mes lieux, sélectionnez un nom de lieu pour définir des informations de
localisation et des raccourcis. Par exemple, appuyez sur Domicile pour définir les informations
de localisation de votre domicile.
Votre adresse actuelle est indiquée dans le champ Adresse et méthode de détection. Ensuite,
pour rechercher automatiquement les coordonnées de cette adresse, appuyez sur .
Pour rechercher manuellement une adresse, saisissez une adresse ou un mot-clé dans le champ
de recherche, puis appuyez sur .
Vérifiez que l’appareil est connecté à un réseau Wi-Fi ou mobile pour pouvoir lancer une
localisation automatique.
Personnaliser votre appareil
71
2 Appuyez sur SUIVANT.
3 Depuis l’écran Gérer les raccourcis, appuyez sur GÉRER → ou pour ajouter ou supprimer
des raccourcis vers différentes applications ou fonctions.
4 Appuyez sur OK.
Le widget Mes lieux comportant vos informations de localisation s’affiche sur l’écran d’accueil.
Pour modifier d’autres paramètres, comme le mode sonore ou le réseau Wi-Fi, appuyez sur →
Paramètres personnalisés.
Définir des informations de localisation supplémentaires
1 Dans le widget Mes lieux, appuyez sur .
2 Appuyez sur et sélectionnez un autre endroit dans la liste.
Pour ajouter davantage d’endroits à la liste, appuyez sur GÉRER LES LIEUX → .
3 Pour lancer une géolocalisation automatique, appuyez sur ou sur OBTENIR INFO DE
LOCALISATION.
Pour rechercher manuellement une adresse, saisissez une adresse ou un mot-clé dans le champ
de recherche, puis appuyez sur .
Personnaliser votre appareil
72
4 Appuyez sur SAUVEG.
5 Appuyez sur ou sur pour ajouter ou supprimer des raccourcis vers différentes applications
ou fonctions.
6 Appuyez sur .
Lorsque vous vous rendez à un endroit que vous avez ajouté à la liste, les paramètres de
localisation prédéfinis s’affichent dans le widget Mes lieux. Pour modifier d’autres paramètres,
comme le mode sonore ou le réseau Wi-Fi, appuyez sur → Paramètres personnalisés.
Lecteur d’empreintes
Introduction
Pour permettre la reconnaissance des empreintes, vos empreintes digitales doivent être enregistrées
et stockées dans l’appareil. Après l’enregistrement, vous pouvez paramétrer l’appareil pour qu’il
utilise vos empreintes avec les fonctions ci-après :
• Déverrouillage d’écran
• Connexion Web
• Vérifier votre compte Samsung
• Payer avec PayPal
La disponibilité de cette fonction dépend de votre zone géographique ou de votre
opérateur.
Conseils pour une meilleure reconnaissance des empreintes
Lorsque vous scannez vos empreintes sur l’appareil, sachez que les conditions suivantes risquent
d’affecter les performances de cette fonction :
• La touche Accueil est munie d’un capteur de reconnaissance des empreintes. Assurez-vous
que la touche Accueil n’a pas été rayée ni endommagée par des objets métalliques comme des
pièces de monnaie, des clés ou un collier.
• La protection d’écran fournie avec l’appareil peut altérer le fonctionnement du capteur
d’empreintes. Pour améliorer la sensibilité de reconnaissance des empreintes, retirez la
protection de l’écran.
• Assurez-vous que la zone de reconnaissance des empreintes et vos doigts sont propres et secs.
Personnaliser votre appareil
73
• L’appareil peut ne pas reconnaître les empreintes digitales présentant des ridules ou des
cicatrices.
• L’appareil peut ne pas reconnaître l’empreinte d’un petit doigt ou d’un doigt fin.
• Pour améliorer les performances de reconnaissance, enregistrez les empreintes de la main que
vous utilisez le plus fréquemment lorsque vous manipulez l’appareil.
• Ne faites pas glisser le doigt trop rapidement ou trop lentement. Faites glisser le doigt à une
vitesse modérée afin de donner le temps à l’appareil de le reconnaître.
• Dans les environnements secs, de l’électricité statique peut s’accumuler dans l’appareil. Évitez
d’utiliser cette fonction dans des environnements secs ou, avant d’utiliser la fonction, déchargez
l’électricité statique accumulée en touchant un objet métallique.
Enregistrer des empreintes
Si vous pliez le doigt ou si vous utilisez le bout du doigt, l’appareil risque de ne pas
reconnaître l’empreinte.
1 Depuis l’écran Applications, appuyez sur Paramètres → Lecteur d’empreintes → Gestionnaire
d’empreintes.
2 Lisez les instructions à l’écran, puis appuyez sur OK.
3 Placez le doigt sur la zone de reconnaissance d’empreinte au centre en bas de l’écran.
Personnaliser votre appareil
74
4 Maintenez le doigt appuyé sur l’écran dans la zone de reconnaissance d’empreinte, puis faites-le
glisser vers le bas sur la touche Accueil.
Répétez cette opération avec le même doigt jusqu’à ce que l’empreinte soit enregistrée.
5 Appuyez sur OK pour terminer la numérisation de votre empreinte digitale. Vous pouvez
également appuyer sur ENREGISTRER pour enregistrer une empreinte supplémentaire.
6 Lorsqu’un écran apparaît vous demandant d’enregistrer un mot de passe de secours, saisissez ce
mot de passe, puis appuyez sur CONTINUER.
7 Saisissez de nouveau le mot de passe de secours pour le confirmer, puis appuyez sur OK.
Vous pouvez utiliser le mot de passe de secours à la place de l’empreinte.
8 Lorsqu’une fenêtre contextuelle de déverrouillage par empreintes apparaît, appuyez sur OK.
Vous pouvez utiliser vos empreintes pour déverrouiller l’écran.
Personnaliser votre appareil
75
Supprimer des empreintes
Vous pouvez supprimer l’enregistrement de vos empreintes à l’aide du gestionnaire d’empreintes.
1 Depuis l’écran Applications, appuyez sur Paramètres → Lecteur d’empreintes → Gestionnaire
d’empreintes.
2 Scannez l’empreinte enregistrée, ou appuyez sur et saisissez le mot de passe de secours.
3 Appuyer sur → Sélectionner.
4 Cochez les empreintes dont vous souhaitez annuler l’enregistrement, puis appuyez sur .
Modifier le mot de passe de secours
Vous pouvez modifier le mot de passe de secours utilisé en cas de problème de reconnaissance de
vos empreintes.
1 Depuis l’écran Applications, appuyez sur Paramètres → Lecteur d’empreintes → Modifier
MDP de secours.
2 Scannez l’empreinte enregistrée, ou appuyez sur et saisissez le mot de passe de secours.
3 Saisissez un nouveau mot de passe et appuyez sur CONTINUER.
4 Saisissez de nouveau le mot de passe, puis appuyez sur OK.
Vérifier le mot de passe du compte Samsung
Utilisez vos empreintes digitales pour vérifier le mot de passe de votre compte Samsung. Vous
pouvez recourir à votre empreinte au lieu de saisir votre mot de passe, par exemple lorsque vous
achetez du contenu sur GALAXY Apps.
Depuis l’écran Applications, appuyez sur Paramètres → Lecteur d’empreintes → Vérifier le compte
Samsung, puis faites glisser le curseur Vérifier le compte Samsung vers la droite pour activer la
fonction. Saisissez le mot de passe de votre compte Samsung et appuyez sur VALIDER.
Personnaliser votre appareil
76
Utiliser l’empreinte digitale pour se connecter à des comptes
Vous pouvez utiliser vos empreintes pour vous connecter sur des pages Web prenant en charge
l’enregistrement de mot de passe.
1 Depuis l’écran Applications, appuyez sur Paramètres → Lecteur d’empreintes → Connexion
Web, puis faites glisser le curseur Connexion Web vers la droite pour activer la fonction.
2 Ouvrez une page Web à laquelle vous souhaitez vous connecter à l’aide de votre empreinte.
3 Saisissez votre nom d’utilisateur et votre mot de passe, puis appuyez sur la touche de connexion
à la page Web.
4 Cochez la case Connectez-vous en utilisant vos empreintes digitales, puis appuyez sur SE
SOUVENIR.
Vous pouvez utiliser votre empreinte pour confirmer votre compte et votre mot de passe pour
vous connecter à la page Web.
Utiliser l’empreinte digitale pour effectuer des achats via PayPal
Vous pouvez effectuer des achats en numérisant vos empreintes.
La disponibilité de cette fonction dépend de votre zone géographique ou de votre
opérateur.
1 Depuis l’écran Applications, appuyez sur Paramètres → Lecteur d’empreintes → Payer avec
PayPal.
2 Cochez la case Prise en charge FIDO Ready™ et PayPal, puis appuyez sur INSTALLER.
3 Une fois l’installation terminée, appuyez sur LINK MY ACCOUNT.
4 Suivez les instructions à l’écran pour vous connecter à votre compte PayPal et enregistrer vos
empreintes.
Personnaliser votre appareil
77
Mode Privé
Introduction
Masquez les contenus personnels sur votre appareil afin d’empêcher d’autres personnes d’y accéder.
En mode Privé, vous pouvez masquer des éléments dans Galerie, Vidéo, Musique, Enregistreur
vocal, Mes fichiers et S Note.
Configurer le mode Privé
1 Depuis l’écran Applications, appuyez sur Paramètres → Mode Privé.
2 Lisez les informations à l’écran et appuyez sur SUIVANT.
3 Lisez les informations à l’écran concernant l’utilisation de cette fonction, puis appuyez sur
SUIVANT.
4 Appuyez sur DÉMARRER, sélectionnez une méthode d’accès au mode Privé, puis suivez les
instructions à l’écran pour terminer la configuration.
Une fois la configuration terminée, lorsque la fenêtre contextuelle de déverrouillage de l’écran
apparaît, appuyez sur OK pour modifier la méthode de verrouillage de l’écran, ou appuyez sur
IGNORER.
Le mode Privé est activé et l’icône apparaît dans la barre d’état.
Masquer du contenu
1 Depuis l’écran Applications, lancez une application pour en masquer des éléments.
2 Sélectionnez un élément, puis appuyez sur → Déplacer dans Privé.
Si le mode Privé n’est pas activé, passez aux étapes suivantes.
3 Lisez les instructions à l’écran, puis appuyez sur OK.
4 Suivez les instructions à l’écran pour saisir le code d’accès au mode Privé.
Les éléments sélectionnés sont déplacés vers le dossier Privé et disparaissent de l’écran.
Si vous masquez un élément alors que le mode Privé n’est pas activé, celui-ci est activé dès
que l’élément sélectionné est déplacé dans le dossier Privé et à nouveau désactivé une fois
le transfert terminé.
Personnaliser votre appareil
78
Afficher du contenu masqué
Vous pouvez afficher le contenu masqué uniquement si le mode Privé est activé.
1 Depuis l’écran Applications, appuyez sur Paramètres → Mode Privé, puis faites glisser le curseur
Mode Privé vers la droite pour activer la fonction.
Une autre solution consiste à ouvrir le volet de paramétrage rapide, puis à appuyer sur Mode
Privé pour activer cette fonction.
2 Suivez les instructions à l’écran pour saisir le code d’accès au mode Privé.
3 Depuis l’écran Applications, appuyez sur Mes fichiers → Privé.
Tous les éléments du mode Privé s’affichent à l’écran.
Afficher du contenu masqué
1 Dans le dossier Privé, sélectionnez les éléments masqués à afficher.
2 Appuyez sur → Supprimer de Privé.
3 Sélectionnez un dossier dans lequel déplacer les éléments.
Les éléments sont déplacés vers le dossier sélectionné.
Mode simplifié
Le mode simplifié fournit une expérience utilisateur plus conviviale, grâce à une présentation plus
simple et à des icônes plus grosses sur l’écran d’accueil.
Activer le mode simplifié
1 Depuis l’écran Applications, appuyez sur Paramètres → Mode simplifié → Mode simplifié.
2 Cochez les applications auxquelles appliquer une présentation plus simple.
3 Appuyez sur EFFECTUÉ.
Personnaliser votre appareil
79
Revenir en mode standard
Faites glisser votre doigt vers la gauche de l’écran d’accueil, puis appuyez sur Paramètres simples →
Mode simplifié → Mode standard → EFFECTUÉ.
Transférer des données depuis votre ancien
appareil
Utiliser des comptes de sauvegarde
Vous pouvez transférer vos données de sauvegarde depuis votre ancien appareil vers votre nouvel
appareil à l’aide votre compte Google ou Samsung. Pour en savoir plus, reportez-vous à la section
Sauvegarder et restaurer des données.
Utiliser Samsung Smart Switch
Vous pouvez transférer des données de votre ancien appareil vers votre nouvel appareil via Smart
Switch. Pour en savoir plus, rendez-vous sur le site : www.samsung.com/smartswitch.
Samsung Smart Switch n’est pas pris en charge sur certains appareils ou ordinateurs.
Utiliser Smart Switch Mobile
Utilisez cette application pour transférer des données de votre précédent appareil vers le nouveau.
Vous pouvez télécharger l’application depuis GALAXY Apps ou Play Store.
1 Depuis votre appareil, appuyez sur Smart Switch Mobile.
2 Depuis votre appareil, sélectionnez une option en fonction du type de votre ancien appareil et
suivez les instructions qui s’affichent à l’écran.
Si l’ancien appareil est un appareil Android, assurez-vous que l’application Smart Switch Mobile
y est installée. Pour en savoir plus, consultez l’aide.
Personnaliser votre appareil
80
Utiliser Smart Switch avec un ordinateur
Utilisez cette fonction pour importer une sauvegarde de vos données (depuis des appareils mobiles
d’un fabricant sélectionné) depuis un ordinateur vers votre appareil. Vous pouvez télécharger
l’application depuis www.samsung.com/smartswitch.
1 Sauvegardez les données d’un ancien appareil sur l’ordinateur. Pour plus d’informations,
contactez le fabricant de l’appareil.
2 Sur l’ordinateur, lancez Smart Switch.
3 Connectez votre nouvel appareil à l’ordinateur à l’aide du câble USB.
4 Sur l’ordinateur, cliquez sur le fabricant de l’ancien appareil, puis suivez les instructions à l’écran
pour transférer les données sur votre nouvel appareil.
Utiliser Samsung Kies
Importez un fichier de sauvegarde de vos données depuis votre ordinateur via Samsung Kies pour
restaurer les données sur votre appareil. Vous pouvez également sauvegarder les données sur
l’ordinateur via Samsung Kies. Pour en savoir plus, reportez-vous à la section Connecter l’appareil
avec Samsung Kies.
Paramétrer des comptes
Ajouter des comptes
Certaines applications utilisées sur l’appareil nécessitent un compte. Afin de profiter au maximum de
votre appareil, créez des comptes.
1 Depuis l’écran Applications, appuyez sur Paramètres → Comptes → Ajouter compte.
2 Sélectionnez un service de compte.
3 Suivez les instructions qui s’affichent à l’écran pour procéder à la configuration du compte.
Pour synchroniser du contenu avec vos comptes, sélectionnez un compte, puis cochez les éléments
à synchroniser.
Personnaliser votre appareil
81
Supprimer un compte
Depuis l’écran Applications, appuyez sur Paramètres → Comptes, sélectionnez un compte, puis
appuyez sur → Supprimer le compte.
Enregistrer des comptes Samsung
Pour utiliser des applications Samsung, vous devez disposer d’un compte Samsung. Vous pouvez
sauvegarder ou restaurer les données enregistrées sur l’appareil sur votre compte Samsung.
Enregistrez votre compte Samsung sur l’appareil pour pouvoir facilement utiliser les services
Samsung.
1 Depuis l’écran Applications, appuyez sur Paramètres → Comptes → Ajouter compte.
2 Appuyez sur Samsung.
3 Appuyez sur CONNEXION.
4 Saisissez l’adresse électronique et le mot de passe de votre compte, puis appuyez sur
CONNEXION.
Une fois votre compte Samsung enregistré, vous pouvez utiliser des applications nécessitant un
compte Samsung sans avoir à effectuer la procédure de connexion.
82
Téléphone et contacts
Téléphone
Introduction
Passez des appels vocaux et visio et répondez aux appels que vous recevez.
Passer des appels
1 Appuyez sur Téléphone depuis l’écran Applications.
2 Appuyez sur Clavier et composez un numéro de téléphone.
3 Appuyez sur pour passer un appel vocal ou sur pour passer un appel visio.
Accéder à des options
Ajouter le numéro à la liste de supplémentaires.
contacts.
Afficher un aperçu du numéro de
téléphone.
Afficher les contacts favoris.
Supprimer le caractère précédent.
Afficher la liste de contacts.
Afficher les journaux d’appels et de
messages.
Composer un numéro à l’aide du
clavier.
Téléphone et contacts
83
Passer des appels depuis le journal d’appels ou votre liste de contacts
Appuyez sur Journal ou sur Contacts, puis faites glisser votre doigt vers la droite sur le nom d’un
contact ou sur un numéro de téléphone pour passer un appel.
Passer des appels depuis la liste de favoris
Sélectionnez un contact, puis appuyez sur pour l’ajouter à la liste de contacts favoris.
Ouvrez l’écran Favoris et sélectionnez un contact à appeler.
Appeler un numéro à l’étranger
1 Appuyez sur Clavier.
2 Maintenez le doigt appuyé sur 0 jusqu’à ce que le signe + apparaisse. Composez l’indicatif du
pays, l’indicatif régional et le numéro de téléphone, puis appuyez sur .
Téléphone et contacts
84
Recevoir des appels
Répondre à un appel
Lorsque vous recevez un appel, faites glisser votre doigt sur l’icône .
Rejeter un appel
Lorsque vous recevez un appel, faites glisser votre doigt sur l’icône .
Appels manqués
Si vous manquez un appel, l’icône apparaît dans la barre d’état. Ouvrez le volet des raccourcis
pour afficher la liste des appels manqués. Une autre solution consiste, depuis l’écran Applications, à
appuyer sur Téléphone → Journal pour afficher les appels manqués.
• Pour envoyer un message lorsque vous rejetez un appel entrant, faites glisser la barre des
messages de rejet située en bas de l’écran vers le haut.
• Pour créer différents messages de rejet, ouvrez l’écran Applications et appuyez sur
Téléphone → → Paramètres → Appel → Rejet de l’appel → Messages de rejet
→ .
Options en cours d’appel
Options au cours d’un appel vocal
Les options suivantes sont disponibles :
• : augmenter le volume.
• Ajouter : passer un second appel.
• Clavier : ouvrir le clavier.
• Fin : mettre fin à l’appel en cours.
• HP : activer ou désactiver le haut-parleur. Lorsque vous utilisez le haut-parleur, parlez dans le
microphone en haut de l’appareil et éloignez l’appareil de vos oreilles.
• Muet : désactiver le microphone afin que votre correspondant ne puisse pas vous entendre.
• Bluetooth : activer un casque ou des écouteurs Bluetooth, à condition qu’ils soient connectés à
l’appareil.
Téléphone et contacts
85
Options au cours d’un appel visio
Appuyez sur l’écran pour utiliser les options suivantes :
• Permuter : basculer entre les objectifs avant et arrière, et inversement.
• Muet : désactiver le microphone afin que votre correspondant ne puisse pas vous entendre.
• Fin : mettre fin à l’appel en cours.
En mode Dual Camera, l’appel visio est possible pendant 3 minutes maximum. Au bout de
3 minutes, l’appareil désactive l’objectif arrière pour des performances optimales.
Contacts
Introduction
Créez de nouveaux contacts et gérez-les sur l’appareil.
Ajouter des contacts
Transférer des contacts depuis d’autres appareils
Vous pouvez transférer des contacts depuis d’autres appareils sur votre appareil. Pour en savoir plus,
reportez-vous à la section Transférer des données depuis votre ancien appareil.
Créer manuellement des contacts
1 Depuis l’écran Applications, appuyez sur Contacts → Contacts.
2 Appuyez sur , puis sélectionnez un emplacement de stockage.
Téléphone et contacts
86
3 Saisissez les coordonnées du contact.
4 Appuyez sur ENREG.
Pour ajouter un numéro de téléphone à votre liste de contacts à partir du clavier, appuyez sur
Clavier, composez le numéro, puis appuyez sur Ajouter aux contacts.
Pour ajouter le numéro de téléphone d’un appel ou d’un message reçu à la liste de contacts,
appuyez sur Journal, puis sur l’image d’un contact.
Rechercher des contacts
Depuis l’écran Applications, appuyez sur Contacts → Contacts.
Utilisez l’une des méthodes de recherche suivantes :
• Faites défiler la liste de contacts vers le haut ou le bas.
• Faites glisser un doigt le long de l’index à droite de la liste des contacts pour la faire défiler
rapidement.
• Appuyez sur le champ de recherche tout en haut de la liste de contacts, puis saisissez vos
critères de recherche.
Une fois le contact sélectionné, choisissez l’une des options suivantes :
• : ajouter le contact aux favoris.
• / : passer un appel vocal ou visio.
• : rédiger un message.
• : rédiger un e-mail.
87
Messages et e-mails
Messages
Introduction
Envoyez des messages texte (SMS) ou multimédia (MMS) et affichez les messages par conversation.
Envoyer des messages
L’envoi de messages en dehors de la zone couverte par votre opérateur peut occasionner
des frais supplémentaires.
1 Appuyez sur Messages depuis l’écran Applications.
2 Appuyez sur .
3 Ajoutez des destinataires, puis saisissez un message.
Accéder à des options
supplémentaires.
Saisir un message.
Sélectionner des contacts depuis
votre liste de contacts.
Insérer des émoticônes.
Saisir les destinataires.
Joindre des fichiers.
Envoyer le message.
4 Appuyez sur pour envoyer le message.
Messages et e-mails
88
Lire les messages
Les messages sont regroupés sous forme de fils de discussion par contact.
La réception de messages en dehors de la zone couverte par votre opérateur peut
occasionner des frais supplémentaires.
1 Appuyez sur Messages depuis l’écran Applications.
2 Dans la liste de messages, sélectionnez un contact.
3 Affichez votre conversation.
Dans la vue détaillée des messages, appuyez sur pour afficher davantage d’options.
Email
Introduction
Ajoutez des comptes de messagerie électronique pour recevoir des courriers électroniques et y
répondre.
Configurer des comptes de messagerie électronique
1 Appuyez sur Email depuis l’écran Applications.
Lorsque vous ouvrez l’application Email pour la première fois, configurez un compte de
messagerie électronique.
2 Saisissez une adresse e-mail et un mot de passe, puis appuyez sur SUIVANT.
Pour enregistrer manuellement le compte de messagerie d’une société, appuyez sur
CONFIGURATION MANUELLE.
3 Suivez les instructions qui s’affichent à l’écran pour procéder à la configuration.
Pour configurer un compte de messagerie électronique supplémentaire, appuyez sur → GÉRER
LES COMPTES → .
Si vous possédez plusieurs comptes de messagerie électronique, vous pouvez définir un compte par
défaut. Appuyez sur → GÉRER LES COMPTES → → Définir le compte par défaut.
Messages et e-mails
89
Envoyer des e-mails
1 Appuyez sur Email depuis l’écran Applications.
2 Pour rédiger un message, appuyez sur l’icône en bas de l’écran.
3 Ajoutez des destinataires, puis saisissez un message.
4 Appuyez sur pour envoyer le message.
Lire des e-mails
1 Appuyez sur Email depuis l’écran Applications.
2 Depuis la liste des messages, appuyez sur un message pour le lire.
90
Appareil photo et Galerie
Appareil photo
Introduction
Prenez des photos et enregistrez des vidéos à l’aide des divers modes et paramètres offerts.
Prises de vue de base
Vous pouvez tout aussi bien prendre des photos qu’enregistrer des vidéos. Visionnez vos photos et
vidéos dans la Galerie.
Appuyez sur Appareil photo depuis l’écran Applications.
Bon usage de l’appareil photo
• Ne prenez pas de photos et n’enregistrez pas de vidéos de personnes sans leur consentement.
• Ne prenez pas de photos et n’enregistrez pas de vidéos lorsque la loi l’interdit.
• Ne prenez pas de photos et n’enregistrez pas de vidéos en violation de la vie privée d’autrui.
Appareil photo et Galerie
91
Prendre des photos ou enregistrer des vidéos
1 Appuyez sur l’écran d’aperçu à l’endroit où l’appareil photo doit faire la mise au point.
2 Appuyez sur pour prendre une photo ou sur pour enregistrer une vidéo.
Modifier les
paramètres de
l’appareil photo.
Basculer entre
l’objectif avant et
arrière.
HDR (tonalités riches)
Démarrer
l’enregistrement d’une
vidéo.
Prendre une photo.
Modifier le mode de
prise de vue.
Afficher les photos et
les vidéos que vous
avez prises.
Ouvrir l’appareil photo depuis l’écran verrouillé
Pour prendre rapidement des photos de moments particuliers, depuis l’écran de verrouillage,
démarrez l’application Appareil photo.
1 Depuis l’écran verrouillé, faites glisser votre doigt sur l’icône .
2 Appuyez sur l’écran d’aperçu à l’endroit où l’appareil photo doit faire la mise au point.
3 Appuyez sur pour prendre une photo ou sur pour enregistrer une vidéo.
La disponibilité de cette fonction dépend de votre zone géographique ou de votre
opérateur.
• Pour effectuer un zoom avant, écartez deux doigts l’un de l’autre sur l’écran ; pour
effectuer un zoom arrière, rapprochez-les.
• Pour capturer une photo en cours d’enregistrement d’une vidéo, appuyez sur .
• Pour modifier la mise au point en cours d’enregistrement d’une vidéo, appuyez sur
l’endroit souhaité pour la mise au point. Pour faire la mise au point au centre de l’écran,
appuyez sur .
Appareil photo et Galerie
92
Selfie
Automatiser les autoportraits
Lorsque vous prenez une photo avec l’objectif avant, posez le doigt sur le capteur ou utilisez les
commandes vocales pour prendre automatiquement une photo sans appuyer sur la touche du
déclencheur.
1 Appuyez sur Appareil photo depuis l’écran Applications.
2 Appuyez sur pour basculer sur l’objectif avant destiné aux autoportraits.
3 Regardez vers l’objectif avant.
4 Posez le doigt sur le capteur à l’arrière de l’appareil, puis soulevez-le pour vous prendre en
photo. Vous pouvez également prononcer les mots « Sourire », « Cheese », « Capture » ou «
Shooter » pour prendre une photo. Pour enregistrer une vidéo, dites « Enregistrer une vidéo ».
Appareil photo et Galerie
93
Selfie panorama
Effectuez un autoportrait panoramique afin d’inclure davantage de personnes dans la photo.
1 Appuyez sur Appareil photo depuis l’écran Applications.
2 Appuyez sur pour basculer sur l’objectif avant destiné aux autoportraits.
3 Appuyez sur MODE → Selfie panorama.
4 Regardez vers l’objectif avant.
5 Posez le doigt sur le capteur à l’arrière de l’appareil, puis soulevez-le pour vous prendre en
photo. Vous pouvez également prononcer les mots « Sourire », « Cheese », « Capture » ou «
Shooter » pour prendre une photo. Pour enregistrer une vidéo, dites « Enregistrer une vidéo ».
6 Pour prendre un autoportrait panoramique, déplacez lentement l’appareil de gauche à droite.
L’appareil prend des photos supplémentaires dès que le cadre bleu rejoint chacune des
extrémités du cadre blanc.
• Assurez-vous de maintenir le cadre bleu à l’intérieur de la fenêtre du viseur.
• Pour prendre des autoportraits larges, les sujets doivent rester immobiles.
• La résolution d’une photo peut être affectée par les conditions d’éclairage.
• Selon les conditions de prise de vue, les parties supérieure et inférieure de l’image
affichée sur l’écran d’aperçu peuvent être coupées.
Appareil photo et Galerie
94
HDR (Ton riche)
Prenez des photos riches en couleurs et reproduisez chacun des détails, même dans des conditions
de luminosité extrêmes.
1 Appuyez sur Appareil photo depuis l’écran Applications.
2 Appuyez sur pour basculer sur l’objectif arrière.
3 Appuyez sur sur l’écran d’aperçu.
L’icône devient .
4 Pour prendre une photo, appuyez sur .
Sans effet Avec effet
Modes de prise de vue
Vous disposez de divers modes de prise de vue pour prendre vos photos.
Appuyez sur Appareil photo depuis l’écran Applications.
Auto.
Utilisez ce mode pour autoriser l’appareil photo à évaluer l’environnement et à déterminer le mode
idéal de prise de vue.
Depuis l’écran d’aperçu, appuyez sur MODE → Auto.
Appareil photo et Galerie
95
Selfie arrière
Utilisez ce mode pour prendre un grand autoportrait à l’aide de l’objectif arrière.
1 Depuis l’écran d’aperçu, appuyez sur MODE → Selfie arrière.
2 Faites glisser le cadre ou ajustez-le pour définir une zone de détection pour le visage.
3 Composez votre cliché en positionnant l’objectif arrière face à vous.
4 Pour parfaire la composition, laissez-vous guider par les bips.
Dès que la totalité de votre visage se trouve dans la zone de détection, l’appareil photo émet
une tonalité, puis un bip pendant quelques secondes, et enfin prend automatiquement une
photo.
Focus sélectif
Utilisez l’effet de flou pour faire ressortir certains objets sur votre photo.
1 Depuis l’écran d’aperçu, appuyez sur MODE → Focus sélectif.
2 Appuyez sur l’écran d’aperçu à l’endroit où l’appareil photo doit faire la mise au point.
3 Pour prendre une photo, appuyez sur .
4 Appuyez sur la miniature d’aperçu en bas à droite de l’écran d’aperçu.
5 Appuyez sur , puis sélectionnez l’une des options suivantes :
• Focus proche : faire ressortir le sujet et flouter l’arrière-plan autour de lui.
• Focus lointain : flouter le sujet et faire ressortir l’arrière-plan autour de lui.
• Focus panoramique : faire ressortir le sujet et son arrière-plan.
Appareil photo et Galerie
96
6 Appuyez sur .
• Il est recommandé de placer les sujets à une distance de 50 cm de l’appareil. Placez le
sujet sur lequel vous souhaitez faire la mise au point près de l’appareil.
• Lorsque vous prenez des photos, assurez une distance suffisante entre le sujet et l’arrièreplan.
La distance doit être plus de trois fois supérieure à la distance entre l’appareil et le
sujet.
• La qualité des photos prises par l’appareil peut être affectée dans les conditions suivantes
:
– L’appareil ou le sujet est en mouvement.
– Il y a une forte lumière d’arrière-plan, de faibles niveaux de lumière ou vous prenez
des photos en intérieur.
– Le sujet ou l’arrière-plan n’a pas de motif ou celui-ci est composé d’une couleur unie.
Panorama
Prenez une série de photos horizontalement ou verticalement, puis assemblez-les pour obtenir une
large vue.
Depuis l’écran d’aperçu, appuyez sur MODE → Panorama.
Gérer les modes
Sélectionnez les modes de prise de vue à afficher sur l’écran de sélection de mode ou modifiez leur
ordre.
1 Depuis l’écran d’aperçu, appuyez sur MODE → Gérer modes.
2 Cochez les modes à ajouter dans la liste de modes.
• Beauté : ce mode permet de prendre des photos de visages plus claires pour obtenir des
images plus douces.
• Prise & plus : ce mode permet de prendre une série de photos et de les modifier en leur
appliquant différents effets à l’aide des modes de prise de vue.
• Visite virt. : ce mode permet de prendre des photos en avançant ou en tournant à gauche
ou à droite et de capturer le paysage sous différents angles.
• Dual Camera : ce mode permet de prendre une photo ou d’enregistrer une vidéo en utilisant
simultanément l’objectif avant et l’objectif arrière.
Appareil photo et Galerie
97
Télécharger des modes
Téléchargez d’autres modes de prise de vue depuis GALAXY Apps.
Depuis l’écran d’aperçu, appuyez sur MODE → Télécharger.
• Pour obtenir les meilleures prise de vue possibles en mode Panorama, suivez ces
conseils :
– Déplacez l’appareil photo lentement dans le sens de votre choix.
– Maintenez l’image à l’intérieur du cadre de prise de vue de l’appareil photo.
– Évitez de prendre des photos de sujets devant des arrière-plans non identifiables,
comme un ciel ou un pan de mur uni.
• En mode Dual Camera, vous pouvez enregistrer des vidéos d’une durée maximale de
5 minutes en qualité Full HD et d’une durée maximale de 10 minutes en qualité HD ou
VGA.
• Lorsque vous enregistrez des vidéos dans le mode Dual Camera, le son est enregistré par
le microphone interne.
Paramètres de l’appareil photo
Depuis l’écran d’aperçu, appuyez sur .
Les options disponibles peuvent varier selon le mode de prise de vue et le modèle
d’appareil photo utilisés.
• : activer ou désactiver le flash.
• : sélectionner la durée à l’issue de laquelle l’appareil photo doit automatiquement prendre
une photo.
• : sélectionner un effet de filtre à utiliser lorsque vous prenez des photos ou enregistrez des
vidéos. Pour télécharger davantage d’effets, appuyez sur Télécharger. Pour modifier l’ordre des
effets ou masquer des effets de la liste, appuyez sur Gérer effets.
• : sélectionner une résolution pour les photos. Une résolution plus élevée améliore la qualité
des vidéos, mais nécessite davantage de mémoire.
Appareil photo et Galerie
98
Pour accéder aux paramètres supplémentaires de l’appareil photo, ouvrez l’écran d’aperçu et
appuyez sur → .
• Beauté : prendre des photos de visages plus claires pour obtenir des images plus douces.
• Valeur d’expos. : modifier la valeur d’exposition. Ce paramètre détermine la quantité de lumière
reçue par le capteur de l’appareil photo. En cas de faible luminosité, utilisez une exposition plus
élevée.
• ISO : sélectionner une valeur ISO. Ce paramètre permet de contrôler la sensibilité lumineuse
de l’appareil photo. Les valeurs faibles sont destinées aux objets immobiles ou vivement
éclairés. Les valeurs élevées correspondent quant à elles aux sujets en mouvement rapide ou
peu éclairés. Toutefois, plus le réglage ISO est élevé, plus les parasites dans les photos sont
importants.
• Balance des blancs : sélectionner une balance des blancs appropriée de sorte que les images
offrent une gamme de couleurs proches de la réalité.
• Modes de mesure : sélectionner une méthode de mesure. Ce paramètre détermine la manière
dont les valeurs lumineuses sont calculées. Mesure pondérée centrale mesure la lumière
d’arrière-plan au centre de la scène. Spot mesure la lumière à un endroit spécifique. Matrice
calcule la lumière moyenne de la scène toute entière.
• HDR (Ton riche) : prendre des photos riches en couleurs et reproduire chacun des détails, même
dans des conditions de luminosité extrêmes.
• Photo par appui : appuyer sur l’écran d’aperçu pour prendre des photos.
• Taille de la vidéo : sélectionner une résolution pour les vidéos. Une résolution plus élevée
améliore la qualité des vidéos, mais nécessite davantage de mémoire.
• Stabilisation vidéo : activer le stabilisateur pour réduire ou éliminer l’effet de flou provoqué par
les mouvements de l’appareil photo lors de l’enregistrement d’une vidéo.
• Tags de localis. : joindre un tag de géolocalisation GPS à la photo.
• Pour que les signaux GPS soient meilleurs, évitez de prendre des photos dans des lieux
où le signal peut être limité, par exemple entre des bâtiments ou dans des zones de faible
altitude, ou encore lorsque les conditions météorologiques sont mauvaises.
• Votre localisation est susceptible d’apparaître sur vos photos au moment où vous les
publiez sur le Web. Pour empêcher l’affichage de ces données, désactivez le paramètre de
balise de localisation.
• Emplac. de stockage : sélectionner l’emplacement de stockage des photos et des vidéos.
• Enreg. comme ret. : inverser l’image pour créer une image miroir de la scène initiale, lors de
prises de vue avec l’objectif avant.
• Grille : afficher des lignes directrices sur l’écran d’aperçu pour aider à la composition de la photo.
• Contrôle vocal : paramétrer l’appareil pour qu’il prenne des photos ou enregistre des vidéos à
l’aide des commandes vocales.
Appareil photo et Galerie
99
• Touche de volume : paramétrer l’appareil pour pouvoir utiliser la touche de volume pour
contrôler le déclencheur ou le zoom.
• Évaluer les photos : paramétrer l’appareil pour afficher les photos après leur capture.
• Réinit. les paramétres : réinitialiser les paramètres de l’appareil photo.
• : afficher les informations d’aide à l’utilisation de l’appareil photo.
Galerie
Introduction
Affichez et gérez les photos et les vidéos stockées dans l’appareil.
Afficher des photos ou lire des vidéos
1 Appuyez sur Galerie depuis l’écran Applications.
2 Sélectionnez une photo ou une vidéo.
Les fichiers vidéo sont caractérisés par l’icône sur la miniature. Pour regarder une vidéo,
appuyez sur .
Autres options
Supprimer
Modifier
Revenir à l’écran précédent.
Partager via
Autre lecteur
Aperçus miniatures des images et
des vidéos
Pour masquer ou afficher la barre de menus et les miniatures, appuyez sur l’écran.
Appareil photo et Galerie
100
Accéder à des contenus stockés sur d’autres appareils
Recherchez des contenus stockés sur d’autres appareils pour les afficher sur votre appareil.
Accéder à des contenus stockés sur des appareils Samsung Link
Pour utiliser cette fonctionnalité, vous devez vous connecter à votre compte Samsung. Pour en savoir
plus, reportez-vous à la section Enregistrer des comptes Samsung.
Depuis l’écran principal Galerie, appuyez sur et sélectionnez un appareil dans la liste Appareils
enregistrés pour accéder à son contenu. Vous pouvez afficher les contenus des appareils enregistrés
sur Samsung Link. Pour en savoir plus, consultez l’adresse suivante : link.samsung.com.
• Vérifiez que les appareils enregistrés sont allumés et connectés à un réseau Wi-Fi ou
mobile.
• Il se peut que des frais supplémentaires vous soient facturés lorsque vous accédez à des
contenus enregistrés sur d’autres appareils via le réseau mobile.
Accéder à des contenus stockés sur des appareils à proximité
Recherchez des appareils à proximité via le Wi-Fi, Wi-Fi Direct ou un point d’accès mobile pour
afficher des contenus stockés sur ces appareils.
1 Depuis l’écran Applications, appuyez sur Paramètres → NFC et partage → Appareils à
proximité, puis faites glisser le curseur Appareils à proximité vers la droite pour activer la
fonction.
2 Depuis l’écran principal Galerie, appuyez sur .
3 Sélectionnez un appareil dans la liste Appareils à proximité.
Vous pouvez visionner des photos et des vidéos sur les appareils dont la fonction de partage de
contenus est activée.
Appareil photo et Galerie
101
Supprimer des photos ou des vidéos
Supprimer une photo ou une vidéo
Sélectionnez une photo ou une vidéo et appuyez sur en haut de l’écran.
Supprimer plusieurs photos et vidéos
1 Depuis l’écran principal Galerie, maintenez le doigt appuyé sur une photo ou une vidéo pour la
supprimer.
Vous pouvez également appuyer sur → Sélectionner.
2 Cochez les photos et les vidéos à supprimer.
3 Appuyez sur en haut de l’écran.
Vous pouvez également appuyer sur → Supprimer, cochez les photos ou vidéos à supprimer, puis
appuyer sur TERMINÉ pour supprimer plusieurs éléments.
102
Assistance sécurité
Mode Urgence
En mode Urgence, l’écran passe en nuances de gris afin d’économiser la batterie. En outre,
l’utilisation de certaines applications et fonctions est limitée.
Activer le mode Urgence
1 Depuis l’écran Applications, appuyez sur Paramètres → Assistance sécurité → Mode Urgence,
puis faites glisser le curseur Mode Urgence vers la droite pour activer la fonction.
Vous pouvez également maintenir la touche Marche/Arrêt enfoncée, puis appuyer sur Mode
Urgence.
2 Lisez et acceptez les conditions générales, puis appuyez sur OK.
3 Lisez les instructions à l’écran, puis appuyez sur ACTIVER.
Faire retentir des alarmes.
Ajouter des applications à utiliser
dans ce mode.
Passer un appel d’urgence.
Niveau de charge de la batterie et
temps de veille estimé.
Activer la lampe de poche.
Envoyer votre position actuelle Passer un appel.
dans un message.
Naviguer sur Internet.
Accéder à des options
supplémentaires.
Le délai de veille maximum estimé est le temps qu’il faut à la batterie pour se décharger
complètement lorsque l’appareil n’est pas utilisé. Le délai de veille peut varier selon les
paramètres de l’appareil et les conditions d’utilisation.
Assistance sécurité
103
Désactiver le mode Urgence
Pour désactiver le mode Urgence, appuyez sur → Désactiver le mode Urgence → DÉSACTIV. Vous
pouvez également maintenir la touche Marche/Arrêt enfoncée, puis appuyer sur Mode Urgence →
DÉSACTIV.
Envoyer des messages d’aide
En cas d’urgence, appuyez à trois reprises rapprochées sur la touche Marche/Arrêt. L’appareil
envoie un message à vos contacts prédéfinis. Les messages incluent des informations concernant
votre position géographique. Pour utiliser cette fonction, commencez par enregistrer vos contacts
prédéfinis.
Ajouter des contacts prédéfinis
1 Depuis l’écran Applications, appuyez sur Paramètres → Assistance sécurité.
2 Appuyez sur Gérer les contacts principaux → Créer un contact principal.
3 Appuyez sur Créer un contact et saisissez ses coordonnées, ou appuyez sur Sélectionner dans
les contacts pour transformer un contact existant en contact prédéfini.
Définir des messages d’aide
1 Depuis l’écran Applications, appuyez sur Paramètres → Assistance sécurité.
2 Appuyez sur Envoyer des messages d’aide, puis faites glisser le curseur Envoyer des messages
d’aide vers la droite pour activer la fonction.
3 Lisez et acceptez les conditions générales, puis appuyez sur OK.
Pour envoyer des messages d’aide comportant des enregistrements audio ou des photos,
cochez la case Envoyer un enreg. sonore ou Envoyer images.
Selon votre zone géographique ou votre opérateur, l’option Envoyer images peut ne pas
être disponible.
104
Applications utiles
Mode Voiture
Introduction
Utilisez ce mode pour contrôler l’appareil lorsque vous conduisez. Vous pouvez écouter des
messages et de la musique grâce aux commandes vocales sans avoir à manipuler l’appareil.
Ne regardez pas l’écran et n’utilisez aucune fonction tactile en conduisant.
• Les cartes, votre position actuelle et autres données de navigation peuvent différer des
informations de localisation réelles. Soyez attentif aux conditions de trafic, à l’état de la
route et à tous les autres facteurs qui pourraient affecter votre conduite. Respectez le
code de la route et les consignes de sécurité en vigueur.
• L’utilisation de la fonction de navigation peut entraîner des frais supplémentaires.
• La disponibilité de ce mode dépend de votre zone géographique ou de votre opérateur.
• Ce mode n’est pas pris en charge dans certaines langues.
Démarrer le mode Voiture
Lorsque vous enregistrez un véhicule sur votre appareil, vous pouvez écouter le son émis par
l’appareil via les haut-parleurs de la voiture. Vous pouvez également paramétrer l’appareil pour qu’il
active automatiquement le mode Voiture dès la connexion au véhicule, etc.
Lorsque vous ouvrez cette application pour la première fois, suivez les instructions qui s’affichent à
l’écran pour terminer la configuration.
1 Ouvrez le volet de paramétrage rapide, puis appuyez sur Mode voit. pour activer la fonction.
Applications utiles
105
2 Suivez les instructions qui s’affichent à l’écran pour procéder à la configuration.
Lorsque la fenêtre de demande d’autorisation Bluetooth apparaît, appuyez sur OUI pour
autoriser un véhicule à rechercher votre appareil et s’y connecter via la fonction Bluetooth.
• Avant d’enregistrer votre véhicule, démarrez-le et allumez la radio.
• Lorsque vous enregistrez un véhicule sur l’appareil, placez l’appareil près du véhicule.
Enregistrer d’autres véhicules
Appuyez sur PLUS → Paramètres → Mes voitures → AJOUTER.
Utiliser les menus du mode Voiture
Sélectionnez les menus du mode Voiture à l’aide des commandes vocales afin de passer des appels,
envoyer des messages, trouver un itinéraire ou écouter de la musique. Vous pouvez également
appuyer sur chaque icône de menu affichée sur l’écran.
1 Ouvrez le volet de paramétrage rapide, puis appuyez sur Mode voit. pour activer la fonction.
Accéder à des options
supplémentaires.
Menus du mode
Voiture
Activer la fonction de
commande vocale.
Ouvrir l’écran de
menus.
2 Depuis l’écran principal du mode Voiture, dites « Salut Galaxy ».
3 Lorsque l’icône apparaît, énoncez une commande vocale pour démarrer le menu souhaité.
Vous pouvez également utiliser des commandes vocales instantanées. Pour afficher des
exemples de ces commandes, appuyez sur PLUS → Ex. de commandes.
Applications utiles
106
Utiliser la fonction de navigation
Sélectionnez un lieu en maintenant le doigt appuyé sur la carte. Vous pouvez aussi utiliser une
commande vocale pour obtenir l’itinéraire jusqu’à une adresse.
1 Ouvrez le volet de paramétrage rapide, puis appuyez sur Mode voit. pour activer la fonction.
2 Depuis l’écran principal du mode Voiture, dites « Salut Galaxy ».
3 Dites « Navigation ».
4 Dites un mot-clé ou l’adresse du lieu.
L’appareil démarre automatiquement la navigation.
S Finder
Introduction
Recherchez un mot-clé parmi une grande variété de contenus.
Rechercher du contenu
Ouvrez le volet des raccourcis et appuyez sur S Finder.
Saisissez un mot-clé dans le champ de recherche ou appuyez sur et énoncez un mot-clé.
Pour obtenir des résultats plus précis, appuyez sur les touches de filtre sous le champ de recherche,
puis sélectionnez un élément.
Paramétrer des critères de recherche
Vous pouvez définir des critères afin de rechercher du contenu dans des champs de recherche
spécifiques.
Appuyez sur → Paramètres → Sélect. cat. de recherche, puis cochez les critères souhaités.
Applications utiles
107
Gérer l’historique de recherche
Vos anciennes recherches sont automatiquement enregistrées. Pour supprimer un élément de
l’historique de recherche, appuyez sur près de cet élément.
Pour paramétrer l’appareil afin qu’il n’enregistre pas l’historique de recherche, appuyez sur →
Paramètres, puis désélectionnez Utiliser histor. recherc.
S Planner
Introduction
Gérez votre agenda en y entrant vos événements ou tâches à venir.
Créer un événement ou une tâche
1 Appuyez sur S Planner depuis l’écran Applications.
2 Appuyez sur ou appuyez deux fois sur une date.
Si la date comporte déjà des événements ou tâches, appuyez sur la date et sur .
3 Appuyez en haut à gauche de l’écran pour sélectionner un événement ou une tâche, puis
complétez les informations requises.
• Ajouter événement : définir la date de début et de fin d’un événement. Vous pouvez lui
appliquer une option de répétition.
• Ajouter une tâche : ajouter une tâche à faire à une date spécifique. Vous pouvez lui
appliquer une option de priorité.
Applications utiles
108
Saisir un titre.
Joindre une carte indiquant le lieu
de l’événement.
Définir un rappel pour l’événement.
Ajouter des détails.
Sélectionner un calendrier à utiliser
ou à synchroniser.
Sélectionner un élément.
Définir une date de début et de fin
pour l’événement.
4 Appuyez sur ENREGISTRER pour sauvegarder l’événement ou la tâche.
Synchroniser les événements et les tâches avec vos comptes
Depuis l’écran principal S Planner, appuyez sur → Sync maintenant pour synchroniser les
événements et les tâches avec vos comptes.
Pour ajouter des comptes avec lesquels effectuer la synchronisation, appuyez sur → Calendriers →
Ajouter compte. Sélectionnez ensuite un compte avec lequel effectuer la synchronisation et ouvrez
une session. Une fois le compte ajouté, un cercle vert apparaît près du nom du compte.
Pour modifier l’option de synchronisation du compte, ouvrez l’écran Applications, appuyez sur
Paramètres → Comptes, puis sélectionnez un service de compte.
Applications utiles
109
S Health
Introduction
S Health vous aide à gérer votre bien-être et votre condition physique. Définissez des objectifs de
remise en forme, vérifiez vos progrès et effectuez un suivi régulier de votre condition physique.
Démarrer S Health
Si vous exécutez cette application pour la première fois ou après la réinitialisation de vos données,
suivez les instructions à l’écran pour procéder à la configuration.
1 Appuyez sur S Health depuis l’écran Applications.
2 Suivez les instructions qui s’affichent à l’écran pour procéder à la configuration.
En fonction de vos données physiques, l’appareil calcule votre métabolisme de base
standard (MB) et vous recommande un apport calorique quotidien. Cette recommandation
peut ne pas s’adapter à tous les âges, constitutions corporelles ou besoins nutritionnels.
Écran principal S Health
Vous pouvez afficher les informations essentielles depuis les menus S Health et utiliser les raccourcis
pour accéder directement aux menus S Health.
Appuyez sur S Health depuis l’écran Applications. Appuyez sur → Écran principal.
Pour y accéder, ouvrez l’écran principal S Health et appuyez sur → Aide.
Applications utiles
110
Informations complémentaires
• L’objet du recueil de ces données est limité à la fourniture du service que vous avez demandé,
dont la transmission d’informations supplémentaires pour améliorer votre bien-être, de
données de sauvegarde/de synchronisation, d’analyses de données et de statistiques, ou
pour développer et offrir de meilleurs services. (Mais, si vous vous connectez sur votre compte
Samsung depuis S Health, vos données peuvent être enregistrées sur le serveur pour être
sauvegardées.) Les données personnelles peuvent être conservées à cette fin. Vous pouvez
supprimer les données personnelles sauvegardées par l’application S Health à l’aide de
l’option de réinitialisation des données dans le menu Paramètres. Pour supprimer des données
partagées sur vos réseaux sociaux ou transférées vers des systèmes de stockage, vous devez les
supprimer séparément.
• Vous assumez l’entière responsabilité d’une utilisation inappropriée des données partagées sur
les réseaux sociaux ou transmises à d’autres personnes. Soyez vigilant lorsque vous partagez vos
données personnelles avec d’autres personnes.
• Si l’appareil est connecté à des appareils de mesure, vérifiez le protocole de communication
pour confirmer le bon fonctionnement. Si vous utilisez une connexion sans fil, telle que
Bluetooth ou ANT+, il se peut que l’appareil soit affecté par des interférences électroniques
provenant d’autres appareils. Évitez d’utiliser l’appareil à proximité immédiate d’autres appareils
émettant des ondes radio.
• Selon la version logicielle de l’application, le contenu utilisé dans l’application S Health
peut différer. Les services offerts avec l’application sont sujets à modification ou annulation
d’assistance sans préavis.
• La disponibilité des fonctions et services S Health dépend de la législation et des
réglementations en vigueur dans votre région.
• Certaines fonctions S Health peuvent ne pas être disponibles dans votre région.
• Les fonctions de S Health sont indiquées uniquement à titre d’information, mais ne sauraient
être utilisées pour diagnostiquer une maladie ou une pathologie, ou pour guérir, soulager,
traiter ou prévenir une maladie.
Applications utiles
111
S Voice
Introduction
Réalisez diverses tâches à l’aide d’une simple commande vocale.
Lancer S Voice
1 Appuyez sur S Voice depuis l’écran Applications.
Vous pouvez également appuyer deux fois sur la touche Accueil.
La disponibilité de cette application dépend de votre zone géographique ou de votre
opérateur.
2 Suivez les instructions qui s’affichent à l’écran pour procéder à la configuration.
3 Affichez le didacticiel ou appuyez sur LANCER pour ignorer le didacticiel.
Définir une langue
Appuyez sur → Paramètres → Langue, puis sélectionnez une langue.
La langue sélectionnée est appliquée à S Voice uniquement, et non à la langue d’affichage
de l’appareil.
Utiliser S Voice
1 Appuyez sur S Voice depuis l’écran Applications.
Vous pouvez également appuyer deux fois sur la touche Accueil.
Dès que S Voice est lancé, l’appareil démarre la reconnaissance vocale.
2 Prononcez une commande vocale.
Si l’appareil reconnaît la commande, il exécute l’action correspondante. Pour répéter une
commande vocale ou en énoncer une autre, appuyez sur .
Applications utiles
112
Conseils pour améliorer la reconnaissance vocale :
• Parlez clairement.
• Parlez dans des endroits calmes.
• N’utilisez pas de langage injurieux ni d’argot.
• Évitez de parler avec un accent local.
Selon l’environnement où vous vous trouvez ou la manière dont vous parlez, il se peut que l’appareil
ne reconnaisse pas vos commandes ou qu’il exécute des commandes erronées.
Activer S Voice en mode veille
Si vous n’utilisez pas S Voice pendant un certain temps, l’application passe automatiquement en
mode veille. Appuyez sur l’icône de microphone ou dites « Bonjour Galaxy » pour reprendre la
reconnaissance vocale.
Changer de commande de réveil
Vous pouvez changer la commande de réveil qui correspond par défaut à « Bonjour Galaxy ». La
commande de réveil sert à relancer la reconnaissance vocale lorsque l’appareil est en mode veille.
Appuyez sur → Paramètres → Réveil vocal → Définir commande réveil.
Utiliser des commandes de réveil sur l’écran verrouillé
Sur l’écran verrouillé, vous pouvez utiliser différentes fonctions avec des commandes de réveil
prédéfinies.
Appuyez sur → Paramètres → Réveil vocal → Réveiller qd verrouillé.
Applications utiles
113
Musique
Introduction
Écoutez de la musique classée par catégorie et personnalisez les paramètres de lecture.
Écouter de la musique
Appuyez sur Musique depuis l’écran Applications.
Sélectionnez un morceau à écouter.
Ajouter le morceau de musique à
une liste de lecture.
Passer au morceau suivant.
Maintenir appuyé pour effectuer
une avance rapide.
Mettre en pause et reprendre la
lecture.
Accéder à des options
supplémentaires.
Modifier le mode de répétition.
Revenir au morceau précédent.
Maintenir appuyé pour effectuer un
retour rapide.
Activer la lecture aléatoire.
Ouvrir la liste de lecture.
Rechercher d’autres appareils pour
y lire le fichier.
Définir le fichier comme votre
morceau favori.
Régler le volume.
Applications utiles
114
Écouter de la musique stockée sur d’autres appareils
Recherchez des morceaux stockés sur d’autres appareils pour les écouter sur votre appareil.
Appuyez sur Musique depuis l’écran Applications.
Accéder à de la musique stockée sur des appareils Samsung Link
Pour utiliser cette fonctionnalité, vous devez vous connecter à votre compte Samsung. Pour en savoir
plus, reportez-vous à la section Enregistrer des comptes Samsung.
Depuis l’écran principal Musique, appuyez sur APPAREILS et sélectionnez un appareil dans Appareils
enregistrés pour y accéder et lire les morceaux. Vous pouvez écouter des morceaux sur les appareils
enregistrés sur Samsung Link. Pour en savoir plus, consultez l’adresse suivante : link.samsung.com.
• Vérifiez que les appareils enregistrés sont allumés et connectés à un réseau Wi-Fi ou
mobile.
• Il se peut que des frais supplémentaires vous soient facturés lorsque vous accédez à des
contenus enregistrés sur d’autres appareils via le réseau mobile.
Accéder à de la musique stockée sur des appareils à proximité
Recherchez des appareils à proximité via le Wi-Fi, Wi-Fi Direct ou un point d’accès mobile pour lire de
la musique stockée sur ces appareils.
1 Depuis l’écran Applications, appuyez sur Paramètres → NFC et partage → Appareils à
proximité, puis faites glisser le curseur Appareils à proximité vers la droite pour activer la
fonction.
2 Depuis l’écran principal Musique, appuyez sur APPAREILS.
3 Sélectionnez un appareil dans Appareils à proximité pour accéder aux morceaux et les lire.
Vous pouvez écouter des morceaux sur les appareils dont la fonction de partage de contenu est
activée.
Applications utiles
115
Vidéo
Introduction
Regardez des vidéos stockées sur l’appareil et personnalisez les paramètres de lecture.
Lire des vidéos
Appuyez sur Vidéo depuis l’écran Applications.
Sélectionnez une vidéo à lire.
Modifier le format
d’écran.
Effectuer une avance
ou un retour rapdie en
faisant glisser la barre.
Rechercher d’autres
appareils pour y lire le
fichier.
Revenir à la vidéo
précédente. Maintenir
la touche appuyée
pour effectuer un
retour rapide.
Passer à la vidéo
suivante. Maintenir la
touche appuyée pour
effectuer une avance
rapide.
Accéder à des options
supplémentaires.
Basculer sur le lecteur
vidéo contextuel.
Mettre en pause et
reprendre la lecture.
Régler le volume.
Faites glisser le doigt vers le haut ou le bas sur le côté gauche de l’écran de lecture pour régler la
luminosité, ou faites glisser le doigt vers le haut ou le bas sur le côté droit de l’écran de lecture pour
régler le volume.
Pour effectuer un retour ou une avance rapide, faites glisser le doigt vers la gauche ou la droite sur
l’écran de lecture.
Applications utiles
116
Regarder des vidéos stockées sur d’autres appareils
Recherchez des vidéos stockées sur d’autres appareils pour les lire sur votre appareil.
Appuyez sur Vidéo depuis l’écran Applications.
Accéder à des vidéos stockées sur des appareils Samsung Link
Pour utiliser cette fonctionnalité, vous devez vous connecter à votre compte Samsung. Pour en savoir
plus, reportez-vous à la section Enregistrer des comptes Samsung.
Depuis l’écran principal Vidéo, appuyez sur APPAREILS et sélectionnez un appareil dans Appareils
enregistrés pour y accéder et regarder la vidéo. Vous pouvez regarder la vidéo sur les appareils
enregistrés sur Samsung Link. Pour en savoir plus, consultez l’adresse suivante : link.samsung.com.
• Vérifiez que les appareils enregistrés sont allumés et connectés à un réseau Wi-Fi ou
mobile.
• Il se peut que des frais supplémentaires vous soient facturés lorsque vous accédez à des
contenus enregistrés sur d’autres appareils via le réseau mobile.
Accéder à des vidéos stockées sur des appareils à proximité
Recherchez des appareils à proximité via le Wi-Fi, Wi-Fi Direct ou un point d’accès mobile pour
regarder des vidéos stockées sur ces appareils.
1 Depuis l’écran Applications, appuyez sur Paramètres → NFC et partage → Appareils à
proximité, puis faites glisser le curseur Appareils à proximité vers la droite pour activer la
fonction.
2 Depuis l’écran principal Vidéo, appuyez sur APPAREILS.
3 Sélectionnez un appareil dans Appareils à proximité pour accéder à la vidéo et la regarder.
Vous pouvez regarder des vidéos sur les appareils dont la fonction de partage de contenu est
activée.
Applications utiles
117
Internet
Naviguez sur Internet pour rechercher des informations et enregistrez vos pages Web préférées en
tant que favoris afin d’y accéder plus facilement.
Parcourir des pages Web
1 Appuyez sur Internet depuis l’écran Applications.
2 Appuyez sur le champ d’adresse. Pour changer de moteur de recherche, appuyez sur l’icône du
moteur de recherche près du champ d’adresse Web.
3 Saisissez une adresse Web ou un mot-clé, puis appuyez sur Aller à. Pour effectuer oralement une
recherche sur le Web, appuyez sur .
Pour afficher la barre d’outils, faites glisser votre doigt vers le bas de l’écran.
Lire un article en mode Lecture.
Définir la page Web en cours
comme favori.
Ouvrir la page d’accueil.
Revenir à la page précédemment
visitée.
Afficher la liste des favoris.
Accéder à des options
supplémentaires.
Ouvrir le gestionnaire de fenêtres
Web.
Actualiser la page Web en cours.
Afficher les pages enregistrées.
Applications utiles
118
Enregistreur vocal
Introduction
Changez de modes d’enregistrement en fonction de la situation, par exemple, lors d’une interview
ou d’une réunion. L’appareil peut convertir vos paroles en texte et distinguer les diverses sources
sonores.
Enregistrer des mémos vocaux
1 Depuis l’écran Applications, appuyez sur Enregistreur vocal.
2 Pour commencer l’enregistrement, appuyez sur . Parlez dans le microphone.
Pour interrompre l’enregistrement, appuyez sur . Pour annuler l’enregistrement, appuyez sur
.
Pendant l’enregistrement d’un mémo vocal, appuyez sur pour caractériser un passage
comme favori.
Afficher la liste des mémos vocaux.
Modifier le mode d’enregistrement.
Accéder à des options
supplémentaires.
Démarrer l’enregistrement.
Faire défiler parmi les modes
d’enregistrement disponibles.
Mode d’enregistrement actuel.
3 Pour terminer l’enregistrement, appuyez sur .
Applications utiles
119
Modifier le mode d’enregistrement
Appuyez sur pour sélectionner un mode dans la liste.
• Normal : mode d’enregistrement normal.
• Interview : le microphone est sensible aux sons provenant des deux directions. Dans ce mode,
les microphones situés en haut et en bas de l’appareil prélèvent la même quantité de sons.
L’icône s’affiche à côté des mémos vocaux enregistrés dans ce mode.
• Réunion : le microphone est sensible aux sons provenant de différentes directions. L’icône
s’affiche à côté des mémos vocaux enregistrés dans ce mode.
• Mémo vocal : l’appareil enregistre votre voix et la convertit simultanément en texte affiché à
l’écran. Pour un résultat optimal, rapprochez l’appareil de votre bouche et parlez clairement
dans un environnement calme. L’icône s’affiche à côté des mémos vocaux enregistrés dans
ce mode.
Si la langue que vous parlez n’est pas prise en charge par la fonction Enregistreur vocal,
l’appareil ne reconnaît pas vos paroles. Avant d’utiliser cette fonction, appuyez sur →
Paramètres → Langue pour définir la langue du système de mémos vocaux.
Écouter les mémos vocaux
Lorsque vous écoutez un entretien ou une réunion enregistré(e) dans un mémo vocal, vous pouvez
activer ou désactiver certaines sources sonores de l’enregistrement.
1 Depuis l’écran Applications, appuyez sur Enregistreur vocal.
2 Appuyez sur , puis sélectionnez un mémo vocal enregistré en mode réunion.
3 Pour désactiver certaines sources sonores, appuyez sur dans le sens correspondant au son à
désactiver.
L’icône devient et le son est désactivé.
Source sonore activée
Source sonore désactivée
Applications utiles
120
Horloge
Introduction
Configurez les alarmes, vérifiez l’heure dans les plus grandes villes du monde, planifiez un
événement ou définissez un minuteur.
Alarme
Depuis l’écran Applications, appuyez sur Horloge → Alarme.
Créer une alarme
1 Appuyez sur .
2 Définissez l’heure de l’alarme, sélectionnez les jours où celle-ci doit sonner, puis paramétrez les
diverses options de l’alarme.
3 Appuyez sur OK.
L’alarme sélectionnée est ajoutée à la liste des alarmes.
4 Pour activer ou désactiver des alarmes, appuyez sur l’icône près de l’alarme concernée.
Arrêter ou répéter une alarme
Pour éteindre une alarme, faites glisser votre doigt sur l’icône . Si l’option de répétition est activée,
faites glisser votre doigt sur l’icône pour répéter l’alarme après une période de répétition
prédéfinie.
Supprimer une alarme
Appuyez sur → Sélectionner, sélectionnez l’alarme à supprimer, puis appuyez sur .
Applications utiles
121
Horloge mondiale
Depuis l’écran Applications, appuyez sur Horloge → Horloge mondiale.
Créer une horloge
Saisissez le nom d’une ville ou sélectionnez-en une, puis appuyez sur .
Pour appliquer l’heure d’été, appuyez sur , maintenez le doigt appuyé sur une horloge, puis
appuyez sur .
Supprimer une horloge
Appuyez sur → Sélectionner, sélectionnez l’horloge à supprimer, puis appuyez sur .
Chronomètre
1 Depuis l’écran Applications, appuyez sur Horloge → Chronomètre.
2 Appuyez sur DÉBUT pour commencer à chronométrer.
Pour enregistrer des temps intermédiaires lors du chronométrage d’un événement, appuyez sur
TOUR.
3 Appuyez sur APPÊTER pour arrêter le chronométrage.
Pour effacer les temps intermédiaires, appuyez sur RÉINIT. Pour redémarrer le chronomètre,
appuyez sur REPRENDRE.
Minuteur
1 Depuis l’écran Applications, appuyez sur Horloge → Minuteur.
2 Définissez la durée, puis appuyez sur DÉMARRER.
3 Lorsque la durée du minuteur est écoulée, faites glisser votre doigt sur l’icône .
Applications utiles
122
Calculatrice
Exécutez des calculs simples ou complexes.
Utiliser la calculatrice
Appuyez sur Calculatrice depuis l’écran Applications.
Faites pivoter l’appareil vers la gauche pour utiliser la calculatrice scientifique en mode Paysage. Si
l’option Rotation écran est désactivée dans le volet des raccourcis, appuyez sur → Calculatrice
scientifique.
Pour afficher l’historique des calculs, appuyez sur pour masquer le clavier.
Pour effacer l’historique, appuyez sur → EFFACER L’HISTORIQUE.
Dropbox
Utilisez cette application pour enregistrer et partager des fichiers avec d’autres personnes via le
service de stockage Cloud Dropbox. Lorsque vous enregistrez des fichiers dans Dropbox, votre
appareil les synchronise automatiquement avec le serveur Web et tout autre appareil sur lequel le
service Dropbox est installé.
La disponibilité de cette application dépend de votre zone géographique ou de votre
opérateur.
Appuyez sur Dropbox depuis l’écran Applications.
Si vous démarrez cette application pour la première fois ou après la réinitialisation de vos données,
suivez les instructions à l’écran pour procéder à la configuration.
Depuis l’écran principal Dropbox, utilisez les fonctions suivantes :
• : charger ou ouvrir des fichiers. Appuyez sur → Transférer ici pour télécharger les fichiers.
• : afficher les photos ou vidéos chargées. Appuyez sur pour partager ou supprimer des
fichiers ou créer des albums.
• : ouvrir des fichiers de la liste des favoris.
• : afficher des notifications.
Applications utiles
123
Flipboard
Utilisez cette application pour afficher en direct les nouvelles de vos réseaux sociaux et les actualités
à un format de magazine personnalisé.
Appuyez sur Flipboard depuis l’écran Applications.
La disponibilité de cette application dépend de votre zone géographique ou de votre
opérateur.
Si vous démarrez cette application pour la première fois ou après la réinitialisation de vos données,
suivez les instructions à l’écran pour procéder à la configuration.
Depuis l’écran principal Flipboard, sélectionnez des articles d’actualités et des abonnements.
Smart Remote
Introduction
Utilisez cette application pour vous connecter à des téléviseurs, des décodeurs ou des projecteurs, et
utiliser l’appareil comme une télécommande.
Applications utiles
124
Commencer à utiliser Smart Remote
1 Appuyez sur Smart Remote depuis l’écran Applications.
2 Appuyez sur DÉMARRER.
3 Sélectionnez un pays, une région et un service de radiodiffusion.
Les programmes de télévision disponibles s’affichent.
Utiliser l’appareil comme télécommande
Vous pouvez allumer et éteindre le téléviseur, parcourir les chaînes ou régler le volume du téléviseur
en utilisant l’appareil comme une télécommande.
1 Appuyez sur Smart Remote depuis l’écran Applications.
2 Appuyez sur → Suivant.
3 Sélectionnez la marque du téléviseur.
4 Assurez-vous que le port infrarouge de l’appareil est orienté vers le téléviseur et appuyez sur
Bouton 1. Appuyez ensuite sur OUI si l’appareil allume le téléviseur.
Si l’appareil ne réussit pas à allumer le téléviseur, appuyez sur NON et recommencez cette
opération jusqu’à ce que le téléviseur reconnaisse le signal.
Applications utiles
125
5 Sélectionnez un fournisseur de chaînes.
Allumer ou éteindre le téléviseur.
Menus de commande du téléviseur
Fonctions supplémentaires
Accéder à des options
supplémentaires.
Regarder la télévision à l’aide de l’appareil
Sélectionnez un programme TV dans la liste des programmes disponibles pour le regarder sur le
téléviseur connecté.
1 Appuyez sur Smart Remote depuis l’écran Applications.
2 Appuyez sur POUR VOUS, SÉRIES TÉLÉ, FILMS ou SPORTS.
3 Sélectionnez un programme TV, puis appuyez sur REGARDER SUR TV.
Le programme sélectionné apparaît sur le téléviseur connecté.
4 Appuyez sur pour changer de chaîne ou régler le volume.
Le volet de télécommande apparaît à l’écran.
Définir un rappel de programme
1 Sélectionnez un programme télévisé qui n’est pas actuellement en cours de diffusion.
2 Appuyez sur ME LE RAPPELER et configurez une alarme pour vous rappeler l’heure de début du
programme.
Applications utiles
126
Evernote
Utilisez cette application pour créer, synchroniser et partager des notes multimédia. Vous pouvez
ajouter des balises aux notes ou trier les notes dans un carnet et gérer ainsi efficacement vos idées.
Appuyez sur Evernote depuis l’écran Applications.
Connectez-vous à votre compte Evernote. Si vous n’en possédez pas, créez un compte Evernote.
Suivez les instructions qui s’affichent à l’écran pour procéder à la configuration.
La disponibilité de cette application dépend de votre zone géographique ou de votre
opérateur.
Composer des notes
Vous pouvez créer une note à l’aide d’images, d’enregistrements vocaux et autres pièces jointes.
Depuis l’écran principal Evernote, appuyez sur Nouvelle note.
Lorsque vous rédigez une note, utilisez les options suivantes :
• : définir un rappel pour la note.
• : joindre des fichiers ou utiliser des options supplémentaires.
• : prendre une photo et la joindre à la note.
• : accéder à des options supplémentaires.
Supprimer des notes
Maintenez le doigt appuyé sur une note de la liste, puis appuyez sur Supprimer.
Applications utiles
127
PEN.UP
Utilisez cette application pour publier et partager vos dessins réalisés avec le S Pen.
Appuyez sur PEN.UP depuis l’écran Applications.
Si vous démarrez cette application pour la première fois ou après la réinitialisation de vos données,
appuyez sur S’inscrire ou Connexion en haut de l’écran. Ensuite, suivez les instructions qui
s’affichent à l’écran pour procéder à la configuration.
Publier des œuvres
Depuis l’écran principal PEN.UP, appuyez sur . Ajoutez votre dessin, complétez ses informations,
puis appuyez sur .
Afficher une œuvre
Depuis l’écran principal PEN.UP, sélectionnez un post. Appuyez sur → Enregistrer l’œuvre pour
télécharger l’œuvre sur votre appareil. L’œuvre est enregistrée dans le dossier PEN.UP. Pour ouvrir le
dossier, ouvrez l’écran Applications et appuyez sur Galerie → → Album → PEN.UP.
Vous pouvez uniquement télécharger des œuvres étiquetées en tant que fond d’écran.
Applications Google
Google fournit des applications de divertissement, de réseaux sociaux et des applications à caractère
professionnel. Vous aurez éventuellement besoin d’un compte Google pour accéder à certaines
applications. Pour en savoir plus, reportez-vous à la section Paramétrer des comptes.
Pour afficher des informations sur une application, ouvrez son écran principal, puis appuyez sur →
Aide.
Certaines applications peuvent ne pas être disponibles ou s’intituler différemment selon
votre zone géographique ou votre opérateur.
Chrome
Recherchez des informations et naviguez dans des pages Web.
Gmail
Envoyez et recevez des e-mails via le service Google Mail.
Applications utiles
128
Google+
Communiquez et partagez des contenus avec votre famille, vos amis et bien plus encore. Cet espace
vous permet également de sauvegarder vos photos, vidéos, etc.
Maps
Localisez votre position sur une carte, recherchez des adresses et affichez des informations de
localisation.
Play Musique
Découvrez, écoutez et partagez des morceaux de musique à l’aide de votre appareil.
Play Films
Regardez des vidéos enregistrées sur votre appareil et téléchargez divers contenus sur Play Store.
Play Livres
Téléchargez des livres sur Play Store et lisez-les.
Play Kiosque
Consultez les actualités et les magazines qui vous intéressent.
Play Jeux
Téléchargez des jeux sur Play Store et jouez avec d’autres participants.
Google Drive
Stockez vos données sur le cloud, accédez-y où que vous soyez et partagez-les avec d’autres
personnes.
YouTube
Regardez ou créez des vidéos et partagez-les avec d’autres personnes.
Applications utiles
129
Google+ Photos
Gérez vos photos, albums et vidéos enregistré(e)s sur l’appareil et téléchargé(e)s sur Google+.
Hangouts
Discutez avec vos amis, séparément ou en groupe, et ajoutez des images, émoticônes et vidéos.
Recherche Google
Recherchez rapidement des informations sur Internet ou sur votre appareil.
Recherche vocale
Recherchez rapidement des informations en énonçant un mot-clé ou une phrase.
Paramètres Google
Configurez certaines fonctions proposées par Google.
130
Établir une connexion avec
d’autres appareils
Connexion rapide
Introduction
Recherchez automatiquement les appareils à proximité et établissez rapidement une connexion
avec eux.
• Assurez-vous que la fonction Wi-Fi Direct ou Bluetooth est activée sur les appareils ne
prenant pas en charge la fonction Connexion rapide.
• Les modes de connexion peuvent varier selon le type des appareils connectés ou du
contenu partagé.
• Le nom de l’appareil peut varier selon les appareils Bluetooth avec lesquels il est appairé.
Par exemple, le nom de l’appareil peut s’afficher comme BT MAC.
Établir une connexion à d’autres appareils
Si vous démarrez cette application pour la première fois ou après la réinitialisation de vos données,
suivez les instructions à l’écran pour procéder à la configuration.
1 Ouvrez le volet des raccourcis et appuyez sur Connex. rapide.
À l’ouverture du volet, les fonctions Wi-Fi et Bluetooth sont automatiquement activées et
l’appareil recherche les appareils à proximité.
2 Sélectionnez un appareil dans la liste et établissez une connexion en suivant les instructions à
l’écran.
Les étapes suivantes peuvent varier en fonction de l’appareil connecté.
Pour permettre aux appareils à proximité de rechercher votre appareil et de s’y connecter,
appuyez sur → Définir la visibilité de l’appareil → Rendre l’appareil visible, puis
sélectionnez une option.
Établir une connexion avec d’autres appareils
131
Relancer la recherche d’appareils
Si l’appareil recherché n’apparaît pas dans la liste, recherchez-le.
Appuyez sur et sélectionnez l’appareil dans la liste des appareils détectés.
Désactiver la fonction Connexion rapide
Pour désactiver la fonction Connexion rapide, faites glisser vers le bas depuis le haut de
l’écran. Sinon, appuyez sur .
Partager du contenu
Partagez du contenu avec les appareils connectés.
1 Ouvrez le volet des raccourcis et appuyez sur Connex. rapide.
2 Sélectionnez un appareil dans la liste des appareils détectés.
3 Sélectionnez une catégorie de média.
4 Sélectionnez le contenu à partager, puis appuyez sur TERMINÉ.
Votre appareil envoie le contenu à l’appareil connecté.
Établir une connexion avec d’autres appareils
132
Bluetooth
Introduction
Utilisez la fonction Bluetooth pour échanger des données ou des fichiers multimédia avec d’autres
appareils compatibles Bluetooth.
• Samsung ne peut être tenu responsable de la perte, de l’interception ou du mauvais
usage des données envoyées ou reçues via la fonction Bluetooth.
• Assurez-vous de toujours utiliser des appareils dignes de confiance et correctement
protégés avant de partager ou de recevoir des données. La présence d’obstacles entre les
deux appareils peut réduire le rayon d’action.
• Il est possible que votre appareil ne fonctionne pas avec certains appareils, en particulier
ceux qui n’ont pas été testés ou approuvés par Bluetooth SIG.
• N’utilisez pas la fonction Bluetooth de manière illégale (par exemple, pour le piratage de
fichiers ou l’enregistrement de communications à des fins commerciales).
Samsung ne peut être tenu responsable des répercussions d’une utilisation illégale de la
fonction Bluetooth.
Établir une connexion avec d’autres appareils Bluetooth
1 Depuis l’écran Applications, appuyez sur Paramètres → Bluetooth, appuyez sur le curseur
Bluetooth pour l’activer, puis sur ANALYSER.
Une liste des appareils détectés apparaît.
2 Sélectionnez un appareil auquel vous associer.
Si votre appareil a été appairé par le passé avec un appareil, appuyez sur son nom sans
confirmer le mot de passe.
Si l’appareil auquel vous souhaitez vous associer ne figure pas dans la liste, demandez à ce
que l’option de visibilité soit activée sur l’appareil. Reportez-vous au mode d’emploi de l’autre
appareil.
3 Pour confirmer, acceptez la demande de connexion Bluetooth sur les deux appareils.
Établir une connexion avec d’autres appareils
133
Envoyer et recevoir des données
De nombreuses applications prennent en charge le transfert de données via la fonction Bluetooth.
Vous pouvez partager des données, comme des contacts ou des fichiers multimédia, avec d’autres
appareils Bluetooth. Vous pouvez, par exemple, envoyer une image à un autre appareil.
Envoyer une image
1 Appuyez sur Galerie depuis l’écran Applications.
2 Sélectionnez une image.
3 Appuyez sur → Bluetooth, puis sélectionnez un appareil sur lequel transférer l’image.
Si l’appareil auquel vous souhaitez vous associer ne figure pas dans la liste, demandez à ce que
l’option de visibilité soit activée sur l’appareil.
4 Acceptez la demande de connexion Bluetooth sur l’autre appareil.
Recevoir une image
Lorsqu’un autre appareil vous envoie une image, acceptez la demande d’autorisation Bluetooth.
L’image reçue est enregistrée dans le dossier Download. Pour ouvrir le dossier, ouvrez l’écran
Applications et appuyez sur Galerie → → Album → Download.
Dissocier des appareils Bluetooth
1 Depuis l’écran Applications, appuyez sur Paramètres → Bluetooth.
L’appareil affiche la liste des appareils associés.
2 Appuyez sur à côté du nom de l’appareil à dissocier.
3 Appuyez sur Dissocier.
Établir une connexion avec d’autres appareils
134
Wi-Fi Direct
Introduction
Le Wi-Fi Direct autorise la connexion directe entre des appareils via un réseau Wi-Fi sans passer par
un point d’accès.
Établir une connexion à d’autres appareils
1 Depuis l’écran Applications, appuyez sur Paramètres → Wi-Fi, puis faites glisser le curseur Wi-Fi
vers la droite pour activer la fonction.
2 Appuyez sur → Wi-Fi Direct.
Une liste des appareils détectés apparaît.
Si l’appareil auquel vous souhaitez vous connecter ne figure pas dans la liste, demandez à ce
que la fonction Wi-Fi Direct soit activée sur l’appareil.
3 Sélectionnez un appareil auquel vous connecter.
4 Acceptez la demande de connexion Wi-Fi Direct sur l’autre appareil pour confirmer.
Envoyer et recevoir des données
Vous pouvez partager des données, comme des contacts ou des fichiers multimédia, avec d’autres
appareils. Vous pouvez, par exemple, envoyer une image à un autre appareil.
Envoyer une image
1 Appuyez sur Galerie depuis l’écran Applications.
2 Sélectionnez une image.
3 Appuyez sur → Wi-Fi Direct, puis sélectionnez un appareil sur lequel transférer l’image.
4 Acceptez la demande de connexion Wi-Fi Direct sur l’autre appareil.
Si les appareils sont déjà connectés, l’image est envoyée à l’autre appareil sans demande de
connexion.
Établir une connexion avec d’autres appareils
135
Recevoir une image
Lorsqu’un autre appareil vous envoie une image, acceptez la demande de connexion Wi-Fi Direct. Si
les appareils sont déjà connectés, l’image est reçue sur votre appareil sans demande de connexion.
L’image reçue est enregistrée dans le dossier Download. Pour ouvrir le dossier, ouvrez l’écran
Applications et appuyez sur Galerie → → Album → Download.
Déconnecter les appareils
1 Depuis l’écran Applications, appuyez sur Paramètres → Wi-Fi.
2 Appuyez sur → Wi-Fi Direct.
L’appareil affiche la liste des appareils connectés.
3 Appuyez sur TERMINER LA CONNEXION → OK pour déconnecter les appareils.
NFC
Introduction
Votre appareil est équipé d’une fonction qui permet de lire les tags NFC (Near Field Communication)
contenant des informations relatives aux produits. Grâce à cette fonction, vous pouvez également
effectuer des paiements et acheter des tickets de transport ou des billets de spectacle après avoir
téléchargé les applications correspondantes.
La batterie comporte une antenne NFC intégrée. Manipulez l’appareil avec précaution afin
de ne pas endommager l’antenne NFC.
Utiliser la fonction NFC
Utilisez la fonction NFC pour envoyer des images ou des contacts à d’autres appareils et lire des
informations produit. Si vous insérez une carte SIM ou USIM comportant une fonction de paiement,
vous pouvez utiliser l’appareil pour effectuer facilement des paiements.
1 Depuis l’écran Applications, appuyez sur Paramètres → NFC et partage → NFC, puis faites
glisser le curseur NFC vers la droite pour activer la fonction.
Vous pouvez également ouvrir le volet de paramétrage rapide, puis appuyer sur NFC pour
activer la fonction.
Établir une connexion avec d’autres appareils
136
2 Rapprochez l’antenne NFC, située à l’arrière de votre appareil, d’un tag NFC.
Les informations figurant sur le tag apparaissent à l’écran.
Assurez-vous que l’écran de l’appareil est déverrouillé. Sinon, l’appareil ne pourra pas lire les
tags NFC ou recevoir des données.
Effectuer un achat à l’aide de la fonction NFC
Pour pouvoir effectuer des paiements à l’aide de la fonction NFC, vous devez d’abord vous inscrire
à un service de paiement mobile. Pour vous inscrire ou obtenir plus d’informations sur ce service,
contactez votre opérateur.
1 Depuis l’écran Applications, appuyez sur Paramètres → NFC et partage → NFC, puis faites
glisser le curseur NFC vers la droite pour activer la fonction.
Vous pouvez également ouvrir le volet de paramétrage rapide, puis appuyer sur NFC pour
activer la fonction.
2 Rapprochez l’antenne NFC, située à l’arrière de votre appareil, du lecteur de carte NFC.
3 Appuyez sur Paiement NFC et sélectionnez une application pour configurer l’application de
paiement par défaut.
La liste des services peut ne pas inclure toutes les applications de paiement disponibles.
Établir une connexion avec d’autres appareils
137
Envoyer des données
Autorisez l’échange de données lorsque vous rapprochez l’antenne NFC de votre appareil de celle
d’un autre appareil NFC.
1 Depuis l’écran Applications, appuyez sur Paramètres → NFC et partage → NFC, puis faites
glisser le curseur NFC vers la droite pour activer la fonction.
Vous pouvez également ouvrir le volet de paramétrage rapide, puis appuyer sur NFC pour
activer la fonction.
2 Appuyez sur Android Beam ou S Beam, puis faites glisser le curseur Android Beam ou S Beam
vers la droite pour activer la fonction.
• Android Beam : envoyer des données via la fonction Bluetooth.
• S Beam : envoyer des données via le Wi-Fi Direct. Cette fonction est particulièrement
adaptée aux transferts de données volumineux.
3 Sélectionnez un élément et rapprochez l’antenne NFC de l’autre appareil de l’antenne NFC de
votre appareil.
4 Lorsque l’option Appuyez ici pour transférer apparaît à l’écran, appuyez sur l’écran de l’appareil
pour envoyer l’élément.
• N’envoyez pas de données protégées par des droits d’auteur via S Beam. Vous risqueriez
de violer les lois sur les droits d’auteur. Samsung ne peut en aucun cas être tenu
responsable en cas d’utilisation illégale de données protégées par des droits d’auteur.
• Si les deux appareils tentent d’envoyer simultanément des données, le transfert de
fichiers risque d’échouer.
Établir une connexion avec d’autres appareils
138
Screen Mirroring
Introduction
Utilisez cette fonction pour connecter votre appareil à un grand écran avec le routeur AllShare Cast
ou HomeSync, puis partagez vos contenus.
Appareils compatibles
Screen Mirroring (routeur
AllShare Cast ou
HomeSync)
• La disponibilité de cette fonction dépend de votre zone géographique ou de votre
opérateur.
• Selon la connexion réseau, certains fichiers peuvent être mis en mémoire tampon en
cours de lecture.
• Si vous indiquez une bande de fréquence Wi-Fi, il se peut que les routeurs AllShare Cast
ou HomeSync ne soient pas détectés.
Établir une connexion avec d’autres appareils
139
Afficher du contenu sur un téléviseur
Connectez le téléviseur et l’appareil devant utiliser la fonction Screen Mirroring. Pour configurer la
connexion, reportez-vous au mode d’emploi de l’appareil. Vous pouvez, par exemple, afficher du
contenu sur un téléviseur connecté via un routeur AllShare Cast.
1 Connectez l’appareil compatible avec la fonction Screen Mirroring au téléviseur à l’aide d’un
câble HDMI.
2 Sur le téléviseur, sélectionnez un mode de connexion, comme le mode HDMI, pour permettre la
connexion à un appareil externe.
3 Depuis l’écran Applications, appuyez sur Paramètres → NFC et partage → Screen Mirroring.
Une liste des appareils détectés apparaît.
4 Sélectionnez un appareil auquel vous connecter. L’écran de votre appareil apparaît sur l’écran du
téléviseur.
Si vous connectez l’appareil pour la première fois, maintenez le doigt appuyé sur le nom du
routeur figurant dans la liste et saisissez le code PIN indiqué sur l’écran du téléviseur.
5 Ouvrez ou lisez un fichier, puis commandez l’affichage à l’aide des touches de votre appareil.
Interrompre la connexion Screen Mirroring
Depuis l’écran Applications, appuyez sur Paramètres → NFC et partage → Screen Mirroring.
• Pour économiser votre batterie, désactivez cette fonction lorsque vous ne l’utilisez pas.
• Si vous lisez des vidéos ou jouez à des jeux sur un téléviseur, sélectionnez un mode TV
approprié afin d’obtenir un résultat optimal.
Établir une connexion avec d’autres appareils
140
MirrorLink
Contrôlez l’application MirrorLink de votre appareil depuis l’écran du tableau de bord d’un véhicule.
Votre appareil est compatible avec les véhicules prenant en charge MirrorLink version 1.1 ou
ultérieure.
Connecter votre appareil à un véhicule via MirrorLink
Lorsque vous utilisez cette fonction pour la première fois, connectez l’appareil à un réseau Wi-Fi ou
mobile.
1 Associez votre appareil à un véhicule via la fonction Bluetooth.
Pour en savoir plus, reportez-vous à la section Établir une connexion avec d’autres appareils
Bluetooth.
2 Connectez votre appareil au véhicule à l’aide d’un câble USB.
Une fois la connexion établie, accédez à l’application MirrorLink de votre appareil depuis l’écran
du tableau de bord.
Interrompre la connexion MirrorLink
Débranchez le câble USB entre votre appareil et le véhicule.
Établir une connexion avec d’autres appareils
141
Utiliser la fonction d’impression mobile
Introduction
Connectez l’appareil à une imprimante à l’aide de la fonction Wi-Fi ou Wi-Fi Direct, puis imprimez des
images ou des documents.
Certaines imprimantes peuvent ne pas être compatibles avec l’appareil.
Ajouter des modules d’extension d’imprimante
Ajoutez des modules d’extension pour les imprimantes que vous souhaitez utiliser.
1 Depuis l’écran Applications, appuyez sur Paramètres → NFC et partage → Impression →
Télécharger le plug-in.
2 Recherchez un plug-in d’imprimante dans Play Store.
3 Sélectionnez un module d’extension et installez-le.
4 Sélectionnez le plug-in d’imprimante, puis appuyez sur le curseur en haut à droite de l’écran
pour activer cette fonction.
L’appareil recherche les imprimantes connectées au même réseau Wi-Fi que lui.
Pour ajouter des imprimantes manuellement, appuyez sur → Ajouter une imprimante → .
Pour modifier les paramètres d’impression, appuyez sur → Paramètres.
Imprimer du contenu
En mode affichage d’une image ou d’un document par exemple, appuyez sur → Imprimer, puis
sélectionnez une imprimante.
142
Gestionnaire d’appareils et de
données
Mettre à jour l’appareil
L’appareil peut être mis à jour avec la version logicielle la plus récente.
Mettre l’appareil à jour sans connexion PC
Grâce au service FOTA (Firmware Over The Air), le logiciel de l’appareil peut être mis à jour sans
passer par une connexion avec un ordinateur.
Depuis l’écran Applications, appuyez sur Paramètres → À propos de l’appareil → Mises à jour
logicielles → Mettre à jour maintenant.
Cochez la case Mise à jour auto. pour rechercher automatiquement les mises à jour
disponibles. Pour télécharger les mises à jour uniquement si une connexion Wi-Fi est activée,
cochez la case Wi-Fi uniquement.
Mettre l’appareil à jour avec Samsung Kies
Connectez l’appareil à un ordinateur et mettez à jour l’appareil avec la version logicielle la plus
récente.
1 Depuis l’ordinateur, téléchargez la dernière version de Samsung Kies à partir du site Web
Samsung.
2 Depuis l’ordinateur, lancez Samsung Kies et connectez l’appareil à un ordinateur à l’aide d’un
câble USB.
3 Suivez les instructions qui s’affichent à l’écran pour mettre à jour l’appareil.
• Lorsque vous mettez votre appareil à jour, n’éteignez pas l’ordinateur et ne déconnectez
pas le câble USB.
• Lors de la mise à jour, ne connectez pas d’autres appareils multimédia à l’ordinateur. Cela
pourrait interférer avec le processus de mise à jour. Avant de procéder à la mise à jour,
déconnectez les autres appareils multimédia de l’ordinateur.
Gestionnaire d’appareils et de données
143
Transférer des fichiers entre l’appareil et un
ordinateur
Vous pouvez transférer différents types de fichiers (sons, vidéos, images, etc.) de l’appareil vers un
ordinateur, et inversement.
Ne débranchez pas le câble USB de l’appareil lorsqu’un transfert de fichiers est en cours. Cela
risquerait d’entraîner une perte de données ou d’endommager l’appareil.
Il se peut que les appareils ne se connectent pas correctement s’ils le sont via un
concentrateur USB. Branchez directement l’appareil sur le port USB de l’ordinateur.
Connecter l’appareil en tant qu’appareil multimédia
1 Connectez l’appareil à un ordinateur à l’aide du câble USB.
2 Ouvrez le volet des raccourcis, puis appuyez sur Connecté en tant que périphérique
multimédia → Périphérique multimédia (MTP).
Appuyez sur Appareil photo (PTP) si votre ordinateur ne gère pas le protocole MTP (Media
Transfer Protocol) ou ne dispose pas du pilote approprié.
3 Transférez des fichiers entre votre appareil et l’ordinateur.
Connecter l’appareil avec Samsung Kies
Samsung Kies est un logiciel qui permet de gérer vos contenus multimédia et vos informations
personnelles avec des appareils Samsung.
1 Depuis l’ordinateur, téléchargez la dernière version de Samsung Kies à partir du site Web
Samsung.
2 Depuis l’ordinateur, lancez Samsung Kies et connectez l’appareil à un ordinateur à l’aide d’un
câble USB.
3 Transférez des fichiers entre votre appareil et l’ordinateur.
Pour plus d’informations, consultez l’aide de Samsung Kies.
Gestionnaire d’appareils et de données
144
Sauvegarder et restaurer des données
Conservez vos informations personnelles, données d’applications et paramètres en toute sécurité
sur votre appareil. Vous pouvez effectuer une sauvegarde de vos informations importantes sur un
compte de sauvegarde et y accéder ultérieurement. Pour sauvegarder ou restaurer des données,
vous devez vous connecter à votre compte Google ou Samsung.
Utiliser un compte Google
1 Appuyez sur Paramètres depuis l’écran Applications.
2 Appuyez sur Sauvegarder et réinitialiser et cochez la case Sauvegarder mes données.
3 Appuyez sur Compte de sauvegarde et sélectionnez un compte de sauvegarde.
Utiliser un compte Samsung
Depuis l’écran Applications, appuyez sur Paramètres → Comptes → Samsung → Sauvegarder,
cochez les éléments à sauvegarder, puis appuyez sur SAUVEGARDER MAINTENANT →
SAUVEGARDER MAINTENANT. Pour activer la sauvegarde automatique des données de l’appareil,
cochez la case Sauvegarde automatique.
• Pour restaurer les données à l’aide d’un compte Google, ouvrez l’écran Applications,
appuyez sur Paramètres → Sauvegarder et réinitialiser, puis cochez la case
Restauration auto. Lors de la réinstallation d’applications, les paramètres et données
sauvegardés seront restaurés.
• Pour restaurer les données à l’aide d’un compte Samsung, ouvrez l’écran Applications,
puis appuyez sur Paramètres → Comptes → Samsung → Restaurer. Les données
actuelles sont supprimées de l’appareil afin de restaurer les éléments sélectionnés.
Réinitialiser les données
Vous pouvez supprimer tous les paramètres et toutes les données de l’appareil. Avant de rétablir les
paramètres par défaut, assurez-vous de sauvegarder toutes les données importantes stockées sur
l’appareil. Pour en savoir plus, reportez-vous à la section Sauvegarder et restaurer des données.
Depuis l’écran Applications, appuyez sur Paramètres → Sauvegarder et réinitialiser → Rétablir
param. par défaut → RÉINITIALISER LE PÉRIPHÉRIQUE → SUPPRIMER TOUT. L’appareil redémarre
automatiquement.
145
Paramètres
Introduction
Personnalisez les paramètres de nombreuses fonctions et applications. Vous pouvez personnaliser
votre appareil en configurant divers paramètres.
Configurer les paramètres
Depuis l’écran Applications, appuyez sur Paramètres pour accéder à l’écran des paramètres.
Pour rechercher des paramètres en saisissant des mots clés, appuyez sur .
Vous pouvez changer le mode d’affichage, soit sous forme de listes, soit sous forme
d’onglets. Appuyez sur → Type d’affichage → Affichage Onglet.
Paramètres rapides
Créez une liste des paramètres fréquemment utilisés.
Appuyez sur → Modifier les raccourcis. Sélectionnez les éléments à ajouter ou désélectionnez les
éléments à supprimer, puis appuyez sur EFFECTUÉ.
Paramètres
146
Connexions
Wi-Fi
Activez la fonction Wi-Fi pour permettre la connexion à un réseau Wi-Fi et accéder à Internet ou à
d’autres périphériques réseau.
Votre appareil utilise une fréquence non harmonisée et est conçu pour fonctionner dans
tous les pays européens. Au sein de l’Union Européenne, le réseau Wi-Fi peut fonctionner
sans restriction en intérieur, mais pas en extérieur.
1 Depuis l’écran Paramètres, appuyez sur Wi-Fi, puis faites glisser le curseur Wi-Fi vers la droite
pour activer la fonction.
2 Sélectionnez un réseau dans la liste des réseaux Wi-Fi détectés.
Les réseaux nécessitant un mot de passe sont signalés par une icône en forme de verrou.
3 Appuyez sur CONNEXION.
Ajouter un réseau Wi-Fi
Si le réseau souhaité n’apparaît pas dans la liste de réseaux Wi-Fi, vous pouvez l’ajouter
manuellement.
1 Appuyez sur Ajouter un réseau Wi-Fi en bas de la liste.
2 Saisissez le nom de réseau dans SSID du réseau.
3 Sélectionnez le type de sécurité.
4 S’il ne s’agit pas d’un réseau ouvert, saisissez le mot de passe, puis appuyez sur CONNEXION.
Paramètres
147
Utiliser la fonction Réseau intelligent
Utilisez cette fonction pour maintenir une connexion réseau stable lorsque vous naviguez sur des
pages Web, téléchargez du contenu, etc.
Depuis l’écran Paramètres, appuyez sur Wi-Fi, puis cochez la case Réseau intelligent.
L’appareil passe automatiquement du réseau Wi-Fi au réseau mobile lorsque le réseau Wi-Fi actif
est faible ou instable. Lorsque le signal du réseau Wi-Fi redevient fort, l’appareil repasse du réseau
mobile au réseau Wi-Fi.
• Lorsque vous n’utilisez pas le réseau Wi-Fi, désactivez-le afin d’économiser la batterie.
• Une fois que l’appareil s’est connecté à un réseau Wi-Fi, il se reconnecte à ce réseau
chaque fois que ce dernier est disponible sans réclamer de mot de passe. Pour empêcher
l’appareil de se connecter automatiquement au réseau, sélectionnez-le dans la liste des
réseaux et appuyez sur OUBLIER.
Bluetooth
Activez la fonction Bluetooth pour échanger des informations sur de courtes distances.
Depuis l’écran Paramètres, appuyez sur Bluetooth, puis faites glisser le curseur Bluetooth vers la
droite pour activer la fonction.
Appuyez sur pour afficher davantage d’options.
Modem et point d’accès mobile
Utilisez l’appareil comme point d’accès mobile pour partager la connexion de données de votre
appareil avec d’autres appareils si aucune connexion Internet n’est disponible. Les connexions
peuvent être effectuées via la fonction Wi-Fi, USB ou Bluetooth.
Depuis l’écran Paramètres, appuyez sur Modem et point d’accès mobile.
L’utilisation de cette fonction peut entraîner des frais supplémentaires.
• Point d’accès mobile : utilisez le point d’accès mobile pour partager la connexion de données
de votre appareil avec des ordinateurs ou d’autres appareils.
Paramètres
148
• Modem USB : utilisez le modem USB pour partager la connexion de données de votre appareil
avec un ordinateur via le mode USB. Lorsqu’il est connecté à un ordinateur, l’appareil sert de
modem sans fil.
• Modem Bluetooth : utilisez le modem Bluetooth pour partager la connexion de données de
votre appareil avec un ordinateur ou d’autres appareils via la fonction Bluetooth.
Utiliser le point d’accès mobile
Utilisez votre appareil comme point d’accès mobile pour partager sa connexion de données avec
d’autres appareils.
1 Depuis l’écran Paramètres, appuyez sur Modem et point d’accès mobile → Point d’accès
mobile.
2 Faites glisser le curseur Point d’accès mobile vers la droite pour activer la fonction.
L’icône apparaît dans la barre d’état. Les autres appareils peuvent détecter le vôtre dans la
liste de réseaux Wi-Fi.
Pour définir un mot de passe pour le point d’accès mobile, appuyez sur → Configurer le point
d’accès, puis sélectionnez le niveau de sécurité. Saisissez ensuite un mot de passe, puis appuyez
sur ENREG.
3 Sur l’écran de l’autre appareil, recherchez et sélectionnez votre appareil dans la liste des réseaux
Wi-Fi.
4 Sur l’appareil connecté, utilisez la connexion de données de votre appareil pour accéder à
Internet.
Mode Hors-ligne
Désactivez toutes les fonctions sans fil de l’appareil. Vous pouvez uniquement utiliser les services
hors-réseau, c’est-à-dire les fonctions autres que les fonctions d’appel, Wi-Fi et Bluetooth.
Depuis l’écran Paramètres, appuyez sur Mode Hors-ligne.
Utilisation des données
Effectuez un suivi de la quantité de données utilisées et personnalisez les paramètres de limite
d’utilisation des données.
Depuis l’écran Paramètres, appuyez sur Utilisation des données.
• Données mobiles : paramétrez l’appareil pour pouvoir utiliser les connexions de données sur
n’importe quel réseau mobile.
Appuyez sur pour afficher davantage d’options.
Paramètres
149
Position
Modifiez les paramètres des informations de localisation.
Depuis l’écran Paramètres, appuyez sur Position, puis faites glisser le curseur Position vers la droite
pour activer la fonction.
• Mode : sélectionnez une méthode pour recueillir vos données de localisation.
• Demandes de localisation récentes : affichez les applications qui requièrent votre position et la
batterie consommée à cet effet.
• Services de localisation : affichez les services de localisation utilisés par votre appareil.
• Mes endroits : enregistrez vos endroits favoris à utiliser avec des applications nécessitant des
informations de localisation. Votre appareil fournit les informations et services pertinents en
identifiant les endroits sauvegardés à l’aide des fonctions Maps, Wi-Fi ou Bluetooth.
NFC et partage
Modifiez les paramètres des différentes fonctions de partage.
Depuis l’écran Paramètres, appuyez sur NFC et partage.
• NFC : modifiez les paramètres d’utilisation de la fonction NFC. Pour en savoir plus, reportez-vous
à la section NFC.
• Appareils à proximité : modifiez les paramètres de partage de contenus avec des appareils à
proximité. Tous les appareils doivent être compatibles avec Wi-Fi Direct ou être connectés au
même réseau ou point d’accès Wi-Fi.
• Impression : configurez les paramètres pour les plug-ins d’imprimante installés sur l’appareil.
Vous pouvez rechercher les imprimantes disponibles ou en ajouter une manuellement
pour imprimer des fichiers. Pour en savoir plus, reportez-vous à la section Utiliser la fonction
d’impression mobile.
• Screen Mirroring : activez cette fonction pour partager votre écran avec d’autres personnes.
Pour en savoir plus, reportez-vous à la section Screen Mirroring.
• MirrorLink : utilisez cette fonction pour contrôler l’application MirrorLink de votre appareil
depuis l’écran du tableau de bord d’un véhicule. Pour en savoir plus, reportez-vous à la section
MirrorLink.
Paramètres
150
Plus de réseaux
Personnalisez les paramètres réseaux.
Depuis l’écran Paramètres, appuyez sur Plus de réseaux.
• Download Booster : paramétrez l’appareil pour qu’il télécharge simultanément et plus
rapidement des fichiers faisant plus de 30 Mo via le réseau Wi-Fi et les réseaux mobiles. Un signal
Wi-Fi plus fort offre un débit de téléchargement supérieur.
• La prise en charge de cette fonction dépend de l’appareil.
• Il se peut que des frais supplémentaires vous soient facturés lors du téléchargement de
fichiers via le réseau mobile.
• Lorsque vous téléchargez des fichiers volumineux, l’appareil risque de chauffer. Si
l’appareil dépasse une certaine température, l’application se ferme.
• Si les signaux réseau sont instables, la vitesse et les performances de cette fonction
peuvent s’en trouver affectées.
• Si les débits de transfert de données du Wi-Fi et des réseaux mobiles sont très différents, il
se peut que l’appareil utilise uniquement la connexion la plus rapide.
• Cette fonction prend en charge Hypertext Transmission Protocol (HTTP) 1.1 et Hypertext
Transmission Protocol Secure (HTTPS). La fonction ne peut pas être utilisée avec d’autres
protocoles, comme FTP.
• Application de messagerie par défaut : sélectionnez l’application par défaut à utiliser pour la
messagerie.
• Réseaux mobiles : configurez votre réseau mobile.
• VPN : paramétrez des réseaux privés virtuels (VPN) pour vous y connecter.
Appareil
Sons et notifications
Modifiez les paramètres des différents sons de l’appareil.
Depuis l’écran Paramètres, appuyez sur Sons et notifications.
• Mode son : configurez le mode sonore à utiliser (vibreur, son ou silencieux).
• Intensité des vibrations : réglez l’intensité des vibrations émises par l’appareil.
Paramètres
151
• Vibreur et sonnerie : paramétrez l’appareil pour qu’il vibre et émette une sonnerie à chaque
appel entrant.
• Sonneries : sélectionnez une sonnerie pour les appels entrants.
• Vibrations : sélectionnez un type de vibreur.
• Sonnerie de notification : sélectionnez une sonnerie pour les événements, comme les
messages entrants.
Affichage et fond d’écran
Modifiez les paramètres d’affichage.
Depuis l’écran Paramètres, appuyez sur Affichage et fond d’écran.
• Luminosité : définissez la luminosité de l’écran.
• Fond d’écran : modifiez les paramètres du fond d’écran pour l’écran d’accueil et l’écran
verrouillé.
• Police : modifiez la taille et le type de police.
• Opération à une main : activez ce mode pour utiliser l’appareil d’une seule main. Pour en savoir
plus, reportez-vous à la section Opération à une main.
• Rotation de l’écran : indiquez si le contenu doit automatiquement pivoter en même temps que
l’appareil.
• Smart Stay : paramétrez l’appareil pour empêcher le rétroéclairage de se désactiver lorsque
vous consultez l’écran.
• Mise en veille de l’écran : définissez le délai à l’issue duquel l’écran doit s’éteindre
automatiquement.
• Mode d’écran : modifiez le mode d’affichage à l’écran.
• Tons écran auto. : paramétrez l’appareil pour pouvoir économiser de l’énergie en ajustant la
luminosité de l’écran.
• Écran de veille : paramétrez l’appareil pour pouvoir activer l’économiseur d’écran lorsque
l’appareil est connecté à une station d’accueil ou est en cours de chargement.
• Témoin lumineux : paramétrez l’appareil pour activer ou désactiver le témoin lumineux.
• Durée de l’éclairage des touches : paramétrez la durée de rétroéclairage des touches
Applications récentes et Retour.
• Augmenter sensib. tactile : paramétrez l’appareil pour pouvoir autoriser l’utilisation de l’écran
tactile avec des gants.
Selon la matière des gants que vous portez, certaines commandes peuvent ne pas être
reconnues.
Paramètres
152
Écran de verrouillage
Modifiez les paramètres de l’écran de verrouillage.
Depuis l’écran Paramètres, appuyez sur Écran de verrouillage.
• Déverrouillage de l’écran : modifiez la fonction de déverrouillage sécurisé de l’écran. Les
options suivantes peuvent varier selon la méthode de verrouillage d’écran sélectionnée.
• Afficher les informations : modifiez les paramètres des éléments affichés sur l’écran verrouillé.
• Raccourci Appareil photo : paramétrez l’appareil pour qu’il affiche le raccourci de l’appareil
photo sur l’écran verrouillé.
La disponibilité de cette fonction dépend de votre zone géographique ou de votre
opérateur.
• Action memo sur écran verr. : paramétrez l’appareil pour pouvoir lancer Action memo en
appuyant deux fois sur l’écran verrouillé à l’aide du S Pen tout en maintenant la touche S Pen
appuyée.
• Effet de déverrouillage : sélectionnez un effet à appliquer lorsque vous déverrouillez l’écran.
Fenêtres multiples
Activez ou désactivez la fonction Multi-fenêtres.
Depuis l’écran Paramètres, appuyez sur Fenêtres multiples, puis faites glisser le curseur Fenêtres
multiples vers la droite pour activer la fonction.
• Ouvrir en vue fractionnée : paramétrez l’appareil pour qu’il active la fonction Multi-fenêtres
lorsque vous ouvrez des fichiers dans les dossiers Mes fichiers, Vidéo ou à partir des pièces
jointes des messages.
• Racc. affich. contextuel : paramétrez l’appareil pour qu’il affiche la liste des applications dans
une fenêtre contextuelle lorsque vous faites glisser votre doigt de l’angle supérieur de l’écran
vers l’angle inférieur opposé.
Volet des raccourcis
Réorganisez les touches de paramétrage rapide affichées dans le volet des raccourcis.
Depuis l’écran Paramètres, appuyez sur Volet des raccourcis.
Paramètres
153
S Pen
Modifiez les paramètres d’utilisation du S Pen.
Depuis l’écran Paramètres, appuyez sur S Pen.
• Air Command : paramétrez l’appareil pour qu’il affiche les fonctions Air command lorsque vous
passez le S Pen au-dessus de l’écran en appuyant sur la touche S Pen.
• Air View : activez la fonction Air view pour effectuer diverses opérations à l’aide du S Pen.
• Pointeur : paramétrez l’appareil pour pouvoir afficher le pointeur du S Pen lorsque le S Pen est
placé au-dessus de l’écran.
• Saisie S Pen : paramétrez l’appareil pour afficher l’icône du champ d’écriture manuscrite lorsque
le S Pen passe au-dessus d’un champ de saisie de texte.
• Alertes S Pen : paramétrez l’appareil pour qu’il affiche un message d’alerte et émette une
alarme sonore lorsque l’écran tactile est désactivé et que le S Pen ne se trouve plus dans son
compartiment.
• Désact. détection stylet : configurez l’écran afin qu’il ne réagisse pas à l’insertion ou au retrait
du S Pen.
• Son du S Pen : paramétrez l’appareil pour qu’il émette un son d’écriture lorsque vous écrivez ou
dessinez à l’aide du S Pen.
• Retour vibration du S Pen : paramétrez l’appareil pour qu’il vibre lorsque vous écrivez ou
dessinez à l’aide du S Pen.
• Options de retrait : paramétrez l’appareil pour qu’il lance Action memo ou affiche les fonctions
Air command lorsque le S Pen est retiré de son compartiment.
• Son de retrait/insertion : paramétrez l’appareil pour qu’il émette un son lorsque vous insérez ou
retirez le S Pen de son compartiment.
• Vibrat. retrait/insertion : paramétrez l’appareil pour qu’il vibre lorsque vous insérez ou retirez le
S Pen de son compartiment.
Paramètres
154
Mouvements et gestes
Activez la fonction de détection des mouvements et modifiez les paramètres permettant de
contrôler la détection des mouvements de votre appareil.
Depuis la liste des applications, appuyez sur Mouvements et gestes.
• Appel direct : paramétrez l’appareil pour pouvoir passer un appel vocal en portant l’appareil à
l’oreille lorsque vous consultez le journal d’appels, la liste des messages ou celle des contacts.
• Smart Alert : paramétrez l’appareil pour pouvoir être averti des appels manqués ou des
nouveaux messages lorsque vous le prenez dans la main.
• Muet/pause : paramétrez l’appareil pour désactiver la sonnerie des appels entrants ou des
alarmes lorsque vous recouvrez l’écran avec la paume de votre main ou retournez l’appareil.
• Balayer pour capturer : paramétrez l’appareil pour pouvoir effectuer une capture d’écran en
balayant l’écran avec la main vers la gauche ou vers la droite.
Personnalisation
Comptes
Ajoutez vos comptes Samsung et Google, ou d’autres comptes, afin de les synchroniser.
Depuis l’écran Paramètres, appuyez sur Comptes.
Cloud
Modifiez les paramètres de synchronisation, de sauvegarde et de restauration pour vos comptes
Samsung et Dropbox.
Depuis l’écran Paramètres, appuyez sur Cloud.
Sauvegarder et réinitialiser
Modifiez les paramètres de gestion des paramètres et des données.
Depuis la liste des applications, appuyez sur Sauvegarder et réinitialiser.
• Sauvegarder mes données : paramétrez l’appareil pour pouvoir sauvegarder vos paramètres et
vos données d’application sur le serveur Google.
• Compte de sauvegarde : configurez ou modifiez votre compte de sauvegarde Google.
Paramètres
155
• Restauration auto. : paramétrez l’appareil pour pouvoir restaurer vos paramètres et vos
données d’application lorsque les applications sont réinstallées.
• Rétablir param. par défaut : restaurez les valeurs par défaut de l’appareil et supprimez toutes
vos données.
Mode simplifié
Définissez un mode d’affichage à utiliser.
Depuis l’écran Paramètres, appuyez sur Mode simplifié.
• Mode standard : utilisez le mode standard de l’appareil.
• Mode simplifié : utilisez le mode simplifié de l’appareil.
• Applications simplifiées : sélectionnez les applications auxquelles appliquer une présentation
simplifiée.
Accessibilité
Utilisez cette fonction pour améliorer l’accessibilité de l’appareil. Pour en savoir plus, reportez-vous à
la section À propos des menus Accessibilité.
Depuis l’écran Paramètres, appuyez sur Accessibilité.
Mode Privé
Paramétrez l’appareil pour empêcher d’autres personnes d’accéder à votre contenu personnel en
activant le mode Privé. Pour en savoir plus, reportez-vous à la section Mode Privé.
Depuis l’écran Paramètres, appuyez sur Mode Privé, puis faites glisser le curseur Mode Privé vers la
droite pour activer la fonction.
• Type d’accès mode Privé : configurez ou modifiez la méthode de déverrouillage pour activer le
mode Privé.
• Désactivation automatique : paramétrez l’appareil pour quitter automatiquement le mode
Privé lorsque l’écran est éteint.
Paramètres
156
Lecteur d’empreintes
Enregistrez vos empreintes digitales sur l’appareil pour le sécuriser ou vous connecter à votre
compte Samsung. Pour en savoir plus, reportez-vous à la section Lecteur d’empreintes.
Depuis l’écran Paramètres, appuyez sur Lecteur d’empreintes.
• Gestionnaire d’empreintes : enregistrez ou supprimez des empreintes.
• Modifier MDP de secours : définissez un mot de passe de secours à utiliser si l’appareil ne
reconnaît pas votre empreinte.
• Déverrouillage de l’écran : modifiez la fonction de déverrouillage sécurisé de l’écran.
• Connexion Web : paramétrez l’appareil pour qu’il vérifie vos comptes enregistrés à l’aide de vos
empreintes digitales.
• Vérifier le compte Samsung : configurez l’appareil pour qu’il vérifie votre compte Samsung à
l’aide de vos empreintes digitales.
• Payer avec PayPal : configurez l’appareil pour qu’il vérifie votre compte PayPal et autorise les
achats en utilisant vos empreintes digitales.
La disponibilité de cette fonction dépend de votre zone géographique ou de votre
opérateur.
Système
Langue et saisie
Modifiez les paramètres de saisie de texte. La disponibilité de certaines options dépend de la langue
sélectionnée.
Depuis l’écran Paramètres, appuyez sur Langue et saisie.
• Langue : sélectionnez la langue d’affichage des menus et des applications.
• Par défaut : sélectionnez le type de clavier à utiliser par défaut pour la saisie de texte.
• Clavier Samsung : modifiez les paramètres du clavier Samsung.
La disponibilité des options dépend de votre zone géographique ou de votre opérateur.
Paramètres
157
• Saisie vocale Google : modifiez les paramètres de saisie vocale.
• Langue : sélectionnez la langue de la reconnaissance de l’écriture manuscrite. Vous pouvez
rechercher les fichiers comportant des parties manuscrites dans la langue sélectionnée.
• Options synthèse vocale : modifiez les paramètres de synthèse vocale.
• Lect. notific. haute voix : paramétrez l’appareil pour qu’il lise les notifications à haute voix en cas
d’appel entrant, de message ou d’événement.
• Vitesse du curseur : réglez la vitesse du curseur d’une souris ou d’un pavé tactile connecté(e) à
l’appareil.
Date et heure
Accédez aux paramètres suivants et modifiez-les afin de contrôler l’affichage de l’heure et de la date.
Depuis l’écran Paramètres, appuyez sur Date et heure.
Si la batterie est entièrement déchargée ou si vous la retirez de l’appareil, l’heure et la date
sont alors réinitialisées.
• Date et heure automatiques : mettez automatiquement à jour l’heure et la date lorsque vous
changez de fuseau horaire.
• Définir la date : réglez la date du jour manuellement.
• Définir l’heure : réglez l’heure manuellement.
• Fuseau horaire auto : paramétrez l’appareil pour pouvoir recevoir des informations sur l’heure
depuis le réseau lorsque vous changez de fuseau horaire.
• Sélectionner le fuseau horaire : réglez le fuseau horaire de votre zone géographique.
• Format 24 heures : affichez l’heure au format 24 heures.
• Format de date : sélectionnez le format de date.
Paramètres
158
Assistance sécurité
Activez les fonctions d’assistance sécurité.
Depuis l’écran Paramètres, appuyez sur Assistance sécurité.
• Mode Urgence : paramétrez l’appareil pour qu’il active le mode Urgence et réduise la
consommation de la batterie en n’utilisant que les fonctions de base, comme le téléphone. Pour
en savoir plus, reportez-vous à la section Mode Urgence.
• Geo News : paramétrez l’appareil pour recevoir des notifications de catastrophe naturelle. Pour
utiliser cette fonction, vous devez télécharger et installer l’application.
• Envoyer des messages d’aide : paramétrez l’appareil pour envoyer des messages d’aide en
appuyant à trois reprises sur la touche Marche/Arrêt. Vous pouvez également envoyer des
enregistrements audio avec votre message au destinataire. Pour en savoir plus, reportez-vous à
la section Envoyer des messages d’aide.
• Gérer les contacts principaux : ajoutez ou modifiez les correspondants à qui envoyer des
messages d’aide.
Accessoires
Modifiez les paramètres des accessoires.
Depuis l’écran Paramètres, appuyez sur Accessoires.
• Son station d’accueil : paramétrez l’appareil pour qu’il émette un son lorsque vous le connectez
à une station d’accueil ou l’en déconnectez.
• Sortie audio : sélectionnez le format de sortie audio à utiliser lorsque vous connectez l’appareil
à des périphériques HDMI. Certains appareils peuvent ne pas prendre en charge les paramètres
de son Surround.
Économie d’énergie
Activez le mode Économie d’énergie et modifiez les paramètres. Pour en savoir plus, reportez-vous à
la section Fonctions d’économie d’énergie.
Depuis l’écran Paramètres, appuyez sur Économie d’énergie.
• Mode Éco. d’énergie : activez le mode Économie d’énergie et modifiez les paramètres.
• Mode Ultra économie d’énergie : paramétrez l’appareil pour prolonger le temps de veille et
réduire la consommation de la batterie en affichant une présentation simplifiée et en autorisant
un accès limité à une application.
Le délai de veille maximum estimé est le temps qu’il faut à la batterie pour se décharger
complètement lorsque l’appareil n’est pas utilisé. Le délai de veille peut varier selon les
paramètres de l’appareil et les conditions d’utilisation.
Paramètres
159
• Charg. rapide : paramétrez l’appareil pour pouvoir utiliser la fonction de charge rapide. Pour en
savoir plus, reportez-vous à la section Charge rapide.
• Affich. pourcentage batterie : paramétrez l’appareil pour qu’il affiche l’autonomie restante de la
batterie dans la barre d’état.
Stockage
Affichez les informations de mémoire relatives à l’appareil.
Depuis l’écran Paramètres, appuyez sur Stockage.
Le formatage d’une carte mémoire supprime définitivement toutes les données qui y sont
stockées.
La mémoire interne de votre appareil a une capacité réelle disponible inférieure à la capacité
indiquée, car elle est en partie occupée par le système d’exploitation et les applications
installées par défaut. La capacité restante peut varier lorsque vous mettez à jour l’appareil.
Sécurité
Modifiez les paramètres de sécurité de l’appareil et de la carte SIM ou USIM.
Depuis l’écran Paramètres, appuyez sur Sécurité.
• Admin. de périphérique : affichez les administrateurs de votre appareil. Vous pouvez autoriser
les administrateurs de l’appareil à appliquer de nouvelles règles à celui-ci.
• Sources inconnues : paramétrez l’appareil pour autoriser l’installation d’applications provenant
de sources inconnues.
• Crypter l’appareil : définissez un mot de passe pour crypter les données enregistrées sur
l’appareil. Vous devez saisir ce mot de passe à chaque fois que vous allumez l’appareil.
Le cryptage des données peut prendre plus d’une heure. Avant de crypter les données,
connectez le chargeur pour recharger complètement la batterie et ne le débranchez pas
tant que le cryptage n’est pas terminé.
• Crypter la carte SD externe : paramétrez l’appareil pour pouvoir crypter les fichiers contenus
sur une carte mémoire.
Votre appareil ne sera pas en mesure de lire les fichiers cryptés si vous le réinitialisez lorsque
ces paramètres sont activés. Désactivez ces paramètres avant de réinitialiser votre appareil.
Paramètres
160
• Contrôle à distance : paramétrez l’appareil pour pouvoir le contrôler à distance via Internet si
vous l’égarez ou s’il vous est dérobé. Pour utiliser cette fonction, vous devez vous connecter à
votre compte Samsung.
• Alerte changement de SIM : activez ou désactivez la fonction de Traçage du mobile qui permet
de localiser l’appareil en cas de perte ou de vol.
• Accéder au site Web : accédez au site Web Traçage du mobile (findmymobile.samsung.com). Ce
site vous permet de repérer et de contrôler un appareil égaré ou dérobé.
• Verr. de réactivation : paramétrez l’appareil pour qu’il requiert votre compte Samsung une fois
l’appareil réinitialisé pour empêcher d’autres personnes de le réactiver.
• Configurer blocage SIM : modifiez les paramètres de verrouillage de la carte SIM.
• Rendre les mots de passe visibles : paramétrez l’appareil pour qu’il affiche votre mot de passe à
mesure que vous le saisissez.
• MàJ de politique sécurité : paramétrez l’appareil pour qu’il vérifie et télécharge les mises à jour
de sécurité.
• Envoyer des rapports de sécurité : paramétrez l’appareil pour qu’il envoie automatiquement
des rapports de sécurité à Samsung.
• Type de stockage : définissez un type de stockage pour les fichiers d’identification.
• Infos d’ident. sécurisées : recourez à des certificats et des identifiants pour sécuriser l’utilisation
des diverses applications.
• Installer depuis stock. périph. : installez les certificats cryptés stockés en mémoire interne.
• Effacer infos identification : effacez les identifiants de sécurité contenus dans l’appareil et
réinitialisez le mot de passe.
Aide
Affichez les informations d’aide pour apprendre à utiliser l’appareil et les applications, ou configurer
des paramètres importants.
Depuis l’écran Paramètres, appuyez sur Aide.
À propos de l’appareil
Accédez aux informations relatives à l’appareil, modifiez le nom de l’appareil ou mettez à jour le
logiciel de l’appareil.
Depuis l’écran Paramètres, appuyez sur À propos de l’appareil.
Paramètres
161
Applications
Gestionnaire d’applications
Affichez et gérez les applications installées sur votre appareil.
Depuis l’écran Paramètres, appuyez sur Gestionnaire d’applications.
Applications par défaut
Sélectionnez un paramètre par défaut pour utiliser des applications.
Depuis l’écran Paramètres, appuyez sur Applications par défaut.
Paramètres d’application
Personnalisez les paramètres de l’application.
Depuis l’écran Paramètres, appuyez sur Paramètres d’application.
162
Accessibilité
À propos des menus Accessibilité
Améliorez l’accessibilité grâce à des fonctions qui simplifient l’utilisation de l’appareil pour les
personnes ayant certaines capacités réduites comme une mauvaise vue, des troubles auditifs ou une
dextérité réduite.
Depuis l’écran Applications, appuyez sur Paramètres → Accessibilité.
Utiliser la touche Accueil pour ouvrir les menus
d’accessibilité
Vous pouvez accéder aux menus d’accessibilité suivants en appuyant à trois reprises rapprochées sur
la touche Accueil.
• Accessibilité
• TalkBack
• Couleurs négatives
• Contrôle par interaction
Depuis l’écran Applications, appuyez sur Paramètres → Accessibilité → Accès direct, puis faites
glisser le curseur Accès direct vers la droite pour activer la fonction. Ensuite, sélectionnez un menu
d’accessibilité à ouvrir lorsque vous appuyez à trois reprises rapprochées sur la touche Accueil.
Informations orales (TalkBack)
Activer TalkBack
Lorsque vous activez TalkBack, l’appareil lit à haute voix le texte affiché à l’écran ou les fonctions
sélectionnées.
1 Depuis l’écran Applications, appuyez sur Paramètres → Accessibilité → Vue → TalkBack.
2 Faites glisser le curseur TalkBack vers la droite pour activer la fonction.
Accessibilité
163
3 Appuyez sur OK. L’appareil lance la synthèse vocale.
Lorsque vous utilisez TalkBack, certaines fonctions ne sont pas disponibles.
Désactiver TalkBack
1 Depuis l’écran Applications, appuyez sur Paramètres → Accessibilité → Vue → TalkBack.
2 Appuyez sur le curseur TalkBack, puis appuyez rapidement à deux reprises n’importe où sur
l’écran.
3 Appuyez sur OK, puis appuyez rapidement à deux reprises n’importe où sur l’écran. L’appareil
interrompt la synthèse vocale.
Commander l’écran à l’aide de gestes des doigts
Avec TalkBack, vous pouvez contrôler l’écran d’un simple geste des doigts.
• Parcourir l’écran : placez un doigt sur l’écran, puis déplacez-le pour parcourir l’écran. Maintenez
le doigt appuyé sur un élément afin que l’appareil énonce son nom. Lorsque vous relâchez le
doigt, l’élément sous le doigt est sélectionné.
• Sélectionner des éléments : appuyez sur un élément pour le sélectionner. Vous pouvez
également sélectionner un élément et maintenir le doigt appuyé dessus, puis relâcher le doigt.
• Ouvrir l’élément sélectionné : lorsque les noms des éléments sélectionnés sont énoncés,
relâchez le doigt dès que vous entendez le nom de l’élément souhaité. Appuyez ensuite à deux
reprises rapprochées sur l’écran.
• Sélectionner l’élément précédent : balayez rapidement l’écran du doigt vers le haut ou vers la
gauche.
• Sélectionner l’élément suivant : balayez rapidement l’écran du doigt vers le bas ou vers la droite.
• Parcourir les listes : balayez l’écran avec deux doigts vers le haut ou vers le bas.
• Revenir à la page précédente : balayez l’écran avec deux doigts vers la droite.
• Accéder à la page suivante : balayez l’écran avec deux doigts vers la gauche.
Accessibilité
164
• Déverrouiller l’écran : balayez l’écran avec deux doigts dans n’importe quelle direction au sein de
la zone de verrouillage de l’écran.
• Ouvrir le volet des raccourcis : faites glisser le haut de l’écran vers le bas avec deux doigts.
• Ouvrir le volet de paramétrage rapide : faites glisser le haut de l’écran vers le bas avec trois
doigts.
Vous pouvez configurer les paramètres des gestes des doigts de TalkBack dans Gérer les gestes.
Pour en savoir plus, reportez-vous à la section Configurer les paramètres des gestes des doigts.
Configurer les paramètres des gestes des doigts
Lorsque vous utilisez la fonction TalkBack, vous pouvez vous servir de vos doigts pour effectuer des
opérations, comme revenir à l’écran précédent, ouvrir l’écran d’accueil, etc. Configurez les gestes des
doigts avant de les utiliser.
Configurer les paramètres des gestes verticaux
Vous pouvez utiliser des gestes verticaux décomposés en faisant glisser votre doigt vers le haut et
vers le bas depuis le bas de l’écran, ou inversement.
Depuis l’écran Applications, appuyez sur Paramètres → Accessibilité → Vue → TalkBack →
PARAMÈTRES → Gérer les gestes → Gestes verticaux en deux parties. Sélectionnez ensuite l’une
des fonctions suivantes :
• Accéder au premier et au dernier élément à l’écran : lorsque vous faites glisser votre doigt vers
le haut, puis vers le bas de l’écran, le premier élément en haut de l’écran est sélectionné. Lorsque
vous faites glisser votre doigt vers le bas, puis vers le haut de l’écran, le dernier élément en bas
de l’écran est sélectionné.
• Sélection du niveau de précision pour la lecture : lorsque vous faites glisser votre doigt vers
le haut, puis vers le bas de l’écran, l’unité de lecture change. L’unité de lecture passe à la page,
au paragraphe, à la ligne, au mot, au caractère, puis à une unité par défaut. Lorsque vous faites
glisser votre doigt vers le bas, puis vers le haut de l’écran, l’ordre des unités de lecture est inversé.
Configurer les paramètres des gestes de raccourci
Vous pouvez modifier les gestes de raccourci ou assigner des fonctions à des raccourcis vierges.
Depuis l’écran Applications, appuyez sur Paramètres → Accessibilité → Vue → TalkBack →
PARAMÈTRES → Gérer les gestes. Sélectionnez un geste, puis assignez-lui une fonction.
Accessibilité
165
Mettre TalkBack en pause
Ouvrez le menu contextuel général en faisant glisser le doigt vers le bas, puis vers la droite de l’écran
sans le relâcher. Lorsque vous sélectionnez Suspendre les commentaires en haut à gauche de
l’écran, TalkBack est mis en pause.
Ajouter et gérer des libellés d’image
Vous pouvez assigner des libellés aux images à l’écran. L’appareil énonce les libellés lorsque les
éléments sont sélectionnés. Ajoutez des libellés aux images sans libellé à l’aide du menu contextuel
local.
Ouvrez le menu contextuel local en faisant glisser le doigt vers le haut, puis vers la droite de l’écran
sans le relâcher. Maintenez le doigt appuyé sur l’écran, puis tracez un cercle du doigt autour du menu
pour parcourir les menus. Lorsque vous entendez le nom du menu d’ajout de libellé, relâchez le
doigt pour ajouter des libellés.
Pour afficher les libellés, ouvrez l’écran Applications, puis appuyez sur Paramètres → Accessibilité
→ Vue → TalkBack → PARAMÈTRES → Gérer les libellés personnalisés.
Configurer les paramètres de TalkBack
Configurez les paramètres de TalkBack selon vos préférences.
Depuis l’écran Applications, appuyez sur Paramètres → Accessibilité → Vue → TalkBack →
PARAMÈTRES.
• Volume de la voix : réglez le volume des informations orales.
• Modification du ton : paramétrez l’appareil pour qu’il énonce le texte saisi à l’aide du clavier à
basse tonalité.
• Écho du clavier : paramétrez l’appareil pour qu’il lise à haute voix le mot saisi lorsque vous
appuyez sur la touche espace.
• Parler losque l’écran est éteint : paramétrez l’appareil pour qu’il fournisse des informations
orales lorsque l’écran est éteint.
• Utiliser capteur proxim. : paramétrez l’appareil pour qu’il mette les informations orales en
pause quand vous placez la main sur le capteur en haut de l’appareil.
• Secouer pour démarrer la lecture continue : paramétrez l’appareil pour qu’il énonce le texte
affiché à l’écran lorsque vous secouez l’appareil. Vous pouvez sélectionner différentes options de
vitesses de secousses.
Accessibilité
166
• Dire le numéro de l’appelant : paramétrez l’appareil pour qu’il lise à haute voix le nom de
l’appelant lors d’un appel entrant.
• Vibration : paramétrez l’appareil pour qu’il vibre lorsque vous parcourez l’écran du doigt.
• Retour audio : paramétrez l’appareil pour qu’il émette un son lorsque vous commandez l’écran,
comme lorsque vous le parcourez, etc.
• Privilégier le volume de la voix : paramétrez l’appareil pour qu’il baisse le volume du média
lorsqu’il lit un élément à haute voix.
• Volume sonore : réglez le volume du son émis lorsque vous appuyez sur l’écran pour le
contrôler. Cette fonction est disponible lorsque Retour audio est sélectionné.
• Explorer au toucher : paramétrez l’appareil pour qu’il lise à haute voix les éléments sur lesquels
vous appuyez du doigt.
• Faire défiler les listes automatiquement : paramétrez l’appareil pour qu’il parcoure
automatiquement la partie de la liste non affichée à l’écran et qu’il énonce les éléments.
• Appuyer une fois pour sélectionner : paramétrez l’appareil pour qu’il ouvre l’élément
sélectionné lorsque vous appuyez une fois dessus.
• Lancer le didacticiel "Explorer au toucher" : affichez le didacticiel sur l’utilisation de la fonction
Navigation tactile.
• Gérer les gestes : assignez les opérations à effectuer à l’aide des gestes des doigts. Pour en
savoir plus, reportez-vous à la section Configurer les paramètres des gestes des doigts.
• Gérer les libellés personnalisés : affichez les libellés que vous avez ajoutés.
• Réactiver : sélectionnez une méthode de reprise des informations orales si TalkBack est mis en
pause.
• Paramètres du développeur : paramétrez les options de développement d’applications.
Utiliser l’appareil avec l’écran éteint
Paramétrez l’appareil pour qu’il laisse toujours l’écran éteint afin de préserver la confidentialité de
vos données. L’écran ne s’allume pas lorsque vous appuyez sur la touche Accueil ou sur l’écran. Les
fonctions actuellement activées ne sont pas désactivées lorsque l’écran s’éteint.
Depuis l’écran Applications, appuyez sur Paramètres → Accessibilité → Vue, puis cochez la case
Ecran atténué. Vous pouvez activer ou désactiver cette fonction en appuyant à deux reprises sur la
touche Marche/Arrêt.
Accessibilité
167
Lire des mots de passe à haute voix
Paramétrez l’appareil pour qu’il lise le mot de passe à haute voix lorsque vous saisissez le mot de
passe lorsque TalkBack est activé.
Depuis l’écran Applications, appuyez sur Paramètres → Accessibilité → Vue, puis cochez la case
Énoncer mots de passe.
Paramétrer les fonctions de diction de la synthèse vocale
Modifiez les paramètres de diction de la synthèse vocale utilisés lorsque TalkBack est activé, comme
les langues, la vitesse, etc.
Depuis l’écran Applications, appuyez sur Paramètres → Accessibilité → Vue → Options synthèse
vocale, puis utilisez les fonctions suivantes :
• Moteur de synthèse vocale Samsung / Moteur de synthèse vocale Google : sélectionnez un
moteur pour la fonction de diction de la synthèse vocale.
• Vitesse d’élocution : sélectionnez la vitesse de diction de la synthèse vocale.
• Écouter un exemple : écoutez un exemple de texte parlé. Si l’appareil ne parvient pas à lire des
exemples à haute voix, appuyez sur → Installer les données vocales pour télécharger et
installer les données vocales de la fonction de diction de la synthèse vocale.
• État langue par défaut : affichez le statut de la langue actuelle choisie pour la fonction de
synthèse vocale.
Saisir du texte à l’aide du clavier
Pour afficher le clavier, appuyez sur le champ de saisie de texte, puis appuyez à deux reprises
rapprochées n’importe où sur l’écran.
Lorsque vous appuyez du doigt sur le clavier, l’appareil lit à haute voix les touches de caractères sous
votre doigt. Lorsque vous entendez le caractère que vous recherchez, relâchez le doigt de l’écran
pour le sélectionner. Le caractère est saisi et l’appareil lit le texte à haute voix.
Si la fonction Saisie clavier rapide n’est pas activée, relâchez le doigt du caractère que vous
souhaitez, puis appuyez à deux reprises rapprochées sur l’écran. Pour activer la touche de saisie
rapide, depuis l’écran Applications, appuyez sur Paramètres → Accessibilité → Vue, puis cochez la
case Saisie clavier rapide.
Accessibilité
168
Saisir des caractères supplémentaires
Maintenez le doigt appuyé sur une touche du clavier pour saisir les autres caractères disponibles
pour cette touche. Une fenêtre contextuelle indiquant les caractères disponibles s’affiche au-dessus
de la touche. Pour sélectionner un caractère, faites glisser le doigt sur la fenêtre contextuelle jusqu’à
ce que vous entendiez le nom du caractère souhaité, puis relâchez le doigt.
Vue
Modifier la taille de police
Utilisez cette fonction pour modifier la taille de police. Il se peut que, dans certaines applications, il
ne soit pas possible de régler la taille de la police sur Enorme.
Depuis l’écran Applications, appuyez sur Paramètres → Accessibilité → Vue → Taille de police.
Grossir l’écran
Utilisez cette fonction pour grossir l’écran et effectuer un zoom avant sur une zone spécifique.
Depuis l’écran Applications, appuyez sur Paramètres → Accessibilité → Vue → Gestes
d’agrandissement, puis faites glisser le curseur Gestes d’agrandissement vers la droite pour activer
la fonction.
• Effectuer un zoom avant et arrière : appuyez à trois reprises rapprochées sur l’écran pour
effectuer un zoom avant sur une zone spécifique. Appuyez à trois reprises rapprochées sur
l’écran pour revenir en mode d’affichage normal.
• Parcourir l’écran en le faisant défiler : faites glisser deux doigts ou plus pour faire défiler l’écran
grossi.
• Régler le niveau de zoom : rapprochez deux ou plusieurs doigts sur l’écran grossi ou écartez-les.
Vous pouvez également grossir temporairement l’écran en appuyant dessus à trois reprises
rapprochées et en maintenant la pression. Tout en maintenant l’écran appuyé, faites glisser le doigt
pour parcourir l’écran. Relâchez le doigt pour revenir en mode d’affichage normal.
• Il n’est pas possible d’agrandir les claviers à l’écran.
• Lorsque cette fonction est activée, les performances de certaines applications, comme
Téléphone et Calculatrice, peuvent en être affectées.
Accessibilité
169
Zoom sur survol
Utilisez cette fonction pour grossir un contenu en survolant l’écran avec un stylet.
Depuis l’écran Applications, appuyez sur Paramètres → Accessibilité → Vue → Zoom sur survol,
puis faites glisser le curseur Zoom sur survol vers la droite pour activer la fonction.
Faites glisser la barre de pourcentage de zoom vers la gauche ou la droite, ou appuyez sur Taille de
la loupe pour modifier les paramètres de la loupe.
Lorsque cette fonction est activée, vous ne pouvez pas utiliser certaines autres fonctions,
comme Air command, Air view, Saisie S Pen et TalkBack.
Configurer des rappels de notification
Utilisez cette fonction pour vous rappeler des notifications que vous n’avez pas vérifiées selon
l’intervalle défini.
Depuis l’écran Applications, appuyez sur Paramètres → Accessibilité → Vue → Rappel de
notification, puis faites glisser le curseur Rappel de notification vers la droite pour activer la
fonction.
Pour définir un intervalle entre les alertes, appuyez sur Fréquence de rappel.
Inverser les couleurs d’affichage
Utilisez cette fonction pour améliorer la visibilité de l’écran et aider les utilisateurs à déchiffrer plus
facilement le texte à l’écran.
Depuis l’écran Applications, appuyez sur Paramètres → Accessibilité → Vue, puis cochez la case
Couleurs négatives.
Réglage des couleurs
Utilisez cette fonction pour régler l’affichage des couleurs à l’écran si vous avez des difficultés à
distinguer les couleurs. L’appareil remplace les couleurs par des couleurs plus faciles à reconnaître.
Depuis l’écran Applications, appuyez sur Paramètres → Accessibilité → Vue → Réglage des
couleurs, puis faites glisser le curseur Réglage des couleurs vers la droite pour activer la fonction.
Suivez les instructions qui s’affichent à l’écran pour procéder aux réglages des couleurs.
Accessibilité
170
Audition
Configurer une notification par flash
Configurez le flash pour qu’il clignote lorsque vous recevez des appels entrants, de nouveaux
messages ou des notifications.
Depuis l’écran Applications, appuyez sur Paramètres → Accessibilité → Audition, puis cochez la
case Notification par flash.
Couper tous les sons
Configurez l’appareil pour qu’il coupe tous les sons, comme les sons multimédia et la voix du
correspondant en cours d’appel.
Depuis l’écran Applications, appuyez sur Paramètres → Accessibilité → Audition, puis cochez la
case Désactiver tours les sons.
Paramètres des sous-titres
Depuis l’écran Applications, appuyez sur Paramètres → Accessibilité → Audition → Sous-titres
Samsung (CC) ou Sous-titres Google (CC), puis faites glisser le curseur Sous-titres Samsung (CC) ou
Sous-titres Google (CC) vers la droite pour activer la fonction.
Choisissez une option pour configurer les paramètres des sous-titres.
Régler la balance audio
Configurez l’appareil pour pouvoir régler la balance audio lorsque vous utilisez un casque ou un
écouteur.
1 Connectez un casque ou un écouteur à l’appareil et portez-le.
2 Depuis l’écran Applications, appuyez sur Paramètres → Accessibilité → Audition → Balance
audio.
3 Faites glisser la barre de réglage vers la gauche ou vers la droite pour régler la balance audio,
puis appuyez sur DÉFINIR.
Accessibilité
171
Audio mono
La sortie mono combine le son stéréo en un seul signal qui est joué dans tous les haut-parleurs des
casques ou écouteurs. Utilisez ce mode en cas de troubles auditifs ou si une oreillette unique est plus
pratique.
Depuis l’écran Applications, appuyez sur Paramètres → Accessibilité → Audition, puis cochez la
case Audio mono.
Détecteurs de son
Paramétrez l’appareil pour qu’il vibre si quelqu’un sonne à la porte ou si un bébé pleure.
Détecteur pleurs bébé
1 Depuis l’écran Applications, appuyez sur Paramètres → Accessibilité → Audition →
Détecteurs de son → Détecteur pleurs bébé, puis faites glisser le curseur vers la droite pour
activer la fonction.
2 Lisez les instructions à l’écran, puis appuyez sur OK.
3 Appuyez sur pour démarrer le détecteur de pleurs de bébé.
L’appareil vibre dès qu’il détecte un son et l’alerte est enregistrée dans un journal d’alertes.
Détecteur de sonnettes
1 Depuis l’écran Applications, appuyez sur Paramètres → Accessibilité → Audition →
Détecteurs de son → Détecteur de sonnettes, puis faites glisser le curseur vers la droite pour
activer la fonction.
2 Lisez les instructions à l’écran, puis appuyez sur OK.
3 Appuyez sur pour enregistrer la sonnette de votre porte. Lorsque vous avez terminé
l’enregistrement, appuyez sur SUIVANT.
4 Appuyez sur et actionnez votre sonnette pour vérifier qu’elle a bien été enregistrée. Une fois,
la sonnette détectée par l’appareil, appuyez sur OK.
Pour changer de sonnette, appuyez sur → Modifier le son de la sonnette.
Une fois le détecteur de sonnette paramétré, appuyez sur pour commencer à l’utiliser. L’appareil
vibre dès qu’il détecte une sonnette.
Accessibilité
172
Modifier les paramètres d’alerte
Appuyez sur → Paramètres pour utiliser les options suivantes :
• Intensité des vibrations : réglez l’intensité des vibrations émises par l’appareil.
• Vibrations : changer de type de vibreur.
• Notification par flash : paramétrez le flash pour qu’il clignote lorsqu’un son est détecté.
Tactile auto
Dès que la fonction tactile est activée, l’appareil vibre lorsque vous lisez de la musique, regardez
des vidéos ou jouez à des jeux. Il vibre également lorsque vous appuyez sur des touches dans les
applications prenant en charge cette fonction.
Depuis l’écran Applications, appuyez sur Paramètres → Accessibilité → Audition, puis cochez la
case Tactile auto.
Il est possible que certaines applications ne soient pas compatibles avec cette fonction.
Dextérité et interaction
Assistant menu
Afficher l’icône de raccourci auxiliaire
Paramétrez l’appareil pour qu’il affiche l’icône du raccourci d’assistance pour accéder à des
applications, fonctions et paramètres. Vous pouvez facilement contrôler l’appareil en accédant aux
menus d’assistance affichés par l’icône.
1 Depuis l’écran Applications, appuyez sur Paramètres → Accessibilité → Dextérité et
interaction → Assistant menu.
2 Faites glisser le curseur Assistant menu vers la droite pour activer la fonction, puis appuyez sur
OK pour activer le mode appui unique.
L’icône de raccourci auxiliaire apparaît en bas à droite de l’écran.
3 Appuyez sur Main dominante pour déplacer l’icône de raccourci auxiliaire vers un emplacement
pratique.
Accessibilité
173
Accéder aux menus auxiliaires
L’icône de raccourci auxiliaire apparaît sous forme d’icône flottante, ce qui vous permet d’accéder
facilement aux menus auxiliaires depuis n’importe quel écran.
Lorsque vous appuyez sur l’icône de raccourci auxiliaire, l’icône s’agrandit légèrement et les menus
auxiliaires apparaissent sur l’icône. Appuyez sur la flèche haut ou bas pour accéder à d’autres volets
ou balayez l’écran vers le haut ou vers le bas pour sélectionner d’autres menus.
Utiliser le curseur
Depuis le menu auxiliaire, appuyez sur Curseur. Vous pouvez commander l’écran à l’aide de petits
mouvements du doigt sur la zone tactile. Faites glisser le doigt sur la zone tactile afin de déplacer le
curseur. Vous pouvez également appuyer sur l’écran afin de sélectionner les éléments situés sous le
curseur.
Vous pouvez utiliser les options suivantes :
• / : sélectionner un élément ou faire défiler l’écran vers la gauche ou la droite.
• / : faire défiler l’écran vers le haut ou le bas.
• : déplacer la zone tactile vers un autre emplacement.
• : grossir la zone où est placé le curseur.
• : fermer la zone tactile.
Pour modifier les paramètres du curseur, ouvrez l’écran Applications, appuyez sur Paramètres →
Accessibilité → Dextérité et interaction → Assistant menu. Ensuite, personnalisez les paramètres
sous Param. pavé tactile et curseur.
Utiliser les menus auxiliaires avancés
Configurez l’appareil pour qu’il affiche des menus auxiliaires avancés pour les applications
sélectionnées.
Depuis l’écran Applications, appuyez sur Paramètres → Accessibilité → Dextérité et interaction →
Assistant menu → Assistant plus, faites glisser le curseur Assistant plus vers la droite pour activer la
fonction, puis sélectionnez des applications.
Accessibilité
174
Activer l’écran à l’aide de la fonction Air Gesture
Utilisez la fonction Air Gesture pour activer l’écran en agitant la main au-dessus du capteur tout en
haut de l’appareil. Vous pouvez allumer l’écran sans appuyer sur aucune touche. Lorsque vous utilisez
cette fonction, placez l’appareil sur une surface plane ou tenez-le fermement pour l’empêcher de
bouger.
Depuis l’écran Applications, appuyez sur Paramètres → Accessibilité → Dextérité et interaction →
Air wake up, puis faites glisser le curseur Air wake up vers la droite pour activer la fonction.
Configurer la durée de l’appui prolongé
Définissez le délai de reconnaissance lorsque vous maintenez le doigt appuyé sur l’écran.
Depuis l’écran Applications, appuyez sur Paramètres → Accessibilité → Dextérité et interaction →
Durée de l’appui prolongé, puis sélectionnez une option.
Contrôle par interaction
Activez le mode Contrôle par interaction pour limiter les réactions de l’appareil aux saisies lorsque
vous utilisez des applications.
1 Depuis l’écran Applications, appuyez sur Paramètres → Accessibilité → Dextérité et
interaction → Contrôle par interaction.
2 Faites glisser le curseur Contrôle par interaction vers la droite pour activer la fonction.
3 Maintenez les touches Accueil et Volume simultanément enfoncées tout en utilisant une
application.
4 Réglez la taille du cadre ou tracez une ligne autour d’une zone que vous souhaitez limiter.
5 Appuyez sur OK.
L’appareil affiche la zone limitée. La zone limitée ne réagit pas si vous appuyez dessus et les
touches physiques de l’appareil sont désactivées.
Pour désactiver le mode contrôle par interaction, maintenez les touches Accueil et Volume
simultanément enfoncées.
Accessibilité
175
Prendre ou mettre fin à des appels
Modifiez la manière de prendre ou de raccrocher un appel.
Depuis l’écran Applications, appuyez sur Paramètres → Accessibilité → Répondre et mettre fin
aux appels.
Sélectionnez la méthode souhaitée.
Utiliser le mode à appui unique
En cas d’alarme ou d’appel entrant, appuyez sur la touche pour arrêter l’alarme ou prendre l’appel au
lieu de faire glisser la touche.
Depuis l’écran Applications, appuyez sur Paramètres → Accessibilité, puis cochez la case Mode
pression unique.
Gérer les paramètres d’accessibilité
Enregistrer les paramètres d’accessibilité dans un fichier
Exportez les paramètres d’accessibilité en cours dans un fichier.
Depuis l’écran Applications, appuyez sur Paramètres → Accessibilité → Gérer l’accessibilité →
Importer/Exporter, puis sélectionnez une option d’exportation.
Importer un fichier de paramètres d’accessibilité
Importez un fichier de paramètres d’accessibilité et mettez à jour les paramètres actuels.
Depuis l’écran Applications, appuyez sur Paramètres → Accessibilité → Gérer l’accessibilité
→ Importer/Exporter, puis sélectionnez une option d’importation. Sélectionnez un fichier
d’importation, puis appuyez sur OK → OK. Les paramètres d’accessibilité sont mis à jour
conformément au fichier importé.
Partager des fichiers de paramètres d’accessibilité
Partagez des fichiers de paramètres d’accessibilité avec d’autres personnes par e-mail ou via les
fonctions Wi-Fi Direct, Bluetooth, etc.
Depuis l’écran Applications, appuyez sur Paramètres → Accessibilité → Gérer l’accessibilité →
Partager via. Sélectionnez ensuite des fichiers d’accessibilité, puis appuyez sur OK. Sélectionnez un
mode de partage, puis suivez les instructions à l’écran pour partager les fichiers.
176
Dépannage
Avant de contacter un centre de service après-vente Samsung, veuillez essayer de mettre en œuvre
les solutions suivantes. Il est possible que certaines situations ne s’appliquent pas à votre appareil.
Lorsque vous allumez ou utilisez votre appareil, un message vous invite à
effectuer l’une des manipulations suivantes :
• Mot de passe : lorsque la fonction de verrouillage est activée, vous devez saisir le mot de passe
que vous avez défini pour l’appareil.
• Code PIN : lorsque vous utilisez l’appareil pour la première fois ou lorsque vous avez activé le
verrouillage de votre appareil par code PIN, vous devez saisir le code PIN fourni avec la carte SIM
ou USIM. Vous pouvez désactiver cette fonction à l’aide du menu de verrouillage de la carte SIM.
• Code PUK : si vous saisissez un code PIN incorrect à plusieurs reprises, la carte SIM ou USIM est
bloquée. Vous devez alors saisir le code PUK fourni par votre opérateur.
• Code PIN2 : lorsque vous accédez à un menu nécessitant le code PIN2, vous devez saisir le code
PIN2 fourni avec la carte SIM ou USIM. Pour en savoir plus, contactez votre opérateur.
Votre appareil affiche des messages d’erreur de réseau et de service
• Lorsque vous vous trouvez dans une zone de mauvaise réception, vous risquez de perdre
la connexion au réseau. Déplacez-vous et réessayez. Lorsque vous vous déplacez, plusieurs
messages d’erreur peuvent apparaître.
• Certaines options ne sont pas accessibles sans abonnement. Pour en savoir plus, contactez votre
opérateur.
Votre appareil ne s’allume pas
• Lorsque la batterie est entièrement déchargée, il n’est pas possible d’allumer l’appareil. Procédez
au chargement complet de la batterie avant d’allumer l’appareil.
• Il est possible que la batterie ne soit pas correctement installée. Réinsérez la batterie.
• Essuyez les deux contacts dorés et réinsérez la batterie.
Dépannage
177
Mauvaise réaction ou lenteur de l’écran tactile
• Si vous fixez sur l’écran tactile un cache de protection ou tout autre accessoire en option, il est
possible que l’écran ne fonctionne pas correctement.
• Si vous portez des gants, si vos mains ne sont pas parfaitement propres, ou si vous appuyez
sur l’écran avec un objet pointu ou vos ongles, l’écran tactile risque de présenter des
dysfonctionnements.
• L’humidité ou le contact avec l’eau peut provoquer des dysfonctionnements de l’écran tactile.
• Redémarrez votre appareil afin de mettre fin à d’éventuels dysfonctionnements logiciels
temporaires.
• Assurez-vous que vous disposez bien de la version logicielle mise à jour de votre appareil.
• Si l’écran tactile est endommagé ou rayé, contactez un centre de service après-vente Samsung.
Votre appareil se bloque ou est sujet à des erreurs fatales
Si votre appareil ne répond plus ou se bloque, vous devrez éventuellement fermer les applications
ou réinsérer la batterie et réinitialiser votre appareil pour qu’il retrouve un fonctionnement correct. Si
votre appareil se bloque et ne répond plus, maintenez simultanément la touche Marche/Arrêt et la
touche de volume enfoncées pendant plus de 7 secondes afin de redémarrer.
Si vous ne parvenez pas à résoudre le problème à la suite de ces manipulations, procédez à la
réinitialisation des paramètres par défaut. Depuis l’écran Applications, appuyez sur Paramètres →
Sauvegarder et réinitialiser → Rétablir param. par défaut → RÉINITIALISER LE PÉRIPHÉRIQUE
→ SUPPRIMER TOUT. Avant de rétablir les paramètres par défaut de votre appareil, n’oubliez pas
d’effectuer des copies de sauvegarde de toutes les données importantes qui y sont stockées.
Si le problème persiste, contactez un centre de service après-vente Samsung.
Impossible de passer des appels
• Assurez-vous d’être connecté au réseau cellulaire approprié.
• Vérifiez que vous n’avez pas activé la fonction de restriction d’appel pour le numéro de
téléphone que vous composez.
• Vérifiez que vous n’avez pas activé la fonction de restriction d’appel pour le numéro de
téléphone de l’appel entrant.
Vos interlocuteurs ne vous entendent pas
• Vérifiez que le microphone intégré n’est pas recouvert.
• Vérifiez que le microphone est placé suffisamment près de votre bouche.
• Si vous utilisez un casque ou des écouteurs, vérifiez qu’il est correctement branché.
Dépannage
178
Vous percevez un écho lors des appels
Réglez le volume en appuyant sur la touche de volume ou déplacez-vous.
Déconnexions fréquentes du réseau cellulaire ou d’Internet, ou mauvaise
qualité audio
• Assurez-vous que rien n’entrave l’antenne intégrée à l’appareil.
• Lorsque vous vous trouvez dans une zone de mauvaise réception, vous risquez de perdre la
connexion au réseau. Vos problèmes de connectivité peuvent être dus à une panne au niveau
de votre opérateur. Déplacez-vous et réessayez.
• Si vous utilisez votre appareil tout en vous déplaçant, il est possible que les services de réseau
sans fil soient désactivés en raison de problèmes sur le réseau de votre opérateur.
L’icône de la batterie est vide
Le niveau de charge de la batterie est faible. Rechargez ou remplacez la batterie.
La batterie ne se charge pas correctement (pour les chargeurs
homologués Samsung)
• Assurez-vous que le chargeur est correctement branché.
• Si les bornes de la batterie sont sales, la batterie peut ne pas se recharger correctement ou
l’appareil risque de s’éteindre. Essuyez les deux contacts dorés et réessayez de recharger la
batterie.
• Sur certains appareils, la batterie ne peut pas être remplacée par l’utilisateur. Pour remplacer ce
type de batterie, contactez un centre de service après-vente Samsung.
La batterie se décharge de plus en plus rapidement
• Lorsque la batterie est exposée à des températures extrêmes, la charge utile peut être réduite.
• La consommation de la batterie augmente lorsque vous utilisez certaines fonctions, comme les
SMS et MMS, ou certaines applications, comme les jeux ou Internet.
• La batterie est un consommable dont la charge utile diminue avec le temps.
Dépannage
179
L’appareil est chaud au toucher
Lorsque vous utilisez plusieurs applications simultanément ou sur une période prolongée, l’appareil
peut chauffer. Ce phénomène est normal et n’affecte ni la durée de vie, ni les performances de
l’appareil.
Messages d’erreur à l’ouverture de l’appareil photo
Pour utiliser l’appareil photo, votre appareil doit disposer de suffisamment de mémoire et sa batterie
être suffisamment chargée. Si vous obtenez des messages d’erreur lors de l’ouverture de l’appareil
photo, tentez les manipulations suivantes :
• Chargez la batterie ou remplacez-la par une autre entièrement chargée.
• Libérez de la mémoire en transférant des fichiers sur un ordinateur ou en supprimant des
éléments de l’appareil.
• Redémarrez l’appareil. Si les problèmes persistent avec l’appareil photo, contactez un centre de
service après-vente Samsung.
Qualité des photos inférieure par rapport à l’aperçu
• La qualité de vos photos peut varier selon l’environnement et les techniques photographiques
utilisées.
• Si vous prenez des photos avec une luminosité insuffisante, de nuit ou en intérieur, l’image
risque d’être floue.
Messages d’erreur à l’ouverture de fichiers multimédia
Si vous obtenez des messages d’erreur ou si vous ne parvenez pas à lire les fichiers multimédia
lorsque vous les ouvrez sur votre appareil, tentez les manipulations suivantes :
• Libérez de la mémoire en transférant des fichiers sur un ordinateur ou en supprimant des
éléments de l’appareil.
• Assurez-vous que le fichier audio n’est pas protégé par des droits DRM (Gestion des droits
d’auteur). Si le fichier est protégé par des droits DRM, vous devez posséder une licence ou une
clé pour pouvoir le lire.
• Assurez-vous que les formats de fichiers sont pris en charge par l’appareil. Si un format de
fichier n’est pas pris en charge, tel que DivX ou AC3, installez une application le prenant en
charge. Pour confirmer les formats de fichier compatibles avec votre appareil, connectez-vous à
www.samsung.com.
Dépannage
180
• Votre appareil est compatible avec les photos et vidéos capturées avec ce même appareil. Les
photos et vidéos capturées avec d’autres appareils peuvent ne pas s’afficher correctement.
• Votre appareil prend en charge les fichiers multimédia autorisés par votre opérateur ainsi que
les opérateurs, des autres services réseaux. Il est possible que certains contenus circulant sur
Internet, comme des sonneries, vidéos ou fonds d’écran, ne fonctionnent pas correctement.
Impossible de localiser un autre appareil Bluetooth
• Vérifiez que la fonction sans fil Bluetooth est activée sur votre appareil.
• Vérifiez que la fonction sans fil Bluetooth est également activée sur l’appareil auquel vous tentez
de vous connecter.
• Vérifiez que les deux appareils Bluetooth se trouvent bien à l’intérieur du rayon d’action
Bluetooth (10 m maximum).
Si les conseils ci-dessus ne résolvent pas le problème, contactez un centre de service après-vente
Samsung.
Problème de connexion avec un ordinateur
• Assurez-vous que le câble USB utilisé est compatible avec votre appareil.
• Vérifiez que le pilote nécessaire est bien installé sur votre ordinateur et qu’il est à jour.
• Si vous utilisez Windows XP, vérifiez que votre ordinateur est équipé de Windows XP Service
Pack 3 ou de toute version ultérieure.
• Vérifiez que Samsung Kies ou Windows Media Player 10 (ou toute version ultérieure) est installé
sur votre ordinateur.
Votre appareil ne parvient pas à détecter votre position
À certains endroits, comme à l’intérieur d’un bâtiment, les signaux GPS peuvent être faibles. Si cela se
produit, configurez votre appareil pour l’utilisation d’un réseau Wi-Fi ou mobile afin de trouver votre
position.
Dépannage
181
Les données stockées sur l’appareil ont été perdues
Effectuez toujours des copies des données importantes stockées sur votre appareil. Dans le cas
contraire, vous ne pourriez pas récupérer vos données corrompues ou perdues. Samsung ne peut
être tenu responsable de la perte des données stockées sur votre appareil.
Un petit espace est apparu sur le bord externe du boîtier de l’appareil
• Cet espace est une caractéristique de fabrication, et il est possible d’observer un jeu ou une
vibration des pièces.
• Au fil du temps, la friction entre les pièces peut entraîner l’élargissement de cet espace.
Droits d’auteur
Copyright © 2015 Samsung Electronics
Ce mode d’emploi est protégé par les lois internationales sur les droits d’auteur.
Il est interdit de reproduire, distribuer, traduire ou transmettre sous quelque forme et par quelque
moyen que ce soit, électronique ou mécanique, notamment par photocopie, enregistrement ou
stockage dans un système de stockage et de recherche documentaire, tout ou partie de ce mode
d’emploi, sans le consentement préalable écrit de Samsung Electronics.
Marques
• SAMSUNG et le logo SAMSUNG sont des marques déposées de Samsung Electronics.
• Bluetooth® est une marque déposée de Bluetooth SIG, Inc.
• Wi-Fi®, Wi-Fi Protected Setup™, Wi-Fi CERTIFIED Passpoint™, Wi-Fi Direct™, Wi-Fi CERTIFIED™
et le logo Wi-Fi sont des marques déposées de Wi-Fi Alliance.
• Toutes les autres marques et droits d’auteur demeurent la propriété de leurs propriétaires
respectifs.
French. 01/2015. Rev.1.0 www.samsung.com
Mode d’emploi
SM-N915F
SM-N915FY
SM-N915G
2
Table des matières
À lire avant utilisation
Démarrage
7 Contenu du coffret
8 Présentation de l’appareil
10 S Pen
13 Utiliser la carte SIM ou USIM et la batterie
16 Charger la batterie
19 Utiliser une carte mémoire
21 Allumer et éteindre l’appareil
21 Verrouiller et déverrouiller l’écran
Fonctions de base
22 Utiliser l’écran tactile
25 Disposition de l’écran d’accueil
27 Écran latéral
39 Écran Applications
40 Icônes d’informations
41 Volets des raccourcis et de paramétrage
rapide
43 Ouvrir des applications
43 Installer ou désinstaller des applications
45 Saisir du texte
47 Capture d’écran
47 Utiliser le dictionnaire
48 Mes fichiers
49 Fonctions d’économie d’énergie
50 Afficher les informations d’aide
Fonctions du S Pen
51 Air Command
52 Action memo
54 Sélection intelligente
55 Image clip
56 Capture
57 S Note
64 Scrapbook
65 Utiliser le S Pen
Reconnaissance des
mouvements et maniabilité
68 Mouvements et gestes
71 Fenêtres multiples
76 Opération à une main
77 Augmenter la sensibilité de l’écran tactile
Table des matières
3
Applications utiles
117 Mode Voiture
119 S Finder
120 S Planner
122 S Health
124 S Voice
126 Musique
128 Vidéo
130 Internet
131 Enregistreur vocal
133 Horloge
135 Calculatrice
135 Dropbox
136 Flipboard
136 Smart Remote
139 Evernote
140 PEN.UP
140 Applications Google
Établir une connexion avec
d’autres appareils
143 Connexion rapide
145 Bluetooth
147 Wi-Fi Direct
148 NFC
151 Screen Mirroring
153 MirrorLink
154 Utiliser la fonction d’impression mobile
Personnaliser votre appareil
78 Gérer les écrans d’accueil et les écrans
d’applications
80 Définir un fond d’écran et des sonneries
81 Changer la méthode de verrouillage de
l’écran
82 Mes lieux
85 Lecteur d’empreintes
90 Mode Privé
91 Mode simplifié
92 Transférer des données depuis votre
ancien appareil
93 Paramétrer des comptes
Téléphone et contacts
95 Téléphone
98 Contacts
Messages et e-mails
100 Messages
101 Email
Appareil photo et Galerie
103 Appareil photo
112 Galerie
Assistance sécurité
115 Mode Urgence
116 Envoyer des messages d’aide
Table des matières
4
Gestionnaire d’appareils et
de données
155 Mettre à jour l’appareil
156 Transférer des fichiers entre l’appareil et
un ordinateur
157 Sauvegarder et restaurer des données
157 Réinitialiser les données
Paramètres
158 Introduction
158 Configurer les paramètres
158 PARAMÈTRES RAPIDES
159 CONNEXIONS
163 APPAREIL
168 PERSONNALISATION
170 SYSTÈME
175 APPLICATIONS
Accessibilité
176 À propos des menus Accessibilité
176 Utiliser la touche Accueil pour ouvrir les
menus d’accessibilité
176 Informations orales (TalkBack)
182 Vue
184 Audition
186 Dextérité et interaction
189 Prendre ou mettre fin à des appels
189 Utiliser le mode à appui unique
189 Gérer les paramètres d’accessibilité
Dépannage
5
À lire avant utilisation
Veuillez lire attentivement ce mode d’emploi, afin de pouvoir utiliser votre appareil correctement et
en toute sécurité.
• Les descriptions sont basées sur les paramètres par défaut de votre appareil.
• En fonction de votre zone géographique, de votre opérateur ou de la version logicielle, certains
contenus peuvent différer par rapport à votre appareil.
• Les contenus de qualité élevée nécessitant une forte utilisation du processeur et de la RAM
peuvent avoir une incidence sur les performances générales de l’appareil. Les applications en
rapport avec ces contenus peuvent ne pas fonctionner correctement selon les caractéristiques
de l’appareil et les conditions d’utilisation.
• Samsung ne peut être tenu responsable des problèmes de performance relatifs aux applications
fournies par des prestataires autres que Samsung.
• Samsung ne peut être tenu responsable des problèmes de performance ou des incompatibilités
découlant de la modification des paramètres de registre par l’utilisateur. Toute tentative de
personnalisation du système d’exploitation peut entraîner des problèmes de fonctionnement de
l’appareil ou de ses applications.
• Les logiciels, sons, fonds d’écran, images ainsi que les autres contenus multimédia fourni(e)s
avec cet appareil sont concédés sous licence et leur usage est soumis à une utilisation limitée.
L’extraction et l’utilisation de ces éléments à des fins commerciales ou autres constituent
une infraction au regard des lois sur les droits d’auteur. Les utilisateurs sont entièrement
responsables de toute utilisation illégale d’un contenu multimédia.
• Les services de données tels que l’envoi ou la réception de messages, le téléchargement ou
le chargement de données, la synchronisation automatique ou l’utilisation de services de
localisation peuvent occasionner des frais supplémentaires, en fonction de l’offre à laquelle vous
avez souscrit dans le cadre de votre forfait. Pour les transferts de données volumineux, il est
recommandé d’utiliser la fonction Wi-Fi.
• Les applications fournies par défaut avec l’appareil peuvent être modifiées ou ne plus être
disponibles, et ce, sans préavis. Si vous avez des questions à propos d’une application fournie
avec l’appareil, contactez un centre de service après-vente Samsung. Pour les applications
installées par l’utilisateur, contactez les opérateurs.
• Toute modification du système d’exploitation de l’appareil ou installation de logiciels non
officiels peut entraîner des dysfonctionnements et corrompre vos données. Ces actions
constituent des violations de l’accord de licence Samsung et annuleront votre garantie.
À lire avant utilisation
6
Icônes
Avertissement : situations susceptibles de vous blesser ou de blesser autrui.
Attention : situations susceptibles d’endommager votre appareil ou d’autres équipements.
Avis : informations essentielles concernant l’utilisation de l’appareil, les limites
fonctionnelles de son utilisation, sa charge d’utilisation ou des avis légaux.
Remarque : remarques, conseils d’utilisation ou informations complémentaires.
7
Démarrage
Contenu du coffret
Vérifiez le contenu du coffret et assurez-vous que tous les éléments suivants sont présents :
• Appareil
• Batterie
• Guide de prise en main rapide
• Les éléments fournis avec l’appareil et les accessoires disponibles peuvent varier en
fonction de votre zone géographique ou de votre opérateur.
• Les accessoires fournis ont été spécialement conçus pour votre appareil et peuvent ne
pas fonctionner avec d’autres appareils.
• L’aspect et les caractéristiques du produit peuvent faire l’objet de modifications sans
préavis.
• Vous pouvez acheter d’autres accessoires auprès de votre revendeur Samsung. Avant
tout achat, assurez-vous qu’ils sont compatibles avec votre appareil.
• Utilisez exclusivement des accessoires homologués par Samsung. L’utilisation
d’accessoires non homologués peut entraîner des problèmes de performances ainsi que
des dysfonctionnements non couverts par la garantie.
• La disponibilité de l’ensemble des accessoires dépend entièrement des fabricants. Pour
plus d’informations sur la disponibilité des accessoires, consultez le site Web Samsung.
Démarrage
8
Présentation de l’appareil
Microphone
Touche Retour
Connecteur à fonctions
multiples
Touche Marche/Arrêt
Objectif avant
Capteur de proximité/
luminosité/mouvements
Écran tactile Écran latéral
Touche Applications
récentes
Microphone
Touche Accueil (lecteur
d’empreintes)
Témoin lumineux
Haut-parleur
Prise audio 3,5 mm
Port infrarouge
Microphone
Touche de volume
Antenne NFC
(sur la batterie)
Objectif arrière
Antenne GPS
Flash
Cache arrière
Haut-parleur
S Pen Antenne principale
Démarrage
9
• Ne recouvrez pas la zone autour de l’antenne avec vos mains ou tout autre objet. Cela
peut entraîner des problèmes de connectivité ou décharger la batterie.
• L’utilisation d’une protection d’écran agréée Samsung est recommandée. Les protections
d’écran non agréées peuvent provoquer un dysfonctionnement des capteurs.
• Évitez de mettre l’écran tactile en contact avec de l’eau. L’humidité ou le contact avec l’eau
peut provoquer des dysfonctionnements de l’écran tactile.
• Les couleurs sur l’écran concave peuvent paraître différentes selon l’angle de vision.
Touches
Touche Fonction
Marche/Arrêt
• Maintenir cette touche enfoncée pour allumer ou éteindre
l’appareil.
• Appuyer sur cette touche pour allumer ou verrouiller l’écran.
Applications
récentes
• Appuyer sur cette touche pour ouvrir la liste des applications
récentes.
• Maintenir cette touche enfoncée pour accéder à des options
supplémentaires dans l’écran actuel.
Accueil
• Appuyer sur cette touche pour allumer l’écran lorsqu’il est
verrouillé.
• Appuyer sur cette touche pour revenir à l’écran d’accueil.
• Appuyer deux fois sur cette touche pour lancer l’application
S Voice.
• Maintenir cette touche enfoncée pour lancer la fonction de
recherche Google.
Retour • Appuyer sur cette touche pour revenir à l’écran précédent.
Volume • Appuyer sur cette touche pour régler le volume de l’appareil.
Démarrage
10
S Pen
Touche S Pen
Pointe du S Pen
Pince
Touche/Port Fonctions
Pointe du S Pen
• Utiliser le S Pen pour écrire, dessiner ou réaliser des actions tactiles sur
l’écran.
• Survoler des éléments à l’écran à l’aide du S Pen pour accéder à des
fonctions S Pen supplémentaires comme la fonction Air View.
Touche S Pen
• Survoler l’écran à l’aide du S Pen et appuyer sur la touche S Pen pour
afficher les fonctions Air Command.
• Tout en maintenant la touche S Pen enfoncée, faire glisser le S Pen sur
des éléments pour les sélectionner.
Pince • Ôter la pointe du S Pen à l’aide de la pince pour la remplacer.
Démarrage
11
Retirer le S Pen
Lorsque vous retirez le S Pen de son compartiment, l’appareil lance la fonction Action
memo ou affiche les fonctions Air Command en fonction des paramètres de retrait du
S Pen que vous avez définis.
Pour modifier ce paramètre, ouvrez l’écran Applis et appuyez sur Paramètres → S Pen → Options
de retrait.
Remplacer la pointe du S Pen
Si la pointe est usée, remplacez-la par une pointe neuve.
1 Saisissez fermement la pointe avec la pince, puis tirez.
Démarrage
12
2 Insérez une nouvelle pointe dans le S Pen.
Veillez à ne pas vous pincer les doigts avec la pince.
• Ne réutilisez pas les anciennes pointes. Cela risquerait de provoquer un
dysfonctionnement du S Pen.
• N’exercez pas une pression excessive sur la pointe lorsque vous l’insérez dans le S Pen.
• N’insérez pas l’extrémité arrondie de la pointe dans le S Pen. Cela risquerait
d’endommager le S Pen ou votre appareil.
• Si le S Pen ne fonctionne pas correctement, apportez-le dans un centre de service aprèsvente
Samsung.
• Si vous utilisez le S Pen verticalement sur l’écran, il se peut que l’appareil ne reconnaisse
pas les actions du S Pen. Ne pliez pas et n'exercez pas de pression excessive sur le S Pen
lorsque vous l’utilisez.
• Les touches Applications récentes et Retour peuvent être utilisées avec le S Pen.
• Pour en savoir plus sur le S Pen, consultez le site Web de Samsung.
Démarrage
13
Utiliser la carte SIM ou USIM et la batterie
Installer la carte SIM ou USIM et la batterie
Insérez la carte SIM ou USIM fournie par votre opérateur, ainsi que la batterie.
• Seules les cartes microSIM sont compatibles avec cet appareil.
• La disponibilité de certains services 4G dépend de votre opérateur. Pour en savoir plus sur
la disponibilité des services, contactez votre opérateur.
1 Retirez le cache arrière.
Veillez à ne pas abîmer vos ongles en retirant le cache arrière.
Évitez de plier ou de déformer excessivement le cache arrière. Vous risqueriez de
l’endommager.
Démarrage
14
2 Insérez la carte SIM ou USIM, puce orientée vers le bas.
• N’introduisez pas de carte mémoire dans le compartiment prévu pour la carte SIM. Si
une carte mémoire venait à se coincer dans le compartiment prévu pour la carte SIM,
apportez l’appareil dans un centre de service après-vente Samsung afin de la faire retirer.
• Veillez à ne pas perdre ou laisser d’autres personnes utiliser votre carte SIM ou USIM.
Samsung ne peut être tenu responsable en cas de dommage ou désagrément résultant
d’une perte ou d’un vol de carte.
3 Insérez la batterie en alignant correctement ses bornes avec celles de l’appareil.
2
1
Démarrage
15
4 Remettez le cache arrière en place.
Retirer la carte SIM ou USIM et la batterie
1 Retirez le cache arrière.
2 Retirez la batterie.
3 Appuyez sur la carte SIM ou sur la carte USIM, puis sortez-la de son compartiment.
Démarrage
16
Charger la batterie
Utiliser le chargeur de batterie
Chargez la batterie avant d’utiliser l’appareil pour la première fois ou lorsque vous ne l’avez pas
utilisé depuis un certain temps.
Utilisez uniquement des chargeurs, des batteries et des câbles homologués par Samsung.
L’utilisation de chargeurs ou de câbles non homologués peut provoquer l’éclatement de la
batterie ou endommager l’appareil.
• Si la batterie est complètement déchargée, vous ne pouvez pas allumer l’appareil,
même si le chargeur est branché. Rechargez la batterie pendant quelques minutes avant
d’allumer l’appareil.
• Si vous utilisez une source d’alimentation autre que l’adaptateur USB, comme un
ordinateur, la vitesse de chargement risque d’être ralentie.
Branchez le câble USB sur l’adaptateur USB, puis la fiche micro-USB sur le connecteur à fonctions
multiples de l’appareil.
Un branchement incorrect du chargeur peut sérieusement endommager l’appareil. Les
dégâts résultant d’une mauvaise utilisation ne sont pas couverts par la garantie.
• Lorsque l’appareil est en cours de chargement, il est possible que l’écran tactile ne
fonctionne pas en raison de l’instabilité de l’alimentation électrique. Dans ce cas,
débranchez le chargeur de l’appareil.
• Il est possible que l’appareil et le chargeur chauffent en cours de chargement. Ce
phénomène est normal et n’affecte ni la durée de vie, ni les performances de l’appareil. Si
la température de la batterie devient trop élevée, le chargement risque de s’interrompre.
• Si l’appareil ne se charge pas correctement, apportez-le, accompagné de son chargeur,
dans un centre de service après-vente Samsung.
Démarrage
17
Lorsque la batterie est complètement chargée, déconnectez l’appareil du chargeur. Pour ce faire,
débranchez d’abord le chargeur de l’appareil, puis de la prise de courant.
Ne retirez jamais la batterie avant d’avoir débranché le chargeur. Ceci pourrait endommager
l’appareil.
• Pour économiser l’énergie, débranchez le chargeur lorsque vous ne l’utilisez pas. Le
chargeur n’étant pas muni d’une touche Marche/Arrêt, vous devez le débrancher de la
prise de courant pour couper l’alimentation. L’appareil doit rester à proximité de la prise
en cours de chargement.
• Le socle de prise de courant doit être installé à proximité du matériel et doit être aisément
accessible.
Réduire la consommation d’énergie de la batterie
Votre appareil est doté de diverses options destinées à économiser l’autonomie de votre batterie.
• Lorsque vous n’utilisez pas l’appareil, désactivez l’écran tactile en appuyant sur la touche
Marche/Arrêt.
• Activez le mode économie d’énergie.
• Fermez toutes les applications fonctionnant inutilement en arrière-plan à l’aide du gestionnaire
de tâches.
• Lorsque vous n’utilisez pas la fonction Bluetooth, désactivez-la.
• Lorsque vous n’utilisez pas la fonction Wi-Fi, désactivez-la.
• Désactivez la fonction de synchronisation automatique des applications.
• Réduisez la durée du rétroéclairage de l’écran.
• Réduisez la luminosité de l’écran.
• Lorsque le niveau de charge est faible, l’icône de la batterie est vide.
• Si vous utilisez simultanément plusieurs applications, des applications réseaux ou des
applications qui nécessitent une connexion à un autre appareil, la batterie se déchargera
rapidement. Pour éviter toute déconnexion du réseau ou perte d’alimentation lors
d’un transfert de données, utilisez toujours ces applications lorsque la batterie est
parfaitement chargée.
• L’appareil peut être utilisé en cours de chargement, mais dans ce cas, le chargement
complet de la batterie risque de prendre plus de temps.
Démarrage
18
Charge rapide
L’appareil est doté d’une fonction de charge rapide intégrée. Vous pouvez utiliser cette fonction pour
charger la batterie plus rapidement si l’appareil ou l’écran est éteint.
À propos de la charge rapide
• La charge rapide utilise la technologie qui permet de recharger une batterie plus rapidement en
augmentant la puissance de charge. L’appareil est compatible avec la fonction de charge rapide
Adaptive de Samsung et Qualcomm Quick Charge 2.0.
• Pour utiliser la charge rapide sur votre appareil, connectez-le à un chargeur de batterie
compatible avec la charge rapide Adaptive ou Quick Charge 2.0.
Augmenter la vitesse de chargement
Pour augmenter la vitesse de chargement, éteignez l’appareil ou son écran lorsque vous chargez la
batterie.
• Si vous chargez la batterie lorsque l’appareil est éteint, l’icône apparaît à l’écran.
• Si vous chargez la batterie lorsque l’appareil est allumé, une fenêtre contextuelle s’affiche pour
vous demander d’éteindre l’écran. Pour augmenter la vitesse de charge, éteignez l’écran.
• Vous ne pouvez pas utiliser la fonction de charge rapide intégrée si vous rechargez la
batterie à l’aide d’un chargeur de batterie standard.
• Si l’appareil chauffe ou si la température de l’air ambiant augmente, il est possible
que la vitesse de chargement diminue automatiquement. Il s’agit d’une condition de
fonctionnement normale pour protéger l’appareil.
Démarrage
19
Utiliser une carte mémoire
Installer une carte mémoire
L’appareil est compatible avec les cartes mémoire d’une capacité allant jusqu’à 128 Go. Selon
le fabricant et le modèle, certaines cartes mémoire peuvent ne pas être compatibles avec votre
appareil.
• Certaines cartes mémoire peuvent ne pas être parfaitement compatibles avec l’appareil.
L’utilisation d’une carte mémoire incompatible peut endommager l’appareil ou la carte
mémoire elle-même et corrompre les données qui y sont stockées.
• Veillez à insérer la carte mémoire du bon côté.
Seules les structures de fichiers FAT et exFAT sont compatibles avec les cartes mémoire de
l’appareil. Lorsque vous insérez une carte mémoire formatée avec une autre structure de
fichiers, l’appareil vous invite à la reformater.
1 Retirez le cache arrière.
2 Insérez la carte mémoire en orientant la puce vers le bas.
3 Remettez le cache arrière en place.
• Une trop grande fréquence des opérations d’effacement et d’écriture réduit la durée de
vie des cartes mémoire.
• Lorsque vous insérez une carte mémoire dans l’appareil, le répertoire de fichiers de la
carte mémoire apparaît dans le dossier Mes fichiers → Carte SD.
Démarrage
20
Retirer une carte mémoire
Avant de retirer la carte mémoire, vous devez au préalable la désactiver pour pouvoir la retirer en
toute sécurité.
Depuis l’écran d’accueil, appuyez sur → Paramètres → Stockage → Démonter la carte SD.
1 Retirez le cache arrière.
2 Retirez la carte mémoire.
3 Remettez le cache arrière en place.
Ne retirez jamais la carte mémoire lorsque l’appareil y enregistre ou lit des informations.
Cela pourrait entraîner une perte ou une corruption des données, ou endommager la carte
mémoire ou l’appareil. Samsung ne peut être tenu responsable en cas de perte de données
résultant d’une utilisation frauduleuse ou en cas de détérioration d’une carte mémoire.
Formater une carte mémoire
Une carte mémoire ayant été formatée sur un ordinateur peut ne pas être compatible avec l’appareil.
Formatez la carte mémoire dans l’appareil.
Depuis l’écran d’accueil, appuyez sur → Paramètres → Stockage → Formater la carte SD →
Formater la carte SD → Supprimer tout.
Avant de formater la carte mémoire, n’oubliez pas d’effectuer des copies de sauvegarde de
toutes les données importantes qui y sont stockées. La garantie du fabricant ne couvre pas
la perte de données résultant des manipulations de l’utilisateur.
Démarrage
21
Allumer et éteindre l’appareil
Pour allumer l’appareil, maintenez la touche Marche/Arrêt enfoncée pendant quelques secondes.
Si vous allumez l’appareil pour la première fois ou après l’avoir réinitialisé, suivez les instructions
affichées à l’écran pour procéder à sa configuration.
Pour éteindre l’appareil, maintenez la touche Marche/Arrêt enfoncée, puis appuyez sur Éteindre.
Respectez toutes les consignes de sécurité et directives formulées par le personnel
compétent dans les lieux où l’utilisation d’appareils mobiles est interdite, comme par
exemple dans les avions et les hôpitaux.
Verrouiller et déverrouiller l’écran
Lorsque vous appuyez sur la touche Marche/Arrêt, l’écran s’éteint et se verrouille. De même, si vous
n’utilisez pas l’appareil pendant un certain temps, l’écran s’éteint et se verrouille.
Pour déverrouiller l’écran, appuyez sur la touche Marche/Arrêt ou sur la touche Accueil et balayez
l’écran dans n’importe quelle direction.
Vous pouvez modifier la méthode de déverrouillage de l’écran et utiliser des fonctions de sécurité
supplémentaires. Pour en savoir plus, reportez-vous à la section Changer la méthode de verrouillage
de l’écran.
22
Fonctions de base
Utiliser l’écran tactile
• Évitez tout contact de l’écran tactile avec d’autres appareils électriques. Les décharges
électrostatiques peuvent provoquer des dysfonctionnements de l’écran tactile.
• Pour éviter d’endommager l’écran tactile, n’appuyez pas dessus avec un objet pointu et
n’exercez aucune pression excessive avec vos doigts.
• Il se peut que l’appareil ne reconnaisse pas la saisie tactile près des bords de l’écran, hors
de la zone de saisie dédiée.
• Si l’écran tactile reste inactif pendant une période prolongée, des images rémanentes
risquent d’apparaître (ou persistance de l’affichage). Éteignez l’écran tactile lorsque vous
n’utilisez pas l’appareil.
Appuyer
Pour ouvrir une application, sélectionner un élément de menu, appuyer sur une touche à l’écran ou
saisir un caractère sur le clavier à l’écran, appuyez sur l’écran tactile avec un doigt ou avec le S Pen.
Fonctions de base
23
Maintenir appuyé
Pour accéder aux options disponibles, maintenez votre doigt ou le S Pen appuyé sur un élément à
l’écran pendant plus de 2 secondes.
Faire glisser
Pour déplacer un élément, maintenez-y le doigt ou le S Pen appuyé et faites-le glisser vers un nouvel
emplacement.
Appuyer deux fois
Pour effectuer un zoom avant sur une page Web ou une image, appuyez deux fois sur l’écran.
Appuyez de nouveau à deux reprises sur l’écran pour annuler le zoom.
Fonctions de base
24
Balayer
Pour afficher d’autres volets, balayez l’écran d’accueil ou l’écran Applis vers la gauche ou vers la
droite. Pour parcourir une page Web ou une liste d’éléments, telle que celle de vos contacts, balayez
l’écran vers le haut ou le bas.
Écarter et rapprocher les doigts
Pour effectuer un zoom avant sur une page Web, une carte ou une image, placez deux doigts sur
l’écran et écartez-les. Rapprochez-les pour effectuer un zoom arrière.
Fonctions de base
25
Disposition de l’écran d’accueil
Écran d’accueil
L’écran d’accueil est le point de départ pour accéder à toutes les fonctions de l’appareil. Il affiche des
widgets, des raccourcis vers les applications, etc. Les widgets sont de petits outils qui permettent
d’obtenir des informations comme la météo ou l’actualité par exemple.
Pour afficher d’autres volets, balayez l’écran vers la gauche ou la droite ou appuyez sur un volet
miniature en bas de l’écran.
Pour en savoir plus sur la personnalisation de l’écran d’accueil, reportez-vous à la section Gérer l’écran
d’accueil.
Widget
Écran latéral
Icône Applications
Volets miniatures
Ouvrir le clavier du Téléphone.
Fonctions de base
26
Options de l’écran d’accueil
Maintenez votre doigt appuyé sur une zone vide de l’écran d’acccueil ou rapprochez-y les doigts
pour accéder aux options disponibles. Personnalisez l’écran d’accueil en ajoutant, supprimant ou
réorganisant ses volets. Vous pouvez également définir le fond d’écran d’accueil, lui ajouter des
widgets, etc.
Flipboard Briefing
Utilisez cette fonction pour afficher les tout derniers articles de différentes catégories d’actualités.
Grâce à cette fonction, vous pouvez consulter les actualités qui vous intéressent.
1 Depuis l’écran d’accueil, appuyez sur ou balayez l’écran vers la droite pour ouvrir Flipboard
Briefing.
2 Si vous lancez cette fonction pour la première fois, appuyez sur DÉMARRER.
3 Pour parcourir les articles de chaque catégorie d’actualités, balayez l’écran vers le haut.
Pour désactiver Flipboard Briefing, maintenez le doigt appuyé sur une zone vide de l’écran
d’accueil. Appuyez ensuite sur Param. écran d’accueil, puis décochez la case Flipboard
Briefing.
Fonctions de base
27
Écran latéral
Introduction
Répondez à un appel ou vérifiez les notifications directement depuis l’écran latéral. Vous pouvez
également l’utiliser pour démarrer une application ou lire un morceau de musique plus facilement.
Utiliser l’écran latéral
Vous pouvez afficher les alertes d’appels et de messages et d’autres notifications depuis l’écran
latéral. Il est également possible d’ajouter des volets à l’écran latéral, avec toutes les fonctions
souhaitées.
Balayez l’écran latéral vers la gauche ou la droite pour afficher le volet souhaité.
Pour ajouter des volets à l’écran latéral, reportez-vous à la section Gérer l’écran latéral.
Écran latéral
Écran principal
Fonctions de base
28
Utiliser les outils rapides
Vous pouvez allumer la lampe, effectuer des enregistrements vocaux et utiliser de nombreuses
autres fonctions pratiques au quotidien, directement depuis l’écran latéral. Pour afficher les outils
rapides, faites glisser l'icône de haut en bas sur l’écran latéral.
Pour fermer les outils rapides, faites glisser le bas de l’écran latéral vers le haut.
Lampe
Minuteur
Enregistreur vocal
Chronomètre
Règle
Fonctions de base
29
Activer uniquement l’écran latéral
Vous pouvez activer l’écran latéral uniquement, et afficher l’horloge et les notifications lorsque
l’écran principal est éteint.
Balayez l’écran latéral de bas en haut, puis de haut en bas, ou inversement, pour l’activer, puis balayez
vers la gauche ou la droite pour afficher les informations souhaitées. Pour démarrer des applications
ou consulter les détails d’une notification, appuyez sur la touche Accueil pour allumer l’écran
principal.
Utiliser l’écran latéral depuis l’écran verrouillé
Depuis l’écran verrouillé, vous pouvez afficher les notifications et les volets ajoutés par l’utilisateur,
mais aussi utiliser les outils rapides.
Pour démarrer des applications ou afficher les détails d’une notification, déverrouillez l’écran
principal.
Fonctions de base
30
Démarrer des applications
Démarrez les applications directement depuis l’écran latéral. Vous pouvez ajouter les applications
que vous utilisez le plus fréquemment au volet d’applications de l’écran latéral afin d’y accéder
facilement.
1 Balayez l’écran latéral vers la gauche ou la droite pour afficher le volet d’applications.
2 Balayez la liste d’applications vers le haut ou le bas pour en sélectionner une.
L’application sélectionnée démarre sur l’écran principal.
Fonctions de base
31
Ajouter ou supprimer des applications sur le volet d’applications
Gérez vos applications depuis le volet d’applications. Vous pouvez ajouter les applications que vous
utilisez le plus fréquemment au volet d’applications de l’écran latéral afin d’y accéder facilement.
1 Balayez l’écran latéral vers la gauche ou la droite pour afficher le volet d’applications.
2 Appuyez sur en haut du volet.
3 Maintenez votre doigt appuyé sur l’une des applications de la liste à gauche de l’écran. Faites
ensuite glisser cette application vers le bord droit de l’écran.
Pour supprimer une application du volet d’applications, maintenez votre doigt appuyé
sur l’une des applications de la liste sur le bord droit de l’écran. Faites ensuite glisser cette
application vers la partie gauche de l’écran.
4 Lorsque vous avez terminé, appuyez sur OK.
L’application est ajoutée au volet d’applications.
Fonctions de base
32
Ajouter des dossiers
1 Balayez l’écran latéral vers la gauche ou la droite pour afficher le volet d’applications.
2 Appuyez sur en haut du volet.
3 Maintenez votre doigt appuyé sur une application et faites-la glisser vers l’option Créer dossier
en haut de l’écran.
Pour ajouter davantage d’applications à un dossier, maintenez votre doigt appuyé sur une
application et faites-la glisser vers le dossier.
4 Appuyez sur OK.
Supprimer des dossiers
1 Balayez l’écran latéral vers la gauche ou la droite pour afficher le volet d’applications.
2 Appuyez sur en haut du volet.
3 Maintenez votre doigt appuyé sur un dossier et faites-le glisser vers l’option Supprimer en haut
de l’écran.
4 Appuyez sur OK → OK.
Lorsque vous supprimez un dossier, les applications de ce dossier ne sont pas supprimées.
Vérifier les notifications
Depuis l’écran latéral, vous pouvez afficher les détails d’une notification, comme les appels entrants,
les nouveaux messages et les alertes provenant de l’appareil. Si vous recevez un appel ou un
nouveau message lorsque vous jouez ou regardez un film sur votre appareil, des alertes s’affichent.
Fonctions de base
33
Répondre aux appels ou les rejeter
Depuis l’écran latéral, vous pouvez répondre aux appels ou les rejeter, lorsque l’écran principal est
allumé ou qu’une application est en cours d’exécution.
Lorsque vous recevez un appel, faites glisser l'icône ou vers la droite ou la gauche sur l’écran
latéral.
Lire les messages
Depuis l’écran latéral, vous pouvez lire les messages.
Lorsque vous recevez un message, appuyez sur sur l’écran latéral. L’application Messages
démarre sur l’écran principal et vous pouvez afficher les détails du message.
Lorsque vous recevez un appel lorsque l’écran principal est éteint, ce dernier s’allume et une
alerte apparaît afin de vous prévenir de l’appel.
Fonctions de base
34
Utiliser l’horloge nocturne
Servez-vous de l’horloge nocturne pour que l’écran latéral reste actif. Vous pouvez afficher la date et
l’heure sur l’écran latéral sans allumer l’écran principal.
1 Balayez l’écran latéral de bas en haut, puis appuyez sur .
Une autre solution consiste, depuis l’écran Applications, à appuyer sur Paramètres → Écran
latéral.
Le menu des paramètres de l’écran latéral apparaît.
2 Appuyez sur Horloge de nuit, puis sur le curseur Horloge de nuit pour activer le fonction.
3 Faites glisser le cercle de l’heure de début et de fin pour définir la durée d’activation de l’horloge
nocturne.
L’écran latéral reste allumé pendant la durée définie.
• La durée maximale d’activation de l’horloge nocturne est de 12 heures.
• Lorsque l’autonomie de la batterie atteint 15 %, l’horloge nocturne est désactivée.
Fonctions de base
35
Gérer l’écran latéral
Ajouter des volets à l’écran latéral
Ajoutez des volets à l’écran latéral ou téléchargez-les depuis GALAXY Apps.
1 Balayez l’écran latéral de bas en haut, puis appuyez sur .
Une autre solution consiste, depuis l’écran Applications, à appuyer sur Paramètres → Écran
latéral.
Le menu des paramètres de l’écran latéral apparaît.
2 Appuyez sur Gérer les volets.
Fonctions de base
36
3 Cochez les volets à ajouter à l’écran latéral, puis appuyez sur .
Balayez l’écran latéral vers la gauche ou la droite pour afficher les volets ajoutés.
Volets par défaut
Télécharger des volets
1 Balayez l’écran latéral de bas en haut, puis appuyez sur .
Une autre solution consiste, depuis l’écran Applications, à appuyer sur Paramètres → Écran
latéral.
Le menu des paramètres de l’écran latéral apparaît.
2 Appuyez sur Gérer les volets.
3 Appuyez sur .
GALAXY Apps démarre. Lorsque vous lancez l’application pour la première fois ou lorsque vous
la redémarrez après en avoir réinitialisé les données, lisez et acceptez les conditions générales.
4 Sélectionnez et téléchargez les volets.
Fonctions de base
37
Organiser les volets de widgets
1 Balayez l’écran latéral de bas en haut, puis appuyez sur .
Une autre solution consiste, depuis l’écran Applications, à appuyer sur Paramètres → Écran
latéral.
Le menu des paramètres de l’écran latéral apparaît.
2 Appuyez sur Gérer les volets → → Réorganiser.
3 Maintenez votre doigt appuyé sur un volet, puis faites-le glisser jusqu’à l’emplacement souhaité.
Lorsque vous déplacez un volet sous l’icône , celui-ci est défini en tant que volet principal.
4 Appuyez sur .
Créer ses propres volets
Créez vos propres volets pour l’écran latéral en ajoutant un texte manuscrit ou en appliquant divers
effets aux images.
Les volets ajoutés par l’utilisateur sont disponibles lorsque l’écran est verrouillé.
1 Balayez l’écran latéral de bas en haut, puis appuyez sur .
Une autre solution consiste, depuis l’écran Applications, à appuyer sur Paramètres → Écran
latéral.
Le menu des paramètres de l’écran latéral apparaît.
2 Appuyez sur Mon espace.
3 Appuyez sur → et sélectionnez l’image souhaitée.
4 Faites glisser l’image sur l’écran afin de définir la zone réservée au volet. Utilisez ensuite les
options de retouche disponibles.
• Pivoter : pivoter ou retourner l’image.
• Effet : appliquer divers effets à l’image.
• Image : ajouter d’autres images à l’image actuelle.
• Objet : ajouter d’autres objets, comme des couleurs ou des motifs, à l’image.
Fonctions de base
38
5 Appuyez sur lorsque vous avez terminé.
Vous pouvez utiliser les icônes suivantes pour modifier le volet :
• : changer l’image du volet.
• : ajouter du texte manuscrit au volet.
• : ajouter du texte au volet.
• : appliquer un effet textuel ou graphique au volet.
6 Appuyez sur OK.
Le volet est ajouté à la liste Expression libre.
Fonctions de base
39
7 Appuyez sur le nouveau volet.
Le volet est ajouté à la liste des volets de l’écran latéral.
Pour partager ou supprimer les nouveaux volets, appuyez sur → Sélect., cochez les volets à
sélectionner, puis appuyez sur ou .
Modifier un volet.
Écran Applications
L’écran Applis affiche les icônes de toutes vos applications, y compris celles récemment installées.
Depuis l’écran d’accueil, appuyez sur pour ouvrir l’écran Applis. Pour afficher d’autres volets,
balayez l’écran vers la gauche ou la droite ou sélectionnez le point d'un volet en bas de l’écran.
Pour personnaliser l’écran Applis, reportez-vous à la section Gérer l’écran Applis.
Fonctions de base
40
Icônes d’informations
Des icônes d’informations peuvent apparaître dans la barre d’état en haut de l’écran. Les icônes
répertoriées dans le tableau ci-dessous sont les plus courantes.
Icône Signification
Aucun signal
Puissance du signal
Itinérance (hors de la zone de service normale)
Réseau GPRS connecté
Réseau EDGE connecté
Réseau UMTS connecté
Réseau HSDPA connecté
Réseau HSPA+ connecté
/ Réseau LTE (4G) connecté
Wi-Fi connecté
Fonction Bluetooth activée
GPS activé
Appel en cours
Appel manqué
Fonction Smart Stay activée
Connecté à un ordinateur
Carte SIM ou USIM absente
Nouveau SMS ou MMS
Alarme activée
S Pen détaché
Profil Discret activé
Fonctions de base
41
Icône Signification
Mode Vibreur activé
Mode Hors-ligne activé
Une erreur s’est produite ou votre attention est nécessaire
Niveau de charge de la batterie
Il se peut que la barre d’état ne s’affiche pas en haut de l’écran dans certaines applications.
Pour afficher la barre d’état, faites glisser votre doigt de haut en bas de l’écran.
Volets des raccourcis et de paramétrage rapide
Utiliser le volet des raccourcis
Lorsque vous recevez de nouvelles notifications, telles que des messages ou des appels manqués,
des icônes d’information apparaissent en haut de votre écran. Pour en savoir plus sur les icônes,
ouvrez le volet des raccourcis et consultez les détails.
Pour ouvrir le volet des raccourcis, faites glisser la barre d’état vers le bas. Pour fermer le volet des
raccourcis, faites glisser la barre d’état de bas en haut de l’écran.
Fonctions de base
42
Vous pouvez utiliser les fonctions suivantes dans le volet des raccourcis.
Ouvrir les Paramètres.
Lancer la fonction S Finder.
Sélectionner une notification et
exécuter différentes actions.
Effacer toutes les notifications.
Régler la luminosité.
Afficher toutes les touches de
paramétrage rapide.
Activer ou désactiver des options.
Maintenir le doigt appuyé sur une
touche pour afficher les paramètres
détaillés.
Lancer la fonction Connex. rapide.
Réorganiser les touches de paramétrage rapide
Pour réorganiser les touches de paramétrage rapide dans le volet des raccourcis, appuyez sur →
, puis maintenez le doigt appuyé sur un élément et faites-le glisser vers un autre emplacement.
Utiliser le volet de paramétrage rapide
Vous pouvez activer ou désactiver certaines fonctions depuis le volet des raccourcis. Pour ce faire,
ouvrez le volet de paramétrage rapide.
Pour ouvrir le volet de paramétrage rapide, faites glisser la barre d’état vers le bas en vous servant de
deux doigts. Une autre solution consiste à appuyer sur l’icône dans le volet des raccourcis. Pour
fermer le volet de paramétrage rapide, faites glisser la barre d’état de bas en haut de l’écran.
Appuyez sur les touches du volet de paramétrage rapide pour activer ou désactiver des fonctions.
Vous pouvez afficher des options de paramétrage plus détaillées en maintenant le doigt appuyé sur
une touche.
Fonctions de base
43
Ouvrir des applications
Depuis l’écran d’accueil ou l’écran Applis, appuyez sur une icône pour ouvrir l’application
correspondante.
Pour ouvrir la liste des applications récemment utilisées, appuyez sur , puis sélectionnez une
fenêtre d’application pour l’ouvrir.
Fermer une application
Appuyez sur → , puis sur Fin à côté d’une application pour la fermer. Pour fermer toutes les
applications en cours d’exécution, appuyez sur Fermer tout. Vous pouvez également appuyer sur
→ .
Installer ou désinstaller des applications
Samsung GALAXY Apps
Utilisez cette application pour acheter et télécharger des applications.
Appuyez sur GALAXY Apps depuis l’écran Applis.
La disponibilité de cette application dépend de votre zone géographique ou de votre
opérateur.
Installer des applications
Parcourez les applications par catégorie ou appuyez sur pour rechercher une application à l’aide
d’un mot-clé.
Sélectionnez une application pour en afficher les informations. Pour télécharger des applications
gratuites, appuyez sur Gratuit. Pour acheter et télécharger des applications payantes, appuyez sur la
touche qui indique le prix de l’application.
Pour modifier les paramètres de mise à jour automatique, appuyez sur → Paramètres →
Mettre à jour les applications automatiquement, puis sélectionnez une option.
Play Store
Utilisez cette application pour acheter et télécharger des applications.
Appuyez sur Play Store depuis l’écran Applis.
Fonctions de base
44
Installer des applications
Parcourez les applications par catégorie ou appuyez sur pour rechercher une application à l’aide
d’un mot-clé.
Sélectionnez une application pour en afficher les informations. Pour télécharger des applications
gratuites, appuyez sur INSTALLER. Pour acheter et télécharger des applications payantes, appuyez
sur le prix et suivez les instructions à l’écran.
Pour modifier les paramètres de mise à jour automatique, appuyez sur → PARAMÈTRES
→ Mise à jour automatique des applis, puis sélectionnez une option.
Gérer les applications
Désinstaller ou désactiver des applications
Pour désactiver des applications par défaut, ouvrez l’écran Applis, puis appuyez sur → Désinstaller/
désactiver des applications. L’icône apparaît sur les applications qu’il est possible de désactiver.
Sélectionnez une application, puis appuyez sur Désactiver.
Pour désinstaller des applications téléchargées, ouvrez l’écran Applis, puis appuyez sur →
Applications téléchargées → → Désinstaller, sélectionnez une application, puis appuyez sur
Désinstaller. Une autre solution consiste à appuyer, depuis l’écran Applis, sur Paramètres →
Gestionnaire d’applications, à sélectionner une application, puis à appuyer sur Désinstaller.
Activer les applications désactivées
Depuis l’écran Applis, appuyez sur → Afficher les applis désactivées, sélectionnez les applications
à activer de nouveau, puis appuyez sur OK. Vous pouvez également, depuis l’écran Applis, appuyer
sur Paramètres → Gestionnaire d’applications, sélectionner l’onglet DÉSACTIVÉ, une application,
puis appuyer sur Activer.
Masquer des applications
Vous pouvez masquer les applications que vous ne voulez pas retrouver sur l’écran Applis.
Depuis l’écran Applis, appuyez sur → Masquer applications.
Pour afficher les applications masquées, appuyez sur → Afficher les applications masquées.
Fonctions de base
45
• Masquer des applications : masquer des applications uniquement sur l’écran Applis. Vous
pouvez continuer à utiliser les applications masquées.
• Désactiver des applications : désactiver les applications fournies par défaut et ne
pouvant pas être désinstallées de l’appareil. Vous ne pouvez pas utiliser les applications
désactivées.
• Désinstaller des applications : désinstaller des applications téléchargées.
Saisir du texte
Présentation du clavier
Un clavier apparaît automatiquement lorsque vous saisissez du texte pour envoyer des messages ou
créer des mémos.
La saisie de texte est impossible dans certaines langues. Pour saisir du texte, vous devez
sélectionner une des langues prises en charge.
Passer à la ligne suivante.
Mots-clés suggérés
Supprimer le caractère précédent.
Saisir des signes de ponctuation.
Saisir des majuscules. Pour saisir
l’ensemble de votre texte en
majuscules, appuyez deux fois sur
cette touche.
Basculer en mode de saisie
manuscrite. Insérer un espace.
Modifier la langue de saisie
Maintenez le doigt appuyé sur l’icône , appuyez sur → Sélectionner langue de saisie, puis
sélectionnez les langues à utiliser. Si vous sélectionnez au moins deux langues, vous pouvez passer
de l’une à l’autre en balayant la touche d’espace vers la gauche ou vers la droite.
Modifier la disposition du clavier
Maintenez le doigt appuyé sur l’icône , appuyez sur , sélectionnez une langue sous LANGUES
DE SAISIE, puis sélectionnez la disposition de clavier à utiliser.
Sur le Clavier 3x4, une touche correspond à trois ou quatre caractères. Pour saisir un
caractère, appuyez à plusieurs reprises sur la touche correspondante jusqu’à ce que le
caractère correspondant s’affiche.
Fonctions de base
46
Utiliser les fonctions supplémentaires du clavier
Maintenez le doigt appuyé sur l’icône pour utiliser diverses fonctions. Suivant la dernière
fonction utilisée, d’autres icônes peuvent apparaître à la place de l’icône .
• : saisir du texte en le dictant.
Changer de langue.
Ouvrir le clavier.
Démarrer ou interrompre la saisie
orale de texte.
• : basculer en mode de saisie manuscrite.
Revenir au clavier standard.
Basculer entre le mode numérique
ou le mode lettres.
La disponibilité de cette fonction dépend de votre zone géographique ou de votre
opérateur.
• : ajouter un élément du presse-papier.
• : modifier les paramètres du clavier.
• : insérer des émoticônes.
• : activer le clavier flottant. Vous pouvez déplacer le clavier en maintenant le doigt appuyé sur
.
Revenir au clavier standard.
Fonctions de base
47
Copier et coller du texte
1 Maintenez le doigt appuyé sur le texte.
2 Faites glisser l’icône ou pour sélectionner le texte voulu, ou appuyez sur Sélectionner tout
pour sélectionner l’intégralité du texte.
3 Appuyez sur Copier ou sur Couper.
Le texte sélectionné est copié dans le presse-papier.
4 Placez le curseur à l’endroit où le texte doit être inséré, puis appuyez sur → Coller.
Pour coller le texte préalablement copié, appuyez sur Presse-papier, puis sélectionnez le texte.
Capture d’écran
Vous pouvez effectuer une capture d’écran en cours d’utilisation de l’appareil.
Maintenez simultanément les touches Accueil et Marche/Arrêt enfoncées. L’image est enregistrée
dans le dossier Screenshots. Pour ouvrir le dossier, ouvrez l’écran Applis et appuyez sur Galerie →
→ Album → Screenshots. Après avoir effectué la capture d’écran, vous pouvez modifier l’image et
la partager.
Il existe également d’autres méthodes pour effectuer une copie d’écran. Pour en savoir plus,
reportez-vous à la section Balayer pour capturer.
Cette fonction n’est disponible que pour certaines applications.
Utiliser le dictionnaire
Recherchez des définitions ou traductions de termes en cours d’utilisation de fonctions, par exemple
lorsque vous parcourez des pages Web.
1 Maintenez le doigt appuyé sur un terme que vous souhaitez rechercher.
Si le terme que vous souhaitez rechercher n’a pas été correctement sélectionné, faites glisser les
icônes ou pour sélectionner le texte désiré.
Fonctions de base
48
2 Appuyez sur Dictionnaire.
Si aucun dictionnaire n’est préinstallé sur l’appareil, suivez les instructions à l’écran pour en
installer un.
3 Affichez la définition.
Pour afficher davantage de définitions ou traductions, appuyez sur . Dans la vue détaillée,
appuyez sur pour ajouter le mot à votre liste de termes favoris ou appuyez sur Recherche
Web pour utiliser le terme comme critère de recherche.
Dans la vue détaillée, appuyez sur pour afficher davantage d’options.
Mes fichiers
Accédez à divers fichiers stockés sur l’appareil ou, par exemple, sur des services de stockage cloud, et
gérez-les.
Utiliser le menu Mes fichiers
Appuyez sur Mes fichiers depuis l’écran Applis.
Accéder à des options
supplémentaires.
Afficher l’historique de
téléchargement.
Rechercher des fichiers ou des
dossiers.
Afficher les fichiers stockés sur la
carte mémoire.
Afficher les fichiers par catégorie.
Afficher les fichiers stockés sur
l’appareil.
Fonctions de base
49
Fonctions d’économie d’énergie
Mode Éco. d’énergie
Préservez l’autonomie de la batterie en limitant les fonctions de l’appareil.
Depuis l’écran Applis, appuyez sur Paramètres → Économie d’énergie → Mode Éco. d’énergie, puis
appuyez sur le curseur Mode Éco. d’énergie pour activer cette fonction. Une autre solution consiste
à ouvrir le volet de paramétrage rapide, puis à appuyer sur Éco. énergie pour activer cette fonction.
Sélectionnez parmi les options suivantes :
• Restr. données arrière-plan : empêcher les applications exécutées en arrière-plan d’utiliser une
connexion de données mobiles.
• Limiter les performances : limiter diverses options, par exemple en désactivant le rétroéclairage
des touches Applications récentes et Retour.
• Mode Échelle de gris : afficher les couleurs à l’écran en nuances de gris.
Mode Ultra économie d’énergie
Utilisez cette fonction pour prolonger l’autonomie de la batterie. En mode Ultra économie d’énergie,
l’appareil se comporte comme suit :
• Il affiche les couleurs à l’écran en nuances de gris.
• Il limite le nombre d’applications disponibles et affiche uniquement les applications
sélectionnées.
• Il désactive la connexion de données mobiles quand l’écran s’éteint.
• Il désactive les fonctions Wi-Fi et Bluetooth.
1 Depuis l’écran Applis, appuyez sur Paramètres → Économie d’énergie → Mode Ultra
économie d’énergie, puis appuyez sur le curseur Mode Ultra économie d’énergie pour activer
la fonction.
Une autre solution consiste à ouvrir le volet de paramétrage rapide, puis à appuyer sur l’option
Ultra éco énergie pour activer cette fonction.
2 Lisez et acceptez les conditions générales, puis appuyez sur OK.
Fonctions de base
50
3 Lisez les informations à l’écran concernant l’utilisation de ce mode, puis appuyez sur Activer.
Pour désactiver le mode Ultra économie d’énergie, appuyez sur → Désact. Ultra économie énergie
→ Désactiv.
Le délai de veille maximum estimé est le temps qu’il faut à la batterie pour se décharger
complètement lorsque l’appareil n’est pas utilisé. Le délai de veille peut varier selon les
paramètres de l’appareil et les conditions d’utilisation.
Afficher les informations d’aide
Pour afficher des informations d’aide afin de savoir comment utiliser l’appareil et les applications,
ouvrez l’écran Applis, puis appuyez sur Paramètres → Aide.
Pour accéder aux informations d’aide relatives à une application lorsque vous l’utilisez, appuyez sur
→ Aide.
Il est possible que certaines applications ne comportent aucune information d’aide.
51
Fonctions du S Pen
Air Command
Retirez le S Pen de son compartiment ou survolez n’importe quelle partie de l’écran à l’aide du S Pen
et appuyez sur la touche S Pen pour accéder à quatre fonctions particulièrement utiles.
Avec les fonctions Air Command, vous pouvez effectuer différentes actions.
Image clip
Capture
Action memo
Sélection intelligente
• Action memo : écrire rapidement des mémos et leur associer des actions. Vous pouvez
passer des appels, envoyer des messages, effectuer des recherches sur le Web, etc. Pour en
savoir plus, reportez-vous à la section Action memo.
• Sélection intelligente : collecter rapidement du contenu. Pour en savoir plus, reportez-vous
à la section Sélection intelligente.
• Image clip : entourer une zone de l’écran que vous souhaitez enregistrer ou partager. Pour en
savoir plus, reportez-vous à la section Image clip.
• Capture : capturer, modifier et rédiger des mémos sur des captures d’écran, puis les partager.
Pour en savoir plus, reportez-vous à la section Capture.
Si cette fonction n’est pas activée, ouvrez l’écran Applis, appuyez sur Paramètres → S Pen
→ Air Command, puis sur le curseur Air Command pour activer la fonction.
Fonctions du S Pen
52
Action memo
Ouvrez le volet Action memo et créez des mémos afin d’exécuter diverses opérations à l’aide
d’informations écrites ou dessinées.
1 Depuis le volet Air command, appuyez sur Action memo.
2 Écrivez ou dessinez un mémo.
3 Appuyez sur .
Le mémo est entièrement sélectionné. Si vous souhaitez utiliser des informations spécifiques du
mémo, appuyez en dehors de la zone sélectionnée pour désélectionner le mémo et tracez un
trait autour des informations pour les utiliser.
Accéder à des options
supplémentaires.
Ajuster la taille du pavé du mémo.
Effacer le mémo.
Rédiger un mémo ou modifier la
couleur du crayon.
Modifier le mémo sous forme de
fichier S Note.
Fonctions disponibles pour le
mémo sélectionné
Sélectionner un texte saisi.
Enregistrer le mémo.
Ignorer le mémo.
Ajouter le mémo comme widget
sur l’écran d’accueil.
Fonctions du S Pen
53
4 Sélectionnez une application à utiliser avec les informations de mémo sélectionnées.
L’application sélectionnée est lancée depuis Action memo.
Rechercher un
emplacement.
Créer une tâche.
Envoyer un message.
Créer un contact.
Passer un appel.
Effectuer des recherches sur
le Web.
Envoyer un e-mail.
Afficher des mémos
Depuis l’écran Action memo, appuyez sur → Afficher la liste des Action memos. Sélectionnez un
mémo à afficher et modifiez-le.
Ajouter des widgets Action memo à l’écran d’accueil
Après avoir composé un mémo, maintenez le doigt appuyé sur , puis faites glisser le mémo jusqu’à
un emplacement vide de l’écran d’accueil. Un widget Action memo est ajouté à l’écran d’accueil et
vous pouvez afficher et modifier le mémo.
Modifier un mémo sous forme de fichier S Note
Lorsque vous rédigez un mémo, appuyez sur pour ouivrir S Note et utilisez cette application pour
modifier le mémo. La couleur de crayon utilisée dans Action memo est appliquée dans S Note.
Fonctions du S Pen
54
Sélection intelligente
Collectez du contenu figurant sur l’écran à l’aide du S Pen. Vous pouvez collecter des contenus
depuis des pages Web, ainsi que des contenus audio ou vidéo en cours de lecture.
1 Lorsque vous trouvez un contenu que vous souhaitez conserver, comme une portion de page
Web, ouvrez le volet Air command et appuyez sur Sélection intelligente.
2 Faites glisser le S Pen sur le contenu que vous souhaitez collecter.
Enregistrer dans
l’album
Partager via
Collecter
3 Choisissez une option à utiliser avec l’élément collecté.
• : enregistrer l’élément dans Scrapbook.
• : partager l’élément avec d’autres personnes.
• : extraire du texte de l’élément. Vous pouvez copier le texte extrait dans le presse-papiers
ou l’insérer dans des messages, notes, etc.
Extraire du texte.
• : enregistrer l’élément dans la liste des éléments collectés afin de recueillir davantage
d’éléments.
Fonctions du S Pen
55
Collecter plusieurs éléments
Appuyez sur pour ajouter du contenu à votre liste d’éléments collectés afin de l’utiliser
ultérieurement. Pour recueillir davantage de contenu, appuyez sur dans la fenêtre contextuelle
des éléments collectés.
Pour afficher les éléments collectés, appuyez sur la fenêtre contextuelle correspondante. Vous
pouvez partager, supprimer ou enregistrer plusieurs éléments simultanément. Pour sélectionner
un seul élément de la liste des éléments collectés, maintenez votre doigt appuyé sur l'élément en
question.
Pour supprimer les éléments collectés, maintenez votre doigt appuyé sur la fenêtre
contextuelle des éléments collectés, puis faites-la glisser jusqu’à l’option Supprimer en haut
de l’écran.
Image clip
Utilisez le S Pen pour dessiner une forme autour de la zone à enregistrer ou partager. Vous pouvez
rogner une partie de l’image.
1 Lorsque vous trouvez un contenu que vous souhaitez conserver, comme une portion d’image,
ouvrez le volet Air command et appuyez sur Image clip.
2 Tracez un trait autour d’une zone pour la sélectionner à l’aide du S Pen.
Remodelez la zone sélectionnée en choisissant une icône de forme dans la barre d’outils ou
appuyez sur pour remodeler automatiquement la zone sélectionnée.
Fonctions du S Pen
56
3 Choisissez une option à utiliser avec la zone sélectionnée.
• : enregistrer la zone sélectionnée dans Scrapbook.
• : partager la zone sélectionnée avec d’autres personnes.
Capture
Effectuez des captures d’écran pour écrire ou dessiner dessus.
1 Lorsque vous trouvez un contenu que vous souhaitez capturer, comme une portion de page
Web, ouvrez le volet Air command et appuyez sur Capture.
L’écran affiché est automatiquement capturé et la barre d’outils d’édition apparaît à l’écran.
2 Rédigez un mémo sur la capture d’écran.
3 Choisissez une option à utiliser avec la capture d’écran.
• : partager la capture d’écran avec d’autres personnes.
• : enregistrer la capture d’écran. Pour afficher la capture d’écran enregistrée, ouvrez l’écran
Applis et appuyez sur Galerie → → Album → Screenshots.
Cette fonction n’est disponible que pour certaines applications.
Fonctions du S Pen
57
S Note
Introduction
Créez des notes personnalisées en enregistrant ce qui vous vient à l’esprit. Vous pouvez insérer des
fichiers multimédia et créer des notes photographiques.
Lancer S Note
1 Appuyez sur S Note depuis l’écran Applis.
Vous pouvez également, depuis l’écran d’accueil, appuyer sur le wiget S Note.
2 Lisez les informations à l’écran concernant l’application, puis appuyez sur Suivant.
3 Sélectionnez des styles de couverture, puis appuyez sur Suivant.
4 Sélectionnez un modèle de note par défaut, puis appuyez sur Suivant.
5 Sélectionnez un compte avec lequel synchroniser vos notes, puis appuyez sur Début.
Si vous n’êtes pas connecté(e) au compte sélectionné, suivez les instructions à l’écran pour vous
y connecter.
Si vous synchronisez vos notes avec un compte, vous pouvez les afficher sur d’autres appareils
en enregistrant le compte sur ces appareils.
Fonctions du S Pen
58
Utiliser le widget S Note
Vous pouvez lancer certaines fonctions S Note directement depuis le widget S Note.
Depuis l’écran d’accueil, appuyez sur une icône du widget S Note.
Lancer S Note. Insérer un mémo vocal.
Créer une note en mode de
saisie manuscrite.
Créer une note
photographique.
Créer une note en mode
texte.
Créer des notes
1 Appuyez sur S Note depuis l’écran Applis.
Vous pouvez également, depuis l’écran d’accueil, appuyer sur le widget S Note.
2 Appuyez sur .
3 Composez une note.
Sur l’écran latéral, appuyez sur pour écrire ou dessiner à l’écran, ou sur pour saisir du texte
à l’aide du clavier.
Mode Saisie manuscrite
Sauvegarder
Mode gomme
Mode de sélection
Annuler/Recommencer
Autres options
Photo Note
Mode S Pen et doigt/S Pen
uniquement
Ajouter une page
Style du texte
Fonctions du S Pen
59
Modifier les paramètres du crayon
Lorsque vous écrivez ou dessinez à l’écran, appuyez une fois sur , sur l’écran latéral, pour modifier
le type de crayon, l’épaisseur du trait ou la couleur de l’encre.
Enregistrer les paramètres en cours
comme profil de crayon.
Modifier l’épaisseur de la ligne.
Modifier la couleur du crayon.
Changer de type de crayon.
Sélectionner une nouvelle couleur à
l’aide de la palette.
Ouvrir le profil de crayon prédéfini.
Stylo plume Stylo de calligraphie
Utiliser la gomme
1 Appuyez sur sur l’écran latéral.
2 Appuyez sur une zone à effacer.
Le trait entier de la zone est effacé. La gomme peut effacer votre S Note trait par trait.
• Pour effacer uniquement la zone au contact du S Pen, appuyez à nouveau sur et décochez
la case Eff. par trait. Vous pouvez régler la taille de la gomme en faisant glisser la barre de
réglage de la taille.
• Pour effacer la note, appuyez sur Eff. tout.
Même avec une gomme plus petite, il est possible que vous ne puissiez pas effacer
précisément la partie que vous souhaitez supprimer.
Fonctions du S Pen
60
Modifier des notes manuscrites
Modifiez les notes manuscrites à l’aide de différentes options d’édition, comme couper, déplacer,
redimensionner ou transformer.
1 Lorsque la note comporte une entrée manuscrite ou dessinée, appuyez sur sur l’écran
latéral.
2 Appuyez sur l’entrée ou tracez une ligne autour de celle-ci pour la sélectionner et la modifier.
Pour déplacer l’entrée vers un autre emplacement, sélectionnez-la, puis faites-la glisser vers un
nouvel emplacement.
Pour redimensionner l’entrée, sélectionnez-la, puis faites glisser les contours du cadre qui
l'entoure.
3 Utilisez l’une des options suivantes :
• : modifier les propriétés de l’entrée, telles que sa présentation, sa taille, sa couleur ou son
épaisseur.
• : affiner ou convertir l’entrée manuscrite ou dessinée.
• : couper l’entrée. Pour la coller à un autre emplacement, maintenez le doigt appuyé sur
l’emplacement, puis appuyez sur Coller.
• : copier l’entrée. Pour la coller à un autre emplacement, maintenez le doigt appuyé sur
l’emplacement, puis appuyez sur Coller.
• : supprimer l’entrée.
Mode manuscrit agrandi
Appuyez sur → Aff. note agrandie et faites glisser le cadre agrandi vers une zone. La zone du cadre
agrandi apparaît dans la fenêtre agrandie en bas de l’écran. Vous pouvez saisir ou corriger avec
précision la zone manuscrite.
Fonctions du S Pen
61
Enregistrer des esquisses
Vous pouvez enregistrer vos actions tout en composant une note.
1 Appuyez sur → Enregistrer esquisse.
2 Appuyez sur et écrivez ou dessinez une note.
Vos actions sont enregistrées en temps réel.
3 Pour arrêter l’enregistrement, appuyez de nouveau sur .
Appuyez sur pour afficher l’enregistrement.
Créer des notes photographiques (Photo Note)
Créez des notes en prenant des photos de contenus, comme du texte manuscrit ou des dessins. Vous
pouvez appliquer l’effet Photo Note afin de faciliter l’affichage du texte sur une photo en supprimant
l’arrière-plan.
Utiliser le mode automatique
1 Depuis l’écran Applications, appuyez sur S Note → → sur l’écran latéral.
Une autre solution consiste, depuis l’écran d’accueil, à appuyer sur dans le widget S Note.
2 Positionnez l'élément à l'intérieur de l’écran d’aperçu.
Activer ou désactiver le flash.
Élément détecté
Ouvrir la Galerie.
Modifier le mode de prise de vue.
Afficher ou masquer les lignes
directrices de l'objectif.
Prendre une photo.
Fonctions du S Pen
62
3 Lorsque le cadre entourant l'élément devient bleu, appuyez sur pour prendre une photo.
L’appareil applique automatiquement l’effet Photo Note et l’insère dans une S Note.
4 Modifiez la note.
Avec l’effet Photo Note
Sans l’effet Photo Note
Utiliser le mode Manuel
1 Sur l’écran d’aperçu de la note photographique, appuyez sur pour passer en mode manuel.
2 Pour prendre une photo, appuyez sur . Vous pouvez également appuyer sur pour
sélectionner une photo enregistrée dans l’appareil.
3 Faites glisser les contours du cadre pour sélectionner une portion de l'élément, puis appuyez sur
.
4 Modifiez les portions à insérer dans S Note.
Faites glisser les contours du cadre entourant l'élément pour régler la taille d’une zone reconnue.
Supprimer la portion.
Faites glisser le cadre entourant
l'élément pour régler la taille.
Ajouter manuellement une portion
pour la reconnaissance.
Activer ou désactiver l’effet Photo
Note.
5 Appuyez sur pour insérer les portions sélectionnées dans la note.
Fonctions du S Pen
63
Modifier des notes photographiques
Modifiez les portions insérées dans S Note.
1 Maintenez votre doigt appuyé sur une portion, puis appuyez sur Convertir.
L’image du texte de cette portion sera transformée en ligne colorées afin d’autoriser sa
modification.
2 Appuyez sur sur l’écran latéral, et tracez une ligne autour de la portion à modifier.
3 Sélectionnez une option d’édition.
• : modifier les propriétés de l’entrée, telles que sa présentation, sa taille, sa couleur ou son
épaisseur.
• : couper l’entrée. Pour la coller à un autre emplacement, maintenez le doigt appuyé sur
l’emplacement, puis appuyez sur Coller.
• : copier l’entrée. Pour la coller à un autre emplacement, maintenez le doigt appuyé sur
l’emplacement, puis appuyez sur Coller.
• : supprimer l’entrée.
Créer des notes avec des mémos vocaux
1 Depuis l’écran Applis, appuyez sur S Note → → → Insérer → Mémo vocal.
Vous pouvez également, depuis l’écran d’accueil, appuyer sur dans le widget S Note.
2 Lisez les conditions générales, puis appuyez sur Accepter.
3 Lisez les informations à l’écran concernant l’utilisation de cette fonction, puis appuyez sur OK.
4 Pour commencer l’enregistrement, appuyez sur .
5 Parlez dans le microphone.
Vos paroles sont converties en texte.
6 Appuyez sur pour insérer le texte converti dans la note.
Si la langue que vous parlez n’est pas prise en charge par la fonction Enregistreur vocal,
l’appareil ne reconnaît pas vos paroles. Pour changer la langue de l'enregistreur vocal,
ouvrez l’écran Applis, puis appuyez sur Enregistreur vocal → → Paramètres → Langue.
Fonctions du S Pen
64
Scrapbook
Collectez des contenus provenant de diverses sources afin de créer votre propre album numérique.
Lorsque vous consultez des pages Web ou visonnez des vidéos, vous pouvez sélectionner et ajouter
une zone désirée à des albums.
La disponibilité de cette application dépend de votre zone géographique ou de votre
opérateur.
Afficher des albums
Lorsque vous lancez cette application pour la première fois ou lorsque vous la redémarrez après en
avoir réinitialisé les données, lisez et acceptez les conditions générales, puis sélectionnez une option
de synchronisation.
1 Appuyez sur Scrapbook depuis l’écran Applis.
2 Appuyez sur pour sélectionner une catégorie et sélectionnez un album.
S’il existe un lien sous le contenu de l’album, appuyez dessus pour accéder à la source.
3 Appuyez sur pour modifier l'album.
Vous pouvez lui ajouter un titre, du texte, des mémos ou des légendes.
4 Appuyez sur Enreg. pour enregistrer les modifications.
Fonctions du S Pen
65
Utiliser le S Pen
Introduction
Le S Pen vous permet d’écrire, de dessiner et de réaliser des opérations tactiles. Vous pouvez
facilement accéder à des fonctions supplémentaires en appuyant sur la touche S Pen.
Air View
Survolez un élément à l’écran à l’aide du S Pen pour activer différentes fonctions.
Afficher un aperçu des informations
Pointez un élément sur l’écran avec le S Pen pour afficher un aperçu du contenu ou des informations
dans une fenêtre contextuelle.
Fonctions du S Pen
66
Utiliser la touche Air
En survolant avec le S Pen les éléments de certaines applications, comme Galerie et Vidéo, vous
pouvez afficher la touche Air sur la fenêtre d’aperçu. Grâce à la touche Air, vous pouvez effectuer
différentes actions directement à partir de la fenêtre d’aperçu.
Touche Air
Si cette fonction n’est pas activée, ouvrez l’écran Applis, appuyez sur Paramètres → S Pen
→ Air View, puis sur le curseur Air View pour activer la fonction.
Effectuer une sélection à l’aide du stylet
Tout en maintenant la touche S Pen enfoncée, faites glisser le S Pen sur des listes de textes ou
d’éléments pour sélectionner plusieurs éléments ou plusieurs textes. Vous pouvez également copier
et coller les éléments ou les textes sélectionnés dans une autre application ou les partager.
Fonctions du S Pen
67
Saisie S Pen
Remplissez des formulaires et rédigez des messages en écriture manuscrite à l’aide du S Pen.
Écrire dans différents champs de texte
1 Survolez un champ de texte à l’aide du S Pen.
2 Appuyez sur pour ouvrir le champ d’écriture manuscrite.
3 Écrivez à l’aide du S Pen.
Lorsque vous rédigez un message dans Messages, appuyez sur en haut du champ d’écriture
manuscrite pour passer en mode dessin. Un dessin est inséré en pièce jointe dans le message.
4 Lorsque vous avez terminé, appuyez sur .
Écrire dans des applications
Lorsque vous utilisez certaines fonctions et applications, vous pouvez écrire directement sur l’écran
à l’aide du S Pen. Par exemple, vous pouvez composer des numéros sur le pavé de numérotation ou
définir une heure d’alarme en écrivant à l’aide du S Pen.
Si cette fonction n’est pas activée, ouvrez l’écran Applis, appuyez sur Paramètres → S Pen
→ Saisie S Pen, puis sur le curseur Saisie S Pen pour activer le fonction.
68
Reconnaissance des
mouvements et maniabilité
Mouvements et gestes
Si l’appareil est soumis à des secousses ou à des chocs excessifs, cela peut entraîner un
comportement imprévu. Veillez à contrôler vos gestes.
Appel direct
Lorsque vous consultez le journal d’appels, la liste des messages ou celle des contacts, rapprochez
l’appareil de votre oreille pour passer un appel.
Si cette fonction n’est pas activée, ouvrez l’écran Applis, appuyez sur Paramètres →
Mouvements et gestes → Appel direct, puis sur Appel direct pour activer la fonction.
Reconnaissance des mouvements et maniabilité
69
Smart Alert
Si vous avez des appels manqués ou de nouveaux messages, l’appareil vibre lorsque vous le prenez
dans la main.
Il est possible que cette fonction ne fonctionne pas si l’écran est allumé ou si l’appareil n’est
pas sur une surface plane.
Si cette fonction n’est pas activée, ouvrez l’écran Applis, appuyez sur Paramètres →
Mouvements et gestes → Smart Alert, puis sur Smart Alert pour activer la fonction.
Muet/pause
Couvrir l’écran avec la main
Recouvrez l’écran avec la paume de votre main pour désactiver la sonnerie des appels entrants ou
des alarmes.
Reconnaissance des mouvements et maniabilité
70
Retourner l’appareil
Retournez l’appareil pour désactiver la sonnerie des appels entrants ou les alarmes.
Si cette fonction n’est pas activée, ouvrez l’écran Applis, appuyez sur Paramètres →
Mouvements et gestes → Muet/pause, puis sur Muet/pause pour activer la fonction.
Balayer pour capturer
Placez le côté de votre main sur l’écran et faites-le glisser de droite à gauche ou inversement pour
réaliser une capture d’écran. Pour afficher la capture d’écran enregistrée, ouvrez l’écran Applis et
appuyez sur Galerie → → Album → Screenshots. Après avoir effectué la capture d’écran, vous
pouvez modifier l’image et la partager.
Cette fonction n’est disponible que pour certaines applications.
Si cette fonction n’est pas activée, ouvrez l’écran Applis, appuyez sur Paramètres →
Mouvements et gestes → Balayer pour capturer, puis sur Balayer pour capturer pour
activer la fonction.
Reconnaissance des mouvements et maniabilité
71
Fenêtres multiples
Introduction
La fonction Multi-fenêtres vous permet d’exécuter deux applications en même temps sur un écran
partagé. Vous pouvez également exécuter simultanément plusieurs applications dans des fenêtres
contextuelles.
Partager l’écran en mode Multi-fenêtres
Certaines applications, telles que la Calculatrice et les Contacts, peuvent uniquement être
utilisées dans des fenêtres contextuelles lorsque vous les faites glisser du volet Multi-fenêtres
vers l’écran.
1 Maintenez le doigt appuyé sur pour ouvrir le volet Multi-fenêtres.
2 Maintenez le doigt appuyé sur une icône d’application et faites-la glisser du volet vers l’écran.
Faites ensuite glisser une autre icône d’application vers un autre endroit de l’écran.
Les applications caractérisées par l’icône peuvent être lancées simultanément dans des
fenêtres distinctes de l’écran. Appuyez sur une application caractérisée par l’icône , puis
faites-la glisser vers un autre endroit pour ouvrir l’application dans les deux fenêtres. Pour lancer
simultanément l’application dans une fenêtre contextuelle, appuyez sur l’application, puis sur .
Reconnaissance des mouvements et maniabilité
72
Lancer le mode Multi-fenêtres depuis la liste des applications récemment
utilisées
1 Appuyez sur .
2 Balayez l’écran vers le haut ou le bas, puis appuyez sur pour lancer une application en mode
Multi-fenêtres.
3 Sélectionnez une autre application pour la lancer en mode Multi-fenêtres.
Utiliser les options Multi-fenêtres
En mode Multi-fenêtres, sélectionnez une fenêtre d’application et appuyez sur le cercle entre les
fenêtres d’applications pour accéder aux options suivantes :
Reconnaissance des mouvements et maniabilité
73
• : passer d’une application Multi-fenêtres à l’autre.
• : glisser et déposer du texte ou des images d’une fenêtre à l’autre. Maintenez le doigt appuyé
sur un élément dans la fenêtre sélectionnée et faites-le glisser vers l’autre fenêtre.
• : activer l’affichage sous forme d’icône flottante.
• : activer l’affichage plein écran.
• : fermer la fenêtre.
Partager du contenu entre des fenêtres d’applications
Vous pouvez facilement partager du contenu entre des applications comme Email et Internet par un
mouvement de glisser-déposer.
Il est possible que certaines applications ne soient pas compatibles avec cette fonction.
1 Lancez les applications Email et Internet en mode Multi-fenêtres.
Vous pouvez également les lancer dans des fenêtres contextuelles.
2 Appuyez sur le cercle situé entre les deux fenêtres d’application, puis appuyez sur .
3 Maintenez le doigt appuyé sur du texte ou une image dans la fenêtre Internet et faites glisser
l'élément vers un emplacement de la fenêtre E-mail.
L’élément sélectionné est inséré dans la fenêtre E-mail.
Reconnaissance des mouvements et maniabilité
74
Ajuster la taille des fenêtres
Faites glisser le cercle situé entre les fenêtres vers le haut ou le bas pour ajuster la taille des fenêtres.
Si le mode Multi-fenêtres n’est pas activé, ouvrez l’écran Applis, appuyez sur Paramètres
→ Fenêtres multiples, puis sur le curseur Fenêtres multiples pour activer la fonction. Une
autre solution consiste à ouvrir le volet de paramétrage rapide, puis à appuyer sur Fenêtres
multiples pour activer cette fonction.
Utiliser le mode Multi-fenêtres contextuelles
1 Depuis l’écran Applis, lancez une application à utiliser dans une fenêtre contextuelle.
2 Faites glisser le doigt ou le stylet à la diagonale en partant de l’angle supérieur gauche.
L’écran d’application apparaît dans une fenêtre contextuelle.
Déplacer le contenu.
Activer l’affichage sous
forme d’icône flottante.
Fermer la fenêtre.
Activer l’affichage plein
écran.
Reconnaissance des mouvements et maniabilité
75
Déplacer ou fermer des fenêtres contextuelles
Pour déplacer une fenêtre contextuelle, appuyez sur le cercle d’une fenêtre et faites-le glisser vers un
nouvel emplacement.
Pour fermer la fenêtre, appuyez sur le cercle en haut de la fenêtre, puis sur .
Ouvrir des fenêtres contextuelles depuis l’écran partagé Multi-fenêtres
1 Depuis l’écran partagé Multi-fenêtres, appuyez sur une fenêtre d’application pour l’ouvrir dans
une fenêtre contextuelle.
2 Maintenez le doigt appuyé sur le cercle entre les fenêtres d’applications.
L’application sélectionnée apparaît dans une fenêtre contextuelle.
Ouvrir des fenêtres contextuelles depuis le volet Multi-fenêtres
Maintenez le doigt appuyé sur pour ouvrir le volet Multi-fenêtres. Appuyez sur une icône
d’application dans le volet Multi-fenêtres afin de lancer l’application dans une fenêtre contextuelle.
Si le mode Multi-fenêtres n’est pas activé, ouvrez l’écran Applis, appuyez sur Paramètres
→ Fenêtres multiples, puis sur le curseur Fenêtres multiples pour activer la fonction. Une
autre solution consiste à ouvrir le volet de paramétrage rapide, puis à appuyer sur Fenêtres
multiples pour activer cette fonction.
Reconnaissance des mouvements et maniabilité
76
Opération à une main
Introduction
Vous pouvez activer le mode Opération à une main pour pouvoir utiliser de façon pratique l’appareil
à l’aide d’une seule main.
Depuis l’écran Applis, appuyez sur Paramètres → Affichage et fond d’écran → Opération à une
main.
Réduire la taille de l’écran
Appuyez sur Réduire taille de l’écran, puis sur le curseur Réduire taille de l’écran pour activer la
fonction.
Pour activer le mode d’utilisation d’une seule main, tenez l’appareil à une main. Ensuite, faites
rapidement glisser votre pouce du bord de l’écran jusqu’au centre, puis inversement.
Saisie à une main
Appuyez sur Saisie à une main, puis sur le curseur Saisie à une main pour activer la fonction.
Appuyez sur ou sur pour régler la position du pavé de numérotation, des touches d’appels et
des autres volets de saisie pour y accéder facilement d’une seule main.
Reconnaissance des mouvements et maniabilité
77
Volet touches latérales
Appuyez sur Volet touches latérales, puis sur le curseur Volet touches latérales pour activer la
fonction.
Simplifiez l’utilisation de l’appareil d’une seule main en plaçant les touches Applications récentes,
Accueil et Retour, ainsi que d’autres touches de fonction dans le volet des touches latérales.
Augmenter la sensibilité de l’écran tactile
Utilisez cette fonction pour pouvoir manipuler l’écran lorsque vous portez des gants.
Depuis l’écran Applis, appuyez sur Paramètres → Affichage et fond d’écran, puis cochez la case
Augmenter sensib. tactile. Une autre solution consiste à ouvrir le volet de paramétrage rapide, puis
à appuyer sur Sensib. tactile pour activer cette fonction.
• Pour une meilleure reconnaissance tactile, utilisez plutôt des gants en cuir. Certaines
autres matières peuvent ne pas être reconnues.
• Cette fonction peut ne pas fonctionner si vous utilisez S view.
Pour un résultat optimal, appuyez fermement sur l’écran lorsque vous portez des gants.
78
Personnaliser votre appareil
Gérer les écrans d’accueil et les écrans
d’applications
Gérer l’écran d’accueil
Ajouter des éléments
Depuis l’écran Applis, maintenez le doigt appuyé sur une application ou un dossier, puis faites-le
glisser vers l’écran d’accueil.
Pour ajouter des widgets, maintenez le doigt appuyé sur une zone vide de l’écran d’accueil, appuyez
sur Widgets, maintenez le doigt appuyé sur un widget, puis faites-le glisser vers l’écran d’accueil.
Déplacer et supprimer un élément
Maintenez le doigt appuyé sur un élément depuis l’écran d’accueil, puis faites-le glisser jusqu’à
l’emplacement souhaité.
Pour déplacer l’élément vers un autre volet, faites-le glisser vers le bord de l’écran.
Maintenez le doigt appuyé sur l’élément à supprimer. Faites-le ensuite glisser vers l’option
Supprimer en haut de l’écran.
Créer un dossier
1 Depuis l’écran d’accueil, maintenez le doigt appuyé sur une application, puis faites-la glisser vers
l’option Créer dossier qui apparaît en haut de l’écran.
2 Saisissez un nom de dossier.
3 Appuyez sur , sélectionnez les applications à déplacer dans ce dossier, puis appuyez sur OK.
Personnaliser votre appareil
79
Gérer les volets
Maintenez le doigt appuyé sur une zone vide de l'écran d'accueil pour ajouter, déplacer ou
supprimer un volet.
Pour ajouter un volet, balayez l’écran vers la gauche, puis appuyez sur .
Pour déplacer un volet, maintenez le doigt appuyé sur son aperçu, puis faites-le glisser jusqu’à
l’emplacement souhaité.
Pour supprimer un volet, maintenez le doigt appuyé sur son aperçu, puis faites-le glisser vers l’option
Supprimer en haut de l’écran.
Pour définir un volet comme écran d’accueil principal, appuyez sur .
Gérer l’écran Applis
Changer de mode d’affichage
Depuis l’écran Applis, appuyez sur → Trier par et sélectionnez un mode d'affichage.
Déplacer des éléments
Depuis l’écran Applis, appuyez sur → Modifier. Maintenez le doigt appuyé sur l’élément à déplacer,
puis faites-le glisser jusqu’à l’emplacement souhaité.
Pour déplacer l’élément vers un autre volet, faites-le glisser vers le bord de l’écran.
Pour déplacer un élément vers un nouveau volet, faites-le glisser vers l’option Créer une page qui
s’affiche en haut de l’écran.
Créer des dossiers
1 Depuis l’écran Applis, appuyez sur → Créer dossier.
Une autre solution consiste à appuyer sur → Modifier, à maintenir le doigt appuyé sur une
application, puis à la faire glisser vers l’option Créer dossier qui apparaît en haut de l’écran.
2 Saisissez un nom de dossier.
3 Appuyez sur , cochez les applications à déplacer vers ce dossier, puis appuyez sur OK.
Personnaliser votre appareil
80
Définir un fond d’écran et des sonneries
Définir un fond d’écran
Définissez une image ou une photo enregistrée dans l’appareil comme fond de l’écran d’accueil ou
de verrouillage.
1 Maintenez le doigt appuyé sur une zone vide de l’écran d’accueil, puis appuyez sur Fonds
d’écran.
Vous pouvez également, depuis l’écran Applis, appuyer sur Paramètres → Affichage et fond
d’écran → Fond d’écran.
2 Sélectionnez un écran auquel appliquer un fond d’écran.
3 Balayez l’écran vers la gauche ou vers la droite, puis sélectionnez une image parmi celles
affichées en bas de l’écran.
Pour sélectionner des photos que vous avez prises avec l’appareil photo ou d’autres images,
appuyez sur Depuis Galerie.
Lorsque vous définissez un fond d’écran de verrouillage, vous pouvez sélectionnez des images
parmi les diverses catégories de fonds d’écran.
4 Appuyez sur Définir comme fond d’écran ou sur Enregistrer.
L’image sélectionnée servira de fond d’écran d’accueil ou de verrouillage.
Définir un écran de verrouillage dynamique
Utilisez cette fonction pour que le fond d’écran de verrouillage change automatiquement en
fonction de vos paramètres, votre position géographique ou le temps qu’il fait, et en fonction de vos
centres d’intérêt.
1 Maintenez le doigt appuyé sur une zone vide de l’écran d’accueil, puis appuyez sur Fonds
d’écran.
Vous pouvez également, depuis l’écran Applis, appuyer sur Paramètres → Affichage et fond
d’écran → Fond d’écran.
2 Appuyez sur Écran de verrouillage.
Personnaliser votre appareil
81
3 Sélectionnez une option de fond d’écran.
• Depuis Galerie : sélectionner des images depuis la Galerie. L’appareil affiche les images sur
l’écran de verrouillage à la fréquence que vous avez définie.
• Météo tps réel : afficher des images de grande qualité sur l’écran de verrouillage en fonction
de l’heure, du temps qu’il fait et de vos informations de localisation.
• Mes intérêts : sélectionner les catégories qui vous intéressent. L’appareil affiche des images
de grande qualité sur l’écran de verrouillage en fonction de vos centres d’intérêt.
• L’utilisation de cette fonction peut entraîner des frais supplémentaires.
• Le bon fonctionnement de cette fonction dépend de votre zone géographique.
Modifier les sonneries
Modifiez les sonneries des appels entrants et des notifications.
Depuis l’écran Applis, appuyez sur Paramètres → Son.
Pour définir une sonnerie pour les appels entrants, appuyez sur Sonneries, sélectionnez une
sonnerie, puis appuyez sur OK. Pour utiliser un morceau de musique stocké sur l’appareil ou sur l’un
de vos comptes comme sonnerie, appuyez sur Ajouter.
Pour définir une sonnerie pour les notifications, appuyez sur Notifications, sélectionnez une
sonnerie, puis appuyez sur OK.
Changer la méthode de verrouillage de l’écran
Vous pouvez définir une méthode de déverrouillage sécurisé de l’écran pour empêcher l’accès à vos
informations personnelles par autrui.
Depuis l’écran Applis, appuyez sur Paramètres → Écran de verrouillage → Déverrouillage de
l’écran, puis sélectionnez une méthode de déverrouillage. Pour protéger votre appareil, vous pouvez
définir un code de déverrouillage. Sans ce code, l’appareil ne pourra pas être déverrouillé.
Si vous oubliez le code de déverrouillage, apportez l’appareil dans un centre de service
après-vente Samsung pour le réinitialiser.
Personnaliser votre appareil
82
Modèle
Dessinez un modèle en reliant au moins quatre points, puis recommencez pour valider. Définissez un
code PIN de secours pour déverrouiller l’écran en cas d’oubli du modèle.
Code PIN
Un code PIN se compose uniquement de chiffres. Saisissez au moins quatre chiffres, puis
recommencez pour valider.
Mot de passe
Un mot de passe comprend des caractères et des chiffres. Saisissez au moins quatre caractères, y
compris des chiffres et des symboles, puis recommencez pour valider.
Empreinte
Enregistrez vos empreintes digitales pour pouvoir déverrouiller l’écran. Pour en savoir plus, reportezvous
à la section Lecteur d’empreintes.
Mes lieux
Accédez rapidement à des fonctions utiles associées aux adresses que vous avez souvent visitées
grâce à la géolocalisation automatique.
Personnaliser votre appareil
83
Ajouter un widget Mes lieux
Pour ajouter le widget, maintenez le doigt appuyé sur une zone vide de l’écran d’accueil, appuyez
sur Widgets, maintenez le doigt appuyé sur le widget Mes lieux, puis faites-le glisser vers l’écran
d’accueil.
Définir des informations de localisation
Lorsque vous visitez un endroit avec des informations de localisation prédéfinies, l’appareil reconnaît
automatiquement cet endroit et affiche des raccourcis pour les fonctions prédéfinies. L’appareil
applique également les paramètres définis pour cet endroit.
1 Depuis l’écran d’accueil, appuyez sur le widget Mes lieux.
2 Dans le widget Mes lieux, sélectionnez un nom de lieu pour définir des informations de
localisation et des raccourcis. Par exemple, appuyez sur Domicile pour définir les informations
de localisation de votre domicile.
Votre adresse actuelle est indiquée dans le champ Adresse et méthode de détection. Ensuite,
pour rechercher automatiquement les coordonnées de cette adresse, appuyez sur .
Pour rechercher manuellement une adresse, saisissez une adresse ou un mot-clé dans le champ
de recherche, puis appuyez sur .
Vérifiez que l’appareil est connecté à un réseau Wi-Fi ou mobile pour pouvoir lancer une
localisation automatique.
Personnaliser votre appareil
84
3 Appuyez sur Suivant.
4 Depuis l’écran des raccourcis de gestion, appuyez sur Gérer.
5 Appuyez sur ou sur pour ajouter ou supprimer des raccourcis vers différentes applications
ou fonctions.
6 Appuyez sur OK.
Le widget Mes lieux comportant vos informations de localisation s’affiche sur l’écran d’accueil.
Pour modifier d’autres paramètres, comme le mode sonore ou le réseau Wi-Fi, appuyez sur →
Paramètres personnalisés.
Définir des informations de localisation supplémentaires
1 Dans le widget Mes lieux, appuyez sur .
2 Appuyez sur et sélectionnez un autre endroit dans la liste.
Pour ajouter davantage d’endroits à la liste, appuyez sur Gérer les lieux → .
3 Pour lancer une géolocalisation automatique, appuyez sur ou sur Obtenir info de
localisation.
Pour rechercher manuellement une adresse, saisissez une adresse ou un mot-clé dans le champ
de recherche, puis appuyez sur .
Personnaliser votre appareil
85
4 Appuyez sur Sauveg.
5 Appuyez sur ou sur pour ajouter ou supprimer des raccourcis vers différentes applications
ou fonctions.
6 Appuyez sur .
Lorsque vous vous rendez à un endroit que vous avez ajouté à la liste, les paramètres de
localisation prédéfinis s’affichent dans le widget Mes lieux. Pour modifier d’autres paramètres,
comme le mode sonore ou le réseau Wi-Fi, appuyez sur → Paramètres personnalisés.
Lecteur d’empreintes
Introduction
Pour permettre la reconnaissance des empreintes, vos empreintes digitales doivent être enregistrées
et stockées dans l’appareil. Après l’enregistrement, vous pouvez paramétrer l’appareil pour qu’il
utilise vos empreintes avec les fonctions ci-après :
• Déverrouillage d’écran
• Connexion Web
• Vérifier votre compte Samsung
• Payer avec PayPal
La disponibilité de cette fonction dépend de votre zone géographique ou de votre
opérateur.
Conseils pour une meilleure reconnaissance des empreintes
Lorsque vous scannez vos empreintes sur l’appareil, sachez que les conditions suivantes risquent
d’affecter les performances de cette fonction :
• La touche Accueil est munie d’un capteur de reconnaissance des empreintes. Assurez-vous
que la touche Accueil n’a pas été rayée ni endommagée par des objets métalliques comme des
pièces de monnaie, des clés ou un collier.
• La protection d’écran fournie avec l’appareil peut altérer le fonctionnement du capteur
d’empreintes. Pour améliorer la sensibilité de reconnaissance des empreintes, retirez la
protection de l’écran.
• Assurez-vous que la zone de reconnaissance des empreintes et vos doigts sont propres et secs.
Personnaliser votre appareil
86
• L’appareil peut ne pas reconnaître les empreintes digitales présentant des ridules ou des
cicatrices.
• L’appareil peut ne pas reconnaître l’empreinte d’un petit doigt ou d’un doigt fin.
• Pour améliorer les performances de reconnaissance, enregistrez les empreintes de la main que
vous utilisez le plus fréquemment lorsque vous manipulez l’appareil.
• Ne faites pas glisser le doigt trop rapidement ou trop lentement. Faites glisser le doigt à une
vitesse modérée afin de donner le temps à l’appareil de le reconnaître.
• Dans les environnements secs, de l’électricité statique peut s’accumuler dans l’appareil. Évitez
d’utiliser cette fonction dans des environnements secs ou, avant d’utiliser la fonction, déchargez
l’électricité statique accumulée en touchant un objet métallique.
Enregistrer des empreintes
Si vous pliez le doigt ou si vous utilisez le bout du doigt, l’appareil risque de ne pas
reconnaître l’empreinte.
1 Depuis l’écran Applis, appuyez sur Paramètres → Lecteur d’empreintes → Gestionnaire
d’empreintes.
2 Lisez les instructions à l’écran, puis appuyez sur OK.
3 Placez le doigt sur la zone de reconnaissance d’empreinte au centre en bas de l’écran.
Personnaliser votre appareil
87
4 Maintenez le doigt appuyé sur l’écran dans la zone de reconnaissance d’empreinte, puis faites-le
glisser vers le bas sur la touche Accueil.
Répétez cette opération avec le même doigt jusqu’à ce que l’empreinte soit enregistrée.
5 Appuyez sur OK pour terminer la numérisation de votre empreinte digitale. Vous pouvez
également appuyer sur Enregistrer pour enregistrer une empreinte supplémentaire.
6 Lorsqu’un écran apparaît vous demandant d’enregistrer un mot de passe de secours, saisissez ce
mot de passe, puis appuyez sur Continuer.
7 Saisissez de nouveau le mot de passe de secours pour le confirmer, puis appuyez sur OK.
Vous pouvez utiliser le mot de passe de secours à la place de l’empreinte.
8 Lorsqu’une fenêtre contextuelle de déverrouillage par empreintes apparaît, appuyez sur OK.
Vous pouvez utiliser vos empreintes pour déverrouiller l’écran.
Personnaliser votre appareil
88
Supprimer des empreintes
Vous pouvez supprimer l’enregistrement de vos empreintes à l’aide du gestionnaire d’empreintes.
1 Depuis l’écran Applis, appuyez sur Paramètres → Lecteur d’empreintes → Gestionnaire
d’empreintes.
2 Scannez l'empreinte enregistrée, ou appuyez sur et saisissez le mot de passe de secours.
3 Appuyez sur → Sélectionner.
4 Cochez les empreintes dont vous souhaitez annuler l’enregistrement, puis appuyez sur .
Modifier le mot de passe de secours
Vous pouvez modifier le mot de passe de secours utilisé en cas de problème de reconnaissance de
vos empreintes.
1 Depuis l’écran Applis, appuyez sur Paramètres → Lecteur d’empreintes → Modifier MDP de
secours.
2 Scannez l'empreinte enregistrée, ou appuyez sur et saisissez le mot de passe de secours.
3 Saisissez un nouveau mot de passe et appuyez sur Continuer.
4 Saisissez de nouveau le mot de passe, puis appuyez sur OK.
Vérifier le mot de passe du compte Samsung
Utilisez vos empreintes digitales pour vérifier le mot de passe de votre compte Samsung. Vous
pouvez recourir à votre empreinte au lieu de saisir votre mot de passe, par exemple lorsque vous
achetez du contenu sur GALAXY Apps.
Depuis l’écran Applis, appuyez sur Paramètres → Lecteur d’empreintes → Vérifier le compte
Samsung, puis appuyez sur le curseur Vérifier le compte Samsung pour activer cette fonction.
Personnaliser votre appareil
89
Utiliser l'empreinte digitale pour se connecter à des comptes
Vous pouvez utiliser vos empreintes pour vous connecter sur des pages Web prenant en charge
l’enregistrement de mot de passe.
1 Depuis l’écran Applis, appuyez sur Paramètres → Lecteur d’empreintes → Connexion Web,
puis appuyez sur le curseur Connexion Web pour activer cette fonction.
2 Ouvrez une page Web à laquelle vous souhaitez vous connecter à l’aide de votre empreinte.
3 Saisissez votre nom d’utilisateur et votre mot de passe, puis appuyez sur la touche de connexion
à la page Web.
4 Cochez la case Connectez-vous en utilisant vos empreintes digitales, puis appuyez sur Se
souvenir.
Vous pouvez utiliser votre empreinte pour confirmer votre compte et votre mot de passe pour
vous connecter à la page Web.
Utiliser l'empreinte digitale pour effectuer des achats via PayPal
Vous pouvez effectuer des achats en numérisant vos empreintes.
La disponibilité de cette fonction dépend de votre zone géographique ou de votre
opérateur.
1 Depuis l’écran Applis, appuyez sur Paramètres → Lecteur d’empreintes → Payer avec PayPal.
2 Cochez la case Prise en charge FIDO Ready™ et PayPal, puis appuyez sur Installer.
3 Une fois l’installation terminée, appuyez sur Associer un compte PayPal.
4 Suivez les instructions à l’écran pour vous connecter à votre compte PayPal et enregistrer vos
empreintes.
Personnaliser votre appareil
90
Mode Privé
Introduction
Masquez les contenus personnels sur votre appareil afin d’empêcher d’autres personnes d’y accéder.
En mode Privé, vous pouvez masquer des éléments dans Galerie, Vidéo, Musique, Enregistreur
vocal, Mes fichiers et S Note.
Configurer le mode Privé
1 Depuis l’écran Applis, appuyez sur Paramètres → Mode Privé.
2 Lisez les informations à l’écran et appuyez sur Suivant.
3 Lisez les informations à l’écran concernant l’utilisation de cette fonction, puis appuyez sur
Suivant.
4 Appuyez sur Démarrer, sélectionnez une méthode d’accès au mode Privé, puis suivez les
instructions à l’écran pour terminer la configuration.
Une fois la configuration terminée, lorsque la fenêtre contextuelle de déverrouillage de l’écran
apparaît, appuyez sur OK pour modifier la méthode de déverrouillage de l’écran, ou appuyez sur
Ignorer.
Le mode Privé est activé et l’icône apparaît dans la barre d’état.
Masquer du contenu
1 Depuis l’écran Applis, lancez une application pour en masquer des éléments.
2 Sélectionnez un élément, puis appuyez sur → Déplacer dans Privé.
Si le mode Privé n’est pas activé, passez aux étapes suivantes.
3 Lisez les instructions à l’écran, puis appuyez sur OK.
4 Suivez les instructions à l’écran pour saisir le code d’accès au mode Privé.
Les éléments sélectionnés sont déplacés vers le dossier Privé et disparaissent de l’écran.
Si vous masquez un élément alors que le mode Privé n’est pas activé, celui-ci est activé dès
que l’élément sélectionné est déplacé dans le dossier Privé et à nouveau désactivé une fois
le transfert terminé.
Personnaliser votre appareil
91
Afficher du contenu masqué
Vous pouvez afficher le contenu masqué uniquement si le mode Privé est activé.
1 Depuis l’écran Applis, appuyez sur Paramètres → Mode Privé, puis appuyez sur le curseur
Mode Privé pour activer cette fonction.
Une autre solution consiste à ouvrir le volet de paramétrage rapide, puis à appuyer sur Mode
Privé pour activer cette fonction.
2 Suivez les instructions à l’écran pour saisir le code d’accès au mode Privé.
3 Depuis l’écran Applis, appuyez sur Mes fichiers → Privé.
Tous les éléments du mode Privé s’affichent à l’écran.
Afficher du contenu masqué
1 Dans le dossier Privé, sélectionnez les éléments masqués à afficher.
2 Appuyez sur → Supprimer de Privé.
3 Sélectionnez un dossier dans lequel déplacer les éléments.
Les éléments sont déplacés vers le dossier sélectionné.
Mode simplifié
Le mode simplifié fournit une expérience utilisateur plus conviviale, grâce à une présentation plus
simple et à des icônes plus grosses sur l’écran d’accueil.
Activer le mode simplifié
1 Depuis l’écran Applis, appuyez sur Paramètres → Mode simplifié → Mode simplifié.
2 Cochez les applications auxquelles appliquer une présentation plus simple.
3 Appuyez sur Effectué.
Personnaliser votre appareil
92
Revenir en mode standard
Faites glisser votre doigt vers la gauche de l’écran d’accueil, puis appuyez sur Paramètres simples →
Mode simplifié → Mode standard → Effectué.
Transférer des données depuis votre ancien
appareil
Utiliser des comptes de sauvegarde
Vous pouvez transférer vos données de sauvegarde depuis votre ancien appareil vers votre nouvel
appareil à l’aide votre compte Google ou Samsung. Pour en savoir plus, reportez-vous à la section
Sauvegarder et restaurer des données.
Utiliser Samsung Smart Switch
Vous pouvez transférer des données de votre ancien appareil vers votre nouvel appareil via Smart
Switch. Pour en savoir plus, rendez-vous sur le site : www.samsung.com/smartswitch.
Samsung Smart Switch n’est pas pris en charge sur certains appareils ou ordinateurs.
Utiliser Smart Switch Mobile
Utilisez cette application pour transférer des données de votre ancien appareil iPhone ou Android
vers votre nouvel appareil. Vous pouvez télécharger l’application depuis GALAXY Apps ou Play
Store.
1 Depuis votre appareil, appuyez sur Smart Switch Mobile.
2 Depuis votre appareil, sélectionnez une option en fonction du type de votre ancien appareil et
suivez les instructions qui s’affichent à l’écran.
Si l’ancien appareil est un appareil Android, assurez-vous que l’application Smart Switch Mobile
y est installée. Pour en savoir plus, consultez l’aide.
Personnaliser votre appareil
93
Utiliser Smart Switch avec un ordinateur
Utilisez cette fonction pour importer une sauvegarde de vos données (depuis des appareils mobiles
d’un fabricant sélectionné) depuis un ordinateur vers votre appareil. Vous pouvez télécharger
l’application depuis www.samsung.com/smartswitch.
1 Sauvegardez les données d’un ancien appareil sur l’ordinateur. Pour plus d’informations,
contactez le fabricant de l’appareil.
2 Sur l’ordinateur, lancez Smart Switch.
3 Connectez votre nouvel appareil à l’ordinateur à l’aide du câble USB.
4 Sur l’ordinateur, cliquez sur le fabricant de l'ancien appareil, puis suivez les instructions à l’écran
pour transférer les données sur votre nouvel appareil.
Utiliser Samsung Kies
Importez un fichier de sauvegarde de vos données depuis votre ordinateur via Samsung Kies pour
restaurer les données sur votre appareil. Vous pouvez également sauvegarder les données sur
l’ordinateur via Samsung Kies. Pour en savoir plus, reportez-vous à la section Connecter l’appareil
avec Samsung Kies.
Paramétrer des comptes
Ajouter des comptes
Certaines applications utilisées sur l’appareil nécessitent un compte. Afin de profiter au maximum de
votre appareil, créez des comptes.
1 Depuis l’écran Applis, appuyez sur Paramètres → Comptes → Ajouter compte.
2 Sélectionnez un service de compte.
3 Suivez les instructions qui s’affichent à l’écran pour procéder à la configuration du compte.
Pour synchroniser du contenu avec vos comptes, sélectionnez un compte, puis cochez les éléments
à synchroniser.
Personnaliser votre appareil
94
Supprimer un compte
Depuis l’écran Applis, appuyez sur Paramètres → Comptes, sélectionnez un nom de compte sous
l’option MES COMPTES, choisissez le compte à supprimer, puis appuyez sur → Supprimer le
compte.
Enregistrer des comptes Samsung
Pour utiliser des applications Samsung, vous devez disposer d’un compte Samsung. Vous pouvez
sauvegarder ou restaurer les données enregistrées sur l’appareil sur votre compte Samsung.
Enregistrez votre compte Samsung sur l’appareil pour pouvoir facilement utiliser les services
Samsung.
1 Depuis l’écran Applis, appuyez sur Paramètres → Comptes → Ajouter compte.
2 Appuyez sur Samsung.
3 Appuyez sur Connexion.
4 Saisissez l’adresse électronique et le mot de passe de votre compte, puis appuyez sur
Connexion.
Une fois votre compte Samsung enregistré, vous pouvez utiliser des applications nécessitant un
compte Samsung sans avoir à effectuer la procédure de connexion.
95
Téléphone et contacts
Téléphone
Introduction
Passez des appels vocaux et visio et répondez aux appels que vous recevez.
Passer des appels
1 Appuyez sur sur l’écran d’accueil.
2 Appuyez sur Clavier et composez un numéro de téléphone.
3 Appuyez sur pour passer un appel vocal ou sur pour passer un appel visio.
Accéder à des options
Ajouter le numéro à la liste de supplémentaires.
contacts.
Afficher un aperçu du numéro de
téléphone.
Afficher les contacts favoris.
Supprimer le caractère précédent.
Afficher la liste de contacts.
Afficher les journaux d’appels et de
messages.
Composer un numéro à l’aide du
clavier.
Téléphone et contacts
96
Passer des appels depuis le journal d’appels ou votre liste de contacts
Appuyez sur Journal ou sur Contacts, puis faites glisser votre doigt vers la droite sur le nom d'un
contact ou sur un numéro de téléphone pour passer un appel.
Passer des appels depuis la liste de favoris
Sélectionnez un contact, puis appuyez sur pour l’ajouter à la liste de contacts favoris.
Ouvrez l’écran Favoris et sélectionnez un contact à appeler.
Appeler un numéro à l’étranger
1 Appuyez sur Clavier.
2 Maintenez le doigt appuyé sur la touche 0 jusqu’à ce que le signe + apparaisse. Composez
l’indicatif du pays, l’indicatif régional et le numéro de téléphone, puis appuyez sur .
Téléphone et contacts
97
Recevoir des appels
Répondre à un appel
• Si l’écran principal est éteint :
L’écran principal s’allume et une alerte d’appel s’affiche. Pour répondre à un appel, faites glisser
votre doigt sur l'icône .
• Si l’écran principal est allumé ou qu’une application est en cours d’exécution :
une alerte d’appel s’affiche sur l’écran latéral. Pour répondre à un appel, faites glisser votre doigt
sur l'icône .
Rejeter un appel
• Si l’écran principal est éteint :
L’écran principal s’allume et une alerte d’appel s’affiche. Pour rejeter un appel, faites glisser votre
doigt sur l'icône .
• Si l’écran principal est allumé ou qu’une application est en cours d’exécution :
une alerte d’appel s’affiche sur l’écran latéral. Pour rejeter un appel, faites glisser votre doigt sur
l'icône .
Appels manqués
Si vous manquez un appel, l’icône apparaît dans le volet des raccourcis et sur l’écran latéral.
Ouvrez le volet des raccourcis ou appuyez sur sur l’écran latéral pour afficher la liste des appels
manqués. Une autre solution consiste, depuis l’écran d’accueil, à appuyer sur → Journal pour
afficher les appels manqués.
• Pour envoyer un message lorsque vous rejetez un appel entrant, faites glisser la barre des
messages de rejet située en bas de l’écran vers le haut.
• Pour créer des messages de rejet, depuis l’écran d’accueil, appuyez sur → →
Paramètres → Appel → Rejet de l’appel → Définir les messages de rejet → .
Options en cours d’appel
Options au cours d’un appel vocal
Les options suivantes sont disponibles :
• : augmenter le volume.
• Ajouter : passer un second appel.
• Clavier : ouvrir le clavier.
Téléphone et contacts
98
• Fin : mettre fin à l’appel en cours.
• HP : activer ou désactiver le haut-parleur. Lorsque vous utilisez le haut-parleur, parlez dans le
microphone en haut de l’appareil et éloignez l’appareil de vos oreilles.
• Muet : désactiver le microphone afin que votre correspondant ne puisse pas vous entendre.
• Bluetooth : activer un casque ou des écouteurs Bluetooth, à condition qu’ils soient connectés à
l’appareil.
Options au cours d’un appel visio
Appuyez sur l’écran pour utiliser les options suivantes :
• Objectif : basculer entre les objectifs avant et arrière.
• Muet : désactiver le microphone afin que votre correspondant ne puisse pas vous entendre.
• Fin : mettre fin à l’appel en cours.
En mode Dual Camera, l’appel visio est possible pendant 3 minutes maximum. Au bout de
3 minutes, l’appareil désactive l’objectif arrière pour des performances optimales.
Contacts
Introduction
Créez de nouveaux contacts et gérez-les sur l’appareil.
Ajouter des contacts
Transférer des contacts depuis d’autres appareils
Vous pouvez transférer des contacts depuis d’autres appareils sur votre appareil. Pour en savoir plus,
reportez-vous à la section Transférer des données depuis votre ancien appareil.
Créer manuellement des contacts
1 Depuis l’écran Applis, appuyez sur Contacts → Contacts.
2 Appuyez sur , puis sélectionnez un emplacement de stockage.
Téléphone et contacts
99
3 Saisissez les coordonnées du contact.
• : ajouter une image.
• / : ajouter ou supprimer un champ d’information.
4 Appuyez sur Enreg.
Pour ajouter un numéro de téléphone à votre liste de contacts à partir du clavier, appuyez sur
Clavier, composez le numéro, puis appuyez sur Ajouter aux contacts.
Pour ajouter le numéro de téléphone d’un appel ou d’un message reçu à la liste de contacts,
appuyez sur Journal, puis sur l’image d’un contact.
Rechercher des contacts
Depuis l’écran Applis, appuyez sur Contacts → Contacts.
Utilisez l’une des méthodes de recherche suivantes :
• Faites défiler la liste de contacts vers le haut ou le bas.
• Faites glisser un doigt le long de l’index à droite de la liste des contacts pour la faire défiler
rapidement.
• Appuyez sur le champ de recherche tout en haut de la liste de contacts, puis saisissez vos
critères de recherche.
Une fois le contact sélectionné, choisissez l’une des options suivantes :
• : ajouter le contact aux favoris.
• / : passer un appel vocal ou visio.
• : rédiger un message.
• : rédiger un e-mail.
100
Messages et e-mails
Messages
Introduction
Envoyez des messages texte (SMS) ou multimédia (MMS) et affichez les messages par conversation.
Envoyer des messages
L’envoi de messages en dehors de la zone couverte par votre opérateur peut occasionner
des frais supplémentaires.
1 Appuyez sur Messages depuis l’écran Applis.
2 Appuyez sur .
3 Ajoutez des destinataires, puis saisissez un message.
Accéder à des options
supplémentaires.
Saisir un message.
Sélectionner des contacts depuis
votre liste de contacts.
Insérer des émoticônes.
Saisir les destinataires.
Joindre des fichiers.
Envoyer le message.
4 Appuyez sur pour envoyer le message.
Messages et e-mails
101
Lire les messages
Les messages sont regroupés sous forme de fils de discussion par contact.
La réception de messages en dehors de la zone couverte par votre opérateur peut
occasionner des frais supplémentaires.
1 Appuyez sur Messages depuis l’écran Applis.
2 Dans la liste de messages, sélectionnez un contact.
3 Affichez votre conversation.
Dans la vue détaillée des messages, appuyez sur pour afficher davantage d’options.
Email
Introduction
Ajoutez des comptes de messagerie électronique pour recevoir des courriers électroniques et y
répondre.
Configurer des comptes de messagerie électronique
1 Appuyez sur Email depuis l’écran Applis.
Lorsque vous ouvrez l’application Email pour la première fois, configurez un compte de
messagerie électronique.
2 Saisissez une adresse e-mail et un mot de passe, puis appuyez sur Suivant.
Pour enregistrer manuellement le compte de messagerie d’une société, appuyez sur
Configuration manuelle.
3 Suivez les instructions qui s’affichent à l’écran pour procéder à la configuration.
Pour configurer un compte de messagerie électronique supplémentaire, appuyez sur → Gérer les
comptes → .
Si vous possédez plusieurs comptes de messagerie électronique, vous pouvez définir un compte par
défaut. Appuyez sur → Gérer les comptes → → Définir le compte par défaut.
Messages et e-mails
102
Envoyer des e-mails
1 Appuyez sur Email depuis l’écran Applis.
2 Pour rédiger un message, appuyez sur l’icône en bas de l’écran.
3 Ajoutez des destinataires, puis saisissez un message.
4 Appuyez sur pour envoyer le message.
Lire des e-mails
1 Appuyez sur Email depuis l’écran Applis.
2 Depuis la liste des messages, appuyez sur un message pour le lire.
103
Appareil photo et Galerie
Appareil photo
Introduction
Prenez des photos et enregistrez des vidéos à l’aide des divers modes et paramètres offerts.
Prises de vue de base
Vous pouvez tout aussi bien prendre des photos qu’enregistrer des vidéos. Visionnez vos photos et
vidéos dans la Galerie.
Appuyez sur Appareil photo depuis l’écran Applis.
Bon usage de l’appareil photo
• Ne prenez pas de photos et n’enregistrez pas de vidéos de personnes sans leur consentement.
• Ne prenez pas de photos et n’enregistrez pas de vidéos lorsque la loi l’interdit.
• Ne prenez pas de photos et n’enregistrez pas de vidéos en violation de la vie privée d’autrui.
Appareil photo et Galerie
104
Prendre des photos ou enregistrer des vidéos
1 Appuyez sur l’écran d’aperçu à l’endroit où l’appareil photo doit faire la mise au point.
2 Depuis l’écran latéral, appuyez sur pour prendre une photo ou sur pour enregistrer
une vidéo.
Modifier les paramètres
de l’appareil photo.
Basculer entre l’objectif
avant et arrière.
HDR (tonalités riches)
Modifier le mode de prise
de vue.
Afficher les photos et les
vidéos que vous avez
prises.
Démarrer l’enregistrement
d’une vidéo.
Prendre une photo.
Ouvrir l’appareil photo depuis l’écran verrouillé
Pour prendre rapidement des photos de moments particuliers, depuis l’écran de verrouillage,
démarrez l’application Appareil photo.
1 Depuis l’écran verrouillé, faites glisser votre doigt sur l’icône .
2 Appuyez sur l’écran d’aperçu à l’endroit où l’appareil photo doit faire la mise au point.
3 Depuis l’écran latéral, appuyez sur pour prendre une photo ou sur pour enregistrer
une vidéo.
La disponibilité de cette fonction dépend de votre zone géographique ou de votre
opérateur.
• Pour effectuer un zoom avant, écartez deux doigts l’un de l’autre sur l’écran ; pour
effectuer un zoom arrière, rapprochez-les.
• Pour extraire une image d’une vidéo en cours d’enregistrement, appuyez sur sur
l’écran latéral.
• Pour modifier la mise au point en cours d’enregistrement d’une vidéo, appuyez sur
l’endroit souhaité pour la mise au point. Pour faire la mise au point au centre de l’écran,
appuyez sur sur l’écran latéral.
Appareil photo et Galerie
105
Selfie
Automatiser les autoportraits
Lorsque vous prenez une photo avec l’objectif avant, posez le doigt sur le capteur ou utilisez les
commandes vocales pour prendre automatiquement une photo sans appuyer sur la touche du
déclencheur.
1 Appuyez sur Appareil photo depuis l’écran Applis.
2 Appuyez sur sur l’écran latéral pour basculer sur l’objectif avant destiné aux autoportraits.
3 Regardez vers l’objectif avant.
4 Posez le doigt sur le capteur à l’arrière de l’appareil, puis soulevez-le pour vous prendre en
photo. Vous pouvez également prononcer les mots « Sourire », « Cheese », « Capture » ou
« Shooter » pour prendre une photo. Pour enregistrer une vidéo, dites « Enregistrer une vidéo ».
Appareil photo et Galerie
106
Selfie panorama
Effectuez un autoportrait panoramique afin d’inclure davantage de personnes dans la photo.
1 Appuyez sur Appareil photo depuis l’écran Applis.
2 Appuyez sur sur l’écran latéral pour basculer sur l’objectif avant destiné aux autoportraits.
3 Appuyez sur MODE sur l’écran latéral → Selfie panorama.
4 Regardez vers l’objectif avant.
5 Posez le doigt sur le capteur à l’arrière de l’appareil, puis soulevez-le pour vous prendre en
photo. Vous pouvez également prononcer les mots « Sourire », « Cheese », « Capture » ou
« Shooter » pour prendre une photo. Pour enregistrer une vidéo, dites « Enregistrer une vidéo ».
6 Pour prendre un autoportrait panoramique, déplacez lentement l’appareil de gauche à droite.
L’appareil prend des photos supplémentaires dès que le cadre bleu rejoint chacune des
extrémités du cadre blanc.
• Assurez-vous de maintenir le cadre bleu à l’intérieur de la fenêtre du viseur.
• Pour prendre des autoportraits larges, les sujets doivent rester immobiles.
• La résolution d’une photo peut être affectée par les conditions d’éclairage.
• En fonction des conditions de prise de vue, il est possible que les parties supérieure et
inférieure de l’image affichée dans l’écran d’aperçu soient coupées.
Appareil photo et Galerie
107
HDR (Ton riche)
Prenez des photos riches en couleurs et reproduisez chacun des détails, même dans des conditions
de luminosité extrêmes.
1 Appuyez sur Appareil photo depuis l’écran Applis.
2 Appuyez sur sur l’écran latéral pour basculer sur l’objectif arrière.
3 Appuyez sur sur l’écran d’aperçu.
L’icône devient .
4 Appuyez sur sur l’écran latéral pour prendre une photo.
Sans effet Avec effet
Modes de prise de vue
Vous disposez de divers modes de prise de vue pour prendre vos photos.
Appuyez sur Appareil photo depuis l’écran Applis.
Auto.
Utilisez ce mode pour autoriser l’appareil photo à évaluer l’environnement et à déterminer le mode
idéal de prise de vue.
Depuis l’écran d’aperçu, appuyez sur MODE sur l’écran latéral → Auto.
Appareil photo et Galerie
108
Selfie arrière
Utilisez ce mode pour prendre un grand autoportrait à l’aide de l’objectif arrière.
1 Depuis l’écran d’aperçu, appuyez sur MODE sur l’écran latéral → Selfie arrière.
2 Faites glisser le cadre ou ajustez-le pour définir une zone de détection pour le visage.
3 Composez votre cliché en positionnant l’objectif arrière face à vous.
4 Pour parfaire la composition, laissez-vous guider par les bips.
Dès que la totalité de votre visage se trouve dans la zone de détection, l’appareil photo émet
une tonalité, puis un bip pendant quelques secondes, et enfin prend automatiquement une
photo.
Focus sélectif
Utilisez l’effet de flou pour faire ressortir certains objets sur votre photo.
1 Depuis l’écran d’aperçu, appuyez sur MODE sur l’écran latéral → Focus sélectif.
2 Appuyez sur l’écran d’aperçu à l’endroit où l’appareil photo doit faire la mise au point.
3 Appuyez sur sur l’écran latéral pour prendre une photo.
4 Appuyez sur la miniature d’aperçu en bas à droite de l’écran d’aperçu.
5 Appuyez sur , puis sélectionnez l’une des options suivantes :
• Focus proche : faire ressortir le sujet et flouter l’arrière-plan autour de lui.
• Focus lointain : flouter le sujet et faire ressortir l’arrière-plan autour de lui.
• Focus panoramique : faire ressortir le sujet et son arrière-plan.
Appareil photo et Galerie
109
6 Appuyez sur .
• Il est recommandé de placer les sujets à une distance de 50 cm de l’appareil. Placez le
sujet sur lequel vous souhaitez faire la mise au point près de l’appareil.
• Lorsque vous prenez des photos, assurez une distance suffisante entre le sujet et l’arrièreplan.
La distance doit être plus de trois fois supérieure à la distance entre l’appareil et le
sujet.
• La qualité des photos prises par l’appareil peut être affectée dans les conditions
suivantes :
– L’appareil ou le sujet est en mouvement.
– Il y a une forte lumière d’arrière-plan, de faibles niveaux de lumière ou vous prenez
des photos en intérieur.
– Le sujet ou l’arrière-plan n’a pas de motif ou celui-ci est composé d’une couleur unie.
Panorama
Prenez une série de photos horizontalement ou verticalement, puis assemblez-les pour obtenir une
large vue.
Depuis l’écran d’aperçu, appuyez sur MODE sur l’écran latéral → Panorama.
Gérer modes
Sélectionnez les modes de prise de vue à afficher sur l’écran de sélection de mode ou modifiez leur
ordre.
1 Depuis l’écran d’aperçu, appuyez sur MODE sur l’écran latéral → Gérer modes.
2 Cochez les modes à ajouter dans la liste de modes.
• Beauté : ce mode permet de prendre des photos de visages plus claires pour obtenir des
images plus douces.
• Cliché & plus : ce mode permet de prendre une série de photos et de les modifier en leur
appliquant différents effets à l’aide des modes de prise de vue.
• Visite virt. : ce mode permet de prendre des photos en avançant ou en tournant à gauche
ou à droite et de capturer le paysage sous différents angles.
• Dual Camera : ce mode permet de prendre une photo ou d’enregistrer une vidéo en utilisant
simultanément l’objectif avant et l’objectif arrière.
Appareil photo et Galerie
110
Télécharger des modes
Téléchargez d’autres modes de prise de vue depuis GALAXY Apps.
Depuis l’écran d’aperçu, appuyez sur MODE sur l’écran latéral → Télécharger.
• Pour obtenir les meilleures prise de vue possibles en mode Panorama, suivez ces
conseils :
– Déplacez l’appareil photo lentement dans le sens de votre choix.
– Maintenez l’image à l’intérieur du cadre de prise de vue de l’appareil photo.
– Évitez de prendre des photos de sujets devant des arrière-plans non identifiables,
comme un ciel ou un pan de mur uni.
• En mode Dual Camera, vous pouvez enregistrer des vidéos d’une durée maximale de
5 minutes en qualité Full HD et d’une durée maximale de 10 minutes en qualité HD ou
VGA.
• Lorsque vous enregistrez des vidéos dans le mode Dual Camera, le son est enregistré par
le microphone interne.
Paramètres de l’appareil photo
Depuis l’écran d’aperçu, appuyez sur sur l’écran latéral.
Les options disponibles peuvent varier selon le mode de prise de vue et le modèle
d’appareil photo utilisés.
• : activer ou désactiver le flash.
• : définir le nombre de photos prises lorsque vous utilisez l’objectif avant.
• : sélectionner la durée à l'issue de laquelle l’appareil photo doit automatiquement prendre
une photo.
• : sélectionner un effet de filtre à utiliser lorsque vous prenez des photos ou enregistrez des
vidéos. Pour télécharger davantage d’effets, appuyez sur Télécharger. Pour modifier l’ordre des
effets ou masquer des effets de la liste, appuyez sur Gérer effets.
• : sélectionner une résolution pour les photos. Une résolution plus élevée améliore la qualité
des photos, mais nécessite davantage de mémoire.
Pour accéder aux paramètres supplémentaires de l’appareil photo, ouvrez l’écran d’aperçu et
appuyez sur → .
• Beauté : prendre des photos de visages plus claires pour obtenir des images plus douces.
• Valeur d’expos. : modifier la valeur d’exposition. Ce paramètre détermine la quantité de lumière
reçue par le capteur de l’appareil photo. En cas de faible luminosité, utilisez une exposition plus
élevée.
Appareil photo et Galerie
111
• ISO : sélectionner une valeur ISO. Ce paramètre permet de contrôler la sensibilité lumineuse
de l’appareil photo. Les valeurs faibles sont destinées aux objets immobiles ou vivement
éclairés. Les valeurs élevées correspondent quant à elles aux sujets en mouvement rapide ou
peu éclairés. Toutefois, plus le réglage ISO est élevé, plus les parasites dans les photos sont
importants.
• Balance des blancs : sélectionner une balance des blancs appropriée de sorte que les images
offrent une gamme de couleurs proches de la réalité.
• Modes de mesure : sélectionner une méthode de mesure. Ce paramètre détermine la manière
dont les valeurs lumineuses sont calculées. Mesure pondérée centrale mesure la lumière
d’arrière-plan au centre de la scène. Spot mesure la lumière à un endroit spécifique. Matrice
calcule la lumière moyenne de la scène toute entière.
• HDR (Ton riche) : prendre des photos riches en couleurs et reproduire chacun des détails, même
dans des conditions de luminosité extrêmes.
• Photo par appui : appuyer sur l’écran d’aperçu pour prendre des photos.
• Taille de la vidéo : sélectionner une résolution pour les vidéos. Une résolution plus élevée
améliore la qualité des vidéos, mais nécessite davantage de mémoire.
• Mode enregistr. : modifier le mode d’enregistrement.
• Stabilis. vidéo : activer le stabilisateur pour réduire ou éliminer l’effet de flou provoqué par les
mouvements de l’appareil photo lors de l’enregistrement d’une vidéo.
• Tags de localis. : joindre un tag de géolocalisation GPS à la photo.
• Pour que les signaux GPS soient meilleurs, évitez de prendre des photos dans des lieux
où le signal peut être limité, par exemple entre des bâtiments ou dans des zones de faible
altitude, ou encore lorsque les conditions météorologiques sont mauvaises.
• Votre localisation est susceptible d’apparaître sur vos photos au moment où vous les
publiez sur le Web. Pour empêcher l’affichage de ces données, désactivez le paramètre de
balise de localisation.
• Emplac. de stockage : sélectionner l’emplacement de stockage des photos et des vidéos.
• Enreg. comme ret. : inverser l’image pour créer une image miroir de la scène initiale, lors de
prises de vue avec l’objectif avant.
• Grille : afficher des lignes directrices sur l'écran d'aperçu pour aider à la composition de la photo.
• Contrôle vocal : paramétrer l’appareil pour qu’il prenne des photos ou enregistre des vidéos à
l’aide des commandes vocales.
• Touche de volume : paramétrer l’appareil pour pouvoir utiliser la touche de volume pour
contrôler le déclencheur ou le zoom.
• Aperçu photo/vidéo : paramétrer l’appareil pour afficher les photos ou les vidéos après leur
capture.
• Modifier les paramètres rapides : réorganiser les raccourcis des options fréquemment utilisées.
Appareil photo et Galerie
112
• Réinit. les paramètres : réinitialiser les paramètres de l’appareil photo.
• : afficher les informations d’aide à l'utilisation de l’appareil photo.
Galerie
Introduction
Affichez et gérez les photos et les vidéos stockées dans l’appareil.
Afficher des photos ou lire des vidéos
1 Appuyez sur Galerie depuis l’écran Applis.
2 Sélectionnez une photo ou une vidéo.
Les fichiers vidéo sont caractérisés par l’icône sur la miniature. Pour regarder une vidéo,
appuyez sur .
Afficher davantage d’options
Supprimer
Modifier
Revenir à l’écran précédent
Partager
Changer de lecteur
Aperçus miniatures des images et
des vidéos
Pour masquer ou afficher la barre de menus et les miniatures, appuyez sur l’écran.
Appareil photo et Galerie
113
Accéder à des contenus stockés sur d’autres appareils
Recherchez des contenus stockés sur d’autres appareils pour les afficher sur votre appareil.
Accéder à des contenus stockés sur des appareils Samsung Link
Pour utiliser cette fonctionnalité, vous devez vous connecter à votre compte Samsung. Pour en savoir
plus, reportez-vous à la section Enregistrer des comptes Samsung.
Depuis l’écran principal Galerie, appuyez sur et sélectionnez un appareil dans la liste APPAREILS
ENREGISTRÉS pour accéder à son contenu. Vous pouvez afficher les contenus des appareils
enregistrés sur Samsung Link. Pour en savoir plus, consultez l’adresse suivante : link.samsung.com.
• Vérifiez que les appareils enregistrés sont allumés et connectés à un réseau Wi-Fi ou
mobile.
• Il se peut que des frais supplémentaires vous soient facturés lorsque vous accédez à des
contenus enregistrés sur d’autres appareils via le réseau mobile.
Accéder à des contenus stockés sur des appareils à proximité
Recherchez des appareils à proximité via le Wi-Fi, Wi-Fi Direct ou un point d’accès mobile pour
afficher des contenus stockés sur ces appareils.
1 Depuis l’écran Applis, appuyez sur Paramètres → NFC et partage → Appareils à proximité,
puis sur le curseur Appareils à proximité pour activer la fonction.
2 Depuis l’écran principal Galerie, appuyez sur .
3 Sélectionnez un appareil dans la liste APPAREILS À PROXIMITÉ.
Vous pouvez visionner des photos et des vidéos sur les appareils dont la fonction de partage de
contenus est activée.
Appareil photo et Galerie
114
Supprimer des photos ou des vidéos
Supprimer une photo ou une vidéo
Sélectionnez une photo ou une vidéo et appuyez sur en haut de l’écran.
Supprimer plusieurs photos et vidéos
1 Depuis l’écran principal Galerie, maintenez le doigt appuyé sur une photo ou une vidéo pour la
supprimer.
Vous pouvez également appuyer sur → Sélectionner.
2 Cochez les photos et les vidéos à supprimer.
3 Appuyez sur en haut de l’écran.
Vous pouvez également appuyer sur → Supprimer, cochez les photos ou vidéos à supprimer, puis
appuyer sur Terminé pour supprimer plusieurs éléments.
115
Assistance sécurité
Mode Urgence
En mode Urgence, l’écran passe en nuances de gris afin d’économiser la batterie. En outre,
l’utilisation de certaines applications et fonctions est limitée.
Activer le mode Urgence
1 Depuis l’écran Applis, appuyez sur Paramètres → Assistance sécurité → Mode Urgence, puis
appuyez sur le curseur Mode Urgence pour activer la fonction.
Vous pouvez également maintenir la touche Marche/Arrêt enfoncée, puis appuyer sur Mode
Urgence.
2 Lisez et acceptez les conditions générales, puis appuyez sur OK.
3 Lisez les instructions à l’écran, puis appuyez sur Activer.
Ajouter des applications à utiliser
dans ce mode.
Passer un appel d’urgence.
Niveau de charge de la batterie et
temps de veille estimé.
Activer la lampe de poche.
Envoyer votre position actuelle Passer un appel.
dans un message.
Naviguer sur Internet.
Accéder à des options
supplémentaires.
Faire retentir des alarmes.
Le délai de veille maximum estimé est le temps qu’il faut à la batterie pour se décharger
complètement lorsque l’appareil n’est pas utilisé. Le délai de veille peut varier selon les
paramètres de l’appareil et les conditions d’utilisation.
Assistance sécurité
116
Désactiver le mode Urgence
Pour désactiver le mode Urgence, appuyez sur → Désactiver le mode Urgence → Désactiv. Vous
pouvez également maintenir la touche Marche/Arrêt enfoncée, puis appuyer sur Mode Urgence →
Désactiv.
Envoyer des messages d’aide
En cas d’urgence, appuyez à trois reprises rapprochées sur la touche Marche/Arrêt. L’appareil
envoie un message à vos contacts prédéfinis. Les messages incluent des informations concernant
votre position géographique. Pour utiliser cette fonction, commencez par enregistrer vos contacts
prédéfinis.
Ajouter des contacts prédéfinis
1 Depuis l’écran Applis, appuyez sur Paramètres → Assistance sécurité.
2 Appuyez sur Gérer les contacts principaux → Créer un contact principal.
3 Appuyez sur Créer un contact et saisissez ses coordonnées, ou appuyez sur Sélectionner dans
les contacts pour transformer un contact existant en contact prédéfini.
Définir des messages d’aide
1 Depuis l’écran Applis, appuyez sur Paramètres → Assistance sécurité.
2 Appuyez sur Envoyer des messages d’aide, puis sur le curseur Envoyer des messages d’aide
pour activer la fonction.
3 Lisez et acceptez les conditions générales, puis appuyez sur OK.
Pour envoyer des messages d’aide comportant des enregistrements audio ou des photos,
cochez la case Envoyer un enreg. sonore ou Envoyer images.
Selon votre zone géographique ou votre opérateur, l’option Envoyer images peut ne pas
être disponible.
117
Applications utiles
Mode Voiture
Introduction
Utilisez ce mode pour contrôler l’appareil pendant que vous conduisez. Vous pouvez écouter des
messages et de la musique grâce aux commandes vocales sans avoir à manipuler l’appareil.
Ne regardez pas l’écran et n’utilisez aucune fonction tactile en conduisant.
• Les cartes, votre position actuelle et autres données de navigation peuvent différer des
informations de localisation réelles. Soyez attentif aux conditions de trafic, à l’état de la
route et à tous les autres facteurs qui pourraient affecter votre conduite. Respectez le
code de la route et les consignes de sécurité en vigueur.
• L’utilisation de la fonction de navigation peut entraîner des frais supplémentaires.
• La disponibilité de ce mode dépend de votre zone géographique ou de votre opérateur.
• Ce mode n’est pas pris en charge dans certaines langues.
Démarrer le mode Voiture
Lorsque vous enregistrez un véhicule sur votre appareil, vous pouvez écouter le son émis par
l’appareil via les haut-parleurs de la voiture. Vous pouvez également paramétrer l’appareil pour qu’il
active automatiquement le mode Voiture dès la connexion au véhicule, etc.
Lorsque vous ouvrez cette application pour la première fois, suivez les instructions qui s’affichent à
l’écran pour terminer la configuration.
1 Ouvrez le volet de paramétrage rapide, puis appuyez sur Mode voit. pour activer la fonction.
Applications utiles
118
2 Suivez les instructions qui s’affichent à l’écran pour procéder à la configuration.
Lorsque la fenêtre de demande d’autorisation Bluetooth apparaît, appuyez sur Oui pour
autoriser un véhicule à rechercher votre appareil et s’y connecter via la fonction Bluetooth.
• Avant d’enregistrer votre véhicule, démarrez-le et allumez la radio.
• Lorsque vous enregistrez un véhicule sur l’appareil, placez l’appareil près du véhicule.
Enregistrer d’autres véhicules
Appuyez sur → Paramètres → Mes voitures → .
Utiliser les menus du mode Voiture
Sélectionnez les menus du mode Voiture à l’aide des commandes vocales afin de passer des appels,
envoyer des messages, trouver un itinéraire ou écouter de la musique. Vous pouvez également
appuyer sur chaque icône de menu affichée sur l’écran.
1 Ouvrez le volet de paramétrage rapide, puis appuyez sur Mode voit. pour activer la fonction.
Accéder à des options
supplémentaires.
Menus du mode
Voiture
Activer la fonction de
commande vocale.
Ouvrir l’écran de
menus.
2 Depuis l’écran principal du mode Voiture, dites « Salut Galaxy ».
3 Lorsque l’icône apparaît, énoncez une commande vocale pour démarrer le menu souhaité.
Vous pouvez également utiliser des commandes vocales instantanées. Pour afficher des
exemples de ces commandes, appuyez sur → Ex. de commandes.
Applications utiles
119
Utiliser la fonction de navigation
Sélectionnez un lieu en maintenant le doigt appuyé sur la carte. Vous pouvez aussi utiliser une
commande vocale pour obtenir l’itinéraire jusqu’à une adresse.
1 Ouvrez le volet de paramétrage rapide, puis appuyez sur Mode voit. pour activer la fonction.
2 Depuis l’écran principal du mode Voiture, dites « Salut Galaxy ».
3 Dites « Navigation ».
4 Dites un mot-clé ou l’adresse du lieu.
L’appareil démarre automatiquement la navigation.
S Finder
Introduction
Recherchez un mot-clé parmi une grande variété de contenus.
Rechercher du contenu
Ouvrez le volet des raccourcis et appuyez sur S Finder.
Saisissez un mot-clé dans le champ de recherche ou appuyez sur et énoncez un mot-clé.
Pour obtenir des résultats plus précis, appuyez sur les touches de filtre sous le champ de recherche,
puis sélectionnez un élément.
Paramétrer des critères de recherche
Vous pouvez définir des critères afin de rechercher du contenu dans des champs de recherche
spécifiques.
Appuyez sur → Paramètres → Sélect. cat. de recherche, puis cochez les critères souhaités.
Applications utiles
120
Gérer l’historique de recherche
Vos anciennes recherches sont automatiquement enregistrées. Pour supprimer un élément de
l’historique de recherche, appuyez sur près de cet élément.
Pour paramétrer l’appareil afin qu’il n’enregistre pas l’historique de recherche, appuyez sur →
Paramètres, puis désélectionnez Utiliser histor. recherc.
S Planner
Introduction
Gérez votre agenda en y entrant vos événements ou tâches à venir.
Créer un événement ou une tâche
1 Appuyez sur S Planner depuis l’écran Applis.
2 Appuyez sur ou appuyez deux fois sur une date.
Si la date comporte déjà des événements ou tâches, appuyez sur la date et sur .
3 Appuyez en haut à gauche de l’écran pour sélectionner un événement ou une tâche, puis
complétez les informations requises.
• Ajouter événement : définir la date de début et de fin d’un événement. Vous pouvez lui
appliquer une option de répétition.
• Ajouter une tâche : ajouter une tâche à faire à une date spécifique. Vous pouvez lui
appliquer une option de priorité.
Applications utiles
121
Saisir un titre.
Joindre une carte indiquant le lieu
de l’événement.
Définir un rappel pour l’événement.
Ajouter des détails.
Sélectionner un calendrier à utiliser
ou à synchroniser.
Sélectionner un élément.
Définir une date de début et de fin
pour l’événement.
4 Appuyez sur Enregistrer pour sauvegarder l’événement ou la tâche.
Synchroniser les événements et les tâches avec vos comptes
Depuis l’écran principal S Planner, appuyez sur → Sync maintenant pour synchroniser les
événements et les tâches avec vos comptes.
Pour ajouter des comptes avec lesquels effectuer la synchronisation, appuyez sur → Calendriers →
Ajouter compte. Sélectionnez ensuite un compte avec lequel effectuer la synchronisation et ouvrez
une session. Une fois le compte ajouté, un cercle vert apparaît près du nom du compte.
Pour modifier l’option de synchronisation du compte, ouvrez l’écran Applis, appuyez sur Paramètres
→ Comptes, puis sélectionnez un service de compte.
Applications utiles
122
S Health
Introduction
S Health vous aide à gérer votre bien-être et votre condition physique. Définissez des objectifs de
remise en forme, vérifiez vos progrès et effectuez un suivi régulier de votre condition physique.
Démarrer S Health
Si vous exécutez cette application pour la première fois ou après la réinitialisation de vos données,
suivez les instructions à l’écran pour procéder à la configuration.
1 Appuyez sur S Health depuis l’écran Applis.
2 Suivez les instructions qui s’affichent à l’écran pour procéder à la configuration.
En fonction de vos données physiques, l’appareil calcule votre métabolisme de base
standard (MB) et vous recommande un apport calorique quotidien. Cette recommandation
peut ne pas s’adapter à tous les âges, constitutions corporelles ou besoins nutritionnels.
Écran principal S Health
Vous pouvez afficher les informations essentielles depuis les menus S Health et utiliser les raccourcis
pour accéder directement aux menus S Health.
Appuyez sur S Health depuis l’écran Applis. Appuyez sur → Écran principal.
Pour y accéder, ouvrez l’écran principal S Health et appuyez sur → Aide.
Applications utiles
123
Informations complémentaires
• L’objet du recueil de ces données est limité à la fourniture du service que vous avez demandé,
dont la transmission d’informations supplémentaires pour améliorer votre bien-être, de
données de sauvegarde/de synchronisation, d’analyses de données et de statistiques, ou
pour développer et offrir de meilleurs services. (Mais, si vous vous connectez sur votre compte
Samsung depuis S Health, vos données peuvent être enregistrées sur le serveur pour être
sauvegardées.) Les données personnelles peuvent être conservées à cette fin. Vous pouvez
supprimer les données personnelles sauvegardées par l’application S Health à l’aide de
l’option de réinitialisation des données dans le menu Paramètres. Pour supprimer des données
partagées avec des réseaux sociaux ou transférées vers des systèmes de stockage, vous devez
les supprimer séparément.
• Vous assumez l’entière responsabilité d’une utilisation inappropriée des données partagées sur
les réseaux sociaux ou transmises à d’autres personnes. Soyez vigilant lorsque vous partagez vos
données personnelles avec d’autres personnes.
• Si l’appareil est connecté à des appareils de mesure, vérifiez le protocole de communication
pour confirmer le bon fonctionnement. Si vous utilisez une connexion sans fil, telle que
Bluetooth ou ANT+, il se peut que l’appareil soit affecté par des interférences électroniques
provenant d’autres appareils. Évitez d’utiliser l’appareil à proximité immédiate d’autres appareils
émettant des ondes radio.
• Selon la version logicielle de l’application, le contenu utilisé dans l’application S Health
peut différer. Les services offerts avec l’application sont sujets à modification ou annulation
d’assistance sans préavis.
• La disponibilité des fonctions et services S Health dépend de la législation et des
réglementations en vigueur dans votre région.
• Certaines fonctions S Health peuvent ne pas être disponibles dans votre région.
• Les fonctions de S Health sont indiquées uniquement à titre d’information, mais ne sauraient
être utilisées pour diagnostiquer une maladie ou une pathologie, ou pour guérir, soulager,
traiter ou prévenir une maladie.
Applications utiles
124
S Voice
Introduction
Réalisez diverses tâches à l’aide d’une simple commande vocale.
Lancer S Voice
1 Appuyez sur S Voice depuis l’écran Applis.
Vous pouvez également appuyer deux fois sur la touche Accueil.
La disponibilité de cette application dépend de votre zone géographique ou de votre
opérateur.
2 Suivez les instructions qui s’affichent à l’écran pour procéder à la configuration.
3 Affichez le didacticiel ou appuyez sur Lancer pour ignorer le didacticiel.
Paramétrer la langue
Appuyez sur → Paramètres → Langue, puis sélectionnez une langue.
La langue sélectionnée est appliquée à S Voice uniquement, et non à la langue d’affichage
de l’appareil.
Utiliser S Voice
1 Appuyez sur S Voice depuis l’écran Applis.
Vous pouvez également appuyer deux fois sur la touche Accueil.
Dès que S Voice est lancé, l’appareil démarre la reconnaissance vocale.
2 Prononcez une commande vocale.
Si l’appareil reconnaît la commande, il exécute l’action correspondante. Pour répéter une
commande vocale ou en énoncer une autre, appuyez sur .
Applications utiles
125
Conseils pour améliorer la reconnaissance vocale :
• Parlez clairement.
• Parlez dans des endroits calmes.
• N’utilisez pas de langage injurieux ni d’argot.
• Évitez de parler avec un accent local.
Selon l’environnement où vous vous trouvez ou la manière dont vous parlez, il se peut que l’appareil
ne reconnaisse pas vos commandes ou qu’il exécute des commandes erronées.
Activer S Voice en mode veille
Si vous n’utilisez pas S Voice pendant un certain temps, l’application passe automatiquement
en mode veille. Appuyez sur l’icône de microphone ou dites « Salut Galaxy » pour reprendre la
reconnaissance vocale.
Changer de commande de réveil
Vous pouvez changer la commande de réveil qui correspond par défaut à « Salut Galaxy ». La
commande de réveil sert à relancer la reconnaissance vocale lorsque l’appareil est en mode veille.
Appuyez sur → Paramètres → Réveil vocal → Définir commande réveil.
Utiliser des commandes de réveil sur l’écran verrouillé
Sur l’écran verrouillé, vous pouvez utiliser différentes fonctions avec des commandes de réveil
prédéfinies.
Appuyez sur → Paramètres → Réveil vocal → Réveiller qd verrouillé.
Applications utiles
126
Musique
Introduction
Écoutez de la musique classée par catégorie et personnalisez les paramètres de lecture.
Écouter de la musique
Appuyez sur Musique depuis l’écran Applis.
Sélectionnez un morceau à écouter.
Ajouter le morceau de musique à
une liste de lecture.
Passer au morceau suivant.
Maintenir appuyé pour effectuer
une avance rapide.
Mettre en pause et reprendre la
lecture.
Accéder à des options
supplémentaires.
Modifier le mode de répétition.
Revenir au morceau précédent.
Maintenir appuyé pour effectuer un
retour rapide.
Activer la lecture aléatoire.
Ouvrir la liste de lecture.
Rechercher d’autres appareils pour
y lire le fichier.
Définir le fichier comme votre
morceau favori.
Régler le volume.
Applications utiles
127
Écouter de la musique stockée sur d’autres appareils
Recherchez des morceaux stockés sur d’autres appareils pour les écouter sur votre appareil.
Appuyez sur Musique depuis l’écran Applis.
Accéder à de la musique stockée sur des appareils Samsung Link
Pour utiliser cette fonctionnalité, vous devez vous connecter à votre compte Samsung. Pour en savoir
plus, reportez-vous à la section Enregistrer des comptes Samsung.
Depuis l’écran principal Musique, appuyez sur Appareils et sélectionnez un appareil dans
APPAREILS ENREGISTRÉS pour y accéder et lire les morceaux. Vous pouvez écouter des morceaux
sur les appareils enregistrés sur Samsung Link. Pour en savoir plus, consultez l’adresse suivante :
link.samsung.com.
• Vérifiez que les appareils enregistrés sont allumés et connectés à un réseau Wi-Fi ou
mobile.
• Il se peut que des frais supplémentaires vous soient facturés lorsque vous accédez à des
contenus enregistrés sur d’autres appareils via le réseau mobile.
Accéder à de la musique stockée sur des appareils à proximité
Recherchez des appareils à proximité via le Wi-Fi, Wi-Fi Direct ou un point d’accès mobile pour lire de
la musique stockée sur ces appareils.
1 Depuis l’écran Applis, appuyez sur Paramètres → NFC et partage → Appareils à proximité,
puis sur le curseur Appareils à proximité pour activer la fonction.
2 Depuis l’écran principal Musique, appuyez sur Appareils.
3 Sélectionnez un appareil dans APPAREILS À PROXIMITÉ pour accéder aux morceaux et les lire.
Vous pouvez écouter des morceaux sur les appareils dont la fonction de partage de contenu est
activée.
Applications utiles
128
Vidéo
Introduction
Regardez des vidéos stockées sur l’appareil et personnalisez les paramètres de lecture.
Lire des vidéos
Appuyez sur Vidéo depuis l’écran Applis.
Sélectionnez une vidéo à lire.
Modifier le format
d’écran.
Effectuer une avance ou
un retour rapdie en
faisant glisser la barre.
Revenir à la vidéo
précédente. Maintenir la
touche appuyée pour
effectuer un retour
rapide. Passer à la vidéo suivante.
Maintenir la touche
appuyée pour effectuer
une avance rapide.
Rechercher d’autres
appareils pour y lire le
fichier.
Mettre en pause et
reprendre la lecture.
Accéder à des options
supplémentaires.
Faites glisser le doigt vers le haut ou le bas sur le côté gauche de l’écran de lecture pour régler la
luminosité, ou faites glisser le doigt vers le haut ou le bas sur le côté droit de l’écran de lecture pour
régler le volume.
Pour effectuer un retour ou une avance rapide, faites glisser le doigt vers la gauche ou la droite sur
l’écran de lecture.
Applications utiles
129
Regarder des vidéos stockées sur d’autres appareils
Recherchez des vidéos stockées sur d’autres appareils pour les lire sur votre appareil.
Appuyez sur Vidéo depuis l’écran Applis.
Accéder à des vidéos stockées sur des appareils Samsung Link
Pour utiliser cette fonctionnalité, vous devez vous connecter à votre compte Samsung. Pour en savoir
plus, reportez-vous à la section Enregistrer des comptes Samsung.
Depuis l’écran principal Vidéo, appuyez sur Appareils et sélectionnez un appareil dans APPAREILS
ENREGISTRÉS pour y accéder et regarder les vidéos. Vous pouvez regarder la vidéo sur les appareils
enregistrés sur Samsung Link. Pour en savoir plus, consultez l’adresse suivante : link.samsung.com.
• Vérifiez que les appareils enregistrés sont allumés et connectés à un réseau Wi-Fi ou
mobile.
• Il se peut que des frais supplémentaires vous soient facturés lorsque vous accédez à des
contenus enregistrés sur d’autres appareils via le réseau mobile.
Accéder à des vidéos stockées sur des appareils à proximité
Recherchez des appareils à proximité via le Wi-Fi, Wi-Fi Direct ou un point d’accès mobile pour
regarder des vidéos stockées sur ces appareils.
1 Depuis l’écran Applis, appuyez sur Paramètres → NFC et partage → Appareils à proximité,
puis sur le curseur Appareils à proximité pour activer la fonction.
2 Depuis l’écran principal Vidéo, appuyez sur Appareils.
3 Sélectionnez un appareil dans APPAREILS À PROXIMITÉ pour accéder aux vidéos et les regarder.
Vous pouvez regarder des vidéos sur les appareils dont la fonction de partage de contenu est
activée.
Applications utiles
130
Internet
Naviguez sur Internet pour rechercher des informations et enregistrez vos pages Web préférées en
tant que favoris afin d’y accéder plus facilement.
Parcourir des pages Web
1 Appuyez sur Internet depuis l’écran Applis.
2 Appuyez sur le champ d’adresse. Pour changer de moteur de recherche, appuyez sur l’icône du
moteur de recherche près du champ d’adresse Web.
3 Saisissez une adresse Web ou un mot-clé, puis appuyez sur Aller à. Pour effectuer oralement une
recherche sur le Web, appuyez sur .
Pour afficher la barre d’outils, faites glisser votre doigt vers le bas de l’écran.
Lire un article en mode Lecture.
Définir la page Web en cours
comme favori.
Ouvrir la page d’accueil.
Revenir à la page précédemment
visitée.
Afficher la liste des favoris.
Accéder à des options
supplémentaires.
Ouvrir le gestionnaire de fenêtres
Web.
Actualiser la page Web en cours.
Afficher les pages enregistrées.
Applications utiles
131
Enregistreur vocal
Introduction
Changez de modes d’enregistrement en fonction de la situation, par exemple, lors d'une interview
ou d'une réunion. L’appareil peut convertir vos paroles en texte et distinguer les diverses sources
sonores.
Enregistrer des mémos vocaux
1 Depuis l’écran Applis, appuyez sur Enregistreur vocal.
2 Pour commencer l’enregistrement, appuyez sur . Parlez dans le microphone.
Pour interrompre l’enregistrement, appuyez sur . Pour annuler l’enregistrement, appuyez sur
.
Pendant l’enregistrement d’un mémo vocal, appuyez sur pour caractériser un passage comme
favori.
Afficher la liste des mémos vocaux.
Modifier le mode d’enregistrement.
Accéder à des options
supplémentaires.
Démarrer l’enregistrement.
Faire défiler parmi les modes
d’enregistrement disponibles.
Mode d’enregistrement actuel.
3 Pour terminer l’enregistrement, appuyez sur .
Applications utiles
132
Modifier le mode d’enregistrement
Appuyez sur pour sélectionner un mode dans la liste.
• Normal : mode d’enregistrement normal.
• Interview : le microphone est sensible aux sons provenant des deux directions. Dans ce mode,
les microphones situés en haut et en bas de l’appareil prélèvent la même quantité de sons.
L’icône s’affiche à côté des mémos vocaux enregistrés dans ce mode.
• Réunion : le microphone est sensible aux sons provenant de différentes directions. L’icône
s’affiche à côté des mémos vocaux enregistrés dans ce mode.
• Mémo vocal : l’appareil enregistre votre voix et la convertit simultanément en texte affiché à
l’écran. Pour un résultat optimal, rapprochez l’appareil de votre bouche et parlez clairement
dans un environnement calme. L’icône s’affiche à côté des mémos vocaux enregistrés dans
ce mode.
Si la langue que vous parlez n’est pas prise en charge par le système de mémos vocaux,
l’appareil ne reconnaît pas vos paroles. Avant d’utiliser cette fonction, appuyez sur →
Paramètres → Langue pour définir la langue du système de mémos vocaux.
Écouter les mémos vocaux
Lorsque vous écoutez un entretien ou une réunion enregistré(e) dans un mémo vocal, vous pouvez
activer ou désactiver certaines sources sonores de l’enregistrement.
1 Depuis l’écran Applis, appuyez sur Enregistreur vocal.
2 Appuyez sur , puis sélectionnez un mémo vocal enregistré en mode réunion.
3 Pour désactiver certaines sources sonores, appuyez sur dans le sens correspondant au son à
désactiver.
L’icône devient et le son est désactivé.
Source sonore activée
Source sonore désactivée
Applications utiles
133
Horloge
Introduction
Configurez les alarmes, vérifiez l’heure dans les plus grandes villes du monde, planifiez un
événement ou définissez un minuteur.
Alarme
Depuis l’écran Applis, appuyez sur Horloge → Alarme.
Créer une alarme
1 Appuyez sur .
2 Définissez l’heure de l’alarme, sélectionnez les jours où celle-ci doit sonner, puis paramétrez les
diverses options de l’alarme.
3 Appuyez sur Enreg.
L’alarme sélectionnée est ajoutée à la liste des alarmes.
4 Pour activer ou désactiver des alarmes, appuyez sur près de l’alarme concernée.
Arrêter ou répéter une alarme
Pour éteindre une alarme, faites glisser votre doigt sur l’icône . Si l’option de répétition est activée,
faites glisser votre doigt sur l’icône pour répéter l’alarme après une période de répétition
prédéfinie.
Supprimer une alarme
Appuyez sur → Sélectionner, sélectionnez l’alarme à supprimer, puis appuyez sur .
Applications utiles
134
Horloge mondiale
Depuis l’écran Applis, appuyez sur Horloge → Horloge mondiale.
Créer une horloge
Appuyez sur , puis saisissez le nom d’une ville ou sélectionnez-en une dans la liste ou sur le globe.
Pour appliquer l’heure d’été, maintenez le doigt appuyé sur une horloge, puis appuyez sur .
Supprimer une horloge
Appuyez sur → Sélectionner, sélectionnez l’horloge à supprimer, puis appuyez sur .
Chronomètre
1 Depuis l’écran Applis, appuyez sur Horloge → Chronomètre.
2 Appuyez sur Début pour commencer à chronométrer.
Pour enregistrer des temps intermédiaires lors du chronométrage d’un événement, appuyez sur
Tour.
3 Appuyez sur Arrêter pour arrêter le chronométrage.
Pour effacer les temps intermédiaires, appuyez sur Réinit. Pour redémarrer le chronomètre,
appuyez sur Reprendre.
Minuteur
1 Depuis l’écran Applis, appuyez sur Horloge → Minuteur.
2 Définissez la durée, puis appuyez sur Début.
3 Lorsque la durée du minuteur est écoulée, faites glisser votre doigt sur l’icône .
Applications utiles
135
Calculatrice
Exécutez des calculs simples ou complexes.
Utiliser la calculatrice
Appuyez sur Calculatrice depuis l’écran Applis.
Faites pivoter l’appareil vers la gauche pour utiliser la calculatrice scientifique en mode Paysage. Si
l’option Rotation écran est désactivée dans le volet des raccourcis, appuyez sur → Calculatrice
scientifique.
Pour afficher l’historique des calculs, appuyez sur pour masquer le clavier.
Pour effacer l’historique, appuyez sur → Effacer l’historique.
Dropbox
Utilisez cette application pour enregistrer et partager des fichiers avec d’autres personnes via le
service de stockage Cloud Dropbox. Lorsque vous enregistrez des fichiers dans Dropbox, votre
appareil les synchronise automatiquement avec le serveur Web et tout autre appareil sur lequel le
service Dropbox est installé.
La disponibilité de cette application dépend de votre zone géographique ou de votre
opérateur.
Appuyez sur Dropbox depuis l’écran Applis.
Si vous démarrez cette application pour la première fois ou après la réinitialisation de vos données,
suivez les instructions à l’écran pour procéder à la configuration.
Depuis l’écran principal Dropbox, utilisez les fonctions suivantes :
• : charger ou ouvrir des fichiers. Appuyez sur → Transférer ici pour télécharger les fichiers.
• : afficher les photos ou vidéos chargées. Appuyez sur pour partager ou supprimer des
fichiers ou créer des albums.
• : ouvrir des fichiers de la liste des favoris.
• : afficher des notifications.
Applications utiles
136
Flipboard
Utilisez cette application pour afficher en direct les nouvelles de vos réseaux sociaux et les actualités
à un format de magazine personnalisé.
Appuyez sur Flipboard depuis l’écran Applis.
La disponibilité de cette application dépend de votre zone géographique ou de votre
opérateur.
Si vous démarrez cette application pour la première fois ou après la réinitialisation de vos données,
suivez les instructions à l’écran pour procéder à la configuration.
Depuis l’écran principal Flipboard, sélectionnez des articles d’actualités et des abonnements.
Smart Remote
Introduction
Utilisez cette application pour vous connecter à des téléviseurs, des décodeurs ou des projecteurs, et
utiliser l’appareil comme une télécommande.
Applications utiles
137
Commencer à utiliser Smart Remote
1 Appuyez sur Smart Remote depuis l’écran Applis.
2 Appuyez sur Sélect. un pays ou une région et sélectionnez un pays, une région et un service de
diffusion.
3 Appuyez sur Personnaliser, sélectionnez vos genres et sports favoris, puis appuyez sur Suivant.
4 Appuyez sur Age ou Genre pour définir votre profil, puis appuyez sur OK.
5 Appuyez sur → Continuer.
6 Sélectionnez la marque du téléviseur.
Pour connecter l’appareil à un projecteur et utiliser l’appareil comme télécommande, appuyez
sur J’ai un projecteur.
7 Assurez-vous que le port infrarouge de l’appareil est orienté vers le téléviseur et appuyez sur TV.
Appuyez ensuite sur Oui, ce code fonctionne si l’appareil allume le téléviseur.
Si l’appareil n’allume pas le téléviseur, appuyez sur Renvoyer ce code ou Non, essayer code
suiv. et recommencez cette opération jusqu’à ce que le téléviseur reconnaisse le signal.
8 Sélectionnez un fournisseur de chaînes.
Utiliser l’appareil comme télécommande
Vous pouvez allumer et éteindre le téléviseur, parcourir les chaînes ou régler le volume du téléviseur
en utilisant l’appareil comme une télécommande.
1 Appuyez sur Smart Remote depuis l’écran Applis.
2 Sélectionnez une catégorie en haut de l’écran.
3 Orientez le port infrarouge de l’appareil vers le téléviseur, sélectionnez un programme TV, puis
appuyez sur REGARDER À LA TV.
Le programme sélectionné apparaît sur le téléviseur connecté.
Applications utiles
138
4 Appuyez sur pour changer de chaîne ou régler le volume.
Le volet de télécommande apparaît à l’écran.
Allumer ou éteindre le téléviseur.
Menus de commande du téléviseur
Fonctions supplémentaires
Accéder à des options
supplémentaires.
Définir un rappel de programme
1 Sélectionnez un programme télévisé qui n’est pas actuellement en cours de diffusion.
2 Appuyez sur ME LE RAPPELER et configurez une alarme pour vous rappeler l’heure de début du
programme.
Applications utiles
139
Evernote
Utilisez cette application pour créer, synchroniser et partager des notes multimédia. Vous pouvez
ajouter des balises aux notes ou trier les notes dans un carnet et gérer ainsi efficacement vos idées.
Appuyez sur Evernote depuis l’écran Applis.
Connectez-vous à votre compte Evernote. Si vous n’en possédez pas, créez un compte Evernote.
Suivez les instructions qui s’affichent à l’écran pour procéder à la configuration.
La disponibilité de cette application dépend de votre zone géographique ou de votre
opérateur.
Composer des notes
Vous pouvez créer une note à l’aide d’images, d’enregistrements vocaux et autres pièces jointes.
Depuis l’écran principal Evernote, appuyez sur Nouvelle note.
Lorsque vous rédigez une note, utilisez les options suivantes :
• : définir un rappel pour la note.
• : joindre des fichiers ou utiliser des options supplémentaires.
• : prendre une photo et la joindre à la note.
• : accéder à des options supplémentaires.
Supprimer des notes
Maintenez le doigt appuyé sur une note de la liste, puis appuyez sur Supprimer.
Applications utiles
140
PEN.UP
Utilisez cette application pour publier et partager vos dessins réalisés avec le S Pen.
Appuyez sur PEN.UP depuis l’écran Applis.
Si vous démarrez cette application pour la première fois ou après la réinitialisation de vos données,
appuyez sur S’inscrire ou Connexion en haut de l’écran. Ensuite, suivez les instructions qui
s’affichent à l’écran pour procéder à la configuration.
Publier des œuvres
Depuis l’écran principal PEN.UP, appuyez sur . Ajoutez votre dessin, complétez ses informations,
puis appuyez sur .
Afficher une œuvre
Depuis l’écran principal PEN.UP, sélectionnez un post. Appuyez sur → Enregistrer l’oeuvre pour
télécharger l’œuvre sur votre appareil. L’œuvre est enregistrée dans le dossier PEN.UP. Pour ouvrir le
dossier, ouvrez l’écran Applis et appuyez sur Galerie → → Album → PEN.UP.
Vous pouvez uniquement télécharger des œuvres étiquetées en tant que fond d’écran.
Applications Google
Google fournit des applications de divertissement, de réseaux sociaux et des applications à caractère
professionnel. Vous aurez éventuellement besoin d’un compte Google pour accéder à certaines
applications. Pour en savoir plus, reportez-vous à la section Paramétrer des comptes.
Pour afficher des informations sur une application, ouvrez son écran principal, puis appuyez sur →
Aide.
Certaines applications peuvent ne pas être disponibles ou s’intituler différemment selon
votre zone géographique ou votre opérateur.
Chrome
Recherchez des informations et naviguez dans des pages Web.
Google Mail
Envoyez et recevez des e-mails via le service Google Mail.
Applications utiles
141
Google+
Communiquez et partagez des contenus avec votre famille, vos amis et bien plus encore. Cet espace
vous permet également de sauvegarder vos photos, vidéos, etc.
Maps
Localisez votre position sur une carte, recherchez des adresses et affichez des informations de
localisation.
Play Musique
Découvrez, écoutez et partagez des morceaux de musique à l’aide de votre appareil.
Play Films
Regardez des vidéos enregistrées sur votre appareil et téléchargez divers contenus sur Play Store.
Play Livres
Téléchargez des livres sur Play Store et lisez-les.
Play Kiosque
Consultez les actualités et les magazines qui vous intéressent.
Play Jeux
Téléchargez des jeux sur Play Store et jouez avec d’autres participants.
Drive
Stockez vos données sur le cloud, accédez-y où que vous soyez et partagez-les avec d’autres
personnes.
YouTube
Regardez ou créez des vidéos et partagez-les avec d’autres personnes.
Applications utiles
142
Photos
Gérez vos photos, albums et vidéos enregistrés sur l’appareil et téléchargés sur Google+.
Hangouts
Discutez avec vos amis, séparément ou en groupe, et ajoutez des images, émoticônes et vidéos.
Google
Recherchez rapidement des informations sur Internet ou sur votre appareil.
Recherche vocale
Recherchez rapidement des informations en énonçant un mot-clé ou une phrase.
Paramètres Google
Configurez certaines fonctions proposées par Google.
143
Établir une connexion avec
d’autres appareils
Connexion rapide
Introduction
Recherchez automatiquement les appareils à proximité et établissez rapidement une connexion
avec eux.
• Assurez-vous que la fonction Wi-Fi Direct ou Bluetooth est activée sur les appareils ne
prenant pas en charge la fonction Connexion rapide.
• Les modes de connexion peuvent varier selon le type des appareils connectés ou du
contenu partagé.
• Le nom de l’appareil peut varier selon les appareils Bluetooth avec lesquels il est appairé.
Par exemple, le nom de l’appareil peut s’afficher comme BT MAC.
Établir une connexion à d’autres appareils
Si vous démarrez cette application pour la première fois ou après la réinitialisation de vos données,
suivez les instructions à l’écran pour procéder à la configuration.
1 Ouvrez le volet des raccourcis et appuyez sur Connex. rapide.
À l’ouverture du volet, les fonctions Wi-Fi et Bluetooth sont automatiquement activées et
l’appareil recherche les appareils à proximité.
2 Sélectionnez un appareil dans la liste et établissez une connexion en suivant les instructions à
l’écran.
Les étapes suivantes peuvent varier en fonction de l’appareil connecté.
Pour permettre aux appareils à proximité de rechercher votre appareil et de s’y connecter,
appuyez sur → Définir la visibilité de l’appareil → Rendre l’appareil visible, puis sélectionnez
une option.
Établir une connexion avec d’autres appareils
144
Relancer la recherche d’appareils
Si l’appareil recherché n’apparaît pas dans la liste, recherchez-le.
Appuyez sur et sélectionnez l’appareil dans la liste des appareils détectés.
Désactiver la fonction Connexion rapide
Pour désactiver la fonction Connexion rapide, faites glisser vers le bas depuis le haut de l’écran.
Sinon, appuyez sur .
Partager du contenu
Partagez du contenu avec les appareils connectés.
1 Ouvrez le volet des raccourcis et appuyez sur Connex. rapide.
2 Sélectionnez un appareil dans la liste des appareils détectés.
3 Sélectionnez une catégorie de média.
4 Sélectionnez le contenu à partager, puis appuyez sur Terminé.
Votre appareil envoie le contenu à l’appareil connecté.
Établir une connexion avec d’autres appareils
145
Bluetooth
Introduction
Utilisez la fonction Bluetooth pour échanger des données ou des fichiers multimédia avec d’autres
appareils compatibles Bluetooth.
• Samsung ne peut être tenu responsable de la perte, de l’interception ou du mauvais
usage des données envoyées ou reçues via la fonction Bluetooth.
• Assurez-vous de toujours utiliser des appareils dignes de confiance et correctement
protégés avant de partager ou de recevoir des données. La présence d’obstacles entre les
deux appareils peut réduire le rayon d’action.
• Il est possible que votre appareil ne fonctionne pas avec certains appareils, en particulier
ceux qui n’ont pas été testés ou approuvés par Bluetooth SIG.
• N’utilisez pas la fonction Bluetooth de manière illégale (par exemple, pour le piratage de
fichiers ou l’enregistrement de communications à des fins commerciales).
Samsung ne peut être tenu responsable des répercussions d’une utilisation illégale de la
fonction Bluetooth.
Établir une connexion avec d’autres appareils Bluetooth
1 Depuis l’écran Applis, appuyez sur Paramètres → Bluetooth, appuyez sur le curseur Bluetooth
pour activer la fonction, puis sur Analyser.
Une liste des appareils détectés apparaît.
2 Sélectionnez un appareil auquel vous associer.
Si votre appareil a été appairé par le passé avec un appareil, appuyez sur son nom sans
confirmer le mot de passe.
Si l’appareil auquel vous souhaitez vous associer ne figure pas dans la liste, demandez à ce
que l’option de visibilité soit activée sur l’appareil. Reportez-vous au mode d’emploi de l’autre
appareil.
3 Pour confirmer, acceptez la demande de connexion Bluetooth sur les deux appareils.
Établir une connexion avec d’autres appareils
146
Envoyer et recevoir des données
De nombreuses applications prennent en charge le transfert de données via la fonction Bluetooth.
Vous pouvez partager des données, comme des contacts ou des fichiers multimédia, avec d’autres
appareils Bluetooth. Vous pouvez, par exemple, envoyer une image à un autre appareil.
Envoyer une image
1 Appuyez sur Galerie depuis l’écran Applis.
2 Sélectionnez une image.
3 Appuyez sur → Bluetooth, puis sélectionnez un appareil sur lequel transférer l’image.
Si l’appareil auquel vous souhaitez vous associer ne figure pas dans la liste, demandez à ce que
l’option de visibilité soit activée sur l’appareil.
4 Acceptez la demande de connexion Bluetooth sur l’autre appareil.
Recevoir une image
Lorsqu’un autre appareil vous envoie une image, acceptez la demande d’autorisation Bluetooth.
L’image reçue est enregistrée dans le dossier Download. Pour ouvrir le dossier, ouvrez l’écran Applis
et appuyez sur Galerie → → Album → Download.
Dissocier des appareils Bluetooth
1 Depuis l’écran Applis, appuyez sur Paramètres → Bluetooth.
L’appareil affiche la liste des appareils associés.
2 Appuyez sur à côté du nom de l’appareil à dissocier.
3 Appuyez sur Dissocier.
Établir une connexion avec d’autres appareils
147
Wi-Fi Direct
Introduction
Le Wi-Fi Direct autorise la connexion directe entre des appareils via un réseau Wi-Fi sans passer par
un point d’accès.
Établir une connexion à d’autres appareils
1 Depuis l’écran Applis, appuyez sur Paramètres → Wi-Fi, puis appuyez sur le curseur Wi-Fi pour
activer cette fonction.
2 Appuyez sur → Wi-Fi Direct.
Une liste des appareils détectés apparaît.
Si l’appareil auquel vous souhaitez vous connecter ne figure pas dans la liste, demandez à ce
que la fonction Wi-Fi Direct soit activée sur l’appareil.
3 Sélectionnez un appareil auquel vous connecter.
Pour connecter plusieurs appareils, appuyez sur → Connexion multiple.
4 Acceptez la demande de connexion Wi-Fi Direct sur l’autre appareil pour confirmer.
Envoyer et recevoir des données
Vous pouvez partager des données, comme des contacts ou des fichiers multimédia, avec d’autres
appareils. Vous pouvez, par exemple, envoyer une image à un autre appareil.
Envoyer une image
1 Appuyez sur Galerie depuis l’écran Applis.
2 Sélectionnez une image.
3 Appuyez sur → Wi-Fi Direct, puis sélectionnez un appareil sur lequel transférer l’image.
4 Acceptez la demande de connexion Wi-Fi Direct sur l’autre appareil.
Si les appareils sont déjà connectés, l’image est envoyée à l’autre appareil sans demande de
connexion.
Établir une connexion avec d’autres appareils
148
Recevoir une image
Lorsqu’un autre appareil vous envoie une image, acceptez la demande de connexion Wi-Fi Direct. Si
les appareils sont déjà connectés, l’image est reçue sur votre appareil sans demande de connexion.
L’image reçue est enregistrée dans le dossier Download. Pour ouvrir le dossier, ouvrez l’écran Applis
et appuyez sur Galerie → → Album → Download.
Déconnecter les appareils
1 Depuis l’écran Applis, appuyez sur Paramètres → Wi-Fi.
2 Appuyez sur → Wi-Fi Direct.
L’appareil affiche la liste des appareils connectés.
3 Appuyez sur Terminer la connexion → OK pour déconnecter les appareils.
NFC
Introduction
Votre appareil est équipé d’une fonction qui permet de lire les tags NFC (Near Field Communication)
contenant des informations relatives aux produits. Grâce à cette fonction, vous pouvez également
effectuer des paiements et acheter des tickets de transport ou des billets de spectacle après avoir
téléchargé les applications correspondantes.
La batterie comporte une antenne NFC intégrée. Manipulez l’appareil avec précaution afin
de ne pas endommager l’antenne NFC.
Utiliser la fonction NFC
Utilisez la fonction NFC pour envoyer des images ou des contacts à d’autres appareils et lire des
informations produit. Si vous insérez une carte SIM ou USIM comportant une fonction de paiement,
vous pouvez utiliser l’appareil pour effectuer facilement des paiements.
1 Depuis l’écran Applis, appuyez sur Paramètres → NFC et partage → NFC, puis sur le curseur
NFC pour activer la fonction.
Vous pouvez également ouvrir le volet de paramétrage rapide, puis appuyer sur NFC pour
activer la fonction.
Établir une connexion avec d’autres appareils
149
2 Rapprochez l’antenne NFC, située à l’arrière de votre appareil, d’un tag NFC.
Les informations figurant sur le tag apparaissent à l’écran.
Assurez-vous que l’écran de l’appareil est déverrouillé. Sinon, l’appareil ne pourra pas lire les
tags NFC ou recevoir des données.
Effectuer un achat à l’aide de la fonction NFC
Pour pouvoir effectuer des paiements à l’aide de la fonction NFC, vous devez d’abord vous inscrire
à un service de paiement mobile. Pour vous inscrire ou obtenir plus d’informations sur ce service,
contactez votre opérateur.
1 Depuis l’écran Applis, appuyez sur Paramètres → NFC et partage → NFC, puis sur le curseur
NFC pour activer la fonction.
Vous pouvez également ouvrir le volet de paramétrage rapide, puis appuyer sur NFC pour
activer la fonction.
2 Rapprochez l’antenne NFC, située à l’arrière de votre appareil, du lecteur de carte NFC.
3 Appuyez sur Paiement NFC et sélectionnez une application pour configurer l’application de
paiement par défaut.
La liste des services peut ne pas inclure toutes les applications de paiement disponibles.
Établir une connexion avec d’autres appareils
150
Envoyer des données
Autorisez l’échange de données lorsque vous rapprochez l’antenne NFC de votre appareil de celle
d’un autre appareil NFC.
1 Depuis l’écran Applis, appuyez sur Paramètres → NFC et partage → NFC, puis sur le curseur
NFC pour activer la fonction.
Vous pouvez également ouvrir le volet de paramétrage rapide, puis appuyer sur NFC pour
activer la fonction.
2 Appuyez sur Android Beam ou S Beam, puis sur le curseur Android Beam ou S Beam pour
activer la fonction.
• Android Beam : envoyer des données via la fonction Bluetooth.
• S Beam : envoyer des données via le Wi-Fi Direct. Cette fonction est particulièrement
adaptée aux transferts de données volumineux.
3 Sélectionnez un élément et rapprochez l’antenne NFC de l’autre appareil de l’antenne NFC de
votre appareil.
4 Lorsque l’option Appuyez ici pour transférer apparaît à l’écran, appuyez sur l’écran de l’appareil
pour envoyer l’élément.
• N’envoyez pas de données protégées par des droits d’auteur via S Beam. Vous risqueriez
de violer les lois sur les droits d’auteur. Samsung ne peut en aucun cas être tenu
responsable en cas d’utilisation illégale de données protégées par des droits d’auteur.
• Si les deux appareils tentent d’envoyer simultanément des données, le transfert de
fichiers risque d’échouer.
Établir une connexion avec d’autres appareils
151
Screen Mirroring
Introduction
Utilisez cette fonction pour connecter votre appareil à un grand écran avec le routeur AllShare Cast
ou HomeSync, puis partagez vos contenus.
Appareils compatibles Screen
Mirroring (routeur AllShare
Cast ou HomeSync)
• La disponibilité de cette fonction dépend de votre zone géographique ou de votre
opérateur.
• Selon la connexion réseau, certains fichiers peuvent être mis en mémoire tampon en
cours de lecture.
• Si vous indiquez une bande de fréquence Wi-Fi, il se peut que les routeurs AllShare Cast
ou HomeSync ne soient pas détectés.
Établir une connexion avec d’autres appareils
152
Afficher du contenu sur un téléviseur
Connectez le téléviseur et l’appareil devant utiliser la fonction Screen Mirroring. Pour configurer la
connexion, reportez-vous au mode d’emploi de l’appareil. Vous pouvez, par exemple, afficher du
contenu sur un téléviseur connecté via un routeur AllShare Cast.
1 Connectez l’appareil compatible avec la fonction Screen Mirroring au téléviseur à l’aide d’un
câble HDMI.
2 Sur le téléviseur, sélectionnez un mode de connexion, comme le mode HDMI, pour permettre la
connexion à un appareil externe.
3 Depuis l’écran Applis, appuyez sur Paramètres → NFC et partage → Screen Mirroring.
Une liste des appareils détectés apparaît.
4 Sélectionnez un appareil auquel vous connecter. L’écran de votre appareil apparaît sur l’écran du
téléviseur.
Si vous connectez l’appareil pour la première fois, maintenez le doigt appuyé sur le nom du
routeur figurant dans la liste et saisissez le code PIN indiqué sur l’écran du téléviseur.
5 Ouvrez ou lisez un fichier, puis commandez l’affichage à l’aide des touches de votre appareil.
Interrompre la connexion Screen Mirroring
Depuis l’écran Applis, appuyez sur Paramètres → NFC et partage → Screen Mirroring, puis sur le
curseur Screen Mirroring pour activer la fonction.
• Pour économiser votre batterie, désactivez cette fonction lorsque vous ne l’utilisez pas.
• Si vous lisez des vidéos ou jouez à des jeux sur un téléviseur, sélectionnez un mode TV
approprié afin d’obtenir un résultat optimal.
Établir une connexion avec d’autres appareils
153
MirrorLink
Contrôlez l’application MirrorLink de votre appareil depuis l’écran du tableau de bord d’un véhicule.
Votre appareil est compatible avec les véhicules prenant en charge MirrorLink version 1.1 ou
ultérieure.
Connecter votre appareil à un véhicule via MirrorLink
Lorsque vous utilisez cette fonction pour la première fois, connectez l’appareil à un réseau Wi-Fi ou
mobile.
1 Associez votre appareil à un véhicule via la fonction Bluetooth.
Pour en savoir plus, reportez-vous à la section Établir une connexion avec d’autres appareils
Bluetooth.
2 Connectez votre appareil au véhicule à l’aide d’un câble USB.
Une fois la connexion établie, accédez à l’application MirrorLink de votre appareil depuis l’écran
du tableau de bord.
Interrompre la connexion MirrorLink
Débranchez le câble USB entre votre appareil et le véhicule.
Établir une connexion avec d’autres appareils
154
Utiliser la fonction d’impression mobile
Introduction
Connectez l’appareil à une imprimante à l’aide de la fonction Wi-Fi ou Wi-Fi Direct, puis imprimez des
images ou des documents.
Certaines imprimantes peuvent ne pas être compatibles avec l’appareil.
Ajouter des modules d’extension d’imprimante
Ajoutez des modules d’extension pour les imprimantes que vous souhaitez utiliser.
1 Depuis l’écran Applis, appuyez sur Paramètres → NFC et partage → Impression →
Télécharger le plug-in.
2 Recherchez un plug-in d’imprimante dans Play Store.
3 Sélectionnez un module d’extension et installez-le.
4 Sélectionnez le plug-in d’imprimante, puis appuyez sur le curseur en haut à droite de l’écran
pour activer cette fonction.
L’appareil recherche les imprimantes connectées au même réseau Wi-Fi que lui.
Pour ajouter des imprimantes manuellement, appuyez sur → Ajouter une imprimante → .
Pour modifier les paramètres d’impression, appuyez sur → Paramètres.
Imprimer du contenu
En mode affichage d’une image ou d’un document par exemple, appuyez sur → Imprimer, puis
sélectionnez une imprimante.
155
Gestionnaire d’appareils et de
données
Mettre à jour l’appareil
L’appareil peut être mis à jour avec la version logicielle la plus récente.
Mettre l’appareil à jour sans connexion PC
Grâce au service FOTA (Firmware Over The Air), le logiciel de l’appareil peut être mis à jour sans
passer par une connexion avec un ordinateur.
Depuis l’écran Applis, appuyez sur Paramètres → À propos de l’appareil → Mises à jour logicielles
→ Mettre à jour maintenant.
Cochez la case Mise à jour auto. pour rechercher automatiquement les mises à jour
disponibles. Pour télécharger les mises à jour uniquement si une connexion Wi-Fi est activée,
cochez la case Wi-Fi uniquement.
Mettre l’appareil à jour avec Samsung Kies
Connectez l’appareil à un ordinateur et mettez à jour l’appareil avec la version logicielle la plus
récente.
1 Depuis l’ordinateur, téléchargez la dernière version de Samsung Kies à partir du site Web
Samsung.
2 Depuis l’ordinateur, lancez Samsung Kies et connectez l’appareil à un ordinateur à l’aide d’un
câble USB.
3 Suivez les instructions qui s’affichent à l’écran pour mettre à jour l’appareil.
• Lorsque vous mettez votre appareil à jour, n’éteignez pas l’ordinateur et ne déconnectez
pas le câble USB.
• Lors de la mise à jour, ne connectez pas d’autres appareils multimédia à l’ordinateur. Cela
pourrait interférer avec le processus de mise à jour. Avant de procéder à la mise à jour,
déconnectez les autres appareils multimédia de l’ordinateur.
Gestionnaire d’appareils et de données
156
Transférer des fichiers entre l’appareil et un
ordinateur
Vous pouvez transférer différents types de fichiers (sons, vidéos, images, etc.) de l’appareil vers un
ordinateur, et inversement.
Ne débranchez pas le câble USB de l’appareil lorsqu’un transfert de fichiers est en cours. Cela
risquerait d’entraîner une perte de données ou d’endommager l’appareil.
Il se peut que les appareils ne se connectent pas correctement s’ils le sont via un
concentrateur USB. Branchez directement l’appareil sur le port USB de l’ordinateur.
Connecter l’appareil en tant qu’appareil multimédia
1 Connectez l’appareil à un ordinateur à l’aide du câble USB.
2 Ouvrez le volet des raccourcis, puis appuyez sur Connecté en tant que périphérique
multimédia → Périphérique multimédia (MTP).
Appuyez sur Appareil photo (PTP) si votre ordinateur ne gère pas le protocole MTP (Media
Transfer Protocol) ou ne dispose pas du pilote approprié.
3 Transférez des fichiers entre votre appareil et l’ordinateur.
Connecter l’appareil avec Samsung Kies
Samsung Kies est un logiciel qui permet de gérer vos contenus multimédia et vos informations
personnelles avec des appareils Samsung.
1 Depuis l’ordinateur, téléchargez la dernière version de Samsung Kies à partir du site Web
Samsung.
2 Depuis l’ordinateur, lancez Samsung Kies et connectez l’appareil à un ordinateur à l’aide d’un
câble USB.
3 Transférez des fichiers entre votre appareil et l’ordinateur.
Pour plus d’informations, consultez l’aide de Samsung Kies.
Gestionnaire d’appareils et de données
157
Sauvegarder et restaurer des données
Conservez vos informations personnelles, données d’applications et paramètres en toute sécurité
sur votre appareil. Vous pouvez effectuer une sauvegarde de vos informations importantes sur un
compte de sauvegarde et y accéder ultérieurement. Pour sauvegarder ou restaurer des données,
vous devez vous connecter à votre compte Google ou Samsung.
Utiliser un compte Google
1 Appuyez sur Paramètres depuis l’écran Applis.
2 Appuyez sur Sauvegarder et réinitialiser et cochez la case Sauvegarder mes données.
3 Appuyez sur Compte de sauvegarde et sélectionnez un compte de sauvegarde.
Utiliser un compte Samsung
Depuis l’écran Applis, appuyez sur Paramètres → Comptes → Samsung → Sauvegarder,
cochez les éléments à sauvegarder, puis appuyez sur Sauvegarder maintenant → Sauvegarder.
Pour activer la sauvegarde automatique des données de l’appareil, cochez la case Sauvegarde
automatique.
• Pour restaurer les données à l’aide d’un compte Google, ouvrez l’écran Applis, appuyez
sur Paramètres → Sauvegarder et réinitialiser, puis cochez la case Restauration auto.
Lors de la réinstallation d’applications, les paramètres et données sauvegardés seront
restaurés.
• Pour restaurer les données à l’aide d’un compte Samsung, ouvrez l’écran Applis, puis
appuyez sur Paramètres → Comptes → Samsung → Restaurer. Les données actuelles
sont supprimées de l’appareil afin de restaurer les éléments sélectionnés.
Réinitialiser les données
Vous pouvez supprimer tous les paramètres et toutes les données de l’appareil. Avant de rétablir les
paramètres par défaut, assurez-vous de sauvegarder toutes les données importantes stockées sur
l’appareil. Pour en savoir plus, reportez-vous à la section Sauvegarder et restaurer des données.
Depuis l’écran Applis, appuyez sur Paramètres → Sauvegarder et réinitialiser → Rétablir
param. par défaut → Réinitialiser le périphérique → Supprimer tout. L’appareil redémarre
automatiquement.
158
Paramètres
Introduction
Personnalisez les paramètres de nombreuses fonctions et applications. Vous pouvez personnaliser
votre appareil en configurant divers paramètres.
Configurer les paramètres
Depuis l’écran Applis, appuyez sur Paramètres pour accéder à l’écran des paramètres.
Pour rechercher des paramètres en saisissant des mots clés, appuyez sur .
Vous pouvez changer le mode d'affichage, soit sous forme de listes, soit sous forme
d'onglets. Appuyez sur → Type d’affichage → Affichage Onglet.
PARAMÈTRES RAPIDES
Créez une liste des paramètres fréquemment utilisés.
Appuyez sur → Modifier les paramètres rapides. Sélectionnez les éléments à ajouter ou
désélectionnez les éléments à supprimer, puis appuyez sur Effectué.
Paramètres
159
CONNEXIONS
Wi-Fi
Activez la fonction Wi-Fi pour permettre la connexion à un réseau Wi-Fi et accéder à Internet ou à
d’autres périphériques réseau.
Votre appareil utilise une fréquence non harmonisée et est conçu pour fonctionner dans
tous les pays européens. Au sein de l’Union Européenne, le réseau Wi-Fi peut fonctionner
sans restriction en intérieur, mais pas en extérieur.
1 Depuis l’écran Paramètres, appuyez sur Wi-Fi, puis faites glisser le curseur Wi-Fi pour activer la
fonction.
2 Sélectionnez un réseau dans la liste des réseaux Wi-Fi détectés.
Les réseaux nécessitant un mot de passe sont signalés par une icône en forme de verrou.
3 Appuyez sur Connexion.
Ajouter un réseau Wi-Fi
Si le réseau souhaité n’apparaît pas dans la liste de réseaux Wi-Fi, vous pouvez l’ajouter
manuellement.
1 Appuyez sur Ajouter un réseau Wi-Fi en bas de la liste.
2 Saisissez le nom de réseau dans SSID du réseau.
3 Sélectionnez le type de sécurité.
4 S’il ne s’agit pas d’un réseau ouvert, saisissez le mot de passe, puis appuyez sur Connexion.
Paramètres
160
Utiliser la fonction Réseau intelligent
Utilisez cette fonction pour maintenir une connexion réseau stable lorsque vous naviguez sur des
pages Web, téléchargez du contenu, etc.
Depuis l’écran Paramètres, appuyez sur Wi-Fi, puis cochez la case Réseau intelligent.
L’appareil passe automatiquement du réseau Wi-Fi au réseau mobile lorsque le réseau Wi-Fi actif
est faible ou instable. Lorsque le signal du réseau Wi-Fi redevient fort, l’appareil repasse du réseau
mobile au réseau Wi-Fi.
• Lorsque vous n’utilisez pas le réseau Wi-Fi, désactivez-le afin d’économiser la batterie.
• Une fois que l’appareil s’est connecté à un réseau Wi-Fi, il se reconnecte à ce réseau
chaque fois que ce dernier est disponible sans réclamer de mot de passe. Pour empêcher
l’appareil de se connecter automatiquement au réseau, sélectionnez-le dans la liste des
réseaux et appuyer sur Oublier.
Bluetooth
Activez la fonction Bluetooth pour échanger des informations sur de courtes distances.
Depuis l’écran Paramètres, appuyez sur Bluetooth, puis faites glisser le curseur Bluetooth pour
activer la fonction.
Appuyez sur pour afficher davantage d’options.
Modem et point d’accès mobile
Utilisez l’appareil comme point d’accès mobile pour partager la connexion de données de votre
appareil avec d’autres appareils si aucune connexion Internet n’est disponible. Les connexions
peuvent être effectuées via la fonction Wi-Fi, USB ou Bluetooth.
Depuis l’écran Paramètres, appuyez sur Modem et point d’accès mobile.
L’utilisation de cette fonction peut entraîner des frais supplémentaires.
• Point d’accès mobile : utilisez le point d’accès mobile pour partager la connexion de données
de votre appareil avec des ordinateurs ou d’autres appareils.
• Modem USB : utilisez le modem USB pour partager la connexion de données de votre appareil
avec un ordinateur via le mode USB. Lorsqu’il est connecté à un ordinateur, l’appareil sert de
modem sans fil.
• Modem Bluetooth : utilisez le modem Bluetooth pour partager la connexion de données de
votre appareil avec un ordinateur ou d’autres appareils via la fonction Bluetooth.
Paramètres
161
Utiliser le point d’accès mobile
Utilisez votre appareil comme point d’accès mobile pour partager sa connexion de données avec
d’autres appareils.
1 Depuis l’écran Paramètres, appuyez sur Modem et point d’accès mobile → Point d’accès
mobile.
2 Faites glisser le curseur Point d’accès mobile pour activer la fonction.
L’icône apparaît dans la barre d’état. Les autres appareils peuvent détecter le vôtre dans la
liste de réseaux Wi-Fi.
Pour définir un mot de passe pour le point d’accès mobile, appuyez sur → Configurer le point
d’accès, puis sélectionnez le niveau de sécurité. Saisissez ensuite un mot de passe, puis appuyez
sur Enreg.
3 Sur l’écran de l’autre appareil, recherchez et sélectionnez votre appareil dans la liste des réseaux
Wi-Fi.
4 Sur l’appareil connecté, utilisez la connexion de données de votre appareil pour accéder à
Internet.
Mode Hors-ligne
Désactivez toutes les fonctions sans fil de l’appareil. Vous pouvez uniquement utiliser les services
hors-réseau, c’est-à-dire les fonctions autres que les fonctions d’appel, Wi-Fi et Bluetooth.
Depuis l’écran Paramètres, appuyez sur Mode Hors-ligne.
Utilisation des données
Effectuez un suivi de la quantité de données utilisées et personnalisez les paramètres de limite
d’utilisation des données.
Depuis l’écran Paramètres, appuyez sur Utilisation des données.
• Données mobiles : paramétrez l’appareil pour pouvoir utiliser les connexions de données sur
n’importe quel réseau mobile.
• Définir la limite des données mobiles : configurez une limite d’utilisation des données mobiles.
• Cycle utilisation données : indiquez la date de réinitialisation mensuelle à laquelle effectuer la
vérification de l’utilisation des données entre deux périodes.
Appuyez sur pour afficher davantage d’options.
Paramètres
162
Position
Modifiez les paramètres des informations de localisation.
Depuis l’écran Paramètres, appuyez sur Position, puis faites glisser le curseur Position pour activer la
fonction.
• Mode : sélectionnez une méthode pour recueillir vos données de localisation.
• DEMANDES DE LOCALISATION RÉCENTES : affichez les applications qui requièrent votre
position et la batterie consommée à cet effet.
• SERVICES DE LOCALISATION : affichez les services de localisation utilisés par votre appareil.
• Mes endroits : enregistrez vos endroits favoris à utiliser avec des applications nécessitant des
informations de localisation. Votre appareil fournit les informations et services pertinents en
identifiant les endroits sauvegardés à l’aide des fonctions Maps, Wi-Fi ou Bluetooth.
NFC et partage
Modifiez les paramètres des différentes fonctions de partage.
Depuis l’écran Paramètres, appuyez sur NFC et partage.
• NFC : modifiez les paramètres d’utilisation de la fonction NFC. Pour en savoir plus, reportez-vous
à la section NFC.
• Appareils à proximité : modifiez les paramètres de partage de contenus avec des appareils à
proximité. Tous les appareils doivent être compatibles avec Wi-Fi Direct ou être connectés au
même réseau ou point d’accès Wi-Fi.
• Impression : configurez les paramètres pour les plug-ins d’imprimante installés sur l’appareil.
Vous pouvez rechercher les imprimantes disponibles ou en ajouter une manuellement
pour imprimer des fichiers. Pour en savoir plus, reportez-vous à la section Utiliser la fonction
d’impression mobile.
• Screen Mirroring : activez cette fonction pour partager votre écran avec d’autres personnes.
Pour en savoir plus, reportez-vous à la section Screen Mirroring.
• MirrorLink : utilisez cette fonction pour contrôler l’application MirrorLink de votre appareil
depuis l’écran du tableau de bord d’un véhicule. Pour en savoir plus, reportez-vous à la section
MirrorLink.
Paramètres
163
Plus de réseaux
Personnalisez les paramètres réseaux.
Depuis l’écran Paramètres, appuyez sur Plus de réseaux.
• Download Booster : paramétrez l’appareil pour qu’il télécharge simultanément et plus
rapidement des fichiers faisant plus de 30 Mo via le réseau Wi-Fi et les réseaux mobiles. Un signal
Wi-Fi plus fort offre un débit de téléchargement supérieur.
• La prise en charge de cette fonction dépend de l’appareil.
• Il se peut que des frais supplémentaires vous soient facturés lors du téléchargement de
fichiers via le réseau mobile.
• Lorsque vous téléchargez des fichiers volumineux, l’appareil risque de chauffer. Si
l’appareil dépasse une certaine température, l’application se ferme.
• Si les signaux réseau sont instables, la vitesse et les performances de cette fonction
peuvent s’en trouver affectées.
• Si les débits de transfert de données du Wi-Fi et des réseaux mobiles sont très différents, il
se peut que l’appareil utilise uniquement la connexion la plus rapide.
• Cette fonction prend en charge Hypertext Transmission Protocol (HTTP) 1.1 et Hypertext
Transmission Protocol Secure (HTTPS). La fonction ne peut pas être utilisée avec d’autres
protocoles, comme FTP.
• Application de messagerie par défaut : sélectionnez l’application par défaut à utiliser pour la
messagerie.
• Réseaux mobiles : configurez votre réseau mobile.
• VPN : paramétrez des réseaux privés virtuels (VPN) pour vous y connecter.
APPAREIL
Son
Modifiez les paramètres des différents sons de l’appareil.
Depuis l’écran Paramètres, appuyez sur Son.
• Mode son : configurez le mode sonore à utiliser (vibreur, son ou silencieux).
• Volume : réglez le volume des sonneries d’appel, de la musique et des vidéos, des sons système
et des notifications.
Paramètres
164
• Intensité des vibrations : réglez l’intensité des vibrations émises par l’appareil.
• Sonneries : sélectionnez une sonnerie pour les appels entrants.
• Vibrations : sélectionnez un type de vibreur.
• Notifications : sélectionnez une sonnerie pour les notifications, comme les messages entrants.
• Vibreur et sonnerie : paramétrez l’appareil pour qu’il vibre et émette une sonnerie à chaque
appel entrant.
• Son des touches : paramétrez l’appareil pour qu’il émette un son lorsque vous appuyez sur les
touches du clavier.
• Sélections audibles : paramétrez l’appareil pour qu’il émette un son lorsque vous sélectionnez
une application ou une option sur l’écran tactile.
• Son verrouillage écran : paramétrez l’appareil pour qu’il émette un son lorsque vous verrouillez
ou déverrouillez l’écran tactile.
• Retour tactile : paramétrez l’appareil pour qu’il vibre lorsque vous appuyez sur une touche.
• Son en cas d’appui : paramétrez l’appareil pour qu’il émette un son lorsque vous appuyez sur
une touche.
• Vibreur en cas d’appui : paramétrez l’appareil pour qu’il vibre lorsque vous appuyez sur une
touche.
Affichage et fond d’écran
Modifiez les paramètres d’affichage.
Depuis l’écran Paramètres, appuyez sur Affichage et fond d’écran.
• Luminosité : définissez la luminosité de l’écran.
• Fond d’écran : modifiez les paramètres du fond d’écran pour l’écran d’accueil et l’écran
verrouillé.
• Police : modifiez la taille et le type de police.
• Opération à une main : activez ce mode pour utiliser l’appareil d’une seule main. Pour en savoir
plus, reportez-vous à la section Opération à une main.
• Rotation de l’écran : indiquez si le contenu doit automatiquement pivoter en même temps que
l’appareil.
• Smart Stay : paramétrez l’appareil pour empêcher le rétroéclairage de se désactiver lorsque
vous consultez l’écran.
• Mise en veille de l’écran : définissez le délai à l’issue duquel l’écran doit s’éteindre
automatiquement.
• Mode d’écran : modifiez le mode d’affichage à l’écran.
Paramètres
165
• Tons écran auto. : paramétrez l’appareil pour pouvoir économiser de l’énergie en ajustant la
luminosité de l’écran.
• Écran de veille : paramétrez l’appareil pour pouvoir activer l’économiseur d’écran lorsque
l’appareil est connecté à une station d’accueil ou est en cours de chargement.
• Témoin lumineux : paramétrez l’appareil pour activer ou désactiver le témoin lumineux.
• Durée de l’éclairage des touches : paramétrez la durée de rétroéclairage des touches
Applications récentes et Retour.
• Augmenter sensib. tactile : paramétrez l’appareil pour pouvoir autoriser l’utilisation de l’écran
tactile avec des gants.
Selon la matière des gants que vous portez, certaines commandes peuvent ne pas être
reconnues.
Écran de verrouillage
Modifiez les paramètres de l’écran de verrouillage.
Depuis l’écran Paramètres, appuyez sur Écran de verrouillage.
• Déverrouillage de l’écran : modifiez la fonction de verrouillage sécurisé de l’écran. Les options
suivantes peuvent varier selon la méthode de verrouillage d’écran sélectionnée.
• Afficher les informations : modifiez les paramètres des éléments affichés sur l’écran verrouillé.
• Raccourci Appareil photo : paramétrez l’appareil pour qu’il affiche le raccourci de l’appareil
photo sur l’écran verrouillé.
La disponibilité de cette fonction dépend de votre zone géographique ou de votre
opérateur.
• Action memo sur écran verr. : paramétrez l’appareil pour pouvoir lancer Action memo en
appuyant deux fois sur l’écran verrouillé à l’aide du S Pen tout en maintenant la touche S Pen
appuyée.
• Effet de déverrouillage : sélectionnez un effet à appliquer lorsque vous déverrouillez l’écran.
Paramètres
166
Fenêtres multiples
Activez ou désactivez la fonction Multi-fenêtre.
Depuis l’écran Paramètres, appuyez sur Fenêtres multiples, puis faites glisser le curseur Fenêtres
multiples pour activer la fonction.
• Ouvrir en vue Multi-fenêtre : paramétrez l’appareil pour qu’il active la fonction Multi-fenêtre
lorsque vous ouvrez des fichiers dans les dossiers Mes fichiers, Vidéo ou à partir des pièces
jointes des messages.
• Racc. affich. contextuel : paramétrez l’appareil pour qu’il affiche la liste des applications dans
une fenêtre contextuelle lorsque vous faites glisser le doigt ou le stylet à la diagonale en partant
de l’angle supérieur gauche.
Volet des raccourcis
Modifiez les touches de paramétrage rapide affichées dans le volet des raccourcis.
Depuis l’écran Paramètres, appuyez sur Volet des raccourcis.
S Pen
Modifiez les paramètres d’utilisation du S Pen.
Depuis l’écran Paramètres, appuyez sur S Pen.
• Air Command : paramétrez l’appareil pour qu’il affiche les fonctions Air command lorsque vous
passez le S Pen au-dessus de l’écran en appuyant sur la touche S Pen.
• Air View : activez la fonction Air view pour effectuer diverses opérations à l’aide du S Pen.
• Pointeur : paramétrez l’appareil pour pouvoir afficher le pointeur du S Pen lorsque le S Pen est
placé au-dessus de l’écran.
• Saisie S Pen : paramétrez l’appareil pour afficher l’icône du champ d’écriture manuscrite lorsque
le S Pen passe au-dessus d’un champ de saisie de texte.
• Alertes S Pen : paramétrez l’appareil pour qu’il affiche un message d’alerte et émette une
alarme sonore lorsque l’écran tactile est désactivé et que le S Pen ne se trouve plus dans son
compartiment.
• Désact. détection stylet : configurez l’écran afin qu’il ne réagisse pas à l’insertion ou au retrait
du S Pen.
• Son du S Pen : paramétrez l’appareil pour qu’il émette un son d’écriture lorsque vous écrivez ou
dessinez à l’aide du S Pen.
• Retour vibration du S Pen : paramétrez l’appareil pour qu’il vibre lorsque vous écrivez ou
dessinez à l’aide du S Pen.
Paramètres
167
• Options de retrait : paramétrez l’appareil pour qu’il lance Action memo ou affiche les fonctions
Air command lorsque le S Pen est retiré de son compartiment.
• Son de retrait/insertion : paramétrez l’appareil pour qu’il émette un son lorsque vous insérez ou
retirez le S Pen de son compartiment.
• Vibrat. retrait/insertion : paramétrez l’appareil pour qu’il vibre lorsque vous insérez ou retirez le
S Pen de son compartiment.
Mouvements et gestes
Activez la fonction de détection des mouvements et modifiez les paramètres permettant de
contrôler la détection des mouvements de votre appareil.
Depuis la liste des applications, appuyez sur Mouvements et gestes.
• Appel direct : paramétrez l’appareil pour pouvoir passer un appel vocal en portant l’appareil à
l’oreille lorsque vous consultez le journal d’appels, la liste des messages ou celle des contacts.
• Smart Alert : paramétrez l’appareil pour pouvoir être averti des appels manqués ou des
nouveaux messages lorsque vous le prenez dans la main.
• Muet/pause : paramétrez l’appareil pour désactiver la sonnerie des appels entrants ou des
alarmes lorsque vous recouvrez l’écran avec la paume de votre main ou retournez l’appareil.
• Balayer pour capturer : paramétrez l’appareil pour pouvoir effectuer une capture d’écran en
balayant l’écran avec la main vers la gauche ou vers la droite.
Écran latéral
Modifiez les paramètres d’utilisation de l’écran latéral.
Depuis l’écran Paramètres, appuyez sur Écran latéral.
• Gérer les volets : gérez les volets utilisés sur l’écran latéral. Vous pouvez télécharger des volets
supplémentaires depuis GALAXY Apps.
• Mon espace : créez ou supprimez vos propres volets à utiliser sur l’écran latéral.
Paramètres
168
• Flux d’informations : définissez le délai à l’issue duquel le rétroéclairage de l’écran latéral doit
s’éteindre automatiquement. Vous pouvez également personnaliser les paramètres d’affichage
sur l’écran latéral des informations concernant la bourse, le sport et l’actualité.
• Horloge de nuit : paramétrez l’appareil pour que l’écran latéral serve d’horloge la nuit. Vous
pouvez définir la durée d’activation de l’horloge nocturne.
• Texte de l’écran latéral : saisissez le message à afficher sur l’écran latéral.
• Afficher à gauche : autorisez l’interface à pivoter automatiquement de 180° lorsque vous
tournez l’appareil de 180°.
La disponibilité de cette fonction dépend de votre zone géographique ou de votre
opérateur.
PERSONNALISATION
Comptes
Ajoutez vos comptes Samsung et Google, ou d’autres comptes, afin de les synchroniser.
Depuis l’écran Paramètres, appuyez sur Comptes.
Cloud
Modifiez les paramètres de synchronisation, de sauvegarde et de restauration pour vos comptes
Samsung et Dropbox.
Depuis l’écran Paramètres, appuyez sur Cloud.
Sauvegarder et réinitialiser
Modifiez les paramètres de gestion des paramètres et des données.
Depuis la liste des applications, appuyez sur Sauvegarder et réinitialiser.
• Sauvegarder mes données : paramétrez l’appareil pour pouvoir sauvegarder vos paramètres et
vos données d’application sur le serveur Google.
• Compte de sauvegarde : configurez ou modifiez votre compte de sauvegarde Google.
• Restauration auto. : paramétrez l’appareil pour pouvoir restaurer vos paramètres et vos
données d’application lorsque les applications sont réinstallées.
• Rétablir param. par défaut : restaurez les valeurs par défaut de l’appareil et supprimez toutes
vos données.
Paramètres
169
Mode simplifié
Configurez l’appareil en mode simplifié.
Depuis l’écran Paramètres, appuyez sur Mode simplifié.
• Mode standard : utilisez le mode standard de l’appareil.
• Mode simplifié : utilisez le mode simplifié de l’appareil.
• APPLICATIONS SIMPLIFIÉES : sélectionnez les applications auxquelles appliquer une
présentation simplifiée.
Accessibilité
Utilisez cette fonction pour améliorer l’accessibilité de l’appareil. Pour en savoir plus, reportez-vous à
la section À propos des menus Accessibilité.
Depuis l’écran Paramètres, appuyez sur Accessibilité.
Mode Blocage
Sélectionnez les notifications à bloquer ou paramétrez l’appareil pour qu’il autorise les notifications
provenant des contacts autorisés en Mode blocage.
Depuis l’écran Paramètres, appuyez sur Mode Blocage, puis faites glisser le curseur Mode Blocage
pour activer la fonction.
Mode Privé
Paramétrez l’appareil pour empêcher d’autres personnes d’accéder à votre contenu personnel en
activant le mode Privé. Pour en savoir plus, reportez-vous à la section Mode Privé.
Depuis l’écran Paramètres, appuyez sur Mode Privé, puis faites glisser le curseur Mode Privé pour
activer la fonction.
• Type d’accès mode Privé : configurez ou modifiez la méthode de déverrouillage pour activer le
mode Privé.
• Désactivation automatique : paramétrez l’appareil pour quitter automatiquement le mode
Privé lorsque l’écran est éteint.
Paramètres
170
Lecteur d’empreintes
Enregistrez vos empreintes digitales sur l’appareil pour le sécuriser ou vous connecter à votre
compte Samsung. Pour en savoir plus, reportez-vous à la section Lecteur d’empreintes.
Depuis l’écran Paramètres, appuyez sur Lecteur d’empreintes.
• Gestionnaire d’empreintes : enregistrez ou supprimez des empreintes.
• Modifier MDP de secours : définissez un mot de passe de secours à utiliser si l’appareil ne
reconnaît pas votre empreinte.
• Déverrouillage de l’écran : modifiez la fonction de verrouillage sécurisé de l’écran.
• Connexion Web : paramétrez l’appareil pour qu’il vérifie vos comptes enregistrés à l’aide de vos
empreintes digitales.
• Vérifier le compte Samsung : configurez l’appareil pour qu’il vérifie votre compte Samsung à
l’aide de vos empreintes digitales.
• Payer avec PayPal : configurez l’appareil pour qu’il vérifie votre compte PayPal et autorise les
achats en utilisant vos empreintes digitales.
La disponibilité de cette fonction dépend de votre zone géographique ou de votre
opérateur.
SYSTÈME
Langue et saisie
Modifiez les paramètres de saisie de texte. La disponibilité de certaines options dépend de la langue
sélectionnée.
Depuis l’écran Paramètres, appuyez sur Langue et saisie.
• Langue : sélectionnez la langue d’affichage des menus et des applications.
• Par défaut : sélectionnez le type de clavier à utiliser par défaut pour la saisie de texte.
• Clavier Samsung : modifiez les paramètres du clavier Samsung. Pour accéder aux paramètres,
appuyez sur .
La disponibilité des options dépend de votre zone géographique ou de votre opérateur.
Paramètres
171
• Saisie vocale Google : modifiez les paramètres de saisie vocale. Pour accéder aux paramètres,
appuyez sur . Cochez cette option pour utiliser la saisie vocale.
• Langue : sélectionnez la langue de la reconnaissance de l’écriture manuscrite. Vous pouvez
rechercher les fichiers comportant des parties manuscrites dans la langue sélectionnée.
• Recherche vocale : modifiez les paramètres de recherche vocale.
• Options synthèse vocale : modifiez les paramètres de synthèse vocale.
• Lect. notific. haute voix : paramétrez l’appareil pour qu’il lise les notifications à haute voix en cas
d’appel entrant, de message ou d’événement.
• Vitesse du curseur : réglez la vitesse du curseur d’une souris ou d’un pavé tactile connecté(e) à
l’appareil.
Date et heure
Accédez aux paramètres suivants et modifiez-les afin de contrôler l’affichage de l’heure et de la date.
Depuis l’écran Paramètres, appuyez sur Date et heure.
Si la batterie est entièrement déchargée ou si vous la retirez de l’appareil, l’heure et la date
sont alors réinitialisées.
• Date et heure automatiques : mettez automatiquement à jour l’heure et la date lorsque vous
changez de fuseau horaire.
• Définir la date : réglez la date du jour manuellement.
• Définir l’heure : réglez l’heure manuellement.
• Fuseau horaire auto : paramétrez l’appareil pour pouvoir recevoir des informations sur l’heure
depuis le réseau lorsque vous changez de fuseau horaire.
• Sélectionner le fuseau horaire : réglez le fuseau horaire de votre zone géographique.
• Format 24 heures : affichez l’heure au format 24 heures.
• Format de date : sélectionnez le format de date.
Paramètres
172
Assistance sécurité
Activez les fonctions d’assistance sécurité.
Depuis l’écran Paramètres, appuyez sur Assistance sécurité.
• Mode Urgence : paramétrez l’appareil pour qu’il active le mode Urgence et réduise la
consommation de la batterie en n’utilisant que les fonctions de base, comme le téléphone. Pour
en savoir plus, reportez-vous à la section Mode Urgence.
• Geo News : paramétrez l’appareil pour recevoir des notifications de catastrophe naturelle. Pour
utiliser cette fonction, vous devez télécharger et installer l’application.
• Envoyer des messages d’aide : paramétrez l’appareil pour envoyer des messages d’aide en
appuyant à trois reprises sur la touche Marche/Arrêt. Vous pouvez également envoyer des
enregistrements audio avec votre message au destinataire. Pour en savoir plus, reportez-vous à
la section Envoyer des messages d’aide.
• Gérer les contacts principaux : ajoutez ou modifiez les correspondants à qui envoyer des
messages d’aide.
Accessoires
Modifiez les paramètres des accessoires.
Depuis l’écran Paramètres, appuyez sur Accessoires.
• Son station d’accueil : paramétrez l’appareil pour qu’il émette un son lorsque vous le connectez
à une station d’accueil ou l’en déconnectez.
• Sortie audio : sélectionnez le format de sortie audio à utiliser lorsque vous connectez l’appareil
à des périphériques HDMI. Certains appareils peuvent ne pas prendre en charge les paramètres
de son Surround.
Économie d’énergie
Activez le mode Économie d’énergie et modifiez les paramètres. Pour en savoir plus, reportez-vous à
la section Fonctions d’économie d’énergie.
Depuis l’écran Paramètres, appuyez sur Économie d’énergie.
• Mode Éco. d’énergie : activez le mode Économie d’énergie et modifiez les paramètres.
• Mode Ultra économie d’énergie : paramétrez l’appareil pour prolonger le temps de veille et
réduire la consommation de la batterie en affichant une présentation simplifiée et en autorisant
un accès limité à une application.
Le délai de veille maximum estimé est le temps qu’il faut à la batterie pour se décharger
complètement lorsque l’appareil n’est pas utilisé. Le délai de veille peut varier selon les
paramètres de l’appareil et les conditions d’utilisation.
Paramètres
173
• Charg. rapide : paramétrez l’appareil pour pouvoir utiliser la fonction charge rapide. Pour en
savoir plus, reportez-vous à la section Charge rapide.
• Affich. pourcentage batterie : paramétrez l’appareil pour qu’il affiche l’autonomie restante de la
batterie dans la barre d’état.
Stockage
Affichez les informations de mémoire relatives à l’appareil.
Depuis l’écran Paramètres, appuyez sur Stockage.
Le formatage d’une carte mémoire supprime définitivement toutes les données qui y sont
stockées.
La mémoire interne de votre appareil a une capacité réelle disponible inférieure à la capacité
indiquée, car elle est en partie occupée par le système d’exploitation et les applications
installées par défaut. La capacité restante peut varier lorsque vous mettez à jour l’appareil.
Sécurité
Modifiez les paramètres de sécurité de l’appareil et de la carte SIM ou USIM.
Depuis l’écran Paramètres, appuyez sur Sécurité.
• Admin. de périphérique : affichez les administrateurs de votre appareil. Vous pouvez autoriser
les administrateurs de l’appareil à appliquer de nouvelles règles à celui-ci.
• Sources inconnues : paramétrez l’appareil pour autoriser l’installation d’applications provenant
de sources inconnues.
• Vérifier les applications : paramétrez l’appareil pour vérifier que les applications ne présentent
aucun danger avant de les installer.
• Crypter l’appareil : définissez un mot de passe pour crypter les données enregistrées sur
l’appareil. Vous devez saisir ce mot de passe à chaque fois que vous allumez l’appareil.
Le cryptage des données peut prendre plus d’une heure. Avant de crypter les données,
connectez le chargeur pour recharger complètement la batterie et ne le débranchez pas
tant que le cryptage n’est pas terminé.
• Crypter la carte SD externe : paramétrez l’appareil pour pouvoir crypter les fichiers contenus
sur une carte mémoire.
Votre appareil ne sera pas en mesure de lire les fichiers cryptés si vous le réinitialisez lorsque
ces paramètres sont activés. Désactivez ces paramètres avant de réinitialiser votre appareil.
Paramètres
174
• Contrôle à distance : paramétrez l’appareil pour pouvoir le contrôler à distance via Internet si
vous l’égarez ou s’il vous est dérobé. Pour utiliser cette fonction, vous devez vous connecter à
votre compte Samsung.
• Alerte changement de SIM : activez ou désactivez la fonction de Traçage du mobile qui permet
de localiser l’appareil en cas de perte ou de vol.
• Accéder au site Web : accédez au site Web Traçage du mobile (findmymobile.samsung.com). Ce
site vous permet de repérer et de contrôler un appareil égaré ou dérobé.
• Verr. de réactivation : paramétrez l’appareil pour qu’il requiert votre compte Samsung une fois
l’appareil réinitialisé pour empêcher d’autres personnes de le réactiver.
• Configurer blocage SIM : modifiez les paramètres de verrouillage de la carte SIM.
• Rendre les mots de passe visibles : paramétrez l’appareil pour qu’il affiche votre mot de passe à
mesure que vous le saisissez.
• MàJ de politique sécurité : paramétrez l’appareil pour qu’il vérifie et télécharge les mises à jour
de sécurité.
• Envoyer des rapports de sécurité : paramétrez l’appareil pour qu’il envoie automatiquement
des rapports de sécurité à Samsung.
• Type de stockage : définissez un type de stockage pour les fichiers d’identification.
• Infos d’ident. sécurisées : recourez à des certificats et des identifiants pour sécuriser l’utilisation
des diverses applications.
• Installer depuis stock. périph. : installez les certificats cryptés stockés en mémoire interne.
• Effacer infos identification : effacez les identifiants de sécurité contenus dans l’appareil et
réinitialisez le mot de passe.
Aide
Affichez les informations d’aide pour apprendre à utiliser l’appareil et les applications, ou configurer
des paramètres importants.
Depuis l’écran Paramètres, appuyez sur Aide.
À propos de l’appareil
Accédez aux informations relatives à l’appareil, modifiez le nom de l’appareil ou mettez à jour le
logiciel de l’appareil.
Depuis l’écran Paramètres, appuyez sur À propos de l’appareil.
Paramètres
175
APPLICATIONS
Gestionnaire d’applications
Affichez et gérez les applications installées sur votre appareil.
Depuis l’écran Paramètres, appuyez sur Gestionnaire d’applications.
Applications par défaut
Sélectionnez un paramètre par défaut pour utiliser des applications.
Depuis l’écran Paramètres, appuyez sur Applications par défaut.
Paramètres d’application
Personnalisez les paramètres de l’application.
Depuis l’écran Paramètres, appuyez sur Paramètres d’application.
176
Accessibilité
À propos des menus Accessibilité
Améliorez l’accessibilité grâce à des fonctions qui simplifient l’utilisation de l’appareil pour les
personnes ayant certaines capacités réduites comme une mauvaise vue, des troubles auditifs ou une
dextérité réduite.
Depuis l’écran Applis, appuyez sur Paramètres → Accessibilité.
Utiliser la touche Accueil pour ouvrir les menus
d’accessibilité
Vous pouvez accéder aux menus d’accessibilité suivants en appuyant à trois reprises rapprochées sur
la touche Accueil.
• Accessibilité
• TalkBack
• Couleurs négatives
• Contrôle par interaction
Depuis l’écran Applis, appuyez sur Paramètres → Accessibilité → Accès direct, puis appuyez sur le
curseur Accès direct pour activer la fonction. Ensuite, sélectionnez un menu d’accessibilité à ouvrir
lorsque vous appuyez à trois reprises rapprochées sur la touche Accueil.
Informations orales (TalkBack)
Activer TalkBack
Lorsque vous activez TalkBack, l’appareil lit à haute voix le texte affiché à l’écran ou les fonctions
sélectionnées.
1 Depuis l’écran Applis, appuyez sur Paramètres → Accessibilité → Vue → TalkBack.
2 Faites glisser le curseur TalkBack pour activer la fonction.
Accessibilité
177
3 Appuyez sur OK. L’appareil lance la synthèse vocale.
Lorsque vous utilisez TalkBack, certaines fonctions ne sont pas disponibles.
Désactiver TalkBack
1 Depuis l’écran Applis, appuyez sur Paramètres → Accessibilité → Vue → TalkBack.
2 Appuyez sur le curseur TalkBack, puis appuyez rapidement à deux reprises n’importe où sur
l’écran.
3 Appuyez sur OK, puis appuyez rapidement à deux reprises n’importe où sur l’écran. L’appareil
interrompt la synthèse vocale.
Commander l’écran à l’aide de gestes des doigts
Avec TalkBack, vous pouvez contrôler l’écran d’un simple geste des doigts.
• Parcourir l’écran : placez un doigt sur l’écran, puis déplacez-le pour parcourir l’écran. Maintenez
le doigt appuyé sur un élément afin que l’appareil énonce son nom. Lorsque vous relâchez le
doigt, l’élément sous le doigt est sélectionné.
• Sélectionner des éléments : appuyez sur un élément pour le sélectionner. Vous pouvez
également sélectionner un élément et maintenir le doigt appuyé dessus, puis relâcher le doigt.
• Ouvrir l’élément sélectionné : lorsque les noms des éléments sélectionnés sont énoncés,
relâchez le doigt dès que vous entendez le nom de l’élément souhaité. Appuyez ensuite à deux
reprises rapprochées sur l’écran.
• Sélectionner l’élément précédent : balayez rapidement l’écran du doigt vers le haut ou vers la
gauche.
• Sélectionner l’élément suivant : balayez rapidement l’écran du doigt vers le bas ou vers la droite.
• Parcourir les listes : balayez l’écran avec deux doigts vers le haut ou vers le bas.
• Revenir à la page précédente : balayez l’écran avec deux doigts vers la droite.
• Accéder à la page suivante : balayez l’écran avec deux doigts vers la gauche.
Accessibilité
178
• Déverrouiller l’écran : balayez l’écran avec deux doigts dans n’importe quelle direction au sein de
la zone de verrouillage de l’écran.
• Ouvrir le volet des raccourcis : faites glisser le haut de l’écran vers le bas avec deux doigts.
• Ouvrir le volet de paramétrage rapide : faites glisser le haut de l’écran vers le bas avec trois
doigts.
Vous pouvez configurer les paramètres des gestes des doigts de TalkBack dans Gérer les gestes.
Pour en savoir plus, reportez-vous à la section Configurer les paramètres des gestes des doigts.
Configurer les paramètres des gestes des doigts
Lorsque vous utilisez la fonction TalkBack, vous pouvez vous servir de vos doigts pour effectuer des
opérations, comme revenir à l’écran précédent, ouvrir l’écran d’accueil, etc. Configurez les gestes des
doigts avant de les utiliser.
Configurer les paramètres des gestes verticaux
Vous pouvez utiliser des gestes verticaux décomposés en faisant glisser votre doigt vers le haut et
vers le bas depuis le bas de l’écran, ou inversement.
Depuis l’écran Applis, appuyez sur Paramètres → Accessibilité → Vue → TalkBack → Paramètres
→ Gérer les gestes → Gestes verticaux en deux parties. Sélectionnez ensuite l’une des fonctions
suivantes :
• Déplacement vers le premier et le dernier élément à l’écran : lorsque vous faites glisser
votre doigt vers le haut, puis vers le bas de l’écran, le premier élément en haut de l’écran est
sélectionné. Lorsque vous faites glisser votre doigt vers le bas, puis vers le haut de l’écran, le
dernier élément en bas de l’écran est sélectionné.
• Sélection du niveau de précision pour la lecture : lorsque vous faites glisser votre doigt vers
le haut, puis vers le bas de l’écran, l’unité de lecture change. L’unité de lecture passe à la page,
au paragraphe, à la ligne, au mot, au caractère, puis à une unité par défaut. Lorsque vous faites
glisser votre doigt vers le bas, puis vers le haut de l’écran, l’ordre des unités de lecture est inversé.
Configurer les paramètres des gestes de raccourci
Vous pouvez modifier les gestes de raccourci ou assigner des fonctions à des raccourcis vierges.
Depuis l’écran Applis, appuyez sur Paramètres → Accessibilité → Vue → TalkBack → Paramètres
→ Gérer les gestes. Sélectionnez un geste, puis assignez-lui une fonction.
Accessibilité
179
Mettre TalkBack en pause
Ouvrez le menu contextuel général en faisant glisser le doigt vers le bas, puis vers la droite de l’écran
sans le relâcher. Lorsque vous sélectionnez Mettre en pause les retours en haut à gauche de l’écran,
TalkBack est mis en pause.
Ajouter et gérer des libellés d’image
Vous pouvez assigner des libellés aux images à l’écran. L’appareil énonce les libellés lorsque les
éléments sont sélectionnés. Ajoutez des libellés aux images sans libellé à l’aide du menu contextuel
local.
Ouvrez le menu contextuel local en faisant glisser le doigt vers le haut, puis vers la droite de l’écran
sans le relâcher. Maintenez le doigt appuyé sur l’écran, puis tracez un cercle du doigt autour du menu
pour parcourir les menus. Lorsque vous entendez le nom du menu d’ajout de libellé, relâchez le
doigt pour ajouter des libellés.
Pour afficher les libellés, ouvrez l’écran Applis, puis appuyez sur Paramètres → Accessibilité → Vue
→ TalkBack → Paramètres → Gérer les libellés personnalisés.
Configurer les paramètres de TalkBack
Configurez les paramètres de TalkBack selon vos préférences.
Depuis l’écran Applis, appuyez sur Paramètres → Accessibilité → Vue → TalkBack → Paramètres.
• Volume de la voix : réglez le volume des informations orales.
• Modification du ton : paramétrez l’appareil pour qu’il énonce le texte saisi à l’aide du clavier à
basse tonalité.
• Écho du clavier : paramétrez l’appareil pour qu’il lise à haute voix le mot saisi lorsque vous
appuyez sur la touche espace.
• Parler quand l’écran est éteint : paramétrez l’appareil pour qu’il fournisse des informations
orales lorsque l’écran est éteint.
• Utiliser capteur proxim. : paramétrez l’appareil pour qu’il mette les informations orales en
pause quand vous placez la main sur le capteur en haut de l’appareil.
• Secouer pour démarrer la lecture continue : paramétrez l’appareil pour qu’il énonce le texte
affiché à l’écran lorsque vous secouez l’appareil. Vous pouvez sélectionner différentes options de
vitesses de secousses.
Accessibilité
180
• Dire le n° de l’appelant : paramétrez l’appareil pour qu’il lise à haute voix le nom de l’appelant
lors d’un appel entrant.
• Vibration : paramétrez l’appareil pour qu’il vibre lorsque vous parcourez l’écran du doigt.
• Retour audio : paramétrez l’appareil pour qu’il émette un son lorsque vous commandez l’écran,
comme lorsque vous le parcourez, etc.
• Privilégier le volume de la voix : paramétrez l’appareil pour qu’il baisse le volume du média
lorsqu’il lit un élément à haute voix.
• Volume sonore : réglez le volume du son émis lorsque vous appuyez sur l’écran pour le
contrôler. Cette fonction est disponible lorsque Retour audio est sélectionné.
• Explorer au toucher : paramétrez l’appareil pour qu’il lise à haute voix les éléments sur lesquels
vous appuyez du doigt.
• Faire défiler les listes automatiquement : paramétrez l’appareil pour qu’il parcoure
automatiquement la partie de la liste non affichée à l’écran et qu’il énonce les éléments.
• Appuyer une fois pour sélectionner : paramétrez l’appareil pour qu’il ouvre l’élément
sélectionné lorsque vous appuyez une fois dessus.
• Lancer le didacticiel "Explorer au toucher" : affichez le didacticiel sur l’utilisation de la fonction
Navigation tactile.
• Gérer les gestes : assignez les opérations à effectuer à l’aide des gestes des doigts. Pour en
savoir plus, reportez-vous à la section Configurer les paramètres des gestes des doigts.
• Gérer les libellés personnalisés : affichez les libellés que vous avez ajoutés.
• Réactiver : sélectionnez une méthode de reprise des informations orales si TalkBack est mis en
pause.
• Paramètres du développeur : paramétrez les options de développement d’applications.
Utiliser l’appareil avec l’écran éteint
Paramétrez l’appareil pour qu’il laisse toujours l’écran éteint afin de préserver la confidentialité de
vos données. L’écran ne s’allume pas lorsque vous appuyez sur la touche Accueil ou sur l’écran. Les
fonctions actuellement activées ne sont pas désactivées lorsque l'écran s'éteint.
Depuis l’écran Applis, appuyez sur Paramètres → Accessibilité → Vue, puis cochez la case Ecran
atténué. Vous pouvez activer ou désactiver cette fonction en appuyant à deux reprises sur la touche
Marche/Arrêt.
Accessibilité
181
Lire des mots de passe à haute voix
Paramétrez l’appareil pour qu’il lise le mot de passe à haute voix lorsque vous saisissez le mot de
passe lorsque TalkBack est activé.
Depuis l’écran Applis, appuyez sur Paramètres → Accessibilité → Vue, puis cochez la case Énoncer
mots de passe.
Paramétrer les fonctions de diction de la synthèse vocale
Modifiez les paramètres de diction de la synthèse vocale utilisés lorsque TalkBack est activé, comme
les langues, la vitesse, etc.
Depuis l’écran Applis, appuyez sur Paramètres → Accessibilité → Vue → Options synthèse vocale,
puis utilisez les fonctions suivantes :
• Moteur de synthèse vocale Samsung / Moteur de synthèse vocale Google : sélectionnez un
moteur pour la fonction de diction de la synthèse vocale.
• Vitesse d’élocution : sélectionnez la vitesse de diction de la synthèse vocale.
• Écouter un exemple : écoutez un exemple de texte parlé. Si l’appareil ne parvient pas à lire des
exemples à haute voix, appuyez sur → Installer les données vocales pour télécharger et
installer les données vocales de la fonction de diction de la synthèse vocale.
• État langue par défaut : affichez le statut de la langue actuelle choisie pour la fonction de
synthèse vocale.
Saisir du texte à l’aide du clavier
Pour afficher le clavier, appuyez sur le champ de saisie de texte, puis appuyez à deux reprises
rapprochées n’importe où sur l’écran.
Lorsque vous appuyez du doigt sur le clavier, l’appareil lit à haute voix les touches de caractères sous
votre doigt. Lorsque vous entendez le caractère que vous recherchez, relâchez le doigt de l’écran
pour le sélectionner. Le caractère est saisi et l’appareil lit le texte à haute voix.
Si la fonction Saisie clavier rapide n’est pas activée, relâchez le doigt du caractère que vous
souhaitez, puis appuyez à deux reprises rapprochées sur l’écran. Pour activer la touche de saisie
rapide, depuis l’écran Applis, appuyez sur Paramètres → Accessibilité → Vue, puis cochez la case
Saisie clavier rapide.
Accessibilité
182
Saisir des caractères supplémentaires
Maintenez le doigt appuyé sur une touche du clavier pour saisir les autres caractères disponibles
pour cette touche. Une fenêtre contextuelle indiquant les caractères disponibles s’affiche au-dessus
de la touche. Pour sélectionner un caractère, faites glisser le doigt sur la fenêtre contextuelle jusqu’à
ce que vous entendiez le nom du caractère souhaité, puis relâchez le doigt.
Vue
Modifier la taille de police
Utilisez cette fonction pour modifier la taille de police. Il se peut que, dans certaines applications, il
ne soit pas possible de régler la taille de la police sur Enorme.
Depuis l’écran Applis, appuyez sur Paramètres → Accessibilité → Vue → Taille de police.
Grossir l’écran
Utilisez cette fonction pour grossir l’écran et effectuer un zoom avant sur une zone spécifique.
Depuis l’écran Applis, appuyez sur Paramètres → Accessibilité → Vue → Gestes
d’agrandissement, puis appuyez sur le curseur Gestes d’agrandissement pour activer la fonction.
• Effectuer un zoom avant et arrière : appuyez à trois reprises rapprochées sur l’écran pour
effectuer un zoom avant sur une zone spécifique. Appuyez à trois reprises rapprochées sur
l’écran pour revenir en mode d’affichage normal.
• Parcourir l’écran en le faisant défiler : faites glisser deux doigts ou plus pour faire défiler l’écran
grossi.
• Régler le niveau de zoom : rapprochez deux ou plusieurs doigts sur l’écran grossi ou écartez-les.
Vous pouvez également grossir temporairement l’écran en appuyant dessus à trois reprises
rapprochées et en maintenant la pression. Tout en maintenant l’écran appuyé, faites glisser le doigt
pour parcourir l’écran. Relâchez le doigt pour revenir en mode d’affichage normal.
• Il n’est pas possible d’agrandir les claviers à l’écran.
• Lorsque cette fonction est activée, les performances de certaines applications, comme
Téléphone et Calculatrice, peuvent en être affectées.
Accessibilité
183
Zoom sur survol
Utilisez cette fonction pour grossir un contenu en survolant l’écran avec un stylet.
Depuis l’écran Applis, appuyez sur Paramètres → Accessibilité → Vue → Zoom sur survol, puis
appuyez sur le curseur Zoom sur survol pour activer la fonction.
Faites glisser la barre de pourcentage de zoom vers la gauche ou la droite, ou appuyez sur Taille de
la loupe pour modifier les paramètres de la loupe.
Lorsque cette fonction est activée, vous ne pouvez pas utiliser certaines autres fonctions,
comme Air command, Air view, Saisie S Pen et TalkBack.
Configurer des rappels de notification
Utilisez cette fonction pour vous rappeler des notifications que vous n’avez pas vérifiées selon
l’intervalle défini.
Depuis l’écran Applis, appuyez sur Paramètres → Accessibilité → Vue → Rappel de notification,
puis appuyez sur le curseur Rappel de notification pour activer la fonction.
Pour définir un intervalle entre les alertes, appuyez sur Fréquence de rappel.
Inverser les couleurs d’affichage
Utilisez cette fonction pour améliorer la visibilité de l’écran et aider les utilisateurs à déchiffrer plus
facilement le texte à l’écran.
Depuis l’écran Applis, appuyez sur Paramètres → Accessibilité → Vue, puis cochez la case Couleurs
négatives.
Réglage des couleurs
Utilisez cette fonction pour régler l’affichage des couleurs à l’écran si vous avez des difficultés à
distinguer les couleurs. L’appareil remplace les couleurs par des couleurs plus faciles à reconnaître.
Depuis l’écran Applis, appuyez sur Paramètres → Accessibilité → Vue → Réglage des couleurs,
puis appuyez sur le curseur Réglage des couleurs pour activer la fonction. Suivez les instructions qui
s’affichent à l’écran pour procéder aux réglages des couleurs.
Accessibilité
184
Audition
Configurer une notification par flash
Configurez le flash pour qu’il clignote lorsque vous recevez des appels entrants, de nouveaux
messages ou des notifications.
Depuis l’écran Applis, appuyez sur Paramètres → Accessibilité → Audition, puis cochez la case
Notification par flash.
Couper tous les sons
Configurez l’appareil pour qu’il coupe tous les sons, comme les sons multimédia et la voix du
correspondant en cours d’appel.
Depuis l’écran Applis, appuyez sur Paramètres → Accessibilité → Audition, puis cochez la case
Désactiver tous les sons.
Paramètres des sous-titres
Depuis l’écran Applis, appuyez sur Paramètres → Accessibilité → Audition → Sous-titres Samsung
(CC) ou Sous-titres Google (CC), puis sur le curseur Sous-titres Samsung (CC) ou Sous-titres
Google (CC) pour activer la fonction.
Choisissez une option pour configurer les paramètres des sous-titres.
Régler la balance audio
Configurez l’appareil pour pouvoir régler la balance audio lorsque vous utilisez un casque ou un
écouteur.
1 Connectez un casque ou un écouteur à l’appareil et portez-le.
2 Depuis l’écran Applis, appuyez sur Paramètres → Accessibilité → Audition → Balance audio.
3 Faites glisser la barre de réglage vers la gauche ou vers la droite pour régler la balance audio,
puis appuyez sur Définir.
Accessibilité
185
Audio mono
La sortie mono combine le son stéréo en un seul signal qui est joué dans tous les haut-parleurs des
casques ou écouteurs. Utilisez ce mode en cas de troubles auditifs ou si une oreillette unique est plus
pratique.
Depuis l’écran Applis, appuyez sur Paramètres → Accessibilité → Audition, puis cochez la case
Audio mono.
Détecteurs de son
Paramétrez l’appareil pour qu’il vibre si quelqu’un sonne à la porte ou si un bébé pleure.
Détecteur pleurs bébé
1 Depuis l’écran Applis, appuyez sur Paramètres → Accessibilité → Audition → Détecteurs de
son → Détecteur pleurs bébé, puis appuyez sur le curseur pour activer la fonction.
2 Lisez les instructions à l’écran, puis appuyez sur OK → OK.
3 Appuyez sur pour démarrer le détecteur de pleurs de bébé.
L’appareil vibre dès qu’il détecte un son et l’alerte est enregistrée dans un journal d’alertes.
Détecteur de sonnettes
1 Depuis l’écran Applis, appuyez sur Paramètres → Accessibilité → Audition → Détecteurs de
son → Détecteur de sonnettes, puis appuyez sur le curseur pour activer la fonction.
2 Lisez les instructions à l’écran, puis appuyez sur OK → OK.
3 Appuyez sur pour enregistrer la sonnette de votre porte. Lorsque vous avez terminé
l’enregistrement, appuyez sur Suivant.
4 Appuyez sur et actionnez votre sonnette pour vérifier qu’elle a bien été enregistrée. Une fois,
la sonnette détectée par l’appareil, appuyez sur OK.
Pour changer de sonnette, appuyez sur → Modifier le son de la sonnette.
Une fois le détecteur de sonnette paramétré, appuyez sur pour commencer à l’utiliser. L’appareil
vibre dès qu’il détecte une sonnette.
Accessibilité
186
Modifier les paramètres d’alerte
Appuyez sur → Paramètres pour utiliser les options suivantes :
• Intensité des vibrations : réglez l’intensité des vibrations émises par l’appareil.
• Vibrations : changer de type de vibreur.
• Notification par flash : paramétrez le flash pour qu’il clignote lorsqu’un son est détecté.
Tactile auto
Dès que la fonction tactile est activée, l’appareil vibre lorsque vous lisez de la musique, regardez
des vidéos ou jouez à des jeux. Il vibre également lorsque vous appuyez sur des touches dans les
applications prenant en charge cette fonction.
Depuis l’écran Applis, appuyez sur Paramètres → Accessibilité → Audition, puis cochez la case
Tactile auto.
Il est possible que certaines applications ne soient pas compatibles avec cette fonction.
Dextérité et interaction
Assistant menu
Afficher l’icône de raccourci auxiliaire
Paramétrez l’appareil pour qu’il affiche l’icône du raccourci d’assistance pour accéder à des
applications, fonctions et paramètres. Vous pouvez facilement contrôler l’appareil en accédant aux
menus d’assistance affichés par l’icône.
1 Depuis l’écran Applis, appuyez sur Paramètres → Accessibilité → Dextérité et interaction →
Assistant menu.
2 Appuyez sur le curseur Assistant menu pour activer la fonction, puis sur OK pour activer le
mode appui unique.
L’icône de raccourci auxiliaire apparaît en bas à droite de l’écran.
3 Appuyez sur Main dominante pour déplacer l’icône de raccourci auxiliaire vers un emplacement
pratique.
Accessibilité
187
Accéder aux menus auxiliaires
L’icône de raccourci auxiliaire apparaît sous forme d’icône flottante, ce qui vous permet d’accéder
facilement aux menus auxiliaires depuis n’importe quel écran.
Lorsque vous appuyez sur l’icône de raccourci auxiliaire, l’icône s’agrandit légèrement et les menus
auxiliaires apparaissent sur l’icône. Appuyez sur la flèche haut ou bas pour accéder à d’autres volets
ou balayez l’écran vers le haut ou vers le bas pour sélectionner d’autres menus.
Utiliser le curseur
Depuis le menu auxiliaire, appuyez sur Curseur. Vous pouvez commander l’écran à l’aide de petits
mouvements du doigt sur la zone tactile. Faites glisser le doigt sur la zone tactile afin de déplacer le
curseur. Vous pouvez également appuyer sur l’écran afin de sélectionner les éléments situés sous le
curseur.
Vous pouvez utiliser les options suivantes :
• / : sélectionner un élément ou faire défiler l’écran vers la gauche ou la droite.
• / : faire défiler l’écran vers le haut ou le bas.
• : déplacer la zone tactile vers un autre emplacement.
• : grossir la zone où est placé le curseur.
• : fermer la zone tactile.
Pour modifier les paramètres du curseur, ouvrez l’écran Applis, appuyez sur Paramètres →
Accessibilité → Dextérité et interaction → Assistant menu. Ensuite, personnalisez les paramètres
sous PARAMÈTRES PAVÉ ET CURSEUR.
Utiliser les menus auxiliaires avancés
Configurez l’appareil pour qu’il affiche des menus auxiliaires avancés pour les applications
sélectionnées.
Depuis l’écran Applis, appuyez sur Paramètres → Accessibilité → Dextérité et interaction →
Assistant menu → Assistant plus, appuyez sur le curseur Assistant plus pour activer la fonction,
puis sélectionnez des applications.
Accessibilité
188
Activer l’écran à l’aide de la fonction Air Gesture
Utilisez la fonction Air Gesture pour activer l’écran en agitant la main au-dessus du capteur tout en
haut de l’appareil. Vous pouvez allumer l’écran sans appuyer sur aucune touche. Lorsque vous utilisez
cette fonction, placez l’appareil sur une surface plane ou tenez-le fermement pour l’empêcher de
bouger.
Depuis l’écran Applis, appuyez sur Paramètres → Accessibilité → Dextérité et interaction → Air
wake up, puis appuyez sur le curseur Air wake up pour activer la fonction.
Configurer la durée de l’appui prolongé
Définissez le délai de reconnaissance lorsque vous maintenez le doigt appuyé sur l’écran.
Depuis l’écran Applis, appuyez sur Paramètres → Accessibilité → Dextérité et interaction →
Durée de l’appui prolongé, puis sélectionnez une option.
Contrôle par interaction
Activez le mode contrôle par interaction pour limiter les réactions de l’appareil aux saisies lorsque
vous utilisez des applications.
1 Depuis l’écran Applis, appuyez sur Paramètres → Accessibilité → Dextérité et interaction →
Contrôle par interaction.
2 Faites glisser le curseur Contrôle par interaction pour activer la fonction.
3 Maintenez les touches Accueil et Volume simultanément enfoncées tout en utilisant une
application.
4 Réglez la taille du cadre ou tracez une ligne autour d’une zone que vous souhaitez limiter.
5 Appuyez sur OK.
L’appareil affiche la zone limitée. La zone limitée ne réagit pas si vous appuyez dessus et les
touches physiques de l’appareil sont désactivées.
Pour désactiver le mode contrôle par interaction, maintenez les touches Accueil et Volume
simultanément enfoncées.
Accessibilité
189
Prendre ou mettre fin à des appels
Modifiez la manière de prendre ou de raccrocher un appel.
Depuis l’écran Applis, appuyez sur Paramètres → Accessibilité → Répondre et mettre fin aux
appels.
Sélectionnez la méthode souhaitée.
Utiliser le mode à appui unique
En cas d’alarme ou d’appel entrant, appuyez sur la touche pour arrêter l’alarme ou prendre l’appel au
lieu de faire glisser la touche.
Depuis l’écran Applis, appuyez sur Paramètres → Accessibilité, puis cochez la case Mode pression
unique.
Gérer les paramètres d’accessibilité
Enregistrer les paramètres d’accessibilité dans un fichier
Exportez les paramètres d’accessibilité en cours dans un fichier.
Depuis l’écran Applis, appuyez sur Paramètres → Accessibilité → Gérer l’accessibilité → Importer/
Exporter, puis sélectionnez une option d’importation et appuyez sur OK.
Importer un fichier de paramètres d’accessibilité
Importez un fichier de paramètres d’accessibilité et mettez à jour les paramètres actuels.
Depuis l’écran Applis, appuyez sur Paramètres → Accessibilité → Gérer l’accessibilité → Importer/
Exporter, puis sélectionnez une option d’importation. Sélectionnez un fichier d’importation, puis
appuyez sur OK → OK. Les paramètres d’accessibilité sont mis à jour conformément au fichier
importé.
Partager des fichiers de paramètres d’accessibilité
Partagez des fichiers de paramètres d’accessibilité avec d’autres personnes par e-mail ou via les
fonctions Wi-Fi Direct, Bluetooth, etc.
Depuis l’écran Applis, appuyez sur Paramètres → Accessibilité → Gérer l’accessibilité → Partager
via. Sélectionnez ensuite des fichiers d’accessibilité, puis appuyez sur OK. Sélectionnez un mode de
partage, puis suivez les instructions à l’écran pour partager les fichiers.
190
Dépannage
Avant de contacter un centre de service après-vente Samsung, veuillez essayer de mettre en œuvre
les solutions suivantes. Il est possible que certaines situations ne s’appliquent pas à votre appareil.
Lorsque vous allumez ou utilisez votre appareil, un message vous invite à
effectuer l’une des manipulations suivantes :
• Mot de passe : lorsque la fonction de verrouillage est activée, vous devez saisir le mot de passe
que vous avez défini pour l’appareil.
• Code PIN : lorsque vous utilisez l’appareil pour la première fois ou lorsque vous avez activé le
verrouillage de votre appareil par code PIN, vous devez saisir le code PIN fourni avec la carte SIM
ou USIM. Vous pouvez désactiver cette fonction à l’aide du menu de verrouillage de la carte SIM.
• Code PUK : si vous saisissez un code PIN incorrect à plusieurs reprises, la carte SIM ou USIM est
bloquée. Vous devez alors saisir le code PUK fourni par votre opérateur.
• Code PIN2 : lorsque vous accédez à un menu nécessitant le code PIN2, vous devez saisir le code
PIN2 fourni avec la carte SIM ou USIM. Pour en savoir plus, contactez votre opérateur.
Votre appareil affiche des messages d’erreur de réseau et de service
• Lorsque vous vous trouvez dans une zone de mauvaise réception, vous risquez de perdre
la connexion au réseau. Déplacez-vous et réessayez. Lorsque vous vous déplacez, plusieurs
messages d’erreur peuvent apparaître.
• Certaines options ne sont pas accessibles sans abonnement. Pour en savoir plus, contactez votre
opérateur.
Votre appareil ne s’allume pas
• Lorsque la batterie est entièrement déchargée, il n’est pas possible d’allumer l’appareil. Procédez
au chargement complet de la batterie avant d’allumer l’appareil.
• Il est possible que la batterie ne soit pas correctement installée. Réinsérez la batterie.
• Essuyez les deux contacts dorés et réinsérez la batterie.
Dépannage
191
Mauvaise réaction ou lenteur de l’écran tactile
• Si vous fixez sur l’écran tactile un cache de protection ou tout autre accessoire en option, il est
possible que l’écran ne fonctionne pas correctement.
• Si vous portez des gants, si vos mains ne sont pas parfaitement propres, ou si vous appuyez
sur l’écran avec un objet pointu ou vos ongles, l’écran tactile risque de présenter des
dysfonctionnements.
• L’humidité ou le contact avec l’eau peut provoquer des dysfonctionnements de l’écran tactile.
• Redémarrez votre appareil afin de mettre fin à d’éventuels dysfonctionnements logiciels
temporaires.
• Assurez-vous que vous disposez bien de la version logicielle mise à jour de votre appareil.
• Si l’écran tactile est endommagé ou rayé, contactez un centre de service après-vente Samsung.
Votre appareil se bloque ou est sujet à des erreurs fatales
Si votre appareil ne répond plus ou se bloque, vous devrez éventuellement fermer les applications
ou réinsérer la batterie et réinitialiser votre appareil pour qu’il retrouve un fonctionnement correct. Si
votre appareil se bloque et ne répond plus, maintenez simultanément la touche Marche/Arrêt et la
touche de volume enfoncées pendant plus de 7 secondes afin de redémarrer.
Si vous ne parvenez pas à résoudre le problème à la suite de ces manipulations, procédez à la
réinitialisation des paramètres par défaut. Depuis l’écran Applis, appuyez sur Paramètres →
Sauvegarder et réinitialiser → Rétablir param. par défaut → Réinitialiser le périphérique
→ Supprimer tout. Avant de rétablir les paramètres par défaut de votre appareil, n’oubliez pas
d’effectuer des copies de sauvegarde de toutes les données importantes qui y sont stockées.
Si le problème persiste, contactez un centre de service après-vente Samsung.
Impossible de passer des appels
• Assurez-vous d’être connecté au réseau cellulaire approprié.
• Vérifiez que vous n’avez pas activé la fonction de restriction d’appel pour le numéro de
téléphone que vous composez.
• Vérifiez que vous n’avez pas activé la fonction de restriction d’appel pour le numéro de
téléphone de l’appel entrant.
Vos interlocuteurs ne vous entendent pas
• Vérifiez que le microphone intégré n’est pas recouvert.
• Vérifiez que le microphone est placé suffisamment près de votre bouche.
• Si vous utilisez un casque ou des écouteurs, vérifiez qu’il est correctement branché.
Dépannage
192
Vous percevez un écho lors des appels
Réglez le volume en appuyant sur la touche de volume ou déplacez-vous.
Déconnexions fréquentes du réseau cellulaire ou d’Internet, ou mauvaise
qualité audio
• Assurez-vous que rien n’entrave l’antenne intégrée à l’appareil.
• Lorsque vous vous trouvez dans une zone de mauvaise réception, vous risquez de perdre la
connexion au réseau. Vos problèmes de connectivité peuvent être dus à une panne au niveau
de votre opérateur. Déplacez-vous et réessayez.
• Si vous utilisez votre appareil tout en vous déplaçant, il est possible que les services de réseau
sans fil soient désactivés en raison de problèmes sur le réseau de votre opérateur.
L’icône de la batterie est vide
Le niveau de charge de la batterie est faible. Rechargez ou remplacez la batterie.
La batterie ne se charge pas correctement (pour les chargeurs
homologués Samsung)
• Assurez-vous que le chargeur est correctement branché.
• Si les bornes de la batterie sont sales, la batterie peut ne pas se recharger correctement ou
l’appareil risque de s’éteindre. Essuyez les deux contacts dorés et réessayez de recharger la
batterie.
• Sur certains appareils, la batterie ne peut pas être remplacée par l’utilisateur. Pour remplacer ce
type de batterie, contactez un centre de service après-vente Samsung.
La batterie se décharge de plus en plus rapidement
• Lorsque la batterie est exposée à des températures extrêmes, la charge utile peut être réduite.
• La consommation de la batterie augmente lorsque vous utilisez certaines fonctions, comme les
SMS et MMS, ou certaines applications, comme les jeux ou Internet.
• La batterie est un consommable dont la charge utile diminue avec le temps.
Dépannage
193
L’appareil est chaud au toucher
Lorsque vous utilisez plusieurs applications simultanément ou sur une période prolongée, l’appareil
peut chauffer. Ce phénomène est normal et n’affecte ni la durée de vie, ni les performances de
l’appareil.
Messages d’erreur à l’ouverture de l’appareil photo
Pour utiliser l’appareil photo, votre appareil doit disposer de suffisamment de mémoire et sa batterie
être suffisamment chargée. Si vous obtenez des messages d’erreur lors de l’ouverture de l’appareil
photo, tentez les manipulations suivantes :
• Chargez la batterie ou remplacez-la par une autre entièrement chargée.
• Libérez de la mémoire en transférant des fichiers sur un ordinateur ou en supprimant des
éléments de l’appareil.
• Redémarrez l’appareil. Si les problèmes persistent avec l’appareil photo, contactez un centre de
service après-vente Samsung.
Qualité des photos inférieure par rapport à l’aperçu
• La qualité de vos photos peut varier selon l’environnement et les techniques photographiques
utilisées.
• Si vous prenez des photos avec une luminosité insuffisante, de nuit ou en intérieur, l’image
risque d’être floue.
Messages d’erreur à l’ouverture de fichiers multimédia
Si vous obtenez des messages d’erreur ou si vous ne parvenez pas à lire les fichiers multimédia
lorsque vous les ouvrez sur votre appareil, tentez les manipulations suivantes :
• Libérez de la mémoire en transférant des fichiers sur un ordinateur ou en supprimant des
éléments de l’appareil.
• Assurez-vous que le fichier audio n’est pas protégé par des droits DRM (Gestion des droits
d’auteur). Si le fichier est protégé par des droits DRM, vous devez posséder une licence ou une
clé pour pouvoir le lire.
• Assurez-vous que les formats de fichiers sont pris en charge par l’appareil. Si un format de
fichier n’est pas pris en charge, tel que DivX ou AC3, installez une application le prenant en
charge. Pour confirmer les formats de fichier compatibles avec votre appareil, connectez-vous à
www.samsung.com.
Dépannage
194
• Votre appareil est compatible avec les photos et vidéos capturées avec ce même appareil. Les
photos et vidéos capturées avec d’autres appareils peuvent ne pas s’afficher correctement.
• Votre appareil prend en charge les fichiers multimédia autorisés par votre opérateur ainsi que
les opérateurs, des autres services réseaux. Il est possible que certains contenus circulant sur
Internet, comme des sonneries, vidéos ou fonds d’écran, ne fonctionnent pas correctement.
Impossible de localiser un autre appareil Bluetooth
• Vérifiez que la fonction sans fil Bluetooth est activée sur votre appareil.
• Vérifiez que la fonction sans fil Bluetooth est également activée sur l’appareil auquel vous tentez
de vous connecter.
• Vérifiez que les deux appareils Bluetooth se trouvent bien à l’intérieur du rayon d’action
Bluetooth (10 m maximum).
Si les conseils ci-dessus ne résolvent pas le problème, contactez un centre de service après-vente
Samsung.
Problème de connexion avec un ordinateur
• Assurez-vous que le câble USB utilisé est compatible avec votre appareil.
• Vérifiez que le pilote nécessaire est bien installé sur votre ordinateur et qu’il est à jour.
• Si vous utilisez Windows XP, vérifiez que votre ordinateur est équipé de Windows XP Service
Pack 3 ou de toute version ultérieure.
• Vérifiez que Samsung Kies ou Windows Media Player 10 (ou toute version ultérieure) est installé
sur votre ordinateur.
Votre appareil ne parvient pas à détecter votre position
À certains endroits, comme à l’intérieur d’un bâtiment, les signaux GPS peuvent être faibles. Si cela se
produit, configurez votre appareil pour l’utilisation d’un réseau Wi-Fi ou mobile afin de trouver votre
position.
Dépannage
195
Les données stockées sur l’appareil ont été perdues
Effectuez toujours des copies des données importantes stockées sur votre appareil. Dans le cas
contraire, vous ne pourriez pas récupérer vos données corrompues ou perdues. Samsung ne peut
être tenu responsable de la perte des données stockées sur votre appareil.
Un petit espace est apparu sur le bord externe du boîtier de l’appareil
• Cet espace est une caractéristique de fabrication, et il est possible d’observer un jeu ou une
vibration des pièces.
• Au fil du temps, la friction entre les pièces peut entraîner l’élargissement de cet espace.
Droits d’auteur
Copyright © 2015 Samsung Electronics
Ce mode d’emploi est protégé par les lois internationales sur les droits d’auteur.
Il est interdit de reproduire, distribuer, traduire ou transmettre sous quelque forme et par quelque
moyen que ce soit, électronique ou mécanique, notamment par photocopie, enregistrement ou
stockage dans un système de stockage et de recherche documentaire, tout ou partie de ce mode
d’emploi, sans le consentement préalable écrit de Samsung Electronics.
Marques
• SAMSUNG et le logo SAMSUNG sont des marques déposées de Samsung Electronics.
• Bluetooth® est une marque déposée de Bluetooth SIG, Inc.
• Wi-Fi®, Wi-Fi Protected Setup™, Wi-Fi CERTIFIED Passpoint™, Wi-Fi Direct™, Wi-Fi CERTIFIED™
et le logo Wi-Fi sont des marques déposées de Wi-Fi Alliance.
• Toutes les autres marques et droits d’auteur demeurent la propriété de leurs propriétaires
respectifs.
French. 03/2015. Rev.1.0 www.samsung.com
Mode d’emploi
SM-N910C
SM-N910F
SM-N910H
2
Table des matières
À lire avant utilisation
Démarrage
7 Contenu du coffret
8 Présentation de l’appareil
10 S Pen
13 Installer la carte SIM ou USIM et la
batterie
16 Charger la batterie
19 Utiliser une carte mémoire
21 Allumer et éteindre l’appareil
21 Verrouiller et déverrouiller l’écran
Fonctions de base
22 Utiliser l’écran tactile
25 Disposition de l’écran d’accueil
28 Volets des raccourcis et de paramétrage
rapide
30 Ouvrir des applications
30 Installer ou désinstaller des applications
32 Saisir du texte
34 Capture d’écran
34 Utiliser le dictionnaire
35 Mes fichiers
36 Fonctions d’économie d’énergie
37 Afficher les informations d’aide
Fonctions du S Pen
38 Air Command
39 Action memo
41 Sélection intelligente
42 Image clip
43 Capture
44 S Note
51 Scrapbook
51 Utiliser le S Pen
Reconnaissance des
mouvements et maniabilité
55 Mouvements et gestes
58 Fenêtres multiples
63 Opération à une main
64 Augmenter la sensibilité de l’écran tactile
Personnaliser votre appareil
65 Gérer l’écran d’accueil et les écrans
d’applications
67 Définir un fond d’écran et des sonneries
68 Changer la méthode de verrouillage de
l’écran
69 Mes lieux
72 Lecteur d’empreintes
77 Mode Privé
Table des matières
3
113 Musique
115 Vidéo
117 Internet
118 Enregistreur vocal
120 Horloge
122 Calculatrice
122 Dropbox
123 Flipboard
123 Smart Remote
126 Evernote
127 PEN.UP
127 Applications Google
Établir une connexion avec
d’autres appareils
130 Connexion rapide
132 Bluetooth
134 Wi-Fi Direct
135 NFC
138 Screen Mirroring
140 MirrorLink
141 Utiliser la fonction d’impression mobile
Gestionnaire d’appareils et
de données
142 Mettre à jour l’appareil
143 Transférer des fichiers entre l’appareil et
un ordinateur
144 Sauvegarder et restaurer des données
144 Réinitialiser les données
78 Mode simplifié
79 Transférer des données depuis votre
ancien appareil
80 Paramétrer des comptes
Téléphone et contacts
82 Téléphone
85 Contacts
Messages et e-mails
87 Messages
88 Email
Appareil photo et Galerie
90 Appareil photo
99 Galerie
Assistance sécurité
102 Mode Urgence
103 Envoyer des messages d’aide
Applications utiles
104 Mode Voiture
106 S Finder
107 S Planner
109 S Health
111 S Voice
Table des matières
4
Paramètres
145 Introduction
145 Configurer les paramètres
145 Paramètres rapides
146 Connexions
150 Appareil
154 Personnalisation
156 Système
161 Applications
Accessibilité
162 À propos des menus Accessibilité
162 Utiliser la touche Accueil pour ouvrir les
menus d’accessibilité
162 Informations orales (TalkBack)
168 Vue
170 Audition
172 Dextérité et interaction
175 Prendre ou mettre fin à des appels
175 Utiliser le mode à appui unique
175 Gérer les paramètres d’accessibilité
Dépannage
5
À lire avant utilisation
Veuillez lire attentivement ce mode d’emploi, afin de pouvoir utiliser votre appareil correctement et
en toute sécurité.
• Les descriptions sont basées sur les paramètres par défaut de votre appareil.
• En fonction de votre zone géographique, de votre opérateur ou de la version logicielle, certains
contenus peuvent différer par rapport à votre appareil.
• Les contenus de qualité élevée nécessitant une forte utilisation du processeur et de la RAM
peuvent avoir une incidence sur les performances générales de l’appareil. Les applications en
rapport avec ces contenus peuvent ne pas fonctionner correctement selon les caractéristiques
de l’appareil et les conditions d’utilisation.
• Samsung ne peut être tenu responsable des problèmes de performance relatifs aux applications
fournies par des prestataires autres que Samsung.
• Samsung ne peut être tenu responsable des problèmes de performance ou des incompatibilités
découlant de la modification des paramètres de registre par l’utilisateur. Toute tentative de
personnalisation du système d’exploitation peut entraîner des problèmes de fonctionnement de
l’appareil ou de ses applications.
• Les logiciels, sons, fonds d’écran, images ainsi que les autres contenus multimédia fourni(e)s
avec cet appareil sont concédés sous licence et leur usage est soumis à une utilisation limitée.
L’extraction et l’utilisation de ces éléments à des fins commerciales ou autres constituent
une infraction au regard des lois sur les droits d’auteur. Les utilisateurs sont entièrement
responsables de toute utilisation illégale d’un contenu multimédia.
• Les services de données tels que l’envoi ou la réception de messages, le téléchargement ou
le chargement de données, la synchronisation automatique ou l’utilisation de services de
localisation peuvent occasionner des frais supplémentaires, en fonction de l’offre à laquelle vous
avez souscrit dans le cadre de votre forfait. Pour les transferts de données volumineux, il est
recommandé d’utiliser la fonction Wi-Fi.
• Les applications fournies par défaut avec l’appareil peuvent être modifiées ou ne plus être
disponibles, et ce, sans préavis. Si vous avez des questions à propos d’une application fournie
avec l’appareil, contactez un centre de service après-vente Samsung. Pour les applications
installées par l’utilisateur, contactez les opérateurs.
• Toute modification du système d’exploitation de l’appareil ou installation de logiciels non
officiels peut entraîner des dysfonctionnements et corrompre vos données. Ces actions
constituent des violations de l’accord de licence Samsung et annuleront votre garantie.
À lire avant utilisation
6
Icônes
Avertissement : situations susceptibles de vous blesser ou de blesser autrui
Attention : situations susceptibles d’endommager votre appareil ou d’autres équipements
Avis : informations essentielles concernant l’utilisation de l’appareil, les limites
fonctionnelles de son utilisation, sa charge d’utilisation ou des avis légaux
Remarque : remarques, conseils d’utilisation ou informations complémentaires
7
Démarrage
Contenu du coffret
Vérifiez le contenu du coffret et assurez-vous que tous les éléments suivants sont présents :
• Appareil
• Batterie
• Guide de prise en main rapide
• Les éléments fournis avec l’appareil et les accessoires disponibles peuvent varier en
fonction de votre zone géographique ou de votre opérateur.
• Les accessoires fournis ont été spécialement conçus pour votre appareil et peuvent ne
pas fonctionner avec d’autres appareils.
• L’aspect et les caractéristiques du produit peuvent faire l’objet de modifications sans
préavis.
• Vous pouvez acheter d’autres accessoires auprès de votre revendeur Samsung. Avant
tout achat, assurez-vous qu’ils sont compatibles avec votre appareil.
• Utilisez exclusivement des accessoires homologués par Samsung. L’utilisation
d’accessoires non homologués peut entraîner des problèmes de performances, ainsi que
des dysfonctionnements non couverts par la garantie.
• La disponibilité de l’ensemble des accessoires dépend entièrement des fabricants. Pour
plus d’informations sur la disponibilité des accessoires, consultez le site Web Samsung.
Démarrage
8
Présentation de l’appareil
Microphone
Touche Retour
Connecteur à fonctions
multiples
Capteur de proximité/
luminosité/mouvements
Objectif avant
Touche Marche/Arrêt
Écran tactile
Touche Applications
récentes
Microphone
Touche Accueil (lecteur
d’empreintes)
Témoin lumineux
Haut-parleur
Prise audio 3,5 mm
Antenne principale
Microphone
Touche de volume
Antenne NFC (sur la
batterie)
Objectif arrière
Flash
Cache arrière
Haut-parleur
S Pen
Port infrarouge
Antenne GPS
Démarrage
9
• Ne recouvrez pas la zone autour de l’antenne avec vos mains ou tout autre objet. Cela
peut entraîner des problèmes de connectivité ou décharger la batterie.
• L’utilisation d’une protection d’écran agréée Samsung est recommandée. Les protections
d’écran non agréées peuvent provoquer un dysfonctionnement des capteurs.
• Évitez de mettre l’écran tactile en contact avec de l’eau. L’humidité ou le contact avec l’eau
peut provoquer des dysfonctionnements de l’écran tactile.
Touches
Touche Fonction
Marche/Arrêt
• Maintenir cette touche enfoncée pour allumer ou éteindre
l’appareil.
• Appuyer sur cette touche pour allumer ou verrouiller l’écran.
Applications
récentes
• Appuyer sur cette touche pour ouvrir la liste des applications
récentes.
• Maintenir cette touche enfoncée pour accéder à des options
supplémentaires dans l’écran actuel.
Accueil
• Appuyer sur cette touche pour allumer l’écran lorsqu’il est
verrouillé.
• Appuyer sur cette touche pour revenir à l’écran d’accueil.
• Appuyer deux fois sur cette touche pour lancer l’application S
Voice.
• Maintenir cette touche enfoncée pour lancer la fonction de
recherche Google.
Retour • Appuyer sur cette touche pour revenir à l’écran précédent.
Volume • Appuyer sur cette touche pour régler le volume de l’appareil.
Démarrage
10
S Pen
Touche S Pen
Pointe du S Pen
Pince
Touche/Port Fonctions
Pointe du S Pen
• Utiliser le S Pen pour écrire, dessiner ou réaliser des actions tactiles sur
l’écran.
• Survoler des éléments à l’écran à l’aide du S Pen pour accéder à des
fonctions S Pen supplémentaires comme la fonction Air View.
Touche S Pen
• Survoler l’écran à l’aide du S Pen et appuyer sur la touche S Pen pour
afficher les fonctions Air Command.
• Tout en maintenant la touche S Pen enfoncée, faire glisser le S Pen sur
des éléments pour les sélectionner.
Pince • Ôter la pointe du S Pen à l’aide de la pince pour la remplacer.
Démarrage
11
Retirer le S Pen
Lorsque vous retirez le S Pen de son compartiment, l’appareil lance la fonction Action memo ou
affiche les fonctions Air Command en fonction des paramètres de retrait du S Pen que vous avez
définis.
Pour modifier ce paramètre, ouvrez l’écran Applications et appuyez sur Paramètres → S Pen →
Options de retrait.
Remplacer la pointe du S Pen
Si la pointe est usée, remplacez-la par une pointe neuve.
1 Saisissez fermement la pointe avec la pince, puis tirez.
Démarrage
12
2 Insérez une nouvelle pointe dans le S Pen.
Veillez à ne pas vous pincer les doigts avec la pince.
• Ne réutilisez pas les anciennes pointes. Cela risquerait de provoquer un
dysfonctionnement du S Pen.
• N’exercez pas une pression excessive sur la pointe lorsque vous l’insérez dans le S Pen.
• N’insérez pas l’extrémité arrondie de la pointe dans le S Pen. Cela risquerait
d’endommager le S Pen ou votre appareil.
• Si le S Pen ne fonctionne pas correctement, apportez-le dans un centre de service aprèsvente
Samsung.
• Si vous utilisez le S Pen verticalement sur l’écran, il se peut que l’appareil ne reconnaisse
pas les actions du S Pen. Ne pliez pas et n’exercez pas de pression excessive sur le S Pen
lorsque vous l’utilisez.
• Les touches Applications récentes et Retour peuvent être utilisées avec le S Pen.
• Pour en savoir plus sur le S Pen, consultez le site Web de Samsung.
Démarrage
13
Installer la carte SIM ou USIM et la batterie
Installer la carte SIM ou USIM et la batterie
Insérez la carte SIM ou USIM fournie par votre opérateur, ainsi que la batterie.
• Seules les cartes microSIM sont compatibles avec cet appareil.
• La disponibilité de certains services LTE 4G dépend de votre opérateur. Pour en savoir
plus sur la disponibilité des services, contactez votre opérateur.
1 Retirez le cache arrière.
Veillez à ne pas abîmer vos ongles en retirant le cache arrière.
Évitez de plier ou de déformer excessivement le cache arrière. Vous risqueriez de
l’endommager.
Démarrage
14
2 Insérez la carte SIM ou USIM, puce orientée vers le bas.
• N’introduisez pas de carte mémoire dans le compartiment prévu pour la carte SIM. Si
une carte mémoire venait à se coincer dans le compartiment prévu pour la carte SIM,
apportez l’appareil dans un centre de service après-vente Samsung afin de la faire retirer.
• Veillez à ne pas perdre ou laisser d’autres personnes utiliser votre carte SIM ou USIM.
Samsung ne peut être tenu responsable en cas de dommage ou désagrément résultant
d’une perte ou d’un vol de carte.
3 Insérez la batterie en alignant correctement ses bornes avec celles de l’appareil.
2
1
Démarrage
15
4 Remettez le cache arrière en place.
Retirer la carte SIM ou USIM et la batterie
1 Retirez le cache arrière.
2 Retirez la batterie.
3 Appuyez sur la carte SIM ou sur la carte USIM, puis sortez-la de son compartiment.
Démarrage
16
Charger la batterie
Utiliser le chargeur de batterie
Chargez la batterie avant d’utiliser l’appareil pour la première fois ou lorsque vous ne l’avez pas
utilisé depuis un certain temps.
Utilisez uniquement des chargeurs, des batteries et des câbles homologués par Samsung.
L’utilisation de chargeurs ou de câbles non homologués peut provoquer l’éclatement de la
batterie ou endommager l’appareil.
• Si la batterie est complètement déchargée, vous ne pouvez pas allumer l’appareil,
même si le chargeur est branché. Rechargez la batterie pendant quelques minutes avant
d’allumer l’appareil.
• Si vous utilisez une source d’alimentation autre que l’adaptateur USB, comme un
ordinateur, la vitesse de chargement risque d’être ralentie.
Branchez le câble USB sur l’adaptateur USB, puis la fiche micro-USB sur le connecteur à fonctions
multiples de l’appareil.
Un branchement incorrect du chargeur peut sérieusement endommager l’appareil. Les
dégâts résultant d’une mauvaise utilisation ne sont pas couverts par la garantie.
• Lorsque l’appareil est en cours de chargement, il est possible que l’écran tactile ne
fonctionne pas en raison de l’instabilité de l’alimentation électrique. Dans ce cas,
débranchez le chargeur de l’appareil.
• Il est possible que l’appareil et le chargeur chauffent en cours de chargement. Ce
phénomène est normal et n’affecte ni la durée de vie, ni les performances de l’appareil. Si
la température de la batterie devient trop élevée, le chargement risque de s’interrompre.
• Si l’appareil ne se charge pas correctement, apportez-le, accompagné de son chargeur,
dans un centre de service après-vente Samsung.
Démarrage
17
Lorsque la batterie est complètement chargée, déconnectez l’appareil du chargeur. Pour ce faire,
débranchez d’abord le chargeur de l’appareil, puis de la prise de courant.
Ne retirez jamais la batterie avant d’avoir débranché le chargeur. Ceci pourrait endommager
l’appareil.
• Pour économiser l’énergie, débranchez le chargeur lorsque vous ne l’utilisez pas. Le
chargeur n’étant pas muni d’une touche Marche/Arrêt, vous devez le débrancher de la
prise de courant pour couper l’alimentation. L’appareil doit rester à proximité de la prise
en cours de chargement.
• Le socle de prise de courant doit être installé à proximité du matériel et doit être aisément
accessible.
Réduire la consommation d’énergie de la batterie
Votre appareil est doté de diverses options destinées à économiser l’autonomie de votre batterie.
• Lorsque vous n’utilisez pas l’appareil, désactivez l’écran tactile en appuyant sur la touche
Marche/Arrêt.
• Activez le mode économie d’énergie.
• Fermez toutes les applications fonctionnant inutilement en arrière-plan à l’aide du gestionnaire
de tâches.
• Lorsque vous n’utilisez pas la fonction Bluetooth, désactivez-la.
• Lorsque vous n’utilisez pas la fonction Wi-Fi, désactivez-la.
• Désactivez la fonction de synchronisation automatique des applications.
• Réduisez la durée du rétroéclairage de l’écran.
• Réduisez la luminosité de l’écran.
• Lorsque le niveau de charge est faible, l’icône de la batterie est vide.
• Si vous utilisez simultanément plusieurs applications, des applications réseaux ou des
applications qui nécessitent une connexion à un autre appareil, la batterie se déchargera
rapidement. Pour éviter toute déconnexion du réseau ou perte d’alimentation lors
d’un transfert de données, utilisez toujours ces applications lorsque la batterie est
parfaitement chargée.
• L’appareil peut être utilisé en cours de chargement, mais dans ce cas, le chargement
complet de la batterie risque de prendre plus de temps.
Démarrage
18
Charge rapide
L’appareil est doté d’une fonction de charge rapide intégrée. Vous pouvez utiliser cette fonction pour
charger la batterie plus rapidement si l’appareil ou l’écran est éteint.
À propos de la charge rapide
• La charge rapide utilise la technologie qui permet de recharger une batterie plus rapidement en
augmentant la puissance de charge. L’appareil est compatible avec la fonction de charge rapide
Adaptive de Samsung et l’application Qualcomm Quick Charge 2.0.
• Pour utiliser la charge rapide sur votre appareil, connectez-le à un chargeur de batterie
compatible avec la charge rapide Adaptive ou Quick Charge 2.0.
Augmenter la vitesse de chargement
Pour augmenter la vitesse de chargement, éteignez l’appareil ou son écran lorsque vous chargez la
batterie.
• Si vous chargez la batterie lorsque l’appareil est éteint, l’icône apparaît à l’écran.
• Si vous chargez la batterie lorsque l’appareil est allumé, une fenêtre contextuelle s’affiche pour
vous demander d’éteindre l’écran. Pour augmenter la vitesse de charge, éteignez l’écran.
• Vous ne pouvez pas utiliser la fonction de charge rapide intégrée si vous rechargez la
batterie à l’aide d’un chargeur de batterie standard.
• Si l’appareil chauffe ou si la température de l’air ambiant augmente, il est possible
que la vitesse de chargement diminue automatiquement. Il s’agit d’une condition de
fonctionnement normale pour protéger l’appareil.
Démarrage
19
Utiliser une carte mémoire
Installer une carte mémoire
L’appareil est compatible avec les cartes mémoire d’une capacité allant jusqu’à 128 Go. Selon
le fabricant et le modèle, certaines cartes mémoire peuvent ne pas être compatibles avec votre
appareil.
• Certaines cartes mémoire peuvent ne pas être parfaitement compatibles avec l’appareil.
L’utilisation d’une carte mémoire incompatible peut endommager l’appareil ou la carte
mémoire elle-même et corrompre les données qui y sont stockées.
• Veillez à insérer la carte mémoire du bon côté.
Seules les structures de fichiers FAT et exFAT sont compatibles avec les cartes mémoire de
l’appareil. Lorsque vous insérez une carte mémoire formatée avec une autre structure de
fichiers, l’appareil vous invite à la reformater.
1 Retirez le cache arrière.
2 Insérez la carte mémoire en orientant la puce vers le bas.
3 Remettez le cache arrière en place.
• Une trop grande fréquence des opérations d’effacement et d’écriture réduit la durée de
vie des cartes mémoire.
• Lorsque vous insérez une carte mémoire dans l’appareil, le répertoire de fichiers de la
carte mémoire apparaît dans le dossier Mes fichiers → Carte SD.
Démarrage
20
Retirer une carte mémoire
Avant de retirer la carte mémoire, vous devez au préalable la désactiver pour pouvoir la retirer en
toute sécurité.
Depuis l’écran d’accueil, appuyez sur Applis → Paramètres → Stockage → Démonter la carte SD.
1 Retirez le cache arrière.
2 Retirez la carte mémoire.
3 Remettez le cache arrière en place.
Ne retirez jamais la carte mémoire lorsque l’appareil y enregistre ou lit des informations.
Cela pourrait entraîner une perte ou une corruption des données, ou endommager la carte
mémoire ou l’appareil. Samsung ne peut être tenu responsable en cas de perte de données
résultant d’une utilisation frauduleuse ou en cas de détérioration d’une carte mémoire.
Formater une carte mémoire
Une carte mémoire ayant été formatée sur un ordinateur peut ne pas être compatible avec l’appareil.
Formatez la carte mémoire dans l’appareil.
Depuis l’écran d’accueil, appuyez sur Applis → Paramètres → Stockage → Formater la carte SD →
FORMATER LA CARTE SD → SUPPRIMER TOUT.
Avant de formater la carte mémoire, n’oubliez pas d’effectuer des copies de sauvegarde de
toutes les données importantes qui y sont stockées. La garantie du fabricant ne couvre pas
la perte de données résultant des manipulations de l’utilisateur.
Démarrage
21
Allumer et éteindre l’appareil
Pour allumer l’appareil, maintenez la touche Marche/Arrêt enfoncée pendant quelques secondes.
Si vous allumez l’appareil pour la première fois ou après l’avoir réinitialisé, suivez les instructions
affichées à l’écran pour procéder à sa configuration.
Pour éteindre l’appareil, maintenez la touche Marche/Arrêt enfoncée, puis appuyez sur Éteindre.
Respectez toutes les consignes de sécurité et directives formulées par le personnel
compétent dans les lieux où l’utilisation d’appareils mobiles est interdite, comme par
exemple dans les avions et les hôpitaux.
Verrouiller et déverrouiller l’écran
Lorsque vous appuyez sur la touche Marche/Arrêt, l’écran s’éteint et se verrouille. De même, si vous
n’utilisez pas l’appareil pendant un certain temps, l’écran s’éteint et se verrouille.
Pour déverrouiller l’écran, appuyez sur la touche Marche/Arrêt ou sur la touche Accueil et balayez
l’écran dans n’importe quelle direction.
Vous pouvez modifier la méthode de déverrouillage de l’écran et utiliser des fonctions de sécurité
supplémentaires. Pour en savoir plus, reportez-vous à la section Changer la méthode de verrouillage
de l’écran.
22
Fonctions de base
Utiliser l’écran tactile
• Évitez tout contact de l’écran tactile avec d’autres appareils électriques. Les décharges
électrostatiques peuvent provoquer des dysfonctionnements de l’écran tactile.
• Pour éviter d’endommager l’écran tactile, n’appuyez pas dessus avec un objet pointu et
n’exercez aucune pression excessive avec vos doigts.
• Il se peut que l’appareil ne reconnaisse pas la saisie tactile près des bords de l’écran, hors
de la zone de saisie dédiée.
• Si l’écran tactile reste inactif pendant une période prolongée, des images rémanentes
risquent d’apparaître (ou persistance de l’affichage). Éteignez l’écran tactile lorsque vous
n’utilisez pas l’appareil.
Appuyer
Pour ouvrir une application, sélectionner un élément de menu, appuyer sur une touche à l’écran ou
saisir un caractère sur le clavier à l’écran, appuyez sur l’écran tactile avec un doigt ou avec le S Pen.
Fonctions de base
23
Maintenir appuyé
Pour accéder aux options disponibles, maintenez votre doigt ou le S Pen appuyé sur un élément à
l’écran pendant plus de 2 secondes.
Faire glisser
Pour déplacer un élément, maintenez-y le doigt ou le S Pen appuyé et faites-le glisser vers un nouvel
emplacement.
Appuyer deux fois
Pour effectuer un zoom avant sur une page Web ou une image, appuyez deux fois sur l’écran.
Appuyez de nouveau à deux reprises sur l’écran pour annuler le zoom.
Fonctions de base
24
Balayer
Pour afficher d’autres volets, balayez l’écran d’accueil ou l’écran Applications vers la gauche ou vers la
droite. Pour parcourir une page Web ou une liste d’éléments, telle que celle de vos contacts, balayez
l’écran vers le haut ou le bas.
Écarter et rapprocher les doigts
Pour effectuer un zoom avant sur une page Web, une carte ou une image, placez deux doigts sur
l’écran et écartez-les. Rapprochez-les pour effectuer un zoom arrière.
Fonctions de base
25
Disposition de l’écran d’accueil
Écran d’accueil
L’écran d’accueil est le point de départ pour accéder à toutes les fonctions de l’appareil. Il affiche des
widgets, des raccourcis vers les applications, etc. Les widgets sont de petits outils qui permettent
d’obtenir des informations comme la météo ou l’actualité par exemple.
Pour afficher d’autres volets, balayez l’écran vers la gauche ou la droite ou appuyez sur un volet
miniature en bas de l’écran.
Pour en savoir plus sur la personnalisation de l’écran d’accueil, reportez-vous à la section Gérer l’écran
d’accueil.
Widget
Application Dossier
Volets miniatures
Applications favorites
Icône Applications
Fonctions de base
26
Options de l’écran d’accueil
Maintenez votre doigt appuyé sur une zone vide de l’écran d’acccueil ou rapprochez-y les doigts
pour accéder aux options disponibles. Personnalisez l’écran d’accueil en ajoutant, supprimant ou
réorganisant ses volets. Vous pouvez également définir le fond d’écran d’accueil, lui ajouter des
widgets, etc.
Flipboard Briefing
Utilisez cette fonction pour afficher les tout derniers articles de différentes catégories d’actualités.
Grâce à cette fonction, vous pouvez consulter les actualités qui vous intéressent.
1 Depuis l’écran d’accueil, appuyez sur ou balayez l’écran vers la droite pour ouvrir Flipboard
Briefing.
2 Si vous lancez cette fonction pour la première fois, appuyez sur COMMENCER À LIRE.
3 Pour parcourir les articles de chaque catégorie d’actualités, balayez l’écran vers le haut.
Pour désactiver Flipboard Briefing, maintenez le doigt appuyé sur une zone vide de l’écran
d’accueil. Appuyez ensuite sur Param. écran d’accueil, puis décochez la case Flipboard
Briefing.
Fonctions de base
27
Écran Applications
L’écran Applications affiche les icônes de toutes vos applications, y compris celles récemment
installées.
Depuis l’écran d’accueil, appuyez sur Applis pour ouvrir l’écran Applications. Pour afficher d’autres
volets, balayez l’écran vers la gauche ou la droite ou sélectionnez le point d’un volet en bas de l’écran.
Pour personnaliser l’écran Applications, reportez-vous à la section Gérer l’écran Applications.
Icônes d’informations
Des icônes d’informations peuvent apparaître dans la barre d’état en haut de l’écran. Les icônes
répertoriées dans le tableau ci-dessous sont les plus courantes.
Icône Signification
Aucun signal
Puissance du signal
Itinérance (hors de la zone de service normale)
Réseau GPRS connecté
Réseau EDGE connecté
Réseau UMTS connecté
Réseau HSDPA connecté
Réseau HSPA+ connecté
/ Réseau LTE connecté (pour les modèles prenant en charge le service 4G)
Wi-Fi connecté
Fonction Bluetooth activée
GPS activé
Appel en cours
Appel manqué
Fonction Smart Stay activée
Connecté à un ordinateur
Carte SIM ou USIM absente
Nouveau SMS ou MMS
Fonctions de base
28
Icône Signification
Alarme activée
S Pen détaché
Mode Vibreur activé
Mode Hors-ligne activé
Une erreur s’est produite ou votre attention est nécessaire
Niveau de charge de la batterie
Il se peut que rien ne s’affiche en haut de l’écran dans certaines applications. Pour afficher
des éléments, faites glisser votre doigt de haut en bas de l’écran.
Volets des raccourcis et de paramétrage rapide
Utiliser le volet des raccourcis
Lorsque vous recevez de nouvelles notifications, telles que des messages ou des appels manqués,
des icônes d’information apparaissent en haut de votre écran. Pour en savoir plus sur les icônes,
ouvrez le volet des raccourcis et consultez les détails.
Pour ouvrir le volet des raccourcis, faites glisser la barre d’état vers le bas. Pour refermer le volet des
raccourcis, balayez l’écran de bas en haut.
Fonctions de base
29
Vous pouvez utiliser les fonctions suivantes dans le volet des raccourcis.
Ouvrir les Paramètres.
Lancer la fonction S Finder.
Sélectionner une notification et
exécuter différentes actions.
Effacer toutes les notifications.
Régler la luminosité.
Afficher toutes les touches de
paramétrage rapide.
Activer ou désactiver des options.
Maintenir le doigt appuyé sur une
touche pour afficher les paramètres
détaillés.
Lancer Connex. rapide.
Réorganiser les touches de paramétrage rapide
Pour réorganiser les touches de paramétrage rapide dans le volet des raccourcis, appuyez sur →
, puis maintenez le doigt appuyé sur un élément et faites-le glisser vers un autre emplacement.
Utiliser le volet de paramétrage rapide
Vous pouvez activer ou désactiver certaines fonctions depuis le volet des raccourcis. Pour ce faire,
ouvrez le volet de paramétrage rapide.
Pour ouvrir le volet de paramétrage rapide, faites glisser la barre d’état vers le bas en vous servant de
deux doigts. Une autre solution consiste à appuyer sur l’icône dans le volet des raccourcis. Pour
refermer le volet de paramétrage rapide, balayez l’écran de bas en haut.
Appuyez sur les touches du volet de paramétrage rapide pour activer ou désactiver des fonctions.
Vous pouvez afficher des options de paramétrage plus détaillées en maintenant le doigt appuyé sur
une touche.
Fonctions de base
30
Ouvrir des applications
Depuis l’écran d’accueil ou l’écran Applications, appuyez sur une icône pour ouvrir l’application
correspondante.
Pour ouvrir la liste des applications récemment utilisées, appuyez sur , puis sélectionnez une
fenêtre d’application pour l’ouvrir.
Fermer une application
Appuyez sur → , puis sur FIN à côté d’une application pour la fermer. Pour fermer toutes les
applications en cours d’exécution, appuyez sur FERMER TOUT. Vous pouvez également appuyer sur
→ .
Installer ou désinstaller des applications
Samsung GALAXY Apps
Utilisez cette application pour acheter et télécharger des applications.
Appuyez sur GALAXY Apps depuis l’écran Applications.
La disponibilité de cette application dépend de votre zone géographique ou de votre
opérateur.
Installer des applications
Parcourez les applications par catégorie ou appuyez sur pour rechercher une application à l’aide
d’un mot-clé.
Sélectionnez une application pour en afficher les informations. Pour télécharger des applications
gratuites, appuyez sur Installer. Pour acheter et télécharger des applications payantes, appuyez sur
la touche qui indique le prix de l’application.
Pour modifier les paramètres de mise à jour automatique, appuyez sur → Paramètres →
Mettre à jour les applications automatiquement, puis sélectionnez une option.
Play Store
Utilisez cette application pour acheter et télécharger des applications.
Appuyez sur Play Store depuis l’écran Applications.
Fonctions de base
31
Installer des applications
Parcourez les applications par catégorie ou appuyez sur pour rechercher une application à l’aide
d’un mot-clé.
Sélectionnez une application pour en afficher les informations. Pour télécharger des applications
gratuites, appuyez sur INSTALLER. Pour acheter et télécharger des applications payantes, appuyez
sur le prix et suivez les instructions à l’écran.
Pour modifier les paramètres de mise à jour automatique, appuyez sur → Paramètres
→ Mise à jour automatique des applis, puis sélectionnez une option.
Gérer les applications
Désinstaller ou désactiver des applications
Pour désactiver des applications par défaut, ouvrez l’écran Applications, puis appuyez sur →
Désinstaller/désactiver des applications. L’icône apparaît sur les applications qu’il est possible
de désactiver. Sélectionnez une application, puis appuyez sur DÉSACTIVER.
Pour désinstaller des applications téléchargées, ouvrez l’écran Applications, puis appuyez sur →
Applications téléchargées → → Désinstaller, sélectionnez une application, puis appuyez sur
DÉSINSTALLER. Une autre solution consiste à appuyer, depuis l’écran Applications, sur Paramètres
→ Gestionnaire d’applications, à sélectionner une application, puis à appuyer sur DÉSINSTALLER.
Activer les applications désactivées
Depuis l’écran Applications, appuyez sur → Afficher les applis désactivées, sélectionnez les
applications à activer de nouveau, puis appuyez sur OK. Une autre solution consiste à appuyer,
depuis l’écran Applications, sur Paramètres → Gestionnaire d’applications, sélectionner l’onglet
DÉSACTIVÉ, une application, puis appuyer sur ACTIVER.
Masquer des applications
Vous pouvez masquer les applications que vous ne voulez pas retrouver sur l’écran Applications.
Depuis l’écran Applications, appuyez sur → Masquer applications.
Pour afficher les applications masquées, appuyez sur → Afficher les applications masquées.
• Masquer des applications : masquer des applications uniquement sur l’écran
Applications. Vous pouvez continuer à utiliser les applications masquées.
• Désactiver des applications : désactiver les applications fournies par défaut et ne
pouvant pas être désinstallées de l’appareil. Vous ne pouvez pas utiliser les applications
désactivées.
• Désinstaller des applications : désinstaller des applications téléchargées.
Fonctions de base
32
Saisir du texte
Présentation du clavier
Un clavier apparaît automatiquement lorsque vous saisissez du texte pour envoyer des messages ou
créer des mémos.
La saisie de texte est impossible dans certaines langues. Pour saisir du texte, vous devez
sélectionner une des langues prises en charge.
Passer à la ligne suivante.
Supprimer le caractère précédent.
Saisir des signes de ponctuation.
Saisir des majuscules. Pour saisir
l’ensemble de votre texte en
majuscules, appuyez deux fois sur
cette touche.
Basculer en mode de saisie
manuscrite.
Insérer un espace.
Modifier la langue de saisie
Maintenez le doigt appuyé sur l’icône , appuyez sur → Sélectionner langue de saisie, puis
sélectionnez les langues à utiliser. Si vous sélectionnez au moins deux langues, vous pouvez passer
de l’une à l’autre en balayant la touche d’espace vers la gauche ou vers la droite.
Modifier la disposition du clavier
Maintenez le doigt appuyé sur l’icône , appuyez sur , sélectionnez une langue sous Langues de
saisie, puis sélectionnez la disposition de clavier à utiliser.
Sur le Clavier 3x4, une touche correspond à trois ou quatre caractères. Pour saisir un
caractère, appuyez à plusieurs reprises sur la touche correspondante jusqu’à ce que le
caractère correspondant s’affiche.
Fonctions de base
33
Utiliser les fonctions supplémentaires du clavier
Maintenez le doigt appuyé sur l’icône pour utiliser diverses fonctions. Suivant la dernière
fonction utilisée, d’autres icônes peuvent apparaître à la place de l’icône .
• : saisir du texte en le dictant.
Changer de langue.
Ouvrir le clavier.
Démarrer ou interrompre la saisie
orale de texte.
• : basculer en mode de saisie manuscrite.
Revenir au clavier standard.
Basculer entre le mode numérique
ou le mode lettres.
La disponibilité de cette fonction dépend de votre zone géographique ou de votre
opérateur.
• : ajouter un élément du presse-papier.
• : modifier les paramètres du clavier.
• : insérer des émoticônes.
• : activer le clavier flottant. Vous pouvez déplacer le clavier en faisant glisser l’onglet à un
autre endroit.
Revenir au clavier standard.
Fonctions de base
34
Copier et coller du texte
1 Maintenez le doigt appuyé sur le texte.
2 Faites glisser l’icône ou pour sélectionner le texte voulu, ou appuyez sur Sélect. tout pour
sélectionner l’intégralité du texte.
3 Appuyez sur Copier ou sur Couper.
Le texte sélectionné est copié dans le presse-papier.
4 Placez le curseur à l’endroit où le texte doit être inséré, puis appuyez sur → Coller.
Pour coller le texte préalablement copié, appuyez sur Presse-papier, puis sélectionnez le texte.
Capture d’écran
Vous pouvez effectuer une capture d’écran en cours d’utilisation de l’appareil.
Maintenez simultanément les touches Accueil et Marche/Arrêt enfoncées. L’image est enregistrée
dans le dossier Screenshots. Pour ouvrir le dossier, ouvrez l’écran Applications et appuyez sur
Galerie → → Album → Screenshots. Après avoir réalisé une capture d’écran, vous pouvez
modifier l’image et la partager.
Il existe également d’autres méthodes pour effectuer une copie d’écran. Pour en savoir plus,
reportez-vous à la section Balayer pour capturer.
Cette fonction n’est disponible que pour certaines applications.
Utiliser le dictionnaire
Recherchez des définitions ou traductions de termes en cours d’utilisation de fonctions, par exemple
lorsque vous parcourez des pages Web.
1 Maintenez le doigt appuyé sur un terme que vous souhaitez rechercher.
Si le terme que vous souhaitez rechercher n’a pas été correctement sélectionné, faites glisser les
icônes ou pour sélectionner le texte désiré.
Fonctions de base
35
2 Appuyez sur Dictionnaire.
Si aucun dictionnaire n’est préinstallé sur l’appareil, suivez les instructions à l’écran pour en
installer un.
3 Affichez la définition.
Pour afficher davantage de définitions ou traductions, appuyez sur . Dans la vue détaillée,
appuyez sur pour ajouter le mot à votre liste de termes favoris ou appuyez sur RECHERCHE
WEB pour utiliser le terme comme critère de recherche.
Dans la vue détaillée, appuyez sur pour afficher davantage d’options.
Mes fichiers
Accédez à divers fichiers stockés sur l’appareil ou, par exemple, sur des services de stockage cloud, et
gérez-les.
Utiliser le menu Mes fichiers
Appuyez sur Mes fichiers depuis l’écran Applications.
Accéder à des options
supplémentaires.
Afficher l’historique de
téléchargement.
Rechercher des fichiers ou des
dossiers.
Afficher les fichiers stockés sur
l’appareil.
Afficher les fichiers par catégorie.
Fonctions de base
36
Fonctions d’économie d’énergie
Mode Éco. d’énergie
Préservez l’autonomie de la batterie en limitant les fonctions de l’appareil.
Depuis l’écran Applications, appuyez sur Paramètres → Économie d’énergie → Mode Éco.
d’énergie, puis faites glisser le curseur Mode Éco. d’énergie vers la droite pour activer la fonction.
Une autre solution consiste à ouvrir le volet de paramétrage rapide, puis à appuyer sur Éco. énergie
pour activer cette fonction.
Sélectionnez parmi les options suivantes :
• Restr. données arrière-plan : empêcher les applications exécutées en arrière-plan d’utiliser une
connexion de données mobiles.
• Limiter les performances : limiter diverses options, par exemple en désactivant le rétroéclairage
des touches Applications récentes et Retour.
• Mode Échelle de gris : afficher les couleurs à l’écran en nuances de gris.
Mode Ultra économie d’énergie
Utilisez cette fonction pour prolonger l’autonomie de la batterie. En mode Ultra économie d’énergie,
l’appareil se comporte comme suit :
• Elle affiche les couleurs à l’écran en nuances de gris.
• Il limite le nombre d’applications disponibles et affiche uniquement les applications
sélectionnées.
• Il désactive la connexion de données mobiles quand l’écran s’éteint.
• Il désactive les fonctions Wi-Fi et Bluetooth.
1 Depuis l’écran Applications, appuyez sur Paramètres → Économie d’énergie → Mode Ultra
économie d’énergie, puis faites glisser le curseur Mode Ultra économie d’énergie vers la droite
pour activer la fonction.
Une autre solution consiste à ouvrir le volet de paramétrage rapide, puis à appuyer sur l’option
Ultra éco énergie pour activer cette fonction.
2 Lisez et acceptez les conditions générales, puis appuyez sur OK.
Fonctions de base
37
3 Lisez les informations à l’écran concernant l’utilisation de ce mode, puis appuyez sur ACTIVER.
Pour désactiver le mode Ultra économie d’énergie, appuyez sur → Désact. Ultra économie énergie
→ DÉSACTIV.
Le délai de veille maximum estimé est le temps qu’il faut à la batterie pour se décharger
complètement lorsque l’appareil n’est pas utilisé. Le délai de veille peut varier selon les
paramètres de l’appareil et les conditions d’utilisation.
Afficher les informations d’aide
Pour afficher des informations d’aide et savoir comment utiliser l’appareil et les applications, ouvrez
l’écran Applications, puis appuyez sur Paramètres → Aide.
Pour accéder aux informations d’aide relatives à une application lorsque vous l’utilisez, appuyez sur
→ Aide.
Il est possible que certaines applications ne comportent aucune information d’aide.
38
Fonctions du S Pen
Air Command
Retirez le S Pen de son compartiment ou survolez n’importe quelle partie de l’écran à l’aide du S Pen
et appuyez sur la touche S Pen pour accéder à quatre fonctions particulièrement utiles.
Avec les fonctions Air Command, vous pouvez effectuer différentes actions.
Image clip
Capture
Action memo
Sélection intelligente
• Action memo : écrire rapidement des mémos et leur associer des actions. Vous pouvez
passer des appels, envoyer des messages, effectuer des recherches sur le Web, etc. Pour en
savoir plus, reportez-vous à la section Action memo.
• Sélection intelligente : collecter rapidement du contenu. Pour en savoir plus, reportez-vous
à la section Sélection intelligente.
• Image clip : entourer une zone de l’écran que vous souhaitez enregistrer ou partager. Pour en
savoir plus, reportez-vous à la section Image clip.
• Capture : capturer, modifier et rédiger des mémos sur des captures d’écran, puis les partager.
Pour en savoir plus, reportez-vous à la section Capture.
Si cette fonction n’est pas activée, ouvrez l’écran Applications, appuyez sur Paramètres → S
Pen → Air Command, puis faites glisser le curseur Air Command vers la droite pour activer
la fonction.
Fonctions du S Pen
39
Action memo
Ouvrez le volet Action memo et créez des mémos afin d’exécuter diverses opérations à l’aide
d’informations écrites ou dessinées.
1 Depuis le volet Air command, appuyez sur Action memo.
2 Écrivez ou dessinez un mémo.
3 Appuyez sur .
Le mémo est entièrement sélectionné. Si vous souhaitez utiliser des informations spécifiques du
mémo, appuyez en dehors de la zone sélectionnée pour désélectionner le mémo et tracez un
trait autour des informations pour les utiliser.
Accéder à des options
supplémentaires.
Ajuster la taille du pavé du mémo.
Effacer le mémo.
Rédiger un mémo ou modifier la
couleur du crayon.
Modifier le mémo sous forme de
fichier S Note.
Fonctions disponibles pour le
mémo sélectionné
Sélectionner un texte saisi.
Enregistrer le mémo.
Ignorer le mémo.
Ajouter le mémo comme widget
sur l’écran d’accueil.
Fonctions du S Pen
40
4 Sélectionnez une application à utiliser avec les informations de mémo sélectionnées.
L’application sélectionnée est lancée depuis Action memo.
Rechercher un
emplacement.
Créer une tâche.
Envoyer un message.
Créer un contact.
Passer un appel.
Effectuer des recherches sur
le Web.
Envoyer un e-mail.
Afficher des mémos
Depuis l’écran Action memo, appuyez sur → Afficher la liste des notes d’action. Sélectionnez un
mémo à afficher et modifiez-le.
Ajouter des widgets Action memo à l’écran d’accueil
Après avoir composé un mémo, maintenez le doigt appuyé sur , puis faites glisser le mémo jusqu’à
un emplacement vide de l’écran d’accueil. Un widget Action memo est ajouté à l’écran d’accueil et
vous pouvez afficher et modifier le mémo.
Modifier un mémo sous forme de fichier S Note
Lorsque vous rédigez un mémo, appuyez sur pour ouivrir S Note et utilisez cette application pour
modifier le mémo. La couleur de crayon utilisée dans Action memo est appliquée dans S Note.
Fonctions du S Pen
41
Sélection intelligente
Collectez du contenu figurant sur l’écran à l’aide du S Pen. Vous pouvez collecter des contenus
depuis des pages Web, ainsi que des contenus audio ou vidéo en cours de lecture.
1 Lorsque vous trouvez un contenu que vous souhaitez conserver, comme une portion de page
Web, ouvrez le volet Air command et appuyez sur Sélection intelligente.
2 Faites glisser le S Pen sur le contenu que vous souhaitez collecter.
Enregistrer dans
Scrapbook
Partager via
Collecter
3 Choisissez une option à utiliser avec l’élément collecté.
• : enregistrer l’élément dans Scrapbook.
• : partager l’élément avec d’autres personnes.
• : extraire du texte de l’élément. Vous pouvez copier le texte extrait dans le presse-papiers
ou l’insérer dans des messages, notes, etc.
Extraire du texte.
• : enregistrer l’élément dans la liste des éléments collectés afin de recueillir davantage
d’éléments.
Fonctions du S Pen
42
Collecter plusieurs éléments
Appuyez sur pour ajouter du contenu à votre liste d’éléments collectés afin de l’utiliser
ultérieurement. Pour recueillir davantage de contenu, appuyez sur dans la fenêtre contextuelle
des éléments collectés.
Pour afficher les éléments collectés, appuyez sur la fenêtre contextuelle correspondante. Vous
pouvez partager, supprimer ou enregistrer plusieurs éléments simultanément. Pour sélectionner
un seul élément de la liste des éléments collectés, maintenez votre doigt appuyé sur l’élément en
question.
Pour supprimer les éléments collectés, maintenez votre doigt appuyé sur la fenêtre
contextuelle des éléments collectés, puis faites-la glisser jusqu’à l’option Supprimer en haut
de l’écran.
Image clip
Utilisez le S Pen pour dessiner une forme autour de la zone à enregistrer ou partager. Vous pouvez
rogner une partie de l’image.
1 Lorsque vous trouvez un contenu que vous souhaitez conserver, comme une portion d’image,
ouvrez le volet Air command et appuyez sur Image clip.
2 Tracez un trait autour d’une zone pour la sélectionner à l’aide du S Pen.
Remodelez la zone sélectionnée en choisissant une icône de forme dans la barre d’outils ou
appuyez sur pour remodeler automatiquement la zone sélectionnée.
Fonctions du S Pen
43
3 Choisissez une option à utiliser avec la zone sélectionnée.
• : enregistrer la zone sélectionnée dans Scrapbook.
• : partager la zone sélectionnée avec d’autres personnes.
Capture
Effectuez des captures d’écran pour écrire ou dessiner dessus.
1 Lorsque vous trouvez un contenu que vous souhaitez capturer, comme une portion de page
Web, ouvrez le volet Air command et appuyez sur Capture.
L’écran affiché est automatiquement capturé et la barre d’outils d’édition apparaît à l’écran.
2 Rédigez un mémo sur la capture d’écran.
3 Choisissez une option à utiliser avec la capture d’écran.
• : partager la capture d’écran avec d’autres personnes.
• : enregistrer la capture d’écran. Pour afficher la capture d’écran enregistrée, ouvrez l’écran
Applications et appuyez sur Galerie → → Album → Screenshots.
Cette fonction n’est disponible que pour certaines applications.
Fonctions du S Pen
44
S Note
Introduction
Créez des notes personnalisées en enregistrant ce qui vous vient à l’esprit. Vous pouvez insérer des
fichiers multimédia et créer des notes photographiques.
Lancer S Note
1 Appuyez sur S Note depuis l’écran Applications.
Vous pouvez également, depuis l’écran d’accueil, appuyer sur le widget S Note.
2 Lisez les informations à l’écran concernant l’application, puis appuyez sur SUIVANT.
3 Sélectionnez des styles de couverture, puis appuyez sur SUIVANT.
4 Sélectionnez un modèle de note par défaut, puis appuyez sur SUIVANT.
5 Sélectionnez un compte avec lequel synchroniser vos notes, puis appuyez sur DÉBUT.
Si vous n’êtes pas connecté(e) au compte sélectionné, suivez les instructions à l’écran pour vous
y connecter.
Si vous synchronisez vos notes avec un compte, vous pouvez les afficher sur d’autres appareils
en enregistrant le compte sur ces appareils.
Fonctions du S Pen
45
Utiliser le widget S Note
Vous pouvez lancer certaines fonctions S Note directement depuis le widget S Note.
Depuis l’écran d’accueil, appuyez sur une icône du widget S Note.
Lancer S Note. Insérer un mémo vocal.
Créer une note en mode de
saisie manuscrite.
Créer une note
photographique
(Photo Note).
Créer une note en mode
texte.
Créer des notes
1 Appuyez sur S Note depuis l’écran Applications.
Vous pouvez également, depuis l’écran d’accueil, appuyer sur le widget S Note.
2 Appuyez sur .
3 Composez une note.
Appuyez sur pour écrire ou dessiner à l’écran ou sur pour saisir du texte à l’aide du clavier.
Mode Saisie manuscrite
Mode gomme Sauveg.
Style du texte
Annuler/Recommencer
Mode de sélection
Afficher davantage d'options
Photo Note
S Pen et doigt/S Pen uniquement
Ajouter une page
Fonctions du S Pen
46
Modifier les paramètres du crayon
Lorsque vous écrivez ou dessinez à l’écran, appuyez une fois sur pour modifier le type de crayon,
l’épaisseur du trait ou la couleur de l’encre.
Ouvrir le profil de crayon prédéfini.
Enregistrer les paramètres en cours
comme profil de crayon.
Modifier l’épaisseur de la ligne.
Modifier la couleur du crayon.
Changer de type de crayon.
Sélectionner une nouvelle couleur à
l’aide de la palette.
Stylo-plume Stylo de calligraphie
Utiliser la gomme
1 Appuyez sur .
2 Appuyez sur une zone à effacer.
Le trait entier de la zone est effacé. La gomme peut effacer votre S Note trait par trait.
• Pour effacer uniquement la zone au contact du S Pen, appuyez à nouveau sur et décochez
la case Eff. par trait. Vous pouvez régler la taille de la gomme en faisant glisser la barre de
réglage de la taille.
• Pour effacer la note, appuyez sur EFF. TOUT.
Même avec une gomme plus petite, il est possible que vous ne puissiez pas effacer
précisément la partie que vous souhaitez supprimer.
Fonctions du S Pen
47
Modifier des notes manuscrites
Modifiez les notes manuscrites à l’aide de différentes options d’édition, comme couper, déplacer,
redimensionner ou transformer.
1 Lorsque la note comporte une entrée manuscrite ou dessinée, appuyez sur .
2 Appuyez sur l’entrée ou tracez une ligne autour de celle-ci pour la sélectionner et la modifier.
Pour déplacer l’entrée vers un autre emplacement, sélectionnez-la, puis faites-la glisser vers un
nouvel emplacement.
Pour redimensionner l’entrée, sélectionnez-la, puis faites glisser les contours du cadre qui
l’entoure.
3 Utilisez l’une des options suivantes :
• : modifier les propriétés de l’entrée, telles que sa présentation, sa taille, sa couleur ou son
épaisseur.
• : affiner ou convertir l’entrée manuscrite ou dessinée.
• : couper l’entrée. Pour la coller à un autre emplacement, maintenez le doigt appuyé sur
l’emplacement, puis appuyez sur Coller.
• : copier l’entrée. Pour la coller à un autre emplacement, maintenez le doigt appuyé sur
l’emplacement, puis appuyez sur Coller.
• : supprimer l’entrée.
Mode manuscrit agrandi
Appuyez sur → Aff. note agrandie et faites glisser le cadre agrandi vers une zone. La zone du
cadre agrandi apparaît dans la fenêtre agrandie en bas de l’écran. Vous pouvez saisir ou corriger avec
précision la zone manuscrite.
Fonctions du S Pen
48
Enregistrer des esquisses
Vous pouvez enregistrer vos actions tout en composant une note.
1 Appuyez sur → Enregistrer esquisse.
2 Appuyez sur et écrivez ou dessinez une note.
Vos actions sont enregistrées en temps réel.
3 Pour arrêter l’enregistrement, appuyez de nouveau sur .
Appuyez sur pour afficher l’enregistrement.
Créer des notes photographiques (Photo Note)
Créez des notes en prenant des photos de contenus, comme du texte manuscrit ou des dessins. Vous
pouvez appliquer l’effet Photo Note afin de faciliter l’affichage du texte sur une photo en supprimant
l’arrière-plan.
Utiliser le mode automatique
1 Depuis l’écran Applications, appuyez sur S Note → → .
Une autre solution consiste, depuis l’écran d’accueil, à appuyer sur dans le widget S Note.
2 Positionnez l’élément à l’intérieur de l’écran d’aperçu.
Activer ou désactiver le flash.
Élément détecté
Ouvrir la Galerie.
Modifier le mode de prise de vue.
Afficher ou masquer les lignes
directrices de l’objectif.
Prendre une photo.
Fonctions du S Pen
49
3 Lorsque le cadre entourant l’élément devient bleu, appuyez sur pour prendre une photo.
L’appareil applique automatiquement l’effet Photo Note et l’insère dans une S Note.
4 Modifiez la note.
Avec l’effet Photo Note
Sans l’effet Photo Note
Utiliser le mode Manuel
1 Sur l’écran d’aperçu de la note photographique, appuyez sur pour passer en mode manuel.
2 Pour prendre une photo, appuyez sur . Vous pouvez également appuyer sur pour
sélectionner une photo enregistrée dans l’appareil.
3 Faites glisser les contours du cadre pour sélectionner une portion de l’élément, puis appuyez sur
.
4 Modifiez les portions à insérer dans S Note.
Faites glisser lles contours du cadre entourant lélément pour régler la taille d’une zone
reconnue.
Supprimer la portion.
Faites glisser le cadre entourant
l’élément pour régler la taille.
Ajouter manuellement une portion
pour la reconnaissance.
Activer ou désactiver l’effet Photo
Note.
5 Appuyez sur pour insérer les portions sélectionnées dans la note.
Fonctions du S Pen
50
Modifier des notes photographiques
Modifiez les portions insérées dans S Note.
1 Maintenez votre doigt appuyé sur une portion, puis appuyez sur Convertir.
L’image du texte de cette portion sera transformée en ligne colorées afin d’autoriser sa
modification.
2 Appuyez sur et tracez une ligne autour de la portion à modifier.
3 Sélectionnez une option d’édition.
• : modifier les propriétés de l’entrée, telles que sa présentation, sa taille, sa couleur ou son
épaisseur.
• : couper l’entrée. Pour la coller à un autre emplacement, maintenez le doigt appuyé sur
l’emplacement, puis appuyez sur Coller.
• : copier l’entrée. Pour la coller à un autre emplacement, maintenez le doigt appuyé sur
l’emplacement, puis appuyez sur Coller.
• : supprimer l’entrée.
Créer des notes avec des mémos vocaux
1 Depuis l’écran Applications, appuyez sur S Note → → → Insérer → Mémo vocal.
Vous pouvez également, depuis l’écran d’accueil, appuyer sur dans le widget S Note.
2 Lisez les conditions générales, puis appuyez sur ACCEPTER.
3 Lisez les informations à l’écran concernant l’utilisation de cette fonction, puis appuyez sur OK.
4 Pour commencer l’enregistrement, appuyez sur .
5 Parlez dans le microphone.
Vos paroles sont converties en texte.
6 Appuyez sur pour insérer le texte converti dans la note.
Si la langue que vous parlez n’est pas prise en charge par la fonction Enregistreur vocal,
l’appareil ne reconnaît pas vos paroles. Pour changer la langue de l’enregistreur vocal,
ouvrez l’écran Applications, puis appuyez sur Enregistreur vocal → → Paramètres →
Langue.
Fonctions du S Pen
51
Scrapbook
Collectez des contenus provenant de diverses sources afin de créer votre propre album numérique.
Lorsque vous consultez des pages Web ou visonnez des vidéos, vous pouvez sélectionner et ajouter
une zone désirée à des albums.
La disponibilité de cette application dépend de votre zone géographique ou de votre
opérateur.
Afficher des albums
Lorsque vous lancez cette application pour la première fois ou lorsque vous la redémarrez après en
avoir réinitialisé les données, lisez et acceptez les conditions générales, puis sélectionnez une option
de synchronisation.
1 Appuyez sur Scrapbook depuis l’écran Applications.
2 Appuyez sur pour sélectionner une catégorie et sélectionnez un album.
S’il existe un lien sous le contenu de l’album, appuyez dessus pour accéder à la source.
3 Appuyez sur pour modifier l’album.
Vous pouvez lui ajouter un titre, du texte, des mémos ou des légendes.
4 Appuyez sur ENREG. pour enregistrer les modifications.
Utiliser le S Pen
Introduction
Le S Pen vous permet d’écrire, de dessiner et de réaliser des opérations tactiles. Vous pouvez
facilement accéder à des fonctions supplémentaires en appuyant sur la touche S Pen.
Fonctions du S Pen
52
Air View
Survolez un élément à l’écran à l’aide du S Pen pour activer différentes fonctions.
Afficher un aperçu des informations
Pointez un élément sur l’écran avec le S Pen pour afficher un aperçu du contenu ou des informations
dans une fenêtre contextuelle.
Utiliser la touche Air
En survolant avec le S Pen les éléments de certaines applications, comme Galerie et Vidéo, vous
pouvez afficher la touche Air sur la fenêtre d’aperçu. Grâce à la touche Air, vous pouvez effectuer
différentes actions directement à partir de la fenêtre d’aperçu.
Touche Air
Si cette fonction n’est pas activée, ouvrez l’écran Applications, appuyez sur Paramètres → S
Pen → Air View, puis faites glisser le curseur Air View vers la droite pour activer la fonction.
Fonctions du S Pen
53
Effectuer une sélection à l’aide du stylet
Tout en maintenant la touche S Pen enfoncée, faites glisser le S Pen sur des listes de textes ou
d’éléments pour sélectionner plusieurs éléments ou plusieurs textes. Vous pouvez également copier
et coller les éléments ou les textes sélectionnés dans une autre application ou les partager.
Saisie S Pen
Remplissez des formulaires et rédigez des messages en écriture manuscrite à l’aide du S Pen.
Écrire dans différents champs de texte
1 Survolez un champ de texte à l’aide du S Pen.
2 Appuyez sur pour ouvrir le champ d’écriture manuscrite.
Fonctions du S Pen
54
3 Écrivez à l’aide du S Pen.
Lorsque vous rédigez un message dans Messages, appuyez sur en haut du champ d’écriture
manuscrite pour passer en mode dessin. Un dessin est inséré en pièce jointe dans le message.
4 Lorsque vous avez terminé, appuyez sur .
Écrire dans des applications
Lorsque vous utilisez certaines fonctions et applications, vous pouvez écrire directement sur l’écran
à l’aide du S Pen. Par exemple, vous pouvez composer des numéros sur le pavé de numérotation ou
définir une heure d’alarme en écrivant à l’aide du S Pen.
Si cette fonction n’est pas activée, ouvrez l’écran Applications, appuyez sur Paramètres → S
Pen → Saisie S Pen, puis sur le curseur Saisie S Pen pour activer le fonction.
55
Reconnaissance des
mouvements et maniabilité
Mouvements et gestes
Si l’appareil est soumis à des secousses ou à des chocs excessifs, cela peut entraîner un
comportement imprévu. Veillez à contrôler vos gestes.
Appel direct
Lorsque vous consultez le journal d’appels, la liste des messages ou celle des contacts, rapprochez
l’appareil de votre oreille pour passer un appel.
Si cette fonction n’est pas activée, ouvrez l’écran Applications, appuyez sur Paramètres →
Mouvements et gestes → Appel direct, puis faites glisser le curseur Appel direct vers la
droite pour activer la fonction.
Reconnaissance des mouvements et maniabilité
56
Smart Alert
Si vous avez des appels manqués ou de nouveaux messages, l’appareil vibre lorsque vous le prenez
dans la main.
Il est possible que cette fonction ne fonctionne pas si l’écran est allumé ou si l’appareil n’est
pas sur une surface plane.
Si cette fonction n’est pas activée, ouvrez l’écran Applications, appuyez sur Paramètres →
Mouvements et gestes → Smart Alert, puis faites glisser le curseur Smart Alert vers la
droite pour activer la fonction.
Muet/pause
Couvrir l’écran avec la main
Recouvrez l’écran avec la paume de votre main pour désactiver la sonnerie des appels entrants ou
des alarmes.
Reconnaissance des mouvements et maniabilité
57
Retourner l’appareil
Retournez l’appareil pour désactiver la sonnerie des appels entrants ou les alarmes.
Si cette fonction n’est pas activée, ouvrez l’écran Applications, appuyez sur Paramètres →
Mouvements et gestes → Muet/pause, puis faites glisser le curseur Muet/pause vers la
droite pour activer la fonction.
Balayer pour capturer
Placez le côté de votre main sur l’écran et faites-le glisser de droite à gauche ou inversement pour
réaliser une capture d’écran. Pour afficher la capture d’écran enregistrée, ouvrez l’écran Applications
et appuyez sur Galerie → → Album → Screenshots. Après avoir réalisé une capture d’écran,
vous pouvez modifier l’image et la partager.
Cette fonction n’est disponible que pour certaines applications.
Si cette fonction n’est pas activée, ouvrez l’écran Applications, appuyez sur Paramètres →
Mouvements et gestes → Balayer pour capturer, puis faites glisser le curseur Balayer pour
capturer vers la droite pour activer la fonction.
Reconnaissance des mouvements et maniabilité
58
Fenêtres multiples
Introduction
La fonction Multi-fenêtres vous permet d’exécuter deux applications en même temps sur un écran
partagé. Vous pouvez également exécuter simultanément plusieurs applications dans des fenêtres
contextuelles.
Partager l’écran en mode Multi-fenêtres
Certaines applications, telles que la Calculatrice et les Contacts, peuvent uniquement
être utilisées dans des fenêtres contextuelles lorsque vous les faites glisser du volet Multifenêtres
vers l’écran.
1 Maintenez le doigt appuyé sur pour ouvrir le volet Multi-fenêtres.
2 Maintenez le doigt appuyé sur une icône d’application et faites-la glisser du volet vers l’écran.
Faites ensuite glisser une autre icône d’application vers un autre endroit de l’écran.
Les applications caractérisées par l’icône peuvent être lancées simultanément dans des
fenêtres distinctes de l’écran. Appuyez sur une application caractérisée par l’icône , puis
faites-la glisser vers un autre endroit pour ouvrir l’application dans les deux fenêtres. Pour lancer
simultanément l’application dans une fenêtre contextuelle, appuyez sur l’application, puis
sur .
Reconnaissance des mouvements et maniabilité
59
Lancer le mode Multi-fenêtres depuis la liste des applications récemment
utilisées
1 Appuyez sur .
2 Balayez l’écran vers le haut ou le bas, puis appuyez sur pour lancer une application en mode
Multi-fenêtres.
3 Sélectionnez une autre application pour la lancer en mode Multi-fenêtres.
Utiliser les options Multi-fenêtres
En mode Multi-fenêtres, sélectionnez une fenêtre d’application et appuyez sur le cercle entre les
fenêtres d’applications pour accéder aux options suivantes :
Reconnaissance des mouvements et maniabilité
60
• : passer d’une application Multi-fenêtres à l’autre.
• : glisser et déposer du texte ou des images d’une fenêtre à l’autre. Maintenez le doigt appuyé
sur un élément dans la fenêtre sélectionnée et faites-le glisser vers l’autre fenêtre.
• : activer l’affichage sous forme d’icône flottante.
• : activer l’affichage plein écran.
• : fermer la fenêtre.
Partager du contenu entre des fenêtres d’applications
Vous pouvez facilement partager du contenu entre des applications comme Email et Internet par un
mouvement de glisser-déposer.
Il est possible que certaines applications ne soient pas compatibles avec cette fonction.
1 Lancez les applications Email et Internet en mode Multi-fenêtres.
Vous pouvez également les lancer dans des fenêtres contextuelles.
2 Appuyez sur le cercle situé entre les deux fenêtres d’application, puis appuyez sur .
3 Maintenez le doigt appuyé sur du texte ou une image dans la fenêtre Internet et faites glisser
l’élément vers un emplacement de la fenêtre E-mail.
L’élément sélectionné est inséré dans la fenêtre E-mail.
Reconnaissance des mouvements et maniabilité
61
Ajuster la taille des fenêtres
Faites glisser le cercle situé entre les fenêtres vers le haut ou le bas pour ajuster la taille des fenêtres.
Si le mode Multi-fenêtres n’est pas activé, ouvrez l’écran Applications, appuyez sur
Paramètres → Fenêtres multiples, puis faites glisser le curseur Fenêtres multiples vers la
droite pour activer la fonction. Une autre solution consiste à ouvrir le volet de paramétrage
rapide, puis à appuyer sur Multi fenêtres pour activer cette fonction.
Utiliser le mode Multi-fenêtres contextuelles
1 Depuis l’écran Applications, lancez une application à utiliser dans une fenêtre contextuelle.
2 Faites glisser l’écran en diagonale vers l’angle inférieur opposé ou vers l’angle supérieur opposé.
L’écran d’application apparaît dans une fenêtre contextuelle.
Activer l’affichage sous forme
d’icône flottante.
Fermer la fenêtre.
Activer l’affichage plein écran.
Déplacer le contenu.
Reconnaissance des mouvements et maniabilité
62
Déplacer ou fermer des fenêtres contextuelles
Pour déplacer une fenêtre contextuelle, appuyez sur le cercle d’une fenêtre et faites-le glisser vers un
nouvel emplacement.
Pour fermer la fenêtre, appuyez sur le cercle en haut de la fenêtre, puis sur .
Ouvrir des fenêtres contextuelles depuis l’écran partagé Multi-fenêtres
1 Depuis l’écran partagé Multi-fenêtres, appuyez sur une fenêtre d’application pour l’ouvrir dans
une fenêtre contextuelle.
2 Maintenez le doigt appuyé sur le cercle entre les fenêtres d’applications.
L’application sélectionnée apparaît dans une fenêtre contextuelle.
Ouvrir des fenêtres contextuelles depuis le volet Multi-fenêtres
Maintenez le doigt appuyé sur pour ouvrir le volet Multi-fenêtres. Appuyez sur une icône
d’application dans le volet Multi-fenêtres afin de lancer l’application dans une fenêtre contextuelle.
Si le mode Multi-fenêtres n’est pas activé, ouvrez l’écran Applications, appuyez sur
Paramètres → Fenêtres multiples, puis faites glisser le curseur Fenêtres multiples vers la
droite pour activer la fonction. Une autre solution consiste à ouvrir le volet de paramétrage
rapide, puis à appuyer sur Multi fenêtres pour activer cette fonction.
Reconnaissance des mouvements et maniabilité
63
Opération à une main
Introduction
Vous pouvez activer le mode Opération à une main pour pouvoir utiliser de façon pratique l’appareil
à l’aide d’une seule main.
Depuis l’écran Applications, appuyez sur Paramètres → Affichage et fond d’écran → Opération à
une main.
Réduire la taille de l’écran
Appuyez sur Réduire taille de l’écran, puis faites glisser le curseur Réduire taille de l’écran vers la
droite pour activer la fonction.
Pour activer le mode d’utilisation à une seule main, tenez l’appareil à une main. Ensuite, faites
rapidement glisser votre pouce du bord de l’écran jusqu’au centre, puis inversement.
Reconnaissance des mouvements et maniabilité
64
Saisie à une main
Appuyez sur Saisie à une main, puis faites glisser le curseur Saisie à une main vers la droite pour
activer la fonction.
Appuyez sur ou sur pour régler la position du pavé de numérotation, des touches d’appels et
des autres volets de saisie pour y accéder facilement d’une seule main.
Panneau touches latéral
Appuyez sur Panneau touches latéral, puis faites glisser le curseur Panneau touches latéral vers la
droite pour activer la fonction.
Simplifiez l’utilisation de l’appareil d’une seule main en plaçant les touches Applications récentes,
Accueil et Retour, ainsi que d’autres touches de fonction dans le volet des touches latérales.
Augmenter la sensibilité de l’écran tactile
Utilisez cette fonction pour pouvoir manipuler l’écran lorsque vous portez des gants.
Depuis l’écran Applications, appuyez sur Paramètres → Affichage et fond d’écran, puis cochez la
case Augmenter sensib. tactile. Une autre solution consiste à ouvrir le volet de paramétrage rapide,
puis à appuyer sur Sensib. tactile pour activer cette fonction.
• Pour une meilleure reconnaissance tactile, utilisez plutôt des gants en cuir. Certaines
autres matières peuvent ne pas être reconnues.
• Cette fonction peut ne pas fonctionner si vous utilisez S view.
Pour un résultat optimal, appuyez fermement sur l’écran lorsque vous portez des gants.
65
Personnaliser votre appareil
Gérer l’écran d’accueil et les écrans d’applications
Gérer l’écran d’accueil
Ajouter des éléments
Depuis l’écran Applications, maintenez le doigt appuyé sur une application ou un dossier, puis faitesle
glisser vers l’écran d’accueil.
Pour ajouter des widgets, maintenez le doigt appuyé sur une zone vide de l’écran d’accueil, appuyez
sur Widgets, maintenez le doigt appuyé sur un widget, puis faites-le glisser vers l’écran d’accueil.
Déplacer et supprimer un élément
Maintenez le doigt appuyé sur un élément depuis l’écran d’accueil, puis faites-le glisser jusqu’à
l’emplacement souhaité.
Pour déplacer l’élément vers un autre volet, faites-le glisser vers le bord de l’écran.
Vous pouvez également déplacer les applications fréquemment utilisées vers la zone de raccourcis
située en bas de l’écran d’accueil.
Maintenez le doigt appuyé sur l’élément à supprimer. Faites-le ensuite glisser vers l’option
Supprimer en haut de l’écran.
Créer un dossier
1 Depuis l’écran d’accueil, maintenez le doigt appuyé sur une application, puis faites-la glisser vers
l’option Créer dossier qui apparaît en haut de l’écran.
2 Saisissez un nom de dossier.
3 Appuyez sur , sélectionnez les applications à déplacer dans ce dossier, puis appuyez sur OK.
Personnaliser votre appareil
66
Gérer les volets
Maintenez le doigt appuyé sur une zone vide de l’écran d’accueil pour ajouter, déplacer ou
supprimer un volet.
Pour ajouter un volet, balayez l’écran vers la gauche, puis appuyez sur .
Pour déplacer un volet, maintenez le doigt appuyé sur son aperçu, puis faites-le glisser jusqu’à
l’emplacement souhaité.
Pour supprimer un volet, maintenez le doigt appuyé sur son aperçu, puis faites-le glisser vers l’option
Supprimer en haut de l’écran.
Pour définir un volet comme écran d’accueil principal, appuyez sur .
Gérer l’écran Applications
Changer de mode d’affichage
Depuis l’écran Applications, appuyez sur → Trier par et sélectionnez un mode d’affichage.
Déplacer des éléments
Depuis l’écran Applications, appuyez sur → Modifier. Maintenez le doigt appuyé sur l’élément à
déplacer, puis faites-le glisser jusqu’à l’emplacement souhaité.
Pour déplacer l’élément vers un autre volet, faites-le glisser vers le bord de l’écran.
Pour déplacer un élément vers un nouveau volet, faites-le glisser vers l’option Créer une page qui
s’affiche en haut de l’écran.
Créer des dossiers
1 Depuis l’écran Applications, appuyez sur → Créer dossier.
Une autre solution consiste à appuyer sur → Modifier, à maintenir le doigt appuyé sur une
application, puis à la faire glisser vers l’option Créer dossier qui apparaît en haut de l’écran.
2 Saisissez un nom de dossier.
3 Appuyez sur , cochez les applications à déplacer vers ce dossier, puis appuyez sur OK.
Personnaliser votre appareil
67
Définir un fond d’écran et des sonneries
Définir un fond d’écran
Définissez une image ou une photo enregistrée dans l’appareil comme fond de l’écran d’accueil ou
de verrouillage.
1 Maintenez le doigt appuyé sur une zone vide de l’écran d’accueil, puis appuyez sur Fonds
d’écran.
Vous pouvez également, depuis l’écran Applications, appuyer sur Paramètres → Affichage et
fond d’écran → Fond d’écran.
2 Sélectionnez un écran auquel appliquer un fond d’écran.
3 Balayez l’écran vers la gauche ou vers la droite, puis sélectionnez une image parmi celles
affichées en bas de l’écran.
Pour sélectionner des photos que vous avez prises avec l’appareil photo ou d’autres images,
appuyez sur Depuis Galerie.
Lorsque vous définissez un fond d’écran de verrouillage, vous pouvez sélectionnez des images
parmi les diverses catégories de fonds d’écran.
4 Appuyez sur DÉFINIR COMME FOND D’ÉCRAN ou sur ENREGISTRER.
L’image sélectionnée servira de fond d’écran d’accueil ou de verrouillage.
Définir un écran de verrouillage dynamique
Utilisez cette fonction pour que le fond d’écran de verrouillage change automatiquement en
fonction de vos paramètres, votre position géographique ou le temps qu’il fait, et en fonction de vos
centres d’intérêt.
1 Maintenez le doigt appuyé sur une zone vide de l’écran d’accueil, puis appuyez sur Fonds
d’écran.
Vous pouvez également, depuis l’écran Applications, appuyer sur Paramètres → Affichage et
fond d’écran → Fond d’écran.
2 Appuyez sur Écran de verrouillage.
Personnaliser votre appareil
68
3 Sélectionnez une option de fond d’écran.
• Depuis Galerie : sélectionner des images depuis la Galerie. L’appareil affiche les images sur
l’écran de verrouillage à la fréquence que vous avez définie.
• Météo tps réel : afficher des images de grande qualité sur l’écran de verrouillage en fonction
de l’heure, du temps qu’il fait et de vos informations de localisation.
• Mes intérêts : sélectionner les catégories qui vous intéressent. L’appareil affiche des images
de grande qualité sur l’écran de verrouillage en fonction de vos centres d’intérêt.
• L’utilisation de cette fonction peut entraîner des frais supplémentaires.
• Le bon fonctionnement de cette fonction dépend de votre zone géographique.
Modifier les sonneries
Modifiez les sonneries des appels entrants et des notifications.
Depuis l’écran Applications, appuyez sur Paramètres → Sons et notifications.
Pour définir une sonnerie pour les appels entrants, appuyez sur Sonneries, sélectionnez une
sonnerie, puis appuyez sur OK. Pour utiliser un morceau de musique stocké sur l’appareil ou sur l’un
de vos comptes comme sonnerie, appuyez sur AJOUTER.
Pour définir une sonnerie pour les notifications, appuyez sur Sonnerie de notification, sélectionnez
une sonnerie, puis appuyez sur OK.
Changer la méthode de verrouillage de l’écran
Vous pouvez définir une méthode de déverrouillage sécurisé de l’écran pour empêcher l’accès à vos
informations personnelles par autrui.
Depuis l’écran Applications, appuyez sur Paramètres → Écran de verrouillage → Déverrouillage de
l’écran, puis sélectionnez une méthode de déverrouillage. Pour protéger votre appareil, vous pouvez
définir un code de déverrouillage.
Si vous oubliez le code de déverrouillage, apportez l’appareil dans un centre de service
après-vente Samsung pour le réinitialiser.
Personnaliser votre appareil
69
Modèle
Dessinez un modèle en reliant au moins quatre points, puis recommencez pour valider. Définissez un
code PIN de secours pour déverrouiller l’écran en cas d’oubli du modèle.
Code PIN
Un code PIN se compose uniquement de chiffres. Saisissez au moins quatre chiffres, puis
recommencez pour valider.
Mot de passe
Un mot de passe comprend des caractères et des chiffres. Saisissez au moins quatre caractères, y
compris des chiffres et des symboles, puis recommencez pour valider.
Empreinte
Enregistrez vos empreintes digitales pour pouvoir déverrouiller l’écran. Pour en savoir plus, reportezvous
à la section Lecteur d’empreintes.
Mes lieux
Accédez rapidement à des fonctions utiles associées aux adresses que vous avez souvent visitées
grâce à la géolocalisation automatique.
Personnaliser votre appareil
70
Ajouter un widget Mes lieux
Pour ajouter le widget, maintenez le doigt appuyé sur une zone vide de l’écran d’accueil, appuyez
sur Widgets, maintenez le doigt appuyé sur le widget Mes lieux, puis faites-le glisser vers l’écran
d’accueil.
Sélectionner une catégorie pour
définir les informations de
localisation et les préférences.
Définir des informations de localisation
Lorsque vous visitez un endroit avec des informations de localisation prédéfinies, l’appareil reconnaît
automatiquement cet endroit et affiche des raccourcis pour les fonctions prédéfinies. L’appareil
applique également les paramètres définis pour cet endroit.
1 Dans le widget Mes lieux, sélectionnez un nom de lieu pour définir des informations de
localisation et des raccourcis. Par exemple, appuyez sur Domicile pour définir les informations
de localisation de votre domicile.
Votre adresse actuelle est indiquée dans le champ Adresse et méthode de détection. Ensuite,
pour rechercher automatiquement les coordonnées de cette adresse, appuyez sur .
Pour rechercher manuellement une adresse, saisissez une adresse ou un mot-clé dans le champ
de recherche, puis appuyez sur .
Vérifiez que l’appareil est connecté à un réseau Wi-Fi ou mobile pour pouvoir lancer une
localisation automatique.
Personnaliser votre appareil
71
2 Appuyez sur SUIVANT.
3 Depuis l’écran Gérer les raccourcis, appuyez sur GÉRER → ou pour ajouter ou supprimer
des raccourcis vers différentes applications ou fonctions.
4 Appuyez sur OK.
Le widget Mes lieux comportant vos informations de localisation s’affiche sur l’écran d’accueil.
Pour modifier d’autres paramètres, comme le mode sonore ou le réseau Wi-Fi, appuyez sur →
Paramètres personnalisés.
Définir des informations de localisation supplémentaires
1 Dans le widget Mes lieux, appuyez sur .
2 Appuyez sur et sélectionnez un autre endroit dans la liste.
Pour ajouter davantage d’endroits à la liste, appuyez sur GÉRER LES LIEUX → .
3 Pour lancer une géolocalisation automatique, appuyez sur ou sur OBTENIR INFO DE
LOCALISATION.
Pour rechercher manuellement une adresse, saisissez une adresse ou un mot-clé dans le champ
de recherche, puis appuyez sur .
Personnaliser votre appareil
72
4 Appuyez sur SAUVEG.
5 Appuyez sur ou sur pour ajouter ou supprimer des raccourcis vers différentes applications
ou fonctions.
6 Appuyez sur .
Lorsque vous vous rendez à un endroit que vous avez ajouté à la liste, les paramètres de
localisation prédéfinis s’affichent dans le widget Mes lieux. Pour modifier d’autres paramètres,
comme le mode sonore ou le réseau Wi-Fi, appuyez sur → Paramètres personnalisés.
Lecteur d’empreintes
Introduction
Pour permettre la reconnaissance des empreintes, vos empreintes digitales doivent être enregistrées
et stockées dans l’appareil. Après l’enregistrement, vous pouvez paramétrer l’appareil pour qu’il
utilise vos empreintes avec les fonctions ci-après :
• Déverrouillage d’écran
• Connexion Web
• Vérifier votre compte Samsung
• Payer avec PayPal
La disponibilité de cette fonction dépend de votre zone géographique ou de votre
opérateur.
Conseils pour une meilleure reconnaissance des empreintes
Lorsque vous scannez vos empreintes sur l’appareil, sachez que les conditions suivantes risquent
d’affecter les performances de cette fonction :
• La touche Accueil est munie d’un capteur de reconnaissance des empreintes. Assurez-vous
que la touche Accueil n’a pas été rayée ni endommagée par des objets métalliques comme des
pièces de monnaie, des clés ou un collier.
• La protection d’écran fournie avec l’appareil peut altérer le fonctionnement du capteur
d’empreintes. Pour améliorer la sensibilité de reconnaissance des empreintes, retirez la
protection de l’écran.
• Assurez-vous que la zone de reconnaissance des empreintes et vos doigts sont propres et secs.
Personnaliser votre appareil
73
• L’appareil peut ne pas reconnaître les empreintes digitales présentant des ridules ou des
cicatrices.
• L’appareil peut ne pas reconnaître l’empreinte d’un petit doigt ou d’un doigt fin.
• Pour améliorer les performances de reconnaissance, enregistrez les empreintes de la main que
vous utilisez le plus fréquemment lorsque vous manipulez l’appareil.
• Ne faites pas glisser le doigt trop rapidement ou trop lentement. Faites glisser le doigt à une
vitesse modérée afin de donner le temps à l’appareil de le reconnaître.
• Dans les environnements secs, de l’électricité statique peut s’accumuler dans l’appareil. Évitez
d’utiliser cette fonction dans des environnements secs ou, avant d’utiliser la fonction, déchargez
l’électricité statique accumulée en touchant un objet métallique.
Enregistrer des empreintes
Si vous pliez le doigt ou si vous utilisez le bout du doigt, l’appareil risque de ne pas
reconnaître l’empreinte.
1 Depuis l’écran Applications, appuyez sur Paramètres → Lecteur d’empreintes → Gestionnaire
d’empreintes.
2 Lisez les instructions à l’écran, puis appuyez sur OK.
3 Placez le doigt sur la zone de reconnaissance d’empreinte au centre en bas de l’écran.
Personnaliser votre appareil
74
4 Maintenez le doigt appuyé sur l’écran dans la zone de reconnaissance d’empreinte, puis faites-le
glisser vers le bas sur la touche Accueil.
Répétez cette opération avec le même doigt jusqu’à ce que l’empreinte soit enregistrée.
5 Appuyez sur OK pour terminer la numérisation de votre empreinte digitale. Vous pouvez
également appuyer sur ENREGISTRER pour enregistrer une empreinte supplémentaire.
6 Lorsqu’un écran apparaît vous demandant d’enregistrer un mot de passe de secours, saisissez ce
mot de passe, puis appuyez sur CONTINUER.
7 Saisissez de nouveau le mot de passe de secours pour le confirmer, puis appuyez sur OK.
Vous pouvez utiliser le mot de passe de secours à la place de l’empreinte.
8 Lorsqu’une fenêtre contextuelle de déverrouillage par empreintes apparaît, appuyez sur OK.
Vous pouvez utiliser vos empreintes pour déverrouiller l’écran.
Personnaliser votre appareil
75
Supprimer des empreintes
Vous pouvez supprimer l’enregistrement de vos empreintes à l’aide du gestionnaire d’empreintes.
1 Depuis l’écran Applications, appuyez sur Paramètres → Lecteur d’empreintes → Gestionnaire
d’empreintes.
2 Scannez l’empreinte enregistrée, ou appuyez sur et saisissez le mot de passe de secours.
3 Appuyer sur → Sélectionner.
4 Cochez les empreintes dont vous souhaitez annuler l’enregistrement, puis appuyez sur .
Modifier le mot de passe de secours
Vous pouvez modifier le mot de passe de secours utilisé en cas de problème de reconnaissance de
vos empreintes.
1 Depuis l’écran Applications, appuyez sur Paramètres → Lecteur d’empreintes → Modifier
MDP de secours.
2 Scannez l’empreinte enregistrée, ou appuyez sur et saisissez le mot de passe de secours.
3 Saisissez un nouveau mot de passe et appuyez sur CONTINUER.
4 Saisissez de nouveau le mot de passe, puis appuyez sur OK.
Vérifier le mot de passe du compte Samsung
Utilisez vos empreintes digitales pour vérifier le mot de passe de votre compte Samsung. Vous
pouvez recourir à votre empreinte au lieu de saisir votre mot de passe, par exemple lorsque vous
achetez du contenu sur GALAXY Apps.
Depuis l’écran Applications, appuyez sur Paramètres → Lecteur d’empreintes → Vérifier le compte
Samsung, puis faites glisser le curseur Vérifier le compte Samsung vers la droite pour activer la
fonction. Saisissez le mot de passe de votre compte Samsung et appuyez sur VALIDER.
Personnaliser votre appareil
76
Utiliser l’empreinte digitale pour se connecter à des comptes
Vous pouvez utiliser vos empreintes pour vous connecter sur des pages Web prenant en charge
l’enregistrement de mot de passe.
1 Depuis l’écran Applications, appuyez sur Paramètres → Lecteur d’empreintes → Connexion
Web, puis faites glisser le curseur Connexion Web vers la droite pour activer la fonction.
2 Ouvrez une page Web à laquelle vous souhaitez vous connecter à l’aide de votre empreinte.
3 Saisissez votre nom d’utilisateur et votre mot de passe, puis appuyez sur la touche de connexion
à la page Web.
4 Cochez la case Connectez-vous en utilisant vos empreintes digitales, puis appuyez sur SE
SOUVENIR.
Vous pouvez utiliser votre empreinte pour confirmer votre compte et votre mot de passe pour
vous connecter à la page Web.
Utiliser l’empreinte digitale pour effectuer des achats via PayPal
Vous pouvez effectuer des achats en numérisant vos empreintes.
La disponibilité de cette fonction dépend de votre zone géographique ou de votre
opérateur.
1 Depuis l’écran Applications, appuyez sur Paramètres → Lecteur d’empreintes → Payer avec
PayPal.
2 Cochez la case Prise en charge FIDO Ready™ et PayPal, puis appuyez sur INSTALLER.
3 Une fois l’installation terminée, appuyez sur LINK MY ACCOUNT.
4 Suivez les instructions à l’écran pour vous connecter à votre compte PayPal et enregistrer vos
empreintes.
Personnaliser votre appareil
77
Mode Privé
Introduction
Masquez les contenus personnels sur votre appareil afin d’empêcher d’autres personnes d’y accéder.
En mode Privé, vous pouvez masquer des éléments dans Galerie, Vidéo, Musique, Enregistreur
vocal, Mes fichiers et S Note.
Configurer le mode Privé
1 Depuis l’écran Applications, appuyez sur Paramètres → Mode Privé.
2 Lisez les informations à l’écran et appuyez sur SUIVANT.
3 Lisez les informations à l’écran concernant l’utilisation de cette fonction, puis appuyez sur
SUIVANT.
4 Appuyez sur DÉMARRER, sélectionnez une méthode d’accès au mode Privé, puis suivez les
instructions à l’écran pour terminer la configuration.
Une fois la configuration terminée, lorsque la fenêtre contextuelle de déverrouillage de l’écran
apparaît, appuyez sur OK pour modifier la méthode de verrouillage de l’écran, ou appuyez sur
IGNORER.
Le mode Privé est activé et l’icône apparaît dans la barre d’état.
Masquer du contenu
1 Depuis l’écran Applications, lancez une application pour en masquer des éléments.
2 Sélectionnez un élément, puis appuyez sur → Déplacer dans Privé.
Si le mode Privé n’est pas activé, passez aux étapes suivantes.
3 Lisez les instructions à l’écran, puis appuyez sur OK.
4 Suivez les instructions à l’écran pour saisir le code d’accès au mode Privé.
Les éléments sélectionnés sont déplacés vers le dossier Privé et disparaissent de l’écran.
Si vous masquez un élément alors que le mode Privé n’est pas activé, celui-ci est activé dès
que l’élément sélectionné est déplacé dans le dossier Privé et à nouveau désactivé une fois
le transfert terminé.
Personnaliser votre appareil
78
Afficher du contenu masqué
Vous pouvez afficher le contenu masqué uniquement si le mode Privé est activé.
1 Depuis l’écran Applications, appuyez sur Paramètres → Mode Privé, puis faites glisser le curseur
Mode Privé vers la droite pour activer la fonction.
Une autre solution consiste à ouvrir le volet de paramétrage rapide, puis à appuyer sur Mode
Privé pour activer cette fonction.
2 Suivez les instructions à l’écran pour saisir le code d’accès au mode Privé.
3 Depuis l’écran Applications, appuyez sur Mes fichiers → Privé.
Tous les éléments du mode Privé s’affichent à l’écran.
Afficher du contenu masqué
1 Dans le dossier Privé, sélectionnez les éléments masqués à afficher.
2 Appuyez sur → Supprimer de Privé.
3 Sélectionnez un dossier dans lequel déplacer les éléments.
Les éléments sont déplacés vers le dossier sélectionné.
Mode simplifié
Le mode simplifié fournit une expérience utilisateur plus conviviale, grâce à une présentation plus
simple et à des icônes plus grosses sur l’écran d’accueil.
Activer le mode simplifié
1 Depuis l’écran Applications, appuyez sur Paramètres → Mode simplifié → Mode simplifié.
2 Cochez les applications auxquelles appliquer une présentation plus simple.
3 Appuyez sur EFFECTUÉ.
Personnaliser votre appareil
79
Revenir en mode standard
Faites glisser votre doigt vers la gauche de l’écran d’accueil, puis appuyez sur Paramètres simples →
Mode simplifié → Mode standard → EFFECTUÉ.
Transférer des données depuis votre ancien
appareil
Utiliser des comptes de sauvegarde
Vous pouvez transférer vos données de sauvegarde depuis votre ancien appareil vers votre nouvel
appareil à l’aide votre compte Google ou Samsung. Pour en savoir plus, reportez-vous à la section
Sauvegarder et restaurer des données.
Utiliser Samsung Smart Switch
Vous pouvez transférer des données de votre ancien appareil vers votre nouvel appareil via Smart
Switch. Pour en savoir plus, rendez-vous sur le site : www.samsung.com/smartswitch.
Samsung Smart Switch n’est pas pris en charge sur certains appareils ou ordinateurs.
Utiliser Smart Switch Mobile
Utilisez cette application pour transférer des données de votre précédent appareil vers le nouveau.
Vous pouvez télécharger l’application depuis GALAXY Apps ou Play Store.
1 Depuis votre appareil, appuyez sur Smart Switch Mobile.
2 Depuis votre appareil, sélectionnez une option en fonction du type de votre ancien appareil et
suivez les instructions qui s’affichent à l’écran.
Si l’ancien appareil est un appareil Android, assurez-vous que l’application Smart Switch Mobile
y est installée. Pour en savoir plus, consultez l’aide.
Personnaliser votre appareil
80
Utiliser Smart Switch avec un ordinateur
Utilisez cette fonction pour importer une sauvegarde de vos données (depuis des appareils mobiles
d’un fabricant sélectionné) depuis un ordinateur vers votre appareil. Vous pouvez télécharger
l’application depuis www.samsung.com/smartswitch.
1 Sauvegardez les données d’un ancien appareil sur l’ordinateur. Pour plus d’informations,
contactez le fabricant de l’appareil.
2 Sur l’ordinateur, lancez Smart Switch.
3 Connectez votre nouvel appareil à l’ordinateur à l’aide du câble USB.
4 Sur l’ordinateur, cliquez sur le fabricant de l’ancien appareil, puis suivez les instructions à l’écran
pour transférer les données sur votre nouvel appareil.
Utiliser Samsung Kies
Importez un fichier de sauvegarde de vos données depuis votre ordinateur via Samsung Kies pour
restaurer les données sur votre appareil. Vous pouvez également sauvegarder les données sur
l’ordinateur via Samsung Kies. Pour en savoir plus, reportez-vous à la section Connecter l’appareil
avec Samsung Kies.
Paramétrer des comptes
Ajouter des comptes
Certaines applications utilisées sur l’appareil nécessitent un compte. Afin de profiter au maximum de
votre appareil, créez des comptes.
1 Depuis l’écran Applications, appuyez sur Paramètres → Comptes → Ajouter compte.
2 Sélectionnez un service de compte.
3 Suivez les instructions qui s’affichent à l’écran pour procéder à la configuration du compte.
Pour synchroniser du contenu avec vos comptes, sélectionnez un compte, puis cochez les éléments
à synchroniser.
Personnaliser votre appareil
81
Supprimer un compte
Depuis l’écran Applications, appuyez sur Paramètres → Comptes, sélectionnez un compte, puis
appuyez sur → Supprimer le compte.
Enregistrer des comptes Samsung
Pour utiliser des applications Samsung, vous devez disposer d’un compte Samsung. Vous pouvez
sauvegarder ou restaurer les données enregistrées sur l’appareil sur votre compte Samsung.
Enregistrez votre compte Samsung sur l’appareil pour pouvoir facilement utiliser les services
Samsung.
1 Depuis l’écran Applications, appuyez sur Paramètres → Comptes → Ajouter compte.
2 Appuyez sur Samsung.
3 Appuyez sur CONNEXION.
4 Saisissez l’adresse électronique et le mot de passe de votre compte, puis appuyez sur
CONNEXION.
Une fois votre compte Samsung enregistré, vous pouvez utiliser des applications nécessitant un
compte Samsung sans avoir à effectuer la procédure de connexion.
82
Téléphone et contacts
Téléphone
Introduction
Passez des appels vocaux et visio et répondez aux appels que vous recevez.
Passer des appels
1 Appuyez sur Téléphone depuis l’écran Applications.
2 Appuyez sur Clavier et composez un numéro de téléphone.
3 Appuyez sur pour passer un appel vocal ou sur pour passer un appel visio.
Accéder à des options
Ajouter le numéro à la liste de supplémentaires.
contacts.
Afficher un aperçu du numéro de
téléphone.
Afficher les contacts favoris.
Supprimer le caractère précédent.
Afficher la liste de contacts.
Afficher les journaux d’appels et de
messages.
Composer un numéro à l’aide du
clavier.
Téléphone et contacts
83
Passer des appels depuis le journal d’appels ou votre liste de contacts
Appuyez sur Journal ou sur Contacts, puis faites glisser votre doigt vers la droite sur le nom d’un
contact ou sur un numéro de téléphone pour passer un appel.
Passer des appels depuis la liste de favoris
Sélectionnez un contact, puis appuyez sur pour l’ajouter à la liste de contacts favoris.
Ouvrez l’écran Favoris et sélectionnez un contact à appeler.
Appeler un numéro à l’étranger
1 Appuyez sur Clavier.
2 Maintenez le doigt appuyé sur 0 jusqu’à ce que le signe + apparaisse. Composez l’indicatif du
pays, l’indicatif régional et le numéro de téléphone, puis appuyez sur .
Téléphone et contacts
84
Recevoir des appels
Répondre à un appel
Lorsque vous recevez un appel, faites glisser votre doigt sur l’icône .
Rejeter un appel
Lorsque vous recevez un appel, faites glisser votre doigt sur l’icône .
Appels manqués
Si vous manquez un appel, l’icône apparaît dans la barre d’état. Ouvrez le volet des raccourcis
pour afficher la liste des appels manqués. Une autre solution consiste, depuis l’écran Applications, à
appuyer sur Téléphone → Journal pour afficher les appels manqués.
• Pour envoyer un message lorsque vous rejetez un appel entrant, faites glisser la barre des
messages de rejet située en bas de l’écran vers le haut.
• Pour créer différents messages de rejet, ouvrez l’écran Applications et appuyez sur
Téléphone → → Paramètres → Appel → Rejet de l’appel → Messages de rejet
→ .
Options en cours d’appel
Options au cours d’un appel vocal
Les options suivantes sont disponibles :
• : augmenter le volume.
• Ajouter : passer un second appel.
• Clavier : ouvrir le clavier.
• Fin : mettre fin à l’appel en cours.
• HP : activer ou désactiver le haut-parleur. Lorsque vous utilisez le haut-parleur, parlez dans le
microphone en haut de l’appareil et éloignez l’appareil de vos oreilles.
• Muet : désactiver le microphone afin que votre correspondant ne puisse pas vous entendre.
• Bluetooth : activer un casque ou des écouteurs Bluetooth, à condition qu’ils soient connectés à
l’appareil.
Téléphone et contacts
85
Options au cours d’un appel visio
Appuyez sur l’écran pour utiliser les options suivantes :
• Permuter : basculer entre les objectifs avant et arrière, et inversement.
• Muet : désactiver le microphone afin que votre correspondant ne puisse pas vous entendre.
• Fin : mettre fin à l’appel en cours.
En mode Dual Camera, l’appel visio est possible pendant 3 minutes maximum. Au bout de
3 minutes, l’appareil désactive l’objectif arrière pour des performances optimales.
Contacts
Introduction
Créez de nouveaux contacts et gérez-les sur l’appareil.
Ajouter des contacts
Transférer des contacts depuis d’autres appareils
Vous pouvez transférer des contacts depuis d’autres appareils sur votre appareil. Pour en savoir plus,
reportez-vous à la section Transférer des données depuis votre ancien appareil.
Créer manuellement des contacts
1 Depuis l’écran Applications, appuyez sur Contacts → Contacts.
2 Appuyez sur , puis sélectionnez un emplacement de stockage.
Téléphone et contacts
86
3 Saisissez les coordonnées du contact.
4 Appuyez sur ENREG.
Pour ajouter un numéro de téléphone à votre liste de contacts à partir du clavier, appuyez sur
Clavier, composez le numéro, puis appuyez sur Ajouter aux contacts.
Pour ajouter le numéro de téléphone d’un appel ou d’un message reçu à la liste de contacts,
appuyez sur Journal, puis sur l’image d’un contact.
Rechercher des contacts
Depuis l’écran Applications, appuyez sur Contacts → Contacts.
Utilisez l’une des méthodes de recherche suivantes :
• Faites défiler la liste de contacts vers le haut ou le bas.
• Faites glisser un doigt le long de l’index à droite de la liste des contacts pour la faire défiler
rapidement.
• Appuyez sur le champ de recherche tout en haut de la liste de contacts, puis saisissez vos
critères de recherche.
Une fois le contact sélectionné, choisissez l’une des options suivantes :
• : ajouter le contact aux favoris.
• / : passer un appel vocal ou visio.
• : rédiger un message.
• : rédiger un e-mail.
87
Messages et e-mails
Messages
Introduction
Envoyez des messages texte (SMS) ou multimédia (MMS) et affichez les messages par conversation.
Envoyer des messages
L’envoi de messages en dehors de la zone couverte par votre opérateur peut occasionner
des frais supplémentaires.
1 Appuyez sur Messages depuis l’écran Applications.
2 Appuyez sur .
3 Ajoutez des destinataires, puis saisissez un message.
Accéder à des options
supplémentaires.
Saisir un message.
Sélectionner des contacts depuis
votre liste de contacts.
Insérer des émoticônes.
Saisir les destinataires.
Joindre des fichiers.
Envoyer le message.
4 Appuyez sur pour envoyer le message.
Messages et e-mails
88
Lire les messages
Les messages sont regroupés sous forme de fils de discussion par contact.
La réception de messages en dehors de la zone couverte par votre opérateur peut
occasionner des frais supplémentaires.
1 Appuyez sur Messages depuis l’écran Applications.
2 Dans la liste de messages, sélectionnez un contact.
3 Affichez votre conversation.
Dans la vue détaillée des messages, appuyez sur pour afficher davantage d’options.
Email
Introduction
Ajoutez des comptes de messagerie électronique pour recevoir des courriers électroniques et y
répondre.
Configurer des comptes de messagerie électronique
1 Appuyez sur Email depuis l’écran Applications.
Lorsque vous ouvrez l’application Email pour la première fois, configurez un compte de
messagerie électronique.
2 Saisissez une adresse e-mail et un mot de passe, puis appuyez sur SUIVANT.
Pour enregistrer manuellement le compte de messagerie d’une société, appuyez sur
CONFIGURATION MANUELLE.
3 Suivez les instructions qui s’affichent à l’écran pour procéder à la configuration.
Pour configurer un compte de messagerie électronique supplémentaire, appuyez sur → GÉRER
LES COMPTES → .
Si vous possédez plusieurs comptes de messagerie électronique, vous pouvez définir un compte par
défaut. Appuyez sur → GÉRER LES COMPTES → → Définir le compte par défaut.
Messages et e-mails
89
Envoyer des e-mails
1 Appuyez sur Email depuis l’écran Applications.
2 Pour rédiger un message, appuyez sur l’icône en bas de l’écran.
3 Ajoutez des destinataires, puis saisissez un message.
4 Appuyez sur pour envoyer le message.
Lire des e-mails
1 Appuyez sur Email depuis l’écran Applications.
2 Depuis la liste des messages, appuyez sur un message pour le lire.
90
Appareil photo et Galerie
Appareil photo
Introduction
Prenez des photos et enregistrez des vidéos à l’aide des divers modes et paramètres offerts.
Prises de vue de base
Vous pouvez tout aussi bien prendre des photos qu’enregistrer des vidéos. Visionnez vos photos et
vidéos dans la Galerie.
Appuyez sur Appareil photo depuis l’écran Applications.
Bon usage de l’appareil photo
• Ne prenez pas de photos et n’enregistrez pas de vidéos de personnes sans leur consentement.
• Ne prenez pas de photos et n’enregistrez pas de vidéos lorsque la loi l’interdit.
• Ne prenez pas de photos et n’enregistrez pas de vidéos en violation de la vie privée d’autrui.
Appareil photo et Galerie
91
Prendre des photos ou enregistrer des vidéos
1 Appuyez sur l’écran d’aperçu à l’endroit où l’appareil photo doit faire la mise au point.
2 Appuyez sur pour prendre une photo ou sur pour enregistrer une vidéo.
Modifier les
paramètres de
l’appareil photo.
Basculer entre
l’objectif avant et
arrière.
HDR (tonalités riches)
Démarrer
l’enregistrement d’une
vidéo.
Prendre une photo.
Modifier le mode de
prise de vue.
Afficher les photos et
les vidéos que vous
avez prises.
Ouvrir l’appareil photo depuis l’écran verrouillé
Pour prendre rapidement des photos de moments particuliers, depuis l’écran de verrouillage,
démarrez l’application Appareil photo.
1 Depuis l’écran verrouillé, faites glisser votre doigt sur l’icône .
2 Appuyez sur l’écran d’aperçu à l’endroit où l’appareil photo doit faire la mise au point.
3 Appuyez sur pour prendre une photo ou sur pour enregistrer une vidéo.
La disponibilité de cette fonction dépend de votre zone géographique ou de votre
opérateur.
• Pour effectuer un zoom avant, écartez deux doigts l’un de l’autre sur l’écran ; pour
effectuer un zoom arrière, rapprochez-les.
• Pour capturer une photo en cours d’enregistrement d’une vidéo, appuyez sur .
• Pour modifier la mise au point en cours d’enregistrement d’une vidéo, appuyez sur
l’endroit souhaité pour la mise au point. Pour faire la mise au point au centre de l’écran,
appuyez sur .
Appareil photo et Galerie
92
Selfie
Automatiser les autoportraits
Lorsque vous prenez une photo avec l’objectif avant, posez le doigt sur le capteur ou utilisez les
commandes vocales pour prendre automatiquement une photo sans appuyer sur la touche du
déclencheur.
1 Appuyez sur Appareil photo depuis l’écran Applications.
2 Appuyez sur pour basculer sur l’objectif avant destiné aux autoportraits.
3 Regardez vers l’objectif avant.
4 Posez le doigt sur le capteur à l’arrière de l’appareil, puis soulevez-le pour vous prendre en
photo. Vous pouvez également prononcer les mots « Sourire », « Cheese », « Capture » ou «
Shooter » pour prendre une photo. Pour enregistrer une vidéo, dites « Enregistrer une vidéo ».
Appareil photo et Galerie
93
Selfie panorama
Effectuez un autoportrait panoramique afin d’inclure davantage de personnes dans la photo.
1 Appuyez sur Appareil photo depuis l’écran Applications.
2 Appuyez sur pour basculer sur l’objectif avant destiné aux autoportraits.
3 Appuyez sur MODE → Selfie panorama.
4 Regardez vers l’objectif avant.
5 Posez le doigt sur le capteur à l’arrière de l’appareil, puis soulevez-le pour vous prendre en
photo. Vous pouvez également prononcer les mots « Sourire », « Cheese », « Capture » ou «
Shooter » pour prendre une photo. Pour enregistrer une vidéo, dites « Enregistrer une vidéo ».
6 Pour prendre un autoportrait panoramique, déplacez lentement l’appareil de gauche à droite.
L’appareil prend des photos supplémentaires dès que le cadre bleu rejoint chacune des
extrémités du cadre blanc.
• Assurez-vous de maintenir le cadre bleu à l’intérieur de la fenêtre du viseur.
• Pour prendre des autoportraits larges, les sujets doivent rester immobiles.
• La résolution d’une photo peut être affectée par les conditions d’éclairage.
• Selon les conditions de prise de vue, les parties supérieure et inférieure de l’image
affichée sur l’écran d’aperçu peuvent être coupées.
Appareil photo et Galerie
94
HDR (Ton riche)
Prenez des photos riches en couleurs et reproduisez chacun des détails, même dans des conditions
de luminosité extrêmes.
1 Appuyez sur Appareil photo depuis l’écran Applications.
2 Appuyez sur pour basculer sur l’objectif arrière.
3 Appuyez sur sur l’écran d’aperçu.
L’icône devient .
4 Pour prendre une photo, appuyez sur .
Sans effet Avec effet
Modes de prise de vue
Vous disposez de divers modes de prise de vue pour prendre vos photos.
Appuyez sur Appareil photo depuis l’écran Applications.
Auto.
Utilisez ce mode pour autoriser l’appareil photo à évaluer l’environnement et à déterminer le mode
idéal de prise de vue.
Depuis l’écran d’aperçu, appuyez sur MODE → Auto.
Appareil photo et Galerie
95
Selfie arrière
Utilisez ce mode pour prendre un grand autoportrait à l’aide de l’objectif arrière.
1 Depuis l’écran d’aperçu, appuyez sur MODE → Selfie arrière.
2 Faites glisser le cadre ou ajustez-le pour définir une zone de détection pour le visage.
3 Composez votre cliché en positionnant l’objectif arrière face à vous.
4 Pour parfaire la composition, laissez-vous guider par les bips.
Dès que la totalité de votre visage se trouve dans la zone de détection, l’appareil photo émet
une tonalité, puis un bip pendant quelques secondes, et enfin prend automatiquement une
photo.
Focus sélectif
Utilisez l’effet de flou pour faire ressortir certains objets sur votre photo.
1 Depuis l’écran d’aperçu, appuyez sur MODE → Focus sélectif.
2 Appuyez sur l’écran d’aperçu à l’endroit où l’appareil photo doit faire la mise au point.
3 Pour prendre une photo, appuyez sur .
4 Appuyez sur la miniature d’aperçu en bas à droite de l’écran d’aperçu.
5 Appuyez sur , puis sélectionnez l’une des options suivantes :
• Focus proche : faire ressortir le sujet et flouter l’arrière-plan autour de lui.
• Focus lointain : flouter le sujet et faire ressortir l’arrière-plan autour de lui.
• Focus panoramique : faire ressortir le sujet et son arrière-plan.
Appareil photo et Galerie
96
6 Appuyez sur .
• Il est recommandé de placer les sujets à une distance de 50 cm de l’appareil. Placez le
sujet sur lequel vous souhaitez faire la mise au point près de l’appareil.
• Lorsque vous prenez des photos, assurez une distance suffisante entre le sujet et l’arrièreplan.
La distance doit être plus de trois fois supérieure à la distance entre l’appareil et le
sujet.
• La qualité des photos prises par l’appareil peut être affectée dans les conditions suivantes
:
– L’appareil ou le sujet est en mouvement.
– Il y a une forte lumière d’arrière-plan, de faibles niveaux de lumière ou vous prenez
des photos en intérieur.
– Le sujet ou l’arrière-plan n’a pas de motif ou celui-ci est composé d’une couleur unie.
Panorama
Prenez une série de photos horizontalement ou verticalement, puis assemblez-les pour obtenir une
large vue.
Depuis l’écran d’aperçu, appuyez sur MODE → Panorama.
Gérer les modes
Sélectionnez les modes de prise de vue à afficher sur l’écran de sélection de mode ou modifiez leur
ordre.
1 Depuis l’écran d’aperçu, appuyez sur MODE → Gérer modes.
2 Cochez les modes à ajouter dans la liste de modes.
• Beauté : ce mode permet de prendre des photos de visages plus claires pour obtenir des
images plus douces.
• Prise & plus : ce mode permet de prendre une série de photos et de les modifier en leur
appliquant différents effets à l’aide des modes de prise de vue.
• Visite virt. : ce mode permet de prendre des photos en avançant ou en tournant à gauche
ou à droite et de capturer le paysage sous différents angles.
• Dual Camera : ce mode permet de prendre une photo ou d’enregistrer une vidéo en utilisant
simultanément l’objectif avant et l’objectif arrière.
Appareil photo et Galerie
97
Télécharger des modes
Téléchargez d’autres modes de prise de vue depuis GALAXY Apps.
Depuis l’écran d’aperçu, appuyez sur MODE → Télécharger.
• Pour obtenir les meilleures prise de vue possibles en mode Panorama, suivez ces
conseils :
– Déplacez l’appareil photo lentement dans le sens de votre choix.
– Maintenez l’image à l’intérieur du cadre de prise de vue de l’appareil photo.
– Évitez de prendre des photos de sujets devant des arrière-plans non identifiables,
comme un ciel ou un pan de mur uni.
• En mode Dual Camera, vous pouvez enregistrer des vidéos d’une durée maximale de
5 minutes en qualité Full HD et d’une durée maximale de 10 minutes en qualité HD ou
VGA.
• Lorsque vous enregistrez des vidéos dans le mode Dual Camera, le son est enregistré par
le microphone interne.
Paramètres de l’appareil photo
Depuis l’écran d’aperçu, appuyez sur .
Les options disponibles peuvent varier selon le mode de prise de vue et le modèle
d’appareil photo utilisés.
• : activer ou désactiver le flash.
• : sélectionner la durée à l’issue de laquelle l’appareil photo doit automatiquement prendre
une photo.
• : sélectionner un effet de filtre à utiliser lorsque vous prenez des photos ou enregistrez des
vidéos. Pour télécharger davantage d’effets, appuyez sur Télécharger. Pour modifier l’ordre des
effets ou masquer des effets de la liste, appuyez sur Gérer effets.
• : sélectionner une résolution pour les photos. Une résolution plus élevée améliore la qualité
des vidéos, mais nécessite davantage de mémoire.
Appareil photo et Galerie
98
Pour accéder aux paramètres supplémentaires de l’appareil photo, ouvrez l’écran d’aperçu et
appuyez sur → .
• Beauté : prendre des photos de visages plus claires pour obtenir des images plus douces.
• Valeur d’expos. : modifier la valeur d’exposition. Ce paramètre détermine la quantité de lumière
reçue par le capteur de l’appareil photo. En cas de faible luminosité, utilisez une exposition plus
élevée.
• ISO : sélectionner une valeur ISO. Ce paramètre permet de contrôler la sensibilité lumineuse
de l’appareil photo. Les valeurs faibles sont destinées aux objets immobiles ou vivement
éclairés. Les valeurs élevées correspondent quant à elles aux sujets en mouvement rapide ou
peu éclairés. Toutefois, plus le réglage ISO est élevé, plus les parasites dans les photos sont
importants.
• Balance des blancs : sélectionner une balance des blancs appropriée de sorte que les images
offrent une gamme de couleurs proches de la réalité.
• Modes de mesure : sélectionner une méthode de mesure. Ce paramètre détermine la manière
dont les valeurs lumineuses sont calculées. Mesure pondérée centrale mesure la lumière
d’arrière-plan au centre de la scène. Spot mesure la lumière à un endroit spécifique. Matrice
calcule la lumière moyenne de la scène toute entière.
• HDR (Ton riche) : prendre des photos riches en couleurs et reproduire chacun des détails, même
dans des conditions de luminosité extrêmes.
• Photo par appui : appuyer sur l’écran d’aperçu pour prendre des photos.
• Taille de la vidéo : sélectionner une résolution pour les vidéos. Une résolution plus élevée
améliore la qualité des vidéos, mais nécessite davantage de mémoire.
• Stabilisation vidéo : activer le stabilisateur pour réduire ou éliminer l’effet de flou provoqué par
les mouvements de l’appareil photo lors de l’enregistrement d’une vidéo.
• Tags de localis. : joindre un tag de géolocalisation GPS à la photo.
• Pour que les signaux GPS soient meilleurs, évitez de prendre des photos dans des lieux
où le signal peut être limité, par exemple entre des bâtiments ou dans des zones de faible
altitude, ou encore lorsque les conditions météorologiques sont mauvaises.
• Votre localisation est susceptible d’apparaître sur vos photos au moment où vous les
publiez sur le Web. Pour empêcher l’affichage de ces données, désactivez le paramètre de
balise de localisation.
• Emplac. de stockage : sélectionner l’emplacement de stockage des photos et des vidéos.
• Enreg. comme ret. : inverser l’image pour créer une image miroir de la scène initiale, lors de
prises de vue avec l’objectif avant.
• Grille : afficher des lignes directrices sur l’écran d’aperçu pour aider à la composition de la photo.
• Contrôle vocal : paramétrer l’appareil pour qu’il prenne des photos ou enregistre des vidéos à
l’aide des commandes vocales.
Appareil photo et Galerie
99
• Touche de volume : paramétrer l’appareil pour pouvoir utiliser la touche de volume pour
contrôler le déclencheur ou le zoom.
• Évaluer les photos : paramétrer l’appareil pour afficher les photos après leur capture.
• Réinit. les paramétres : réinitialiser les paramètres de l’appareil photo.
• : afficher les informations d’aide à l’utilisation de l’appareil photo.
Galerie
Introduction
Affichez et gérez les photos et les vidéos stockées dans l’appareil.
Afficher des photos ou lire des vidéos
1 Appuyez sur Galerie depuis l’écran Applications.
2 Sélectionnez une photo ou une vidéo.
Les fichiers vidéo sont caractérisés par l’icône sur la miniature. Pour regarder une vidéo,
appuyez sur .
Autres options
Supprimer
Modifier
Revenir à l’écran précédent.
Partager via
Autre lecteur
Aperçus miniatures des images et
des vidéos
Pour masquer ou afficher la barre de menus et les miniatures, appuyez sur l’écran.
Appareil photo et Galerie
100
Accéder à des contenus stockés sur d’autres appareils
Recherchez des contenus stockés sur d’autres appareils pour les afficher sur votre appareil.
Accéder à des contenus stockés sur des appareils Samsung Link
Pour utiliser cette fonctionnalité, vous devez vous connecter à votre compte Samsung. Pour en savoir
plus, reportez-vous à la section Enregistrer des comptes Samsung.
Depuis l’écran principal Galerie, appuyez sur et sélectionnez un appareil dans la liste Appareils
enregistrés pour accéder à son contenu. Vous pouvez afficher les contenus des appareils enregistrés
sur Samsung Link. Pour en savoir plus, consultez l’adresse suivante : link.samsung.com.
• Vérifiez que les appareils enregistrés sont allumés et connectés à un réseau Wi-Fi ou
mobile.
• Il se peut que des frais supplémentaires vous soient facturés lorsque vous accédez à des
contenus enregistrés sur d’autres appareils via le réseau mobile.
Accéder à des contenus stockés sur des appareils à proximité
Recherchez des appareils à proximité via le Wi-Fi, Wi-Fi Direct ou un point d’accès mobile pour
afficher des contenus stockés sur ces appareils.
1 Depuis l’écran Applications, appuyez sur Paramètres → NFC et partage → Appareils à
proximité, puis faites glisser le curseur Appareils à proximité vers la droite pour activer la
fonction.
2 Depuis l’écran principal Galerie, appuyez sur .
3 Sélectionnez un appareil dans la liste Appareils à proximité.
Vous pouvez visionner des photos et des vidéos sur les appareils dont la fonction de partage de
contenus est activée.
Appareil photo et Galerie
101
Supprimer des photos ou des vidéos
Supprimer une photo ou une vidéo
Sélectionnez une photo ou une vidéo et appuyez sur en haut de l’écran.
Supprimer plusieurs photos et vidéos
1 Depuis l’écran principal Galerie, maintenez le doigt appuyé sur une photo ou une vidéo pour la
supprimer.
Vous pouvez également appuyer sur → Sélectionner.
2 Cochez les photos et les vidéos à supprimer.
3 Appuyez sur en haut de l’écran.
Vous pouvez également appuyer sur → Supprimer, cochez les photos ou vidéos à supprimer, puis
appuyer sur TERMINÉ pour supprimer plusieurs éléments.
102
Assistance sécurité
Mode Urgence
En mode Urgence, l’écran passe en nuances de gris afin d’économiser la batterie. En outre,
l’utilisation de certaines applications et fonctions est limitée.
Activer le mode Urgence
1 Depuis l’écran Applications, appuyez sur Paramètres → Assistance sécurité → Mode Urgence,
puis faites glisser le curseur Mode Urgence vers la droite pour activer la fonction.
Vous pouvez également maintenir la touche Marche/Arrêt enfoncée, puis appuyer sur Mode
Urgence.
2 Lisez et acceptez les conditions générales, puis appuyez sur OK.
3 Lisez les instructions à l’écran, puis appuyez sur ACTIVER.
Faire retentir des alarmes.
Ajouter des applications à utiliser
dans ce mode.
Passer un appel d’urgence.
Niveau de charge de la batterie et
temps de veille estimé.
Activer la lampe de poche.
Envoyer votre position actuelle Passer un appel.
dans un message.
Naviguer sur Internet.
Accéder à des options
supplémentaires.
Le délai de veille maximum estimé est le temps qu’il faut à la batterie pour se décharger
complètement lorsque l’appareil n’est pas utilisé. Le délai de veille peut varier selon les
paramètres de l’appareil et les conditions d’utilisation.
Assistance sécurité
103
Désactiver le mode Urgence
Pour désactiver le mode Urgence, appuyez sur → Désactiver le mode Urgence → DÉSACTIV. Vous
pouvez également maintenir la touche Marche/Arrêt enfoncée, puis appuyer sur Mode Urgence →
DÉSACTIV.
Envoyer des messages d’aide
En cas d’urgence, appuyez à trois reprises rapprochées sur la touche Marche/Arrêt. L’appareil
envoie un message à vos contacts prédéfinis. Les messages incluent des informations concernant
votre position géographique. Pour utiliser cette fonction, commencez par enregistrer vos contacts
prédéfinis.
Ajouter des contacts prédéfinis
1 Depuis l’écran Applications, appuyez sur Paramètres → Assistance sécurité.
2 Appuyez sur Gérer les contacts principaux → Créer un contact principal.
3 Appuyez sur Créer un contact et saisissez ses coordonnées, ou appuyez sur Sélectionner dans
les contacts pour transformer un contact existant en contact prédéfini.
Définir des messages d’aide
1 Depuis l’écran Applications, appuyez sur Paramètres → Assistance sécurité.
2 Appuyez sur Envoyer des messages d’aide, puis faites glisser le curseur Envoyer des messages
d’aide vers la droite pour activer la fonction.
3 Lisez et acceptez les conditions générales, puis appuyez sur OK.
Pour envoyer des messages d’aide comportant des enregistrements audio ou des photos,
cochez la case Envoyer un enreg. sonore ou Envoyer images.
Selon votre zone géographique ou votre opérateur, l’option Envoyer images peut ne pas
être disponible.
104
Applications utiles
Mode Voiture
Introduction
Utilisez ce mode pour contrôler l’appareil lorsque vous conduisez. Vous pouvez écouter des
messages et de la musique grâce aux commandes vocales sans avoir à manipuler l’appareil.
Ne regardez pas l’écran et n’utilisez aucune fonction tactile en conduisant.
• Les cartes, votre position actuelle et autres données de navigation peuvent différer des
informations de localisation réelles. Soyez attentif aux conditions de trafic, à l’état de la
route et à tous les autres facteurs qui pourraient affecter votre conduite. Respectez le
code de la route et les consignes de sécurité en vigueur.
• L’utilisation de la fonction de navigation peut entraîner des frais supplémentaires.
• La disponibilité de ce mode dépend de votre zone géographique ou de votre opérateur.
• Ce mode n’est pas pris en charge dans certaines langues.
Démarrer le mode Voiture
Lorsque vous enregistrez un véhicule sur votre appareil, vous pouvez écouter le son émis par
l’appareil via les haut-parleurs de la voiture. Vous pouvez également paramétrer l’appareil pour qu’il
active automatiquement le mode Voiture dès la connexion au véhicule, etc.
Lorsque vous ouvrez cette application pour la première fois, suivez les instructions qui s’affichent à
l’écran pour terminer la configuration.
1 Ouvrez le volet de paramétrage rapide, puis appuyez sur Mode voit. pour activer la fonction.
Applications utiles
105
2 Suivez les instructions qui s’affichent à l’écran pour procéder à la configuration.
Lorsque la fenêtre de demande d’autorisation Bluetooth apparaît, appuyez sur OUI pour
autoriser un véhicule à rechercher votre appareil et s’y connecter via la fonction Bluetooth.
• Avant d’enregistrer votre véhicule, démarrez-le et allumez la radio.
• Lorsque vous enregistrez un véhicule sur l’appareil, placez l’appareil près du véhicule.
Enregistrer d’autres véhicules
Appuyez sur PLUS → Paramètres → Mes voitures → AJOUTER.
Utiliser les menus du mode Voiture
Sélectionnez les menus du mode Voiture à l’aide des commandes vocales afin de passer des appels,
envoyer des messages, trouver un itinéraire ou écouter de la musique. Vous pouvez également
appuyer sur chaque icône de menu affichée sur l’écran.
1 Ouvrez le volet de paramétrage rapide, puis appuyez sur Mode voit. pour activer la fonction.
Accéder à des options
supplémentaires.
Menus du mode
Voiture
Activer la fonction de
commande vocale.
Ouvrir l’écran de
menus.
2 Depuis l’écran principal du mode Voiture, dites « Salut Galaxy ».
3 Lorsque l’icône apparaît, énoncez une commande vocale pour démarrer le menu souhaité.
Vous pouvez également utiliser des commandes vocales instantanées. Pour afficher des
exemples de ces commandes, appuyez sur PLUS → Ex. de commandes.
Applications utiles
106
Utiliser la fonction de navigation
Sélectionnez un lieu en maintenant le doigt appuyé sur la carte. Vous pouvez aussi utiliser une
commande vocale pour obtenir l’itinéraire jusqu’à une adresse.
1 Ouvrez le volet de paramétrage rapide, puis appuyez sur Mode voit. pour activer la fonction.
2 Depuis l’écran principal du mode Voiture, dites « Salut Galaxy ».
3 Dites « Navigation ».
4 Dites un mot-clé ou l’adresse du lieu.
L’appareil démarre automatiquement la navigation.
S Finder
Introduction
Recherchez un mot-clé parmi une grande variété de contenus.
Rechercher du contenu
Ouvrez le volet des raccourcis et appuyez sur S Finder.
Saisissez un mot-clé dans le champ de recherche ou appuyez sur et énoncez un mot-clé.
Pour obtenir des résultats plus précis, appuyez sur les touches de filtre sous le champ de recherche,
puis sélectionnez un élément.
Paramétrer des critères de recherche
Vous pouvez définir des critères afin de rechercher du contenu dans des champs de recherche
spécifiques.
Appuyez sur → Paramètres → Sélect. cat. de recherche, puis cochez les critères souhaités.
Applications utiles
107
Gérer l’historique de recherche
Vos anciennes recherches sont automatiquement enregistrées. Pour supprimer un élément de
l’historique de recherche, appuyez sur près de cet élément.
Pour paramétrer l’appareil afin qu’il n’enregistre pas l’historique de recherche, appuyez sur →
Paramètres, puis désélectionnez Utiliser histor. recherc.
S Planner
Introduction
Gérez votre agenda en y entrant vos événements ou tâches à venir.
Créer un événement ou une tâche
1 Appuyez sur S Planner depuis l’écran Applications.
2 Appuyez sur ou appuyez deux fois sur une date.
Si la date comporte déjà des événements ou tâches, appuyez sur la date et sur .
3 Appuyez en haut à gauche de l’écran pour sélectionner un événement ou une tâche, puis
complétez les informations requises.
• Ajouter événement : définir la date de début et de fin d’un événement. Vous pouvez lui
appliquer une option de répétition.
• Ajouter une tâche : ajouter une tâche à faire à une date spécifique. Vous pouvez lui
appliquer une option de priorité.
Applications utiles
108
Saisir un titre.
Joindre une carte indiquant le lieu
de l’événement.
Définir un rappel pour l’événement.
Ajouter des détails.
Sélectionner un calendrier à utiliser
ou à synchroniser.
Sélectionner un élément.
Définir une date de début et de fin
pour l’événement.
4 Appuyez sur ENREGISTRER pour sauvegarder l’événement ou la tâche.
Synchroniser les événements et les tâches avec vos comptes
Depuis l’écran principal S Planner, appuyez sur → Sync maintenant pour synchroniser les
événements et les tâches avec vos comptes.
Pour ajouter des comptes avec lesquels effectuer la synchronisation, appuyez sur → Calendriers →
Ajouter compte. Sélectionnez ensuite un compte avec lequel effectuer la synchronisation et ouvrez
une session. Une fois le compte ajouté, un cercle vert apparaît près du nom du compte.
Pour modifier l’option de synchronisation du compte, ouvrez l’écran Applications, appuyez sur
Paramètres → Comptes, puis sélectionnez un service de compte.
Applications utiles
109
S Health
Introduction
S Health vous aide à gérer votre bien-être et votre condition physique. Définissez des objectifs de
remise en forme, vérifiez vos progrès et effectuez un suivi régulier de votre condition physique.
Démarrer S Health
Si vous exécutez cette application pour la première fois ou après la réinitialisation de vos données,
suivez les instructions à l’écran pour procéder à la configuration.
1 Appuyez sur S Health depuis l’écran Applications.
2 Suivez les instructions qui s’affichent à l’écran pour procéder à la configuration.
En fonction de vos données physiques, l’appareil calcule votre métabolisme de base
standard (MB) et vous recommande un apport calorique quotidien. Cette recommandation
peut ne pas s’adapter à tous les âges, constitutions corporelles ou besoins nutritionnels.
Écran principal S Health
Vous pouvez afficher les informations essentielles depuis les menus S Health et utiliser les raccourcis
pour accéder directement aux menus S Health.
Appuyez sur S Health depuis l’écran Applications. Appuyez sur → Écran principal.
Pour y accéder, ouvrez l’écran principal S Health et appuyez sur → Aide.
Applications utiles
110
Informations complémentaires
• L’objet du recueil de ces données est limité à la fourniture du service que vous avez demandé,
dont la transmission d’informations supplémentaires pour améliorer votre bien-être, de
données de sauvegarde/de synchronisation, d’analyses de données et de statistiques, ou
pour développer et offrir de meilleurs services. (Mais, si vous vous connectez sur votre compte
Samsung depuis S Health, vos données peuvent être enregistrées sur le serveur pour être
sauvegardées.) Les données personnelles peuvent être conservées à cette fin. Vous pouvez
supprimer les données personnelles sauvegardées par l’application S Health à l’aide de
l’option de réinitialisation des données dans le menu Paramètres. Pour supprimer des données
partagées sur vos réseaux sociaux ou transférées vers des systèmes de stockage, vous devez les
supprimer séparément.
• Vous assumez l’entière responsabilité d’une utilisation inappropriée des données partagées sur
les réseaux sociaux ou transmises à d’autres personnes. Soyez vigilant lorsque vous partagez vos
données personnelles avec d’autres personnes.
• Si l’appareil est connecté à des appareils de mesure, vérifiez le protocole de communication
pour confirmer le bon fonctionnement. Si vous utilisez une connexion sans fil, telle que
Bluetooth ou ANT+, il se peut que l’appareil soit affecté par des interférences électroniques
provenant d’autres appareils. Évitez d’utiliser l’appareil à proximité immédiate d’autres appareils
émettant des ondes radio.
• Selon la version logicielle de l’application, le contenu utilisé dans l’application S Health
peut différer. Les services offerts avec l’application sont sujets à modification ou annulation
d’assistance sans préavis.
• La disponibilité des fonctions et services S Health dépend de la législation et des
réglementations en vigueur dans votre région.
• Certaines fonctions S Health peuvent ne pas être disponibles dans votre région.
• Les fonctions de S Health sont indiquées uniquement à titre d’information, mais ne sauraient
être utilisées pour diagnostiquer une maladie ou une pathologie, ou pour guérir, soulager,
traiter ou prévenir une maladie.
Applications utiles
111
S Voice
Introduction
Réalisez diverses tâches à l’aide d’une simple commande vocale.
Lancer S Voice
1 Appuyez sur S Voice depuis l’écran Applications.
Vous pouvez également appuyer deux fois sur la touche Accueil.
La disponibilité de cette application dépend de votre zone géographique ou de votre
opérateur.
2 Suivez les instructions qui s’affichent à l’écran pour procéder à la configuration.
3 Affichez le didacticiel ou appuyez sur LANCER pour ignorer le didacticiel.
Définir une langue
Appuyez sur → Paramètres → Langue, puis sélectionnez une langue.
La langue sélectionnée est appliquée à S Voice uniquement, et non à la langue d’affichage
de l’appareil.
Utiliser S Voice
1 Appuyez sur S Voice depuis l’écran Applications.
Vous pouvez également appuyer deux fois sur la touche Accueil.
Dès que S Voice est lancé, l’appareil démarre la reconnaissance vocale.
2 Prononcez une commande vocale.
Si l’appareil reconnaît la commande, il exécute l’action correspondante. Pour répéter une
commande vocale ou en énoncer une autre, appuyez sur .
Applications utiles
112
Conseils pour améliorer la reconnaissance vocale :
• Parlez clairement.
• Parlez dans des endroits calmes.
• N’utilisez pas de langage injurieux ni d’argot.
• Évitez de parler avec un accent local.
Selon l’environnement où vous vous trouvez ou la manière dont vous parlez, il se peut que l’appareil
ne reconnaisse pas vos commandes ou qu’il exécute des commandes erronées.
Activer S Voice en mode veille
Si vous n’utilisez pas S Voice pendant un certain temps, l’application passe automatiquement en
mode veille. Appuyez sur l’icône de microphone ou dites « Bonjour Galaxy » pour reprendre la
reconnaissance vocale.
Changer de commande de réveil
Vous pouvez changer la commande de réveil qui correspond par défaut à « Bonjour Galaxy ». La
commande de réveil sert à relancer la reconnaissance vocale lorsque l’appareil est en mode veille.
Appuyez sur → Paramètres → Réveil vocal → Définir commande réveil.
Utiliser des commandes de réveil sur l’écran verrouillé
Sur l’écran verrouillé, vous pouvez utiliser différentes fonctions avec des commandes de réveil
prédéfinies.
Appuyez sur → Paramètres → Réveil vocal → Réveiller qd verrouillé.
Applications utiles
113
Musique
Introduction
Écoutez de la musique classée par catégorie et personnalisez les paramètres de lecture.
Écouter de la musique
Appuyez sur Musique depuis l’écran Applications.
Sélectionnez un morceau à écouter.
Ajouter le morceau de musique à
une liste de lecture.
Passer au morceau suivant.
Maintenir appuyé pour effectuer
une avance rapide.
Mettre en pause et reprendre la
lecture.
Accéder à des options
supplémentaires.
Modifier le mode de répétition.
Revenir au morceau précédent.
Maintenir appuyé pour effectuer un
retour rapide.
Activer la lecture aléatoire.
Ouvrir la liste de lecture.
Rechercher d’autres appareils pour
y lire le fichier.
Définir le fichier comme votre
morceau favori.
Régler le volume.
Applications utiles
114
Écouter de la musique stockée sur d’autres appareils
Recherchez des morceaux stockés sur d’autres appareils pour les écouter sur votre appareil.
Appuyez sur Musique depuis l’écran Applications.
Accéder à de la musique stockée sur des appareils Samsung Link
Pour utiliser cette fonctionnalité, vous devez vous connecter à votre compte Samsung. Pour en savoir
plus, reportez-vous à la section Enregistrer des comptes Samsung.
Depuis l’écran principal Musique, appuyez sur APPAREILS et sélectionnez un appareil dans Appareils
enregistrés pour y accéder et lire les morceaux. Vous pouvez écouter des morceaux sur les appareils
enregistrés sur Samsung Link. Pour en savoir plus, consultez l’adresse suivante : link.samsung.com.
• Vérifiez que les appareils enregistrés sont allumés et connectés à un réseau Wi-Fi ou
mobile.
• Il se peut que des frais supplémentaires vous soient facturés lorsque vous accédez à des
contenus enregistrés sur d’autres appareils via le réseau mobile.
Accéder à de la musique stockée sur des appareils à proximité
Recherchez des appareils à proximité via le Wi-Fi, Wi-Fi Direct ou un point d’accès mobile pour lire de
la musique stockée sur ces appareils.
1 Depuis l’écran Applications, appuyez sur Paramètres → NFC et partage → Appareils à
proximité, puis faites glisser le curseur Appareils à proximité vers la droite pour activer la
fonction.
2 Depuis l’écran principal Musique, appuyez sur APPAREILS.
3 Sélectionnez un appareil dans Appareils à proximité pour accéder aux morceaux et les lire.
Vous pouvez écouter des morceaux sur les appareils dont la fonction de partage de contenu est
activée.
Applications utiles
115
Vidéo
Introduction
Regardez des vidéos stockées sur l’appareil et personnalisez les paramètres de lecture.
Lire des vidéos
Appuyez sur Vidéo depuis l’écran Applications.
Sélectionnez une vidéo à lire.
Modifier le format
d’écran.
Effectuer une avance
ou un retour rapdie en
faisant glisser la barre.
Rechercher d’autres
appareils pour y lire le
fichier.
Revenir à la vidéo
précédente. Maintenir
la touche appuyée
pour effectuer un
retour rapide.
Passer à la vidéo
suivante. Maintenir la
touche appuyée pour
effectuer une avance
rapide.
Accéder à des options
supplémentaires.
Basculer sur le lecteur
vidéo contextuel.
Mettre en pause et
reprendre la lecture.
Régler le volume.
Faites glisser le doigt vers le haut ou le bas sur le côté gauche de l’écran de lecture pour régler la
luminosité, ou faites glisser le doigt vers le haut ou le bas sur le côté droit de l’écran de lecture pour
régler le volume.
Pour effectuer un retour ou une avance rapide, faites glisser le doigt vers la gauche ou la droite sur
l’écran de lecture.
Applications utiles
116
Regarder des vidéos stockées sur d’autres appareils
Recherchez des vidéos stockées sur d’autres appareils pour les lire sur votre appareil.
Appuyez sur Vidéo depuis l’écran Applications.
Accéder à des vidéos stockées sur des appareils Samsung Link
Pour utiliser cette fonctionnalité, vous devez vous connecter à votre compte Samsung. Pour en savoir
plus, reportez-vous à la section Enregistrer des comptes Samsung.
Depuis l’écran principal Vidéo, appuyez sur APPAREILS et sélectionnez un appareil dans Appareils
enregistrés pour y accéder et regarder la vidéo. Vous pouvez regarder la vidéo sur les appareils
enregistrés sur Samsung Link. Pour en savoir plus, consultez l’adresse suivante : link.samsung.com.
• Vérifiez que les appareils enregistrés sont allumés et connectés à un réseau Wi-Fi ou
mobile.
• Il se peut que des frais supplémentaires vous soient facturés lorsque vous accédez à des
contenus enregistrés sur d’autres appareils via le réseau mobile.
Accéder à des vidéos stockées sur des appareils à proximité
Recherchez des appareils à proximité via le Wi-Fi, Wi-Fi Direct ou un point d’accès mobile pour
regarder des vidéos stockées sur ces appareils.
1 Depuis l’écran Applications, appuyez sur Paramètres → NFC et partage → Appareils à
proximité, puis faites glisser le curseur Appareils à proximité vers la droite pour activer la
fonction.
2 Depuis l’écran principal Vidéo, appuyez sur APPAREILS.
3 Sélectionnez un appareil dans Appareils à proximité pour accéder à la vidéo et la regarder.
Vous pouvez regarder des vidéos sur les appareils dont la fonction de partage de contenu est
activée.
Applications utiles
117
Internet
Naviguez sur Internet pour rechercher des informations et enregistrez vos pages Web préférées en
tant que favoris afin d’y accéder plus facilement.
Parcourir des pages Web
1 Appuyez sur Internet depuis l’écran Applications.
2 Appuyez sur le champ d’adresse. Pour changer de moteur de recherche, appuyez sur l’icône du
moteur de recherche près du champ d’adresse Web.
3 Saisissez une adresse Web ou un mot-clé, puis appuyez sur Aller à. Pour effectuer oralement une
recherche sur le Web, appuyez sur .
Pour afficher la barre d’outils, faites glisser votre doigt vers le bas de l’écran.
Lire un article en mode Lecture.
Définir la page Web en cours
comme favori.
Ouvrir la page d’accueil.
Revenir à la page précédemment
visitée.
Afficher la liste des favoris.
Accéder à des options
supplémentaires.
Ouvrir le gestionnaire de fenêtres
Web.
Actualiser la page Web en cours.
Afficher les pages enregistrées.
Applications utiles
118
Enregistreur vocal
Introduction
Changez de modes d’enregistrement en fonction de la situation, par exemple, lors d’une interview
ou d’une réunion. L’appareil peut convertir vos paroles en texte et distinguer les diverses sources
sonores.
Enregistrer des mémos vocaux
1 Depuis l’écran Applications, appuyez sur Enregistreur vocal.
2 Pour commencer l’enregistrement, appuyez sur . Parlez dans le microphone.
Pour interrompre l’enregistrement, appuyez sur . Pour annuler l’enregistrement, appuyez sur
.
Pendant l’enregistrement d’un mémo vocal, appuyez sur pour caractériser un passage
comme favori.
Afficher la liste des mémos vocaux.
Modifier le mode d’enregistrement.
Accéder à des options
supplémentaires.
Démarrer l’enregistrement.
Faire défiler parmi les modes
d’enregistrement disponibles.
Mode d’enregistrement actuel.
3 Pour terminer l’enregistrement, appuyez sur .
Applications utiles
119
Modifier le mode d’enregistrement
Appuyez sur pour sélectionner un mode dans la liste.
• Normal : mode d’enregistrement normal.
• Interview : le microphone est sensible aux sons provenant des deux directions. Dans ce mode,
les microphones situés en haut et en bas de l’appareil prélèvent la même quantité de sons.
L’icône s’affiche à côté des mémos vocaux enregistrés dans ce mode.
• Réunion : le microphone est sensible aux sons provenant de différentes directions. L’icône
s’affiche à côté des mémos vocaux enregistrés dans ce mode.
• Mémo vocal : l’appareil enregistre votre voix et la convertit simultanément en texte affiché à
l’écran. Pour un résultat optimal, rapprochez l’appareil de votre bouche et parlez clairement
dans un environnement calme. L’icône s’affiche à côté des mémos vocaux enregistrés dans
ce mode.
Si la langue que vous parlez n’est pas prise en charge par la fonction Enregistreur vocal,
l’appareil ne reconnaît pas vos paroles. Avant d’utiliser cette fonction, appuyez sur →
Paramètres → Langue pour définir la langue du système de mémos vocaux.
Écouter les mémos vocaux
Lorsque vous écoutez un entretien ou une réunion enregistré(e) dans un mémo vocal, vous pouvez
activer ou désactiver certaines sources sonores de l’enregistrement.
1 Depuis l’écran Applications, appuyez sur Enregistreur vocal.
2 Appuyez sur , puis sélectionnez un mémo vocal enregistré en mode réunion.
3 Pour désactiver certaines sources sonores, appuyez sur dans le sens correspondant au son à
désactiver.
L’icône devient et le son est désactivé.
Source sonore activée
Source sonore désactivée
Applications utiles
120
Horloge
Introduction
Configurez les alarmes, vérifiez l’heure dans les plus grandes villes du monde, planifiez un
événement ou définissez un minuteur.
Alarme
Depuis l’écran Applications, appuyez sur Horloge → Alarme.
Créer une alarme
1 Appuyez sur .
2 Définissez l’heure de l’alarme, sélectionnez les jours où celle-ci doit sonner, puis paramétrez les
diverses options de l’alarme.
3 Appuyez sur OK.
L’alarme sélectionnée est ajoutée à la liste des alarmes.
4 Pour activer ou désactiver des alarmes, appuyez sur l’icône près de l’alarme concernée.
Arrêter ou répéter une alarme
Pour éteindre une alarme, faites glisser votre doigt sur l’icône . Si l’option de répétition est activée,
faites glisser votre doigt sur l’icône pour répéter l’alarme après une période de répétition
prédéfinie.
Supprimer une alarme
Appuyez sur → Sélectionner, sélectionnez l’alarme à supprimer, puis appuyez sur .
Applications utiles
121
Horloge mondiale
Depuis l’écran Applications, appuyez sur Horloge → Horloge mondiale.
Créer une horloge
Saisissez le nom d’une ville ou sélectionnez-en une, puis appuyez sur .
Pour appliquer l’heure d’été, appuyez sur , maintenez le doigt appuyé sur une horloge, puis
appuyez sur .
Supprimer une horloge
Appuyez sur → Sélectionner, sélectionnez l’horloge à supprimer, puis appuyez sur .
Chronomètre
1 Depuis l’écran Applications, appuyez sur Horloge → Chronomètre.
2 Appuyez sur DÉBUT pour commencer à chronométrer.
Pour enregistrer des temps intermédiaires lors du chronométrage d’un événement, appuyez sur
TOUR.
3 Appuyez sur APPÊTER pour arrêter le chronométrage.
Pour effacer les temps intermédiaires, appuyez sur RÉINIT. Pour redémarrer le chronomètre,
appuyez sur REPRENDRE.
Minuteur
1 Depuis l’écran Applications, appuyez sur Horloge → Minuteur.
2 Définissez la durée, puis appuyez sur DÉMARRER.
3 Lorsque la durée du minuteur est écoulée, faites glisser votre doigt sur l’icône .
Applications utiles
122
Calculatrice
Exécutez des calculs simples ou complexes.
Utiliser la calculatrice
Appuyez sur Calculatrice depuis l’écran Applications.
Faites pivoter l’appareil vers la gauche pour utiliser la calculatrice scientifique en mode Paysage. Si
l’option Rotation écran est désactivée dans le volet des raccourcis, appuyez sur → Calculatrice
scientifique.
Pour afficher l’historique des calculs, appuyez sur pour masquer le clavier.
Pour effacer l’historique, appuyez sur → EFFACER L’HISTORIQUE.
Dropbox
Utilisez cette application pour enregistrer et partager des fichiers avec d’autres personnes via le
service de stockage Cloud Dropbox. Lorsque vous enregistrez des fichiers dans Dropbox, votre
appareil les synchronise automatiquement avec le serveur Web et tout autre appareil sur lequel le
service Dropbox est installé.
La disponibilité de cette application dépend de votre zone géographique ou de votre
opérateur.
Appuyez sur Dropbox depuis l’écran Applications.
Si vous démarrez cette application pour la première fois ou après la réinitialisation de vos données,
suivez les instructions à l’écran pour procéder à la configuration.
Depuis l’écran principal Dropbox, utilisez les fonctions suivantes :
• : charger ou ouvrir des fichiers. Appuyez sur → Transférer ici pour télécharger les fichiers.
• : afficher les photos ou vidéos chargées. Appuyez sur pour partager ou supprimer des
fichiers ou créer des albums.
• : ouvrir des fichiers de la liste des favoris.
• : afficher des notifications.
Applications utiles
123
Flipboard
Utilisez cette application pour afficher en direct les nouvelles de vos réseaux sociaux et les actualités
à un format de magazine personnalisé.
Appuyez sur Flipboard depuis l’écran Applications.
La disponibilité de cette application dépend de votre zone géographique ou de votre
opérateur.
Si vous démarrez cette application pour la première fois ou après la réinitialisation de vos données,
suivez les instructions à l’écran pour procéder à la configuration.
Depuis l’écran principal Flipboard, sélectionnez des articles d’actualités et des abonnements.
Smart Remote
Introduction
Utilisez cette application pour vous connecter à des téléviseurs, des décodeurs ou des projecteurs, et
utiliser l’appareil comme une télécommande.
Applications utiles
124
Commencer à utiliser Smart Remote
1 Appuyez sur Smart Remote depuis l’écran Applications.
2 Appuyez sur DÉMARRER.
3 Sélectionnez un pays, une région et un service de radiodiffusion.
Les programmes de télévision disponibles s’affichent.
Utiliser l’appareil comme télécommande
Vous pouvez allumer et éteindre le téléviseur, parcourir les chaînes ou régler le volume du téléviseur
en utilisant l’appareil comme une télécommande.
1 Appuyez sur Smart Remote depuis l’écran Applications.
2 Appuyez sur → Suivant.
3 Sélectionnez la marque du téléviseur.
4 Assurez-vous que le port infrarouge de l’appareil est orienté vers le téléviseur et appuyez sur
Bouton 1. Appuyez ensuite sur OUI si l’appareil allume le téléviseur.
Si l’appareil ne réussit pas à allumer le téléviseur, appuyez sur NON et recommencez cette
opération jusqu’à ce que le téléviseur reconnaisse le signal.
Applications utiles
125
5 Sélectionnez un fournisseur de chaînes.
Allumer ou éteindre le téléviseur.
Menus de commande du téléviseur
Fonctions supplémentaires
Accéder à des options
supplémentaires.
Regarder la télévision à l’aide de l’appareil
Sélectionnez un programme TV dans la liste des programmes disponibles pour le regarder sur le
téléviseur connecté.
1 Appuyez sur Smart Remote depuis l’écran Applications.
2 Appuyez sur POUR VOUS, SÉRIES TÉLÉ, FILMS ou SPORTS.
3 Sélectionnez un programme TV, puis appuyez sur REGARDER SUR TV.
Le programme sélectionné apparaît sur le téléviseur connecté.
4 Appuyez sur pour changer de chaîne ou régler le volume.
Le volet de télécommande apparaît à l’écran.
Définir un rappel de programme
1 Sélectionnez un programme télévisé qui n’est pas actuellement en cours de diffusion.
2 Appuyez sur ME LE RAPPELER et configurez une alarme pour vous rappeler l’heure de début du
programme.
Applications utiles
126
Evernote
Utilisez cette application pour créer, synchroniser et partager des notes multimédia. Vous pouvez
ajouter des balises aux notes ou trier les notes dans un carnet et gérer ainsi efficacement vos idées.
Appuyez sur Evernote depuis l’écran Applications.
Connectez-vous à votre compte Evernote. Si vous n’en possédez pas, créez un compte Evernote.
Suivez les instructions qui s’affichent à l’écran pour procéder à la configuration.
La disponibilité de cette application dépend de votre zone géographique ou de votre
opérateur.
Composer des notes
Vous pouvez créer une note à l’aide d’images, d’enregistrements vocaux et autres pièces jointes.
Depuis l’écran principal Evernote, appuyez sur Nouvelle note.
Lorsque vous rédigez une note, utilisez les options suivantes :
• : définir un rappel pour la note.
• : joindre des fichiers ou utiliser des options supplémentaires.
• : prendre une photo et la joindre à la note.
• : accéder à des options supplémentaires.
Supprimer des notes
Maintenez le doigt appuyé sur une note de la liste, puis appuyez sur Supprimer.
Applications utiles
127
PEN.UP
Utilisez cette application pour publier et partager vos dessins réalisés avec le S Pen.
Appuyez sur PEN.UP depuis l’écran Applications.
Si vous démarrez cette application pour la première fois ou après la réinitialisation de vos données,
appuyez sur S’inscrire ou Connexion en haut de l’écran. Ensuite, suivez les instructions qui
s’affichent à l’écran pour procéder à la configuration.
Publier des œuvres
Depuis l’écran principal PEN.UP, appuyez sur . Ajoutez votre dessin, complétez ses informations,
puis appuyez sur .
Afficher une œuvre
Depuis l’écran principal PEN.UP, sélectionnez un post. Appuyez sur → Enregistrer l’œuvre pour
télécharger l’œuvre sur votre appareil. L’œuvre est enregistrée dans le dossier PEN.UP. Pour ouvrir le
dossier, ouvrez l’écran Applications et appuyez sur Galerie → → Album → PEN.UP.
Vous pouvez uniquement télécharger des œuvres étiquetées en tant que fond d’écran.
Applications Google
Google fournit des applications de divertissement, de réseaux sociaux et des applications à caractère
professionnel. Vous aurez éventuellement besoin d’un compte Google pour accéder à certaines
applications. Pour en savoir plus, reportez-vous à la section Paramétrer des comptes.
Pour afficher des informations sur une application, ouvrez son écran principal, puis appuyez sur →
Aide.
Certaines applications peuvent ne pas être disponibles ou s’intituler différemment selon
votre zone géographique ou votre opérateur.
Chrome
Recherchez des informations et naviguez dans des pages Web.
Gmail
Envoyez et recevez des e-mails via le service Google Mail.
Applications utiles
128
Google+
Communiquez et partagez des contenus avec votre famille, vos amis et bien plus encore. Cet espace
vous permet également de sauvegarder vos photos, vidéos, etc.
Maps
Localisez votre position sur une carte, recherchez des adresses et affichez des informations de
localisation.
Play Musique
Découvrez, écoutez et partagez des morceaux de musique à l’aide de votre appareil.
Play Films
Regardez des vidéos enregistrées sur votre appareil et téléchargez divers contenus sur Play Store.
Play Livres
Téléchargez des livres sur Play Store et lisez-les.
Play Kiosque
Consultez les actualités et les magazines qui vous intéressent.
Play Jeux
Téléchargez des jeux sur Play Store et jouez avec d’autres participants.
Google Drive
Stockez vos données sur le cloud, accédez-y où que vous soyez et partagez-les avec d’autres
personnes.
YouTube
Regardez ou créez des vidéos et partagez-les avec d’autres personnes.
Applications utiles
129
Google+ Photos
Gérez vos photos, albums et vidéos enregistré(e)s sur l’appareil et téléchargé(e)s sur Google+.
Hangouts
Discutez avec vos amis, séparément ou en groupe, et ajoutez des images, émoticônes et vidéos.
Recherche Google
Recherchez rapidement des informations sur Internet ou sur votre appareil.
Recherche vocale
Recherchez rapidement des informations en énonçant un mot-clé ou une phrase.
Paramètres Google
Configurez certaines fonctions proposées par Google.
130
Établir une connexion avec
d’autres appareils
Connexion rapide
Introduction
Recherchez automatiquement les appareils à proximité et établissez rapidement une connexion
avec eux.
• Assurez-vous que la fonction Wi-Fi Direct ou Bluetooth est activée sur les appareils ne
prenant pas en charge la fonction Connexion rapide.
• Les modes de connexion peuvent varier selon le type des appareils connectés ou du
contenu partagé.
• Le nom de l’appareil peut varier selon les appareils Bluetooth avec lesquels il est appairé.
Par exemple, le nom de l’appareil peut s’afficher comme BT MAC.
Établir une connexion à d’autres appareils
Si vous démarrez cette application pour la première fois ou après la réinitialisation de vos données,
suivez les instructions à l’écran pour procéder à la configuration.
1 Ouvrez le volet des raccourcis et appuyez sur Connex. rapide.
À l’ouverture du volet, les fonctions Wi-Fi et Bluetooth sont automatiquement activées et
l’appareil recherche les appareils à proximité.
2 Sélectionnez un appareil dans la liste et établissez une connexion en suivant les instructions à
l’écran.
Les étapes suivantes peuvent varier en fonction de l’appareil connecté.
Pour permettre aux appareils à proximité de rechercher votre appareil et de s’y connecter,
appuyez sur → Définir la visibilité de l’appareil → Rendre l’appareil visible, puis
sélectionnez une option.
Établir une connexion avec d’autres appareils
131
Relancer la recherche d’appareils
Si l’appareil recherché n’apparaît pas dans la liste, recherchez-le.
Appuyez sur et sélectionnez l’appareil dans la liste des appareils détectés.
Désactiver la fonction Connexion rapide
Pour désactiver la fonction Connexion rapide, faites glisser vers le bas depuis le haut de
l’écran. Sinon, appuyez sur .
Partager du contenu
Partagez du contenu avec les appareils connectés.
1 Ouvrez le volet des raccourcis et appuyez sur Connex. rapide.
2 Sélectionnez un appareil dans la liste des appareils détectés.
3 Sélectionnez une catégorie de média.
4 Sélectionnez le contenu à partager, puis appuyez sur TERMINÉ.
Votre appareil envoie le contenu à l’appareil connecté.
Établir une connexion avec d’autres appareils
132
Bluetooth
Introduction
Utilisez la fonction Bluetooth pour échanger des données ou des fichiers multimédia avec d’autres
appareils compatibles Bluetooth.
• Samsung ne peut être tenu responsable de la perte, de l’interception ou du mauvais
usage des données envoyées ou reçues via la fonction Bluetooth.
• Assurez-vous de toujours utiliser des appareils dignes de confiance et correctement
protégés avant de partager ou de recevoir des données. La présence d’obstacles entre les
deux appareils peut réduire le rayon d’action.
• Il est possible que votre appareil ne fonctionne pas avec certains appareils, en particulier
ceux qui n’ont pas été testés ou approuvés par Bluetooth SIG.
• N’utilisez pas la fonction Bluetooth de manière illégale (par exemple, pour le piratage de
fichiers ou l’enregistrement de communications à des fins commerciales).
Samsung ne peut être tenu responsable des répercussions d’une utilisation illégale de la
fonction Bluetooth.
Établir une connexion avec d’autres appareils Bluetooth
1 Depuis l’écran Applications, appuyez sur Paramètres → Bluetooth, appuyez sur le curseur
Bluetooth pour l’activer, puis sur ANALYSER.
Une liste des appareils détectés apparaît.
2 Sélectionnez un appareil auquel vous associer.
Si votre appareil a été appairé par le passé avec un appareil, appuyez sur son nom sans
confirmer le mot de passe.
Si l’appareil auquel vous souhaitez vous associer ne figure pas dans la liste, demandez à ce
que l’option de visibilité soit activée sur l’appareil. Reportez-vous au mode d’emploi de l’autre
appareil.
3 Pour confirmer, acceptez la demande de connexion Bluetooth sur les deux appareils.
Établir une connexion avec d’autres appareils
133
Envoyer et recevoir des données
De nombreuses applications prennent en charge le transfert de données via la fonction Bluetooth.
Vous pouvez partager des données, comme des contacts ou des fichiers multimédia, avec d’autres
appareils Bluetooth. Vous pouvez, par exemple, envoyer une image à un autre appareil.
Envoyer une image
1 Appuyez sur Galerie depuis l’écran Applications.
2 Sélectionnez une image.
3 Appuyez sur → Bluetooth, puis sélectionnez un appareil sur lequel transférer l’image.
Si l’appareil auquel vous souhaitez vous associer ne figure pas dans la liste, demandez à ce que
l’option de visibilité soit activée sur l’appareil.
4 Acceptez la demande de connexion Bluetooth sur l’autre appareil.
Recevoir une image
Lorsqu’un autre appareil vous envoie une image, acceptez la demande d’autorisation Bluetooth.
L’image reçue est enregistrée dans le dossier Download. Pour ouvrir le dossier, ouvrez l’écran
Applications et appuyez sur Galerie → → Album → Download.
Dissocier des appareils Bluetooth
1 Depuis l’écran Applications, appuyez sur Paramètres → Bluetooth.
L’appareil affiche la liste des appareils associés.
2 Appuyez sur à côté du nom de l’appareil à dissocier.
3 Appuyez sur Dissocier.
Établir une connexion avec d’autres appareils
134
Wi-Fi Direct
Introduction
Le Wi-Fi Direct autorise la connexion directe entre des appareils via un réseau Wi-Fi sans passer par
un point d’accès.
Établir une connexion à d’autres appareils
1 Depuis l’écran Applications, appuyez sur Paramètres → Wi-Fi, puis faites glisser le curseur Wi-Fi
vers la droite pour activer la fonction.
2 Appuyez sur → Wi-Fi Direct.
Une liste des appareils détectés apparaît.
Si l’appareil auquel vous souhaitez vous connecter ne figure pas dans la liste, demandez à ce
que la fonction Wi-Fi Direct soit activée sur l’appareil.
3 Sélectionnez un appareil auquel vous connecter.
4 Acceptez la demande de connexion Wi-Fi Direct sur l’autre appareil pour confirmer.
Envoyer et recevoir des données
Vous pouvez partager des données, comme des contacts ou des fichiers multimédia, avec d’autres
appareils. Vous pouvez, par exemple, envoyer une image à un autre appareil.
Envoyer une image
1 Appuyez sur Galerie depuis l’écran Applications.
2 Sélectionnez une image.
3 Appuyez sur → Wi-Fi Direct, puis sélectionnez un appareil sur lequel transférer l’image.
4 Acceptez la demande de connexion Wi-Fi Direct sur l’autre appareil.
Si les appareils sont déjà connectés, l’image est envoyée à l’autre appareil sans demande de
connexion.
Établir une connexion avec d’autres appareils
135
Recevoir une image
Lorsqu’un autre appareil vous envoie une image, acceptez la demande de connexion Wi-Fi Direct. Si
les appareils sont déjà connectés, l’image est reçue sur votre appareil sans demande de connexion.
L’image reçue est enregistrée dans le dossier Download. Pour ouvrir le dossier, ouvrez l’écran
Applications et appuyez sur Galerie → → Album → Download.
Déconnecter les appareils
1 Depuis l’écran Applications, appuyez sur Paramètres → Wi-Fi.
2 Appuyez sur → Wi-Fi Direct.
L’appareil affiche la liste des appareils connectés.
3 Appuyez sur TERMINER LA CONNEXION → OK pour déconnecter les appareils.
NFC
Introduction
Votre appareil est équipé d’une fonction qui permet de lire les tags NFC (Near Field Communication)
contenant des informations relatives aux produits. Grâce à cette fonction, vous pouvez également
effectuer des paiements et acheter des tickets de transport ou des billets de spectacle après avoir
téléchargé les applications correspondantes.
La batterie comporte une antenne NFC intégrée. Manipulez l’appareil avec précaution afin
de ne pas endommager l’antenne NFC.
Utiliser la fonction NFC
Utilisez la fonction NFC pour envoyer des images ou des contacts à d’autres appareils et lire des
informations produit. Si vous insérez une carte SIM ou USIM comportant une fonction de paiement,
vous pouvez utiliser l’appareil pour effectuer facilement des paiements.
1 Depuis l’écran Applications, appuyez sur Paramètres → NFC et partage → NFC, puis faites
glisser le curseur NFC vers la droite pour activer la fonction.
Vous pouvez également ouvrir le volet de paramétrage rapide, puis appuyer sur NFC pour
activer la fonction.
Établir une connexion avec d’autres appareils
136
2 Rapprochez l’antenne NFC, située à l’arrière de votre appareil, d’un tag NFC.
Les informations figurant sur le tag apparaissent à l’écran.
Assurez-vous que l’écran de l’appareil est déverrouillé. Sinon, l’appareil ne pourra pas lire les
tags NFC ou recevoir des données.
Effectuer un achat à l’aide de la fonction NFC
Pour pouvoir effectuer des paiements à l’aide de la fonction NFC, vous devez d’abord vous inscrire
à un service de paiement mobile. Pour vous inscrire ou obtenir plus d’informations sur ce service,
contactez votre opérateur.
1 Depuis l’écran Applications, appuyez sur Paramètres → NFC et partage → NFC, puis faites
glisser le curseur NFC vers la droite pour activer la fonction.
Vous pouvez également ouvrir le volet de paramétrage rapide, puis appuyer sur NFC pour
activer la fonction.
2 Rapprochez l’antenne NFC, située à l’arrière de votre appareil, du lecteur de carte NFC.
3 Appuyez sur Paiement NFC et sélectionnez une application pour configurer l’application de
paiement par défaut.
La liste des services peut ne pas inclure toutes les applications de paiement disponibles.
Établir une connexion avec d’autres appareils
137
Envoyer des données
Autorisez l’échange de données lorsque vous rapprochez l’antenne NFC de votre appareil de celle
d’un autre appareil NFC.
1 Depuis l’écran Applications, appuyez sur Paramètres → NFC et partage → NFC, puis faites
glisser le curseur NFC vers la droite pour activer la fonction.
Vous pouvez également ouvrir le volet de paramétrage rapide, puis appuyer sur NFC pour
activer la fonction.
2 Appuyez sur Android Beam ou S Beam, puis faites glisser le curseur Android Beam ou S Beam
vers la droite pour activer la fonction.
• Android Beam : envoyer des données via la fonction Bluetooth.
• S Beam : envoyer des données via le Wi-Fi Direct. Cette fonction est particulièrement
adaptée aux transferts de données volumineux.
3 Sélectionnez un élément et rapprochez l’antenne NFC de l’autre appareil de l’antenne NFC de
votre appareil.
4 Lorsque l’option Appuyez ici pour transférer apparaît à l’écran, appuyez sur l’écran de l’appareil
pour envoyer l’élément.
• N’envoyez pas de données protégées par des droits d’auteur via S Beam. Vous risqueriez
de violer les lois sur les droits d’auteur. Samsung ne peut en aucun cas être tenu
responsable en cas d’utilisation illégale de données protégées par des droits d’auteur.
• Si les deux appareils tentent d’envoyer simultanément des données, le transfert de
fichiers risque d’échouer.
Établir une connexion avec d’autres appareils
138
Screen Mirroring
Introduction
Utilisez cette fonction pour connecter votre appareil à un grand écran avec le routeur AllShare Cast
ou HomeSync, puis partagez vos contenus.
Appareils compatibles
Screen Mirroring (routeur
AllShare Cast ou
HomeSync)
• La disponibilité de cette fonction dépend de votre zone géographique ou de votre
opérateur.
• Selon la connexion réseau, certains fichiers peuvent être mis en mémoire tampon en
cours de lecture.
• Si vous indiquez une bande de fréquence Wi-Fi, il se peut que les routeurs AllShare Cast
ou HomeSync ne soient pas détectés.
Établir une connexion avec d’autres appareils
139
Afficher du contenu sur un téléviseur
Connectez le téléviseur et l’appareil devant utiliser la fonction Screen Mirroring. Pour configurer la
connexion, reportez-vous au mode d’emploi de l’appareil. Vous pouvez, par exemple, afficher du
contenu sur un téléviseur connecté via un routeur AllShare Cast.
1 Connectez l’appareil compatible avec la fonction Screen Mirroring au téléviseur à l’aide d’un
câble HDMI.
2 Sur le téléviseur, sélectionnez un mode de connexion, comme le mode HDMI, pour permettre la
connexion à un appareil externe.
3 Depuis l’écran Applications, appuyez sur Paramètres → NFC et partage → Screen Mirroring.
Une liste des appareils détectés apparaît.
4 Sélectionnez un appareil auquel vous connecter. L’écran de votre appareil apparaît sur l’écran du
téléviseur.
Si vous connectez l’appareil pour la première fois, maintenez le doigt appuyé sur le nom du
routeur figurant dans la liste et saisissez le code PIN indiqué sur l’écran du téléviseur.
5 Ouvrez ou lisez un fichier, puis commandez l’affichage à l’aide des touches de votre appareil.
Interrompre la connexion Screen Mirroring
Depuis l’écran Applications, appuyez sur Paramètres → NFC et partage → Screen Mirroring.
• Pour économiser votre batterie, désactivez cette fonction lorsque vous ne l’utilisez pas.
• Si vous lisez des vidéos ou jouez à des jeux sur un téléviseur, sélectionnez un mode TV
approprié afin d’obtenir un résultat optimal.
Établir une connexion avec d’autres appareils
140
MirrorLink
Contrôlez l’application MirrorLink de votre appareil depuis l’écran du tableau de bord d’un véhicule.
Votre appareil est compatible avec les véhicules prenant en charge MirrorLink version 1.1 ou
ultérieure.
Connecter votre appareil à un véhicule via MirrorLink
Lorsque vous utilisez cette fonction pour la première fois, connectez l’appareil à un réseau Wi-Fi ou
mobile.
1 Associez votre appareil à un véhicule via la fonction Bluetooth.
Pour en savoir plus, reportez-vous à la section Établir une connexion avec d’autres appareils
Bluetooth.
2 Connectez votre appareil au véhicule à l’aide d’un câble USB.
Une fois la connexion établie, accédez à l’application MirrorLink de votre appareil depuis l’écran
du tableau de bord.
Interrompre la connexion MirrorLink
Débranchez le câble USB entre votre appareil et le véhicule.
Établir une connexion avec d’autres appareils
141
Utiliser la fonction d’impression mobile
Introduction
Connectez l’appareil à une imprimante à l’aide de la fonction Wi-Fi ou Wi-Fi Direct, puis imprimez des
images ou des documents.
Certaines imprimantes peuvent ne pas être compatibles avec l’appareil.
Ajouter des modules d’extension d’imprimante
Ajoutez des modules d’extension pour les imprimantes que vous souhaitez utiliser.
1 Depuis l’écran Applications, appuyez sur Paramètres → NFC et partage → Impression →
Télécharger le plug-in.
2 Recherchez un plug-in d’imprimante dans Play Store.
3 Sélectionnez un module d’extension et installez-le.
4 Sélectionnez le plug-in d’imprimante, puis appuyez sur le curseur en haut à droite de l’écran
pour activer cette fonction.
L’appareil recherche les imprimantes connectées au même réseau Wi-Fi que lui.
Pour ajouter des imprimantes manuellement, appuyez sur → Ajouter une imprimante → .
Pour modifier les paramètres d’impression, appuyez sur → Paramètres.
Imprimer du contenu
En mode affichage d’une image ou d’un document par exemple, appuyez sur → Imprimer, puis
sélectionnez une imprimante.
142
Gestionnaire d’appareils et de
données
Mettre à jour l’appareil
L’appareil peut être mis à jour avec la version logicielle la plus récente.
Mettre l’appareil à jour sans connexion PC
Grâce au service FOTA (Firmware Over The Air), le logiciel de l’appareil peut être mis à jour sans
passer par une connexion avec un ordinateur.
Depuis l’écran Applications, appuyez sur Paramètres → À propos de l’appareil → Mises à jour
logicielles → Mettre à jour maintenant.
Cochez la case Mise à jour auto. pour rechercher automatiquement les mises à jour
disponibles. Pour télécharger les mises à jour uniquement si une connexion Wi-Fi est activée,
cochez la case Wi-Fi uniquement.
Mettre l’appareil à jour avec Samsung Kies
Connectez l’appareil à un ordinateur et mettez à jour l’appareil avec la version logicielle la plus
récente.
1 Depuis l’ordinateur, téléchargez la dernière version de Samsung Kies à partir du site Web
Samsung.
2 Depuis l’ordinateur, lancez Samsung Kies et connectez l’appareil à un ordinateur à l’aide d’un
câble USB.
3 Suivez les instructions qui s’affichent à l’écran pour mettre à jour l’appareil.
• Lorsque vous mettez votre appareil à jour, n’éteignez pas l’ordinateur et ne déconnectez
pas le câble USB.
• Lors de la mise à jour, ne connectez pas d’autres appareils multimédia à l’ordinateur. Cela
pourrait interférer avec le processus de mise à jour. Avant de procéder à la mise à jour,
déconnectez les autres appareils multimédia de l’ordinateur.
Gestionnaire d’appareils et de données
143
Transférer des fichiers entre l’appareil et un
ordinateur
Vous pouvez transférer différents types de fichiers (sons, vidéos, images, etc.) de l’appareil vers un
ordinateur, et inversement.
Ne débranchez pas le câble USB de l’appareil lorsqu’un transfert de fichiers est en cours. Cela
risquerait d’entraîner une perte de données ou d’endommager l’appareil.
Il se peut que les appareils ne se connectent pas correctement s’ils le sont via un
concentrateur USB. Branchez directement l’appareil sur le port USB de l’ordinateur.
Connecter l’appareil en tant qu’appareil multimédia
1 Connectez l’appareil à un ordinateur à l’aide du câble USB.
2 Ouvrez le volet des raccourcis, puis appuyez sur Connecté en tant que périphérique
multimédia → Périphérique multimédia (MTP).
Appuyez sur Appareil photo (PTP) si votre ordinateur ne gère pas le protocole MTP (Media
Transfer Protocol) ou ne dispose pas du pilote approprié.
3 Transférez des fichiers entre votre appareil et l’ordinateur.
Connecter l’appareil avec Samsung Kies
Samsung Kies est un logiciel qui permet de gérer vos contenus multimédia et vos informations
personnelles avec des appareils Samsung.
1 Depuis l’ordinateur, téléchargez la dernière version de Samsung Kies à partir du site Web
Samsung.
2 Depuis l’ordinateur, lancez Samsung Kies et connectez l’appareil à un ordinateur à l’aide d’un
câble USB.
3 Transférez des fichiers entre votre appareil et l’ordinateur.
Pour plus d’informations, consultez l’aide de Samsung Kies.
Gestionnaire d’appareils et de données
144
Sauvegarder et restaurer des données
Conservez vos informations personnelles, données d’applications et paramètres en toute sécurité
sur votre appareil. Vous pouvez effectuer une sauvegarde de vos informations importantes sur un
compte de sauvegarde et y accéder ultérieurement. Pour sauvegarder ou restaurer des données,
vous devez vous connecter à votre compte Google ou Samsung.
Utiliser un compte Google
1 Appuyez sur Paramètres depuis l’écran Applications.
2 Appuyez sur Sauvegarder et réinitialiser et cochez la case Sauvegarder mes données.
3 Appuyez sur Compte de sauvegarde et sélectionnez un compte de sauvegarde.
Utiliser un compte Samsung
Depuis l’écran Applications, appuyez sur Paramètres → Comptes → Samsung → Sauvegarder,
cochez les éléments à sauvegarder, puis appuyez sur SAUVEGARDER MAINTENANT →
SAUVEGARDER MAINTENANT. Pour activer la sauvegarde automatique des données de l’appareil,
cochez la case Sauvegarde automatique.
• Pour restaurer les données à l’aide d’un compte Google, ouvrez l’écran Applications,
appuyez sur Paramètres → Sauvegarder et réinitialiser, puis cochez la case
Restauration auto. Lors de la réinstallation d’applications, les paramètres et données
sauvegardés seront restaurés.
• Pour restaurer les données à l’aide d’un compte Samsung, ouvrez l’écran Applications,
puis appuyez sur Paramètres → Comptes → Samsung → Restaurer. Les données
actuelles sont supprimées de l’appareil afin de restaurer les éléments sélectionnés.
Réinitialiser les données
Vous pouvez supprimer tous les paramètres et toutes les données de l’appareil. Avant de rétablir les
paramètres par défaut, assurez-vous de sauvegarder toutes les données importantes stockées sur
l’appareil. Pour en savoir plus, reportez-vous à la section Sauvegarder et restaurer des données.
Depuis l’écran Applications, appuyez sur Paramètres → Sauvegarder et réinitialiser → Rétablir
param. par défaut → RÉINITIALISER LE PÉRIPHÉRIQUE → SUPPRIMER TOUT. L’appareil redémarre
automatiquement.
145
Paramètres
Introduction
Personnalisez les paramètres de nombreuses fonctions et applications. Vous pouvez personnaliser
votre appareil en configurant divers paramètres.
Configurer les paramètres
Depuis l’écran Applications, appuyez sur Paramètres pour accéder à l’écran des paramètres.
Pour rechercher des paramètres en saisissant des mots clés, appuyez sur .
Vous pouvez changer le mode d’affichage, soit sous forme de listes, soit sous forme
d’onglets. Appuyez sur → Type d’affichage → Affichage Onglet.
Paramètres rapides
Créez une liste des paramètres fréquemment utilisés.
Appuyez sur → Modifier les raccourcis. Sélectionnez les éléments à ajouter ou désélectionnez les
éléments à supprimer, puis appuyez sur EFFECTUÉ.
Paramètres
146
Connexions
Wi-Fi
Activez la fonction Wi-Fi pour permettre la connexion à un réseau Wi-Fi et accéder à Internet ou à
d’autres périphériques réseau.
Votre appareil utilise une fréquence non harmonisée et est conçu pour fonctionner dans
tous les pays européens. Au sein de l’Union Européenne, le réseau Wi-Fi peut fonctionner
sans restriction en intérieur, mais pas en extérieur.
1 Depuis l’écran Paramètres, appuyez sur Wi-Fi, puis faites glisser le curseur Wi-Fi vers la droite
pour activer la fonction.
2 Sélectionnez un réseau dans la liste des réseaux Wi-Fi détectés.
Les réseaux nécessitant un mot de passe sont signalés par une icône en forme de verrou.
3 Appuyez sur CONNEXION.
Ajouter un réseau Wi-Fi
Si le réseau souhaité n’apparaît pas dans la liste de réseaux Wi-Fi, vous pouvez l’ajouter
manuellement.
1 Appuyez sur Ajouter un réseau Wi-Fi en bas de la liste.
2 Saisissez le nom de réseau dans SSID du réseau.
3 Sélectionnez le type de sécurité.
4 S’il ne s’agit pas d’un réseau ouvert, saisissez le mot de passe, puis appuyez sur CONNEXION.
Paramètres
147
Utiliser la fonction Réseau intelligent
Utilisez cette fonction pour maintenir une connexion réseau stable lorsque vous naviguez sur des
pages Web, téléchargez du contenu, etc.
Depuis l’écran Paramètres, appuyez sur Wi-Fi, puis cochez la case Réseau intelligent.
L’appareil passe automatiquement du réseau Wi-Fi au réseau mobile lorsque le réseau Wi-Fi actif
est faible ou instable. Lorsque le signal du réseau Wi-Fi redevient fort, l’appareil repasse du réseau
mobile au réseau Wi-Fi.
• Lorsque vous n’utilisez pas le réseau Wi-Fi, désactivez-le afin d’économiser la batterie.
• Une fois que l’appareil s’est connecté à un réseau Wi-Fi, il se reconnecte à ce réseau
chaque fois que ce dernier est disponible sans réclamer de mot de passe. Pour empêcher
l’appareil de se connecter automatiquement au réseau, sélectionnez-le dans la liste des
réseaux et appuyez sur OUBLIER.
Bluetooth
Activez la fonction Bluetooth pour échanger des informations sur de courtes distances.
Depuis l’écran Paramètres, appuyez sur Bluetooth, puis faites glisser le curseur Bluetooth vers la
droite pour activer la fonction.
Appuyez sur pour afficher davantage d’options.
Modem et point d’accès mobile
Utilisez l’appareil comme point d’accès mobile pour partager la connexion de données de votre
appareil avec d’autres appareils si aucune connexion Internet n’est disponible. Les connexions
peuvent être effectuées via la fonction Wi-Fi, USB ou Bluetooth.
Depuis l’écran Paramètres, appuyez sur Modem et point d’accès mobile.
L’utilisation de cette fonction peut entraîner des frais supplémentaires.
• Point d’accès mobile : utilisez le point d’accès mobile pour partager la connexion de données
de votre appareil avec des ordinateurs ou d’autres appareils.
Paramètres
148
• Modem USB : utilisez le modem USB pour partager la connexion de données de votre appareil
avec un ordinateur via le mode USB. Lorsqu’il est connecté à un ordinateur, l’appareil sert de
modem sans fil.
• Modem Bluetooth : utilisez le modem Bluetooth pour partager la connexion de données de
votre appareil avec un ordinateur ou d’autres appareils via la fonction Bluetooth.
Utiliser le point d’accès mobile
Utilisez votre appareil comme point d’accès mobile pour partager sa connexion de données avec
d’autres appareils.
1 Depuis l’écran Paramètres, appuyez sur Modem et point d’accès mobile → Point d’accès
mobile.
2 Faites glisser le curseur Point d’accès mobile vers la droite pour activer la fonction.
L’icône apparaît dans la barre d’état. Les autres appareils peuvent détecter le vôtre dans la
liste de réseaux Wi-Fi.
Pour définir un mot de passe pour le point d’accès mobile, appuyez sur → Configurer le point
d’accès, puis sélectionnez le niveau de sécurité. Saisissez ensuite un mot de passe, puis appuyez
sur ENREG.
3 Sur l’écran de l’autre appareil, recherchez et sélectionnez votre appareil dans la liste des réseaux
Wi-Fi.
4 Sur l’appareil connecté, utilisez la connexion de données de votre appareil pour accéder à
Internet.
Mode Hors-ligne
Désactivez toutes les fonctions sans fil de l’appareil. Vous pouvez uniquement utiliser les services
hors-réseau, c’est-à-dire les fonctions autres que les fonctions d’appel, Wi-Fi et Bluetooth.
Depuis l’écran Paramètres, appuyez sur Mode Hors-ligne.
Utilisation des données
Effectuez un suivi de la quantité de données utilisées et personnalisez les paramètres de limite
d’utilisation des données.
Depuis l’écran Paramètres, appuyez sur Utilisation des données.
• Données mobiles : paramétrez l’appareil pour pouvoir utiliser les connexions de données sur
n’importe quel réseau mobile.
Appuyez sur pour afficher davantage d’options.
Paramètres
149
Position
Modifiez les paramètres des informations de localisation.
Depuis l’écran Paramètres, appuyez sur Position, puis faites glisser le curseur Position vers la droite
pour activer la fonction.
• Mode : sélectionnez une méthode pour recueillir vos données de localisation.
• Demandes de localisation récentes : affichez les applications qui requièrent votre position et la
batterie consommée à cet effet.
• Services de localisation : affichez les services de localisation utilisés par votre appareil.
• Mes endroits : enregistrez vos endroits favoris à utiliser avec des applications nécessitant des
informations de localisation. Votre appareil fournit les informations et services pertinents en
identifiant les endroits sauvegardés à l’aide des fonctions Maps, Wi-Fi ou Bluetooth.
NFC et partage
Modifiez les paramètres des différentes fonctions de partage.
Depuis l’écran Paramètres, appuyez sur NFC et partage.
• NFC : modifiez les paramètres d’utilisation de la fonction NFC. Pour en savoir plus, reportez-vous
à la section NFC.
• Appareils à proximité : modifiez les paramètres de partage de contenus avec des appareils à
proximité. Tous les appareils doivent être compatibles avec Wi-Fi Direct ou être connectés au
même réseau ou point d’accès Wi-Fi.
• Impression : configurez les paramètres pour les plug-ins d’imprimante installés sur l’appareil.
Vous pouvez rechercher les imprimantes disponibles ou en ajouter une manuellement
pour imprimer des fichiers. Pour en savoir plus, reportez-vous à la section Utiliser la fonction
d’impression mobile.
• Screen Mirroring : activez cette fonction pour partager votre écran avec d’autres personnes.
Pour en savoir plus, reportez-vous à la section Screen Mirroring.
• MirrorLink : utilisez cette fonction pour contrôler l’application MirrorLink de votre appareil
depuis l’écran du tableau de bord d’un véhicule. Pour en savoir plus, reportez-vous à la section
MirrorLink.
Paramètres
150
Plus de réseaux
Personnalisez les paramètres réseaux.
Depuis l’écran Paramètres, appuyez sur Plus de réseaux.
• Download Booster : paramétrez l’appareil pour qu’il télécharge simultanément et plus
rapidement des fichiers faisant plus de 30 Mo via le réseau Wi-Fi et les réseaux mobiles. Un signal
Wi-Fi plus fort offre un débit de téléchargement supérieur.
• La prise en charge de cette fonction dépend de l’appareil.
• Il se peut que des frais supplémentaires vous soient facturés lors du téléchargement de
fichiers via le réseau mobile.
• Lorsque vous téléchargez des fichiers volumineux, l’appareil risque de chauffer. Si
l’appareil dépasse une certaine température, l’application se ferme.
• Si les signaux réseau sont instables, la vitesse et les performances de cette fonction
peuvent s’en trouver affectées.
• Si les débits de transfert de données du Wi-Fi et des réseaux mobiles sont très différents, il
se peut que l’appareil utilise uniquement la connexion la plus rapide.
• Cette fonction prend en charge Hypertext Transmission Protocol (HTTP) 1.1 et Hypertext
Transmission Protocol Secure (HTTPS). La fonction ne peut pas être utilisée avec d’autres
protocoles, comme FTP.
• Application de messagerie par défaut : sélectionnez l’application par défaut à utiliser pour la
messagerie.
• Réseaux mobiles : configurez votre réseau mobile.
• VPN : paramétrez des réseaux privés virtuels (VPN) pour vous y connecter.
Appareil
Sons et notifications
Modifiez les paramètres des différents sons de l’appareil.
Depuis l’écran Paramètres, appuyez sur Sons et notifications.
• Mode son : configurez le mode sonore à utiliser (vibreur, son ou silencieux).
• Intensité des vibrations : réglez l’intensité des vibrations émises par l’appareil.
Paramètres
151
• Vibreur et sonnerie : paramétrez l’appareil pour qu’il vibre et émette une sonnerie à chaque
appel entrant.
• Sonneries : sélectionnez une sonnerie pour les appels entrants.
• Vibrations : sélectionnez un type de vibreur.
• Sonnerie de notification : sélectionnez une sonnerie pour les événements, comme les
messages entrants.
Affichage et fond d’écran
Modifiez les paramètres d’affichage.
Depuis l’écran Paramètres, appuyez sur Affichage et fond d’écran.
• Luminosité : définissez la luminosité de l’écran.
• Fond d’écran : modifiez les paramètres du fond d’écran pour l’écran d’accueil et l’écran
verrouillé.
• Police : modifiez la taille et le type de police.
• Opération à une main : activez ce mode pour utiliser l’appareil d’une seule main. Pour en savoir
plus, reportez-vous à la section Opération à une main.
• Rotation de l’écran : indiquez si le contenu doit automatiquement pivoter en même temps que
l’appareil.
• Smart Stay : paramétrez l’appareil pour empêcher le rétroéclairage de se désactiver lorsque
vous consultez l’écran.
• Mise en veille de l’écran : définissez le délai à l’issue duquel l’écran doit s’éteindre
automatiquement.
• Mode d’écran : modifiez le mode d’affichage à l’écran.
• Tons écran auto. : paramétrez l’appareil pour pouvoir économiser de l’énergie en ajustant la
luminosité de l’écran.
• Écran de veille : paramétrez l’appareil pour pouvoir activer l’économiseur d’écran lorsque
l’appareil est connecté à une station d’accueil ou est en cours de chargement.
• Témoin lumineux : paramétrez l’appareil pour activer ou désactiver le témoin lumineux.
• Durée de l’éclairage des touches : paramétrez la durée de rétroéclairage des touches
Applications récentes et Retour.
• Augmenter sensib. tactile : paramétrez l’appareil pour pouvoir autoriser l’utilisation de l’écran
tactile avec des gants.
Selon la matière des gants que vous portez, certaines commandes peuvent ne pas être
reconnues.
Paramètres
152
Écran de verrouillage
Modifiez les paramètres de l’écran de verrouillage.
Depuis l’écran Paramètres, appuyez sur Écran de verrouillage.
• Déverrouillage de l’écran : modifiez la fonction de déverrouillage sécurisé de l’écran. Les
options suivantes peuvent varier selon la méthode de verrouillage d’écran sélectionnée.
• Afficher les informations : modifiez les paramètres des éléments affichés sur l’écran verrouillé.
• Raccourci Appareil photo : paramétrez l’appareil pour qu’il affiche le raccourci de l’appareil
photo sur l’écran verrouillé.
La disponibilité de cette fonction dépend de votre zone géographique ou de votre
opérateur.
• Action memo sur écran verr. : paramétrez l’appareil pour pouvoir lancer Action memo en
appuyant deux fois sur l’écran verrouillé à l’aide du S Pen tout en maintenant la touche S Pen
appuyée.
• Effet de déverrouillage : sélectionnez un effet à appliquer lorsque vous déverrouillez l’écran.
Fenêtres multiples
Activez ou désactivez la fonction Multi-fenêtres.
Depuis l’écran Paramètres, appuyez sur Fenêtres multiples, puis faites glisser le curseur Fenêtres
multiples vers la droite pour activer la fonction.
• Ouvrir en vue fractionnée : paramétrez l’appareil pour qu’il active la fonction Multi-fenêtres
lorsque vous ouvrez des fichiers dans les dossiers Mes fichiers, Vidéo ou à partir des pièces
jointes des messages.
• Racc. affich. contextuel : paramétrez l’appareil pour qu’il affiche la liste des applications dans
une fenêtre contextuelle lorsque vous faites glisser votre doigt de l’angle supérieur de l’écran
vers l’angle inférieur opposé.
Volet des raccourcis
Réorganisez les touches de paramétrage rapide affichées dans le volet des raccourcis.
Depuis l’écran Paramètres, appuyez sur Volet des raccourcis.
Paramètres
153
S Pen
Modifiez les paramètres d’utilisation du S Pen.
Depuis l’écran Paramètres, appuyez sur S Pen.
• Air Command : paramétrez l’appareil pour qu’il affiche les fonctions Air command lorsque vous
passez le S Pen au-dessus de l’écran en appuyant sur la touche S Pen.
• Air View : activez la fonction Air view pour effectuer diverses opérations à l’aide du S Pen.
• Pointeur : paramétrez l’appareil pour pouvoir afficher le pointeur du S Pen lorsque le S Pen est
placé au-dessus de l’écran.
• Saisie S Pen : paramétrez l’appareil pour afficher l’icône du champ d’écriture manuscrite lorsque
le S Pen passe au-dessus d’un champ de saisie de texte.
• Alertes S Pen : paramétrez l’appareil pour qu’il affiche un message d’alerte et émette une
alarme sonore lorsque l’écran tactile est désactivé et que le S Pen ne se trouve plus dans son
compartiment.
• Désact. détection stylet : configurez l’écran afin qu’il ne réagisse pas à l’insertion ou au retrait
du S Pen.
• Son du S Pen : paramétrez l’appareil pour qu’il émette un son d’écriture lorsque vous écrivez ou
dessinez à l’aide du S Pen.
• Retour vibration du S Pen : paramétrez l’appareil pour qu’il vibre lorsque vous écrivez ou
dessinez à l’aide du S Pen.
• Options de retrait : paramétrez l’appareil pour qu’il lance Action memo ou affiche les fonctions
Air command lorsque le S Pen est retiré de son compartiment.
• Son de retrait/insertion : paramétrez l’appareil pour qu’il émette un son lorsque vous insérez ou
retirez le S Pen de son compartiment.
• Vibrat. retrait/insertion : paramétrez l’appareil pour qu’il vibre lorsque vous insérez ou retirez le
S Pen de son compartiment.
Paramètres
154
Mouvements et gestes
Activez la fonction de détection des mouvements et modifiez les paramètres permettant de
contrôler la détection des mouvements de votre appareil.
Depuis la liste des applications, appuyez sur Mouvements et gestes.
• Appel direct : paramétrez l’appareil pour pouvoir passer un appel vocal en portant l’appareil à
l’oreille lorsque vous consultez le journal d’appels, la liste des messages ou celle des contacts.
• Smart Alert : paramétrez l’appareil pour pouvoir être averti des appels manqués ou des
nouveaux messages lorsque vous le prenez dans la main.
• Muet/pause : paramétrez l’appareil pour désactiver la sonnerie des appels entrants ou des
alarmes lorsque vous recouvrez l’écran avec la paume de votre main ou retournez l’appareil.
• Balayer pour capturer : paramétrez l’appareil pour pouvoir effectuer une capture d’écran en
balayant l’écran avec la main vers la gauche ou vers la droite.
Personnalisation
Comptes
Ajoutez vos comptes Samsung et Google, ou d’autres comptes, afin de les synchroniser.
Depuis l’écran Paramètres, appuyez sur Comptes.
Cloud
Modifiez les paramètres de synchronisation, de sauvegarde et de restauration pour vos comptes
Samsung et Dropbox.
Depuis l’écran Paramètres, appuyez sur Cloud.
Sauvegarder et réinitialiser
Modifiez les paramètres de gestion des paramètres et des données.
Depuis la liste des applications, appuyez sur Sauvegarder et réinitialiser.
• Sauvegarder mes données : paramétrez l’appareil pour pouvoir sauvegarder vos paramètres et
vos données d’application sur le serveur Google.
• Compte de sauvegarde : configurez ou modifiez votre compte de sauvegarde Google.
Paramètres
155
• Restauration auto. : paramétrez l’appareil pour pouvoir restaurer vos paramètres et vos
données d’application lorsque les applications sont réinstallées.
• Rétablir param. par défaut : restaurez les valeurs par défaut de l’appareil et supprimez toutes
vos données.
Mode simplifié
Définissez un mode d’affichage à utiliser.
Depuis l’écran Paramètres, appuyez sur Mode simplifié.
• Mode standard : utilisez le mode standard de l’appareil.
• Mode simplifié : utilisez le mode simplifié de l’appareil.
• Applications simplifiées : sélectionnez les applications auxquelles appliquer une présentation
simplifiée.
Accessibilité
Utilisez cette fonction pour améliorer l’accessibilité de l’appareil. Pour en savoir plus, reportez-vous à
la section À propos des menus Accessibilité.
Depuis l’écran Paramètres, appuyez sur Accessibilité.
Mode Privé
Paramétrez l’appareil pour empêcher d’autres personnes d’accéder à votre contenu personnel en
activant le mode Privé. Pour en savoir plus, reportez-vous à la section Mode Privé.
Depuis l’écran Paramètres, appuyez sur Mode Privé, puis faites glisser le curseur Mode Privé vers la
droite pour activer la fonction.
• Type d’accès mode Privé : configurez ou modifiez la méthode de déverrouillage pour activer le
mode Privé.
• Désactivation automatique : paramétrez l’appareil pour quitter automatiquement le mode
Privé lorsque l’écran est éteint.
Paramètres
156
Lecteur d’empreintes
Enregistrez vos empreintes digitales sur l’appareil pour le sécuriser ou vous connecter à votre
compte Samsung. Pour en savoir plus, reportez-vous à la section Lecteur d’empreintes.
Depuis l’écran Paramètres, appuyez sur Lecteur d’empreintes.
• Gestionnaire d’empreintes : enregistrez ou supprimez des empreintes.
• Modifier MDP de secours : définissez un mot de passe de secours à utiliser si l’appareil ne
reconnaît pas votre empreinte.
• Déverrouillage de l’écran : modifiez la fonction de déverrouillage sécurisé de l’écran.
• Connexion Web : paramétrez l’appareil pour qu’il vérifie vos comptes enregistrés à l’aide de vos
empreintes digitales.
• Vérifier le compte Samsung : configurez l’appareil pour qu’il vérifie votre compte Samsung à
l’aide de vos empreintes digitales.
• Payer avec PayPal : configurez l’appareil pour qu’il vérifie votre compte PayPal et autorise les
achats en utilisant vos empreintes digitales.
La disponibilité de cette fonction dépend de votre zone géographique ou de votre
opérateur.
Système
Langue et saisie
Modifiez les paramètres de saisie de texte. La disponibilité de certaines options dépend de la langue
sélectionnée.
Depuis l’écran Paramètres, appuyez sur Langue et saisie.
• Langue : sélectionnez la langue d’affichage des menus et des applications.
• Par défaut : sélectionnez le type de clavier à utiliser par défaut pour la saisie de texte.
• Clavier Samsung : modifiez les paramètres du clavier Samsung.
La disponibilité des options dépend de votre zone géographique ou de votre opérateur.
Paramètres
157
• Saisie vocale Google : modifiez les paramètres de saisie vocale.
• Langue : sélectionnez la langue de la reconnaissance de l’écriture manuscrite. Vous pouvez
rechercher les fichiers comportant des parties manuscrites dans la langue sélectionnée.
• Options synthèse vocale : modifiez les paramètres de synthèse vocale.
• Lect. notific. haute voix : paramétrez l’appareil pour qu’il lise les notifications à haute voix en cas
d’appel entrant, de message ou d’événement.
• Vitesse du curseur : réglez la vitesse du curseur d’une souris ou d’un pavé tactile connecté(e) à
l’appareil.
Date et heure
Accédez aux paramètres suivants et modifiez-les afin de contrôler l’affichage de l’heure et de la date.
Depuis l’écran Paramètres, appuyez sur Date et heure.
Si la batterie est entièrement déchargée ou si vous la retirez de l’appareil, l’heure et la date
sont alors réinitialisées.
• Date et heure automatiques : mettez automatiquement à jour l’heure et la date lorsque vous
changez de fuseau horaire.
• Définir la date : réglez la date du jour manuellement.
• Définir l’heure : réglez l’heure manuellement.
• Fuseau horaire auto : paramétrez l’appareil pour pouvoir recevoir des informations sur l’heure
depuis le réseau lorsque vous changez de fuseau horaire.
• Sélectionner le fuseau horaire : réglez le fuseau horaire de votre zone géographique.
• Format 24 heures : affichez l’heure au format 24 heures.
• Format de date : sélectionnez le format de date.
Paramètres
158
Assistance sécurité
Activez les fonctions d’assistance sécurité.
Depuis l’écran Paramètres, appuyez sur Assistance sécurité.
• Mode Urgence : paramétrez l’appareil pour qu’il active le mode Urgence et réduise la
consommation de la batterie en n’utilisant que les fonctions de base, comme le téléphone. Pour
en savoir plus, reportez-vous à la section Mode Urgence.
• Geo News : paramétrez l’appareil pour recevoir des notifications de catastrophe naturelle. Pour
utiliser cette fonction, vous devez télécharger et installer l’application.
• Envoyer des messages d’aide : paramétrez l’appareil pour envoyer des messages d’aide en
appuyant à trois reprises sur la touche Marche/Arrêt. Vous pouvez également envoyer des
enregistrements audio avec votre message au destinataire. Pour en savoir plus, reportez-vous à
la section Envoyer des messages d’aide.
• Gérer les contacts principaux : ajoutez ou modifiez les correspondants à qui envoyer des
messages d’aide.
Accessoires
Modifiez les paramètres des accessoires.
Depuis l’écran Paramètres, appuyez sur Accessoires.
• Son station d’accueil : paramétrez l’appareil pour qu’il émette un son lorsque vous le connectez
à une station d’accueil ou l’en déconnectez.
• Sortie audio : sélectionnez le format de sortie audio à utiliser lorsque vous connectez l’appareil
à des périphériques HDMI. Certains appareils peuvent ne pas prendre en charge les paramètres
de son Surround.
Économie d’énergie
Activez le mode Économie d’énergie et modifiez les paramètres. Pour en savoir plus, reportez-vous à
la section Fonctions d’économie d’énergie.
Depuis l’écran Paramètres, appuyez sur Économie d’énergie.
• Mode Éco. d’énergie : activez le mode Économie d’énergie et modifiez les paramètres.
• Mode Ultra économie d’énergie : paramétrez l’appareil pour prolonger le temps de veille et
réduire la consommation de la batterie en affichant une présentation simplifiée et en autorisant
un accès limité à une application.
Le délai de veille maximum estimé est le temps qu’il faut à la batterie pour se décharger
complètement lorsque l’appareil n’est pas utilisé. Le délai de veille peut varier selon les
paramètres de l’appareil et les conditions d’utilisation.
Paramètres
159
• Charg. rapide : paramétrez l’appareil pour pouvoir utiliser la fonction de charge rapide. Pour en
savoir plus, reportez-vous à la section Charge rapide.
• Affich. pourcentage batterie : paramétrez l’appareil pour qu’il affiche l’autonomie restante de la
batterie dans la barre d’état.
Stockage
Affichez les informations de mémoire relatives à l’appareil.
Depuis l’écran Paramètres, appuyez sur Stockage.
Le formatage d’une carte mémoire supprime définitivement toutes les données qui y sont
stockées.
La mémoire interne de votre appareil a une capacité réelle disponible inférieure à la capacité
indiquée, car elle est en partie occupée par le système d’exploitation et les applications
installées par défaut. La capacité restante peut varier lorsque vous mettez à jour l’appareil.
Sécurité
Modifiez les paramètres de sécurité de l’appareil et de la carte SIM ou USIM.
Depuis l’écran Paramètres, appuyez sur Sécurité.
• Admin. de périphérique : affichez les administrateurs de votre appareil. Vous pouvez autoriser
les administrateurs de l’appareil à appliquer de nouvelles règles à celui-ci.
• Sources inconnues : paramétrez l’appareil pour autoriser l’installation d’applications provenant
de sources inconnues.
• Crypter l’appareil : définissez un mot de passe pour crypter les données enregistrées sur
l’appareil. Vous devez saisir ce mot de passe à chaque fois que vous allumez l’appareil.
Le cryptage des données peut prendre plus d’une heure. Avant de crypter les données,
connectez le chargeur pour recharger complètement la batterie et ne le débranchez pas
tant que le cryptage n’est pas terminé.
• Crypter la carte SD externe : paramétrez l’appareil pour pouvoir crypter les fichiers contenus
sur une carte mémoire.
Votre appareil ne sera pas en mesure de lire les fichiers cryptés si vous le réinitialisez lorsque
ces paramètres sont activés. Désactivez ces paramètres avant de réinitialiser votre appareil.
Paramètres
160
• Contrôle à distance : paramétrez l’appareil pour pouvoir le contrôler à distance via Internet si
vous l’égarez ou s’il vous est dérobé. Pour utiliser cette fonction, vous devez vous connecter à
votre compte Samsung.
• Alerte changement de SIM : activez ou désactivez la fonction de Traçage du mobile qui permet
de localiser l’appareil en cas de perte ou de vol.
• Accéder au site Web : accédez au site Web Traçage du mobile (findmymobile.samsung.com). Ce
site vous permet de repérer et de contrôler un appareil égaré ou dérobé.
• Verr. de réactivation : paramétrez l’appareil pour qu’il requiert votre compte Samsung une fois
l’appareil réinitialisé pour empêcher d’autres personnes de le réactiver.
• Configurer blocage SIM : modifiez les paramètres de verrouillage de la carte SIM.
• Rendre les mots de passe visibles : paramétrez l’appareil pour qu’il affiche votre mot de passe à
mesure que vous le saisissez.
• MàJ de politique sécurité : paramétrez l’appareil pour qu’il vérifie et télécharge les mises à jour
de sécurité.
• Envoyer des rapports de sécurité : paramétrez l’appareil pour qu’il envoie automatiquement
des rapports de sécurité à Samsung.
• Type de stockage : définissez un type de stockage pour les fichiers d’identification.
• Infos d’ident. sécurisées : recourez à des certificats et des identifiants pour sécuriser l’utilisation
des diverses applications.
• Installer depuis stock. périph. : installez les certificats cryptés stockés en mémoire interne.
• Effacer infos identification : effacez les identifiants de sécurité contenus dans l’appareil et
réinitialisez le mot de passe.
Aide
Affichez les informations d’aide pour apprendre à utiliser l’appareil et les applications, ou configurer
des paramètres importants.
Depuis l’écran Paramètres, appuyez sur Aide.
À propos de l’appareil
Accédez aux informations relatives à l’appareil, modifiez le nom de l’appareil ou mettez à jour le
logiciel de l’appareil.
Depuis l’écran Paramètres, appuyez sur À propos de l’appareil.
Paramètres
161
Applications
Gestionnaire d’applications
Affichez et gérez les applications installées sur votre appareil.
Depuis l’écran Paramètres, appuyez sur Gestionnaire d’applications.
Applications par défaut
Sélectionnez un paramètre par défaut pour utiliser des applications.
Depuis l’écran Paramètres, appuyez sur Applications par défaut.
Paramètres d’application
Personnalisez les paramètres de l’application.
Depuis l’écran Paramètres, appuyez sur Paramètres d’application.
162
Accessibilité
À propos des menus Accessibilité
Améliorez l’accessibilité grâce à des fonctions qui simplifient l’utilisation de l’appareil pour les
personnes ayant certaines capacités réduites comme une mauvaise vue, des troubles auditifs ou une
dextérité réduite.
Depuis l’écran Applications, appuyez sur Paramètres → Accessibilité.
Utiliser la touche Accueil pour ouvrir les menus
d’accessibilité
Vous pouvez accéder aux menus d’accessibilité suivants en appuyant à trois reprises rapprochées sur
la touche Accueil.
• Accessibilité
• TalkBack
• Couleurs négatives
• Contrôle par interaction
Depuis l’écran Applications, appuyez sur Paramètres → Accessibilité → Accès direct, puis faites
glisser le curseur Accès direct vers la droite pour activer la fonction. Ensuite, sélectionnez un menu
d’accessibilité à ouvrir lorsque vous appuyez à trois reprises rapprochées sur la touche Accueil.
Informations orales (TalkBack)
Activer TalkBack
Lorsque vous activez TalkBack, l’appareil lit à haute voix le texte affiché à l’écran ou les fonctions
sélectionnées.
1 Depuis l’écran Applications, appuyez sur Paramètres → Accessibilité → Vue → TalkBack.
2 Faites glisser le curseur TalkBack vers la droite pour activer la fonction.
Accessibilité
163
3 Appuyez sur OK. L’appareil lance la synthèse vocale.
Lorsque vous utilisez TalkBack, certaines fonctions ne sont pas disponibles.
Désactiver TalkBack
1 Depuis l’écran Applications, appuyez sur Paramètres → Accessibilité → Vue → TalkBack.
2 Appuyez sur le curseur TalkBack, puis appuyez rapidement à deux reprises n’importe où sur
l’écran.
3 Appuyez sur OK, puis appuyez rapidement à deux reprises n’importe où sur l’écran. L’appareil
interrompt la synthèse vocale.
Commander l’écran à l’aide de gestes des doigts
Avec TalkBack, vous pouvez contrôler l’écran d’un simple geste des doigts.
• Parcourir l’écran : placez un doigt sur l’écran, puis déplacez-le pour parcourir l’écran. Maintenez
le doigt appuyé sur un élément afin que l’appareil énonce son nom. Lorsque vous relâchez le
doigt, l’élément sous le doigt est sélectionné.
• Sélectionner des éléments : appuyez sur un élément pour le sélectionner. Vous pouvez
également sélectionner un élément et maintenir le doigt appuyé dessus, puis relâcher le doigt.
• Ouvrir l’élément sélectionné : lorsque les noms des éléments sélectionnés sont énoncés,
relâchez le doigt dès que vous entendez le nom de l’élément souhaité. Appuyez ensuite à deux
reprises rapprochées sur l’écran.
• Sélectionner l’élément précédent : balayez rapidement l’écran du doigt vers le haut ou vers la
gauche.
• Sélectionner l’élément suivant : balayez rapidement l’écran du doigt vers le bas ou vers la droite.
• Parcourir les listes : balayez l’écran avec deux doigts vers le haut ou vers le bas.
• Revenir à la page précédente : balayez l’écran avec deux doigts vers la droite.
• Accéder à la page suivante : balayez l’écran avec deux doigts vers la gauche.
Accessibilité
164
• Déverrouiller l’écran : balayez l’écran avec deux doigts dans n’importe quelle direction au sein de
la zone de verrouillage de l’écran.
• Ouvrir le volet des raccourcis : faites glisser le haut de l’écran vers le bas avec deux doigts.
• Ouvrir le volet de paramétrage rapide : faites glisser le haut de l’écran vers le bas avec trois
doigts.
Vous pouvez configurer les paramètres des gestes des doigts de TalkBack dans Gérer les gestes.
Pour en savoir plus, reportez-vous à la section Configurer les paramètres des gestes des doigts.
Configurer les paramètres des gestes des doigts
Lorsque vous utilisez la fonction TalkBack, vous pouvez vous servir de vos doigts pour effectuer des
opérations, comme revenir à l’écran précédent, ouvrir l’écran d’accueil, etc. Configurez les gestes des
doigts avant de les utiliser.
Configurer les paramètres des gestes verticaux
Vous pouvez utiliser des gestes verticaux décomposés en faisant glisser votre doigt vers le haut et
vers le bas depuis le bas de l’écran, ou inversement.
Depuis l’écran Applications, appuyez sur Paramètres → Accessibilité → Vue → TalkBack →
PARAMÈTRES → Gérer les gestes → Gestes verticaux en deux parties. Sélectionnez ensuite l’une
des fonctions suivantes :
• Accéder au premier et au dernier élément à l’écran : lorsque vous faites glisser votre doigt vers
le haut, puis vers le bas de l’écran, le premier élément en haut de l’écran est sélectionné. Lorsque
vous faites glisser votre doigt vers le bas, puis vers le haut de l’écran, le dernier élément en bas
de l’écran est sélectionné.
• Sélection du niveau de précision pour la lecture : lorsque vous faites glisser votre doigt vers
le haut, puis vers le bas de l’écran, l’unité de lecture change. L’unité de lecture passe à la page,
au paragraphe, à la ligne, au mot, au caractère, puis à une unité par défaut. Lorsque vous faites
glisser votre doigt vers le bas, puis vers le haut de l’écran, l’ordre des unités de lecture est inversé.
Configurer les paramètres des gestes de raccourci
Vous pouvez modifier les gestes de raccourci ou assigner des fonctions à des raccourcis vierges.
Depuis l’écran Applications, appuyez sur Paramètres → Accessibilité → Vue → TalkBack →
PARAMÈTRES → Gérer les gestes. Sélectionnez un geste, puis assignez-lui une fonction.
Accessibilité
165
Mettre TalkBack en pause
Ouvrez le menu contextuel général en faisant glisser le doigt vers le bas, puis vers la droite de l’écran
sans le relâcher. Lorsque vous sélectionnez Suspendre les commentaires en haut à gauche de
l’écran, TalkBack est mis en pause.
Ajouter et gérer des libellés d’image
Vous pouvez assigner des libellés aux images à l’écran. L’appareil énonce les libellés lorsque les
éléments sont sélectionnés. Ajoutez des libellés aux images sans libellé à l’aide du menu contextuel
local.
Ouvrez le menu contextuel local en faisant glisser le doigt vers le haut, puis vers la droite de l’écran
sans le relâcher. Maintenez le doigt appuyé sur l’écran, puis tracez un cercle du doigt autour du menu
pour parcourir les menus. Lorsque vous entendez le nom du menu d’ajout de libellé, relâchez le
doigt pour ajouter des libellés.
Pour afficher les libellés, ouvrez l’écran Applications, puis appuyez sur Paramètres → Accessibilité
→ Vue → TalkBack → PARAMÈTRES → Gérer les libellés personnalisés.
Configurer les paramètres de TalkBack
Configurez les paramètres de TalkBack selon vos préférences.
Depuis l’écran Applications, appuyez sur Paramètres → Accessibilité → Vue → TalkBack →
PARAMÈTRES.
• Volume de la voix : réglez le volume des informations orales.
• Modification du ton : paramétrez l’appareil pour qu’il énonce le texte saisi à l’aide du clavier à
basse tonalité.
• Écho du clavier : paramétrez l’appareil pour qu’il lise à haute voix le mot saisi lorsque vous
appuyez sur la touche espace.
• Parler losque l’écran est éteint : paramétrez l’appareil pour qu’il fournisse des informations
orales lorsque l’écran est éteint.
• Utiliser capteur proxim. : paramétrez l’appareil pour qu’il mette les informations orales en
pause quand vous placez la main sur le capteur en haut de l’appareil.
• Secouer pour démarrer la lecture continue : paramétrez l’appareil pour qu’il énonce le texte
affiché à l’écran lorsque vous secouez l’appareil. Vous pouvez sélectionner différentes options de
vitesses de secousses.
Accessibilité
166
• Dire le numéro de l’appelant : paramétrez l’appareil pour qu’il lise à haute voix le nom de
l’appelant lors d’un appel entrant.
• Vibration : paramétrez l’appareil pour qu’il vibre lorsque vous parcourez l’écran du doigt.
• Retour audio : paramétrez l’appareil pour qu’il émette un son lorsque vous commandez l’écran,
comme lorsque vous le parcourez, etc.
• Privilégier le volume de la voix : paramétrez l’appareil pour qu’il baisse le volume du média
lorsqu’il lit un élément à haute voix.
• Volume sonore : réglez le volume du son émis lorsque vous appuyez sur l’écran pour le
contrôler. Cette fonction est disponible lorsque Retour audio est sélectionné.
• Explorer au toucher : paramétrez l’appareil pour qu’il lise à haute voix les éléments sur lesquels
vous appuyez du doigt.
• Faire défiler les listes automatiquement : paramétrez l’appareil pour qu’il parcoure
automatiquement la partie de la liste non affichée à l’écran et qu’il énonce les éléments.
• Appuyer une fois pour sélectionner : paramétrez l’appareil pour qu’il ouvre l’élément
sélectionné lorsque vous appuyez une fois dessus.
• Lancer le didacticiel "Explorer au toucher" : affichez le didacticiel sur l’utilisation de la fonction
Navigation tactile.
• Gérer les gestes : assignez les opérations à effectuer à l’aide des gestes des doigts. Pour en
savoir plus, reportez-vous à la section Configurer les paramètres des gestes des doigts.
• Gérer les libellés personnalisés : affichez les libellés que vous avez ajoutés.
• Réactiver : sélectionnez une méthode de reprise des informations orales si TalkBack est mis en
pause.
• Paramètres du développeur : paramétrez les options de développement d’applications.
Utiliser l’appareil avec l’écran éteint
Paramétrez l’appareil pour qu’il laisse toujours l’écran éteint afin de préserver la confidentialité de
vos données. L’écran ne s’allume pas lorsque vous appuyez sur la touche Accueil ou sur l’écran. Les
fonctions actuellement activées ne sont pas désactivées lorsque l’écran s’éteint.
Depuis l’écran Applications, appuyez sur Paramètres → Accessibilité → Vue, puis cochez la case
Ecran atténué. Vous pouvez activer ou désactiver cette fonction en appuyant à deux reprises sur la
touche Marche/Arrêt.
Accessibilité
167
Lire des mots de passe à haute voix
Paramétrez l’appareil pour qu’il lise le mot de passe à haute voix lorsque vous saisissez le mot de
passe lorsque TalkBack est activé.
Depuis l’écran Applications, appuyez sur Paramètres → Accessibilité → Vue, puis cochez la case
Énoncer mots de passe.
Paramétrer les fonctions de diction de la synthèse vocale
Modifiez les paramètres de diction de la synthèse vocale utilisés lorsque TalkBack est activé, comme
les langues, la vitesse, etc.
Depuis l’écran Applications, appuyez sur Paramètres → Accessibilité → Vue → Options synthèse
vocale, puis utilisez les fonctions suivantes :
• Moteur de synthèse vocale Samsung / Moteur de synthèse vocale Google : sélectionnez un
moteur pour la fonction de diction de la synthèse vocale.
• Vitesse d’élocution : sélectionnez la vitesse de diction de la synthèse vocale.
• Écouter un exemple : écoutez un exemple de texte parlé. Si l’appareil ne parvient pas à lire des
exemples à haute voix, appuyez sur → Installer les données vocales pour télécharger et
installer les données vocales de la fonction de diction de la synthèse vocale.
• État langue par défaut : affichez le statut de la langue actuelle choisie pour la fonction de
synthèse vocale.
Saisir du texte à l’aide du clavier
Pour afficher le clavier, appuyez sur le champ de saisie de texte, puis appuyez à deux reprises
rapprochées n’importe où sur l’écran.
Lorsque vous appuyez du doigt sur le clavier, l’appareil lit à haute voix les touches de caractères sous
votre doigt. Lorsque vous entendez le caractère que vous recherchez, relâchez le doigt de l’écran
pour le sélectionner. Le caractère est saisi et l’appareil lit le texte à haute voix.
Si la fonction Saisie clavier rapide n’est pas activée, relâchez le doigt du caractère que vous
souhaitez, puis appuyez à deux reprises rapprochées sur l’écran. Pour activer la touche de saisie
rapide, depuis l’écran Applications, appuyez sur Paramètres → Accessibilité → Vue, puis cochez la
case Saisie clavier rapide.
Accessibilité
168
Saisir des caractères supplémentaires
Maintenez le doigt appuyé sur une touche du clavier pour saisir les autres caractères disponibles
pour cette touche. Une fenêtre contextuelle indiquant les caractères disponibles s’affiche au-dessus
de la touche. Pour sélectionner un caractère, faites glisser le doigt sur la fenêtre contextuelle jusqu’à
ce que vous entendiez le nom du caractère souhaité, puis relâchez le doigt.
Vue
Modifier la taille de police
Utilisez cette fonction pour modifier la taille de police. Il se peut que, dans certaines applications, il
ne soit pas possible de régler la taille de la police sur Enorme.
Depuis l’écran Applications, appuyez sur Paramètres → Accessibilité → Vue → Taille de police.
Grossir l’écran
Utilisez cette fonction pour grossir l’écran et effectuer un zoom avant sur une zone spécifique.
Depuis l’écran Applications, appuyez sur Paramètres → Accessibilité → Vue → Gestes
d’agrandissement, puis faites glisser le curseur Gestes d’agrandissement vers la droite pour activer
la fonction.
• Effectuer un zoom avant et arrière : appuyez à trois reprises rapprochées sur l’écran pour
effectuer un zoom avant sur une zone spécifique. Appuyez à trois reprises rapprochées sur
l’écran pour revenir en mode d’affichage normal.
• Parcourir l’écran en le faisant défiler : faites glisser deux doigts ou plus pour faire défiler l’écran
grossi.
• Régler le niveau de zoom : rapprochez deux ou plusieurs doigts sur l’écran grossi ou écartez-les.
Vous pouvez également grossir temporairement l’écran en appuyant dessus à trois reprises
rapprochées et en maintenant la pression. Tout en maintenant l’écran appuyé, faites glisser le doigt
pour parcourir l’écran. Relâchez le doigt pour revenir en mode d’affichage normal.
• Il n’est pas possible d’agrandir les claviers à l’écran.
• Lorsque cette fonction est activée, les performances de certaines applications, comme
Téléphone et Calculatrice, peuvent en être affectées.
Accessibilité
169
Zoom sur survol
Utilisez cette fonction pour grossir un contenu en survolant l’écran avec un stylet.
Depuis l’écran Applications, appuyez sur Paramètres → Accessibilité → Vue → Zoom sur survol,
puis faites glisser le curseur Zoom sur survol vers la droite pour activer la fonction.
Faites glisser la barre de pourcentage de zoom vers la gauche ou la droite, ou appuyez sur Taille de
la loupe pour modifier les paramètres de la loupe.
Lorsque cette fonction est activée, vous ne pouvez pas utiliser certaines autres fonctions,
comme Air command, Air view, Saisie S Pen et TalkBack.
Configurer des rappels de notification
Utilisez cette fonction pour vous rappeler des notifications que vous n’avez pas vérifiées selon
l’intervalle défini.
Depuis l’écran Applications, appuyez sur Paramètres → Accessibilité → Vue → Rappel de
notification, puis faites glisser le curseur Rappel de notification vers la droite pour activer la
fonction.
Pour définir un intervalle entre les alertes, appuyez sur Fréquence de rappel.
Inverser les couleurs d’affichage
Utilisez cette fonction pour améliorer la visibilité de l’écran et aider les utilisateurs à déchiffrer plus
facilement le texte à l’écran.
Depuis l’écran Applications, appuyez sur Paramètres → Accessibilité → Vue, puis cochez la case
Couleurs négatives.
Réglage des couleurs
Utilisez cette fonction pour régler l’affichage des couleurs à l’écran si vous avez des difficultés à
distinguer les couleurs. L’appareil remplace les couleurs par des couleurs plus faciles à reconnaître.
Depuis l’écran Applications, appuyez sur Paramètres → Accessibilité → Vue → Réglage des
couleurs, puis faites glisser le curseur Réglage des couleurs vers la droite pour activer la fonction.
Suivez les instructions qui s’affichent à l’écran pour procéder aux réglages des couleurs.
Accessibilité
170
Audition
Configurer une notification par flash
Configurez le flash pour qu’il clignote lorsque vous recevez des appels entrants, de nouveaux
messages ou des notifications.
Depuis l’écran Applications, appuyez sur Paramètres → Accessibilité → Audition, puis cochez la
case Notification par flash.
Couper tous les sons
Configurez l’appareil pour qu’il coupe tous les sons, comme les sons multimédia et la voix du
correspondant en cours d’appel.
Depuis l’écran Applications, appuyez sur Paramètres → Accessibilité → Audition, puis cochez la
case Désactiver tours les sons.
Paramètres des sous-titres
Depuis l’écran Applications, appuyez sur Paramètres → Accessibilité → Audition → Sous-titres
Samsung (CC) ou Sous-titres Google (CC), puis faites glisser le curseur Sous-titres Samsung (CC) ou
Sous-titres Google (CC) vers la droite pour activer la fonction.
Choisissez une option pour configurer les paramètres des sous-titres.
Régler la balance audio
Configurez l’appareil pour pouvoir régler la balance audio lorsque vous utilisez un casque ou un
écouteur.
1 Connectez un casque ou un écouteur à l’appareil et portez-le.
2 Depuis l’écran Applications, appuyez sur Paramètres → Accessibilité → Audition → Balance
audio.
3 Faites glisser la barre de réglage vers la gauche ou vers la droite pour régler la balance audio,
puis appuyez sur DÉFINIR.
Accessibilité
171
Audio mono
La sortie mono combine le son stéréo en un seul signal qui est joué dans tous les haut-parleurs des
casques ou écouteurs. Utilisez ce mode en cas de troubles auditifs ou si une oreillette unique est plus
pratique.
Depuis l’écran Applications, appuyez sur Paramètres → Accessibilité → Audition, puis cochez la
case Audio mono.
Détecteurs de son
Paramétrez l’appareil pour qu’il vibre si quelqu’un sonne à la porte ou si un bébé pleure.
Détecteur pleurs bébé
1 Depuis l’écran Applications, appuyez sur Paramètres → Accessibilité → Audition →
Détecteurs de son → Détecteur pleurs bébé, puis faites glisser le curseur vers la droite pour
activer la fonction.
2 Lisez les instructions à l’écran, puis appuyez sur OK.
3 Appuyez sur pour démarrer le détecteur de pleurs de bébé.
L’appareil vibre dès qu’il détecte un son et l’alerte est enregistrée dans un journal d’alertes.
Détecteur de sonnettes
1 Depuis l’écran Applications, appuyez sur Paramètres → Accessibilité → Audition →
Détecteurs de son → Détecteur de sonnettes, puis faites glisser le curseur vers la droite pour
activer la fonction.
2 Lisez les instructions à l’écran, puis appuyez sur OK.
3 Appuyez sur pour enregistrer la sonnette de votre porte. Lorsque vous avez terminé
l’enregistrement, appuyez sur SUIVANT.
4 Appuyez sur et actionnez votre sonnette pour vérifier qu’elle a bien été enregistrée. Une fois,
la sonnette détectée par l’appareil, appuyez sur OK.
Pour changer de sonnette, appuyez sur → Modifier le son de la sonnette.
Une fois le détecteur de sonnette paramétré, appuyez sur pour commencer à l’utiliser. L’appareil
vibre dès qu’il détecte une sonnette.
Accessibilité
172
Modifier les paramètres d’alerte
Appuyez sur → Paramètres pour utiliser les options suivantes :
• Intensité des vibrations : réglez l’intensité des vibrations émises par l’appareil.
• Vibrations : changer de type de vibreur.
• Notification par flash : paramétrez le flash pour qu’il clignote lorsqu’un son est détecté.
Tactile auto
Dès que la fonction tactile est activée, l’appareil vibre lorsque vous lisez de la musique, regardez
des vidéos ou jouez à des jeux. Il vibre également lorsque vous appuyez sur des touches dans les
applications prenant en charge cette fonction.
Depuis l’écran Applications, appuyez sur Paramètres → Accessibilité → Audition, puis cochez la
case Tactile auto.
Il est possible que certaines applications ne soient pas compatibles avec cette fonction.
Dextérité et interaction
Assistant menu
Afficher l’icône de raccourci auxiliaire
Paramétrez l’appareil pour qu’il affiche l’icône du raccourci d’assistance pour accéder à des
applications, fonctions et paramètres. Vous pouvez facilement contrôler l’appareil en accédant aux
menus d’assistance affichés par l’icône.
1 Depuis l’écran Applications, appuyez sur Paramètres → Accessibilité → Dextérité et
interaction → Assistant menu.
2 Faites glisser le curseur Assistant menu vers la droite pour activer la fonction, puis appuyez sur
OK pour activer le mode appui unique.
L’icône de raccourci auxiliaire apparaît en bas à droite de l’écran.
3 Appuyez sur Main dominante pour déplacer l’icône de raccourci auxiliaire vers un emplacement
pratique.
Accessibilité
173
Accéder aux menus auxiliaires
L’icône de raccourci auxiliaire apparaît sous forme d’icône flottante, ce qui vous permet d’accéder
facilement aux menus auxiliaires depuis n’importe quel écran.
Lorsque vous appuyez sur l’icône de raccourci auxiliaire, l’icône s’agrandit légèrement et les menus
auxiliaires apparaissent sur l’icône. Appuyez sur la flèche haut ou bas pour accéder à d’autres volets
ou balayez l’écran vers le haut ou vers le bas pour sélectionner d’autres menus.
Utiliser le curseur
Depuis le menu auxiliaire, appuyez sur Curseur. Vous pouvez commander l’écran à l’aide de petits
mouvements du doigt sur la zone tactile. Faites glisser le doigt sur la zone tactile afin de déplacer le
curseur. Vous pouvez également appuyer sur l’écran afin de sélectionner les éléments situés sous le
curseur.
Vous pouvez utiliser les options suivantes :
• / : sélectionner un élément ou faire défiler l’écran vers la gauche ou la droite.
• / : faire défiler l’écran vers le haut ou le bas.
• : déplacer la zone tactile vers un autre emplacement.
• : grossir la zone où est placé le curseur.
• : fermer la zone tactile.
Pour modifier les paramètres du curseur, ouvrez l’écran Applications, appuyez sur Paramètres →
Accessibilité → Dextérité et interaction → Assistant menu. Ensuite, personnalisez les paramètres
sous Param. pavé tactile et curseur.
Utiliser les menus auxiliaires avancés
Configurez l’appareil pour qu’il affiche des menus auxiliaires avancés pour les applications
sélectionnées.
Depuis l’écran Applications, appuyez sur Paramètres → Accessibilité → Dextérité et interaction →
Assistant menu → Assistant plus, faites glisser le curseur Assistant plus vers la droite pour activer la
fonction, puis sélectionnez des applications.
Accessibilité
174
Activer l’écran à l’aide de la fonction Air Gesture
Utilisez la fonction Air Gesture pour activer l’écran en agitant la main au-dessus du capteur tout en
haut de l’appareil. Vous pouvez allumer l’écran sans appuyer sur aucune touche. Lorsque vous utilisez
cette fonction, placez l’appareil sur une surface plane ou tenez-le fermement pour l’empêcher de
bouger.
Depuis l’écran Applications, appuyez sur Paramètres → Accessibilité → Dextérité et interaction →
Air wake up, puis faites glisser le curseur Air wake up vers la droite pour activer la fonction.
Configurer la durée de l’appui prolongé
Définissez le délai de reconnaissance lorsque vous maintenez le doigt appuyé sur l’écran.
Depuis l’écran Applications, appuyez sur Paramètres → Accessibilité → Dextérité et interaction →
Durée de l’appui prolongé, puis sélectionnez une option.
Contrôle par interaction
Activez le mode Contrôle par interaction pour limiter les réactions de l’appareil aux saisies lorsque
vous utilisez des applications.
1 Depuis l’écran Applications, appuyez sur Paramètres → Accessibilité → Dextérité et
interaction → Contrôle par interaction.
2 Faites glisser le curseur Contrôle par interaction vers la droite pour activer la fonction.
3 Maintenez les touches Accueil et Volume simultanément enfoncées tout en utilisant une
application.
4 Réglez la taille du cadre ou tracez une ligne autour d’une zone que vous souhaitez limiter.
5 Appuyez sur OK.
L’appareil affiche la zone limitée. La zone limitée ne réagit pas si vous appuyez dessus et les
touches physiques de l’appareil sont désactivées.
Pour désactiver le mode contrôle par interaction, maintenez les touches Accueil et Volume
simultanément enfoncées.
Accessibilité
175
Prendre ou mettre fin à des appels
Modifiez la manière de prendre ou de raccrocher un appel.
Depuis l’écran Applications, appuyez sur Paramètres → Accessibilité → Répondre et mettre fin
aux appels.
Sélectionnez la méthode souhaitée.
Utiliser le mode à appui unique
En cas d’alarme ou d’appel entrant, appuyez sur la touche pour arrêter l’alarme ou prendre l’appel au
lieu de faire glisser la touche.
Depuis l’écran Applications, appuyez sur Paramètres → Accessibilité, puis cochez la case Mode
pression unique.
Gérer les paramètres d’accessibilité
Enregistrer les paramètres d’accessibilité dans un fichier
Exportez les paramètres d’accessibilité en cours dans un fichier.
Depuis l’écran Applications, appuyez sur Paramètres → Accessibilité → Gérer l’accessibilité →
Importer/Exporter, puis sélectionnez une option d’exportation.
Importer un fichier de paramètres d’accessibilité
Importez un fichier de paramètres d’accessibilité et mettez à jour les paramètres actuels.
Depuis l’écran Applications, appuyez sur Paramètres → Accessibilité → Gérer l’accessibilité
→ Importer/Exporter, puis sélectionnez une option d’importation. Sélectionnez un fichier
d’importation, puis appuyez sur OK → OK. Les paramètres d’accessibilité sont mis à jour
conformément au fichier importé.
Partager des fichiers de paramètres d’accessibilité
Partagez des fichiers de paramètres d’accessibilité avec d’autres personnes par e-mail ou via les
fonctions Wi-Fi Direct, Bluetooth, etc.
Depuis l’écran Applications, appuyez sur Paramètres → Accessibilité → Gérer l’accessibilité →
Partager via. Sélectionnez ensuite des fichiers d’accessibilité, puis appuyez sur OK. Sélectionnez un
mode de partage, puis suivez les instructions à l’écran pour partager les fichiers.
176
Dépannage
Avant de contacter un centre de service après-vente Samsung, veuillez essayer de mettre en œuvre
les solutions suivantes. Il est possible que certaines situations ne s’appliquent pas à votre appareil.
Lorsque vous allumez ou utilisez votre appareil, un message vous invite à
effectuer l’une des manipulations suivantes :
• Mot de passe : lorsque la fonction de verrouillage est activée, vous devez saisir le mot de passe
que vous avez défini pour l’appareil.
• Code PIN : lorsque vous utilisez l’appareil pour la première fois ou lorsque vous avez activé le
verrouillage de votre appareil par code PIN, vous devez saisir le code PIN fourni avec la carte SIM
ou USIM. Vous pouvez désactiver cette fonction à l’aide du menu de verrouillage de la carte SIM.
• Code PUK : si vous saisissez un code PIN incorrect à plusieurs reprises, la carte SIM ou USIM est
bloquée. Vous devez alors saisir le code PUK fourni par votre opérateur.
• Code PIN2 : lorsque vous accédez à un menu nécessitant le code PIN2, vous devez saisir le code
PIN2 fourni avec la carte SIM ou USIM. Pour en savoir plus, contactez votre opérateur.
Votre appareil affiche des messages d’erreur de réseau et de service
• Lorsque vous vous trouvez dans une zone de mauvaise réception, vous risquez de perdre
la connexion au réseau. Déplacez-vous et réessayez. Lorsque vous vous déplacez, plusieurs
messages d’erreur peuvent apparaître.
• Certaines options ne sont pas accessibles sans abonnement. Pour en savoir plus, contactez votre
opérateur.
Votre appareil ne s’allume pas
• Lorsque la batterie est entièrement déchargée, il n’est pas possible d’allumer l’appareil. Procédez
au chargement complet de la batterie avant d’allumer l’appareil.
• Il est possible que la batterie ne soit pas correctement installée. Réinsérez la batterie.
• Essuyez les deux contacts dorés et réinsérez la batterie.
Dépannage
177
Mauvaise réaction ou lenteur de l’écran tactile
• Si vous fixez sur l’écran tactile un cache de protection ou tout autre accessoire en option, il est
possible que l’écran ne fonctionne pas correctement.
• Si vous portez des gants, si vos mains ne sont pas parfaitement propres, ou si vous appuyez
sur l’écran avec un objet pointu ou vos ongles, l’écran tactile risque de présenter des
dysfonctionnements.
• L’humidité ou le contact avec l’eau peut provoquer des dysfonctionnements de l’écran tactile.
• Redémarrez votre appareil afin de mettre fin à d’éventuels dysfonctionnements logiciels
temporaires.
• Assurez-vous que vous disposez bien de la version logicielle mise à jour de votre appareil.
• Si l’écran tactile est endommagé ou rayé, contactez un centre de service après-vente Samsung.
Votre appareil se bloque ou est sujet à des erreurs fatales
Si votre appareil ne répond plus ou se bloque, vous devrez éventuellement fermer les applications
ou réinsérer la batterie et réinitialiser votre appareil pour qu’il retrouve un fonctionnement correct. Si
votre appareil se bloque et ne répond plus, maintenez simultanément la touche Marche/Arrêt et la
touche de volume enfoncées pendant plus de 7 secondes afin de redémarrer.
Si vous ne parvenez pas à résoudre le problème à la suite de ces manipulations, procédez à la
réinitialisation des paramètres par défaut. Depuis l’écran Applications, appuyez sur Paramètres →
Sauvegarder et réinitialiser → Rétablir param. par défaut → RÉINITIALISER LE PÉRIPHÉRIQUE
→ SUPPRIMER TOUT. Avant de rétablir les paramètres par défaut de votre appareil, n’oubliez pas
d’effectuer des copies de sauvegarde de toutes les données importantes qui y sont stockées.
Si le problème persiste, contactez un centre de service après-vente Samsung.
Impossible de passer des appels
• Assurez-vous d’être connecté au réseau cellulaire approprié.
• Vérifiez que vous n’avez pas activé la fonction de restriction d’appel pour le numéro de
téléphone que vous composez.
• Vérifiez que vous n’avez pas activé la fonction de restriction d’appel pour le numéro de
téléphone de l’appel entrant.
Vos interlocuteurs ne vous entendent pas
• Vérifiez que le microphone intégré n’est pas recouvert.
• Vérifiez que le microphone est placé suffisamment près de votre bouche.
• Si vous utilisez un casque ou des écouteurs, vérifiez qu’il est correctement branché.
Dépannage
178
Vous percevez un écho lors des appels
Réglez le volume en appuyant sur la touche de volume ou déplacez-vous.
Déconnexions fréquentes du réseau cellulaire ou d’Internet, ou mauvaise
qualité audio
• Assurez-vous que rien n’entrave l’antenne intégrée à l’appareil.
• Lorsque vous vous trouvez dans une zone de mauvaise réception, vous risquez de perdre la
connexion au réseau. Vos problèmes de connectivité peuvent être dus à une panne au niveau
de votre opérateur. Déplacez-vous et réessayez.
• Si vous utilisez votre appareil tout en vous déplaçant, il est possible que les services de réseau
sans fil soient désactivés en raison de problèmes sur le réseau de votre opérateur.
L’icône de la batterie est vide
Le niveau de charge de la batterie est faible. Rechargez ou remplacez la batterie.
La batterie ne se charge pas correctement (pour les chargeurs
homologués Samsung)
• Assurez-vous que le chargeur est correctement branché.
• Si les bornes de la batterie sont sales, la batterie peut ne pas se recharger correctement ou
l’appareil risque de s’éteindre. Essuyez les deux contacts dorés et réessayez de recharger la
batterie.
• Sur certains appareils, la batterie ne peut pas être remplacée par l’utilisateur. Pour remplacer ce
type de batterie, contactez un centre de service après-vente Samsung.
La batterie se décharge de plus en plus rapidement
• Lorsque la batterie est exposée à des températures extrêmes, la charge utile peut être réduite.
• La consommation de la batterie augmente lorsque vous utilisez certaines fonctions, comme les
SMS et MMS, ou certaines applications, comme les jeux ou Internet.
• La batterie est un consommable dont la charge utile diminue avec le temps.
Dépannage
179
L’appareil est chaud au toucher
Lorsque vous utilisez plusieurs applications simultanément ou sur une période prolongée, l’appareil
peut chauffer. Ce phénomène est normal et n’affecte ni la durée de vie, ni les performances de
l’appareil.
Messages d’erreur à l’ouverture de l’appareil photo
Pour utiliser l’appareil photo, votre appareil doit disposer de suffisamment de mémoire et sa batterie
être suffisamment chargée. Si vous obtenez des messages d’erreur lors de l’ouverture de l’appareil
photo, tentez les manipulations suivantes :
• Chargez la batterie ou remplacez-la par une autre entièrement chargée.
• Libérez de la mémoire en transférant des fichiers sur un ordinateur ou en supprimant des
éléments de l’appareil.
• Redémarrez l’appareil. Si les problèmes persistent avec l’appareil photo, contactez un centre de
service après-vente Samsung.
Qualité des photos inférieure par rapport à l’aperçu
• La qualité de vos photos peut varier selon l’environnement et les techniques photographiques
utilisées.
• Si vous prenez des photos avec une luminosité insuffisante, de nuit ou en intérieur, l’image
risque d’être floue.
Messages d’erreur à l’ouverture de fichiers multimédia
Si vous obtenez des messages d’erreur ou si vous ne parvenez pas à lire les fichiers multimédia
lorsque vous les ouvrez sur votre appareil, tentez les manipulations suivantes :
• Libérez de la mémoire en transférant des fichiers sur un ordinateur ou en supprimant des
éléments de l’appareil.
• Assurez-vous que le fichier audio n’est pas protégé par des droits DRM (Gestion des droits
d’auteur). Si le fichier est protégé par des droits DRM, vous devez posséder une licence ou une
clé pour pouvoir le lire.
• Assurez-vous que les formats de fichiers sont pris en charge par l’appareil. Si un format de
fichier n’est pas pris en charge, tel que DivX ou AC3, installez une application le prenant en
charge. Pour confirmer les formats de fichier compatibles avec votre appareil, connectez-vous à
www.samsung.com.
Dépannage
180
• Votre appareil est compatible avec les photos et vidéos capturées avec ce même appareil. Les
photos et vidéos capturées avec d’autres appareils peuvent ne pas s’afficher correctement.
• Votre appareil prend en charge les fichiers multimédia autorisés par votre opérateur ainsi que
les opérateurs, des autres services réseaux. Il est possible que certains contenus circulant sur
Internet, comme des sonneries, vidéos ou fonds d’écran, ne fonctionnent pas correctement.
Impossible de localiser un autre appareil Bluetooth
• Vérifiez que la fonction sans fil Bluetooth est activée sur votre appareil.
• Vérifiez que la fonction sans fil Bluetooth est également activée sur l’appareil auquel vous tentez
de vous connecter.
• Vérifiez que les deux appareils Bluetooth se trouvent bien à l’intérieur du rayon d’action
Bluetooth (10 m maximum).
Si les conseils ci-dessus ne résolvent pas le problème, contactez un centre de service après-vente
Samsung.
Problème de connexion avec un ordinateur
• Assurez-vous que le câble USB utilisé est compatible avec votre appareil.
• Vérifiez que le pilote nécessaire est bien installé sur votre ordinateur et qu’il est à jour.
• Si vous utilisez Windows XP, vérifiez que votre ordinateur est équipé de Windows XP Service
Pack 3 ou de toute version ultérieure.
• Vérifiez que Samsung Kies ou Windows Media Player 10 (ou toute version ultérieure) est installé
sur votre ordinateur.
Votre appareil ne parvient pas à détecter votre position
À certains endroits, comme à l’intérieur d’un bâtiment, les signaux GPS peuvent être faibles. Si cela se
produit, configurez votre appareil pour l’utilisation d’un réseau Wi-Fi ou mobile afin de trouver votre
position.
Dépannage
181
Les données stockées sur l’appareil ont été perdues
Effectuez toujours des copies des données importantes stockées sur votre appareil. Dans le cas
contraire, vous ne pourriez pas récupérer vos données corrompues ou perdues. Samsung ne peut
être tenu responsable de la perte des données stockées sur votre appareil.
Un petit espace est apparu sur le bord externe du boîtier de l’appareil
• Cet espace est une caractéristique de fabrication, et il est possible d’observer un jeu ou une
vibration des pièces.
• Au fil du temps, la friction entre les pièces peut entraîner l’élargissement de cet espace.
Droits d’auteur
Copyright © 2015 Samsung Electronics
Ce mode d’emploi est protégé par les lois internationales sur les droits d’auteur.
Il est interdit de reproduire, distribuer, traduire ou transmettre sous quelque forme et par quelque
moyen que ce soit, électronique ou mécanique, notamment par photocopie, enregistrement ou
stockage dans un système de stockage et de recherche documentaire, tout ou partie de ce mode
d’emploi, sans le consentement préalable écrit de Samsung Electronics.
Marques
• SAMSUNG et le logo SAMSUNG sont des marques déposées de Samsung Electronics.
• Bluetooth® est une marque déposée de Bluetooth SIG, Inc.
• Wi-Fi®, Wi-Fi Protected Setup™, Wi-Fi CERTIFIED Passpoint™, Wi-Fi Direct™, Wi-Fi CERTIFIED™
et le logo Wi-Fi sont des marques déposées de Wi-Fi Alliance.
• Toutes les autres marques et droits d’auteur demeurent la propriété de leurs propriétaires
respectifs.
www.samsung.com
Mode d’emploi
SM-G357FZ
French. 10/2014. Rev.1.0
2
Table des matières
À lire avant utilisation
Démarrage
7 Contenu du coffret
8 Présentation de l’appareil
10 Installer la carte SIM ou USIM et la
batterie
15 Utiliser une carte mémoire
17 Allumer et éteindre l’appareil
18 Verrouiller et déverrouiller l’écran
Fonctions de base
19 Utiliser l’écran tactile
22 Disposition de l’écran d’accueil
26 Volet des raccourcis
28 Ouvrir des applications
28 Installer ou désinstaller des applications
30 Saisir du texte
32 Capture d’écran
33 Mes fichiers
35 Fonctions d’économie d’énergie
Connectivité réseau
37 Données mobiles
37 Wi-Fi
38 Modem et point d’accès mobile
40 Internet
Personnaliser votre appareil
42 Gérer l’écran d’accueil et la liste des
applications
44 Définir un fond d’écran et des sonneries
45 Changer la méthode de verrouillage de
l’écran
46 Transférer des données depuis votre
ancien appareil
47 Paramétrer des comptes
Téléphone
48 Passer des appels
50 Recevoir des appels
51 Options en cours d’appel
Contacts
53 Ajouter des contacts
54 Gérer les contacts
Table des matières
3
Établir une connexion avec
d’autres appareils
82 Bluetooth
84 Wi-Fi Direct
86 NFC
88 Utiliser la fonction d’impression mobile
Gestionnaire d’appareils et
de données
89 Mettre l’appareil à jour
90 Transférer des fichiers entre l’appareil et
un ordinateur
91 Sauvegarder et restaurer des données
92 Réinitialiser les données
Paramètres
93 Accéder au menu des paramètres
93 SANS FIL ET RÉSEAUX
96 APPAREIL
101 PERSONNEL
105 COMPTES
105 SYSTÈME
Accessibilité
107 À propos des menus Accessibilité
108 Utiliser la touche Accueil pour ouvrir les
menus d’accessibilité
108 Informations orales (TalkBack)
Messages et e-mails
56 Messages
58 Email
Appareil photo
61 Prises de vue de base
63 Modes de prise de vue
64 Paramètres de l’appareil photo
Galerie
66 Afficher des photos ou lire des vidéos
68 Retoucher des photos
Multimédia
69 Vidéo
Fonctions et applications
utiles
70 S Planner
72 Calculatrice
73 Horloge
75 Mémo
76 Radio
78 Enregistreur vocal
79 Applications Google
Table des matières
4
118 Modifier la taille de police
118 Grossir l’écran
118 Inverser les couleurs d’affichage
119 Configurer une notification par flash
119 Couper tous les sons
119 Paramètres des sous-titres
119 Régler la balance audio
120 Audio mono
120 Configurer la durée de l’appui prolongé
120 Contrôle par interaction
121 Prendre ou mettre fin à des appels
121 Utiliser le mode à appui unique
121 Afficher des services d’accessibilité
122 Utiliser d’autres fonctions utiles
Dépannage
5
À lire avant utilisation
Veuillez lire attentivement ce mode d’emploi, afin de pouvoir utiliser votre appareil correctement et
en toute sécurité.
• Les descriptions sont basées sur les paramètres par défaut de votre appareil.
• En fonction de votre zone géographique, de votre opérateur ou de la version logicielle, certains
contenus peuvent différer par rapport à votre appareil.
• Les contenus de qualité élevée nécessitant une forte utilisation du processeur et de la RAM
peuvent avoir une incidence sur les performances générales de l’appareil. Les applications en
rapport avec ces contenus peuvent ne pas fonctionner correctement selon les caractéristiques
de l’appareil et les conditions d’utilisation.
• Samsung ne peut être tenu responsable des problèmes de performance relatifs aux applications
fournies par des prestataires autres que Samsung.
• Samsung ne peut être tenu responsable des problèmes de performance ou des incompatibilités
découlant de la modification des paramètres de registre par l’utilisateur. Toute tentative de
personnalisation du système d’exploitation peut entraîner des problèmes de fonctionnement de
l’appareil ou de ses applications.
• Les logiciels, sons, fonds d’écran, images ainsi que les autres contenus multimédia fourni(e)s
avec cet appareil sont concédés sous licence et leur usage est soumis à une utilisation limitée.
L’extraction et l’utilisation de ces éléments à des fins commerciales ou autres constituent
une infraction au regard des lois sur les droits d’auteur. Les utilisateurs sont entièrement
responsables de toute utilisation illégale d’un contenu multimédia.
• Les services de données tels que l’envoi ou la réception de messages, le téléchargement ou
le chargement de données, la synchronisation automatique ou l’utilisation de services de
localisation peuvent occasionner des frais supplémentaires, en fonction de l’offre à laquelle vous
avez souscrit dans le cadre de votre forfait. Pour les transferts de données volumineux, il est
recommandé d’utiliser la fonction Wi-Fi.
• Les applications fournies par défaut avec l’appareil peuvent être modifiées ou ne plus être
disponibles, et ce, sans préavis. Si vous avez des questions à propos d’une application fournie
avec l’appareil, contactez un centre de service après-vente Samsung. Pour les applications
installées par l’utilisateur, contactez les opérateurs.
• Toute modification du système d’exploitation de l’appareil ou installation de logiciels non
officiels peut entraîner des dysfonctionnements et corrompre vos données. Ces actions
constituent des violations de l’accord de licence Samsung et annuleront votre garantie.
À lire avant utilisation
6
Icônes
Avertissement : situations susceptibles de vous blesser ou de blesser autrui.
Attention : situations susceptibles d’endommager votre appareil ou d’autres équipements.
Remarque : remarques, conseils d’utilisation ou informations complémentaires.
7
Démarrage
Contenu du coffret
Vérifiez le contenu du coffret et assurez-vous que tous les éléments suivants sont présents :
• Appareil
• Batterie
• Guide de prise en main rapide
• Les éléments fournis avec l’appareil et les accessoires disponibles peuvent varier en
fonction de votre zone géographique ou de votre opérateur.
• Les accessoires fournis ont été spécialement conçus pour votre appareil et peuvent ne
pas fonctionner avec d’autres appareils.
• L’aspect et les caractéristiques du produit peuvent faire l’objet de modifications sans
préavis.
• Vous pouvez acheter d’autres accessoires auprès de votre revendeur Samsung. Avant
tout achat, assurez-vous qu’ils sont compatibles avec votre appareil.
• Utilisez exclusivement des accessoires homologués par Samsung. L’utilisation
d’accessoires non homologués peut entraîner des problèmes de performances ainsi que
des dysfonctionnements non couverts par la garantie.
• La disponibilité de l’ensemble des accessoires dépend entièrement des fabricants. Pour
plus d’informations sur la disponibilité des accessoires, consultez le site Web Samsung.
Démarrage
8
Présentation de l’appareil
Touche Retour
Microphone
Touche Applications
récentes
Écran tactile
Objectif avant
Connecteur à fonctions
multiples
Touche Accueil
Touche Marche/Arrêt
Prise audio 3,5 mm
Écouteur
Cache arrière
Flash
Antenne GPS
Antenne principale
Touche de volume
Haut-parleur
Objectif arrière
Antenne NFC
(sur la batterie)
Démarrage
9
• Ne recouvrez pas la zone autour de l’antenne avec vos mains ou tout autre objet. Cela
peut entraîner des problèmes de connectivité ou décharger la batterie.
• L’utilisation d’une protection d’écran agréée Samsung est recommandée. Les protections
d’écran non agréées peuvent provoquer un dysfonctionnement des capteurs.
• Évitez de mettre l’écran tactile en contact avec de l’eau. L’humidité ou le contact avec l’eau
peut provoquer des dysfonctionnements de l’écran tactile.
Touches
Touche Fonction
Marche/Arrêt
• Maintenir cette touche enfoncée pour allumer ou éteindre
l’appareil.
• Appuyer sur cette touche pour allumer ou verrouiller l’écran.
Applications
récentes
• Appuyer sur cette touche pour ouvrir la liste des applications
récentes.
• Maintenir cette touche enfoncée pour accéder à des options
supplémentaires dans l’écran actuel.
Accueil
• Appuyer sur cette touche pour allumer l’écran lorsqu’il est
verrouillé.
• Appuyer sur cette touche pour revenir à l’écran d’accueil.
• Maintenir cette touche enfoncée pour lancer la fonction de
recherche Google.
Retour • Appuyer sur cette touche pour revenir à l’écran précédent.
Volume • Appuyer sur cette touche pour régler le volume de l’appareil.
Démarrage
10
Installer la carte SIM ou USIM et la batterie
Installer la carte SIM ou USIM et la batterie
Insérez la carte SIM ou USIM fournie par votre opérateur, ainsi que la batterie.
• Seules les cartes microSIM sont compatibles avec cet appareil.
• La disponibilité de certains services 4G dépend de votre opérateur. Pour en savoir plus sur
la disponibilité des services, contactez votre opérateur.
1 Retirez le cache arrière.
Veillez à ne pas abîmer vos ongles en retirant le cache arrière.
Évitez de plier ou de déformer excessivement le cache arrière. Vous risqueriez de
l’endommager.
Démarrage
11
2 Insérez la carte SIM ou USIM, puce orientée vers le bas.
• N’introduisez pas de carte mémoire dans le compartiment prévu pour la carte SIM. Si
une carte mémoire venait à se coincer dans le compartiment prévu pour la carte SIM,
apportez l’appareil dans un centre de service après-vente Samsung afin de la faire retirer.
• Veillez à ne pas perdre ou à ne pas laisser d’autres personnes utiliser votre carte SIM ou
USIM. Samsung ne peut être tenu responsable en cas de dommage ou désagrément
résultant d’une perte ou d’un vol de carte.
3 Insérez la batterie en alignant correctement ses contacts dorés sur les contacts de l’appareil.
1
2
Démarrage
12
4 Remettez le cache arrière en place.
• Assurez-vous que le cache arrière est bien fermé.
• Avec cet appareil, utilisez uniquement des caches arrière et des accessoires homologués
par Samsung.
Retirer la carte SIM ou USIM et la batterie
1 Retirez le cache arrière.
2 Retirez la batterie.
3 Retirez la carte SIM ou USIM.
Démarrage
13
Charger la batterie
Vous devez charger la batterie avant d’utiliser l’appareil pour la première fois. Vous pouvez charger
l’appareil à l’aide d’un chargeur ou en le branchant sur un ordinateur à l’aide d’un câble USB.
Utilisez uniquement des chargeurs, des batteries et des câbles homologués par Samsung.
L’utilisation de chargeurs ou de câbles non homologués peut provoquer l’éclatement de la
batterie ou endommager l’appareil.
• Lorsque le niveau de charge est faible, l’icône de la batterie est vide.
• Si la batterie est complètement déchargée, vous ne pouvez pas allumer l’appareil,
même si le chargeur est branché. Rechargez la batterie pendant quelques minutes avant
d’allumer l’appareil.
• Si vous utilisez simultanément plusieurs applications, des applications réseaux ou des
applications qui nécessitent une connexion à un autre appareil, la batterie se déchargera
rapidement. Pour éviter toute déconnexion du réseau ou perte d’alimentation lors
d’un transfert de données, utilisez toujours ces applications lorsque la batterie est
parfaitement chargée.
Branchez la fiche micro-USB du chargeur sur le connecteur à fonctions multiples de l’appareil et
l’autre extrémité sur une prise de courant.
Un branchement incorrect du chargeur peut sérieusement endommager l’appareil. Les
dégâts résultant d’une mauvaise utilisation ne sont pas couverts par la garantie.
Démarrage
14
• L’appareil peut être utilisé en cours de chargement, mais dans ce cas, le chargement
complet de la batterie risque de prendre plus de temps.
• Lorsque l’appareil est en cours de chargement, il est possible que l’écran tactile ne
fonctionne pas en raison de l’instabilité de l’alimentation électrique. Dans ce cas,
débranchez le chargeur de l’appareil.
• Il est possible que l’appareil chauffe lorsqu’il est en cours de chargement. Ce phénomène
est normal et n’affecte ni la durée de vie, ni les performances de l’appareil. Si la
température de la batterie devient trop élevée, le chargement risque de s’interrompre.
• Si l’appareil ne se charge pas correctement, apportez-le, accompagné de son chargeur,
dans un centre de service après-vente Samsung.
Lorsque la batterie est complètement chargée, déconnectez l’appareil du chargeur. Pour ce faire,
débranchez d’abord le chargeur de l’appareil, puis de la prise de courant.
Ne retirez jamais la batterie avant d’avoir débranché le chargeur. Ceci pourrait endommager
l’appareil.
• Pour économiser l’énergie, débranchez le chargeur lorsque vous ne l’utilisez pas. Le
chargeur n’étant pas muni d’une touche Marche/Arrêt, vous devez le débrancher de la
prise de courant pour couper l’alimentation. L’appareil doit rester à proximité de la prise
en cours de chargement.
• Le socle de prise de courant doit être installé à proximité du matériel et doit être aisément
accessible.
Réduire la consommation d’énergie de la batterie
Votre appareil est doté d’options destinées à optimiser l’autonomie de votre batterie. En
personnalisant ces options et en désactivant les applications fonctionnant inutilement en arrièreplan,
vous pouvez utiliser l’appareil plus longtemps entre deux chargements :
• Lorsque vous n’utilisez pas l’appareil, désactivez l’écran tactile en appuyant sur la touche
Marche/Arrêt.
• Fermez toutes les applications fonctionnant inutilement en arrière-plan à l’aide du gestionnaire
de tâches.
• Désactivez la fonction Bluetooth.
• Désactivez la fonction Wi-Fi.
• Désactivez la fonction de synchronisation automatique des applications.
• Réduisez la durée du rétroéclairage de l’écran.
• Réduisez la luminosité de l’écran.
Démarrage
15
Utiliser une carte mémoire
Installer une carte mémoire
L’appareil est compatible avec les cartes mémoire d’une capacité allant jusqu’à 64 Go. Selon le
fabricant et le modèle, certaines cartes mémoire peuvent ne pas être compatibles avec votre
appareil.
• Certaines cartes mémoire peuvent ne pas être parfaitement compatibles avec l’appareil.
L’utilisation d’une carte mémoire incompatible peut endommager l’appareil ou la carte
mémoire elle-même et corrompre les données qui y sont stockées.
• Veillez à insérer la carte mémoire du bon côté.
• Seules les structures de fichiers VFAT et exFAT sont compatibles avec les cartes mémoire
de l’appareil. Lorsque vous insérez une carte mémoire formatée avec une autre structure
de fichiers, l’appareil vous invite à la reformater.
• Une trop grande fréquence des opérations d’effacement et d’écriture réduit la durée de
vie des cartes mémoire.
• Lorsque vous insérez une carte mémoire dans l’appareil, le répertoire de fichiers de la
carte mémoire apparaît dans le dossier Mes fichiers → Carte SD.
1 Retirez le cache arrière.
2 Insérez la carte mémoire en orientant la puce vers le haut.
3 Remettez le cache arrière en place.
Démarrage
16
Retirer une carte mémoire
Avant de retirer la carte mémoire, vous devez au préalable la désactiver pour pouvoir la retirer en
toute sécurité. Depuis l’écran d’accueil, appuyez sur → Paramètres → Stockage → Démonter la
carte SD.
1 Retirez le cache arrière.
2 Retirez la carte mémoire.
3 Remettez le cache arrière en place.
Ne retirez jamais la carte mémoire lorsque l’appareil y enregistre ou lit des informations.
Cela pourrait entraîner une perte ou une corruption des données, ou endommager la carte
mémoire ou l’appareil. Samsung ne peut être tenu responsable en cas de perte de données
résultant d’une utilisation frauduleuse ou en cas de détérioration d’une carte mémoire.
Formater une carte mémoire
Une carte mémoire ayant été formatée sur un ordinateur peut ne pas être compatible avec l’appareil.
Formatez la carte mémoire dans l’appareil.
Depuis l’écran d’accueil, appuyez sur → Paramètres → Stockage → Formater la carte SD →
Formater la carte SD → Supprimer tout.
Avant de formater la carte mémoire, n’oubliez pas d’effectuer des copies de sauvegarde de
toutes les données importantes qui y sont stockées. La garantie du fabricant ne couvre pas
la perte de données résultant des manipulations de l’utilisateur.
Démarrage
17
Allumer et éteindre l’appareil
Pour allumer l’appareil, maintenez la touche Marche/Arrêt enfoncée pendant quelques secondes.
Si vous allumez l’appareil pour la première fois ou après l’avoir réinitialisé, suivez les instructions
affichées à l’écran pour procéder à sa configuration.
Pour éteindre l’appareil, maintenez la touche Marche/Arrêt enfoncée, puis appuyez sur Éteindre.
Respectez toutes les consignes de sécurité et directives formulées par le personnel
compétent dans les lieux où l’utilisation d’appareils mobiles est interdite, comme par
exemple dans les avions et les hôpitaux.
Démarrage
18
Verrouiller et déverrouiller l’écran
Lorsque vous appuyez sur la touche Marche/Arrêt, l’écran s’éteint et se verrouille. De même, si vous
n’utilisez pas l’appareil pendant un certain temps, l’écran s’éteint et se verrouille.
Pour déverrouiller l’appareil, appuyez sur la touche Marche/Arrêt ou la touche Accueil, puis faites
glisser votre doigt sur l’écran dans le sens de votre choix.
Vous pouvez changer la méthode de déverrouillage de l’écran. Pour en savoir plus, reportez-vous à la
section Changer la méthode de verrouillage de l’écran.
19
Fonctions de base
Utiliser l’écran tactile
• Évitez tout contact de l’écran tactile avec d’autres appareils électriques. Les décharges
électrostatiques peuvent provoquer des dysfonctionnements de l’écran tactile.
• Pour éviter d’endommager l’écran tactile, n’appuyez pas dessus avec un objet pointu et
n’exercez aucune pression excessive avec vos doigts.
• Il se peut que l’appareil ne reconnaisse pas la saisie tactile près des bords de l’écran, hors
de la zone de saisie dédiée.
• Si l’écran tactile reste inactif pendant une période prolongée, des images rémanentes
risquent d’apparaître (ou persistance de l’affichage). Éteignez l’écran tactile lorsque vous
n’utilisez pas l’appareil.
• Il est recommandé d’utiliser l’écran tactile avec les doigts.
Appuyer
Pour ouvrir une application, sélectionner un élément de menu, activer une touche à l’écran ou saisir
un caractère sur le clavier à l’écran, appuyez sur l’écran tactile avec un seul doigt.
Fonctions de base
20
Maintenir appuyé
Pour accéder aux options disponibles, maintenez votre doigt appuyé sur un élément à l’écran
pendant plus de 2 secondes.
Faire glisser
Pour déplacer un élément, maintenez-y le doigt appuyé et faites-le glisser vers un nouvel
emplacement.
Appuyer deux fois
Pour effectuer un zoom avant sur une page Web ou une image, appuyez deux fois sur l’écran.
Appuyez de nouveau à deux reprises sur l’écran pour annuler le zoom.
Fonctions de base
21
Effleurer
Pour passer d’une fenêtre à l’autre, faites glisser votre doigt vers la gauche ou la droite sur l’écran
d’accueil ou dans la liste des applications. Pour parcourir une page Web ou une liste, telle que celle
de vos contacts, faites glisser votre doigt vers le haut ou le bas de l’écran.
Écarter et rapprocher les doigts
Pour effectuer un zoom avant sur une page Web, une carte ou une image, placez deux doigts sur
l’écran et écartez-les. Rapprochez-les pour effectuer un zoom arrière.
Fonctions de base
22
Disposition de l’écran d’accueil
Écran d’accueil
L’écran d’accueil est le point de départ pour accéder à toutes les fonctions de l’appareil. Il affiche
des widgets, des raccourcis vers les applications, etc. Les widgets sont petits outils qui permettent
d’obtenir des informations comme la météo ou l’actualité par exemple.
Pour afficher d’autres volets, faites défiler l’écran à gauche ou à droite, ou sélectionnez l’icône d’un
volet en bas de l’écran. Pour en savoir plus sur la personnalisation de l’écran d’accueil, reportez-vous
à la section Gérer l’écran d’accueil.
Widget
Application Dossier
Icône de volet d'écran d'accueil
Applications favorites
Fonctions de base
23
Options de l’écran d’accueil
Maintenez votre doigt appuyé sur une zone vide de l’écran d’acccueil ou rapprochez-y les doigts
pour accéder aux options disponibles.
Fonctions de base
24
Liste des applications
La liste des applications affiche les icônes de toutes vos applications, y compris celles récemment
installées.
Depuis l’écran d’accueil, appuyez sur pour ouvrir la liste des applications. Pour afficher d’autres
volets, faites défiler la liste des applications vers la gauche ou la droite ou appuyez sur le point
d’un volet d’application en bas de l’écran. Pour en savoir plus sur la personnalisation de la liste des
applications, reportez-vous à la section Gérer la liste des applications.
Accéder à des
options
supplémentaires.
Application
Volets d’applications
Fonctions de base
25
Icônes d’informations
Des icônes d’informations apparaissent en haut de l’écran. Les icônes répertoriées dans le tableau cidessous
sont les plus courantes.
Il se peut que rien ne s’affiche en haut de l’écran dans certaines applications. Pour afficher
des éléments, faites glisser votre doigt de haut en bas de l’écran.
Icône Signification
Aucun signal
Puissance du signal
Itinérance (hors de la zone de service normale)
Réseau GPRS connecté
Réseau EDGE connecté
Réseau UMTS connecté
Réseau HSDPA connecté
Réseau HSPA+ connecté
/ Réseau LTE (4G) connecté
Wi-Fi connecté
Fonction Bluetooth activée
GPS activé
Appel en cours
Appel manqué
Synchronisation avec le Web
Connecté à un ordinateur
Carte SIM ou USIM absente
Nouveau SMS ou MMS
Alarme activée
Profil Discret activé
Mode Vibreur activé
Fonctions de base
26
Icône Signification
Mode Hors-ligne activé
Une erreur s’est produite ou votre attention est nécessaire
Niveau de charge de la batterie
Volet des raccourcis
Utiliser le volet des raccourcis
Lorsque vous recevez de nouvelles notifications, telles que des messages ou des appels manqués,
des icônes d’information apparaissent en haut de votre écran. Pour en savoir plus sur les icônes,
ouvrez le volet des raccourcis et consultez les détails.
Pour ouvrir le volet des raccourcis, faites-le glisser vers le bas. Pour fermer le volet des raccourcis,
faites-le glissser de bas en haut.
Fonctions de base
27
Vous pouvez utiliser les fonctions suivantes dans le volet des raccourcis :
Ouvrir les Paramètres.
Appuyer sur une notification et
exécuter différentes actions.
Effacer toutes les notifications.
Régler la luminosité.
Activer ou désactiver des options.
Maintenir le doigt appuyé sur une
touche pour afficher les paramètres
détaillés.
Utiliser les touches de paramétrage rapide
Vous pouvez activer ou désactiver certaines fonctions depuis le volet des raccourcis. Appuyez sur les
options suivantes pour les activer ou désactiver. Vous pouvez afficher davantage de paramètres en
maintenant le doigt appuyé sur une touche.
• Wi-Fi : pour en savoir plus, reportez-vous à la section Wi-Fi.
• Position : pour en savoir plus, reportez-vous à la section Localisation.
• Son / Vibreur / Muet : activer ou désactiver le son de votre appareil ou le profil Discret.
• Rotation écran : autoriser ou empêcher l’interface de pivoter lorsque vous tournez l’appareil.
Certaines applications ne permettent pas la rotation de l’écran.
Fonctions de base
28
• Bluetooth : pour en savoir plus, reportez-vous à la section Bluetooth.
• Données mobiles : pour en savoir plus, reportez-vous aux sections Utilisation des données ou
Réseaux mobiles.
• Ultra éco énergie : pour en savoir plus, reportez-vous à la section Mode Ultra économie
d’énergie.
• Pt accès mobile : pour en savoir plus, reportez-vous à la section Modem et point d’accès mobile.
• NFC : pour en savoir plus, reportez-vous à la section NFC.
• Synchro. : lorsque vous activez cette fonction, l’appareil synchronise automatiquement les
applications, comme le calendrier ou les e-mails.
Ouvrir des applications
Depuis l’écran d’accueil ou la liste des applications, appuyez sur une icône pour ouvrir l’application
correspondante.
Pour ouvrir la liste des applications récemment utilisées, appuyez sur , puis sélectionnez l’icône
d’une application à ouvrir.
Fermer une application
Appuyez sur et faites glisser votre doigt vers la gauche ou la droite sur l’icône d’une application
afin de la fermer. Pour fermer toutes les applications en cours d’exécution, appuyez sur → .
Installer ou désinstaller des applications
Samsung GALAXY Apps
Utilisez cette application pour acheter et télécharger des applications.
Appuyez sur GALAXY Apps depuis la liste des applications.
La disponibilité de cette application dépend de votre zone géographique ou de votre
opérateur.
Fonctions de base
29
Installer des applications
Parcourez les applications par catégorie ou appuyez sur pour rechercher une application à l’aide
d’un mot-clé.
Sélectionnez une application pour en afficher les informations. Pour télécharger des applications
gratuites, appuyez sur Gratuit. Pour acheter et télécharger des applications payantes, appuyez sur la
touche qui indique le prix de l’application.
Pour modifier les paramètres de mise à jour automatique, appuyez sur → Paramètres →
Mettre à jour les applications automatiquement, puis sélectionnez une option.
Play Store
Utilisez cette application pour acheter et télécharger des applications.
Appuyez sur Play Store depuis la liste des applications.
Installer des applications
Parcourez les applications par catégorie ou appuyez sur pour rechercher une application à l’aide
d’un mot-clé.
Sélectionnez une application pour en afficher les informations. Pour télécharger des applications
gratuites, appuyez sur INSTALLER. Pour acheter et télécharger des applications payantes, appuyez
sur le prix et suivez les instructions à l’écran.
Pour modifier les paramètres de mise à jour automatique, appuyez sur → PARAMÈTRES
→ Mise à jour automatique des applis, puis sélectionnez une option.
Gérer les applications
Désinstaller ou désactiver des applications
Pour désactiver des applications par défaut, ouvrez la liste des applications, puis appuyez sur →
Désinstaller/désactiver des applications. L’icône apparaît en haut à droite de chaque application
qu’il est possible de désactiver. Sélectionnez une application, puis appuyez sur OK.
Pour désinstaller des applications téléchargées, ouvrez la liste des applications, puis appuyez sur →
Applications téléchargées → → Désinstaller. Une autre solution consiste à appuyer, depuis la liste
des applications, sur Paramètres → Gestionnaire d’applications, à sélectionner une application,
puis à appuyer sur Désinstaller.
Fonctions de base
30
Activer les applications désactivées
Depuis la liste des applications, appuyez sur → Aff. applis désact., sélectionnez les applications à
activer de nouveau, puis appuyez sur OK. Vous pouvez également, depuis la liste des applications,
appuyer sur Paramètres → Gestionnaire d’applications, sélectionner l’onglet DÉSACTIVÉ, une
application, puis appuyer sur Activer.
• Masquer des applications : masquer des applications uniquement dans la liste des
applications. Vous pouvez continuer à utiliser les applications masquées.
• Désactiver des applications : désactiver les applications fournies par défaut et ne
pouvant pas être désinstallées de l’appareil. Vous ne pouvez pas utiliser les applications
désactivées.
• Désinstaller des applications : désinstaller des applications téléchargées.
Saisir du texte
Présentation du clavier
Un clavier apparaît automatiquement lorsque vous saisissez du texte pour envoyer des messages,
créer des mémos, etc.
La saisie de texte est impossible dans certaines langues. Pour saisir du texte, vous devez
sélectionner une des langues prises en charge.
Passer à la ligne suivante.
Supprimer le caractère précédent.
Saisir des signes de ponctuation.
Saisir des majuscules. Pour saisir
l’ensemble de votre texte en
majuscules, appuyez deux fois sur
cette touche.
Modifier les paramètres du clavier. Insérer un espace.
Mots-clés suggérés
Fonctions de base
31
Modifier la langue de saisie
Appuyez sur → Sélectionner langue de saisie, puis sélectionnez les langues à utiliser. Si vous
sélectionnez au moins deux langues, vous pouvez passer de l’une à l’autre en faisant glisser votre
doigt sur la barre d’espace vers la gauche ou la droite.
Modifier la disposition du clavier
Appuyez sur l’icône , sélectionnez une langue sous LANGUES DE SAISIE, puis sélectionnez la
disposition de clavier à utiliser.
Sur le Clavier 3x4, une touche correspond à trois ou quatre caractères. Pour saisir un
caractère, appuyez à plusieurs reprises sur la touche correspondante jusqu’à ce que le
caractère correspondant s’affiche.
Utiliser les fonctions supplémentaires du clavier
Maintenez le doigt appuyé sur l’icône pour utiliser diverses fonctions. Suivant la dernière fonction
utilisée, d’autres icônes peuvent apparaître à la place de l’icône .
• : modifier les paramètres du clavier.
• : insérer des émoticônes.
Modifier le type de clavier
Appuyez sur une zone de saisie, ouvrez le volet des raccourcis, appuyez sur Mode de saisie, puis
choisissez le type de clavier à utiliser.
Si les claviers par défaut n’apparaissent pas dans la liste des claviers disponibles ou si vous installez
de nouveaux claviers, ouvrez la liste des applications, appuyez sur Paramètres → Langue et saisie,
puis sélectionnez un clavier.
Fonctions de base
32
Copier et coller du texte
1 Maintenez le doigt appuyé sur le texte.
2 Faites glisser l’icône ou pour sélectionner le texte voulu, ou appuyez sur Sélectionner tout
pour sélectionner l’intégralité du texte.
3 Appuyez sur Copier ou sur Couper. Le texte sélectionné est copié dans le presse-papier.
4 Maintenez le doigt appuyé à l’endroit où le texte doit être inséré, puis appuyez sur Coller.
Capture d’écran
Vous pouvez effectuer une capture d’écran en cours d’utilisation de l’appareil.
Maintenez simultanément les touches Accueil et Marche/Arrêt enfoncées. L’image est enregistrée
dans le dossier Galerie → Screenshots. Après avoir réalisé une capture d’écran, vous pouvez
modifier l’image et la partager avec d’autres personnes.
Cette fonction n’est disponible que pour certaines applications.
Fonctions de base
33
Mes fichiers
À propos de Mes fichiers
Utilisez cette application pour accéder à divers fichiers stockés sur l’appareil ou, par exemple, sur des
services de stockage cloud.
Appuyez sur Mes fichiers depuis la liste des applications.
Accéder à des options
supplémentaires.
Afficher les informations de
stockage.
Rechercher des fichiers ou des
dossiers.
Afficher les fichiers par catégorie.
Afficher l’historique de
téléchargement.
Appuyez sur et utilisez les options suivantes :
• Ajouter un raccourci : ajouter un raccourci vers un dossier sur l’écran principal Mes fichiers.
• Ajouter un serveur FTP : ajouter un raccourci vers un serveur FTP sur l’écran principal Mes
fichiers.
• Paramètres : modifier les paramètres du gestionnaire de fichiers.
Fonctions de base
34
Visionner des fichiers
Appuyez sur Mes fichiers depuis la liste des applications.
Sélectionnez un dossier pour l’ouvrir. Pour remonter d’un niveau dans le répertoire, appuyez sur .
Pour revenir à l’écran principal Mes fichiers, appuyez sur .
Sélectionnez un dossier, appuyez sur , puis utilisez les options suivantes :
• Sélectionner : sélectionner des fichiers ou des dossiers auxquels appliquer des options.
• Supprimer : supprimer des fichiers ou des dossiers.
• Créer dossier : créer un dossier.
• Trier par : trier les fichiers ou les dossiers.
• Ajouter un raccourci : ajouter un raccourci vers un dossier sur l’écran principal Mes fichiers ou
sur l’écran d’accueil.
• Paramètres : modifier les paramètres du gestionnaire de fichiers.
Maintenez le doigt appuyé sur un fichier ou un dossier, puis utilisez l’une des options suivantes :
• : partager des fichiers avec d’autres personnes.
• : supprimer des fichiers ou des dossiers.
• → Déplacer : déplacer des fichiers ou des dossiers vers un autre dossier.
• → Copier : copier des fichiers ou des dossiers vers un autre dossier.
• → Renommer : renommer un fichier ou un dossier.
• → Ajouter un raccourci : ajouter un raccourci vers un dossier sur l’écran principal Mes fichiers
ou sur l’écran d’accueil.
• → Zip : compresser des fichiers ou des dossiers pour créer un fichier zip.
• → Détails : afficher les détails d’un fichier ou d’un dossier.
Fonctions de base
35
Fonctions d’économie d’énergie
Mode Ultra économie d’énergie
Utilisez cette fonction pour prolonger l’autonomie de la batterie. En mode Ultra économie d’énergie,
l’appareil se comporte comme suit :
• Il affiche les couleurs à l’écran en nuances de gris.
• Il limite le nombre d’applications disponibles et affiche uniquement les applications
sélectionnées.
• Il désactive la connexion de données mobiles quand l’écran s’éteint.
• Il désactive les fonctions Wi-Fi et Bluetooth.
Depuis la liste des applications, appuyez sur Paramètres → Mode Ultra économie d’énergie, puis
faites glisser le curseur Mode Ultra économie d’énergie vers la droite pour activer la fonction.
Niveau de charge de la batterie
Accéder à des options
supplémentaires.
Applications essentielles
Temps de veille maximum estimé
Fonctions de base
36
Pour ajouter une application à l’écran d’accueil, appuyez sur , puis sélectionnez une application.
Pour supprimer une application de l’écran d’accueil, appuyez sur → Supprimer, supprimez
l’application à l’aide de l’icône , puis appuyez sur OK.
Pour modifier les paramètres du mode Ultra économie d’énergie, comme la connectivité réseau ou le
son, appuyez sur → Paramètres.
Pour désactiver le mode Ultra économie d’énergie, appuyez sur → Désact. Ultra économie
énergie.
Le délai de veille maximum estimé est le temps qu’il faut à la batterie pour se décharger
complètement lorsque l’appareil n’est pas utilisé. Le délai de veille peut varier selon les
paramètres de l’appareil et les conditions d’utilisation.
37
Connectivité réseau
Données mobiles
Connectez l’appareil à un réseau mobile pour pouvoir utiliser Internet ou partager des fichiers
multimédia avec d’autres appareils. Pour connaître les options supplémentaires, reportez-vous à la
section Utilisation des données.
Depuis la liste des applications, appuyez sur Paramètres → Utilisation des données, puis cochez la
case Données mobiles.
Wi-Fi
Connectez l’appareil à un réseau Wi-Fi pour pouvoir utiliser Internet ou partager des fichiers
multimédia avec d’autres appareils. Pour connaître les options supplémentaires, reportez-vous à la
section Wi-Fi.
Lorsque vous n’utilisez pas le réseau Wi-Fi, désactivez-le afin d’économiser la batterie.
1 Depuis la liste des applications, appuyez sur Paramètres → Wi-Fi, puis faites glisser le curseur
Wi-Fi vers la droite pour activer la fonction.
2 Sélectionnez un réseau dans la liste des réseaux Wi-Fi détectés. Les réseaux nécessitant un mot
de passe sont signalés par une icône en forme de verrou.
3 Appuyez sur Connexion.
Une fois que l’appareil s’est connecté à un réseau Wi-Fi, il se reconnecte à ce réseau chaque
fois que ce dernier est disponible sans réclamer de mot de passe.
Pour empêcher l’appareil de se connecter automatiquement au réseau, sélectionnez-le dans
la liste des réseaux et appuyer sur Oublier.
Ajouter un réseau Wi-Fi
Si le réseau souhaité n’apparaît pas dans la liste de réseaux Wi-Fi, appuyez sur Ajouter un réseau WiFi
en bas de la liste. Saisissez le nom du réseau dans la zone SSID du réseau, sélectionnez le type de
sécurité, indiquez votre mot de passe si le réseau est protégé, puis appuyez sur Enreg.
Connectivité réseau
38
Modem et point d’accès mobile
À propos de la fonction Point d’accès mobile et modem
En l’absence de connexion Internet, utilisez cette fonction pour partager la connexion de données
de votre appareil avec des ordinateurs et d’autres appareils. Les connexions peuvent être effectuées
via la fonction Wi-Fi, USB ou Bluetooth.
L’utilisation de cette fonction peut entraîner des frais supplémentaires.
Utiliser le point d’accès mobile
Utilisez votre appareil comme point d’accès mobile pour partager sa connexion de données avec
d’autres appareils.
1 Depuis la liste des applications, appuyez sur Paramètres → Modem et point d’accès mobile.
2 Cochez la case Point d’accès mobile.
• L’icône apparaît dans la barre d’état. Les autres appareils peuvent détecter le vôtre dans la
liste de réseaux Wi-Fi.
• Pour définir un mot de passe pour le point d’accès mobile, appuyez sur Config. point
d’accès mobile, puis sélectionnez le niveau de sécurité. Saisissez ensuite un mot de passe,
puis appuyez sur Enreg.
3 Sur l’écran de l’autre appareil, recherchez et sélectionnez votre appareil dans la liste des réseaux
Wi-Fi.
4 Sur l’appareil connecté, utilisez la connexion de données de votre appareil pour accéder à
Internet.
Connectivité réseau
39
Utiliser le modem USB
Partagez la connexion de données mobiles de votre appareil avec d’autres ordinateurs via un
câble USB.
1 Depuis la liste des applications, appuyez sur Paramètres → Modem et point d’accès mobile.
2 Connectez l’appareil à un ordinateur à l’aide du câble USB.
3 Cochez la case Modem USB.
L’icône apparaît dans la barre d’état lorsque les deux appareils sont connectés.
4 Sur l’ordinateur, utilisez la connexion de données de votre appareil.
Utiliser le modem Bluetooth
Partagez la connexion de données mobiles de votre appareil avec d’autres ordinateurs via la fonction
Bluetooth. Assurez-vous que l’ordinateur auquel vous vous connectez prend en charge la fonction
Bluetooth.
1 Associez les deux appareils via la fonction Bluetooth. Pour en savoir plus, reportez-vous à la
section Établir une connexion avec d’autres appareils Bluetooth.
2 Depuis la liste des applications de votre appareil, appuyez sur Paramètres → Modem et point
d’accès mobile.
3 Cochez la case Modem Bluetooth.
4 Sur l’appareil connecté, ouvrez l’écran des paramètres Bluetooth, puis appuyez sur → Accès
Internet.
L’icône apparaît dans la barre d’état lorsque les deux appareils sont connectés.
5 Sur l’appareil connecté, utilisez la connexion de données de votre appareil pour accéder à
Internet.
Les modes de connexion peuvent varier en fonction des appareils connectés.
Connectivité réseau
40
Internet
Parcourir des pages Web
1 Depuis la liste des applications, appuyez sur Internet.
2 Appuyez sur le champ d’adresse. Pour changer de moteur de recherche, appuyez sur l’icône du
moteur de recherche près du champ d’adresse Web.
3 Saisissez une adresse Web ou un mot-clé, puis appuyez sur Aller à. Pour effectuer oralement une
recherche sur le Web, appuyez sur .
Pour afficher la barre d’outils, faites glisser votre doigt vers le bas de l’écran.
Définir la page Web en cours
comme favori.
Lire un article en mode Lecture.
Ouvrir la page d’accueil.
Revenir à la page précédente. Afficher vos favoris et l’historique
Internet récent.
Accéder à des options
supplémentaires.
Ouvrir le gestionnaire de fenêtres
de page Web.
Actualiser la page Web en cours.
Connectivité réseau
41
Définir une page d’accueil
Depuis la liste des applications, appuyez sur Internet.
Appuyez sur → Paramètres → Général → Définir la page d’accueil, puis sélectionnez l’une des
options suivantes :
• Page en cours : définir la page Web affichée comme page d’accueil.
• Page vierge : définir une page Web vierge comme page d’accueil.
• Page par défaut : définir la page Web par défaut comme page d’accueil.
• Autre : définir une page Web prédéfinie comme page d’accueil.
En mode affichage d’une page Web, appuyez sur pour ouvrir la page d’accueil.
Gérer l’historique des pages Web
Depuis la liste des applications, appuyez sur Internet.
Pour ouvrir une page figurant dans la liste des pages récemment consultées, appuyez sur →
Historique.
Pour effacer l’historique, appuyez sur → Effacer l’historique.
42
Personnaliser votre appareil
Gérer l’écran d’accueil et la liste des applications
Gérer l’écran d’accueil
Ajouter des éléments
Depuis la liste des applications, maintenez le doigt appuyé sur une application, puis faites-la glisser
vers l’écran d’accueil.
Pour ajouter des widgets, ouvrez l’écran d’accueil, maintenez le doigt appuyé sur une zone vide,
appuyez sur Widgets, maintenez le doigt appuyé sur un widget, puis faites-le glisser vers l’écran
d’accueil.
Déplacer et supprimer un élément
Maintenez le doigt appuyé sur un élément depuis l’écran d’accueil, puis faites-le glisser jusqu’à
l’emplacement souhaité.
Pour déplacer l’élément vers un autre volet, faites-le glisser vers le bord de l’écran.
Vous pouvez également déplacer les applications fréquemment utilisées vers la zone de raccourcis
située en bas de l’écran d’accueil.
Maintenez le doigt appuyé sur l’élément à supprimer. Faites-le ensuite glisser vers l’option
Supprimer qui s’affiche en haut de l’écran.
Créer un dossier
1 Depuis l’écran d’accueil, maintenez le doigt appuyé sur une application, puis faites-la glisser vers
l’option Créer dossier qui apparaît en haut de l’écran.
2 Saisissez un nom de dossier.
3 Appuyez sur , sélectionnez les applications à déplacer dans ce dossier, puis appuyez sur OK.
Personnaliser votre appareil
43
Gérer les dossiers
Pour renommer un dossier, appuyez sur son nom. Renommez le dossier, puis appuyez sur OK.
Pour modifier la couleur d’un dossier, sélectionnez un dossier, appuyez sur , puis sélectionnez une
couleur.
Pour mettre une application dans un dossier, maintenez le doigt appuyé sur l’application, puis faitesla
glisser vers le dossier.
Pour retirer une application d’un dossier, sélectionnez un dossier, maintenez le doigt appuyé sur
l’application, puis faites-la glisser vers un nouvel emplacement.
Gérer les volets
Sur l’écran d’accueil, maintenez le doigt appuyé sur une zone vide pour ajouter, déplacer ou
supprimer un volet.
Pour ajouter un volet, faites glisser l’icône l’écran vers la gauche jusqu’au dernier volet, puis appuyez
sur .
Pour déplacer un volet, maintenez le doigt appuyé sur son aperçu, puis faites-le glisser jusqu’à
l’emplacement souhaité.
Pour supprimer un volet, maintenez le doigt appuyé sur son aperçu, puis faites-le glisser vers l’option
Supprimer en haut de l’écran.
Pour définir un volet comme écran d’accueil principal, appuyez sur .
Gérer la liste des applications
Changer de mode d’affichage
Depuis la liste des applications, appuyez sur → Type d’affichage et sélectionnez un mode
d’affichage.
Masquer des applications
Vous pouvez masquer les applications que vous ne voulez pas retrouver dans la liste des
applications.
Depuis la liste des applications, appuyez sur → Masquer les applications, sélectionnez des
applications, puis appuyez sur OK.
Pour afficher les applications masquées, appuyez sur → Afficher apps masquées, sélectionnez des
applications, puis appuyez sur OK.
Personnaliser votre appareil
44
Déplacer des éléments
Depuis la liste des applications, appuyez sur → Modifier. Maintenez le doigt appuyé sur l’élément à
déplacer, puis faites-le glisser jusqu’à l’emplacement souhaité.
Pour déplacer l’élément vers un autre volet, faites-le glisser vers le bord de l’écran.
Pour déplacer un élément vers un tout nouveau volet, faites-le glisser vers l’option Créer une page
qui s’affiche en haut de l’écran.
Définir un fond d’écran et des sonneries
Définir un fond d’écran
Définissez une image ou une photo enregistrée dans l’appareil comme fond de l’écran d’accueil ou
de verrouillage.
1 Maintenez le doigt appuyé sur une zone vide de l’écran d’accueil, puis appuyez sur Fonds
d’écran. Vous pouvez également, depuis la liste des applications, appuyer sur Paramètres →
Affichage → Fond d’écran.
2 Sélectionnez un écran à modifier ou auquel appliquer un fond d’écran.
3 Sélectionnez une option et une image.
4 Appuyez sur Déf. fond écran ou sur OK.
Modifier les sonneries
Modifiez les sonneries des appels entrants et des notifications.
Depuis la liste des applications, appuyez sur Paramètres → Son.
Pour définir une sonnerie pour les appels entrants, appuyez sur Sonneries, sélectionnez une
sonnerie, puis appuyez sur OK. Pour utiliser un morceau de musique stocké sur l’appareil ou sur l’un
de vos comptes, comme une sonnerie, appuyez sur Ajouter.
Pour définir une sonnerie pour les notifications, appuyez sur Notifications, sélectionnez une
sonnerie, puis appuyez sur OK.
Personnaliser votre appareil
45
Changer la méthode de verrouillage de l’écran
Vous pouvez définir une méthode de verrouillage de l’écran pour empêcher l’accès à vos
informations personnelles par autrui.
Depuis la liste des applications, appuyez sur Paramètres → Écran de verrouillage →
Déverrouillage de l’écran, puis sélectionnez une méthode de déverrouillage. Pour protéger votre
appareil, vous pouvez définir un code de déverrouillage. Sans ce code, l’appareil ne pourra pas être
déverrouillé.
Si vous oubliez le code de déverrouillage, apportez l’appareil dans un centre de service
après-vente Samsung pour le réinitialiser.
Modèle
Dessinez un modèle en reliant au moins quatre points, puis recommencez pour valider. Définissez un
code PIN de secours pour déverrouiller l’écran en cas d’oubli du modèle.
Code PIN
Un code PIN se compose uniquement de chiffres. Saisissez au moins quatre chiffres, puis
recommencez pour valider.
Mot de passe
Un mot de passe comprend des caractères et des chiffres. Saisissez au moins quatre caractères, y
compris des chiffres et des symboles, puis recommencez pour valider.
Personnaliser votre appareil
46
Transférer des données depuis votre ancien
appareil
Utiliser des comptes de sauvegarde
Vous pouvez transférer les données de sauvegarde depuis votre ancien appareil vers votre nouveau
appareil à l’aide de votre compte Google. Pour en savoir plus, reportez-vous à la section Sauvegarder
et restaurer des données.
Utiliser Samsung Smart Switch
Vous pouvez transférer des données de votre ancien appareil vers votre nouvel appareil via Smart
Switch. Pour en savoir plus, rendez-vous sur le site : www.samsung.com/smartswitch.
Samsung Smart Switch n’est pas pris en charge sur certains appareils ou ordinateurs.
Utiliser Smart Switch avec un ordinateur
Utilisez cette fonction pour importer une sauvegarde de vos données (depuis des appareils mobiles
d’un fabricant sélectionné) depuis un ordinateur vers votre appareil. Vous pouvez télécharger
l’application depuis www.samsung.com/smartswitch.
1 Sauvegardez les données d’un ancien appareil sur l’ordinateur. Pour plus d’informations,
contactez le fabricant de l’appareil.
2 Sur l’ordinateur, lancez Smart Switch.
3 Connectez votre nouvel appareil à l’ordinateur à l’aide du câble USB.
4 Sur l’ordinateur, sélectionnez le fabricant de votre ancien appareil, puis suivez les instructions à
l’écran pour transférer les données sur votre nouvel appareil.
Personnaliser votre appareil
47
Utiliser Samsung Kies
Importez un fichier de sauvegarde de vos données depuis votre ordinateur via Samsung Kies pour
restaurer les données sur votre appareil. Vous pouvez également sauvegarder les données sur
l’ordinateur via Samsung Kies. Pour en savoir plus, reportez-vous à la section Connecter l’appareil
avec Samsung Kies.
Paramétrer des comptes
Ajouter des comptes
Certaines applications utilisées sur l’appareil nécessitent un compte. Afin de profiter au maximum de
votre appareil, créez des comptes.
Depuis la liste des applications, appuyez sur Paramètres → Ajouter compte et sélectionnez
un service de compte. Ensuite, suivez les instructions qui s’affichent à l’écran pour procéder à la
configuration du compte.
Pour synchroniser du contenu avec vos comptes, sélectionnez un compte, puis cochez les éléments
à synchroniser.
Supprimer un compte
Depuis la liste des applications, appuyez sur Paramètres, sélectionnez un nom de compte sous
l’option COMPTES, choisissez le compte à supprimer, puis appuyez sur → Supp. compte.
48
Téléphone
Passer des appels
Depuis la liste des applications, appuyez sur Téléphone.
Appuyez sur Clavier, composez un numéro de téléphone, puis appuyez sur pour passer un appel
vocal ou sur pour passer un appel visio. Vous pouvez également passer des appels aux numéros
de téléphone répertoriés dans les menus Journal, Favoris et Contacts.
Accéder à des options
supplémentaires.
Ajouter le numéro à la liste de
contacts.
Afficher un aperçu du numéro de
téléphone.
Afficher les contacts favoris.
Supprimer le caractère précédent.
Afficher la liste de contacts.
Afficher les journaux d’appels et de
messages.
Composer un numéro à l’aide du
clavier.
Passer des appels depuis le journal d’appels ou votre liste de contacts
Appuyez sur Journal ou Contacts, sélectionnez un contact ou un numéro de téléphone, puis
appuyez sur ou .
Téléphone
49
Passer des appels depuis la liste de favoris
Vous pouvez facilement appeler les contacts avec lesquels vous communiquez fréquemment en les
ajoutant à votre liste de contacts favoris.
Pour ajouter des contacts à la liste des favoris, appuyez sur Contacts, sélectionnez un contact, puis
appuyez sur .
Pour passer un appel à un contact favori, appuyez sur Favoris, puis sélectionnez un contact.
Saisie intuitive de numéros
Appuyez sur Clavier.
Lorsque vous saisissez des chiffres sur le clavier, l’appareil vous suggère automatiquement des
numéros. Pour passer un appel, sélectionnez un des numéros proposés.
Numéros d’appel abrégés
Appuyez sur Clavier.
Pour composer un numéro abrégé, maintenez le doigt appuyé sur le chiffre correspondant.
Pour affecter un contact à un chiffre de numérotation rapide, maintenez le doigt appuyé sur
un chiffre disponible sur le clavier, appuyez sur OK, puis sélectionnez un contact. Vous pouvez
également appuyer sur → Numérotation rapide, sélectionner un numéro, puis un contact.
Appeler un numéro à l’étranger
Appuyez sur Clavier.
Maintenez le doigt appuyé sur la touche 0 jusqu’à ce que le signe + apparaisse. Composez l’indicatif
du pays, l’indicatif régional et le numéro de téléphone, puis appuyez sur .
Pour interdire les appels à l’étranger, appuyez sur → Paramètres → Appel → Paramètres
supplémentaires → Restriction d’appel. Sélectionnez ensuite un type d’appel, puis cochez la case
Appels internationaux.
Téléphone
50
Recevoir des appels
Répondre à un appel
Lorsque vous recevez un appel, faites glisser votre doigt sur l’icône .
Si le signal d’appel est activé, vous pouvez répondre à un autre appel. L’appareil vous demande alors
si vous souhaitez mettre fin au premier appel ou le mettre en attente.
Rejeter un appel
Lorsque vous recevez un appel, faites glisser votre doigt sur l’icône .
Pour envoyer un message lorsque vous rejetez un appel entrant, faites glisser la barre des messages
de rejet située en bas de l’écran vers le haut.
Pour créer des messages de rejet, ouvrez la liste des applications et appuyez sur Téléphone → →
Paramètres → Appel → Définir les messages de rejet → .
Appels manqués
Si vous manquez un appel, l’icône apparaît dans la barre d’état. Ouvrez le volet des raccourcis
pour afficher la liste des appels manqués. Une autre solution consiste, depuis la liste des applications,
à appuyer sur Téléphone → Journal pour afficher les appels manqués.
Téléphone
51
Options en cours d’appel
Options au cours d’un appel vocal
Lors d’un appel vocal, l’appareil verrouille automatiquement l’écran pour empêcher toute saisie
involontaire. Pour déverrouiller l’écran, appuyez deux fois sur .
Les options suivantes sont disponibles :
• Ajouter : composer un second appel.
• Clavier : ouvrir le clavier.
• Fin : mettre fin à l’appel en cours.
• HP : activer ou désactiver le haut-parleur. Lorsque vous utilisez le haut-parleur, parlez dans le
microphone en haut de l’appareil et éloignez l’appareil de vos oreilles.
• Muet : désactiver le microphone afin que votre correspondant ne puisse pas vous entendre.
• Bluetooth : activer un casque ou des écouteurs Bluetooth, à condition qu’ils soient connectés à
l’appareil.
• → Attente : mettre un appel en attente. Appuyez sur Récupérer pour récupérer l’appel en
attente.
• → Contacts : ouvrir la liste de contacts.
• → Mémo : créer un mémo.
• → Messages : envoyer un message.
• → Volume suppl : augmenter le volume.
• → Paramètres : modifier les paramètres d’appel.
Téléphone
52
Options au cours d’un appel visio
Les options suivantes sont disponibles :
• → Masquer mon image : masquer votre image à votre correspondant.
• → Image sortante : sélectionner une image à afficher à votre correspondant.
• → Capturer une image : capturer l’image de votre correspondant.
• → Enregistrer une vidéo : enregistrer une vidéo de votre correspondant.
• → Mémo : créer un mémo.
• → Messages : envoyer un message.
• → Clavier : ouvrir le clavier.
• → Désactiver haut-parleur / Activer haut-parleur : activer ou désactiver le haut-parleur.
Lorsque vous utilisez le haut-parleur, parlez dans le microphone en haut de l’appareil et éloignez
l’appareil de vos oreilles.
• → Activer un casque / Activer le téléphone : basculer la sortie audio entre le casque
Bluetooth connecté ou le haut-parleur de l’appareil.
Appuyez sur l’écran pour utiliser les options suivantes :
• Permuter : basculer entre les objectifs avant et arrière, et inversement.
• Muet : désactiver le microphone afin que votre correspondant ne puisse pas vous entendre.
• Fin : mettre fin à l’appel en cours.
53
Contacts
Ajouter des contacts
Transférer des contacts depuis d’autres appareils
Vous pouvez transférer des contacts depuis d’autres appareils sur votre appareil. Pour en savoir plus,
reportez-vous à la section Transférer des données depuis votre ancien appareil.
Créer manuellement des contacts
1 Depuis la liste des applications, appuyez sur Contacts → Contacts.
2 Appuyez sur , sélectionnez une mémoire de stockage et saisissez les informations du contact.
• : ajouter une image.
• / : ajouter ou supprimer un champ d’information.
3 Appuyez sur Enreg.
Pour ajouter un numéro de téléphone à votre liste de contacts à partir du clavier, appuyez sur
Clavier, composez le numéro, puis appuyez sur Ajouter aux contacts.
Contacts
54
Gérer les contacts
Modifier un contact
1 Depuis la liste des applications, appuyez sur Contacts → Contacts.
2 Sélectionnez un contact à modifier, puis appuyez sur .
3 Modifiez les coordonnées du contact ou appuyez sur Aj. un autre champ pour ajouter plus
d’informations sur le contact.
4 Appuyez sur Enreg.
Supprimer un contact
Sélectionnez un contact à supprimer, puis appuyez sur → Supprimer.
Partager un contact
Sélectionnez un contact à partager, appuyez sur → Partager la carte de visite, puis sélectionnez le
mode de partage.
Gérer les groupes
Depuis la liste des applications, appuyez sur Contacts → Contacts.
Appuyez sur .
Créer un nouveau groupe
Appuyez sur , saisissez un nom de groupe, puis appuyez sur Enreg.
Ajouter des contacts à un groupe
Dans l’onglet des groupes, sélectionnez un groupe, puis appuyez sur . Sélectionnez les contacts à
ajouter, puis appuyez sur OK.
Supprimer un groupe
Appuyez sur , sélectionnez des groupes que vous avez ajoutés, puis appuyez sur OK.
Contacts
55
Importer et exporter des contacts
Importez des contacts depuis des services de stockage ou exportez-les vers ces services.
Depuis la liste des applications, appuyez sur Contacts → Contacts.
Appuyez sur → Paramètres → Contacts → Importer/Exporter, puis sélectionnez une option
d’importation ou d’exportation.
Rechercher des contacts
Depuis la liste des applications, appuyez sur Contacts → Contacts.
Utilisez l’une des méthodes de recherche suivantes :
• Faites défiler la liste de contacts vers le haut ou le bas.
• Appuyez sur le champ de recherche tout en haut de la liste de contacts, puis saisissez vos
critères de recherche.
Une fois le contact sélectionné, choisissez l’une des options suivantes :
• : ajouter le contact aux favoris.
• / : passer un appel vocal ou visio.
• : rédiger un message.
• : rédiger un e-mail.
Ajouter des raccourcis vers des contacts à l’écran d’accueil
Ajoutez des raccourcis vers les contacts avec lesquels vous communiquez fréquemment sur l’écran
d’accueil.
1 Depuis la liste des applications, appuyez sur Contacts → Contacts.
2 Sélectionnez un contact.
3 Appuyez sur → Ajouter un raccourci à l’écran d’accueil.
56
Messages et e-mails
Messages
Envoyer des messages
Envoyez des messages texte (SMS) ou des messages multimédia (MMS).
L’envoi ou la réception de messages en dehors de la zone couverte par votre opérateur peut
occasionner des frais supplémentaires.
1 Depuis la liste des applications, appuyez sur Messages.
2 Appuyez sur .
3 Ajoutez des destinataires, puis saisissez un message.
Accéder à des options
supplémentaires.
Saisir un message.
Sélectionner des contacts depuis
votre liste de contacts.
Saisir les destinataires.
Envoyer le message.
Joindre des fichiers.
4 Appuyez sur pour envoyer le message.
Messages et e-mails
57
Lorsque vous rédigez un message, appuyez sur pour utiliser l’une des options suivantes :
• Insérer smiley : insérer des émoticônes.
• Ajouter un objet : saisir un objet.
• Ajouter diapo : ajouter des diapositives de messages.
• Programmer un message : définir une heure et une date spécifiques auxquelles envoyer un
message.
• Ne pas enregistrer : annuler la rédaction du message.
• Taille de police : modifier la taille de police du texte.
Envoyer des messages programmés
Lorsque vous rédigez un message, appuyez sur → Programmer un message. Définissez la date et
l’heure, puis appuyez sur OK.
• Le message ne sera pas envoyé à l’heure et à la date programmées, si l’appareil est éteint,
s’il n’est pas connecté au réseau ou si le réseau est instable.
• Cette fonction est basée sur l’heure et la date configurées sur l’appareil. Si vous changez
de fuseau horaire et que le réseau ne met pas ces informations à jour, les messages
peuvent être envoyés à la mauvaise heure.
Lire les messages entrants
Les messages entrants sont regroupés sous forme de fils de discussion par contact. Pour afficher les
messages d’un contact, sélectionnez ce dernier.
L’envoi ou la réception de messages en dehors de la zone couverte par votre opérateur peut
occasionner des frais supplémentaires.
En mode affichage d’un message, appuyez sur pour utiliser l’une des options suivantes :
• Appel visio : passer un appel visio à ce contact.
• Aj. dest. : ajouter des destinataires supplémentaires à qui envoyer le message.
• Insérer smiley : insérer des émoticônes.
• Ajouter un objet : saisir un objet.
Messages et e-mails
58
• Ajouter diapo : ajouter des diapositives de messages.
• Programmer un message : définir une heure et une date spécifiques auxquelles envoyer un
message.
• Ajouter aux numéros spam / Supprimer des numéros spam : identifier le numéro de
téléphone comme indésirable ou supprimer le numéro de téléphone de la liste des spams.
• Ne pas enregistrer : annuler la rédaction du message.
• Taille de police : modifier la taille de police du texte.
Gérer les messages
Dans la liste des messages, appuyez sur et utilisez les options suivantes :
• Sélectionner : sélectionner des messages auxquels appliquer des options.
• Supprimer : supprimer tous les messages ou supprimer les messages sélectionnés.
• Messages Spam : afficher les messages indésirables.
• Taille de police : modifier la taille de police du texte.
• Paramètres : modifier les paramètres des messages.
Email
Configurer des comptes de messagerie électronique
Depuis la liste des applications, appuyez sur Email.
Lorsque vous ouvrez l’application Email pour la première fois, configurez un compte de messagerie
électronique.
Saisissez votre adresse e-mail et votre mot de passe. Pour configurer un compte de messagerie
électronique privé, appuyez sur Suivant ; pour configurer un compte de messagerie électronique
professionnel, appuyez sur Configuration manuelle. Suivez ensuite les instructions qui s’affichent à
l’écran pour procéder à la configuration du compte.
Pour configurer un compte de messagerie électronique supplémentaire, appuyez sur → Gérer les
comptes → .
Si vous possédez plusieurs comptes de messagerie électronique, vous pouvez définir un compte par
défaut. Appuyez sur → Gérer les comptes, sélectionnez un compte, puis cochez la case Compte
par défaut.
Messages et e-mails
59
Envoyer des e-mails
Depuis la liste des applications, appuyez sur Email.
Pour rédiger un message, appuyez sur l’icône en bas de l’écran.
Ajouter des destinataires.
Ajouter un contact en copie ou
copie cachée.
Ajouter des destinataires à partir de
la liste de contacts. Saisir un message.
Saisir un objet.
Envoyer le message.
Accéder à des options
supplémentaires.
Joindre des images, des vidéos, etc.
Enregistrer le message pour un
envoi ultérieur.
Ignorer le message.
Accéder à des options supplémentaires
Lorsque vous rédigez un message, appuyez sur pour accéder à des options supplémentaires.
• M’envoyer l’e-mail : m’envoyer un message.
• E-mail programmé : envoyer un message à une heure définie.
• Le message ne sera pas envoyé à l’heure et à la date programmées, si l’appareil est éteint,
s’il n’est pas connecté au réseau ou si le réseau est instable.
• Cette fonction est basée sur l’heure et la date configurées sur l’appareil. Si vous changez
de fuseau horaire et que le réseau ne met pas ces informations à jour, les messages
peuvent être envoyés à la mauvaise heure.
• Priorité : sélectionner le niveau de priorité d’un message.
• Options de sécurité : définir les options de sécurité du message.
Messages et e-mails
60
Lire des e-mails
Depuis la liste des applications, appuyez sur Email.
Appuyez sur , puis sélectionnez un compte de messagerie électronique à utiliser. Les nouveaux
messages sont récupérés. Pour récupérer manuellement les messages, appuyez sur .
Appuyez sur un message pour le lire.
Répondre au message.
Ajouter cette adresse e-mail à votre
liste de contacts ou afficher d’autres
options.
Répondre à tous les destinataires.
Transférer le message.
Passer au message suivant ou
revenir au message précédent.
Supprimer le message.
Ouvrir les pièces jointes.
Accéder à des options
supplémentaires.
Identifier le message comme favori.
61
Appareil photo
Prises de vue de base
Prendre des photos ou enregistrer des vidéos
1 Depuis la liste des applications, appuyez sur Appareil photo.
2 Appuyez sur l’écran d’aperçu à l’endroit où l’appareil photo doit faire la mise au point.
Une fois la mise au point terminée, le cadre de mise au point devient vert.
3 Appuyez sur pour prendre une photo ou sur pour enregistrer une vidéo.
• Pour effectuer un zoom avant, écartez deux doigts l’un de l’autre sur l’écran ; pour effectuer
un zoom arrière, rapprochez-les.
• Pour capturer une photo en cours d’enregistrement d’une vidéo, appuyez sur .
Modifier le mode de
prise de vue.
Démarrer
l’enregistrement d’une
vidéo.
Prendre une photo.
Afficher les photos et
les vidéos que vous
avez prises.
Basculer entre l’objectif
avant et arrière.
Afficher davantage
d’options. Afficher le mode en
cours.
Indique les paramètres
actuels de l’appareil
photo.
Appareil photo
62
• Lorsque vous n’utilisez plus l’appareil photo, il se ferme automatiquement.
• Assurez-vous que l’objectif est bien propre. Dans le cas contraire, l’appareil risque de ne
pas fonctionner correctement dans certains modes nécessitant des résolutions élevées.
• L’objectif avant est adapté à la prise de photos grand-angle. Il se peut qu’une distorsion
mineure se produise sur les photos grand-angle ; cela ne traduit pas un problème de
performances de l’appareil.
Ouvrir l’appareil photo depuis l’écran verrouillé
Pour prendre rapidement des photos de moments particuliers, depuis l’écran de verrouillage,
démarrez l’application Appareil photo.
Depuis l’écran verrouillé, faites glisser votre doigt sur l’icône . Si l’icône n’apparaît pas, ouvrez
la liste des applications, appuyez sur Paramètres → Écran de verrouillage, puis cochez la case
Raccourci Appareil photo.
La disponibilité de cette fonction dépend de votre zone géographique ou de votre
opérateur.
Réorganiser les raccourcis de l’appareil photo
Vous pouvez réorganiser les raccourcis de l’appareil photo pour y avoir facilement et rapidement
accès depuis l’écran d’aperçu. Appuyez sur → → → Modifier les paramètres rapides.
Maintenez le doigt appuyé sur un élément et faites-le glisser vers un autre emplacement en haut de
l’écran.
Bon usage de l’appareil photo
• Ne prenez pas de photos et n’enregistrez pas de vidéos d’autres personnes sans leur
consentement.
• Ne prenez pas de photos et n’enregistrez pas de vidéos lorsque la loi l’interdit.
• Ne prenez pas de photos et n’enregistrez pas de vidéos en violation de la vie privée d’autrui.
Appareil photo
63
Modes de prise de vue
Auto
Utilisez ce mode pour autoriser l’appareil photo à évaluer l’environnement et à déterminer le mode
idéal de prise de vue.
Depuis la liste des applications, appuyez sur Appareil photo → → Auto.
Beauté
Utilisez ce mode pour photographier des portraits avec des couleurs plus claires afin d’obtenir des
images plus douces.
Depuis la liste des applications, appuyez sur Appareil photo → → Beauté.
Meilleures poses
Utilisez ce mode pour prendre une série de photos et conserver la meilleure. Pour afficher d’autres
photos de la série, faites défiler l’écran vers la gauche ou la droite. L’appareil recommande la
meilleure photo et l’identifie à l’aide de l’icône . L’appareil identifie les photos avec l’icône dans
la Galerie.
Depuis la liste des applications, appuyez sur Appareil photo → → Meilleures poses.
Rafale
Utilisez ce mode pour prendre une série de photos de sujets en mouvement.
Depuis la liste des applications, appuyez sur Appareil photo → → Rafale.
Maintenez le doigt appuyé sur l’icône pour prendre plusieurs photos en rafale.
Appareil photo
64
Panorama
Utilisez ce mode pour prendre une photo panoramique composée de différents clichés assemblés
les uns aux autres. L’appareil identifie la photo à l’aide de l’icône dans la Galerie.
Depuis la liste des applications, appuyez sur Appareil photo → → Panorama.
Pour obtenir la meilleure photo possible, suivez ces conseils :
• Déplacez l’appareil photo lentement dans le sens de votre choix.
• Maintenez l’image à l’intérieur du cadre de prise de vue de l’appareil photo.
• Évitez de prendre des photos de sujets devant des arrière-plans non identifiables, comme
un ciel ou un pan de mur uni.
Sports
Utilisez ce mode pour prendre une photo de sujets se déplaçant rapidement.
Depuis la liste des applications, appuyez sur Appareil photo → → Sports.
Nuit
Ce mode permet de prendre une photo dans des conditions de faible éclairage, sans utiliser le flash.
Depuis la liste des applications, appuyez sur Appareil photo → → Nuit.
Paramètres de l’appareil photo
Depuis la liste des applications, appuyez sur Appareil photo → → . Les options suivantes sont
disponibles pour les deux modes (appareil photo et caméscope) ou l’un ou l’autre des modes.
• Taille des photos : sélectionner une résolution. Pour obtenir une meilleure qualité, utilisez une
résolution élevée. Cependant, notez qu’une résolution élevée nécessite davantage de mémoire.
• Taille de la vidéo : sélectionner une résolution. Pour obtenir une meilleure qualité, utilisez une
résolution élevée. Cependant, notez qu’une résolution élevée nécessite davantage de mémoire.
• Mode focus : sélectionner un mode de mise au point. Auto focus est une mise au point
automatique effectuée par l’appareil photo. Macro permet de faire une mise au point sur des
sujets très proches, en gros plan.
Appareil photo
65
• Modes de mesure : sélectionner une méthode de mesure. Ce paramètre détermine la manière
dont les valeurs lumineuses sont calculées. Mesure pondérée centrale mesure la lumière
d’arrière-plan au centre de la scène. Spot mesure la valeur de la lumière à un endroit spécifique.
Matrice calcule la moyenne de la scène toute entière.
• ISO : sélectionner une valeur ISO. Ce paramètre permet de contrôler la sensibilité lumineuse
de l’appareil photo. Celle-ci est mesurée en équivalents de caméra-film. Les valeurs faibles sont
destinées aux objets immobiles ou vivement éclairés. Les valeurs plus élevées sont pour les
objets en mouvement ou faiblement éclairés.
• Balise de localisation : paramétrer l’appareil pour qu’il ajoute une balise de localisation à la
photo.
• Pour que les signaux GPS soient meilleurs, évitez de prendre des photos dans des lieux
où le signal peut être limité, par exemple entre des bâtiments ou dans des zones de faible
altitude, ou encore lorsque les conditions météorologiques sont mauvaises.
• Lorsque vous partagez une photo comportant une balise de localisation, ces informations
seront accessibles à d’autres personnes.
• Touche de volume : paramétrer l’appareil pour pouvoir utiliser la touche de volume pour
contrôler l’obturateur ou le zoom.
• Retardateur : prendre une photo ou enregistrer une vidéo à l’issue d’un délai de retardement
prédéfini.
• Balance des blancs : sélectionner une balance des blancs appropriée de sorte que les images
offrent une gamme de couleurs proches de la réalité. Les paramètres sont conçus pour des
situations lumineuses spécifiques. Ils sont similaires à la gamme thermique d’exposition et de
balance des blancs des appareils photo professionnels.
• Valeur d’exposition : modifier la valeur d’exposition. Ce paramètre détermine la quantité
de lumière reçue par le capteur de l’appareil photo. En cas de faible luminosité, utilisez une
exposition plus élevée.
• Guide : afficher des lignes directrices sur l’écran d’aperçu.
• Flash : activer ou désactiver le flash.
• Nom de fichier contextuel : ajouter des balises contextuelles aux noms de fichiers, comme des
informations de localisation.
• Stockage : sélectionner l’emplacement de stockage des photos et des vidéos.
• Modifier les paramètres rapides : réorganiser les raccourcis en fonction des options
fréquemment utilisées.
• Réinitialiser : réinitialiser les paramètres de l’appareil photo/caméscope.
Les options disponibles peuvent varier selon le mode utilisé.
66
Galerie
Afficher des photos ou lire des vidéos
Afficher les photos et les vidéos de l’appareil
Depuis la liste des applications, appuyez sur Galerie et sélectionnez une image ou une vidéo.
Les fichiers vidéo sont caractérisés par l’icône sur la miniature.
Pour masquer ou afficher la barre de menus et les miniatures, appuyez sur l’écran.
Accéder à des options
supplémentaires.
Supprimer l’image.
Modifier la photo.
Revenir à l’écran précédent.
Envoyer l’image à d’autres
personnes.
Aperçus miniatures des images et
des vidéos.
Galerie
67
Changer de mode d’affichage
Depuis la liste des applications, appuyez sur Galerie → , puis sélectionnez une méthode de tri.
Accéder à des options supplémentaires
Depuis la liste des applications, appuyez sur Galerie et sélectionnez une image ou une vidéo.
Appuyez sur et utilisez les options suivantes.
• Diaporama : lancer un diaporama de l’ensemble des photos du dossier ouvert.
• Imprimer : imprimer l’image en connectant l’appareil à une imprimante. Pour en savoir plus,
reportez-vous à la section Utiliser la fonction d’impression mobile.
• Renommer : renommer le fichier.
• Rotation à gauche : pivoter l’image dans le sens contraire des aiguilles d’une montre.
• Rotation à droite : pivoter l’image dans le sens des aiguilles d’une montre.
• Rogner : rogner l’image.
• Définir comme : définir l’image comme fond d’écran ou image d’un contact.
• Détails : afficher les détails d’une image ou d’une vidéo.
Les options disponibles peuvent varier selon le fichier sélectionné.
Pour sélectionner plusieurs fichiers depuis la liste des fichiers, maintenez le doigt appuyé sur un
fichier, puis appuyez sur les autres. Une fois les fichiers sélectionnés, vous pouvez tous les partager
ou le supprimer, ou appuyer sur pour accéder à des options supplémentaires.
Galerie
68
Retoucher des photos
Modifiez vos images en leur appliquant divers effets.
Depuis la liste des applications, appuyez sur Galerie.
Pour utiliser cette fonction, vous devez télécharger et installer l’application.
En mode affichage d’une photo, appuyez sur et utilisez les fonctions suivantes :
• Pivoter : pivoter l’image.
• Rogner : rogner l’image.
• Couleur : ajuster la saturation ou la luminosité de l’image.
• Effet : appliquer des effets à l’image.
• Portrait : corriger les yeux rouges, ajuster ou retoucher les visages, ou appliquer un effet de flou
à l’arrière-plan.
• Autocollant : appliquer des autocollants.
• Dessin : dessiner sur l’image.
• Cadre : appliquer des cadres à l’image.
Une fois l’image modifiée, appuyez sur .
69
Multimédia
Vidéo
Lire des vidéos
Depuis la liste des applications, appuyez sur Vidéo.
Sélectionnez une vidéo à lire.
Effectuer un retour ou
une avance rapide en
faisant glisser la barre.
Modifier le format
d’écran.
Revenir à la vidéo
précédente. Maintenir la
touche appuyée pour
effectuer un retour
rapide.
Passer à la vidéo
suivante. Maintenir la
touche appuyée pour
effectuer une avance
rapide.
Accéder à des options
supplémentaires.
Mettre en pause et
reprendre la lecture.
Régler le volume.
Pour personnaliser l’emplacement du volet de contrôle, appuyez sur → Paramètres, cochez la case
Mini contrôleur, puis appuyez sur Fermer. Appuyez ensuite sur ou sur pour déplacer le volet de
contrôle, d’un côté ou de l’autre de l’écran.
Cette fonction est disponible uniquement en mode paysage.
Partager ou supprimer des vidéos
Depuis la liste des applications, appuyez sur Vidéo.
Maintenez le doigt appuyé sur la vidéo, appuyez sur , puis sélectionnez un mode de partage.
Appuyez sur → Supprimer, sélectionnez des vidéos, puis appuyez sur Effectué → OK.
70
Fonctions et applications utiles
S Planner
Démarrer S Planner
Utilisez cette application pour gérer des événements et des tâches.
Appuyez sur S Planner depuis la liste des applications.
Accéder à des options
supplémentaires.
Créer un événement ou une tâche.
Modifier le mode d’affichage.
Aller à la date d’aujourd’hui.
Appuyez sur et utilisez les options suivantes :
• Aller à : accéder à une date spécifique.
• Supprimer : supprimer des événements ou des tâches.
• Recherche : rechercher des événements ou des tâches.
• Synchroniser : synchroniser les événements et les tâches avec vos comptes.
• Calendriers : sélectionner les calendriers à afficher.
• Paramètres : configurer les paramètres de S Planner.
Fonctions et applications utiles
71
Créer un événement ou une tâche
1 Appuyez sur S Planner depuis la liste des applications.
2 Appuyez sur . Vous pouvez également sélectionner une date ne comportant aucun
événement ou tâche, et appuyer à deux reprises dessus.
Si la date comporte déjà des événements ou tâches enregistrés, appuyez sur la date et sur .
3 Sélectionnez un événement ou une tâche, et saisissez les détails.
• Ajouter événement : définir la date de début et de fin d’un événement. Vous pouvez lui
appliquer une option de répétition.
• Ajouter une tâche : ajouter une tâche à faire à une date spécifique. Vous pouvez lui
appliquer une option de priorité.
Saisir un titre.
Ajouter des détails.
Sélectionner un calendrier à utiliser
ou à synchroniser.
Sélectionner un élément.
Définir une date de début et de fin
pour l’événement.
4 Appuyez sur Enregistrer pour sauvegarder l’événement ou la tâche.
Fonctions et applications utiles
72
Synchroniser les événements et les tâches avec vos comptes
Appuyez sur S Planner depuis la liste des applications.
Pour synchroniser des événements et des tâches avec vos comptes, appuyez sur → Synchroniser.
Pour ajouter des comptes avec lesquels effectuer la synchronisation, appuyez sur → Calendriers →
Ajouter compte. Sélectionnez ensuite un compte avec lequel effectuer la synchronisation et ouvrez
une session. Une fois le compte ajouté, un cercle vert apparaît près du nom du compte.
Pour modifier l’option de synchronisation du compte, ouvrez la liste des applications, appuyez sur
Paramètres, puis sélectionnez un service de compte sous l’option COMPTES.
Supprimer un événement ou une tâche
Appuyez sur S Planner depuis la liste des applications.
Pour supprimer des événements ou des tâches, appuyez sur → Supprimer, sélectionnez les
éléments ou les tâches, puis appuyez sur OK.
Pour supprimer un événement ou une tâche en cours d’affichage, appuyez sur → OK.
Pour indiquer que les tâches sont terminées, appuyez sur une date comportant des tâches et cochez
celles qui sont terminées.
Partager un événement ou une tâche
Appuyez sur S Planner depuis la liste des applications.
Pour partager un événement ou une tâche, appuyez sur → Partager via, puis sélectionnez un
mode de partage.
Calculatrice
Utilisez cette application pour réaliser des calculs simples ou complexes.
Depuis la liste des applications, appuyez sur Calculatrice.
Faites pivoter l’appareil vers la gauche pour utiliser la calculatrice scientifique en mode Paysage. Si
l’option Rotation écran est désactivée dans le volet des raccourcis, appuyez sur → Calculatrice
scientifique.
Fonctions et applications utiles
73
Horloge
Alarme
Depuis la liste des applications, appuyez sur Horloge → Alarme.
Créer une alarme
Appuyez sur , réglez l’heure de l’alarme, sélectionnez les jours de répétition, paramétrez diverses
autres options si besoin, puis appuyez sur Enreg. Pour activer ou désactiver des alarmes, appuyez sur
près de l’alarme concernée.
• Répéter : définir le délai à l’issue duquel l’alarme doit sonner une nouvelle fois et le nombre de
répétitions.
• Alarme intelligente : définir la tonalité de l’alarme intelligente et combien de temps avant
l’alarme principale elle doit sonner. Une alarme intelligente démarre à faible volume quelques
minutes avant l’heure prédéfinie de l’alarme. Le volume de l’alarme intelligente augmente
graduellement jusqu’à ce que vous l’éteigniez ou que vous désactiviez l’alarme principale.
Arrêter ou répéter une alarme
Pour éteindre une alarme, faites glisser votre doigt sur l’icône . Si l’option de répétition est activée,
faites glisser votre doigt sur l’icône pour répéter l’alarme après une période de répétition
prédéfinie.
Supprimer une alarme
Appuyez sur → Supprimer, sélectionnez l’alarme à supprimer, puis appuyez sur OK.
Fonctions et applications utiles
74
Horloge mondiale
Depuis la liste des applications, appuyez sur Horloge → Horloge mondiale.
Créer une horloge
Appuyez sur , puis saisissez le nom d’une ville ou sélectionnez-en une dans la liste.
Supprimer une horloge
Appuyez sur → Supprimer, sélectionnez l’horloge à supprimer, puis appuyez sur OK.
Chronomètre
Depuis la liste des applications, appuyez sur Horloge → Chronomètre.
Appuyez sur Début pour commencer à chronométrer. Appuyez sur Tour pour enregistrer des temps
intermédiaires.
Appuyez sur Arrêter pour arrêter le chronométrage. Pour effacer les temps intermédiaires, appuyez
sur Réinitialiser.
Pour réduire la luminosité de l’écran pendant les temps intermédiaires, appuyez sur → Paramètres
→ Garder luminosité réduite.
Minuteur
Depuis la liste des applications, appuyez sur Horloge → Minuteur.
Définissez la durée, puis appuyez sur Début.
Lorsque la durée du minuteur est écoulée, faites glisser votre doigt sur l’icône .
Pour modifier les paramètres de la sonnerie de l’alarme, appuyez sur → Paramètres.
Fonctions et applications utiles
75
Mémo
Utilisez cette application pour créer des mémos et les trier par catégorie.
Depuis la liste des applications, appuyez sur Mémo.
Créer un mémo
Appuyez sur dans la liste des mémos et saisissez votre mémo. Lorsque vous rédigez un mémo,
utilisez les options suivantes :
• : créer ou définir une catégorie.
• : insérer des images.
• : enregistrer un mémo vocal et l’insérer.
Pour enregistrer le mémo, appuyez sur Sauveg.
Pour modifier un mémo, appuyez sur le mémo, puis sur son contenu.
Rechercher des mémos
Appuyez sur dans la liste des mémos, puis saisissez un mot-clé à rechercher dans les mémos.
Ajouter et gérer des catégories
Créez des catégories afin de trier et gérer vos mémos.
Depuis la liste des mémos, appuyez sur → Gérer les catégories.
Pour ajouter une catégorie, appuyez sur , saisissez le nom d’une catégorie, puis appuyez sur OK.
Pour supprimer une catégorie, appuyez sur près de la catégorie concernée.
Pour renommer une catégorie, maintenez le doigt appuyé sur son nom, nommez la catégorie, puis
appuyez sur Renommer.
Pour modifier l’ordre des catégories, appuyez sur près d’une catégorie, puis faite-la glisser vers le
haut ou le bas, à l’emplacement souhaité.
Fonctions et applications utiles
76
Accéder à des options supplémentaires
Vous pouvez accéder à des options supplémentaires dans la liste des mémos ou en mode affichage
d’un mémo.
Depuis la liste des mémos, appuyez sur , puis utilisez les options suivantes :
• Sélectionner : sélectionner des mémos auxquels appliquer des options.
• Supprimer : supprimer des mémos.
En mode affichage d’un mémo, appuyez sur , puis utilisez les options suivantes :
• Supprimer : supprimer le mémo.
• Partager via : partager le mémo avec d’autres personnes.
• Imprimer : imprimer le mémo en connectant l’appareil à une imprimante. Pour en savoir plus,
reportez-vous à la section Utiliser la fonction d’impression mobile.
Radio
Écouter la radio FM
Depuis la liste des applications, appuyez sur Radio.
Avant d’utiliser cette application, vous devez brancher un casque ou des écouteurs qui font office
d’antenne radio.
Lorsque vous lancez la radio FM pour la première fois, l’appareil recherche et enregistre
automatiquement les stations disponibles.
Fonctions et applications utiles
77
Pour allumer la radio FM, appuyez sur . Sélectionnez la station radio à écouter dans la liste, puis
appuyez sur pour revenir à l’écran de la radio FM.
Afficher la liste des stations
préférées.
Accéder à des options
supplémentaires.
Allumer ou éteindre la radio FM.
Régler le volume.
Ajouter la station de radio en cours
d’écoute à la liste des favoris.
Régler précisément la fréquence.
Afficher la liste des stations
disponibles.
Enregistrer un morceau depuis la
radio FM.
Saisir la fréquence de la station de
radio manuellement.
Rechercher manuellement les
stations de radio disponibles.
Rechercher des stations radio
Depuis la liste des applications, appuyez sur Radio.
Appuyez sur → Analyser, puis sélectionnez une option de recherche. L’appareil recherche et
mémorise automatiquement les stations de radio FM disponibles.
Sélectionnez la station radio à écouter dans la liste, puis appuyez sur pour revenir à l’écran de la
radio FM.
Ajouter des stations à votre liste de favoris
Depuis la liste des applications, appuyez sur Radio.
Sélectionnez une station radio, puis appuyez sur pour ajouter la station à la liste de favoris.
Fonctions et applications utiles
78
Enregistreur vocal
Enregistrer des mémos vocaux
Depuis la liste des applications, appuyez sur Enregistreur vocal.
Pour commencer l’enregistrement, appuyez sur . Parlez dans le microphone. Pour interrompre
l’enregistrement, appuyez sur . Pour annuler l’enregistrement, appuyez sur . Pour terminer
l’enregistrement, appuyez sur .
Afficher la liste des mémos vocaux.
Accéder à des options
supplémentaires.
Démarrer l’enregistrement.
Durée enregistrée.
Écouter des mémos vocaux
Depuis la liste des applications, appuyez sur Enregistreur vocal.
Appuyez sur , puis sélectionnez un mémo vocal à lire.
• / : mettre en pause ou reprendre la lecture.
• / : revenir au mémo vocal précédent ou passer au mémo vocal suivant.
Fonctions et applications utiles
79
Gérer les mémos vocaux
Depuis la liste des applications, appuyez sur Enregistreur vocal → .
Appuyez sur , puis sélectionnez l’une des options suivantes :
• Sélectionner : sélectionner des mémos vocaux auxquels appliquer des options.
• Supprimer : sélectionner les mémos vocaux à supprimer.
• Paramètres : modifier les paramètres de l’enregistreur vocal.
Renommer les mémos vocaux
Maintenez le doigt appuyé sur un mémo vocal, appuyez sur → Renommer, saisissez le nom du
mémo vocal, puis appuyez sur OK.
Applications Google
Google fournit des applications de divertissement, de réseaux sociaux et professionnelles. Vous
aurez éventuellement besoin d’un compte Google pour accéder à certaines applications. Pour en
savoir plus, reportez-vous à la section Paramétrer des comptes.
Pour afficher des informations sur une application, ouvrez son écran principal, puis appuyez sur →
Aide.
Certaines applications peuvent ne pas être disponibles ou s’intituler différemment selon
votre zone géographique ou votre opérateur.
Chrome
Recherchez des informations et naviguez dans des pages Web.
Drive
Stockez vos données sur le cloud, accédez-y où que vous soyez et partagez-les avec d’autres
personnes.
Fonctions et applications utiles
80
Google Mail
Envoyez et recevez des e-mails via le service Google Mail.
Recherche Google
Recherchez rapidement des informations sur Internet ou sur votre appareil.
Paramètres Google
Configurez certaines fonctions proposées par Google.
Google+
Communiquez et partagez des contenus avec votre famille, vos amis et bien plus de personnes. Cet
espace vous permet également de sauvegarder vos photos, vidéos, etc.
Hangouts
Discutez avec vos amis, séparément ou en groupe, et ajoutez des images, émoticônes et vidéos.
Maps
Localisez votre position sur une carte, recherchez des adresses et affichez des informations de
localisation.
Google+ Photos
Gérez vos photos, albums et vidéos enregistré(e)s sur l’appareil et téléchargé(e)s sur Google+.
Play Livres
Téléchargez des livres sur Play Store et lisez-les.
Fonctions et applications utiles
81
Play Jeux
Téléchargez des jeux sur Play Store et jouez avec d’autres participants.
Play Films
Regardez des vidéos enregistrées sur votre appareil et téléchargez divers contenus sur Play Store.
Play Musique
Découvrez, écoutez et partagez des morceaux de musique à l’aide de votre appareil.
Play Kiosque
Consultez les actualités et les magazines qui vous intéressent.
Recherche vocale
Recherchez rapidement des informations en énonçant un mot-clé ou une phrase.
YouTube
Regardez ou créez des vidéos et partagez-les avec d’autres personnes.
82
Établir une connexion avec
d’autres appareils
Bluetooth
À propos de Bluetooth
La fonction Bluetooth crée une connexion sans fil directe entre deux appareils sur de courtes
distances. Pour échanger des données ou des fichiers multimédia avec d’autres appareils, utilisez la
fonction Bluetooth.
• Samsung ne peut être tenu responsable de la perte, de l’interception ou du mauvais
usage des données envoyées ou reçues via la fonction Bluetooth.
• Assurez-vous de toujours utiliser des appareils dignes de confiance et correctement
protégés avant de partager ou de recevoir des données. La présence d’obstacles entre les
deux appareils peut réduire le rayon d’action.
• Il est possible que votre appareil ne fonctionne pas avec certains appareils, en particulier
ceux qui n’ont pas été testés ou approuvés par Bluetooth SIG.
• N’utilisez pas la fonction Bluetooth de manière illégale (par exemple, pour le piratage de
fichiers ou l’enregistrement de communications à des fins commerciales).
Samsung ne peut être tenu responsable des répercussions d’une utilisation illégale de la
fonction Bluetooth.
Établir une connexion avec d’autres appareils
83
Établir une connexion avec d’autres appareils Bluetooth
1 Depuis la liste des applications, appuyez sur Paramètres → Bluetooth, faites glisser le curseur
Bluetooth vers la droite pour activer la fonction, puis appuyez sur Analyser.
Une liste des appareils détectés apparaît.
Pour définir l’appareil comme visible aux autres appareils, appuyez sur son nom.
2 Sélectionnez un appareil auquel vous associer.
Si votre appareil a été appairé par le passé avec un appareil, appuyez sur son nom sans
confirmer le mot de passe.
Si l’appareil auquel vous souhaitez vous associer ne figure pas dans la liste, demandez à ce que
l’option de visibilité soit activée sur l’appareil.
3 Pour confirmer, acceptez la demande d’autorisation Bluetooth sur les deux appareils.
Envoyer et recevoir des données
De nombreuses applications prennent en charge le transfert de données via la fonction Bluetooth.
Vous pouvez partager des données, comme des contacts ou des fichiers multimédia, avec d’autres
appareils Bluetooth. Vous pouvez, par exemple, envoyer une image à un autre appareil.
Envoyer une image
1 Depuis la liste des applications, appuyez sur Galerie.
2 Sélectionnez une image.
3 Appuyez sur → Bluetooth, puis sélectionnez un appareil sur lequel transférer l’image.
Si l’appareil auquel vous souhaitez vous associer ne figure pas dans la liste, demandez à ce que
l’option de visibilité soit activée sur l’appareil. Ou définissez votre appareil comme visible aux
autres appareils.
4 Acceptez la demande d’autorisation Bluetooth sur l’autre appareil.
Établir une connexion avec d’autres appareils
84
Recevoir une image
Lorsqu’un autre appareil vous envoie une image, acceptez la demande d’autorisation Bluetooth.
L’image reçue est enregistrée dans le dossier Galerie → Download.
Dissocier des appareils Bluetooth
1 Depuis la liste des applications, appuyez sur Paramètres → Bluetooth.
L’appareil affiche la liste des appareils associés.
2 Appuyez sur près du nom de l’appareil à dissocier.
3 Appuyez sur Dissocier.
Wi-Fi Direct
À propos de Wi-Fi Direct
Le Wi-Fi Direct autorise la connexion directe entre des appareils via un réseau Wi-Fi sans passer par
un point d’accès.
Établir une connexion à d’autres appareils
1 Depuis la liste des applications, appuyez sur Paramètres → Wi-Fi, puis faites glisser le curseur
Wi-Fi vers la droite pour activer la fonction.
2 Appuyez sur → Wi-Fi Direct.
Une liste des appareils détectés apparaît.
3 Sélectionnez un appareil auquel vous connecter.
Pour raccorder plusieurs appareils, appuyez sur → Connexion multiple.
Pour modifier le nom de l’appareil, appuyez sur → Renommer le périphérique.
4 Acceptez la demande d’autorisation Wi-Fi Direct sur l’autre appareil pour confirmer.
Établir une connexion avec d’autres appareils
85
Envoyer et recevoir des données
Vous pouvez partager des données, comme des contacts ou des fichiers multimédia, avec d’autres
appareils. Vous pouvez, par exemple, envoyer une image à un autre appareil.
Envoyer une image
1 Depuis la liste des applications, appuyez sur Galerie.
2 Sélectionnez une image.
3 Appuyez sur → Wi-Fi Direct, sélectionnez un appareil sur lequel transférer l’image, puis
appuyez sur OK.
4 Acceptez la demande d’autorisation Wi-Fi Direct sur l’autre appareil.
Recevoir une image
Lorsqu’un autre appareil vous envoie une image, acceptez la demande d’autorisation Wi-Fi Direct.
L’image reçue est enregistrée dans le dossier Galerie → Download.
Déconnecter les appareils
1 Depuis la liste des applications, appuyez sur Paramètres → Wi-Fi.
2 Appuyez sur → Wi-Fi Direct.
L’appareil affiche la liste des appareils connectés.
3 Appuyez sur Terminer la connexion → OK pour déconnecter les appareils.
Établir une connexion avec d’autres appareils
86
NFC
À propos de NFC
Votre appareil est équipé d’une fonction qui permet de lire les tags NFC (Near Field Communication)
contenant des informations relatives aux produits. Grâce à cette fonction, vous pouvez également
effectuer des paiements et acheter des tickets de transport ou des billets de spectacle après avoir
téléchargé les applications correspondantes.
La batterie comporte une antenne NFC intégrée. Manipulez l’appareil avec précaution afin
de ne pas endommager l’antenne NFC.
Utiliser la fonction NFC
Utilisez la fonction NFC pour envoyer des images ou des contacts à d’autres appareils et lire des
informations produit. Si vous insérez une carte SIM ou USIM comportant une fonction de paiement,
vous pouvez utiliser l’appareil pour effectuer facilement des paiements.
Depuis la liste des applications, appuyez sur Paramètres → NFC, puis faites glisser le curseur NFC
vers la droite pour activer la fonction.
Rapprochez l’antenne NFC, située à l’arrière de votre appareil, d’un tag NFC. Les informations figurant
sur le tag apparaissent à l’écran.
Assurez-vous que l’écran de l’appareil est déverrouillé. Sinon, l’appareil ne pourra pas lire les
tags NFC ou recevoir des données.
Établir une connexion avec d’autres appareils
87
Effectuer un achat à l’aide de la fonction NFC
Pour pouvoir effectuer des paiements à l’aide de la fonction NFC, vous devez d’abord vous inscrire
à un service de paiement mobile. Pour vous inscrire ou obtenir plus d’informations sur ce service,
contactez votre opérateur.
Depuis la liste des applications, appuyez sur Paramètres → NFC, puis faites glisser le curseur NFC
vers la droite pour activer la fonction.
Rapprochez l’antenne NFC, située à l’arrière de votre appareil, du lecteur de carte NFC.
Pour définir l’application de paiement par défaut, appuyez sur Paiement NFC et sélectionnez une
application.
La liste des services peut ne pas inclure toutes les applications de paiement disponibles.
Envoyer des données
Utilisez la fonction Android Beam pour envoyer des données, telles que des pages Web ou des
contacts, à des appareils compatibles NFC.
1 Depuis la liste des applications, appuyez sur Paramètres → NFC, puis faites glisser le curseur
NFC vers la droite pour activer la fonction.
2 Appuyez sur Android Beam, puis faites glisser le curseur Android Beam vers la droite pour
activer la fonction.
3 Sélectionnez un élément et connectez l’antenne NFC de l’autre appareil avec l’antenne NFC de
votre appareil.
4 Lorsque l’option Appuyez ici pour transférer apparaît à l’écran, appuyez sur l’écran de l’appareil
pour envoyer l’élément.
Établir une connexion avec d’autres appareils
88
Utiliser la fonction d’impression mobile
Connectez l’appareil à une imprimante à l’aide de la fonction Wi-Fi ou Wi-Fi Direct, puis imprimez des
images ou des documents.
Certaines imprimantes peuvent ne pas être compatibles avec l’appareil.
Ajouter des modules d’extension d’imprimante
Ajoutez des modules d’extension pour les imprimantes que vous souhaitez utiliser.
Depuis la liste des applications, appuyez sur Paramètres → Impression → Ajouter une
imprimante, puis recherchez le module d’extension correspondant dans Play Store. Sélectionnez un
module d’extension et installez-le.
Connecter l’appareil à une imprimante
Depuis la liste des applications, appuyez sur Paramètres → Impression, sélectionnez un module
d’extension, puis faites glisser le curseur en haut à droite de l’écran vers la droite pour activer
la fonction. L’appareil recherche les imprimantes connectées au même réseau Wi-Fi que lui.
Sélectionnez une imprimante à utiliser comme imprimante par défaut.
Pour ajouter des imprimantes manuellement, sélectionnez un module d’imprimante, appuyez sur
→ Ajouter une imprimante → , saisissez les détails, puis appuyez sur OK.
Pour modifier les paramètres d’impression, sélectionnez un module d’imprimante, puis appuyez sur
→ Paramètres d’impression.
Imprimer du contenu
En mode affichage d’une image ou d’un document par exemple, appuyez sur → Imprimer, puis
sélectionnez une imprimante.
89
Gestionnaire d’appareils et de
données
Mettre l’appareil à jour
L’appareil peut être mis à jour avec la version logicielle la plus récente.
Mettre l’appareil à jour sans connexion PC
Grâce au service FOTA (Firmware Over The Air), le logiciel de l’appareil peut être mis à jour sans
passer par une connexion avec un ordinateur.
Depuis la liste des applications, appuyez sur Paramètres → À propos de l’appareil → Mise à jour
logicielle → Mettre à jour.
Mettre l’appareil à jour avec Samsung Kies
Téléchargez la dernière version de Samsung Kies à partir du site Web Samsung. Démarrez Samsung
Kies et connectez l’appareil à un ordinateur. Samsung Kies reconnaît automatiquement l’appareil et
affiche, le cas échéant, les mises à jour disponibles. Pour lancer la mise à jour, cliquez sur la touche de
mise à jour dans la boîte de dialogue. Pour en savoir plus sur la mise à jour, consultez l’aide Samsung
Kies.
• Lorsque vous mettez votre appareil à jour, n’éteignez pas l’ordinateur et ne déconnectez
pas le câble USB.
• Ne connectez pas non plus d’autres appareils multimédia à l’ordinateur. Cela pourrait
interférer avec le processus de mise à jour.
Gestionnaire d’appareils et de données
90
Transférer des fichiers entre l’appareil et un
ordinateur
Vous pouvez transférer différents types de fichiers (sons, vidéos, images, etc.) de l’appareil vers un
ordinateur, et inversement.
Ne débranchez pas le câble USB de l’appareil lorsqu’un transfert de fichiers est en cours. Cela
risquerait d’entraîner une perte de données ou d’endommager l’appareil.
• Ne débranchez pas l’appareil de l’ordinateur lorsque vous lisez des fichiers enregistrés
sur l’appareil sur l’ordinateur raccordé. Une fois que vous avez terminé de lire le fichier,
débranchez l’appareil de l’ordinateur.
• Il se peut que les appareils ne se connectent pas correctement s’ils le sont via un
concentrateur USB. Branchez directement l’appareil sur le port USB de l’ordinateur.
Connecter l’appareil en tant qu’appareil multimédia
1 Connectez l’appareil à un ordinateur à l’aide du câble USB.
2 Ouvrez le volet des raccourcis, puis appuyez sur Connecté en tant que périphérique
multimédia → Périphérique multimédia (MTP).
Appuyez sur Appareil photo (PTP) si votre ordinateur ne gère pas le protocole MTP (Media
Transfer Protocol) ou ne dispose pas du pilote approprié.
3 Transférez des fichiers entre votre appareil et l’ordinateur.
Gestionnaire d’appareils et de données
91
Connecter l’appareil avec Samsung Kies
Samsung Kies est un logiciel qui permet de gérer vos contenus multimédia et vos informations
personnelles avec des appareils Samsung. Téléchargez la dernière version de Samsung Kies à partir
du site Web Samsung.
1 Connectez l’appareil à un ordinateur à l’aide du câble USB.
Samsung Kies démarre automatiquement sur l’ordinateur. Si Samsung Kies ne démarre pas,
double-cliquez sur l’icône Samsung Kies sur votre ordinateur.
2 Transférez des fichiers entre votre appareil et l’ordinateur.
Pour plus d’informations, consultez l’aide de Samsung Kies.
Sauvegarder et restaurer des données
Conservez vos informations personnelles, données d’applications et paramètres en toute sécurité
sur votre appareil. Vous pouvez effectuer une sauvegarde de vos informations importantes sur un
compte de sauvegarde et y accéder ultérieurement.
1 Appuyez sur Paramètres depuis la liste des applications.
2 Appuyez sur Sauvegarder et réinitialiser et cochez la case Sauvegarder mes données.
3 Appuyez sur Compte de sauvegarde et sélectionnez un compte de sauvegarde.
Pour restaurer les données, vous devez vous connecter à votre compte Google via l’assistant
de configuration. Vous pouvez lancer et ouvrir l’assistant de configuration en effectuant une
réinitialisation des données par défaut sur l’appareil. Si vous ne vous connectez pas à votre
compte Google via l’assistant de configuration, vous ne pouvez pas restaurer les données de
sauvegarde.
Gestionnaire d’appareils et de données
92
Réinitialiser les données
Vous pouvez supprimer tous les paramètres et toutes les données de l’appareil. Avant de rétablir les
paramètres par défaut, assurez-vous de sauvegarder toutes les données importantes stockées sur
l’appareil. Pour en savoir plus, reportez-vous à la section Sauvegarder et restaurer des données.
Depuis la liste des applications, appuyez sur Paramètres → Sauvegarder et réinitialiser → Rétablir
param. par défaut → Réinitialiser le périphérique → Supprimer tout. L’appareil redémarre
automatiquement.
93
Paramètres
Accéder au menu des paramètres
Utilisez cette application pour configurer l’appareil, définir les paramètres d’une application et
ajouter des comptes.
Appuyez sur Paramètres depuis la liste des applications.
SANS FIL ET RÉSEAUX
Wi-Fi
Activez la fonction Wi-Fi pour permettre la connexion à un réseau Wi-Fi et accéder à Internet ou à
d’autres périphériques réseau.
Depuis l’écran Paramètres, appuyez sur Wi-Fi, puis faites glisser le curseur Wi-Fi vers la droite pour
activer la fonction.
Pour utiliser des options supplémentaires, appuyez sur .
• Analyser : recherchez les réseaux disponibles.
• Wi-Fi Direct : activez la fonction Wi-Fi Direct et connectez directement des appareils via le
réseau Wi-Fi pour partager des fichiers.
• Paramètres avancés : personnalisez les paramètres Wi-Fi.
• Touche WPS : connectez-vous à un réseau Wi-Fi sécurisé à l’aide d’une touche WPS.
• Entrée PIN WPS : connectez-vous à un réseau Wi-Fi sécurisé à l’aide d’un code PIN WPS.
Politique de mise en veille Wi-Fi
Appuyez sur → Paramètres avancés → Wi-Fi activé en mode veille.
Lorsque l’écran est éteint, l’appareil désactive automatiquement les connexions Wi-Fi.
Lorsque cela se produit, l’appareil accède automatiquement aux réseaux mobiles s’il a été
configuré pour utiliser ces réseaux. Cela peut entraîner des frais de transfert de données.
Pour éviter des frais supplémentaires, définissez cette option sur Toujours.
Paramètres
94
Paramètres de notification réseau
L’appareil détecte les réseaux Wi-Fi ouverts et affiche une icône dans la barre d’état lorsqu’un réseau
est disponible.
Appuyez sur → Paramètres avancés et cochez la case Notification réseau pour activer cette
fonction.
Wi-Fi Direct
Le Wi-Fi Direct autorise la connexion directe entre des appareils via un réseau Wi-Fi sans passer par
un point d’accès.
Appuyez sur → Wi-Fi Direct.
Bluetooth
Activez la fonction Bluetooth pour échanger des informations sur de courtes distances.
Depuis l’écran Paramètres, appuyez sur Bluetooth, puis faites glisser le curseur Bluetooth vers la
droite pour activer la fonction.
Pour accéder à des options supplémentaires, appuyez sur .
• Délai d’expiration de la visibilité : définissez la durée pendant laquelle l’appareil est visible.
• Fichiers reçus : affichez les fichiers reçus via la fonction Bluetooth.
Modem et point d’accès mobile
Utilisez l’appareil comme point d’accès mobile pour partager la connexion de données de votre
appareil avec d’autres appareils. Pour en savoir plus, reportez-vous à la section Modem et point
d’accès mobile.
Depuis l’écran Paramètres, appuyez sur Modem et point d’accès mobile.
• Point d’accès mobile : utilisez le point d’accès mobile pour partager la connexion de données
de votre appareil avec des ordinateurs ou d’autres appareils via le réseau Wi-Fi. Vous pouvez
utiliser cette fonction lorsque la connexion réseau n’est pas disponible.
• Config. point d’accès mobile : configurez les paramètres du point d’accès mobile tels que le
mot de passe, le SSID du réseau, etc.
• Modem USB : utilisez le modem USB pour partager la connexion de données de votre appareil
avec un ordinateur via le mode USB. Lorsqu’il est connecté à un ordinateur, l’appareil sert de
modem sans fil.
• Modem Bluetooth : utilisez le modem Bluetooth pour partager la connexion de données de
votre appareil avec un ordinateur ou d’autres appareils via la fonction Bluetooth.
Paramètres
95
Mode Hors-ligne
Désactivez toutes les fonctions sans fil de l’appareil. Vous pouvez uniquement utiliser les services
hors-réseau, c’est-à-dire les fonctions autres que les fonctions d’appel, Wi-Fi et Bluetooth.
Depuis l’écran Paramètres, appuyez sur Mode Hors-ligne.
Utilisation des données
Effectuez un suivi de la quantité de données utilisées et personnalisez les paramètres de limite
d’utilisation des données.
Depuis l’écran Paramètres, appuyez sur Utilisation des données.
• Données mobiles : paramétrez l’appareil pour pouvoir utiliser les connexions de données sur
n’importe quel réseau mobile.
• Définir limite données mobiles : configurez une limite d’utilisation des données mobiles.
• Cycle utilisation données : indiquez la date de réinitialisation mensuelle à laquelle effectuer la
vérification de l’utilisation des données entre deux périodes.
Pour accéder à des options supplémentaires, appuyez sur .
• Itinérance : paramétrez l’appareil pour pouvoir utiliser les connexions de données lorsque vous
changez de zone de couverture.
• Restr. données arrière-plan : paramétrez l’appareil pour pouvoir désactiver la synchronisation
en arrière-plan lorsque vous utilisez un réseau mobile.
• Synchroniser les données automatiquement : activez ou désactivez la synchronisation
automatique des applications, comme le calendrier ou les e-mails. Vous pouvez sélectionner les
informations à synchroniser pour chaque compte dans Paramètres → COMPTES.
• Afficher utilisation Wi-Fi : paramétrez l’appareil pour pouvoir afficher l’utilisation des données
via le réseau Wi-Fi.
• Points d’accès mobiles : sélectionnez des points d’accès mobiles afin d’empêcher que les
applications fonctionnant en arrière-plan ne les utilisent.
NFC
Activez la fonction NFC pour lire ou écrire des tags NFC contenant des informations.
Depuis l’écran Paramètres, appuyez sur NFC, puis faites glisser le curseur NFC vers la droite pour
activer la fonction.
• Android Beam : activez la fonction Android Beam pour envoyer des données, notamment des
pages Web et des contacts, vers des appareils compatibles NFC.
• Paiement NFC : définissez l’application de paiement par défaut.
La liste des services peut ne pas inclure toutes les applications de paiement disponibles.
Paramètres
96
Plus de réseaux
Personnalisez les paramètres réseaux.
Depuis l’écran Paramètres, appuyez sur Plus de réseaux.
Application de messagerie par défaut
Sélectionnez l’application par défaut à utiliser pour la messagerie.
VPN
Paramétrez des réseaux privés virtuels (VPN) pour vous y connecter.
Réseaux mobiles
• Données mobiles : paramétrez l’appareil pour pouvoir utiliser les connexions de données sur
n’importe quel réseau mobile.
• Itinérance : paramétrez l’appareil pour pouvoir utiliser les connexions de données lorsque vous
changez de zone de couverture.
• Nom des points d’accès : attribuez des noms aux points d’accès (APN).
• Mode réseau : sélectionnez un type de réseau.
• Opérateurs réseau : recherchez les réseaux disponibles et sélectionnez-en un pour vous y
connecter.
APPAREIL
Écran de verrouillage
Modifiez les paramètres de l’écran de verrouillage.
Depuis l’écran Paramètres, appuyez sur Écran de verrouillage.
• Déverrouillage de l’écran : modifiez la fonction de déverrouillage sécurisé de l’écran. Les
options suivantes peuvent varier selon la méthode de verrouillage d’écran sélectionnée.
• Double horloge : paramétrez l’appareil pour pouvoir afficher deux horloges.
• Afficher la date : paramétrez l’appareil pour qu’il affiche la date et l’heure.
Paramètres
97
• Raccourci Appareil photo : paramétrez l’appareil pour qu’il affiche le raccourci de l’appareil
photo sur l’écran verrouillé.
La disponibilité de cette fonction dépend de votre zone géographique ou de votre
opérateur.
• Infos propriétaire : saisissez les informations que vous souhaitez voir apparaître sur l’écran
verrouillé.
• Effet de déverrouillage : sélectionnez un effet à appliquer lorsque vous déverrouillez l’écran.
• Texte d’aide : paramétrez l’appareil pour pouvoir afficher un texte d’aide sur l’écran verrouillé.
Son
Modifiez les paramètres des différents sons de l’appareil.
Depuis l’écran Paramètres, appuyez sur Son.
• Volume : réglez le volume des sonneries d’appel, de la musique et des vidéos, des sons système
et des notifications.
• Sonneries : sélectionnez une sonnerie pour les appels entrants.
• Notifications : sélectionnez une sonnerie pour les notifications, comme les messages entrants.
• Vibreur et sonnerie : paramétrez l’appareil pour qu’il vibre et émette une sonnerie à chaque
appel entrant.
• Son des touches : paramétrez l’appareil pour qu’il émette un son lorsque vous appuyez sur les
touches du clavier.
• Sélections audibles : réglez l’appareil pour qu’il émette un son lorsque vous sélectionnez une
application ou une option sur l’écran tactile.
• Son verrouillage écran : paramétrez l’appareil pour qu’il émette un son lorsque vous verrouillez
ou déverrouillez l’écran tactile.
Affichage
Modifiez les paramètres d’affichage.
Depuis l’écran Paramètres, appuyez sur Affichage.
• Fond d’écran :
– Écran d’accueil : sélectionnez l’image d’arrière-plan de l’écran d’accueil.
– Écran de verrouillage : sélectionnez l’image d’arrière-plan de l’écran de verrouillage.
– Écrans d’accueil et de verrouillage : sélectionnez l’image d’arrière-plan de l’écran d’accueil
et de l’écran de verrouillage.
Paramètres
98
• Volet des raccourcis :
– Ajustement de la luminosité : paramétrez l’appareil pour qu’il affiche la barre de réglage de
la luminosité dans le volet des raccourcis.
– Définir les options de configuration rapide : réorganisez les touches de paramétrage rapide
dans le volet des raccourcis.
• Luminosité : définissez la luminosité de l’écran.
• Rotation auto. écran : indiquez si le contenu doit automatiquement pivoter en même temps
que l’appareil.
• Mise en veille de l’écran : définissez le délai à l’issue duquel l’écran doit s’éteindre
automatiquement.
• Écran de veille : paramétrez l’appareil pour pouvoir activer l’écran de veille lorsque l’appareil est
en cours de chargement.
• Mode d’écran :
– Affichage adaptatif : lorsque cette fonction est activée, l’affichage est automatiquement
optimisé pour les différentes applications.
– Cinéma AMOLED : utilisez ce mode pour obtenir un arrière-plan sombre, comme dans une
pièce peu éclairée.
– Photo AMOLED : utilisez ce mode pour que les tons de l’écran ressemblent à de vraies
couleurs.
– Basique : utilisez ce mode pour obtenir un arrière-plan normal.
• Police : modifiez le type de police du texte affiché à l’écran.
• Taille de police : modifiez la taille de la police.
• Durée de l’éclairage des touches : paramétrez la durée de rétroéclairage des touches
Applications récentes et Retour.
• Tons écran auto. : paramétrez l’appareil pour pouvoir économiser de l’énergie en ajustant la
luminosité de l’écran.
Paramètres
99
Appels
Personnalisez les paramètres d’appel.
Depuis l’écran Paramètres, appuyez sur Appels.
• Définir les messages de rejet : ajoutez ou modifiez le message envoyé lorsque vous rejetez un
appel.
• Début/Fin d’appel :
– Touche Accueil pour répondre aux appels : paramétrez l’appareil pour pouvoir répondre
aux appels en appuyant sur la touche Accueil.
– Touche Marche pour terminer les appels : paramétrez l’appareil pour pouvoir mettre fin à
un appel en appuyant sur la touche Marche/Arrêt.
• Paramètres supplémentaires :
– Identité de l’appelant : affichez votre identité à vos correspondants lorsque vous passez un
appel.
– Transfert d’appel : transférez les appels entrants vers un autre numéro.
– Code région auto : paramétrez l’appareil pour pouvoir insérer automatiquement un préfixe
(code régional ou national) avant un numéro de téléphone.
– Restriction d’appel : bloquez les appels entrants ou sortants.
– Signal d’appel : autorisez les appels entrants en cours d’appel.
– Numérotation fixe : activez ou désactivez le mode de numérotation fixe pour limiter les
appels aux numéros de la liste FDN. Saisissez le code PIN2 fourni avec votre carte SIM ou
USIM.
• Sonneries et son clavier :
– Sonneries : sélectionnez une sonnerie pour les appels entrants.
– Vibreur et sonnerie : paramétrez l’appareil pour qu’il vibre et émette une sonnerie à chaque
appel entrant.
– Son des touches : paramétrez l’appareil pour qu’il émette un son lorsque vous appuyez sur
les touches du clavier.
• Masquer ma vidéo : sélectionnez une image à afficher à votre correspondant.
• Service de messagerie vocale : sélectionnez ou définissez votre opérateur de messagerie
vocale.
• Param. messagerie vocale : indiquez le numéro de votre service de messagerie vocale. Vous
pouvez obtenir ce numéro auprès de votre opérateur.
• Comptes : paramétrez l’appareil pour pouvoir accepter les appels IP et configurez vos comptes
de services IP.
• Utiliser appel Internet : définissez si vous devez utiliser les appels Internet pour tous les appels
ou seulement pour les appels IP.
Paramètres
100
Stockage
Affichez les informations relatives à la quantité de stockage disponible sur l’appareil et la carte
mémoire, ou formatez une carte mémoire.
Depuis l’écran Paramètres, appuyez sur Stockage.
Le formatage d’une carte mémoire supprime définitivement toutes les données qui y sont
stockées.
La mémoire interne de votre appareil a une capacité réelle disponible inférieure à la capacité
indiquée, car elle est en partie occupée par le système d’exploitation et les applications
installées par défaut. La capacité disponible peut varier lorsque vous mettez à jour l’appareil.
Batterie
Affichez la quantité d’énergie consommée par votre appareil.
Depuis l’écran Paramètres, appuyez sur Batterie.
• Affich. pourcentage batterie : paramétrez l’appareil pour qu’il affiche l’autonomie restante de la
batterie.
Mode Ultra économie d’énergie
Prolongez le temps de veille et réduisez la consommation de la batterie en affichant une
présentation simplifiée et en autorisant un accès limité à une application. Pour en savoir plus,
reportez-vous à la section Mode Ultra économie d’énergie.
Depuis l’écran Paramètres, appuyez sur Mode Ultra économie d’énergie.
Le délai de veille maximum estimé est le temps qu’il faut à la batterie pour se décharger
complètement lorsque l’appareil n’est pas utilisé. Le délai de veille peut varier selon les
paramètres de l’appareil et les conditions d’utilisation.
Gestionnaire d’applications
Affichez et gérez les applications installées sur votre appareil.
Depuis l’écran Paramètres, appuyez sur Gestionnaire d’applications.
Paramètres
101
PERSONNEL
Localisation
Modifiez les paramètres des informations de localisation.
Depuis l’écran Paramètres, appuyez sur Localisation, puis faites glisser le curseur Localisation vers la
droite pour activer la fonction.
• Mode : sélectionnez une méthode pour recueillir vos données de localisation.
• DEMANDES LOCAL. RÉCENTES : affichez les applications qui requièrent votre position et la
batterie consommée à cet effet.
• SERVICES DE LOCALISATION : affichez les services de localisation utilisés par votre appareil.
Sécurité
Modifiez les paramètres de sécurité de l’appareil et de la carte SIM ou USIM.
Depuis l’écran Paramètres, appuyez sur Sécurité.
• Crypter l’appareil : définissez un mot de passe pour crypter les données enregistrées sur
l’appareil. Vous devez saisir ce mot de passe à chaque fois que vous allumez l’appareil.
Chargez la batterie avant d’activer ce paramètre, car il peut arriver que le cryptage des
données dure plus d’une heure.
• Crypter la carte SD externe : paramétrez l’appareil pour pouvoir crypter les fichiers contenus
sur une carte mémoire.
Votre appareil ne sera pas en mesure de lire les fichiers cryptés si vous le réinitialisez lorsque
ces paramètres sont activés. Désactivez ces paramètres avant de réinitialiser votre appareil.
• Contrôle à distance : paramétrez l’appareil pour pouvoir le contrôler à distance via Internet si
vous l’égarez ou s’il vous est dérobé. Pour utiliser cette fonction, vous devez vous connecter à
votre compte Samsung.
– ENREGISTREMENT DU COMPTE : enregistrez ou connectez-vous à votre compte Samsung.
– Utiliser réseaux sans fil : paramétrez l’appareil pour pouvoir autoriser la collecte des
données de localisation en cas de perte ou de vol ou pour retrouver l’appareil via le réseau
Wi-Fi ou mobile.
• Alerte changement de SIM : activez ou désactivez la fonction de Traçage du mobile qui permet
de localiser l’appareil en cas de perte ou de vol.
Paramètres
102
• Accéder au site Web : accédez au site Web Traçage du mobile (findmymobile.samsung.com). Ce
site vous permet de repérer et de contrôler un appareil égaré ou dérobé.
• Configurer blocage SIM :
– Verrouiller carte SIM : activez ou désactivez la fonction de verrouillage par code PIN de
l’appareil. Si vous activez ce paramètre, un code PIN vous sera demandé à chaque fois que
vous allumez l’appareil.
– Modifier code PIN SIM : modifiez le code PIN fourni pour accéder aux données SIM ou USIM.
• Rendre les mots de passe visibles : paramétrez l’appareil pour qu’il affiche votre mot de passe à
mesure que vous le saisissez.
• Admin. de périphérique : affichez les administrateurs de votre appareil. Vous pouvez autoriser
les administrateurs de l’appareil à appliquer de nouvelles règles à celui-ci.
• Sources inconnues : paramétrez l’appareil pour autoriser l’installation d’applications provenant
de sources inconnues.
• Vérifier les applications : paramétrez l’appareil pour vérifier que les applications ne présentent
aucun danger avant de les installer.
• MàJ de politique sécurité : paramétrez l’appareil pour qu’il vérifie et télécharge les mises à jour
de sécurité.
• Envoyer des rapports de sécurité : paramétrez l’appareil pour qu’il envoie automatiquement
des rapports de sécurité à Samsung.
• Type de stockage : définissez un type de stockage pour les fichiers d’identification.
• Infos d’ident. sécurisées : recourez à des certificats et des identifiants pour sécuriser l’utilisation
des diverses applications.
• Installer depuis stock. périph. : installez les certificats cryptés stockés sur une clé USB.
• Effacer infos identification : effacez les identifiants de sécurité contenus dans l’appareil et
réinitialisez le mot de passe.
Langue et saisie
Modifiez les paramètres de saisie de texte. La disponibilité de certaines options dépend de la langue
sélectionnée.
Depuis l’écran Paramètres, appuyez sur Langue et saisie.
Langue
Sélectionnez la langue d’affichage des menus et des applications.
Par défaut
Sélectionnez le type de clavier à utiliser par défaut pour la saisie de texte.
Paramètres
103
Clavier Samsung
Pour modifier les paramètres du clavier Samsung, appuyez sur .
La disponibilité des options dépend de votre zone géographique ou de votre opérateur.
• Français : sélectionnez une présentation de clavier par défaut.
• Sélectionner langue de saisie : sélectionnez les langues de saisie.
• Texte intuitif : activez le mode de saisie intuitive pour que des suggestions de mots s’affichent
au fur et à mesure de votre saisie. Vous pouvez également personnaliser les paramètres de la
saisie intuitive.
• Remplacement automatique : paramétrez l’appareil pour pouvoir corriger les fautes
d’orthographe et les mots incomplets en appuyant sur la barre d’espace ou un signe de
ponctuation.
• Majuscules auto. : paramétrez l’appareil pour pouvoir mettre automatiquement en majuscules
la première lettre qui suit un signe de ponctuation final (point, point d’interrogation et point
d’exclamation).
• Espace auto : paramétrez l’appareil pour qu’il insère automatiquement un espace entre les
mots.
• Ponctuation automatique : paramétrez l’appareil pour qu’il insère un point lorsque vous
appuyez deux fois sur la barre d’espace.
• Glissement du clavier :
– Aucun(e) : paramétrez l’appareil pour désactiver la fonction de balayage du clavier.
– Saisie en continu : autorisez la saisie continue qui consiste à faire glisser le doigt d’une lettre
à l’autre sur le clavier, sans le soulever.
• Son : paramétrez l’appareil pour qu’il émette un son lorsque vous appuyez sur une touche.
• Aperçu du caractère : paramétrez l’appareil pour qu’il affiche une image agrandie de chaque
caractère saisi.
• Réinitialiser paramètres : réinitialisez les paramètres du clavier Samsung.
Saisie vocale Google
Pour modifier les paramètres de saisie vocale, appuyez sur .
• Sélect. langues saisie : sélectionnez les langues de saisie.
• Bloquer termes choquants : paramétrez l’appareil pour qu’il bloque les mots injurieux lors de la
saisie vocale.
• Reconnaissance vocale hors connexion : téléchargez et installez les données linguistiques
pour la saisie vocale hors-ligne.
Paramètres
104
Recherche vocale
• Langue : sélectionnez la langue de la reconnaissance vocale.
• Sortie vocale : paramétrez l’appareil pour qu’il vous prévienne de l’action en cours à l’aide d’un
retour vocal.
• Détection du mot clé "OK Google" : paramétrez l’appareil pour qu’il lance la reconnaissance
vocale dès que vous prononcez la commande OK Google dans une application de recherche.
La disponibilité de cette fonction dépend de votre zone géographique ou de votre
opérateur.
• Reconnaissance vocale hors connexion : téléchargez et installez les données linguistiques
pour la saisie vocale hors-ligne.
• Bloquer termes choquants : masquez les mots injurieux dans les résultats de la recherche
vocale.
• Casque Bluetooth : paramétrez l’appareil pour autoriser la saisie vocale de mots-clés via le
microphone du casque et/ou de l’écouteur Bluetooth si celui-ci est connecté.
Options synthèse vocale
• MOTEUR TTS FAVORI : sélectionnez un moteur de synthèse vocale. Pour modifier les paramètres
des moteurs de synthèse vocale, appuyez sur .
• Vitesse d’élocution : sélectionnez la vitesse de diction de la synthèse vocale.
• Écouter un exemple : écoutez un exemple de texte parlé.
• État langue par défaut : affichez le statut de la langue par défaut pour la fonction de synthèse
vocale.
Vitesse du curseur
Réglez la vitesse du curseur d’une souris ou d’un pavé tactile connecté(e) à l’appareil.
Paramètres
105
Sauvegarder et réinitialiser
Modifiez les paramètres de gestion des paramètres et des données.
Depuis la liste des applications, appuyez sur Sauvegarder et réinitialiser.
• Sauvegarder mes données : paramétrez l’appareil pour pouvoir sauvegarder vos paramètres et
vos données d’application sur le serveur Google.
• Compte de sauvegarde : configurez ou modifiez votre compte de sauvegarde Google.
• Restauration auto. : paramétrez l’appareil pour pouvoir restaurer vos paramètres et vos
données d’application lorsque les applications sont réinstallées.
• Rétablir param. par défaut : restaurez les valeurs par défaut de l’appareil et supprimez toutes
vos données.
COMPTES
Ajouter compte
Ajoutez des comptes de messagerie électronique ou de réseaux sociaux.
Depuis l’écran Paramètres, appuyez sur Ajouter compte.
SYSTÈME
Date et heure
Accédez aux paramètres suivants et modifiez-les afin de contrôler l’affichage de l’heure et de la date.
Depuis l’écran Paramètres, appuyez sur Date et heure.
Si la batterie est entièrement déchargée ou si vous la retirez de l’appareil, l’heure et la date
sont alors réinitialisées.
• Date et heure automatiques : mettez automatiquement à jour l’heure et la date lorsque vous
changez de fuseau horaire.
• Fuseau horaire auto : paramétrez l’appareil pour pouvoir recevoir des informations sur l’heure
depuis le réseau lorsque vous changez de fuseau horaire.
• Définir la date : réglez la date du jour manuellement.
• Définir l’heure : réglez l’heure manuellement.
Paramètres
106
• Sélectionner le fuseau horaire : réglez le fuseau horaire de votre zone géographique.
• Format 24 heures : affichez l’heure au format 24 heures.
• Format de date : sélectionnez le format de date.
Accessibilité
Utilisez cette fonction pour améliorer l’accessibilité de l’appareil. Pour en savoir plus, reportez-vous à
la section À propos des menus Accessibilité.
Depuis l’écran Paramètres, appuyez sur Accessibilité.
Impression
Configurez les paramètres pour les modules d’extension d’imprimante installés sur l’appareil. Vous
pouvez rechercher les imprimantes disponibles ou en ajouter une manuellement pour imprimer des
fichiers via le réseau Wi-Fi ou les services de Cloud.
Depuis l’écran Paramètres, appuyez sur Impression.
À propos de l’appareil
Accédez aux informations relatives à l’appareil, modifiez le nom de l’appareil ou mettez à jour le
logiciel de l’appareil.
Depuis l’écran Paramètres, appuyez sur À propos de l’appareil.
107
Accessibilité
À propos des menus Accessibilité
Les menus Accessibilité correspondent à des fonctions spéciales qui s’adressent aux personnes ayant
certaines capacités réduites comme une mauvaise vue ou des troubles auditifs.
Utiliser la touche Accueil pour ouvrir les menus d’accessibilité
Informations orales (TalkBack)
Modifier la taille de police
Grossir l’écran
Inverser les couleurs d’affichage
Configurer une notification par flash
Couper tous les sons
Paramètres des sous-titres
Régler la balance audio
Audio mono
Configurer la durée de l’appui prolongé
Contrôle par interaction
Prendre ou mettre fin à des appels
Utiliser le mode à appui unique
Afficher des services d’accessibilité
Utiliser d’autres fonctions utiles
Pour utiliser les menus d’accessibilité, ouvrez la liste des applications, puis appuyez sur Paramètres
→ Accessibilité.
Accessibilité
108
Utiliser la touche Accueil pour ouvrir les menus
d’accessibilité
Vous pouvez accéder aux menus d’accessibilité suivants en appuyant à trois reprises rapprochées sur
la touche Accueil.
• Accessibilité
• TalkBack
• Couleurs négatives
• Contrôle par interaction
Depuis la liste des applications, appuyez sur Paramètres → Accessibilité → Accès direct, puis faites
glisser le curseur Accès direct vers la droite pour activer la fonction. Ensuite, sélectionnez un menu
d’accessibilité à ouvrir lorsque vous appuyez à trois reprises rapprochées sur la touche Accueil.
Si vous sélectionnez plusieurs menus, l’appareil affiche une fenêtre contextuelle vous demandant
quel menu utiliser lorsque vous appuyez à trois reprises rapprochées sur la touche Accueil. Pour
activer le Contrôle par interaction des menus d’accessibilité, activez la fonction. Depuis la liste
des applications, appuyez sur Paramètres → Accessibilité → Contrôle par interaction, puis faites
glisser le curseur Contrôle par interaction vers la droite pour activer la fonction.
Informations orales (TalkBack)
Activer ou désactiver TalkBack
Lorsque vous activez TalkBack, l’appareil lit à haute voix le texte affiché à l’écran ou les fonctions
sélectionnées. Cette fonction s’avère utile si vous rencontrez des difficultés à voir l’écran.
1 Depuis la liste des applications, appuyez sur Paramètres → Accessibilité → TalkBack.
2 Faites glisser le curseur TalkBack vers la droite pour activer la fonction.
Pour désactiver TalkBack, faites glisser le curseur TalkBack puis appuyez rapidement à deux
reprises n’importe où sur l’écran.
Accessibilité
109
3 Appuyez sur OK.
Pour désactiver TalkBack, appuyez sur OK, puis appuyez rapidement à deux reprises n’importe
où sur l’écran.
Lorsque vous activez TalkBack, l’appareil fournit des informations orales et lit à haute voix les
fonctions que vous sélectionnez. L’appareil fournit également des informations orales lorsque l’écran
est éteint, lorsque vous recevez de nouvelles notifications, etc.
Lorsque vous activez la fonction Explorer au toucher lorsque vous utilisez TalkBack, l’appareil lit à
haute voix les éléments sélectionnés. D’abord, l’appareil lit à haute voix les éléments à l’écran lorsque
vous appuyez dessus. Ensuite, l’appareil exécute la fonction ou ouvre l’application si vous appuyez à
deux reprises rapprochées n’importe où sur l’écran. Si la fonction Explorer au toucher est désactivée,
l’appareil ne peut pas prendre en compte plusieurs fonctions qui requièrent des gestes des doigts.
Pour activer la fonction Explorer au toucher, ouvrez la liste des applications, appuyez sur
Paramètres → Accessibilité → TalkBack → Paramètres, puis cochez la case Explorer au toucher.
Lorsque vous utilisez TalkBack, certaines fonctions ne sont pas disponibles.
Commander l’écran à l’aide de gestes des doigts
Avec TalkBack, vous pouvez contrôler l’écran d’un simple geste des doigts. Si la fonction Explorer
au toucher est désactivée, l’appareil ne peut pas prendre en compte certaines des fonctions qui
requièrent des gestes des doigts.
Pour activer la fonction Explorer au toucher, ouvrez la liste des applications, appuyez sur
Paramètres → Accessibilité → TalkBack → Paramètres, puis cochez la case Explorer au toucher.
• Parcourir l’écran : placez un doigt sur l’écran, puis déplacez-le pour parcourir l’écran. Maintenez
le doigt appuyé sur un élément afin que l’appareil énonce son nom. Lorsque vous relâchez le
doigt, l’élément sous le doigt est sélectionné.
• Sélectionner des éléments : appuyez sur un élément pour le sélectionner. Vous pouvez
également sélectionner un élément et maintenir le doigt appuyé dessus, puis relâcher le doigt.
• Ouvrir l’élément sélectionné : lorsque les noms des éléments sélectionnés sont énoncés,
relâchez le doigt dès que vous entendez le nom de l’élément souhaité. Appuyez ensuite à deux
reprises rapprochées sur l’écran.
Accessibilité
110
• Sélectionner l’élément précédent : faites défiler rapidement l’écran du doigt vers le haut ou vers
la gauche.
• Sélectionner l’élément suivant : faites défiler rapidement l’écran du doigt vers le bas ou vers la
droite.
• Parcourir les listes : faites défiler l’écran avec deux doigts vers le haut ou vers le bas.
• Revenir à la page précédente : faites défiler l’écran avec deux doigts vers la droite.
• Passer à la page suivante : faites défiler l’écran avec deux doigts vers la gauche.
• Déverrouiller l’écran : faites défiler l’écran avec deux doigts dans n’importe quelle direction au
sein de la zone de verrouillage de l’écran.
• Ouvrir le volet des raccourcis : faites glisser le haut de l’écran vers le bas avec deux doigts.
Vous pouvez configurer les paramètres des gestes des doigts de TalkBack dans Gérer les gestes.
Pour en savoir plus, reportez-vous à la section Configurer les paramètres des gestes des doigts.
Configurer les paramètres des gestes des doigts
Lorsque vous utilisez la fonction TalkBack, vous pouvez effectuer certaines opérations d’un simple
geste des doigts. Vous pouvez effectuer des opérations, comme revenir à l’écran précédent, ouvrir
l’écran d’accueil, etc. Configurez les gestes des doigts avant de les utiliser.
Configurer les paramètres des gestes verticaux
Vous pouvez utiliser des gestes verticaux décomposés en faisant glisser votre doigt vers le haut et
vers le bas depuis le bas de l’écran, ou inversement.
Depuis la liste des applications, appuyez sur Paramètres → Accessibilité → TalkBack →
Paramètres → Gérer les gestes → Gestes verticaux en deux parties. Sélectionnez ensuite l’une
des fonctions suivantes :
• Déplacement vers le premier et le dernier élément à l’écran : lorsque vous faites glisser
votre doigt vers le haut, puis vers le bas de l’écran, le premier élément en haut de l’écran est
sélectionné. Lorsque vous faites glisser votre doigt vers le bas, puis vers le haut de l’écran, le
dernier élément en bas de l’écran est sélectionné.
• Sélection du niveau de précision pour la lecture : lorsque vous faites glisser votre doigt vers
le haut, puis vers le bas de l’écran, l’unité de lecture change. L’unité de lecture passe à la page,
au paragraphe, à la ligne, au mot, au caractère, puis à une unité par défaut. Lorsque vous faites
glisser votre doigt vers le bas, puis vers le haut de l’écran, l’ordre des unités de lecture est inversé.
Accessibilité
111
Configurer les paramètres des gestes de raccourci
Utilisez cette fonction pour configurer huit gestes de raccourci. Vous pouvez configurer des gestes,
comme faire glisser le doigt vers le haut, puis vers la droite, sans le relâcher. Vous pouvez modifier les
gestes de raccourci ou assigner des fonctions à des raccourcis vierges.
Depuis la liste des applications, appuyez sur Paramètres → Accessibilité → TalkBack →
Paramètres → Gérer les gestes. Sélectionnez un geste, puis assignez-lui une fonction.
Les fonctions suivantes sont disponibles :
• Bouton "Retour" : revenez à l’écran précédent.
• Bouton "Accueil" : ouvrez l’écran d’accueil.
• Bouton "Applications récentes" : ouvrez la liste des applications récemment utilisées.
• Ouvrir les notifications : ouvrez le volet des raccourcis.
• Ouvrir le menu contextuel général : ouvrez le menu contextuel général. Maintenez le doigt
appuyé sur l’écran pour ouvrir le menu contextuel général circulaire. Vous pouvez utiliser des
fonctions telles que Navigation rapide, Lire à partir du haut de la page, Épeler le dernier
énoncé et Lire à partir de l’élément suivant. Ensuite, parcourez les menus en traçant un cercle
du doigt sans le relâcher. Une fois que vous avez trouvé le menu que vous cherchez, relâchez le
doigt du menu pour le sélectionner.
Appuyez sur Mettre en pause les retours en haut à gauche de l’écran pour mettre en pause les
informations orales.
Appuyez sur Paramètres TalkBack en haut à droite de l’écran pour accéder aux paramètres
TalkBack. Pour en savoir plus, reportez-vous à la section Configurer les paramètres de TalkBack.
• Ouvrir le menu contextuel local : ouvrez le menu contextuel local. Vous pouvez sélectionner
une unité pour lire le texte à l’écran. Lorsque vous utilisez cette fonction tout en saisissant du
texte, des menus contextuels, comme le menu de commande du curseur, sont disponibles.
Maintenez le doigt appuyé sur l’écran pour ouvrir le menu contextuel circulaire. Ensuite,
parcourez les menus en traçant un cercle du doigt sans le relâcher. Une fois que vous avez
trouvé le menu que vous cherchez, relâchez le doigt du menu pour le sélectionner.
• Lire à partir du haut de la page : l’appareil énonce les éléments du premier au dernier.
• Lire à partir de l’élément suivant : l’appareil énonce les éléments à partir de l’élément figurant
après l’élément sélectionné.
Accessibilité
112
Modifier les unités de lecture
Lorsque vous utilisez TalkBack, vous pouvez écouter le texte affiché à l’écran. Vous pouvez faire
glisser le doigt vers le haut, le bas, la gauche ou la droite afin de sélectionner le texte souhaité.
Par défaut, l’appareil énonce le texte figurant dans la zone sélectionnée. Vous pouvez également
paramétrer l’appareil pour qu’il lise le texte d’autres unités, comme des lignes ou des paragraphes.
Modifier les unités de lecture à l’aide du menu contextuel local
1 Sélectionnez un texte à lire.
2 Faites glisser votre doigt vers le haut, puis vers la droite sans le relâcher pour ouvrir le menu
contextuel local.
3 Maintenez le doigt appuyé sur l’écran, puis tracez un cercle du doigt pour parcourir les menus.
Relâchez ensuite le doigt quand vous entendez Modifier le niveau de lecture.
4 Maintenez à nouveau le doigt appuyé sur l’écran, puis tracez un cercle du doigt pour parcourir
les menus. Relâchez ensuite le doigt quand vous entendez l’unité de lecture souhaitée.
Pour modifier le geste de raccourci permettant d’ouvrir le menu contextuel local, reportez-vous à la
section Configurer les paramètres des gestes de raccourci.
Modifier les unités de lecture à l’aide de gestes verticaux décomposés
Lorsque vous faites glisser le doigt vers le haut, puis vers le bas de l’écran, l’unité de lecture change.
L’unité de lecture passe à la page, au paragraphe, à la ligne, au mot, au caractère, puis à une unité
par défaut. Lorsque vous faites glisser votre doigt vers le bas, puis vers le haut de l’écran, l’ordre des
unités de lecture est inversé.
Depuis la liste des applications, appuyez sur Paramètres → Accessibilité → TalkBack →
Paramètres → Gérer les gestes → Gestes verticaux en deux parties → Sélection du niveau de
précision pour la lecture.
Vous pouvez écouter le texte à la suite du texte actuellement sélectionné grâce à l’unité de lecture
en cours. Pour écouter le texte de la prochaine unité de lecture, faites glisser le doigt vers le bas
ou vers la droite de l’écran. Vous pouvez également écouter le texte avant le texte actuellement
sélectionné grâce à l’unité de lecture en cours. Pour écouter le texte de la précédente unité de
lecture, faites glisser le doigt vers le haut ou vers la gauche de l’écran.
Accessibilité
113
Mettre TalkBack en pause
Ouvrez le menu contextuel général en faisant glisser le doigt vers le bas, puis vers la droite de l’écran
sans le relâcher. Lorsque vous sélectionnez Mettre en pause les retours au coin supérieur gauche de
l’écran, TalkBack est mis en pause.
Lorsque TalkBack est mis en pause, vous pouvez le réactiver en allumant l’écran ou par d’autres
méthodes. Pour modifier la méthode de réactivation de TalkBack, ouvrez la liste des applications,
puis appuyez sur Paramètres → Accessibilité → TalkBack → Paramètres → Réactiver.
Sélectionnez ensuite une option.
Pour modifier le geste de raccourci permettant d’ouvrir le menu contextuel général, reportez-vous à
la section Configurer les paramètres des gestes de raccourci.
Utiliser la fonction de navigation rapide
Avec la fonction de navigation rapide, vous pouvez accéder à des menus en traçant un cercle à
l’écran sans faire défiler l’écran vers le haut ou vers le bas pour sélectionner un élément.
Ouvrez le menu contextuel général en faisant glisser le doigt vers le bas, puis vers la droite de l’écran
sans le relâcher. Maintenez le doigt appuyé sur l’écran, puis tracez un cercle du doigt autour du
menu pour parcourir les menus. Relâchez ensuite le doigt quand vous entendez Navigation rapide.
Appuyez à nouveau sur l’écran, puis tracez un cercle du doigt autour du menu pour parcourir les
menus. Relâchez ensuite le doigt quand vous entendez le menu souhaité.
Ajouter et gérer des libellés d’image
Vous pouvez assigner des libellés aux images à l’écran. L’appareil énonce les libellés lorsque les
éléments sont sélectionnés. Ajoutez des libellés aux images sans libellé à l’aide du menu contextuel
local.
Ouvrez le menu contextuel local en faisant glisser le doigt vers le haut, puis vers la droite de l’écran
sans le relâcher. Maintenez le doigt appuyé sur l’écran, puis tracez un cercle du doigt autour du menu
pour parcourir les menus. Lorsque vous entendez le nom du menu d’ajout de libellé, relâchez le
doigt pour ajouter des libellés.
Pour afficher les libellés, depuis la liste des applications, appuyez sur Paramètres → Accessibilité →
TalkBack → Paramètres → Gérer les libellés personnalisés.
Accessibilité
114
Configurer les paramètres de TalkBack
Configurez les paramètres de TalkBack selon vos préférences.
Depuis la liste des applications, appuyez sur Paramètres → Accessibilité → TalkBack →
Paramètres. Vous pouvez également ouvrir le menu contextuel général en faisant glisser votre doigt
vers le bas, puis vers la droite de l’écran sans le relâcher. Ensuite, faites glisser votre doigt vers le coin
supérieur droit de l’écran et relâchez-le lorsque vous entendez Paramètres TalkBack.
• Volume de la voix : réglez le volume des informations orales.
Le volume des informations orales peut varier en fonction du volume du média. Pour régler le
volume du média, appuyez sur la touche de volume haut/bas tout en écoutant des informations
orales. Ou, depuis la liste des applications, appuyez sur Paramètres → Son → Volume, puis
faites glisser la barre de réglage du volume du contenu multimédia vers la gauche ou vers la
droite.
• Modification du ton : paramétrez l’appareil pour qu’il énonce le texte saisi à l’aide du clavier à
basse tonalité.
• Écho du clavier : paramétrer l’appareil pour qu’il lise à haute voix le texte saisi lorsque vous
appuyez sur la touche espace.
• Parler quand l’écran est éteint : paramétrez l’appareil pour qu’il fournisse des informations
orales lorsque l’écran est éteint.
• Secouer pour démarrer la lecture continue : paramétrez l’appareil pour qu’il énonce le texte
affiché à l’écran lorsque vous secouez l’appareil. Vous pouvez sélectionner différentes options de
vitesses de secousses.
• Dire le n° de l’appelant : paramétrez l’appareil pour qu’il lise à haute voix le nom de l’appelant
lors d’un appel entrant.
• Vibration : paramétrez l’appareil pour qu’il vibre lorsque vous parcourez l’écran du doigt.
• Retour audio : paramétrez l’appareil pour qu’il émette un son lorsque vous commandez l’écran,
comme lorsque vous le parcourez, etc.
• Privilégier le volume de la voix : paramétrez l’appareil pour qu’il baisse le volume du média
lorsqu’il lit un élément à haute voix.
• Volume sonore : réglez le volume du son émis lorsque vous appuyez sur l’écran pour le
contrôler. Cette fonction est disponible lorsque Retour audio est sélectionné.
Accessibilité
115
• Explorer au toucher : paramétrez l’appareil pour qu’il lise à haute voix les éléments sur lesquels
vous appuyez du doigt. Déplacez le doigt sur l’écran pour trouver l’élément souhaité. Lorsque
le nom de l’élément recherché est prononcé, relâchez le doigt et appuyez rapidement à deux
reprises à n’importe quel endroit de l’écran pour l’ouvrir. Vous pouvez aller à la page de votre
choix en faisant défiler l’écran vers la gauche ou la droite avec deux doigts. Pour savoir comment
commander l’écran à l’aide de la fonction de navigation tactile, reportez-vous à la section
Commander l’écran à l’aide de gestes des doigts.
• Faire défiler les listes automatiquement : paramétrez l’appareil pour qu’il parcoure
automatiquement la partie de la liste non affichée à l’écran et qu’il énonce les éléments.
• Appuyer une fois pour sélectionner : paramétrez l’appareil pour qu’il ouvre l’élément
sélectionné lorsque vous appuyez une fois dessus.
• Lancer le didacticiel "Explorer au toucher" : affichez le didacticiel sur l’utilisation de la fonction
Navigation tactile.
• Gérer les gestes : assignez les opérations à effectuer à l’aide des gestes des doigts. Pour en
savoir plus, reportez-vous à la section Configurer les paramètres des gestes des doigts.
• Gérer les libellés personnalisés : affichez les libellés que vous avez ajoutés.
• Réactiver : sélectionnez une méthode de reprise des informations orales.
• Paramètres du développeur : paramétrez les options de développement d’applications.
Lire des mots de passe à haute voix
Paramétrez l’appareil pour qu’il lise le mot de passe à haute voix lorsque vous saisissez le mot de
passe lorsque TalkBack est activé. Utilisez cette fonction pour vous assurer que vous saisissez le mot
de passe correct.
Depuis la liste des applications, appuyez sur Paramètres → Accessibilité, puis cochez la case
Énoncer mots de passe.
Accessibilité
116
Paramétrer les fonctions de diction de la synthèse vocale
Modifiez les paramètres de diction de la synthèse vocale utilisés lorsque TalkBack est activé, comme
les langues, la vitesse, etc.
Depuis la liste des applications, appuyez sur Paramètres → Accessibilité → Options synthèse
vocale, puis utilisez les fonctions suivantes :
• MOTEUR TTS FAVORI : sélectionnez un moteur de synthèse vocale.
• Vitesse d’élocution : sélectionnez la vitesse de diction de la synthèse vocale.
• Écouter un exemple : écoutez un exemple de texte parlé. Si l’appareil ne parvient pas à lire des
exemples à haute voix, appuyez sur → Installer les données vocales pour télécharger et
installer les données vocales de la fonction de diction de la synthèse vocale.
• État langue par défaut : affichez le statut de la langue actuelle choisie pour la fonction de
synthèse vocale.
Saisir du texte à l’aide du clavier
Pour afficher le clavier, appuyez sur le champ de saisie de texte, puis appuyez à deux reprises
rapprochées n’importe où sur l’écran.
Lorsque vous appuyez du doigt sur le clavier, l’appareil lit à haute voix les touches de caractères sous
votre doigt. Lorsque vous entendez le caractère que vous recherchez, relâchez le doigt de l’écran
pour le sélectionner. Le caractère est saisi et l’appareil lit le texte à haute voix.
Saisir des caractères supplémentaires
Maintenez le doigt appuyé sur une touche du clavier. Si des caractères supplémentaires sont
disponibles via la touche, une fenêtre contextuelle apparaît au-dessus du clavier, affichant les
caractères. Pour sélectionner un caractère, faites glisser le doigt sur l’écran jusqu’à ce que vous
entendiez le nom du caractère souhaité, puis relâchez le doigt.
Accessibilité
117
Modifier la langue de saisie
Pour ajouter des langues de saisie, depuis la liste des applications, appuyez sur Paramètres →
Langue et saisie. Appuyez ensuite sur près de l’option Clavier Samsung → Sélectionner langue
de saisie, puis sélectionnez les langues à utiliser.
Pour modifier la langue de saisie, appuyez sur .
Modifier du texte
Utilisez le menu contextuel local pour déplacer le curseur ou copier et coller du texte.
Ouvrez le menu contextuel local en faisant glisser le doigt vers le haut, puis vers la droite de l’écran
sans le relâcher. Maintenez le doigt appuyé sur l’écran, puis tracez un cercle du doigt autour du
menu pour parcourir le menu. Relâchez ensuite le doigt quand vous entendez Modifier le niveau
de lecture. Appuyez à nouveau sur l’écran, puis tracez un cercle autour du menu pour parcourir les
menus. Relâchez ensuite le doigt quand vous entendez l’unité de lecture souhaitée.
Lorsque vous modifiez du texte, pour plus de facilité, définissez l’unité de lecture sur mot ou
caractère. En mode sélection, l’appareil sélectionne le texte en fonction de l’unité de lecture
sélectionnée.
Faites glisser le doigt vers le haut, vers le bas, vers la gauche ou vers la droite pour écouter le texte.
Lorsque le texte que vous souhaitez modifier est lu à haute voix, effectuez les opérations suivantes :
• Supprimer le texte : appuyez sur la touche Supprimer du clavier.
• Sélectionner le texte à l’aide du mode sélection : activez le mode sélection pour sélectionner
et écouter le texte. Pour activer le mode sélection, ouvrez le menu contextuel local, puis
sélectionnez Contrôle du curseur → Commencer la sélection. Faites défiler l’écran vers
la gauche ou vers la droite pour écouter le texte avant ou après le texte sélectionné. Pour
désactiver le mode sélection, ouvrez le menu contextuel local, puis sélectionnez Contrôle du
curseur → Terminer la sélection.
• Sélectionner le texte tout entier : ouvrez le menu contextuel local, puis sélectionnez Contrôle
du curseur → Tout sélectionner. L’ensemble du texte du document est sélectionné.
• Copier ou couper du texte : sélectionnez le texte à l’aide du menu contextuel local. Ensuite,
ouvrez le menu contextuel local, puis sélectionnez Contrôle du curseur. Sélectionnez
Copier pour copier le texte sélectionné, ou Couper pour couper le texte sélectionné. Le texte
sélectionné est copié dans le presse-papier.
• Coller le texte : placez le curseur à l’endroit où le texte doit être inséré, ouvrez le menu
contextuel local, puis sélectionnez Contrôle du curseur → Coller.
Accessibilité
118
Modifier la taille de police
Utilisez cette fonction pour modifier la taille de police. Pour faciliter l’utilisation pour les malvoyants,
l’appareil propose différentes tailles de police. Il se peut que, dans certaines applications, il ne soit
pas possible de régler la taille de la police sur Enorme.
Depuis la liste des applications, appuyez sur Paramètres → Accessibilité → Taille de police.
Grossir l’écran
Utilisez cette fonction pour grossir l’écran et effectuer un zoom avant sur une zone spécifique.
Depuis la liste des applications, appuyez sur Paramètres → Accessibilité → Gestes
d’agrandissement, puis faites glisser le curseur Gestes d’agrandissement vers la droite pour activer
la fonction.
• Effectuer un zoom avant et arrière : appuyez à trois reprises rapprochées sur l’écran pour
effectuer un zoom avant sur une zone spécifique. Appuyez de nouveau à trois reprises
rapprochées sur l’écran pour annuler le zoom.
• Parcourir l’écran en le faisant défiler : utilisez deux doigts pour faire défiler l’écran grossi.
• Régler le niveau de zoom : appuyez sur l’écran grossi avec deux doigts. Ensuite, écartez deux
doigts ou rapprochez-les pour régler le niveau de zoom.
• Il n’est pas possible d’agrandir les claviers à l’écran.
• Lorsque cette fonction est activée, les performances de certaines applications, comme
Téléphone et Calculatrice, peuvent en être affectées.
Inverser les couleurs d’affichage
Utilisez cette fonction pour améliorer la visibilité de l’écran et aider les utilisateurs à déchiffrer plus
facilement le texte à l’écran. Lorsque cette fonction est activée, l’appareil affiche une image négative
qui inverse les couleurs à l’écran. L’inversion des couleurs augmente le contraste entre le noir et le
blanc.
Depuis la liste des applications, appuyez sur Paramètres → Accessibilité, puis cochez la case
Couleurs négatives.
Accessibilité
119
Configurer une notification par flash
Configurez le flash pour qu’il clignote lorsque vous recevez des appels entrants, de nouveaux
messages ou des notifications.
Depuis la liste des applications, appuyez sur Paramètres → Accessibilité, puis cochez la case
Notification par flash.
Couper tous les sons
Configurez l’appareil pour qu’il coupe tous les sons, comme les sons multimédia et la voix du
correspondant en cours d’appel.
Depuis la liste des applications, appuyez sur Paramètres → Accessibilité, puis cochez la case
Désactiver tous les sons.
Paramètres des sous-titres
Depuis la liste des applications, appuyez sur Paramètres → Accessibilité → Sous-titres Google
(CC), puis faites glisser le curseur Sous-titres Google (CC) vers la droite pour activer la fonction.
Vous pouvez utiliser les options suivantes :
• Langue : sélectionnez une langue d’affichage.
• Taille du texte : modifiez la taille de police.
• Style des sous-titres : modifiez le style des sous-titres.
Régler la balance audio
Configurez l’appareil pour pouvoir régler la balance audio lorsque vous utilisez un casque ou un
écouteur.
Pour régler la balance audio, connectez un casque ou un écouteur à l’appareil. Depuis la liste des
applications, appuyez sur Paramètres → Accessibilité → Balance audio. Faites glisser la barre de
réglage vers la gauche ou vers la droite pour régler la balance audio, puis appuyez sur Définir.
Accessibilité
120
Audio mono
Paramétrez l’appareil pour qu’il passe de stéréo à mono lorsque vous connectez un casque ou un
écouteur. La sortie mono combine le son stéréo en un seul signal qui est joué dans tous les hautparleurs
des casques ou écouteurs. Utilisez ce mode en cas de troubles auditifs ou si une oreillette
unique est plus pratique.
Depuis la liste des applications, appuyez sur Paramètres → Accessibilité, puis cochez la case Audio
mono.
Configurer la durée de l’appui prolongé
Définissez le délai de reconnaissance lorsque vous maintenez le doigt appuyé sur l’écran.
Depuis la liste des applications, appuyez sur Paramètres → Accessibilité → Durée de l’appui
prolongé, puis sélectionnez une option.
Contrôle par interaction
Activez le mode Contrôle par interaction pour limiter les réactions de l’appareil aux saisies lorsque
vous utilisez des applications. Utilisez ce mode si vous souhaitez limiter l’accès des autres personnes
et commander vos médias ou vos données.
1 Depuis la liste des applications, appuyez sur Paramètres → Accessibilité → Contrôle par
interaction.
2 Faites glisser le curseur Contrôle par interaction vers la droite pour activer la fonction.
3 Maintenez les touches Accueil et Volume bas simultanément enfoncées tout en utilisant une
application.
4 Réglez la taille du cadre ou tracez une ligne autour d’une zone que vous souhaitez limiter.
5 Appuyez sur OK.
L’appareil affiche la zone limitée. Si vous appuyez sur l’écran ou sur des touches, comme la
touche Accueil, l’opération ne fonctionne pas dans cette zone.
Pour désactiver le mode Contrôle par interaction, maintenez les touches Accueil et Volume bas
simultanément enfoncées.
Accessibilité
121
Prendre ou mettre fin à des appels
Modifiez la manière de prendre ou de raccrocher un appel.
Depuis la liste des applications, appuyez sur Paramètres → Accessibilité → Début/Fin d’appel.
Vous pouvez utiliser les options suivantes :
• Touche Accueil pour répondre aux appels : paramétrez l’appareil pour pouvoir répondre aux
appels en appuyant sur la touche Accueil.
• Touche Marche pour terminer les appels : paramétrez l’appareil pour pouvoir mettre fin à un
appel en appuyant sur la touche Marche/Arrêt.
Utiliser le mode à appui unique
Paramétrez l’appareil pour commander les appels entrants ou les notifications en appuyant sur la
touche plutôt qu’en la faisant glisser. En cas d’alarme ou d’appel entrant, appuyez sur la touche pour
arrêter l’alarme ou prendre l’appel au lieu de faire glisser la touche.
Depuis la liste des applications, appuyez sur Paramètres → Accessibilité, puis cochez la case Mode
pression unique.
Afficher des services d’accessibilité
Affichez les services d’accessibilité installés sur l’appareil.
Depuis la liste des applications, appuyez sur Paramètres → Accessibilité, puis affichez la liste des
services d’accessibilité dans SERVICES.
Accessibilité
122
Utiliser d’autres fonctions utiles
• Effectuer une recherche oralement : utilisez les commandes vocales pour rechercher un contenu
de page Web. Utilisez cette fonction lorsque vous vous déplacez et que vous ne pouvez pas vous
servir de vos mains pour saisir du texte.
• Utiliser le volet des raccourcis : faites glisser la barre d’état vers le bas pour ouvrir le volet
des raccourcis. Vous pouvez afficher les appels manqués, les nouveaux messages, régler la
luminosité de l’écran et plus encore. Pour en savoir plus, reportez-vous à la section Volet des
raccourcis.
• Utiliser les raccourcis vers les contacts : ajoutez des raccourcis vers les contacts sur l’écran
d’accueil pour passer plus facilement des appels ou envoyer plus facilement des messages.
Pour en savoir plus, reportez-vous à la section Ajouter des raccourcis vers des contacts à l’écran
d’accueil.
• Utiliser l’enregistreur vocal : enregistrez ou écoutez des mémos vocaux. Pour en savoir plus,
reportez-vous à la section Enregistreur vocal.
123
Dépannage
Avant de contacter un centre de service après-vente Samsung, veuillez essayer de mettre en œuvre
les solutions suivantes. Il est possible que certaines situations ne s’appliquent pas à votre appareil.
Lorsque vous allumez ou utilisez votre appareil, un message vous invite à
effectuer l’une des manipulations suivantes :
• Mot de passe : lorsque la fonction de verrouillage est activée, vous devez saisir le mot de passe
que vous avez défini pour l’appareil.
• Code PIN : lorsque vous utilisez l’appareil pour la première fois ou lorsque vous avez activé le
verrouillage de votre appareil par code PIN, vous devez saisir le code PIN fourni avec la carte SIM
ou USIM. Vous pouvez désactiver cette fonction à l’aide du menu de verrouillage de la carte SIM.
• Code PUK : si vous saisissez un code PIN incorrect à plusieurs reprises, la carte SIM ou USIM est
bloquée. Vous devez alors saisir le code PUK fourni par votre opérateur.
• Code PIN2 : lorsque vous accédez à un menu nécessitant le code PIN2, vous devez saisir le code
PIN2 fourni avec la carte SIM ou USIM. Pour en savoir plus, contactez votre opérateur.
Votre appareil affiche des messages d’erreur de réseau et de service
• Lorsque vous vous trouvez dans une zone de mauvaise réception, vous risquez de perdre
la connexion au réseau. Déplacez-vous et réessayez. Lorsque vous vous déplacez, plusieurs
messages d’erreur peuvent apparaître.
• Certaines options ne sont pas accessibles sans abonnement. Pour en savoir plus, contactez votre
opérateur.
Votre appareil ne s’allume pas
• Lorsque la batterie est entièrement déchargée, il n’est pas possible d’allumer l’appareil. Procédez
au chargement complet de la batterie avant d’allumer l’appareil.
• Si la batterie peut être remplacée par l’utilisateur, il est possible qu’elle n’ait pas été correctement
insérée. Réinsérez la batterie.
• Si la batterie peut être remplacée par l’utilisateur, essuyez les deux contacts dorés et réinsérez-la.
Dépannage
124
Mauvaise réaction ou lenteur de l’écran tactile
• Si vous fixez sur l’écran tactile un cache de protection ou tout autre accessoire en option, il est
possible que l’écran tactile ne fonctionne pas correctement.
• Si vous portez des gants, si vos mains ne sont pas parfaitement propres, ou si vous appuyez
sur l’écran avec un objet pointu ou vos ongles, l’écran tactile risque de présenter des
dysfonctionnements.
• L’humidité ou le contact avec l’eau peut provoquer des dysfonctionnements de l’écran tactile.
• Redémarrez votre appareil afin de mettre fin à d’éventuels dysfonctionnements logiciels
temporaires.
• Assurez-vous que vous disposez bien de la dernière version logicielle de votre appareil.
• Si l’écran tactile est endommagé ou rayé, contactez un centre de service après-vente Samsung.
Votre appareil se bloque ou est sujet à des erreurs fatales
Si votre appareil ne répond plus ou se bloque, vous devrez éventuellement fermer les applications,
ou éteindre l’appareil et le rallumer. Si votre appareil se bloque et ne répond plus, maintenez
simultanément la touche Marche/Arrêt et la touche de volume enfoncées pendant plus de
7 secondes afin de redémarrer.
Si vous ne parvenez pas à résoudre le problème à la suite de ces manipulations, procédez à la
réinitialisation des paramètres par défaut. Depuis la liste des applications, appuyez sur Paramètres
→ Sauvegarder et réinitialiser → Rétablir param. par défaut → Réinitialiser le périphérique
→ Supprimer tout. Avant de rétablir les paramètres par défaut de votre appareil, n’oubliez pas
d’effectuer des copies de sauvegarde de toutes les données importantes qui y sont stockées.
Si le problème persiste, contactez un centre de service après-vente Samsung.
Impossible de passer des appels
• Assurez-vous d’être connecté au réseau cellulaire approprié.
• Vérifiez que vous n’avez pas activé la fonction de restriction d’appel pour le numéro de
téléphone que vous composez.
• Vérifiez que vous n’avez pas activé la fonction de restriction d’appel pour le numéro de
téléphone de l’appel entrant.
Vos interlocuteurs ne vous entendent pas
• Vérifiez que le microphone intégré n’est pas recouvert.
• Vérifiez que le microphone est placé suffisamment près de votre bouche.
• Si vous utilisez un casque ou des écouteurs, vérifiez qu’il est correctement branché.
Dépannage
125
Vous percevez un écho lors des appels
Réglez le volume en appuyant sur la touche de volume ou déplacez-vous.
Déconnexions fréquentes du réseau cellulaire ou d’Internet, ou mauvaise
qualité audio
• Assurez-vous que rien n’entrave l’antenne intégrée à l’appareil.
• Lorsque vous vous trouvez dans une zone de mauvaise réception, vous risquez de perdre la
connexion au réseau. Vos problèmes de connectivité peuvent être dus à une panne au niveau
de votre opérateur. Déplacez-vous et réessayez.
• Si vous utilisez votre appareil tout en vous déplaçant, il est possible que les services de réseau
sans fil soient désactivés en raison de problèmes sur le réseau de votre opérateur.
L’icône de la batterie est vide
Le niveau de charge de la batterie est faible. Chargez la batterie ou remplacez-la s’il s’agit d’une
batterie remplaçable par l’utilisateur.
La batterie ne se charge pas correctement (pour les chargeurs
homologués Samsung)
• Assurez-vous que le chargeur est correctement branché.
• Si les bornes de la batterie sont sales, la batterie peut ne pas se recharger correctement ou
l’appareil risque de s’éteindre. Essuyez les deux contacts dorés et réessayez de recharger la
batterie.
• Sur certains appareils, la batterie ne peut pas être remplacée par l’utilisateur. Pour remplacer ce
type de batterie, contactez un centre de service après-vente Samsung.
La batterie se décharge de plus en plus rapidement
• Lorsque la batterie est exposée à des températures extrêmes, la charge utile peut être réduite.
• La consommation de la batterie augmente lorsque vous utilisez certaines fonctions, comme les
SMS et MMS, ou certaines applications, comme les jeux ou Internet.
• La batterie est un consommable dont la charge utile diminue avec le temps.
Dépannage
126
L’appareil est chaud au toucher
Lorsque vous utilisez plusieurs applications simultanément ou sur une période prolongée, l’appareil
peut chauffer. Ce phénomène est normal et n’affecte ni la durée de vie, ni les performances de
l’appareil.
Messages d’erreur à l’ouverture de l’appareil photo
Pour utiliser l’appareil photo, votre appareil doit disposer de suffisamment de mémoire et sa batterie
être suffisamment chargée. Si vous obtenez des messages d’erreur lors de l’ouverture de l’appareil
photo, tentez les manipulations suivantes :
• Chargez la batterie ou remplacez-la s’il s’agit d’une batterie remplaçable par l’utilisateur.
• Libérez de la mémoire en transférant des fichiers sur un ordinateur ou en supprimant des
éléments de l’appareil.
• Redémarrez l’appareil. Si les problèmes persistent avec l’appareil photo, contactez un centre de
service après-vente Samsung.
Qualité des photos inférieure par rapport à l’aperçu
• La qualité de vos photos peut varier selon l’environnement et les techniques photographiques
utilisées.
• Si vous prenez des photos avec une luminosité insuffisante, de nuit ou en intérieur, l’image
risque d’être floue.
Messages d’erreur à l’ouverture de fichiers multimédia
Si vous obtenez des messages d’erreur ou si vous ne parvenez pas à lire les fichiers multimédia
lorsque vous les ouvrez sur votre appareil, tentez les manipulations suivantes :
• Libérez de la mémoire en transférant des fichiers sur un ordinateur ou en supprimant des
éléments de l’appareil.
• Assurez-vous que le fichier audio n’est pas protégé par des droits DRM (Gestion des droits
d’auteur). Si le fichier est protégé par des droits DRM, vous devez posséder une licence ou une
clé pour pouvoir le lire.
• Assurez-vous que les formats de fichiers sont pris en charge par l’appareil. Si un format de
fichier n’est pas pris en charge, tel que DivX ou AC3, installez une application le prenant en
charge. Pour confirmer les formats de fichier compatibles avec votre appareil, connectez-vous à
www.samsung.com.
Dépannage
127
• Votre appareil est compatible avec les photos et vidéos capturées avec ce même appareil. Les
photos et vidéos capturées avec d’autres appareils peuvent ne pas s’afficher correctement.
• Votre appareil prend en charge les fichiers multimédia autorisés par votre opérateur ainsi que
les opérateurs, des autres services réseaux. Il est possible que certains contenus circulant sur
Internet, comme des sonneries, vidéos ou fonds d’écran, ne fonctionnent pas correctement.
Impossible de localiser un autre appareil Bluetooth
• Vérifiez que la fonction sans fil Bluetooth est activée sur votre appareil.
• Vérifiez que la fonction sans fil Bluetooth est également activée sur l’appareil auquel vous tentez
de vous connecter.
• Vérifiez que les deux appareils Bluetooth se trouvent bien à l’intérieur du rayon d’action
Bluetooth (10 m maximum).
Si les conseils ci-dessus ne résolvent pas le problème, contactez un centre de service après-vente
Samsung.
Problème de connexion avec un ordinateur
• Assurez-vous que le câble USB utilisé est compatible avec votre appareil.
• Vérifiez que le pilote nécessaire est bien installé sur votre ordinateur et qu’il est à jour.
• Si vous utilisez Windows XP, vérifiez que votre ordinateur est équipé de Windows XP Service
Pack 3 ou de toute version ultérieure.
• Vérifiez que Samsung Kies ou Windows Media Player 10 (ou toute version ultérieure) est installé
sur votre ordinateur.
Votre appareil ne parvient pas à détecter votre position
À certains endroits, comme à l’intérieur d’un bâtiment, les signaux GPS peuvent être faibles. Si cela se
produit, configurez votre appareil pour l’utilisation d’un réseau Wi-Fi ou mobile afin de trouver votre
position.
Dépannage
128
Les données stockées sur l’appareil ont été perdues
Effectuez toujours des copies des données importantes stockées sur votre appareil. Dans le cas
contraire, vous ne pourriez pas récupérer vos données corrompues ou perdues. Samsung ne peut
être tenu responsable de la perte des données stockées sur votre appareil.
Un petit espace est apparu sur le bord externe du boîtier de l’appareil
• Cet espace est une caractéristique de fabrication, et il est possible d’observer un jeu ou une
vibration des pièces.
• Au fil du temps, la friction entre les pièces peut entraîner l’élargissement de cet espace.
Droits d’auteur
Copyright © 2014 Samsung Electronics
Ce mode d’emploi est protégé par les lois internationales sur les droits d’auteur.
Il est interdit de reproduire, distribuer, traduire ou transmettre sous quelque forme et par quelque
moyen que ce soit, électronique ou mécanique, notamment par photocopie, enregistrement
ou stockage dans un système de stockage et de recherche documentaire, tout ou partie de ce
document, sans le consentement préalable écrit de Samsung Electronics.
Marques
• SAMSUNG et le logo SAMSUNG sont des marques déposées de Samsung Electronics.
• Bluetooth® est une marque déposée de Bluetooth SIG, Inc.
• Wi-Fi®, Wi-Fi Protected Setup™, Wi-Fi Direct™, Wi-Fi CERTIFIED™ et le logo Wi-Fi sont des
marques déposées de Wi-Fi Alliance.
• Toutes les autres marques et droits d’auteur demeurent la propriété de leurs propriétaires
respectifs.
www.samsung.com
Mode d’emploi
SM-T530
2
À propos de ce mode d’emploi
Cet appareil vous permet de communiquer et d’accéder à des divertissements de haute qualité,
basés sur les critères de qualité et la technologie de Samsung. Ce mode d’emploi a été spécialement
conçu pour vous permettre de découvrir les fonctions et les caractéristiques de votre appareil.
• Veuillez lire attentivement ce mode d’emploi, afin de pouvoir utiliser votre appareil
correctement et en toute sécurité.
• Les descriptions sont basées sur les paramètres par défaut de votre appareil.
• Les images et les captures d’écran peuvent différer par rapport à l’aspect réel du produit.
• Le contenu de ce mode d’emploi peut différer par rapport au produit ou à votre version
logicielle, et faire l’objet de modifications sans préavis. Pour obtenir la version la plus récente de
ce mode d’emploi, connectez-vous sur le site Web de Samsung : www.samsung.com.
• Les contenus de qualité élevée nécessitant une forte utilisation du processeur et de la RAM
peuvent avoir une incidence sur les performances générales de l’appareil. Les applications en
rapport avec ces contenus peuvent ne pas fonctionner correctement selon les caractéristiques
de l’appareil et les conditions d’utilisation.
• Les fonctions disponibles et les services supplémentaires peuvent varier selon l’appareil, votre
version logicielle ou votre opérateur.
• Les applications et leurs fonctions peuvent varier en fonction de votre zone géographique ou
des caractéristiques du matériel. Samsung ne peut être tenu responsable des problèmes de
performance relatifs aux applications fournies par des éditeurs de logiciels autres que Samsung.
• Samsung ne peut être tenu responsable des problèmes de performance ou des incompatibilités
découlant de la modification des paramètres de registre par l’utilisateur. Toute tentative de
personnalisation du système d’exploitation peut entraîner des problèmes de fonctionnement de
l’appareil ou de ses applications.
• Les logiciels, sons, fonds d’écran, images ainsi que les autres contenus multimédia fourni(e)s
avec cet appareil sont concédé(e)s sous licence et leur usage est soumis à une utilisation limitée.
L’extraction et l’utilisation de ces éléments à des fins commerciales ou autres constituent
une infraction au regard des lois sur les droits d’auteur. Les utilisateurs sont entièrement
responsables de toute utilisation illégale d’un contenu multimédia.
À propos de ce mode d’emploi
3
• Les applications fournies par défaut avec l’appareil peuvent être modifiées ou ne plus être
disponibles, et ce, sans préavis. Si vous avez des questions à propos d’une application fournie
avec l’appareil, contactez un centre de service après-vente Samsung. Pour les applications
installées par l’utilisateur, contactez les opérateurs.
• Toute modification du système d’exploitation de l’appareil ou installation de logiciels non
officiels peut entraîner des dysfonctionnements et corrompre vos données. Ces actions
constituent des violations de l’accord de licence Samsung et annuleront votre garantie.
Icônes
Avertissement : situations susceptibles de vous blesser ou de blesser autrui.
Attention : situations susceptibles d’endommager votre appareil ou d’autres équipements.
Remarque : remarques, conseils d’utilisation ou informations complémentaires.
Droits d’auteur
Copyright © 2014 Samsung Electronics
Ce mode d’emploi est protégé par les lois internationales sur les droits d’auteur.
Il est interdit de reproduire, distribuer, traduire ou transmettre sous quelque forme et par quelque
moyen que ce soit, électronique ou mécanique, notamment par photocopie, enregistrement
ou stockage dans un système de stockage et de recherche documentaire, tout ou partie de ce
document, sans le consentement préalable écrit de Samsung Electronics.
À propos de ce mode d’emploi
4
Marques
• SAMSUNG et le logo SAMSUNG sont des marques déposées de Samsung Electronics.
• Bluetooth® est une marque déposée de Bluetooth SIG, Inc.
• Wi-Fi®, Wi-Fi Protected Setup™, Wi-Fi Direct™, Wi-Fi CERTIFIED™ et le logo Wi-Fi sont des
marques déposées de Wi-Fi Alliance.
• Toutes les autres marques et droits d’auteur demeurent la propriété de leurs propriétaires
respectifs.
5
Table des matières
Démarrage
7 Présentation de l’appareil
8 Touches
9 Contenu du coffret
10 Charger la batterie
12 Insérer une carte mémoire
14 Allumer et éteindre l’appareil
15 Manipuler l’appareil
15 Verrouiller et déverrouiller l’appareil
15 Régler le volume
15 Activer le profil Discret
Fonctions de base
16 Icônes d’informations
17 Utiliser l’écran tactile
20 Pivoter l’écran
21 Mouvements de la main
22 Utiliser le mode Multi-fenêtres
25 Notifications
26 Écran d’accueil
29 Liste des applications
30 Utiliser les applications
31 Aide
31 Saisir du texte
33 Établir une connexion au réseau Wi-Fi
34 Créer un compte
35 Configurer les profils utilisateurs
35 Transférer des fichiers
37 Protéger l’appareil
38 Mettre l’appareil à jour
Communication
39 Contacts
43 Email
45 Google Mail
46 Hangouts
46 Google+
47 Google+ Photos
Web et réseau
48 Internet
50 Chrome
51 Bluetooth
52 Screen Mirroring
Multimédia
53 Musique
55 Appareil photo
60 Galerie
63 Vidéo
64 YouTube
Table des matières
6
Paramètres
83 Accéder au menu des paramètres
83 Connexions
86 Appareil
90 Commandes
94 Général
97 Paramètres Google
Dépannage
Boutiques d’applications et
multimédia
65 Play Store
66 Samsung Apps
66 Play Livres
67 Play Films
67 Play Musique
67 Play Jeux
67 Play Kiosque
Utilitaires
68 Mémo
69 S Planner
71 Dropbox
71 Cloud
72 Google Drive
72 Hancom Viewer
75 Alarme
76 Horloge mondiale
77 Calculatrice
77 S Voice
78 Recherche Google
79 Recherche vocale
79 Mes fichiers
Géolocalisation
82 Maps
7
Démarrage
Présentation de l’appareil
Touche Applications
récentes
Touche Accueil
Écran tactile
Touche de volume
Touche Marche/Arrêt
Touche Retour
Objectif avant
Haut-parleur
Objectif arrière
Microphone
Connecteur à
fonctions multiples
Prise audio 3,5 mm
Antenne GPS
Compartiment pour
carte mémoire
Haut-parleur
Démarrage
8
• Ne recouvrez pas la zone autour de l’antenne avec vos mains ou tout autre objet. Cela
peut entraîner des problèmes de connectivité ou décharger la batterie.
• L’utilisation d’une protection d’écran agréée Samsung est recommandée. Les protections
d’écran non agréées peuvent provoquer un dysfonctionnement des capteurs.
• Évitez de mettre l’écran tactile en contact avec de l’eau. L’humidité ou le contact avec l’eau
peut provoquer des dysfonctionnements de l’écran tactile.
Touches
Touche Fonction
Marche/Arrêt
• Maintenir cette touche enfoncée pour allumer ou éteindre
l’appareil.
• Maintenir cette touche enfoncée pendant 7 secondes pour
réinitialiser l’appareil en cas d’erreur fatale, ou s’il ne répond plus
ou se bloque.
• Appuyer sur cette touche pour verrouiller ou déverrouiller
l’appareil. Lorsque l’écran tactile s’éteint, l’appareil passe en mode
Verrouillage.
Applications
récentes
• Appuyer sur cette touche pour ouvrir la liste des applications
récentes.
Accueil
• Appuyer sur cette touche pour revenir à l’écran d’accueil.
• Depuis l’écran d’accueil, maintenir cette touche enfoncée pour
lancer l’application de recherche Google.
Retour • Appuyer sur cette touche pour revenir à l’écran précédent.
Volume • Appuyer sur cette touche pour régler le volume de l’appareil.
Démarrage
9
Contenu du coffret
Vérifiez le contenu du coffret et assurez-vous que tous les éléments suivants sont présents :
• Appareil
• Guide de prise en main rapide
• Les éléments fournis avec l’appareil et les accessoires disponibles peuvent varier en
fonction de votre zone géographique ou de votre opérateur.
• Les accessoires fournis ont été spécialement conçus pour votre appareil et peuvent ne
pas fonctionner avec d’autres appareils.
• L’aspect et les caractéristiques du produit peuvent faire l’objet de modifications sans
préavis.
• Vous pouvez acheter d’autres accessoires auprès de votre revendeur Samsung. Avant
tout achat, assurez-vous qu’ils sont compatibles avec votre appareil.
• Certains accessoires, autres que ceux fournis, peuvent ne pas être compatibles avec votre
appareil.
• Utilisez exclusivement des accessoires homologués par Samsung. Les
dysfonctionnements résultant d’une utilisation d’accessoires non homologués ne sont
pas couverts par le service de garantie.
• La disponibilité de l’ensemble des accessoires dépend entièrement des fabricants. Pour
plus d’informations sur la disponibilité des accessoires, consultez le site Web Samsung.
Démarrage
10
Charger la batterie
Vous devez charger la batterie avant d’utiliser l’appareil pour la première fois.
Utilisez uniquement des chargeurs, des batteries et des câbles homologués par Samsung.
L’utilisation de chargeurs ou de câbles non homologués peut provoquer l’éclatement de la
batterie ou endommager l’appareil.
• Lorsque le niveau de charge est faible, l’icône de la batterie est vide.
• Si la batterie est complètement déchargée, vous ne pouvez pas allumer l’appareil,
même si le chargeur est branché. Rechargez la batterie pendant quelques minutes avant
d’allumer l’appareil.
• Si vous utilisez simultanément plusieurs applications, des applications réseaux ou des
applications qui nécessitent une connexion à un autre appareil, la batterie se déchargera
rapidement. Pour éviter toute déconnexion du réseau ou perte d’alimentation lors
d’un transfert de données, utilisez toujours ces applications lorsque la batterie est
parfaitement chargée.
Charger la batterie avec le chargeur
Branchez le câble USB sur l’adaptateur secteur USB, puis la fiche micro-USB sur le connecteur à
fonctions multiples de l’appareil.
Démarrage
11
Un branchement incorrect du chargeur peut sérieusement endommager l’appareil. Les
dégâts résultant d’une mauvaise utilisation ne sont pas couverts par la garantie.
• L’appareil peut être utilisé en cours de chargement, mais dans ce cas, le chargement
complet de la batterie risque de prendre plus de temps.
• Lorsque l’appareil est en cours de chargement, il est possible que l’écran tactile ne
fonctionne pas en raison de l’instabilité de l’alimentation électrique. Dans ce cas,
débranchez le chargeur de l’appareil.
• Il est possible que l’appareil chauffe lorsqu’il est en cours de chargement. Ce phénomène
est normal et n’affecte ni la durée de vie, ni les performances de l’appareil. Si la
température de la batterie devient trop élevée, le chargement risque de s’interrompre.
• Si l’appareil ne se charge pas correctement, apportez-le, accompagné de son chargeur,
dans un centre de service après-vente Samsung.
Lorsque la batterie est complètement chargée, déconnectez l’appareil du chargeur. Pour ce faire,
débranchez d’abord le chargeur de l’appareil, puis de la prise de courant.
• Pour économiser l’énergie, débranchez le chargeur lorsque vous ne l’utilisez pas. Le
chargeur n’étant pas muni d’un bouton Marche/Arrêt, vous devez le débrancher de la
prise de courant pour couper l’alimentation. L’appareil doit rester à proximité de la prise
en cours de chargement.
• Le socle de prise de courant doit être installé à proximité du matériel et doit être aisément
accessible.
Vérifier la charge de la batterie
Lorsque vous chargez la batterie et que l’appareil est éteint, les icônes suivantes indiquent l’état du
chargement :
Chargement en cours Chargement terminé
Démarrage
12
Réduire la consommation d’énergie de la batterie
Votre appareil est doté d’options destinées à optimiser l’autonomie de votre batterie. En
personnalisant ces options et en désactivant les applications fonctionnant inutilement en arrièreplan,
vous pouvez utiliser l’appareil plus longtemps entre deux chargements :
• Lorsque vous n’utilisez pas l’appareil, désactivez l’écran tactile en appuyant sur la touche
Marche/Arrêt.
• Fermez toutes les applications fonctionnant inutilement en arrière-plan à l’aide du gestionnaire
de tâches.
• Désactivez la fonction Bluetooth.
• Désactivez la fonction Wi-Fi.
• Désactivez les applications de synchronisation automatique.
• Réduisez la durée du rétroéclairage de l’écran.
• Réduisez la luminosité de l’écran.
Insérer une carte mémoire
L’appareil est compatible avec les cartes mémoire d’une capacité allant jusqu’à 64 Go. Selon le
fabricant et le modèle, certaines cartes mémoire peuvent ne pas être compatibles avec votre
appareil.
• Certaines cartes mémoire peuvent ne pas être parfaitement compatibles avec l’appareil.
L’utilisation d’une carte mémoire incompatible peut endommager l’appareil ou la carte
mémoire elle-même et corrompre les données qui y sont stockées.
• Veillez à insérer la carte mémoire du bon côté.
• Seules les structures de fichiers FAT et exFAT sont compatibles avec les cartes mémoire de
l’appareil. Lorsque vous insérez une carte mémoire formatée avec une autre structure de
fichiers, l’appareil vous invite à la reformater.
• Une trop grande fréquence des opérations d’effacement et d’écriture réduit la durée de
vie des cartes mémoire.
• Lorsque vous insérez une carte mémoire dans l’appareil, le répertoire de fichiers de la
carte apparaît dans le dossier SD card du menu Mes fichiers.
Démarrage
13
1 Ouvrez le cache du compartiment de la carte mémoire.
2 Insérez la carte mémoire en orientant la puce vers le bas.
3 Enfoncez la carte mémoire dans son compartiment jusqu’à ce qu’elle se verrouille.
4 Fermez le cache du compartiment de la carte mémoire.
Retirer une carte mémoire
Avant de retirer la carte mémoire, vous devez au préalable la désactiver pour pouvoir la retirer en
toute sécurité. Depuis l’écran d’accueil, appuyez sur → Paramètres → Général → Stockage →
Démonter la carte SD.
1 Ouvrez le cache du compartiment de la carte mémoire.
2 Appuyez avec précaution sur la carte mémoire pour la libérer, puis sortez-la du compartiment.
3 Fermez le cache du compartiment de la carte mémoire.
Ne retirez jamais la carte mémoire lorsque l’appareil y enregistre ou lit des informations.
Cela pourrait entraîner une perte ou une corruption des données, ou endommager la carte
mémoire ou l’appareil. Samsung ne peut être tenu responsable en cas de perte de données
résultant d’une utilisation frauduleuse ou en cas de détérioration d’une carte mémoire.
Démarrage
14
Formater une carte mémoire
Une carte mémoire ayant été formatée sur un ordinateur peut ne pas être compatible avec l’appareil.
Formatez la carte mémoire dans l’appareil.
Depuis l’écran d’accueil, appuyez sur → Paramètres → Général → Stockage → Formater la
carte SD → Formater la carte SD → Supprimer tout.
Avant de formater la carte mémoire, n’oubliez pas d’effectuer des copies de sauvegarde de
toutes les données importantes qui y sont stockées. La garantie du fabricant ne couvre pas
la perte de données résultant des manipulations de l’utilisateur.
Allumer et éteindre l’appareil
Si vous allumez l’appareil pour la première fois, suivez les instructions affichées à l’écran pour
procéder à sa configuration.
Pour allumer l’appareil, maintenez la touche Marche/Arrêt enfoncée pendant quelques secondes.
• Respectez toutes les consignes de sécurité et directives formulées par le personnel
compétent dans les lieux où l’utilisation d’appareils mobiles est interdite, comme par
exemple dans les avions et les hôpitaux.
• Pour désactiver les fonctions de connexion sans fil, c’est-à-dire les fonctions Wi-Fi et
Bluetooth, maintenez la touche Marche/Arrêt enfoncée et appuyez sur Mode Hors-ligne.
Pour éteindre l’appareil, maintenez la touche Marche/Arrêt enfoncée, puis appuyez sur Éteindre.
Démarrage
15
Manipuler l’appareil
Ne recouvrez pas la zone autour de l’antenne avec vos mains ou tout autre objet. Cela peut entraîner
des problèmes de connectivité ou décharger la batterie.
Verrouiller et déverrouiller l’appareil
Pour empêcher toute opération accidentelle de l’appareil lorsque vous ne l’utilisez pas, vous pouvez
le verrouiller. Lorsque vous appuyez sur la touche Marche/Arrêt, l’écran s’éteint et l’appareil passe en
mode Verrouillage. Il se verrouille également automatiquement si vous ne l’utilisez pas pendant un
certain temps.
Pour déverrouiller l’appareil, appuyez sur la touche Marche/Arrêt ou sur la touche Accueil alors que
l’écran est désactivé, appuyez ensuite sur l’écran, puis faites-y glisser votre doigt.
Régler le volume
Pour régler le volume pour la lecture de la musique ou des vidéos, appuyez sur la touche de
volume Haut ou Bas.
Activer le profil Discret
Utilisez l’une des méthodes suivantes :
• Maintenez la touche de volume Bas enfoncée jusqu’à ce que le profil Discret soit activé.
• Maintenez la touche Marche/Arrêt enfoncée, puis appuyez sur Muet.
• Ouvrez le volet des raccourcis en haut de l’écran, puis appuyez sur Son.
16
Fonctions de base
Icônes d’informations
Les icônes susceptibles de s’afficher en haut de l’écran vous indiquent le statut de l’appareil. Les
icônes répertoriées dans le tableau ci-dessous sont les plus courantes.
Icône Signification
Wi-Fi connecté
Fonction Bluetooth activée
GPS activé
Synchronisation avec le Web
Connecté à un ordinateur
Alarme activée
Profil Discret activé
Mode Hors-ligne activé
Une erreur s’est produite ou votre attention est nécessaire
Niveau de charge de la batterie
Fonctions de base
17
Utiliser l’écran tactile
L’écran tactile réagit uniquement au doigt.
• Évitez tout contact de l’écran tactile avec d’autres appareils électriques. Les décharges
électrostatiques peuvent provoquer des dysfonctionnements de l’écran tactile.
• Pour éviter d’endommager l’écran tactile, n’appuyez pas dessus avec un objet pointu et
n’exercez aucune pression excessive avec vos doigts.
• Il se peut que l'appareil ne reconnaisse pas la saisie tactile près des bords de l'écran, hors
de la zone de saisie dédiée.
• Si l’écran tactile reste inactif pendant une période prolongée, des images rémanentes
risquent d’apparaître (ou persistance de l’affichage). Éteignez l’écran tactile lorsque vous
n’utilisez pas l’appareil.
Mouvements
Appuyer
Pour ouvrir une application, sélectionner un élément de menu, activer une commande ou saisir un
caractère sur le clavier, appuyez sur l’écran tactile avec un seul doigt.
Fonctions de base
18
Maintenir appuyé
Pour ouvrir une fenêtre d’options contextuelle, maintenez le doigt appuyé sur un élément pendant
plus de 2 secondes.
Faire glisser
Pour déplacer un élément vers un nouvel emplacement, maintenez le doigt appuyé sur l’élément et
faites-le glisser sur l’écran.
Fonctions de base
19
Appuyer deux fois
Pour effectuer un zoom sur une page Web ou une image, appuyez deux fois sur l’écran. Appuyez à
nouveau à deux reprises pour annuler le zoom.
Effleurer
Pour passer d’une fenêtre à l’autre, faites glisser votre doigt vers la gauche ou la droite sur l’écran
d’accueil ou dans la liste des applications. Pour parcourir une page Web ou une liste, telle que celle
de vos contacts, faites glisser votre doigt vers le haut ou le bas de l’écran.
Fonctions de base
20
Pincer
Pour effectuer un zoom avant sur une page Web, une carte ou une image, placez deux doigts sur
l’écran et écartez-les. Rapprochez-les pour effectuer un zoom arrière.
Pivoter l’écran
De nombreuses applications autorisent l’affichage en mode Portrait ou Paysage. Lorsque vous faites
pivoter l’appareil, l’écran s’adapte automatiquement à la nouvelle orientation.
Pour empêcher l’écran de pivoter automatiquement, ouvrez le volet des raccourcis et désélectionnez
l’option Rotation écran.
• Certaines applications ne permettent pas la rotation de l’écran.
• Pour certaines autres applications, l’écran affiché diffère selon l’orientation.
Fonctions de base
21
Mouvements de la main
Utilisez les mouvements de votre main pour contrôler l’appareil par un simple contact avec l’écran
tactile.
Avant toute chose, vérifiez que la reconnaissance des mouvements de main est activée. Depuis
l’écran d’accueil, appuyez sur → Paramètres → Commandes → Mouvement de paume, puis
faites glisser le curseur Mouvement de paume la droite.
Balayer
Balayez l’écran avec le côté de la main pour réaliser une capture d’écran. L’image est enregistrée dans
Galerie → Screenshots. Cette fonction n’est disponible que pour certaines applications.
Recouvrir
Recouvrez l’écran avec la paume de la main pour effectuer une pause lors de la lecture d’un contenu
multimédia.
Fonctions de base
22
Utiliser le mode Multi-fenêtres
Utilisez cette fonction pour exécuter plusieurs applications sur le même écran en même temps.
• Seules les applications définies par défaut dans le volet Multi-fenêtres peuvent être
exécutées.
• La disponibilité de cette fonction dépend de votre zone géographique ou de votre
opérateur.
Pour utiliser la fonction Multi-fenêtres, depuis l’écran d’accueil, appuyez sur → Paramètres →
Appareil → Fenêtres multiples, puis faites glisser le curseur Fenêtres multiples vers la droite.
Utiliser un écran partagé Multi-fenêtres
Utilisez cette fonction pour exécuter des applications sur un écran partagé.
Lancer des applications sur un écran partagé Multi-fenêtres
1 Placez votre doigt sur le côté droit de l'écran et faites-le glisser vers le milieu de l’écran. Vous
pouvez également maintenir le doigt appuyé sur .
Le volet Multi-fenêtres s’affiche sur le côté droit de l’écran.
Volet Multi-fenêtres
Fonctions de base
23
2 Maintenez le doigt appuyé sur l’icône d’une application dans le volet Multi-fenêtres, puis faitesla
glisser vers l’écran.
Relâchez l’icône de l’application lorsque l’écran devient bleu.
3 Maintenez le doigt appuyé sur l’icône d’une autre application dans le volet Multi-fenêtres, puis
faites-la glisser vers un nouvel emplacement.
Fonctions de base
24
Partager du contenu entre applications
Vous pouvez facilement partager du contenu entre des applications comme Email et Internet par un
mouvement de glisser-déposer.
Il est possible que certaines applications ne soient pas compatibles avec cette fonction.
1 Lancez les applications Email et Internet sur un écran partagé Multi-fenêtres.
Accéder aux options
Multi-fenêtres
2 Appuyez sur le cercle situé entre les deux fenêtres d'application, puis appuyez sur .
Appuyez sur le cercle situé entre les deux fenêtres d'application pour accéder aux options
suivantes :
• : passer d’une application Fenêtres multiples à l’autre.
• : partager facilement des éléments comme des images, du texte ou des liens entre les
fenêtres d'application en réalisant un mouvement de glisser-déposer.
• : agrandir la fenêtre.
• : fermer l’application.
Fonctions de base
25
3 Maintenez le doigt appuyé sur un élément dans la fenêtre Internet et faites-le glisser vers un
emplacement dans la fenêtre E-mail.
Notifications
Des icônes de notification peuvent apparaître dans le volet des raccourcis en haut de l’écran afin de
vous signaler les nouveaux messages, les événements à venir, le statut de l’appareil, et plus encore.
Pour ouvrir le volet des raccourcis, faites glisser votre doigt de haut en bas sur le volet. Pour afficher
des notifications supplémentaires, faites défiler la liste vers le bas. Pour fermer le volet, faites-le
glisser de bas en haut.
Vous pouvez afficher tous les paramètres actuels de votre appareil à partir du volet des raccourcis.
Faites glisser le volet des raccourcis vers le bas, puis appuyez sur pour utiliser les options
suivantes :
• Wi-Fi : activer ou désactiver la fonction Wi-Fi.
• Position : activer ou désactiver la fonction GPS.
• Son : activer ou désactiver le profil Discret.
• Rotation écran : autoriser ou empêcher l’interface de pivoter lorsque vous tournez l’appareil.
• Bluetooth : activer ou désactiver la fonction Bluetooth.
Fonctions de base
26
• Fenêtres multiples : activer ou désactiver la fonction Multi-fenêtres.
• Screen Mirroring : activer ou désactiver la fonction Screen Mirroring qui permet de répliquer
votre écran sur l’écran d’un autre appareil.
• Synchro. : activer ou désactiver la synchronisation automatique des applications.
• Smart Stay : activer ou désactiver la fonction de veille intelligente Smart Stay.
• Éco. énergie : activer ou désactiver le mode économie d’énergie.
• Mode blocage : activer ou désactiver le mode blocage. En mode blocage, l’appareil bloque
toutes les notifications. Pour sélectionner les notifications à bloquer, appuyez sur Paramètres →
Appareil → Mode Blocage.
• Mode Hors-ligne : activer ou désactiver le mode Hors-ligne.
La disponibilité des options dépend de votre zone géographique ou de votre opérateur.
Pour redisposer les options dans le volet des raccourcis, ouvrez-le, appuyez sur → , puis
maintenez votre doigt appuyé sur un élément et faites-le glisser vers un autre emplacement.
Écran d’accueil
L’écran d’accueil est le point de départ pour accéder à toutes les fonctions de l’appareil. Il affiche des
icônes d’information, des widgets, des raccourcis vers les applications, etc.
L’écran d’accueil comprend plusieurs volets. Pour afficher les autres volets, faites défiler l’écran vers la
gauche ou la droite.
Organiser les éléments de l’écran d’accueil
Ajouter une icône d’application
Depuis l’écran d’accueil, appuyez sur , maintenez le doigt appuyé sur une icône d’application, puis
faites-la glisser sur l’aperçu d’un volet.
Fonctions de base
27
Ajouter un élément
Personnalisez l’écran d’accueil en lui ajoutant des widgets, des dossiers ou des volets.
Maintenez le doigt appuyé sur une zone vide de l’écran d’accueil, puis sélectionnez l’une des
catégories suivantes :
• Applications et widgets : ajouter des widgets ou des applications à l’écran d’accueil.
• Dossier : créer un nouveau dossier.
• Page : ajouter un volet à l’écran d’accueil.
Déplacer un élément
Maintenez le doigt appuyé sur l’élément à déplacer, puis faites-le glisser jusqu’à l’emplacement
souhaité. Pour déplacer l’élément vers un autre volet, faites-le glisser vers le bord droit ou gauche de
l’écran.
Supprimer un élément
Maintenez le doigt appuyé sur l’élément à supprimer, puis faites-le glisser vers la corbeille qui
apparaît en haut de l’écran d’accueil. Lorsque la corbeille devient rouge, relâchez l’élément.
Organiser les volets de widgets
Ajouter un volet
Placez deux doigts sur l’écran et resserrez-les, puis appuyez sur .
Déplacer un volet
Placez deux doigts sur l’écran et resserrez-les pour passer en mode Modification. Maintenez ensuite
le doigt appuyé sur l’aperçu d’un volet, puis faites-le glisser jusqu’à l’emplacement souhaité.
Supprimer un volet
Placez deux doigts sur l’écran et resserrez-les, maintenez le doigt appuyé sur l’aperçu d’un volet, puis
faites-le glisser vers la corbeille en haut de l’écran.
Fonctions de base
28
Définir un fond d’écran
Définissez une image ou une photo enregistrée dans l’appareil comme fond d’écran d’accueil.
Depuis l’écran d’accueil, maintenez le doigt appuyé sur une zone vide de l’écran d’accueil, appuyez
sur Définir fond d'écran → Écran d’accueil, puis sélectionnez un des éléments suivants :
• Galerie : photos que vous avez prises avec l’appareil photo ou images que vous avez
téléchargées depuis Internet.
• Fonds d’écran animés : fonds d’écran animés fournis par défaut avec votre appareil.
• Photos : images de l'application Google Photos.
• Fonds d’écran : fonds d’écran fournis par défaut avec votre appareil.
Sélectionnez une image, redimensionnez le cadre si nécessaire, puis définissez-la comme fond
d’écran.
Utiliser les widgets
Les widgets sont de petites applications qui permettent d’accéder à des fonctions et des
informations pratiques sur l’écran d’accueil. Vous pouvez ajouter des widgets depuis le volet des
widgets sur l’écran d’accueil.
• Certains widgets permettent de se connecter à des services Web. L’utilisation d’un widget
Internet peut entraîner des frais supplémentaires.
• La disponibilité des widgets dépend de votre zone géographique ou de votre opérateur.
Depuis l’écran d’accueil, appuyez sur → Widgets. Faites défiler le volet des widgets vers la gauche
ou la droite, puis maintenez le doigt appuyé sur un widget pour l’ajouter à l’écran d’accueil. Placezle
à l’endroit souhaité, redimensionnez-le en étirant son cadre, puis, le cas échéant, appuyez à un
endroit quelconque de l’écran pour valider le nouvel emplacement du widget.
Fonctions de base
29
Liste des applications
La liste des applications affiche les icônes de toutes vos applications, y compris celles récemment
installées.
Depuis l’écran d’accueil, appuyez sur pour ouvrir la liste des applications.
Pour afficher les autres volets, faites défiler l’écran vers la gauche ou la droite.
Organiser les applications
Cette fonction est disponible uniquement en mode d’affichage Grille personnalisable.
Appuyez sur → Modifier, maintenez le doigt appuyé sur une application, puis faites-la glisser
jusqu’à l’emplacement souhaité. Pour déplacer l’élément vers un autre volet, faites-le glisser vers le
bord droit ou gauche de l’écran.
Organiser les applications dans des dossiers
Placez les applications similaires dans un même dossier pour faciliter leur utilisation.
Appuyez sur → Modifier, maintenez le doigt appuyé sur une application, puis faites-la glisser vers
l'option Créer dossier. Saisissez le nom du dossier, puis appuyez sur OK. Placez les applications dans
le nouveau dossier en les faisant glisser, puis appuyez sur Sauveg. pour sauvegarder la nouvelle
configuration.
Organiser les volets de widgets
Placez deux doigts sur l’écran et resserrez-les pour passer en mode Modification. Maintenez ensuite
le doigt appuyé sur l’aperçu d’un volet, puis faites-le glisser jusqu’à l’emplacement souhaité.
Installer des applications
Utilisez les boutiques d’applications, comme Samsung Apps, pour télécharger et installer des
applications.
Désinstaller des applications
Appuyez sur → Désinstaller/désactiver des applications, puis sélectionnez l’application à
désinstaller.
Il est impossible de désinstaller les applications fournies par défaut avec l’appareil.
Fonctions de base
30
Désactiver des applications
Appuyez sur → Désinstaller/désactiver des applications, puis sélectionnez l’application à
désactiver.
Pour activer de nouveau l’application, depuis la liste des applications, appuyez sur Paramètres →
Général → Gestionnaire d’applications, faites défiler jusqu’à DÉSACTIVÉ, sélectionnez l’application,
puis appuyez sur Activer.
• Les applications téléchargées et certaines des applications fournies par défaut avec
l’appareil ne peuvent pas être désactivées.
• Lorsque vous utilisez cette fonction, les applications désactivées disparaissent de la liste
des applications, mais restent enregistrées dans l’appareil.
Utiliser les applications
Cet appareil peut exécuter différent types d’applications, vous permettant d’utiliser aussi bien des
contenus multimédia que des contenus Internet.
Ouvrir une application
Depuis l’écran d’accueil ou la liste des applications, appuyez sur une icône pour ouvrir l’application
correspondante.
Certaines applications sont regroupées dans des dossiers. Appuyez sur un dossier, puis sur
une application pour l’ouvrir.
Ouvrir des applications récemment utilisées
Appuyer sur pour ouvrir la liste des applications récemment utilisées.
Appuyez sur une icône pour ouvrir l’application correspondante.
Fermer une application
Fermez les applications fonctionnant inutilement en arrière-plan pour économiser la batterie et
optimiser les performances de l’appareil.
Appuyez sur → Gest. tâches, puis sur Fin à côté de l’application à fermer. Pour fermer toutes
les applications en cours d’exécution, appuyez sur Fermer tout près du nombre total d’applications
actives. Vous pouvez également appuyer sur → Tout fermer.
Fonctions de base
31
Aide
Accédez aux informations d’aide pour apprendre à utiliser l’appareil et les applications, ou configurer
des paramètres importants.
Appuyez sur Aide depuis la liste des applications. Pour afficher des conseils, sélectionnez une
catégorie.
Pour trier les catégories par ordre alphabétique, appuyez sur .
Pour rechercher des mots-clés, appuyez sur .
Saisir du texte
Pour saisir du texte, utilisez le clavier Samsung ou la fonction de saisie vocale.
La saisie de texte est impossible dans certaines langues. Pour saisir du texte, vous devez
sélectionner une des langues prises en charge.
Modifier le type de clavier
Appuyez sur une zone de saisie, ouvrez le volet des raccourcis, appuyez sur Mode de saisie, puis
choisissez le type de clavier à utiliser.
Utiliser le clavier Samsung
Saisir des signes de
ponctuation.
Saisir des majuscules.
Accéder aux paramètres du
clavier Samsung.
Passer à la ligne suivante.
Supprimer le caractère
précédent.
Insérer un espace.
Saisir des majuscules.
Déplacer le curseur.
Saisir des majuscules
Appuyez sur avant de saisir un caractère. Pour saisir l’ensemble de votre texte en majuscules,
appuyez deux fois sur cette touche.
Fonctions de base
32
Modifier le type de clavier
Maintenez le doigt appuyé sur , puis appuyez sur pour activer le clavier flottant.
Sur le clavier flottant, maintenez le doigt appuyé sur et déplacez le clavier flottant vers un autre
emplacement.
Modifier la langue du clavier
Ajoutez des langues au clavier, puis faites glisser la barre d’espace vers la gauche ou la droite pour
modifier la langue du clavier.
Écrire de façon manuscrite
Maintenez le doigt appuyé sur , appuyez ensuite sur , puis écrivez un mot à l’aide du doigt. Les
mots suggérés apparaissent au fur et à mesure de votre saisie. Sélectionnez une suggestion.
La disponibilité de cette fonction dépend de votre zone géographique ou de votre
opérateur.
Dicter du texte
Activez la fonction de saisie vocale, puis parlez dans le microphone. L’appareil affiche à l’écran ce que
vous venez de dire.
Si l’appareil ne reconnaît pas correctement les mots, appuyez sur le texte mis en surbrillance et
sélectionnez une autre proposition dans la liste déroulante qui apparaît.
Pour modifier la langue de la reconnaissance vocale ou en ajouter une autre, appuyez sur la langue
actuellement prise en charge.
Fonctions de base
33
Copier et coller du texte
Maintenez le doigt appuyé sur le texte souhaité, faites glisser l’icône ou pour redimensionner
la sélection, puis appuyez sur Copier pour copier le texte ou sur Couper pour le couper. Le texte
sélectionné est copié dans le presse-papier.
Pour le coller dans une zone de saisie, maintenez le doigt appuyé à l’endroit où vous souhaitez
insérer le texte, puis appuyez sur → Coller.
Établir une connexion au réseau Wi-Fi
Connectez l’appareil à un réseau Wi-Fi pour pouvoir utiliser Internet ou partager des fichiers
multimédia avec d’autres appareils (p. 83).
Assurez-vous que la connexion Wi-Fi est activée avant d’utiliser les applications Internet.
Activer ou désactiver un réseau Wi-Fi
Ouvrez le volet des raccourcis, puis appuyez sur Wi-Fi pour activer ou désactiver la fonction.
• Votre appareil utilise une fréquence non harmonisée et est conçu pour fonctionner dans
tous les pays européens. Au sein de l’Union Européenne, le réseau Wi-Fi peut fonctionner
sans restriction en intérieur, mais pas en extérieur.
• Lorsque vous n’utilisez pas le réseau Wi-Fi, désactivez-le afin d’économiser la batterie.
Établir une connexion à un réseau Wi-Fi
Depuis la liste des applications, appuyez sur Paramètres → Connexions → Wi-Fi, puis faites glisser
le curseur Wi-Fi vers la droite.
Sélectionnez un réseau dans la liste des réseaux Wi-Fi détectés, saisissez un mot de passe, le cas
échéant, puis appuyez sur Connexion. Les réseaux nécessitant un mot de passe sont signalés par
une icône représentant un verrou. Après connexion à un réseau Wi-Fi, l’appareil s’y connectera
automatiquement dès qu’il sera disponible.
Fonctions de base
34
Ajouter un réseau Wi-Fi
Si le réseau souhaité n’apparaît pas dans la liste, appuyez sur Ajouter un réseau Wi-Fi au bas de la
liste des réseaux. Saisissez le nom du réseau dans la zone SSID du réseau, sélectionnez le type de
sécurité, indiquez votre mot de passe si le réseau est protégé, puis appuyez sur Connexion.
Supprimer un réseau Wi-Fi
Si un réseau ne doit plus être utilisé, même s’il s’agit du réseau actuellement activé, vous pouvez le
supprimer afin que l’appareil ne s’y connecte plus automatiquement. Sélectionnez le réseau dans la
liste, puis appuyez sur Oublier.
Créer un compte
Les applications Google, comme Play Store, nécessitent un compte Google et Samsung Apps
requiert un compte Samsung. Créez des comptes Google et Samsung afin de profiter au maximum
de votre appareil.
Ajouter des comptes
Lorsque vous ouvrez une application Google, suivez les instructions qui apparaissent à l’écran. Pour
créer un compte Google, vous n’avez pas besoin de vous connecter.
Pour vous connecter à un compte Google ou en créer un, depuis la liste des applications, appuyez
sur Paramètres → Général → Comptes → Ajouter compte → Google. Appuyez ensuite sur
Nouveau pour créer un compte ou sur Compte existant pour vous connecter, puis suivez les
instructions à l’écran pour procéder à la configuration. Vous pouvez utiliser plusieurs comptes
Google sur l’appareil.
Vous pouvez également créer un compte Samsung.
Supprimer un compte
Depuis la liste des applications, appuyez sur Paramètres → Général → Comptes, sélectionnez un
nom de compte sous l’option MES COMPTES, choisissez le compte à supprimer, puis appuyez sur
Supprimer le compte.
Fonctions de base
35
Configurer les profils utilisateurs
Configurez des profils utilisateurs, puis sélectionnez-en un lorsque vous déverrouillez l’appareil
pour utiliser des paramètres personnalisés. En configurant plusieurs profils utilisateurs, plusieurs
utilisateurs peuvent partager l’appareil sans affecter les paramètres personnels des autres, tels que
les comptes de messagerie électronique ou les préférences de fond d’écran.
Depuis la liste des applications, appuyez sur Paramètres → Général → Utilisateurs → →
Utilisateur → OK → Config. maint., puis suivez les instructions à l’écran pour configurer un nouveau
profil utilisateur. Pour accéder à l’appareil avec un profil utilisateur, sélectionnez un profil en haut à
droite de l’écran verrouillé.
Transférer des fichiers
Vous pouvez transférer différents types de fichiers (sons, vidéos, images, etc.) de l’appareil vers un
ordinateur, et inversement.
Les formats de fichiers suivants sont pris en charge par certaines applications. En fonction
de la version logicielle de l’appareil ou du système d’exploitation de l’ordinateur, certains
formats ne sont pas compatibles.
• Musique : mp3, m4a, 3ga, wma, ogg, oga, aac et flac
• Image : bmp, gif, jpg et png
• Vidéo : avi, wmv, asf, flv, mkv, mp4, 3gp, webm et m4v
• Document : txt, rtf, dot, doc, docx, dotx, show, pptx, ppt, thmx, potx, cell, htm, html, csv,
prn, tsv, txt, xls, xlsx, xlt, xlsb, xlsm, xltx, xltm et pdf
Si les applications ne peuvent pas lire les fichiers aux formats divx ou ac3, installez des
applications qui les prennent en charge.
Fonctions de base
36
Connecter l’appareil avec Samsung Kies
Samsung Kies est un logiciel qui permet de gérer vos contenus multimédia et vos informations
personnelles avec des appareils Samsung. Téléchargez la dernière version de Samsung Kies à partir
du site Web Samsung.
1 Raccordez l’appareil à un ordinateur à l’aide du câble USB.
Samsung Kies démarre automatiquement sur l’ordinateur. Si Samsung Kies ne démarre pas,
double-cliquez sur l’icône Samsung Kies sur votre ordinateur.
2 Transférez des fichiers entre votre appareil et l’ordinateur.
Pour plus d’informations, consultez l’aide de Samsung Kies.
Connecter l’appareil à Windows Media Player
Assurez-vous que Windows Media Player est bien installé sur votre ordinateur.
1 Raccordez l’appareil à un ordinateur à l’aide du câble USB.
2 Ouvrez Windows Media Player pour synchroniser les fichiers audio.
Connecter l’appareil en tant qu’appareil multimédia
1 Raccordez l’appareil à un ordinateur à l’aide du câble USB.
2 Ouvrez le volet des raccourcis, puis appuyez sur Connecté en tant que périphérique
multimédia → Périphérique multimédia (MTP).
Appuyez sur Appareil photo (PTP) si votre ordinateur ne gère pas le protocole MTP (Media
Transfer Protocol) ou ne dispose pas du pilote approprié.
3 Transférez des fichiers entre votre appareil et l’ordinateur.
Fonctions de base
37
Protéger l’appareil
Vous pouvez empêcher toute personne d’utiliser votre appareil et de consulter les données et
informations personnelles qui y sont enregistrées. Pour protéger votre appareil, vous pouvez définir
un code de déverrouillage. Sans ce code, l’appareil ne pourra pas être déverrouillé.
Déverrouillage par modèle
Depuis la liste des applications, appuyez sur Paramètres → Appareil → Écran de verrouillage →
Déverrouillage de l’écran → Modèle.
Dessinez un modèle en reliant au moins quatre points, puis recommencez pour valider. Définissez un
code PIN de déverrouillage de secours pour déverrouiller l’écran en cas d’oubli du modèle.
Déverrouillage par code PIN
Depuis la liste des applications, appuyez sur Paramètres → Appareil → Écran de verrouillage →
Déverrouillage de l’écran → Code PIN.
Saisissez au moins quatre chiffres, puis recommencez pour valider.
Déverrouillage par mot de passe
Depuis la liste des applications, appuyez sur Paramètres → Appareil → Écran de verrouillage →
Déverrouillage de l’écran → Mot de passe.
Saisissez au moins quatre caractères, y compris des chiffres et des symboles, puis recommencez pour
valider.
Fonctions de base
38
Déverrouiller l’appareil
Allumez l’écran en appuyant sur la touche Marche/Arrêt ou sur la touche Accueil, puis saisissez le
code ou dessinez le modèle de déverrouillage.
Si vous oubliez le code de déverrouillage, apportez l’appareil dans un centre de service
après-vente Samsung pour le réinitialiser.
Mettre l’appareil à jour
L’appareil peut être mis à jour avec la version logicielle la plus récente.
La disponibilité de cette fonction dépend de votre zone géographique ou de votre
opérateur.
Mettre l’appareil à jour avec Samsung Kies
Démarrez Samsung Kies et raccordez l’appareil à un ordinateur. Samsung Kies reconnaît
automatiquement l’appareil et affiche, le cas échéant, les mises à jour disponibles. Pour lancer la mise
à jour, cliquez sur la touche Mettre à jour dans la boîte de dialogue. Pour plus d’informations sur la
mise à jour, consultez l’aide Samsung Kies.
• Lorsque vous mettez votre appareil à jour, n’éteignez pas l’ordinateur et ne déconnectez
pas le câble de USB.
• Ne raccordez pas non plus d’autres appareils multimédia à l’ordinateur. Cela pourrait
interférer avec le processus de mise à jour.
Mettre l’appareil à jour sans connexion PC
Grâce au service FOTA (Firmware Over The Air), le logiciel de l’appareil peut être mis à jour sans
passer par une connexion avec un ordinateur.
Depuis la liste des applications, appuyez sur Paramètres → Général → À propos de l’appareil →
Mise à jour logicielle → Mettre à jour maintenant.
39
Communication
Contacts
Utilisez cette application pour gérer les contacts, y compris les numéros de téléphone, les adresses
e-mail, et plus encore.
Appuyez sur Contacts depuis la liste des applications.
Gérer les contacts
Appuyez sur Contacts.
Créer un contact
Appuyez sur , sélectionnez une mémoire de stockage, puis saisissez les informations d’un contact.
• : ajouter une image.
• / : ajouter ou supprimer un champ d’information.
Modifier un contact
Sélectionnez un contact à modifier, puis appuyez sur .
Supprimer un contact
Appuyez sur .
Rechercher des contacts
Appuyez sur Contacts.
Utilisez l’une des méthodes de recherche suivantes :
• Faites défiler la liste de contacts vers le haut ou le bas.
• Pour faire défiler la liste rapidement, placez votre index à gauche de la liste de contacts et faites
défiler vers le haut ou le bas.
• Appuyez sur le champ de recherche tout en haut de la liste de contacts, puis saisissez vos
critères de recherche.
Communication
40
Une fois le contact sélectionné, choisissez l’une des options suivantes :
• : ajouter le contact aux favoris.
• : rédiger un e-mail.
Afficher les contacts
Appuyez sur Contacts.
Par défaut, l’appareil affiche tous les contacts enregistrés.
Appuyez sur → Paramètres → Contacts à afficher, puis sélectionnez la source à partir de laquelle
les contacts doivent être affichés.
Synchroniser des contacts
Appuyez sur Contacts.
Synchroniser les contacts de l’appareil avec les contacts Google
Appuyez sur → Fusionner les comptes → Fusionner avec Google.
Les contacts Google sont caractérisés par l’icône .
Synchroniser les contacts de l’appareil avec les contacts Samsung
Appuyez sur → Fusionner les comptes → Fusionner avec Samsung.
Les contacts Samsung sont caractérisés par l’icône .
Importer et exporter des contacts
Appuyez sur Contacts.
Importer des contacts
Appuyez sur → Paramètres → Importer/Exporter, puis sélectionnez une option d’importation.
Communication
41
Exporter des contacts
Appuyez sur → Paramètres → Importer/Exporter, puis sélectionnez une option d’exportation.
Partager des contacts
Appuyez sur → Partager carte de visite via → Plusieurs contacts, sélectionnez les contacts à
partager, appuyez sur OK, puis sélectionnez un mode de partage.
Contacts favoris
Appuyez sur Favoris.
Appuyez sur pour ajouter des contacts à vos favoris.
Appuyez sur , puis choisissez l’une des options suivantes :
• Rechercher : rechercher des contacts.
• Supprimer des favoris : supprimer des contacts des favoris.
• Affichage Liste / Affichage Grille : afficher les contacts sous forme de tableau ou de liste.
• Aide : accéder aux informations d’aide à propos des contacts.
Groupes de contacts
Appuyez sur Groupes.
Créer un groupe
Appuyez sur , configurez les détails du groupe, ajoutez des contacts, puis appuyez sur Enreg.
Ajouter des contacts à un groupe
Sélectionnez un groupe, puis appuyez sur → Ajouter membre. Sélectionnez les contacts à ajouter,
puis appuyez sur OK.
Communication
42
Gérer les groupes
Appuyez sur , puis choisissez l’une des options suivantes :
• Rechercher : rechercher des contacts.
• Supprimer des groupes : sélectionner des groupes auxquels vous avez ajouté des contacts, puis
appuyer sur OK. Vous ne pouvez pas supprimer les groupes par défaut.
• Modifier : modifier les paramètres du groupe.
• Ajouter membre : ajouter des membres au groupe.
• Supprimer le membre : retirer un membre du groupe.
• Envoyer un e-mail : envoyer un e-mail aux membres d’un groupe.
• Modifier l’ordre : maintenir le doigt appuyé sur l’icône près du nom du groupe, faire glisser
l’icône vers le haut ou le bas jusqu’à l’emplacement souhaité, puis appuyer sur OK.
• Aide : accéder aux informations d’aide à propos des contacts.
Envoyer un e-mail aux membres d’un groupe
Sélectionnez un groupe, appuyez sur → Envoyer un e-mail, sélectionnez des membres, puis
appuyez sur OK.
Carte de visite
Appuyez sur Contacts.
Créez une carte de visite et envoyez-la à vos contacts.
En haut de la liste des contacts, appuyez sur Profil configuré, saisissez vos coordonnées, comme
votre numéro de téléphone, votre adresse e-mail et votre adresse postale, puis appuyez sur Enreg.
Si, lorsque vous avez configuré votre appareil, vous avez enregistré vos coordonnées d’utilisateur,
sélectionnez la carte de visite, puis appuyez sur pour la modifier.
Appuyez sur → Partager carte de visite via → Contact sélectionné, puis sélectionnez un mode
de partage.
Communication
43
Email
Utilisez cette application pour envoyer ou consulter des e-mails.
Appuyez sur Email depuis la liste des applications.
Configurer des comptes de messagerie électronique
Lorsque vous ouvrez l’application Email pour la première fois, configurez un compte de messagerie
électronique.
Saisissez votre adresse e-mail et votre mot de passe. Pour configurer un compte de messagerie
électronique privé, comme Google Mail, appuyez sur ; pour configurer un compte de messagerie
électronique professionnel, appuyez sur Config manuelle. Suivez ensuite les instructions qui
s’affichent à l’écran pour procéder à la configuration du compte.
Pour configurer un compte de messagerie électronique supplémentaire, appuyez sur →
Paramètres → Ajouter compte.
Envoyer des e-mails
Sélectionnez le compte de messagerie électronique que vous souhaitez utiliser, puis appuyez sur
en haut de l’écran. Saisissez les destinataires, l’objet et le message, puis appuyez sur pour envoyer
l’e-mail.
Pour ajouter un destinataire figurant dans votre liste de contacts, appuyez sur .
Appuyez sur +Moi pour vous ajouter comme destinataire.
Appuyez sur pour joindre des images, vidéos, contacts, événements, etc.
Appuyez sur → pour insérer dans le message des images, événements, contacts, informations
de localisation et bien plus encore.
Communication
44
Envoyer des e-mails programmés
Lorsque vous rédigez un e-mail, appuyez sur → Envoi programmé. Cochez la case Envoi
programmé, définissez une heure et une date, puis appuyez sur OK. L’appareil envoie le message à
l’heure et à la date indiquées.
• Le message ne sera pas envoyé à l’heure et à la date programmées, si l’appareil est éteint,
s’il n’est pas connecté au réseau ou si le réseau est instable.
• Cette fonction est basée sur l’heure et la date configurées sur l’appareil. Si vous changez
de fuseau horaire et que le réseau ne met pas ces informations à jour, il se peut que
l’heure et la date soient incorrectes.
Lire des e-mails
Sélectionnez un compte de messagerie électronique. Les nouveaux messages sont récupérés. Pour
récupérer manuellement les messages, appuyez sur .
Appuyez sur un message pour le lire.
Ouvrir les pièces jointes.
Modifier la disposition de
l’écran.
Ajouter cette adresse e-mail
à votre liste de contacts.
Répondre au message.
Transférer le message.
Supprimer le message.
Accéder à des options
supplémentaires.
Rédiger un message.
Identifier le message comme
favori.
Récupérer de nouveaux
messages.
Rechercher un message.
Appuyez sur l’onglet de la pièce jointe pour l’ouvrir ou sur Enreg. pour l’enregistrer.
Communication
45
Google Mail
Utilisez cette application pour accéder directement au service Google Mail.
Appuyez sur Google Mail depuis la liste des applications.
• La disponibilité de cette application dépend de votre zone géographique ou de votre
opérateur.
• Cette application peut s’intituler différemment selon votre zone géographique ou votre
opérateur.
Envoyer des messages
Dans la boîte de réception, appuyez sur , saisissez les destinataires et un objet, rédigez un
message, puis appuyez sur ENVOYER.
Pour enregistrer le message afin de l’envoyer ultérieurement, appuyez sur → Enregistrer le
brouillon.
Pour joindre des fichiers, appuyez sur → Joindre un fichier.
Pour annuler votre message, appuyez sur → Supprimer.
Appuyez sur → Paramètres pour modifier les paramètres de Google Mail.
Appuyez sur → Envoyer des commentaires pour indiquer votre opinion sur le développement de
l’application.
Appuyez sur → Aide pour accéder aux informations d’aide à propos de Google Mail.
Lire des e-mails
Afficher la pièce jointe.
Rechercher un message.
Rédiger un message.
Ajouter cette adresse e-mail
à la liste de contacts.
Répondre au message.
Archiver le message.
Supprimer le message.
Répondre à tous les
destinataires ou imprimer le
message.
Transférer le message.
Identifier le message comme
favori.
Accéder à des options
supplémentaires.
Communication
46
Libellés
Google Mail utilise des libellés pour classer les messages. Par défaut, Google Mail affiche les
messages du libellé Boîte de réception.
Sélectionnez un libellé dans la rubrique TOUS LES LIBELLÉS pour afficher les messages des autres
libellés.
Pour ajouter un libellé à un message, sélectionnez le message, appuyez sur → Modifier les
libellés, puis sélectionnez le libellé que vous souhaitez lui attribuer.
Hangouts
Utilisez cette application pour discuter avec vos amis.
Appuyez sur Hangouts depuis la liste des applications.
La disponibilité de cette application dépend de votre zone géographique ou de votre
opérateur.
Sélectionnez un ami dans la liste ou saisissez des critères de recherche et sélectionnez un ami dans
les résultats pour commencer à discuter.
Google+
Utilisez cette application pour rester connecté à votre entourage via le service de réseau social de
Google.
Appuyez sur Google+ depuis la liste des applications.
La disponibilité de cette application dépend de votre zone géographique ou de votre
opérateur.
Appuyez sur Tous pour modifier la catégorie, puis faites défiler la liste vers le haut ou le bas pour
afficher les publications de vos cercles d’amis.
Appuyez sur pour utiliser d’autres fonctionnalités des réseaux sociaux.
Communication
47
Google+ Photos
Utilisez cette application pour afficher et partager des images ou des vidéos via le service de réseau
social de Google.
Appuyez sur Photos depuis la liste des applications.
La disponibilité de cette application dépend de votre zone géographique ou de votre
opérateur.
Sélectionnez l’une des catégories suivantes :
• APPAREIL PHOTO : afficher toutes les photos ou vidéos prises ou téléchargées sur l’appareil.
• SÉLECTION : afficher toutes les photos ou vidéos regroupées par date ou par album. Appuyez
sur pour afficher toutes les photos ou vidéos du groupe.
Sélectionnez ensuite une photo ou une vidéo.
En mode affichage d'une photo ou d'une vidéo, utilisez l’une des icônes suivantes :
• : modifier la photo ou la vidéo.
• : partager la photo ou la vidéo avec d’autres personnes.
• : supprimer la photo ou la vidéo.
48
Web et réseau
Internet
Utilisez cette application pour naviguer sur Internet.
Appuyez sur Internet depuis la liste des applications.
Afficher des pages Web
Appuyez sur le champ d’adresse, saisissez l’adresse Web, puis appuyez sur Aller à.
Appuyez sur pour accéder à des options complémentaires lors de l’affichage d’une page Web.
Pour changer de moteur de recherche, appuyez sur le champ d’adresse, puis appuyez sur l’icône du
moteur de recherche près de l’adresse Web.
Ouvrir un nouvel onglet
Appuyez sur → Nouvel onglet.
Pour passer d'un onglet à l'autre, faites défiler l’écran vers la gauche ou la droite, puis appuyez sur le
titre pour le sélectionner.
Effectuer une recherche oralement
Appuyez sur le champ d’adresse, puis sur → , prononcez un mot-clé, puis sélectionnez l’une
des suggestions qui apparaissent à l’écran.
La disponibilité de cette fonction dépend de votre zone géographique ou de votre
opérateur.
Web et réseau
49
Favoris
Pour enregistrer la page Web actuelle dans les favoris, appuyez sur → .
Pour ouvrir une page Web enregistrée dans vos favoris, appuyez sur , puis sélectionnez la page
souhaitée.
Historique
Pour ouvrir une page figurant dans la liste des pages récemment consultées, appuyez sur →
Historique. Pour effacer l’historique, appuyez sur .
Pages enregistrées
Pour afficher des pages Web enregistrées, appuyez sur → Pages enreg.
Liens
Maintenez le doigt appuyé sur un lien d’une page Web pour l’ouvrir dans une nouvelle page,
l’enregistrer ou le copier.
Pour afficher les liens enregistrés, depuis la liste des applications, appuyez sur Mes fichiers →
Stockage de l’appareil → Download.
Partager des pages Web
Pour partager l’adresse d’une page Web avec d’autres personnes, appuyez sur → Partager via.
Pour partager une partie d’une page Web, maintenez le doigt appuyé sur le texte de votre choix, puis
appuyez sur Partager via.
Web et réseau
50
Chrome
Utilisez cette application pour rechercher des informations et parcourir des pages Web.
Appuyez sur Chrome depuis la liste des applications.
La disponibilité de cette application dépend de votre zone géographique ou de votre
opérateur.
Afficher des pages Web
Appuyez sur le champ d’adresse, puis saisissez une adresse Web ou des critères de recherche.
Ouvrir un nouvel onglet
Appuyez sur → Nouvel onglet.
Pour passer d'un onglet à l'autre, faites défiler l’écran vers la gauche ou la droite, puis appuyez sur le
titre pour le sélectionner.
Favoris
Pour enregistrer la page Web actuelle dans les favoris, appuyez sur → Enregistrer.
Pour ouvrir une page Web enregistrée dans vos favoris, appuyez sur → Favoris, puis sélectionnez
la page souhaitée.
Effectuer une recherche oralement
Appuyez sur , prononcez un mot-clé, puis sélectionnez l’une des suggestions qui apparaissent à
l’écran.
Synchroniser votre appareil avec d’autres appareils
Synchronisez des onglets et des favoris ouverts afin de les utiliser avec Chrome sur un autre appareil
lorsque vous êtes connecté au même compte Google.
Pour afficher des onglets ouverts sur d’autres appareils, appuyez sur → Autres appareils.
Sélectionnez la page Web à ouvrir.
Pour afficher les favoris, appuyez sur FAVORIS.
Web et réseau
51
Bluetooth
La fonction Bluetooth crée une connexion sans fil directe entre deux appareils sur de courtes
distances. Pour échanger des données ou des fichiers multimédia avec d’autres appareils, utilisez la
fonction Bluetooth.
• Samsung ne peut être tenu responsable de la perte, de l’interception ou du mauvais
usage des données envoyées ou reçues via la fonction Bluetooth.
• Assurez-vous de toujours utiliser des appareils dignes de confiance et correctement
protégés avant de partager ou de recevoir des données. La présence d’obstacles entre les
deux appareils peut réduire le rayon d’action.
• Il est possible que votre appareil ne fonctionne pas avec certains appareils, en particulier
ceux qui n’ont pas été testés ou approuvés par Bluetooth SIG.
• N’utilisez pas la fonction Bluetooth de manière illégale (par exemple, pour la copie pirate
de fichiers ou l’enregistrement de communications à des fins commerciales).
Samsung ne peut être tenu responsable des répercussions d’une utilisation illégale de la
fonction Bluetooth.
Pour activer la fonction Bluetooth, depuis la liste des applications, appuyez sur Paramètres →
Connexions → Bluetooth, puis faites glisser le curseur Bluetooth vers la droite.
Établir une connexion avec d’autres appareils Bluetooth
Depuis la liste des applications, appuyez sur Paramètres → Connexions → Bluetooth → Analyser
pour afficher la liste des appareils détectés. Sélectionnez l’appareil auquel vous souhaitez vous
connecter, puis acceptez la demande d’autorisation automatiquement générée sur les deux
appareils pour confirmer l’opération.
Envoyer et recevoir des données
De nombreuses applications prennent en charge le transfert de données via la fonction Bluetooth.
C’est le cas, par exemple, de l’application Galerie. Ouvrez l’application Galerie, sélectionnez une
image, appuyez sur → Bluetooth, puis sélectionnez un appareil Bluetooth. Ensuite, pour recevoir
l’image, confirmez la demande d’autorisation Bluetooth sur l’autre appareil.
Lorsqu’un autre appareil vous envoie des données, acceptez la demande d’autorisation Bluetooth
émanant de cet autre appareil. Les fichiers reçus sont enregistrés dans le dossier Download. Si vous
recevez un nouveau contact, il est automatiquement ajouté à votre liste de contacts.
Web et réseau
52
Screen Mirroring
Utilisez cette fonction pour connecter votre appareil à un grand écran avec le routeur AllShare Cast
ou HomeSync, puis partagez vos contenus. Vous pouvez également utiliser cette fonction avec
d’autres appareils prenant en charge la fonction Miracast Wi-Fi.
• La disponibilité de cette fonction dépend de votre zone géographique ou de votre
opérateur.
• Cette fonction peut ne pas fonctionner sur les appareils compatibles Miracast ne prenant
pas en charge le protocole HDCP 2.X (High-bandwidth Digital Content Protection).
• Selon la connexion réseau, certains fichiers peuvent être mis en mémoire tampon en
cours de lecture.
• Pour économiser votre batterie, désactivez cette fonction lorsque vous ne l’utilisez pas.
• Si vous indiquez une bande de fréquence Wi-Fi, il se peut que les routeurs AllShare Cast
ou HomeSync ne soient pas détectés.
• Si vous lisez des vidéos ou jouez à des jeux sur un téléviseur, sélectionnez un mode TV
approprié afin d’obtenir un résultat optimal.
Depuis la liste des applications, appuyez sur Paramètres → Connexions → Screen Mirroring, puis
faites glisser le curseur Screen Mirroring vers la droite. Sélectionnez un appareil, ouvrez un fichier,
puis contrôlez l’écran à l’aide des touches de votre appareil. Pour établir une connexion avec un
appareil à l’aide d’un code PIN, maintenez votre doigt appuyé sur son nom, puis saisissez votre code
PIN.
53
Multimédia
Musique
Utilisez cette application pour écouter de la musique.
Appuyez sur Musique depuis la liste des applications.
• Selon la version logicielle de votre appareil, certains formats ne sont pas compatibles.
• Certains fichiers peuvent ne pas être lus correctement en fonction de leur encodage.
Écouter de la musique
Sélectionnez une catégorie de musique, puis un morceau à écouter.
Appuyez sur l’image de l’album en bas de l’écran pour afficher le lecteur MP3 en plein écran.
Passer au morceau suivant.
Maintenir la touche appuyée
pour effectuer une avance
rapide.
Mettre en pause et reprendre
la lecture.
Régler le volume.
Accéder à des options
supplémentaires.
Modifier le mode de
répétition.
Redémarrer le morceau en
cours de lecture ou revenir au
morceau précédent.
Maintenir la touche appuyée
pour effectuer un retour
rapide.
Activer la lecture aléatoire.
Ouvrir la liste de lecture.
Recherche d’autres appareils
pour lire le fichier.
Définir le fichier comme
votre morceau favori.
Multimédia
54
Pour écouter de la musique à volume égal, appuyez sur → Paramètres → Lecteur → Volume
intelligent.
Lorsque la fonction Volume intelligent est activée, le volume effectif peut être plus élevé
que celui réglé sur l’appareil. Soyez prudent et évitez toute exposition prolongée à des
niveaux sonores élevés, car cela pourrait provoquer des séquelles auditives.
Volume intelligent peut ne pas être activée pour certains fichiers.
Pour personnaliser vos réglages audio lors de l’écoute de musique avec un casque ou un écouteur,
appuyez sur → Paramètres → Lecteur → Adapt Sound → Activé. Lorsque vous réglez le volume
au niveau 13 ou supérieur, l’option d’adaptation du son (Adapt Sound) n’est pas appliquée. Si vous
baissez le volume au niveau 12 ou inférieur, l’option est de nouveau appliquée.
Définir un morceau comme sonnerie d’alarme
Pour utiliser le morceau comme une sonnerie d’alarme, appuyez sur → Définir comme tonalité
d’alarme → OK.
Créer des listes de lecture
Faites votre propre sélection de morceaux de musique.
Appuyez sur Listes lect., puis sur → Créer une liste de lecture. Saisissez un titre, puis appuyez sur
OK. Appuyez sur Ajouter, sélectionnez les morceaux à inclure dans la liste de lecture, puis appuyez
sur OK.
Pour ajouter le morceau de musique en cours de lecture à une liste de lecture, appuyez sur → Aj.
liste lecture.
Écouter de la musique par catégorie
Écoutez de la musique classée par atmosphère musicale. L’appareil crée automatiquement la liste de
lecture.
Appuyez sur → Coin musique et sélectionnez une atmosphère. Vous pouvez également
sélectionner plusieurs atmosphères en faisant glisser votre doigt sur l’écran.
Multimédia
55
Appareil photo
Utilisez cette application pour prendre des photos ou enregistrer des vidéos.
Pour visionner les photos et des vidéos prises avec l’appareil, utilisez l’application Galerie (p. 60).
Appuyez sur Appareil photo depuis la liste des applications.
• Lorsque vous n’utilisez plus l’appareil photo, il se ferme automatiquement.
• Assurez-vous que l’objectif est bien propre. Dans le cas contraire, l’appareil risque de ne
pas fonctionner correctement dans certains modes nécessitant des résolutions élevées.
Bon usage de l’appareil photo
• Ne prenez pas de photos et n’enregistrez pas de vidéos d’autres personnes sans leur
consentement.
• Ne prenez pas de photos et n’enregistrez pas de vidéos lorsque la loi l’interdit.
• Ne prenez pas de photos et n’enregistrez pas de vidéos en violation de la vie privée d’autrui.
Prendre des photos
Prendre une photo
Pour prendre une photo, appuyez sur .
Afficher le mode en cours.
Modifier le mode de prise de
vue.
Modifier les paramètres de
l’appareil photo.
Basculer entre l’objectif avant
et arrière.
Sélectionner un des divers
effets disponibles.
Afficher davantage d’options.
Basculer entre l’appareil
photo et le caméscope.
Afficher les photos et les
vidéos que vous avez prises.
Multimédia
56
Mode de capture
Il existe plusieurs effets de photo.
Appuyez sur MODE, puis faites défiler les modes à droite de l’écran vers le haut ou le bas.
• Auto : ce mode permet à l’appareil photo d’évaluer l’environnement et de déterminer le mode
idéal de prise de vue.
• Beauté : ce mode permet de prendre des photos de visages plus claires pour obtenir des images
plus douces.
• Son & prise : ce mode permet de prendre une photo et d’enregistrer le son de la scène.
Pour prendre une photo, appuyez sur . L’appareil enregistre quelques secondes de contenu
audio après la prise de vue.
Lorsque vous prenez des photos dans ce mode, le son est enregistré par le microphone
interne.
• Panorama : ce mode permet de prendre une photo panoramique composée de différents
clichés assemblés les uns aux autres.
Pour obtenir la meilleure photo possible, suivez ces conseils :
– Déplacez l’appareil photo lentement dans le sens de votre choix.
– Maintenez l’objectif, de l’appareil photo dans le cadre de guidage.
– Évitez de prendre des photos de sujets devant des arrière-plans non identifiables, comme un
ciel ou un pan de mur uni.
• Sports : ce mode permet de prendre des photos de sujets en action.
• Nuit : ce mode permet de prendre des photos dans l’obscurité.
Photos panoramiques
Une photo panoramique est une large image en mode paysage constituée de plusieurs clichés.
Appuyez sur MODE → Panorama.
Appuyez sur et déplacez l’appareil photo dans le sens de votre choix. Lorsque les deux cadres de
prise de vue sont alignés, l’appareil photo prend automatiquement un autre cliché pour constituer
une séquence panoramique. Pour mettre fin à la prise de vue, appuyez sur .
Si l’objectif n’est plus aligné, la prise de vue s’interrompt.
Appliquer des effets de filtre
Utilisez les effets de filtre pour prendre des photos ou enregistrer des vidéos uniques.
Appuyez sur , puis sélectionnez un effet de filtre. Les options disponibles varient selon le mode
sélectionné.
Multimédia
57
Enregistrer des vidéos
Enregistrer une vidéo
Faites glisser le curseur vers l’icône de caméscope, puis appuyez sur pour enregistrer une vidéo.
Pour interrompre l’enregistrement, appuyez sur . Pour arrêter l’enregistrement, appuyez sur .
La mise au point manuelle n’est pas disponible en mode caméscope.
Mode d’enregistrement
Sélectionner un des divers
effets disponibles.
Afficher le mode en cours.
Basculer entre l’appareil
photo et le caméscope.
Basculer entre l’objectif avant
et arrière.
Afficher les photos et les
vidéos que vous avez prises.
Modifier les paramètres de
l’appareil photo.
Afficher davantage d’options.
Pour modifier le mode d’enregistrement, appuyez sur → .
• Normal : ce mode permet d’obtenir une qualité standard.
• Limite pour e-mail : ce mode permet de réduire la qualité d’enregistrement pour envoyer la
vidéo via e-mail.
Multimédia
58
Effectuer un zoom avant et arrière
Utilisez l’une des méthodes suivantes :
• Utilisez la touche de volume Haut ou Bas pour effectuer un zoom avant ou arrière.
• Pour effectuer un zoom avant, écartez deux doigts l’un de l’autre sur l’écran ; pour effectuer un
zoom arrière, rapprochez-les.
La fonction zoom avant/arrière est disponible en cours d’enregistrement d’une vidéo.
Partager des photos
Appuyez sur → , puis utilisez l’une des méthodes suivantes :
• Partage : envoyer directement une photo à un autre appareil Wi-Fi Direct.
• Partage de photo d’ami : envoyer la photo à la personne dont le visage est utilisé comme
libellé.
• Viseur à distance : commander l’appareil photo à distance.
Commander l’appareil photo à distance
Paramétrez l’appareil comme un viseur afin de commander l’appareil photo à distance.
Appuyez sur → → Viseur à distance, puis établissez une connexion Wi-Fi Direct entre cet
appareil et l’appareil photo. Pour prendre une photo à distance en vous servant de l’appareil comme
viseur, appuyez sur .
Multimédia
59
Configurer les paramètres de l’appareil photo et du caméscope
Pour configurer les paramètres de l’appareil photo, appuyez sur . Les options suivantes sont
disponibles pour les deux modes (appareil photo et caméscope). Les options disponibles peuvent
varier selon le mode utilisé.
• Taille des photos / Taille de la vidéo : sélectionner une option de résolution. Pour obtenir une
meilleure qualité, utilisez une résolution élevée. Cependant, notez qu’une résolution élevée
nécessite davantage de mémoire.
• Mesure : sélectionner une méthode de mesure. Ce paramètre détermine la manière dont les
valeurs lumineuses sont calculées. Mesure pondérée centrale mesure la lumière d’arrière-plan
au centre de la scène. Spot mesure la valeur de la luminosité à un endroit spécifique. Matrice
calcule la moyenne de la scène toute entière.
• Balise de localisation : joindre une étiquette de géolocalisation GPS à la photo.
• Pour que les signaux GPS soient meilleurs, évitez de prendre des photos dans des lieux
où le signal peut être limité, par exemple entre des bâtiments ou dans des zones de faible
altitude, ou encore lorsque les conditions météorologiques sont mauvaises.
• Votre localisation est susceptible d’apparaître sur vos photos au moment où vous les
publiez sur le Web. Pour empêcher l’affichage de ces données, désactivez le paramètre de
balise GPS.
• Aperçu : paramétrer l’appareil pour afficher les photos ou les vidéos après les avoir prises.
• Touche de volume : paramétrer l’appareil pour pouvoir utiliser la touche de volume pour
contrôler l’obturateur ou le zoom.
• Retardateur : prendre une photo ou enregistrer une vidéo à l’issue d’un délai de retardement
prédéfini.
• Balance des blancs : sélectionner une balance des blancs appropriée de sorte que les images
offrent une gamme de couleurs proches de la réalité. Les paramètres sont conçus pour des
situations lumineuses spécifiques. Ils sont similaires à la gamme thermique d’exposition et de
balance des blancs des appareils photo professionnels.
• Luminosité : modifier la luminosité.
• Guide : afficher des lignes directrices sur l’écran d’aperçu.
• Nom de fichier contextuel : paramétrer l’appareil photo pour qu’il affiche des balises
contextuelles. Activez cette fonction pour utiliser les tags contexuels dans la Galerie.
• Retourner l’image : inverser l’image pour créer une image miroir de la scène initiale.
• Stockage : sélectionner l’emplacement de stockage des photos et vidéos.
Multimédia
60
• Rénitialiser : réinitialiser les paramètres de l’appareil photo/caméscope.
• Aide : accédez aux informations d’aide pour utiliser l’appareil photo.
Raccourcis
Réorganisez les raccourcis pour accéder facilement aux différentes options de l’appareil photo.
Appuyez sur et maintenez le doigt appuyé sur l’icône de raccourci.
Maintenez le doigt appuyé sur une option et faites-la glisser vers un autre emplacement en haut de
l’écran.
Galerie
Utilisez cette application pour visualiser des photos ou des vidéos.
Appuyez sur Galerie depuis la liste des applications.
• Selon la version logicielle de votre appareil, certains formats ne sont pas compatibles.
• Certains fichiers peuvent ne pas être lus correctement en fonction de leur encodage.
Afficher des images
Lorsque vous lancez l’application, la Galerie affiche les dossiers disponibles. Lorsqu’une autre
application, telle que Email, enregistre une image, le dossier Download contenant l’image est
automatiquement créé. De même, si vous effectuez une capture d’écran, le dossier Screenshots est
automatiquement créé. Sélectionnez un dossier pour l’ouvrir.
Les images d’un dossier sont affichées par date de création. Appuyez sur une image pour l’afficher en
plein écran.
Faites défiler l’écran vers la gauche ou la droite pour afficher l’image précédente ou suivante.
Effectuer un zoom avant et arrière
Pour effectuer un zoom sur une image, utilisez l’une des méthodes suivantes :
• Pour effectuer un zoom avant, appuyez deux fois sur l’image à l’endroit de votre choix.
• Pour effectuer un zoom avant, écartez deux doigts l’un de l’autre sur l’écran à l’endroit de votre
choix ; pour effectuer un zoom arrière, rapprochez-les ; pour revenir à l’affichage initial, appuyez
deux fois sur l’écran.
Multimédia
61
Lire des vidéos
Les fichiers vidéo sont caractérisés par l’icône . Sélectionnez la vidéo que vous souhaitez regarder,
puis appuyez sur .
Découper les segments d’une vidéo
Sélectionnez une vidéo, puis appuyez sur . Déplacez le crochet d’ouverture au début de la section
souhaitée et le crochet de fermeture à la fin, puis enregistrez la vidéo.
Modifier des photos
En mode affichage d’une photo, appuyez sur et utilisez les fonctions suivantes :
• Favoris : ajouter à votre liste de favoris.
• Diaporama : lancer un diaporama de l’ensemble des photos du dossier ouvert.
• Cadre photo : ajouter un cadre et des notes à une image. L’image modifiée est enregistrée dans
le dossier Photo frame.
• Note photo : écrire une note à l’arrière de l’image. Pour modifier la note, appuyez sur .
• Copier dans le presse-papier : copier l’image dans le presse-papiers.
• Imprimer : imprimer l’image en connectant l’appareil à une imprimante. Certaines imprimantes
peuvent ne pas être compatibles avec l’appareil.
• Renommer : renommer le fichier.
• Partage de photo d’ami : envoyer l’image à une personne dont le visage sert de libellé.
• Rotation à gauche : pivoter dans le sens contraire des aiguilles d’une montre.
• Rotation à droite : pivoter l’image dans le sens des aiguilles d’une montre.
• Rogner : redimensionner le cadre bleu pour couper l’image.
• Définir comme : définir l’image comme fond d’écran ou image d’un contact.
• Détails : afficher les détails d’une image.
• Paramètres : modifier les paramètres de la Galerie.
Mes photos favorites
En mode affichage d’une image, appuyez sur → Favoris pour ajouter l’image à votre liste de
favoris.
Multimédia
62
Supprimer des photos
Utilisez l’une des méthodes suivantes :
• Dans un dossier, appuyez sur → Sélectionner élément, sélectionnez une image, puis appuyez
sur .
• En mode affichage d’une photo, appuyez sur .
Partager des photos
Utilisez l’une des méthodes suivantes :
• Dans un dossier, appuyez sur → Sélectionner élément, sélectionnez une image, puis appuyez
sur pour l’envoyer à des contacts ou la partager via des services de réseaux sociaux.
• En mode affichage d’une photo, appuyez sur pour l’envoyer à des contacts ou la partager via
des services de réseaux sociaux.
Définir une image comme fond d’écran
En mode affichage d’une photo, appuyez sur → Définir comme pour définir l’image comme fond
d’écran ou l’affecter à un contact.
Libellés de portraits
En mode affichage d’une photo, appuyez sur → Paramètres → Tags, puis cochez la case Libellé
de portrait. Un cadre jaune apparaît autour du visage identifié. Appuyez sur le visage, puis sur
Ajouter un nom, et sélectionnez ou ajoutez un contact.
Lorsque le libellé de portrait apparaît sur une image, appuyez sur le nom et utilisez les fonctions
disponibles, comme la messagerie.
Selon l’angle du visage, la taille, l’expression, les conditions lumineuses ou les accessoires
portés par la personne, il est possible que la reconnaissance faciale ne fonctionne pas.
Utiliser les tags contextuels
Appuyez sur → Paramètres → Tags → Tag contextuel, puis faites glisser le curseur Tag
contextuel vers la droite pour afficher une balise contextuelle (météo, localisation, date et nom de la
personne) lors de l’ouverture d’une image.
Multimédia
63
Organiser les applications dans des dossiers
Créez un dossier pour organiser les images ou les vidéos enregistrées sur l’appareil. Vous pouvez
copier ou déplacer des fichiers d’un dossier à un autre.
Pour créer un nouveau dossier, appuyez sur . Saisissez le nom du dossier, appuyez sur OK, puis
cochez les images ou les vidéos à intégrer au nouveau dossier. Maintenez votre doigt appuyé sur
une image ou une vidéo, faites-la glisser vers le nouveau dossier, puis appuyez sur OK. Appuyez sur
Copier pour copier ou sur Déplacer pour déplacer.
Vidéo
Utilisez cette application pour lire des fichiers vidéo.
Appuyez sur Vidéo depuis la liste des applications.
• Selon la version logicielle de votre appareil, certains formats ne sont pas compatibles.
• Certains fichiers peuvent ne pas être lus correctement en fonction de leur encodage.
Lire des vidéos
Sélectionnez une vidéo à lire.
Déplacer le volet de
commande vers la gauche.
Ouvrir la liste de lecture.
Effectuer un retour ou une
avance rapide en faisant
glisser la barre.
Redémarrer la vidéo en cours
de lecture ou revenir à la
vidéo précédente. Maintenir
la touche appuyée pour
effectuer un retour rapide.
Recherche d’autres appareils
pour lire le fichier.
Passer à la vidéo suivante.
Maintenir la touche appuyée
pour effectuer une avance
rapide.
Régler le volume.
Mettre en pause et reprendre
la lecture.
Accéder à des options
supplémentaires.
Modifier le format d’écran.
Déplacer le volet de
commande vers la droite.
Passer en mode d’écran
flottant.
Multimédia
64
Supprimer des vidéos
Appuyez sur → Supprimer, sélectionnez des vidéos, puis appuyez sur Supprimer.
Partager des vidéos
Appuyez sur → Partager via, sélectionnez des vidéos, appuyez sur OK, puis choisissez une
méthode de partage.
Utiliser le lecteur contextuel
Utilisez cette fonctionnalité pour utiliser d’autres applications sans fermer le lecteur vidéo. Lorsque
vous visionnez des vidéos, appuyez sur pour utiliser le lecteur contextuel.
Pour agrandir le lecteur, écartez deux doigts l’un de l’autre sur l’écran ; pour le réduire, rapprochezles.
Pour déplacer le lecteur, maintenez-y le doigt appuyé, puis faites-le glisser vers un autre
emplacement.
YouTube
Utilisez cette application pour regarder des vidéos à partir du site Web YouTube.
Appuyez sur YouTube depuis la liste des applications.
La disponibilité de cette application dépend de votre zone géographique ou de votre
opérateur.
Visionner des vidéos
Appuyez sur , puis saisissez un mot-clé. Sélectionnez l’un des résultats de recherche obtenus pour
visionner la vidéo correspondante.
Appuyez sur l’écran, puis sur et faites pivoter ensuite l’appareil vers la gauche pour afficher la
vidéo en plein écran.
Partager une vidéo
Sélectionnez la vidéo à partager, appuyez sur , puis sélectionnez un mode de partage.
Mettre une vidéo en ligne
Appuyez sur Vidéos ajoutées → , sélectionnez une vidéo, saisissez les informations de la vidéo,
puis appuyez sur ENVOYER.
65
Boutiques d’applications et
multimédia
Play Store
Utilisez cette application pour télécharger des applications et des jeux, gratuits ou payants, pouvant
s’exécuter sur votre appareil.
Appuyez sur Play Store depuis la liste des applications.
La disponibilité de cette application dépend de votre zone géographique ou de votre
opérateur.
Installer des applications
Parcourez les applications par catégorie ou appuyez sur pour effectuer une recherche à l’aide
d’un mot-clé.
Sélectionnez une application pour en afficher les informations. Pour la télécharger, appuyez sur
INSTALLER. Si l’application est payante, appuyez sur le prix et suivez les instructions qui s’affichent à
l’écran pour effectuer l’achat.
• Lorsqu’une nouvelle version d’une application installée est disponible, une icône de
mise à jour apparaît dans le volet des raccourcis en haut de l’écran. Ouvrez le volet des
raccourcis et appuyez sur l’icône pour mettre à jour l’application.
• Pour installer des applications téléchargées depuis d’autres sources, depuis la liste des
applications, appuyez sur Paramètres → Général → Sécurité → Sources inconnues.
Désinstaller des applications
Désinstallez les applications téléchargées sur Play Store.
Appuyez sur → Mes applications, sélectionnez une application à supprimer depuis la liste des
applications installées, puis appuyez sur DÉSINSTALLER.
Boutiques d’applications et multimédia
66
Samsung Apps
Utilisez cette application pour télécharger des applications Samsung, gratuites ou payantes. Pour
plus d’informations, visitez le site apps.samsung.com.
Appuyez sur Samsung Apps depuis la liste des applications.
La disponibilité de cette application dépend de votre zone géographique ou de votre
opérateur.
Installer des applications
Parcourez les applications par catégorie. Appuyez sur CATÉGORIES pour sélectionner une catégorie.
Pour rechercher une application, appuyez sur en haut de l’écran, puis saisissez un mot-clé dans le
champ de recherche.
Sélectionnez une application pour en afficher les informations. Pour la télécharger, appuyez sur
Installer. Si l’application est payante, appuyez sur le prix et suivez les instructions qui s’affichent à
l’écran pour effectuer l’achat.
Lorsqu’une nouvelle version d’une application installée est disponible, une icône de mise à
jour apparaît dans le volet des raccourcis en haut de l’écran. Ouvrez le volet des raccourcis et
appuyez sur l’icône pour mettre à jour l’application.
Play Livres
Utilisez cette application pour télécharger des fichiers de livre.
Appuyez sur Play Livres depuis la liste des applications.
La disponibilité de cette application dépend de votre zone géographique ou de votre
opérateur.
Boutiques d’applications et multimédia
67
Play Films
Utilisez cette application pour regarder, télécharger et louer des films ou des émissions TV.
Appuyez sur Play Films depuis la liste des applications.
La disponibilité de cette application dépend de votre zone géographique ou de votre
opérateur.
Play Musique
Utilisez cette application pour écouter de la musique à l’aide de l’appareil ou de la musique diffusée
sur le service Cloud de Google.
Appuyez sur Play Musique depuis la liste des applications.
La disponibilité de cette application dépend de votre zone géographique ou de votre
opérateur.
Play Jeux
Utilisez cette application pour télécharger des jeux et y jouer.
Appuyez sur Play Jeux depuis la liste des applications.
La disponibilité de cette application dépend de votre zone géographique ou de votre
opérateur.
Play Kiosque
Utilisez cette application pour lire les articles les plus récents.
Appuyez sur Play Kiosque depuis la liste des applications.
La disponibilité de cette application dépend de votre zone géographique ou de votre
opérateur.
68
Utilitaires
Mémo
Cette application permet d’enregistrer des informations importantes à sauvegarder et à consulter
ultérieurement.
Appuyez sur Mémo depuis la liste des applications.
Ajouter et gérer des catégories
Créez des catégories afin de trier et gérer vos mémos.
Pour ajouter une catégorie, appuyez sur → Ajouter une catégorie, saisissez le nom d’une
catégorie, puis appuyez sur OK.
Pour supprimer une catégorie, appuyez sur → Modifier les catégories, puis sur près de la
catégorie concernée.
Pour renommer une catégorie, sélectionnez une catégorie, appuyez sur → Renommer une
catégorie, nommez la catégorie, puis appuyez sur OK.
Pour modifier l’ordre des catégories, appuyez sur → Modifier les catégories, puis appuyez sur
près de la catégorie concernée et faite-la glisser vers le haut ou le bas, vers une nouvelle position.
Créer un mémo
Appuyez sur dans la liste des mémos et saisissez votre mémo. Lors de la rédaction d’un mémo,
utilisez les options suivantes :
• : créer ou définir une catégorie.
• : insérer des images.
• : enregistrer un mémo vocal et l’insérer.
Pour enregistrer le mémo, appuyez sur Enreg.
Pour modifier un mémo, appuyez sur le mémo, puis sur le contenu du mémo.
Naviguer parmi les mémos
Parcourez les mémos miniatures en faisant défiler l’écran vers le haut ou le bas.
Pour rechercher un mémo, appuyez sur .
Pour envoyer un mémo à d’autres personnes, appuyez sur → Sélectionner, sélectionnez un mémo,
puis appuyez sur .
Utilitaires
69
Pour imprimer les mémos en connectant l’appareil à une imprimante, appuyez sur →
Sélectionner, sélectionnez les mémos, puis appuyez sur . Certaines imprimantes peuvent ne pas
être compatibles avec l’appareil.
Pour supprimer des mémos, appuyez sur → Sélectionner, sélectionnez les mémos, puis appuyez
sur .
Afficher un mémo
Appuyez sur la miniature d’un mémo pour l’ouvrir.
Pour supprimer le mémo, appuyez sur .
Pour envoyer le mémo à d’autres personnes, appuyez sur .
Pour imprimer le mémo en connectant l’appareil à une imprimante, appuyez sur . Certaines
imprimantes peuvent ne pas être compatibles avec l’appareil.
S Planner
Utilisez cette application pour gérer des événements et des tâches.
Appuyez sur S Planner depuis la liste des applications.
Créer un événement ou une tâche
Appuyez sur , puis utilisez l’une des méthodes suivantes :
• Événement : saisir un événement avec un paramètre de répétition en option.
• Tâche : saisir une tâche avec un paramètre de priorité en option.
Pour ajouter plus rapidement un événement ou une tâche, appuyez deux fois sur une date.
Utilitaires
70
Saisissez un titre et indiquez le calendrier que vous souhaitez utiliser pour la synchronisation.
Appuyez ensuite sur Modif. détails événement ou sur Modifier détails tâche pour ajouter d’autres
détails, comme la fréquence de répétition de l’événement ou de la tâche, son association ou non à
une alerte préalable ou le lieu concerné.
Joignez une carte indiquant le lieu de l’événement. Saisissez l’adresse dans le champ Emplacement,
appuyez sur près du champ, puis signalez l’endroit précis en maintenant le doigt appuyé sur la
carte qui apparaît.
Synchroniser avec Google Agenda
Depuis la liste des applications, appuyez sur Paramètres → Général → Comptes → Google sous
MES COMPTES, sélectionnez le compte Google, puis cochez la case Synchroniser Calendrier.
Pour réaliser la synchronisation manuellement et mettre le calendrier à jour, appuyez sur S Planner
→ → Synchroniser depuis la liste des applications.
Pour afficher les événements ou les tâches synchronisés, appuyez sur → Calendriers, puis cochez
le compte Google.
Modifier le type de calendrier
En haut de l’écran, sélectionnez un type de calendrier (annuel, mensuel, hebdomadaire, etc.).
Rechercher un événement ou une tâche
Appuyez sur , puis sélectionnez un critère de recherche.
Pour afficher les événements ou les tâches de la date du jour, appuyez sur Aujourd’hui tout en haut
de l’écran.
Supprimer un événement ou une tâche
Sélectionnez un événement ou une tâche, puis appuyez sur → Supprimer.
Partager un événement ou une tâche
Sélectionnez un événement ou une tâche, appuyez sur → Partager via, puis sélectionnez un mode
de partage.
Utilitaires
71
Dropbox
Utilisez cette application pour enregistrer et partager des fichiers avec d’autres personnes via le
stockage Cloud Dropbox. Lorsque vous enregistrez des fichiers dans Dropbox, votre appareil les
synchronise automatiquement avec le serveur Web et tout autre ordinateur sur lequel le service
Dropbox est installé.
Appuyez sur Dropbox depuis la liste des applications.
La disponibilité de cette application dépend de votre zone géographique ou de votre
opérateur.
Connectez-vous à votre compte Dropbox. Si vous n’en possédez pas, créez un compte Dropbox.
Une fois la Dropbox activée, appuyez sur Activer Chargements appareil photo pour télécharger
automatiquement sur Dropbox les photos et les vidéos prises avec l’appareil photo de l’appareil.
Pour afficher les photos ou les vidéos importées, appuyez sur . Pour partager ou supprimer des
fichiers ou créer des albums, appuyez sur , puis sélectionnez les fichiers.
Pour importer des fichiers dans Dropbox, appuyez sur → → Transférer ici → Photos ou vidéos
ou Autres fichiers. Pour ouvrir des fichiers dans Dropbox, sélectionnez un fichier.
En mode affichage d’une image ou d’une vidéo, appuyez sur pour les ajouter à la liste des favoris.
Pour ouvrir des fichiers dans la liste des favoris, appuyez sur .
Cloud
Utilisez cette fonction pour synchroniser vos fichiers ou sauvegarder les données de vos applications
avec votre compte Samsung ou Dropbox.
Depuis la liste des applications, appuyez sur Paramètres → Général → Cloud.
La disponibilité de cette fonction dépend de votre zone géographique ou de votre
opérateur.
Synchroniser avec le compte Samsung
Pour synchroniser les fichiers, sélectionnez votre compte Samsung ou appuyez sur Paramètres sync.
Utilitaires
72
Sauvegarder ou restaurer des données
Pour sauvegarder ou restaurer des données avec votre compte Samsung, appuyez sur Sauvegarder
ou Restaurer.
Synchroniser avec la Dropbox
Appuyez sur Associer le compte Dropbox, puis accédez au compte Dropbox. Suivez les instructions
qui s’affichent à l’écran pour procéder à la configuration.
Lorsque vous êtes connecté, appuyez sur Autoriser afin que l’appareil synchronise
automatiquement les fichiers avec la Dropbox dès que vous effectuez des modifications.
Google Drive
Utilisez cette application pour créer et modifier des documents et les partager avec d’autres
personnes via le service de stockage Google Drive. Lorsque vous créez des documents ou
téléchargez des fichiers dans Google Drive, votre appareil les synchronise automatiquement avec le
serveur Web et tout autre ordinateur sur lequel Google Drive est installé. Accédez à vos fichiers sans
transfert ou téléchargement.
Appuyez sur Drive depuis la liste des applications.
La disponibilité de cette application dépend de votre zone géographique ou de votre
opérateur.
Hancom Viewer
Cette application permet de consulter des documents dans différents formats, y compris des feuilles
de calcul et des présentations.
Appuyez sur Hancom Viewer depuis la liste des applications.
Utilitaires
73
Rechercher des documents
Appuyez sur Ouvrir pour parcourir un document.
Lorsque vous parcourez un document, utilisez l’une des options suivantes :
• : créer un dossier.
• : récupérer de nouveaux documents.
• : trier des documents et des dossiers.
• : modifier le mode d’affichage.
• : sélectionner des documents ou des dossiers.
Pour rechercher des documents récemment utilisés, appuyez sur Documents récents.
Lire des documents
Appuyez sur un document dans Documents récents ou dans un dossier.
Appuyez sur ou sur , puis utilisez l’une des fonctions suivantes :
Traitement de texte
• Rechercher : rechercher du texte.
• Zoom : modifier la taille de l’affichage.
• Descriptif du document : afficher les détails du document, comme le titre, la date et l’auteur.
• Imprimer : imprimer le document en connectant l’appareil à une imprimante. Certaines
imprimantes peuvent ne pas être compatibles avec l’appareil.
• Envoyer : envoyer le document à d’autres personnes ou le partager.
• Modifier : modifier le document. Pour utiliser cette fonction, vous devez télécharger et installer
l’application.
• Aide : afficher des informations sur Hancom Viewer.
Utilitaires
74
Présentation
• Rechercher : rechercher du texte.
• Zoom : modifier la taille de l’affichage.
• Descriptif du document : afficher les détails du document, comme le titre, la date et l’auteur.
• Diaporama : démarrer un diaporama à partir de la première page.
• À partir de la diapositive active : démarrer un diaporama à partir de la page en cours.
• Mode Présentateur : afficher les outils de présentation sur l’appareil lorsque celui-ci est
connecté à un moniteur externe.
• Imprimer : imprimer le document en connectant l’appareil à une imprimante. Certaines
imprimantes peuvent ne pas être compatibles avec l’appareil.
• Envoyer : envoyer le document à d’autres personnes ou le partager.
• Modifier : modifier le document. Pour utiliser cette fonction, vous devez télécharger et installer
l’application.
• Aide : afficher des informations sur Hancom Viewer.
Feuille de calcul
• Rechercher : rechercher du texte.
• Zoom : modifier la taille de l’affichage.
• Descriptif du document : afficher les détails du document, comme le titre, la date et l’auteur.
• Trier : trier les cellules selon des critères spécifiques.
• Afficher les formules : afficher les formules à l’intérieur des cellules à la place des résultats.
• Figer les volets : garder la ligne sélectionnée en place.
• Quadrillage : afficher ou masquer les grilles de ligne.
• Afficher tous les commentaires : afficher ou masquer des mémos sur le document.
• Zone d’impression : sélectionner une zone à imprimer.
• Imprimer : imprimer le document en connectant l’appareil à une imprimante. Certaines
imprimantes peuvent ne pas être compatibles avec l’appareil.
• Envoyer : envoyer le document à d’autres personnes ou le partager.
• Modifier : modifier le document. Pour utiliser cette fonction, vous devez télécharger et installer
l’application.
• Aide : afficher des informations sur Hancom Viewer.
Utilitaires
75
PDF
• Rechercher : rechercher du texte.
• Envoyer : envoyer le document à d’autres personnes ou le partager.
• Propriétés : afficher les détails du document, comme le titre, la date et l’auteur.
• Zoom : modifier la taille de l’affichage.
• Masquer les commentaires : afficher ou masquer les commentaires sur le document.
• Défilement vertical / Affichage en continu / Défilement horizontal : modifier le mode
d’affichage.
• Mode lecture : afficher le contenu du document uniquement, sans les marges.
• Atteindre la page : accéder à une page indiquée.
• Signets : afficher des signets sur le document.
• Imprimer : imprimer le document en connectant l’appareil à une imprimante. Certaines
imprimantes peuvent ne pas être compatibles avec l’appareil.
Alarme
Utilisez cette application pour définir des alarmes pour les événements importants.
Appuyez sur Alarme depuis la liste des applications.
Activer ou désactiver cette
alarme.
Utilitaires
76
Créer une alarme
Appuyez sur , sélectionnez l’heure d’activation de l’alarme, sélectionnez les jours de répétition de
l’alarme, puis appuyez sur Enreg.
• Alarme géolocalisée : définir une position. L’alarme ne se déclenche qu’une fois que vous vous
trouvez à l’endroit indiqué.
• Répéter : définir le délai à l’issue duquel l’alarme doit sonner une nouvelle fois et le nombre de
répétitions.
• Alarme intelligente : utiliser cette option pour que votre appareil simule des sons naturels avant
le déclenchement de l’alarme principale.
Arrêter ou répéter une alarme
Pour éteindre une alarme, faites glisser votre doigt sur l’icône . Pour répéter l’alarme après une
période donnée, faites glisser votre doigt sur l’icône .
Supprimer une alarme
Appuyez sur → Supprimer, sélectionnez l'alarme à supprimer, puis appuyez sur OK.
Horloge mondiale
Utilisez cette application pour vérifier l’heure de nombreuses grandes villes dans le monde.
Appuyez sur Horloge mondiale depuis la liste des applications.
Créer une horloge
Appuyez sur , puis saisissez le nom d’une ville ou sélectionnez-en une dans la liste.
Pour appliquer l’heure d’été, appuyez sur → Sélectionner, sélectionnez une horloge, puis appuyez
sur .
Supprimer une horloge
Appuyez sur → Sélectionner, sélectionnez l'horloge à supprimer, puis appuyez sur .
Utilitaires
77
Calculatrice
Utilisez cette application pour réaliser des calculs simples ou complexes.
Appuyez sur Calculatrice depuis la liste des applications.
Pour effacer l’historique, appuyez sur .
S Voice
Utilisez cette application pour commander vocalement l’appareil pour qu’il exécute différentes
fonctions.
Appuyez sur S Voice depuis la liste des applications. Vous pouvez également appuyer deux fois sur la
touche Accueil.
• La disponibilité de cette application dépend de votre zone géographique ou de votre
opérateur.
• Cette application n’est pas prise en charge dans certaines langues.
Voici quelques exemples de commandes vocales :
• Ouvrir le lecteur MP3
• Lancer la calculatrice
• Vérifier le calendrier
Conseils pour améliorer la reconnaissance vocale :
• Parlez clairement.
• Parlez dans des endroits tranquilles.
• N’utilisez pas de langage injurieux ni d’argot.
• Évitez de parler avec un accent local.
Selon l’environnement où vous vous trouvez ou la manière dont vous parlez, il se peut que l’appareil
ne reconnaisse pas vos commandes ou qu’il exécute des commandes erronées.
Utilitaires
78
Utiliser des commandes de réveil sur l’écran verrouillé
Sur l’écran verrouillé, vous pouvez utiliser différentes fonctions avec des commandes de réveil
prédéfinies.
Pour activer cette fonction, appuyez sur → Paramètres → Réveil vocal, puis faites glisser le
curseur Réveil vocal vers la droite. Appuyez sur Définir commande de réveil, puis configurez les
fonctions et les commandes vocales.
Recherche Google
Utilisez cette application pour effectuer une recherche non seulement sur Internet, mais aussi dans
les applications et le contenu de l’appareil.
Appuyez sur Google depuis la liste des applications.
La disponibilité de cette application dépend de votre zone géographique ou de votre
opérateur.
Effectuer une recherche sur l’appareil
Appuyez sur le champ de recherche, puis saisissez un mot-clé. Vous pouvez également appuyer sur
, puis énoncer un mot-clé.
Google Now
Démarrez la recherche Google pour afficher les cartes Google Now qui vous indiquent, dès que vous
en avez besoin, la météo du jour, les infos trafic en temps réel, vos prochains rendez-vous, et bien
plus encore.
Rejoignez Google Now lorsque vous ouvrez pour la première fois la recherche Google. Pour modifier
les paramètres de Google Now, appuyez sur → Paramètres, puis faites glisser le curseur Google
Now vers la gauche ou la droite.
Utilitaires
79
Recherche vocale
Utilisez cette application pour rechercher des pages Web oralement.
Appuyez sur Recherche vocale depuis la liste des applications.
La disponibilité de cette application dépend de votre zone géographique ou de votre
opérateur.
Quand l’instruction Parlez maintenant apparaît à l’écran, prononcez un mot-clé ou une expression.
Mes fichiers
Utilisez cette application pour accéder à tous les types de fichiers stockés dans l’appareil, y compris
les images, vidéos, musiques et clips musicaux.
Appuyez sur Mes fichiers depuis la liste des applications.
Visionner des fichiers
Les fichiers enregistrés dans l’appareil sont triés par critères. Depuis le volet gauche de l’écran,
sélectionnez l’une des catégories suivantes :
• Chronologie : afficher les fichiers regroupés par date.
• Dossiers Favoris : afficher les raccourcis vers les dossiers.
• Dossiers : afficher les fichiers enregistrés dans la mémoire interne ou sur une carte mémoire,
ainsi que les raccourcis vers les serveurs FTP.
• Catégories : afficher les fichiers triés selon leurs types.
• Applications : afficher les fichiers enregistrés ou créés dans des applications spécifiques.
Sélectionnez une catégorie, puis un fichier ou un dossier à ouvrir.
Utilitaires
80
Sélectionnez une catégorie, appuyez sur , puis utilisez l’une des options suivantes :
• Sélectionner : sélectionner des fichiers ou des dossiers.
• Trier par : trier les fichiers ou les dossiers.
• Ajouter aux dossiers Favoris : ajouter un raccourci vers le dossier dans Dossiers Favoris.
• Ajouter raccourci à l’écran d’accueil : ajouter un raccourci à un fichier ou un dossier vers l’écran
d’accueil.
• Ajouter FTP : ajouter un raccourci vers un serveur FTP dans Dossiers.
• Rechercher des périphériques : rechercher des périphériques dont le partage multimédia est
activé.
• Options d’affichage : modifier les options d’affichage des fichiers.
Appuyez sur → Sélectionner, sélectionnez un fichier ou un dossier, puis utilisez l’une des options
suivantes :
• : envoyer des fichiers à d’autres contacts ou les partager.
• : supprimer des fichiers ou des dossiers.
• : déplacer des fichiers ou des dossiers vers un autre dossier.
• : copier des fichiers ou des dossiers vers un autre dossier.
• → Renommer : renommer un fichier ou un dossier.
• → Ajouter aux dossiers Favoris : ajouter un raccourci vers le dossier dans Dossiers favoris.
• → Ajouter raccourci à l’écran d’accueil : ajouter un raccourci à un fichier ou un dossier vers
l’écran d’accueil.
• → Zip : compresser des fichiers ou des dossiers pour créer un fichier zip.
• → Détails : afficher les détails d’un fichier ou d’un dossier.
Rechercher un fichier
Appuyez sur , puis saisissez un critère de recherche.
Afficher les informations de mémoire
Appuyez sur pour afficher les informations de mémoire relatives à l’appareil et à la carte mémoire.
Modifier le mode d’affichage
Appuyez sur pour modifier le mode d’affichage.
Utilitaires
81
Créer un dossier
Appuyez sur , saisissez le nom du dossier, puis appuyez sur OK.
Ajouter des raccourcis à des dossiers
Ajoutez un raccourci aux dossiers fréquemment utilisés dans Dossiers Favoris. Sélectionnez un
dossier et appuyez sur → Ajouter aux dossiers Favoris.
Ajouter des raccourcis de serveur FTP à l’appareil
Ajouter un raccourci vers un serveur FTP dans Dossiers. Appuyez sur → Ajouter FTP, saisissez les
informations sur le serveur FTP, puis appuyez sur OK.
82
Géolocalisation
Maps
Utilisez cette application pour repérer la position de votre appareil, rechercher des lieux ou obtenir
un itinéraire.
Appuyez sur Maps depuis la liste des applications.
La disponibilité de cette application dépend de votre zone géographique ou de votre
opérateur.
Rechercher des lieux
Recherchez des lieux en saisissant une adresse ou un mot-clé. Une fois le lieu trouvé, sélectionnez-le
afin d’afficher des informations détaillées. Pour en savoir plus, consultez l’aide.
Obtenir un itinéraire
Appuyez sur pour définir une adresse de départ et une adresse de destination, et choisir un mode
de transport. L’appareil affiche l’itinéraire à suivre pour arriver à destination.
83
Paramètres
Accéder au menu des paramètres
Utilisez cette application pour configurer l’appareil, définir les paramètres d’une application et
ajouter des comptes.
Appuyez sur Paramètres depuis la liste des applications.
Connexions
Wi-Fi
Activez la fonction Wi-Fi pour permettre la connexion à un réseau Wi-Fi et accéder à Internet ou à
d’autres périphériques réseau.
Pour utiliser des options, appuyez sur .
• Paramètres avancés : personnalisez les paramètres Wi-Fi.
• Touche WPS : connectez-vous à un réseau Wi-Fi sécurisé à l’aide d’une touche WPS.
• Entrée PIN WPS : connectez-vous à un réseau Wi-Fi sécurisé à l’aide d’un code PIN WPS.
• Aide : accédez aux informations d’aide à propos du Wi-Fi.
Politique de mise en veille Wi-Fi
Dans l’écran Paramètres, appuyez sur Connexions → Wi-Fi → → Paramètres avancés → Wi-Fi
activé en mode veille.
Paramètres
84
Paramètres de notification réseau
L’appareil détecte les réseaux Wi-Fi ouverts et affiche une icône dans le volet des raccourcis lorsqu’un
réseau est disponible.
Dans l’écran Paramètres, appuyez sur Connexions → Wi-Fi → → Paramètres avancés et cochez la
case Notification réseau pour activer cette fonctionnalité.
Wi-Fi Direct
Le Wi-Fi Direct autorise la connexion directe entre deux appareils via un réseau Wi-Fi sans passer par
un point d’accès.
Dans l’écran Paramètres, appuyez sur Connexions → Wi-Fi → Wi-Fi Direct.
Bluetooth
Activez la fonction Bluetooth pour échanger des informations sur de courtes distances.
Pour accéder à des options supplémentaires, appuyez sur .
• Délai d’expiration de la visibilité : définissez la durée pendant laquelle l’appareil est visible.
• Fichiers reçus : affichez les fichiers reçus via la fonction Bluetooth.
• Renommer le périphérique : changez le nom de l’appareil.
• Aide : accédez aux informations d’aide à propos du Bluetooth.
Mode Hors-ligne
Désactivez toutes les fonctions sans fil de l’appareil. Vous pouvez uniquement utiliser les services
hors-réseau, c’est-à-dire les fonctions autres que les fonctions Wi-Fi et Bluetooth.
Utilisation des données
Suivez le trace du volume de données utilisées.
• Cycle d’util. des données : indiquez la date à laquelle effectuer la vérification mensuelle des
données.
Pour accéder à des options supplémentaires, appuyez sur .
• Synchroniser les données automatiquement : activez ou désactivez la synchronisation
automatique des applications. Vous pouvez sélectionner les informations à synchroniser pour
chaque compte dans Paramètres → Général → Comptes.
• Points d’accès mobiles : sélectionnez des points d’accès mobiles Wi-Fi afin d’empêcher que les
applications fonctionnant en arrière-plan ne les utilisent.
Paramètres
85
Position
Modifiez les paramètres des informations de localisation.
• Mode : sélectionnez une méthode pour recueillir vos données de localisation.
• DEMANDES DE LOCALISATION RÉCENTES : affichez les applications qui requièrent votre
position et la batterie qu'elles consomment.
• SERVICES DE LOCALISATION : affichez les services de localisation que votre appareil utilise.
• Mes endroits : définissez des profils correspondant à des adresses spécifiques qui vous aideront
à localiser votre position lorsque vous utilisez des options GPS, Wi-Fi ou Bluetooth.
Plus de réseaux
Personnalisez les paramètres permettant de contrôler les connexions avec d’autres appareils ou
réseaux.
Impression
Configurez les paramètres pour les modules d’extension d’imprimante installés sur l’appareil. Vous
pouvez rechercher les imprimantes disponibles ou en ajouter une manuellement pour imprimer des
fichiers via le réseau Wi-Fi ou les services de Cloud.
VPN
Paramétrez des réseaux privés virtuels (VPN) pour vous y connecter.
Ethernet
L’option Ethernet est disponible lorsqu’un adaptateur Ethernet est connecté à l’appareil. Utilisez cette
option pour activer la fonction Ethernet et configurer les paramètres réseau.
Appareils à proximité
• NOM DE L’APPAREIL : affichez le nom de l’appareil.
• Contenus partagés : paramétrez l’appareil pour pouvoir partager son contenu avec d’autres
appareils.
• Appareils autorisés : affichez la liste des appareils qui peuvent accéder à votre appareil.
• Appareils refusés : affichez la liste des appareils qui ne sont pas autorisés à accéder à votre
appareil.
• Destination de téléchargement : sélectionnez l’emplacement de la mémoire dans laquelle
enregistrer les fichiers multimédia téléchargés.
• Téléch. depuis autres app. : paramétrez l’appareil pour pouvoir autoriser le chargement à partir
d’autres appareils.
Paramètres
86
Screen Mirroring
Activez cette fonction pour partager votre écran avec d’autres personnes.
Appareil
Son
Modifiez les paramètres des différents sons de l’appareil.
• Volume : réglez le volume de la musique et des vidéos, des sons système et des notifications.
• Notifications : sélectionnez une sonnerie pour les événements, tels que les messages entrants.
• Sélections audibles : paramétrez l’appareil pour qu’il émette un son lorsque vous sélectionnez
une application ou une option sur l’écran tactile.
• Son verrouillage écran : paramétrez l’appareil pour qu’il émette un son lorsque vous verrouillez
ou déverrouillez l’écran tactile.
• APPLICATIONS SAMSUNG : modifiez les paramètres de notification pour chaque application.
• Son en cas d’appui : paramétrez l’appareil pour qu’il émette un son lorsque vous appuyez sur
une touche.
• Adapt Sound : personnalisez vos réglages audio pour écouter de la musique.
Affichage
Modifiez les paramètres d’affichage.
• Luminosité : définissez la luminosité de l’écran.
• Mise en veille de l’écran : définissez le délai à l’issue duquel l’écran doit s’éteindre
automatiquement.
• Écran de veille : paramétrez l’appareil pour pouvoir activer l’économiseur d’écran lorsque
l’appareil est connecté à une station d’accueil ou est en cours de chargement.
• Affich. pourcentage batterie : paramétrez l’appareil pour qu’il affiche l’autonomie restante de la
batterie.
Paramètres
87
Fenêtres multiples
Activez la fonction Multi-fenêtres pour exécuter plusieurs applications sur le même écran en même
temps.
• Ouvrir en vue Multi-fenêtre : paramétrez l’appareil pour qu’il active la fonction Fenêtres
multiples lorsque vous ouvrez des fichiers dans Mes fichiers ou Vidéo.
Écran de verrouillage
Modifiez les paramètres de l’écran de verrouillage.
• Déverrouillage de l’écran : activez la fonction de déverrouillage sécurisé de l’écran. Les options
suivantes peuvent varier selon la fonction de déverrouillage d’écran sélectionnée.
• Options widget Horloge : configurez les paramètres pour le widget horloge.
– Taille de l’horloge : modifiez la taille de l’horloge.
– Afficher la date : paramétrez l’appareil pour qu’il affiche la date en même temps que l’heure.
• Raccourcis : paramétrez l’appareil pour pouvoir afficher et modifier les raccourcis des
applications sur l’écran verrouillé.
La disponibilité de cette fonction dépend de votre zone géographique ou de votre
opérateur.
• Message personnel : paramétrez l’appareil pour afficher un message personnel sur l’écran
verrouillé.
– Modifier un message personnel : modifiez le message personnel.
• Infos propriétaire : saisissez les informations que vous souhaitez voir apparaître sur l'écran
verrouillé.
• Effet de déverrouillage : sélectionnez un effet à appliquer lorsque vous déverrouillez l’écran.
• Texte d’aide : paramétrez l’appareil pour pouvoir afficher un texte d’aide sur l’écran verrouillé.
Fond d’écran
Modifiez les paramètres du fond d’écran.
• Écran d’accueil : sélectionnez l’image d’arrière-plan de l’écran d’accueil.
• Écran de verrouillage : sélectionnez l’image d’arrière-plan de l’écran de verrouillage.
• Écrans d’accueil et de verrouillage : sélectionnez l’image d’arrière-plan de l’écran d’accueil et
de l’écran de verrouillage.
Paramètres
88
Police
Modifiez les paramètres de la police.
• Police : modifiez le type de police du texte affiché à l’écran.
• Taille de police : modifiez la taille de la police.
Volet des raccourcis
Personnalisez les éléments apparaissant dans le volet des raccourcis.
• Luminosité et volume : paramétrez l’appareil pour qu’il affiche les barres de réglage de la
luminosité et du volume dans le volet des raccourcis.
• Applications recommandées : paramétrez l’appareil pour qu’il affiche la liste des applications
recommandées dans le volet des raccourcis en fonction de vos actions, par exemple lorsque
vous connectez un casque ou un écouteur à l’appareil.
• Déf. bout. config. rapide : réorganisez les touches de paramétrage rapide dans le volet des
raccourcis.
Accessibilité
Les services d’accessibilité sont des fonctions spéciales destinées aux personnes présentant des
handicaps physiques. Accédez aux paramètres suivants et modifiez-les pour améliorer l’accessibilité
à l’appareil.
• Rotation auto. écran : paramétrez l’interface pour qu’elle pivote automatiquement en même
temps que l’appareil.
• Mise en veille de l’écran : définissez le délai à l’issue duquel l’écran doit s’éteindre
automatiquement.
• Énoncer mots de passe : paramétrez l’appareil pour que les mots de passe que vous saisissez
sur les sites Web à l’aide de la fonction TalkBack soient énoncés à voix haute.
• Mode pression unique : paramétrez cette fonction pour commander les notifications en
appuyant sur la touche plutôt qu’en la faisant glisser.
• Afficher le raccourci : ajoutez un raccourci vers le menu Accessibilité ou TalkBack dans le menu
rapide qui apparaît lorsque vous maintenez la touche Marche/Arrêt enfoncée.
• Gérer l’accessibilité : exportez ou importez les paramètres d’accessibilité afin de les partager
avec d’autres appareils.
– Exporter : exportez les paramètres d’accessibilité en cours sous forme de fichier.
– Mise à jour : importez les paramètres d’accessibilité en cours sous forme de fichier.
– Partager via : envoyez le fichier des paramètres d’accessibilité à d’autres personnes.
• TalkBack : activez le service TalkBack qui propose des commentaires parlés.
Paramètres
89
• Taille de police : modifiez la taille de la police.
• Gestes d’agrandissement : paramétrez l’appareil pour pouvoir effectuer un zoom avant ou
arrière à l’aide des doigts.
• Couleurs négatives : inversez les couleurs d’affichage pour une meilleure visibilité.
• Rappel de notification : paramétrez l’appareil pour qu’il vous prévienne lorsque vous avez des
notifications et définissez un intervalle pour la répétition de l’alerte.
• Raccourci d’accessibilité : paramétrez l’appareil pour pouvoir activer TalkBack lorsque vous
maintenez la touche Marche/Arrêt enfoncée et maintenez deux doigts appuyés à l’écran.
• Options synthèse vocale :
– MOTEUR TTS FAVORI : sélectionnez un moteur de synthèse vocale. Pour modifier les
paramètres des moteurs de synthèse vocale, appuyez sur .
– Vitesse d’élocution : sélectionnez la vitesse de diction de la synthèse vocale.
– Écouter un exemple : écoutez un exemple de texte parlé.
– État langue par défaut : affichez le statut de la langue par défaut pour la fonction synthèse
vocale.
• Balance audio : réglez la balance audio lors de l’utilisation d’un casque à double oreillette.
• Audio mono : activez le réglage audio monophonique lorsque vous utilisez une seule oreillette.
• Désactiver tous les sons : désactivez tous les sons de l’appareil.
• Sous-titres Google (CC) : paramétrez l’appareil pour qu’il affiche des sous-titres sur les contenus
pris en charge par Google et pour modifier les paramètres des sous-titres.
• Sous-titres Samsung (CC) : paramétrez l’appareil pour qu’il affiche des sous-titres sur les
contenus pris en charge par Samsung et pour modifier les paramètres des sous-titres.
• Menu assistant : paramétrez l’appareil pour pouvoir afficher l’icône d’assistance qui vous
permettra d’accéder aux fonctions prises en charge par les touches externes ou les options du
volet des raccourcis. Vous pouvez également modifier le menu de l’icône de raccourci.
– Main dominante : sélectionnez la main gauche ou droite pour une utilisation aisée du menu
d’assistance.
– Modif. : personnalisez les éléments apparaissant sur le menu d’assistance.
Paramètres
90
• Durée de l’appui prolongé : définissez le délai de reconnaissance lorsque vous maintenez le
doigt appuyé sur l’écran.
• Contrôle par interaction : activez le mode Contrôle par interaction afin d’éviter que l'appareil
réagisse aux saisies malencontreuses qui pourraient se produire dans une application.
Mode Blocage
Sélectionnez les notifications qui seront bloquées et la durée du blocage.
Commandes
Langue et saisie
Modifiez les paramètres de la saisie de texte. La disponibilité de certaines options dépend de la
langue sélectionnée.
Langue
Sélectionnez la langue d’affichage des menus et des applications.
Par défaut
Sélectionnez le type de clavier à utiliser par défaut pour la saisie de texte.
Clavier Samsung
Pour modifier les paramètres du clavier Samsung, appuyez sur .
La disponibilité des options dépend de votre zone géographique ou de votre opérateur.
• LANGUES DE SAISIE : sélectionnez les langues de saisie.
• Texte intuitif : activez le mode de saisie intuitive pour que des suggestions de mots s’affichent
au fur et à mesure de votre saisie. Vous pouvez également personnaliser les paramètres de la
saisie intuitive.
Paramètres
91
• Remplacement automatique : paramétrez l’appareil pour corriger les fautes d’orthographe et
les mots incomplets en appuyant sur la barre d’espace ou un signe de ponctuation.
• Majuscules auto. : paramétrez l’appareil pour pouvoir mettre automatiquement en majuscules
la première lettre qui suit un signe de ponctuation final (point, point d’interrogation et point
d’exclamation).
• Espace auto : paramétrez l’appareil pour qu’il insère automatiquement un espace entre les
mots.
• Ponctuation automatique : paramétrez l’appareil pour qu’il insère un point lorsque vous
appuyez deux fois sur la barre d’espace.
• Aucun(e) : paramétrez l’appareil pour désactiver la fonction de balayage du clavier.
• Saisie en continu : autorisez la saisie continue qui consiste à faire glisser le doigt d’une lettre à
l’autre sur le clavier, sans le soulever.
• Contrôle du curseur : activez la fonction de navigation intelligente qui permet de déplacer le
curseur en faisant défiler le clavier.
• Son : paramétrez l’appareil pour qu’il émette un son lorsque vous appuyez sur une touche.
• Aperçu du caractère : paramétrez l’appareil pour qu’il affiche une image agrandie de chaque
caractère saisi.
• Aide : accédez aux informations d’aide du clavier Samsung.
• Réinitialiser paramètres : réinitialisez les paramètres du clavier Samsung.
Saisie vocale Google
Pour modifier les paramètres de saisie vocale, appuyez sur .
• Sélect. langues saisie : sélectionnez les langues de saisie.
• Bloquer termes choquants : paramétrez l’appareil pour qu’il bloque les mots injurieux lors de la
saisie vocale.
• Reconnaissance vocale hors connexion : téléchargez et installez les données linguistiques
pour la saisie vocale hors-ligne.
Outil reconnais. vocale
Sélectionnez un moteur de reconnaissance vocale.
Cette fonction apparaît lorsque vous utilisez une application de reconnaissance vocale.
Paramètres
92
Recherche vocale
Pour le moteur de reconnaissance vocale Samsung, utilisez les options suivantes :
• Langue : sélectionnez la langue de la reconnaissance vocale.
• Masquer mots injurieux : masquez les mots injurieux dans les résultats de la recherche vocale.
• A propos de : affichez les informations concernant la version.
• Ouvrir via touche accueil : paramétrez l’appareil pour pouvoir lancer S Voice en appuyant deux
fois sur la touche Accueil.
• Réveil vocal : paramétrez l’appareil pour pouvoir lancer la reconnaissance vocale à l’aide d’une
commande de réveil quand vous utilisez S Voice.
• Événements manqués : paramétrez l’appareil pour qu’il vérifie les messages ou événements
manqués lorsque vous lancez S Voice en appuyant sur la touche du casque/écouteur.
• Adresse personnelle : saisissez l’adresse à utiliser dans les informations de localisation de la
reconnaissance vocale.
• Se connecter à Facebook : indiquez oralement les informations de votre compte Facebook
pour utiliser Facebook à l’aide de l’application S Voice.
• Se connecter à Twitter : indiquez oralement les informations de votre compte Twitter pour
l’utiliser avec l’application S Voice.
Pour le moteur de reconnaissance vocale Google, utilisez les options suivantes :
• Langue : sélectionnez la langue de la reconnaissance vocale.
• Sortie vocale : paramétrez l’appareil pour qu’il vous prévienne de l’action en cours à l’aide d’un
retour vocal.
• Bloquer termes choquants : masquez les mots injurieux dans les résultats de la recherche
vocale.
• Reconnaissance vocale hors connexion : téléchargez et installez les données linguistiques
pour la saisie vocale hors-ligne.
• Casque Bluetooth : paramétrez l’appareil pour qu'il autorise la recherche vocale avec un casque
Bluetooth lorsque ce dernier est connecté à l’appareil.
Paramètres
93
Options synthèse vocale
• MOTEUR TTS FAVORI : sélectionnez un moteur de synthèse vocale. Pour modifier les paramètres
des moteurs de synthèse vocale, appuyez sur .
• Vitesse d’élocution : sélectionnez la vitesse de diction de la synthèse vocale.
• Écouter un exemple : écoutez un exemple de texte parlé.
• État langue par défaut : affichez le statut de la langue par défaut pour la fonction synthèse
vocale.
Vitesse du curseur
Réglez la vitesse du curseur de la souris ou du pavé tactile connectés à l’appareil.
Mouvement de paume
Activez la fonction des mouvements de la main pour contrôler l’appareil par un simple contact avec
l’écran tactile.
• Capture d’écran : paramétrez l’appareil pour pouvoir effectuer une capture d’écran en balayant
l’écran avec le côté de la main vers la gauche ou vers la droite.
• Muet/pause : paramétrez l’appareil pour pouvoir interrompre la lecture d’un fichier multimédia
en effleurant l’écran de la paume de la main.
Smart Screen
• Smart Stay : paramétrez l’appareil pour empêcher le rétroéclairage de se désactiver lorsque
vous consultez l’écran.
Paramètres
94
Général
Comptes
Ajoutez des comptes de messagerie électronique ou de réseaux sociaux.
Cloud
Modifiez les paramètres de synchronisation des données ou des fichiers avec votre compte Samsung
ou le stockage Cloud Dropbox.
Sauvegarder et réinitialiser
Modifiez les paramètres de gestion des paramètres et des données.
• Sauvegarder mes données : paramétrez l’appareil pour pouvoir sauvegarder vos paramètres et
vos données d’application sur le serveur Google.
• Compte de sauvegarde : configurez ou modifiez votre compte de sauvegarde Google.
• Restauration auto. : paramétrez l’appareil pour pouvoir restaurer vos paramètres et vos
données d’application lorsque les applications sont réinstallées.
• Rétablir param. par défaut : restaurez les valeurs par défaut de l’appareil et supprimez toutes
vos données.
Date et heure
Accédez aux paramètres suivants et modifiez-les afin de contrôler l’affichage de l’heure et de la date.
Si la batterie est entièrement déchargée ou si vous la retirez de l’appareil, l’heure et la date
sont alors réinitialisées.
• Définir la date : réglez la date du jour manuellement.
• Définir l’heure : réglez l’heure manuellement.
• Sélectionner le fuseau horaire : sélectionnez le fuseau horaire de votre zone géographique.
• Format 24 heures : affichez l’heure au format 24 heures.
• Format de date : sélectionnez le format de la date.
Paramètres
95
Accessoires
Modifiez les paramètres des accessoires.
• Son station d’accueil : paramétrez l’appareil pour qu’il émette un son lorsque vous le connectez
à une station d’accueil ou l’en déconnectez.
• Mode de sortie audio : paramétrez l’appareil pour pouvoir utiliser le haut-parleur de la station
d’accueil lorsque l’appareil y est connecté.
• Déverrouillage automatique : paramétrez l’appareil pour pouvoir le déverrouiller
automatiquement lorsque vous l’ouvrez.
Gestionnaire d’applications
Affichez et gérez les applications installées sur votre appareil.
Applications par défaut
Sélectionnez un paramètre par défaut pour utiliser des applications.
• Accueil : sélectionnez un mode d’écran d’accueil par défaut.
Utilisateurs
Paramétrez et gérez les profils utilisateurs pour des réglages personnalisés.
Batterie
Affichez la quantité d’énergie consommée par votre appareil.
• Affich. pourcentage batterie : paramétrez l’appareil pour qu’il affiche l’autonomie restante de la
batterie.
Mode Éco. d’énergie
Activez le mode Économie d’énergie et modifiez les paramètres.
• PARAMÈTRES DU MODE D’ÉCONOMIE D’ÉNERGIE : paramétrez l’appareil pour pouvoir limiter
l’utilisation de certaines ressources système de l’appareil.
• Sortie d’écran : paramétrez l’appareil pour pouvoir diminuer la luminosité de l’écran.
• En savoir plus : découvrez comment réduire la consommation de la batterie.
Paramètres
96
Stockage
Affichez les informations relatives à la quantité de stockage disponible sur l’appareil et la carte
mémoire, ou formatez une carte mémoire.
Le formatage d’une carte mémoire supprime définitivement toutes les données qui y sont
stockées.
La mémoire interne de votre appareil a une capacité réelle disponible inférieure à la capacité
indiquée, car elle est en partie occupée par le système d’exploitation et les applications
installées par défaut. La capacité disponible peut varier lorsque vous mettez à jour l’appareil.
Sécurité
Modifiez les paramètres de sécurité de l’appareil.
• Crypter l’appareil : définissez un mot de passe pour crypter les données enregistrées sur
l’appareil. Vous devez saisir ce mot de passe à chaque fois que vous allumez l’appareil.
Chargez la batterie avant d’activer ce paramètre, car il peut arriver que le cryptage des
données dure plus d’une heure.
• Crypter la carte SD externe : paramétrez l’appareil pour pouvoir crypter les fichiers contenus
sur une carte mémoire.
Votre appareil ne sera pas en mesure de lire les fichiers cryptés si vous le réinitialisez alors
que ces paramètres sont activés. Désactivez ces paramètres avant de réinitialiser votre
appareil.
• Contrôle à distance : paramétrez l’appareil pour pouvoir le contrôler à distance via Internet
si vous l’égarez ou s’il vous est dérobé. Pour utiliser cette fonctionnalité, vous devez vous
connecter à votre compte Samsung.
– ENREGISTREMENT DU COMPTE : enregistrez ou connectez-vous à votre compte Samsung.
– Utiliser réseaux sans fil : paramétrez l’appareil pour pouvoir autoriser la collecte des
données de localisation en cas de perte ou de vol ou retrouver l’appareil via le réseau Wi-Fi.
• Accéder au site Web : accédez au site Web Traçage du mobile (findmymobile.samsung.com). Ce
site vous permet de repérer et de contrôler un appareil égaré ou dérobé.
• Rendre le mots de passe visibles : paramétrez l’appareil pour qu’il affiche votre mot de passe à
mesure que vous le saisissez.
• Admin. de périphérique : affichez les administrateurs de votre appareil. Vous pouvez autoriser
les administrateurs de l’appareil à appliquer de nouvelles règles à celui-ci.
Paramètres
97
• Sources inconnues : choisissez d’installer des applications à partir de n’importe quelle source.
Dans le cas contraire, vous pourrez télécharger des applications uniquement depuis Play Store.
• Vérifier les applications : paramétrez l’appareil pour permettre à Google de vérifier que les
applications ne présentent aucun danger avant de les installer.
• MàJ de politique sécurité :
– Mises à jour automatiques : paramétrez l’appareil pour qu’il vérifie et télécharge
automatiquement les mises à jour de sécurité.
– Rechercher les mises à jour : vérifiez les mises à jour de sécurité.
• Envoyer des rapports de sécurité : paramétrez l’appareil pour qu’il envoie automatiquement
des rapports de sécurité lorsque l’appareil est connecté à un réseau Wi-Fi.
• Type de stockage : définissez un type de stockage pour les fichiers d’identification.
• Infos d’ident. sécurisées : recourez à des certificats et des identifiants pour sécuriser l’utilisation
des diverses applications.
• Installer depuis stock. périph. : installez les certificats cryptés stockés sur une clé USB.
• Effacer infos identification : effacez les identifiants de sécurité contenus dans l’appareil et
réinitialisez le mot de passe.
À propos de l’appareil
Accédez aux informations relatives à l’appareil, modifiez le nom de l’appareil ou mettez à jour le
logiciel de l’appareil.
Paramètres Google
Utilisez cette application pour configurer certaines fonctions proposées par Google.
Appuyez sur Paramètres Google depuis la liste des applications.
98
Dépannage
Avant de contacter un centre de service après-vente Samsung, veuillez essayer de mettre en œuvre
les solutions suivantes. Il est possible que certaines situations ne s’appliquent pas à votre appareil.
Lorsque vous allumez ou utilisez votre appareil, un message vous invite à
effectuer l’une des manipulations suivantes :
• Mot de passe : lorsque la fonction de verrouillage est activée, vous devez saisir le mot de passe
que vous avez défini pour l’appareil.
• Code PIN : lorsque vous utilisez l’appareil pour la première fois ou lorsque vous avez activé le
verrouillage de votre appareil par code PIN, vous devez saisir le code PIN fourni avec la carte SIM
ou USIM. Vous pouvez désactiver cette fonction à l’aide du menu de verrouillage de la carte SIM.
• Code PUK : si vous saisissez un code PIN incorrect à plusieurs reprises, la carte SIM ou USIM est
bloquée. Vous devez alors saisir le code PUK fourni par votre opérateur.
• Code PIN2 : lorsque vous accédez à un menu nécessitant le code PIN2, vous devez saisir le code
PIN2 fourni avec la carte SIM ou USIM. Pour en savoir plus, contactez votre opérateur.
Votre appareil affiche des messages d’erreur de réseau et de service
• Lorsque vous vous trouvez dans une zone de mauvaise réception, vous risquez de perdre
la connexion au réseau. Déplacez-vous et réessayez. Lorsque vous vous déplacez, plusieurs
messages d’erreur peuvent apparaître.
• Certaines options ne sont pas accessibles sans abonnement. Pour en savoir plus, contactez votre
opérateur.
Votre appareil ne s’allume pas
• Lorsque la batterie est entièrement déchargée, il n’est pas possible d’allumer l’appareil.
Rechargez complètement la batterie avant d’allumer l’appareil.
• Il est possible que la batterie ne soit pas correctement installée. Réinsérez la batterie.
• Essuyez les deux contacts dorés et réinsérez la batterie.
Dépannage
99
Mauvaise réaction ou lenteur de l’écran tactile
• Si vous fixez sur l’écran tactile un cache de protection ou tout autre accessoire en option, il est
possible que l’écran ne fonctionne pas correctement.
• Si vous portez des gants, si vos mains ne sont pas parfaitement propres, ou si vous appuyez
sur l’écran avec un objet pointu ou vos ongles, l’écran tactile risque de présenter des
dysfonctionnements.
• L’humidité ou le contact avec l’eau peut provoquer des dysfonctionnements de l’écran tactile.
• Redémarrez votre appareil afin de mettre fin à d’éventuels dysfonctionnements logiciels
temporaires.
• Assurez-vous que vous disposez bien de la dernière version logicielle de votre appareil.
• Si l’écran tactile est endommagé ou rayé, contactez un centre de service après-vente Samsung.
Votre appareil se bloque ou est sujet à des erreurs fatales
Si votre appareil ne répond plus ou se bloque, vous devrez éventuellement fermer les applications
ou réinsérer la batterie et réinitialiser votre appareil pour qu’il retrouve un fonctionnement correct. Si
votre appareil se bloque et ne répond plus, maintenez la touche Marche/Arrêt appuyée pendant plus
de 7 secondes afin de redémarrer.
Si vous ne parvenez pas à résoudre le problème à la suite de ces manipulations, procédez à la
réinitialisation des paramètres par défaut. Depuis la liste des applications, appuyez sur Paramètres
→ Général → Sauvegarder et réinitialiser → Rétablir param. par défaut → Réinitialiser le
périphérique → Supprimer tout. Avant de rétablir les paramètres par défaut de votre appareil,
n’oubliez pas d’effectuer des copies de sauvegarde de toutes les données importantes qui y sont
stockées.
Si le problème persiste, contactez un centre de service après-vente Samsung.
Impossible de passer des appels
• Assurez-vous d’être connecté au réseau cellulaire approprié.
• Vérifiez que vous n’avez pas activé la fonction de restriction d’appel pour le numéro de
téléphone que vous composez.
• Vérifiez que vous n’avez pas activé la fonction de restriction d’appel pour le numéro de
téléphone de l’appel entrant.
Vos interlocuteurs ne vous entendent pas
• Vérifiez que le microphone intégré n’est pas recouvert.
• Vérifiez que le microphone est placé suffisamment près de votre bouche.
• Si vous utilisez un kit piéton ou un casque, vérifiez qu’il est correctement branché.
Dépannage
100
Vous percevez un écho lors des appels
Réglez le volume en appuyant sur la touche de volume ou déplacez-vous.
Déconnexions fréquentes du réseau cellulaire ou d’Internet, ou mauvaise
qualité audio
• Assurez-vous que rien n’entrave l’antenne intégrée à l’appareil.
• Lorsque vous vous trouvez dans une zone de mauvaise réception, vous risquez de perdre la
connexion au réseau. Vos problèmes de connectivité peuvent être dus à une panne au niveau
de votre opérateur. Déplacez-vous et réessayez.
• Si vous utilisez votre appareil tout en vous déplaçant, il est possible que les services de réseau
sans fil soient désactivés en raison de problèmes sur le réseau de votre opérateur.
L’icône de la batterie est vide
Le niveau de charge de la batterie est faible. Rechargez ou remplacez la batterie.
La batterie ne se charge pas correctement (pour les chargeurs
homologués Samsung)
• Assurez-vous que le chargeur est correctement branché.
• Si les bornes de la batterie sont sales, la batterie peut ne pas se recharger correctement ou
l’appareil risque de s’éteindre. Essuyez les deux contacts dorés et réessayez de recharger la
batterie.
• Sur certains appareils, la batterie ne peut pas être remplacée par l’utilisateur. Pour remplacer ce
type de batterie, contactez un centre de service après-vente Samsung.
La batterie se décharge de plus en plus rapidement
• Lorsque la batterie est exposée à des températures extrêmes, la charge utile peut être réduite.
• La consommation de la batterie augmente lorsque vous utilisez certaines fonctionnalités,
comme les SMS et MMS, ou certaines applications, comme les jeux ou Internet.
• La batterie est un consommable et sa charge utile diminue avec le temps.
Dépannage
101
L’appareil est chaud au toucher
Lorsque vous utilisez plusieurs applications simultanément ou sur une période prolongée, l’appareil
peut chauffer. Ce phénomène est normal et n’affecte ni la durée de vie, ni les performances de
l’appareil.
Messages d’erreur à l’ouverture de l’appareil photo
Pour utiliser l’appareil photo, votre appareil doit disposer de suffisamment de mémoire et sa batterie
être suffisamment chargée. Si vous obtenez des messages d’erreur lors de l’ouverture de l’appareil
photo, tentez les manipulations suivantes :
• Chargez la batterie ou remplacez-la par une autre entièrement chargée.
• Libérez de la mémoire en transférant des fichiers sur un ordinateur ou en supprimant des
éléments de l’appareil.
• Redémarrez l’appareil. Si les problèmes persistent, contactez un centre de service après-vente
Samsung.
Qualité des photos inférieure par rapport à l’aperçu
• La qualité de vos photos peut varier selon l’environnement et les techniques photographiques
utilisées.
• Si vous prenez des photos avec une luminosité insuffisante, de nuit ou en intérieur, l’image
risque d’être floue.
Messages d’erreur à l’ouverture de fichiers multimédia
Si vous obtenez des messages d’erreur lors de l’ouverture de fichiers multimédia ou si vous ne
parvenez pas à les ouvrir, tentez les manipulations suivantes :
• Libérez de la mémoire en transférant des fichiers sur un ordinateur ou en supprimant des
éléments de l’appareil.
• Assurez-vous que le fichier audio n’est pas protégé par des droits DRM (Gestion des droits
d’auteur). Si le fichier est protégé par des droits DRM, vous devez posséder une licence ou une
clé pour pouvoir le lire.
• Vérifiez que votre appareil prend en charge le type du fichier audio.
Dépannage
102
• Votre appareil est compatible avec les photos et vidéos capturées avec ce même appareil. Les
photos et vidéos capturées avec d’autres appareils peuvent ne pas s’afficher correctement.
• Votre appareil prend en charge les fichiers multimédia autorisés par votre opérateur ainsi que
les opérateur, des autres services réseaux. Il est possible que certains contenus circulant sur
Internet, comme des sonneries, vidéos ou fonds d’écran, ne fonctionnent pas correctement.
Impossible de localiser un autre appareil Bluetooth
• Vérifiez que la fonction sans fil Bluetooth est activée sur votre appareil.
• Vérifiez que la fonction sans fil Bluetooth est également activée sur l’appareil auquel vous tentez
de vous connecter.
• Vérifiez que les deux appareils Bluetooth se trouvent bien à l’intérieur du rayon d’action
Bluetooth (10 m maximum).
Si les conseils ci-dessus ne résolvent pas le problème, contactez un centre de service après-vente
Samsung.
Problème de connexion avec un ordinateur
• Assurez-vous que le câble USB utilisé est compatible avec votre appareil.
• Vérifiez que le pilote nécessaire est bien installé sur votre ordinateur et qu’il est à jour.
• Si vous utilisez Windows XP, vérifiez que votre ordinateur est équipé de Windows XP Service
Pack 3 ou de toute version ultérieure.
• Vérifiez que Samsung Kies ou Windows Media Player 10 (ou toute version ultérieure) est installé
sur votre ordinateur.
Votre appareil ne parvient pas à détecter votre position
À certains endroits, comme à l’intérieur d’un bâtiment, les signaux GPS peuvent être faibles. Si cela se
produit, configurez votre appareil pour l’utilisation d’un réseau Wi-Fi ou mobile afin de trouver votre
position.
Dépannage
103
Les données stockées sur l’appareil ont été perdues
Effectuez toujours des copies des données importantes stockées sur votre appareil. Dans le cas
contraire, vous ne pourriez pas récupérer vos données corrompues ou perdues. Samsung ne peut
être tenu responsable de la perte des données stockées sur votre appareil.
Un petit espace est apparu sur le bord externe du boîtier de l’appareil
• Cet espace est une caractéristique de fabrication, et il est possible d’observer un jeu ou une
vibration des pièces.
• Au fil du temps, la friction entre les pièces peut entraîner l’élargissement de cet espace.
www.samsung.com French. 07/2014. Rev.1.1
Le contenu de ce mode d’emploi peut différer par rapport à votre appareil en fonction de votre
zone géographique, votre opérateur ou votre version logicielle, et faire l’objet de modifications sans
préavis.
www.samsung.com
Mode d'emploi
GT-S7580
2
À propos de ce mode d'emploi
Cet appareil vous permet de communiquer et d’accéder à des divertissements de haute qualité,
basés sur les critères de qualité et la technologie de Samsung. Ce mode d’emploi a été spécialement
conçu pour vous permettre de découvrir les fonctions et les caractéristiques de votre appareil.
• Veuillez lire attentivement mode d'emploi, afin de pouvoir l’utiliser correctement et en toute
sécurité.
• Les descriptions sont basées sur les paramètres par défaut de votre appareil.
• Les images et les captures d’écran peuvent différer par rapport à l’aspect réel du produit.
• Le contenu de ce mode d'emploi peut différer par rapport au produit ou à votre version
logicielle, et faire l’objet de modifications sans préavis. Pour obtenir la version la plus récente de
ce mode d’emploi, connectez-vous sur le site Web de Samsung : www.samsung.com.
• Les contenus de qualité élevée nécessitant une forte utilisation du processeur et de la RAM
peuvent avoir une incidence sur les performances générales de l’appareil. Les applications en
rapport avec ces contenus peuvent ne pas fonctionner correctement selon les caractéristiques
de l’appareil et les conditions d’utilisation.
• Les fonctions disponibles et les services supplémentaires peuvent varier selon l’appareil, votre
version logicielle ou votre opérateur.
• Les applications et leurs fonctions peuvent varier en fonction de votre zone géographique ou
des caractéristiques du matériel. Samsung ne peut être tenu responsable des problèmes de
performance relatifs aux applications fournies par des éditeurs de logiciels autres que Samsung.
• Samsung ne peut être tenu responsable des problèmes de performance ou des incompatibilités
découlant de la modification des paramètres de registre par l’utilisateur. Toute tentative de
personnalisation du système d’exploitation peut entraîner des problèmes de fonctionnement de
l’appareil ou de ses applications.
• Les logiciels, sons, fonds d’écran, images ainsi que les autres contenus multimédia fourni(e)s
avec cet appareil sont concédé(e)s sous licence et leur usage est soumis à une utilisation limitée.
L’extraction et l’utilisation de ces éléments à des fins commerciales ou autres constituent
une infraction au regard des lois sur les droits d’auteur. Les utilisateurs sont entièrement
responsables de toute utilisation illégale d’un contenu multimédia.
• Les services de données tels que l’envoi ou la réception de messages, le téléchargement ou
le chargement de données, la synchronisation automatique ou l’utilisation de services de
localisation peuvent occasionner des frais supplémentaires, en fonction de l’offre à laquelle vous
avez souscrite. Afin d’éviter ces frais, choisissez un forfait de connexion approprié. Pour en savoir
plus, contactez votre opérateur.
À propos de ce mode d'emploi
3
• Les applications fournies par défaut avec l’appareil peuvent être modifiées ou ne plus être
disponibles, et ce, sans préavis. Si vous avez des questions à propos d’une application fournie
avec l’appareil, contactez un centre de service après-vente Samsung. Pour les applications
installées par l’utilisateur, contactez les opérateurs.
• Toute modification du système d’exploitation ou installation de logiciels non officiels peut
entraîner des dysfonctionnements et corrompre vos données. Ces actions constituent des
violations de l’accord de licence Samsung et annuleront votre garantie.
Icônes
Avertissement : situations susceptibles de vous blesser ou de blesser autrui
Attention : situations susceptibles d’endommager votre appareil ou d’autres équipements
Remarque : remarques, conseils d’utilisation ou informations complémentaires
Droits d’auteur
Copyright © 2014 Samsung Electronics
Ce mode d’emploi est protégé par les lois internationales sur les droits d’auteur.
Il est interdit de reproduire, distribuer, traduire ou transmettre sous quelque forme et par quelque
moyen que ce soit, électronique ou mécanique, notamment par photocopie, enregistrement
ou stockage dans un système de stockage et de recherche documentaire, tout ou partie de ce
document, sans le consentement préalable écrit de Samsung Electronics.
Marques
• SAMSUNG et le logo SAMSUNG sont des marques déposées de Samsung Electronics.
• Bluetooth® est une marque déposée de Bluetooth SIG, Inc.
• Wi-Fi®, Wi-Fi Protected Setup™, Wi-Fi Direct™, Wi-Fi CERTIFIED™ et le logo Wi-Fi sont des
marques déposées de Wi-Fi Alliance.
• Toutes les autres marques et droits d’auteur demeurent la propriété de leurs propriétaires
respectifs.
4
Table des matières
Démarrage
6 Présentation de l’appareil
7 Touches
8 Contenu du coffret
9 Installer la carte SIM ou USIM et la
batterie
12 Charger la batterie
14 Insérer une carte mémoire
16 Allumer et éteindre l’appareil
17 Manipuler l’appareil
17 Verrouiller et déverrouiller l’appareil
17 Régler le volume
17 Activer le profil Discret
Fonctions de base
18 Icônes d’informations
19 Utiliser l’écran tactile
22 Reconnaissance des mouvements
24 Notifications
24 Écran d’accueil
27 Utiliser les applications
27 Liste des applications
29 Saisir du texte
30 Établir une connexion au réseau Wi-Fi
31 Créer un compte
32 Transférer des fichiers
33 Protéger l’appareil
35 Mettre l’appareil à jour
Communication
36 Téléphone
42 Contacts
46 Messages
47 Email
49 Google Mail
50 Hangouts
51 Google+
51 Google Photos
52 ChatON
Web et réseau
53 Internet
54 Chrome
55 Bluetooth
Table des matières
5
Géolocalisation
84 Maps
85 Local
85 Navigation
Paramètres
86 Accéder au menu des paramètres
86 Connexions
89 Mon appareil
98 Comptes
98 Plus
101 Paramètres Google
Dépannage
Multimédia
57 Musique
59 Appareil photo
64 Galerie
66 Vidéo
68 YouTube
69 Radio
Boutiques d’applications et
multimédia
71 Play Store
72 Samsung Apps
72 Play Livres
73 Play Jeux
73 Play Musique
73 Play Magazines
Utilitaires
74 Mémo
75 S Planner
77 Dropbox
78 Horloge
80 Calculatrice
80 Enregistreur vocal
82 Google
82 Recherche vocale
83 Mes fichiers
83 Téléchargements
6
Démarrage
Présentation de l’appareil
Touche Retour
Touche Menu
Connecteur à fonctions
multiples
Touche Accueil
Écouteur Objectif avant
Capteur de proximité
Microphone
Touche de volume
Écran tactile
Haut-parleur
Antenne principale
Antenne GPS
Flash
Objectif arrière
Touche Marche/Arrêt
Cache arrière
Compartiment pour carte
mémoire
Prise audio 3,5 mm
Démarrage
7
• Ne recouvrez pas la zone autour de l’antenne avec vos mains ou tout autre objet. Cela
peut entraîner des problèmes de connectivité ou décharger la batterie.
• N’utilisez pas de protection d’écran. Cela pourrait entraîner un dysfonctionnement du
capteur.
• Évitez de mettre l’écran tactile en contact avec de l’eau. L’humidité ou le contact avec l’eau
peut provoquer des dysfonctionnements de l’écran tactile.
Touches
Touche Fonction
Marche/Arrêt
• Maintenir cette touche enfoncée pour allumer ou éteindre
l’appareil.
• Maintenir cette touche enfoncée pendant 8 à 10 secondes pour
réinitialiser l’appareil en cas d’erreur fatale, ou s’il ne répond plus
ou se bloque.
• Appuyer sur cette touche pour verrouiller ou déverrouiller
l’appareil. Lorsque l’écran s’éteint, l’appareil passe en mode
Verrouillage.
Menu
• Appuyer sur cette touche pour ouvrir la liste des options
disponibles dans l’écran actuel.
• Depuis l’écran d’accueil, maintenir cette touche enfoncée pour
lancer l’application de recherche Google.
Accueil
• Appuyer sur cette touche pour revenir à l’écran d’accueil.
• Maintenir cette touche enfoncée pour ouvrir la liste des
applications récentes.
Retour • Appuyer sur cette touche pour revenir à l’écran précédent.
Volume • Appuyer sur cette touche pour régler le volume de l’appareil.
Démarrage
8
Contenu du coffret
Vérifiez le contenu du coffret et assurez-vous que tous les éléments suivants sont présents :
• Appareil
• Batterie
• Guide de prise en main rapide
• Les éléments fournis avec l’appareil et les accessoires disponibles peuvent varier en
fonction de votre zone géographique ou de votre opérateur.
• Les accessoires fournis ont été spécialement conçus pour votre appareil et peuvent ne
pas fonctionner avec d’autres appareils.
• L’aspect et les caractéristiques du produit peuvent faire l’objet de modifications sans
préavis.
• Vous pouvez acheter d’autres accessoires auprès de votre revendeur Samsung. Avant
tout achat, assurez-vous qu’ils sont compatibles avec votre appareil.
• Certains accessoires, autres que ceux fournis, peuvent ne pas être compatibles avec votre
appareil.
• Utilisez exclusivement des accessoires homologués par Samsung. Les
dysfonctionnements résultant d’une utilisation d’accessoires non homologués ne sont
pas couverts par le service de garantie.
• La disponibilité de l’ensemble des accessoires dépend entièrement des fabricants. Pour
plus d’informations sur la disponibilité des accessoires, consultez le site Web Samsung.
Démarrage
9
Installer la carte SIM ou USIM et la batterie
Insérez la carte SIM ou USIM fournie par votre opérateur, ainsi que la batterie.
1 Retirez le cache arrière.
Veillez à ne pas abîmer vos ongles en retirant le cache.
Évitez de plier ou de déformer excessivement le cache arrière. Vous risqueriez de
l’endommager.
2 Insérez la carte SIM ou USIM, puce orientée vers le bas.
Démarrage
10
• N’introduisez pas de carte mémoire dans le compartiment prévu pour la carte SIM. Si
la carte mémoire venait à se coincer dans le compartiment prévu pour la carte SIM,
apportez l’appareil dans un centre de service après-vente Samsung afin de la faire retirer.
• Veillez à ne pas perdre ou à ne pas laisser d’autres personnes utiliser votre carte SIM ou
USIM. Samsung ne peut être tenu responsable en cas de dommage ou désagrément
résultant d’une perte ou d’un vol de carte.
3 Insérez la batterie.
2
1
4 Remettez le cache en place.
Démarrage
11
Retirer la carte SIM ou USIM et la batterie
1 Retirez le cache arrière.
2 Retirez la batterie.
3 Retirez la carte SIM/USIM.
Démarrage
12
Charger la batterie
Vous devez charger la batterie avant d’utiliser l’appareil pour la première fois. Pour ce faire, vous
pouvez utiliser le chargeur ou relier l’appareil à un ordinateur à l’aide d’un câble de connexion PC.
Utilisez uniquement des chargeurs, des batteries et des câbles USB homologués par
Samsung. L’utilisation de chargeurs ou de câbles non homologués peut provoquer
l’éclatement de la batterie ou endommager l’appareil.
• Lorsque le niveau de charge de la batterie est faible, l’appareil émet un signal sonore et
affiche un message d’avertissement.
• Si la batterie est complètement déchargée, vous ne pouvez pas allumer l’appareil,
même si le chargeur est branché. Rechargez la batterie pendant quelques minutes avant
d’allumer l’appareil.
Charger la batterie avec le chargeur
Branchez la fiche micro-USB du chargeur sur le connecteur à fonctions multiples de l’appareil et
l’autre extrémité sur une prise de courant.
Un branchement incorrect du chargeur peut sérieusement endommager l’appareil. Les
dégâts résultant d’une mauvaise utilisation ne sont pas couverts par la garantie.
Démarrage
13
• L’appareil peut être utilisé en cours de chargement, mais dans ce cas, le chargement
complet de la batterie risque de prendre plus de temps.
• Lorsque l’appareil est en cours de chargement, il est possible que l’écran tactile ne
fonctionne pas en raison de l’instabilité de l’alimentation électrique. Dans ce cas,
débranchez le chargeur de l’appareil.
• Il est possible que l’appareil chauffe lorsqu’il est en cours de chargement. Ce phénomène
est normal et n’affecte ni la durée de vie, ni les performances de l’appareil. Si la
température de la batterie devient trop élevée, le chargement risque de s’interrompre.
• Si l’appareil ne se charge pas correctement, apportez-le, accompagné de son chargeur,
dans un centre de service après-vente Samsung.
Lorsque la batterie est complètement chargée, déconnectez l’appareil du chargeur. Pour ce faire,
débranchez d’abord le chargeur de l’appareil, puis de la prise de courant.
Ne retirez jamais la batterie avant d’avoir débranché le chargeur. Ceci pourrait endommager
l’appareil.
• Pour économiser l’énergie, débranchez le chargeur lorsque vous ne l’utilisez pas. Le
chargeur n’étant pas muni d'une touche Marche/Arrêt, vous devez le débrancher de la
prise de courant pour couper l’alimentation. L’appareil doit rester à proximité de la prise
lors du chargement.
• Le socle de prise de courant doit être installé à proximité du matériel et doit être aisément
accessible.
Vérifier la charge de la batterie
Lorsque vous chargez la batterie et que l’appareil est éteint, les icônes suivantes indiquent l’état du
chargement :
Chargement en cours Chargement terminé
Démarrage
14
Réduire la consommation d’énergie de la batterie
Votre appareil est doté d’options destinées à optimiser l’autonomie de votre batterie. En
personnalisant ces options et en désactivant les applications fonctionnant inutilement en arrièreplan,
vous pouvez utiliser l’appareil plus longtemps entre deux chargements :
• Lorsque vous n’utilisez pas l’appareil, désactivez l’écran tactile en appuyant sur la touche
Marche/Arrêt.
• Fermez toutes les applications fonctionnant inutilement en arrière-plan à l’aide du gestionnaire
de tâches.
• Désactivez la fonction Bluetooth.
• Désactivez la fonction Wi-Fi.
• Désactivez les applications de synchronisation automatique.
• Réduisez la durée du rétroéclairage de l’écran.
• Réduisez la luminosité de l’écran.
Insérer une carte mémoire
L’appareil est compatible avec les cartes mémoire d’une capacité allant jusqu’à 64 Go. Selon le
fabricant et le modèle, certaines cartes mémoire peuvent ne pas être compatibles avec votre
appareil.
• Certaines cartes mémoire peuvent ne pas être parfaitement compatibles avec l’appareil.
L’utilisation d’une carte mémoire incompatible peut endommager l’appareil ou la carte
mémoire elle-même et corrompre les données qui y sont stockées.
• Veillez à insérer la carte mémoire du bon côté.
• Seules les structures de fichiers FAT et exFAT sont compatibles avec les cartes mémoire de
l’appareil. Lorsque vous insérez une carte mémoire formatée avec une autre structure de
fichiers, l’appareil vous invite à la reformater.
• Une trop grande fréquence des opérations d’effacement et d’écriture réduit la durée de
vie des cartes mémoire.
• Lorsque vous insérez une carte mémoire dans l’appareil, le répertoire de fichiers de la
carte apparaît dans le dossier Mes fichiers → Tous les fichiers → SD memory card.
Démarrage
15
1 Ouvrez le compartiment de la carte mémoire.
2 Insérez la carte mémoire en orientant la puce vers le haut.
3 Enfoncez la carte mémoire dans son compartiment jusqu’à ce qu’elle se verrouille.
4 Fermez le compartiment de la carte mémoire.
Retirer une carte mémoire
Avant de retirer la carte mémoire, vous devez au préalable la désactiver pour pouvoir la retirer en
toute sécurité. Depuis l’écran d’accueil, appuyez sur Applis → Paramètres → Plus → Stockage →
Démonter la carte SD.
1 Ouvrez le compartiment de la carte mémoire.
2 Appuyez avec précaution sur la carte mémoire pour la dégager, puis sortez-la du compartiment.
3 Fermez le compartiment de la carte mémoire.
Ne retirez jamais la carte mémoire lorsque l’appareil y enregistre ou lit des informations.
Cela pourrait entraîner une perte ou une corruption des données, ou endommager la carte
mémoire ou l’appareil. Samsung ne peut être tenu responsable en cas de perte de données
résultant d’une utilisation frauduleuse ou en cas de détérioration d’une carte mémoire.
Démarrage
16
Formater une carte mémoire
Une carte mémoire ayant été formatée sur un ordinateur peut ne pas être compatible avec l’appareil.
Formatez la carte mémoire dans l’appareil.
Depuis l’écran d’accueil, appuyez sur Applis → Paramètres → Plus → Stockage → Formater la
carte SD → Formater la carte SD → Supprimer tout.
Avant de formater la carte mémoire, n’oubliez pas d’effectuer des copies de sauvegarde de
toutes les données importantes qui y sont stockées. La garantie du fabricant ne couvre pas
la perte de données résultant des manipulations de l’utilisateur.
Allumer et éteindre l’appareil
Si vous allumez l’appareil pour la première fois, suivez les instructions affichées à l’écran pour
procéder à sa configuration.
Pour allumer l'appareil, maintenez la touche Marche/Arrêt enfoncée pendant quelques secondes.
• Respectez toutes les consignes de sécurité et directives formulées par le personnel
compétent dans les lieux où l’utilisation d’appareils mobiles est interdite, comme par
exemple dans les avions et les hôpitaux.
• Pour désactiver les fonctions d'appel et de connexion sans fil, c'est-à-dire les fonctions
Wi-Fi et Bluetooth, maintenez la touche Marche/Arrêt enfoncée et appuyez sur Mode
Hors-ligne.
Pour éteindre l’appareil, maintenez la touche Marche/Arrêt enfoncée, puis appuyez sur Éteindre.
Démarrage
17
Manipuler l’appareil
Ne recouvrez pas la zone autour de l’antenne avec vos mains ou tout autre objet. Cela peut entraîner
des problèmes de connectivité ou décharger la batterie.
Verrouiller et déverrouiller l’appareil
Pour empêcher toute opération accidentelle de l’appareil lorsque vous ne l’utilisez pas, vous pouvez
le verrouiller. Lorsque vous appuyez sur la touche Marche/Arrêt, l’écran s’éteint et l’appareil passe en
mode Verrouillage. Il se verrouille également automatiquement si vous ne l’utilisez pas pendant un
certain temps.
Pour déverrouiller l’appareil, appuyez sur la touche Marche/Arrêt ou sur la touche Accueil, puis faites
glisser votre doigt dans n’importe quelle direction sur l'écran.
Régler le volume
Pour régler le volume de la sonnerie d’appel ou des sons multimédia, appuyez sur la touche de
volume Haut ou Bas.
Activer le profil Discret
Utilisez l’une des méthodes suivantes :
• Maintenez la touche de volume Bas enfoncée jusqu’à ce que le profil Discret soit activé.
• Maintenez la touche Marche/Arrêt enfoncée, puis appuyez sur Muet ou Vibreur.
• Ouvrez le volet des raccourcis en haut de l’écran, puis appuyez sur Son ou Vibreur.
18
Fonctions de base
Icônes d’informations
Les icônes susceptibles de s'afficher en haut de l’écran vous indiquent le statut de l’appareil. Les
icônes répertoriées dans le tableau ci-dessous sont les plus courantes.
Icône Signification
Aucun signal
Puissance du signal
Itinérance (hors de la zone de service locale)
Réseau GPRS connecté
Réseau EDGE connecté
Réseau UMTS connecté
Réseau HSDPA connecté
Connecté au réseau Wi-Fi
Fonction Bluetooth activée
GPS activé
Appel en cours
Appel manqué
Synchronisation avec le Web
Connecté à un ordinateur
Carte SIM ou USIM absente
Nouveau SMS ou MMS
Alarme activée
Profil Discret activé
Vibreur activé
Fonctions de base
19
Icône Signification
Mode Hors-ligne activé
Une erreur s’est produite ou votre attention est nécessaire
Niveau de charge de la batterie
Utiliser l’écran tactile
L’écran tactile réagit uniquement au doigt.
• Évitez tout contact de l’écran tactile avec d’autres appareils électriques. Les décharges
électrostatiques peuvent provoquer des dysfonctionnements de l’écran tactile.
• Évitez de mettre l’écran tactile en contact avec de l’eau. L’humidité ou le contact avec l’eau
peut provoquer des dysfonctionnements de l’écran tactile.
• Pour éviter d’endommager l’écran tactile, n’appuyez pas dessus avec un objet pointu et
n’exercez aucune pression excessive avec vos doigts.
• Si l’écran tactile reste inactif pendant une période prolongée, des images rémanentes
risquent d’apparaître (ou persistance de l’affichage). Éteignez l’écran tactile lorsque vous
n’utilisez pas l’appareil.
Mouvements
Appuyer
Pour ouvrir une application, sélectionner un élément de menu, activer une commande ou saisir un
caractère sur le clavier, appuyez sur l’écran tactile avec un seul doigt.
Fonctions de base
20
Faire glisser
Pour déplacer un élément vers un nouvel emplacement, maintenez le doigt appuyé sur l’élément et
faites-le glisser sur l’écran.
Appuyer deux fois
Pour effectuer un zoom sur une page web, une carte ou une image, appuyez deux fois sur l'écran.
Appuyez à nouveau à deux reprises pour annuler le zoom.
Fonctions de base
21
Effleurer
Pour passer d’une fenêtre à l’autre, faites glisser votre doigt vers la gauche ou la droite sur l’écran
d’accueil ou dans la liste des applications. Pour parcourir une page Web ou une liste, telle que celle
de vos contacts, faites glisser votre doigt vers le haut ou le bas de l’écran.
Pincer
Pour effectuer un zoom avant sur une page Web, une carte ou une image, placez deux doigts sur
l’écran et écartez-les. Rapprochez-les pour effectuer un zoom arrière.
Fonctions de base
22
Reconnaissance des mouvements
Vous pouvez contrôler l’appareil à l’aide de quelques mouvements simples.
Avant toute chose, vérifiez que la reconnaissance des mouvements est activée. Depuis l’écran
d’accueil, appuyez sur Applis → Paramètres → Mon appareil → Mouvements et gestes, puis faites
glisser le curseur Mouvements et gestes vers la droite.
Si l’appareil est soumis à des secousses ou à des chocs excessifs, cela peut entraîner un
comportement imprévu. Veillez à contrôler vos gestes.
Pivoter l’écran
De nombreuses applications autorisent l’affichage en mode Portrait ou Paysage. Lorsque vous faites
pivoter l’appareil, l’écran s’adapte automatiquement à la nouvelle orientation.
Pour empêcher l'écran de pivoter automatiquement, ouvrez le volet des raccourcis et désélectionnez
l’option Rotation écran.
• Certaines applications ne permettent pas la rotation de l’écran.
• Pour certaines autres applications, l’écran affiché diffère selon l’orientation. Par exemple,
pour utiliser la calculatrice scientifique, vous devez pivoter l’écran en mode Paysage.
Fonctions de base
23
Soulever
Lorsque vous prenez l’appareil dans vos mains alors qu’il est resté inactif pendant un certain temps
ou que l’écran a été désactivé, il vibre pour vous avertir des appels manqués ou des nouveaux
messages.
Retourner
Retournez l'appareil face vers le bas pour désactiver la sonnerie, interrompre la lecture d'un fichier
multimédia ou désactiver le son de la radio FM (en cas d'utilisation du haut-parleur).
Fonctions de base
24
Notifications
Des icônes de notification peuvent apparaître dans le volet des raccourcis en haut de l’écran afin
de vous signaler les appels manqués, les nouveaux messages, les événements à venir, le statut de
l’appareil, et plus encore. Pour ouvrir le volet des raccourcis, faites glisser votre doigt de haut en bas
sur le volet. Pour afficher des notifications supplémentaires, faites défiler la liste vers le bas. Pour
fermer le volet, faites-le glisser de bas en haut.
Depuis le volet des raccourcis, vous pouvez afficher l’état actuel de l’appareil et utiliser les options
suivantes :
• Wi-Fi : activer ou désactiver la fonction Wi-Fi.
• GPS : activer ou désactiver la fonction GPS.
• Son : activer ou désactiver le son ou le vibreur de l'appareil. Vous pouvez activer le mode vibreur
ou discret en mode silencieux.
• Rotation écran : autoriser ou empêcher l’interface de pivoter lorsque vous tournez l’appareil.
• Bluetooth : activer ou désactiver la fonction Bluetooth.
• Données mobiles : activer ou désactiver la connexion de données.
• Mode blocage : activer ou désactiver le mode blocage. En mode blocage, votre appareil bloque
toutes les notifications. Pour sélectionner les notifications qui seront bloquées, appuyez sur
Paramètres → Mon appareil → Mode Blocage.
• Accès Wi-Fi : activer ou désactiver la fonction modem Wi-Fi.
• Mode mains-lib. : activer ou désactiver le mode conduite.
• Synchro. : activer ou désactiver la synchronisation automatique des applications.
• Mode Hors-ligne : activer ou désactiver le mode Hors-ligne.
La disponibilité des options dépend de votre zone géographique ou de votre opérateur.
Écran d’accueil
L’écran d’accueil est le point de départ pour accéder à toutes les fonctions de l’appareil. Il affiche des
icônes d’information, des widgets, des raccourcis vers les applications, etc.
L’écran d’accueil comprend plusieurs volets. Pour afficher les autres volets, faites défiler l’écran vers la
gauche ou la droite.
Fonctions de base
25
Organiser les éléments de l’écran d’accueil
Ajouter une icône d’application
Depuis l’écran d’accueil, appuyez sur Applis, maintenez le doigt appuyé sur une icône d’application,
puis faites-la glisser vers l’aperçu d’un volet d’écran d’accueil.
Ajouter un élément
Personnalisez l'écran d'accueil en y ajoutant des widgets, des dossiers ou des volets.
Maintenez le doigt appuyé sur une zone vide de l’écran d’accueil, puis sélectionnez l’une des
catégories suivantes :
• Applications et widgets : ajoutez des widgets ou des applications à l'écran d'accueil.
• Dossier : créez un nouveau dossier.
• Page : ajoutez un volet à l'écran d'accueil.
Déplacer un élément
Maintenez le doigt appuyé sur l’élément à déplacer, puis faites-le glisser jusqu’à l’emplacement
souhaité. Pour déplacer l’élément vers un autre volet, faites-le glisser vers le bord droit ou gauche de
l’écran.
Supprimer un élément
Maintenez le doigt appuyé sur l’élément à supprimer, puis faites-le glisser vers la corbeille qui
apparaît en haut de l’écran d’accueil. Lorsque la corbeille devient rouge, relâchez l’élément.
Réorganiser les volets d'écran d'accueil
Ajouter un volet
Appuyez sur → Modifier la page → .
Déplacer un volet
Appuyez sur → Modifier la page, maintenez le doigt appuyé sur l’aperçu d’un volet, puis faitesle
glisser jusqu’à l’emplacement souhaité.
Fonctions de base
26
Supprimer un volet
Appuyez sur → Modifier la page, maintenez le doigt appuyé sur l’aperçu d’un volet, puis faitesle
glisser vers la corbeille en haut de l'écran.
Définir un fond d’écran
Définissez une image ou une photo enregistrée dans l’appareil comme fond d’écran d’accueil.
Depuis l’écran d’accueil, appuyez sur → Définir fond d'écran → Écran d'accueil, puis
sélectionnez l’une des options ci-dessous :
• Galerie : photos que vous avez prises avec l’appareil photo ou images téléchargées depuis
Internet.
• Fonds d'écran animés : fonds d'écran animés fournis par défaut avec votre appareil.
• Fonds d'écran : fonds d'écran fournis par défaut avec votre appareil.
Sélectionnez ensuite une image et appuyez sur Déf. fond écran. Vous pouvez également
sélectionner une image, la redimensionner en faisant glisser le cadre et en appuyant sur OK.
Utiliser les widgets
Les widgets sont de petites applications qui permettent d’accéder à des fonctions et des
informations pratiques sur l’écran d’accueil. Vous pouvez ajouter des widgets depuis le volet des
widgets sur l’écran d’accueil.
• Certains widgets permettent de se connecter à des services Web. L’utilisation d’un widget
Internet peut entraîner des frais supplémentaires.
• La disponibilité des widgets dépend de votre zone géographique ou de votre opérateur.
Ajouter des widgets à l’écran d’accueil
Depuis l’écran d’accueil, appuyez sur Applis → Widgets. Faites défiler le volet des widgets vers la
gauche ou la droite, puis maintenez le doigt appuyé sur un widget pour l’ajouter à l’écran d’accueil.
Utiliser le widget Raccourci des paramètres
Depuis l’écran d’accueil, appuyez sur Applis → Widgets, faites défiler vers la gauche ou la droite
pour atteindre le widget Raccourci Paramètres et ouvrir une liste d’options de paramétrage.
Sélectionnez une option de paramétrage pour l’ajouter à l’écran d’accueil comme raccourci.
Fonctions de base
27
Utiliser les applications
Cet appareil peut exécuter différent types d’applications, vous permettant d’utiliser aussi bien des
contenus multimédia que des contenus Internet.
Ouvrir une application
Depuis l’écran d’accueil ou la liste des applications, appuyez sur une icône pour ouvrir l’application
correspondante.
Ouvrir des applications récemment utilisées
Maintenez la touche Accueil appuyée pour ouvrir la liste des applications récemment utilisées.
Appuyez sur une icône pour ouvrir l’application correspondante.
Fermer une application
Fermez les applications fonctionnant inutilement en arrière-plan pour économiser la batterie et
optimiser les performances de l’appareil.
Maintenez la touche Accueil enfoncée, puis appuyez sur et sur Fin près de l’application à fermer.
Pour fermer toutes les applications en cours d’exécution, appuyez sur Fermer tout près du nombre
total d’applications actives. Vous pouvez également maintenir la touche Accueil enfoncée et appuyer
sur .
Liste des applications
La liste des applications affiche les icônes de toutes vos applications, y compris celles récemment
installées.
Depuis l’écran d’accueil, appuyez sur Applis pour ouvrir la liste des applications.
Pour afficher les autres volets, faites défiler l’écran vers la gauche ou la droite.
Organiser les applications
Appuyez sur → Modifier, maintenez le doigt appuyé sur une application, puis faites-la glisser
jusqu’à l’emplacement souhaité. Pour déplacer l’élément vers un autre volet, faites-le glisser vers le
bord droit ou gauche de l’écran.
Fonctions de base
28
Organiser les applications dans des dossiers
Placez les applications similaires dans un même dossier pour faciliter leur utilisation.
Appuyez sur → Modifier, maintenez le doigt appuyé sur une application, puis faites-la glisser
vers Créer dossier. Saisissez le nom du dossier, puis appuyez sur OK. Placez les applications dans
le nouveau dossier en les faisant glisser, puis appuyez sur Enreg. pour sauvegarder la nouvelle
configuration.
Réorganiser les volets d'applications
Placez deux doigts sur l’écran et resserrez-les pour passer en mode Modification. Maintenez ensuite
le doigt appuyé sur l’aperçu d’un volet, puis faites-le glisser jusqu’à l’emplacement souhaité.
Installer des applications
Utilisez les boutiques d’applications, comme Samsung Apps, pour télécharger et installer des
applications.
Désinstaller des applications
Appuyez sur → Désinstaller, puis sélectionnez l’application à désinstaller.
Il est impossible de désinstaller les applications fournies par défaut avec l’appareil.
Partager des applications
Partagez des applications téléchargées avec d’autres utilisateurs par e-mail, Bluetooth ou toute autre
méthode.
Appuyez sur → Partager applications, sélectionnez des applications, appuyez sur OK, puis
choisissez une méthode de partage. Les étapes suivantes dépendent de la méthode de partage
sélectionnée.
Fonctions de base
29
Saisir du texte
Pour saisir du texte, utilisez le clavier Samsung ou la fonction de saisie vocale.
La saisie de texte est impossible dans certaines langues. Pour saisir du texte, vous devez
sélectionner une des langues prises en charge.
Modifier le type de clavier
Appuyez sur une zone de saisie, ouvrez le volet des raccourcis, appuyez sur Mode de saisie, puis
choisissez le type de clavier à utiliser.
Utiliser le clavier Samsung
Modifier la disposition du clavier
Appuyez sur → Alphabets ou Nombres et symboles, puis appuyez sur Clavier Azerty ou Clavier
3x4.
Sur le clavier 3x4, une touche correspond à trois ou quatre caractères. Pour saisir un
caractère, appuyez à plusieurs reprises sur la touche correspondante pour accéder à celui-ci.
Passer à la ligne suivante.
Supprimer le caractère précédent.
Saisir des chiffres et des signes de
ponctuation.
Saisir des majuscules.
Accéder aux paramètres du clavier
Samsung.
Insérer un espace.
Saisir des majuscules
Appuyez sur avant de saisir un caractère. Pour saisir l’ensemble de votre texte en majuscules,
appuyez deux fois sur cette touche.
Modifier la langue du clavier
Ajoutez des langues au clavier, puis faites glisser la barre d’espace vers la gauche ou la droite pour
modifier la langue du clavier.
Fonctions de base
30
Dicter du texte
Activez la fonction de saisie vocale, puis parlez dans le microphone. L’appareil affiche à l’écran ce que
vous venez de dire.
Si l’appareil ne reconnaît pas correctement les mots, appuyez sur le texte mis en surbrillance et
sélectionnez une autre proposition dans la liste déroulante qui apparaît.
Pour modifier la langue de la reconnaissance vocale ou en ajouter une autre, appuyez sur la langue
actuellement prise en charge.
Copier et coller du texte
Maintenez le doigt appuyé sur le texte souhaité, faites glisser l’icône ou pour redimensionner
la sélection, puis appuyez sur Copier pour copier le texte ou sur Couper pour le couper. Le texte
sélectionné est copié dans le presse-papier.
Pour le coller dans une zone de saisie, maintenez le doigt appuyé à l'endroit où vous souhaitez
insérer le texte, puis appuyez sur → Coller.
Établir une connexion au réseau Wi-Fi
Connectez l’appareil à un réseau Wi-Fi pour pouvoir utiliser Internet ou partager des fichiers
multimédia avec d’autres appareils (p. 86).
Activer ou désactiver le réseau Wi-Fi
Ouvrez le volet des raccourcis, puis appuyez sur Wi-Fi pour activer ou désactiver la fonction.
Lorsque vous n’utilisez pas le réseau Wi-Fi, désactivez-le afin d’économiser la batterie.
Établir une connexion à un réseau Wi-Fi
Depuis la liste des applications, appuyez sur Paramètres → Connexions → Wi-Fi, puis faites glisser
le curseur Wi-Fi vers la droite.
Sélectionnez un réseau dans la liste des réseaux Wi-Fi détectés, saisissez un mot de passe, le cas
échéant, puis appuyez sur Connexion. Les réseaux nécessitant un mot de passe sont signalés par
une icône représentant un verrou. Après connexion à un réseau Wi-Fi, l’appareil s’y connectera
automatiquement dès qu’il sera disponible.
Fonctions de base
31
Ajouter un réseau Wi-Fi
Si le réseau souhaité n’apparaît pas dans la liste, appuyez sur Ajouter un réseau Wi-Fi au bas de la
liste des réseaux. Saisissez le nom du réseau dans la zone SSID du réseau, sélectionnez le type de
sécurité, indiquez votre mot de passe si le réseau est protégé, puis appuyez sur Connexion.
Supprimer un réseau Wi-Fi
Si un réseau ne doit plus être utilisé, même s’il s’agit du réseau actuellement activé, vous pouvez le
supprimer afin que l’appareil ne s’y connecte plus automatiquement. Sélectionnez le réseau dans la
liste, puis appuyez sur Oublier.
Créer un compte
Les applications Google, comme Play Store, nécessitent un compte Google et Samsung Apps
requiert un compte Samsung. Créez des comptes Google et Samsung afin de profiter au maximum
de votre appareil.
Ajouter des comptes
Lorsque vous ouvrez une application Google, suivez les instructions qui apparaissent à l’écran. Pour
créer un compte Google, vous n’avez pas besoin de vous connecter.
Pour vous connecter à un compte Google ou en créer un, ouvrez la liste des applications et appuyez
sur Paramètres → Comptes → Ajouter compte → Google. Appuyez ensuite sur Nouveau pour
créer un compte ou sur Compte existant pour vous connecter, puis suivez les instructions à l’écran
pour procéder à la configuration. Vous pouvez utiliser plusieurs comptes Google sur l’appareil.
Vous pouvez également créer un compte Samsung.
Supprimer un compte
Depuis la liste des applications, appuyez sur Paramètres → Comptes, sélectionnez un nom sous
l’option Mes comptes, choisissez le compte à supprimer, puis appuyez sur Supp. compte.
Fonctions de base
32
Transférer des fichiers
Vous pouvez transférer différents types de fichiers (sons, vidéos, images, etc.) de l’appareil vers un
ordinateur, et inversement.
Les formats de fichiers suivants sont pris en charge par certaines applications. En fonction
de la version logicielle de l’appareil ou du système d’exploitation de l’ordinateur, certains
formats ne sont pas compatibles.
• Musique : mp3, m4a, mp4, 3gp, 3ga, wma, ogg, oga, aac, flac, wav, amr, awb, mid, midi,
xmf, mxmf, imy, rttl, rtx et ota
• Image : bmp, gif, jpg et png
• Vidéo : 3gp, mp4, avi, wmv, flv, asf, m4v, webm et mkv
• Document : doc, docx, dot, dotx, xls, xlsx, xltx, csv, ppt, pptx, pps, ppsx, pot, potx, pdf,
hwp, txt, asc, rtf et zip
Si les applications ne peuvent pas lire les fichiers au format divX ou ac3, installez les
applications qui les prennent en charge.
Connecter l’appareil avec Samsung Kies
Samsung Kies est un logiciel qui permet de gérer vos contenus multimédias et vos informations
personnelles avec des appareils Samsung. Téléchargez la dernière version de Samsung Kies à partir
du site Web Samsung.
1 Raccordez l’appareil à un ordinateur à l’aide du câble de connexion PC.
Samsung Kies démarre automatiquement sur l’ordinateur. Si Samsung Kies ne démarre pas,
double-cliquez sur l’icône Samsung Kies sur votre ordinateur.
2 Transférez des fichiers entre votre appareil et l’ordinateur.
Pour plus d’informations, consultez l’aide de Samsung Kies.
Connecter l’appareil à Windows Media Player
Assurez-vous que Windows Media Player est bien installé sur votre ordinateur.
1 Raccordez l’appareil à un ordinateur à l’aide du câble de connexion PC.
2 Ouvrez Windows Media Player pour synchroniser les fichiers audio.
Fonctions de base
33
Connecter l’appareil en tant qu’appareil multimédia
1 Raccordez l’appareil à un ordinateur à l’aide du câble de connexion PC.
2 Ouvrez le volet des raccourcis, puis appuyez sur Connecté en tant que périphérique
multimédia → Périphérique multimédia (MTP).
Appuyez sur Appareil photo (PTP) si votre ordinateur ne gère pas le protocole MTP (Media
Transfer Protocol) ou ne dispose pas du pilote approprié.
3 Transférez des fichiers entre votre appareil et l’ordinateur.
Protéger l’appareil
Vous pouvez empêcher toute personne d’utiliser votre appareil et de consulter les données et
informations personnelles qui y sont enregistrées. Pour protéger votre appareil, vous pouvez définir
un code de déverrouillage. Sans ce code, l’appareil ne pourra pas être déverrouillé.
Déverrouillage par reconnaissance faciale
Depuis la liste des applications, appuyez sur Paramètres → Mon appareil → Écran de verrouillage
→ Déverrouillage de l'écran → Déverrouillage visage.
Positionnez votre visage dans le cadre de mise au point. Définissez ensuite un code PIN ou un
modèle de déverrouillage de secours à utiliser si la procédure de déverrouillage par reconnaissance
faciale échoue.
Fonctions de base
34
Déverrouillage par modèle
Depuis la liste des applications, appuyez sur Paramètres → Mon appareil → Écran de verrouillage
→ Déverrouillage de l'écran → Modèle.
Dessinez un modèle en reliant au moins quatre points, puis recommencez pour valider. Définissez un
code PIN de déverrouillage de secours pour déverrouiller l’écran en cas d’oubli du modèle.
Déverrouillage par code PIN
Depuis la liste des applications, appuyez sur Paramètres → Mon appareil → Écran de verrouillage
→ Déverrouillage de l'écran → Code PIN.
Saisissez au moins quatre chiffres, puis recommencez pour valider.
Déverrouillage par mot de passe
Depuis la liste des applications, appuyez sur Paramètres → Mon appareil → Écran de verrouillage
→ Déverrouillage de l'écran → Mot de passe.
Saisissez au moins quatre caractères, y compris des chiffres et des symboles, puis recommencez pour
valider.
Fonctions de base
35
Déverrouiller l’appareil
Allumez l’écran en appuyant sur la touche Marche/Arrêt ou sur la touche Accueil, puis saisissez le
code de déverrouillage.
Si vous oubliez le code de déverrouillage, apportez l’appareil dans un centre de service
après-vente Samsung pour le réinitialiser.
Mettre l’appareil à jour
L’appareil peut être mis à jour avec la version logicielle la plus récente.
La disponibilité de cette fonction dépend de votre zone géographique ou de votre
opérateur.
Mettre l’appareil à jour avec Samsung Kies
Démarrez Samsung Kies et raccordez l’appareil à un ordinateur. Samsung Kies reconnaît
automatiquement l’appareil et affiche, le cas échéant, les mises à jour disponibles. Pour lancer la mise
à jour, cliquez sur la touche Mettre à jour dans la boîte de dialogue. Pour plus d’informations sur la
mise à jour, consultez l’aide Samsung Kies.
• Lorsque vous mettez votre appareil à jour, n’éteignez pas l’ordinateur et ne déconnectez
pas le câble USB.
• Ne raccordez pas non plus d’autres appareils multimédia à l’ordinateur. Cela pourrait
interférer avec le processus de mise à jour.
Mettre l’appareil à jour sans connexion PC
Grâce au service FOTA (Firmware Over The Air), le logiciel de l’appareil peut être mis à jour sans
passer par une connexion avec un ordinateur.
Depuis la liste des applications, appuyez sur Paramètres → Plus → À propos de l'appareil → Mise
à jour logicielle → Mettre à jour.
36
Communication
Téléphone
Utilisez cette application pour passer un appel ou y répondre.
Appuyez sur Téléphone depuis la liste des applications.
Passer des appels
Passer un appel
Utilisez l’une des méthodes suivantes :
• Clavier : composez le numéro à l’aide du clavier, puis appuyez sur .
• Journal : passez un appel à partir de l’historique des appels et des messages entrants et
sortants.
• Favoris : passez un appel à partir de votre liste de contacts favoris.
• Contacts : passez un appel à partir de votre liste de contacts.
Numéros d’appel abrégés
Pour composer un numéro abrégé, maintenez le doigt appuyé sur le chiffre correspondant.
Saisie intuitive de numéros
Lorsque vous composez des numéros sur le clavier, l’appareil vous suggère automatiquement des
numéros. Pour passer un appel, sélectionnez un des numéros proposés.
Communication
37
Rechercher des contacts
Pour trouver un contact dans la liste de contacts, saisissez un nom, un numéro de téléphone ou une
adresse e-mail. À mesure que vous saisissez des caractères, l’appareil vous suggère des contacts.
Pour passer un appel, sélectionnez un de ces contacts.
Appeler un numéro à l’étranger
Maintenez le doigt appuyé sur la touche 0 jusqu’à ce que le signe + apparaisse. Composez l’indicatif
du pays, l’indicatif régional et le numéro de téléphone, puis appuyez sur .
Options au cours d'un appel vocal
Les options suivantes sont disponibles au cours d’un appel vocal :
• : mettre un appel en attente. Appuyez sur pour reprendre l'appel en attente.
• Ajouter : effectuer un autre appel.
• Clavier : ouvrir le clavier.
• Fin : terminer l'appel en cours.
• HP : activer le haut-parleur. Lors de l’utilisation du haut-parleur, tenez l’appareil éloigné de vos
oreilles.
• Muet : désactiver le microphone afin que votre correspondant ne puisse pas vous entendre.
• Casque : sélectionner un casque Bluetooth, à condition qu’il soit connecté à l’appareil.
• Permuter : passer d’un appel à l’autre.
• Fusionner : organiser une conférence téléphonique lorsque vous êtes en liaison avec deux
correspondants à la fois. Répétez cette même procédure pour ajouter d’autres correspondants.
Cette fonction est disponible uniquement si vous avez activé le service de conférence
téléphonique.
• → Contacts : ouvrir votre liste de contacts.
• → Message : envoyer un message.
• → Mémo : créer un mémo.
• → Transférer : mettre le premier correspondant en contact avec le second. Dans ce cas,
vous êtes déconnecté de la conversation.
• → Gérer la conférence : converser en privé avec un correspondant au cours d’une
conférence téléphonique ou déconnecter un correspondant de la conférence.
Communication
38
Ajouter des contacts
Pour ajouter un numéro de téléphone à la liste de contacts à partir du clavier, composez le numéro,
puis appuyez sur Ajouter aux contacts.
Envoyer un message
Appuyez sur → Envoyer message pour envoyer un message au numéro à l'écran.
Afficher les journaux d’appels
Pour afficher l’historique des appels entrants et sortants, appuyez sur Journal.
Pour filtrer le journal d’appels, appuyez sur → Afficher, puis sélectionnez une option.
Numérotation fixe
Il est possible de configurer l’appareil pour limiter les appels sortants aux numéros précédés de
préfixes spécifiés. Ces préfixes sont enregistrés sur la carte SIM ou USIM.
Appuyez sur → Paramètres d'appel → Paramètres supplémentaires → Numérotation fixe
→ Activer FDN, puis saisissez le code PIN2 fourni avec la carte SIM ou USIM. Appuyez sur Liste FDN,
puis ajoutez des numéros.
Restriction d’appel
Il est possible de configurer l’appareil pour empêcher certains appels sortants. Vous pouvez, par
exemple, désactiver les appels à l’étranger.
Appuyez sur → Paramètres d'appel → Paramètres supplémentaires → Restriction d'appel,
sélectionnez un type d’appel, une option de restriction d’appel, puis saisissez un mot de passe.
Recevoir des appels
Répondre à un appel
Lorsque vous recevez un appel, faites glisser votre doigt sur l'icône .
Si le signal d’appel est actif, vous pouvez recevoir un autre appel. Lorsque vous recevez un deuxième
appel, mettez fin au premier appel ou mettez-le en attente.
Communication
39
Rejeter un appel
Lorsque vous recevez un appel, faites glisser votre doigt sur l'icône .
Pour envoyer un message lorsque vous rejetez un appel entrant, appuyez sur Rejeter l’appel avec
message. Pour créer le message de rejet, appuyez sur → Paramètres d'appel → Définir les
messages de rejet.
Rejeter automatiquement des appels de numéros indésirables
Appuyez sur → Paramètres d'appel → Rejet de l'appel → Mode de rejet automatique →
Numéros rejetés auto, puis sur Liste de rejet auto. Appuyez sur Créer, composez un numéro,
affectez-lui une catégorie, puis appuyez sur Enreg.
Appels manqués
Si vous manquez un appel, l’icône apparaît dans la barre d’état. Ouvrez le volet des raccourcis
pour afficher la liste des appels manqués.
Signal d’appel
Le signal d’appel est un service fourni par l’opérateur. Vous pouvez utiliser ce service pour suspendre
un appel en cours et prendre un appel entrant.
Pour utiliser ce service, appuyez sur → Paramètres d'appel → Paramètres supplémentaires →
Signal d'appel.
Transfert d’appel
Il est possible de configurer l’appareil pour qu’il transfère automatiquement les appels vers un
numéro spécifié.
Appuyez sur → Paramètres d'appel → Paramètres supplémentaires → Transfert d'appel, puis
sélectionnez un type et une condition d’appel. Composez un numéro, puis appuyez sur Activer.
Communication
40
Appels visio
Passer un appel visio
Entrez le numéro ou sélectionnez un contact dans la liste des contacts, puis appuyez sur .
Options au cours d’un appel visio
Les options suivantes sont disponibles au cours d’un appel visio :
• Objectif : basculer entre l’objectif avant et arrière.
• Muet : désactiver le microphone afin que votre correspondant ne puisse pas vous entendre.
• Fin : terminer l'appel en cours.
• → Masquer mon image : masquer votre image à l'interlocuteur.
• → Image sortante : sélectionner l'image à afficher à votre correspondant.
• → Clavier : ouvrir le clavier.
• → Basculer sur le casque : sélectionner un casque Bluetooth, à condition qu’il soit connecté
à l’appareil.
• → Désactiver haut-parleur : désactiver la fonction haut-parleur.
• → Émotions animées : associer des émoticônes à votre image.
• → Vue thème : associer des icônes décoratives à votre image.
• → Act. dessin animé : passer en mode d'affichage dessin animé.
Maintenez le doigt appuyé sur l’image de votre correspondant pour accéder aux options suivantes :
• Capturer une image : capturer l’image de votre correspondant.
• Enregistrer une vidéo : enregistrer une vidéo de l'appel visio.
Dans de nombreux pays, il est illégal d’enregistrer un appel sans l’autorisation préalable du
correspondant.
Communication
41
Maintenez le doigt appuyé sur votre image pour accéder aux options suivantes :
• Objectif : basculer entre l’objectif avant et arrière.
• Image sortante : sélectionner l'image à afficher à votre correspondant.
Permuter les images
Pour permuter les images, faites glisser l’image de l’un des correspondants sur celle de l’autre.
Écouter la messagerie vocale
Maintenez le doigt appuyé sur la touche 1 du clavier, puis suivez les instructions de votre opérateur.
Communication
42
Contacts
Utilisez cette application pour gérer les contacts, y compris les numéros de téléphone, les adresses
e-mail, et plus encore.
Appuyez sur Contacts depuis la liste des applications.
Gérer les contacts
Appuyez sur Contacts.
Créer un contact
Appuyez sur , puis saisissez les informations d’un contact.
• : ajouter une image.
• / : ajouter ou supprimer un champ d'information.
Modifier un contact
Sélectionnez un contact à modifier, puis appuyez sur .
Supprimer un contact
Sélectionnez un contact à supprimer, puis appuyez sur → Supprimer.
Configurer un numéro d’appel abrégé
Appuyez sur → Numérotation rapide, sélectionnez un numéro d’appel abrégé, puis le contact
correspondant. Pour supprimer un numéro d’appel abrégé, maintenez le doigt appuyé sur le chiffre
correspondant, puis appuyez sur Supprimer.
Communication
43
Rechercher des contacts
Appuyez sur Contacts.
Utilisez l’une des méthodes de recherche suivantes :
• Faites défiler la liste de contacts vers le haut ou le bas.
• Pour faire défiler la liste rapidement, placez votre index à droite de la liste de contacts et faites
défiler vers le haut ou le bas.
• Appuyez sur le champ de recherche tout en haut de la liste de contacts, puis saisissez vos
critères de recherche.
Une fois le contact sélectionné, choisissez l’une des options suivantes :
• : ajouter le contact aux favoris.
• / : passer un appel vocal ou visio.
• : rédiger un message.
• : rédiger un e-mail.
Afficher les contacts
Appuyez sur Contacts.
Par défaut, l'appareil affiche tous les contacts enregistrés.
Appuyez sur → Contacts à afficher, puis sélectionnez la source à partir de laquelle les contacts
doivent être affichés.
Synchroniser des contacts
Appuyez sur Contacts.
Synchroniser les contacts de l’appareil avec les contacts Google
Appuyez sur → Fusionner les comptes → Fusionner avec Google.
Les contacts Google sont caractérisés par l’icône .
Synchroniser les contacts de l’appareil avec les contacts Samsung
Appuyez sur → Fusionner les comptes → Fusionner avec Samsung.
Les contacts Samsung sont caractérisés par l’icône .
Communication
44
Importer et exporter des contacts
Appuyez sur Contacts.
Importer des contacts
Appuyez sur → Importer/Exporter → Importer depuis stockage USB, Importer depuis la
carte SD ou Importer depuis la carte SIM.
Exporter des contacts
Appuyez sur → Importer/Exporter → Exporter vers le stockage USB, Exporter vers la carte SD
ou Exporter vers la carte SIM.
Partager des contacts
Appuyez sur → Partager carte de visite via, sélectionnez des contacts, appuyez sur OK, puis
sélectionnez un mode de partage.
Contacts favoris
Appuyez sur Favoris.
Dans l'onglet des favoris, appuyez sur , puis choisissez l’une des options suivantes :
• Rechercher : rechercher des contacts.
• Ajouter aux favoris : ajouter des contacts aux favoris.
• Supprimer des favoris : retirer des contacts des favoris.
• Affichage : Grille / Affichage : Liste : afficher les contacts sous forme de grille ou de liste.
Communication
45
Groupes de contacts
Appuyez sur Groupes.
Ajouter des contacts à un groupe
Sélectionnez un groupe, puis appuyez sur . Sélectionnez les contacts à ajouter, puis appuyez sur
OK.
Gérer les groupes
Dans l'onglet des groupes, appuyez sur , puis choisissez l’une des options suivantes :
• Créer : créer un groupe.
• Rechercher : rechercher des contacts.
• Modifier l'ordre : maintenir le doigt appuyé sur près du nom du groupe, faire glisser l'icône
vers le haut ou le bas jusqu’à l’emplacement souhaité, puis appuyer sur OK.
• Supprimer des groupes : sélectionner les groupes à supprimer, puis appuyer sur Supprimer.
Vous ne pouvez pas supprimer les groupes par défaut.
Envoyer un message ou un e-mail aux membres d’un groupe
Sélectionnez un groupe, appuyez sur → Envoyer message ou Envoyer un e-mail, sélectionnez
des membres, puis appuyez sur OK.
Carte de visite
Appuyez sur Contacts.
Créez une carte de visite et envoyez-la à vos contacts.
En haut de la liste des contacts, appuyez sur Profil configuré, saisissez vos coordonnées, comme
votre numéro de téléphone, votre adresse e-mail et votre adresse postale, puis appuyez sur Enreg.
Si, lorsque vous avez configuré votre appareil, vous avez enregistré vos coordonnées d’utilisateur,
sélectionnez la carte de visite dans MOI, puis appuyez sur pour la modifier.
Appuyez sur → Partager carte de visite via, puis sélectionnez un mode de partage.
Communication
46
Messages
Utilisez cette application pour envoyer des messages texte (SMS) ou multimédia (MMS).
Appuyez sur Messages depuis la liste des applications.
L’envoi ou la réception de messages en dehors de la zone couverte par votre opérateur peut
occasionner des frais supplémentaires, en fonction de l’offre à laquelle vous avez souscrite.
Pour en savoir plus, contactez votre opérateur.
Envoyer des messages
Appuyez sur , ajoutez des destinataires, composez un message, puis appuyez sur pour
envoyer le message.
Pour ajouter des destinataires, utilisez l’une des méthodes suivantes :
• Saisissez un numéro de téléphone.
• Appuyez sur , sélectionnez des contacts, puis appuyez sur OK.
Pour envoyer un message multimédia, utilisez l’une des méthodes suivantes :
• Appuyez sur et joignez des images, vidéos, contacts, mémos, événements, etc.
• Pour ajouter un objet, appuyez sur → Ajouter un objet.
Envoyer des messages programmés
Lorsque vous rédigez un message, appuyez sur → Envoi programmé. Définissez la date et
l’heure, puis appuyez sur OK. L’appareil envoie le message à l’heure et à la date indiquées.
• Le message ne sera pas envoyé à l’heure et à la date programmées, si l’appareil est éteint,
s’il n’est pas connecté au réseau ou si le réseau est instable.
• Cette fonction est basée sur l’heure et la date configurées sur l’appareil. Si vous changez
de fuseau horaire et que le réseau ne met pas ces informations à jour, il se peut que
l’heure et la date soient incorrectes.
Communication
47
Lire les messages entrants
Les messages entrants sont regroupés sous forme de fils de discussion par contact.
Pour afficher les messages d’un contact, sélectionnez ce contact.
Écouter la messagerie vocale
Maintenez le doigt appuyé sur la touche 1 du clavier, puis suivez les instructions de votre opérateur.
Email
Utilisez cette application pour envoyer ou consulter des e-mails.
Appuyez sur Email depuis la liste des applications.
Configurer des comptes de messagerie électronique
Lorsque vous ouvrez l’application Email pour la première fois, configurez un compte de messagerie
électronique.
Saisissez votre adresse e-mail et votre mot de passe. Pour configurer un compte de messagerie
électronique privé, comme Google Mail, appuyez sur Suivant ; pour configurer un compte de
messagerie électronique professionnel, appuyez sur Config manuelle. Suivez ensuite les instructions
qui s’affichent à l’écran pour procéder à la configuration du compte.
Pour configurer un compte de messagerie électronique supplémentaire, appuyez sur →
Paramètres → Ajouter compte.
Envoyer des messages
Sélectionnez le compte de messagerie électronique que vous souhaitez utiliser, puis appuyez sur
en haut de l’écran. Saisissez les destinataires, l’objet et le message, puis appuyez sur pour envoyer
l’e-mail.
Pour ajouter un destinataire figurant dans la liste de contacts, appuyez sur .
Appuyez sur pour joindre des images, vidéos, contacts, mémos, événements, etc.
Appuyez sur → pour insérer dans le message des images, événements, contacts, informations
de localisation et bien plus encore.
Communication
48
Envoyer des messages programmés
Lorsque vous rédigez un message, appuyez sur → E-mail programmé. Cochez la case E-mail
programmé, définissez une heure et une date, puis appuyez sur OK. L’appareil envoie le message à
l’heure et à la date indiquées.
• Le message ne sera pas envoyé à l’heure et à la date programmées, si l’appareil est éteint,
s’il n’est pas connecté au réseau ou si le réseau est instable.
• Cette fonction est basée sur l’heure et la date configurées sur l’appareil. Si vous changez
de fuseau horaire et que le réseau ne met pas ces informations à jour, il se peut que
l’heure et la date soient incorrectes.
Lire des e-mails
Sélectionnez un compte de messagerie électronique. Les nouveaux messages sont récupérés. Pour
récupérer manuellement les messages, appuyez sur .
Appuyez sur un e-mail pour le lire.
Ouvrir les pièces jointes.
Ajouter cette adresse e-mail à la
liste de contacts.
Répondre au message.
Répondre à tous les destinataires.
Identifier le message comme favori.
Supprimer le message.
Transférer le message.
Appuyez sur l’onglet de la pièce jointe pour l’ouvrir, puis appuyez sur Enreg. pour l’enregistrer.
Communication
49
Google Mail
Utilisez cette application pour accéder directement au service Google Mail.
Appuyez sur Google Mail depuis la liste des applications.
• La disponibilité de cette application dépend de votre zone géographique ou de votre
opérateur.
• Cette application peut s’intituler différemment selon votre zone géographique ou votre
opérateur.
Envoyer des messages
Dans la boîte de réception, appuyez sur , saisissez les destinataires et un objet, rédigez un
message, puis appuyez sur pour l’envoyer.
Pour ajouter une photo en pièce jointe, appuyez sur → Joindre une photo.
Pour joindre une vidéo, appuyez sur → Joindre une vidéo.
Pour ajouter d’autres destinataires, appuyez sur → Ajouter Cc/Cci.
Pour enregistrer le message afin de l’envoyer ultérieurement, appuyez sur → Enregistrer le
brouillon.
Pour annuler votre message, appuyez sur → Supprimer.
Appuyez sur → Paramètres pour modifier les paramètres Google Mail.
Appuyez sur → Envoyer des commentaires pour commenter le développement de
l'application.
Appuyez sur → Aide pour accéder aux informations d'aide sur Google Mail.
Communication
50
Lire des e-mails
Identifier le message comme non
lu.
Supprimer ce message.
Afficher la pièce jointe.
Identifier le message comme favori.
Archiver ce message.
Répondre à ce message.
Répondre à tous les destinataires
ou transférer ce message à d’autres
personnes.
Ajouter cette adresse e-mail à la
liste de contacts.
Libellés
Google Mail utilise des libellés pour classer les messages. Par défaut, Google Mail affiche les
messages du libellé Boîte de réception.
Pour afficher des messages portant d’autres libellés, appuyez sur .
Pour ajouter un libellé à un message, sélectionnez le message, appuyez sur → Modifier les
libellés, puis sélectionnez le libellé que vous souhaitez lui attribuer.
Hangouts
Utilisez cette application pour discuter avec vos amis.
Appuyez sur Hangouts depuis la liste des applications.
La disponibilité de cette application dépend de votre zone géographique ou de votre
opérateur.
Sélectionnez un ami dans la liste ou saisissez vos critères de recherche et sélectionnez un ami dans
les résultats pour commencer à discuter.
Communication
51
Google+
Utilisez cette application pour rester connecté avec d’autres personnes via le service de réseau social
de Google.
Appuyez sur Google+ depuis la liste des applications.
La disponibilité de cette application dépend de votre zone géographique ou de votre
opérateur.
Appuyez sur Tous pour modifier la catégorie, puis faites défiler la liste vers le haut ou le bas pour
afficher les publications de vos cercles d’amis.
Appuyez sur pour utiliser d’autres fonctionnalités des réseaux sociaux.
Google Photos
Utilisez cette application pour partager des images ou des vidéos via le service de réseau social de
Google.
Appuyez sur Photos depuis la liste des applications.
La disponibilité de cette application dépend de votre zone géographique ou de votre
opérateur.
Appuyez sur → pour sélectionner des images ou des vidéos, puis utilisez l'une des options
suivantes :
• Partager : partager les images ou les vidéos.
• : partager les images ou les vidéos via Hangouts.
• : supprimer les images ou les vidéos.
• : créer un nouvel album et copier les images ou les vidéos.
Communication
52
ChatON
Utilisez cette application pour discuter avec vos amis. Pour utiliser cette application, vous devez vous
connecter à votre compte Samsung ou vérifier votre numéro de téléphone.
Appuyez sur ChatON depuis la liste des applications.
La disponibilité de cette application dépend de votre zone géographique ou de votre
opérateur.
Créez votre liste d’amis en saisissant un numéro de téléphone ou une adresse électronique ou
encore en sélectionnant les contacts dans la liste de suggestions.
Sélectionnez un ami et bavardez en ligne avec lui.
Pour synchroniser les contacts de votre appareil avec ChatON, appuyez sur → Paramètres →
Synchro. des contacts.
Appuyez sur et choisissez un ami avec qui discuter.
53
Web et réseau
Internet
Utilisez cette application pour naviguer sur Internet.
Appuyez sur Internet depuis la liste des applications.
Afficher des pages Web
Appuyez sur le champ d’adresse, saisissez l’adresse Web, puis appuyez sur Aller à.
Pour partager, enregistrer ou imprimer une page Web, appuyez sur .
Ouvrir une nouvelle fenêtre
Appuyez sur → Nouvelle fenêtre.
Pour passer d'une fenêtre à une autre, appuyez sur , faites défiler l’écran vers la gauche ou la
droite, puis appuyez sur la page pour l'ouvrir.
Effectuer une recherche oralement
Appuyez sur le champ d’adresse, puis sur , prononcez un mot-clé, puis sélectionnez l’une des
suggestions qui apparaissent à l’écran.
La disponibilité de cette fonction dépend de votre zone géographique ou de votre
opérateur.
Favoris
Pour définir la page Web en tant que favori, appuyez sur → Ajouter un favori.
Pour ouvrir une page Web enregistrée dans vos favoris, appuyez sur → Favoris, puis sélectionnez
la page voulue.
Web et réseau
54
Historique
Pour ouvrir une page Web figurant dans la liste des pages récemment consultées, appuyez sur →
Historique. Pour effacer l’historique, appuyez sur → Effacer l'historique.
Pour ouvrir une page Web figurant dans la liste des pages les plus consultées, appuyez sur →
Historique → Les plus visités.
Pages enregistrées
Pour afficher des pages Web enregistrées, appuyez sur → Pages enregistrées.
Liens
Maintenez le doigt appuyé sur un lien sur la page Web pour l’ouvrir dans une nouvelle page,
l’enregistrer, le partager ou le copier.
Pour afficher les fichiers téléchargés depuis le Web, appuyez sur → Téléchargements.
Partager des pages Web
Pour partager l’adresse d’une page Web avec d’autres personnes, appuyez sur → Partager via.
Pour partager une partie d’une page Web, maintenez le doigt appuyé sur le texte de votre choix, puis
appuyez sur Partager.
Chrome
Utilisez cette application pour rechercher des informations et parcourir des pages Web.
Appuyez sur Chrome depuis la liste des applications.
La disponibilité de cette application dépend de votre zone géographique ou de votre
opérateur.
Afficher des pages Web
Appuyez sur le champ d’adresse, puis saisissez une adresse Web ou des critères de recherche.
Web et réseau
55
Ouvrir une nouvelle fenêtre
Appuyez sur → Nouvel onglet.
Pour accéder à une autre page Web, appuyez sur , puis sélectionnez-la.
Effectuer une recherche oralement
Appuyez sur le champ d’adresse, puis sur , prononcez un mot-clé, puis sélectionnez l’une des
suggestions qui apparaissent à l’écran.
Synchroniser votre appareil avec d’autres appareils
Synchronisez des onglets et des favoris ouverts afin de les utiliser avec Chrome sur un autre appareil
lorsque vous êtes connecté au même compte Google.
Pour afficher les onglets ouverts sur d'autres appareils, appuyez sur → Autres appareils.
Sélectionnez la page Web à ouvrir.
Pour afficher les favoris, appuyez sur → Favoris.
Bluetooth
La fonction Bluetooth crée une connexion sans fil directe entre deux appareils sur de courtes
distances. Pour échanger des données ou des fichiers multimédia avec d’autres appareils, utilisez la
fonction Bluetooth.
• Samsung ne peut être tenu responsable de la perte, de l’interception ou du mauvais
usage des données envoyées ou reçues via la fonction Bluetooth.
• Assurez-vous de toujours utiliser des appareils dignes de confiance et correctement
protégés avant de partager ou de recevoir des données. La présence d’obstacles entre les
deux appareils peut réduire le rayon d’action.
• Il est possible que votre appareil ne fonctionne pas avec certains appareils, en particulier
ceux qui n’ont pas été testés ou approuvés par Bluetooth SIG.
• N’utilisez pas la fonction Bluetooth de manière illégale (par exemple, pour la copie pirate
de fichiers ou l’enregistrement de communications à des fins commerciales).
Samsung ne peut être tenu responsable des répercussions d’une utilisation illégale de la
fonction Bluetooth.
Pour activer la fonction Bluetooth, depuis la liste des applications, appuyez sur Paramètres →
Connexions → Bluetooth, puis faites glisser le curseur Bluetooth vers la droite.
Web et réseau
56
Établir une connexion avec d’autres appareils Bluetooth
Depuis la liste des applications, appuyez sur Paramètres → Connexions → Bluetooth → Analyser
et la liste des appareils détectés apparaît à l’écran. Sélectionnez l’appareil auquel vous souhaitez
vous connecter, puis acceptez la demande d’autorisation automatiquement générée sur les deux
appareils pour confirmer l’opération.
Envoyer et recevoir des données
De nombreuses applications prennent en charge le transfert de données via la fonction Bluetooth.
C’est le cas, par exemple, de l’application Galerie. Ouvrez la Galerie, sélectionnez une image,
appuyez sur → Bluetooth, puis sélectionnez un appareil Bluetooth. Ensuite, pour recevoir
l’image, confirmez la demande d’autorisation Bluetooth sur l’autre appareil. Le fichier transféré est
enregistré dans le dossier Bluetooth du menu Mes fichiers. Si vous recevez un nouveau contact, il est
automatiquement ajouté à la liste de contacts.
57
Multimédia
Musique
Utilisez cette application pour écouter de la musique.
Appuyez sur Musique depuis la liste des applications.
• Selon la version logicielle de votre appareil, certains formats ne sont pas compatibles.
• Certains fichiers peuvent ne pas être lus correctement en fonction de la méthode
d'encodage utilisée.
Écouter de la musique
Sélectionnez une catégorie de musique, puis un morceau à écouter.
Appuyez sur l’image de l’album en bas de l’écran pour ouvrir le lecteur MP3.
Masquer l’écran du lecteur.
Redémarrer le morceau en cours de
lecture ou revenir au morceau
précédent. Maintenir la touche
appuyée pour effectuer un retour
rapide.
Activer la lecture aléatoire.
Définir le fichier comme votre
morceau favori.
Rechercher des appareils
compatibles DLNA.
Modifier le mode de répétition.
Ouvrir la liste de lecture.
Mettre en pause ou reprendre la
lecture.
Passer au morceau suivant.
Maintenir la touche appuyée pour
effectuer une avance rapide.
Régler le volume.
Multimédia
58
Pour personnaliser vos réglages audio lors de l’écoute de musique avec un casque ou un écouteur,
appuyez sur → Paramètres → Adapt Sound → Activé. Lorsque vous réglez le volume au niveau
14 ou supérieur, l’option d'adaptation du son (Adapt Sound) n'est pas appliquée. Si vous baissez le
volume au niveau 13 ou inférieur, l’option est de nouveau appliquée.
Choisir un morceau comme sonnerie
Pour utiliser le morceau de musique en cours de lecture comme sonnerie, appuyez sur → Définir
comme → Sonnerie du téléphone.
Créer des listes de lecture
Faites votre propre sélection de morceaux de musique.
Appuyez sur Listes de lecture, puis sur → Créer une liste de lecture. Saisissez un titre, puis
appuyez sur OK. Appuyez sur Ajouter musique, sélectionnez les morceaux à inclure dans la liste de
lecture, puis appuyez sur OK.
Pour ajouter le morceau de musique en cours de lecture à une liste de lecture, appuyez sur →
Ajouter à liste de lecture.
Écouter de la musique par catégorie
Écoutez de la musique classée par atmosphère musicale. L’appareil crée automatiquement la liste
de lecture. Pour utiliser cette fonctionnalité, configurez le menu Music square de manière à ce qu’il
apparaisse en haut de l’audiothèque en appuyant sur → Paramètres → Menu musique → Coin
musique → OK. Lorsque vous ajoutez un morceau de musique, appuyez sur Coin musique →
→ Mise à jour de la bibliothèque.
Appuyez sur Coin musique et sélectionnez une atmosphère. Vous pouvez également sélectionner
plusieurs cellules en faisant glisser votre doigt.
Multimédia
59
Appareil photo
Utilisez cette application pour prendre des photos ou enregistrer des vidéos.
Pour visionner les photos et les vidéos prises avec l’appareil, utilisez l’application Galerie (p. 64).
Appuyez sur Appareil photo depuis la liste des applications.
• Lorsque l’appareil photo n’est pas utilisé, il se ferme automatiquement.
• Assurez-vous que l’objectif est bien propre. Dans le cas contraire, l’appareil risque de ne
pas fonctionner correctement dans certains modes nécessitant des résolutions élevées.
Bon usage de l’appareil photo
• Ne prenez pas de photos et n’enregistrez pas de vidéos d’autres personnes sans leur
consentement.
• Ne prenez pas de photos et n’enregistrez pas de vidéos lorsque la loi l’interdit.
• Ne prenez pas de photos et n’enregistrez pas de vidéos en violation de la vie privée d’autrui.
Prendre des photos
Prendre une photo
Pour prendre une photo, appuyez sur .
Afficher le mode en
cours.
Enregistrer une vidéo.
Modifier le mode de
prise de vue.
Sélectionner un des
divers effets
disponibles.
Afficher davantage
d’options.
Basculer entre l’objectif
avant et arrière.
Ouvrir la Galerie pour
afficher des photos et
des vidéos.
Multimédia
60
Mode de capture
Il existe plusieurs effets de photo.
Appuyez sur MODE, puis faites défiler les modes à droite de l’écran vers le haut ou le bas.
• Auto : ce mode permet à l'appareil photo d'évaluer l'environnement et de déterminer le mode
idéal pour la photo.
• Meilleures poses : ce mode permet de prendre une série de photos et de conserver la meilleure.
• Rafale : ce mode permet de prendre une série de photos de sujets en mouvement.
• Son & prise : ce mode permet d'associer un son à une photo.
Pour prendre une photo, appuyez sur . L’appareil enregistre quelques secondes de contenu
audio après la prise de vue.
Lorsque vous prenez des photos dans ce mode, le son est enregistré par le microphone
interne.
• Panorama : ce mode permet de prendre une photo composée de différents clichés assemblés
les uns aux autres.
Pour obtenir la meilleure photo possible, suivez ces conseils :
– Déplacez l’appareil photo lentement dans le sens de votre choix.
– Alignez l’objectif de l’appareil photo avec le cadre de prise de vue.
– Évitez de prendre des photos de sujets devant des arrière-plans non identifiables, comme un
ciel ou un pan de mur uni.
• Sports : ce mode permet de prendre des photos de sujets en déplacement.
• Nuit : ce mode permet de prendre des photos dans des conditions de faible éclairage.
Photos panoramiques
Une photo panoramique est une large image en mode paysage constituée de plusieurs clichés.
Appuyez sur MODE → Panorama.
Appuyez sur et déplacez l’appareil photo dans le sens de votre choix. Lorsque le cadre bleu est
aligné avec l'objectif, l’appareil photo prend automatiquement un autre cliché pour constituer la
séquence panoramique. Pour mettre fin à la prise de vue, appuyez sur .
Multimédia
61
Enregistrer des vidéos
Enregistrer une vidéo
Pour enregistrer une vidéo, appuyez sur . Pour interrompre l’enregistrement, appuyez sur . Pour
arrêter l’enregistrement, appuyez sur .
Appuyez sur pour prendre des photos tout en effectuant une vidéo.
Mode d’enregistrement
Pour modifier le mode d’enregistrement, appuyez sur → .
• Normal : ce mode permet d'obtenir une qualité standard.
• Limite MMS : ce mode permet de réduire la qualité et d'envoyer la vidéo par le biais de
messages.
Multimédia
62
Effectuer un zoom avant et arrière
Utilisez l’une des méthodes suivantes :
• Appuyez sur la touche de volume Haut ou Bas pour effectuer un zoom avant ou arrière.
• Pour effectuer un zoom avant, écartez deux doigts l’un de l’autre sur l’écran ; pour effectuer un
zoom arrière, rapprochez-les.
La fonction zoom avant/arrière est disponible en cours d’enregistrement d’une vidéo.
Configurer les paramètres de l’appareil photo et du caméscope
Pour configurer les paramètres de l’appareil photo, appuyez sur → . Les options suivantes
sont disponibles soit pour les deux modes (appareil photo et caméscope), soit pour le mode appareil
photo, ou le mode caméscope. Les options disponibles varient selon le mode utilisé.
• Taille des photos / Taille de la vidéo : sélectionner une résolution. Pour obtenir une meilleure
qualité, utilisez une résolution élevée. Cependant, notez qu’une résolution élevée nécessite
davantage de mémoire.
• Mode focus : sélectionner un mode de mise au point. Auto focus est commandée par l’appareil
photo. Le mode Macro est recommandé pour des gros plans.
• Mesure : sélectionner un mode de mesure. Ce paramètre détermine la manière dont les valeurs
lumineuses sont calculées. Mesure pondérée centrale mesure la lumière d’arrière-plan au
centre de la scène. Spot mesure la valeur de la lumière à un endroit spécifique. Matrice calcule
la moyenne de la scène toute entière.
Multimédia
63
• ISO : sélectionner une valeur ISO. Ce paramètre permet de contrôler la sensibilité lumineuse
de l’appareil photo. Celle-ci est mesurée en équivalents de caméra-film. Les valeurs faibles sont
destinées aux objets immobiles vivement éclairés. Les valeurs plus élevées sont pour les objets
en mouvement ou faiblement éclairés.
• Balise GPS : joindre une étiquette de géolocalisation GPS à la photo.
• Pour que les signaux GPS soient meilleurs, évitez de prendre des photos dans des lieux
où le signal peut être limité, par exemple entre des bâtiments ou dans des zones de faible
altitude, ou encore lorsque les conditions météorologiques sont mauvaises.
• Votre localisation est susceptible d’apparaître sur vos photos au moment où vous les
publiez sur le Web. Pour empêcher l’affichage de ces données, désactivez le paramètre de
balise GPS.
• Touche de volume : paramétrer l'appareil pour que la touche de volume puisse contrôler le
déclencheur ou le zoom.
• Retardateur : définir le délai à l'issue duquel l'appareil doit prendre une photo ou enregistrer
une vidéo.
• Balance des blancs : sélectionner une balance des blancs appropriée de sorte que les images
offrent une gamme de couleurs proches de la réalité. Les paramètres sont conçus pour des
situations lumineuses spécifiques. Ils sont similaires à la gamme thermique d’exposition et de
balance des blancs des appareils professionnels.
• Valeur d'exposition : modifier la valeur d'exposition. Cela détermine la quantité de lumière
reçue par le capteur de l’appareil photo. En cas de faible luminosité, utilisez une exposition plus
élevée.
• Guide : afficher des lignes directrices sur l'écran d'aperçu.
• Flash : activer ou désactiver le flash.
• Nom de fichier contextuel : paramétrer l’appareil photo pour qu’il affiche des balises
contextuelles. Activez cette fonction pour utiliser des libellés dans Galerie.
• Retourner l'image : inverser l’image pour créer une image miroir de la scène initiale.
• Stockage : sélectionner l’emplacement de stockage des photos et des vidéos.
• Réinitialiser : réinitialiser les paramètres de l'appareil.
Raccourcis
Réorganisez les raccourcis pour accéder facilement aux différentes options de l’appareil photo.
Appuyez sur → Modifier les paramètres rapides.
Maintenez le doigt appuyé sur une option et faites-la glisser vers un autre emplacement en haut
de l’écran. Vous pouvez déplacer les autres icônes de la liste en appuyant dessus, puis en les faisant
glisser.
Multimédia
64
Galerie
Utilisez cette application pour visualiser des photos ou des vidéos.
Appuyez sur Galerie depuis la liste des applications.
• Selon la version logicielle de votre appareil, certains formats ne sont pas compatibles.
• Certains fichiers peuvent ne pas être lus correctement en fonction de la méthode
d'encodage utilisée.
Afficher des images
Lorsque vous lancez l’application, l'application Galerie affiche les dossiers disponibles. Lorsqu’une
autre application, telle que Email, enregistre une image, le dossier Download contenant l’image est
automatiquement créé. De même, si vous effectuez une capture d’écran, le dossier Screenshots est
automatiquement créé. Sélectionnez un dossier pour l’ouvrir.
Les images d’un dossier sont affichées par date de création. Appuyez sur une image pour l’afficher en
plein écran.
Faites défiler l’écran vers la gauche ou la droite pour afficher l’image précédente ou suivante.
Effectuer un zoom avant et arrière
Pour effectuer un zoom sur une image, utilisez l’une des méthodes suivantes :
• Pour effectuer un zoom avant, appuyez deux fois sur l’image à l’endroit de votre choix.
• Pour effectuer un zoom avant, écartez deux doigts l’un de l’autre sur l’écran à l’endroit de votre
choix ; pour effectuer un zoom arrière, rapprochez-les ; pour revenir à l’affichage initial, appuyez
deux fois sur l’écran.
Visionner des vidéos
Les fichiers vidéo sont caractérisés par l’icône . Sélectionnez la vidéo que vous souhaitez regarder,
puis appuyez sur .
Découper les segments d’une vidéo
Sélectionnez une vidéo, puis appuyez sur . Déplacez le crochet d’ouverture au début de la section
souhaitée et le crochet de fermeture à la fin, puis enregistrez la vidéo.
Multimédia
65
Modifier des photos
En mode affichage d’une photo, appuyez sur et utilisez les fonctions suivantes :
• Favoris : ajouter l'élément à la liste des favoris.
• Diaporama : lancer un diaporama de l’ensemble des images du dossier ouvert.
• Cadre photo : ajouter un cadre et une note à une image. L’image modifiée est enregistrée dans
le dossier Photo frame.
• Note photo : écrire une note au dos de l'image.
• Copier dans le presse-papier : copier l’image dans le presse-papiers.
• Imprimer : imprimer l'image via une connexion USB ou Wi-Fi. Certaines imprimantes peuvent ne
pas être compatibles avec votre appareil.
• Renommer : renommer le fichier.
• Partage de photo d'ami : envoyer l’image à une personne dont le visage sert de libellé.
• Rotation à gauche : pivoter l’image dans le sens inverse des aiguilles d'une montre.
• Rotation à droite : pivoter l’image dans le sens des aiguilles d'une montre.
• Rogner : redimensionner le cadre orange pour couper l’image.
• Définir comme : définir l'image comme fond d'écran ou image de contact.
• Détails : afficher les détails d’une image.
• Paramètres : modifier les paramètres de la galerie.
Multimédia
66
Supprimer des photos
Utilisez l’une des méthodes suivantes :
• Dans un dossier, appuyez sur → Sélectionner élément, sélectionnez des images, puis
appuyez sur .
• En mode affichage d’une photo, appuyez sur .
Partager des photos
Utilisez l’une des méthodes suivantes :
• Dans le dossier, appuyez sur → Sélectionner élément, sélectionnez des images, puis
appuyez sur pour les envoyer à des contacts ou les partager sur les réseaux sociaux.
• En mode affichage d’une photo, appuyez sur pour l’envoyer à des contacts ou la partager via
des services de réseaux sociaux.
Définir une image comme fond d’écran
En mode affichage d'une image, appuyez sur → Définir comme pour définir l’image comme
fond d’écran ou l’affecter à un contact.
Vidéo
Utilisez cette application pour lire des fichiers vidéo.
Appuyez sur Vidéo depuis la liste des applications.
• Selon la version logicielle de votre appareil, certains formats ne sont pas compatibles.
• Certains fichiers peuvent ne pas être lus correctement en fonction de la méthode
d'encodage utilisée.
Multimédia
67
Visionner des vidéos
Sélectionnez une vidéo à lire.
Modifier le format
d’écran.
Effectuer un retour ou
une avance rapide en
faisant glisser la barre.
Rechercher des
appareils compatibles
DLNA.
Redémarrer la vidéo
en cours de lecture
ou revenir à la vidéo
précédente.
Maintenir la touche
appuyée pour
effectuer un retour
rapide.
Passer à la vidéo
suivante. Maintenir la
touche appuyée pour
effectuer une avance
rapide.
Régler le volume.
Mettre en pause ou
reprendre la lecture.
Supprimer des vidéos
Appuyez sur → Supprimer, sélectionnez des vidéos, puis appuyez sur Supprimer.
Partager des vidéos
Appuyez sur → Partager via, sélectionnez les vidéos, appuyez sur OK, puis sélectionnez une
méthode de partage.
Multimédia
68
YouTube
Utilisez cette application pour regarder des vidéos à partir du site Web YouTube.
Appuyez sur YouTube depuis la liste des applications.
La disponibilité de cette application dépend de votre zone géographique ou de votre
opérateur.
Visionner des vidéos
Appuyez sur , puis saisissez un mot-clé. Sélectionnez l’un des résultats de recherche obtenus pour
visionner la vidéo correspondante.
Pivotez l’appareil vers la gauche pour afficher la vidéo en mode Paysage.
Mettre en pause ou
reprendre la lecture.
Effectuer un retour ou
une avance rapide en
faisant glisser la barre.
Modifier la qualité
d’affichage.
Ajouter la vidéo à la
liste de lecture.
Rechercher des
vidéos.
Envoyer l’adresse URL
à d’autres personnes.
Partager des vidéos
Sélectionnez la vidéo à partager, appuyez sur , puis sélectionnez un mode de partage.
Mettre des vidéos en ligne
Sélectionnez votre compte, appuyez sur , sélectionnez une vidéo, saisissez les informations de la
vidéo, puis appuyez sur .
Multimédia
69
Radio
Écoutez de la musique et les actualités sur la radio FM. Pour écouter la radio FM, vous devez brancher
un casque ou des écouteurs qui font office d’antenne radio.
Appuyez sur Radio depuis la liste des applications.
Écouter la radio FM
Avant de démarrer la radio FM, branchez un casque ou des écouteurs sur l’appareil.
Lorsque vous démarrez la radio FM pour la première fois, elle recherche et enregistre
automatiquement les stations disponibles.
Pour allumer la radio FM, appuyez sur . Sélectionnez la station radio à écouter dans la liste, puis
appuyez sur pour revenir à l’écran de la radio FM.
Ajouter la station de radio en cours
d’écoute à la liste des favoris.
Régler le volume.
Entrer manuellement la fréquence
radio.
Accéder aux services de la station
en cours d’écoute.
Rechercher manuellement les
stations de radio disponibles.
Régler précisément la fréquence.
Enregistrer un morceau depuis la
radio FM.
Allumer ou éteindre la radio FM.
Multimédia
70
Rechercher des stations radio
Appuyez sur → Analyser, puis sélectionnez une option de balayage. L’appareil recherche et
mémorise automatiquement les stations de radio FM disponibles.
Sélectionnez la station radio à écouter dans la liste, puis appuyez sur pour revenir à l’écran de la
radio FM.
Ajouter des stations à votre liste de favoris
Sélectionnez une station radio, puis appuyez sur pour ajouter la station à la liste de favoris.
71
Boutiques d’applications et
multimédia
Play Store
Utilisez cette application pour télécharger des applications et des jeux, gratuits ou payants, pouvant
s’exécuter sur votre appareil.
Appuyez sur Play Store depuis la liste des applications.
La disponibilité de cette application dépend de votre zone géographique ou de votre
opérateur.
Installer des applications
Parcourez les applications par catégorie ou appuyez sur pour effectuer une recherche à l’aide
d’un mot-clé.
Sélectionnez une application pour en afficher les informations. Pour la télécharger, appuyez sur
INSTALLER. Si l’application est payante, appuyez sur le prix et suivez les instructions qui s’affichent à
l’écran pour effectuer l’achat.
• Lorsqu’une nouvelle version d’une application installée est disponible, une icône de
mise à jour apparaît dans le volet des raccourcis en haut de l’écran. Ouvrez le volet des
raccourcis et appuyez sur l’icône pour mettre à jour l’application.
• Pour installer des applications provenant d’autres sources, appuyez sur Paramètres →
Plus → Sécurité → Sources inconnues depuis la liste des applications.
Désinstaller des applications
Désinstallez les applications téléchargées sur Play Store.
Appuyez sur → Mes applications, sélectionnez une application à supprimer depuis la liste des
applications installées, puis appuyez sur DÉSINSTALLER.
Boutiques d’applications et multimédia
72
Samsung Apps
Utilisez cette application pour télécharger des applications Samsung, gratuites ou payantes. Pour
plus d’informations, visitez le site www.samsungapps.com.
Appuyez sur Samsung Apps depuis la liste des applications.
La disponibilité de cette application dépend de votre zone géographique ou de votre
opérateur.
Si vous n'avez pas de compte Samsung, suivez les instructions qui s'affichent à l'écran pour en
créer un. Pour terminer votre inscription, vous devez lire les conditions générales, puis appuyer sur
Accepter pour les accepter.
Installer des applications
Parcourez les applications par catégorie. Appuyez sur CATÉGORIES pour sélectionner une catégorie.
Pour rechercher une application, appuyez sur en haut de l’écran, puis saisissez un mot-clé dans le
champ de recherche.
Sélectionnez une application pour en afficher les informations. Pour la télécharger, appuyez sur
Gratuit. Si l’application est payante, appuyez sur le prix et suivez les instructions qui s’affichent à
l’écran pour effectuer l’achat.
Lorsqu’une nouvelle version d’une application installée est disponible, une icône de mise à
jour apparaît dans le volet des raccourcis en haut de l’écran. Ouvrez le volet des raccourcis et
appuyez sur l’icône pour mettre à jour l’application.
Play Livres
Utilisez cette application pour télécharger des fichiers de livre.
Appuyez sur Play Livres depuis la liste des applications.
La disponibilité de cette application dépend de votre zone géographique ou de votre
opérateur.
Boutiques d’applications et multimédia
73
Play Jeux
Utilisez cette application pour télécharger des jeux et y jouer.
Appuyez sur Play Jeux depuis la liste des applications.
La disponibilité de cette application dépend de votre zone géographique ou de votre
opérateur.
Play Musique
Utilisez cette application pour écouter de la musique à l’aide de l’appareil ou de la musique diffusée
sur le service Google Cloud.
Appuyez sur Play Musique depuis la liste des applications.
La disponibilité de cette application dépend de votre zone géographique ou de votre
opérateur.
Play Magazines
Utilisez cette application pour télécharger des magazines.
Appuyez sur Play Magazines depuis la liste des applications.
La disponibilité de cette application dépend de votre zone géographique ou de votre
opérateur.
74
Utilitaires
Mémo
Grâce à cette application, consignez par écrit des informations importantes à sauvegarder et à
consulter ultérieurement.
Appuyez sur Mémo depuis la liste des applications.
Créer un mémo
Appuyez sur , écrivez un mémo, puis appuyez sur Enregistrer.
Modifiez la couleur de l'arrière-plan en appuyant sur → Coul.
Pour verrouiller un mémo de sorte que vos contacts ne puissent pas le consulter, appuyez sur →
Verrouiller.
Naviguer parmi les mémos
Parcourez les mémos miniatures en faisant défiler l’écran vers le haut ou le bas.
Pour modifier un mémo, appuyez dessus.
Pour rechercher un mémo, appuyez sur → Recherche.
Pour supprimer un mémo, appuyez sur → Supprimer.
Pour trier les mémos par date ou par couleur, appuyez sur → Trier par.
Pour imprimer un mémo via une connexion USB ou Wi-Fi, appuyez sur → Imprimer.
Pour envoyer le texte des mémos à d’autres personnes, appuyez sur → Partager fichier texte
via.
Pour envoyer des mémos à d’autres personnes, appuyez sur → Partager via.
Pour importer un mémo à partir de Google Docs, appuyez sur → Importer.
Pour exporter les mémos dans un autre format de fichier, appuyez sur le bouton Menu, appuyez sur
→ Exporter.
Pour modifier les paramètres de mémo, appuyez sur → Paramètres.
Utilitaires
75
Afficher un mémo
Appuyez sur la miniature du mémo pour l’ouvrir. Faites défiler l’écran vers la gauche ou vers la droite
pour afficher d'autres mémos.
Appuyez sur et sur le symbole de votre choix :
• Supprimer : supprimez le mémo.
• Coul. : modifiez la couleur de l'arrière-plan.
• Verrouiller : verrouillez le mémo de sorte que vos contacts ne puissent pas le consulter.
• Imprimer : imprimez le mémo via une connexion USB ou Wi-Fi.
• Partager fichier texte via : envoyez le texte du mémo à d'autres personnes.
• Partager via : envoyez le mémo à d'autres personnes.
S Planner
Utilisez cette application pour gérer des événements et des tâches.
Appuyez sur S Planner depuis la liste des applications.
Créer un événement ou une tâche
Appuyez sur , puis utilisez l’une des méthodes suivantes :
• Ajouter événement : entrer un événement avec un paramètre de répétition en option.
• Ajouter une tâche : entrer une tâche avec un paramètre de priorité en option.
Pour ajouter plus rapidement un événement ou une tâche, appuyez deux fois sur une date.
Utilitaires
76
Saisissez un titre et indiquez le calendrier que vous souhaitez utiliser pour la synchronisation.
Appuyez ensuite sur Modifier détails événement ou sur Modifier détails tâche pour ajouter
d’autres détails, comme la fréquence de répétition de l’événement ou de la tâche, son association ou
non à une alerte préalable ou le lieu concerné.
Invitez d’autres personnes à l’événement en envoyant un message ou un e-mail. Saisissez le numéro
de téléphone ou l’adresse e-mail dans la zone Participants, ou appuyez sur pour ouvrir la liste de
contacts.
Joignez une carte indiquant le lieu de l’événement. Saisissez l’adresse dans le champ Emplacement,
appuyez sur près du champ, puis signalez l’endroit précis en maintenant le doigt appuyé sur la
carte qui apparaît.
Synchroniser avec Google Agenda
Dans l'écran des applications, appuyez sur Paramètres → Comptes → Google sous Mes comptes
→ un compte Google, puis appuyez sur Synchroniser Calendrier.
Pour réaliser la synchronisation manuellement et mettre le calendrier à jour, appuyez sur S Planner
→ → Synchroniser.
Pour afficher les événements ou tâches synchronisés, appuyez sur → Calendriers → Affichage
puis cochez le compte Google.
Modifier le type de calendrier
À droite de l’écran, sélectionnez un type de calendrier (annuel, mensuel, hebdomadaire, etc.).
Rechercher un événement
Appuyez sur → Recherche, puis sélectionnez un critère de recherche.
Pour afficher les événements de la date du jour, appuyez sur Aujourd'hui tout en haut de l’écran.
Supprimer un événement
Sélectionnez un événement ou une tâche, puis appuyez sur → Supprimer → OK.
Utilitaires
77
Dropbox
Utilisez cette application pour enregistrer et partager des fichiers avec d’autres personnes via le
stockage Cloud Dropbox. Lorsque vous enregistrez des fichiers dans Dropbox, votre appareil les
synchronise automatiquement avec le serveur Web et tout autre ordinateur sur lequel le service
Dropbox est installé.
Appuyez sur Dropbox depuis la liste des applications.
La disponibilité de cette application dépend de votre zone géographique ou de votre
opérateur.
Lorsque vous ouvrez la Dropbox pour la première fois, appuyez sur Démarrer pour activer le service.
Suivez les instructions qui s’affichent à l’écran pour procéder à la configuration.
Une fois la Dropbox activée, les photos et les vidéos prises avec l’appareil sont automatiquement
importées dans Dropbox. Pour afficher les photos ou les vidéos importées, appuyez sur . Pour
partager ou supprimer des fichiers ou créer des albums, appuyez sur , puis sélectionnez les
fichiers.
Pour importer des fichiers dans la Dropbox, appuyez sur → → Transférer ici → Photos ou
vidéos ou Autres fichiers. Pour ouvrir des fichiers dans Dropbox, sélectionnez un fichier.
En mode affichage d'une image ou d'une vidéo, appuyez sur pour les ajouter à la liste de favoris.
Pour ouvrir des fichiers dans la liste des favoris, appuyez sur .
Utilitaires
78
Horloge
Utilisez cette application pour définir des alarmes, consulter l’heure de n’importe quelle grande ville
dans le monde, mesurer la durée d’un événement ou définir un minuteur.
Appuyez sur Horloge depuis la liste des applications.
Activer ou désactiver cette alarme.
Alarme
Créer une alarme
Dans la page intitulée Alarme, appuyez sur Créer une alarme, sélectionnez l’heure de
déclenchement de l’alarme, les jours de répétition de l’alarme, puis appuyez sur Enreg.
• Alarme géolocalisée : définissez un emplacement. L’alarme ne se déclenche qu’une fois que
vous vous trouvez à l’endroit indiqué.
• Répéter : définissez le délai à l'issue duquel l'alarme doit sonner de nouveau et le nombre de
répétitions.
• Alarme intelligente : activez cette option pour que l'appareil simule des sons naturels avant le
déclenchement de l'alarme principale.
Utilitaires
79
Arrêter ou répéter une alarme
Pour éteindre une alarme, faites glisser votre doigt sur l’icône . Pour répéter l’alarme après une
période donnée, faites glisser votre doigt sur l’icône .
Supprimer une alarme
Maintenez le doigt appuyé sur l’alarme à supprimer, puis appuyez sur Supprimer.
Horloge mondiale
Créer une horloge
Dans l’onglet de l’horloge mondiale, appuyez sur Ajouter une ville, puis saisissez le nom d’une ville
ou sélectionnez-en une dans la liste.
Pour appliquer l’heure d’été, maintenez le doigt appuyé sur une horloge, puis appuyez sur Heure
d'été.
Supprimer une horloge
Maintenez le doigt appuyé sur l'horloge à supprimer, puis appuyez sur Supprimer.
Chronomètre
Dans l’onglet du chronomètre, appuyez sur Début pour commencer à chronométrer. Pour
enregistrer des temps intermédiaires, appuyez sur Tour.
Pour effacer les temps enregistrés, appuyez sur Réinit.
Minuteur
Dans l’onglet du minuteur, définissez la durée du minuteur, puis appuyez sur Début.
Lorsque la durée du minuteur est écoulée, faites glisser votre doigt sur l’icône .
Utilitaires
80
Calculatrice
Utilisez cette application pour réaliser des calculs simples ou complexes.
Appuyez sur Calculatrice depuis la liste des applications.
Faites pivoter l’appareil vers la gauche pour utiliser la calculatrice scientifique en mode Paysage. Si
l'option Rotation écran est désactivée dans le volet des raccourcis, appuyez sur → Calculatrice
scientifique.
Pour afficher l’historique des calculs, appuyez sur pour masquer le clavier.
Pour effacer l’historique, appuyez sur → Effacer l'historique.
Enregistreur vocal
Utilisez cette application pour enregistrer ou écouter des mémos vocaux.
Appuyez sur Enregistreur vocal depuis la liste des applications.
Enregistrer des mémos vocaux
Pour commencer l’enregistrement, appuyez sur . Parlez dans le micro en haut de l’appareil. Pour
interrompre l’enregistrement, appuyez sur . Pour terminer l’enregistrement, appuyez sur .
Démarrer l’enregistrement.
Durée enregistrée.
Afficher la liste des mémos vocaux.
Modifier la qualité
d’enregistrement.
Utilitaires
81
Écouter des mémos vocaux
Sélectionnez un mémo vocal.
• : réduire le contenu du mémo vocal.
• : régler la vitesse de lecture.
• : interrompre la lecture.
• / : revenir au mémo vocal précédent ou passer au mémo vocal suivant.
• / : effectuer un retour rapide ou une avance rapide de 60 secondes.
Pour envoyer un mémo vocal à des contacts, appuyez sur → Partager via, puis sélectionnez un
mode de partage.
Gérer les mémos vocaux
Dans la liste de mémos vocaux, appuyez sur et sélectionnez l’une des options suivantes :
• Partager via : sélectionner les mémos vocaux à envoyer, puis sélectionnez un mode de partage.
• Supprimer : sélectionner les mémos vocaux à supprimer.
• Paramètres : modifier les paramètres de l’enregistreur vocal.
• Fin : fermer l’enregistreur vocal.
Enregistrer des fichiers avec des balises contextuelles
Dans la liste des mémos vocaux, appuyez sur → Paramètres → Nom de fichier contextuel →
Activé.
Utilitaires
82
Google
Utilisez cette application pour effectuer une recherche non seulement sur Internet, mais aussi dans
les applications et le contenu de l’appareil.
Appuyez sur Google depuis la liste des applications.
La disponibilité de cette application dépend de votre zone géographique ou de votre
opérateur.
Effectuer une recherche sur l’appareil
Appuyez sur le champ de recherche, puis saisissez un mot-clé. Vous pouvez également appuyer sur
, puis énoncer un mot-clé.
Étendre la recherche
Pour sélectionner les applications qui doivent faire l’objet d’une recherche, appuyez sur →
Paramètres → Recherche sur le téléphone, puis cochez les éléments correspondants.
Google Now
Démarrez la recherche Google pour afficher les cartes Google Now qui vous indiquent, dès que vous
en avez besoin, la météo du jour, les infos trafic en temps réel, vos prochains rendez-vous, et bien
plus encore.
Rejoignez Google Now lorsque vous ouvrez pour la première fois la recherche Google. Pour modifier
les paramètres Google Now, appuyez sur → Paramètres → Goolge Now.
Recherche vocale
Utilisez cette application pour rechercher des pages Web oralement.
Appuyez sur Recherche vocale depuis la liste des applications.
La disponibilité de cette application dépend de votre zone géographique ou de votre
opérateur.
Quand l’instruction Parlez maintenant apparaît à l’écran, prononcez un mot-clé ou une expression.
Utilitaires
83
Mes fichiers
Utilisez cette application pour accéder à tous les types de fichiers stockés dans l’appareil, y compris
les images, vidéos, musiques et clips musicaux.
Appuyez sur Mes fichiers depuis la liste des applications.
Visionner des fichiers
Sélectionnez une catégorie, puis un dossier pour l'ouvrir. Pour revenir au dossier supérieur, appuyez
sur . Pour revenir au répertoire principal, appuyez sur .
Dans un dossier, appuyez sur , puis utilisez l’une des options suivantes :
• Sélectionner tout : sélectionner tous les fichiers pour leur appliquer simultanément la même
option.
• Créer dossier : créer un nouveau dossier.
• Recherche : rechercher des fichiers.
• Afficher par : modifier le mode d'affichage.
• Trier par : trier les fichiers ou les dossiers.
• Paramètres : modifier les paramètres du gestionnaire de fichiers.
Ajouter des raccourcis à des dossiers
Ajoutez un raccourci vers les dossiers fréquemment utilisés. Appuyez sur → Ajouter un
raccourci, saisissez un nom de raccourci, appuyez sur OK, sélectionnez un dossier, puis appuyez sur
Définir ici.
Téléchargements
Utilisez cette application pour voir les fichiers téléchargés depuis des applications.
Appuyez sur Téléchargements depuis la liste des applications.
La disponibilité de cette application dépend de votre zone géographique ou de votre
opérateur.
Pour afficher les fichiers téléchargés depuis Internet, appuyez sur Téléch. Internet ; pour afficher les
fichiers téléchargés depuis d’autres applications, comme l'application Email, appuyez sur Autres
télécharg.
Sélectionnez un fichier et ouvrez-le dans l'application correspondante.
Pour trier les fichiers par taille, appuyez sur Trier par taille.
Pour trier les fichiers par date, appuyez sur Trier par date.
84
Géolocalisation
Maps
Utilisez cette application pour marquer votre position, rechercher des lieux ou obtenir un itinéraire.
Appuyez sur Maps depuis la liste des applications.
La disponibilité de cette application dépend de votre zone géographique ou de votre
opérateur.
Rechercher des lieux
Recherchez des lieux en saisissant une adresse ou un mot-clé. Une fois que le lieu est trouvé,
sélectionnez-le pour visualiser les informations détaillées. Consultez l’aide pour obtenir plus
d'informations.
Obtenir un itinéraire
Appuyez sur pour définir les points de départ et d'arrivée, puis sélectionnez un moyen de
transport. L'appareil affiche les routes qui mènent au lieu de destination.
Géolocalisation
85
Local
Utilisez cette application pour rechercher des restaurants, banques, arrêts de bus, etc. à proximité de
votre position.
Appuyez sur Local depuis la liste des applications.
La disponibilité de cette application dépend de votre zone géographique ou de votre
opérateur.
Sélectionnez une catégorie de lieux, puis un lieu dans la liste des résultats de recherche. Une fois le
lieu trouvé, affichez les informations sur l'emplacement, telles que la situation géographique sur la
carte ou des commentaires d'autres personnes. Vous pouvez également noter l'emplacement, laisser
des commentaires et partager des informations avec d'autres personnes.
Navigation
Utilisez cette application pour obtenir des instructions vocales qui vous guideront vers votre
destination.
Appuyez sur Navigation depuis la liste des applications.
• Les cartes, votre position actuelle et autres données de navigation peuvent différer des
informations de localisation réelles. Soyez attentif aux conditions de trafic, à l’état de la
route et à tous les autres facteurs qui pourraient affecter votre conduite. Respectez le
code de la route et les consignes de sécurité en vigueur.
• La disponibilité de cette application dépend de votre zone géographique ou de votre
opérateur.
Vous pouvez indiquer la destination de différentes manières : oralement ou en saisissant l'adresse
de destination. Une fois l’itinéraire trouvé, suivez les instructions qui s’affichent à l’écran pour vous
rendre à destination.
86
Paramètres
Accéder au menu des paramètres
Utilisez cette application pour configurer l’appareil, définir les paramètres d’une application et
ajouter des comptes.
Appuyez sur Paramètres depuis la liste des applications.
Connexions
Wi-Fi
Activez la fonction Wi-Fi pour permettre la connexion à un réseau Wi-Fi et accéder à Internet ou à
d’autres périphériques réseau.
Pour accéder aux options, appuyez sur Wi-Fi → .
• Paramètres avancés : personnalisez les paramètres Wi-Fi.
• Touche WPS : connectez-vous à un réseau Wi-Fi sécurisé à l'aide d'une touche WPS.
• Entrée PIN WPS : connectez-vous à un réseau Wi-Fi sécurisé à l'aide d'un code PIN WPS.
Définition de la politique de mise en veille Wi-Fi
Appuyez sur Wi-Fi → → Paramètres avancés → Wi-Fi activé en mode veille.
Lorsque l’écran est éteint, l’appareil désactive automatiquement les connexions Wi-Fi.
Lorsque cela se produit, l’appareil accède automatiquement aux réseaux de données s’il a
été configuré pour utiliser ces réseaux. Cela peut entraîner des frais de transfert de données.
Pour éviter toute dépense inutile, définissez cette option sur Toujours.
Paramètres de notification réseau
L’appareil détecte les réseaux Wi-Fi ouverts et affiche une icône dans le volet des raccourcis lorsqu’un
réseau est disponible.
Appuyez sur Wi-Fi → → Paramètres avancés, puis cochez la case Notification réseau pour
activer cette fonctionnalité.
Paramètres
87
Wi-Fi Direct
Wi-Fi Direct permet de relier directement deux appareils via un réseau Wi-Fi sans passer par un point
d'accès
Appuyez sur Wi-Fi → Wi-Fi Direct.
Bluetooth
Activez la fonction Bluetooth pour échanger des informations sur de courtes distances.
Pour accéder à des options supplémentaires, appuyez sur .
• Délai d'expiration de la visibilité : définissez une durée pendant laquelle l'appareil est visible.
• Fichiers reçus : affichez les fichiers reçus via la fonction Bluetooth.
Utilisation des données
Effectuez un suivi de la quantité de données utilisées et personnalisez les paramètres de limite
d’utilisation des données.
• Données mobiles : paramétrez l'appareil pour qu'il utilise les connexions de données sur
n'importe quel réseau mobile.
• Définir limite données mobiles : définissez une limite d'utilisation des données mobiles.
• Cycle d'util. des données : saisissez la date de réinitialisation mensuelle afin de contrôler
l'utilisation de vos données.
Pour accéder à des options supplémentaires, appuyez sur .
• Itinérance : paramétrez l'appareil pour qu'il utilise les connexions de données lorsque vous
changez de zone de couverture.
• Restr. données arrière-plan : paramétrez l'appareil pour qu'il désactive la synchronisation en
arrière-plan lorsque vous utilisez un réseau mobile.
• Synchroniser les données automatiquement : activer ou désactiver la synchronisation
automatique des applications. Vous pouvez choisir les informations devant être synchronisées
pour chaque compte dans Paramètres → Comptes.
• Afficher utilisation Wi-Fi : paramétrez l'appareil pour qu'il affiche l'utilisation de données via
une connexion Wi-Fi.
• Points d'accès mobiles : sélectionnez les points d'accès Wi-Fi afin d'éviter que les applications
s'exécutant en arrière-plan les utilisent.
Paramètres
88
Plus de réseaux
Personnalisez les paramètres réseaux.
Mode Hors-ligne
Désactivez toutes les fonctions sans fil de l’appareil. Vous pouvez uniquement utiliser les services
hors-réseau, c’est-à-dire les fonctions autres que les fonctions Wi-Fi et Bluetooth.
Réseaux mobiles
• Données mobiles : autorisez la connexion de données pour pouvoir utiliser Internet par
exemple.
• Itinérance : paramétrez l’appareil pour qu’il se connecte à un autre réseau lorsque vous changez
de zone de couverture ou que le réseau de votre opérateur n’est pas disponible.
• Nom des points d'accès : configurez des noms de point d'accès (APN).
• Mode réseau : sélectionnez un type de réseau.
• Opérateurs réseau : recherchez les réseaux disponibles et sélectionnez-en un pour vous y
connecter.
Point d’accès et modem
• Point d'accès mobile : utilisez le point d'accès mobile pour partager la connexion de données
de votre appareil avec des ordinateurs ou d'autres appareils via le réseau Wi-Fi.
• Modem USB : utilisez le modem USB pour partager la connexion de données de votre appareil
avec un ordinateur via le protocole USB. Lorsqu’il est connecté à un ordinateur, l’appareil sert de
modem sans fil.
• Modem Bluetooth : utilisez le modem Bluetooth pour partager la connexion de données de
votre appareil avec des ordinateurs ou d'autres appareils via le protocole Bluetooth.
• Aide : apprenez-en plus sur les fonctions USB, Wi-Fi et Bluetooth.
VPN
Paramétrez des réseaux privés virtuels (VPN) pour vous y connecter.
Kies via Wi-Fi
Connectez l’appareil à Samsung Kies via un réseau Wi-Fi.
Paramètres
89
Mon appareil
Écran de verrouillage
Modifiez les paramètres de l’écran de verrouillage.
• Déverrouillage de l'écran : activez la fonction de déverrouillage par mot de passe, modèle ou
code PIN de l'écran. Les options ci-dessous peuvent varier selon que la fonction de verrouillage
de l'écran est activée ou non.
• Plusieurs widgets : paramétrez l’appareil pour autoriser l'utilisation de widgets sur l'écran
verrouillé.
• Widgets écran verrouill. :
– Applications favorites ou Appareil photo : paramétrez l’appareil pour pouvoir afficher les
raccourcis de chaque application ou démarrer automatiquement l’appareil photo lorsque
vous faites glisser les volets vers la gauche sur l’écran verrouillé.
– Horloge ou msg personnel : paramétrez l'appareil pour afficher une horloge ou un message
personnel sur l'écran verrouillé. Les options suivantes peuvent varier selon votre sélection.
Pour une horloge :
– Double horloge : paramétrez l'appareil pour qu'il affiche la double horloge.
– Taille de l'horloge : modifiez la taille de l'horloge.
– Afficher la date : paramétrez l'appareil pour qu'il affiche la date et l'heure.
– Infos propriétaire : saisissez les informations que vous souhaitez voir apparaître avec
l'horloge.
Pour un message personnel :
– Modifier un message personnel : modifiez le message personnel.
• Raccourcis : paramétrez l'appareil pour pouvoir afficher et modifier les raccourcis des
applications sur l'écran verrouillé.
La disponibilité de cette fonction dépend de votre zone géographique ou de votre
opérateur.
• Effet de déverrouillage : sélectionnez un effet lorsque vous déverrouillez l'écran.
• Texte d'aide : paramétrez l'appareil pour qu'il affiche un texte d'aide à l'utilisation sur l'écran
verrouillé.
Paramètres
90
Affichage
Modifiez les paramètres d’affichage.
• Fond d'écran :
– Écran d'accueil : sélectionnez l'image d'arrière-plan de l'écran d'accueil.
– Écran de verrouillage : sélectionnez l’image d’arrière-plan de l’écran de verrouillage.
– Écrans d'accueil et de verrouillage : sélectionnez l'image d'arrière-plan de l'écran d'accueil
et de l'écran de verrouillage.
• Volet des raccourcis : personnalisez les éléments qui apparaissent dans le volet des
notifications.
• Luminosité : réglez la luminosité de l'écran.
• Rotation auto. écran : indiquez si le contenu doit automatiquement pivoter en même temps
que l’appareil.
• Mise en veille de l'écran : définissez le délai à l'issue duquel l'écran doit s'éteindre
automatiquement.
• Écran de veille : paramétrez l’appareil pour déclencher l'ouverture d'un économiseur d'écran
lorsqu’il est connecté à une station d’accueil ou de recharge.
• Police : modifiez le type de police du texte affiché à l’écran.
• Taille de police : modifiez la taille de la police.
• Durée de l'éclairage des touches : définissez la durée du rétroéclairage de la touche tactile.
• Affich. pourcentage batterie : paramétrez l'appareil pour qu'il affiche la durée de vie restante
de la batterie.
Son
Modifiez les paramètres des différents sons de l’appareil.
• Volume : réglez le niveau sonore des sonneries d’appel, des musiques et des vidéos, des sons
système et des notifications.
• Sonneries : ajoutez ou sélectionnez une sonnerie pour les appels entrants.
• Vibrations : ajoutez ou sélectionnez un type de vibreur.
• Son de notif. par défaut : sélectionnez une sonnerie pour les événements, tels que les messages
entrants et les appels manqués.
Paramètres
91
• Vibreur et sonnerie : paramétrez l’appareil pour qu’il vibre et émette une sonnerie à chaque
appel entrant.
• Son pavé de numérotation : paramétrez l’appareil pour qu’il émette un son lorsque vous
appuyez sur les touches du clavier.
• Sélections audibles : paramétrez l’appareil pour qu’il émette un son lorsque vous sélectionnez
une application ou une option sur l’écran tactile.
• Son verrouillage écran : paramétrez l’appareil pour qu’il émette un son lorsque vous verrouillez
ou déverrouillez l’écran tactile.
• Adapt Sound : personnalisez le son pour l'oreille que vous utilisez le plus pendant vos appels ou
pour écouter de la musique.
Mode Écran d'accueil
Sélectionnez un mode d’affichage pour l’écran d’accueil (mode standard ou facile).
Appels
Personnalisez les paramètres d’appel.
• Rejet de l'appel : rejetez automatiquement les appels provenant de numéros de téléphone
spécifiques. Ajoutez des numéros de téléphone à la liste de rejet.
• Définir les messages de rejet : ajoutez ou modifiez le message envoyé lorsque vous rejetez un
appel.
• Début/Fin d'appel :
– Touche Accueil pour répondre aux appels : paramétrez l’appareil pour pouvoir répondre
aux appels en appuyant sur la touche Accueil.
– Touche Marche pour terminer les appels : paramétrez l’appareil pour pouvoir mettre fin à
un appel en appuyant sur la touche Marche/Arrêt.
• Désactiver l'écran pendant les appels : paramétrez l’appareil pour pouvoir activer le capteur de
proximité lors d’un appel.
• Alertes d'appel :
– Vibreur en cas de réponse : paramétrez l’appareil pour qu’il vibre lorsque votre
correspondant répond à un appel.
– Vibreur en fin d'appel : paramétrez l’appareil pour qu’il vibre lorsque votre correspondant
met fin à un appel.
– Tonalité de connexion : activez ou désactivez la tonalité de connexion d’appel.
– Bip durée d'appel : activez ou désactivez la tonalité émise chaque minute.
– Tonalité de fin d'appel : activez ou désactivez la tonalité de fin d’appel.
Paramètres
92
– Signal d'appel : paramétrez l’appareil pour qu’il vous prévienne de vos événements au cours
d’un appel.
• Accessoires d'appel :
– Réponse automatique : paramétrez l’appareil pour qu’il réponde automatiquement aux
appels au bout d’un certain temps disponible uniquement si un casque ou un écouteur est
connecté.
– Temps de réponse auto : sélectionnez la durée à l’issue de laquelle l’appareil doit répondre à
l’appel.
– Conditions appel sortant : paramétrez l’appareil pour pouvoir autoriser les appels sortant
avec un casque Bluetooth, même si l’appareil est verrouillé.
– Type d'appel sortant : sélectionnez le type d'appels sortants à effectuer lorsque vous utilisez
un casque Bluetooth.
• Paramètres supplémentaires :
– Identité de l'appelant : affichez votre identité à vos correspondants lors d’un appel sortant.
– Transfert d'appel : transférez les appels entrants vers un autre numéro.
– Code région auto : paramétrez l’appareil pour qu'il insère automatiquement un préfixe
(code régional ou national) avant un numéro de téléphone.
– Restriction d'appel : bloquez les appels entrants ou sortants.
– Signal d'appel : autorisez les appels entrants en cours d’appel.
– Rappel auto. : activez le rappel automatique si un appel n’a pas abouti ou a été interrompu.
– Numérotation fixe : activez ou désactivez le mode de numérotation fixe pour limiter les
appels aux numéros de la liste FDN. Saisissez le code PIN2 fourni avec votre carte SIM ou
USIM.
• Sonneries et son clavier :
– Sonneries : sélectionnez une sonnerie pour les appels entrants.
– Vibrations : ajoutez ou sélectionnez un type de vibreur.
– Vibreur et sonnerie : paramétrez l’appareil pour qu’il vibre et émette une sonnerie à chaque
appel entrant.
– Tonalités clavier : paramétrez l’appareil pour qu’il émette un son lorsque vous appuyez sur
les touches du clavier.
• Personnaliser son d'appel : sélectionnez un type de son d’appel à utiliser avec un casque ou
des écouteurs.
• Image appel visio : sélectionnez une image à afficher à votre correspondant.
• Options d'échec d'appel : paramétrez l’appareil pour pouvoir basculer sur un appel vocal en cas
d’échec de l’appel visio.
Paramètres
93
• Service de messagerie vocale : sélectionnez ou définissez votre opérateur de messagerie
vocale.
• Param. messagerie vocale : indiquez le numéro pour accéder au service de messagerie vocale.
Vous pouvez obtenir ce numéro auprès de votre opérateur.
• Son : sélectionnez une sonnerie pour signaler l’arrivée de messages vocaux.
• Vibreur : paramétrez l’appareil pour qu’il vibre lors de la réception de messages vocaux.
• Comptes : paramétrez l’appareil pour pouvoir accepter les appels IP et configurez vos comptes
de services IP.
• Utiliser appel Internet : définissez si vous devez utiliser les appels Internet pour tous les appels
ou seulement pour les appels IP.
Mode Blocage
Sélectionnez les notifications à bloquer ou paramétrez l’appareil pour qu'il autorise les notifications
d’appel des contacts définis en Mode blocage.
Mode mains-libres
Paramétrez l'appareil pour qu'il lise tout haut les contenus et déterminez les applications à utiliser au
mode mains-libres.
Assistance sécurité
Paramétrez l’appareil pour qu’il envoie un message à certains destinataires en cas d’urgence.
Maintenez les deux côtés du bouton Volume appuyés pendant 3 secondes pour envoyer le message.
• Modifier le message d'urgence : modifiez le message qui sera envoyé en cas d'urgence.
• Envoyer photos d'urgence : paramétrez l’appareil pour pouvoir prendre des photos et les
envoyer avec le message à vos correspondants.
La disponibilité de cette fonction dépend de votre zone géographique ou de votre
opérateur.
• Intervalle de message : définissez un intervalle de renvoi du message.
• Contacts d'urgence : sélectionnez ou modifiez les correspondants à qui envoyer ce message.
Paramètres
94
Accessibilité
Les services d’accessibilité sont des fonctions spéciales destinées aux personnes présentant des
handicaps physiques. Accédez aux paramètres suivants et modifiez-les pour améliorer l’accessibilité
de l’appareil.
• Rotation auto. écran : paramétrez l’interface pour qu’elle pivote automatiquement en même
temps que l’appareil.
• Mise en veille de l'écran : définissez le délai à l'issue duquel l'écran doit s'éteindre
automatiquement.
• Énoncer mots de passe : paramétrez l’appareil pour que les mots de passe que vous saisissez
sur les sites Web à l’aide de la fonction TalkBack soient énoncés à voix haute.
• Début/Fin d'appel :
– Touche Accueil pour répondre aux appels : paramétrez l’appareil pour pouvoir répondre
aux appels en appuyant sur la touche Accueil.
– Rép. aux appels en app. : paramétrez l’appareil pour pouvoir répondre à un appel entrant en
appuyant sur la touche permettant de prendre les appels.
– Touche Marche pour terminer les appels : paramétrez l’appareil pour pouvoir mettre fin à
un appel en appuyant sur la touche Marche/Arrêt.
• Afficher le raccourci : ajoutez dans le menu rapide un raccourci pour le paramètre Accessibilité
qui apparaît lorsque vous maintenez la touche Marche/Arrêt enfoncée.
• Gérer l'accessibilité : exportez ou importez les paramètres d'accessibilité afin de les partager
avec d'autres appareils.
– Exporter : exportez les paramètres d'accessibilité actuels sous forme de fichier.
– MàJ : importez les paramètres d'accessibilité actuels sous forme de fichier.
– Partager via : partagez le fichier des paramètres d'accessibilité avec d'autres personnes.
• TalkBack : activez le service TalkBack qui propose des commentaires parlés.
• Taille de police : modifiez la taille de la police.
• Agrandissement : paramétrez l’appareil pour pouvoir effectuer un zoom avant ou arrière à l’aide
des doigts.
• Raccourci d'accessibilité : paramétrez l'appareil pour activer Talkback lorsque vous maintenez la
touche Marche/Arrêt enfoncée et appuyez sur l'écran avec deux doigts.
Paramètres
95
• Options synthèse vocale :
– Moteur TTS favori : sélectionnez un moteur de synthèse vocale. Pour modifier les
paramètres des moteurs de synthèse vocale, appuyez sur .
– Vitesse d'élocution : sélectionnez la vitesse de diction de la synthèse vocale.
– Écouter un exemple : écoutez le texte prononcé à titre d'exemple.
• Améliorer l'accessibilité Web : configurez les applications pour installer des scripts Web qui
rendent les contenus Web plus accessibles.
• Balance audio : réglez la balance audio lors de l’utilisation d’un casque à double oreillette.
• Audio mono : activez le réglage audio monophonique lorsque vous utilisez une seule oreillette.
• Désactiver tous les sons : désactivez tous les sons de l'appareil.
• Notification par flash : paramétrez l’appareil pour que le flash clignote en cas d’appels entrants,
de nouveaux messages ou de notifications.
• Menu assistant : paramétrez l'appareil pour afficher le raccourci d'aide qui vous permet
d'accéder aux fonctions prises en charge par les touches ou fonctions externes dans le volet des
notifications. Vous pouvez également modifier le menu de l’icône de raccourci.
– Main dominante : sélectionnez la main gauche ou droite pour une utilisation facile du
menu.
– Modifier : personnalisez les éléments qui apparaissent dans le menu.
• Durée de l'appui prolongé : définissez le délai de reconnaissance lorsque vous maintenez le
doigt appuyé sur l'écran.
• Contrôle par interaction : définissez une zone de l'écran dans laquelle la saisie tactile est
inopérante.
Langue et saisie
Modifiez les paramètres de la saisie de texte. La disponibilité de certaines options dépend de la
langue sélectionnée.
Langue
Sélectionnez la langue d’affichage des menus et des applications.
Par défaut
Sélectionnez le type de clavier à utiliser par défaut pour la saisie de texte.
Paramètres
96
Clavier Samsung
Pour modifier les paramètres du clavier Samsung, appuyez sur .
La disponibilité des options dépend de votre zone géographique ou de votre opérateur.
• Types de clavier Portrait : modifiez la disposition du clavier.
• Langues de saisie : sélectionnez les langues pour la saisie de texte.
• Texte intuitif : activez le mode de saisie intuitive pour que des suggestions de mots s’affichent
au fur et à mesure de votre saisie. Vous pouvez également personnaliser les paramètres de la
saisie intuitive.
• Saisie en continu : paramétrez l'appareil pour qu'il autorise la saisie continue qui consiste à faire
glisser le doigt d'une lettre à l'autre sur le clavier, sans le soulever.
• Contrôle du curseur : activez la fonction de navigation intelligente sur le clavier pour déplacer
le curseur en faisant défiler le clavier.
• Son touches : paramétrez l’appareil pour qu’il émette un son lorsque vous appuyez sur une
touche.
• Paramètres avancés :
– Majuscules auto. : paramétrez l’appareil pour qu'il mette automatiquement en majuscules
la première lettre qui suit un signe de ponctuation final (point, point d’interrogation et point
d’exclamation).
– Espace auto : paramétrez l'appareil pour qu'il insère automatiquement un espace entre les
mots.
– Ponctuation automatique : paramétrez l’appareil pour qu'il insère un point lorsque vous
appuyez deux fois sur la barre d’espace.
– Aperçu du caractère : paramétrez l’appareil pour qu'il affiche une image agrandie de chaque
caractère saisi.
• Didacticiel : découvrez comment saisir du texte avec le clavier Samsung.
• Réinitialiser paramètres : réinitialisez les paramètres du clavier Samsung.
Saisie vocale Google
Pour modifier les paramètres de saisie vocale, appuyez sur .
• Sélect. langues saisie : sélectionnez les langues utilisées pour la saisie de texte.
• Bloquer termes choquants : paramétrez l'appareil pour l'empêcher de reconnaître les mots
injurieux lors de la saisie vocale.
• Reconnaissance vocale hors connexion : téléchargez et installez les données linguistiques
pour la saisie vocale hors ligne.
Paramètres
97
Recherche vocale
• Langue : sélectionnez la langue de la reconnaissance vocale.
• Sortie vocale : paramétrez l’appareil pour qu’il vous prévienne de l’action en cours à l’aide d’un
retour vocal.
• Bloquer termes choquants : masquez les mots injurieux dans les résultats de la recherche
vocale.
• Reconnaissance vocale hors connexion : téléchargez et installez les données linguistiques
pour la saisie vocale hors ligne.
• Casque Bluetooth : paramétrez l’appareil pour qu'il autorise la recherche vocale lorsqu’un
casque Bluetooth est connecté.
Options synthèse vocale
• Moteur TTS favori : sélectionnez un moteur de synthèse vocale. Pour modifier les paramètres
des moteurs de synthèse vocale, appuyez sur .
• Vitesse d'élocution : sélectionnez la vitesse de diction de la synthèse vocale.
• Écouter un exemple : écoutez le texte prononcé à titre d'exemple.
Vitesse du curseur
Réglez la vitesse du curseur de la souris ou du pavé tactile connecté à l’appareil.
Mouvements et gestes
Activez la fonction de détection des mouvements et modifiez les paramètres permettant de
contrôler la détection de mouvement de votre appareil.
• Smart Alert : paramétrez l’appareil pour être averti des appels manqués ou des nouveaux
messages lorsque vous le prenez dans la main.
• Muet/pause : paramétrez l’appareil pour pouvoir couper la sonnerie des appels entrants, les
alarmes, la musique et la radio Internet en plaçant l'appareil face vers le bas.
Paramètres
98
Comptes
Ajouter compte
Ajoutez des comptes de messagerie électronique ou de réseaux sociaux.
Sauvegarder et réinitialiser
Modifiez les paramètres de gestion des paramètres et des données.
• Sauvegarder mes données : paramétrez l'appareil pour qu'il sauvegarde les paramètres et les
données d'application sur le serveur Google.
• Compte de sauvegarde : configurez ou modifiez votre compte de sauvegarde Google.
• Restauration auto. : paramétrez l'appareil pour qu'il restaure les paramètres et les données
d'application lorsque les applications sont réinstallées.
• Rétablir param. par défaut : restaurez les valeurs par défaut de l’appareil et supprimez toutes
vos données.
Plus
Services de localisation
Modifiez les paramètres des informations de localisation.
• Accéder à ma position : paramétrez l'appareil pour qu'il autorise les applications à utiliser vos
informations de localisation réelles.
• Utiliser les satellites GPS : paramétrez l’appareil pour qu'il utilise les satellites GPS pour localiser
votre position.
• Utiliser réseaux sans fil : paramétrez l'appareil pour qu'il autorise la collecte de données de
localisation ou détermine l'emplacement de votre appareil perdu ou volé via le Wi-Fi ou un
réseau mobile.
• Mes endroits : définissez les profils à utiliser pour des emplacements spécifiques lorsque vous
utilisez les fonctions GPS, Wi-Fi ou Bluetooth afin de déterminer votre position.
Paramètres
99
Sécurité
Modifiez les paramètres de sécurité de l’appareil et de la carte SIM ou USIM.
• Crypter l'appareil : définissez un mot de passe pour crypter les données enregistrées sur
l’appareil. Vous devez saisir ce mot de passe à chaque fois que vous allumez l’appareil.
Chargez la batterie avant d’activer ce paramètre, car il peut arriver que le cryptage des
données dure plus d’une heure.
• Crypter la carte SD externe : paramétrez l'appareil pour crypter les fichiers contenus sur une
carte mémoire.
Votre appareil ne sera pas en mesure de lire les fichiers cryptés si vous le réinitialisez alors
que ces paramètres sont activés. Désactivez ces paramètres avant de réinitialiser votre
appareil.
• Contrôle à distance : paramétrez l'appareil pour qu'il autorise le contrôle à distance de votre
appareil perdu ou volé via Internet. Pour utiliser cette fonctionnalité, vous devez vous connecter
à votre compte Samsung.
– Ajouter compte : ajoutez ou affichez vos comptes Samsung et Google.
– Utiliser réseaux sans fil : paramétrez l'appareil pour qu'il autorise la collecte de données de
localisation ou détermine l'emplacement de votre appareil perdu ou volé via le Wi-Fi ou un
réseau mobile.
• Traçage du mobile : activez ou désactivez la fonction de Traçage du mobile qui vous aide à
localiser votre appareil en cas de perte ou de vol.
• Accéder à la page Traçage du mobile : accédez au site Web permettant de localiser votre
mobile (findmymobile.samsung.com). Ce site vous permet de repérer et de contrôler un appareil
égaré ou dérobé.
• Configurer blocage SIM :
– Verrouiller carte SIM : activez ou désactivez la fonction de verrouillage par code PIN de
l'appareil. Si vous activez ce paramètre, un code PIN vous sera demandé à chaque fois que
vous allumez l'appareil.
– Modifier code PIN SIM : modifiez le code PIN utilisé pour accéder aux données SIM ou USIM.
• Rendre les mots de passe visibles : paramétrez l’appareil pour qu’il affiche votre mot de passe à
mesure que vous le saisissez.
• Admin. de périphérique : affichez les administrateurs de votre appareil. Vous pouvez autoriser
les administrateurs de l’appareil à appliquer de nouvelles règles à celui-ci.
Paramètres
100
• Sources inconnues : installez des applications à partir de n'importe quelle source. Dans le cas
contraire, vous pourrez télécharger des applications uniquement depuis Play Store.
• Vérifier les applications : paramétrez cette fonction pour que Google vérifie si les applications
présentent un danger avant de les installer.
• Infos d'ident. sécurisées : recourez à des certificats et des identifiants pour sécuriser l’utilisation
des diverses applications.
• Installer depuis stock. périph. : installez des certificats cryptés sur le stockage USB.
• Effacer infos identification : effacez les identifiants de sécurité contenus dans l’appareil et
réinitialisez le mot de passe.
Gestionnaire d'applications
Affichez et gérez les applications installées sur votre appareil.
Batterie
Affichez la quantité d’énergie consommée par votre appareil.
Stockage
Affichez les informations relatives à la quantité de stockage disponible sur l’appareil et la carte
mémoire, ou formatez une carte mémoire.
Le formatage d’une carte mémoire supprime définitivement toutes les données qui y sont
stockées.
La mémoire interne de votre appareil a une capacité réelle disponible inférieure à la capacité
indiquée, car elle est en partie occupée par le système d’exploitation et les applications
installées par défaut. La capacité disponible peut changer lorsque vous effectuez une mise à
jour de l'appareil.
Paramètres
101
Date et heure
Accédez aux paramètres suivants et modifiez-les afin de contrôler l’affichage de l’heure et de la date.
Si la batterie est entièrement déchargée ou si vous la retirez de l’appareil, la date et l’heure
seront réinitialisées.
• Date et heure automatiques : mettez automatiquement à jour la date et l'heure lors du
changement de fuseaux horaires.
• Définir date : réglez la date manuellement.
• Définir l'heure : réglez l'heure manuellement.
• Fuseau horaire auto : paramétrez l'appareil pour pouvoir recevoir des informations sur l'heure
depuis le réseau lorsque vous changez de fuseau horaire.
• Sélectionner le fuseau horaire : réglez le fuseau horaire de votre domicile.
• Format 24 heures : affichez l'heure au format 24 heures.
• Format de date : sélectionnez un format de date.
À propos de l'appareil
Accédez à des informations d’aide sur votre téléphone et mettez à jour sa version logicielle.
Paramètres Google
Utilisez cette application pour configurer les paramètres de certaines fonctions fournies par Google.
Appuyez sur Paramètres Google depuis la liste des applications.
102
Dépannage
Avant de contacter un centre de service après-vente Samsung, veuillez essayer de mettre en œuvre
les solutions suivantes. Il est possible que certaines situations ne s’appliquent pas à votre appareil.
Lorsque vous allumez ou utilisez votre appareil, un message vous invite à
effectuer l’une des manipulations suivantes :
• Mot de passe : lorsque la fonction de verrouillage est activée, vous devez saisir le mot de passe
que vous avez défini pour l’appareil.
• Code PIN : lorsque vous utilisez l’appareil pour la première fois ou lorsque la demande de code
PIN est activée, vous devez saisir le code PIN fourni avec la carte SIM ou USIM. Vous pouvez
désactiver cette fonction à l’aide du menu de verrouillage de la carte SIM.
• Code PUK : si vous saisissez un code PIN incorrect à plusieurs reprises, la carte SIM ou USIM est
bloquée. Vous devez alors saisir le code PUK fourni par votre opérateur.
• Code PIN2 : lorsque vous accédez à un menu nécessitant le code PIN2, vous devez saisir le code
PIN2 fourni avec la carte SIM ou USIM. Pour en savoir plus, contactez votre opérateur.
Votre appareil affiche des messages d’erreur de réseau et de service
• Lorsque vous vous trouvez dans une zone de mauvaise réception, vous risquez de perdre
la connexion au réseau. Déplacez-vous et réessayez. Lorsque vous vous déplacez, plusieurs
messages d’erreur peuvent apparaître.
• Certaines options ne sont pas accessibles sans abonnement. Pour en savoir plus, contactez votre
opérateur.
Votre appareil ne s’allume pas
• Lorsque la batterie est entièrement déchargée, il n’est pas possible d’allumer l’appareil.
Rechargez complètement la batterie avant d’allumer l’appareil.
• Il est possible que la batterie ne soit pas correctement installée. Réinsérez la batterie.
• Essuyez les deux contacts dorés et réinsérez la batterie.
Dépannage
103
Mauvaise réaction ou lenteur de l’écran tactile
• Si vous fixez sur l’écran tactile un cache de protection ou tout autre accessoire en option, il est
possible que l’écran ne fonctionne pas correctement.
• Si vous portez des gants, si vos mains ne sont pas parfaitement propres, ou si vous appuyez
sur l’écran avec un objet pointu ou vos ongles, l’écran tactile risque de présenter des
dysfonctionnements.
• L’humidité ou le contact avec l’eau peut provoquer des dysfonctionnements de l’écran tactile.
• Redémarrez votre appareil afin de mettre fin à d’éventuels dysfonctionnements logiciels
temporaires.
• Assurez-vous que vous disposez bien de la dernière version logicielle de votre appareil.
• Si l’écran tactile est endommagé ou rayé, contactez un centre de service après-vente Samsung.
Votre appareil se bloque ou est sujet à des erreurs fatales
Si votre appareil ne répond plus ou se bloque, vous devrez éventuellement fermer les applications
ou réinsérer la batterie et réinitialiser votre appareil pour qu’il retrouve un fonctionnement correct.
Si votre appareil se bloque et ne répond plus, maintenez la touche Marche/Arrêt enfoncée pendant
8 à 10 secondes pour redémarrer.
Si vous ne parvenez pas à résoudre le problème à la suite de ces manipulations, procédez à la
réinitialisation des paramètres par défaut. Depuis la liste des applications, appuyez sur Paramètres →
Comptes → Sauvegarder et réinitialiser → Rétablir param. par défaut → Réinitialiser le périphérique
→ Supprimer tout. Avant de rétablir les paramètres par défaut de votre appareil, n’oubliez pas
d’effectuer des copies de sauvegarde de toutes les données importantes qui y sont stockées.
Si le problème persiste, contactez un centre de service après-vente Samsung.
Impossible de passer des appels
• Assurez-vous d’être connecté au réseau cellulaire approprié.
• Vérifiez que vous n’avez pas activé la fonction de restriction d’appel pour le numéro de
téléphone que vous composez.
• Vérifiez que vous n’avez pas activé la fonction de restriction d’appel pour le numéro de
téléphone de l’appel entrant.
Vos interlocuteurs ne vous entendent pas
• Vérifiez que le microphone intégré n’est pas recouvert.
• Vérifiez que le microphone est placé suffisamment près de votre bouche.
• Si vous utilisez un kit piéton ou un casque, vérifiez qu’il est correctement branché.
Dépannage
104
Vous percevez un écho lors des appels
Réglez le volume en appuyant sur la touche de volume ou déplacez-vous.
Déconnexions fréquentes du réseau cellulaire ou d’Internet, ou mauvaise
qualité audio
• Assurez-vous que rien n’entrave l’antenne intégrée à l’appareil.
• Lorsque vous vous trouvez dans une zone de mauvaise réception, vous risquez de perdre la
connexion au réseau. Vos problèmes de connectivité peuvent être dus à une panne au niveau
de votre opérateur. Déplacez-vous et réessayez.
• Si vous utilisez votre appareil tout en vous déplaçant, il est possible que les services de réseau
sans fil soient désactivés en raison de problèmes sur le réseau de votre opérateur.
L’icône de la batterie est vide
Le niveau de charge de la batterie est faible. Rechargez ou remplacez la batterie.
La batterie ne se charge pas correctement (pour les chargeurs
homologués Samsung)
• Assurez-vous que le chargeur est correctement branché.
• Si les bornes de la batterie sont sales, la batterie peut ne pas se recharger correctement ou
l’appareil risque de s’éteindre. Essuyez les deux contacts dorés et réessayez de recharger la
batterie.
• Sur certains appareils, la batterie ne peut pas être remplacée par l’utilisateur. Pour remplacer ce
type de batterie, contactez un centre de service après-vente Samsung.
La batterie se décharge de plus en plus rapidement
• Lorsque la batterie est exposée à des températures extrêmes, la charge utile peut être réduite.
• La consommation de la batterie augmente lorsque vous utilisez certaines fonctionnalités,
comme les SMS et MMS, ou certaines applications, comme les jeux ou Internet.
• La batterie est un consommable et sa charge utile diminue avec le temps.
Dépannage
105
L’appareil est chaud au toucher
Lorsque vous utilisez plusieurs applications simultanément ou sur une période prolongée, l’appareil
peut chauffer. Ce phénomène est normal et n’affecte ni la durée de vie, ni les performances de
l’appareil.
Messages d’erreur à l’activation de l’appareil photo
Pour utiliser l’appareil photo, votre appareil doit disposer de suffisamment de mémoire et sa batterie
être suffisamment chargée. Si vous obtenez des messages d’erreur lors de l’activation de l’appareil
photo, tentez les manipulations suivantes :
• Chargez la batterie ou remplacez-la par une autre entièrement chargée.
• Libérez de la mémoire en transférant des fichiers sur un ordinateur ou en supprimant des
éléments de l’appareil.
• Redémarrez l’appareil. Si les problèmes persistent, contactez un centre de service après-vente
Samsung.
Qualité des photos inférieure par rapport à l’aperçu
• La qualité de vos photos peut varier selon l’environnement et les techniques photographiques
utilisées.
• Si vous prenez des photos avec une luminosité insuffisante, de nuit ou en intérieur, l’image
risque d’être floue.
Messages d’erreur à l’ouverture de fichiers multimédia
Si vous obtenez des messages d’erreur lors de l’ouverture de fichiers multimédia ou si vous ne
parvenez pas à les ouvrir, tentez les manipulations suivantes :
• Libérez de la mémoire en transférant des fichiers sur un ordinateur ou en supprimant des
éléments de l’appareil.
• Assurez-vous que le fichier audio n’est pas protégé par des droits DRM (Gestion des droits
d’auteur). Si c’est le cas, pour lire le fichier, vous devez posséder une licence ou une clé.
• Vérifiez que votre appareil prend en charge le type du fichier audio.
• Votre appareil est compatible avec les photos et vidéos capturées avec ce même appareil. Les
photos et vidéos capturées avec d’autres appareils peuvent ne pas s’afficher correctement.
• Votre appareil prend en charge les fichiers multimédia autorisés par votre opérateur ainsi que
les opérateur, des autres services réseaux. Il est possible que certains contenus circulant sur
Internet, comme des sonneries, vidéos ou fonds d’écran, ne fonctionnent pas correctement.
Dépannage
106
Impossible de localiser un autre appareil Bluetooth
• Vérifiez que la fonction sans fil Bluetooth est activée sur votre appareil.
• Vérifiez que la fonction sans fil Bluetooth est également activée sur l’appareil auquel vous tentez
de vous connecter.
• Vérifiez que les deux appareils Bluetooth se trouvent bien à l’intérieur du rayon d’action
Bluetooth (10 m maximum).
Si les conseils ci-dessus ne résolvent pas le problème, contactez un centre de service après-vente
Samsung.
Problème de connexion avec un ordinateur
• Assurez-vous que le câble de connexion PC utilisé est compatible avec votre appareil.
• Vérifiez que le pilote nécessaire est bien installé sur votre ordinateur et qu’il est à jour.
• Si vous utilisez Windows XP, vérifiez que vous possédez la version Windows XP Service Pack 3 ou
version ultérieure sur votre ordinateur.
• Vérifiez que vous disposez bien de Samsung Kies ou Windows Media Player 10 ou une version
ultérieure sur votre ordinateur.
Votre appareil ne parvient pas à détecter votre position
À certains endroits, comme à l’intérieur d’un bâtiment, les signaux GPS peuvent être faibles. Si cela se
produit, configurez votre appareil pour l’utilisation d’un réseau Wi-Fi ou mobile afin de trouver votre
position.
Les données stockées sur l’appareil ont été perdues
Effectuez toujours des copies des données importantes stockées sur votre appareil. Dans le cas
contraire, vous ne pourriez pas récupérer vos données corrompues ou perdues. Samsung ne peut
être tenu responsable de la perte des données stockées sur votre appareil.
Un petit espace est apparu sur le bord externe du boîtier de l’appareil
• Cet espace est une caractéristique de fabrication, et il est possible d’observer un jeu ou une
vibration des pièces.
• Au fil du temps, la friction entre les pièces peut entraîner l’élargissement de cet espace.
French. 01/2014. Rev.1.0
Le contenu de ce manuel peut différer par rapport à votre appareil en fonction de votre zone
géographique, votre opérateur ou votre version logicielle, et faire l’objet de modifications sans
préavis.
www.samsung.com
www.samsung.com
Mode d'emploi
SM-T520
2
À propos de ce mode d'emploi
Cet appareil vous permet de communiquer et d’accéder à des divertissements de haute qualité,
basés sur les critères de qualité et la technologie de Samsung. Ce mode d’emploi a été spécialement
conçu pour vous permettre de découvrir les fonctions et les caractéristiques de votre appareil.
• Veuillez lire attentivement mode d'emploi, afin de pouvoir l’utiliser correctement et en toute
sécurité.
• Les descriptions sont basées sur les paramètres par défaut de votre appareil.
• Les images et les captures d’écran peuvent différer par rapport à l’aspect réel du produit.
• Le contenu de ce mode d'emploi peut différer par rapport au produit ou à votre version
logicielle, et faire l’objet de modifications sans préavis. Pour obtenir la version la plus récente de
ce mode d’emploi, connectez-vous sur le site Web de Samsung : www.samsung.com.
• Les contenus de qualité élevée nécessitant une forte utilisation du processeur et de la RAM
peuvent avoir une incidence sur les performances générales de l’appareil. Les applications en
rapport avec ces contenus peuvent ne pas fonctionner correctement selon les caractéristiques
de l’appareil et les conditions d’utilisation.
• Les fonctions disponibles et les services supplémentaires peuvent varier selon l’appareil, votre
version logicielle ou votre opérateur.
• Les applications et leurs fonctions peuvent varier en fonction de votre zone géographique ou
des caractéristiques du matériel. Samsung ne peut être tenu responsable des problèmes de
performance relatifs aux applications fournies par des éditeurs de logiciels autres que Samsung.
• Samsung ne peut être tenu responsable des problèmes de performance ou des incompatibilités
découlant de la modification des paramètres de registre par l’utilisateur. Toute tentative de
personnalisation du système d’exploitation peut entraîner des problèmes de fonctionnement de
l’appareil ou de ses applications.
• Les logiciels, sons, fonds d’écran, images ainsi que les autres contenus multimédia fourni(e)s
avec cet appareil sont concédé(e)s sous licence et leur usage est soumis à une utilisation limitée.
L’extraction et l’utilisation de ces éléments à des fins commerciales ou autres constituent
une infraction au regard des lois sur les droits d’auteur. Les utilisateurs sont entièrement
responsables de toute utilisation illégale d’un contenu multimédia.
À propos de ce mode d'emploi
3
• Les applications fournies par défaut avec l’appareil peuvent être modifiées ou ne plus être
disponibles, et ce, sans préavis. Si vous avez des questions à propos d’une application fournie
avec l’appareil, contactez un centre de service après-vente Samsung. Pour les applications
installées par l’utilisateur, contactez les opérateurs.
• Toute modification du système d’exploitation ou installation de logiciels non officiels peut
entraîner des dysfonctionnements et corrompre vos données. Ces actions constituent des
violations de l’accord de licence Samsung et annuleront votre garantie.
Icônes
Avertissement : situations susceptibles de vous blesser ou de blesser autrui
Attention : situations susceptibles d’endommager votre appareil ou d’autres équipements
Remarque : remarques, conseils d’utilisation ou informations complémentaires
Droits d’auteur
Copyright © 2014 Samsung Electronics
Ce mode d’emploi est protégé par les lois internationales sur les droits d’auteur.
Il est interdit de reproduire, distribuer, traduire ou transmettre sous quelque forme et par quelque
moyen que ce soit, électronique ou mécanique, notamment par photocopie, enregistrement
ou stockage dans un système de stockage et de recherche documentaire, tout ou partie de ce
document, sans le consentement préalable écrit de Samsung Electronics.
À propos de ce mode d'emploi
4
Marques
• SAMSUNG et le logo SAMSUNG sont des marques déposées de Samsung Electronics.
• Bluetooth® est une marque déposée de Bluetooth SIG, Inc.
• Wi-Fi®, Wi-Fi Protected Setup™, Wi-Fi CERTIFIED Passpoint™, Wi-Fi Direct™, Wi-Fi CERTIFIED™
et le logo Wi-Fi sont des marques déposées de Wi-Fi Alliance.
• Toutes les autres marques et droits d’auteur demeurent la propriété de leurs propriétaires
respectifs.
5
Table des matières
Démarrage
7 Présentation de l’appareil
8 Touches
9 Contenu du coffret
10 Charger la batterie
12 Insérer une carte mémoire
14 Allumer et éteindre l’appareil
15 Manipuler l’appareil
15 Verrouiller et déverrouiller l’appareil
15 Régler le volume
15 Activer le profil Discret
Fonctions de base
16 Icônes d’informations
17 Utiliser l’écran tactile
20 Reconnaissance des mouvements
22 Mouvements de la main
23 Smart Pause
24 Utiliser la fonction Multi-fenêtres
29 Notifications
30 Écran d’accueil
35 Liste des applications
36 Utiliser les applications
37 Aide
37 Saisir du texte
39 Établir une connexion au réseau Wi-Fi
41 Créer un compte
41 Configurer des profils utilisateur
42 Transférer des fichiers
43 Protéger l’appareil
45 Mettre l’appareil à jour
Communication
46 Contacts
50 Email
52 Google Mail
54 Hangouts
54 Google+
55 Google+ Photos
Web et réseau
56 Internet
57 Chrome
58 Bluetooth
59 Screen Mirroring
60 e-Meeting
66 WebEx
75 Remote PC
80 SideSync 3.0
Table des matières
6
118 Téléchargements
119 KNOX
Géolocalisation
120 Maps
Paramètres
121 Accéder au menu des paramètres
121 Connexions
124 Appareil
128 Contrôle
131 Général
135 Paramètres Google
Dépannage
Multimédia
86 Musique
88 Appareil photo
95 Galerie
99 Vidéo
100 YouTube
101 Flipboard
Boutiques d’applications et
multimédia
102 Play Store
103 Samsung Apps
103 Play Livres
104 Play Films
104 Play Musique
104 Play Jeux
104 Play Kiosque
Utilitaires
105 Mémo
106 S Planner
108 Dropbox
108 Cloud
109 Google Drive
110 Hancom Viewer
112 Alarme
113 Horloge mondiale
114 Calculatrice
114 S Voice
115 S Finder
115 Recherche Google
116 Recherche vocale
116 Mes fichiers
7
Démarrage
Présentation de l’appareil
Touche Retour
Touche Accueil
Haut-parleur
Capteur de luminosité
Touche Applications
récentes
Connecteur à
fonctions multiples
Écran tactile
Objectif avant
Touche Marche/Arrêt
Touche de volume
Microphone
Compartiment pour
carte mémoire
Témoin lumineux
Antenne GPS
Objectif arrière
Haut-parleur
Prise audio 3,5 mm
Flash
Démarrage
8
• Ne recouvrez pas la zone autour de l’antenne avec vos mains ou tout autre objet. Cela
peut entraîner des problèmes de connectivité ou décharger la batterie.
• L’utilisation d’une protection d’écran agréée Samsung est recommandée. Les protections
d’écran non agréées peuvent provoquer un dysfonctionnement des capteurs.
• Évitez de mettre l’écran tactile en contact avec de l’eau. L’humidité ou le contact avec l’eau
peut provoquer des dysfonctionnements de l’écran tactile.
Touches
Touche Fonction
Marche/Arrêt
• Maintenir cette touche enfoncée pour allumer ou éteindre
l’appareil.
• Maintenir cette touche enfoncée pendant 7 secondes pour
réinitialiser l’appareil en cas d’erreur fatale, ou s’il ne répond plus
ou mal.
• Appuyer sur cette touche pour verrouiller ou déverrouiller
l’appareil. Lorsque l’écran s’éteint, l’appareil passe en mode
Verrouillage.
Applications
récentes
• Appuyez sur cette touche pour ouvrir la liste des applications
récentes.
Accueil
• Appuyer sur cette touche pour revenir à l’écran d’accueil.
• Maintenez cette touche enfoncée pour lancer l'application de
recherche Google.
Retour • Appuyer sur cette touche pour revenir à l’écran précédent.
Volume • Appuyer sur cette touche pour régler le volume de l’appareil.
Démarrage
9
Contenu du coffret
Vérifiez le contenu du coffret et assurez-vous que tous les éléments suivants sont présents :
• Appareil
• Guide de prise en main rapide
• Les éléments fournis avec l’appareil et les accessoires disponibles peuvent varier en
fonction de votre zone géographique ou de votre opérateur.
• Les accessoires fournis ont été spécialement conçus pour votre appareil et peuvent ne
pas fonctionner avec d’autres appareils.
• L’aspect et les caractéristiques du produit peuvent faire l’objet de modifications sans
préavis.
• Vous pouvez acheter d’autres accessoires auprès de votre revendeur Samsung. Avant
tout achat, assurez-vous qu’ils sont compatibles avec votre appareil.
• Certains accessoires, autres que ceux fournis, peuvent ne pas être compatibles avec votre
appareil.
• Utilisez exclusivement des accessoires homologués par Samsung. Les
dysfonctionnements résultant d’une utilisation d’accessoires non homologués ne sont
pas couverts par le service de garantie.
• La disponibilité de l’ensemble des accessoires dépend entièrement des fabricants. Pour
plus d’informations sur la disponibilité des accessoires, consultez le site Web Samsung.
Démarrage
10
Charger la batterie
Vous devez charger la batterie avant d’utiliser l’appareil pour la première fois.
Utilisez uniquement des chargeurs, des batteries et des câbles USB homologués par
Samsung. L’utilisation de chargeurs ou de câbles non homologués peut provoquer
l’éclatement de la batterie ou endommager l’appareil.
• Lorsque la batterie est déchargée, l'icône de batterie est vide.
• Si la batterie est complètement déchargée, vous ne pouvez pas allumer l’appareil,
même si le chargeur est branché. Rechargez la batterie pendant quelques minutes avant
d’allumer l’appareil.
• Si vous utilisez simultanément plusieurs applications, des applications réseaux ou des
applications qui nécessitent une connexion à un autre appareil, la batterie se déchargera
rapidement. Pour éviter toute déconnexion du réseau ou perte d’alimentation lors
d’un transfert de données, utilisez toujours ces applications lorsque la batterie est
parfaitement chargée.
Charger la batterie avec le chargeur
Branchez le câble USB sur l’adaptateur secteur USB, puis la fiche micro-USB sur le connecteur à
fonctions multiples de l’appareil.
Démarrage
11
Un branchement incorrect du chargeur peut sérieusement endommager l’appareil. Les
dégâts résultant d’une mauvaise utilisation ne sont pas couverts par la garantie.
• L’appareil peut être utilisé en cours de chargement, mais dans ce cas, le chargement
complet de la batterie risque de prendre plus de temps.
• Lorsque l’appareil est en cours de chargement, il est possible que l’écran tactile ne
fonctionne pas en raison de l’instabilité de l’alimentation électrique. Dans ce cas,
débranchez le chargeur de l’appareil.
• Il est possible que l’appareil chauffe lorsqu’il est en cours de chargement. Ce phénomène
est normal et n’affecte ni la durée de vie, ni les performances de l’appareil. Si la
température de la batterie devient trop élevée, le chargement risque de s’interrompre.
• Si l’appareil ne se charge pas correctement, apportez-le, accompagné de son chargeur,
dans un centre de service après-vente Samsung.
Lorsque la batterie est complètement chargée, déconnectez l’appareil du chargeur. Pour ce faire,
débranchez d’abord le chargeur de l’appareil, puis de la prise de courant.
• Pour économiser l’énergie, débranchez le chargeur lorsque vous ne l’utilisez pas. Le
chargeur n’étant pas muni d'une touche Marche/Arrêt, vous devez le débrancher de la
prise de courant pour couper l’alimentation. L’appareil doit rester à proximité de la prise
lors du chargement.
• Le socle de prise de courant doit être installé à proximité du matériel et doit être aisément
accessible.
Vérifier la charge de la batterie
Lorsque vous chargez la batterie et que l’appareil est éteint, les icônes suivantes indiquent l’état du
chargement :
Chargement en cours Chargement terminé
Démarrage
12
Réduire la consommation d’énergie de la batterie
Votre appareil est doté d’options destinées à optimiser l’autonomie de votre batterie. En
personnalisant ces options et en désactivant les applications fonctionnant inutilement en arrièreplan,
vous pouvez utiliser l’appareil plus longtemps entre deux chargements :
• Lorsque vous n’utilisez pas l’appareil, désactivez l’écran tactile en appuyant sur la touche
Marche/Arrêt.
• Fermez toutes les applications fonctionnant inutilement en arrière-plan à l’aide du gestionnaire
de tâches.
• Désactivez la fonction Bluetooth.
• Désactivez la fonction Wi-Fi.
• Désactivez les applications de synchronisation automatique.
• Réduisez la durée du rétroéclairage de l’écran.
• Réduisez la luminosité de l’écran.
Insérer une carte mémoire
L’appareil est compatible avec les cartes mémoire d’une capacité allant jusqu’à 64 Go. Selon le
fabricant et le modèle, certaines cartes mémoire peuvent ne pas être compatibles avec votre
appareil.
• Certaines cartes mémoire peuvent ne pas être parfaitement compatibles avec l’appareil.
L’utilisation d’une carte mémoire incompatible peut endommager l’appareil ou la carte
mémoire elle-même et corrompre les données qui y sont stockées.
• Veillez à insérer la carte mémoire du bon côté.
• Seules les structures de fichiers FAT et exFAT sont compatibles avec les cartes mémoire de
l’appareil. Lorsque vous insérez une carte mémoire formatée avec une autre structure de
fichiers, l’appareil vous invite à la reformater.
• Une trop grande fréquence des opérations d’effacement et d’écriture réduit la durée de
vie des cartes mémoire.
• Lorsque vous insérez une carte mémoire dans l’appareil, le répertoire de fichiers de la
carte apparaît dans le dossier SD Memory card. card du menu Mes fichiers.
Démarrage
13
1 Ouvrez le compartiment de la carte mémoire.
2 Insérez la carte mémoire en orientant la puce vers le bas.
3 Enfoncez la carte mémoire dans son compartiment jusqu’à ce qu’elle se verrouille.
4 Fermez le compartiment de la carte mémoire.
Retirer une carte mémoire
Avant de retirer la carte mémoire, vous devez au préalable la désactiver pour pouvoir la retirer en
toute sécurité. Depuis l’écran d’accueil, appuyez sur → Paramètres → Général → Stockage →
Démonter la carte SD.
1 Ouvrez le compartiment de la carte mémoire.
2 Appuyez avec précaution sur la carte mémoire pour la dégager, puis sortez-la du compartiment.
3 Fermez le compartiment de la carte mémoire.
Ne retirez jamais la carte mémoire lorsque l’appareil y enregistre ou lit des informations.
Cela pourrait entraîner une perte ou une corruption des données, ou endommager la carte
mémoire ou l’appareil. Samsung ne peut être tenu responsable en cas de perte de données
résultant d’une utilisation frauduleuse ou en cas de détérioration d’une carte mémoire.
Démarrage
14
Formater une carte mémoire
Une carte mémoire ayant été formatée sur un ordinateur peut ne pas être compatible avec l’appareil.
Formatez la carte mémoire dans l’appareil.
Depuis l’écran d’accueil, appuyez sur → Paramètres → Général → Stockage → Formater la
carte SD → Formater la carte SD → Supprimer tout.
Avant de formater la carte mémoire, n’oubliez pas d’effectuer des copies de sauvegarde de
toutes les données importantes qui y sont stockées. La garantie du fabricant ne couvre pas
la perte de données résultant des manipulations de l’utilisateur.
Allumer et éteindre l’appareil
Si vous allumez l’appareil pour la première fois, suivez les instructions affichées à l’écran pour
procéder à sa configuration.
Pour allumer l'appareil, maintenez la touche Marche/Arrêt enfoncée pendant quelques secondes.
• Respectez toutes les consignes de sécurité et directives formulées par le personnel
compétent dans les lieux où l’utilisation d’appareils mobiles est interdite, comme par
exemple dans les avions et les hôpitaux.
• Pour désactiver les fonctions de connexion sans fil, c'est-à-dire les fonctions Wi-Fi et
Bluetooth, maintenez la touche Marche/Arrêt enfoncée et appuyez sur Mode Hors-ligne.
Pour éteindre l’appareil, maintenez la touche Marche/Arrêt enfoncée, puis appuyez sur Éteindre.
Démarrage
15
Manipuler l’appareil
Ne recouvrez pas la zone autour de l’antenne avec vos mains ou tout autre objet. Cela peut entraîner
des problèmes de connectivité ou décharger la batterie.
Verrouiller et déverrouiller l’appareil
Pour empêcher toute opération accidentelle de l’appareil lorsque vous ne l’utilisez pas, vous pouvez
le verrouiller. Lorsque vous appuyez sur la touche Marche/Arrêt, l’écran s’éteint et l’appareil passe en
mode Verrouillage. Il se verrouille également automatiquement si vous ne l’utilisez pas pendant un
certain temps.
Pour déverrouiller l’appareil, appuyez sur la touche Marche/Arrêt ou sur la touche Accueil, puis faites
glisser votre doigt dans n’importe quelle direction sur l'écran.
Régler le volume
Pour régler le volume des notifications ou des sons multimédia, appuyez sur la touche de volume
Haut ou Bas.
Activer le profil Discret
Utilisez l’une des méthodes suivantes :
• Maintenez la touche de volume Bas enfoncée jusqu'à ce que le profil Discret soit activé.
• Maintenez la touche Marche/Arrêt enfoncée, puis appuyez sur Muet ou Vibreur.
• Ouvrez le volet des raccourcis en haut de l’écran, puis appuyez sur Son ou Vibreur.
16
Fonctions de base
Icônes d’informations
Les icônes susceptibles de s'afficher en haut de l’écran vous indiquent le statut de l’appareil. Les
icônes répertoriées dans le tableau ci-dessous sont les plus courantes.
Icône Signification
Connecté au réseau Wi-Fi
Fonction Bluetooth activée
GPS activé
Fonction Smart Screen activée
Synchronisation avec le Web
Connecté à un ordinateur
Alarme activée
Mode Discret activé
Vibreur activé
Mode Hors-ligne activé
Une erreur s’est produite ou votre attention est nécessaire
Niveau de charge de la batterie
Fonctions de base
17
Utiliser l’écran tactile
L’écran tactile réagit uniquement au doigt.
• Évitez tout contact de l’écran tactile avec d’autres appareils électriques. Les décharges
électrostatiques peuvent provoquer des dysfonctionnements de l’écran tactile.
• Pour éviter d’endommager l’écran tactile, n’appuyez pas dessus avec un objet pointu et
n’exercez aucune pression excessive avec vos doigts.
• Il se peut que l'appareil ne reconnaisse pas la saisie tactile près des bords de l'écran, hors
de la zone de saisie dédiée.
• Si l’écran tactile reste inactif pendant une période prolongée, des images rémanentes
risquent d’apparaître (ou persistance de l’affichage). Éteignez l’écran tactile lorsque vous
n’utilisez pas l’appareil.
Mouvements
Appuyer
Pour ouvrir une application, sélectionner un élément de menu, activer une commande ou saisir un
caractère sur le clavier, appuyez sur l’écran tactile avec un seul doigt.
Fonctions de base
18
Maintenir appuyé
Pour ouvrir une fenêtre d’options contextuelle, maintenez le doigt appuyé sur un élément pendant
plus de 2 secondes.
Faire glisser
Pour déplacer un élément vers un nouvel emplacement, maintenez le doigt appuyé sur l’élément et
faites-le glisser sur l’écran.
Fonctions de base
19
Appuyer deux fois
Pour effectuer un zoom sur une page Web ou une image, appuyez deux fois sur l'écran. Appuyez à
nouveau à deux reprises pour annuler le zoom.
Effleurer
Pour passer d’une fenêtre à l’autre, faites glisser votre doigt vers la gauche ou la droite sur l’écran
d’accueil ou dans la liste des applications. Pour parcourir une page Web ou une liste, telle que celle
de vos contacts, faites glisser votre doigt vers le haut ou le bas de l’écran.
Fonctions de base
20
Pincer
Pour effectuer un zoom avant sur une page Web, une carte ou une image, placez deux doigts sur
l’écran et écartez-les. Rapprochez-les pour effectuer un zoom arrière.
Reconnaissance des mouvements
Vous pouvez contrôler l’appareil à l’aide de quelques mouvements simples.
Avant toute chose, vérifiez que la fonction de reconnaissance des mouvements est activée. Depuis
l’écran d’accueil, appuyez sur → Paramètres → Contrôle → Mouvements, puis faites glisser le
curseur Mouvements vers la droite.
Si l’appareil est soumis à des secousses ou à des chocs excessifs, cela peut entraîner un
comportement imprévu. Veillez à contrôler vos gestes.
Pivoter l’écran
De nombreuses applications autorisent l’affichage en mode Portrait ou Paysage. Lorsque vous faites
pivoter l’appareil, l’écran s’adapte automatiquement à la nouvelle orientation.
Fonctions de base
21
Pour empêcher l'écran de pivoter automatiquement, ouvrez le volet des raccourcis et désélectionnez
l’option Rotation écran.
• Certaines applications ne permettent pas la rotation de l’écran.
• Pour certaines autres applications, l’écran affiché diffère selon l’orientation.
Effectuer un panoramique pour naviguer
Lors d’un zoom sur une image, maintenez le doigt appuyé à l’écran, puis déplacez l’appareil dans une
direction pour faire défiler l’image.
Fonctions de base
22
Incliner
Maintenez vos pouces appuyés sur deux points de l’écran, puis inclinez l’appareil vers l’avant ou
l’arrière pour effectuer un zoom avant ou arrière.
Mouvements de la main
Utilisez les mouvements de votre main pour contrôler l’appareil par un simple contact avec l’écran
tactile.
Avant toute chose, vérifiez que la reconnaissance des mouvements de main est activée. Depuis
l’écran d’accueil, appuyez sur → Paramètres → Contrôle → Mouvement de paume, puis faites
glisser le curseur Mouvement de paume vers la droite.
Balayer
Balayez l’écran avec le côté de la main pour réaliser une capture d’écran. L’image est enregistrée dans
le menu Galerie → Screenshots. Cette fonction n’est disponible que pour certaines applications.
Fonctions de base
23
Recouvrir
Recouvrez l’écran avec la paume de la main pour effectuer une pause lors de la lecture d’un contenu
multimédia.
Smart Pause
Utilisez cette fonction pour mettre en pause des vidéos lorsque vous ne regardez pas l'écran.
Depuis l’écran d’accueil, appuyez sur → Paramètres → Contrôle → Smart Screen, puis cochez la
case Smart Pause.
Lorsque vous lisez une vidéo, détournez les yeux de l’écran pour effectuer une pause. Pour reprendre
la lecture, regardez à nouveau l’écran.
Fonctions de base
24
Utiliser la fonction Multi-fenêtres
Cette fonction permet d'exécuter plusieurs applications en même temps sur le même écran.
• Seules les applications figurant dans le volet Multi-fenêtres peuvent être exécutées.
• La disponibilité de cette fonction dépend de votre zone géographique ou de votre
opérateur.
Pour utiliser la fonction Multi-fenêtres, depuis l’écran d’accueil, appuyez sur → Paramètres →
Appareil → Fenêtres multiples, puis faites glisser le curseur Fenêtres multiples vers la droite.
Vous pouvez utiliser deux types de Multi-fenêtres.
<Écran partagé Multi-fenêtres>
Utiliser un écran partagé Multi-fenêtres
Cette fonction permet d'exécuter des applications sur un écran partagé.
Fonctions de base
25
Lancer des applications sur un écran partagé Multi-fenêtres
1 Placez votre doigt sur le côté droit de l'écran et faites-le glisser vers le centre. Vous pouvez
également maintenir le doigt appuyé sur .
Le volet Multi-fenêtres apparaît sur le côté droit de l'écran.
Volet Multi-fenêtres
2 Maintenez le doigt appuyé sur une icône d'application dans le volet Multi-fenêtres, puis faites-la
glisser vers l'écran.
Lorsque l'écran devient bleu, relâchez l'icône d'application.
Fonctions de base
26
3 Maintenez le doigt appuyé sur une autre icône d'application dans le volet Multi-fenêtres, puis
faites-la glisser vers un nouvel emplacement.
Vous pouvez exécuter la même application en même temps dans un écran partagé. Seules
les applications caractérisées par l'icône sont compatibles avec cette fonction .
Partager du contenu entre des applications
Il est très facile de partager du contenu entre des applications, comme Email et Internet, par un
mouvement de glisser-déplacer.
Il se peut que certaines applications ne prennent pas en charge cette fonction.
1 Lancez les applications Email et Internet sur un écran partagé Multi-fenêtres.
Accéder aux options
Multi-fenêtres.
2 Appuyez sur le cercle situé entre les fenêtres d'application, puis appuyez sur .
Appuyez sur le cercle situé entre les fenêtres d'application pour accéder aux options
suivantes :
• : ouvrir une liste d'applications utilisées récemment dans la fenêtre sélectionnée.
• : passer d’une application Multi-fenêtres à l’autre.
• : partager des éléments, comme des images, du texte ou des liens, entre les fenêtres en
réalisant un mouvement de glisser-déplacer.
• : agrandir la fenêtre.
• : fermer l'application.
Fonctions de base
27
3 Maintenez le doigt appuyé sur un élément affiché dans la fenêtre Internet et faites glisser cet
élément vers l'emplacement souhaité dans la fenêtre Email.
Créer une combinaison Multi-fenêtres
Cette fonction vous permet d'enregistrer les applications Multi-fenêtres en cours d'exécution en tant
que combinaison.
1 Lancez plusieurs applications sur un écran partagé Multi-fenêtres.
2 Ouvrez le volet Multi-fenêtres et appuyez sur → Créer.
3 Saisissez un titre, puis appuyez sur OK.
La combinaison Multi-fenêtres en cours d'exécution est ajoutée au plateau Multi-fenêtres.
Pour lancer des applications sur la base d'une combinaison enregistrée, sélectionnez-la dans le
volet Multi-fenêtres.
Fonctions de base
28
Utiliser une Multi-fenêtres contextuelle
Cette fonction permet de lancer des applications dans des fenêtres contextuelles.
1 Placez votre doigt sur le côté droit de l'écran et faites-le glisser vers le centre. Vous pouvez
également maintenir le doigt appuyé sur .
Le volet Multi-fenêtres apparaît sur le côté droit de l'écran.
Volet Multi-fenêtres
2 Appuyez sur une icône d'application dans le volet Multi-fenêtres.
Une fenêtre contextuelle apparaît à l'écran.
Réduire la fenêtre.
Agrandir la fenêtre.
Fermer la fenêtre.
Vous pouvez lancer la même application dans plusieurs fenêtres contextuelles en même
temps. Seules les applications caractérisées par l'icône sont compatibles avec cette
fonction .
Fonctions de base
29
Notifications
Des icônes de notification apparaissent dans le volet de des raccourcis en haut de l'écran pour vous
signaler les nouveaux messages, les événements à venir, le statut de l'appareil, et plus encore. Pour
ouvrir le volet des raccourcis, faites glisser votre doigt de haut en bas sur le volet. Pour afficher des
notifications supplémentaires, faites défiler la liste vers le bas. Pour le fermer, faites glisser votre doigt
de bas en haut sur le volet.
Dans le volet des raccourcis, vous pouvez afficher tous les paramètres actuels de votre appareil.
Faites glisser votre doigt de haut en bas sur le volet des raccourcis, puis appuyez sur pour utiliser
les options suivantes :
• Wi-Fi : activer ou désactiver la fonction Wi-Fi.
• GPS : activer ou désactiver la fonction GPS.
• Son : activer ou désactiver le son ou le vibreur de l'appareil. Vous pouvez activer le mode vibreur
ou discret en mode silencieux.
• Rotation écran : autoriser ou empêcher l’interface de pivoter lorsque vous tournez l’appareil.
• Bluetooth : activer ou désactiver la fonction Bluetooth.
• Mode lecture : activer ou désactiver le mode lecture. En mode lecture, l'appareil vous protège
de la fatigue oculaire lorsque vous lisez la nuit. Pour sélectionner les applications à utiliser en
mode lecture, appuyez sur Paramètres → Appareil → Affichage → Mode lecture.
• Mode blocage : activer ou désactiver le mode blocage. En mode blocage, l’appareil bloque
toutes les notifications. Pour sélectionner les notifications qui seront bloquées, appuyez sur
Paramètres → Appareil → Mode Blocage.
• Éco. énergie : activer ou désactiver le mode économie d'énergie.
• Multi fenêtres : activer ou désactiver la fonction Multi-fenêtres.
• Screen Mirroring : activer ou désactiver la fonction Screen Mirroring qui permet de répliquer
votre écran sur l’écran d’un autre appareil.
• Smart Stay : activer ou désactiver la fonction Smart Stay de veille intelligente.
• Smart Pause : activer ou désactiver la fonction Smart Pause de pause intelligente.
• Synchro. : activez ou désactivez la synchronisation automatique des applications.
• Mode Hors-ligne : activer ou désactiver le mode Hors-ligne.
La disponibilité des options dépend de votre zone géographique ou de votre opérateur.
Pour réorganiser les options dans le volet des raccourcis, ouvrez-le, appuyez sur → , puis
maintenez votre doigt appuyé sur un élément et faites-le glisser vers un autre emplacement.
Fonctions de base
30
Écran d’accueil
L’écran d’accueil est le point de départ pour accéder à toutes les fonctions de l’appareil.
L’écran d’accueil comporte deux types de volet différents. L'écran d'accueil Classique affiche des
raccourcis vers les applications et les widgets. L'écran d'accueil Contenu, quant à lui, affiche des
widgets avec du contenu.
L’écran d’accueil comprend plusieurs volets. Pour afficher les autres volets, faites défiler l’écran vers la
gauche ou la droite.
<Écran d’accueil Classique> <Écran d’accueil Contenu>
Afficher toutes les applications
Sur l'écran d'accueil, appuyez sur pour afficher toutes les applications.
<Écran d’accueil>
Fonctions de base
31
Pour revenir à l'écran d'accueil, appuyez sur la touche Accueil.
Utiliser l’écran d’accueil Classique
L’écran d’accueil Classique affiche des icônes d’information, des widgets, des raccourcis vers les
applications, etc.
Ajouter un élément
1 Sur l'écran d'accueil, appuyez sur .
2 Maintenez le doigt appuyé sur un élément de l'onglet Applis ou Widgets et faites-le glisser vers
l'emplacement souhaité.
Icône ajoutée
Accéder à l'écran
d'accueil Contenu.
Fonctions de base
32
Ajouter ou supprimer un volet dans l'écran d'accueil Classique
1 Pincez vos doigts sur l'écran d'accueil Classique.
2 Appuyez sur pour ajouter un volet.
Pour supprimer un volet, maintenez le doigt appuyé sur le volet et faites-le glisser vers la
corbeille, en haut de l'écran.
Définir un fond d’écran
Définissez une image ou une photo enregistrée dans l'appareil comme fond d'écran pour l'écran
d'accueil Classique.
Maintenez le doigt appuyé sur une zone vide de l'écran d'accueil Classique, appuyez sur Écran
d'accueil, puis sélectionnez l'une des catégories suivantes :
• Galerie : photos que vous avez prises avec l’appareil photo ou images téléchargées depuis
Internet.
• Fonds d'écran animés : fonds d'écran animés fournis par défaut avec votre appareil.
• Photos : photos disponibles dans l'application Google Photos.
• Fonds d'écran : fonds d'écran fournis par défaut avec votre appareil.
Sélectionnez une image, redimensionnez le cadre si nécessaire, puis définissez-la comme fond
d'écran.
Fonctions de base
33
Utiliser l'écran d'accueil Contenu
L'écran d'accueil Contenu affiche des widgets avec du contenu. Vous pouvez accéder directement à
une application en sélectionnant un widget avec du contenu sur l'écran d'accueil Contenu.
Ajouter un widget ou un volet
1 Resserrez les doigts sur l’écran d’accueil Contenu.
2 Dans l'écran Widgets, sélectionnez le volet à modifier ou appuyez sur pour en créer un ( 1 ).
Dans le volet inférieur, sélectionnez les widgets à ajouter au volet ( 2 ).
Faites défiler le volet inférieur vers la gauche ou la droite pour afficher davantage de
widgets.
3 Appuyez sur OK.
Fonctions de base
34
Ajuster la taille d'un widget
1 Sur l'écran d'accueil Contenu, maintenez le doigt appuyé sur le widget à redimensionner.
2 Pour ajuster la taille du widget, faites glisser le cadre qui l'entoure.
3 Appuyez sur pour enregistrer vos modifications.
Supprimer un volet de l'écran d'accueil Contenu
1 Resserrez les doigts sur l’écran d’accueil Contenu.
2 Sur l'écran Widgets, maintenez le doigt appuyé sur le volet à supprimer.
3 Faites glisser le volet vers la corbeille, en haut de l'écran.
Lorsque la corbeille devient rouge, relâchez le volet.
Il doit rester au moins un volet sur l’écran d’accueil Contenu.
Fonctions de base
35
Liste des applications
La liste des applications affiche les icônes de toutes vos applications, y compris celles récemment
installées.
Depuis l’écran d’accueil, appuyez sur pour ouvrir la liste des applications.
Pour afficher les autres volets, faites défiler l’écran vers la gauche ou la droite.
Organiser les applications
Cette fonction est disponible uniquement en mode d'affichage Grille personnalisable.
Appuyez sur → Modifier, maintenez le doigt appuyé sur une application, puis faites-la glisser
jusqu’à l’emplacement souhaité. Pour déplacer l’élément vers un autre volet, faites-le glisser vers le
bord droit ou gauche de l’écran.
Organiser les applications dans des dossiers
Placez les applications similaires dans un même dossier pour faciliter leur utilisation.
Appuyez sur → Modifier, maintenez le doigt appuyé sur une application, puis faites-la glisser
vers Créer dossier. Saisissez le nom du dossier, puis appuyez sur OK. Placez les applications dans
le nouveau dossier en les faisant glisser, puis appuyez sur Sauveg. pour sauvegarder la nouvelle
configuration.
Réorganiser les volets d'applications
Placez deux doigts sur l’écran et resserrez-les pour passer en mode Modification. Maintenez ensuite
le doigt appuyé sur l’aperçu d’un volet, puis faites-le glisser jusqu’à l’emplacement souhaité.
Installer des applications
Utilisez les boutiques d’applications, comme Samsung Apps, pour télécharger et installer des
applications.
Désinstaller des applications
Appuyez sur → Désinstaller/désactiver des applications, puis sélectionnez l’application à
désinstaller.
Il est impossible de désinstaller les applications fournies par défaut avec l’appareil.
Fonctions de base
36
Désactiver des applications
Appuyez sur → Désinstaller/désactiver des applications, puis sélectionnez l'application à
désactiver.
Pour activer une application qui a été désactivée, depuis la liste des applications, appuyez sur
Paramètres → Général → Gestionnaire d'applications, faites défiler jusqu’à DÉSACTIVÉ,
sélectionnez l'application, puis appuyez sur Activer.
• Les applications téléchargées et certaines applications par défaut livrées avec l'appareil
ne peuvent pas être désactivées.
• Lorsque vous utilisez cette fonction, les applications désactivées ne sont plus affichées
dans l'écran Applications. Elles restent néanmoins stockées sur l'appareil.
Utiliser les applications
Cet appareil peut exécuter différent types d’applications, vous permettant d’utiliser aussi bien des
contenus multimédia que des contenus Internet.
Ouvrir une application
Depuis l’écran d’accueil ou la liste des applications, appuyez sur une icône pour ouvrir l’application
correspondante.
Certaines applications sont regroupées dans des dossiers. Appuyez sur un dossier, puis sur
une application pour l'ouvrir.
Ouvrir des applications récemment utilisées
Appuyez sur pour ouvrir la liste des applications récemment utilisées.
Appuyez sur une icône pour ouvrir l’application correspondante.
Fermer une application
Fermez les applications fonctionnant inutilement en arrière-plan pour économiser la batterie et
optimiser les performances de l’appareil.
Appuyez sur → Gest. tâches, puis sur Fin en regard d’une application pour la fermer. Pour
fermer toutes les applications en cours d’exécution, appuyez sur Fermer tout près du nombre total
d’applications actives. Vous pouvez également appuyer sur → Tout fermer.
Fonctions de base
37
Aide
Accédez aux informations d’aide pour apprendre à utiliser l’appareil et les applications, ou configurer
des paramètres importants.
Appuyez sur Aide depuis la liste des applications. Pour afficher des conseils, sélectionnez une
catégorie.
Pour trier les catégories par ordre alphabétique, appuyez sur .
Pour effectuer une recherche par mot-clé, appuyez sur .
Saisir du texte
Pour saisir du texte, utilisez le clavier Samsung ou la fonction de saisie vocale.
La saisie de texte est impossible dans certaines langues. Pour saisir du texte, vous devez
sélectionner une des langues prises en charge.
Modifier le type de clavier
Appuyez sur une zone de saisie, ouvrez le volet des raccourcis, appuyez sur Mode de saisie, puis
choisissez le type de clavier à utiliser.
Utiliser le clavier Samsung
Insérer un espace.
Passer à la ligne suivante.
Supprimer le caractère
précédent.
Saisir des signes de
ponctuation.
Saisir des majuscules.
Permet de masquer le
clavier.
Accéder aux paramètres du
clavier Samsung.
Saisir des majuscules.
Déplacer le curseur.
Fonctions de base
38
Saisir des majuscules
Appuyez sur Shift avant de saisir un caractère. Pour tout mettre en majuscule, appuyez sur Caps
lock.
Modifier le type de clavier
Maintenez le doigt appuyé sur , puis appuyez sur pour activer le clavier flottant.
Sur le clavier flottant, maintenez le doigt appuyé sur et déplacez le clavier flottant vers un autre
emplacement.
Modifier la langue du clavier
Ajoutez des langues au clavier, puis faites glisser la barre d’espace vers la gauche ou la droite pour
modifier la langue du clavier.
Écrire de façon manuscrite
Maintenez le doigt appuyé sur , appuyez sur , puis écrivez un mot à l’aide du doigt. Les mots
suggérés apparaissent au fur et à mesure de votre saisie. Sélectionnez une suggestion.
Utilisez les gestes de saisie manuscrite pour effectuer des opérations, comme la modification ou
la suppression de caractères, et l’insertion d’espaces. Pour afficher le tutoriel, maintenez le doigt
appuyé sur , puis appuyez sur → Aide.
La disponibilité de cette fonction dépend de votre zone géographique ou de votre
opérateur.
Fonctions de base
39
Dicter du texte
Activez la fonction de saisie vocale, puis parlez dans le microphone. L’appareil affiche à l’écran ce que
vous venez de dire.
Si l’appareil ne reconnaît pas correctement les mots, appuyez sur le texte mis en surbrillance et
sélectionnez une autre proposition dans la liste déroulante qui apparaît.
Pour modifier la langue de la reconnaissance vocale ou en ajouter une autre, appuyez sur la langue
actuellement prise en charge.
Copier et coller du texte
Maintenez le doigt appuyé sur le texte souhaité, faites glisser l’icône ou pour redimensionner
la sélection, puis appuyez sur Copier pour copier le texte ou sur Couper pour le couper. Le texte
sélectionné est copié dans le presse-papier.
Pour le coller dans une zone de saisie, maintenez le doigt appuyé à l’endroit où vous souhaitez
insérer le texte, puis appuyez sur Coller.
Établir une connexion au réseau Wi-Fi
Connectez l’appareil à un réseau Wi-Fi pour pouvoir utiliser Internet ou partager des fichiers
multimédia avec d’autres appareils (p. 121).
Assurez-vous que la connexion Wi-Fi est active avant d'utiliser des applications sur Internet.
Activer ou désactiver un réseau Wi-Fi
Ouvrez le volet des raccourcis, puis appuyez sur Wi-Fi pour activer ou désactiver la fonction.
• Votre appareil utilise une fréquence non harmonisée et est conçu pour fonctionner dans
tous les pays européens. Au sein de l’Union Européenne, le réseau Wi-Fi peut fonctionner
sans restriction en intérieur, mais pas en extérieur.
• Lorsque vous n’utilisez pas le réseau Wi-Fi, désactivez-le afin d’économiser la batterie.
Fonctions de base
40
Établir une connexion à un réseau Wi-Fi
Depuis la liste des applications, appuyez sur Paramètres → Connexions → Wi-Fi, puis faites glisser
le curseur Wi-Fi vers la droite.
Sélectionnez un réseau dans la liste des réseaux Wi-Fi détectés, saisissez un mot de passe, le cas
échéant, puis appuyez sur Connexion. Les réseaux nécessitant un mot de passe sont signalés par
une icône représentant un verrou. Après connexion à un réseau Wi-Fi, l’appareil s’y connectera
automatiquement dès qu’il sera disponible.
Ajouter un réseau Wi-Fi
Si le réseau souhaité n’apparaît pas dans la liste, appuyez sur Ajouter un réseau Wi-Fi au bas de la
liste des réseaux. Saisissez le nom du réseau dans la zone SSID du réseau, sélectionnez le type de
sécurité, indiquez votre mot de passe si le réseau est protégé, puis appuyez sur Connexion.
Activer la fonction Wi-Fi CERTIFIED Passpoint
Avec Passpoint, l'appareil recherche automatiquement les réseaux Wi-Fi disponibles et se connecte
à l'un d'eux. Si vous effectuez un déplacement vers une nouvelle zone, il se connectera à un autre
réseau Wi-Fi disponible sans avoir besoin d'utiliser un mot de passe.
Depuis la liste des applications, appuyez sur Paramètres → Connexions → Wi-Fi → →
Paramètres avancés, puis faites glisser le curseur Passpoint vers la droite.
Supprimer un réseau Wi-Fi
Si un réseau ne doit plus être utilisé, même s’il s’agit du réseau actuellement activé, vous pouvez le
supprimer afin que l’appareil ne s’y connecte plus automatiquement. Sélectionnez le réseau dans la
liste, puis appuyez sur Oublier.
Fonctions de base
41
Créer un compte
Les applications Google, comme Play Store, nécessitent un compte Google et Samsung Apps
requiert un compte Samsung. Créez des comptes Google et Samsung afin de profiter au maximum
de votre appareil.
Ajouter des comptes
Lorsque vous ouvrez une application Google, suivez les instructions qui apparaissent à l’écran. Pour
créer un compte Google, vous n’avez pas besoin de vous connecter.
Pour vous connecter à un compte Google ou en créer un, depuis la liste des applications, appuyez
sur Paramètres → Général → Comptes → Ajouter compte → Google. Appuyez ensuite sur
Nouveau pour créer un compte ou sur Compte existant pour vous connecter, puis suivez les
instructions à l’écran pour procéder à la configuration. Vous pouvez utiliser plusieurs comptes
Google sur l’appareil.
Vous pouvez également créer un compte Samsung.
Supprimer un compte
Depuis la liste des applications, appuyez sur Paramètres → Général → Comptes, sélectionnez un
nom sous l’option Mes comptes, choisissez le compte à supprimer, puis appuyez sur → Supp.
compte.
Configurer des profils utilisateur
Configurez les profils utilisateur, puis sélectionnez-en un lorsque vous déverrouillez l’appareil
pour utiliser les paramètres personnalisés. Lorsque vous configurez plusieurs profils utilisateur,
les utilisateurs peuvent partager l’appareil sans affecter les paramètres personnels des autres
utilisateurs, comme les comptes de messagerie et les préférences de fond d'écran par exemple.
Dans l’écran des applications, appuyez sur Paramètres → Général → Utilisateurs → → OK →
Config. maint., puis suivez les instructions affichées pour configurer un nouveau profil utilisateur.
Pour accéder à l’appareil avec un profil utilisateur particulier, sélectionnez ce profil en haut à droite
dans l’écran verrouillé.
Fonctions de base
42
Transférer des fichiers
Vous pouvez transférer différents types de fichiers (sons, vidéos, images, etc.) de l’appareil vers un
ordinateur, et inversement.
Les formats de fichiers suivants sont pris en charge par certaines applications. En fonction
de la version logicielle de l’appareil ou du système d’exploitation de l’ordinateur, certains
formats ne sont pas compatibles.
• Musique : mp3, m4a, mp4, 3ga, wma, ogg, oga, aac et flac
• Image : bmp, gif, agif, jpg et png
• Vidéo : avi, wmv, asf, flv, mkv, mp4, 3gp, webm et m4v
• Document : doc, docx, xls, xlsx, ppt, pptx, pdf, et txt
Si les applications ne peuvent pas lire les fichiers au format divX ou ac3, installez les
applications qui les prennent en charge.
Connecter l’appareil avec Samsung Kies
Samsung Kies est un logiciel qui permet de gérer vos contenus multimédias et vos informations
personnelles avec des appareils Samsung. Téléchargez la dernière version de Samsung Kies à partir
du site Web Samsung.
1 Raccordez l’appareil à un ordinateur à l’aide du câble USB.
Samsung Kies démarre automatiquement sur l’ordinateur. Si Samsung Kies ne démarre pas,
double-cliquez sur l’icône Samsung Kies sur votre ordinateur.
2 Transférez des fichiers entre votre appareil et l’ordinateur.
Pour plus d’informations, consultez l’aide de Samsung Kies.
Connecter l’appareil à Windows Media Player
Assurez-vous que Windows Media Player est bien installé sur votre ordinateur.
1 Raccordez l’appareil à un ordinateur à l’aide du câble USB.
2 Ouvrez Windows Media Player pour synchroniser les fichiers audio.
Fonctions de base
43
Connecter l’appareil en tant qu’appareil multimédia
1 Raccordez l’appareil à un ordinateur à l’aide du câble USB.
2 Ouvrez le volet des raccourcis, puis appuyez sur Connecté en tant que périphérique
multimédia → Périphérique multimédia (MTP).
Appuyez sur Appareil photo (PTP) si votre ordinateur ne gère pas le protocole MTP (Media
Transfer Protocol) ou ne dispose pas du pilote approprié.
3 Transférez des fichiers entre votre appareil et l’ordinateur.
Protéger l’appareil
Vous pouvez empêcher toute personne d’utiliser votre appareil et de consulter les données et
informations personnelles qui y sont enregistrées. Pour protéger votre appareil, vous pouvez définir
un code de déverrouillage. Sans ce code, l’appareil ne pourra pas être déverrouillé.
Déverrouillage par modèle
Depuis la liste des applications, appuyez sur Paramètres → Appareil → Écran de verrouillage →
Déverrouillage de l'écran → Modèle.
Dessinez un modèle en reliant au moins quatre points, puis recommencez pour valider. Définissez un
code PIN de déverrouillage de secours pour déverrouiller l’écran en cas d’oubli du modèle.
Fonctions de base
44
Déverrouillage par code PIN
Depuis la liste des applications, appuyez sur Paramètres → Appareil → Écran de verrouillage →
Déverrouillage de l'écran → Code PIN.
Saisissez au moins quatre chiffres, puis recommencez pour valider.
Déverrouillage par mot de passe
Depuis la liste des applications, appuyez sur Paramètres → Appareil → Écran de verrouillage →
Déverrouillage de l'écran → Mot de passe.
Saisissez au moins quatre caractères, y compris des chiffres et des symboles, puis recommencez pour
valider.
Déverrouiller l’appareil
Allumez l’écran en appuyant sur la touche Marche/Arrêt ou sur la touche Accueil, puis saisissez le
code ou dessinez le modèle de déverrouillage.
Si vous oubliez le code de déverrouillage, apportez l’appareil dans un centre de service
après-vente Samsung pour le réinitialiser.
Fonctions de base
45
Mettre l’appareil à jour
L’appareil peut être mis à jour avec la version logicielle la plus récente.
La disponibilité de cette fonction dépend de votre zone géographique ou de votre
opérateur.
Mettre l’appareil à jour avec Samsung Kies
Démarrez Samsung Kies et raccordez l’appareil à un ordinateur. Samsung Kies reconnaît
automatiquement l’appareil et affiche, le cas échéant, les mises à jour disponibles. Pour lancer la mise
à jour, cliquez sur la touche Mettre à jour dans la boîte de dialogue. Pour plus d’informations sur la
mise à jour, consultez l’aide Samsung Kies.
• Lorsque vous mettez votre appareil à jour, n’éteignez pas l’ordinateur et ne déconnectez
pas le câble USB.
• Ne raccordez pas non plus d’autres appareils multimédia à l’ordinateur. Cela pourrait
interférer avec le processus de mise à jour.
Mettre l’appareil à jour sans connexion PC
Grâce au service FOTA (Firmware Over The Air), le logiciel de l’appareil peut être mis à jour sans
passer par une connexion avec un ordinateur.
Depuis la liste des applications, appuyez sur Paramètres → Général → À propos de l'appareil →
Mise à jour logicielle → Mettre à jour.
46
Communication
Contacts
Utilisez cette application pour gérer les contacts, y compris les numéros de téléphone, les adresses
e-mail, et plus encore.
Appuyez sur Contacts depuis la liste des applications.
Gérer les contacts
Appuyez sur Contacts.
Créer un contact
Appuyez sur , sélectionnez une mémoire de stockage, puis saisissez les informations d’un contact.
• : ajouter une image.
• / : ajouter ou supprimer un champ d'information.
Modifier un contact
Sélectionnez un contact à modifier, puis appuyez sur .
Supprimer un contact
Appuyer sur .
Communication
47
Rechercher des contacts
Appuyez sur Contacts.
Utilisez l’une des méthodes de recherche suivantes :
• Faites défiler la liste de contacts vers le haut ou le bas.
• Pour faire défiler la liste rapidement, placez votre index à gauche de la liste de contacts et faites
défiler vers le haut ou le bas.
• Appuyez sur le champ de recherche tout en haut de la liste de contacts, puis saisissez vos
critères de recherche.
Une fois le contact sélectionné, choisissez l’une des options suivantes :
• : ajouter le contact aux favoris.
• : rédiger un e-mail.
Afficher les contacts
Appuyez sur Contacts.
Par défaut, l'appareil affiche tous les contacts enregistrés.
Appuyez sur → Paramètres → Contacts à afficher, puis sélectionnez la source à partir de laquelle
les contacts doivent être affichés.
Synchroniser des contacts
Appuyez sur Contacts.
Synchroniser les contacts de l’appareil avec les contacts Google
Appuyez sur → Fusionner les comptes → Fusionner avec Google.
Les contacts Google sont caractérisés par l’icône .
Synchroniser les contacts de l’appareil avec les contacts Samsung
Appuyez sur → Fusionner les comptes → Fusionner avec Samsung.
Les contacts Samsung sont caractérisés par l’icône .
Communication
48
Importer et exporter des contacts
Appuyez sur Contacts.
Importer des contacts
Appuyez sur → Paramètres → Importer/Exporter, puis sélectionnez une option d’importation.
Exporter des contacts
Appuyez sur → Paramètres → Importer/Exporter, puis sélectionnez une option d’exportation.
Partager des contacts
Appuyez sur → Partager carte de visite via → Plusieurs contacts, sélectionnez les contacts à
partager, appuyez sur OK, puis sélectionnez un mode de partage.
Contacts favoris
Appuyez sur Favoris.
Appuyez sur pour ajouter des contacts aux favoris.
Appuyez sur , puis choisissez l’une des options suivantes :
• Rechercher : rechercher des contacts.
• Supprimer des favoris : retirer des contacts des favoris.
• Affichage Liste / Affichage Grille : afficher les contacts sous forme de grille ou de liste.
• Aide : accéder à l'aide sur l'utilisation des contacts.
Communication
49
Groupes de contacts
Appuyez sur Groupes.
Créer un groupe
Appuyez sur , définissez les détails pour le groupe, ajoutez des contacts, puis appuyez sur Enreg.
Ajouter des contacts à un groupe
Sélectionnez un groupe, puis appuyez sur → Ajouter membre. Sélectionnez les contacts à ajouter,
puis appuyez sur OK.
Gérer les groupes
Sélectionnez un groupe, appuyez sur , puis choisissez l’une des options suivantes :
• Rechercher : rechercher des contacts.
• Supprimer des groupes : sélectionner les groupes à supprimer, puis appuyer sur Supprimer.
Vous ne pouvez pas supprimer les groupes par défaut.
• Modifier : modifier les paramètres du groupe.
• Ajouter membre : ajouter des membres au groupe.
• Supprimer le membre : supprimer des membres du groupe.
• Envoyer un e-mail : envoyer un e-mail aux membres d'un groupe.
• Modifier l'ordre : maintenir le doigt appuyé sur près du nom du groupe, faire glisser l'icône
vers le haut ou le bas jusqu’à l’emplacement souhaité, puis appuyer sur OK.
• Aide : accéder à l'aide sur l'utilisation des contacts.
Envoyer un e-mail aux membres d'un groupe
Sélectionnez un groupe, appuyez sur → Envoyer un e-mail, sélectionnez des membres, puis
appuyez sur OK.
Communication
50
Carte de visite
Appuyez sur Contacts.
Créez une carte de visite et envoyez-la à vos contacts.
En haut de la liste des contacts, appuyez sur Profil configuré, saisissez vos coordonnées, comme
votre numéro de téléphone, votre adresse e-mail et votre adresse postale, puis appuyez sur Enreg.
Si, lorsque vous avez configuré votre appareil, vous avez enregistré vos coordonnées d’utilisateur,
sélectionnez la carte de visite, puis appuyez sur pour la modifier.
Appuyez sur → Partager carte de visite via → Contact seléctionné, puis sélectionnez un mode
de partage.
Email
Utilisez cette application pour envoyer ou consulter des e-mails.
Appuyez sur Email depuis la liste des applications.
Configurer des comptes de messagerie électronique
Lorsque vous ouvrez l’application Email pour la première fois, configurez un compte de messagerie
électronique.
Saisissez votre adresse e-mail et votre mot de passe. Pour configurer un compte de messagerie
électronique privé, comme Google Mail, appuyez sur ; pour configurer un compte de messagerie
électronique professionnel, appuyez sur Config. manuelle. Suivez ensuite les instructions qui
s’affichent à l’écran pour procéder à la configuration du compte.
Pour configurer un compte de messagerie électronique supplémentaire, appuyez sur →
Paramètres → Ajouter compte.
Envoyer des messages
Sélectionnez le compte de messagerie électronique que vous souhaitez utiliser, puis appuyez sur
en haut de l’écran. Saisissez les destinataires, l’objet et le message, puis appuyez sur pour envoyer
l’e-mail.
Pour ajouter un destinataire figurant dans votre liste de contacts, appuyez sur .
Appuyez sur +Moi pour vous ajouter dans la liste des destinataires.
Appuyez sur pour joindre des images, vidéos, contacts, mémos, événements, etc.
Appuyez sur → pour insérer dans le message des images, événements, contacts, informations
de localisation et bien plus encore.
Communication
51
Envoyer des messages programmés
Lorsque vous rédigez un message, appuyez sur → Envoi programmé. Cochez la case Envoi
programmé, définissez une heure et une date, puis appuyez sur OK. L’appareil envoie le message à
l’heure et à la date indiquées.
• Le message ne sera pas envoyé à l’heure et à la date programmées, si l’appareil est éteint,
s’il n’est pas connecté au réseau ou si le réseau est instable.
• Cette fonction est basée sur l’heure et la date configurées sur l’appareil. Si vous changez
de fuseau horaire et que le réseau ne met pas ces informations à jour, il se peut que
l’heure et la date soient incorrectes.
Lire des e-mails
Sélectionnez un compte de messagerie électronique. Les nouveaux messages sont récupérés
automatiquement. Pour récupérer manuellement les messages, appuyez sur .
Appuyez sur un e-mail pour le lire.
Ouvrir les pièces jointes.
Ajouter cette adresse e-mail
à votre liste de contacts.
Accéder à des options
supplémentaires.
Identifier le message comme
favori.
Supprimer le message.
Transférer le message.
Répondre au message.
Rédiger un message.
Modifier la disposition de
l’écran.
Appuyez sur l’onglet de la pièce jointe pour l’ouvrir, puis appuyez sur Sauveg. pour l’enregistrer.
Communication
52
Google Mail
Utilisez cette application pour accéder directement au service Google Mail.
Appuyez sur Google Mail depuis la liste des applications.
• La disponibilité de cette application dépend de votre zone géographique ou de votre
opérateur.
• Cette application peut s’intituler différemment selon votre zone géographique ou votre
opérateur.
Envoyer des messages
Dans la boîte de réception, appuyez sur , saisissez les destinataires et un objet, rédigez un
message, puis appuyez sur ENVOYER.
Pour enregistrer le message afin de l’envoyer ultérieurement, appuyez sur → Enregistrer le
brouillon.
Appuyez sur → Attach file pour joindre des images, des vidéos, de la musique, etc.
Pour annuler votre message, appuyez sur → Supprimer.
Appuyez sur → Paramètres pour modifier les paramètres Google Mail.
Appuyez sur → Envoyer des commentaires pour commenter le développement de l'application.
Appuyez sur → Aide pour accéder aux informations d'aide sur Google Mail.
Communication
53
Lire des e-mails
Supprimer le message.
Identifier le message comme
favori.
Accéder à des options
supplémentaires.
Archiver le message.
Répondre au message.
Transférer le message.
Répondre à tous les
destinataires ou imprimer le
message.
Afficher la pièce jointe.
Ajouter cette adresse e-mail
à votre liste de contacts.
Rédiger un message.
Rechercher un message.
Libellés
Google Mail utilise des libellés pour classer les messages. Par défaut, Google Mail affiche les
messages du libellé Boîte de réception.
Sélectionnez un intitulé dans ALL LABELS pour afficher des messages portant d’autres libellés.
Pour ajouter un libellé à un message, sélectionnez le message, appuyez sur →
Modifier les libellés, puis sélectionnez le libellé que vous souhaitez lui attribuer.
Communication
54
Hangouts
Utilisez cette application pour discuter avec vos amis.
Appuyez sur Hangouts depuis la liste des applications.
La disponibilité de cette application dépend de votre zone géographique ou de votre
opérateur.
Sélectionnez un ami dans la liste ou saisissez vos critères de recherche et sélectionnez un ami dans
les résultats pour commencer à discuter.
Google+
Utilisez cette application pour rester connecté avec d’autres personnes via le service de réseau social
de Google.
Appuyez sur Google+ depuis la liste des applications.
La disponibilité de cette application dépend de votre zone géographique ou de votre
opérateur.
Appuyez sur Tous pour modifier la catégorie, puis faites défiler la liste vers le haut ou le bas pour
afficher les publications de vos cercles d’amis.
Appuyez sur pour utiliser d’autres fonctionnalités des réseaux sociaux.
Communication
55
Google+ Photos
Utilisez cette application pour visualiser et partager des images ou des vidéos via le service de réseau
social de Google.
Appuyez sur Photos depuis la liste des applications.
La disponibilité de cette application dépend de votre zone géographique ou de votre
opérateur.
Sélectionnez l’une des catégories suivantes:
• APPAREIL PHOTO : afficher toutes les photos ou vidéos prises ou téléchargées sur l’appareil.
• SÉLECTION : afficher toutes les photos ou vidéos regroupées par date ou par album. Appuyez
sur pour consulter toutes les images ou vidéos du groupe.
Sélectionnez ensuite une photo ou une vidéo.
En mode affichage d'une photo ou d'une vidéo, utilisez l'une des icônes suivantes :
• : modifier la photo ou la vidéo.
• : partager l’image ou la vidéo avec d’autres personnes.
• : supprimer la photo ou la vidéo.
56
Web et réseau
Internet
Utilisez cette application pour naviguer sur Internet.
Appuyez sur Internet depuis la liste des applications.
Afficher des pages Web
Appuyez sur le champ d’adresse, saisissez l’adresse Web, puis appuyez sur Aller à.
Pour partager, enregistrer ou imprimer une page Web, appuyez sur .
Pour changer de moteur de recherche, appuyez sur le champ d’adresse, puis appuyez sur l’icône du
moteur de recherche près de l’adresse Web.
Ouvrir un nouvel onglet
Appuyez sur → Nouvel onglet.
Pour passer d'un onglet à l'autre, faites défiler le champ de titre vers la gauche ou la droite, puis
appuyez sur le titre voulu pour sélectionner la page correspondante.
Effectuer une recherche oralement
Appuyez sur le champ d’adresse, puis sur → , prononcez un mot-clé, puis sélectionnez l’une des
suggestions qui apparaissent à l’écran.
La disponibilité de cette fonction dépend de votre zone géographique ou de votre
opérateur.
Favoris
Pour enregistrer la page Web actuelle dans les favoris, appuyez sur → .
Pour ouvrir une page Web enregistrée dans vos favoris, appuyez sur , puis sélectionnez la page
souhaitée.
Web et réseau
57
Historique
Pour ouvrir une page Web figurant dans la liste des pages récemment consultées, appuyez sur →
Historique. Pour effacer l’historique, appuyez sur .
Pages enregistrées
Pour afficher des pages Web enregistrées, appuyez sur → Pages enreg.
Liens
Maintenez le doigt appuyé sur un lien d’une page Web pour l’ouvrir dans une nouvelle page,
l’enregistrer ou le copier.
Pour afficher les liens enregistrés, appuyez sur Téléchargements (p. 118).
Partager des pages Web
Pour partager l’adresse d’une page Web avec d’autres personnes, appuyez sur → Partager via.
Pour partager une partie d’une page Web, maintenez le doigt appuyé sur le texte de votre choix, puis
appuyez sur Partager via.
Chrome
Utilisez cette application pour rechercher des informations et parcourir des pages Web.
Appuyez sur Chrome depuis la liste des applications.
La disponibilité de cette application dépend de votre zone géographique ou de votre
opérateur.
Afficher des pages Web
Appuyez sur le champ d’adresse, puis saisissez une adresse Web ou des critères de recherche.
Ouvrir un nouvel onglet
Appuyez sur → Nouvel onglet.
Pour passer d'un onglet à l'autre, faites défiler le champ de titre vers la gauche ou la droite, puis
appuyez sur le titre voulu pour sélectionner la page correspondante.
Web et réseau
58
Favoris
Pour enregistrer la page Web actuelle dans les favoris, appuyez sur → Enregistrer.
Pour ouvrir une page Web enregistrée dans vos favoris, appuyez sur → Favoris, puis sélectionnez
la page voulue.
Effectuer une recherche oralement
Appuyez sur , prononcez un mot-clé, puis sélectionnez l’une des suggestions qui apparaissent à
l’écran.
Synchroniser votre appareil avec d’autres appareils
Synchronisez des onglets et des favoris ouverts afin de les utiliser avec Chrome sur un autre appareil
lorsque vous êtes connecté au même compte Google.
Pour afficher les onglets ouverts sur d'autres appareils, appuyez sur → Autres appareils.
Sélectionnez la page Web à ouvrir.
Pour afficher les favoris, appuyez sur FAVORIS.
Bluetooth
La fonction Bluetooth crée une connexion sans fil directe entre deux appareils sur de courtes
distances. Pour échanger des données ou des fichiers multimédia avec d’autres appareils, utilisez la
fonction Bluetooth.
• Samsung ne peut être tenu responsable de la perte, de l’interception ou du mauvais
usage des données envoyées ou reçues via la fonction Bluetooth.
• Assurez-vous de toujours utiliser des appareils dignes de confiance et correctement
protégés avant de partager ou de recevoir des données. La présence d’obstacles entre les
deux appareils peut réduire le rayon d’action.
• Il est possible que votre appareil ne fonctionne pas avec certains appareils, en particulier
ceux qui n’ont pas été testés ou approuvés par Bluetooth SIG.
• N’utilisez pas la fonction Bluetooth de manière illégale (par exemple, pour la copie pirate
de fichiers ou l’enregistrement de communications à des fins commerciales).
Samsung ne peut être tenu responsable des répercussions d’une utilisation illégale de la
fonction Bluetooth.
Pour activer la fonction Bluetooth, depuis la liste des applications, appuyez sur Paramètres →
Connexions → Bluetooth, puis faites glisser le curseur Bluetooth vers la droite.
Web et réseau
59
Établir une connexion avec d’autres appareils Bluetooth
Depuis la liste des applications, appuyez sur Paramètres → Connexions → Bluetooth → Analyser
pour afficher la liste des appareils détectés. Sélectionnez l’appareil auquel vous souhaitez vous
connecter, puis acceptez la demande d’autorisation automatiquement générée sur les deux
appareils pour confirmer l’opération.
Envoyer et recevoir des données
De nombreuses applications prennent en charge le transfert de données via la fonction Bluetooth.
C’est le cas, par exemple, de l’application Galerie. Ouvrez la Galerie, sélectionnez une image,
appuyez sur → Bluetooth, puis sélectionnez un appareil Bluetooth. Ensuite, pour recevoir l’image,
confirmez la demande d’autorisation Bluetooth sur l’autre appareil.
Lorsqu’un autre appareil vous envoie des données, confirmez la demande d’autorisation Bluetooth
de cet appareil. Les fichiers reçus sont enregistrés dans le dossier Bluetooth. Si vous recevez un
nouveau contact, il est automatiquement ajouté à votre liste de contacts.
Screen Mirroring
Utilisez cette fonction pour connecter votre appareil à un grand écran avec le routeur AllShare Cast
ou HomeSync, puis partagez vos contenus. Vous pouvez également utiliser cette fonction avec
d’autres appareils prenant en charge la fonction Miracast Wi-Fi.
• La disponibilité de cette fonction dépend de votre zone géographique ou de votre
opérateur.
• Cette fonction peut ne pas fonctionner sur les appareils compatibles Miracast ne prenant
pas en charge le protocole HDCP 2.X (High-bandwidth Digital Content Protection).
• Selon la connexion réseau, certains fichiers peuvent être mis en mémoire tampon en
cours de lecture.
• Pour économiser votre batterie, désactivez cette fonction lorsque vous ne l’utilisez pas.
• Si vous indiquez une bande de fréquence Wi-Fi, il se peut que les routeurs AllShare Cast
ou HomeSync ne soient pas détectés.
• Si vous lisez des vidéos ou jouez à des jeux sur un téléviseur, sélectionnez un mode TV
approprié afin d’obtenir un résultat optimal.
Depuis la liste des applications, appuyez sur Paramètres → Connexions → Screen Mirroring, puis
faites glisser le curseur Screen Mirroring vers la droite. Sélectionnez un appareil, ouvrez un fichier,
puis contrôlez l’affichage à l’aide des touches de votre appareil. Pour établir une connexion avec un
appareil à l’aide d’un code PIN, maintenez votre doigt appuyé sur le nom, puis saisissez votre code
PIN.
Web et réseau
60
e-Meeting
Utilisez cette application pour organiser une réunion virtuelle (ou e-meeting) ou y participer. Vous
pouvez partager des fichiers avec les participants lors d’une réunion.
Pour utiliser cette application, assurez-vous que tous les appareils à utiliser lors de la réunion
sont connectés au même point d’accès.
Créer une réunion
Créez une session pour héberger la réunion.
1 Appuyez sur e-Meeting depuis la liste des applications.
2 Appuyez sur Créer une réunion.
Créer une réunion.
Web et réseau
61
3 Vérifiez les informations réseau pour les partager avec les participants, paramétrez les détails de
la réunion, puis appuyez sur OK.
Pour ajouter des fichiers à la réunion, appuyez sur .
Utiliser un mot de
passe.
Vérifier les
informations réseau à
partager.
Informations sur la
réunion
Définissez un mot de passe et le niveau de sécurité de la réunion.
• Afficher le mot de passe : fournit aux participants le mot de passe à saisir pour se joindre
à la réunion.
• Autoriser particip. auto : autorise les participants à se joindre à la réunion lorsqu'ils
saisissent le mot de passe sans avoir obtenu l'approbation de l'hôte.
• Autoriser l'enregistrement de fichiers : autorise les participants à effectuer des captures
d'écran et à enregistrer les fichiers de la réunion pendant que celle-ci se déroule.
Web et réseau
62
4 La réunion est créée.
Le fichier ajouté lors de la création de la réunion apparaît à l’écran, ou, si aucun fichier n’a été
ajouté, un tableau blanc apparaît à l’écran.
Consulter le fichier
partagé.
Accéder à des options
supplémentaires.
5 Communiquez aux participants les informations réseau et le mot de passe de la réunion pour
qu'ils puissent se joindre à la réunion.
Participer à une réunion
Si vous disposez des informations réseau relatives à une réunion, vous pouvez participer à cette
réunion.
1 Appuyez sur e-Meeting depuis la liste des applications.
2 Appuyez sur Rejoindre la réunion.
Rejoindre une
réunion.
Web et réseau
63
3 Sélectionnez le réseau auquel la réunion est connectée, entrez un mot de passe si nécessaire,
puis appuyez sur OK.
4 Sélectionnez la réunion à rejoindre.
5 Entrez votre nom, puis appuyez sur OK. Vous pouvez alors participer à la réunion.
Vous pouvez consulter les fichiers et le contenu partagés par l'animateur de la réunion.
Utiliser l'écran de réunion
Écran de l'animateur
Si vous êtes l'hôte de la réunion, vous pouvez ouvrir un fichier et passer aux pages suivantes du
fichier ou afficher le tableau blanc et y écrire.
L’écran de l'animateur est affiché sur l'écran des participants.
Ouvrir des fichiers
1 Appuyez sur Fichiers ( 1 ) → Ajouter ( 2 ), puis sélectionnez un fichier.
Web et réseau
64
2 Le fichier sélectionné est ajouté à la liste des fichiers. Appuyez sur un fichier pour l'ouvrir.
Icône de l'animateur
Afficher le tableau
blanc.
Liste des fichiers
Accéder à des options
supplémentaires.
Afficher le tableau blanc
Appuyez sur Aff. tableau blanc en haut à droite de l'écran.
Le tableau blanc apparaît à l'écran.
Utiliser des options supplémentaires
Appuyez sur pour utiliser l'une des options suivantes :
Accéder à des options
supplémentaires.
• Ouvrir un nouveau fichier : ouvrir de nouveaux fichiers.
• Activer l'affichage des scripts : afficher le volet des commentaires sous la présentation.
Web et réseau
65
• Boîte messages : envoyer des messages aux participants.
• Afficher les messages reçus : afficher les messages envoyés par les participants.
• Envoyer les fichiers : envoyer des fichiers aux participants.
• Partager via : partager des fichiers avec les participants.
• Verrouillage de la page : verrouiller la page pour que les participants ne puissent voir que la
page présentée par l'animateur.
• Changer d'hôte : changer d'animateur.
• Enregistrer fichiers réunion : enregistrer les fichiers de la réunion et tous les travaux écrits.
• Informations sur la réunion : afficher les informations de la réunion.
• Aide : accéder aux informations d’aide à propos de e-Meeting.
• Fermer la réunion : fermer la session de réunion en cours.
Écran des participants
Affichez sur votre écran l'écran de l'animateur.
Faites défiler le document et appuyez sur pour accéder à la page affichée par l'animateur.
Pour devenir l'animateur, appuyez sur . L'écran passe en mode Animateur. Appuyez sur pour
revenir en mode Participant.
Fermer ou quitter la réunion
Appuyez sur , sur → Fermer la réunion ou Quitter la réunion.
Web et réseau
66
En cas d'échec de la connexion réseau lors d'une réunion
En cas de déconnexion de l’animateur
Mettez fin à la réunion ou reconnectez-vous au même réseau pour poursuivre la réunion.
Les participants peuvent enregistrer les fichiers et quitter la réunion ou attendre qu'elle reprenne.
En cas de déconnexion des participants
Lancez de nouveau e-Meeting et rejoignez la réunion.
WebEx
Cette application permet d'organiser des téléconférences et d'y participer. Vous avez accès à diverses
fonctions, comme le partage de contenu et les réunions en vidéo HD.
Avant d'utiliser cette application
• Vérifiez que l'appareil est connecté à un réseau Wi-Fi.
• Vérifiez que vous disposez d'un compte WebEx.
• La disponibilité de cette application dépend de votre zone géographique ou de votre
opérateur.
• Cette application peut présenter des dysfonctionnements selon le pare-feu utilisé et l'état
du réseau.
Web et réseau
67
Ouvrir un compte
1 Appuyez sur WebEx depuis la liste des applications.
2 Appuyez sur Souscrire à un compte dans l'écran d'inscription.
3 La page Web permettant de s'inscrire à WebEx est affichée.
Vous ne pouvez pas utiliser cette application si une fenêtre contextuelle vous informe que
WebEx n'est pas disponible dans votre région.
4 Suivez les instructions qui s'affichent à l'écran pour configurer le compte.
Certaines fonctions ne sont plus disponibles à la fin de la période d'essai. Pour pouvoir
utiliser toutes les fonctions WebEx, vous devez créer un compte payant. Pour en savoir plus,
reportez-vous au site Web de WebEx.
Créer une réunion
1 Appuyez sur WebEx dans l'écran Applications, puis appuyez sur Se connecter.
2 Entrez l'adresse électronique enregistrée et appuyez sur Suivant.
3 Entrez le mot de passe et appuyez sur Se connecter.
Web et réseau
68
4 L'écran WebEx apparaît sur l'appareil.
Créer une réunion.
Rafraîchir la liste de la
réunion.
Fermer l’application.
Accéder au site Web
de WebEx.
Se joindre à une
réunion en entrant un
numéro de session.
5 Appuyez sur pour créer une réunion.
6 Entrez le thème de la réunion, définissez un mot de passe, puis appuyez sur Démarrer
maintenant.
7 Appuyez sur → Connectez-vous via Internet.
Web et réseau
69
8 Le microphone s'allume et l'icône apparaît en haut à droite de l'écran. Vous pouvez alors avoir
une réunion audio avec d’autres participants.
Afficher le numéro de
session.
Partager l'écran.
Inviter des personnes
à une réunion ou
rappeler une réunion
aux invités.
Allumer ou éteindre le
microphone.
Démarrer ou
interrompre une
visioconférence.
Démarrer ou
interrompre une
audioconférence.
Vérifier les
informations de la
réunion.
Afficher les
participants et
discuter avec eux.
Mettre fin à la réunion.
Inviter des participants à une réunion
Invitez des participants à une réunion en leur envoyant un e-mail d'invitation. Pour les inviter à
une réunion, vous pouvez également leur communiquer un numéro de session ou le numéro de
téléphone de la session.
Lancer des invitations par e-mail
1 Appuyez sur → Inviter par courrier électronique.
2 Entrez une adresse e-mail, puis appuyez sur Envoyer une invitation.
Lancer des invitations en envoyant un numéro de téléphone de session
Vous pouvez inviter des personnes à une réunion en leur communiquant le numéro de téléphone
de la réunion. Ce numéro est créé en même temps que la réunion. Il est indiqué dans l'e-mail
d'invitation avec les autres informations concernant la réunion.
La disponibilité de cette fonction dépend de votre zone géographique ou de votre
opérateur.
Web et réseau
70
Rejoindre une réunion
Pour vous joindre à une réunion, utilisez l'une des méthodes décrites ci-dessous.
Rejoindre une réunion en utilisant le numéro de session
1 Appuyez sur WebEx depuis la liste des applications.
2 Connectez-vous à votre compte WebEx.
3 Appuyez sur → Rejoindre avec un numéro.
4 Entrez le numéro de la réunion et appuyez sur Rejoindre.
Le numéro de session est créé lorsqu'un organisateur crée une réunion. Si vous ne connaissez
pas ce numéro, contactez l'hôte.
5 Appuyez sur → Connectez-vous via Internet.
6 Le microphone s'allume et l'icône apparaît en haut à droite de l'écran. Vous pouvez alors avoir
une réunion audio avec d’autres participants.
Web et réseau
71
Rejoindre une réunion du menu Mes Réunions
1 Appuyez sur WebEx depuis la liste des applications.
2 Connectez-vous à votre compte WebEx.
3 Sélectionnez une réunion dans Mes Réunions et appuyez sur Rejoindre.
4 Appuyez sur → Connectez-vous via Internet.
5 Le microphone s'allume et l'icône apparaît en haut à droite de l'écran. Vous pouvez alors vous
joindre à l'audioconférence.
Rejoindre une réunion depuis un e-mail d'invitation
Lorsqu'une personne vous invite à participer à une réunion, vous recevez un e-mail d'invitation.
1 Ouvrez l'e-mail d'invitation et appuyez sur le lien qu'il contient.
2 WebEx démarre. L'écran de connexion apparaît.
3 Connectez-vous à votre compte WebEx.
Si vous êtes déjà connecté à votre compte, un écran de réunion apparaît.
Web et réseau
72
4 Appuyez sur → Connectez-vous via Internet.
5 Le microphone s'allume et l'icône apparaît en haut à droite de l'écran. Vous pouvez alors avoir
une réunion audio avec d’autres participants.
Rejoindre une réunion en appelant un numéro de téléphone de session
Vous pouvez vous joindre à une réunion en appelant le numéro de téléphone de la session sur votre
smartphone. Appelez le numéro fourni dans l'e-mail d'invitation.
La disponibilité de cette fonction dépend de votre zone géographique ou de votre
opérateur.
Tenir une réunion
Tenir une vidéoconférence
1 Appuyez sur → Démarrer ma vidéo.
2 Votre image apparaît en bas à gauche de l'écran.
Pour arrêter la vidéoconférence, appuyez sur → Arrêter ma vidéo.
Tenir une audioconférence
1 Appuyez sur → Connectez-vous via Internet.
2 Le microphone s'allume et l'icône apparaît en haut à droite de l'écran.
Pour désactiver le microphone sur votre appareil, appuyez sur . L'icône devient .
Pour arrêter l'audioconférence, appuyez sur → Quitter la conférence audio.
Web et réseau
73
Bavarder en ligne avec des participants
1 Appuyez sur pour afficher la liste des participants.
2 Sélectionnez un nom de compte et appuyez sur Conversation instantanée.
3 La fenêtre de conversation apparaît à l'écran.
Pour discuter avec tous les participants, appuyez sur Tchatez avec tout le monde.
Partager l'écran
Partagez l'écran actuellement affiché sur votre appareil avec les participants. Seule la personne
désignée comme animateur peut partager son écran. L'organisateur de la réunion est désigné
comme animateur au début de la réunion.
1 Si vous êtes l'animateur, appuyez sur Partager l'écran en haut de l'écran.
2 Si vous utilisez cette fonction pour la première fois, suivez les instructions affichées à l'écran.
3 Appuyez sur Partager l'écran dans la fenêtre contextuelle.
4 Lorsque la fonction de partage d'écran est activée, l'icône apparaît en haut à droite de l'écran.
Le contenu de l'écran affiché sur l'appareil de l'animateur apparaît alors sur l'écran des appareils
des participants.
Désactiver la fonction de partage d'écran
Appuyez sur → Arrêter le partage. Le partage d'écran est interrompu. L'écran de réunion
apparaît.
Web et réseau
74
Changer d'animateur
L'organisateur de la réunion et l'animateur actuel peuvent choisir un autre animateur.
1 Appuyez sur et sélectionnez le participant à désigner comme animateur.
2 Appuyez sur Donner le rôle d'animateur.
3 L'icône apparaît près du nom de compte de l'animateur.
Fermer ou quitter la réunion
Appuyez sur → Terminer la réunion ou Quitter la réunion.
En cas d'échec de la connexion réseau lors d'une réunion
Si la réunion se poursuit, reconnectez-vous à la réunion.
Si la réunion est terminée, redémarrez-la.
Web et réseau
75
Remote PC
Cette application permet de consulter et de contrôler l'écran de votre ordinateur depuis votre
appareil, en connectant votre appareil et un ordinateur via Wi-Fi ou le réseau local. Vous pouvez
également consulter et transférer des fichiers en toute simplicité entre votre appareil et votre
ordinateur.
Avant d'utiliser cette application
• Vérifiez que vous disposez d'un compte Samsung enregistré.
• Assurez-vous que l'ordinateur est allumé.
• Vérifiez que le pilote est installé sur votre ordinateur.
• Pour utiliser cette fonction, procédez comme suit :
1. Enregistrez l'appareil dans votre compte Samsung.
2. Enregistrez l'ordinateur dans votre compte Samsung.
3. Connectez à distance l'appareil et l'ordinateur.
Enregistrer l'appareil
1 Appuyez sur Remote PC depuis la liste des applications.
2 Sur la page d'accueil, appuyez sur Démarrer.
Démarrer
l'application.
Web et réseau
76
3 Appuyez sur Connexion, entrez votre nom de compte Samsung et votre mot de passe, puis
appuyez de nouveau sur Connex.
Si vous n’avez pas de compte Samsung, suivez les instructions qui s’affichent à l’écran pour
encréer un.
4 Lisez le tutoriel et appuyez sur Suivant.
5 Le processus d'enregistrement est terminé. L'écran Remote PC est alors affiché.
Enregistrer un ordinateur
1 Sur votre ordinateur, lancez le navigateur Web et visitez le site remotepc.rview.com.
2 Connectez-vous à votre compte Samsung.
Vous devez vous connecter au même compte Samsung que sur votre appareil.
3 S'il n'est pas déjà installé sur votre ordinateur, installez le pilote.
Suivez les instructions affichées pour entrer le nom d'affichage de l'ordinateur, les paramètres
proxy et le mot de passe. Pour plus d'informations sur les paramètres du serveur proxy,
contactez l'administrateur réseau.
Lorsque l'installation est terminée, l'icône apparaît dans la barre des tâches.
4 Appuyez sur Vérifier la connexion.
Web et réseau
77
Connecter à distance l'appareil et un ordinateur
1 Appuyez sur Remote PC depuis la liste des applications.
2 Appuyez sur Vérifier la connexion (Actualiser).
Afficher le nom de
l'ordinateur.
Connecter à distance
l'appareil et
l'ordinateur.
3 Appuyez sur ON computer.
4 Entrez le mot de passe de connexion et appuyez sur OK.
Si vous avez oublié votre mot de passe, appuyez sur Mot de passe oublié ?.
5 La connexion est établie. Vous pouvez maintenant contrôler l'ordinateur à distance, depuis
l'appareil.
Web et réseau
78
Contrôler l’ordinateur depuis l’appareil
Après avoir connecté les appareils, vous pouvez consulter et contrôler l'écran de votre ordinateur sur
l'appareil. Vous pouvez également ouvrir ou modifier des fichiers sur l'ordinateur et les transférer vers
votre appareil.
Parcourir l'écran.
Accéder à des options
supplémentaires.
État de la connexion
Appuyez sur l'écran, puis sur au bas de l'écran pour utiliser l'un des éléments suivants :
• Souris : permet d’afficher le pointeur de la souris sur l’écran de l’appareil.
• Clavier : permet d’ouvrir le clavier pour saisir du texte dans le champ sélectionné.
• Explorateur à distance : permet d’ouvrir le gestionnaire de fichiers pour rechercher des fichiers
et les transférer entre les appareils connectés.
• Verrouillage d'écran : permet de verrouiller l’écran de l’appareil afin de désactiver les fonctions
de zoom et de défilement.
• Changer de fenêtre : permet de basculer entre deux moniteurs lorsque l’ordinateur est
connecté à deux moniteurs.
• Paramètres : permet de modifier les paramètres de connexion.
• Déconnecter : permet de mettre fin à la connexion entre l'appareil et l'ordinateur.
Web et réseau
79
Transférer des fichiers entre votre appareil et l'ordinateur
1 Appuyez sur → Explorateur à distance.
2 Dans le volet du gestionnaire de fichiers de l'ordinateur, maintenez le doigt appuyé sur un
fichier. Faites ensuite glisser ce fichier vers le volet du gestionnaire de fichiers de l'appareil. Vous
pouvez également déplacer un fichier dans l'autre sens.
Gestionnaire de
fichiers de l'ordinateur
Gestionnaire de
fichiers de l'appareil
Web et réseau
80
SideSync 3.0
Cette application permet de contrôler l'écran de votre smartphone à à l'aide d'un écran virtuel de
smartphone affiché sur votre tablette.
• Sur votre tablette, consultez des messages ou utilisez le forum de discussion de votre
smartphone.
• Sur votre tablette, regardez en grand une vidéo en cours de diffusion sur votre smartphone.
• Transférez facilement des fichiers entre votre tablette et votre smartphone.
Avant d'utiliser cette application
• Votre tablette et le smartphone doivent prendre en charge la fonction Wi-Fi Direct. Dans le cas
contraire, les deux appareils doivent être connectés au même point d'accès.
• SideSync 3.0 doit être installé sur la tablette et le smartphone.
S'il n'est installé sur aucun appareil, téléchargez-le depuis Samsung Apps ou Play Store et
installez-le.
• SideSync 3.0 fonctionne uniquement sur les appareils équipés d'Android version 4.4 ou
supérieure.
Connecter votre tablette et votre smartphone
1 Appuyez sur SideSync 3.0 sur l'écran Applications de votre tablette.
Pour lancer SideSync 3.0, vous devez télécharger et installer l'application. Appuyez sur Installer
et suivez les instructions à l’écran.
2 Lancez l'application SideSync 3.0 sur un smartphone.
Web et réseau
81
3 La tablette cherche automatiquement les smartphones disponibles.
Sélectionnez un des smartphones détectés.
4 Appuyez sur OK sur l'écran du smartphone.
5 L'écran du smartphone virtuel est affiché sur votre tablette et l'écran du smartphone s'éteint.
Web et réseau
82
Utiliser l'écran du smartphone virtuel
Parcourez l'écran du smartphone virtuel et utilisez les applications proposées. Vous pouvez ainsi
envoyer ou recevoir des messages ou tenir des discussions.
Certaines fonctions, telles que Appareil photo et Screen Mirroring, peuvent ne pas
fonctionner dans l'écran virtuel du smartphone.
Fermer SideSync 3.0.
Écran du smartphone virtuel.
Touche Retour
Touche Accueil
Touche Menu
Rotation d'écran
Accéder à des options
supplémentaires.
Capture d'écran
Ouvrir la même page Web dans le
navigateur Web de la tablette.
Réduire l'écran.
Ajuster l’écran à la taille de l’écran
de votre tablette.
Web et réseau
83
Déplacer l'écran du smartphone virtuel
Appuyez en haut de l'écran du smartphone virtuel et faites-le glisser vers l'emplacement souhaité.
Ajuster la taille de l'écran du smartphone virtuel
1 Maintenez le doigt appuyé sur , en bas à droite de l'écran du smartphone virtuel.
2 Lorsqu'un cadre apparaît, faites-le glisser pour ajuster la taille.
Saisir du texte
Lorsque vous saisissez du texte sur l'écran du smartphone virtuel, le clavier de la tablette apparaît.
Saisissez le texte à l'aide de ce clavier.
Web et réseau
84
Basculer d'un écran à l'autre
Vous ne pouvez pas utiliser en même temps l'écran du smartphone et l'écran du smartphone virtuel.
En effet, lorsque vous utilisez l'écran du smartphone virtuel sur la tablette, l'écran du smartphone
s'éteint.
Utiliser l'écran du smartphone
Pour allumer l'écran du smartphone et éteindre l'écran du smartphone virtuel sur la tablette,
appuyez sur la touche Accueil du smartphone.
Utiliser l'écran du smartphone virtuel
Pour allumer l'écran du smartphone virtuel et éteindre l'écran du smartphone, appuyez sur Basculer
sur la tablette sur l'écran de la tablette.
Écouter de la musique ou lire des vidéos sur la tablette
Écoutez de la musique ou lisez des vidéos stockées sur le smartphone en utilisant l'écran et le hautparleur
de la tablette.
1 Ouvrez un fichier audio ou vidéo dans l'écran du smartphone virtuel, sur la tablette.
2 Le fichier sélectionné est lu en utilisant l'écran et le haut-parleur de la tablette.
Pendant la lecture, réglez le volume sur l'écran du smartphone virtuel ou la tablette.
Web et réseau
85
Copier des fichiers d'un appareil à l'autre
Copier des fichiers du smartphone vers la tablette
1 Maintenez le doigt appuyé sur un fichier dans l'écran du smartphone virtuel.
2 Maintenez le doigt appuyé sur un fichier, puis faites-le glisser vers l'écran de la tablette.
3 L'application Mes fichiers démarre sur l'écran de la tablette. Sélectionnez le dossier où
enregistrer le fichier, puis appuyez sur OK.
Copier des fichiers de la tablette vers le smartphone
1 Maintenez le doigt appuyé sur un fichier dans l'écran de la tablette.
2 Maintenez le doigt appuyé sur un fichier, puis faites-le glisser vers l'écran du smartphone virtuel.
3 L'application Mes fichiers démarre sur l'écran du smartphone virtuel. Sélectionnez le dossier où
enregistrer le fichier, puis appuyez sur OK.
86
Multimédia
Musique
Utilisez cette application pour écouter de la musique.
Appuyez sur Musique depuis la liste des applications.
• Selon la version logicielle de votre appareil, certains formats ne sont pas compatibles.
• Certains fichiers peuvent ne pas être lus correctement en fonction de la méthode
d'encodage utilisée.
Écouter de la musique
Sélectionnez une catégorie de musique, puis un morceau à écouter.
Appuyez sur l’image de l’album en bas de l’écran pour afficher le lecteur MP3 en plein écran.
Passer au morceau suivant.
Maintenir la touche appuyée
pour effectuer une avance
rapide.
Mettre en pause ou
reprendre la lecture.
Régler le volume.
Modifier le mode de
répétition.
Redémarrer le morceau en
cours de lecture ou revenir
au morceau précédent.
Maintenir la touche appuyée
pour effectuer un retour
rapide.
Activer la lecture aléatoire.
Définir le fichier comme
votre morceau favori.
Rechercher d'autres
appareils pour lire le fichier.
Ouvrir la liste de lecture.
Accéder à des options
supplémentaires.
Multimédia
87
Pour écouter de la musique à volume égal, appuyez sur → Paramètres → Lecteur →
Volume intelligent.
Lorsque la fonction Volume intelligent est activée, le volume effectif peut être plus élevé
que celui réglé sur l’appareil. Soyez prudent et évitez toute exposition prolongée à des
niveaux sonores élevés, car cela pourrait provoquer des séquelles auditives.
Il est possible que la fonction Volume intelligent ne soit pas activée pour certains fichiers.
Pour personnaliser vos réglages audio lors de l’écoute de musique avec un casque ou un écouteur,
appuyez sur → Paramètres → Lecteur → Adapt Sound → Activé. Lorsque vous réglez le volume
au niveau 14 ou supérieur, l’option d'adaptation du son (Adapt Sound) n'est pas appliquée. Si vous
baissez le volume au niveau 13 ou inférieur, l’option est de nouveau appliquée.
Définir une musique comme tonalité d’alarme
Pour utiliser la chanson en cours de lecture comme tonalité de sonnerie, appuyez sur →
Définir comme → Depuis le début ou Recommandations auto → OK.
Créer des listes de lecture
Faites votre propre sélection de morceaux de musique.
Appuyez sur Listes lect., puis sur → Créer une liste de lecture. Saisissez un titre, puis appuyez sur
OK. Appuyez sur Ajouter, sélectionnez les morceaux à inclure dans la liste de lecture, puis appuyez
sur OK.
Pour ajouter le morceau de musique en cours de lecture à une liste de lecture, appuyez sur →
Aj. liste lecture.
Écouter de la musique par catégorie
Écoutez de la musique classée par atmosphère musicale. L’appareil crée automatiquement la liste de
lecture.
Appuyez sur → Coin musique et sélectionnez une atmosphère. Vous pouvez également
sélectionner plusieurs cellules en faisant glisser votre doigt.
Multimédia
88
Appareil photo
Utilisez cette application pour prendre des photos ou enregistrer des vidéos.
Pour visionner les photos et les vidéos prises avec l’appareil, utilisez l’application Galerie (p. 95).
Appuyez sur Appareil photo depuis la liste des applications.
• Lorsque l’appareil photo n’est pas utilisé, il se ferme automatiquement.
• Assurez-vous que l’objectif est bien propre. Dans le cas contraire, l’appareil risque de ne
pas fonctionner correctement dans certains modes nécessitant des résolutions élevées.
Bon usage de l’appareil photo
• Ne prenez pas de photos et n’enregistrez pas de vidéos d’autres personnes sans leur
consentement.
• Ne prenez pas de photos et n’enregistrez pas de vidéos lorsque la loi l’interdit.
• Ne prenez pas de photos et n’enregistrez pas de vidéos en violation de la vie privée d’autrui.
Prendre des photos
Prendre une photo
Appuyez sur l’écran d’aperçu à l’endroit où l’appareil photo doit faire la mise au point. Une fois la
mise au point terminée, le cadre de mise au point devient vert. Pour prendre la photo, appuyez sur
.
Modifier le mode de prise de
vue.
Sélectionner un des divers
effets disponibles.
Basculer entre l’objectif
avant et arrière.
Passer en mode Dual
Camera.
Afficher davantage
d’options.
Modifier les paramètres de
l’appareil photo.
Visionner les photos et
vidéos que vous avez prises.
Enregistrer une vidéo.
Afficher le mode en cours.
Multimédia
89
Mode de capture
Il existe plusieurs effets de photo.
Appuyez sur MODE, puis faites défiler les modes à droite de l’écran vers le haut ou le bas.
• Auto : ce mode permet à l'appareil photo d'évaluer l'environnement et de déterminer le mode
idéal pour la photo.
• Beauté : ce mode permet de prendre des photos de visages plus claires pour obtenir des images
plus douces.
• Meilleures poses : ce mode permet de prendre une série de photos et de conserver la meilleure.
• Meilleure photo : ce mode permet de prendre plusieurs photos de groupe en même temps et
de les associer pour créer la meilleure photo possible.
Appuyez sur pour prendre plusieurs photos. Pour obtenir le meilleur cliché possible, évitez de
bouger l’appareil photo en cours de prise. Lorsque la Galerie s’ouvre, appuyez sur le cadre jaune
représenté sur chaque visage et sélectionnez la meilleure photo de chacun des sujets. Lorsque
vous avez sélectionné la meilleure photo pour chacun des sujets du groupe, appuyez sur Enreg.
pour fusionner les images en une seule photo et la sauvegarder.
• Son & prise : ce mode permet d'associer un son à une photo.
Pour prendre une photo, appuyez sur . L’appareil enregistre quelques secondes de contenu
audio après la prise de vue.
Lorsque vous prenez des photos dans ce mode, le son est enregistré par le microphone
interne.
• Chronophoto : ce mode permet de prendre une série de photos et de les combiner en une
image reflétant les mouvements.
Pour obtenir la meilleure photo possible, suivez ces conseils : dans certaines conditions, il est
possible que l’appareil ne puisse pas correctement procéder aux prises de vue.
– Maintenez fermement l’appareil photo et évitez de bouger lors de la prise de vue.
– Photographiez un sujet qui se déplace dans une seule direction.
– Les arrière-plans de vos prises de vue ne doivent pas comporter d’objets en mouvement.
– Évitez de prendre en photo un sujet et un arrière-plan aux couleurs similaires.
– Évitez de prendre des photos de sujets trop proches ou trop éloignés qui ne cadreraient pas
dans l’objectif, ou qui seraient trop longs comme un bus ou un train.
Multimédia
90
• Ton riche (HDR) : ce mode permet de prendre une photo avec un meilleur rapport de contraste.
• Gomme : ce mode permet d'effacer les mouvements des objets animés en arrière-plan.
Pour prendre une série de photos, appuyez sur . L'appareil efface toute trace de mouvements
d'un objet animé. Pour rétablir la photo d’origine, appuyez sur , puis appuyez sur la zone en
surbrillance.
Pour obtenir la meilleure photo possible, suivez ces conseils :
– Maintenez fermement l’appareil photo et évitez de bouger lors de la prise de vue.
– Lors de la prise de photos d'un objet et d'un fond de même couleur, l'appareil risque de ne
pas reconnaître tous les mouvements.
– Évitez de prendre des photos de sujets dont les mouvements sont imperceptibles ou
exagérés, car l’appareil photo pourrait ne pas reconnaître tous les mouvements.
– Évitez de prendre des photos de sujets se déplaçant en arrière-plan, car l’appareil photo
pourrait ne pas reconnaître tous les mouvements.
• Panorama : ce mode permet de prendre une photo composée de différents clichés assemblés
les uns aux autres.
Pour obtenir la meilleure photo possible, suivez ces conseils :
– Déplacez l’appareil photo lentement dans le sens de votre choix.
– Alignez l’objectif de l’appareil photo avec le cadre de prise de vue.
– Évitez de prendre des photos de sujets devant des arrière-plans non identifiables, comme un
ciel ou un pan de mur uni.
• Sports : ce mode permet de prendre des photos de sujets en déplacement.
Photos panoramiques
Une photo panoramique est une large image en mode paysage constituée de plusieurs clichés.
Appuyez sur MODE → Panorama.
Appuyez sur et déplacez l’appareil photo dans le sens de votre choix. Suivez le guide de prise de
vue en alignant les deux cadres bleus et l'appareil photo prend automatiquement le cliché suivant
en séquence panoramique. Pour mettre fin à la prise de vue, appuyez sur .
Si l’objectif n’est plus aligné, la prise de vue s’interrompt.
Multimédia
91
Appliquer des effets de filtre
Utilisez les effets de filtre pour prendre des photos ou enregistrer des vidéos uniques.
Appuyez sur , puis sélectionnez un effet de filtre. Les options disponibles varient selon le mode
sélectionné.
Enregistrer des vidéos
Enregistrer une vidéo
Pour enregistrer une vidéo, appuyez sur . Pour interrompre l’enregistrement, appuyez sur . Pour
arrêter l’enregistrement, appuyez sur .
Lorsque vous enregistrez une vidéo, utilisez les fonctions suivantes :
• Pour modifier la mise au point, appuyez à l’endroit souhaité. Pour faire la mise au point au centre
de l’écran, appuyez sur .
• Pour capturer une photo en cours d'enregistrement d'une vidéo, appuyez sur .
Mode d’enregistrement
Pour modifier le mode d’enregistrement, appuyez sur → .
• Normal : ce mode permet d'obtenir une qualité standard.
• Limite pour e-mail : ce mode permet de réduire la qualité d’enregistrement et d’envoyer la
vidéo via un e-mail.
• Mouvement rapide : ce mode permet de filmer un sujet en mouvement. Dans ce cas, l’appareil
lit rapidement la vidéo.
Multimédia
92
Effectuer un zoom avant et arrière
Utilisez l’une des méthodes suivantes :
• Appuyez sur la touche de volume Haut ou Bas pour effectuer un zoom avant ou arrière.
• Pour effectuer un zoom avant, écartez deux doigts l’un de l’autre sur l’écran ; pour effectuer un
zoom arrière, rapprochez-les.
La fonction zoom avant/arrière est disponible en cours d’enregistrement d’une vidéo.
Mode Dual Camera
Lorsque vous prenez un paysage en photo avec l’objectif arrière, la photo ou la vidéo capturée
avec l’objectif avant apparaît dans un encart, et inversement. Utilisez cette fonctionnalité pour
photographier simultanément un magnifique paysage et votre autoportrait par exemple.
Appuyez sur pour passer au mode Dual Camera. Appuyez sur pour prendre une photo ou sur
pour enregistrer une vidéo.
Appuyer pour
redimensionner ou déplacer
l’encart.
Sélectionner un des divers
effets disponibles.
• En mode Dual Camera, vous pouvez enregistrer des vidéos d’une durée maximale de
5 minutes en qualité Full HD et d’une durée maximale de 10 minutes en qualité HD.
• Lorsque vous enregistrez des vidéos dans ce mode, le son est enregistré par le
microphone interne.
Multimédia
93
Partager des photos
Appuyez sur → , puis sélectionnez l’une des fonctions suivantes :
• Partage : envoyer directement une photo à un autre appareil Wi-Fi Direct.
• Partage de photo d'ami : envoyer la photo à la personne dont le visage est utilisé comme
libellé.
• Viseur à distance : contrôler l'appareil photo à distance.
Commander l’appareil photo à distance
Paramétrez l’appareil comme viseur afin de commander l’appareil photo à distance.
Appuyez sur → → Viseur à distance, puis établissez une connexion Wi-Fi Direct entre l’appareil
et l’appareil photo. Pour prendre une photo à distance en vous servant de l’appareil comme viseur,
appuyez sur .
Configurer les paramètres de l’appareil photo et du caméscope
Pour configurer les paramètres de l’appareil photo, appuyez sur . Les options suivantes sont
disponibles soit pour les deux modes (appareil photo et caméscope), soit pour le mode appareil
photo, ou le mode caméscope. Les options disponibles varient selon le mode utilisé.
• Taille des photos / Taille de la vidéo : sélectionner une résolution. Pour obtenir une meilleure
qualité, utilisez une résolution élevée. Cependant, notez qu’une résolution élevée nécessite
davantage de mémoire.
• Rafale : prendre une série de photos de sujets en mouvement.
• Photo par appui : appuyer sur l'image à l'écran pour prendre une photo.
• Détect. portrait : paramétrer l’appareil pour qu’il reconnaisse les visages des personnes et vous
aide à les prendre en photo.
• Modes de mesure : sélectionner un mode de mesure. Ce paramètre détermine la manière dont
les valeurs lumineuses sont calculées. Mesure pondérée centrale mesure la lumière d’arrièreplan
au centre de la scène. Spot mesure la valeur de la lumière à un endroit spécifique. Matrice
calcule la moyenne de la scène toute entière.
• ISO : sélectionner une valeur ISO. Ce paramètre permet de contrôler la sensibilité lumineuse
de l’appareil photo. Celle-ci est mesurée en équivalents de caméra-film. Les valeurs faibles sont
destinées aux objets immobiles vivement éclairés. Les valeurs plus élevées sont pour les objets
en mouvement ou faiblement éclairés.
• Stabilisateur : paramétrer l’appareil pour qu’il détecte automatiquement les conditions de faible
luminosité et règle la luminosité de la photo sans le flash.
• Enregistrer : enregistrer la photo à tonalité riche et la photo d’origine ou uniquement la photo à
tonalité riche.
Multimédia
94
• Stabilisateur : activer ou désactiver le stabilisateur vidéo. Le stabilisateur permet d’effectuer la
mise au point de l’appareil quand il bouge.
• Balise de localisation : joindre une étiquette de géolocalisation GPS à la photo.
• Pour que les signaux GPS soient meilleurs, évitez de prendre des photos dans des lieux
où le signal peut être limité, par exemple entre des bâtiments ou dans des zones de faible
altitude, ou encore lorsque les conditions météorologiques sont mauvaises.
• Votre localisation est susceptible d’apparaître sur vos photos au moment où vous les
publiez sur le Web. Pour empêcher l’affichage de ces données, désactivez le paramètre de
balise GPS.
• Aperçu photo/vidéo : afficher des photos ou des vidéos après les avoir prises.
• Touche de volume : utiliser la touche de volume pour contrôler l’obturateur ou le zoom.
• Retardateur : définir le délai à l'issue duquel l'appareil doit prendre une photo ou enregistrer
une vidéo.
• Balance des blancs : sélectionner une balance des blancs appropriée de sorte que les images
offrent une gamme de couleurs proches de la réalité. Les paramètres sont conçus pour des
situations lumineuses spécifiques. Ils sont similaires à la gamme thermique d’exposition et de
balance des blancs des appareils professionnels.
• Valeur d'exposition : modifier la valeur d'exposition. Cela détermine la quantité de lumière
reçue par le capteur de l’appareil photo. En cas de faible luminosité, utilisez une exposition plus
élevée.
• Guide : afficher des lignes directrices sur l'écran d'aperçu.
• Flash : activer ou désactiver le flash.
• Contrôle vocal : configurer l’appareil photo pour qu’il prenne des photos à l’aide de commandes
vocales.
• Nom de fichier contextuel : paramétrer l’appareil photo pour qu’il affiche des balises
contextuelles. Activez cette fonction pour utiliser des libellés dans l'application Galerie.
• Retourner l'image : inverser l’image pour créer une image miroir de la scène initiale.
• Stockage : sélectionner l’emplacement de stockage des photos et des vidéos.
• Réinitialiser : réinitialiser les paramètres de l'appareil.
• Aide : accéder aux informations d’aide relatives à l’utilisation de l’appareil photo.
Raccourcis
Réorganisez les raccourcis pour accéder facilement aux différentes options de l’appareil photo.
Appuyez sur et maintenez le doigt appuyé sur une icône de raccourci.
Maintenez le doigt appuyé sur une option et faites-la glisser vers un autre emplacement en haut de
l’écran.
Multimédia
95
Galerie
Utilisez cette application pour visualiser des photos ou des vidéos.
Appuyez sur Galerie depuis la liste des applications.
• Selon la version logicielle de votre appareil, certains formats ne sont pas compatibles.
• Certains fichiers peuvent ne pas être lus correctement en fonction de la méthode
d'encodage utilisée.
Afficher des images
Lorsque vous lancez l’application, l'application Galerie affiche les dossiers disponibles. Lorsqu’une
autre application, telle que Email, enregistre une image, le dossier Download contenant l’image est
automatiquement créé. De même, si vous effectuez une capture d’écran, le dossier Screenshots est
automatiquement créé. Sélectionnez un dossier pour l’ouvrir.
Les images d’un dossier sont affichées par date de création. Appuyez sur une image pour l’afficher en
plein écran.
Faites défiler l’écran vers la gauche ou la droite pour afficher l’image précédente ou suivante.
Effectuer un zoom avant et arrière
Pour effectuer un zoom sur une image, utilisez l’une des méthodes suivantes :
• Pour effectuer un zoom avant, appuyez deux fois sur l’image à l’endroit de votre choix.
• Pour effectuer un zoom avant, écartez deux doigts l’un de l’autre sur l’écran à l’endroit de votre
choix ; pour effectuer un zoom arrière, rapprochez-les ; pour revenir à l’affichage initial, appuyez
deux fois sur l’écran.
Afficher des images à l’aide de la fonction de reconnaissance des mouvements
Pour exécuter une fonction avec un mouvement spécifique, utilisez la fonction de reconnaissance
des mouvements.
Depuis la liste des applications, appuyez sur Paramètres → Contrôle → Mouvements, faites glisser
le curseur Mouvements vers la droite, puis faites glisser le curseur des fonctions à activer avec les
mouvements vers la droite.
Pour ne plus utiliser une fonction de reconnaissance des mouvements, faites glisser le curseur des
fonctions à désactiver vers la gauche.
Multimédia
96
Visionner des vidéos
Les fichiers vidéo sont caractérisés par l’icône . Sélectionnez la vidéo que vous souhaitez regarder,
puis appuyez sur .
Découper les segments d’une vidéo
Sélectionnez une vidéo et appuyez sur . Déplacez le crochet d’ouverture au début de la section
souhaitée et le crochet de fermeture à la fin, puis enregistrez la vidéo.
Modifier des photos
En mode affichage d’une photo, appuyez sur et utilisez les fonctions suivantes :
• Favoris : ajouter l'élément à votre liste de favoris.
• Diaporama : lancer un diaporama de l’ensemble des images du dossier ouvert.
• Cadre photo : ajouter un cadre et une note à une image. L’image modifiée est enregistrée dans
le dossier Photo frame.
• Note photo : écrire une note au dos de l'image. Pour modifier la note, appuyez sur .
• Copier dans le presse-papier : copier l’image dans le presse-papiers.
• Imprimer : imprimer image en connectant l'appareil à une imprimante. Certaines imprimantes
peuvent ne pas être compatibles avec votre appareil.
• Renommer : renommer le fichier.
• Partage de photo d'ami : envoyer l’image à une personne dont le visage sert de libellé.
• Rotation à gauche : pivoter l’image dans le sens inverse des aiguilles d'une montre.
• Rotation à droite : pivoter l’image dans le sens des aiguilles d'une montre.
• Rogner : redimensionner le cadre orange pour couper l’image.
• Définir comme: définir l'image comme fond d'écran ou image de contact.
• Détails : afficher les détails d’une image.
• Paramètres : modifier les paramètres de la galerie.
Multimédia
97
Retoucher des images
En mode affichage d’une photo, appuyez sur et utilisez les fonctions suivantes :
• Pivoter: pivoter l’image.
• Rogner : rogner l’image.
• Couleur : régler la saturation ou la luminosité de l'image.
• Effet : appliquer des effets à l’image.
• Autocollant : appliquer des autocollants à l’image.
• Dessin : dessiner sur l’image.
• Cadre : appliquer des cadres à l’image.
Mes photos favorites
En mode affichage d’une image, appuyez sur → Favoris pour ajouter l’image à votre liste de favoris.
Effectuer des collages d’images
Dans un dossier, appuyez sur → Sélectionner élément, choisissez deux à quatre images, puis
appuyez sur → Créer un collage. Sélectionnez un style au bas de l’écran, puis appuyez sur Sauveg.
Pour ajouter des images, appuyez sur .
Pour supprimer des images, appuyez sur .
Pour modifier le type de fractionnement, appuyez sur .
Supprimer des photos
Utilisez l’une des méthodes suivantes :
• Dans un dossier, appuyez sur → Sélectionner élément, sélectionnez des images, puis appuyez
sur .
• En mode affichage d’une photo, appuyez sur .
Multimédia
98
Partager des photos
Utilisez l’une des méthodes suivantes :
• Dans le dossier, appuyez sur → Sélectionner élément, sélectionnez des images, puis appuyez
sur pour les envoyer à des contacts ou les partager sur les réseaux sociaux.
• En mode affichage d’une photo, appuyez sur pour l’envoyer à des contacts ou la partager via
des services de réseaux sociaux.
Définir une image comme fond d’écran
En mode affichage d'une image, appuyez sur → Définir comme pour définir l’image comme fond
d’écran ou l’affecter à un contact.
Libellés de portraits
En mode affichage d'une image, appuyez sur → Paramètres → Tags, puis cochez la case
Libellé de portrait. Un cadre jaune apparaît autour du visage identifié. Appuyez sur le visage, puis
sur Ajouter un nom, et sélectionnez ou ajoutez un contact.
Lorsque le libellé de portrait apparaît sur une image, appuyez sur le nom et utilisez les fonctions
disponibles, comme la messagerie.
Selon l’angle du visage, la taille, l’expression, les conditions lumineuses ou les accessoires
portés par la personne, il est possible que la reconnaissance faciale ne fonctionne pas.
Utiliser les tags contextuels
Appuyez sur → Paramètres → Tags → Tag contextuel, puis faites glisser le curseur
Tag contextuel vers la droite pour afficher une balise contextuelle (météo, localisation, date et nom
de la personne) lors de l’ouverture d’une image.
Organiser les applications dans des dossiers
Créez un dossier pour organiser les images ou les vidéos stockées dans l'appareil. Vous pouvez copier
ou déplacer des fichiers d'un dossier vers un autre.
Pour créer un nouveau dossier, appuyez sur . Saisissez le nom du dossier, appuyez sur OK, puis
sélectionnez les images ou vidéos à intégrer au nouveau dossier. Maintenez votre doigt appuyé
sur l'image ou la vidéo sélectionnée, faites-la glisser vers le nouveau dossier, puis appuyez sur OK.
Appuyez sur Copier pour copier l'élément ou sur Déplacer pour le déplacer.
Multimédia
99
Vidéo
Utilisez cette application pour lire des fichiers vidéo.
Appuyez sur Vidéo depuis la liste des applications.
• Selon la version logicielle de votre appareil, certains formats ne sont pas compatibles.
• Certains fichiers peuvent ne pas être lus correctement en fonction de la méthode
d'encodage utilisée.
Visionner des vidéos
Sélectionnez une vidéo à lire.
Déplacer le volet de contrôle
vers la gauche.
Basculer en mode écran
flottant.
Effectuer un retour ou une
avance rapide en faisant
glisser la barre.
Rechercher d'autres
appareils pour lire le fichier.
Redémarrer la vidéo en
cours de lecture ou revenir à
la vidéo précédente.
Maintenir la touche appuyée
pour effectuer un retour
rapide.
Passer à la vidéo suivante.
Maintenir la touche appuyée
pour effectuer une avance
rapide.
Accéder à des options
supplémentaires.
Régler le volume.
Déplacer le volet de contrôle
vers la droite.
Modifier le format d’écran.
Ouvrir la liste de lecture.
Mettre en pause ou
reprendre la lecture.
Supprimer des vidéos
Appuyez sur → Supprimer, sélectionnez des vidéos, puis appuyez sur Supprimer.
Partager une vidéo
Appuyez sur → Partager via, sélectionnez les vidéos, appuyez sur OK, puis sélectionnez une
méthode de partage.
Multimédia
100
Utiliser le lecteur contextuel
Utilisez cette fonctionnalité pour utiliser d’autres applications sans fermer le lecteur vidéo. Lorsque
vous visionnez des vidéos, appuyez sur pour utiliser le lecteur contextuel.
Pour agrandir le lecteur, écartez deux doigts l’un de l’autre sur l’écran ; pour le réduire, rapprochezles.
Pour déplacer le lecteur, maintenez-y le doigt appuyé, puis faites-le glisser vers un autre
emplacement.
YouTube
Utilisez cette application pour regarder des vidéos à partir du site Web YouTube.
Appuyez sur YouTube depuis la liste des applications.
La disponibilité de cette application dépend de votre zone géographique ou de votre
opérateur.
Visionner une vidéo
Appuyez sur , puis saisissez un mot-clé. Sélectionnez l’un des résultats de recherche obtenus pour
visionner la vidéo correspondante.
Appuyez sur l’écran, puis sur pour afficher la vidéo en plein écran.
Partager une vidéo
Sélectionnez la vidéo à partager, appuyez sur , puis sélectionnez un mode de partage.
Mettre une vidéo en ligne
Appuyez sur Vidéos ajoutèes → , sélectionnez une vidéo, entrez les informations concernant
cette vidéo, puis appuyez sur ENVOYER.
Multimédia
101
Flipboard
Utilisez cette application pour accéder à vos magazines personnalisés.
Appuyez sur Flipboard depuis la liste des applications.
La disponibilité de cette application dépend de votre zone géographique ou de votre
opérateur.
Pour lancer Flipboard, faites glisser votre doigt vers la gauche sur la page d’accueil, sélectionnez des
thèmes d’actualité, puis appuyez sur Construis ton Flipboard.
Sélectionnez un article de couverture ou un thème, parcourez les pages Flipboard, puis sélectionnez
un article à lire.
102
Boutiques d’applications et
multimédia
Play Store
Utilisez cette application pour télécharger des applications et des jeux, gratuits ou payants, pouvant
s’exécuter sur votre appareil.
Appuyez sur Play Store depuis la liste des applications.
La disponibilité de cette application dépend de votre zone géographique ou de votre
opérateur.
Installer des applications
Parcourez les applications par catégorie ou appuyez sur pour effectuer une recherche à l’aide
d’un mot-clé.
Sélectionnez une application pour en afficher les informations. Pour la télécharger, appuyez sur
INSTALLER. Si l’application est payante, appuyez sur le prix et suivez les instructions qui s’affichent à
l’écran pour effectuer l’achat.
• Lorsqu’une nouvelle version d’une application installée est disponible, une icône de
mise à jour apparaît dans le volet des raccourcis en haut de l’écran. Ouvrez le volet des
raccourcis et appuyez sur l’icône pour mettre à jour l’application.
• Pour installer des applications provenant d’autres sources, appuyez sur Paramètres →
Général → Sécurité → Sources inconnues depuis la liste des applications.
Désinstaller des applications
Désinstallez les applications téléchargées sur Play Store.
Appuyez sur → Mes applications, sélectionnez une application à supprimer depuis la liste des
applications installées, puis appuyez sur DÉSINSTALLER.
Boutiques d’applications et multimédia
103
Samsung Apps
Utilisez cette application pour télécharger des applications Samsung, gratuites ou payantes. Pour
plus d’informations, visitez le site apps.samsung.com.
Appuyez sur Samsung Apps depuis la liste des applications.
La disponibilité de cette application dépend de votre zone géographique ou de votre
opérateur.
Installer des applications
Parcourez les applications par catégorie. Appuyez sur CATÉGORIES pour sélectionner une catégorie.
Pour rechercher une application, appuyez sur en haut de l’écran, puis saisissez un mot-clé dans le
champ de recherche.
Sélectionnez une application pour en afficher les informations. Pour la télécharger, appuyez sur
Gratuit. Si l’application est payante, appuyez sur le prix et suivez les instructions qui s’affichent à
l’écran pour effectuer l’achat.
Lorsqu’une nouvelle version d’une application installée est disponible, une icône de mise à
jour apparaît dans le volet des raccourcis en haut de l’écran. Ouvrez le volet des raccourcis et
appuyez sur l’icône pour mettre à jour l’application.
Play Livres
Utilisez cette application pour télécharger des fichiers de livre.
Appuyez sur Play Livres depuis la liste des applications.
La disponibilité de cette application dépend de votre zone géographique ou de votre
opérateur.
Boutiques d’applications et multimédia
104
Play Films
Utilisez cette application pour regarder, télécharger et louer des films ou des émissions TV.
Appuyez sur Play Films depuis la liste des applications.
La disponibilité de cette application dépend de votre zone géographique ou de votre
opérateur.
Play Musique
Utilisez cette application pour écouter de la musique à l’aide de l’appareil ou de la musique diffusée
sur le service Cloud de Google.
Appuyez sur Play Musique depuis la liste des applications.
La disponibilité de cette application dépend de votre zone géographique ou de votre
opérateur.
Play Jeux
Utilisez cette application pour télécharger des jeux et y jouer.
Appuyez sur Play Jeux depuis la liste des applications.
La disponibilité de cette application dépend de votre zone géographique ou de votre
opérateur.
Play Kiosque
Utilisez cette application pour lire les dernières informations.
Appuyez sur Play Kiosque depuis la liste des applications.
La disponibilité de cette application dépend de votre zone géographique ou de votre
opérateur.
105
Utilitaires
Mémo
Grâce à cette application, consignez par écrit des informations importantes à sauvegarder et à
consulter ultérieurement.
Appuyez sur Mémo depuis la liste des applications.
Créer un mémo
Appuyez sur , écrivez un mémo, puis appuyez sur Enreg.
Pour changer de catégorie, appuyez sur .
Pour insérer une image dans le mémo, appuyez sur .
Pour créer un mémo vocal à insérer dans le mémo, appuyez sur .
Naviguer parmi les mémos
Parcourez les mémos miniatures en faisant défiler l’écran vers le haut ou le bas.
Pour modifier un mémo, appuyez sur sa miniature, puis sur son contenu.
Pour rechercher un mémo, appuyez sur .
Pour créer un mémo, appuyez sur .
Pour supprimer ou imprimer des mémos, appuyez sur → Sélectionner, sélectionnez les mémos
concernés, puis appuyez sur ou .
Pour modifier la liste des catégories, appuyez sur .
Afficher un mémo
Appuyez sur la miniature d'un mémo pour l'ouvrir.
Pour modifier le mémo, appuyez sur son contenu.
Pour supprimer le mémo, appuyez sur .
Pour envoyer le mémo à d’autres personnes, appuyez sur .
Pour imprimer le mémo en connectant l’appareil à une imprimante, appuyez sur . Certaines
imprimantes peuvent ne pas être compatibles avec votre appareil.
Utilitaires
106
S Planner
Utilisez cette application pour gérer des événements et des tâches.
Appuyez sur S Planner depuis la liste des applications.
Créer un événement ou une tâche
Appuyez sur , puis utilisez l’une des méthodes suivantes :
• Événement : entrer un événement avec un paramètre de répétition en option.
• Tâche : entrer une tâche avec un paramètre de priorité en option.
Pour ajouter plus rapidement un événement ou une tâche, appuyez deux fois sur une date.
Saisissez un titre et indiquez le calendrier que vous souhaitez utiliser pour la synchronisation.
Appuyez ensuite sur Modif. détails événement ou sur Modifier détails tâche pour ajouter d’autres
détails, comme la fréquence de répétition de l’événement ou de la tâche, son association ou non à
une alerte préalable ou le lieu concerné.
Joignez une carte indiquant le lieu de l’événement. Saisissez l’adresse dans le champ Emplacement,
appuyez sur près du champ, puis signalez l’endroit précis en maintenant le doigt appuyé sur la
carte qui apparaît.
Utilitaires
107
Synchroniser avec Google Agenda
Sur l’écran des applications, appuyez sur Paramètres → Général → Comptes → Google sous
Mes comptes, sélectionnez le compte Google, puis cochez la case Synchroniser Calendrier.
Pour réaliser la synchronisation manuellement et mettre le calendrier à jour, appuyez sur S Planner
→ → Synchroniser.
Pour afficher les événements ou tâches synchronisés, appuyez sur → Calendriers, puis cochez le
compte Google.
Modifier le type de calendrier
En haut de l’écran, sélectionnez un type de calendrier (annuel, mensuel, hebdomadaire, etc.).
Rechercher un événement ou une tâche
Appuyez sur , puis sélectionnez un critère de recherche.
Pour afficher les événements ou les tâches de la date du jour, appuyez sur Aujourd'hui en haut de
l’écran.
Supprimer un événement ou une tâche
Sélectionnez un événement ou une tâche, puis appuyez sur → Supprimer.
Partager un événement ou une tâche
Sélectionnez un événement ou une tâche, appuyez sur → Partager via, puis sélectionnez un mode
de partage.
Utilitaires
108
Dropbox
Utilisez cette application pour enregistrer et partager des fichiers avec d’autres personnes via le
stockage Cloud Dropbox. Lorsque vous enregistrez des fichiers dans Dropbox, votre appareil les
synchronise automatiquement avec le serveur Web et tout autre ordinateur sur lequel le service
Dropbox est installé.
Appuyez sur Dropbox depuis la liste des applications.
La disponibilité de cette application dépend de votre zone géographique ou de votre
opérateur.
Lorsque vous ouvrez la Dropbox pour la première fois, appuyez sur Démarrer pour activer le service.
Suivez les instructions qui s’affichent à l’écran pour procéder à la configuration.
Une fois la Dropbox activée, appuyez sur Activer Chargements appareil photo pour télécharger
automatiquement dans la Dropbox des photos et des vidéos prises avec l'appareil. Pour afficher les
photos ou les vidéos importées, appuyez sur . Pour partager ou supprimer des fichiers ou créer
des albums, appuyez sur , puis sélectionnez les fichiers.
Pour importer des fichiers dans la Dropbox, appuyez sur → → Transférer ici → Photos ou
vidéos ou Autres fichiers. Pour ouvrir des fichiers dans Dropbox, sélectionnez un fichier.
En mode affichage d'une image ou d'une vidéo, appuyez sur pour l'ajouter à la liste de favoris.
Pour ouvrir des fichiers dans la liste des favoris, appuyez sur .
Cloud
Utilisez cette fonction pour synchroniser les fichiers ou sauvegarder des données d'applications avec
votre compte Samsung ou Dropbox.
Depuis la liste des applications, appuyez sur Paramètres → Général → Cloud.
La disponibilité de cette fonction dépend de votre zone géographique ou de votre
opérateur.
Utilitaires
109
Synchroniser avec le compte Samsung
Pour synchroniser les fichiers, sélectionnez votre compte Samsung ou sur Paramètres sync.
Sauvegarder ou restaurer des données
Pour sauvegarder ou restaurer des données avec votre compte Samsung, appuyez sur Sauvegarder
ou sur Restaurer.
Synchroniser avec la Dropbox
Appuyez sur Associer le compte Dropbox, puis accédez au compte Dropbox. Suivez les instructions
qui s’affichent à l’écran pour procéder à la configuration.
Lorsque vous êtes connecté, appuyez sur Autoriser afin que l’appareil synchronise
automatiquement les fichiers avec la Dropbox dès que vous effectuez des modifications.
Google Drive
Utilisez cette application pour créer et modifier des documents, puis les partager avec d'autres
utilisateurs via le service de stockage Google Drive. Lorsque vous créez des documents ou que
vous téléchargez des fichiers vers Google Drive, votre appareil effectue automatiquement la
synchronisation avec le serveur Web et tout autre ordinateur sur lequel Google Drive est installé.
Vous pouvez ainsi accéder directement à vos fichiers (sans avoir à les transférer ou à les télécharger
au préalable).
Appuyez sur Drive depuis la liste des applications.
La disponibilité de cette application dépend de votre zone géographique ou de votre
opérateur.
Utilitaires
110
Hancom Viewer
Grâce à cette application, affichez vos documents dans divers formats, y compris des feuilles de
calcul et des présentations.
Appuyez sur Hancom Viewer depuis la liste des applications.
Rechercher des documents
Appuyez sur Ouvrir pour rechercher un document.
Lorsque vous recherchez un document, utilisez l'une des options suivantes :
• : créer un nouveau dossier.
• : récupérer de nouveaux documents.
• : trier des documents et des dossiers.
• : modifier le mode d'affichage.
• : sélectionner des documents ou des dossiers.
Pour rechercher des documents récemment utilisés, appuyez sur Documents récents.
Lire des documents
Appuyez sur un document dans Documents récents ou dans un dossier.
Appuyez sur ou , puis utilisez l'une des fonctions suivantes :
Traitement de texte
• Rechercher : rechercher du texte.
• Zoom : modifier la taille d'affichage.
• Descriptif du document : afficher les détails d'un document, comme le titre, la date et l'auteur.
• Imprimer : imprimer le document en connectant l'appareil à une imprimante. Certaines
imprimantes peuvent ne pas être compatibles avec votre appareil.
• Envoyer : envoyer le document à d'autres personnes ou de le partager.
• Modifier : ouvrir la barre d’outils d’édition.
• Aide : afficher des informations sur Hancom Viewer.
Utilitaires
111
Présentation
• Rechercher : rechercher du texte.
• Zoom : modifier la taille d'affichage.
• Descriptif du document : afficher les détails d'un document, comme le titre, la date et l'auteur.
• Diaporama : démarrer un diaporama à la première page.
• À partir de la diapositive active : démarrer un diaporama à la page en cours.
• Mode Présentateur : afficher les outils de présentation sur l'appareil lorsqu'il est connecté à un
moniteur externe.
• Imprimer : imprimer le document en connectant l'appareil à une imprimante. Certaines
imprimantes peuvent ne pas être compatibles avec votre appareil.
• Envoyer : envoyer le document à d'autres personnes ou de le partager.
• Modifier : ouvrir la barre d’outils d’édition.
• Aide : afficher des informations sur Hancom Viewer.
Feuille de calcul
• Rechercher : rechercher du texte.
• Zoom : modifier la taille d'affichage.
• Descriptif du document : afficher les détails d'un document, comme le titre, la date et l'auteur.
• Trier : trier les cellules par critères.
• Afficher les formules : afficher les formules dans les cellules à la place des résultats.
• Figer les volets : figer la ligne sélectionnée.
• Quadrillage : masquer ou afficher le quadrillage.
• Afficher tous les commentaires : afficher ou masquer les mémos sur le document.
• Zone d'impression : sélectionner la zone à imprimer.
• Imprimer : imprimer le document en connectant l'appareil à une imprimante. Certaines
imprimantes peuvent ne pas être compatibles avec votre appareil.
• Envoyer : envoyer le document à d'autres personnes ou de le partager.
• Modifier : ouvrir la barre d’outils d’édition.
• Aide : afficher des informations sur Hancom Viewer.
Utilitaires
112
PDF
• Rechercher : rechercher du texte.
• Envoyer : envoyer le document à d'autres personnes ou de le partager.
• Propriétés : afficher les détails d'un document, comme le titre, la date et l'auteur.
• Zoom : modifier la taille d'affichage.
• Masquer les commentaires : afficher ou de masquer les commentaires sur le document.
• Défilement vertical : modifier le mode d'affichage. Cette option peut être intitulée
différemment, selon le mode d'affichage sélectionné.
• Mode lecture : afficher uniquement le contenu du document, sans les marges.
• Atteindre la page : accéder à la page indiquée.
• Signets : afficher les favoris sur le document.
• Imprimer : imprimer le document en connectant l'appareil à une imprimante. Certaines
imprimantes peuvent ne pas être compatibles avec votre appareil.
Alarme
Utilisez cette application pour définir des heures de réveil et des alarmes pour les événements
importants.
Appuyez sur Alarme depuis la liste des applications.
Activer ou désactiver cette
alarme.
Utilitaires
113
Créer une alarme
Appuyez sur , sélectionnez l’heure d'activation de l'alarme et les jours de répétition, puis appuyez
sur Enreg.
• Alarme géolocalisée : définissez un emplacement. L’alarme ne se déclenche qu’une fois que
vous vous trouvez à l’endroit indiqué.
• Répéter : définissez le délai à l'issue duquel l'alarme doit sonner de nouveau et le nombre de
répétitions.
• Alarme intelligente : activez cette option pour que l'appareil simule des sons naturels avant le
déclenchement de l'alarme principale.
Arrêter ou répéter une alarme
Pour éteindre une alarme, faites glisser votre doigt sur l’icône . Pour répéter l’alarme après une
période donnée, faites glisser votre doigt sur l’icône .
Supprimer une alarme
Appuyez sur → Sélectionner, sélectionnez l'alarme à supprimer, puis appuyez sur .
Horloge mondiale
Utilisez cette application pour vérifier l'heure dans de nombreuses grandes métropoles du monde
entier.
Appuyez sur Horloge mondiale depuis la liste des applications.
Créer une horloge
Appuyez sur , puis saisissez un nom de ville ou sélectionnez une ville dans la liste.
Pour appliquer l’heure d’été, appuyez sur → Sélectionner, sélectionnez une horloge et appuyez sur
→ Heure d'été.
Supprimer une horloge
Appuyez sur → Sélectionner, sélectionnez l'horloge à supprimer, puis appuyez sur .
Utilitaires
114
Calculatrice
Utilisez cette application pour réaliser des calculs simples ou complexes.
Appuyez sur Calculatrice depuis la liste des applications.
Pour effacer l’historique, appuyez sur .
S Voice
Utilisez cette application pour commander l’appareil vocalement afin d’effectuer différentes
opérations.
Appuyez sur S Voice depuis la liste des applications. Vous pouvez également appuyer deux fois sur la
touche Accueil.
• La disponibilité de cette application dépend de votre zone géographique ou de votre
opérateur.
• Cette application n'est pas prise en charge dans certaines langues.
Voici quelques exemples de commandes vocales :
• Ouvrir le lecteur MP3
• Lancer la calculatrice
• Vérifier le calendrier
Conseils pour améliorer la reconnaissance vocale :
• Parlez clairement.
• Parlez dans des endroits tranquilles.
• N’utilisez pas de langage injurieux ni d’argot.
• Évitez de parler avec un accent local.
Selon l’environnement où vous vous trouvez ou la manière dont vous parlez, il se peut que l’appareil
ne reconnaisse pas vos commandes ou qu’il exécute des commandes erronées.
Utiliser des commandes de réveil sur l'écran verrouillé
Lorsque l'écran est verrouillé, vous pouvez utiliser différentes fonctions avec des commandes de
réveil prédéfinies.
Pour activer cette fonction, depuis la liste des applications, appuyez sur Paramètres → Appareil →
Écran de verrouillage, puis faites glisser le curseur Déverrouillage de l'écran vers la droite.
Utilitaires
115
S Finder
Utilisez cette application pour chercher divers éléments sur l'appareil, notamment des e-mails, des
documents, des images, des musiques, des applications et bien plus encore.
Ouvrez le volet des raccourcis et appuyez sur pour exécuter S Finder.
Appuyez sur le champ de recherche, puis saisissez vos critères de recherche. Vous pouvez également
appuyer sur , et prononcer un mot-clé à rechercher.
Recherche Google
Utilisez cette application pour effectuer une recherche non seulement sur Internet, mais aussi dans
les applications et le contenu de l’appareil.
Appuyez sur Google depuis la liste des applications.
La disponibilité de cette application dépend de votre zone géographique ou de votre
opérateur.
Effectuer une recherche sur l’appareil
Appuyez sur le champ de recherche, puis saisissez un mot-clé. Vous pouvez également appuyer sur
, puis énoncer un mot-clé.
Étendre la recherche
Pour sélectionner les applications qui doivent faire l’objet d’une recherche, appuyez sur →
Paramètres → Recherche sur la tablette, puis cochez les éléments correspondants.
Google Now
Démarrez la recherche Google pour afficher les cartes Google Now qui vous indiquent, dès que vous
en avez besoin, la météo du jour, les infos trafic en temps réel, vos prochains rendez-vous, et bien
plus encore.
Rejoignez Google Now lorsque vous ouvrez pour la première fois la recherche Google. Pour modifier
les paramètres Google Now, appuyez sur → Paramètres, puis faites glisser le curseur Google Now
vers la gauche ou la droite.
Utilitaires
116
Recherche vocale
Utilisez cette application pour rechercher des pages Web oralement.
Appuyez sur Recherche vocale depuis la liste des applications.
La disponibilité de cette application dépend de votre zone géographique ou de votre
opérateur.
Quand l’instruction Parlez maintenant apparaît à l’écran, prononcez un mot-clé ou une expression.
Mes fichiers
Utilisez cette application pour accéder à tous les types de fichiers stockés dans l’appareil, comme les
images, les vidéos, la musique, les mémos vocaux.
Appuyez sur Mes fichiers depuis la liste des applications.
Visionner des fichiers
Les fichiers stockés sur l’appareil sont triés en fonction de critères. Dans le volet gauche de l’écran,
sélectionnez l’une des catégories suivantes :
• Chronologie : afficher les fichiers regroupés par date.
• Dossiers Favoris : afficher les raccourcis dans les dossiers.
• Dossiers : afficher les fichiers stockés dans la mémoire interne ou sur une carte mémoire et les
raccourcis aux serveurs FTP.
• Catégories : afficher les fichiers triés par type.
• Applications : afficher les fichiers stockés ou créés dans des applications particulières.
Sélectionnez une catégorie, puis un fichier ou un dossier pour l’ouvrir.
Utilitaires
117
Sélectionnez une catégorie, appuyez sur , puis utilisez l’une des options suivantes :
• Sélectionner : sélectionner des fichiers ou des dossiers.
• Trier par : trier les fichiers ou les dossiers.
• Ajouter aux dossiers Favoris : ajouter un raccourci vers le dossier dans Dossiers Favoris.
• Ajouter raccourci à l'écran d'accueil : ajouter un raccourci vers un fichier ou un dossier sur
l’écran d’accueil.
• Ajouter FTP : ajouter un raccourci vers le serveur FTP dans Dossiers.
• Rechercher des périphériques : rechercher les appareils sur lesquels le partage multimédia est
activé.
• Options d'affichage : modifier les options d'affichage.
Appuyez sur → Sélectionner, sélectionnez un fichier ou un dossier, puis utilisez l’une des fonctions
suivantes :
• : envoyer des fichiers à d’autres personnes ou de partager des fichiers.
• : supprimer les fichiers ou dossiers.
• : déplacer les fichiers ou dossiers dans un autre dossier.
• : copier les fichiers ou dossiers dans un autre dossier.
• → Renommer : renommer un fichier ou dossier.
• → Ajouter aux dossiers Favoris : ajouter un raccourci vers le dossier dans Dossiers Favoris.
• → Ajouter raccourci à l'écran d'accueil : ajouter un raccourci vers un fichier ou un dossier sur
l’écran d’accueil.
• → Zip : compresser des fichiers ou des dossiers pour créer un fichier Zip.
• → Détails : afficher les détails du fichier ou dossier.
Rechercher un fichier
Appuyez sur , puis saisissez un critère de recherche.
Afficher les informations de mémoire
Appuyez sur pour afficher les informations relatives à la mémoire de votre appareil et de la carte
mémoire.
Utilitaires
118
Modifier le mode d’affichage
Pour modifier le mode d’affichage, appuyez sur .
Créer des dossiers
Appuyez sur , entrez le nom du dossier, puis appuyez sur OK.
Ajouter des raccourcis à des dossiers
Ajoutez un raccourci vers les dossiers fréquemment utilisés dans Dossiers Favoris. Sélectionnez un
dossier et appuyez sur → Ajouter aux dossiers Favoris.
Ajouter des raccourcis vers le serveur FTP sur l'appareil
Ajouter un raccourci vers le serveur FTP dans Dossiers. Appuyez sur → Ajouter FTP, saisissez les
informations relatives au serveur FTP, puis appuyez sur OK.
Téléchargements
Utilisez cette application pour voir les fichiers téléchargés depuis des applications.
Appuyez sur Téléchargements depuis la liste des applications.
La disponibilité de cette application dépend de votre zone géographique ou de votre
opérateur.
Sélectionnez un fichier et ouvrez-le dans l'application correspondante.
Pour trier les fichiers en fonction de leur titre, appuyez sur → Par nom.
Pour trier les fichiers par date, appuyez sur → Par date.
Pour trier les fichiers par taille, appuyez sur → Par taille.
Pour effacer l’historique, appuyez sur → Effacer la liste.
Utilitaires
119
KNOX
Utilisez cette application pour séparer les données personnelles et professionnelles ainsi que pour
accéder aux applications d'entreprise de manière sécurisée depuis votre appareil.
Appuyez sur KNOX depuis la liste des applications.
Pour lancer KNOX, vous devez télécharger et installer l'application. Appuyez sur Installer et suivez les
instructions à l’écran.
• La disponibilité de cette application dépend de votre zone géographique ou de votre
opérateur.
• Pour protéger vos données, KNOX et les données associées sont supprimés lorsqu'un
mot de passe incorrect est saisi à plusieurs reprises.
120
Géolocalisation
Maps
Utilisez cette application pour marquer votre position, rechercher des lieux ou obtenir un itinéraire.
Appuyez sur Maps depuis la liste des applications.
La disponibilité de cette application dépend de votre zone géographique ou de votre
opérateur.
Rechercher des lieux
Recherchez des lieux en saisissant une adresse ou un mot-clé. Une fois que le lieu est trouvé,
sélectionnez-le pour visualiser les informations détaillées. Consultez l’aide pour obtenir plus
d'informations.
Obtenir un itinéraire
Appuyez sur pour définir les points de départ et d'arrivée, puis sélectionnez un moyen de
transport. L'appareil affiche les routes qui mènent au lieu de destination.
121
Paramètres
Accéder au menu des paramètres
Utilisez cette application pour configurer l’appareil, définir les paramètres d’une application et
ajouter des comptes.
Appuyez sur Paramètres depuis la liste des applications.
Connexions
Wi-Fi
Activez la fonction Wi-Fi pour permettre la connexion à un réseau Wi-Fi et accéder à Internet ou à
d’autres périphériques réseau.
Pour accéder à des options supplémentaires, appuyez sur .
• Paramètres avancés : personnalisez les paramètres Wi-Fi.
• Touche WPS : connectez-vous à un réseau Wi-Fi sécurisé à l'aide d'une touche WPS.
• Entrée PIN WPS : connectez-vous à un réseau Wi-Fi sécurisé à l'aide d'un code PIN WPS.
• Aide : accédez aux informations d'aide relatives au Wi-Fi.
Définition de la politique de mise en veille Wi-Fi
Dans l’écran Paramètres, appuyez sur Connexions → Wi-Fi → → Paramètres avancés → Wi-Fi
activé en mode veille.
Paramètres de notification réseau
L’appareil détecte les réseaux Wi-Fi ouverts et affiche une icône dans le volet des raccourcis lorsqu’un
réseau est disponible.
Dans l’écran Paramètres, appuyez sur Connexions → Wi-Fi → → Paramètres avancés et cochez la
case Notification réseau pour activer cette fonctionnalité.
Paramètres
122
Wi-Fi Direct
Wi-Fi Direct permet de relier directement deux appareils via un réseau Wi-Fi sans passer par un point
d'accès.
Sur l'écran Paramètres, appuyez sur Connexions → Wi-Fi → Wi-Fi Direct.
Bluetooth
Activez la fonction Bluetooth pour échanger des informations sur de courtes distances.
Pour accéder à des options supplémentaires, appuyez sur .
• Délai d'expiration de la visibilité : définissez une durée pendant laquelle l'appareil est visible.
• Fichiers reçus : affichez les fichiers reçus via la fonction Bluetooth.
• Aide : accédez aux informations d'aide sur la fonction Bluetooth.
Mode Hors-ligne
Désactivez toutes les fonctions sans fil de l’appareil. Vous pouvez uniquement utiliser les services
hors-réseau, c’est-à-dire les fonctions autres que les fonctions Wi-Fi et Bluetooth.
Utilisation des données
Effectuez le suivi du volume de données que vous utilisez.
• Cycle d'util. des données : saisissez la date de réinitialisation mensuelle afin de contrôler
l'utilisation de vos données.
Pour accéder à des options supplémentaires, appuyez sur .
• Synchroniser les données automatiquement : activez ou désactivez la synchronisation
automatique des applications. Vous pouvez choisir les informations devant être synchronisées
pour chaque compte dans Paramètres → Général → Comptes.
• Points d'accès mobiles : sélectionnez les points d'accès Wi-Fi afin d'éviter que les applications
s'exécutant en arrière-plan les utilisent.
Localisation
Modifiez les paramètres des informations de localisation.
• Mode : sélectionnez une méthode pour collecter vos données de localisation.
• Demandes de localisation récentes : affichez les applications qui utilisent vos informations de
localisation actuelles et la batterie qu'elles consomment.
Paramètres
123
• Services de localisation : affichez les services de localisation utilisés par votre appareil.
• Mes endroits : définissez les profils à utiliser pour des emplacements spécifiques lorsque vous
utilisez les fonctions GPS, Wi-Fi ou Bluetooth afin de déterminer votre position.
Plus de réseaux
Personnalisez les paramètres permettant de contrôler les connexions avec d’autres appareils ou
réseaux.
Impression
Configurez les paramètres pour les plug-ins d'imprimante installés sur l'appareil. Vous pouvez
rechercher des imprimantes disponibles ou en ajouter une manuellement pour imprimer des fichiers
via le Wi-Fi ou d'autres services cloud.
VPN
Paramétrez des réseaux privés virtuels (VPN) pour vous y connecter.
Ethernet
L'option Ethernet est disponible lorsqu'un adaptateur Ethernet est connecté à l'appareil. Utilisez
cette option pour activer la fonction Ethernet et configurer les paramètres réseau.
Appareils à proximité
• Nom de l'appareil : affichez le nom de l’appareil.
• Contenus partagés : paramétrez l'appareil pour partager son contenu avec d’autres appareils.
• Liste des appareils autorisés : affichez la liste des périphériques pouvant accéder à votre
appareil.
• Liste des appareils non autorisés : affichez la liste des périphériques ne pouvant pas accéder à
votre appareil.
• Destination de téléchargement : sélectionnez l’emplacement de la mémoire dans laquelle
enregistrer les fichiers multimédia téléchargés.
• Charger depuis autres appareils : paramétrez l'appareil pour autoriser le chargement à partir
d'autres appareils.
Screen Mirroring
Activez cette fonction pour partager votre écran avec d’autres personnes.
Paramètres
124
Appareil
Son
Modifiez les paramètres des différents sons de l’appareil.
• Volume : réglez le niveau sonore de la musique et des vidéos, des sons système et des
notifications.
• Intensité des vibrations : réglez l’intensité des vibrations émises par l’appareil lorsque vous
appuyez sur l’écran.
• Son de notif. par défaut : sélectionnez une sonnerie pour les événements, tels que les messages
entrants.
• Sélections audibles : paramétrez l’appareil pour qu’il émette un son lorsque vous sélectionnez
une application ou une option sur l’écran tactile.
• Son verrouillage écran : paramétrez l’appareil pour qu’il émette un son lorsque vous verrouillez
ou déverrouillez l’écran tactile.
• Retour tactile : paramétrez l’appareil pour qu’il vibre lorsque vous appuyez sur une touche.
• Applications Samsung : modifiez les paramètres de notification pour chaque application.
• Son touches : paramétrez l’appareil pour qu’il émette un son lorsque vous appuyez sur une
touche.
• Vibration touches : paramétrez l’appareil pour qu’il vibre lorsque vous appuyez sur une touche.
• Sortie audio : sélectionnez le format de sortie audio à utiliser lorsque vous connectez l’appareil
à des périphériques HDMI. Certains appareils peuvent ne pas prendre en charge les paramètres
de son Surround.
• Adapt Sound : personnalisez le son pour l'oreille que vous utilisez le plus pour écouter de la
musique.
Affichage
Modifiez les paramètres d’affichage.
• Luminosité : réglez la luminosité de l'écran.
• Mise en veille de l'écran : définissez le délai à l'issue duquel l'écran doit s'éteindre
automatiquement.
• Durée de l'éclairage des touches : définissez la durée du rétroéclairage de la touche tactile.
• Mode d'écran :
– Adapter l'affichage : utilisez ce mode pour optimiser l'affichage en fonction des paramètres
d'affichage.
– Dynamique : utilisez ce mode pour rendre les couleurs plus vives.
Paramètres
125
– Standard : utilisez ce mode pour obtenir un environnement normal.
– Vidéo : utilisez ce mode pour obtenir un environnement sombre (une chambre obscure, par
exemple).
• Mode lecture : sélectionnez quelles applications utiliseront le mode lecture. En mode lecture,
l'appareil vous protège de la fatigue oculaire lorsque vous lisez la nuit.
• Écran de veille : paramétrez l’appareil pour déclencher l'ouverture d'un économiseur d'écran
lorsqu’il est connecté à une station d’accueil ou de recharge.
• Affich. pourcentage batterie : paramétrez l'appareil pour qu'il affiche l'autonomie restante de la
batterie.
• Modifier après capture d'écran : paramétrez l’appareil pour modifier la capture d'écran après
l'avoir créée.
Fenêtres multiples
Activez la fonction Multi-fenêtres pour exécuter plusieurs applications en même temps sur l'écran.
• Ouvrir en vue Multi-fenêtres : paramétrez l'appareil pour pouvoir activer la fonction Multifenêtres
lorsque vous ouvrez des fichiers depuis Mes fichiers ou Vidéo.
Écran de verrouillage
Modifiez les paramètres de l’écran de verrouillage.
• Déverrouillage de l'écran : activez la fonction de déverrouillage par mot de passe, modèle ou
code PIN de l'écran. Les options ci-dessous peuvent varier selon que la fonction de verrouillage
de l'écran est activée ou non.
• Options du widget Horloge : configurez les paramètres de l'horloge.
– Taille de l'horloge : modifiez la taille de l'horloge.
– Afficher la date : paramétrez l'appareil pour qu'il affiche la date et l'heure.
• Raccourcis : paramétrez l'appareil pour pouvoir afficher et modifier les raccourcis des
applications sur l'écran verrouillé.
La disponibilité de cette fonction dépend de votre zone géographique ou de votre
opérateur.
• Message personnel : paramétrez l'appareil pour qu'il affiche un message personnel sur l'écran
verrouillé.
– Modifier un message personnel: modifiez le message personnel.
• Infos propriétaire : saisissez les informations que vous souhaitez voir apparaître avec l'horloge.
• Effet de déverrouillage : sélectionnez un effet lorsque vous déverrouillez l'écran.
• Commande de réveil : paramétrez l'appareil pour qu'il reconnaisse votre commande de réveil
même lorsque l'écran est verrouillé.
Paramètres
126
• Texte d'aide : paramétrez l'appareil pour qu'il affiche un texte d'aide à l'utilisation sur l'écran
verrouillé.
Fond d'écran
Modifier les paramètres de fond d’écran.
• Écran d'accueil : sélectionnez l'image d'arrière-plan de l'écran d'accueil.
• Écran de verrouillage : sélectionnez l’image d’arrière-plan de l’écran de verrouillage.
• Écrans d'accueil et de verrouillage : sélectionnez l'image d'arrière-plan de l'écran d'accueil et
de l'écran de verrouillage.
Police
Modifiez les paramètres de la police.
• Police : modifiez le type de police du texte affiché à l’écran.
• Taille de police : modifiez la taille de la police.
Volet des raccourcis
Personnalisez les éléments qui apparaissent dans le volet des raccourcis.
• Luminosité et volume : paramétrez l'appareil pour qu'il affiche les barres de réglage de la
luminosité et du volume dans le volet des raccourcis.
• Applications recommandées : paramétrez l'appareil pour afficher la liste des applications
recommandées dans le volet des raccourcis en fonction de vos actions, par exemple la
connexion d’un casque/écouteur à l’appareil.
• Définir les options de configuration rapide : réorganisez les touches de paramétrage rapide
dans le volet des raccourcis.
Accessibilité
Les services d’accessibilité sont des fonctions spéciales destinées aux personnes présentant des
handicaps physiques. Accédez aux paramètres suivants et modifiez-les pour améliorer l’accessibilité
de l’appareil.
• Rotation auto. écran : paramétrez l’interface pour qu’elle pivote automatiquement en même
temps que l’appareil.
• Mise en veille de l'écran : définissez le délai à l'issue duquel l'écran doit s'éteindre
automatiquement.
• Énoncer mots de passe : paramétrez l’appareil pour que les mots de passe que vous saisissez
sur les sites Web à l’aide de la fonction TalkBack soient énoncés à voix haute.
Paramètres
127
• Mode Easy touch : paramétrez l'appareil pour pouvoir contrôler les notifications en appuyant
sur la touche au lieu de la faire glisser.
• Afficher le raccourci : ajoutez un raccourci vers le menu Accessibilité ou TalkBack dans le menu
rapide qui apparaît lorsque vous maintenez la touche Marche/Arrêt enfoncée.
• Gérer l'accessibilité : exportez ou importez les paramètres d'accessibilité afin de les partager
avec d'autres appareils.
– Exporter : exportez les paramètres d'accessibilité actuels sous forme de fichier.
– Mise à jour : importez les paramètres d'accessibilité actuels sous forme de fichier.
– Partager via : envoyez le fichier des paramètres d’accessibilité à d’autres personnes.
• TalkBack : activez le service TalkBack qui propose des commentaires parlés.
• Taille de police : modifiez la taille de la police.
• Agrandissement : paramétrez l’appareil pour pouvoir effectuer un zoom avant ou arrière à l’aide
des doigts.
• Couleurs négatives : inversez les couleurs d’affichage pour une meilleure visibilité.
• Réglage des couleurs : réglez la palette de couleurs à l'écran si l'appareil détermine que vous
êtes daltonien ou que vous avez des difficultés à lire le contenu.
• Rappel de notification : paramétrez l'appareil pour qu'il vous alerte lorsque vous avez manqué
des notifications et définissez l'intervalle de répétition de l'alerte.
• Raccourci d'accessibilité : paramétrez l'appareil pour pouvoir activer TalkBack lorsque vous
maintenez la touche Marche/Arrêt enfoncée et appuyez sur l'écran avec deux doigts.
• Options synthèse vocale :
– Moteur TTS favori : sélectionnez un moteur de synthèse vocale. Pour modifier les
paramètres des moteurs de synthèse vocale, appuyez sur .
– Vitesse d'élocution : sélectionnez la vitesse de diction de la synthèse vocale.
– Écouter un exemple : écoutez le texte prononcé à titre d'exemple.
– État de la langue par défaut : affichez le statut de la langue par défaut pour la fonction de
synthèse vocale.
• Balance audio : réglez la balance audio lors de l’utilisation d’un casque à double oreillette.
• Audio mono : activez le réglage audio monophonique lorsque vous utilisez une seule oreillette.
• Désactiver tous les sons : désactivez tous les sons de l'appareil.
• Notification par flash : configurez le flash de manière à ce qu’il clignote en cas de nouveaux
messages ou de notifications.
• Sous-titres Google (CC) : paramétrez l’appareil pour qu’il affiche des sous-titres sur les contenus
pris en charge par Google et pour modifier les paramètres des sous-titres.
• Sous-titres Samsung (CC) : paramétrez l’appareil pour qu’il affiche des sous-titres sur les
contenus pris en charge par Samsung et pour modifier les paramètres des sous-titres.
Paramètres
128
• Assistant menu : paramétrez l'appareil pour qu'il affiche le raccourci d'aide qui vous permet
d'accéder aux fonctions prises en charge par les touches ou fonctions externes dans le volet des
raccourcis. Vous pouvez également modifier le menu de l’icône de raccourci.
– Main dominante : sélectionnez la main gauche ou droite pour une utilisation facile du
menu.
– Modif. : personnalisez les éléments qui apparaissent dans le menu.
• Durée de l'appui prolongé : définissez le délai de reconnaissance lorsque vous maintenez le
doigt appuyé sur l'écran.
• Contrôle par interaction : activez le mode Contrôle par interaction afin d'éviter que l'appareil
réagisse aux saisies malencontreuses qui pourraient se produire dans une application.
Mode Blocage
Sélectionnez les notifications qui seront bloquées et la durée pendant laquelle elles seront bloquées.
Contrôle
Langue et saisie
Modifiez les paramètres de la saisie de texte. La disponibilité de certaines options dépend de la
langue sélectionnée.
Langue
Sélectionnez la langue d’affichage des menus et des applications.
Par défaut
Sélectionnez le type de clavier à utiliser par défaut pour la saisie de texte.
Clavier Samsung
Pour modifier les paramètres du clavier Samsung, appuyez sur .
La disponibilité des options dépend de votre zone géographique ou de votre opérateur.
• Sélectionner langue de saisie : sélectionnez les langues pour la saisie de texte.
• Texte intuitif : activez le mode de saisie intuitive pour que des suggestions de mots s’affichent
au fur et à mesure de votre saisie. Vous pouvez également personnaliser les paramètres de la
saisie intuitive.
Paramètres
129
• Remplacement automatique : paramétrez l'appareil pour qu'il corrige les mots erronés et
incomplets en appuyant sur la barre d'espace ou un signe de ponctuation.
• Majuscules auto. : paramétrez l’appareil pour qu'il mette automatiquement en majuscules
la première lettre qui suit un signe de ponctuation final (point, point d’interrogation et point
d’exclamation).
• Espace auto : paramétrez l'appareil pour qu'il insère automatiquement un espace entre les
mots.
• Ponctuation automatique : paramétrez l’appareil pour qu'il insère un point lorsque vous
appuyez deux fois sur la barre d’espace.
• Aucun(e) : paramétrez l'appareil pour désactiver la fonction de balayage du clavier.
• Saisie en continu : paramétrez l'appareil pour qu'il autorise la saisie continue qui consiste à faire
glisser le doigt d'une lettre à l'autre sur le clavier, sans le soulever.
• Contrôle du curseur : activez la fonction de navigation intelligente sur le clavier pour déplacer
le curseur en faisant défiler le clavier.
• Son : paramétrez l’appareil pour qu’il émette un son lorsque vous appuyez sur une touche.
• Vibreur : paramétrez l’appareil pour qu’il vibre lorsque vous appuyez sur une touche.
• Aperçu du caractère : paramétrez l’appareil pour qu'il affiche une image agrandie de chaque
caractère saisi.
• Aide : accédez aux informations d'aide relative à l'utilisation du clavier Samsung.
• Réinitialiser paramètres : réinitialisez les paramètres du clavier Samsung.
Saisie vocale Google
Pour modifier les paramètres de saisie vocale, appuyez sur .
• Sélect. langues saisie : sélectionnez les langues utilisées pour la saisie de texte.
• Bloquer termes choquants : paramétrez l'appareil pour l'empêcher de reconnaître les mots
injurieux lors de la saisie vocale.
• Reconnaissance vocale hors connexion : téléchargez et installez les données linguistiques
pour la saisie vocale hors ligne.
Recherche vocale
• Langue : sélectionnez la langue de la reconnaissance vocale.
• Sortie vocale : paramétrez l’appareil pour qu’il vous prévienne de l’action en cours à l’aide d’un
retour vocal.
• Bloquer termes choquants : masquez les mots injurieux dans les résultats de la recherche
vocale.
• Reconnaissance vocale hors connexion : téléchargez et installez les données linguistiques
pour la saisie vocale hors ligne.
Paramètres
130
• Casque Bluetooth : paramétrez l’appareil pour qu'il autorise la recherche vocale lorsqu’un
casque Bluetooth est connecté.
Options synthèse vocale
• Moteur TTS favori : sélectionnez un moteur de synthèse vocale. Pour modifier les paramètres
des moteurs de synthèse vocale, appuyez sur .
• Vitesse d'élocution : sélectionnez la vitesse de diction de la synthèse vocale.
• Écouter un exemple : écoutez le texte prononcé à titre d'exemple.
• État de la langue par défaut : affichez le statut de la langue par défaut pour la fonction de
synthèse vocale.
Fenêtres contextuelles
Activez la fonction Mouseover pour utiliser diverses fonctions lorsque le pointeur de la souris ou du
pavé tactile connecté à votre appareil se déplace à l'écran.
• Aperçu & intitulés icônes : paramétrez l’appareil pour qu’il affiche un aperçu du contenu ou des
informations contextuelles lorsque vous pointez un élément du doigt.
• Défilement de la liste : paramétrez l'appareil pour pouvoir parcourir les listes en déplaçant le
pointeur sur un bord de l'écran.
Vitesse du curseur
Réglez la vitesse du curseur de la souris ou du pavé tactile connecté à l’appareil.
Contrôle vocal
Paramétrez l'appareil pour reconnaître les commandes vocales. Vous pouvez sélectionner les
fonctions à contrôler avec des commandes vocales.
Mouvements
Activez la fonction de détection des mouvements et modifiez les paramètres permettant de
contrôler la détection de mouvement de votre appareil.
• Zoom : paramétrez l’appareil pour pouvoir effectuer des zooms avant ou arrière lorsque vous
regardez des photos dans la Galerie ou des pages Web, en maintenant deux doigts sur deux
points de l’écran, puis en inclinant l’appareil vers l’arrière et l’avant.
• Parcourir une image : paramétrez l’appareil pour pouvoir faire défiler une image lorsqu’elle est
agrandie en bougeant l’appareil dans n’importe quel sens.
Paramètres
131
Mouvement de paume
Activez la fonction des mouvements de la main pour contrôler l'appareil en touchant l'écran.
• Capture d'écran : paramétrez l’appareil pour pouvoir effectuer une capture d’écran en balayant
l’écran avec le côté de la main vers la gauche ou vers la droite.
• Muet/pause : paramétrez l’appareil pour pouvoir interrompre la lecture d’un fichier multimédia
en effleurant l’écran de la paume de la main.
Smart Screen
• Smart Stay : paramétrez l’appareil pour empêcher le rétroéclairage de se désactiver lorsque
vous consultez l’écran.
• Smart Rotation : paramétrez l’interface pour qu’elle pivote selon l’orientation de votre visage.
• Smart Pause : paramétrez l’appareil pour pouvoir mettre la lecture vidéo en pause lorsque vous
détournez les yeux de l’écran.
Général
Comptes
Ajoutez des comptes de messagerie électronique ou de réseaux sociaux.
Cloud
Modifiez les paramètres de synchronisation des données et des fichiers avec votre compte Samsung
ou le stockage Cloud Dropbox.
Paramètres
132
Sauvegarder et réinitialiser
Modifiez les paramètres de gestion des paramètres et des données.
• Sauvegarder mes données : paramétrez l'appareil pour qu'il sauvegarde les paramètres et les
données d'application sur le serveur Google.
• Compte de sauvegarde : configurez ou modifiez votre compte de sauvegarde Google.
• Restauration auto. : paramétrez l'appareil pour qu'il restaure les paramètres et les données
d'application lorsque les applications sont réinstallées.
• Rétablir param. par défaut : restaurez les valeurs par défaut de l’appareil et supprimez toutes
vos données.
Date et heure
Accédez aux paramètres suivants et modifiez-les afin de contrôler l’affichage de l’heure et de la date.
Si la batterie est entièrement déchargée ou si vous la retirez de l’appareil, la date et l’heure
seront réinitialisées.
• Définir la date : réglez la date manuellement.
• Définir l'heure : réglez l'heure manuellement.
• Sélectionner le fuseau horaire : réglez le fuseau horaire de votre domicile.
• Format 24 heures : affichez l'heure au format 24 heures.
• Format de date : sélectionnez un format de date.
Accessoire
Modifiez les paramètres des accessoires.
• Son station d'accueil : paramétrez l’appareil pour qu’il émette un son lorsque vous le connectez
à une station d'accueil ou l'en déconnectez.
• Mode de sortie audio : paramétrez l’appareil pour qu'il utilise le haut-parleur de la station
d’accueil lorsqu’il est connecté à une station d’accueil.
• Sortie audio : sélectionnez le format de sortie audio à utiliser lorsque vous connectez l’appareil
à des périphériques HDMI. Certains appareils peuvent ne pas prendre en charge les paramètres
de son Surround.
Paramètres
133
Gestionnaire d'applications
Affichez et gérez les applications installées sur votre appareil.
Applications par défaut
• Accueil : sélectionnez un mode d'écran d'accueil par défaut.
Utilisateurs
Configurez et gérez les paramètres personnalisés des profils utilisateur.
Batterie
Affichez la quantité d’énergie consommée par votre appareil.
Mode Éco. d'énergie
Activez le mode Économie d’énergie et modifiez les paramètres.
• Éco. énergie processeur : paramétrez l'appareil pour limiter l'utilisation de certaines ressources
système.
• Éco. d'énergie écran : paramétrez l’appareil pour qu'il diminue la luminosité de l’écran.
• Désactiver le retour tactile : paramétrez l'appareil pour qu'il désactive les vibrations lorsque
vous appuyez sur une touche.
• En savoir plus : découvrez comment réduire la consommation de la batterie.
Stockage
Affichez les informations relatives à la quantité de stockage disponible sur l’appareil et la carte
mémoire, ou formatez une carte mémoire.
Le formatage d’une carte mémoire supprime définitivement toutes les données qui y sont
stockées.
La mémoire interne de votre appareil a une capacité réelle disponible inférieure à la capacité
indiquée, car elle est en partie occupée par le système d’exploitation et les applications
installées par défaut. La capacité disponible peut changer lorsque vous effectuez une mise à
jour de l'appareil.
Paramètres
134
Sécurité
Modifiez les paramètres de sécurité de l’appareil.
• Crypter l'appareil : définissez un mot de passe pour crypter les données enregistrées sur
l’appareil. Vous devez saisir ce mot de passe à chaque fois que vous allumez l’appareil.
Chargez la batterie avant d’activer ce paramètre, car il peut arriver que le cryptage des
données dure plus d’une heure.
• Crypter la carte SD externe : paramétrez l'appareil pour crypter les fichiers contenus sur une
carte mémoire.
Votre appareil ne sera pas en mesure de lire les fichiers cryptés si vous le réinitialisez alors
que ces paramètres sont activés. Désactivez ces paramètres avant de réinitialiser votre
appareil.
• Contrôle à distance : paramétrez l'appareil pour qu'il autorise le contrôle à distance de votre
appareil perdu ou volé via Internet. Pour utiliser cette fonctionnalité, vous devez vous connecter
à votre compte Samsung.
– Enregistrement du compte : ajoutez ou affichez vos comptes Samsung et Google.
– Utiliser réseaux sans fil : paramétrez l'appareil pour qu'il autorise la collecte de données
de localisation ou détermine la position de votre appareil perdu ou volé via une connexion
Wi-Fi.
• Accéder à la page Traçage du mobile : accédez au site Web permettant de localiser votre
mobile (findmymobile.samsung.com). Ce site vous permet de repérer et de contrôler un appareil
égaré ou dérobé.
• Rendre les mots de passe visibles : paramétrez l’appareil pour qu’il affiche votre mot de passe à
mesure que vous le saisissez.
• Admin. de périphérique : affichez les administrateurs de votre appareil. Vous pouvez autoriser
les administrateurs de l’appareil à appliquer de nouvelles règles à celui-ci.
• Sources inconnues : installez des applications à partir de n'importe quelle source. Dans le cas
contraire, vous pourrez télécharger des applications uniquement depuis Play Store.
• Vérifier les applications : paramétrez l'appareil pour permettre à Google de vérifier si les
applications présentent un danger avant de les installer.
• Niveau de sécurité : définissez le niveau de sécurité de l'appareil dans le cadre de la politique de
sécurité.
Paramètres
135
• MàJ de politique sécurité :
– Mises à jour automatiques : paramétrez l'appareil pour qu'il vérifie et télécharge
automatiquement les mises à jour de sécurité.
– Rechercher les mises à jour : recherchez les mises à jour de sécurité.
• Envoyer des rapports de sécurité : paramétrez l’appareil pour qu’il envoie automatiquement
les rapports de sécurité lorsqu’il est connecté à un réseau Wi-Fi.
• Type de stockage : définissez un type de stockage pour les fichiers d'identification.
• Infos d'ident. sécurisées : recourez à des certificats et des identifiants pour sécuriser l’utilisation
des diverses applications.
• Installer depuis stock. périph. : installez des certificats cryptés depuis l'emplacement ou le
service dans lequel ils sont stockés.
• Effacer infos identification : effacez les identifiants de sécurité contenus dans l’appareil et
réinitialisez le mot de passe.
À propos de l'appareil
Accédez aux informations sur l'appareil, modifiez le nom de l'appareil ou mettez à jour le logiciel de
l'appareil.
Paramètres Google
Utilisez cette application pour configurer les paramètres de certaines fonctions fournies par Google.
Appuyez sur Paramètres Google depuis la liste des applications.
136
Dépannage
Avant de contacter un centre de service après-vente Samsung, veuillez essayer de mettre en œuvre
les solutions suivantes. Il est possible que certaines situations ne s’appliquent pas à votre appareil.
Lorsque vous allumez ou utilisez votre appareil, un message vous invite à
effectuer l’une des manipulations suivantes :
• Mot de passe : lorsque la fonction de verrouillage est activée, vous devez saisir le mot de passe
que vous avez défini pour l’appareil.
• Code PIN : lorsque vous utilisez l’appareil pour la première fois ou lorsque la demande de code
PIN est activée, vous devez saisir le code PIN fourni avec la carte SIM ou USIM. Vous pouvez
désactiver cette fonction à l’aide du menu de verrouillage de la carte SIM.
• Code PUK : si vous saisissez un code PIN incorrect à plusieurs reprises, la carte SIM ou USIM est
bloquée. Vous devez alors saisir le code PUK fourni par votre opérateur.
• Code PIN2 : lorsque vous accédez à un menu nécessitant le code PIN2, vous devez saisir le code
PIN2 fourni avec la carte SIM ou USIM. Pour en savoir plus, contactez votre opérateur.
Votre appareil affiche des messages d’erreur de réseau et de service
• Lorsque vous vous trouvez dans une zone de mauvaise réception, vous risquez de perdre
la connexion au réseau. Déplacez-vous et réessayez. Lorsque vous vous déplacez, plusieurs
messages d’erreur peuvent apparaître.
• Certaines options ne sont pas accessibles sans abonnement. Pour en savoir plus, contactez votre
opérateur.
Votre appareil ne s’allume pas
• Lorsque la batterie est entièrement déchargée, il n’est pas possible d’allumer l’appareil.
Rechargez complètement la batterie avant d’allumer l’appareil.
• Il est possible que la batterie ne soit pas correctement installée. Réinsérez la batterie.
• Essuyez les deux contacts dorés et réinsérez la batterie.
Dépannage
137
Mauvaise réaction ou lenteur de l’écran tactile
• Si vous fixez sur l’écran tactile un cache de protection ou tout autre accessoire en option, il est
possible que l’écran ne fonctionne pas correctement.
• Si vous portez des gants, si vos mains ne sont pas parfaitement propres, ou si vous appuyez
sur l’écran avec un objet pointu ou vos ongles, l’écran tactile risque de présenter des
dysfonctionnements.
• L’humidité ou le contact avec l’eau peut provoquer des dysfonctionnements de l’écran tactile.
• Redémarrez votre appareil afin de mettre fin à d’éventuels dysfonctionnements logiciels
temporaires.
• Assurez-vous que vous disposez bien de la dernière version logicielle de votre appareil.
• Si l’écran tactile est endommagé ou rayé, contactez un centre de service après-vente Samsung.
Votre appareil se bloque ou est sujet à des erreurs fatales
Si votre appareil ne répond plus ou se bloque, vous devrez éventuellement fermer les applications
ou réinsérer la batterie et réinitialiser votre appareil pour qu’il retrouve un fonctionnement correct. Si
votre appareil se bloque et ne répond plus, maintenez la touche Marche/Arrêt appuyée pendant plus
de 7 secondes afin de redémarrer.
Si vous ne parvenez pas à résoudre le problème à la suite de ces manipulations, procédez à la
réinitialisation des paramètres par défaut. Depuis la liste des applications, appuyez sur Paramètres
→ Général → Sauvegarder et réinitialiser → Rétablir param. par défaut → Réinitialiser le
périphérique → Supprimer tout. Avant de rétablir les paramètres par défaut de votre appareil,
n’oubliez pas d’effectuer des copies de sauvegarde de toutes les données importantes qui y sont
stockées.
Si le problème persiste, contactez un centre de service après-vente Samsung.
Impossible de passer des appels
• Assurez-vous d’être connecté au réseau cellulaire approprié.
• Vérifiez que vous n’avez pas activé la fonction de restriction d’appel pour le numéro de
téléphone que vous composez.
• Vérifiez que vous n’avez pas activé la fonction de restriction d’appel pour le numéro de
téléphone de l’appel entrant.
Vos interlocuteurs ne vous entendent pas
• Vérifiez que le microphone intégré n’est pas recouvert.
• Vérifiez que le microphone est placé suffisamment près de votre bouche.
• Si vous utilisez un kit piéton ou un casque, vérifiez qu’il est correctement branché.
Dépannage
138
Vous percevez un écho lors des appels
Réglez le volume en appuyant sur la touche de volume ou déplacez-vous.
Déconnexions fréquentes du réseau cellulaire ou d’Internet, ou mauvaise
qualité audio
• Assurez-vous que rien n’entrave l’antenne intégrée à l’appareil.
• Lorsque vous vous trouvez dans une zone de mauvaise réception, vous risquez de perdre la
connexion au réseau. Vos problèmes de connectivité peuvent être dus à une panne au niveau
de votre opérateur. Déplacez-vous et réessayez.
• Si vous utilisez votre appareil tout en vous déplaçant, il est possible que les services de réseau
sans fil soient désactivés en raison de problèmes sur le réseau de votre opérateur.
L’icône de la batterie est vide
Le niveau de charge de la batterie est faible. Rechargez ou remplacez la batterie.
La batterie ne se charge pas correctement (pour les chargeurs
homologués Samsung)
• Assurez-vous que le chargeur est correctement branché.
• Si les bornes de la batterie sont sales, la batterie peut ne pas se recharger correctement ou
l’appareil risque de s’éteindre. Essuyez les deux contacts dorés et réessayez de recharger la
batterie.
• Sur certains appareils, la batterie ne peut pas être remplacée par l’utilisateur. Pour remplacer ce
type de batterie, contactez un centre de service après-vente Samsung.
La batterie se décharge de plus en plus rapidement
• Lorsque la batterie est exposée à des températures extrêmes, la charge utile peut être réduite.
• La consommation de la batterie augmente lorsque vous utilisez certaines fonctionnalités,
comme les SMS et MMS, ou certaines applications, comme les jeux ou Internet.
• La batterie est un consommable et sa charge utile diminue avec le temps.
Dépannage
139
L’appareil est chaud au toucher
Lorsque vous utilisez plusieurs applications simultanément ou sur une période prolongée, l’appareil
peut chauffer. Ce phénomène est normal et n’affecte ni la durée de vie, ni les performances de
l’appareil.
Messages d’erreur à l’activation de l’appareil photo
Pour utiliser l’appareil photo, votre appareil doit disposer de suffisamment de mémoire et sa batterie
être suffisamment chargée. Si vous obtenez des messages d’erreur lors de l’activation de l’appareil
photo, tentez les manipulations suivantes :
• Chargez la batterie ou remplacez-la par une autre entièrement chargée.
• Libérez de la mémoire en transférant des fichiers sur un ordinateur ou en supprimant des
éléments de l’appareil.
• Redémarrez l’appareil. Si les problèmes persistent, contactez un centre de service après-vente
Samsung.
Qualité des photos inférieure par rapport à l’aperçu
• La qualité de vos photos peut varier selon l’environnement et les techniques photographiques
utilisées.
• Si vous prenez des photos avec une luminosité insuffisante, de nuit ou en intérieur, l’image
risque d’être floue.
Messages d’erreur à l’ouverture de fichiers multimédia
Si vous obtenez des messages d’erreur lors de l’ouverture de fichiers multimédia ou si vous ne
parvenez pas à les ouvrir, tentez les manipulations suivantes :
• Libérez de la mémoire en transférant des fichiers sur un ordinateur ou en supprimant des
éléments de l’appareil.
• Assurez-vous que le fichier audio n’est pas protégé par des droits DRM (Gestion des droits
d’auteur). Si c’est le cas, pour lire le fichier, vous devez posséder une licence ou une clé.
• Vérifiez que votre appareil prend en charge le type du fichier audio.
Dépannage
140
• Votre appareil est compatible avec les photos et vidéos capturées avec ce même appareil. Les
photos et vidéos capturées avec d’autres appareils peuvent ne pas s’afficher correctement.
• Votre appareil prend en charge les fichiers multimédia autorisés par votre opérateur ainsi que
les opérateur, des autres services réseaux. Il est possible que certains contenus circulant sur
Internet, comme des sonneries, vidéos ou fonds d’écran, ne fonctionnent pas correctement.
Impossible de localiser un autre appareil Bluetooth
• Vérifiez que la fonction sans fil Bluetooth est activée sur votre appareil.
• Vérifiez que la fonction sans fil Bluetooth est également activée sur l’appareil auquel vous tentez
de vous connecter.
• Vérifiez que les deux appareils Bluetooth se trouvent bien à l’intérieur du rayon d’action
Bluetooth (10 m maximum).
Si les conseils ci-dessus ne résolvent pas le problème, contactez un centre de service après-vente
Samsung.
Problème de connexion avec un ordinateur
• Assurez-vous que le câble USB utilisé est compatible avec votre appareil.
• Vérifiez que le pilote nécessaire est bien installé sur votre ordinateur et qu’il est à jour.
• Si vous utilisez Windows XP, vérifiez que vous possédez la version Windows XP Service Pack 3 ou
version ultérieure sur votre ordinateur.
• Vérifiez que vous disposez bien de Samsung Kies ou Windows Media Player 10 ou une version
ultérieure sur votre ordinateur.
Votre appareil ne parvient pas à détecter votre position
À certains endroits, comme à l’intérieur d’un bâtiment, les signaux GPS peuvent être faibles. Si cela se
produit, configurez votre appareil pour l’utilisation d’un réseau Wi-Fi ou mobile afin de trouver votre
position.
Dépannage
141
Les données stockées sur l’appareil ont été perdues
Effectuez toujours des copies des données importantes stockées sur votre appareil. Dans le cas
contraire, vous ne pourriez pas récupérer vos données corrompues ou perdues. Samsung ne peut
être tenu responsable de la perte des données stockées sur votre appareil.
Un petit espace est apparu sur le bord externe du boîtier de l’appareil
• Cet espace est une caractéristique de fabrication, et il est possible d’observer un jeu ou une
vibration des pièces.
• Au fil du temps, la friction entre les pièces peut entraîner l’élargissement de cet espace.
Le contenu de ce mode d'emploi peut différer par rapport à votre appareil en fonction de votre
zone géographique, votre opérateur ou votre version logicielle, et faire l’objet de modifications sans
préavis.
www.samsung.com French. 07/2014. Rev.1.1
A847
TÉLÉPHONE MOBILE
QUATRE BANDES
Guide d’utilisateur
Veuillez lire ce guide avant d’utiliser votre téléphone
et conservez-le à titre de référence.
SGH_A847D_GU_FR_20101208_D5
Propriété intellectuelle
Tous les éléments de propriété intellectuelle définis ci-dessous, qui sont la possession ou la
propriété de SAMSUNG ou de ses fournisseurs, et qui ont trait au téléphone SAMSUNG,
incluant, de façon non limitative, les accessoires, les pièces ou les logiciels s’y rattachant (le
« système téléphonique »), sont des propriétés exclusives de SAMSUNG et sont protégés
conformément aux lois fédérales et provinciales, et aux dispositions de traités
internationaux. Les éléments de propriété intellectuelle comprennent, de façon non
limitative, les inventions (brevetables ou non brevetables), les brevets, les secrets
commerciaux, les droits d’auteur, les logiciels, les programmes informatiques et les
documents qui s’y rattachent, ainsi que toute autre oeuvre de création. En aucun cas, vous
ne pouvez enfreindre ou autrement violer les droits garantis par la propriété intellectuelle.
De plus, vous acceptez de ne pas modifier, préparer d’oeuvres dérivées, rétroconcevoir,
décompiler, désassembler ou essayer de quelque manière que ce soit de créer un code
source à partir des logiciels, ni même de faire toute tentative dans ce sens. Aucun droit ni
titre de propriété à l’égard des éléments de propriété intellectuelle ne vous est cédé par la
présente. Tous les droits applicables de propriété intellectuelle demeureront la propriété de
SAMSUNG et de ses fournisseurs.
Droits d’auteur
© 2010 Samsung Electronics Canada, Inc. SAMSUNG est une marque déposée de
SAMSUNG Electronics Co., Ltd. et de ses sociétés affiliées.
Accordé sous licence par Qualcomm Incorporated sous un ou plusieurs des brevets
suivants : brevets américains 4, 901, 307; 5, 056, 109; 5, 099, 204; 5, 101, 501; 5, 103, 459;
5, 107, 225; 5, 109, 390.
OpenwaveMD est une marque déposée de Openwave, Inc.
RSAMD est une marque déposée de RSA Security, Inc.
Post-itMD est une marque déposée de Minnesota Mining and Manufacturing Company,
connue sous le nom 3M CORPORATION DELAWARE.
La lettre de marque et les logos BluetoothMD sont des propriétés de Bluetooth SIG Inc. et
ces marques sont utilisées sous licence par Samsung Electronics Canada inc. Toutes les
autres marques de commerce et tous les autres noms commerciaux appartiennent à leurs
propriétaires respectifs.
Dénégation de garantie; exclusion de responsabilité
Sauf tel que stipulé dans la garantie expresse figurant à la page de garantie accompagnant
le produit, l'acheteur prend le produit « tel quel », et Samsung ne donne aucune garantie
expresse ou tacite que ce soit à l'égard du produit, y compris notamment à propos de la
qualité marchande du produit ou de sa convenance à un usage particulier; de la
conception, de l'état ou de la qualité du produit; du rendement du produit; de la fabrication
du produit ou des composantes qu'il renferme; ou de la conformité du produit aux
exigences de tout règlement, toute loi, toute spécification ou tout contrat. Rien, dans le
guide d'utilisation, ne pourra être interprété comme créant une garantie expresse ou tacite
de quelque nature que ce soit par rapport au produit. De plus, Samsung ne pourra être
tenue responsable de quelque dommage que ce soit pouvant résulter de l'achat ou de
l'utilisation du produit, ou du non-respect de la garantie expresse, y compris les dommages
indirects, spéciaux ou accessoires, ou encore la perte de profits ou d'avantages prévus.
Confidentialité
Les lois sur la vie privée et le droit d’auteur du Canada régissent la divulgation, la
reproduction et la distribution des données, des médias et d’autres contenus, y compris la
musique et les vidéos. Certaines activités, notamment le téléchargement ou le transfert par
quelque moyen que ce soit (y compris par câble, par BluetoothMD ou autrement) de tel
contenu, peuvent constituer une violation des lois sur la vie privée et le droit d’auteur. Ni
Samsung Electronics Canada inc. ni aucune de ses sociétés affiliées ne peuvent être
tenues responsables de la divulgation, de la reproduction, du téléchargement ou de la
distribution de données par l’utilisateur de cet équipement.
Avertissement
Selon l’interface utilisateur utilisée sur le téléphone, il arrive parfois que la vitesse de
réponse du pavé soit lente lorsque certaines tâches sont exécutées en arrière-plan. Cela
peut avoir une incidence sur la composition des appels. S’il n’y a aucune activité ni aucun
changement des icônes dans la partie supérieure de l’écran principal, le téléphone
reprendra un fonctionnement normal.
Table des matières
Chapitre 1 : Mise en route ......................................................... 1
Activation du téléphone . . . . . . . . . . . . . . . . . . . . . . . . . . . . . . . . . . . . . . . . . . . . . 1
Allumer et éteindre le téléphone . . . . . . . . . . . . . . . . . . . . . . . . . . . . . . . . . . . . . . 7
Configurer la messagerie vocale . . . . . . . . . . . . . . . . . . . . . . . . . . . . . . . . . . . . . . 7
Chapitre 2 : Votre téléphone ..................................................... 9
Fonctionnalités de votre téléphone . . . . . . . . . . . . . . . . . . . . . . . . . . . . . . . . . . . . 9
Vue du téléphone ouvert . . . . . . . . . . . . . . . . . . . . . . . . . . . . . . . . . . . . . . . . . . . 10
Vues du téléphone fermé . . . . . . . . . . . . . . . . . . . . . . . . . . . . . . . . . . . . . . . . . . 12
Rétroéclairage . . . . . . . . . . . . . . . . . . . . . . . . . . . . . . . . . . . . . . . . . . . . . . . . . . . 13
Écran d’affichage . . . . . . . . . . . . . . . . . . . . . . . . . . . . . . . . . . . . . . . . . . . . . . . . 13
Touches de commande . . . . . . . . . . . . . . . . . . . . . . . . . . . . . . . . . . . . . . . . . . . . 16
Chapitre 3 : Fonctions d’appel ............................................... 19
Faire un appel . . . . . . . . . . . . . . . . . . . . . . . . . . . . . . . . . . . . . . . . . . . . . . . . . . . 19
Faire un appel à partir des contacts . . . . . . . . . . . . . . . . . . . . . . . . . . . . . . . . . . 21
Répondre à un appel . . . . . . . . . . . . . . . . . . . . . . . . . . . . . . . . . . . . . . . . . . . . . . 21
Appels récents . . . . . . . . . . . . . . . . . . . . . . . . . . . . . . . . . . . . . . . . . . . . . . . . . . 22
Détails d’un appel . . . . . . . . . . . . . . . . . . . . . . . . . . . . . . . . . . . . . . . . . . . . . . . . 25
Options pendant un appel . . . . . . . . . . . . . . . . . . . . . . . . . . . . . . . . . . . . . . . . . . 25
Profil Silencieux . . . . . . . . . . . . . . . . . . . . . . . . . . . . . . . . . . . . . . . . . . . . . . . . . . 31
Chapitre 4 : Navigation dans les menus ............................... 32
Naviguer dans les menus . . . . . . . . . . . . . . . . . . . . . . . . . . . . . . . . . . . . . . . . . . 32
Raccourcis . . . . . . . . . . . . . . . . . . . . . . . . . . . . . . . . . . . . . . . . . . . . . . . . . . . . . 33
Chapitre 5 : Entrée de texte .................................................... 34
Les modes de saisie de texte . . . . . . . . . . . . . . . . . . . . . . . . . . . . . . . . . . . . . . . 34
Utiliser le mode texte intuitif T9 . . . . . . . . . . . . . . . . . . . . . . . . . . . . . . . . . . . . . . 35
Utiliser le mode alphabétique . . . . . . . . . . . . . . . . . . . . . . . . . . . . . . . . . . . . . . . 37
Utiliser le mode Symboles . . . . . . . . . . . . . . . . . . . . . . . . . . . . . . . . . . . . . . . . . . 38
Utiliser le mode Chiffres . . . . . . . . . . . . . . . . . . . . . . . . . . . . . . . . . . . . . . . . . . . 38
Chapitre 6 : Contacts ...............................................................39
Paramètres des Contacts . . . . . . . . . . . . . . . . . . . . . . . . . . . . . . . . . . . . . . . . . . 39
Ajouter un nouveau contact . . . . . . . . . . . . . . . . . . . . . . . . . . . . . . . . . . . . . . . . . 39
Utiliser la liste de contacts . . . . . . . . . . . . . . . . . . . . . . . . . . . . . . . . . . . . . . . . . . 42
Options des entrées de contact . . . . . . . . . . . . . . . . . . . . . . . . . . . . . . . . . . . . . . 43
Trouver mes numéros de téléphone personnel . . . . . . . . . . . . . . . . . . . . . . . . . . 44
Numéros autorisés . . . . . . . . . . . . . . . . . . . . . . . . . . . . . . . . . . . . . . . . . . . . . . . 44
Paramètres de groupe . . . . . . . . . . . . . . . . . . . . . . . . . . . . . . . . . . . . . . . . . . . . . 45
Ajouter une entrée de composition rapide . . . . . . . . . . . . . . . . . . . . . . . . . . . . . . 47
Utiliser les numéros de service . . . . . . . . . . . . . . . . . . . . . . . . . . . . . . . . . . . . . . 47
Gérer les entrées des contacts . . . . . . . . . . . . . . . . . . . . . . . . . . . . . . . . . . . . . . 47
Chapitre 7 : Messages .............................................................51
Types de messages . . . . . . . . . . . . . . . . . . . . . . . . . . . . . . . . . . . . . . . . . . . . . . 51
Rédiger et envoyer des messages texte . . . . . . . . . . . . . . . . . . . . . . . . . . . . . . . 51
Rédiger et envoyer des messages multimédias . . . . . . . . . . . . . . . . . . . . . . . . . 53
Joindre une carte professionnelle à un message . . . . . . . . . . . . . . . . . . . . . . . . 55
Affichage des messages reçus . . . . . . . . . . . . . . . . . . . . . . . . . . . . . . . . . . . . . . 56
Boite de réception . . . . . . . . . . . . . . . . . . . . . . . . . . . . . . . . . . . . . . . . . . . . . . . . 56
Utiliser les options de message . . . . . . . . . . . . . . . . . . . . . . . . . . . . . . . . . . . . . . 57
Boite d’envoi . . . . . . . . . . . . . . . . . . . . . . . . . . . . . . . . . . . . . . . . . . . . . . . . . . . . 59
Brouillons . . . . . . . . . . . . . . . . . . . . . . . . . . . . . . . . . . . . . . . . . . . . . . . . . . . . . . . 59
Messagerie vocale . . . . . . . . . . . . . . . . . . . . . . . . . . . . . . . . . . . . . . . . . . . . . . . . 59
Paramètres de messagerie . . . . . . . . . . . . . . . . . . . . . . . . . . . . . . . . . . . . . . . . . 60
Modèles . . . . . . . . . . . . . . . . . . . . . . . . . . . . . . . . . . . . . . . . . . . . . . . . . . . . . . . . 62
Supprimer par dossier . . . . . . . . . . . . . . . . . . . . . . . . . . . . . . . . . . . . . . . . . . . . . 63
Espace utilisé . . . . . . . . . . . . . . . . . . . . . . . . . . . . . . . . . . . . . . . . . . . . . . . . . . . 63
Chapitre 8 : Mes trucs .............................................................65
Photos . . . . . . . . . . . . . . . . . . . . . . . . . . . . . . . . . . . . . . . . . . . . . . . . . . . . . . . . . 65
Musique . . . . . . . . . . . . . . . . . . . . . . . . . . . . . . . . . . . . . . . . . . . . . . . . . . . . . . . . 66
Images . . . . . . . . . . . . . . . . . . . . . . . . . . . . . . . . . . . . . . . . . . . . . . . . . . . . . . . . . 66
Sons . . . . . . . . . . . . . . . . . . . . . . . . . . . . . . . . . . . . . . . . . . . . . . . . . . . . . . . . . . 67
Vidéos . . . . . . . . . . . . . . . . . . . . . . . . . . . . . . . . . . . . . . . . . . . . . . . . . . . . . . . . . 68
Jeux et applications . . . . . . . . . . . . . . . . . . . . . . . . . . . . . . . . . . . . . . . . . . . . . . . 69
Autres fichiers . . . . . . . . . . . . . . . . . . . . . . . . . . . . . . . . . . . . . . . . . . . . . . . . . . . 70
Espace utilisé . . . . . . . . . . . . . . . . . . . . . . . . . . . . . . . . . . . . . . . . . . . . . . . . . . . 70
Chapitre 9 : Outils .................................................................... 71
Utiliser l’appareil photo . . . . . . . . . . . . . . . . . . . . . . . . . . . . . . . . . . . . . . . . . . . . 71
Utiliser l’appareil vidéo . . . . . . . . . . . . . . . . . . . . . . . . . . . . . . . . . . . . . . . . . . . . 76
Lecteur de musique . . . . . . . . . . . . . . . . . . . . . . . . . . . . . . . . . . . . . . . . . . . . . . . 81
Reconnaissance vocale . . . . . . . . . . . . . . . . . . . . . . . . . . . . . . . . . . . . . . . . . . . 85
Enregistrer un audio . . . . . . . . . . . . . . . . . . . . . . . . . . . . . . . . . . . . . . . . . . . . . . 87
Alarmes . . . . . . . . . . . . . . . . . . . . . . . . . . . . . . . . . . . . . . . . . . . . . . . . . . . . . . . . 88
Calendrier . . . . . . . . . . . . . . . . . . . . . . . . . . . . . . . . . . . . . . . . . . . . . . . . . . . . . . 90
Tâches . . . . . . . . . . . . . . . . . . . . . . . . . . . . . . . . . . . . . . . . . . . . . . . . . . . . . . . . 94
Notes . . . . . . . . . . . . . . . . . . . . . . . . . . . . . . . . . . . . . . . . . . . . . . . . . . . . . . . . . . 95
Calculatrice . . . . . . . . . . . . . . . . . . . . . . . . . . . . . . . . . . . . . . . . . . . . . . . . . . . . . 95
Calculateur de pourboire . . . . . . . . . . . . . . . . . . . . . . . . . . . . . . . . . . . . . . . . . . . 95
Convertisseur . . . . . . . . . . . . . . . . . . . . . . . . . . . . . . . . . . . . . . . . . . . . . . . . . . . 96
Fuseaux horaires . . . . . . . . . . . . . . . . . . . . . . . . . . . . . . . . . . . . . . . . . . . . . . . . 96
Minuteur . . . . . . . . . . . . . . . . . . . . . . . . . . . . . . . . . . . . . . . . . . . . . . . . . . . . . . . 97
Chronomètre . . . . . . . . . . . . . . . . . . . . . . . . . . . . . . . . . . . . . . . . . . . . . . . . . . . . 98
Chapitre 10 : Web .................................................................... 99
Accéder au Web . . . . . . . . . . . . . . . . . . . . . . . . . . . . . . . . . . . . . . . . . . . . . . . . . 99
Paramètres du navigateur . . . . . . . . . . . . . . . . . . . . . . . . . . . . . . . . . . . . . . . . . 100
Chapitre 11 : Paramètres ...................................................... 102
Profil de son . . . . . . . . . . . . . . . . . . . . . . . . . . . . . . . . . . . . . . . . . . . . . . . . . . . 102
Paramètres d’affichage . . . . . . . . . . . . . . . . . . . . . . . . . . . . . . . . . . . . . . . . . . . 104
Heure et date . . . . . . . . . . . . . . . . . . . . . . . . . . . . . . . . . . . . . . . . . . . . . . . . . . 107
Téléphone . . . . . . . . . . . . . . . . . . . . . . . . . . . . . . . . . . . . . . . . . . . . . . . . . . . . . 107
Appels . . . . . . . . . . . . . . . . . . . . . . . . . . . . . . . . . . . . . . . . . . . . . . . . . . . . . . . . 113
Connectivité . . . . . . . . . . . . . . . . . . . . . . . . . . . . . . . . . . . . . . . . . . . . . . . . . . . 117
Paramètres d’application . . . . . . . . . . . . . . . . . . . . . . . . . . . . . . . . . . . . . . . . . . 123
Gestion de la mémoire . . . . . . . . . . . . . . . . . . . . . . . . . . . . . . . . . . . . . . . . . . . 123
Chapitre 12 : Renseignements sur la santé et la sécurité .126
Obtenir la meilleure réception possible . . . . . . . . . . . . . . . . . . . . . . . . . . . . . . . 126
Assurer une utilisation sécuritaire et un accès approprié au téléphone . . . . . . 127
Entretien de la pile . . . . . . . . . . . . . . . . . . . . . . . . . . . . . . . . . . . . . . . . . . . . . . . 129
Renseignements destinés à l’utilisateur . . . . . . . . . . . . . . . . . . . . . . . . . . . . . . 131
Débit d’absorption spécifique (DAS) des téléphones sans fil . . . . . . . . . . . . . . 131
Renseignements pour le propriétaire . . . . . . . . . . . . . . . . . . . . . . . . . . . . . . . . 132
Chapitre 13 : Garantie du fabricant ......................................133
Garantie limitée standard . . . . . . . . . . . . . . . . . . . . . . . . . . . . . . . . . . . . . . . . . 133
Index .....................................................................................................138
1
Chapitre 1 : Mise en route
Ce chapitre explique comment régler votre téléphone avant de l’utiliser. Il explique comment installer le
matériel, activer le service et configurer la messagerie vocale.
Activation du téléphone
Quand vous vous abonnez à un réseau cellulaire, vous recevez une carte enfichable SIM (module
d'identification de l'abonné) contenant tous les détails de votre abonnement, tels que votre NIP (numéro
d’identification personnel), les services optionnels que vous avez choisis et de nombreuses autres
fonctionnalités.
Retirer la pile
1. Au besoin, éteignez le téléphone en pressant fermement la touche jusqu’à ce que l’image de mise
hors tension s’affiche.
2. Insérez une pièce de monnaie dans le verrou du couvercle de la pile (1) et tournez-la dans le sens
antihoraire pour déverrouiller le couvercle (2).
3. Utilisez les encoches, situées sur les côtés supérieurs du couvercle de la pile, pour soulever le
couvercle (1).
Mise en route 2
4. Soulevez la pile (1) et retirez-la (2) du téléphone.
Insérer la carte SIM
Important! La carte SIM et ses éléments de contact peuvent facilement être endommagés si on l’égratigne ou la plie. Il faut
procéder avec soin lorsque vous manipulez, insérez ou retirez cette carte. Gardez la carte SIM hors de la portée des
jeunes enfants.
3
1. Retirez le couvercle et la pile.
2. Assurez-vous de placer les contacts métalliques de la carte vers l’intérieur du téléphone et l’encoche de
la carte correctement (voir l’illustration), puis insérez doucement la carte SIM dans son logement jusqu’à
ce qu’elle soit bien en place.
Remettre la pile
1. Insérez la pile dans son logement. Assurez-vous d’aligner les contacts métalliques de la pile avec ceux
du téléphone (1).
2. Pressez délicatement la pile pour la mettre en place (2).
Mise en route 4
3. Replacez le couvercle à l’arrière du téléphone (1) et pressez fermement (2).
4. Tournez le verrou dans le sens horaire pour verrouiller le couvercle.
Nota : Assurez-vous d’insérer correctement la pile avant de charger la pile ou d’allumer le téléphone.
Insérer ou retirer la carte mémoire
Votre téléphone prend aussi en charge une carte mémoire (microSDMC) pour le stockage de données,
comme les fichiers musicaux, images, vidéos ou autres types de fichiers. Ce type de carte mémoire est
conçue pour ce téléphone mobile, mais aussi pour d’autres appareils.
Nota : Le téléphone A847 peut prendre en charge une carte mémoire d’une capacité allant jusqu’à 16 Go.
1. Retirez le couvercle et la pile.
2. Poussez la carte mémoire dans son logement. Assurez-vous d’insérer la carte mémoire avec les
contacts métalliques vers le bas.
5
3. Pour retirer la carte mémoire, poussez celle-ci délicatement jusqu’à ce qu’elle s’éjecte de son logement.
Charger la pile
Votre téléphone est alimenté par une pile au lithium-ion rechargeable au moyen d’un chargeur, inclus avec
votre téléphone. N’utilisez que des piles et chargeurs approuvés par Samsung.
Vous pouvez utiliser le téléphone pendant la recharge de la pile, mais la recharge se fera alors plus lentement.
Nota : Vous devez charger la pile complètement avant d’utiliser votre téléphone pour la première fois. Une pile déchargée met
environ quatre heures à se recharger complètement.
1. Retirez la languette de plastique de la prise multifonction et branchez la fiche du chargeur dans la prise
multifonction.
Correct
Incorrect
Mise en route 6
Correct
Incorrect
Nota : L’illustration ci-dessus montre les méthodes correcte et incorrecte de brancher le chargeur. Un branchement inadéquat
peut endommager la prise. Aucun dommage causé par une mauvaise utilisation n’est couvert par la garantie.
2. Branchez l’autre fiche du chargeur dans une prise de courant c. a. ordinaire.
3. Une fois la pile rechargée, débranchez la fiche du chargeur de la prise de courant c. a. ordinaire.
4. Débranchez délicatement le chargeur du téléphone et replacez la languette de plastique.
Nota : Pendant le chargement, débranchez le chargeur avant d’enlever la pile, afin d’éviter d’endommager le téléphone.
Témoin de pile faible
Lorsque la pile est faible et qu’il ne reste plus que quelques minutes d’autonomie pour la conversation,
l’appareil émet une tonalité d’avertissement, le message « Pile faible » apparait à intervalles réguliers et
l’icône clignote. Le rétroéclairage est désactivé afin de conserver l’énergie de la pile.
Lorsque la pile devient trop faible, le téléphone s’éteint automatiquement.
7
Allumer et éteindre le téléphone
1. Ouvrez le rabat du téléphone.
2. Pressez fermement la touche jusqu’à ce que l’écran de mise sous tension s’affiche.
3. Si le téléphone vous demande de saisir un mot de passe, utilisez le clavier pour le saisir et pressez la
touche programmable Confirmer.
L’écran d’accueil s’affiche pendant que le téléphone recherche votre réseau. Dès qu’un réseau est
trouvé et que l’intensité du signal est adéquate, il vous est possible de faire et de recevoir des appels.
Nota : La langue d’affichage est prédéfinie à Automatique. Pour changer la langue, allez au menu Langue.
4. Pour éteindre le téléphone, pressez fermement la touche jusqu’à ce que l’écran de mise hors
tension s’affiche.
Configurer la messagerie vocale
Pour les nouveaux utilisateurs, suivez les instructions pour configurer la messagerie vocale :
1. Ouvrez le rabat du téléphone.
2. Dans l’écran de veille, pressez fermement la touche .
3. Suivez les instructions. Pour en savoir davantage sur la configuration de votre messagerie vocale,
contactez votre fournisseur de services.
Changer le nom et le numéro de votre messagerie vocale
Votre carte SIM contient le numéro de service par défaut du centre de messagerie vocale. Toutefois, vous
pourriez avoir besoin de le changer. Suivez les instructions suivantes :
1. Dans l’écran de veille, pressez la touche pour Menu.
2. Sélectionnez Messages.
Mise en route 8
3. Mettez en évidence Paramètres de messagerie et pressez la touche programmable Sélect. ou la
touche .
4. Mettez en évidence Messagerie vocale et pressez la touche programmable Sélect. ou la touche
.
5. Pressez la touche programmable Modifier .
6. Pour modifier le nom du serveur de messagerie vocale, mettez en évidence Nom et pressez
pour supprimer le nom actuel et utilisez le clavier pour saisir le nouveau nom.
7. Pour modifier le numéro de messagerie vocale, mettez en évidence Adresse du centre et pressez
pour supprimer le numéro actuel.
8. Saisissez le nouveau numéro de messagerie vocale et pressez la touche programmable Sauvegard..
ou la touche pour enregistrer le nouveau numéro.
9. Pressez la touche pour revenir à l’écran de veille.
9
Chapitre 2 : Votre téléphone
Ce chapitre décrit les principales fonctionnalités de votre téléphone. Vous y trouverez également une
explication de l’écran d’affichage et des icônes qui s’y affichent lorsque vous l’utilisez.
Fonctionnalités de votre téléphone
Votre téléphone est léger, facile à utiliser et offre de nombreuses fonctionnalités, dont les suivantes :
• Reconnaissance vocale
• Accès sans fil Bluetooth
• Appareil photo/vidéo
• Objectif pour autoportrait
• Fonctionnalité de navigation
• Fonctionnalité de messagerie
• Divers outils, comme alarmes, calendrier, calculatrice, enregistreur audio, convertisseur, minuteur, chronomètre et horloge
mondiale.
• Messagerie multimédia (MMS)
• Fonctionnalité multimédia (avec lecteur de musique)
• Affichage de l’image du contact
• Hautparleur
Votre téléphone 10
Vue du téléphone ouvert
L’illustration suivante présente les principaux éléments internes du téléphone :
5
2
4
6
12
11
10
9
7 8
13
1
3
14
15
Touches
1. Écran principal : affiche toute l'information requise pour l'utilisation de votre téléphone.
2. Touche de navigation : permet de parcourir les options du menu du téléphone et offre des raccourcis
vers des fonctions du téléphone dans l’écran de veille.
3. Touche programmable (gauche) : permet de sélectionner les actions ou menus affichés à gauche au
bas de l’écran.
4. Touche Reconnaissance vocale : lance l’application Reconnaissance vocale.
11
5. Touche Appel/Envoi : permet de faire un appel ou de répondre à un appel. Dans l’écran de veille,
pressez cette touche pour ouvrir le menu Appels récents. Pressez fermement cette touche pour
recomposer le dernier numéro des appels récents. Si le téléphone est éteint, pressez fermement cette
touche pour l’allumer.
6. Touche Messagerie vocale : pressez fermement la touche pour composer automatiquement le
numéro de téléphone de votre boite vocale.
7. Microphone : permet à votre interlocuteur de vous entendre lorsque vous lui parlez.
8. Touches Fonctions spéciales : la touche Étoile/Maj. permet de saisir le caractère [
*
] dans les
fonctions d’appel. En mode d’entrée texte, pressez cette touche pour changer le type de caractère saisi.
La touche Carré/Espace permet de saisir le caractère [#] dans les fonctions d’appel. En mode d’entrée
de texte, pressez cette touche pour insérer une espace entre deux caractères. Pressez fermement la
touche pour activer ou désactiver le profil Silencieux. Pressez fermement la touche pour
insérer une pause entre deux chiffres.
9. Clavier alphanumérique : permet de saisir des chiffres, des lettres et des caractères spéciaux. Dans
l’écran de veille, pressez fermement la touche pour accéder au serveur de messagerie vocale ou
pressez fermement la touche pour saisir un indicatif d’appel international.
10. Touche Effacer ( ) : permet de supprimer les caractères à l’écran en mode d’entrée de texte ou les
éléments dans une application. Dans le menu principal, pressez cette touche pour revenir au menu
précédent. Dans l’écran de veille, pressez brièvement cette touche pour afficher le calendrier en mode
Mois.
11. Touche Allumer/Éteindre/Fin : permet de mettre fin à l’appel en cours. Pressez fermement cette
touche quelques secondes pour allumer ou éteindre le téléphone. Dans le menu principal, pressez cette
touche pour revenir à l’écran de veille et annuler la saisie. Lors de la réception d’un appel, pressez cette
touche pour l’ignorer.
12. Touche Multitâche : ouvre la fenêtre multitâche vous permettant de sélectionner une application sans
avoir à quitter l’application en cours. Vous pouvez faire un appel, rédiger un message, lancer le
navigateur, lancer le lecteur de musique, accéder aux jeux ou mettre fin à toutes les applications.
13. Touche programmable (droite) : permet de sélectionner les actions ou menus affichés à droite au bas
de l’écran.
14. Touche Menu/Confirmer : permet d’accepter les options sélectionnées lors de la navigation dans un
menu.
Votre téléphone 12
15. Écouteur/Hautparleur : permet d’entendre votre interlocuteur et d’écouter les sons provenant de votre
téléphone.
Vues du téléphone fermé
L’illustration suivante présente les principaux éléments externes du téléphone :
2 5
4
6
1
3
Touches
1. Touche Appareil photo : pressez fermement pour lancer l’application permettant de prendre un
autoportrait.
2. Touches de volume/Navigation du menu : permet de régler le volume de la sonnerie dans l’écran de
veille ou celui de la voix pendant un appel. Lors de la réception d’un appel, pressez l’une ou l’autre des
touches de volume pour fermer la sonnerie. Utilisez les touches de volume pour parcourir les options
des différents menus. Si le téléphone est fermé, pressez fermement ces touches pour afficher l’écran
externe. Vous pouvez également utiliser cette touche lorsque le lecteur de musique est lancé.
• Si vous écoutez de la musique et le rétroéclairage s’éteint, pressez cette touche pour afficher l’écran du lecteur de
musique.
3. Appareil photo/vidéo : permet de prendre des photos et de saisir des vidéos.
13
4. Écran externe : permet de voir un appel ou un message entrant. Il affiche également la date, l’heure, le
type de réseau, la force du signal, le niveau de charge de la pile et toute icône associée aux alertes ou
alarmes.
5. Prise multifonction : permet de brancher un câble d’alimentation (chargeur), un câble de données
données ou un casque d’écoute pour des conversations sécuritaires.
6. Touche hautparleur : pressez cette touche pendant un appel pour activer le hautparleur.
Rétroéclairage
Le rétroéclairage illumine l’écran et le clavier lorsque vous pressez une touche ou ouvrez le téléphone. Selon
les paramètres définis dans le menu Durée du rétroéclairage, l'éclairage s'éteint ou se tamise lorsque vous
ne pressez aucune touche pendant un temps défini.
Écran d’affichage
L’écran est composé de trois zones :
Icônes
Date
Zone texte
et graphique
Votre téléphone 14
Icônes
Indique l’intensité du signal capté. Plus il y a de barres, meilleur est le signal.
Indique le niveau de charge de la pile. Plus il y a de barres, plus la pile est chargée.
S’affiche si le téléphone accède aux services du réseau GPRS. L’icône s’anime lors du transfert de
données.
S’affiche si le téléphone accède aux services du réseau EDGE. L’icône s’anime lors du transfert de
données.
S’affiche si le téléphone accède aux services du réseau 3G (UMTS). L’icône s’anime lors du transfert
de données.
Indique qu’un appel est en cours.
Indique que vous êtes à l’extérieur de votre zone de service. Vous ne pouvez faire ou recevoir d’appels.
Indique qu’une alarme est programmée sur votre téléphone.
S’affiche si vos appels entrants sont renvoyés vers un autre numéro.
S’affiche à l’écran lorsque vous recevez un nouveau message vocal.
S’affiche à l’écran lorsque vous recevez un nouveau courriel.
15
S’affiche à l’écran lorsque vous recevez un nouveau message texte.
S’affiche à l’écran lorsque vous recevez un nouveau message multimédia.
S’affiche à l’écran lorsque vous recevez un nouveau message de pousser du serveur WAP.
S’affiche à l’écran lorsque vous recevez un fichier de mise à jour de logiciel par liaison radio.
Indique qu’une carte mémoire (microSD) est insérée.
S’affiche si la technologie sans fil Bluetooth est active. L’icône clignote entre rouge et bleu lors du
transfert de données.
S’affiche si le téléphone est connecté à un appareil au moyen de la technologie sans fil Bluetooth.
L’icône apparait rouge jusqu’à ce que la connexion soit établie, puis passe au bleu.
S’affiche si le casque sans fil Bluetooth est actif et en cours d’utilisation.
S’affiche lorsque vous utilisez le lecteur de musique.
S’affiche lors d’une connexion à un ordinateur via un port USB.
S’affiche si le mode T-Coil est activé.
S’affiche si le mode Hors-ligne est activé.
Votre téléphone 16
Nota : Par défaut, le profil du téléphone est réglé à Normal. Vous pouvez modifier ce profil, l’icône affichée variera selon le
paramètre défini.
Options de sélection
Pour afficher les diverses fonctions et options offertes et en sélectionner une :
• Pressez la touche programmable appropriée.
• Pour sélectionner la fonction affichée ou l’option mise en évidence, pressez la touche programmable Sélect. ou la
touche .
• Pour voir la prochaine fonction ou mettre en évidence la prochaine option, pressez la touche de navigation du Bas.
• Pour revenir à la fonction ou l’option précédente, pressez la touche de navigation du Haut.
• Pour revenir au niveau supérieur dans un menu, pressez la touche programmable Retour.
• Pour quitter le menu sans changer les paramètres, pressez la touche .
Touches de commande
Les fonctions associées aux touches programmables s’affichent au-dessus de la touche sur l’écran principal.
Il existe deux touches programmables, la touche programmable de gauche et celle de droite .
S’affiche si le profil du téléphone est réglé à Normal.
S’affiche si le profil du téléphone est réglé à Silencieux. Dans ce cas, le hautparleur est désactivé, le
téléphone n’émet que des vibrations pour toute notication et affiche l’information sur l’écran externe.
S’affiche si le profil du téléphone est réglé à Voiture. Dans ce cas, le hautparleur est activé, le téléphone
fait entendre la sonnerie ou la mélodie associée à la notification activée. L’icône apparait avec l’icône
Audio.
S’affiche si le profil du téléphone est réglé à Extérieur. Dans ce cas, le hautparleur est activé, le volume
est réglé au maximum, toutes les sonneries et mélodies sont activées, ainsi que la fonction vibration
du téléphone.
17
Touches programmables
L’action des touches programmables varie selon la fonction utilisée, le libellé au bas de l’écran principal juste
au-dessus de la touche indique son action.
Touche programmable de gauche
Voici certaines actions exécutées par la touche programmable de gauche :
• Dans l’écran de veille, pressez la touche programmable de gauche pour lancer le Navigateur.
• Dans l’écran Menu, la fonction de la touche programmable de gauche est Sélect..
Touche programmable de droite
Voici certaines actions exécutées par la touche programmable de droite :
• Dans l’écran de veille, pressez la touche programmable Contacts (droite) pour ouvrir la liste des options des
contacts.
• Dans l’écran Menu, la fonction de la touche programmable de droite est Retour.
Touche Effacer
La touche Effacer est utilisée pour effacer les chiffres, le texte ou les symboles que vous avez saisis. Vous
pouvez aussi utiliser pour revenir au menu précédent ou à l’écran de veille à partir de tout menu. Dans
l’écran de veille, pressez brièvement la touche pour afficher le calendrier en mode Mois.
• Pour effacer un caractère, pressez brièvement pou effectuer un espacement arrière.
• Pour effacer tout le texte, pressez fermement .
• Pour revenir au menu supérieur, pressez brièvement .
• Dans l’écran de veille, pressez brièvement pour afficher le calendrier en mode Mois.
Touche Fin
La touche Fin permet d’allumer et d’éteindre le téléphone, de mettre fin à l’appel en cours et de revenir à
l’écran de veille.
• Pressez fermement pour allumer ou éteindre le téléphone.
• Pressez brièvement pour mettre fin à l’appel.
• Pressez pour revenir à l’écran de veille à partir de tout menu.
Votre téléphone 18
Touche Appel/Envoi
La touche Appel/Envoi permet de faire un appel ou de répondre à un appel, ou de recomposer le
dernier numéro des appels récents émis, reçus ou manqués.
• Pressez pour répondre à un appel.
• Saisissez un numéro et pressez brièvement pour lancer un appel.
• Dans l’écran de veille, pressez brièvement pour afficher la liste des appels récents reçus et émis.
• Dans l’écran de veille, pressez deux fois pour composer le numéro du plus récent appel.
• Pressez pour prendre un appel en attente.
• Pressez fermement pour allumer le téléphone lorsqu’il est éteint.
Touche de navigation
Utilisez les touches directionnelles de la touche de navigation pour parcourir les menus, les sous-menus et
les listes. Pressez la touche de navigation du haut ou du bas pour accéder au lien mis en évidence dans le
Web.
Chaque touche sert de raccourci vers une application dans l’écran d’accueil :
Nouveau message
Mes trucs
Contacts
Messages
19
Chapitre 3 : Fonctions d’appel
Ce chapitre explique comment faire des appels et y répondre. Il décrit également les fonctionnalités associées
aux appels émis ou reçus.
Faire un appel
Dans l’écran de veille, saisissez l’indicatif régional et le numéro de téléphone, puis pressez .
Nota : Si vous activez l’option Rappel automatique du menu Appel vocal, le téléphone recompose automatiquement le numéro
jusqu’à 10 fois si la personne ne répond pas ou est déjà au téléphone.
Faire un appel à l’étranger
1. Pressez fermement la touche . Le caractère + apparait.
2. Saisissez l’indicatif de pays, l’indicatif régional et le numéro de téléphone et pressez la touche .
Corriger un numéro
Utilisez les étapes suivantes pour corriger une entrée erronée lors de la composition d’un numéro de
téléphone.
1. Après la saisie d’un numéro.
• Pour effacer le dernier chiffre saisi, pressez la touche .
• Pour effacer un autre chiffre dans le numéro, pressez la touche de navigation de gauche ou de droite jusqu’à ce que le
curseur se trouve à la droite du chiffre à effacer, puis pressez la touche .
• Pour insérer un chiffre manquant, pressez la touche de navigation de gauche ou de droite jusqu’à ce que le curseur se
trouve à la bonne position et saisissez le chiffre.
• Pour effacer le numéro en entier, pressez fermement la touche .
2. Pressez la touche pour revenir dans l’écran de veille.
Mettre fin à un appel
Pour mettre fin à un appel, pressez brièvement la touche ou fermez le rabat du téléphone.
Fonctions d’appel 20
Composer un numéro avec des pauses
Lorsque vous utilisez des systèmes automatisés, vous êtes souvent invité à saisir un mot de passe ou un
numéro de compte. Au lieu de saisir manuellement les numéros chaque fois que vous utilisez un système
automatisé, vous pouvez composer des numéros avec des caractères spéciaux appelés pauses.
Pour composer manuellement un numéro avec des pauses, sans avoir à le stocker dans votre liste de
contacts :
1. Dans l’écran de veille, saisissez un numéro de téléphone.
2. Pressez fermement la touche pour ajouter une pause de deux secondes. La lettre P apparaitra à
l’endroit où la pause a été ajoutée.
3. Continuez à saisir des numéros, si nécessaire.
Astuce : Vous pouvez créer des pauses de plus de deux secondes en entrant plusieurs pauses de deux secondes P.
Recomposer le dernier numéro
Pour afficher le dernier numéro composé :
1. Dans l’écran de veille, pressez la touche pour afficher le menu Appels récents. Le dernier
numéro composé apparait au haut de la liste des appels récents. Si le numéro est enregistré dans votre
liste de contacts, le nom qui y est associé s’affiche également.
2. Pressez la touche pour lancer l’appel.
Composer un numéro à partir du menu Appels récents
Tous les appels reçus, émis et manqués apparaissent dans le menu Appels récents. Si le numéro est
enregistré dans votre liste de contacts, le nom qui y est associé s’affiche également.
Pour ouvrir le menu Appels récents :
1. Dans l’écran de veille, pressez la touche .
21
2. Utilisez la touche de navigation de gauche ou de droite pour parcourir les options des Appels récents.
Choisissez l’une des options suivantes : Tous les appels, Appels manqués, Appels effectués ou
Appels reçus.
3. Allez au numéro désiré et mettez-le en évidence pour le sélectionner. Pressez la touche pour
lancer l’appel.
Faire un appel à partir des contacts
Vous pouvez stocker les numéros de téléphone que vous utilisez le plus souvent dans la carte SIM ou dans la
mémoire du téléphone. Ces entrées sont appelées Contacts.
Lorsque le numéro est enregistré dans les contacts, vous pouvez le composer en pressant quelques touches
au moyen de la fonction de numérotation rapide.
Répondre à un appel
Si vous recevez un appel, le téléphone sonne et affiche le numéro de l’appelant ou le nom si stocké dans les
contacts.
1. Dans l’écran de veille, pressez la touche .
2. Si vous activez l’option Touche indifférente dans (Menu) ➔ Paramètres ➔ Appels ➔ Général
➔ Prise d’appel, vous pouvez presser n’importe quelle touche pour répondre à un appel, à l’exception
de la touche et de la touche programmable Rejeter.
Si vous activez l’option Ouvrir le rabat dans (Menu) ➔ Paramètres ➔ Appels ➔ Général ➔
Prise d’appel, vous pouvez répondre à un appel en ouvrant le rabat du téléphone.
Nota : Pour rejeter un appel entrant, pressez fermement l’une ou l’autre des touches de volume (sur le côté gauche du téléphone)
avant d’ouvrir le téléphone. Pour arrêter la sonnerie d’un appel entrant, pressez brièvement l’une ou l’autre des touches de
volume.
3. Pressez la touche ou fermez le rabat du téléphone pour mettre fin à l’appel.
Fonctions d’appel 22
Nota : Vous pouvez répondre à un appel pendant l’utilisation de la liste de contacts ou des menus. Une fois l’appel terminé, le
téléphone revient à l’écran de la fonction que vous utilisiez avant l’appel.
Appels récents
Tous les appels reçus, émis et manqués apparaissent dans le menu Appels récents. Si le numéro est
enregistré dans votre liste de contacts, le nom qui y est associé s’affiche également.
Pour ouvrir le menu Appels récents :
1. Dans l’écran de veille, pressez la touche .
2. Utilisez la touche de navigation de gauche ou de droite pour parcourir les options des Appels récents.
Choisissez l’une des options suivantes Tous les appels, Appels manqués, Appels effectués ou
Appels reçus.
3. Allez au numéro désiré et mettez-le en évidence pour le sélectionner. Pressez la touche pour
lancer l’appel.
Afficher tous les appels
Dans le menu Appels récents, sélectionnez l’option Tous les appels. La liste de tous les appels émis, reçus
et manqués s’affiche. Pressez la touche programmable Options pour afficher les options suivantes :
• Détails : permet de voir les détails : le numéro de téléphone, l’heure et la date de l’appel, la durée de l’appel de même
que le nom du contact, s’il est enregistré dans les contacts.
• Appel : permet de recomposer le numéro automatiquement.
• Enregistrer dans le répertoire : permet d’enregistrer le numéro dans les contacts.
• Envoyer un message : permet d’envoyer un message texte ou multimédia au contact.
• Supprimer : permet de supprimer l’appel sélectionné (Sélection) ou tous les appels (Tout).
• Ajouter à la liste de rejet : permet d’ajouter le numéro à la liste de numéros à rejeter.
Afficher la liste des appels manqués
Le nombre d’appels manqués s’affiche dans l’écran de veille et l’écran externe. Pour afficher la liste des
appels manqués :
23
1. Si le téléphone est fermé, ouvrez le rabat et pressez la touche programmable Afficher. Le dernier appel
manqué s’affiche.
Nota : Si un message vocal a été envoyé depuis ce même numéro, les icônes associées s’affichent. Vous pouvez les
sélectionner.
2. Parcourez la liste des appels manqués.
Afficher les détails d’un appel manqué
Pour afficher les détails d’un appel manqué :
1. Pressez la touche programmable Afficher. Le dernier appel manqué s’affiche.
2. Parcourez la liste des appels manqués.
3. Sélectionnez l’appel manqué désiré et pressez la touche programmable Options.
4. Mettez en évidence Détails et pressez la touche .
Enregistrer le numéro d’un appel manqué dans les contacts
Pour enregistrer le numéro d’un appel manqué dans les contacts :
1. Pressez la touche programmable Afficher. Le dernier appel manqué s’affiche.
2. Sélectionnez l’appel manqué désiré et pressez la touche programmable Options.
3. Mettez en évidence Enregistrer dans le répertoire et pressez la touche .
4. Sélectionnez le type de numéro (Nouveau ou Mettre à jour) et pressez la touche programmable Sélect.
ou la touche .
Pour tout renseignement, consultez «Ajouter un nouveau contact» à la page 39.
Envoyer un message au numéro d’un appel manqué
Pour envoyer un message texte ou multimédia au numéro d’un appel manqué :
1. Immédiatement après avoir manqué un appel, pressez la touche programmable Afficher.
Fonctions d’appel 24
2. Pressez la touche programmable Options. Utilisez la touche de navigation pour sélectionner Envoyer
un message et pressez la touche programmable Sélect. ou la touche .
3. Dans l’écran Nouveau message, utilisez les touches alphanumériques pour rédiger un message ou
pressez la touche programmable Insérer pour ajouter un élément, c omme Photo, Vidéo, Son,
Modèles, Binette, Prendre une photo, Enregistrer une vidéo, Enregistrer un son, URL des favoris ou
Informations du contact.
4. Pressez la touche programmable Envoyer à lorsque vous avez terminé de rédiger votre message.
5. Dans l’écran Liste des destinataires, utilisez le clavier numérique pour ajouter d’autres numéros de
téléphone, si nécessaire.
6. Pressez la touche Envoyer pour envoyer le message.
Nota : Lorsque vous insérez un élément dans votre message, il passe automatique à Message multimédia.
Supprimer un appel manqué
Pour supprimer l’entrée d’un appel manqué :
1. Immédiatement après avoir manqué un appel, pressez la touche programmable Afficher.
2. Pressez la touche programmable Options. Utilisez la touche de navigation pour sélectionner
Supprimer et pressez la touche programmable Sélect. ou la touche .
3. Sélectionnez les éléments à supprimer :
• Sélectionné : permet de supprimer les entrées sélectionnées.
• Tout : permet de supprimer toutes les entrées.
4. À l’invite Supprimer?, pressez la touche programmable Oui pour confirmer la suppression ou Non
pour annuler.
5. Pressez la touche pour quitter la fonction Appel manqué.
25
Détails d’un appel
1. Dans l’écran de veille, pressez ➔ Appels récents ➔ Tous les appels et pressez la touche
programmable Sélect. ou la touche .
2. Mettez en évidence l’appel désiré et pressez la touche programmable Options.
3. Mettez en évidence Détails et pressez la touche programmable Sélect. ou la touche .
4. L’information suivante s’affiche :
• (Nombre d’appels) Nom du contact / Aucun nom : affiche le nombre d’appels émis ou reçus associés à ce contact ou
numéro.
• Numéro de téléphone : affiche le numéro de téléphone.
• Liste des appels de ce contact ou numéro : l’information suivante s’affiche pour chacun des appels :
– Heure et date : affiche l’heure, le jour de la semaine et la date de l’appel émis ou reçu.
– hh:mm:ss : affiche la durée de l’appel en heures, minutes et secondes.
Composer le numéro d’un appel manqué
Pour composer le numéro d’un appel manqué :
1. Pressez la touche programmable Afficher. Le dernier appel manqué s’affiche.
2. Parcourez la liste des appels manqués.
3. Mettez en évidence le numéro que vous souhaitez composer et pressez la touche programmable
Options. Sélectionnez Appel et pressez la touche programmable Sélect. ou la touche . Vous
pouvez également mettre en évidence le numéro et pressez la touche .
Options pendant un appel
Votre téléphone vous permet d’accéder à diverses options pendant un appel.
Régler le volume d’un appel
Pendant un appel, vous pouvez régler le volume de l’écouteur. Pressez les touches de volume (sur le côté
gauche du téléphone).
Fonctions d’appel 26
Pressez la touche de volume du haut pour augmenter le niveau de volume et la touche de volume du bas
pour le diminuer.
Dans l’écran de veille, vous pouvez régler le volume de la sonnerie au moyen des mêmes touches.
Mettre un appel en attente
Vous pouvez mettre un appel en attente en tout temps. Vous pouvez également faire un nouvel appel pendant
un appel, si votre réseau offre ce service.
Pour mettre un appel en attente :
1. Pendant un appel, pressez la touche programmable Options, mettez en évidence Attente et pressez la
touche programmable Sélect. ou la touche . Cette action met l’appel actif en attente (l’information
s’affiche en gris).
2. Vous pouvez réactiver l’appel quand vous le voulez en pressant la touche programmable Reprendre.
Pour faire un nouvel appel pendant un appel en cours :
1. Pendant un appel, pressez la touche programmable Options, mettez en évidence Attente et pressez la
touche programmable Sélect. ou la touche .
2. Saisissez le nouveau numéro de téléphone que vous souhaitez composer ou recherchez-le dans les
contacts.
3. Pressez la touche pour composer le numéro.
4. Vous pouvez aussi presser la touche programmable Options, puis mettez en évidence Nouvel appel
et pressez la touche programmable Sélect. ou la touche . Une fois la communication établie, les
deux appels s’affichent à l’écran.
Nota : L’information sur l’appel en attente s’affiche en gris à l’écran.
27
Alterner entre les deux appels
Lorsque vous avez un appel en cours et un appel en attente, vous pouvez alterner entre les deux appels. Si
vous alternez entre les appels, le deuxième appel est automatiquement mis en attente.
Pour alterner entre les deux appels :
1. Pressez la touche programmable Options. Utilisez la touche de navigation pour mettre en évidence
Permuter et pressez la touche programmable Sélect. ou la touche .
• L’appel actif (deuxième appel) est mis en attente et l’appel en attente (premier appel) est réactivé, vous pouvez donc
reprendre la conversation avec cet interlocuteur.
2. Pressez la touche pour mettre fin à l’appel actif.
Pour mettre fin à un appel particulier :
1. Pressez la touche programmable Options. Utilisez la touche de navigation pour mettre en évidence Fin
➔ Appel actif ou Fin ➔ Appel en attente et pressez la touche programmable Sélect. ou la
touche . Pour mettre fin à tous les appels, pressez Fin ➔ Tous les appels ou la touche .
2. Pressez la touche pour mettre fin à l’autre appel.
Options pendant un appel
Pendant un appel, pressez la touche programmable Options :
• Hautparleur activé/désactivé : active ou désactive le hautparleur.
• Attente : met l’appel actif en attente.
• Contacts : permet d’accéder à la liste de contacts.
• Suppression du bruit activée/désactivée : active ou désactive la suppression du bruit. Utilisez cette option pour
supprimer le bruit de fond.
Nota : La suppression de bruit est activée par défaut pendant un appel vocal. Toutefois, si vous utilisez le hautparleur, le casque
d’écoute ou la casque Bluetooth, la suppression de bruit est désactivée. Vous devrez la réactiver lors du prochain appel
vocal. Pour réactiver la suppression de bruit, sélectionnez Options ➔ Suppression du bruit activée.
• Nouvel appel : met l’appel actif en attente et vous permet de saisir et de composer un autre numéro.
Fonctions d’appel 28
• Envoyer un message : permet d’envoyer un message texte ou multimédia.
• Autres : permet de sélectionner les options suivantes :
– Calendrier : permet d’accéder temporairement au calendrier tout en maintenant l’appel actif.
– Notes : permet d’accéder temporairement aux notes tout en maintenant l’appel actif.
– Mode chuchotage activé/désactivé : augmente la sensibilité du microphone. Utilisez-le dans un environnement calme,
comme au cinéma, dans une réunion, etc.
– Tonalité clavier activée/désactivée : éteint les tonalités du clavier pendant un appel.
– Envoyer DTMF : envoie des tonalités DTMF (multifréquence à deux tonalités) aux contacts sélectionnés. Vous pouvez
envoyer ces tonalités DTMF par groupe uniquement si votre réseau offre cette fonction. Les tonalités DTMF sont utilisées
pour l’envoi de tonalités lors de la pression des touches numérotées. Cette option sert à entrer un mot de passe ou un
numéro de compte lorsque vous êtes en communication avec un système automatisé, comme les services bancaires.
• Fin d’appel : permet de mettre fin à l’appel actif.
Pendant un appel, sélectionnez l’option Nouvel appel et composez un deuxième numéro ou répondez à
autre appel pour mettre l’appel actif en attente.
Lorsque la deuxième communication est établie, ces options vous sont offertes :
• Permuter : met l’appel actif en attente et réactive l’appel en attente.
• Ajouter : permet de joindre les communicatons (appel actif et appel en attente) pour établir une conférence
téléphonique.
Pressez la touche pour mettre fin à chacun des appels.
Utiliser le hautparleur pendant un appel actif
Pendant un appel, il est possible d’activer le hautparleur.
1. Composez le numéro et pressez la touche .
2. Lorsque la communication est établie, pressez la touche pour activer le hautparleur.
3. Pressez les touches de volume (sur le côté gauche du téléphone) pour ajuster le volume.
Activer ou désactiver les tonalités du clavier
Pendant un appel, vous pouvez activer ou désactiver les tonalités du clavier. Si l’option Tonalité clavier
désactivée est sélectionnée, vous pouvez presser des touches sans que l’on entende les tonalités.
29
Nota : Lors de communication avec des boites vocales ou des systèmes téléphoniques automatisés, l’option Tonalité clavier
activée doit être sélectionnée dans le menu Options ➔ Autres pendant l’appel.
Éteindre le microphone (Muet)
Vous pouvez temporairement éteindre le microphone du téléphone, de sorte que votre interlocuteur ne puisse
vous entendre.
Exemple : Vous souhaitez dire quelque chose à une personne près de vous sans que votre interlocuteur au téléphone vous
entende.
Pour éteindre temporairement le microphone pendant un appel :
1. Pressez la touche programmable Muet.
2. Pressez la touche programmable Son pour réactiver le microphone.
Chercher un numéro dans les contacts
Vous pouvez rechercher le numéro d’un contact pendant un appel.
1. Pressez la touche programmable Options. Utilisez la touche de navigation pour mettre en évidence
Contacts et pressez la touche programmable Sélect. ou la touche .
2. Mettez en évidence le contact désiré au moyen de la touche de navigation du haut ou du bas. Vous
pouvez saisir les premières lettres du nom du contact dans le champ Rechercher afin de mettre en
évidence le nom correspondant dans la liste de contacts.
3. Pressez la touche programmable Afficher.
Pour tout renseignement, consultez «Trouver une entrée dans la liste de contacts» à la page 43.
Appel en attente
Vous pouvez répondre à un appel entrant pendant un appel en cours, si votre réseau offre ce service. Vous
êtes ainsi avisé d’un appel entrant par une tonalité d’appel en attente.
Fonctions d’appel 30
Nota : Vous devez régler la fonction Appel en attente à Activé.
Pour répondre à un appel entrant pendant un appel :
1. Pressez la touche programmable Accepter pour répondre à l’appel entrant. Le premier appel est
automatiquement mis en attente.
2. Pour alterner entre les deux appels, sélectionnez Options ➔ Permuter et pressez la touche
programmable Sélect. ou la touche .
• Permuter : met l’appel actif en attente et réactive l’appel en attente.
Pour mettre fin à un appel :
1. Pressez la touche programmable Options. Mettez en évidence Fin et pressez la touche de navigation
de droite.
2. Mettez en évidence Appel actif, Appel en attente ou Tous les appels et pressez la touche
programmable Sélect. ou la touche .
Établir une conférence téléphonique
La fonction de conférence téléphonique vous permet de répondre à plusieurs appels et de les mettre en
attente. Si votre réseau offre ce service, tous les appels peuvent être mis en communication. Vous êtes ainsi
avisé d’un appel entrant par une tonalité d’appel en attente.
Nota : L’option Ajouter permet de mettre en communication tous les appels établis avec votre téléphone (en cours et en attente).
L’option Permuter met l’appel actif en attente et l’autre appel est activé.
1. Pressez la touche programmable Accepter pour répondre au premier appel entrant.
2. Pressez la touche programmable Accepter pour répondre au prochain appel. Le premier appel est
automatiquement mis en attente.
31
3. Pour ajouter les interlocuteurs à la conférence téléphonique, pressez la touche programmable Options.
Utilisez la touche de navigation pour mettre en évidence Ajouter et pressez la touche programmable
Sélect. ou la touche .
• Ajouter : permet de joindre les communicatons (appel actif et appel en attente) pour établir une conférence
téléphonique.
4. Pressez la touche pour mettre fin à l’appel.
Profil Silencieux
Le profil Silencieux est utilisé lorsque vous souhaitez éteindre tous les sons de votre téléphone, par exemple
au cinéma.
Dans l’écran de veille, pressez fermement la touche jusqu’à ce que le téléphone vibre, le message Profil
Silencieux activé et l’icône du profil Silencieux apparaissent. Pour tout renseignement, consultez «Profil
de son» à la page 102.
Lorsque le profil silencieux est activé, le hautparleur de votre téléphone est éteint. Si le rabat est fermé lors de
la réception d’un appel, le téléphone vibre et l’écran externe s’illumine ou, selon les paramètres définis du profil
Silencieux, seul l’écran externe s’illumine.
Pour réactiver les paramètres de son précédents, pressez de nouveau fermement la touche jusqu’à ce
que le Profil Normal activé s’affiche. Les icônes du profil Silencieux et du vibreur disparaissent.
Navigation dans les menus 32
Chapitre 4 : Navigation dans les menus
Ce chapitre explique comment parcourir les menus de votre téléphone. Il présente également tous les menus
qui y sont offerts. Certaines options de menu sont régies par la carte SIM fournie par votre fournisseur de
services.
Naviguer dans les menus
Vous pouvez parcourir les menus et sous-menus au moyen de la touche de navigation ou des touches de
raccourci.
Accéder à une fonction du menu à l’aide de la touche de navigation
1. Dans l’écran de veille, pressez la touche pour ouvrir le Menu et utilisez la touche de navigation
pour mettre en évidence un élément du menu principal, comme Paramètres.
2. Si le menu contient des sous-menus, mettez en évidence le sous-menu désiré, puis pressez la touche
programmable Sélect. ou la touche . Si le sous-menu contient des options, répétez cette étape.
33
3. Pour parcourir les menus, pressez la touche de navigation du haut ou du bas, puis pressez la touche
programmable Sélect. ou la touche pour confirmer votre sélection.
4. Pour revenir au niveau de menu précédent, pressez la touche programmable Retour ou la
touche .
5. Pour quitter le menu sans changer les paramètres, pressez la touche .
Utiliser les raccourcis numérotés
Vous pouvez accéder directement aux menus, sous-menus, options en pressant la touche numérotée qui y est
associée. Pour les menus principaux, pressez la touche du clavier (1 à 0, * et #) correspondant au menu voulu.
Exemple :Lancez l’appareil photo.
1. Dans l’écran de veille, pressez la touche pour Menu.
2. Pressez la touche pour Outils.
3. Pressez la touche pour Appareil photo.
Le téléphone est en mode Appareil photo.
Raccourcis
Vous pouvez aussi accéder aux applications sans avoir à naviguer dans le menu principal. La touche de
navigation sert de raccourcis pour Mes trucs (gauche), Messages (droite), Nouveau message (haut) et
Contacts (bas).
Vous pouvez aussi accéder à certains menus à l’aide de la touche Multitâche. Ces menus sont : Appel,
Messages, Navigateur, Lecteur de musique et Jeux.
Entrée de texte 34
Chapitre 5 : Entrée de texte
Ce chapitre explique comment sélectionner le mode d’entrée de texte désiré lors de la saisie de caractères
sur votre téléphone. Il explique aussi comment utiliser le mode d'entrée de texte intuitif T9 afin de réduire le
nombre de frappes nécessaires à l'entrée de texte.
Les modes de saisie de texte
L’option Mode texte permet de changer la fonction de la touche de saisie : ABC (alphabétique), T9 (texte
intuitif T9), 123 (chiffres) et Symboles.
Mode alphabétique (abc, Abc et ABC)
Ce mode permet d’entrer des lettres en pressant la touche correspondant à la lettre désirée. Pressez la
touche une fois pour la première lettre, deux fois pour la deuxième lettre et ainsi de suite.
Le mode abc affiche tous les caractères en minuscule. Le mode Abc affiche le premier caractère en
majuscule et les caractères subséquents en minuscule. Le mode ABC affiche tous les caractères en
majuscule.
Mode T9 (T9 abc, T9 Abc et T9 ABC)
Le mode T9 est un mode d'entrée de texte intuitif qui permet d'entrer n’importe quel caractère à l’aide d’une
seule frappe. Chaque touche sur le clavier comprend plus d’une lettre; par exemple, si vous pressez la touche
, vous pouvez saisir J, K ou L. Le mode T9 compare automatiquement la série de frappes au
dictionnaire intégré afin de déterminer le mot le plus probable, ce qui diminue le nombre de frappes par
rapport au mode alphabétique. Le mode T9 abc affiche tous les caractères en minuscule. Le mode T9 Abc
affiche le premier caractère en majuscule et les caractères subséquents en minuscule. Le mode T9 ABC
affiche tous les caractères en majuscule.
Mode Chiffres
Ce mode permet d’entrer des chiffres.
Mode Symboles
Ce mode permet d’entrer des symboles, comme des signes de ponctuation.
35
Changer le mode de saisie de texte
Lorsque vous vous trouvez dans un champ permettant la saisie de texte, comme dans un message texte,
l’indicateur du mode de saisie de texte s’affiche.
1. Pour changer le mode de saisie de texte, pressez la touche . Si vous souhaitez activer le mode T9,
pressez la touche programmable Options et sélectionnez Mode texte. Choisissez un mode de saisie de
texte.
2. Après avoir sélectionné un mode de saisie, continuez à presser la touche pour choisir parmi les
options suivantes :
En mode Saisie de texte normale : pressez brièvement la touche pour alterner entre abc (tout en
minuscule), Abc (première lettre en majuscule), ABC (tout en majuscule) et 123 (chiffres).
En mode Texte intuitif T9 : pressez brièvement la touche pour alterner entre T9 abc (mots
complétés sont en minuscule), T9 Abc (première lettre des mots complétés est en majuscule),T9 ABC
(mots complétés sont en majuscule) et 123 (chiffres).
En mode Chiffres : pressez brièvement la touche pour alterner entre 123 et le mode de saisie
initial.
En mode Symboles : pressez la touche programmable OK pour revenir au mode de saisie de départ.
Nota : Pressez fermement la touche pour accéder au mode Symboles. Pressez la touche numérotée correspondant au
symbole désiré. Pressez la touche de navigation du haut et du bas pour parcourir tous les symboles. Pressez la touche
programmable Annuler pour quitter.
Utiliser le mode texte intuitif T9
Ce mode d’entrée de texte exploite un dictionnaire intégré au téléphone. La série de frappes est comparée aux
entrées du dictionnaire intégré afin de déterminer le mot le plus probable.
Saisir un mot en mode T9
1. Commencez à saisir un mot en pressant les touches de 2 à 9. Pressez chaque touche une seul fois pour
Entrée de texte 36
chaque lettre. La liste des mots du dictionnaire intégré correspondant aux frappes s’affiche.
2. Exemple : Pour entrer « Salut » en mode T9, pressez les touches 7, 2, 5, 8 et 8.
Le mot que vous saisissez s’affiche à l’écran. Le mot change au fur et à mesure que vous pressez les
touches correspondant aux caractères voulus.
3. Saisissez le mot en entier avant de modifier ou de supprimer des frappes.
4. Si le mot s’affiche correctement, allez à l’étape 5.
Si le mot ne s’affiche pas correctement, pressez la touche pour afficher d’autres mots.
Exemple : Les mots « Ici » et « Gag » utilisent tous deux les touches 4, 2 et 4. Le téléphone affiche en premier le plus utilisé des
deux.
5. Pour insérer une espace, pressez la touche et commencez à entrer le prochain mot.
Ajouter un nouveau mot dans le dictionnaire T9
1. Après avoir pressé les touches correspondant au mot que vous voulez entrer, pressez la touche
pour afficher d’autres mots.
2. Après l’affichage du dernier mot proposé, la fonction Épeler s’affiche. Pressez la touche programmable
Épeler.
3. Entrez le mot que vous voulez ajouter avec le mode de saisie ABC.
4. Pressez la touche programmable Ajouter ou la touche .
Le mot s’ajoute au dictionnaire T9 et devient le premier mot associé à cette séquence de frappes.
Nota : Cette fonction pourrait ne pas être disponible dans certaines langues.
• Pour entrer des points, des traits d’union, des deux points ou des parenthèses, pressez fermement la touche . Le
mode T9 applique les règles de grammaire pour l’utilisation de la ponctuation.
37
• Pour changer la casse en mode T9, pressez brièvement pour alterner entre majuscule sur la première lettre, verrou
majuscule, minuscule et numérique.
• Déplacez le curseur en utilisant la touche de navigation de gauche ou de droite. Pour effacer des caractères, pressez la
touche . Pressez fermement la touche pour effacer toute la saisie.
Utiliser le mode alphabétique
En mode alphabétique, vous pouvez utiliser les touches de à pour saisir du texte.
1. Pressez la touche correspondant à la lettre désirée :
• une fois pour la première lettre,
• deux fois pour la deuxième lettre et ainsi de suite.
2. Sélectionnez les lettres suivantes de la même façon.
Nota : Le curseur se déplace vers la droite lorsque vous pressez une nouvelle touche. Mais si vous entrez la même lettre deux
fois ou une lettre différente sur la même touche, attendez quelques secondes pour que le curseur se déplace
automatiquement vers la droite, puis sélectionnez la prochaine lettre.
Touches
. , ’ - ? ! @ : / 1
A B C Ä Å Æ Ç 2 a b c ä à å æ ç 2
D E F É ∆ Φ 3 d e f è é Φ 3
G H I Γ 4 g h i ì Γ 4
J K L Λ 5 j k l Λ 5
M N O Ñ Ö Ø Ω 6 m n o ñ ö ò ø Ω 6
P Q R S П Σ Ψ 7 p q r s β Σ Ψ 7
T U V Ü θ 8 t u v ü ù 8
Entrée de texte 38
Utiliser le mode Symboles
Le mode Symboles vous permet d’insérer des symboles et des signes de ponctuation.
1. Pressez fermement la touche pour afficher le mode symboles.
2. Utilisez la touche de navigation pour sélectionner un groupe de symboles à l’écran.
3. Pressez la touche numérotée correspondant au symbole désiré.
4. Pour effacer un symbole, pressez la touche . Si la zone de saisie est vide, cette touche permet de
revenir au menu pécédent.
5. Pour revenir au message, pressez la touche programmable OK ou la touche .
Utiliser le mode Chiffres
Vous pouvez entrer des chiffres dans un message texte. Pressez les touches numérotées correspondant aux
chiffres désirés.
W X Y Z Ξ 9 w x y z Ξ 9
+ = < > € £ $ % & ¥ ¤ 0
39
Chapitre 6 : Contacts
Ce chapitre explique comment gérer vos contacts en stockant les noms et numéros de téléphone utilisés dans
Contacts. Vous pouvez organiser la liste des contacts par noms, entrées ou groupes.
Nota : Lorsque vous stockez une entrée de contact dans votre carte SIM, seuls les champs Nom, Numéro de téléphone, Groupe
et Emplacement sont offerts par défaut (certaines cartes SIM peuvent aussi permettre l’entrée d’une adresse). Bien que
vous entriez des champs supplémentaires à votre entrée SIM, si vous insérez votre carte SIM dans un autre modèle de
téléphone, il est possible que seules les informations de base soient conservées.
Paramètres des Contacts
1. Dans l’écran de veille, sélectionnez Contacts (touche programmable de droite) ➔ Paramètres des Contacts
ou pressez ➔ Contacts ➔ Paramètres des Contacts.
2. Sélectionnez l’une des options suivantes :
• Ma carte professionnelle : crée et ajoute une carte professionnelle virtuelle dans les messages sortants. Pour
tout renseignement, consultez «Joindre une carte professionnelle à un message» à la page 55.
• Sauvegarder les nouveaux contacts dans : définit la destination de l’entrée du nouveau contact (Mémoire
du téléphone, Mémoire SIM ou Toujours demander).
• Afficher les contacts de : filtre l’affichage des entrées des contacts (Tout, Mémoire du téléphone ou Mémoire
SIM).
• Numéro personnel : affiche le numéro actuel du téléphone (page 44).
• Numéros autorisés : assigne les numéros de téléphone de votre choix comme contacts autorisés (page 44).
• Espace utilisé : affiche l’espace utilisé dans la mémoire (espace total disponible et restant) dans Téléphone,
Carte SIM, No
supplémentaire 1, No
supplémentaire 2, No
supplémentaire 3, Courriel, Surnom, Numéros
autorisés. Pour tout renseignement, consultez «Vérifier l’espace utilisé dans les contacts» à la
page 49.
Ajouter un nouveau contact
Suivez les étapes suivantes pour stocker un nouveau contact dans vos contacts. Par défaut, les nouveaux
contacts sont stockés dans votre téléphone.
Contacts 40
Sauvegarder un numéro à partir de l’écran de veille
1. Dans l’écran de veille, sélectionnez Contacts (touche programmable de droite) ➔ Ajouter nouveau contact
ou pressez ➔ Contacts ➔ Ajouter nouveau contact.
2. Mettez en évidence les champs Prénom, Nom de famille et Afficher nom (Pseudonyme) et utilisez le
clavier pour saisir les noms de ce contact. Pour tout renseignement, consultez «Entrée de texte» à la
page 34.
3. Mettez en évidence le champ Mobile - Privé et utilisez le clavier pour saisir le numéro de téléphone pour
ce contact.
4. Mettez en évidence le champ Ligne terrestre et utilisez le clavier pour saisir numéro fixe pour ce
contact.
5. Mettez en évidence le champ Email - Privé et utilisez le clavier pour saisir une adresse de courriel privée
pour ce contact.
6. Mettez en évidence le champ Groupe et pressez . Sélectionnez un nom de groupe et
pressez .
7. Mettez en évidence le champ Ident. de l’appelant et pressez .
8. Sélectionnez une image pour représenter ce contact et sélectionnez Options ➔ Sélect..
9. Mettez en évidence le champ Sonnerie et pressez .
10. Sélectionnez une tonalité pour représenter ce contact et pressez Options ➔ Sélect..
11. Mettez en évidence le champ Notes et utilisez le clavier pour saisir une note. Pour tout renseignement,
consultez «Entrée de texte» à la page 34.
12. Sélectionnez Options ➔ Sauvegarder.
Nota : Par défaut, les contacts sont stockés dans le téléphone. Pour copier les contacts dans la carte SIM, consultez «Copier
un contact dans la carte SIM» à la page 47.
41
Ajouter d’autres champs à un numéro
Lors de la création ou de la modification d’une entrée de contact, vous pouvez ajouter des champs
supplémentaires à la liste d’information des entrées.
1. Dans l’écran de veille, sélectionnez Contacts ➔ Contacts, mettez en évidence un nom de contact et
pressez .
2. Sélectionnez Options ➔ Modifier.
3. Sélectionnez Options ➔ Ajouter plus de champs.
4. Dans la liste Ajouter détails, pressez la touche de navigation de gauche ou de droite pour mettre en
évidence le champ à ajouter et pressez Sélect. ou .
Le type de champ sélectionné s’affiche à l’écran Modifier contact.
5. Entrez l’information voulue dans le nouveau champ et sélectionnez Options ➔ Sauvegarder.
Supprimer des champs à un numéro
1. Dans l’écran de veille, sélectionnez Contacts ➔ Contacts, mettez en évidence un nom de contact et
pressez .
2. Sélectionnez Options ➔ Modifier.
3. Mettez en évidence le champ à supprimer et sélectionnez Options ➔ Supprimer un champ.
Nota : Seuls les nouveaux champs peuvent être supprimés. Si vous n’avez pas ajouté de nouveaux champs aux contacts, l’option
Supprimer un champ ne s’affichera pas.
4. Sélectionnez Options ➔ Sauvegarder.
Sauvegarder un numéro après un appel
1. Pressez pour ouvrir l’écran Appels récents.
2. Mettez en évidence un numéro de téléphone dans la liste et sélectionnez Options ➔ Enregistrer dans
le répertoire.
Contacts 42
3. Dans l’écran Sélectionner un type, sélectionnez Nouveau ou Mettre à jour, si l’entrée de ce contact existe
déjà et que vous souhaitez y ajouter un numéro de téléphone.
4. Saisissez l’information désirée. Pour tout renseignement, consultez «Sauvegarder un numéro à
partir de l’écran de veille» à la page 40.
Ajouter des pauses aux numéros du contact
Lorsque vous utilisez des systèmes automatisés, vous êtes souvent invité à saisir un mot de passe ou un
numéro de compte. Au lieu de saisir manuellement les numéros chaque fois que vous utilisez un système
automatisé, vous pouvez composer des numéros avec des caractères spéciaux appelés pauses.
Pour ajouter une pause aux numéros d’un contact :
1. Dans l’écran de veille, sélectionnez Contacts ➔ Contacts, mettez en évidence un nom de contact et
pressez .
2. Sélectionnez Options ➔ Modifier.
3. Mettez en évidence le type de numéro dans lequel vous voulez ajouter une pause.
4. Allez à l’endroit où vous voulez ajouter la pause et pressez fermement pour ajouter une pause de
deux secondes, utilisez le clavier pour saisir tout autre chiffre, si nécessaire. La lettre P s’affiche à
l’endroit de la pause.
Nota : Si plusieurs pauses de deux secondes sont requises, pressez fermement autant de fois que nécessaire pour les
ajouter.
5. Sélectionnez Options ➔ Sauvegarder pour enregistrer les changements.
Utiliser la liste de contacts
Faire un appel à partir de la liste de contacts
Une fois le numéro de téléphone enregistré dans les contacts, vous pouvez le composer facilement en
utilisant le numéro de l’emplacement qui lui est assigné dans la carte SIM ou vous pouvez le trouver à partir
du champ Recherche.
43
Trouver une entrée dans la liste de contacts
Vous pouvez sauvegarder les numéros de téléphone et les noms qui y sont associés dans la carte SIM ou la
mémoire du téléphone. Ces deux mémoires sont physiquement distinctes, mais sont utilisées comme une
seule entité appelée Contacts.
Le nombre maximum de numéros de téléphone pouvant être stockés dans la carte SIM et la façon dont ces
numéros sont stockés peuvent différer selon la carte SIM utilisée.
1. Dans l’écran de veille, sélectionnez Contacts ➔ Contacts.
2. Pressez la touche de navigation du haut ou du bas pour trouver un contact.
Astuce : L’onglet Groupes vous permet de localiser les contacts par groupe. Pressez la touche de navigation de gauche ou de
droite pour vous déplacer de Contacts à Groupes et vice versa.
3. Pressez la touche ou sélectionnez Options ➔ Appel pour appeler le contact.
Options des entrées de contact
Pour accéder aux options des entrées de contact :
1. Dans l’écran de veille, sélectionnez Contacts ➔ Contacts, sélectionnez une entrée dans la liste et
pressez .
2. Sélectionnez Options, puis l’une des options suivantes :
• Modifier : permet de modifier les informations d’un contact.
• Appel : permet de composer le numéro de l’entrée sélectionnée.
• Envoyer un message : permet d’envoyer un message texte ou multimédia au contact sélectionné.
• Supprimer : permet de supprimer le contact sélectionné de la mémoire du téléphone ou de la carte SIM.
• Envoyer carte professionnelle par : permet d’envoyer une carte professionnelle au contact sélectionné par
Message ou Bluetooth.
• Cocher comme numéro par défaut : permet de définir un numéro par défaut et le message si le contact a
plus d’un numéro (Changer, Sauvegarder ou Réinitialiser).
• Autres : permet de Copier dans Numéros autorisés ou Imprimer via Bluetooth.
Contacts 44
Trouver mes numéros de téléphone personnel
Cette fonction est un aide-mémoire que vous pouvez utiliser pour vérifier vos numéros de téléphone au
besoin.
1. Dans l’écran de veille, sélectionnez Contacts ➔ Paramètres des Contacts ➔ Numéro personnel ➔
.
Numéros autorisés
Le mode Numéros autorisés, si pris en charge par votre carte SIM, restreint les appels sortants à une liste de
numéros de téléphone définis. Lorsque cette fonction est activée, votre téléphone ne peut composer que les
numéros de téléphone stockés dans la liste des numéros autorisés de la carte SIM.
Nota : Vous devez activer le mode Numéros autorisés dans Menu ➔ Paramètres ➔ Téléphone ➔ Sécurité ➔ Régler Mode
Numéros autorisés avant de pouvoir ajouter, modifier ou supprimer des contatcs de la liste Contacts autorisés.
Changer le mode Numéros autorisés
1. Dans l’écran de veille, pressez ➔ Paramètres ➔ Téléphone ➔ Sécurité ➔ Régler Mode Numéros
autorisés.
2. Cochez Activé (pour activer le mode Numéros autorisés) ou Désactivé pour désactiver cette option et
pressez Sauvegard...
3. Saisissez le NIP2, si vous avez sélectionné Activé.
Important! Lorsque le mode Numéros autorisés est activé, le téléphone NE PEUT composer AUCUN autre numéro que ceux de
la liste de numéros autorisés.
Créer de nouveaux numéros autorisés
Si vous avez activé le mode Numéros autorisés, suivez les étapes suivantes :
1. Dans l’écran de veille, sélectionnez Contacts ➔ Paramètres des Contacts ➔ Numéros autorisés.
2. Sélectionnez Options ➔ Créer un numéro autorisé.
45
3. Saisissez le NIP2 et pressez .
Nota : Le NIP2 est défini par votre fournisseur de services.
4. Sélectionnez Nom et utilisez le clavier pour saisir le nom du numéro autorisé.
5. Sélectionnez Numéro de téléphone et utilisez le clavier pour saisir le numéro de téléphone du numéro
autorisé.
6. Mettez en évidence le champ Emplacement SIM et utilisez le clavier pour saisir l’emplacement voulu sur
la carte SIM.
7. Sélectionnez Options ➔ Sauvegarder pour enregistrer la nouvelle entrée de numéro autorisé.
8. Pressez pour revenir à l’écran de veille.
Paramètres de groupe
Créer un groupe
1. Dans l’écran de veille, sélectionnez Contacts ➔ Groupes.
2. Sélectionnez Options ➔ Créer un groupe.
3. Entrez un nom pour ce groupe dans le champ Ajouter groupe et pressez Sauvegard... Pour tout
renseignement, consultez «Entrée de texte» à la page 34.
4. Sélectionnez Options ➔ Paramètres groupe et pressez .
5. Mettez en évidence le champ Image et pressez .
6. Sélectionnez une image, puis Options ➔ Sélect. ou pressez . L’image sélectionnée s’affiche dans
le champ Image avec le nom de l’image à sa droite.
7. Mettez en évidence le champ Sonnerie et pressez .
8. Sélectionnez un fichier audio, puis Options ➔ Sélect..
9. Sélectionnez Options ➔ Sauvegarder et pressez Sélect. ou la touche .
Contacts 46
10. Pressez Retour pour revenir au menu Contacts.
11. Pressez pour revenir à l’écran de veille.
Ajouter une entrée dans un groupe
1. Dans l’écran de veille, sélectionnez Contacts ➔ Groupes.
2. Mettez en évidence une entrée de groupe et pressez .
3. Sélectionnez Options ➔ Ajouter membre et pressez .
4. Mettez en évidence une entrée ou Tout et sélectionnez Cocher pour cocher le nom ou les noms à
ajouter au groupe.
5. Sélectionnez Ajouter.
Retirer une entrée d’un groupe
1. Dans l’écran de veille, sélectionnez Contacts ➔ Groupes.
2. Mettez en évidence une entrée de groupe et pressez .
3. Mettez en évidence le membre que vous souhaitez retirer du groupe, sélectionnez Options ➔
Supprimer et pressez .
4. Mettez en évidence un membre de la liste ou Tout et sélectionnez Cocher pour cocher le nom ou les
noms à supprimer du groupe.
5. Pressez la touche programmable Supprimer.
Renommer un groupe
1. Dans l’écran de veille, sélectionnez Contacts ➔ Groupes.
2. Mettez en évidence le nom de groupe que vous souhaitez modifier.
3. Sélectionnez Options ➔ Renommer.
4. Effacer le nom actuel avec la touche Retour et utilisez le clavier pour saisir un nouveau nom pour ce
groupe, puis pressez la touche programmable Sauvegard...
47
Ajouter une entrée de composition rapide
1. Dans l’écran de veille, sélectionnez Contacts ➔ Liste de composition rapide et pressez .
2. Mettez en évidence une touche numérotée (2-9) à laquelle vous voulez attribuer la composition rapide et
sélectionnez Options ➔ Attribuer.
3. Sélectionnez Contacts ou Numéros autorisés et pressez .
4. Mettez en évidence le contact à attribuer à la touche numérotée et pressez Sélect. ou pressez .
Le contact est automatiquement attribué à la touche numérotée désignée.
Utiliser les numéros de service
Vous pouvez voir la liste des numéros de services assignés par votre fournisseur de services. Ces numéros
peuvent inclure les numéros d’urgence, de service à la clientèle et d’assistance-annuaire.
1. Dans l’écran de veille, sélectionnez Contacts ➔ Numéros de service et pressez .
2. Parcourez les numéros au moyen de la touche de navigation du haut ou du bas.
3. Pressez pour composer le numéro sélectionné.
Gérer les entrées des contacts
Vous pouvez afficher l’état de la mémoire, et copier ou supprimer des entrées stockées dans la carte SIM ou
dans la mémoire du téléphone.
Copier un contact dans la carte SIM
Nota : Lorsque vous stockez une entrée dans votre carte SIM, seuls les champs Nom, Numéro de téléphone, Groupe et
Emplacement sont offerts (certaines cartes SIM peuvent aussi permettre l’entrée d’une adresse). Pour sauvegarder de
l’information supplémentaire au sujet d’un contact, comme un autre numéro de téléphone ou une adresse courriel, vous
devez créer de nouveaux champs. Si vous insérez votre carte SIM dans un autre modèle de téléphone qui ne prend pas en
charge ces champs supplémentaires, cette information peut être perdue.
1. Dans l’écran de veille, sélectionnez Contacts ➔ Gestion des contacts SIM ➔ Copier Contacts dans carte
SIM et pressez .
2. Mettez en évidence une entrée de la liste ou Tout et sélectionnez Cocher.
Contacts 48
3. Pressez la touche programmable Copier.
Important! Lorsque vous copiez de la mémoire du téléphone vers la carte SIM, certaines informations pourraient être perdues.
4. À l’invite Continuer?, pressez Oui pour copier le contact ou Non pour annuler.
5. Pressez pour revenir à l’écran de veille.
Copier un contact dans le téléphone
1. Dans l’écran de veille, sélectionnez Contacts ➔ Gestion des contacts SIM ➔ Copier contacts de la carte
SIM et pressez . Le téléphone affiche la liste de vos contacts stockés sur la carte SIM.
Nota : Si l’image de groupe du contact affiche une icône d’emplacement SIM, ce contact existe dans la carte SIM. Vous pouvez
le copier.
Si l’image de groupe du contact n’affiche pas d’icône d’emplacement SIM, ce contact existe déjà dans le téléphone.
2. Mettez en évidence une entrée de la liste et sélectionnez Cocher.
3. Répétez l’étape 2 pour chaque entrée que vous voulez copier dans la mémoire du téléphone ou mettez
en évidence Tout.
4. Pressez Copier.
5. Pressez pour revenir à l’écran de veille.
Supprimer un contact
Vous pouvez supprimer une entrée de contact de la carte SIM ou de la mémoire du téléphone.
Supprimer un contact de la mémoire du téléphone
1. Dans l’écran de veille, sélectionnez Contacts ➔ Contacts et pressez .
2. Mettez en évidence le contact à supprimer et pressez .
3. Sélectionnez Options ➔ Supprimer.
4. À l’invite Supprimer contact?, pressez Oui pour supprimer ou Non pour annuler.
49
5. Pressez pour revenir à l’écran de veille.
Supprimer tous les contacts de la carte SIM
1. Dans l’écran de veille, sélectionnez Contacts ➔ Gestion des contacts SIM ➔ Supprimer contacts de la
carte SIM et pressez .
2. Mettez en évidence une entrée de la liste ou Tout et pressez Cocher.
3. Sélectionnez Supprimer.
4. À l’invite Voulez-vous continuer?, pressez Oui pour supprimer ou Non pour annuler.
5. Pressez pour revenir à l’écran de veille.
Vérifier l’espace utilisé dans les contacts
Vous pouvez vérifier la mémoire disponible et la mémoire utilisée (combien de noms et numéros de téléphone
sont stockés dans vos contacts), tant dans la carte SIM que dans la mémoire du téléphone.
1. Dans l’écran de veille, sélectionnez Contacts ➔ Paramètres des Contacts ➔ Espace utilisé.
• Téléphone : indique le nombre d’entrées de contacts utilisés (sur une possibilité de 1000) dans le téléphone.
• Carte SIM : indique le nombre d’entrées de contacts utilisés dans la carte SIM.
• No
supplémentaire 1 : indique le nombre de contacts SIM contenant un numéro supplémentaire, si vous avez
ajouté des numéros supplémentaires à vos contacts enregistrés dans la carte SIM.
• No
supplémentaire 2 : indique le nombre de contacts SIM contenant un deuxième numéro supplémentaire, si
vous avez ajouté des numéros supplémentaires à vos contacts enregistrés dans la carte SIM.
• No
supplémentaire 3 : indique le nombre de contacts SIM contenant un troisième numéro supplémentaire, si
vous avez ajouté des numéros supplémentaires à vos contacts enregistrés dans la carte SIM.
• Surnom : indique le nombre de surnoms utilisés.
• Courriel : indique le nombre d’entrées utilisées.
• Numéros autorisés : indique le nombre d’entrées utilisées dans la mémoire des numéros autorisés de la carte
SIM.
Nota : Selon la carte SIM utilisée, le nombre d’entrées peut varier.
Contacts 50
2. Pressez pour revenir à l’écran de veille.
51
Chapitre 7 : Messages
Ce chapitre décrit les types de message que vous pouvez envoyer et recevoir. Il explique aussi les
fonctionnalités associées à la messagerie.
Types de messages
Votre téléphone prend en charge les types de messages suivants :
• Messages texte
• Messages multimédias
Rédiger et envoyer des messages texte
La messagerie SMS (services de minimessages) vous permet d’échanger (envoyer et recevoir) de courts
messages texte avec d’autres téléphones mobiles ou adresses courriel. Vous pourriez devoir vous abonner à
ce service auprès de votre fournisseur de services pour utiliser cette fonction.
L’icône Message ( ) s’affiche lorsque vous recevez de nouveaux messages texte. Si la mémoire est pleine,
un message d’erreur apparait à l’écran et vous ne pouvez plus recevoir de messages. Utilisez l’option
Supprimer dans votre boite de réception pour supprimer les messages inutiles.
1. Dans l’écran de veille, pressez ➔ Messages➔ Nouveau message. L’écran Nouveau message
s’ouvre. Vous pouvez aussi utiliser la touche de navigation du haut dans l’écran de veille pour ouvrir
l’écran Nouveau message.
2. Dans le champ de saisie de texte, rédigez votre message texte.
3. Pressez la touche programmable Options. Les options suivantes s’affichent :
• Mode texte : permet de sélectionner le mode de saisie de texte. Les options sont : Texte intuitif T9, Multitouche, Chiffres ou
Symboles.
• Afficher liste de destinataires : permet de voir et modifier la liste des destinataires du message.
• Options avancées : permet de joindre un objet, des fichiers, une carte professionnelle, des rendez-vous et des URL de
favoris. Vous pouvez aussi changer la langue de saisie de vos messages entre English ou Français.
• Sauvegarder dans Brouillons : permet de sauvegarder le message dans votre dossier Brouillons.
Messages 52
• Enregistrer en tant que modèles : permet de sauvegarder le message en tant que modèles afin de l’utiliser
ultérieurement dans d’autres messages.
• Options de remise : permet de sélectionner les options suivantes : Prise en charge des caractères, Obtenir un rapport de
remise ou Conserver une copie de votre message.
• Annuler message : permet d’annuler le message. À l’invite Sauvegarder dans Brouillons?, pressez la touche
programmable Oui ou Non.
4. Pour insérer un fichier joint dans l’écran Nouveau message, pressez la touche . Les options
suivantes s’affichent :
• Photo : permet de joindre une image au message.
• Vidéo : permet de joindre un fichier vidéo au message.
• Son : permet de joindre un fichier audio au message.
• Modèles : permet de joindre un modèle prédéfini au message.
• Binette : permet d’ajouter une binette à votre message, comme un sourire :-).
• Prendre une photo : permet de prendre une photo et de la joindre au message.
• Enregistrer une vidéo : permet d’enregistrer une vidéo et de la joindre au message.
• Enregistrer un son : permet d’enregistrer un fichier audio et de le joindre au message.
• URL des favoris : permet de joindre au message une adresse Web à partir de votre liste de sites Internet favoris.
• Informations du contact : permet d’ajouter au message les coordonnées d’une entrée de votre liste de contacts.
Important! L’ajout d’une image, d’un fichier audio ou d’une vidéo lors de la rédaction d’un message texte change le type de
message de message texte à message multimédia.
5. Pressez la touche programmable Envoyer à. L’écran Liste de destinataires s’ouvre.
6. Vous pouvez saisir un numéro de téléphone ou le nom d’un contact (de votre liste de contact). Pressez
la touche programmable Options et choisissez l’option Ajouter destinataires.
• Contacts récents : permet de choisir un destinataire dans la liste des numéros de téléphone récents. Pressez la
touche pour ajouter le numéro sélectionné dans la liste de destinataires. Cette entrée peut être modifiée avant
d’envoyer le message.
53
• Contacts : permet d’ajouter des destinataires de votre liste de contacts au moyen de la touche de navigation du haut et du
bas.
– Pressez la touche pour cocher les entrées à ajouter.
– Pressez la touche programmable Terminé pour revenir au message après la sélection des destinataires.
• Groupe : permet d’ajouter des membres d’un groupe de votre liste de contacts au moyen de la touche de navigation du
haut et du bas.
7. Vous pouvez envoyer une copie du message à d’autres destinataires. Pressez la touche programmable
Options, choisissez l’option Modifier destinataires et sélectionnez Cc ou Cci.
8. Vous pouvez sauvegarder votre message dans le dossier Brouillons. Pressez la touche programmable
Options et choisissez l’option Sauvegarder dans Brouillons.
9. Vous pouvez ajouter d’autres destinataires de votre liste de contacts. Sélectionnez l’un des champs
Vide, saisissez un numéro de téléphone ou sélectionnez Options ➔ Ajouter destinataires et
choisissez entre Contacts récents, Contacts ou Groupe et pressez .
• Ajoutez des destinataires en sélectionnant les entrées désirées dans votre liste de contacts.
• Pressez la touche pour cocher les entrées à ajouter.
• Pressez la touche programmable Terminé pour revenir au message après la sélection des destinataires.
• Pressez Options ➔ Retour pour revenir au message.
10. Pressez la touche Envoyer pour envoyer le message.
Rédiger et envoyer des messages multimédias
La messagerie MMS (services de messages multimédias) vous permet d’échanger (envoyer et recevoir) des
messages multimédias (comme des messages photo) avec d’autres téléphones mobiles ou adresses courriel.
Vous pourriez devoir vous abonner à ce service auprès de votre fournisseur de services pour utiliser cette
fonction.
L’icône Message multimédia ( ) s’affiche lorsque vous recevez de nouveaux messages multimédias. Si la
mémoire est pleine, un message d’erreur apparait à l’écran et vous ne pouvez plus recevoir de messages.
Utilisez l’option Supprimer dans votre boite de réception pour supprimer les messages inutiles.
1. Dans l’écran de veille, pressez ➔ Messages ➔ Nouveau message ou utilisez la touche de
Messages 54
navigation du haut.
2. Dans le champ de saisie de texte, rédigez votre message texte.
3. Pressez la touche Insérer . Les options suivantes s’affichent :
• Photo : permet de joindre une image au message.
• Vidéo : permet de joindre un fichier vidéo au message.
• Son : permet de joindre un fichier audio au message.
• Modèles : permet de joindre un modèle prédéfini au message.
• Binette : permet d’ajouter une binette à votre message, comme un sourire :-).
• Prendre une photo : permet de prendre une photo et de la joindre au message.
• Enregistrer une vidéo : permet d’enregistrer une vidéo et de la joindre au message.
• Enregistrer un son : permet d’enregistrer un fichier audio et de le joindre au message.
• URL des favoris : permet de joindre au message une adresse Web à partir de votre liste de sites Internet favoris.
• Informations du contact : permet d’ajouter au message les coordonnées d’une entrée de votre liste de contacts.
4. Sélectionnez une image, un fichier audio ou vidéo et pressez la touche .
Nota : Vous ne pouvez envoyer des messages multimédias qu’à des téléphones prenant en charge la réception et l’affichage de
messages multimédias.
5. Pressez la touche programmable Envoyer à. L’écran Liste de destinataires s’ouvre.
6. Vous pouvez saisir un numéro de téléphone ou le nom d’un contact (de votre liste de contact). Pressez
la touche programmable Options et choisissez l’option Ajouter destinataires.
• Contacts récents : permet de choisir un destinataire dans la liste des numéros de téléphone récents. Pressez la
touche pour ajouter le numéro sélectionné dans la liste de destinataires. Cette entrée peut être modifiée avant
d’envoyer le message.
• Contacts : permet d’ajouter des destinataires de votre liste de contacts au moyen de la touche de navigation du haut et
du bas.
– Pressez la touche pour cocher les entrées à ajouter.
55
– Pressez la touche programmable Ajouter pour revenir au message après la sélection des destinataires.
• Groupe : permet d’ajouter des membres d’un groupe de votre liste de contacts au moyen de la touche de navigation du
haut et du bas.
7. Vous pouvez envoyer une copie du message à d’autres destinataires. Pressez la touche programmable
Options, choisissez l’option Modifier destinataires et sélectionnez Cc ou Cci.
8. Vous pouvez sauvegarder votre message dans le dossier Brouillons. Pressez la touche programmable
Options et choisissez l’option Sauvegarder dans Brouillons.
9. Vous pouvez ajouter d’autres destinataires de votre liste de contacts. Sélectionnez l’un des champs
Vide, saisissez un numéro de téléphone ou sélectionnez Options ➔ Ajouter destinataires et
choisissez entre Contacts récents, Contacts ou Groupe et pressez .
• Ajoutez des destinataires en sélectionnant les entrées désirées dans votre liste de contacts.
• Pressez la touche pour cocher les entrées à ajouter.
• Pressez la touche programmable Terminé pour revenir au message après la sélection des destinataires.
• Pressez Options ➔ Retour pour revenir au message.
10. Pressez la touche Envoyer pour envoyer le message.
Joindre une carte professionnelle à un message
Pour joindre une carte professionnelle à un message sortant :
1. Créer une entrée de contact (l’information stockée dans l’entrée constitue la carte professionnelle). Pour
tout renseignement, consultez «Ajouter un nouveau contact» à la page 39.
2. Pressez Contacts ➔ Contacts.
3. Mettez en évidence le contact et pressez la touche .
4. Pressez Options ➔ Envoyer carte professionnelle par et pressez la touche de navigation de droite.
5. Sélectionnez Message et pressez la touche .
6. Rédigez votre message.
Messages 56
7. Pressez la touche programmable Envoyer à et ajoutez les destinataires. Pressez Envoyer.
Affichage des messages reçus
1. Lorsque vous recevez de nouveaux messages texte, multimédias et vocaux, ils s’affichent dans l’écran
principal. Utilisez la touche de navigation pour sélectionner le message que vous souhaitez afficher.
Les icônes suivantes indiquent le type de message :
2. Pressez la touche programmable Afficher (dans le cas de la messagerie vocale, la touche
programmable indique Appel et permet de composer le numéro de la messagerie vocale) ou la touche
. Les écrans Messages, Appels récents ou Messagerie vocale s’affichent avec les détails de la
communication entrante. Si vous quittez l’écran principal, allez au menu Messages ou composez le
numéro de votre messagerie vocale pour afficher toutes les communications.
Boite de réception
La Boite de réception stocke les messages reçus. Vous pouvez identifier le type de message grâce à l’icône
affichée. L'icône représentant une enveloppe ouverte indique un message lu et l'icône représentant une
enveloppe fermée indique un message non lu. .
Visualiser un message texte à partir de la Boite de réception
Lorsque vous recevez de nouveaux messages texte, l’icône Message ( ) et l’information sur l’expéditeur
s’affichent dans l’écran de veille.
1. Dans l’écran de veille, pressez ➔ Messages ➔ Boite de réception.
2. Sélectionnez un message texte dans la liste et pressez la touche pour l’afficher.
• S’affiche à l’écran lorsque vous recevez un nouveau message vocal.
• S’affiche à l’écran lorsque vous recevez un nouveau message texte.
• S’affiche à l’écran lorsque vous recevez un nouveau message multimédia.
57
Astuce : Lorsque vous visualisez un message texte, pressez les touches de volume du haut ou du bas pour augmenter ou
diminuer la taille de police du texte. Six tailles de police sont offertes.
3. Pressez pour revenir à l’écran de veille.
Visualiser un message multimédia à partir de la Boite de réception
Lorsque vous recevez de nouveaux messages multimédias, l’icône Message multimédia ( ) et l’information
sur l’expéditeur s’affichent dans l’écran de veille.
1. Dans l’écran de veille, pressez ➔ Messages ➔ Boite de réception.
2. Sélectionnez un message multimédia dans la liste.
3. Pressez la touche programmable Options, mettez en évidence Détails message et pressez la touche
programmable Sélect. ou la touche pour voir l’information concernant le message, comme le
numéro de l’expéditeur, l’heure et la date, la taille du message et l’objet.
Si vous souhaitez visualiser ce message plus tard, pressez la touche programmable Retour.
4. Pour visualiser le message, pressez la touche .
5. Pour faire jouer le message multimédia, pressez la touche .
6. Pour arrêter temporairement le fichier audio/vidéo, pressez la touche .
7. Pour arrêter le fichier audio/vidéo, pressez la touche programmable Arrêter.
8. Pour parcourir le message (s’il contient plus d’une page), pressez la touche de navigation du haut ou du
bas.
9. Pressez pour revenir à l’écran de veille.
Utiliser les options de message
Les options de message au niveau de la Boite de réception varient selon les actions effectuées. Dans la liste
des messages de la Boite de réception, pressez la touche programmable Options pour accéder aux options
suivantes :
Messages 58
Options des messages texte
• Répondre : permet de répondre au message.
• Appel : permet de composer le numéro de l’expéditeur.
• Supprimer : permet de supprimer le message sélectionné ou plusieurs messages.
• Transférer : permet de transférer le message à une autre personne.
• Sauvegarder dans les contacts : permet de sauvegarder l’information du destinataire ou de l’expéditeur du message
dans les contacts soit dans le téléphone, soit dans la carte SIM.
• Autres : offre d’autres options de message :
– Déplacer dans téléphone / Déplacer dans carte SIM : si un message est stocké dans la carte SIM, il est sauvegardé dans la
mémoire du téléphone. Si un message est stocké dans la mémoire du téléphone, il est sauvegardé dans la carte SIM.
– Verrouiller/Déverrouiller : permet de verrouiller ou déverrouiller un message.
– Marquer comme lu : permet de marquer le message comme lu.
– Trier par : permet de trier les messages de votre boite de réception selon les critères suivants : Date, Expéditeur, Lu/Non lu, Type,
Objet, Taille et Verrouiller/Déverrouiller.
Nota : Lorsque vous ouvrez un message texte, des options supplémentaires vous sont offertes, comme Enregistrer en tant que
modèles et Imprimer via Bluetooth.
Nota : Lorsque vous stockez des entrées de contact dans une carte SIM, seuls le nom, le numéro de téléphone, le groupe et
l’emplacement s’affichent dans un premier temps. Pour sauvegarder d’autres informations sur un contact, comme d’autres
numéros de téléphone ou une adresse courriel, vous devez ajouter de nouveaux champs à cette entrée de contact. Si
vous transférez la carte SIM dans un autre téléphone qui ne prend pas en charge les champs supplémentaires sur la carte
SIM, l’information ajoutée dans de tels champs ne sera pas disponible.
Options des messages multimédias
• Répondre : permet de répondre au message.
• Appel : permet de composer le numéro de l’expéditeur.
• Supprimer : permet de supprimer le message sélectionné ou plusieurs messages.
• Transférer : permet de transférer le message à une autre personne.
• Détails message : permet d’afficher l’information sur le message, comme le numéro de l’expéditeur, l’heure et la date, la
taille du message et l’objet.
59
• Autres :
– Verrouiller/Déverrouiller : permet de verrouiller ou déverrouiller un message.
– Marquer comme lu : permet de marquer le message comme lu.
– Trier par : permet de trier les messages selon les critères suivants : Date, Expéditeur, Lu/Non lu, Type, Objet, Taille et Verrouiller/
Déverrouiller.
Boite d’envoi
Cette boite de messagerie contient les messages qui ont déjà été envoyés ou qui seront envoyés.
Lorsque vous accédez à ce menu, la liste des messages de la Boite d’envoi s’affiche avec les numéros de
téléphone ou les noms des destinataires, s’ils apparaissent dans vos contacts.
1. Dans l’écran de veille, pressez ➔ Messages ➔ Boite d’envoi.
Brouillons
Cette boite de messagerie conserve les messages non envoyés que vous voulez modifier et envoyer plus tard.
1. Dans l’écran de veille, pressez ➔ Messages ➔ Brouillons.
Messagerie vocale
Cette option vous connecte au centre de messagerie vocale.
Nota : Les étapes peuvent varier selon le réseau utilisé.
Accéder à votre messagerie vocale
1. Dans l’écran de veille, pressez ➔ Messages➔ Messagerie vocale. Vous pouvez aussi presser
fermement la touche .
Votre téléphone compose automatiquement le numéro de la messagerie vocale.
2. Une fois la communication établie, suivez les instructions du centre de messagerie vocale.
Accéder à votre messagerie vocale à partir d’un autre téléphone
1. Composez le numéro de votre téléphone mobile.
2. Lorsque vous entendez votre message d’accueil, pressez .
Messages 60
3. Saisissez votre mot de passe au moyen du clavier.
4. Mettez fin à l’appel lorsque vous avez terminé.
Paramètres de messagerie
Vous pouvez configurer diverses options pour vos services de messagerie.
1. Dans l’écran de veille, pressez ➔ Messages ➔ Paramètres de messagerie.
2. Sélectionnez le type de messages dont vous souhaitez modifier les paramètres.
• Message texte
• Message multimédia
• Messagerie vocale
• Message de pousser
• Message de diffusion (dépend de la carte SIM)
3. Pressez la touche programmable Sélect. ou la touche .
Message texte
Les options suivantes sont offertes :
• Options de remise : permet de configurer les options suivantes :
– Prise en charge des caractères : permet de sélectionner quel type d’alphabet est pris en charge.
– Obtenir un rapport de remise : si cette option est activée, le réseau vous informe de la remise ou non du message.
– Conserver une copie : permet de choisir si vous souhaitez ou non conserver une copie des messages envoyés.
• Centre de messagerie texte : permet de définir le mode de transmission des messages texte par défaut utilisé par le
centre de messagerie texte. Les options sont :
– SMS Centre : permet de configurer les paramètres de remise utilisés lors de l’envoi de ce type de message.
Message multimédia
Les options suivantes sont offertes :
• Options de remise :
– Priorité : permet de sélectionner le niveau de priorité de vos messages.
– Expiration : permet de sélectionner la durée de stockage de votre message sur le serveur de message multimédia.
61
– Délai de remise : permet de déterminer un délai avant que le téléphone n’envoie vos messages.
– Taille du message : permet de déterminer la taille maximale autorisée pour un message multimédia.
– Obtenir un rapport de remise : si cette option est activée, le réseau vous informe de la remise ou non du message.
– Obtenir une confirmation de lecture : si cette option est activée, le réseau vous informe de la lecture du message par le
destinataire.
– Conserver une copie : permet de choisir si vous souhaitez ou non conserver une copie des messages envoyés.
– Ajouter ma carte professionnelle : permet d’envoyer votre carte professionnelle avec vos messages.
• Options de réception : vous pouvez spécifier la catégorie des messages que vous voulez recevoir. Vous pouvez configurer
les fonctions suivantes :
– Réseau local : permet de définir les options de réception des messages dans votre réseau local. Les options
sont :Téléchargement automatique, Manuel ou Rejeter).
– Réseau en itinérance : permet de définir les options de réception des messages en itinérance. Les options sont :
(Téléchargement automatique, Manuel, Restreint ou Rejeter).
– Envoyer une confirmation de lecture : si cette option est activée, votre téléphone envoie une notification à l’expéditeur lui indiquant
que son message a été lu. Les options sont : (Autorisé, Jamais ou Toujours demander).
– Envoyer un rapport de remise : si cette option est activée, le réseau informe l’expéditeur de la remise ou non du message.
– Rejeter les messages anonymes : permet de rejeter automatiquement les messages appartenant à la catégorie Anonyme.
– Rejeter la publicité : permet de rejeter automatiquement les messages appartenant à la catégorie Publicité.
• Profils MMS : vous pouvez sélectionner un profil de connexion pour envoyer et recevoir des messages multimédias.
• Redimensionnement automatiquement de l’image : vous pouvez définir la limite de taille au-delà de laquelle les images
jointes seront redimensionnées :
– Pas de redimensionnement
– 100 Ko
– 300 Ko
– 600 Ko
• Mode de création : vous pouvez spécifier si les utilisateurs peuvent ou non créer un nouveau contenu multimédia à partir
de ce message :
– Libre
– Avertissement
– Restreint
Messages 62
• Style par défaut : vous pouvez régler les paramètres d’affichage par défaut pour ce type de message:
– Couleur de la police
– Type de police
– Couleur d’arrière-plan
– Durée de la diapo
Messagerie vocale
Les options suivantes sont offertes :
• Messagerie vocale : vous pouvez modifier le numéro de téléphone pour accéder à la messagerie vocale
distante.
Important! La modification de l’adresse du Centre de messagerie peut vous empêcher d’accéder à votre boite vocale. Il est
recommandé de vérifier auprès du service à la clientèle avant d’effectuer ce changement.
Message de pousser
Les messages poussés sont des messages envoyés par le fournisseur de services, y compris des mises à
jour de logiciel ou de l’information générale. Les options suivantes sont offertes :
• Options de réception : vous pouvez activer/désactiver (Activé/Désactivé) la réception de messages poussés.
• Chargement du service : vous pouvez choisir le moment de chargement du service. Les options sont : Toujours, Invite
ou Jamais.
Message de diffusion (dépend de la carte SIM)
Ce service réseau vous permet de recevoir des messages texte portant sur divers sujets, comme la météo ou
la circulation routière.
Modèles
Votre téléphone contient des modèles de messages texte et multimédias que vous pouvez insérer dans vos
nouveaux messages. Vous pouvez également modifier les modèles au besoin.
1. Dans l’écran de veille, pressez ➔ Messages ➔ Modèles.
2. Sélectionnez un type de modèle (Modèles texte ou Modèles multimédias).
63
3. Mettez en évidence un message modèle et pressez la touche programmable Options pour afficher les
options suivantes :
• Envoyer : permet de créer et d’envoyer un message à partir du modèle sélectionné.
• Créer : permet d’ajouter un nouveau modèle dans la liste.
• Modifier : permet de modifier le modèle sélectionné.
• Supprimer : permet de supprimer le modèle sélectionné ou plusieurs modèles.
4. Lorsque vous avez terminé, pressez pour revenir à l’écran de veille.
Supprimer par dossier
Vous pouvez supprimer tous les messages d’une Boite de messagerie ou de toutes les Boites de messagerie.
1. Dans l’écran de veille, pressez ➔ Messages ➔ Supprimer par dossier.
2. Cochez le dossier que vous souhaitez supprimer en pressant la touche .
3. Pour supprimer tous les dossiers de messagerie, cochez Tout.
4. Pressez la touche programmable Supprimer.
5. À l’invite Supprimer?, cochez ou décochez Messages verrouillés pour supprimer ou non les messages
verrouillés.
6. Pressez la touche programmable Oui pour confirmer la suppression ou Annuler.
7. Pressez pour revenir à l’écran de veille.
Espace utilisé
Cette option affiche l’espace utilisé et restant pour les divers types de messages.
1. Dans l’écran de veille, pressez ➔ Messages ➔ Espace utilisé.
2. Pressez la touche de navigation de gauche ou de droite pour sélectionner le type de message à
consulter :
• Message multimédia - affiche l’espace utilisé et restant de :
– Boite de réception
Messages 64
– Boite d’envoi
– Brouillons
• Message texte - affiche l’espace utilisé dans le téléphone et la carte SIM de :
– Boite de réception
– Boite d’envoi
– Brouillons
• Message de pousser - affiche l’espace utilisé dans le téléphone de :
– Boite de réception
• Messages de diffusion - affiche l’espace utilisé dans le téléphone de :
– Boite de réception
• Message de configuration - affiche l’espace utilisé dans le téléphone de :
– Boite de réception
3. Pressez pour revenir à l’écran de veille.
65
Chapitre 8 : Mes trucs
Ce chapitre présente les diverses applications chargées sur votre téléphone. Le menu Mes trucs vous permet
de gérer les photos, les fichiers musicaux, les vidéos, les sons, les jeux et les applications, les autres types de
fichiers et l’espace utilisé à partir d’un même menu.
Dans l’écran de veille, pressez ➔ Mes trucs et sélectionnez le dossier désiré.
Photos
Ce dossier contient les photos que vous avez prises.
1. Dans l’écran de veille, pressez la touche de navigation de gauche et sélectionnez Photos ou pressez
➔ Mes trucs ➔ Photos.
2. Sélectionnez l’onglet Téléphone ou Carte. Les dossiers contenant vos photos apparaissent.
3. Mettez en évidence une photo dans la liste et pressez la touche programmable Options. Les options
suivantes sont offertes :
• Afficher : affiche la photo.
• Envoyer via : permet d’envoyer la photo dans un message ou à un appareil compatible à Bluetooth.
• Définir comme : permet d’assigner la photo comme Écran principal, Affichage extérieur ou Ident. de
l’appelant.
• Supprimer : permet de supprimer la photo sélectionnée ou plusieurs photos.
• Renommer : permet de renommer la photo.
• Déplacer : permet de déplacer la photo sélectionnée ou plusieurs photos.
• Copier : permet de copier la photo sélectionnée ou plusieurs photos.
• Prendre une photo : permet de prendre une autre photo.
• Créer un dossier : permet de créer un nouveau dossier.
• Autres :
– Verrouiller/Déverrouiller : verrouille la photo pour en empêcher la suppression accidentelle, la
déverrouille pour en permettre la suppression.
Mes trucs 66
– Visibilité Bluetooth : pemet d’activer la visibilité Bluetooth, d’une ou plusieurs photos (Sélection,
Plusieurs).
– Trier par : permet de trier les graphiques selon les critères suivants : Nom, Date, Taille, Type.
– Imprimer via : permet d’imprimer la photo par le biais d’un branchement USB ou d’une imprimante compatible à Bluetooth.
– Propriétés : affiche les propriétés de la photo sélectionnée.
Musique
1. Dans l’écran de veille, pressez ➔ Mes trucs ➔ Musique ➔ Lecteur de musique ou pressez la
touche Multitâche et sélectionnez Lecteur de musique.
2. Sélectionnez un dossier et pressez la touche programmable Sélect. ou la touche .
3. Mettez en évidence un morceau et pressez la touche .
4. Lorsque vous écoutez de la musique, l’icône Musique ( ) apparait au haut de l’écran.
5. Pour masquer le lecteur de musique, pressez la touche programmable Options et sélectionnez l’option
Masquer lecteur ou pressez une seule fois la touche .
6. Pressez Retour rapide (touche de navigation de gauche) pour revenir au morceau précédent.
Pour arrêter temporairement la musique, pressez Pause (touche ). Pressez Avance rapide
(touche de navigation de droite) pour passer au morceau suivant. Pendant l’écoute de la musique
dans l’écran de veille, vous pouvez quitter le lecteur de musique en pressant la touche .
Une fois le lecteur de musique activé, vous pouvez écouter de la musique en arrière-plan pendant l’exécution
d’autres tâches sur votre téléphone.
Images
1. Dans l’écran de veille, pressez la touche de navigation de gauche et sélectionnez Images ou pressez
➔ Mes trucs ➔ Images.
2. Sélectionnez un dossier et pressez la touche programmable Sélect. ou la touche .
Les options suivantes sont offertes :
67
Télécharger des images
L’option Télécharger des images vous permet d’accéder au site Web de votre fournisseur de services afin de
télécharger des images.
1. Dans l’écran de veille, pressez ➔ Mes trucs ➔ Images ➔ Télécharger des images.
Le navigateur Web démarre.
2. Sélectionnez une image et pressez la touche .
3. Lorsque vous êtes prêt à acheter une image, pressez le bouton Acheter pour compléter la transaction.
Papier peint
L’option Papier peint vous permet de choisir des images préchargées comme Papier peint.
1. Dans l’écran de veille, pressez ➔ Mes trucs ➔ Images ➔ Papier peint.
2. Sélectionnez une image et pressez la touche .
Images téléchargées
L’option Images téléchargées vous permet d’accéder au dossier Images téléchargées du téléphone ou de la
carte.
1. Dans l’écran de veille, pressez ➔ Mes trucs ➔ Images ➔ Images téléchargées.
2. Sélectionnez une image et pressez la touche .
Une image s’affiche. Vous pouvez utiliser les options qui y sont associées.
Sons
1. Dans l’écran de veille, pressez ➔ Mes trucs ➔ Sons.
2. Sélectionnez un dossier et pressez la touche programmable Sélect. ou la touche .
Les options suivantes sont offertes :
Mes trucs 68
Télécharger des sonneries
L’option Télécharger des sonneries vous permet d’accéder au site Web de votre fournisseur de services afin
de télécharger des sonneries.
1. Dans l’écran de veille, pressez ➔ Mes trucs ➔ Sons ➔ Télécharger des sonneries.
Le navigateur Web démarre.
2. Sélectionnez un fichier musical pour votre sonnerie et pressez la touche .
3. Lorsque vous êtes prêt à acheter une sonnerie, pressez le bouton Acheter pour compléter la
transaction.
Sons
L’option Sons vous permet de choisir des tonalités préchargées comme Sonnerie d’appel, Sonnerie de
l’appelant ou Tonalité d’alarme.
1. Dans l’écran de veille, pressez ➔ Mes trucs ➔ Sons ➔ Sons.
2. Sélectionnez une tonalité et pressez la touche pour en entendre un extrait et la sélectionner.
Liste des mémos vocaux
L’option Liste des mémos vocaux vous permet de choisir un mémo vocal enregistré comme Sonnerie d’appel,
Sonnerie de l’appelant ou Tonalité d’alarme.
1. Dans l’écran de veille, pressez ➔ Mes trucs ➔ Sons ➔ Liste des mémos vocaux.
2. Sélectionnez un mémo vocal et pressez la touche pour en entendre un extrait et le sélectionner.
Vidéos
Ce dossier contient la liste des vidéos téléchargées du serveur Web, reçues dans les messages multimédias
ou enregistrées avec votre téléphone.
1. Dans l’écran de veille, pressez la touche de navigation de gauche et sélectionnez Vidéos ou pressez
➔ Mes trucs ➔ Vidéos.
2. Sélectionnez un dossier et pressez la touche programmable Sélect. ou la touche .
69
Les options suivantes sont offertes :
Télécharger des vidéos
L’option Télécharger des vidéos vous permet d’accéder au site Web de votre fournisseur de services afin de
télécharger des vidéos.
1. Dans l’écran de veille, pressez ➔ Mes trucs ➔ Videos ➔ Télécharger des vidéos et pressez la
touche programmable Sélect. ou la touche .
Le navigateur Web démarre.
Enregistrer une vidéo
L’option Enregistrer une vidéo vous permet d’enregistrer une vidéo au moyen de l’appareil vidéo intégré. Vous avez
accès à toutes les options de l’appareil vidéo.
Jeux et applications
Nouveaux jeux
Vous pouvez télécharger des jeux à partir du site Web de votre fournisseur de services.
1. Dans l’écran de veille, pressez ➔ Mes trucs ➔ Jeux et applications ➔ Nouveaux jeux.
Le navigateur Web démarre.
2. Suivez les instructions à l’écran. Des frais peuvent vous être facturés pour le téléchargement de jeux. Le
fichier sera téléchargé et stocké dans le dossier Jeux.
Nouvelles applications
Vous pouvez télécharger des applications à partir du site Web de votre fournisseur de services.
1. Dans l’écran de veille, pressez ➔ Mes trucs ➔ Jeux et applications ➔ Nouvelles aplications.
Le navigateur Web démarre.
Mes trucs 70
Autres fichiers
Cette option permet d’afficher d’autres types de fichiers stockés dans votre téléphone. Ces types de fichiers
comprennent les feuilles de calcul Excel, les présentations PowerPoint, les documents PDF et Word. Vous
pouvez déplacer ou copier les fichiers sur votre carte mémoire, les envoyer à un appareil compatible à
Bluetooth ou en activer la visibilité Bluetooth.
Espace utilisé
Vous pouvez vérifier la mémoire utilisée et disponible pour les photos, la musique, les images, les vidéos, les
sons, les autres fichiers, et les jeux et applications.
71
Chapitre 9 : Outils
Ce chapitre vous explique comment lancer et utiliser l’appareil photo, le lecteur de musique, la reconnaissance
vocale et l’enregistreur audio; programmer des alarmes et des rendez-vous, afficher l’agenda, créer des tâches
et des notes, utiliser la calculatrice, le calculateur de pourboire, le convertisseur (devise, longueur, poids,
volume, surface, température), afficher l’heure de différents fuseaux horaires et utiliser un décompte et un
chronomètre.
Utiliser l’appareil photo
Prendre une photo
Nota : Si vous prenez une photo dans des conditions d’ensoleillement élevé, des ombres peuvent apparaitre dans votre photo.
1. Dans l’écran de veille, pressez ➔ Outils ➔ Appareil photo. Vous pouvez aussi presser ➔
Appareil photo.
2. Dirigez l’objectif de l’appareil vers le sujet.
3. Avant de prendre la photo, pressez la touche programmable Menu pour afficher les paramètres dans la
partie supérieure du viseur, puis utilisez les touches de navigation pour accéder aux paramètres de
l’appareil photo.
ou
Pressez la touche programmable Afficher pour revenir au visualiseur d’image.
ou
Utilisez le clavier, comme touches de raccourci, pour changer les paramètres de l’appareil photo.
4. Pressez la touche pour prendre la photo.
5. Pressez la touche pour ajouter la photo dans un message ou l’envoyer via Bluetooth.
Outils 72
Nota : Votre appareil photo sauvegarde les photos en format JPEG. Le nombre affiché dans le coin inférieur gauche de l’écran
inique le nombre de photos sauvegardées dans le média sélectionné et le nombre total approximatif de photos que vous
pouvez prendre selon la résolution utilisée.
Utiliser la fonction autoportrait
Vous pouvez facilement prendre des photos de vous-même grâce à la fonction Autoportrait. Pour lancer la
fonction, suivez les étapes suivantes :
1. Si le téléphone est fermé, pressez fermement la touche située sur le côté gauche du téléphone.
2. La photo de votre visage apparait sur l’écran externe. Pressez pour prendre une photo.
Nota : Pour de meilleurs résultats, tenez le téléphone au niveau des yeux lorsque vous prenez un autoportrait.
3. Lorsque vous avez terminé, ouvrez le téléphone et il sera en mode Appareil photo. Les photos prises
sont automatiquement sauvegardées dans le dossier Photos.
Paramètres de l’appareil photo
Les paramètres de l’appareil photo sont représentés par des icônes dans la partie supérieure de l’écran.
Pressez la touche programmable Menu, puis les touches de navigation pour accéder aux paramètres de
l’appareil photo.
Le tableau ci-dessous présente les diverses icônes :
Mode Appareil photo : permet de prendre une photo ou d’enregistrer une vidéo selon le mode
sélectionné. Lorsque vous changez le mode, l’icône qui y est associée s’affiche dans le coin supérieur
gauche de l’écran.
73
Mode Prises de vue : permet de choisir un mode pour la prise de photo. Les options sont :
• Unique : permet de prendre une seule photo et l’affiche avant de revenir en mode Prises de vue.
• Multiprise : permet de prendre une série de photos.
• Mosaïque : permet de prendre jusqu’à neuf photos et de les regrouper pour créer une seule
image.
• Cadre : permet de choisir un cadre personnalisé pour la photo parmi plus de vingt cadres.
• Panorama : permet de créer une vue panoramique.
Format : permet de définir le format des photos. Les options sont :
• 1600x1200 (2M)
• 1280x960 (1.3M)
• 640x480 (0.3M)
• 320x240
Équilibre des blancs : permet de régler l’équilibre des blancs. Les options sont : Auto, Lumière du jour,
Incandescent, Fluorescent ou Nuageux.
Prise de nuit : permet d’activer le mode nuit pour prendre des photos dans des conditions de faible
éclairage. Les options sont : Activé ou Désactivé.
Retardateur : permet de régler un temps d’attente avant la prise de photos. Les options sont : 3, 5 ou
10 secondes.
1600
1200
Outils 74
Options de l’appareil photo après la prise d’une photo
Après la prise de la photo, pressez la touche programmable Options. Mettez en évidence une option et
pressez la touche .
Les options suivantes sont offertes :
• Envoyer via : permet d’ajouter la photo dans un message ou de l’envoyer par Bluetooth.
Effets : permet de changer la teinte ou d’appliquer des effets spéciaux sur la photo. Les options sont :
• Aucun effet : règle automatiquement la photo pour la meilleure qualité possible.
• Noir et blanc : enlève toute couleur et affiche la photo en échelle de gris/noir et blanc.
• Sépia : ajoute une teinte sépia à la photo. C’est une ou orangée typique des débuts de la photo.
• Négatif : affiche l’image en négatif.
Raccourcis : permet de voir les raccourcis définis pour le mode Appareil photo/vidéo.
Paramètres : permet de personnaliser les paramètres de l’appareil photo. Les options sont :
Général :
• Signal de l’obturateur : permet de choisir un son d’obturateur lors de la prise de photo.
• Stockage par défaut : permet de régler le lieu de stockage par défaut pour les photos prises. Les
options sont : Téléphone ou Carte mémoire.
Appareil photo :
• Qualité : permet de régler la qualité de la photo. Les options sont : Élevée, Normale ou Économie.
• Unique : permet de choisir entre Prendre et revoir ou Prendre et afficher.
Appareil vidéo :
• Qualité: permet de régler la qualité de la vidéo. Les options sont : Élevée, Normale ou Économie.
• Format ciné : permet de choisir le format ciné par défaut. Les options sont : MP4 ou 3GP.
75
• Définir comme : permet d’assigner la photo comme Papier peint or Ident. de l’appelant pour un contact.
• Supprimer : permet de supprimer la photo.
• Pivoter : permet de pivoter la photo du mode portrait au mode paysage.
Pressez la touche programmable Appareil p.. pour revenir au viseur de l’appareil photo.
Options de l’appareil photo
À partir du menu Appareil photo, vous pouvez afficher la liste des photos saisies. Vous pouvez également
accéder au dossier Photos, mais il ne contient que les photos prises avec le téléphone.
Mettez en évidence une photo dans le dossier Photos et pressez la touche programmable Options. Les
options suivantes sont offertes :
• Afficher : affiche la photo.
• Envoyer via : permet d’envoyer la photo dans un message ou à un appareil compatible à Bluetooth.
• Définir comme : permet d’assigner l’image comme Écran principal, Affichage extérieur ou Ident. de l’appelant.
• Supprimer : permet de supprimer la photo sélectionnée ou plusieurs photos.
• Renommer : permet de renommer la photo sélectionnée.
• Déplacer : permet de déplacer la photo sélectionnée ou plusieurs photos vers l’un des dossiers Mes trucs (Téléphone).
• Copier : permet de copier la photo sélectionnée ou plusieurs photos dans l’un des dossiers Mes trucs (Téléphone).
• Créer un dossier : permet de créer un nouveau dossier.
• Autres : affiche des options supplémentaires :
– Verrouiller/Déverrouiller : verrouille la photo pour en empêcher la suppression accidentelle, la déverrouille pour en permettre la
suppression.
– Visibilité Bluetooth : permet d’activer la visibilité de votre téléphone à d’autres appareils Bluetooth.
– Trier par : permet de trier les graphiques selon les critères suivants : Date, Type, Nom et Taille.
– Imprimer via : permet d’imprimer la photo par le biais d’un branchement USB ou d’une imprimante compatible à Bluetooth.
– Propriétés : affiche les propriétés de la photo sélectionnée.
Retoucher une photo
Vous pouvez retoucher et gérer une photo sélectionnée. Les options suivantes sont offertes :
• Zoom : permet de faire un zoom avant ou arrière de la photo. Vous pouvez presser les touches de volume pour faire un
zoom avant ou arrière.
Outils 76
• Envoyer via : permet d’envoyer la photo dans un message multimédia ou de l’envoyer par Bluetooth.
• Définir comme : permet d’assigner la photo comme Papier peint sur l’ Écran principal, Affichage extérieur ou de l’assigner
comme Ident. de l’appelant pour un contact.
• Supprimer : permet de supprimer la photo prise.
• Renommer : permet de renommer la photo.
• Modifier : permet de retoucher la photo. Les options sont :
– Sauvegarder comme : permet de changer le nom de la photo.
– Effets : permet de choisir parmi certains effets tels que : Filtre, Style, Déformer ou Flou partiel.
– Ajuster : permet d’ajuster la Luminosité, le Contraste et la Couleur.
– Transformer : permet de Redimensionner, Pivoter ou Inverser la photo.
– Rogner : permet de rogner l’image. Utilisez les touches de navigation pour placer un cadre rouge autour de l’image afin de
définir la portion voulue, puis pressez la touche Options, puis Rogner.
– Insérer : permet d’ajouter des éléments tels que Cadres, Clipart, Binette ou Texte.
– Définir comme : permet d’assigner la photo comme Papier peint sur l’ Écran principal, Affichage extérieur ou de l’assigner
comme Ident. de l’appelant pour un contact.
– Envoyer via : permet d’ajouter la photo dans un message multimédia ou de l’envoyer par Bluetooth.
• Autres : affiche des options supplémentaires :
– Diaporama : permet de visionner vos photos dans un diaporama. Cette option s’affiche uniquement si plusieurs photos sont
enregistrées dans le dossier.
– Verrouiller/Déverrouiller : verrouille la photo pour en empêcher la suppression accidentelle, la déverrouille pour en permettre la
suppression.
– Visibilité Bluetooth : permet d’activer la visibilité de votre téléphone à d’autres appareils Bluetooth.
– Imprimer via : permet d’imprimer la photo par le biais d’un branchement USB ou d’une imprimante compatible à Bluetooth.
– Propriétés : affiche les propriétés de la photo sélectionnée.
Utiliser l’appareil vidéo
Enregistrer une vidéo
Astuce : Lorsque vous saisissez une vidéo directement au soleil en conditions de forte luminosité, il est recommandé d’éclairer
suffisamment votre sujet avec une source de lumière derrière vous.
1. Dans l’écran de veille, pressez ➔ Outils ➔ Appareil photo. Vous pouvez aussi presser ➔
77
Appareil photo.
2. Pressez la touche programmable Menu pour afficher les paramètres dans la partie supérieure de
l’écran, sélectionnez l’icône , puis l’option Appareil vidéo.
3. Dirigez l’objectif de l’appareil vers le sujet.
4. Pressez la touche pour commencer l’enregistrement.
5. Pressez la touche programmable Arrêter pour arrêter l’enregistrement et sauvegarder le fichier vidéo
dans le dossier Vidéos.
6. Pressez la touche pour la visionner.
7. Pressez la touche pour revenir en mode Appareil vidéo.
Astuce : Vous pouvez utiliser le clavier au moyen des touches de raccourci, pour changer rapidement les paramètres de l’appareil
vidéo.
Paramètres de l’appareil vidéo
Les paramètres de l’appareil vidéo sont représentés par des icônes dans la partie supérieure de l’écran.
Pressez la touche programmable Menu, puis les touches de navigation pour accéder aux paramètres de
l’appareil vidéo.
Le tableau ci-dessous présente les diverses icônes :
Mode Appareil vidéo : permet de prendre une photo ou d’enregistrer une vidéo selon le mode
sélectionné. Lorsque vous changez le mode, l’icône qui y est associée s’affiche dans le coin supérieur
gauche de l’écran.
Mode d’enregistrement : permet de choisir un mode pour l’enregistrement de la vidéo. Les options sont :
Normale : enregistre le fichier vidéo en mode Normale.
Message multimédia : enregistre le fichier vidéo, dont la taille est limitée afin de l’ajouter à un message
multimédia.
Outils 78
Format de la vidéo : permet de définir le format des vidéos. Les options sont 176x144 et 320x240 (Mode
Normale uniquement).
Équilibre des blancs : permet de régler l’équilibre des blancs. Les options sont : Auto, Lumière du jour,
Incandescent, Fluorescent ou Nuageux.
Enregistrement audio : permet d’activer ou de désactiver l’enregistrement audio d’un fichier vidéo.
Retardateur : permet de régler un temps d’attente avant de commencer l’enregistrement de la vidéo. Les
options sont : 3, 5 ou 10 secondes.
Effets : permet de changer la teinte ou d’appliquer des effets spéciaux sur la vidéo. Les options sont :
• Aucun effet : règle automatiquement la vidéo pour la meilleure qualité possible.
• Noir et blanc : enlève toute couleur et affiche la vidéo en échelle de gris/noir et blanc.
• Sépia : ajoute une teinte sépia à la photo. C’est une ou orangée typique des débuts de la photo.
• Négatif : affiche l’image de la vidéo en négatif.
Raccourcis : permet de voir les raccourcis définis pour le mode Appareil photo/vidéo.
320
240
79
Options de l’appareil vidéo après la saisie de la vidéo
Après la saisie de la vidéo, pressez la touche programmable Options. Mettez en évidence une option et
pressez la touche .
Les options suivantes sont offertes :
• Envoyer via : permet d’envoyer la vidéo dans un message multimédia ou à un appareil compatible à Bluetooth.
• Supprimer : permet de supprimer le fichier vidéo.
Pressez la touche programmable Appareil vi.. pour revenir au viseur de l’appareil vidéo.
Accéder au dossier Vidéos
1. Dans l’écran de veille, pressez la touche de navigation de gauche pour ouvrir Mes trucs ou pressez
➔ Mes trucs.
2. Sélectionnez Téléphone ou Carte, puis sélectionnez Vidéos.
Paramètres : permet de personnaliser les paramètres de l’appareil photo. Les options sont :
Général:
• Signal de l’obturateur : permet de choisir un son d’obturateur lors de la prise de photo.
• Stockage par défaut : permet de régler le lieu de stockage par défaut pour les photos prises. Les
options sont : Téléphone ou Carte mémoire.
Appareil photo :
• Qualité : permet de régler la qualité de la photo. Les options sont : Élevée, Normale ou Économie.
• Unique : permet de choisir entre Prendre et revoir ou Prendre et afficher.
Appareil vidéo :
• Qualité: permet de régler la qualité de la vidéo. Les options sont : Rapide (Élevée), Normale ou
Économie.
• Format ciné : permet de choisir le format ciné par défaut. Les options sont : MP4 ou 3GP.
Outils 80
3. Sélectionnez un fichier vidéo et pressez la touche pour le visionner.
Mettez en évidence une vidéo dans le dossier Vidéos. Avant de visionner la vidéo, pressez la touche
programmable Options. Les options suivantes sont offertes :
• Lire : fait jouer la vidéo sélectionnée.
• Envoyer via : permet d’envoyer la vidéo dans un message multimédia ou à un appareil compatible à Bluetooth.
• Supprimer : permet de supprimer la vidéo sélectionnée (Sélection) ou plusieurs vidéos.
• Renommer : permet de renommer le fichier vidéo.
• Déplacer : permet de déplacer la vidéo sélectionnée ou plusieurs vidéos.
• Copier : permet de copier la photo sélectionnée ou plusieurs vidéos.
• Enregistrer une vidéo : permet d’enregistrer une vidéo avec l’appareil vidéo.
• Créer un dossier : permet de créer un nouveau dossier dans le dossier Vidéos.
• Autres : affiche des options supplémentaires :
– Verrouiller/Déverrouiller : verrouille la photo pour en empêcher la suppression accidentelle, la déverrouille pour en permettre la
suppression.
– Visibilité Bluetooth : permet d’activer la visibilité de votre téléphone à d’autres appareils Bluetooth.
– Trier par : permet de trier les vidéos selon les critères suivants : Nom, Date, Taille et Type.
– Propriétés : affiche les propriétés de la vidéo.
Pendant le visionnement de la vidéo, les options suivantes sont offertes :
• Pause/Reprendre : permet d’arrêter temporairement le visionnement de la vidéo et de le reprendre.
• Arrêter : permet d’arrêter le visionnement de la vidéo.
• Transférer vers le casque Bluetooth : vous permet d’écouter la vidéo via le casque Bluetooth.
• Sauter la durée de la piste : permet de sauter à un moment précis dans la piste.
• Envoyer via : permet d’envoyer le fichier vidéo dans un message multimédia ou à un appareil compatible à Bluetooth.
• Mode Portrait/Paysage : permet de pivoter la vidéo du mode portrait au mode paysage.
• Propriétés : affiche les propriétés de la vidéo sélectionnée.
Après le visionnement de la vidéo ou si vous sélectionnez l’option Arrêter, les options suivantes sont offertes :
• Lire : permet de visionner de nouveau la vidéo.
• Envoyer via : permet d’envoyer le fichier vidéo dans un message multimédia ou à un appareil compatible à Bluetooth.
81
• Propriétés : affiche les propriétés de la vidéo sélectionnée.
Lecteur de musique
Le lecteur de musique permet de faire jouer (lire) des fichiers musicaux. Il prend en charge les fichiers avec les
extensions AAC, AAC+, MP3, WMA, 3GP, MPEG, MP4 et M4A. Vous n’avez qu’à lancer le lecteur de musique
pour commencer à naviguer parmi les fichiers musicaux et sélectionner le matériel que vous voulez entendre.
1. Dans l’écran de veille, pressez ➔ Outils ➔ Lecteur de musique ou pressez la touche Multitâche et
sélectionnez Lecteur de musique.
2. Sélectionnez un dossier et pressez la touche programmable Sélect. ou la touche .
3. Mettez en évidence un morceau et pressez la touche .
Nota : Le nombre maximum de morceaux que vous pouvez synchroniser entre votre téléphone et votre ordinateur est de 1000.
Options du lecteur de musique
Vous pouvez configurer les options de lecture de la musique, comme la lecture aléatoire, la lecture en boucle
des fichiers musicaux, l’ajout de morceaux dans la liste de lecture, etc.
1. Dans l’écran de veille, pressez ➔ Outils ➔ Lecteur de musique ou pressez la touche Multitâche et
sélectionnez Lecteur de musique.
2. Sélectionnez un dossier, puis un fichier musical et pressez la touche . Le fichier musical commence
à jouer.
3. Pressez la touche programmable Options et sélectionnez l’une des options suivantes :
• Pause/Reprendre : permet d’arrêter temporairement l’écoute du morceau et de la reprendre.
• Transférer vers le casque Bluetooth : vous permet d’écouter le morceau via le casque Bluetooth.
• Masquer lecteur : continue de faire jouer la musique, mais place le lecteur en arrière-plan.
• Mode aléatoire : permet d’activer ou de désactiver le mode Aléatoire. Lorsque le mode est activé, les morceaux de la
liste en cours sont joués aléatoirement.
Outils 82
• Boucle : répète le morceau en cours de lecture ou refait jouer tous les morceaux de la liste actuelle et,
lorsque le dernier morceau est fini, rejoue tous les morceaux suivant l’ordre de la liste.
• Ajouter à la liste de lecture : ajoute le morceau en écoute à la liste de lecture en cours ou à une autre liste de
lecture.
• Envoyer via : permet d’envoyer le fichier musical dans un message ou à un appareil compatible à Bluetooth.
• Définir comme : définit ce fichier musical comme Sonnerie d’appel, Sonnerie de l’appelant ou Tonalité d’alarme.
• Égaliseur : permet de sélectionner les paramètres de l’égaliseur. Les options sont : Normal, Rock, Pop,
Danse, Classique ou Jazz.
• Propriétés : affiche les propriétés du fichier musical sélectionné : Artiste, Titre, Taille, Format, Durée de la
piste, Genre, Description et Numéro de la piste.
4. Pressez la touche programmable Sélect. et suivez les invites de l’option sélectionnée.
Écouter de la musique
1. Dans l’écran de veille, pressez ➔ Outils ➔ Lecteur de musique ➔ Toute la musique et
pressez la touche programmable Sélect. ou la touche .
Nota : Toute la musique affiche tous les morceaux téléchargés ou tous les morceaux stockés dans le téléphone ou la carte
mémoire.
2. Pressez la touche de navigation du haut ou du bas pour sélectionner un morceau et pressez .
Écouter de la musique tout en utilisant le téléphone
Le lecteur de musique permet d’écouter de la musique en arrière-plan tout en exécutant d’autres tâches avec
le téléphone. La musique s’arrête lors de la prise d’un appel entrant et elle reprend à la fin de l’appel. La
musique continue à jouer lorsque vous recevez un message texte ou multimédia.
Vous pouvez aussi utiliser ces fonctions :
• Appel : permet de faire ou de recevoir un appel (le lecteur de musique se met en pause).
• Messages : permet d’envoyer ou de recevoir un message texte ou multimédia. La musique continue à jouer, à moins
qu’un fichier audio/vidéo ne soit reçu avec le fichier multimédia.
• Navigateur : permet de lancer le navigateur.
83
• Jeux : permet de jouer à des jeux tout en écoutant de la musique.
Nota : Que vous écoutiez de la musique ou arrêtiez temporairement la lecture de la musique, le téléphone consomme la même
quantité d’énergie.
1. Dans l’écran de veille, pressez ➔ Outils ➔ Lecteur de musique ou pressez la touche Multitâche et
sélectionnez Lecteur de musique.
2. Sélectionnez un dossier et pressez la touche programmable Sélect. ou la touche .
3. Mettez en évidence un morceau et pressez la touche .
4. Lorsque vous écoutez de la musique, l’icône Musique ( ) apparait au haut de l’écran.
5. Pour masquer le lecteur de musique, pressez la touche programmable Options et sélectionnez l’option
Masquer lecteur ou pressez une seule fois la touche .
6. Pressez Retour rapide (touche de navigation de gauche) pour revenir au morceau précédent.
Pour arrêter temporairement la musique, pressez Pause (touche ). Pressez Avance rapide
(touche de navigation de droite) pour passer au morceau suivant. Pendant l’écoute de la musique
dans l’écran de veille, vous pouvez quitter le lecteur de musique en pressant la touche .
Une fois le lecteur de musique activé, vous pouvez écouter de la musique en arrière-plan pendant l’exécution
d’autres tâches sur votre téléphone.
Important!: Lorsque vous avez fini d’utiliser la fonction Lecteur de musique, pressez deux fois la touche pour arrêter cette
fonction et éviter de vider la charge de la pile. La mise en Pause n’interrompt pas le lecteur de musique et continue de
consommer l’énergie de la pile.
Utiliser les listes de lecture
Les listes de lecture servent à assigner des morceaux à une liste de multimédias préférés qui peuvent ainsi
être regroupés en listes pour être écoutées ultérieurement. Ces listes de lecture peuvent être créées en
utilisant le menu des options du lecteur de musique ou à partir d’une application musicale externe (comme le
Lecteur Windows Media) et ensuite téléchargées sur l’appareil.
Outils 84
Créer une liste de lecture
1. Dans l’écran de veille, pressez ➔ Outils ➔ Lecteur de musique ➔ Listes de lecture ➔
Nouvelle liste de lecture.
2. Mettez en évidence Tout et pressez la touche de navigation de droite.
3. Sélectionnez un morceau de la liste ou Tout et pressez la touche programmable Cocher pour cocher les
morceaux.
4. Pressez la touche programmable Ajouter, saisissez le nom de la liste de lecture dans le champ Nom et
pressez la touche programmable Sauvegard...
5. Pressez pour revenir à l’écran de veille.
Ajouter un morceau à une liste de lecture
1. Dans l’écran de veille, pressez ➔ Outils ➔ Lecteur de musique.
2. Sélectionnez Listes de lecture.
3. Mettez en évidence une liste de lecture créée au préalable.
4. Pressez la touche programmable Options ➔ Ajouter des pistes.
5. Mettez en évidence Tout, un morceau ou plusieurs morceaux et pressez pour cocher votre
sélection.
6. Pressez la touche programmable Ajouter et attendez que le morceau soit ajouté à la liste en cours.
Retirer des morceaux de la liste de lecture
1. Dans l’écran de veille, pressez ➔ Outils ➔ Lecteur de musique.
2. Sélectionnez Listes de lecture.
3. Mettez en évidence une liste de lecture créée au préalable et pressez la touche . Les pistes
ajoutées s’affichent.
85
4. Mettez en évidence la piste à supprimer, pressez la touche programmable Options, sélectionnez
Supprimer et pressez la touche programmable Sélect. ou la touche .
5. À l’invite Supprimer ?, pressez la touche programmable Oui pour supprimer le
morceau de la liste de lecture Non pour annuler.
6. Pressez pour revenir à l’écran de veille.
Reconnaissance vocale
Nuance est un puissant logiciel de reconnaissance qui permet d’activer une vaste gamme de fonctions sur
votre téléphone. Le logiciel Nuance permet d’activer automatiquement par commande vocale la recherche et la
composition de numéros (jusqu’à 1 000 contacts). Aucun préenregistrement ou entrainement n’est requis.
Dites normalement le nom d’un contact pour composer son numéro et utilisez votre voix pour consulter vos
contacts, lancer des applications et parcourir les menus du téléphone.
1. Dans l’écran de veille, pressez (touche Reconnaissance vocale) ou pressez ➔ Outils ➔
Reconnaissance vocale.
2. À l’invite « Dites une commande », dites une commande. La liste des commandes offertes est présentée
ci-dessous.
Nota : Cette liste de commandes vocales s’affiche brièvement.
Options de commandes
• Appeler : compose le numéro demandé ou le numéro correspondant à l’entrée des contacts demandée. Si
plusieurs numéros existent (par ex., domicile, bureau ou autre), dites le nom et le type de numéro (emplacement).
• Envoyer message : affiche l’écran Nouveau message.
• Rechercher : permet d’utiliser une commande vocale pour repérer et afficher l’information d’un contact stockée
dans Contacts.
• Ouvrir : permet d’accéder à toutes les fonctions de votre téléphone si elles sont activées : Messagerie
vocale, Contacts, Sonneries, Calendrier, Tâches et Navigateur.
Outils 86
• Vérifier : vous permet de vérifier le statut complet de votre téléphone dans un même rapport (État, Messages
reçus, Appels manqués, Heure, Force du signal, Opérateur, Batterie, Mon numéro de téléphone et Volume).
Lorsque l’écran Dites une commande s’affiche, vous avez deux options :
• Didac. : donne des exemples sur la façon d’utiliser les commandes vocales.
• Réglages : affiche les réglages du logiciel de reconnaissance vocale tels que : Confirmation, Adaptation, Modes audio,
Mains-libres et À propos de.
Dites clairement votre commande. Il n’est pas nécessaire de parler lentement ou d’y mettre de l’emphase. Le
logiciel de reconnaissance vocale a été conçu pour reconnaitre la parole dans sa forme naturelle. S’il ne
reconnait pas votre commande après quelques secondes, une invite vous demande de répéter la commande.
Si votre commande n’est toujours pas reconnue, le message « Commande non reconnue » s’affiche et la
reconnaissance vocale est désactivée.
Vous devez terminer votre commande vocale en cours avant de tenter d’effectuer un autre appel à l’aide des
commandes vocales. Si vous effectuez un appel à trois, seul le premier appel peut se faire avec les
commandes vocales.
Astuces pour la reconnaissance vocale
• Attendez la tonalité avant de parler.
• Parlez clairement à un volume normal.
• Nul besoin de parler lentement. Le logiciel de reconnaissance vocale est conçu pour reconnaitre la parole naturelle et
fonctionne mieux lorsque vous parlez naturellement.
• Dans un environnement bruyant, il peut être utile d’utiliser un casque d’écoute ou un casque Bluetooth.
Activation de la liste de contacts
Au démarrage initial, le logiciel Nuance lit votre liste de contacts et active tous les noms pour la voix.
Lorsque vous ajoutez ou modifiez des contacts, le logiciel de reconnaissance vocale recharge
automatiquement la liste de contacts.
87
Enregistrer un audio
L’enregistreur audio permet d’enregistrer des mémos vocaux. Il vous permet également d’envoyer votre fichier
audio à d’autres personnes comme pièce attachée à un message multimédia. Le temps d’enregistrement
variera selon la quantité de mémoire disponible dans le téléphone.
1. Dans l’écran de veille, pressez ➔ Outils ➔ Enregistrer un audio.
2. Avant d’enregistrer un fichier audio, pressez la touche programmable Options. Les options suivantes
sont offertes :
• Enregistrer : permet de commencer l’enregistrement d’un fichier audio.
• Mes mémos vocaux : permet d’entendre vos fichiers audios.
• Paramètres d’enregistrement audio : permet de définir le nom par défaut des fichiers audios et de régler la durée
des enregistrements (Limite pour MMS, 1 min, 2 min, 3 min, 4 min, 5 min ou 60 min).
3. Pour démarrer l’enregistrement, pressez . Parlez dans le microphone.
4. Durant l’enregistrement, pressez la touche programmable Arrêter pour mettre fin à l’enregistrement ou
Pause pour interrompre momentanément l’enregistrement. Une fois l’enregistrement audio terminé,
celui-ci est automatiquement sauvegardé.
5. Pressez la touche programmable Options. Les options suivantes sont offertes :
• Lire : permet d’écouter le mémo.
• Enregistrer : permet de sauvegarder le mémo et de démarrer une autre session.
• Mes mémos vocaux : permet d’entendre vos fichiers audios.
• Paramètres d’enregistrement audio : permet de définir le nom par défaut des fichiers audios et de régler la durée
des enregistrements (Limite pour MMS, 1 min, 2 min, 3 min, 4 min, 5 min ou 60 min).
• Envoyer via : permet d’envoyer le fichier audio dans un message ou à un appareil compatible à Bluetooth.
• Définir comme : définit ce fichier audio comme Sonnerie d’appel, Sonnerie de l’appelant ou Tonalité d’alarme.
• Supprimer : permet de supprimer le fichier audio.
• Autres : affiche des options supplémentaires :
– Renommer : permet de renommer le fichier audio.
Outils 88
– Verrouiller/Déverrouiller : verrouille le fichier audio pour en empêcher la suppression accidentelle, le déverrouille pour en
permettre la suppression.
– Visibilité Bluetooth : permet d’activer la visibilité de votre téléphone à d’autres appareils Bluetooth.
– Propriétés : affiche le nom, le format, la taille, la possibilité de renvoi, la date et l’heure de création et l’emplacement de
stockage.
6. Pour quitter, pressez la touche programmable Retour ou la touche .
Alarmes
Cet outil vous permet de :
• régler une alarme qui se déclenchera à une heure précise.
• programmer le téléphone pour qu'il se mette automatiquement en marche et émette l'alarme à l’heure prévue, même s’il
est éteint.
Pour régler une alarme :
1. Dans l’écran de veille, pressez ➔ Outils ➔ Alarmes ou pressez ➔ Alarmes.
2. Les options suivantes sont offertes :
• Réveil : l’alarme sonne pour vous réveiller à une heure désignée.
• Alarme 1 : réglage de la première alarme.
• Alarme 2 : réglage de la deuxième alarme.
• Alarme 3 : réglage de la troisième alarme
• Alarme 4 : réglage de la quatrième alarme.
• Mise en marche auto : si l’option est activée, les alarmes sonnent même si le téléphone est éteint.
3. Sélectionnez un type d’alarme et pressez Options ➔ Sélect. ou la touche .
4. Réglez les options suivantes :
• Nom : permet de nommer l’alarme. Le nom apparait à l’écran lorsque l’alarme s’active, mais n’apparait pas si le
type d’alarme est réglé à réveil.
• Activation de l’alarme : permet d’activer ou de désactiver l’alarme. Sélectionnez Activé pour changer les autres
champs.
• Heure de l’alarme : utilisez le clavier pour entrer l’heure de l’alarme.
89
Nota : L’affichage de l’heure est prédéfini en format 12 h.
• Type d’alarme : pressez la touche pour choisir le type d’alarme. Les options sont : Mélodie, Vibreur,
Vibreur puis mélodie, Vibreur et mélodie.
• Tonalité d’alarme : pressez la touche pour choisir une tonalité dans le dossier Sons.
• Volume de l’alarme : pressez la touche de navigation de gauche ou droite pour régler le volume de l’alarme (1 à 7).
• Fréquence : pressez la touche pour ouvrir le menu de la récurrence de l’alarme. Cochez les jours où
vous voulez utliser cette alarme et pressez la touche programmable OK pour sauvegarder.
• Rappel d’alarme : permet de définir un délai de rappel (Désactivé, 5, 10, 15, 20 ou 30 minutes).
• Répéter : permet de définir un nombre de répétitons de rappel (1, 2, 3, 5 ou 10 fois). L’option Rappel d’alarme doit
être activée pour utiliser cette option).
5. Pressez la touche pour sauvegarder.
Nota : Pour arrêter l’alarme lorsqu’elle sonne, pressez une touche ou les touches de volume. Pressez la touche programmable
OK pour éteindre l’alarme.
Configurer l’activation auto des alarmes
Vous pouvez régler le téléphone pour qu’il émette les alarmes à l’heure prévue, même s’il est éteint.
1. Dans l’écran de veille, pressez ➔ Outils ➔ Alarmes ou pressez ➔ Alarmes.
2. Mettez en évidence Mise en marche auto et pressez la touche .
3. Mettez en évidence Activé et pressez la touche programmable Sauvegard.. ou la touche pour
activer la fonction.
Nota : Si l’option de menu est réglée à Désactivé et le téléphone est éteint à l’heure désignée, l’alarme ne sonnera pas.
4. Pressez pour revenir à l’écran de veille.
Outils 90
Calendrier
Cet outil permet d’afficher les mois, les semaines ou les jours. Vous pouvez ajouter des rendez-vous, des
anniversaires, des congés, des évènements importants ou privés. Il permet aussi d’afficher les alarmes
d’évènements manqués.
Pour afficher le calendrier :
1. Dans l’écran de veille, pressez ➔ Outils ➔ Calendrier ou ➔ Calendrier.
Astuce : Dans l’écran de veille, pressez brièvement la touche pour afficher le calendrier en mode Mois.
2. Pressez la touche programmable Options. Mettez en évidence Créer et pressez la touche de
navigation de droite.
3. Sélectionnez l’un des types d’évènements suivants et pressez la touche programmable Sélect. ou la
touche .
• Rendez-vous
• Anniversaire
• Congés
• Important
• Privé
4. Les options du calendrier sont :
• Afficher : permet d’afficher une date spécifiée.
• Mode d’affichage : permet de choisir entre l’affichage Jour, Semaine ou Mois.
• Créer : permet de sélectionner une catégorie d’évènement : Rendez-vous, Anniversaires, Congés, Important ou
Privé.
• Aller à : permet d’aller directement à la page du jour présent ou à une date spécifiée.
• Liste d’évènements : permet de se référer à des évènements programmés dans votre calendrier selon le type
d’évènement : Rendez-vous, Anniversaire, Congé, Important ou Privé.
91
• Supprimer : permet de supprimer l’évènement sélectionné, les évènements d’une période, de ce mois, antérieurs à
une date (Avant le) ou tous les évènements (Tout). Cette option n’apparait que si des évènements sont inscrits à
votre calendrier.
• Paramètres : permet de configurer le 1er jour de la semaine (Jour de début) et le Mode d’affichage par défaut (Mois,
Semaine ou Jour).
• Évènements manqués : affiche tous les évènements manqués.
• Espace utilisé : affiche la liste de diverses catégories d’évènements avec la quantité de mémoire utilisée pour
chacune.
Rendez-vous
1. Dans l’écran de veille, pressez ➔ Outils ➔ Calendrier ou ➔ Calendrier.
2. Pressez la touche programmable Options. Mettez en évidence Créer et pressez la touche de navigation
de droite.
3. Mettez en évidence Rendez-vous et pressez la touche programmable Sélect. ou la touche . Les
options offertes sont :
• Titre : pernet d’ajouter un titre (jusqu’à 15 caractères).
• Détails : permet d’ajouter une description (jusqu’à 100 caractères).
• Date de début : permet d’entrer la date de début.
• Heure de début : permet d’entrer l’heure de début. Utilisez la touche de navigation de droite pour sélectionner AM ou PM.
• Date de fin : permet d’entrer la date de fin.
• Heure de fin : permet d’entrer l’heure de fin. Utilisez la touche de navigation de droite pour sélectionner AM ou PM .
• Lieu : permet d’entrer une description du lieu (jusqu’à 15 caractères).
• Alarme : permet de régler une alarme. Pressez la touche pour sélectionner cette option. Une fois sélectionnée, les
options suivantes sont activées :
– Avant : permet de régler le délai de rappel (min, heure, jour) avant le rendez-vous.
– Tonalité d’alarme : permet de choisir une tonalité d’alarme. Une fois mise en évidence, pressez la touche pour
sélectionner un fichier audio.
• Répéter : permet de régler la récurrence de ce rendez-vous (Tous les jours, Toutes les semaines ou Tous les mois).
Pressez la touche pour sélectionner cette option. Une fois sélectionnée, les options suivantes sont activées :
Outils 92
– Tous les : permet de régler le délai de répétition.
– Sauf le weekend : permet d’exclure les jours de weekend (si l’option Tous les jours est sélectionnée).
– Jusqu’à : permet d’entrer la date de fin.
4. Pressez pour sauvegarder le rendez-vous.
Anniversaire
1. Dans l’écran de veille, pressez ➔ Outils ➔ Calendrier ou ➔ Calendrier.
2. Pressez la touche programmable Options. Mettez en évidence Créer et pressez la touche de
navigation de droite.
3. Mettez en évidence Anniversaire et pressez la touche programmable Sélect. ou la touche . Les
options offertes sont :
• Titre : pernet d’ajouter un titre (jusqu’à 15 caractères).
• Détails : permet d’ajouter une description (jusqu’à 100 caractères).
• Date : permet d’entrer la date d’anniversaire.
• Alarme : permet de régler une alarme. Pressez la touche pour sélectionner cette option. Une fois sélectionnée, les
options suivantes sont activées :
– Avant : permet de régler le délai de rappel (min, heure, jour) avant l’anniversaire.
– Heure de l’alarme : permet de régler l’heure à partir de laquelle vous serez informé de l’anniversaire. Utilisez la touche de
navigation de droite pour sélectionner AM ou PM.
– Tonalité d’alarme : permet de choisir une tonalité d’alarme. Une fois mise en évidence, pressez la touche pour
sélectionner un fichier audio.
• Tous les ans : permet d’activer cet anniversaire tous les ans. Pressez la touche pour sélectionner cette option.
4. Pressez pour sauvegarder l’anniversaire.
Nota : Les autres types d’évènements (Congé, Important ou Privé) contiennent des champs similaires, les étapes de création
sont donc les mêmes.
Afficher un évènement
1. Dans l’écran de veille, pressez ➔ Outils ➔ Calendrier ou ➔ Calendrier.
93
2. Le calendrier s’affiche avec la date d’aujourd’hui mise en évidence.
3. Sélectionnez la date de l’évènement que vous souhaitez voir et pressez la touche ou utilisez la
touche de navigation pour sélectionner une date contenant un évènement.
Nota : Les icônes apparaissant au bas de l’écran indiquent les types d’évènements programmés pour le jour sélectionné.
Si une alarme est programmée, l’icône apparait à côté de l’évènement auquel elle est associée.
4. Pressez la touche de navigation du haut ou du bas pour aller à l’évènement précédent ou suivant.
Mettez en évidence une entrée et pressez la touche programmable Options. Les options offertes sont :
• Afficher : permet d’afficher les détails de l’évènement sélectionné.
• Mode d’affichage : permet de choisir le type d’affichage du calendrier. Les options sont : Semaine (une semaine à la
fois), Mois (un mois à la fois) et Jour (un jour à la fois).
• Créer : permet d’ajouter un évènement au jour sélectionné.
• Envoyer via : permet d’ajouter une liste d’évènements dans un message ou de l’envoyer par Bluetooth.
• Liste d’évènements : permet de se référer à des évènements programmés dans votre calendrier selon le type
d’évènement : Rendez-vous, Anniversaire, Congé, Important ou Privé.
• Supprimer : permet de supprimer l’évènement sélectionné, les évènements d’une période, de ce mois, antérieurs à
une date (Avant le) ou tous les évènements (Tout).
• Sauvegarder dans Mes trucs : permet de sauvegarder l’entrée au calendrier dans le dossier Mes trucs.
Indique un Rendez-vous.
Indique un Anniversaire.
Indique une évènement Important.
Indique un Congé.
Indique un évènement Privé.
Outils 94
• Imprimer via Bluetooth : imprime la liste des évènements au moyen d’une imprimante compatible à Bluetooth.
• Paramètres : permet de configurer le 1er jour de la semaine (Jour de début) et le Mode d’affichage par défaut (Mois,
Semaine ou Jour).
• Évènements manqués : affiche tous les évènements manqués.
• Espace utilisé : affiche la liste de diverses catégories d’évènements avec la quantité de mémoire utilisée pour
chacune.
5. Pressez pour revenir à l’écran de veille.
Tâches
Cet outil vous permet d’entrer une liste de tâches, de façon similaire aux entrées de calendrier expliquées
précédemment.
1. Dans l’écran de veille, pressez ➔ Outils ➔ Tâches.
2. Pressez la touche programmable Options. Mettez en évidence Créer, et pressez la touche
programmable Sélect. ou la touche . Les options suivantes s’affichent :
• Titre : pernet d’ajouter un titre (jusqu’à 15 caractères).
• Détails : permet d’ajouter une description (jusqu’à 100 caractères).
• Date de début : permet d’entrer la date de début.
• Date d’exécution : permet d’entrer la date d’échéance.
• Alarme : permet de régler une alarme. Pressez la touche pour sélectionner cette option. Une fois sélectionnée, les
options suivantes sont activées :
– Date d’alarme : permet d’entrer la date à partir de laquelle l’alarme sonnera.
– Heure de l’alarme : permet de régler l’heure à partir de laquelle l’alarme sonnera. Utilisez la touche de navigation de droite
pour sélectionner AM ou PM.
– Tonalité d’alarme : permet de choisir une tonalité d’alarme. Une fois mise en évidence, pressez la touche pour
sélectionner un fichier audio.
• Priorité : permet de sélectionner le niveau de priorité de vos tâches (1, 2 ou 3).
3. Pressez la touche pour sauvegarder la nouvelle tâche.
95
Notes
Cet outil vous permet de créer des notes que vous pourrez consulter ultérieurement.
1. Dans l’écran de veille, pressez ➔ Outils ➔ Notes.
2. L’écran Vide s’ouvre. Pressez la touche programmable Options. Mettez en évidence Créer et pressez la
touche programmable Sélect. ou la touche .
3. Saisissez votre texte et pressez la touche programmable Options, sélectionnez Sauvegard.. et pressez
la touche ou pressez la touche .
Calculatrice
Cet outil permet d'utiliser le téléphone comme calculatrice avec les fonctions arithmétiques de base (addition,
soustraction, multiplication et division).
1. Dans l’écran de veille, pressez ➔ Outils ➔ Calculatrice.
2. Entrez la première valeur de l’opération avec les touches numérotées.
Nota : Pour insérer une décimale ou une parenthèse, pressez la touche de navigation de gauche jusqu’à ce que le symbole
désiré apparaisse.
3. Entrez les opérateurs à l’aide des touches de navigation comme indiqué à l’écran.
4. Entrez la deuxième valeur.
5. Pour voir le résultat, pressez .
Calculateur de pourboire
Cet outil permet de calculer automatiquement le montant du pourboire et la part individuelle à partir du montant
total de l’addition, du pourcentage sélectionné et du nombre de personnes qui se partagent la facture.
1. Dans l’écran de veille, pressez ➔ Outils ➔ Calculateur de pourboire.
2. Entrez les valeurs dans les champs appropriés à l’aide des touches numérotées.
• Facture
• Pourboire(%)
Outils 96
• nb à payer
Nota : Pour insérer une décimale, pressez .
3. Les autres champs sont :
• Pourboire($) : le montant du pourboire calculé à partir des valeurs entrées.
• Vs payez : votre part du montant total. Cette valeur tient compte de la valeur entrée dans le champ nb à payer.
Convertisseur
Cet outil de conversion offre les catégories de conversion suivantes :
• Devise
• Longueur
• Poids
• Volume
• Surface
• Température
1. Dans l’écran de veille, pressez ➔ Outils ➔ Convertisseur.
2. Mettez en évidence la fonction de conversion voulue, puis pressez la touche programmable Sélect. ou
la touche .
3. Chaque fonction du convertisseur a un champ pour le type d’unités à convertir (unités de départ) et
pour le type d’unités d’arrivée. Un champ supplémentaire permet d’indiquer le nombre d’unités à
convertir.
4. La valeur des unités converties s’affiche automatiquement en dessous du second champ d’unités. Pour
une meilleure précision, le résultat s’affiche avec des décimales.
Fuseaux horaires
Cet outil permet d’afficher l’heure du jour et de la nuit dans d’autres parties du monde. L’heure est affichée
dans 30 villes différentes, dans les 24 zones horaires mondiales.
97
Ajouter un nouveau fuseau horaire
1. Dans l’écran de veille, pressez ➔ Outils ➔ Fuseaux horaires.
Votre fuseau horaire s’affiche avec le nom des villes, la date et l’heure.
2. Pour ajouter un nouveau fuseau horaire, sélectionnez Options ➔ Ajouter et pressez la touche .
3. Pressez la touche de navigation de gauche ou de droite pour mettre en évidence le fuseau horaire
voulu.
4. Mettez en évidence le champ Heure d’été et pressez la touche pour cocher la fonction et ainsi
l’activer.
5. Pressez la touche programmable Sauvegard.. pour confirmer les changements.
6. Le nouveau fuseau horaire apparait à l’écran.
Modifier un fuseau horaire
1. Dans l’écran de veille, pressez ➔ Outils ➔ Fuseaux horaires.
Votre fuseau horaire s’affiche avec le nom des villes, la date et l’heure.
2. Pour modifier un fuseau horaire, sélectionnez Options ➔ Modifier et pressez la touche .
3. Pressez la touche de navigation de gauche ou de droite pour mettre en évidence le fuseau horaire que
vous souhaitez modifier.
4. Mettez en évidence le champ Heure d’été et pressez la touche pour cocher l’activer.
5. Pressez la touche programmable Sauvegard.. pour confirmer les changements.
Minuteur
Vous pouvez utiliser cet outil pour effectuer un décompte.
1. Dans l’écran de veille, pressez ➔ Outils ➔ Minuteur.
2. Pressez la touche programmable Régler pour entrer la durée du décompte.
Outils 98
3. Entrez la durée et pressez la touche programmable OK.
4. Pressez la touche pour démarrer le minuteur. Pressez la touche pour l’arrêter.
Chronomètre
Vous pouvez utiliser cet outil pour mesurer jusqu’à 50 intervalles de temps.
1. Dans l’écran de veille, pressez ➔ Outils ➔ Chronomètre.
2. Pressez la touche pour démarrer le chronomètre. Pressez la touche pour enregistrer un
tour (intervalle).
3. Pressez la touche programmable Arrêter pour arrêter le chronomètre. Pressez la touche
programmable Réinit. pour effacer toutes les valeurs enregistrées.
99
Chapitre 10 : Web
Ce chapitre décrit les fonctionnalités Web qu’offre votre téléphone.
Accéder au Web
Votre téléphone est équipé d’un navigateur offrant une connectivité sans fil pour accéder au Web.
1. Dans l’écran de veille, pressez la touche programmable Navigateur ou pressez ➔Navigateur ou
pressez la touche Multitâche et sélectionnez Navigateur.
Votre téléphone se connecte au réseau et la page d’accueil s’affiche.
Entrer du texte dans le navigateur
Lorsque vous naviguez dans le Web, vous êtes souvent appelé à entrer du texte, comme une URL. Vous
pouvez entrer des caractères alphanumériques à l’aide du clavier. Pour tout renseignement, consultez
«Entrée de texte» à la page 34.
Sélectionner et utiliser le menu des options
Divers menus s’offrent à vous lors de l’utilisation du navigateur pour naviguer sur le Web sans fil.
Les options suivantes sont offertes :
Ouvrir
Cette option permet d’ouvrir la page Web sélectionnée.
Parcourir
Cette option permet de revenir à la page précédente, de recharger la page, d’aller à la page d’accueil ou
d’afficher la page Web en plein écran.
Affichage standard
Cette option permet de choisir le mode d’affichage de la page Web. Les options sont : Affichage standard ou
Vue smart-width.
Web 100
Afficher les signets
Cette option permet de sélectionner une page Web mise en signet.
Ajouter à Signets
Cette option permet de mettre en signet une page Web sélectionnée. Une fois la page mise en signet, vous
pouvez y accéder par le biais de l’option Afficher les signets.
Saisir l’URL
Cette option permet d’entrer manuellement l’adresse URL du site Web et d’accéder au site. Pour en savoir
davantage sur l’entrée de texte, consultez «Entrée de texte» à la page 34.
Avancé
Cette option permet d’afficher l’historique de navigation, d’envoyer une page Web et de sauvegarder la page
Web dans le téléphone. Les options offertes sont :
• Historique : affiche l’historique de navigation.
• Envoyer l’URL par : envoie l’URL en cours dans un message ou par Bluetooth.
• Sauvegarder : permet d’enregistrer l’image ou la page Web.
• Pages sauvegardées : affiche la liste des pages sauvegardées.
• Détails de la page : affiche les détails de la page en cours : Titre, URL, Type de contenu MIME, Dernière mise
à jour et Taille.
Paramètres du navigateur
Divers paramètres sont disponibles pour configurer votre navigation sans fil dans Internet.
Vider les caches
Vous pouvez effacer l’information stockée dans la mémoire cache, une mémoire temporaire de votre
téléphone où sont stockées les pages Web consultées récemment.
Témoins
Les témoins transmettent de l’information à votre sujet lorsque vous visitez des sites Web. lls peuvent
également servir à surveiller vos habitudes de navigation.
101
• Vider les témoins : cette option permet de supprimer les témoins. La suppression des témoins améliore la sécurité
sur votre téléphone.
• Options du témoin : cette option permet d’accepter tous les témoins (Accepter tout), de les rejeter (Rejeter tout) ou de
demander l’autorisation (Invite) lorsque’un site souhaite ajouter un témoin.
Préférences
Cette option permet de régler vos préférences Web, comme Exécuter JavaScript, Afficher les images, Jouer un
son ou Exécuter Flash.
Certificats
Cette option permet de choisir entre les certificats de base et les certificats de l’AC.
Profils du navigateur
Cette option permet de sélectionner diverses options offertes par votre fournisseur de services.
À propos du navigateur
Cette option affiche l’information sur le navigateur comme le type et la version.
Paramètres 102
Chapitre 11 : Paramètres
Ce chapitre explique comment utiliser diverses fonctions du téléphone et comment modifier ou personnaliser
les paramètres d’affichage, de sécurité, des appels et d’autres paramètres de votre téléphone.
Profil de son
Ce menu permet de personnaliser les divers profils de son de votre téléphone.
1. Dans l’écran de veille, pressez ➔ Paramètres ➔ Profil de son.
2. Sélectionnez l’une des options et pressez la touche programmable Modifier pour accéder aux
paramètres de son.
3. Pressez la touche programmable Changer pour changer des paramètres particuliers.
4. Pressez la touche programmable Sauvegard.. lorsque vous avez terminé.
Profil Normal
1. Pressez la touche programmable Modifier pour accéder aux paramètres de son de ce profil.
2. Pressez la touche de navigation de gauche ou de droite pour aller d’un onglet à l’autre.
3. Sélectionnez l’un des champs et pressez la touche programmable Changer pour changer le paramètre.
Onglet Appel
• Type d’alerte d’appel : permet de sélectionner le type d’alerte utilisé lors de la réception d’un appel.
– Mélodie : le téléphone fait jouer la mélodie sélectionnée.
– Vibreur : le téléphone vibre.
– Vibreur puis mélodie : le téléphone vibre, puis fait jouer la mélodie.
– Vibreur et mélodie : le téléphone vibre et fait jouer la mélodie.
• Sonnerie d’appel vocal : permet de sélectionner une sonnerie dans le dossier Sons du téléphone qui comprend non
seulement les sonneries par défaut, mais aussi les sonneries téléchargées.
• Volume de la sonnerie : permet de régler le volume de la sonnerie. Le niveau varie de 1 à 7.
103
Onglet Message
• Type d’alerte message : permet de sélectionner le type d’alerte utilisé lors de la réception d’un message texte ou
multimédia.
– Mélodie : le téléphone fait jouer la mélodie sélectionnée.
– Vibreur : le téléphone vibre.
– Vibreur et mélodie : le téléphone vibre et fait jouer la mélodie.
– Muet : le téléphone ne vibre ni ne fait jouer une sonnerie. La seule indication de la réception d’un message est l’affichage
d’une alerte sur l’écran.
• Tonalité d’alerte message : permet de sélectionner une tonalité utilisée lors de la réception d’un message.
• Répétition d’alerte message : permet de choisir si la tonalité joue une seule fois ou de façon périodique.
• Volume de tonalité du message : permet de régler le volume de la tonalité d’alerte. Le niveau varie de 1 à 7.
Onglet Téléphone
• Tonalité du clavier : permet de choisir la tonalité (Bip, Métallique, Boîte de musique, Brillant et Muet (aucune tonalité))
lorsque vous pressez les touches du téléphone.
• Type de mise en marche : permet de sélectionner le type d’alerte utilisé lorsque vous allumez le téléphone.
– Mélodie : le téléphone fait jouer la mélodie sélectionnée.
– Vibreur : le téléphone vibre.
– Vibreur et mélodie : le téléphone vibre et fait jouer la mélodie.
– Muet : le téléphone ne vibre ni ne fait jouer une sonnerie.
• Type de mise en arrêt : permet de sélectionner le type d’alerte utilisé lorsque vous éteignez le téléphone.
– Mélodie : le téléphone fait jouer la mélodie sélectionnée.
– Vibreur : le téléphone vibre.
– Vibreur et mélodie : le téléphone vibre et fait jouer la mélodie.
– Muet : le téléphone ne vibre ni ne fait jouer une sonnerie.
• Volume des sons du téléphone : permet de régler le volume du téléphone lorsque vous allumez le téléphone. Les
changements apportés pendant l’utilisation du téléphone ne sont pas conservés, ces paramètres par défaut est réactivé
après la remise en marche du téléphone.
Paramètres 104
Autres profils offerts
Vous pouvez activer d’autres profils sonores sur votre téléphone à partir du menu Profils de son. Bien que ces
profils soient similaires, chacun des profils est prédéfini avec différents paramètres sonores pour les alertes
d’appel entrant, les alertes de message et l’utilisation du téléphone. Pour tout renseignement, consultez
«Icônes» à la page 14.
Nota : Le profil Silencieux peut aussi être activé en pressant fermement la touche ou en réduisant le volume à 0. Un
message s'affiche à l'écran pour vous aviser que le profil Silencieux est actif. Pour désactiver le profil Silencieux, pressez
de nouveau fermement la touche et augmenter le volume avec la touche de volume.
Nota : Pour changer un profil, mettez en évidence le profil désiré dans l’écran Profil de son et pressez la touche Modifier .
Faites les changements nécessaires et pressez la touche programmable Sauv..
Paramètres d’affichage
Ce menu permet de modifier les paramètres d’affichage.
1. Dans l’écran de veille, pressez ➔ Paramètres ➔ Paramètres d’affichage.
Les options suivantes sont offertes :
S’affiche si le profil du téléphone est réglé à Silencieux. Dans ce cas, le hautparleur est désactivé, le
téléphone n’émet que des vibrations pour toute notication et affiche l’information sur l’écran externe.
S’affiche si le profil du téléphone est réglé à Voiture. Dans ce cas, le hautparleur est activé, le téléphone
fait entendre la sonnerie ou la mélodie associée à la notification activée. Vous pouvez également régler
l’envoi automatique d’une réponse à un appel vocal ou un message texte entrant.
S’affiche si le profil du téléphone est réglé à Extérieur. Dans ce cas, le hautparleur est activé, le volume
est réglé au maximum, toutes les sonneries et mélodies sont activées, ainsi que la fonction vibration
du téléphone. L’icône apparait avec l’icône Vibreur/Audio. Vous pouvez également régler l’envoi
automatique d’une réponse à un appel vocal ou un message texte entrant.
105
• Écran principal
• Affichage extérieur
• Paramètres d’éclairage
2. Sélectionnez une option et pressez la touche .
Écran principal
• Papier peint : permet de sélectionner Photo ou Aucun. L’option Aucun laisse l’arrière-plan sans papier peint. Pressez la
touche programmable Modifier et parcourez les images du dossier Photos (dans le téléphone ou la carte de mémoire) pour
sélectionner votre papier peint. Pressez la touche programmable Sélect. ou la touche pour confirmer votre sélection.
• Mon thème : permet de sélectionner parmi différents thèmes. Faites votre choix et pressez la touche programmable
Sauvegard...
• Type de menu : permet de sélectionner le type d’affichage des menus : Grille ou Liste. Mettez en évidence votre sélection et
pressez la touche programmable Sauvegard...
• Affichage de la numérotation : règle la police et l’arrière-plan de la numérotation :
– Type de police : permet de sélectionner la police utilisée. Pressez la touche de navigation de gauche ou de droite pour
faire votre sélection : Normale 1, Normale 2 ou Utiliser un thème. Pressez la touche programmable Sauvegard.. ou la
touche pour confirmer votre sélection.
– Taille de police : permet de sélectionner la taille de la police sélectionnée. Pressez la touche de navigation de gauche
ou de droite pour faire votre sélection : Volumineux (Grande), Moyenne ou Peu volumineux (Petite). Pressez la touche
programmable Sauvegard.. ou la touche pour confirmer votre sélection.
– Couleur de police : permet de sélectionner une couleur pour la police sélectionnée. Pressez la touche de navigation de
gauche ou de droite pour faire votre sélection : Monochrome, Dégradé ou Normal. Pressez la touche de navigation du
bas et sélectionnez votre choix de couleur. Pressez la touche programmable Sauvegard.. ou la touche pour
confirmer votre sélection.
– Couleur d’arrière-plan : permet de sélectionner une couleur pour l’arrière-plan. Pressez la touche de navigation de
gauche ou de droite pour faire votre sélection. Pressez la touche programmable Sauvegard.. ou la touche pour
confirmer votre sélection.
• Message d’accueil : permet d’entrer le texte que vous voulez afficher en guise de message d’accueil lorsque le téléphone
s’allume.
Paramètres 106
Affichage extérieur
• Papier peint : permet de sélectionner Horloge, Mon image ou Slogan de l’écran.
– Pour choisir le type d’horloge, mettez en évidence l’option Horloge et pressez la touche programmable Modifier.
Pressez la touche de navigation de gauche ou de droite pour afficher les options Horloge numérique 1, Horloge
numérique 2, Horloge analogique 1 et Horloge analogique 2. Pressez la touche programmable Sauvegard.. ou la
touche pour confirmer votre sélection.
– Pour choisir une image comme papier peint, mettez en évidence l’option Mon image et pressez la touche
programmable Modifier. Pressez la touche programmable Changer et parcourez les images dans le dossier Photos
du menu Mes trucs pour choisir un papier peint. Utilisez les touches programmables pour faire un zoom avant ou
arrière et les touches de navigation pour centrer le cadre sur la partie de l’image que vous souhaitez conserver.
Pressez la touche , puis pressez Options ➔ Régler ou la touche pour confirmer votre sélection.
– Pour rédiger un slogan de l’écran, mettez en évidence l’option Slogan de l’écran et pressez la touche programmable
Modifier. La zone de texte s’active et affiche le slogan par défaut. Pressez la touche pour effacer le slogan
actuel et utilisez les options d’entrée de texte et le clavier pour entrer votre slogan. Pressez la touche programmable
Sauvegard.. ou la touche pour confirmer votre sélection.
• Message d’accueil : permet d’entrer le texte que vous voulez afficher en guise de message d’accueil lorsque le téléphone
s’allume.
Paramètres d’éclairage
Nota : Les paramètres d’éclairage peuvent influer sur la durée de charge de la pile.
• Luminosité : permet de régler la luminosité de l’écran pour maximiser l’affichage sous différentes conditions d’éclairage.
Pressez la touche de navigation de gauche ou de droite pour régler la luminosité. Pressez la touche programmable
Sauvegard.. ou la touche pour confirmer votre sélection.
• Durée du rétroéclairage : permet de régler la période durant laquelle le rétroéclairage demeure à pleine intensité et
s’atténue lorsque le téléphone tombe en veille. Mettez en évidence le champ Activé et pressez la touche programmable
Changer, utilisez la touche de navigation du haut ou du bas pour choisir entre 10 secondes, 30 secondes, 1 minute,
3 minutes ou 10 minutes. Pour le champ Tamisage, choisissez entre Désactivé, 5 secondes, 10 secondes, 30
secondes, 1 minute, 3 minutes ou 10 minutes. Pressez la touche programmable OK ou la touche pour
confirmer votre sélection, puis pressez la touche programmable Sauvegard...
107
Heure et date
Ce menu permet de modifier l’heure et la date affichées. Vous pouvez également afficher l’heure d’autres
régions du monde.
1. Dans l’écran de veille, pressez ➔ Paramètres ➔ Heure et date.
Utilisez la touche de navigation pour parcourir et régler les options. Les options suivantes sont offertes :
• Mise à jour fuseau horaire : permet d’activer la mise à jour de l’information de votre fuseau horaire. Les options sont :
Automatique (les autres options sont voilées), D’abord demander ou Manuel seulement.
• Fuseau horaire : permet de choisir votre fuseau horaire selon le temps universel. Les principales villes de chacun des
fuseaux horaires s’affichent. Pressez la touche Changer et pressez la touche de navigation de gauche ou de droite pour
sélectionner un nouveau fuseau. Si vous souhaitez que le téléphone active automatiquement l’heure d’été, mettez en
évidence le champ et pressez Cochez. Pressez la touche programmable Sauvegard.. pour sauvegarder les
changements.
Astuce : Vous pouvez activer l’heure d’été à partir du menu Fuseau horaire.
• Durée (Heure) : permet d’entrer l’heure à l’aide du clavier. Pressez la touche de navigation de droite pour sélectionner am
ou pm. Pressez la touche programmable Sauvegard.. ou la touche pour confirmer la sélection.
• Date : érmet d’entrer la date à l’aide du clavier. Pressez la touche de navigation pour passer d’un champ à l’autre (mois,
jour, année). Pressez la touche programmable Sauvegard.. ou la touche pour confirmer la sélection.
• Format de l’heure : permet de changer le format de l’heure entre 12 h ou 24 h. Pressez la touche de navigation pour
sélectionner une option. Pressez la touche programmable Sauvegard.. pour confirmer la sélection.
• Format de la date : permet de changer le format de la date. Pressez la touche de navigation de gauche ou de droite pour
choisir l’une des options. Pressez la touche programmable Sauvegard.. pour confirmer la sélection.
Nota : Les mises à jour automatiques de l’heure et de la date ne changent pas l’heure programmée des alarmes et des
évènements au calendrier.
Téléphone
Vous pouvez personnaliser divers paramètres du téléphone.
1. Dans l’écran de veille, pressez ➔ Paramètres ➔ Téléphone.
Paramètres 108
Utilisez la touche de navigation pour parcourir et régler les options. Les options suivantes sont offertes :
Langue
Cette fonction permet de sélectionner la langue pour le texte affiché à l’écran et la saisie de texte.
Texte de l’écran
Cette option permet de sélectionner la langue d’affichage de l’interface du téléphone.
1. Mettez en évidence votre sélection à l’aide de la touche de navigation du haut ou du bas. Les options
sont :
• Automatique : la langue est automatiquement sélectionnée selon la langue de la carte SIM.
• English : la langue de l’interface du téléphone passe à English (Anglais).
• Français : la langue de l’interface du téléphone passe à Français.
2. Pressez la touche programmable OK ou la touche pour confirmer votre sélection.
3. Pressez la touche programmable Sauvegard.. pour confirmer votre sélection.
Langue de saisie
Cette option permet de sélectionner la langue utilisée lorsque vous saisissez du texte.
1. Mettez en évidence votre sélection à l’aide la touche de navigation du haut ou du bas. Les options
sont :
• English : la langue de saisie est passe à English (Anglais).
• Français : la langue de saisie passe à Français.
2. Pressez la touche programmable OK ou la touche pour confirmer votre sélection.
3. Pressez la touche programmable Sauvegard.. pour confirmer votre sélection.
Raccourcis
Cette option permet de changer les applications assignées aux touches de navigation.
1. Pressez une touche de navigation et pressez la touche programmable Options.
109
2. Mettez en évidence Changer et pressez la touche . Sélectionnez la nouvelle application à assigner
à la touche sélectionnée au préalable.
3. Pressez la touche programmable Sauvegard.. ou la touche pour assigner la nouvelle application.
Numéro personnel
Cette option affiche le numéro assigné à la carte SIM insérée dans votre téléphone. Vous pouvez changer le
numéro, mais la saisie d’un autre numéro peut vous empêcher de faire ou de recevoir des appels. Vous
pouvez aussi stocker des noms et numéros de téléphone personnels dans votre téléphone pour un accès
pratique.
Sécurité
Cette fonction permet de restreindre, à l’aide de divers codes et mots de passe, l’utilisation du téléphone par
d’autres personnes et les types d’appel effectués.
Les options suivantes sont offertes :
Verrouiller le téléphone
Lorsque cette option est activée, le téléphone est verrouillé et vous devez entrer le mot de passe de 4 à 8
chiffres chaque fois que le téléphone est allumé.
Nota : On vous demandera de créer un mot de passe lors de la première activation de cette fonction.
Pour changer le mot de passe, consultez «Changer le mot de passe du téléphone» à la page 111. Une fois
le mot de passe correctement entré, vous pouvez utiliser le téléphone jusqu’à ce que vous l’éteigniez. Les
options suivantes sont offertes :
– Activé : un mot de passe vous est demandé lorsque vous allumez le téléphone.
– Désactivé : aucun mot de passe n’est demandé lorsque vous allumez le téléphone.
Verrouiller la carte SIM
Lorsque cette option est activée, votre téléphone ne fonctionne qu’avec la carte SIM actuelle. Vous devez
entrer le code de verrouillage pour déverrouiller la carte SIM et pouvoir utiliser une autre carte SIM. Une fois le
code de verrouillage entré, on vous demande de confirmer le mot de passe. Entrez de nouveau le mot de
passe et pressez la touche programmable Confirmer.
Paramètres 110
Nota : Ce code de verrouillage est souvent composé des quatre derniers chiffres du numéro de téléphone, sinon vous pouvez
l’obtenir du service à la clientèle de votre fournisseur de services.
Vérifier NIP
Lorsque cette option est activée, vous devez entrer votre NIP chaque fois que vous allumez le téléphone.
Ainsi, quelqu’un qui ne connait pas votre NIP ne peut faire d’appel sans votre accord. Le NIP est
généralement fourni avec la carte SIM.
Les options suivantes sont offertes :
– Activé : vous devez entrer un NIP à toutes les fois que vous allumez le téléphone.
– Désactivé : le téléphone se connecte directement au réseau lorsqu’il est allumé.
Nota : Avant de désactiver cette option, vous devez entrer votre NIP. Vous pouvez obtenir votre NIP du service à la clientèle de
votre fournisseur de services.
Verrouiller les applications
Cette option permet de verrouiller vos applications. Lorsque ces contenus sont verrouillés, vous devez entrer
le mot de passe du téléphone pour y accéder.
Nota : La première fois que vous accédez à l’écran de mot de passe, on vous demande de créer votre mot de passe.
Les options sont :
– Tout
– Messages
– Appels récents
– Mes trucs
– Calendrier
– Tâches
– Notes
– Contacts
111
Régler Mode Numéros autorisés
Ce mode, si pris en charge par votre carte SIM, permet de restreindre les appels sortants de votre téléphone à
un lot de numéro limité. Les options suivantes sont offertes :
• Activé : votre téléphone ne peut appeler que les numéros de téléphone stockés dans votre liste de contacts autorisés.
Vous devez entrer votre NIP2. Lorsque vous voulez entrer des numéros autorisés dans votre liste de contacts, les options
suivantes sont offertes :
• Des entrées de nom complètes ou des caractères de remplacement peuvent être saisis dans la liste de numéros
d’appels autorisés.
• Un numéro pleine longueur avec un nom de contact spécifique peut être entré dans la liste de numéros autorisés.
• Les caractères de remplacement permettent de composer une série de numéros avec une seule entrée : ex. 555 –
Toutes les entrées commençant par 555 sont autorisées. Les numéros qui ne satisfont pas à ces conditions dans la
liste des numéros autorisés sont restreints.
• Désactivé : vous pouvez appeler tous les numéros.
Nota : L’entrée d’un astérisque (*) n’est pas nécessaire pour les caractères de remplacement.
Changer le mot de passe du téléphone
Cette option permet de changer le mot de passe actuel du téléphone. Une fois le nouveau mot de passe entré,
on vous demande de le confirmer en l’entrant de nouveau.
Modifier le code de sécurité
Cette option permet de changer le code de sécurité actuel. Une fois le nouveau mot de passe entré, on vous
demande de le confirmer en l’entrant de nouveau.
Modifier NIP
Cette option permet de changer votre NIP, si l’option Vérifier NIP est activée. Vous devez saisir le NIP actuel
avant de définir un nouveau NIP. Une fois le nouveau NIP entré, on vous demande de confirmer ce nouveau
NIP en l’entrant de nouveau.
Paramètres 112
Modifier NIP2
Cette option permet de changer votre NIP2. Vous devez saisir le NIP2 actuel avant de définir un nouveau
NIP2. Une fois le nouveau NIP2 entré, on vous demande de confirmer ce nouveau NIP2 en l’entrant de
nouveau.
Nota : Si votre carte SIM ne requiert pas de NIP2, ce menu ne s’affiche pas.
Réinitialiser le téléphone
Cette fonction permet de réinitialiser tous les paramètres par défaut du téléphone. Pour réinitialiser votre
téléphone :
1. Dans l’écran de veille, pressez ➔ Paramètres ➔ Téléphone ➔ Réinitialiser le téléphone.
2. À l’invite Restituer tous les paramètres d’usine. Continuer?, pressez Oui pour réinitialiser ou Non
pour annuler.
3. Entrez le mot de passe du téléphone et pressez la touche programmable Confirmer.
4. Après que les paramètres du téléphone ont été réinitialisés, le message de confirmation Réinitialisation
complétée s’affiche.
Une fois la réinitialisation des paramètres par défaut effectuée pour les options sélectionnées, le
téléphone redémarre afin d’intégrer les nouveaux paramètres.
Nota : Les données de l’utilisateur, comme les contacts, les messages, les photos, les vidéos et la musique ne seront pas
supprimées.
Restaurer le téléphone
Cette fonction exécute la même action que la fonction Réinitialiser le téléphone décrite ci-dessus. Tous les
paramètres sont réinitialisés aux valeurs par défaut, mais de plus, toutes les données de l’utilisateur sont
effacées.
113
Avertissement! Toutes les données de l’utilisateur, comme les contacts, les messages, les photos, les vidéos et la musique seront
effacées. Assurez-vous de retirer la carte microSD, si vous souhaitez conserver les données qui y sont stockées, car
ces données seront également supprimées lors de la restauration du téléphone.
Avertissement! Lorsque vous exécutez une restauration du téléphone, n’enlevez pas la pile avant que le téléphone ait terminé la
restauration et redémarre. Autrement, le téléphone pourrait subir des dommages.
Mode Hors-ligne
Si ce mode est activé, vous pouvez utiliser d’autres fonctions du téléphone (p. ex., les jeux, la musique, les
notes, les mémos vocaux, etc.) en des endroits où il est interdit d'envoyer/recevoir des appels ou d'accéder à
Internet L’icône apparait dans l’écran de veille.
1. Dans l’écran de veille, pressez ➔ Paramètres ➔ Téléphone ➔ Mode Hors-ligne.
2. Sélectionnez Activé ou Désactivé et pressez la touche programmable Sauv..
3. Le message Mode Hors-ligne activé s’affiche.
Mode T-Coil
Ce mode vous permet d’utiliser un appareil auditif avec votre téléphone. Si le mode T-Coil est activé,
l’icône apparait dans l’écran de veille.
1. Dans l’écran de veille, pressez ➔ Paramètres ➔ Téléphone ➔ Mode T-Coil.
2. Sélectionnez Activer ou Désactiver et pressez la touche programmable Sauv..
3. Pressez la touche programmable Oui lorsque le message de confirmation s’affiche.
Important! La catégorie d’appareil auditif indiqué pour ce produit n’est compatible avec le téléphone que si le rabat est ouvert, car
l’efficacité de l’antenne est alors à son maximum. Lorsque cette option est activée et le téléphone est ouvert pendant
un appel, le mode t-Coil ajuste l’audio en fonction de l’utilisation de l’appareil auditif T-Coil.
Appels
Ce menu vous permet de configurer les paramètres de composition et de réception d’appels.
1. Dans l’écran de veille, pressez ➔ Paramètres ➔ Appels. Les options suivantes sont offertes :
Paramètres 114
Général
Vous pouvez configurer certains paramètres avancés utilisés pour la plupart des appels.
Afficher mon numéro
Cette option permet de spécifier comment gérer votre identité lors d'un appel sortant.
1. Mettez en évidence votre sélection et pressez la touche programmable Sélect. ou la touche . Les
choix sont :
• Défini par le réseau : utilise l’information du réseau par défaut pour afficher votre identité sur l’afficheur de l’interlocuteur.
• Afficher le numéro : affiche votre identité sur l’afficheur de l’interlocuteur.
• Masquer le numéro : masque votre identité sur l’afficheur de l’interlocuteur.
Liste de rejet
La liste de rejet contient les numéros dont vous ne souhaitez pas recevoir d’appel. L’appel entrant est rejeté,
mais il est tout de même renvoyé vers votre messagerie vocale. Vous pouvez manuellement ajouter des
numéros à rejeter ou cocher les appels entrants dans le menu Appels récents afin de les ajouter dans la liste
de rejet.
Ajouter manuellement un numéro à rejeter :
1. Dans l’écran de veille, pressez ➔ Paramètres ➔ Appels ➔ Général ➔ Liste de rejet ➔ Liste
de rejet.
2. Pressez Options ➔ Créer.
3. Saisissez le numéro que vous souhaitez rejeter et pressez Sauvegard...
Rejeter un numéro à partir de l’écran Appels récents :
1. Dans l’écran de veille, pressez pour afficher l’écran Appels récents.
2. Mettez en évidence le numéro que vous souhaitez ajouter à la liste de rejet et sélectionnez Options ➔
Ajouter à la liste de rejet.
3. À l’invite Ajouter à liste nos bloqués?, pressez Oui.
115
Prise d’appel
Cette option permet de choisir le mode de réponse pour les appels entrants.
1. Mettez en évidence l’une des options suivantes :
• Touche Envoi : répond à un appel entrant en pressant la touche programmable Accepter ou la touche .
• Touche indifférente : répond à un appel entrant en pressant n’importe quelle touche sur le téléphone, à l’exception
de la touche .
• Ouvrir le rabat : répond à un appel entrant en ouvrant le rabat de téléphone.
2. Pressez Options ➔ Sauvegarder pour sauvegarder la sélection.
Réponse automatique
Cette option permet de rédiger un message texte qui sera envoyé automatiquement à l’appelant lors d’un
appel manqué.
Tonalités d’état d’appel
Cette option permet d’activer une tonalité d’alerte pour l’une des deux catégories d’état.
1. Mettez en évidence l’une des options suivantes et pressez la touche programmable Cocher pour
confirmer la sélection.
• Tonalité de communication établie : permet d’activer une tonalité d’alerte émise à chaque fois qu’une communication est
établie.
• Bip durée d’appel : permet d’activer une tonalité émise toutes les minutes durant l'appel.
2. Pressez la touche programmable Sauvegard.. lorsque vous avez terminé.
Signal d’appel
Cette option permet d’activer une alerte lors de la réception d'un message pendant un appel.
1. Mettez en évidence Activé ou Désactivé et pressez la touche programmable Sauvegard.. ou la touche
.
Appel vocal
Vous pouvez configurer certains paramètres utilisés pour les appels vocaux.
Paramètres 116
Renvoi d’appel
Cette option permet de diriger un appel entrant vers un autre numéro de téléphone.
2. Mettez en évidence une option et pressez la touche programmable Sélect. ou la touche . Les
options offertes sont :
• Always (Toujours) : permet d’activer le renvoi automatique de tous les appels vocaux entrants.
• Occupé : permet d’activer le renvoi vers un autre numéro au lieu de votre messagerie vocale quand vous êtes déjà en
communication.
• Pas de réponse : permet d’activer le renvoi vers un autre numéro au lieu de votre messagerie vocale quand vous ne
répondez pas. Vous pouvez également déterminer un laps de temps après lequel l’appel est renvoyé.
• Inaccessible : permet d’activer le renvoi vers un autre numéro au lieu de votre messagerie vocale quand vous ne vous
trouvez pas dans la zone de couverture de votre fournisseur de services ou si votre téléphone est éteint.
• Tout annuler : permet d’annuler toutes les options de renvoi d’appel. Pressez la touche programmable Sélect. pour activer
cette option.
Nota : Si vous souhaitez changer une option (par exemple, de Toujours à Occupé), désactivez l’option sélectionnée, puis activez
la nouvelle option.
3. Entrez le numéro dans le champ Renvoyer à ou pressez la touche pour sélectionner un numéro à
partir des contacts.
4. Pressez la touche programmable Options, sélectionnez Activer ou Vérifier le statut et pressez la touche
programmable Sélect. ou la touche .
Nota : Lorsque vous sélectionnez Vérifier le statut, le téléphone vérifie si le numéro entré dans le champ Renvoyer à est en
service et disponible. Si le numéro n’est pas en service ou non disponible, un message s’affiche.
Appel en attente
Cette option permet de vous aviser quand une personne essaie de vous appeler pendant que vous êtes au
téléphone.
1. Pressez la touche programmable Options. Les options offertes sont :
• Activer : permet d’activer cette option pour les appels vocaux.
117
• Désactiver : permet de désactiver cette option pour les appels vocaux.
• Vérifier le statut : permet de vérifier le statut de cette option pour les appels vocaux.
2. Pressez la touche programmable Sélect. pour confirmer votre sélection.
Rappel automatique
Cette option permet de recomposer automatiquement le dernier numéro si l’appel a été interrompu ou n’a pu
être établi.
1. Sélectionnez l’une des options suivantes et pressez :
• Activé : le téléphone recompose automatiquement le dernier numéro si l’appel a été interrompu ou n’a
pu être établi.
• Désactivé : le téléphone ne recompose pas automatiquement le dernier numéro si l’appel a été
interrompu ou n’a pu être établi.
2. Pressez la touche programmable Sauvegard.. pour confirmer votre sélection.
Suppression de bruit
Cette option permet d’activer ou de désactiver la suppression du bruit environnant.
Nota : La suppression de bruit est activée par défaut pendant un appel vocal. Toutefois, si vous utilisez le hautparleur, le casque
d’écoute ou la casque Bluetooth, la suppression de bruit est désactivée. Vous devrez la réactiver lors du prochain appel
vocal. Pour réactiver la suppression de bruit, sélectionnez Options ➔ Suppression du bruit activée.
Connectivité
Ce menu vous permet de gérer les paramètres associés aux types de connexion disponibles pour votre
téléphone, comme Bluetooth, Mode USB, Sélection et Profils de réseau.
1. Dans l’écran de veille, pressez ➔ Paramètres ➔ Connectivité. Sélectionnez l’une des options
suivantes :
Bluetooth
Bluetooth est une technologie de communication sans fil de courte portée qui permet l'échange d'information à
l’intérieur d’une zone d'environ 9 mètres (30 pi).
Paramètres 118
Contrairement à l’infrarouge, les appareils n’ont pas besoin d’être physiquement branchés pour transmettre
de l’information avec Bluetooth. Si les appareils sont à portée l’un de l’autre, vous pouvez échanger de
l’information entre ceux-ci, même s’ils sont dans des pièces différentes.
Le menu des paramètres de la technologie Bluetooth permet d’afficher et de modifier le nom de l’appareil,
d’activer/désactiver la visibilité de l’appareil et de définir les conditions de sécurité.
Activation
Vous devez d’abord activer la fonction Bluetooth avant de pouvoir l’utiliser. Lorsque l’option Bluetooth est
désactivée, vous ne pouvez pas envoyer ou recevoir de l’information via Bluetooth. Afin d’économiser la pile,
ou dans les situations où Bluetooth est interdit, vous pouvez éteindre la technologie sans fil Bluetooth.
1. Dans l’écran de veille, pressez ➔ Paramètres ➔ Connectivité ➔ Bluetooth.
2. Si la première option du menu option est Bluetooth : Désactivé, mettez-la en évidence et pressez la
touche programmable Sélect. ou la touche .
3. Le message Bluetooth activé s’affiche à l’écran.
4. Si la première option du menu option est Bluetooth : Activé, c’est que la fonction Bluetooth est déjà
activée.
Visibilité
Lorsque l'option Visibilité Bluetooth est activée, le téléphone transmet par le réseau sans fil son nom et son
état aux périphériques Bluetooth qui se trouvent à l’intérieur de sa portée. Cependant, cette transmission
représente un risque de sécurité et facilite la connexion non autorisée. Il est donc recommandé d’activer le
mode Sécurité Bluetooth de votre téléphone.
1. Dans l’écran de veille, pressez ➔ Paramètres ➔ Connectivité➔ Bluetooth.
2. Si la deuxième option du menu option est Visibilité : Désactivé, mettez-la en évidence et pressez la
touche programmable Sélect. ou la touche .
3. Le message Visibilité activée s’affiche à l’écran.
4. Si la deuxième option du menu option est Visibilité : Activé, c’est que l’option Visibilité est déjà activée.
119
Mes périphériques
L’option Mes périphériques fournit une liste d’appareils compatibles Bluetooth identifiable par votre téléphone.
1. Dans l’écran de veille, pressez ➔ Paramètres ➔ Connectivité➔ Bluetooth ➔ Mes
périphériques.
Mettez en évidence Rechercher nouveau périphérique et pressez la touche programmable Sélect. ou
la touche . Entrez clé d’activation (si nécessaire).
Si vous vous connectez à un appareil Bluetooth sans fil, consultez le guide d’utilisation pour le NIP
assigné.
Si vous vous connectez à un autre appareil, saisissez le même NIP défini par l’utilisateur sur les deux
appareils.
2. Mettez en évidence le champ Options de connexion, pressez la touche de navigation de gauche ou de
droite pour sélectionner Automatique (couplage automatique) ou Toujours demander (demande avant de
se coupler) et pressez la touche programmable Jumeler.
Nota : La première fois que vous jumelez votre téléphone à un autre appareil, vous et le propriétaire de l’autre appareil doivent
entrer la même clé (mot de passe). Une fois les appareils jumelés, vous n’avez plus besoin d’utiliser de clé.
3. Si vous êtes incapable de jumeler l’appareil, une fenêtre éclair s’affiche. Pressez la touche
programmable Oui pour réessayer.
Mes infos Bluetooth
L’option Mes infos Bluetooth permet à votre téléphone de s’identifier au moyen d’un nom et d’une adresse de
périphérique et d’une Version du matériel et de logiciel Bluetooth. Ces infos s’affichent dans les champs
lorsque la visibilité Bluetooth du téléphone est activée. L’information peut être modifiée en sélectionnant et
remplaçant le texte actuel.
1. Dans l’écran de veille, pressez ➔ Paramètres ➔ Connectivité ➔ Bluetooth ➔ Mes infos
Bluetooth.
2. Pressez la touche pour effacer l’ancien nom du périphérique.
Paramètres 120
3. Répétez l’étape 1 pour régler le Mode SIM à distance.
Nota : Le mode de saisie de texte par défaut est Abc, pour lequel le caractère initial est en majuscule et toutes les lettres
consécutives du même mot sont en minuscule.
4. Pressez la touche programmable Options et sélectionnez Sauvegarder lorsque vous avez terminé.
Rechercher de nouveaux périphériques
Cette option permet de chercher de nouveaux appareils Bluetooth.
1. Dans l’écran de veille, pressez ➔ Paramètres ➔ Connectivité ➔ Bluetooth ➔ Rechercher
nouveau périphérique. Le téléphone recherche de nouveaux appareils.
2. Mettez en évidence le nom d’un périphérique et pressez la touche programmable Sélect. ou la touche
.
3. Entrez clé d’activation.
4. Sélectionnez une option de connexion et pressez la touche programmable Jumeler.
Sélectionner un mode USB
Vous pouvez sélectionner le mode de communication par défaut lorsque vous connectez votre téléphone à un
ordinateur au moyen d’un câble USB (vendu séparément).
Nota : Vous devez désactiver la fonction Bluetooth avant d’établir une connexion USB. Avant de brancher le câble USB au
téléphone, installez la plus récente version du logiciel PC Studio. Cette application installe tous les pilotes USB
nécessaires sur l’ordinateur. Pour télécharger gratuitement PC Studio, allez à www.samsung.com.
1. Utilisez un câble USB pour connecter votre téléphone à un ordinateur. L’icône USB ( ) apparait à
l’écran lorsqu’une connexion active est établie.
2. Dans l’écran de veille, pressez ➔ Paramètres ➔ Connectivité ➔ Sélectionner un mode USB.
Pressez la touche de navigation du haut ou du bas pour mettre en évidence l’une des options
suivantes :
121
• Demander à la connexion : le téléphone affiche la fenêtre contextuelle « Sélectionnez le mode USB » lorsque vous
le branchez à l’ordinateur afin de choisir l’application USB par défaut.
• Lecteur multimédia : règle l’utilisation par défaut du lecteur multimédia dès que la connexion USB est détectée.
• Samsung PC Studio : règle l’utilisation par défaut du logiciel PC Studio de Samsung dès que la connexion USB
est détectée. Allez à :www.samsung.com/support pour télécharger gratuitement PC Studio.
• Mémoire auxiliaire : traite la carte mémoire comme un disque amovible, par exemple un lecteur zip.
3. Pressez la touche programmable Sauvegard.. ou la touche .
Sélection du réseau
Vous pouvez sélectionner le réseau auquel vous voulez vous connecter. Vous pouvez le sélectionner
manuellement à partir d’une liste de réseaux trouvés par le téléphone ou le téléphone peut se connecter
automatiquement à un réseau.
1. Dans l’écran de veille, pressez ➔ Paramètres ➔ Connectivité ➔ Sélection de réseau.
• Automatique : le téléphone se connecte automatiquement à un réseau.
• Manuel : le téléphone recherche les réseaux et affiche la liste des réseaux trouvés. Sélectionnez l’un des réseaux.
Profils du réseau
Votre téléphone effectue sa connexion sans fil à Internet grâce à un navigateur WAP intégré. La connexion
peut être établie au moyen de l’un des navigateurs WAP disponibles. Vous devez donc configurer ces
paramètres pour être en mesure d’utiliser le navigateur Web ou d’envoyer des messages multimédias ou des
courriels.
Utilisez ce menu pour créer et personnaliser les profils contenant les paramètres pour connecter votre
téléphone au réseau. Bien que le type de connexion puisse être changé par l’utilisateur, il est recommandé que
ce choix soit fait avec l’assistance de votre fournisseur de services.
1. Dans l’écran de veille, pressez ➔ Paramètres ➔ Connectivité ➔ Profils du réseau.
2. Mettez en évidence l’une des options et pressez la touche programmable Modifier.
Paramètres 122
Nota : Tous les profils de réseau sont préconfigurés et ne doivent pas être modifiés. Votre téléphone est réglé par défaut pour se
connecter au réseau. Si vous changez ces paramètres sans vérifier d’abord auprès de votre fournisseur de services, le
navigateur Web, la messagerie multimédia et les courriels pourraient ne plus fonctionner correctement.
3. Sélectionnez le paramètre à modifier :
• Définir le nom pour entrer un nom de profil.
• Nom d'accès pour modifier le nom du point d’accès.
• Type d'authentification pour sélectionner le type d’authentification utilisée pour cette connexion WAP : Aucun,
Normale ou Sécurisé.
• ID utilisateur pour entrer le nom d’utilisateur requis pour la connexion au réseau.
• Mot de passe pour entrer le mot de passe utilisateur requis pour la connexion au réseau.
• Protocole pour régler le protocole de connexion utilisé par le navigateur : HTTP ou WAP.
• URL page d'accueil pour entrer l’adresse URL de la page à définir comme votre page d’accueil.
• Adresse du serveur mandataire (Protocole : HTTP) pour régler l’adresse et le port du serveur mandataire.
• Adresse de passerelle (Protocole : WAP) pour entrer l’adresse de passerelle.
• Connexion sécurisée (Protocole : WAP) : Sélectionnez Activé pour établir une connexion sécurisée.
• Délai d’attente (s) pour définir un laps de temps (en secondes) après quoi le réseau est déconnecté lorsqu’aucune
donnée ne circule.
• Paramètres avancés permet de configurer certaines des informations spécifiques à IP : IP statique, DNS statique,
Information du serveur et Classe de trafic. Mettez en évidence cette option et pressez la touche programmable
Modifier pour accéder aux options suivantes :
– IP statique pour spécifier si vous voulez entrer manuellement une adresse IP. Décochez si vous voulez que l’adresse IP soit
automatiquement assignée au serveur.
– IP téléphone local pour entrer l’adresse IP de l’opérateur réseau local.
– DNS statique pour spécifier si vous voulez entrer manuellement une adresse de serveur de nom de domaine (DNS).
Décochez si vous voulez que l’adresse soit automatiquement assignée par le serveur.
– Serveur 1/Serveur 2 pour entrer les adresses de serveur de nom de domaine (DNS).
123
– Classe de trafic pour sélectionner la classe de trafic, pressez la touche programmable Modifier, sélectionnez une classe de
trafic (Souscrit, Conversation, Transmission en flux continu, Interactif ou Arrière-plan) et pressez la touche
programmable OK.
Nota : Les paramètres WAP peuvent varient selon le fournisseur de services.
Paramètres d’application
Ce menu permet de configurer les paramètres fonctionnels pour la plupart des applications du téléphone. Ces
applications sont décrites de façon détaillée dans d’autres chapitres de ce guide.
1. Dans l’écran de veille, pressez ➔ Paramètres ➔ Paramètres d’application.
2. Sélectionnez l’application à modifier et pressez la touche programmable Sélect. ou la touche .
• Paramètres de messagerie
• Paramètres du navigateur
• Paramètres de l’appareil photo
• Paramètres du lecteur de musique
• Paramètres d’enregistrement audio
• Paramètres du calendrier
• Paramètres des Contacts
Gestion de la mémoire
Vous pouvez facilement vérifier la quantité de mémoire utilisée pour la mémoire partagée, les messages, Mes
trucs, le calendrier, les tâches, les notes ou les contacts. Vous pouvez aussi effacer toute cette information du
téléphone.
1. Dans l’écran de veille, pressez ➔ Paramètres ➔ Gestion de la mémoire.
2. Sélectionnez l’une des options suivantes :
• Effacer la mémoire
• Espace utilisé
Paramètres 124
Effacer la mémoire
1. Mettez en évidence Effacer la mémoire et pressez la touche programmable Sélect. ou la touche
.
2. Mettez en évidence Tout et pressez la touche pour sélectionner toutes les catégories. Vous
pouvez décocher les sélections en pressant de nouveau . En sélectionnant Tout, vous cochez
également toutes les catégories disponibles.
3. Pressez la touche programmable OK.
4. Entrez le mot de passe. À l’invite Effacer ?, pressez la touche programmable Oui pour confirmer la
suppression ou Non pour annuler. Selon les paramètres de sécurité de votre téléphone, il est possible
que ayez à saisir votre mot de passe une deuxième fois.
5. Lorsque vous avez terminé, pressez pour revenir à l’écran de veille.
Espace utilisé
1. Mettez en évidence Espace utilisé et pressez la touche programmable Sélect. ou la touche .
2. Mettez en évidence l’une des catégories de mémoire et pressez la touche programmable Sélect. ou la
touche . Les catégories sont :
• Mémoire partagée
• Messages
• Mes trucs
• Calendrier
• Tâches
• Notes
• Contacts
3. Mettez en évidence une entrée et pressez la touche programmable Sélect. or pour afficher le
contenu de la mémoire sélectionnée.
125
4. Mettez en évidence une entrée spécifique ou Sélectionner tout et pressez pour sélectionner les
entrées à supprimer.
5. Pressez la touche programmable Supprimer.
6. À l’invite Supprimer?, pressez la touche programmable Oui pour confirmer la suppression ou Non pour
annuler.
7. Pressez pour revenir à l’écran de veille.
Renseignements sur la santé et la sécurité 126
Chapitre 12 : Renseignements sur la santé et la sécurité
Obtenir la meilleure réception possible
L’intensité du signal
La qualité sonore de chaque appel que vous faites ou recevez dépend de l’intensité du signal présent dans
votre secteur. Votre téléphone vous informe de l’intensité du signal capté au moyen de barres affichées à côté
de l’icône d’intensité du signal. Plus il y a de barres, plus le signal est fort. Si vous êtes dans un édifice, la
réception pourrait être meilleure près d’une fenêtre.
Le mode économie d’énergie
Au bout de 15 minutes d’absence de signal, le téléphone passe automatiquement en mode économie
d’énergie. Si l’appareil est allumé, il vérifie régulièrement la disponibilité du service. Vous pouvez aussi le faire
manuellement en pressant n’importe quelle touche. Un message Aucun service et une icône représentant une
Antenne s’affichent chaque fois que le mode économie d’énergie est activé. Lorsqu’un signal est capté, le
téléphone retourne en mode attente.
Le fonctionnement de votre téléphone
Votre téléphone est en fait un émetteur-récepteur radio. Lorsqu’il est allumé, il reçoit et transmet des
fréquences radioélectriques (RF). Pendant l’utilisation, le système traitant votre appel contrôle le niveau de
puissance. Cette puissance peut atteindre de 0,006 watt à 0,2 watt en mode numérique.
Sécurité en matière de fréquences radioélectriques
En 1991-1992, Electrical and Electronics Engineers (IEEE) et l’American National Standards Institute (ANSI)
se sont entendus pour mettre à jour la norme de niveaux de sécurité 1982 de l’ANSI relativement à
l’exposition des êtres humains aux fréquences radioélectriques (RF). Plus de 120 chercheurs, ingénieurs et
médecins d’universités, d’agences de santé gouvernementales et de l’industrie ont élaboré cette nouvelle
norme après avoir analysé les recherches effectuées. En 1993, la Federal Communication Commission
(FCC) a adopté cette nouvelle norme dans le cadre d’un règlement. En aout 1996, la FCC a adopté une
norme hybride composée des normes IEEE et ANSI existantes et de lignes directrices publiées par le
National Council of Radiation Protection and Measurements (NCRP).
127
Assurer le rendement optimal du téléphone
Il existe plusieurs solutions simples pour faire fonctionner le téléphone de façon appropriée et assurer un
service sécuritaire et satisfaisant.
– Parlez directement dans le microphone.
– Évitez d’exposer le téléphone et les accessoires à la pluie et aux autres liquides. Si le téléphone est aspergé d’un liquide
quelconque, éteignez l’appareil immédiatement et retirez la pile. S’il ne fonctionne pas, rapportez-le à un magasin ou appelez
le service à la clientèle.
Nota : Pour assurer le meilleur rendement de votre téléphone, l'entretien de votre téléphone et de ses accessoires doit être confié
uniquement à un personnel autorisé. Un service de mauvaise qualité pourrait annuler la garantie.
Assurer une utilisation sécuritaire et un accès approprié au téléphone
Une utilisation non conforme à ces règles pourrait causer des blessures corporelles graves et des dommages
matériels.
Utilisation du téléphone au volant
L’utilisation du téléphone au volant (ou l’utilisation du téléphone sans dispositif mains libres) est interdite dans
certaines régions. Les lois varient d’un endroit à l’autre. Rappelez-vous que la sécurité est toujours prioritaire.
Lorsque vous utilisez le téléphone au volant :
• Familiarisez-vous avec votre téléphone et ses fonctionnalités, comme la numérotation rapide et la recomposition.
• Si possible, utilisez un dispositif mains libres.
• Placez votre téléphone à portée de la main.
• Dites à la personne à qui vous parlez que vous êtes au volant. Au besoin, interrompez l’appel quand la circulation est
dense ou si les conditions météorologiques sont dangereuses.
• Ne prenez pas de notes ou n’essayez pas de lire un numéro de téléphone en conduisant.
• Composez les numéros de téléphone lentement et évaluez la circulation. Si possible, faites vos appels quand vous
êtes arrêté ou avant de vous lancer dans la circulation.
• Ne vous engagez pas dans des conversations stressantes ou émotives qui pourraient vous distraire.
• Composez le 911 pour signaler des urgences graves. Ce service est gratuit avec votre téléphone sans fil.
• Utilisez votre téléphone sans fil pour aider les autres en cas d’urgence.
Renseignements sur la santé et la sécurité 128
• Appelez l’assistance routière ou composez tout autre numéro spécial d’assistance non urgente, au besoin.
Règles de sécurité
Pour le fonctionnement sûr et efficace de votre téléphone, conformez-vous à toute règle ou directive
s’appliquant aux zones où vous vous trouvez. Éteignez votre téléphone dans les zones où l’utilisation en est
interdite où peut causer de l’interférence ou un danger.
Utilisation du téléphone près d’autres appareils électroniques
La plupart des appareils électroniques modernes sont protégés contre les signaux RF. Cependant, certains
appareils peuvent ne pas être protégés contre les signaux RF émis par le téléphone.
Les signaux RF peuvent nuire à des systèmes électroniques mal installés ou mal protégés dans des
véhicules automobiles. Vérifiez auprès du fabricant ou des représentants pour savoir si ces systèmes sont
protégés contre les signaux RF externes. Vous devriez également consulter le fabricant pour tout équipement
que vous avez ajouté à votre véhicule.
Si vous utilisez des appareils médicaux, comme un stimulateur cardiaque ou un appareil auditif, consultez le
fabricant pour savoir s’ils sont bien protégés contre les signaux RF externes.
Nota : Veuillez toujours éteindre le téléphone dans les établissements de soins de santé et demander la permission avant
d'utiliser le téléphone près du matériel médical.
Mise en arrêt du téléphone avant de prendre l’avion
Éteignez votre téléphone avant de monter à bord d’un avion. Pour éviter les interférences possibles avec les
systèmes d’avionique, les règlements de la Federal Aviation Administration (FAA) exigent d’obtenir la
permission de l’équipage avant d’utiliser votre téléphone dans un avion au sol. Pour prévenir tout risque
d’interférence, ces règlements interdisent d’utiliser votre téléphone dans un avion en vol
Mise en arrêt du téléphone dans les endroits dangereux
Pour éviter de nuire aux opérations de dynamitage, vous devez éteindre le téléphone dans les zones de
dynamitage ou dans les zones affichant un avis Éteindre les émetteurs-récepteurs.
129
Éteignez le téléphone dans les zones à atmosphère explosive. Bien que cela arrive rarement, le téléphone et les
accessoires peuvent produire des étincelles. Les étincelles pourraient causer une explosion ou un feu causant des
blessures corporelles ou même la mort. Les zones à atmosphère potentiellement explosive sont souvent, mais pas
toujours, bien indiquées. Elles comprennent :
• Les zones de ravitaillement, comme les stations-services;
• Les cales des bateaux;
• Les établissements de transfert ou d’entreposage de carburant ou de produits chimiques;
• Les zones où l’atmosphère contient des produits chimiques ou des particules de grain, de poussière ou des poudres
métalliques;
• Toute autre zone où on vous demanderait normalement d’arrêter le moteur de votre véhicule.
Nota : Dans votre véhicule, ne transportez ni n'entreposez jamais de gaz ou de liquides inflammables et d'explosifs dans le
compartiment qui contient le téléphone et les accessoires.
Restreindre l’accès des enfants au téléphone
Votre téléphone n’est pas un jouet. Les enfants ne devraient pas jouer avec le téléphone parce qu’ils
pourraient se blesser et blesser les autres, endommager le téléphone, composer le 911 par erreur ou effectuer
des appels qui augmenteront vos frais.
Avertissement concernant l’écran du téléphone
L’écran de votre appareil est fait de verre ou de résine acrylique et peut se briser si vous l’échappez ou le
frappez. N’utilisez pas votre appareil, si l’écran est brisé ou fissuré, car vous pourriez vous blesser.
Entretien de la pile
Protection de la pile
Voici les règles à suivre pour obtenir un rendement optimal de votre pile.
• N’utilisez que les piles et les chargeurs approuvés par Samsung. Ces chargeurs sont conçus pour maximiser la
durée utile de la pile. L’utilisation d’autres piles ou chargeurs pourrait annuler la garantie et causer des dommages.
• Pour éviter de l’endommager, rechargez la pile à des températures comprises entre 0 °C et 45 °C (32 °F et 113 °F).
• N’utilisez pas le chargeur au soleil ni dans des endroits très humides, comme la salle de bain.
Renseignements sur la santé et la sécurité 130
• Ne jetez pas la pile dans le feu.
• Les contacts métalliques de la pile doivent toujours être propres.
• N’essayez pas de démonter la pile ou de la court-circuiter.
• Il sera peut-être nécessaire de recharger la pile si le téléphone n’a pas servi depuis longtemps.
• Remplacez la pile lorsqu’elle n’offre plus un rendement acceptable. Elle peut être rechargée des centaines de fois
avant qu’il soit nécessaire de la remplacer.
• Ne rangez pas la pile à des températures élevées pendant de longues périodes. Suivez les règles de température
de rangement ci-dessous :
Pendant moins d’un mois :
-20 °C et 60 °C (-4 °F et 140 °F)
Pendant plus d’un mois :
-20 °C et 45 °C (-4 °F et 113 °F)
Mise au rebut des piles au lithium-ion (LiIon)
Pour vous débarrasser des piles au lithium-ion de façon sécuritaire, consultez votre centre de service local.
Note spéciale : Assurez-vous de jeter votre pile de façon appropriée. Dans certaines régions, il se peut qu’il
soit interdit de jeter les piles dans les ordures ménagères ou commerciales.
Nota : Pour des raisons de sécurité, ne manipulez pas une pile au lithium-ion endommagée ou qui fuit.
Précautions spéciales et avis d’Industrie Canada
Toute modification apportée à votre téléphone qui n’est pas expressément approuvée dans le présent
document pourrait invalider la garantie du téléphone et annuler votre droit de l’utiliser. N’utilisez que les piles,
les antennes et les chargeurs approuvés. L’utilisation d’accessoires non autorisés pourrait être dangereuse et
invalidera la garantie du téléphone si lesdits accessoires ont causé des dommages ou une défectuosité au
téléphone.
Même si votre téléphone est plutôt robuste, c’est un appareil électronique complexe qui peut se briser. Évitez
de l’échapper, de le frapper, de le plier ou de vous assoir dessus.
131
Renseignements destinés à l’utilisateur
Ce téléphone a subi des tests et répond aux critères d’un dispositif numérique de classe B, d’après la partie 15
des directives de la FCC. Ces critères sont établis afin d’assurer une protection suffisante contre les
interférences nocives à l’intérieur d’une résidence. Ce téléphone produit, utilise et peut émettre de l’énergie
radioélectrique et peut occasionner des interférences nuisibles aux communications radio s’il n’est pas
assemblé et utilisé selon les directives. Cependant, il n’y a aucune garantie qu’il ne se produira pas
d’interférence dans une installation particulière. Si le téléphone nuit à la réception du signal radio ou de
télévision, ce qui peut être vérifié en éteignant puis en allumant de nouveau le téléphone, on recommande à
l’utilisateur de prendre les mesures correctives suivantes :
• Réorientez ou déplacez l’antenne réceptrice.
• Augmentez la distance séparant l’appareil et le récepteur.
• Branchez l’appareil à un circuit différent de celui où est branché le récepteur.
Consultez le marchand ou un technicien expérimenté en radio et télévision.
Débit d’absorption spécifique (DAS) des téléphones sans fil
Le DAS est une valeur qui correspond à la quantité relative d’énergie RF absorbée par la tête de l’utilisateur du
dispositif sans fil.
L’indice DAS d’un téléphone est obtenu par des tests, des mesures et des calculs complexes. Cet indice ne
représente pas la quantité d’énergie RF émise par le téléphone. Tous les modèles de téléphone sont testés en
laboratoire à leur indice maximal dans des conditions rigoureuses. Lorsque le téléphone fonctionne, l’indice
DAS du téléphone peut être bien inférieur au niveau indiqué à la FCC. Ce fait est lié à une variété de facteurs,
entre autres la proximité de l’antenne d’une station et la conception du téléphone. Ce qu’il faut retenir, c’est que
chaque téléphone respecte des normes fédérales strictes. Les variations de l’indice DAS ne représentent pas
des variations de la sécurité d’utilisation.
Tous les téléphones doivent respecter la norme fédérale, qui comprend une marge de sécurité substantielle.
Comme précisé ci-dessus, les variations des indices DAS d’un modèle de téléphone à l’autre ne signifient pas
des différences sur la plan de la sécurité. Les indices DAS égaux ou inférieurs à la norme fédérale de 1,6 W/kg
sont considérés comme sécuritaires pour le public.
Les indices DAS connus les plus élevés pour le modèle A847 sont :
Renseignements sur la santé et la sécurité 132
GSM 850 : Tête : 0,33 W/Kg; Porté au corps : 1,38 W/kg
GSM 1900 : Tête : 0,52 W/Kg; Porté au corps : 0,48 W/kg
UMTS V : Tête : 0,61 W/kg; Porté au corps : 0,66 W/kg
UMTS II : Tête : 1,1 W/kg; Porté au corps : 0,63 W/kg
Renseignements pour le propriétaire
Les numéros de modèle, d’enregistrement et de série du téléphone sont inscrits sur une plaque dans le
logement de la pile. Inscrivez ces renseignements dans l’espace ci-dessous. Ils vous seront utiles si vous
devez nous téléphoner au sujet de votre téléphone.
Modèle : SGH-A847
No de série :
133
Chapitre 13 : Garantie du fabricant
Garantie limitée standard
SAMSUNG Electronics Canada inc. (SAMSUNG) garantit à l’acheteur initial (l’Acheteur) que les
téléphones et accessoires SAMSUNG (les Produits) sont exempts de vices de matériaux et de
fabrication, dans le cadre d’une utilisation et d’une exploitation normales, à compter de la date
d’achat et pendant la durée précisée à partir de la date de l’achat :
Qu’est-ce qui n’est pas couvert? La présente garantie limitée est valide à la condition que
l’acheteur utilise le produit de façon adéquate. Elle ne couvre pas les éléments suivants : (a) les
défectuosités ou les dommages découlant d’un accident, d’un usage abusif, d’une mauvaise
utilisation, de négligence, de contraintes physiques, électriques ou électromécaniques inhabituelles,
ou des modifications de l’une ou l’autre partie du produit, y compris l’antenne, ou les dommages
d’ordre esthétique; (b) un équipement dont le numéro de série a été supprimé ou rendu illisible; (c)
toutes les surfaces de plastique et autres pièces exposées qui sont égratignées ou endommagées à la
suite d’un usage normal; (d) les vices de fonctionnement attribuables à l’utilisation du produit avec
des accessoires, produits ou équipements auxiliaires ou périphériques qui ne sont ni fournis ni
approuvés par SAMSUNG; (e) les défectuosités ou les dommages découlant d’essais, d’une
utilisation, d’un entretien, d’une installation, d’un réglage ou d’une réparation inadéquats des
produits; (f) l’installation, l’entretien et les services relatifs au produit, ou (g) les produits utilisés ou
achetés à l’extérieur des États-Unis et du Canada.
Téléphone 1 an
Piles 1 an
Pochette de cuir 90 jours
Étui protecteur 90 jours
Autres accessoires 1 an
Garantie du fabricant 134
La présente garantie limitée couvre les piles uniquement si leur capacité tombe à moins de 80 % de leur
capacité nominale, ou si les piles ont des fuites, et cette garantie limitée ne couvre pas les piles (i) si elles ont
été chargées au moyen d’un chargeur de pile que SAMSUNG n’a pas spécifié ou approuvé pour la recharge de
ses piles, (ii) si l’un ou l’autre des joints d’étanchéité des piles est brisé ou présente des signes de manipulation
non autorisée, ou (iii) si les piles ont été utilisées dans des équipements autres que les téléphones SAMSUNG
pour lesquels elles sont destinées.
Quelles sont les obligations de SAMSUNG? Pendant la période de garantie applicable,
SAMSUNG réparera ou remplacera, à sa seule discrétion et sans frais pour l’acheteur, tout
composant défectueux du téléphone ou de l’accessoire. Pour se prévaloir du service dans le cadre de
la présente garantie limitée, l’acheteur doit retourner le produit à un réparateur de téléphone
Samsung autorisé dans un contenant approprié pour l’expédition, accompagné de la facture de
l’acheteur ou de toute autre preuve d’achat comparable sur laquelle sont indiqués la date de l’achat,
le numéro de série du produit, ainsi que le nom et l’adresse du vendeur. Pour savoir où envoyer le
téléphone ou l’accessoire, communiquez avec votre fournisseur de services ou avec le Centre
d’assistance à la clientèle de Samsung au 1-800-SAMSUNG. SAMSUNG réparera rapidement le
produit défectueux dès sa réception. SAMSUNG pourra, à sa discrétion exclusive, utiliser des pièces
ou des composants remis à neuf, remis en état ou neufs pour réparer un produit, ou encore remplacer
ledit produit par un produit remis à neuf, remis en état ou neuf. Les étuis réparés ou remplacés seront
garantis pour une période de 90 jours. Tous les autres produits réparés ou remplacés seront garantis
pendant une période égale à la période résiduelle de la garantie limitée originale applicable au
produit visé, ou pendant 90 jours, selon la plus longue de ces éventualités. Tous les composants,
pièces, cartes et équipements remplacés deviendront la propriété de SAMSUNG. Si SAMSUNG
établit qu’un produit n’est pas couvert par la présente garantie limitée, l’acheteur devra payer toutes
les pièces ainsi que tous les frais d’expédition et de main-d’oeuvre applicables à la réparation ou au
retour dudit produit.
Quelles sont les limites à la responsabilité de SAMSUNG? SAUF COMME STIPULÉ DANS LA
GARANTIE EXPRESSE FIGURANT AUX PRÉSENTES, L’ACHETEUR PREND LE PRODUIT « TEL
QUEL », ET SAMSUNG NE FAIT AUCUNE DÉCLARATION NI NE DONNE AUCUNE GARANTIE
EXPRESSE OU TACITE QUE CE SOIT À L’ÉGARD DU PRODUIT, Y COMPRIS NOTAMMENT :
135
• À PROPOS DE LA QUALITÉ MARCHANDE DU PRODUIT OU DE SA CONVENANCE À UN USAGE
PARTICULIER;
• AUX GARANTIES LIÉES AUX TITRES DE PROPRIÉTÉ OU DE NON-VIOLATION;
• À LA CONCEPTION, À L’ÉTAT, À LA QUALITÉ OU AU RENDEMENT DU PRODUIT;
• À LA FABRICATION DU PRODUIT OU AUX COMPOSANTS QU’IL CONTIENT; OU
• À LA CONFORMITÉ DU PRODUIT AUX EXIGENCES DE TOUTE LOI, DE TOUTE SPÉCIFICATION
OU DE TOUT CONTRAT PERTINENT.
AUCUNE PARTIE DU PRÉSENT GUIDE D’UTILISATION NE POURRA ÊTRE INTERPRÉTÉE COMME
CRÉANT UNE QUELCONQUE GARANTIE EXPRESSE À L’ÉGARD DU PRODUIT. TOUTES LES
GARANTIES ET CONDITIONS TACITES POUVANT DÉCOULER DE L’APPLICATION DE LA LOI, Y
COMPRIS, S’IL Y A LIEU, LES GARANTIES TACITES DE QUALITÉ MARCHANDE ET DE
CONVENANCE À UN USAGE PARTICULIER, SONT PAR LA PRÉSENTE LIMITÉES À LA MÊME
PÉRIODE QUE LA GARANTIE EXPRESSE ÉCRITE CONTENUE AUX PRÉSENTES. CERTAINES
RÉGIONS NE PERMETTENT PAS L’EXCLUSION OU LA LIMITATION DES DOMMAGES INDIRECTS
OU CONSÉCUTIFS, NI LA DÉFINITION DE LA DURÉE D’UNE GARANTIE TACITE. IL SE PEUT DONC
QUE LES LIMITATIONS OU EXCLUSIONS CI-DESSUS NE S’APPLIQUENT PAS À VOTRE CAS. DE
PLUS, SAMSUNG NE POURRA ÊTRE TENUE RESPONSABLE DE TOUS DOMMAGES DÉCOULANT
DE L’ACHAT, DE L’UTILISATION, DE L’USAGE ABUSIF OU DE L’INCAPACITÉ À UTILISER LE
PRODUIT, OU DÉCOULANT DIRECTEMENT OU INDIRECTEMENT DE L’UTILISATION OU DE LA
PRIVATION D’UTILISATION DU PRODUIT, OU D’UN NON-RESPECT DE LA GARANTIE EXPRESSE,
Y COMPRIS LES DOMMAGES SPÉCIAUX, INDIRECTS, CONSÉCUTIFS OU AUTRES DOMMAGES
SIMILAIRES, DE TOUTE PERTE DE BÉNÉFICES OU D’AVANTAGES PRÉVUS, OU DE DOMMAGES
DÉCOULANT DE TOUT DÉLIT (INCLUANT LA NÉGLIGENCE OU UNE FAUTE MAJEURE) OU DE
TOUTE FAUTE COMMISE PAR SAMSUNG, SES AGENTS OU EMPLOYÉS, OU DE TOUTE
INEXÉCUTION DE CONTRAT OU DE TOUTE RÉCLAMATION DÉPOSÉE CONTRE L’ACHETEUR PAR
UNE AUTRE PARTIE. CERTAINES RÉGIONS NE PERMETTENT PAS L’EXCLUSION OU LA
LIMITATION DES DOMMAGES INDIRECTS OU CONSÉCUTIFS. IL SE PEUT DONC QUE LES
LIMITATIONS OU EXCLUSIONS CI-DESSUS NE S’APPLIQUENT PAS À VOTRE CAS.
LA PRÉSENTE GARANTIE LIMITÉE VOUS CONFÈRE DES DROITS SPÉCIFIQUES. IL SE POURRAIT
QUE VOUS AYEZ D’AUTRES DROITS, LESQUELS PEUVENT VARIER D’UNE PROVINCE À UNE
AUTRE. LA PRÉSENTE GARANTIE LIMITÉE NE POURRA S’ÉTENDRE À TOUTE PERSONNE AUTRE
Garantie du fabricant 136
QUE LE PREMIER ACHETEUR ET CONSTITUE LES RECOURS EXCLUSIFS DE L’ACHETEUR. SI
UNE PARTIE DE LA PRÉSENTE GARANTIE LIMITÉE EST ILLÉGALE OU INAPPLICABLE EN
RAISON D’UNE LOI, LADITE PARTIE ILLÉGALE OU INAPPLICABLE N’AURA AUCUN EFFET SUR
L’APPLICABILITÉ DU RESTE DE LA GARANTIE LIMITÉE, QUE L’ACHETEUR RECONNAIT
COMME ÉTANT ET DEVANT TOUJOURS ÊTRE JUGÉE LIMITÉE PAR SES MODALITÉS OU DANS LA
MESURE PERMISE PAR LA LOI.
LES PARTIES COMPRENNENT QUE L’ACHETEUR PEUT UTILISER DES LOGICIELS OU DE
L’ÉQUIPEMENT D’AUTRES FOURNISSEURS AVEC LE PRODUIT. SAMSUNG NE DONNE AUCUNE
GARANTIE NI NE FAIT AUCUNE DÉCLARATION, ET IL N’EXISTE AUCUNE CONDITION,
EXPRESSE OU TACITE, LÉGALE OU AUTRE QUANT À LA QUALITÉ, AUX POSSIBILITÉS, AU
FONCTIONNEMENT, AU RENDEMENT OU À LA CONVENANCE DE TELS LOGICIELS OU
ÉQUIPEMENT D’AUTRES FOURNISSEURS, QUE LESDITS LOGICIELS OU ÉQUIPEMENT SOIENT
FOURNIS OU NON AVEC LE PRODUIT DISTRIBUÉ PAR SAMSUNG OU AUTREMENT, Y COMPRIS
LA CAPACITÉ D’INTÉGRER LESDITS LOGICIELS OU ÉQUIPEMENT AU PRODUIT. LA
RESPONSABILITÉ QUANT À LA QUALITÉ, AUX POSSIBILITÉS, AU FONCTIONNEMENT, AU
RENDEMENT OU À LA CONVENANCE DE TELS LOGICIELS OU ÉQUIPEMENTS D’AUTRES
FOURNISSEURS REPOSE ENTIÈREMENT SUR L’ACHETEUR ET LE FOURNISSEUR DIRECT, LE
PROPRIÉTAIRE OU LE FOURNISSEUR DE TELS LOGICIELS OU ÉQUIPEMENTS D’AUTRES
La présente garantie limitée partage le risque des défectuosités de produit entre l’acheteur et SAMSUNG, et les
prix des produits de SAMSUNG reflètent ce partage de risques et les limitations de responsabilité contenues
dans la présente garantie limitée. Les agents, employés, distributeurs et marchands de SAMSUNG ne sont pas
autorisés à apporter des modifications à la présente garantie limitée, ni à offrir des garanties additionnelles
pouvant lier SAMSUNG. Par conséquent, les déclarations supplémentaires comme la publicité ou les
représentations des marchands, verbales ou écrites, ne constituent pas des garanties de SAMSUNG et n’ont
aucun effet.
Samsung Electronics Canada, Inc.
©2010 SSamsung Electronics Canada Inc. Samsung est une marque de commerce déposée de Samsung
Electronics Co. Ltd. et de ses sociétés affiliées.
137
oute reproduction totale ou partielle est interdite sans approbation écrite préalable.
Les caractéristiques et la disponibilité peuvent être modifiées sans préavis.
138
Index
A
Accéder à une fonction du menu 32
Affichage
Affichage extérieur 106
Écran principal 105
Heure et date 107
Message d’accueil 105, 106
Numérotation 105
Paramètres d’éclairage 106
Affichage extérieur
Papier peint 106
Alarmes
Activation auto des alarmes 89
Appareil photo
Paramètres de l’appareil photo 72
Prendre une photo 71
Appareil vidéo 76
Accéder au dossier Vidéos 79
Enregistrer une vidéo 76
Paramètres de l’appareil vidéo 77
Appel vocal
Appel en attente 116
Rappel automatique 117
Appels
Afficher mon numéro 114
Appel vocal 115
Général 114
Paramètres 113
Réponse automatique 115
Tonalités d’état d’appel 115
B
Bluetooth 117
Activation 118
Mes infos Bluetooth 119
Visibilité 118
Boite de réception
Options 57
C
Calendrier 90
Afficher un évènement 92
Anniversaire 92
Congé 92
Évènement important 92
Évènement privé 92
Carte professionnelle
Joindre à un message 55
Changer le mot de passe du téléphone 111
Charger la pile 5
Connectivité
Bluetooth 117
Mode USB 120
Profils du réseau 121
Contacts 39
Ajouter d’autres champs à un numéro 41
Ajouter des pauses aux numéros du
contact 42
Ajouter un nouveau contact 39
Copier un contact dans la carte SIM 47
139
Copier un contact dans le téléphone 48
Faire un appel à partir de la liste de
contacts 42
Gérer les entrées des contacts 47
Numéros autorisés 44
Options des entrées de contact 43
Paramètres de groupe 45
Sauvegarder un numéro à partir de l’écran
de veille 40
Sauvegarder un numéro après un appel
41
Supprimer des champs à un numéro 41
Supprimer un contact de la mémoire du
téléphone 48
Trouver mes numéros de téléphone
personnel 44
Trouver une entrée dans la liste de
contacts 43
Utiliser la liste de contacts 42
Utiliser les numéros de service 47
Vérifier l’espace utilisé dans les contacts
49
Convertisseur 96
E
Écran principal
Papier peint 105
Enregistreur audio 87
Entrée de texte 34
Utiliser le mode alphabétique 37
Utiliser le mode Chiffres 38
Utiliser le mode Symboles 38
Utiliser le mode texte intuitif T9 35
Espace utilisé 49
F
Faire un appel à l’étranger 19
Fonctions d’appel 19
Activer ou désactiver les tonalités du
clavier 28
Afficher les appels manqués 22
Afficher les détails d’un appel manqué 23
Afficher tous les appels 22
Appel en attente 29
Chercher un numéro dans les contacts 29
Composer le numéro d’un appel manqué
25
Composer un numéro à partir du menu
Appels récents 20
Corriger un numéro 19
Envoyer un message au numéro d’un
appel manqué 23
Établir une conférence téléphonique 30
Faire un appel 19
Faire un appel à l’étranger 19
Faire un appel à partir des contacts 21
Mettre fin à un appel 19
Mettre un appel en attente 26
Options pendant un appel 27
Profil Silencieux 31
Recomposer le dernier numéro 20
Régler le volume d’un appel 25
Supprimer un appel manqué 24
Utiliser le hautparleur pendant un appel
140
28
Fuseaux horaires 96
G
Garantie du fabricant 133
Gestion de la mémoire
Effacer la mémoire 124
Groupe
Ajouter une entrée dans un groupe 46
Créer un groupe 45
Renommer un groupe 46
Retirer une entrée d’un groupe 46
H
Heure et date 107
Date 107
Format de l’heure 107
Format de la date 107
Heure 107
Mise à jour fuseau horaire 107
L
Langue
Langue de saisie 108
Texte de l’écran 108
Lecteur de musique
Écouter de la musique tout en utilisant le
téléphone 82
Extensions de fichier musical 81
Listes de lecture 83
Ajouter des morceaux 84
Ajouter un morceau à une liste de lecture
84
M
Mes trucs 65
Messagerie vocale 7, 59
Accéder à votre messagerie vocale 59
Accéder à votre messagerie vocale à
partir d’un autre téléphone 59
Messages 51
Affichage des messages reçus 56
Options des messages multimédias 58
Options des messages texte 58
Rédiger et envoyer des messages
multimédias 53
Rédiger et envoyer des messages texte
51
Types de messages 51
Utiliser les options de message 57
Visualiser un message texte à partir de la
Boite de réception 56
Mise en route 1
Activation du téléphone 1
Messagerie vocale 7
Mode T9
Ajouter un nouveau mot dans le
dictionnaire 36
Saisir un mot 35
Modes de saisie de texte 34
Mode alphabétique 34
Mode Chiffres 34
Mode Symboles 34
Mode T9 34
Modifier NIP 111
141
Muet 29
N
Navigateur
Avancé 100
Entrer du texte 99
Paramètres 100
Saisir l’URL 100
Navigation dans les menus 32
Utiliser les raccourcis numérotés 33
Numéros autorisés 111
Changer le mode Numéros autorisés 44
Créer de nouveaux numéros autorisés 44
Numéros de service 47
Numérotation
Couleur d’arrière-plan 105
Couleur de police 105
Taille de police 105
Type de police 105
O
Options de l’appareil vidéo
Options de l’appareil vidéo après la saisie
de la vidéo 79
Outils 71
Alarmes 88
Calculateur de pourboire 95
Calculatrice 95
Calendrier 90
Chronomètre 98
Convertisseur 96
Enregistrer un audio 87
Fuseaux horaires 96
Lecteur de musique 81
Minuteur 97
Notes 95
Reconnaissance vocale 85
Tâches 94
Utiliser l’appareil photo 71
P
Paramètres 102
Appels 113
Applications 123
Connectivité 117
Contacts 39
Gestion de la mémoire 123
Profil de son 102
Téléphone 107
Paramètres d’affichage 104
Paramètres de l’appareil photo
Cadre 73
Effets 74
Équilibre des blancs 73
Format 73
Mode Prises de vue 73
Mosaïque 73
Panorama 73
Paramètres 74
Prise de nuit 73
Raccourcis 74
Retardateur 73
Paramètres de l’appareil vidéo
Effets 78
Enregistrement audio 78
142
Équilibre des blancs 78
Format de la vidéo 78
Mode d’enregistrement 77
Retardateur 78
Paramètres des Contacts 39
Pile
Charger
5
Retirer
1
Témoin de pile faible
6
Prise multifonction 13
Profil de son
Autres 104
Paramètres d’appel 102
Paramètres de message 103
Répétition d’alerte message 103
Sonnerie d’appel vocal 102
Téléphone 103
Tonalité d’alerte message 103
Tonalité du clavier 103
Type d’alerte d’appel 102
Type d’alerte message 103
Type de mise en arrêt 103
Type de mise en marche 103
Volume de la sonnerie 102
Profil Normal 102 R
Raccourcis 33
Reconnaissance vocale 85
Réinitialiser le téléphone 112
Restaurer le téléphone 112
S
Santé et sécurité 126
Sécurité
Modifier NIP2 112
Numéros autorisés 111
Vérifier NIP 110
Verrouiller la carte SIM 109
Verrouiller le téléphone 109
Verrouiller les applications 110 T
T-Coil 15
Téléphone
9
Allumer et éteindre le téléphone
7
Écran d’affichage 13
Fonctionnalités
9
Langue 108
Numéro personnel 109
Sécurité 109
Touche 10
Vue de téléphone ouvert 10
Vues du téléphone fermé 12
Témoin de pile faible
6
Touche Appareil photo 12
Touche Appel/Envoi 18
Touche de navigation 18
Touche Effacer 17
Touche Fin 17
Touche hautparleur 28
Touche programmable de droite 17
Touche programmable de gauche 17
Touches de commande 16
143
Touches de volume/Navigation du menu 12
Touches du téléphone 10
www.samsung.com
Mode d'emploi
SM-G355HN
2
À propos de ce mode d'emploi
Cet appareil vous permet de communiquer et d’accéder à des divertissements de haute qualité,
basés sur les critères de qualité et la technologie de Samsung. Ce mode d’emploi a été spécialement
conçu pour vous permettre de découvrir les fonctions et les caractéristiques de votre appareil.
• Veuillez lire attentivement ce mode d’emploi, afin de pouvoir utiliser votre appareil
correctement et en toute sécurité.
• Les descriptions sont basées sur les paramètres par défaut de votre appareil.
• Les images et les captures d’écran peuvent différer par rapport à l’aspect réel du produit.
• Le contenu de ce mode d'emploi peut différer par rapport au produit ou à votre version
logicielle, et faire l’objet de modifications sans préavis. Pour obtenir la version la plus récente de
ce mode d’emploi, connectez-vous sur le site Web de Samsung : www.samsung.com.
• Les contenus de qualité élevée nécessitant une forte utilisation du processeur et de la RAM
peuvent avoir une incidence sur les performances générales de l’appareil. Les applications en
rapport avec ces contenus peuvent ne pas fonctionner correctement selon les caractéristiques
de l’appareil et les conditions d’utilisation.
• Les fonctions disponibles et les services supplémentaires peuvent varier selon l’appareil, votre
version logicielle ou votre opérateur.
• Les applications et leurs fonctions peuvent varier en fonction de votre zone géographique ou
des caractéristiques du matériel. Samsung ne peut être tenu responsable des problèmes de
performance relatifs aux applications fournies par des éditeurs de logiciels autres que Samsung.
• Samsung ne peut être tenu responsable des problèmes de performance ou des incompatibilités
découlant de la modification des paramètres de registre par l’utilisateur. Toute tentative de
personnalisation du système d’exploitation peut entraîner des problèmes de fonctionnement de
l’appareil ou de ses applications.
• Les logiciels, sons, fonds d’écran, images ainsi que les autres contenus multimédia fourni(e)s
avec cet appareil sont concédés sous licence et leur usage est soumis à une utilisation limitée.
L’extraction et l’utilisation de ces éléments à des fins commerciales ou autres constituent
une infraction au regard des lois sur les droits d’auteur. Les utilisateurs sont entièrement
responsables de toute utilisation illégale d’un contenu multimédia.
• Les services de données tels que l’envoi ou la réception de messages, le téléchargement ou
le chargement de données, la synchronisation automatique ou l’utilisation de services de
localisation peuvent occasionner des frais supplémentaires, en fonction de l’offre à laquelle vous
avez souscrit. Afin d’éviter ces frais, choisissez un forfait de connexion approprié. Pour en savoir
plus, contactez votre opérateur.
À propos de ce mode d'emploi
3
• Les applications fournies par défaut avec l’appareil peuvent être modifiées ou ne plus être
disponibles, et ce, sans préavis. Si vous avez des questions à propos d’une application fournie
avec l’appareil, contactez un centre de service après-vente Samsung. Pour les applications
installées par l’utilisateur, contactez les opérateurs.
• Toute modification du système d’exploitation de l’appareil ou installation de logiciels non
officiels peut entraîner des dysfonctionnements et corrompre vos données. Ces actions
constituent des violations de l’accord de licence Samsung et annuleront votre garantie.
Icônes
Avertissement : situations susceptibles de vous blesser ou de blesser autrui
Attention : situations susceptibles d’endommager votre appareil ou d’autres équipements
Remarque : remarques, conseils d’utilisation ou informations complémentaires
Droits d’auteur
Copyright © 2015 Samsung Electronics
Ce mode d’emploi est protégé par les lois internationales sur les droits d’auteur.
Il est interdit de reproduire, distribuer, traduire ou transmettre sous quelque forme et par quelque
moyen que ce soit, électronique ou mécanique, notamment par photocopie, enregistrement
ou stockage dans un système de stockage et de recherche documentaire, tout ou partie de ce
document, sans le consentement préalable écrit de Samsung Electronics.
À propos de ce mode d'emploi
4
Marques
• SAMSUNG et le logo SAMSUNG sont des marques déposées de Samsung Electronics.
• Bluetooth® est une marque déposée de Bluetooth SIG, Inc.
• Wi-Fi®, Wi-Fi Protected Setup™, Wi-Fi Direct™, Wi-Fi CERTIFIED™ et le logo Wi-Fi sont des
marques déposées de Wi-Fi Alliance.
• Toutes les autres marques et droits d’auteur demeurent la propriété de leurs propriétaires
respectifs.
5
Table des matières
Démarrage
7 Présentation de l’appareil
8 Touches
9 Contenu du coffret
10 Installer la carte SIM ou USIM et la
batterie
13 Charger la batterie
15 Insérer une carte mémoire
17 Allumer et éteindre l’appareil
18 Manipuler l’appareil
18 Verrouiller et déverrouiller l’appareil
18 Régler le volume
18 Activer le profil Discret
Fonctions de base
19 Icônes d’informations
20 Utiliser l’écran tactile
23 Pivoter l’écran
24 Notifications
25 Écran d’accueil
27 Liste des applications
28 Utiliser les applications
29 Saisir du texte
30 Établir une connexion au réseau Wi-Fi
31 Créer un compte
32 Transférer des fichiers
33 Protéger l’appareil
35 Mettre l’appareil à jour
Communication
36 Téléphone
41 Contacts
44 Messages
45 Email
47 Google Mail
48 Hangouts
49 Google+
49 Google+ Photos
50 ChatON
Web et réseau
51 Internet
52 Chrome
53 Bluetooth
54 NFC
55 S Beam
Multimédia
56 Appareil photo
62 Galerie
64 Vidéo
65 YouTube
66 Radio
Table des matières
6
84 Utilisation des données
84 Plus de réseaux
85 NFC
85 S Beam
85 Écran de verrouillage
86 Son
86 Affichage
87 Appels
88 Stockage
88 Mode Éco. d'énergie
89 Batterie
89 Gestionnaire d'applications
89 Localisation
89 Sécurité
91 Langue et saisie
93 Sauvegarder et réinitialiser
93 Ajouter compte
94 Date et heure
94 Accessibilité
96 Accessories
96 Impression
96 À propos de l'appareil
96 Paramètres Google
Dépannage
Boutiques d’applications et
multimédia
68 Play Store
69 Samsung Apps
69 Play Livres
70 Play Films et TV
70 Play Musique
70 Play Jeux
70 Play Kiosque
Utilitaires
71 Mémo
72 S Planner
73 Google Drive
74 Horloge
75 Calculatrice
76 Enregistreur vocal
77 Recherche Google
78 Recherche vocale
78 Mes fichiers
80 Téléchargements
Géolocalisation
81 Maps
Paramètres
82 Accéder au menu des paramètres
82 Wi-Fi
83 Bluetooth
83 Modem et point d'accès mobile
83 Mode Hors-ligne
7
Démarrage
Présentation de l’appareil
Microphone
Écran tactile
Écouteur
Connecteur à fonctions
multiples
Touche Accueil
Touche Applications
récentes
Touche Marche/Arrêt
Objectif avant
Touche Retour
Touche de volume
Antenne principale
Haut-parleur
Antenne NFC (sur la
batterie)
Prise audio 3,5 mm
Antenne GPS
Objectif arrière
Flash
Cache arrière
Démarrage
8
• Ne recouvrez pas la zone autour de l’antenne avec vos mains ou tout autre objet. Cela
peut entraîner des problèmes de connectivité ou décharger la batterie.
• L’utilisation d’une protection d’écran agréée Samsung est recommandée. Les protections
d’écran non agréées peuvent provoquer un dysfonctionnement des capteurs.
• Évitez de mettre l’écran tactile en contact avec de l’eau. L’humidité ou le contact avec l’eau
peut provoquer des dysfonctionnements de l’écran tactile.
Touches
Touche Fonction
Marche/Arrêt
• Maintenir cette touche enfoncée pour allumer ou éteindre
l’appareil.
• Maintenir cette touche enfoncée pendant 7 secondes pour
réinitialiser l’appareil en cas d’erreur fatale, ou s’il ne répond plus
ou mal.
• Appuyer sur cette touche pour verrouiller ou déverrouiller
l’appareil. Lorsque l’écran tactile s’éteint, l’appareil passe en mode
Verrouillage.
Applications
récentes
• Appuyez sur cette touche pour ouvrir la liste des applications
récentes.
Accueil
• Appuyer sur cette touche pour revenir à l’écran d’accueil.
• Maintenez cette touche enfoncée pour lancer l'application de
recherche Google.
Retour • Appuyer sur cette touche pour revenir à l’écran précédent.
Volume • Appuyer sur cette touche pour régler le volume de l’appareil.
Démarrage
9
Contenu du coffret
Vérifiez le contenu du coffret et assurez-vous que tous les éléments suivants sont présents :
• Appareil
• Batterie
• Guide de prise en main rapide
• Les éléments fournis avec l’appareil et les accessoires disponibles peuvent varier en
fonction de votre zone géographique ou de votre opérateur.
• Les accessoires fournis ont été spécialement conçus pour votre appareil et peuvent ne
pas fonctionner avec d’autres appareils.
• L’aspect et les caractéristiques du produit peuvent faire l’objet de modifications sans
préavis.
• Vous pouvez acheter d’autres accessoires auprès de votre revendeur Samsung. Avant
tout achat, assurez-vous qu’ils sont compatibles avec votre appareil.
• Certains accessoires, autres que ceux fournis, peuvent ne pas être compatibles avec votre
appareil.
• Utilisez exclusivement des accessoires homologués par Samsung. L'utilisation
d'accessoires non approuvés peut entraîner des problèmes de performance et des
pannes qui ne sont pas couverts par la garantie.
• La disponibilité de l’ensemble des accessoires dépend entièrement des fabricants. Pour
plus d’informations sur la disponibilité des accessoires, consultez le site Web Samsung.
Démarrage
10
Installer la carte SIM ou USIM et la batterie
Insérez la carte SIM ou USIM fournie par votre opérateur, ainsi que la batterie.
Seules les cartes microSIM sont compatibles avec cet appareil.
1 Retirez le cache arrière.
Veillez à ne pas abîmer vos ongles en retirant le cache arrière.
Évitez de plier ou de déformer excessivement le cache arrière. Vous risqueriez de
l’endommager.
2 Insérez la carte SIM ou USIM, puce orientée vers le bas.
Démarrage
11
• Ne retirez pas le ruban de protection recouvrant l’antenne, car cela pourrait
l’endommager.
• N’introduisez pas de carte mémoire dans le compartiment prévu pour la carte SIM. Si
une carte mémoire venait à se coincer dans le compartiment prévu pour la carte SIM,
apportez l’appareil dans un centre de service après-vente Samsung afin de la faire retirer.
• Veillez à ne pas perdre ou à ne pas laisser d’autres personnes utiliser votre carte SIM ou
USIM. Samsung ne peut être tenu responsable en cas de dommage ou désagrément
résultant d’une perte ou d’un vol de carte.
3 Insérez la batterie.
2
1
4 Remettez le cache arrière en place.
Démarrage
12
Retirer la carte SIM ou USIM et la batterie
1 Retirez le cache arrière.
2 Retirez la batterie.
3 Appuyez avec précaution sur la carte SIM ou USIM pour la dégager, puis sortez-la du
compartiment.
Démarrage
13
Charger la batterie
Vous devez charger la batterie avant d’utiliser l’appareil pour la première fois. Vous pouvez charger
l’appareil à l’aide d’un chargeur ou en le branchant sur un ordinateur à l’aide d’un câble USB.
Utilisez uniquement des chargeurs, des batteries et des câbles homologués par Samsung.
L’utilisation de chargeurs ou de câbles non homologués peut provoquer l’éclatement de la
batterie ou endommager l’appareil.
• Lorsque le niveau de charge de la batterie est faible, l’appareil émet un signal sonore et
affiche un message d’avertissement.
• Si la batterie est complètement déchargée, vous ne pouvez pas allumer l’appareil,
même si le chargeur est branché. Rechargez la batterie pendant quelques minutes avant
d’allumer l’appareil.
• Si vous utilisez simultanément plusieurs applications, des applications réseaux ou des
applications qui nécessitent une connexion à un autre appareil, la batterie se déchargera
rapidement. Pour éviter toute déconnexion du réseau ou perte d’alimentation lors
d’un transfert de données, utilisez toujours ces applications lorsque la batterie est
parfaitement chargée.
Charger la batterie avec le chargeur
Branchez la fiche micro-USB du chargeur sur le connecteur à fonctions multiples de l’appareil et
l’autre extrémité sur une prise de courant.
Un branchement incorrect du chargeur peut sérieusement endommager l’appareil. Les
dégâts résultant d’une mauvaise utilisation ne sont pas couverts par la garantie.
Démarrage
14
• L’appareil peut être utilisé en cours de chargement, mais dans ce cas, le chargement
complet de la batterie risque de prendre plus de temps.
• Lorsque l’appareil est en cours de chargement, il est possible que l’écran tactile ne
fonctionne pas en raison de l’instabilité de l’alimentation électrique. Dans ce cas,
débranchez le chargeur de l’appareil.
• Il est possible que l’appareil chauffe lorsqu’il est en cours de chargement. Ce phénomène
est normal et n’affecte ni la durée de vie, ni les performances de l’appareil. Si la
température de la batterie devient trop élevée, le chargement risque de s’interrompre.
• Si l’appareil ne se charge pas correctement, apportez-le, accompagné de son chargeur,
dans un centre de service après-vente Samsung.
Lorsque la batterie est complètement chargée, déconnectez l’appareil du chargeur. Pour ce faire,
débranchez d’abord le chargeur de l’appareil, puis de la prise de courant.
Ne retirez jamais la batterie avant d’avoir débranché le chargeur. Ceci pourrait endommager
l’appareil.
• Pour économiser l’énergie, débranchez le chargeur lorsque vous ne l’utilisez pas. Le
chargeur n’étant pas muni d'une touche Marche/Arrêt, vous devez le débrancher de la
prise de courant pour couper l’alimentation. L’appareil doit rester à proximité de la prise
lors du chargement.
• Le socle de prise de courant doit être installé à proximité du matériel et doit être aisément
accessible.
Vérifier la charge de la batterie
Lorsque vous chargez la batterie et que l’appareil est éteint, les icônes suivantes indiquent l’état du
chargement :
Chargement en cours Chargement terminé
Démarrage
15
Réduire la consommation d’énergie de la batterie
Votre appareil est doté d’options destinées à optimiser l’autonomie de votre batterie. En
personnalisant ces options et en désactivant les applications fonctionnant inutilement en arrièreplan,
vous pouvez utiliser l’appareil plus longtemps entre deux chargements :
• Activez le mode économie d’énergie.
• Lorsque vous n’utilisez pas l’appareil, désactivez l’écran tactile en appuyant sur la touche
Marche/Arrêt.
• Fermez toutes les applications fonctionnant inutilement en arrière-plan à l’aide du gestionnaire
de tâches.
• Désactivez la fonction Bluetooth.
• Désactivez la fonction Wi-Fi.
• Désactivez les applications de synchronisation automatique.
• Réduisez la durée du rétroéclairage de l’écran.
• Réduisez la luminosité de l’écran.
Insérer une carte mémoire
L’appareil est compatible avec les cartes mémoire d’une capacité allant jusqu’à 64 Go. Selon le
fabricant et le modèle, certaines cartes mémoire peuvent ne pas être compatibles avec votre
appareil.
• Certaines cartes mémoire peuvent ne pas être parfaitement compatibles avec l’appareil.
L’utilisation d’une carte mémoire incompatible peut endommager l’appareil ou la carte
mémoire elle-même et corrompre les données qui y sont stockées.
• Veillez à insérer la carte mémoire du bon côté.
• Seules les structures de fichiers VFAT et exFAT sont compatibles avec les cartes mémoire
de l’appareil. Lorsque vous insérez une carte mémoire formatée avec une autre structure
de fichiers, l’appareil vous invite à la reformater.
• Une trop grande fréquence des opérations d’effacement et d’écriture réduit la durée de
vie des cartes mémoire.
• Lorsque vous insérez une carte mémoire dans l’appareil, le répertoire de fichiers de la
carte apparaît dans le dossier Carte SD du menu Mes fichiers.
Démarrage
16
1 Retirez le cache et la batterie.
2 Insérez la carte mémoire en orientant la puce vers le bas.
N’introduisez pas une carte microSIM dans un compartiment pour carte mémoire.
3 Remettez la batterie et le cache en place.
Retirer une carte mémoire
Avant de retirer la carte mémoire, vous devez au préalable la désactiver pour pouvoir la retirer en
toute sécurité. Depuis l’écran d’accueil, appuyez sur → Paramètres → Stockage → Démonter la
carte SD.
1 Retirez le cache et la batterie.
2 Retirez la carte mémoire.
3 Remettez la batterie et le cache en place.
Ne retirez jamais la carte mémoire lorsque l’appareil y enregistre ou lit des informations.
Cela pourrait entraîner une perte ou une corruption des données, ou endommager la carte
mémoire ou l’appareil. Samsung ne peut être tenu responsable en cas de perte de données
résultant d’une utilisation frauduleuse ou en cas de détérioration d’une carte mémoire.
Démarrage
17
Formater une carte mémoire
Une carte mémoire ayant été formatée sur un ordinateur peut ne pas être compatible avec l’appareil.
Formatez la carte mémoire dans l’appareil.
Depuis l’écran d’accueil, appuyez sur → Paramètres → Stockage → Formater la carte SD →
Formater la carte SD → Supprimer tout.
Avant de formater la carte mémoire, n’oubliez pas d’effectuer des copies de sauvegarde de
toutes les données importantes qui y sont stockées. La garantie du fabricant ne couvre pas
la perte de données résultant des manipulations de l’utilisateur.
Allumer et éteindre l’appareil
Si vous allumez l’appareil pour la première fois, suivez les instructions affichées à l’écran pour
procéder à sa configuration.
Pour allumer l’appareil, maintenez la touche Marche/Arrêt enfoncée pendant quelques secondes.
• Respectez toutes les consignes de sécurité et directives formulées par le personnel
compétent dans les lieux où l’utilisation d’appareils mobiles est interdite, comme par
exemple dans les avions et les hôpitaux.
• Pour désactiver les fonctions d’appel et de connexion sans fil, c'est-à-dire les fonctions
Wi-Fi et Bluetooth, maintenez la touche Marche/Arrêt enfoncée et appuyez sur Mode
Hors-ligne.
Pour éteindre l’appareil, maintenez la touche Marche/Arrêt enfoncée, puis appuyez sur Éteindre.
Démarrage
18
Manipuler l’appareil
Ne recouvrez pas la zone autour de l’antenne avec vos mains ou tout autre objet. Cela peut entraîner
des problèmes de connectivité ou décharger la batterie.
Verrouiller et déverrouiller l’appareil
Pour empêcher toute opération accidentelle de l’appareil lorsque vous ne l’utilisez pas, vous pouvez
le verrouiller. Lorsque vous appuyez sur la touche Marche/Arrêt, l’écran s’éteint et l’appareil passe en
mode Verrouillage. Il se verrouille également automatiquement si vous ne l’utilisez pas pendant un
certain temps.
Pour déverrouiller l’appareil, appuyez sur la touche Marche/Arrêt ou sur la touche Accueil, puis faites
glisser votre doigt dans n’importe quelle direction sur l'écran.
Régler le volume
Pour régler le volume des sons multimédia, appuyez sur la touche de volume Haut ou Bas.
Activer le profil Discret
Utilisez l’une des méthodes suivantes :
• Maintenez la touche de volume Bas enfoncée jusqu’à ce que le profil Discret soit activé.
• Maintenez la touche Marche/Arrêt enfoncée, puis appuyez sur Muet ou Vibreur.
• Ouvrez le volet des raccourcis en haut de l’écran, puis appuyez sur Son ou Vibreur.
19
Fonctions de base
Icônes d’informations
Les icônes susceptibles de s'afficher en haut de l’écran vous indiquent le statut de l’appareil. Les
icônes répertoriées dans le tableau ci-dessous sont les plus courantes.
Icône Signification
Aucun signal
Puissance du signal
Itinérance (hors de la zone de service locale)
Réseau GPRS connecté
Réseau EDGE connecté
Réseau UMTS connecté
Réseau HSDPA connecté
Réseau HSPA+ connecté
Connecté au réseau Wi-Fi
Fonction Bluetooth activée
GPS activé
Appel en cours
Appel manqué
Connecté à un ordinateur
Carte SIM ou USIM absente
Nouveau SMS ou MMS
Alarme activée
Profil Discret activé
Mode Vibreur activé
Mode Hors-ligne activé
Une erreur s’est produite ou votre attention est nécessaire
Niveau de charge de la batterie
Fonctions de base
20
Utiliser l’écran tactile
L’écran tactile réagit uniquement au doigt.
• Évitez tout contact de l’écran tactile avec d’autres appareils électriques. Les décharges
électrostatiques peuvent provoquer des dysfonctionnements de l’écran tactile.
• Pour éviter d’endommager l’écran tactile, n’appuyez pas dessus avec un objet pointu et
n’exercez aucune pression excessive avec vos doigts.
• Il se peut que l'appareil ne reconnaisse pas la saisie tactile près des bords de l'écran, hors
de la zone de saisie dédiée.
• Si l’écran tactile reste inactif pendant une période prolongée, des images rémanentes
risquent d’apparaître (ou persistance de l’affichage). Éteignez l’écran tactile lorsque vous
n’utilisez pas l’appareil.
Mouvements
Appuyer
Pour ouvrir une application, sélectionner un élément de menu, activer une commande ou saisir un
caractère sur le clavier, appuyez sur l’écran tactile avec un seul doigt.
Fonctions de base
21
Maintenir appuyé
Pour ouvrir une fenêtre d’options contextuelle, maintenez votre doigt appuyé sur un élément
pendant plus de 2 secondes.
Faire glisser
Pour déplacer un élément vers un nouvel emplacement, maintenez votre doigt appuyé sur l’élément
et faites-le glisser sur l’écran.
Appuyer deux fois
Pour effectuer un zoom sur une page Web ou une image, appuyez deux fois sur l’écran. Appuyez à
nouveau à deux reprises pour annuler le zoom.
Fonctions de base
22
Effleurer
Pour passer d’une fenêtre à l’autre, faites glisser votre doigt vers la gauche ou la droite sur l’écran
d’accueil ou dans la liste des applications. Pour parcourir une page Web ou une liste, telle que celle
de vos contacts, faites glisser votre doigt vers le haut ou le bas de l’écran.
Pincer
Pour effectuer un zoom avant sur une page Web, une carte ou une image, placez deux doigts sur
l’écran et écartez-les. Rapprochez-les pour effectuer un zoom arrière.
Fonctions de base
23
Pivoter l’écran
De nombreuses applications autorisent l’affichage en mode Portrait ou Paysage. Lorsque vous faites
pivoter l’appareil, l’écran s’adapte automatiquement à la nouvelle orientation.
Pour empêcher l'écran de pivoter automatiquement, ouvrez le volet des raccourcis et désélectionnez
l’option Rotation écran.
• Certaines applications ne permettent pas la rotation de l’écran.
• Pour certaines autres applications, l’écran affiché diffère selon l’orientation. Par exemple,
pour utiliser la calculatrice scientifique, vous devez pivoter l’écran en mode Paysage.
Fonctions de base
24
Notifications
Des icônes de notification peuvent apparaître dans le volet des raccourcis en haut de l’écran afin
de vous signaler les appels manqués, les nouveaux messages, les événements à venir, le statut de
l’appareil, et plus encore. Pour ouvrir le volet des raccourcis, faites glisser votre doigt de haut en bas
sur le volet. Pour afficher des notifications supplémentaires, faites défiler la liste vers le bas. Pour
fermer le volet, faites-le glisser de bas en haut.
Depuis le volet des raccourcis, vous pouvez afficher l’état actuel de l’appareil et utiliser les options
suivantes :
• Wi-Fi : activer ou désactiver la fonction Wi-Fi.
• Position : activer ou désactiver la fonction GPS.
• Son : activer ou désactiver le son ou le vibreur de l'appareil. Vous pouvez également activer le
mode Vibreur en mode Discret.
• Rotation écran : autoriser ou empêcher l’interface de pivoter lorsque vous tournez l’appareil.
• Bluetooth : activer ou désactiver la fonction Bluetooth.
• Données mobiles : activer ou désactiver la connexion de données.
• Pt accès mobile : activer ou désactiver la fonction modem Wi-Fi.
• NFC : activer ou désactiver la fonction NFC.
• Synchro. : activer ou désactiver la synchronisation automatique des applications.
• Éco. énergie : activer ou désactiver le mode économie d'énergie.
La disponibilité des options dépend de votre zone géographique ou de votre opérateur.
Fonctions de base
25
Écran d’accueil
L’écran d’accueil est le point de départ pour accéder à toutes les fonctions de l’appareil. Il affiche des
icônes d’information, des widgets, des raccourcis vers les applications, etc.
L’écran d’accueil comprend plusieurs volets. Pour afficher les autres volets, faites défiler l’écran vers la
gauche ou la droite.
Organiser les éléments de l’écran d’accueil
Ajouter une icône d’application
Depuis l’écran d’accueil, appuyez sur , maintenez le doigt appuyé sur une icône d’application, puis
faites-la glisser sur l’aperçu d’un volet.
Déplacer un élément
Maintenez le doigt appuyé sur l’élément à déplacer, puis faites-le glisser jusqu’à l’emplacement
souhaité. Pour déplacer l’élément vers un autre volet, faites-le glisser vers le bord droit ou gauche de
l’écran.
Supprimer un élément
Maintenez le doigt appuyé sur l’élément à supprimer, puis faites-le glisser vers la corbeille qui
apparaît en haut de l’écran d’accueil. Lorsque la corbeille devient rouge, relâchez l’élément.
Réorganiser les volets d'écran d'accueil
Ajouter un volet
Placez deux doigts sur l’écran et resserrez-les, puis appuyez sur .
Déplacer un volet
Placez deux doigts sur l’écran et resserrez-les pour passer en mode Modification. Maintenez ensuite
le doigt appuyé sur l’aperçu d’un volet, puis faites-le glisser jusqu’à l’emplacement souhaité.
Supprimer un volet
Placez deux doigts sur l’écran et resserrez-les, maintenez le doigt appuyé sur l’aperçu d’un volet, puis
faites-le glisser vers la corbeille en haut de l’écran.
Fonctions de base
26
Définir un fond d’écran
Définissez une image ou une photo enregistrée dans l’appareil comme fond d’écran d’accueil.
Maintenez le doigt appuyé sur une zone vide de l’écran d’accueil, appuyez ensuite sur Fonds d'écran
→ Écran d'accueil, puis sélectionnez l’une des options ci-dessous.
• Fonds d'écran : fonds d'écran fournis par défaut avec votre appareil.
• Fonds d'écran animés : afficher les images animées téléchargées sur l'appareil.
• Galerie : photos que vous avez prises avec l’appareil photo ou images téléchargées depuis
Internet.
• Photos : photos disponibles dans l'application Google Photos.
Sélectionnez une image, redimensionnez le cadre si nécessaire, puis définissez-la comme fond
d'écran.
Utiliser les widgets
Les widgets sont de petits outils qui permettent d’accéder à des fonctions et des informations
pratiques depuis l’écran d’accueil. Vous pouvez ajouter des widgets depuis le volet des widgets sur
l’écran d’accueil.
• Certains widgets permettent de se connecter à des services Web. L’utilisation d’un widget
Internet peut entraîner des frais supplémentaires.
• La disponibilité des widgets dépend de votre zone géographique ou de votre opérateur.
Maintenez le doigt appuyé sur une zone vide de l’écran d’accueil, puis appuyez sur Widgets. Faites
défiler le volet des widgets vers la gauche ou la droite, maintenez le doigt appuyé sur un widget
pour l’ajouter à l’écran d’accueil, puis faites-le glisser sur l’aperçu d’un volet. Placez-le à l'endroit
souhaité, redimensionnez-le (si nécessaire) en étirant le cadre qui l'entoure, puis appuyez n'importe
où sur l'écran pour valider le nouvel emplacement du widget.
Pour ajouter un widget à un nouveau volet, faites-le glisser sur le dernier volet.
Fonctions de base
27
Liste des applications
La liste des applications affiche les icônes de toutes vos applications, y compris celles récemment
installées.
Depuis l’écran d’accueil, appuyez sur pour ouvrir la liste des applications.
Pour afficher les autres volets, faites défiler l’écran vers la gauche ou la droite.
Organiser les applications
Appuyez sur → Modifier, maintenez le doigt appuyé sur une application, puis faites-la glisser
jusqu’à l’emplacement souhaité. Pour déplacer l’élément vers un autre volet, faites-le glisser vers le
bord droit ou gauche de l’écran.
Organiser les applications dans des dossiers
Placez les applications similaires dans un même dossier pour faciliter leur utilisation.
Maintenez le doigt appuyé sur une application, faites-la glisser vers l'option Créer dossier, puis
indiquez un nom de dossier. Faites glisser les applications dans le nouveau dossier.
Installer des applications
Utilisez les boutiques d’applications, comme Samsung Apps, pour télécharger et installer des
applications.
Désinstaller des applications
Appuyez sur → Désinstaller/désactiver des applications, puis sélectionnez l’application à
désinstaller.
Il est impossible de désinstaller les applications fournies par défaut avec l’appareil.
Fonctions de base
28
Désactiver des applications
Appuyez sur → Désinstaller/désactiver des applications, puis sélectionnez l'application à
désactiver.
Pour activer de nouveau les applications désactivées, appuyez sur → Aff. applis désact.,
sélectionnez les applications, puis appuyez sur OK dans l'écran Applications.
• Les applications téléchargées et certaines applications fournies par défaut ne peuvent
pas être désactivées.
• Lorsque vous utilisez cette fonction, les applications désactivées ne sont plus affichées
dans l'écran Applications. Elles restent néanmoins stockées sur l'appareil.
Utiliser les applications
Cet appareil peut exécuter différent types d’applications, vous permettant d’utiliser aussi bien des
contenus multimédia que des contenus Internet.
Ouvrir une application
Depuis l’écran d’accueil ou la liste des applications, appuyez sur une icône pour ouvrir l’application
correspondante.
Certaines applications sont regroupées dans des dossiers. Appuyez sur un dossier, puis sur
une application pour l'ouvrir.
Ouvrir des applications récemment utilisées
Appuyez sur pour ouvrir la liste des applications récemment utilisées.
Appuyez sur une icône pour ouvrir l’application correspondante.
Fermer une application
Fermez les applications fonctionnant inutilement en arrière-plan pour économiser la batterie et
optimiser les performances de l’appareil.
Appuyez sur → , puis sur Fin à côté d’une application pour la fermer. Pour fermer toutes les
applications en cours d’exécution, appuyez sur Fermer tout près du nombre total d’applications
actives. Vous pouvez également appuyer sur → .
Fonctions de base
29
Saisir du texte
Pour saisir du texte, utilisez le clavier Samsung ou la fonction de saisie vocale.
La saisie de texte est impossible dans certaines langues. Pour saisir du texte, vous devez
sélectionner une des langues prises en charge.
Modifier le type de clavier
Appuyez sur une zone de saisie, ouvrez le volet des raccourcis, appuyez sur Mode de saisie, puis
choisissez le type de clavier à utiliser.
Utiliser le clavier Samsung
Modifier la disposition du clavier
Appuyez sur , sélectionnez une langue, puis appuyez sur Clavier Azerty ou Clavier 3x4.
• Sur le clavier 3x4, une touche correspond à trois ou quatre caractères. Pour saisir un
caractère, appuyez à plusieurs reprises sur la touche correspondante pour accéder au
caractère souhaité.
• Pour certaines langues, il n’est pas possible de modifier la disposition du clavier.
Passer à la ligne suivante.
Supprimer le caractère précédent.
Saisir des chiffres et des signes de
ponctuation.
Saisir des majuscules.
Accéder aux paramètres du clavier
Samsung.
Insérer un espace.
Saisir des majuscules
Appuyez sur avant de saisir un caractère. Pour saisir l’ensemble de votre texte en majuscules,
appuyez deux fois sur cette touche.
Fonctions de base
30
Modifier la langue du clavier
Ajoutez des langues au clavier, puis faites glisser la barre d’espace vers la gauche ou la droite pour
modifier la langue du clavier.
Dicter du texte
Activez la fonction de saisie vocale, puis parlez dans le microphone. L’appareil affiche à l’écran ce que
vous venez de dire.
Si l’appareil ne reconnaît pas correctement les mots, appuyez sur le texte mis en surbrillance et
sélectionnez une autre proposition dans la liste déroulante qui apparaît.
Pour modifier la langue de la reconnaissance vocale ou en ajouter une autre, appuyez sur la langue
actuellement prise en charge.
Copier et coller du texte
Maintenez le doigt appuyé sur le texte souhaité, faites glisser l’icône ou pour redimensionner
la sélection, puis appuyez sur Copier pour copier le texte ou sur Couper pour le couper. Le texte
sélectionné est copié dans le presse-papier.
Pour le coller dans une zone de saisie, maintenez le doigt appuyé à l’endroit où vous souhaitez
insérer le texte, puis appuyez sur Coller.
Établir une connexion au réseau Wi-Fi
Connectez l’appareil à un réseau Wi-Fi pour pouvoir utiliser Internet ou partager des fichiers
multimédia avec d’autres appareils (p. 82).
Activer ou désactiver un réseau Wi-Fi
Ouvrez le volet des raccourcis, puis appuyez sur Wi-Fi pour activer ou désactiver la fonction.
Lorsque vous n’utilisez pas le réseau Wi-Fi, désactivez-le afin d’économiser la batterie.
Fonctions de base
31
Établir une connexion à un réseau Wi-Fi
Depuis la liste des applications, appuyez sur Paramètres → Wi-Fi, puis faites glisser le curseur Wi-Fi
vers la droite.
Sélectionnez un réseau dans la liste des réseaux Wi-Fi détectés, saisissez un mot de passe, le cas
échéant, puis appuyez sur Connexion. Les réseaux nécessitant un mot de passe sont signalés par
une icône représentant un verrou. Après connexion à un réseau Wi-Fi, l’appareil s’y connectera
automatiquement dès qu’il sera disponible.
Ajouter un réseau Wi-Fi
Si le réseau souhaité n’apparaît pas dans la liste, appuyez sur Ajouter un réseau Wi-Fi en bas de la
liste des réseaux. Saisissez le nom du réseau dans la zone SSID du réseau, sélectionnez le type de
sécurité, indiquez votre mot de passe si le réseau est protégé, puis appuyez sur Connexion.
Supprimer un réseau Wi-Fi
Si un réseau ne doit plus être utilisé, même s’il s’agit du réseau actuellement en service, vous pouvez
le supprimer afin que l’appareil ne s’y connecte plus automatiquement. Sélectionnez le réseau dans
la liste, puis appuyez sur Oublier.
Créer un compte
Les applications Google, comme Play Store, nécessitent un compte Google et Samsung Apps
requiert un compte Samsung. Créez des comptes Google et Samsung afin de profiter au maximum
de votre appareil.
Ajouter des comptes
Lorsque vous ouvrez une application Google, suivez les instructions qui apparaissent à l’écran. Pour
créer un compte Google, vous n’avez pas besoin de vous connecter.
Pour vous connecter à un compte Google ou en créer un, ouvrez la liste des applications et appuyez
sur Paramètres → Ajouter compte → Google. Appuyez ensuite sur Nouveau pour créer un compte
ou sur Compte existant pour vous connecter, puis suivez les instructions à l’écran pour procéder à la
configuration. Vous pouvez utiliser plusieurs comptes Google sur l’appareil.
Vous pouvez également créer un compte Samsung.
Fonctions de base
32
Supprimer un compte
Depuis la liste des applications, appuyez sur Paramètres, sélectionnez un nom sous l’option
COMPTES, choisissez le compte à supprimer, puis appuyez sur Supp. compte.
Transférer des fichiers
Vous pouvez transférer différents types de fichiers (sons, vidéos, images, etc.) de l’appareil vers un
ordinateur, et inversement.
Connecter l’appareil avec Samsung Kies
Samsung Kies est un logiciel qui permet de gérer vos contenus multimédias et vos informations
personnelles avec des appareils Samsung. Téléchargez la dernière version de Samsung Kies à partir
du site Web Samsung.
1 Connectez l’appareil à un ordinateur à l’aide du câble USB.
Samsung Kies démarre automatiquement sur l’ordinateur. Si Samsung Kies ne démarre pas,
double-cliquez sur l’icône Samsung Kies sur votre ordinateur.
2 Transférez des fichiers entre votre appareil et l’ordinateur.
Pour plus d’informations, consultez l’aide de Samsung Kies.
Connecter l’appareil à Windows Media Player
Assurez-vous que Windows Media Player est bien installé sur votre ordinateur.
1 Connectez l’appareil à un ordinateur à l’aide du câble USB.
2 Ouvrez Windows Media Player pour synchroniser les fichiers audio.
Fonctions de base
33
Connecter l’appareil en tant qu’appareil multimédia
1 Connectez l’appareil à un ordinateur à l’aide du câble USB.
2 Ouvrez le volet des raccourcis, puis appuyez sur Connecté en tant que périphérique
multimédia → Périphérique multimédia (MTP).
Appuyez sur Appareil photo (PTP) si votre ordinateur ne gère pas le protocole MTP (Media
Transfer Protocol) ou ne dispose pas du pilote approprié.
3 Transférez des fichiers entre votre appareil et l’ordinateur.
Protéger l’appareil
Vous pouvez empêcher toute personne d’utiliser votre appareil et de consulter les données et
informations personnelles qui y sont enregistrées. Pour protéger votre appareil, vous pouvez définir
un code de déverrouillage. Sans ce code, l’appareil ne pourra pas être déverrouillé.
Déverrouillage par modèle
Depuis la liste des applications, appuyez sur Paramètres → Écran de verrouillage →
Déverrouillage de l'écran → Modèle.
Dessinez un modèle en reliant au moins quatre points, puis recommencez pour valider. Définissez un
code PIN de déverrouillage de secours pour déverrouiller l’écran en cas d’oubli du modèle.
Fonctions de base
34
Déverrouillage par code PIN
Depuis la liste des applications, appuyez sur Paramètres → Écran de verrouillage →
Déverrouillage de l'écran → Code PIN.
Saisissez au moins quatre chiffres, puis recommencez pour valider.
Déverrouillage par mot de passe
Depuis la liste des applications, appuyez sur Paramètres → Écran de verrouillage →
Déverrouillage de l'écran → Mot de passe.
Saisissez au moins quatre caractères, y compris des chiffres et des symboles, puis recommencez pour
valider.
Déverrouiller l’appareil
Allumez l’écran en appuyant sur la touche Marche/Arrêt ou sur la touche Accueil, puis saisissez le
code ou dessinez le modèle de déverrouillage.
Si vous oubliez le code de déverrouillage, apportez l’appareil dans un centre de service
après-vente Samsung pour le réinitialiser.
Fonctions de base
35
Mettre l’appareil à jour
L’appareil peut être mis à jour avec la version logicielle la plus récente.
La disponibilité de cette fonction dépend de votre zone géographique ou de votre
opérateur.
Mettre l’appareil à jour avec Samsung Kies
Démarrez Samsung Kies et connectez l’appareil à un ordinateur. Samsung Kies reconnaît
automatiquement l’appareil et affiche, le cas échéant, les mises à jour disponibles. Pour lancer la mise
à jour, cliquez sur la touche Mettre à jour dans la boîte de dialogue. Pour plus d’informations sur la
mise à jour, consultez l’aide Samsung Kies.
• Lorsque vous mettez votre appareil à jour, n’éteignez pas l’ordinateur et ne déconnectez
pas le câble USB.
• Ne connectez pas non plus d’autres appareils multimédia à l’ordinateur. Cela pourrait
interférer avec le processus de mise à jour.
Mettre l’appareil à jour sans connexion PC
Grâce au service FOTA (Firmware Over The Air), le logiciel de l’appareil peut être mis à jour sans
passer par une connexion avec un ordinateur.
Depuis la liste des applications, appuyez sur Paramètres → À propos de l'appareil → Mise à jour
logicielle → Mettre à jour.
36
Communication
Téléphone
Utilisez cette application pour passer un appel ou y répondre.
Appuyez sur Téléphone depuis la liste des applications.
Passer des appels
Passer un appel
Utilisez l’une des méthodes suivantes :
• Clavier : composez un numéro à l’aide du clavier, puis appuyez sur .
• Journal : passez un appel à partir de l’historique des appels et des messages.
• Favoris : passez un appel à partir de votre liste de contacts favoris.
• Contacts : passez un appel à partir de votre liste de contacts.
Numéros d’appel abrégés
Pour composer un numéro abrégé, maintenez le doigt appuyé sur le chiffre correspondant.
Saisie intuitive de numéros
Lorsque vous saisissez des chiffres sur le clavier, l’appareil vous suggère automatiquement des
numéros. Pour passer un appel, sélectionnez un des numéros proposés.
Communication
37
Rechercher des contacts
Pour trouver un contact dans la liste de contacts, saisissez un nom, un numéro de téléphone ou une
adresse e-mail. À mesure que vous saisissez des caractères, l’appareil vous suggère des contacts.
Pour passer un appel, sélectionnez un de ces contacts.
Appeler un numéro à l’étranger
Maintenez le doigt appuyé sur la touche 0 jusqu’à ce que le signe + apparaisse. Composez l’indicatif
du pays, l’indicatif régional et le numéro de téléphone, puis appuyez sur .
Options au cours d’un appel vocal
Les options suivantes sont disponibles :
• Ajouter : passer un autre appel.
• Clavier : ouvrir le clavier.
• Fin : terminer l'appel en cours.
• HP : activer le haut-parleur. Lorsque vous utilisez le haut-parleur, tenez l’appareil éloigné de vos
oreilles.
• Muet : désactiver le microphone afin que votre correspondant ne puisse pas vous entendre.
• Casque : sélectionner un casque Bluetooth, à condition qu’il soit connecté à l’appareil.
• Permuter : passer d’un appel à l’autre.
• Fusionner : organiser une conférence téléphonique lorsque vous êtes en liaison avec deux
correspondants à la fois. Répétez cette même procédure pour ajouter d’autres correspondants.
Cette fonction est disponible uniquement si vous avez activé le service de conférence
téléphonique.
• → Contacts : ouvrir votre liste de contacts.
• → Mémo : créer un mémo.
• → Message : envoyer un message.
• → Attente : mettre un appel en attente. Appuyez sur Récup. pour reprendre l'appel en
attente.
• → Volume suppl : augmenter le volume.
• → Paramètres d'appel : configurer les paramètres d'appel.
• → Transférer : mettre le premier correspondant en contact avec le second. Dans ce cas, vous
êtes déconnecté de la conversation.
Communication
38
Ajouter des contacts
Pour ajouter un numéro de téléphone à votre liste de contacts à partir du clavier, composez le
numéro, puis appuyez sur Ajouter aux contacts.
Envoyer un message
Appuyez sur → SMS/MMS pour envoyer un message correspondant au numéro à l'écran.
Afficher les journaux d’appels
Pour afficher l’historique des appels entrants et sortants, appuyez sur Journal.
Pour filtrer le journal d’appels, appuyez sur → Afficher, puis sélectionnez une option.
Numérotation fixe
Il est possible de configurer l’appareil pour limiter les appels sortants aux numéros précédés de
préfixes spécifiés. Ces préfixes sont enregistrés sur la carte SIM ou USIM.
Appuyez sur → Paramètres d'appel → Paramètres supplémentaires → Numérotation fixe →
Activer FDN, puis saisissez le code PIN2 fourni avec la carte SIM ou USIM. Appuyez sur Liste FDN,
puis ajoutez des numéros.
Restriction d’appel
Il est possible de configurer l’appareil pour empêcher certains appels sortants. Vous pouvez, par
exemple, désactiver les appels à l’étranger.
Appuyez sur → Paramètres d'appel → Paramètres supplémentaires → Restriction d'appel,
sélectionnez un type d’appel, une option de restriction d’appel, puis saisissez un mot de passe.
Communication
39
Recevoir des appels
Répondre à un appel
Lorsque vous recevez un appel, faites glisser votre doigt sur l’icône .
Si le signal d’appel est actif, vous pouvez recevoir un autre appel. L’appareil vous demande alors si
vous souhaitez mettre fin au premier appel ou le mettre en attente.
Rejeter un appel
Lorsque vous recevez un appel, faites glisser votre doigt sur l’icône .
Pour envoyer un message lorsque vous rejetez un appel entrant, faites glisser la barre des messages
de rejet située en bas de l’écran vers le haut. Pour créer le message de rejet, appuyez sur →
Paramètres d'appel → Définir les messages de rejet.
Appels manqués
Si vous manquez un appel, l’icône apparaît dans le volet des raccourcis. Ouvrez le volet des
raccourcis pour afficher la liste des appels manqués.
Signal d’appel
Le signal d’appel est un service fourni par l’opérateur. Vous pouvez utiliser ce service pour suspendre
un appel en cours et prendre un appel entrant. Ce service n’est pas disponible pour les appels visio.
Pour utiliser ce service, appuyez sur → Paramètres d'appel → Paramètres supplémentaires →
Signal d'appel.
Transfert d’appel
Il est possible de configurer l’appareil pour qu’il transfère automatiquement les appels vers un
numéro spécifié.
Appuyez sur → Paramètres d'appel → Paramètres supplémentaires → Transfert d'appel, puis
sélectionnez un type et une condition d’appel. Composez un numéro, puis appuyez sur Activer.
Communication
40
Appels visio
Passer un appel visio
Saisissez le numéro, puis appuyez sur . Vous pouvez également sélectionner un contact dans la
liste de contacts, puis appuyer sur .
Options au cours d’un appel visio
Les options suivantes sont disponibles :
• Permuter : basculer entre l’objectif avant et arrière.
• Muet : désactiver le microphone afin que votre correspondant ne puisse pas vous entendre.
• Fin : terminer l'appel en cours.
• → Masquer mon image : masquer votre image à l'interlocuteur.
• → Image sortante : sélectionner l'image à afficher à votre correspondant.
• → Capturer une image : capturer l’image de votre correspondant.
• → Enregistrer une vidéo : enregistrer une vidéo de l'appel visio.
• → Clavier : ouvrir le clavier.
• → Désactiver haut-parleur : désactiver le haut-parleur.
• → Basculer sur le casque : sélectionner un casque Bluetooth, à condition qu’il soit connecté à
l’appareil.
Écouter la messagerie vocale
Maintenez le doigt appuyé sur la touche 1 du clavier, puis suivez les instructions de votre opérateur.
Communication
41
Contacts
Utilisez cette application pour gérer les contacts, y compris les numéros de téléphone, les adresses
e-mail, et plus encore.
Appuyez sur Contacts depuis la liste des applications.
Gérer les contacts
Appuyez sur Contacts.
Créer un contact
Appuyez sur , sélectionnez une mémoire de stockage et saisissez les informations d’un contact.
• : ajouter une image.
• / : ajouter ou supprimer un champ d'information.
Modifier un contact
Sélectionnez un contact à modifier, puis appuyez sur .
Supprimer un contact
Sélectionnez un contact à supprimer, puis appuyez sur → Supprimer.
Configurer un numéro d’appel abrégé
Appuyez sur → Numérotation rapide, sélectionnez un chiffre de numérotation rapide, puis le
contact à affecter à ce chiffre. Pour supprimer un numéro d’appel abrégé, maintenez le doigt appuyé
sur le chiffre correspondant, puis appuyez sur Supprimer.
Communication
42
Rechercher des contacts
Appuyez sur Contacts.
Utilisez l’une des méthodes de recherche suivantes :
• Faites défiler la liste de contacts vers le haut ou le bas.
• Appuyez sur le champ de recherche tout en haut de la liste de contacts, puis saisissez vos
critères de recherche.
Une fois le contact sélectionné, choisissez l’une des options suivantes :
• : ajouter le contact aux favoris.
• / : passer un appel vocal ou visio.
• : rédiger un message.
• : rédiger un e-mail.
Afficher les contacts
Appuyez sur Contacts.
Par défaut, l'appareil affiche tous les contacts enregistrés.
Appuyez sur → Contacts à afficher, puis sélectionnez la source à partir de laquelle les contacts
doivent être affichés.
Importer et exporter des contacts
Appuyez sur Contacts.
Importer des contacts
Appuyez sur → Importer/Exporter, puis sélectionnez une option d'importation.
Exporter des contacts
Appuyez sur → Importer/Exporter, puis sélectionnez une option d'exportation.
Communication
43
Contacts favoris
Appuyez sur Favoris.
Appuyez sur pour ajouter des contacts aux favoris.
Appuyez sur , puis choisissez l’une des options suivantes :
• Supprimer des favoris : retirer des contacts des favoris.
Groupes de contacts
Appuyez sur Groupes.
Ajouter des contacts à un groupe
Sélectionnez un groupe, puis appuyez sur . Sélectionnez les contacts à ajouter, puis appuyez sur
OK.
Gérer les groupes
Appuyez sur , puis choisissez l’une des options suivantes :
• Supprimer des groupes : sélectionner les groupes à supprimer, puis appuyer sur . Vous ne
pouvez pas supprimer les groupes par défaut.
Envoyer un message ou un e-mail aux membres d’un groupe
Sélectionnez un groupe, appuyez sur → Envoyer un message ou Envoyer un e-mail, sélectionnez
des membres, puis appuyez sur OK.
Communication
44
Carte de visite
Appuyez sur Contacts.
Créez une carte de visite et envoyez-la à vos contacts.
En haut de la liste des contacts, appuyez sur Profil configuré, saisissez vos coordonnées, comme
votre numéro de téléphone, votre adresse e-mail et votre adresse postale, puis appuyez sur Enreg.
Si, lorsque vous avez configuré votre appareil, vous avez enregistré vos coordonnées, sélectionnez la
carte de visite, puis appuyez sur pour la modifier.
Appuyez sur → Partager carte de visite via, puis sélectionnez un mode de partage.
Messages
Utilisez cette application pour envoyer des messages texte (SMS) ou multimédia (MMS).
Appuyez sur Messages depuis la liste des applications.
L’envoi ou la réception de messages en dehors de la zone couverte par votre opérateur peut
occasionner des frais supplémentaires, en fonction de l’offre à laquelle vous avez souscrit.
Pour en savoir plus, contactez votre opérateur.
Envoyer des messages
Appuyez sur , ajoutez des destinataires, composez un message, puis appuyez sur pour
envoyer le message.
Pour ajouter des destinataires, utilisez l’une des méthodes suivantes :
• Saisissez un numéro de téléphone.
• Appuyez sur , sélectionnez des contacts, puis appuyez sur OK.
Pour envoyer un message multimédia, utilisez l’une des méthodes suivantes :
• Appuyez sur et joignez des images, vidéos, contacts, événements, etc.
• Pour ajouter un objet, appuyez sur → Ajouter un objet.
Communication
45
Envoyer des messages programmés
Lorsque vous rédigez un message, appuyez sur → Programmer un message. Définissez la date et
l’heure, puis appuyez sur OK. L’appareil envoie le message à l’heure et à la date indiquées.
• Le message ne sera pas envoyé à l’heure et à la date programmées, si l’appareil est éteint,
s’il n’est pas connecté au réseau ou si le réseau est instable.
• Cette fonction est basée sur l’heure et la date configurées sur l’appareil. Si vous changez
de fuseau horaire et que le réseau ne met pas ces informations à jour, il se peut que
l’heure et la date soient incorrectes.
Lire les messages entrants
Les messages entrants sont regroupés sous forme de fils de discussion par contact.
Pour afficher les messages d’un contact, sélectionnez ce contact.
Email
Utilisez cette application pour envoyer ou consulter des e-mails.
Appuyez sur Email depuis la liste des applications.
Configurer des comptes de messagerie électronique
Lorsque vous ouvrez l’application Email pour la première fois, configurez un compte de messagerie
électronique.
Saisissez votre adresse e-mail et votre mot de passe. Pour configurer un compte de messagerie
électronique privé, comme Google Mail, appuyez sur Suivant ; pour configurer un compte de
messagerie électronique professionnel, appuyez sur Config manuelle. Suivez ensuite les instructions
qui s’affichent à l’écran pour procéder à la configuration du compte.
Pour configurer un compte de messagerie électronique supplémentaire, appuyez sur →
Paramètres → Ajouter compte.
Envoyer des e-mails
Sélectionnez le compte de messagerie électronique que vous souhaitez utiliser, puis appuyez sur
en bas de l’écran. Saisissez les destinataires, l’objet et le message, puis appuyez sur pour envoyer
l’e-mail.
Pour ajouter un destinataire figurant dans la liste de contacts, appuyez sur .
Appuyez sur pour joindre des images, vidéos, contacts, mémos, événements, etc.
Communication
46
Envoyer des e-mails programmés
Lorsque vous rédigez un message, appuyez sur → E-mail programmé. Cochez la case E-mail
programmé, définissez une heure et une date, puis appuyez sur OK. L’appareil envoie le message à
l’heure et à la date indiquées.
• Le message ne sera pas envoyé à l’heure et à la date programmées, si l’appareil est éteint,
s’il n’est pas connecté au réseau ou si le réseau est instable.
• Cette fonction est basée sur l’heure et la date configurées sur l’appareil. Si vous changez
de fuseau horaire et que le réseau ne met pas ces informations à jour, il se peut que
l’heure et la date soient incorrectes.
Lire des e-mails
Sélectionnez un compte de messagerie électronique. Les nouveaux messages sont récupérés
automatiquement. Pour récupérer manuellement les messages, appuyez sur .
Appuyez sur un message pour le lire.
Ouvrir les pièces jointes.
Répondre au message.
Ajouter cette adresse e-mail à
votre liste de contacts.
Supprimer le message.
Passer au message suivant ou
revenir au message précédent.
Identifier le message comme favori.
Répondre à tous les
destinataires.
Transférer le message.
Accéder à des options
supplémentaires.
Appuyez sur l’onglet de la pièce jointe pour l’ouvrir, puis appuyez sur Enreg. pour l’enregistrer.
Communication
47
Google Mail
Utilisez cette application pour accéder directement au service Google Mail.
Appuyez sur Google Mail depuis la liste des applications.
• La disponibilité de cette application dépend de votre zone géographique ou de votre
opérateur.
• Cette application peut s’intituler différemment selon votre zone géographique ou votre
opérateur.
Envoyer des e-mails
Dans la boîte de réception, appuyez sur , saisissez les destinataires et un objet, rédigez un
message, puis appuyez sur pour l’envoyer.
Appuyez sur → Joindre un fichier pour joindre des images, des vidéos, de la musique, etc.
Appuyez sur → Ajouter Cc/Cci pour ajouter des destinataires en copie ou copie cachée.
Appuyez sur → Enregistrer le brouillon pour enregistrer le message afin de l’envoyer
ultérieurement.
Appuyez sur → Supprimer pour annuler votre message.
Appuyez sur → Paramètres pour modifier les paramètres Google Mail.
Appuyez sur → Envoyer des commentaires pour faire part de votre opinion sur le développement
de l'application.
Appuyez sur → Aide pour accéder aux informations d'aide de Google Mail.
Communication
48
Lire des e-mails
Archiver le message.
Identifier le message comme favori.
Supprimer le message.
Répondre au message.
Accéder à des options
supplémentaires.
Répondre à tous les destinataires,
transférer le message à d'autres ou
imprimer le message.
Afficher la pièce jointe.
Libellés
Google Mail utilise des libellés pour classer les messages. Par défaut, Google Mail affiche les
messages du libellé Boîte de réception.
Pour afficher des messages portant d’autres libellés, appuyez sur .
Pour ajouter un libellé à un message, sélectionnez le message, appuyez sur → Modifier les libellés,
puis sélectionnez le libellé que vous souhaitez lui attribuer.
Hangouts
Utilisez cette application pour discuter avec vos amis.
Appuyez sur Hangouts depuis la liste des applications.
La disponibilité de cette application dépend de votre zone géographique ou de votre
opérateur.
Sélectionnez un ami dans la liste ou saisissez des critères de recherche et sélectionnez un ami dans
les résultats pour commencer à discuter.
Communication
49
Google+
Utilisez cette application pour rester connecté avec d’autres personnes via le service de réseau social
de Google.
Appuyez sur Google+ depuis la liste des applications.
La disponibilité de cette application dépend de votre zone géographique ou de votre
opérateur.
Appuyez sur Tous pour modifier la catégorie, puis faites défiler la liste vers le haut ou le bas pour
afficher les publications de vos cercles d’amis.
Google+ Photos
Utilisez cette application pour visualiser et partager des images ou des vidéos via le service de réseau
social de Google.
Appuyez sur Photos depuis la liste des applications.
La disponibilité de cette application dépend de votre zone géographique ou de votre
opérateur.
Sélectionnez l’une des catégories suivantes :
• TOUT : afficher toutes les photos ou vidéos enregistrées ou téléchargées sur l’appareil.
• SÉLECTION : afficher toutes les photos ou vidéos regroupées par date ou par album. Appuyez
sur pour consulter toutes les images ou vidéos du groupe.
Sélectionnez ensuite une photo ou une vidéo.
En mode affichage d'une photo ou d'une vidéo, utilisez l'une des icônes suivantes :
• : modifier la photo ou la vidéo.
• : partager l’image ou la vidéo avec d’autres personnes.
• : supprimer la photo ou la vidéo.
Communication
50
ChatON
Utilisez cette application pour discuter avec vos amis. Pour utiliser cette application, vous devez vous
connecter à votre compte Samsung ou vérifier votre numéro de téléphone.
Appuyez sur ChatON depuis la liste des applications.
La disponibilité de cette application dépend de votre zone géographique ou de votre
opérateur.
Créez votre liste d’amis en saisissant des numéros de téléphone ou des adresses électroniques ou
en sélectionnant les contacts dans la liste de suggestions. Vous pouvez également appuyer sur
→ Synchroniser la liste des contacts pour synchroniser manuellement les contacts à partir de
l’appareil.
Appuyez sur , sélectionnez des amis à qui parler, puis appuyez sur OK.
51
Web et réseau
Internet
Utilisez cette application pour naviguer sur Internet.
Appuyez sur Internet depuis la liste des applications.
Afficher des pages Web
Appuyez sur le champ d’adresse, saisissez l’adresse Web, puis appuyez sur Aller à.
Appuyez sur pour accéder à des options supplémentaires lorsque vous consultez une page Web.
Pour changer de moteur de recherche, appuyez sur le champ d’adresse, puis appuyez sur l’icône du
moteur de recherche près de l’adresse Web.
Ouvrir un nouvel onglet
Appuyez sur → .
Pour passer d'un onglet à l'autre, appuyez sur , faites défiler l’écran vers le haut ou le bas, puis
appuyez sur la page pour l’ouvrir.
Effectuer une recherche oralement
Appuyez sur le champ d’adresse, puis sur → , prononcez un mot-clé, puis sélectionnez l’une des
suggestions qui apparaissent à l’écran.
La disponibilité de cette fonction dépend de votre zone géographique ou de votre
opérateur.
Favoris
Pour enregistrer la page Web actuelle dans les favoris, appuyez sur → → Enreg.
Pour ouvrir une page Web enregistrée dans vos favoris, appuyez sur , puis sélectionnez la page
souhaitée.
Web et réseau
52
Historique
Pour ouvrir une page figurant dans la liste des pages récemment consultées, appuyez sur →
Historique. Pour effacer l’historique, appuyez sur → Effacer l'historique.
Liens
Maintenez le doigt appuyé sur un lien d’une page Web pour l’ouvrir dans un nouvel onglet,
l’enregistrer ou le copier.
Pour afficher les liens enregistrés, appuyez sur Téléchargements (p. 80).
Partager des pages Web
Pour partager l’adresse d’une page Web avec d’autres personnes, appuyez sur → Partager via.
Pour partager une partie d’une page Web, maintenez le doigt appuyé sur le texte de votre choix, puis
appuyez sur Partager via.
Chrome
Utilisez cette application pour rechercher des informations et parcourir des pages Web.
Appuyez sur Chrome depuis la liste des applications.
La disponibilité de cette application dépend de votre zone géographique ou de votre
opérateur.
Afficher des pages Web
Appuyez sur le champ d’adresse, puis saisissez une adresse Web ou des critères de recherche.
Ouvrir un nouvel onglet
Appuyez sur → Nouvel onglet.
Pour passer d'un onglet à l'autre, appuyez sur , faites défiler l’écran vers le haut ou le bas, puis
appuyez sur la page pour l’ouvrir.
Web et réseau
53
Favoris
Pour enregistrer la page Web actuelle dans les favoris, appuyez sur → → Enregistrer.
Pour ouvrir une page Web enregistrée dans vos favoris, appuyez sur → Favoris, puis sélectionnez la
page voulue.
Effectuer une recherche oralement
Appuyez sur le champ d’adresse, puis sur → , prononcez un mot-clé, puis sélectionnez l’une
des suggestions qui apparaissent à l’écran.
Synchroniser votre appareil avec d’autres appareils
Synchronisez des onglets et des favoris ouverts afin de les utiliser avec Chrome sur un autre appareil
lorsque vous êtes connecté au même compte Google.
Pour afficher les onglets ouverts sur d'autres appareils, appuyez sur → Autres appareils.
Sélectionnez la page Web à ouvrir.
Pour afficher les favoris, appuyez sur .
Bluetooth
La fonction Bluetooth crée une connexion sans fil directe entre deux appareils sur de courtes
distances. Pour échanger des données ou des fichiers multimédia avec d’autres appareils, utilisez la
fonction Bluetooth.
• Samsung ne peut être tenu responsable de la perte, de l’interception ou du mauvais
usage des données envoyées ou reçues via la fonction Bluetooth.
• Assurez-vous de toujours utiliser des appareils dignes de confiance et correctement
protégés avant de partager ou de recevoir des données. La présence d’obstacles entre les
deux appareils peut réduire le rayon d’action.
• Il est possible que votre appareil ne fonctionne pas avec certains appareils, en particulier
ceux qui n’ont pas été testés ou approuvés par Bluetooth SIG.
• N’utilisez pas la fonction Bluetooth de manière illégale (par exemple, pour le piratage de
fichiers ou l’enregistrement de communications à des fins commerciales).
Samsung ne peut être tenu responsable des répercussions d’une utilisation illégale de la
fonction Bluetooth.
Pour activer la fonction Bluetooth, depuis la liste des applications, appuyez sur Paramètres →
Bluetooth, puis faites glisser le curseur Bluetooth vers la droite.
Web et réseau
54
Établir une connexion avec d’autres appareils Bluetooth
Depuis la liste des applications, appuyez sur Paramètres → Bluetooth → Analyser. Une liste des
appareils détectés apparaît à l’écran. Sélectionnez l’appareil auquel vous souhaitez vous connecter,
puis acceptez la demande d’autorisation automatiquement générée sur les deux appareils pour
confirmer l’opération.
Envoyer et recevoir des données
De nombreuses applications prennent en charge le transfert de données via la fonction Bluetooth.
C’est le cas, par exemple, de l’application Galerie. Ouvrez la Galerie, sélectionnez une image,
appuyez sur → Bluetooth, puis sélectionnez un appareil Bluetooth. Ensuite, pour recevoir l’image,
confirmez la demande d’autorisation Bluetooth sur l’autre appareil.
Lorsqu’un autre appareil vous envoie des données, confirmez la demande d’autorisation Bluetooth
de cet appareil. Les fichiers reçus sont enregistrés dans le dossier Download. Si vous recevez un
nouveau contact, il est automatiquement ajouté à votre liste de contacts.
NFC
Votre appareil est équipé d’une fonction qui permet de lire les tags NFC (Near Field Communication)
contenant des informations relatives aux produits.
Grâce à cette fonction, vous pouvez également effectuer des paiements et acheter des tickets de
transport ou de spectacle après avoir téléchargé les applications correspondantes.
Le cache de la batterie comporte une antenne NFC intégrée. Manipulez-le avec précaution
afin de ne pas endommager l’antenne NFC.
• La batterie comporte une antenne NFC intégrée.
• Lorsque l’écran est verrouillé, l’appareil n’est pas en mesure de lire les tags NFC ou de
recevoir des données.
Pour activer la fonction NFC, depuis la liste des applications, appuyez sur Paramètres → NFC. Faites
glisser le curseur NFC vers la droite.
Lire les informations d’un tag NFC
Pour lire les informations d’un tag NFC, placez la zone de l'antenne NFC à l'arrière de votre appareil, à
proximité du tag NFC. Les informations figurant sur le tag apparaissent à l’écran.
Web et réseau
55
Effectuer un achat à l’aide de la fonction NFC
Pour pouvoir effectuer des paiements à l’aide de la fonction NFC, vous devez d’abord vous inscrire
à un service de paiement mobile. Pour vous inscrire ou obtenir des renseignements sur ce service,
contactez votre opérateur.
Positionnez le dos de votre appareil sur le lecteur de cartes NFC.
Envoyer des données via Android Beam
Utilisez la fonction Android Beam pour envoyer des données, telles que des pages Web ou des
contacts, à des appareils compatibles NFC.
Depuis la liste des applications, appuyez sur Paramètres → NFC → Android Beam. Faites glisser le
curseur Android Beam vers la droite.
Sélectionnez un élément, localisez l'antenne NFC sur l'autre appareil, placez les deux appareils coque
contre coque, puis appuyez sur l'écran de votre appareil.
S Beam
Utilisez cette fonction, pour envoyer des données, telles que des vidéos, des images et des
documents.
N’envoyez pas de données protégées par des droits d’auteur via S Beam. Vous risqueriez de
violer des lois sur les droits d’auteur. Samsung ne peut en aucun cas être tenu responsable
en cas d’utilisation illégale de données protégées par des droits d’auteur.
Depuis la liste des applications, appuyez sur Paramètres → S Beam, puis faites glisser le curseur
S Beam vers la droite.
Sélectionnez un fichier, placez les deux appareils coque contre coque, puis appuyez sur l’écran de
votre appareil.
Si les deux appareils tentent d’envoyer simultanément des données, le transfert de fichiers
risque d’échouer.
56
Multimédia
Appareil photo
Utilisez cette application pour prendre des photos ou enregistrer des vidéos.
Pour visionner les photos et les vidéos prises avec l’appareil, utilisez l’application Galerie (p. 62).
Appuyez sur Appareil photo depuis la liste des applications. Vous pouvez également, à partir de
l'écran verrouillé, faire glisser à n'importe quel emplacement sur l'écran.
• Lorsque vous n’utilisez plus l’appareil photo, il se ferme automatiquement.
• Assurez-vous que l’objectif est bien propre. Dans le cas contraire, l’appareil risque de ne
pas fonctionner correctement dans certains modes nécessitant des résolutions élevées.
Bon usage de l’appareil photo
• Ne prenez pas de photos et n’enregistrez pas de vidéos d’autres personnes sans leur
consentement.
• Ne prenez pas de photos et n’enregistrez pas de vidéos lorsque la loi l’interdit.
• Ne prenez pas de photos et n’enregistrez pas de vidéos en violation de la vie privée d’autrui.
Multimédia
57
Prendre des photos
Prendre une photo
Appuyez sur l’écran d’aperçu à l’endroit où l’appareil photo doit faire la mise au point. Une fois la
mise au point terminée, le cadre de mise au point devient vert. Pour prendre la photo, appuyez sur
.
Afficher le mode en
cours.
Modifier le mode de
prise de vue.
Basculer entre l’objectif
avant et arrière.
Sélectionner un des
divers effets disponibles.
Afficher davantage
d’options.
Enregistrer une vidéo.
Afficher les photos et les
vidéos que vous avez
enregistrées.
Mode de capture
Il existe plusieurs modes de prise de vue.
Appuyez sur , puis faites défiler les modes à droite de l’écran vers le haut ou le bas.
• Auto. : ce mode permet à l'appareil photo d'évaluer l'environnement et de déterminer le mode
idéal pour la photo.
• Meilleures poses : ce mode permet de prendre une série de photos et de conserver la meilleure.
• Rafale : ce mode permet de prendre une série de photos de sujets en mouvement.
• Son & prise : ce mode permet d'associer un son à une photo.
Pour prendre une photo, appuyez sur . L’appareil enregistre quelques secondes de contenu
audio après la prise de vue.
Lorsque vous prenez des photos dans ce mode, le son est enregistré par le microphone
interne.
Multimédia
58
• Panorama : ce mode permet de prendre une photo composée de différents clichés assemblés
les uns aux autres.
Pour obtenir la meilleure photo possible, suivez ces conseils.
– Déplacez l’appareil photo lentement dans le sens de votre choix.
– Maintenez l’objectif, de l’appareil photo dans le cadre de prise de vue.
– Évitez de prendre des photos de sujets devant des arrière-plans non identifiables, comme un
ciel ou un pan de mur uni.
• Sports : ce mode permet de prendre des photos de sujets en déplacement.
• Nuit : ce mode permet de prendre des photos dans des conditions de faible éclairage.
Photos panoramiques
Une photo panoramique est une large image en mode paysage constituée de plusieurs clichés.
Appuyez sur → Panorama.
Appuyez sur et déplacez l’appareil photo dans le sens de votre choix. Suivez le cadre de prise de
vue en alignant les deux cadres bleus et l'appareil photo prend automatiquement le cliché suivant
en séquence panoramique. Pour mettre fin à la prise de vue, appuyez sur .
Si l’objectif n’est plus aligné, la prise de vue s’interrompt.
Appliquer des effets de filtre
Utilisez les effets de filtre pour prendre des photos ou enregistrer des vidéos uniques.
Appuyez sur , puis sélectionnez un effet de filtre. Les options disponibles varient selon le mode
sélectionné.
Multimédia
59
Enregistrer des vidéos
Enregistrer une vidéo
Pour enregistrer une vidéo, appuyez sur . Pour interrompre l’enregistrement, appuyez sur . Pour
arrêter l’enregistrement, appuyez sur .
Mode d’enregistrement
Pour modifier le mode d’enregistrement, appuyez sur → .
• Normal : ce mode permet d'obtenir une qualité standard.
• Limite MMS : ce mode permet de réduire la qualité d’enregistrement pour pouvoir envoyer la
vidéo via MMS.
Multimédia
60
Effectuer un zoom avant et arrière
Utilisez l’une des méthodes suivantes :
• Appuyez sur la touche de volume Haut ou Bas pour effectuer un zoom avant ou arrière.
• Pour effectuer un zoom avant, écartez deux doigts l’un de l’autre sur l’écran ; pour effectuer un
zoom arrière, rapprochez-les.
La fonction zoom avant/arrière est disponible en cours d’enregistrement d’une vidéo.
Partager des photos
Appuyez sur → , puis sélectionnez l’une des fonctions suivantes :
• Partage : envoyer directement une photo à un autre appareil via la fonction Wi-Fi Direct ou NFC.
• Partage photos ChatON : envoyer une photo à un autre appareil via ChatON.
Configurer les paramètres de l’appareil photo et du caméscope
Pour configurer les paramètres de l’appareil photo, appuyez sur → . Les options suivantes sont
disponibles pour les deux modes (appareil photo et caméscope). Les options disponibles peuvent
varier selon le mode utilisé.
• Taille des photos / Taille de la vidéo : sélectionner une résolution. Pour obtenir une meilleure
qualité, utilisez une résolution élevée. Cependant, notez qu’une résolution élevée nécessite
davantage de mémoire.
• Mode focus : sélectionner un mode de mise au point. Auto focus est une mise au point
automatique effectuée par l’appareil photo. Macro permet de faire une mise au point sur des
sujets très proches, en gros plan.
Multimédia
61
• Modes de mesure : sélectionner un mode de mesure. Ce paramètre détermine la manière dont
les valeurs lumineuses sont calculées. Mesure pondérée centrale mesure la lumière d’arrièreplan
au centre de la scène. Spot mesure la valeur de la lumière à un endroit spécifique. Matrice
calcule la moyenne de la scène toute entière.
• ISO : sélectionner une valeur ISO. Ce paramètre permet de contrôler la sensibilité lumineuse
de l’appareil photo. Celle-ci est mesurée en équivalents de caméra-film. Les valeurs faibles sont
destinées aux objets immobiles vivement éclairés. Les valeurs plus élevées sont pour les objets
en mouvement ou faiblement éclairés.
• Balise de localisation : joindre une étiquette de géolocalisation GPS à la photo.
• Pour que les signaux GPS soient meilleurs, évitez de prendre des photos dans des lieux
où le signal peut être limité, par exemple entre des bâtiments ou dans des zones de faible
altitude, ou encore lorsque les conditions météorologiques sont mauvaises.
• Votre localisation est susceptible d’apparaître sur vos photos au moment où vous les
publiez sur le Web. Pour empêcher l’affichage de ces données, désactivez le paramètre de
balise de localisation.
• Touche de volume : utiliser la touche de volume pour contrôler l’obturateur ou le zoom.
• Retardateur : définir le délai à l'issue duquel l'appareil doit prendre une photo ou enregistrer
une vidéo.
• Balance des blancs : sélectionner une balance des blancs appropriée de sorte que les images
offrent une gamme de couleurs proches de la réalité. Les paramètres sont conçus pour des
situations lumineuses spécifiques. Ils sont similaires à la gamme thermique d’exposition et de
balance des blancs des appareils photo professionnels.
• Valeur d'exposition : modifier la valeur d'exposition. Cela détermine la quantité de lumière
reçue par le capteur de l’appareil photo. En cas de faible luminosité, utilisez une exposition plus
élevée.
• Guide : afficher des lignes directrices sur l'écran d'aperçu.
• Flash : activer ou désactiver le flash.
• Nom de fichier contextuel : paramétrez l'appareil photo afin d'ajouter aux noms de fichiers les
étiquettes contextuelles, par exemple les informations de géolocalisation.
• Retourner l'image : inverser l’image pour créer une image miroir de la scène initiale.
• Stockage : sélectionner l’emplacement de stockage des photos et des vidéos.
• Modifier les paramètres rapides : réorganiser les raccourcis en fonction des options
fréquemment utilisées.
• Réinitialiser : réinitialiser les paramètres de l'appareil.
Multimédia
62
Galerie
Utilisez cette application pour visualiser des photos ou des vidéos.
Appuyez sur Galerie depuis la liste des applications.
Afficher des images
Lorsque vous lancez l’application, l'application Galerie affiche les dossiers disponibles. Lorsqu’une
autre application, telle que Email, enregistre une image, le dossier Download contenant l’image est
automatiquement créé. De même, si vous effectuez une capture d’écran, le dossier Screenshots est
automatiquement créé. Sélectionnez un dossier pour l’ouvrir.
Les images d’un dossier sont affichées par date de création. Appuyez sur une image pour l’afficher en
plein écran.
Faites défiler l’écran vers la gauche ou la droite pour afficher l’image précédente ou suivante.
Effectuer un zoom avant et arrière
Pour effectuer un zoom sur une image, utilisez l’une des méthodes suivantes :
• Pour effectuer un zoom avant, appuyez deux fois sur l’image à l’endroit de votre choix.
• Pour effectuer un zoom avant, écartez deux doigts l’un de l’autre sur l’écran à l’endroit de votre
choix ; pour effectuer un zoom arrière, rapprochez-les ; pour revenir à l’affichage initial, appuyez
deux fois sur l’écran.
Lire une vidéo
Les fichiers vidéo sont caractérisés par l’icône . Sélectionnez la vidéo que vous souhaitez regarder,
puis appuyez sur .
Modifier des photos
En mode affichage d’une photo, appuyez sur et utilisez les fonctions suivantes :
• Diaporama : lancer un diaporama de l’ensemble des images du dossier ouvert.
• Copier dans le presse-papier : copier l’image dans le presse-papiers.
Multimédia
63
• Imprimer : imprimer l'image en connectant l'appareil à une imprimante.
• Renommer : renommer le fichier.
• Rotation à gauche : pivoter l’image dans le sens inverse des aiguilles d'une montre.
• Rotation à droite : pivoter l’image dans le sens des aiguilles d'une montre.
• Rogner : redimensionner le cadre orange pour couper l’image.
• Définir comme : définir l'image comme fond d'écran ou image de contact.
• Détails : afficher les détails d’une image.
• Paramètres : modifier les paramètres de la galerie.
Retoucher des images
En mode affichage d’une photo, appuyez sur .
Supprimer des photos
Utilisez l’une des méthodes suivantes :
• Dans un dossier, appuyez sur → Sélectionner élément, sélectionnez des images, puis
appuyez sur .
• En mode affichage d’une photo, appuyez sur .
Partager des photos
Utilisez l’une des méthodes suivantes :
• Dans le dossier, appuyez sur → Sélectionner élément, sélectionnez des images, puis appuyez
sur pour les envoyer à des contacts ou les partager sur les réseaux sociaux.
• En mode affichage d’une photo, appuyez sur pour l’envoyer à des contacts ou la partager via
des services de réseaux sociaux.
Définir une image comme fond d’écran
En mode affichage d'une image, appuyez sur → Définir comme pour définir l’image comme fond
d’écran ou l’affecter à un contact.
Multimédia
64
Organiser les applications dans des dossiers
Créez un dossier pour organiser les images ou les vidéos stockées dans l'appareil. Vous pouvez copier
ou déplacer des fichiers d'un dossier vers un autre.
Pour créer un nouveau dossier, appuyez sur . Saisissez le nom du dossier, appuyez sur OK, puis
sélectionnez les images ou vidéos à intégrer au nouveau dossier. Maintenez votre doigt appuyé
sur l'image ou la vidéo sélectionnée, faites-la glisser vers le nouveau dossier, puis appuyez sur OK.
Appuyez sur Copier pour copier l'élément ou sur Déplacer pour le déplacer.
Vidéo
Utilisez cette application pour lire des fichiers vidéo.
Appuyez sur Vidéo depuis la liste des applications.
Lire une vidéo
Sélectionnez une vidéo à lire.
Modifier le format
d’écran.
Effectuer un retour ou
une avance rapide en
faisant glisser la barre.
Redémarrer la vidéo en
cours de lecture ou
revenir à la vidéo
précédente. Maintenir la
touche appuyée pour
effectuer un retour
rapide.
Passer à la vidéo
suivante. Maintenir la
touche appuyée pour
effectuer une avance
rapide.
Accéder à des options
supplémentaires.
Mettre en pause et
reprendre la lecture.
Régler le volume.
Multimédia
65
Supprimer une vidéo
Appuyez sur → Supprimer, sélectionnez des vidéos, puis appuyez sur OK.
YouTube
Utilisez cette application pour regarder des vidéos à partir du site Web YouTube.
Appuyez sur YouTube depuis la liste des applications.
La disponibilité de cette application dépend de votre zone géographique ou de votre
opérateur.
Visionner une vidéo
Appuyez sur , puis saisissez un mot-clé. Sélectionnez l’un des résultats de recherche obtenus pour
visionner la vidéo correspondante.
Pivotez l’appareil pour afficher la vidéo en mode Paysage.
Partager une vidéo
Sélectionnez la vidéo à partager, appuyez sur , puis sélectionnez un mode de partage.
Mettre une vidéo en ligne
Appuyez sur → Vidéos ajoutées → → Ajouter, sélectionnez une vidéo, saisissez les
informations de la vidéo, puis appuyez sur .
Multimédia
66
Radio
Écoutez de la musique et les actualités sur la radio FM. Pour écouter la radio FM, vous devez brancher
un casque ou des écouteurs qui font office d’antenne radio.
Appuyez sur Radio depuis la liste des applications.
Écouter la radio FM
Avant de démarrer la radio FM, branchez un casque ou des écouteurs sur l’appareil.
Lorsque vous démarrez la radio FM pour la première fois, elle recherche et enregistre
automatiquement les stations disponibles.
Pour allumer la radio FM, appuyez sur . Sélectionnez la station radio à écouter dans la liste, puis
appuyez sur pour revenir à l’écran de la radio FM.
Afficher la liste des stations
favorites.
Accéder à des options
supplémentaires.
Allumer ou éteindre la radio FM.
Régler le volume.
Ajouter la station de radio en
cours d’écoute à la liste des
favoris.
Régler précisément la
fréquence.
Affiche la liste des stations
disponibles.
Enregistrer un morceau
depuis la radio FM.
Entrer manuellement la
fréquence radio.
Rechercher manuellement les
stations de radio disponibles.
Multimédia
67
Rechercher des stations radio
Appuyez sur → Analyser, puis sélectionnez une option de balayage. L’appareil recherche et
mémorise automatiquement les stations de radio FM disponibles.
Sélectionnez la station radio à écouter dans la liste, puis appuyez sur pour revenir à l’écran de la
radio FM.
Ajouter des stations à votre liste de favoris
Sélectionnez une station radio, puis appuyez sur pour ajouter la station à la liste de favoris.
68
Boutiques d’applications et
multimédia
Play Store
Utilisez cette application pour télécharger des applications et des jeux, gratuits ou payants, pouvant
s’exécuter sur votre appareil.
Appuyez sur Play Store depuis la liste des applications.
La disponibilité de cette application dépend de votre zone géographique ou de votre
opérateur.
Installer des applications
Parcourez les applications par catégorie ou appuyez sur pour effectuer une recherche à l’aide
d’un mot-clé.
Sélectionnez une application pour en afficher les informations. Pour la télécharger, appuyez sur
INSTALLER. Si l’application est payante, appuyez sur le prix et suivez les instructions qui s’affichent à
l’écran pour effectuer l’achat.
Lorsqu’une nouvelle version d’une application installée est disponible, une icône de mise à
jour apparaît dans le volet des raccourcis en haut de l’écran. Ouvrez le volet des raccourcis et
appuyez sur l’icône pour mettre à jour l’application.
Désinstaller des applications
Désinstallez les applications téléchargées sur Play Store.
Appuyez sur → Mes applications, sélectionnez une application à supprimer depuis la liste des
applications installées, puis appuyez sur DÉSINSTALLER.
Boutiques d’applications et multimédia
69
Samsung Apps
Utilisez cette application pour télécharger des applications Samsung, gratuites ou payantes. Pour
plus d’informations, visitez le site apps.samsung.com.
Appuyez sur Samsung Apps depuis la liste des applications.
La disponibilité de cette application dépend de votre zone géographique ou de votre
opérateur.
Installer des applications
Parcourez les applications par catégorie. Appuyez sur Catégorie pour sélectionner une catégorie.
Pour rechercher une application, appuyez sur en haut de l’écran, puis saisissez un mot-clé dans le
champ de recherche.
Sélectionnez une application pour en afficher les informations. Pour la télécharger, appuyez sur
Gratuit. Si l’application est payante, appuyez sur le prix et suivez les instructions qui s’affichent à
l’écran pour effectuer l’achat.
Lorsqu’une nouvelle version d’une application installée est disponible, une icône de mise à
jour apparaît dans le volet des raccourcis en haut de l’écran. Ouvrez le volet des raccourcis et
appuyez sur l’icône pour mettre à jour l’application.
Play Livres
Utilisez cette application pour télécharger des fichiers de livre.
Appuyez sur Play Livres depuis la liste des applications.
La disponibilité de cette application dépend de votre zone géographique ou de votre
opérateur.
Boutiques d’applications et multimédia
70
Play Films et TV
Utilisez cette application pour regarder, télécharger et louer des films ou des émissions TV.
Appuyez sur Play Films et TV depuis la liste des applications.
La disponibilité de cette application dépend de votre zone géographique ou de votre
opérateur.
Play Musique
Utilisez cette application pour écouter de la musique à sur votre appareil ou de la musique diffusée
sur le service Cloud de Google.
Appuyez sur Play Musique depuis la liste des applications.
La disponibilité de cette application dépend de votre zone géographique ou de votre
opérateur.
Play Jeux
Utilisez cette application pour télécharger des jeux et y jouer.
Appuyez sur Play Jeux depuis la liste des applications.
La disponibilité de cette application dépend de votre zone géographique ou de votre
opérateur.
Play Kiosque
Utilisez cette application pour lire les dernières informations.
Appuyez sur Play Kiosque depuis la liste des applications.
La disponibilité de cette application dépend de votre zone géographique ou de votre
opérateur.
71
Utilitaires
Mémo
Grâce à cette application, consignez par écrit des informations importantes à sauvegarder et à
consulter ultérieurement.
Appuyez sur Mémo depuis la liste des applications.
Créer un mémo
Appuyez sur , écrivez un mémo, puis appuyez sur OK.
Naviguer parmi les mémos
Parcourez les mémos miniatures en faisant défiler l’écran vers le haut ou le bas.
Pour modifier un mémo, appuyez dessus.
Pour rechercher un mémo, appuyez sur → Recherche.
Pour verrouiller un mémo afin que d'autres personnes ne puissent l'afficher, appuyez sur →
Sélectionner, sélectionnez un mémo, puis appuyez sur → Verrouiller.
Pour envoyer le texte des mémos à des correspondants, appuyez sur → Sélectionner, sélectionnez
des mémos, puis appuyez sur → Partager fichier texte via.
Pour envoyer des mémos à des correspondants, appuyez sur → Sélectionner, sélectionnez des
mémos, puis appuyez sur → Partager via.
Pour supprimer un mémo, appuyez sur → Supprimer.
Pour trier les mémos par date, appuyez sur → Trier par.
Afficher un mémo
Appuyez sur la miniature du mémo pour l’ouvrir.
Appuyez sur et utilisez les options suivantes :
• Supprimer : supprimez le mémo.
• Verrouiller : verrouillez le mémo de sorte que personne ne puisse le consulter.
• Partager fichier texte via : envoyez le texte des mémos à d'autres personnes.
• Partager via : envoyez le mémo à d'autres personnes.
Utilitaires
72
S Planner
Utilisez cette application pour gérer des événements et des tâches.
Appuyez sur S Planner depuis la liste des applications.
Créer un événement ou une tâche
Appuyez sur , puis utilisez l’une des méthodes suivantes :
• Ajouter événement : entrer un événement avec un paramètre de répétition en option.
• Ajouter une tâche : entrer une tâche avec un paramètre de priorité en option.
Synchroniser avec Google Agenda
Depuis la liste des applications, appuyez sur Paramètres → Google sous COMPTES → un compte
Google, puis cochez la case Synchroniser Calendrier.
Pour réaliser la synchronisation manuellement et mettre le calendrier à jour, appuyez sur S Planner
→ → Synchroniser.
Pour afficher les événements ou les tâches synchronisé(e)s, appuyez sur → Calendriers →
Affichage, cochez le compte Google, puis appuyez sur OK.
Utilitaires
73
Modifier le type de calendrier
En haut de l'écran, sélectionnez un affichage mensuel, hebdomadaire etc.
Rechercher un événement ou une tâche
Appuyez sur → Recherche, puis entrez un critère de recherche.
Pour afficher les événements ou les tâches de la date du jour, appuyez sur Aujourd'hui en haut de
l’écran.
Supprimer un événement ou une tâche
Sélectionnez un événement ou une tâche, puis appuyez sur → Supprimer.
Partager un événement ou une tâche
Sélectionnez un événement ou une tâche, appuyez sur → Partager via, puis sélectionnez un mode
de partage.
Google Drive
Utilisez cette application pour créer et modifier des documents, puis les partager avec d'autres
utilisateurs via le service de stockage Google Drive. Lorsque vous créez des documents ou que
vous téléchargez des fichiers vers Google Drive, votre appareil effectue automatiquement la
synchronisation avec le serveur Web et tout autre ordinateur sur lequel Google Drive est installé.
Vous pouvez ainsi accéder directement à vos fichiers (sans avoir à les transférer ou à les télécharger
au préalable).
Appuyez sur Drive depuis la liste des applications.
La disponibilité de cette application dépend de votre zone géographique ou de votre
opérateur.
Utilitaires
74
Horloge
Utilisez cette application pour définir des alarmes, consulter l’heure dans les plus grandes villes du
monde, mesurer la durée d’un événement ou définir un minuteur.
Appuyez sur Horloge depuis la liste des applications.
Activer ou désactiver cette alarme.
Alarme
Créer une alarme
Dans l'onglet de l'alarme, appuyez sur , sélectionnez l’heure de déclenchement de l'alarme et les
jours de répétition, puis appuyez sur Enreg.
• Répéter : définissez le délai à l'issue duquel l'alarme doit sonner de nouveau et le nombre de
répétitions.
• Alarme intelligente : activez cette option pour que l'appareil simule des sons naturels avant le
déclenchement de l'alarme principale.
Arrêter ou répéter une alarme
Pour éteindre une alarme, faites glisser votre doigt sur l’icône . Pour répéter l’alarme après une
période de répétition prédéfinie, faites glisser votre doigt sur l’icône .
Supprimer une alarme
Appuyez sur → Supprimer, sélectionnez l'alarme à supprimer, puis appuyez sur OK.
Utilitaires
75
Horloge mondiale
Créer une horloge
Dans l'onglet de l'horloge mondiale, appuyez sur , puis saisissez le nom d’une ville ou
sélectionnez-en une dans la liste.
Supprimer une horloge
Appuyez sur → Supprimer, sélectionnez l'horloge à supprimer, puis appuyez sur OK.
Chronomètre
Dans l’onglet du chronomètre, appuyez sur Début pour commencer à chronométrer. Pour
enregistrer des temps intermédiaires, appuyez sur Tour.
Pour effacer les temps enregistrés, appuyez sur Réinitialiser.
Minuteur
Dans l’onglet du minuteur, définissez la durée, puis appuyez sur Début.
Lorsque la durée du minuteur est écoulée, faites glisser votre doigt sur l’icône .
Calculatrice
Utilisez cette application pour réaliser des calculs simples ou complexes.
Appuyez sur Calculatrice depuis la liste des applications.
Faites pivoter l’appareil vers la gauche pour utiliser la calculatrice scientifique en mode Paysage. Si
l'option Rotation écran est désactivée dans le volet des raccourcis, appuyez sur → Calculatrice
scientifique.
Utilitaires
76
Enregistreur vocal
Utilisez cette application pour enregistrer ou écouter des mémos vocaux.
Appuyez sur Enregistreur vocal depuis la liste des applications.
Enregistrer des mémos vocaux
Pour commencer l’enregistrement, appuyez sur . Parlez dans le microphone en bas de l’appareil.
Pour interrompre l’enregistrement, appuyez sur . Pour terminer l’enregistrement, appuyez sur .
Accéder à des options
supplémentaires.
Afficher la liste des mémos vocaux. Démarrer l’enregistrement.
Durée enregistrée
Écouter des mémos vocaux
Sélectionnez un mémo vocal.
• : interrompre la lecture.
• / : revenir au mémo vocal précédent ou passer au mémo vocal suivant.
Utilitaires
77
Gérer les mémos vocaux
Dans la liste de mémos vocaux, appuyez sur → Sélectionner, sélectionnez des mémos vocaux et
sélectionnez l’une des options suivantes :
• : sélectionner les mémos vocaux à envoyer, puis le mode de partage.
• : sélectionner les mémos vocaux à supprimer.
• → Renommer : renommer le mémo vocal.
• → Définir comme : définir le mémo vocal comme sonnerie.
• → Détails : afficher les infos détaillées du mémo vocal.
Recherche Google
Utilisez cette application pour effectuer une recherche non seulement sur Internet, mais aussi dans
les applications et le contenu de l’appareil.
Appuyez sur Google depuis la liste des applications.
La disponibilité de cette application dépend de votre zone géographique ou de votre
opérateur.
Effectuer une recherche sur l’appareil
Appuyez sur le champ de recherche, puis saisissez un mot-clé. Vous pouvez également appuyer sur
, puis énoncer un mot-clé.
Si les applications ne renvoient aucun résultat, le navigateur Web apparaît, affichant les résultats de
recherche.
Étendre la recherche
Pour sélectionner les applications qui doivent faire l’objet d’une recherche, appuyez sur →
Paramètres → Recherche sur le téléphone, puis cochez les éléments correspondants.
Utilitaires
78
Google Now
Démarrez la recherche Google pour afficher les cartes Google Now qui vous indiquent, dès que vous
en avez besoin, la météo du jour, les infos trafic en temps réel, vos prochains rendez-vous, et bien
plus encore.
Rejoignez Google Now lorsque vous ouvrez pour la première fois la recherche Google. Pour modifier
les paramètres Google Now, appuyez sur → Paramètres, puis faites glisser le curseur Google Now
vers la gauche ou la droite.
Recherche vocale
Utilisez cette application pour rechercher des pages Web oralement.
Appuyez sur Recherche vocale depuis la liste des applications.
La disponibilité de cette application dépend de votre zone géographique ou de votre
opérateur.
Quand l’instruction Parlez maintenant apparaît à l’écran, prononcez un mot-clé ou une expression.
Mes fichiers
Utilisez cette application pour accéder à tous les types de fichiers stockés dans l’appareil, comme les
images, les vidéos, la musique, les mémos vocaux.
Appuyez sur Mes fichiers depuis la liste des applications.
Visionner des fichiers
Sélectionnez une catégorie, puis un fichier ou un dossier pour l’ouvrir. Pour revenir au dossier
supérieur, appuyez sur . Pour revenir au répertoire principal, appuyez sur .
Dans un dossier, appuyez sur , puis utilisez l’une des options suivantes :
• Sélectionner un élément : sélectionner des fichiers ou des dossiers.
• Créer dossier : créer un nouveau dossier.
• Affichage : modifier le mode d'affichage.
• Trier par : trier les fichiers ou les dossiers.
• Ajouter un raccourci : ajouter un raccourci vers le dossier dans la zone des raccourcis.
• Paramètres : modifier les paramètres du gestionnaire de fichiers.
Utilitaires
79
Appuyez sur → Sélectionner un élément, sélectionnez un fichier ou un dossier, puis utilisez l’une
des fonctions suivantes :
• : envoyer des fichiers à d’autres ou partager des fichiers.
• : supprimer les fichiers ou dossiers.
• → Déplacer : déplacer les fichiers ou dossiers dans un autre dossier.
• → Copier : copier les fichiers ou dossiers dans un autre dossier.
• → Renommer : renommer un fichier ou dossier.
• → Zip : compresser des fichiers ou des dossiers pour créer un fichier Zip.
• → Détails : afficher les détails du fichier ou dossier.
Rechercher un fichier
Appuyez sur , puis saisissez un critère de recherche.
Afficher les informations d’enregistrement
Appuyez sur pour afficher les informations de mémoire relatives à l’appareil et à la carte mémoire.
Ajouter des raccourcis à des dossiers
Ajoutez un raccourci vers les dossiers fréquemment utilisés dans la zone des raccourcis. Appuyez sur
, sélectionnez un dossier, puis appuyez sur OK.
Utilitaires
80
Téléchargements
Utilisez cette application pour voir les fichiers téléchargés depuis des applications.
Appuyez sur Téléchargements depuis la liste des applications.
La disponibilité de cette application dépend de votre zone géographique ou de votre
opérateur.
Sélectionnez un fichier et ouvrez-le dans l'application correspondante.
Pour trier les fichiers par date, appuyez sur → Trier par → Date.
Pour trier les fichiers en fonction de leur titre, appuyez sur → Trier par → Nom.
Pour trier les fichiers par taille, appuyez sur → Trier par → Taille.
Pour effacer l’historique, appuyez sur → Effacer la liste.
81
Géolocalisation
Maps
Utilisez cette application pour marquer votre position, rechercher des lieux ou obtenir un itinéraire.
Appuyez sur Maps depuis la liste des applications.
La disponibilité de cette application dépend de votre zone géographique ou de votre
opérateur.
Rechercher des lieux
Recherchez des lieux en saisissant une adresse ou un mot-clé. Une fois le lieu trouvé, sélectionnez-le
afin d’afficher des informations détaillées. Pour en savoir plus, consultez l’aide.
Obtenir un itinéraire
Appuyez sur pour définir une adresse de départ et une adresse de destination, et choisir un mode
de transport. L’appareil affiche l’itinéraire à suivre pour arriver à destination.
82
Paramètres
Accéder au menu des paramètres
Utilisez ce menu pour configurer l’appareil, définir les paramètres d’une application et ajouter des
comptes.
Appuyez sur Paramètres depuis la liste des applications.
Wi-Fi
Activez la fonction Wi-Fi pour permettre la connexion à un réseau Wi-Fi et accéder à Internet ou à
d’autres périphériques réseau.
Vous pouvez maintenir une connexion réseau stable en sélectionnant automatiquement le réseau
Wi-Fi ou le réseau mobile pour utiliser le signal le plus puissant. Pour basculer automatiquement
entre les réseaux, cochez la case Basculement réseau intelligent.
Pour utiliser des options, appuyez sur .
• Analyser : recherchez les réseaux disponibles.
• Wi-Fi Direct : utilisez le Wi-Fi Direct pour établir une connexion entre deux appareils via Wi-Fi
sans passer par un point d’accès.
• Paramètres avancés : personnalisez les paramètres Wi-Fi.
• Touche WPS : connectez-vous à un réseau Wi-Fi sécurisé à l'aide d'une touche WPS.
• Entrée PIN WPS : connectez-vous à un réseau Wi-Fi sécurisé à l'aide d'un code PIN WPS.
Politique de mise en veille Wi-Fi
Dans l’écran Paramètres, appuyez sur Wi-Fi → → Paramètres avancés → Wi-Fi activé en mode
veille.
Lorsque l’écran est éteint, l’appareil désactive automatiquement les connexions Wi-Fi.
Lorsque cela se produit, l’appareil accède automatiquement aux réseaux de données s’il a
été configuré pour utiliser ces réseaux. Cela peut entraîner des frais de transfert de données.
Pour éviter toute dépense inutile, définissez cette option sur Toujours.
Paramètres
83
Paramètres de notification réseau
L’appareil détecte les réseaux Wi-Fi ouverts et affiche une icône dans le volet des raccourcis lorsqu’un
réseau est disponible.
Dans l’écran Paramètres, appuyez sur Wi-Fi → → Paramètres avancés et cochez la case
Notification réseau pour activer cette fonction.
Wi-Fi Direct
La fonction Wi-Fi Direct permet de relier directement deux appareils via un réseau Wi-Fi sans passer
par un point d'accès.
Sur l'écran Paramètres, appuyez sur Wi-Fi → → Wi-Fi Direct.
Bluetooth
Activez la fonction Bluetooth pour échanger des informations sur de courtes distances.
Pour accéder à des options supplémentaires, appuyez sur .
• Délai d'expiration de la visibilité : définissez une durée pendant laquelle l'appareil est visible.
• Fichiers reçus : affichez les fichiers reçus via la fonction Bluetooth.
Modem et point d'accès mobile
• Point d'accès mobile : utilisez le point d'accès mobile pour partager la connexion de données
de votre appareil avec des ordinateurs ou d'autres appareils via le réseau Wi-Fi.
• Modem USB : utilisez le modem USB pour partager la connexion de données de votre appareil
avec un ordinateur via le protocole USB. Lorsqu’il est connecté à un ordinateur, l’appareil sert de
modem sans fil.
• Modem Bluetooth : utilisez le modem Bluetooth pour partager la connexion de données de
votre appareil avec des ordinateurs ou d'autres appareils via le protocole Bluetooth.
Mode Hors-ligne
Désactivez toutes les fonctions sans fil de l’appareil. Vous pouvez uniquement utiliser les services
hors-réseau, c’est-à-dire les fonctions autres que les fonctions d'appel, Wi-Fi et Bluetooth.
Paramètres
84
Utilisation des données
Effectuez un suivi de la quantité de données utilisées et personnalisez les paramètres de limite
d’utilisation des données.
• Données mobiles : paramétrez l'appareil pour qu'il utilise les connexions de données sur
n'importe quel réseau mobile.
• Définir limite données mobiles : définissez une limite d'utilisation des données mobiles.
• Cycle utilisation données : saisissez la date de réinitialisation mensuelle afin de contrôler
l'utilisation de vos données.
Pour accéder à des options supplémentaires, appuyez sur .
• Itinérance : paramétrez l'appareil pour qu'il utilise les connexions de données lorsque vous
changez de zone de couverture.
• Restr. données arrière-plan : paramétrez l'appareil pour qu'il désactive la synchronisation en
arrière-plan lorsque vous utilisez un réseau mobile.
• Synchroniser les données automatiquement : activez ou désactivez la synchronisation
automatique des applications. Vous pouvez choisir les informations devant être synchronisées
pour chaque compte dans Paramètres → COMPTES.
• Afficher utilisation Wi-Fi : paramétrez l'appareil pour qu'il affiche l'utilisation de données via
une connexion Wi-Fi.
• Points d'accès mobiles : sélectionnez les points d'accès Wi-Fi afin d'éviter que les applications
s'exécutant en arrière-plan les utilisent.
Plus de réseaux
Personnalisez les paramètres réseaux.
Application de messagerie par défaut
Sélectionnez l'application par défaut à utiliser pour la messagerie.
VPN
Paramétrez des réseaux privés virtuels (VPN) pour vous y connecter.
Paramètres
85
Réseaux mobiles
• Données mobiles : autorisez la connexion de données pour pouvoir utiliser Internet par
exemple.
• Itinérance : paramétrez l'appareil pour qu'il utilise les connexions de données lorsque vous
changez de zone de couverture.
• Nom des points d'accès : configurez des noms de point d'accès (APN).
• Mode réseau : sélectionnez un type de réseau.
• Opérateurs réseau : recherchez les réseaux disponibles et sélectionnez-en un pour vous y
connecter.
NFC
Activez la fonction NFC pour lire ou écrire des tags NFC contenant des informations.
• Android Beam : activez la fonction Android Beam pour envoyer des données, telles que des
pages Web ou des contacts, à des appareils compatibles NFC.
• Paiement NFC : définissez la méthode de paiement par défaut.
S Beam
Activez la fonction S Beam pour envoyer des données telles que des vidéos, des images et des
documents à des appareils prenant en charge les fonctions NFC et Wi-Fi Direct.
Écran de verrouillage
Modifiez les paramètres de l’écran de verrouillage.
• Déverrouillage de l'écran : activez la fonction de déverrouillage par mot de passe, modèle ou
code PIN de l'écran. Les options suivantes peuvent varier selon la fonction de déverrouillage
d’écran sélectionnée.
• Double horloge : paramétrez l'appareil pour qu'il affiche la double horloge sur l'écran verrouillé.
• Afficher la date : paramétrez l'appareil pour qu'il affiche la date et l'heure.
• Raccourci Appareil photo : paramétrez l’appareil pour qu’il affiche le raccourci de l’appareil
photo sur l’écran verrouillé.
• Infos propriétaire : saisissez les informations que vous souhaitez voir apparaître sur l’écran
verrouillé.
Paramètres
86
• Effet de déverrouillage : sélectionnez un effet lorsque vous déverrouillez l'écran.
• Texte d'aide : paramétrez l'appareil pour qu'il affiche un texte d'aide à l'utilisation sur l'écran
verrouillé.
Son
Modifiez les paramètres des différents sons de l’appareil.
• Volume : réglez le niveau sonore des sonneries d’appel, des musiques et des vidéos, des sons
système et des notifications.
• Sonneries : sélectionnez une sonnerie pour les appels entrants.
• Notifications : sélectionnez une sonnerie pour les événements, tels que les messages entrants
et les appels manqués.
• Vibreur et sonnerie : paramétrez l’appareil pour qu’il vibre et émette une sonnerie à chaque
appel entrant.
• Son des touches : paramétrez l’appareil pour qu’il émette un son lorsque vous appuyez sur les
touches du clavier.
• Sélections audibles : paramétrez l’appareil pour qu’il émette un son lorsque vous sélectionnez
une application ou une option sur l’écran tactile.
• Son verrouillage écran : paramétrez l’appareil pour qu’il émette un son lorsque vous verrouillez
ou déverrouillez l’écran tactile.
Affichage
Modifiez les paramètres d’affichage.
• Fond d'écran :
– Écran d'accueil : sélectionnez l'image d'arrière-plan de l'écran d'accueil.
– Écran de verrouillage : sélectionnez l’image d’arrière-plan de l’écran de verrouillage.
– Écrans d'accueil et de verrouillage : sélectionnez l'image d'arrière-plan de l'écran d'accueil
et de l'écran de verrouillage.
• Volet des raccourcis : personnalisez les éléments apparaissant sur le volet des raccourcis.
• Luminosité : réglez la luminosité de l'écran.
• Rotation auto. écran : indiquez si le contenu doit automatiquement pivoter en même temps
que l’appareil.
Paramètres
87
• Mise en veille de l'écran : définissez le délai à l'issue duquel l'écran doit s'éteindre
automatiquement.
• Écran de veille : paramétrez l’appareil pour pouvoir activer l'écran de veille lorsque l'appareil est
connecté à une station d’accueil ou est en cours de chargement.
• Police : modifiez le type de police du texte affiché à l’écran.
• Taille de police : modifiez la taille de la police.
• Affich. pourcentage batterie : paramétrez l'appareil pour qu'il affiche l'autonomie restante de la
batterie.
Appels
Personnalisez les paramètres d’appel.
• Définir les messages de rejet : ajoutez ou modifiez le message envoyé lorsque vous rejetez un
appel.
• Début/Fin d'appel :
– Touche Accueil pour répondre aux appels : paramétrez l’appareil pour pouvoir répondre
aux appels en appuyant sur la touche Accueil.
– Touche Marche pour terminer les appels : paramétrez l’appareil pour pouvoir mettre fin à
un appel en appuyant sur la touche Marche/Arrêt.
• Paramètres supplémentaires :
– Identité de l'appelant : affichez votre identité à vos correspondants lorsque vous passez un
appel.
– Transfert d'appel : transférez les appels entrants vers un autre numéro.
– Code région auto : paramétrez l’appareil pour qu'il insère automatiquement un préfixe
(code régional ou national) avant un numéro de téléphone.
– Restriction d'appel : bloquez les appels entrants ou sortants.
– Signal d'appel : autorisez les appels entrants en cours d’appel.
– Numérotation fixe : activez ou désactivez le mode de numérotation fixe pour limiter les
appels aux numéros de la liste FDN. Saisissez le code PIN2 fourni avec votre carte SIM ou
USIM.
• Sonneries et son clavier :
– Sonneries : sélectionnez une sonnerie pour les appels entrants.
– Vibreur et sonnerie : paramétrez l’appareil pour qu’il vibre et émette une sonnerie à chaque
appel entrant.
– Son des touches : paramétrez l’appareil pour qu’il émette un son lorsque vous appuyez sur
les touches du clavier.
Paramètres
88
• Image appel visio : sélectionnez une image à afficher à votre correspondant.
• Service de messagerie vocale : sélectionnez ou définissez votre opérateur de messagerie
vocale.
• Param. messagerie vocale : indiquez le numéro de votre service de messagerie vocale. Vous
pouvez obtenir ce numéro auprès de votre opérateur.
• Comptes : paramétrez l’appareil pour pouvoir accepter les appels IP et configurez vos comptes
de services IP.
• Utiliser appel Internet : définissez si vous devez utiliser les appels Internet pour tous les appels
ou seulement pour les appels IP.
Stockage
Affichez les informations relatives à la quantité de stockage disponible sur l’appareil et la carte
mémoire, ou formatez une carte mémoire.
Le formatage d’une carte mémoire supprime définitivement toutes les données qui y sont
stockées.
La mémoire interne de votre appareil a une capacité réelle disponible inférieure à la capacité
indiquée, car elle est en partie occupée par le système d’exploitation et les applications
installées par défaut. La capacité disponible peut varier lorsque vous mettez à jour l’appareil.
Mode Éco. d'énergie
Activez le mode Économie d’énergie et modifiez les paramètres.
• L'appareil s'éteint automatiquement si vous ne touchez pas l'écran, ou n'utilisez pas les
touches pendant un certain temps. Pour une utilisation étendue, sélectionnez une durée
plus longue.
• Cette fonction est désactivée lorsque vous regardez des vidéos ou que vous écoutez de la
musique.
• Vous pouvez économiser la batterie en activant cette fonction.
• Éco. d'énergie écran : paramétrez l'appareil pour limiter l'utilisation de certaines ressources
système.
• Eco. d’énergie écran : paramétrez l’appareil pour qu'il diminue la luminosité de l’écran.
• En savoir plus : découvrez comment réduire la consommation de la batterie.
Paramètres
89
Batterie
Affichez la quantité d’énergie consommée par votre appareil.
Gestionnaire d'applications
Affichez et gérez les applications installées sur votre appareil.
Localisation
Modifiez les paramètres des informations de localisation.
• Mode : sélectionnez une méthode pour collecter vos données de localisation.
• DEMANDES LOCAL. RÉCENTES : paramétrez l'appareil pour qu'il affiche les applications qui
utilisent vos informations de localisation actuelles, ainsi que la batterie consommée à cet effet.
• SERVICES DE LOCALISATION : affichez les services de localisation utilisés par votre appareil.
Sécurité
Modifiez les paramètres de sécurité de l’appareil et de la carte SIM ou USIM.
• Crypter l'appareil : définissez un mot de passe pour crypter les données enregistrées sur
l’appareil. Vous devez saisir ce mot de passe à chaque fois que vous allumez l’appareil.
Chargez la batterie avant d’activer ce paramètre, car il peut arriver que le cryptage des
données dure plus d’une heure.
• Crypter la carte SD externe : paramétrez l'appareil pour crypter les fichiers contenus sur une
carte mémoire.
Votre appareil ne sera pas en mesure de lire les fichiers cryptés si vous le réinitialisez lorsque
ces paramètres sont activés. Désactivez ces paramètres avant de réinitialiser votre appareil.
• Contrôle à distance : paramétrez l'appareil pour qu'il autorise le contrôle à distance de votre
appareil perdu ou volé via Internet. Pour utiliser cette fonction, vous devez vous connecter à
votre compte Samsung.
– ENREGISTREMENT DU COMPTE : enregistrez ou connectez-vous à vos comptes Samsung et
Google.
– Utiliser réseaux sans fil : paramétrez l'appareil pour qu'il autorise la collecte de données de
localisation ou détermine l'emplacement de votre appareil perdu ou volé via le Wi-Fi ou un
réseau mobile.
Paramètres
90
• Alerte de changement SIM : activez ou désactivez la fonction de Traçage du mobile qui vous
aide à localiser votre appareil en cas de perte ou de vol.
• Accéder au site Web : accédez au site Web permettant de localiser votre mobile
(findmymobile.samsung.com). Ce site vous permet de repérer et de contrôler un appareil égaré
ou dérobé.
• Configurer blocage SIM :
– Verrouiller carte SIM : activez ou désactivez la fonction de verrouillage par code PIN de
l'appareil. Si vous activez ce paramètre, un code PIN vous sera demandé à chaque fois que
vous allumez l'appareil.
– Modifier code PIN SIM : modifiez le code PIN utilisé pour accéder aux données SIM ou USIM.
• Rendre les mots de passe visibles : paramétrez l’appareil pour qu’il affiche votre mot de passe à
mesure que vous le saisissez.
• Admin. de périphérique : affichez les administrateurs de votre appareil. Vous pouvez autoriser
les administrateurs de l’appareil à appliquer de nouvelles règles à celui-ci.
• Sources inconnues : paramétrez l’appareil pour permettre l'installation d'applications de
sources inconnues.
• Vérifier les applications : paramétrez l'appareil pour permettre à Google de vérifier si les
applications présentent un danger avant de les installer.
• Mise à jour de la sécurité:
– Mises à jour automatiques : paramétrez l'appareil pour qu'il vérifie et télécharge
automatiquement les mises à jour de sécurité.
– Réseaux préférés : sélectionnez une option de connexion réseau pour vérifier et télécharger
automatiquement les mises à jour de sécurité.
– Rechercher les mises à jour : recherchez les mises à jour de sécurité.
• Type de stockage : définissez un type de stockage pour les fichiers d'identification.
• Infos d'ident. sécurisées : recourez à des certificats et des identifiants pour sécuriser l’utilisation
des diverses applications.
• Installer depuis stock. périph. : installez des certificats cryptés sur le stockage USB.
• Effacer infos identification : effacez les identifiants de sécurité contenus dans l’appareil et
réinitialisez le mot de passe.
Paramètres
91
Langue et saisie
Modifiez les paramètres de saisie de texte. La disponibilité de certaines options dépend de la langue
sélectionnée.
Langue
Sélectionnez la langue d’affichage des menus et des applications.
Par défaut
Sélectionnez le type de clavier à utiliser par défaut pour la saisie de texte.
Clavier Samsung
Pour modifier les paramètres du clavier Samsung, appuyez sur .
La disponibilité des options dépend de votre zone géographique ou de votre opérateur.
• Français(FR) : modifiez la disposition du clavier.
• Sélectionner langue de saisie : sélectionnez les langues de saisie.
• Texte intuitif : activez le mode de saisie intuitive pour que des suggestions de mots s’affichent
au fur et à mesure de votre saisie. Vous pouvez également personnaliser les paramètres de la
saisie intuitive.
• Remplacement automatique : paramétrez l'appareil pour qu'il corrige les mots erronés et
incomplets en appuyant sur la barre d'espace ou un signe de ponctuation.
• Majuscules auto. : paramétrez l’appareil pour qu'il mette automatiquement en majuscules
la première lettre qui suit un signe de ponctuation final (point, point d’interrogation et point
d’exclamation).
• Espace auto : paramétrez l'appareil pour qu'il insère automatiquement un espace entre les
mots.
• Ponctuation automatique : paramétrez l’appareil pour qu'il insère un point lorsque vous
appuyez deux fois sur la barre d’espace.
• Aucun(e) : paramétrez l'appareil pour désactiver la fonction de balayage du clavier.
• Saisie en continu : paramétrez l'appareil pour qu'il autorise la saisie continue qui consiste à faire
glisser le doigt d'une lettre à l'autre sur le clavier, sans le soulever.
• Contrôle du curseur : activez la fonction de navigation intelligente sur le clavier pour déplacer
le curseur en faisant défiler le clavier.
Paramètres
92
• Son : paramétrez l’appareil pour qu’il émette un son lorsque vous appuyez sur une touche.
• Aperçu du caractère : paramétrez l’appareil pour qu'il affiche une image agrandie de chaque
caractère saisi.
• Réinitialiser paramètres : réinitialisez les paramètres du clavier Samsung.
Saisie vocale Google
Pour modifier les paramètres de saisie vocale, appuyez sur .
• Sélect. langues saisie : sélectionnez les langues utilisées pour la saisie de texte.
• Bloquer termes choquants : paramétrez l'appareil pour l'empêcher de reconnaître les mots
injurieux lors de la saisie vocale.
• Reconnaissance vocale hors connexion : téléchargez et installez les données linguistiques
pour la saisie vocale hors ligne.
Recherche vocale
• Langue : sélectionnez la langue de la reconnaissance vocale.
• Détection du mot actif “Ok Google” : paramétrez l'appareil pour qu'il lance la fonction de
reconnaissance vocale lorsque vous prononcez la commande Ok Google lorsque vous utilisez
l'application de recherche.
La disponibilité de cette fonction dépend de votre zone géographique ou de votre
opérateur.
• Sortie vocale : paramétrez l’appareil pour qu’il vous prévienne de l’action en cours à l’aide d’un
retour vocal.
• Bloquer termes choquants : masquez les mots injurieux dans les résultats de la recherche
vocale.
• Reconnaissance vocale hors connexion : téléchargez et installez les données linguistiques
pour la saisie vocale hors ligne.
• Reconnais. personnalisée : paramétrez l'appareil pour qu'il utilise les informations provenant
de votre tableau de bord Google afin d'améliorer la précision de la reconnaissance vocale.
• Casque Bluetooth : paramétrez l’appareil pour qu'il autorise la recherche vocale lorsqu’un
casque Bluetooth est connecté.
Paramètres
93
Options synthèse vocale
• MOTEUR TTS FAVORI : sélectionnez un moteur de synthèse vocale. Pour modifier les paramètres
des moteurs de synthèse vocale, appuyez sur .
• Vitesse d'élocution : sélectionnez la vitesse de diction de la synthèse vocale.
• Écouter un exemple : écoutez le texte prononcé à titre d'exemple.
• État langue par défaut : affichez le statut de la langue par défaut pour la fonction de synthèse
vocale.
Vitesse du curseur
Réglez la vitesse du curseur de la souris ou du pavé tactile connecté(e) à l’appareil.
Sauvegarder et réinitialiser
Modifiez les paramètres de gestion des paramètres et des données.
• Sauvegarder mes données : paramétrez l'appareil pour qu'il sauvegarde les paramètres et les
données d'application sur le serveur Google.
• Compte de sauvegarde : configurez ou modifiez votre compte de sauvegarde Google.
• Restauration auto. : paramétrez l'appareil pour qu'il restaure les paramètres et les données
d'application lorsque les applications sont réinstallées.
• Rétablir param. par défaut : restaurez les valeurs par défaut de l’appareil et supprimez toutes
vos données.
Ajouter compte
Ajoutez des comptes de messagerie électronique ou de réseaux sociaux.
Paramètres
94
Date et heure
Accédez aux paramètres suivants et modifiez-les afin de contrôler l’affichage de l’heure et de la date.
Si la batterie est entièrement déchargée ou si vous la retirez de l’appareil, l’heure et la date
sont alors réinitialisées.
• Date et heure automatiques : mettez automatiquement à jour la date et l'heure lorsque vous
changez de fuseau horaire.
• Fuseau horaire auto : paramétrez l'appareil pour pouvoir recevoir des informations sur l'heure
depuis le réseau lorsque vous changez de fuseau horaire.
• Définir la date : réglez la date manuellement.
• Définir l'heure : réglez l'heure manuellement.
• Sélectionner le fuseau horaire : réglez le fuseau horaire de votre domicile.
• Format 24 heures : affichez l'heure au format 24 heures.
• Format de date : sélectionnez un format de date.
Accessibilité
Les services d’accessibilité sont des fonctions spéciales destinées aux personnes présentant des
handicaps physiques. Accédez aux paramètres suivants et modifiez-les pour améliorer l’accessibilité
de l’appareil.
• Rotation auto. écran : paramétrez l’interface pour qu’elle pivote automatiquement en même
temps que l’appareil.
• Mise en veille de l'écran : définissez le délai à l'issue duquel l'écran doit s'éteindre
automatiquement.
• Afficher le raccourci : ajoutez un raccourci vers le menu Accessibilité ou TalkBack dans le menu
rapide qui apparaît lorsque vous maintenez la touche Marche/Arrêt enfoncée.
• Début/Fin d'appel :
– Touche Accueil pour répondre aux appels : paramétrez l’appareil pour pouvoir répondre
aux appels en appuyant sur la touche Accueil.
– Rép. aux appels en app. : paramétrer le mobile de manière à répondre aux appels en
appuyant deux fois sur la touche « accepter l'appel ».
– Touche Marche pour terminer les appels : paramétrez l’appareil pour pouvoir mettre fin à
un appel en appuyant sur la touche Marche/Arrêt.
Paramètres
95
• TalkBack : activez le service TalkBack qui propose des commentaires parlés.
• Énoncer mots de passe : paramétrez l’appareil pour que les mots de passe que vous saisissez
sur les sites Web à l’aide de la fonction TalkBack soient énoncés à voix haute.
• Couleurs négatives : inversez les couleurs d’affichage pour une meilleure visibilité.
• Taille de police : modifiez la taille de la police.
• Agrandissement : paramétrez l’appareil pour pouvoir effectuer un zoom avant ou arrière à l’aide
des doigts.
• Raccourci d'accessibilité : paramétrez l'appareil pour pouvoir activer TalkBack lorsque vous
maintenez la touche Marche/Arrêt enfoncée et appuyez sur l'écran avec deux doigts.
• Options synthèse vocale :
– MOTEUR TTS FAVORI : sélectionnez un moteur de synthèse vocale. Pour modifier les
paramètres des moteurs de synthèse vocale, appuyez sur .
– Vitesse d'élocution : sélectionnez la vitesse de diction de la synthèse vocale.
– Écouter un exemple : écoutez le texte prononcé à titre d'exemple.
– État langue par défaut : affichez le statut de la langue par défaut pour la fonction de
synthèse vocale.
• Notification par flash : configurez le flash pour qu’il clignote lorsque vous recevez des appels
entrants, de nouveaux messages ou des notifications.
• Désactiver tous les sons : désactivez tous les sons de l'appareil.
• Audio mono : activez le réglage audio monophonique lorsque vous utilisez une seule oreillette.
• Durée de l'appui prolongé : définissez le délai de reconnaissance lorsque vous maintenez le
doigt appuyé sur l’écran.
Paramètres
96
Accessories
Modifiez les paramètres des accessoires.
• Déverrouillage automatique : paramétrez l’appareil pour pouvoir le déverrouiller
automatiquement lorsque vous l’ouvrez.
Impression
Configurez les paramètres pour les modules d’extension d’imprimante installés sur l’appareil. Vous
pouvez rechercher les imprimantes disponibles ou en ajouter une manuellement pour imprimer des
fichiers via le réseau Wi-Fi ou les services Cloud.
À propos de l'appareil
Accédez aux informations relatives à l’appareil, modifiez le nom de l’appareil ou mettez à jour le
logiciel de l’appareil.
Paramètres Google
Utilisez cette application pour configurer les paramètres de certaines fonctions fournies par Google.
Appuyez sur Paramètres Google depuis la liste des applications.
97
Dépannage
Avant de contacter un centre de service après-vente Samsung, veuillez essayer de mettre en œuvre
les solutions suivantes. Il est possible que certaines situations ne s’appliquent pas à votre appareil.
Lorsque vous allumez ou utilisez votre appareil, un message vous invite à
effectuer l’une des manipulations suivantes :
• Mot de passe : lorsque la fonction de verrouillage est activée, vous devez saisir le mot de passe
que vous avez défini pour l’appareil.
• Code PIN : lorsque vous utilisez l’appareil pour la première fois ou lorsque la demande de code
PIN est activée, vous devez saisir le code PIN fourni avec la carte SIM ou USIM. Vous pouvez
désactiver cette fonction à l’aide du menu de verrouillage de la carte SIM.
• Code PUK : si vous saisissez un code PIN incorrect à plusieurs reprises, la carte SIM ou USIM est
bloquée. Vous devez alors saisir le code PUK fourni par votre opérateur.
• Code PIN2 : lorsque vous accédez à un menu nécessitant le code PIN2, vous devez saisir le code
PIN2 fourni avec la carte SIM ou USIM. Pour en savoir plus, contactez votre opérateur.
Votre appareil affiche des messages d’erreur de réseau et de service
• Lorsque vous vous trouvez dans une zone de mauvaise réception, vous risquez de perdre
la connexion au réseau. Déplacez-vous et réessayez. Lorsque vous vous déplacez, plusieurs
messages d’erreur peuvent apparaître.
• Certaines options ne sont pas accessibles sans abonnement. Pour en savoir plus, contactez votre
opérateur.
Votre appareil ne s’allume pas
• Lorsque la batterie est entièrement déchargée, il n’est pas possible d’allumer l’appareil.
Rechargez complètement la batterie avant d’allumer l’appareil.
• Il est possible que la batterie ne soit pas correctement installée. Réinsérez la batterie.
• Essuyez les deux contacts dorés et réinsérez la batterie.
Dépannage
98
Mauvaise réaction ou lenteur de l’écran tactile
• Si vous fixez sur l’écran tactile un cache de protection ou tout autre accessoire en option, il est
possible que l’écran ne fonctionne pas correctement.
• Si vous portez des gants, si vos mains ne sont pas parfaitement propres, ou si vous appuyez
sur l’écran avec un objet pointu ou vos ongles, l’écran tactile risque de présenter des
dysfonctionnements.
• L’humidité ou le contact avec l’eau peut provoquer des dysfonctionnements de l’écran tactile.
• Redémarrez votre appareil afin de mettre fin à d’éventuels dysfonctionnements logiciels
temporaires.
• Assurez-vous que vous disposez bien de la dernière version logicielle de votre appareil.
• Si l’écran tactile est endommagé ou rayé, contactez un centre de service après-vente Samsung.
Votre appareil se bloque ou est sujet à des erreurs fatales
Si votre appareil ne répond plus ou se bloque, vous devrez éventuellement fermer les applications
ou réinsérer la batterie et réinitialiser votre appareil pour qu’il retrouve un fonctionnement correct. Si
votre appareil se bloque et ne répond plus, maintenez la touche Marche/Arrêt appuyée pendant plus
de 7 secondes afin de redémarrer.
Si vous ne parvenez pas à résoudre le problème à la suite de ces manipulations, procédez à la
réinitialisation des paramètres par défaut. Depuis la liste des applications, appuyez sur Paramètres
→ Sauvegarder et réinitialiser → Rétablir param. par défaut → Réinitialiser le téléphone
→ Supprimer tout. Avant de rétablir les paramètres par défaut de votre appareil, n’oubliez pas
d’effectuer des copies de sauvegarde de toutes les données importantes qui y sont stockées.
Si le problème persiste, contactez un centre de service après-vente Samsung.
Impossible de passer des appels
• Assurez-vous d’être connecté au réseau cellulaire approprié.
• Vérifiez que vous n’avez pas activé la fonction de restriction d’appel pour le numéro de
téléphone que vous composez.
• Vérifiez que vous n’avez pas activé la fonction de restriction d’appel pour le numéro de
téléphone de l’appel entrant.
Dépannage
99
Vos interlocuteurs ne vous entendent pas
• Vérifiez que le microphone intégré n’est pas recouvert.
• Vérifiez que le microphone est placé suffisamment près de votre bouche.
• Si vous utilisez un kit piéton ou un casque, vérifiez qu’il est correctement branché.
Vous percevez un écho lors des appels
Réglez le volume en appuyant sur la touche de volume ou déplacez-vous.
Déconnexions fréquentes du réseau cellulaire ou d’Internet, ou mauvaise
qualité audio
• Assurez-vous que rien n’entrave l’antenne intégrée à l’appareil.
• Lorsque vous vous trouvez dans une zone de mauvaise réception, vous risquez de perdre la
connexion au réseau. Vos problèmes de connectivité peuvent être dus à une panne au niveau
de votre opérateur. Déplacez-vous et réessayez.
• Si vous utilisez votre appareil tout en vous déplaçant, il est possible que les services de réseau
sans fil soient désactivés en raison de problèmes sur le réseau de votre opérateur.
L’icône de la batterie est vide
Le niveau de charge de la batterie est faible. Rechargez ou remplacez la batterie.
La batterie ne se charge pas correctement (pour les chargeurs
homologués Samsung)
• Assurez-vous que le chargeur est correctement branché.
• Si les bornes de la batterie sont sales, la batterie peut ne pas se recharger correctement ou
l’appareil risque de s’éteindre. Essuyez les deux contacts dorés et réessayez de recharger la
batterie.
• Sur certains appareils, la batterie ne peut pas être remplacée par l’utilisateur. Pour remplacer ce
type de batterie, contactez un centre de service après-vente Samsung.
Dépannage
100
La batterie se décharge de plus en plus rapidement
• Lorsque la batterie est exposée à des températures extrêmes, la charge utile peut être réduite.
• La consommation de la batterie augmente lorsque vous utilisez certaines fonctions, comme les
SMS et MMS, ou certaines applications, comme les jeux ou Internet.
• La batterie est un consommable dont la charge utile diminue avec le temps.
L’appareil est chaud au toucher
Lorsque vous utilisez plusieurs applications simultanément ou sur une période prolongée, l’appareil
peut chauffer. Ce phénomène est normal et n’affecte ni la durée de vie, ni les performances de
l’appareil.
Messages d’erreur à l’ouverture de l’appareil photo
Pour utiliser l’appareil photo, votre appareil doit disposer de suffisamment de mémoire et sa batterie
être suffisamment chargée. Si vous obtenez des messages d’erreur lors de l’ouverture de l’appareil
photo, tentez les manipulations suivantes :
• Chargez la batterie ou remplacez-la par une autre entièrement chargée.
• Libérez de la mémoire en transférant des fichiers sur un ordinateur ou en supprimant des
éléments de l’appareil.
• Redémarrez l’appareil. Si les problèmes persistent, contactez un centre de service après-vente
Samsung.
Qualité des photos inférieure par rapport à l’aperçu
• La qualité de vos photos peut varier selon l’environnement et les techniques photographiques
utilisées.
• Si vous prenez des photos avec une luminosité insuffisante, de nuit ou en intérieur, l’image
risque d’être floue.
Dépannage
101
Messages d’erreur à l’ouverture de fichiers multimédia
Si vous obtenez des messages d’erreur ou si vous ne parvenez pas à lire les fichiers multimédia
lorsque vous les ouvrez sur votre appareil, tentez les manipulations suivantes :
• Libérez de la mémoire en transférant des fichiers sur un ordinateur ou en supprimant des
éléments de l’appareil.
• Assurez-vous que le fichier audio n’est pas protégé par des droits DRM (Gestion des droits
d’auteur). Si le fichier est protégé par des droits DRM, vous devez posséder une licence ou une
clé pour pouvoir le lire.
• Assurez-vous que les formats de fichiers sont pris en charge par l’appareil. Si un format de
fichier n'est pas pris en charge, comme DivX ou AC3, installez une application le prenant en
charge. Pour confirmer les formats de fichier compatibles avec votre appareil, connectez-vous à
www.samsung.com.
• Votre appareil est compatible avec les photos et vidéos capturées avec ce même appareil. Les
photos et vidéos capturées avec d’autres appareils peuvent ne pas s’afficher correctement.
• Votre appareil prend en charge les fichiers multimédia autorisés par votre opérateur ainsi que
les opérateur, des autres services réseaux. Il est possible que certains contenus circulant sur
Internet, comme des sonneries, vidéos ou fonds d’écran, ne fonctionnent pas correctement.
Impossible de localiser un autre appareil Bluetooth
• Vérifiez que la fonction sans fil Bluetooth est activée sur votre appareil.
• Vérifiez que la fonction sans fil Bluetooth est également activée sur l’appareil auquel vous tentez
de vous connecter.
• Vérifiez que les deux appareils Bluetooth se trouvent bien à l’intérieur du rayon d’action
Bluetooth (10 m maximum).
Si les conseils ci-dessus ne résolvent pas le problème, contactez un centre de service après-vente
Samsung.
Problème de connexion avec un ordinateur
• Assurez-vous que le câble USB utilisé est compatible avec votre appareil.
• Vérifiez que le pilote nécessaire est bien installé sur votre ordinateur et qu’il est à jour.
• Si vous utilisez Windows XP, vérifiez que votre ordinateur est équipé de Windows XP Service
Pack 3 ou de toute version ultérieure.
• Vérifiez que Samsung Kies ou Windows Media Player 10 (ou toute version ultérieure) est installé
sur votre ordinateur.
Dépannage
102
Votre appareil ne parvient pas à détecter votre position
À certains endroits, comme à l’intérieur d’un bâtiment, les signaux GPS peuvent être faibles. Si cela se
produit, configurez votre appareil pour l’utilisation d’un réseau Wi-Fi ou mobile afin de trouver votre
position.
Les données stockées sur l’appareil ont été perdues
Effectuez toujours des copies des données importantes stockées sur votre appareil. Dans le cas
contraire, vous ne pourriez pas récupérer vos données corrompues ou perdues. Samsung ne peut
être tenu responsable de la perte des données stockées sur votre appareil.
Un petit espace est apparu sur le bord externe du boîtier de l’appareil
• Cet espace est une caractéristique de fabrication, et il est possible d’observer un jeu ou une
vibration des pièces.
• Au fil du temps, la friction entre les pièces peut entraîner l’élargissement de cet espace.
French. 02/2015. Rev.1.0
Le contenu de ce mode d’emploi peut différer par rapport à votre appareil en fonction de votre
zone géographique, votre opérateur ou votre version logicielle, et faire l’objet de modifications sans
préavis.
www.samsung.com
www.samsung.com
Mode d'emploi
SM-P601
2
À propos de ce mode d'emploi
Cet appareil vous permet de communiquer et d’accéder à des divertissements de haute qualité,
basés sur les critères de qualité et la technologie de Samsung. Ce mode d’emploi a été spécialement
conçu pour vous permettre de découvrir les fonctions et les caractéristiques de votre appareil.
• Veuillez lire attentivement ce mode d’emploi, afin de pouvoir utiliser votre appareil
correctement et en toute sécurité.
• Les descriptions sont basées sur les paramètres par défaut de votre appareil.
• Les images et les captures d’écran peuvent différer par rapport à l’aspect réel du produit.
• Le contenu de ce mode d'emploi peut différer par rapport au produit ou à votre version
logicielle, et faire l’objet de modifications sans préavis. Pour obtenir la version la plus récente de
ce mode d’emploi, connectez-vous sur le site Web de Samsung : www.samsung.com.
• Les contenus de qualité élevée nécessitant une forte utilisation du processeur et de la RAM
peuvent avoir une incidence sur les performances générales de l’appareil. Les applications en
rapport avec ces contenus peuvent ne pas fonctionner correctement selon les caractéristiques
de l’appareil et les conditions d’utilisation.
• Les fonctions disponibles et les services supplémentaires peuvent varier selon l’appareil, votre
version logicielle ou votre opérateur.
• Les applications et leurs fonctions peuvent varier en fonction de votre zone géographique ou
des caractéristiques du matériel. Samsung ne peut être tenu responsable des problèmes de
performance relatifs aux applications fournies par des éditeurs de logiciels autres que Samsung.
• Samsung ne peut être tenu responsable des problèmes de performance ou des incompatibilités
découlant de la modification des paramètres de registre par l’utilisateur. Toute tentative de
personnalisation du système d’exploitation peut entraîner des problèmes de fonctionnement de
l’appareil ou de ses applications.
• Les logiciels, sons, fonds d’écran, images ainsi que les autres contenus multimédia fourni(e)s
avec cet appareil sont concédés sous licence et leur usage est soumis à une utilisation limitée.
L’extraction et l’utilisation de ces éléments à des fins commerciales ou autres constituent
une infraction au regard des lois sur les droits d’auteur. Les utilisateurs sont entièrement
responsables de toute utilisation illégale d’un contenu multimédia.
• Les services de données tels que l’envoi ou la réception de messages, le téléchargement ou
le chargement de données, la synchronisation automatique ou l’utilisation de services de
localisation peuvent occasionner des frais supplémentaires, en fonction de l’offre à laquelle vous
avez souscrit. Afin d’éviter ces frais, choisissez un forfait de connexion approprié. Pour en savoir
plus, contactez votre opérateur.
À propos de ce mode d'emploi
3
• Les applications fournies par défaut avec l’appareil peuvent être modifiées ou ne plus être
disponibles, et ce, sans préavis. Si vous avez des questions à propos d’une application fournie
avec l’appareil, contactez un centre de service après-vente Samsung. Pour les applications
installées par l’utilisateur, contactez les opérateurs.
• Toute modification du système d’exploitation de l’appareil ou installation de logiciels non
officiels peut entraîner des dysfonctionnements et corrompre vos données. Ces actions
constituent des violations de l’accord de licence Samsung et annuleront votre garantie.
Icônes
Avertissement : situations susceptibles de vous blesser ou de blesser autrui
Attention : situations susceptibles d’endommager votre appareil ou d’autres équipements
Remarque : remarques, conseils d’utilisation ou informations complémentaires
Droits d’auteur
Copyright © 2015 Samsung Electronics
Ce mode d’emploi est protégé par les lois internationales sur les droits d’auteur.
Il est interdit de reproduire, distribuer, traduire ou transmettre sous quelque forme et par quelque
moyen que ce soit, électronique ou mécanique, notamment par photocopie, enregistrement
ou stockage dans un système de stockage et de recherche documentaire, tout ou partie de ce
document, sans le consentement préalable écrit de Samsung Electronics.
À propos de ce mode d'emploi
4
Marques
• SAMSUNG et le logo SAMSUNG sont des marques déposées de Samsung Electronics.
• Bluetooth® est une marque déposée de Bluetooth SIG, Inc.
• Wi-Fi®, Wi-Fi Protected Setup™, Wi-Fi CERTIFIED Passpoint™, Wi-Fi Direct™, Wi-Fi CERTIFIED™
et le logo Wi-Fi sont des marques déposées de Wi-Fi Alliance.
• Toutes les autres marques et droits d’auteur demeurent la propriété de leurs propriétaires
respectifs.
5
Table des matières
Démarrage
7 Présentation de l’appareil
8 Touches
9 S Pen
9 Contenu du coffret
10 Installer la carte SIM ou USIM
11 Charger la batterie
14 Insérer une carte mémoire
16 Remplacer la pointe S Pen
17 Allumer et éteindre l’appareil
17 Manipuler l’appareil
18 Verrouiller et déverrouiller l’appareil
18 Régler le volume
18 Activer le profil Discret
Fonctions de base
19 Icônes d’informations
20 Utiliser l’écran tactile
24 Reconnaissance des mouvements
26 Mouvements de la main
27 Utiliser la fonction Multi-fenêtres
31 Utiliser le stylet S Pen
34 Air View
35 Notifications
36 Écran d’accueil
38 Liste des applications
39 Utiliser les applications
40 Aide
40 Saisir du texte
43 Établir une connexion au réseau Wi-Fi
44 Créer un compte
45 Configurer des profils utilisateur
45 Transférer des fichiers
46 Protéger l’appareil
48 Mettre l’appareil à jour
Communication
49 Téléphone
54 Contacts
58 Messages
60 Email
61 Gmail
63 Hangouts
63 ChatON
63 Google+
64 Photos
64 Twitter
Web et réseau
65 Internet
66 Chrome
67 Bluetooth
68 Screen Mirroring
69 Samsung Link
69 Group Play
70 Télécommande intelligente
Table des matières
6
107 Calculatrice
108 S Translator
108 S Voice
109 S Finder
109 Google
110 Recherche vocale
111 Scrapbook
112 Mes fichiers
114 Téléchargements
114 TripAdvisor
115 Evernote
115 KNOX
Géolocalisation
116 Maps
Paramètres
117 Accéder au menu des paramètres
117 Connexions
121 Appareil
128 Commandes
133 Général
137 Paramètres Google
Dépannage
Multimédia
71 Musique
73 Appareil photo
80 Galerie
84 Story Album
84 Vidéo
85 Editeur vidéo
86 YouTube
86 My Magazine
87 Flipboard
87 Businessweek+
88 NYTimes
88 SketchBook for Galaxy
Boutiques d’applications et
multimédia
89 Play Store
90 Samsung Apps (GALAXY Apps)
90 Play Livres
91 Play Films et TV
91 Play Musique
91 Play Jeux
91 Play Kiosque
Utilitaires
92 S Note
99 Action Memo
100 S Planner
102 Dropbox
102 Cloud
103 Drive
104 POLARIS Office 5
106 Alarme
107 Horloge mondiale
7
Démarrage
Présentation de l’appareil
Touche Retour
Touche Accueil
Haut-parleur
Capteur de luminosité
Touche Menu
Connecteur à
fonctions multiples
Écran tactile
Objectif avant
Touche Marche/Arrêt
Touche de volume
Microphone
Compartiment pour
carte SIM
Objectif arrière
Compartiment pour
carte mémoire
Haut-parleur
Antenne principale
Prise audio 3,5 mm
Compartiment pour
stylet S Pen
Flash
Antenne GPS
Démarrage
8
• Ne recouvrez pas la zone autour de l’antenne avec vos mains ou tout autre objet. Cela
peut entraîner des problèmes de connectivité ou décharger la batterie.
• L’utilisation d’une protection d’écran agréée Samsung est recommandée. Les protections
d’écran non agréées peuvent provoquer un dysfonctionnement des capteurs.
• Évitez de mettre l’écran tactile en contact avec de l’eau. L’humidité ou le contact avec l’eau
peut provoquer des dysfonctionnements de l’écran tactile.
Touches
Touche Fonction
Marche/Arrêt
• Maintenir cette touche enfoncée pour allumer ou éteindre
l’appareil.
• Maintenir cette touche enfoncée pendant 7 secondes pour
réinitialiser l’appareil en cas d’erreur fatale, ou s’il ne répond plus
ou mal.
• Appuyer sur cette touche pour verrouiller ou déverrouiller
l’appareil. Lorsque l’écran tactile s’éteint, l’appareil passe en mode
Verrouillage.
Menu
• Appuyer sur cette touche pour ouvrir la liste des options
disponibles dans l’écran actuel.
• Depuis l’écran d’accueil, maintenir cette touche enfoncée pour
lancer l’application de recherche S Finder.
Accueil
• Appuyer sur cette touche pour revenir à l’écran d’accueil.
• Maintenir cette touche enfoncée pour ouvrir la liste des
applications récentes.
Retour • Appuyer sur cette touche pour revenir à l’écran précédent.
Volume • Appuyer sur cette touche pour régler le volume de l’appareil.
Démarrage
9
S Pen
Pointe S Pen
Touche S Pen
Nom Fonction
Pointe S Pen • Réaliser des manipulations de base avec le S Pen (p. 20).
Touche S Pen • Réaliser des manipulations avancées avec le S Pen (p. 31).
Contenu du coffret
Vérifiez le contenu du coffret et assurez-vous que tous les éléments suivants sont présents :
• Appareil
• Guide de prise en main rapide
• Les éléments fournis avec l’appareil et les accessoires disponibles peuvent varier en
fonction de votre zone géographique ou de votre opérateur.
• Les accessoires fournis ont été spécialement conçus pour votre appareil et peuvent ne
pas fonctionner avec d’autres appareils.
• L’aspect et les caractéristiques du produit peuvent faire l’objet de modifications sans
préavis.
• Vous pouvez acheter d’autres accessoires auprès de votre revendeur Samsung. Avant
tout achat, assurez-vous qu’ils sont compatibles avec votre appareil.
• Certains accessoires, autres que ceux fournis, peuvent ne pas être compatibles avec votre
appareil.
• Utilisez exclusivement des accessoires homologués par Samsung. Les
dysfonctionnements résultant d’une utilisation d’accessoires non homologués ne sont
pas couverts par le service de garantie.
• La disponibilité de l’ensemble des accessoires dépend entièrement des fabricants. Pour
plus d’informations sur la disponibilité des accessoires, consultez le site Web Samsung.
Démarrage
10
Installer la carte SIM ou USIM
Insérez la carte SIM ou USIM fournie par votre opérateur de téléphonie mobile.
Seules les cartes microSIM sont compatibles avec cet appareil.
1 Insérez la carte SIM ou USIM, puce orientée vers le bas.
• N’introduisez pas de carte mémoire dans le compartiment prévu pour la carte SIM. Si
une carte mémoire venait à se coincer dans le compartiment prévu pour la carte SIM,
apportez l’appareil dans un centre de service après-vente Samsung afin de la faire retirer.
• Veillez à ne pas perdre ou à ne pas laisser d’autres personnes utiliser votre carte SIM ou
USIM. Samsung ne peut être tenu responsable en cas de dommage ou désagrément
résultant d’une perte ou d’un vol de carte.
2 Enfoncez la carte SIM dans son compartiment jusqu’à ce qu’elle se verrouille.
Démarrage
11
Retirer la carte SIM ou USIM
Appuyez avec précaution sur la carte SIM ou USIM pour la dégager, puis sortez-la du compartiment.
Charger la batterie
Vous devez charger la batterie avant d’utiliser l’appareil pour la première fois. Vous pouvez charger
l’appareil à l’aide d’un chargeur ou en le branchant sur un ordinateur à l’aide d’un câble USB.
Utilisez uniquement des chargeurs, des batteries et des câbles homologués par Samsung.
L’utilisation de chargeurs ou de câbles non homologués peut provoquer l’éclatement de la
batterie ou endommager l’appareil.
• Lorsque le niveau de charge de la batterie est faible, l’appareil émet un signal sonore et
affiche un message d’avertissement.
• Si la batterie est complètement déchargée, vous ne pouvez pas allumer l’appareil,
même si le chargeur est branché. Rechargez la batterie pendant quelques minutes avant
d’allumer l’appareil.
• Si vous utilisez simultanément plusieurs applications, des applications réseaux ou des
applications qui nécessitent une connexion à un autre appareil, la batterie se déchargera
rapidement. Pour éviter toute déconnexion du réseau ou perte d’alimentation lors
d’un transfert de données, utilisez toujours ces applications lorsque la batterie est
parfaitement chargée.
Démarrage
12
Charger la batterie avec le chargeur
Branchez le câble USB sur l’adaptateur secteur USB, puis la fiche micro-USB sur le connecteur à
fonctions multiples de l’appareil.
Un branchement incorrect du chargeur peut sérieusement endommager l’appareil. Les
dégâts résultant d’une mauvaise utilisation ne sont pas couverts par la garantie.
• L’appareil peut être utilisé en cours de chargement, mais dans ce cas, le chargement
complet de la batterie risque de prendre plus de temps.
• Lorsque l’appareil est en cours de chargement, il est possible que l’écran tactile ne
fonctionne pas en raison de l’instabilité de l’alimentation électrique. Dans ce cas,
débranchez le chargeur de l’appareil.
• Il est possible que l’appareil chauffe lorsqu’il est en cours de chargement. Ce phénomène
est normal et n’affecte ni la durée de vie, ni les performances de l’appareil. Si la
température de la batterie devient trop élevée, le chargement risque de s’interrompre.
• Si l’appareil ne se charge pas correctement, apportez-le, accompagné de son chargeur,
dans un centre de service après-vente Samsung.
Lorsque la batterie est complètement chargée, déconnectez l’appareil du chargeur. Pour ce faire,
débranchez d’abord le chargeur de l’appareil, puis de la prise de courant.
Ne retirez jamais la batterie avant d’avoir débranché le chargeur. Ceci pourrait endommager
l’appareil.
• Pour économiser l’énergie, débranchez le chargeur lorsque vous ne l’utilisez pas. Le
chargeur n’étant pas muni d'une touche Marche/Arrêt, vous devez le débrancher de la
prise de courant pour couper l’alimentation. L’appareil doit rester à proximité de la prise
lors du chargement.
• Le socle de prise de courant doit être installé à proximité du matériel et doit être aisément
accessible.
Démarrage
13
Vérifier la charge de la batterie
Lorsque vous chargez la batterie et que l’appareil est éteint, les icônes suivantes indiquent l’état du
chargement :
Chargement en cours Chargement terminé
Réduire la consommation d’énergie de la batterie
Votre appareil est doté d’options destinées à optimiser l’autonomie de votre batterie. En
personnalisant ces options et en désactivant les applications fonctionnant inutilement en arrièreplan,
vous pouvez utiliser l’appareil plus longtemps entre deux chargements :
• Lorsque vous n’utilisez pas l’appareil, désactivez l’écran tactile en appuyant sur la touche
Marche/Arrêt.
• Fermez toutes les applications fonctionnant inutilement en arrière-plan à l’aide du gestionnaire
de tâches.
• Désactivez la fonction Bluetooth.
• Désactivez la fonction Wi-Fi.
• Désactivez les applications de synchronisation automatique.
• Réduisez la durée du rétroéclairage de l’écran.
• Réduisez la luminosité de l’écran.
Démarrage
14
Insérer une carte mémoire
L’appareil est compatible avec les cartes mémoire d’une capacité allant jusqu’à 64 Go. Selon le
fabricant et le modèle, certaines cartes mémoire peuvent ne pas être compatibles avec votre
appareil.
• Certaines cartes mémoire peuvent ne pas être parfaitement compatibles avec l’appareil.
L’utilisation d’une carte mémoire incompatible peut endommager l’appareil ou la carte
mémoire elle-même et corrompre les données qui y sont stockées.
• Veillez à insérer la carte mémoire du bon côté.
• Seules les structures de fichiers FAT et exFAT sont compatibles avec les cartes mémoire de
l’appareil. Lorsque vous insérez une carte mémoire formatée avec une autre structure de
fichiers, l’appareil vous invite à la reformater.
• Une trop grande fréquence des opérations d’effacement et d’écriture réduit la durée de
vie des cartes mémoire.
• Lorsque vous insérez une carte mémoire dans l’appareil, le répertoire de fichiers de la
carte apparaît dans le dossier SD Memory card du menu Mes fichiers.
1 Insérez la carte mémoire en orientant la puce vers le bas.
2 Enfoncez la carte mémoire dans son compartiment jusqu’à ce qu’elle se verrouille.
Démarrage
15
Retirer une carte mémoire
Avant de retirer la carte mémoire, vous devez au préalable la désactiver pour pouvoir la retirer en
toute sécurité. Depuis l’écran d’accueil, appuyez sur → Paramètres → Général → Stockage →
Démonter la carte SD.
Appuyez avec précaution sur la carte mémoire pour la dégager, puis sortez-la du compartiment.
Ne retirez jamais la carte mémoire lorsque l’appareil y enregistre ou lit des informations.
Cela pourrait entraîner une perte ou une corruption des données, ou endommager la carte
mémoire ou l’appareil. Samsung ne peut être tenu responsable en cas de perte de données
résultant d’une utilisation frauduleuse ou en cas de détérioration d’une carte mémoire.
Formater une carte mémoire
Une carte mémoire ayant été formatée sur un ordinateur peut ne pas être compatible avec l’appareil.
Formatez la carte mémoire dans l’appareil.
Depuis l’écran d’accueil, appuyez sur → Paramètres → Général → Stockage → Formater la
carte SD → Formater la carte SD → Supprimer tout.
Avant de formater la carte mémoire, n’oubliez pas d’effectuer des copies de sauvegarde de
toutes les données importantes qui y sont stockées. La garantie du fabricant ne couvre pas
la perte de données résultant des manipulations de l’utilisateur.
Démarrage
16
Remplacer la pointe S Pen
Le S Pen est un consommable dont la pointe est susceptible de s'user. Si la pointe est usée,
remplacez-la.
1 Immobilisez la pointe avec la pincette, puis tirez.
2 Insérez une nouvelle pointe dans le S Pen jusqu'à ce que vous entendiez un clic.
Faites attention à ne pas vous pincer les doigts entre la pointe et la pincette.
• Ne réutilisez pas les anciennes pointes. Cela pourrait provoquer un dysfonctionnement
du S Pen.
• N'appuyez pas trop fort sur la pointe lorsque vous insérez la pointe dans le S Pen.
• N'insérez pas la partie ronde de la pointe dans le S Pen. Cela risque d’endommager le
S Pen ou l’appareil.
La pointe de couleur noire possède un embout de caoutchouc blanc. Si l'embout de
caoutchouc est usé, remplacez la pointe.
Démarrage
17
Allumer et éteindre l’appareil
Si vous allumez l’appareil pour la première fois, suivez les instructions affichées à l’écran pour
procéder à sa configuration.
Pour allumer l’appareil, maintenez la touche Marche/Arrêt enfoncée pendant quelques secondes.
• Respectez toutes les consignes de sécurité et directives formulées par le personnel
compétent dans les lieux où l’utilisation d’appareils mobiles est interdite, comme par
exemple dans les avions et les hôpitaux.
• Pour désactiver les fonctions d'appel et de connexion sans fil, c'est-à-dire les fonctions
Wi-Fi et Bluetooth, maintenez la touche Marche/Arrêt enfoncée et appuyez sur Mode
Hors-ligne.
Pour éteindre l’appareil, maintenez la touche Marche/Arrêt enfoncée, puis appuyez sur Éteindre.
Manipuler l’appareil
Ne recouvrez pas la zone autour de l’antenne avec vos mains ou tout autre objet. Cela peut entraîner
des problèmes de connectivité ou décharger la batterie.
Démarrage
18
Verrouiller et déverrouiller l’appareil
Pour empêcher toute opération accidentelle de l’appareil lorsque vous ne l’utilisez pas, vous pouvez
le verrouiller. Lorsque vous appuyez sur la touche Marche/Arrêt, l’écran s’éteint et l’appareil passe en
mode Verrouillage. Il se verrouille également automatiquement si vous ne l’utilisez pas pendant un
certain temps.
Pour déverrouiller l’appareil, appuyez sur la touche Marche/Arrêt ou sur la touche Accueil, puis faites
glisser votre doigt dans n’importe quelle direction sur l'écran.
Régler le volume
Pour régler le volume de la sonnerie d'appel ou des sons multimédia, appuyez sur la touche de
volume Haut ou Bas.
Activer le profil Discret
Utilisez l’une des méthodes suivantes :
• Maintenez la touche de volume Bas enfoncée jusqu’à ce que le profil Discret soit activé.
• Maintenez la touche Marche/Arrêt enfoncée, puis appuyez sur Muet ou Vibreur.
• Ouvrez le volet des raccourcis en haut de l’écran, puis appuyez sur Son ou Vibreur.
19
Fonctions de base
Icônes d’informations
Les icônes susceptibles de s'afficher en haut de l’écran vous indiquent le statut de l’appareil. Les
icônes répertoriées dans le tableau ci-dessous sont les plus courantes.
Icône Signification
Aucun signal
Puissance du signal
Itinérance (hors de la zone de service locale)
Réseau GPRS connecté
Réseau EDGE connecté
Réseau UMTS connecté
Réseau HSDPA connecté
Réseau HSPA+ connecté
Connecté au réseau Wi-Fi
Fonction Bluetooth activée
GPS activé
Appel en cours
Appel manqué
Fonction Smart Screen activée
Synchronisation avec le Web
Fonctions de base
20
Icône Signification
Connecté à un ordinateur
Carte SIM ou USIM absente
Nouveau SMS ou MMS
Alarme activée
S Pen retiré
Profil Discret activé
Mode Vibreur activé
Mode Hors-ligne activé
Une erreur s’est produite ou votre attention est nécessaire
Niveau de charge de la batterie
Utiliser l’écran tactile
L’écran tactile réagit uniquement au doigt et au stylet S Pen.
• Évitez tout contact de l’écran tactile avec d’autres appareils électriques. Les décharges
électrostatiques peuvent provoquer des dysfonctionnements de l’écran tactile.
• Pour éviter d’endommager l’écran tactile, n’appuyez pas dessus avec un objet pointu et
n’exercez aucune pression excessive avec vos doigts.
• Il se peut que l'appareil ne reconnaisse pas la saisie tactile près des bords de l'écran, hors
de la zone de saisie dédiée.
• Si l’écran tactile reste inactif pendant une période prolongée, des images rémanentes
risquent d’apparaître (ou persistance de l’affichage). Éteignez l’écran tactile lorsque vous
n’utilisez pas l’appareil.
Fonctions de base
21
Mouvements
Appuyer
Pour ouvrir une application, sélectionner un élément de menu, activer une commande ou saisir un
caractère sur le clavier, appuyez sur l’écran tactile avec un seul doigt.
Maintenir appuyé
Pour ouvrir une fenêtre d’options contextuelle, maintenez votre doigt appuyé sur un élément
pendant plus de 2 secondes.
Fonctions de base
22
Faire glisser
Pour déplacer un élément vers un nouvel emplacement, maintenez votre doigt appuyé sur l’élément
et faites-le glisser sur l’écran.
Appuyer deux fois
Pour effectuer un zoom sur une page Web ou une image, appuyez deux fois sur l’écran. Pour annuler
le zoom, appuyez à nouveau à deux reprises sur l'écran.
Fonctions de base
23
Effleurer
Pour passer d’une fenêtre à l’autre, faites glisser votre doigt vers la gauche ou la droite sur l’écran
d’accueil ou dans la liste des applications. Pour parcourir une page Web ou une liste, telle que celle
de vos contacts, faites glisser votre doigt vers le haut ou le bas de l’écran.
Pincer
Pour effectuer un zoom avant sur une page Web, une carte ou une image, placez deux doigts sur
l’écran et écartez-les. Rapprochez-les pour effectuer un zoom arrière.
Fonctions de base
24
Reconnaissance des mouvements
Vous pouvez contrôler l’appareil à l’aide de quelques mouvements simples.
Avant toute chose, vérifiez que la fonction de reconnaissance des mouvements est activée. Depuis
l’écran d’accueil, appuyez sur → Paramètres → Commandes → Mouvements, puis faites glisser
le curseur Mouvements vers la droite.
Si l’appareil est soumis à des secousses ou à des chocs excessifs, cela peut entraîner un
comportement imprévu. Veillez à contrôler vos gestes.
Pivoter l’écran
De nombreuses applications autorisent l’affichage en mode Portrait ou Paysage. Lorsque vous faites
pivoter l’appareil, l’écran s’adapte automatiquement à la nouvelle orientation.
Pour empêcher l'écran de pivoter automatiquement, ouvrez le volet des raccourcis et désélectionnez
l’option Rotation écran.
• Certaines applications ne permettent pas la rotation de l’écran.
• Pour certaines autres applications, l’écran affiché diffère selon l’orientation.
Fonctions de base
25
Soulever
Lorsque vous prenez l’appareil dans vos mains alors qu’il est resté inactif pendant un certain temps
ou que l’écran a été désactivé, il vibre pour vous avertir des appels manqués ou des nouveaux
messages.
Incliner
Maintenez vos pouces appuyés sur deux points de l’écran, puis inclinez l’appareil vers l’avant ou
l’arrière pour effectuer un zoom avant ou arrière.
Fonctions de base
26
Effectuer un panoramique pour naviguer
Lorsque vous effectuez un zoom sur une image, maintenez votre doigt appuyé à l’écran, puis
déplacez l’appareil dans une direction pour faire défiler l’image.
Mouvements de la main
Utilisez les mouvements de votre main pour contrôler l’appareil par un simple contact avec l’écran
tactile.
Avant toute chose, vérifiez que la fonction de reconnaissance des mouvements de main est activée.
Depuis l’écran d’accueil, appuyez sur → Paramètres → Commandes → Mouvement de paume,
puis faites glisser le curseur Mouvement de paume vers la droite.
Balayer
Balayez l’écran avec le côté de la main pour réaliser une capture d’écran. L’image est enregistrée dans
le menu Galerie → Screenshots. Cette fonction n’est disponible que pour certaines applications.
Fonctions de base
27
Recouvrir
Recouvrez l’écran avec la paume de la main pour effectuer une pause lors de la lecture d’un contenu
multimédia.
Utiliser la fonction Multi-fenêtres
Cette fonction permet d'exécuter plusieurs applications en même temps sur le même écran.
• Seules les applications définies par défaut dans le volet Multi-fenêtres peuvent être
exécutées.
• La disponibilité de cette fonction dépend de votre zone géographique ou de votre
opérateur.
Pour utiliser la fonction Multi-fenêtres, depuis l’écran d’accueil, appuyez sur → Paramètres →
Appareil → Fenêtres multiples, puis faites glisser le curseur Fenêtres multiples vers la droite.
Fonctions de base
28
Utiliser un écran partagé Multi-fenêtres
Cette fonction permet d'exécuter des applications sur un écran partagé.
Lancer des applications sur un écran partagé Multi-fenêtres
1 Placez votre doigt sur le côté droit de l'écran et faites-le glisser vers le centre. Vous pouvez
également maintenir le doigt appuyé sur .
Le volet Multi-fenêtres apparaît sur le côté droit de l'écran.
Volet Multi-fenêtres
2 Maintenez le doigt appuyé sur une icône d'application dans le volet Multi-fenêtres, puis faites-la
glisser vers l'écran.
Lorsque l'écran devient bleu, relâchez l'icône d'application.
Fonctions de base
29
3 Maintenez le doigt appuyé sur une autre icône d'application dans le volet Multi-fenêtres, puis
faites-la glisser vers un nouvel emplacement.
Vous pouvez exécuter la même application en même temps sur un écran partagé. Seules les
applications caractérisées par l'icône sont compatibles avec cette fonction.
Partager du contenu entre applications
Il est très facile de partager du contenu entre des applications, comme Email et Internet, par un
mouvement de glisser-déplacer.
Il se peut que certaines applications ne prennent pas en charge cette fonction.
1 Lancez les applications Email et Internet sur un écran partagé Multi-fenêtres.
Accéder aux options
Multi-fenêtres.
2 Appuyez sur le cercle situé entre les fenêtres d'applications, puis appuyez sur .
Appuyez sur le cercle situé entre les fenêtres d'applications pour accéder aux options
suivantes :
• : ouvrir une liste d'applications utilisées récemment dans la fenêtre sélectionnée.
• : passer d’une application Multi-fenêtres à l’autre.
• : partager des éléments, comme des images, du texte ou des liens, entre les fenêtres
en réalisant un mouvement de glisser-déplacer.
• : agrandir la fenêtre.
• : fermer l'application.
Fonctions de base
30
3 Maintenez le doigt appuyé sur un élément affiché dans la fenêtre Internet et faites glisser cet
élément vers l'emplacement souhaité dans la fenêtre Email.
Créer une combinaison Multi-fenêtres
Cette fonction vous permet d'enregistrer les applications Multi-fenêtres en cours d'exécution en tant
que combinaison.
1 Lancez plusieurs applications sur un écran partagé Multi-fenêtres.
2 Ouvrez le volet Multi-fenêtres et appuyez sur → Créer.
3 Saisissez un titre, puis appuyez sur OK.
La combinaison Multi-fenêtres en cours d'exécution est ajoutée au volet Multi-fenêtres.
Pour lancer des applications sur la base d'une combinaison enregistrée, sélectionnez-la dans le
volet Multi-fenêtres.
Fonctions de base
31
Utiliser le stylet S Pen
Le stylet S Pen fourni vous permet de sélectionner des éléments et des fonctions en toute facilité.
La touche latérale du S Pen vous offre également des fonctions supplémentaires, comme la capture
d’écran.
Pour utiliser le S Pen, sortez-le de son compartiment.
Dès que vous sortez le S Pen de son compartiment, l’appareil le détecte et effectue les opérations
suivantes :
• Il active automatiquement l’écran tactile (s’il est éteint).
• Il lance les applications Action Memo ou Air Command.
• Vous pouvez remplacer la pointe du stylet du S Pen. Si la pointe est usée, remplacez-la.
• Si le S Pen ne fonctionne pas correctement, apportez-le dans un centre de service aprèsvente
Samsung. Pour plus d’informations sur le S Pen, consultez le site Web Samsung.
• Pour de meilleures performances, maintenez le S Pen perpendiculairement à l’écran
tactile et évitez de l’utiliser trop incliné.
Fonctions de base
32
Réaliser une capture d’écran
Appuyez sur la touche latérale du S Pen et maintenez la pointe du stylet appuyée sur l’écran
jusqu’à ce que vous entendiez un clic. La capture d’écran est enregistrée dans le dossier Galerie →
Screenshots.
Il est possible de dessiner ou d’écrire sur une capture d’écran, ou d’en couper une partie. L’image
modifiée est enregistrée dans le dossier Galerie → IMG_edited.
Cette fonction n’est disponible que pour certaines applications.
Rédiger un Action Memo
Maintenez la touche latérale du S Pen enfoncée et appuyez deux fois sur l’écran pour rédiger un
Action Memo.
Écrivez ou dessinez quelque chose, puis sélectionnez la note en appuyant sur pour effectuer
différentes opérations : ajouter un contact, envoyer un e-mail, etc. Une fois la note sélectionnée,
dessinez une ligne autour d'une zone avec le S Pen pour effectuer des opérations en rapport avec
cette zone.
Fonctions de base
33
Sélectionner et enregistrer une image
Maintenez la touche latérale du S Pen enfoncée et dessinez une ligne autour de la zone à
sélectionner.
Le cas échéant, utilisez l'une des options suivantes :
• : restaurer la sélection d'origine.
• : convertir la sélection en forme circulaire.
• : convertir la sélection en forme rectangulaire.
• : personnaliser la sélection.
Sélectionnez l’application à utiliser à l’aide des icônes affichées en bas de l’écran.
Air command
Appuyez sur la touche latérale du S Pen et survolez l’écran pour afficher le volet Air Command.
Cette fonction vous permet d’effectuer les opérations suivantes :
• Action Memo : lancez l’application Action Memo et rédigez une note autour de laquelle vous
pourrez dessiner une ligne pour effectuer des opérations en rapport avec cette note.
• Scrapbooker : sélectionnez et capturez une image, puis enregistrez-la dans l’application
Scrapbook, votre outil de création d’albums de scrapbooking (p. 111).
• Capture : réalisez une capture d'écran et modifiez-la.
• S Finder : lancez l’application S Finder et recherchez tout type de contenu sur votre appareil
(p. 109).
• Pen Window : utilisez de nombreuses applications dans des zones flottantes que vous pourrez
disposer n’importe où sur l'écran.
Fonctions de base
34
Lancer des applications dans la zone sélectionnée
Appuyez sur Pen Window dans le volet Air Command. Tracez une ligne autour d’une zone, puis
sélectionnez une application. L’application se lance dans la zone tracée.
Pour réduire l’application, appuyez sur . Les applications minimisées sont affichées sous forme
d'icônes flottantes.
Pour agrandir l'application, appuyez sur .
Pour fermer les applications, appuyez sur .
Options disponibles
Certains éléments sont dotés de menus contextuels mis en surbrillance par le pointeur du S Pen.
Appuyez sur la touche latérale du S Pen pour afficher le menu lorsque vous survolez l'élément avec le
S Pen.
Air View
Utilisez cette fonction pour effectuer diverses opérations en survolant simplement l'écran avec votre
S Pen.
Depuis l’écran d’accueil, appuyez sur → Paramètres → Commandes → S Pen → Air View, puis
faites glisser le curseur Air View vers la droite.
Pointez un élément avec le S Pen pour afficher un aperçu du contenu ou visualiser les informations
dans des fenêtres contextuelles.
Pour faire défiler des volets ou des listes, déplacez le pointeur du S Pen vers un bord de l’écran (haut/
bas/gauche/droite).
Fonctions de base
35
Notifications
Des icônes de notification apparaissent dans le volet de des raccourcis en haut de l'écran pour vous
signaler les nouveaux messages, les événements à venir, le statut de l'appareil, et plus encore. Pour
ouvrir le volet des raccourcis, faites glisser votre doigt de haut en bas sur le volet. Pour afficher des
notifications supplémentaires, faites défiler la liste vers le bas. Pour fermer le volet, faites-le glisser de
bas en haut.
Dans le volet des raccourcis, vous pouvez afficher tous les paramètres actuels de votre appareil.
Faites glisser votre doigt de haut en bas sur le volet des raccourcis, puis appuyez sur pour utiliser
les options suivantes :
• Wi-Fi : activer ou désactiver la fonction Wi-Fi.
• Position : activer ou désactiver la fonction GPS.
• Son : activer ou désactiver le son ou le vibreur de l'appareil. Vous pouvez également activer le
mode Vibreur en mode Discret.
• Rotation écran : autoriser ou empêcher l’interface de pivoter lorsque vous tournez l’appareil.
• Bluetooth : activer ou désactiver la fonction Bluetooth.
• Mode lecture : activer ou désactiver le mode lecture. En mode lecture, l'appareil vous protège
de la fatigue oculaire lorsque vous lisez la nuit. Pour sélectionner les applications à utiliser en
mode lecture, appuyez sur Paramètres → Appareil → Affichage → Mode lecture.
• Données mobiles : activer ou désactiver la connexion de données.
• Éco. énergie : activer ou désactiver le mode économie d'énergie.
• Fenêtres multiples : activer ou désactiver la fonction Multi-fenêtres.
• Accès Wi-Fi : activer ou désactiver la fonction modem Wi-Fi.
• Screen Mirroring : activer ou désactiver la fonction Screen Mirroring qui permet de répliquer
votre écran sur l’écran d’un autre appareil.
• Synchro. : activer ou désactiver la synchronisation automatique des applications.
• Smart Stay : activer ou désactiver la fonction Smart Stay de veille intelligente.
• Smart Pause : activer ou désactiver la fonction Smart Pause de pause intelligente.
• Smart Scroll : activer ou désactiver la fonction Smart Scroll de défilement intelligent.
• Mode blocage : activer ou désactiver le mode blocage. En mode blocage, l’appareil bloque
toutes les notifications. Pour sélectionner les notifications qui seront bloquées, appuyez sur
Paramètres → Appareil → Mode Blocage.
• Mode Hors-ligne : activer ou désactiver le mode Hors-ligne.
Fonctions de base
36
• Air View : activer ou désactiver la fonction Air View.
La disponibilité des options dépend de votre zone géographique ou de votre opérateur.
Pour réorganiser les options dans le volet des raccourcis, ouvrez-le, appuyez sur → , puis
maintenez votre doigt appuyé sur un élément et faites-le glisser vers un autre emplacement.
Écran d’accueil
L’écran d’accueil est le point de départ pour accéder à toutes les fonctions de l’appareil. Il affiche des
icônes d’information, des widgets, des raccourcis vers les applications, etc.
L’écran d’accueil comprend plusieurs volets. Pour afficher les autres volets, faites défiler l’écran vers la
gauche ou la droite.
Organiser les éléments de l’écran d’accueil
Ajouter une icône d’application
Depuis l’écran d’accueil, appuyez sur , maintenez le doigt appuyé sur une icône d’application, puis
faites-la glisser vers l’aperçu d’un volet.
Ajouter un élément
Personnalisez l'écran d'accueil en y ajoutant des widgets, des dossiers ou des volets.
Maintenez le doigt appuyé sur une zone vide de l’écran d’accueil, puis sélectionnez l’une des
catégories suivantes :
• Applications et widgets : ajoutez des widgets ou des applications à l'écran d'accueil.
• Dossier : créez un nouveau dossier.
• Page : ajoutez un volet à l'écran d'accueil.
Déplacer un élément
Maintenez le doigt appuyé sur l’élément à déplacer, puis faites-le glisser jusqu’à l’emplacement
souhaité. Pour déplacer l’élément vers un autre volet, faites-le glisser vers le bord droit ou gauche de
l’écran.
Supprimer un élément
Maintenez le doigt appuyé sur l’élément à supprimer, puis faites-le glisser vers la corbeille qui
apparaît en haut de l’écran d’accueil. Lorsque la corbeille devient rouge, relâchez l’élément.
Fonctions de base
37
Réorganiser les volets d'applications
Ajouter un volet
Appuyez sur → Modifier la page → .
Déplacer un volet
Appuyez sur → Modifier la page, maintenez le doigt appuyé sur l’aperçu d’un volet, puis faitesle
glisser jusqu’à l’emplacement souhaité.
Supprimer un volet
Appuyez sur → Modifier la page, maintenez le doigt appuyé sur l’aperçu d’un volet, puis faitesle
glisser vers la corbeille.
Définir un fond d’écran
Définissez une image ou une photo enregistrée dans l’appareil comme fond d’écran d’accueil.
Depuis l’écran d’accueil, appuyez sur → Définir fond d'écran → Écran d'accueil, puis
sélectionnez l’une des options ci-dessous :
• Fonds d'écran : fonds d'écran fournis par défaut avec votre appareil.
• Fonds d'écran animés : fonds d'écran animés fournis par défaut avec votre appareil.
• Galerie : photos que vous avez prises avec l’appareil photo ou images téléchargées depuis
Internet.
• Photos : photos disponibles dans l'application Google Photos.
Sélectionnez une image, redimensionnez le cadre si nécessaire, puis définissez-la comme fond
d'écran.
Utiliser les widgets
Les widgets sont de petits outils qui permettent d’accéder à des fonctions et des informations
pratiques depuis l’écran d’accueil. Vous pouvez ajouter des widgets depuis le volet des widgets sur
l’écran d’accueil.
• Certains widgets permettent de se connecter à des services Web. L’utilisation d’un widget
Internet peut entraîner des frais supplémentaires.
• La disponibilité des widgets dépend de votre zone géographique ou de votre opérateur.
Fonctions de base
38
Ajouter des widgets à l’écran d’accueil
Depuis l’écran d’accueil, appuyez sur → Widgets. Faites défiler le volet des widgets vers la gauche
ou la droite, puis maintenez le doigt appuyé sur un widget pour l’ajouter à l’écran d’accueil. Placez-le
à l'endroit souhaité, redimensionnez-le (si nécessaire) en étirant le cadre qui l'entoure, puis appuyez
n'importe où sur l'écran pour valider le nouvel emplacement du widget.
Liste des applications
La liste des applications affiche les icônes de toutes vos applications, y compris celles récemment
installées.
Depuis l’écran d’accueil, appuyez sur pour ouvrir la liste des applications.
Pour afficher les autres volets, faites défiler l’écran vers la gauche ou la droite.
Organiser les applications
Appuyez sur → Modifier, maintenez le doigt appuyé sur une application, puis faites-la glisser
jusqu’à l’emplacement souhaité. Pour déplacer l’élément vers un autre volet, faites-le glisser vers le
bord droit ou gauche de l’écran.
Organiser les applications dans des dossiers
Placez les applications similaires dans un même dossier pour faciliter leur utilisation.
Appuyez sur → Modifier, maintenez le doigt appuyé sur une application, puis faites-la glisser
vers l'option Créer dossier. Saisissez le nom du dossier, puis appuyez sur OK. Placez les applications
dans le nouveau dossier en les faisant glisser, puis appuyez sur Sauveg. pour sauvegarder la nouvelle
configuration.
Réorganiser les volets d'applications
Placez deux doigts sur l’écran et resserrez-les pour passer en mode Modification. Maintenez ensuite
le doigt appuyé sur l’aperçu d’un volet, puis faites-le glisser jusqu’à l’emplacement souhaité.
Fonctions de base
39
Installer des applications
Utilisez les boutiques d’applications, comme Samsung Apps (GALAXY Apps), pour télécharger et
installer des applications.
Désinstaller des applications
Appuyez sur → Désinstaller/désactiver des applications, puis sélectionnez l’application à
désinstaller.
Il est impossible de désinstaller les applications fournies par défaut avec l’appareil.
Désactiver des applications
Appuyez sur → Désinstaller/désactiver des applications, puis sélectionnez l'application à
désactiver.
Pour activer de nouveau les applications désactivées, appuyez sur → Afficher les applications
désactivées, sélectionnez les applications, puis appuyez sur OK dans la liste des applications.
• Les applications téléchargées et certaines applications fournies par défaut ne peuvent
pas être désactivées.
• Lorsque vous utilisez cette fonction, les applications désactivées ne sont plus affichées
dans la liste des applications. Elles restent néanmoins stockées sur l'appareil.
Utiliser les applications
Cet appareil peut exécuter différent types d’applications, vous permettant d’utiliser aussi bien des
contenus multimédia que des contenus Internet.
Ouvrir une application
Depuis l’écran d’accueil ou la liste des applications, appuyez sur une icône pour ouvrir l’application
correspondante.
Certaines applications sont regroupées dans des dossiers. Appuyez sur un dossier, puis sur
une application pour l'ouvrir.
Ouvrir des applications récemment utilisées
Maintenez la touche Accueil enfoncée pour ouvrir la liste des applications récemment utilisées.
Appuyez sur une icône pour ouvrir l’application correspondante.
Fonctions de base
40
Fermer une application
Fermez les applications fonctionnant inutilement en arrière-plan pour économiser la batterie et
optimiser les performances de l’appareil.
Maintenez la touche Accueil enfoncée, puis appuyez sur Gest. tâches et sur Fin près de l’application
à fermer. Pour fermer toutes les applications en cours d’exécution, appuyez sur Fermer tout près du
nombre total d’applications actives. Vous pouvez également maintenir la touche Accueil enfoncée et
appuyer sur Tout fermer.
Aide
Accédez aux informations d’aide pour apprendre à utiliser l’appareil et les applications, ou configurer
des paramètres importants.
Appuyez sur Aide depuis la liste des applications. Pour afficher des conseils, sélectionnez une
catégorie.
Pour trier les catégories par ordre alphabétique, appuyez sur .
Pour effectuer une recherche par mot-clé, appuyez sur .
Saisir du texte
Pour saisir du texte, utilisez le clavier Samsung ou la fonction de saisie vocale.
La saisie de texte est impossible dans certaines langues. Pour saisir du texte, vous devez
sélectionner une des langues prises en charge.
Modifier le type de clavier
Appuyez sur une zone de saisie, ouvrez le volet des raccourcis, appuyez sur Mode de saisie, puis
choisissez le type de clavier à utiliser.
Insérer un espace.
Passer à la ligne suivante.
Supprimer le caractère
précédent.
Saisir des signes de
ponctuation.
Saisir des majuscules.
Modifier le type de clavier.
Saisir des majuscules.
Ajouter un élément du
presse-papier.
Fonctions de base
41
Saisir des majuscules
Appuyez sur avant de saisir un caractère. Pour saisir l’ensemble de votre texte en majuscules,
appuyez deux fois sur cette touche.
Modifier le type de clavier
Appuyez sur pour modifier le type de clavier.
Sur le clavier flottant, maintenez le doigt appuyé sur et déplacez le clavier flottant vers un autre
emplacement.
Modifier la langue du clavier
Ajoutez des langues au clavier, puis faites glisser la barre d’espace vers la gauche ou la droite pour
modifier la langue du clavier.
Écrire de façon manuscrite
Maintenez le doigt appuyé sur , appuyez sur , puis écrivez un mot à l’aide du doigt ou
du S Pen. Les mots suggérés apparaissent au fur et à mesure de votre saisie. Sélectionnez une
suggestion.
Utilisez les gestes de saisie manuscrite pour effectuer des opérations, comme la modification ou
la suppression de caractères, et l’insertion d’espaces. Pour afficher le tutoriel, maintenez le doigt
appuyé sur , puis appuyez sur → Aide.
La disponibilité de cette fonction dépend de votre zone géographique ou de votre
opérateur.
Fonctions de base
42
Saisir du texte avec le S Pen
Depuis la liste des applications, appuyez sur Paramètres → Commandes → S Pen → Saisie S Pen,
puis faites glisser le curseur Saisie S Pen vers la droite.
Lorsque vous survolez une zone de texte avec le S Pen, l'icône apparaît dans l'angle supérieur
gauche de la zone. Appuyez sur pour écrire avec le S Pen. Pour effectuer de simples corrections,
modifier les langues de saisie ou insérer un espace entre les caractères, utilisez les outils affichés dans
le volet d'écriture manuscrite.
Cette fonction vous permet d'effectuer les opérations suivantes :
• Envoyer un message manuscrit.
• Passer un appel en écrivant le nom d'un contact ou son numéro de téléphone.
• Paramétrer une alarme en inscrivant simplement les chiffres.
• Naviguer sur Internet en écrivant les adresses Web.
Dicter du texte
Activez la fonction de saisie vocale, puis parlez dans le microphone. L’appareil affiche à l’écran ce que
vous venez de dire.
Si l’appareil ne reconnaît pas correctement les mots, appuyez sur le texte mis en surbrillance et
sélectionnez une autre proposition dans la liste déroulante qui apparaît.
Pour modifier la langue de la reconnaissance vocale ou ajouter d'autres langues, appuyez sur la
langue actuellement prise en charge.
Copier et coller du texte
Maintenez le doigt appuyé sur le texte souhaité, faites glisser l’icône ou pour redimensionner
la sélection, puis appuyez sur Copier pour copier le texte ou sur Couper pour le couper. Le texte
sélectionné est copié dans le presse-papier.
Pour le coller dans une zone de saisie, maintenez le doigt appuyé à l’endroit où vous souhaitez
insérer le texte, puis appuyez sur Coller.
Fonctions de base
43
Établir une connexion au réseau Wi-Fi
Connectez l’appareil à un réseau Wi-Fi pour pouvoir utiliser Internet ou partager des fichiers
multimédia avec d’autres appareils (p. 117).
Activer ou désactiver un réseau Wi-Fi
Ouvrez le volet des raccourcis, puis appuyez sur Wi-Fi pour activer ou désactiver la fonction.
• Votre appareil utilise une fréquence non harmonisée et est conçu pour fonctionner dans
tous les pays européens. Au sein de l’Union Européenne, le réseau Wi-Fi peut fonctionner
sans restriction en intérieur, mais pas en extérieur.
• Lorsque vous n’utilisez pas le réseau Wi-Fi, désactivez-le afin d’économiser la batterie.
Établir une connexion à un réseau Wi-Fi
Depuis la liste des applications, appuyez sur Paramètres → Connexions → Wi-Fi, puis faites glisser
le curseur Wi-Fi vers la droite.
Sélectionnez un réseau dans la liste des réseaux Wi-Fi détectés, saisissez un mot de passe, le cas
échéant, puis appuyez sur Connexion. Les réseaux nécessitant un mot de passe sont signalés
par une icône en forme de verrou. Après connexion à un réseau Wi-Fi, l’appareil s’y connectera
automatiquement dès qu’il sera disponible.
Ajouter un réseau Wi-Fi
Si le réseau souhaité n’apparaît pas dans la liste, appuyez sur Ajouter un réseau Wi-Fi en bas de la
liste des réseaux. Saisissez le nom du réseau dans la zone SSID du réseau, sélectionnez le type de
sécurité, indiquez le mot de passe si le réseau est protégé, puis appuyez sur Connexion.
Activer la fonction Wi-Fi CERTIFIED Passpoint
Avec Passpoint, l'appareil recherche automatiquement les réseaux Wi-Fi disponibles et se connecte
à l'un d'eux. Si vous effectuez un déplacement vers une nouvelle zone, il se connectera à un autre
réseau Wi-Fi disponible sans avoir besoin d'utiliser un mot de passe.
Depuis la liste des applications, appuyez sur Paramètres → Connexions → Wi-Fi → →
Paramètres avancés, puis cochez la case Passpoint.
Fonctions de base
44
Supprimer un réseau Wi-Fi
Si un réseau ne doit plus être utilisé, même s’il s’agit du réseau actuellement en service, vous pouvez
le supprimer afin que l’appareil ne s’y connecte plus automatiquement. Sélectionnez le réseau dans
la liste, puis appuyez sur Oublier.
Créer un compte
Les applications Google, comme Play Store, nécessitent un compte Google et Samsung Apps
(GALAXY Apps) requiert un compte Samsung. Créez des comptes Google et Samsung afin de
profiter au maximum de votre appareil.
Ajouter des comptes
Lorsque vous ouvrez une application Google, suivez les instructions qui apparaissent à l’écran. Pour
créer un compte Google, vous n’avez pas besoin de vous connecter.
Pour vous connecter à un compte Google ou en créer un, depuis la liste des applications, appuyez
sur Paramètres → Général → Comptes → Ajouter compte → Google. Appuyez ensuite sur
Nouveau pour créer un compte ou sur Compte existant pour vous connecter, puis suivez les
instructions à l’écran pour procéder à la configuration. Vous pouvez utiliser plusieurs comptes
Google sur l’appareil.
Vous pouvez également créer un compte Samsung.
Supprimer un compte
Depuis la liste des applications, appuyez sur Paramètres → Général, sélectionnez un nom sous
l’option Comptes, choisissez le compte à supprimer, puis appuyez sur Supp. compte.
Fonctions de base
45
Configurer des profils utilisateur
Configurez des profils utilisateur, puis sélectionnez un compte lorsque vous déverrouillez l’appareil
pour utiliser des paramètres personnalisés. Lorsque vous configurez plusieurs profils utilisateur,
les utilisateurs peuvent partager l’appareil sans affecter les paramètres personnels des autres
utilisateurs, comme les comptes de messagerie et les préférences de fond d'écran par exemple.
Depuis l’écran d'accueil, appuyez sur → Paramètres → Général → Utilisateurs → , puis suivez
les instructions affichées pour configurer un nouveau profil utilisateur. Pour accéder à l’appareil avec
un profil utilisateur particulier, sélectionnez ce profil en haut à droite sur l’écran verrouillé.
Transférer des fichiers
Vous pouvez transférer différents types de fichiers (sons, vidéos, images, etc.) de l’appareil vers un
ordinateur, et inversement.
Connecter l’appareil avec Samsung Kies
Samsung Kies est un logiciel qui permet de gérer vos contenus multimédias et vos informations
personnelles avec des appareils Samsung. Téléchargez la dernière version de Samsung Kies à partir
du site Web Samsung.
1 Connectez l’appareil à un ordinateur à l’aide du câble USB.
Samsung Kies démarre automatiquement sur l’ordinateur. Si Samsung Kies ne démarre pas,
double-cliquez sur l’icône Samsung Kies sur votre ordinateur.
2 Transférez des fichiers entre votre appareil et l’ordinateur.
Pour plus d’informations, consultez l’aide de Samsung Kies.
Connecter l’appareil à Windows Media Player
Assurez-vous que Windows Media Player est bien installé sur votre ordinateur.
1 Connectez l’appareil à un ordinateur à l’aide du câble USB.
2 Ouvrez Windows Media Player pour synchroniser les fichiers audio.
Fonctions de base
46
Connecter l’appareil en tant qu’appareil multimédia
1 Connectez l’appareil à un ordinateur à l’aide du câble USB.
2 Ouvrez le volet des raccourcis, puis appuyez sur Connecté en tant que périphérique
multimédia → Périphérique multimédia (MTP).
Appuyez sur Appareil photo (PTP) si votre ordinateur ne gère pas le protocole MTP (Media
Transfer Protocol) ou ne dispose pas du pilote approprié.
3 Transférez des fichiers entre votre appareil et l’ordinateur.
Protéger l’appareil
Vous pouvez empêcher toute personne d’utiliser votre appareil et de consulter les données et
informations personnelles qui y sont enregistrées. Pour protéger votre appareil, vous pouvez définir
un code de déverrouillage. Sans ce code, l’appareil ne pourra pas être déverrouillé.
Déverrouillage par signature
Depuis la liste des applications, appuyez sur Paramètres → Appareil → Écran de verrouillage →
Déverrouillage de l'écran → Signature.
Dessinez votre signature avec le S Pen, puis dessinez la signature deux autres fois pour la vérifier.
Définissez un modèle ou un code PIN de déverrouillage de secours pour déverrouiller l’écran en cas
d’oubli de la signature.
Lorsque vous déverrouillez l'appreil, veillez à écrire votre signature dans les mêmes
conditions (par exemple, l'angle d'écriture) que lorsque vous l'avez enregistrée.
Fonctions de base
47
Déverrouillage par modèle
Depuis la liste des applications, appuyez sur Paramètres → Appareil → Écran de verrouillage →
Déverrouillage de l'écran → Modèle.
Dessinez un modèle en reliant au moins quatre points, puis recommencez pour valider. Définissez un
code PIN de déverrouillage de secours pour déverrouiller l’écran en cas d’oubli du modèle.
Déverrouillage par code PIN
Depuis la liste des applications, appuyez sur Paramètres → Appareil → Écran de verrouillage →
Déverrouillage de l'écran → Code PIN.
Saisissez au moins quatre chiffres, puis recommencez pour valider.
Déverrouillage par mot de passe
Depuis la liste des applications, appuyez sur Paramètres → Appareil → Écran de verrouillage →
Déverrouillage de l'écran → Mot de passe.
Saisissez au moins quatre caractères, y compris des chiffres et des symboles, puis recommencez pour
valider.
Fonctions de base
48
Déverrouiller l’appareil
Allumez l’écran en appuyant sur la touche Marche/Arrêt ou sur la touche Accueil, puis saisissez le
code ou dessinez le modèle de déverrouillage.
Si vous oubliez le code de déverrouillage, apportez l’appareil dans un centre de service
après-vente Samsung pour le réinitialiser.
Mettre l’appareil à jour
L’appareil peut être mis à jour avec la version logicielle la plus récente.
La disponibilité de cette fonction dépend de votre zone géographique ou de votre
opérateur.
Mettre l’appareil à jour avec Samsung Kies
Démarrez Samsung Kies et connectez l’appareil à un ordinateur. Samsung Kies reconnaît
automatiquement l’appareil et affiche, le cas échéant, les mises à jour disponibles. Pour lancer la mise
à jour, cliquez sur la touche de mise à jour dans la boîte de dialogue. Pour plus d’informations sur la
mise à jour, consultez l’aide Samsung Kies.
• Lorsque vous mettez votre appareil à jour, n’éteignez pas l’ordinateur et ne déconnectez
pas le câble USB.
• Ne connectez pas non plus d’autres appareils multimédia à l’ordinateur. Cela pourrait
interférer avec le processus de mise à jour.
Mettre l’appareil à jour sans connexion PC
Grâce au service FOTA (Firmware Over The Air), le logiciel de l’appareil peut être mis à jour sans
passer par une connexion avec un ordinateur.
Depuis la liste des applications, appuyez sur Paramètres → Général → À propos de l'appareil →
Mise à jour logicielle → Mettre à jour maintenant.
49
Communication
Téléphone
Utilisez cette application pour passer un appel ou y répondre.
Appuyez sur Téléphone depuis la liste des applications.
Passer des appels
Passer un appel
Utilisez l’une des méthodes suivantes :
• Clavier : composez un numéro à l’aide du clavier, puis appuyez sur .
• Journal : passez un appel à partir de l’historique des appels et des messages.
• Favoris : passez un appel à partir de votre liste de contacts favoris.
• Contacts : passez un appel à partir de votre liste de contacts.
Numéros d’appel abrégés
Pour composer un numéro abrégé, maintenez le doigt appuyé sur le chiffre correspondant.
Saisie intuitive de numéros
Lorsque vous saisissez des chiffres sur le clavier, l’appareil vous suggère automatiquement des
numéros. Pour passer un appel, sélectionnez un des numéros proposés.
Communication
50
Rechercher des contacts
Pour trouver un contact dans la liste de contacts, saisissez un nom, un numéro de téléphone ou une
adresse e-mail. À mesure que vous saisissez des caractères, l’appareil vous suggère des contacts.
Pour passer un appel, sélectionnez un de ces contacts.
Appeler un numéro à l’étranger
Maintenez le doigt appuyé sur la touche 0 jusqu’à ce que le signe + apparaisse. Composez l’indicatif
du pays, l’indicatif régional et le numéro de téléphone, puis appuyez sur .
Options au cours d’un appel vocal
Les options suivantes sont disponibles :
• Attente : mettre un appel en attente. Appuyez sur Récup. pour reprendre l'appel en attente.
• Ajouter : passer un autre appel.
• Clavier : ouvrir le clavier.
• Fin : terminer l'appel en cours.
• Contacts : ouvrir votre liste de contacts.
• Muet : désactiver le microphone afin que votre correspondant ne puisse pas vous entendre.
• Casque : sélectionner un casque Bluetooth, à condition qu’il soit connecté à l’appareil.
• Permuter : passer d’un appel à l’autre.
• Fusionner : organiser une conférence téléphonique lorsque vous êtes en liaison avec deux
correspondants à la fois. Répétez cette même procédure pour ajouter d’autres correspondants.
Cette fonction est disponible uniquement si vous avez activé le service de conférence
téléphonique.
• → Action Memo : ouvrir l'application Action Memo.
• → Message : envoyer un message.
• → Transférer : mettre le premier correspondant en contact avec le second. Dans ce cas,
vous êtes déconnecté de la conversation.
Communication
51
Ajouter des contacts
Pour ajouter un numéro de téléphone à la liste de contacts à partir du clavier, composez le numéro,
puis appuyez sur .
Afficher les journaux d’appels
Pour afficher l’historique des appels entrants et sortants, appuyez sur Journal.
Pour filtrer le journal d’appels, appuyez sur → Afficher, puis sélectionnez une option.
Numérotation fixe
Il est possible de configurer l’appareil pour limiter les appels sortants aux numéros précédés de
préfixes spécifiés. Ces préfixes sont enregistrés sur la carte SIM ou USIM.
Appuyez sur → Paramètres d'appel → Paramètres d'appel → Paramètres supplémentaires
→ Numérotation fixe → Activer FDN, puis saisissez le code PIN2 fourni avec la carte SIM ou USIM.
Appuyez sur Liste FDN, puis ajoutez des numéros.
Restriction d’appel
Il est possible de configurer l’appareil pour empêcher certains appels sortants. Vous pouvez, par
exemple, désactiver les appels à l’étranger.
Appuyez sur → Paramètres d'appel → Paramètres d'appel → Paramètres supplémentaires
→ Restriction d'appel, sélectionnez un type d’appel, une option de restriction d’appel, puis saisissez
un mot de passe.
Recevoir des appels
Répondre à un appel
Lorsque vous recevez un appel, faites glisser votre doigt sur l’icône .
Si le signal d’appel est actif, vous pouvez recevoir un autre appel. L’appareil vous demande alors si
vous souhaitez mettre fin au premier appel ou le mettre en attente.
Communication
52
Rejeter un appel
Lorsque vous recevez un appel, faites glisser votre doigt sur l’icône .
Pour envoyer un message lorsque vous rejetez un appel entrant, faites glisser la barre des messages
de rejet située en bas de l’écran vers le haut. Pour créer le message de rejet, appuyez sur →
Paramètres d'appel → Paramètres d'appel → Définir les messages de rejet.
Rejeter automatiquement des appels de numéros indésirables
Appuyez sur → Paramètres d'appel → Paramètres d'appel → Rejet de l'appel → Mode
de rejet automatique → Numéros rejetés auto, puis sur Liste de rejet auto. Appuyez sur ,
composez un numéro, affectez-lui une catégorie, puis appuyez sur Enreg.
Appels manqués
Si vous manquez un appel, l’icône apparaît dans le volet des raccourcis. Ouvrez le volet des
raccourcis pour afficher la liste des appels manqués.
Signal d’appel
Le signal d’appel est un service fourni par l’opérateur. Vous pouvez utiliser ce service pour suspendre
un appel en cours et prendre un appel entrant. Ce service n’est pas disponible pour les appels visio.
Pour utiliser ce service, appuyez sur → Paramètres d'appel → Paramètres d'appel →
Paramètres supplémentaires, puis cochez la case Signal d'appel.
Transfert d’appel
Il est possible de configurer l’appareil pour qu’il transfère automatiquement les appels vers un
numéro spécifié.
Appuyez sur → Paramètres d'appel → Paramètres d'appel → Paramètres supplémentaires
→ Transfert d'appel, puis sélectionnez un type et une condition d’appel. Composez un numéro,
puis appuyez sur Activer.
Communication
53
Appels visio
Passer un appel visio
Composez le numéro ou sélectionnez un contact dans la liste, puis appuyez sur pour passer un
appel visio.
Options au cours d’un appel visio
Les options suivantes sont disponibles :
• Masquer mon image : masquer votre image à l'interlocuteur.
• Muet : désactiver le microphone afin que votre correspondant ne puisse pas vous entendre.
• Casque : sélectionner un casque Bluetooth, à condition qu’il soit connecté à l’appareil.
• Objectif : basculer entre l’objectif avant et arrière.
• Clavier : ouvrir le clavier.
• Fin : terminer l'appel en cours.
• → Image sortante : sélectionner l'image à afficher à votre correspondant.
• → Émotions animées : associer des émoticônes à votre image.
• → Vue thème : associer des icônes décoratives à votre image.
• → Act. dessin animé : passer en mode d'affichage dessin animé.
• → Activer le mode Dual Camera : utiliser les objectifs avant et arrière afin que votre
correspondant puisse vous voir ainsi que les alentours.
En mode Dual Camera, l’appel visio est possible pendant 3 minutes maximum. Au bout de
3 minutes, l’appareil désactive l’objectif arrière pour des performances optimales.
Maintenez le doigt appuyé sur l’image de votre correspondant pour accéder aux options suivantes :
• Capturer une image : capturer l’image de votre correspondant.
• Enregistrer une vidéo : enregistrer une vidéo de l'appel visio.
Dans de nombreux pays, il est illégal d’enregistrer un appel sans l’autorisation préalable du
correspondant.
Communication
54
Contacts
Utilisez cette application pour gérer les contacts, y compris les numéros de téléphone, les adresses
e-mail, et plus encore.
Appuyez sur Contacts depuis la liste des applications.
Gérer les contacts
Appuyez sur Contacts.
Créer un contact
Appuyez sur , sélectionnez une mémoire de stockage, puis saisissez les informations du contact.
• : ajouter une image.
• / : ajouter ou supprimer un champ d'information.
Modifier un contact
Sélectionnez un contact à modifier, puis appuyez sur .
Supprimer un contact
Appuyez sur → Supprimer des contacts.
Configurer un numéro d’appel abrégé
Appuyez sur → Numérotation rapide, sélectionnez un chiffre de numérotation rapide, puis le
contact à affecter à ce chiffre. Pour supprimer un numéro d’appel abrégé, maintenez le doigt appuyé
sur le chiffre correspondant, puis appuyez sur Supprimer.
Communication
55
Rechercher des contacts
Appuyez sur Contacts.
Utilisez l’une des méthodes de recherche suivantes :
• Faites défiler la liste de contacts vers le haut ou le bas.
• Pour faire défiler la liste rapidement, placez votre index à gauche de la liste de contacts et faites
défiler vers le haut ou le bas.
• Appuyez sur le champ de recherche tout en haut de la liste de contacts, puis saisissez vos
critères de recherche.
Une fois le contact sélectionné, choisissez l’une des options suivantes :
• : ajouter le contact aux favoris.
• / : passer un appel vocal ou visio.
• : rédiger un message.
• : rédiger un e-mail.
Afficher les contacts
Appuyez sur Contacts.
Par défaut, l'appareil affiche tous les contacts enregistrés.
Appuyez sur → Contacts à afficher, puis sélectionnez la source à partir de laquelle les contacts
doivent être affichés.
Synchroniser les contacts
Appuyez sur Contacts.
Synchroniser les contacts de l’appareil avec les contacts Google
Appuyez sur → Fusionner les comptes → Fusionner avec Google.
Les contacts Google sont caractérisés par l’icône .
Synchroniser les contacts de l’appareil avec les contacts Samsung
Appuyez sur → Fusionner les comptes → Fusionner avec Samsung.
Les contacts Samsung sont caractérisés par l’icône .
Communication
56
Importer et exporter des contacts
Appuyez sur Contacts.
Importer des contacts
Appuyez sur → Importer/Exporter, puis sélectionnez une option d'importation.
Exporter des contacts
Appuyez sur → Importer/Exporter, puis sélectionnez une option d'exportation.
Partager des contacts
Appuyez sur → Partager carte de visite via → Plusieurs contacts, sélectionnez les contacts à
partager, appuyez sur OK, puis sélectionnez un mode de partage.
Contacts favoris
Appuyez sur Favoris.
Appuyez sur , puis choisissez l’une des options suivantes :
• Rechercher : rechercher des contacts.
• Ajouter aux favoris : ajouter des contacts aux favoris.
• Supprimer des favoris : retirer des contacts des favoris.
• Affichage Grille / Affichage Liste : afficher les contacts sous forme de grille ou de liste.
• Aide : accéder à l'aide sur l'utilisation des contacts.
Communication
57
Groupes de contacts
Appuyez sur Groupes.
Ajouter des contacts à un groupe
Sélectionnez un groupe, puis appuyez sur . Sélectionnez les contacts à ajouter, puis appuyez sur
OK.
Gérer les groupes
Appuyez sur , puis choisissez l’une des options suivantes :
• Rechercher : rechercher des contacts.
• Modifier : modifier les paramètres du groupe.
• Créer : créer un groupe.
• Supprimer le membre : supprimer des membres du groupe.
• Envoyer un message / Envoyer un e-mail : envoyer un message ou un e-mail aux membres
d’un groupe.
• Modifier l'ordre : maintenir le doigt appuyé sur près du nom du groupe, faire glisser l'icône
vers le haut ou le bas jusqu’à l’emplacement souhaité, puis appuyer sur OK.
• Aide : accéder à l'aide sur l'utilisation des contacts.
Supprimer des groupes
Appuyez sur , sélectionnez les groupes que vous avez ajoutés, puis appuyez sur Supprimer. Vous
ne pouvez pas supprimer les groupes par défaut.
Envoyer un message ou un e-mail aux membres d’un groupe
Sélectionnez un groupe, appuyez sur → Envoyer un message ou Envoyer un e-mail,
sélectionnez des membres, puis appuyez sur OK.
Carte de visite
Appuyez sur Contacts.
Créez une carte de visite et envoyez-la à vos contacts.
En haut de la liste des contacts, appuyez sur Profil configuré, saisissez vos coordonnées, comme
votre numéro de téléphone, votre adresse e-mail et votre adresse postale, puis appuyez sur Enreg.
Si, lorsque vous avez configuré votre appareil, vous avez enregistré vos coordonnées, sélectionnez la
carte de visite dans MOI, puis appuyez sur pour la modifier.
Appuyez sur → Partager carte de visite via → Contact sélectionné, puis sélectionnez un mode
de partage.
Communication
58
Messages
Utilisez cette application pour envoyer des messages texte (SMS) ou multimédia (MMS).
Appuyez sur Messages depuis la liste des applications.
L’envoi ou la réception de messages en dehors de la zone couverte par votre opérateur peut
occasionner des frais supplémentaires, en fonction de l’offre à laquelle vous avez souscrit.
Pour en savoir plus, contactez votre opérateur.
Envoyer des messages
Appuyez sur , ajoutez des destinataires, composez un message, puis appuyez sur pour
envoyer le message.
Pour ajouter des destinataires, utilisez l’une des méthodes suivantes :
• Saisissez un numéro de téléphone.
• Appuyez sur , sélectionnez des contacts, puis appuyez sur OK.
• Passez le S Pen sur , puis appuyez sur la touche du S Pen. La liste des contacts récemment
utilisés apparaît.
Pour envoyer un message multimédia, utilisez l’une des méthodes suivantes :
• Appuyez sur et joignez des images, vidéos, contacts, notes, événements, etc.
• Pour ajouter un objet, appuyez sur → Ajouter un objet.
• Passez le S Pen sur , puis appuyez sur la touche du S Pen. Les images récemment ajoutées
apparaissent.
Communication
59
Envoyer des messages manuscrits
Lorsque vous survolez une zone de texte avec le S Pen, l'icône apparaît dans l'angle supérieur
gauche de la zone. Appuyez sur , puis sur pour saisir un message écrit à la main avec le S Pen.
Envoyer des messages programmés
Lorsque vous rédigez un message, appuyez sur → Envoi programmé. Définissez la date et
l’heure, puis appuyez sur OK. L’appareil envoie le message à l’heure et à la date indiquées.
• Le message ne sera pas envoyé à l’heure et à la date programmées, si l’appareil est éteint,
s’il n’est pas connecté au réseau ou si le réseau est instable.
• Cette fonction est basée sur l’heure et la date configurées sur l’appareil. Si vous changez
de fuseau horaire et que le réseau ne met pas ces informations à jour, il se peut que
l’heure et la date soient incorrectes.
Lire les messages entrants
Les messages entrants sont regroupés sous forme de fils de discussion par contact.
Pour afficher les messages d’un contact, sélectionnez ce contact.
Écouter la messagerie vocale
Maintenez le doigt appuyé sur la touche 1 du clavier, puis suivez les instructions de votre opérateur.
Communication
60
Email
Utilisez cette application pour envoyer ou consulter des e-mails.
Appuyez sur Email depuis la liste des applications.
Configurer des comptes de messagerie électronique
Lorsque vous ouvrez l’application Email pour la première fois, configurez un compte de messagerie
électronique.
Saisissez votre adresse e-mail et votre mot de passe. Pour configurer un compte de messagerie
électronique privé, comme Google Mail, appuyez sur ; pour configurer un compte de messagerie
électronique professionnel, appuyez sur Config manuelle. Suivez ensuite les instructions qui
s’affichent à l’écran pour procéder à la configuration du compte.
Pour configurer un compte de messagerie électronique supplémentaire, appuyez sur →
Paramètres → Ajouter compte.
Envoyer des messages
Sélectionnez le compte de messagerie électronique que vous souhaitez utiliser, puis appuyez sur
en haut de l’écran. Saisissez les destinataires, l’objet et le message, puis appuyez sur pour envoyer
l’e-mail.
Pour ajouter un destinataire figurant dans votre liste de contacts, appuyez sur .
Appuyez sur +Moi pour vous ajouter dans la liste des destinataires.
Appuyez sur pour joindre des images, vidéos, contacts, mémos, événements, etc.
Appuyez sur → pour insérer dans le message des images, événements, contacts, informations
de localisation et bien plus encore.
Envoyer des messages programmés
Lorsque vous composez un message, appuyez sur → Envoi programmé, configurez l’heure et la
date, puis appuyez sur OK. L’appareil envoie le message à l’heure et à la date indiquées.
• Le message ne sera pas envoyé à l’heure et à la date programmées, si l’appareil est éteint,
s’il n’est pas connecté au réseau ou si le réseau est instable.
• Cette fonction est basée sur l’heure et la date configurées sur l’appareil. Si vous changez
de fuseau horaire et que le réseau ne met pas ces informations à jour, il se peut que
l’heure et la date soient incorrectes.
Communication
61
Lire des e-mails
Sélectionnez un compte de messagerie électronique. Les nouveaux messages sont récupérés
automatiquement. Pour récupérer manuellement les messages, appuyez sur .
Appuyez sur un message pour le lire.
Ouvrir les pièces jointes.
Ajouter cette adresse e-mail
à votre liste de contacts.
Supprimer le message.
Identifier le message comme
favori.
Transférer le message.
Répondre au message.
Rédiger un message.
Appuyez sur l’onglet de la pièce jointe pour l’ouvrir, puis appuyez sur Enreg. pour l’enregistrer.
Gmail
Utilisez cette application pour accéder directement au service Google Mail.
Appuyez sur Gmail depuis la liste des applications.
• La disponibilité de cette application dépend de votre zone géographique ou de votre
opérateur.
• Cette application peut s’intituler différemment selon votre zone géographique ou votre
opérateur.
Communication
62
Envoyer des messages
Dans la boîte de réception, appuyez sur , saisissez les destinataires et un objet, rédigez un
message, puis appuyez sur ENVOYER.
Appuyez sur + CC/CCI pour ajouter des destinataires en copie ou copie cachée.
Appuyez sur pour joindre des images.
Appuyez sur → Enregistrer le brouillon pour enregistrer le message afin de l’envoyer
ultérieurement.
Appuyez sur → Joindre un fichier pour joindre des images, des vidéos, de la musique, etc.
Appuyer sur → Supprimer pour annuler votre message.
Appuyez sur → Paramètres pour modifier les paramètres Google Mail.
Appuyez sur → Envoyer des commentaires pour faire part de votre opinion sur le
développement de l'application.
Appuyez sur → Aide pour accéder aux informations d'aide de Google Mail.
Lire des e-mails
Supprimer le message.
Identifier le message comme
favori.
Rechercher un message. Archiver le message.
Rédiger un message.
Répondre au message.
Transférer le message.
Répondre à tous les
destinataires ou imprimer le
message. Afficher la pièce jointe.
Libellés
Google Mail utilise des libellés pour classer les messages. Par défaut, Google Mail affiche les
messages du libellé Boîte de réception.
Pour ajouter un libellé à un message, sélectionnez le message, appuyez sur → Modifier les
libellés, puis sélectionnez le libellé que vous souhaitez lui attribuer.
Communication
63
Hangouts
Utilisez cette application pour discuter avec vos amis.
Appuyez sur Hangouts depuis la liste des applications.
La disponibilité de cette application dépend de votre zone géographique ou de votre
opérateur.
Sélectionnez un ami dans la liste ou saisissez des critères de recherche et sélectionnez un ami dans
les résultats pour commencer à discuter.
ChatON
Utilisez cette application pour discuter avec vos amis. Pour utiliser cette application, vous devez vous
connecter à votre compte Samsung.
Appuyez sur ChatON depuis la liste des applications.
La disponibilité de cette application dépend de votre zone géographique ou de votre
opérateur.
Créez votre liste d’amis en saisissant des numéros de téléphone ou des adresses électroniques ou en
sélectionnant les contacts dans la liste de suggestions.
Sélectionnez un ami et bavardez en ligne avec lui.
Google+
Utilisez cette application pour rester connecté avec d’autres personnes via le service de réseau social
de Google.
Appuyez sur Google+ depuis la liste des applications.
La disponibilité de cette application dépend de votre zone géographique ou de votre
opérateur.
Appuyez sur Tout pour modifier la catégorie, puis faites défiler la liste vers le haut ou le bas pour
afficher les publications de vos cercles d’amis.
Communication
64
Photos
Utilisez cette application pour visualiser et partager des images ou des vidéos via le service de réseau
social de Google.
Appuyez sur Photos depuis la liste des applications.
La disponibilité de cette application dépend de votre zone géographique ou de votre
opérateur.
Sélectionnez l’une des catégories suivantes :
• TOUT : afficher toutes les photos ou vidéos enregistrées ou téléchargées sur l’appareil.
• SÉLECTION : afficher toutes les photos ou vidéos regroupées par date ou par album. Appuyez
sur pour consulter toutes les images ou vidéos du groupe.
Sélectionnez ensuite une photo ou une vidéo.
En mode affichage d'une photo ou d'une vidéo, utilisez l'une des icônes suivantes :
• : modifier la photo ou la vidéo.
• : partager l’image ou la vidéo.
• : supprimer la photo ou la vidéo.
Twitter
Utilisez cette application pour accéder au site de réseau social Twitter et rester en contact avec
d’autres personnes.
Appuyez sur Twitter depuis la liste des applications.
La disponibilité de cette application dépend de votre zone géographique ou de votre
opérateur.
65
Web et réseau
Internet
Utilisez cette application pour naviguer sur Internet.
Appuyez sur Internet depuis la liste des applications.
Afficher des pages Web
Appuyez sur le champ d’adresse, saisissez l’adresse Web, puis appuyez sur Aller à.
Appuyez sur pour accéder à des options supplémentaires lorsque vous consultez une page Web.
Pour changer de moteur de recherche, appuyez sur le champ d’adresse, puis appuyez sur l’icône du
moteur de recherche près de l’adresse Web.
Ouvrir un nouvel onglet
Appuyez sur .
Pour passer d'un onglet à l'autre, faites défiler le champ de titre vers la gauche ou la droite, puis
appuyez sur le titre voulu pour sélectionner la page correspondante.
Effectuer une recherche oralement
Appuyez sur le champ d’adresse, puis sur → , prononcez un mot-clé, puis sélectionnez l’une des
suggestions qui apparaissent à l’écran.
Favoris
Pour enregistrer la page Web actuelle dans les favoris, appuyez sur .
Pour ouvrir une page Web enregistrée dans vos favoris, appuyez sur , puis sélectionnez la page
souhaitée.
Historique
Pour ouvrir une page Web figurant dans la liste des pages récemment consultées, appuyez sur →
Historique. Pour effacer l’historique, appuyez sur .
Web et réseau
66
Pages enregistrées
Pour afficher des pages Web enregistrées, appuyez sur → Pages enreg.
Liens
Maintenez le doigt appuyé sur un lien d’une page Web pour l’ouvrir dans un nouvel onglet,
l’enregistrer ou le copier.
Pour afficher les liens enregistrés, appuyez sur Téléchargements (p. 114).
Partager des pages Web
Pour partager l’adresse d’une page Web avec d’autres personnes, appuyez sur → Partager via.
Pour partager une partie d’une page Web, maintenez le doigt appuyé sur le texte de votre choix, puis
appuyez sur Partager via.
Chrome
Utilisez cette application pour rechercher des informations et parcourir des pages Web.
Appuyez sur Chrome depuis la liste des applications.
La disponibilité de cette application dépend de votre zone géographique ou de votre
opérateur.
Afficher des pages Web
Appuyez sur le champ d’adresse, puis saisissez une adresse Web ou des critères de recherche.
Ouvrir un nouvel onglet
Appuyez sur → Nouvel onglet.
Pour passer d'un onglet à l'autre, faites défiler le champ de titre vers la gauche ou la droite, puis
appuyez sur le titre voulu pour sélectionner la page correspondante.
Favoris
Pour enregistrer la page Web actuelle dans les favoris, appuyez sur , saisissez les détails, tels que le
nom et l'adresse Web, puis appuyez sur Enregistrer.
Pour ouvrir une page Web enregistrée dans vos favoris, appuyez sur → Favoris, puis sélectionnez
la page voulue.
Web et réseau
67
Effectuer une recherche oralement
Appuyez sur , prononcez un mot-clé, puis sélectionnez l’une des suggestions qui apparaissent à
l’écran.
Synchroniser votre appareil avec d’autres appareils
Synchronisez les onglets et les favoris ouverts afin de les utiliser avec Chrome sur un autre appareil
lorsque vous êtes connecté au même compte Google.
Pour afficher les onglets ouverts sur d'autres appareils, appuyez sur → Onglets récents.
Sélectionnez la page Web à ouvrir.
Pour afficher les favoris, appuyez sur FAVORIS.
Bluetooth
La fonction Bluetooth crée une connexion sans fil directe entre deux appareils sur de courtes
distances. Pour échanger des données ou des fichiers multimédia avec d’autres appareils, utilisez la
fonction Bluetooth.
• Samsung ne peut être tenu responsable de la perte, de l’interception ou du mauvais
usage des données envoyées ou reçues via la fonction Bluetooth.
• Assurez-vous de toujours utiliser des appareils dignes de confiance et correctement
protégés avant de partager ou de recevoir des données. La présence d’obstacles entre les
deux appareils peut réduire le rayon d’action.
• Il est possible que votre appareil ne fonctionne pas avec certains appareils, en particulier
ceux qui n’ont pas été testés ou approuvés par Bluetooth SIG.
• N’utilisez pas la fonction Bluetooth de manière illégale (par exemple, pour le piratage de
fichiers ou l’enregistrement de communications à des fins commerciales).
Samsung ne peut être tenu responsable des répercussions d’une utilisation illégale de la
fonction Bluetooth.
Pour activer la fonction Bluetooth, depuis la liste des applications, appuyez sur Paramètres →
Connexions → Bluetooth, puis faites glisser le curseur Bluetooth vers la droite.
Web et réseau
68
Établir une connexion avec d’autres appareils Bluetooth
Depuis la liste des applications, appuyez sur Paramètres → Connexions → Bluetooth → Analyser
pour afficher la liste des appareils détectés. Sélectionnez l’appareil auquel vous souhaitez vous
connecter, puis acceptez la demande d’autorisation automatiquement générée sur les deux
appareils pour confirmer l’opération.
Envoyer et recevoir des données
De nombreuses applications prennent en charge le transfert de données via la fonction Bluetooth.
C’est le cas, par exemple, de l’application Galerie. Ouvrez la Galerie, sélectionnez une image,
appuyez sur → Bluetooth, puis sélectionnez un appareil Bluetooth. Ensuite, pour recevoir
l’image, confirmez la demande d’autorisation Bluetooth sur l’autre appareil. Lorsqu’un autre appareil
vous envoie des données, confirmez la demande d’autorisation Bluetooth de cet appareil. Les
fichiers reçus sont enregistrés dans le dossier Download. Si vous recevez un nouveau contact, il est
automatiquement ajouté à votre liste de contacts.
Screen Mirroring
Utilisez cette fonction pour connecter votre appareil à un grand écran avec le routeur AllShare Cast
ou HomeSync, puis partagez vos contenus. Vous pouvez également utiliser cette fonction avec
d’autres appareils prenant en charge la fonction Miracast Wi-Fi.
• La disponibilité de cette fonction dépend de votre zone géographique ou de votre
opérateur.
• Cette fonction peut ne pas fonctionner sur les appareils compatibles Miracast ne prenant
pas en charge le protocole HDCP (High-bandwidth Digital Content Protection).
• Selon la connexion réseau, certains fichiers peuvent être mis en mémoire tampon en
cours de lecture.
• Pour économiser votre batterie, désactivez cette fonction lorsque vous ne l’utilisez pas.
• Si vous indiquez une bande de fréquence Wi-Fi, il se peut que les routeurs AllShare Cast
ou HomeSync ne soient pas détectés.
• Si vous lisez des vidéos ou jouez à des jeux sur un téléviseur, sélectionnez un mode TV
approprié afin d’obtenir un résultat optimal.
Depuis la liste des applications, appuyez sur Paramètres → Connexions → Screen Mirroring, puis
faites glisser le curseur Screen Mirroring vers la droite. Sélectionnez un appareil, ouvrez un fichier,
puis contrôlez l’affichage à l’aide des touches de votre appareil. Pour établir une connexion avec un
appareil à l’aide d’un code PIN, maintenez votre doigt appuyé sur le nom, puis saisissez votre code
PIN.
Web et réseau
69
Samsung Link
Utilisez cette application pour lire le contenu enregistré sur des appareils distants ou des services de
stockage Web sur Internet. Vous pouvez lire et envoyer des fichiers multimédia de votre appareil vers
un autre appareil ou un service de stockage Web.
Pour utiliser cette application, vous devez vous connecter à votre compte Samsung et enregistrer au
moins deux appareils. La méthode d’enregistrement peut varier en fonction du type d’appareil.
Appuyez sur Samsung Link depuis la liste des applications.
Pour démarrer Samsung Link, vous devez télécharger et installer l'application. Appuyez sur Installer
et suivez les instructions à l’écran.
• La disponibilité de cette application dépend de votre zone géographique ou de votre
opérateur.
• Le téléchargement de cette application via le réseau mobile peut entraîner des frais
supplémentaires. Pour éviter ces frais supplémentaires, contactez votre opérateur.
Group Play
Utilisez cette application pour profiter des bons moments avec vos amis en partageant et en lisant
un même contenu. Créez ou rejoignez une session Group Play, puis partagez vos images ou fichiers
audio par exemple.
Appuyez sur Group Play depuis la liste des applications.
Pour démarrer Group Play, vous devez télécharger et installer l'application. Appuyez sur Installer et
suivez les instructions à l’écran.
• La disponibilité de cette application dépend de votre zone géographique ou de votre
opérateur.
• Lorsque vous utilisez cette application, vous ne pouvez pas accéder à Internet.
• Le téléchargement de cette application via le réseau mobile peut entraîner des frais
supplémentaires. Pour éviter ces frais supplémentaires, contactez votre opérateur.
Web et réseau
70
Télécommande intelligente
Utilisez cette application pour que l'appareil serve de télécommande pour des téléviseurs et des
systèmes multimédia.
Appuyez sur Télécommande intelligente depuis la liste des applications.
Vous devez d'abord connecter l'appareil à un réseau Wi-Fi et vous assurer que le port infrarouge de
l'appareil fait face au téléviseur.
Configurer l'appareil pour servir de télécommande à un téléviseur
Appuyez sur Choisissez votre pays/région, sélectionnez un pays ou une région, puis suivez les
instructions à l'écran pour terminer la configuration.
Pour ouvrir le volet de commande à distance, appuyez sur l'icône en bas à droite de l'écran.
Pour ajouter une autre pièce, appuyez sur → Ajouter une nouvelle pièce.
Personnaliser les paramètres de commande à distance
Appuyez sur et utilisez les options suivantes :
• Pièces et appareils : changer les paramètres de connexion.
• Modifier les chaînes : modifier les chaînes affichées sur l'écran de l'appareil.
• Profil : entrer le profil utilisateur de sorte que la télécommande intelligente puisse vous aider à
trouver vos sélections préférées.
• Émissions préférées : afficher vos programmes favoris.
• Émissions supprimées : restaurer les programmes qui ont été masqués.
• Genres : masquer ou modifier l'ordre des genres.
• Sports : masquer ou modifier l'ordre des sports.
• Envoyer un commentaire : faire part de son opinion sur le développement de l'application.
• Notifications : paramétrer l'appareil pour vous rappeler les divers programmes télévisés à venir.
• Réinitialiser Peel : réinitialiser les paramètres de connexion.
71
Multimédia
Musique
Utilisez cette application pour écouter de la musique.
Appuyez sur Musique depuis la liste des applications.
Écouter de la musique
Sélectionnez une catégorie de musique, puis un morceau à écouter.
Appuyez sur l’image de l’album en bas de l’écran pour afficher le lecteur MP3 en plein écran.
Passer au morceau suivant.
Maintenir la touche appuyée
pour effectuer une avance
rapide.
Mettre en pause et reprendre
la lecture.
Régler le volume.
Modifier le mode de
répétition.
Redémarrer le morceau en
cours de lecture ou revenir
au morceau précédent.
Maintenir la touche appuyée
pour effectuer un retour
rapide.
Activer la lecture aléatoire.
Définir le fichier comme
votre morceau favori.
Rechercher d’autres
appareils pour lire le fichier.
Masquer l’écran du lecteur. Ouvrir la liste de lecture.
Multimédia
72
Pour écouter de la musique à volume égal, appuyez sur → Paramètres → Paramètres avancés
→ Volume intelligent.
Lorsque la fonction Volume intelligent est activée, le volume effectif peut être plus élevé
que celui réglé sur l’appareil. Soyez prudent et évitez toute exposition prolongée à des
niveaux sonores élevés, car cela pourrait provoquer des séquelles auditives.
Il est possible que la fonction Volume intelligent ne soit pas activée pour certains fichiers.
Pour personnaliser vos réglages audio lorsque vous écoutez de la musique avec un casque ou des
écouteurs, appuyez sur → Paramètres → Paramètres avancés → Adapt Sound → Activé.
Lorsque vous réglez le volume au niveau 14 ou supérieur, l’option d’adaptation du son (Adapt
Sound) n’est pas appliquée. Si vous baissez le volume au niveau 13 ou inférieur, l’option est de
nouveau appliquée.
Définir un morceau comme sonnerie ou sonnerie d’alarme
Pour utiliser la musique que vous écoutez comme sonnerie ou alarme, appuyez sur → Définir
comme et sélectionnez une option.
Créer des listes de lecture
Créez votre propre sélection de morceaux de musique.
Appuyez sur , puis entrez un titre et appuyez sur OK. Sélectionnez les chansons à ajouter, puis
appuyez sur OK.
Pour ajouter le morceau de musique en cours de lecture à une liste de lecture, appuyez sur →
Ajouter à liste de lecture.
Écouter de la musique par catégorie
Écoutez de la musique classée par atmosphère musicale. L’appareil crée automatiquement la liste de
lecture. Lorsque vous ajoutez un morceau de musique, appuyez sur Coin musique → .
Appuyez sur Coin musique et sélectionnez une atmosphère. Vous pouvez également sélectionner
plusieurs cellules en faisant glisser votre doigt sur l’écran.
Multimédia
73
Appareil photo
Utilisez cette application pour prendre des photos ou enregistrer des vidéos.
Pour visionner les photos et les vidéos prises avec l’appareil, utilisez l’application Galerie (p. 80).
Appuyez sur Appareil photo depuis la liste des applications.
• Lorsque vous n’utilisez plus l’appareil photo, il se ferme automatiquement.
• Assurez-vous que l’objectif est bien propre. Dans le cas contraire, l’appareil risque de ne
pas fonctionner correctement dans certains modes nécessitant des résolutions élevées.
Bon usage de l’appareil photo
• Ne prenez pas de photos et n’enregistrez pas de vidéos d’autres personnes sans leur
consentement.
• Ne prenez pas de photos et n’enregistrez pas de vidéos lorsque la loi l’interdit.
• Ne prenez pas de photos et n’enregistrez pas de vidéos en violation de la vie privée d’autrui.
Prendre des photos
Prendre une photo
Appuyez sur l’écran d’aperçu à l’endroit où l’appareil photo doit faire la mise au point. Une fois la
mise au point terminée, le cadre de mise au point devient vert. Pour prendre la photo, appuyez sur
.
Afficher le mode en cours.
Modifier le mode de prise de
vue.
Sélectionner un des divers
effets disponibles.
Passer en mode Dual
Camera.
Basculer entre l’objectif avant
et arrière.
Afficher davantage d’options.
Ouvrir la Galerie pour afficher
des photos et des vidéos.
Enregistrer une vidéo.
Multimédia
74
Mode de capture
Il existe plusieurs modes de prise de vue.
Appuyez sur MODE, puis faites défiler les modes à droite de l’écran vers le haut ou le bas.
• Auto : ce mode permet à l'appareil photo d'évaluer l'environnement et de déterminer le mode
idéal pour la photo.
• Beauté : ce mode permet de prendre des photos de visages plus claires pour obtenir des images
plus douces.
• Meilleures poses : ce mode permet de prendre une série de photos et de conserver la meilleure.
• Meilleure photo : ce mode permet de prendre plusieurs photos de groupe en même temps et
de les associer pour créer la meilleure photo possible.
Appuyez sur pour prendre plusieurs photos. Pour obtenir le meilleur cliché possible, évitez
de bouger l’appareil photo en cours de prise. Lorsque la Galerie s’ouvre, appuyez sur le cadre
jaune représenté sur chaque visage et sélectionnez la meilleure photo de chacun des sujets.
Lorsque vous avez sélectionné la meilleure photo pour chacun des sujets du groupe, appuyez
sur Enreg. pour fusionner les images en une seule photo et la sauvegarder.
• Son & prise : ce mode permet d'associer un son à une photo.
Pour prendre une photo, appuyez sur . L’appareil enregistre quelques secondes de contenu
audio après la prise de vue.
Lorsque vous prenez des photos dans ce mode, le son est enregistré par le microphone
interne.
• Chronophoto : ce mode permet de prendre une série de photos et de les combiner en une
image reflétant les mouvements.
Pour obtenir la meilleure photo possible, suivez ces conseils : dans certaines conditions, il est
possible que l’appareil ne puisse pas correctement procéder aux prises de vue.
– Maintenez fermement l’appareil photo et évitez de bouger lors de la prise de vue.
– Photographiez un sujet qui se déplace dans une seule direction.
– Les arrière-plans de vos prises de vue ne doivent pas comporter d’objets en mouvement.
– Évitez de prendre en photo un sujet et un arrière-plan aux couleurs similaires.
– Évitez de prendre des photos de sujets trop proches ou trop éloignés qui ne cadreraient pas
dans l’objectif, ou qui seraient trop longs comme un bus ou un train.
Multimédia
75
• Ton riche (HDR) : ce mode permet de prendre une photo avec un meilleur rapport de contraste.
• Gomme : ce mode permet d'effacer les mouvements des objets animés en arrière-plan.
Pour prendre une série de photos, appuyez sur . L'appareil efface toute trace de
mouvements d'un objet animé. Pour rétablir la photo d’origine, appuyez sur , puis appuyez
sur la zone en surbrillance.
Pour obtenir la meilleure photo possible, suivez ces conseils :
– Maintenez fermement l’appareil photo et évitez de bouger lors de la prise de vue.
– Lors de la prise de photos d'un objet et d'un fond de même couleur, l'appareil risque de ne
pas reconnaître tous les mouvements.
– Évitez de prendre des photos de sujets dont les mouvements sont imperceptibles ou
exagérés, car l’appareil photo pourrait ne pas reconnaître tous les mouvements.
– Évitez de prendre des photos de sujets se déplaçant en arrière-plan, car l’appareil photo
pourrait ne pas reconnaître tous les mouvements.
• Panorama : ce mode permet de prendre une photo composée de différents clichés assemblés
les uns aux autres.
Pour obtenir la meilleure photo possible, suivez ces conseils :
– Déplacez l’appareil photo lentement dans le sens de votre choix.
– Alignez l’objectif de l’appareil photo avec le cadre de prise de vue.
– Évitez de prendre des photos de sujets devant des arrière-plans non identifiables, comme un
ciel ou un pan de mur uni.
• Sports : ce mode permet de prendre des photos de sujets en déplacement.
• Nuit : ce mode permet de prendre des photos dans des conditions de faible éclairage.
Photos panoramiques
Une photo panoramique est une large image en mode paysage constituée de plusieurs clichés.
Appuyez sur MODE → Panorama.
Appuyez sur et déplacez l’appareil photo dans le sens de votre choix. Lorsque le cadre bleu est
aligné avec l'objectif, l’appareil photo prend automatiquement un autre cliché pour constituer la
séquence panoramique. Pour mettre fin à la prise de vue, appuyez sur .
Si l’objectif n’est plus aligné, la prise de vue s’interrompt.
Multimédia
76
Appliquer des effets de filtre
Utilisez les effets de filtre pour prendre des photos ou enregistrer des vidéos uniques.
Appuyez sur , puis sélectionnez un effet de filtre. Les options disponibles varient selon le mode
sélectionné.
Enregistrer des vidéos
Enregistrer une vidéo
Pour enregistrer une vidéo, appuyez sur . Pour interrompre l’enregistrement, appuyez sur . Pour
arrêter l’enregistrement, appuyez sur .
Lorsque vous enregistrez une vidéo, utilisez les fonctions suivantes :
• Pour modifier la mise au point, appuyez à l’endroit souhaité. Pour faire la mise au point au centre
de l’écran, appuyez sur .
• Pour capturer une image de la vidéo en cours d’enregistrement, appuyez sur .
Mode d’enregistrement
Pour modifier le mode d’enregistrement, appuyez sur → .
• Normal : ce mode permet d'obtenir une qualité standard.
• Limite MMS : ce mode permet de réduire la qualité et d'envoyer la vidéo par le biais de
messages.
• Mouvement rapide : ce mode permet de filmer un sujet en mouvement. Dans ce cas, l’appareil
lit rapidement la vidéo.
Multimédia
77
Effectuer un zoom avant et arrière
Utilisez l’une des méthodes suivantes :
• Appuyez sur la touche de volume Haut ou Bas pour effectuer un zoom avant ou arrière.
• Pour effectuer un zoom avant, écartez deux doigts l’un de l’autre sur l’écran ; pour effectuer un
zoom arrière, rapprochez-les.
La fonction zoom avant/arrière est disponible en cours d’enregistrement d’une vidéo.
Mode Dual Camera
Lorsque vous prenez la photo d’un paysage avec l’objectif arrière, la photo ou la vidéo capturée avec
l’objectif avant apparaît dans un encart, et inversement. Utilisez cette fonction pour photographier
simultanément un magnifique paysage et votre autoportrait par exemple.
Appuyez sur pour passer au mode Dual Camera. Appuyez sur pour prendre une photo ou
sur pour enregistrer une vidéo.
Sélectionner un des divers
effets disponibles.
Appuyez et maintenez pour
redimensionner ou déplacer.
• En mode Dual Camera, vous pouvez enregistrer des vidéos d’une durée maximale de
5 minutes en qualité Full HD et d’une durée maximale de 10 minutes en qualité HD.
• Lorsque vous enregistrez des vidéos dans ce mode, le son est enregistré par le
microphone interne.
Multimédia
78
Partager des photos
Appuyez sur → , puis sélectionnez l’une des fonctions suivantes :
• Partage : ce mode permet d'envoyer directement la photo à un autre appareil Wi-Fi Direct.
• Partage de photo d'ami : envoyer la photo à la personne dont le visage est utilisé comme
libellé.
• Partage photos ChatON : envoyer une photo à un autre appareil via ChatON.
• Viseur à distance : contrôler l'appareil photo à distance.
Commander l’appareil photo à distance
Paramétrez l’appareil comme viseur afin de commander l’appareil photo à distance.
Appuyez sur → → Viseur à distance, puis établissez une connexion Wi-Fi Direct entre
l’appareil et l’appareil photo. Pour prendre une photo à distance en vous servant de l’appareil
comme viseur, appuyez sur .
Configurer les paramètres de l’appareil photo et du caméscope
Pour configurer les paramètres de l’appareil photo, appuyez sur → . Les options suivantes sont
disponibles pour les deux modes (appareil photo et caméscope) ou l'un ou l'autre des modes. Les
options disponibles peuvent varier selon le mode utilisé.
• Taille des photos / Taille de la vidéo : sélectionner une résolution. Pour obtenir une meilleure
qualité, utilisez une résolution élevée. Cependant, notez qu’une résolution élevée nécessite
davantage de mémoire.
• Rafale : ce mode permet de prendre une série de photos de sujets en mouvement.
• Photo par appui : appuyer sur l'image à l'écran pour prendre une photo.
• Détection visages : ce mode permet à l'appareil de reconnaître les visages des personnes et
ainsi de vous aider à les prendre en photo.
• Modes de mesure : sélectionner un mode de mesure. Ce paramètre détermine la manière dont
les valeurs lumineuses sont calculées. Mesure pondérée centrale mesure la lumière d’arrièreplan
au centre de la scène. Spot mesure la valeur de la lumière à un endroit spécifique. Matrice
calcule la moyenne de la scène toute entière.
• ISO : sélectionner une valeur ISO. Ce paramètre permet de contrôler la sensibilité lumineuse
de l’appareil photo. Celle-ci est mesurée en équivalents de caméra-film. Les valeurs faibles sont
destinées aux objets immobiles vivement éclairés. Les valeurs plus élevées sont pour les objets
en mouvement ou faiblement éclairés.
Multimédia
79
• Stabil. vidéo : activer ou désactiver le stabilisateur. Le stabilisateur permet d’effectuer la mise au
point de l’appareil quand il bouge.
• Détection nuit auto : paramétrer l’appareil pour qu’il détecte automatiquement les conditions
de faible luminosité et règle la luminosité de la photo sans le flash.
• Enregistrer : paramétrer l’appareil pour qu’il supprime la photo d’origine lors des prises de vue
en mode Ton riche.
• Balise de localisation : joindre un balise de géolocalisation GPS à la photo. Activez cette
fonction lorsque vous prenez des photos afin de créer des albums dans Album photo.
• Pour que les signaux GPS soient meilleurs, évitez de prendre des photos dans des lieux
où le signal peut être limité, par exemple entre des bâtiments ou dans des zones de faible
altitude, ou encore lorsque les conditions météorologiques sont mauvaises.
• Votre localisation est susceptible d’apparaître sur vos photos au moment où vous les
publiez sur le Web. Pour empêcher l’affichage de ces données, désactivez le paramètre de
balise de localisation.
• Éval. phot./vid. : afficher des photos ou des vidéos après les avoir prises.
• Touche de volume : utiliser la touche de volume pour contrôler l’obturateur ou le zoom.
• Retardateur : définir le délai à l'issue duquel l'appareil doit prendre une photo ou enregistrer
une vidéo.
• Balance des blancs : sélectionner une balance des blancs appropriée de sorte que les images
offrent une gamme de couleurs proches de la réalité. Les paramètres sont conçus pour des
situations lumineuses spécifiques. Ils sont similaires à la gamme thermique d’exposition et de
balance des blancs des appareils photo professionnels.
• Valeur d'exposition : modifier la valeur d'exposition. Ce paramètre détermine la quantité
de lumière reçue par le capteur de l’appareil photo. En cas de faible luminosité, utilisez une
exposition plus élevée.
• Guide : afficher des lignes directrices sur l'écran d'aperçu.
• Flash : activer ou désactiver le flash.
• Contrôle vocal : configurer l’appareil photo pour qu’il prenne des photos à l’aide de commandes
vocales.
• Nom de fichier contextuel : paramétrer l’appareil photo pour qu’il affiche des tags contextuels.
Activez cette fonction pour utiliser des tags contextuels dans les applications Galerie et Album
photo.
• Retourner l'image : inverser l’image pour créer une image miroir de la scène initiale.
• Stockage : sélectionner l’emplacement de stockage des photos et des vidéos.
• Réinitialiser : réinitialiser les paramètres de l'appareil.
Multimédia
80
Raccourcis
Réorganisez les raccourcis pour accéder facilement aux différentes options de l’appareil photo.
Appuyez sur → Modifier les paramètres rapides.
Maintenez le doigt appuyé sur une option et faites-la glisser vers un autre emplacement en haut
de l’écran. Vous pouvez déplacer les autres icônes de la liste en appuyant dessus, puis en les faisant
glisser.
Galerie
Utilisez cette application pour visualiser des photos ou des vidéos.
Appuyez sur Galerie depuis la liste des applications.
Afficher des images
Lorsque vous lancez l'application Galerie, tous les dossiers disponibles s'affichent. Lorsqu’une autre
application, telle que Email, enregistre une image, le dossier Download contenant l’image est
automatiquement créé. De même, si vous effectuez une capture d’écran, le dossier Screenshots est
automatiquement créé. Sélectionnez un dossier pour l’ouvrir.
Les images d’un dossier sont affichées par date de création. Appuyez sur une image pour l’afficher en
plein écran.
Faites défiler l’écran vers la gauche ou la droite pour afficher l’image précédente ou suivante.
Effectuer un zoom avant et arrière
Pour effectuer un zoom sur une image, utilisez l’une des méthodes suivantes :
• Pour effectuer un zoom avant, appuyez deux fois sur l’image à l’endroit de votre choix.
• Pour effectuer un zoom avant, écartez deux doigts l’un de l’autre sur l’écran à l’endroit de votre
choix ; pour effectuer un zoom arrière, rapprochez-les ; pour revenir à l’affichage initial, appuyez
deux fois sur l’écran.
Afficher des images à l’aide de la fonction de reconnaissance des mouvements
Pour exécuter une fonction avec un mouvement spécifique, utilisez la fonction de reconnaissance
des mouvements.
Depuis la liste des applications, appuyez sur Paramètres → Commandes → Mouvements, faites
glisser le curseur Mouvements vers la droite, puis faites glisser le curseur des fonctions à activer avec
les mouvements vers la droite.
Pour ne plus utiliser une de ces fonctions, faites glisser le curseur Mouvements vers la gauche.
Multimédia
81
Lire une vidéo
Les fichiers vidéo sont caractérisés par l’icône . Sélectionnez la vidéo que vous souhaitez regarder,
puis appuyez sur .
Découper les segments d’une vidéo
Sélectionnez une vidéo et appuyez sur . Déplacez le crochet d’ouverture au début de la section
souhaitée et le crochet de fermeture à la fin, puis enregistrez la vidéo.
Modifier des photos
En mode affichage d’une photo, appuyez sur et utilisez les fonctions suivantes :
• Favoris : ajouter l'élément à votre liste de favoris.
• Diaporama : lancer un diaporama de l’ensemble des images du dossier ouvert.
• Cadre photo : ajouter un cadre et une note à une image. L’image modifiée est enregistrée dans
le dossier Photo frame.
• Note photo : écrire une note au dos de l'image. Pour modifier la note, appuyez sur .
• Copier dans le presse-papier : copier l’image dans le presse-papiers.
• Imprimer : imprimer l'image en connectant l'appareil à une imprimante. Certaines imprimantes
peuvent ne pas être compatibles avec l’appareil.
• Renommer : renommer le fichier.
• Partage de photo d'ami : envoyer l’image à une personne dont le visage sert de libellé.
• Rotation à gauche : pivoter l’image dans le sens inverse des aiguilles d'une montre.
• Rotation à droite : pivoter l’image dans le sens des aiguilles d'une montre.
• Rogner : redimensionner le cadre orange pour couper l’image.
• Définir comme : définir l'image comme fond d'écran ou image de contact.
• Détails : afficher les détails d’une image.
• Paramètres : modifier les paramètres de la Galerie.
Multimédia
82
Retoucher des images
En mode affichage d’une photo, appuyez sur et utilisez les fonctions suivantes :
• Pivoter : pivoter l’image.
• Rogner : rogner l’image.
• Couleur : ajuster la saturation ou la luminosité de l’image.
• Effet : appliquer des effets à l’image.
• Autocollant : appliquer des autocollants à l’image.
• Dessin : dessiner sur l’image.
• Cadres : appliquer des cadres à l’image.
Mes photos favorites
En mode affichage d’une image, appuyez sur → Favoris pour ajouter l’image à votre liste de
favoris.
Supprimer des photos
Utilisez l’une des méthodes suivantes :
• Dans un dossier, appuyez sur → Sélectionner élément, sélectionnez des images, puis
appuyez sur .
• En mode affichage d’une photo, appuyez sur .
Partager des photos
Utilisez l’une des méthodes suivantes :
• Dans le dossier, appuyez sur → Sélectionner élément, sélectionnez des images, puis
appuyez sur pour les envoyer à des contacts ou les partager sur les réseaux sociaux.
• En mode affichage d’une photo, appuyez sur pour l’envoyer à des contacts ou la partager via
des services de réseaux sociaux.
Multimédia
83
Définir une image comme fond d’écran
En mode affichage d'une image, appuyez sur → Définir comme pour définir l’image comme
fond d’écran ou l’affecter à un contact.
Libellés de portraits
Appuyez sur → Paramètres → Tags, puis cochez la case Libellé de portrait. Un cadre jaune
apparaît autour du visage identifié. Appuyez sur le visage, puis sur Ajouter un nom, et sélectionnez
ou ajoutez un contact.
Lorsque le libellé de portrait apparaît sur une image, appuyez sur le nom et utilisez les fonctions
disponibles, comme la messagerie.
Selon l’angle du visage, la taille, l’expression, les conditions lumineuses ou les accessoires
portés par la personne, il est possible que la reconnaissance faciale ne fonctionne pas.
Utiliser les tags contextuels
Appuyez sur → Paramètres → Tags → Tag contextuel, puis faites glisser le curseur Tag
contextuel vers la droite pour afficher un tag contextuel (météo, localisation, date et nom de la
personne) lorsque vous ouvrez une image.
Organiser les applications dans des dossiers
Créez un dossier pour organiser les images ou les vidéos stockées dans l'appareil. Vous pouvez copier
ou déplacer des fichiers d'un dossier vers un autre.
Pour créer un nouveau dossier, appuyez sur . Saisissez le nom du dossier, appuyez sur OK, puis
sélectionnez les images ou vidéos à intégrer au nouveau dossier. Maintenez votre doigt appuyé
sur l'image ou la vidéo sélectionnée, faites-la glisser vers le nouveau dossier, puis appuyez sur OK.
Appuyez sur Copier pour copier l'élément ou sur Déplacer pour le déplacer.
Multimédia
84
Story Album
Utilisez cette application pour créer votre propre album numérique et conserver les scènes de votre
vie en disposant vos photos comme bon vous semble.
Appuyez sur Story Album depuis la liste des applications.
Pour lancer Story Album, vous devez télécharger et installer l'application. Appuyez sur Installer et
suivez les instructions à l’écran.
Le téléchargement de cette application via le réseau mobile peut entraîner des frais
supplémentaires. Pour éviter ces frais supplémentaires, contactez votre opérateur.
Vidéo
Utilisez cette application pour lire des fichiers vidéo.
Appuyez sur Vidéo depuis la liste des applications.
Lire une vidéo
Sélectionnez une vidéo à lire.
Modifier le format d’écran.
Effectuer un retour ou une
avance rapide en faisant
glisser la barre.
Redémarrer la vidéo en
cours de lecture ou revenir à
la vidéo précédente.
Maintenir la touche appuyée
pour effectuer un retour
rapide.
Passer à la vidéo suivante.
Maintenir la touche
appuyée pour effectuer
une avance rapide.
Régler le volume.
Basculer en mode écran
flottant.
Rechercher d’autres
appareils pour lire le fichier.
Mettre en pause et
reprendre la lecture.
Déplacer le volet de
commande vers la gauche.
Déplacer le volet de
commande vers la droite.
Ouvrir la liste de lecture.
Multimédia
85
Supprimer une vidéo
Appuyez sur → Supprimer, sélectionnez des vidéos, puis appuyez sur Supprimer.
Partager des vidéos
Appuyez sur → Partager via, sélectionnez les vidéos, appuyez sur OK, puis sélectionnez une
méthode de partage.
Utiliser le lecteur contextuel
Utilisez cette fonction pour utiliser d’autres applications sans fermer le lecteur vidéo. Lorsque vous
visionnez des vidéos, appuyez sur pour utiliser le lecteur contextuel.
Pour agrandir le lecteur, écartez deux doigts sur l’écran ; pour le réduire, rapprochez-les. Pour
déplacer le lecteur, maintenez-y le doigt appuyé, puis faites-le glisser vers un autre emplacement.
Acheter des vidéos
Appuyez sur BOUTIQUE DE VIDÉOS, puis sélectionnez une vidéo.
Editeur vidéo
Utilisez cette application pour modifier des vidéos et appliquer différents effets.
Appuyez sur Editeur vidéo depuis la liste des applications.
Pour démarrer l'application Editeur vidéo, vous devez télécharger et installer l'application. Appuyez
sur Installer et suivez les instructions à l’écran.
• Certains fichiers vidéo de l'application Galerie peuvent ne pas être visibles en fonction de
la résolution et du codec vidéo.
• Le téléchargement de cette application via le réseau mobile peut entraîner des frais
supplémentaires. Pour éviter ces frais supplémentaires, contactez votre opérateur.
Multimédia
86
YouTube
Utilisez cette application pour regarder des vidéos à partir du site Web YouTube.
Appuyez sur YouTube depuis la liste des applications.
La disponibilité de cette application dépend de votre zone géographique ou de votre
opérateur.
Visionner une vidéo
Appuyez sur , puis saisissez un mot-clé. Sélectionnez l’un des résultats de recherche obtenus pour
visionner la vidéo correspondante.
Pour afficher la vidéo en plein écran, appuyez sur .
Partager des vidéos
Sélectionnez la vidéo à partager, appuyez sur , puis sélectionnez un mode de partage.
Mettre une vidéo en ligne
Appuyez sur Vidéos ajoutées → , sélectionnez une vidéo, entrez les informations concernant
cette vidéo, puis appuyez sur ENVOYER.
My Magazine
Utilisez cette application pour créer votre propre magazine.
Effleurez l'écran d'accueil de bas en haut avec votre doigt.
Lorsque vous lancez l'application My Magazine pour la première fois, appuyez sur Suivant
pour indiquer que vous avec lu les termes et conditions et que vous vous y conformez, puis
appuyez sur Démarrer.
Pour composer les rubriques de votre magazine, appuyez sur , puis cochez les catégories
souhaitées. Appuyez sur , sélectionnez de nouvelles rubriques, puis appuyez sur .
Effleurez l'écran vers la gauche ou la droite pour changer de catégorie, vers le haut ou le bas pour
tourner les pages du magazine, puis sélectionnez un article à lire.
Multimédia
87
En mode affichage d'une page, appuyez sur pour utiliser les options suivantes :
• : lancer S Note.
• : lancer S Planner.
• : envoyer un e-mail.
• : lancer une recherche Google.
• : ouvrir le navigateur Web.
• : ouvrir l'écran Applications.
Flipboard
Utilisez cette application pour accéder à vos magazines personnalisés.
Appuyez sur Flipboard depuis la liste des applications.
La disponibilité de cette application dépend de votre zone géographique ou de votre
opérateur.
Lorsque vous lancez cette application pour la première fois ou lorsque vous la redémarrez après
avoir procédé à la réinitialisation des données, suivez les instructions à l'écran pour terminer la
configuration.
Sélectionnez un article à la une ou un thème, parcourez les pages Flipboard, puis sélectionnez un
article à lire.
Businessweek+
Utilisez cette application pour obtenir les dernières informations sur la finance, les activités
économiques, les données du marché et bien plus encore.
Appuyez sur Businessweek+ depuis la liste des applications.
La disponibilité de cette application dépend de votre zone géographique ou de votre
opérateur.
Multimédia
88
NYTimes
Utilisez cette application pour parcourir des articles et plus encore.
Appuyez sur NYTimes depuis la liste des applications.
La disponibilité de cette application dépend de votre zone géographique ou de votre
opérateur.
Pour rechercher des articles, appuyez sur , puis saisissez un mot-clé dans le champ de recherche.
SketchBook for Galaxy
Utilisez cette application pour créer un concept rapide ou esquisser une idée nouvelle pour un
projet.
Dans la liste des applications, appuyez sur SketchBook for Galaxy.
Utilisez les outils artistiques pour dessiner et peindre votre création numérique. L'image est
enregistrée dans Galerie.
Pour lancer SketchBook for Galaxy, vous devez télécharger et installer l'application. Appuyez sur
Installation et suivez les instructions à l’écran.
• La disponibilité de cette application dépend de votre zone géographique ou de votre
opérateur.
• Le téléchargement de cette application via le réseau mobile peut entraîner des frais
supplémentaires. Pour éviter ces frais supplémentaires, contactez votre opérateur.
89
Boutiques d’applications et
multimédia
Play Store
Utilisez cette application pour télécharger des applications et des jeux, gratuits ou payants, pouvant
s’exécuter sur votre appareil.
Appuyez sur Play Store depuis la liste des applications.
La disponibilité de cette application dépend de votre zone géographique ou de votre
opérateur.
Installer des applications
Parcourez les applications par catégorie ou appuyez sur pour effectuer une recherche à l’aide
d’un mot-clé.
Sélectionnez une application pour en afficher les informations. Pour la télécharger, appuyez sur
INSTALLER. Si l’application est payante, appuyez sur le prix et suivez les instructions qui s’affichent à
l’écran pour effectuer l’achat.
Lorsqu’une nouvelle version d’une application installée est disponible, une icône de mise à
jour apparaît dans le volet des raccourcis en haut de l’écran. Ouvrez le volet des raccourcis et
appuyez sur l’icône pour mettre à jour l’application.
Désinstaller des applications
Désinstallez les applications téléchargées sur Play Store.
Appuyez sur → Mes applications, sélectionnez une application à supprimer depuis la liste des
applications installées, puis appuyez sur DÉSINSTALLER.
Boutiques d’applications et multimédia
90
Samsung Apps (GALAXY Apps)
Utilisez cette application pour télécharger des applications Samsung, gratuites ou payantes. Pour
plus d’informations, visitez le site apps.samsung.com.
Appuyez sur Samsung Apps (GALAXY Apps) depuis la liste des applications.
La disponibilité de cette application dépend de votre zone géographique ou de votre
opérateur.
Installer des applications
Parcourez les applications par catégorie ou appuyez sur pour rechercher une application à l’aide
d’un mot-clé.
Sélectionnez une application pour en afficher les informations. Pour télécharger des applications
gratuites, appuyez sur Gratuit. Pour acheter et télécharger des applications payantes, appuyez sur la
touche qui indique le prix de l’application.
Pour modifier les paramètres de mise à jour automatique, appuyez sur → Paramètres →
Mettre à jour les applications automatiquement, puis sélectionnez une option.
Play Livres
Utilisez cette application pour télécharger des fichiers de livre.
Appuyez sur Play Livres depuis la liste des applications.
La disponibilité de cette application dépend de votre zone géographique ou de votre
opérateur.
Boutiques d’applications et multimédia
91
Play Films et TV
Utilisez cette application pour regarder, télécharger et louer des films ou des émissions TV.
Appuyez sur Play Films et TV depuis la liste des applications.
La disponibilité de cette application dépend de votre zone géographique ou de votre
opérateur.
Play Musique
Utilisez cette application pour écouter de la musique sur votre appareil ou de la musique diffusée sur
le service Cloud de Google.
Appuyez sur Play Musique depuis la liste des applications.
La disponibilité de cette application dépend de votre zone géographique ou de votre
opérateur.
Play Jeux
Utilisez cette application pour télécharger des jeux et y jouer.
Appuyez sur Play Jeux depuis la liste des applications.
La disponibilité de cette application dépend de votre zone géographique ou de votre
opérateur.
Play Kiosque
Utilisez cette application pour lire les dernières informations.
Appuyez sur Play Kiosque depuis la liste des applications.
La disponibilité de cette application dépend de votre zone géographique ou de votre
opérateur.
92
Utilitaires
S Note
Utilisez cette application pour créer une note à l’aide de fichiers multimédia ou de mémos vocaux.
Appuyez sur S Note depuis la liste des applications.
Lancer S Note
Lorsque vous lancez l'application S Note pour la première fois, appuyez sur Début pour définir les
images de couverture par défaut et un modèle. Suivez les instructions qui s’affichent à l’écran pour
procéder à la configuration.
Créer des notes
Créez des notes avec du contenu enrichi en ajoutant des fichiers multimédia ou des mémos vocaux.
Appuyez sur pour écrire ou dessiner à l’écran ou sur pour saisir du texte à l’aide du clavier.
Annuler ou répéter la
dernière action.
Sélectionner la note.
Supprimer la note.
Ouvrir une note.
Insérer un fichier multimédia.
Basculer en mode de saisie
manuscrite agrandie.
Ajouter une page à la note
actuelle.
Enregistrez la note.
Modifier le mode d'entrée
pour dessiner à la fois avec le
S Pen et un doigt, ou pour
dessiner uniquement avec le
S Pen.
Modifier les options de page.
Utilitaires
93
Pour supprimer un cadre, maintenez-y le doigt appuyé, puis appuyez sur Supprimer.
Lorsque vous composez une note, appuyez sur pour modifier le type de stylet, l’épaisseur du trait
ou la couleur de l’encre.
Modifier l’épaisseur de la ligne.
Modifier la couleur du crayon.
Enregistrer les paramètres en cours
comme profil de crayon.
Changer de type de crayon.
Ajouter une nouvelle couleur à
l'aide de la palette de couleurs.
Pour effectuer un zoom avant ou arrière, écartez vos deux doigts l’un de l’autre sur l’écran ou
rapprochez-les.
Pour ajouter une page, appuyez sur → Ajouter une page.
Pour supprimer une page, appuyez sur → Supprimer la page.
Pour ajouter un libellé à la page, appuyez sur → Modifier les tags.
Pour ajouter un index à la page, appuyez sur → Modifier l'index.
Pour modifier le modèle de page, appuyez sur → Ajouter un modèle.
Pour modifier l'arrière-plan de la page, appuyez sur → Modifier arrière-plan.
Pour afficher une grille sur la page, appuyez sur → Guide.
Utiliser la gomme
Une ligne tracée n’est pas reconnue en tant que série de points, mais en tant que traits brefs.
Vous pouvez donc sélectionner une ligne entière et la supprimer, la déplacer ou la transformer.
Cependant, il se peut que vous effaciez même une portion de ligne non voulue, ou que vous ne
soyez pas en mesure d'effacer, même avec la gomme, des lignes à forte intensité ou se chevauchant.
Pour limiter les cas d’effacement de portions non voulues, réglez la taille de la gomme en appuyant
sur → .
Pour effacer la note, appuyez sur Eff. tout.
Même avec une gomme plus petite, il se peut que vous ne soyez pas capable d'effacer avec
précision la zone voulue.
Utilitaires
94
Modifier des notes manuscrites.
Sélectionnez une note manuscrite à couper, déplacer, redimensionner ou transformer. Lorsque vous
composez une note, appuyez sur . Appuyez ensuite sur la note ou dessinez un trait autour pour la
sélectionner et la modifier.
Pour déplacer la note vers un autre endroit, sélectionnez-la, puis faites-la glisser à un autre
emplacement.
Pour redimensionner la note, sélectionnez-la, puis ajustez le cadre.
Lorsque vous sélectionnez une note manuscrite, utilisez les options suivantes :
• Propriétés : modifiez les propriétés de la note telles que la présentation, la taille, la couleur ou
l'épaisseur.
• Transformer en : passez d'une forme dessinée ou d'une note manuscrite à une forme ou une
note organisée.
• Couper : coupez la note. Pour la coller à un autre emplacement, sélectionnez l'emplacement en
y maintenant votre doigt appuyé, puis appuyez sur Coller.
• Copier : copiez la note. Pour la coller à un autre emplacement, sélectionnez l'emplacement en y
maintenant votre doigt appuyé, puis appuyez sur Coller.
• Supprimer : supprimer la note.
Utilitaires
95
Insérer des fichiers multimédia
Appuyez sur pour insérer des images, des vidéos, des mémos vocaux et bien plus encore.
Insérer une Esquisse d'idée
Appuyez sur → Esquisse d'idée, puis écrivez un mot-clé ou sélectionnez une catégorie pour
chercher des images.
Pour ajouter vos propres croquis à la liste, appuyez sur et dessinez une image dans la fenêtre.
Insérer une image ou une vidéo avec un cadre
Appuyez sur → Image ou Vidéo → Prendre une photo avec le cadre dessiné ou Enregistrer la
vidéo dans la zone de dessin.
Dessinez un cadre sur la note, puis appuyez à l’intérieur du cadre avec le S Pen ou votre doigt pour
prendre une photo ou enregistrer une vidéo.
Insérer des informations de localisation
Appuyez sur → Cartes, parcourez les cartes ou appuyez sur pour rechercher un lieu, puis
appuyez sur .
• Pour afficher le lieu en plein écran, maintenez votre doigt appuyé sur la carte, puis appuyez sur
Ouvrir carte.
• Pour partager des informations de localisation, appuyez sur → Partager via et sélectionnez
le mode de partage.
Utilitaires
96
Créer et gérer des graphiques
Créer un tableau
Appuyez sur → Easy Chart → Tableau, définissez le nombre de lignes et de colonnes du tableau,
et appuyez sur OK.
• Pour saisir des données dans le tableau, appuyez sur une cellule.
• Pour ajouter ou supprimer des données, appuyez sur → Ajouter une colonne ou
Supprimer la colonne.
• Pour ajouter ou supprimer des lignes, appuyez sur → Ajouter une ligne ou Supprimer la
ligne.
Créer un graphique
Pour créer un graphique, appuyez sur → Easy Chart et sélectionnez un type de graphique.
Ensuite, tracez des barres, des lignes ou des séparateurs sur le graphique.
Pour créer un graphique à partir des données contenues dans le tableau, maintenez le doigt appuyé
sur le tableau, appuyez sur Modifier le graphique → , puis sélectionnez un graphique.
Utilitaires
97
Modifier un graphique
Maintenez le doigt appuyé sur un graphique ou un tableau, appuyez sur Modifier le graphique, puis
utilisez les options suivantes :
• Appuyez sur en haut à gauche de l'écran pour modifier le type de graphique.
• Appuyez sur un élément, puis sur , puis modifiez les valeurs.
Les options disponibles peuvent varier en fonction du type de graphique.
Afficher des pages de note
En mode affichage d'une page, appuyez sur pour utiliser les options suivantes :
• Supprimer : supprimer la page.
• Partager via : envoyer la page à d'autres personnes.
• Exporter : exporter la page sous forme de fichier image ou PDF.
• Modifier pages : modifier la présentation des pages ou importer des pages à partir d'autres
notes.
• Modifier les tags : ajouter un libellé à la page.
• Index : ajouter un index à la page.
• Aj. raccourci écran acc. : ajouter un raccourci vers la page sur l'écran d'accueil.
• Imprimer : imprimer la page en connectant l'appareil à l'imprimante. Certaines imprimantes
peuvent ne pas être compatibles avec l’appareil.
• Enregistrer sous : enregistrer la page sous un autre nom.
• Définir comme : définir la page comme fond d'écran ou image de contact.
Utilitaires
98
Afficher un aperçu des pages
Faites glisser votre doigt vers le bas de l'écran sur la note pour obtenir un aperçu des pages que
contient de la note.
Appuyez sur sur la couverture de la note pour accéder aux options suivantes :
• Supprimer : supprimer la note.
• Partager via : partager la note avec d’autres personnes.
• Exporter : exporter la note sous forme de fichier image ou PDF.
• Renommer : renommer la note.
• Modifier couverture : modifier la couverture de la note.
• Ajouter aux favoris : ajouter la note à la liste des favoris.
• Verrouiller : verrouiller la note de sorte que personne ne puisse la consulter.
• Aj. raccourci écran acc. : ajouter un raccourci vers la note sur l'écran d'accueil.
Modifier des notes
Appuyez sur une note pour l'ouvrir. La note s'affiche en mode d'affichage. Pour modifier une note,
appuyez sur .
Rechercher des notes
Utilisez cette fonction pour chercher une note en saisissant des critères de recherche, comme des
noms, des tags, du texte ou des mots manuscrits.
Appuyez sur , puis sur le champ de recherche tout en haut de l'écran et saisissez vos critères de
recherche.
Utilitaires
99
Action Memo
Utilisez cette application pour créer un mémo manuscrit et effectuer rapidement une des fonctions
utiles associées à Action Memo.
Appuyez sur Action Memo depuis la liste des applications.
Créer un mémo
Appuyez sur , écrivez un mémo, puis appuyez sur . Lorsque le menu des fonctions apparaît,
sélectionnez-en une pour l'utiliser avec le mémo que vous avez écrit.
• : passer un appel.
• : créer un contact.
• : envoyer un message.
• : envoyer un e-mail.
• : rechercher Internet.
• : rechercher un emplacement.
• : créer une tâche.
Si vous souhaitez utiliser des informations spécifiques depuis le mémo, appuyez dessus pour le
désélectionner et entourez l'information.
Permet de régler la taille du carnet
de mémos.
Permet d'enregistrer le mémo.
Permet de masquer les outils.
Permet de fermer le mémo.
Permet d'afficher la liste des
mémos.
Permet d'écrire un mémo.
Permet de tracer une ligne autour
d'une zone.
Permet d'effacer le mémo.
Modifiez la couleur de
l'arrière-plan.
Permet de réduire le mémo.
Permet d'enregistrer le mémo et
d'en créer un autre.
Utilitaires
100
Naviguer parmi les mémos
Parcourez les mémos miniatures en faisant défiler l’écran vers le haut ou le bas.
Pour modifier un mémo, appuyez dessus.
Pour créer un mémo, appuyez sur .
Pour rechercher un mémo, appuyez sur .
Pour supprimer des mémos, appuyez sur .
Pour envoyer les mémos à d'autres personnes, appuyez sur → Partager via.
Pour modifier le mode d’affichage, appuyez sur → Afficher.
Pour accéder à l'aide du mémo action, appuyez sur → Aide.
S Planner
Utilisez cette application pour gérer des événements et des tâches.
Appuyez sur S Planner depuis la liste des applications.
Créer un événement ou une tâche
Appuyez sur , puis utilisez l’une des méthodes suivantes :
• Événement : entrer un événement avec un paramètre de répétition en option.
• Tâche : entrer une tâche avec un paramètre de priorité en option.
Pour ajouter plus rapidement un événement ou une tâche, appuyez deux fois sur une date.
Utilitaires
101
Saisissez un titre et indiquez le calendrier que vous souhaitez utiliser pour la synchronisation.
Appuyez ensuite sur Modif. détails événement ou sur Modifier détails tâche pour ajouter d’autres
détails, comme la fréquence de répétition de l’événement ou de la tâche, son association ou non à
une alerte préalable ou le lieu concerné.
Joignez une carte indiquant le lieu de l’événement. Saisissez l’adresse dans le champ Emplacement,
appuyez sur près du champ, puis signalez l’endroit précis en maintenant le doigt appuyé sur la
carte qui apparaît.
Synchroniser avec Google Agenda
Sur l’écran des applications, appuyez sur Paramètres → Général → Comptes → Google sous Mes
comptes, sélectionnez le compte Google, puis cochez la case Synchroniser Calendrier.
Pour réaliser la synchronisation manuellement et mettre le calendrier à jour, appuyez sur S Planner
→ → Synchroniser.
Pour afficher les événements ou tâches synchronisés, appuyez sur → Calendriers, puis cochez le
compte Google.
Saisie manuscrite sur la vue Mensuelle
Dans la vue mensuelle, appuyez sur pour activer cette fonction.
Modifier le type de calendrier
Dans la partie supérieure de l’écran, sélectionnez un type de calendrier (annuel, mensuel,
hebdomadaire, etc.).
Rechercher un événement ou une tâche
Appuyez sur , puis sélectionnez un critère de recherche.
Pour afficher les événements ou les tâches de la date du jour, appuyez sur Aujourd'hui tout en haut
de l’écran.
Supprimer un événement ou une tâche
Sélectionnez une tâche ou un événement, puis appuyez sur → Supprimer.
Partager un événement ou une tâche
Sélectionnez un événement ou une tâche, appuyez sur → Partager via, puis sélectionnez un mode
de partage.
Utilitaires
102
Dropbox
Utilisez cette application pour enregistrer et partager des fichiers avec d’autres personnes via le
service de stockage Cloud Dropbox. Lorsque vous enregistrez des fichiers dans Dropbox, votre
appareil les synchronise automatiquement avec le serveur Web et tout autre ordinateur sur lequel le
service Dropbox est installé.
Appuyez sur Dropbox depuis la liste des applications.
La disponibilité de cette application dépend de votre zone géographique ou de votre
opérateur.
Lorsque vous lancez la Dropbox pour la première fois, suivez les instructions à l'écran pour procéder
à la configuration.
Une fois la Dropbox activée, les photos et les vidéos prises avec l’appareil sont automatiquement
importées dans Dropbox. Pour afficher les photos ou les vidéos importées, appuyez sur . Pour
partager ou supprimer des fichiers ou créer des albums, appuyez sur , puis sélectionnez les
fichiers.
Pour importer des fichiers dans la Dropbox, appuyez sur → → Transférer ici → Photos ou
vidéos ou Autres fichiers. Pour ouvrir des fichiers dans Dropbox, sélectionnez un fichier.
En mode affichage d'une image ou d'une vidéo, appuyez sur pour l'ajouter à la liste des favoris.
Pour ouvrir la liste des favoris, appuyez sur .
Cloud
Utilisez cette fonction pour synchroniser vos fichiers ou sauvegarder vos paramètres et les données
de vos applications avec votre compte Samsung ou Dropbox.
Depuis la liste des applications, appuyez sur Paramètres → Général → Cloud.
La disponibilité de cette fonction dépend de votre zone géographique ou de votre
opérateur.
Synchroniser avec le compte Samsung
Pour synchroniser les fichiers, sélectionnez votre compte Samsung ou sur Paramètres sync.
Utilitaires
103
Sauvegarder ou restaurer des données
Pour sauvegarder ou restaurer des données avec votre compte Samsung, appuyez sur Sauvegarder
ou Restaurer.
Synchroniser avec la Dropbox
Appuyez sur Associer le compte Dropbox, puis accédez au compte Dropbox. Suivez les instructions
qui s’affichent à l’écran pour procéder à la configuration.
Lorsque vous êtes connecté, appuyez sur Autoriser afin que l’appareil synchronise
automatiquement les fichiers avec la Dropbox dès que vous effectuez des modifications.
Drive
Utilisez cette application pour créer et modifier des documents, puis les partager avec d'autres
utilisateurs via le service de stockage Google Drive. Lorsque vous créez des documents
ou téléchargez des fichiers vers Google Drive, votre appareil effectue automatiquement la
synchronisation avec le serveur Web et tout autre ordinateur sur lequel Google Drive est installé.
Vous pouvez ainsi accéder directement à vos fichiers (sans avoir à les transférer ou à les télécharger
au préalable).
Appuyez sur Drive depuis la liste des applications.
La disponibilité de cette application dépend de votre zone géographique ou de votre
opérateur.
Utilitaires
104
POLARIS Office 5
Grâce à cette application, modifiez vos documents dans divers formats, y compris des feuilles de
calcul et des présentations.
Appuyez sur POLARIS Office 5 depuis la liste des applications.
Selon le type de fichier utilisé, certaines fonctions peuvent ne pas être disponibles.
Partager des documents
avec d’autres personnes.
Parcourir par formats de
document.
Parcourir les dossiers.
Afficher vos documents
récents.
Afficher vos documents
favoris.
Créer un document.
Créer des documents
Appuyez sur , puis sélectionnez un type de document.
Utilisez la barre d'outils d'édition en haut de l'écran pour modifier le document.
Pour finir, appuyez sur l’icône de document dans la partie supérieure gauche de l’écran, appuyez sur
Enregistrer, saisissez un nom de fichier, sélectionnez un dossier cible, puis appuyez sur Enregistrer.
Pour enregistrer le document en tant que fichier PDF, appuyez sur l’icône de document dans la
partie supérieure gauche de l’écran, appuyez sur Exportation PDF, saisissez un nom de fichier, puis
appuyez sur Exporter.
Lorsque vous éditez les documents, appuyez sur , puis utilisez l’une des fonctions suivantes :
• Passer en mode Affichage : afficher un aperçu du document.
• Note diapositive : modifier des mémos sur des diapositives.
• Rechercher/Remplacer : rechercher ou remplacer du texte.
• Mise en page : modifier la disposition des pages.
Utilitaires
105
• Conversion d'écran : appliquer des effets d’animation ou de transition à des diapositives.
• Préférences : modifier les paramètres du mode d’affichage.
• Lire tout : lire le document via la fonction de synthèse vocale.
• Filtre : afficher les cellules filtrées par critères.
• Trier : trier les cellules par critères.
• Protéger la feuille : verrouiller la feuille de sorte que vos contacts ne puissent pas la modifier.
• Image figée : figer la ligne sélectionnée.
• Recalculer : recalculer les fonctions sur la feuille.
• Capture d'écran : capturer la zone sélectionnée.
• Afficher les informations : afficher les détails du document.
• Aide : accéder aux informations d’aide relative à l’utilisation de POLARIS Office.
Lire des documents
Sélectionnez un fichier dans l'écran des documents récents. Ou appuyez sur Explorateur de fichiers,
Type de formulaire, Favoris, ou View Together, puis sélectionnez le fichier que vous souhaitez
ouvrir.
Pour dessiner dans le document, appuyez sur .
Pour rechercher du texte dans le document, appuyez sur .
Appuyez sur , puis utilisez l’une des fonctions suivantes :
• Passer en mode Édition : ouvrir la barre d’outils d’édition.
• Favori : ouvrir le volet des favoris. Sélectionner un intitulé pour aller à un point de favori.
• Préférences : modifier les paramètres du mode d’affichage.
• Mode diapositive simple : visualiser les diapositives l'une après l'autre.
• Note diapositive : modifier des mémos sur des diapositives.
• Image figée : figer la ligne sélectionnée.
• Capture d'écran : capturer la zone sélectionnée.
• Afficher les informations : afficher les détails du document.
• Aide : accéder aux informations d’aide relative à l’utilisation de POLARIS Office.
Utilitaires
106
Partager des documents
Partagez des documents avec plusieurs appareils connectés au même réseau Wi-Fi. Lorsque vous
partagez des documents, vous pouvez écrire une note ou dessiner à l’écran.
Pour créer un groupe de partage, appuyez sur View Together → . Sélectionnez un document à
partager, saisissez un nom et un mot de passe pour le groupe de partage, puis appuyez sur OK.
Pour rejoindre un groupe de partage, recherchez le groupe de partage voulu et rejoignez-le à l’aide
du mot de passe.
Alarme
Utilisez cette application pour définir des heures de réveil et des alarmes pour les événements
importants.
Appuyez sur Alarme depuis la liste des applications.
Activer ou désactiver cette
alarme.
Date et heure
Créer une alarme
Appuyez sur , sélectionnez l’heure de déclenchement de l'alarme et les jours de répétition, puis
appuyez sur Enreg. Vous pouvez également définir une heure d'alarme en écrivant des chiffres avec
le S Pen.
• Alarme géolocalisée : définissez un emplacement. L’alarme ne se déclenche qu’une fois que
vous vous trouvez à l’endroit indiqué.
• Répéter : définir le délai à l'issue duquel l'alarme doit sonner de nouveau et le nombre de
répétitions.
• Alarme intelligente : activer cette option pour que l'appareil simule des sons naturels avant le
déclenchement de l'alarme principale.
Utilitaires
107
Arrêter ou répéter une alarme
Pour éteindre une alarme, faites glisser votre doigt sur l’icône . Pour répéter l’alarme après une
période de répétition prédéfinie, faites glisser votre doigt sur l’icône .
Supprimer une alarme
Maintenez le doigt appuyé sur l’alarme à supprimer, puis appuyez sur Supprimer.
Horloge mondiale
Utilisez cette application pour vérifier l'heure dans de nombreuses grandes métropoles du monde.
Appuyez sur Horloge mondiale depuis la liste des applications.
Créer une horloge
Appuyez sur , puis saisissez le nom d’une ville ou sélectionnez-en une dans la liste.
Pour appliquer l’heure d’été, appuyez sur → Sélectionner, sélectionnez une horloge et appuyez
sur → Heure d'été.
Supprimer une horloge
Appuyez sur → Sélectionner, sélectionnez l'horloge à supprimer, puis appuyez sur .
Calculatrice
Utilisez cette application pour réaliser des calculs simples ou complexes.
Appuyez sur Calculatrice depuis la liste des applications.
Pour effacer l’historique, appuyez sur .
Utilitaires
108
S Translator
Utilisez cette application pour traduire du texte dans d’autres langues.
Appuyez sur S Translator depuis la liste des applications.
Pour démarrer S Translator, vous devez télécharger et installer l'application. Appuyez sur Installer,
puis suivez les instructions à l'écran.
Le téléchargement de cette application via le réseau mobile peut entraîner des frais
supplémentaires. Pour éviter ces frais supplémentaires, contactez votre opérateur.
S Voice
Utilisez cette application pour commander l’appareil vocalement afin d’effectuer différentes
opérations.
Appuyez sur S Voice depuis la liste des applications. Vous pouvez également appuyer deux fois sur la
touche Accueil.
• La disponibilité de cette application dépend de votre zone géographique ou de votre
opérateur.
• Cette application n'est pas prise en charge dans certaines langues.
Voici quelques exemples de commandes vocales :
• Ouvrir le lecteur MP3
• Lancer la calculatrice
• Appeler le portable de Lulu
• Appeler Lulu au travail
• Vérifier le calendrier
Conseils pour améliorer la reconnaissance vocale :
• Parlez clairement.
• Parlez dans des endroits calmes.
• N’utilisez pas de langage injurieux ni d’argot.
• Évitez de parler avec un accent local.
Selon l’environnement où vous vous trouvez ou la manière dont vous parlez, il se peut que l’appareil
ne reconnaisse pas vos commandes ou qu’il exécute des commandes erronées.
Utilitaires
109
Utiliser des commandes de réveil sur l'écran verrouillé
Lorsque l'écran est verrouillé, vous pouvez utiliser différentes fonctions avec des commandes de
réveil prédéfinies.
Pour activer cette fonction, depuis la liste des applications, appuyez sur Paramètres → Appareil →
Écran de verrouillage, puis faites glisser le curseur Commande de réveil vers la droite.
S Finder
Utilisez cette application pour chercher divers éléments sur l'appareil, notamment des e-mails, des
documents, des images, des musiques, des applications et bien plus encore.
Maintenez le doigt appuyé sur pour lancer S Finder.
Appuyez sur le champ de recherche, puis saisissez vos critères de recherche. Vous pouvez également
appuyer sur , et prononcer un mot-clé à rechercher. Vous pouvez utiliser cette fonction pour
chercher du contenu manuscrit dans l'appareil.
Google
Utilisez cette application pour effectuer une recherche non seulement sur Internet, mais aussi dans
les applications et le contenu de l’appareil.
Appuyez sur Google depuis la liste des applications.
La disponibilité de cette application dépend de votre zone géographique ou de votre
opérateur.
Effectuer une recherche sur l’appareil
Appuyez sur le champ de recherche, puis saisissez un mot-clé. Vous pouvez également appuyer sur
, puis énoncer un mot-clé.
Si les applications ne renvoient aucun résultat, le navigateur Web apparaît, affichant les résultats de
recherche.
Utilitaires
110
Étendre la recherche
Pour sélectionner les applications qui doivent faire l’objet d’une recherche, appuyez sur →
Paramètres → Recherche sur la tablette, puis cochez les éléments correspondants.
Google Now
Démarrez la recherche Google pour afficher les cartes Google Now qui vous indiquent, dès que vous
en avez besoin, la météo du jour, les infos trafic en temps réel, vos prochains rendez-vous, et bien
plus encore.
Rejoignez Google Now lorsque vous ouvrez pour la première fois la recherche Google. Pour modifier
les paramètres Google Now, appuyez sur → Paramètres, puis faites glisser le curseur Google
Now vers la gauche ou la droite.
Recherche vocale
Utilisez cette application pour rechercher des pages Web oralement.
Appuyez sur Recherche vocale depuis la liste des applications.
La disponibilité de cette application dépend de votre zone géographique ou de votre
opérateur.
Quand l’instruction Parlez maintenant apparaît à l’écran, prononcez un mot-clé ou une expression.
Sélectionnez l’une des suggestions à l’écran.
Utilitaires
111
Scrapbook
Utilisez cette application pour créer votre propre album de scrapbooking avec du contenu issu de
pages Web, de vidéos et autres.
Appuyez sur Scrapbook depuis la liste des applications.
La disponibilité de cette application dépend de votre zone géographique ou de votre
opérateur.
Créer des catégories
Appuyez sur , sélectionnez une présentation dans la liste, saisissez un nom, puis puis appuyez sur
Enreg.
Collecter des éléments
Lorsque vous consultez des pages Web ou visionnez des vidéos, tracez une ligne autour de la
zone que vous souhaitez sélectionner en maintenant la touche du S Pen enfoncée. Appuyez sur
Scrapbook dans la liste qui apparaît au bas de l'écran, puis sélectionnez la catégorie où classer la
zone sélectionnée.
En outre, vous pouvez appuyer sur Scrapbooker dans le volet Air Command, tracer une ligne autour
d'une zone, puis appuyer sur OK.
Afficher des éléments
Sélectionnez une catégorie, puis un élément. Lorsque vous affichez un élément, appuyez sur l'icône
située en haut à droite de l’écran pour accéder à la source à partir de laquelle il a été collecté.
Utilitaires
112
Mes fichiers
Utilisez cette application pour accéder à tous les types de fichiers stockés dans l’appareil, comme les
images, les vidéos, la musique, les mémos vocaux.
Appuyez sur Mes fichiers depuis la liste des applications.
Visionner des fichiers
Les fichiers stockés sur l’appareil sont triés en fonction de critères. Dans le volet gauche de l’écran,
sélectionnez l’une des catégories suivantes :
• Chronologie : afficher les fichiers regroupés par date.
• Dossiers Favoris : afficher les raccourcis dans les dossiers.
• Dossiers : permet d’afficher les fichiers stockés dans la mémoire interne ou sur une carte
mémoire.
• Catégories : afficher les fichiers triés par type.
• Applications : afficher les fichiers stockés ou créés dans des applications particulières.
Sélectionnez une catégorie, puis un fichier ou un dossier pour l’ouvrir.
Dans un dossier, appuyez sur , puis utilisez l’une des options suivantes :
• Sélectionner : sélectionner des fichiers ou des dossiers.
• Trier par : trier les fichiers ou les dossiers.
• Ajouter aux dossiers Favoris : ajouter un raccourci vers le dossier dans Dossiers Favoris.
• Ajouter raccourci à l'écran d'accueil : ajouter un raccourci vers un fichier ou un dossier sur
l’écran d’accueil.
• Ajouter FTP : ajoutez un raccourci vers un serveur FTP dans la zone de raccourcis.
• Rechercher des périphériques : rechercher les appareils sur lesquels le partage multimédia est
activé.
• Options d'affichage : modifier les options d'affichage.
Appuyez sur → Sélectionner, sélectionnez un fichier ou un dossier, puis utilisez l’une des
fonctions suivantes :
• : envoyer un fichier à d'autres personnes.
• : supprimer les fichiers ou dossiers.
• : déplacer les fichiers ou dossiers dans un autre dossier.
• : copier les fichiers ou dossiers dans un autre dossier.
Utilitaires
113
• → Renommer : renommer un fichier ou dossier.
• → Ajouter aux dossiers Favoris : ajouter un raccourci vers le dossier dans Dossiers Favoris.
• → Ajouter raccourci à l'écran d'accueil : ajouter un raccourci vers un fichier ou un dossier
sur l’écran d’accueil.
• → Zip : compresser des fichiers ou des dossiers pour créer un fichier Zip.
• → Détails : afficher les détails du fichier ou dossier.
Rechercher un fichier
Appuyez sur , puis sur le champ de recherche tout en haut de l'écran et saisissez vos critères de
recherche.
Afficher les informations de mémoire
Appuyez sur pour afficher les informations de mémoire relatives à l’appareil et à la carte mémoire.
Modifier le mode d’affichage
Pour modifier le mode d’affichage, appuyez sur .
Créer un dossier
Appuyez sur , entrez le nom du dossier, puis appuyez sur OK.
Ajouter des raccourcis à des dossiers
Ajoutez un raccourci vers les dossiers fréquemment utilisés dans Dossiers Favoris. Sélectionnez un
dossier et appuyez sur → Ajouter aux dossiers Favoris.
Ajouter des raccourcis de serveur FTP à l’appareil
Ajouter un raccourci vers le serveur FTP dans Dossiers. Appuyez sur → Ajouter FTP, saisissez les
informations relatives au serveur FTP, puis appuyez sur OK.
Utilitaires
114
Téléchargements
Utilisez cette application pour voir les fichiers téléchargés depuis des applications.
Appuyez sur Téléchargements depuis la liste des applications.
La disponibilité de cette application dépend de votre zone géographique ou de votre
opérateur.
Sélectionnez un fichier et ouvrez-le dans l'application correspondante.
Pour trier les fichiers par taille, appuyez sur Trier par taille.
Pour effacer l’historique, appuyez sur Effacer la liste.
TripAdvisor
Utilisez cette application pour obtenir des informations de voyage, notamment sur vos destinations,
vols ou hôtels. Vous pouvez également réserver une chambre d’hôtel et partager vos commentaires
avec d’autres personnes.
Appuyez sur TripAdvisor depuis la liste des applications.
Pour lancer TripAdvisor, vous devez télécharger et installer l'application. Appuyez sur Installer, puis
suivez les instructions à l'écran.
• La disponibilité de cette application dépend de votre zone géographique ou de votre
opérateur.
• Le téléchargement de cette application via le réseau mobile peut entraîner des frais
supplémentaires. Pour éviter ces frais supplémentaires, contactez votre opérateur.
Utilitaires
115
Evernote
Utilisez cette application pour créer, synchroniser et partager les notes multimédia que vous créez.
Vous pouvez ajouter des balises aux notes ou les trier dans un carnet pour gérer efficacement vos
idées.
Appuyez sur Evernote depuis la liste des applications.
La disponibilité de cette application dépend de votre zone géographique ou de votre
opérateur.
KNOX
Utilisez cette application pour séparer les données personnelles et professionnelles et pour accéder
aux applications d'entreprise de manière sécurisée depuis votre appareil.
Appuyez sur KNOX depuis la liste des applications.
Pour lancer KNOX, vous devez télécharger et installer l'application. Appuyez sur Installer et suivez les
instructions à l’écran.
• La disponibilité de cette application dépend de votre zone géographique ou de votre
opérateur.
• Pour protéger vos données, KNOX et les données associées sont supprimés lorsqu'un
mot de passe incorrect est saisi à plusieurs reprises.
• Le téléchargement de cette application via le réseau mobile peut entraîner des frais
supplémentaires. Pour éviter ces frais supplémentaires, contactez votre opérateur.
116
Géolocalisation
Maps
Utilisez cette application pour marquer votre position, rechercher des lieux ou obtenir un itinéraire.
Appuyez sur Maps depuis la liste des applications.
La disponibilité de cette application dépend de votre zone géographique ou de votre
opérateur.
Rechercher des lieux
Recherchez des lieux en saisissant une adresse ou un mot-clé. Une fois le lieu trouvé, sélectionnez-le
afin d’afficher des informations détaillées. Pour en savoir plus, consultez l’aide.
Obtenir un itinéraire
Appuyez sur pour définir une adresse de départ et une adresse de destination, et choisir un mode
de transport. L’appareil affiche l’itinéraire à suivre pour arriver à destination.
117
Paramètres
Accéder au menu des paramètres
Utilisez ce menu pour configurer l’appareil, définir les paramètres d’une application et ajouter des
comptes.
Appuyez sur Paramètres depuis la liste des applications.
Connexions
Wi-Fi
Activez la fonction Wi-Fi pour permettre la connexion à un réseau Wi-Fi et accéder à Internet ou à
d’autres périphériques réseau.
Vous pouvez maintenir une connexion réseau stable en sélectionnant automatiquement le réseau
Wi-Fi ou le réseau mobile pour utiliser le signal le plus puissant. Pour basculer automatiquement
entre les réseaux, cochez la case Basculement réseau auto.
Pour accéder aux options, appuyez sur Wi-Fi → .
• Paramètres avancés : personnalisez les paramètres Wi-Fi.
• Touche WPS : connectez-vous à un réseau Wi-Fi sécurisé à l'aide d'une touche WPS.
• Entrée PIN WPS : connectez-vous à un réseau Wi-Fi sécurisé à l'aide d'un code PIN WPS.
• Aide : accédez aux informations d'aide relatives au Wi-Fi.
Politique de mise en veille Wi-Fi
Appuyez sur Wi-Fi → → Paramètres avancés → Wi-Fi activé en mode veille.
Lorsque l’écran est éteint, l’appareil désactive automatiquement les connexions Wi-Fi.
Lorsque cela se produit, l’appareil accède automatiquement aux réseaux de données s’il a
été configuré pour utiliser ces réseaux. Cela peut entraîner des frais de transfert de données.
Pour éviter toute dépense inutile, définissez cette option sur Toujours.
Paramètres
118
Paramètres de notification réseau
L’appareil détecte les réseaux Wi-Fi ouverts et affiche une icône dans le volet des raccourcis lorsqu’un
réseau est disponible.
Appuyez sur Wi-Fi → → Paramètres avancés, puis cochez la case Notification réseau pour
activer cette fonction.
Wi-Fi Direct
La fonction Wi-Fi Direct permet de relier directement deux appareils via un réseau Wi-Fi sans passer
par un point d'accès.
Appuyez sur Wi-Fi → Wi-Fi Direct.
Bluetooth
Activez la fonction Bluetooth pour échanger des informations sur de courtes distances.
Pour accéder à des options supplémentaires, appuyez sur .
• Délai d'expiration de la visibilité : définissez une durée pendant laquelle l'appareil est visible.
• Fichiers reçus : affichez les fichiers reçus via la fonction Bluetooth.
• Renommer le périphérique : attribuez un nom Bluetooth à l'appareil.
• Aide : accédez aux informations d'aide sur la fonction Bluetooth.
Pt d'accès Wi-Fi et modem
• Point d'accès mobile : utilisez le point d'accès mobile pour partager la connexion de données
de votre appareil avec des ordinateurs ou d'autres appareils via le réseau Wi-Fi.
• Modem USB : utilisez le modem USB pour partager la connexion de données de votre appareil
avec un ordinateur via le protocole USB. Lorsqu’il est connecté à un ordinateur, l’appareil sert de
modem sans fil.
• Modem Bluetooth : utilisez le modem Bluetooth pour partager la connexion de données de
votre appareil avec des ordinateurs ou d'autres appareils via le protocole Bluetooth.
Mode Hors-ligne
Désactivez toutes les fonctions sans fil de l’appareil. Vous pouvez uniquement utiliser les services
hors-réseau, c’est-à-dire les fonctions autres que les fonctions d'appel, Wi-Fi et Bluetooth.
Paramètres
119
Utilisation des données
Effectuez un suivi de la quantité de données utilisées et personnalisez les paramètres de limite
d’utilisation des données.
• Données mobiles : paramétrez l'appareil pour qu'il utilise les connexions de données sur
n'importe quel réseau mobile.
• Cycle d'util. des données : saisissez la date de réinitialisation mensuelle afin de contrôler
l'utilisation de vos données.
Pour accéder à des options supplémentaires, appuyez sur .
• Itinérance : paramétrez l'appareil pour qu'il utilise les connexions de données lorsque vous
changez de zone de couverture.
• Restr. données arrière-plan : paramétrez l'appareil pour qu'il désactive la synchronisation en
arrière-plan lorsque vous utilisez un réseau mobile.
• Synchroniser les données automatiquement : activer ou désactiver la synchronisation
automatique des applications. Vous pouvez choisir les informations devant être synchronisées
pour chaque compte dans Paramètres → Général → Comptes.
• Afficher utilisation Wi-Fi : paramétrez l'appareil pour qu'il affiche l'utilisation de données via
une connexion Wi-Fi.
• Points d'accès mobiles : sélectionnez les points d'accès Wi-Fi afin d'éviter que les applications
s'exécutant en arrière-plan les utilisent.
Emplacements
Modifiez les paramètres des informations de localisation.
• Mode : sélectionnez une méthode pour collecter vos données de localisation.
• Demandes de localisation récentes : paramétrez l'appareil pour qu'il affiche les applications qui
utilisent vos informations de localisation actuelles, ainsi que la batterie consommée à cet effet.
• Services de localisation : affichez les services de localisation utilisés par votre appareil.
• Mes endroits : définissez les profils à utiliser pour des emplacements spécifiques lorsque vous
utilisez les fonctions GPS, Wi-Fi ou Bluetooth afin de déterminer votre position.
Paramètres
120
Plus de réseaux
Personnalisez les paramètres réseaux.
Application de messagerie par défaut
Sélectionnez l'application par défaut à utiliser pour la messagerie.
Impression
Configurez les paramètres pour les modules d’extension d’imprimante installés sur l’appareil. Vous
pouvez rechercher les imprimantes disponibles ou en ajouter une manuellement pour imprimer des
fichiers via le réseau Wi-Fi ou les services Cloud.
Réseaux mobiles
• Données mobiles : autorisez la connexion de données pour pouvoir utiliser Internet par
exemple.
• Itinérance : paramétrez l'appareil pour qu'il utilise les connexions de données lorsque vous
changez de zone de couverture.
• Nom des points d'accès : configurez des noms de point d'accès (APN).
• Mode réseau : sélectionnez un type de réseau.
• Opérateurs réseau : recherchez les réseaux disponibles et sélectionnez-en un pour vous y
connecter.
VPN
Paramétrez des réseaux privés virtuels (VPN) pour vous y connecter.
Appareils à proximité
• Nom de l'appareil : saisissez un nom pour désigner votre appareil en tant que serveur
multimédia.
• Contenus partagés : sélectionnez les contenus à partager avec d’autres appareils.
• Appareils autorisés : affichez la liste des périphériques pouvant accéder à votre appareil.
• Appareils refusés : affichez la liste des périphériques ne pouvant pas accéder à votre appareil.
• Destination de téléchargement : sélectionnez la mémoire dans laquelle enregistrer les fichiers
multimédia téléchargés.
• Téléch. depuis autres app. : paramétrez l'appareil pour pouvoir autoriser le chargement à partir
d'autres appareils.
Screen Mirroring
Activez cette fonction pour partager votre écran avec d’autres personnes.
Paramètres
121
Appareil
Son
Modifiez les paramètres des différents sons de l’appareil.
• Volume : réglez le volume de la musique et des vidéos, des sons système et des notifications.
• Intensité des vibrations : réglez l’intensité des vibrations émises par l’appareil lorsque vous
appuyez sur l’écran.
• Sonneries : sélectionnez une sonnerie pour les appels entrants.
• Vibrations : sélectionnez un type de vibreur.
• Notifications : sélectionnez une sonnerie pour les notifications, comme les messages entrants.
• Vibreur et sonnerie : paramétrez l’appareil pour qu’il vibre et émette une sonnerie à chaque
appel entrant.
• Son pavé de numérotation : paramétrez l’appareil pour qu’il émette un son lorsque vous
appuyez sur les touches du clavier.
• Sélections audibles : paramétrez l’appareil pour qu’il émette un son lorsque vous sélectionnez
une application ou une option sur l’écran tactile.
• Son verrouillage écran : paramétrez l’appareil pour qu’il émette un son lorsque vous verrouillez
ou déverrouillez l’écran tactile.
• Retour tactile : paramétrez l’appareil pour qu’il vibre lorsque vous appuyez sur une touche.
• Son retrait/insertion du S Pen : paramétrez l’appareil pour qu’il émette un son lorsque vous
insérez ou retirez le S Pen de son compartiment.
• Applications Samsung : modifiez les paramètres de notification pour chaque application.
• Son en cas d'appui : paramétrez l’appareil pour qu’il émette un son lorsque vous appuyez sur
une touche.
• Vibreur en cas d'appui : paramétrez l’appareil pour qu’il vibre lorsque vous appuyez sur une
touche.
• Sortie audio : sélectionnez le format de sortie audio à utiliser lorsque vous connectez l’appareil
à des périphériques HDMI. Certains appareils peuvent ne pas prendre en charge les paramètres
de son Surround.
• Adapt Sound : personnalisez le son pour l'oreille que vous utilisez le plus pour écouter de la
musique.
Affichage
Modifiez les paramètres d’affichage.
• Luminosité : réglez la luminosité de l'écran.
Paramètres
122
• Mise en veille de l'écran : définissez le délai à l'issue duquel l'écran doit s'éteindre
automatiquement.
• Durée de l'éclairage des touches : définissez la durée du rétroéclairage de la touche tactile.
• Mode d'écran :
– Adapt Display : utilisez ce mode pour optimiser l’affichage automatiquement en fonction
des différentes applications.
– Dynamique : utilisez ce mode pour rendre les couleurs plus vives.
– Standard : utilisez ce mode pour obtenir un environnement normal.
– Cinéma : utilisez ce mode pour obtenir un environnement sombre (une chambre obscure,
par exemple).
• Mode lecture : sélectionnez quelles applications utiliseront le mode lecture. En mode lecture,
l'appareil vous protège de la fatigue oculaire lorsque vous lisez la nuit.
• Écran de veille : paramétrez l’appareil pour pouvoir activer l'écran de veille lorsque l'appareil est
connecté à une station d’accueil ou est en cours de chargement.
• Affich. pourcentage batterie : paramétrez l'appareil pour qu'il affiche l'autonomie restante de la
batterie.
• Modifier après capture d'écran : activez cette option pour modifier la capture d'écran après
l'avoir créée.
Fenêtres multiples
Activez la fonction Multi-fenêtres pour exécuter plusieurs applications en même temps sur l'écran.
• Ouvrir en vue Multi-fen. : paramétrez l'appareil pour pouvoir activer la fonction Multi-fenêtres
lorsque vous ouvrez des fichiers depuis Mes fichiers ou Vidéo.
Écran de verrouillage
Modifiez les paramètres de l’écran de verrouillage.
• Déverrouillage de l'écran : changez la méthode de déverrouillage de l'écran. Les options
suivantes peuvent varier selon la fonction de déverrouillage d’écran sélectionnée.
• Options du widget Horloge : configurez les paramètres de l'horloge.
– Double horloge : paramétrez l'appareil pour qu'il affiche la double horloge sur l'écran
verrouillé.
– Taille de l'horloge : modifiez la taille de l'horloge.
– Afficher la date : paramétrez l'appareil pour qu'il affiche la date et l'heure.
Paramètres
123
• Raccourcis : paramétrez l'appareil pour pouvoir afficher et modifier les raccourcis des
applications sur l'écran verrouillé.
La disponibilité de cette fonction dépend de votre zone géographique ou de votre
opérateur.
• Message personnel : paramétrez l'appareil pour qu'il affiche un message personnel sur l'écran
verrouillé.
– Modifier un message personnel : modifiez le message personnel.
• Infos propriétaire : saisissez les informations que vous souhaitez voir apparaître sur l'écran
verrouillé.
• Effet de déverrouillage : sélectionnez un effet lorsque vous déverrouillez l'écran.
• Effet encre : modifiez la couleur de l'effet d'encre. L'effet d'encre est disponible uniquement avec
le S Pen.
• Commande de réveil : paramétrez l'appareil pour qu'il reconnaisse votre commande de réveil
même lorsque l'écran est verrouillé.
• Action Memo sur écran verr. : paramétrez l'appareil pour qu'il lance un Action Memo lorsque
vous appuyez deux fois sur l'écran verrouillé avec la touche du S Pen appuyée.
• Texte d'aide : paramétrez l'appareil pour qu'il affiche un texte d'aide à l'utilisation sur l'écran
verrouillé.
Fond d'écran
Modifier les paramètres de fond d’écran.
• Écran d'accueil : sélectionnez l'image d'arrière-plan de l'écran d'accueil.
• Écran de verrouillage : sélectionnez l’image d’arrière-plan de l’écran de verrouillage.
• Écrans d'accueil et de verrouillage : sélectionnez l'image d'arrière-plan de l'écran d'accueil et
de l'écran de verrouillage.
Police
Modifiez les paramètres de la police.
• Police : modifiez le type de police du texte affiché à l’écran.
• Taille de police : modifiez la taille de la police.
Paramètres
124
Volet des raccourcis
Personnalisez les éléments apparaissant dans le volet des raccourcis.
• Luminosité et volume : paramétrez l'appareil pour qu'il affiche les barres de réglage de la
luminosité et du volume dans le volet des raccourcis.
• Applications recommandées : paramétrez l'appareil pour afficher la liste des applications
recommandées dans le volet des raccourcis en fonction de vos actions, par exemple la
connexion d’un casque/écouteur à l’appareil.
• Déf. bout. config. rapide : réorganisez les touches de paramétrage rapide dans le volet des
raccourcis.
Accessibilité
Les services d’accessibilité sont des fonctions spéciales destinées aux personnes présentant des
handicaps physiques. Accédez aux paramètres suivants et modifiez-les pour améliorer l’accessibilité
de l’appareil.
• Rotation auto. écran : paramétrez l’interface pour qu’elle pivote automatiquement en même
temps que l’appareil.
• Mise en veille de l'écran : définissez le délai à l'issue duquel l'écran doit s'éteindre
automatiquement.
• Énoncer mots de passe : paramétrez l’appareil pour que les mots de passe que vous saisissez
sur les sites Web à l’aide de la fonction TalkBack soient énoncés à voix haute.
• Répondre et mettre fin aux appels :
– Touche Accueil pour répondre aux appels : paramétrez l’appareil pour pouvoir répondre
aux appels en appuyant sur la touche Accueil.
– Contrôle vocal : paramétrez l'appareil pour accepter ou refuser un appel entrant à l'aide des
commandes vocales.
– Touche Marche pour terminer les appels : paramétrez l’appareil pour pouvoir mettre fin à
un appel en appuyant sur la touche Marche/Arrêt.
• Mode pression unique : paramétrez l'appareil pour pouvoir contrôler les notifications en
appuyant sur la touche au lieu de la faire glisser.
• Afficher le raccourci : ajoutez un raccourci pour le paramètre Accessibilité dans le menu rapide
qui apparaît lorsque vous maintenez la touche Marche/Arrêt enfoncée.
• Gérer l'accessibilité : exportez ou importez les paramètres d'accessibilité afin de les partager
avec d'autres appareils.
Paramètres
125
• TalkBack : activez le service TalkBack qui propose des commentaires parlés.
• Taille de police : modifiez la taille de la police.
• Gestes d'agrandissement : paramétrez l’appareil pour pouvoir effectuer un zoom avant ou
arrière à l’aide des doigts.
• Couleurs négatives : inversez les couleurs d’affichage pour une meilleure visibilité.
• Réglage des couleurs : réglez la palette de couleurs à l'écran si l'appareil détermine que vous
êtes daltonien ou que vous avez des difficultés à lire le contenu.
• Rappel de notification : activez ou désactivez les sonneries pour les nouvelles notifications.
• Raccourci d'accessibilité : paramétrez l'appareil pour pouvoir activer TalkBack lorsque vous
maintenez la touche Marche/Arrêt enfoncée et appuyez sur l'écran avec deux doigts.
• Options synthèse vocale :
– Moteur TTS favori : sélectionnez un moteur de synthèse vocale. Pour modifier les
paramètres des moteurs de synthèse vocale, appuyez sur .
– Vitesse d'élocution : sélectionnez la vitesse de diction de la synthèse vocale.
– Écouter un exemple : écoutez le texte prononcé à titre d'exemple.
– État langue par défaut : affichez le statut de la langue par défaut pour la fonction de
synthèse vocale.
• Balance audio : réglez la balance audio lorsque vous utilisez un casque à double oreillette.
• Audio mono : activez le réglage audio monophonique lorsque vous utilisez une seule oreillette.
• Désactiver tous les sons : désactivez tous les sons de l'appareil.
• Sous-titres Google (CC) : paramétrez l’appareil pour qu’il affiche des sous-titres sur les contenus
pris en charge par Google et pour modifier les paramètres des sous-titres.
• Sous-titres Samsung (CC) : paramétrez l’appareil pour qu’il affiche des sous-titres sur les
contenus pris en charge par Samsung et pour modifier les paramètres des sous-titres.
• Menu assistant : paramétrez l'appareil pour qu'il affiche le raccourci d'aide qui vous permet
d'accéder aux fonctions prises en charge par les touches ou fonctions externes dans le volet des
raccourcis. Vous pouvez également modifier le menu de l’icône de raccourci.
• Durée de l'appui prolongé : définissez le délai de reconnaissance lorsque vous maintenez le
doigt appuyé sur l’écran.
• Contrôle par interaction : activez le mode Contrôle par interaction afin d'éviter que l'appareil
réagisse aux saisies malencontreuses qui pourraient se produire dans une application.
Paramètres
126
Appels
Personnalisez les paramètres d’appel.
• Rejet de l'appel : rejetez automatiquement les appels provenant de numéros de téléphone
spécifiques. Ajoutez des numéros de téléphone à la liste de rejet.
• Définir les messages de rejet : ajoutez ou modifiez le message envoyé lorsque vous rejetez un
appel.
• Début/Fin d'appel :
– Touche Accueil pour répondre aux appels : paramétrez l’appareil pour pouvoir répondre
aux appels en appuyant sur la touche Accueil.
– Contrôle vocal : paramétrez l'appareil pour accepter ou refuser un appel entrant à l'aide des
commandes vocales.
– Touche Marche pour terminer les appels : paramétrez l’appareil pour pouvoir mettre fin à
un appel en appuyant sur la touche Marche/Arrêt.
• Alertes d'appel :
– Vibreur en cas de réponse : paramétrez l’appareil pour qu’il vibre lorsque votre
correspondant répond à un appel.
– Vibreur en fin d'appel : paramétrez l’appareil pour qu’il vibre lorsque votre correspondant
met fin à un appel.
– Tonalité de connexion : activez ou désactivez la tonalité de connexion d’appel.
– Bip durée d'appel : activez ou désactivez la tonalité émise chaque minute.
– Tonalité de fin d'appel : activez ou désactivez la tonalité de fin d’appel.
– Signal d'appel : paramétrez l’appareil pour qu’il vous prévienne de vos événements au cours
d’un appel.
• Accessoires d'appel :
– Réponse automatique : paramétrez l’appareil pour qu’il réponde automatiquement aux
appels au bout d’un certain temps disponible uniquement si un casque ou un écouteur est
connecté.
– Temps de réponse auto. : sélectionnez la durée à l’issue de laquelle l’appareil doit répondre
à l’appel.
– Conditions appel sortant : paramétrez l’appareil pour qu'il autorise les appels sortant avec
un casque Bluetooth, même si l’appareil est verrouillé.
– Type d'appel sortant : sélectionnez le type d’appels sortants à effectuer avec un casque
Bluetooth.
Paramètres
127
• Paramètres supplémentaires :
– Identité de l'appelant : affichez votre identité à vos correspondants lorsque vous passez un
appel.
– Transfert d'appel : transférez les appels entrants vers un autre numéro.
– Code région auto : paramétrez l’appareil pour qu'il insère automatiquement un préfixe
(code régional ou national) avant un numéro de téléphone.
– Restriction d'appel : bloquez les appels entrants ou sortants.
– Signal d'appel : autorisez les appels entrants en cours d’appel.
– Rappel auto. : activez le rappel automatique si un appel n’a pas abouti ou a été interrompu.
– Numérotation fixe : activez ou désactivez le mode de numérotation fixe pour limiter les
appels aux numéros de la liste FDN. Saisissez le code PIN2 fourni avec votre carte SIM ou
USIM.
• Sonneries et son clavier :
– Sonneries : sélectionnez une sonnerie pour les appels entrants.
– Vibrations : sélectionnez un type de vibreur.
– Vibreur et sonnerie : paramétrez l’appareil pour qu’il vibre et émette une sonnerie à chaque
appel entrant.
– Son des touches : paramétrez l’appareil pour qu’il émette un son lorsque vous appuyez sur
les touches du clavier.
• Augment. volume poche : paramétrez l’appareil pour qu'il augmente le volume de la sonnerie
si l’appareil se trouve dans un espace confiné, comme une poche ou un sac.
• Image appel visio : sélectionnez une image autre que la vôtre à afficher à votre correspondant.
• Vidéo lors d'un appel reçu : indiquez si le correspondant doit voir votre image en direct ou une
image prédéfinie.
• Options d'échec d'appel : paramétrez l’appareil pour pouvoir basculer sur un appel vocal en cas
d’échec de l’appel visio.
• Service de messagerie vocale : sélectionnez ou définissez votre opérateur de messagerie
vocale.
• Param. messagerie vocale : indiquez le numéro de votre service de messagerie vocale. Vous
pouvez obtenir ce numéro auprès de votre opérateur.
• Son : sélectionnez une sonnerie pour signaler l’arrivée de messages vocaux.
• Vibreur : paramétrez l’appareil pour qu’il vibre lorsque vous recevez des messages vocaux.
• Comptes : paramétrez l’appareil pour pouvoir accepter les appels IP et configurez vos comptes
de services IP.
• Utiliser appel Internet : définissez si vous devez utiliser les appels Internet pour tous les appels
ou seulement pour les appels IP.
Paramètres
128
Mode Blocage
Sélectionnez les notifications à bloquer ou paramétrez l’appareil pour autoriser les notifications
provenant des contacts autorisés en Mode blocage.
Commandes
Langue et saisie
Modifiez les paramètres de saisie de texte. La disponibilité de certaines options dépend de la langue
sélectionnée.
Langue
Sélectionnez la langue d’affichage des menus et des applications.
Par défaut
Sélectionnez le type de clavier à utiliser par défaut pour la saisie de texte.
Clavier Samsung
Pour modifier les paramètres du clavier Samsung, appuyez sur .
La disponibilité des options dépend de votre zone géographique ou de votre opérateur.
• Langues de saisie : sélectionnez les langues pour la saisie de texte.
• Texte intuitif : activez le mode de saisie intuitive pour que des suggestions de mots s’affichent
au fur et à mesure de votre saisie. Vous pouvez également personnaliser les paramètres de la
saisie intuitive.
• Remplacement automatique : paramétrez l'appareil pour pouvoir corriger les mots erronés et
incomplets en appuyant sur la barre d'espace ou un signe de ponctuation.
• Majuscules auto. : paramétrez l’appareil pour qu'il mette automatiquement en majuscules
la première lettre qui suit un signe de ponctuation final (point, point d’interrogation et point
d’exclamation).
Paramètres
129
• Espace auto : paramétrez l'appareil pour qu'il insère automatiquement un espace entre les
mots.
• Ponctuation automatique : paramétrez l’appareil pour qu'il insère un point lorsque vous
appuyez deux fois sur la barre d’espace.
• Aucun(e) : paramétrez l'appareil pour désactiver la fonction de balayage du clavier.
• Saisie en continu : paramétrez l'appareil pour qu'il autorise la saisie continue qui consiste à faire
glisser le doigt d'une lettre à l'autre sur le clavier, sans le soulever.
• Contrôle du curseur : activez la fonction de navigation intelligente sur le clavier pour déplacer
le curseur en faisant défiler le clavier.
• Son : paramétrez l’appareil pour qu’il émette un son lorsque vous appuyez sur une touche.
• Vibreur : paramétrez l’appareil pour qu’il vibre lorsque vous appuyez sur une touche.
• Aperçu du caractère : paramétrez l’appareil pour qu'il affiche une image agrandie de chaque
caractère saisi.
• Détection du stylet : paramétrez l’appareil pour ouvrir le volet de saisie manuscrite lorsque vous
appuyez sur un champ à l’aide du S Pen.
• Aide : accédez aux informations d'aide relative à l'utilisation du clavier Samsung.
• Réinitialiser paramètres : réinitialisez les paramètres du clavier Samsung.
Saisie vocale Google
Pour modifier les paramètres de saisie vocale, appuyez sur .
• Sélect. langues saisie : sélectionnez les langues utilisées pour la saisie de texte.
• Bloquer termes choquants : paramétrez l'appareil pour qu’il bloque les mots injurieux lors de la
saisie vocale.
• Reconnaissance vocale hors connexion : téléchargez et installez les données linguistiques
pour la saisie vocale hors ligne.
Reconn. saisie manuscrite
Sélectionnez une langue de reconnaissance de la saisie manuscrite.
Paramètres
130
Recherche vocale
• Langue : sélectionnez la langue de la reconnaissance vocale.
• Sortie vocale : paramétrez l’appareil pour qu’il vous prévienne de l’action en cours à l’aide d’un
retour vocal.
• Détection du mot clé "OK Google" : Paramétrez l'appareil pour qu'il lance la fonction de
reconnaissance vocale lorsque vous prononcez la commande Ok Google lorsque vous utilisez
l'application de recherche.
• Reconnaissance vocale hors connexion : téléchargez et installez les données linguistiques
pour la saisie vocale hors ligne.
La disponibilité de cette application dépend de votre zone géographique ou de votre
opérateur.
• Bloquer termes choquants : masquez les mots injurieux dans les résultats de la recherche
vocale.
• Casque Bluetooth : paramétrez l’appareil pour qu'il autorise la recherche vocale lorsqu’un
casque Bluetooth est connecté.
Options synthèse vocale
• Moteur TTS favori : sélectionnez un moteur de synthèse vocale. Pour modifier les paramètres
des moteurs de synthèse vocale, appuyez sur .
• Vitesse d'élocution : sélectionnez la vitesse de diction de la synthèse vocale.
• Écouter un exemple : écoutez le texte prononcé à titre d'exemple.
• État langue par défaut : affichez le statut de la langue par défaut pour la fonction de synthèse
vocale.
Vitesse du curseur
Réglez la vitesse du curseur de la souris ou du pavé tactile connecté(e) à l’appareil.
Contrôle vocal
Paramétrez l'appareil pour reconnaître les commandes vocales. Vous pouvez sélectionner les
fonctions à contrôler avec des commandes vocales.
Si l'option Vibreur et sonnerie est activée, l'appareil ne peut reconnaître les commandes
vocales lorsqu'il reçoit un appel.
Paramètres
131
S Pen
Modifiez les paramètres d’utilisation du S Pen.
• Désact. détection stylet : configurez l’écran afin qu’il ne réagisse pas à l’insertion ou au retrait
du S Pen.
• Pointeur : paramétrez l’appareil pour qu'il affiche le curseur du S Pen lorsque vous survolez
l'écran avec.
• Saisie S Pen : paramétrez l'appareil pour qu'il lance le bloc-notes de saisie manuscrite lorsque
vous survolez un champ de saisie de texte avec le S Pen.
• Air View : paramétrez l'appareil de manière à activer la fonction Air View pour afficher un aperçu
du contenu ou visualiser les informations dans une fenêtre contextuelle en pointant sur un
élément avec le S Pen.
– Aperçu des informations : affichez des informations dans une fenêtre contextuelle en
pointant sur des éléments avec le S Pen.
– Aperçu progression : pendant la lecture d’une piste audio ou vidéo, prévisualisez une scène
ou affichez le temps écoulé en pointant sur la barre de progression avec le S Pen.
– Aperçu numérot. rapide : affichez dans une fenêtre contextuelle des informations sur les
contacts définis en numéro abrégé en pointant votre S Pen dessus.
– Etiquettes d'icône : affichez des informations simples sur un élément dans une fenêtre
contextuelle en pointant le S Pen dessus.
– Défilement de la liste : lorsque vous consultez des e-mails ou des pages Web, maintenez le
S Pen au-dessus du bord de l'écran pour faire défiler la page.
• Air Command : paramétrez l'appareil de manière à activer la fonction Air Command pour
effectuer des actions en appuyant sur la touche du S Pen.
• Retour sonore et tactile : paramétrez l’appareil pour qu’il vibre et émette une sonnerie lorsque
vous pointez sur des fichiers, des sujets ou des options.
• Options de détach. stylet : paramétrez l'appareil pour qu'il lance une note d'action ou affiche
les commandes sans contact lorsque le S Pen est sorti de son emplacement.
• Son retrait/insertion du S Pen : paramétrez l’appareil pour qu’il émette un son lorsque vous
insérez ou retirez le S Pen de son compartiment.
• Vibrat. retrait/insertion : paramétrez l’appareil pour qu’il vibre lorsque vous insérez ou retirez le
S Pen de son compartiment.
Paramètres
132
Mouvements
Activez la fonction de détection des mouvements et modifiez les paramètres permettant de
contrôler la détection de mouvement de votre appareil.
• Smart Alert : paramétrez l’appareil pour pouvoir être averti des appels manqués ou des
nouveaux messages lorsque vous le prenez dans la main.
• Zoom : paramétrez l’appareil pour pouvoir effectuer des zooms avant ou arrière lorsque vous
regardez des photos dans la Galerie ou des pages Web, en maintenant deux doigts sur deux
points de l’écran, puis en inclinant l’appareil vers l’arrière et l’avant.
• Parcourir une image : paramétrez l’appareil pour pouvoir faire défiler une image lorsqu’elle est
agrandie en bougeant l’appareil dans n’importe quel sens.
Mouvement de paume
Activez la fonction des mouvements de la main pour contrôler l'appareil en touchant l'écran.
• Capture d'écran : paramétrez l’appareil pour pouvoir effectuer une capture d’écran en balayant
l’écran avec le côté de la main vers la gauche ou vers la droite.
• Muet/pause : paramétrez l’appareil pour pouvoir interrompre la lecture d’un fichier multimédia
en effleurant l’écran de la paume de la main.
Smart Screen
• Smart Stay : paramétrez l’appareil pour empêcher le rétroéclairage de se désactiver lorsque
vous consultez l’écran.
• Smart Rotation : paramétrez l’interface pour qu’elle pivote selon l’orientation de votre visage.
Paramètres
133
Général
Comptes
Ajoutez des comptes de messagerie électronique ou de réseaux sociaux.
Cloud
Modifiez les paramètres de synchronisation des données ou des fichiers avec votre compte Samsung
ou le stockage Cloud Dropbox.
Sauvegarder et réinitialiser
Modifiez les paramètres de gestion des paramètres et des données.
• Sauvegarder mes données : paramétrez l'appareil pour qu'il sauvegarde les paramètres et les
données d'application sur le serveur Google.
• Compte de sauvegarde : configurez ou modifiez votre compte de sauvegarde Google.
• Restauration auto. : paramétrez l'appareil pour qu'il restaure les paramètres et les données
d'application lorsque les applications sont réinstallées.
• Rétablir param. par défaut : restaurez les valeurs par défaut de l’appareil et supprimez toutes
vos données.
Date et heure
Accédez aux paramètres suivants et modifiez-les afin de contrôler l’affichage de l’heure et de la date.
Si la batterie est entièrement déchargée ou si vous la retirez de l’appareil, l’heure et la date
sont alors réinitialisées.
• Date et heure automatiques : mettez automatiquement à jour la date et l'heure lorsque vous
changez de fuseau horaire.
• Définir la date : réglez la date manuellement.
• Définir l'heure : réglez l'heure manuellement.
Paramètres
134
• Fuseau horaire auto : paramétrez l'appareil pour pouvoir recevoir des informations sur l'heure
depuis le réseau lorsque vous changez de fuseau horaire.
• Sélectionner le fuseau horaire : réglez le fuseau horaire de votre domicile.
• Format 24 heures : affichez l'heure au format 24 heures.
• Format de date : sélectionnez un format de date.
Accessoires
Modifiez les paramètres des accessoires.
• Son station d'accueil : paramétrez l’appareil pour qu’il émette un son lorsque vous le connectez
à une station d'accueil ou l'en déconnectez.
• Mode de sortie audio : paramétrez l’appareil pour qu'il utilise le haut-parleur de la station
d’accueil lorsqu’il est connecté à une station d’accueil.
• Sortie audio : sélectionnez le format de sortie audio à utiliser lorsque vous connectez l’appareil
à des périphériques HDMI. Certains appareils peuvent ne pas prendre en charge les paramètres
de son Surround.
Gestionnaire d'applications
Affichez et gérez les applications installées sur votre appareil.
Applications par défaut
Sélectionnez un paramètre par défaut pour utiliser les applications.
Utilisateurs
Configurez et gérez les paramètres personnalisés des profils utilisateur.
Batterie
Affichez la quantité d’énergie consommée par votre appareil.
Paramètres
135
Mode Éco. d'énergie
Activez le mode Économie d’énergie et modifiez les paramètres.
• Performances du CPU : paramétrez l'appareil pour limiter l'utilisation de certaines ressources
système.
• Sortie d'écran : paramétrez l’appareil pour qu'il diminue la luminosité de l’écran.
• Désactiver le retour tactile : paramétrez l'appareil pour qu'il désactive les vibrations lorsque
vous appuyez sur une touche.
• En savoir plus : découvrez comment réduire la consommation de la batterie.
Stockage
Affichez les informations relatives à la quantité de mémoire disponible sur l’appareil et la carte
mémoire, ou formatez une carte mémoire.
Le formatage d’une carte mémoire supprime définitivement toutes les données qui y sont
stockées.
La mémoire interne de votre appareil a une capacité réelle disponible inférieure à la capacité
indiquée, car elle est en partie occupée par le système d’exploitation et les applications
installées par défaut. La capacité disponible peut varier lorsque vous mettez à jour l’appareil.
Sécurité
Modifiez les paramètres de sécurité de l’appareil.
• Crypter l'appareil : définissez un mot de passe pour crypter les données enregistrées sur
l’appareil. Vous devez saisir ce mot de passe à chaque fois que vous allumez l’appareil.
Chargez la batterie avant d’activer ce paramètre, car il peut arriver que le cryptage des
données dure plus d’une heure.
• Crypter la carte SD externe : paramétrez l'appareil pour crypter les fichiers contenus sur une
carte mémoire.
Votre appareil ne sera pas en mesure de lire les fichiers cryptés si vous le réinitialisez lorsque
ces paramètres sont activés. Désactivez ces paramètres avant de réinitialiser votre appareil.
Paramètres
136
• Contrôle à distance : paramétrez l'appareil pour pouvoir le contrôler à distance via Internet si
vous l’égarez ou s’il vous est dérobé. Pour utiliser cette fonction, vous devez vous connecter à
votre compte Samsung.
– Enregistrement du compte : enregistrez ou connectez-vous à vos comptes Samsung et
Google.
– Utiliser réseaux sans fil : paramétrez l'appareil pour qu'il autorise la collecte de données de
localisation ou détermine l'emplacement de votre appareil perdu ou volé via le Wi-Fi ou un
réseau mobile.
• Traçage du mobile : activez ou désactivez la fonction de Traçage du mobile qui vous aide à
localiser votre appareil en cas de perte ou de vol.
• Accéder au site Web : accédez au site Web permettant de localiser votre mobile
(findmymobile.samsung.com). Ce site vous permet de repérer et de contrôler un appareil égaré
ou dérobé.
• Configurer blocage SIM :
– Verrouiller carte SIM : activez ou désactivez la fonction de verrouillage par code PIN de
l'appareil. Si vous activez ce paramètre, un code PIN vous sera demandé à chaque fois que
vous allumez l'appareil.
– Modifier code PIN SIM : modifiez le code PIN utilisé pour accéder aux données SIM ou USIM.
• Rendre les mots de passe visibles : par défaut, l'appareil masque les mots de passe pour
la sécurité. Paramétrez l’appareil pour qu’il affiche votre mot de passe à mesure que vous le
saisissez.
• Admin. de périphérique : affichez les administrateurs de votre appareil. Vous pouvez autoriser
les administrateurs de l’appareil à appliquer de nouvelles règles à celui-ci.
• Sources inconnues : paramétrez l’appareil pour permettre l'installation d'applications de
sources inconnues.
• Vérifier les applications : paramétrez l'appareil pour permettre à Google de vérifier si les
applications présentent un danger avant de les installer.
• MàJ de politique sécurité :
– Mises à jour automatiques : paramétrez l'appareil pour qu'il vérifie et télécharge
automatiquement les mises à jour de sécurité.
– Réseaux préférés : sélectionnez une option de connexion réseau pour vérifier et télécharger
automatiquement les mises à jour de sécurité.
– Rechercher les mises à jour : recherchez les mises à jour de sécurité.
Paramètres
137
• Envoyer des rapports de sécurité : paramétrez l’appareil pour qu’il envoie automatiquement
les rapports de sécurité lorsqu’il est connecté à un réseau Wi-Fi.
• Type de stockage : définissez un type de stockage pour les fichiers d'identification.
• Infos d'ident. sécurisées : recourez à des certificats et des identifiants pour sécuriser l’utilisation
des diverses applications.
• Installer depuis stock. périph. : installez des certificats cryptés sur le stockage USB.
• Effacer infos identification : effacez les identifiants de sécurité contenus dans l’appareil et
réinitialisez le mot de passe.
À propos de l'appareil
Accédez à des informations d’aide sur votre téléphone et mettez à jour sa version logicielle.
Paramètres Google
Utilisez cette application pour configurer les paramètres de certaines fonctions fournies par Google.
Appuyez sur Paramètres Google depuis la liste des applications.
138
Dépannage
Avant de contacter un centre de service après-vente Samsung, veuillez essayer de mettre en œuvre
les solutions suivantes. Il est possible que certaines situations ne s’appliquent pas à votre appareil.
Lorsque vous allumez ou utilisez votre appareil, un message vous invite à
effectuer l’une des manipulations suivantes :
• Mot de passe : lorsque la fonction de verrouillage est activée, vous devez saisir le mot de passe
que vous avez défini pour l’appareil.
• Code PIN : lorsque vous utilisez l’appareil pour la première fois ou lorsque la demande de code
PIN est activée, vous devez saisir le code PIN fourni avec la carte SIM ou USIM. Vous pouvez
désactiver cette fonction à l’aide du menu de verrouillage de la carte SIM.
• Code PUK : si vous saisissez un code PIN incorrect à plusieurs reprises, la carte SIM ou USIM est
bloquée. Vous devez alors saisir le code PUK fourni par votre opérateur.
• Code PIN2 : lorsque vous accédez à un menu nécessitant le code PIN2, vous devez saisir le code
PIN2 fourni avec la carte SIM ou USIM. Pour en savoir plus, contactez votre opérateur.
Votre appareil affiche des messages d’erreur de réseau et de service
• Lorsque vous vous trouvez dans une zone de mauvaise réception, vous risquez de perdre
la connexion au réseau. Déplacez-vous et réessayez. Lorsque vous vous déplacez, plusieurs
messages d’erreur peuvent apparaître.
• Certaines options ne sont pas accessibles sans abonnement. Pour en savoir plus, contactez votre
opérateur.
Votre appareil ne s’allume pas
• Lorsque la batterie est entièrement déchargée, il n’est pas possible d’allumer l’appareil.
Rechargez complètement la batterie avant d’allumer l’appareil.
• Il est possible que la batterie ne soit pas correctement installée. Réinsérez la batterie.
• Essuyez les deux contacts dorés et réinsérez la batterie.
Dépannage
139
Mauvaise réaction ou lenteur de l’écran tactile
• Si vous fixez sur l’écran tactile un cache de protection ou tout autre accessoire en option, il est
possible que l’écran ne fonctionne pas correctement.
• Si vous portez des gants, si vos mains ne sont pas parfaitement propres, ou si vous appuyez
sur l’écran avec un objet pointu ou vos ongles, l’écran tactile risque de présenter des
dysfonctionnements.
• L’humidité ou le contact avec l’eau peut provoquer des dysfonctionnements de l’écran tactile.
• Redémarrez votre appareil afin de mettre fin à d’éventuels dysfonctionnements logiciels
temporaires.
• Assurez-vous que vous disposez bien de la dernière version logicielle de votre appareil.
• Si l’écran tactile est endommagé ou rayé, contactez un centre de service après-vente Samsung.
Votre appareil se bloque ou est sujet à des erreurs fatales
Si votre appareil ne répond plus ou se bloque, vous devrez éventuellement fermer les applications
ou réinsérer la batterie et réinitialiser votre appareil pour qu’il retrouve un fonctionnement correct. Si
votre appareil se bloque et ne répond plus, maintenez la touche Marche/Arrêt appuyée pendant plus
de 7 secondes afin de redémarrer.
Si vous ne parvenez pas à résoudre le problème à la suite de ces manipulations, procédez à la
réinitialisation des paramètres par défaut. Depuis la liste des applications, appuyez sur Paramètres
→ Général → Sauvegarder et réinitialiser → Rétablir param. par défaut → Réinitialiser le
périphérique → Supprimer tout. Avant de rétablir les paramètres par défaut de votre appareil,
n’oubliez pas d’effectuer des copies de sauvegarde de toutes les données importantes qui y sont
stockées.
Si le problème persiste, contactez un centre de service après-vente Samsung.
Impossible de passer des appels
• Assurez-vous d’être connecté au réseau cellulaire approprié.
• Vérifiez que vous n’avez pas activé la fonction de restriction d’appel pour le numéro de
téléphone que vous composez.
• Vérifiez que vous n’avez pas activé la fonction de restriction d’appel pour le numéro de
téléphone de l’appel entrant.
Vos interlocuteurs ne vous entendent pas
• Vérifiez que le microphone intégré n’est pas recouvert.
• Vérifiez que le microphone est placé suffisamment près de votre bouche.
• Si vous utilisez un kit piéton ou un casque, vérifiez qu’il est correctement branché.
Dépannage
140
Vous percevez un écho lors des appels
Réglez le volume en appuyant sur la touche de volume ou déplacez-vous.
Déconnexions fréquentes du réseau cellulaire ou d’Internet, ou mauvaise
qualité audio
• Assurez-vous que rien n’entrave l’antenne intégrée à l’appareil.
• Lorsque vous vous trouvez dans une zone de mauvaise réception, vous risquez de perdre la
connexion au réseau. Vos problèmes de connectivité peuvent être dus à une panne au niveau
de votre opérateur. Déplacez-vous et réessayez.
• Si vous utilisez votre appareil tout en vous déplaçant, il est possible que les services de réseau
sans fil soient désactivés en raison de problèmes sur le réseau de votre opérateur.
L’icône de la batterie est vide
Le niveau de charge de la batterie est faible. Rechargez ou remplacez la batterie.
La batterie ne se charge pas correctement (pour les chargeurs
homologués Samsung)
• Assurez-vous que le chargeur est correctement branché.
• Si les bornes de la batterie sont sales, la batterie peut ne pas se recharger correctement ou
l’appareil risque de s’éteindre. Essuyez les deux contacts dorés et réessayez de recharger la
batterie.
• Sur certains appareils, la batterie ne peut pas être remplacée par l’utilisateur. Pour remplacer ce
type de batterie, contactez un centre de service après-vente Samsung.
La batterie se décharge de plus en plus rapidement
• Lorsque la batterie est exposée à des températures extrêmes, la charge utile peut être réduite.
• La consommation de la batterie augmente lorsque vous utilisez certaines fonctions, comme les
SMS et MMS, ou certaines applications, comme les jeux ou Internet.
• La batterie est un consommable dont la charge utile diminue avec le temps.
Dépannage
141
L’appareil est chaud au toucher
Lorsque vous utilisez plusieurs applications simultanément ou sur une période prolongée, l’appareil
peut chauffer. Ce phénomène est normal et n’affecte ni la durée de vie, ni les performances de
l’appareil.
Messages d’erreur à l’ouverture de l’appareil photo
Pour utiliser l’appareil photo, votre appareil doit disposer de suffisamment de mémoire et sa batterie
être suffisamment chargée. Si vous obtenez des messages d’erreur lors de l’ouverture de l’appareil
photo, tentez les manipulations suivantes :
• Chargez la batterie ou remplacez-la par une autre entièrement chargée.
• Libérez de la mémoire en transférant des fichiers sur un ordinateur ou en supprimant des
éléments de l’appareil.
• Redémarrez l’appareil. Si les problèmes persistent, contactez un centre de service après-vente
Samsung.
Qualité des photos inférieure par rapport à l’aperçu
• La qualité de vos photos peut varier selon l’environnement et les techniques photographiques
utilisées.
• Si vous prenez des photos avec une luminosité insuffisante, de nuit ou en intérieur, l’image
risque d’être floue.
Messages d’erreur à l’ouverture de fichiers multimédia
Si vous obtenez des messages d’erreur ou si vous ne parvenez pas à lire les fichiers multimédia
lorsque vous les ouvrez sur votre appareil, tentez les manipulations suivantes :
• Libérez de la mémoire en transférant des fichiers sur un ordinateur ou en supprimant des
éléments de l’appareil.
• Assurez-vous que le fichier audio n’est pas protégé par des droits DRM (Gestion des droits
d’auteur). Si le fichier est protégé par des droits DRM, vous devez posséder une licence ou une
clé pour pouvoir le lire.
• Assurez-vous que les formats de fichiers sont pris en charge par l’appareil. Si un format de
fichier n’est pas pris en charge, tel que DivX ou AC3, installez une application le prenant en
charge. Pour confirmer les formats de fichier compatibles avec votre appareil, connectez-vous à
www.samsung.com.
Dépannage
142
• Votre appareil est compatible avec les photos et vidéos capturées avec ce même appareil. Les
photos et vidéos capturées avec d’autres appareils peuvent ne pas s’afficher correctement.
• Votre appareil prend en charge les fichiers multimédia autorisés par votre opérateur ainsi que
les opérateur, des autres services réseaux. Il est possible que certains contenus circulant sur
Internet, comme des sonneries, vidéos ou fonds d’écran, ne fonctionnent pas correctement.
Impossible de localiser un autre appareil Bluetooth
• Vérifiez que la fonction sans fil Bluetooth est activée sur votre appareil.
• Vérifiez que la fonction sans fil Bluetooth est également activée sur l’appareil auquel vous tentez
de vous connecter.
• Vérifiez que les deux appareils Bluetooth se trouvent bien à l’intérieur du rayon d’action
Bluetooth (10 m maximum).
Si les conseils ci-dessus ne résolvent pas le problème, contactez un centre de service après-vente
Samsung.
Problème de connexion avec un ordinateur
• Assurez-vous que le câble USB utilisé est compatible avec votre appareil.
• Vérifiez que le pilote nécessaire est bien installé sur votre ordinateur et qu’il est à jour.
• Si vous utilisez Windows XP, vérifiez que vous possédez la version Windows XP Service Pack 3 ou
version ultérieure sur votre ordinateur.
• Vérifiez que vous disposez bien de Samsung Kies ou Windows Media Player 10 ou une version
ultérieure sur votre ordinateur.
Votre appareil ne parvient pas à détecter votre position
À certains endroits, comme à l’intérieur d’un bâtiment, les signaux GPS peuvent être faibles. Si cela se
produit, configurez votre appareil pour l’utilisation d’un réseau Wi-Fi ou mobile afin de trouver votre
position.
Dépannage
143
Les données stockées sur l’appareil ont été perdues
Effectuez toujours des copies des données importantes stockées sur votre appareil. Dans le cas
contraire, vous ne pourriez pas récupérer vos données corrompues ou perdues. Samsung ne peut
être tenu responsable de la perte des données stockées sur votre appareil.
Un petit espace est apparu sur le bord externe du boîtier de l’appareil
• Cet espace est une caractéristique de fabrication, et il est possible d’observer un jeu ou une
vibration des pièces.
• Au fil du temps, la friction entre les pièces peut entraîner l’élargissement de cet espace.
French (MEA). 01/2015. Rev.1.0
Le contenu de ce mode d'emploi peut différer par rapport à votre appareil en fonction de votre
zone géographique, votre opérateur ou votre version logicielle, et faire l’objet de modifications sans
préavis.
www.samsung.com
www.samsung.com
Mode d'emploi
French. 02/2015. Rev.1.1
SM-A500FU
2
Table des matières
À lire avant utilisation
Démarrage
7 Contenu du coffret
8 Présentation de l’appareil
10 Installer la carte SIM ou USIM et la
batterie
18 Utiliser une carte mémoire
21 Allumer et éteindre l’appareil
21 Verrouiller et déverrouiller l’écran
Fonctions de base
22 Utiliser l’écran tactile
25 Disposition de l'écran d’accueil
29 Volets des raccourcis et de paramétrage
rapide
32 Ouvrir des applications
32 Installer ou désinstaller des applications
34 Saisir du texte
37 Capture d'écran
37 Mes fichiers
38 Utiliser les fonctions d’économie
d’énergie
39 Afficher les informations d'aide
Connectivité réseau
40 Données mobiles
40 Wi-Fi
41 Modem et point d'accès mobile
Reconnaissance des
mouvements et maniabilité
43 Mouvements et gestes
46 Fenêtres multiples
49 Opération à une main
Personnaliser votre appareil
50 Gérer l’écran d’accueil et la liste des
applications
52 Définir un fond d’écran et des sonneries
53 Changer la méthode de déverrouillage de
l’écran
54 Mode Privé
55 Mode simplifié
56 Transférer des données depuis votre
ancien appareil
57 Paramétrer des comptes
Table des matières
3
Applications et fonctions
utiles
80 S Finder
80 S Planner
82 S Voice
83 Internet
84 Musique
86 Vidéo
88 Studio
89 Horloge
91 Calculatrice
91 Mémo
92 Enregistreur vocal
93 Dropbox
94 Flipboard
94 Radio
96 Applications Google
Établir une connexion avec
d’autres appareils
98 Bluetooth
100 Wi-Fi Direct
102 NFC
104 S Beam
105 Connexion rapide
106 Screen Mirroring
108 Fonction d’impression mobile
Téléphone
58 Passer des appels
60 Recevoir des appels
61 Options en cours d’appel
Contacts
63 Ajouter des contacts
63 Importer et exporter des contacts
64 Rechercher des contacts
Messages et e-mails
65 Messages
67 Email
Appareil photo
69 Prise de vue de base
71 Modes de prise de vue
74 Paramètres de l'appareil photo
Galerie
76 Afficher les photos et les vidéos de
l’appareil
77 Afficher les contenus stockés sur d’autres
appareils
Assistance sécurité
78 Mode Urgence
79 Message d’aide
Table des matières
4
Gestionnaire d’appareils et
de données
109 Mettre l’appareil à jour
110 Transférer des fichiers entre l’appareil et
un ordinateur
111 Sauvegarder et restaurer des données
111 Réinitialiser les données
Paramètres
112 Accéder au menu des paramètres
112 PARAMÈTRES RAPIDES
112 CONNEXIONS
117 APPAREIL
121 PERSONNALISATION
124 SYSTÈME
130 APPLICATIONS
Annexe
131 Dépannage
136 Retirer la batterie (type non amovible)
5
À lire avant utilisation
Veuillez lire attentivement ce mode d’emploi, afin de pouvoir utiliser votre appareil correctement et
en toute sécurité.
• Les descriptions sont basées sur les paramètres par défaut de votre appareil.
• En fonction de votre zone géographique, de votre opérateur ou de la version logicielle, certains
contenus peuvent différer par rapport à votre appareil.
• Les contenus de qualité élevée nécessitant une forte utilisation du processeur et de la RAM
peuvent avoir une incidence sur les performances générales de l’appareil. Les applications en
rapport avec ces contenus peuvent ne pas fonctionner correctement selon les caractéristiques
de l’appareil et les conditions d’utilisation.
• Samsung ne peut être tenu responsable des problèmes de performance relatifs aux applications
fournies par des prestataires autres que Samsung.
• Samsung ne peut être tenu responsable des problèmes de performance ou des incompatibilités
découlant de la modification des paramètres de registre par l’utilisateur. Toute tentative de
personnalisation du système d’exploitation peut entraîner des problèmes de fonctionnement de
l’appareil ou de ses applications.
• Les logiciels, sons, fonds d’écran, images ainsi que les autres contenus multimédia fourni(e)s
avec cet appareil sont concédés sous licence et leur usage est soumis à une utilisation limitée.
L’extraction et l’utilisation de ces éléments à des fins commerciales ou autres constituent
une infraction au regard des lois sur les droits d’auteur. Les utilisateurs sont entièrement
responsables de toute utilisation illégale d’un contenu multimédia.
• Les services de données tels que l’envoi ou la réception de messages, le téléchargement ou
le chargement de données, la synchronisation automatique ou l’utilisation de services de
localisation peuvent occasionner des frais supplémentaires, en fonction de l’offre à laquelle vous
avez souscrit dans le cadre de votre forfait. Pour les transferts de données volumineux, il est
recommandé d’utiliser la fonction Wi-Fi.
• Les applications fournies par défaut avec l’appareil peuvent être modifiées ou ne plus être
disponibles, et ce, sans préavis. Si vous avez des questions à propos d’une application fournie
avec l’appareil, contactez un centre de service après-vente Samsung. Pour les applications
installées par l’utilisateur, contactez les opérateurs.
• Toute modification du système d’exploitation de l’appareil ou installation de logiciels non
officiels peut entraîner des dysfonctionnements et corrompre vos données. Ces actions
constituent des violations de l’accord de licence Samsung et annuleront votre garantie.
À lire avant utilisation
6
• Selon la zone géographique ou le modèle, certains appareils doivent obligatoirement recevoir
l'approbation de la FCC (Federal Communications Commission). Si votre appareil est approuvé
par la FCC, vous pouvez afficher l'identifiant FCC de l'appareil. Pour afficher l'identifiant FCC,
appuyez sur Applis → Paramètres → À propos de l'appareil.
• Les fonctions prises en charge peuvent être différentes ou porter un autre nom selon que votre
appareil est un modèle à une ou deux cartes SIM.
Icônes
Avertissement : situations susceptibles de vous blesser ou de blesser autrui
Attention : situations susceptibles d’endommager votre appareil ou d’autres équipements
Remarque : remarques, conseils d’utilisation ou informations complémentaires
7
Démarrage
Contenu du coffret
Vérifiez le contenu du coffret et assurez-vous que tous les éléments suivants sont présents :
• Appareil
• Guide de prise en main rapide
• Les éléments fournis avec l’appareil et les accessoires disponibles peuvent varier en
fonction de votre zone géographique ou de votre opérateur.
• Les accessoires fournis ont été spécialement conçus pour votre appareil et peuvent ne
pas fonctionner avec d’autres appareils.
• L’aspect et les caractéristiques du produit peuvent faire l’objet de modifications sans
préavis.
• Vous pouvez acheter d’autres accessoires auprès de votre revendeur Samsung. Avant
tout achat, assurez-vous qu’ils sont compatibles avec votre appareil.
• Utilisez exclusivement des accessoires homologués par Samsung. L’utilisation
d’accessoires non homologués peut entraîner des problèmes de performances, ainsi que
des dysfonctionnements non couverts par la garantie.
• La disponibilité de l’ensemble des accessoires dépend entièrement des fabricants. Pour
plus d’informations sur la disponibilité des accessoires, consultez le site Web Samsung.
Démarrage
8
Présentation de l’appareil
Microphone
Écran tactile
Objectif avant
Capteur de
proximité/luminosité
Prise audio 3,5 mm
Connecteur à fonctions
multiples
Touche Accueil
Touche Applications
récentes
Touche Marche/Arrêt
Compartiment pour carte
SIM / carte mémoire
(modèles à deux SIM)
Compartiment pour carte
mémoire (modèles à une
seule SIM)
Compartiment pour carte
SIM
Écouteur
Microphone
Touche Retour
Touche de volume
Antenne NFC
Haut-parleur
Antenne GPS
Objectif arrière
Flash
Antenne principale
Démarrage
9
• Ne recouvrez pas la zone autour de l’antenne avec vos mains ou tout autre objet. Cela
peut entraîner des problèmes de connectivité ou décharger la batterie.
• L’utilisation d’une protection d’écran agréée Samsung est recommandée. Les protections
d’écran non agréées peuvent provoquer un dysfonctionnement des capteurs.
• Évitez de mettre l’écran tactile en contact avec de l’eau. L’humidité ou le contact avec l’eau
peut provoquer des dysfonctionnements de l’écran tactile.
Touches
Touche Fonction
Marche/Arrêt
• Maintenir cette touche enfoncée pour allumer ou éteindre
l’appareil.
• Appuyez sur cette touche pour activer ou verrouiller l'écran.
Applications
récentes
• Appuyer sur cette touche pour ouvrir la liste des applications
récentes.
• Maintenir cette touche enfoncée pour accéder à des options
supplémentaires dans l’écran actuel.
Accueil
• Appuyer sur cette touche pour allumer l’écran lorsqu’il est
verrouillé.
• Appuyer sur cette touche pour revenir à l’écran d’accueil.
• Appuyer deux fois sur cette touche pour lancer l’application
S Voice.
• Maintenir cette touche enfoncée pour lancer la fonction de
recherche Google.
Retour • Appuyer sur cette touche pour revenir à l’écran précédent.
Volume • Appuyer sur cette touche pour régler le volume de l’appareil.
Démarrage
10
Installer la carte SIM ou USIM et la batterie
Installer la carte SIM ou USIM
Insérez la carte SIM ou USIM fournie par votre opérateur de téléphonie mobile.
• Seules les cartes nano-SIM sont compatibles avec cet appareil.
• La disponibilité de certains services 4G dépend de votre opérateur. Pour en savoir plus sur
la disponibilité des services, contactez votre opérateur.
1 Insérez l'outil de retrait à l'endroit prévu à cet effet sur le compartiment de la carte SIM et
appuyez et relâchez pour déverrouiller le compartiment.
► Modèles à deux cartes SIM :
► Modèles à une carte SIM :
Vérifiez que l'outil de retrait est perpendiculaire à l'orifice. Dans le cas contraire, l'appareil
pourrait être endommagé.
Démarrage
11
2 Retirez délicatement le compartiment pour carte SIM.
► Modèles à deux cartes SIM :
► Modèles à une carte SIM :
Démarrage
12
3 ► Modèles à deux cartes SIM : placez la carte SIM ou USIM sur le compartiment, puces
orientées vers le bas.
Placez la carte SIM ou USIM principale sur le compartiment de la carte SIM 1 ( 1 ) et la deuxième
carte SIM ou USIM sur le compartiment de la carte SIM 2 ( 2 ).
2
1
Le compartiment de la carte SIM 2 sert également de compartiment pour la carte mémoire.
Vous ne pouvez toutefois pas placer à la fois la carte SIM ou USIM et la carte mémoire en
même temps.
► Modèles à une carte SIM : placez la carte SIM ou USIM sur le compartiment, puce orientée
vers le bas.
Veillez à ne pas perdre ou à ne pas laisser d’autres personnes utiliser votre carte SIM ou
USIM. Samsung ne peut être tenu responsable en cas de dommage ou désagrément
résultant d’une perte ou d’un vol de carte.
Démarrage
13
4 Insérez le compartiment de la carte SIM à l'endroit prévu à cet effet sur l'appareil.
► Modèles à deux cartes SIM :
► Modèles à une carte SIM :
Démarrage
14
Retirer la carte SIM ou USIM
1 Insérez l'outil de retrait à l'endroit prévu à cet effet sur le compartiment de la carte SIM et
appuyez et relâchez pour déverrouiller le compartiment.
2 Retirez délicatement le compartiment pour carte SIM.
3 Retirez la carte SIM ou USIM.
► Modèles à deux cartes SIM :
► Modèles à une carte SIM :
4 Insérez le compartiment de la carte SIM à l'endroit prévu à cet effet sur l'appareil.
Démarrage
15
Utilisation de deux cartes SIM ou USIM (modèles à deux cartes
SIM)
Si vous insérez deux cartes SIM ou USIM, vous pouvez disposer de deux numéros de téléphone ou
opérateurs pour un même appareil.
Activer une carte SIM ou USIM
Depuis l’écran d’accueil, appuyez sur Applis → Paramètres → Gestionnaire de carte SIM. Appuyez
sur le curseur des cartes SIM ou USIM pour les activer.
Changer le nom et l'icône d'une carte SIM ou USIM
Depuis l’écran d’accueil, appuyez sur Applis → Paramètres → Gestionnaire de carte SIM.
Sélectionnez une carte SIM ou USIM et appuyez sur Enregistrer le nom ou Sélectionner icône.
Indiquez un nom et une icône d'affichage pour chaque carte.
Basculer d'une carte à l'autre
Si deux cartes SIM ou USIM sont activées, des icônes de sélection de la carte apparaissent dans le
volet des raccourcis. Ouvrez le volet et sélectionnez une carte.
Démarrage
16
Charger la batterie
Vous devez charger la batterie avant d’utiliser l’appareil pour la première fois. Vous pouvez
également charger la batterie à l’aide d’un ordinateur en les connectant via le câble USB.
Utilisez uniquement des chargeurs, des batteries et des câbles homologués par Samsung.
L’utilisation de chargeurs ou de câbles non homologués peut provoquer l’éclatement de la
batterie ou endommager l’appareil.
• Lorsque le niveau de charge est faible, l’icône de la batterie est vide.
• Si la batterie est complètement déchargée, vous ne pouvez pas allumer l’appareil,
même si le chargeur est branché. Rechargez la batterie pendant quelques minutes avant
d’allumer l’appareil.
• Si vous utilisez simultanément plusieurs applications, des applications réseaux ou des
applications qui nécessitent une connexion à un autre appareil, la batterie se déchargera
rapidement. Pour éviter toute déconnexion du réseau ou perte d’alimentation lors
d’un transfert de données, utilisez toujours ces applications lorsque la batterie est
parfaitement chargée.
Branchez le câble USB sur l’adaptateur secteur USB, puis la fiche micro-USB sur le connecteur à
fonctions multiples de l’appareil.
Un branchement incorrect du chargeur peut sérieusement endommager l’appareil. Les
dégâts résultant d’une mauvaise utilisation ne sont pas couverts par la garantie.
Démarrage
17
• L’appareil peut être utilisé en cours de chargement, mais dans ce cas, le chargement
complet de la batterie risque de prendre plus de temps.
• Lorsque l’appareil est en cours de chargement, il est possible que l’écran tactile ne
fonctionne pas en raison de l’instabilité de l’alimentation électrique. Dans ce cas,
débranchez le chargeur de l’appareil.
• Il est possible que l’appareil chauffe lorsqu’il est en cours de chargement. Ce phénomène
est normal et n’affecte ni la durée de vie, ni les performances de l’appareil. Si la
température de la batterie devient trop élevée, le chargement risque de s’interrompre.
• Si l’appareil ne se charge pas correctement, apportez-le, accompagné de son chargeur,
dans un centre de service après-vente Samsung.
Lorsque la batterie est complètement chargée, déconnectez l’appareil du chargeur. Pour ce faire,
débranchez d’abord le chargeur de l’appareil, puis de la prise de courant.
• Pour économiser l’énergie, débranchez le chargeur lorsque vous ne l’utilisez pas. Le
chargeur n’étant pas muni d'une touche Marche/Arrêt, vous devez le débrancher de la
prise de courant pour couper l’alimentation. L’appareil doit rester à proximité de la prise
lors du chargement.
• Le socle de prise de courant doit être installé à proximité du matériel et doit être aisément
accessible.
Réduire la consommation d’énergie de la batterie
Votre appareil est doté d’options destinées à optimiser l’autonomie de votre batterie. En
personnalisant ces options et en désactivant les applications fonctionnant inutilement en arrièreplan,
vous pouvez utiliser l’appareil plus longtemps entre deux chargements :
• Lorsque vous n’utilisez pas l’appareil, désactivez l’écran tactile en appuyant sur la touche
Marche/Arrêt.
• Fermez toutes les applications fonctionnant inutilement en arrière-plan à l’aide du Gestionnaire
de tâches.
• Désactivez la fonction Bluetooth.
• Désactivez la fonction Wi-Fi.
• Désactivez les applications de synchronisation automatique.
• Réduisez la durée du rétroéclairage de l’écran.
• Réduisez la luminosité de l’écran.
Démarrage
18
Utiliser une carte mémoire
Installer une carte mémoire
L’appareil est compatible avec les cartes mémoire d’une capacité allant jusqu’à 64 Go. Selon le
fabricant et le modèle, certaines cartes mémoire peuvent ne pas être compatibles avec votre
appareil.
• Certaines cartes mémoire peuvent ne pas être parfaitement compatibles avec l’appareil.
L’utilisation d’une carte mémoire incompatible peut endommager l’appareil ou la carte
mémoire elle-même et corrompre les données qui y sont stockées.
• Veillez à insérer la carte mémoire du bon côté.
• Seules les structures de fichiers FAT et exFAT sont compatibles avec les cartes mémoire de
l’appareil. Lorsque vous insérez une carte mémoire formatée avec une autre structure de
fichiers, l’appareil vous invite à la reformater.
• Une trop grande fréquence des opérations d’effacement et d’écriture réduit la durée de
vie des cartes mémoire.
• Lorsque vous insérez une carte mémoire dans l’appareil, le répertoire de fichiers de la
carte mémoire apparaît dans le dossier Mes fichiers → Carte SD.
1 Insérez l'outil de retrait à l'endroit prévu à cet effet sur le compartiment de la carte mémoire et
appuyez et relâchez pour déverrouiller le compartiment.
2 Retirez délicatement le compartiment de la carte mémoire.
3 Placez une carte mémoire sur le compartiment, puce orientée vers le bas.
Démarrage
19
4 Insérez le compartiment de la carte mémoire à l'endroit prévu à cet effet sur l'appareil.
► Modèles à deux cartes SIM :
► Modèles à une carte SIM :
Démarrage
20
Retirer une carte mémoire
Avant de retirer la carte mémoire, vous devez au préalable la désactiver pour pouvoir la retirer
en toute sécurité. Depuis l’écran d’accueil, appuyez sur Applis → Paramètres → Stockage →
Démonter la carte SD.
1 Insérez l'outil de retrait à l'endroit prévu à cet effet sur le compartiment de la carte mémoire et
appuyez et relâchez pour déverrouiller le compartiment.
2 Retirez délicatement le compartiment de la carte mémoire.
3 Retirez la carte mémoire.
4 Insérez le compartiment de la carte mémoire à l'endroit prévu à cet effet sur l'appareil.
Ne retirez jamais la carte mémoire lorsque l’appareil y enregistre ou lit des informations. Cela
peut occasionner une perte ou une corruption des données ou des dommages au niveau
de la carte mémoire ou du périphérique. Samsung ne peut être tenu responsable en cas de
perte de données résultant d’une utilisation frauduleuse ou en cas de détérioration d’une
carte mémoire.
Formater une carte mémoire
Une carte mémoire ayant été formatée sur un ordinateur peut ne pas être compatible avec l’appareil.
Formatez la carte mémoire dans l’appareil.
Depuis l’écran d’accueil, appuyez sur Applis → Paramètres → Stockage → Formater la carte SD →
Formater la carte SD → Supprimer tout.
Avant de formater la carte mémoire, n’oubliez pas d’effectuer des copies de sauvegarde de
toutes les données importantes qui y sont stockées. La garantie du fabricant ne couvre pas
la perte de données résultant des manipulations de l’utilisateur.
Démarrage
21
Allumer et éteindre l’appareil
Pour allumer l’appareil, maintenez la touche Marche/Arrêt enfoncée pendant quelques secondes.
Si vous allumez votre appareil pour la première fois ou après avoir procédé à la réinitialisation des
paramètres, suivez les instructions à l'écran pour configurer votre appareil.
Pour éteindre l’appareil, maintenez la touche Marche/Arrêt enfoncée, puis appuyez sur Éteindre.
Respectez toutes les consignes de sécurité et directives formulées par le personnel
compétent dans les lieux où l’utilisation d’appareils mobiles est interdite, comme par
exemple dans les avions et les hôpitaux.
Verrouiller et déverrouiller l’écran
Lorsque vous appuyez sur la touche Marche/Arrêt, l’écran s’éteint et se verrouille. De même, si vous
n’utilisez pas l’appareil pendant un certain temps, l’écran s’éteint et se verrouille.
Pour déverrouiller l’appareil, appuyez sur la touche Marche/Arrêt ou sur la touche Accueil, puis faites
glisser votre doigt sur l’écran dans le sens de votre choix.
Vous pouvez changer le code permettant de déverrouiller l'écran. Pour plus d’informations, reportezvous
à la section Changer la méthode de déverrouillage de l’écran.
22
Fonctions de base
Utiliser l’écran tactile
• Évitez tout contact de l’écran tactile avec d’autres appareils électriques. Les décharges
électrostatiques peuvent provoquer des dysfonctionnements de l’écran tactile.
• Pour éviter d’endommager l’écran tactile, n’appuyez pas dessus avec un objet pointu et
n’exercez aucune pression excessive avec vos doigts.
• Il se peut que l'appareil ne reconnaisse pas la saisie tactile près des bords de l'écran, hors
de la zone de saisie dédiée.
• Si l’écran tactile reste inactif pendant une période prolongée, des images rémanentes
risquent d’apparaître (ou persistance de l’affichage). Éteignez l’écran tactile lorsque vous
n’utilisez pas l’appareil.
• Il est recommandé d’utiliser l’écran tactile avec les doigts.
Appuyer
Pour ouvrir une application, sélectionner un élément de menu, activer une touche à l’écran ou saisir
un caractère sur le clavier à l’écran, appuyez sur l’écran tactile avec un seul doigt.
Fonctions de base
23
Maintenir appuyé
Pour ouvrir une fenêtre d'options contextuelle, maintenez votre doigt appuyé sur un élément ou
l'écran pendant plus de 2 secondes.
Faire glisser
Pour déplacer un élément, maintenez-y le doigt appuyé et faites-le glisser vers un nouvel
emplacement.
Appuyer deux fois
Pour effectuer un zoom sur une page Web ou une image, appuyez deux fois sur l’écran. Pour annuler
le zoom, appuyez à nouveau à deux reprises sur l'écran.
Fonctions de base
24
Effleurer
Pour passer d’une fenêtre à l’autre, faites glisser votre doigt vers la gauche ou la droite depuis l’écran
d’accueil ou la liste des applications. Pour parcourir une page Web ou une liste d'éléments, telle que
celle de vos contacts, faites glisser votre doigt vers le haut ou le bas de l’écran.
Écarter et rapprocher les doigts
Pour effectuer un zoom avant sur une page Web, une carte ou une image, placez deux doigts sur
l’écran et écartez-les. Rapprochez-les pour effectuer un zoom arrière.
Fonctions de base
25
Disposition de l'écran d’accueil
Écran d’accueil
L’écran d’accueil est le point de départ pour accéder à toutes les fonctions de l’appareil. Il affiche des
widgets, des raccourcis vers les applications, etc. Les widgets sont de petits outils qui permettent
d’obtenir des informations comme la météo ou l’actualité par exemple.
Pour afficher d'autres volets, faites défiler l'écran vers la gauche ou la droite, ou sélectionnez l'icône
d'un type de volet en bas de l'écran. Pour personnaliser l’écran d’accueil, reportez-vous à la section
Gérer l’écran d’accueil.
Widget
Application
Volets d'écrans d'accueil
Dossier
Applications favorites
Fonctions de base
26
Options de l’écran d’accueil
Pour accéder aux options disponibles, maintenez le doigt appuyé sur une zone vide de l'écran
d'accueil ou rapprochez-y deux doigts l'un de l'autre.
Flipboard Briefing
Utilisez cette fonction pour afficher les derniers articles dans diverses catégories. Elle vous permet
d'obtenir les actualités qui vous intéressent.
1 Dans l'écran d'accueil, appuyez sur ou balayez l'écran vers la droite pour ouvrir Flipboard
Briefing.
2 Appuyez sur DÉMARRER lorsque vous lancez cette fonction pour la première fois.
3 Balayez l'écran vers le haut pour parcourir les articles de chaque catégorie d'actualités.
Pour désactiver Flipboard Briefing, maintenez votre doigt appuyé sur une zone vide
de l’écran d’accueil. Appuyez ensuite sur Param. écran d'accueil, puis désélectionnez
Flipboard Briefing.
Fonctions de base
27
Liste des applications
La liste des applications affiche les icônes de toutes vos applications, y compris celles récemment
installées.
Depuis l’écran d’accueil, appuyez sur Applis pour ouvrir la liste des applications. Pour afficher
d’autres volets, faites défiler la liste des applications vers la gauche ou la droite ou appuyez sur le
point d'un volet d’applications en bas de l’écran. Pour plus d’informations sur la personnalisation de
la liste des applications, reportez-vous à la section Gérer la liste des applications.
Accéder à des
options
supplémentaires.
Application
Volets d’applications
Fonctions de base
28
Icônes d’informations
Des icônes d'informations sont susceptibles de s'afficher dans la barre d'état en haut de l'écran. Les
icônes répertoriées dans le tableau ci-dessous sont les plus courantes.
Il se peut que la barre d’état ne s’affiche pas en haut de l’écran dans certaines applications.
Pour afficher la barre d’état, faites glisser votre doigt du haut de l’écran vers le bas.
Icône Signification
Aucun signal
/ Puissance du signal
/ Accès à la carte SIM ou USIM en cours (modèles à deux cartes SIM)
Itinérance (hors de la zone de service locale)
Réseau GPRS connecté
Réseau EDGE connecté
Réseau UMTS connecté
Réseau HSDPA connecté
Réseau HSPA+ connecté
/ Réseau LTE (4G) connecté
Connecté au réseau Wi-Fi
Fonction Bluetooth activée
GPS activé
Appel en cours
Appel manqué
Fonction Smart Stay activée
Synchronisation avec le Web
Connecté à un ordinateur
Carte SIM ou USIM absente
Fonctions de base
29
Icône Signification
Nouveau SMS ou MMS
Alarme activée
Profil Discret activé
Mode Vibreur activé
Mode Hors-ligne activé
Une erreur s’est produite ou votre attention est nécessaire
Niveau de charge de la batterie
Volets des raccourcis et de paramétrage rapide
Utiliser le volet des raccourcis
Lorsque vous recevez de nouvelles notifications, telles que des messages ou des appels manqués,
des icônes d’information apparaissent en haut de votre écran. Pour en savoir plus sur les icônes,
ouvrez le volet des raccourcis et consultez les détails.
Pour ouvrir le volet des raccourcis, faites-le glisser vers le bas. Pour fermer le volet des raccourcis,
faites-le glissser de bas en haut.
Fonctions de base
30
Vous pouvez utiliser les fonctions suivantes dans le volet des raccourcis.
Ouvrir les Paramètres.
Ouvrir S Finder.
Appuyer sur une notification et
exécuter différentes actions.
Régler la luminosité.
Afficher toutes les touches de
paramétrage rapide.
Activer ou désactiver des options.
Maintenir le doigt appuyé sur une
touche pour afficher les paramètres
détaillés.
Lancer Connex. rapide.
Effacer toutes les notifications.
Sélectionner une carte SIM ou USIM
(modèles à deux cartes SIM).
Réorganiser les touches de paramétrage rapide
Pour redisposer les touches de paramétrage rapide dans le volet des raccourcis, appuyez sur →
, puis maintenez le doigt appuyé sur un élément et faites-le glisser vers un autre emplacement.
Fonctions de base
31
Utiliser le volet de paramétrage rapide
Vous pouvez activer ou désactiver certaines fonctions du volet des raccourcis. Pour activer ou
désactiver davantage de fonctions, ouvrez le volet de paramétrage rapide.
Pour ouvrir le volet de paramétrage rapide, faites glisser le volet des raccourcis vers le bas en vous
servant de deux doigts. Une autre solution consiste à appuyer sur dans volet des raccourcis. Pour
fermer le volet de paramétrage rapide, faites glisser le volet des raccourcis de bas en haut.
Appuyez sur les options suivantes pour les activer ou les désactiver. Vous pouvez afficher des
paramètres plus détaillés en maintenant le doigt appuyé sur une option.
• Wi-Fi : pour plus d'informations, reportez-vous à la section Wi-Fi.
• Position : pour plus d'informations, reportez-vous à la section Position.
• Son / Vibreur / Muet : activer ou désactiver le son de votre appareil ou le profil Discret.
• Rotation écran : autoriser ou empêcher l’interface de pivoter lorsque vous tournez l’appareil.
Certaines applications ne permettent pas la rotation de l’écran.
• Bluetooth : pour plus d'informations, reportez-vous à la section Bluetooth.
• Données mobiles : pour plus d'informations, reportez-vous aux sections Utilisation des données
ou Réseaux mobiles.
• Ultra éco énergie : pour plus d'informations, reportez-vous à la section Mode Ultra économie
d’énergie.
• Multi fenêtres : pour plus d'informations, reportez-vous à la section Fenêtres multiples.
• Mode Hors-ligne : pour plus d'informations, reportez-vous à la section Mode Hors-ligne.
• Pt accès mobile : pour plus d'informations, reportez-vous à la section Modem et point d'accès
mobile.
• Screen Mirroring : pour plus d'informations, reportez-vous à la section Screen Mirroring.
• NFC : pour plus d'informations, reportez-vous à la section NFC.
• Synchro. : activer cette fonction permet à l'appareil de synchroniser automatiquement les
applications, comme le calendrier ou la messagerie électronique.
Fonctions de base
32
• Smart Stay : activer cette fonction permet à l’écran de rester allumé tant que vous le regardez.
• Éco. énergie : pour plus d'informations, reportez-vous à la section Utiliser les fonctions
d’économie d’énergie.
• Mode blocage : pour plus d'informations, reportez-vous à la section Mode Blocage.
• Mode Privé : pour plus d'informations, reportez-vous à la section Mode Privé.
Ouvrir des applications
Depuis l’écran d’accueil ou la liste des applications, appuyez sur une icône pour ouvrir l’application
correspondante.
Pour ouvrir la liste des applications récemment utilisées, appuyez sur , puis sélectionnez l’icône
d’une application à ouvrir.
Fermer une application
Appuyez sur → , puis sur Fin à côté d’une application pour la fermer. Pour fermer toutes les
applications en cours d’exécution, appuyez sur Fermer tout. Vous pouvez également appuyer sur
→ .
Installer ou désinstaller des applications
Applications Samsung GALAXY
Utilisez cette application pour acheter et télécharger des applications.
Depuis la liste des applications, appuyez sur GALAXY Apps.
La disponibilité de cette application dépend de votre zone géographique ou de votre
opérateur.
Installer des applications
Parcourez les applications par catégorie ou appuyez sur pour rechercher une application à l’aide
d’un mot-clé.
Sélectionnez une application pour en afficher les informations. Pour télécharger des applications
gratuites, appuyez sur Gratuit. Pour acheter et télécharger des applications payantes, appuyez sur la
touche qui indique le prix de l’application.
Pour modifier les paramètres de mise à jour automatique, appuyez sur → Paramètres →
Mettre à jour les applications automatiquement, puis sélectionnez une option.
Fonctions de base
33
Play Store
Utilisez cette application pour acheter et télécharger des applications.
Appuyez sur Play Store depuis la liste des applications.
Installer des applications
Parcourez les applications par catégorie ou appuyez sur pour rechercher une application à l’aide
d’un mot-clé.
Sélectionnez une application pour en afficher les informations. Pour télécharger des applications
gratuites, appuyez sur INSTALLER. Pour acheter et télécharger des applications payantes, appuyez
sur le prix et suivez les instructions à l’écran.
Pour modifier les paramètres de mise à jour automatique, appuyez sur → PARAMÈTRES
→ Mise à jour automatique des applis, puis sélectionnez une option.
Gérer les applications
Désinstaller ou désactiver des applications
Pour désactiver les applications par défaut, ouvrez la liste des applications et appuyez sur →
Désinstaller/désactiver des applications. L'icône apparaît en haut à droite de chaque application
qu’il est possible de désactiver. Sélectionnez une application, puis appuyez sur Désactiver.
Pour désinstaller des applications téléchargées, ouvrez la liste des applications et appuyez sur →
Applications téléchargées → → Désinstaller. Une autre solution consiste à appuyer, depuis la liste
des applications, sur Paramètres → Gestionnaire d'applications, à sélectionner une application,
puis à appuyer sur Désinstaller.
Activer les applications désactivées
Depuis la liste des applications, appuyez sur → Afficher les applis désactivées, sélectionnez des
applications à activer de nouveau, puis appuyez sur OK. Vous pouvez également, depuis la liste des
applications, appuyer sur Paramètres → Gestionnaire d'applications, faire défiler jusqu'à l'onglet
DÉSACTIVÉ, sélectionner une application, puis appuyer sur Activer.
• Masquer des applications : masquer des applications uniquement dans la liste des
applications. Vous pouvez continuer à utiliser les applications masquées.
• Désactiver des applications : désactiver les applications fournies par défaut et ne
pouvant pas être désinstallées de l’appareil. Vous ne pouvez pas utiliser les applications
désactivées.
• Désinstaller des applications : désinstaller des applications téléchargées.
Fonctions de base
34
Saisir du texte
Disposition du clavier
Un clavier apparaît automatiquement lorsque vous saisissez du texte pour envoyer des messages,
créer des mémos, etc.
La saisie de texte est impossible dans certaines langues. Pour saisir du texte, vous devez
sélectionner une des langues prises en charge.
Passer à la ligne suivante.
Saisir des majuscules. Pour saisir Supprimer le caractère précédent.
l’ensemble de votre texte en
majuscules, appuyez deux fois sur
cette touche.
Saisir des signes de ponctuation.
Modifier les paramètres du clavier. Insérer un espace.
Modifier la langue de saisie
Appuyez sur → Sélectionner langue de saisie, puis sélectionnez les langues à utiliser. Si vous
sélectionnez au moins deux langues, vous pouvez passer d'une langue de saisie à l’autre en faisant
glisser votre doigt sur la barre d'espace vers la gauche ou la droite.
Modifier la disposition du clavier
Appuyez sur , sélectionnez une langue sous LANGUES DE SAISIE, puis sélectionnez la disposition
de clavier à utiliser.
Sur le Clavier 3x4, une touche correspond à trois ou quatre caractères. Pour saisir un
caractère, appuyez à plusieurs reprises sur la touche correspondante jusqu’à ce que le
caractère souhaité s’affiche.
Fonctions de base
35
Utiliser les fonctions supplémentaires du clavier
Maintenez le doigt appuyé sur la touche pour utiliser diverses fonctions. Suivant la dernière
fonction utilisée, d’autres icônes peuvent apparaître à la place de l'icône .
• : saisir du texte en le dictant.
Changer de langue.
Ouvrir le clavier.
Démarrer ou interrompre la saisie
orale de texte.
• : basculer en mode de saisie manuscrite.
Revenir au clavier standard.
Passer du mode Numérique au
mode Lettres.
La disponibilité de cette fonction dépend de votre zone géographique ou de votre
opérateur.
• : ajouter un élément du presse-papiers.
• : modifier les paramètres du clavier.
Fonctions de base
36
• : insérer des émoticônes.
• : activer le clavier amovible. Vous pouvez déplacer le clavier en maintenant le doigt appuyé
sur .
Revenir au clavier standard.
Copier et coller du texte
1 Maintenez le doigt appuyé sur le texte.
2 Faites glisser l'icône ou pour sélectionner le texte voulu, ou appuyez sur Sélectionner tout
pour sélectionner l’intégralité du texte.
3 Appuyez sur Copier ou sur Couper. Le texte sélectionné est copié dans le presse-papier.
4 Placez le curseur à l’endroit où le texte doit être inséré, puis appuyez sur → Coller. Pour coller
le texte préalablement copié, appuyez sur → Presse-papier, puis sélectionnez le texte.
Fonctions de base
37
Capture d'écran
Vous pouvez effectuer une capure d'écran lorsque vous utilisez l’appareil.
Maintenez les touches Accueil et Marche/Arrêt simultanément enfoncées. L’image est enregistrée
dans le dossier Galerie → → Album → Screenshots. Après avoir réalisé une capture d'écran,
vous pouvez modifier l'image et la partager avec d'autres personnes.
Il existe également d’autres méthodes pour effectuer une capture d’écran. Pour plus d'informations,
reportez-vous à la section Balayer pour capturer.
Cette fonction n’est disponible que pour certaines applications.
Mes fichiers
Utilisez cette application pour accéder à divers fichiers stockés sur l'appareil ou, par exemple, sur des
services de stockage Cloud.
Appuyez sur Mes fichiers depuis la liste des applications.
Accéder à des options
supplémentaires.
Rechercher des fichiers ou des
dossiers.
Afficher l'historique de
téléchargement.
Afficher les fichiers enregistrés sur
les services de stockage Cloud.
Afficher les fichiers par catégorie.
Afficher les fichiers stockés sur
l'appareil.
Fonctions de base
38
Utiliser les fonctions d’économie d’énergie
Mode Éco. d'énergie
Préservez l'autonomie de la batterie en limitant les fonctions de l’appareil.
Dans la liste des applications, appuyez sur Paramètres → Économie d'énergie → Mode Éco.
d'énergie, puis appuyez sur le curseur Mode Éco. d'énergie pour activer la fonction. Une autre
solution consiste à ouvrir le volet de paramétrage rapide, puis à appuyer sur l'option Éco. énergie.
Sélectionnez parmi les options suivantes :
• Restr. données arrière-plan : empêcher les applications exécutées en arrière-plan d’utiliser une
connexion de données mobile.
• Limiter les performances : limiter diverses options, par exemple en désactivant le rétroéclairage
des touches Applications récentes et Retour.
• Mode Échelle de gris : afficher les couleurs à l’écran en nuances de gris.
Mode Ultra économie d'énergie
Utilisez cette fonction pour prolonger l’autonomie de la batterie. En mode Ultra économie d’énergie,
l’appareil se comporte comme suit :
• Il affiche les couleurs à l’écran en nuances de gris.
• Il limite le nombre d’applications disponibles à l’essentiel et affiche uniquement les applications
sélectionnées.
• Il désactive la connexion de données mobiles quand l’écran s’éteint.
• Il désactive les fonctions Wi-Fi et Bluetooth.
Dans la liste des applications, appuyez sur Paramètres → Économie d'énergie → Mode Ultra
économie d'énergie, puis appuyez sur le curseur Mode Ultra économie d'énergie pour activer la
fonction. Une autre solution consiste à ouvrir le volet de paramétrage rapide, puis à appuyer sur
l'option Ultra éco énergie.
Pour ajouter une application à l’écran d’accueil, appuyez sur , puis sélectionnez une application.
Pour supprimer une application de l’écran d’accueil, appuyez sur → Supprimer, supprimez
l’application à l’aide de l’icône , puis appuyez sur OK.
Pour modifier les paramètres du mode Ultra économie d’énergie, par exemple la connectivité réseau
ou le son, appuyez sur → Paramètres.
Pour désactiver le mode Ultra économie énergie, appuyez sur → Désact. Ultra économie énergie.
Le délai de veille maximum estimé est le temps qu’il faut à la batterie pour se décharger
complètement lorsque l’appareil n’est pas utilisé. Le délai de veille peut varier selon les
paramètres de l’appareil et les conditions d’utilisation.
Fonctions de base
39
Afficher les informations d'aide
Pour afficher des informations d’aide concernant l’utilisation du périphérique et des applications,
ouvrez la liste des applications et appuyez sur Paramètres → Aide.
Pour afficher les informations d’aide relatives à une application que vous utilisez, appuyez sur →
Aide.
Il est possible que certaines applications ne possèdent pas d'informations d'aide.
40
Connectivité réseau
Données mobiles
Connectez l’appareil à un réseau mobile pour pouvoir utiliser Internet ou partager des fichiers
multimédia avec d’autres appareils. Pour connaître les options supplémentaires, reportez-vous à la
section « Utilisation des données ».
► Modèles à deux cartes SIM : depuis la liste des applications, appuyez sur Paramètres →
Utilisation des données → une carte SIM ou USIM, puis cochez l’option Données mobiles.
► Modèles à une carte SIM : depuis la liste des applications, appuyez sur Paramètres → Utilisation
des données, puis cochez la case Données mobiles.
Une autre solution consiste à ouvrir le volet de paramétrage rapide, puis à appuyer sur Données
mobiles pour activer la fonction.
Wi-Fi
Connectez l’appareil à un réseau Wi-Fi pour pouvoir utiliser Internet ou partager des fichiers
multimédia avec d’autres appareils Pour connaître les options supplémentaires, reportez-vous à la
section « Wi-Fi ».
• Votre appareil utilise une fréquence non harmonisée et est conçu pour fonctionner dans
tous les pays européens. Au sein de l’Union Européenne, le réseau Wi-Fi peut fonctionner
sans restriction en intérieur, mais pas en extérieur.
• Lorsque vous n’utilisez pas le réseau Wi-Fi, désactivez-le afin d’économiser la batterie.
1 Depuis la liste des applications, appuyez sur Paramètres → Wi-Fi, puis appuyez sur le curseur
Wi-Fi pour activer la fonction.
2 Sélectionnez un réseau dans la liste des réseaux Wi-Fi. Les réseaux nécessitant un mot de passe
sont signalés par une icône en forme de verrou.
3 Appuyez sur Connexion.
Une fois l’appareil connecté à un réseau Wi-Fi, il se reconnecte automatiquement à ce réseau
à chaque fois qu’il est disponible sans nécessiter de mot de passe.
Pour éviter la connexion automatique de l’appareil au réseau, sélectionnez le réseau dans la
liste de réseaux et appuyez sur Oublier.
Connectivité réseau
41
Modem et point d'accès mobile
À propos de la fonction Point d’accès mobile et modem
En l’absence de connexion Internet, utilisez cette fonction pour partager la connexion de données
de votre appareil avec des ordinateurs et d’autres appareils. Les connexions peuvent être effectuées
via la fonction Wi-Fi, USB ou Bluetooth.
L’utilisation de cette fonction peut entraîner des frais supplémentaires.
Utiliser le point d’accès mobile
Utilisez votre appareil comme point d’accès mobile pour partager sa connexion de données avec
d’autres appareils.
1 Depuis la liste des applications, appuyez sur Paramètres → Modem et point d'accès mobile →
Point d'accès mobile.
2 Faites glisser le curseur Point d'accès mobile vers la droite pour activer la fonction.
• L'icône apparaît dans la barre d’état. Les autres appareils peuvent détecter le vôtre dans la
liste de réseaux Wi-Fi.
• Pour définir un mot de passe pour le point d’accès mobile, appuyez sur → Configurer le
point d'accès, puis sélectionnez le type de sécurité. Saisissez ensuite un mot de passe, puis
appuyez sur Enreg.
3 Sur l’écran de l’autre appareil, recherchez et sélectionnez votre appareil dans la liste des réseaux
Wi-Fi.
4 Sur l’appareil connecté, utilisez la connexion de données mobiles de votre appareil pour accéder
à Internet.
Connectivité réseau
42
Utiliser le modem USB
Partagez la connexion de données mobiles de votre appareil avec d’autres ordinateurs via un
câble USB.
1 Depuis la liste des applications, appuyez sur Paramètres → Modem et point d'accès mobile.
2 Connectez l’appareil à un ordinateur à l’aide du câble USB.
3 Cochez la case Modem USB.
L'icône apparaît dans la barre d’état lorsque les deux appareils sont connectés.
4 Sur l’ordinateur, utilisez la connexion de données de votre appareil.
Utiliser le modem Bluetooth
Partagez la connexion de données mobiles de votre appareil avec d’autres ordinateurs via la fonction
Bluetooth. Assurez-vous que l’ordinateur auquel vous vous connectez prend en charge la fonction
Bluetooth.
1 Associez les deux appareils via la fonction Bluetooth. Pour plus d’informations, reportez-vous à
la section Établir une connexion avec d’autres appareils Bluetooth.
2 Depuis la liste des applications de votre appareil, appuyez sur Paramètres → Modem et point
d'accès mobile.
3 Cochez la case Modem Bluetooth.
4 Sur l’appareil connecté, ouvrez l’écran des paramètres Bluetooth, puis appuyez sur → Accès
Internet.
L'icône apparaît dans la barre d’état lorsque les deux appareils sont connectés.
5 Sur l’appareil connecté, utilisez la connexion de données mobiles de votre appareil pour accéder
à Internet.
Les modes de connexion peuvent varier en fonction des appareils connectés.
43
Reconnaissance des
mouvements et maniabilité
Mouvements et gestes
Si l’appareil est soumis à des secousses ou à des chocs excessifs, cela peut entraîner un
comportement imprévu. Veillez à contrôler vos gestes.
Smart Alert
Depuis la liste des applications, appuyez sur Paramètres → Mouvements et gestes → Smart Alert,
puis appuyez sur le curseur Smart Alert pour activer la fonction.
Si vous avez manqué des appels ou des nouveaux messages, l'appareil vibre lorsque vous le prenez
dans la main.
Il se peut que cette fonction ne soit pas opérationnelle si l'écran est allumé ou si l'appareil ne
se trouve pas sur une surface plane.
Reconnaissance des mouvements et maniabilité
44
Muet/pause
Depuis la liste des applications, appuyez sur Paramètres → Mouvements et gestes → Muet/pause,
puis appuyez sur le curseur Muet/pause pour activer la fonction.
Couvrir l'écran avec la main
Couvrez l'écran avec votre paume pour désactiver le son des appels entrants ou des alarmes.
Retourner l'appareil
Retournez l'appareil pour désactiver le son des appels entrants ou des alarmes.
Reconnaissance des mouvements et maniabilité
45
Balayer pour capturer
Depuis la liste des applications, appuyez sur Paramètres → Mouvements et gestes → Balayer pour
capturer, puis appuyez sur le curseur Balayer pour capturer pour activer la fonction.
Placez le côté de votre main sur l’écran et faites-le glisser de droite à gauche ou inversement pour
réaliser une capture d’écran. L’image est enregistrée dans le dossier Galerie → → Album →
Screenshots. Après avoir réalisé une capture d'écran, vous pouvez modifier l'image et la partager
avec d'autres personnes.
Cette fonction n’est disponible que pour certaines applications.
Reconnaissance des mouvements et maniabilité
46
Fenêtres multiples
À propos de la fonction Multi-fenêtres
Utilisez cette fonction pour exécuter simultanément deux applications sur le même écran. Vous
pouvez utiliser cette fonction pour afficher des e-mails ou utiliser Internet tout en lisant une vidéo.
Lancer la fonction Multi-fenêtres
1 Depuis la liste des applications, appuyez sur Paramètres → Fenêtres multiples, puis faites
glisser le curseur Fenêtres multiples vers la droite. Une autre solution consiste à ouvrir le volet
des raccourcis, puis à appuyer sur Multi fenêtres pour activer la fonction.
2 Maintenez le doigt appuyé sur la touche pour ouvrir le volet Multi-fenêtres.
3 Maintenez votre doigt appuyé sur une icône d'application et faites-la glisser du volet vers
l'écran. Ensuite, faites glisser une autre icône d'application du volet vers l'écran.
Les icônes d’application caractérisées par le symbole peuvent être lancées simultanément
dans des fenêtres distinctes de l’écran.
Reconnaissance des mouvements et maniabilité
47
Créer une combinaison Multi-fenêtres
Utilisez cette fonction pour enregistrer la combinaison de fenêtres que vous utilisez actuellement.
1 Lancez deux applications sur un écran partagé Multi-fenêtres.
2 Ouvrez le volet Multi-fenêtres et appuyez sur → Créer.
La combinaison Multi-fenêtres est ajoutée en haut du volet Multi-fenêtres.
Pour supprimer des combinaisons Multi-fenêtres, ouvrez le volet Multi-fenêtres, appuyez sur →
Modifier, sélectionnez une combinaison Multi-fenêtres, puis appuyez sur OK.
Ajuster la taille des fenêtres
Faites glisser le cercle situé entre les fenêtres d'applications vers le haut ou le bas pour ajuster la taille
des fenêtres.
Reconnaissance des mouvements et maniabilité
48
Utiliser les options Multi-fenêtres
Lorsque vous utilisez des applications Multi-fenêtres, sélectionnez la fenêtre d'une application ; un
cadre bleu apparaît autour. Appuyez sur le cercle situé entre les fenêtres d'applications pour accéder
aux options suivantes :
• : passer d’une application Multi-fenêtres à l’autre.
• : glisser et déposer du texte ou des images d’une fenêtre à l’autre. Maintenez le doigt appuyé
sur un élément dans la fenêtre sélectionnée et faites-le glisser vers l'autre fenêtre.
Il est possible que certaines applications ne soient pas compatibles avec cette fonction.
• : fermer l’application.
Reconnaissance des mouvements et maniabilité
49
Opération à une main
Vous pouvez activer le mode Opération à une main pour exploiter de façon pratique l’appareil à
l’aide d’une seule main.
Dans la liste des applications, appuyez sur Paramètres → Affichage et fond d'écran → Opération à
une main, puis appuyez sur le curseur Opération à une main pour activer la fonction.
Pour activer le mode d’utilisation d’une seule main, tenez l’appareil d’une main. Ensuite, faites
rapidement glisser le pouce du bord de l’écran jusqu’au centre, puis inversement.
Agrandir ou réduire la taille de
l’écran.
Revenir au mode plein écran.
Régler le volume.
Revenir à l’écran précédent.
Revenir à l’écran d’accueil.
Ouvrir la liste des applications
récemment ouvertes.
50
Personnaliser votre appareil
Gérer l’écran d’accueil et la liste des applications
Gérer l’écran d’accueil
Ajouter des éléments
Depuis la liste des applications, maintenez le doigt appuyé sur une application ou un dossier, puis
faites glisser l'élément vers l’écran d’accueil.
Pour ajouter des widgets, ouvrez l’écran d’accueil, appuyez sans relâcher sur une zone vide, appuyez
sur Widgets, appuyez sans relâcher sur un widget, puis faites-le glisser vers l’écran d’accueil.
Déplacer et supprimer un élément
Maintenez le doigt appuyé sur un élément depuis l’écran d’accueil, puis faites-le glisser jusqu’à
l’emplacement souhaité.
Pour déplacer l’élément vers un autre volet, faites-le glisser vers le bord de l’écran.
Vous pouvez également déplacer les applications fréquemment utilisées vers la zone de raccourcis
située en bas de l’écran d’accueil.
Pour supprimer un élément, maintenez le doigt appuyé dessus. Faites-le ensuite glisser vers l’option
Supprimer qui s’affiche en haut de l’écran.
Créer un dossier
1 Depuis l’écran d’accueil, maintenez le doigt appuyé sur une application, puis faites-la glisser vers
l’option Créer dossier qui apparaît en haut de l’écran.
2 Saisissez un nom de dossier.
3 Appuyez sur , sélectionnez les applications à déplacer vers le dossier, puis appuyez sur OK.
Personnaliser votre appareil
51
Gérer les volets
Depuis l’écran d’accueil, maintenez le doigt appuyé sur une zone vide pour ajouter, déplacer ou
supprimer un volet.
Pour ajouter un volet, faites défiler l'icône l’écran vers la gauche jusqu’au dernier volet, puis appuyez
sur .
Pour déplacer un volet, maintenez le doigt appuyé sur son aperçu, puis faites-le glisser jusqu’à
l’emplacement souhaité.
Pour supprimer un volet, maintenez le doigt appuyé sur son aperçu, puis faites-le glisser vers l’option
Supprimer en haut de l’écran.
Pour définir un volet comme écran d’accueil principal, appuyez sur .
Gérer la liste des applications
Changer le mode d'affichage
Depuis la liste des applications, appuyez sur → Trier par et sélectionnez un mode d'affichage.
Masquer des applications
Vous pouvez masquer les applications que vous ne voulez pas retrouver dans la liste des
applications.
Depuis la liste des applications, appuyez sur → Masquer applications, sélectionnez des
applications, puis appuyez sur OK.
Pour afficher les applications masquées, appuyez sur → Afficher les applications masquées,
sélectionnez des applications, puis appuyez sur OK.
Déplacer des éléments
Depuis la liste des applications, appuyez sur → Modifier. Maintenez le doigt appuyé sur l’élément à
déplacer, puis faites-le glisser jusqu’à l’emplacement souhaité.
Pour déplacer l’élément vers un autre volet, faites-le glisser vers le bord de l’écran.
Pour déplacer un élément vers un tout nouveau volet, faites-le glisser vers l’option Créer une page
qui s’affiche en haut de l’écran.
Personnaliser votre appareil
52
Créer un dossier
1 Depuis la liste des applications, appuyez sur → Créer dossier. Sinon, appuyez sur →
Modifier, maintenez le doigt appuyé sur une application, puis faites-la glisser vers l'option Créer
dossier qui apparaît en haut de l’écran.
2 Saisissez un nom de dossier.
3 Appuyez sur , sélectionnez les applications à déplacer vers le dossier, puis appuyez sur OK.
Définir un fond d’écran et des sonneries
Définir un fond d’écran
Définissez une image ou une photo enregistrée dans l’appareil comme fond de l’écran d’accueil ou
de verrouillage.
1 Maintenez le doigt appuyé sur une zone vide de l’écran d’accueil, puis appuyez sur Fonds
d'écran. Vous pouvez également appuyer sur Paramètres → Affichage et fond d'écran →
Fond d'écran dans la liste des applications.
2 Sélectionnez un écran à modifier ou auquel appliquer un fond d’écran.
3 Faites défiler vers la gauche ou la droite, puis sélectionnez une image parmi celles affichées en
bas de l’écran.
Pour sélectionner les photos que vous avez prises avec l’appareil photo ou d’autres images,
appuyez sur Depuis Galerie ou .
4 Appuyez sur Définir comme fond d'écran ou sur Enregistrer.
Personnaliser votre appareil
53
Modifier les sonneries
Modifiez les sonneries des appels entrants et des notifications.
Depuis la liste des applications, appuyez sur Paramètres → Son.
► Modèles à deux cartes SIM : pour définir une sonnerie pour les appels entrants, appuyez sur
Sonnerie → une carte SIM ou USIM → Sonneries, sélectionnez une sonnerie, puis appuyez sur
OK. Pour utiliser un morceau de musique stocké sur l’appareil ou sur l’un de vos comptes comme
sonnerie, appuyez sur Ajouter.
Pour définir une sonnerie pour les notifications, appuyez sur Sonnerie → une carte SIM ou USIM →
Notifications, sélectionnez une sonnerie, puis appuyez sur OK.
► Modèles à une carte SIM : pour définir une sonnerie pour les appels entrants, appuyez sur
Sonneries, sélectionnez une sonnerie, puis appuyez sur OK. Pour utiliser un morceau de musique
stocké sur l’appareil ou sur l’un de vos comptes comme sonnerie, appuyez sur Ajouter.
Pour définir une sonnerie pour les notifications, appuyez sur Notifications, sélectionnez une
sonnerie, puis appuyez sur OK.
Changer la méthode de déverrouillage de l’écran
Vous pouvez définir une méthode de déverrouillage de l’écran pour empêcher l’accès à vos
informations personnelles par autrui.
Depuis la liste des applications, appuyez sur Paramètres → Écran de verrouillage →
Déverrouillage de l'écran, puis sélectionnez une méthode de déverrouillage. Pour protéger votre
appareil, vous pouvez définir un code de déverrouillage. Sans ce code, l’appareil ne pourra pas être
déverrouillé.
Si vous oubliez le code de déverrouillage, apportez l’appareil dans un centre de service
après-vente Samsung pour le réinitialiser.
Modèle
Dessinez un modèle en reliant au moins quatre points, puis recommencez pour valider. Définissez un
code PIN de secours pour déverrouiller l’écran en cas d’oubli du modèle.
Code PIN
Un code PIN se compose uniquement de chiffres. Saisissez au moins quatre chiffres, puis
recommencez pour valider.
Mot de passe
Un mot de passe comprend des caractères et des chiffres. Saisissez au moins quatre caractères, y
compris des chiffres et des symboles, puis recommencez pour valider.
Personnaliser votre appareil
54
Mode Privé
À propos du mode Privé
Utilisez ce mode pour empêcher d’autres personnes d’utiliser ou d’accéder à des contenus
spécifiques, tels que des images ou des documents enregistrés sur l’appareil. Vous pouvez
enregistrer du contenu à un emplacement spécifique, puis désactiver le mode Privé pour masquer
ces éléments.
Masquer du contenu
1 Depuis la liste des applications, appuyez sur Paramètres → Mode Privé, puis appuyez sur le
curseur Mode Privé pour activer la fonction. Une autre solution consiste à ouvrir le volet de
paramétrage rapide, puis à appuyer sur Mode Privé.
Lorsque vous activez le mode Privé pour la première fois, définissez un code de déverrouillage et
un code PIN de secours.
2 Saisissez le code de déverrouillage du mode Privé.
Une fois ce mode activé, l’icône apparaît en haut de l’écran.
3 Pour sélectionner les éléments à masquer, maintenez le doigt appuyé sur un élément de la liste,
cochez-le pour le sélectionner, puis appuyez sur → Déplacer dans Privé, ou sur Déplacer →
Privé → Déplacer ici.
Les éléments du mode Privé sont caractérisés par le symbole .
4 Une fois les éléments à masquer sélectionnés, ouvrez la liste des applications, appuyez sur
Paramètres → Mode Privé, puis faites glisser le curseur Mode Privé vers la gauche pour
désactiver la fonction. Une autre solution consiste à ouvrir le volet de paramétrage rapide, puis à
appuyer sur Mode Privé pour désactiver la fonction.
Les éléments sélectionnés disparaissent de l’écran.
Vérifiez que les fichiers ont bien été enregistrés et déplacés avant de désactiver le mode
Privé.
Personnaliser votre appareil
55
Afficher du contenu masqué
Vous pouvez afficher le contenu masqué uniquement si le mode Privé est activé.
1 Depuis la liste des applications, appuyez sur Paramètres → Mode Privé, puis appuyez sur le
curseur Mode Privé pour activer la fonction. Une autre solution consiste à ouvrir le volet de
paramétrage rapide, puis à appuyer sur Mode Privé.
2 Saisissez le code de déverrouillage du mode Privé.
3 Depuis la liste des applications, appuyez sur Mes fichiers → Privé.
Tous les éléments du mode Privé s’affichent à l’écran.
Mode simplifié
Le mode simplifié fournit une expérience utilisateur plus conviviale, grâce à une présentation plus
simple et à des icônes plus grosses sur l’écran d’accueil. Vous pouvez accéder aux applications les
plus courantes et aux paramètres fréquemment utilisés, et utiliser des raccourcis vers vos contacts
favoris.
Depuis la liste des applications, appuyez sur Paramètres → Mode simplifié → Mode simplifié,
sélectionnez les applications auxquelles appliquer une disposition plus simple, puis appuyez sur
Effectué.
Pour retourner au mode standard, ouvrez l’écran d’accueil et appuyez sur Paramètres simples →
Mode simplifié → Mode standard → Effectué.
Gérer les raccourcis
En mode simplifié, pour ajouter un raccourci vers une application depuis l’écran d’accueil, faites
défiler l’écran vers la gauche, appuyez sur , puis sélectionnez une application.
Pour ajouter un raccourci vers un contact depuis l’écran d’accueil, faites défiler l’écran vers la droite,
puis appuyez sur .
Pour supprimer un raccourci depuis l’écran d’accueil, appuyez sur → Modif., sélectionnez une
application ou un contact à supprimer à l'aide de l'icône .
Personnaliser votre appareil
56
Transférer des données depuis votre ancien
appareil
Utiliser un compte de sauvegarde
Vous pouvez transférer des données de sauvegarde depuis votre ancien appareil vers votre nouvel
appareil à l'aide de votre compte Google ou Samsung. Pour plus d'informations, reportez-vous à la
section Sauvegarder et restaurer des données.
Utiliser Samsung Smart Switch
Vous pouvez transférer des données de votre ancien appareil vers un nouvel appareil via Smart
Switch. visitez www.samsung.com/smartswitch pour en savoir plus.
Samsung Smart Switch n’est pas pris en charge sur certains appareils ou ordinateurs.
Utiliser Smart Switch Mobile
Utilisez cette application pour transférer vos données de votre ancien appareil vers votre nouvel
appareil. Vous pouvez télécharger l’application depuis GALAXY Apps ou Play Store.
1 Depuis votre appareil, appuyez sur Smart Switch Mobile.
2 Depuis votre appareil, sélectionnez une option en fonction du type de votre ancien appareil et
suivez les instructions qui s’affichent à l’écran.
Si l’ancien appareil est un appareil Android, assurez-vous que l’application Smart Switch Mobile
y est installée. Pour en savoir plus, consultez l’aide.
Utiliser Smart Switch avec un ordinateur
Utilisez cette fonction pour importer une sauvegarde de vos données (depuis des appareils mobiles
d'un fabricant sélectionné) depuis un ordinateur vers votre appareil. Vous pouvez télécharger
l’application depuis www.samsung.com/smartswitch.
1 Sauvegardez les données d'un ancien appareil sur un ordinateur. Pour plus d’informations,
contactez le fabricant de l’appareil.
2 Sur l’ordinateur, lancez Smart Switch.
Personnaliser votre appareil
57
3 Connectez votre ancien appareil à l’ordinateur à l’aide d'un câble USB.
4 Sur l'ordinateur, sélectionnez le fabricant de l'ancien appareil, puis suivez les instructions à
l'écran pour transférer les données vers votre appareil.
Utiliser Samsung Kies
Importez un fichier de sauvegarde de vos données depuis votre ordinateur via Samsung Kies
pour restaurer les données sur votre appareil. Vous pouvez également sauvegarder les données
sur l'ordinateur via Samsung Kies. Pour plus d’informations, reportez-vous à la section Connecter
l’appareil avec Samsung Kies.
Paramétrer des comptes
Ajouter des comptes
Certaines applications utilisées sur l’appareil nécessitent un compte enregistré. Afin de profiter au
maximum de votre appareil, créez des comptes.
Depuis la liste des applications, appuyez sur Paramètres → Comptes → Ajouter compte et
sélectionnez un service de compte. Ensuite, suivez les instructions qui s’affichent à l’écran pour
procéder à la configuration du compte.
Pour synchroniser du contenu avec vos comptes, sélectionnez un compte, puis cochez les éléments
à synchroniser.
Supprimer un compte
Depuis la liste des applications, appuyez sur Paramètres → Comptes, sélectionnez un compte, puis
appuyez sur → Supprimer le compte.
58
Téléphone
Passer des appels
Depuis la liste des applications, appuyez sur Téléphone.
► Modèles à deux cartes SIM : appuyez sur Clavier, composez un numéro de téléphone, puis
appuyez sur ou pour passer un appel vocal ou sur pour passer un appel visio.
Accéder à des options
supplémentaires.
Afficher un aperçu du numéro de
téléphone.
Afficher les contacts favoris.
Supprimer le caractère précédent.
Afficher la liste de contacts.
Afficher les journaux d’appels et de
messages.
Ajouter le numéro à la liste de
contacts.
Composer un numéro à l’aide du
clavier.
Téléphone
59
► Modèles à une carte SIM : appuyez sur Clavier, composez un numéro de téléphone, puis
appuyez sur pour passer un appel vocal ou sur pour passer un appel visio.
Accéder à des options
supplémentaires.
Afficher un aperçu du numéro de
téléphone.
Afficher les contacts favoris.
Supprimer le caractère précédent.
Afficher la liste de contacts.
Afficher les journaux d’appels et de
messages.
Composer un numéro à l’aide du
clavier.
Ajouter le numéro à la liste de
contacts.
Vous pouvez également passer des appels aux numéros de téléphone répertoriés dans les menus
Journal, Favoris et Contacts.
Passer des appels depuis le journal d’appels ou la liste de contacts
Appuyez sur Journal ou sur Contacts, puis faites glisser votre doigt vers la droite sur un contact ou
un numéro de téléphone pour passer un appel.
Pour désactiver la fonction d’appel en faisant glisser une icône vers la droite, appuyez sur →
Paramètres → Contacts, puis décochez l’option Glisser pour appel/msg.
Téléphone
60
Appeler un numéro à l’étranger
Appuyez sur Clavier.
► Modèles à deux cartes SIM : maintenez le doigt appuyé sur la touche 0 jusqu’à ce que le signe +
apparaisse. Composez l'indicatif du pays, l'indicatif régional et le numéro de téléphone, puis appuyez
sur ou .
Pour interdire les appels à l’étranger, appuyez sur → Paramètres → Appel → Paramètres
supplémentaires → une carte SIM ou USIM → Restriction d'appel. Sélectionnez ensuite un type
d’appel, puis cochez la case Appels internationaux.
► Modèles à une carte SIM : maintenez le doigt appuyé sur la touche 0 jusqu’à ce que le signe +
apparaisse. Composez l’indicatif du pays, l’indicatif régional et le numéro de téléphone, puis appuyez
sur .
Pour interdire les appels à l’étranger, appuyez sur → Paramètres → Appel → Paramètres
supplémentaires → Restriction d'appel. Sélectionnez ensuite un type d’appel, puis cochez la case
Appels internationaux.
Recevoir des appels
Répondre à un appel
Lorsque vous recevez un appel, faites glisser votre doigt sur l’icône .
Rejeter un appel
Lorsque vous recevez un appel, faites glisser votre doigt sur l’icône .
Pour envoyer un message lorsque vous rejetez un appel entrant, faites glisser la barre des messages
de rejet située en bas de l’écran vers le haut.
Pour créer des messages de rejet, ouvrez la liste des applications et appuyez sur Téléphone → →
Paramètres → Appel → Rejet de l'appel → Définir les messages de rejet → .
Appels manqués
Si vous manquez un appel, l’icône apparaît dans le volet des raccourcis. Ouvrez le volet des
raccourcis pour afficher la liste des appels manqués. Une autre solution consiste, depuis la liste des
applications, à appuyer sur Téléphone → Journal pour afficher les messages manqués.
Téléphone
61
Options en cours d’appel
Options au cours d’un appel vocal
Les options suivantes sont disponibles :
• : augmenter le volume.
• Ajouter : passer un autre appel.
• Clavier : ouvrir le clavier.
• Fin : terminer l'appel en cours.
• HP : activer ou désactiver le haut-parleur. Lorsque vous utilisez le haut-parleur, parlez dans le
microphone en haut de l’appareil et éloignez l’appareil de vos oreilles.
• Muet : désactiver le microphone afin que votre correspondant ne puisse pas vous entendre.
• Bluetooth : sélectionner un casque Bluetooth, à condition qu’il soit connecté à l’appareil.
Appuyez sur pour afficher d'autres options.
Si vous démarrez des applications au cours d’un appel, une fenêtre contextuelle affichant l’écran
d’appel ( ) apparaît. Vous pouvez poursuivre la conversation téléphonique tout en utilisant des
applications.
Pour déplacer la fenêtre contextuelle, faites-la glisser vers un autre emplacement.
Pour supprimer la fenêtre contextuelle, maintenez-y le doigt appuyé, puis appuyez sur OK.
Pour revenir à l’écran d’appel, appuyez sur la fenêtre contextuelle.
Téléphone
62
Options au cours d’un appel visio
Appuyez sur l’écran pour utiliser les options suivantes :
• → Masquer mon image : masquer votre image à l'interlocuteur.
• → Image sortante : sélectionner l'image à afficher à votre correspondant.
• → Capturer une image : capturer l’image de votre correspondant.
• → Enregistrer une vidéo : enregistrer une vidéo de votre correspondant.
• → Mémo : créer un mémo.
• → Messages : envoyer un message.
• → Clavier : ouvrir le clavier.
• → Désactiver haut-parleur / Activer haut-parleur : activer ou désactiver le haut-parleur.
Lorsque vous utilisez le haut-parleur, parlez dans le microphone en haut de l’appareil et éloignez
l’appareil de vos oreilles.
• → Basculer sur le casque / Basculer sur le téléphone : basculer la sortie audio entre le casque
Bluetooth connecté ou le haut-parleur de l’appareil.
• Permuter : basculer entre l'objectif avant et arrière, et inversement.
• Muet : désactiver le microphone afin que votre correspondant ne puisse pas vous entendre.
• Fin : terminer l'appel en cours.
63
Contacts
Ajouter des contacts
Transférer des contacts depuis d’autres appareils
Vous pouvez transférer des contacts depuis d'autres appareils sur votre appareil. Pour plus
d'informations, reportez-vous à la section Transférer des données depuis votre ancien appareil.
Créer manuellement des contacts
1 Depuis la liste des applications, appuyez sur Contacts → Contacts.
2 Appuyez sur , sélectionnez une mémoire de stockage, puis saisissez les informations du
contact.
• : ajouter une image.
• / : ajouter ou supprimer un champ d'information.
3 Appuyez sur Enreg.
Pour ajouter un numéro de téléphone à la liste de contacts à partir du clavier, appuyez sur Clavier,
composez le numéro, puis appuyez sur Ajouter aux contacts.
Importer et exporter des contacts
Importez des contacts depuis des services de stockage ou exportez-les vers ces services.
Depuis la liste des applications, appuyez sur Contacts → Contacts.
Appuyez sur → Paramètres → Contacts → Importer/Exporter les contacts, puis sélectionnez une
option d’importation ou d’exportation.
Contacts
64
Rechercher des contacts
Depuis la liste des applications, appuyez sur Contacts → Contacts.
Utilisez l’une des méthodes de recherche suivantes :
• Faites défiler la liste de contacts vers le haut ou le bas.
• Faites glisser un doigt le long de l’index à droite de la liste des contacts pour la faire défiler
rapidement.
• Appuyez sur le champ de recherche tout en haut de la liste de contacts, puis saisissez vos
critères de recherche.
Une fois le contact sélectionné, choisissez l’une des options suivantes :
• : ajouter le contact aux favoris.
• / : passer un appel vocal ou visio.
• : rédiger un message.
• : rédiger un e-mail.
Ajouter des raccourcis vers des contacts à l’écran d’accueil
Ajoutez des raccourcis vers les contacts avec lesquels vous communiquez fréquemment sur l’écran
d’accueil.
1 Depuis la liste des applications, appuyez sur Contacts → Contacts.
2 Sélectionnez un contact.
3 Appuyez sur → Ajouter un raccourci à l'écran d'accueil.
65
Messages et e-mails
Messages
Envoyer des messages
Envoyez des messages texte (SMS) ou des messages multimédia (MMS).
L’envoi ou la réception de messages en dehors de la zone couverte par votre opérateur peut
occasionner des frais supplémentaires.
1 Depuis la liste des applications, appuyez sur Messages.
2 Appuyez sur .
3 Ajoutez des destinataires, puis saisissez un message.
► Modèles à deux cartes SIM :
Accéder à des options
supplémentaires.
Insérer un message.
Sélectionner des contacts depuis
votre liste de contacts.
Insérer des émoticônes.
Saisir les destinataires.
Joindre des fichiers. Envoyer le message.
Messages et e-mails
66
► Modèles à une carte SIM :
Accéder à des options
supplémentaires.
Insérer un message.
Sélectionner des contacts depuis
votre liste de contacts.
Insérer des émoticônes.
Saisir les destinataires.
Joindre des fichiers.
Envoyer le message.
4 ► Modèles à deux cartes SIM : appuyez sur ou pour envoyer le message.
► Modèles à une carte SIM : appuyez sur pour envoyer le message.
Lire les messages entrants
Les messages entrants sont regroupés sous forme de fils de discussion par contact. Pour afficher les
messages d’un contact, sélectionnez ce dernier.
L’envoi ou la réception de messages en dehors de la zone couverte par votre opérateur peut
occasionner des frais supplémentaires.
En mode affichage d'un message, appuyez sur pour afficher d'autres options.
Messages et e-mails
67
Email
Configurer des comptes de messagerie électronique
Depuis la liste des applications, appuyez sur Email.
Lorsque vous ouvrez l’application Email pour la première fois, configurez un compte de messagerie
électronique.
Saisissez votre adresse e-mail et votre mot de passe. Appuyez sur Suivant s’il s’agit d’un compte de
messagerie électronique privé ou sur Configuration manuelle s’il s’agit d’un compte de messagerie
électronique professionnel. Suivez ensuite les instructions qui s’affichent à l’écran pour procéder à la
configuration du compte.
Pour configurer un compte de messagerie électronique supplémentaire, appuyez sur → Gérer les
comptes → .
Si vous disposez de plus d’un compte de messagerie électronique, vous pouvez définir l’un d’eux
comme compte par défaut. Appuyez sur → Gérer les comptes → → Définir le compte par
défaut.
Envoyer des e-mails
Depuis la liste des applications, appuyez sur Email.
Appuyez sur l'icône en bas de l’écran pour rédiger un message.
Ajouter un destinataire en copie ou
copie cachée.
Ajouter des destinataires.
Ajouter des destinataires depuis la
liste de contacts.
Insérer un message.
Entrer un objet.
Envoyer le message.
Accéder à des options
supplémentaires.
Joindre des images, des vidéos et
autres.
Enregistrer le message pour
l'envoyer ultérieurement.
Ignorer le message.
Insérer des fichiers dans le
message, ou utiliser des options
d'édition.
Messages et e-mails
68
Lire des e-mails
Depuis la liste des applications, appuyez sur Email.
Appuyez sur , puis sélectionnez un compte de messagerie électronique à utiliser. Les nouveaux
messages sont récupérés. Pour récupérer manuellement les messages, appuyez sur .
Appuyez sur un message pour le lire.
Ouvrir les pièces jointes.
Répondre au message.
Ajouter cette adresse e-mail à votre
liste de contacts ou afficher d'autres
options.
Identifier le message comme favori.
Répondre à tous les destinataires.
Transférer le message.
Passer au message suivant ou
revenir au message précédent.
Supprimer le message.
Accéder à des options
supplémentaires.
69
Appareil photo
Prise de vue de base
Prendre des photos ou enregistrer des vidéos
1 Depuis la liste des applications, appuyez sur Appareil photo.
2 Appuyez sur l’écran d’aperçu à l’endroit où l’appareil photo doit faire la mise au point.
3 Appuyez sur pour prendre une photo ou sur pour enregistrer une vidéo.
• Pour effectuer un zoom avant, écartez deux doigts l’un de l’autre sur l’écran ; pour effectuer
un zoom arrière, rapprochez-les.
• Pour capturer une image de la vidéo en cours d’enregistrement, appuyez sur .
• Pour modifier la mise au point en cours d’enregistrement d’une vidéo, appuyez sur l’endroit
souhaité pour la mise au point. Pour faire la mise au point au centre de l’écran, appuyez sur
.
Modifier le mode de
prise de vue.
Enregistrer une vidéo.
Prendre une photo.
Afficher les photos et
les vidéos que vous
avez prises.
Afficher le mode en
cours.
Basculer entre
l'objectif avant et
arrière, et inversement.
Modifier les
paramètres de
l’appareil photo.
Appareil photo
70
• Lorsque vous n’utilisez plus l’appareil photo, il se ferme automatiquement.
• Assurez-vous que l’objectif est bien propre. Dans le cas contraire, l’appareil risque de ne
pas fonctionner correctement dans certains modes nécessitant des résolutions élevées.
• L’objectif avant est adapté à la prise de photos grand-angle. Il se peut qu’une distorsion
mineure se produise dans les photos grand-angle ; cela ne traduit pas un problème de
performances de l’appareil.
Ouvrir l’appareil photo depuis l’écran verrouillé
Pour prendre rapidement des photos de moments particuliers, depuis l’écran de verrouillage,
démarrez l’application Appareil photo.
Depuis l’écran verrouillé, faites glisser votre doigt sur l'icône . Si l’icône ne s’affiche pas, ouvrez
la liste des applications, appuyez sur Paramètres → Écran de verrouillage, puis cochez la case
Raccourci Appareil photo.
La disponibilité de cette fonction dépend de votre zone géographique ou de votre
opérateur.
Bon usage de l’appareil photo
• Ne prenez pas de photos et n’enregistrez pas de vidéos d’autres personnes sans leur
consentement.
• Ne prenez pas de photos et n’enregistrez pas de vidéos lorsque la loi l’interdit.
• Ne prenez pas de photos et n’enregistrez pas de vidéos en violation de la vie privée d’autrui.
Appareil photo
71
Modes de prise de vue
Auto.
Ce mode permet à l'appareil photo d'évaluer l'environnement et de déterminer le mode idéal pour la
photo.
Depuis la liste des applications, appuyez sur Appareil photo → MODE → Aut.
Selfie
Utilisez ce mode pour faire un autoportrait avec l'objectif avant.
1 Depuis la liste des applications, appuyez sur Appareil photo.
2 Appuyez sur pour utiliser l'objectif avant.
3 Appuyez sur MODE → Selfie.
4 Présentez la paume de la main à l'écran ou appuyez sur pour faire un autoportrait.
Selfie panorama
Utilisez ce mode pour réaliser un autoportrait grand-angle avec l'objectif avant. L’appareil identifie la
photo à l’aide de l’icône dans la Galerie.
1 Depuis la liste des applications, appuyez sur Appareil photo.
2 Appuyez sur pour utiliser l'objectif avant.
3 Appuyez sur MODE → Selfie panorama.
Appareil photo
72
4 Présentez la paume de la main à l'écran ou appuyez sur pour réaliser un autoportrait.
5 Tournez lentement l'appareil vers la gauche, puis vers la droite pour prendre une photo
panoramique. L'appareil combine les photos en une seule image panoramique.
• Veillez à ce que le cadre bleu reste à l'intérieur du cadre de prise de vue.
• Les sujets ne doivent pas bouger pendant la prise de vue d'autoportraits grand-angle.
• Les conditions d'éclairage peuvent affecter la résolution d'une photo.
• Les parties supérieures et inférieures de l'image affichée sur l'écran d'aperçu peuvent être
coupées de la photo selon les conditions de prise de vue.
• Pour obtenir des résultats optimaux, tenez l'appareil dans votre main et étendez votre
bras le plus loin possible.
Selfie arrière
Utilisez ce mode pour permettre à l'appareil photo de détecter votre visage et d'effectuer la mise au
point dessus automatiquement lorsque vous faites un autoportrait à l'aide de l'objectif arrière.
1 Depuis la liste des applications, appuyez sur Appareil photo → MODE → Selfie arrière.
2 Déplacez le cadre jusqu'à votre visage et ajustez la taille du cadre.
3 Positionnez l'appareil de manière à ce que l'objectif arrière soit dirigé vers votre visage. Lorsque
le visage est détecté, l'appareil émet un bip. L'appareil prend alors automatiquement la photo
après 2 secondes.
Panorama
Ce mode permet de prendre une photo composée de différents clichés assemblés les uns aux autres.
L’appareil identifie la photo à l’aide de l’icône dans la Galerie.
Depuis la liste des applications, appuyez sur Appareil photo → MODE → Panorama.
Pour obtenir la meilleure photo possible, suivez ces conseils :
• Déplacez l’appareil photo lentement dans le sens de votre choix.
• Maintenez l’image à l’intérieur du cadre de prise de vue de l’appareil photo.
• Évitez de prendre des photos de sujets devant des arrière-plans non identifiables, comme
un ciel ou un pan de mur uni.
Appareil photo
73
Nuit
Utilisez ce mode pour prendre une photo en conditions de faible éclairage, sans utiliser le flash.
Depuis la liste des applications, appuyez sur Appareil photo → MODE → Nuit.
GIF animé
Ce mode permet de créer une photo animée à partir d'une série de photos.
Depuis la liste des applications, appuyez sur Appareil photo → MODE → GIF animé.
Gérer les modes de prise de vue
Sélectionnez les modes de prise de vue à afficher sur l'écran de sélection de mode.
1 Depuis la liste des applications, appuyez sur Appareil photo → MODE → Gérer modes.
2 Cochez les modes à ajouter à la liste des modes.
• Beauté : ce mode permet de prendre des photos de visages plus claires pour obtenir des
images plus douces.
• Prise & plus : ce mode permet de prendre une série de photos et de leur appliquer divers
effets à l’aide des modes de prise de vue.
• Rafale : ce mode permet de prendre une série de photos de sujets en mouvement.
• HDR (Ton riche) : ce mode permet de prendre des photos riches en couleurs et de
reproduire chacun des détails, même dans des conditions de luminosité extrêmes.
Télécharger des modes de prise de vue
Téléchargez d’autres modes de prise de vue depuis GALAXY Apps.
Depuis la liste des applications, appuyez sur Appareil photo → MODE → Télécharger.
Appareil photo
74
Paramètres de l'appareil photo
Depuis la liste des applications, appuyez sur Appareil photo → . Les options suivantes sont
disponibles pour les deux modes (appareil photo et caméscope) ou l'un ou l'autre des modes.
• : activer ou de désactiver le flash.
• : indiquer à l'appareil le nombre de photos à prendre à intervalles prédéfinis lorsque vous
photographiez avec l'objectif avant.
• : définir le délai à l'issue duquel l'appareil doit prendre une photo ou enregistrer une vidéo.
• : sélectionner un effet de filtre à utiliser lorsque vous prenez des photos ou enregistrez des
vidéos.
• / : sélectionner une résolution. Pour obtenir une meilleure qualité, utilisez une résolution
élevée. Cependant, notez qu’une résolution élevée nécessite davantage de mémoire.
Pour accéder à des options supplémentaires, appuyez sur .
• Selfie paume : paramétrer l'appareil pour qu'il détecte votre paume et que vous puissiez ainsi
l'utiliser pour prendre des autoportraits.
• Beauté : paramétrer l'appareil pour qu'il photographie des portraits avec des couleurs plus
claires afin d'obtenir des images plus douces.
• Valeur d'expos. : modifier la valeur d'exposition. Ce paramètre détermine la quantité de lumière
reçue par le capteur de l’appareil photo. En cas de faible luminosité, utilisez une exposition plus
élevée.
• ISO : sélectionner une valeur ISO. Ce paramètre permet de contrôler la sensibilité lumineuse
de l’appareil photo. Celle-ci est mesurée en équivalents de caméra-film. Les valeurs faibles sont
destinées aux objets immobiles vivement éclairés. Les valeurs plus élevées sont pour les objets
en mouvement ou faiblement éclairés.
• Balance des blancs : sélectionner une balance des blancs appropriée de sorte que les images
offrent une gamme de couleurs proches de la réalité. Les paramètres sont conçus pour des
situations lumineuses spécifiques. Ils sont similaires à la gamme thermique d’exposition et de
balance des blancs des appareils photo professionnels.
• Modes de mesure : sélectionner un mode de mesure. Ce paramètre détermine la manière dont
les valeurs lumineuses sont calculées. Mesure pondérée centrale mesure la lumière d’arrièreplan
au centre de la scène. Spot mesure la valeur de la lumière à un endroit spécifique. Matrice
calcule la moyenne de la scène toute entière.
• Photo par appui: appuyer sur l'image à l'écran pour prendre une photo.
• Taille de la vidéo : sélectionner une résolution. Pour obtenir une meilleure qualité, utilisez une
résolution élevée. Cependant, notez qu’une résolution élevée nécessite davantage de mémoire.
• Mode enregistr. : modifier le mode d’enregistrement.
Appareil photo
75
• Tags de localis. : paramétrer l'appareil pour qu'il joigne la balise de localisation à la photo.
• Pour que les signaux GPS soient meilleurs, évitez de prendre des photos dans des lieux
où le signal peut être limité, par exemple entre des bâtiments ou dans des zones de faible
altitude, ou encore lorsque les conditions météorologiques sont mauvaises.
• Lorsque vous partagez une photo comprenant une balise de localisation, il se peut
les informations de localisation soient exposées à des tiers. Pour éviter cela, lors de la
visualisation de la photo, appuyez sur → Plus d'infos → , puis appuyez sur sous
Localisation pour effacer vos informations de localisation.
• Emplac. de stockage : sélectionner l’emplacement de stockage des photos et des vidéos.
• Enreg. comme ret. : inverser l'image pour créer une image miroir de la scène originale, lorsque
vous prenez des photos avec l'objectif avant.
• Grille : afficher des lignes directrices sur l'écran d'aperçu.
• Contrôle vocal : paramétrer l’appareil pour qu’il prenne des photos à l’aide de commandes
vocales.
• Touche de volume : utiliser la touche de volume pour contrôler l’obturateur ou le zoom.
• Aperçu photo/vidéo : paramétrer l'appareil pour qu'il affiche les photos ou les vidéos que vous
avez prises.
• Réinit. les paramètres : réinitialiser les paramètres de l'appareil.
Les options disponibles peuvent varier selon le mode utilisé.
76
Galerie
Afficher les photos et les vidéos de l’appareil
Depuis la liste des applications, appuyez sur Galerie et sélectionnez une image ou une vidéo.
Les fichiers vidéo sont caractérisés par l’icône dans l'aperçu miniature.
Pour masquer ou afficher la barre de menus et les miniatures, appuyez sur l'écran.
Accéder à des options
supplémentaires.
Supprimer l’image.
Modifier la photo.
Revenir à l’écran précédent.
Envoyer l’image à d’autres
personnes.
Rechercher d’autres appareils pour
afficher la photo.
Miniatures d'aperçu.
Galerie
77
Afficher les contenus stockés sur d’autres
appareils
Recherchez des contenus stockés sur d’autres appareils pour les afficher sur votre appareil.
Depuis la liste des applications, appuyez sur Galerie.
Accéder à un contenu sur un appareil enregistré
Pour utiliser cette fonction, vous devez vous connecter à votre compte Samsung.
Dans l'écran principal Galerie, appuyez sur et sélectionnez un appareil dans APPAREILS
ENREGISTRÉS pour accéder à son contenu. Vous pouvez afficher le contenu sur les appareils
enregistrés sur Samsung Link. Pour en savoir plus, consultez l’adresse suivante : link.samsung.com.
• Vérifiez que les appareils enregistrés sont allumés et connectés à un réseau Wi-Fi ou
mobile.
• Il se peut que des frais supplémentaires vous soient facturés lorsque vous accédez à des
contenus enregistrés sur d’autres appareils via le réseau mobile.
Accéder à un contenu sur un appareil à proximité
Pour utiliser cette fonction, ouvrez la liste des applications, appuyez sur Paramètres → NFC et
partage → Appareils à proximité, puis appuyez sur le curseur Appareils à proximité pour activer
la fonction. Pour accéder aux paramètres supplémentaires, reportez-vous à la section « Appareils à
proximité ».
Dans l'écran principal Galerie, appuyez sur et sélectionnez un appareil dans APPAREILS À
PROXIMITÉ pour accéder à son contenu. Vous pouvez afficher des contenus sur les appareils où la
fonction de partage de contenu est activée.
78
Assistance sécurité
Mode Urgence
À propos du mode Urgence
Utilisez ce mode pour prolonger la durée de veille de l’appareil lorsque vous vous trouvez dans une
situation d’urgence. Lorsque ce mode est activé, la luminosité de l’écran diminue et la consommation
de la batterie est réduite grâce à la restriction de certaines fonctions. Vous pouvez également allumer
le flash, faire retentir des alarmes et envoyer votre position géographique à d’autres personnes dans
un message.
Activer le mode Urgence
Maintenez la touche Marche/Arrêt enfoncée, puis appuyez sur Mode Urgence. Vous pouvez
également, depuis la liste des applications, appuyer sur Paramètres → Assistance sécurité → Mode
Urgence, puis faire glisser le curseur Mode Urgence vers la droite pour activer la fonction.
Faire retentir des alarmes.
Ajouter des applications à utiliser
en mode Ultra économie d'énergie.
Passer un appel d’urgence.
Niveau de charge de la batterie et
temps de veille estimé de la batterie
Activer le flash.
Envoyer votre position actuelle Passer un appel.
dans un message.
Navigation sur Internet.
Accéder à des options
supplémentaires.
Le délai de veille maximum estimé est le temps qu’il faut à la batterie pour se décharger
complètement lorsque l’appareil n’est pas utilisé. Le délai de veille peut varier selon les
paramètres de l’appareil et les conditions d’utilisation.
Assistance sécurité
79
Désactiver le mode Urgence
Pour désactiver le mode Urgence, maintenez le doigt appuyé sur la touche Marche/Arrêt, puis
appuyez sur Mode Urgence. Une autre solution consiste à appuyer sur → Désactiver le mode
Urgence. Le mode Urgence est désactivé.
Message d’aide
À propos des messages d’aide
Vous pouvez prédéfinir des contacts pour leur envoyer un message en cas d’urgence. Envoyez des
messages à vos contacts principaux en appuyant à trois reprises sur la touche Marche/arrêt.
Depuis la liste des applications, appuyez sur Paramètres → Assistance sécurité.
Ajouter des contacts prédéfinis
1 Depuis la liste des applications, appuyez sur Paramètres → Assistance sécurité.
2 Appuyez sur Gérer les contacts principaux → Créer un contact principal.
3 Appuyez sur Créer un contact et saisissez ses coordonnées, ou appuyez sur Sélectionner dans
les contacts pour transformer un contact en contact prédéfini.
Définir des messages d’aide
Depuis la liste des applications, appuyez sur Paramètres → Assistance sécurité → Envoyer des
messages d'aide, puis appuyez sur le curseur Envoyer des messages d'aide pour activer la fonction.
Sélectionnez le contenu à inclure dans les messages d’aide.
Envoyer des messages d’aide
En cas d’urgence, appuyez à trois reprises rapprochées sur la touche Marche/Arrêt. L’appareil envoie
des messages à vos contacts prédéfinis. Les messages incluent des informations concernant votre
position géographique.
80
Applications et fonctions utiles
S Finder
Utilisez cette application pour rechercher un contenu sur l'appareil. Vous pouvez appliquer divers
filtres et afficher l’historique de recherche.
Ouvrez le volet des raccourcis et appuyez sur S Finder.
Rechercher du contenu
Appuyez sur le champ de recherche et saisissez un mot-clé, ou appuyez sur et prononcez un motclé.
Pour obtenir des résultats plus précis, appuyez sur et appliquez des filtres sous le champ de
recherche.
Vous pouvez définir les paramètres de recherche à l’aide des filtres disponibles ou sélectionner des
catégories de recherche. Appuyez sur → Paramètres → Sélectionnez des filtres ou Sélect. cat. de
recherche.
S Planner
Créer un événement ou une tâche
1 Appuyez sur S Planner depuis la liste des applications.
2 Appuyez sur . Vous pouvez également sélectionner une date ne comportant aucun
événement ou tâche, et appuyer à deux reprise dessus.
Si la date comporte déjà des événements ou tâches enregistrés, appuyez sur la date et sur .
3 Sélectionnez un événement ou une tâche, et saisissez les détails.
• Ajouter événement : définir la date de début et de fin d’un événement. Vous pouvez lui
appliquer une option de répétition.
• Ajouter une tâche : ajouter une tâche à faire à une date spécifique. Vous pouvez lui
appliquer une option de priorité.
Applications et fonctions utiles
81
Saisir un titre.
Joindre une carte indiquant le lieu
de l’événement.
Ajouter des détails.
Sélectionner un calendrier à utiliser
ou à synchroniser.
Sélectionner un élément.
Définir une date de début et de fin
pour l’événement.
4 Appuyez sur Enregistrer pour sauvegarder l’événement ou la tâche.
Synchroniser les événements et les tâches avec vos comptes
Appuyez sur S Planner depuis la liste des applications.
Pour synchroniser des événements et des tâches avec vos comptes, appuyez sur → Synchroniser.
Pour ajouter des comptes avec lesquels effectuer la synchronisation, appuyez sur → Calendriers →
Ajouter compte. Sélectionnez ensuite un compte avec lequel effectuer la synchronisation et ouvrez
une session. Une fois le compte ajouté, un cercle vert apparaît près du nom du compte.
Pour modifier l’option de synchronisation d'un compte, ouvrez la liste des applications, appuyez sur
Paramètres → Comptes, puis sélectionnez un service de compte.
Applications et fonctions utiles
82
S Voice
À propos de S Voice
Utilisez cette application pour commander vocalement l’appareil et qu’il exécute différentes
fonctions.
Depuis la liste des applications, appuyez sur S Voice. Vous pouvez également appuyer deux fois sur
la touche Accueil.
Vous pouvez désactiver l’accès en appuyant sur la touche Accueil, sur → Paramètres, puis en
désélectionnant l’option Ouvrir via touche accueil.
La disponibilité de cette application dépend de votre zone géographique ou de votre
opérateur.
Paramétrer la langue
Appuyez sur → Paramètres → Langue, puis sélectionnez une langue.
La langue sélectionnée est appliquée à S Voice uniquement, et non à la langue affichée sur
l’appareil.
Utiliser S Voice
Lorsque vous lancez S Voice, l’appareil démarre la reconnaissance vocale et l’icône de microphone
devient rouge.
Prononcez une commande vocale.
Si vous prononcez une commande et que l’appareil la reconnaît, l’icône de microphone au bas de
l’écran clignote en vert. Ensuite, l’appareil exécute la commande.
Conseils pour améliorer la reconnaissance vocale :
• Parlez clairement.
• Parlez dans des endroits calmes.
• N’utilisez pas de langage injurieux ni d’argot.
• Évitez de parler avec un accent local.
Selon l’environnement où vous vous trouvez ou la manière dont vous parlez, il se peut que l’appareil
ne reconnaisse pas vos commandes ou qu’il exécute des commandes erronées.
Applications et fonctions utiles
83
Activer S Voice en mode veille
Si vous n’utilisez pas S Voice pendant un certain temps, l’application passe automatiquement en
mode veille.
Pour reprendre la commande vocale, appuyez sur l’icône de microphone ou dites « Bonjour Galaxy »
à l’appareil.
Changer de commande pour le réveil
Vous pouvez changer la commande de réveil qui correspond par défaut à « Bonjour Galaxy ». La
commande de réveil sert à lancer S Voice lorsque l’appareil est en mode veille.
Appuyez sur → Paramètres → Réveil vocal → Définir commande de réveil.
Internet
1 Depuis la liste des applications, appuyez sur Internet.
2 Appuyez sur le champ d’adresse. Pour changer de moteur de recherche, appuyez sur l’icône du
moteur de recherche près du champ d’adresse Web.
3 Saisissez une adresse Web ou un mot-clé, puis appuyez sur Aller à.
Pour afficher la barre de navigation, faites glisser votre doigt vers le bas de l’écran.
Définir la page Web en cours
comme favori.
Lire un article en mode Lecture.
Ouvrir la page d'accueil.
Revenir à la page précédente. Afficher la liste des favoris.
Accéder à des options
supplémentaires.
Ouvrir le gestionnaire de fenêtres
de page Web.
Actualiser la page Web en cours.
Afficher les pages enregistrées.
Applications et fonctions utiles
84
Musique
Écouter de la musique
Depuis la liste des applications, appuyez sur Musique.
Sélectionnez une catégorie de musique, puis un morceau à écouter.
Ajouter le morceau de musique à
une liste de lecture.
Passer au morceau suivant.
Maintenir la touche appuyée pour
effectuer une avance rapide.
Mettre en pause et reprendre la
lecture.
Accéder à des options
supplémentaires.
Modifier le mode de répétition.
Revenir au morceau précédent.
Maintenir la touche appuyée pour
effectuer un retour rapide.
Activer la lecture aléatoire.
Ouvrir la liste de lecture.
Rechercher d’autres appareils pour
lire le fichier.
Définir le fichier comme votre
morceau favori.
Régler le volume.
Pour écouter de la musique à volume égal, appuyez sur → Paramètres, puis cochez la case Volume
intelligent.
Lorsque la fonction Volume intelligent est activée, le volume effectif peut être plus élevé
que celui réglé sur l’appareil. Soyez prudent et évitez toute exposition prolongée à des
niveaux sonores élevés, car cela pourrait provoquer des séquelles auditives.
Il est possible que la fonction Volume intelligent ne soit pas activée pour certains fichiers.
Applications et fonctions utiles
85
Pour personnaliser vos réglages audio lorsque vous écoutez de la musique avec un casque ou des
écouteurs, appuyez sur → Paramètres → Adapt Sound → Activé.
Lorsque vous activez cette option pour la première fois, appuyez sur Démarrer pour régler le son.
L’appareil démarre une série de tests audio pour régler le niveau sonore et commence à bipper.
Appuyez sur Oui si vous entendez le bip ou sur Non si vous ne l’entendez pas. Répétez cette étape
pour chaque test jusqu’à ce que le réglage du son soit terminé. Cochez ensuite la case Musique et
appuyez sur OK afin de bénéficier de cette option quand vous écoutez de la musique.
Lorsque vous réglez le volume au niveau 14 ou supérieur, l’option d’adaptation du son
(Adapt Sound) n’est pas appliquée. Si vous baissez le volume au niveau 13 ou inférieur,
l’option est de nouveau appliquée.
Lire des morceaux stockés sur d’autres appareils
Recherchez des morceaux stockés sur d’autres appareils pour les écouter sur votre appareil.
Depuis la liste des applications, appuyez sur Musique.
Accéder à la musique sur un appareil enregistré
Pour utiliser cette fonction, vous devez vous connecter à votre compte Samsung.
Dans l'écran principal Musique, appuyez sur Appareils et sélectionnez un appareil dans APPAREILS
ENREGISTRÉS pour y accéder et lire les morceaux. Vous pouvez lire les morceaux des appareils
enregistrés sur Samsung Link. Pour en savoir plus, consultez l’adresse suivante : link.samsung.com.
• Vérifiez que les appareils enregistrés sont allumés et connectés à un réseau Wi-Fi ou
mobile.
• Il se peut que des frais supplémentaires vous soient facturés lorsque vous accédez à des
contenus enregistrés sur d’autres appareils via le réseau mobile.
Accéder à des morceaux sur un appareil à proximité
Pour utiliser cette fonction, ouvrez la liste des applications, appuyez sur Paramètres → NFC et
partage → Appareils à proximité, puis appuyez sur le curseur Appareils à proximité pour activer
la fonction. Pour accéder aux paramètres supplémentaires, reportez-vous à la section « Appareils à
proximité ».
Dans l'écran principal Musique, appuyez sur Appareils et sélectionnez un appareil dans APPAREILS
À PROXIMITÉ pour y accéder et lire les morceaux. Vous pouvez lire les morceaux des appareils sur
lesquels la fonction de partage de contenu est activée.
Applications et fonctions utiles
86
Vidéo
Lire une vidéo
Depuis la liste des applications, appuyez sur Vidéo.
Sélectionnez une vidéo à lire.
Modifier le format
d’écran.
Effectuer un retour ou
une avance rapide en
faisant glisser la barre.
Rechercher d’autres
appareils pour lire le
fichier.
Revenir à la vidéo
précédente. Maintenir
la touche appuyée
pour effectuer un
retour rapide.
Passer à la vidéo
suivante. Maintenir la
touche appuyée pour
effectuer une avance
rapide.
Accéder à des options
supplémentaires.
Basculer sur le lecteur
vidéo contextuel.
Mettre en pause et
reprendre la lecture.
Changer l'orientation
de l'écran.
Régler le volume.
Pour personnaliser l’emplacement du volet de commande en cours de lecture, appuyez sur →
Paramètres, cochez la case Mini contrôleur, puis appuyez sur Fermer. Appuyez ensuite sur ou sur
pour déplacer le volet de commande d’un côté ou de l’autre de l’écran.
Cette fonction est disponible uniquement en mode paysage.
Applications et fonctions utiles
87
Lire des vidéos stockées sur d’autres appareils
Recherchez des vidéos stockées sur d’autres appareils pour les lire sur votre appareil.
Depuis la liste des applications, appuyez sur Vidéo.
Accéder à une vidéo sur un appareil enregistré
Pour utiliser cette fonction, vous devez vous connecter à votre compte Samsung.
Dans l'écran principal Vidéo, appuyez sur Appareils et sélectionnez un appareil dans APPAREILS
ENREGISTRÉS pour y accéder et lire la vidéo. Vous pouvez lire la vidéo sur les appareils enregistrés
sur Samsung Link. Pour en savoir plus, consultez l’adresse suivante : link.samsung.com.
• Vérifiez que les appareils enregistrés sont allumés et connectés à un réseau Wi-Fi ou
mobile.
• Il se peut que des frais supplémentaires vous soient facturés lorsque vous accédez à des
contenus enregistrés sur d’autres appareils via le réseau mobile.
Accéder à une vidéo sur un appareil à proximité
Pour utiliser cette fonction, ouvrez la liste des applications, appuyez sur Paramètres → NFC et
partage → Appareils à proximité, puis appuyez sur le curseur Appareils à proximité pour activer
la fonction. Pour accéder aux paramètres supplémentaires, reportez-vous à la section « Appareils à
proximité ».
Dans l'écran principal Vidéo, appuyez sur Appareils et sélectionnez un appareil dans APPAREILS À
PROXIMITÉ pour y accéder et lire la vidéo. Vous pouvez lire la vidéo sur les appareils dont la fonction
de partage de contenu est activée.
Applications et fonctions utiles
88
Studio
Modifier des photos ou des vidéos en leur appliquant différents effets.
1 Depuis la liste des applications, appuyez sur Studio.
2 Sélectionnez une option et modifiez des images ou des vidéos.
Modifier vos images en leur
appliquant différents effets.
Appliquer divers effets aux images
que vous avez prises en mode Prise
& plus.
Modifier ou créer des vidéos.
Associer plusieurs photos pour
créer un collage.
3 Une fois la modification terminée, appuyez sur ou OK.
Applications et fonctions utiles
89
Horloge
Alarme
Depuis la liste des applications, appuyez sur Horloge → Alarme.
Créer une alarme
Appuyez sur , réglez l’heure de l’alarme, sélectionnez les jours de répétition, paramétrez diverses
autres options d’alarme, puis appuyez sur Enreg. Pour activer ou désactiver les alarmes, appuyez sur
près de l'alarme concernée dans la liste des alarmes.
• Répéter : définir le délai à l'issue duquel l'alarme doit sonner de nouveau et le nombre de
répétitions.
• Alarme intelligente : définir la tonalité de l’alarme intelligente et combien de temps avant
l'alarme principe elle doit sonner. Une alarme intelligente démarre à faible volume quelques
minutes avant l’heure prédéfinie de l’alarme. Le volume de l’alarme intelligente augmente
graduellement jusqu’à ce que vous l’éteigniez ou que vous désactiviez l’alarme principale.
Arrêter ou répéter une alarme
Pour éteindre une alarme, faites glisser votre doigt sur l’icône . Si vous avez précédemment activé
l'option de répétition, faites glisser votre doigt sur l’icône pour répéter l'alarme à l'issue d'une
période de répétition prédéfinie.
Supprimer une alarme
Appuyez sur → Supprimer, sélectionnez l’alarme à supprimer, puis appuyez sur OK.
Applications et fonctions utiles
90
Horloge mondiale
Depuis la liste des applications, appuyez sur Horloge → Horloge mondiale.
Créer une horloge
Appuyez sur , puis saisissez le nom d’une ville ou sélectionnez-en une dans la liste.
Pour appliquer l’heure d’été, maintenez le doigt appuyé sur une horloge, puis appuyez sur .
Supprimer une horloge
Appuyez sur → Supprimer, sélectionnez l’horloge à supprimer, puis appuyez sur OK.
Chronomètre
Depuis la liste des applications, appuyez sur Horloge → Chronomètre.
Appuyez sur Début pour commencer à chronométrer. Pour enregistrer des temps intermédiaires,
appuyez sur Tour.
Appuyez sur Arrêter pour arrêter le chronométrage. Pour effacer les temps intermédiaires, appuyez
sur Réinitialiser.
Minuteur
Depuis la liste des applications, appuyez sur Horloge → Minuteur.
Définissez la durée, puis appuyez sur Début.
Lorsque la durée du minuteur est écoulée, faites glisser votre doigt sur l’icône .
Applications et fonctions utiles
91
Calculatrice
Utilisez cette application pour réaliser des calculs simples ou complexes.
Depuis la liste des applications, appuyez sur Calculatrice.
Faites pivoter l’appareil vers la gauche pour utiliser la calculatrice scientifique en mode Paysage. Si
l'option Rotation écran est désactivée dans le volet des raccourcis, appuyez sur → Calculatrice
scientifique.
Pour afficher l’historique des calculs, appuyez sur pour masquer le clavier.
Pour effacer l’historique, appuyez sur → Effacer l'historique.
Mémo
Cette application permet de créer des mémos et de les organiser par catégorie.
Depuis la liste des applications, appuyez sur Mémo.
Créer un mémo
Appuyez sur dans la liste des mémos et saisissez votre mémo. Lorsque vous rédigez un mémo,
utilisez les options suivantes :
• : créer ou définir une catégorie.
• : insérer des images.
• : enregistrer un mémo vocal et l’insérer.
Pour enregistrer le mémo, appuyez sur Sauveg.
Pour modifier un mémo, appuyez sur le mémo, puis sur son contenu.
Rechercher des mémos
Appuyez sur dans la liste des mémos, puis saisissez un mot-clé à rechercher dans les mémos.
Applications et fonctions utiles
92
Enregistreur vocal
Enregistrer des mémos vocaux
Depuis la liste des applications, appuyez sur Enregistreur vocal.
Pour commencer l’enregistrement, appuyez sur . Parlez dans le microphone. Pour interrompre
l’enregistrement, appuyez sur . Pour annuler l’enregistrement, appuyez sur . Pour terminer
l’enregistrement, appuyez sur .
Pendant l’enregistrement d’un mémo vocal, appuyez sur pour caractériser un passage comme
favori.
Afficher la liste des mémos vocaux. Modifier le mode d’enregistrement.
Accéder à des options
supplémentaires.
Démarrer l’enregistrement.
Durée enregistrée.
Pour paramétrer l’appareil pour qu’il supprime les bruits de fond, appuyez sur → Paramètres, puis
cochez la case Réduction du bruit.
Applications et fonctions utiles
93
Écouter des mémos vocaux
Depuis la liste des applications, appuyez sur Enregistreur vocal.
Appuyez sur , puis sélectionnez un mémo vocal à lire.
• : réduire le contenu du mémo vocal.
• : sélectionner une partie du mémo vocal pour la lire en boucle.
• : régler la vitesse de lecture.
• : ignorer une portion silencieuse du mémo vocal.
• : caractériser des passages comme favoris dans le mémo vocal.
• / : mettre en pause ou reprendre la lecture.
• / : revenir au mémo vocal précédent ou passer au mémo vocal suivant.
Dropbox
Cette application permet d’enregistrer et de partager des fichiers avec d’autres personnes via le
service de stockage Cloud Dropbox. Lorsque vous enregistrez des fichiers dans Dropbox, votre
appareil les synchronise automatiquement avec le serveur Web et tout autre appareil sur lequel le
service Dropbox est installé.
La disponibilité de cette application dépend de votre zone géographique ou de votre
opérateur.
Depuis la liste des applications, appuyez sur Dropbox.
Lorsque vous lancez cette application pour la première fois ou lorsque vous la redémarrez après
avoir procédé à la réinitialisation des données, suivez les instructions à l'écran pour terminer la
configuration.
Utilisez les fonctions suivantes :
• : charger ou ouvrir des fichiers. Appuyez sur → Transférer ici pour télécharger les fichiers.
• : afficher/lire les photos/vidéos chargées. Appuyez sur pour partager ou supprimer des
fichiers ou créer des albums.
• : ouvrir des fichiers de la liste des favoris.
• : afficher des notifications.
Applications et fonctions utiles
94
Flipboard
Utilisez cette application pour afficher les mises à jour et les actualités de réseaux sociaux dans un
format de magazine personnalisé.
Depuis la liste des applications, appuyez sur Flipboard.
La disponibilité de cette application dépend de votre zone géographique ou de votre
opérateur.
Lorsque vous lancez cette application pour la première fois ou lorsque vous la redémarrez après
avoir procédé à la réinitialisation des données, suivez les instructions à l'écran pour terminer la
configuration.
Depuis l'écran principal Flipboard, choisissez parmi divers articles d'actualités et abonnements.
Radio
Écouter la radio FM
Appuyez sur Radio depuis la liste des applications.
Avant d'utiliser cette application, vous devez brancher un casque ou des écouteurs qui font office
d’antenne radio.
Lorsque vous démarrez la radio FM pour la première fois, elle recherche et enregistre
automatiquement les stations disponibles.
Pour allumer la radio FM, appuyez sur . Sélectionnez la station radio à écouter dans la liste, puis
appuyez sur pour revenir à l’écran de la radio FM.
Applications et fonctions utiles
95
Afficher les informations sur la
station actuelle.
Régler précisément la fréquence.
Entrer manuellement la fréquence
radio.
Enregistrer un morceau depuis la
radio FM.
Afficher la liste des stations
favorites.
Accéder à des options
supplémentaires.
Ajouter la station de radio en cours
d’écoute à la liste des favoris.
Régler le volume.
Rechercher manuellement les
stations de radio disponibles.
Allumer ou éteindre la radio FM.
Rechercher des stations radio
Appuyez sur Radio depuis la liste des applications.
Appuyez sur → Analyser, puis sélectionnez une option de balayage. L’appareil recherche et
mémorise automatiquement les stations de radio FM disponibles.
Sélectionnez la station radio à écouter dans la liste, puis appuyez sur pour revenir à l’écran de la
radio FM.
Applications et fonctions utiles
96
Applications Google
Google propose des applications de divertissement, de réseaux sociaux et d'activités économiques.
Il se peut que vous ayez besoin d'un compte Google pour accéder à certaines applications. Pour plus
d'informations, reportez-vous à la section Paramétrer des comptes.
Pour afficher plus d'informations sur les applications, accédez au menu d'aide de chaque application.
Certaines applications peuvent ne pas être disponibles ou peuvent être accessibles
différemment en fonction de la zone géographique ou de l'opérateur.
Chrome
Rechercher des informations et parcourir des pages Web.
Gmail
Envoyer ou recevoir des e-mails via le service Google Mail.
Google+
Partager vos nouvelles et suivre les mises à jour partagées par votre famille, vos amis et autres
personnes. Vous pouvez également sauvegarder vos photos et vos vidéos, et plus encore.
Maps
Rechercher votre emplacement sur la carte, rechercher des lieux et afficher des informations de
localisation pour différents endroits.
Play Musique
Découvrir, écouter et partager de la musique sur votre appareil.
Play Films
Visionner des vidéos enregistrées sur votre appareil et télécharger divers contenus à visionner depuis
Play Store.
Applications et fonctions utiles
97
Play Livres
Télécharger des livres depuis Play Store et les lire.
Play Kiosque
Lire les actualités et les magazines qui vous intéressent depuis un emplacement pratique.
Play Jeux
Télécharger des jeux depuis Play Store et jouer avec d'autres personnes.
Drive
Stocker des contenus sur le Cloud, y accéder où que vous soyez et les partager avec d'autres
personnes.
YouTube
Visionner ou créer des vidéos et les partager avec d'autres personnes.
Photos
Gérer les photos, les albums et les vidéos enregistré(e)s sur l’appareil et téléchargé(e)s sur Google+.
Hangouts
Discuter avec vos amis en tête-à-tête ou en groupes, et utiliser des images, des émoticônes et des
appels visio pendant vos conversations.
Google
Lancer des recherches rapides sur Internet ou sur votre appareil.
Recherche vocale
Lancer des recherches rapides en prononçant un mot clé ou une phrase.
Paramètres Google
Configurer les paramètres pour certaines fonctions fournies par Google.
98
Établir une connexion avec
d’autres appareils
Bluetooth
À propos de la fonction Bluetooth
La fonction Bluetooth crée une connexion sans fil directe entre deux appareils sur de courtes
distances. Pour échanger des données ou des fichiers multimédia avec d’autres appareils, utilisez la
fonction Bluetooth.
• Samsung ne peut être tenu responsable de la perte, de l’interception ou du mauvais
usage des données envoyées ou reçues via Bluetooth.
• Assurez-vous de toujours utiliser des appareils dignes de confiance et correctement
protégés avant de partager ou de recevoir des données. La présence d’obstacles entre les
deux appareils peut réduire le rayon d’action.
• Il est possible que votre appareil ne fonctionne pas avec certains appareils, en particulier
ceux qui n’ont pas été testés ou approuvés par Bluetooth SIG.
• N’utilisez pas la fonction Bluetooth de manière illégale (par exemple, pour le piratage de
fichiers ou l’enregistrement de communications à des fins commerciales).
Samsung ne peut être tenu responsable des répercussions d’une utilisation illégale de la
fonction Bluetooth.
Établir une connexion avec d’autres appareils Bluetooth
1 Depuis la liste des applications, appuyez sur Paramètres → Bluetooth, appuyez sur le curseur
Bluetooth pour activer la fonction, puis appuyez sur Analyser.
Une liste des appareils détectés apparaît.
Pour définir l’appareil comme visible aux autres appareils, appuyez sur son nom.
Établir une connexion avec d’autres appareils
99
2 Sélectionnez un appareil auquel vous associer.
Si votre appareil a été appairé par le passé avec un appareil, appuyez sur son nom sans
confirmer le mot de passe.
Si l’appareil auquel vous souhaitez vous associer ne figure pas dans la liste, demandez à ce que
l’appareil active son option de visibilité.
3 Pour confirmer, acceptez la demande d’autorisation Bluetooth sur les deux appareils.
Envoyer et recevoir des données
De nombreuses applications prennent en charge le transfert de données via la fonction Bluetooth.
Vous pouvez partager des données, comme des contacts ou des fichiers multimédia, avec d’autres
appareils Bluetooth. Vous pouvez, par exemple, envoyer une image à un autre appareil.
Envoyer une image
1 Depuis la liste des applications, appuyez sur Galerie.
2 Sélectionnez une image.
3 Appuyez sur → Bluetooth, puis sélectionnez un appareil vers lequel transférer l'image.
Si l’appareil auquel vous souhaitez vous associer ne figure pas dans la liste, demandez à ce que
l’appareil active son option de visibilité ou définissez votre appareil comme visible aux autres
appareils.
4 Acceptez la demande d’autorisation Bluetooth sur l’autre appareil.
Recevoir une image
Lorsqu’un autre appareil vous envoie une image, acceptez la demande d’autorisation Bluetooth.
L’image reçue est enregistrée dans le dossier Galerie → Download.
Établir une connexion avec d’autres appareils
100
Dissocier des appareils Bluetooth
1 Depuis la liste des applications, appuyez sur Paramètres → Bluetooth.
Le périphérique affiche les périphériques associés dans la liste.
2 Appuyez sur près du nom de l’appareil à dissocier.
3 Appuyez sur Dissocier.
Wi-Fi Direct
À propos de Wi-Fi Direct
Le Wi-Fi Direct autorise la connexion directe entre des appareils via un réseau Wi-Fi sans passer par
un point d’accès.
Établir une connexion à d’autres appareils
1 Depuis la liste des applications, appuyez sur Paramètres → Wi-Fi, puis appuyez sur le curseur
Wi-Fi pour activer la fonction.
2 Appuyez sur → Wi-Fi Direct.
Une liste des appareils détectés apparaît.
3 Sélectionnez un appareil auquel vous connecter.
Pour vous connecter à plusieurs appareils, appuyez sur → Connexion multiple.
Pour modifier le nom de l'appareil, appuyez sur → Renommer le périphérique.
4 Acceptez la demande d'autorisation Wi-Fi Direct sur l'autre appareil pour confirmer.
Établir une connexion avec d’autres appareils
101
Envoyer et recevoir des données
Vous pouvez partager des données, comme des contacts ou des fichiers multimédia, avec d’autres
appareils. Vous pouvez, par exemple, envoyer une image à un autre appareil.
Envoyer une image
1 Depuis la liste des applications, appuyez sur Galerie.
2 Sélectionnez une image.
3 Appuyez sur → Wi-Fi Direct, puis sélectionnez un appareil vers lequel transférer l'image.
4 Acceptez la demande d'autorisation Wi-Fi Direct sur l'autre appareil.
Recevoir une image
Lorsqu’un autre appareil vous envoie une image, acceptez la demande d’autorisation Wi-Fi Direct.
L’image reçue est enregistrée dans le dossier Galerie → Download.
Déconnecter les appareils
1 Depuis la liste des applications, appuyez sur Paramètres → Wi-Fi.
2 Appuyez sur → Wi-Fi Direct.
L’appareil affiche la liste des appareils connectés.
3 Appuyez sur Terminer la connexion → OK pour déconnecter les appareils.
Établir une connexion avec d’autres appareils
102
NFC
À propos de NFC
Votre appareil est équipé d’une fonction qui permet de lire les tags NFC (Near Field Communication)
contenant des informations relatives aux produits. Grâce à cette fonction, vous pouvez également
effectuer des paiements et acheter des tickets de transport ou de spectacle après avoir téléchargé les
applications correspondantes.
L'appareil est équipé d'une antenne NFC qui se trouve autour de l'objectif photo arrière.
Manipulez-le avec précaution afin de ne pas endommager l’antenne NFC.
Utiliser la fonction NFC
Utilisez la fonction NFC pour envoyer des images ou des contacts à d’autres appareils et lire des
informations produit. Si vous insérez une carte SIM ou USIM comportant une fonction de paiement,
vous pouvez utiliser l’appareil pour effectuer facilement des paiements.
Depuis la liste des applications, appuyez sur Paramètres → NFC et partage → NFC, puis faites
glisser le curseur NFC vers la droite. Une autre solution consiste à ouvrir le volet de paramétrage
rapide, puis à appuyer sur NFC pour activer la fonction.
Rapprochez l’antenne NFC, située à l’arrière de votre appareil, d'un tag NFC. Les informations figurant
sur le tag s’affichent.
Assurez-vous que l’écran de l’appareil est déverrouillé. Sinon, l’appareil ne pourra pas lire les
tags NFC ou recevoir des données.
Établir une connexion avec d’autres appareils
103
Effectuer un achat à l’aide de la fonction NFC
Pour pouvoir effectuer des paiements à l’aide de la fonction NFC, vous devez d’abord vous inscrire
à un service de paiement mobile. Pour vous inscrire ou pour obtenir de plus amples informations
concernant le service, contactez votre opérateur.
Depuis la liste des applications, appuyez sur Paramètres → NFC et partage → NFC, puis faites
glisser le curseur NFC vers la droite. Une autre solution consiste à ouvrir le volet de paramétrage
rapide, puis à appuyer sur NFC pour activer la fonction.
Rapprochez l’antenne NFC, située à l’arrière de votre appareil, du lecteur de carte NFC.
Pour définir l’application de paiement par défaut, appuyez sur Paiement NFC et sélectionnez une
application.
• La liste des services peut ne pas inclure toutes les applications de paiement disponibles.
• Pour effectuer un paiement avec la carte SIM ou USIM, insérez la carte SIM ou USIM
compatible NFC dans le compartiment de la carte SIM 1 ( 1 ). Le compartiment de la carte
SIM 2 ( 2 ) n'est pas compatible avec la fonction NFC.
2
1
Envoyer des données
Utilisez la fonction Android Beam pour envoyer des données, telles que des pages Web ou des
contacts, à des appareils compatibles NFC.
1 Depuis la liste des applications, appuyez sur Paramètres → NFC et partage → NFC, puis faites
glisser le curseur NFC vers la droite. Une autre solution consiste à ouvrir le volet de paramétrage
rapide, puis à appuyer sur NFC pour activer la fonction.
2 Appuyez sur Android Beam, puis appuyez sur le curseur Android Beam pour activer la fonction.
3 Sélectionnez un élément et connectez l’antenne NFC de l’autre appareil avec l’antenne NFC de
votre appareil.
4 Lorsque l’option Appuyez ici pour transférer apparaît à l’écran, appuyez sur l’écran de l’appareil
pour envoyer l’élément.
Établir une connexion avec d’autres appareils
104
S Beam
Utilisez cette fonction, pour envoyer des données, telles que des vidéos, des images et des
documents.
1 Activez la fonction S Beam sur le périphérique de réception.
2 Depuis la liste des applications, appuyez sur Paramètres → NFC et partage → NFC, puis faites
glisser le curseur NFC vers la droite. Une autre solution consiste à ouvrir le volet de paramétrage
rapide, puis à appuyer sur NFC pour activer la fonction.
3 Appuyez sur S Beam, puis appuyez sur le curseur S Beam pour activer la fonction.
4 Sélectionnez un fichier et connectez l’antenne NFC de l’autre appareil à l’antenne NFC de votre
appareil.
5 Lorsque l’option Appuyez ici pour transférer apparaît à l’écran, appuyez sur l’écran de l’appareil
pour envoyer le fichier.
• N’envoyez pas de données protégées par des droits d’auteur via S Beam. Vous risqueriez
de violer des lois sur les droits d’auteur. Samsung ne peut en aucun cas être tenu
responsable en cas d’utilisation illégale de données protégées par des droits d’auteur.
• Si les deux appareils tentent d’envoyer simultanément des données, le transfert de
fichiers risque d’échouer.
Établir une connexion avec d’autres appareils
105
Connexion rapide
À propos de la fonction Connexion rapide
Utilisez cette fonction pour rechercher et vous connecter facilement aux appareils à proximité. Vous
pouvez également facilement partager du contenu stocké sur votre appareil avec des ordinateurs.
• Lors de la connexion d’un appareil ne prenant pas en charge la fonction Connexion
rapide, vérifiez que l’option Wi-Fi Direct ou Bluetooth est activée.
• Les modes de connexion peuvent varier selon le type des appareils connectés ou du
contenu partagé.
• Le nom de l’appareil peut varier selon les appareils Bluetooth avec lesquels il est appairé.
Par exemple, le nom de l’appareil peut s’afficher comme BT MAC.
Établir une connexion à d’autres appareils
1 Ouvrez le volet des raccourcis et appuyez sur Connex. rapide.
À l’ouverture du volet, les fonctions Wi-Fi et Bluetooth sont automatiquement activées et
l’appareil recherche les appareils à proximité.
2 Sélectionnez un appareil auquel vous connecter.
Les étapes suivantes peuvent varier en fonction de l’appareil connecté. Suivez les instructions
qui s’affichent à l’écran pour effectuer la connexion entre les appareils.
Pour permettre aux appareils à proximité de rechercher votre appareil et de s'y connecter,
appuyez sur → Définir la visibilité de l'appareil → Rendre l'appareil visible, puis sélectionnez
une option.
Relancer la recherche d’appareils
Si l’appareil recherché n’apparaît pas dans la liste, recherchez-le.
Appuyez sur et sélectionnez l’appareil dans la liste des appareils détectés.
Déconnecter des appareils
Pour désactiver la fonction Connexion rapide, appuyez sur en haut de l’écran. Sinon, appuyez
sur .
Établir une connexion avec d’autres appareils
106
Partager du contenu
Partagez du contenu avec les appareils connectés.
1 Ouvrez le volet des raccourcis et appuyez sur Connex. rapide.
2 Sélectionnez un appareil dans la liste des appareils détectés.
3 Sélectionnez une catégorie de média.
4 Sélectionnez le contenu à partager, puis appuyez sur Terminé.
Votre appareil envoie le contenu à l’appareil connecté.
Screen Mirroring
À propos de la fonction Screen Mirroring
Utilisez cette fonction pour connecter votre appareil à un grand écran avec le routeur AllShare Cast
ou HomeSync, puis partagez vos contenus.
Appareils devant utiliser la
fonction Screen Mirroring
(routeur AllShare Cast,
HomeSync)
Établir une connexion avec d’autres appareils
107
• La disponibilité de cette fonction dépend de votre zone géographique ou de votre
opérateur.
• Selon la connexion réseau, certains fichiers peuvent être mis en mémoire tampon en
cours de lecture.
• Pour économiser votre batterie, désactivez cette fonction lorsque vous ne l’utilisez pas.
• Si vous indiquez une bande de fréquence Wi-Fi, il se peut que les routeurs AllShare Cast
ou HomeSync ne soient pas détectés ou connectés.
• Si vous lisez des vidéos ou jouez à des jeux sur un téléviseur, sélectionnez un mode TV
approprié afin d’obtenir un résultat optimal.
Afficher du contenu sur un téléviseur
Connectez l'appareil possédant la fonction Screen Mirroring au téléviseur. Pour configurer la
connexion, reportez-vous au mode d'emploi de l’appareil. Vous pouvez, par exemple, afficher du
contenu sur un téléviseur connecté via un routeur AllShare Cast.
1 Connectez le routeur AllShare Cast au téléviseur via un câble HDMI.
2 Sur le téléviseur, sélectionnez un mode de connexion, comme le mode HDMI, pour permettre la
connexion à un appareil externe.
3 Depuis la liste des applications, appuyez sur Paramètres → NFC et partage → Screen
Mirroring.
Une liste des appareils détectés apparaît.
4 Sélectionnez un appareil auquel vous connecter.
L’écran de votre appareil apparaît sur l’écran du téléviseur.
Si vous connectez l’appareil pour la première fois, maintenez le doigt appuyé sur le nom du
routeur figurant dans la liste et saisissez le code PIN indiqué sur l’écran du téléviseur.
5 Ouvrez ou lisez un fichier, puis commandez l’affichage à l’aide des touches de votre appareil.
Établir une connexion avec d’autres appareils
108
Fonction d’impression mobile
Connectez l'appareil à une imprimante via Wi-Fi ou Wi-Fi Direct, et imprimez des images ou des
documents.
Certaines imprimantes peuvent ne pas être compatibles avec l’appareil.
Ajout de modules d’extension d’imprimante
Ajoutez des modules d’extension d’imprimante pour les imprimantes auxquelles vous souhaitez
connecter l'appareil.
Depuis la liste des applications, appuyez sur Paramètres → NFC et partage → Impression →
Télécharger le plug-in et recherchez le module d’extension d’imprimante dans le Play Store.
Sélectionnez le module d’extension d’imprimante et installez-le.
Connecter l’appareil à une imprimante
Depuis la liste des applications, appuyez sur Paramètres → NFC et partage → Impression,
sélectionnez un module d’extension d’imprimante, puis appuyez sur le curseur situé en haut à droite
de l’écran pour activer la fonction. L’appareil recherche les imprimantes connectées au même réseau
Wi-Fi que lui. Sélectionnez une imprimante à utiliser comme imprimante par défaut.
Pour ajouter des imprimantes manuellement, sélectionnez un module d’extension d’imprimante,
appuyez sur → Ajouter une imprimante → , saisissez les détails, puis appuyez sur OK.
Pour modifier les paramètres d'impression, sélectionnez un module d’extension d’imprimante et
appuyez sur → Paramètres.
Imprimer du contenu
En mode affichage d’une image ou d’un document par exemple, appuyez sur → Imprimer, puis
sélectionnez une imprimante.
109
Gestionnaire d’appareils et de
données
Mettre l’appareil à jour
L’appareil peut être mis à jour avec la version logicielle la plus récente.
Mettre l’appareil à jour sans connexion PC
Grâce au service FOTA (Firmware Over The Air), le logiciel de l’appareil peut être mis à jour sans
passer par une connexion avec un ordinateur.
Depuis la liste des applications, appuyez sur Paramètres → À propos de l'appareil → Mises à jour
logicielles → Mettre à jour maintenant.
Mettre l’appareil à jour avec Samsung Kies
Téléchargez la dernière version de Samsung Kies à partir du site Web Samsung. Démarrez Samsung
Kies et connectez l’appareil à un ordinateur. Samsung Kies reconnaît automatiquement l’appareil et
affiche, le cas échéant, les mises à jour disponibles. Pour lancer la mise à jour, cliquez sur la touche
de mise à jour dans la boîte de dialogue. Pour plus d’informations sur la mise à jour, consultez l’aide
Samsung Kies.
• Lorsque vous mettez votre appareil à jour, n’éteignez pas l’ordinateur et ne déconnectez
pas le câble USB.
• Ne connectez pas non plus d’autres appareils multimédia à l’ordinateur. Cela pourrait
interférer avec le processus de mise à jour.
Gestionnaire d’appareils et de données
110
Transférer des fichiers entre l’appareil et un
ordinateur
Vous pouvez transférer différents types de fichiers (sons, vidéos, images, etc.) de l’appareil vers un
ordinateur, et inversement.
Ne débranchez pas le câble USB de l’appareil lorsqu’un transfert de fichiers est en cours. Cela
risquerait d’entraîner une perte de données ou d’endommager l’appareil.
• Ne débranchez pas l’appareil de l’ordinateur lorsque vous lisez des fichiers enregistrés
sur l’appareil sur l’ordinateur raccordé. Une fois que vous avez terminé de lire le fichier,
débranchez l’appareil de l’ordinateur.
• Il se peut que les appareils ne se connectent pas correctement s’ils le sont via un
concentrateur USB. Branchez directement l’appareil sur le port USB de l’ordinateur.
Connecter l’appareil en tant qu’appareil multimédia
1 Connectez l’appareil à un ordinateur à l’aide du câble USB.
2 Ouvrez le volet des raccourcis, puis appuyez sur Connecté en tant que périphérique
multimédia → Périphérique multimédia (MTP).
Appuyez sur Appareil photo (PTP) si votre ordinateur ne gère pas le protocole MTP (Media
Transfer Protocol) ou ne dispose pas du pilote approprié.
3 Transférez des fichiers entre votre appareil et l’ordinateur.
Connecter l’appareil avec Samsung Kies
Samsung Kies est un logiciel qui permet de gérer vos contenus multimédia et vos informations
personnelles avec des appareils Samsung. Téléchargez la dernière version de Samsung Kies à partir
du site Web Samsung.
1 Connectez l’appareil à un ordinateur à l’aide du câble USB.
Samsung Kies démarre automatiquement sur l’ordinateur. Si Samsung Kies ne démarre pas,
double-cliquez sur l’icône Samsung Kies sur votre ordinateur.
2 Transférez des fichiers entre votre appareil et l’ordinateur.
Pour plus d’informations, consultez l’aide de Samsung Kies.
Gestionnaire d’appareils et de données
111
Sauvegarder et restaurer des données
Conservez vos informations personnelles, données d’applications et paramètres en toute sécurité
sur votre appareil. Vous pouvez effectuer une sauvegarde de vos informations importantes sur un
compte de sauvegarde et y accéder ultérieurement.
Utiliser un compte Google
1 Appuyez sur Paramètres depuis la liste des applications.
2 Appuyez sur Sauvegarder et réinitialiser et cochez la case Sauvegarder mes données.
3 Appuyez sur Compte de sauvegarde et sélectionnez un compte de sauvegarde.
Pour restaurer les données, vous devez vous connecter à votre compte Google via l’assistant
de configuration. Vous pouvez lancer et ouvrir l’assistant de configuration en effectuant une
réinitialisation des données par défaut sur l’appareil. Si vous ne vous connectez pas à votre
compte Google via l’assistant de configuration, vous ne pouvez pas restaurer les données de
sauvegarde.
Utiliser un compte Samsung
Depuis la liste des applications, appuyez sur Paramètres → Comptes → Ajouter compte →
Samsung, puis connectez-vous à votre compte Samsung.
Appuyez sur Samsung → Sauvegarder, cochez les éléments à sauvegarder, puis appuyez sur
Sauvegarder maintenant → Sauvegarder.
Pour restaurer des données, ouvrez la liste des applications, appuyez sur Paramètres →
Comptes → Samsung → Restaurer, sélectionnez les éléments, puis appuyez sur Restaurer
maintenant.
Réinitialiser les données
Vous pouvez supprimer tous les paramètres et toutes les données de l’appareil. Avant de rétablir les
paramètres par défaut, assurez-vous de sauvegarder toutes les données importantes stockées sur
l’appareil. Pour plus d'informations, reportez-vous à la section Sauvegarder et restaurer des données.
Depuis la liste des applications, appuyez sur Paramètres → Sauvegarder et réinitialiser → Rétablir
param. par défaut → Réinitialiser le périphérique → Supprimer tout. L’appareil redémarre
automatiquement.
112
Paramètres
Accéder au menu des paramètres
Utilisez cette application pour configurer l’appareil, définir les paramètres d’une application et
ajouter des comptes.
Appuyez sur Paramètres depuis la liste des applications.
Pour rechercher des paramètres en saisissant des mots clés, appuyez sur .
Vous pouvez modifier le mode d'affichage sur des onglets séparés ou une liste. Appuyez sur →
Type d'affichage et sélectionnez un mode d'affichage.
Les fonctions prises en charge peuvent être différentes ou porter un autre nom selon que
votre appareil est un modèle à une ou deux cartes SIM.
PARAMÈTRES RAPIDES
Affichez la liste de vos paramètres favoris.
Pour modifier la liste des options de paramétrage préférées, appuyez sur → Modifier les raccourcis,
sélectionnez une option de paramétrage, puis appuyez sur Effectué.
CONNEXIONS
Wi-Fi
Activez la fonction Wi-Fi pour permettre la connexion à un réseau Wi-Fi et accéder à Internet ou à
d’autres périphériques réseau.
Depuis l’écran Paramètres, appuyez sur Wi-Fi, puis appuyez sur le curseur Wi-Fi pour activer la
fonction.
La stabilité de la connexion réseau peut être maintenue en sélectionnant automatiquement
le réseau Wi-Fi ou le réseau mobile pour utiliser le signal le plus puissant. Pour basculer
automatiquement entre les réseaux, cochez la case Réseau intelligent.
Paramètres
113
Pour utiliser des options supplémentaires, appuyez sur .
• Analyser : recherchez les réseaux disponibles.
• Wi-Fi Direct : activez l’option Wi-Fi Direct et connectez directement les périphériques via Wi-Fi
pour partager des fichiers.
• Paramètres avancés : personnalisez les paramètres Wi-Fi.
• Touche WPS : connectez-vous à un réseau Wi-Fi sécurisé à l'aide d'une touche WPS.
• Entrée PIN WPS : connectez-vous à un réseau Wi-Fi sécurisé à l'aide d'un code PIN WPS.
• Aide : accédez aux informations d'aide relatives au Wi-Fi.
Politique de mise en veille Wi-Fi
Appuyez sur → Paramètres avancés → Wi-Fi activé en mode veille.
Lorsque l’écran est éteint, l’appareil désactive automatiquement les connexions Wi-Fi.
Lorsque cela se produit, l’appareil accède automatiquement aux réseaux mobiles s’il a été
configuré pour utiliser ces réseaux. Cela peut entraîner des frais de transfert de données.
Pour éviter des frais supplémentaires, définissez cette option sur Toujours.
Bluetooth
Activez la fonction Bluetooth pour échanger des informations sur de courtes distances.
Depuis l’écran Paramètres, appuyez sur Bluetooth, puis appuyez sur le curseur Bluetooth pour
activer la fonction.
Pour accéder à des options supplémentaires, appuyez sur .
• Délai d'expiration de la visibilité : définissez une durée pendant laquelle l'appareil est visible.
• Fichiers reçus : affichez les fichiers reçus via Bluetooth.
• Renommer le périphérique : changez le nom de l’appareil.
• Aide : affichez les informations d'aide sur la fonction Bluetooth.
Paramètres
114
Modem et point d'accès mobile
Utilisez l’appareil comme point d’accès mobile pour partager sa connexion de données avec d’autres
appareils. Pour plus d'informations, reportez-vous à la section Modem et point d'accès mobile.
Depuis l’écran Paramètres, appuyez sur Modem et point d'accès mobile.
• Point d'accès mobile : utilisez le point d’accès mobile pour partager la connexion de données
de votre appareil avec des ordinateurs ou d’autres appareils via le réseau Wi-Fi. Vous pouvez
utiliser cette fonction lorsque la connexion réseau n’est pas disponible.
• Modem USB : utilisez le modem USB pour partager la connexion de données de votre appareil
avec un ordinateur via le mode USB. Lorsqu’il est connecté à un ordinateur, l’appareil sert de
modem sans fil.
• Modem Bluetooth : utilisez le modem Bluetooth pour partager la connexion de données de
votre appareil avec un ordinateur ou d’autres appareils via la fonction Bluetooth.
Mode Hors-ligne
Désactivez toutes les fonctions sans fil de l’appareil. Vous pouvez uniquement utiliser les services
hors-réseau, c’est-à-dire les fonctions autres que les fonctions d'appel, Wi-Fi et Bluetooth.
Depuis l’écran Paramètres, appuyez sur Mode Hors-ligne.
Utilisation des données
Effectuez un suivi de la quantité de données utilisées et personnalisez les paramètres de limite
d’utilisation des données.
Depuis l’écran Paramètres, appuyez sur Utilisation des données.
• Données mobiles : paramétrez l'appareil pour qu'il utilise les connexions de données sur
n'importe quel réseau mobile.
• Définir la limite des données mobiles : configurez une limite d’utilisation des données mobiles.
• Cycle utilisation données : indiquez la date de réinitialisation mensuelle à laquelle effectuer la
vérification de l’utilisation des données entre deux périodes.
Pour accéder à des options supplémentaires, appuyez sur .
• Itinérance : paramétrez l'appareil pour qu'il utilise les connexions de données lorsque vous
changez de zone de couverture.
• Restr. données arrière-plan : paramétrez l'appareil pour qu'il désactive la synchronisation en
arrière-plan lorsque vous utilisez un réseau mobile.
Paramètres
115
• Synchroniser les données automatiquement : activez ou désactivez la synchronisation
automatique des applications, comme le calendrier ou la messagerie électronique. Vous pouvez
choisir les informations devant être synchronisées pour chaque compte dans Paramètres →
Comptes.
• Afficher utilisation Wi-Fi : paramétrez l'appareil pour qu'il affiche l'utilisation de données via
une connexion Wi-Fi.
• Points d'accès mobiles : sélectionnez des points d’accès mobiles afin d’empêcher que les
applications fonctionnant en arrière-plan ne les utilisent.
Position
Modifiez les paramètres des informations de localisation.
Depuis l’écran Paramètres, appuyez sur Position, puis appuyez sur le curseur Position pour activer la
fonction.
• Mode : sélectionnez une méthode pour collecter vos données de localisation.
• DEMANDES DE LOCALISATION RÉCENTES : affichez les applications qui requièrent vos
informations de localisation actuelles et la batterie consommée à cet effet.
• SERVICES DE LOCALISATION : affichez les services de localisation utilisés par votre appareil.
• Mes endroits : définissez les profils à utiliser pour des emplacements spécifiques lorsque vous
utilisez les fonctions GPS, Wi-Fi ou Bluetooth afin de déterminer votre position.
Gestionnaire de carte SIM (modèles à deux cartes SIM)
Activez vos cartes SIM ou USIM et personnalisez les paramètres associés.
Depuis l’écran Paramètres, appuyez sur Gestionnaire de carte SIM.
• Appel vocal : sélectionnez une carte SIM ou USIM pour les appels vocaux.
• Appel visio : sélectionnez une carte SIM ou USIM pour les appels visio.
• Service de connexion données : sélectionnez une carte SIM ou USIM pour le service de
données.
• Double carte SIM activée en permanence : paramétrez l'appareil pour autoriser les appels
entrants provenant d'autres cartes SIM ou USIM lors d'un appel.
Lorsque cette fonction est activée, le transfert d’appel peut occasionner des frais
supplémentaires selon votre zone géographique ou votre opérateur.
Paramètres
116
NFC et partage
Personnalisez les paramètres permettant de contrôler les connexions avec d’autres appareils.
Depuis la liste des applications, appuyez sur NFC et partage.
NFC
Activez la fonction NFC pour lire ou écrire des tags NFC contenant des informations.
• Android Beam : activez la fonction Android Beam pour envoyer des données, telles que des
pages Web ou des contacts, à des appareils compatibles NFC.
• S Beam : activez la fonction S Beam pour envoyer des données telles que des vidéos, des images
et des documents à des appareils prenant en charge les fonctions NFC et Wi-Fi Direct.
• Paiement NFC : définissez l’application de paiement mobile par défaut.
La liste des services peut ne pas inclure toutes les applications de paiement disponibles.
Appareils à proximité
Modifiez les paramètres de partage de contenu lorsque vous connectez l’appareil à des appareils à
proximité. Tous les appareils doivent être compatibles avec Wi-Fi direct ou être connectés au même
point d'accès.
• NOM DE L'APPAREIL : affichez le nom de serveur multimédia de votre appareil.
• Contenu à partager : sélectionnez les contenus à partager avec d’autres appareils.
• Appareils autorisés : affichez la liste des périphériques pouvant accéder à votre appareil.
• Appareils refusés : affichez la liste des périphériques ne pouvant pas accéder à votre appareil.
• Destination de téléchargement : sélectionnez la mémoire dans laquelle enregistrer les fichiers
multimédia téléchargés.
• Recevoir fichiers d'autres app. : paramétrez l'appareil pour pouvoir autoriser le chargement à
partir d'autres appareils.
Impression
Configurez les paramètres pour les modules d’extension d’imprimante installés sur l’appareil. Vous
pouvez rechercher les imprimantes disponibles ou en ajouter une manuellement pour imprimer les
fichiers.
Screen Mirroring
Activez cette fonction pour partager votre écran avec d’autres personnes.
Paramètres
117
Plus de réseaux
Personnalisez les paramètres réseaux.
Depuis l’écran Paramètres, appuyez sur Plus de réseaux.
Application de messagerie par défaut
Sélectionnez l’application par défaut à utiliser pour la messagerie.
Réseaux mobiles
• Données mobiles : paramétrez l'appareil pour qu'il utilise les connexions de données sur
n'importe quel réseau mobile.
• Itinérance : paramétrez l'appareil pour qu'il utilise les connexions de données lorsque vous
changez de zone de couverture.
• Nom des points d'accès : configurez des noms de point d'accès (APN).
• Mode réseau SIM 1 / Mode réseau SIM 2 (modèles à deux cartes SIM) : sélectionnez un type de
réseau.
Mode réseau (modèles à une carte SIM) : sélectionnez un type de réseau.
• Opérateurs réseau : recherchez des réseaux disponibles et enregistrez un réseau
manuellement.
VPN
Paramétrez des réseaux privés virtuels (VPN) pour vous y connecter.
APPAREIL
Son
Modifiez les paramètres des différents sons de l’appareil.
Depuis l’écran Paramètres, appuyez sur Son.
• Mode son : configurez le mode sonore à utiliser (vibreur, son ou silencieux).
• Volume : réglez le volume des sonneries d’appel, des musiques et des vidéos, des sons système
et des notifications.
• Intensité des vibrations : réglez l’intensité des vibrations émises par l’appareil lorsque vous
appuyez sur l’écran.
Paramètres
118
• Sonnerie (modèles à deux cartes SIM) :
– Sonneries : sélectionnez une sonnerie pour les appels entrants.
– Notifications : sélectionnez une sonnerie pour notifications, comme les messages entrants
et les appels manqués.
• Sonneries (modèles à une cartes SIM) : sélectionnez une sonnerie pour les appels entrants.
• Vibrations : sélectionnez un type de vibreur.
• Notifications (modèles à une cartes SIM) : sélectionnez une sonnerie pour les notifications,
comme les messages entrants et les appels manqués.
• Vibreur et sonnerie : paramétrez l’appareil pour qu’il vibre et émette une sonnerie à chaque
appel entrant.
• Son des touches : paramétrez l’appareil pour qu’il émette un son lorsque vous appuyez sur les
touches du clavier.
• Sélections audibles : paramétrez l’appareil pour qu’il émette un son lorsque vous sélectionnez
une application ou une option sur l’écran tactile.
• Son verrouillage écran : paramétrez l’appareil pour qu’il émette un son lorsque vous verrouillez
ou déverrouillez l’écran tactile.
• Retour tactile : paramétrez l’appareil pour qu’il vibre lorsque vous appuyez sur une touche.
• Son en cas d'appui : paramétrez l’appareil pour qu’il émette un son lorsque vous appuyez sur
une touche.
• Vibreur en cas d'appui : paramétrez l’appareil pour qu’il vibre lorsque vous appuyez sur une
touche.
Affichage et fond d'écran
Modifiez les paramètres d'affichage.
Depuis l’écran Paramètres, appuyez sur Affichage et fond d'écran.
• Luminosité : réglez la luminosité de l'écran.
• Fond d'écran :
– Écran d’accueil : sélectionnez l'image d'arrière-plan de l'écran d'accueil.
– Écran de verrouillage : sélectionnez l’image d’arrière-plan de l’écran de verrouillage.
– Écrans d'accueil et de verrouillage : sélectionnez l'image d'arrière-plan de l'écran d'accueil
et de l'écran de verrouillage.
– Fenêtre S View : modifiez le fond d'écran de la fenêtre S view.
• Thèmes : changez le thème de l'écran d'accueil, de la liste des applications et de l'écran de
verrouillage.
Paramètres
119
• Police :
– Style de police : modifiez le type de police du texte affiché à l’écran.
– Taille de police : modifiez la taille de la police.
• Opération à une main : paramétrez l'appareil de manière à activer le mode d'opération à une
main.
• Rotation de l'écran : indiquez si le contenu doit automatiquement pivoter en même temps que
l’appareil.
• Smart Stay : paramétrez l’appareil pour empêcher le rétroéclairage de se désactiver lorsque
vous consultez l’écran.
• Mise en veille de l'écran : définissez le délai à l'issue duquel l'écran doit s'éteindre
automatiquement.
• Mode d'écran :
– Affichage adaptatif : utilisez ce mode pour optimiser l’affichage automatiquement en
fonction des différentes applications.
– Cinéma AMOLED : utilisez ce mode pour obtenir un environnement sombre (une chambre
obscure, par exemple).
– Photo AMOLED : utilisez ce mode pour que les tons de l’écran ressemblent à de vraies
couleurs.
– Basique : utilisez ce mode pour obtenir un environnement normal.
• Tons écran auto. : paramétrez l’appareil pour pouvoir économiser de l’énergie en ajustant la
luminosité de l’écran.
• Écran de veille : paramétrez l'appareil pour activer un économiseur d'écran lorsque l'appareil est
en cours de chargement.
• Durée de l'éclairage des touches : paramétrez la durée de rétroéclairage des touches
Applications récentes et Retour.
Écran de verrouillage
Modifiez les paramètres de l'écran verrouillé.
Depuis l’écran Paramètres, appuyez sur Écran de verrouillage.
• Déverrouillage de l'écran : changez la méthode de déverrouillage de l’écran. Les options
suivantes peuvent varier selon la fonction de déverrouillage d’écran sélectionnée.
• Double horloge : paramétrez l'appareil pour qu'il affiche deux horloges.
• Taille de l'horloge : modifiez la taille de l'horloge.
Paramètres
120
• Afficher la date : paramétrez l'appareil pour qu'il affiche la date et l'heure.
• Raccourci Appareil photo : paramétrez l'appareil pour qu’il affiche le raccourci vers l’appareil
photo sur l’écran verrouillé.
La disponibilité de cette fonction dépend de votre zone géographique ou de votre
opérateur.
• Infos propriétaire : saisissez les informations que vous souhaitez voir apparaître sur l'écran
verrouillé.
• Effet de déverrouillage : sélectionnez un effet à appliquer lorsque vous déverrouillez l’écran.
• Afficher infos météo : paramétrez l’appareil pour qu'il affiche la météo sur l’écran verrouillé.
• Texte d'aide : paramétrez l'appareil pour qu'il affiche un texte d'aide à l'utilisation sur l'écran
verrouillé.
Fenêtres multiples
Activez ou désactivez la fonction Multi-fenêtres.
Depuis la liste des paramètres, appuyez sur Fenêtres multiples, puis appuyez sur le curseur Fenêtres
multiples pour activer la fonction.
• Ouvrir en vue Multi-fenêtre : paramétrez l'appareil pour pouvoir activer la fonction Fenêtres
multiples lorsque vous ouvrez des fichiers depuis Mes fichiers ou Vidéo. De même, l’appareil
désactive cette fonction lorsque vous affichez les pièces jointes des messages.
Volet des raccourcis
Personnalisez les éléments apparaissant dans le volet des raccourcis.
Depuis l’écran Paramètres, appuyez sur Volet des raccourcis.
Mouvements et gestes
Activez la fonction de détection des mouvements et modifiez les paramètres permettant de
contrôler la détection de mouvement de votre appareil.
Depuis la liste des applications, appuyez sur Mouvements et gestes.
• Smart Alert : paramétrez l’appareil pour pouvoir être averti des appels manqués ou des
nouveaux messages lorsque vous le prenez dans la main.
• Muet/pause : paramétrez l’appareil pour pouvoir couper la sonnerie des appels entrants ou des
alarmes à l'aide de mouvements de la paume de la main ou en retournant l’appareil.
• Balayer pour capturer : paramétrez l’appareil pour pouvoir effectuer une capture d’écran en
balayant l’écran avec le côté de la main vers la gauche ou vers la droite.
Paramètres
121
PERSONNALISATION
Comptes
Ajoutez des comptes de messagerie électronique ou de réseaux sociaux.
Depuis l’écran Paramètres, appuyez sur Comptes.
Cloud
Modifiez les paramètres de synchronisation des données ou des fichiers avec votre compte Samsung
ou le stockage Cloud Dropbox.
Depuis l’écran Paramètres, appuyez sur Cloud.
Sauvegarder et réinitialiser
Modifiez les paramètres de gestion des paramètres et des données.
Depuis la liste des applications, appuyez sur Sauvegarder et réinitialiser.
• Sauvegarder mes données : paramétrez l’appareil pour pouvoir sauvegarder vos paramètres et
vos données d’application sur le serveur Google.
• Compte de sauvegarde : configurez ou modifiez votre compte de sauvegarde Google.
• Restauration auto. : paramétrez l’appareil pour pouvoir restaurer vos paramètres et vos
données d’application lorsque les applications sont réinstallées.
• Rétablir param. par défaut : restaurez les valeurs par défaut de l’appareil et supprimez toutes
vos données.
Mode simplifié
Utilisez le mode simplifié de l’appareil.
Depuis l’écran Paramètres, appuyez sur Mode simplifié.
• Mode standard : utilisez le mode standard de l’appareil.
• Mode simplifié : utilisez le mode simplifié de l’appareil.
• APPLICATIONS SIMPLIFIÉES : sélectionnez les applications auxquelles appliquer une
présentation simplifiée.
Paramètres
122
Accessibilité
Utilisez cette fonction pour améliorer l'accessibilité de l'appareil.
Depuis l’écran Paramètres, appuyez sur Accessibilité.
• Vue : personnalisez les paramètres permettant d'améliorer l'accessibilité pour les utilisateurs
malvoyants.
– TalkBack : activez le service TalkBack qui propose des commentaires parlés. Pour afficher les
informations d'aide expliquant l'utilisation de cette fonction, appuyez sur Paramètres →
Lancer le didacticiel "Explorer au toucher".
– Ecran atténué : paramétrez l’appareil pour qu’il laisse toujours l’écran éteint afin de préserver
la confidentialité de vos données.
– Saisie clavier rapide : paramétrez l’appareil pour pouvoir saisir un caractère lorsque vous
relâchez le doigt du caractère du clavier. Vous pouvez utiliser cette fonction pour saisir des
caractères au lieu de relâcher le doigt et d’appuyer deux fois sur l’écran.
– Énoncer mots de passe : paramétrez l’appareil pour qu’il lise le mot de passe à haute voix
lorsque vous saisissez le mot de passe lorsque TalkBack est activé.
– Taille de police : modifiez la taille de la police.
– Gestes d'agrandissement : paramétrez l'appareil de manière à grossir l’écran et à effectuer
un zoom avant sur une zone spécifique.
– Rappel de notification : paramétrez l'appareil de manière à vous alerter des notifications
que vous n’avez pas vérifiées selon l’intervalle défini.
– Couleurs négatives : inversez les couleurs d’affichage pour une meilleure visibilité.
– Réglage des couleurs : réglez la palette de couleurs à l'écran si l'appareil détermine que vous
êtes daltonien ou que vous avez des difficultés à lire le contenu.
– Raccourci d'accessibilité : paramétrez l'appareil pour pouvoir activer TalkBack lorsque vous
maintenez la touche Marche/Arrêt enfoncée et appuyez sur l'écran avec deux doigts.
– Options synthèse vocale : modifiez les paramètres de diction de la synthèse vocale utilisés
lorsque TalkBack est activé, comme les langues, la vitesse, etc.
Paramètres
123
• Audition : personnalisez les paramètres permettant d'améliorer l'accessibilité pour les
utilisateurs malentendants.
– Notification par flash : configurez le flash pour qu’il clignote lorsque vous recevez des appels
entrants, de nouveaux messages ou des notifications.
– Désactiver tous les sons : paramétrez l'appareil pour que tous les sons, tels que les sons
multimédia et la voix du correspondant soient mis en sourdine lors d’un appel.
– Sous-titres Samsung (CC) : paramétrez l’appareil pour qu’il affiche des sous-titres sur les
contenus pris en charge par Samsung et pour modifier les paramètres des sous-titres.
– Sous-titres Google (CC) : paramétrez l’appareil pour qu’il affiche des sous-titres sur les
contenus pris en charge par Google et pour modifier les paramètres des sous-titres.
– Balance audio : configurez l’appareil pour pouvoir régler la balance audio lorsque vous
utilisez un casque.
– Audio mono : paramétrez l'appareil de manière à ce que la sortie son passe du stéréo au
mono lorsqu'un casque est connecté.
– Tactile auto : paramétrez l’appareil pour qu’il vibre lorsque des sons d’applications
téléchargées, comme des jeux, sont lus.
Il se peut que cette fonction ne soit pas prise en charge par certains appareils.
• Dextérité et interaction : personnalisez les paramètres permettant d'améliorer l'accessibilité
pour les utilisateurs à dextérité réduite.
– Assistant menu : paramétrez l'appareil pour qu'il affiche le raccourci d'aide qui vous permet
d'accéder aux fonctions prises en charge par les touches ou fonctions externes dans le volet
des raccourcis. Vous pouvez également modifier le menu de l’icône de raccourci.
– Durée de l'appui prolongé : définissez le délai de reconnaissance lorsque vous maintenez le
doigt appuyé sur l’écran.
– Contrôle par interaction : activez le mode contrôle par interaction pour limiter les réactions
de l’appareil aux saisies lorsque vous utilisez des applications.
• Accès direct : paramétrez l'appareil de manière à ouvrir les menus d’accessibilité sélectionnés
lorsque vous appuyez à trois reprises rapprochées sur la touche Accueil.
• Répondre et mettre fin aux appels : modifiez le mode de prise ou de fin d’appel.
• Mode pression unique : paramétrez l’appareil pour commander les notifications en appuyant
sur la touche plutôt qu’en la faisant glisser.
• Gérer l'accessibilité : exportez ou importez les paramètres d'accessibilité afin de les partager
avec d'autres appareils.
• SERVICES : affichez les services d’accessibilité installés sur l’appareil.
Paramètres
124
Mode Blocage
Sélectionnez les notifications à bloquer ou paramétrez l’appareil pour autoriser les notifications
provenant des contacts autorisés en Mode blocage.
Depuis l’écran Paramètres, appuyez sur Mode Blocage, puis appuyez sur le curseur Mode Blocage
pour activer la fonction.
Mode Privé
Paramétrez l’appareil pour empêcher d’autres personnes d’accéder à votre contenu personnel en
activant le mode Privé.
Depuis l’écran Paramètres, appuyez sur Mode Privé, puis appuyez sur le curseur Mode Privé pour
activer la fonction.
• Type d'accès mode Privé : configurez ou modifiez la méthode de déverrouillage pour activer le
mode Privé.
SYSTÈME
Langue et saisie
Modifiez les paramètres de saisie de texte. La disponibilité de certaines options dépend de la langue
sélectionnée.
Depuis la liste des applications, appuyez sur Langue et saisie.
Langue
Sélectionnez la langue d’affichage des menus et des applications.
Par défaut
Sélectionnez le type de clavier à utiliser par défaut pour la saisie de texte.
Paramètres
125
Clavier Samsung
Pour modifier les paramètres du clavier Samsung, appuyez sur .
La disponibilité des options dépend de votre zone géographique ou de votre opérateur.
• Français(FR) : sélectionnez une présentation de clavier par défaut.
• Sélectionner langue de saisie : sélectionnez les langues pour la saisie de texte.
• Texte intuitif : activez le mode de saisie intuitive pour que des suggestions de mots s’affichent
au fur et à mesure de votre saisie. Vous pouvez également personnaliser les paramètres de la
saisie intuitive.
• Remplacement automatique : paramétrez l'appareil pour pouvoir corriger les mots erronés et
incomplets en appuyant sur la barre d'espace ou un signe de ponctuation.
• Mes raccourcis clavier : paramétrez le nombre de raccourcis vers le texte fréquemment utilisé.
Vous pouvez maintenir une touche numérique enfoncée pour insérer un texte présélectionné.
• Majuscules automatiques : paramétrez l’appareil pour qu'il mette automatiquement en
majuscules la première lettre qui suit un signe de ponctuation final (point, point d’interrogation
et point d’exclamation).
• Espace auto : paramétrez l'appareil pour qu'il insère automatiquement un espace entre les
mots.
• Ponctuation automatique : paramétrez l’appareil pour qu'il insère un point lorsque vous
appuyez deux fois sur la barre d’espace.
• Glissement du clavier :
– Aucun(e) : paramétrez l'appareil pour désactiver la fonction de balayage du clavier.
– Saisie en continu : paramétrez l'appareil pour qu'il autorise la saisie continue qui consiste à
faire glisser le doigt d'une lettre à l'autre sur le clavier, sans le soulever.
– Contrôle du curseur : activez la fonction de navigation intelligente sur le clavier pour
déplacer le curseur en faisant défiler le clavier.
• Son : paramétrez l’appareil pour qu’il émette un son lorsque vous appuyez sur une touche.
• Vibreur : paramétrez l’appareil pour qu’il vibre lorsque vous appuyez sur une touche.
• Aperçu du caractère : paramétrez l’appareil pour qu'il affiche une image agrandie de chaque
caractère saisi.
• Réinitialiser paramètres : réinitialisez les paramètres du clavier Samsung.
Paramètres
126
Saisie vocale Google
Pour modifier les paramètres de saisie vocale, appuyez sur .
• Sélect. langues saisie : sélectionnez les langues pour la saisie de texte.
• Bloquer termes choquants : paramétrez l'appareil pour qu’il bloque les mots injurieux lors de la
saisie vocale.
• Reconnaissance vocale hors connexion : téléchargez et installez les données linguistiques
pour la saisie vocale hors ligne.
Recherche vocale
• Langue : sélectionnez la langue de la reconnaissance vocale.
• Sortie vocale : paramétrez l’appareil pour qu’il vous prévienne de l’action en cours à l’aide d’un
retour vocal.
• Détection du mot clé "Ok Google" : paramétrez l’appareil pour qu’il lance la reconnaissance
vocale lorsque vous prononcez la commande Ok Google lorsque vous utilisez l’application de
recherche.
La disponibilité de cette fonction dépend de votre zone géographique ou de votre
opérateur.
• Reconnaissance vocale hors connexion : téléchargez et installez les données linguistiques
pour la saisie vocale hors ligne.
• Bloquer termes choquants : masquez les mots injurieux dans les résultats de la recherche
vocale.
• Casque Bluetooth : paramétrez l’appareil pour autoriser la saisie vocale de mots-clés via le
microphone du casque et/ou des écouteurs Bluetooth si ceux-ci sont connectés.
Options synthèse vocale
• MOTEUR TTS FAVORI : sélectionnez un moteur de synthèse vocale. Pour modifier les paramètres
des moteurs de synthèse vocale, appuyez sur .
• Vitesse d'élocution : sélectionnez la vitesse de diction de la synthèse vocale.
• Écouter un exemple : écoutez le texte prononcé à titre d'exemple.
• État langue par défaut : affichez le statut de la langue par défaut pour la fonction de synthèse
vocale.
Lect. notific. haute voix
Paramétrez l’appareil pour qu’il lise les notifications à haute voix en cas d’appel entrant, de message
ou d’événement.
Paramètres
127
Vitesse du curseur
Réglez la vitesse du curseur de la souris ou du pavé tactile connecté(e) à l’appareil.
Date et heure
Accédez aux paramètres suivants et modifiez-les afin de contrôler l’affichage de l’heure et de la date.
Depuis l’écran Paramètres, appuyez sur Date et heure.
Si la batterie est entièrement déchargée ou si vous la retirez de l’appareil, l’heure et la date
sont alors réinitialisées.
• Date et heure automatiques : mettez automatiquement à jour la date et l'heure lorsque vous
changez de fuseau horaire.
• Définir la date : réglez la date manuellement.
• Définir l'heure : réglez l'heure manuellement.
• Fuseau horaire auto : paramétrez l'appareil pour pouvoir recevoir des informations sur l'heure
depuis le réseau lorsque vous changez de fuseau horaire.
• Sélectionner le fuseau horaire : réglez le fuseau horaire de votre domicile.
• Format 24 heures : affichez l'heure au format 24 heures.
• Format de date : sélectionnez un format de date.
Assistance sécurité
Activez le mode Urgence et configurez des contacts et des messages prédéfinis. Pour plus
d'informations, reportez-vous à la section Mode Urgence.
Depuis l’écran Paramètres, appuyez sur Assistance sécurité.
• Mode Urgence : paramétrer l’appareil pour qu’il active le mode Urgence et réduise la
consommation de la batterie en utilisant les fonctions de base, comme le téléphone.
• Envoyer des messages d'aide : paramétrez l’appareil pour pouvoir envoyer des messages d’aide
en appuyant à trois reprises sur la touche Marche/Arrêt.
• Gérer les contacts principaux : sélectionnez ou modifiez les destinataires des messages d’aide.
Paramètres
128
Accessoires
Modifiez les paramètres des accessoires.
Depuis l’écran Paramètres, appuyez sur Accessoires.
• Déverrouillage automatique : paramétrez l’appareil pour pouvoir le déverrouiller
automatiquement lorsque vous l’ouvrez. Cette fonction est disponible uniquement pour
certaines méthodes de déverrouillage de l’écran.
• Fond écran fenêtre S View : modifiez le fond d'écran de la fenêtre S view.
• Sélect. élém. à afficher : personnalisez les informations qui s'affichent sur l'écran de la fenêtre S
view.
Économie d'énergie
Activez le mode Économie d’énergie et modifiez les paramètres. Pour plus d'informations, reportezvous
à la section Utiliser les fonctions d’économie d’énergie.
Depuis l’écran Paramètres, appuyez sur Économie d'énergie.
• Mode Éco. d'énergie : activez le mode Économie d’énergie et modifiez les paramètres.
• Mode Ultra économie d'énergie : paramétrez l’appareil pour prolonger le temps de veille et
réduire la consommation de la batterie en affichant une présentation simplifiée et en autorisant
un accès limité à une application.
Le délai de veille maximum estimé est le temps qu’il faut à la batterie pour se décharger
complètement lorsque l’appareil n’est pas utilisé. Le délai de veille peut varier selon les
paramètres de l’appareil et les conditions d’utilisation.
• Affich. pourcentage batterie : paramétrez l'appareil pour qu'il affiche l'autonomie restante de la
batterie.
Stockage
Affichez les informations relatives à la quantité de mémoire disponible sur l’appareil et la carte
mémoire, ou formatez une carte mémoire.
Depuis l’écran Paramètres, appuyez sur Stockage.
Le formatage d’une carte mémoire supprime définitivement toutes les données qui y sont
stockées.
La mémoire interne de votre appareil a une capacité réelle disponible inférieure à la capacité
indiquée, car elle est en partie occupée par le système d’exploitation et les applications
installées par défaut. La capacité disponible peut varier lorsque vous mettez à jour l’appareil.
Paramètres
129
Sécurité
Modifiez les paramètres de sécurité de l’appareil et de la carte SIM ou USIM.
Depuis l’écran Paramètres, appuyez sur Sécurité.
• Admin. de périphérique : affichez les administrateurs de votre appareil. Vous pouvez autoriser
les administrateurs de l’appareil à appliquer de nouvelles règles à celui-ci.
• Sources inconnues : paramétrez l’appareil pour autoriser l’installation d’applications provenant
de sources inconnues.
• Vérifier les applications : paramétrez l’appareil pour qu'il vérifie que les applications ne
présentent aucun danger avant de les installer.
• Crypter l'appareil : définissez un mot de passe pour crypter les données enregistrées sur
l’appareil. Vous devez saisir ce mot de passe à chaque fois que vous allumez l’appareil.
Chargez la batterie avant d’activer ce paramètre, car il peut arriver que le cryptage des
données dure plus d’une heure.
• Crypter la carte SD externe : paramétrez l'appareil pour crypter les fichiers contenus sur une
carte mémoire.
Votre appareil ne sera pas en mesure de lire les fichiers cryptés si vous le réinitialisez lorsque
ces paramètres sont activés. Désactivez ces paramètres avant de réinitialiser votre appareil.
• Contrôle à distance : paramétrez l'appareil pour pouvoir le contrôler à distance via Internet si
vous l’égarez ou s’il vous est dérobé. Pour utiliser cette fonction, vous devez vous connecter à
votre compte Samsung.
• Alerte changement de SIM : activez ou désactivez la fonction de traçage du mobile qui vous
aide à localiser votre appareil en cas de perte ou de vol.
• Accéder au site Web : accédez au site Web permettant de localiser votre mobile
(findmymobile.samsung.com). Ce site vous permet de repérer et de contrôler un appareil égaré
ou dérobé.
• Verr. de réactivation : paramétrez l'appareil pour qu'il demande votre compte Samsung une
fois l'appareil réinitialisé afin d'empêcher d'autres personnes de réactiver l'appareil.
• Configurer blocage SIM :
– Verrouiller carte SIM : activez ou désactivez la fonction de verrouillage par code PIN de
l'appareil. Si vous activez ce paramètre, un code PIN vous sera demandé à chaque fois que
vous allumez l'appareil.
– Modifier code PIN SIM : modifiez le code PIN utilisé pour accéder aux données SIM ou USIM.
• Rendre les mots de passe visibles : paramétrez l’appareil pour qu’il affiche votre mot de passe à
mesure que vous le saisissez.
• MàJ de politique sécurité : paramétrez l'appareil pour qu'il vérifie et télécharge
automatiquement les mises à jour de sécurité.
Paramètres
130
• Envoyer des rapports de sécurité : paramétrez l'appareil pour qu'il envoie automatiquement
les rapports de sécurité à Samsung.
• Type de stockage : définissez un type de stockage pour les fichiers d'identification.
• Infos d'ident. sécurisées : recourez à des certificats et des identifiants pour sécuriser l’utilisation
des diverses applications.
• Installer depuis stock. périph. : installez des certificats cryptés sur le stockage USB.
• Effacer infos identification : effacez les identifiants de sécurité contenus dans l’appareil et
réinitialisez le mot de passe.
Aide
Affichez les informations d’aide pour apprendre à utiliser l’appareil et les applications, ou configurer
des paramètres importants.
Depuis l’écran Paramètres, appuyez sur Aide.
À propos de l'appareil
Accédez aux informations relatives à l’appareil, modifiez le nom de l’appareil ou mettez à jour le
logiciel de l’appareil.
Depuis l’écran Paramètres, appuyez sur À propos de l'appareil.
APPLICATIONS
Gestionnaire d'applications
Affichez et gérez les applications installées sur votre appareil.
Depuis l’écran Paramètres, appuyez sur Gestionnaire d'applications.
Applications par défaut
Sélectionnez un paramètre par défaut pour utiliser des applications.
Depuis l’écran Paramètres, appuyez sur Applications par défaut.
Paramètres d'application
Personnalisez les paramètres pour chaque application.
Depuis l’écran Paramètres, appuyez sur Paramètres d'application.
131
Annexe
Dépannage
Avant de contacter un centre de service après-vente Samsung, veuillez essayer de mettre en œuvre
les solutions suivantes. Il est possible que certaines situations ne s’appliquent pas à votre appareil.
Lorsque vous allumez ou utilisez votre appareil, un message vous invite à
effectuer l’une des manipulations suivantes :
• Mot de passe : lorsque la fonction de verrouillage est activée, vous devez saisir le mot de passe
que vous avez défini pour l’appareil.
• Code PIN : lorsque vous utilisez l’appareil pour la première fois ou lorsque la demande de code
PIN est activée, vous devez saisir le code PIN fourni avec la carte SIM ou USIM. Vous pouvez
désactiver cette fonction à l’aide du menu de verrouillage de la carte SIM.
• Code PUK : si vous saisissez un code PIN incorrect à plusieurs reprises, la carte SIM ou USIM est
bloquée. Vous devez alors saisir le code PUK fourni par votre opérateur.
• Code PIN2 : lorsque vous accédez à un menu nécessitant le code PIN2, vous devez saisir le code
PIN2 fourni avec la carte SIM ou USIM. Pour en savoir plus, contactez votre opérateur.
Votre appareil affiche des messages d’erreur de réseau et de service
• Lorsque vous vous trouvez dans une zone de mauvaise réception, vous risquez de perdre
la connexion au réseau. Déplacez-vous et réessayez. Lorsque vous vous déplacez, plusieurs
messages d’erreur peuvent apparaître.
• Certaines options ne sont pas accessibles sans abonnement. Pour en savoir plus, contactez votre
opérateur.
Votre appareil ne s’allume pas
Lorsque la batterie est entièrement déchargée, il n’est pas possible d’allumer l’appareil. Rechargez
complètement la batterie avant d’allumer l’appareil.
Annexe
132
Mauvaise réaction ou lenteur de l’écran tactile
• Si vous fixez sur l’écran tactile un cache de protection ou tout autre accessoire en option, il est
possible que l’écran ne fonctionne pas correctement.
• Si vous portez des gants, si vos mains ne sont pas parfaitement propres, ou si vous appuyez
sur l’écran avec un objet pointu ou vos ongles, l’écran tactile risque de présenter des
dysfonctionnements.
• L’humidité ou le contact avec l’eau peut provoquer des dysfonctionnements de l’écran tactile.
• Redémarrez votre appareil afin de mettre fin à d’éventuels dysfonctionnements logiciels
temporaires.
• Assurez-vous que vous disposez bien de la dernière version logicielle de votre appareil.
• Si l’écran tactile est endommagé ou rayé, contactez un centre de service après-vente Samsung.
Votre appareil se bloque ou est sujet à des erreurs fatales
Si votre appareil se bloque, il se peut que vous deviez fermer les applications ou éteindre l'appareil,
puis le rallumer. Si votre appareil se bloque et ne répond plus, maintenez simultanément la touche
Marche/Arrêt et la touche Volume enfoncées pendant plus de 7 secondes afin de redémarrer.
Si vous ne parvenez pas à résoudre le problème à la suite de ces manipulations, procédez à la
réinitialisation des paramètres par défaut. Depuis la liste des applications, appuyez sur Paramètres
→ Sauvegarder et réinitialiser → Rétablir param. par défaut → Réinitialiser le périphérique
→ Supprimer tout. Avant de rétablir les paramètres par défaut de votre appareil, n’oubliez pas
d’effectuer des copies de sauvegarde de toutes les données importantes qui y sont stockées.
Si le problème persiste, contactez un centre de service après-vente Samsung.
Impossible de passer des appels
• Assurez-vous d’être connecté au réseau cellulaire approprié.
• Vérifiez que vous n’avez pas activé la fonction de restriction d’appel pour le numéro de
téléphone que vous composez.
• Vérifiez que vous n’avez pas activé la fonction de restriction d’appel pour le numéro de
téléphone de l’appel entrant.
Vos interlocuteurs ne vous entendent pas
• Vérifiez que le microphone intégré n’est pas recouvert.
• Vérifiez que le microphone est placé suffisamment près de votre bouche.
• Si vous utilisez un kit piéton ou un casque, vérifiez qu’il est correctement branché.
Annexe
133
Vous percevez un écho lors des appels
Réglez le volume en appuyant sur la touche de volume ou déplacez-vous.
Déconnexions fréquentes du réseau cellulaire ou d’Internet, ou mauvaise
qualité audio
• Assurez-vous que rien n’entrave l’antenne intégrée à l’appareil.
• Lorsque vous vous trouvez dans une zone de mauvaise réception, vous risquez de perdre la
connexion au réseau. Vos problèmes de connectivité peuvent être dus à une panne au niveau
de votre opérateur. Déplacez-vous et réessayez.
• Si vous utilisez votre appareil tout en vous déplaçant, il est possible que les services de réseau
sans fil soient désactivés en raison de problèmes sur le réseau de votre opérateur.
L’icône de la batterie est vide
Le niveau de charge de la batterie est faible. Chargez la batterie.
La batterie ne se charge pas correctement (pour les chargeurs
homologués Samsung)
• Assurez-vous que le chargeur est correctement branché.
• Contactez un centre de service après-vente Samsung pour faire remplacer la batterie.
La batterie se décharge de plus en plus rapidement
• Si vous exposez l'appareil ou la batterie à des températures extrêmes, la charge utile peut être
réduite.
• La consommation de la batterie augmente lorsque vous utilisez certaines fonctions, comme les
SMS et MMS, ou certaines applications, comme les jeux ou Internet.
• La batterie est un consommable dont la charge utile diminue avec le temps.
Annexe
134
L’appareil est chaud au toucher
Lorsque vous utilisez plusieurs applications simultanément ou sur une période prolongée, l’appareil
peut chauffer. Ce phénomène est normal et n’affecte ni la durée de vie, ni les performances de
l’appareil.
Messages d’erreur à l’ouverture de l’appareil photo
Pour utiliser l’appareil photo, votre appareil doit disposer de suffisamment de mémoire et sa batterie
être suffisamment chargée. Si vous obtenez des messages d’erreur lors de l’ouverture de l’appareil
photo, tentez les manipulations suivantes :
• Chargez la batterie.
• Libérez de la mémoire en transférant des fichiers sur un ordinateur ou en supprimant des
éléments de l’appareil.
• Redémarrez l’appareil. Si les problèmes persistent avec l’appareil photo, contactez un centre de
service après-vente Samsung.
Qualité des photos inférieure par rapport à l’aperçu
• La qualité de vos photos peut varier selon l’environnement et les techniques photographiques
utilisées.
• Si vous prenez des photos avec une luminosité insuffisante, de nuit ou en intérieur, l’image
risque d’être floue.
Messages d’erreur à l’ouverture de fichiers multimédia
Si vous obtenez des messages d’erreur ou si vous ne parvenez pas à lire les fichiers multimédia
lorsque vous les ouvrez sur votre appareil, tentez les manipulations suivantes :
• Libérez de la mémoire en transférant des fichiers sur un ordinateur ou en supprimant des
éléments de l’appareil.
• Assurez-vous que le fichier audio n’est pas protégé par des droits DRM (Gestion des droits
d’auteur). Si le fichier est protégé par des droits DRM, vous devez posséder une licence ou une
clé pour pouvoir le lire.
• Assurez-vous que les formats de fichiers sont pris en charge par l’appareil. Si un format de
fichier n’est pas pris en charge, tel que DivX ou AC3, installez une application le prenant en
charge. Pour confirmer les formats de fichier compatibles avec votre appareil, connectez-vous à
www.samsung.com.
Annexe
135
• Votre appareil est compatible avec les photos et vidéos capturées avec ce même appareil. Les
photos et vidéos capturées avec d’autres appareils peuvent ne pas s’afficher correctement.
• Votre appareil prend en charge les fichiers multimédia autorisés par votre opérateur ainsi que
les opérateur, des autres services réseaux. Il est possible que certains contenus circulant sur
Internet, comme des sonneries, vidéos ou fonds d’écran, ne fonctionnent pas correctement.
Impossible de localiser un autre appareil Bluetooth
• Vérifiez que la fonction sans fil Bluetooth est activée sur votre appareil.
• Vérifiez que la fonction sans fil Bluetooth est également activée sur l’appareil auquel vous tentez
de vous connecter.
• Vérifiez que les deux appareils Bluetooth se trouvent bien à l’intérieur du rayon d’action
Bluetooth (10 m maximum).
Si les conseils ci-dessus ne résolvent pas le problème, contactez un centre de service après-vente
Samsung.
Problème de connexion avec un ordinateur
• Assurez-vous que le câble USB utilisé est compatible avec votre appareil.
• Vérifiez que le pilote nécessaire est bien installé sur votre ordinateur et qu’il est à jour.
• Si vous utilisez Windows XP, vérifiez que votre ordinateur est équipé de Windows XP Service
Pack 3 ou de toute version ultérieure.
• Vérifiez que Samsung Kies ou Windows Media Player 10 (ou toute version ultérieure) est installé
sur votre ordinateur.
Votre appareil ne parvient pas à détecter votre position
À certains endroits, comme à l’intérieur d’un bâtiment, les signaux GPS peuvent être faibles. Si cela se
produit, configurez votre appareil pour l’utilisation d’un réseau Wi-Fi ou mobile afin de trouver votre
position.
Annexe
136
Les données stockées sur l’appareil ont été perdues
Effectuez toujours des copies des données importantes stockées sur votre appareil. Dans le cas
contraire, vous ne pourriez pas récupérer vos données corrompues ou perdues. Samsung ne peut
être tenu responsable de la perte des données stockées sur votre appareil.
Un petit espace est apparu sur le bord externe du boîtier de l’appareil
• Cet espace est une caractéristique de fabrication, et il est possible d’observer un jeu ou une
vibration des pièces.
• Au fil du temps, la friction entre les pièces peut entraîner l’élargissement de cet espace.
Retirer la batterie (type non amovible)
• Ces instructions sont uniquement destinées à votre fournisseur de services ou un
réparateur agréé.
• Les dommages causés par le retrait non autorisé de la batterie ne sont pas couverts par la
garantie.
• Pour retirer ou remplacer la batterie, contactez votre fournisseur de services ou un
réparateur agréé.
1 Retirez le compartiment de la carte SIM ou de la carte mémoire de l’appareil avant de procéder
au retrait de la batterie.
2 Soulevez légèrement la base du panneau avant, puis débranchez le câble afin de séparer le
panneau avant du boîtier.
Ne séparez pas complètement le panneau avant du boîtier avant d'avoir débranché le câble.
Cela peut endommager l’appareil.
Annexe
137
3 Retirez la touche Accueil, puis desserrez et retirez les vis.
4 Retirez la carte de circuit imprimé en la soulevant à l’aide d’un outil, puis mettez le boîtier de
côté et placez la carte de circuit imprimé face vers le bas sur une surface de travail plane.
5 Débranchez le connecteur de la batterie, comme illustré ci-dessous.
Annexe
138
6 Appuyez sur la partie arrière de la batterie et retirez la batterie.
Veillez à ne pas percer la batterie avec vos ongles ou d’autres objets lorsque vous la retirez.
Cela peut entraîner une explosion ou un incendie.
Droits d’auteur
Copyright © 2015 Samsung Electronics
Ce mode d’emploi est protégé par les lois internationales sur les droits d’auteur.
Il est interdit de reproduire, distribuer, traduire ou transmettre sous quelque forme et par quelque
moyen que ce soit, électronique ou mécanique, notamment par photocopie, enregistrement
ou stockage dans un système de stockage et de recherche documentaire, tout ou partie de ce
document, sans le consentement préalable écrit de Samsung Electronics.
Marques
• SAMSUNG et le logo SAMSUNG sont des marques déposées de Samsung Electronics.
• Bluetooth® est une marque déposée de Bluetooth SIG, Inc.
• Wi-Fi®, Wi-Fi Protected Setup™, Wi-Fi CERTIFIED Passpoint™, Wi-Fi Direct™, Wi-Fi CERTIFIED™
et le logo Wi-Fi sont des marques déposées de Wi-Fi Alliance.
• Toutes les autres marques et droits d’auteur demeurent la propriété de leurs propriétaires
respectifs.
www.samsung.com
User Manual
SM-G925F
SM-G925FQ
SM-G925I
English. 03/2015
2
Table of Contents
Basics
4 Read me first
5 Package contents
6 Device layout
8 SIM or USIM card
10 Battery
15 Turning the device on and off
16 Touchscreen
19 Home screen
25 Lock screen
26 Edge screen
32 Notification panel
35 Entering text
38 Screen capture
38 Opening apps
39 Multi window
44 Device and data management
48 Connecting to a TV
50 Sharing files with contacts
51 Emergency mode
Applications
52 Installing or uninstalling apps
53 Phone
56 Contacts
58 Messages
60 Internet
61 Email
62 Camera
78 Gallery
80 Smart Manager
82 S Planner
83 S Health
86 S Voice
88 Music
89 Video
90 Voice Recorder
92 My Files
93 Memo
93 Clock
95 Calculator
96 Google apps
Settings
98 Introduction
98 Wi-Fi
100 Bluetooth
102 Flight mode
102 Mobile hotspot and tethering
103 Data usage
104 Mobile networks
104 NFC and payment
107 More connection settings
109 Sounds and notifications
110 Display
Table of Contents
3
110 Edge screen
111 Motions and gestures
112 Applications
112 Wallpaper
112 Themes
113 Lock screen and security
117 Privacy and safety
120 Easy mode
121 Accessibility
121 Accounts
122 Backup and reset
123 Language and input
123 Battery
124 Storage
124 Date and time
125 User manual
125 About device
Appendix
126 Accessibility
141 Troubleshooting
4
Basics
Read me first
Please read this manual before using the device to ensure safe and proper use.
• Descriptions are based on the device’s default settings.
• Some content may differ from your device depending on the region, service provider,
model specifications, or device’s software.
• Content (high quality content) that requires high CPU and RAM usage will affect the
overall performance of the device. Apps related to the content may not work properly
depending on the device’s specifications and the environment that it is used in.
• Samsung is not liable for performance issues caused by apps supplied by providers other
than Samsung.
• Samsung is not liable for performance issues or incompatibilities caused by edited
registry settings or modified operating system software. Attempting to customise the
operating system may cause the device or apps to work improperly.
• Software, sound sources, wallpapers, images, and other media provided with this device
are licensed for limited use. Extracting and using these materials for commercial or other
purposes is an infringement of copyright laws. Users are entirely responsible for illegal
use of media.
• You may incur additional charges for data services, such as messaging, uploading and
downloading, auto-syncing, or using location services depending on your data plan. For
large data transfers, it is recommended to use the Wi-Fi feature.
• Default apps that come with the device are subject to updates and may no longer be
supported without prior notice. If you have questions about an app provided with
the device, contact a Samsung Service Centre. For user-installed apps, contact service
providers.
• Modifying the device’s operating system or installing softwares from unofficial sources
may result in device malfunctions and data corruption or loss. These actions are violations
of your Samsung licence agreement and will void your warranty.
Basics
5
• Depending on the region or model, some devices are required to receive approval from
the Federal Communications Commission (FCC). If your device is approved by the FCC,
you can view the FCC ID of the device. To view the FCC ID, tap Apps → Settings →
About device.
Instructional icons
Warning: situations that could cause injury to yourself or others
Caution: situations that could cause damage to your device or other equipment
Notice: notes, usage tips, or additional information
Package contents
Check the product box for the following items:
• Device
• Quick start guide
• The items supplied with the device and any available accessories may vary
depending on the region or service provider.
• The supplied items are designed only for this device and may not be compatible
with other devices.
• Appearances and specifications are subject to change without prior notice.
• You can purchase additional accessories from your local Samsung retailer. Make
sure they are compatible with the device before purchase.
• Use only Samsung-approved accessories. Using unapproved accessories may cause
the performance problems and malfunctions that are not covered by the warranty.
• Availability of all accessories is subject to change depending entirely on
manufacturing companies. For more information about available accessories, refer
to the Samsung website.
Basics
6
Device layout
Microphone
Loud speaker
Back key
Multipurpose jack
Front camera
Speaker
Edge screen
Power key
Touchscreen
Edge screen
Recents key
Headset jack
Home key (Fingerprint
recognition sensor)
LED indicator
Proximity/Light sensor
SIM card tray
GPS antenna
Main antenna
Infrared port
Flash
Volume key
NFC antenna/Wireless
charging coil
Rear camera
Microphone
Basics
7
• Do not cover the antenna area with your hands or other objects. This may cause
connectivity problems or drain the battery.
• Using a Samsung-approved screen protector is recommended. Unapproved screen
protectors may cause the sensors to malfunction.
• Do not allow water to contact the touchscreen. The touchscreen may malfunction
in humid conditions or when exposed to water.
Keys
Key Function
Power
• Press and hold to turn the device on or off.
• Press to turn on or lock the screen.
Recents
• Tap to open the list of recent apps.
• Tap and hold to launch the split screen view.
Home
• Press to turn on the screen while the screen is locked.
• Press to return to the Home screen.
• Press and hold to launch Google.
Back • Tap to return to the previous screen.
Volume • Press to adjust the device volume.
Basics
8
SIM or USIM card
Installing the SIM or USIM card
Insert the SIM or USIM card provided by the mobile telephone service provider.
• Only nano-SIM cards work with the device.
• Some LTE services may not be available depending on the service provider. For
more information about service availability, contact your service provider.
1 Insert the ejection pin into the hole on the SIM card tray to loosen the tray.
Ensure that the ejection pin is perpendicular to the hole. Otherwise, the device may
be damaged.
Basics
9
2 Pull out the SIM card tray gently from the SIM card tray slot.
3 Place the SIM or USIM card on the SIM card tray with the gold-coloured contacts facing
downwards.
Use caution not to lose or let others use the SIM or USIM card. Samsung is not
responsible for any damages or inconveniences caused by lost or stolen cards.
4 Insert the SIM card tray back into the SIM card tray slot.
Removing the SIM or USIM card
1 Insert the ejection pin into the hole on the SIM card tray to loosen the tray.
2 Pull out the SIM card tray gently from the SIM card tray slot.
3 Remove the SIM or USIM card.
4 Insert the SIM card tray back into the SIM card tray slot.
Basics
10
Battery
Charging the battery
Charge the battery before using it for the first time or when it has been unused for extended
periods.
Use only Samsung-approved chargers, batteries, and cables. Unapproved chargers or
cables can cause the battery to explode or damage the device.
1 Connect the USB cable to the USB power adaptor, and then plug the end of the USB cable
into the multipurpose jack.
Connecting the charger improperly may cause serious damage to the device. Any
damage caused by misuse is not covered by the warranty.
2 Plug the USB power adaptor into an electric socket.
Basics
11
3 After fully charging, disconnect the device from the charger. First unplug the charger
from the device, and then unplug it from the electric socket.
To save energy, unplug the charger when not in use. The charger does not have a
power switch, so you must unplug the charger from the electric socket when not in
use to avoid wasting power. The charger should remain close to the electric socket
and easily accessible while charging.
Viewing the remaining charging time
While charging, open the Home screen and tap Apps → Settings → Battery.
The actual charging time may vary depending on the status of your device and the
charging conditions. The remaining charging time may not be displayed when you
charge the device in very cold or very hot conditions.
Reducing the battery consumption
Your device provides various options that help you conserve battery power.
• Optimise the device using the Smart manager.
• When you are not using the device, switch to sleep mode by pressing the Power key.
• Activate power saving mode.
• Close unnecessary apps.
• Deactivate the Bluetooth feature when not in use.
• Deactivate the Wi-Fi feature when not in use.
• Deactivate auto-syncing of apps.
• Decrease the backlight time.
• Decrease the screen brightness.
Basics
12
Battery charging tips and precautions
• When the battery power is low, the battery icon appears empty.
• If the battery is completely discharged, the device cannot be turned on immediately
when the charger is connected. Allow a depleted battery to charge for a few minutes
before turning on the device.
• If you use multiple apps at once, network apps, or apps that need a connection to
another device, the battery will drain quickly. To avoid disconnecting from the network
or losing power during a data transfer, always use these apps after fully charging the
battery.
• Using a power source other than the USB power adaptor, such as a computer, may result
in a slower charging speed due to a lower electric current.
• The device can be used while it is charging, but it may take longer to fully charge the
battery.
• If the device receives an unstable power supply while charging, the touchscreen may not
function. If this happens, unplug the charger from the device.
• While charging, the device and the charger may heat up. This is normal and should not
affect the device’s lifespan or performance. If the battery gets hotter than usual, the
charger may stop charging.
• If the device is not charging properly, take the device and the charger to a Samsung
Service Centre.
Basics
13
Fast charging
The device has a built-in fast charging feature. You can use this feature to charge the battery
more quickly while the device or its screen is turned off.
About Fast charging
• Fast charging uses battery charging technology that charges the battery faster by
increasing the charging power. The device supports Samsung’s Adaptive fast charging
feature and Qualcomm Quick Charge 2.0.
• To use Fast charging on your device, connect it to a battery charger that supports
Adaptive fast charging or Quick Charge 2.0.
Increasing the charging speed
To increase the charging speed, turn the device or its screen off when you charge the battery.
• While charging the battery when the device is turned off, the icon appears on the
screen.
• You cannot use the fast charging feature when the screen is turned on. Turn off the
screen to increase the charging speed.
• You cannot use the built-in fast charging feature when you charge the battery
using a standard battery charger.
• If the device heats up or the ambient air temperature rises, the charging speed may
decrease automatically. This is a normal operating condition to prevent damage to
the device.
Basics
14
Wireless charging
The device has a built-in wireless charging coil. You can charge the battery using a wireless
charger (sold separately).
1 Place the centre of the device’s back on the centre of the wireless charger.
You can check the remaining charging time on the screen. The actual remaining time
may vary depending on the charging conditions.
2 After fully charging, disconnect the device from the wireless charger.
• When there are foreign materials between the device and the wireless charger, the
device may not charge properly.
• If you use the wireless charger in areas with weak network signals, you may lose
network reception.
• Use Samsung-approved wireless chargers. If you use other wireless chargers, the
battery may not charge properly.
Power saving mode
Save the battery power by limiting the device’s functions.
On the Home screen, tap Apps → Settings → Battery → Power saving mode, and then tap
the switch to activate it.
To automatically activate power saving mode when the remaining battery power reaches the
preset level, tap Start power saving and select an option.
Basics
15
Ultra power saving mode
Use this mode to extend the device’s battery power. In ultra power saving mode, the device
performs the following:
• Displays colours on the screen as grey tones.
• Restricts the available apps to essential and selected apps only.
• Deactivates the mobile data connection when the screen turns off.
• Deactivates the Wi-Fi and Bluetooth features.
On the Home screen, tap Apps → Settings → Battery → Ultra power saving mode, and
then tap the switch to activate it.
To deactivate ultra power saving mode, tap MORE → Disable ultra power saving mode.
The usage time left shows the time remaining before the battery power runs
out. Usage time left may vary depending on your device settings and operating
conditions.
Turning the device on and off
Press and hold the Power key for a few seconds to turn on the device.
When you turn on your device for the first time or after performing a data reset, follow the onscreen
instructions to set up your device.
To turn off the device, press and hold the Power key, and then tap Power off.
• If your device is frozen and unresponsive, press and hold the Power key and the
Volume key down simultaneously for more than 7 seconds to restart it.
• Follow all posted warnings and directions from authorised personnel in areas
where the use of wireless devices is restricted, such as aeroplanes and hospitals.
Basics
16
Touchscreen
• Do not allow the touchscreen to come into contact with other electrical devices.
Electrostatic discharges can cause the touchscreen to malfunction.
• To avoid damaging the touchscreen, do not tap it with anything sharp or apply
excessive pressure to it with your fingertips.
• The device may not recognise touch inputs close to the edges of the screen, which
are outside of the touch input area.
• Leaving the touchscreen idle for extended periods may result in afterimages
(screen burn-in) or ghosting. Turn off the touchscreen when you do not use the
device.
• It is recommended to use fingers when you use the touchscreen.
Tapping
To open an app, to select a menu item, to press an on-screen button, or to enter a character
using the keyboard on the screen, tap it with your finger.
Basics
17
Tapping and holding
Tap and hold an item or the screen for more than 2 seconds to access available options.
Dragging
To move an item, tap and hold it and drag it to the target position.
Double-tapping
Double-tap on a webpage or image to zoom in. Double-tap again to return.
Basics
18
Swiping
Swipe to the left or right on the Home screen or the Apps screen to view other panels. Swipe
upwards or downwards to scroll through a webpage or a list of items, such as contacts.
Spreading and pinching
Spread two fingers apart on a webpage, map, or image to zoom in a part. Pinch to zoom out.
Basics
19
Home screen
Home screen
The Home screen is the starting point for accessing all of the device’s features. It displays
widgets, shortcuts to apps, and more.
To view other panels, swipe to the left or right, or tap one of the screen indicators at the
bottom of the screen.
A widget
An app A folder
Screen indicators
Favourite apps Apps screen icon
Basics
20
Home screen options
On the Home screen, tap and hold an empty area, or pinch your fingers together to access
the available options. Customise the Home screen by adding, deleting, or rearranging Home
screen panels. You can also set the Home screen wallpaper, add widgets to the Home screen,
and more.
• Wallpapers: Change the wallpaper settings for the Home screen and the locked screen.
• Widgets: Add widgets to the Home screen. Widgets are small apps that launch specific
app functions to provide information and convenient access on your Home screen.
• Themes: Change the device’s theme. Visual elements of interface, such as colours, icons,
and wallpapers, will change depending on the selected theme.
• Screen grid: Change the size of the grid to display more or less items on the Home
screen.
Basics
21
Flipboard Briefing
View the latest articles in various categories. You can get up to date on news that interests
you using this feature.
On the Home screen, tap or swipe to the right to open Flipboard Briefing. Swipe upwards
or downwards to browse articles in each news category.
To deactivate Flipboard Briefing, tap and hold an empty area on the Home screen. Then,
swipe to the right and deselect the tick box at the top of the Flipboard Briefing panel.
Adding items
Tap and hold an app or a folder from the Apps screen, and then drag it to the Home screen.
To add widgets, tap and hold an empty area on the Home screen, tap Widgets, tap and hold a
widget, and then drag it to the Home screen.
Moving and removing an item
Tap and hold an item on the Home screen, and then drag it to a new location.
To move the item to another panel, drag it to the side of the screen.
You can also move frequently used apps to the shortcuts area at the bottom of the Home
screen.
To remove an item, tap and hold the item. Then, drag it to Remove at the top of the screen.
Basics
22
Creating folders
1 On the Home screen, tap and hold an app, and then drag it over another app.
2 Drop the app when a folder frame appears around the apps.
A new folder containing the selected apps will be created.
3 Tap Enter folder name and enter a folder name.
To change the folder colour, tap .
To add more apps to the folder, tap and hold another app, and then drag it to the folder.
Managing panels
On the Home screen, tap and hold an empty area to add, move, or remove a panel.
To add a panel, swipe to the left, and then tap .
To move a panel, tap and hold a panel preview, and then drag it to a new location.
To remove a panel, tap and hold a panel preview, and then drag it to Remove at the top of
the screen.
To set a panel as the main Home screen, tap .
Basics
23
Apps screen
The Apps screen displays icons for all apps, including newly installed apps.
On the Home screen, tap Apps to open the Apps screen. To view other panels, swipe to the
left or right, or select a screen indicator at the bottom of the screen.
Moving items
On the Apps screen, tap EDIT. Tap and hold an item and drag it to a new location.
To move the item to another panel, drag it to the side of the screen.
Creating folders
This feature may not be available depending on the region or service provider.
1 On the Apps screen, tap EDIT.
2 Tap and hold an app, and then drag it over another app.
3 Drop the app when a folder frame appears around the apps.
A new folder containing the selected apps will be created.
Basics
24
4 Tap Enter folder name and enter a folder name.
To change the folder colour, tap .
To add more apps to the folder, tap and hold another app, and then drag it to the folder.
Indicator icons
Indicator icons appear on the status bar at the top of the screen. The icons listed in the table
below are most common.
The status bar may not appear at the top of the screen in some apps. To display the
status bar, drag down from the top of the screen.
Icon Meaning
No signal
Signal strength
Roaming (outside of normal service area)
GPRS network connected
EDGE network connected
UMTS network connected
HSDPA network connected
HSPA+ network connected
/ LTE network connected (LTE-enabled models)
Wi-Fi connected
Bluetooth feature activated
GPS activated
Call in progress
Missed call
New text or multimedia message
Alarm activated
Mute mode activated
Vibration mode activated
Basics
25
Icon Meaning
Flight mode activated
Error occurred or caution required
Battery power level
Lock screen
Pressing the Power key turns off the screen and locks it. Also, the screen turns off and
automatically locks if the device is not used for a specified period.
To unlock the screen, press the Power key or the Home key and swipe in any direction.
You can change the way that you lock the screen to prevent others from accessing your
personal information.
On the Apps screen, tap Settings → Lock screen and security → Screen lock type, and then
select a screen lock method. The device requires an unlock code whenever unlocking it.
If the unlock code is forgotten, take the device to a Samsung Service Centre to reset it.
Pattern
Draw a pattern by connecting four dots or more, and then draw the pattern again to verify it.
Set a backup PIN to unlock the screen when you forget the pattern.
Basics
26
PIN
A PIN consists of numbers only. Enter at least four numbers, and then enter the password
again to verify it.
Password
A password consists of characters and numbers. Enter at least four characters including
numbers and symbols, and then enter the password again to verify it.
Fingerprint
Register your fingerprints to unlock the screen. Refer to Fingerprint recognition for more
information.
Edge screen
Introduction
Distinguish between up to five contacts by displaying assigned colours on the Edge screen.
You can easily communicate with your favourite contacts using the tabs displayed on the
Edge screen. The Edge screen can also display various items, such as news, without turning on
the screen. You can also use it as a clock at night.
Setting the position of the Edge screen
Select the left or right Edge screen to activate it according to your preference.
On the Apps screen, tap Settings → Edge screen → Edge screen position and select a side.
Selecting notification items
Select items for providing notifications on the Edge screen via colour lighting and coloured
tabs.
On the Apps screen, tap Settings → Edge screen → Select notifications, and then select
items.
Basics
27
Edge lighting
The Edge screen lights up when you receive a call or notification while the device’s screen is
facing downwards.
On the Apps screen, tap Settings → Edge screen → Edge lighting, and then tap the switch
to activate it.
The Edge screen lights up with an assigned colour when you receive a call or a notification
from your priority contacts. Refer to Adding contacts to My people for adding contacts to the
priority contacts list.
Quick reply
You can reject incoming calls using custom rejection messages. While the device’s screen is
facing downwards, hold your finger on the sensor on the back of the device for two seconds
to reject calls.
On the Apps screen, tap Settings → Edge screen → Edge lighting → Quick reply, and then
tap the switch to activate it.
To edit the default rejection message, tap the message text under Quick reply messages.
Basics
28
People edge
The Edge screen can display a tab with an assigned colour when there is a missed notification
from a priority contact.
On the Apps screen, tap Settings → Edge screen → People edge, and then tap the switch to
activate it.
This feature is available on the Home screen, locked screen, and Apps screen.
Adding contacts to My people
Add frequently used contacts to the My people list and set them as your priority contacts.
Only contacts saved in Contacts can be added to the My people list.
1 Drag the tab from the Edge screen towards the centre of the screen to open the My
people list.
2 Select a colour by tapping and select a contact to add.
Basics
29
To change the order of contacts, tap and hold a contact icon and drag it to another location.
To delete a contact, tap and hold a contact icon and drag it to Remove at the top of the
screen.
To change the assigned colour for a contact, tap → My people, and then tap the contact’s
colour icon.
Viewing missed notifications from My people
When there is a missed notification from a My people contact, a tab with the contact’s
assigned colour will appear on the Edge screen.
Drag the tab towards the centre of the screen to view the details. You can directly reply to the
contact by tapping one of the communication options.
When the screen is off, you will receive My people notification alerts when you pick up the
device. Open the My people list, tap , and then tap the Alert when picking up switch to
activate it.
Basics
30
Contacting My people
Open the My people list and tap a contact. The communication buttons will appear on the
screen. Tap the desired button to call, send a message, or send an email to the contact.
Information stream
Real-time news and other information you set can be displayed on the Edge screen when the
screen is turned off.
Setting information stream
Set information to display on the Edge screen.
1 On the Apps screen, tap Settings → Edge screen.
2 Tap Information stream and tap the switch to activate it.
3 Tap Manage feeds and tick items to display.
To download additional items, swipe to the left and tap .
To rearrange items, tap REORDER. Then, tap and hold on an item and drag it to
another location.
Basics
31
Viewing information stream
1 With the screen turned off, swipe upwards then downwards or vice versa on the Edge
screen to turn it on.
2 Swipe to the left or right on the Edge screen to view the information stream.
The Edge screen turns off if the device is not used for a specified period. To change
the Edge screen’s time-out setting, open the Apps screen and tap Settings → Edge
screen → Information stream → Edge screen timeout.
Basics
32
Night clock
Keep the clock on the Edge screen active to view it at night.
1 On the Apps screen, tap Settings → Edge screen.
2 Tap Night clock and tap the switch to activate it.
3 Set the duration that the night clock remains active.
• The night clock feature can be set for a maximum of 12 hours.
• The night clock feature will deactivate when the battery power reaches 15%.
Notification panel
Using the notification panel
When you receive new notifications, such as messages or missed calls, indicator icons appear
on the status bar. To see more information about the icons, open the notification panel and
view the details.
To open the notification panel, drag the status bar downwards. To close the notification panel,
swipe upwards on the screen.
Basics
33
You can use the following functions on the notification panel.
Launch Settings.
Launch S Finder.
Tap a notification and perform
various actions.
Clear all notifications.
Adjust the brightness.
Rearrange quick setting buttons.
Quick setting buttons
Launch Quick Connect.
Using quick setting buttons
Tap quick setting buttons to activate some features. Swipe to the left or right on the buttons
area to view more buttons. To view more detailed settings, tap and hold a button.
To rearrange buttons, tap EDIT, tap and hold a button, and then drag it to another location.
S Finder
Search for a wide variety of content with a keyword.
Searching for content on the device
Open the notification panel and tap S Finder.
Enter a keyword in the search field or tap and say a keyword.
To get more refined results, tap the filter buttons under the search field, and then select filter
details.
Basics
34
Setting search categories
You can set search categories to search for content in specific search fields.
Tap MORE → Select search locations and select categories.
Quick Connect
Automatically search for nearby devices and quickly connect to them.
• When connecting to a device that does not support the Quick connect feature,
ensure that Wi-Fi Direct or the Bluetooth feature is activated.
• Connection methods may vary depending on the type of connected devices or the
shared content.
Connecting to other devices
1 Open the notification panel and tap Quick Connect.
If you are using this feature for the first time, select a visibility option and tap ENABLE
QUICK CONNECT.
When the panel opens, the Wi-Fi and the Bluetooth features are activated automatically
and the device searches for nearby devices.
If you have installed Samsung Link on your device, the list of devices registered with
Samsung Link will appear at the top of the screen.
2 Select a device from the list and connect to it by following the on-screen instructions.
The next steps may vary depending on the connected device.
To change your device’s visibility setting, tap SETTINGS → Device visibility, and then
select an option.
Re-searching for devices
If the desired device does not appear in the list, search for the device.
Tap REFRESH and select the device from the list of detected devices.
Basics
35
Sharing content
Share content with the connected devices.
1 Open the notification panel and tap Quick Connect.
2 Select a device from the list of detected devices.
3 Tap Share content and select a media category.
4 Follow the on-screen instructions to send content to the connected device.
The next steps may vary depending on the selected media category.
Entering text
Keyboard layout
A keyboard appears automatically when you enter text to send messages, create memos, and
more.
Text entry is not supported in some languages. To enter text, you must change the
input language to one of the supported languages.
Break to the next line.
Delete a preceding character.
Enter punctuation marks.
Enter uppercase. For all caps, tap
it twice.
Change the keyboard settings. Enter a space.
Changing the input language
Tap → Select input languages, and then select the languages to use. When you select
two or more languages, you can switch between the input languages by swiping to the left or
right on the space key.
Basics
36
Changing the keyboard layout
Tap , select a language under Input languages, and then select a keyboard layout to use.
On 3x4 keyboard, a key has three or four characters. To enter a character, tap the
corresponding key repeatedly until the desired character appears.
Additional keyboard functions
Tap and hold to use various functions. Other icons may appear instead of the icon
depending on the last function that was used.
• : Enter text by voice.
Change the language.
Open the keyboard.
Start or pause entering text by
voice.
• : Add an item from the clipboard.
• : Enter emoticons.
• : Switch to the floating keyboard. You can move the keyboard to another location by
dragging the tab.
Switch to the standard keyboard.
• : Change the keyboard settings.
Basics
37
Copying and pasting
1 Tap and hold over text.
2 Drag or to select the desired text, or tap Select all to select all text.
3 Tap Copy or Cut.
The selected text is copied to the clipboard.
4 Place the cursor where the text is to be inserted and tap → Paste.
To paste text that you have previously copied, tap Clipboard and select the text.
Dictionary
Look up definitions for words while using certain features, such as when browsing webpages.
1 Tap and hold over a word that you want to look up.
If the word you want to look up is not selected, drag or to select the desired text.
2 Tap Dictionary on the options list.
If a dictionary is not preinstalled on the device, tap next to a dictionary to download it.
3 View the definition in the dictionary pop-up window.
To switch to the full screen view, tap . Tap the definition on the screen to view more
definitions. In the detailed view, tap to add the word to your favourite words list or tap
SEARCH WEB to use the word as a search term.
Basics
38
Screen capture
Capture a screenshot while using the device.
Press and hold the Home key and the Power key simultaneously. You can view captured
images in Gallery.
You can also capture screenshots by swiping your hand to the left or right across the screen.
Refer to Motions and gestures for more information.
It is not possible to capture a screenshot while using some apps and features.
Opening apps
On the Home screen or the Apps screen, select an app icon to open it.
To open an app from the list of recently used apps, tap and select a recent app window.
Closing an app
Tap and drag a recent app window to the left or right to close it. To close all running apps,
tap CLOSE ALL.
Basics
39
Multi window
Introduction
Multi window lets you run two apps at the same time in the split screen view. You can also run
multiple apps at the same time in the pop-up view.
Some apps may not support this feature.
Split screen view Pop-up view
Basics
40
Split screen view
1 Tap to open the list of recently used apps.
2 Swipe upwards or downwards and tap on a recent app window.
The selected app will launch in the upper window.
3 Select another app to launch.
You can also launch the split screen view by tapping and holding .
Basics
41
Using additional options
When using apps in the split screen view, select an app window and tap the circle between
the app windows to access the following options:
• : Switch locations between app windows.
• : Drag and drop text or copied images from one window to another. Tap and hold an
item in the selected window and drag it to a location in another window.
Some apps may not support this feature.
Basics
42
• : Minimise the window.
• : Maximise the window.
• : Close the app.
Adjusting the window size
Drag the circle between the app windows up or down to adjust the size of the windows.
Pop-up view
1 On the Apps screen, launch an app to use in the pop-up view.
2 Drag down diagonally from either end of the top edge.
The app screen will appear in the pop-up view.
Minimise the window.
Close the app.
Maximise the window.
Drag and drop content.
Basics
43
Moving pop-up windows
To move a pop-up window, tap and hold the circle on a window and drag it to a new location.
Launching the pop-up view from the split screen view
1 On the split screen view, tap an app window to launch it in the pop-up view.
2 Tap and hold the circle between the app windows.
The selected app will launch in a pop-up window.
Basics
44
Device and data management
Transferring data from your previous device
You can transfer data from a previous device to your new device via Samsung Smart Switch.
The following versions of Samsung Smart Switch are available.
• Mobile version (Smart Switch Mobile): Transfer data between mobile devices. You can
download the app from Galaxy Apps or Play Store.
• Computer version: Transfer data between your device and a computer. You can download
the app from www.samsung.com/smartswitch.
• Samsung Smart Switch is not supported on some devices or computers.
• Limitations apply. Visit www.samsung.com/smartswitch for details. Samsung
takes copyright seriously. Only transfer content that you own or have the right to
transfer.
Transferring data from a mobile device
Transfer data from your previous device to your new device.
The following actions are an example of transferring data from your previous Android device.
To import data from a mobile device with a different operating system, refer to the on-screen
instructions.
1 When you turn on your new device for the first time, tap DOWNLOAD AND OPEN in the
Smart Switch installation pop-up window to install the app.
If the Smart Switch installation pop-up window does not appear on the screen, you
can download the app from Galaxy Apps or Play Store.
2 On your previous device, download and install Smart Switch from Galaxy Apps or Play
Store.
3 Launch Smart Switch Mobile on both devices.
4 On your previous device, tap ANDROID TO GALAXY → SEND CONTENT.
The devices will automatically connect.
Basics
45
5 On your previous device, select data to send to your new device and tap SEND.
6 On your new device, tap RECEIVE on the connection request pop-up window to receive
the data.
The data transfer will begin.
7 On both devices, tap FINISH when the data transfer is complete.
Transferring data from a computer
Back up data from your previous device to a computer and import the data to your new
device.
1 On the computer, visit www.samsung.com/smartswitch to download Smart Switch.
2 On the computer, launch Smart Switch.
If your previous device is not a Samsung device, back up data to a computer using a
program provided by the device’s manufacturer. Then, skip to the fifth step.
3 Connect your previous device to the computer using the USB cable.
4 On the computer, follow the on-screen instructions to back up data from the device.
Then, disconnect your previous device from the computer.
5 Connect your new device to the computer using the USB cable.
6 On the computer, follow the on-screen instructions to transfer data to your new device.
Basics
46
Using the device as a removable disk for data transfer
Move audio, video, image, or other types of files from the device to the computer, or vice
versa.
Do not disconnect the USB cable from the device when you are transferring files.
Doing so may cause data loss or device damage.
The devices may not connect properly if they are connected via a USB hub. Directly
connect the device to the computer’s USB port.
1 Connect the device to the computer using the USB cable.
2 Open the notification panel, and then tap Connected as a media device → Media
device (MTP).
Tap Camera (PTP) if your computer does not support Media Transfer Protocol (MTP) or
not have any appropriate driver installed.
3 Transfer files between your device and the computer.
Updating the device
The device can be updated to the latest software.
Updating over the air
The device can be directly updated to the latest software by the firmware over-the-air (FOTA)
service.
On the Apps screen, tap Settings → About device → Software update → Update now.
To automatically check for available updates, tap the Auto update switch to activate
it. To download updates only when a Wi-Fi connection is activated, tap the Wi-Fi only
switch to activate it.
Basics
47
Updating with Smart Switch
Connect the device to a computer and update the device to the latest software.
1 On the computer, visit www.samsung.com/smartswitch to download and install Smart
Switch.
2 On the computer, launch Smart Switch.
3 Connect the device to the computer using a USB cable.
4 On the computer, click the update button in the connection window.
• Do not turn off the computer or disconnect the USB cable while the device is
updating.
• While updating the device, do not connect other media devices to the computer.
Doing so may interfere with the update process. Before updating, disconnect all
other media devices from the computer.
Backing up and restoring data
Keep your personal information, app data, and settings safe on your device. You can back
up your sensitive information to a backup account and access it later. You must sign in to
your Google or Samsung account to back up or restore data. Refer to Accounts for more
information.
Using a Samsung account
On the Apps screen, tap Settings → Backup and reset → Back up my data, select the items
to back up, and then tap BACK UP NOW.
To set the device to automatically back up data, tap the Auto back up switch to activate it.
To restore data using a Samsung account, tap Restore. Current data will be deleted from the
device to restore the selected items.
Basics
48
Using a Google account
On the Apps screen, tap Settings → Backup and reset, and then tap the Back up my data
switch to activate it. Tap Backup account and select an account as the backup account.
To restore data using a Google account, tap the Automatic restore switch to activate it. When
you reinstall apps, backed up settings and data will be restored.
Performing a data reset
Delete all settings and data on the device. Before performing a factory data reset, ensure you
back up all important data stored on the device. Refer to Backing up and restoring data for
more information.
On the Apps screen, tap Settings → Backup and reset → Factory data reset → RESET
DEVICE → ERASE EVERYTHING. The device automatically restarts.
Connecting to a TV
Introduction
Register a TV to your device to easily share content between them.
• This feature is compatible with Samsung Smart TVs released in 2015 or later that
support the Bluetooth Low Energy (BLE) feature.
• Some files may be buffered during playback, depending on the network
connection.
Registering a TV
Register a TV to your device. Once you register a TV, you can easily share the screen between
your device and TV and use the Briefing on TV feature.
1 Turn on the TV and place your device close to the TV.
2 Open the notification panel and tap Quick Connect.
3 Select the TV and tap Register TV.
Basics
49
Sharing screen
You can mirror your device’s screen on a TV or vice versa.
Mirroring your device’s screen to a TV
When your device recognises the registered TV while you are watching a video, the icon
will appear on the device. Tap the icon to stream the video from your device to your TV.
If the TV is turned off and registered with Quick Connect, it will automatically turn on and
your device’s screen will appear on the TV screen.
This feature is supported by the default video player app only.
Mirroring a TV screen to your device
1 Open the notification panel and tap Quick Connect.
The registered TV appears on the list.
2 Select the registered TV.
3 Tap TV to mobile device.
The TV screen will appear on your device.
Using the Briefing on TV feature
Your registered TV turns on automatically according to the preset time set on your device and
displays the time, weather, and your schedule information on the screen. To use this feature,
your device and the TV must be connected to the same access point.
1 Open the notification panel and tap Quick Connect.
The registered TV will appear on the list.
Basics
50
2 Select the registered TV.
3 Tap Briefing on TV and set a time and day to display the briefing.
Time, weather, and schedule information will be displayed on the right side of the TV
screen at the preset time.
Sharing files with contacts
Share files with your contacts using the simple sharing feature. The following actions are an
example of sharing images.
This feature may not be available depending on the region or service provider.
1 Tap Gallery on the Apps screen.
2 Select an image.
3 Tap Share → Contacts.
If you are using this feature for the first time, read and agree to the terms and conditions.
Your phone number will be verified and then the simple sharing feature will be activated.
4 Select recipients and tap DONE.
• If the recipients’ devices do not support the simple sharing feature, a link to the
files will be sent to them via text message. The link will expire after a certain period.
• You may incur additional charges when sharing files via the mobile network.
Basics
51
Emergency mode
Emergency mode changes the screen to grey tones to reduce battery consumption. Some
apps and functions will be restricted. In emergency mode, you can make an emergency call,
send your current location information to others, sound an emergency alarm, and more.
Press and hold the Power key, and then tap Emergency mode.
Add more apps to use.
Make an emergency call.
Remaining battery power and
usage time left
Turn on the flash.
Send your current location Make a call.
information in a message.
Browse the Internet.
Access additional options.
Sound alarms.
The usage time left shows the time remaining before the battery power runs
out. Usage time left may vary depending on your device settings and operating
conditions.
Deactivating emergency mode
To deactivate emergency mode, tap MORE → Disable Emergency mode. Alternatively, press
and hold the Power key, and then tap Emergency mode.
52
Applications
Installing or uninstalling apps
Samsung Galaxy Apps
Purchase and download apps. You can download apps that are specialised for Samsung
Galaxy devices.
Tap Galaxy Apps on the Apps screen.
This app may not be available depending on the region or service provider.
Installing apps
Browse apps by category or tap SEARCH to search for a keyword.
Select an app to view information about it. To download free apps, tap INSTALL. To purchase
and download apps where charges apply, tap the price and follow the on-screen instructions.
To change the auto update settings, tap → Settings → Auto update apps, and
then select an option.
Play Store
Purchase and download apps.
Tap Play Store on the Apps screen.
Installing apps
Browse apps by category or tap to search for a keyword.
Select an app to view information about it. To download free apps, tap INSTALL. To purchase
and download apps where charges apply, tap the price and follow the on-screen instructions.
To change the auto update settings, tap → Settings → Auto-update apps, and
then select an option.
Applications
53
Managing apps
Uninstalling or disabling apps
On the Apps screen, tap EDIT. The icon appears on the apps that you can disable or
uninstall. Select an app and tap DISABLE or UNINSTALL. Alternatively, on the Apps screen,
tap Settings → Applications → Application manager, select an app, and then tap DISABLE
or UNINSTALL.
• DISABLE: Disable selected default apps that cannot be uninstalled from the device.
• UNINSTALL: Uninstall downloaded apps.
Enabling apps
On the Apps screen, tap Settings → Applications → Application manager, scroll to
DISABLED, select an app, and then tap ENABLE.
Phone
Introduction
Make or answer voice and video calls.
Making calls
1 Tap Phone on the Apps screen.
2 Enter a phone number.
If the keypad does not appear on the screen, tap to open the keypad.
Applications
54
3 Tap to make a voice call, or tap to make a video call.
Add the number to the contacts
list. Preview the phone number.
Hide the keypad.
Delete a preceding character.
Access additional options.
Making calls from the locked screen
On the locked screen, drag outside the large circle.
Making calls from call logs or contacts list
Tap LOG or CONTACTS, and then swipe to the right on a contact or a phone number to make
a call.
Making an international call
1 Tap to open the keypad if the keypad does not appear on the screen.
2 Tap and hold 0 until the + sign appears.
3 Enter the country code, area code, and phone number, and then tap .
Applications
55
Receiving calls
Answering a call
When a call comes in, drag outside the large circle.
Rejecting a call
When a call comes in, drag outside the large circle.
To send a message when rejecting an incoming call, drag the reject message bar upwards.
To create various rejection messages, open the Apps screen and tap Phone → MORE →
Settings → Call rejection → Rejection messages, enter a message, and then tap .
Missed calls
If a call is missed, the icon appears on the status bar. Open the notification panel to view
the list of missed calls. Alternatively, on the Apps screen, tap Phone → LOG to view missed
calls.
Options during calls
During a voice call
The following actions are available:
• Add call: Dial a second call.
• Extra volume: Increase the volume.
• Bluetooth: Switch to a Bluetooth headset if it is connected to the device.
• Speaker: Activate or deactivate the speakerphone. When using the speakerphone, speak
into the microphone at the top of the device and keep the device away from your ears.
• Keypad / Hide: Open or close the keypad.
• Mute: Turn off the microphone so that the other party cannot hear you.
• Email: Send an email.
• Message: Send a message.
Applications
56
• Internet: Browse webpages.
• Contacts: Open the contacts list.
• S Planner: Open the calendar.
• Memo: Create a memo.
• : End the current call.
During a video call
Tap the screen to use the following options:
• : Switch between the front and rear cameras.
• : End the current call.
• : Turn off the microphone so that the other party cannot hear you.
Contacts
Introduction
Create new contacts or manage contacts on the device.
Adding contacts
Creating contacts manually
1 Tap Contacts on the Apps screen.
2 Tap and select a storage location.
3 Enter contact information.
• : Add an image.
• / : Add or delete a contact field.
4 Tap SAVE.
Applications
57
To add a phone number to the contacts list from the keypad, open the Apps screen and tap
Phone. If the keypad does not appear on the screen, tap to open the keypad. Enter the
number and tap Add to Contacts.
To add a phone number to the contacts list from received calls or messages, open the Apps
screen and tap Phone → LOG → a contact.
Importing contacts
Import contacts from storage services to your device.
On the Apps screen, tap Contacts → MORE → Settings → Import/Export contacts →
IMPORT and select an import option.
Searching for contacts
On the Apps screen, tap Contacts.
Use one of the following search methods:
• Scroll up or down the contacts list.
• Drag a finger along the index at the right side of the contacts list to scroll through it
quickly.
• Tap the search field at the top of the contacts list and enter search criteria.
Once a contact is selected, take one of the following actions:
• : Add to favourite contacts.
• / : Make a voice or video call.
• : Compose a message.
• : Compose an email.
Applications
58
Sharing profile
Share your profile information, such as your photo and status message, with others using the
profile sharing feature.
• This feature may not be available depending on the region or service provider.
• This feature is only available for contacts who have activated the profile sharing
feature on their device.
On the Apps screen, tap Contacts → your profile → Profile sharing, and then tap the switch
to activate it. If you are using this feature for the first time, read and agree to the terms and
conditions. Your phone number will be verified and then the profile sharing feature will be
activated.
To set additional items to share, tap Shared profile info and select items.
To set a contact group to share your profile with, select a contact group under Share with.
Messages
Introduction
Send and view messages by conversation.
Sending messages
You may incur additional charges for sending messages when you are roaming.
1 Tap Messages on the Apps screen.
2 Tap .
Applications
59
3 Add recipients and enter a message.
Access additional options.
Enter a message.
Select contacts from the
contacts list.
Enter emoticons.
Enter recipients.
Attach files. Send the message.
4 Tap SEND to send the message.
Viewing messages
Messages are grouped into message threads by contact.
You may incur additional charges for receiving messages when you are roaming.
1 Tap Messages on the Apps screen.
2 On the messages list, select a contact.
3 View your conversation.
Applications
60
Internet
Browse the Internet to search for information and bookmark your favourite webpages to
access them conveniently.
1 Tap Internet on the Apps screen.
2 Tap the address field.
3 Enter the web address or a keyword, and then tap Go.
To view the toolbars, drag your finger downwards slightly on the screen.
Open the homepage.
Move to the previously visited
page.
Open the browser's tab
manager.
Access additional options.
Refresh the current webpage.
View your bookmarks, saved
webpages, and recent history.
Applications
61
Email
Setting up email accounts
Set up an email account when opening Email for the first time.
1 Tap Email on the Apps screen.
2 Enter the email address and password, and then tap NEXT.
To manually register a company email account, tap MANUAL SETUP.
3 Follow the on-screen instructions to complete the setup.
To set up another email account, tap MORE → Settings → Add account.
If you have more than one email account, you can set one as the default account. Tap MORE
→ Settings → MORE → Set default account.
Sending emails
1 Tap to compose an email.
2 Add recipients and enter an email text.
3 Tap SEND to send the mail.
Reading emails
On the emails list, tap an email to read.
Applications
62
Camera
Introduction
Take photos and record videos using various modes and settings.
Basic shooting
You can take photos or record videos. View your photos and videos in Gallery.
Tap Camera on the Apps screen.
Camera etiquette
• Do not take photos or record videos of other people without their permission.
• Do not take photos or record videos where legally prohibited.
• Do not take photos or record videos in places where you may violate other people’s
privacy.
Taking photos or recording videos
1 Tap the image on the preview screen where the camera should focus.
2 Tap to take a photo or tap to record a video.
• Spread two fingers apart on the screen to zoom in, and pinch to zoom out.
• To capture an image from the video while recording, tap Capture.
Applications
63
• To change the focus while recording a video, tap where you want to focus. To focus on
the centre of the screen, tap .
Camera settings
Hide or show the
setting icons.
Quick settings
Record a video.
Take a photo.
Switch between the
front and rear
cameras.
Shooting modes
Preview thumbnail Current mode
On the preview screen, swipe to the right to access the list of shooting modes. Or, swipe to
the left to view photos and videos you have captured.
• The preview screen may vary depending on the shooting mode and which camera
is being used.
• The camera automatically shuts off when unused.
• Make sure that the lens is clean. Otherwise, the device may not work properly in
some modes that require high resolutions.
• The front camera lens is suitable for taking wide-angle photos. Minor distortion
may occur in wide-angle photos and does not indicate device performance
problems.
• The maximum recording time may reduce when you record video at high
resolution.
Applications
64
Launching Camera on the locked screen
To quickly take photos, launch Camera on the locked screen.
On the locked screen, drag outside the large circle.
• This feature may not be available depending on the region or service provider.
• Some camera features are not available when you launch Camera from the locked
screen while the security features are activated.
Launching Camera quickly
Press the Home key twice quickly to launch Camera. Camera always launches in auto mode.
Some camera features are not available when you launch Camera from the locked
screen or when the screen is turned off while the security features are activated.
HDR (High Dynamic Range)
Take photos with rich colours and reproduce details even in bright and dark areas.
To activate or deactivate HDR mode, open the preview screen and tap until you reach the
desired option.
• : The device automatically activates HDR mode depending on the shooting
conditions.
• : HDR mode is activated.
• : HDR mode is deactivated.
Without effect With effect
Applications
65
Tracking AF
Set the device to track and automatically focus on a selected subject, even when the subject
is moving or when you change the shooting composition.
1 On the preview screen, tap and tap the Tracking AF switch to activate it.
2 Tap to return to the preview screen.
3 Tap the subject you want to track.
4 Tap to take a photo or tap to record a video.
Tracking a subject may fail in the following conditions:
• The subject is too big or too small.
• The subject moves excessively.
• The subject is backlit or you are shooting in a dark place.
• Colours or patterns on the subject and the background are the same.
• The subject includes horizontal patterns, such as blinds.
• The camera shakes excessively.
• The video resolution is high.
Auto mode
Auto mode allows the camera to evaluate the surroundings and determine the ideal mode
for the photo.
On the preview screen, tap MODE → Auto.
Locking the focus and exposure
Strong light/dark contrast and the subject being outside the auto focus area may make it
difficult to achieve an appropriate exposure. Lock the focus or exposure and then take a
photo. Tap and hold the area to focus, the AF/AE frame will appear on the area and the focus
and exposure setting will be locked. The setting remains locked even after you take a photo.
Applications
66
Pro mode
Take photos while manually adjusting various shooting options, such as exposure value and
ISO value.
On the preview screen, tap MODE → Pro. Select options and customise the settings, and
then tap to take a photo.
• : Select a colour effect. To create your own colour effect, tap Preset 1 or Preset 2.
• : Change the focus mode. Drag the adjustment bar towards or to manually
adjust the focus. To switch to auto focus mode, drag the adjustment bar towards AUTO.
• : Select an appropriate white balance, so images have a true-to-life colour range.
• : Select an ISO value. This controls camera light sensitivity. Low values are for
stationary or brightly lit objects. Higher values are for fast-moving or poorly lit objects.
However, higher ISO settings can result in noise in photos.
• : Change the exposure value. This determines how much light the camera’s sensor
receives. For low-light situations, use a higher exposure.
Saving the current setting as a custom setting
On the preview screen, tap Custom → Save current settings, select a name, and then tap
SAVE.
To apply the saved settings to the camera, open the preview screen, tap Custom, and then
select a name.
Applications
67
Separating the exposure area and the focus area
If bright light affects the contrast or the subject is outside the auto focus area, use this feature
to achieve an appropriate exposure. You can separate the exposure and focus areas and select
the exposure level you want for the subject.
1 On the preview screen, tap and hold the area to focus.
The AF/AE frame will appear on the focus area.
2 Drag the AF/AE frame to the exposure area.
The exposure area will be separated from the focus area.
Applications
68
Selective focus
Use the out-of-focus effect to make specific objects stand out in a photo.
1 On the preview screen, tap MODE → Selective focus.
2 Tap the image on the preview screen where the camera should focus.
3 Tap to take a photo.
4 Tap the preview thumbnail.
5 Tap and select one of the following:
• Near focus: Make the subject stand out and blur the background around the subject.
• Far focus: Blur the subject and make the background stand out around the subject.
• Pan focus: Make the subject and its background stand out.
6 Tap SAVE.
• It is recommended that you position subjects within 50 cm of the device. Position
the subject that you want to focus on close to the device.
• When taking photos, ensure there is sufficient distance between the subject
and the background. The distance should be more than three times the distance
between the device and the subject.
• The quality of photos taken by the device can be affected in the following
conditions:
– The device or the subject is moving.
– There is strong background light, low levels of light, or you are taking photos
indoors.
– The subject or background has no pattern, or consists of a plain colour.
Applications
69
Panorama
Take a series of photos horizontally or vertically and then stitch them together to create a
wide scene.
On the preview screen, tap MODE → Panorama.
To get the best shots using panorama mode, follow these tips:
• Move the camera slowly in one direction.
• Keep the image within the frame on the camera’s viewfinder.
• Avoid taking photos of indistinct backgrounds, such as an empty sky or a plain
wall.
Slow motion
Record a video for viewing it in slow motion. You can specify sections of your videos to be
played in slow motion.
The focal length may become shorter when using this mode.
1 On the preview screen, tap MODE → Slow motion.
2 Tap to start recording.
3 When you are finished recording, tap to stop.
4 On the preview screen, tap the preview thumbnail.
5 Tap .
The video will start playing with a randomly set slow motion section.
Applications
70
Editing slow motion sections
1 On the preview screen, tap the preview thumbnail.
2 Tap .
The video will start playing with a randomly set slow motion section.
3 Tap to pause playback.
4 Drag the start bracket and the end bracket to the desired point to trim segments of a
video.
5 Drag to select the area of the video to be played in slow motion.
To set a slow motion section more precisely, tap and hold , and then drag your finger
to the left or right to move through the section frame by frame.
Slow motion section
6 Tap the slow motion section and use the following options:
• Speed: Change the playback speed of the selected section.
• Split: Divide the section into two parts.
• Delete: Delete the section.
7 Tap to preview the video.
8 Tap EXPORT to save the video.
Applications
71
Fast motion
Record a video for viewing it in fast motion. You can specify sections of your videos to be
played in fast motion.
The focal length may become shorter when using this mode.
1 On the preview screen, tap MODE → Fast motion.
2 Tap to start recording.
3 When you are finished recording, tap to stop.
4 On the preview screen, tap the preview thumbnail.
5 Tap .
The video will start playing with a randomly set fast motion section.
Editing fast motion sections
1 On the preview screen, tap the preview thumbnail.
2 Tap .
The video will start playing with a randomly set fast motion section.
3 Tap to pause playback.
4 Drag the start bracket and the end bracket to the desired point to trim segments of a
video.
Applications
72
5 Drag to select the area of the video to be played in fast motion.
To set a fast motion section more precisely, tap and hold , and then drag your finger to
the left or right to move through the section frame by frame.
Fast motion section
6 Tap the fast motion section and use the following options:
• Speed: Change the playback speed of the selected section.
• Split: Divide the section into two parts.
• Delete: Delete the section.
7 Tap to preview the video.
8 Tap EXPORT to save the video.
Applications
73
Virtual Shot
Take a series of photos while circling a subject to create a view of the subject from multi
angles. You can view the subject from different angles by dragging your finger left or right on
the photo.
1 On the preview screen, tap MODE → Virtual Shot.
2 Place a subject in the centre of the preview screen and tap .
3 Move the device around the subject slowly in one direction to take more photos.
When the arrow becomes completely yellow or when you stop circling the subject, the
device will automatically stop taking photos.
Viewing virtual shot photos
1 On the preview screen, tap the preview thumbnail.
2 Tap .
3 Drag your finger left or right on the screen, or slowly swivel the device left or right to view
the subject from different angles.
Applications
74
Selfie
Take self-portraits with the front camera.
1 On the preview screen, tap to switch to the front camera for self-portraits.
2 Tap MODE → Selfie.
3 Face the front camera lens.
4 When the device detects your face, tap the sensor on the back of the device to take a
photo of yourself. You can also tap the screen to take a photo.
To take a photo using your palm, tap and tap the Gesture control switch to activate it.
Show your palm to the front camera. After recognising your palm, the device will take a
photo after two seconds.
Applications
75
Wide selfie
Take a wide self-portrait to include more people in the photo and avoid leaving people out.
1 On the preview screen, tap to switch to the front camera for self-portraits.
2 Tap MODE → Wide selfie.
3 Face the front camera lens.
4 When the device detects your face, tap the sensor on the back of the device to take a
photo of yourself. You can also tap the screen to take a photo.
To take a photo using your palm, tap and tap the Gesture control switch to activate it.
Show your palm to the front camera. After recognising your palm, the device will take a
photo after two seconds.
5 Slowly swivel the device left and then right or vice versa to take a wide self-portrait.
The device will take additional photos when the white frame moves to each end of the
viewfinder window.
• Make sure to keep the white frame inside the viewfinder window.
• The subjects should remain still while taking wide self-portraits.
• The resolution of a photo may be affected by lighting conditions.
• The top and bottom parts of the image displayed on the preview screen may be
cut out of the photo depending on the shooting conditions.
Applications
76
Interval shot
Take series of self-portraits at an interval and save photos you want.
1 On the preview screen, tap to switch to the front camera for self-portraits.
2 Tap MODE → Interval shot.
3 When the device detects your face, tap the sensor on the back of the device to take a
photo of yourself. You can also tap the screen to take a photo.
The device will take four photos at the two-second intervals.
To take a photo using your palm, tap and tap the Gesture control switch to activate it.
Show your palm to the front camera. After recognising your palm, the device will take a
photo after two seconds.
4 Tick photos you want to save and tap SAVE.
Downloading modes
Download more shooting modes from Galaxy Apps.
On the preview screen, tap MODE → Download.
Some downloaded shooting modes do not have access to every feature. Swiping
right to view the modes list and swiping left to view captured images and videos may
not be available.
Applications
77
Camera settings
Quick settings
On the preview screen, use the following quick settings.
The available options may vary depending on the shooting mode and which camera
is being used.
• : Select a filter effect to use when taking photos or recording videos. To download
more effects, tap Download.
• : Use this to take photos with rich colours and reproduce details even in bright and
dark areas.
• : Select a metering method. This determines how light values are calculated. Centreweighted
uses the light in the centre portion of the shot to calculate the exposure of
the shot. Spot uses the light in a concentrated centre area of the shot to calculate the
exposure of the shot. Matrix averages the entire scene.
• : Select the length of the delay before the camera automatically takes a photo.
• : Adjust the slide bar to take a photo with lightened faces for gentler images.
• : Activate or deactivate the flash.
Camera settings
On the preview screen, tap .
The available options may vary depending on the shooting mode and which camera
is being used.
• Picture size (rear) / Picture size (front): Select a resolution for photos. Using a higher
resolution will result in higher quality photos, but they will take up more memory.
• Video size (rear) / Video size (front): Select a resolution for videos. Using a higher
resolution will result in higher quality videos, but they will take up more memory.
• Gesture control: Set the device to detect your palm, so you can use it to take selfportraits.
• Save as horizontally flipped: Invert the image to create a mirror-image of the original
scene, when taking photos with the front camera.
Applications
78
• Tracking AF: Set the device to track and automatically focus on a selected subject, even
when the subject or camera moves.
• Video stabilisation: Activate anti-shake to reduce or eliminate blurriness resulting from
camera shake while recording a video.
• Grid lines: Display viewfinder guides to help composition when selecting subjects.
• Location tags: Attach a GPS location tag to the photo.
• GPS signal strength may decrease in locations where the signal is obstructed, such
as between buildings or in low-lying areas, or in poor weather conditions.
• Your location may appear on your photos when you upload them to the Internet.
To avoid this, deactivate the location tag setting.
• Review pictures: Set the device to show photos after capturing them.
• Quick launch: Set the device to launch the camera by pressing the Home key twice
quickly.
• Voice control: Set the device to take photos or record videos with voice commands.
You can say “Smile”, “Cheese”, “Capture”, or “Shoot” to take a photo. To record a video, say
“Record video.”
• Volume keys function: Set the device to use the Volume key to control the shutter or
zoom function.
• Reset settings: Reset the camera settings.
Gallery
Introduction
View and manage photos and videos stored in the device.
Viewing images or videos
1 Tap Gallery on the Apps screen.
Applications
79
2 Select an image or a video.
Video files show the icon on the preview thumbnail. To play a video, tap .
Move to the previous screen. More options
Add the image to favourites.
Share the image with others.
Delete the image.
Modify the image.
To hide or show the menus, tap the screen.
Deleting images or videos
Deleting an image or a video
Select an image or a video and tap Delete at the bottom of the screen.
Deleting multiple images and videos
1 On the Gallery main screen, tap and hold an image or a video to delete.
2 Tick the images or videos to delete.
3 Tap DELETE.
Applications
80
Smart Manager
Introduction
The Smart manager provides an overview of the status of your device’s battery, storage, RAM,
and system security. You can also automatically optimise the device with one tap of your
finger.
Using the quick optimisation feature
On the Apps screen, tap Smart Manager → CLEAN ALL.
The quick optimisation feature improves device performance through the following actions.
• Identifying apps that use excessive battery power and clearing some memory.
• Deleting unnecessary files and closing apps running in the background.
• Scanning for malware and phishing attacks.
Applications
81
Using the Smart manager
On the Apps screen, tap Smart Manager and select a feature.
Battery
Check the remaining battery power and time to use the device. For devices with low battery
levels, conserve battery power by activating power saving features and closing apps that are
consuming an excessive amount of battery power.
The usage time left shows the time remaining before the battery power runs
out. Usage time left may vary depending on your device settings and operating
conditions.
Storage
Check the status of used and available memory capacity. You can delete unused and residual
files or uninstall apps that you do not use any more.
RAM
Check the amount of available RAM. You can close background apps and reduce the amount
of RAM you are using to speed up your device.
Device security
Check the device’s security status. This feature scans your device for malware and blocks
phishing attacks and malicious websites.
Applications
82
S Planner
Introduction
Manage your schedule by entering upcoming events or tasks in your planner.
Creating events
1 Tap S Planner on the Apps screen.
2 Tap or double-tap a date.
If the date already has saved events or tasks in it, tap the date and tap .
3 Enter event details.
Select a calendar to use or sync
with.
Attach a map showing the
location of the event.
Enter the location of the event.
Enter a title.
Set a start and end date for the
event.
Add more details.
Set an alarm.
4 Tap SAVE to save the event.
Applications
83
Creating tasks
1 Tap S Planner on the Apps screen.
2 Tap → Tasks.
3 Enter task details and tap TODAY or TOMORROW to set a due date.
To add more details, tap .
4 Tap SAVE to save the task.
Syncing events and tasks with your accounts
On the Apps screen, tap Settings → Accounts, select an account service, and then tap the
Sync Calendar switch to sync events and tasks with the account.
To add accounts to sync with, open the Apps screen and tap S Planner → MORE → Manage
calendars → Add account. Then, select an account to sync with and sign in. When an
account is added, a green circle is displayed next to the account name.
S Health
Introduction
S Health helps you manage your wellness and fitness. Set fitness goals, check your progress,
and keep track of your overall wellness and fitness.
Starting S Health
When running this app for the first time or restart it after performing a data reset, follow the
on-screen instructions to complete the setup.
1 Tap S Health on the Apps screen.
2 Follow the on-screen instructions to complete the setup.
Applications
84
Using S Health
You can view the key information from S Health menus and trackers to monitor your wellness
and fitness.
Tap S Health on the Apps screen.
Trackers
Goals and programmes
• GOALS: Set your daily fitness goals and view your progress.
• PROGRAMMES: Use customisable exercise programmes.
• TRACKERS: Monitor your activities, food intake, and body measurements.
To add trackers, goals, or programmes to the S Health screen, tap MORE → Manage items,
and then select items under TRACKERS, GOALS, or PROGRAMMES tab.
To access more information about S Health functions, tap MORE → Settings → Help.
Applications
85
Additional information
• S Health is intended for fitness and wellness purposes only and is not intended for use
in the diagnosis of disease or other conditions, or in the cure, mitigation, treatment, or
prevention of disease.
• The available functions, features and addable applications for S Health may vary from
country to country due to different local laws and regulations. You should check the
features and applications available in your specific region before use.
• S Health applications and its service can be changed or discontinued without prior
notice.
• The purpose for data collection is limited to providing the service that you have
requested, including providing additional information to enhance your wellness, sync
data, data analysis and statistics or to develop and provide better services. (But if you
sign in to your Samsung account from S Health, your data may be saved on the server
for data backup purposes.) Personal information may be stored until the completion of
such purposes. You can delete personal data stored by S Health by using the Reset data
option in the Settings menu. To delete any data you have shared with social networks or
transferred to storage devices, you must delete them separately.
• You may share and/or synchronize your data with additional Samsung services or
compatible third party services that you select, as well as with any of your other
connected devices. Access to S Health information by such additional services or third
party devices will only be permitted with your express approval.
• You assume full responsibility for the inappropriate use of data shared on social networks
or transmitted to others. Use caution when sharing your personal data with others.
• If the device is connected to measuring devices, verify the communication protocol to
confirm proper operation. If you use a wireless connection, such as Bluetooth or ANT+,
the device may be affected by electronic interference from other devices. Avoid using the
device near other devices that transmit radio waves.
• Please read Terms and Conditions and Privacy Policy of S Health carefully before using it.
Applications
86
S Voice
Introduction
Perform various tasks simply by speaking.
Setting a wake-up command
You can launch S Voice using your own wake-up command.
When launching S Voice for the first time, tap START and set your own wake-up command.
To change the wake-up command, open the Apps screen and tap S Voice. Then, tap →
Voice wake-up → Delete wake-up command to reset the current setting. Tap the switch, tap
Set wake-up command → START, and then follow the on-screen instructions.
To set the device to launch S Voice using the wake-up command while the device is locked,
tap and tap the Wake up in secured lock switch to activate it.
Using S Voice
1 Say the preset wake-up command.
Alternatively, on the Apps screen, tap S Voice.
When S Voice is launched, the device begins voice recognition.
This app may not be available depending on the region or service provider.
View examples of voice
commands.
S Voice settings
Applications
87
2 Say a voice command.
If the device recognises the command, the device will perform the corresponding action.
To repeat a voice command or say a different command, tap .
This app will close automatically if the device is not used for a specified period.
Tips for better voice recognition
• Speak clearly.
• Speak in quiet places.
• Do not use offensive or slang words.
• Avoid speaking in dialectal accents.
The device may not recognise your commands or may perform unwanted commands
depending on your surroundings or how you speak.
Setting the language
On the Apps screen, tap S Voice → → Language, and then select a language.
The selected language is applied to S Voice only, not to the language displayed on
the device.
Applications
88
Music
Listen to music sorted by category and customise playback settings.
Tap Music on the Apps screen.
Tap , select a category, and then select a song to play.
Tap the album image at the bottom of the screen to open the music player screen.
Change the repeat mode.
Skip to the next song. Tap and
hold to fast-forward.
Pause and resume playback.
Access additional options.
Adjust the volume.
Skip to the previous song. Tap
and hold to rewind.
Turn on shuffle.
Set the file as your favourite
song.
Open the playlist.
Applications
89
Video
Watch videos stored in the device and customise playback settings.
Tap Video on the Apps screen.
Select a video to play.
Change screen ratio.
Rewind or
fast-forward by
dragging the bar.
Skip to the previous
video. Tap and hold
to rewind.
Skip to the next
video. Tap and hold
to fast-forward.
Access additional
options.
Switch to the
pop-up video player.
Pause and resume
playback.
Adjust the volume.
Drag your finger up or down on the left side of the playback screen to adjust the brightness,
or drag your finger up or down on the right side of the playback screen to adjust the volume.
To rewind or fast-forward, swipe to the left or right on the playback screen.
Applications
90
Voice Recorder
Introduction
Use different recording modes for various situations, such as in an interview. The device can
convert your voice to text and distinguish between sound sources.
Recording voice memos
1 On the Apps screen, tap Tools → Voice Recorder.
2 Tap to start recording. Speak into the microphone.
Tap Pause to pause recording.
While recording a voice memo, tap Bookmark to insert a bookmark.
Change the recording mode.
Start recording.
3 Tap to finish recording.
Applications
91
Changing the recording mode
Tap to select a mode from the list.
• Standard: This is the normal recording mode. Voice memos recorded in this mode appear
with the icon next to them.
• Interview: The microphone is sensitive to sounds from two directions. In this mode, both
the top and the bottom of the device pick up equal amounts of sound. Voice memos
recorded in this mode appear with the icon next to them.
• Voice memo: The device records your voice and simultaneously converts it to on-screen
text. For best results, keep the device near your mouth and speak loudly and clearly in a
quiet place. Voice memos recorded in this mode appear with the icon next to them.
If the voice memo system language does not match the language you are speaking,
the device will not recognise your voice. Before using this feature, tap the current
language to set the voice memo system language.
Playing selected voice memos
When you review interview recordings, you can mute or unmute certain sound sources in the
recording.
1 On the Apps screen, tap Tools → Voice Recorder.
2 Tap Recordings and select a voice memo recorded in interview mode.
Applications
92
3 To mute certain sound sources, tap for the corresponding direction that sound is to be
muted.
The icon will change to and the sound will be muted.
Unmuted sound source
Muted sound source
My Files
Access and manage various files stored in the device or in other locations, such as cloud
storage services.
On the Apps screen, tap Tools → My Files.
• Category: View files by category.
• Local storage: View files stored in the device.
• Cloud storage: View files stored in the cloud storage service.
• STORAGE USAGE: View your device’s memory information.
To search for files or folder, tap SEARCH.
Applications
93
Memo
Create memos and organise them by category.
On the Apps screen, tap Tools → Memo.
Composing memos
Tap on the memos list and enter a memo. While composing a memo, use the following
options:
• Category: Create or set a category.
• Image: Insert images.
• Voice: Make a voice recording to insert.
• Tasks: Add tick boxes at the beginning of each row to create a list of tasks.
To save the memo, tap SAVE.
To edit a memo, tap a memo, and then tap the content of the memo.
Searching for memos
Tap SEARCH on the memos list and enter a keyword to search for memos that include the
keyword.
Clock
Introduction
Set alarms, check the current time in many cities around the world, time an event, or set a
specific duration.
Alarm
On the Apps screen, tap Clock → Alarm.
Applications
94
Setting alarms
Set an alarm time and tap SAVE.
To open the keypad to enter an alarm time, tap KEYPAD.
To set an alarm with various alarm options, tap OPTIONS, set alarm options, and then tap
SAVE.
To activate or deactivate alarms, tap the clock icon next to the alarm in the alarms list.
Stopping alarms
Tap DISMISS to stop an alarm. If you have previously enabled the snooze option, tap
SNOOZE to repeat the alarm after a specified length of time.
Deleting alarms
Tap on an alarm in the list of alarms.
World clock
On the Apps screen, tap Clock → World clock.
Creating clocks
Enter a city name or select a city from the globe, and then tap .
Deleting clocks
Tap on a clock.
Stopwatch
1 On the Apps screen, tap Clock → Stopwatch.
2 Tap START to time an event.
To record lap times while timing an event, tap LAP.
Applications
95
3 Tap STOP to stop timing.
To restart the timing, tap RESUME.
To clear lap times, tap RESET.
Timer
1 On the Apps screen, tap Clock → Timer.
2 Set the duration, and then tap START.
To open the keypad to enter the duration, tap KEYPAD.
3 Tap DISMISS when the timer goes off.
Calculator
Perform simple or complex calculations.
Tap Calculator on the Apps screen.
Rotate the device to landscape orientation to display the scientific calculator. If Screen
rotation is disabled, open the notification panel and tap Screen rotation to activate it.
To see the calculation history, tap HISTORY. To close the calculation history panel, tap
KEYPAD.
To clear the history, tap HISTORY → CLEAR HISTORY.
Applications
96
Google apps
Google provides entertainment, social network, and business apps. You may require a Google
account to access some apps. Refer to Accounts for more information.
To view more app information, access each app’s help menu.
Some apps may not be available or may be labelled differently depending on the
region or service provider.
Chrome
Search for information and browse webpages.
Gmail
Send or receive emails via the Google Mail service.
Google+
Share your news and follow updates that your family, friends, and others share. You can also
back up your photos and videos, and more.
Maps
Find your location on the map, search for locations, and view location information for various
places.
Play Music
Discover, listen to, and share music on your device.
Play Movies & TV
Watch videos stored on your device and download various content to watch from the Play
Store.
Play Books
Download various books from Play Store and read them.
Applications
97
Play Newsstand
Read news and magazines that interest you in one convenient location.
Play Games
Download games from Play Store and play them with others.
Drive
Store your content on the cloud, access it from anywhere, and share it with others.
YouTube
Watch or create videos and share them with others.
Photos
Manage photos, albums, and videos that you have saved on the device and uploaded to
Google+.
Hangouts
Chat with your friends individually or in groups and use images, emoticons, and video calls
while you are chatting.
Google
Search quickly for items on the Internet or your device.
Voice Search
Search quickly for items by saying a keyword or phrase.
Google Settings
Configure settings for some features provided by Google.
98
Settings
Introduction
Customise settings for functions and apps. You can make your device more personalised by
configuring various setting options.
On the Apps screen, tap Settings.
To search for settings by entering keywords, tap SEARCH.
To edit the list of frequently used settings, tap EDIT. Then, tick items to add or deselect items
to remove.
Wi-Fi
Connecting to a Wi-Fi network
Activate the Wi-Fi feature to connect to a Wi-Fi network and access the Internet or other
network devices.
• Your device uses a non-harmonised frequency and is intended for use in all
European countries. The WLAN can be operated in the EU without restriction
indoors, but cannot be operated outdoors.
• Turn off Wi-Fi to save the battery when not in use.
1 On the Settings screen, tap Wi-Fi, and then tap the switch to activate it.
2 Select a network from the Wi-Fi networks list.
Networks that require a password appear with a lock icon.
Settings
99
3 Tap CONNECT.
Once the device connects to a Wi-Fi network, the device will reconnect to that
network each time it is available without requiring a password. To prevent the device
connecting to the network automatically, select it from the list of networks and tap
FORGET.
Wi-Fi Direct
Wi-Fi Direct connects devices directly via a Wi-Fi network without requiring an access point.
1 On the Settings screen, tap Wi-Fi, and then tap the switch to activate it.
2 Tap Wi-Fi Direct.
The detected devices are listed.
If the device you want to connect to is not in the list, request that the device turns on its
Wi-Fi Direct feature.
3 Select a device to connect to.
The devices will be connected when the other device accepts the Wi-Fi Direct
connections request.
Sending and receiving data
You can share data, such as contacts or media files, with other devices. The following actions
are an example of sending an image to another device.
1 Tap Gallery on the Apps screen.
2 Select an image.
3 Tap Share → Wi-Fi Direct, select a device to transfer the image to, and then tap SHARE.
4 Accept the Wi-Fi Direct connection request on the other device.
If the devices are already connected, the image will be sent to the other device without
the connection request procedure.
Settings
100
Ending the device connection
1 Tap Wi-Fi on the Settings screen.
2 Tap Wi-Fi Direct.
The device displays the connected devices in the list.
3 Tap the device name to disconnect the devices.
Bluetooth
Introduction
Use Bluetooth to exchange data or media files with other Bluetooth-enabled devices.
• Samsung is not responsible for the loss, interception, or misuse of data sent or
received via Bluetooth.
• Always ensure that you share and receive data with devices that are trusted
and properly secured. If there are obstacles between the devices, the operating
distance may be reduced.
• Some devices, especially those that are not tested or approved by the Bluetooth
SIG, may be incompatible with your device.
• Do not use the Bluetooth feature for illegal purposes (for example, pirating copies
of files or illegally tapping communications for commercial purposes).
Samsung is not responsible for the repercussion of illegal use of the Bluetooth
feature.
Settings
101
Pairing with other Bluetooth devices
1 On the Settings screen, tap Bluetooth, and then tap the switch to activate it.
The detected devices are listed.
2 Select a device to pair with.
If your device has paired with the device before, tap the device name without confirming
the auto-generated passkey.
If the device you want to pair with is not in the list, request that the device turns on its
visibility option. Refer to the other device’s user manuals.
Your device is visible to other devices while the Bluetooth settings screen is open.
3 Accept the Bluetooth connection request on your device to confirm.
The devices will be connected when the other device accepts the Bluetooth connection
request.
Sending and receiving data
Many apps support data transfer via Bluetooth. You can share data, such as contacts or media
files, with other Bluetooth devices. The following actions are an example of sending an image
to another device.
1 Tap Gallery on the Apps screen.
2 Select an image.
3 Tap Share → Bluetooth, and then select a device to transfer the image to.
If the device you want to pair with is not in the list, request that the device turns on its
visibility option.
4 Accept the Bluetooth connection request on the other device.
Settings
102
Unpairing Bluetooth devices
1 Tap Bluetooth on the Settings screen.
The device displays the paired devices in the list.
2 Tap next to the device name to unpair.
3 Tap Unpair.
Flight mode
This disables all wireless functions on your device. You can use only non-network services.
On the Settings screen, tap Flight mode.
Mobile hotspot and tethering
Use the device as a mobile hotspot to share the device’s mobile data connection with other
devices when the network connection is not available. Connections can be made via Wi-Fi,
USB, or Bluetooth.
On the Settings screen, tap Mobile hotspot and tethering.
You may incur additional charges when using this feature.
• Mobile hotspot: Use the mobile hotspot to share the device’s mobile data connection
with computers or other devices.
• Bluetooth tethering: Use Bluetooth tethering to share the device’s mobile data
connection with computers or other devices via Bluetooth.
• USB tethering: Use USB tethering to share the device’s mobile data connection with
a computer via USB. When connected to a computer, the device is used as a wireless
modem for the computer.
Settings
103
Using the mobile hotspot
Use your device as a mobile hotspot to share your device’s mobile data connection with other
devices.
1 On the Settings screen, tap Mobile hotspot and tethering → Mobile hotspot.
2 Tap the switch to activate it.
The icon appears on the status bar. Other devices can find your device in the Wi-Fi
networks list.
To set a password for the mobile hotspot, tap MORE → Configure Mobile hotspot and
select the level of security. Then, enter a password and tap SAVE.
3 On the other device’s screen, search for and select your device from the Wi-Fi networks
list.
4 On the connected device, use the device’s mobile data connection to access the Internet.
Data usage
Keep track of your data usage amount and customise the settings for the limitation.
On the Settings screen, tap Data usage.
• Mobile data: Set the device to use data connections on any mobile network.
• Set mobile data limit: Set a limit for mobile data usage.
To change the monthly reset date for the monitoring period, tap → Change cycle.
Limiting data usage
1 On the Settings screen, tap Data usage and tap the Set mobile data limit switch to
activate it.
2 Drag the limit adjustment bar upwards or downwards to set the limit.
3 Drag the warning adjustment bar upwards or downwards to set a data usage alert level.
The device will alert you when the warning level is reached.
Settings
104
Mobile networks
Configure your mobile network settings.
On the Settings screen, tap Mobile networks.
• Data roaming: Set the device to use data connections when you are roaming.
• Access Point Names: Set up access point names (APNs).
• Network mode: Select a network type.
• Network operators: Search for available networks and manually register a network.
NFC and payment
Introduction
Your device allows you to read near field communication (NFC) tags that contain information
about products. You can also use this feature to make payments and buy tickets for
transportation or events after downloading the required apps.
The device contains a built-in NFC antenna. Handle the device carefully to avoid
damaging the NFC antenna.
Using the NFC feature
Use the NFC feature to send images or contacts to other devices, and read product
information from NFC tags. If you insert a SIM or USIM card that has a payment feature, you
can use the device to make payments conveniently.
1 On the Settings screen, tap NFC and payment → NFC, and then tap the switch to
activate it.
Settings
105
2 Place the NFC antenna area on the back of your device near an NFC tag.
The information from the tag appears.
Ensure that the device’s screen is unlocked. Otherwise, the device will not read NFC
tags or receive data.
Making payments with the NFC feature
Before you can use the NFC feature to make payments, you must register for the mobile
payment service. To register or get more information about the service, contact your service
provider.
1 On the Settings screen, tap NFC and payment → NFC, and then tap the switch to
activate it.
2 Touch the NFC antenna area on the back of your device to the NFC card reader.
To set the default payment app, open the settings screen and tap NFC and payment → Tap
& Pay, and then select an app.
The payment services list may not include all available payment apps.
Settings
106
Sending data
Allow data exchange when your device’s NFC antenna touches the other device’s NFC
antenna.
1 On the Settings screen, tap NFC and payment → NFC, and then tap the switch to
activate it.
2 Tap Android Beam and tap the switch to activate it.
3 Select an item and touch the other device’s NFC antenna to your device’s NFC antenna.
4 When Touch to beam. appears on the screen, tap your device’s screen to send the item.
If both devices try to send data simultaneously, the file transfer may fail.
Settings
107
More connection settings
Options
Customise settings to control other features.
On the Settings screen, tap More connection settings.
• Printing: Configure settings for printer plug-ins installed on the device. You can search
for available printers or add one manually to print files. Refer to Printing for more
information.
• MirrorLink: Use the MirrorLink feature to control your device’s MirrorLink apps on the
vehicle’s head unit monitor. Refer to MirrorLink for more information.
• Download booster: Set the device to download files larger than 30 MB, faster via Wi-Fi
and mobile networks simultaneously. Refer to Download booster for more information.
• VPN: Set up and connect to virtual private networks (VPNs).
• Default messaging app: Select the default app to use for messaging.
Printing
Configure settings for printer plug-ins installed on the device. You can connect the device to a
printer via Wi-Fi or Wi-Fi Direct, and print images or documents.
Some printers may not be compatible with the device.
Adding printer plug-ins
Add printer plug-ins for printers you want to connect the device to.
1 On the Settings screen, tap More connection settings → Printing → Download plug-in.
2 Search for a printer plug-in in Play Store.
3 Select a printer plug-in and install it.
Settings
108
4 Select the printer plug-in and tap the switch to activate it.
The device searches for printers that are connected to the same Wi-Fi network as your
device.
To add printers manually, tap MORE → Add printer → ADD PRINTER.
To change print settings, tap MORE → Printing settings.
Printing content
While viewing content, such as images or documents, tap Share → Print → → All
printers, and then select a printer.
MirrorLink
Connect your device to a vehicle to control your device’s MirrorLink apps on the vehicle’s
head unit monitor.
On the Settings screen, tap More connection settings → MirrorLink.
Your device is compatible with vehicles that support MirrorLink version 1.1 or higher.
Connecting your device to a vehicle via MirrorLink
When using this feature for the first time, connect the device to a Wi-Fi or mobile network.
1 Pair your device with a vehicle via Bluetooth.
Refer to Pairing with other Bluetooth devices for more information.
2 Connect your device to the vehicle using a USB cable.
When they are connected, access your device’s MirrorLink apps on the head unit monitor.
Ending the MirrorLink connection
Unplug the USB cable from your device and the vehicle.
Settings
109
Download booster
Set the device to download files larger than 30 MB, faster via Wi-Fi and mobile networks
simultaneously. A stronger Wi-Fi signal will provide a faster download speed.
On the Settings screen, tap More connection settings → Download booster.
• This feature may not be supported by some devices.
• You may incur additional charges when downloading files via the mobile network.
• When you download large files, the device may heat up. If the device exceeds a set
temperature, the feature will turn off.
• If network signals are unstable, the speed and performance of this feature may be
affected.
• If the Wi-Fi and mobile network connections have significantly different data
transfer speeds, the device may use only the fastest connection.
• This feature supports Hypertext Transmission Protocol (HTTP) 1.1 and Hypertext
Transmission Protocol Secure (HTTPS). The feature cannot be used with other
protocols, such as FTP.
Sounds and notifications
Change settings for various sounds on the device.
On the Settings screen, tap Sounds and notifications.
• Sound mode: Set the device to use sound mode or silent mode.
• Volume: Adjust the volume level for call ringtones, music and videos, system sounds, and
notifications.
• Ringtones and sounds: Change the ringtone and system sound settings.
• Vibrations: Change the vibration settings.
• Sound quality and effects: Configure additional sound settings.
• Do not disturb: Change settings for managing interruptions.
Settings
110
• Notifications on lock screen: Set whether or not to show the content of notifications on
the locked screen.
• App notifications: Change the notification settings for each app.
• LED indicator: Set the device to turn on the LED indicator when you have missed calls,
messages, or notifications.
Display
Change the display settings.
On the Settings screen, tap Display.
• Brightness: Adjust the brightness of the display.
• Font: Change the font size and type.
• Screen timeout: Set the length of time the device waits before turning off the display’s
backlight.
• Smart stay: Set the device to prevent the display backlight from turning off while you are
looking at the display.
• Screen mode: Change the screen mode to adjust the display’s colour and contrast.
• Daydream: Set the device to launch a screensaver when the device is charging or
connected to a desktop dock.
Edge screen
Change the settings for the Edge screen. Refer to Edge screen for more information.
On the Settings screen, tap Edge screen.
• Edge lighting: Set the Edge screen to light up when you receive calls or notifications
while the device’s screen is facing downwards.
• People edge: Set the device to display tabs with assigned colours on the Edge screen
when there are missed notifications from priority contacts.
• Select notifications: Select items for providing notifications on the Edge screen via
colour lighting and coloured tabs.
Settings
111
• Information stream: Customise settings for displaying various items, such as news, on
the Edge screen.
• Night clock: Set the device to use the Edge screen as a clock at night. You can set the
duration that the night clock stays on.
• Edge screen position: Select the left or right Edge screen to activate it according to your
preference.
Motions and gestures
Activate the motion recognition feature and change the settings that control motion
recognition on your device.
On the Settings screen, tap Motions and gestures.
Excessive shaking or impact on the device may result in unintended inputs. Control
motions properly.
• Direct call: Set the device to make a voice call by picking up and holding the device near
your ear while viewing call, message, or contact details.
• Smart alert: Set the device to alert you if you have missed calls or new messages when
you pick up the device.
This feature may not work if the screen is turned on or the device is not on a flat
surface.
• Mute: Set the device to mute incoming calls or alarms by using palm motions or facing
the device’s screen downwards.
• Palm swipe to capture: Set the device to capture a screenshot when you swipe your
hand to the left or right across the screen. You can view the captured images in Gallery.
It is not possible to capture a screenshot while using some apps and features.
Settings
112
Applications
Manage the device’s apps and change their settings.
On the Settings screen, tap Applications.
• Application manager: View and manage the apps on your device.
• Default applications: Select a default settings for using apps.
• Application settings: Customise the settings for each app.
Wallpaper
Change the wallpaper settings for the Home screen and the locked screen.
On the Settings screen, tap Wallpaper.
Themes
Apply various themes to the device to change the visual elements of the Home screen, locked
screen, and icons.
On the Settings screen, tap Themes.
To download more themes, tap STORE.
Settings
113
Lock screen and security
Options
Change the settings for securing the device and the SIM or USIM card.
On the Settings screen, tap Lock screen and security.
The available options may vary depending on the screen lock method selected.
• Screen lock type: Change the screen lock method.
• Show information: Change settings for the items displayed on the locked screen.
• Unlock effect: Select an effect that you see when you unlock the screen.
• Fingerprint: Register your fingerprint to the device to secure the device or sign in to your
Samsung account. Refer to Fingerprint recognition for more information.
• Device security: Scan for and remove malware from the device. You can also activate the
real-time scanning feature to block phishing attacks and malicious websites.
• Find My Mobile: Activate or deactivate the Find My Mobile feature. This feature can
help you locate your device if it is lost or stolen. You can also access the Find my mobile
website (findmymobile.samsung.com) to track and control your lost or stolen device.
• Unknown sources: Set the device to allow the installation of apps from unknown
sources.
• Other security settings: Configure additional security settings.
Settings
114
Fingerprint recognition
In order for fingerprint recognition to function, your fingerprint information needs to be
registered and stored in your device. After registering, you can set the device to use your
fingerprint for the features below:
• Screen lock
• Web sign-in
• Verify Samsung account
• This feature may not be available depending on the region or service provider.
• Fingerprint recognition uses the unique characteristics of each fingerprint to
enhance the security of your device. The likelihood of the fingerprint sensor
confusing two different fingerprints is very low. However, in rare cases where
separate fingerprints are very similar the sensor may recognise them as identical.
For better fingerprint recognition
When you scan your fingerprints on the device, be aware of the following conditions that
may affect the feature’s performance:
• The Home key contains a fingerprint recognition sensor. Ensure that the Home key is not
scratched or damaged by metal objects, such as coins, keys, and necklaces.
• The screen protector supplied with the device may cause the fingerprint recognition
sensor to malfunction. Remove the screen protector to improve fingerprint sensitivity.
• Ensure that the fingerprint recognition area and your fingers are clean and dry.
• The device may not recognise fingerprints that are affected by wrinkles or scars.
• The device may not recognise fingerprints from small or thin fingers.
• If you bend your finger or use a fingertip, the device may not recognise your fingerprints.
Make sure to cover the entire Home key with your finger.
• To improve recognition performance, register fingerprints of the hand used most often to
perform tasks on the device.
• In dry environments, static electricity can build up in the device. Avoid using this feature
in dry environments or before using the feature, discharge static electricity by touching a
metal object.
Settings
115
Registering fingerprints
1 On the Settings screen, tap Lock screen and security → Fingerprint → Add fingerprint.
2 Place your finger on the Home key.
3 Lift your finger when the device vibrates, and then place it on the Home key again.
Repeat this action using the same finger until the fingerprint is registered.
4 When a screen appears requesting to register a backup password, enter the backup
password, and then tap CONTINUE.
5 Enter the backup password again to verify it, and then tap OK.
You can use the backup password instead of scanning your fingerprints.
6 When a fingerprint lock pop-up window appears, tap OK. You can use your fingerprints to
unlock the screen.
Deleting fingerprints
You can delete registered fingerprints using the fingerprint manager.
1 On the Settings screen, tap Lock screen and security → Fingerprint.
2 Scan a registered fingerprint, or tap BACKUP PASSWORD and enter the backup
password.
3 Tap EDIT.
4 Tick fingerprints to delete and tap REMOVE.
Settings
116
Changing the backup password
You can change the password that you use as a backup to scanning your fingerprints.
1 On the Settings screen, tap Lock screen and security → Fingerprint.
2 Scan a registered fingerprint, or tap BACKUP PASSWORD and enter the backup
password.
3 Tap Change backup password.
4 Enter a new password and tap CONTINUE.
5 Enter the password again and tap OK.
Verifying the Samsung account password
Use fingerprints to verify your Samsung account password. You can use a fingerprint instead
of entering your password, for example, when you purchase content from Galaxy Apps.
1 On the Settings screen, tap Lock screen and security → Fingerprint.
2 Scan a registered fingerprint, or tap BACKUP PASSWORD and enter the backup
password.
3 Tap the Verify Samsung account switch to activate it.
4 Sign in to your Samsung account.
Settings
117
Using fingerprints to sign in to accounts
You can use your fingerprints to sign in to webpages that support password saving.
1 On the Settings screen, tap Lock screen and security → Fingerprint.
2 Scan a registered fingerprint, or tap BACKUP PASSWORD and enter the backup
password.
3 Tap the Web sign-in switch to activate it.
4 Open a webpage that you want to sign in to with a fingerprint.
5 Enter your user name and password, and then tap the webpage’s sign in button.
6 Tick Sign in using your fingerprints and tap REMEMBER.
You can use your fingerprint to verify your account and password to sign in to the
webpage.
Privacy and safety
Options
Change the settings for maintaining your privacy and safety.
On the Settings screen, tap Privacy and safety.
• Location: Change settings for location information permissions.
• Private mode: Activate private mode to prevent others from accessing your personal
content. Refer to Private mode for more information.
• Report diagnostic info: Set the device to automatically send the device’s diagnostic and
usage information to Samsung.
• Send SOS messages: Set the device to send help messages by pressing the Power
key three times. You can also send sound recordings along with the message to the
recipients. Refer to Send SOS messages for more information.
Settings
118
Private mode
Hide personal content in your device to prevent others from accessing it.
In private mode, you can hide items in Gallery, Video, Music, Voice Recorder, My Files, and
Internet.
Activating private mode
1 On the Settings screen, tap Privacy and safety → Private mode, and then tap the switch
to activate it.
If you are activating private mode for the first time, follow the on-screen instructions to
set up a private mode access code.
2 Follow the on-screen instructions to enter the preset private mode access code.
Private mode is activated and the icon appears on the status bar.
You can view and access the hidden items only when private mode is activated. To
hide items stored in the private folder, deactivate private mode.
Hiding content
1 On the Apps screen, launch an app to hide items.
2 Select an item and tap MORE → Move to Private.
If private mode is not activated, follow the on-screen instructions to enter the preset
private mode access code.
The selected items will be moved to the private folder.
Settings
119
Viewing hidden content
You can view hidden items only when private mode is activated.
1 On the Settings screen, tap Privacy and safety → Private mode, and then tap the switch
to activate it.
2 Follow the on-screen instructions to enter the preset private mode access code.
3 On the Apps screen, tap Tools → My Files → Private.
Items moved to the private folder will appear on the screen. For bookmarks, you can view
them with the Internet app.
Unhiding content
1 In the private folder, tap and hold an item, and then tick items to unhide.
2 Tap MORE → Remove from Private.
3 Select a folder to move the items to, and then tap MOVE HERE.
The items will be moved to the selected folder.
Automatically deactivating private mode
You can set the device to automatically deactivate private mode each time the screen turns
off.
1 On the Settings screen, tap Privacy and safety → Private mode, and then tap the switch
to activate it.
2 Follow the on-screen instructions to enter the preset private mode access code.
3 Tap the Auto disable switch to activate it.
When the Auto disable option is enabled, the device will fail to transfer files to the
private folder if the screen turns off during transfer.
Settings
120
Send SOS messages
In an emergency situation, quickly press the Power key three times. The device sends
messages to your primary contacts. The messages include your location information.
1 On the Settings screen, tap Privacy and safety → Send SOS messages, and then tap the
switch to activate it.
2 Follow the on-screen instructions to add primary contacts if you have not already done
so.
To send help messages with audio recordings or photos, tap the Attach audio recording or
Attach pictures switch to activate it.
The Attach pictures option may not be available depending on the region or service
provider.
Adding primary contacts
On the Settings screen, tap Privacy and safety → Send SOS messages → Send messages
to → ADD. Tap Create contact and enter contact information or tap Select from contacts to
add an existing contact as a primary contact.
Easy mode
Easy mode provides an easier user experience by using a simpler layout and bigger icons on
the Home screen.
Switching to easy mode
1 On the Settings screen, tap Easy mode → Easy mode.
2 Select apps under Easy applications to apply a simpler layout.
3 Tap DONE.
Settings
121
Returning to standard mode
Swipe to the left on the Home screen and tap Settings → Easy mode → Standard mode →
DONE.
Managing shortcuts
To add a shortcut to an app to the Home screen, swipe to the left, tap , and then select an
app.
To add a shortcut to a contact on the Home screen, swipe to the right and tap .
To delete a shortcut from the Home screen, tap EDIT and select an app or contact with .
Accessibility
Configure various settings to improve accessibility to the device. Refer to Accessibility for
more information.
On the Settings screen, tap Accessibility.
Accounts
Add your Samsung and Google accounts, or other accounts, to sync with.
Adding accounts
Some apps used on your device require a registered account. Create accounts to have the
best experience with your device.
1 On the Settings screen, tap Accounts → Add account.
2 Select an account service.
3 Follow the on-screen instructions to complete the account setup.
To sync content with your accounts, select an account and select items to sync.
Settings
122
Registering Samsung accounts
You need a Samsung account when using some Samsung apps. You can back up or restore
data saved in the device to your Samsung account. Register your Samsung account to the
device to conveniently use Samsung services.
1 On the Settings screen, tap Accounts → Add account.
2 Tap Samsung account.
3 Follow the on-screen instructions to complete the account setup.
Once your Samsung account has been registered, you can use apps requiring your Samsung
account without the sign in procedure.
Removing accounts
On the Settings screen, tap Accounts, select an account name, select the account to remove,
and then tap MORE → Remove account.
Backup and reset
Change the settings for managing settings and data.
On the Settings screen, tap Backup and reset.
• Back up my data: Back up your personal information and app data to the Samsung
server. You can also set the device to automatically back up data.
• Restore: Restore previously backed up personal information and app data from your
Samsung account.
• Backup account: Set up or edit your Google backup account.
• Back up my data: Set the device to back up settings and app data to the Google server.
• Automatic restore: Set the device to automatically restore settings and app data from
the Google server when apps are reinstalled.
• Factory data reset: Reset settings to the factory default values and delete all data.
Settings
123
Language and input
Change the settings for text input. Some options may not be available depending on the
selected language.
On the Settings screen, tap Language and input.
• Language: Select a display language for all menus and apps.
• Default keyboard: Select a default keyboard type for text input.
• Samsung keyboard: Change the Samsung keyboard settings.
• Google voice typing: Change the voice input settings.
• Voice input: Select a default voice input service. You can also change settings for each
service.
• Text-to-speech options: Change the text-to-speech settings.
• Pointer speed: Adjust the pointer speed for the mouse or trackpad connected to your
device.
Battery
View battery power information and change power saving options.
On the Settings screen, tap Battery.
The usage time left shows the time remaining before the battery power runs
out. Usage time left may vary depending on your device settings and operating
conditions.
• BATTERY USAGE: View the amount of battery power consumed by your device.
• Power saving mode: Activate power-saving mode and change the settings for powersaving
mode. Refer to Power saving mode for more information.
• Ultra power saving mode: Extend standby time and reduce battery consumption by
displaying a simpler layout and allowing limited access to an app. Refer to Ultra power
saving mode for more information.
• Abnormal battery usage: View a list of apps that are consuming an excessive amount of
battery power.
Settings
124
Storage
View memory information for your device.
On the Settings screen, tap Storage.
The actual available capacity of the internal memory is less than the specified
capacity because the operating system and default apps occupy part of the memory.
The available capacity may change when you update the device.
Date and time
Access and alter the following settings to control how the device displays the time and date.
On the Settings screen, tap Date and time.
If the battery remains fully discharged or removed from the device, the time and date
is reset.
• Automatic date and time: Automatically update the time and date when moving across
time zones.
• Automatic time zone: Set the device to receive time zone information from the network
when you move across time zones.
• Set date: Set the current date manually.
• Set time: Set the current time manually.
• Select time zone: Set the home time zone.
• Use 24-hour format: Display time in 24-hour format.
• Select date format: Select a date format.
Settings
125
User manual
View help information to learn how to use the device and apps or configure important
settings.
On the Settings screen, tap User manual.
About device
Access device information, edit the device name, or update device software.
On the Settings screen, tap About device.
126
Appendix
Accessibility
About Accessibility
Improve accessibility with features that make the device easier to use for users who have
impaired vision, hearing, and reduced dexterity.
On the Apps screen, tap Settings → Accessibility.
Using the Home key to open accessibility menus
On the Apps screen, tap Settings → Accessibility → Direct access, and then tap the switch
to activate it. Then, select an accessibility menu to open when you press the Home key three
times quickly.
You can access the following accessibility menus.
• Accessibility
• Galaxy TalkBack
• Universal switch
• Magnifier window
• Negative colours
• Greyscale
• Colour adjustment
• Interaction control
Appendix
127
Voice feedback (TalkBack)
Activating or deactivating TalkBack
When you activate TalkBack, the device reads aloud the text on the screen or selected
features when you tap it once.
On the Apps screen, tap Settings → Accessibility → Vision → Galaxy TalkBack, and then
tap the switch to activate it. The device will start voice feedback.
To deactivate TalkBack, tap the switch and tap anywhere on the screen twice quickly.
When you activate TalkBack for the first time, the tutorial will start after activation. You can
replay it by tapping Galaxy TalkBack help.
Some features are not available while you are using TalkBack.
Controlling the screen with finger gestures
You can use various finger gestures to control the screen while you are using TalkBack.
One finger gestures
• Tapping: Read aloud the item under your finger. To explore the screen, place a finger on
the screen and move it on the screen.
• Tapping twice: Open the selected item. While selected items are read aloud, when you
hear the item you want, release your finger from the item. Then, tap anywhere on the
screen twice quickly.
• Double-tapping and holding the screen: Move an item or access an available option.
• Swiping to the left: Move to the previous item.
• Swiping to the right: Move to the next item.
• Swiping upwards or downwards: Use the most recent contextual menu option or change
its settings. In text selection mode, move the cursor backwards or forwards to select text.
Appendix
128
• Swiping to the left then right in one motion: Scroll up the screen.
• Swiping to the right then left in one motion: Scroll down the screen.
• Swiping upwards then downwards in one motion: Move to the first item on the screen.
• Swiping downwards then upwards in one motion: Move to the last item on the screen.
Two finger gestures
• Tapping: Pause or resume voice feedback.
• Tapping twice: Start, pause, or resume playback.
• Tapping three times: Check the current time, remaining battery power, and mode.
To change items that are read aloud, open the Apps screen and tap Settings →
Accessibility → Vision → Galaxy TalkBack → SETTINGS → Status bar information.
• Double-tapping and holding the screen: Enable or disable text selection mode.
• Swiping to the left: Move to the next page. In text selection mode, cut the selected text.
• Swiping to the right: Return to the previous page. In text selection mode, paste the
copied text.
• Swiping upwards: Scroll down the list. In text selection mode, copy the selected text.
• Swiping downwards: Scroll up the list. In text selection mode, select all text.
• Swiping in any direction on the locked screen: Unlock the screen.
• Swiping downwards from the top of the screen: Open the notification panel.
Three finger gestures
• Tapping: Start reading items aloud from the top.
• Tapping twice: Start reading from the next item.
• Tapping three times: Read the last selected text and copy it to the clipboard.
• Swiping to the left or right: Open the contextual menu and scroll through the options.
• Swiping upwards or downwards: Change the text reading and selecting granularity.
Appendix
129
Using the contextual menu
While you are using TalkBack, swipe to the left or right with three fingers. The contextual
menu will appear and the device will read the options aloud. Swipe to the left or right
with three fingers to scroll through the options. When you hear the option you want,
swipe upwards or downwards to use the option or adjust the settings for the option. For
example, when you hear Media Volume, you can adjust the volume by swiping upwards or
downwards.
Adding image labels
You can assign labels to images on the screen. The device reads aloud the labels when the
images are selected. Add labels to unlabelled images by tapping the screen twice with three
fingers and holding.
Configuring settings for TalkBack
Configure settings for TalkBack for your convenience.
On the Apps screen, tap Settings → Accessibility → Vision → Galaxy TalkBack →
SETTINGS.
• Speech volume: Select the volume level for voice feedback.
• Speech rate: Select a speed for voice feedback.
• Pitch changes: Set the device to read aloud text at a low pitch when it is entered using a
keyboard.
• Keyboard feedback: Set the device to read aloud a word that you enter using a keyboard
when you tap the space key.
• Speak while screen off: Set the device to provide voice feedback when the screen is
turned off.
• Use proximity sensor: Set the device to pause voice feedback when you place your hand
over the sensor at the top of the device.
• Shake to continue reading: Set the device to read aloud the text displayed on the screen
when you shake the device. You can select from various shaking speeds.
Appendix
130
• Vibration feedback: Set the device to vibrate when you explore the screen.
• Sound feedback: Set the device to emit a sound when you control the screen, such as
scrolling the screen, and more.
• Focus on speech audio: Set the device to turn the media volume down when the device
reads an item aloud.
• Sound feedback volume: Adjust the volume that sound is played when you touch the
screen to control it. This feature is available when Sound feedback is activated.
• Single-tap selection: Set the device to open the selected item by tapping it once.
• Back/Recents key feedback: Set the device to provide voice feedback when you tap
or once. Tap or twice to activate them.
• Status bar information: Select items to read aloud when you tap the screen three times
with two fingers.
• Developer options: Set options for app development.
Using the device with the screen turned off
Set the device to turn the screen off at all times to keep the content on your screen private.
The screen does not turn on when you press the Home key or tap the screen. Currently
activated features do not turn off when the screen is off.
On the Apps screen, tap Settings → Accessibility → Vision, and then tap the Dark screen
switch to activate it. You can activate or deactivate this feature by pressing the Power key
twice.
Reading passwords aloud
Set the device to read the password aloud when you enter the password while TalkBack is
activated.
On the Apps screen, tap Settings → Accessibility → Vision, and then tap the Speak
passwords switch to activate it.
Appendix
131
Setting text-to-speech features
Change the settings for text-to-speech features used when TalkBack is activated, such as
languages, speed, and more.
On the Apps screen, tap Settings → Accessibility → Vision → Text-to-speech options, and
then use the following functions:
• Preferred TTS engine: Select an engine for the text-to-speech feature.
• Speech rate: Adjust the speed for the text-to-speech feature.
• Default language status: View the status of the current language set for the text-to
speech feature.
Entering text using the keyboard
To display the keyboard, tap the text input field, and then tap anywhere on the screen twice
quickly.
When you touch the keyboard with your finger, the device reads aloud the character keys
under your finger. When you hear the character you want, release your finger from the screen
to select it. The character is entered and the device reads the text aloud.
If Rapid key input is not activated, release your finger from the character you want, and
then tap anywhere on the screen twice quickly. To activate the rapid key input feature, open
the Apps screen, tap Settings → Accessibility → Vision, and then tap the Rapid key input
switch to activate it.
Entering additional characters
Tap and hold a key on the keyboard to enter additional characters available for the key. A
pop-up window appears above the key showing available characters. To select a character,
drag your finger on the pop-up window until you hear the character you want, and release it.
Appendix
132
Vision
Writing voice memos to voice labels
You can use voice labels to distinguish objects of similar shape by attaching labels to them.
You can record and assign a voice memo to an NFC-enabled voice label. The voice memo is
played back when you place your device near the label.
Turn on the NFC feature before using this feature.
1 On the Apps screen, tap Settings → Accessibility → Vision → Voice Label.
The voice recorder will launch.
2 Tap to start recording. Speak into the microphone.
3 When you are finished recording, tap to stop.
4 Hold the back of your device over the voice label.
The information in the voice recording will be written to the voice label.
Changing the font size
Change the font size displayed on the screen. Setting the font size to Huge may not be
available in some apps.
On the Apps screen, tap Settings → Accessibility → Vision → Font size.
Magnifying the screen
Magnify the screen and zoom in on a specific area.
On the Apps screen, tap Settings → Accessibility → Vision → Magnification gestures, and
then tap the switch to activate it.
• Zooming in and out: Quickly tap the screen three times to zoom in on a specific area.
Quickly tap the screen three times again to return to the normal view.
Appendix
133
• Exploring the screen by scrolling: Drag two or more fingers across the magnified screen.
• Adjusting zoom ratio: Pinch two or more fingers on the magnified screen or spread them
apart.
You can also temporarily magnify the screen by tapping the screen three times and holding.
While holding the screen, drag your finger to explore the screen. Release your finger to return
to the normal view.
• Keyboards on the screen cannot be magnified.
• When this feature is activated, the performance of some apps, such as Phone and
Calculator, may be affected.
Using a magnifier
Activate a magnifier to zoom in on the screen to view a larger version of the content.
On the Apps screen, tap Settings → Accessibility → Vision → Magnifier window, and then
tap the switch to activate it. The magnifier will appear on the screen.
Drag the magnifier to where you want to zoom in on the screen.
Converting the screen to greyscale mode
Display colours on the screen as grey tones.
On the Apps screen, tap Settings → Accessibility → Vision, and then tap the Greyscale
switch to activate it.
Reversing the display colours
Improve screen visibility to help users recognise text on the screen more easily.
On the Apps screen, tap Settings → Accessibility → Vision, and then tap the Negative
colours switch to activate it.
Appendix
134
Colour adjustment
Adjust how colours are displayed on the screen if you have difficulty in distinguishing colours.
The device changes the colours into more recognisable colours.
On the Apps screen, tap Settings → Accessibility → Vision → Colour adjustment, and
then tap the switch to activate it. Follow the on-screen instructions to complete the colour
adjustment procedure.
Hearing
Sound detectors
Set the device to vibrate when it detects your doorbell or a baby crying.
Baby crying detector
On the Apps screen, tap Settings → Accessibility → Hearing → Sound detectors, and then
tap the Baby crying detector switch to activate it. The device will vibrate when it detects
sound and the alert will be saved as a log.
Doorbell detector
1 On the Apps screen, tap Settings → Accessibility → Hearing → Sound detectors, and
then tap the Doorbell detector switch to activate it.
2 Tap to make a recording of your doorbell.
The device will detect and record the doorbell.
3 Tap and ring your doorbell to check if it is recorded correctly. When the device detects
the doorbell sound, tap OK.
To change the doorbell sound, tap Change doorbell sound.
The device will vibrate when it detects sound and the alert will be saved as a log.
Appendix
135
Setting flash notification
Set the flash to blink when you have incoming calls, new messages, or notifications.
On the Apps screen, tap Settings → Accessibility → Hearing, and then tap the Flash
notification switch to activate it.
Turning off all sounds
Set the device to mute all device sounds, such as media sounds, and the caller’s voice during
a call.
On the Apps screen, tap Settings → Accessibility → Hearing, and then tap the Turn off all
sounds switch to activate it.
Caption settings
On the Apps screen, tap Settings → Accessibility → Hearing → Samsung subtitles (CC) or
Google subtitles (CC), and then tap the switch to activate it.
Select an option for configuring the caption settings.
Adjusting the sound balance
Set the device to adjust the sound balance when using a headset.
1 Connect a headset to the device and wear it.
2 On the Apps screen, tap Settings → Accessibility → Hearing → Left/right sound
balance.
3 Drag the adjustment bar to the left or right and adjust the sound balance, and then tap
SET.
Appendix
136
Mono audio
Mono output combines stereo sound into one signal that is played through all headset
speakers. Use this if you have a hearing impairment or if a single earbud is more convenient.
On the Apps screen, tap Settings → Accessibility → Hearing, and then tap the Mono audio
switch to activate it.
Auto haptic
When the auto haptic feature is activated, the device will vibrate with the sound when
playing music, watching videos, or playing games. It will also vibrate when buttons are
tapped in supported apps.
On the Apps screen, tap Settings → Accessibility → Hearing, and then tap the Auto haptic
switch to activate it.
Some apps may not support this feature.
Dexterity and interaction
Universal switch
You can control the touchscreen by connecting an external switch, by tapping the screen, or
by using head movements and face gestures.
On the Apps screen, tap Settings → Accessibility → Dexterity and interaction → Universal
switch, and then tap the switch to activate it. If the universal switches are not registered on
the device, tap ADD SWITCH and set switches to control the device.
To activate the universal switch feature, at least one switch must be registered on the
device.
To set switches to control the device, tap SETTINGS → Switches.
To quickly deactivate this feature, press the Home key three times.
Appendix
137
Assistant menu
Displaying the assistive shortcut icon
Set the device to display the assistive shortcut icon for accessing apps, features, and settings.
You can easily control the device by tapping the assistive menus in the icon.
1 On the Apps screen, tap Settings → Accessibility → Dexterity and interaction →
Assistant menu.
2 Tap the switch to activate it.
The assistive shortcut icon appears at the bottom right of the screen.
3 Tap Dominant hand to move the assistive shortcut icon to a convenient location.
Accessing assistive menus
The assistive shortcut icon appears as a floating icon for easy access to the assistive menus
from any screen.
When you tap the assistive shortcut icon, the icon expands slightly and the assistive menus
appear on the icon. Tap the up or down arrow to move to other panels or swipe upwards or
downwards to select other menus.
Using the cursor
On the assistive menu, tap Cursor. You can control the screen using small finger movements
on the touch area. Drag your finger on the touch area to move the cursor. Also, tap the screen
to select items under the cursor.
Use the following options:
• / : Select an item or scroll left or right on the screen.
• / : Scroll up or down the screen.
• : Magnify the area where the cursor is located.
• : Move the touch area to another location.
• : Close the touch area.
Appendix
138
To change the cursor settings, open the Apps screen, tap Settings → Accessibility →
Dexterity and interaction → Assistant menu. Then, customise settings in Touchpad and
cursor settings.
Using enhanced assistive menus
Set the device to display enhanced assistive menus for selected apps.
On the Apps screen, tap Settings → Accessibility → Dexterity and interaction → Assistant
menu → Assistant plus, tap the switch to activate it, and then select apps.
Turning on the screen with the air gesture feature
Use the air gesture feature to turn on the screen by moving your hand above the sensor at
the top of the device. You can turn on the screen without pressing a key. When you use this
feature, place the device on a flat surface with the screen facing upwards or hold the device
securely to prevent it from moving.
On the Apps screen, tap Settings → Accessibility → Dexterity and interaction → Gesture
wake up, and then tap the switch to activate it.
Setting tap and hold delay options
Set the recognition time for tapping and holding the screen.
On the Apps screen, tap Settings → Accessibility → Dexterity and interaction → Tap and
hold delay, and then select an option.
Interaction control
Activate interaction control mode to restrict the device’s reaction to inputs while using apps.
1 On the Apps screen, tap Settings → Accessibility → Dexterity and interaction →
Interaction control.
2 Tap the switch to activate it.
3 Press and hold the Home key and the Volume key down simultaneously while using an
app.
Appendix
139
4 Adjust the size of the frame or draw a line around an area that you want to restrict.
5 Tap DONE.
The device displays the restricted area. The restricted area will not react when you touch
it and the device’s hard keys will be disabled.
To deactivate interaction control mode, press and hold the Home key and the Volume key
down simultaneously.
Direction lock
Create a directional combination to unlock the screen.
1 On the Apps screen, tap Settings → Accessibility → Direction lock and tap the switch
to activate it.
2 Drag your finger up, down, left, or right more than four times, and then tap CONTINUE.
3 Draw the direction combination again to verify it and tap CONFIRM.
4 Set a backup PIN to unlock the screen when you forget the combination.
Notification reminder
Set the device to alert you to notifications that you have not checked at the interval.
On the Apps screen, tap Settings → Accessibility → Notification reminder, and then tap
the switch to activate it.
To set the device to vibrate when you have unchecked notifications, tap the Vibrate switch to
activate it.
To set the device to turn on the LED indicator when you have unchecked notifications while
the screen is turned off, tap the LED indicator switch to activate it.
To set an interval between alerts, tap Reminder interval.
To set apps to alert you to notifications, select apps under Select applications.
Appendix
140
Answering or ending calls
Change the method of answering or ending calls.
On the Apps screen, tap Settings → Accessibility → Answering and ending calls.
Select the desired method.
Using single tap mode
When an alarm sounds or a call comes in, tap the button to stop the alarm or answer the call
instead of dragging the button.
On the Apps screen, tap Settings → Accessibility, and then tap the Single tap mode switch
to activate it.
Managing accessibility settings
Saving accessibility settings in a file
Export the current accessibility settings in a file.
On the Apps screen, tap Settings → Accessibility → Manage accessibility → Import/
Export → Export to My Files.
Importing an accessibility settings file
Import an accessibility settings file and update the current settings.
On the Apps screen, tap Settings → Accessibility → Manage accessibility → Import/
Export → Import from My Files. Select a file to import and tap DONE. The accessibility
settings will be updated according to the imported file.
Sharing accessibility settings files
Share accessibility settings files with others via email, Wi-Fi Direct, Bluetooth, and more.
On the Apps screen, tap Settings → Accessibility → Manage accessibility → Share via.
Then, select the accessibility files and tap DONE. Select a sharing method and follow the onscreen
instructions to share the files.
Appendix
141
Troubleshooting
Before contacting a Samsung Service Centre, please attempt the following solutions. Some
situations may not apply to your device.
When you turn on your device or while you are using the device, it
prompts you to enter one of the following codes:
• Password: When the device lock feature is enabled, you must enter the password you set
for the device.
• PIN: When using the device for the first time or when the PIN requirement is enabled, you
must enter the PIN supplied with the SIM or USIM card. You can disable this feature by
using the Lock SIM card menu.
• PUK: Your SIM or USIM card is blocked, usually as a result of entering your PIN incorrectly
several times. You must enter the PUK supplied by your service provider.
• PIN2: When you access a menu requiring the PIN2, you must enter the PIN2 supplied with
the SIM or USIM card. For more information, contact your service provider.
Your device displays network or service error messages
• When you are in areas with weak signals or poor reception, you may lose reception. Move
to another area and try again. While moving, error messages may appear repeatedly.
• You cannot access some options without a subscription. For more information, contact
your service provider.
Your device does not turn on
When the battery is completely discharged, your device will not turn on. Fully charge the
battery before turning on the device.
Appendix
142
The touchscreen responds slowly or improperly
• If you attach a protective cover or optional accessories to the touchscreen, the
touchscreen may not function properly.
• If you are wearing gloves, if your hands are not clean while touching the touchscreen,
or if you tap the screen with sharp objects or your fingertips, the touchscreen may
malfunction.
• The touchscreen may malfunction in humid conditions or when exposed to water.
• Restart your device to clear any temporary software bugs.
• Ensure that your device software is updated to the latest version.
• If the touchscreen is scratched or damaged, visit a Samsung Service Centre.
Your device freezes or has fatal errors
If your device freezes or hangs, you may need to close apps or turn off the device and turn
it on again. If your device is frozen and unresponsive, press and hold the Power key and the
Volume key down simultaneously for more than 7 seconds to restart it.
If this does not solve the problem, perform a factory data reset. On the Apps screen,
tap Settings → Backup and reset → Factory data reset → RESET DEVICE → ERASE
EVERYTHING. Before performing the factory data reset, remember to make backup copies of
all important data stored in the device.
If the problem is still not resolved, contact a Samsung Service Centre.
Calls are not connected
• Ensure that you have accessed the right cellular network.
• Ensure that you have not set call barring for the phone number you are dialling.
• Ensure that you have not set call barring for the incoming phone number.
Others cannot hear you speaking on a call
• Ensure that you are not covering the built-in microphone.
• Ensure that the microphone is close to your mouth.
• If using a headset, ensure that it is properly connected.
Appendix
143
Sound echoes during a call
Adjust the volume by pressing the Volume key or move to another area.
A cellular network or the Internet is often disconnected or audio
quality is poor
• Ensure that you are not blocking the device’s internal antenna.
• When you are in areas with weak signals or poor reception, you may lose reception. You
may have connectivity problems due to issues with the service provider’s base station.
Move to another area and try again.
• When using the device while moving, wireless network services may be disabled due to
issues with the service provider’s network.
The battery icon is empty
Your battery is low. Charge the battery.
The battery does not charge properly (For Samsung-approved
chargers)
• Ensure that the charger is connected properly.
• Visit a Samsung Service Centre and have the battery replaced.
The battery depletes faster than when first purchased
• When you expose the device or the battery to very cold or very hot temperatures, the
useful charge may be reduced.
• Battery consumption increases when you use messaging features or some apps, such as
games or the Internet.
• The battery is consumable and the useful charge will get shorter over time.
Your device is hot to the touch
When you use apps that require more power or use apps on your device for an extended
period of time, your device may feel hot to the touch. This is normal and should not affect
your device’s lifespan or performance.
Appendix
144
Error messages appear when launching the camera
Your device must have sufficient available memory and battery power to operate the camera
app. If you receive error messages when launching the camera, try the following:
• Charge the battery.
• Free some memory by transferring files to a computer or deleting files from your device.
• Restart the device. If you are still having trouble with the camera app after trying these
tips, contact a Samsung Service Centre.
Photo quality is poorer than the preview
• The quality of your photos may vary, depending on the surroundings and the
photography techniques you use.
• If you take photos in dark areas, at night, or indoors, image noise may occur or images
may be out of focus.
Error messages appear when opening multimedia files
If you receive error messages or multimedia files do not play when you open them on your
device, try the following:
• Free some memory by transferring files to a computer or deleting files from your device.
• Ensure that the music file is not Digital Rights Management (DRM)-protected. If the file is
DRM-protected, ensure that you have the appropriate licence or key to play the file.
• Ensure that the file formats are supported by the device. If a file format is not supported,
such as DivX or AC3, install an app that supports it. To confirm the file formats that your
device supports, visit www.samsung.com.
• Your device supports photos and videos captured with the device. Photos and videos
captured by other devices may not work properly.
• Your device supports multimedia files that are authorised by your network service
provider or providers of additional services. Some content circulated on the Internet,
such as ringtones, videos, or wallpapers, may not work properly.
Appendix
145
Another Bluetooth device is not located
• Ensure that the Bluetooth wireless feature is activated on your device.
• Ensure that the Bluetooth wireless feature is activated on the device you wish to connect
to.
• Ensure that your device and the other Bluetooth device are within the maximum
Bluetooth range (10 m).
If the tips above do not solve the problem, contact a Samsung Service Centre.
A connection is not established when you connect the device to a
computer
• Ensure that the USB cable you are using is compatible with your device.
• Ensure that you have the proper driver installed and updated on your computer.
• If you are a Windows XP user, ensure that you have Windows XP Service Pack 3 or higher
installed on your computer.
Your device cannot find your current location
GPS signals may be obstructed in some locations, such as indoors. Set the device to use Wi-Fi
or a mobile network to find your current location in these situations.
Data stored in the device has been lost
Always make backup copies of all important data stored in the device. Otherwise, you cannot
restore data if it is corrupted or lost. Samsung is not responsible for the loss of data stored in
the device.
A small gap appears around the outside of the device case
• This gap is a necessary manufacturing feature and some minor rocking or vibration of
parts may occur.
• Over time, friction between parts may cause this gap to expand slightly.
Copyright
Copyright © 2015 Samsung Electronics
This manual is protected under international copyright laws.
No part of this manual may be reproduced, distributed, translated, or transmitted in any form
or by any means, electronic or mechanical, including photocopying, recording, or storing
in any information storage and retrieval system, without the prior written permission of
Samsung Electronics.
Trademarks
• SAMSUNG and the SAMSUNG logo are registered trademarks of Samsung Electronics.
• Bluetooth® is a registered trademark of Bluetooth SIG, Inc. worldwide.
• Wi-Fi®, Wi-Fi Protected Setup™, Wi-Fi Direct™, Wi-Fi CERTIFIED™, and the Wi-Fi logo are
registered trademarks of the Wi-Fi Alliance.
• All other trademarks and copyrights are the property of their respective owners.
This manual is a draft version. Some content is subject to change.
www.samsung.com
User Manual
SM-G920F
SM-G920FQ
SM-G920I
English. 03/2015
2
Table of Contents
Basics
4 Read me first
5 Package contents
6 Device layout
8 SIM or USIM card
10 Battery
15 Turning the device on and off
16 Touchscreen
19 Home screen
25 Lock screen
26 Notification panel
29 Entering text
32 Screen capture
32 Opening apps
33 Multi window
38 Device and data management
42 Connecting to a TV
44 Sharing files with contacts
45 Emergency mode
Applications
46 Installing or uninstalling apps
47 Phone
50 Contacts
52 Messages
54 Internet
55 Email
56 Camera
72 Gallery
74 Smart Manager
76 S Planner
77 S Health
80 S Voice
82 Music
83 Video
84 Voice Recorder
86 My Files
87 Memo
87 Clock
89 Calculator
90 Google apps
Settings
92 Introduction
92 Wi-Fi
94 Bluetooth
96 Flight mode
96 Mobile hotspot and tethering
97 Data usage
98 Mobile networks
98 NFC and payment
101 More connection settings
103 Sounds and notifications
104 Display
104 Motions and gestures
Table of Contents
3
105 Applications
105 Wallpaper
105 Themes
106 Lock screen and security
110 Privacy and safety
113 Easy mode
114 Accessibility
114 Accounts
115 Backup and reset
116 Language and input
116 Battery
117 Storage
117 Date and time
118 User manual
118 About device
Appendix
119 Accessibility
134 Troubleshooting
4
Basics
Read me first
Please read this manual before using the device to ensure safe and proper use.
• Descriptions are based on the device’s default settings.
• Some content may differ from your device depending on the region, service provider,
model specifications, or device’s software.
• Content (high quality content) that requires high CPU and RAM usage will affect the
overall performance of the device. Apps related to the content may not work properly
depending on the device’s specifications and the environment that it is used in.
• Samsung is not liable for performance issues caused by apps supplied by providers other
than Samsung.
• Samsung is not liable for performance issues or incompatibilities caused by edited
registry settings or modified operating system software. Attempting to customise the
operating system may cause the device or apps to work improperly.
• Software, sound sources, wallpapers, images, and other media provided with this device
are licensed for limited use. Extracting and using these materials for commercial or other
purposes is an infringement of copyright laws. Users are entirely responsible for illegal
use of media.
• You may incur additional charges for data services, such as messaging, uploading and
downloading, auto-syncing, or using location services depending on your data plan. For
large data transfers, it is recommended to use the Wi-Fi feature.
• Default apps that come with the device are subject to updates and may no longer be
supported without prior notice. If you have questions about an app provided with
the device, contact a Samsung Service Centre. For user-installed apps, contact service
providers.
• Modifying the device’s operating system or installing softwares from unofficial sources
may result in device malfunctions and data corruption or loss. These actions are violations
of your Samsung licence agreement and will void your warranty.
Basics
5
• Depending on the region or model, some devices are required to receive approval from
the Federal Communications Commission (FCC). If your device is approved by the FCC,
you can view the FCC ID of the device. To view the FCC ID, tap Apps → Settings →
About device.
Instructional icons
Warning: situations that could cause injury to yourself or others
Caution: situations that could cause damage to your device or other equipment
Notice: notes, usage tips, or additional information
Package contents
Check the product box for the following items:
• Device
• Quick start guide
• The items supplied with the device and any available accessories may vary
depending on the region or service provider.
• The supplied items are designed only for this device and may not be compatible
with other devices.
• Appearances and specifications are subject to change without prior notice.
• You can purchase additional accessories from your local Samsung retailer. Make
sure they are compatible with the device before purchase.
• Use only Samsung-approved accessories. Using unapproved accessories may cause
the performance problems and malfunctions that are not covered by the warranty.
• Availability of all accessories is subject to change depending entirely on
manufacturing companies. For more information about available accessories, refer
to the Samsung website.
Basics
6
Device layout
Microphone
Loud speaker
Back key
Multipurpose jack
Front camera
Speaker
SIM card tray
Power key
Touchscreen
Recents key
Headset jack
Home key (Fingerprint
recognition sensor)
LED indicator
Proximity/Light sensor
Main antenna
Infrared port
Flash
Volume key
NFC antenna/Wireless
charging coil
Rear camera
Microphone GPS antenna
Basics
7
• Do not cover the antenna area with your hands or other objects. This may cause
connectivity problems or drain the battery.
• Using a Samsung-approved screen protector is recommended. Unapproved screen
protectors may cause the sensors to malfunction.
• Do not allow water to contact the touchscreen. The touchscreen may malfunction
in humid conditions or when exposed to water.
Keys
Key Function
Power
• Press and hold to turn the device on or off.
• Press to turn on or lock the screen.
Recents
• Tap to open the list of recent apps.
• Tap and hold to launch the split screen view.
Home
• Press to turn on the screen while the screen is locked.
• Press to return to the Home screen.
• Press and hold to launch Google.
Back • Tap to return to the previous screen.
Volume • Press to adjust the device volume.
Basics
8
SIM or USIM card
Installing the SIM or USIM card
Insert the SIM or USIM card provided by the mobile telephone service provider.
• Only nano-SIM cards work with the device.
• Some LTE services may not be available depending on the service provider. For
more information about service availability, contact your service provider.
1 Insert the ejection pin into the hole on the SIM card tray to loosen the tray.
Ensure that the ejection pin is perpendicular to the hole. Otherwise, the device may
be damaged.
Basics
9
2 Pull out the SIM card tray gently from the SIM card tray slot.
3 Place the SIM or USIM card on the SIM card tray with the gold-coloured contacts facing
downwards.
Use caution not to lose or let others use the SIM or USIM card. Samsung is not
responsible for any damages or inconveniences caused by lost or stolen cards.
4 Insert the SIM card tray back into the SIM card tray slot.
Removing the SIM or USIM card
1 Insert the ejection pin into the hole on the SIM card tray to loosen the tray.
2 Pull out the SIM card tray gently from the SIM card tray slot.
3 Remove the SIM or USIM card.
4 Insert the SIM card tray back into the SIM card tray slot.
Basics
10
Battery
Charging the battery
Charge the battery before using it for the first time or when it has been unused for extended
periods.
Use only Samsung-approved chargers, batteries, and cables. Unapproved chargers or
cables can cause the battery to explode or damage the device.
1 Connect the USB cable to the USB power adaptor, and then plug the end of the USB cable
into the multipurpose jack.
Connecting the charger improperly may cause serious damage to the device. Any
damage caused by misuse is not covered by the warranty.
2 Plug the USB power adaptor into an electric socket.
Basics
11
3 After fully charging, disconnect the device from the charger. First unplug the charger
from the device, and then unplug it from the electric socket.
To save energy, unplug the charger when not in use. The charger does not have a
power switch, so you must unplug the charger from the electric socket when not in
use to avoid wasting power. The charger should remain close to the electric socket
and easily accessible while charging.
Viewing the remaining charging time
While charging, open the Home screen and tap Apps → Settings → Battery.
The actual charging time may vary depending on the status of your device and the
charging conditions. The remaining charging time may not be displayed when you
charge the device in very cold or very hot conditions.
Reducing the battery consumption
Your device provides various options that help you conserve battery power.
• Optimise the device using the Smart manager.
• When you are not using the device, switch to sleep mode by pressing the Power key.
• Activate power saving mode.
• Close unnecessary apps.
• Deactivate the Bluetooth feature when not in use.
• Deactivate the Wi-Fi feature when not in use.
• Deactivate auto-syncing of apps.
• Decrease the backlight time.
• Decrease the screen brightness.
Basics
12
Battery charging tips and precautions
• When the battery power is low, the battery icon appears empty.
• If the battery is completely discharged, the device cannot be turned on immediately
when the charger is connected. Allow a depleted battery to charge for a few minutes
before turning on the device.
• If you use multiple apps at once, network apps, or apps that need a connection to
another device, the battery will drain quickly. To avoid disconnecting from the network
or losing power during a data transfer, always use these apps after fully charging the
battery.
• Using a power source other than the USB power adaptor, such as a computer, may result
in a slower charging speed due to a lower electric current.
• The device can be used while it is charging, but it may take longer to fully charge the
battery.
• If the device receives an unstable power supply while charging, the touchscreen may not
function. If this happens, unplug the charger from the device.
• While charging, the device and the charger may heat up. This is normal and should not
affect the device’s lifespan or performance. If the battery gets hotter than usual, the
charger may stop charging.
• If the device is not charging properly, take the device and the charger to a Samsung
Service Centre.
Basics
13
Fast charging
The device has a built-in fast charging feature. You can use this feature to charge the battery
more quickly while the device or its screen is turned off.
About Fast charging
• Fast charging uses battery charging technology that charges the battery faster by
increasing the charging power. The device supports Samsung’s Adaptive fast charging
feature and Qualcomm Quick Charge 2.0.
• To use Fast charging on your device, connect it to a battery charger that supports
Adaptive fast charging or Quick Charge 2.0.
Increasing the charging speed
To increase the charging speed, turn the device or its screen off when you charge the battery.
• While charging the battery when the device is turned off, the icon appears on the
screen.
• You cannot use the fast charging feature when the screen is turned on. Turn off the
screen to increase the charging speed.
• You cannot use the built-in fast charging feature when you charge the battery
using a standard battery charger.
• If the device heats up or the ambient air temperature rises, the charging speed may
decrease automatically. This is a normal operating condition to prevent damage to
the device.
Basics
14
Wireless charging
The device has a built-in wireless charging coil. You can charge the battery using a wireless
charger (sold separately).
1 Place the centre of the device’s back on the centre of the wireless charger.
You can check the remaining charging time on the screen. The actual remaining time
may vary depending on the charging conditions.
2 After fully charging, disconnect the device from the wireless charger.
• When there are foreign materials between the device and the wireless charger, the
device may not charge properly.
• If you use the wireless charger in areas with weak network signals, you may lose
network reception.
• Use Samsung-approved wireless chargers. If you use other wireless chargers, the
battery may not charge properly.
Power saving mode
Save the battery power by limiting the device’s functions.
On the Home screen, tap Apps → Settings → Battery → Power saving mode, and then tap
the switch to activate it.
To automatically activate power saving mode when the remaining battery power reaches the
preset level, tap Start power saving and select an option.
Basics
15
Ultra power saving mode
Use this mode to extend the device’s battery power. In ultra power saving mode, the device
performs the following:
• Displays colours on the screen as grey tones.
• Restricts the available apps to essential and selected apps only.
• Deactivates the mobile data connection when the screen turns off.
• Deactivates the Wi-Fi and Bluetooth features.
On the Home screen, tap Apps → Settings → Battery → Ultra power saving mode, and
then tap the switch to activate it.
To deactivate ultra power saving mode, tap MORE → Disable ultra power saving mode.
The usage time left shows the time remaining before the battery power runs
out. Usage time left may vary depending on your device settings and operating
conditions.
Turning the device on and off
Press and hold the Power key for a few seconds to turn on the device.
When you turn on your device for the first time or after performing a data reset, follow the onscreen
instructions to set up your device.
To turn off the device, press and hold the Power key, and then tap Power off.
• If your device is frozen and unresponsive, press and hold the Power key and the
Volume key down simultaneously for more than 7 seconds to restart it.
• Follow all posted warnings and directions from authorised personnel in areas
where the use of wireless devices is restricted, such as aeroplanes and hospitals.
Basics
16
Touchscreen
• Do not allow the touchscreen to come into contact with other electrical devices.
Electrostatic discharges can cause the touchscreen to malfunction.
• To avoid damaging the touchscreen, do not tap it with anything sharp or apply
excessive pressure to it with your fingertips.
• The device may not recognise touch inputs close to the edges of the screen, which
are outside of the touch input area.
• Leaving the touchscreen idle for extended periods may result in afterimages
(screen burn-in) or ghosting. Turn off the touchscreen when you do not use the
device.
• It is recommended to use fingers when you use the touchscreen.
Tapping
To open an app, to select a menu item, to press an on-screen button, or to enter a character
using the keyboard on the screen, tap it with your finger.
Basics
17
Tapping and holding
Tap and hold an item or the screen for more than 2 seconds to access available options.
Dragging
To move an item, tap and hold it and drag it to the target position.
Double-tapping
Double-tap on a webpage or image to zoom in. Double-tap again to return.
Basics
18
Swiping
Swipe to the left or right on the Home screen or the Apps screen to view other panels. Swipe
upwards or downwards to scroll through a webpage or a list of items, such as contacts.
Spreading and pinching
Spread two fingers apart on a webpage, map, or image to zoom in a part. Pinch to zoom out.
Basics
19
Home screen
Home screen
The Home screen is the starting point for accessing all of the device’s features. It displays
widgets, shortcuts to apps, and more.
To view other panels, swipe to the left or right, or tap one of the screen indicators at the
bottom of the screen.
A widget
An app A folder
Screen indicators
Favourite apps Apps screen icon
Basics
20
Home screen options
On the Home screen, tap and hold an empty area, or pinch your fingers together to access
the available options. Customise the Home screen by adding, deleting, or rearranging Home
screen panels. You can also set the Home screen wallpaper, add widgets to the Home screen,
and more.
• Wallpapers: Change the wallpaper settings for the Home screen and the locked screen.
• Widgets: Add widgets to the Home screen. Widgets are small apps that launch specific
app functions to provide information and convenient access on your Home screen.
• Themes: Change the device’s theme. Visual elements of interface, such as colours, icons,
and wallpapers, will change depending on the selected theme.
• Screen grid: Change the size of the grid to display more or less items on the Home
screen.
Basics
21
Flipboard Briefing
View the latest articles in various categories. You can get up to date on news that interests
you using this feature.
On the Home screen, tap or swipe to the right to open Flipboard Briefing. Swipe upwards
or downwards to browse articles in each news category.
To deactivate Flipboard Briefing, tap and hold an empty area on the Home screen. Then,
swipe to the right and deselect the tick box at the top of the Flipboard Briefing panel.
Adding items
Tap and hold an app or a folder from the Apps screen, and then drag it to the Home screen.
To add widgets, tap and hold an empty area on the Home screen, tap Widgets, tap and hold a
widget, and then drag it to the Home screen.
Moving and removing an item
Tap and hold an item on the Home screen, and then drag it to a new location.
To move the item to another panel, drag it to the side of the screen.
You can also move frequently used apps to the shortcuts area at the bottom of the Home
screen.
To remove an item, tap and hold the item. Then, drag it to Remove at the top of the screen.
Basics
22
Creating folders
1 On the Home screen, tap and hold an app, and then drag it over another app.
2 Drop the app when a folder frame appears around the apps.
A new folder containing the selected apps will be created.
3 Tap Enter folder name and enter a folder name.
To change the folder colour, tap .
To add more apps to the folder, tap and hold another app, and then drag it to the folder.
Managing panels
On the Home screen, tap and hold an empty area to add, move, or remove a panel.
To add a panel, swipe to the left, and then tap .
To move a panel, tap and hold a panel preview, and then drag it to a new location.
To remove a panel, tap and hold a panel preview, and then drag it to Remove at the top of
the screen.
To set a panel as the main Home screen, tap .
Basics
23
Apps screen
The Apps screen displays icons for all apps, including newly installed apps.
On the Home screen, tap Apps to open the Apps screen. To view other panels, swipe to the
left or right, or select a screen indicator at the bottom of the screen.
Moving items
On the Apps screen, tap EDIT. Tap and hold an item and drag it to a new location.
To move the item to another panel, drag it to the side of the screen.
Creating folders
This feature may not be available depending on the region or service provider.
1 On the Apps screen, tap EDIT.
2 Tap and hold an app, and then drag it over another app.
3 Drop the app when a folder frame appears around the apps.
A new folder containing the selected apps will be created.
Basics
24
4 Tap Enter folder name and enter a folder name.
To change the folder colour, tap .
To add more apps to the folder, tap and hold another app, and then drag it to the folder.
Indicator icons
Indicator icons appear on the status bar at the top of the screen. The icons listed in the table
below are most common.
The status bar may not appear at the top of the screen in some apps. To display the
status bar, drag down from the top of the screen.
Icon Meaning
No signal
Signal strength
Roaming (outside of normal service area)
GPRS network connected
EDGE network connected
UMTS network connected
HSDPA network connected
HSPA+ network connected
/ LTE network connected (LTE-enabled models)
Wi-Fi connected
Bluetooth feature activated
GPS activated
Call in progress
Missed call
New text or multimedia message
Alarm activated
Mute mode activated
Vibration mode activated
Basics
25
Icon Meaning
Flight mode activated
Error occurred or caution required
Battery power level
Lock screen
Pressing the Power key turns off the screen and locks it. Also, the screen turns off and
automatically locks if the device is not used for a specified period.
To unlock the screen, press the Power key or the Home key and swipe in any direction.
You can change the way that you lock the screen to prevent others from accessing your
personal information.
On the Apps screen, tap Settings → Lock screen and security → Screen lock type, and then
select a screen lock method. The device requires an unlock code whenever unlocking it.
If the unlock code is forgotten, take the device to a Samsung Service Centre to reset it.
Pattern
Draw a pattern by connecting four dots or more, and then draw the pattern again to verify it.
Set a backup PIN to unlock the screen when you forget the pattern.
Basics
26
PIN
A PIN consists of numbers only. Enter at least four numbers, and then enter the password
again to verify it.
Password
A password consists of characters and numbers. Enter at least four characters including
numbers and symbols, and then enter the password again to verify it.
Fingerprint
Register your fingerprints to unlock the screen. Refer to Fingerprint recognition for more
information.
Notification panel
Using the notification panel
When you receive new notifications, such as messages or missed calls, indicator icons appear
on the status bar. To see more information about the icons, open the notification panel and
view the details.
To open the notification panel, drag the status bar downwards. To close the notification panel,
swipe upwards on the screen.
Basics
27
You can use the following functions on the notification panel.
Launch Settings.
Launch S Finder.
Tap a notification and perform
various actions.
Clear all notifications.
Adjust the brightness.
Rearrange quick setting buttons.
Quick setting buttons
Launch Quick Connect.
Using quick setting buttons
Tap quick setting buttons to activate some features. Swipe to the left or right on the buttons
area to view more buttons. To view more detailed settings, tap and hold a button.
To rearrange buttons, tap EDIT, tap and hold a button, and then drag it to another location.
S Finder
Search for a wide variety of content with a keyword.
Searching for content on the device
Open the notification panel and tap S Finder.
Enter a keyword in the search field or tap and say a keyword.
To get more refined results, tap the filter buttons under the search field, and then select filter
details.
Basics
28
Setting search categories
You can set search categories to search for content in specific search fields.
Tap MORE → Select search locations and select categories.
Quick Connect
Automatically search for nearby devices and quickly connect to them.
• When connecting to a device that does not support the Quick connect feature,
ensure that Wi-Fi Direct or the Bluetooth feature is activated.
• Connection methods may vary depending on the type of connected devices or the
shared content.
Connecting to other devices
1 Open the notification panel and tap Quick Connect.
If you are using this feature for the first time, select a visibility option and tap ENABLE
QUICK CONNECT.
When the panel opens, the Wi-Fi and the Bluetooth features are activated automatically
and the device searches for nearby devices.
If you have installed Samsung Link on your device, the list of devices registered with
Samsung Link will appear at the top of the screen.
2 Select a device from the list and connect to it by following the on-screen instructions.
The next steps may vary depending on the connected device.
To change your device’s visibility setting, tap SETTINGS → Device visibility, and then
select an option.
Re-searching for devices
If the desired device does not appear in the list, search for the device.
Tap REFRESH and select the device from the list of detected devices.
Basics
29
Sharing content
Share content with the connected devices.
1 Open the notification panel and tap Quick Connect.
2 Select a device from the list of detected devices.
3 Tap Share content and select a media category.
4 Follow the on-screen instructions to send content to the connected device.
The next steps may vary depending on the selected media category.
Entering text
Keyboard layout
A keyboard appears automatically when you enter text to send messages, create memos, and
more.
Text entry is not supported in some languages. To enter text, you must change the
input language to one of the supported languages.
Break to the next line.
Delete a preceding character.
Enter punctuation marks.
Enter uppercase. For all caps, tap
it twice.
Change the keyboard settings. Enter a space.
Changing the input language
Tap → Select input languages, and then select the languages to use. When you select
two or more languages, you can switch between the input languages by swiping to the left or
right on the space key.
Basics
30
Changing the keyboard layout
Tap , select a language under Input languages, and then select a keyboard layout to use.
On 3x4 keyboard, a key has three or four characters. To enter a character, tap the
corresponding key repeatedly until the desired character appears.
Additional keyboard functions
Tap and hold to use various functions. Other icons may appear instead of the icon
depending on the last function that was used.
• : Enter text by voice.
Change the language.
Open the keyboard.
Start or pause entering text by
voice.
• : Add an item from the clipboard.
• : Enter emoticons.
• : Switch to the floating keyboard. You can move the keyboard to another location by
dragging the tab.
Switch to the standard keyboard.
• : Change the keyboard settings.
Basics
31
Copying and pasting
1 Tap and hold over text.
2 Drag or to select the desired text, or tap Select all to select all text.
3 Tap Copy or Cut.
The selected text is copied to the clipboard.
4 Place the cursor where the text is to be inserted and tap → Paste.
To paste text that you have previously copied, tap Clipboard and select the text.
Dictionary
Look up definitions for words while using certain features, such as when browsing webpages.
1 Tap and hold over a word that you want to look up.
If the word you want to look up is not selected, drag or to select the desired text.
2 Tap Dictionary on the options list.
If a dictionary is not preinstalled on the device, tap next to a dictionary to download it.
3 View the definition in the dictionary pop-up window.
To switch to the full screen view, tap . Tap the definition on the screen to view more
definitions. In the detailed view, tap to add the word to your favourite words list or tap
SEARCH WEB to use the word as a search term.
Basics
32
Screen capture
Capture a screenshot while using the device.
Press and hold the Home key and the Power key simultaneously. You can view captured
images in Gallery.
You can also capture screenshots by swiping your hand to the left or right across the screen.
Refer to Motions and gestures for more information.
It is not possible to capture a screenshot while using some apps and features.
Opening apps
On the Home screen or the Apps screen, select an app icon to open it.
To open an app from the list of recently used apps, tap and select a recent app window.
Closing an app
Tap and drag a recent app window to the left or right to close it. To close all running apps,
tap CLOSE ALL.
Basics
33
Multi window
Introduction
Multi window lets you run two apps at the same time in the split screen view. You can also run
multiple apps at the same time in the pop-up view.
Some apps may not support this feature.
Split screen view Pop-up view
Basics
34
Split screen view
1 Tap to open the list of recently used apps.
2 Swipe upwards or downwards and tap on a recent app window.
The selected app will launch in the upper window.
3 Select another app to launch.
You can also launch the split screen view by tapping and holding .
Basics
35
Using additional options
When using apps in the split screen view, select an app window and tap the circle between
the app windows to access the following options:
• : Switch locations between app windows.
• : Drag and drop text or copied images from one window to another. Tap and hold an
item in the selected window and drag it to a location in another window.
Some apps may not support this feature.
Basics
36
• : Minimise the window.
• : Maximise the window.
• : Close the app.
Adjusting the window size
Drag the circle between the app windows up or down to adjust the size of the windows.
Pop-up view
1 On the Apps screen, launch an app to use in the pop-up view.
2 Drag down diagonally from either end of the top edge.
The app screen will appear in the pop-up view.
Minimise the window.
Close the app.
Maximise the window.
Drag and drop content.
Basics
37
Moving pop-up windows
To move a pop-up window, tap and hold the circle on a window and drag it to a new location.
Launching the pop-up view from the split screen view
1 On the split screen view, tap an app window to launch it in the pop-up view.
2 Tap and hold the circle between the app windows.
The selected app will launch in a pop-up window.
Basics
38
Device and data management
Transferring data from your previous device
You can transfer data from a previous device to your new device via Samsung Smart Switch.
The following versions of Samsung Smart Switch are available.
• Mobile version (Smart Switch Mobile): Transfer data between mobile devices. You can
download the app from Galaxy Apps or Play Store.
• Computer version: Transfer data between your device and a computer. You can download
the app from www.samsung.com/smartswitch.
• Samsung Smart Switch is not supported on some devices or computers.
• Limitations apply. Visit www.samsung.com/smartswitch for details. Samsung
takes copyright seriously. Only transfer content that you own or have the right to
transfer.
Transferring data from a mobile device
Transfer data from your previous device to your new device.
The following actions are an example of transferring data from your previous Android device.
To import data from a mobile device with a different operating system, refer to the on-screen
instructions.
1 When you turn on your new device for the first time, tap DOWNLOAD AND OPEN in the
Smart Switch installation pop-up window to install the app.
If the Smart Switch installation pop-up window does not appear on the screen, you
can download the app from Galaxy Apps or Play Store.
2 On your previous device, download and install Smart Switch from Galaxy Apps or Play
Store.
3 Launch Smart Switch Mobile on both devices.
4 On your previous device, tap ANDROID TO GALAXY → SEND CONTENT.
The devices will automatically connect.
Basics
39
5 On your previous device, select data to send to your new device and tap SEND.
6 On your new device, tap RECEIVE on the connection request pop-up window to receive
the data.
The data transfer will begin.
7 On both devices, tap FINISH when the data transfer is complete.
Transferring data from a computer
Back up data from your previous device to a computer and import the data to your new
device.
1 On the computer, visit www.samsung.com/smartswitch to download Smart Switch.
2 On the computer, launch Smart Switch.
If your previous device is not a Samsung device, back up data to a computer using a
program provided by the device’s manufacturer. Then, skip to the fifth step.
3 Connect your previous device to the computer using the USB cable.
4 On the computer, follow the on-screen instructions to back up data from the device.
Then, disconnect your previous device from the computer.
5 Connect your new device to the computer using the USB cable.
6 On the computer, follow the on-screen instructions to transfer data to your new device.
Basics
40
Using the device as a removable disk for data transfer
Move audio, video, image, or other types of files from the device to the computer, or vice
versa.
Do not disconnect the USB cable from the device when you are transferring files.
Doing so may cause data loss or device damage.
The devices may not connect properly if they are connected via a USB hub. Directly
connect the device to the computer’s USB port.
1 Connect the device to the computer using the USB cable.
2 Open the notification panel, and then tap Connected as a media device → Media
device (MTP).
Tap Camera (PTP) if your computer does not support Media Transfer Protocol (MTP) or
not have any appropriate driver installed.
3 Transfer files between your device and the computer.
Updating the device
The device can be updated to the latest software.
Updating over the air
The device can be directly updated to the latest software by the firmware over-the-air (FOTA)
service.
On the Apps screen, tap Settings → About device → Software update → Update now.
To automatically check for available updates, tap the Auto update switch to activate
it. To download updates only when a Wi-Fi connection is activated, tap the Wi-Fi only
switch to activate it.
Basics
41
Updating with Smart Switch
Connect the device to a computer and update the device to the latest software.
1 On the computer, visit www.samsung.com/smartswitch to download and install Smart
Switch.
2 On the computer, launch Smart Switch.
3 Connect the device to the computer using a USB cable.
4 On the computer, click the update button in the connection window.
• Do not turn off the computer or disconnect the USB cable while the device is
updating.
• While updating the device, do not connect other media devices to the computer.
Doing so may interfere with the update process. Before updating, disconnect all
other media devices from the computer.
Backing up and restoring data
Keep your personal information, app data, and settings safe on your device. You can back
up your sensitive information to a backup account and access it later. You must sign in to
your Google or Samsung account to back up or restore data. Refer to Accounts for more
information.
Using a Samsung account
On the Apps screen, tap Settings → Backup and reset → Back up my data, select the items
to back up, and then tap BACK UP NOW.
To set the device to automatically back up data, tap the Auto back up switch to activate it.
To restore data using a Samsung account, tap Restore. Current data will be deleted from the
device to restore the selected items.
Basics
42
Using a Google account
On the Apps screen, tap Settings → Backup and reset, and then tap the Back up my data
switch to activate it. Tap Backup account and select an account as the backup account.
To restore data using a Google account, tap the Automatic restore switch to activate it. When
you reinstall apps, backed up settings and data will be restored.
Performing a data reset
Delete all settings and data on the device. Before performing a factory data reset, ensure you
back up all important data stored on the device. Refer to Backing up and restoring data for
more information.
On the Apps screen, tap Settings → Backup and reset → Factory data reset → RESET
DEVICE → ERASE EVERYTHING. The device automatically restarts.
Connecting to a TV
Introduction
Register a TV to your device to easily share content between them.
• This feature is compatible with Samsung Smart TVs released in 2015 or later that
support the Bluetooth Low Energy (BLE) feature.
• Some files may be buffered during playback, depending on the network
connection.
Registering a TV
Register a TV to your device. Once you register a TV, you can easily share the screen between
your device and TV and use the Briefing on TV feature.
1 Turn on the TV and place your device close to the TV.
2 Open the notification panel and tap Quick Connect.
3 Select the TV and tap Register TV.
Basics
43
Sharing screen
You can mirror your device’s screen on a TV or vice versa.
Mirroring your device’s screen to a TV
When your device recognises the registered TV while you are watching a video, the icon
will appear on the device. Tap the icon to stream the video from your device to your TV.
If the TV is turned off and registered with Quick Connect, it will automatically turn on and
your device’s screen will appear on the TV screen.
This feature is supported by the default video player app only.
Mirroring a TV screen to your device
1 Open the notification panel and tap Quick Connect.
The registered TV appears on the list.
2 Select the registered TV.
3 Tap TV to mobile device.
The TV screen will appear on your device.
Using the Briefing on TV feature
Your registered TV turns on automatically according to the preset time set on your device and
displays the time, weather, and your schedule information on the screen. To use this feature,
your device and the TV must be connected to the same access point.
1 Open the notification panel and tap Quick Connect.
The registered TV will appear on the list.
Basics
44
2 Select the registered TV.
3 Tap Briefing on TV and set a time and day to display the briefing.
Time, weather, and schedule information will be displayed on the right side of the TV
screen at the preset time.
Sharing files with contacts
Share files with your contacts using the simple sharing feature. The following actions are an
example of sharing images.
This feature may not be available depending on the region or service provider.
1 Tap Gallery on the Apps screen.
2 Select an image.
3 Tap Share → Contacts.
If you are using this feature for the first time, read and agree to the terms and conditions.
Your phone number will be verified and then the simple sharing feature will be activated.
4 Select recipients and tap DONE.
• If the recipients’ devices do not support the simple sharing feature, a link to the
files will be sent to them via text message. The link will expire after a certain period.
• You may incur additional charges when sharing files via the mobile network.
Basics
45
Emergency mode
Emergency mode changes the screen to grey tones to reduce battery consumption. Some
apps and functions will be restricted. In emergency mode, you can make an emergency call,
send your current location information to others, sound an emergency alarm, and more.
Press and hold the Power key, and then tap Emergency mode.
Add more apps to use.
Make an emergency call.
Remaining battery power and
usage time left
Turn on the flash.
Send your current location Make a call.
information in a message.
Browse the Internet.
Access additional options.
Sound alarms.
The usage time left shows the time remaining before the battery power runs
out. Usage time left may vary depending on your device settings and operating
conditions.
Deactivating emergency mode
To deactivate emergency mode, tap MORE → Disable Emergency mode. Alternatively, press
and hold the Power key, and then tap Emergency mode.
46
Applications
Installing or uninstalling apps
Samsung Galaxy Apps
Purchase and download apps. You can download apps that are specialised for Samsung
Galaxy devices.
Tap Galaxy Apps on the Apps screen.
This app may not be available depending on the region or service provider.
Installing apps
Browse apps by category or tap SEARCH to search for a keyword.
Select an app to view information about it. To download free apps, tap INSTALL. To purchase
and download apps where charges apply, tap the price and follow the on-screen instructions.
To change the auto update settings, tap → Settings → Auto update apps, and
then select an option.
Play Store
Purchase and download apps.
Tap Play Store on the Apps screen.
Installing apps
Browse apps by category or tap to search for a keyword.
Select an app to view information about it. To download free apps, tap INSTALL. To purchase
and download apps where charges apply, tap the price and follow the on-screen instructions.
To change the auto update settings, tap → Settings → Auto-update apps, and
then select an option.
Applications
47
Managing apps
Uninstalling or disabling apps
On the Apps screen, tap EDIT. The icon appears on the apps that you can disable or
uninstall. Select an app and tap DISABLE or UNINSTALL. Alternatively, on the Apps screen,
tap Settings → Applications → Application manager, select an app, and then tap DISABLE
or UNINSTALL.
• DISABLE: Disable selected default apps that cannot be uninstalled from the device.
• UNINSTALL: Uninstall downloaded apps.
Enabling apps
On the Apps screen, tap Settings → Applications → Application manager, scroll to
DISABLED, select an app, and then tap ENABLE.
Phone
Introduction
Make or answer voice and video calls.
Making calls
1 Tap Phone on the Apps screen.
2 Enter a phone number.
If the keypad does not appear on the screen, tap to open the keypad.
Applications
48
3 Tap to make a voice call, or tap to make a video call.
Add the number to the contacts
list. Preview the phone number.
Hide the keypad.
Delete a preceding character.
Access additional options.
Making calls from the locked screen
On the locked screen, drag outside the large circle.
Making calls from call logs or contacts list
Tap LOG or CONTACTS, and then swipe to the right on a contact or a phone number to make
a call.
Making an international call
1 Tap to open the keypad if the keypad does not appear on the screen.
2 Tap and hold 0 until the + sign appears.
3 Enter the country code, area code, and phone number, and then tap .
Applications
49
Receiving calls
Answering a call
When a call comes in, drag outside the large circle.
Rejecting a call
When a call comes in, drag outside the large circle.
To send a message when rejecting an incoming call, drag the reject message bar upwards.
To create various rejection messages, open the Apps screen and tap Phone → MORE →
Settings → Call rejection → Rejection messages, enter a message, and then tap .
Missed calls
If a call is missed, the icon appears on the status bar. Open the notification panel to view
the list of missed calls. Alternatively, on the Apps screen, tap Phone → LOG to view missed
calls.
Options during calls
During a voice call
The following actions are available:
• Add call: Dial a second call.
• Extra volume: Increase the volume.
• Bluetooth: Switch to a Bluetooth headset if it is connected to the device.
• Speaker: Activate or deactivate the speakerphone. When using the speakerphone, speak
into the microphone at the top of the device and keep the device away from your ears.
• Keypad / Hide: Open or close the keypad.
• Mute: Turn off the microphone so that the other party cannot hear you.
• Email: Send an email.
• Message: Send a message.
Applications
50
• Internet: Browse webpages.
• Contacts: Open the contacts list.
• S Planner: Open the calendar.
• Memo: Create a memo.
• : End the current call.
During a video call
Tap the screen to use the following options:
• : Switch between the front and rear cameras.
• : End the current call.
• : Turn off the microphone so that the other party cannot hear you.
Contacts
Introduction
Create new contacts or manage contacts on the device.
Adding contacts
Creating contacts manually
1 Tap Contacts on the Apps screen.
2 Tap and select a storage location.
3 Enter contact information.
• : Add an image.
• / : Add or delete a contact field.
4 Tap SAVE.
Applications
51
To add a phone number to the contacts list from the keypad, open the Apps screen and tap
Phone. If the keypad does not appear on the screen, tap to open the keypad. Enter the
number and tap Add to Contacts.
To add a phone number to the contacts list from received calls or messages, open the Apps
screen and tap Phone → LOG → a contact.
Importing contacts
Import contacts from storage services to your device.
On the Apps screen, tap Contacts → MORE → Settings → Import/Export contacts →
IMPORT and select an import option.
Searching for contacts
On the Apps screen, tap Contacts.
Use one of the following search methods:
• Scroll up or down the contacts list.
• Drag a finger along the index at the right side of the contacts list to scroll through it
quickly.
• Tap the search field at the top of the contacts list and enter search criteria.
Once a contact is selected, take one of the following actions:
• : Add to favourite contacts.
• / : Make a voice or video call.
• : Compose a message.
• : Compose an email.
Applications
52
Sharing profile
Share your profile information, such as your photo and status message, with others using the
profile sharing feature.
• This feature may not be available depending on the region or service provider.
• This feature is only available for contacts who have activated the profile sharing
feature on their device.
On the Apps screen, tap Contacts → your profile → Profile sharing, and then tap the switch
to activate it. If you are using this feature for the first time, read and agree to the terms and
conditions. Your phone number will be verified and then the profile sharing feature will be
activated.
To set additional items to share, tap Shared profile info and select items.
To set a contact group to share your profile with, select a contact group under Share with.
Messages
Introduction
Send and view messages by conversation.
Sending messages
You may incur additional charges for sending messages when you are roaming.
1 Tap Messages on the Apps screen.
2 Tap .
Applications
53
3 Add recipients and enter a message.
Access additional options.
Enter a message.
Select contacts from the
contacts list.
Enter emoticons.
Enter recipients.
Attach files. Send the message.
4 Tap SEND to send the message.
Viewing messages
Messages are grouped into message threads by contact.
You may incur additional charges for receiving messages when you are roaming.
1 Tap Messages on the Apps screen.
2 On the messages list, select a contact.
3 View your conversation.
Applications
54
Internet
Browse the Internet to search for information and bookmark your favourite webpages to
access them conveniently.
1 Tap Internet on the Apps screen.
2 Tap the address field.
3 Enter the web address or a keyword, and then tap Go.
To view the toolbars, drag your finger downwards slightly on the screen.
Open the homepage.
Move to the previously visited
page.
Open the browser's tab
manager.
Access additional options.
Refresh the current webpage.
View your bookmarks, saved
webpages, and recent history.
Applications
55
Email
Setting up email accounts
Set up an email account when opening Email for the first time.
1 Tap Email on the Apps screen.
2 Enter the email address and password, and then tap NEXT.
To manually register a company email account, tap MANUAL SETUP.
3 Follow the on-screen instructions to complete the setup.
To set up another email account, tap MORE → Settings → Add account.
If you have more than one email account, you can set one as the default account. Tap MORE
→ Settings → MORE → Set default account.
Sending emails
1 Tap to compose an email.
2 Add recipients and enter an email text.
3 Tap SEND to send the mail.
Reading emails
On the emails list, tap an email to read.
Applications
56
Camera
Introduction
Take photos and record videos using various modes and settings.
Basic shooting
You can take photos or record videos. View your photos and videos in Gallery.
Tap Camera on the Apps screen.
Camera etiquette
• Do not take photos or record videos of other people without their permission.
• Do not take photos or record videos where legally prohibited.
• Do not take photos or record videos in places where you may violate other people’s
privacy.
Taking photos or recording videos
1 Tap the image on the preview screen where the camera should focus.
2 Tap to take a photo or tap to record a video.
• Spread two fingers apart on the screen to zoom in, and pinch to zoom out.
• To capture an image from the video while recording, tap Capture.
Applications
57
• To change the focus while recording a video, tap where you want to focus. To focus on
the centre of the screen, tap .
Camera settings
Hide or show the
setting icons.
Quick settings
Record a video.
Take a photo.
Switch between the
front and rear
cameras.
Shooting modes
Preview thumbnail Current mode
On the preview screen, swipe to the right to access the list of shooting modes. Or, swipe to
the left to view photos and videos you have captured.
• The preview screen may vary depending on the shooting mode and which camera
is being used.
• The camera automatically shuts off when unused.
• Make sure that the lens is clean. Otherwise, the device may not work properly in
some modes that require high resolutions.
• The front camera lens is suitable for taking wide-angle photos. Minor distortion
may occur in wide-angle photos and does not indicate device performance
problems.
• The maximum recording time may reduce when you record video at high
resolution.
Applications
58
Launching Camera on the locked screen
To quickly take photos, launch Camera on the locked screen.
On the locked screen, drag outside the large circle.
• This feature may not be available depending on the region or service provider.
• Some camera features are not available when you launch Camera from the locked
screen while the security features are activated.
Launching Camera quickly
Press the Home key twice quickly to launch Camera. Camera always launches in auto mode.
Some camera features are not available when you launch Camera from the locked
screen or when the screen is turned off while the security features are activated.
HDR (High Dynamic Range)
Take photos with rich colours and reproduce details even in bright and dark areas.
To activate or deactivate HDR mode, open the preview screen and tap until you reach the
desired option.
• : The device automatically activates HDR mode depending on the shooting
conditions.
• : HDR mode is activated.
• : HDR mode is deactivated.
Without effect With effect
Applications
59
Tracking AF
Set the device to track and automatically focus on a selected subject, even when the subject
is moving or when you change the shooting composition.
1 On the preview screen, tap and tap the Tracking AF switch to activate it.
2 Tap to return to the preview screen.
3 Tap the subject you want to track.
4 Tap to take a photo or tap to record a video.
Tracking a subject may fail in the following conditions:
• The subject is too big or too small.
• The subject moves excessively.
• The subject is backlit or you are shooting in a dark place.
• Colours or patterns on the subject and the background are the same.
• The subject includes horizontal patterns, such as blinds.
• The camera shakes excessively.
• The video resolution is high.
Auto mode
Auto mode allows the camera to evaluate the surroundings and determine the ideal mode
for the photo.
On the preview screen, tap MODE → Auto.
Locking the focus and exposure
Strong light/dark contrast and the subject being outside the auto focus area may make it
difficult to achieve an appropriate exposure. Lock the focus or exposure and then take a
photo. Tap and hold the area to focus, the AF/AE frame will appear on the area and the focus
and exposure setting will be locked. The setting remains locked even after you take a photo.
Applications
60
Pro mode
Take photos while manually adjusting various shooting options, such as exposure value and
ISO value.
On the preview screen, tap MODE → Pro. Select options and customise the settings, and
then tap to take a photo.
• : Select a colour effect. To create your own colour effect, tap Preset 1 or Preset 2.
• : Change the focus mode. Drag the adjustment bar towards or to manually
adjust the focus. To switch to auto focus mode, drag the adjustment bar towards AUTO.
• : Select an appropriate white balance, so images have a true-to-life colour range.
• : Select an ISO value. This controls camera light sensitivity. Low values are for
stationary or brightly lit objects. Higher values are for fast-moving or poorly lit objects.
However, higher ISO settings can result in noise in photos.
• : Change the exposure value. This determines how much light the camera’s sensor
receives. For low-light situations, use a higher exposure.
Saving the current setting as a custom setting
On the preview screen, tap Custom → Save current settings, select a name, and then tap
SAVE.
To apply the saved settings to the camera, open the preview screen, tap Custom, and then
select a name.
Applications
61
Separating the exposure area and the focus area
If bright light affects the contrast or the subject is outside the auto focus area, use this feature
to achieve an appropriate exposure. You can separate the exposure and focus areas and select
the exposure level you want for the subject.
1 On the preview screen, tap and hold the area to focus.
The AF/AE frame will appear on the focus area.
2 Drag the AF/AE frame to the exposure area.
The exposure area will be separated from the focus area.
Applications
62
Selective focus
Use the out-of-focus effect to make specific objects stand out in a photo.
1 On the preview screen, tap MODE → Selective focus.
2 Tap the image on the preview screen where the camera should focus.
3 Tap to take a photo.
4 Tap the preview thumbnail.
5 Tap and select one of the following:
• Near focus: Make the subject stand out and blur the background around the subject.
• Far focus: Blur the subject and make the background stand out around the subject.
• Pan focus: Make the subject and its background stand out.
6 Tap SAVE.
• It is recommended that you position subjects within 50 cm of the device. Position
the subject that you want to focus on close to the device.
• When taking photos, ensure there is sufficient distance between the subject
and the background. The distance should be more than three times the distance
between the device and the subject.
• The quality of photos taken by the device can be affected in the following
conditions:
– The device or the subject is moving.
– There is strong background light, low levels of light, or you are taking photos
indoors.
– The subject or background has no pattern, or consists of a plain colour.
Applications
63
Panorama
Take a series of photos horizontally or vertically and then stitch them together to create a
wide scene.
On the preview screen, tap MODE → Panorama.
To get the best shots using panorama mode, follow these tips:
• Move the camera slowly in one direction.
• Keep the image within the frame on the camera’s viewfinder.
• Avoid taking photos of indistinct backgrounds, such as an empty sky or a plain
wall.
Slow motion
Record a video for viewing it in slow motion. You can specify sections of your videos to be
played in slow motion.
The focal length may become shorter when using this mode.
1 On the preview screen, tap MODE → Slow motion.
2 Tap to start recording.
3 When you are finished recording, tap to stop.
4 On the preview screen, tap the preview thumbnail.
5 Tap .
The video will start playing with a randomly set slow motion section.
Applications
64
Editing slow motion sections
1 On the preview screen, tap the preview thumbnail.
2 Tap .
The video will start playing with a randomly set slow motion section.
3 Tap to pause playback.
4 Drag the start bracket and the end bracket to the desired point to trim segments of a
video.
5 Drag to select the area of the video to be played in slow motion.
To set a slow motion section more precisely, tap and hold , and then drag your finger
to the left or right to move through the section frame by frame.
Slow motion section
6 Tap the slow motion section and use the following options:
• Speed: Change the playback speed of the selected section.
• Split: Divide the section into two parts.
• Delete: Delete the section.
7 Tap to preview the video.
8 Tap EXPORT to save the video.
Applications
65
Fast motion
Record a video for viewing it in fast motion. You can specify sections of your videos to be
played in fast motion.
The focal length may become shorter when using this mode.
1 On the preview screen, tap MODE → Fast motion.
2 Tap to start recording.
3 When you are finished recording, tap to stop.
4 On the preview screen, tap the preview thumbnail.
5 Tap .
The video will start playing with a randomly set fast motion section.
Editing fast motion sections
1 On the preview screen, tap the preview thumbnail.
2 Tap .
The video will start playing with a randomly set fast motion section.
3 Tap to pause playback.
4 Drag the start bracket and the end bracket to the desired point to trim segments of a
video.
Applications
66
5 Drag to select the area of the video to be played in fast motion.
To set a fast motion section more precisely, tap and hold , and then drag your finger to
the left or right to move through the section frame by frame.
Fast motion section
6 Tap the fast motion section and use the following options:
• Speed: Change the playback speed of the selected section.
• Split: Divide the section into two parts.
• Delete: Delete the section.
7 Tap to preview the video.
8 Tap EXPORT to save the video.
Applications
67
Virtual Shot
Take a series of photos while circling a subject to create a view of the subject from multi
angles. You can view the subject from different angles by dragging your finger left or right on
the photo.
1 On the preview screen, tap MODE → Virtual Shot.
2 Place a subject in the centre of the preview screen and tap .
3 Move the device around the subject slowly in one direction to take more photos.
When the arrow becomes completely yellow or when you stop circling the subject, the
device will automatically stop taking photos.
Viewing virtual shot photos
1 On the preview screen, tap the preview thumbnail.
2 Tap .
3 Drag your finger left or right on the screen, or slowly swivel the device left or right to view
the subject from different angles.
Applications
68
Selfie
Take self-portraits with the front camera.
1 On the preview screen, tap to switch to the front camera for self-portraits.
2 Tap MODE → Selfie.
3 Face the front camera lens.
4 When the device detects your face, tap the sensor on the back of the device to take a
photo of yourself. You can also tap the screen to take a photo.
To take a photo using your palm, tap and tap the Gesture control switch to activate it.
Show your palm to the front camera. After recognising your palm, the device will take a
photo after two seconds.
Applications
69
Wide selfie
Take a wide self-portrait to include more people in the photo and avoid leaving people out.
1 On the preview screen, tap to switch to the front camera for self-portraits.
2 Tap MODE → Wide selfie.
3 Face the front camera lens.
4 When the device detects your face, tap the sensor on the back of the device to take a
photo of yourself. You can also tap the screen to take a photo.
To take a photo using your palm, tap and tap the Gesture control switch to activate it.
Show your palm to the front camera. After recognising your palm, the device will take a
photo after two seconds.
5 Slowly swivel the device left and then right or vice versa to take a wide self-portrait.
The device will take additional photos when the white frame moves to each end of the
viewfinder window.
• Make sure to keep the white frame inside the viewfinder window.
• The subjects should remain still while taking wide self-portraits.
• The resolution of a photo may be affected by lighting conditions.
• The top and bottom parts of the image displayed on the preview screen may be
cut out of the photo depending on the shooting conditions.
Applications
70
Interval shot
Take series of self-portraits at an interval and save photos you want.
1 On the preview screen, tap to switch to the front camera for self-portraits.
2 Tap MODE → Interval shot.
3 When the device detects your face, tap the sensor on the back of the device to take a
photo of yourself. You can also tap the screen to take a photo.
The device will take four photos at the two-second intervals.
To take a photo using your palm, tap and tap the Gesture control switch to activate it.
Show your palm to the front camera. After recognising your palm, the device will take a
photo after two seconds.
4 Tick photos you want to save and tap SAVE.
Downloading modes
Download more shooting modes from Galaxy Apps.
On the preview screen, tap MODE → Download.
Some downloaded shooting modes do not have access to every feature. Swiping
right to view the modes list and swiping left to view captured images and videos may
not be available.
Applications
71
Camera settings
Quick settings
On the preview screen, use the following quick settings.
The available options may vary depending on the shooting mode and which camera
is being used.
• : Select a filter effect to use when taking photos or recording videos. To download
more effects, tap Download.
• : Use this to take photos with rich colours and reproduce details even in bright and
dark areas.
• : Select a metering method. This determines how light values are calculated. Centreweighted
uses the light in the centre portion of the shot to calculate the exposure of
the shot. Spot uses the light in a concentrated centre area of the shot to calculate the
exposure of the shot. Matrix averages the entire scene.
• : Select the length of the delay before the camera automatically takes a photo.
• : Adjust the slide bar to take a photo with lightened faces for gentler images.
• : Activate or deactivate the flash.
Camera settings
On the preview screen, tap .
The available options may vary depending on the shooting mode and which camera
is being used.
• Picture size (rear) / Picture size (front): Select a resolution for photos. Using a higher
resolution will result in higher quality photos, but they will take up more memory.
• Video size (rear) / Video size (front): Select a resolution for videos. Using a higher
resolution will result in higher quality videos, but they will take up more memory.
• Gesture control: Set the device to detect your palm, so you can use it to take selfportraits.
• Save as horizontally flipped: Invert the image to create a mirror-image of the original
scene, when taking photos with the front camera.
Applications
72
• Tracking AF: Set the device to track and automatically focus on a selected subject, even
when the subject or camera moves.
• Video stabilisation: Activate anti-shake to reduce or eliminate blurriness resulting from
camera shake while recording a video.
• Grid lines: Display viewfinder guides to help composition when selecting subjects.
• Location tags: Attach a GPS location tag to the photo.
• GPS signal strength may decrease in locations where the signal is obstructed, such
as between buildings or in low-lying areas, or in poor weather conditions.
• Your location may appear on your photos when you upload them to the Internet.
To avoid this, deactivate the location tag setting.
• Review pictures: Set the device to show photos after capturing them.
• Quick launch: Set the device to launch the camera by pressing the Home key twice
quickly.
• Voice control: Set the device to take photos or record videos with voice commands.
You can say “Smile”, “Cheese”, “Capture”, or “Shoot” to take a photo. To record a video, say
“Record video.”
• Volume keys function: Set the device to use the Volume key to control the shutter or
zoom function.
• Reset settings: Reset the camera settings.
Gallery
Introduction
View and manage photos and videos stored in the device.
Viewing images or videos
1 Tap Gallery on the Apps screen.
Applications
73
2 Select an image or a video.
Video files show the icon on the preview thumbnail. To play a video, tap .
Move to the previous screen. More options
Add the image to favourites.
Share the image with others.
Delete the image.
Modify the image.
To hide or show the menus, tap the screen.
Deleting images or videos
Deleting an image or a video
Select an image or a video and tap Delete at the bottom of the screen.
Deleting multiple images and videos
1 On the Gallery main screen, tap and hold an image or a video to delete.
2 Tick the images or videos to delete.
3 Tap DELETE.
Applications
74
Smart Manager
Introduction
The Smart manager provides an overview of the status of your device’s battery, storage, RAM,
and system security. You can also automatically optimise the device with one tap of your
finger.
Using the quick optimisation feature
On the Apps screen, tap Smart Manager → CLEAN ALL.
The quick optimisation feature improves device performance through the following actions.
• Identifying apps that use excessive battery power and clearing some memory.
• Deleting unnecessary files and closing apps running in the background.
• Scanning for malware and phishing attacks.
Applications
75
Using the Smart manager
On the Apps screen, tap Smart Manager and select a feature.
Battery
Check the remaining battery power and time to use the device. For devices with low battery
levels, conserve battery power by activating power saving features and closing apps that are
consuming an excessive amount of battery power.
The usage time left shows the time remaining before the battery power runs
out. Usage time left may vary depending on your device settings and operating
conditions.
Storage
Check the status of used and available memory capacity. You can delete unused and residual
files or uninstall apps that you do not use any more.
RAM
Check the amount of available RAM. You can close background apps and reduce the amount
of RAM you are using to speed up your device.
Device security
Check the device’s security status. This feature scans your device for malware and blocks
phishing attacks and malicious websites.
Applications
76
S Planner
Introduction
Manage your schedule by entering upcoming events or tasks in your planner.
Creating events
1 Tap S Planner on the Apps screen.
2 Tap or double-tap a date.
If the date already has saved events or tasks in it, tap the date and tap .
3 Enter event details.
Select a calendar to use or sync
with.
Attach a map showing the
location of the event.
Enter the location of the event.
Enter a title.
Set a start and end date for the
event.
Add more details.
Set an alarm.
4 Tap SAVE to save the event.
Applications
77
Creating tasks
1 Tap S Planner on the Apps screen.
2 Tap → Tasks.
3 Enter task details and tap TODAY or TOMORROW to set a due date.
To add more details, tap .
4 Tap SAVE to save the task.
Syncing events and tasks with your accounts
On the Apps screen, tap Settings → Accounts, select an account service, and then tap the
Sync Calendar switch to sync events and tasks with the account.
To add accounts to sync with, open the Apps screen and tap S Planner → MORE → Manage
calendars → Add account. Then, select an account to sync with and sign in. When an
account is added, a green circle is displayed next to the account name.
S Health
Introduction
S Health helps you manage your wellness and fitness. Set fitness goals, check your progress,
and keep track of your overall wellness and fitness.
Starting S Health
When running this app for the first time or restart it after performing a data reset, follow the
on-screen instructions to complete the setup.
1 Tap S Health on the Apps screen.
2 Follow the on-screen instructions to complete the setup.
Applications
78
Using S Health
You can view the key information from S Health menus and trackers to monitor your wellness
and fitness.
Tap S Health on the Apps screen.
Trackers
Goals and programmes
• GOALS: Set your daily fitness goals and view your progress.
• PROGRAMMES: Use customisable exercise programmes.
• TRACKERS: Monitor your activities, food intake, and body measurements.
To add trackers, goals, or programmes to the S Health screen, tap MORE → Manage items,
and then select items under TRACKERS, GOALS, or PROGRAMMES tab.
To access more information about S Health functions, tap MORE → Settings → Help.
Applications
79
Additional information
• S Health is intended for fitness and wellness purposes only and is not intended for use
in the diagnosis of disease or other conditions, or in the cure, mitigation, treatment, or
prevention of disease.
• The available functions, features and addable applications for S Health may vary from
country to country due to different local laws and regulations. You should check the
features and applications available in your specific region before use.
• S Health applications and its service can be changed or discontinued without prior
notice.
• The purpose for data collection is limited to providing the service that you have
requested, including providing additional information to enhance your wellness, sync
data, data analysis and statistics or to develop and provide better services. (But if you
sign in to your Samsung account from S Health, your data may be saved on the server
for data backup purposes.) Personal information may be stored until the completion of
such purposes. You can delete personal data stored by S Health by using the Reset data
option in the Settings menu. To delete any data you have shared with social networks or
transferred to storage devices, you must delete them separately.
• You may share and/or synchronize your data with additional Samsung services or
compatible third party services that you select, as well as with any of your other
connected devices. Access to S Health information by such additional services or third
party devices will only be permitted with your express approval.
• You assume full responsibility for the inappropriate use of data shared on social networks
or transmitted to others. Use caution when sharing your personal data with others.
• If the device is connected to measuring devices, verify the communication protocol to
confirm proper operation. If you use a wireless connection, such as Bluetooth or ANT+,
the device may be affected by electronic interference from other devices. Avoid using the
device near other devices that transmit radio waves.
• Please read Terms and Conditions and Privacy Policy of S Health carefully before using it.
Applications
80
S Voice
Introduction
Perform various tasks simply by speaking.
Setting a wake-up command
You can launch S Voice using your own wake-up command.
When launching S Voice for the first time, tap START and set your own wake-up command.
To change the wake-up command, open the Apps screen and tap S Voice. Then, tap →
Voice wake-up → Delete wake-up command to reset the current setting. Tap the switch, tap
Set wake-up command → START, and then follow the on-screen instructions.
To set the device to launch S Voice using the wake-up command while the device is locked,
tap and tap the Wake up in secured lock switch to activate it.
Using S Voice
1 Say the preset wake-up command.
Alternatively, on the Apps screen, tap S Voice.
When S Voice is launched, the device begins voice recognition.
This app may not be available depending on the region or service provider.
View examples of voice
commands.
S Voice settings
Applications
81
2 Say a voice command.
If the device recognises the command, the device will perform the corresponding action.
To repeat a voice command or say a different command, tap .
This app will close automatically if the device is not used for a specified period.
Tips for better voice recognition
• Speak clearly.
• Speak in quiet places.
• Do not use offensive or slang words.
• Avoid speaking in dialectal accents.
The device may not recognise your commands or may perform unwanted commands
depending on your surroundings or how you speak.
Setting the language
On the Apps screen, tap S Voice → → Language, and then select a language.
The selected language is applied to S Voice only, not to the language displayed on
the device.
Applications
82
Music
Listen to music sorted by category and customise playback settings.
Tap Music on the Apps screen.
Tap , select a category, and then select a song to play.
Tap the album image at the bottom of the screen to open the music player screen.
Change the repeat mode.
Skip to the next song. Tap and
hold to fast-forward.
Pause and resume playback.
Access additional options.
Adjust the volume.
Skip to the previous song. Tap
and hold to rewind.
Turn on shuffle.
Set the file as your favourite
song.
Open the playlist.
Applications
83
Video
Watch videos stored in the device and customise playback settings.
Tap Video on the Apps screen.
Select a video to play.
Change screen ratio.
Rewind or
fast-forward by
dragging the bar.
Skip to the previous
video. Tap and hold
to rewind.
Skip to the next
video. Tap and hold
to fast-forward.
Access additional
options.
Switch to the
pop-up video player.
Pause and resume
playback.
Adjust the volume.
Drag your finger up or down on the left side of the playback screen to adjust the brightness,
or drag your finger up or down on the right side of the playback screen to adjust the volume.
To rewind or fast-forward, swipe to the left or right on the playback screen.
Applications
84
Voice Recorder
Introduction
Use different recording modes for various situations, such as in an interview. The device can
convert your voice to text and distinguish between sound sources.
Recording voice memos
1 On the Apps screen, tap Tools → Voice Recorder.
2 Tap to start recording. Speak into the microphone.
Tap Pause to pause recording.
While recording a voice memo, tap Bookmark to insert a bookmark.
Change the recording mode.
Start recording.
3 Tap to finish recording.
Applications
85
Changing the recording mode
Tap to select a mode from the list.
• Standard: This is the normal recording mode. Voice memos recorded in this mode appear
with the icon next to them.
• Interview: The microphone is sensitive to sounds from two directions. In this mode, both
the top and the bottom of the device pick up equal amounts of sound. Voice memos
recorded in this mode appear with the icon next to them.
• Voice memo: The device records your voice and simultaneously converts it to on-screen
text. For best results, keep the device near your mouth and speak loudly and clearly in a
quiet place. Voice memos recorded in this mode appear with the icon next to them.
If the voice memo system language does not match the language you are speaking,
the device will not recognise your voice. Before using this feature, tap the current
language to set the voice memo system language.
Playing selected voice memos
When you review interview recordings, you can mute or unmute certain sound sources in the
recording.
1 On the Apps screen, tap Tools → Voice Recorder.
2 Tap Recordings and select a voice memo recorded in interview mode.
Applications
86
3 To mute certain sound sources, tap for the corresponding direction that sound is to be
muted.
The icon will change to and the sound will be muted.
Unmuted sound source
Muted sound source
My Files
Access and manage various files stored in the device or in other locations, such as cloud
storage services.
On the Apps screen, tap Tools → My Files.
• Category: View files by category.
• Local storage: View files stored in the device.
• Cloud storage: View files stored in the cloud storage service.
• STORAGE USAGE: View your device’s memory information.
To search for files or folder, tap SEARCH.
Applications
87
Memo
Create memos and organise them by category.
On the Apps screen, tap Tools → Memo.
Composing memos
Tap on the memos list and enter a memo. While composing a memo, use the following
options:
• Category: Create or set a category.
• Image: Insert images.
• Voice: Make a voice recording to insert.
• Tasks: Add tick boxes at the beginning of each row to create a list of tasks.
To save the memo, tap SAVE.
To edit a memo, tap a memo, and then tap the content of the memo.
Searching for memos
Tap SEARCH on the memos list and enter a keyword to search for memos that include the
keyword.
Clock
Introduction
Set alarms, check the current time in many cities around the world, time an event, or set a
specific duration.
Alarm
On the Apps screen, tap Clock → Alarm.
Applications
88
Setting alarms
Set an alarm time and tap SAVE.
To open the keypad to enter an alarm time, tap KEYPAD.
To set an alarm with various alarm options, tap OPTIONS, set alarm options, and then tap
SAVE.
To activate or deactivate alarms, tap the clock icon next to the alarm in the alarms list.
Stopping alarms
Tap DISMISS to stop an alarm. If you have previously enabled the snooze option, tap
SNOOZE to repeat the alarm after a specified length of time.
Deleting alarms
Tap on an alarm in the list of alarms.
World clock
On the Apps screen, tap Clock → World clock.
Creating clocks
Enter a city name or select a city from the globe, and then tap .
Deleting clocks
Tap on a clock.
Stopwatch
1 On the Apps screen, tap Clock → Stopwatch.
2 Tap START to time an event.
To record lap times while timing an event, tap LAP.
Applications
89
3 Tap STOP to stop timing.
To restart the timing, tap RESUME.
To clear lap times, tap RESET.
Timer
1 On the Apps screen, tap Clock → Timer.
2 Set the duration, and then tap START.
To open the keypad to enter the duration, tap KEYPAD.
3 Tap DISMISS when the timer goes off.
Calculator
Perform simple or complex calculations.
Tap Calculator on the Apps screen.
Rotate the device to landscape orientation to display the scientific calculator. If Screen
rotation is disabled, open the notification panel and tap Screen rotation to activate it.
To see the calculation history, tap HISTORY. To close the calculation history panel, tap
KEYPAD.
To clear the history, tap HISTORY → CLEAR HISTORY.
Applications
90
Google apps
Google provides entertainment, social network, and business apps. You may require a Google
account to access some apps. Refer to Accounts for more information.
To view more app information, access each app’s help menu.
Some apps may not be available or may be labelled differently depending on the
region or service provider.
Chrome
Search for information and browse webpages.
Gmail
Send or receive emails via the Google Mail service.
Google+
Share your news and follow updates that your family, friends, and others share. You can also
back up your photos and videos, and more.
Maps
Find your location on the map, search for locations, and view location information for various
places.
Play Music
Discover, listen to, and share music on your device.
Play Movies & TV
Watch videos stored on your device and download various content to watch from the Play
Store.
Play Books
Download various books from Play Store and read them.
Applications
91
Play Newsstand
Read news and magazines that interest you in one convenient location.
Play Games
Download games from Play Store and play them with others.
Drive
Store your content on the cloud, access it from anywhere, and share it with others.
YouTube
Watch or create videos and share them with others.
Photos
Manage photos, albums, and videos that you have saved on the device and uploaded to
Google+.
Hangouts
Chat with your friends individually or in groups and use images, emoticons, and video calls
while you are chatting.
Google
Search quickly for items on the Internet or your device.
Voice Search
Search quickly for items by saying a keyword or phrase.
Google Settings
Configure settings for some features provided by Google.
92
Settings
Introduction
Customise settings for functions and apps. You can make your device more personalised by
configuring various setting options.
On the Apps screen, tap Settings.
To search for settings by entering keywords, tap SEARCH.
To edit the list of frequently used settings, tap EDIT. Then, tick items to add or deselect items
to remove.
Wi-Fi
Connecting to a Wi-Fi network
Activate the Wi-Fi feature to connect to a Wi-Fi network and access the Internet or other
network devices.
• Your device uses a non-harmonised frequency and is intended for use in all
European countries. The WLAN can be operated in the EU without restriction
indoors, but cannot be operated outdoors.
• Turn off Wi-Fi to save the battery when not in use.
1 On the Settings screen, tap Wi-Fi, and then tap the switch to activate it.
2 Select a network from the Wi-Fi networks list.
Networks that require a password appear with a lock icon.
Settings
93
3 Tap CONNECT.
Once the device connects to a Wi-Fi network, the device will reconnect to that
network each time it is available without requiring a password. To prevent the device
connecting to the network automatically, select it from the list of networks and tap
FORGET.
Wi-Fi Direct
Wi-Fi Direct connects devices directly via a Wi-Fi network without requiring an access point.
1 On the Settings screen, tap Wi-Fi, and then tap the switch to activate it.
2 Tap Wi-Fi Direct.
The detected devices are listed.
If the device you want to connect to is not in the list, request that the device turns on its
Wi-Fi Direct feature.
3 Select a device to connect to.
The devices will be connected when the other device accepts the Wi-Fi Direct
connections request.
Sending and receiving data
You can share data, such as contacts or media files, with other devices. The following actions
are an example of sending an image to another device.
1 Tap Gallery on the Apps screen.
2 Select an image.
3 Tap Share → Wi-Fi Direct, select a device to transfer the image to, and then tap SHARE.
4 Accept the Wi-Fi Direct connection request on the other device.
If the devices are already connected, the image will be sent to the other device without
the connection request procedure.
Settings
94
Ending the device connection
1 Tap Wi-Fi on the Settings screen.
2 Tap Wi-Fi Direct.
The device displays the connected devices in the list.
3 Tap the device name to disconnect the devices.
Bluetooth
Introduction
Use Bluetooth to exchange data or media files with other Bluetooth-enabled devices.
• Samsung is not responsible for the loss, interception, or misuse of data sent or
received via Bluetooth.
• Always ensure that you share and receive data with devices that are trusted
and properly secured. If there are obstacles between the devices, the operating
distance may be reduced.
• Some devices, especially those that are not tested or approved by the Bluetooth
SIG, may be incompatible with your device.
• Do not use the Bluetooth feature for illegal purposes (for example, pirating copies
of files or illegally tapping communications for commercial purposes).
Samsung is not responsible for the repercussion of illegal use of the Bluetooth
feature.
Settings
95
Pairing with other Bluetooth devices
1 On the Settings screen, tap Bluetooth, and then tap the switch to activate it.
The detected devices are listed.
2 Select a device to pair with.
If your device has paired with the device before, tap the device name without confirming
the auto-generated passkey.
If the device you want to pair with is not in the list, request that the device turns on its
visibility option. Refer to the other device’s user manuals.
Your device is visible to other devices while the Bluetooth settings screen is open.
3 Accept the Bluetooth connection request on your device to confirm.
The devices will be connected when the other device accepts the Bluetooth connection
request.
Sending and receiving data
Many apps support data transfer via Bluetooth. You can share data, such as contacts or media
files, with other Bluetooth devices. The following actions are an example of sending an image
to another device.
1 Tap Gallery on the Apps screen.
2 Select an image.
3 Tap Share → Bluetooth, and then select a device to transfer the image to.
If the device you want to pair with is not in the list, request that the device turns on its
visibility option.
4 Accept the Bluetooth connection request on the other device.
Settings
96
Unpairing Bluetooth devices
1 Tap Bluetooth on the Settings screen.
The device displays the paired devices in the list.
2 Tap next to the device name to unpair.
3 Tap Unpair.
Flight mode
This disables all wireless functions on your device. You can use only non-network services.
On the Settings screen, tap Flight mode.
Mobile hotspot and tethering
Use the device as a mobile hotspot to share the device’s mobile data connection with other
devices when the network connection is not available. Connections can be made via Wi-Fi,
USB, or Bluetooth.
On the Settings screen, tap Mobile hotspot and tethering.
You may incur additional charges when using this feature.
• Mobile hotspot: Use the mobile hotspot to share the device’s mobile data connection
with computers or other devices.
• Bluetooth tethering: Use Bluetooth tethering to share the device’s mobile data
connection with computers or other devices via Bluetooth.
• USB tethering: Use USB tethering to share the device’s mobile data connection with
a computer via USB. When connected to a computer, the device is used as a wireless
modem for the computer.
Settings
97
Using the mobile hotspot
Use your device as a mobile hotspot to share your device’s mobile data connection with other
devices.
1 On the Settings screen, tap Mobile hotspot and tethering → Mobile hotspot.
2 Tap the switch to activate it.
The icon appears on the status bar. Other devices can find your device in the Wi-Fi
networks list.
To set a password for the mobile hotspot, tap MORE → Configure Mobile hotspot and
select the level of security. Then, enter a password and tap SAVE.
3 On the other device’s screen, search for and select your device from the Wi-Fi networks
list.
4 On the connected device, use the device’s mobile data connection to access the Internet.
Data usage
Keep track of your data usage amount and customise the settings for the limitation.
On the Settings screen, tap Data usage.
• Mobile data: Set the device to use data connections on any mobile network.
• Set mobile data limit: Set a limit for mobile data usage.
To change the monthly reset date for the monitoring period, tap → Change cycle.
Limiting data usage
1 On the Settings screen, tap Data usage and tap the Set mobile data limit switch to
activate it.
2 Drag the limit adjustment bar upwards or downwards to set the limit.
3 Drag the warning adjustment bar upwards or downwards to set a data usage alert level.
The device will alert you when the warning level is reached.
Settings
98
Mobile networks
Configure your mobile network settings.
On the Settings screen, tap Mobile networks.
• Data roaming: Set the device to use data connections when you are roaming.
• Access Point Names: Set up access point names (APNs).
• Network mode: Select a network type.
• Network operators: Search for available networks and manually register a network.
NFC and payment
Introduction
Your device allows you to read near field communication (NFC) tags that contain information
about products. You can also use this feature to make payments and buy tickets for
transportation or events after downloading the required apps.
The device contains a built-in NFC antenna. Handle the device carefully to avoid
damaging the NFC antenna.
Using the NFC feature
Use the NFC feature to send images or contacts to other devices, and read product
information from NFC tags. If you insert a SIM or USIM card that has a payment feature, you
can use the device to make payments conveniently.
1 On the Settings screen, tap NFC and payment → NFC, and then tap the switch to
activate it.
Settings
99
2 Place the NFC antenna area on the back of your device near an NFC tag.
The information from the tag appears.
Ensure that the device’s screen is unlocked. Otherwise, the device will not read NFC
tags or receive data.
Making payments with the NFC feature
Before you can use the NFC feature to make payments, you must register for the mobile
payment service. To register or get more information about the service, contact your service
provider.
1 On the Settings screen, tap NFC and payment → NFC, and then tap the switch to
activate it.
2 Touch the NFC antenna area on the back of your device to the NFC card reader.
To set the default payment app, open the settings screen and tap NFC and payment → Tap
& Pay, and then select an app.
The payment services list may not include all available payment apps.
Settings
100
Sending data
Allow data exchange when your device’s NFC antenna touches the other device’s NFC
antenna.
1 On the Settings screen, tap NFC and payment → NFC, and then tap the switch to
activate it.
2 Tap Android Beam and tap the switch to activate it.
3 Select an item and touch the other device’s NFC antenna to your device’s NFC antenna.
4 When Touch to beam. appears on the screen, tap your device’s screen to send the item.
If both devices try to send data simultaneously, the file transfer may fail.
Settings
101
More connection settings
Options
Customise settings to control other features.
On the Settings screen, tap More connection settings.
• Printing: Configure settings for printer plug-ins installed on the device. You can search
for available printers or add one manually to print files. Refer to Printing for more
information.
• MirrorLink: Use the MirrorLink feature to control your device’s MirrorLink apps on the
vehicle’s head unit monitor. Refer to MirrorLink for more information.
• Download booster: Set the device to download files larger than 30 MB, faster via Wi-Fi
and mobile networks simultaneously. Refer to Download booster for more information.
• VPN: Set up and connect to virtual private networks (VPNs).
• Default messaging app: Select the default app to use for messaging.
Printing
Configure settings for printer plug-ins installed on the device. You can connect the device to a
printer via Wi-Fi or Wi-Fi Direct, and print images or documents.
Some printers may not be compatible with the device.
Adding printer plug-ins
Add printer plug-ins for printers you want to connect the device to.
1 On the Settings screen, tap More connection settings → Printing → Download plug-in.
2 Search for a printer plug-in in Play Store.
3 Select a printer plug-in and install it.
Settings
102
4 Select the printer plug-in and tap the switch to activate it.
The device searches for printers that are connected to the same Wi-Fi network as your
device.
To add printers manually, tap MORE → Add printer → ADD PRINTER.
To change print settings, tap MORE → Printing settings.
Printing content
While viewing content, such as images or documents, tap Share → Print → → All
printers, and then select a printer.
MirrorLink
Connect your device to a vehicle to control your device’s MirrorLink apps on the vehicle’s
head unit monitor.
On the Settings screen, tap More connection settings → MirrorLink.
Your device is compatible with vehicles that support MirrorLink version 1.1 or higher.
Connecting your device to a vehicle via MirrorLink
When using this feature for the first time, connect the device to a Wi-Fi or mobile network.
1 Pair your device with a vehicle via Bluetooth.
Refer to Pairing with other Bluetooth devices for more information.
2 Connect your device to the vehicle using a USB cable.
When they are connected, access your device’s MirrorLink apps on the head unit monitor.
Ending the MirrorLink connection
Unplug the USB cable from your device and the vehicle.
Settings
103
Download booster
Set the device to download files larger than 30 MB, faster via Wi-Fi and mobile networks
simultaneously. A stronger Wi-Fi signal will provide a faster download speed.
On the Settings screen, tap More connection settings → Download booster.
• This feature may not be supported by some devices.
• You may incur additional charges when downloading files via the mobile network.
• When you download large files, the device may heat up. If the device exceeds a set
temperature, the feature will turn off.
• If network signals are unstable, the speed and performance of this feature may be
affected.
• If the Wi-Fi and mobile network connections have significantly different data
transfer speeds, the device may use only the fastest connection.
• This feature supports Hypertext Transmission Protocol (HTTP) 1.1 and Hypertext
Transmission Protocol Secure (HTTPS). The feature cannot be used with other
protocols, such as FTP.
Sounds and notifications
Change settings for various sounds on the device.
On the Settings screen, tap Sounds and notifications.
• Sound mode: Set the device to use sound mode or silent mode.
• Volume: Adjust the volume level for call ringtones, music and videos, system sounds, and
notifications.
• Ringtones and sounds: Change the ringtone and system sound settings.
• Vibrations: Change the vibration settings.
• Sound quality and effects: Configure additional sound settings.
• Do not disturb: Change settings for managing interruptions.
• Notifications on lock screen: Set whether or not to show the content of notifications on
the locked screen.
Settings
104
• App notifications: Change the notification settings for each app.
• LED indicator: Set the device to turn on the LED indicator when you have missed calls,
messages, or notifications.
Display
Change the display settings.
On the Settings screen, tap Display.
• Brightness: Adjust the brightness of the display.
• Font: Change the font size and type.
• Screen timeout: Set the length of time the device waits before turning off the display’s
backlight.
• Smart stay: Set the device to prevent the display backlight from turning off while you are
looking at the display.
• Screen mode: Change the screen mode to adjust the display’s colour and contrast.
• Daydream: Set the device to launch a screensaver when the device is charging or
connected to a desktop dock.
Motions and gestures
Activate the motion recognition feature and change the settings that control motion
recognition on your device.
On the Settings screen, tap Motions and gestures.
Excessive shaking or impact on the device may result in unintended inputs. Control
motions properly.
• Direct call: Set the device to make a voice call by picking up and holding the device near
your ear while viewing call, message, or contact details.
Settings
105
• Smart alert: Set the device to alert you if you have missed calls or new messages when
you pick up the device.
This feature may not work if the screen is turned on or the device is not on a flat
surface.
• Mute: Set the device to mute incoming calls or alarms by using palm motions or facing
the device’s screen downwards.
• Palm swipe to capture: Set the device to capture a screenshot when you swipe your
hand to the left or right across the screen. You can view the captured images in Gallery.
It is not possible to capture a screenshot while using some apps and features.
Applications
Manage the device’s apps and change their settings.
On the Settings screen, tap Applications.
• Application manager: View and manage the apps on your device.
• Default applications: Select a default settings for using apps.
• Application settings: Customise the settings for each app.
Wallpaper
Change the wallpaper settings for the Home screen and the locked screen.
On the Settings screen, tap Wallpaper.
Themes
Apply various themes to the device to change the visual elements of the Home screen, locked
screen, and icons.
On the Settings screen, tap Themes.
To download more themes, tap STORE.
Settings
106
Lock screen and security
Options
Change the settings for securing the device and the SIM or USIM card.
On the Settings screen, tap Lock screen and security.
The available options may vary depending on the screen lock method selected.
• Screen lock type: Change the screen lock method.
• Show information: Change settings for the items displayed on the locked screen.
• Unlock effect: Select an effect that you see when you unlock the screen.
• Fingerprint: Register your fingerprint to the device to secure the device or sign in to your
Samsung account. Refer to Fingerprint recognition for more information.
• Device security: Scan for and remove malware from the device. You can also activate the
real-time scanning feature to block phishing attacks and malicious websites.
• Find My Mobile: Activate or deactivate the Find My Mobile feature. This feature can
help you locate your device if it is lost or stolen. You can also access the Find my mobile
website (findmymobile.samsung.com) to track and control your lost or stolen device.
• Unknown sources: Set the device to allow the installation of apps from unknown
sources.
• Other security settings: Configure additional security settings.
Settings
107
Fingerprint recognition
In order for fingerprint recognition to function, your fingerprint information needs to be
registered and stored in your device. After registering, you can set the device to use your
fingerprint for the features below:
• Screen lock
• Web sign-in
• Verify Samsung account
• This feature may not be available depending on the region or service provider.
• Fingerprint recognition uses the unique characteristics of each fingerprint to
enhance the security of your device. The likelihood of the fingerprint sensor
confusing two different fingerprints is very low. However, in rare cases where
separate fingerprints are very similar the sensor may recognise them as identical.
For better fingerprint recognition
When you scan your fingerprints on the device, be aware of the following conditions that
may affect the feature’s performance:
• The Home key contains a fingerprint recognition sensor. Ensure that the Home key is not
scratched or damaged by metal objects, such as coins, keys, and necklaces.
• The screen protector supplied with the device may cause the fingerprint recognition
sensor to malfunction. Remove the screen protector to improve fingerprint sensitivity.
• Ensure that the fingerprint recognition area and your fingers are clean and dry.
• The device may not recognise fingerprints that are affected by wrinkles or scars.
• The device may not recognise fingerprints from small or thin fingers.
• If you bend your finger or use a fingertip, the device may not recognise your fingerprints.
Make sure to cover the entire Home key with your finger.
• To improve recognition performance, register fingerprints of the hand used most often to
perform tasks on the device.
• In dry environments, static electricity can build up in the device. Avoid using this feature
in dry environments or before using the feature, discharge static electricity by touching a
metal object.
Settings
108
Registering fingerprints
1 On the Settings screen, tap Lock screen and security → Fingerprint → Add fingerprint.
2 Place your finger on the Home key.
3 Lift your finger when the device vibrates, and then place it on the Home key again.
Repeat this action using the same finger until the fingerprint is registered.
4 When a screen appears requesting to register a backup password, enter the backup
password, and then tap CONTINUE.
5 Enter the backup password again to verify it, and then tap OK.
You can use the backup password instead of scanning your fingerprints.
6 When a fingerprint lock pop-up window appears, tap OK. You can use your fingerprints to
unlock the screen.
Deleting fingerprints
You can delete registered fingerprints using the fingerprint manager.
1 On the Settings screen, tap Lock screen and security → Fingerprint.
2 Scan a registered fingerprint, or tap BACKUP PASSWORD and enter the backup
password.
3 Tap EDIT.
4 Tick fingerprints to delete and tap REMOVE.
Settings
109
Changing the backup password
You can change the password that you use as a backup to scanning your fingerprints.
1 On the Settings screen, tap Lock screen and security → Fingerprint.
2 Scan a registered fingerprint, or tap BACKUP PASSWORD and enter the backup
password.
3 Tap Change backup password.
4 Enter a new password and tap CONTINUE.
5 Enter the password again and tap OK.
Verifying the Samsung account password
Use fingerprints to verify your Samsung account password. You can use a fingerprint instead
of entering your password, for example, when you purchase content from Galaxy Apps.
1 On the Settings screen, tap Lock screen and security → Fingerprint.
2 Scan a registered fingerprint, or tap BACKUP PASSWORD and enter the backup
password.
3 Tap the Verify Samsung account switch to activate it.
4 Sign in to your Samsung account.
Settings
110
Using fingerprints to sign in to accounts
You can use your fingerprints to sign in to webpages that support password saving.
1 On the Settings screen, tap Lock screen and security → Fingerprint.
2 Scan a registered fingerprint, or tap BACKUP PASSWORD and enter the backup
password.
3 Tap the Web sign-in switch to activate it.
4 Open a webpage that you want to sign in to with a fingerprint.
5 Enter your user name and password, and then tap the webpage’s sign in button.
6 Tick Sign in using your fingerprints and tap REMEMBER.
You can use your fingerprint to verify your account and password to sign in to the
webpage.
Privacy and safety
Options
Change the settings for maintaining your privacy and safety.
On the Settings screen, tap Privacy and safety.
• Location: Change settings for location information permissions.
• Private mode: Activate private mode to prevent others from accessing your personal
content. Refer to Private mode for more information.
• Report diagnostic info: Set the device to automatically send the device’s diagnostic and
usage information to Samsung.
• Send SOS messages: Set the device to send help messages by pressing the Power
key three times. You can also send sound recordings along with the message to the
recipients. Refer to Send SOS messages for more information.
Settings
111
Private mode
Hide personal content in your device to prevent others from accessing it.
In private mode, you can hide items in Gallery, Video, Music, Voice Recorder, My Files, and
Internet.
Activating private mode
1 On the Settings screen, tap Privacy and safety → Private mode, and then tap the switch
to activate it.
If you are activating private mode for the first time, follow the on-screen instructions to
set up a private mode access code.
2 Follow the on-screen instructions to enter the preset private mode access code.
Private mode is activated and the icon appears on the status bar.
You can view and access the hidden items only when private mode is activated. To
hide items stored in the private folder, deactivate private mode.
Hiding content
1 On the Apps screen, launch an app to hide items.
2 Select an item and tap MORE → Move to Private.
If private mode is not activated, follow the on-screen instructions to enter the preset
private mode access code.
The selected items will be moved to the private folder.
Settings
112
Viewing hidden content
You can view hidden items only when private mode is activated.
1 On the Settings screen, tap Privacy and safety → Private mode, and then tap the switch
to activate it.
2 Follow the on-screen instructions to enter the preset private mode access code.
3 On the Apps screen, tap Tools → My Files → Private.
Items moved to the private folder will appear on the screen. For bookmarks, you can view
them with the Internet app.
Unhiding content
1 In the private folder, tap and hold an item, and then tick items to unhide.
2 Tap MORE → Remove from Private.
3 Select a folder to move the items to, and then tap MOVE HERE.
The items will be moved to the selected folder.
Automatically deactivating private mode
You can set the device to automatically deactivate private mode each time the screen turns
off.
1 On the Settings screen, tap Privacy and safety → Private mode, and then tap the switch
to activate it.
2 Follow the on-screen instructions to enter the preset private mode access code.
3 Tap the Auto disable switch to activate it.
When the Auto disable option is enabled, the device will fail to transfer files to the
private folder if the screen turns off during transfer.
Settings
113
Send SOS messages
In an emergency situation, quickly press the Power key three times. The device sends
messages to your primary contacts. The messages include your location information.
1 On the Settings screen, tap Privacy and safety → Send SOS messages, and then tap the
switch to activate it.
2 Follow the on-screen instructions to add primary contacts if you have not already done
so.
To send help messages with audio recordings or photos, tap the Attach audio recording or
Attach pictures switch to activate it.
The Attach pictures option may not be available depending on the region or service
provider.
Adding primary contacts
On the Settings screen, tap Privacy and safety → Send SOS messages → Send messages
to → ADD. Tap Create contact and enter contact information or tap Select from contacts to
add an existing contact as a primary contact.
Easy mode
Easy mode provides an easier user experience by using a simpler layout and bigger icons on
the Home screen.
Switching to easy mode
1 On the Settings screen, tap Easy mode → Easy mode.
2 Select apps under Easy applications to apply a simpler layout.
3 Tap DONE.
Settings
114
Returning to standard mode
Swipe to the left on the Home screen and tap Settings → Easy mode → Standard mode →
DONE.
Managing shortcuts
To add a shortcut to an app to the Home screen, swipe to the left, tap , and then select an
app.
To add a shortcut to a contact on the Home screen, swipe to the right and tap .
To delete a shortcut from the Home screen, tap EDIT and select an app or contact with .
Accessibility
Configure various settings to improve accessibility to the device. Refer to Accessibility for
more information.
On the Settings screen, tap Accessibility.
Accounts
Add your Samsung and Google accounts, or other accounts, to sync with.
Adding accounts
Some apps used on your device require a registered account. Create accounts to have the
best experience with your device.
1 On the Settings screen, tap Accounts → Add account.
2 Select an account service.
3 Follow the on-screen instructions to complete the account setup.
To sync content with your accounts, select an account and select items to sync.
Settings
115
Registering Samsung accounts
You need a Samsung account when using some Samsung apps. You can back up or restore
data saved in the device to your Samsung account. Register your Samsung account to the
device to conveniently use Samsung services.
1 On the Settings screen, tap Accounts → Add account.
2 Tap Samsung account.
3 Follow the on-screen instructions to complete the account setup.
Once your Samsung account has been registered, you can use apps requiring your Samsung
account without the sign in procedure.
Removing accounts
On the Settings screen, tap Accounts, select an account name, select the account to remove,
and then tap MORE → Remove account.
Backup and reset
Change the settings for managing settings and data.
On the Settings screen, tap Backup and reset.
• Back up my data: Back up your personal information and app data to the Samsung
server. You can also set the device to automatically back up data.
• Restore: Restore previously backed up personal information and app data from your
Samsung account.
• Backup account: Set up or edit your Google backup account.
• Back up my data: Set the device to back up settings and app data to the Google server.
• Automatic restore: Set the device to automatically restore settings and app data from
the Google server when apps are reinstalled.
• Factory data reset: Reset settings to the factory default values and delete all data.
Settings
116
Language and input
Change the settings for text input. Some options may not be available depending on the
selected language.
On the Settings screen, tap Language and input.
• Language: Select a display language for all menus and apps.
• Default keyboard: Select a default keyboard type for text input.
• Samsung keyboard: Change the Samsung keyboard settings.
• Google voice typing: Change the voice input settings.
• Voice input: Select a default voice input service. You can also change settings for each
service.
• Text-to-speech options: Change the text-to-speech settings.
• Pointer speed: Adjust the pointer speed for the mouse or trackpad connected to your
device.
Battery
View battery power information and change power saving options.
On the Settings screen, tap Battery.
The usage time left shows the time remaining before the battery power runs
out. Usage time left may vary depending on your device settings and operating
conditions.
• BATTERY USAGE: View the amount of battery power consumed by your device.
• Power saving mode: Activate power-saving mode and change the settings for powersaving
mode. Refer to Power saving mode for more information.
• Ultra power saving mode: Extend standby time and reduce battery consumption by
displaying a simpler layout and allowing limited access to an app. Refer to Ultra power
saving mode for more information.
• Abnormal battery usage: View a list of apps that are consuming an excessive amount of
battery power.
Settings
117
Storage
View memory information for your device.
On the Settings screen, tap Storage.
The actual available capacity of the internal memory is less than the specified
capacity because the operating system and default apps occupy part of the memory.
The available capacity may change when you update the device.
Date and time
Access and alter the following settings to control how the device displays the time and date.
On the Settings screen, tap Date and time.
If the battery remains fully discharged or removed from the device, the time and date
is reset.
• Automatic date and time: Automatically update the time and date when moving across
time zones.
• Automatic time zone: Set the device to receive time zone information from the network
when you move across time zones.
• Set date: Set the current date manually.
• Set time: Set the current time manually.
• Select time zone: Set the home time zone.
• Use 24-hour format: Display time in 24-hour format.
• Select date format: Select a date format.
Settings
118
User manual
View help information to learn how to use the device and apps or configure important
settings.
On the Settings screen, tap User manual.
About device
Access device information, edit the device name, or update device software.
On the Settings screen, tap About device.
119
Appendix
Accessibility
About Accessibility
Improve accessibility with features that make the device easier to use for users who have
impaired vision, hearing, and reduced dexterity.
On the Apps screen, tap Settings → Accessibility.
Using the Home key to open accessibility menus
On the Apps screen, tap Settings → Accessibility → Direct access, and then tap the switch
to activate it. Then, select an accessibility menu to open when you press the Home key three
times quickly.
You can access the following accessibility menus.
• Accessibility
• Galaxy TalkBack
• Universal switch
• Magnifier window
• Negative colours
• Greyscale
• Colour adjustment
• Interaction control
Appendix
120
Voice feedback (TalkBack)
Activating or deactivating TalkBack
When you activate TalkBack, the device reads aloud the text on the screen or selected
features when you tap it once.
On the Apps screen, tap Settings → Accessibility → Vision → Galaxy TalkBack, and then
tap the switch to activate it. The device will start voice feedback.
To deactivate TalkBack, tap the switch and tap anywhere on the screen twice quickly.
When you activate TalkBack for the first time, the tutorial will start after activation. You can
replay it by tapping Galaxy TalkBack help.
Some features are not available while you are using TalkBack.
Controlling the screen with finger gestures
You can use various finger gestures to control the screen while you are using TalkBack.
One finger gestures
• Tapping: Read aloud the item under your finger. To explore the screen, place a finger on
the screen and move it on the screen.
• Tapping twice: Open the selected item. While selected items are read aloud, when you
hear the item you want, release your finger from the item. Then, tap anywhere on the
screen twice quickly.
• Double-tapping and holding the screen: Move an item or access an available option.
• Swiping to the left: Move to the previous item.
• Swiping to the right: Move to the next item.
• Swiping upwards or downwards: Use the most recent contextual menu option or change
its settings. In text selection mode, move the cursor backwards or forwards to select text.
Appendix
121
• Swiping to the left then right in one motion: Scroll up the screen.
• Swiping to the right then left in one motion: Scroll down the screen.
• Swiping upwards then downwards in one motion: Move to the first item on the screen.
• Swiping downwards then upwards in one motion: Move to the last item on the screen.
Two finger gestures
• Tapping: Pause or resume voice feedback.
• Tapping twice: Start, pause, or resume playback.
• Tapping three times: Check the current time, remaining battery power, and mode.
To change items that are read aloud, open the Apps screen and tap Settings →
Accessibility → Vision → Galaxy TalkBack → SETTINGS → Status bar information.
• Double-tapping and holding the screen: Enable or disable text selection mode.
• Swiping to the left: Move to the next page. In text selection mode, cut the selected text.
• Swiping to the right: Return to the previous page. In text selection mode, paste the
copied text.
• Swiping upwards: Scroll down the list. In text selection mode, copy the selected text.
• Swiping downwards: Scroll up the list. In text selection mode, select all text.
• Swiping in any direction on the locked screen: Unlock the screen.
• Swiping downwards from the top of the screen: Open the notification panel.
Three finger gestures
• Tapping: Start reading items aloud from the top.
• Tapping twice: Start reading from the next item.
• Tapping three times: Read the last selected text and copy it to the clipboard.
• Swiping to the left or right: Open the contextual menu and scroll through the options.
• Swiping upwards or downwards: Change the text reading and selecting granularity.
Appendix
122
Using the contextual menu
While you are using TalkBack, swipe to the left or right with three fingers. The contextual
menu will appear and the device will read the options aloud. Swipe to the left or right
with three fingers to scroll through the options. When you hear the option you want,
swipe upwards or downwards to use the option or adjust the settings for the option. For
example, when you hear Media Volume, you can adjust the volume by swiping upwards or
downwards.
Adding image labels
You can assign labels to images on the screen. The device reads aloud the labels when the
images are selected. Add labels to unlabelled images by tapping the screen twice with three
fingers and holding.
Configuring settings for TalkBack
Configure settings for TalkBack for your convenience.
On the Apps screen, tap Settings → Accessibility → Vision → Galaxy TalkBack →
SETTINGS.
• Speech volume: Select the volume level for voice feedback.
• Speech rate: Select a speed for voice feedback.
• Pitch changes: Set the device to read aloud text at a low pitch when it is entered using a
keyboard.
• Keyboard feedback: Set the device to read aloud a word that you enter using a keyboard
when you tap the space key.
• Speak while screen off: Set the device to provide voice feedback when the screen is
turned off.
• Use proximity sensor: Set the device to pause voice feedback when you place your hand
over the sensor at the top of the device.
• Shake to continue reading: Set the device to read aloud the text displayed on the screen
when you shake the device. You can select from various shaking speeds.
Appendix
123
• Vibration feedback: Set the device to vibrate when you explore the screen.
• Sound feedback: Set the device to emit a sound when you control the screen, such as
scrolling the screen, and more.
• Focus on speech audio: Set the device to turn the media volume down when the device
reads an item aloud.
• Sound feedback volume: Adjust the volume that sound is played when you touch the
screen to control it. This feature is available when Sound feedback is activated.
• Single-tap selection: Set the device to open the selected item by tapping it once.
• Back/Recents key feedback: Set the device to provide voice feedback when you tap
or once. Tap or twice to activate them.
• Status bar information: Select items to read aloud when you tap the screen three times
with two fingers.
• Developer options: Set options for app development.
Using the device with the screen turned off
Set the device to turn the screen off at all times to keep the content on your screen private.
The screen does not turn on when you press the Home key or tap the screen. Currently
activated features do not turn off when the screen is off.
On the Apps screen, tap Settings → Accessibility → Vision, and then tap the Dark screen
switch to activate it. You can activate or deactivate this feature by pressing the Power key
twice.
Reading passwords aloud
Set the device to read the password aloud when you enter the password while TalkBack is
activated.
On the Apps screen, tap Settings → Accessibility → Vision, and then tap the Speak
passwords switch to activate it.
Appendix
124
Setting text-to-speech features
Change the settings for text-to-speech features used when TalkBack is activated, such as
languages, speed, and more.
On the Apps screen, tap Settings → Accessibility → Vision → Text-to-speech options, and
then use the following functions:
• Preferred TTS engine: Select an engine for the text-to-speech feature.
• Speech rate: Adjust the speed for the text-to-speech feature.
• Default language status: View the status of the current language set for the text-to
speech feature.
Entering text using the keyboard
To display the keyboard, tap the text input field, and then tap anywhere on the screen twice
quickly.
When you touch the keyboard with your finger, the device reads aloud the character keys
under your finger. When you hear the character you want, release your finger from the screen
to select it. The character is entered and the device reads the text aloud.
If Rapid key input is not activated, release your finger from the character you want, and
then tap anywhere on the screen twice quickly. To activate the rapid key input feature, open
the Apps screen, tap Settings → Accessibility → Vision, and then tap the Rapid key input
switch to activate it.
Entering additional characters
Tap and hold a key on the keyboard to enter additional characters available for the key. A
pop-up window appears above the key showing available characters. To select a character,
drag your finger on the pop-up window until you hear the character you want, and release it.
Appendix
125
Vision
Writing voice memos to voice labels
You can use voice labels to distinguish objects of similar shape by attaching labels to them.
You can record and assign a voice memo to an NFC-enabled voice label. The voice memo is
played back when you place your device near the label.
Turn on the NFC feature before using this feature.
1 On the Apps screen, tap Settings → Accessibility → Vision → Voice Label.
The voice recorder will launch.
2 Tap to start recording. Speak into the microphone.
3 When you are finished recording, tap to stop.
4 Hold the back of your device over the voice label.
The information in the voice recording will be written to the voice label.
Changing the font size
Change the font size displayed on the screen. Setting the font size to Huge may not be
available in some apps.
On the Apps screen, tap Settings → Accessibility → Vision → Font size.
Magnifying the screen
Magnify the screen and zoom in on a specific area.
On the Apps screen, tap Settings → Accessibility → Vision → Magnification gestures, and
then tap the switch to activate it.
• Zooming in and out: Quickly tap the screen three times to zoom in on a specific area.
Quickly tap the screen three times again to return to the normal view.
Appendix
126
• Exploring the screen by scrolling: Drag two or more fingers across the magnified screen.
• Adjusting zoom ratio: Pinch two or more fingers on the magnified screen or spread them
apart.
You can also temporarily magnify the screen by tapping the screen three times and holding.
While holding the screen, drag your finger to explore the screen. Release your finger to return
to the normal view.
• Keyboards on the screen cannot be magnified.
• When this feature is activated, the performance of some apps, such as Phone and
Calculator, may be affected.
Using a magnifier
Activate a magnifier to zoom in on the screen to view a larger version of the content.
On the Apps screen, tap Settings → Accessibility → Vision → Magnifier window, and then
tap the switch to activate it. The magnifier will appear on the screen.
Drag the magnifier to where you want to zoom in on the screen.
Converting the screen to greyscale mode
Display colours on the screen as grey tones.
On the Apps screen, tap Settings → Accessibility → Vision, and then tap the Greyscale
switch to activate it.
Reversing the display colours
Improve screen visibility to help users recognise text on the screen more easily.
On the Apps screen, tap Settings → Accessibility → Vision, and then tap the Negative
colours switch to activate it.
Appendix
127
Colour adjustment
Adjust how colours are displayed on the screen if you have difficulty in distinguishing colours.
The device changes the colours into more recognisable colours.
On the Apps screen, tap Settings → Accessibility → Vision → Colour adjustment, and
then tap the switch to activate it. Follow the on-screen instructions to complete the colour
adjustment procedure.
Hearing
Sound detectors
Set the device to vibrate when it detects your doorbell or a baby crying.
Baby crying detector
On the Apps screen, tap Settings → Accessibility → Hearing → Sound detectors, and then
tap the Baby crying detector switch to activate it. The device will vibrate when it detects
sound and the alert will be saved as a log.
Doorbell detector
1 On the Apps screen, tap Settings → Accessibility → Hearing → Sound detectors, and
then tap the Doorbell detector switch to activate it.
2 Tap to make a recording of your doorbell.
The device will detect and record the doorbell.
3 Tap and ring your doorbell to check if it is recorded correctly. When the device detects
the doorbell sound, tap OK.
To change the doorbell sound, tap Change doorbell sound.
The device will vibrate when it detects sound and the alert will be saved as a log.
Appendix
128
Setting flash notification
Set the flash to blink when you have incoming calls, new messages, or notifications.
On the Apps screen, tap Settings → Accessibility → Hearing, and then tap the Flash
notification switch to activate it.
Turning off all sounds
Set the device to mute all device sounds, such as media sounds, and the caller’s voice during
a call.
On the Apps screen, tap Settings → Accessibility → Hearing, and then tap the Turn off all
sounds switch to activate it.
Caption settings
On the Apps screen, tap Settings → Accessibility → Hearing → Samsung subtitles (CC) or
Google subtitles (CC), and then tap the switch to activate it.
Select an option for configuring the caption settings.
Adjusting the sound balance
Set the device to adjust the sound balance when using a headset.
1 Connect a headset to the device and wear it.
2 On the Apps screen, tap Settings → Accessibility → Hearing → Left/right sound
balance.
3 Drag the adjustment bar to the left or right and adjust the sound balance, and then tap
SET.
Appendix
129
Mono audio
Mono output combines stereo sound into one signal that is played through all headset
speakers. Use this if you have a hearing impairment or if a single earbud is more convenient.
On the Apps screen, tap Settings → Accessibility → Hearing, and then tap the Mono audio
switch to activate it.
Auto haptic
When the auto haptic feature is activated, the device will vibrate with the sound when
playing music, watching videos, or playing games. It will also vibrate when buttons are
tapped in supported apps.
On the Apps screen, tap Settings → Accessibility → Hearing, and then tap the Auto haptic
switch to activate it.
Some apps may not support this feature.
Dexterity and interaction
Universal switch
You can control the touchscreen by connecting an external switch, by tapping the screen, or
by using head movements and face gestures.
On the Apps screen, tap Settings → Accessibility → Dexterity and interaction → Universal
switch, and then tap the switch to activate it. If the universal switches are not registered on
the device, tap ADD SWITCH and set switches to control the device.
To activate the universal switch feature, at least one switch must be registered on the
device.
To set switches to control the device, tap SETTINGS → Switches.
To quickly deactivate this feature, press the Home key three times.
Appendix
130
Assistant menu
Displaying the assistive shortcut icon
Set the device to display the assistive shortcut icon for accessing apps, features, and settings.
You can easily control the device by tapping the assistive menus in the icon.
1 On the Apps screen, tap Settings → Accessibility → Dexterity and interaction →
Assistant menu.
2 Tap the switch to activate it.
The assistive shortcut icon appears at the bottom right of the screen.
3 Tap Dominant hand to move the assistive shortcut icon to a convenient location.
Accessing assistive menus
The assistive shortcut icon appears as a floating icon for easy access to the assistive menus
from any screen.
When you tap the assistive shortcut icon, the icon expands slightly and the assistive menus
appear on the icon. Tap the up or down arrow to move to other panels or swipe upwards or
downwards to select other menus.
Using the cursor
On the assistive menu, tap Cursor. You can control the screen using small finger movements
on the touch area. Drag your finger on the touch area to move the cursor. Also, tap the screen
to select items under the cursor.
Use the following options:
• / : Select an item or scroll left or right on the screen.
• / : Scroll up or down the screen.
• : Magnify the area where the cursor is located.
• : Move the touch area to another location.
• : Close the touch area.
Appendix
131
To change the cursor settings, open the Apps screen, tap Settings → Accessibility →
Dexterity and interaction → Assistant menu. Then, customise settings in Touchpad and
cursor settings.
Using enhanced assistive menus
Set the device to display enhanced assistive menus for selected apps.
On the Apps screen, tap Settings → Accessibility → Dexterity and interaction → Assistant
menu → Assistant plus, tap the switch to activate it, and then select apps.
Turning on the screen with the air gesture feature
Use the air gesture feature to turn on the screen by moving your hand above the sensor at
the top of the device. You can turn on the screen without pressing a key. When you use this
feature, place the device on a flat surface with the screen facing upwards or hold the device
securely to prevent it from moving.
On the Apps screen, tap Settings → Accessibility → Dexterity and interaction → Gesture
wake up, and then tap the switch to activate it.
Setting tap and hold delay options
Set the recognition time for tapping and holding the screen.
On the Apps screen, tap Settings → Accessibility → Dexterity and interaction → Tap and
hold delay, and then select an option.
Interaction control
Activate interaction control mode to restrict the device’s reaction to inputs while using apps.
1 On the Apps screen, tap Settings → Accessibility → Dexterity and interaction →
Interaction control.
2 Tap the switch to activate it.
3 Press and hold the Home key and the Volume key down simultaneously while using an
app.
Appendix
132
4 Adjust the size of the frame or draw a line around an area that you want to restrict.
5 Tap DONE.
The device displays the restricted area. The restricted area will not react when you touch
it and the device’s hard keys will be disabled.
To deactivate interaction control mode, press and hold the Home key and the Volume key
down simultaneously.
Direction lock
Create a directional combination to unlock the screen.
1 On the Apps screen, tap Settings → Accessibility → Direction lock and tap the switch
to activate it.
2 Drag your finger up, down, left, or right more than four times, and then tap CONTINUE.
3 Draw the direction combination again to verify it and tap CONFIRM.
4 Set a backup PIN to unlock the screen when you forget the combination.
Notification reminder
Set the device to alert you to notifications that you have not checked at the interval.
On the Apps screen, tap Settings → Accessibility → Notification reminder, and then tap
the switch to activate it.
To set the device to vibrate when you have unchecked notifications, tap the Vibrate switch to
activate it.
To set the device to turn on the LED indicator when you have unchecked notifications while
the screen is turned off, tap the LED indicator switch to activate it.
To set an interval between alerts, tap Reminder interval.
To set apps to alert you to notifications, select apps under Select applications.
Appendix
133
Answering or ending calls
Change the method of answering or ending calls.
On the Apps screen, tap Settings → Accessibility → Answering and ending calls.
Select the desired method.
Using single tap mode
When an alarm sounds or a call comes in, tap the button to stop the alarm or answer the call
instead of dragging the button.
On the Apps screen, tap Settings → Accessibility, and then tap the Single tap mode switch
to activate it.
Managing accessibility settings
Saving accessibility settings in a file
Export the current accessibility settings in a file.
On the Apps screen, tap Settings → Accessibility → Manage accessibility → Import/
Export → Export to My Files.
Importing an accessibility settings file
Import an accessibility settings file and update the current settings.
On the Apps screen, tap Settings → Accessibility → Manage accessibility → Import/
Export → Import from My Files. Select a file to import and tap DONE. The accessibility
settings will be updated according to the imported file.
Sharing accessibility settings files
Share accessibility settings files with others via email, Wi-Fi Direct, Bluetooth, and more.
On the Apps screen, tap Settings → Accessibility → Manage accessibility → Share via.
Then, select the accessibility files and tap DONE. Select a sharing method and follow the onscreen
instructions to share the files.
Appendix
134
Troubleshooting
Before contacting a Samsung Service Centre, please attempt the following solutions. Some
situations may not apply to your device.
When you turn on your device or while you are using the device, it
prompts you to enter one of the following codes:
• Password: When the device lock feature is enabled, you must enter the password you set
for the device.
• PIN: When using the device for the first time or when the PIN requirement is enabled, you
must enter the PIN supplied with the SIM or USIM card. You can disable this feature by
using the Lock SIM card menu.
• PUK: Your SIM or USIM card is blocked, usually as a result of entering your PIN incorrectly
several times. You must enter the PUK supplied by your service provider.
• PIN2: When you access a menu requiring the PIN2, you must enter the PIN2 supplied with
the SIM or USIM card. For more information, contact your service provider.
Your device displays network or service error messages
• When you are in areas with weak signals or poor reception, you may lose reception. Move
to another area and try again. While moving, error messages may appear repeatedly.
• You cannot access some options without a subscription. For more information, contact
your service provider.
Your device does not turn on
When the battery is completely discharged, your device will not turn on. Fully charge the
battery before turning on the device.
Appendix
135
The touchscreen responds slowly or improperly
• If you attach a protective cover or optional accessories to the touchscreen, the
touchscreen may not function properly.
• If you are wearing gloves, if your hands are not clean while touching the touchscreen,
or if you tap the screen with sharp objects or your fingertips, the touchscreen may
malfunction.
• The touchscreen may malfunction in humid conditions or when exposed to water.
• Restart your device to clear any temporary software bugs.
• Ensure that your device software is updated to the latest version.
• If the touchscreen is scratched or damaged, visit a Samsung Service Centre.
Your device freezes or has fatal errors
If your device freezes or hangs, you may need to close apps or turn off the device and turn
it on again. If your device is frozen and unresponsive, press and hold the Power key and the
Volume key down simultaneously for more than 7 seconds to restart it.
If this does not solve the problem, perform a factory data reset. On the Apps screen,
tap Settings → Backup and reset → Factory data reset → RESET DEVICE → ERASE
EVERYTHING. Before performing the factory data reset, remember to make backup copies of
all important data stored in the device.
If the problem is still not resolved, contact a Samsung Service Centre.
Calls are not connected
• Ensure that you have accessed the right cellular network.
• Ensure that you have not set call barring for the phone number you are dialling.
• Ensure that you have not set call barring for the incoming phone number.
Others cannot hear you speaking on a call
• Ensure that you are not covering the built-in microphone.
• Ensure that the microphone is close to your mouth.
• If using a headset, ensure that it is properly connected.
Appendix
136
Sound echoes during a call
Adjust the volume by pressing the Volume key or move to another area.
A cellular network or the Internet is often disconnected or audio
quality is poor
• Ensure that you are not blocking the device’s internal antenna.
• When you are in areas with weak signals or poor reception, you may lose reception. You
may have connectivity problems due to issues with the service provider’s base station.
Move to another area and try again.
• When using the device while moving, wireless network services may be disabled due to
issues with the service provider’s network.
The battery icon is empty
Your battery is low. Charge the battery.
The battery does not charge properly (For Samsung-approved
chargers)
• Ensure that the charger is connected properly.
• Visit a Samsung Service Centre and have the battery replaced.
The battery depletes faster than when first purchased
• When you expose the device or the battery to very cold or very hot temperatures, the
useful charge may be reduced.
• Battery consumption increases when you use messaging features or some apps, such as
games or the Internet.
• The battery is consumable and the useful charge will get shorter over time.
Your device is hot to the touch
When you use apps that require more power or use apps on your device for an extended
period of time, your device may feel hot to the touch. This is normal and should not affect
your device’s lifespan or performance.
Appendix
137
Error messages appear when launching the camera
Your device must have sufficient available memory and battery power to operate the camera
app. If you receive error messages when launching the camera, try the following:
• Charge the battery.
• Free some memory by transferring files to a computer or deleting files from your device.
• Restart the device. If you are still having trouble with the camera app after trying these
tips, contact a Samsung Service Centre.
Photo quality is poorer than the preview
• The quality of your photos may vary, depending on the surroundings and the
photography techniques you use.
• If you take photos in dark areas, at night, or indoors, image noise may occur or images
may be out of focus.
Error messages appear when opening multimedia files
If you receive error messages or multimedia files do not play when you open them on your
device, try the following:
• Free some memory by transferring files to a computer or deleting files from your device.
• Ensure that the music file is not Digital Rights Management (DRM)-protected. If the file is
DRM-protected, ensure that you have the appropriate licence or key to play the file.
• Ensure that the file formats are supported by the device. If a file format is not supported,
such as DivX or AC3, install an app that supports it. To confirm the file formats that your
device supports, visit www.samsung.com.
• Your device supports photos and videos captured with the device. Photos and videos
captured by other devices may not work properly.
• Your device supports multimedia files that are authorised by your network service
provider or providers of additional services. Some content circulated on the Internet,
such as ringtones, videos, or wallpapers, may not work properly.
Appendix
138
Another Bluetooth device is not located
• Ensure that the Bluetooth wireless feature is activated on your device.
• Ensure that the Bluetooth wireless feature is activated on the device you wish to connect
to.
• Ensure that your device and the other Bluetooth device are within the maximum
Bluetooth range (10 m).
If the tips above do not solve the problem, contact a Samsung Service Centre.
A connection is not established when you connect the device to a
computer
• Ensure that the USB cable you are using is compatible with your device.
• Ensure that you have the proper driver installed and updated on your computer.
• If you are a Windows XP user, ensure that you have Windows XP Service Pack 3 or higher
installed on your computer.
Your device cannot find your current location
GPS signals may be obstructed in some locations, such as indoors. Set the device to use Wi-Fi
or a mobile network to find your current location in these situations.
Data stored in the device has been lost
Always make backup copies of all important data stored in the device. Otherwise, you cannot
restore data if it is corrupted or lost. Samsung is not responsible for the loss of data stored in
the device.
A small gap appears around the outside of the device case
• This gap is a necessary manufacturing feature and some minor rocking or vibration of
parts may occur.
• Over time, friction between parts may cause this gap to expand slightly.
Copyright
Copyright © 2015 Samsung Electronics
This manual is protected under international copyright laws.
No part of this manual may be reproduced, distributed, translated, or transmitted in any form
or by any means, electronic or mechanical, including photocopying, recording, or storing
in any information storage and retrieval system, without the prior written permission of
Samsung Electronics.
Trademarks
• SAMSUNG and the SAMSUNG logo are registered trademarks of Samsung Electronics.
• Bluetooth® is a registered trademark of Bluetooth SIG, Inc. worldwide.
• Wi-Fi®, Wi-Fi Protected Setup™, Wi-Fi Direct™, Wi-Fi CERTIFIED™, and the Wi-Fi logo are
registered trademarks of the Wi-Fi Alliance.
• All other trademarks and copyrights are the property of their respective owners.
This manual is a draft version. Some content is subject to change.
E-MANUAL
Merci d'avoir acheté ce produit Samsung.
Afin de bénéficier d'un service plus complet, veuillez
enregistrer votre produit à l'adresse
www.samsung.com/register
Modèle______________ N° de série______________
Contenu
Guide de démarrage
Utilisation de la Smart TV
Utilisation de la Commande vocale
Utilisation de la Commande par mouv.
Utilisation du Samsung Smart Control
Utilisation du Mode Foot
Utilisation du mode Multi-Link Screen
Modification de chaînes
Connexion de l'antenne et de
périphériques externes
Connexion - Avec antenne
Connexion de périphériques vidéo
15 Connexion - HDMI
16 Connexion - Composant
17 Connexion - Entrée externe
18 Connexion - SCART
Utilisation des haut-parleurs externes pour écouter la
télévision
19 Connexion - HDMI (ARC)
20 Connexion - Audio numérique (Optique)
21 Connexion - Casque
22 Connexion - Sortie audio
Connexion à un ordinateur
24 Connexion - Port HDMI
25 Connexion - Port HDMI (DVI)
26 Connexion - Samsung Link
26 Connexion - Réseau domestique (DLNA)
Connexion à l'aide d'un périphérique mobile
28 Ecran du périphérique mobile sur le téléviseur (Réplication de
l'écran)
29 Connexion de périphériques mobiles sans routeur sans fil (Wi-Fi
Direct)
29 Connexion - Samsung Link
30 Connexion - Réseau domestique (DLNA)
30 Connexion via Smart View 2.0
31 Nom du téléviseur sur le réseau
Sélection du signal d'entrée
Utilisation d'une télécommande et
de périphériques
Insertion des piles dans le Samsung Smart Control
32 Lorsque cette icône d'alarme s'affiche à l'écran...
Pairage du Samsung Smart Control
33 Reconnexion du Samsung Smart Control
Utilisation du Samsung Smart Control
34 Fonctions des boutons
37 Utilisation du téléviseur en déplaçant le Samsung Smart Control
38 Utilisation du téléviseur avec le Touchpad
40 Affichage de la télécommande à l'écran (télécommande
virtuelle)
Commande des périphériques externes à l'aide de la
télécommande du téléviseur (Config. télécommande
universelle)
42 Configuration de la télécommande universelle
43 Commande des périphériques externes à l'aide de la
télécommande du téléviseur
Commande du téléviseur à l'aide d'un clavier
45 Connexion d'un clavier
46 Utilisation du clavier
Commande du téléviseur à l'aide d'une souris
47 Connexion d'une souris
48 Utilisation de la souris
Saisie de texte à l'aide d'un clavier QWERTY
49 Utilisation des autres fonctions
II
Connexion Internet
Mise en place d'une connexion câblée à Internet
50 Connexion d'un câble LAN
51 Connexion automatique à un réseau Internet câblé
51 Connexion manuelle à un réseau Internet câblé
Mise en place d'une connexion sans fil à Internet
53 Connexion automatique à un réseau Internet sans fil
54 Connexion manuelle à un réseau Internet sans fil
55 Connexion à un réseau Internet sans fil avec WPS
Résolution des problèmes de connectivité Internet
56 Résolution des problèmes de connectivité Internet câblé
57 Résolution des problèmes de connectivité Internet sans fil
Réseau mobile
58 Nom de modèle et services de télécommunications pris en
charge
Vérification de l'état de la connexion Internet
Fonctions Smart
Plusieurs fonctions sur un seul écran
60 Lancement du mode Multi-Link Screen
60 Utilisation du mode Multi-Link Screen
60 Sélection d'une fonctionnalité
60 Changement de chaîne/Réglage du volume
Smart Hub
61 Test des connexions Smart Hub
62 Ouverture de Barre d'accès rapide
63 Accès à l'écran Panneau
63 Utilisation du Didacticiel Smart Hub
63 Réinitialisation de Smart Hub
Utilisation de Smart Hub avec Compte Samsung
64 Création d'un Compte Samsung
66 Connexion au Compte Samsung
67 Liaison de mes comptes Samsung et d'application
68 Modification et ajout d'informations à un Compte Samsung
68 Suppression de tous les comptes Samsung du téléviseur
Utilisation du panneau Jeux
69 Utilisation des fonctions du menu contextuel
69 Installation et exécution d'un jeu
71 Gestion des jeux téléchargés ou achetés
Utilisation du panneau SAMSUNG APPS
73 Utilisation des fonctions du menu contextuel
74 Installation d'une application
75 Applications par défaut
75 Utilisation de Web Browser
78 Réorganisation des applications dans l'écran SAMSUNG APPS
79 Suppression d'une application du téléviseur
79 Notation/évaluation d'une application
80 Mise à jour d'une application
80 Fonctionnalités SAMSUNG APPS
Utilisation du panneau Mes Programmes
84 Utilisation des fonctions du menu contextuel
84 Affichage d'informations détaillées sur le programme
85 Configuration des Param. Sur la TV
Utilisation du panneau MON VIDEO CLUB
87 Utilisation des fonctions du menu contextuel
88 Visionnage d'un film/programme télévisé
88 Restriction du visionnage du contenu acheté
89 Notation et partage d'un contenu acheté
Lecture de vidéos, de photos et de musique (MULTIMEDIA)
91 Lecture de contenu multimédia à partir d'un périphérique USB
92 Lecture de contenu multimédia enregistré sur un ordinateur/
périphérique mobile
94 Lecture de contenu multimédia à partir d'un Service cloud
95 Boutons et fonctions disponibles pendant le visionnage de
photos
96 Boutons et fonctions disponibles pendant le visionnage de
vidéos
98 Boutons et fonctions disponibles pendant la lecture de musique
99 Fonctions de l'écran Liste de contenu multimédia
Commande du téléviseur par la voix
100 Activation du Commande vocale
102 Utilisation interactive de la fonction Interaction vocale
Commande du téléviseur à l'aide de gestes
103 Test de la luminosité ambiante à l'aide de la caméra du téléviseur
104 Activation de la fonction Commande par mouv.
107 Présentation de l'écran Commande par mouv.
Connexion à l'aide de la Reconnaissance faciale
110 Enregistrement de votre visage sur votre Compte Samsung
111 Définition de la méthode de connexion sur Reconnaissance
II III
faciale
111 Connexion au Compte Samsung par reconnaissance faciale
Fonctions Regarder la télévision et
Enregistrer
Informations sur les diffusions numériques en bref
112 Utilisation du mode Guide
113 Consultation des informations sur les programmes actuels
113 Changement de signal de diffusion
113 Informations relatives au signal numérique et intensité
Enregistrement de programmes
114 Création d'un périphérique USB d'enregistrement
116 Enregistrement de programmes
117 Boutons et fonctions disponibles pendant l'enregistrement d'un
programme
118 Gestion de la liste Programmer enregistrement
119 Visionnage de programmes enregistrés
122 Gestion des fichiers enregistrés
Configuration d'un Programmer visionnage
123 Configuration d'un Programmer visionnage
124 Gestion de la liste Programmer visionnage
Utilisation du Timeshift
Utilisation de la Liste des chaînes
Enregistrement, suppression et modification de chaînes
127 Enregistrement et suppression de chaînes
127 Modification de chaînes enregistrées
128 Activation/désactivation de la protection par mot de passe sur
des chaînes
128 Modification des numéros
128 Verrouillage/Déverrouillage de chaînes
128 Modif. num. chaîne
Création d'une Liste des favoris personnelle
129 Enregistrement d'une chaîne comme Favoris
130 Affichage des chaînes de la Liste des favoris uniquement
130 Modification d'une Liste des favoris
Accentuation du réalisme des manifestations sportives
133 Activation du Mode Foot
133 Extraction automatique des moments forts
134 Fonctions disponibles en Mode Foot
135 Visionnage d'un événement sportif enregistré en Mode Foot
Fonctions de prise en charge du visionnage de programmes
télévisés
136 Affichage des sous-titres
136 Options de sous-titre
137 Modification de la Langue du télétexte
137 Texte numérique
138 Visionnage de programmes en mode PIP
139 Recherche des chaînes disponibles
140 Sélection des options audio du programme
140 Description audio
Utilisation des Paramètres chaînes
141 Pays (zone)
141 Recherche manuelle
142 Réglage précis de l'écran
143 Transf. liste chaînes
143 Supprimer profil opérateur CAM
143 Système satellite
145 Interface commune
Réglages de l'image et du son
Changement du mode d'image et réglage de la qualité d'image
146 Choix du mode d'image le mieux adapté à l'environnement
télévisuel
147 Réglage de la qualité de l'image de chaque mode d'image
148 Réglage précis de chaque mode d'image (Paramètres avancés)
150 Réglage de l'image pour faciliter le visionnage (Options d'image)
Affichage en 3D
152 Démarrage de la 3D
153 Changement du Mode 3D
154 Réglage de l'Effet 3D
Fonctions de prise en charge des images
155 Visionnage de programmes en mode PIP
156 Changement des options Format de l'image et Position
157 Diffusion du son seulement avec écran éteint (Image désactivée)
IV
157 Réinitialisation des paramètres Mode Image
Changement de Mode Son et utilisation d'effets sonores
158 Choix du Mode Son le mieux adapté à l'environnement
159 Utilisation d'effets sonores
Fonctions de prise en charge du son
160 Choix des haut-parleurs
160 Désignation du type d'installation du téléviseur
160 Écoute du son du téléviseur via un périphérique audio Wi-Fi ou
Bluetooth Samsung
161 Écoute du son du téléviseur via des haut-parleurs compatibles
Samsung Multiroom Link
162 Diffusion du son du téléviseur via Casque Bluetooth
162 Activation du son (Paramètres supplém.)
163 Écoute d'un son audio 3D en mode Mode 3D
163 Réinitialisation de tous les paramètres sonores
Général
Réglage de l'heure et utilisation de la minuterie
164 Réglage de l'heure
165 Utilisation des minuteries
Utilisation des fonctions de protection de brûlage d'écran et
d'économie d'énergie
167 Prévention de brûlage d'écran
167 Utilisation des fonctions Energy Saving (Écon. Énergie)
Utilisation du Anynet+ (HDMI-CEC)
168 Configuration d'Anynet+ (HDMI-CEC)
169 Utilisation de Anynet+ (HDMI-CEC)
Utilisation du e-Manual
170 Lancement du e-Manual
170 Fonctionnalités supplémentaires du e-Manual
171 Mise à jour du e-Manual vers la dernière version
Mise à jour du logiciel
172 Mise à jour du logiciel par Internet
172 Mise à jour du logiciel à l'aide d'une connexion USB
173 Activation des mises à jour logicielles automatiques
173 Mise à jour du logiciel via une chaîne satellite
Protection du téléviseur contre le piratage et les programmes
malveillants
174 Vérification du téléviseur et des supports de mémorisation
connectés
174 Recherche automatique lorsque le téléviseur est sous tension
174 Ajout automatique d'un programme malveillant à Blocked List
(Liste bloquée)
Utilisation d'autres fonctions
175 Activation du Guide vocal pour les personnes malvoyantes
176 Activation des Contraste élevé
176 Réglage de la Transparence menu
177 Étendue de la zone de sélection de Smart Hub
177 Changement du Langue des menus
177 Vérification des Notifications
177 Configuration d'un Mot de passe
178 Contrôle Parental
178 Activation du Mode Jeu
178 Couleurs riches et qualité d'image supérieure (BD Wise)
179 Activation/désactivation de Retour son.
179 Verrouillage/déverrouillage des touches du panneau
179 Affichage/masquage du logo Samsung au démarrage
179 Activation du démarrage plus rapide du téléviseur
180 Enregistrement du téléviseur comme appareil certifié DivX
(visionnage de films DivX payants)
181 Rétablissement des paramètres d'usine du téléviseur
181 Conversion du téléviseur en un modèle de présentation (réservé
aux magasins de détail)
Service de diffusion de données
182 Service de diffusion de données auto
182 Utilisation du service de diffusion de données
HbbTV
Connexion à une fente de carte de visionnage TV
184 Pour connecter la carte d'interface commune (CI CARD, CARTE
CI), procédez comme suit :
185 Pour connecter l'adaptateur de CARTE CI, procédez comme
suit :
Fonction Télétexte
IV V
Résolution des problèmes
Obtention de Assistance
189 Support technique via Gestion à distance
191 Recherche des informations dont vous avez besoin pour le
service
Vous rencontrez un problème d'écran
191 Test de l'image
Le son n'est pas clairement perceptible
194 Test du son
Les images 3D ne sont pas clairement visibles.
195 Test de la qualité de l'image 3D
Vous rencontrez un problème d'émission
L'ordinateur ne se connecte pas.
Impossible de me connecter à Internet.
Service de diffusion de données
La fonction Programmer enregistrement/Timeshift ne
s'exécute pas.
Anynet+ (HDMI-CEC) ne fonctionne pas.
Le lancement/l'utilisation des applications est compliqué.
Impossible de lire mon fichier.
Je veux réinitialiser le téléviseur.
Autres problèmes
Notes et précautions
Avant d'utiliser les fonctions Enregistrement et Timeshift
203 Avant d'utiliser les fonctions Enregistrement et Programmer
enregistrement
204 Avant d'utiliser la fonction Timeshift
Déni de responsabilité S Recommandation
205 S Recommandation avec interaction vocale
205 S Recommandation
A lire avant d'utiliser le mode d'affichage en 3D
206 Précautions relatives à la fonction 3D
209 Résolutions prises en charge pour chaque mode 3D
À lire avant d'utiliser les fonctions Voix, Mouvement ou
Reconnaissance faciale
211 Précautions relatives à la reconnaissance vocale, gestuelle et
faciale
213 Spécifications relatives à l'utilisation des fonctions Voix,
Mouvement, ou Reconnaissance faciale
À lire avant d'utiliser les SAMSUNG APPS
Web Browser Restrictions
Restrictions concernant les fichiers Photo, Vidéo et Musique
218 Transferts de fichiers de périphériques de stockage
219 Sous-titres externes pris en charge
219 Sous-titres internes pris en charge
220 Formats d'image et résolutions pris en charge
220 Formats musicaux et codecs pris en charge
221 Codecs vidéo pris en charge
Restrictions
223 Restrictions des fonctions PIP (Picture-in-Picture)
223 CI flexible
À lire après l'installation du téléviseur
224 Tailles de l'image et signaux d'entrée
224 Installation d'un verrou antivol Kensington
225 À lire avant la configuration d'une connexion à Internet sans fil
Précautions d'usage pour la connexion d'un ordinateur
226 IBM
226 MAC
227 VESA DMT
228 Série LED 4500
228 IBM
228 MAC
228 VESA DMT
Résolutions vidéo prises en charge
À lire avant d'utiliser les appareils Bluetooth
230 Restrictions d'utilisation du Bluetooth
Licence
Glossaire
VI
1
Utilisation de la Smart TV
" La disponibilité dépend du modèle et de la région concernés.
Samsung Smart TV
Le téléviseur Smart TV permet de télécharger des applications et de surfer sur Internet. Connectez
le téléviseur à Internet pour pouvoir en profiter pleinement.
Connexion du téléviseur à Internet
1. Connectez le téléviseur à Internet via une connexion avec ou sans fil.
2. Configurez lesParamètres réseau via Réseau > Paramètres réseau.
2
Configuration de Smart Hub
de configuration du téléviseur Smart TV sont disponibles sur les 5 panneaux du Smart Hub. Avant
d'utiliser le Smart Hub, définissez la région et le fournisseur de services.
Vous pouvez profiter de plusieurs services proposés par Samsung en suivant les instructions à l'écran.
Configurer Smart Hub
Configurer Smart Hub
L'utilisation du Smart Hub
Smart Hub est l'élément principal de cette Samsung Smart TV. Il est divisé en 5 panneaux, qui s'affichent
dans la partie supérieure de l'écranSmart Hub. Vous pouvez accéder à Mes Programmes, MON VIDEO
CLUB, Jeux, MULTIMEDIA et SAMSUNG APPS.
Accédez àSmart Hub > Mes Applications et téléchargez les applications depuis le téléviseur Samsung
Smart TV.
" Consultez la section "Smart Hub" pour plus d'informations.
2 3
Téléchargement d'applications
Déplacez la zone de surbrillance sur une application et appuyez de manière prolongée sur le Touch
Pad. Lorsqu'un menu contextuel s'affiche, sélectionnez Téléch. pour pouvoir profiter de l'application.
4
Utilisation de la Commande vocale
" La disponibilité dépend du modèle et de la région concernés.
Configuration de Commande vocale
Certaines des fonctions de ce téléviseur peuvent être commandées par la voix.
Activez Commande vocale via Système > Commande vocale.
Système
Accessibilité
Configuration
Mode Foot
Langue des menus Français
Paramètres Smart Control
Config. télécommande universelle
Commande vocale
L'utilisation du Commande vocale
Appuyez sur la toucheVOICE duSamsung Smart Controlet prononcez « Aide » pour afficher la liste
complète des commandes vocales.
" Consultez la section "Commande du téléviseur par la voix" pour plus d'informations.
4 5
Utilisation de la Commande par mouv.
" La disponibilité dépend du modèle et de la région concernés.
Configuration de Commande par mouv.
Certaines des fonctions de ce téléviseur peuvent être commandées par les mouvements des mains et
des doigts.
ActivezCommande par mouv. via Système > Commande par mouv..
Système
Configuration
Mode Foot
Langue des menus Français
Paramètres Smart Control
Config. télécommande universelle
Commande vocale
Commande par mouv. Activé
L'utilisation du Commande par mouv.
1. Levez une main et tendez l'index, jusqu'à ce qu'un curseur en forme de flèche apparaisse à l'écran.
2. Bougez la main pour déplacer le pointeur sur l'écran, puis cliquez sur un bouton en mimant un clic
avec une souris.
" Pour utiliser la fonctionnalité Commande par mouv., il est nécessaire de connecter une caméra TV (vendue séparément).
" Consultez la section "Commande du téléviseur à l'aide de gestes" pour plus d'informations.
6
Utilisation du Samsung Smart Control
" La disponibilité dépend du modèle et de la région concernés.
Samsung Smart Control
Le Samsung Smart Control vous permet d'accéder à diverses fonctions via les boutons SEARCH,
KEYPAD, SOURCE, et VOICE. Vous pouvez également déplacer le pointeur en appuyant délicatement et
de manière prolongée sur le Touch Pad.
Configuration de Samsung Smart Control
Configurez le Samsung Smart Control en fonction de vos préférences. La configuration comprend la
sensibilité du Touch Pad et la taille des commandes à l'écran.
Configurez lesParamètres Smart Control via Système > Paramètres Smart Control.
Système
Accessibilité
Configuration
Mode Foot
Langue des menus Français
Paramètres Smart Control
Config. télécommande universelle
Commande vocale
6 7
Utilisation de Samsung Smart Control
Les touches vous permettent d'effectuer les
opérations souhaitées.
Déplacez la Samsung Smart Control tout en
appuyant sur le Touch Pad pour déplacer la
sélection.
8
Accès au menu d'options à l'aide de Samsung Smart Control
L'angle d'inclinaison du Samsung Smart Control peut varier en fonction du modèle concerné.
Après avoir appuyé de manière prolongée sur la touche MENU, le menu s'affiche automatiquement.
Après avoir appuyé de manière prolongée sur la touche }, « Info » s'affiche automatiquement.
Après avoir appuyé de manière prolongée sur la touche b, le menu s'affiche automatiquement.
Après avoir appuyé de manière prolongée sur la touche }, « Info » s'affiche automatiquement.
" Consultez la section "Utilisation du Samsung Smart Control" pour plus d'informations.
8 9
Utilisation du Mode Foot
" La disponibilité dépend du modèle et de la région concernés.
Activation du Mode Foot
Mode Foot active les paramètres de son et d'image optimaux, ce qui vous donne l'impression de vivre
les événements sportifs en direct.
Pour enregistrer un événement sportif, connectez le périphérique USB(HDD) au téléviseur, puis
accédez à Système > Mode Foot. Définissez Mode Foot sur Activé.
Système
Accessibilité
Configuration
Mode Foot
Langue des menus Français
Paramètres Smart Control
Config. télécommande universelle
Commande vocale
L'utilisation du Mode Foot
Lorsque vous regardez un événement sportif, appuyez sur Enter (Entrée), puis sur le bouton souhaité
à l'écran. Enregistrez, utilisez les réseaux sociaux, zoomez, sauvegardez et regardez les moments forts.
" Consultez la section "Accentuation du réalisme des manifestations sportives" pour plus d'informations.
10
Utilisation du mode Multi-Link Screen
" La disponibilité dépend du modèle et de la région concernés.
Exécution de Multi-Link Screen
Appuyez sur la touche M.SCREEN.
Utilisation de Multi-Link Screen
Après avoir sélectionné l'écran souhaité à l'aide duSamsung Smart Control, parcourez un site Web
ou exécutez une application tout en regardant la TV. Si vous appuyez sur la touche M.SCREEN, vous
pouvez sélectionner une fonction prise en charge parMulti-Link Screen.
" Consultez la section "Plusieurs fonctions sur un seul écran" pour plus d'informations.
10 11
Modification de chaînes
" La disponibilité dépend du modèle et de la région concernés.
Activation de la fonction de modification de chaînes
ExécutezModifier la chaîne, puis accédez à Diffusion > Modifier la chaîne.
Diffusion
Recherche automatique
Antenne Câble
Liste des chaînes
Guide
Gestionnaire prog.
Modifier la chaîne
Modif. favoris
Modification du numéro ou du nom d'une chaîne
Sélectionnez Changer numéro, puis modifiez l'ordre de la chaîne dans la liste.
Pour supprimer des chaînes de la liste, sélectionnez les chaînes à l'aide du Touch Pad ou des touches de
direction du Samsung Smart Control.
Changer numéro Changer numéro
12
Tri de la liste des chaînes
1. Sélectionnez une chaîne numérique dans la liste, puis Options > Tri.
2. Sélectionnez la méthode de tri souhaitée.
Tri
Options Options
13
Connexion - Avec antenne
" La disponibilité dépend du modèle et de la région concernés.
Avant de connecter un périphérique externe ou un câble au téléviseur, commencez par vérifier le numéro du
modèle du téléviseur. Un autocollant avec le numéro du modèle figure au dos du téléviseur. Le mode de connexion
varie selon le modèle.
Pour recevoir les signaux diffusés, une antenne doit être connectée au téléviseur.
" Il n'est pas nécessaire de connecter une antenne en cas d'utilisation d'un décodeur câble ou d'un récepteur satellite.
En fonction de votre environnement télévisuel, connectez le câble d'antenne approprié au connecteur pour
antenne du téléviseur comme illustré sur le schéma.
Il est préférable de relier les deux connecteurs à l'aide d'un commutateur multiple ou d'un commutateur Diseqc.
etc., et de régler Type de connexion d'antenne sur Double.
" La disponibilité dépend du modèle et de la région concernés.
14
Connexion de périphériques vidéo
" La disponibilité dépend du modèle et de la région concernés.
Votre téléviseur est pourvu de plusieurs connecteurs d'entrée vidéo destinés à la connexion de périphériques
externes tels que des décodeurs câble, des récepteurs satellite, des lecteurs Blu-ray, des lecteurs de DVD, des
caméscopes et des consoles de jeux. Ci-dessous figure une liste de connecteurs spécifiques, classés par ordre
décroissant de qualité d'image.
● HDMI
● Composant
● Entrée externe
Pour obtenir une qualité d'image optimale, connectez le périphérique vidéo via un connecteur HDMI. Si le
périphérique est dépourvu de connecteur HDMI, essayez de le connecter via un connecteur Composant pour
obtenir la deuxième meilleure qualité d'image.
" Le nombre, les noms et les emplacements des connecteurs peuvent varier en fonction du modèle.
" Consultez le manuel d'utilisation du périphérique externe pour le connecter au téléviseur. Le nombre, les noms et les
emplacements des connecteurs de périphériques externes peuvent varier en fonction du fabricant.
14 15
Connexion - HDMI
Avant de connecter un périphérique externe ou un câble au téléviseur, commencez par vérifier le numéro du
modèle du téléviseur. Un autocollant avec le numéro du modèle figure au dos du téléviseur. Le mode de connexion
varie selon le modèle.
Nous recommandons les types de câbles HDMI suivants :
● Câble HDMI haute vitesse
● Câble HDMI haute vitesse avec Ethernet
Les câbles HDMI présentent certaines exigences :
" Utilisez un câble HDMI de 14 mm de diamètre maximum.
" L'utilisation d'un câble HDMI non certifié peut entraîner l'affichage d'un écran vide ou une erreur de connexion.
" Il se peut que certains périphériques et câbles HDMI ne soient pas compatibles avec le téléviseur en raison de
spécifications HDMI différentes.
" Ce téléviseur ne prend pas en charge la fonctionnalité HDMI Ethernet Channel. Ethernet est un réseau local (LAN, Local
Area Network) intégrant des câbles coaxiaux normalisés par l'IEEE.
Suivez les indications du schéma pour connecter à l'aide du câble HDMI le connecteur de sortie HDMI du
périphérique vidéo au connecteur d'entrée HDMI du téléviseur.
" Le nombre, les noms et les emplacements des connecteurs peuvent varier en fonction du modèle.
Une fois la connexion établie, vous pourrez sélectionner le périphérique externe connecté à l'aide du bouton
SOURCE.
16
Connexion - Composant
Avant de connecter un périphérique externe ou un câble au téléviseur, commencez par vérifier le numéro du
modèle du téléviseur que vous avez acheté. Un autocollant avec le numéro du modèle figure au dos du téléviseur.
Le mode de connexion varie selon le modèle.
Suivez les indications du schéma pour connecter, à l'aide du câble Composant, les connecteurs d'entrée Composant
du téléviseur aux connecteurs de sortie Composant du périphérique.
Assurez-vous que les couleurs des câbles correspondent à celles des connecteurs.
Une fois la connexion établie, vous pourrez sélectionner le périphérique externe connecté à l'aide du bouton
SOURCE.
16 17
Connexion - Entrée externe
Avant de connecter un périphérique externe ou un câble au téléviseur, commencez par vérifier le numéro du
modèle du téléviseur. Un autocollant avec le numéro du modèle figure au dos du téléviseur. Le mode de connexion
varie selon le modèle.
Suivez les indications du schéma pour connecter à l'aide du câble AV les connecteurs d'entrée du téléviseur aux
connecteurs de sortie AV du périphérique.
Si vous utilisez les connecteurs d'entrée AV du téléviseur, connectez le câble vidéo au connecteur Y. Certains
modèles sont également équipés d'un connecteur vidéo. Dans ce cas, connectez le câble sur le connecteur vidéo.
Une fois la connexion établie, vous pourrez sélectionner le périphérique externe connecté à l'aide du bouton
SOURCE.
18
Connexion - SCART
" La disponibilité dépend du modèle et de la région concernés.
Avant de connecter un périphérique externe ou un câble au téléviseur, commencez par vérifier le numéro du
modèle du téléviseur que vous avez acheté. Un autocollant avec le numéro du modèle figure au dos du téléviseur.
Le mode de connexion varie selon le modèle.
Connectez le connecteur d'entrée Péritel du téléviseur au connecteur de sortie Péritel du périphérique à l'aide d'un
câble Péritel. Une connexion audio supplémentaire n'est pas nécessaire, dans la mesure où le câble Péritel véhicule
également les signaux audio.
" La norme SCART (Péritel) permet uniquement le transfert de vidéo en définition standard.
18 19
Utilisation des haut-parleurs externes pour écouter la
télévision
Votre téléviseur est pourvu de plusieurs connecteurs d'entrée audio destinés à la connexion de périphériques
tels que des lecteurs Blu-ray ou des lecteurs de DVD, mais aussi de sortie audio tels que des amplificateurs. Les
connecteurs figurent dans la liste suivante.
● ARC (canal de retour audio)
● Audio numérique (Optique)
Vous devez tenir compte de plusieurs éléments lors de l'utilisation de l'entrée audio :
● Pour bénéficier d'une meilleure qualité audio, il est conseillé d'utiliser un récepteur AV.
● Le nombre, les noms et les emplacements des connecteurs peuvent varier en fonction du modèle.
● Consultez le manuel d'utilisation du périphérique externe pour le connecter au téléviseur. Le nombre,
les noms et les emplacements des connecteurs de périphériques externes peuvent varier en fonction du
fabricant.
Connexion - HDMI (ARC)
" Il se peut que certains modèles ne prennent pas en charge la fonction ARC.
Avant de connecter un périphérique externe ou un câble au téléviseur, commencez par vérifier le numéro du
modèle du téléviseur que vous avez acheté. Un autocollant avec le numéro du modèle figure au dos du téléviseur.
Le mode de connexion varie selon le modèle.
La fonction ARC (canal de retour audio) permet la sortie de son numérique en utilisant uniquement un câble HDMI.
Elle n'est cependant disponible que via le port HDMI (ARC), et uniquement quand le téléviseur est connecté à un
récepteur AV compatible ARC.
" Le nombre, les noms et les emplacements des connecteurs peuvent varier en fonction du modèle.
Connectez un câble HDMI sur le connecteur HDMI (ARC) du téléviseur et sur le connecteur de sortie HDMI du
périphérique.
20
Connexion - Audio numérique (Optique)
" La disponibilité dépend du modèle et de la région concernés.
Avant de connecter un périphérique externe ou un câble au téléviseur, commencez par vérifier le numéro du
modèle du téléviseur. Un autocollant avec le numéro du modèle figure au dos du téléviseur. Le mode de connexion
varie selon le modèle.
La connexion d'un récepteur AV au téléviseur via un connecteur audio numérique (optique) vous permet d'écouter
des sons numériques.
La connexion d'un périphérique à l'aide d'un câble optique ne désactive pas automatiquement les haut-parleurs
du téléviseur. Pour désactiver les haut-parleurs du téléviseur, définissez Sortie son TV (Son > Paramètres hautparleur
> Sortie son TV) sur une fonction autre que Haut-parleur TV.
Réglez le volume du périphérique audio à l'aide de sa télécommande.
" L'émission d'un bruit inhabituel par le périphérique audio en cours d'utilisation peut indiquer un problème au niveau de ce
dernier. Dans ce cas, demandez l'assistance du fabricant du périphérique audio.
" Le son numérique est disponible uniquement avec les programmes prenant en charge la norme canal 5.1.
Suivez les indications du schéma pour connecter à l'aide du câble optique le connecteur de sortie audio numérique
du téléviseur au connecteur d'entrée audio numérique du périphérique.
20 21
Connexion - Casque
" La disponibilité dépend du modèle et de la région concernés.
Avant de connecter un périphérique externe ou un câble au téléviseur, commencez par vérifier le numéro du
modèle du téléviseur. Un autocollant avec le numéro du modèle figure au dos du téléviseur. Le mode de connexion
varie selon le modèle.
Suivez les indications du schéma pour connecter un casque au connecteur de sortie adéquat. Utilisez uniquement
un casque équipé d'une prise de type TRS à 3 conducteurs. Les volumes du casque et du téléviseur se règlent
indépendamment l'un de l'autre. Lorsque le casque est connecté, les haut-parleurs du téléviseur sont muets, et
certaines options de Son désactivées.
" De même, selon le modèle, il est possible que certains connecteurs ne soient pas pris en charge.
22
Connexion - Sortie audio
" La disponibilité dépend du modèle et de la région concernés.
Avant de connecter un périphérique externe ou un câble au téléviseur, commencez par vérifier le numéro du
modèle du téléviseur. Un autocollant avec le numéro du modèle figure au dos du téléviseur. Le mode de connexion
varie selon le modèle.
" Les noms des connecteurs et leurs emplacements peuvent varier en fonction du modèle.
Suivez les indications du schéma pour raccorder, à l'aide du câble audio, le connecteur de sortie audio du téléviseur
au connecteur d'entrée audio du périphérique.
22 23
Connexion à un ordinateur
Vous pouvez connecter directement un ordinateur au téléviseur ou au réseau afin d'afficher l'écran ou le contenu
de l'ordinateur sur le téléviseur. Pour cela, procédez comme suit :
● Connexion via le port HDMI
Vous pouvez connecter l'ordinateur au téléviseur à l'aide du câble HDMI afin d'afficher l'écran de l'ordinateur
sur le téléviseur.
● Connexion au port HDMI (DVI)
Vous pouvez connecter un ordinateur au téléviseur en reliant le port DVI de l'ordinateur au port HDMI du
téléviseur à l'aide du câble DVI vers HDMI afin d'afficher l'écran de l'ordinateur sur le téléviseur.
● Connexion via Samsung Link
Vous pouvez accéder rapidement aux fichiers audio, vidéo et photo enregistrés sur un ordinateur équipé du
logiciel Samsung Link, même sans connecter directement le téléviseur à l'ordinateur.
● Connexion via le réseau domestique (DLNA)
Vous pouvez accéder rapidement aux fichiers audio, vidéo et photo enregistrés sur un ordinateur en
connectant ce dernier et le téléviseur au même routeur ou point d'accès.
24
Connexion - Port HDMI
Avant de connecter un périphérique externe ou un câble au téléviseur, commencez par vérifier le numéro du
modèle du téléviseur. Un autocollant avec le numéro du modèle figure au dos du téléviseur. Le mode de connexion
varie selon le modèle.
Dans le cas d'une connexion HDMI, il est recommandé d'utiliser l'un des types de câbles HDMI suivants :
● Câble HDMI haute vitesse
● Câble HDMI haute vitesse avec Ethernet
" Utilisez un câble HDMI de 14 mm de diamètre maximum. L'utilisation d'un câble HDMI non certifié peut entraîner
l'affichage d'un écran vide ou une erreur de connexion.
" Il se peut que certains périphériques et câbles HDMI ne soient pas compatibles avec le téléviseur en raison de
spécifications HDMI différentes.
" Ce téléviseur ne prend pas en charge la fonctionnalité HDMI Ethernet Channel. Ethernet est un réseau local (LAN, Local
Area Network) basé sur des câbles coaxiaux normalisés par l'IEEE.
" Certains ordinateurs ne prennent pas en charge l'interface HDMI en raison des spécifications de l'adaptateur graphique.
Si c'est le cas pour votre ordinateur, utilisez un câble DVI vers HDMI pour connecter l'ordinateur au téléviseur.
Suivez les indications du schéma pour raccorder le connecteur de sortie HDMI du périphérique vidéo externe au
connecteur d'entrée HDMI du téléviseur à l'aide du câble HDMI.
Une fois la connexion établie, vous pourrez sélectionner le périphérique externe connecté à l'aide du bouton
SOURCE.
24 25
Connexion - Port HDMI (DVI)
Si l'adaptateur graphique dont votre ordinateur est équipé ne prend pas en charge l'interface HDMI, connectez ce
dernier au téléviseur à l'aide du câble DVI (Digital Visual Interactive) vers HDMI. Notez toutefois que la connexion
DVI vers HDMI est prise en charge uniquement par le port HDMI et qu'elle ne prend pas en charge la transmission
des signaux audio. Pour diffuser le son de l'ordinateur, raccordez le haut-parleur externe au connecteur de sortie
audio de l'ordinateur.
" Pour plus d'informations sur les résolutions prises en charge par le téléviseur, consultez la section "Précautions d'usage
pour la connexion d'un ordinateur".
Suivez les indications du schéma pour raccorder le port HDMI (DVI) du téléviseur au port de sortie DVI de
l'ordinateur à l'aide du câble DVI vers HDMI.
Une fois la connexion établie, vous pourrez sélectionner le périphérique externe connecté à l'aide du bouton
SOURCE.
26
Connexion - Samsung Link
Vous pouvez accéder rapidement aux fichiers audio, vidéo et photo enregistrés sur un ordinateur équipé du logiciel
Samsung Link. Vous pouvez également utiliser Samsung Link pour lire et afficher le contenu d'un ordinateur qui
a été enregistré sur Samsung Link sous votre compte Samsung, même si l'ordinateur et le téléviseur ne sont pas
connectés au même routeur ou point d'accès.
11 Accédez au portail de service et contenu de Samsung (http://link.samsung.com) via un ordinateur et
connectez-vous à votre compte Samsung.
" Pour installer le logiciel de bureau Samsung Link, vous devez d'abord vous connecter à votre compte Samsung. Si
vous n'en avez pas, créez-en un.
22 Installez le logiciel de bureau Samsung Link. Une fois l’installation terminée, l’ordinateur est enregistré sur
Samsung Link.
33 Précisez le dossier que vous souhaitez lier au téléviseur. Vous pouvez afficher et lire les fichiers audio, vidéo
et photo stockés dans le dossier spécifié sur l'écran du téléviseur.
" Pour plus d'informations sur l'utilisation du logiciel de bureau Samsung Link, consultez la section d'aide du logiciel.
Connexion - Réseau domestique (DLNA)
Vous pouvez accéder et afficher/lire rapidement, sur l'écran du téléviseur, les fichiers audio, vidéo et photo stockés
sur un ordinateur.
11 Connectez le téléviseur et l'ordinateur au même routeur ou point d'accès. Un réseau domestique est
configuré dès que les deux connexions ont été établies.
" Un réseau domestique (DLNA) permet de partager du contenu entre le téléviseur, les ordinateurs et les
périphériques mobiles connectés au même routeur câblé ou sans fil.
22 À partir de l'ordinateur, sélectionnez [Panneau de configuration] > [Réseau et Internet] > [Centre Réseau et
partage] > [Modifier les paramètres de partage avancés], puis sélectionnez [Choisir les options de diffusion
de contenu multimédia…] pour activer la diffusion multimédia en continu.
33 Dans la liste, définissez TV sur [Autorisé].
44 Lancez le Lecteur Windows Media à partir de l'ordinateur, sélectionnez [Paramètres] > [Gestion de
bibliothèque], puis ajoutez l'emplacement de stockage des fichiers audio, photo et vidéo pour les lire sur
l'écran du téléviseur.
" Il sera possible de lire et d'afficher sur l'écran du téléviseur les fichiers déplacés dans le dossier par défaut du
Lecteur Windows Media.
" Tant que le partage de fichiers est activé, il se peut que l'accès non autorisé soit possible. Si l'accès aux données n'est
pas nécessaire, désactivez le partage de fichiers.
26 27
Connexion à l'aide d'un périphérique mobile
Etablissez une connexion directe ou indirecte entre un périphérique mobile, tel qu'un smartphone ou une tablette,
et le téléviseur via un réseau partagé afin d'afficher le contenu ou l'écran du périphérique en question sur le
téléviseur. Pour connecter le périphérique mobile, procédez comme suit :
● Ecran du périphérique mobile sur le téléviseur (Réplication de l'écran)
Connectez le téléviseur au périphérique mobile en mode sans fil à l'aide de la fonction de réplication afin
d'afficher l'écran du périphérique sur le téléviseur.
" Cette option n'est disponible que sur les périphériques mobiles qui prennent en charge la fonction de réplication.
● Connexion de périphériques mobiles sans routeur sans fil (Wi-Fi Direct)
Wi-Fi Direct vous permet de connecter le téléviseur à un périphérique mobile sans passer par un routeur ou
un point d'accès. Vous pouvez accéder et lire rapidement, sur l'écran du téléviseur, les fichiers audio, vidéo et
photo stockés sur un périphérique mobile connecté.
" Cette option n'est disponible que sur les périphériques mobiles qui prennent en charge la fonction Wi-Fi Direct.
● Connexion via Samsung Link
Samsung Link vous permet de lire des fichiers audio, vidéo et photo enregistrés sur un périphérique mobile
compatible Samsung Link, sans qu'il soit nécessaire d'établir une connexion au téléviseur.
● Connexion via le réseau domestique (DLNA)
Vous pouvez afficher/lire sur le téléviseur les fichiers audio, vidéo et photo stockés sur un périphérique
mobile connecté au même routeur ou point d'accès que le téléviseur.

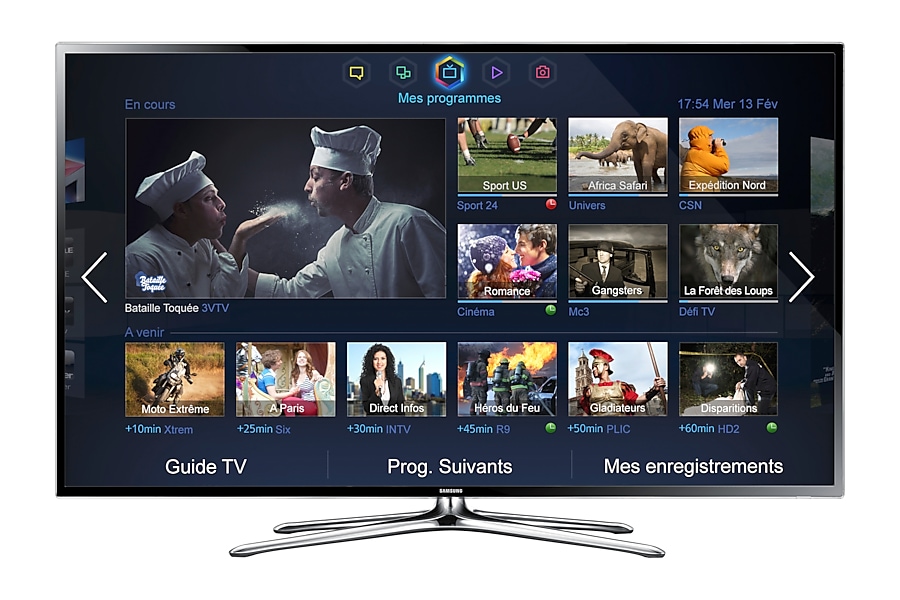


 Samsung-GALAXY-S4-Air-View-Tutoriel-Video
 Samsung- GALAXY S4 - Air Gesture - Tutoriel - Video
 Samsung- GALAXY S4 - Lecteur optique - Tutoriel - Video
 Samsung - GALAXY S4 - Smart Scroll - Tutoriel - Video
 Samsung GALAXY S4 - ChatOn - Tutoriel - Video
 Samsung GALAXY S4 - S Translator - Tutoriel - Video