Samsung GALAXY Y Pro Duos GT-B5512 RUSSE- Mode d'emploi - Manuel de l'utilisateur - Manuels- Samsung
SAMSUNG sur FNAC.COM
- Liste des manuels utilisateur Samsung
- Revenir à l'accueil
|
Описание
|
Дата выпуска 
|
Язык
|
Файл
|
|---|
| руководство пользователя |
2012.04.23 |
АНГЛИЙСКИЙ (EUROPE) |
7.74 MB
 |
| руководство пользователя |
2012.04.23 |
Русский |
6.42 MB
|
| Краткое руководство |
2012.04.19 |
АНГЛИЙСКИЙ (EUROPE) |
1.34 MB
|
| Краткое руководство |
2012.04.19 |
Русский |
1.44 MB
|
http://www.samsung.com/ru/support/model/GT-B5512HKASER-downloads
http://downloadcenter.samsung.com/content/UM/201204/20120423143847003/GT-B5512_UM_EU_Gingerbread_Eng_Rev.1.1_120423_Screen.pdf
http://downloadcenter.samsung.com/content/UM/201205/20120503175840491/GT-B5512_UM_Open_Gingerbread_Rus_Rev.1.1_120427_Screen.pdf
http://downloadcenter.samsung.com/content/EM/201204/20120419175602859/GT-B5512_QSG_EU_Eng_Rev.1.2_120417_Screen.pdf
http://downloadcenter.samsung.com/content/EM/201206/20120611145553197/GT-B5512_QSG_Open_Rus_Rev.1.4_120605_Screen.pdf
Manuels Utilisateurs Samsung :
Samsung-51-Smart-3D-Plasma-E8005-PS51E8005GU-Norvege-Manuels
Samsung-LE46C630-LE46C630K1W-Manuels
Samsung-T240-JP-Manuels
Samsung-821SC-JP-Manuels
Samsung-941SC-JP-Manuels
Samsung-740SC-JP-Manuels
Samsung-940SC-JP-Manuels
Samsung-GALAXY-Tab-7.0-Plus-SC-02D-JP-Manuels
Samsung-SNE-60K_UM_Embedded_KOR_100526-SEC-Manuels
Samsung-M_YUKON_2K_WD175ARYKSU_DC68-02631L-05-120810.pdf-SEC-Manuels
Samsung-DA68-01829P.pdf-SEC-Manuels
Samsung-DA68-01829P.pdf-Manuels
Samsung-LE52A676-LE52A676A1M-Manuels
Samsung-UE55C8700-UE55C8790XS-Manuels
Samsung-22-LE22D450WXZF-serie-4-Full-HD-LCD-TV-LE22D450G1W-Manuels
Samsung-40-UE40D8000WXZF-serie-8-SMART-TV-3D-FULL-HD-LED-TV-UE40D8000YS-Manuels
Samsung-UE40ES7000-ZF-Slim-LED-40-SMART-INTERACTION-3D-UE40ES7000S-Manuels
Samsung-Galaxy-Tab-2-10.1-GT-P5100-Manuels
Samsung-Galaxy-Tab-2-7.0-GT-P3100-Manuels
Samsung-S22B350B-Manuels
Samsung-51-PS51E490WXZF-serie-4-3D-HD-TV-PDP-TV-PS51E490B1W-Manuels
Samsung-Galaxy-Note-II-GT-N7100-Manuels
Samsung-GT-I9300-Manuels
SAMSUNG/SAMSUNG-DV90-Manuels
Samsung-GT-N8000-Manuels
Samsung-AQV12KBBN-Pologne-Manuels
Samsung-ML-2165W-Roumanie-Manuels
Samsung-Notebook-Serie-7-Chronos-700Z5C-S01-NP700Z5C-S01DE-Manuels
Samsung-Player-One-noir-Open-market-GT-S5230-Manuels
Samsung-LE32E420E2W-Manuels
Samsung-910MP-Manuels
Samsung-Galaxy-S-SCL-noir-Open-market-GT-I9003-M4-Manuels
Samsung-Samsung-Galaxy-Pro-gris-Open-market-GT-B7510-Manuels
Samsung-Galaxy-Gio-noir-SFR-GT-S5660-Manuels
Samsung-Galaxy-Teos-noir-Bouygues-GT-I5800-Manuels
Samsung-Galaxy-Spica-noir-Bouygues-GT-I5700-Manuels
Samsung-Omnia-Pro-B7610-noir-Open-market-GT-B7610-Manuels
Samsung-S5610-GT-S5610-Manuels
Samsung-LE32C650-LE32C650L1W-Manuels
Samsung-LE26D450G1W-Manuels
Samsung-N145Plus-NP-N145P-Manuels
Samsung-N150-NP-N150-Manuels
Samsung-NP20-NP20FK02BG-SEF-Manuels
Samsung-GT-S5570_UM_Open_Gingerbread_Fre_Rev.1.0_110726_Screen.pdf-Manuels
Samsung-GT-I9070P_UM_Open_Gingerbread_Fre_Rev.1.0_120710_Screen.pdf-Manuels
Samsung-GT-I9300_UM_Open_Icecream_Fre_Rev.1.2_120725_Screen.pdf-Manuels
Samsung-LE32D400E1W-Manuels
Samsung-Gainable-Slim-MH026FEEA-Manuels
Samsung-CW21Z573N-Manuels
Samsung-40-UE40D5700WXZF-serie-5-SMART-TV-FULL-HD-LED-TV-UE40D5700RS-Manuels
Samsung-UE46C8700-UE46C8790XS-Manuels
Samsung-UE32D5700RS-Manuels
Samsung-UE46ES6300-ZF-Slim-LED-46-SMART-TV-3D-UE46ES6300S-Manuels
Samsung-2012_Skype_Eng-0316-1-Manuels
Samsung-NS140SDXEA-Manuels
Samsung-MH050FXEA2B-Manuels
Samsung-UE75ES9000S-Slim-LED-75-SMART-Interaction-3D-Manuels
Samsung-RR92HAWW-Manuels
Samsung-GT-P6200-Manuels
Samsung-Refrigerateur-1porteA-350-L-Blanc-RR82FHSW-Manuels
Samsung-UE26EH4000-ZF-LED-26-HD-TV-UE26EH4000W-Manuels
Samsung-E-MANUAL-X9DVBEU4E-ENG-Manuel
Samsung-GT-S5360_UM_Open_Gingerbread_Fre_Rev.1.0_111130_Screen-Manuel
Samsung-Galaxy-Tab-10-1-GT-P7500-M16-Manuel
Samsung-Galaxy-Tab-10-1-GT-P7500-M16-Manuels
Samsung-GT-S5360-Manuels
Samsung-Lecteur-Multimedia-Galaxy-S-WiFi-4-0-Blanc-8Go-YP-G1CW-Manuels
Samsung-Galaxy-551-noir-Open-marketGT-I5510-Manuels
Samsung-Galaxy-Note-10-1-GT-N8000-Manuels
Samsung-GALAXY-S-II-LTE-SC-03D-JP-Manuels
Samsung-GALAXY-Note-SC-05D-JP-Manuels
Samsung-NP-R530-NP-R530-JA02FR-Manuels
Samsung-UE40C6000-UE40C6000RW-Manuels
Samsung-Congelateur-1porteA-277-L-Blanc-RZ80FHSW-Manuels
Samsung-GT-B5310-Manuels
Nexus-S-noir-Open-market-GT-I9023-GT-B5310-Manuels
Samsung-32-LE32D450WXZF-serie-4-HD-TV-LCD-TV-Manuels
Samsung-46-UE46D5700WXZF-serie-5-SMART-TV-FULL-HD-LED-TV-UE46D5700RS-Manuels
Samsung-UE55ES6560S-Manuels
Samsung-UE46ES8000-ZF-Slim-LED-46-SMART-INTERACTION-3D-UE46ES8000S-Manuels
Samsung-UE55ES6300-ZF-Slim-LED-55-SMART-TV-3D-UE55ES6300S-Manuels
Samsung-AQV18UGAX-Manuels
Samsung-UE50EH5300W-Manuels
Samsung-LE46A676-LE46A676A1M-Manuels
Samsung-UE46C7700-UE46C7700WS-Manuels
Samsung-CW21Z503N-Manuels
Samsung-AQ18UGFN-Manuels
Samsung-Refrigerateur-DP-A275-L-Blanc-RT34GBSW-Manuels
Samsung-UE46ES6100W-Manuels
Samsung-RR92HASX-Manuels
Samsung-LE40S71B-Manuels
Samsung-UE32ES6710-ZF-Slim-LED-32-SMART-TV-3DUE32ES6710S-Manuels
Samsung-Galaxy-Ace-noir-Open-market-GT-S5830-Manuels
Samsung-GALAXY-Tab-GT-P1000-GT-P1000-M16-Manuels
Samsung-Omnia-Pro-B7330-noir-Open-market-GT-B7330-Manuels
Samsung-Omnia-Lite-noir-Orange-GT-B7300-Manuels
Samsung-Galaxy-S2-GT-I9100-Manuels
Samsung-Nexus-S-noir-Open-market-GT-I9023-Manuels
Samsung-Omnia-II-noir-SFRGT-I8000-Manuels
Samsung-Omnia-II-noir-SFR-GT-I8000-Manuels
Samsung-Omnia-7-noir-Open-market-GT-I8700-Manuels
Samsung-Galaxy-noir-Bouygues-GT-I7500-Manuels
Samsung-Galaxy-mini-gris-Open-market-GT-S5570-Manuels
Samsung-XE700T1A-HF1FR-Manuels
17,3" Série 3 300E7A - NP300E7A-S01FR - Manuels
40", UE40D6500WXZF, série 6, SMART TV, 3D, FULL HD, LED TV - UE40D6500VS - Manuels
CLX-3185FW Manuels
Galaxy Ace GT-S5830
Galaxy S II GT-I9100
Galaxy Tab 8.9 GT-P7310/M16
Galaxy Tab 10.1 GT-P7500/M16
Galaxy YGT-S5360
LE32C350 LE32C350D1W
LE40C630 LE40C630K1W
MM-C330D
MM-D330D
Micro-chaîne, MM-D330DWXZF, série 3 - MM-D330 - Manuels
N145Plus - NP-N145P - Manuels
N150 - NP-N150 - Manuels
RSH5UEPN
SGH-F490
Samsung Galaxy Ace noir - Open market - GT-S5830 - Manuels
Samsung Galaxy S II noir - Open market - Manuels
Samsung Galaxy S III - GT-I9300 - Manuels
Samsung Galaxy S noir - Open market - GT-I9000 - Manuels
Samsung Galaxy NoteGT-N7000
Samsung Galaxy SGT-I9000
Série 3 300E7A - NP300E7A-S03FR - Manuels
T23A550 T23A550
UE40D6500ZF UE40D6500VS
UE55ES8000/ZF, Slim LED 55", SMART INTERACTION, 3D - UE55ES8000S - Manuels
Wave 575 GT-S5750E
Wave II GT-S8530
16/4ppm Imprimante laser couleur CLP-310 Manuels
16/4ppm Multifonction lasercouleur CLX-3170FN Manuels
16/4ppm Multifonction lasercouleur CLX-3185FW Manuels Samsung
16/4ppm Multifonction laser couleur CLX-3185 Manuels Samsung
samsung-Wave-II-noir-Open-market-GT-S8530-Manuels
Samsung-Wave-noir-Open-market-GT-S8500-Manuels
Samsung-Wave-M-noir-Open-market-GT-S7250-Manuels
Samsung-Wave-578-noir-Open-market-GT-S5780-Manuels
Samsung-Wave-533-noir-Open-market-GT-S5330-Manuels
Samsung-Wave-3-noir-Open-market-GT-S8600-Manuels
Samsung-Player-HD-noir-Open-market-GT-I8910-Manuels
Samsung-Player-Duo-noir-Open-market-SGH-D980-Manuels
Samsung-Player-Addict-noir-Open-market-SGH-I900-Manuels
Samsung-Omnia-W-noir-Open-market-GT-I8350-Manuels
| PRODUITS SAMSUNG : |
| Belkin Chargeur Secteur pour Samsung Galaxy S |
| Belkin Coque pour Samsung Galaxy S3 - Noire Translucide |
| Belkin Etui cuir Verve Folio pour Samsung Galaxy S II |
| Belkin Etui Pouch pour Samsung Galaxy S3 - Noir |
| Belkin Kit de Charge Secteur + Automobile pour Samsung Galaxy S |
| Belkin Lot de 3 protections d'écran pour Samsung Galaxy S3 |
| Belkin Lot de 3 protections d'écran pour Samsung Galaxy S3 - Anti-reflets |
| Belkin Lot de 3 protections d'écran Screen Guard pour Samsung Galaxy SII - Transparentes |
| Belkin Micro-Chargeur allume-cigares pour Samsung Galaxy S |
| Belkin Protection d'écran Screen Guard pour Samsung Galaxy SII - Confidentialité 360° |
| Câble Omenex Plug & Phone pour Samsung |
| Câble Omenex Plug & Phone pour Samsung |
| Coque semi-rigide glossy noire pour Samsung Galaxy S II |
| Déclencheur sans Fil Hahnel combi TF pour Canon/Pentax/Samsung |
| Enceintes iLuv iSM524 noir pour Samsung Galaxy Tab |
| Etui-Brassard Belkin DualFit pour Samsung Galaxy S II |
| Etui Samsung CC9S70B noir |
| Fnac chargeur secteur POWY pour Samsung SGH-D800 |
| G-Mobility Pack confort pour Samsung Galaxy SII i9100 |
| Imprimante Samsung CLX-3185FN - Ethernet |
| Kensington Etui pliant pour Samsung Galaxy Tab |
| Le Tanneur Etui cuir Pouch pour Samsung Galaxy S11 I9100 - Noir |
| Lunettes 3D actives Samsung SSG-4100GB |
| Modelabs 2 protections écran pour Samsung Galaxy ACE S5830 |
| Modelabs Lot de 2 protections d'écran One Touch pour Samsung Galaxy Y S5360 - Transparentes |
| Modelabs Lot de 2 protections d'écran pour Samsung Galaxy Note - Transparentes |
| Muvit Adaptateur Jack 3,5 mm pour Samsung (ancienne connectique) |
| Muvit Coque à rabat Agenda pour Samsung Galaxy Note - Noire |
| Muvit Coque Doodle Coeur pour Samsung i9000 Galaxy S |
| Muvit Coque Doodle Extraterrestres pour Samsung i9000 Galaxy S |
| Muvit Coque Doodle Rose pour Samsung i9000 Galaxy S |
| Muvit Coque silicone pour Samsung Galaxy Ace |
| Muvit Coque silicone pour Samsung Galaxy - Noire |
| Muvit Etui Clapet pour Samsung I9100 - Noir |
| Muvit Etui Slim Clapet pour Samsung Galaxy Note |
| Muvit Housse Minigel pour Samsung Galaxy - Noire |
| Muvit Lot de 2 protections d'écran pour Samsung nexus S - 1 Miroir/1 Secret |
| Muvit Lot de 2 protections d'écran pour Samsung S5830 |
| Muvit Pack Accessoires pour Samsung S5830 |
| Muvit Sticker Carbone pour Samsung I9100 |
| Muvit Sticker Drapeau pour Samsung I9100 - I Love Ibiza |
| Muvit Sticker Drapeau pour Samsung I9100 - I Love London |
| Muvit Sticker Drapeau pour Samsung I9100 - I Love New-York |
| Muvit Sticker Drapeau pour Samsung I9100 - I Love Paris |
| Muvit Sticker Drapeau pour Samsung I9100 - I Love Tokyo |
| Muvit Sticker Drapeau pour Samsung I9100 - United Kingdom |
| Muvit Sticker Drapeau pour Samsung I9100 - USA |
| QDOS Coque Cubic pour Samsung Galaxy II I9100 |
| QDOS Coque Steel 4 pour Samsung Galaxy S II |
| Samsung 305U1A 11,6" LED |
| Samsung 305U1A 11,6" LED + Office Famille et Etudiant 2010 1 poste |
| Samsung B1930HD 18.5" LCD TNT HD |
| Samsung B5722 Double SIM |
| Samsung Bac papier supplémentaire ML-S3710A - 520 feuilles |
| Samsung Batterie ED-BP1310 |
| Samsung batterie IA-BH130LB |
| Samsung batterie IA-BP420E |
| Samsung batterie IA-BP85ST |
| Samsung batterie SLB-10A |
| Samsung batterie SSB-690 ELS |
| Samsung BD-E5300 |
| Samsung BD-E5500 3D |
| Samsung BD-E6100 3D |
| Samsung BD-E8300 3D |
| Samsung BD-ES5000 |
| Samsung BD-ES6000 3D |
| Samsung C3050 Stratus |
| Samsung Câble Adaptateur HDTV pour Galaxy Tab 8.9" / 10.1" |
| Samsung Câble data pour téléphones mobiles Samsung |
| Samsung caméra Skype CY-STC1100 |
| Samsung CB20A12 |
| Samsung Ch@t335 - GT-S3350 - Noir |
| Samsung Chargeur allume-cigares micro-USB |
| Samsung chargeur de voyage pour SGH-P260 et SGH-G600 - Modèle Noir |
| Samsung Chargeur secteur de voyage micro-USB |
| Samsung CLP-325 + Toner Samsung CLT-K4072S Noir |
| Samsung CLP-325 + Toner Samsung CLT-K4072S Noir |
| Samsung CLP-620ND - Imprimante Ethernet |
| Samsung CLP-C300A |
| Samsung CLP-K300A |
| Samsung CLP-M300A |
| Samsung CLP-Y300A |
| Samsung CLX-3185FW WiFi |
| Samsung CLX-3185FW WiFi + Toner Samsung CLT-K4072S Noir + MCL Samar câble imprimante USB 2.0 |
| Samsung CLX-3185N Ethernet |
| Samsung CLX-3185W - Imprimante Multifonctions WiFi & Ethernet |
| Samsung CLX-6220FX - Imprimante Multifonctions Ethernet |
| Samsung Coque pour Galaxy S3 - Blanche |
| Samsung Coque pour Galaxy S3 - Noire |
| Samsung CY-SMN1000D meuble TV |
| Samsung Disque Dur interne SSD 128 Go - 830 Series |
| Samsung Disque Dur interne SSD 128 Go MZ-7PC128N 830 Series |
| Samsung Disque Dur interne SSD 256 Go MZ-7PC256D 830 Series |
| Samsung Disque Dur interne SSD 256 Go MZ-7PC256N 830 Series |
| Samsung Disque Dur interne SSD 512 Go - 830 Series |
| Samsung Disque Dur interne SSD 64 Go - 830 Series |
| Samsung Disque Dur interne SSD 64 Go MZ-7PC064D 830 Series |
| Samsung dongle Wi-Fi WIS12ABGNX |
| Samsung DP7000A3B 23" LED Tactile USB 3.0 + Samsung ML-2165 - Imprimante Monochrome |
| Samsung DP7000A3B 23" LED Tactile USB 3.0 + Sennheiser RS170 |
| Samsung DP7000A3B-A01FR 23" LED Tactile USB 3.0 |
| Samsung DP700A3B-S02FR 23" LED Tactile |
| Samsung Duo de 2 coques pour Samsung Galaxy II I9100 - 1 Noire + 1 Camel |
| Samsung Duo de 2 coques pour Samsung Galaxy II I9100 - 1 Noire matelassée + 1 Rose |
| Samsung DV300F Argent/Rouge - WiFi |
| Samsung DV300F Argent/Rouge - WiFi + Etui |
| Samsung DV300F Noir - WiFi |
| Samsung DV300F Noir - WiFi + Etui |
| Samsung E1150 - Silver |
| Samsung ES90 Noir |
| Samsung Etui coque pour Galaxy Note - Noir |
| Samsung Etui coque pour Samsung Galaxy Y S5360 - Noir |
| Samsung Etui cuir pour Galaxy S II - Noir |
| Samsung Etui rabat pour Samsung Galaxy S3 - Noir |
| Samsung Eui cuir pour i9000 Galaxy S |
| Samsung EX1 |
| Samsung Flash SEF15A |
| Samsung Flash SEF20A |
| Samsung Galaxy Ace s5830 (sous Android) |
| Samsung Galaxy Mini (sous Android) |
| Samsung Galaxy Note |
| Samsung Galaxy Note - Blanc |
| Samsung Galaxy Note - Dark Blue |
| Samsung Galaxy S2 (I9100G) - Blanc |
| Samsung Galaxy S2 (I9100G) - Noir |
| Samsung Galaxy S3 (I9300) - Blanc Marbre |
| Samsung Galaxy S3 (I9300) - Bleu Galet |
| Samsung Galaxy S WiFi 4,2" 16 Go |
| Samsung Galaxy Tab 10,1" TFT 16 Go Blanc Wifi |
| Samsung Galaxy Tab 10,1" TFT 16 Go Blanc Wifi + HP Housse Mini Sleeve 10,2" pour Netbook et Tablette - Ocean Drive |
| Samsung Galaxy Tab 10,1" TFT 16 Go Noir Wifi |
| Samsung Galaxy Tab 10,1" TFT Blanc + Western Digital My Book Live 1 To Ethernet |
| Samsung Galaxy Tab 10,1" TFT Noir + Western Digital My Book Live 1 To Ethernet |
| Samsung Galaxy Tab 2 10,1" 16 Go - Argent |
| Samsung Galaxy Tab 2 10,1" 16 Go - Blanc |
| Samsung Galaxy Tab 2 7.0" LED 8 Go |
| Samsung Galaxy Tab 8,9" TFT Blanc 32 Go Wifi |
| Samsung Galaxy Y Pro B5510 (sous Android) |
| Samsung Galaxy Y Young s5360 (sous Android) |
| Samsung Graveur DVD Externe Wifi - SE-208BW - Noir |
| Samsung Graveur Externe BluRay SE-506AB |
| Samsung HMX-F80 Noir |
| Samsung HMX-Q20 Noir |
| Samsung HMX-QF20 Noir |
| Samsung HMX-W350 Noir (tout terrain) + Kit Accessoires Sport + micro SDHC 8 Go |
| Samsung HMX-W350 Rouge (tout terrain) + Kit Accessoires Sport + micro SDHC 8 Go |
| Samsung Housse Folio pour Galaxy Tab 10,1" |
| Samsung Housse Folio pour Galaxy Tab 8,9" |
| Samsung HT-D330 |
| Samsung HT-D350 |
| Samsung HT-D4500 |
| Samsung HT-D5000 3D |
| Samsung HT-E4200 3D |
| Samsung HT-E4500 3D |
| Samsung HT-E5200 3D |
| Samsung HT-E5530 3D |
| Samsung HT-ES4200 3D |
| Samsung HT-ES6200 3D |
| Samsung HT-ES8200 3D |
| Samsung HW-E350 |
| Samsung HW-E450 |
| Samsung I9103 Galaxy R (sous Android) |
| Samsung Kit de connexion USB & SD pour Galaxy Tab 10.1" |
| Samsung Kit de vidéosurveillance tout-en-un SDE-3003P/EX |
| Samsung Kit de vidéosurveillance tout-en-un SME-4220 |
| Samsung kit HDMI |
| Samsung kit papier 10 x 15 cm |
| Samsung kit piéton filaire stéréo Jack 3,5 mm |
| Samsung LE32E420 |
| Samsung LE40D503 |
| Samsung ML-1630/SCX4500 |
| Samsung ML-2010D3 |
| Samsung ML-2165 - Imprimante Monochrome |
| Samsung ML-2165W - Imprimante WiFi |
| Samsung ML-2545 - Imprimante Monochrome |
| Samsung ML-2955DW - Imprimante Ethernet & WiFi |
| Samsung ML-2955ND - Imprimante Ethernet |
| Samsung ML-3310D - Imprimante Monochrome |
| Samsung ML-3710DW - Imprimante Ethernet & WiFi |
| Samsung MLT-D1052S |
| Samsung MLT-D1082S |
| Samsung MLT-D1092S |
| Samsung MM-D430D |
| Samsung MM-E320 |
| Samsung MV800 Noir |
| Samsung MV800 Noir + Etui Zadig & Voltaire Noir |
| Samsung NP300E7A-S09FR 17,3" LED |
| Samsung NP700Z5C 15.6" LED |
| Samsung NP-RC730-S07FR 17.3"LED |
| Samsung NX1000 Noir + Obj. Samsung NX 18 - 55 mm f/3.5 - 5.6 OIS |
| Samsung NX200 Noir + Obj. Samsung NX 20 - 50 mm f/3.5 - 5.6 ED i-Function + Flash SEF-8A NG8 |
| Samsung NX 50 - 200 mm f/4.0 - 5.6 ED OIS II i-Fonction; Dédié Boîtiers Hybrides |
| Samsung NX 60 mm f/2.8 ED OIS SSA Macro i-Function; dédié Boîtiers Hybrides |
| Samsung NX 85 mm f/1.4 ED SSA i-Function; dédié Boîtiers Hybrides |
| Samsung NX Pancake 16 mm f/2.4 i-Function; dédié Boîtiers Hybrides |
| Samsung NX Pancake 20 mm f/2.8 i-Function; dédié Boîtiers Hybrides |
| Samsung NX Pancake 30 mm f/2.0; dédié Boîtiers Hybrides |
| Samsung Oreillette Bluetooth HM1200 |
| Samsung Pack d'accessoire pour Galaxy S II I9100 |
| Samsung Pack HMX-F800 Noir : Caméscope HD + Etui + Carte SDHC 4 Go |
| Samsung Pack HMX-Q200 Noir : Caméscope Full HD + Etui + Carte SDHC 4 Go |
| Samsung PC portable NP300E5A-S0AFR 15.6"LED |
| Samsung PL210 Noir |
| Samsung PL210 Noir + Carte mémoire Lexar MicroSDHC 8 Go |
| Samsung Player mini 2 c3310 - Gris Métal |
| Samsung Port parallèle ML-PAR100 pour imprimante |
| Samsung PS43E450 |
| Samsung PS43E490 3D |
| Samsung PS43E490 3D + Console Xbox 360 4 Go |
| Samsung PS51E450 |
| Samsung PS51E490 3D |
| Samsung PS51E530 |
| Samsung Q3 noir 4 Go |
| Samsung Q3 rose 4 Go |
| Samsung RC530-S03FR 15,6" LED |
| Samsung RF712 E7P-C7261 17,3" LED 3D Blu-Ray USB 3.0 + lunettes |
| Samsung S19A100N Moniteur 18,5" - Flat Panel Display |
| Samsung S22B150N 21,5" LED |
| Samsung S22B350H 21,5" LED |
| Samsung S23A750D 23" LED 3D |
| Samsung S23B350H 23" LED |
| Samsung S23B550V Moniteur 23" LED |
| Samsung S24B300HL Moniteur 23,6" LED |
| Samsung S27B350H 27" LED |
| Samsung SCX-3405F - Imprimante Multifonctions |
| Samsung SCX-3405FW - Imprimante Multifonctions WiFi & Ethernet |
| Samsung SCX-3405 - Imprimante Multifonctions |
| Samsung SCX-3405W - Imprimante Multifonctions WiFi |
| Samsung SCX-4200A |
| Samsung SCX-4729FD - Imprimante Multifonctions Ethernet |
| Samsung SCX-4729FW - Imprimante Multifonctions Ethernet & WiFi |
| Samsung SCX-5737FW - Imprimante Multifonctions Ethernet |
| Samsung SE208AB Graveur DVD externe USB 2.0 |
| Samsung SE-218BB graveur DVD externe ultra slim USB 2.0 |
| Samsung SLB07A pour ST50 |
| Samsung SLB-11A pour Samsung WB1000 |
| Samsung ST200F Noir - WiFi |
| Samsung ST200F Rouge - WiFi |
| Samsung ST200F Violet - WiFi |
| Samsung ST65 Noir |
| Samsung ST65 Rouge |
| Samsung ST66 Noir |
| Samsung ST77 Blanc |
| Samsung ST77 Noir |
| Samsung ST77 Rouge |
| Samsung ST77 Violet |
| Samsung ST88 Noir |
| Samsung station d'accueil |
| Samsung station d'accueil HD2 |
| Samsung Station d'accueil pour tablette Galaxy Tab 8,9" |
| Samsung station d'accueil SSD-760 E2/EUR |
| Samsung SyncMaster C23A550U 23" LED |
| Samsung SyncMaster C23A750X 23" LED |
| Samsung Syncmaster S23A700D 23" LED 3D |
| Samsung Syncmaster T22A550 21,5" LED Tuner TNT HD |
| Samsung Système de vidéosurveillance Baby Monitor SEW-3022WP/ EX |
| Samsung T22A300 21.5" Tuner TNT HD |
| Samsung T22B300EW 21,5" LED Tuner TNT HD |
| Samsung T24B301 24" LED Tuner TNT HD |
| Samsung T27A550 27" LED Tuner TNT HD |
| Samsung Toner MLT-D101S pour imprimantes Samsung SCX-3405 & ML-2165 - Noir |
| Samsung UE19ES4000 LED |
| Samsung UE22ES5000 LED |
| Samsung UE22ES5410 LED |
| Samsung UE26EH4000 LED |
| Samsung UE26EH4500 LED |
| Samsung UE32EH4000 LED |
| Samsung UE32EH5000 LED |
| Samsung UE32ES5500 LED |
| Samsung UE32ES6300 LED 3D |
| Samsung UE32ES6300 LED 3D + Console Xbox 360 4 Go |
| Samsung UE32ES6710 LED 3D blanc |
| Samsung UE37ES5500 LED |
| Samsung UE40D5000 LED |
| Samsung UE40D6500 LED 3D |
| Samsung UE40EH5000 LED |
| Samsung UE40ES5500 LED |
| Samsung UE40ES6300 LED 3D |
| Samsung UE40ES6300 LED 3D + Console Xbox 360 4 Go |
| Samsung UE40ES6710 LED 3D |
| Samsung UE46EH5000 LED |
| Samsung UE46ES5500 LED |
| Samsung UE46ES6300 LED 3D |
| Samsung UE46ES6300 LED 3D + Console Xbox 360 4 Go |
| Samsung UE46ES6710 LED 3D blanc |
| Samsung UE46ES8000 LED 3D |
| Samsung UE55ES6300 LED 3D |
| Samsung UE55ES6300 LED 3D + Console Xbox 360 4 Go |
| Samsung UE60ES6100 LED 3D |
| Samsung ultrabook NP530U3B 13,3" - Aluminium + Microsoft Explorer Touch Mouse - Souris BlueTrack sans fil |
| Samsung ultrabook NP530U3B 13,3" LED USB 3.0 - Aluminium |
| Samsung ultrabook NP530U3B 13,3" LED USB 3.0 - Aluminium+ Samsonite Sac pour ordinateur portable 14,1" S Noir |
| Samsung ultrabook NP530U3B-A02 13,3" LED USB 3.0 + CaseLogic Sacoche double pour ordinateurs 14" & tablettes 10,1" - Grise |
| Samsung Ultrabook NP530U3C 13,3" HD LED - Série 5 Ultra - Marron |
| Samsung Ultrabook NP530U3C 13,3" HD LED - Série 5 Ultra - Rose |
| Samsung Viseur électronique EVF10 |
| Samsung Wave 575 |
| Samsung WB150F Blanc - WiFi |
| Samsung WB150F Noir - WiFi |
| Samsung WB690 Noir |
| Samsung WB700 Noir |
| Samsung WB850F Noir - WiFi - GPS |
| Samsung WMN250M accroche murale |
| Samsung XE700T1A-A02FR 11,6" 64 Go SSD |
| Samsung YP-F3 bleu 2 Go |
| Samsung YP-F3 rose 2 Go |
| Samsung YP-Q3 rose 8 Go |
| Samsung YP-Q3 rose 8 Go + Casque JVC HA-S155-P rose |
| Samsung YP-U6 noir 2 Go |
| Samsung YP-U6 noir 4 Go |
| Samsung YP-U6 rose 2 Go |
| Samsung YP-U6 rose 4 Go |
| Samsung YP-Z3 blanc 4 Go |
| Samsung YP-Z3 bleu 4 Go |
| Samsung YP-Z3 rose 4 Go |
| Samyang 14 mm f/2.8 Aspherical IF ED UMC; Monture Samsung NX |
| Samyang 35 mm f/1.4 AS UMC; Monture Samsung NX |
| Samyang Fish-eye 8 mm f/3.5 Aspherical IF MC; Monture Samsung Type NX |
| Tablette Samsung Galaxy S WiFi 3,6" 8 Go |
| Tablette Samsung Galaxy S WiFi 3,6" 8 Go + Casque weSC Conga Matte noir |
| Tablette Samsung Galaxy S WiFi 4,2" 8 Go |
| Tablette Samsung Galaxy S WiFi 5" 8 Go |
| T'nB Coque Clip On pour Samsung Galaxy SII - New York |
| Toner Samsung CLT-C4072S - Cyan |
| Toner Samsung CLT-C4092S Cyan |
| Toner Samsung CLT-K4072S - Noir |
| Toner Samsung CLT-K4092S Noir |
| Toner Samsung CLT-M4072S - Magenta |
| Toner Samsung CLT-M4092S Magenta |
| Toner Samsung CLT-P4092C - Pack de 4 Toners |
| Toner Samsung CLT-Y4072S - Jaune |
| Toner Samsung CLT-Y4092S Jaune |
| Toner Samsung MLT-D1042S - Noir |
| We Digital by Samsung - Silver We 1 To USB 2.0 |
| We Digital by Samsung - Silver WE 2 To USB 2.0 |
| Xqisit Coque iPlate Glossy pour Samsung Galaxy S3 - Blanche |
| Xqisit Coque iPlate Style pour Samsung Galaxy S3 - Transparente/Blanche |
| Xqisit Coque iPlate Style pour Samsung Galaxy S3 - Transparente/Noire |
| Xqisit Coque Soft Grip pour Samsung Galaxy S3 - Blanche |
| Xqisit Coque Soft Grip pour Samsung Galaxy S3 - Noire |
| Xqisit Etui Flipcover pour Samsung Galaxy S3 - Blanc |
| Xqisit Etui Flipcover pour Samsung Galaxy S3 - Noir |
Samsung - Aspirateur robot Navibot SR8845
Samsung - Aspirateur sans sac EcoStyle SC86G0 gris foncé/fuchsia
Samsung - Aspirateur sans sac SC4780 noir
Samsung - Four micro-ondes MW73B - blanc
SAMSUNG - Micro ondes 36 L - Micro ondes 36 L - CP1395ES
SAMSUNG - Micro ondes 42 L - Micro ondes 42 L - CQ1570U
Samsung - Micro-ondes combiné CE117PT-B
SAMSUNG - Micro-ondes Grill simultané GS89F-1SP
Samsung 305U1A 11,6" LED
Samsung 305U1A 11,6" LED + Office Famille et Etudiant 2010 1 poste
Samsung Aspirateur sans sac EcoStyle SC86H0 gris clair/bleu
Samsung B1930HD 18.5" LCD TNT HD
Samsung B5722 Double SIM
Samsung Bac papier supplémentaire ML-S3710A - 520 feuilles
Samsung Batterie ED-BP1310
Samsung batterie IA-BH130LB
Samsung batterie IA-BP420E
Samsung batterie IA-BP85ST
Samsung batterie SLB-10A
Samsung batterie SSB-690 ELS
Samsung BD-E5300
Samsung BD-E5500 3D
Samsung BD-E8300 3D
Samsung C3050 Stratus
Samsung Câble Adaptateur HDTV pour Galaxy Tab 8.9" / 10.1"
Samsung Câble data pour téléphones mobiles Samsung
Samsung Caméra additionnelle de vidéosurveillance SEB-1015RWP EX
Samsung caméra Skype CY-STC1100
Samsung CB20A12
Samsung Ch@t335 - GT-S3350 - Noir
Samsung Chargeur allume-cigares micro-USB
Samsung chargeur de voyage pour SGH-P260 et SGH-G600 - Modèle Noir
Samsung Chargeur secteur de voyage micro-USB
Samsung CLP-325 + Toner Samsung CLT-K4072S Noir
Samsung CLP-325 + Toner Samsung CLT-K4072S Noir
Samsung CLP-325 WiFi
Samsung CLP-325 WiFi + Toner Samsung CLT-K4072S Noir + MCL Samar câble imprimante USB 2.0
Samsung CLP-620ND - Imprimante Ethernet
Samsung CLP-C300A
Samsung CLP-K300A
Samsung CLP-M300A
Samsung CLP-Y300A
Samsung CLX-3185 + Toner Samsung CLT-K4072S Noir
Samsung CLX-3185 + Toner Samsung CLT-K4072S Noir
Samsung CLX-3185 + Toner Samsung CLT-K4072S Noir
Samsung CLX-3185FW WiFi
Samsung CLX-3185FW WiFi + Toner Samsung CLT-K4072S Noir + MCL Samar câble imprimante USB 2.0
Samsung CLX-3185N Ethernet
Samsung CLX-3185W - Imprimante Multifonctions WiFi & Ethernet
Samsung CLX-6220FX - Imprimante Multifonctions Ethernet
Samsung Coque silicone Croisillons pour nexus S
Samsung CY-SMN1000D meuble TV
Samsung Disque Dur interne SSD 128 Go MZ-7PC128D 830 Series
Samsung Disque Dur interne SSD 128 Go MZ-7PC128N 830 Series
Samsung Disque Dur interne SSD 256 Go MZ-7PC256D 830 Series
Samsung Disque Dur interne SSD 256 Go MZ-7PC256N 830 Series
Samsung Disque Dur interne SSD 64 Go MZ-7PC064D 830 Series
Samsung dongle Wi-Fi WIS12ABGNX
Samsung DP7000A3B 23" LED Tactile USB 3.0
Samsung Duo de 2 coques pour Samsung Galaxy II I9100 - 1 Noire + 1 Camel
Samsung Duo de 2 coques pour Samsung Galaxy II I9100 - 1 Noire matelassée + 1 Rose
Samsung DV300F Argent/Rouge - WiFi
Samsung DV300F Noir - WiFi
Samsung E1150 - Silver
Samsung E2550
Samsung EcoBlue SC61E0 bleu azur
Samsung ES30 Noir
Samsung ES30 Noir + Carte SD 2 Go
Samsung Etui coque pour Galaxy Note - Noir
Samsung Etui cuir pour Galaxy S II - Noir
Samsung Etui flap en cuir pour Samsung Galaxy II I9100 - Noir
Samsung Eui cuir pour i9000 Galaxy S
Samsung Flash SEF15A
Samsung Flash SEF20A
Samsung Galaxy Ace s5830 (sous Androïd)
Samsung Galaxy Mini (sous Android)
Samsung Galaxy Note
Samsung Galaxy Note - Blanc
Samsung Galaxy Note - Rose
Samsung Galaxy S2 (I9100G) - Blanc
Samsung Galaxy S2 (I9100G) - Noir
Samsung Galaxy Tab 10,1" TFT Blanc 32 Go + Western Digital My Book Live 1 To Ethernet
Samsung Galaxy Tab 10,1" TFT Blanc 32 Go Wifi
Samsung Galaxy Tab 10,1" TFT Noir 16 Go 3G
Samsung Galaxy Tab 8,9" TFT Blanc 32 Go Wifi
Samsung Galaxy Xcover s5690 (sous Androïd) - Smartphone Samsung Solide certifié IP67
Samsung Galaxy Y Pro B5510 (sous Androïd)
Samsung Galaxy Y Young s5360 (sous Androïd)
Samsung Graveur DVD Externe Wifi - SE-208BW - Noir
Samsung Housse Folio pour Galaxy Tab 10,1"
Samsung Housse Folio pour Galaxy Tab 8,9"
Samsung HT-D330
Samsung HT-D350
Samsung HT-D423
Samsung HT-D4500
Samsung HT-D5000 3D
Samsung HT-E4200 3D
Samsung HT-E4500 3D
Samsung HT-E5200 3D
Samsung HT-ES6200 3D WiFi
Samsung HW-E450
Samsung I9103 Galaxy R (sous Android)
Samsung Kit de connexion USB & SD pour Galaxy Tab 10.1"
Samsung Kit de vidéosurveillance tout-en-un SDE-3003P/EX
Samsung Kit de vidéosurveillance tout-en-un SME-4220
Samsung Kit Etui + Clavier Bluetooth pour Galaxy Tab 10,1" - Brun foncé
Samsung kit HDMI
Samsung kit HDMI
Samsung kit papier 10 x 15 cm
Samsung kit piéton filaire stéréo Jack 3,5 mm
Samsung LE40D550
Samsung Lot de 2 protections d'écran pour Galaxy S2 - Transparente/Miroir
Samsung Lot de 2 Protections d'écran pour i9000 Galaxy S
Samsung Lunettes 3D SSG-3050GB
SAMSUNG ME106V-SX
Samsung ME82V Micro-onde monofonction
SAMSUNG ME82V-SX
SAMSUNG Micro ondes MW87Y
SAMSUNG Micro-ondes combiné CE117APT B
SAMSUNG Micro-ondes combiné CE137NEMX
SAMSUNG Micro-ondes FW113T002
Samsung ML-1630/SCX4500
Samsung ML-2010D3
Samsung ML-2165 - Imprimante Monochrome
Samsung ML-2165W - Imprimante WiFi
Samsung ML-2545 - Imprimante Monochrome
Samsung ML-2955DW - Imprimante Ethernet & WiFi
Samsung ML-2955ND - Imprimante Ethernet
Samsung ML-3310D - Imprimante Monochrome
Samsung ML-3710DW - Imprimante Ethernet & WiFi
Samsung MLT-D1052S
Samsung MLT-D1082S
Samsung MLT-D1092S
Samsung MM-D430D
Samsung MV800 Noir
Samsung MV800 Noir + Etui Zadig & Voltaire Noir
Samsung NP300E7A-S03FR 17,3" LED
Samsung NP700Z5A-S02FR 15,6" LED
Samsung NX 60 mm f/2.8 ED OIS SSA Macro i-Function; dédié Boîtiers Hybrides
Samsung NX 85 mm f/1.4 ED SSA i-Function; dédié Boîtiers Hybrides
Samsung NX Pancake 16 mm f/2.4 i-Function; dédié Boîtiers Hybrides
Samsung NX Pancake 20 mm f/2.8 i-Function; dédié Boîtiers Hybrides
Samsung NX Pancake 30 mm f/2.0; dédié Boîtiers Hybrides
Samsung NX200 Noir + Obj. Samsung NX 18 - 55 mm f/3.5 - 5.6 OIS + Flash SEF-8A NG8
Samsung NX200 Noir + Obj. Samsung NX 20 - 50 mm f/3.5 - 5.6 ED i-Function + Flash SEF-8A NG8
Samsung Oreillette Bluetooth HM1200
Samsung Pack d'accessoire pour Galaxy S II I9100
Samsung Pack étui cuir + chargeur + protection d'écran pour Galaxy S
Samsung PL170 Noir
Samsung PL210 Noir
Samsung PL210 Noir + Carte mémoire Lexar MicroSDHC 8 Go
Samsung PL90 Noir et Rouge
Samsung Player mini 2 c3310 - Gris Métal
Samsung Player Mini C3300 - Noir
Samsung Port parallèle ML-PAR100 pour imprimante
Samsung PS43D450
Samsung PS43E450
Samsung PS43E490 3D
Samsung PS51E450
Samsung PS51E490 3D
Samsung PS59D530
Samsung Q3 rose 4 Go
Samsung RC530-S03FR 15,6" LED
Samsung RC730-S06FR 17,3" LED
Samsung RF712 E7P-C7261 17,3" LED 3D Blu-Ray USB 3.0 + lunettes
Samsung S22A300B 21,5" TFT
Samsung S22B350H 21,5" LED
Samsung S23A750D 23" LED 3D
Samsung S23B350H 23" LED
Samsung S24B300HL Moniteur 23,6" LED
Samsung S27B350H 27" LED
Samsung SC4340 noir ébène
Samsung SC4790 - Aspirateur sans sac - traineau - rouge
Samsung SCX-3405 - Imprimante Multifonctions
Samsung SCX-3405F - Imprimante Multifonctions
Samsung SCX-3405FW - Imprimante Multifonctions WiFi & Ethernet
Samsung SCX-3405W - Imprimante Multifonctions WiFi
Samsung SCX-4200A
Samsung SCX-4729FD - Imprimante Multifonctions Ethernet
Samsung SCX-4729FW - Imprimante Multifonctions Ethernet & WiFi
Samsung SCX-5737FW - Imprimante Multifonctions Ethernet
Samsung SE-084D graveur DVD externe slim USB 2.0
Samsung SE208AB Graveur DVD externe USB 2.0
Samsung SLB07A pour ST50
Samsung SLB-11A pour Samsung WB1000
Samsung ST65 Noir
Samsung ST65 Rouge
Samsung station d'accueil
Samsung station d'accueil HD2
Samsung Station d'accueil pour tablette Galaxy Tab 10,1"
Samsung Station d'accueil pour tablette Galaxy Tab 8,9"
Samsung station d'accueil SSD-760 E2/EUR
Samsung SyncMaster C23A550U 23" LED
Samsung SyncMaster C23A750X 23" LED
Samsung Syncmaster S23A700D 23" LED 3D
Samsung SyncMaster S24A350H 24" LED
Samsung Syncmaster T22A550 21,5" LED Tuner TNT HD
Samsung Système de vidéosurveillance Baby Monitor SEW-3022WP/ EX
Samsung T22A350 21,5" LED Tuner TNT
Samsung Toner MLT-D101S pour imprimantes Samsung SCX-3405 & ML-2165 - Noir
Samsung UE19D4010 LED
Samsung UE19ES4000 LED
Samsung UE22ES5000 LED
Samsung UE22ES5410 LED
Samsung UE26EH4000 LED
Samsung UE26EH4500 LED
Samsung UE32D5000 LED
Samsung UE32EH4000 LED
Samsung UE32EH5000 LED
Samsung UE32ES5500 LED
Samsung UE32ES6300 LED 3D
Samsung UE32ES6710 LED 3D blanc
Samsung UE40D5000 LED
Samsung UE40D5710 LED
Samsung UE40D6500 LED 3D
Samsung UE40EH5000 LED
Samsung UE40ES5500 LED
Samsung UE40ES6300 LED 3D
Samsung UE40ES6710 LED 3D
Samsung UE46EH5000 LED
Samsung UE46ES5500 LED
Samsung UE46ES6300 LED 3D
Samsung UE46ES6710 LED 3D blanc
Samsung UE55ES6300 LED 3D
Samsung ultrabook NP530U3B-A02 13,3" + Microsoft Explorer Touch Mouse - Souris BlueTrack sans fil
Samsung ultrabook NP530U3B-A02 13,3" LED USB 3.0
Samsung ultrabook NP530U3B-A02 13,3" LED USB 3.0 + CaseLogic Sacoche double pour ordinateurs 14" & tablettes 10,1" - Grise
Samsung ultrabook NP530U3B-A02 13,3" LED USB 3.0 + Samsonite Sac pour ordinateur portable 14,1" S Noir
Samsung ultrabook NP530U4B-S01FR 14" LED + Microsoft Explorer Touch Mouse - Souris BlueTrack sans fil
Samsung ultrabook NP530U4B-S01FR 14" LED USB 3.0
Samsung ultrabook NP530U4B-S01FR 14" LED USB 3.0 + CaseLogic Sacoche double pour ordinateurs 14" & tablettes 10,1" - Grise
Samsung ultrabook NP530U4B-S01FR 14" LED USB 3.0 + Samsonite Sac pour ordinateur portable 14,1" S Noir
Samsung Viseur électronique EVF10
Samsung WB150F Blanc - WiFi
Samsung WB150F Noir - WiFi
Samsung WB700 Noir
Samsung WB750 Noir
Samsung WIS09ABGN LinkStick WLAN-Adapter
Samsung WMN250M accroche murale
Samsung YP-F3 bleu 2 Go
Samsung YP-F3 noir 2 Go
Samsung YP-F3 rose 2 Go
Samsung YP-Q3 rose 8 Go
Samsung YP-Q3 rose 8 Go + Casque JVC HA-S155-P rose
Samsung YP-U6 noir 2 Go
Samsung YP-U6 noir 4 Go
Samsung YP-U6 rose 2 Go
Samsung YP-U6 rose 4 Go
Samsung YP-Z3 blanc 4 Go
Samsung YP-Z3 bleu 4 Go
Samsung YP-Z3 rose 4 Go
GT-B5512
Краткое руководство
Просмотр электронной версии руководства
пользователя
Для дополнительной информации обратитесь к сайту
www.samsung.com.
Руководство предоставляется в виде файла Adobe
Acrobat (.pdf). Если у вас нет программы Adobe Reader,
ее можно бесплатно загрузить по адресу www.adobe.com.2
Благодарим вас за покупку мобильного
устройства Samsung. Оно предоставит вам доступ
к высококачественным мобильным услугам и
развлечениям на основе передовых технологий и
высочайших стандартов Samsung.
• Содержание данного руководства пользователя
зависит от модели устройства и программного
обеспечения, поставляемого операторами
мобильной связи или поставщиками услуг, и может
изменяться без предварительного уведомления.
• Комплект поставки устройства и доступные
аксессуары могут варьироваться в зависимости от
региона или оператора мобильной связи.
• Дополнительные аксессуары можно приобрести у
местных дилеров компании Samsung.
• Рекомендуется использовать с устройством
аксессуары, входящие в комплект поставки.
• Аксессуары, не входящие в комплект поставки, могут
быть несовместимы с данным устройством.
Обозначения, используемые в данном
руководстве
Перед началом работы ознакомьтесь с обозначениями,
используемыми в данном руководстве.
Осторожно! — ситуации, которые могут
привести к получению травмы вами или кем-
либо из окружающих.
Внимание!— ситуации, которые могут привести
к повреждению устройства или другого
оборудования.3
Примечание— примечания, советы или
дополнительные сведения.
[ ] Квадратные скобки— такими скобками
оформляются названия клавиш устройства.
Авторские права
© Samsung Electronics, 2012.
Данное руководство пользователя защищено
международными законами об авторских правах.
Запрещается воспроизводить, распространять,
переводить или передавать какие-либо части данного
руководства пользователя в любой форме и любым
способом, электронным или механическим, включая
фотокопирование, запись и хранение в любой системе
хранения и поиска информации, без предварительного
письменного разрешения компании Samsung Electronics.4
Товарные знаки
• SAMSUNG и логотип SAMSUNG являются
зарегистрированными товарными знаками компании
Samsung Electronics.
• Логотип Android, Google Search™, Google Maps™,
Google Mail™, YouTube™, Android Market™ и Google
Talk™ являются зарегистрированными товарными
знаками корпорации Google, Inc.
• и являются товарными знаками
компании SRS Labs, Inc. Технологии CS Headphone и
WOW HD используются по лицензии компании SRS
Labs, Inc.
• Bluetooth
® является зарегистрированным товарным
знаком Bluetooth SIG, Inc. во всех странах мира.
• Wi-Fi
®, Wi-Fi Protected Setup™, логотип Wi-Fi CERTIFIED™,
и логотип Wi-Fi являются зарегистрированными
товарными знаками Wi-Fi Alliance.
Устройство использует негармонизированную частоту
и может нормально работать во всех европейских
странах. Использование беспроводных локальных
сетей в помещении без ограничений разрешено во
всех странах Европейского Союза. Использование
беспроводных локальных сетей вне помещения
запрещено во Франции.
• Остальные авторские права и товарные знаки
являются собственностью их владельцев.5
Сборка устройства
Установка SIM- или USIM-карты и
аккумулятора
1. Если устройство включено, нажмите и удерживайте
клавишу [ ], затем выберите пункт Выключение
телефона→ Да, чтобы выключить его.
2. Снимите крышку аккумулятора.
Соблюдайте осторожность, чтобы не поранить
пальцы при снятии крышки.6
3. Вставьте SIM- или USIM-карту в устройство
золотистыми контактами вниз.
Устройство оснащено двумя слотами SIM для установки
SIM- или USIM-карт и поддерживает переключение
между ними. Правый слот предназначен для установки
основной SIM- или USIM-карты. Левый слот предназначен
для установки дополнительной SIM- или USIM-карты.
SIM-карта 1
SIM-карта 2
Антенна располагается вверху на задней стороне
устройства. Чтобы избежать повреждений антенны,
не отрывайте защитную ленту, закрывающую ее.
Когда в устройстве используются две SIM- или
USIM-карты, для передачи данных в сетях GSM/UMTS
используется карта, вставленная в дополнительный
слот.7
4. Установите аккумулятор.
5. Закройте крышку аккумулятора.
Зарядка аккумулятора
Перед первым использованием устройства необходимо
зарядить аккумулятор.
Используйте только зарядные устройства и кабели,
одобренные компанией Samsung. Использование
несовместимых зарядных устройств и кабелей может
привести к взрыву аккумулятора или повреждению
устройства.
При полной разрядке аккумулятора включить
мобильное устройство невозможно, даже если
поставить его на зарядку. Следует подождать
несколько минут, пока аккумулятор немного
зарядится.8
1. Вставьте штекер зарядного устройства в
многофункциональный разъем.
Неправильное подключение зарядного устройства
может привести к серьезному повреждению
устройства. Гарантия не распространяется
на повреждения, возникшие в результате
неправильного использования устройства и
аксессуаров.
2. Подключите зарядное устройство к сети
переменного тока.
Во время зарядки телефона сенсорный экран может
не реагировать на касания. Это происходит из-за
нестабильного источника питания. В этом случае
отключите зарядное устройство от телефона.9
3. Когда аккумулятор полностью зарядится,
отсоедините зарядное устройство сначала от
устройства, затем от розетки.
Перед извлечением аккумулятора необходимо
отсоединить зарядное устройство. В противном
случае мобильное устройство может быть
повреждено.
В целях экономии электроэнергии отключайте
зарядное устройство, если оно не используется.
Зарядное устройство не оснащено выключателем
питания, поэтому его нужно отключать, чтобы
прервать процесс зарядки. При использовании
зарядное устройство должно плотно прилегать к
розетке.10
Начало работы
Включение и выключение устройства
Чтобы включить устройство, нажмите и удерживайте
клавишу [ ]. При первом включении устройства
настройте его, следуя инструкциям на экране.
Чтобы выключить устройство, нажмите и удерживайте
клавишу [ ], затем выберите пункт Выключение
телефона→ Да.
• Следуйте всем требованиям предупреждающих
табличек и указаниям персонала в тех местах,
где запрещено использование беспроводных
устройств, например в самолете или в больнице.
• Чтобы использовать несетевые функции
устройства, переключитесь в автономный режим.11
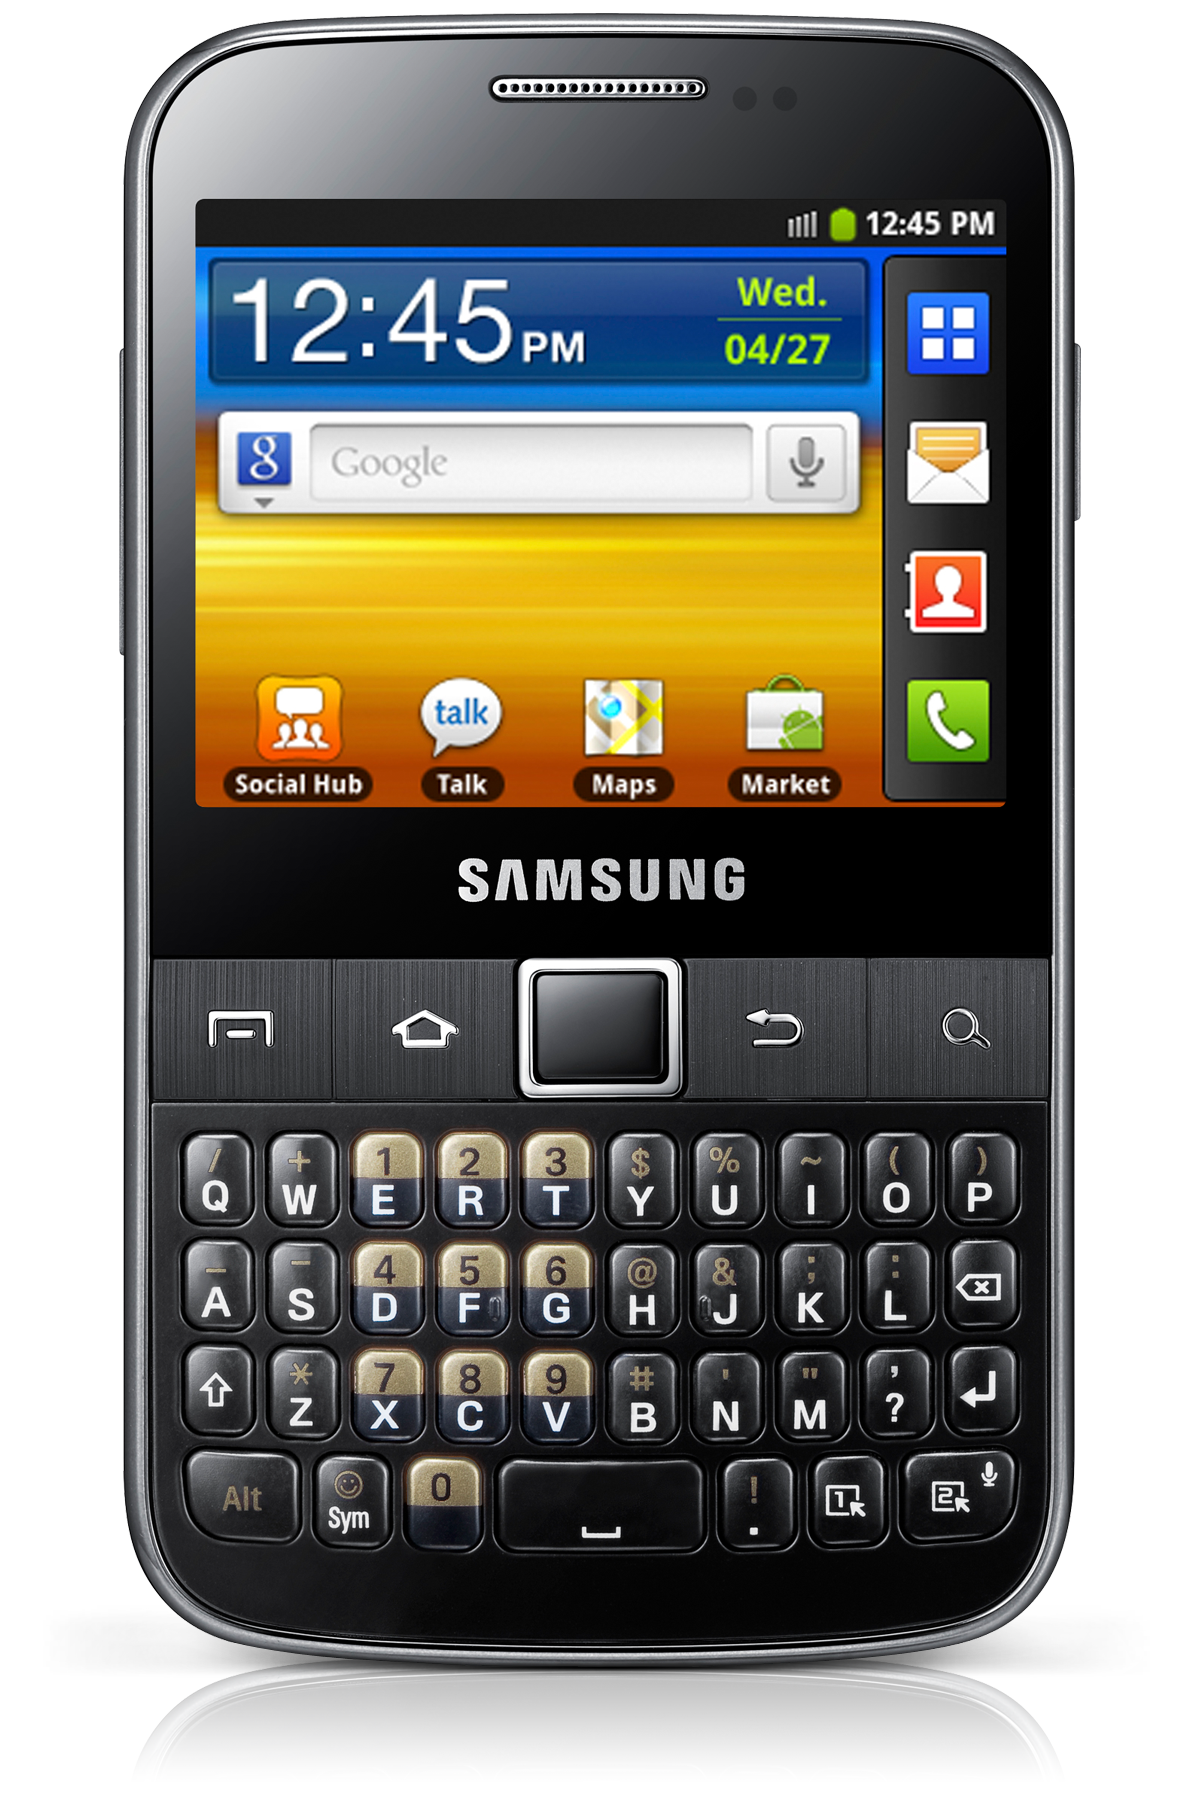
Общие сведения о устройстве
Основная камера
Разъем гарнитуры
Крышка
аккумулятора
Внешний динамик
Клавиша
громкости
Клавиша меню
Клавиша
«Главный экран»
Динамик
Микрофон
Передняя камера
Сенсорный экран
Клавиша «Назад»
Сенсорная панель
Клавиша «Поиск»
Многофункцио-
нальный разъем
Клавиша
питания/
перезагрузки/
блокировки
Основная антенна
GPS антенна
Клавиатура с
раскладкой
QWERTY
Датчики
расстояния12
Клавиши
Клавиша Описание
Питание/
Перезагрузка
1
/
Блокировка
Включение устройства (нажмите
и удерживайте); вызов меню
параметров телефона (нажмите
и удерживайте); перезагрузка
устройства (нажмите и
удерживайте в течение 8-10
секунд, а затем отпустите);
блокировка сенсорного экрана.
Меню
Вывод списка параметров,
доступных на данном экране.
Главный экран
Возврат на экран в режиме
ожидания; Вывод списка недавно
использованных приложений
(нажмите и удерживайте).
Сенсорная
панель
2
Переход между пунктами меню
(проведите пальцем); выбор
выделенного пункта меню или
подтверждение ввода (нажмите).
Назад
Возврат на предыдущий экран.
1. Если устройство «зависает» или возникают критические ошибки, может
потребоваться перезагрузить устройство.
2. Если оставить устройство на прямом солнечном свете на
продолжительное время, это может привести к неисправности трекпада
или отсутствию его реакции на нажатия. Рекомендуется использовать
устройство в тени без прямого солнечного света.13
Клавиша Описание
Клавиша
«Поиск»
Запуск поиска в Google; вывод
окна поиска в некоторых
приложениях; включение
голосового управления (нажмите
и удерживайте).
Громкость
Регулировка громкости звуков
устройства.
Сенсорный экран
Сенсорный экран устройства позволяет легко выбирать
элементы и выполнять различные функции. Управление
элементами на сенсорном экране осуществляется
посредством касания, касания и удержания, а также
перетаскивания.
Экран в режиме ожидания
Этот экран отображается, если устройство находится в
режиме ожидания. На нем отображены значки состояния,
виджеты, ссылки на приложения и прочие элементы.
На экране в режиме ожидания расположено несколько
рабочих столов. Чтобы выбрать нужный рабочий стол в
режиме ожидания,прокрутите изображение влево или
вправо.14
Значки состояния
Вверху экрана расположены значки уровня сигнала,
состояния устройства, текущего времени и других
сведений об устройстве.
Виджеты
На экране в режиме ожидания можно расположить
виджеты, предоставляющие быстрый доступ к функциям
и различной информации. Виджеты можно произвольно
добавлять или удалять с рабочего стола.
Панель уведомлений
На панели уведомлений можно воспользоваться
ссылками на пункты меню и получить доступ к списку
уведомлений (например, о сообщениях, событиях
или состоянии обработки). Чтобы открыть панель
уведомлений, коснитесь области индикаторов вверху
экрана и переместите палец вниз. Чтобы скрыть панель,
перетащите ее нижнюю часть вверх.
Работа с приложениями
1. Для доступа к списку приложений в режиме ожидания
коснитесь значка .
2. Прокрутите изображение влево или вправо, чтобы
выбрать нужный экран меню.
Можно также выбрать цифру с порядковым номером
страницы меню в верхней части экрана, чтобы сразу
перейти к нужному экрану.15
3. Выберите приложение.
4. Чтобы вернуться к предыдущему экрану, нажмите
клавишу [ ]; чтобы вернуться на экран в режиме
ожидания, нажмите клавишу [ ].
Переход к недавно использованным
приложениям
Нажмите и удерживайте [ ], чтобы открыть список
недавно использованных приложений.
Запуск нескольких приложений
Устройство позволяет одновременно использовать
несколько приложений.
Чтобы запустить несколько приложений, во время
использования одного из них нажмите [ ], чтобы
вернуться на экран в режиме ожидания, и выберите
нужное приложение.
Переключение между SIM- или USIM-
картами
После установки двух SIM- или USIM-карт можно
переключаться между ними.
Для переключения между SIM- или USIM-картами
нажмите [ ] в тот момент, когда устройство не
отправляет данные в сотовую сеть и не принимает их
из нее.16
Ввод текста
Текст можно вводить с помощью QWERTY-клавиатуры,
клавиатуры Samsung или в режиме рукописного ввода.
Также можно воспользоваться функциями копирования и
вставки фрагментов текста.
Клавиатура с раскладкой QWERTY
С помощью QWERTY-клавиатуры можно вводить буквы,
цифры и символы.
Клавиатура Samsung
Устройство оснащено несколькими типами клавиатуры
Samsung (например, QWERTY и 3x4), а также режимом
рукописного ввода.
При вводе текста с помощью клавиатур QWERTY или
3x4 используйте режим предикативного ввода. В этом
режиме устройство выводит подсказки по мере набора
слов.
Выполнение вызова и ответ на вызов
Чтобы выполнить вызов, можно набрать номер вручную
или выбрать его из списка контактов. Также можно
выбрать номер в журнале последних набранных
номеров.17
Выполнение вызова
На экране набора номера введите номер телефона и
коснитесь значка . Чтобы выполнить видеовызов,
выберите .
Ответ на вызов
Во время входящего вызова перетащите в любом
направлении до границы окружности.
Отправка и прием сообщений
В данном разделе описано, как создавать и отправлять
сообщения SMS, MMS и сообщения электронной почты,
а также просматривать отправленные и полученные
сообщения и управлять ими.
За отправку и получение сообщений за пределами
домашней сети может взиматься дополнительная
плата. Дополнительные сведения можно получить у
оператора мобильной связи.18
SMS- и MMS-сообщения
Можно создавать и отправлять как обычные сообщения,
так и мультимедийные, то есть содержащие текст,
фотографии, звук или видеозаписи.
Электронные сообщения
С помощью приложения электронной почты можно
отправлять с устройства электронные сообщения. Чтобы
начать отправлять и получать сообщения по электронной
почте, необходимо создать учетную запись электронной
почты.
Подключение к Интернету
Можно подключиться к беспроводной сети с
помощью функции Wi-Fi или к мобильной сети. Чтобы
просматривать веб-страницы, воспользуйтесь веб-
браузером. С его помощью можно добавлять закладки
для избранных веб-страниц и изменять различные
параметры веб- обозревателя.
За доступ к Интернету и загрузку файлов может
взиматься дополнительная плата. Дополнительные
сведения можно получить у оператора мобильной
связи.19
Меры предосторожности
Следующая информация позволит избежать травм, а также повреждений
вашего устройства.
Внимание: предотвращение поражения
электрическим током, возгорания или взрыва
Не используйте поврежденные сетевые шнуры или
штепсельные вилки, а также непрочно закрепленные на стене
розетки
Запрещается трогать вилку влажными руками, а также
отключать устройство, вытягивая вилку за шнур
Избегайте перегибания и повреждения сетевого шнура
Запрещается использовать устройство во время зарядки и
трогать его влажными руками
Защищайте зарядное устройство и аккумулятор от короткого
замыкания
Не роняйте устройство или аккумулятор и избегайте силового
воздействия на него
Запрещается заряжать устройство с помощью зарядных
устройств, не одобренных производителем
Не используйте устройство во время гроз
Ваше устройство может работать неисправно, и риск поражения
электрическим током увеличивается.
Запрещается использовать поврежденные или протекающие
литий-ионные аккумуляторы
Сведения о безопасной утилизации литий-ионных аккумуляторов можно
получить в ближайшем специализированном сервисном центре.20
Осторожно обращайтесь с аккумуляторами и зарядными
устройствами, соблюдайте правила их утилизации
• Используйте только рекомендованные компанией Samsung
аккумуляторы и зарядные устройства. Несовместимые аккумуляторы
и зарядные устройства могут привести к серьезным травмам и
повреждению вашего устройства.
• Ни в коем случае не сжигайте аккумуляторы или устройство в
целях утилизации. Соблюдайте все местные правила утилизации
использованных аккумуляторов и устройств.
• Не помещайте аккумуляторы или устройство на поверхность или внутрь
нагревательных приборов, таких как микроволновые печи, кухонные
плиты или радиаторы. При сильном нагревании аккумулятор может
взорваться.
• Никогда не разбивайте и не прокалывайте аккумуляторы. Не
подвергайте аккумулятор высокому внешнему давлению, которое
может привести к внутреннему короткому замыканию или перегреву.
Берегите устройство, аккумуляторы и зарядные устройства от
повреждений
• Берегите устройство и аккумулятор от воздействия экстремальных
температур.
• Слишком высокие или слишком низкие температуры могут привести
к повреждениям устройства, а также оказать негативное влияние на
емкость и срок службы аккумулятора.
• Не допускайте соприкосновения аккумуляторов с металлическими
предметами, так как это может создать контакт между полюсами
аккумулятора и привести к его временному или необратимому
повреждению.
• Не используйте поврежденные зарядные устройства или аккумуляторы.
Осторожно! Соблюдайте все предостережения об
опасности и правила при использовании устройства
в тех местах, где это запрещено
Выключайте устройство, если запрещается его использование
Ознакомьтесь со всеми предписаниями, ограничивающими использование
устройства в определенных местах.21
Запрещается использовать устройство рядом с электронными
приборами
Большинство электронных приборов излучают радиочастотные сигналы.
Устройство может создать помехи в их работе.
Запрещается использовать устройство рядом с
кардиостимулятором
• Держите включенный устройство на расстоянии не менее 15 см от
кардиостимулятора.
• Данную дистанцию следует соблюдать неукоснительно.
• Чтобы снизить воздействие устройства на кардиостимулятор,
прикладывайте устройство к правому уху, если кардиостимулятор
установлен на левой стороне грудной клетки, и наоборот.
Во избежание помех в работе медицинских приборов
запрещается использовать устройство в больницах
Если вы используете какие-либо медицинские приборы, обратитесь
к их производителю, чтобы убедиться, что эти приборы не излучают
радиочастотных сигналов.
Если вы используете слуховой аппарат, обратитесь к его
производителю за сведениями о взаимодействии с устройством
Включенное устройство может создавать помехи в работе некоторых
слуховых аппаратов. Чтобы не вызвать повреждений вашего слухового
аппарата, обратитесь к его производителю.
Выключайте устройство в потенциально взрывоопасной среде
• В потенциально взрывоопасной среде следует выключить устройство,
не извлекая аккумулятора.
• В потенциально взрывоопасной среде строго соблюдайте все указания,
инструкции и предупреждающие знаки.
• Не используйте устройство на автозаправочных станциях (станциях
техобслуживания), а также вблизи емкостей с топливом или
химическими веществами.
• Не храните и не перевозите горючие жидкости, газы или
взрывчатые вещества вместе с устройством, его компонентами или
принадлежностями.
Выключайте устройство на борту самолета
Использование устройства на борту самолета строго запрещено.
Устройство может создать помехи в работе электронного навигационного
оборудования самолета.22
Из-за излучаемых радиосигналов устройство может создать
помехи в работе электронного оборудования моторных средств
передвижения
Радиосигналы, излучаемые устройством, могут создать помехи в
работе электронного оборудования автомобиля. За дополнительной
информацией обращайтесь к производителю автомобиля.
Соблюдайте все предостережения и правила
использования мобильных устройств во время
управления автомобилем
Соблюдение техники безопасности имеет первостепенное значение при
управлении автомобилем. Никогда не говорите по устройству во время
управления автомобилем, если это запрещено законом. В целях вашей
безопасности и безопасности окружающих будьте осмотрительны и
следуйте данным рекомендациям.
• Пользуйтесь устройством громкой связи.
• Пользуйтесь такими функциями устройства, как быстрый набор и
повторный набор номера. Они ускорят выполнение вызова или прием
звонка.
• Расположите устройство в легкодоступном месте. Предусмотрите,
чтобы устройством можно было пользоваться, не отрывая глаз от
дороги. Входящий вызов, который поступил в неудобное время, может
принять автоответчик.
• Сообщите своему собеседнику, что вы за рулем. В случае интенсивного
движения или плохих погодных условий отложите разговор. Дождь,
мокрый снег, снег, гололед и интенсивное движение могут привести к
несчастному случаю.
• Не делайте записей и не просматривайте список телефонных номеров
во время движения. Просмотр списка дел или записей в телефонной
книге отвлекают внимание водителя от его основной обязанности —
безопасного управления автомобилем.
• Набирайте номер на ощупь, не отвлекаясь от управления автомобилем.
Рекомендуется набирать номер во время остановки или перед началом
движения. Старайтесь делать вызовы, когда автомобиль не движется.
При необходимости исходящего вызова во время движения наберите
только несколько цифр, посмотрите на дорогу и в зеркала и лишь после
этого продолжайте набор номера.
• Не ведите важных или эмоциональных разговоров, которые могут
отвлечь от обстановки на дороге. Сообщите своим собеседникам, что
вы за рулем, и отложите разговор, который может отвлечь внимание от
ситуации на дороге.23
• Пользуйтесь устройством для вызова службы экстренной помощи. В
случае пожара, дорожно-транспортного происшествия или ситуации,
угрожающей здоровью, наберите номер местной службы экстренной
помощи.
• В случае угрозы для жизни других людей воспользуйтесь устройством
для вызова службы экстренной помощи. Если вы стали свидетелем
дорожно- транспортного происшествия, преступления или других
происшествий, угрожающих жизни людей, позвоните в службу
экстренной помощи.
• При необходимости звоните в дорожно-транспортную службу или в
специализированную службу технической помощи. Если вы увидели
сломанный автомобиль, не представляющий серьезной опасности,
поврежденный дорожный знак, незначительное транспортное
происшествие, в котором никто из людей не пострадал, или украденный
автомобиль, позвоните в дорожно-транспортную службу или в
специализированную службу технической помощи.
Правильный уход за устройством и его
использование
Избегайте попадания влаги на устройство
• Влажность и жидкость любого типа могут повредить части или
электросхемы устройства.
• Не включайте намокшее устройство. Если устройство уже включено,
выключите его и сразу извлеките аккумулятор (eсли не удается
выключить устройство или извлечь аккумулятор, не прилагайте
чрезмерных усилий). Протрите устройство полотенцем и отнесите в
сервисный центр.
• В случае попадания воды внутрь устройства индикатор влаги меняет
цвет. Попадание влаги влечет за собой прекращение действия гарантии
производителя.
Не используйте и не храните устройство в запыленных или
загрязненных местах
Пыль может привести к сбоям в работе устройства.
Не кладите устройство на наклонные поверхности
При падении устройство может повредиться.24
Не храните устройство при повышенной или пониженной
температуре. Используйте устройство при температуре от
–20 °C до 50 °C
• Оставленное в салоне автомобиля устройство может взорваться,
поскольку температура в салоне может достигать 80 °C.
• Нельзя подвергать устройство продолжительному воздействию
прямых солнечных лучей (например, класть его на приборную панель
автомобиля).
• Храните аккумулятор при температуре от 0 °C до 40 °C.
Избегайте соприкосновения устройства с металлическими
предметами, такими как цепочки, монеты или ключи
• В противном случае это может привести к деформации или сбоям в
работе устройства.
• Соприкосновение контактов аккумулятора с металлическими
предметами может привести к возгоранию.
Не храните устройство рядом с источниками магнитного поля
• Воздействие магнитных полей может привести к сбоям в работе
устройства или разрядке аккумулятора.
• Также воздействие магнитных полей может привести к повреждению
карт с магнитной полосой, например кредитных и телефонных карт,
банковских книжек и посадочных талонов.
• Не используйте кейсы и аксессуары с магнитными замками и берегите
устройство от длительного воздействия магнитных полей.
Не храните устройство рядом с обогревателями,
микроволновыми печами, нагревающимся кухонным
оборудованием или в контейнерах с высоким давлением
• Аккумулятор может дать течь.
• Устройство может перегреться и вызвать возгорание.
Не роняйте устройство и избегайте силового воздействия на
него
• Дисплей устройства может быть поврежден.
• При изгибании или деформации корпус устройства может быть
поврежден, а электросхемы могут работать со сбоями.
В случае перегрева устройства сделайте перерыв в его
использовании
При длительном соприкосновении с перегретым устройством на коже
может появиться покраснение или пигментация.25
Если устройство оснащен вспышкой или фонариком, не
используйте их слишком близко к глазам людей и животных
Это может привести к временной потере зрения или повреждениям глаз.
Берегите зрение при работе с устройством
• Не держите устройство слишком близко к глазам. При использовании
его в помещении всегда оставляйте включенным хотя бы один источник
света.
• Продолжительный просмотр видеозаписей и использование Flash-игр
может вызвать нарушения зрения, а при наличии заболеваний —
обострение их симптомов. Если вы испытываете малейшие признаки
дискомфорта, немедленно прекратите использование устройства.
Помните о риске получения травм при использовании
устройства
При постоянном выполнении однообразных действий, таких как нажатие
клавиш, начертание пальцем символов на сенсорном экране и управление
играми, вы можете испытывать неприятные ощущения в пальцах, шее,
плечах или других частях тела. При продолжительном использовании
устройства рекомендуется держать его в расслабленной руке, нажимать на
клавиши без усилий и периодически делать перерывы. Если дискомфорт
не проходит долгое время, прекратите использование устройства и
обратитесь к врачу.
Обеспечение максимального срока службы аккумулятора и
зарядного устройства
• Не заряжайте аккумулятор дольше недели, поскольку перезарядка
может сократить срок его службы.
• Со временем неиспользуемые аккумуляторы разряжаются, поэтому
перед использованием их необходимо подзарядить.
• Если зарядное устройство не используется, отключайте его от сети.
• Аккумуляторы следует использовать только по их прямому назначению.
Используйте только одобренные производителем
аккумуляторы, зарядные устройства, аксессуары и компоненты
• Использование универсальных аккумуляторов и зарядных устройств
может сократить срок службы устройства и привести к сбоям в его
работе.
• Компания Samsung не несет ответственности за безопасность
пользователей, которые используют аксессуары и компоненты, не
одобренные компанией Samsung.26
Не кусайте и не лижите устройство или аккумулятор
• Это может привести к повреждению или взрыву устройства.
• Если устройством пользуются дети, убедитесь, что они используют его
правильно.
Во время разговора по устройству соблюдайте следующие
инструкции
• Держите устройство вертикально, как трубку стационарного телефона.
• Говорите прямо в микрофон устройства.
• Избегайте прикосновений к внутренней антенне устройства.
Прикосновение к антенне может снизить уровень сигнала или вызвать
передачу более интенсивного радиосигнала, чем нужно.
Берегите слух при использовании гарнитуры
• Длительное воздействие звука при очень высокой
громкости может привести к нарушениям слуха.
• Во время вождения звук высокой громкости может
отвлечь ваше внимание и привести к аварии.
• Каждый раз перед подключением наушников
уменьшайте уровень громкости. Устанавливайте
минимальный уровень громкости, при котором вы
можете поддерживать разговор или слушать музыку.
• В условиях низкой влажности воздуха в гарнитуре
может накапливаться статическое электричество. При
низкой влажности воздуха не используйте гарнитуру
или каждый раз перед ее подключением к устройству
прикасайтесь к металлическому предмету, чтобы
разрядить накопившееся статическое электричество.
Соблюдайте осторожность, разговаривая по устройству при
ходьбе или в движении
Во избежание травм всегда оценивайте окружающую обстановку.
Не носите устройство в заднем кармане брюк или на поясе
Падение на устройство может привести к травме или повреждению
устройства.
Не пытайтесь самостоятельно разбирать, ремонтировать и
модифицировать устройство
• Любые изменения в его конструкции влекут за собой прекращение
действия гарантии производителя. При нарушении нормальной работы
устройства обратитесь в сервисный центр Samsung.27
• Не разбирайте аккумулятор и не протыкайте его острыми предметами,
это может привести к взрыву или возгоранию.
Не перекрашивайте устройство и не приклеивайте к нему
наклейки
Краска и наклейки могут препятствовать нормальной работе подвижных
частей устройства. Если у вас возникла аллергическая реакция на краску
или металл, например кожный зуд, экзема или припухлость, следует
немедленно прекратить использование устройства и обратиться к врачу.
При очистке устройства соблюдайте следующие инструкции
• Протирайте устройство и зарядное устройство полотенцем или
прорезиненной губкой.
• Протирайте контакты аккумулятора ватным тампоном или полотенцем.
• Не используйте химикаты или моющие средства.
Не используйте устройство, если его дисплей поврежден или
разбит
Разбитое стекло или акриловая краска могут стать причиной травм рук и
лица. Отнесите устройство в сервисный центр Samsung для ремонта.
Используйте устройство только по прямому назначению
Соблюдайте нормы этикета при использовании устройства в
общественных местах
Не позволяйте детям пользоваться устройством
Устройство — не игрушка. Дети могут поранить себя или окружающих,
повредить само устройство или нечаянно выполнить нежелательные
вызовы.
Аккуратно устанавливайте мобильные устройства и
оборудование
• Убедитесь, что мобильные устройства или оборудование,
установленные в автомобиле, надежно закреплены.
• Не помещайте устройство и его аксессуары в зоне раскрытия подушки
безопасности или рядом с ней. Неправильная установка оборудования
для беспроводной связи может привести к серьезным травмам в случае
срабатывания подушки безопасности.28
Доверяйте ремонт устройства только квалифицированным
специалистам
Неквалифицированный ремонт может привести к поломке аппарата и
прекращению действия гарантии.
Аккуратно обращайтесь с SIM-картами и картами памяти
• Не извлекайте карту при передаче и получении данных, это может
привести к потере данных и/или повреждению карты или устройства.
• Предохраняйте карту от сильных ударов, статического электричества и
электрических помех от других устройств.
• Не прикасайтесь к золотистым контактам карт памяти пальцами и
металлическими предметами. Загрязненную карту протирайте мягкой
тканью.
Доступ к службам экстренной помощи
В некоторых зонах и обстоятельствах невозможно совершить экстренные
вызовы. В случае отъезда в отдаленные или необслуживаемые районы
предусмотрите другой способ связи со службами экстренной помощи.
Безопасность личной информации и важных данных
• При использовании устройства не забывайте регулярно создавать
резервные копии своих данных. Компания Samsung не несет
ответственности за утерю данных.
• Перед утилизацией устройства создайте резервную копию данных
и выполните сброс параметров, чтобы ваша личная информация не
попала к посторонним лицам.
Запрет на распространение материала, защищенного
авторскими правами
Распространение записей, которые содержат материал, защищенный
авторскими правами, без разрешения соответствующих владельцев
запрещено. Это является нарушением закона об авторских правах.
Производитель не несет ответственности за любое незаконное
использование материала, защищенного авторскими правами.29
Информация о сертификации удельного
коэффициента поглощения (SAR)
Устройство изготовлено с учетом предельно допустимых уровней
облучения радиочастотной (РЧ) энергией, рекомендованных Советом ЕС.
Данные стандарты запрещают продажу мобильных устройств, уровень
излучения которых (называемый удельным коэффициентом поглощения
SAR) превышает 2 Вт на килограмм.
Максимальное значение коэффициента SAR для данной модели телефона
— 0,573 ватт на килограмм. При обычном использовании значение SAR
гораздо меньше, поскольку устройство использует только радиочастотную
энергию, необходимую для передачи сигнала на ближайшую базовую
станцию. Благодаря автоматическому снижению уровня облучения
устройство сокращает общее количество выделяемой радиочастотной
энергии.
Декларация о соответствии нормам ЕС на задней обложке данного
руководства пользователя свидетельствует о соответствии директиве
Европейского Союза по радиооборудованию и телекоммуникационному
терминальному оборудованию (European Radio & Terminal
Telecommunications Equipment (R&TTE). Для получения дополнительных
сведений о SAR и стандартах ЕС посетите веб-сайт Samsung.
Правильная утилизация изделия
(использованное электрическое и электронное оборудование)
(Данные правила действуют в странах Европейского Союза и
других европейских странах с раздельной системой сбора
мусора)
Наличие данного значка показывает,что изделие и его
электронные аксессуары (например зарядное устройство,
гарнитура, кабель USB) по окончании их срока службы нельзя
утилизировать вместе с бытовыми отходами.
Во избежание нанесения вреда окружающей среде и здоровью людей при
неконтролируемой утилизации, а также для обеспечения возможности их
переработки для повторного использования утилизируйте изделие и его
электронные аксессуары отдельно от прочих отходов.
Сведения о месте и способе утилизации изделия в соответствии с нормами
природоохраны можно получить у продавца или в соответствующей
государственной организации.
Бизнес-пользователи должны обратиться к поставщику и ознакомиться с
условиями договора покупки. Запрещается утилизировать изделие и его
электронные аксессуары вместе с другими производственными отходами.30
Правильная утилизация аккумуляторов для этого
продукта
(для стран ЕС и других европейских стран, использующих
отдельные системы возврата аккумуляторов)
Такая маркировка на аккумуляторе, руководстве или
упаковке указывает на то, что аккумуляторы, используемые
в данном продукте, не должны выбрасываться вместе с
другими бытовыми отходами по окончании срока службы.
Химические символы Hg, Cd или Pb означают то, что аккумулятор
содержит ртуть, кадмий или свинец в количествах, превышающих
контрольный уровень в Директиве ЕС 2006/66. Если аккумуляторы
утилизированы неправильно, эти вещества могут нанести вред здоровью
людей или окружающей среде. Для защиты природных ресурсов и с целью
повторного использования ценных материалов отделяйте аккумуляторы
от остального мусора и сдавайте их на переработку через местную систему
бесплатного обмена аккумуляторов.
Символ «не для пищевой продукции» применяется в
соответствие с техническим регламентом Таможенного
союза «О безопасности упаковки» 005/2011 и указывает
на то, что упаковка данного продукта не предназначена
для повторного использования и подлежит утилизации.
Упаковку данного продукта запрещается использовать
для хранения пищевой продукции.
Символ «петля Мебиуса» указывает на возможность
утилизации упаковки. Символ может быть дополнен
обозначением материала упаковки в виде цифрового и/
или буквенного обозначения.
Отказ от ответственности
Некоторое содержимое и услуги данного устройства принадлежат третьим
лицам и защищены законом об охране авторских прав, патентом, торговой
маркой и/или другими законами об интеллектуальной собственности.
Такое содержимое и услуги предназначены исключительно для личного
некоммерческого использования. Запрещается использование любого
содержимого или услуги способом, отличным от указанного владельцем
содержимого или поставщика услуг. Не ограничиваясь вышеупомянутым,
если это явно не одобрено владельцем соответствующего содержимого
или поставщика услуг, запрещается изменение, копирование,31
переиздание, загрузка, отправка, перевод, продажа, создание
деривативных работ, эксплуатация или распространение любым способом
или средством любого содержимого или услуги, установленных на данном
устройстве.
СОДЕРЖИМОЕ И СЛУЖБЫ ТРЕТЬИХ ЛИЦ ПОСТАВЛЯЮТСЯ НА УСЛОВИИ
«КАК ЕСТЬ». КОМПАНИЯ SAMSUNG НЕ ДАЕТ НИКАКИХ ГАРАНТИЙ, ЯВНЫХ
ИЛИ ПОДРАЗУМЕВАЕМЫХ, НА ИСПОЛЬЗОВАНИЕ ТАКОГО СОДЕРЖИМОГО
ИЛИ СЛУЖБ С ЛЮБОЙ ЦЕЛЬЮ. КОМПАНИЯ SAMSUNG В ЯВНОЙ ФОРМЕ
ОТКАЗЫВАЕТСЯ ОТ ЛЮБЫХ ПОДРАЗУМЕВАЕМЫХ ГАРАНТИЙ, ВКЛЮЧАЯ
(НО НЕ ОГРАНИЧИВАЯСЬ) ГАРАНТИИ ГОДНОСТИ ДЛЯ ПРОДАЖИ И
СООТВЕТСТВИЯ ОПРЕДЕЛЕННОЙ ЦЕЛИ. КОМПАНИЯ SAMSUNG НЕ
ГАРАНТИРУЕТ ТОЧНОСТЬ, ГОДНОСТЬ, СВОЕВРЕМЕННОСТЬ, ЗАКОННОСТЬ
ИЛИ ПОЛНОТУ ЛЮБОГО СОДЕРЖИМОГО ИЛИ СЛУЖБ, ДОСТУПНЫХ НА
ДАННОМ УСТРОЙСТВЕ, И НИ ПРИ КАКИХ ОБСТОЯТЕЛЬСТВАХ, ВКЛЮЧАЯ
НЕБРЕЖНОСТЬ, КОМПАНИЯ SAMSUNG НЕ НЕСЕТ ОТВЕТСТВЕННОСТИ, БУДЬ
ТО КОНТРАКТ ИЛИ ГРАЖДАНСКОЕ ПРАВОНАРУШЕНИЕ, ЗА ЛЮБОЙ ПРЯМОЙ,
НЕПРЯМОЙ, СЛУЧАЙНЫЙ, СПЕЦИАЛЬНЫЙ ИЛИ ВОСПОСЛЕДОВАВШИЙ
УЩЕРБ, АДВОКАТСКИЕ ГОНОРАРЫ, РАСХОДЫ ИЛИ ЛЮБЫЕ ДРУГИЕ УБЫТКИ,
ВОЗНИКАЮЩИЕ В ПРОЦЕССЕ ИСПОЛЬЗОВАНИЯ ЛЮБОЙ ИНФОРМАЦИИ
(ИЛИ В СВЯЗИ С НИМ), СОДЕРЖАЩЕЙСЯ В ЛЮБОМ СОДЕРЖИМОМ ИЛИ
СЛУЖБЕ, ИЛИ В РЕЗУЛЬТАТЕ ИСПОЛЬЗОВАНИЯ ПОСЛЕДНИХ ВАМИ ИЛИ
ТРЕТЬИМИ ЛИЦАМИ, ДАЖЕ В ТОМ СЛУЧАЕ, ЕСЛИ ВЫ ИЛИ ОНИ БЫЛИ
ПРОИНФОРМИРОВАНЫ О ВОЗМОЖНОСТИ ВОЗНИКНОВЕНИЯ ТАКОГО
УЩЕРБА.
Услуги третьих лиц могут быть прекращены или приостановлены в
любое время, и компания Samsung не дает никаких разъяснений или
гарантий, что любое содержимое или услуга будут доступны в любой
период времени. Содержимое и услуги передаются третьими лицами с
помощью сети и средств передачи информации, контроля над которыми
компания Samsung не имеет. Без ограничения универсальности данного
отказа от ответственности компания Samsung явно отказывается от
любой ответственности за приостановку или временное прекращение
предоставления содержимого или услуг, доступных на данном устройстве.
Компания Samsung также не несет ответственности за клиентское
обслуживание, связанное с данным содержимым или услугами. Любые
вопросы или запросы на обслуживание, связанное с содержимым
или услугами, должны направляться напрямую к поставщикам
соответствующего содержимого или услуг.ИНФОРМАЦИЯ О СЕРТИФИКАЦИИ ПРОДУКЦИИ
Абонентская радиостанция носимая (мобильный телефон) Samsung GT-B5512
предназначена для работы в сетях подвижной радиотелефонной связи стандартов GSM 900/1800 и UMTS 2100
ДЕКЛАРАЦИЯ О СООТВЕТСТВИИ
Абонентская радиостанция носимая GT-B5512
производства фирмы Samsung Electronics Co., Ltd. соответствует
Дата принятия декларации:
Сертификат соответствия РСТ:
(Добровольная сертификация)
Абонентские радиостанции носимые типа
GT-B5512
соответствуют требованиям нормативных
документов:
Сертификат соответствия выдан:
РОСС КR.АB57.Н00703
2010-07-26
2013-07-26
ГОСТ Р 51318.22-99
ГОСТ Р 51318.24-99
Сертификат соответствия действителен до:
Декларация действительна до:
Федеральное агентство связи РФ
Регистрационный номер:
СЕРТИФИКАТ СООТВЕТСТВИЯ
Абонентская радиостанция носимая стандарта GSM 900/1800 и UMTS 2100
GT-B5512 производства фирмы Samsung Electronics Co., Ltd.
сертифицирована органом по сертификации "АЛЬТТЕСТ"
Система сертификации ГОСТ Р
ГОССТАНДАРТ РОССИИ
Импортер: ООО «Самсунг Электроникс Рус Компани»
125009 Россия, Москва, Бол. Гнездниковский пер., д.1, стр. 2
Изготовитель:
Samsung Electronics Co.Ltd. Самсунг Электроникс Ко. Лтд.
Адрес изготовителя:
416, Maetan-3dong, Yeongtong-gu
Suwon, Gyeonggi-do, 443-742, Korea
416, Маэтан 3-Донг, Ёнгтонг-Гу,
Сувон, Гьенгги-До, Республика Корея
Samsung Main Building 250, 2-Ka,
Taepyung-Ro Chung-Ku, 100-742, Seoul, Korea
Самсунг Мэйн Билдинг, 250, 2-Га, Тэпенг-Ро,
Чунг-Ку, 100-742, Сеул, Республика Корея
Адреса заводов:
"Самсунг Электроникс Ко., Лтд", 94-1, Имсо-Донг, Гуми-Сити, Кунг-Бак, Корея, 730-350
"Самсунг Электроникс Хуижоу Ко., Лтд.", Ченжианг таун, Хуижоу, провинция Гуангдонг, Китай
"Самсунг Электроникс Вьетнам Ко., Лтд.", Промышленный парк Йенпхонг Ай, Йентранг Комьюн, округ Йенпхонг,
провинция Бэкнинх, Вьетнам
"Тянжин Самсунг Телеком Технолоджи Ко., Лтд", Вейву Роад, Микроэлектроникс Индастриал Парк ТЕДА,
Ксиквин Дистрикт Тянжин 300385, Китай
"Правилам применения абонентских станций (абонентских радиостанций) сетей подвижной
радиотелефонной связи стандарта GSM 900/1800", "Правилам применения абонентских терминалов
систем подвижной радиотелефонной связи стандарта UMTS с частотным дуплексным разносом и
частотно-кодовым разделением радиоканалов, работающих в диапазоне частот 2000 МГц" и "Правилам
применения оборудования радиодоступа. Часть I. Правила применения оборудования радиодоступа для
беспроводной передачи данных в диапазоне от 30 МГц до 66 ГГц"Декларация соответствия (R&TTE)
Компания, Samsung Electronics
подтверждает, что данный
мобильный телефон GSM WCDMA BT/Wi-Fi : GT-B5512
к которому относится настоящая декларация, соответствует указанным ниже стандартам
и нормативным документам.
Безопасность EN 60950-1 : 2006+A1:2010
SAR EN 50360 : 2001 / AC 2006
EN 62209-1 : 2006
EN 62479 : 2010
ЭМС EN 301 489-01 V1.8.1 (04-2008)
EN 301 489-07 V1.3.1 (11-2005)
EN 301 489-17 V2.1.1 (05-2009)
EN 301 489-24 V1.5.1 (10-2010)
Сеть EN 301 511 V9.0.2 (03-2003)
EN 301 908-1 V4.2.1 (03-2010)
EN 301 908-2 V4.2.1 (03-2010)
EN 300 328 V1.7.1 (10-2006)
Настоящим декларируется, что [были проведены все существенные радиотехнические
тесты и что] указанное выше изделие соответствует принципиальным требованиям
директивы 1999/5/EC.
Процедура подтверждения соответствия, упомянутая в статье 10 и подробно описанная
в Приложении [IV] директивы 1999/5/ EC, проводилась с привлечением следующих
организаций:
BABT, Forsyth House,
Churchfield Road,
Walton-on-Thames,
Surrey, KT12 2TD, UK*
Идентификационный знак: 0168
Техническая документация хранится в:
Samsung Electronics QA Lab.
и предоставляется по запросу.
(Представитель в ЕС)
Samsung Electronics Euro QA Lab.
Blackbushe Business Park, Saxony Way,
Yateley, Hampshire, GU46 6GG, UK*
2011.11.25 Joong-Hoon Choi / Менеджер
(место и дата выпуска) (фамилия и подпись уполномоченного лица)
* Данный адрес не является адресом сервисного центра Samsung. Адреса и номера телефонов
сервисного центра Samsung см. в гарантийной карточке или обращайтесь по месту приобретения
изделия.Printed in Korea
GH68-36057X
www.samsung.com Russian. 06/2012. Rev. 1.4
Установка ПО Kies
(Синхронизация с ПК)
1. Загрузите последнюю версию программного
обеспечения Kies c веб-сайта компании
Samsung (www.samsung.com/kies) и
установите его на ваш компьютер.
2. Подключите устройство к компьютеру с
помощью USB-кабеля. Приложение Samsung
Kies запустится автоматически.
Для дополнительной информации обратитесь к
разделу Помощь по Kies.
Некоторая информация, приведенная в настоящем руководстве,
может не соответствовать Вашему телефону, поскольку зависит
от установленного программного обеспечения и/или Вашего
оператора сотовой связи. Дизайн, спецификации и другие данные
могут изменяться без предварительного уведомления.
GT-B5512
quick start guide
View the electronic version of the user manual
For more information, refer to the user manual at
www.samsung.com.
The manual is available as an Adobe Acrobat file (.pdf).
If you do not have Adobe Reader, you can download the
free program at www.adobe.com.2
Thank you for purchasing this Samsung mobile device.
This device will provide you with high quality mobile
communication and entertainment based on Samsung’s
exceptional technology and high standards.
• Content in this manual may differ from the product,
or from software provided by service providers
or carriers, and is subject to change without prior
notice.
• The items supplied with your device and available
accessories may vary depending on your region or
service provider.
• You can purchase additional accessories from your
local Samsung dealer.
• The supplied accessories perform best for your
device.
• Accessories other than the supplied ones may not be
compatible with your device.
Instructional icons
Before you start, familiarise yourself with the icons you
will see in this manual:
Warning—situations that could cause injury to
yourself or others
Caution—situations that could cause damage
to your device or other equipment3
Note—notes, usage tips, or additional
information
[ ] Square brackets—device keys
Copyright
Copyright © 2012 Samsung Electronics
This manual is protected under international copyright
laws.
No part of this manual may be reproduced, distributed,
translated, or transmitted in any form or by any means,
electronic or mechanical, including photocopying,
recording, or storing in any information storage and
retrieval system, without the prior written permission of
Samsung Electronics.4
Trademarks
• SAMSUNG and the SAMSUNG logo are registered
trademarks of Samsung Electronics.
• The Android logo, Google Search™, Google Maps™,
Google Mail™, YouTube™, Android Market™, and
Google Talk™ are trademarks of Google, Inc.
• and are trademarks of SRS Labs, Inc.
CS Headphone and WOW HD technologies are
incorporated under licence from SRS Labs, Inc.
• Bluetooth
® is a registered trademark of the
Bluetooth SIG, Inc. worldwide.
• Wi-Fi
®, Wi-Fi Protected Setup™, Wi-Fi CERTIFIED™,
and the Wi-Fi logo are registered trademarks of the
Wi-Fi Alliance.
Your device uses non-harmonised frequency and is
intended for use in all European countries. The Wi-Fi
can be operated in the EU without restriction indoors,
but cannot be operated outdoors in France.
• All other trademarks and copyrights are the property
of their respective owners.5
Assembling
Install the SIM or USIM card and battery
1. If the device is on, press and hold [ ] and select
Power off→ OK to turn it off.
2. Remove the back cover.
Be careful not to damage your fingernails when you
remove the back cover.6
3. Insert the SIM or USIM card with the gold-coloured
contacts facing down.
Your device has two SIM card slots to allow you to
use two SIM or USIM cards, and switch between
them. Use the right slot for your primary, or most
frequently used, SIM or USIM card. Use the left slot for
a secondary SIM or USIM card.
SIM card 1
SIM card 2
The antenna is located in the upper area on the
back of the device. Do not remove the protective
tape covering the antenna, as this can damage the
antenna.
When you insert two USIM cards into your device,
the card in the secondary slot will be used for a
GPRS network.7
4. Insert the battery.
5. Replace the back cover.
Charge the battery
Before using the device for the first time, you must
charge the battery.
Use only Samsung-approved chargers and cables.
Unauthorised chargers or cables can cause batteries
to explode or damage your device.
If the battery is completely discharged, you cannot
turn on the device, even with the travel adapter
connected. Allow a depleted battery to charge for a
few minutes before you try to turn on the device.8
1. Plug the small end of the travel adapter into the
multifunction jack.
Connecting the travel adapter improperly may
cause serious damage to the device. Any damage
caused by misuse is not covered by the warranty.
2. Plug the large end of the travel adapter into a power
outlet.
While the device is charging, the touch screen may
not function due to an unstable power supply. If
this happens, unplug the travel adapter from the
device.9
3. When the battery is fully charged, first unplug the
travel adapter from the device and then from the
power outlet.
Do not remove the battery before removing the
travel adapter. Doing this may cause damage to
the device.
To save energy, unplug the travel adapter when not
in use. The travel adapter does not have a power
switch, so you must unplug the travel adapter from
the outlet when not in use to avoid wasting power.
The travel adapter should remain close to the
socket when in use.10
Getting started
Turn your device on and off
To turn on your device, press and hold [ ]. If you turn
on your device for the first time, follow the on-screen
instructions to set up your device.
To turn off your device, press and hold [ ] and select
Power off→ OK.
• Follow all posted warnings and directions from
authorised personnel in areas where the use of
wireless devices is restricted, such as aeroplanes
and hospitals.
• To use your device’s non-network services only,
switch to Flight mode.11
Get to know your device
Rear camera lens
Headset jack
Back cover
Speaker
Volume key
Menu key
Home key
Earpiece
Mouthpiece
Front camera lens
Touch screen
Back key
Trackpad
Search key
Multifunction jack
Power/Reset/
Lock key
Main antenna
GPS antenna
QWERTY
keyboard
Proximity sensor12
Keys
Key Function
Power/
Reset
1
/
Lock
Turn on the device (press and hold);
Access the quick menus (press and
hold); Reset the device (press and hold
for 8-10 seconds and release); Lock the
touch screen.
Menu
Open a list of options available on the
current screen.
Home
Return to the idle screen; Open the list
of recent applications (press and hold).
Trackpad
2
Scroll through menu options (drag);
Select the highlighted menu option or
confirm an input (press).
Back
Return to the previous screen.
1. If your device has fatal errors or hang-ups, or freezes, you may
need to reset the device to regain functionality.
2. If you leave your device under direct sunlight for an extended
period of time, it may cause the trackpad to malfunction or freeze.
Try to use your device in a shady place out of direct sunlight.13
Key Function
Search
Open the Google search application;
Open the search input window while
using some applications; Launch the
voice command feature (press and
hold).
Volume
Adjust the device’s volume.
Touch screen
Your device’s touch screen lets you easily select items or
perform functions. Control the touch screen by tapping,
tapping and holding, or dragging across it.
Idle screen
When the device is in Idle mode, you will see the idle
screen. From the idle screen, you can view indicator
icons, widgets, shortcuts to applications, and other
items.
The idle screen has multiple panels. Scroll left or right to
a panel of the idle screen.14
Indicator icons
Indicator icons show the signal strength, device status,
current time, and other information at the top of the
screen.
Widgets
You can use various widgets that provide convenient
functions and information on your idle screen. Add a
widget to the idle screen or remove the widget to the
trash bin.
Notifications panel
From the notifications panel, you can use shortcut
menus and access a list of notifications, such as new
messages, upcoming events, and processing status. Tap
the indicator icons area at the top of the screen and drag
your finger down to open the notifications panel. To
hide the panel, drag the bottom of the list up.
Access applications
1. In Idle mode, select to access the application list.
2. Scroll left or right to another screen.
You can also select a dot at the top of the screen to
move directly to the corresponding screen.15
3. Select an application.
4. Press [ ] to return to the previous screen; Press
[ ] to return to the idle screen.
Access recent applications
Press and hold [ ] to view the applications you have
accessed recently.
Launch multiple applications
Your device allows you to multi-task by running multiple
applications at the same time.
To launch multiple applications, press [ ] while using
an application to return to Idle mode, and then select an
application to launch.
Switch SIM or USIM cards
Once you insert two SIM or USIM cards, you can switch
back and forth between each card.
To switch between SIM or USIM cards, press [ ] except
for when the device is sending or receiving messages or
data from the network.16
Enter text
You can enter text with the QWERTY and Samsung
keypad or in handwriting mode. You can also use editing
options to copy and paste text.
QWERTY keyboard
You can enter characters, numbers, and symbols by
pressing keys on the QWERTY keyboard.
Samsung keypad
The Samsung keypad provides different keypad types
(such as QWERTY and 3x4 keypads) and a handwriting
mode.
When entering text with the QWERTY or 3x4 keypad, use
the predictive text feature. This feature will predict the
word you are entering and display suggestions.
Make or answer a call
You can make a call by entering a phone number or
selecting a number in your contact list. You can also
access the call log to redial recently dialled numbers.17
Make a call
Open the dialling screen, enter a phone number, and
select . To make a video call, select .
Answer a call
When a call comes in, drag in any direction until it
reaches the border of the circle.
Send and receive messages
You can create and send text (SMS), multimedia (MMS),
or email messages, and view or manage messages you
have sent or received.
You may incur additional charges for sending
or receiving messages while outside your home
service area. For details, contact your service
provider.18
Text and multimedia message
You can create and send a simple text message or a
multimedia message which can contain text, image,
video, and sound files.
Email message
You can use the email application to send email
messages on your device. Before you send and receive
email messages, you must add an email account.
Connect to the internet
You can connect to the wireless web by using the Wi-Fi
feature or mobile network connections. Open the web
application and browse web pages. You can bookmark
your favourite web pages or use various web options.
You may incur additional charges for accessing
the web and downloading media files. For details,
contact your service provider.19
Safety precautions
To prevent injury to yourself and others or damage to your device, read all of
the following information before using your device.
Warning: Prevent electric shock, fire, and explosion
Do not use damaged power cords or plugs, or loose electrical
sockets
Do not touch the power cord with wet hands, or disconnect the
charger by pulling on the cord
Do not bend or damage the power cord
Do not use your device while charging or touch your device with
wet hands
Do not short-circuit the charger or the battery
Do not drop or cause an impact to the charger or the battery
Do not charge the battery with chargers that are not approved by
the manufacturer
Do not use your device during a thunderstorm
Your device may malfunction and your risk of electric shock is increased.
Do not handle a damaged or leaking Lithium Ion (Li-Ion) battery
For safe disposal of your Li-Ion batteries, contact your nearest authorised
service centre.
Handle and dispose of batteries and chargers with care
• Use only Samsung-approved batteries and chargers specifically designed for
your device. Incompatible batteries and chargers can cause serious injuries
or damage to your device.
• Never dispose of batteries or devices in a fire. Follow all local regulations
when disposing of used batteries or devices.20
• Never place batteries or devices on or in heating devices, such as microwave
ovens, stoves, or radiators. Batteries may explode when overheated.
• Never crush or puncture the battery. Avoid exposing the battery to
high external pressure, which can lead to an internal short circuit and
overheating.
Protect the device, batteries, and chargers from damage
• Avoid exposing your device and batteries to very cold or very hot
temperatures.
• Extreme temperatures can cause the deformation of the device and reduce
the charging capacity and life of your device and batteries.
• Prevent batteries from contacting metal objects, as this can create a
connection between the + and – terminals of your batteries and lead to
temporary or permanent battery damage.
• Never use a damaged charger or battery.
Caution: Follow all safety warnings and regulations
when using your device in restricted areas
Turn off your device where prohibited
Comply with all regulations that restrict the use of a mobile device in a
particular area.
Do not use your device near other electronic devices
Most electronic devices use radio frequency signals. Your device may interfere
with other electronic devices.
Do not use your device near a pacemaker
• Avoid using your device within a 15 cm range of a pacemaker if possible, as
your device can interfere with the pacemaker.
• If you must use your device, keep at least 15 cm away from the pacemaker.
• To minimise the possible interference with a pacemaker, use your device on
the opposite side of your body from the pacemaker.
Do not use your device in a hospital or near medical equipment
that can be interfered with by radio frequency
If you personally use any medical equipment, contact the manufacturer of the
equipment to ensure the safety of your equipment from radio frequency.21
If you are using a hearing aid, contact the manufacturer for
information about radio interference
Some hearing aids may be interfered with by the radio frequency of your
device. Contact the manufacturer to ensure the safety of your hearing aid.
Turn off the device in potentially explosive environments
• Turn off your device in potentially explosive environments instead of
removing the battery.
• Always comply with regulations, instructions and signs in potentially
explosive environments.
• Do not use your device at refuelling points (service stations), near fuels or
chemicals, and at blasting areas.
• Do not store or carry flammable liquids, gases, or explosive materials in the
same compartment as the device, its parts, or accessories.
Turn off your device when in an aircraft
Using your device in an aircraft is illegal. Your device may interfere with the
electronic navigation instruments of the aircraft.
Electronic devices in a motor vehicle may malfunction due to the
radio frequency of your device
Electronic devices in your car may malfunction due to radio frequency of your
device. Contact the manufacturer for more information.
Comply with all safety warnings and regulations
regarding mobile device usage while operating a
vehicle
While driving, safely operating the vehicle is your first responsibility. Never
use your mobile device while driving, if it is prohibited by law. For your safety
and the safety of others, practice good common sense and remember the
following tips:
• Use a hands-free device.
• Get to know your device and its convenience features, such as speed dial
and redial. These features help you reduce the time needed to place or
receive calls on your mobile device.
• Position your device within easy reach. Be able to access your wireless device
without removing your eyes from the road. If you receive an incoming call at
an inconvenient time, let your voice mail answer it for you.22
• Let the person you are speaking with know you are driving. Suspend calls
in heavy traffic or hazardous weather conditions. Rain, sleet, snow, ice, and
heavy traffic can be hazardous.
• Do not take notes or look up phone numbers. Jotting down a “to do” list or
flipping through your address book takes attention away from your primary
responsibility of driving safely.
• Dial sensibly and assess the traffic. Place calls when you are not moving or
before pulling into traffic. Try to plan calls when your car will be stationary.
If you need to make a call, dial only a few numbers, check the road and your
mirrors, then continue.
• Do not engage in stressful or emotional conversations that may be
distracting. Make people you are talking with aware you are driving and
suspend conversations that have the potential to divert your attention
from the road.
• Use your device to call for help. Dial a local emergency number in the case of
fire, traffic accident, or medical emergencies.
• Use your device to help others in emergencies. If you see an auto accident,
a crime in progress, or a serious emergency where lives are in danger, call a
local emergency number.
• Call roadside assistance or a special, non-emergency assistance number
when necessary. If you see a broken-down vehicle posing no serious hazard,
a broken traffic signal, a minor traffic accident where no one appears injured,
or a vehicle you know to be stolen, call roadside assistance or another
special, non-emergency number.
Proper care and use of your mobile device
Keep your device dry
• Humidity and all types of liquids may damage device parts or electronic
circuits.
• Do not turn on your device if it is wet. If your device is already on, turn it off
and remove the battery immediately (if the device will not turn off or you
cannot remove the battery, leave it as-is). Then, dry the device with a towel
and take it to a service centre.
• Liquids will change the colour of the label that indicates water
damage inside the device. Water damage to your device can void your
manufacturer’s warranty.
Do not use or store your device in dusty, dirty areas
Dust can cause your device to malfunction.23
Do not store your device on slopes
If your device falls, it can be damaged.
Do not store your device in hot or cold areas. Use your device at
-20 °C to 50 °C
• Your device can explode if left inside a closed vehicle, as the inside
temperature can reach up to 80 °C.
• Do not expose your device to direct sunlight for extended periods of time
(such as on the dashboard of a car).
• Store the battery at 0 °C to 40 °C.
Do not store your device with such metal objects as coins, keys
and necklaces
• Your device may become deformed or malfunction.
• If the battery terminals are in contact with metal objects, it may cause a fire.
Do not store your device near magnetic fields
• Your device may malfunction or the battery may discharge from exposure
to magnetic fields.
• Magnetic stripe cards, including credit cards, phone cards, passbooks, and
boarding passes, may be damaged by magnetic fields.
• Do not use carrying cases or accessories with magnetic closures or allow
your device to come in contact with magnetic fields for extended periods
of time.
Do not store your device near or in heaters, microwaves, hot
cooking equipment, or high pressure containers
• The battery may leak.
• Your device may overheat and cause a fire.
Do not drop your device or cause impacts to your device
• The screen of your device may be damaged.
• If bent or deformed, your device may be damaged or parts may malfunction.
Do not use your device or applications for a while if the device is
overheated
Prolonged exposure of your skin to an overheated device may cause low
temperature burn symptoms, such as red spots and pigmentation.24
If your device has a camera flash or light, do not use a flash close to
the eyes of people or pets
Using a flash close to the eyes may cause temporary loss of vision or damage
to the eyes.
Use caution when exposed to flashing lights
• While using your device, leave some lights on in the room and do not hold
the screen too close to your eyes.
• Seizures or blackouts can occur when you are exposed to flashing lights
while watching videos or playing Flash-based games for extended periods. If
you feel any discomfort, stop using the device immediately.
Reduce the risk of repetitive motion injuries
When you repetitively perform actions, such as pressing keys, drawing
characters on a touch screen with your fingers, or playing games, you may
experience occasional discomfort in your hands, neck, shoulders, or other
parts of your body. When using your device for extended periods, hold the
device with a relaxed grip, press the keys lightly, and take frequent breaks. If
you continue to have discomfort during or after such use, stop use and see
a physician.
Ensure maximum battery and charger life
• Avoid charging batteries for more than a week, as overcharging may shorten
battery life.
• Over time, unused batteries will discharge and must be recharged before
use.
• Disconnect chargers from power sources when not in use.
• Use batteries only for their intended purposes.
Use manufacturer-approved batteries, chargers, accessories and
supplies
• Using generic batteries or chargers may shorten the life of your device or
cause the device to malfunction.
• Samsung cannot be responsible for the user’s safety when using accessories
or supplies that are not approved by Samsung.
Do not bite or suck on the device or the battery
• Doing so may damage the device or cause explosion.
• If children use the device, make sure that they use the device properly.25
When speaking on the device:
• Hold the device upright, as you would with a traditional phone.
• Speak directly into the mouthpiece.
• Avoid contact with your device’s internal antenna. Touching the antenna
may reduce the call quality or cause the device to transmit more radio
frequency than necessary.
Protect your hearing and ears when using a headset
• Excessive exposure to loud sounds can cause hearing
damage.
• Exposure to loud sounds while driving may distract your
attention and cause an accident.
• Always turn the volume down before plugging the
earphones into an audio source and use only the
minimum volume setting necessary to hear your
conversation or music.
• In dry environments, static electricity can build up in the
headset. Avoid using headsets in dry environments or
touch a metal object to discharge static electricity before
connecting a headset to the device.
Use caution when using the device while walking or moving
Always be aware of your surroundings to avoid injury to yourself or others.
Do not carry your device in your back pockets or around your waist
You can be injured or damage the device if you fall.
Do not disassemble, modify, or repair your device
• Any changes or modifications to your device can void your manufacturer’s
warranty. For service, take your device to a Samsung Service Centre.
• Do not disassemble or puncture the battery, as this can cause explosion
or fire.
Do not paint or put stickers on your device
Paint and stickers can clog moving parts and prevent proper operation. If you
are allergic to paint or metal parts of the product, you may experience itching,
eczema, or swelling of the skin. When this happens, stop using the product and
consult your physician.26
When cleaning your device:
• Wipe your device or charger with a towel or a rubber.
• Clean the terminals of the battery with a cotton ball or a towel.
• Do not use chemicals or detergents.
Do not use the device if the screen is cracked or broken
Broken glass or acrylic could cause injury to your hands and face. Take the
device to a Samsung Service Centre to have it repaired.
Do not use the device for anything other than its intended use
Avoid disturbing others when using the device in public
Do not allow children to use your device
Your device is not a toy. Do not allow children to play with it as they could
hurt themselves and others, damage the device, or make calls that increase
your charges.
Install mobile devices and equipment with caution
• Ensure that any mobile devices or related equipment installed in your
vehicle are securely mounted.
• Avoid placing your device and accessories near or in an air bag deployment
area. Improperly installed wireless equipment can cause serious injury when
air bags inflate rapidly.
Allow only qualified personnel to service your device
Allowing unqualified personnel to service your device may result in damage to
your device and will void your manufacturer’s warranty.
Handle SIM cards or memory cards with care
• Do not remove a card while the device is transferring or accessing
information, as this could result in loss of data and/or damage to the card
or device.
• Protect cards from strong shocks, static electricity, and electrical noise from
other devices.
• Do not touch gold-coloured contacts or terminals with your fingers or metal
objects. If dirty, wipe the card with a soft cloth.
Ensure access to emergency services
Emergency calls from your device may not be possible in some areas or
circumstances. Before travelling in remote or undeveloped areas, plan an
alternate method of contacting emergency services personnel.27
Keep your personal and important data safe
• While using your device, be sure to back up important data. Samsung is not
responsible for data loss.
• When disposing of your device, back up all data and then reset your device
to prevent misuse of your personal information.
Do not distribute copyright-protected material
Do not distribute copyright-protected material that you have recorded to
others without the permission of the content owners. Doing this may violate
copyright laws. The manufacturer is not liable for any legal issues caused by the
user’s illegal use of copyrighted material.
Specific Absorption Rate (SAR) certification
information
Your device conforms to European Union (EU) standards that limit
human exposure to radio frequency (RF) energy emitted by radio and
telecommunications equipment. These standards prevent the sale of mobile
devices that exceed a maximum exposure level (known as the Specific
Absorption Rate, or SAR) of 2.0W/kg.
During testing, the maximum SAR recorded for this model was 0.573W/kg. In
normal use, the actual SAR is likely to be much lower, as the device has been
designed to emit only the RF energy necessary to transmit a signal to the
nearest base station. By automatically emitting lower levels when possible,
your device reduces your overall exposure to RF energy.
The Declaration of Conformity statement at the back of this manual
demonstrates your device’s compliance with the European Radio & Terminal
Telecommunications Equipment (R&TTE) directive. For more information about
the SAR and related EU standards, visit the Samsung website.28
Correct disposal of this product
(Waste Electrical & Electronic Equipment)
(Applicable in the European Union and other European countries
with separate collection systems)
This marking on the product, accessories or literature indicates
that the product and its electronic accessories (e.g. charger,
headset, USB cable) should not be disposed of with other
household waste at the end of their working life.
To prevent possible harm to the environment or human health
from uncontrolled waste disposal, please separate these items from other types
of waste and recycle them responsibly to promote the sustainable reuse of
material resources.
Household users should contact either the retailer where they purchased this
product, or their local government office, for details of where and how they can
take these items for environmentally safe recycling.
Business users should contact their supplier and check the terms and
conditions of the purchase contract. This product and its electronic accessories
should not be mixed with other commercial wastes for disposal.
This EEE is compliant with RoHS.
Correct disposal of batteries in this product
(Applicable in the European Union and other European countries
with separate battery return systems)
This marking on the battery, manual or packaging indicates
that the batteries in this product should not be disposed of with
other household waste at the end of their working life. Where
marked, the chemical symbols Hg, Cd or Pb indicate that the
battery contains mercury, cadmium or lead above the reference levels in EC
Directive 2006/66. If batteries are not properly disposed of, these substances
can cause harm to human health or the environment.
To protect natural resources and to promote material reuse, please separate
batteries from other types of waste and recycle them through your local, free
battery return system.29
Disclaimer
Some content and services accessible through this device belong to third
parties and are protected by copyright, patent, trademark and/or other
intellectual property laws. Such content and services are provided solely for
your personal noncommercial use. You may not use any content or services
in a manner that has not been authorised by the content owner or service
provider. Without limiting the foregoing, unless expressly authorised by the
applicable content owner or service provider, you may not modify, copy,
republish, upload, post, transmit, translate, sell, create derivative works, exploit,
or distribute in any manner or medium any content or services displayed
through this device.
“THIRD PARTY CONTENT AND SERVICES ARE PROVIDED “AS IS.” SAMSUNG
DOES NOT WARRANT CONTENT OR SERVICES SO PROVIDED, EITHER EXPRESSLY
OR IMPLIEDLY, FOR ANY PURPOSE. SAMSUNG EXPRESSLY DISCLAIMS ANY
IMPLIED WARRANTIES, INCLUDING BUT NOT LIMITED TO, WARRANTIES OF
MERCHANTABILITY OR FITNESS FOR A PARTICULAR PURPOSE. SAMSUNG
DOES NOT GUARANTEE THE ACCURACY, VALIDITY, TIMELINESS, LEGALITY, OR
COMPLETENESS OF ANY CONTENT OR SERVICE MADE AVAILABLE THROUGH
THIS DEVICE AND UNDER NO CIRCUMSTANCES, INCLUDING NEGLIGENCE,
SHALL SAMSUNG BE LIABLE, WHETHER IN CONTRACT OR TORT, FOR ANY
DIRECT, INDIRECT, INCIDENTAL, SPECIAL OR CONSEQUENTIAL DAMAGES,
ATTORNEY FEES, EXPENSES, OR ANY OTHER DAMAGES ARISING OUT OF, OR IN
CONNECTION WITH, ANY INFORMATION CONTAINED IN, OR AS A RESULT OF
THE USE OF ANY CONTENT OR SERVICE BY YOU OR ANY THIRD PARTY, EVEN IF
ADVISED OF THE POSSIBILITY OF SUCH DAMAGES.”
Third party services may be terminated or interrupted at any time, and
Samsung makes no representation or warranty that any content or service will
remain available for any period of time. Content and services are transmitted
by third parties by means of networks and transmission facilities over which
Samsung has no control. Without limiting the generality of this disclaimer,
Samsung expressly disclaims any responsibility or liability for any interruption
or suspension of any content or service made available through this device.
Samsung is neither responsible nor liable for customer service related to
the content and services. Any question or request for service relating to the
content or services should be made directly to the respective content and
service providers.Declaration of Conformity (R&TTE)
We, Samsung Electronics
declare under our sole responsibility that the product
GSM WCDMA BT/Wi-Fi Mobile Phone : GT-B5512
to which this declaration relates, is in conformity with the following standards and/or
other normative documents.
SAFETY EN 60950-1 : 2006 +A1:2010
SAR EN 50360 : 2001 / AC 2006
EN 62209-1 : 2006
EN 62479 : 2010
EMC EN 301 489-01 V1.8.1 (04-2008)
EN 301 489-07 V1.3.1 (11-2005)
EN 301 489-17 V2.1.1 (05-2009)
EN 301 489-24 V1.5.1 (10-2010)
RADIO EN 301 511 V9.0.2 (03-2003)
EN 301 908-1 V4.2.1 (03-2010)
EN 301 908-2 V4.2.1 (03-2010)
EN 300 328 V1.7.1 (10-2006)
We hereby declare that [all essential radio test suites have been carried out and that]
the above named product is in conformity to all the essential requirements of Directive
1999/5/EC.
The conformity assessment procedure referred to in Article 10 and detailed in Annex
[IV] of Directive 1999/5/EC has been followed with the involvement of the following
Notified Body(ies):
BABT, Forsyth House,
Churchfield Road,
Walton-on-Thames,
Surrey, KT12 2TD, UK*
Identification mark: 0168
The technical documentation kept at :
Samsung Electronics QA Lab.
which will be made available upon request.
(Representative in the EU)
Samsung Electronics Euro QA Lab.
Blackbushe Business Park, Saxony Way,
Yateley, Hampshire, GU46 6GG, UK*
2011.11.25 Joong-Hoon Choi / Lab Manager
(place and date of issue) (name and signature of authorised person)
* It is not the address of Samsung Service Centre. For the address or the phone number of
Samsung Service Centre, see the warranty card or contact the retailer where you purchased your
product.Printed in Korea
GH68-36057A
www.samsung.com English (EU). 04/2012. Rev. 1.2
To install Kies (PC Sync)
1. Download the latest version of Kies from the
Samsung website (www.samsung.com/kies) and
install it on your PC.
2. Using a USB cable, connect your device to your PC.
Samsung Kies will launch automatically.
Refer to the Kies help for more information.
Some of the contents in this manual may differ from your device
depending on the software of the device or your service provider.
GT-B5512
Руководство
пользователяО данном руководстве
2
www.sar-tick.com
Данное изделие удовлетворяет
государственным ограничениям значения
SAR — 2,0 Вт/кг. Точные максимальные
значения SAR доступны в разделе
«Информация о сертификации удельного
коэффициента поглощения (SAR)» данного
руководства пользователя.
О данном руководстве
Благодарим вас за покупку мобильного устройства Samsung.
Оно предоставит вам доступ к высококачественным мобильным
услугам и развлечениям на основе передовых технологий и
высочайших стандартов Samsung.
Данное руководство предназначено для того, чтобы помочь вам
разобраться в функциях и характеристиках устройства.
Сначала прочтите следующую информацию
● Внимательное прочтение всех инструкций по безопасности и
данного руководства пользователя гарантирует правильную и
безопасную работу с устройством.
● Описания, приведенные в этом руководстве, основаны на
параметрах устройства по умолчанию.
● Изображения и снимки, приведенные в данном руководстве,
могут отличаться от реального вида устройства.
● Содержание данного руководства пользователя зависит
от модели устройства и программного обеспечения,
поставляемого операторами мобильной связи или
поставщиками услуг, и может изменяться без предварительного
уведомления. Обновленные руководства пользователя см. на
веб-сайте www.samsung.com.
● Доступные функции и дополнительные услуги зависят от
модели устройства, программного обеспечения и оператора
мобильной связи.О данном руководстве
3
● Данное руководство создано для пользователей платформы
Android. При использовании других ОС некоторые
приведенные инструкции могут быть неточными.
● Доступные приложения и их возможности зависят от страны,
региона и характеристик оборудования. Компания Samsung не
несет ответственности за сбои в работе устройства, вызванные
приложениями сторонних разработчиков.
● Компания Samsung не несет ответственности за сбои в
работе устройства и проблемы совместимости, вызванные
изменениями настроек реестра или операционной системы.
Попытка внести изменения в операционную систему может
привести к неправильной работе устройства или приложений.
● Обновления ПО для устройства можно найти на веб-сайте
www.samsung.com.
● ПО, звуковые файлы, обои, изображения и прочее содержимое,
предустановленное на устройство, лицензированы для
ограниченного использования компанией Samsung
и их соответствующими владельцами. Копирование и
использование этих материалов в коммерческих целях
является нарушением авторского права. Компания Samsung
не несет ответственности за нарушение пользователями
авторских прав.
● Сохраните руководство пользователя для использования в
будущем.
Обозначения, используемые в данном
руководстве
Перед началом работы ознакомьтесь с обозначениями,
используемыми в данном руководстве.
Предостережение — ситуации, которые могут привести
к получению травмы вами или кем-либо из окружающих
Внимание— ситуации, которые могут привести к
повреждению устройства или другого оборудования
Примечание— примечания, советы или
дополнительные сведенияО данном руководстве
4
► См.— отсылка к страницам с соответствующей
информацией, например: «►стр. 12» (означает
«смотрите стр. 12»)
→ Следующий шаг— последовательность выбора опций
или пунктов меню для выполнения определенного
действия, например: «В режиме ожидания откройте
список приложений и выберите пункт Настройки→
Сведения о телефоне» (означает, что надо выбрать
пункт Настройки, а затем пункт Сведения о телефоне)
[ ] Квадратные скобки— такими скобками оформляются
названия клавиш устройства, например: [ ] (означает
клавишу меню)
Авторские права
© Samsung Electronics, 2012.
Данное руководство пользователя защищено международными
законами об авторских правах.
Запрещается воспроизводить, распространять, переводить
или передавать какие-либо части данного руководства
пользователя в любой форме или любым способом, электронным
или механическим, включая фотокопирование, запись или
хранение в любой системе хранения и поиска информации, без
предварительного письменного разрешения компании Samsung
Electronics.
Товарные знаки
● SAMSUNG и логотип SAMSUNG являются зарегистрированными
товарными знаками компании Samsung Electronics.
● Логотип Android, Google Search™, Google Maps™, Google
Mail™, YouTube™, Android Market™ и Google Talk™ являются
товарными знаками компании Google, Inc.
● и являются товарными знаками компании SRS
Labs, Inc. Технологии CS Headphone и WOW HD используются по
лицензии компании SRS Labs, Inc.О данном руководстве
5
● Bluetooth® является зарегистрированным товарным знаком
Bluetooth SIG, Inc. во всем мире.
● Wi-Fi
®, логотип Wi-Fi CERTIFIED и логотип Wi-Fi являются
зарегистрированными товарными знаками Wi-Fi Alliance.
● Остальные авторские права и товарные знаки являются
собственностью их владельцев.Содержание
6
Сборка устройства .............................................. 10
Комплект поставки ............................................................ 10
Установка SIM- или USIM-карты и аккумулятора .... 11
Зарядка аккумулятора ..................................................... 13
Установка карты памяти (дополнительно) ................ 15
Прикрепление наручного ремешка
(дополнительно) ................................................................. 17
Начало работы ...................................................... 18
Включение и выключение устройства ....................... 18
Общие сведения об устройстве .................................... 19
Сенсорный экран ................................................................ 26
Сенсорная панель .............................................................. 28
Блокировка и снятие блокировки сенсорного
экрана и клавиш ................................................................. 28
Знакомство с экраном в режиме ожидания ............. 28
Работа с приложениями ................................................... 31
Индивидуальная настройка устройства .................... 33
Переключение между SIM- или USIM-картами ........ 38
Ввод текста ........................................................................... 40
Загрузка приложений из Android Market ................... 43
Загрузка файлов из Интернета ...................................... 44
Синхронизация данных ................................................... 45
Связь ....................................................................... 47
Вызовы ................................................................................... 47
Сообщения ........................................................................... 53
Google Mail ............................................................................ 55
Электронная почта ............................................................ 57
СодержаниеСодержание
7
Google Talk ............................................................................ 59
Сервис Social Hub ............................................................... 60
Развлечения .......................................................... 61
Камера .................................................................................... 61
Галерея ................................................................................... 68
Музыка ................................................................................... 71
FM-радио ............................................................................... 74
Личные данные .................................................... 77
Контакты ................................................................................ 77
Календарь ............................................................................. 81
Заметки .................................................................................. 83
Диктофон .............................................................................. 83
Интернет ................................................................. 85
Интернет ................................................................................ 85
Карты ...................................................................................... 88
Локатор .................................................................................. 90
Адреса .................................................................................... 90
Навигация ............................................................................. 91
YouTube .................................................................................. 92
Samsung Apps ...................................................................... 93
Маркет .................................................................................... 94
Новости и погода ................................................................ 95
Возможности передачи данных ...................... 96
Bluetooth ................................................................................ 96
Wi-Fi ......................................................................................... 98
Общий доступ к мобильной сети ................................ 100
GPS ......................................................................................... 102Содержание
8
Подключение к ПК ........................................................... 103
VPN-соединения ............................................................... 105
Инструменты ....................................................... 107
Часы ...................................................................................... 107
Калькулятор ....................................................................... 108
Загрузки ............................................................................... 108
Поиск .................................................................................... 109
Мои файлы .......................................................................... 109
Polaris Office ........................................................................ 110
SIM-меню ............................................................................. 112
Диспетчер задач ............................................................... 113
Голосовой поиск ............................................................... 113
Настройки ............................................................ 114
Работа с меню настроек ................................................. 114
Диспетчер SIM-карты ...................................................... 114
Беспроводные сети ......................................................... 114
Вызовы ................................................................................. 116
Звук ........................................................................................ 117
Дисплей ............................................................................... 118
GPS и безопасность ......................................................... 118
Приложения ....................................................................... 120
Учетные записи и синхронизация .............................. 121
Конфиденциальность ..................................................... 121
Память .................................................................................. 121
Язык и клавиатура ........................................................... 121
Голосовой ввод и вывод ................................................ 123
Специальные возможности ......................................... 124
Дата и Время ...................................................................... 124
Сведения о телефоне ...................................................... 124Содержание
9
Устранение неполадок ..................................... 125
Меры предосторожности ................................ 131
Алфавитный указатель .................................... 144Сборка устройства
10
Сборка устройства
Комплект поставки
В комплект поставки входят:
● мобильное устройство;
● аккумулятор;
● краткое руководство.
Используйте только аксессуары, рекомендованные
компанией Samsung. Гарантия производителя не
распространяется на повреждения или неисправности в
работе устройства, возникшие в результате использования
пиратского или нелегального программного обеспечения.
● Комплект поставки устройства и доступные аксессуары
могут варьироваться в зависимости от региона или
оператора мобильной связи.
● Дополнительные аксессуары можно приобрести у
местных дилеров компании Samsung.
● Рекомендуется использовать с устройством аксессуары,
входящие в комплект поставки.
● Аксессуары, не входящие в комплект поставки, могут
быть несовместимы с данным устройством.Сборка устройства
11
Установка SIM- или USIM-карты и
аккумулятора
При подключении к услуге сотовой связи вы получите SIM-карту,
содержащую PIN-код и список дополнительных услуг. Чтобы
пользоваться услугами UMTS и HSDPA, необходимо приобрести
универсальный модуль идентификации абонента (USIM-карту).
Чтобы установить SIM- или USIM-карту и аккумулятор, выполните
следующие действия.
1 Если устройство включено, нажмите и удерживайте клавишу
[ ], затем выберите пункт Выключение телефона→Да,
чтобы выключить его.
2 Снимите крышку аккумулятора.
Соблюдайте осторожность, чтобы не поранить пальцы при
снятии крышки.
3 Вставьте SIM- или USIM-карту в устройство золотистыми
контактами вниз.
Устройство оборудовано двумя разъемами для SIM-карт,
что позволяет одновременно использовать две SIM-
или USIM-карты и переключаться между ними. Правый
разъем предназначен для основной (или наиболее часто
использующейся) SIM- или USIM-карты. Левый разъем
предназначен для второстепенной SIM- или USIM-карты.Сборка устройства
12
При установке в устройство двух USIM-карт для сети UMTS
карта во второстепенном разъеме будет использоваться
для подключения к сети GPRS.
SIM-карта 2
SIM-карта 1
Внутренняя антенна расположена в верхней части задней
панели устройства. Не снимайте защитную пленку с
антенны, это может привести к ее повреждению.
4 Установите аккумулятор.
5 Закройте крышку аккумулятора.Сборка устройства
13
Зарядка аккумулятора
Перед первым использованием устройства необходимо зарядить
аккумулятор.
Мобильное устройство можно заряжать как с помощью
зарядного устройства, так и подключив его к ПК посредством
USB-кабеля.
Используйте только зарядные устройства и кабели,
одобренные компанией Samsung. Использование
несовместимых зарядных устройств и кабелей может
привести к взрыву аккумулятора или повреждению
устройства.
● При низком уровне заряда аккумулятора подается
предупредительный звуковой сигнал и появляется
сообщение о его разрядке. Значок аккумулятора
принимает вид пустого аккумулятора. Если уровень
заряда слишком низкий, устройство выключается
автоматически. Чтобы включить устройство, необходимо
зарядить аккумулятор.
● При полной разрядке аккумулятора включить мобильное
устройство невозможно, даже если поставить его на
зарядку. Следует подождать несколько минут, пока
аккумулятор немного зарядится.
› Зарядка с помощью зарядного устройства
1 Вставьте узкий штекер зарядного устройства в
многофункциональный разъем.Сборка устройства
14
Неправильное подключение зарядного устройства может
привести к серьезному повреждению устройства. Гарантия
не распространяется ни на какие повреждения, возникшие
в результате неправильного использования устройства и
аксессуаров.
2 Подключите зарядное устройство к сети переменного тока.
● Во время зарядки аккумулятора можно пользоваться
устройством, но процесс зарядки при этом замедляется.
● Во время зарядки устройства сенсорный экран может
не реагировать на касания. Это вызвано нестабильной
подачей энергии. В таком случае отключите зарядное
устройство от мобильного устройства.
● Во время зарядки устройство может нагреваться. Это
нормальная ситуация, которая никак не скажется
на сроке службы или производительности вашего
устройства.
● При нарушении нормальной работы мобильного
устройства или зарядного устройства обратитесь в
сервисный центр Samsung.
3 Когда аккумулятор полностью зарядится, отсоедините
зарядное устройство сначала от устройства, затем от розетки.
Перед извлечением аккумулятора необходимо отсоединить
зарядное устройство. В противном случае мобильное
устройство может быть повреждено.
В целях экономии электроэнергии вынимайте зарядное
устройство из розетки, если оно не используется. Зарядное
устройство не оснащено выключателем питания, поэтому
его нужно вынимать из розетки, чтобы прервать процесс
зарядки. При использовании зарядное устройство должно
плотно прилегать к розетке.Сборка устройства
15
› Зарядка с помощью USB-кабеля
Перед зарядкой устройства убедитесь, что ПК включен.
1 Подключите один конец (микро-USB) USB-кабеля к
многофункциональному разъему.
2 Подключите второй конец USB-кабеля к порту USB на ПК.
В зависимости от типа используемого USB-кабеля зарядка
устройства может начаться не сразу, а через некоторое
время.
3 Когда аккумулятор полностью зарядится, отключите USB-
кабель сначала от устройства, затем от ПК.
Установка карты памяти (дополнительно)
Для хранения большого количества мультимедийных файлов
установите в устройство карту памяти. Устройство поддерживает
карты памяти microSD™ и microSDHC™ максимальной емкостью
32 Гб (в зависимости от изготовителя и типа карты).
Компания Samsung обеспечивает поддержку
промышленных стандартов для карт памяти; тем
не менее карты некоторых производителей могут
быть несовместимы с устройством. Использование
несовместимой карты памяти может повредить устройство,
саму карту или данные, хранящиеся на ней.
● Устройство поддерживает только файловую систему
FAT. Если вставить карту памяти с файловой системой,
отличной от FAT, появится запрос на форматирование
карты.
● При частом удалении и записи данных срок службы
карты памяти сокращается.
● При установке карты памяти файлы, содержащиеся на
ней, будут находиться в папке sdcard.Сборка устройства
16
1 Снимите крышку аккумулятора.
2 Вставьте карту памяти золотистыми контактами вниз.
3 Осторожно нажмите на карту до щелчка.
4 Закройте крышку аккумулятора.
›Извлечение карты памяти
Во избежание потери данных отключите карту памяти перед ее
извлечением.
1 В режиме ожидания выберите пункт →Настройки→
Память→Отключить карту памяти→Да.
2 Снимите крышку аккумулятора.
3 Осторожно нажмите на карту до щелчка.
4 Уберите карту памяти.
5 Закройте крышку аккумулятора.
Не извлекайте карту памяти во время передачи и
получения данных, так как это может привести к потере
данных либо вызвать повреждение карты или устройства.Сборка устройства
17
› Форматирование карты памяти
После форматирования на ПК карты памяти могут неправильно
работать при установке в устройство. Форматируйте карты
памяти только с помощью устройства.
В режиме ожидания выберите пункт →Настройки→ Память
→Отключить карту памяти→Да→Форматировать карту
памяти→Форматировать карту памяти→Удалить все.
Перед форматированием карты памяти рекомендуется
создать резервную копию всех важных данных, хранящихся
в памяти устройства. Гарантия производителя не
распространяется на потерю данных, произошедшую из-за
действий пользователя.
Прикрепление наручного ремешка
(дополнительно)
1 Снимите крышку аккумулятора.
2 Проденьте ремешок в специальное отверстие и зацепите за
небольшой выступ.
3 Закройте крышку аккумулятора.Начало работы
18
Начало работы
Включение и выключение устройства
Чтобы включить устройство, нажмите и удерживайте клавишу
[ ]. При первом включении устройства следуйте инструкциям на
экране, чтобы подготовить его к использованию.
Чтобы выключить устройство, нажмите и удерживайте клавишу
[ ], а затем выберите пункт Выключение телефона→Да.
● Следуйте всем требованиям предупреждающих табличек
и указаниям персонала в тех местах, где запрещено
использование беспроводных устройств, например в
самолете или в больнице.
● Чтобы использовать несетевые функции устройства,
переключитесь в автономный режим. Нажмите и
удерживайте клавишу [ ], затем выберите пункт
Автономный режим. Начало работы
19
Общие сведения об устройстве
› Внешний вид
Объектив основной
камеры
Крышка
аккумулятора
Внешний динамик
Клавиша «Назад»
Объектив
фронтальной камеры
Сенсорный экран
Сенсорная панель
Клавиша «Поиск»
Много-функцио
нальный разъем
Разъем гарнитуры
Клавиша громкости
Клавиша меню
Клавиша
«Главный экран»
Динамик
Микрофон
Клавиша питания/
перезагрузки/
блокировки
Основная антенна
GPS-антенна
Клавиатура с
раскладкой QWERTY
Датчики расстоянияНачало работы
20
› Клавиши
Клавиша Назначение
Питание/
Перезагрузка
1
/
Блокировка
Включение устройства (нажмите
и удерживайте); вызов меню
параметров телефона (нажмите
и удерживайте); перезагрузка
устройства (нажмите и удерживайте
в течение 8-10 секунд, а затем
отпустите); блокировка сенсорного
экрана.
Меню
Вывод списка параметров,
доступных на данном экране.
Главный экран
Возврат на экран в режиме
ожидания; вывод списка недавно
использованных приложений
(нажмите и удерживайте).
Сенсорная
панель
2
Переход между пунктами меню
(проведите пальцем); выбор
выделенного пункта меню или
подтверждение ввода (нажмите).
Назад Возврат на предыдущий экран.
Клавиша
«Поиск»
Запуск поиска в Google; открытие
окна поиска в некоторых
приложениях; включение
голосового управления (нажмите и
удерживайте).
Громкость
Регулировка громкости звуков
устройства.
1. Если устройство «зависает» или возникают критические ошибки,
может потребоваться перезагрузить устройство.
2. Если оставить устройство на прямом солнечном свете на
продолжительное время, это может привести к неисправности
трекпада или отсутствию его реакции на нажатия. Рекомендуется
использовать устройство в тени без прямого солнечного света.Начало работы
21
› Клавиатура QWERTY
Расположение и функции клавиш, а также надписи и
изображения на них могут различаться в зависимости от
региона.
Клавиша Назначение
Алфавитно-
цифровые
клавиши
Ввод цифр, букв и специальных
символов.
Shift
Изменение регистра текста в поле
ввода.
Alt
В поле ввода текста — ввод
символов, указанных на верхней
половине клавиш.
Символы Ввод символов в поле ввода текста.
Пробел
Вставка пробела в поле ввода
текста; в режиме ожидания —
запуск поиска в Google.
Backspace
Удаление символов в поле ввода
текста.
Enter
Переход на новую строку в поле
ввода текста.
Клавиша
переключения
SIM-карт
Переключение между SIM- или
USIM-картами; доступ к меню
управления SIM-картами (нажмите
и удерживайте).Начало работы
22
› Список горячих клавиш клавиатуры QWERTY
Во время работы с приложениями можно пользоваться
следующими горячими клавишами.
Приложение Горячая клавиша
Календарь
● [T]: переход к текущей дате.
● [A]: переключение на список дел.
● [D]: переключение на вид по дням.
● [W]: переключение на вид по неделям.
● [M]: переключение на вид по месяцам.
E-mail
● [R]: ответ на сообщение.
● [L]: ответ на сообщение всем получателям.
● [F]: пересылка сообщения другим адресатам.
● [C]: создание нового сообщения электронной
почты.
Сообщения
● [T]: переход к началу списка сообщений.
● [B]: переход к концу списка сообщений.
● [N]: переход к следующему сообщению.
● [P]: переход к предыдущему сообщению.
● [R]: ответ на сообщение.
● [F]: пересылка сообщения другим адресатам.
● [C]: создание нового сообщения.
Мои файлы
● [N]: переход к следующему слайду во время
просмотра слайд-шоу PowerPoint.
● [P]: переход к предыдущему слайду во время
просмотра слайд-шоу PowerPoint.Начало работы
23
Приложение Горячая клавиша
Интернет
● [ ]+[Y]: переход к началу веб‑страницы.
● [ ]+[U]: переход к концу веб‑страницы.
● [ ]+[N]: открытие нового окна.
● [ ]+[W]: закрытие текущего окна.
● [ ]+[B]: доступ к списку сохраненных
закладок.
● [ ]+[T]: просмотр открытых окон.
● [ ]+[R]: обновление или остановка
обновления текущей веб‑страницы.
● [ ]+[K]: переход к следующей странице.
● [ ]+[J]: переход к предыдущей странице.
● [ ]+[A]: создание закладки для текущей веб‑
страницы.
● [ ]+[F]: поиск текста на текущей веб‑
странице.
● [ ]+[G]: просмотр сведений о веб‑странице.
● [ ]+[S]: отправка URL‑адреса веб‑страницы
другим пользователям.
● [ ]+[D]: просмотр журнала загрузки.
● [ ]+[P]: настройка параметров веб‑
браузера.
● [ ]+[H]: переход к журналу веб‑браузера.
● [ ]+[I]: увеличение масштаба.
● [ ]+[O]: уменьшение масштаба.
● [ ]+[C]: добавление ссылки для текущей
веб‑страницы на экран режима ожидания.
● [ ]: прокрутка веб‑страницы вниз.
● [ ]+[ ]: прокрутка веб‑страницы вверх.
Галерея
● [T]: переход к первому снимку в списке.
● [B]: переход к последнему снимку в списке.
● [N]: переход к следующему снимку.
● [P]: переход к предыдущему снимку.
● [I]: увеличение масштаба.
● [O]: уменьшение масштаба.Начало работы
24
› Значки состояния
Значки, отображаемые на дисплее, могут различаться в
зависимости от страны или оператора мобильной связи.
Значок Описание
Сигнал отсутствует
Уровень сигнала
/
Тип выбранной SIM- или USIM-карты
Установлено соединение с сетью GPRS
Установлено соединение с сетью EDGE
Установлено соединение с сетью UMTS
Установлено соединение с сетью HSDPA
Доступны открытые сети WLAN
Установлено соединение с сетью WLAN
Включена связь Bluetooth
Подключена телефонная гарнитура Bluetooth
Включена функция GPS
Выполняется вызов
Удержание текущего вызова
Включен динамик громкой связи
1. Внешний вид значка зависит от настроек SIM-карты.
1Начало работы
25
Значок Описание
Пропущенный вызов
Синхронизация с веб-сервером
Выполняется отправка данных
Выполняется загрузка данных
Включена переадресация вызовов
Подключение к ПК
Включен USB-модем
Включена функция модема Wi-Fi
Отсутствует SIM- или USIM-карта
Новое SMS- или MMS-сообщение
Новое сообщение электронной почты
Новый Google Mail
Новое сообщение голосовой почты
Включен сигнал будильника
Уведомление о событии
Роуминг (за пределами зоны обслуживания
домашней сети)Начало работы
26
Значок Описание
Включен профиль «Без звука»
Включен режим вибрации
Включен профиль «Автономный»
Выполняется воспроизведение музыки
Воспроизведение музыки приостановлено
FM-радио работает в фоновом режиме
Произошла ошибка, или требуется внимание
пользователя
Уровень заряда аккумулятора
10:00 Текущее время
Сенсорный экран
Сенсорный экран устройства позволяет с легкостью выбирать
элементы и выполнять различные действия. В этом разделе
описаны основные действия, необходимые для работы с
сенсорным экраном.
● Не используйте острые предметы для работы с
сенсорным экраном: на его поверхности могут появиться
царапины.
● Следите за тем, чтобы сенсорный экран не соприкасался
с электронными устройствами. Возникающие при
этом электростатические разряды могут привести к
неправильной работе сенсорного экрана или выходу его
из строя.
● Не допускайте попадания жидкости на сенсорный экран.
Повышенная влажность и попадание жидкости могут
стать причиной неправильной работы сенсорного
экрана. Начало работы
27
● Для удобства работы с сенсорным экраном удалите с
него защитную пленку.
● На сенсорный экран устройства нанесено покрытие,
чувствительное к слабым электрическим зарядам,
которые исходят от тела человека, поэтому лучше
всего работать с сенсорным экраном непосредственно
с помощью пальцев рук. Сенсорный экран может не
реагировать на прикосновения острых предметов, таких
как стилус и ручка.
Работать с сенсорным экраном можно следующими способами.
● Касание: одним прикосновением выбираются пункты или
параметры меню, а также запускаются приложения.
● Касание и удерживание: выберите и удерживайте элемент в
течение двух секунд, чтобы вызвать всплывающее меню.
● Пролистывание: прикоснитесь к экрану и переместите палец
вверх, вниз, вправо или влево, чтобы выбрать элементы в
списке.
● Перетаскивание: прикоснитесь к экрану и удерживайте
выбранный элемент, а затем перетащите его по экрану.
● Двойное касание: быстрое двойное прикосновение к экрану
позволяет изменить масштаб при просмотре снимков или веб-
страниц.
● Если устройство не используется в течение
определенного времени, сенсорный экран выключается.
Чтобы включить его, нажмите клавишу [ ].
● Также можно настроить время работы подсветки
сенсорного экрана. В режиме ожидания откройте список
приложений и выберите пункт Настройки→Дисплей
→Тайм-аут экрана.Начало работы
28
Сенсорная панель
Сенсорная панель устройства позволяет быстро переходить по
пунктам меню и выбирать элементы.
Работать с сенсорной панелью можно следующими способами.
● Перемещение пальца: для перемещения между пунктами
меню прикоснитесь к панели и проведите пальцем вверх, вниз,
вправо или влево.
● Нажатие: нажмите один раз для выбора выделенного пункта
меню или для подтверждения ввода.
Чтобы пользоваться сенсорной панелью было удобнее,
можно настроить ее чувствительность. ►стр. 118.
Блокировка и снятие блокировки
сенсорного экрана и клавиш
Сенсорный экран и клавиатуру можно заблокировать, чтобы
предотвратить случайные нажатия клавиш.
Чтобы заблокировать сенсорный экран и клавиши, нажмите
клавишу [ ]. Для снятия блокировки включите экран, нажав
клавишу [ ], и быстро проведите по окну пальцем.
Функцию блокировки сенсорного экрана можно
использовать для предотвращения доступа посторонних
лиц к вашим личным данным. ►стр. 35.
Знакомство с экраном в режиме ожидания
Этот экран появляется, если устройство находится в режиме
ожидания. На нем отображены значки состояния, виджеты,
ссылки на приложения и прочие элементы.
На экране в режиме ожидания расположено несколько панелей.
Чтобы выбрать нужную панель на экране в режиме ожидания,
прокрутите изображение влево или вправо.Начало работы
29
›Добавление элементов на экран в режиме
ожидания
Можно настроить экран в режиме ожидания в соответствии со
своими предпочтениями, добавив на него ссылки на приложения
или элементы приложений, а также виджеты или папки. Для этого
выполните следующие действия.
1 Нажмите клавишу [ ] →Добавить или нажмите и
удерживайте пустую область на экране в режиме ожидания.
2 Выберите категорию элемента → элемент.
● Виджеты: добавление виджетов. Виджеты — это мини-
приложения, позволяющие выполнять определенные
действия или выводить нужную информацию на экран
режима ожидания.
● Горячие клавиши: добавление ссылок на такие элементы,
как приложения, закладки и контакты.
● Папки: создание новой папки или добавление папки для
контактов.
● Обои: выбор фонового изображения.
›Перемещение элементов на экране в режиме
ожидания
1 Чтобы переместить элемент, нажмите и удерживайте его.
2 Перетащите элемент в нужное место.
› Удаление элементов с экрана в режиме
ожидания
1 Выберите и удерживайте элемент.
В нижней правой части экрана появится значок корзины.
2 Перетащите элемент в корзину.
3 Когда элемент станет красным, отпустите его.Начало работы
30
›Панель уведомлений
В режиме ожидания или во время использования приложения
коснитесь области значков состояния и переместите палец
вниз, чтобы открыть панель уведомлений. Можно включить
или отключить функции беспроводной связи и открыть список
уведомлений (например, сообщения, вызовы, события или
состояние обработки). Чтобы скрыть панель, перетащите ее
нижнюю часть вверх.
На панели уведомлений можно использовать следующие
функции.
● WiFi: включение и выключение функции WLAN. ►стр. 99.
● B/T: включение и выключение беспроводной связи Bluetooth.
►стр. 96.
● GPS: включение и выключение функции GPS.
● Звук/Вибрация: включение и выключение режима вибрации.
● Автоповорот: включение и выключение функции
автоповорота.
Доступные параметры могут различаться в зависимости от
региона или оператора мобильной связи.
›Добавление и удаление панелей с экрана в
режиме ожидания
Чтобы упорядочить виджеты, можно добавлять панели на экран в
режиме ожидания и удалять их.
1 В режиме ожидания нажмите клавиш [ ] →Изменить.
2 Добавьте или удалите панели следующим образом.
● Чтобы удалить панель, коснитесь ее эскиза и удерживайте
его, затем перетащите его в корзину в нижней правой части
экрана.Начало работы
31
● Чтобы добавить панель, выберите значок .
● Чтобы изменить порядок размещения панелей, выберите и
удерживайте значок панели, затем перетащите его в нужное
место.
3 По окончании нажмите клавишу [ ].
Работа с приложениями
Для перехода к приложениям устройства выполните следующие
действия.
1 Для доступа к списку приложений в режиме ожидания
выберите значок .
2 Прокрутите влево или вправо к другому экрану.
Можно также выбрать точку в верхней части экрана, чтобы
сразу перейти к нужному экрану.
3 Выберите приложение.
● Для использования приложений Google необходимо
иметь учетную запись. Если у вас нет учетной записи
Google, ее необходимо создать.
● Чтобы добавить ссылку на приложение, выберите и
удерживайте значок приложения в списке приложений.
Можно переместить значок в нужное место на экране в
режиме ожидания.
4 Нажмите клавишу [ ], чтобы вернуться к предыдущему
экрану; для возврата на экран режима ожидания нажмите
клавишу [ ].
Если повернуть устройство во время использования какой-
либо функции, изображение повернется автоматически.
Чтобы отключить эту возможность, откройте панель
уведомлений и выберите пункт Автоповорот.Начало работы
32
› Упорядочение приложений
Можно упорядочить приложения в списке, изменив порядок их
расположения или сгруппировав по категориям.
1 Откройте список приложений и нажмите клавиш [ ] →
Изменить.
2 Выберите и удерживайте значок приложения.
3 Перетащите приложение в нужное место.
Значок приложения можно переместить на другой экран.
Часто используемые приложения можно переместить под
значок .
4 Нажмите клавишу [ ] →Сохранить.
›Переход к недавно использованным
приложениям
1 Нажмите и удерживайте клавишу [ ], чтобы открыть список
недавно использованных приложений.
2 Выберите нужное приложение.
›Диспетчер задач
На устройстве установлена многозадачная операционная
система, позволяющая запускать несколько приложений
одновременно. Однако одновременная работа нескольких
приложений может стать причиной «зависания», остановки,
неполадок с памятью или повышенного энергопотребления.
Чтобы избежать этих проблем, завершайте работу ненужных
программ с помощью диспетчера задач.
1 В режиме ожидания откройте список приложений и выберите
пункт Диспетчер задач→Активные.
Появится список работающих приложений.
2 Чтобы закрыть приложение, выберите пункт Завершить.
Чтобы закрыть все работающие приложения, выберите пункт
Зав.все.Начало работы
33
›Настройка горячих клавиш
Можно настроить запуск приложений по нажатию клавиш [ ] и
одновременному вводу соответствующей буквы.
1 В режиме ожидания откройте список приложений и выберите
пункт Настройки→Приложения→Быстрый запуск.
2 Выберите букву → приложение, которое должно запускаться
при нажатии горячей клавиши в сочетании с этой буквой.
Индивидуальная настройка устройства
Используйте все возможности устройства, настроив его в
соответствии со своими предпочтениями.
› Установка текущего времени и даты
1 В режиме ожидания откройте список приложений и выберите
пункт Настройки→Дата и Время.
2 Задайте дату и время, при необходимости измените другие
параметры.
› Включение и выключение звуков при нажатии
В режиме ожидания откройте список приложений и выберите
пункт Настройки→Звук→Звук при нажатии.
› Регулировка громкости вызова
Чтобы отрегулировать громкость вызова, нажмите клавишу
громкости вверх или вниз.Начало работы
34
›Переключение в профиль «Без звука»
Чтобы выключить или включить звук устройства, выполните одно
из следующих действий.
● Откройте панель уведомлений вверху экрана и выберите пункт
Звук.
● Нажмите и удерживайте клавишу [ ], а затем выберите пункт
Профиль Без звука.
В профиле «Без звука» можно настроить оповещения об
определенных событиях. В режиме ожидания откройте
список приложений и выберите пункт Настройки→Звук
→Вибрация→Всегда или Только в режиме "Без звука".
При переключении в профиль «Без звука» вместо значка
появится значок .
› Выбор мелодии вызова
1 В режиме ожидания откройте список приложений и выберите
пункт Настройки→Звук→Мелодия звонка.
2 Выберите SIM- или USIM-карту →Мелодия телефона.
3 Выберите мелодию в списке, а затем пункт Да.
› Включение анимации для переключения между
приложениями
В режиме ожидания откройте список приложений и выберите
пункт Настройки→Дисплей→Анимация→Часть анимации
или Вся анимация.Начало работы
35
› Установка обоев для экрана в режиме ожидания
1 В режиме ожидания нажмите клавишу [ ] →Обои→
укажите параметр.
2 Выберите изображение.
3 Выберите пункт Сохранить или Установить обои → SIM- или
USIM-карту.
Компания Samsung не несет ответственности за
использование изображений и обоев, поставляемых вместе
с устройством.
› Регулировка яркости дисплея
1 В режиме ожидания откройте список приложений и выберите
пункт Настройки→Дисплей→Яркость.
2 Для настройки уровня яркости перетащите ползунок.
3 Выберите пункт Да.
Уровень яркости дисплея влияет на скорость разряда
аккумулятора.
› Блокировка экрана
С помощью этой функции можно заблокировать экран
устройства. При каждом включении и при каждой попытке
разблокировать экран устройство будет запрашивать рисунок
или пароль.
● Если вы забыли рисунок или пароль, обратитесь в
сервисный центр Samsung.
● Компания Samsung не несет ответственности за утерю
паролей или конфиденциальной информации и иной
ущерб, если они вызваны незаконным использованием
какого-либо ПО.Начало работы
36
Создание рисунка разблокировки
1 В режиме ожидания откройте список приложений и выберите
пункт Настройки→GPS и безопасность→Задать
блокировку экрана→Рисунок.
2 Ознакомьтесь с инструкциями и образцами рисунков на
экране, а затем выберите пункт Далее.
3 Создайте рисунок, соединив линией минимум четыре точки, и
выберите пункт Продолжить.
4 Повторите рисунок для подтверждения и выберите пункт
Подтвердить.
Создание PIN-кода разблокировки экрана
1 В режиме ожидания откройте список приложений и выберите
пункт Настройки→GPS и безопасность→Задать
блокировку экрана→PIN.
2 Введите цифровой PIN-код и выберите пункт Продолжить.
3 Введите PIN-код еще раз и выберите пункт Да.
Создание пароля разблокировки экрана
1 В режиме ожидания откройте список приложений и выберите
пункт Настройки→GPS и безопасность→Задать
блокировку экрана→Пароль.
2 Введите алфавитно-цифровой пароль и выберите пункт
Продолжить.
3 Введите пароль еще раз и выберите пункт Да.Начало работы
37
› Блокировка SIM- или USIM-карты
Можно заблокировать устройство с помощью PIN-кода,
поставляемого с SIM- или USIM-картой.
1 В режиме ожидания откройте список приложений и выберите
пункт Настройки→GPS и безопасность→Настройка
блокировки SIM-карты.
2 Выберите SIM- или USIM-карту →Блокировка SIM-карты.
3 Введите PIN-код и выберите пункт Да.
После активирования этой функции потребуется вводить PIN-код
при каждом включении устройства.
● При вводе неверного PIN-кода несколько раз SIM- или
USIM-карта блокируется. В этом случае необходимо
ввести ключ разблокировки PIN-кода (PUK), чтобы
разблокировать SIM- или USIM-карту.
● Если SIM- или USIM-карта заблокируется после ввода
ошибочного PUK, необходимо обратиться к оператору
мобильной связи для ее разблокировки.
› Включение функции поиска устройства
При обнаружении новой SIM- или USIM-карты функция поиска
устройства автоматически отправляет контактный номер
указанным получателям. Благодаря этой функции увеличиваются
шансы обнаружить и вернуть утерянное устройство.
Чтобы воспользоваться функцией удаленного управления
устройством по сети, необходимо создать учетную запись
Samsung.
1 В режиме ожидания откройте список приложений и выберите
пункт Настройки→GPS и безопасность→Оповещ. о
смене SIM-карты.
2 Ознакомьтесь с условиями соглашения, установите флажок
рядом с пунктом Я принимаю условия соглашения и
выберите пункт Принять.Начало работы
38
3 Выберите пункт Регистрация, введите адрес электронной
почты и пароль для учетной записи Samsung, затем выберите
пункт Регистрация.
Чтобы создать учетную запись Samsung, выберите пункт Вход.
4 Выберите пункт Получатели оповещения.
5 Введите пароль для учетной записи Samsung еще раз и
выберите пункт Да.
6 Введите номер телефона с кодом страны (и символом +).
7 Введите текстовое сообщение, которое будет отправлено
получателям.
8 Выберите пункт Готово.
Переключение между SIM- или USIM-
картами
После установки двух SIM- или USIM-карт можно с легкостью
переключаться между ними.
Для этого нужно нажать клавишу [ ] в любой момент, кроме
приема или отправки сообщений либо данных по сети.
Устройство использует технологию Dual Standby для двух
разных сетей. Одновременно выполнять и отвечать на
вызовы в обеих сетях нельзя.
› Активация SIM- или USIM-карты
1 В режиме ожидания откройте список приложений и выберите
пункт Настройки→Диспетчер SIM-карты.
2 Выберите SIM- или USIM-карту для включения или
выключения разъема.
3 Установите флажок около пункта Включить.Начало работы
39
›Изменение имени и значка SIM- или USIM-карты
1 В режиме ожидания откройте список приложений и выберите
пункт Настройки→Диспетчер SIM-карты.
2 Выберите SIM- или USIM-карту → имя SIM- или USIM-карты.
3 Выберите пункт Выберите значок→ значок.
4 Выберите пункт Зарегистрировать имя, измените имя SIM-
или USIM-карты и выберите пункт Да.
›Изменение параметров SIM- или USIM-карты
1 В режиме ожидания откройте список приложений и выберите
пункт Настройки→Диспетчер SIM-карты.
2 Измените следующие параметры.
Параметр Функция
Принимать
входящие вызовы
Разрешение на прием входящих
вызовов с другой SIM- или USIM-карты
во время использования услуг по
передаче данных с помощью SIM- или
USIM-карты.
Принимать входящие вызовы
можно только в том случае, если
SIM- или USIM-карта подключена
к сети GPRS и не занята
передачей данных.
Сеть передачи
данных
Выбор SIM- или USIM-карты для
передачи данных.Начало работы
40
Ввод текста
Текст можно вводить, нажимая клавиши на клавиатуре QWERTY,
выбирая символы на виртуальной клавиатуре либо используя
метод рукописного ввода.
Вводить текст можно не на всех языках. Для ввода текста
необходимо выбрать поддерживаемый язык. ►стр. 121.
› Ввод текста с помощью клавиатуры QWERTY
Нажимайте соответствующие алфавитно-цифровые клавиши для
ввода цифр, букв и символов.
Можно также использовать следующие клавиши.
Клавиша Функция
Изменение регистра.
Ввод символов, указанных на верхней половине
клавиш.
Переход в режим ввода символов.
Ввод пробела.
Удаление введенного текста.
Переход на новую строку.
› Ввод текста с помощью клавиатуры Samsung
Чтобы воспользоваться клавиатурой Samsung, откройте
список приложений и выберите пункт Настройки→Язык
и клавиатура→Экранная клавиатура.
1 Выберите пункт →Типы клавиатуры и выберите режим
ввода текста.
Можно выбрать один из типов клавиатуры (QWERTY или
традиционная) либо рукописного ввода.Начало работы
41
2 Введите текст, нажимая соответствующие алфавитно-
цифровые клавиши или рисуя символы на экране.
Можно также использовать следующие клавиши.
5
4
6
7
1
2
3
Номер Назначение
1 Изменение регистра.
2
Переключение между режимами ввода цифр и
символов и режимом ABC.
3
Голосовой ввод текста; значок появляется только
после включения функции голосового ввода
текста на клавиатуре Samsung.
Данная функция доступна не для всех
языков ввода.
4 Удаление введенного текста.
5 Переход на новую строку.
6
Переход к параметрам клавиатуры; изменение
типа клавиатуры (нажмите и удерживайте).
7
Ввод пробела.
Действия, назначенные этой клавише,
зависят от оператора мобильной связи.Начало работы
42
› Копирование и вставка текста
При вводе текста можно пользоваться функцией копирования и
вставки текста для его добавления в другие приложения.
1 Поместите курсор в текст, который требуется скопировать.
2 Выберите значок .
3 Выберите значок Выберите слово или Выбрать все.
4 Чтобы выбрать нужный фрагмент текста, перетащите значок
или .
5 Выберите значок Копировать для копирования или значок
Вырезать, чтобы вырезать текст в буфер обмена.
6 В другом приложении переместите курсор в место, куда
нужно вставить текст.
7 Выберите значок →Вставить, чтобы вставить текст из
буфера обмена в поле ввода текста.
› Горячие клавиши QWERTY
Добавление или редактирование текста производится с помощью
следующих горячих клавиш.
Клавиша Функция
[ ]
● Вставка символа «@» при вводе
адреса электронной почты в поле
получателей.
● Вставка символа «.» при вводе
адреса электронной почты в поле
получателей.
[ ] + сенсорная
панель
Выбор текста путем проведения пальцем
по сенсорной панели вверх, вниз, влево
или вправо при нажатой клавише [ ].Начало работы
43
Клавиша Функция
[ ]+[ ]
Вырезание текста с помещением его в
буфер обмена.
[ ]+[ ]
Копирование текста с помещением его в
буфер обмена.
[ ]+[ ] Вставка текста из буфера обмена.
[ ] + сенсорная
панель
● Перемещение курсора к началу
или концу текста путем проведения
пальцем вверх или вниз при нажатой
клавише [ ].
● Перемещение курсора к началу
или концу слова путем проведения
пальцем влево или вправо при
нажатой клавише [ ].
Загрузка приложений из Android Market
Поскольку ОС устройства основана на платформе Android, его
функциональность можно расширить за счет загружаемых
приложений.
С помощью Android Market можно легко и быстро подключиться к
магазину загружаемых игр и приложений.
● Эта функция может быть недоступна в зависимости от
региона или оператора мобильной связи.
● Пользовательские файлы загруженных приложений
будут сохранены во встроенной памяти. Чтобы сохранить
их на карте памяти, подключите устройство к ПК и
скопируйте файлы из внутренней памяти на карту
памяти.Начало работы
44
› Установка приложения
1 В режиме ожидания откройте список приложений и выберите
пункт Маркет.
2 При первом запуске приложения выберите пункт Принять.
3 Найдите нужный файл или приложение и загрузите его.
› Удаление приложения
1 На главном экране онлайн-магазина Android Market нажмите
клавишу [ ] →Мои приложения.
2 Выберите приложение, подлежащее удалению.
3 Выберите пункт Удалить→OK.
Загрузка файлов из Интернета
В файлах, загружаемых из Интернета, могут содержаться
вирусы, способные повредить устройство. Чтобы
снизить риск заражения вирусами, для загрузки файлов
используйте надежные источники.
Некоторые медиафайлы в целях соблюдения авторских
прав защищены системой управления цифровыми правами
(DRM). Эта защита не позволяет загружать, копировать,
изменять или передавать некоторые файлы.Начало работы
45
Чтобы загрузить файлы из Интернета, выполните следующие
действия.
1 В режиме ожидания откройте список приложений и выберите
пункт Интернет.
2 Найдите нужный файл или приложение и загрузите его.
Чтобы устанавливать приложения, загруженные из источника,
отличного от Android Market, необходимо выбрать пункт
Настройки→Приложения→Неизвестные источники→Да.
Синхронизация данных
Можно синхронизировать данные с различными веб-серверами,
а также создавать резервную копию данных и восстанавливать их.
По завершении синхронизации устройство остается
подключенным к сети. Если данные на веб-сервере будут
изменены, обновленная информация появится на устройстве и
начнется автоматическая синхронизация, и наоборот.
Эта функция может быть недоступна в зависимости от
региона или оператора мобильной связи.
›Настройка учетной записи на сервере
1 В режиме ожидания откройте список приложений и выберите
пункт Настройки→Учетные записи и синхронизация.
2 Выберите пункт Доб.уч.зап.→ укажите тип учетной записи.
3 Завершите создание учетной записи, следуя указаниям на
экране.Начало работы
46
› Автоматическая синхронизация
1 В режиме ожидания откройте список приложений и выберите
пункт Настройки→Учетные записи и синхронизация.
2 Выберите пункт Автосинхронизация.
3 Выберите учетную запись.
4 Выберите приложения, которые требуется синхронизировать.
Чтобы отменить автоматическую синхронизацию для некоторых
приложений, снимите флажки рядом с ними.
› Ручная синхронизация данных
1 В режиме ожидания откройте список приложений и выберите
пункт Настройки→Учетные записи и синхронизация.
2 Выберите учетную запись.
3 Нажмите клавишу [ ] →Синхронизировать. Начнется
синхронизация выбранных данных.Связь
47
Связь
Вызовы
В этом разделе описано, как выполнять вызовы и отвечать на них,
используя доступные во время разговора функции, а также как
настраивать и использовать смежные функции.
› Выполнение вызова и ответ на вызов
Выполнить, принять, завершить и отклонить вызов можно с
помощью клавиш или сенсорного экрана.
● Если датчик приближения включен, во время вызова
сенсорный экран автоматически выключается и
блокируется во избежание случайного ввода. ►стр. 117.
● Статическое электричество, исходящее от вашего тела
или вашей одежды, может создать помехи в работе
датчика приближения во время вызова.
Выполнение вызова
1 В режиме ожидания откройте список приложений и выберите
пункт →Набор, затем введите код страны и номер
телефона.
2 Чтобы выполнить вызов, выберите значок .
Чтобы выполнить видеовызов, выберите значок .
3 Для завершения вызова выберите пункт Завершить.
● Номера часто вызываемых абонентов можно сохранить в
телефонной книге. ►стр. 77.
● Чтобы быстро перейти к журналу последних вызовов,
выберите пункт →Журналы.Связь
48
Ответ на вызов
1 При входящем вызове перетащите значок в любом
направлении до границы круга.
Чтобы выключить мелодию входящего вызова, нажмите
клавишу громкости.
2 Для завершения вызова выберите пункт Завершить.
Отклонение вызова
При входящем вызове перетащите значок в любом
направлении до границы круга.
Международные вызовы
1 В режиме ожидания откройте список приложений и
выберите пункт →Набор, а затем нажмите и удерживайте
виртуальную клавишу 0, чтобы вставить символ +.
2 Введите полный номер (код страны, код города и номер
телефона), а затем выберите значок , чтобы набрать номер.
› Гарнитура
Подключив гарнитуру к устройству, можно отвечать на вызовы и
управлять ими с ее помощью.
● Чтобы ответить на вызов, нажмите кнопку гарнитуры.
● Чтобы отклонить вызов, нажмите и удерживайте кнопку
гарнитуры.
● Чтобы перевести вызов в режим удержания или вернуться
к удерживаемому вызову, нажмите и удерживайте кнопку
гарнитуры.
● Чтобы завершить вызов, нажмите кнопку гарнитуры.Связь
49
› Функции, доступные во время разговора
Во время видеовызова можно использовать следующие функции.
● Чтобы отрегулировать громкость, нажимайте клавишу
громкости вверх или вниз.
● Чтобы поместить вызов на удержание, выберите значок .
Чтобы снять вызов с удержания, выберите значок .
● Чтобы выполнить второй вызов, нажмите клавишу [ ]→Доб.
вызов и наберите новый номер.
● Для ответа на второй вызов перетащите значок в любом
направлении до границы круга, пока звучит сигнал ожидания.
Появится запрос на завершение или удержание первого
вызова. Чтобы пользоваться этой функцией, необходимо
подключить услугу ожидания вызова.
● Чтобы открыть экран набора, выберите пункт Клавиатура.
● Чтобы включить функцию громкой связи, выберите пункт
Динамик.
В условиях сильного шума иногда бывает трудно различить
голос собеседника при использовании громкой связи.
В таких случаях рекомендуется использовать обычный
режим разговора.
● Чтобы выключить микрофон (при этом собеседник перестанет
вас слышать), выберите пункт Выкл. звук.
● Чтобы перевести вызов с устройства на гарнитуру, нажмите
клавишу [ ]→Bluetooth.
● Для переключения между вызовами выберите пункт
Переключить.
● Чтобы выполнить многосторонний вызов (конференц-
связь), выполните второй вызов или ответьте на него и
выберите пункт Объединить, когда будете соединены
со вторым собеседником. При необходимости повторите
эту процедуру для добавления других участников. Чтобы
воспользоваться этой функцией, необходимо подключить
услугу многостороннего вызова.Связь
50
› Функции, доступные во время видеовызова
Во время видеовызова можно использовать следующие функции.
● Чтобы переключиться между передним и задним объективами
камеры, выберите пункт Перекл. камеры.
● Чтобы выключить микрофон (при этом собеседник перестанет
вас слышать), выберите пункт Отключить звук.
● Чтобы скрыть ваше изображение от собеседника, нажмите
клавиш [ ] →Скрыть меня.
● Чтобы выбрать другое изображение для показа собеседнику,
нажмите клавиш [ ] →Исходящее изображение.
● Чтобы открыть экран набора номера, нажмите клавишт [ ] →
Набор.
● Чтобы перевести вызов с устройства на Bluetooth-гарнитуру,
нажмите клавиш [ ] →Переключить на гарнитуру.
● Чтобы включить функцию громкой связи, нажмите клавиш [ ]
→Динамик откл.
● Чтобы использовать изображение собеседника, нажмите и
удерживайте это изображение. Можно сделать снимок экрана
или записать видеовызов.
›Просмотр и набор пропущенных вызовов
Пропущенные вызовы отображаются на дисплее устройства.
Чтобы набрать номер пропущенного вызова, откройте панель
уведомлений и выберите нужный вызов.Связь
51
›Дополнительные функции
В этом разделе описано, как использовать дополнительные
функции, такие как режим FDN или переадресация вызовов.
Режим FDN (фиксированный набор номера)
В режиме FDN исходящие вызовы можно будет выполнять только
на номера, сохраненные в списке FDN. Чтобы включить режим
FDN, выполните следующие действия.
1 В режиме ожидания откройте список приложений и выберите
пункт Настройки→Вызовы→Номера FDN→Включить
FDN.
2 Введите PIN2-код, поставляемый с SIM- или USIM-картой, и
выберите пункт Да.
3 Выберите пункт Список FDN и добавьте контакты, которые
нужно использовать в режиме FDN.
Переадресация вызовов
Переадресация вызовов— это сетевая функция, позволяющая
переводить входящие вызовы на другой указанный номер.
Переадресацию вызова можно настроить для таких ситуаций,
когда вы уже разговариваете по телефону или находитесь вне
зоны доступа.
1 В режиме ожидания откройте список приложений и выберите
пункт Настройки→Вызовы→Переадресация вызова→
тип вызова.
2 Выберите параметр.
3 Введите номер, на который будут переводиться вызовы, и
выберите пункт Включено.
Настройки будут переданы в сеть.Связь
52
Ожидание вызова
Ожидание вызова— это сетевая функция, уведомляющая о
вызове, поступившем во время разговора с другим абонентом.
Эта функция доступна только для вызовов.
В режиме ожидания откройте список приложений и выберите
пункт Настройки→Вызовы→Дополнительные параметры
→ тип вызова →Ожидание вызова. Настройки будут переданы
в сеть.
›Просмотр журнала вызовов
Можно отсортировать вызовы по типу и просмотреть их в
журнале.
1 В режиме ожидания откройте список приложений и выберите
пункт →Журналы.
2 Нажмите клавиш [ ] →Вид→ укажите параметр
сортировки.
В журналах вызовов можно напрямую выполнить вызов
или отправить сообщение абоненту, переместив палец
вдоль записи контакта вправо или влево.
3 Выберите журнал для просмотра сведений.
В этом режиме можно вызвать абонента или отправить ему
сообщение, а также добавить номер в телефонную книгу.Связь
53
Сообщения
В данном разделе описано, как создавать и отправлять SMS- и
MMS-сообщения, а также просматривать отправленные или
полученные сообщения и управлять ими.
За отправку и получение сообщений за пределами
домашней сети может взиматься дополнительная плата.
Дополнительные сведения можно получить у оператора
мобильной связи.
› Отправка SMS-сообщений
1 В режиме ожидания откройте список приложений и выберите
пункт .
2 Выберите пункт Новое сообщение.
3 Добавьте получателей сообщения.
● Введите телефонные номера вручную, разделив их запятой
или точкой с запятой.
● Можно выбрать телефонные номера из списков, выбирая
нужные параметры в поле ввода получателей.
4 Выберите пункт Введите сообщение и введите текст
сообщения.
Чтобы добавить смайлик, нажмите клавишу [ ] →Вставить
смайлик.
5 Выберите пункт Отпр. для отправки сообщения.
› Отправка MMS-сообщений
1 В режиме ожидания откройте список приложений и выберите
пункт .
2 Выберите пункт Новое сообщение.Связь
54
3 Добавьте получателей сообщения.
● Введите телефонные номера или адреса получателей
вручную, разделив их запятой или точкой с запятой.
● Можно выбрать телефонные номера или адреса
электронной почты из списков, выбирая нужные параметры
в поле ввода получателей.
При вводе адреса электронной почты устройство
автоматически переведет SMS-сообщение в MMS-
сообщение.
4 Нажмите клавишу [ ] →Добавить тему и добавьте тему
сообщения.
5 Выберите пункт Введите сообщение и введите текст
сообщения.
Чтобы добавить смайлик, нажмите клавишу [ ] →Вставить
смайлик.
6 Нажмите клавишу [ ] →Вложить, или выберите значок
и добавьте элемент.
Можно выбрать вложение из списка существующих файлов
либо сделать новый снимок, видеозапись или звуковой файл.
7 Выберите пункт Отпр. для отправки сообщения.
›Просмотр SMS- и MMS-сообщений
1 В режиме ожидания откройте список приложений и выберите
пункт .
Сообщения группируются в потоки по контактам, как в службе
сообщений.
2 Выберите контакт.
3 Выберите MMS-сообщение, чтобы просмотреть сведения о
нем.Связь
55
›Прослушивание голосовых сообщений
Если включена переадресация пропущенных вызовов на сервер
голосовой почты, абоненты могут оставлять вам голосовые
сообщения. Чтобы перейти к голосовой почте и прослушать такие
сообщения, выполните следующие действия.
1 В режиме ожидания откройте список приложений и
выберите пункт →Набор, а затем нажмите и удерживайте
виртуальную клавишу 1.
2 Следуйте инструкциям сервера голосовой почты.
Для обращения к серверу голосовой почты необходимо
сохранить его номер. Этот номер можно получить у
оператора мобильной связи.
Google Mail
Можно загружать новые электронные сообщения из Google
Mail™ в папку «Входящие» на устройстве. При переходе к
Google Mail появляется папка «Входящие». В панели заголовка
отображается число непрочитанных сообщений. Они выделены
полужирным шрифтом.
● Эта функция может быть недоступна в зависимости от
региона или оператора мобильной связи.
● У некоторых операторов мобильной связи элементы
меню Google Mail могут называться по-другому.
› Отправка сообщения по электронной почте
1 В режиме ожидания откройте список приложений и выберите
пункт Google Mail.
2 При первом запуске приложения выберите пункт Да.
3 Нажмите клавишу [ ] →Новое сообщение. Связь
56
4 Введите имя или адрес в поле получателя.
5 Введите тему и текст сообщения.
6 Чтобы вложить в письмо файл изображения, нажмите
клавишу [ ] →Прикрепить файл→ укажите файл.
7 Для отправки сообщения выберите значок .
›Просмотр сообщений электронной почты
1 В режиме ожидания откройте список приложений и выберите
пункт Google Mail.
2 Выберите сообщение электронной почты.
В режиме просмотра сообщения доступны следующие
возможности.
● Чтобы ответить на сообщение, выберите значок .
● Чтобы ответить на сообщение всем получателям, выберите
пункт →Отв. всем.
● Чтобы переслать сообщение другим получателям, выберите
пункт →Переслать.
● Чтобы пометить сообщение звездочкой, выберите значок .
● Чтобы просмотреть вложение, выберите пункт Просмотр.
Чтобы сохранить его на карте памяти, выберите пункт
Загрузить.
● Чтобы заархивировать сообщение, выберите пункт В архив.
● Чтобы удалить сообщение, выберите пункт Удалить.
● Чтобы перейти к следующему или предыдущему сообщению,
выберите значок или .
› Упорядочение сообщений электронной почты
по меткам
Можно упорядочить сообщения электронной почты, пометив их.
Отсортировать сообщения можно по фильтру меток.Связь
57
Добавление метки к сообщению
1 На экране папки «Входящие» нажмите и удерживайте
сообщение.
2 Выберите пункт Изменить ярлыки.
3 Выберите метку, а затем— пункт Да.
Фильтр сообщений
1 На экране папки «Входящие» нажмите клавишу [ ] →
Перейти к ярлыкам.
2 Выберите метку сообщений, которые необходимо
просмотреть.
Электронная почта
В этом разделе описаны функции отправки и просмотра
сообщений электронной почты с помощью личной или рабочей
учетной записи.
›Настройка учетной записи электронной почты
1 В режиме ожидания откройте список приложений и выберите
пункт E-mail.
2 Введите свой адрес электронной почты и пароль.
3 Выберите пункт Далее для настройки обычных учетных
записей, например Google Mail или Yahoo, либо Ручная
настройка для настройки корпоративных учетных записей.
4 Следуйте инструкциям на экране.
После завершения настройки учетной записи начнется загрузка
сообщений электронной почты на устройство. Если создано
более двух учетных записей электронной почты, можно
переключаться между ними. Для этого выберите имя учетной
записи в верхнем правом углу экрана и укажите ту запись, из
которой нужно получить сообщения.Связь
58
› Отправка сообщения по электронной почте
1 В режиме ожидания откройте список приложений и выберите
пункт E-mail→ укажите учетную запись.
2 Нажмите клавишу [ ] →Создать.
3 Добавьте получателей сообщения.
● Введите адреса получателей вручную, разделив их
символом запятой или точки с запятой.
● Можно выбрать адреса электронной почты из списков,
выбирая нужные параметры в поле ввода получателей.
4 Выберите поле Cc/Bcc, чтобы добавить получателей.
5 Перейдите в поле ввода темы и введите тему сообщения.
6 Перейдите в поле ввода текста и введите текст сообщения.
7 Выберите пункт Вложить и вложите файл.
Можно выбрать вложение из списка существующих файлов
либо сделать новый снимок, видеозапись или звуковой файл.
Прикреплять файлы под защитой DRM (Digital Rights
Management— управление цифровым доступом) нельзя.
8 Выберите пункт Отправить для отправки сообщения.
При нахождении в автономном режиме или вне
зоны обслуживания сообщение будет оставаться в
папке «Исходящие» до подключения к Интернету или
обнаружения сети мобильной связи.Связь
59
›Просмотр сообщений электронной почты
При открытии учетной записи электронной почты в автономном
режиме на экране отобразятся ранее полученные сообщения
электронной почты. Для просмотра новых сообщений
необходимо подключиться к почтовому серверу. После загрузки
сообщений с сервера их можно просматривать в автономном
режиме.
1 В режиме ожидания откройте список приложений и выберите
пункт E-mail→ укажите учетную запись.
2 Нажмите клавишу [ ] →Обновить, чтобы обновить список
сообщений.
3 Выберите сообщение электронной почты.
В режиме просмотра сообщения доступны следующие
возможности.
● Чтобы ответить на сообщение, нажмите клавишу [ ] →
Ответить.
● Чтобы переслать сообщение другим получателям, нажмите
клавишу [ ] →Переслать.
● Чтобы удалить сообщение, нажмите клавишу [ ] →Удалить.
● Чтобы переместить сообщение в другую папку, нажмите
клавишу [ ] →Переместить.
● Чтобы загрузить изображения из сообщения, нажмите клавишу
[ ] →Вывод рисунков.
● Чтобы просмотреть вложение, коснитесь его. Чтобы сохранить
вложение на карте памяти, выберите значок .
Google Talk
В данном разделе описывается способ общения с друзьями с
помощью приложения Google Talk™.
Эта функция может быть недоступна в зависимости от
региона или оператора мобильной связи.Связь
60
›Добавление друзей в список
1 В режиме ожидания откройте список приложений и выберите
пункт Google Talk.
В списке друзей можно быстро просмотреть собеседников.
2 Нажмите клавишу [ ] →Добавить друга.
3 Введите адрес электронной почты друга и выберите пункт
Отправить приглашение.
Когда ваш друг примет это приглашение, он будет добавлен в
список друзей.
›Начало разговора
1 В режиме ожидания откройте список приложений и выберите
пункт Google Talk.
2 Выберите друга из списка. Откроется экран чата.
3 Введите текст сообщения и выберите пункт Отправить.
Чтобы добавить смайлик, нажмите клавишу [ ] →Опции→
Вставить смайлик.
4 Чтобы переключиться между активными окнами разговора,
нажмите клавишу [ ] →Открыть другой чат.
5 Чтобы завершить разговор, нажмите клавишу [ ] →
Закрыть чат.
Сервис Social Hub
В этом разделе описывается сервис Social Hub™,
обеспечивающий быстрый доступ к социальным сетям,
электронной почте, сообщениям, чатам, контактам и событиям
календаря. Подробную информацию см. на веб-сайте
socialhub.samsungapps.com.
1 В режиме ожидания откройте список приложений и выберите
пункт Социальный портал.
2 Ознакомьтесь с сервисом Social Hub и приступайте к его
использованию.Развлечения
61
Развлечения
Камера
В этом разделе описаны основные возможности создания
и просмотра снимков и видеозаписей. С помощью камеры
можно делать снимки с разрешением до 2048 x 1536 пикселов
(3,2 Мпикс) и видеозаписи с разрешением до 320 x 240 пикселов.
Чтобы воспользоваться камерой, сначала необходимо установить
карту памяти.
● Интерфейс камеры включается только в альбомном
режиме отображения.
● Коснитесь экрана, чтобы отобразить или скрыть значки
управления на видоискателе.
● Если устройство не используется в течение
определенного времени, камера автоматически
выключается.
● Количество снимков, которое можно сохранить во
встроенной памяти, зависит от режима и условий съемки.Развлечения
62
› Фотосъемка
1 Чтобы включить камеру, в режиме ожидания откройте список
приложений и выберите пункт Камера.
2 Наведите камеру на объект съемки и настройте изображение.
2
3
5
4
1
7
6
8
Номер Назначение
1
Переключение между передним и задним
объективами камеры.
2 Изменение режима съемки.
3 Изменение режима сцены.
4 Изменение настроек камеры.
5
Проверка состояния и настроек камеры.
● : количество снимков, которое можно
сохранить (в зависимости от свободного
места в памяти)
● : место хранения снимков
6 Переключение в режим видеозаписи.
7 Выполнение снимка.
8 Просмотр только что сделанного снимка.Развлечения
63
3 Нажимайте клавишу громкости для увеличения или
уменьшения масштаба.
При съемке с самым высоким разрешением функция зума
может быть недоступна.
4 Чтобы сделать снимок, выберите значок .
Снимок будет сохранен автоматически.
После выполнения снимков выберите значок , чтобы
просмотреть их.
● Перейдите влево или вправо, чтобы просмотреть другие
снимки.
● Чтобы изменить масштаб снимка, коснитесь экрана, затем
выберите значок или . Также можно дважды коснуться
экрана.
● Чтобы отправить снимок другим пользователям, выберите
пункт Отправить.
● Чтобы установить снимок в качестве фонового рисунка или
изображения для абонента, выберите пункт Установить как.
● Чтобы удалить снимок, выберите пункт Удалить.
› Фотосъемка с помощью параметров для разных
сюжетов
У камеры есть несколько предварительно заданных настроек
для разных сюжетов. Можно просто выбрать нужный режим в
соответствии с условиями и объектами съемки.
Например, если вы снимаете ночью, выберите ночной режим
съемки с увеличенной экспозицией.
1 Чтобы включить камеру, в режиме ожидания откройте список
приложений и выберите пункт Камера.
2 Выберите значок → выберите сюжет.
3 При необходимости измените параметры.
4 Чтобы сделать снимок, выберите значок .Развлечения
64
› Съемка в режиме распознавания улыбки
Камера способна распознавать лица людей в кадре и
автоматически делать снимок, когда они улыбаются.
1 Чтобы включить камеру, в режиме ожидания откройте список
приложений и выберите пункт Камера.
2 Выберите пункт →Распознавание улыбки.
3 При необходимости измените параметры.
4 Наведите объектив камеры на объект. и выберите значок .
Устройство обнаружит лица в кадре и распознает их улыбки.
Когда человек улыбнется, снимок будет сделан автоматически.
›Панорамная съемка
В режиме панорамной съемки можно делать широкоформатные
снимки. Этот режим лучше всего подходит для съемки пейзажей.
1 Чтобы включить камеру, в режиме ожидания откройте список
приложений и выберите пункт Камера.
2 Выберите пункт →Панорама.
3 При необходимости измените параметры.
4 Чтобы сделать первый снимок, выберите значок .
5 Медленно перемещайте устройство в выбранном
направлении, соединяя края зеленой рамки с видоискателем.
Когда зеленая рамка будет выровнена в видоискателе, камера
автоматически сделает следующий снимок.
6 Для добавления еще одного снимка к панораме повторите
шаг 5.Развлечения
65
›Настройка фотокамеры
Перед началом съемки выберите значок → для перехода
к следующим параметрам.
Опции Назначение
Значение
экспозиции
Настройка значения экспозиции.
Таймер
Установка временной задержки перед
съемкой.
Разрешение Изменение разрешения.
Баланс белого
Изменение цветового баланса в соответствии
с условиями освещения.
Эффекты Применение специальных эффектов.
Экспозамер Выбор типа экспозамера.
Качество
изображения
Настройка качества снимков.
Перед началом съемки выберите значок → для перехода к
следующим настройкам.
Настройка Назначение
Сетка
Отображение сетки на экране
предварительного просмотра.
Просмотр Просмотр снимка сразу после съемки.
GPS
Добавление к снимкам сведений о
координатах.
При плохих метеоусловиях, а также
в местах, где на пути GPS-сигнала
могут возникнуть препятствия
(пространства между зданиями,
низменности), качество связи может
снижаться.
Сброс Сброс параметров меню и съемки.Развлечения
66
› Видеосъемка
1 Чтобы включить камеру, в режиме ожидания откройте список
приложений и выберите пункт Камера.
2 Выберите значок , чтобы перейти в режим видеозаписи.
3 Наведите камеру на объект съемки и настройте изображение.
1
2
3
5
7
4
6
Номер Назначение
1
Переключение между передним и задним
объективами камеры.
2
Изменение режима видеозаписи (для
вложения в MMS-сообщение или обычного
сохранения).
3 Изменение настроек камеры.
4
Проверка состояния и настроек видеокамеры.
● : длительность видеозаписи (в
зависимости от свободного места в памяти)
● : место хранения видеозаписей
5 Переключение в режим фотокамеры.
6 Запись видео.
7 Просмотр только что сделанной видеозаписи.Развлечения
67
4 Нажимайте клавишу громкости для увеличения или
уменьшения масштаба.
При съемке с самым высоким разрешением функция зума
может быть недоступна.
5 Чтобы начать запись, выберите значок .
6 Выберите значок , чтобы остановить запись.
Видеозапись будет сохранена автоматически.
При записи видео на карту памяти с низкой скоростью
передачи могут возникать сбои.
Чтобы просмотреть видеозапись после съемки, выберите значок
.
● Перейдите влево или вправо, чтобы просмотреть другие
видеозаписи.
● Чтобы отправить видеозапись другим пользователям, выберите
пункт Отправить.
● Чтобы воспроизвести видеозапись, выберите пункт Запуск.
● Чтобы удалить видеозапись, выберите пункт Удалить.
›Настройка параметров видеозаписи
Перед началом съемки выберите значок → , чтобы
перейти к следующим параметрам.
Опции Назначение
Значение
экспозиции
Настройка значения экспозиции.
Таймер
Установка временной задержки перед
видеосъемкой.
Разрешение Изменение разрешения.
Баланс белого
Изменение цветового баланса в соответствии
с условиями освещения.
Эффекты Применение специальных эффектов.
Качество видео Настройка качества видеозаписей.Развлечения
68
Перед началом съемки выберите значок → для перехода к
следующим настройкам.
Настройка Назначение
Сетка
Отображение сетки на экране
предварительного просмотра.
Просмотр Отображение видеозаписи после съемки.
Сброс Сброс параметров меню и записи.
Галерея
В этом разделе описано, как просматривать снимки и
видеозаписи, хранящиеся на карте памяти.
›Поддерживаемые форматы файлов
Тип Формат
Изображения ● Расширение: bmp, gif, jpg, png, wbmp
Видео
● Расширение: 3gp, mp4, mkv
● Кодек: H.263, H.264, mpeg4
● Поддержка некоторых форматов файлов зависит от
программного обеспечения устройства.
● Если попытаться открыть файл, размер которого
превышает объем свободной памяти, может произойти
ошибка.
● Качество воспроизведения может различаться в
зависимости от типа исходных файлов.
● Некоторые файлы могут не воспроизводиться в
зависимости от типа используемого кодека.Развлечения
69
›Просмотр снимков
1 В режиме ожидания откройте список приложений и выберите
пункт Галерея.
2 Выберите папку.
3 Чтобы изменить режим просмотра, выберите значок или
в правом верхнем углу экрана.
4 Выберите снимок для просмотра (без значка).
При просмотре изображения доступны следующие функции.
● Перейдите влево или вправо, чтобы просмотреть другие
снимки.
● Для изменения масштаба выберите значок или . Также
для этого можно дважды коснуться экрана.
● Чтобы запустить слайд-шоу в текущей папке, выберите пункт
Слайд-шоу. Коснитесь экрана, чтобы остановить слайд-шоу.
● Чтобы отправить снимок другим пользователям, выберите
пункт Меню→Отправ.
● Чтобы удалить снимок, выберите пункт Меню→Удалить.
● Чтобы воспользоваться дополнительными возможностями
снимков, выберите пункт Меню→Еще и выполните одно из
следующих действий.
- Сведения: просмотр сведений о снимке.
- Установить как: установка снимка в качестве фонового
рисунка или фотоопределителя вызывающего абонента.
- Обрезать: обрезка фрагмента снимка.
- Повернуть влево: поворот снимка против часовой стрелки.
- Повернуть вправо: поворот снимка по часовой стрелке.Развлечения
70
› Воспроизведение видео
1 В режиме ожидания откройте список приложений и выберите
пункт Галерея.
2 Выберите видеозапись для просмотра (со значком ).
3 Для управления воспроизведением используются следующие
клавиши.
3
2 5
1 4
Номер Назначение
1
Приостановка воспроизведения;
выберите значок , чтобы продолжить
воспроизведение.
2 Прокрутка назад в пределах файла.
3
Переход к определенному месту в
файле путем перемещения ползунка или
прикосновения к нему.
4 Прокрутка вперед в пределах файла.
5 Подрезка фрагмента видео.Развлечения
71
Музыка
В этом разделе описаны возможности прослушивания музыки.
Музыкальный проигрыватель поддерживает следующие
форматы файлов: mp3, m4a, 3gp, mp4, ogg (Кодек: mp3, vorbis
(ogg), aac, aac+, eaac+, amr-nb/wb, wav, midi).
Чтобы воспользоваться этой функцией, сначала необходимо
установить карту памяти.
● Поддержка некоторых форматов файлов зависит от
программного обеспечения устройства.
● Если попытаться открыть файл, размер которого
превышает объем свободной памяти, может произойти
ошибка.
● Качество воспроизведения может различаться в
зависимости от типа исходных файлов.
● Некоторые файлы могут не воспроизводиться в
зависимости от типа используемого кодека.
› Копирование музыкальных файлов на карту
памяти
Для начала скопируйте файлы на карту памяти одним из
следующих способов.
● Загрузка из Интернета с использованием беспроводного
подключения. ►стр. 85.
● Загрузка с ПК с помощью программы Samsung Kies. ►стр. 103.
● Прием файлов по Bluetooth. ►стр. 98.
● Копирование на карту памяти. ►стр. 104.Развлечения
72
› Воспроизведение музыки
После копирования музыкальных файлов на карту памяти
выполните следующие действия.
1 В режиме ожидания откройте список приложений и выберите
пункт Музыка.
2 Выберите музыкальную категорию → музыкальный файл.
3 Для управления воспроизведением используются следующие
значки.
4
3
1
2
5
6
7
8
Номер Назначение
1
Включение 5.1-канальной звуковой системы
при подключенной гарнитуре.
2
Переход к определенному месту в
файле путем перемещения ползунка или
прикосновения к нему.
3
Повторное воспроизведение файла; переход
к предыдущему файлу (двойное касание);
прокрутка назад в пределах файла (нажмите и
удерживайте).
4
Приостановка воспроизведения;
выберите значок , чтобы продолжить
воспроизведение.
5
Изменение режима повтора (повтор
выключен, повтор одного файла, повтор всех
файлов).
6
Включение режима воспроизведения файлов
в случайном порядке.
1. Значки появляются при прикосновении к экрану проигрывателя.
1
1Развлечения
73
Номер Назначение
7 Переход к списку воспроизведения.
8
Переход к следующему файлу; переход вперед
в пределах файла (нажмите и удерживайте).
● С помощью гарнитуры можно управлять
воспроизведением файлов. Чтобы открыть музыкальный
проигрыватель, в режиме ожидания нажмите и
удерживайте кнопку гарнитуры. Чтобы приостановить
или возобновить воспроизведение, нажмите кнопку
гарнитуры.
● При воспроизведении многоканального содержимого,
например DVD-фильмов, SRS CS Headphone™ создают
5.1-канальное объемное звучание, в отличие от обычных
наушников или наушников-вкладышей.
● Технология WOW HD™ значительно повышает качество
звучания, обеспечивая динамичный трехмерный звук
благодаря глубоким насыщенным басам и чистому
воспроизведению высоких частот.
› Воспроизведение файлов в случайном порядке
(«вечеринка»)
В режиме «вечеринка» устройство воспроизводит файлы в
случайном порядке.
1 В режиме ожидания откройте список приложений и выберите
пункт Музыка.
2 Нажмите клавишу [ ] →Режим Party shuffle.
3 Чтобы отключить эту функцию, нажмите клавишу [ ] →
Отключить режим Party shuffle.Развлечения
74
›Изменение настроек музыкального
проигрывателя
1 В режиме ожидания откройте список приложений и выберите
пункт Музыка.
2 Выберите музыкальную категорию → музыкальный файл.
3 Нажмите клавишу [ ] →Настройки.
4 Можно изменять следующие параметры музыкального
проигрывателя.
Опции Назначение
5.1-канальный
звук
Включение виртуальной 5.1-канальной
звуковой системы при подключенной
гарнитуре.
Эквалайзер Выбор типа эквалайзера по умолчанию.
FM-радио
В этом разделе описано, как прослушивать на устройстве музыку
или новости, транслируемые по FM-радио. Для этого следует
подключить к устройству гарнитуру, которая будет выполнять
функцию антенны радиоприемника.
›Прослушивание FM-радио
1 Подключите гарнитуру к устройству.
2 В режиме ожидания откройте список приложений и выберите
пункт FM-радио.
Начнется автоматический поиск и сохранение доступных
радиостанций.
При первом включении FM-радио вам будет предложено
выполнить автоматическую настройку.Развлечения
75
3 Для управления FM-радио можно использовать следующие
значки.
1
3
2
3
5
4
Номер Назначение
1 Включение или выключение FM-радио.
2 Регулировка громкости звука.
3 Поиск доступной радиостанции.
4 Тонкая настройка частоты.
5
Добавление текущей радиостанции в список
избранных.
› Автоматическое сохранение радиостанции
1 Подключите гарнитуру к устройству.
2 В режиме ожидания откройте список приложений и выберите
пункт FM-радио.
3 Нажмите клавишу [ ] →Поиск→ укажите параметр
поиска.
Начнется автоматический поиск и сохранение доступных
радиостанций.
›Добавление радиостанции в список избранных
1 Подключите гарнитуру к устройству.
2 В режиме ожидания откройте список приложений и выберите
пункт FM-радио.Развлечения
76
3 Перейдите к нужной радиостанции.
4 Выберите значок , чтобы добавить ее в список избранных.
Можно добавить название радиостанции или удалить
ее. Для этого коснитесь и удерживайте радиостанцию в
списке избранных, затем выберите пункт Удалить или
Переименовать соответственно.
›Настройка параметров FM-радио
1 В режиме ожидания откройте список приложений и выберите
пункт FM-радио.
2 Нажмите клавишу [ ] →Настройки.
3 Измените следующие параметры FM-радио.
Опции Назначение
РЕГИОН Выбор своего региона.
Фоновое
воспроизведение
Работа FM-радио в фоновом режиме
во время использования других
приложений. Когда эта функция
включена, можно управлять FM-радио с
панели уведомлений.
Название станции
Отображение названия радиостанции
на экране FM-радио; доступно не для
всех радиостанций.
Альтернативная
частота
Настройка FM-радио на повторный
поиск радиостанции при слабом
сигнале.
Автовыключение
FM-радио
Автоматическое выключение FM-радио
через определенное время.Личные данные
77
Личные данные
Контакты
В этом разделе описано, как создавать личные и рабочие
контакты и управлять ими. В телефонной книге можно
сохранять имена абонентов, их мобильные и домашние номера,
электронные адреса, даты рождения и многое другое.
› Создание контакта
1 В режиме ожидания откройте список приложений и выберите
пункт .
2 Нажмите клавишу [ ] →Создать.
В портретном режиме отображения выберите значок .
3 Выберите область памяти.
Если у вас несколько учетных записей, выберите ту, в которой
будет сохранен контакт.
4 Введите сведения о контакте.
5 Выберите пункт Сохранить, чтобы сохранить контакт в
памяти.
Контакт также можно сохранить с экрана набора номера.
1 В режиме ожидания откройте список приложений и выберите
пункт →Набор.
2 Введите номер телефона.
3 Выберите пункт Добавить в Контакты→Создать контакт.
4 Выберите область памяти.
Если у вас несколько учетных записей, выберите ту, в которой
будет сохранен контакт.Личные данные
78
5 Введите сведения о контакте.
6 Выберите пункт Сохранить, чтобы сохранить контакт в
памяти.
›Поиск контакта
1 В режиме ожидания откройте список приложений и выберите
пункт .
2 Прокрутите список контактов вверх или вниз.
Чтобы прокручивать список быстрее, проведите пальцем по
указателю справа.
3 Выберите контакт.
После выбора контакта можно выполнить следующие действия.
● Чтобы выполнить вызов абонента, выберите его номер.
● Чтобы выполнить видеовызов, выберите пункт Видеовызов.
● Чтобы отправить сообщение, выберите пункт Сообщение.
● Чтобы отправить электронное сообщение, выберите
электронный адрес.
● Чтобы изменить сведения о контакте, нажмите клавишу [ ] →
Изменить.
● Чтобы добавить контакт в избранное, выберите значок в
правом верхнем углу экрана.
›Назначение клавиш быстрого набора номера
1 В режиме ожидания откройте список приложений и выберите
пункт .
2 Нажмите клавишу [ ] →Опции→Настройка быстрого
набора.
3 Выберите номер ячейки → контакт.
4 Выберите номер телефона (при необходимости).
Можно сразу же выполнить вызов, нажав и удерживая
виртуальную клавишу с соответствующим номером на
экране набора.Личные данные
79
› Создание визитки
1 В режиме ожидания откройте список приложений и выберите
пункт .
2 Нажмите клавишу [ ] →Мой профиль.
3 Введите свои данные.
4 Выберите пункт Сохранить.
Визитку можно переслать, вложив ее в сообщение, по
электронной почте или передать с помощью беспроводной
связи Bluetooth.
› Создание группы контактов
После создания групп можно управлять несколькими контактами
одновременно, а также отправлять SMS- и MMS-сообщения или
сообщения электронной почты всем членам группы. Сначала
нужно создать группу.
1 В режиме ожидания откройте список приложений и выберите
пункт →Группы.
2 Нажмите клавишу [ ] →Создать.
3 Введите имя группы и выберите мелодию вызова для нее.
4 Выберите пункт Сохранить.
› Копирование контактов
Чтобы скопировать контакты с SIM- или USIM-карты в память
устройства, выполните следующие действия.
1 В режиме ожидания откройте список приложений и выберите
пункт .
2 Нажмите клавишу [ ] →Импорт/экспорт→Импорт с SIM-
карты.
3 Выберите SIM- или USIM-карту.
4 Выберите область памяти.
Если у вас несколько учетных записей, выберите ту, в которой
хотите сохранить контакт.
5 Укажите контакты для копирования и выберите пункт
Импорт.Личные данные
80
Чтобы скопировать контакты из памяти устройства на SIM- или
USIM-карту, выполните следующие действия.
1 В режиме ожидания откройте список приложений и выберите
пункт .
2 Нажмите клавишу [ ] →Импорт/экспорт→Экспорт на
SIM-карту.
3 Выберите SIM- или USIM-карту.
4 Укажите контакты для копирования и выберите пункт
Экспорт→Да.
›Импорт и экспорт контактов
Чтобы импортировать контакты в формате VCF с карты памяти в
память устройства, выполните следующие действия.
1 В режиме ожидания откройте список приложений и выберите
пункт .
2 Нажмите клавишу [ ] →Импорт/экспорт→Импорт с
карты памяти SD.
3 Выберите область памяти.
Если у вас несколько учетных записей, выберите ту, в которой
будет сохранен контакт.
4 Выберите, сколько контактов нужно скопировать— один,
несколько или все, а затем выберите пункт Да.
5 Выберите контакты для импорта, а затем— пункт Да.Личные данные
81
Чтобы экспортировать контакты из памяти устройства на карту
памяти, выполните следующие действия.
1 В режиме ожидания откройте список приложений и выберите
пункт .
2 Нажмите клавишу [ ] →Импорт/экспорт→Экспорт на
карту памяти SD.
3 Для подтверждения выберите пункт Да.
›Просмотр журнала связи
Можно просмотреть журнал связи, где указаны вызовы,
сообщения, электронные письма и беседы из соцсетей.
1 В режиме ожидания откройте список приложений и выберите
пункт →Журнал.
2 Выберите элемент, который требуется просмотреть.
›Просмотр действий в социальных сетях
Можно просмотреть последние действия контактов в социальных
сетях, таких как Facebook и Twitter.
1 В режиме ожидания откройте список приложений и выберите
пункт →История.
2 Выберите элемент, который требуется просмотреть.
Календарь
В этом разделе описано, как создавать ежедневные,
еженедельные и ежемесячные события и устанавливать сигналы
для напоминания о них.
›Добавление события
1 В режиме ожидания откройте список приложений и выберите
пункт Календарь.
2 Нажмите клавишу [ ] →Опции→Создать.Личные данные
82
3 Укажите необходимые сведения о событии.
4 Выберите пункт Готово.
›Просмотр событий
Чтобы изменить вид календаря, выполните следующие действия.
1 В режиме ожидания откройте список приложений и выберите
пункт Календарь.
2 Нажмите клавишу [ ] →День, Неделя или Месяц.
Для просмотра событий, назначенных на определенную дату,
выполните следующие действия.
1 В режиме ожидания откройте список приложений и выберите
пункт Календарь.
2 Выберите дату в календаре.
● Чтобы ввести определенную дату для перехода к ней,
нажмите клавишу [ ] →Опции→Перейти, выберите
дату с помощью значков + или – и выберите пункт
Применить.
● Чтобы перейти к текущей дате, нажмите клавишу [ ] →
Сегодня.
3 Выберите событие, чтобы просмотреть сведения о нем.
› Выключение сигнала о событии при
срабатывании
Если для напоминания о событии задан сигнал, в указанное время
на экране появится значок сигнала.
1 Откройте панель уведомлений вверху экрана.
2 Выберите напоминание, чтобы просмотреть сведения о
событии.
3 Чтобы отключить сигнал на время или насовсем,
выберите пункт Приостановить все или Отклонить все
соответственно.Личные данные
83
Заметки
В этом разделе описано, как вводить важную информацию для
сохранения и последующего просмотра.
› Создание заметки
1 В режиме ожидания откройте список приложений и выберите
пункт Заметки.
2 Выберите пункт Создать заметку.
3 Введите текст заметки.
4 Если используется виртуальная клавиатура, выберите пункт
OK.
5 Выберите фоновый цвет.
6 Выберите пункт Сохранить.
›Просмотр заметок
1 В режиме ожидания откройте список приложений и выберите
пункт Заметки.
2 Выберите заметку для просмотра сведений о ней.
● Чтобы отредактировать заметку, выберите значок .
● Чтобы удалить заметку, выберите пункт →Да.
Чтобы отправить заметку другим пользователям, коснитесь
и удерживайте заметку, затем выберите пункт Отправить
по→ укажите параметр.
Диктофон
В данном разделе описано использование диктофона.
Чтобы воспользоваться этой функцией, сначала необходимо
установить карту памяти.Личные данные
84
› Запись голосовых заметок
1 В режиме ожидания откройте список приложений и выберите
пункт Диктофон.
2 Чтобы начать запись, выберите пункт Запись.
3 Говорите в микрофон устройства.
4 По окончании выберите пункт Стоп.
Заметка будет сохранена автоматически.
5 Чтобы записать еще одну голосовую заметку, снова выберите
пункт Запись.
› Воспроизведение голосовой заметки
1 В режиме ожидания откройте список приложений и выберите
пункт Диктофон.
2 Выберите пункт Спис.
3 Выберите голосовую заметку для воспроизведения.
Чтобы отправить голосовую заметку другим пользователям,
нажмите клавишу [ ] →Отправить→ укажите параметр.Интернет
85
Интернет
Для использования веб-служб требуется подключение к
Интернету. Обратитесь к оператору мобильной связи, чтобы
выбрать наиболее выгодный тарифный план.
Интернет
В этом разделе описано, как подключаться к Интернету и
сохранять закладки для избранных веб-страниц.
● За доступ к Интернету и загрузку файлов может
взиматься дополнительная плата. Дополнительные
сведения можно получить у оператора мобильной связи.
● У некоторых операторов мобильной связи элементы
меню обозревателя могут называться по-другому.
● Наличие тех или иных значков зависит от региона или
оператора мобильной связи.
›Просмотр веб-страниц
1 В режиме ожидания откройте список приложений и выберите
пункт Интернет, чтобы открыть указанную домашнюю
страницу.
Чтобы перейти на определенную веб-страницу, введите ее
URL-адрес в поле ввода и выберите значок .
2 Для просмотра веб-страниц используются следующие значки.
1 2
Вид экрана, изображение которого приведено выше, может
различаться в зависимости от региона или оператора
мобильной связи. Интернет
86
Номер Назначение
1
Ввод адреса веб-страницы для перехода на
нее.
2
Просмотр списка сохраненных закладок, часто
посещаемых страниц, а также журнала веб-
обозревателя.
При просмотре веб-страниц можно использовать следующие
возможности.
● Для изменения масштаба выберите значок или .
Также для этого можно дважды коснуться экрана.
● Чтобы открыть новое окно, нажмите клавишу [ ] →Новое
окно.
● Чтобы просмотреть открытые окна, нажмите клавишу [ ] →
Окна. Можно открыть несколько веб-страниц и переключаться
между ними.
● Чтобы обновить текущую веб-страницу, нажмите клавишу [ ]
→Обновить.
● Чтобы перейти к следующей странице в журнале веб-
обозревателя, нажмите клавишу [ ] →Вперед.
● Чтобы добавить в закладки текущую веб-страницу, нажмите
клавишу [ ] →Добавить закладку.
● Чтобы добавить ярлык текущей веб-страницы на экран в
режиме ожидания, нажмите клавишу [ ] →Опции→
Добавить на рабочий стол.
● Чтобы выполнить поиск текста на веб-странице, нажмите
клавишу [ ] →Опции→Найти на странице.
● Чтобы просмотреть сведения о веб-странице, нажмите клавишу
[ ] →Опции→Свойства страницы.
● Чтобы отправить URL-адрес веб-страницы другим
пользователям, нажмите клавишу [ ] →Опции→
Отправить страницу.
● Чтобы просмотреть журнал загрузки, нажмите клавишу [ ] →
Опции→Загрузки.
● Чтобы изменить параметры веб-обозревателя, нажмите
клавишу [ ] →Опции→Настройки.Интернет
87
› Голосовой поиск информации
Эта функция может быть недоступна в зависимости от
региона или оператора мобильной связи.
1 В режиме ожидания откройте список приложений и выберите
пункт Интернет.
2 Выберите поле ввода URL-адреса.
3 Если используется виртуальная клавиатура, нажмите клавишу
[ ].
4 Выберите значок и произнесите ключевое слово в
микрофон устройства.
Устройство выполнит поиск данных и веб-страниц,
содержащих данное ключевое слово.
›Добавление закладок для веб-страниц
Если адрес веб-страницы известен, можно вручную добавить ее в
закладки. Для этого выполните следующие действия.
1 В режиме ожидания откройте список приложений и выберите
пункт Интернет.
2 Выберите пункт →Закладки.
3 Выберите пункт Добавить.
4 Введите заголовок страницы и адрес (URL).
5 Выберите пункт Да.
В списке закладок нажмите и удерживайте закладку для доступа к
следующим функциям.
● Чтобы открыть веб-страницу в текущем окне, выберите пункт
Откр.
● Чтобы открыть веб-страницу в новом окне, выберите пункт
Открыть в новом окне.
● Чтобы изменить сведения о закладке, выберите пункт
Редактировать закладку.
● Чтобы добавить ярлык закладки на экран в режиме ожидания,
выберите пункт Добавить на рабочий стол.Интернет
88
● Чтобы отправить URL-адрес веб-страницы другим
пользователям, выберите пункт Отправить ссылку.
● Чтобы скопировать URL-адрес веб-страницы, выберите пункт
Копировать URL ссылки.
● Чтобы удалить закладку, выберите пункт Удалить закладку.
● Чтобы использовать веб-страницу в качестве стартовой
страницы в веб-обозревателе, выберите пункт Сделать
домашней страницей.
›Доступ к часто посещаемым страницам и
журналу веб-обозревателя
1 В режиме ожидания откройте список приложений и выберите
пункт Интернет.
2 Выберите пункт →Самые посещаемые или Журнал.
3 Выберите нужную веб-страницу.
Чтобы добавить веб-страницу в избранное, выберите
значок .
Карты
Приложение Google Maps™ позволяет найти интерактивные
карты улиц, городов и стран, а также получить маршруты
проезда.
Эта функция может быть недоступна в зависимости от
региона или оператора мобильной связи.
›Поиск определенного местонахождения
1 В режиме ожидания откройте список приложений и выберите
пункт Карты.
Ваше текущее местонахождение будет показано на карте.
2 Нажмите клавишу [ ] →Поиск.
3 Если используется виртуальная клавиатура, нажмите клавишу
[ ].Интернет
89
4 Введите ключевое слово местонахождения и выберите значок
.
Чтобы выполнить голосовой поиск местонахождения,
выберите значок .
5 Выберите место, сведения о котором требуется просмотреть.
● Чтобы просмотреть список всех результатов поиска,
выберите значок .
● Для изменения масштаба выберите значок или .
● Чтобы добавить слои на карту, нажмите клавишу [ ] →
Слои.
● Чтобы просмотреть ваше текущее местонахождение,
нажмите клавишу [ ] →Мое местоположение.
Чтобы отметить место звездочкой, выберите выноску с
названием места → .
›Получение маршрутов проезда к заданному
пункту назначения
1 В режиме ожидания откройте список приложений и выберите
пункт Карты.
2 Нажмите клавишу [ ] →Маршруты.
3 Введите адреса начального и конечного пунктов.
Чтобы ввести адрес из списка контактов или отмеченных мест
либо указать расположение на карте, выберите пункт →
Контакты, Точка на карте или Мои места.
4 Выберите способ передвижения (на автомобиле,
общественным транспортом или пешком), а затем— пункт
Найти маршрут.
Маршрут будет показан на карте. В зависимости от
выбранного способа передвижения могут появиться
несколько маршрутов. Выберите маршрут, чтобы просмотреть
сведения о нем, и выберите значок , чтобы просмотреть его
на карте.
5 Чтобы просмотреть отдельный фрагмент маршрута, выберите
значок или .
6 По окончании нажмите клавишу [ ] →Опции→Очистить
карту.Интернет
90
Локатор
В этом разделе описано, как с помощью приложения Google
Latitude™ вы можете узнавать о местонахождении друзей, а
они— о вашем.
Эта функция может быть недоступна в зависимости от
региона или оператора мобильной связи.
1 В режиме ожидания откройте список приложений и выберите
пункт Локатор.
Устройство автоматически подключится к сервису Google
Latitude.
2 Выберите пункт →Выбрать из контактов или Добавить
по адресу электронной почты.
3 Выберите того из друзей, кого нужно добавить, или введите
адрес электронной почты и выберите пункт Добавить
друзей.
4 Выберите пункт Да.
Когда друг примет приглашение, можно будет отправить ему
информацию о вашем местонахождении.
5 Нажмите клавишу [ ] →Карта.
Местонахождение ваших друзей отмечается их фотографиями
на карте.
Адреса
В этом разделе описан поиск интересных мест вокруг.
Эта функция может быть недоступна в зависимости от
региона или оператора мобильной связи.
1 В режиме ожидания откройте список приложений и выберите
пункт Адреса.
2 Выберите категорию.
Устройство выполнит поиск мест в районе вашего
местонахождения, относящихся к выбранной категории.Интернет
91
3 Выберите название места для просмотра сведений о нем.
4 Во время просмотра сведений можно использовать
следующие функции.
● Чтобы просмотреть место на карте, выберите пункт Карта.
● Чтобы просмотреть маршрут движения к указанному месту,
выберите пункт Маршруты.
● Чтобы просмотреть телефонный номер указанного места,
выберите пункт Позвонить.
Навигация
В этом разделе описывается использование системы навигации
GPS для поиска и отображения пункта назначения с помощью
голосовых указаний.
● Навигационные карты, ваше текущее местоположение
и прочие навигационные данные могут отличаться от
реальной ситуации. Настоятельно рекомендуем иметь в
виду реальную ситуацию на дорогах и прочие факторы,
влияющие на ваше движение по маршруту, а также
следовать всем предупреждающим и регулирующим
знакам в процессе вождения автомобиля.
● Эта функция может быть недоступна в зависимости от
региона или оператора мобильной связи.
1 В режиме ожидания откройте список приложений и выберите
пункт Навигация.
2 При первом запуске приложения выберите пункт Принимаю.
3 Введите пункт назначения одним из следующих способов.
● Произнести адрес: произнесите название конечного
пункта, например «Navigate to destination» («Перейти к
[название пункта назначения]»).
● Ввести место назначения: ввод пункта назначения с
помощью виртуальной клавиатуры.Интернет
92
● Контакты: выбор пункта назначения из адресов,
сохраненных в контактах.
● Отмеченные места: выбор пункта назначения из списка
отмеченных мест.
YouTube
В этом разделе описывается просмотр и загрузка видео на
YouTube.
Эта функция может быть недоступна в зависимости от
региона или оператора мобильной связи.
›Просмотр видео
1 В режиме ожидания откройте список приложений и выберите
пункт YouTube.
2 При первом запуске приложения выберите пункт Принять.
3 Выберите видеозапись из списка.
4 Для управления просмотром используйте значки на экране.
› Обмен видео
1 В режиме ожидания откройте список приложений и выберите
пункт YouTube.
2 Выберите видеозапись.
3 Поверните устройство, чтобы вернуться в портретный режим
отображения.
4 Выберите пункт → укажите параметр.Интернет
93
› Отправка видео
1 В режиме ожидания откройте список приложений и выберите
пункт YouTube.
2 Нажмите клавишу [ ] →Добавить и укажите видеозапись.
Перейдите к шагу 8.
Если вы хотите отправить еще одну видеозапись, выберите
значок , чтобы включить камеру.
3 Направьте объектив камеры на объект съемки и настройте
изображение.
4 Чтобы начать запись, выберите значок .
5 Выберите значок , чтобы остановить запись.
6 Выберите пункт Сохранить, чтобы отправить только что
сделанную видеозапись.
7 Выберите учетную запись Google, если она связана с веб-
сайтом YouTube. Можно также выбрать пункт Добавить
аккаунт и связать учетную запись с веб-сайтом YouTube.
8 Введите сведения о загрузке и выберите пункт Добавить.
Samsung Apps
Магазин Samsung Apps предлагает множество полезных
мобильных приложений. Среди них вы найдете игры, новости,
справочные материалы, приложения для пользования
социальными сетями, карты, приложения для заботы о здоровье
и многое другое.
Благодаря магазину Samsung Apps функциональность устройства
можно расширить, приспособив его для выполнения самых
разных задач. Узнайте больше о возможностях своего устройства!
● Наличие данной функции зависит от региона или
оператора мобильной связи.
● Дополнительные сведения см. на веб-сайте
www.samsungapps.com.Интернет
94
1 В режиме ожидания откройте список приложений и выберите
пункт Samsung Apps.
2 При первом запуске приложения ознакомьтесь с условиями
соглашения, а затем выберите пункт Принять.
3 Выполните поиск нужных приложений и загрузите их на
устройство.
Маркет
Из магазина Android Market можно загружать игры, мелодии
вызова и приложения.
Эта функция может быть недоступна в зависимости от
региона или оператора мобильной связи.
1 В режиме ожидания откройте список приложений и выберите
пункт Маркет.
2 При первом запуске приложения выберите пункт Принять.
3 Найдите нужный файл и загрузите его на устройство.
►стр. 43.Интернет
95
Новости и погода
В этом разделе описан способ просмотра прогноза погоды,
последних новостей и газетных статей.
›Просмотр прогноза погоды
1 В режиме ожидания откройте список приложений и выберите
пункт Новости и погода.
2 Выберите пункт Погода вверху экрана.
Устройство определит ваше текущее местонахождение и
отобразит прогноз погоды.
Можно изменить местонахождение, чтобы просмотреть
погоду в другом регионе. Нажмите клавишу [ ] →
Настройки→Настройки погоды и снимите флажок
с пункта Мое местоположение. Затем выберите
местонахождение в меню Настроить местоположение.
› Чтение новостей
1 В режиме ожидания откройте список приложений и выберите
пункт Новости и погода.
2 Перейдите влево к категории новостей вверху экрана.
3 Выберите статью, чтобы открыть ее.
Чтобы добавить новостную категорию, нажмите клавишу
[ ] →Настройки→Настройки новостей→Выбор тем
новостей.Возможности передачи данных
96
Возможности передачи
данных
Bluetooth
Bluetooth— это технология беспроводной передачи данных на
короткие расстояния (до 10 м) без необходимости физического
подключения устройств друг к другу.
При использовании Bluetooth не требуется располагать
устройства друг напротив друга. Если устройства находятся в
зоне общего действия, можно обмениваться данными между
ними, даже если они находятся в разных помещениях.
● Компания Samsung не несет ответственности за потерю,
перехват или несанкционированное использование
данных, отправленных или полученных с помощью связи
Bluetooth.
● Убедитесь, что вы обмениваетесь данными с надежным
устройством, имеющим надлежащий уровень
безопасности. Если между взаимодействующими
устройствами находятся препятствия, дальность
действия может уменьшиться.
● Некоторые устройства, в частности те, для которых
компания Bluetooth SIG не проводила испытаний или
которые не были одобрены по результатам таких
испытаний, могут быть несовместимы с устройством.
› Включение беспроводной связи Bluetooth
1 В режиме ожидания откройте список приложений и выберите
пункт Настройки→Беспроводные сети→Параметры
Bluetooth.
2 Выберите пункт Bluetooth, чтобы включить беспроводную
связь Bluetooth. Возможности передачи данных
97
›Поиск и соединение с устройствами,
поддерживающими Bluetooth
1 В режиме ожидания откройте список приложений и выберите
пункт Настройки→Беспроводные сети→Параметры
Bluetooth→Поиск устройств.
2 Выберите устройство.
3 Введите на устройстве PIN-код Bluetooth (при необходимости)
и выберите пункт Да. Вместо этого можно выбрать пункт
Принять, чтобы создать один и тот же PIN-код для связи
устройств.
Когда владелец другого устройства введет тот же код или
согласится установить соединение, соединение будет
установлено. После успешного подключения будет выполнен
автоматический поиск доступных услуг.
У некоторых устройств (как правило, у гарнитур и
устройств громкой связи) может быть фиксированный PIN-
код Bluetooth, например «0000». В таком случае необходимо
ввести этот код.
›Передача данных с помощью беспроводной
связи Bluetooth
1 Выберите нужный файл или элемент, например контакт,
заметку или медиафайл, из соответствующего приложения
или папки Мои файлы.
2 Выберите параметр отправки по Bluetooth.
Способ выбора параметра зависит от типа данных.
3 Выполните поиск устройства, поддерживающего Bluetooth, и
подключитесь к нему.Возможности передачи данных
98
›Прием данных с помощью беспроводной связи
Bluetooth
1 В режиме ожидания откройте список приложений и выберите
пункт Настройки→Беспроводные сети→Параметры
Bluetooth→Видимость.
Устройство станет видимым для других Bluetooth-устройств
на 120 секунд.
2 Когда появится запрос, введите PIN-код беспроводной связи
Bluetooth и выберите пункт Да (при необходимости).
3 Выберите пункт Принять, чтобы разрешить прием данных с
устройства.
Принятые данные сохраняются в папке Bluetooth. Полученные
контакты автоматически сохраняются в телефонной книге.
Wi-Fi
В этом разделе описывается функция беспроводной сети,
позволяющая подключаться к любым беспроводным локальным
сетям (WLAN), которые соответствуют стандарту IEEE 802.11 b/g/n.
Можно подключиться к Интернету или какому-либо сетевому
устройству везде, где есть точка доступа к беспроводной сети.
Устройство использует негармонизированную
частоту и будет работать во всех европейских странах.
Использование беспроводных локальных сетей в
помещении разрешено во всех странах Европейского
союза без каких-либо ограничений. Использование
беспроводных локальных сетей вне помещения запрещено
во Франции.Возможности передачи данных
99
› Включение функции WLAN
В режиме ожидания откройте список приложений и выберите
пункт Настройки→Беспроводные сети→Настройки Wi-Fi→
Wi-Fi.
Когда функция WLAN работает даже в фоновом режиме,
ресурс аккумулятора расходуется более интенсивно. Для
экономии заряда аккумулятора рекомендуется отключать
функцию WLAN, когда она не используется.
›Поиск беспроводной сети и подключение к ней
1 В режиме ожидания откройте список приложений и выберите
пункт Настройки→Беспроводные сети→Настройки
Wi-Fi.
Устройство автоматически выполнит поиск доступных сетей
WLAN.
2 Выберите сеть в меню Сети Wi-Fi.
3 Введите пароль для доступа к сети (при необходимости).
4 Выберите пункт Подключиться.
›Добавление сети WLAN вручную
1 В режиме ожидания откройте список приложений и выберите
пункт Настройки→Беспроводные сети→Настройки
Wi-Fi→Добавить сеть Wi-Fi.
2 Введите идентификатор SSID для сети и выберите тип защиты.
3 Установите настройки безопасности в зависимости от
выбранного типа защиты.
4 Выберите пункт Сохранить.Возможности передачи данных
100
›Подключение к сети WLAN с помощью точки
доступа WPS (защищенный доступ к Wi-Fi)
С помощью точки доступа WPS можно подключиться к
защищенной сети.
Для подключения к сети WLAN с помощью точки доступа WPS
выполните следующие действия.
1 В режиме ожидания откройте список приложений и выберите
пункт Настройки→Беспроводные сети→Настройки
Wi-Fi.
2 Выберите пункт Подключение кнопки WPS.
3 В течение двух минут после этого нажмите кнопку WPS на
точке доступа.
Для подключения к сети WLAN с помощью PIN-кода WPS
выполните следующие действия.
1 В режиме ожидания откройте список приложений и выберите
пункт Настройки→Беспроводные сети→Настройки
Wi-Fi.
2 Выберите сеть, обозначенную значком WPS, а затем — пункт
PIN-код WPS.
3 Введите PIN-код на точке доступа и нажмите клавишу Start.
Общий доступ к мобильной сети
В этом разделе описано, как настроить устройство в качестве
беспроводного модема или точки доступа для ПК и других
устройств и открыть для них доступ к мобильному сетевому
подключению.
›Доступ к мобильному сетевому подключению с
помощью WLAN
1 В режиме ожидания откройте список приложений и выберите
пункт Настройки→Беспроводные сети→Модем и точка
доступа.
2 Выберите пункт Переносная точка доступа Wi-Fi, чтобы
включить функцию модема Wi-Fi.Возможности передачи данных
101
3 Выберите пункт Точка доступа Wi-Fi→Настр. точку
доступа Wi-Fi, чтобы настроить параметры использования
устройства в качестве точки доступа.
Опции Назначение
SSID сети
Просмотр и редактирование имени
устройства, отображаемого для внешних
устройств.
Безопасность Выбор типа защиты.
Пароль
Просмотр и редактирование
сетевого ключа, предотвращающего
несанкционированный доступ к сети.
4 По окончании выберите пункт Сохранить.
5 На другом устройстве найдите имя вашего мобильного
устройства в списке доступных подключений и подключитесь
к сети.
После этого станет возможным использование мобильного
сетевого подключения с другого устройства.
›Доступ к мобильному сетевому подключению с
помощью USB
1 Подключите устройство к ПК через многофункциональный
разъем с помощью USB-кабеля.
2 В режиме ожидания откройте список приложений и выберите
пункт Настройки→Беспроводные сети→Модем и точка
доступа.Возможности передачи данных
102
3 Чтобы включить функцию USB-модема, выберите пункт USB-
модем.
После этого станет возможным использование мобильного
сетевого подключения с ПК.
Чтобы закрыть доступ к сетевому подключению, снимите
флажок рядом с пунктом USB-модем.
Способ предоставления доступа к подключению зависит от
используемой операционной системы.
GPS
Устройство оснащено приемником глобальной системы
позиционирования GPS. В этом разделе описан способ
включения служб определения местонахождения.
Качество сигнала GPS может снижаться в следующих условиях:
● между зданиями, в туннелях и подземных переходах или
внутри зданий;
● при плохой погоде;
● в областях высокого напряжения или электромагнитного
излучения;
● в автомобилях, стекла которых оклеены солнцезащитной
пленкой.
При использовании функций GPS не прикасайтесь к
области внешней антенны рукой и не закрывайте ее
другими предметами.
Эта функция может быть недоступна в зависимости от
региона или оператора мобильной связи.Возможности передачи данных
103
› Включение службы определения
местонахождения
Чтобы определить свое местонахождение и выполнить
поиск по карте, необходимо включить службы определения
местонахождения.
1 В режиме ожидания откройте список приложений и выберите
пункт Настройки→GPS и безопасность.
2 Для включения служб определения местонахождения
настройте следующие параметры.
Опции Назначение
Беспроводные
сети
Определение местонахождения с
помощью сети WLAN и (или) мобильной
сети.
Использовать
GPS
Включение функции определения вашего
местонахождения с помощью спутника
GPS.
Подключение к ПК
В этом разделе описаны способы подключения устройства к ПК
через порт USB с помощью USB-кабеля. Подключив мобильное
устройство к ПК, вы сможете напрямую обмениваться данными с
ПК и использовать программу Samsung Kies.
›Подключение с помощью программы Samsung
Kies
Убедитесь, что на ПК установлена программа Samsung Kies. Эту
программу можно загрузить с веб-сайта компании Samsung
(www.samsung.com/kies).
1 Подключите устройство к ПК через многофункциональный
разъем с помощью USB-кабеля.
Программа Samsung Kies запустится автоматически.
Если программа не запускается автоматически, два раза
щелкните значок Samsung Kies на экране монитора.Возможности передачи данных
104
2 Скопируйте файлы с компьютера на устройство.
Дополнительные сведения см. в справке программы Samsung
Kies.
›Подключение в качестве съемного диска
Можно получить доступ к файловой системе карты памяти,
используя мобильное устройство как устройство для чтения карт
памяти.
1 Вставьте карту памяти в устройство.
2 Подключите устройство к ПК через многофункциональный
разъем с помощью USB-кабеля.
3 Откройте панель уведомлений и выберите пункт USB
подключен→Подключить USB-накопитель→Да.
4 Откройте папку для просмотра файлов.
5 Скопируйте файлы с ПК на карту памяти.
6 По окончании выберите пункт Отключить USB-накопитель.
Чтобы отсоединить устройство от ПК, щелкните значок
USB-устройства на панели задач Windows и выберите
безопасное извлечение устройства. Затем отсоедините USB-
кабель. В противном случае можно потерять все данные,
хранящиеся на карте памяти, или повредить саму карту.Возможности передачи данных
105
VPN-соединения
Можно создать соединение виртуальной частной сети (VPN) и
безопасно подключиться к частной сети через открытую сеть,
например через Интернет.
Устройство уже должно быть настроено для доступа в
Интернет. При возникновении проблем с доступом в
Интернет необходимо изменить настройки. Если вы не
уверены в правильности вводимых данных, обратитесь к
поставщику услуг.
›Настройка VPN-соединений
1 В режиме ожидания откройте список приложений и выберите
пункт Настройки→Беспроводные сети→Параметры
VPN→Добавить VPN.
2 Выберите тип VPN-соединения.
3 Настройте профиль соединения.
Доступные параметры зависят от типа VPN-соединения.
Опции Назначение
Имя VPN Ввод имени сервера VPN.
Настроить
сервер VPN
Ввод IP-адреса сервера VPN.
Включить
Шифрование
Включение шифрования данных на
сервере VPN.
Задать общий
ключ IPsec
Ввод предварительно установленного
ключа.Возможности передачи данных
106
Опции Назначение
Включить Ключ
L2TP
Включение запроса ключа L2TP.
Настроить ключ
L2TP
Ввод ключа L2TP.
Задать
сертификат
пользователя
Выбор пользовательского сертификата,
используемого сервером VPN для вашей
идентификации. Сертификаты можно
импортировать с сервера VPN или
загрузить из Интернета.
Задать
сертификат
из хранилища
сертификатов
Выбор центра сертификации (CA),
используемого сервером VPN для вашей
идентификации. Сертификаты можно
импортировать с сервера VPN или
загрузить из Интернета.
Домены поиска
DNS
Ввод адреса DNS-сервера.
4 По окончании внажмите клавишу [ ] →Сохранить.
›Подключение к частной сети
1 В режиме ожидания откройте список приложений и выберите
пункт Настройки→Беспроводные сети→Параметры
VPN.
2 Выберите частную сеть для подключения.
3 Введите имя пользователя и пароль, затем выберите пункт
Перейти.Инструменты
107
Инструменты
Часы
В этом разделе описывается управление часами на экране в
режиме ожидания, а также оповещениями о важных событиях.
›Просмотр часов
1 В режиме ожидания откройте список приложений и выберите
пункт Часы.
2 После этого можно выполнить следующие действия.
● Чтобы создать или удалить сигнал, выберите значок .
● Чтобы запустить слайд-шоу из снимков в галерее, выберите
значок .
● Чтобы открыть музыкальный проигрыватель, выберите
значок .
● Чтобы вернуться к экрану в режиме ожидания, выберите
значок .
› Установка нового сигнала
1 В режиме ожидания откройте список приложений и выберите
пункт Часы.
2 Выберите пункт →Добавить будильник или пункт [ ]
→Добавить будильник.
3 Настройте параметры сигнала.
4 По окончании выберите пункт Готово.
› Выключение сигнала будильника при
срабатывании
При срабатывании сигнала выполните следующие действия.
● Для выключения сигнала выберите пункт Отменить.
● Выберите пункт Пауза, чтобы отключить сигнал на время (до
следующего повтора).Инструменты
108
› Удаление сигнала будильника
1 В режиме ожидания откройте список приложений и выберите
пункт Часы→ .
2 Выберите сигнал для отключения.
3 Выберите пункт Удалить→Да.
Калькулятор
В этом разделе описано, как использовать калькулятор, схожий
по функциям с карманным или настольным калькулятором.
1 В режиме ожидания откройте список приложений и выберите
пункт Калькулятор.
2 Для выполнения основных арифметических действий
используйте отображаемые на дисплее клавиши
калькулятора.
3 Нажмите клавишу [ ] → Дополнительная панель, чтобы
воспользоваться инженерным калькулятором.
Загрузки
В этом разделе рассказывается, как управлять журналами файлов,
загруженных из Интернета.
1 В режиме ожидания откройте список приложений и выберите
пункт Загрузки.
2 Выберите папку загрузки.
3 Выберите журнал, чтобы открыть загруженный файл.
Чтобы удалить журнал, установите флажок напротив него и
выберите пункт Удалить.Инструменты
109
Поиск
Можно выполнять поиск приложений и данных в памяти
устройства или определенных данных в Интернете.
1 В режиме ожидания откройте список приложений и выберите
пункт Поиск.
2 При первом запуске приложения укажите, просматривать или
нет историю поиска вашей учетной записи Google.
3 Введите букву или слово для поиска данных.
4 Выберите название элемента, который нужно открыть.
Мои файлы
В этом разделе описано, как быстро переходить к изображениям,
видеозаписям, музыкальным, звуковым и прочим файлам,
хранящимся на карте памяти.
›Поддерживаемые форматы файлов
Тип Формат
Изображения ● Расширение: bmp, gif, jpg, png, wbmp
Видео
● Расширение: 3gp, mp4, mkv
● Кодек: H.263, H.264, mpeg4
Музыка
● Расширение: mp3, m4a, 3gp, mp4, ogg, amr
● Кодек: mp3, vorbis(ogg), aac, aac+, eaac+,
amr-nb/wb, wav, midiИнструменты
110
● Поддержка некоторых форматов файлов зависит от
программного обеспечения устройства.
● Если попытаться открыть файл, размер которого
превышает объем свободной памяти, может произойти
ошибка.
● Качество воспроизведения может различаться в
зависимости от типа исходных файлов.
● Некоторые файлы могут не воспроизводиться в
зависимости от типа используемого кодека.
1 В режиме ожидания откройте список приложений и выберите
пункт Мои файлы.
2 Выберите папку.
● Чтобы вернуться в корневой каталог, выберите пункт
Домой.
● Чтобы подняться на один уровень в структуре папок,
выберите пункт Вверх.
3 Выберите файл для открытия.
Находясь в папке, нажмите клавишу [ ] для доступа к
следующим возможностям.
● Чтобы отправить файл другим пользователям, выберите пункт
Отправить.
● Чтобы создать новую папку, выберите пункт Создать папку.
● Чтобы удалить файл или папку, выберите пункт Удалить.
● Чтобы изменить режим просмотра, выберите пункт Просм. по.
● Чтобы отсортировать файлы или папки, выберите пункт
Сортиров. по.
● Чтобы выполнить дополнительные действия с файлом,
такие как перемещение, копирование или переименование,
выберите пункт Опции.
Polaris Office
В этом разделе описано, как создавать и просматривать
документы Polaris Office.Инструменты
111
› Создание документа
1 В режиме ожидания откройте список приложений и выберите
пункт Polaris Office.
2 Ознакомьтесь с информацией о регистрации и выберите
пункт Позже или Регистрация.
3 Выберите значок → тип документа.
4 Создайте документ.
5 По окончании нажмите клавишу [ ] →Сохран.
6 Введите имя документа и выберите место его хранения.
7 Выберите пункт Сохран.
›Просмотр документа
1 В режиме ожидания откройте список приложений и выберите
пункт Polaris Office.
2 Выберите папку в меню Мои файлы или пункт Недавние
документы→ файл документа.
3 Просмотрите документ.
● Чтобы изменить масштаб документа, коснитесь экрана,
затем выберите значок или . Чтобы вернуться
к исходному размеру, дважды коснитесь экрана. Можно
также выбрать пункт [ ] →Масштаб→ параметр.
● Чтобы открыть панель инструментов для редактирования
документов (файлы Word, Excel или презентации), нажмите
клавишу[ ] →Режим редактирования.
● Чтобы выполнить поиск заданной фразы в тексте
документа, нажмите клавишу [ ] →Поиск.Инструменты
112
● Чтобы добавить в закладки текущую страницу, нажмите
клавишу [ ] →Закладка.
● Чтобы подогнать размер документа по ширине экрана,
нажмите клавишу [ ] →Перестроение текста.
● Чтобы отправить файл другим пользователям, нажмите
клавишу [ ] →Опции→Отправить файл.
● Чтобы настроить параметры отображения и управления
документами, нажмите клавишу [ ] →Опции→
Настройки.
Доступные параметры зависят от типа документа.
› Управление документами в интерактивном
режиме
1 В режиме ожидания откройте список приложений и выберите
пункт Polaris Office.
2 Выберите пункт Веб-файлы→ службу.
3 Введите адрес электронной почты и пароль для доступа к
учетной записи и выберите пункт Добавить.
4 Просмотрите и отредактируйте документ на сервере в
соответствии со своими предпочтениями.
SIM-меню
Использование дополнительных услуг, предлагаемых
оператором мобильной связи. Доступность и маркировка
данного пункта меню зависят от SIM- или USIM-карты.
В режиме ожидания откройте список приложений и выберите
пункт SIM-меню.Инструменты
113
Диспетчер задач
С помощью диспетчера задач можно просматривать работающие
приложения и сведения об используемой памяти.
1 В режиме ожидания откройте список приложений и выберите
пункт Диспетчер задач.
2 Для настройки воспользуйтесь следующими параметрами.
● Активные: просмотр списка работающих приложений.
● Загружено: просмотр общего объема памяти,
используемой установленными на устройство
приложениями.
● ОЗУ: проверка состояния оперативной памяти и
управление ею.
● Память: просмотр сведений об используемой и доступной
памяти на устройстве и карте памяти.
● Справка: просмотр справочной информации по
продлению срока службы аккумулятора и использованию
диспетчера памяти RAM.
Голосовой поиск
В этом разделе описаны возможности голосового управления,
с помощью которых можно набирать номера, отправлять
сообщения и выполнять поиск местоположений и данных.
Эта функция может быть недоступна в зависимости от
региона или оператора мобильной связи.
1 В режиме ожидания откройте список приложений и выберите
пункт Голосовой поиск.
2 Выберите пункт Говорите (при необходимости).
3 Произнесите команду в микрофон устройства.
4 Выберите название элемента, который нужно открыть (при
необходимости).Настройки
114
Настройки
Работа с меню настроек
1 В режиме ожидания откройте список приложений и выберите
пункт Настройки.
2 Перейдите к нужной категории и выберите один из
параметров.
Диспетчер SIM-карты
Изменение параметров для управления настройками сети и SIM-
карт устройства. ►стр. 38.
Беспроводные сети
В этом разделе описано, как изменять настройки подключения к
беспроводной сети.
› Автономный режим
Отключение всех беспроводных функций устройства. Можно
использовать только несетевые функции устройства.
›Настройки Wi-Fi
● Wi-Fi: включение или выключение функции WLAN. ►стр. 99.
● Уведомление о сетях: уведомление о пребывании в зоне
открытой сети.
● Подключение кнопки WPS: подключение к сети WLAN с
помощью кнопки WPS (Wi-Fi Protected Setup — защищенный
доступ к Wi-Fi).
● Добавить сеть Wi-Fi: добавление точек доступа сети WLAN
вручную.Настройки
115
›Параметры Bluetooth
● Bluetooth: включение и выключение беспроводной связи
Bluetooth. ►стр. 96.
● Имя устройства: выбор имени устройства.
● Видимость: разрешение обнаружения устройства другими
Bluetooth-устройствами.
● Поиск устройств: поиск доступных Bluetooth-устройств.
› Средства USB
Подключение устройства к ПК в режиме съемного диска.
›Модем и точка доступа
● USB-модем: использование устройства в качестве
беспроводного модема для ПК (доступ к мобильному сетевому
подключению осуществляется через USB). При подключении к
ПК устройство работает как беспроводной модем. ►стр. 101.
● Переносная точка доступа Wi-Fi: использование устройства
в качестве модема Wi-Fi для ПК и других устройств (доступ к
мобильному сетевому соединению осуществляется по сети
WLAN). ►стр. 100.
● Точка доступа Wi-Fi:
- Переносная точка доступа Wi-Fi: использование устройства
в качестве модема Wi-Fi для ПК и других устройств (доступ к
мобильному сетевому соединению осуществляется по сети
WLAN). ►стр. 100.
- Настр. точку доступа Wi-Fi: настройка параметров
использования устройства в качестве точки доступа.
›Параметры VPN
Настройка виртуальных частных сетей (VPN) и подключение к
ним. ►стр. 105.Настройки
116
›Мобильные сети
● Пакетные данные: разрешение на использование сетей с
коммутацией пакетов данных для сетевых услуг.
● Данные в роуминге: подключение устройства к другой сети в
роуминге или при недоступности домашней сети.
● Точки доступа: задание имен точек доступа (APN).
● Только сети 2G: подключение устройства только к сетям 2G.
● Операторы сети: поиск доступных сетей и выбор сети для
роуминга.
Вызовы
Настройка параметров вызовов.
›Номера FDN
● Включить FDN: включение или выключение режима FDN
для ограничения исходящих вызовов номеров, кроме
содержащихся в списке FDN. Необходимо ввести PIN2-код,
предоставленный с SIM- или USIM-картой.
● Изменить PIN2-код: изменение PIN2-кода, предназначенного
для защиты основного PIN-кода. Если SIM- или USIM-карта
заблокирована, данный пункт меню будет называться
Разблокировать PIN2.
● Список FDN: настройка списка разрешенных контактов.
› Голосовая почта
● Услуга голос. почты: выбор службы голосовой почты вашего
оператора мобильной связи. Также можно выбрать другие
службы голосовой почты, если вы загрузили необходимые
приложения.
● Голосовая почта: ввод номера для доступа к службе голосовой
почты. Этот номер можно получить у оператора мобильной
связи.
Расположение данных параметров различается в
зависимости от используемой SIM- или USIM-карты.Настройки
117
›Изображение для видеовызова
Выбор изображения для показа собеседнику.
›Показывать собственное видео при приеме
вызова
Вывод собеседнику вашего изображения или
предустановленного видео.
›Использовать параметры сбоя вызова
Повтор голосового вызова в случае сбоя видеовызова.
› Вкл. датчик расстояния
Включение датчика приближения во время вызова.
›Переадресация вызова
Переадресация входящих вызовов на другой номер.
›Дополнительные параметры
● Определитель номера: отображение вашей фотографии
другим абонентам при исходящем вызове.
● Ожидание вызова: сигнал входящего вызова даже во время
разговора.
Звук
Изменение настроек звуков устройства.
● Профиль Без звука: отключение всех звуков устройства,
кроме звука мультимедиа и сигналов будильника.
● Вибрация: вибрация при возникновении различных событий.
● Громкость: регулировка громкости мелодий вызова, музыки,
видеозаписей, сигналов и уведомлений, а также системных
звуков устройства.
● Мелодия звонка:
- Мелодия телефона: выбор мелодии для входящих вызовов.
- Мелодия уведомления: выбор мелодии для уведомлений,
например о входящих сообщениях и пропущенных вызовах.Настройки
118
● Звук при нажатии: включение звукового сигнала при выборе
приложения или параметра на сенсорном экране.
● Блокировка экрана: включение звукового сигнала при
блокировке или разблокировке сенсорного экрана.
Дисплей
Настройка параметров дисплея.
● Экран:
- Стиль шрифта: изменение типа шрифта для отображаемого
текста. Дополнительные шрифты можно загрузить из Android
Market, выбрав пункт Загрузить шрифты.
- Главный экран:
Обои: выбор фонового изображения для экрана в режиме
ожидания.
- Экран блокировки:
Обои: выбор изображения для заблокированного экрана.
Расположение часов: выбор позиции часов на
заблокированном экране.
● Яркость: регулировка яркости экрана.
● Автоповорот экрана: автоматическое изменение ориентации
при повороте устройства.
● Анимация: включение анимации при переключении между
приложениями.
● Тайм-аут экрана: установка времени ожидания перед
выключением подсветки дисплея.
● Чувствительность оптического джойстика: настройка
чувствительности сенсорной панели.
GPS и безопасность
Изменение настроек безопасности устройства, SIM- или USIM-
карты и функции GPS.
● Беспроводные сети: определение местонахождения с
помощью сети WLAN и (или) мобильной сети.
● Использовать GPS: включение функции определения вашего
местонахождения с помощью спутника GPS.Настройки
119
● Задать блокировку экрана: настройка кода разблокировки
устройства. После настройки кода разблокировки вместо этого
параметра появляется другой— Изменить блокир. экрана.
- Нет: отключение блокировки экрана.
- Рисунок: задание рисунка разблокировки для снятия
блокировки экрана.
- PIN: установка цифрового PIN-кода для разблокировки
экрана.
- Пароль: установка буквенно-цифрового пароля для
разблокировки экрана.
● Настройка блокировки SIM-карты:
- Блокировка SIM-карты: включение или выключение
запроса PIN-кода при включении устройства.
- Изменить PIN-код SIM: изменение PIN-кода, необходимого
для доступа к данным на SIM- или USIM-карте.
● Оповещ. о смене SIM-карты: включение и выключение
функции поиска устройства для отслеживания украденного или
потерянного устройства. ►стр. 37.
● Получатели оповещения: добавление или редактирование
номеров, на которые будет отправляться оповещение.
● Удаленное управление: удаленное управление утерянным
устройством через Интернет.
● Видимые пароли: отображение пароля по мере ввода.
● Выбор администраторов: просмотр установленных на
устройстве приложений администрирования. Приложения
администрирования можно включать для применения новых
политик к поведению устройства.
● Безопасное хранение: использование сертификатов и
удостоверений для безопасной работы с различными
приложениями.
● Установка с карты SD: установка зашифрованных
сертификатов с карты памяти.
● Задать пароль: создание и подтверждение пароля для доступа
к удостоверениям.
● Очистить хранилище: удаление учетных записей с устройства
и сброс пароля.Настройки
120
Приложения
Изменение настроек управления установленными
приложениями.
● Неизвестные источники: разрешение загрузки приложений
из любого источника. Если этот параметр не выбран,
приложения можно будет загрузить только из Android Market.
● Быстрый запуск: назначение приложению буквы при
настройке горячих клавиш. Назначенное приложение
запускается по нажатию клавиши [ ] и одновременному вводу
соответствующей буквы. ►стр. 33.
● Управление приложениями: переход к списку установленных
на устройство приложений и просмотр сведений о них.
● Запущенные службы: просмотр используемых служб и
переход к ним.
● Использование памяти: просмотр сведений об используемой
и доступной памяти на устройстве.
● Использование батареи: просмотр сведений о количестве
потребляемой устройством энергии.
● Разработка:
- Отладка USB: это необходимо для отладки приложений.
При подключении устройства к ПК с помощью USB-кабеля
автоматически запускаются режим отладки USB и программа
Samsung Kies.
- Активный режим: включение подсветки дисплея на время
зарядки аккумулятора.
- Эмуляция расположения: отправка тестовых данных
о местонахождении и служебной информации в службу
местонахождения для проверки. Это необходимо для отладки
приложений.
● Samsung Apps: выбор подключения к сети (WLAN или сеть
с пакетной коммутацией) для получения уведомлений об
обновлениях приложений из Samsung Apps.
Эта функция может быть недоступна в зависимости от
региона или оператора мобильной связи.Настройки
121
Учетные записи и синхронизация
Изменение параметров автосинхронизации и управление
учетными записями синхронизации.
● Фоновый режим: включение функции автоматической
синхронизации. Автоматическая синхронизация данных
будет проходить в фоновом режиме, не требуя открытия
приложений.
● Автосинхронизация: автоматическая синхронизация
контактов, событий календаря и электронной почты.
Конфиденциальность
Изменение параметров для управления настройками и данными.
● Архивация данных: создание резервной копии настроек
устройства на веб-сервере Google.
● Автовосстановление: восстановление данных приложения
при его повторной установке.
● Сброс данных: сброс настроек до заводских значений и
удаление всех данных.
Память
Просмотр сведений о доступной памяти на устройстве и карте
памяти. Можно отформатировать карту памяти.
После форматирования данные будут удалены без
возможности восстановления.
Язык и клавиатура
Изменение параметров ввода текста.
› Выберите язык
Выбор языка отображения для всех меню и приложений.
› Экранная клавиатура
Использование виртуальной клавиатуры для ввода текста.Настройки
122
› Выбрать метод ввода
Выбор клавиатуры по умолчанию для ввода текста.
› Клавиатура Samsung
Настройка использования клавиатуры Samsung.
● Типы клавиатуры: выбор одного из типов клавиатуры
(QWERTY или обычная) либо рукописного ввода.
● Языки ввода: выбор языка ввода текста.
Вводить текст можно не на всех языках. Для ввода текста
необходимо выбрать поддерживаемый язык.
● XT9: включение режима XT9 для упрощенного набора текста.
● Настройки XT9: включение дополнительных возможностей
режима XT9, таких как автозаполнение, автокоррекция и
автозамена слова, а также создание собственного списка слов.
● Сдвиг пальцем: включение или выключение возможности
проведения пальцем по клавиатуре. Чтобы изменить режим
ввода текста, проведите пальцем по клавиатуре влево или
вправо.
● Заглавные буквы: автоматический ввод заглавной буквы
после таких знаков препинания, как точка, вопросительный и
восклицательный знаки.
● Рукописный ввод: настройка времени распознавания для
рукописного ввода.
● Голосовой ввод: включение функции голосового ввода текста
на клавиатуре Samsung.
● Автовставка точки: вставка точки по двойному
прикосновению к клавише пробела.
● Справка: сведения о вводе слов на клавиатуре Samsung.Настройки
123
› Клавиатура устройства
● Автоматическая замена: автоматическое исправление
орфографических ошибок.
● Заглавные буквы: автоматический ввод заглавной буквы
после таких знаков препинания, как точка, вопросительный или
восклицательный знаки.
● Автоматическая пунктуация: вставка точки по двойному
прикосновению к клавише пробела.
Голосовой ввод и вывод
Настройка функций распознавания голоса и преобразования
текста в речь.
› Распознавание голоса
● Язык: выбор языка для функции распознавания голоса Google.
● Безопасный поиск: настройка фильтрации табуированной
лексики и изображений в результатах голосового поиска.
● Фильтр нецензур. слов: удаление оскорбительных слов,
распознанных устройством, из результатов голосового поиска.
›Преобразование текста в речь
● Прослушать пример: прослушивание фрагмента текста
в качестве образца. Для преобразования текста в речь
необходимо установить голосовые данные.
● Всегда использовать мои параметры: замена параметров
языка и скорости речи, сохраненных в приложениях,
пользовательскими параметрами.
● Модуль по умолчанию: выбор голосового модуля для
произнесения текста.
● Установить голосовые данные: загрузка и установка
голосовых данных для преобразования текста в речь.Настройки
124
● Скорость речи: выбор скорости начитки текста для
преобразования текста в речь.
● Язык: выбор языка для функции преобразования текста в речь.
● Модули: просмотр модулей преобразования текста в речь,
установленных на устройстве.
Специальные возможности
● Специальные возможности: включение приложений для
специальных возможностей, таких как Talkback или Kickback,
которые позволяют настроить обратную связь в виде
голосовых комментариев, мелодий или вибрации.
● Завер. вызова клав. пит.: настройка устройства на
завершение вызова по нажатию клавиши [ ].
Дата и Время
Изменение параметров формата времени и даты.
При полной разрядке аккумулятора или извлечении его из
устройства параметры даты и времени будут сброшены.
● Автоматически: автоматическое обновление времени при
перемещении в другой часовой пояс.
● Установить дату: ручная установка текущей даты.
● Выберите часовой пояс: выбор часового пояса.
● Установить время: ручная установка текущего времени.
● 24-часовой формат: вывод времени в 24-часовом формате.
● Формат даты: выбор формата даты.
Сведения о телефоне
Просмотр сведений об устройстве, проверка его состояния, а
также обновление системы.Устранение неполадок
125
Устранение неполадок
При включении устройства или во время его
использования появляется запрос на ввод одного из
следующих кодов:
Код Возможное решение проблемы
Пароль
Если включена функция блокировки, необходимо
ввести пароль устройства.
PIN-код
Если устройство включается в первый раз либо
включена функция проверки PIN-кода, следует
ввести PIN-код, полученный вместе с SIM- или USIM-
картой. Эту функцию можно отключить в меню
Блокировка SIM-карты.
PUK
Как правило, SIM- или USIM-карта блокируется
после того, как несколько раз введен неверный
PIN-код. В этом случае следует ввести PUK-код,
предоставленный оператором мобильной связи.
PIN2-код
При доступе к меню, для которого требуется PIN2-
код, введите PIN2-код, который предоставляется
вместе с SIM- или USIM-картой. Дополнительную
информацию можно получить у оператора
мобильной связи.
На дисплее отображаются уведомления об ошибках
сети или отдельных служб
● В некоторых местах сигнал сети настолько слабый, что
использование сетевых функций устройства становится
невозможным. Перейдите в место, где сигнал более стабилен.
● Для использования некоторых функций требуется
активировать их. Для получения дополнительных сведений
обратитесь к оператору мобильной связи.Устранение неполадок
126
Сенсорный экран медленно или неправильно
реагирует на касания
Если сенсорный экран неправильно реагирует на касания,
попробуйте выполнить следующие действия.
● Удалите защитную пленку с экрана. Защитная пленка
может помешать правильному распознаванию ввода. Не
рекомендуется использовать ее с сенсорным экраном.
● При касании сенсорного экрана руки должны быть чистыми и
сухими.
● Выключите и снова включите устройство, чтобы устранить
временные неисправности ПО.
● Убедитесь, что на устройстве установлена последняя версия
ПО.
● Если сенсорный экран поцарапан или поврежден, обратитесь в
сервисный центр Samsung.
Устройство «зависает» или в его работе возникают
критические ошибки
Если телефон «зависает», необходимо закрыть все приложения
или сбросить параметры. Если телефон не работает и
приложение не отвечает, нажмите и удерживайте [ ] в
течение 8-10 секунд, а затем отпустите. Телефон автоматически
перезагрузится.
Если неполадка не устранена, выполните сброс настроек
телефона. В режиме ожидания откройте список приложений и
выберите пункт Настройки→Конфиденциальность→Сброс
данных→Перезагрузить телефон→Удалить все.
Вызовы сбрасываются
В некоторых местах сигнал сети настолько слабый, что
использование сетевых функций устройства становится
невозможным. Перейдите в другое место и попробуйте
выполнить вызов еще раз.Устранение неполадок
127
Исходящие вызовы не проходят
● Убедитесь, что нажата кнопка вызова.
● Убедитесь, что устройство подключено к правильной сети.
● Убедитесь, что не активирована функция запрета вызова для
данного номера телефона.
Входящие вызовы не проходят
● Убедитесь, что устройство включено.
● Убедитесь, что устройство подключено к правильной сети.
● Убедитесь, что не активирована функция запрета вызова для
данного номера телефона.
Собеседник вас не слышит
● Проверьте, не перекрыт ли доступ к встроенному микрофону.
● Убедитесь, что вы держите микрофон достаточно близко ко рту.
● При использовании гарнитуры проверьте правильность
соединения.
Низкое качество звука при разговоре
● Убедитесь, что доступ к внутренней антенне устройства не
перекрыт.
● В некоторых местах сигнал сети настолько слабый, что
использование сетевых функций устройства становится
невозможным. Перейдите в место, где сигнал более стабилен.
Вызов номера из списка контактов не проходит
● Убедитесь, что в телефонной книге записан правильный номер.
● При необходимости введите и сохраните правильный номер.
● Убедитесь, что не активирована функция запрета вызова для
данного номера телефона.
Устройство издает звуковые сигналы, при этом значок
аккумулятора мигает
Заряд аккумулятора низок. Замените или зарядите аккумулятор,
чтобы продолжать пользоваться устройством.Устранение неполадок
128
Аккумулятор не заряжается полностью или устройство
выключается
● Контакты аккумулятора могут быть загрязнены. Протрите оба
желтых контакта чистой мягкой тканью и попытайтесь зарядить
аккумулятор снова.
● Если после этого аккумулятор не заряжается полностью,
утилизируйте старый аккумулятор надлежащим образом
и замените его новым (за инструкциями по утилизации
обратитесь к местным представителям власти).
Устройство нагревается
При долговременном использовании приложений,
потребляющих большое количество электроэнергии, устройство
может нагреваться. Это нормально и никак не отражается на
работе устройства и не сокращает срок его службы.
При включении камеры появляются сообщения об
ошибках
Чтобы воспользоваться функцией камеры, в памяти мобильного
устройства Samsung должно быть достаточно свободного
места, а аккумулятор должен быть полностью заряжен. Если
при включении камеры появляются сообщения об ошибках,
попробуйте выполнить следующие действия.
● Зарядите аккумулятор или замените его полностью
заряженным.
● Освободите место в памяти устройства, скопировав файлы на
ПК или удалив их.
● Перезагрузите устройство. Если это не устранит проблему,
обратитесь в сервисный центр Samsung.Устранение неполадок
129
При включении FM-радио появляются сообщения об
ошибках
Приложение FM-радио, которым оснащен мобильное устройство
Samsung, использует кабель гарнитуры в качестве антенны. Без
подключенной гарнитуры FM-радио не сможет принять сигнал
от радиостанций. Чтобы воспользоваться FM-радио, сначала
необходимо убедиться в правильности подключения гарнитуры.
Затем выполните поиск доступных радиостанций и сохраните их.
Если это не поможет устранить проблему, попробуйте
подключиться к нужной радиостанции с помощью другого
радиоприемника. Если он успешно примет радиосигнал,
возможно, устройство нуждается в ремонте. Обратитесь в
сервисный центр Samsung.
При воспроизведении музыкальных файлов
появляются сообщения об ошибках
Мобильное устройство Samsung может не воспроизводить
некоторые музыкальные файлы по ряду причин. Для их
устранения попробуйте выполнить следующие действия.
● Освободите место в памяти устройства, скопировав файлы на
ПК или удалив их.
● Убедитесь, что у музыкального файла нет защиты DRM. В
противном случае у вас должны быть лицензия или ключ на
воспроизведение.
● Убедитесь, что устройство поддерживает тип данного файла.Устранение неполадок
130
Не удается найти другое Bluetooth-устройство
● Убедитесь, что на устройстве включена беспроводная связь
Bluetooth.
● При необходимости убедитесь, что беспроводная связь
Bluetooth включена на устройстве, к которому требуется
подключиться.
● Убедитесь, что планшет и Bluetooth-устройство находятся на
расстоянии не более 10 метров друг от друга.
Если это не устранит проблему, обратитесь в сервисный центр
Samsung.
Не удается подключить устройство к ПК
● Убедитесь, что используемый кабель USB совместим с
устройством.
● Убедитесь, что на ПК установлены соответствующие драйверы
и их обновления.Меры предосторожности
131
Меры предосторожности
Следующая информация позволит избежать травм, а также повреждений
вашего устройства.
Внимание: предотвращение поражения
электрическим током, возгорания или взрыва
Не используйте поврежденные сетевые шнуры или
штепсельные вилки, а также непрочно закрепленные на стене
розетки
Запрещается трогать вилку влажными руками, а также
отключать устройство, вытягивая вилку за шнур
Избегайте перегибания и повреждения сетевого шнура
Запрещается использовать устройство во время зарядки и
трогать его влажными руками
Защищайте зарядное устройство и аккумулятор от короткого
замыкания
Не роняйте устройство или аккумулятор и избегайте силового
воздействия на него
Запрещается заряжать устройство с помощью зарядных
устройств, не одобренных производителем
Не используйте устройство во время гроз
Ваше устройство может работать неисправно, и риск поражения
электрическим током увеличивается.
Запрещается использовать поврежденные или протекающие
литий-ионные аккумуляторы
Сведения о безопасной утилизации литий-ионных аккумуляторов можно
получить в ближайшем специализированном сервисном центре.Меры предосторожности
132
Осторожно обращайтесь с аккумуляторами и зарядными
устройствами, соблюдайте правила их утилизации
• Используйте только рекомендованные компанией Samsung
аккумуляторы и зарядные устройства. Несовместимые аккумуляторы
и зарядные устройства могут привести к серьезным травмам и
повреждению вашего устройства.
• Ни в коем случае не сжигайте аккумуляторы или устройство в
целях утилизации. Соблюдайте все местные правила утилизации
использованных аккумуляторов и устройств.
• Не помещайте аккумуляторы или устройство на поверхность или внутрь
нагревательных приборов, таких как микроволновые печи, кухонные
плиты или радиаторы. При сильном нагревании аккумулятор может
взорваться.
• Никогда не разбивайте и не прокалывайте аккумуляторы. Не
подвергайте аккумулятор высокому внешнему давлению, которое
может привести к внутреннему короткому замыканию или перегреву.
Берегите устройство, аккумуляторы и зарядные устройства от
повреждений
• Берегите устройство и аккумулятор от воздействия экстремальных
температур.
• Слишком высокие или слишком низкие температуры могут привести
к повреждениям устройства, а также оказать негативное влияние на
емкость и срок службы аккумулятора.
• Не допускайте соприкосновения аккумуляторов с металлическими
предметами, так как это может создать контакт между полюсами
аккумулятора и привести к его временному или необратимому
повреждению.
• Не используйте поврежденные зарядные устройства или аккумуляторы.
Осторожно! Соблюдайте все предостережения об
опасности и правила при использовании устройства в
тех местах, где это запрещено
Выключайте устройство, если запрещается его использование
Ознакомьтесь со всеми предписаниями, ограничивающими
использование устройства в определенных местах.Меры предосторожности
133
Запрещается использовать устройство рядом с электронными
приборами
Большинство электронных приборов излучают радиочастотные сигналы.
Устройство может создать помехи в их работе.
Запрещается использовать устройство рядом с
кардиостимулятором
• Держите включенный устройство на расстоянии не менее 15 см от
кардиостимулятора.
• Данную дистанцию следует соблюдать неукоснительно.
• Чтобы снизить воздействие устройства на кардиостимулятор,
прикладывайте устройство к правому уху, если кардиостимулятор
установлен на левой стороне грудной клетки, и наоборот.
Во избежание помех в работе медицинских приборов
запрещается использовать устройство в больницах
Если вы используете какие-либо медицинские приборы, обратитесь
к их производителю, чтобы убедиться, что эти приборы не излучают
радиочастотных сигналов.
Если вы используете слуховой аппарат, обратитесь к его
производителю за сведениями о взаимодействии с устройством
Включенное устройство может создавать помехи в работе некоторых
слуховых аппаратов. Чтобы не вызвать повреждений вашего слухового
аппарата, обратитесь к его производителю.
Выключайте устройство в потенциально взрывоопасной среде
• В потенциально взрывоопасной среде следует выключить устройство,
не извлекая аккумулятора.
• В потенциально взрывоопасной среде строго соблюдайте все указания,
инструкции и предупреждающие знаки.
• Не используйте устройство на автозаправочных станциях (станциях
техобслуживания), а также вблизи емкостей с топливом или
химическими веществами.
• Не храните и не перевозите горючие жидкости, газы или
взрывчатые вещества вместе с устройством, его компонентами или
принадлежностями.
Выключайте устройство на борту самолета
Использование устройства на борту самолета строго запрещено.
Устройство может создать помехи в работе электронного навигационного
оборудования самолета.Меры предосторожности
134
Из-за излучаемых радиосигналов устройство может создать
помехи в работе электронного оборудования моторных средств
передвижения
Радиосигналы, излучаемые устройством, могут создать помехи в
работе электронного оборудования автомобиля. За дополнительной
информацией обращайтесь к производителю автомобиля.
Соблюдайте все предостережения и правила
использования мобильных устройств во время
управления автомобилем
Соблюдение техники безопасности имеет первостепенное значение при
управлении автомобилем. Никогда не говорите по устройству во время
управления автомобилем, если это запрещено законом. В целях вашей
безопасности и безопасности окружающих будьте осмотрительны и
следуйте данным рекомендациям.
• Пользуйтесь устройством громкой связи.
• Пользуйтесь такими функциями устройства, как быстрый набор и
повторный набор номера. Они ускорят выполнение вызова или прием
звонка.
• Расположите устройство в легкодоступном месте. Предусмотрите,
чтобы устройством можно было пользоваться, не отрывая глаз от
дороги. Входящий вызов, который поступил в неудобное время, может
принять автоответчик.
• Сообщите своему собеседнику, что вы за рулем. В случае интенсивного
движения или плохих погодных условий отложите разговор. Дождь,
мокрый снег, снег, гололед и интенсивное движение могут привести к
несчастному случаю.
• Не делайте записей и не просматривайте список телефонных номеров
во время движения. Просмотр списка дел или записей в телефонной
книге отвлекают внимание водителя от его основной обязанности —
безопасного управления автомобилем.
• Набирайте номер на ощупь, не отвлекаясь от управления автомобилем.
Рекомендуется набирать номер во время остановки или перед началом
движения. Старайтесь делать вызовы, когда автомобиль не движется.
При необходимости исходящего вызова во время движения наберите
только несколько цифр, посмотрите на дорогу и в зеркала и лишь после
этого продолжайте набор номера.
• Не ведите важных или эмоциональных разговоров, которые могут
отвлечь от обстановки на дороге. Сообщите своим собеседникам, что
вы за рулем, и отложите разговор, который может отвлечь внимание от
ситуации на дороге.Меры предосторожности
135
• Пользуйтесь устройством для вызова службы экстренной помощи. В
случае пожара, дорожно-транспортного происшествия или ситуации,
угрожающей здоровью, наберите номер местной службы экстренной
помощи.
• В случае угрозы для жизни других людей воспользуйтесь устройством
для вызова службы экстренной помощи. Если вы стали свидетелем
дорожно-транспортного происшествия, преступления или других
происшествий, угрожающих жизни людей, позвоните в службу
экстренной помощи.
• При необходимости звоните в дорожно-транспортную службу или в
специализированную службу технической помощи. Если вы увидели
сломанный автомобиль, не представляющий серьезной опасности,
поврежденный дорожный знак, незначительное транспортное
происшествие, в котором никто из людей не пострадал, или украденный
автомобиль, позвоните в дорожно-транспортную службу или в
специализированную службу технической помощи.
Правильный уход за устройством и его
использование
Избегайте попадания влаги на устройство
• Влажность и жидкость любого типа могут повредить части или
электросхемы устройства.
• Не включайте намокшее устройство. Если устройство уже включено,
выключите его и сразу извлеките аккумулятор (eсли не удается
выключить устройство или извлечь аккумулятор, не прилагайте
чрезмерных усилий). Протрите устройство полотенцем и отнесите в
сервисный центр.
• В случае попадания воды внутрь устройства индикатор влаги меняет
цвет. Попадание влаги влечет за собой прекращение действия гарантии
производителя.
Не используйте и не храните устройство в запыленных или
загрязненных местах
Пыль может привести к сбоям в работе устройства.
Не кладите устройство на наклонные поверхности
При падении устройство может повредиться.Меры предосторожности
136
Не храните устройство при повышенной или пониженной
температуре. Используйте устройство при температуре от
–20 °C до 50 °C
• Оставленное в салоне автомобиля устройство может взорваться,
поскольку температура в салоне может достигать 80 °C.
• Нельзя подвергать устройство продолжительному воздействию
прямых солнечных лучей (например, класть его на приборную панель
автомобиля).
• Храните аккумулятор при температуре от 0 °C до 40 °C.
Избегайте соприкосновения устройства с металлическими
предметами, такими как цепочки, монеты или ключи
• В противном случае это может привести к деформации или сбоям в
работе устройства.
• Соприкосновение контактов аккумулятора с металлическими
предметами может привести к возгоранию.
Не храните устройство рядом с источниками магнитного поля
• Воздействие магнитных полей может привести к сбоям в работе
устройства или разрядке аккумулятора.
• Также воздействие магнитных полей может привести к повреждению
карт с магнитной полосой, например кредитных и телефонных карт,
банковских книжек и посадочных талонов.
• Не используйте кейсы и аксессуары с магнитными замками и берегите
устройство от длительного воздействия магнитных полей.
Не храните устройство рядом с обогревателями,
микроволновыми печами, нагревающимся кухонным
оборудованием или в контейнерах с высоким давлением
• Аккумулятор может дать течь.
• Устройство может перегреться и вызвать возгорание.
Не роняйте устройство и избегайте силового воздействия на
него
• Дисплей устройства может быть поврежден.
• При изгибании или деформации корпус устройства может быть
поврежден, а электросхемы могут работать со сбоями.
В случае перегрева устройства сделайте перерыв в его
использовании
При длительном соприкосновении с перегретым устройством на коже
может появиться покраснение или пигментация.Меры предосторожности
137
Если устройство оснащено вспышкой или фонариком, не
используйте их слишком близко к глазам людей и животных
Это может привести к временной потере зрения или повреждениям глаз.
Берегите зрение при работе с устройством
• Не держите устройство слишком близко к глазам. При использовании
его в помещении всегда оставляйте включенным хотя бы один источник
света.
• Продолжительный просмотр видеозаписей и использование Flash-игр
может вызвать нарушения зрения, а при наличии заболеваний —
обострение их симптомов. Если вы испытываете малейшие признаки
дискомфорта, немедленно прекратите использование устройства.
Помните о риске получения травм при использовании
устройства
При постоянном выполнении однообразных действий, таких как нажатие
клавиш, начертание пальцем символов на сенсорном экране и управление
играми, вы можете испытывать неприятные ощущения в пальцах, шее,
плечах или других частях тела. При продолжительном использовании
устройства рекомендуется держать его в расслабленной руке, нажимать на
клавиши без усилий и периодически делать перерывы. Если дискомфорт
не проходит долгое время, прекратите использование устройства и
обратитесь к врачу.
Обеспечение максимального срока службы аккумулятора и
зарядного устройства
• Не заряжайте аккумулятор дольше недели, поскольку перезарядка
может сократить срок его службы.
• Со временем неиспользуемые аккумуляторы разряжаются, поэтому
перед использованием их необходимо подзарядить.
• Если зарядное устройство не используется, отключайте его от сети.
• Аккумуляторы следует использовать только по их прямому назначению.
Используйте только одобренные производителем
аккумуляторы, зарядные устройства, аксессуары и компоненты
• Использование универсальных аккумуляторов и зарядных устройств
может сократить срок службы устройства и привести к сбоям в его
работе.
• Компания Samsung не несет ответственности за безопасность
пользователей, которые используют аксессуары и компоненты, не
одобренные компанией Samsung.Меры предосторожности
138
Не кусайте и не лижите устройство или аккумулятор
• Это может привести к повреждению или взрыву устройства.
• Если устройством пользуются дети, убедитесь, что они используют его
правильно.
Во время разговора по устройству соблюдайте следующие
инструкции
• Держите устройство вертикально, как трубку стационарного телефона.
• Говорите прямо в микрофон устройства.
• Избегайте прикосновений к внутренней антенне устройства.
Прикосновение к антенне может снизить уровень сигнала или вызвать
передачу более интенсивного радиосигнала, чем нужно.
Берегите слух при использовании гарнитуры
• Длительное воздействие звука при очень высокой
громкости может привести к нарушениям слуха.
• Во время вождения звук высокой громкости может
отвлечь ваше внимание и привести к аварии.
• Каждый раз перед подключением наушников
уменьшайте уровень громкости. Устанавливайте
минимальный уровень громкости, при котором вы
можете поддерживать разговор или слушать музыку.
• В условиях низкой влажности воздуха в гарнитуре
может накапливаться статическое электричество. При
низкой влажности воздуха не используйте гарнитуру
или каждый раз перед ее подключением к устройству
прикасайтесь к металлическому предмету, чтобы
разрядить накопившееся статическое электричество.
Соблюдайте осторожность, разговаривая по устройству при
ходьбе или в движении
Во избежание травм всегда оценивайте окружающую обстановку.
Не носите устройство в заднем кармане брюк или на поясе
Падение на устройство может привести к травме или повреждению
устройства.
Не пытайтесь самостоятельно разбирать, ремонтировать и
модифицировать устройство
• Любые изменения в его конструкции влекут за собой прекращение
действия гарантии производителя. При нарушении нормальной работы
устройства обратитесь в сервисный центр Samsung.Меры предосторожности
139
• Не разбирайте аккумулятор и не протыкайте его острыми предметами,
это может привести к взрыву или возгоранию.
Не перекрашивайте устройство и не приклеивайте к нему
наклейки
Краска и наклейки могут препятствовать нормальной работе подвижных
частей устройства. Если у вас возникла аллергическая реакция на краску
или металл, например кожный зуд, экзема или припухлость, следует
немедленно прекратить использование устройства и обратиться к врачу.
При очистке устройства соблюдайте следующие инструкции.
• Протирайте устройство и зарядное устройство полотенцем или
прорезиненной губкой.
• Протирайте контакты аккумулятора ватным тампоном или полотенцем.
• Не используйте химикаты или моющие средства.
Не используйте устройство, если его дисплей поврежден или
разбит
Разбитое стекло или акриловая краска могут стать причиной травм рук и
лица. Отнесите устройство в сервисный центр Samsung для ремонта.
Используйте устройство только по прямому назначению
Соблюдайте нормы этикета при использовании устройства в
общественных местах
Не позволяйте детям пользоваться устройством
Устройство — не игрушка. Дети могут поранить себя или окружающих,
повредить само устройство или нечаянно выполнить нежелательные
вызовы.
Аккуратно устанавливайте мобильные устройства и
оборудование
• Убедитесь, что мобильные устройства или оборудование,
установленные в автомобиле, надежно закреплены.
• Не помещайте устройство и его аксессуары в зоне раскрытия подушки
безопасности или рядом с ней. Неправильная установка оборудования
для беспроводной связи может привести к серьезным травмам в случае
срабатывания подушки безопасности.Меры предосторожности
140
Доверяйте ремонт устройства только квалифицированным
специалистам
Неквалифицированный ремонт может привести к поломке аппарата и
прекращению действия гарантии.
Аккуратно обращайтесь с SIM-картами и картами памяти
• Не извлекайте карту при передаче и получении данных, это может
привести к потере данных и/или повреждению карты или устройства.
• Предохраняйте карту от сильных ударов, статического электричества и
электрических помех от других устройств.
• Не прикасайтесь к золотистым контактам карт памяти пальцами и
металлическими предметами. Загрязненную карту протирайте мягкой
тканью.
Доступ к службам экстренной помощи
В некоторых зонах и обстоятельствах невозможно совершить экстренные
вызовы. В случае отъезда в отдаленные или необслуживаемые районы
предусмотрите другой способ связи со службами экстренной помощи.
Безопасность личной информации и важных данных
• При использовании устройства не забывайте регулярно создавать
резервные копии своих данных. Компания Samsung не несет
ответственности за утерю данных.
• Перед утилизацией устройства создайте резервную копию данных
и выполните сброс параметров, чтобы ваша личная информация не
попала к посторонним лицам.
Запрет на распространение материала, защищенного
авторскими правами
Распространение записей, которые содержат материал, защищенный
авторскими правами, без разрешения соответствующих владельцев
запрещено. Это является нарушением закона об авторских правах.
Производитель не несет ответственности за любое незаконное
использование материала, защищенного авторскими правами.Меры предосторожности
141
Информация о сертификации удельного
коэффициента поглощения (SAR)
Устройство изготовлено с учетом предельно допустимых уровней
облучения радиочастотной (РЧ) энергией, рекомендованных Советом ЕС.
Данные стандарты запрещают продажу мобильных устройств, уровень
излучения которых (называемый удельным коэффициентом поглощения
SAR) превышает 2 Вт на килограмм.
Максимальное значение коэффициента SAR для данной модели телефона
— 0,573 ватт на килограмм. При обычном использовании значение SAR
гораздо меньше, поскольку устройство использует только радиочастотную
энергию, необходимую для передачи сигнала на ближайшую базовую
станцию. Благодаря автоматическому снижению уровня облучения
устройство сокращает общее количество выделяемой радиочастотной
энергии.
Декларация о соответствии нормам ЕС на задней обложке данного
руководства пользователя свидетельствует о соответствии директиве
Европейского Союза по радиооборудованию и телекоммуникационному
терминальному оборудованию (European Radio & Terminal
Telecommunications Equipment (R&TTE). Для получения дополнительных
сведений о SAR и стандартах ЕС посетите веб-сайт Samsung.
Правильная утилизация изделия
(использованное электрическое и электронное оборудование)
(Данные правила действуют в странах Европейского Союза и
других европейских странах с раздельной системой сбора
мусора)
Наличие данного значка показывает, что изделие и его
электронные аксессуары (например зарядное устройство,
гарнитура, кабель USB) по окончании их срока службы
нельзя утилизировать вместе с бытовыми отходами. Во
избежание нанесения вреда окружающей среде и здоровью людей при
неконтролируемой утилизации, а также для обеспечения возможности их
переработки для повторного использования утилизируйте изделие и его
электронные аксессуары отдельно от прочих отходов.
Сведения о месте и способе утилизации изделия в соответствии с нормами
природоохраны можно получить у продавца или в соответствующей
государственной организации.
Бизнес-пользователи должны обратиться к поставщику и ознакомиться с
условиями договора покупки. Запрещается утилизировать изделие и его
электронные аксессуары вместе с другими производственными отходами.Меры предосторожности
142
Правильная утилизация аккумуляторов для этого
продукта
(для стран ЕС и других европейских стран, использующих
отдельные системы возврата аккумуляторов)
Такая маркировка на аккумуляторе, руководстве или
упаковке указывает на то, что аккумуляторы, используемые
в данном продукте, не должны выбрасываться вместе с
другими бытовыми отходами по окончании срока службы.
Химические символы Hg, Cd или Pb означают то, что аккумулятор содержит
ртуть, кадмий или свинец в количествах, превышающих контрольный
уровень в Директиве ЕС 2006/66. Если аккумуляторы утилизированы
неправильно, эти вещества могут нанести вред здоровью людей или
окружающей среде.
Для защиты природных ресурсов и с целью повторного использования
ценных материалов отделяйте аккумуляторы от остального мусора и
сдавайте их на переработку через местную систему бесплатного обмена
аккумуляторов.
Отказ от ответственности
Некоторое содержимое и услуги данного устройства принадлежат третьим
лицам и защищены законом об охране авторских прав, патентом, торговой
маркой и/или другими законами об интеллектуальной собственности.
Такое содержимое и услуги предназначены исключительно для личного
некоммерческого использования. Запрещается использование любого
содержимого или услуги способом, отличным от указанного владельцем
содержимого или поставщика услуг. Не ограничиваясь вышеупомянутым,
если это явно не одобрено владельцем соответствующего содержимого
или поставщика услуг, запрещается изменение, копирование,
переиздание, загрузка, отправка, перевод, продажа, создание
деривативных работ, эксплуатация или распространение любым способом
или средством любого содержимого или услуги, установленных на данном
устройстве.Меры предосторожности
143
СОДЕРЖИМОЕ И СЛУЖБЫ ТРЕТЬИХ ЛИЦ ПОСТАВЛЯЮТСЯ НА УСЛОВИИ
«КАК ЕСТЬ». КОМПАНИЯ SAMSUNG НЕ ДАЕТ НИКАКИХ ГАРАНТИЙ, ЯВНЫХ
ИЛИ ПОДРАЗУМЕВАЕМЫХ, НА ИСПОЛЬЗОВАНИЕ ТАКОГО СОДЕРЖИМОГО
ИЛИ СЛУЖБ С ЛЮБОЙ ЦЕЛЬЮ. КОМПАНИЯ SAMSUNG В ЯВНОЙ ФОРМЕ
ОТКАЗЫВАЕТСЯ ОТ ЛЮБЫХ ПОДРАЗУМЕВАЕМЫХ ГАРАНТИЙ, ВКЛЮЧАЯ
(НО НЕ ОГРАНИЧИВАЯСЬ) ГАРАНТИИ ГОДНОСТИ ДЛЯ ПРОДАЖИ И
СООТВЕТСТВИЯ ОПРЕДЕЛЕННОЙ ЦЕЛИ. КОМПАНИЯ SAMSUNG НЕ
ГАРАНТИРУЕТ ТОЧНОСТЬ, ГОДНОСТЬ, СВОЕВРЕМЕННОСТЬ, ЗАКОННОСТЬ
ИЛИ ПОЛНОТУ ЛЮБОГО СОДЕРЖИМОГО ИЛИ СЛУЖБ, ДОСТУПНЫХ НА
ДАННОМ УСТРОЙСТВЕ, И НИ ПРИ КАКИХ ОБСТОЯТЕЛЬСТВАХ, ВКЛЮЧАЯ
НЕБРЕЖНОСТЬ, КОМПАНИЯ SAMSUNG НЕ НЕСЕТ ОТВЕТСТВЕННОСТИ, БУДЬ
ТО КОНТРАКТ ИЛИ ГРАЖДАНСКОЕ ПРАВОНАРУШЕНИЕ, ЗА ЛЮБОЙ ПРЯМОЙ,
НЕПРЯМОЙ, СЛУЧАЙНЫЙ, СПЕЦИАЛЬНЫЙ ИЛИ ВОСПОСЛЕДОВАВШИЙ
УЩЕРБ, АДВОКАТСКИЕ ГОНОРАРЫ, РАСХОДЫ ИЛИ ЛЮБЫЕ ДРУГИЕ УБЫТКИ,
ВОЗНИКАЮЩИЕ В ПРОЦЕССЕ ИСПОЛЬЗОВАНИЯ ЛЮБОЙ ИНФОРМАЦИИ
(ИЛИ В СВЯЗИ С НИМ), СОДЕРЖАЩЕЙСЯ В ЛЮБОМ СОДЕРЖИМОМ ИЛИ
СЛУЖБЕ, ИЛИ В РЕЗУЛЬТАТЕ ИСПОЛЬЗОВАНИЯ ПОСЛЕДНИХ ВАМИ ИЛИ
ТРЕТЬИМИ ЛИЦАМИ, ДАЖЕ В ТОМ СЛУЧАЕ, ЕСЛИ ВЫ ИЛИ ОНИ БЫЛИ
ПРОИНФОРМИРОВАНЫ О ВОЗМОЖНОСТИ ВОЗНИКНОВЕНИЯ ТАКОГО
УЩЕРБА.
Услуги третьих лиц могут быть прекращены или приостановлены в
любое время, и компания Samsung не дает никаких разъяснений или
гарантий, что любое содержимое или услуга будут доступны в любой
период времени. Содержимое и услуги передаются третьими лицами с
помощью сети и средств передачи информации, контроля над которыми
компания Samsung не имеет. Без ограничения универсальности данного
отказа от ответственности компания Samsung явно отказывается от
любой ответственности за приостановку или временное прекращение
предоставления содержимого или услуг, доступных на данном устройстве.
Компания Samsung также не несет ответственности за клиентское
обслуживание, связанное с данным содержимым или услугами. Любые
вопросы или запросы на обслуживание, связанное с содержимым
или услугами, должны направляться напрямую к поставщикам
соответствующего содержимого или услуг.Алфавитный указатель
144
автономный режим 18
аккумулятор
зарядка 13
установка 11
ввод текста 40
веб-обозреватель
добавление закладок 87
просмотр веб-страниц 85
видео
воспроизведение 70
запись 66
видеоплеер 70
вызовы
выполнение 47
гарнитура 48
использование
функций 49
международные
вызовы 48
многосторонний
вызов 49
ожидание 52
ответ 48
отклонение 48
переадресация 51
просмотр
пропущенных 50
галерея
воспроизведение
видео 70
просмотр снимков 69
форматы файлов 68
голосовая почта 55
голосовой поиск 113
голосовые заметки
воспроизведение 84
запись 84
дата и время,
установка 33
диспетчер задач 113
диспетчер файлов 109
журнал вызовов 52
загрузки
приложения 43
управление 108
файлы 44
заметки
просмотр 83
создание 83
Интернет
см. «веб-обозреватель»
календарь
добавление событий 81
просмотр событий 82
калькулятор 108
камера
запись видео 66
настройка камеры 65
настройка параметров
видеозаписи 67
фотосъемка 62
Алфавитный указательАлфавитный указатель
145
конфиденциальность 121
приложения 120
сведения об
устройстве 124
специальные
возможности 124
учетные записи и
синхронизация 121
язык и ввод 121
ожидание вызова 52
переадресация
вызовов 51
подключение к ПК
Samsung Kies 103
съемный диск 104
подключения
Bluetooth 96
VPN 105
ПК 103
сеть WLAN 98
поиск 109
поиск устройства 37
проверка PIN-кода 37
профиль «Без звука» 34
режим FDN 51
сенсорный экран
блокировка 28
использование 26
сеть WLAN
включение 99
поиск сетей и подключение
к ним 99
карта памяти
извлечение 16
установка 15
форматирование 17
Карты Google 88
коды доступа 125
комплект поставки 10
контакты
импорт и экспорт 80
копирование 79
назначение клавиши
быстрого набора 78
поиск 78
создание 77
музыкальный
проигрыватель
воспроизведение
музыки 72
загрузка файлов 71
мультимедийные
сообщения
отправка 53
просмотр 54
настройки
GPS и безопасность 118
беспроводные сети 114
вызовы 116
голосовой ввод и
вывод 123
дата и время 124
дисплей 118
звуки 117
карта памяти SD и память
устройства 121Алфавитный указатель
146
значки состояния 24
клавиши 20
настройка 33
настройки 114
панель уведомлений 30
экран в режиме ожидания
добавление панелей 30
добавление элементов 29
экран меню
переход 31
упорядочение
приложений 32
электронная почта
настройка учетной
записи 57
отправка 58
просмотр 59
язык сообщений на
дисплее 121
яркость, дисплей 35
Bluetooth
включение 96
передача данных 97
поиск устройств и
подключение к ним 97
прием данных 98
cервис Social Hub 60
FM-радио
прослушивание 74
сохранение
радиостанций 75
Gmail 55
Google Talk 59
News & Weather 95
Samsung Apps 93
сигнал
выключение 107
настройка 107
удаление 108
синхронизация
с учетной записью 45
снимки
панорамная съемка 64
просмотр 69
съемка 62
съемка в режиме
распознавания улыбки 64
съемка с помощью
сюжетов 63
сообщения
настройка учетных записей
электронной почты 57
отправка MMS 53
отправка SMS 53
отправка сообщений
электронной почты 58
переход к голосовой
почте 55
текстовые заметки 83
текстовые сообщения
отправка 53
просмотр 54
телефонная книга
поиск контактов 78
создание визитки 79
создание групп 79
создание контактов 77
устройство
включение или
выключение 18
внешний вид 19Алфавитный указатель
147
Samsung Kies 103
SIM-карта
блокировка 37
установка 11
USIM-карта
блокировка 37
установка 11
VPN-соединения
настройка 105
подключение 106
YouTube
отправка видео 93
просмотр видео 92Дата принятия декларации:
Декларация действительна до:
Регистрационный номер:
Сертификат соответствия РСТ:(Добровольная сертификация) РОСС КR.АB57.Н00703
Сертификат соответствия выдан: 2010-07-26
Сертификат соответствия действителен до: 2013-07-26
Абонентские радиостанции носимые типа ГОСТ Р 51318.22-99
GT-B5512 ГОСТ Р 51318.24-99
соответствуют требованиям нормативных
документов:
Система сертификации ГОСТ Р Импортер: ООО «Самсунг Электроникс Рус Компани»
ГОССТАНДАРТ РОССИИ 125009 Россия, Москва, Бол. Гнездниковский пер., д.1, стр. 2
Изготовитель:
Samsung Electronics Co.Ltd. Самсунг Электроникс Ко. Лтд.
Адрес изготовителя:
416, Maetan-3dong, Yeongtong-gu 416, Маэтан 3-Донг, Ёнгтонг-Гу,
Suwon, Gyeonggi-do, 443-742, Korea Сувон, Гьенгги-До, Республика Корея
Samsung Main Building 250, 2-Ka, Самсунг Мэйн Билдинг, 250, 2-Га, Тэпенг-Ро,
Taepyung-Ro Chung-Ku, 100-742, Seoul, Korea Чунг-Ку, 100-742, Сеул, Республика Корея
Адреса заводов:
ИНФОРМАЦИЯ О СЕРТИФИКАЦИИ ПРОДУКЦИИ
"Самсунг Электроникс Ко., Лтд", 94-1, Имсо-Донг, Гуми-Сити, Кунг-Бак, Корея, 730-350
Федеральное агентство связи РФ
"Тянжин Самсунг Телеком Технолоджи Ко., Лтд", Вейву Роад, Микроэлектроникс Индастриал Парк ТЕДА, Ксиквин Дистрикт Тянжин
300385, Китай
производства фирмы Samsung Electronics Co., Ltd. соответствует
"Правилам применения абонентских станций (абонентских радиостанций) сетей подвижной радиотелефонной связи стандарта GSM 900/1800",
"Правилам применения абонентских терминалов систем подвижной радиотелефонной связи стандарта UMTS с частотным дуплексным разносом и
частотно-кодовым разделением радиоканалов, работающих в диапазоне частот 2000 МГц" и "Правилам применения оборудования радиодоступа.
Часть I. Правила применения оборудования радиодоступа для беспроводной передачи данных в диапазоне от 30 МГц до 66 ГГц"
ДЕКЛАРАЦИЯ О СООТВЕТСТВИИ
Абонентская радиостанция носимая GT-B5512
"Самсунг Электроникс Хуижоу Ко., Лтд.", Ченжианг таун, Хуижоу, провинция Гуангдонг, Китай
"Самсунг Электроникс Вьетнам Ко., Лтд.", Промышленный парк Йенпхонг Ай, Йентранг Комьюн, округ Йенпхонг, провинция Бэкнинх,
Вьетнам
Абонентская радиостанция носимая (мобильный телефон) Samsung GT-B5512
предназначена для работы в сетях подвижной радиотелефонной связи стандартов GSM 900/1800 и UMTS 2100
СЕРТИФИКАТ СООТВЕТСТВИЯ
сертифицирована органом по сертификации "АЛЬТТЕСТ"
Абонентская радиостанция носимая стандарта GSM 900/1800 и UMTS 2100
GT-B5512 производства фирмы Samsung Electronics Co., Ltd. Декларация соответствия (R&TTE)
Компания, Samsung Electronics
подтверждает, что данный
мобильный телефон GSM WCDMA BT/Wi-Fi : GT-B5512
к которому относится настоящая декларация, соответствует указанным ниже
стандартам и нормативным документам.
Безопасность EN 60950-1 : 2006 + A1 : 2010
SAR EN 50360 : 2001 / AC 2006
EN 62209-1 : 2006
EN 62479 : 2010
ЭМС EN 301 489-01 V1.8.1 (04-2008)
EN 301 489-07 V1.3.1 (11-2005)
EN 301 489-17 V2.1.1 (05-2009)
EN 301 489-24 V1.5.1 (10-2010)
Сеть EN 301 511 V9.0.2 (03-2003)
EN 301 908-1 V4.2.1 (03-2010)
EN 301 908-2 V4.2.1 (03-2010)
EN 300 328 V1.7.1 (10-2006)
Настоящим декларируется, что [были проведены все существенные радиотехнические
тесты и что] указанное выше изделие соответствует принципиальным требованиям
директивы 1999/5/EC.
Процедура подтверждения соответствия, упомянутая в статье 10 и подробно
описанная в Приложении [IV] директивы 1999/5/ EC, проводилась с привлечением
следующих организаций:
BABT, Forsyth House,
Churchfield Road,
Walton-on-Thames,
Surrey, KT12 2TD, UK*
Идентификационный знак: 0168
Техническая документация хранится в:
Samsung Electronics QA Lab.
и предоставляется по запросу.
(Представитель в ЕС)
Samsung Electronics Euro QA Lab.
Blackbushe Business Park, Saxony Way,
Yateley, Hampshire, GU46 6GG, UK*
2011.11.25 Joong-Hoon Choi / Менеджер
(место и дата выпуска) (фамилия и подпись уполномоченного лица)
* Данный адрес не является адресом сервисного центра Samsung. Адреса и номера телефонов
сервисного центра Samsung см. в гарантийной карточке или обращайтесь по месту
приобретения изделия.Некоторая информация, приведенная в настоящем
руководстве, может не соответствовать Вашему телефону,
поскольку зависит от установленного программного
обеспечения и/или Вашего оператора сотовой связи.
Дизайн, спецификации и другие данные могут изменяться
без предварительного уведомления.
www.samsung.com Russian. 04/2012. Rev. 1.1
Установка ПО Kies
(Синхронизация с ПК)
1. Загрузите последнюю версию программного
обеспечения Kies c веб-сайта компании Samsung
(www.samsung.com/kies) и установите его на
ваш компьютер.
2. Подключите устройство к компьютеру с
помощью USB-кабеля. Приложение Samsung Kies
запустится автоматически.
Для дополнительной информации обратитесь к
разделу Помощь по Kies.
GT-B5512
user manualUsing this manual
2
www.sar-tick.com
This product meets applicable national
SAR limits of 2.0W/kg. The specific
maximum SAR values can be found in the
SAR information section of this manual.
Using this manual
Thank you for purchasing this Samsung mobile device.
This device will provide you with high quality mobile
communication and entertainment based on Samsung’s
exceptional technology and high standards.
This user manual has been specially designed to guide you
through the functions and features of your device.
Read me first
● Please read all safety precautions and this manual carefully
before using your device to ensure safe and proper use.
● The descriptions in this manual are based on the default
settings of your device.
● Images and screenshots used in this user manual may differ
in appearance from the actual product.
● Content in this user manual may differ from the product,
or from software provided by service providers or carriers,
and is subject to change without prior notice. Refer to
www.samsung.com for the latest version of the user
manual.
● Available features and additional services may vary by
device, software, or service provider.Using this manual
3
● Formatting and delivery of this user manual is based
on Google Android operating systems and may vary
depending on the user’s operating system.
● Applications and their functions may vary by country,
region, or hardware specifications. Samsung is not liable for
performance issues caused by third-party applications.
● Samsung is not liable for performance issues or
incompatibilities caused by edited registry settings or
modified operating system software. Attempting to
customise the operating system may cause your device or
applications to work improperly.
● You may upgrade your mobile device’s software by
accessing www.samsung.com.
● Software, sound sources, wallpapers, images, and other
contents provided in this device are licenced for limited use
between Samsung and their respective owners. Extracting
and using these materials for commercial or other purposes
is an infringement of copyright laws. Samsung is not liable
for such copyright infringement by the user.
● Please keep this manual for future reference.
Instructional icons
Before you start, familiarise yourself with the icons you will
see in this manual:
Warning—situations that could cause injury to
yourself or others
Caution—situations that could cause damage to
your device or other equipment
Note—notes, usage tips, or additional information Using this manual
4
► Refer to—pages with related information; for
example: ► p. 12 (represents “see page 12”)
→ Followed by—the order of options or menus you
must select to perform a step; for example: In Idle
mode, open the application list and select Settings
→ About phone (represents Settings, followed by
About phone)
[ ] Square brackets—device keys; for example:
[ ] (represents the Menu key)
Copyright
Copyright © 2012 Samsung Electronics
This user manual is protected under international copyright
laws.
No part of this user manual may be reproduced, distributed,
translated, or transmitted in any form or by any means,
electronic or mechanical, including photocopying, recording,
or storing in any information storage and retrieval system,
without the prior written permission of Samsung Electronics.
Trademarks
● SAMSUNG and the SAMSUNG logo are registered
trademarks of Samsung Electronics.
● The Android logo, Google Search™, Google Maps™,
Google Mail™, YouTube™, Android Market™, and Google
Talk™ are trademarks of Google, Inc.
● and are trademarks of SRS Labs, Inc. CS
Headphone and WOW HD technologies are incorporated
under licence from SRS Labs, Inc.Using this manual
5
● Bluetooth® is a registered trademark of the Bluetooth SIG,
Inc. worldwide.
● Wi-Fi®, the Wi-Fi CERTIFIED logo, and the Wi-Fi logo are
registered trademarks of the Wi-Fi Alliance.
● All other trademarks and copyrights are the property of
their respective owners.Contents
6
Assembling ............................................................. 10
Unpack .................................................................................... 10
Install the SIM or USIM card and battery ........................ 11
Charge the battery ............................................................... 13
Insert a memory card (optional) ....................................... 15
Attach a hand strap (optional) .......................................... 17
Getting started ....................................................... 18
Turn your device on and off ............................................... 18
Get to know your device ..................................................... 19
Use the touch screen ........................................................... 26
Use the trackpad ................................................................... 28
Lock or unlock the touch screen and keys ..................... 28
Get to know the idle screen ............................................... 28
Access applications .............................................................. 31
Customise your device ........................................................ 33
Switch SIM or USIM cards ................................................... 38
Enter text ................................................................................ 40
Download applications from Android Market .............. 43
Download files from the web ............................................ 44
Synchronise data .................................................................. 45
Communication ..................................................... 47
Calling ..................................................................................... 47
Messaging .............................................................................. 53
Google Mail ............................................................................ 55
Email ........................................................................................ 57
ContentsContents
7
Talk ........................................................................................... 59
Social Hub .............................................................................. 60
Entertainment ........................................................ 61
Camera .................................................................................... 61
Gallery ..................................................................................... 68
Music ....................................................................................... 70
FM radio .................................................................................. 73
Personal information ............................................ 76
Contacts .................................................................................. 76
Calendar ................................................................................. 80
Memo ...................................................................................... 82
Voice recorder ....................................................................... 82
Web .......................................................................... 84
Internet ................................................................................... 84
Maps ........................................................................................ 87
Latitude ................................................................................... 89
Places ....................................................................................... 89
Navigation .............................................................................. 90
YouTube .................................................................................. 91
Samsung Apps ...................................................................... 92
Market ..................................................................................... 93
News & Weather .................................................................... 94
Connectivity ........................................................... 95
Bluetooth ................................................................................ 95
Wi-Fi ......................................................................................... 97
Mobile network sharing ..................................................... 99
GPS ......................................................................................... 101Contents
8
PC connections ................................................................... 102
VPN connections ................................................................ 104
Tools ....................................................................... 106
Clock ...................................................................................... 106
Calculator ............................................................................. 107
Downloads ........................................................................... 107
Google Search ..................................................................... 108
My files .................................................................................. 108
Polaris Office ........................................................................ 109
SIM Toolkit ............................................................................ 111
Task manager ...................................................................... 112
Voice Search ......................................................................... 112
Settings .................................................................. 113
Access the Settings menu ................................................ 113
SIM card manager .............................................................. 113
Wireless and networks ...................................................... 113
Call settings .......................................................................... 115
Sound .................................................................................... 116
Display .................................................................................. 117
Customised keys ................................................................. 118
Location and security ........................................................ 118
Applications ......................................................................... 119
Accounts and sync .............................................................. 120
Privacy ................................................................................... 121
SD card and phone storage ............................................. 121
Locale and text .................................................................... 121
Voice input and output ..................................................... 123
Accessibility ......................................................................... 124Contents
9
Date and time ...................................................................... 124
About phone ....................................................................... 124
Troubleshooting .................................................. 125
Safety precautions ............................................... 131
Index ...................................................................... 142Assembling
10
Assembling
Unpack
Check your product box for the following items:
● Mobile device
● Battery
● Quick start guide
Use only Samsung-approved software. Pirated or illegal
software may cause damage or malfunctions that are
not covered by your manufacturer's warranty.
● The items supplied with your device and available
accessories may vary depending on your region or
service provider.
● You can purchase additional accessories from your
local Samsung dealer.
● The supplied accessories perform best for your device.
● Accessories other than the supplied ones may not be
compatible with your device.Assembling
11
Install the SIM or USIM card and battery
When you subscribe to a cellular service, you will receive
a Subscriber Identity Module (SIM) card, with subscription
details, such as your personal identification number (PIN) and
optional services. To use UMTS or HSDPA services, you can
purchase a Universal Subscriber Identity Module (USIM) card.
To install the SIM or USIM card and battery,
1 If the device is on, press and hold [ ] and select Power
off→ OK to turn it off.
2 Remove the back cover.
Be careful not to damage your fingernails when you
remove the back cover.
3 Insert the SIM or USIM card with the gold-coloured
contacts facing down.
Your device has two SIM card slots to allow you to use two
SIM or USIM cards, and switch between them. Use the
right slot for your primary, or most frequently used, SIM
or USIM card. Use the left slot for a secondary SIM or USIM
card.Assembling
12
When you insert two USIM cards for a UMTS network
into your device, the card in the secondary slot will be
used for a GPRS network.
SIM card 2
SIM card 1
The antenna is located in the upper area on the back of
the device. Do not remove the protective tape covering
the antenna, as this can damage the antenna.
4 Insert the battery.
5 Replace the back cover.Assembling
13
Charge the battery
Before using the device for the first time, you must charge the
battery.
You can charge the device with a travel adapter or by
connecting the device to a PC with a USB cable.
Use only Samsung-approved chargers and cables.
Unauthorised chargers or cables can cause batteries to
explode or damage your device.
● When your battery is low, the device will emit a
warning tone and display a low battery message. The
battery icon will also be empty. If the battery level
becomes too low, the device will automatically power
off. Recharge your battery to continue using your
device.
● If the battery is completely discharged, you cannot
turn on the device, even with the travel adapter
connected. Allow a depleted battery to charge for a
few minutes before you try to turn on the device.
› Charge with a travel adapter
1 Plug the small end of the travel adapter into the
multifunction jack.
Connecting the travel adapter improperly may cause
serious damage to the device. Any damage caused by
misuse is not covered by the warranty.Assembling
14
2 Plug the large end of the travel adapter into a power
outlet.
● You can use the device while it is charging, but it may
take longer to fully charge the battery.
● While the device is charging, the touch screen may
not function due to an unstable power supply. If this
happens, unplug the travel adapter from the device.
● While charging, the device may heat up. This is
normal and should not affect your device’s lifespan or
performance.
● If your device is not charging properly, bring your
device and the charger to a Samsung Service Centre.
3 When the battery is fully charged, first unplug the travel
adapter from the device and then from the power outlet.
Do not remove the battery before removing the travel
adapter. Doing this may cause damage to the device.
To save energy, unplug the travel adapter when not in
use. The travel adapter does not have a power switch,
so you must unplug the travel adapter from the outlet
when not in use to avoid wasting power. The travel
adapter should remain close to the socket when in use.Assembling
15
› Charge with a USB cable
Before charging, ensure that your PC is turned on.
1 Plug one end (micro-USB) of the USB cable into the
multifunction jack.
2 Plug the other end of the USB cable into a USB port on a
PC.
Depending on the type of USB cable you are using, it
may take some time before charging begins.
3 When the battery is fully charged, first unplug the USB
cable from the device and then from the PC.
Insert a memory card (optional)
To store additional multimedia files, you must insert
a memory card. Your device accepts microSD™ or
microSDHC™ memory cards with maximum capacities of
32 GB (depending on memory card manufacturer and type).
Samsung uses approved industry standards for memory
cards, but some brands may not be fully compatible
with your device. Using an incompatible memory card
may damage your device or the memory card and can
corrupt data stored on the card.
● Your device supports only the FAT file structure for
memory cards. If you insert a card formatted with
a different file structure, your device will ask you to
reformat the memory card.
● Frequent writing and erasing of data will shorten the
lifespan of memory cards.
● When you insert a memory card in your device, the
file directory of the memory card will appear in the
sdcard folder.Assembling
16
1 Remove the back cover.
2 Insert a memory card with the gold-coloured contacts
facing down.
3 Push the memory card in the memory card slot until it
locks in place.
4 Replace the back cover.
› Remove the memory card
Before removing a memory card, first unmount it for safe
removal.
1 In Idle mode, select → Settings→ SD card and phone
storage→ Unmount SD card→ OK.
2 Remove the back cover.
3 Push the memory card gently until it disengages from the
device.
4 Remove the memory card.
5 Replace the back cover.
Do not remove a memory card while the device is
transferring or accessing information, as this could
result in loss of data or damage to the memory card or
device.Assembling
17
› Format the memory card
Formatting your memory card on a PC may cause
incompatibilities with your device. Format the memory card
only on the device.
In Idle mode, select → Settings→ SD card and phone
storage→ Unmount SD card→ OK→ Format SD card →
Format SD card → Erase everything.
Before formatting the memory card, remember to make
backup copies of all important data stored on your
device. The manufacturer’s warranty does not cover loss
of data resulting from user actions.
Attach a hand strap (optional)
1 Remove the back cover.
2 Slide a hand strap through the slot and hook it over the
small projection.
3 Replace the back cover.Getting started
18
Getting started
Turn your device on and off
To turn on your device, press and hold [ ]. If you turn on your
device for the first time, follow the on-screen instructions to
set up your device.
To turn off your device, press and hold [ ] and then select
Power off→ OK.
● Follow all posted warnings and directions from
authorised personnel in areas where the use of
wireless devices is restricted, such as aeroplanes and
hospitals.
● To use your device's non-network services only,
switch to Flight mode. Press and hold [ ] and select
Flight mode. Getting started
19
Get to know your device
›Device layout
Main antenna
GPS antenna
Power/Reset/Lock
key
Headset jack
Proximity sensor
Home key
Volume key
Menu key
Earpiece
Mouthpiece
QWERTY keyboard
Speaker
Back cover
Rear camera lens
Front camera lens
Touch screen
Multifunction jack
Back key
Search key
TrackpadGetting started
20
› Keys
Key Function
Power/
Reset
1
/
Lock
Turn on the device (press and hold);
Access the quick menus (press and
hold); Reset the device (press and
hold for 8-10 seconds and release);
Lock the touch screen.
Menu
Open a list of options available on the
current screen.
Home
Return to the idle screen; Open the
list of recent applications (press and
hold).
Trackpad
2
Scroll through menu options (drag);
Select a highlighted menu option or
confirm an input (press).
Back Return to the previous screen.
Search
Open the Google search application;
Open the search input window while
using some applications; Launch the
voice command feature (press and
hold).
Volume Adjust the device’s volume.
1. If your device has fatal errors or hang-ups, or freezes, you may
need to reset the device to regain functionality.
2. If you leave your device under direct sunlight for an extended
period of time, it may cause the trackpad to malfunction or
freeze. Try to use your device in a shady place out of direct
sunlight.Getting started
21
› QWERTY keyboard
The position, images, and functions of the keys may
differ depending on your region.
Key Function
Alphanumeric
Enter numbers, letters, and
special characters.
Shift Change case in a text input field.
Alt
Use characters on the upper half
of the keys in a text input field.
Symbol
Enter symbols in a text input
field.
Space
Insert a space in a text input field;
In Idle mode, open the Google
search application.
Backspace
Delete characters in a text input
field.
Enter
Start a new line in a text input
field.
SIM switch
Switch SIM or USIM cards; Access
the card management setting
(press and hold).
Shortcut
Access user-defined applications.
► p. 33Getting started
22
› QWERTY keyboard shortcut key
While using some applications, you can use the following
shortcut keys:
Application Shortcut key
Calendar
● [T]: Move to today’s date.
● [A]: Change to the agenda view mode.
● [D]: Change to the day view mode.
● [W]: Change to the week view mode.
● [M]: Change to the month view mode.
Email
● [R]: Reply to the message.
● [L]: Reply to the message and include all
recipients.
● [F]: Forward the message to others.
● [C]: Create a new email message.
Message
● [T]: Move to the top of the message list.
● [B]: Move to the bottom of the message list.
● [N]: Go to the next message.
● [P]: Go to the previous message.
● [R]: Reply to the message.
● [F]: Forward the message to others.
● [C]: Create a new message.
My files
● [N]: During a PowerPoint slideshow, go to
the next slide.
● [P]: During a PowerPoint slideshow, go to
the previous slide.Getting started
23
Application Shortcut key
Internet
● [ ]+[Y]: Move to the top of the page.
● [ ]+[U]: Move to the bottom of the page.
● [ ]+[N]: Open a new window.
● [ ]+[W]: Close the current window.
● [ ]+[B]: Open the list of saved bookmarks.
● [ ]+[T]: View active windows.
● [ ]+[R]: Reload the current web page or
stop reloading.
● [ ]+[K]: Go to the next page.
● [ ]+[J]: Go to the previous page.
● [ ]+[A]: Bookmark the current web page.
● [ ]+[F]: Search for text on the web page.
● [ ]+[G]: View the web page details.
● [ ]+[S]: Send the web page address to
others.
● [ ]+[D]: View the download history.
● [ ]+[P]: Customise the browser settings.
● [ ]+[H]: Access the recent history.
● [ ]+[I]: Zoom in.
● [ ]+[O]: Zoom out.
● [ ]+[C]: Add a shortcut to the current web
page to the idle screen.
● [ ]: Scroll down on the page.
● [ ]+[ ]: Scroll up on the page.
Gallery
● [T]: Move to the first photo in the list.
● [B]: Move to the last photo in the list.
● [N]: Go to the next photo.
● [P]: Go to the previous photo.
● [I]: Zoom in.
● [O]: Zoom out.Getting started
24
›Indicator icons
Icons shown on the display may vary depending on
your region or service provider.
Icon Definition
No signal
Signal strength
/ Activated SIM or USIM card type
GPRS network connected
EDGE network connected
UMTS network connected
HSDPA network connected
Open WLANs available
WLAN connected
Bluetooth activated
Bluetooth headset connected
GPS activated
Call in progress
Call on hold
1. This icon may vary depending on your SIM card setting.
1Getting started
25
Icon Definition
Speakerphone activated
Missed call
Synchronised with the web
Uploading data
Downloading data
Call diverting activated
Connected to PC
USB tethering activated
Wi-Fi tethering activated
No SIM or USIM card
New text or multimedia message
New email message
New Google Mail
New voice mail message
Alarm activated
Event notificationGetting started
26
Icon Definition
Roaming (outside of normal service area)
Silent mode activated
Vibration mode activated
Flight mode activated
Music playback in progress
Music playback paused
FM radio turned on in the background
Error occurred or caution required
Battery power level
10:00 Current time
Use the touch screen
Your device’s touch screen lets you easily select items or
perform functions. Learn basic actions to use the touch
screen.
● To avoid scratching the touch screen, do not use
sharp tools.
● Do not allow the touch screen to come into contact
with other electrical devices. Electrostatic discharges
can cause the touch screen to malfunction.
● Do not allow the touch screen to come into contact
with water. The touch screen may malfunction in
humid conditions or when exposed to water. Getting started
27
● For optimal use of the touch screen, remove the
screen protection film before using your device.
● Your touch screen has a layer that detects small
electrical charges emitted by the human body. For
best performance, tap the touch screen with your
fingertip. The touch screen will not react to touches of
sharp tools, such as a stylus or pen.
Control your touch screen with the following actions:
● Tap: Touch once with your finger to select or launch a menu,
option, or application.
● Tap and hold: Tap an item and hold it for more than
2 seconds to open a pop-up option list.
● Drag: Tap and drag your finger up, down, left, or right to
move to items on lists.
● Drag and drop: Tap and hold your finger on an item, and
then drag your finger to move the item.
● Double-tap: Tap twice quickly with your finger to zoom in
or out while viewing photos or web pages.
● Your device turns off the touch screen when you do
not use the device for a specified period. To turn on
the screen, press [ ].
● You can also adjust the backlight time. In Idle mode,
open the application list and select Settings→
Display→ Screen timeout.Getting started
28
Use the trackpad
Your device’s trackpad lets you easily scroll through menu
options or select items.
Control your trackpad with the following actions:
● Drag: Tap and drag your finger up, down, left, or right to
scroll through menu options.
● Press: Press once to select a highlighted menu option or
confirm an input.
For optimal use, you can set the sensitivity of the
trackpad. ► p. 118
Lock or unlock the touch screen and keys
You can lock the touch screen and keys to prevent any
unwanted device operations.
To lock, press [ ]. To unlock, turn on the screen by pressing
[ ] and then flick the window with your finger.
You can activate the screen lock feature to prevent
others from using or accessing your personal data and
information saved in your device. ► p. 35
Get to know the idle screen
When the device is in Idle mode, you will see the idle screen.
From the idle screen, you can view indicator icons, widgets,
shortcuts to applications, and other items.
The idle screen has multiple panels. Scroll left or right to a
panel of the idle screen.Getting started
29
› Add items to the idle screen
You can customise the idle screen by adding shortcuts to
applications or items in applications, widgets, or folders. To
add items to the idle screen,
1 Press [ ] → Add or tap and hold the empty area on the
idle screen.
2 Select the item category → an item:
● Widgets: Add widgets. Widgets are small applications
that provide convenient functions and information on
your idle screen.
● Shortcuts: Add shortcuts to items, such as applications,
bookmarks, and contacts.
● Folders: Create a new folder or add folders for your
contacts.
● Wallpapers: Set a background image.
›Move items on the idle screen
1 Tap and hold an item to move.
2 Drag the item to the location you want.
› Remove items from the idle screen
1 Tap and hold an item to remove.
The trash bin appears at the bottom right of the idle
screen.
2 Drag the item to the trash bin.
3 When the item turns red, release the item.Getting started
30
›Use the notifications panel
In Idle mode or while using an application, tap the
indicator icons area and drag your finger down to open the
notifications panel. You can activate or deactivate wireless
connection features and access a list of notifications, such as
messages, calls, events or processing status. To hide the panel,
drag the bottom of the list up.
From the notifications panel, you can use the following
options:
● Wi-Fi: Activate or deactivate the WLAN connection feature.
► p. 98
● B/T: Activate or deactivate the Bluetooth wireless
connection feature. ► p. 95
● GPS: Activate or deactivate the GPS feature.
● Sound/Vibration: Activate or deactivate Vibration mode.
● Auto rotation: Activate or deactivate the auto rotation.
Available options may vary depending on your region
or service provider.
› Add or remove panels to the idle screen
You can add or remove panels of the idle screen to organise
widgets according to your preferences and needs.
1 In Idle mode, press [ ] → Edit.
2 Add or remove panels by using the following features:
● To remove a panel, tap and hold the thumbnail of a
panel and drag it to the trash bin at the bottom right of
the screen.Getting started
31
● To add a new panel, select .
● To change the order of the panels, tap and hold the
thumbnail of a panel and drag it to the location you
want.
3 When you are finished, press [ ].
Access applications
To access your device’s applications,
1 In Idle mode, select to access the application list.
2 Scroll left or right to another screen.
You can also select a dot at the top of the screen to move
directly to the corresponding screen.
3 Select an application.
● When you use applications provided by Google, you
must have a Google account. If you do not have a
Google account, sign up for a Google account.
● You can add a shortcut to an application by tapping
and holding the application icon from the application
list. You can move the icon to the location you want
on the idle screen.
4 Press [ ] to return to the previous screen; Press [ ] to
return to the idle screen.
If you rotate the device while using some features, the
interface will automatically rotate as well. To prevent
the interface from rotating, open the notifications panel
and select Auto rotation.Getting started
32
› Organise applications
You can reorganise the applications in the application list by
changing their order or grouping them into categories to suit
your preferences and needs.
1 In the application list, press [ ] → Edit.
2 Tap and hold an application.
3 Drag the application icon to the location you want.
You can move an application icon to another screen. You
can also move most-used applications under .
4 Press [ ] → Save.
› Access recent applications
1 Press and hold [ ] to view the applications you have
accessed recently.
2 Select an application to access.
›Use the task manager
Your device is a multitasking device. It can run more than
one application at the same time. However, multitasking
may cause hang-ups, freezing, memory problems, or
additional power consumption. To avoid these problems, end
unnecessary programs using the task manager.
1 In Idle mode, open the application list and select Task
manager→ Active applications.
The list of all the applications currently running on your
device appears.
2 To close an application, select End.
To close all active applications, select End all.Getting started
33
› Set application shortcuts
You can set application shortcuts that you can launch by
pressing [ ], or pressing [ ] and a letter at the same time.
To assign an application to [ ],
1 In Idle mode, open the application list and select Settings
→ Customised keys.
2 Select Assign application.
3 Select an application to assign to the shortcut key.
To assign an application to a letter,
1 In Idle mode, open the application list and select Settings
→ Applications → Quick launch.
2 Select a letter → an application to assign to the shortcut
key.
Customise your device
Get more from your device by customising it to match your
preferences.
› Set the current time and date
1 In Idle mode, open the application list and select Settings
→ Date and time.
2 Set the time and date and change other options.Getting started
34
› Turn on or off the touch tone
In Idle mode, open the application list and select Settings→
Sound→ Audible selection.
› Adjust the volume of the ringtones
Press the Volume key up or down to adjust the ringtone
volume.
› Switch to Silent mode
To mute or unmute your device, do one of the following:
● Open the notifications panel from the top of the screen and
select Sound.
● Press and hold [ ] and select Silent mode.
You can set the device to alert you to various events
in Silent mode. In Idle mode, open the application list
and select Settings→ Sound→ Vibrate→ Always or
Only in Silent mode. When you switch to Silent mode,
will appear in place of .
› Change your ringtone
1 In Idle mode, open the application list and select Settings
→ Sound→ Ringtone.
2 Select a SIM or USIM card → Phone ringtone.
3 Select a ringtone from the list and select OK.
› Activate animation for switching windows
In Idle mode, open the application list and select Settings
→ Display→ Animation → Some animations or All
animations.Getting started
35
› Select a wallpaper for the idle screen
1 In Idle mode, press [ ] → Wallpaper → an option.
2 Select an image.
3 Select Save or Set wallpaper → a SIM or USIM card.
Samsung is not responsible for any use of default
images or wallpapers provided on your device.
› Adjust the brightness of the display
1 In Idle mode, open the application list and select Settings
→ Display→ Brightness.
2 Drag the slider to adjust the level of brightness.
3 Select OK.
The brightness level of the display will affect how
quickly the device consumes battery power.
› Set a screen lock
You can lock the touch screen by activating the screen lock
feature. Your device will require the unlock code each time
you turn on the device or unlock the touch screen.
● If you forget your unlock code, bring your device to a
Samsung Service Centre to reset it.
● Samsung is not responsible for any loss of security
codes or private information or other damages
caused by illegal software.Getting started
36
Set an unlock pattern
1 In Idle mode, open the application list and select Settings
→ Location and security→ Set screen lock → Pattern.
2 See the on-screen instructions and example patterns and
select Next.
3 Draw a pattern by dragging your finger to connect at least
4 dots and select Continue.
4 Draw the pattern again and select Confirm.
Set an unlock PIN code
1 In Idle mode, open the application list and select Settings
→ Location and security→ Set screen lock → PIN.
2 Enter a new PIN (numeric) and select Continue.
3 Enter the PIN again and select OK.
Set an unlock password
1 In Idle mode, open the application list and select
Settings→ Location and security→ Set screen lock →
Password.
2 Enter a new password (alphanumeric) and select
Continue.
3 Enter the password again and select OK.Getting started
37
› Lock your SIM or USIM card
You can lock your device by activating the PIN supplied with
your SIM or USIM card.
1 In Idle mode, open the application list and select Settings
→ Location and security→ Set up SIM card lock.
2 Select a SIM or USIM card → Lock SIM card.
3 Enter your PIN and select OK.
Once the PIN lock is enabled, you must enter the PIN each
time you turn on the device.
● If you enter an incorrect PIN too many times, your SIM
or USIM card will be blocked. You must enter a PIN
unlock key (PUK) to unblock the SIM or USIM card.
● If you block your SIM or USIM card by entering an
incorrect PUK, bring the card to your service provider
to unblock it.
› Activate the Find my mobile feature
When someone inserts a new SIM or USIM card in your
device, the Find my mobile feature will automatically send the
contact number to specified recipients to help you locate and
recover your device.
To use this feature, you need a Samsung account for
controlling the device from the web remotely.
1 In Idle mode, open the application list and select Settings
→ Location and security → SIM change alert.
2 Read the terms and conditions, select the check box next
to I accept all the terms above, and select Accept.Getting started
38
3 Select Sign in, enter your email address and password for
your Samsung account, and select Sign in.
To create a Samsung account, select Sign up.
4 Select Alert message recipients.
5 Enter the password for your Samsung account again and
select OK.
6 Enter a phone number including a country code (with +).
7 Enter the text message to be sent to the recipients.
8 Select Done.
Switch SIM or USIM cards
Once you insert two SIM or USIM cards, you can switch back
and forth between each card.
To switch between SIM or USIM cards, press [ ] except for
when the device is sending or receiving messages or data
from the network.
Your device supports dual standby with two different
networks. You cannot make or answer calls on both
networks at the same time.
› Activate the SIM or USIM card
1 In Idle mode, open the application list and select Settings
→ SIM card manager.
2 Select a SIM or USIM card to turn the card slot on or off.
3 Select the check box next to Activate.Getting started
39
› Change the names and icons of the SIM or
USIM cards
1 In Idle mode, open the application list and select Settings
→ SIM card manager.
2 Select a SIM or USIM card → the name of the SIM or USIM
card.
3 Select Select icon→ an icon.
4 Select Register name, change the name for the SIM or
USIM card, and select OK.
› Change the SIM or USIM card settings
1 In Idle mode, open the application list and select Settings
→ SIM card manager.
2 Change the following options:
Option Function
Receive
incoming calls
Set whether or not to allow incoming
calls from the other SIM or USIM card
while using data services using a SIM
or USIM card.
You can receive calls only when
the other SIM or USIM card
which is not for data service is
connected to a GPRS network.
Data service
network
Select a SIM or USIM for data services.Getting started
40
Enter text
You can enter text by pressing keys on the QWERTY keyboard,
by selecting characters on the virtual keypad, or by inputting
handwriting on the screen.
You cannot enter text in some languages. To enter text,
you should change the writing language to one of the
supported languages. ► p. 121
› Enter text using the QWERTY keyboard
Press appropriate alphanumeric keys to enter characters,
numbers, and symbols.
You can also use the following keys:
Key Function
Change case.
Enter characters on the upper half of the keys.
Switch to Symbol mode.
Insert a space.
Clear your input.
Start a new line.
› Enter text using the Samsung keypad
To use the Samsung keypad, open the application list
and select Settings → Locale and text → On-screen
keypad.
1 Select → Portrait keypad types and select a text
input method.
You can select one of key input methods (QWERTY or
traditional keypad) or handwriting input methods.Getting started
41
2 Enter text by selecting alphanumeric keys or writing on
the screen.
You can also use the following keys:
5
4
6
7
1
2
3
Number Function
1 Change case.
2
Switch between Symbol/Number mode and
ABC mode.
3
Enter text by voice; This icon is available only
when you activate the voice input feature for
the Samsung keypad.
This feature may be unavailable
depending on the selected input
language.
4 Clear your input.
5 Start a new line.
6
Access the keypad settings; Change the
keypad type (tap and hold).
7
Insert a space.
Functions of this key may vary
depending on your service provider.Getting started
42
› Copy and paste text
While you are entering text, you can use the copy and paste
feature to use text in other applications.
1 Place the cursor on the text you want to copy.
2 Select .
3 Select Select word or Select all.
4 Drag or to select the text you want.
5 Select Copy to copy, or Cut to cut the text onto the
clipboard.
6 In another application, place the cursor where you want to
paste the text.
7 Select → Paste to insert the text from the clipboard into
the text field.
›Use QWERTY keyboard shortcut key
Add or edit text with the following shortcut keys:
Key Function
[ ]
● Insert an @ when entering an email
address in the recipient field.
● Insert a dot (.) when entering an email
address in the recipient field.
[ ] +
Trackpad
Select text by dragging your finger up,
down, left, or right on the trackpad while
pressing [ ]. Getting started
43
Key Function
[ ]+[ ]
Cut the highlighted text onto the
clipboard.
[ ]+[ ]
Copy the highlighted text onto the
clipboard.
[ ]+[ ] Insert text from the clipboard.
[ ]+Trackpad
● Move the cursor to the beginning or
end of the text by dragging your finger
up or down while pressing [ ].
● Move the cursor to the beginning or
end of the word by dragging your
finger left or right while pressing [ ].
Download applications from Android
Market
Based on the Android platform, your device’s functionality
can be extended by installing additional applications.
Android Market provides you an easy and quick way to shop
for games and mobile applications.
● This feature may be unavailable depending on your
region or service provider.
● Your device will save user files from downloaded
applications to the internal memory. To save the files
to the memory card, connect your device to a PC and
copy them from the internal memory to the memory
card.Getting started
44
›Install an application
1 In Idle mode, open the application list and select Market.
2 If you are launching this application for the first time,
select Accept.
3 Search for a file or application and download it.
›Uninstall an application
1 From the Android Market home screen, press [ ] → My
Apps.
2 Select the item you want to delete.
3 Select Uninstall→ OK.
Download files from the web
Files you download from the web can include viruses
that will damage your device. To lessen your risk, only
download files from sources you trust.
Some media files include Digital Rights Management
to protect copyrights. This protection may prevent you
from downloading, copying, modifying, or transferring
some files.Getting started
45
To download files from the web,
1 In Idle mode, open the application list and select Internet.
2 Search for a file or application and download it.
To install applications downloaded from websites other than
Android Market, you must select Settings→ Applications
→ Unknown sources→ OK.
Synchronise data
You can synchronise data with various web servers and back
up or restore your data.
Once the synchronisation is completed, your device stays
connected to the web. If any change is made on the web,
the updated information will appear on your device and will
automatically begin synchronisation, and vice versa.
This feature may be unavailable depending on your
region or service provider.
› Set up a server account
1 In Idle mode, open the application list and select Settings
→ Accounts and sync.
2 Select Add account→ an account type.
3 Follow the on-screen instructions to complete the account
setup.Getting started
46
› Activate automatic sync
1 In Idle mode, open the application list and select Settings
→ Accounts and sync.
2 Select Auto sync.
3 Select an account.
4 Select the applications you want to synchronise.
To exclude applications from automatic synchronisation, clear
the check boxes next to the applications you want.
› Synchronise data manually
1 In Idle mode, open the application list and select Settings
→ Accounts and sync.
2 Select an account.
3 Press [ ] → Sync now. Your device will start
synchronising the data you set for synchronisation.Communication
47
Communication
Calling
Learn to use calling functions, such as making and answering
calls, using options available during a call or customising and
using call-related features.
›Make or answer a call
You can use the buttons or the touch screen when you make,
accept, end or reject calls.
● When you turn on the proximity sensor, your device
automatically turns off and locks the touch screen to
prevent accidental inputs when you hold the device
near your face. ► p. 116
● Static electricity discharged from your body or
clothing may interfere with the proximity sensor
during a call.
Make a call
1 In Idle mode, open the application list and select →
Keypad, and enter an area code and a phone number.
2 Select to make a voice call.
For a video call, select .
3 To end the call, select End call.
● Use the phonebook to save numbers you dial
frequently. ► p. 76
● To quickly access the call log to redial the numbers
you dialled recently, select → Logs.Communication
48
Answer a call
1 When a call comes in, drag in any direction until it
reaches the border of the circle.
When the device is ringing, press the Volume key to
mute the ringtone.
2 To end the call, select End call.
Reject a call
When a call comes in, drag in any direction until it reaches
the border of the circle.
Call an international number
1 In Idle mode, open the application list and select →
Keypad, and tap and hold 0 to insert the + character.
2 Enter the complete number you want to dial (country
code, area code and phone number), and then select to
dial the number.
›Use a headset
By plugging a headset into the device, you can answer and
control calls hands-free:
● To answer a call, press the headset button.
● To reject a call, press and hold the headset button.
● To place a call on hold or retrieve a held call during a call,
press and hold the headset button.
● To end a call, press the headset button.Communication
49
›Use options during a voice call
You can use the following options while a voice call is in
progress:
● To adjust the voice volume, press the Volume key up or
down.
● To place a call on hold, select . To retrieve a held call,
select .
● To dial a second call, press [ ] → Add call and then dial a
new number.
● To answer a second call, drag in any direction until it
reaches the border of the circle when a call waiting tone
sounds. The device asks whether to end or hold the first call.
You must subscribe to the call waiting service to use this
feature.
● To open the dialling screen, select Dialpad.
● To activate the speakerphone feature, select Speaker.
In noisy environments, you may have difficulty hearing
some calls while using the speakerphone feature. For
better audio performance, use the normal phone mode.
● To turn off the microphone so that the other party cannot
hear you, select Mute.
● To listen and talk to the other party via a Bluetooth headset,
press [ ] → Bluetooth.
● To switch between the two calls, select Swap.
● To make a multiparty call (conference call), make or
answer a second call and select Merge when connected
to the second party. Repeat to add more parties. You must
subscribe to the multiparty call service to use this feature.Communication
50
›Use options during a video call
You can use the following options while a video call is in
progress:
● To switch between the front and rear camera lens, select
Switch Camera.
● To turn off the microphone so that the other party cannot
hear you, select Mute.
● To hide your image from the other party, press [ ] → Hide
me.
● To select an alternative image to be shown to the other
party, press [ ] → Outgoing image.
● To open the dialling screen, press [ ] → Keypad.
● To listen and talk to the other party via a Bluetooth headset,
press [ ] → Switch to headset.
● To activate the speakerphone feature, press [ ] →
Speaker On/Off.
● To use the other party’s image, tap and hold the other
party’s image. You can capture an image of the screen or
record the video call.
› View and dial missed calls
Your device will display calls you have missed on the display.
To dial the number of a missed call, open the notifications
panel and select the missed call.Communication
51
›Use additional features
You can use various other call-related features, such as Fixed
Dialling Number (FDN) mode or call diverting.
Use Fixed Dialling Number (FDN) mode
In FDN mode, your device will restrict outgoing calls, except
for the numbers stored in the FDN list. To activate FDN mode,
1 In Idle mode, open the application list and select Settings
→ Call settings → Fixed Dialling Numbers → Enable
FDN.
2 Enter the PIN2 supplied with your SIM or USIM card and
select OK.
3 Select FDN list and add contacts to be used in FDN mode.
Set call forwarding
Call diverting is a network feature to send incoming calls to
another number that you specify. You can set this feature
separately for several conditions when you are not able to
answer calls, such as when you are already on the phone or
when you are outside of the service area.
1 In Idle mode, open the application list and select Settings
→ Call settings → Call forwarding →a call type.
2 Select a condition.
3 Enter a number to which calls will be forwarded and select
Enable.
Your setting will be sent to the network.Communication
52
Set call waiting
Call waiting is a network feature to alert you of an incoming
call while you are on a previous call. This feature is available
only for calls.
In Idle mode, open the application list and select Settings
→ Call settings → Additional settings →a call type→ Call
waiting. Your setting will be sent to the network.
› View call logs
You can view logs of your calls filtered by their types.
1 In Idle mode, open the application list and select →
Logs.
2 Press [ ] → View by→ an option to sort the call logs.
From the call logs, you can make a call or send a
message directly to a contact by quickly flicking the
contact to the left or right.
3 Select a log to view its details.
From the detail view, you can dial the number, send
a message to the number or add the number to the
phonebook.Communication
53
Messaging
Learn to create and send text (SMS) or multimedia (MMS)
messages, and view or manage messages you have sent or
received.
You may incur additional charges for sending or
receiving messages while outside your home service
area. For details, contact your service provider.
› Send a text message
1 In Idle mode, open the application list and select .
2 Select New message.
3 Add recipients of your message.
● Enter phone numbers manually, separating them with a
semicolon or a comma.
● Select phone numbers from the lists by selecting
options under the recipient field.
4 Select Enter message here and enter your message text.
To insert emoticons, press [ ] → Insert smiley.
5 Select Send to send the message.
› Send a multimedia message
1 In Idle mode, open the application list and select .
2 Select New message.Communication
54
3 Add recipients of your message.
● Enter phone numbers or email addresses manually,
separating them with a semicolon or a comma.
● Select phone numbers or email addresses from the lists
by selecting options under the recipient field.
When you enter an email address, the device will
convert the message as a multimedia message.
4 Press [ ] → Add subject and enter a subject for the
message.
5 Select Enter message here and enter your message text.
To insert emoticons, press [ ] → Insert smiley.
6 Press [ ] → Attach, or select and add an item.
You can select a file from the file list or create a new photo,
video, or sound.
7 Select Send to send the message.
› View a text or multimedia message
1 In Idle mode, open the application list and select .
Your messages are grouped into message threads by
contact, like a messenger.
2 Select a contact.
3 For a multimedia message, select a message to view the
details.Communication
55
› Listen to voice mail messages
If you have set missed calls to be diverted to the voice mail
server, callers may leave voice messages when you do not
answer incoming calls. To access your voice mail inbox and
listen to voice mail messages,
1 In Idle mode, open the application list and select →
Keypad and then tap and hold 1.
2 Follow the instructions from the voice mail server.
You must save the voice mail server number before
accessing the server. Your service provider can give you
the number.
Google Mail
You can retrieve new email messages from Google Mail™
to your Inbox. When you access this application, the Inbox
screen appears. The total number of unread messages
displays in the title bar and unread messages display in bold.
● This feature may be unavailable depending on your
region or service provider.
● This Google Mail menu may be labelled differently
depending on your service provider.
› Send an email message
1 In Idle mode, open the application list and select Google
Mail.
2 If you are launching this application for the first time,
select OK.
3 Press [ ] → Compose. Communication
56
4 Enter a name or address in the recipient field.
5 Enter a subject and message.
6 To attach an image file, press [ ] → Attach→ a file.
7 Select to send the message.
› View email messages
1 In Idle mode, open the application list and select Google
Mail.
2 Select an email message.
From the message view, use the following options:
● To reply to the message, select .
● To reply to the message including all recipients, select →
Reply all.
● To forward the message to other people, select →
Forward.
● To add a star to the message, select .
● To view an attachment, select Preview. To save it to your
memory card, select Download.
● To archive the message, select Archive.
● To delete the message, select Delete.
● To move to the previous or next message, select or
.
› Organise email by labels
You can organise your email by labelling your messages. You
can sort messages by label filter.Communication
57
Add a label to a message
1 From the Inbox screen, tap and hold a message.
2 Select Change labels.
3 Select a label to add and select OK.
Filter messages
1 From the Inbox screen, press [ ] → Go to labels.
2 Select the label of the messages you want to view.
Email
Learn to send or view email messages via your personal or
company email account.
› Set up an email account
1 In Idle mode, open the application list and select Email.
2 Enter your email address and password.
3 Select Next (for general email accounts, such as Google
Mail and Yahoo) or Manual setup (for other company
email accounts).
4 Follow the on-screen instructions.
When you are finished setting up the email account, the email
messages are downloaded to your device. If you have created
more than two accounts, you can switch between email
accounts; Select an account name at the top right of the
screen and select one you want to retrieve messages from.Communication
58
› Send an email message
1 In Idle mode, open the application list and select Email →
an email account.
2 Press [ ] → Compose.
3 Add recipients of your message.
● Enter email addresses manually, separating them with a
semicolon or a comma.
● Select email addresses from the lists by selecting
options under the recipient field.
4 Select the Cc/Bcc field and add more recipients.
5 Select the subject field and enter a subject.
6 Select the text input field and enter your email text.
7 Select Attach and attach a file.
You can select a file from the file list or create a new photo,
video, or sound.
You cannot attach Digital Rights Management (DRM)-
protected files.
8 Select Send to send the message.
If you are offline or outside your service area, the
message will be held in the outbox until you are online
and in your service area.Communication
59
› View an email message
When you open an email account, you can view previously
retrieved emails offline or connect to the email server to view
new messages. After retrieving email messages, you can view
them offline.
1 In Idle mode, open the application list and select Email→
an email account.
2 Press [ ] → Refresh to update the message list.
3 Select an email message.
From the message view, use the following options:
● To reply to the message, press [ ] → Reply.
● To forward the message to other people, press [ ] →
Forward.
● To delete the message, press [ ] → Delete.
● To move the message to another folder, press [ ] → Move
to folder.
● To load images from the message, press [ ] → Show
pictures.
● To view an attachment, select the attachment item. To save
it to your memory card, select .
Talk
Learn to chat with friends and family via Google Talk™.
This feature may be unavailable depending on your
region or service provider.Communication
60
› Add friends to your friend list
1 In Idle mode, open the application list and select Talk.
The friend list shows all of your Google Talk contacts at a
glance.
2 Press [ ] → Add friend.
3 Enter an email address of the friend and select Send
invitation.
When your friend accepts the invitation, the friend is added to
your friend list.
› Start a chat
1 In Idle mode, open the application list and select Talk.
2 Select a friend from the friend list. The chat screen opens.
3 Enter your message and select Send.
To insert emoticons, press [ ] → More→ Insert smiley.
4 To switch between active chats, press [ ] → Switch
chats.
5 To end the chat, press [ ] → End chat.
Social Hub
Learn to access Social Hub™, the integrated communication
application for Social Network Service (SNS), email, messages,
instant messages, contacts or calendar information. Visit
socialhub.samsungapps.com for more details.
1 In Idle mode, open the application list and select Social
Hub.
2 Check and use contents delivered from Social Hub.Entertainment
61
Entertainment
Camera
Learn how to capture and view photos and videos. You
can take photos at resolutions up to 2048 x 1536 pixels
(3.2 megapixels) and videos at resolutions up to
320 x 240 pixels.
To use this feature, you must first insert a memory card.
● The camera interface appears only in the landscape
orientation.
● Tap the screen to hide or display icons in the
viewfinder.
● The camera automatically turns off when you do not
use it for a specified period.
● The memory capacity may differ depending on the
shooting scene or shooting conditions.Entertainment
62
› Capture a photo
1 In Idle mode, open the application list and select Camera
to turn on the camera.
2 Aim the lens at the subject and make any necessary
adjustments.
2
3
5
4
1
7
6
8
Number Function
1
Switch between the front and rear camera
lenses.
2 Change the shooting mode.
3 Change the scene mode.
4 Change the camera settings.
5
Check the camera status and settings.
● : Number of photos you can take
(according to available memory)
● : Storage location
6 Switch to the camcorder.
7 Capture a photo.
8 View the photo you captured last.Entertainment
63
3 Press the Volume key to zoom in or out.
The zoom function may be unavailable when shooting
in the highest resolution.
4 Select to take a photo.
The photo is saved automatically.
After taking photos, select to view the taken photos.
● To view more photos, scroll left or right.
● To zoom in or out, tap the screen and select or . You
can also double-tap the screen.
● To send a photo to others, select Share.
● To set a photo as wallpaper or a caller ID image for a
contact, select Set as.
● To delete a photo, select Delete.
› Capture a photo by using preset options for
various scenes
Your camera provides you with predefined settings for
various scenes. You can simply select the proper mode for
your shooting conditions and subjects.
For example, when you take photos at night, select the night
mode that uses an extended exposure.
1 In Idle mode, open the application list and select Camera
to turn on the camera.
2 Select → a scene.
3 Make any necessary adjustments.
4 Select to take a photo.Entertainment
64
› Capture a photo in Smile shot mode
Your camera can recognise people’s faces and help you take
photos of their smiling faces.
1 In Idle mode, open the application list and select Camera
to turn on the camera.
2 Select → Smile shot.
3 Make any necessary adjustments.
4 Aim the camera lens at your subject and select .
Your device recognises people in an image and detects
their smiles. When the subject smiles, the device
automatically takes a photo.
› Capture a panoramic photo
You can take wide panoramic photos using Panorama
shooting mode. This mode is convenient for photographing
landscapes.
1 In Idle mode, open the application list and select Camera
to turn on the camera.
2 Select → Panorama.
3 Make any necessary adjustments.
4 Select to take the first photo.
5 Slowly move the device in any direction and align the
green frame with the viewfinder.
When you have aligned the green frame and viewfinder,
the camera will automatically take the next photo.
6 Repeat step 5 to complete the panoramic photo.Entertainment
65
› Customise camera settings
Before taking a photo, select → to access the following
options:
Option Function
Exposure value Adjust the exposure value.
Timer
Select the length of the delay before the
camera takes a photo.
Resolution Change the resolution option.
White balance
Adjust the colour balance according to
lighting conditions.
Effects Apply a special effect.
Metering Select a type of exposure metre.
Image quality Set the quality level for your photos.
Before taking a photo, select → to access the following
settings:
Setting Function
Guidelines
Display the guidelines on the preview
screen.
Review Set the camera to display the taken image.
GPS
Set the camera to include location
information for your photos.
To improve GPS signals, avoid
shooting in locations where the
signal may be obstructed, such as
between buildings or in low-lying
areas, or in poor weather conditions.
Reset Reset menus and shooting options.Entertainment
66
› Record a video
1 In Idle mode, open the application list and select Camera
to turn on the camera.
2 Select to switch to the camcorder.
3 Aim the lens at the subject and make any necessary
adjustments.
1
2
3
5
7
4
6
Number Function
1
Switch between the front and rear camera
lenses.
2
Change the recording mode (for attaching
to a multimedia message or for saving
normally).
3 Change the camcorder settings.
4
Check the camcorder status and settings.
● : Length of video that can be
recorded (according to available memory)
● : Storage location
5 Switch to the camera.
6 Record a video.
7 View the video you recorded last.Entertainment
67
4 Press the Volume key to zoom in or out.
The zoom function may be unavailable when recording
in the highest resolution.
5 Select to start recording.
6 Select to stop recording.
The video is saved automatically.
The camcorder may not be able to properly record
videos to a memory card with a slow transfer speed.
After recording videos, select to view the recorded videos.
● To view more videos, scroll left or right.
● To send a video to others, select Share.
● To play a video, select Play.
● To delete a video, select Delete.
› Customise camcorder settings
Before recording a video, select → to access the
following options:
Option Function
Exposure value Adjust the exposure value.
Timer
Select the length of the delay before the
camera starts recording a video.
Resolution Change the resolution option.
White balance
Adjust the colour balance according to
lighting conditions.
Effects Apply a special effect.
Video quality Set the quality level for your videos.Entertainment
68
Before recording a video, select → to access the
following settings:
Setting Function
Guidelines
Display the guidelines on the preview
screen.
Review
Set the camera to display the recorded
video.
Reset Reset menus and recording options.
Gallery
Learn to view photos and play videos saved in your memory
card.
› Supported file formats
Type Format
Image ● Extension: bmp, gif, jpg, png, wbmp
Video
● Extension: 3gp, mp4, mkv
● Codec: H.263, H.264, mpeg4
● Some file formats are not supported depending on
the software of the device.
● If the file size exceeds the available memory, an error
can occur when you open files.
● Playback quality may vary by content type.
● Some files may not play properly depending on how
they are encoded.Entertainment
69
› View a photo
1 In Idle mode, open the application list and select Gallery.
2 Select a folder.
3 To change the view mode, select or at the top right
of the screen.
4 Select a photo (with no icon) to view.
While viewing a photo, use the following options:
● To view more photos, scroll left or right.
● To zoom in or out, select or . You can also double-tap
the screen.
● To start a slideshow in the selected folder, select Slideshow.
Tap the screen to stop the slideshow.
● To send a photo to others, select Menu→ Share.
● To delete a photo, select Menu→ Delete.
● To use additional features with a photo, select Menu→
More and use the following options:
- Details: View photo details.
- Set as: Set a photo as wallpaper or a caller image for a
contact.
- Crop: Crop an image from a photo.
- Rotate left: Rotate a photo anti-clockwise.
- Rotate right: Rotate a photo clockwise.
› Play a video
1 In Idle mode, open the application list and select Gallery.
2 Select a video (with the icon) to play.Entertainment
70
3 Control playback with the following keys:
3
2 5
1 4
Number Function
1
Pause playback; Select to resume
playback.
2 Scan backward in a file.
3
Move to a point of the file by dragging or
tapping the bar.
4 Scan forward in a file.
5 Trim a segment of a video
Music
Learn to listen to your favourite music while on the go with
the music player. The music player supports the following file
formats: mp3, m4a, 3gp, mp4, ogg (Codec: mp3, vorbis (ogg),
aac, aac+, eaac+, amr-nb/wb, wav, midi).
To use this feature, you must first insert a memory card.
● Some file formats are not supported depending on
the software of the device.
● If the file size exceeds the available memory, an error
can occur when you open files.
● Playback quality may vary by content type.
● Some files may not play properly depending on how
they are encoded.Entertainment
71
› Add music files to your memory card
Start by transferring files to your memory card:
● Download from the wireless web. ► p. 84
● Download from a PC with Samsung Kies. ► p. 102
● Receive via Bluetooth. ► p. 97
● Copy to your memory card. ► p. 103
› Play music
After transferring music files to your memory card,
1 In Idle mode, open the application list and select Music.
2 Select a music category → a music file.
3 Control playback with the following keys:
4
3
1
2
5
6
7
8
Number Function
1
Activate the 5.1 channel surround sound
system when a headset is connected.
2
Move to a point of the file by dragging or
tapping the bar.
3
Restart playback; Skip backward (doubletap); Scan backward in a file (tap and hold).
1. These icons are shown when you tap the player screen.
1Entertainment
72
Number Function
4
Pause playback; Select to resume
playback.
5
Change the repeat mode (off, repeating
one file, or repeating all files).
6 Activate Shuffle mode.
7 Open the playlist.
8
Skip forward; Scan forward in a file (tap and
hold).
● You can control the music player with a headset. In
Idle mode, press and hold the headset button to
launch the music player. Press the headset button to
start or pause playback.
● SRS CS Headphone™ delivers a 5.1 surround sound
experience over standard headphones or earbuds
when listening to multichannel content, such as DVD
movies.
● WOW HD™ significantly improves the playback
quality of audio, delivering a dynamic 3D
entertainment experience with deep, rich bass and
high frequency clarity for crisp detail.
›Use the party shuffle feature
When you turn on the party shuffle feature, your device
selects and plays music files randomly.
1 In Idle mode, open the application list and select Music.
2 Press [ ] → Party shuffle.
3 To turn off the party shuffle feature, press [ ] → Party
shuffle off.
1. These icons are shown when you tap the player screen.
1Entertainment
73
› Customise music player settings
1 In Idle mode, open the application list and select Music.
2 Select a category → a music file.
3 Press [ ] → Settings.
4 Adjust the following settings to customise your music
player:
Option Function
5.1 channel
Set whether or not to activate the
virtual 5.1 channel surround sound
system when a headset is connected.
Equaliser Select a default equaliser type.
FM radio
Learn to listen to music and news on the FM radio. To listen
to the FM radio, you must connect a headset, which serves as
the radio antenna.
› Listen to the FM radio
1 Plug a headset into the device.
2 In Idle mode, open the application list and select FM
radio.
The FM radio scans and saves available stations
automatically.
The first time you turn on the FM radio, it will start
automatic tuning.Entertainment
74
3 Control the FM radio with the following keys:
1
3
2
3
5
4
Number Function
1 Turn the FM radio off or on.
2 Adjust the volume.
3 Search for an available radio station.
4 Fine-tune the frequency.
5
Add the current radio station to the
favourites list.
› Save a radio station automatically
1 Plug a headset into the device.
2 In Idle mode, open the application list and select FM
radio.
3 Press [ ] → Scan→ a scanning option.
The FM radio scans and saves available stations
automatically.
› Add a radio station to the favourites list
1 Plug a headset into the device.
2 In Idle mode, open the application list and select FM
radio.Entertainment
75
3 Scroll to the radio station you want.
4 Select to add to the favourites list.
You can add a name for a radio station or remove
a radio station; Tap and hold a radio station on the
favourites list and select Remove or Rename.
› Customise FM radio settings
1 In Idle mode, open the application list and select FM
radio.
2 Press [ ] → Settings.
3 Adjust the following settings to customise your FM radio:
Option Function
Region Select your region.
Background
playing
Set whether or not to run the FM radio
in the background while using other
applications. If this feature is on, you
can control the FM radio from the
notifications panel.
Show station
ID
Set whether or not to show the station
ID on the FM radio screen; Station IDs
are available only from radio stations
that provide this information.
Alternative
frequency
Set whether or not the FM radio
attempts to retune a radio station
when the signal is weak.
FM radio auto
off
Set the FM radio to automatically turn
off after a specified length of time.Personal information
76
Personal information
Contacts
Learn to create and manage a list of your personal or business
contacts. You can save names, mobile phone numbers, home
phone numbers, email addresses, birthdays and more for
your contacts.
› Create a contact
1 In Idle mode, open the application list and select .
2 Press [ ] → Create.
In portrait view, select .
3 Select a memory location.
If you have more than one account, select an account to
which you want to add the contact.
4 Enter contact information.
5 Select Save to add the contact to memory.
You can also create a contact from the dialling screen.
1 In Idle mode, open the application list and select →
Keypad.
2 Enter a phone number.
3 Select Add to Contacts→ Create contact.
4 Select a memory location.
If you have more than one account, select an account to
which you want to add the contact.Personal information
77
5 Enter contact information.
6 Select Save to add the contact to memory.
› Find a contact
1 In Idle mode, open the application list and select .
2 Scroll up or down on the contact list.
You can also drag your finger along the index on the right
side to quickly scroll through the list.
3 Select a contact’s name.
Once you find a contact, you can use the following options:
● To call the contact, select a phone number.
● To make a video call, select Video call.
● To send a message, select Message.
● To send an email message, select an email address.
● To edit the contact information, press [ ] → Edit.
● To set the contact as your favourites, select on the top
right of the screen.
› Set a speed dial number
1 In Idle mode, open the application list and select .
2 Press [ ] → More→ Speed dial setting.
3 Select a location number → a contact.
4 Select a phone number (if necessary).
You can quickly dial this number by tapping and
holding the location number from the dialling screen.Personal information
78
› Create your namecard
1 In Idle mode, open the application list and select .
2 Press [ ] → My profile.
3 Enter your own personal details.
4 Select Save.
You can send your namecard by attaching it to a
message or email or transferring it via the Bluetooth
wireless feature.
› Create a group of contacts
By creating groups of contacts, you can manage multiple
contacts and send messages or email to an entire group. Start
by creating a group.
1 In Idle mode, open the application list and select →
Groups.
2 Press [ ] → Create.
3 Enter a name and select a ringtone for the group.
4 Select Save.Personal information
79
› Copy contacts
To copy contacts from the SIM or USIM card to your device,
1 In Idle mode, open the application list and select .
2 Press [ ] → Import/Export→ Import from SIM card.
3 Select a SIM or USIM card.
4 Select a memory location.
If you have more than one account, select an account to
which you want to add the contact.
5 Select contacts to copy and select Import.
To copy contacts from your device to the SIM or USIM card,
1 In Idle mode, open the application list and select .
2 Press [ ] → Import/Export→ Export to SIM card.
3 Select a SIM or USIM card.
4 Select contacts to copy and select Export → Yes.
›Import or export contacts
To import contact files (in vcf format) from a memory card to
your device,
1 In Idle mode, open the application list and select .
2 Press [ ] → Import/Export→ Import from SD card.
3 Select a memory location.
If you have more than one account, select an account to
which you want to add the contact.
4 Select an option for importing a single contact file,
multiple contact files, or all contact files, and select OK.
5 Select contact files to import and select OK.Personal information
80
To export contacts from your device to a memory card,
1 In Idle mode, open the application list and select .
2 Press [ ] → Import/Export→ Export to SD card.
3 Select Yes to confirm.
› View the communication log
You can view the communication log of calls, messages, email
or SNS threads.
1 In Idle mode, open the application list and select →
History.
2 Select an item you want to view.
› View social network activities
You can view the recent activities of contacts in social
network services, such as Facebook and Twitter.
1 In Idle mode, open the application list and select →
Activities.
2 Select an item you want to view.
Calendar
Learn to create and manage daily, weekly or monthly events,
and set alarms to remind yourself of important events.
› Create an event
1 In Idle mode, open the application list and select
Calendar.
2 Press [ ] → More → Create.Personal information
81
3 Enter the details of the event as required.
4 Select Done.
› View events
To change the calendar view,
1 In Idle mode, open the application list and select
Calendar.
2 Press [ ] → Day, Week, or Month.
To view events of a specific date,
1 In Idle mode, open the application list and select
Calendar.
2 Select a date on the calendar.
● To move to a specific day by entering a date manually,
press [ ] → More → Go to, enter the date by selecting
+ or -, and select Set.
● To select today’s date, press [ ] → Today.
3 Select an event to view its details.
› Stop an event alarm
If you set an alarm for a calendar event, the event alarm icon
will appear at the specified time.
1 Open the notifications panel from the top of the screen.
2 Select a reminder to view more details about the event.
3 To snooze or dismiss the reminder, select Snooze all or
Dismiss all.Personal information
82
Memo
Learn to record important information to save and view at a
later date.
› Create a memo
1 In Idle mode, open the application list and select Memo.
2 Select Create memo.
3 Enter your memo text.
4 If you are using the on-screen keyboard, select Done.
5 Select a colour to change a background colour.
6 Select Save.
› View memos
1 In Idle mode, open the application list and select Memo.
2 Select a memo to view its details.
● To edit the memo, select .
● To delete the memo, select → OK.
You can send the memo to others by tapping and
holding the memo and selecting Send via→ an
option.
Voice recorder
Learn to operate your device’s voice recorder.
To use this feature, you must first insert a memory card.Personal information
83
› Record a voice memo
1 In Idle mode, open the application list and select Voice
recorder.
2 Select Record to start recording.
3 Speak into the microphone.
4 When you are finished, select Stop.
Your memo is saved automatically.
5 To record more voice memos, select Record again.
› Play a voice memo
1 In Idle mode, open the application list and select Voice
recorder.
2 Select List.
3 Select a voice memo to play.
You can send the voice memo to others by pressing
[ ] → Share→ an option.Web
84
Web
Web services require a data connection. Contact your
operator to choose the best data plan.
Internet
Learn to access and bookmark your favourite web pages.
● You may incur additional charges for accessing the
web and downloading media files. For details, contact
your service provider.
● The web browser menu may be labelled differently
depending on your service provider.
● Available icons may vary depending on your region or
service provider.
› Browse web pages
1 In Idle mode, open the application list and select Internet
to launch a specified homepage.
To access a specific web page, select the URL input field,
enter the web address (URL) of the web page, and select
.
2 Navigate web pages with the following keys:
1 2
The above screen may differ depending on your region
or service provider. Web
85
Number Function
1
Enter the web address of a web page to
access.
2
Open a list of saved bookmarks, frequently
visited pages and recent internet history.
While browsing the web page, use the following options:
● To zoom in or out, select or . You can also doubletap the screen.
● To open a new window, press [ ] → New window.
● To view the currently active windows, press [ ] →
Windows. You can open multiple pages and switch back
and forth between them.
● To reload the current web page, press [ ] → Refresh.
● To go to a next page in history, press [ ] → Forward.
● To bookmark the current web page, press [ ]→ Add
bookmark.
● To add a shortcut to the current web page to the idle
screen, press [ ] → More → Add shortcut to Home.
● To search for text on the web page, press [ ] → More →
Find on page.
● To view the web page details, press [ ] → More → Page
info.
● To send the web address (URL) of the web page to others,
press [ ] → More → Share page.
● To view the download history, press [ ] → More →
Downloads.
● To customise the browser settings, press [ ] → More →
Settings.Web
86
› Search for information by voice
This feature may be unavailable depending on your
region or service provider.
1 In Idle mode, open the application list and select Internet.
2 Select the URL input field.
3 If you are using the on-screen keyboard, press [ ].
4 Select and say a keyword into your device’s
microphone.
The device searches for information and web pages
related with the keyword.
› Bookmark your favourite web pages
If you know the web address of the web page, you can
manually add a bookmark. To add a bookmark,
1 In Idle mode, open the application list and select Internet.
2 Select → Bookmarks.
3 Select Add.
4 Enter a page title and a web address (URL).
5 Select OK.
From the bookmark list, tap and hold a bookmark and use the
following options:
● To open the web page in the current window, select Open.
● To open the web page in a new window, select Open in
new window.
● To edit the bookmark details, select Edit bookmark.
● To add the bookmark shortcut to the idle screen, select Add
shortcut to Home.Web
87
● To send the web address (URL) of the web page to others,
select Share link.
● To copy the web address (URL) of the web page, select
Copy link URL.
● To delete the bookmark, select Delete bookmark.
● To use the web page as your homepage of the browser,
select Set as homepage.
› Access the frequently visited pages or the
recent history
1 In Idle mode, open the application list and select Internet.
2 Select → Most visited or History.
3 Select a web page to access.
You can add a web page to the bookmark list by
selecting .
Maps
Learn to use Google Maps™ to find your location, search the
online map for streets, cities, or countries, and get directions.
This feature may be unavailable depending on your
region or service provider.
› Search for a specific location
1 In Idle mode, open the application list and select Maps.
The map will display your current location.
2 Press [ ] → Search.
3 If you are using the on-screen keyboard, press [ ].Web
88
4 Enter a keyword for the location and select .
To search for a location by voice, select .
5 Select the location you want to view details.
● To view a list of all results for your search, select .
● To zoom in or out, select or .
● To add layers to the map, press [ ] → Layers.
● To view your current location, press [ ] → My
Location.
To add a star to the location, select the balloon of the
location name→ .
›Get directions to a specific destination
1 In Idle mode, open the application list and select Maps.
2 Press [ ] → Directions.
3 Enter the addresses of the starting location and the
ending location.
To select an address from your contact list or starred
places, or point the location on the map, select →
Contacts, Point on map, or My Places.
4 Select a travel method (car, bus, or walk) and select Get
directions.
The route is indicated on the map. Depending on the
selected travel method, you may see multiple routes.
Select a route to view details of your trip and select to
view the route on the map.
5 Select or to view only a single part of the route.
6 When you are finished, press [ ] → More → Clear Map.Web
89
Latitude
Learn to share your location with your friends and view
friends’ locations via Google Latitude™.
This feature may be unavailable depending on your
region or service provider.
1 In Idle mode, open the application list and select Latitude.
The device automatically joins Latitude.
2 Select → Select from Contacts or Add via email
address.
3 Select a friend you want to add, or enter an email address
and select Add friends.
4 Select Yes.
When your friend accepts your invitation, you can share
locations.
5 Press [ ] → Map View.
Your friends’ locations are marked with their photos on the
map.
Places
Learn to search for a place around you.
This feature may be unavailable depending on your
region or service provider.
1 In Idle mode, open the application list and select Places.
2 Select a category.
Your device searches for places around your current
location that are related to the category.Web
90
3 Select a place name to view its details.
4 While viewing information, use the following options:
● To view the place on the map, select Map.
● To view the route to the place, select Directions.
● To view the phone number of the place, select Call.
Navigation
Learn to use the GPS navigation system to find and show your
destination with voice guidance.
● Navigation maps, your current location, and other
navigational data may differ from actual location
information. You should always pay attention to road
conditions, traffic, and any other factors that may
affect your driving and follow all safety warnings and
regulations while driving.
● This feature may be unavailable depending on your
region or service provider.
1 In Idle mode, open the application list and select
Navigation.
2 If you are launching this application for the first time,
select Accept.
3 Enter your destination by using one of the following
methods:
● Speak Destination: Speak your destination such as
“Navigate to destination.”
● Type Destination: Enter your destination with the
virtual keypad.Web
91
● Contacts: Select your destination from addresses of
your contacts.
● Starred Places: Select your destination from the list of
your starred places.
YouTube
Learn to view and share videos via YouTube.
This feature may be unavailable depending on your
region or service provider.
›Watch videos
1 In Idle mode, open the application list and select
YouTube.
2 If you are launching this application for the first time,
select Accept.
3 Select a video from the list.
4 Control playback with the icons on the screen.
› Share videos
1 In Idle mode, open the application list and select
YouTube.
2 Select a video.
3 Rotate the device to portrait view.
4 Select → an option.Web
92
›Upload videos
1 In Idle mode, open the application list and select
YouTube.
2 Press [ ] → Upload and select a video. Skip to 8.
If you want to upload new videos, select to turn on
the camera.
3 Aim the lens at the subject and make any adjustments.
4 Select to start recording.
5 Select to stop recording.
6 Select Save to upload the video that you have recorded.
7 Select your Google account if it is linked to YouTube. You
can also select Add account and set up an account to sign
in YouTube.
8 Enter details of the upload and select Upload.
Samsung Apps
Samsung Apps allows you to simply and easily download an
abundance of applications directly to your device. Featuring
a wealth of games, news, reference, social networking,
navigation, health related applications and more, Samsung
Apps gives you instant access to a huge choice of mobile
experience.
Your device gets smarter with fully optimised applications
from Samsung Apps. Explore amazing applications and make
your mobile life even better.
● The feature may be unavailable depending on your
region or service provider.
● For details, please visit www.samsungapps.com.Web
93
1 In Idle mode, open the application list and select
Samsung Apps.
2 If you are launching this application for the first time, read
the terms and conditions and select Accept.
3 Search for and download applications as desired.
Market
You can download games, ringtones, or other applications
from the Android Market.
This feature may be unavailable depending on your
region or service provider.
1 In Idle mode, open the application list and select Market.
2 If you are launching this application for the first time,
select Accept.
3 Search for a file and download it to the device. ► p. 43Web
94
News & Weather
Learn to view the weather information and read top news
and other news articles.
› View the weather information
1 In Idle mode, open the application list and select News &
Weather.
2 Select Weather at the top of the screen.
Your device searches for your current location and displays
the weather information.
You can change the location to view the weather
information in another region. Press [ ] → Settings →
Weather settings and clear the check box next to Use
My Location. Then select a location in Set location.
› Read news articles
1 In Idle mode, open the application list and select News &
Weather.
2 Scroll left to a news topic at the top of the screen.
3 Select an article to open it.
To add news topics, press [ ] → Settings → News
settings→ Select news topics.Connectivity
95
Connectivity
Bluetooth
Bluetooth is a short-range wireless communications
technology capable of exchanging information over
a distance of about 10 m without requiring a physical
connection.
You do not need to line up the devices to beam information
with Bluetooth. If the devices are within range of one another,
you can exchange information between them even if they are
located in different rooms.
● Samsung is not responsible for the loss, interception,
or misuse of data sent or received via the Bluetooth
wireless feature.
● Always ensure that you share and receive data with
devices that are trusted and properly secured. If there
are obstacles between the devices, the operating
distance may be reduced.
● Some devices, especially those that are not tested
or approved by Bluetooth SIG, may be incompatible
with your device.
› Turn on the Bluetooth wireless feature
1 In Idle mode, open the application list and select Settings
→ Wireless and networks → Bluetooth settings.
2 Select Bluetooth to turn on the Bluetooth wireless
feature. Connectivity
96
› Find and pair with other Bluetooth-enabled
devices
1 In Idle mode, open the application list and select Settings
→ Wireless and networks→ Bluetooth settings→
Scan devices.
2 Select a device.
3 Enter a PIN for the Bluetooth wireless feature or the
other device’s Bluetooth PIN, if it has one, and select OK.
Alternatively, select Accept to match the PIN between
your device and the device.
When the owner of the other device enters the same
PIN or accepts the connection, pairing is complete. If the
pairing is successful, the device will automatically search
for available services.
Some devices, especially headsets or hands-free car
kits, may have a fixed Bluetooth PIN, such as 0000. If the
other device has a PIN, you must enter it.
› Send data using the Bluetooth wireless feature
1 Select a file or item, such as a contact, memo, or media file,
from an appropriate application or My files.
2 Select an option for sending data via Bluetooth.
The method for selecting an option may vary by data
type.
3 Search for and pair with a Bluetooth-enabled device.Connectivity
97
› Receive data using the Bluetooth wireless
feature
1 In Idle mode, open the application list and select Settings
→ Wireless and networks→ Bluetooth settings→
Discoverable.
Your device is visible to other Bluetooth devices for
120 seconds.
2 When prompted, enter the PIN for the Bluetooth wireless
feature and select OK (if necessary).
3 Select Accept to confirm that you are willing to receive
data from the device.
Received data is saved to the bluetooth folder. If you receive a
contact, it is automatically saved to the phonebook.
Wi-Fi
Learn to use your device’s wireless networking capabilities
to activate and connect to any wireless local area network
(WLAN) compatible with the IEEE 802.11 b/g/n standards.
You can connect to the internet or other network devices
anywhere an access point or wireless hotspot is available.
Your device uses non-harmonised frequency and is
intended for use in all European countries. The WLAN
can be operated in the EU without restriction indoors,
but cannot be operated outdoors in France.Connectivity
98
› Activate the WLAN feature
In Idle mode, open the application list and select Settings→
Wireless and networks → Wi-Fi settings → Wi-Fi.
An active WLAN running in the background will
consume battery power. To preserve battery power,
activate the WLAN only when needed.
› Find and connect to a WLAN
1 In Idle mode, open the application list and select Settings
→ Wireless and networks → Wi-Fi settings.
The device will automatically search for available WLANs.
2 Select a network under Wi-Fi networks.
3 Enter a password for the network (if necessary).
4 Select Connect.
› Add a WLAN manually
1 In Idle mode, open the application list and select Settings
→ Wireless and networks → Wi-Fi settings→
Add Wi-Fi network.
2 Enter the SSID for the network and select the security
type.
3 Set the security settings depending on the selected
security type.
4 Select Save.Connectivity
99
› Connect to a WLAN using a Wi-Fi Protected
Setup (WPS)
Using WPS, you can connect to a secured network.
To connect to a WLAN with a WPS button,
1 In Idle mode, open the application list and select Settings
→ Wireless and networks → Wi-Fi settings.
2 Select WPS button connection.
3 Press a WPS button on the access point within 2 minutes.
To connect to a WLAN with a WPS PIN,
1 In Idle mode, open the application list and select Settings
→ Wireless and networks → Wi-Fi settings.
2 Select a network indicated by the WPS icon and select
WPS PIN.
3 On the access point, enter the PIN and press the start
button.
Mobile network sharing
Learn to set your device as a wireless modem or wireless
access point for PCs or other devices, and share your device’s
mobile network connection.
› Share your device’s mobile network via WLAN
1 In Idle mode, open the application list and select Settings
→ Wireless and networks→ Tethering and portable
hotspot.
2 Select Portable Wi-Fi hotspot to activate the Wi-Fi
tethering feature.Connectivity
100
3 Select Portable Wi-Fi hotspot settings→ Configure
portable Wi-Fi hotspot to configure network settings to
use your device as an access point.
Option Function
Network SSID
View and edit the device name that
will be shown to external devices.
Security Select the security type.
Password
View or edit the network key to
prevent unauthorised access to the
network.
4 When you are finished, select Save.
5 From another device, locate your device’s name in the
available connection list and connect to the network.
Your device shares the mobile network connection on
another device.
› Share your device’s mobile network via USB
1 Using a USB cable, connect the multifunction jack on your
device to a PC.
2 In Idle mode, open the application list and select Settings
→ Wireless and networks→ Tethering and portable
hotspot.Connectivity
101
3 Select USB tethering to activate the USB tethering
feature.
Your device shares the mobile network connection on
your PC.
To stop sharing the network connection, clear the check
box next to USB tethering.
The sharing method for the network connection may
differ depending on the PC’s operating system.
GPS
Your device is equipped with a global positioning system
(GPS) receiver. Learn to activate location services.
To receive better GPS signals, avoid using your device in the
following conditions:
● between buildings, in tunnels or underground passages, or
inside buildings
● in poor weather
● around high voltage or electromagnetic fields
● in a vehicle with sun protection film
Do not touch the internal antenna area or cover this
area with your hands or other objects while using the
GPS functions.
This feature may be unavailable depending on your
region or service provider.Connectivity
102
› Activate location services
You must activate location services to receive location
information and search the map.
1 In Idle mode, open the application list and select Settings
→ Location and security.
2 Adjust the following settings to activate location services:
Option Function
Use wireless
networks
Set to use WLAN and/or mobile
networks for finding your location.
Use GPS
satellites
Set to use the GPS satellite for finding
your location.
PC connections
Learn to connect your device to a PC with a USB cable in USB
connection modes. By connecting the device to a PC, you can
transfer data to and from your device directly, and use the
Samsung Kies program.
› Connect with Samsung Kies
Ensure that Samsung Kies is installed on your PC. You
can download the program from the Samsung website
(www.samsung.com/kies).
1 Using a USB cable, connect the multifunction jack on your
device to a PC.
Samsung Kies will launch automatically.
If Samsung Kies does not automatically launch, doubleclick the Samsung Kies icon on your PC.Connectivity
103
2 Copy files from the PC to the device.
Refer to the Samsung Kies help for more information.
› Connect as a mass storage device
You can access the file directory of the memory card by using
the device as a memory card reader.
1 Insert a memory card into the device.
2 Using a USB cable, connect the multifunction jack on your
device to a PC.
3 Open the notifications panel and select USB connected
→ Connect USB storage → OK.
4 Open the folder to view files.
5 Copy files from the PC to the memory card.
6 When you are finished, select Disconnect storage from
PC.
To disconnect the device from the PC, click the USB
device icon on the Windows task bar and click the
option to safely remove the mass storage device. Then
remove the USB cable from the PC. Otherwise, you may
lose data stored on the memory card or damage the
memory card.Connectivity
104
VPN connections
You can create virtual private networks (VPN) and connect to
your private network securely through a public network, such
as the internet.
Your device should already be configured with internet
access. If you have trouble accessing the internet, you
need to edit connections. If you are not sure about
the connection information to enter, ask your service
provider.
› Set up VPN connections
1 In Idle mode, open the application list and select Settings
→ Wireless and networks→ VPN settings → Add VPN.
2 Select a VPN type.
3 Customise the connection information.
Available options may vary depending on the VPN type.
Option Function
VPN name Enter a name of the VPN server.
Set VPN server Enter the IP address of the VPN server.
Enable
Encryption
Set to encrypt the VPN server.
Set IPsec preshared key
Enter a pre-shared key.Connectivity
105
Option Function
Enable L2TP
secret
Set to use the L2TP secret password.
Set L2TP secret Enter the L2TP secret password.
Set user
certificate
Select a user certificate that the VPN
server uses to identify you. You can
import certificates from the VPN server
or download from the web.
Set CA
certificate
Select a certificate authority (CA)
certificate that the VPN server uses
to identify you. You can import
certificates from the VPN server or
download from the web.
DNS search
domains
Enter the domain name server (DNS)
address.
4 When you are finished, press [ ] → Save.
› Connect to a private network
1 In Idle mode, open the application list and select Settings
→ Wireless and networks→ VPN settings.
2 Select a private network to connect.
3 Enter the user name and password and select Connect. Tools
106
Tools
Clock
Learn to use the clock display on the Idle screen, and set and
control alarms for important events.
›Use the clock display
1 In Idle mode, open the application list and select Clock.
2 While using the clock display, use the following features:
● To create or delete an alarm, select .
● To play a slideshow with photos in Gallery, select .
● To launch the music player, select .
● To return to the idle screen, select .
› Set a new alarm
1 In Idle mode, open the application list and select Clock.
2 Select → Add alarm or press [ ] → Add alarm.
3 Set alarm details.
4 When you are finished, select Done.
› Stop an alarm
When the alarm sounds,
● Select Dismiss to stop the alarm.
● Select Snooze to repeat the alarm after a specified length
of time.Tools
107
›Delete an alarm
1 In Idle mode, open the application list and select Clock →
.
2 Select an alarm to delete.
3 Select Delete → OK.
Calculator
Learn to perform mathematical calculations directly on your
device like a typical hand-held or desktop calculator.
1 In Idle mode, open the application list and select
Calculator.
2 Use the keys that correspond to the calculator display to
perform basic mathematical operations.
3 Press [ ] → Advanced panel to use scientific calculator.
Downloads
Learn to manage logs of files you have downloaded from the
web.
1 In Idle mode, open the application list and select
Downloads.
2 Select a download folder.
3 To open a downloaded file, select the log.
To delete a log, select the check box and then select
Delete.Tools
108
Google Search
You can search for applications and data in your device and
specific data on the web.
1 In Idle mode, open the application list and select Google
Search.
2 If you are launching this application for the first time, set
whether or not to view the search history of your Google
account.
3 Enter a letter or a word of the data to search for.
4 Select the item’s name you want to access.
My files
Learn to quickly and easily access all of your images, videos,
music, sound clips, and other types of files stored in your
memory card.
› Supported file formats
Type Format
Image ● Extension: bmp, gif, jpg, png, wbmp
Video
● Extension: 3gp, mp4, mkv
● Codec: H.263, H.264, mpeg4
Music
● Extension: mp3, m4a, 3gp, mp4, ogg, amr
● Codec: mp3, vorbis (ogg), aac, aac+, eaac+,
amr-nb/wb, wav, midiTools
109
● Some file formats are not supported depending on
the software of the device.
● If the file size exceeds the available memory, an error
can occur when you open files.
● Playback quality may vary by content type.
● Some files may not play properly depending on how
they are encoded.
1 In Idle mode, open the application list and select My files.
2 Select a folder.
● To return to the Home directory, select Home.
● To move up one level in the file directory, select Up.
3 Select a file to open.
In a folder, press [ ] to use the following options:
● To send a file to others, select Share.
● To create a new folder, select Create folder.
● To delete files or folders, select Delete.
● To change the view mode, select View by.
● To sort files or folders, select List by.
● To use additional features using a file, such as moving,
copying or renaming option, select More.
Polaris Office
Learn to create and view Polaris Office documents on your
device and memory card.Tools
110
› Create a document
1 In Idle mode, open the application list and select Polaris
Office.
2 Read the information of registration and select Later or
Register
3 Select → a document type.
4 Create the document.
5 When you are finished, press [ ] → Save.
6 Enter a name for the document and select the saving
location.
7 Select Save.
› Open a document
1 In Idle mode, open the application list and select Polaris
Office.
2 Select a folder under My files or Recent documents→ a
document file.
3 View the document as desired.
● To zoom in or out, tap the screen and select or
. To return to the original size, double-tap the
screen. You can also press [ ] → Zoom→ an option.
● To open the toolbar to edit the document (word,
presentation, or excel file), press [ ] → Edit mode.
● To search for text on the document, press [ ] → Find.Tools
111
● To bookmark the current page, press [ ] → Bookclip.
● To adjust the document to fit the screen, press [ ] →
Reflow text.
● To send a file to others, press [ ] → More→ Send file.
● To customise the settings for displaying or managing
documents, press [ ] → More→ Settings.
Available options may vary depending on a document
type.
›Manage documents online
1 In Idle mode, open the application list and select Polaris
Office.
2 Select Web files→ a service.
3 Enter your email address and password to access your
account, and then select Add.
4 View and manage your documents on the server as
desired.
SIM Toolkit
Use a variety of additional services offered by your service
provider. Depending on your SIM or USIM card, this menu
may be available but labelled differently.
In Idle mode, open the application list and select SIM Toolkit.Tools
112
Task manager
With the task manager, you can view currently running
applications and memory information.
1 In Idle mode, open the application list and select Task
manager.
2 Use the following options:
● Active applications: View the list of all the applications
currently running on your device.
● Downloaded: View the total amount of memory used
for applications installed on your device.
● RAM: Check and manage the RAM for your device.
● Storage: View the used and available memory on your
device and memory card.
● Help: View help information about extending battery
life and RAM manager.
Voice Search
Learn to use the voice command feature to dial a number,
send a message, or search for locations and information by
voice.
This feature may be unavailable depending on your
region or service provider.
1 In Idle mode, open the application list and select Voice
Search.
2 Select Speak now (if necessary).
3 Say a command into the microphone.
4 Select the item’s name you want to access (if necessary).Settings
113
Settings
Access the Settings menu
1 In Idle mode, open the application list and select Settings.
2 Select a setting category and select an option.
SIM card manager
Access and alter the settings to control the network and the
card settings for your device. ► p. 38
Wireless and networks
Change the settings for wireless network connections.
› Flight mode
Disable all wireless functions on your device. You can use only
non-network services.
›Wi-Fi settings
● Wi-Fi: Turn the WLAN feature on or off. ► p. 98
● Network notification: Set the device to notify you when an
open network is available.
● WPS button connection: Connect to a WLAN using a Wi-Fi
Protected Setup (WPS) button.
● Add Wi-Fi network: Add WLAN APs manually.Settings
114
› Bluetooth settings
● Bluetooth: Turn the Bluetooth wireless feature on or off.
► p. 95
● Device name: Set a Bluetooth name for your device.
● Discoverable: Set your device to be visible to other
Bluetooth devices.
● Scan devices: Search for available Bluetooth devices.
›USB utilities
Connect your device to a PC as a mass storage.
› Tethering and portable hotspot
● USB tethering: Activate the USB tethering feature to share
your device’s mobile network connection with PCs via USB.
When connected to a PC, your device is used as a wireless
modem for a PC. ► p. 100
● Portable Wi-Fi hotspot: Activate the Wi-Fi tethering feature
to share your device’s mobile network connection with PCs
or other devices through the WLAN feature. ► p. 99
● Portable Wi-Fi hotspot settings:
- Portable Wi-Fi hotspot: Activate the Wi-Fi tethering
feature to share your device’s mobile network connection
with PCs or other devices through the WLAN feature.
► p. 99
- Configure portable Wi-Fi hotspot: Configure network
settings to use your device as an access point.
› VPN settings
Set up and connect to virtual private networks (VPNs).
► p. 104Settings
115
›Mobile networks
● Use packet data: Set to allow packet switched data
networks for network services.
● Data roaming: Set the device to connect another network
when you are roaming or your home network is not
available.
● Access Point Names: Set up access point names (APNs).
● Use only 2G networks: Set the device to connect only to a
2G network.
● Network operators: Search for available networks and
select a network for roaming.
Call settings
Customise the settings for calling features.
› Fixed Dialling Numbers
● Enable FDN: Activate or deactivate FDN mode to restrict
calls to numbers in the FDN list. You must enter the PIN2
supplied with your SIM or USIM card.
● Change PIN2: Change the PIN2, which is used to protect
the primary PIN. If the SIM or USIM card is locked, this menu
changes to Unblock PIN2.
● FDN list: Set up a list of contacts for fixed dialling.
› Voicemail
● Voicemail service: Select your service provider’s voice mail
service. You can also select other voice mail services if you
downloaded applications that support them.
● Voicemail number: Enter the number to access the voice
mail service. You can obtain this number from your service
provider.
The location of these options differs when you insert
one SIM or USIM card.Settings
116
› Video call image
Select an image to be shown to the other party.
› Own video in received call
Set whether to show your live image or preset image to the
other party.
›Use call fail options
Select whether or not to retry a voice call when a video call
fails to connect.
› Turn on proximity sensor
Set to turn on the proximity sensor during a call.
› Call forwarding
Divert incoming calls to another number.
› Additional settings
● Caller ID: Display your caller ID to other parties for
outgoing calls.
● Call waiting: Allow incoming call alerts when a call is in
progress.
Sound
Change the settings for various sounds on your device.
● Silent mode: Activate Silent mode to mute all sounds
except media sounds and alarm ringtones.
● Vibrate: Set when the device will vibrate for various events.
● Volume: Adjust the volume level for call ringtones, music
and videos, alarm ringtones, system sound, and notification
ringtones.Settings
117
● Ringtone:
- Phone ringtone: Select a ringtone to alert you to
incoming calls.
- Notification ringtone: Select a ringtone to alert you to
events, such as incoming messages and missed calls.
● Audible selection: Set the device to sound when you
select an application or option on the touch screen.
● Screen lock sounds: Set the device to sound when you
lock or unlock the touch screen.
Display
Change the settings for the display.
● Screen display:
- Font style: Change the font type for the display text. You
can download fonts from Android Market by selecting
Get fonts online.
- Home screen:
Wallpaper: Select a background image for the idle screen.
- Lock screen:
Wallpaper: Select an image to display when the screen is
locked.
Clock position: Select the location of the clock on the
locked screen.
● Brightness: Set the brightness of the display.
● Auto-rotate screen: Set whether or not to rotate the
content automatically when the device is rotated.
● Animation: Set the device to display animation when you
switch between windows.
● Screen timeout: Set the length of time the device waits
before turning off the display’s backlight.Settings
118
● Optical trackpad sensitivity: Set the sensitivity of the
trackpad.
Customised keys
Assign an application to [ ] to create a shortcut. You can
launch the application by pressing [ ]. ► p. 33
Location and security
Change the settings for securing your device and the SIM or
USIM card, and GPS functionality.
● Use wireless networks: Set to use WLAN and/or mobile
networks for finding your location.
● Use GPS satellites: Set to use the GPS satellite for finding
your location.
● Set screen lock: Set the unlock security code. When you
have set your security code, this option changes to Change
screen lock.
- None: Disable the screen lock.
- Pattern: Set an unlock pattern to unlock the screen.
- PIN: Set a PIN (numeric) to unlock the screen.
- Password: Set a password (alphanumeric) to unlock the
screen.
● Set up SIM card lock:
- Lock SIM card: Activate or deactivate the PIN lock feature
to require the PIN before using the device.
- Change SIM PIN: Change the PIN used to access SIM or
USIM data.Settings
119
● SIM change alert: Activate or deactivate the Find my
mobile feature which helps you locate your device when it
is lost or stolen. ► p. 37
● Alert message recipients: Add or edit recipients for the
alert message.
● Remote controls: Set to control a lost device remotely via
the web.
● Visible passwords: Set the device to display your password
as you enter.
● Select device administrators: View device administrators
installed on your device. You can activate device
administrators to apply new policies to your device.
● Use secure credentials: Use certificates and credentials to
ensure secure use of various applications.
● Install from SD card: Install encrypted certificates that are
stored on a memory card.
● Set password: Create and confirm a password for accessing
credentials.
● Clear storage: Erase the credential contents from the
device and reset the password.
Applications
Change the settings for managing installed applications.
● Unknown sources: Select to download applications
from any source. If you do not select this option, you can
download applications only from Android Market.
● Quick launch: Assign a letter to an application to create a
shortcut. You can launch the application by pressing [ ]
and the letter at the same time. ► p. 33
● Manage applications: Access the list of the applications
installed on the device and check the application
information.Settings
120
● Running services: View the services you are using and
access them to manage.
● Memory usage: View available memory and the memory
used by applications on your device.
● Battery use: View the amount of power consumed by your
device.
● Development:
- USB debugging: This is for application development.
When your device is connected to a PC with a USB cable,
the USB debugging mode will be activated and Samsung
Kies will launch automatically.
- Stay awake: Set the device’s screen to stay on while
charging the battery.
- Allow mock locations: Allow mock locations and service
information to be sent to a Location Manager service for
testing. This is for application development.
● Samsung Apps: Select a network connection (WLAN or
packet switched data network) to get notifications for new
applications from Samsung Apps.
This feature may be unavailable depending on your
region or service provider.
Accounts and sync
Change the settings for the auto sync feature or manage
accounts for synchronisation.
● Background data: Select this setting to use the auto sync
feature. The auto sync will run in the background without
opening applications and synchronise data.
● Auto sync: Set the device to synchronise contact, calendar,
and email data automatically.Settings
121
Privacy
Change the settings for managing your settings and data.
● Back up my data: Back up your device’s settings to the
Google server.
● Automatic restore: Set the device to restore applications’
data you backed up when they are installed in your device.
● Factory data reset: Reset your settings to the factory
default values and delete all your data.
SD card and phone storage
View memory information for your device and memory card.
You can also format the memory card.
Formatting a memory card will permanently delete all
data from the memory card.
Locale and text
Change the settings for text input.
› Select language
Select a display language for all menus and applications.
› On-screen keypad
Set to use the virtual keypad when you enter text.
› Select input method
Select a default keypad type for text input.Settings
122
› Samsung keypad
Set the device to use the Samsung keypad.
● Portrait keypad types: Select the default input method,
such as the QWERTY keyboard, traditional keypad, or
handwriting screen.
● Input languages: Select languages for text input.
You cannot enter text in some languages. To enter text,
you should change the writing language to one of the
supported languages.
● XT9: Activate XT9 mode to enter text using Predictive input
mode.
● XT9 advanced settings: Activate the advanced features
of XT9 mode, such as auto completion, auto correction, or
auto substitution, and set up your own word list.
● Keypad sweeping: Enable or disable the keypad sweeping
feature for the text input mode. You can switch between
input modes by scrolling left or right on the keypad.
● Auto-capitalization: Set the device to automatically
capitalise the first letter after a final punctuation mark, such
as a period, question mark, or exclamation mark.
● Handwriting settings: Customise the recognition time in
Handwriting mode.
● Voice input: Activate the voice input feature to enter text
by voice on the Samsung keypad.
● Auto-full stop: Set the device to insert a period when you
double-tap the space bar.
● Tutorial: Learn how to enter text with the Samsung keypad.Settings
123
›Device keyboard
● Auto-replace: Set the device to automatically correct the
misspelled words.
● Auto-cap: Set the device to automatically capitalise the
first letter after a final punctuation mark, such as a period,
question mark, or exclamation mark.
● Auto-punctuate: Set the device to insert a period when
you double-tap the space bar.
Voice input and output
Change the settings for the voice recogniser and the text-tospeech feature.
› Voice recognition settings
● Language: Select a language for the Google voice
recognition.
● SafeSearch: Set the device to filter explicit text and/or
images from voice search results.
● Block offensive words: Hide offensive words your device
recognised from voice search results.
› Text-to-speech settings
● Listen to an example: Listen to the spoken text for an
example. Install voice data for using the text-to-speech
feature.
● Always use my settings: Set to use the speech rate and
language settings you specify over the settings saved in
applications.
● Default engine: Set the speech synthesis engine to be
used for spoken text.
● Install voice data: Download and install voice data for the
text-to-speech feature.Settings
124
● Speech rate: Select a speed for the text-to-speech feature.
● Language: Select a language for the text-to-speech feature.
● Engines: View the text-to-speech engines in your device.
Accessibility
● Accessibility: Activate an accessibility application you have
downloaded, such as Talkback or Kickback, which provide
voice, melody, or vibration feedback.
● The power key ends calls: Set the device to end a call
when you press [ ].
Date and time
Access and alter the following settings to control how time
and date are displayed on your device.
If the battery remains fully discharged or removed from
the device, the time and date will be reset.
● Automatic: Automatically update the time when you move
across time zones.
● Set date: Set the current date manually.
● Select time zone: Set your home time zone.
● Set time: Set the current time manually.
● Use 24-hour format: Set to the time to be displayed in
24-hour format.
● Select date format: Select a date format.
About phone
Access information about your device, check the device’s
status, and update the device system.Troubleshooting
125
Troubleshooting
When you turn on your device or while you are
using the device, it prompts you to enter one of the
following codes:
Code Try this to solve the problem:
Password
When the device lock feature is enabled,
you must enter the password you set for the
device.
PIN
When using the device for the first time or
when the PIN requirement is enabled, you
must enter the PIN supplied with the SIM or
USIM card. You can disable this feature by
using the Lock SIM card menu.
PUK
Your SIM or USIM card is blocked, usually as a
result of entering your PIN incorrectly several
times. You must enter the PUK supplied by
your service provider.
PIN2
When you access a menu requiring the PIN2,
you must enter the PIN2 supplied with the
SIM or USIM card. For details, contact your
service provider.
Your device displays network or service error
messages
● When you are in areas with weak signals or poor reception,
you may lose reception. Move to another area and try
again.
● You cannot access some options without a subscription.
Contact your service provider for more details.Troubleshooting
126
The touch screen responds slowly or improperly
If your device has a touch screen and the touch screen is not
responding properly, try the following:
● Remove any protective covers from the touch screen.
Protective covers may prevent the device from recognising
your inputs and are not recommended for touch screen
devices.
● Ensure that your hands are clean and dry when tapping the
touch screen.
● Restart your device to clear any temporary software bugs.
● Ensure that your device software is upgraded to the latest
version.
● If the touch screen is scratched or damaged, take it to your
local Samsung Service Centre.
Your device freezes or has fatal errors
If your device freezes or hangs, you may need to close
programs or reset the device to regain functionality. If
your device is frozen and unresponsive, press and hold
[ ] for 8-10 seconds and release. The device will reboot
automatically.
If this does not solve the problem, perform a factory data
reset. In Idle mode, open the application list and select
Settings→ Privacy→ Factory data reset→ Reset phone
→ Erase everything.
Calls are being dropped
When you are in areas with weak signals or poor reception,
you may lose your connection to the network. Move to
another area and try again.Troubleshooting
127
Outgoing calls are not connected
● Ensure that you have pressed the Dial key.
● Ensure that you have accessed the right cellular network.
● Ensure that you have not set call barring for the phone
number you are dialling.
Incoming calls are not connected
● Ensure that your device is turned on.
● Ensure that you have accessed the right cellular network.
● Ensure that you have not set call barring for the incoming
phone number.
Others cannot hear you speaking on a call
● Ensure that you are not covering the built-in microphone.
● Ensure that the microphone is close to your mouth.
● If using a headset, ensure that it is properly connected.
Audio quality is poor
● Ensure that you are not blocking the device’s internal
antenna.
● When you are in areas with weak signals or poor reception,
you may lose reception. Move to another area and try
again.
When dialling from contacts, the call is not connected
● Ensure that the correct number is stored in the contact list.
● Re-enter and save the number, if necessary.
● Ensure that you have not set call barring for the contact’s
phone number.
The device beeps and the battery icon flashes
Your battery is low. Recharge or replace the battery to
continue using the device.Troubleshooting
128
The battery does not charge properly or the device
turns off
● The battery terminals may be dirty. Wipe both goldcoloured contacts with a clean, soft cloth and try charging
the battery again.
● If the battery will no longer charge completely, dispose
of the old battery properly and replace it with a new
battery (refer to your local ordinances for proper disposal
instructions).
Your device is hot to the touch
When you use applications that require more power or use
applications on your device for an extended period of time,
your device may feel hot to the touch. This is normal and
should not affect your device’s lifespan or performance.
Error messages appear when launching the camera
Your Samsung mobile device must have sufficient available
memory and battery power to operate the camera
application. If you receive error messages when launching the
camera, try the following:
● Charge the battery or replace it with a battery that is fully
charged.
● Free some memory by transferring files to a PC or deleting
files from your device.
● Restart the device. If you are still having trouble with
the camera application after trying these tips, contact a
Samsung Service Centre.Troubleshooting
129
Error messages appear when launching the FM radio
The FM radio application on your Samsung mobile device
uses the headset cable as an antenna. Without a headset
connected, the FM radio will be unable to receive radio
stations. To use the FM radio, first ensure that the headset
is properly connected. Next, scan for and save the available
radio stations.
If you still cannot use the FM radio after performing these
steps, try accessing your desired station with another radio
receiver. If you can hear the station with another receiver,
your device may require service. Contact a Samsung Service
Centre.
Error messages appear when opening music files
Some music files may not play on your Samsung mobile
device for a variety of reasons. If you receive error messages
when opening music files on your device, try the following:
● Free some memory by transferring files to a PC or deleting
files from your device.
● Ensure that the music file is not Digital Rights Management
(DRM)-protected. If the file is DRM-protected, ensure that
you have the appropriate license or key to play the file.
● Ensure that your device supports the file type.Troubleshooting
130
Another Bluetooth device is not located
● Ensure that the Bluetooth wireless feature is activated on
your device.
● Ensure that the Bluetooth wireless feature is activated on
the device you wish to connect to, if necessary.
● Ensure that your device and the other Bluetooth device are
within the maximum Bluetooth range (10 m).
If the tips above do not solve the problem, contact a Samsung
Service Centre.
A connection is not established when you connect
the device to a PC
● Ensure that the USB cable you are using is compatible with
your device.
● Ensure that you have the proper drivers installed and
updated on your PC.Safety precautions
131
Safety precautions
To prevent injury to yourself and others or damage to your device, read all of
the following information before using your device.
Warning: Prevent electric shock, fire, and
explosion
Do not use damaged power cords or plugs, or loose electrical
sockets
Do not touch the power cord with wet hands, or disconnect the
charger by pulling on the cord
Do not bend or damage the power cord
Do not use your device while charging or touch your device with
wet hands
Do not short-circuit the charger or the battery
Do not drop or cause an impact to the charger or the battery
Do not charge the battery with chargers that are not approved by
the manufacturer
Do not use your device during a thunderstorm
Your device may malfunction and your risk of electric shock is increased.
Do not handle a damaged or leaking Lithium Ion (Li-Ion) battery
For safe disposal of your Li-Ion batteries, contact your nearest authorised
service centre.
Handle and dispose of batteries and chargers with care
• Use only Samsung-approved batteries and chargers specifically designed for
your device. Incompatible batteries and chargers can cause serious injuries
or damage to your device.
• Never dispose of batteries or devices in a fire. Follow all local regulations
when disposing of used batteries or devices.Safety precautions
132
• Never place batteries or devices on or in heating devices, such as microwave
ovens, stoves, or radiators. Batteries may explode when overheated.
• Never crush or puncture the battery. Avoid exposing the battery to high
external pressure, which can lead to an internal short circuit and overheating.
Protect the device, batteries, and chargers from damage
• Avoid exposing your device and batteries to very cold or very hot
temperatures.
• Extreme temperatures can cause the deformation of the device and reduce
the charging capacity and life of your device and batteries.
• Prevent batteries from contacting metal objects, as this can create a
connection between the + and – terminals of your batteries and lead to
temporary or permanent battery damage.
• Never use a damaged charger or battery.
Caution: Follow all safety warnings and
regulations when using your device in restricted
areas
Turn off your device where prohibited
Comply with all regulations that restrict the use of a mobile device in a
particular area.
Do not use your device near other electronic devices
Most electronic devices use radio frequency signals. Your device may interfere
with other electronic devices.
Do not use your device near a pacemaker
• Avoid using your device within a 15 cm range of a pacemaker if possible, as
your device can interfere with the pacemaker.
• If you must use your device, keep at least 15 cm away from the pacemaker.
• To minimise the possible interference with a pacemaker, use your device on
the opposite side of your body from the pacemaker.
Do not use your device in a hospital or near medical equipment
that can be interfered with by radio frequency
If you personally use any medical equipment, contact the manufacturer of the
equipment to ensure the safety of your equipment from radio frequency.Safety precautions
133
If you are using a hearing aid, contact the manufacturer for
information about radio interference
Some hearing aids may be interfered with by the radio frequency of your
device. Contact the manufacturer to ensure the safety of your hearing aid.
Turn off the device in potentially explosive environments
• Turn off your device in potentially explosive environments instead of
removing the battery.
• Always comply with regulations, instructions and signs in potentially
explosive environments.
• Do not use your device at refuelling points (service stations), near fuels or
chemicals, and at blasting areas.
• Do not store or carry flammable liquids, gases, or explosive materials in the
same compartment as the device, its parts, or accessories.
Turn off your device when in an aircraft
Using your device in an aircraft is illegal. Your device may interfere with the
electronic navigation instruments of the aircraft.
Electronic devices in a motor vehicle may malfunction due to the
radio frequency of your device
Electronic devices in your car may malfunction due to radio frequency of your
device. Contact the manufacturer for more information.
Comply with all safety warnings and regulations
regarding mobile device usage while operating a
vehicle
While driving, safely operating the vehicle is your first responsibility. Never use
your mobile device while driving, if it is prohibited by law. For your safety and
the safety of others, practice good common sense and remember the following
tips:
• Use a hands-free device.
• Get to know your device and its convenience features, such as speed dial and
redial. These features help you reduce the time needed to place or receive
calls on your mobile device.
• Position your device within easy reach. Be able to access your wireless device
without removing your eyes from the road. If you receive an incoming call at
an inconvenient time, let your voice mail answer it for you.Safety precautions
134
• Let the person you are speaking with know you are driving. Suspend calls
in heavy traffic or hazardous weather conditions. Rain, sleet, snow, ice, and
heavy traffic can be hazardous.
• Do not take notes or look up phone numbers. Jotting down a “to do” list or
flipping through your address book takes attention away from your primary
responsibility of driving safely.
• Dial sensibly and assess the traffic. Place calls when you are not moving or
before pulling into traffic. Try to plan calls when your car will be stationary.
If you need to make a call, dial only a few numbers, check the road and your
mirrors, then continue.
• Do not engage in stressful or emotional conversations that may be
distracting. Make people you are talking with aware you are driving and
suspend conversations that have the potential to divert your attention from
the road.
• Use your device to call for help. Dial a local emergency number in the case of
fire, traffic accident, or medical emergencies.
• Use your device to help others in emergencies. If you see an auto accident,
a crime in progress, or a serious emergency where lives are in danger, call a
local emergency number.
• Call roadside assistance or a special, non-emergency assistance number
when necessary. If you see a broken-down vehicle posing no serious hazard,
a broken traffic signal, a minor traffic accident where no one appears injured,
or a vehicle you know to be stolen, call roadside assistance or another
special, non-emergency number.
Proper care and use of your mobile device
Keep your device dry
• Humidity and all types of liquids may damage device parts or electronic
circuits.
• Do not turn on your device if it is wet. If your device is already on, turn it off
and remove the battery immediately (if the device will not turn off or you
cannot remove the battery, leave it as-is). Then, dry the device with a towel
and take it to a service centre.
• Liquids will change the colour of the label that indicates water damage
inside the device. Water damage to your device can void your manufacturer’s
warranty.
Do not use or store your device in dusty, dirty areas
Dust can cause your device to malfunction.Safety precautions
135
Do not store your device on slopes
If your device falls, it can be damaged.
Do not store your device in hot or cold areas. Use your device at
-20 °C to 50 °C
• Your device can explode if left inside a closed vehicle, as the inside
temperature can reach up to 80 °C.
• Do not expose your device to direct sunlight for extended periods of time
(such as on the dashboard of a car).
• Store the battery at 0 °C to 40 °C.
Do not store your device with such metal objects as coins, keys and
necklaces
• Your device may become deformed or malfunction.
• If the battery terminals are in contact with metal objects, it may cause a fire.
Do not store your device near magnetic fields
• Your device may malfunction or the battery may discharge from exposure to
magnetic fields.
• Magnetic stripe cards, including credit cards, phone cards, passbooks, and
boarding passes, may be damaged by magnetic fields.
• Do not use carrying cases or accessories with magnetic closures or allow
your device to come in contact with magnetic fields for extended periods of
time.
Do not store your device near or in heaters, microwaves, hot
cooking equipment, or high pressure containers
• The battery may leak.
• Your device may overheat and cause a fire.
Do not drop your device or cause impacts to your device
• The screen of your device may be damaged.
• If bent or deformed, your device may be damaged or parts may malfunction.
Do not use your device or applications for a while if the device is
overheated
Prolonged exposure of your skin to an overheated device may cause low
temperature burn symptoms, such as red spots and pigmentation.Safety precautions
136
If your device has a camera flash or light, do not use a flash close to
the eyes of people or pets
Using a flash close to the eyes may cause temporary loss of vision or damage to
the eyes.
Use caution when exposed to flashing lights
• While using your device, leave some lights on in the room and do not hold
the screen too close to your eyes.
• Seizures or blackouts can occur when you are exposed to flashing lights
while watching videos or playing Flash-based games for extended periods. If
you feel any discomfort, stop using the device immediately.
Reduce the risk of repetitive motion injuries
When you repetitively perform actions, such as pressing keys, drawing
characters on a touch screen with your fingers, or playing games, you may
experience occasional discomfort in your hands, neck, shoulders, or other
parts of your body. When using your device for extended periods, hold the
device with a relaxed grip, press the keys lightly, and take frequent breaks. If
you continue to have discomfort during or after such use, stop use and see a
physician.
Ensure maximum battery and charger life
• Avoid charging batteries for more than a week, as overcharging may shorten
battery life.
• Over time, unused batteries will discharge and must be recharged before
use.
• Disconnect chargers from power sources when not in use.
• Use batteries only for their intended purposes.
Use manufacturer-approved batteries, chargers, accessories and
supplies
• Using generic batteries or chargers may shorten the life of your device or
cause the device to malfunction.
• Samsung cannot be responsible for the user’s safety when using accessories
or supplies that are not approved by Samsung.
Do not bite or suck on the device or the battery
• Doing so may damage the device or cause explosion.
• If children use the device, make sure that they use the device properly.Safety precautions
137
When speaking on the device:
• Hold the device upright, as you would with a traditional phone.
• Speak directly into the mouthpiece.
• Avoid contact with your device’s internal antenna. Touching the antenna
may reduce the call quality or cause the device to transmit more radio
frequency than necessary.
Protect your hearing and ears when using a headset
• Excessive exposure to loud sounds can cause hearing
damage.
• Exposure to loud sounds while driving may distract your
attention and cause an accident.
• Always turn the volume down before plugging the
earphones into an audio source and use only the minimum
volume setting necessary to hear your conversation or
music.
• In dry environments, static electricity can build up in the
headset. Avoid using headsets in dry environments or
touch a metal object to discharge static electricity before
connecting a headset to the device.
Use caution when using the device while walking or moving
Always be aware of your surroundings to avoid injury to yourself or others.
Do not carry your device in your back pockets or around your waist
You can be injured or damage the device if you fall.
Do not disassemble, modify, or repair your device
• Any changes or modifications to your device can void your manufacturer’s
warranty. For service, take your device to a Samsung Service Centre.
• Do not disassemble or puncture the battery, as this can cause explosion or
fire.
Do not paint or put stickers on your device
Paint and stickers can clog moving parts and prevent proper operation. If you
are allergic to paint or metal parts of the product, you may experience itching,
eczema, or swelling of the skin. When this happens, stop using the product and
consult your physician.Safety precautions
138
When cleaning your device:
• Wipe your device or charger with a towel or a rubber.
• Clean the terminals of the battery with a cotton ball or a towel.
• Do not use chemicals or detergents.
Do not use the device if the screen is cracked or broken
Broken glass or acrylic could cause injury to your hands and face. Take the
device to a Samsung Service Centre to have it repaired.
Do not use the device for anything other than its intended use
Avoid disturbing others when using the device in public
Do not allow children to use your device
Your device is not a toy. Do not allow children to play with it as they could hurt
themselves and others, damage the device, or make calls that increase your
charges.
Install mobile devices and equipment with caution
• Ensure that any mobile devices or related equipment installed in your vehicle
are securely mounted.
• Avoid placing your device and accessories near or in an air bag deployment
area. Improperly installed wireless equipment can cause serious injury when
air bags inflate rapidly.
Allow only qualified personnel to service your device
Allowing unqualified personnel to service your device may result in damage to
your device and will void your manufacturer’s warranty.
Handle SIM cards or memory cards with care
• Do not remove a card while the device is transferring or accessing
information, as this could result in loss of data and/or damage to the card or
device.
• Protect cards from strong shocks, static electricity, and electrical noise from
other devices.
• Do not touch gold-coloured contacts or terminals with your fingers or metal
objects. If dirty, wipe the card with a soft cloth.Safety precautions
139
Ensure access to emergency services
Emergency calls from your device may not be possible in some areas or
circumstances. Before travelling in remote or undeveloped areas, plan an
alternate method of contacting emergency services personnel.
Keep your personal and important data safe
• While using your device, be sure to back up important data. Samsung is not
responsible for data loss.
• When disposing of your device, back up all data and then reset your device
to prevent misuse of your personal information.
Do not distribute copyright-protected material
Do not distribute copyright-protected material that you have recorded to
others without the permission of the content owners. Doing this may violate
copyright laws. The manufacturer is not liable for any legal issues caused by the
user’s illegal use of copyrighted material.
Specific Absorption Rate (SAR) certification
information
Your device conforms to European Union (EU) standards that limit
human exposure to radio frequency (RF) energy emitted by radio and
telecommunications equipment. These standards prevent the sale of mobile
devices that exceed a maximum exposure level (known as the Specific
Absorption Rate, or SAR) of 2.0W/kg.
During testing, the maximum SAR recorded for this model was 0.573W/kg. In
normal use, the actual SAR is likely to be much lower, as the device has been
designed to emit only the RF energy necessary to transmit a signal to the
nearest base station. By automatically emitting lower levels when possible,
your device reduces your overall exposure to RF energy.
The Declaration of Conformity statement at the back of this manual
demonstrates your device’s compliance with the European Radio & Terminal
Telecommunications Equipment (R&TTE) directive. For more information about
the SAR and related EU standards, visit the Samsung website.Safety precautions
140
Correct disposal of this product
(Waste Electrical & Electronic Equipment)
(Applicable in the European Union and other European countries
with separate collection systems)
This marking on the product, accessories or literature indicates
that the product and its electronic accessories (e.g. charger,
headset, USB cable) should not be disposed of with other
household waste at the end of their working life.
To prevent possible harm to the environment or human health
from uncontrolled waste disposal, please separate these items from other types
of waste and recycle them responsibly to promote the sustainable reuse of
material resources.
Household users should contact either the retailer where they purchased this
product, or their local government office, for details of where and how they can
take these items for environmentally safe recycling.
Business users should contact their supplier and check the terms and
conditions of the purchase contract. This product and its electronic accessories
should not be mixed with other commercial wastes for disposal.
This EEE is compliant with RoHS.
Correct disposal of batteries in this product
(Applicable in the European Union and other European countries
with separate battery return systems)
This marking on the battery, manual or packaging indicates
that the batteries in this product should not be disposed of with
other household waste at the end of their working life. Where
marked, the chemical symbols Hg, Cd or Pb indicate that the
battery contains mercury, cadmium or lead above the reference levels in EC
Directive 2006/66. If batteries are not properly disposed of, these substances
can cause harm to human health or the environment.
To protect natural resources and to promote material reuse, please separate
batteries from other types of waste and recycle them through your local, free
battery return system.Safety precautions
141
Disclaimer
Some content and services accessible through this device belong to third
parties and are protected by copyright, patent, trademark and/or other
intellectual property laws. Such content and services are provided solely for
your personal noncommercial use. You may not use any content or services in a
manner that has not been authorised by the content owner or service provider.
Without limiting the foregoing, unless expressly authorised by the applicable
content owner or service provider, you may not modify, copy, republish,
upload, post, transmit, translate, sell, create derivative works, exploit, or
distribute in any manner or medium any content or services displayed through
this device.
“THIRD PARTY CONTENT AND SERVICES ARE PROVIDED “AS IS.” SAMSUNG
DOES NOT WARRANT CONTENT OR SERVICES SO PROVIDED, EITHER EXPRESSLY
OR IMPLIEDLY, FOR ANY PURPOSE. SAMSUNG EXPRESSLY DISCLAIMS ANY
IMPLIED WARRANTIES, INCLUDING BUT NOT LIMITED TO, WARRANTIES OF
MERCHANTABILITY OR FITNESS FOR A PARTICULAR PURPOSE. SAMSUNG
DOES NOT GUARANTEE THE ACCURACY, VALIDITY, TIMELINESS, LEGALITY, OR
COMPLETENESS OF ANY CONTENT OR SERVICE MADE AVAILABLE THROUGH
THIS DEVICE AND UNDER NO CIRCUMSTANCES, INCLUDING NEGLIGENCE,
SHALL SAMSUNG BE LIABLE, WHETHER IN CONTRACT OR TORT, FOR ANY
DIRECT, INDIRECT, INCIDENTAL, SPECIAL OR CONSEQUENTIAL DAMAGES,
ATTORNEY FEES, EXPENSES, OR ANY OTHER DAMAGES ARISING OUT OF, OR IN
CONNECTION WITH, ANY INFORMATION CONTAINED IN, OR AS A RESULT OF
THE USE OF ANY CONTENT OR SERVICE BY YOU OR ANY THIRD PARTY, EVEN IF
ADVISED OF THE POSSIBILITY OF SUCH DAMAGES.”
Third party services may be terminated or interrupted at any time, and
Samsung makes no representation or warranty that any content or service will
remain available for any period of time. Content and services are transmitted
by third parties by means of networks and transmission facilities over which
Samsung has no control. Without limiting the generality of this disclaimer,
Samsung expressly disclaims any responsibility or liability for any interruption
or suspension of any content or service made available through this device.
Samsung is neither responsible nor liable for customer service related to the
content and services. Any question or request for service relating to the content
or services should be made directly to the respective content and service
providers.Index
142
Index
access codes 125
alarms
creating 106
deleting 107
stopping 106
battery
charging 13
installing 11
Bluetooth
activating 95
finding and pairing with
devices 96
receiving data 97
sending data 96
brightness, display 35
calculator 107
calendar
creating events 80
viewing events 81
call forwarding 51
call log 52
calls
answering 48
forwarding 51
international numbers 48
making 47
multiparty 49
rejecting 48
using headset 48
using options 49
viewing missed 50
waiting 52
call waiting 52
camera
capturing photos 62
customising camcorder 67
customising camera 65
recording videos 66
connections
Bluetooth 95
PC 102
VPN 104
WLAN 97
contacts
copying 79
creating 76
finding 77
importing or exporting 79
setting speed dial 77
device
customising 33
indicator icons 24
keys 20
layout 19
notifications panel 30
settings 113
turning on or off 18
display language 121
downloads
applications 43
files 44
managing 107
email
sending 58Index
143
organising applications 32
messages
accessing voice mail 55
sending email 58
sending multimedia 53
sending text 53
setting email accounts 57
multimedia messages
sending 53
viewing 54
music player
adding files 71
playing music 71
news & weather 94
PC connections
mass storage 103
Samsung Kies 102
phonebook
creating contacts 76
creating groups 78
creating your namecard 78
finding contacts 77
photos
capturing 62
capturing by scene 63
capturing in smile shot 64
capturing panoramic 64
viewing 69
PIN lock 37
Samsung Apps 92
Samsung Kies 102
settings
about phone 124
setting accounts 57
viewing 59
file manager 108
find my mobile 37
fixed dialling number
mode 51
flight mode 18
FM radio
listening to 73
saving stations 74
gallery
file formats 68
playing videos 69
viewing photos 69
Google Mail 55
Google Maps 87
Google Search 108
Google Talk 59
idle screen
adding items 29
adding panels 30
internet
see web browser
memory card
formatting 17
inserting 15
removing 16
memos
creating 82
viewing 82
menu screen
accessing 31Index
144
USIM card
installing 11
locking 37
video player 69
videos
playing 69
recording 66
voice mail 55
voice memos
playing 83
recording 83
voice search 112
VPN connections
connecting to 105
creating 104
web browser
adding bookmarks 86
browsing web pages 84
WLAN
activating 98
finding and connecting to
networks 98
YouTube
uploading videos 92
watching videos 91
accessibility 124
accounts and sync 120
applications 119
call settings 115
date and time 124
display 117
locale and text 121
location and security 118
privacy 121
SD card and phone
storage 121
sound 116
voice input and output 123
wireless and networks 113
silent mode 34
SIM card
installing 11
locking 37
Social Hub 60
synchronisation
with web accounts 45
task manager 112
text input 40
text memos 82
text messages
sending 53
viewing 54
time and date, set 33
touch screen
locking 28
using 26
unpack 10Declaration of Conformity (R&TTE)
We, Samsung Electronics
declare under our sole responsibility that the product
GSM WCDMA BT/Wi-Fi Mobile Phone : GT-B5512
to which this declaration relates, is in conformity with the following standards and/or
other normative documents.
SAFETY EN 60950-1 : 2006 + A1:2010
SAR EN 50360 : 2001 / AC 2006
EN 62209-1 : 2006
EN 62479 : 2010
EMC EN 301 489-01 V1.8.1 (04-2008)
EN 301 489-07 V1.3.1 (11-2005)
EN 301 489-17 V2.1.1 (05-2009)
EN 301 489-24 V1.5.1 (10-2010)
RADIO EN 301 511 V9.0.2 (03-2003)
EN 301 908-1 V4.2.1 (03-2010)
EN 301 908-2 V4.2.1 (03-2010)
EN 300 328 V1.7.1 (10-2006)
We hereby declare that [all essential radio test suites have been carried out and that]
the above named product is in conformity to all the essential requirements of Directive
1999/5/EC.
The conformity assessment procedure referred to in Article 10 and detailed in Annex[IV]
of Directive 1999/5/EC has been followed with the involvement of the following Notified
Body(ies):
BABT, Forsyth House,
Churchfield Road,
Walton-on-Thames,
Surrey, KT12 2TD, UK*
Identification mark: 0168
The technical documentation kept at :
Samsung Electronics QA Lab.
which will be made available upon request.
(Representative in the EU)
Samsung Electronics Euro QA Lab.
Blackbushe Business Park, Saxony Way,
Yateley, Hampshire, GU46 6GG, UK*
2011.11.25 Joong-Hoon Choi / Lab Manager
(place and date of issue) (name and signature of authorised person)
* It is not the address of Samsung Service Centre. For the address or the phone number of Samsung
Service Centre, see the warranty card or contact the retailer where you purchased your product.Some of the contents in this manual may differ from your
device depending on the software of the device or your service
provider.
www.samsung.com English (EU). 04/2012. Rev. 1.1
To install Kies (PC Sync)
1. Download the latest version of Kies from the
Samsung website (www.samsung.com/kies) and
install it on your PC.
2. Using a USB cable, connect your device to your PC.
Samsung Kies will launch automatically.
Refer to the Kies help for more information.
GT-I9100
user manualUsing this manual
2
Using this manual
Thank you for purchasing this Samsung mobile device.
This device will provide you with high quality mobile
communication and entertainment based on Samsung’s
exceptional technology and high standards.
This user manual has been specially designed to guide you
through the functions and features of your device.
Read me first
● Please read all safety precautions and this manual carefully
before using your device to ensure safe and proper use.
● The descriptions in this manual are based on the default
settings of your device.
● Images and screenshots used in this user manual may differ
in appearance from the actual product.
● Content in this user manual may differ from the product,
or from software provided by service providers or carriers,
and is subject to change without prior notice. Refer to
www.samsung.com for the latest version of the user
manual.
● Available features and additional services may vary by
device, software, or service provider.
● Formatting and delivery of this user manual is based
on Google Android operating systems and may vary
depending on the user’s operating system.
● Applications and their functions may vary by country,
region, or hardware specifications. Samsung is not liable for
performance issues caused by third-party applications.
● Samsung is not liable for performance issues or
incompatibilities caused by user editing of registry settings.Using this manual
3
● You may upgrade your mobile device’s software by
accessing www.samsung.com.
● Sound sources, wallpapers, and images provided in this
device are licenced for limited use between Samsung
and their respective owners. Extracting and using
these materials for commercial or other purposes is an
infringement of copyright laws. Samsung is not liable for
such copyright infringement by the user.
● Please keep this manual for future reference.
Instructional icons
Before you start, familiarise yourself with the icons you will
see in this manual:
Warning—situations that could cause injury to
yourself or others
Caution—situations that could cause damage to
your device or other equipment
Note—notes, usage tips, or additional information
► Refer to—pages with related information; for
example: ► p. 12 (represents “see page 12”)
→ Followed by—the order of options or menus you
must select to perform a step; for example: In Idle
mode, open the application list and select Settings
→ About phone (represents Settings, followed by
About phone)
[ ] Square brackets—device keys; for example: [ ]
(represents the Menu key)Using this manual
4
Copyright
Copyright © 2012 Samsung Electronics
This user manual is protected under international copyright
laws.
No part of this user manual may be reproduced, distributed,
translated, or transmitted in any form or by any means,
electronic or mechanical, including photocopying, recording,
or storing in any information storage and retrieval system,
without the prior written permission of Samsung Electronics.
Trademarks
● SAMSUNG and the SAMSUNG logo are registered
trademarks of Samsung Electronics.
● The Android logo, Google™, Google Maps™, Google
Mail™, YouTube™, Android Market™, and Google Talk™
are trademarks of Google, Inc.
● Bluetooth® is a registered trademark of the Bluetooth SIG,
Inc. worldwide.
● Oracle and Java are registered trademarks of Oracle and/
or its affiliates. Other names may be trademarks of their
respective owners.
● Windows Media Player® is a registered trademark of
Microsoft Corporation.
● Wi-Fi®, Wi-Fi Protected Setup™, Wi-Fi Direct™, Wi-Fi
CERTIFIED™, and the Wi-Fi logo are registered trademarks
of the Wi-Fi Alliance.Using this manual
5
● DivX®, DivX Certified®, and
associated logos are trademarks
of Rovi Corporation or its
subsidiaries and are used under
licence.
● All other trademarks and copyrights are the property of
their respective owners.
ABOUT DIVX VIDEO
DivX® is a digital video format created by DivX, LLC, a
subsidiary of Rovi Corporation. This is an official DivX
Certified® device that plays DivX video. Visit www.divx.com
for more information and software tools to convert your files
into DivX videos.
DivX Certified® to play DivX® video up to HD 720p, including
premium content
May play DivX® video up to HD 1080p
ABOUT DIVX VIDEO-ON-DEMAND
This DivX Certified® device must be registered in order to play
purchased DivX Video-on-Demand (VOD) movies. To obtain
your registration code, locate the DivX VOD section in your
device setup menu. Go to vod.divx.com for more information
on how to complete your registration.Contents
6
Contents
Assembling ............................................................. 10
Unpack .................................................................................... 10
Install the SIM or USIM card and battery ........................ 11
Charge the battery ............................................................... 12
Insert a memory card .......................................................... 15
Attach a hand strap .............................................................. 17
Getting started ....................................................... 18
Turn your device on and off ............................................... 18
Get to know your device ..................................................... 19
Use the touch screen ........................................................... 23
Lock or unlock the touch screen and keys ..................... 24
Get to know the idle screen ............................................... 24
Access applications .............................................................. 27
Customise your device ........................................................ 29
Enter text ................................................................................ 34
Download applications from Android Market .............. 38
Download files from the web ............................................ 39
Synchronise data .................................................................. 40
Communication ..................................................... 42
Calling ..................................................................................... 42
Messaging .............................................................................. 48
Google Mail ............................................................................ 50
Email ........................................................................................ 52
Talk ........................................................................................... 54
Messenger .............................................................................. 55Contents
7
Google+ .................................................................................. 55
Social Hub .............................................................................. 56
IM .............................................................................................. 56
Entertainment ........................................................ 57
Camera .................................................................................... 57
Video Player ........................................................................... 67
Gallery ..................................................................................... 68
Photo editor ........................................................................... 70
Music ....................................................................................... 71
Music Hub .............................................................................. 74
FM radio .................................................................................. 74
Game Hub .............................................................................. 77
Personal information ............................................ 78
Contacts .................................................................................. 78
Calendar ................................................................................. 82
Task .......................................................................................... 83
Memo ...................................................................................... 84
Voice recorder ....................................................................... 85
Web .......................................................................... 86
Internet ................................................................................... 86
Maps ........................................................................................ 89
Latitude ................................................................................... 91
Places ....................................................................................... 91
Navigation .............................................................................. 92
Search ...................................................................................... 92
YouTube .................................................................................. 93
Samsung Apps ...................................................................... 94Contents
8
Market ..................................................................................... 95
Readers Hub .......................................................................... 95
News & Weather .................................................................... 96
Connectivity ........................................................... 97
Bluetooth ................................................................................ 97
Wi-Fi ......................................................................................... 99
Wi-Fi Direct ........................................................................... 102
AllShare ................................................................................. 103
Mobile network sharing ................................................... 105
GPS ......................................................................................... 107
PC connections ................................................................... 108
VPN connections ................................................................ 110
Tools ....................................................................... 112
Clock ...................................................................................... 112
Calculator ............................................................................. 114
Downloads ........................................................................... 115
Kies air ................................................................................... 116
Mini diary ............................................................................. 117
My files .................................................................................. 118
Polaris Office ........................................................................ 118
Task Manager ...................................................................... 119
Voice command .................................................................. 120
Voice talk .............................................................................. 120
Settings .................................................................. 121
Access the Settings menu ................................................ 121
Wi-Fi ....................................................................................... 121
Bluetooth .............................................................................. 121Contents
9
Data usage ........................................................................... 121
More... .................................................................................... 121
Call .......................................................................................... 123
Sound .................................................................................... 125
Display .................................................................................. 125
Power saving ....................................................................... 127
Storage .................................................................................. 127
Battery ................................................................................... 128
Applications ......................................................................... 128
Accounts and sync .............................................................. 128
Location services ................................................................ 128
Security ................................................................................. 129
Language and input .......................................................... 131
Back up and reset ............................................................... 135
Dock ....................................................................................... 135
Date and time ...................................................................... 136
Accessibility ......................................................................... 136
Motion ................................................................................... 137
Developer options ............................................................. 137
About phone ....................................................................... 138
Troubleshooting .................................................. 139
Safety precautions ............................................... 145
Index ...................................................................... 155Assembling
10
Assembling
Unpack
Check your product box for the following items:
● Mobile device
● Battery
● microSIM holder
1
● Quick start guide
Use only Samsung-approved software. Pirated or illegal
software may cause damage or malfunctions that are
not covered by your manufacturer's warranty.
● The items supplied with your device may vary
depending on the software and accessories available
in your region or offered by your service provider.
● You can obtain additional accessories from your local
Samsung dealer.
● The supplied accessories perform best for your device.
● Accessories other than the supplied ones may not be
compatible with your device.
1. The microSIM holder allows you to use a microSIM card, which
is a smaller sized version of a standard SIM card, in your device.
This accessory may be unavailable depending on your region.Assembling
11
Install the SIM or USIM card and battery
When you subscribe to a cellular service, you will receive
a Subscriber Identity Module (SIM) card, with subscription
details, such as your personal identification number (PIN) and
optional services. To use UMTS or HSDPA services, you can
purchase a Universal Subscriber Identity Module (USIM) card.
To install the SIM or USIM card and battery,
1 If the device is on, press and hold the Power/Lock key and
select Power off→ OK to turn it off.
2 Remove the back cover.
Be careful not to damage your fingernails when you
remove the back cover.
3 Insert the SIM or USIM card with the gold-coloured
contacts facing down.
Do not insert a memory card into the SIM card slot.Assembling
12
4 Insert the battery.
5 Replace the back cover.
Charge the battery
Before using the device for the first time, you must charge the
battery.
You can charge the device with a travel adapter or by
connecting the device to a PC with a PC data cable.
Use only Samsung-approved chargers and cables.
Unauthorised chargers or cables can cause batteries to
explode or damage your device.Assembling
13
● When your battery is low, the device will emit a
warning tone and display a low battery message. The
battery icon will also be empty. If the battery level
becomes too low, the device will automatically power
off. Recharge your battery to continue using your
device.
● If the battery is completely discharged, you cannot
turn on the device, even with the travel adapter
connected. Allow a depleted battery to charge for a
few minutes before you try to turn on the device.
› Charge with a travel adapter
1 Plug the small end of the travel adapter into the
multifunction jack.
Connecting the travel adapter improperly may cause
serious damage to the device. Any damage caused by
misuse is not covered by the warranty.Assembling
14
2 Plug the large end of the travel adapter into a power
outlet.
● You can use the device while it is charging, but it may
take longer to fully charge the battery.
● While the device is charging, the touch screen may
not function due to an unstable power supply. If this
happens, unplug the travel adapter from the device.
● While charging, the device may heat up. This is
normal and should not affect your device’s lifespan or
performance.
● If your device is not charging properly, bring your
device and the charger to a Samsung Service Centre.
3 When the battery is fully charged (the battery icon is no
longer moving), unplug the travel adapter from the device
and then from the power outlet.
Do not remove the battery before removing the travel
adapter. Doing this may cause damage to the device.
To save energy, unplug the travel adapter when not in
use. The travel adapter does not have a power switch,
so you must unplug the travel adapter from the outlet
when not in use to avoid wasting power. The travel
adapter should remain close to the socket when in use.
› Charge with a PC data cable
Before charging, ensure that your PC is turned on.
1 Plug one end (micro-USB) of the PC data cable into the
multifunction jack.Assembling
15
2 Plug the other end of the PC data cable into a USB port on
a PC.
Depending on the type of PC data cable you are using,
it may take some time before charging begins.
3 When the battery is fully charged (the battery icon is no
longer moving), unplug the PC data cable from the device
and then from the PC.
Insert a memory card
To store additional multimedia files, you must insert
a memory card. Your device accepts microSD™ or
microSDHC™ memory cards with maximum capacities of
32 GB (depending on memory card manufacturer and type).
Samsung uses approved industry standards for memory
cards, but some brands may not be fully compatible
with your device. Using an incompatible memory card
may damage your device or the memory card and can
corrupt data stored on the card.
● Your device supports only the FAT file structure for
memory cards. If you insert a card formatted with
a different file structure, your device will ask you to
reformat the memory card.
● Frequent writing and erasing of data will shorten the
lifespan of memory cards.
● When you insert a memory card in your device,
the file directory of the memory card will appear in
the external_sd folder under the internal memory
(moviNAND™).Assembling
16
1 Remove the back cover and battery.
2 Insert a memory card with the gold-coloured contacts
facing down.
3 Push the memory card in the memory card slot until it
locks in place.
4 Replace the battery and back cover.
› Remove the memory card
Before removing a memory card, first unmount it for safe
removal.
1 In Idle mode, select Applications→ Settings→ Storage
→ Unmount SD card→ OK.
2 Remove the back cover and battery.
3 Push the memory card gently until it disengages from the
device.
4 Pull the memory card out of the memory card slot.
5 Remove the memory card.
6 Replace the battery and back cover.
Do not remove a memory card while the device is
transferring or accessing information, as this could
result in loss of data or damage to the memory card or
device.Assembling
17
› Format the memory card
Formatting your memory card on a PC may cause
incompatibilities with your device. Format the memory card
only on the device.
In Idle mode, select Applications→ Settings→ Storage→
Erase SD card→ Erase SD card→ Erase everything.
Before formatting the memory card, remember to make
backup copies of all important data stored on your
device. The manufacturer’s warranty does not cover loss
of data resulting from user actions.
Attach a hand strap
1 Remove the back cover.
2 Slide a hand strap through the slot and hook it over the
small projection.
3 Replace the back cover.Getting started
18
Getting started
Turn your device on and off
To turn on your device,
1 Press and hold the Power/Lock key.
2 If you turn on your device for the first time, follow the onscreen instructions to set up your device.
To turn off your device, press and hold the Power/Lock key
and then select Power off→ OK.
● Follow all posted warnings and directions from official
personnel when in areas where the use of wireless
devices is restricted, such as aeroplanes and hospitals.
● To use your device's non-network services only,
switch to Flight mode. Press and hold the Power/Lock
key and select Flight mode. Getting started
19
Get to know your device
›Device layout
1. Active only when you use the speakerphone feature or record
videos.
Front camera lens
Proximity sensor
Home key
Volume key
Light sensor
Menu key
Multifunction jack
Earpiece
Touch screen
Back key
Mouthpiece
Mouthpiece
1Getting started
20
› Keys
Key Function
Power/
Lock
Turn on the device (press and hold);
Access the quick menus (press and
hold); Lock the touch screen.
Menu
Open a list of options available on the
current screen; In Idle mode, open the
search application (press and hold);
Open the search input window while
using some applications (press and
hold).
Home
Return to the idle screen; Open the list
of recent applications (press and hold).
Back Return to the previous screen.
Volume Adjust the device’s volume.
Headset jack
Internal antenna
Rear camera lens
Power/Lock key
Speaker
Back cover
FlashbulbGetting started
21
›Indicator icons
Icons shown on the display may vary depending on
your region or service provider.
Icon Definition
No signal
Signal strength
GPRS network connected
EDGE network connected
UMTS network connected
Open WLANs available
WLAN connected
Wi-Fi Direct connected
Bluetooth activated
Bluetooth headset connected
GPS activated
Call in progress
Call on hold
Speakerphone activated
Missed call
Uploading data
Downloading dataGetting started
22
Icon Definition
Call diverting activated
Connected to PC
USB tethering activated
WLAN hotspot activated
No SIM or USIM card
New text or multimedia message
New email message
New voice mail message
Alarm activated
Event notification
Roaming (outside of normal service area)
Silent mode activated
Vibration mode activated
Flight mode activated
Music playback in progress
Music playback paused
FM radio turned on in the background
Error occurred or caution required
Battery power level
10:00 Current timeGetting started
23
Use the touch screen
Your device’s touch screen lets you easily select items or
perform functions. Learn basic actions to use the touch
screen.
● To avoid scratching the touch screen, do not use
sharp tools.
● Do not allow the touch screen to come into contact
with other electrical devices. Electrostatic discharges
can cause the touch screen to malfunction.
● Do not allow the touch screen to come into contact
with water. The touch screen may malfunction in
humid conditions or when exposed to water.
● For optimal use of the touch screen, remove the
screen protection film before using your device.
● Your touch screen has a layer that detects small
electrical charges emitted by the human body. For
best performance, tap the touch screen with your
fingertip. The touch screen will not react to touches of
sharp tools, such as a stylus or pen.
Control your touch screen with the following actions:
● Tap: Touch once with your finger to select or launch a menu,
option, or application.
● Tap and hold: Tap an item and hold it for more than
2 seconds to open a pop-up option list.
● Drag: Tap and drag your finger up, down, left, or right to
move to items on lists.
● Drag and drop: Tap and hold your finger on an item, and
then drag your finger to move the item.Getting started
24
● Double-tap: Tap twice quickly with your finger to zoom in
or out while viewing photos or web pages.
● Your device turns off the touch screen when you do
not use the device for a specified period. To turn on
the screen, press the Power/Lock key or the Home
key.
● You can also adjust the backlight time. In Idle mode,
open the application list and select Settings→
Display→ Screen timeout.
Lock or unlock the touch screen and keys
You can lock the touch screen and keys to prevent any
unwanted device operations.
To lock, press the Power/Lock key. To unlock, turn on the
screen by pressing the Power/Lock key or the Home key, tap
anywhere on the screen, and then drag your finger outside of
the large circle.
Get to know the idle screen
When the device is in Idle mode, you will see the idle screen.
From the idle screen, you can view your device’s status and
access applications.
The idle screen has multiple panels. Scroll left or right to
a panel of the idle screen. You can also select a dot at the
bottom of the screen to move to the corresponding panel of
the idle screen directly.Getting started
25
› Add items to the idle screen
You can customise the idle screen by adding shortcuts to
applications or items in applications, widgets, or folders. To
add items to the idle screen,
1 Press [ ] → Add or tap and hold the empty area on the
idle screen.
2 Select the item category → an item:
● Widgets: Add widgets to the idle screen.
● Shortcuts: Add shortcuts to items, such as applications,
bookmarks, and contacts.
● Folders: Create a new folder or add folders for your
contacts.
● Wallpapers: Set a background image.
›Move items on the idle screen
1 Tap and hold an item to move.
2 Drag the item to the location you want.
› Remove items from the idle screen
1 Tap and hold an item to remove.
The trash bin appears at the bottom of the idle screen.
2 Drag the item to the trash bin.
3 When the item turns red, release the item.Getting started
26
›Use the shortcuts panel
In Idle mode or while using an application, tap the indicator
icons area and drag your finger down to open the shortcuts
panel. You can activate or deactivate wireless connection
features and access a list of notifications, such as messages,
calls, events or processing status. To hide the list, drag the
bottom of the list up.
From the shortcuts panel, you can use the following options:
● Wi-Fi: Activate or deactivate the WLAN connection feature.
► p. 100
● Bluetooth: Activate or deactivate the Bluetooth wireless
connection feature. ► p. 97
● GPS: Activate or deactivate the GPS feature.
● Silent mode: Activate or deactivate Silent mode.
● Auto rotation: Activate or deactivate the auto rotation.
Available options may vary depending on your region
or service provider.
› Add or remove panels to the idle screen
You can add or remove panels of the idle screen to organise
widgets according to your preferences and needs.
1 In Idle mode, press [ ] → Edit.
You can also place your two fingers on the screen and
pinch to switch to Edit mode.
2 Add or remove panels by using the following features:
● To remove a panel, tap and hold the thumbnail of a
panel and drag it to the trash bin at the bottom of the
screen.
● To add a new panel, select .
● To change the order of the panels, tap and hold the
thumbnail of a panel and drag it to the location you
want.
3 When you are finished, press [ ].Getting started
27
Access applications
To access your device’s applications,
1 In Idle mode, select Applications to access the application
list.
2 Scroll left or right to another application screen.
You can also select a dot at the bottom of the screen to
move to the corresponding main menu screen directly.
3 Select an application.
● When you use applications provided by Google, you
must have a Google account. If you do not have a
Google account, sign up for a Google account.
● You can add a shortcut to an application by tapping
and holding the application icon from the application
list. You can move the icon to the location you want
on the idle screen.
4 Press [ ] to return to the previous screen; Press the Home
key to return to the idle screen.
● If you rotate the device while using some features, the
interface will automatically rotate as well. To prevent
the interface from rotating, open the shortcuts panel
and select Auto rotation.
● While using the device, you can capture an image of a
screen by pressing and holding the Volume key down
and the Power/Lock key simultaneously. The image
will be saved in My files→ Pictures→ Screenshots.Getting started
28
› Organise applications
You can reorganise the applications in the application list by
changing their order or grouping them into categories to suit
your preferences and needs.
1 In the application list, press [ ] → Edit→ OK.
2 Tap and hold an application.
3 Drag the application icon to the location you want.
You can move an application icon to another main menu
screen. You can also move most-used applications next to
Home.
4 Press [ ] → Save.
To add a folder or panel to the menu screen,
1 In the application list, press [ ] → Edit.
2 Tap and hold an application.
3 Drag the application icon to Add Folder or Add Page at
the bottom of the screen.
4 Repeat steps 2-3 to add more applications.
5 Drag Add Folder or Add Page to the menu screen.
A new folder or panel containing the applications is added
to the menu screen.
6 If you added a folder, enter a name and select OK.
7 Press [ ] → Save.
To change the order of the main menu screens,
1 In the application list, place your two fingers on the screen
and pinch.
2 Tap and hold the thumbnail of a screen and drag it to the
location you want.Getting started
29
› Access recent applications
1 Press and hold the Home key to open the list of
applications you have accessed recently.
2 Select an application to access.
›Use the task manager
Your device is a multitasking device. It can run more than
one application at the same time. However, multitasking
may cause hang-ups, freezing, memory problems, or
additional power consumption. To avoid these problems, end
unnecessary programs using the task manager.
1 In Idle mode, open the application list and select Task
Manager→ Active applications.
The list of all the applications currently running on your
device appears.
2 To close an application, select Exit.
To close all active applications, select Exit all.
Customise your device
Get more from your device by customising it to match your
preferences.
› Set the current time and date
1 In Idle mode, open the application list and select Settings
→ Date and time.
2 Set the time and date and change other options.Getting started
30
› Turn on or off the touch tone
In Idle mode, open the application list and select Settings→
Sound→ Touch sounds.
› Switch to the silent mode
To mute or unmute your device, do one of the following:
● Open the shortcuts panel from the top of the screen and
select Silent mode.
● Press and hold the Power/Lock key and select Silent mode.
● In Idle mode, open the application list and select Phone→
, and then tap and hold #.
› Change your ringtone
1 In Idle mode, open the application list and select Settings
→ Sound→ Phone ringtone.
2 Select a ringtone from the list and select OK.
› Select a wallpaper for the idle screen
1 In Idle mode, press [ ] → Wallpaper→ an option.
2 Select an image.
3 Select Save or Set wallpaper.
Samsung is not responsible for any use of default
images or wallpapers provided on your device.Getting started
31
› Adjust the brightness of the display
1 In Idle mode, open the application list and select Settings
→ Display→ Brightness.
2 Clear the check box next to Automatic brightness.
3 Drag the slider to adjust the level of brightness.
4 Select OK.
The brightness level of the display will affect how
quickly the device consumes battery power.
› Set a screen lock
You can lock the touch screen by activating the screen lock
feature. Your device will require the unlock code each time
you turn on the device or unlock the touch screen.
● If you forget your unlock code, bring your device to a
Samsung Service Centre to reset it.
● Samsung is not responsible for any loss of security
codes or private information or other damages
caused by illegal software.
Set an unlock pattern
1 In Idle mode, open the application list and select Settings
→ Security→ Screen lock→ Pattern.
2 See the on-screen instructions and example patterns and
select Next.
3 Draw a pattern by dragging your finger to connect at least
4 dots.
4 Select Continue.
5 Draw a pattern again to confirm.
6 Select Confirm.Getting started
32
Set an unlock PIN code
1 In Idle mode, open the application list and select Settings
→ Security→ Screen lock→ PIN.
2 Enter a new PIN (numeric) and select Continue.
3 Enter the PIN again and select OK.
Set an unlock password
1 In Idle mode, open the application list and select Settings
→ Security→ Screen lock→ Password.
2 Enter a new password (alphanumeric) and select
Continue.
3 Enter the password again and select OK.
Set a face detection unlock
1 In Idle mode, open the application list and select Settings
→ Security→ Screen lock→ Face unlock.
2 Select Set it up→ Continue.
3 Adjust the device to fit your face inside the figure.
4 When your face is captured correctly, select Continue.
5 Complete the setup of the secondary unlock code.Getting started
33
› Lock your SIM or USIM card
You can lock your device by activating the PIN supplied with
your SIM or USIM card.
1 In Idle mode, open the application list and select Settings
→ Security→ Set up SIM card lock→ Lock SIM card.
2 Enter your PIN and select OK.
Once the PIN lock is enabled, you must enter the PIN each
time you turn on the device.
● If you enter an incorrect PIN too many times, your SIM
or USIM card will be blocked. You must enter a PIN
unlock key (PUK) to unblock the SIM or USIM card.
● If you block your SIM or USIM card by entering an
incorrect PUK, bring the card to your service provider
to unblock it.
› Activate the Find my mobile feature
When someone inserts a new SIM or USIM card in your
device, the Find my mobile feature will automatically send the
contact number to specified recipients to help you locate and
recover your device.
To use this feature, you need a Samsung account for
controlling the device from the web remotely.
1 In Idle mode, open the application list and select Settings
→ Security→ SIM Change Alert.
2 Enter your email address and password for your Samsung
account and select Sign in.
To create a Samsung account, select Sign up.Getting started
34
3 Select Alert message recipients.
4 Enter the password for your Samsung account again and
select Confirm.
5 Enter a phone number including a country code (with +).
6 Enter the text message to be sent to the recipients.
7 Select Done.
Enter text
You can enter text by selecting characters on the virtual
keypad or by inputting handwriting on the screen.
You cannot enter text in some languages. To enter text,
you should change the writing language to one of the
supported languages. ► p. 131
› Change the keyboard type
You can change the keyboard type. Tap and hold and
select a keyboard type (Samsung keypad or Swype).
You can also enter text with your voice. Select Google voice
typing, and then select a language to use for the voice input
feature.
› Enter text using the Samsung keypad
1 Select → Portrait keypad types and select a text input
method.
You can select one of key input methods (QWERTY or
traditional keypad) or handwriting input methods.
2 Enter text by selecting alphanumeric keys or writing on
the screen.Getting started
35
You can also use the following keys:
6
5
7
8
1
2
3
4
Number Function
1 Change case.
2
Switch between Symbol/Number mode and
ABC mode.
3
Access the keypad settings; Change the
keyboard type (tap and hold).
4
Enter text by voice; This icon is available only
when you activate the voice input feature for
the Samsung keypad.
This feature may be unavailable
depending on the selected input
language.
5 Clear your input.
6 Start a new line.
7
Insert a full stop; Open the symbol panel (tap
and hold).
8 Insert a space.Getting started
36
› Enter text using the Swype keyboard
1 Select the first character of a word and drag your finger
to the second character without releasing the finger from
the screen.
2 Continue until you have finished the word.
3 Release the finger on the last character.
4 When the word displays correctly, select to insert
a space. If the correct word does not display, select an
alternative word from the list that appears.
5 Repeat steps 1-4 to complete your text.
● You can also tap the keys to enter text.
● You can tap and hold a key to enter characters on the
upper half of the key. When you tap and hold a key
until the character list appears, you can enter special
characters and symbols.Getting started
37
You can also use the following keys:
1
3
2
4
5
6
8
7
Number Function
1 Change case.
2
Show the alternative word list for the selected
characters; Access the keypad settings (tap and
hold).
3
Switch between Symbol/Number mode and
ABC mode.
4 Change the input language.
5 Clear your input.
6 Start a new line.
7
Enter text by voice.
This feature may be unavailable
depending on the selected input
language.
8 Insert a space.Getting started
38
› Copy and paste text
While you are entering text, you can use the copy and paste
feature to use text in other applications.
1 Tap and hold a passage of text.
2 Drag or to select the text to be copied.
3 Select to copy, or to cut the text onto the clipboard.
4 In another application, place the cursor where you want to
paste the text.
5 Select → Paste to insert the text from the clipboard into
the text field.
Download applications from Android
Market
Based on the Android platform, your device’s functionality
can be extended by installing additional applications.
Android Market provides you an easy and quick way to shop
for games and mobile applications.
● This feature may be unavailable depending on your
region or service provider.
● Your device will save user files from downloaded
applications to the internal moviNAND™ memory.
To save the files to the memory card, connect your
device to a PC and copy them from moviNAND to
memory card.Getting started
39
›Install an application
1 In Idle mode, open the application list and select Market
(Play Shop).
2 Select Accept when the terms and conditions appear.
3 Search for a file or application and download it.
›Uninstall an application
1 From the Android Market home screen, press [ ] → My
Apps.
2 Select the item you want to delete.
3 Select Uninstall→ OK.
Download files from the web
When you download files or web applications from the web,
your device saves them in a memory card.
Files you download from the web can include viruses
that will damage your device. To lessen your risk, only
download files from sources you trust.
Some media files include Digital Rights Management
to protect copyrights. This protection may prevent you
from downloading, copying, modifying, or transferring
some files.
To download files from the web,
1 In Idle mode, open the application list and select Internet.
2 Search for a file or application and download it.
To install applications downloaded from websites other than
Android Market, you must select Settings→ Security→
Unknown sources→ OK.Getting started
40
Synchronise data
You can synchronise data with various web servers and back
up or restore your data.
Once the synchronisation is completed, your device stays
connected to the web. If any change is made on the web,
the updated information will appear on your device and will
automatically begin synchronisation, and vice versa.
This feature may be unavailable depending on your
region or service provider.
› Set up a server account
1 In Idle mode, open the application list and select Settings
→ Accounts and sync.
2 Select Add account→ an account type.
3 Follow the on-screen instructions to complete the account
setup.
› Activate automatic sync
1 In Idle mode, open the application list and select Settings
→ Accounts and sync.
2 Select an account.
3 Select the applications you want to synchronise.
To exclude applications from automatic synchronisation, clear
the check boxes next to the applications you want.Getting started
41
› Synchronise data manually
1 In Idle mode, open the application list and select Settings
→ Accounts and sync.
2 Select an account.
3 Select Sync now. Your device will start synchronising the
data you set for synchronisation.Communication
42
Communication
Calling
Learn to use calling functions, such as making and answering
calls, using options available during a call or customising and
using call-related features.
›Make and answer a call
You can use the buttons or the touch screen when you make,
accept, end or reject calls.
● When you turn on the proximity sensor, your device
automatically turns off and locks the touch screen to
prevent accidental inputs when you hold the device
near your face. ► p. 124
● Static electricity discharged from your body or
clothing may interfere with the proximity sensor
during a call.
Make a call
1 In Idle mode, open the application list and select Phone
→ , and enter an area code and a phone number.
2 Select to make a voice call.
For a video call, select .
3 To end the call, select End call.
● Use the phonebook to save numbers you dial
frequently. ► p. 78
● To quickly access the call log to redial the numbers
you dialled recently, select Phone→ .Communication
43
Answer a call
1 When a call comes in, select and then drag your finger
outside of the large circle.
When the device is ringing, press the Volume key to
mute the ringtone.
2 To end the call, select End call.
Reject a call
When a call comes in, select and then drag your finger
outside of the large circle.
To send a message when you reject incoming calls, select
Reject call with message.
First set a text message to be sent to callers. In Idle
mode, open the application list and select Settings→
Call→ Set reject messages.
Call an international number
1 In Idle mode, open the application list and select Phone
→ , and tap and hold 0 to insert the + character.
2 Enter the complete number you want to dial (country
code, area code and phone number), and then select
to dial the number.
›Use a headset
By plugging a headset into the device, you can answer and
control calls hands-free:
● To answer a call, press the headset button.
● To reject a call, press and hold the headset button.
● To place a call on hold or retrieve a held call during a call,
press and hold the headset button.
● To end a call, press the headset button.Communication
44
›Use options during a voice call
You can use the following options while a voice call is in
progress:
● To adjust the voice volume, press the Volume key up or
down.
● To place a call on hold, select . To retrieve a held call,
select .
● To dial a second call, select Add call and then dial a new
number.
● To answer a second call, select and then drag your finger
outside of the large circle when a call waiting tone sounds.
The device asks whether to end or hold the first call. You
must subscribe to the call waiting service to use this feature.
● To open the dialling screen, select Keypad.
● To activate the speakerphone feature, select Speaker.
In noisy environments, you may have difficulty hearing
some calls while using the speakerphone feature. For
better audio performance, use the normal phone mode.
● To turn off the microphone so that the other party cannot
hear you, select Mute.
● To listen and talk to the other party via a Bluetooth headset,
select Headset.
● To open the phonebook, press [ ] → Contacts.
● To add a memo, press [ ] → Memo.
● To switch between the two calls, select Swap.
● To make a multiparty call (conference call), make or
answer a second call and select Merge when connected
to the second party. Repeat to add more parties. You must
subscribe to the multiparty call service to use this feature.Communication
45
›Use options during a video call
You can use the following options while a video call is in
progress:
● To switch between the front and rear camera lens, select
Switch Camera.
● To turn off the microphone so that the other party cannot
hear you, select Mute.
● To hide your image from the other party, press [ ] → Hide
me.
● To select an alternative image to be shown to the other
party, press [ ] → Outgoing image.
● To open the dialling screen, press [ ] → Dialpad.
● To listen and talk to the other party via a Bluetooth headset,
press [ ] → Switch to headset.
● To activate the speakerphone feature, press [ ] →
Speaker On/Off.
● To use the other party’s image, tap and hold the other
party’s image. You can capture an image of the screen or
record the video call.
› View and dial missed calls
Your device will display calls you have missed on the display.
To dial the number of a missed call, open the shortcuts panel
and select the missed call.
›Use additional features
You can use various other call-related features, such as auto
rejection, Fixed Dialling Number (FDN) mode, or call diverting
or barring.Communication
46
Set auto rejection
Use auto rejection to reject calls from certain numbers
automatically. To activate auto rejection and create auto
reject lists,
1 In Idle mode, open the application list and select Settings
→ Call→ Call rejection.
2 Select Auto reject mode→ an option.
Option Function
All numbers Reject all calls.
Auto reject
numbers
Reject calls from phone numbers on
the auto reject list.
3 Select Auto reject list.
4 Select Add.
5 Select an option under Match criteria (if necessary).
6 Enter a phone number and select Save.
7 To add more numbers, repeat steps 4-6.
Use Fixed Dialling Number (FDN) mode
In FDN mode, your device will restrict outgoing calls, except
for the numbers stored in the FDN list. To activate FDN mode,
1 In Idle mode, open the application list and select Settings
→ Call→ Additional settings→ Fixed Dialling
Numbers→ Enable FDN.
2 Enter the PIN2 supplied with your SIM or USIM card and
select OK.
3 Select FDN list and add contacts to be used in FDN mode.Communication
47
Set call forwarding
Call diverting is a network feature to send incoming calls to
another number that you specify. You can set this feature
separately for several conditions when you are not able to
answer calls, such as when you are already on the phone or
when you are outside of the service area.
1 In Idle mode, open the application list and select Settings
→ Call→ Call forwarding→ a call type.
2 Select a condition.
3 Enter a number to which calls will be forwarded and select
Enable.
Your setting will be sent to the network.
Set call barring
Call barring is a network feature to restrict certain types of
calling or to prevent others from making calls with your
device.
1 In Idle mode, open the application list and select Settings
→ Call→ Additional settings→ Call barring→ a call
type.
2 Select a call barring option.
3 Enter a call barring password and select OK.
Your setting will be sent to the network.
Set call waiting
Call waiting is a network feature to alert you of an incoming
call while you are on a previous call. This feature is available
only for voice calls.
In Idle mode, open the application list and select Settings→
Call→ Additional settings→ Call waiting. Your setting will
be sent to the network.Communication
48
› View call logs
You can view logs of your calls filtered by their types.
1 In Idle mode, open the application list and select Phone
→ .
2 Press [ ] → View by→ an option to sort the call logs.
From the call logs, you can make a call or send a
message directly to a contact by quickly flicking the
contact to the left or right.
3 Select a log to view its details.
From the detail view, you can dial the number, send
a message to the number or add the number to the
phonebook or black list.
Messaging
Learn to create and send text (SMS) or multimedia (MMS)
messages, and view or manage messages you have sent or
received.
You may incur additional charges for sending or
receiving messages while outside your home service
area. For details, contact your service provider.
› Send a text message
1 In Idle mode, open the application list and select
Messaging.
2 Select .Communication
49
3 Add recipients of your message.
● Enter phone numbers manually, separating them with a
semicolon or a comma.
● Select phone numbers from the lists by selecting .
4 Select Tap to enter message and enter your message
text.
To insert emoticons, press [ ] → Insert smiley.
5 Select Send to send the message.
› Send a multimedia message
1 In Idle mode, open the application list and select
Messaging.
2 Select .
3 Add recipients of your message.
● Enter phone numbers or email addresses manually,
separating them with a semicolon or a comma.
● Select phone numbers or email addresses from the lists
by selecting .
When you enter an email address, the device will
convert the message as a multimedia message.
4 Press [ ] → Add subject and add a subject for the
message.
5 Select Tap to enter message and enter your message
text.
To insert emoticons, press [ ] → Insert smiley.
6 Select and add an item.
You can select a file from the file list or create a new photo,
video, or sound.
7 Select Send to send the message.Communication
50
› View a text or multimedia message
1 In Idle mode, open the application list and select
Messaging.
Your messages are grouped into message threads by
contact, like a messenger.
2 Select a contact.
3 For a multimedia message, select a message to view the
details.
› Listen to voice mail messages
If you have set missed calls to be diverted to the voice mail
server, callers may leave voice messages when you do not
answer incoming calls. To access your voice mail inbox and
listen to voice mail messages,
1 In Idle mode, open the application list and select Phone
→ , and then tap and hold 1.
2 Follow the instructions from the voice mail server.
You must save the voice mail server number before
accessing the server. Your service provider can give you
the number.
Google Mail
You can retrieve new email messages from Google Mail™
to your Inbox. When you access this application, the Inbox
screen appears. The total number of unread messages
displays in the title bar and unread messages display in bold.
● This feature may be unavailable depending on your
region or service provider.
● This Google Mail menu may be labelled differently
depending on your service provider.Communication
51
› Send an email message
1 In Idle mode, open the application list and select Google
Mail.
2 Select .
3 Enter a name or address in the recipient field.
4 Enter a subject and message.
5 To attach an image file, press [ ] → Attach file→ a file.
6 Select to send the message.
› View email messages
1 In Idle mode, open the application list and select Google
Mail.
2 Select an email message.
From the message view, use the following options:
● To reply to the message, select .
● To reply to the message including all recipients, select →
Reply all.
● To forward the message to other people, select →
Forward.
● To view an attachment, select PREVIEW. To save it to your
device, select SAVE.
● To archive the message, select .
● To delete the message, select .
● To move to the previous or next message, scroll left or right.Communication
52
› Organise email by labels
You can organise your email by labelling your messages
or adding stars to mark important messages. You can sort
messages by label filter.
Add a label to a message
1 From the Inbox screen, tap and hold a message.
2 Select .
3 Select a label to add and select OK.
Add a star to a message
From the Inbox screen, select . The icon next to the
message is activated.
Filter messages
1 From the Inbox screen, select .
2 Select the label of the messages you want to view.
Email
Learn to send or view email messages via your personal or
company email account.
› Set up an email account
1 In Idle mode, open the application list and select Email.
2 Enter your email address and password.Communication
53
3 Select Next.
To set up an Exchange ActiveSync account, select
Microsoft Exchange ActiveSync.
4 Follow the on-screen instructions.
When you are finished setting up the email account, the email
messages are downloaded to your device. If you have created
more than two accounts, you can switch between email
accounts; Select an account name and select one you want to
retrieve messages from.
› Send an email message
1 In Idle mode, open the application list and select Email.
2 Select .
3 Add recipients of your message.
● Enter email addresses manually, separating them with a
semicolon or a comma.
● Select email addresses from the lists by selecting .
● To add more recipients, press [ ] → Add Cc/Bcc.
4 Select the subject field to enter a subject.
5 Select the text input field to enter your email text.
6 Select and attach a file.
You cannot attach Digital Rights Management (DRM)-
protected files.
7 Select to send the message.
If you are offline or outside your service area, the
message will be held in the message thread list until
you are online and in your service area.Communication
54
› View an email message
When you open an email account, you can view previously
retrieved emails offline or connect to the email server to view
new messages. After retrieving email messages, you can view
them offline.
1 In Idle mode, open the application list and select Email.
2 Press [ ] → Refresh to update the message list.
3 Select an email message.
From the message view, use the following options:
● To move to the next or previous message, select or .
● To reply to the message, select .
● To forward the message to other people, select .
● To delete the message, select .
● To save an attachment to your device, select the
attachment tab → .
Talk
Learn to chat with friends and family via Google Talk™.
This feature may be unavailable depending on your
region or service provider.
› Add friends to your friend list
1 In Idle mode, open the application list and select Talk.
The friend list shows all of your Google Talk contacts at a
glance.
2 Select .
3 Enter an email address of the friend and select DONE.
When your friend accepts the invitation, the friend is added to
your friend list.Communication
55
› Start a chat
1 In Idle mode, open the application list and select Talk.
2 Select a friend from the friend list. The chat screen opens.
3 Enter your message and select .
4 To end the chat, press [ ] → End chat.
Messenger
Learn to send and receive instant messages to friends and
family with the Google+ messenger instant messaging
service.
1 In Idle mode, open the application list and select
Messenger.
If you are launching this application for the first time,
follow the on-screen instructions to complete the
account setup.
2 Enter and send your message.
Google+
Learn to access the Google’s social network service. You can
create groups to share interests and thoughts or send and
receive instant messages, and upload your photos.
1 In Idle mode, open the application list and select
Google+.
If you are launching this application for the first time,
follow the on-screen instructions to complete the
account setup.
2 Select a social network feature.Communication
56
Social Hub
Learn to access Social Hub™, the integrated communication
application for Social Network Service (SNS), email, messages,
instant messages, contacts or calendar information. Visit
socialhub.samsungapps.com for more details.
1 In Idle mode, open the application list and select Social
Hub.
2 Check and use contents delivered from Social Hub.
IM
Learn to chat with friends and family from any of the universal
instant messengers.
1 In Idle mode, open the application list and select IM.
2 If you are launching this application for the first time,
select the check box next to I accept all the terms above
and select Agree.
3 Select Add account→ a messenger.
4 Enter your user name and password to sign in.
5 Chat with friends and family instantly.Entertainment
57
Entertainment
Camera
Learn how to capture and view photos and videos. You
can take photos at resolutions up to 3264 x 2448 pixels
(8 megapixels) and videos at resolutions up to
1920 x 1080 pixels.
● The camera automatically turns off when you do not
use it for a specified period.
● The memory capacity may differ depending on the
shooting scene or shooting conditions.
› Capture a photo
1 In Idle mode, open the application list and select Camera
to turn on the camera.
2 Aim the lens at the subject and make any necessary
adjustments.
1
2
4
6
5
3 Entertainment
58
Number Function
1 Change the camera settings.
2
Open the image viewer to view photos you
captured.
3
Use camera shortcuts.
● : Change the flash setting.
● : Switch between the front and rear
camera lenses.
You can add or remove shortcuts to
frequently used options. ► p. 67
4 View the default storage location.
5 Switch to the camcorder.
6 Capture a photo.
3 Press the Volume key to zoom in or out.
You can also tap the screen with two fingers and spread
them apart (move your fingers closer together to zoom
out).
The zoom function may be unavailable when shooting
in the highest resolution.
4 Tap where you want to focus on the preview screen.
The focus frame moves to the place you tap and changes
to green when the subject is in focus.
5 Select to take a photo.
The photo is saved automatically.Entertainment
59
After taking photos, select the image viewer icon to view the
taken photos.
● To view more photos, scroll left or right.
● To zoom in or out, place two fingers on the screen and
spread them apart (move your fingers closer together to
zoom out) or double-tap the screen.
● To send a photo to others, select Share.
● To delete a photo, select Delete.
● To set a photo as wallpaper or a caller ID image for a
contact, select More→ Set as.
● To rename a photo file, select More→ Rename.
› Capture a photo by using preset options for
various scenes
Your camera provides you with predefined settings for
various scenes. You can simply select the proper mode for
your shooting conditions and subjects.
For example, when you take photos at night, select the night
mode that uses an extended exposure.
1 In Idle mode, open the application list and select Camera
to turn on the camera.
2 Select → Scene mode→ a scene → [ ].
3 Make any necessary adjustments.
4 Select to take a photo.Entertainment
60
› Capture a photo in Self shot mode
You can take photos of yourself conveniently using the front
camera lens.
1 In Idle mode, open the application list and select Camera
to turn on the camera.
2 Select → Self portrait.
3 Make any necessary adjustments.
4 Select to take a photo.
› Capture a photo in Smile shot mode
Your camera can recognise people’s faces and help you take
photos of their smiling faces.
1 In Idle mode, open the application list and select Camera
to turn on the camera.
2 Select → Shooting mode→ Smile shot.
3 Make any necessary adjustments.
4 Select .
5 Aim the camera lens at your subject.
Your device recognises people in an image and detects
their smiles. When the subject smiles, the device
automatically takes a photo.
› Capture a beauty photo
You can hide facial imperfections using Beauty mode.
1 In Idle mode, open the application list and select Camera
to turn on the camera.
2 Select → Shooting mode→ Beauty.
3 Make any necessary adjustments.
4 Select to take a photo.Entertainment
61
› Capture a panoramic photo
You can take wide panoramic photos using Panorama
shooting mode. This mode is convenient for photographing
landscapes.
1 In Idle mode, open the application list and select Camera
to turn on the camera.
2 Select → Shooting mode→ Panorama.
3 Make any necessary adjustments.
4 Select to take the first photo.
5 Slowly move the device in any direction and align the
green frame with the viewfinder.
When you have aligned the green frame and viewfinder,
the camera will automatically take the next photo.
6 Repeat step 5 to complete the panoramic photo.
› Capture a photo of action
You can capture shots of a moving subject and then combine
them into a single photo that shows the action.
1 In Idle mode, open the application list and select Camera
to turn on the camera.
2 Select → Shooting mode→ Action shot.
3 Make any necessary adjustments.
4 Select to capture the first photo.
5 Move the device to follow the moving subject.
The device automatically captures the next photos.
6 Continue to follow the subject until the device has
captured all the shots necessary for the action photo.Entertainment
62
› Capture a photo in Cartoon mode
You can take photos with cartoon effects.
1 In Idle mode, open the application list and select Camera
to turn on the camera.
2 Select → Shooting mode→ Cartoon.
3 Make any necessary adjustments.
4 Select to take a photo.
› Customise camera settings
Before taking a photo, select to access the following
options:
Option Function
Edit shortcuts Edit shortcuts to frequently used options.
Self portrait
Switch between the front and rear camera
lenses.
Flash
Change the flash setting; You can
manually turn the flash on or off, or set
the camera to automatically use the flash
when needed.
Shooting
mode
Change the shooting mode.
Scene mode Change the scene mode.
Exposure value Adjust the exposure value.
Focus mode
Take close-up photos or set the camera to
focus on the subject or focus on human
faces automatically.
Timer
Select the length of the delay before the
camera takes a photo.Entertainment
63
Option Function
Effects
Apply a special effect, such as sepia or
black and white tones.
Resolution Change the resolution option.
White balance
Adjust the colour balance according to
lighting conditions.
ISO
Adjust the sensitivity of the camera
imaging sensor.
Metering Select a type of exposure metre.
Outdoor
visibility
Activate Outdoor visibility to select an
appropriate lighting condition.
Anti-Shake
Reduce blur caused by the device's
vibration or movement.
Auto contrast
Automatically adjust contrast between
your subject and background.
Blink detection
Set the camera to alert you when people
close their eyes.
Guidelines
Display the guidelines on the preview
screen.
Image quality Set the quality level for your photos.
GPS tag
Set the camera to include location
information for your photos. To use
this feature, you must activate location
services. ► p. 107
Save as flipped
Set the camera to flip the image
automatically when you take a photo with
the front camera lens.
Storage
Select a memory location for storing
captured photos.
Reset Reset menus and shooting options.Entertainment
64
› Record a video
1 In Idle mode, open the application list and select Camera
to turn on the camera.
2 Drag the slider to the camcorder to switch to the
camcorder.
3 Aim the lens at the subject and make any necessary
adjustments.
1
2
6
5
4
3
Number Function
1 Change the camcorder settings.
2
Open the image viewer to view videos you
recorded.
3
Use camcorder shortcuts.
● : Change the flash setting.
● : Change the recording mode or switch
between the front and rear camera lenses.
You can add or remove shortcuts to
frequently used options. ► p. 67Entertainment
65
Number Function
4
Check the camcorder status.
● : Length of video that can be
recorded (according to available memory)
● : Default storage location
5 Switch to the camera.
6 Record a video.
4 Press the Volume key to zoom in or out.
You can also tap the screen with two fingers and spread
them apart (move your fingers closer together to zoom
out).
The zoom function may be unavailable when recording
in the highest resolution.
5 Select to start recording.
6 Select to stop recording.
The video is saved automatically.
The camcorder may not be able to properly record
videos to a memory card with a slow transfer speed.
After recording videos, select the image viewer icon to view
the recorded videos.
● To view more videos, scroll left or right.
● To send a video to others, select Share.
● To delete a video, select Delete.
● To play a video, select or select More→ Play.
● To rename a video file, select More→ Rename.Entertainment
66
› Customise camcorder settings
Before recording a video, select to access the following
options:
Option Function
Edit shortcuts Edit shortcuts to frequently used options.
Flash
Change the flash setting; You can
manually turn the flash on or off.
Recording
mode
Change the recording mode.
Exposure value Adjust the exposure value.
Timer
Select the length of the delay before the
camera starts recording a video.
Effects
Apply a special effect, such as sepia or
black and white tones.
Resolution Change the resolution option.
White balance
Adjust the colour balance according to
lighting conditions.
Outdoor
visibility
Activate Outdoor visibility to select an
appropriate lighting condition.
Video quality Set the quality level for your videos.
Guidelines
Display the guidelines on the preview
screen.
Save as flipped
Set the camera to flip the image
automatically when you record a video
with the front camera lens.
Storage
Select a memory location for storing
recorded videos.
Reset Reset menus and shooting options.Entertainment
67
› Edit the shortcut icons
You can add or remove shortcuts to frequently used options.
1 From the preview screen, press [ ] → Edit shortcuts or
select → Edit shortcuts.
2 Tap and hold an icon from the option list and drag it to the
shortcut area.
To remove shortcuts, tap and hold an icon and drag it to
the option list.
3 Press [ ] to return to the preview screen.
Video Player
Learn to use the video player to play various kinds of videos.
The video player supports the following file formats: 3gp,
mp4, avi, wmv, flv, mkv, WebM (Codec: MPEG4, H.264, H.263,
Sorenson Spark, VC-1, DivX®, DivX3.11, WMV7/8, VP8).
● Some file formats are not supported depending on
the software of the device.
● If the file size exceeds the available memory, an error
can occur when you open files.
1 In Idle mode, open the application list and select Video
Player.
2 Select a video to play.
3 Control playback with the following icons:
Icon Function
Change a ratio of the video screen.
Play the video on other DLNA devices.
Skip backward; Scan backward in a file (tap
and hold).Entertainment
68
Icon Function
Pause playback; Select to resume
playback.
Skip forward; Scan forward in a file (tap and
hold).
Activate the 5.1 channel surround sound
system when a headset is connected.
Adjust the volume.
Gallery
Learn to view photos and play videos saved in your device’s
memory and memory card.
› Supported file formats
Type Format
Image bmp, gif, jpg, png
Video
3gp, mp4, avi, wmv, flv, mkv, WebM (Codec:
MPEG4, H.264, H.263, Sorenson Spark, VC-1,
DivX®, DivX3.11, WMV7/8, VP8).
● Avoid locking the device’s screen while playing a DivX
Video-On-Demand. Each time you lock the screen
while playing a DivX Video-On-Demand, one of your
available rental counts will be decremented.
● Some file formats are not supported depending on
the software of the device.
● If the file size exceeds the available memory, an error
can occur when you open files. Entertainment
69
› View a photo
1 In Idle mode, open the application list and select Gallery.
2 Select a folder.
3 To change the view mode, select or at the top right
of the screen.
4 Select a photo (with no icon) to view.
While viewing a photo, use the following options:
● To view more photos, scroll left or right.
● To zoom in or out, tap the screen with two fingers and
spread them apart (move your fingers closer together to
zoom out).
If you activated tilting motions, you can zoom in or out
by tapping and holding two points with your fingers
and then tilting the device back and forth.
● To send a photo to others, select Send via.
● To delete a photo, select Delete.
● To share a photo with others via AllShare or social network
services, press [ ] → Share via.
● To set a photo as wallpaper or a caller ID image for a
contact, press [ ] → Set as.
● To use additional features with a photo, press [ ] → More
and use the following options:
- Copy: Copy a photo file.
- Print: Print a photo using a WLAN or USB connection. Your
device is compatible only with some Samsung printers.
- Edit: Edit the photo. ► p. 70
- Crop: Crop an image from a photo.
- Motion: Access the settings to control motion recognition
of your device.
- Rotate left: Rotate a photo anti-clockwise.
- Rotate right: Rotate a photo clockwise.Entertainment
70
- Slideshow: Start a slideshow in the selected folder.
- Rename: Rename a photo file.
- Details: View photo details.
› Play a video
1 In Idle mode, open the application list and select Gallery.
2 Select a video (with the icon) to play.
3 Rotate the device to landscape view.
4 Control playback with the virtual keys. ► p. 67
Photo editor
You can edit photos and apply various effects.
1 In Idle mode, open the application list and select Photo
editor.
2 Select Select picture→ an image.
To take a new photo, select Capture picture.
3 Select → New selection→ OK.
● To add to or subtract from the selection border, select
→ Add to selection or Remove from selection.
● To reverse the selection, select → Inverse
selection.
● To change the selection size, select .
● To rotate or flip the image, select .
● To crop the image, select .
● To undo or redo your last action, select or .
4 Drag your finger over the area you want to select.Entertainment
71
5 Select to apply a colour effect, or select to apply a
filter effect.
To use additional tools, such as copying and warping,
select .
6 Select a variation of the effect to apply.
7 Adjust the image as desired (if necessary) and select
Done.
8 When you are finished, press [ ] → Save.
Music
Learn to listen to your favourite music while on the go with
the music player. The music player supports the following file
formats: mp3, m4a, mp4, 3gp, 3ga, asf/wma, ogg, oga, aac,
flac, wav.
● Some file formats are not supported depending on
the software of the device.
● If the file size exceeds the available memory, an error
can occur when you open files.
› Add music files to your device
Start by transferring files to your device or memory card:
● Download from the wireless web. ► p. 86
● Download from a PC with Samsung Kies. ► p. 108
● Receive via Bluetooth. ► p. 99
● Synchronise with Windows Media Player 11. ► p. 109
● Copy to your memory card. ► p. 109Entertainment
72
› Play music
After transferring music files to your device or memory card,
1 In Idle mode, open the application list and select Music.
2 Select a music category.
3 Select a music file.
4 Control playback with the following icons:
Icon Function
Adjust the volume.
Activate the 5.1 channel surround sound
system when a headset is connected.
Activate Shuffle mode.
Change the repeat mode (off, repeating a
file, or repeating all files).
Skip backward; Scan backward in a file (tap
and hold).
Pause playback; Select to resume
playback.
Skip forward; Scan forward in a file (tap and
hold).
1. These icons are shown when you tap the player screen.
› Create a playlist
1 In Idle mode, open the application list and select Music.
2 Select Playlists.
3 Press [ ] → Create.
4 Enter a title for your new playlist and select Save.
1
1Entertainment
73
5 Select Add music.
6 Select the files you want to include and select Add.
During playback, you can add files to a playlist by pressing
[ ] → Add to playlist.
› Add songs to the quick list
You can add songs to the quick list and save them as a
playlist. During playback, press [ ] → Add to quick list to
add the current song to the quick list.
To go to the quick list, from the music player main screen,
select Playlists→ Quick list. To save the quick list as a
playlist, press [ ] → Save as playlist.
› Customise music player settings
1 In Idle mode, open the application list and select Music.
2 Press [ ] → Settings.
3 Adjust the following settings to customise your music
player:
Option Function
Equaliser Select a default equaliser type.
Sound effect Select a sound effect.
Music menu
Select music categories to display on
the music library screen.
Visualisation
Display an animated visualisation
during playback.
Lyrics Set to display lyrics during playback.
Music auto off
Set the music player to turn off
automatically after a specific period of
time.Entertainment
74
Music Hub
You can access the online music store, and search for and buy
your favourite songs.
This feature may be unavailable depending on your
region or service provider.
1 In Idle mode, open the application list and select Music
Hub.
2 If you are launching this application for the first time,
select the check box next to Do not show for 90 days and
select Confirm.
3 Search for songs, and preview or buy your favourite songs.
FM radio
Learn to listen to music and news on the FM radio. To listen
to the FM radio, you must connect a headset, which serves as
the radio antenna.
› Listen to the FM radio
1 Plug a headset into the device.
2 In Idle mode, open the application list and select FM
radio.
The FM radio scans and saves available stations
automatically.
The first time you turn on the FM radio, it will start
automatic tuning.
3 Select the radio station you want from the all station list
and press [ ] to return to the FM radio screen.Entertainment
75
4 Control the FM radio with the following keys:
1 4
2 2
3
5
Number Function
1 Turn off or on the FM radio.
2 Search for an available radio station.
3
Add the current radio station to the
favourites list.
4 Adjust the volume.
5 Fine-tune the frequency.
› Save a radio station automatically
1 Plug a headset into the device.
2 In Idle mode, open the application list and select FM
radio.
3 Press [ ] → Scan→ a scanning option.
The FM radio scans and saves available stations
automatically.
4 Select the radio station you want from the all station list
and press [ ] to return to the FM radio screen.Entertainment
76
› Add a radio station to the favourites list
1 Plug a headset into the device.
2 In Idle mode, open the application list and select FM
radio.
3 Select to turn on the FM radio.
4 Scroll to the radio station you want.
5 Select to add to the favourites list.
› Customise FM radio settings
1 In Idle mode, open the application list and select FM
radio.
2 Press [ ] → Settings.
3 Adjust the following settings to customise your FM radio:
Option Function
Background
playing
Set whether or not to run the FM radio
in the background while using other
applications. If this feature is on, you
can control the FM radio from the
shortcuts panel.
Show station
ID
Set whether or not to show the station
ID on the FM radio screen; Station IDs
are available only from radio stations
that provide this information.
Alternative
frequency
Set whether or not the FM radio
attempts to retune a radio station
when the signal is weak.
FM auto off
Set the FM radio to automatically turn
off after a specified length of time.Entertainment
77
Game Hub
Learn to play social and premium games.
1 In Idle mode, open the application list and select Game
Hub.
2 If you are launching this application for the first time,
select the check box next to Do not show for 90 days and
select Confirm.
3 Select and install a game.
4 Follow the on-screen instructions.
● Available games may vary depending on your region
or service provider.
● Controls and options of games may vary.Personal information
78
Personal information
Contacts
Learn to create and manage a list of your personal or business
contacts. You can save names, mobile phone numbers, home
phone numbers, email addresses, birthdays and more for
your contacts.
› Create a contact
1 In Idle mode, open the application list and select
Contacts.
2 Select .
3 Select a memory location.
If you have more than one account, select an account to
which you want to add the contact.
4 Enter contact information.
5 Select to add the contact to memory.
You can also create a contact from the dialling screen.
1 In Idle mode, open the application list and select Phone
→ .
2 Enter a phone number.
3 Select Add to Contacts→ Create contact.
4 Select a memory location.
If you have more than one account, select an account to
which you want to add the contact.
5 Enter contact information.
6 Select to add the contact to memory.Personal information
79
› Find a contact
1 In Idle mode, open the application list and select
Contacts.
2 Scroll up or down on the contact list.
You can also drag your finger along the index on the right
side to quickly scroll through the list.
3 Select a contact’s name.
Once you find a contact, you can use the following options:
● To call the contact, select or .
● To send a message, select .
● To edit the contact information, select .
› Set a speed dial number
1 In Idle mode, open the application list and select
Contacts.
2 Press [ ] → Speed dial setting.
3 Select a location number → a contact.
4 Select a phone number (if necessary).
You can quickly dial this number by tapping and
holding the location number from the dialling screen.
› Create your namecard
1 In Idle mode, open the application list and select
Contacts.
2 Select your name at the top of the contact list.
3 Select .Personal information
80
4 Enter your own personal details.
5 Select .
You can send your namecard by attaching it to a
message or email or transferring it via the Bluetooth
wireless feature.
› Create a group of contacts
By creating groups of contacts, you can manage multiple
contacts and send messages or email to an entire group. Start
by creating a group.
1 In Idle mode, open the application list and select Contacts
→ .
2 Press [ ] → New.
3 Enter a name and select a ringtone for the group.
4 Select Add member, select contacts to add to the group,
and select .
5 Select .
› Copy contacts
To copy contacts from the SIM or USIM card to your device,
1 In Idle mode, open the application list and select
Contacts.
2 Press [ ] → Import/Export→ Import from SIM card.
3 Select a memory location.
If you have more than one account, select an account to
which you want to add the contact.
4 Select contacts to copy and select .Personal information
81
To copy contacts from your device to the SIM or USIM card,
1 In Idle mode, open the application list and select
Contacts.
2 Press [ ] → Import/Export→ Export to SIM card.
3 Select contacts to copy and select → OK.
›Import or export contacts
You can import or export files (in vcf format) to or from your
device’s USB storage or a memory card.
Import contact files
1 In Idle mode, open the application list and select
Contacts.
2 Press [ ] → Import/Export→ Import from USB
storage or Import from SD card.
3 Select a memory location.
If you have more than one account, select an account to
which you want to add the contact.
4 Select an option for importing a single contact file,
multiple contact files, or all contact files, and select OK.
5 Select contact files to import and select OK.
Export contacts
1 In Idle mode, open the application list and select
Contacts.
2 Press [ ] → Import/Export→ Export to USB storage
or Export to SD card.
3 Select OK to confirm.Personal information
82
Calendar
Learn to create and manage daily, weekly or monthly events,
and set alarms to remind yourself of important events.
› Create an event
1 In Idle mode, open the application list and select
Calendar.
2 Select Tap to create event or press [ ] → Create event.
3 If alert messages about the calendar sync appear, select
OK.
4 Enter the details of the event as required.
5 Select Save.
› View events
To change the calendar view,
1 In Idle mode, open the application list and select
Calendar.
2 Select a view mode from the top of the calendar.
To view events of a specific date,
1 In Idle mode, open the application list and select
Calendar.
2 Select a date on the calendar. In month view, days with
scheduled events are indicated by a small square.
● To move to a specific day by entering a date manually,
press [ ] → Go to, enter the date by selecting + or -,
and select Set.
● To select today’s date, press [ ] → Today.
3 Select an event to view its details.
You can send the event to others by pressing [ ] →
Send via→ an option.Personal information
83
› Stop an event alarm
If you set an alarm for a calendar event, the event alarm icon
will appear at the specified time.
1 Open the shortcuts panel from the top of the screen.
2 Select the event notification.
3 Select an event to view more details.
To snooze the event alarm, select the check box next to
the event and select Snooze.
Task
Learn to create a task list and set alarms to remind yourself of
important tasks or set priority.
› Create a task
1 In Idle mode, open the application list and select Task.
2 Select Create task or press [ ] → Create task to create
a task.
3 Enter the details of the task.
4 Select Save.
› View a task
1 In Idle mode, open the application list and select Task.
2 Press [ ] → List by→ an option to sort the tasks.
3 Select a task to view its details.
For completed tasks with an expired deadline, you can set
their status to completed by selecting the check box.Personal information
84
Memo
Learn to record important information to save and view at a
later date.
› Create a memo
1 In Idle mode, open the application list and select Memo.
2 If there is a memo saved, select Create memo or press
[ ] → Create to create a memo.
3 Enter your memo text and select Save.
› View memos
1 In Idle mode, open the application list and select Memo.
2 Press [ ] → Search or press and hold [ ] to search for a
memo (if necessary).
3 Select a memo to view its details.
To edit the memo, select .
You can send the memo to others by tapping and
holding the memo and selecting Send.Personal information
85
Voice recorder
Learn to operate your device’s voice recorder.
› Record a voice memo
1 In Idle mode, open the application list and select Voice
recorder.
2 Select Record to start recording.
3 Speak into the microphone.
4 When you are finished, select Stop.
Your memo is saved automatically.
5 To record more voice memos, select Record again.
› Play a voice memo
1 In Idle mode, open the application list and select Voice
recorder.
2 Select List.
3 Select a voice memo to play.
You can send the voice memo to others by pressing
[ ] → Share.Web
86
Web
Web services require a data connection. Contact your
operator to choose the best data plan.
Internet
Learn to access and bookmark your favourite web pages.
● You may incur additional charges for accessing the
web and downloading media. For details, contact
your service provider.
● Available icons may vary depending on your region or
service provider.
› Browse web pages
1 In Idle mode, open the application list and select Internet
to launch a specified homepage.
To access a specific web page, select the URL input field,
enter the web address (URL) of the web page, and select
Go.
2 Navigate web pages with the following keys:
1
2
3
Number Function
1
Enter the web address of a web page to
access.
2
Open a list of saved bookmarks, saved
pages and recent internet history.
3
View thumbnails of active browser
windows.Web
87
While browsing the web page, use the following options:
● To zoom in or out, tap the screen with two fingers and
spread them apart (move your fingers closer together to
zoom out).
If you activated tilting motions, you can zoom in or out
by tapping and holding two points with your fingers
and then tilting the device back and forth.
● To reload the current web page, press [ ] → Refresh.
● To go to a next page in history, press [ ] → Forward.
● To open a new window, press [ ] → New window.
● To open a new window without saving your browsing data,
press [ ] → New incognito window.
● To bookmark the current web page, press [ ] →
Bookmark this page.
● To send the web address (URL) of the web page to others,
press [ ] → Share page.
● To search for text on the web page, press [ ] → Find on
page.
● To switch to desktop view, press [ ] → Request desktop
site.
● To save current web page and read it on offline later, press
[ ] → Save for offline reading. You can view the saved
pages by selecting → Saved pages.
● To adjust the brightness and colour of the screen, press [ ]
→ Brightness/colour.
● To view the web page details, press [ ] → Page info.
● To view the download history, press [ ] → Downloads.
● To print the current web page or screen via a connected
printer, press [ ] → Print. Your device is compatible only
with Samsung printers.
● To customise the browser settings, press [ ] → Settings.Web
88
› Search for information by voice
This feature may be unavailable depending on your
region or service provider.
1 In Idle mode, open the application list and select Internet.
2 Select the URL input field.
3 Select and say a keyword into your device’s
microphone.
The device searches for information and web pages
related with the keyword.
› Bookmark your favourite web pages
If you know the web address of the web page, you can
manually add a bookmark. To add a bookmark,
1 In Idle mode, open the application list and select Internet.
2 Select → Bookmarks.
3 Press [ ] → Bookmark last-viewed page.
To bookmark the web page you were viewing, skip to
step 5.
4 Enter a page title and a web address (URL).
5 Select .
From the bookmark list, tap and hold a bookmark and use the
following options:
● To open the web page in the current window, select Open.
● To open the web page in a new window, select Open in
new window.
● To edit the bookmark details, select Edit bookmark.
● To add the bookmark shortcut to the idle screen, select Add
shortcut to home.Web
89
● To send the web address (URL) of the web page to others,
select Share link.
● To copy the web address (URL) of the web page, select
Copy link URL.
● To delete the bookmark, select Delete bookmark.
● To use the web page as your homepage of the browser,
select Set as homepage.
› Access the recent history
1 In Idle mode, open the application list and select Internet.
2 Select → History.
3 Select a web page to access.
You can add a web page to the bookmark list by
selecting .
Maps
Learn to use Google Maps™ to find your location, search the
online map for streets, cities, or countries, and get directions.
› Search for a specific location
1 In Idle mode, open the application list and select Maps.
2 If you are launching this application for the first time,
select OK.
The map will display your current location.
3 Select .
To search for a place around you, select .Web
90
4 Enter a keyword for the location and select .
To search for a location by voice, select .
5 Select the location you want to view details.
● To view a list of all results for your search, select
RESULTS LIST.
● To view your current location, select .
● To switch to a compass view of the map that changes
orientation when you move the device, select .
● To add a star to the location, select the balloon of the
location name → .
›Get directions to a specific destination
1 In Idle mode, open the application list and select Maps.
2 Select .
3 Enter the addresses of the starting location and the
ending location.
To enter an address from your contact list or starred
places, or point the location on the map, select →
Contacts, Point on map, or My Places.
4 Select a travel method (car, bus, or walk) and select GET
DIRECTIONS.
Depending on the selected travel method, you may see
multiple routes.
5 Select a route to view details of your trip and select MAP
VIEW to view the route on the map.
6 Select or to view only a single part of the route.
7 When you are finished, press [ ] → Clear Map.Web
91
Latitude
Learn to share your location with your friends and view
friends’ locations via Google Latitude™.
1 In Idle mode, open the application list and select Latitude.
The device automatically joins Latitude.
2 Select → Select from Contacts or Add via email
address.
3 Select a friend you want to add, or enter an email address
and select Add friends.
4 Select Yes.
When your friend accepts your invitation, you can share
locations.
5 Select MAP VIEW.
Your friends’ locations are marked with their photos on the
map.
Places
Learn to search for a place around you.
This feature may be unavailable depending on your
region or service provider.
1 In Idle mode, open the application list and select Places.
2 Select a category.
Your device searches for places around your current
location that are related to the category.
3 Select a place name to view its details.
4 To view the place on the map, select Map.
To view the route to the place, select Directions.
To view the phone number of the place, select Call.Web
92
Navigation
Learn to use the GPS navigation system to find and show your
destination with voice guidance.
This feature may be unavailable depending on your
region or service provider.
1 In Idle mode, open the application list and select
Navigation.
2 If you are launching this application for the first time,
select Accept.
3 Enter your destination by using one of the following
methods:
● Enter your destination by voice.
● Enter your destination with the virtual keypad.
● Select your destination from contacts’ addresses.
● Select your destination from your starred places.
Search
You can search for data saved on your device or on the web.
1 In Idle mode, open the application list and select Search.
2 Enter a letter or a word of the data to search for.
3 Select the item’s name you want to access.Web
93
YouTube
Learn to view and share videos via YouTube.
This feature may be unavailable depending on your
region or service provider.
›Watch videos
1 In Idle mode, open the application list and select
YouTube.
2 Select a video from the list.
3 Rotate the device to landscape view.
4 Control playback with the icons on the screen.
› Share videos
1 In Idle mode, open the application list and select
YouTube.
2 Select a video.
3 Select → an option.
›Upload videos
1 In Idle mode, open the application list and select
YouTube.
2 Select to turn on the camera.
3 Aim the lens at the subject and make any adjustments.Web
94
4 Select to start recording.
5 Select to stop recording.
6 Select Save to upload the video that you have recorded.
7 Select your Google account if it is linked to YouTube.
Alternatively, you can select Add account and set up an
account to sign in to YouTube.
8 Enter details of the upload and select Upload.
Samsung Apps
Samsung Apps allows you to simply and easily download an
abundance of applications directly to your device. Featuring
a wealth of games, news, reference, social networking,
navigation, health related applications and more, Samsung
Apps gives you instant access to a huge choice of mobile
experience.
Your device gets smarter with fully optimised applications
from Samsung Apps. Explore amazing applications and make
your mobile life even better.
● The feature may be unavailable depending on your
region or service provider.
● For details, please visit www.samsungapps.com.
1 In Idle mode, open the application list and select
Samsung Apps.
2 If you are launching this application for the first time,
select Accept.
3 Search for and download applications as desired.Web
95
Market
You can download games, ringtones, or other applications
from the Android Market.
This feature may be unavailable depending on your
region or service provider.
1 In Idle mode, open the application list and select Market
(Play Shop).
2 Search for a file and download it to the device. ► p. 38
Readers Hub
Learn to access various reading materials.
Some features may be currently unavailable.
1 In Idle mode, open the application list and select Readers
Hub.
2 If you are launching this application for the first time,
select the check box next to Do not show for 90 days and
select Confirm.
3 Select an image of reading material.
4 Search for and download reading material from the online
store.Web
96
News & Weather
Learn to view the weather information and read top news
and other news articles.
› View the weather information
1 In Idle mode, open the application list and select News &
Weather.
2 Select WEATHER at the top of the screen.
Your device searches for your current location and displays
the weather information.
You can change the location to view the weather
information in another region. Press [ ] → Settings→
Weather settings and clear the check box next to Use
My Location. Then select a location in Set location.
› Read news articles
1 In Idle mode, open the application list and select News &
Weather.
2 Scroll left to a news topic at the top of the screen.
3 Select an article to open it.
To add news topics, press [ ] → Settings→ News
settings→ Select news topics.Connectivity
97
Connectivity
Bluetooth
Bluetooth is a short-range wireless communications
technology capable of exchanging information over
a distance of about 10 m without requiring a physical
connection.
You do not need to line up the devices to beam information
with Bluetooth. If the devices are within range of one another,
you can exchange information between them even if they are
located in different rooms.
● Samsung is not responsible for the loss, interception,
or misuse of data sent or received via the Bluetooth
wireless feature.
● Always ensure that you share and receive data with
devices that are trusted and properly secured. If there
are obstacles between the devices, the operating
distance may be reduced.
● Some devices, especially those that are not tested
or approved by Bluetooth SIG, may be incompatible
with your device.
› Turn on the Bluetooth wireless feature
In Idle mode, open the application list and select Settings,
and then select OFF next to Bluetooth.Connectivity
98
› Find and pair with other Bluetooth-enabled
devices
1 In Idle mode, open the application list and select Settings
→ Bluetooth→ Scan for devices.
2 Select a device.
3 Enter a PIN for the Bluetooth wireless feature or the
other device’s Bluetooth PIN, if it has one, and select OK.
Alternatively, select Accept to match the PIN between
your device and the device.
When the owner of the other device enters the same
PIN or accepts the connection, pairing is complete. If the
pairing is successful, the device will automatically search
for available services.
Some devices, especially headsets or hands-free car
kits, may have a fixed Bluetooth PIN, such as 0000. If the
other device has a PIN, you must enter it.
› Send data using the Bluetooth wireless feature
1 Select a file or item, such as a contact, calendar event,
memo, or media file, from an appropriate application or
My files.
2 Select an option for sending data via Bluetooth.
The method for selecting an option may vary by data
type.
3 Search for and pair with a Bluetooth-enabled device.Connectivity
99
› Receive data using the Bluetooth wireless
feature
1 In the application list, select Settings→ Bluetooth and
then select the check box next to your device.
To select the length of time that your device will be
visible, press [ ] → Visible time-out.
2 When prompted, enter the PIN for the Bluetooth wireless
feature and select OK. Alternatively, select Accept to
match the PIN between your device and the device.
3 Select Accept to confirm that you are willing to receive
data from the device.
Received data is saved to the bluetooth folder. If you receive a
contact, it is automatically saved to the phonebook.
Wi-Fi
Learn to use your device’s wireless networking capabilities
to activate and connect to any wireless local area network
(WLAN) compatible with the IEEE 802.11 a/b/g/n standards.
You can connect to the internet or other network devices
anywhere an access point or wireless hotspot is available.
Your device uses non-harmonised frequency and is
intended for use in all European countries. The WLAN
can be operated in the EU without restriction indoors,
but cannot be operated outdoors.Connectivity
100
› Activate the WLAN feature
In Idle mode, open the application list and select Settings,
and then select OFF next to Wi-Fi.
An active WLAN running in the background will
consume battery power. To preserve battery power,
activate the WLAN only when needed.
› Find and connect to a WLAN
1 In Idle mode, open the application list and select Settings
→ Wi-Fi.
The device will automatically search for available WLANs.
2 Select a network.
3 Enter a password for the network (if necessary).
4 Select Connect.
› Add a WLAN manually
1 In Idle mode, open the application list and select Settings
→ Wi-Fi→ Add network.
2 Enter the SSID for the network and select the security
type.
3 Set the security settings depending on the selected
security type.
4 Select Save.Connectivity
101
› Connect to a WLAN AP using a Wi-Fi Protected
Setup (WPS)
Using WPS, you can connect to a secured network.
To connect to a Wi-Fi AP with a WPS button,
1 In Idle mode, open the application list and select Settings
→ Wi-Fi.
2 Select a network indicated as protected network available,
and select the check box next to Show advanced
options.
3 Select the WPS drop-down menu.
4 Select Push button→ Connect.
5 Press a WPS button on the access point within 2 minutes.
To connect to a Wi-Fi AP with a WPS PIN,
1 In Idle mode, open the application list and select Settings
→ Wi-Fi.
2 Select a network indicated as protected network available,
and select the check box next to Show advanced
options.
3 Select the WPS drop-down menu.
4 Select PIN from access point or PIN from this device→
Connect.
5 On the access point, enter the PIN and press the start
button.Connectivity
102
› Set the static IP settings
1 In Idle mode, open the application list and select Settings
→ Wi-Fi.
2 Select a network, and select the check box next to Show
advanced options.
3 Select the IP settings drop-down menu.
4 Select Static.
5 Change the IP settings for the access point such as IP
address, Network prefix length, Gateway, DNS.
6 Select Connect.
Wi-Fi Direct
Learn to use the Wi-Fi Direct feature to connect two devices
via a WLAN without requiring an access point.
› Connect your device to another WLAN device
1 In Idle mode, open the application list and select Settings
→ More...→ Wi-Fi Direct.
2 Select OFF next to Wi-Fi Direct and then select OK.
3 Select Scan.
4 Select a device and then select Connect.
When the owner of the other device accepts the
connection, pairing is complete.
5 To deactivate the Wi-Fi Direct feature, select Connection
end.Connectivity
103
› Send data via a WLAN
1 Select a file or item, such as a memo, media file, or web
address, from an appropriate application or My files.
2 Select an option for sending data via a WLAN.
The method for selecting an option may vary by data
type.
3 Search for and select a WLAN device.
› Receive data via a WLAN
When you receive data, it is saved to your device
automatically. Received data is saved to the ShareViaWifi
folder.
AllShare
Learn to use the Digital Living Network Alliance (DLNA)
service that enables you to share media files between DLNAenabled devices in your home over a WLAN.
You must first activate the WLAN feature and add a WLAN
profile. ► p. 100
› Customise DLNA settings for sharing media
files
To allow other DLNA-enabled devices to access media files on
your device, you must activate media sharing.
Some files may not play on the DLNA-enabled devices
depending on the devices.
1 In Idle mode, open the application list and select AllShare.
2 Press [ ] → Settings.Connectivity
104
3 Adjust the following settings to customise the DLNA
feature:
Option Function
Device name
Enter a name for your device as a
media server.
Share videos
Turn on video sharing with other
DLNA-enabled devices.
Share photos
Turn on image sharing with other
DLNA-enabled devices.
Share music
Turn on music sharing with other
DLNA-enabled devices.
Upload from
other devices
Set whether or not to accept the
upload from other devices.
Default
memory
Select the default memory location for
saving downloaded media files.
Subtitles Set to display subtitles.
› Play your files on another DLNA-enabled
device
1 In Idle mode, open the application list and select AllShare.
2 Select My device.
3 Select a media category and a file.
4 Select a player—the one that will play the media file.
Playback begins at the selected player.
5 Control playback using icons of your device.
Playback may be buffered, depending on the network
connection and the connected server.Connectivity
105
› Play files of one device on the other device
1 In Idle mode, open the application list and select AllShare.
2 Select Remote device.
Your device automatically searches for DLNA-enabled
devices.
3 Select a device as the media server—the one that
contains media files.
4 Select a media category and a file.
5 Select a player—the one that will play the media file.
Playback begins at the selected player.
6 Control playback using icons of your device.
Mobile network sharing
Learn to set your device as a wireless modem or wireless
access point for PCs or other devices, and share your device’s
mobile network connection.
› Share your device’s mobile network via WLAN
1 In Idle mode, open the application list and select Settings
→ More...→ Tethering and portable hotspot.
2 Select Portable Wi-Fi hotspot to activate the WLAN
hotspot.
3 Select Configure Wi-Fi hotspot to customise the WLAN
hotspot:
Option Function
Network SSID
View and edit the device name that
will be shown to external devices.
Security Select the security type.Connectivity
106
4 When you are finished, select Save.
5 From another device, locate your device’s name in the
available connection list and connect to the network.
Your device shares the mobile network connection on
another device.
› Share your device’s mobile network via USB
1 Using a PC data cable, connect the multifunction jack on
your device to a PC.
2 In Idle mode, open the application list and select Settings
→ More...→ Tethering and portable hotspot.
3 Select USB tethering to activate the USB tethering
feature.
Your device shares the mobile network connection on
your PC.
To stop sharing the network connection, clear the check
box next to USB tethering.
The sharing method for the network connection may
differ depending on the PC’s operating system.
› Share your device’s mobile network via the
Bluetooth wireless feature
1 In Idle mode, open the application list and select Settings
→ More...→ Tethering and portable hotspot.
2 Select Bluetooth tethering to activate the Bluetooth
tethering feature.
3 On another device, find and pair with your device.
Ensure that you have activated the Bluetooth feature and
the visibility setting.Connectivity
107
GPS
Your device is equipped with a global positioning system
(GPS) receiver. Learn to activate location services.
To receive better GPS signals, avoid using your device in the
following conditions:
● between buildings, in tunnels or underground passages, or
inside buildings
● in poor weather
● around high voltage or electromagnetic fields
Do not touch the internal antenna area or cover this
area with your hands or other objects while using the
GPS functions.
This feature may be unavailable depending on your
region or service provider.
› Activate location services
You must activate location services to receive location
information and search the map.
1 In Idle mode, open the application list and select Settings
→ Location services.
2 Adjust the following settings to activate location services:
Option Function
Google’s
location service
Set to use WLAN and/or mobile
networks for finding your location.
GPS satellites
Set to use the GPS satellite for finding
your location.Connectivity
108
Option Function
Use sensor
aiding
Use sensors to enhance pedestrian
positioning when the GPS signal is
obstructed. There may be variations
between the sensor estimates and
your actual location.
Location and
Google search
Set the device to use your current
location for Google search and other
Google services.
PC connections
Learn to connect your device to a PC with a PC data cable in
USB connection modes. By connecting the device to a PC,
you can synchronise files with Windows Media Player, transfer
data to and from your device directly and use the Samsung
Kies program.
To use PC connections, you must deactivate USB debugging
mode. Open the application list and select Settings→
Developer options, and then clear the check box next to
USB debugging.
› Connect with Samsung Kies
Ensure that Samsung Kies is installed on your PC. You
can download the program from the Samsung website
(www.samsung.com/kies).
1 Using a PC data cable, connect the multifunction jack on
your device to a PC.
2 Double-click the Samsung Kies icon on your PC to launch
Samsung Kies.Connectivity
109
3 Copy files from the PC to the device.
Refer to the Samsung Kies help for more information.
› Synchronise with Windows Media Player
Ensure that Windows Media Player is installed on your PC.
1 Using a PC data cable, connect the multifunction jack on
your device to a PC with Windows Media Player installed.
When connected, a pop-up window will appear on the PC.
2 Open Windows Media Player to synchronise music files.
3 Edit or enter your device’s name in the pop-up window (if
necessary).
4 Select and drag the music files you want to the sync list.
5 Start synchronisation.
› Connect as a mass storage device
You can connect your device to a PC as a removable disk and
access the file directory. If you insert a memory card in the
device, you can access the file directory of the memory card
by using the device as a memory card reader.
The file directory of the memory card will appear as a
removable disk, separate from the internal memory.
1 In Idle mode, open the application list and select Settings
→ More...→ USB utilities→ Connect storage to PC.
2 Select OK to confirm (if necessary).
3 Using a PC data cable, connect the multifunction jack on
your device to a PC.
4 When connected, select Turn on USB storage.
5 Select OK to confirm (if necessary).Connectivity
110
6 Open the folder to view files.
7 Copy files from the PC to your device.
8 When you are finished, select Turn off USB storage.
To disconnect the device from the PC, click the USB
device icon on the Windows task bar and click the
option to safely remove the mass storage device. Then
remove the PC data cable from the PC. Otherwise, you
may lose data stored on the memory card or damage
the memory card.
VPN connections
You can create virtual private networks (VPN) and connect to
your private network securely through a public network, such
as the internet.
Your device should already be configured with internet
access. If you have trouble accessing the internet, you
need to edit connections. If you are not sure about
the connection information to enter, ask your service
provider.
› Set up VPN connections
1 In Idle mode, open the application list and select Settings
→ More...→ VPN.
To use this feature, you must activate the screen lock
feature.
2 Select Add VPN network.
3 Customise the connection information.
Available options may vary depending on the VPN type.Connectivity
111
Option Function
Name Enter a name of the VPN server.
Type Select a VPN type.
Server address Enter the IP address of the VPN server.
L2TP secret Set to use the L2TP secret password.
IPSec identifier Enter a user name.
IPSec preshared key
Enter a pre-shared key.
IPSec user
certificate
Select a user certificate that the VPN
server uses to identify you. You can
import certificates from the VPN server
or download from the web.
IPSec CA
certificate
Select a certificate authority (CA)
certificate that the VPN server uses
to identify you. You can import
certificates from the VPN server or
download from the web.
PPP encryption
(MPPE)
Set to encrypt data before sending it to
the VPN server.
Show
advanced
options
Set to change the advanced network
settings.
4 When you are finished, select Save.
› Connect to a private network
1 In Idle mode, open the application list and select Settings
→ More...→ VPN.
2 Select a private network to connect.
3 Enter the user name and password and select Connect.Tools
112
Tools
Clock
Learn to set and control alarms, and world clocks. You can also
use the stopwatch and the desk clock.
› Set a new alarm
1 In Idle mode, open the application list and select Clock→
Alarm.
2 Select Create alarm or press [ ] → Create.
3 Set alarm details.
Select the check box next to Smart alarm to activate
simulated nature sounds with the alarm screen prior to
the main alarm.
4 When you are finished, select Save.
› Stop an alarm
When the alarm sounds,
● To stop the alarm, select and then drag your finger
outside of the large circle.
● To repeat the alarm after a specified length of time, select
and then drag your finger outside of the large circle.
›Delete an alarm
1 In Idle mode, open the application list and select Clock→
Alarm.
2 Press [ ] → Delete.
3 Select alarms to delete.
4 Select Delete.Tools
113
› Create a world clock
1 In Idle mode, open the application list and select Clock→
World clock.
2 Select Add city or press [ ] → Add.
3 Enter a city name or select one from the city list.
To select a city in the world map view, select .
4 To add more world clocks, repeat steps 2-3.
To apply the summer time to the clocks, tap and hold a
clock and select DST settings.
›Use the stopwatch
1 In Idle mode, open the application list and select Clock→
Stopwatch.
2 Select Start to begin the stopwatch.
3 Select Lap to record lap times.
4 When you are finished, select Stop.
5 Select Reset to clear recorded times.
›Use the count-down timer
1 In Idle mode, open the application list and select Clock→
Timer.
2 Set the length of time to count down.
3 Select Start to begin the countdown.
4 When the timer expires, select and then drag your
finger outside of the large circle to stop the alarm.Tools
114
›Use the desk clock
The desk clock displays the current time and date, and
weather.
1 In Idle mode, open the application list and select Clock→
Desk clock.
2 Press [ ] → Settings.
3 Change the following options:
Option Function
Time/Calendar
display
Set to display the clock or calendar.
AccuWeather
Set to display the weather for your
current location. You can also set the
desk clock to be automatically updated
with latest information and select a
temperature unit.
Reset to
default
Reset the desk clock settings to the
factory default values.
Dock Settings
Set to use the connected dock’s
speaker when your device is
connected to a car or desktop dock.
Calculator
Learn to perform mathematical calculations directly on your
device like a typical hand-held or desktop calculator.Tools
115
› Perform the calculation
1 In Idle mode, open the application list and select
Calculator.
2 Use the keys that correspond to the calculator display to
perform basic mathematical operations.
Rotate the device to landscape view to use the scientific
calculator. If you deactivate the auto rotation, press [ ]
→ Scientific calculator.
› View the calculation history
1 In Idle mode, open the application list and select
Calculator.
2 Perform the calculation.
3 Select to close the calculator keypad.
The calculation history appears.
4 To clear the history, press [ ] → Clear history.
Downloads
Learn to manage logs of files you have downloaded from the
web and email.
1 In Idle mode, open the application list and select
Downloads.
2 Select a download folder.
3 To open a file, select the log.
To delete a log, select the check box and then select .Tools
116
Kies air
Kies air allows you to connect your device to another device
via a WLAN. From a browser, you can view and control media
files, contacts, messages, and any other data saved on your
device.
› Customise Kies air settings
1 In Idle mode, open the application list and select Kies air.
2 Press [ ] → Settings.
3 Change the following options:
Option Function
Device name View or edit your device name.
Access request
Set to receive authorisation requests
from other devices while using Kies air.
Enable
visibility
Set the device to be visible to other
devices.
Time-out
Select the length of time the device
waits before ending the connection.
Lock contents
Select the types of data that should
not display on other devices.
Reset settings
Reset your settings to the factory
default values.
› Connect your device to another device via a
WLAN
1 In Idle mode, open the application list and select Kies air
→ Start.
2 Enter the web address displayed by Kies air in the browser
on the other device.Tools
117
3 Select Allow (if necessary).
When connected, you will see your device data on the
other device.
4 To end the connection, select Stop.
Mini diary
Learn to keep a photo diary.
› Create a Mini diary
1 In Idle mode, open the application list and select Mini
diary.
2 If you are launching this application for the first time,
select Yes.
3 If there is a diary saved, select Create diary to create a
new entry.
4 Change the today’s date and set the weather (if
necessary).
5 Select Tap to add photo and add an image or capture a
photo.
6 Select Tap to add text, and enter text and select Done.
7 Select Save.
› View a Mini diary
1 In Idle mode, open the application list and select Mini
diary.
2 Select a diary.
To upload a mini diary to your community website,
press [ ] → Publish.Tools
118
My files
Learn to quickly and easily access all of your images, videos,
music, sound clips, and other types of files stored in your
device and memory card.
1 In Idle mode, open the application list and select My files.
2 Select a folder → a file.
In a folder, press [ ] to use the following options:
● To send a file to others, select Share.
● To create a new folder, select Create folder.
● To delete files or folders, select Delete.
● To change the view mode, select View by.
● To sort files or folders, select List by.
● To move a file to another folder, select Move.
● To copy a file to another folder, select Copy.
● To change the name of a file, select Rename.
● To change the file manager settings, select Settings.
Polaris Office
Learn to create and view Polaris Office documents on your
device and memory card.
› Create a document
1 In Idle mode, open the application list and select Polaris
Office.
2 If you are launching this application for the first time,
register as an online user or skip the registration.
3 Select → a document type.Tools
119
4 Enter contents in the document.
5 When you are finished, press [ ] → Save.
6 Enter a name for the document and select the saving
location.
7 Select Save.
› Open a document
1 In Idle mode, open the application list and select Polaris
Office.
2 Select My files→ a document file.
Task Manager
With the task manager, you can view currently running
applications and memory information.
1 In Idle mode, open the application list and select Task
Manager.
2 Use the following options:
● Active applications: View the list of all the applications
currently running on your device.
● Downloaded: View the total amount of memory used
for applications installed on your device.
● RAM: Check and manage the RAM for your device.
● Storage: View the used and available memory on your
device and memory card.
● Help: View help information about extending battery
life.Tools
120
Voice command
Your device provides the intelligent voice command feature
which turns your voice commands into action. You can dial a
number, send a message, search for locations or information,
or complete other tasks simply by speaking to your device.
1 In Idle mode, open the application list and select Voice
command.
2 If you are launching this application for the first time, read
the disclaimer and help information by following the
screens.
3 Select Tap & Speak.
4 Say a command into the microphone.
Voice talk
Learn to use the voice command feature provided by Voice
talk. You can dial a number, send a message, write a memo, or
complete other tasks simply by speaking to your device while
on the go.
1 In Idle mode, open the application list and select Voice
talk.
2 If you are launching this application for the first time, read
the disclaimer and help information by following the
screens.
3 Select Tap & Speak.
4 Say a command into the microphone.Settings
121
Settings
Access the Settings menu
1 In Idle mode, open the application list and select Settings.
2 Select a setting category and select an option.
Wi-Fi
Turn the WLAN feature on or off. ► p. 100
Bluetooth
Turn the Bluetooth wireless feature on or off. ► p. 97
Data usage
Keep track of your data usage and customise settings for your
data limit.
● Mobile data: Set to use data connections on any mobile
network.
● Set mobile data limit: Set a limit for the mobile data usage.
● Data usage cycle: Customise the settings for the limit cycle.
More...
Change the settings to control connections with other
devices or networks.
› Flight mode
Disable all wireless functions on your device. You can use only
non-network services.Settings
122
› Kies via Wi-Fi
Connect your device to Samsung Kies via a WLAN.
›USB utilities
Connect your device to a PC as a mass storage. ► p. 109
› VPN
Set up and connect to virtual private networks (VPNs).
► p. 110
› Tethering and portable hotspot
● USB tethering: Activate the USB tethering feature to share
your device’s mobile network connection with PCs via USB.
When connected to a PC, your device is used as a wireless
modem for a PC. ► p. 106
● Portable Wi-Fi hotspot: Activate the Portable WLAN
hotspot feature to share your device’s mobile network
connection with PCs or other devices through the WLAN
feature. ► p. 105
● Configure Wi-Fi hotspot: Configure network settings for
your WLAN hotspot.
● Bluetooth tethering: Activate the Bluetooth tethering
feature to share your device’s mobile network connection
with PCs via the Bluetooth wireless feature. ► p. 106
● Help: View information about using the tethering features.
›Wi-Fi Direct
Activate the Wi-Fi Direct feature to connect two devices via a
WLAN without requiring an access point. ► p. 102Settings
123
›Mobile networks
● Use packet data: Set to allow packet switched data
networks for network services.
● Data roaming: Set the device to connect another network
when you are roaming or your home network is not
available.
● Access Point Names: Set up access point names (APNs).
● Network mode: Select a network type.
● Network operators: Search for available networks and
select a network for roaming.
Call
Customise the settings for calling features.
● Call rejection: Set to reject calls from specified phone
numbers automatically. You can add phone numbers to the
reject list. ► p. 46
● Set reject messages: Add or edit the message that will be
sent when you reject a call.
● Call alert:
- Answer vibration: Set the device to vibrate when the
other party answers a call.
- Call status tones: Activate or deactivate call connection
tone, minute minder tone, or call disconnect tone.
- Alerts on call: Select how the device will alert you to
events during a call.
● Call answering/ending:
- Answering key: Set the device to answer calls by pressing
the Home key.Settings
124
- Automatic answering: Set to answer automatically
after a specified period (available only when a headset is
connected).
- The power key ends calls: Set the device to end a call
when you press the Power/Lock key.
● Turn on proximity sensor: Set to turn on the proximity
sensor during a call.
● Call forwarding: Divert incoming calls to another number.
● Additional settings:
- Caller ID: Display your caller ID to other parties for
outgoing calls.
- Call barring: Block incoming or outgoing calls.
- Call waiting: Activate call waiting to receive an incoming
call when you are already on a call.
- Auto redial: Activate auto redial for automatically
redialling a call that was not connected or cut off during a
call.
- Fixed Dialling Numbers: Activate or deactivate FDN
mode to restrict calls to numbers in the FDN list. You must
enter the PIN2 supplied with your SIM or USIM card and
reboot the device.
● Video call image: Select an image to be shown to the other
party.
● Own video in received call: Set whether to show your live
image or preset image to the other party.
● Use call fail options: Select whether or not to retry a voice
call when a video call fails to connect.
● Voicemail service: Select your service provider or set
another provider to receive voice mails.
● Voicemail: Enter the number to access the voice mail
service. You can obtain this number from your service
provider.Settings
125
Sound
Change the settings for various sounds on your device.
● Volumes: Adjust the volume level for call ringtones, media
sound, device system sound, and notification ringtones.
● Vibration intensity: Adjust the vibration intensity.
● Silent mode: Activate Silent mode to make your device
vibrate or mute all sounds, except for media sounds and
alarm ringtones.
● Phone ringtone: Select a ringtone to alert you to incoming
calls.
● Default notification: Select a ringtone to alert you to
events, such as incoming messages, and missed calls.
● Vibrate and ring: Set the device to vibrate and play a
ringtone to alert you to incoming calls.
● Dial pad touch tones: Set the device to sound when you
touch the keys on the dialling screen.
● Touch sounds: Set the device to sound when you select an
application or option on the touch screen.
● Screen lock sound: Set the device to sound when you lock
or unlock the touch screen.
● Vibrate on touch: Set the device to vibrate when you press
the Menu key or the Back key, or press and hold the Home
key or the Power/Lock key.
Display
Change the settings for the display.
● Home screen wallpaper: Select a background image for
the idle screen.
● Lock screen wallpaper: Select an image to display when
the screen is locked.
● Clock: Set to show the clock on the locked screen.
● Weather: Set to show the weather information on the
locked screen.Settings
126
● Weather settings: Customise the settings for the weather
information.
● Clock and weather position: Select the location of the
clock and the weather information on the locked screen.
● Brightness: Set the brightness of the display.
● Screen mode: Select a display mode.
● Auto-rotate screen: Set whether or not to rotate the
content automatically when the device is rotated.
● Screen timeout: Set the length of time the device waits
before turning off the display’s backlight.
● Font style: Change the font type for the display text. You
can download fonts from Android Market by selecting Get
fonts online.
● Touch key light duration: Set the duration for the touch
key backlight.
● Auto adjust screen power: Set to save power by adjusting
the brightness of the display.
● Horizontal calibration: Calibrate the accelerometer to
adjust the horizontal axis of the device for better motion
recognition.
● Gyroscope calibration: Calibrate the gyroscope so your
device can correctly recognise rotation.
● Place the device on a stable surface during calibration.
The calibration process may fail if the device vibrates
or moves during calibration.
● Calibrate the gyroscope when tilting or panning
motions, or motion-enabled games, show drifting or
unintended movements.Settings
127
Power saving
● System power saving mode: Activate Power saving mode
to limit some system resource usage.
● Custom power saving mode: Set to activate Power saving
mode according to your custom settings.
● Custom power saving mode settings:
- Power saving on at: Select a power level for Power saving
mode.
- Turn off Wi-Fi: Deactivate the WLAN feature when the
device is not connected with a WLAN AP.
- Turn off Bluetooth: Deactivate the Bluetooth feature
when not in use.
- Turn off GPS: Deactivate the GPS feature when not in use.
- Turn off Sync: Turn off sync when the device is not
synchronising with a web server.
- Brightness: Activate the brightness setting for Power
saving mode.
- Brightness: Set the brightness level for Power saving
mode.
- Screen timeout: Set the length of time the device waits
before turning off the display’s backlight.
● Learn about power saving: Learn how to reduce battery
consumption.
Storage
View memory information for your device and memory card.
You can also format the USB storage and the memory card.
Formatting a memory card will permanently delete all
data from the memory card.Settings
128
Battery
View the amount of power consumed by your device.
Applications
View and manage the applications on your device.
Accounts and sync
Change the settings for the auto sync feature or manage
accounts for synchronisation.
Location services
Change the settings for GPS functionality.
● Google’s location service: Set to use WLAN and/or mobile
networks for finding your location.
● GPS satellites: Set to use the GPS satellite for finding your
location.
● Use sensor aiding: Set to use sensors to enhance
pedestrian positioning when the GPS signal is obstructed.
There may be variations between the sensor estimates and
your actual location.
● Location and Google search: Set the device to use your
current location for Google search and other Google
services.Settings
129
Security
Change the settings for securing your device and the SIM or
USIM card.
● Screen lock: Set how to unlock the screen.
- None: Disable the screen lock.
- Slide: Set to use the screen lock without a PIN, password,
pattern, or face detection.
- Face unlock: Set a face detection lock.
- Pattern: Set an unlock pattern to unlock the screen.
- PIN: Set a PIN (numeric) to unlock the screen.
- Password: Set to display your own message for the
locked screen.
● Owner info: Enter your information that is shown on the
locked screen.
● Encrypt device: Set a PIN or a password to encrypt the
device to protect data and information saved on the device.
Once the device is encrypted, you must enter the password
each time you turn on the device. You must first charge the
battery because it may take more than an hour to encrypt
your device.
● Encrypt SD card:
- Encrypt SD card: Protect your personal information by
encrypting the data on your memory card.
- Full encryption: Set to encrypt all files on your memory
card.
- Exclude multimedia files: Set to encrypt all files except
multimedia files on your memory card.
You may not access the encrypted memory card after
he factory data reset. First, decode the memory card
before the factory data reset.Settings
130
● SIM Change Alert: Activate or deactivate the Find my
mobile feature which helps you locate your device when it
is lost or stolen. ► p. 33
● Alert message recipients: Add or edit recipients for the
alert message.
● Remote controls: Set to control a lost device remotely via
the web.
● Set up SIM card lock:
- Lock SIM card: Activate or deactivate the PIN lock feature
to require the PIN before using the device.
- Change SIM PIN: Change the PIN used to access SIM or
USIM data.
● Make passwords visible: Set the device to display your
password as you enter.
● Device administrators: View device administrators
installed on your device. You can activate device
administrators to apply new policies to your device.
● Unknown sources: Select to download applications
from any source. If you do not select this option, you can
download applications only from Android Market.
● Trusted credentials: Select certificates and credentials to
ensure secure use of various applications.
● Install from storage: Install encrypted certificates that are
stored in the USB storage.
● Clear credentials: Erase the credential contents from the
device and reset the password.Settings
131
Language and input
Change the settings for text input.
› Language
Select a display language for all menus and applications.
›Default
Select a default keyboard type for text input.
›Google voice typing
Activate the Google voice input feature to enter text by voice.
To change the voice input settings, select .
● Select input languages: Select input languages for Google
voice recognition.
● Block offensive words: Set to prevent the device from
recognising offensive words in voice inputs.
› Samsung IME
To change the Samsung keypad settings, select .
● Portrait keypad types: Select the default input method,
such as the QWERTY keyboard, 3*4 keypad, or handwriting
screen.
● Input language: Select languages for text input.
● XT9: Activate XT9 mode to predict words based on your
input and show word suggestions.
● XT9 advanced settings: Activate the advanced features
of XT9 mode, such as auto completion, auto correction, or
auto substitution, and set up your own word list.Settings
132
● Keypad sweeping: Enable or disable the keypad sweeping
feature for the text input mode. You can switch between
input modes by scrolling left or right on the keypad.
● Character preview: Set the device to show a preview
image of each letter you tap.
● Auto-capitalization: Set the device to automatically
capitalise the first letter after a final punctuation mark, such
as a full stop, question mark, or exclamation mark.
● Handwriting settings:Customise the recognition time in
Handwriting mode.
● Voice input: Activate the voice input feature to enter text
by voice on the Samsung keypad.
● Auto-full stop: Set the device to insert a full stop when you
double-tap the space bar.
● Tutorial: Learn how to enter text with the Samsung keypad.
› Swype
To change the Swype keypad settings, select .
● Select Input Method: Change the keypad type.
● How to Swype: Learn how to enter text with the Swype
keyboard.
● Personal dictionary: Set up your own dictionary. The
words in your dictionary will appear as suggestions for your
text inputs.
● Preferences:
- Audio feedback: Set to alert you when there are no
alternative words for your input if you double-tap a word.
- Vibrate on keypress: Set the device to vibrate when you
touch a key.
- Show tips: Set the device to automatically display tips for
your actions when available.Settings
133
- Auto-spacing: Set the device to automatically insert a
space between words.
- Auto-capitalization: Set the device to automatically
capitalise the first letter after a final punctuation mark,
such as a period, question mark, or exclamation mark.
- Show complete trace: Set to display the trace of your
dragging on the keyboard.
- Word suggestion: Set the device to predict words
according to your input and display word suggestions.
- Speed vs. accuracy: Set the ratio between the speed and
accuracy of Swype suggestions.
- Reset Swype’s dictionary: Delete the words you have
added to the dictionary.
- Version: View version information.
● Language Options: Select languages for text input.
› Voice recognizer
Select a voice recognition engine.
› Voice Search
For the Google voice recognition, use the following options:
● Language: Select a language for the voice recognition.
● SafeSearch: Set the device to filter explicit text and/or
images from voice search results.
● Block offensive words: Hide offensive words your device
recognised from voice search results.
For the Samsung voice recognition, use the following options:
● Language: Select a language for the voice recognition.
● Web search engine: Select a web search engine.
● Auto-dial: Set to automatically dial a number when the
voice recognition result is confident.Settings
134
● Use location: Set to use your location information for voice
search results.
● Hide offensive words: Hide offensive words your device
recognised from voice search results.
● Auto-punctuation: Set to automatically insert punctuation
marks when needed.
● Listen over Bluetooth: Set to recognise your voice
commands when using a connected Bluetooth headset.
● Voice talk unique ID: View your device’s unique ID for
services when you have problems with Voice talk.
● About: View version information.
● Auto-start listening: Set to automatically begin voice
recognition when you launch the voice command feature.
● Voice command help: Access help information for using
the voice command feature.
● Social settings: Change the settings for accessing
community websites.
● Voice talk settings: Change the settings for using Voice
talk.
● Voice talk help: Access help information for using Voice
talk.
› Text-to-speech output
● Preferred engine: View and select the text-to-speech
engines in your device.
● Speech rate: Select a speed for the text-to-speech feature.
● Listen to an example: Listen to the spoken text for an
example. Install voice data for using the text-to-speech
feature.
● Driving mode: Activate Driving mode to set the device to
read contents aloud.
● Driving mode settings: Specify applications to use in
Driving mode.Settings
135
› Pointer speed
Adjust the pointer speed for the mouse or trackpad
connected to your device.
Back up and reset
Change the settings for managing your settings and data.
● Back up my data: Set to back up your settings and
application data to the Google server.
● Backup account: Add and view your Google account to
back up your data.
● Automatic restore: Set to restore your settings and
application data when the applications are reinstalled on
your device.
● Factory data reset: Reset your settings to the factory
default values and delete all your data.
Dock
Audio output mode: Set to use the connected dock’s
speaker when your device is connected to a car or desktop
dock.Settings
136
Date and time
Access and alter the following settings to control how time
and date are displayed on your device:
● Automatic date and time: Automatically update the time
when you set a time zone.
● Automatic time zone: Automatically update the time
when you move across time zones.
● Set date: Set the current date manually.
● Set time: Set the current time manually.
● Select time zone: Set your home time zone.
● Use 24-hour format: Set to the time to be displayed in
24-hour format.
● Select date format: Select a date format.
Accessibility
● Services: Activate an accessibility application you have
downloaded, such as Talkback or Kickback, which provide
voice, melody, or vibration feedback.
● Power button ends calls: Set the device to end a call when
you press the Power/Lock key.
● Auto-rotate screen: Set whether or not to rotate the
content automatically when the device is rotated.
● Touch and hold delay: Set the recognition time for tapping
and holding the screen.
● Install web scripts: Set applications to install web scripts to
make their web content more accessible.Settings
137
Motion
Change the settings that control motion recognition on your
device.
● Motion activation: Set to use motion recognition.
● Tilt to zoom: Set to zoom in or out while viewing images in
Gallery or browsing web pages when you tap and hold two
points with your fingers and then tilt the device back and
forth.
● Pan to edit: Set to move an item to another page when you
tap and hold the item and then tilt the device to the left or
right.
● Double tap: Set to activate Voice talk by double-tapping
the device.
● Turn over to mute: Set to mute incoming calls, alarms, and
music by placing the device face down.
Developer options
Change the settings for application development.
● USB debugging: Select to connect your device to a PC by
using a USB cable. This is for application development.
● Development device ID: View your device’s development
ID.
● Allow mock locations: Allow mock locations and service
information to be sent to a Location Manager service for
testing. This is for application development.
● Desktop backup password: Set a password to secure your
backup data.Settings
138
● Strict mode enabled: Set the device to flash the screen
when applications perform long operations.
● Pointer location: Set to show the coordinates and traces of
the pointer when you touch the screen.
● Show touches: Set to show the pointer when you touch
the screen.
● Show screen updates: Set to flash areas of the screen
when they are updated.
● Show CPU usage: Set to list all active processes.
● Force GPU rendering: Set to use 2D hardware acceleration
to improve graphic performance.
● Window animation scale: Select a speed for opening and
closing pop-up windows.
● Transition animation scale: Select a speed for switching
between screens.
● Don’t keep activities: Set to end a running application
when you launch a new application.
● Background process limit: Set to limit the number of
processes that can run in the background.
● Show all ANRs: Set the device to alert you to unresponsive
applications that are running in the background.
About phone
Access information about your device, check the device’s
status, and update the device system.Troubleshooting
139
Troubleshooting
When you turn on your device or while you are
using the device, it prompts you to enter one of the
following codes:
Code Try this to solve the problem:
Password
When the device lock feature is enabled, you
must enter the password you set for the device.
PIN
When using the device for the first time or
when the PIN requirement is enabled, you
must enter the PIN supplied with the SIM or
USIM card. You can disable this feature by
using the Lock SIM card menu.
PUK
Your SIM or USIM card is blocked, usually as a
result of entering your PIN incorrectly several
times. You must enter the PUK supplied by
your service provider.
PIN2
When you access a menu requiring the PIN2,
you must enter the PIN2 supplied with the SIM
or USIM card. For details, contact your service
provider.
Your device displays network or service error
messages
● When you are in areas with weak signals or poor reception,
you may lose reception. Move to another area and try
again.
● You cannot access some options without a subscription.
Contact your service provider for more details.Troubleshooting
140
The touch screen responds slowly or improperly
If your device has a touch screen and the touch screen is not
responding properly, try the following:
● Remove any protective covers from the touch screen.
Protective covers may prevent the device from recognising
your inputs and are not recommended for touch screen
devices.
● Ensure that your hands are clean and dry when tapping the
touch screen.
● Restart your device to clear any temporary software bugs.
● Ensure that your device software is upgraded to the latest
version.
● If the touch screen is scratched or damaged, take it to your
local Samsung Service Centre.
Your device freezes or has fatal errors
If your device freezes or hangs, you may need to close
programs or reset the device to regain functionality. If
your device is frozen and unresponsive, press and hold the
Power/Lock key for 8-10 seconds. The device will reboot
automatically.
If this does not solve the problem, perform a factory data
reset. In Idle mode, open the application list and select
Settings→ Back up and reset → Factory data reset →
Reset phone → Erase everything.
Calls are being dropped
When you are in areas with weak signals or poor reception,
you may lose your connection to the network. Move to
another area and try again.Troubleshooting
141
Outgoing calls are not connected
● Ensure that you have pressed the Dial key.
● Ensure that you have accessed the right cellular network.
● Ensure that you have not set call barring for the phone
number you are dialling.
Incoming calls are not connected
● Ensure that your device is turned on.
● Ensure that you have accessed the right cellular network.
● Ensure that you have not set call barring for the incoming
phone number.
Others cannot hear you speaking on a call
● Ensure that you are not covering the built-in microphone.
● Ensure that the microphone is close to your mouth.
● If using a headset, ensure that it is properly connected.
Audio quality is poor
● Ensure that you are not blocking the device’s internal
antenna.
● When you are in areas with weak signals or poor reception,
you may lose reception. Move to another area and try
again.
When dialling from contacts, the call is not connected
● Ensure that the correct number is stored in the contact list.
● Re-enter and save the number, if necessary.
● Ensure that you have not set call barring for the contact’s
phone number.
The device beeps and the battery icon is empty
Your battery is low. Recharge or replace the battery to
continue using the device.Troubleshooting
142
The battery does not charge properly or the device
turns off
● The battery terminals may be dirty. Wipe both goldcoloured contacts with a clean, soft cloth and try charging
the battery again.
● If the battery will no longer charge completely, dispose
of the old battery properly and replace it with a new
battery (refer to your local ordinances for proper disposal
instructions).
Your device is hot to the touch
When you use applications that require more power or use
applications on your device for an extended period of time,
your device may feel hot to the touch. This is normal and
should not affect your device’s lifespan or performance.
Error messages appear when launching the camera
Your Samsung mobile device must have sufficient available
memory and battery power to operate the camera
application. If you receive error messages when launching the
camera, try the following:
● Charge the battery or replace it with a battery that is fully
charged.
● Free some memory by transferring files to a PC or deleting
files from your device.
● Restart the device. If you are still having trouble with
the camera application after trying these tips, contact a
Samsung Service Centre.Troubleshooting
143
Error messages appear when launching the FM radio
The FM radio application on your Samsung mobile device
uses the headset cable as an antenna. Without a headset
connected, the FM radio will be unable to receive radio
stations. To use the FM radio, first ensure that the headset
is properly connected. Next, scan for and save the available
radio stations.
If you still cannot use the FM radio after performing these
steps, try accessing your desired station with another radio
receiver. If you can hear the station with another receiver,
your device may require service. Contact a Samsung Service
Centre.
Error messages appear when opening music files
Some music files may not play on your Samsung mobile
device for a variety of reasons. If you receive error messages
when opening music files on your device, try the following:
● Free some memory by transferring files to a PC or deleting
files from your device.
● Ensure that the music file is not Digital Rights Management
(DRM)-protected. If the file is DRM-protected, ensure that
you have the appropriate licence or key to play the file.
● Ensure that your device supports the file type.Troubleshooting
144
Another Bluetooth device is not located
● Ensure that the Bluetooth wireless feature is activated on
your device.
● Ensure that the Bluetooth wireless feature is activated on
the device you wish to connect to, if necessary.
● Ensure that your device and the other Bluetooth device are
within the maximum Bluetooth range (10 m).
If the tips above do not solve the problem, contact a Samsung
Service Centre.
A connection is not established when you connect
the device to a PC
● Ensure that the PC data cable you are using is compatible
with your device.
● Ensure that you have the proper drivers installed and
updated on your PC.Safety precautions
145
Safety precautions
To prevent injury to yourself and others or damage to your device, read all of
the following information before using your device.
Warning: Prevent electric shock, fire, and
explosion
Do not use damaged power cords or plugs, or loose electrical
sockets
Do not touch the power cord with wet hands, or disconnect the
charger by pulling on the cord
Do not bend or damage the power cord
Do not use your device while charging or touch your device with
wet hands
Do not short-circuit the charger or the battery
Do not drop or cause an impact to the charger or the battery
Do not charge the battery with chargers that are not approved by
the manufacturer
Do not use your device during a thunderstorm
Your device may malfunction and your risk of electric shock is increased.
Do not handle a damaged or leaking Lithium Ion (Li-Ion) battery
For safe disposal of your Li-Ion batteries, contact your nearest authorised
service centre.
Handle and dispose of batteries and chargers with care
• Use only Samsung-approved batteries and chargers specifically designed for
your device. Incompatible batteries and chargers can cause serious injuries
or damage to your device.
• Never dispose of batteries or devices in a fire. Follow all local regulations
when disposing of used batteries or devices.Safety precautions
146
• Never place batteries or devices on or in heating devices, such as microwave
ovens, stoves, or radiators. Batteries may explode when overheated.
• Never crush or puncture the battery. Avoid exposing the battery to high
external pressure, which can lead to an internal short circuit and overheating.
Protect the device, batteries, and chargers from damage
• Avoid exposing your device and batteries to very cold or very hot
temperatures.
• Extreme temperatures can cause the deformation of the device and reduce
the charging capacity and life of your device and batteries.
• Prevent batteries from contacting metal objects, as this can create a
connection between the + and – terminals of your batteries and lead to
temporary or permanent battery damage.
• Never use a damaged charger or battery.
Caution: Follow all safety warnings and
regulations when using your device in restricted
areas
Turn off your device where prohibited
Comply with all regulations that restrict the use of a mobile device in a
particular area.
Do not use your device near other electronic devices
Most electronic devices use radio frequency signals. Your device may interfere
with other electronic devices.
Do not use your device near a pacemaker
• Avoid using your device within a 15 cm range of a pacemaker if possible, as
your device can interfere with the pacemaker.
• If you must use your device, keep at least 15 cm away from the pacemaker.
• To minimise the possible interference with a pacemaker, use your device on
the opposite side of your body from the pacemaker.
Do not use your device in a hospital or near medical equipment
that can be interfered with by radio frequency
If you personally use any medical equipment, contact the manufacturer of the
equipment to ensure the safety of your equipment from radio frequency.Safety precautions
147
If you are using a hearing aid, contact the manufacturer for
information about radio interference
Some hearing aids may be interfered with by the radio frequency of your
device. Contact the manufacturer to ensure the safety of your hearing aid.
Turn off the device in potentially explosive environments
• Turn off your device in potentially explosive environments instead of
removing the battery.
• Always comply with regulations, instructions and signs in potentially
explosive environments.
• Do not use your device at refuelling points (service stations), near fuels or
chemicals, and at blasting areas.
• Do not store or carry flammable liquids, gases, or explosive materials in the
same compartment as the device, its parts, or accessories.
Turn off your device when in an aircraft
Using your device in an aircraft is illegal. Your device may interfere with the
electronic navigation instruments of the aircraft.
Electronic devices in a motor vehicle may malfunction due to the
radio frequency of your device
Electronic devices in your car may malfunction due to radio frequency of your
device. Contact the manufacturer for more information.
Comply with all safety warnings and regulations
regarding mobile device usage while operating a
vehicle
While driving, safely operating the vehicle is your first responsibility. Never use
your mobile device while driving, if it is prohibited by law. For your safety and
the safety of others, practice good common sense and remember the following
tips:
• Use a hands-free device.
• Get to know your device and its convenience features, such as speed dial and
redial. These features help you reduce the time needed to place or receive
calls on your mobile device.
• Position your device within easy reach. Be able to access your wireless device
without removing your eyes from the road. If you receive an incoming call at
an inconvenient time, let your voice mail answer it for you.Safety precautions
148
• Let the person you are speaking with know you are driving. Suspend calls
in heavy traffic or hazardous weather conditions. Rain, sleet, snow, ice, and
heavy traffic can be hazardous.
• Do not take notes or look up phone numbers. Jotting down a “to do” list or
flipping through your address book takes attention away from your primary
responsibility of driving safely.
• Dial sensibly and assess the traffic. Place calls when you are not moving or
before pulling into traffic. Try to plan calls when your car will be stationary.
If you need to make a call, dial only a few numbers, check the road and your
mirrors, then continue.
• Do not engage in stressful or emotional conversations that may be
distracting. Make people you are talking with aware you are driving and
suspend conversations that have the potential to divert your attention from
the road.
• Use your device to call for help. Dial a local emergency number in the case of
fire, traffic accident, or medical emergencies.
• Use your device to help others in emergencies. If you see an auto accident,
a crime in progress, or a serious emergency where lives are in danger, call a
local emergency number.
• Call roadside assistance or a special, non-emergency assistance number
when necessary. If you see a broken-down vehicle posing no serious hazard,
a broken traffic signal, a minor traffic accident where no one appears injured,
or a vehicle you know to be stolen, call roadside assistance or another
special, non-emergency number.
Proper care and use of your mobile device
Keep your device dry
• Humidity and all types of liquids may damage device parts or electronic
circuits.
• When wet, remove the battery without turning on your device. Dry your
device with a towel and take it to a service centre.
• Liquids will change the colour of the label that indicates water damage
inside the device. Water damage to your device can void your manufacturer’s
warranty.
Do not use or store your device in dusty, dirty areas
Dust can cause your device to malfunction.
Do not store your device on slopes
If your device falls, it can be damaged.Safety precautions
149
Do not store your device in hot or cold areas. Use your device at
-20 °C to 50 °C
• Your device can explode if left inside a closed vehicle, as the inside
temperature can reach up to 80 °C.
• Do not expose your device to direct sunlight for extended periods of time
(such as on the dashboard of a car).
• Store the battery at 0 °C to 40 °C.
Do not store your device with such metal objects as coins, keys and
necklaces
• Your device may become deformed or malfunction.
• If the battery terminals are in contact with metal objects, it may cause a fire.
Do not store your device near magnetic fields
• Your device may malfunction or the battery may discharge from exposure to
magnetic fields.
• Magnetic stripe cards, including credit cards, phone cards, passbooks, and
boarding passes, may be damaged by magnetic fields.
• Do not use carrying cases or accessories with magnetic closures or allow
your device to come in contact with magnetic fields for extended periods of
time.
Do not store your device near or in heaters, microwaves, hot
cooking equipment, or high pressure containers
• The battery may leak.
• Your device may overheat and cause a fire.
Do not drop your device or cause impacts to your device
• The screen of your device may be damaged.
• If bent or deformed, your device may be damaged or parts may malfunction.
Do not use a flash close to the eyes of people or animals
Using a flash close to the eyes may cause temporary loss of vision or damage to
the eyes.
Ensure maximum battery and charger life
• Avoid charging batteries for more than a week, as overcharging may shorten
battery life.
• Over time, unused batteries will discharge and must be recharged before
use.
• Disconnect chargers from power sources when not in use.
• Use batteries only for their intended purposes.Safety precautions
150
Use manufacturer-approved batteries, chargers, accessories and
supplies
• Using generic batteries or chargers may shorten the life of your device or
cause the device to malfunction.
• Samsung cannot be responsible for the user’s safety when using accessories
or supplies that are not approved by Samsung.
Do not bite or suck on the device or the battery
• Doing so may damage the device or cause explosion.
• If children use the device, make sure that they use the device properly.
When speaking on the device:
• Hold the device upright, as you would with a traditional phone.
• Speak directly into the mouthpiece.
• Avoid contact with your device’s internal antenna. Touching the antenna
may reduce the call quality or cause the device to transmit more radio
frequency than necessary.
• Hold the device with a relaxed grip, press the keys lightly, use special features
that reduce the number of keys you have to press (such as templates and
predictive text), and take frequent breaks.
Protect your hearing
• Excessive exposure to loud sounds can cause hearing
damage.
• Exposure to loud sounds while driving may distract your
attention and cause an accident.
• Always turn the volume down before plugging the
earphones into an audio source and use only the minimum
volume setting necessary to hear your conversation or
music.
Use caution when using the device while walking or moving
Always be aware of your surroundings to avoid injury to yourself or others.
Do not carry your device in your back pockets or around your waist
You can be injured or damage the device if you fall.
Do not disassemble, modify, or repair your device
• Any changes or modifications to your device can void your manufacturer’s
warranty. For service, take your device to a Samsung Service Centre.
• Do not disassemble or puncture the battery, as this can cause explosion or
fire.Safety precautions
151
Do not paint or put stickers on your device
Paint and stickers can clog moving parts and prevent proper operation. If you
are allergic to paint or metal parts of the product, you may experience itching,
eczema, or swelling of the skin. When this happens, stop using the product and
consult your physician.
When cleaning your device:
• Wipe your device or charger with a towel or a rubber.
• Clean the terminals of the battery with a cotton ball or a towel.
• Do not use chemicals or detergents.
Do not use the device if the screen is cracked or broken
Broken glass or acrylic could cause injury to your hands and face. Take the
device to a Samsung Service Centre to have it repaired.
Do not use the device for anything other than its intended use
Avoid disturbing others when using the device in public
Do not allow children to use your device
Your device is not a toy. Do not allow children to play with it as they could hurt
themselves and others, damage the device, or make calls that increase your
charges.
Install mobile devices and equipment with caution
• Ensure that any mobile devices or related equipment installed in your vehicle
are securely mounted.
• Avoid placing your device and accessories near or in an air bag deployment
area. Improperly installed wireless equipment can cause serious injury when
air bags inflate rapidly.
Allow only qualified personnel to service your device
Allowing unqualified personnel to service your device may result in damage to
your device and will void your manufacturer’s warranty.
Handle SIM cards or memory cards with care
• Do not remove a card while the device is transferring or accessing
information, as this could result in loss of data and/or damage to the card or
device.
• Protect cards from strong shocks, static electricity, and electrical noise from
other devices.
• Do not touch gold-coloured contacts or terminals with your fingers or metal
objects. If dirty, wipe the card with a soft cloth.Safety precautions
152
Ensure access to emergency services
Emergency calls from your device may not be possible in some areas or
circumstances. Before travelling in remote or undeveloped areas, plan an
alternate method of contacting emergency services personnel.
Be sure to back up important data
Samsung is not responsible for data loss.
Do not distribute copyright-protected material
Do not distribute copyright-protected material that you have recorded to
others without the permission of the content owners. Doing this may violate
copyright laws. The manufacturer is not liable for any legal issues caused by the
user’s illegal use of copyrighted material.
Specific Absorption Rate (SAR) certification
information
Your device conforms to European Union (EU) standards that limit
human exposure to radio frequency (RF) energy emitted by radio and
telecommunications equipment. These standards prevent the sale of mobile
devices that exceed a maximum exposure level (known as the Specific
Absorption Rate, or SAR) of 2.0W/kg.
During testing, the maximum SAR recorded for this model was 0.338W/kg. In
normal use, the actual SAR is likely to be much lower, as the device has been
designed to emit only the RF energy necessary to transmit a signal to the
nearest base station. By automatically emitting lower levels when possible,
your device reduces your overall exposure to RF energy.
The Declaration of Conformity statement at the back of this manual
demonstrates your device’s compliance with the European Radio & Terminal
Telecommunications Equipment (R&TTE) directive. For more information about
the SAR and related EU standards, visit the Samsung website.Safety precautions
153
Correct disposal of this product
(Waste Electrical & Electronic Equipment)
(Applicable in the European Union and other European countries
with separate collection systems)
This marking on the product, accessories or literature indicates
that the product and its electronic accessories (e.g. charger,
headset, USB cable) should not be disposed of with other
household waste at the end of their working life.
To prevent possible harm to the environment or human health
from uncontrolled waste disposal, please separate these items from other types
of waste and recycle them responsibly to promote the sustainable reuse of
material resources.
Household users should contact either the retailer where they purchased this
product, or their local government office, for details of where and how they can
take these items for environmentally safe recycling.
Business users should contact their supplier and check the terms and
conditions of the purchase contract. This product and its electronic accessories
should not be mixed with other commercial wastes for disposal.
This EEE is compliant with RoHS.
Correct disposal of batteries in this product
(Applicable in the European Union and other European countries
with separate battery return systems)
This marking on the battery, manual or packaging indicates
that the batteries in this product should not be disposed of with
other household waste at the end of their working life. Where
marked, the chemical symbols Hg, Cd or Pb indicate that the
battery contains mercury, cadmium or lead above the reference levels in EC
Directive 2006/66. If batteries are not properly disposed of, these substances
can cause harm to human health or the environment.
To protect natural resources and to promote material reuse, please separate
batteries from other types of waste and recycle them through your local, free
battery return system.Safety precautions
154
Disclaimer
Some content and services accessible through this device belong to third
parties and are protected by copyright, patent, trademark and/or other
intellectual property laws. Such content and services are provided solely for
your personal noncommercial use. You may not use any content or services in a
manner that has not been authorised by the content owner or service provider.
Without limiting the foregoing, unless expressly authorised by the applicable
content owner or service provider, you may not modify, copy, republish,
upload, post, transmit, translate, sell, create derivative works, exploit, or
distribute in any manner or medium any content or services displayed through
this device.
“THIRD PARTY CONTENT AND SERVICES ARE PROVIDED “AS IS.” SAMSUNG
DOES NOT WARRANT CONTENT OR SERVICES SO PROVIDED, EITHER EXPRESSLY
OR IMPLIEDLY, FOR ANY PURPOSE. SAMSUNG EXPRESSLY DISCLAIMS ANY
IMPLIED WARRANTIES, INCLUDING BUT NOT LIMITED TO, WARRANTIES OF
MERCHANTABILITY OR FITNESS FOR A PARTICULAR PURPOSE. SAMSUNG
DOES NOT GUARANTEE THE ACCURACY, VALIDITY, TIMELINESS, LEGALITY, OR
COMPLETENESS OF ANY CONTENT OR SERVICE MADE AVAILABLE THROUGH
THIS DEVICE AND UNDER NO CIRCUMSTANCES, INCLUDING NEGLIGENCE,
SHALL SAMSUNG BE LIABLE, WHETHER IN CONTRACT OR TORT, FOR ANY
DIRECT, INDIRECT, INCIDENTAL, SPECIAL OR CONSEQUENTIAL DAMAGES,
ATTORNEY FEES, EXPENSES, OR ANY OTHER DAMAGES ARISING OUT OF, OR IN
CONNECTION WITH, ANY INFORMATION CONTAINED IN, OR AS A RESULT OF
THE USE OF ANY CONTENT OR SERVICE BY YOU OR ANY THIRD PARTY, EVEN IF
ADVISED OF THE POSSIBILITY OF SUCH DAMAGES.”
Third party services may be terminated or interrupted at any time, and
Samsung makes no representation or warranty that any content or service will
remain available for any period of time. Content and services are transmitted
by third parties by means of networks and transmission facilities over which
Samsung has no control. Without limiting the generality of this disclaimer,
Samsung expressly disclaims any responsibility or liability for any interruption
or suspension of any content or service made available through this device.
Samsung is neither responsible nor liable for customer service related to the
content and services. Any question or request for service relating to the content
or services should be made directly to the respective content and service
providers.Index
155
access codes 139
alarms
creating 112
deactivating 112
stopping 112
AllShare 103
auto rejection 46
battery
charging 12
installing 11
Bluetooth
activating 97
finding and pairing with
devices 98
receiving data 99
sending data 98
brightness, display 31
calculator 114
calendar
creating events 82
viewing events 82
call barring 47
call forwarding 47
call log 48
calls
answering 43
barring 47
forwarding 47
international numbers 43
multiparty 44
rejecting 43
using headset 43
using options during
voice 44
viewing missed 45
waiting 47
call waiting 47
camera
capturing photos 57
customising camcorder 67
customising camera 62
recording videos 64
connections
Bluetooth 97
DLNA 103
PC 108
VPN 110
WLAN 99
contacts
copying 80
creating 78
finding 79
importing or exporting 81
setting speed dial 79
device
customising 29
indicator icons 21
keys 20
layout 19
settings 121
shortcuts panel 26
turning on or off 18
display language 131
IndexIndex
156
Kies air 116
memory card
formatting 17
inserting 15
removing 16
memos
creating 84
viewing 84
menu screen
accessing 27
adding folders or panels 28
organising applications 28
messages
accessing voice mail 50
sending email 53
sending multimedia 49
sending text 48
setting email accounts 52
mini diary 117
multimedia messages
sending 49
viewing 50
music hub 74
music player
adding files 71
creating playlists 72
playing music 72
news & weather 96
PC connections
mass storage 109
Samsung Kies 108
Windows Media Player 109
phonebook
creating contacts 78
DLNA
see AllShare
downloads
applications 38
files 39
managing 115
email
sending 53
setting accounts 52
viewing 54
file manager 118
fixed dialling number
mode 46
flight mode 18
FM radio
listening to 74
saving stations 75
gallery
file formats 68
playing videos 70
viewing photos 69
game hub 77
Google Mail 50
Google Maps 89
Google Search 92
Google Talk 54
idle screen
adding items 25
adding panels 26
instant messenger 56
internet
see web browserIndex
157
language and input 131
location services 128
more 121
motion 137
power saving 127
security 129
sound 125
storage 127
silent mode 30
SIM card
installing 11
locking 33
Social Hub 56
stopwatch 113
synchronisation
with web accounts 40
task manager 119
tasks
creating 83
viewing 83
text input 34
text memos 84
text messages
sending 48
viewing 50
time and date, set 29
touch screen
locking 24
using 23
unpack 10
USIM card
installing 11
locking 33
creating groups 80
creating your namecard 79
finding contacts 79
photo editor 70
photos
capturing 57
capturing action 61
capturing by scene 59
capturing in beauty
mode 60
capturing in cartoon
mode 62
capturing in smile shot 60
capturing panoramic 61
capturing yourself 60
viewing 69
PIN lock 33
Polaris Office 118
readers hub 95
Samsung Apps 94
Samsung Kies 108
settings
about phone 138
accessibility 136
accounts and sync 128
applications 128
back up and reset 135
battery 128
Bluetooth 121
call 123
data usage 121
date and time 136
developer options 137
display 125
dock 135Index
158
video calls
answering 43
making 42
using options 45
video player 67, 70
videos
playing 67, 70
recording 64
voice calls
answering 43
making 42
using options 44
voice command 120
voice mail 50
voice memos
playing 85
recording 85
VPN connections
connecting to 111
creating 110
web browser
adding bookmarks 88
browsing web pages 86
WLAN
activating 100
finding and connecting to
networks 100
using WPS 101
world clock 113
YouTube
uploading videos 93
watching videos 93Declaration of Conformity (R&TTE)
We, Samsung Electronics
declare under our sole responsibility that the product
GSM WCDMA Wi-Fi Mobile Phone : GT-I9100
to which this declaration relates, is in conformity with the following standards and/or
other normative documents.
SAFETY EN 60950-1 : 2006 + A11:2009
SAR EN 50360 : 2001 / AC 2006
EN 62209-1 : 2006
EMC EN 301 489-01 V1.8.1 (04-2008)
EN 301 489-07 V1.3.1 (11-2005)
EN 301 489-17 V2.1.1 (05-2009)
EN 301 489-24 V1.4.1 (09-2007)
RADIO EN 301 511 V9.0.2 (03-2003)
EN 300 328 V1.7.1 (10-2006)
EN 301 908-1 V4.2.1 (03-2010)
EN 301 908-2 V4.2.1 (03-2010)
EN 300 440-1 V1.5.1 (03-2009)
EN 300 440-2 V1.3.1 (03-2009)
EN 301 893 V1.5.1 (12-2008)
We hereby declare that [all essential radio test suites have been carried out and that]
the above named product is in conformity to all the essential requirements of Directive
1999/5/EC.
The conformity assessment procedure referred to in Article 10 and detailed in Annex[IV]
of Directive 1999/5/EC has been followed with the involvement of the following Notified
Body(ies):
BABT, Forsyth House,
Churchfield Road,
Walton-on-Thames,
Surrey, KT12 2TD, UK*
Identification mark: 0168
The technical documentation kept at :
Samsung Electronics QA Lab.
which will be made available upon request.
(Representative in the EU)
Samsung Electronics Euro QA Lab.
Blackbushe Business Park, Saxony Way,
Yateley, Hampshire, GU46 6GG, UK*
2011.05.23 Joong-Hoon Choi / Lab Manager
(place and date of issue) (name and signature of authorised person)
* It is not the address of Samsung Service Centre. For the address or the phone number of Samsung
Service Centre, see the warranty card or contact the retailer where you purchased your product.Some of the contents in this manual may differ from your
device depending on the software of the device or your service
provider.
www.samsung.com English (EU). 05/2012. Rev. 1.2
To install Kies (PC Sync)
1. Download the latest version of Kies from the
Samsung website (www.samsung.com/kies) and
install it on your PC.
2. Using a PC data cable, connect your device to your
PC.
3. Double-click the Samsung Kies icon on your PC to
launch Samsung Kies.
Refer to the Kies help for more information.
用户指南 CHS
www.samsungcomputer.com
사용설명서 KOR
USER GUIDE ENG
คูมือผูใช THA
Hướng dẫn sử dụng VIE
Panduan IND
Руководство пользователя RUS
Пайдаланушы нұсқаулығы KAZ
Kullanım Kılavuzu TUR
使用者指南 CHT
ARA ﺩﻟﻴﻞ ﺍﳌﺴﺘﺨﺪﻡ
BA68-07938C13 120315
BA68- 07938C13
300E4Z/300E5Z/300E7Z/
305E4Z/305E5Z/305E7Z/
300E4X/300E5X/300E7X
Thank you for purchasing a Samsung Computer2 333
目录
차례 / Contents / สารบัญ / Nội dung / Isi / Содержание / Мазмұны / İçindekiler / 目錄 / احملتويات
1. 基本部件..............................................6
기본 구성물 / Basic Items / ผลิตภัณฑ์พื้นฐาน / Các linh kiện cơ bản / Item Dasar /
Основные устройства / Негізгі элементтері / Temel Öğeler / 基本物件 / األساسية العناصر
2. 概览..................................................7
각 부분의 명칭 / Overview / ภาพรวม / Tổng quan / Ikhtisar / Обзор / Жалпы көрінісі / Genel Bakış / 總覽
نظرة عامة /
3. 打开计算机...........................................10
컴퓨터 켜기 / Turn on the computer / เปิดคอมพิวเตอร์ / Bật máy tính / Menghidupkan komputer /
Включите компьютер / Компьютерді іске қосу / Bilgisayarı açın / 開啟電腦 /الكمبيوتر جهاز تشغيل
4. 产品规格.............................................11
제품 규격..............................................................................................................................................................................................................11
产品规格.................................................................................................................................................................................................................11
Product Specifications.......................................................................................................................................................................................12
ข้อมูลจ�าเพาะของผลิตภัณฑ์.................................................................................................................................................................12
Các thông số của sản phẩm.............................................................................................................................................................................13
Spesifikasi Produk................................................................................................................................................................................................13
Өнімнің сипаттамасы .................................................................................................................................. 14
Характеристики продукта .............................................................................................................................................................................14
Ürün özellikleri......................................................................................................................................................................................................14
產品規格.............................................................................................................................................................. 15
مواصفات املنتج.................................................................................................................................................................................................................................................. 16
5. 安全注意事项. ........................................17
안전을 위한 주의사항........................................................................................................................................................................................17
Safety Precautions...............................................................................................................................................................................................17
ข้อควรระวังเพื่อความปลอดภัย.................................................................................................................................................................................17
Các khuyến cáo về an toàn .............................................................................................................................................................................17
Peringatan Keselamatan...................................................................................................................................................................................17
Меры предосторожности..............................................................................................................................................................................17
Сақтық шаралары...........................................................................................................................................................................................17
Güvenlik Önlemleri .............................................................................................................................................................................................17
安全使用要點.........................................................................................................................................................................................................17
احتياطات األمان...................................................................................................................................................................................................................................................174
有关更多信息,请参阅 DVD 上提供的 PDF 手册。
您需要安装 Adobe Reader 以便阅读此用户手册。
包装中包含的部件取决于您选择的可选部件。
某些部件可能被类似产品取代,图片中端口的外观、颜色和位置可能与您计算机的实际情况不同。
购买本产品之后,在第一次使用前,请把电池充足电。
자세한 내용은 DVD로 제공되는 PDF 타입의 사용 설명서를 참조하세요.
사용 설명서는 Adobe Reader를 설치해야만 볼 수 있습니다.
기본 구성물은 모델에 따라 다르게 제공될 수 있으며, 컴퓨터의 외관과 색상, 포트 위치는 사진과 다르게 제공될 수 있습니다.
컴퓨터 구입 후 최초 사용시에는 배터리를 충분히 충전한 후에 사용하세요.
For more information, please refer to a PDF manual by DVD.
You need to install Adobe Reader to read the user manual.
The items included in the package may vary depending on your selection of the optional items.
The appearance, color and locations of the port in the pictures may differ from those of your computer
Charge the battery fully when using the computer for the first time.
ส�าหรับข้อมูลเพิ่มเติม โปรดดูที่คู่มือ PDF ใน DVD
คุณต้องติดตั้ง Adobe Reader เพื่ออ่านคู่มือผู้ใช้
์ผลิตภัณฑ์ที่รวมในบรรจุภัณฑ์นี้อาจแตกต่างกันไปตามการเลือกผลิตภัณฑ์ที่เป็นตัวเลือก
ลักษณะ สี และต�าแหน่งของพอร์ตในภาพอาจแตกต่างจากในคอมพิวเตอร์ของคุณ
โปรดชาร์จแบตเตอรี่ให้เต็มก่อนที่จะใช้คอมพิวเตอร์เป็นครั้งแรก
Để biết thêm thông tin, tham khảo hướng dẫn PDF bằng DVD.
Bạn cần cài đặt chương trình Adobe Reader để đọc bản hướng dẫn sử dụng.
Các linh kiện trong gói sản phẩm này có thể thay đổi tùy theo lựa chọn linh kiện tùy chọn của bạn.
Hình dạng, màu sắc và vị trí của cổng trong hình có thể khác so với máy tính của bạn.
Sạc đầy pin khi sử dụng máy tính lần đầu tiên.
FUntuk informasi lebih lanjut, lihat panduan PDF pada DVD.
Anda harus menginstal Adobe Reader untuk membaca panduan pengguna.
Item yang disertakan dalam kemasan mungkin berbeda tergantung pada pilihan item opsional Anda.
Tampilan, warna, dan lokasi port pada gambar mungkin berbeda dengan port pada komputer Anda.
Isi penuh baterai ketika menggunakan komputer untuk pertama kali.
Для получения дополнительной информации см. руководство в формате PDF на DVD-диске.
Для просмотра руководства пользователя необходимо установить Adobe Reader.
Комплектация поставки может различаться в зависимости от вашего выбора дополнительных устройств.
Внешний вид, цвет и расположение порта на изображениях могут отличаться от фактических.
При первом использовании компьютера зарядите аккумулятор полностью.
Толығырақ ақпарат алу DVD дискіндегі PDF пайдалану нұсқаулығын қараңыз.
Пайдаланушы нұсқаулығын оқу үшін Adobe Reader бағдарламасын орнатуыңыз керек.
Жинаққа кіретін элементтердің қатарына, қалауыңызша таңдауға болатын элементтер де кіретіндіктен, оның
құрамы әртүрлі болуы мүмкін.
Суретте көрсетілген ұяшықтардың сырт көрінісі, түсі және орналасқан орны сіздің компьютеріңізбен
салыстырғанда өзгеше болуы мүмкін.
Компьютерді ең алғаш рет іске қосарда, батареясын толық зарядтаңыз.5
Daha fazla bilgi için, lütfen DVD ile sağlanan PDF kılavuzuna bakın.
Kullanıcı kılavuzunu okumak için Adobe Reader yüklemeniz gerekir.
Pakette bulunan öğeler, seçtiğiniz opsiyonel öğelere bağlı olarak değişebilir.
Resimlerdeki baglantı noktalarının görünümü, rengi ve yerleri bilgisayarınızdan farklı olabilir.
Bilgisayarı ilk kez kullanmadan önce, pili tamamen şarj edin.
要獲得更多資訊,請參閱 DVD 上的 PDF 手冊。
為閱讀此使用者手冊,您需要安裝 Adobe Reader。
視您選擇的選購物件而定,此套件中包含的物件可能有所不同。
圖片中連接埠的外觀、顏色和位置可能與您電腦的實際情況有所不同。
在初次使用電腦時,請先為電池完全充電。
ملزيد من املعلومات، الرجاء الرجوع إلى دليل PDF املرفق على DVD.
ستحتاج إلى تثبيت برنامج Adobe Reader لقراءة دليل املستخدم.
ً قد تختلف العناصر املوجودة داخل الغالف وفقا الختيارك للعناصر االختيارية. قد يتم استبدال بعض العناصر مبنتجات مشابهة كما قد يختلف لون بعض العناصر عن
اللون املوجود في هذه الوثيقة.
قد يختلف شكل املنفذ ولونه ومكانه في الصور عن جهاز الكمبيوتر اخلاص بك.
الرجاء شحن البطارية بالكامل عند استخدام الكمبيوتر للمرة األولى.6
交流适配器
AC 어댑터 / AC Adapter /
อะแดปเตอร์ไฟฟ้ากระแสสลับ /
Bộ thích ứng AC / Adaptor AC /
Адаптер переменного тока /
АТ адаптері / AC Adaptörü / 變電器 /
电源线
전원 케이블 / Power Cable /
สายไฟ / Cáp nguồn / Kabel Daya /
Кабель подачи питания / Қорек сымы /
Güç Kablosu / 電源線 /
计算机
컴퓨터 / Computer /
คอมพิวเตอร์ / Máy tính /
Komputer / Компьютер /
Компьютер / Bilgisayar / 電腦 /
标准型电池
배터리 / Standard Battery /
แบตเตอรี่มาตรฐาน / Pin chuẩn /
Baterai Standar /
Стандартная батарея /
Стандартты батарея /
Standart Pil / 標準電池 /
PUSH
20% 40% 60% 80% 100%
基本部件
기본 구성물 / Basic Items / ผลิตภัณฑ์พื้นฐาน / Các linh kiện cơ bản / Item Dasar /
Основные устройства / Негізгі элементтері / Temel Öğeler / 目錄 / األساسية العناصر
جهاز كمبيوتر
محول تيار متردد
سلك كهرباء
بطارية أساسية7
概览
각 부분의 명칭 / Overview / ภาพรวม / Tổng quan / Ikhtisar /
Обзор / Жалпы көрінісі / Genel Bakış / 總覽 /
z 摄像头 (可选)
카메라 (선택 사양) / Camera (Optional) / เลนส์กล้อง (ตัวเลือก) / Camera (tùy chọn) / Kamera (Opsional) /
Камера (дополнительно) / Камера (опция) / Kamera (İsteğe bağlı) / 相機 (選用) / (اختياري) الكاميرا
x 电源按钮
전원 버튼 / Power Button / ปุ่มเปิด/ปิด / Nút nguồn / Tombol Daya /
Кнопка питания / Қуат түймешігі / Güç Düğmesi / 電源按鈕 / التشغيل زر
c 扬声器
스피커 / Speaker / ล�าโพง / Loa / Speaker / Громкоговоритель / Үндеткіш / Hoparlör / 喇叭 / صوت مكبر
v 触摸板/触摸板按钮
터치패드/터치패드버튼 / Touchpad/Touchpad buttons / ทัชแพด/ปุ่มทัชแพด / Touchpad/Các tấm cảm ứng Touchpad /
Touchpad/Tombol Touchpad / Сенсорная панель/Кнопки сенсорной панели /
Сенсорлық панель/Сенсорлық панель түймешіктері / Dokunmatik panel/Dokunmatik panel düğmeleri /
لوحة اللمس/ أزرار لوحة اللمس / 觸控板/觸控板按鈕
b 麦克风
마이크 / Microphone / ไมโครโฟน / Microphone / Mikrofon / Микрофон / Микрофон / Mikrofon / 麥克風 / ميكروفون
n 多卡插槽 (可选)
멀티카드 슬롯 (선택 사양) / Multi Card Slot (Optional) / สล็อตมัลติการ์ด (ตัวเลือก) /
Khe cắm thẻ nhớ đa năng (tùy chọn) / Slot Multi Kartu (Opsional) /
Универсальное гнездо для карт (дополнительно) / Мульти-карта ұяшығы (опция) /
Çoklu Kart Yuvası (İsteğe bağlı) / 多媒體卡插槽 (選用) / (اختيارية) املتعددة البطاقات فتحة
m 状态指示灯
동작 표시등 / Status Indicators / สัญญาณบอกสถานะ / Đèn trạng thái / Indikator Status /
Индикаторы состояния / Қалып-күй индикаторлары / Durum Göstergeleri / 狀態指示燈 / احلالة مؤشرات
前视图
앞면 / Front View / ภาพด้านหน้า / Góc nhìn phía trước / Tampak Depan /
Вид спереди / Алдыңғы көрінісі / Önden Görünüm / 前視圖 /
نظرة عامة
منظر أمامي
z 摄像头镜头 (可选)
x 电源按钮
c 扬声器
v 触摸板/触摸板按钮
b 麦克风
n 多卡插槽 (可选)
m 状态指示灯8
左视图
왼쪽면 / Left View / ภาพด้านซ้าย / Góc nhìn bên trái / Tampak Kiri /
Вид слева / Сол жақ көрініс / Soldan Görünüm / 左視圖 / األيسر اجلانب من منظر
z直流电插孔 c风扇通风孔
x有线 LAN 端口 v显示器端口 ,耳机插孔
b数字视频/音频接口 (HDMI) (可选) m 麦克风插孔
nUSB 端口 (可选)
z 直流电插孔
전원 입력 잭 / DC Jack / แจ็ค DC / Jack cắm DC / Jack DC /
Разъем питания постоянного тока / DC ұяшығы / DC Girişi / DC 插孔 / DC مقبس
x 有线 LAN 端口
유선랜 포트 / Wired LAN Port / พอร์ต LAN ชนิดมีสาย / Cổng LAN có dây / Por t LAN Kabel /
Порт проводной LAN / LAN құрылғысы сым арқылы қосылатын ұяшық / Kablolu LAN Bağlantı Noktası /
有線 LAN 連接埠 / السلكية LAN شبكة منفذ
c 风扇通风孔
통풍구 / Fan Vents / ช่องระบายความร้อนพัดลม / Khe thông gió / Ventilasi Kipas / Вентиляционные отверстия /
Желдеткіш саңылаулар / Fan Delikleri / 通風孔 / املروحة فتحات
v 显示器端口
모니터 포트 / Monitor Port / พอร์ตจอภาพ / Cổng màn hình / Port Monitor /
Порт монитора / Монитор ұяшығы / Monitör Bağlantı Noktası / 顯示器連接埠 / الشاشة منفذ
b 数字视频/音频接口 (HDMI) (可选)
디지털 영상/음성 포트 (HDMI) (선택 사양) / Digital Video, Audio Port (HDMI) (Optional) /
พอร์ตวิดีโอ/เสียงแบบดิจิทัล (HDMI) (ตัวเลือก) / Cổng hình ảnh/âm thanh số (HDMI) (tùy chọn) /
Port Video, Audio Digital (HDMI) (Opsional) / Цифровой видео-, аудиопорт (HDMI) (дополнительно) /
Сандық видео, аудио ұяшығы (HDMI) (опция) / Dijital Video, Ses Bağlantı Noktası (HDMI) (İsteğe bağlı) /
منفذ صوت/فيديو رقمي (HDMI) (اختيارية) / (數位視訊, 音訊連接埠 (HDMI) (選用
n USB 端口 (可选)
USB 포트 (선택 사양) / USB Port (Optional) / พอร์ต USB (ตัวเลือก) / Cổng USB (tùy chọn) / Port USB (Opsional) /
Порт USB (дополнительно) / USB ұяшығы (опция)/ USB Bağlantı Noktası (İsteğe bağlı) / USB 連接埠 (選用) /
منفذ USB (اختيارية)
m 麦克风插孔
마이크 잭 / Microphone Jack / แจ็คไมโครโฟน / Jack cắm microphone / Jack Mikrofon /
Гнездо микрофона / Микрофон ұяшығы / Kulaklık Girişi / 麥克風插孔 / امليكروفون مقبس
, 耳机插孔
헤드폰 잭 / Headphone Jack / แจ็คหูฟัง / Jack cắm tai nghe / Jack Headphone /
Разъем для наушников / Құлаққап ұяшығы / Kulaklık Girişi / 耳機插孔 / الرأس سماعة مقبس9
右视图
오른쪽면 / Right View / ภาพด้านขวา / Góc nhìn bên phải / Tampak Kanan /
Вид справа / Оң жақ көрініс / Sağdan Görünüm / 右視圖 / األمين اجلانب من منظر
z CD 驱动器 (可选)
CD 드라이브 (ODD) (선택 사양) / CD Drive (ODD) (Optional) / ไดรฟ์ซีดี (ODD) (ตัวเลือก) / Ổ CD (ODD) (tùy chọn) /
CD Drive(ODD) (Opsional) / Дисковод компакт-дисков (дополнительно) / CD құралы (ODD) (опция) /
CD Sürücüsü (ODD) (İsteğe bağlı) / CD 光碟機 (ODD) (選購) /
محرك أقراص مضغوطة (تعد ODD ”األقراص الرقمية الضوئية“) (اختيارية)
x USB 端口 (可选)
USB 포트 (선택 사양) / USB Port (Optional) / พอร์ต USB (ตัวเลือก) / Cổng USB (tùy chọn) / Port USB (Opsional) /
Порт USB (дополнительно) / USB ұяшығы (опция)/ USB Bağlantı Noktası (İsteğe bağlı) / USB 連接埠 (選用) /
منفذ USB (اختيارية)
c 安全锁孔
잠금장치 홀 / Security Slot / สล็อตรักษาความปลอดภัย / Khe an toàn / Slot Keamanan / Гнездо замка безопасности /
Қауіпсіздік ұяшығы / Güvenlik Yuvası / 安全插槽 / األمان فتحة
c 安全锁孔
z CD 驱动器 (可选) xUSB 端口 (可选)10
连接 AC 适配器
AC 어댑터 연결 / Connect the AC adapter / ต่ออะแดปเตอร์ไฟฟ้ากระแสสลับ / Nối bộ thích ứng AC / Hubungkan adaptor AC /
Подключение адаптера сети переменного тока / АТ адаптерін жалғаңыз / AC adaptörünü bağlayın / 連接變電器 /
x 电源线
전원 케이블 / Power Cable /
สายไฟ / Cáp nguồn / Kabel Daya /
Кабель подачи питания /
Қорек сымы / Güç Kablosu /
電源線 /
交流适配器
AC 어댑터 / AC Adapter /
อะแดปเตอร์ไฟฟ้ากระแสสลับ /
Bộ thích ứng AC / Adaptor AC /
Адаптер переменного тока /
АТ адаптері / AC Adaptörü / 變電器 /
z
直流电插孔
전원 입력 잭 / DC Jack / แจ็ค DC /
Jack cắm DC / Jack DC /
Разъем питания постоянного тока /
DC ұяшығы / DC Girişi /
DC 插孔 /
打开计算机
컴퓨터 켜기 / Turn on the computer / เปิดคอมพิวเตอร์ / Bật máy tính / Menghidupkan komputer /
Включите компьютер / Компьютерді іске қосу / Bilgisayarı açın / 開啟電腦 /
z
x
打开计算机
컴퓨터 켜기 / Turn on the computer / เปิดคอมพิวเตอร์ / Bật máy tính / Menghidupkan komputer /
Включите компьютер / Компьютерді іске қосу / Bilgisayarı açın / 開啟電腦 / الكمبيوتر جهاز تشغيل
توصيل محول التيار املتردد
تشغيل جهاز الكمبيوتر
محول تيار متردد
سلك كهرباء
مقبس DC11
产品规格
系统规格可能因派生出来的型号而异。有关详细系统规格,请参考产品目录。
CPU (可选) Intel Core i3/i5 处理器
Intel Pentium/Celeron 处理器
AMD Dual-Core 处理器
AMD Quad-Core 处理器
主存储器 内存类型: DDR3 SODIMM
主芯片组 (可选) Intel HM65 / Intel HM70 / Intel HM75
AMD A60M
硬盘驱动器 9.5mmH SATA HDD
图形卡 (可选) Intel HD Graphics (集成)
Nvidia Geforce 315M (Optimus)
Nvidia Geforce GT 520MX (Optimus)
NVIDIA GT620M (Optimus)
NVIDIA 610M (Optimus)
AMD Radeon HD 6470M (PowerXpress)
AMD Radeon HD 7450M (PowerXpress)
AMD Radeon HD 7470M (PowerXpress)
AMD Dual Radeon HD 6380G/6480G/6520G/6620G (PowerXpress)
AMD Radeon HD 6380G/6480G/6520G/6620G (集成)
运行环境 温度:-5~40°C (存储),10~32°C (运行)
湿度:5~90% (存储),20~80% (运行)
交流/直流额定值 输入) 100-240VAC, 50/60Hz,
输出) 19VDC 3.16A
PC 额定值 19VDC 3.16A (60W)
● 可能不会提供可选组件或提供不同的组件,具体情况取决于计算机型号。
● 系统规格会在未发出通知的情况下受到更改。
제품 규격
제품 규격은 파생 모델에 따라 다를 수 있습니다. 자세한 규격은 구입 시 카탈로그를 참고하세요.
CPU (선택 사양) Intel Core i3/i5 Processor
Intel Pentium/Celeron Processor
AMD Dual-Core Processor
AMD Quad-Core Processor
메인 메모리 메모리 타입: DDR3 SODIMM
메인 Chipset (선택 사양) Intel HM65 / Intel HM70 / Intel HM75
AMD A60M
하드디스크 9.5mmH SATA HDD
그래픽스 (선택 사양) Intel HD Graphics (Internal)
Nvidia Geforce 315M (Optimus)
Nvidia Geforce GT 520MX (Optimus)
NVIDIA GT620M (Optimus)
NVIDIA 610M (Optimus)
AMD Radeon HD 6470M (PowerXpress)
AMD Radeon HD 7450M (PowerXpress)
AMD Radeon HD 7470M (PowerXpress)
AMD Dual Radeon HD 6380G/6480G/6520G/6620G (PowerXpress)
AMD Radeon HD 6380G/6480G/6520G/6620G (Internal)
사용 환경 온도: 보관 시 -5~40°C, 동작 시 10~32°C
습도: 보관 시 5~90%, 동작 시 20~80%
어댑터 정격 Input: 100-240VAC, 50/60Hz,
Output: 19VDC 3.16A
제품 정격 19VDC 3.16A (60W)
● 선택 사양은 파생 모델에 따라 제공되지 않거나 다르게 제공됩니다.
● 제품 규격은 예고 없이 변경될 수 있습니다.
产品规格
CHS
KOR12
Product Specifications
The system specifications may differ depending on the derived models. For detailed system specifications, refer to the product catalogue.
CPU (Optional) Intel Core i3/i5 Processor
Intel Pentium/Celeron Processor
AMD Dual-Core Processor
AMD Quad-Core Processor
Main Memory Memory type: DDR3 SODIMM
Main Chipset (Optional) Intel HM65 / Intel HM70 / Intel HM75
AMD A60M
Hard Disk Drive 9.5mmH SATA HDD
Graphics (Optional) Intel HD Graphics (Internal)
Nvidia Geforce 315M (Optimus)
Nvidia Geforce GT 520MX (Optimus)
NVIDIA GT620M (Optimus)
NVIDIA 610M (Optimus)
AMD Radeon HD 6470M (PowerXpress)
AMD Radeon HD 7450M (PowerXpress)
AMD Radeon HD 7470M (PowerXpress)
AMD Dual Radeon HD 6380G/6480G/6520G/6620G (PowerXpress)
AMD Radeon HD 6380G/6480G/6520G/6620G (Internal)
Operating Environment Temperature : -5~40°C for storage, 10~32°C when operating
Humidity : 5~90% for storage, 20~80% when operating
AC/DC Rating Input: 100-240VAC, 50/60Hz,
Output: 19VDC 3.16A
PC Rating 19VDC 3.16A (60W)
● Optional components may not be provided or different components may be provided depending on the computer model.
● The system specifications are subject to change without notice.
ENG
ข้อมูลจำ�เพ�ะของผลิตภัณฑ์
ข้อมูลจำ�เพ�ะของระบบอ�จแตกต่�งกันไปต�มรุ่น สำ�หรับข้อมูลจำ�เพ�ะโดยละเอียด โปรดอ่�นแคตต�ล็อกผลิตภัณฑ์
CPU (ตัวเลือก) โปรเซสเซอร์ Intel Core i3/i5
โปรเซสเซอร์ Intel Pentium/Celeron
โปรเซสเซอร์ AMD Dual-Core
โปรเซสเซอร์ AMD Quad-Core
หน่วยคว�มจำ�หลัก ประเภทหน่วยคว�มจำ�: DDR3 SODIMM
ชิปเซ็ตหลัก (ตัวเลือก) Intel HM65 / Intel HM70 / Intel HM75
AMD A60M
ฮ�ร์ดดิสก์ไดรฟ์ 9.5mmH SATA HDD
กร�ฟิก (ตัวเลือก) Intel HD Graphics (ภ�ยใน)
Nvidia Geforce 315M (Optimus)
Nvidia Geforce GT 520MX (Optimus)
NVIDIA GT620M (Optimus)
NVIDIA 610M (Optimus)
AMD Radeon HD 6470M (PowerXpress)
AMD Radeon HD 7450M (PowerXpress)
AMD Radeon HD 7470M (PowerXpress)
AMD Dual Radeon HD 6380G/6480G/6520G/6620G (PowerXpress)
AMD Radeon HD 6380G/6480G/6520G/6620G (ภ�ยใน)
สภ�พแวดล้อมในก�รทำ�ง�น อุณหภูมิ : -5~40°C สำ�หรับก�รจัดเก็บ 10~32°C ขณะทำ�ง�น
คว�มชื้น : 5~90% สำ�หรับก�รจัดเก็บ 20~80% ขณะทำ�ง�น
อัตร�กำ�ลัง AC/DC อินพุต: 100-240VAC, 50/60Hz
เอ�ต์พุต: 19VDC 3.16A
อัตร�กำ�ลังของ PC 19VDC 3.16A (60W)
● องค์ประกอบที่เป็นตัวเลือกอ�จไม่มีให้ หรือองค์ประกอบต่�งๆ อ�จมีให้ต�มรุ่นของคอมพิวเตอร์
● ข้อมูลจำ�เพ�ะของระบบอ�จมีก�รเปลี่ยนแปลงโดยไม่ได้แจ้งให้ทร�บ
THA13
Spesifikasi Produk
Spesifikasi sistem mungkin berbeda tergantung pada model yang diturunkan. Untuk spesifikasi sistem terperinci, lihat katalog produk.
CPU (Opsional) Intel Core i3/i5 Processor
Intel Pentium/Celeron Processor
AMD Dual-Core Processor
AMD Quad-Core Processor
Memori Utama Tipe memori: DDR3 SODIMM
Chipset Utama (Opsional) Intel HM65 / Intel HM70 / Intel HM75
AMD A60M
Hard Disk Drive 9.5mmH SATA HDD
Grafis (Opsional) Intel HD Graphics (Internal)
Nvidia Geforce 315M (Optimus)
Nvidia Geforce GT 520MX (Optimus)
NVIDIA GT620M (Optimus)
NVIDIA 610M (Optimus)
AMD Radeon HD 6470M (PowerXpress)
AMD Radeon HD 7450M (PowerXpress)
AMD Radeon HD 7470M (PowerXpress)
AMD Dual Radeon HD 6380G/6480G/6520G/6620G (PowerXpress)
AMD Radeon HD 6380G/6480G/6520G/6620G (Internal)
Lingkungan Operasi Suhu: -5~40°C untuk penyimpanan, 10~3232°C saat dioperasikan
Kelembaban: 5 5~90% untuk penyimpanan, 20~80% saat dioperasikan
Kelas AC/DC Input : 100-240VAC, 50/60Hz
Output : 19VDC 3.16A
Kelas PC 19VDC 3.16A (60W)
● Komponen opsional mungkin tidak disertakan atau diganti dengan komponen lain tergantung pada model komputer.
● Spesifikasi sistem dapat berubah tanpa pemberitahuan.
IND
Các thông số của sản phẩm
Các thông số của hệ thống có thể khác nhau tùy vào từng mẫu máy. Để biết được các thông số chi tiết, hãy tham khảo catalo của sản phẩm.
CPU (tùy chọn) Bộ vi xử lý Intel Core i3/i5 Processor
Bộ vi xử lý Intel Pentium/Celeron Processor
Bộ vi xử lý AMD Dual-Core Processor
Bộ vi xử lý AMD Quad-Core Processor
Bộ nhớ chính Loại thẻ nhớ: DDR3 SODIMM
Chipset chính (tùy chọn) Intel HM65 / Intel HM70 / Intel HM75
AMD A60M
Ổ cứng 9.5mmH SATA HDD
Đồ họa (tùy chọn) Intel HD Graphics (Internal)
Nvidia Geforce 315M (Optimus)
Nvidia Geforce GT 520MX (Optimus)
NVIDIA GT620M (Optimus)
NVIDIA 610M (Optimus)
AMD Radeon HD 6470M (PowerXpress)
AMD Radeon HD 7450M (PowerXpress)
AMD Radeon HD 7470M (PowerXpress)
AMD Dual Radeon HD 6380G/6480G/6520G/6620G (PowerXpress)
AMD Radeon HD 6380G/6480G/6520G/6620G (Internal)
Môi trường làm việc Nhiệt độ: -5~40°C khi cất giữ, 10~32°C khi làm việc
Độ ẩm: 5~90% khi cất giữ, 20~80% khi làm việc
Đánh giá AC/DC Đầu vào : 100-240VAC, 50/60Hz
Đầu ra : 19VDC 3.16A
Đánh giá PC 19VDC 3.16A (60W)
● Các thành phần tùy chọn có thể không được cung cấp hoặc các thành phần khác được cung cấp cho bạn có thể tùy vào mẫu máy
tính của bạn.
● Các thông số của hệ thống có thể sẽ được thay đổi mà không cần phải thông báo.
VIE14
Өнімнің сипаттамасы
Жүйенің техникалық параметрлері, үлгі түрлеріне қарай әр түрлі болуы мүмкін. Жүйенің нақты техникалық параметрін, өнімнің
өз каталогынан қараңыз.
CPU (опция) Intel Core i3/i5 Processor
Intel Pentium/Celeron Processor
AMD Dual-Core Processor
AMD Quad-Core Processor
Негізгі жады Жады түрі: DDR3 SODIMM
Негізгі микропроцессор жинағы
(опция)
Intel HM65 / Intel HM70 / Intel HM75
AMD A60M
Тұрғылықты диск 9.5mmH SATA HDD
Графикалық құрал (опция) Intel HD Graphics (Ішкі)
Nvidia Geforce 315M (Optimus)
Nvidia Geforce GT 520MX (Optimus)
NVIDIA GT620M (Optimus)
NVIDIA 610M (Optimus)
AMD Radeon HD 6470M (PowerXpress)
AMD Radeon HD 7450M (PowerXpress)
AMD Radeon HD 7470M (PowerXpress)
AMD Dual Radeon HD 6380G/6480G/6520G/6620G (PowerXpress)
AMD Radeon HD 6380G/6480G/6520G/6620G (Ішкі)
Жұмыс ортасы Температура : сақтау үшін -5~40°C, жұмыс жасау кезінде 10~32°C
Ылғалдылық : сақтау үшін 5~90%, жұмыс жасау үшін 20~80%
АТ/ТТ мәні Кірісі : 100-240VAC, 50/60Гц
Шығысы : 19VDC 3.16A
ДК мәні 19VDC 3.16A (60Вт)
● Опция ретінде ұсынылатын бөлшектер бірге жеткізілмеуі мүмкін немесе компьютердің үлгісіне қарай басқа бөлшекпен
жабдықталуы мүмкін.
● Жүйенің техникалық параметрлері ешбір ескертусіз өзгертілуі мүмкін.
KAZ
Характеристики продукта
Технические данные системы могут отличаться в зависимости от модели. Подробные технические характеристики системы можно найти
в каталоге продукции.
Процессор (дополнительно) Процессор Intel Core i3/i5 Processor
Процессор Intel Pentium/Celeron Processor
Процессор AMD Dual-Core Processor
Процессор AMD Quad-Core Processor
Основная память Тип памяти: DDR3 SODIMM
Основной чипсет (дополнительно) Intel HM65 / Intel HM70 / Intel HM75
AMD A60M
Жесткий диск 9.5mmH SATA HDD
Графика (дополнительно) Intel HD Graphics (встроенная)
Nvidia Geforce 315M (Optimus)
Nvidia Geforce GT 520MX (Optimus)
NVIDIA GT620M (Optimus)
NVIDIA 610M (Optimus)
AMD Radeon HD 6470M (PowerXpress)
AMD Radeon HD 7450M (PowerXpress)
AMD Radeon HD 7470M (PowerXpress)
AMD Dual Radeon HD 6380G/6480G/6520G/6620G (PowerXpress)
AMD Radeon HD 6380G/6480G/6520G/6620G (встроенная)
Условия Температура: -5~40°C для хранения, 10~32°C во время работы
Влажность: 5~90%для хранения, 20~80% во время работы
Характеристики питания переменного/
постоянного тока
На входе) 100 - 240 В переменного тока, 50 / 60 Гц,
На выходе) 19 BDC 3,16 A
Характеристики питания ПК 19 B 3,16 A (60 Вт)
● Дополнительные компоненты могут не поставляться, или могут поставляться другие компоненты, в зависимости от модели
компьютера.
● Технические характеристики системы могут изменяться без дополнительного уведомления.
RUS15
產品規格
系統規格可能根據衍生型號而不同。有關詳細的系統規格,請參閱產品型錄。
CPU (選購) Intel Core i3/i5 處理器
Intel Pentium/Celeron 處理器
AMD Dual-Core 處理器
AMD Quad-Core 處理器
主記憶體 記憶體類型:DDR3 SODIMM
主晶片集 (選購) Intel HM65 / Intel HM70 / Intel HM75
AMD A60M
硬碟機 9.5mmH SATA HDD
圖形 (選購) Intel HD Graphics (內部)
Nvidia Geforce 315M (Optimus)
Nvidia Geforce GT 520MX (Optimus)
NVIDIA GT620M (Optimus)
NVIDIA 610M (Optimus)
AMD Radeon HD 6470M (PowerXpress)
AMD Radeon HD 7450M (PowerXpress)
AMD Radeon HD 7470M (PowerXpress)
AMD Dual Radeon HD 6380G/6480G/6520G/6620G (PowerXpress)
AMD Radeon HD 6380G/6480G/6520G/6620G (內部)
操作環境 溫度:-5~40°C (儲存時),10~32°C (操作時)
濕度:5~90% (儲存時),20~80% (操作時)
交流/直流額定值 輸入: 100-240VAC,50/60Hz
輸出: 19VDC 3.16A
PC 額定值 19VDC 3.16A (60W)
● 視電腦型號而定,選購元件可能不提供或提供不同的元件。
● 系統規格如有變更,恕不另行通知。
CHT
Ürün özellikleri
Sistem özellikleri, modellere göre değişebilir. Ayrıntılı Sistem özellikleri için, ürün kataloguna bakın.
CPU (İsteğe bağlı) Intel Core i3/i5 İşlemci
Intel Pentium/Celeron İşlemci
AMD Dual-Core İşlemci
AMD Quad-Core İşlemci
Ana Bellek Bellek türü: DDR3 SODIMM
Ana Yonga Takımı (İsteğe bağlı) Intel HM65 / Intel HM70 / Intel HM75
AMD A60M
Sabit Disk Sürücüsü 9.5mmH SATA HDD
Grafikler (İsteğe bağlı) Intel HD Graphics (Dahili)
Nvidia Geforce 315M (Optimus)
Nvidia Geforce GT 520MX (Optimus)
NVIDIA GT620M (Optimus)
NVIDIA 610M (Optimus)
AMD Radeon HD 6470M (PowerXpress)
AMD Radeon HD 7450M (PowerXpress)
AMD Radeon HD 7470M (PowerXpress)
AMD Dual Radeon HD 6380G/6480G/6520G/6620G (PowerXpress)
AMD Radeon HD 6380G/6480G/6520G/6620G (Dahili)
Çalıştırma Ortamı Sıcaklık: -5~40°C (depolama için), 10~32°C (çalışırken)
Nem: %5~90 (depolama için), %20~80 (çalışırken)
Çalıştırma Voltajı 100 - 240VAC
Frekans 50 / 60Hz
AC/DC Anma Değeri Giriş) 100-240VAC, 50/60Hz,
Çıkış) 19VDC 3.16A
PC Anma Değeri 19VDC 3.16A (60W)
● İsteğe bağlı bileşenler, bilgisayar modeline bağlı olarak sağlanmayabilir veya farklı bileşenler sağlanabilir.
● Sistem belirtimleri herhangi bir uyarıda bulunulmaksızın değiştirilebilir.
TUR16
احملتويات
قد تختلف مواصفات النظام حسب الطرازات اخملتلفة. ملعرفة مواصفات النظام بالتفصيل، الرجاء مراجعة النشرة املصورة اخلاصة باملنتج.
معالج Intel Core i3/i5
معالج Intel Pentium/Celeron
معالج AMD Dual-Core
معالج AMD Quad-Core
CPU (وحدة املعاجلة املركزية) (اختيارية)
الذاكرة األساسية نوع الذاكرة: DDR3 SODIMM
Intel HM65 / Intel HM70 / Intel HM75
AMD A60M
مجموعة الشرائح األساسية (اختيارية)
9.5mmH SATA HDD الثابتة األقراص محرك
(داخلي) Intel HD Graphics
(Optimus) Nvidia Geforce 315M
(Optimus) Nvidia Geforce GT 520MX
(Optimus) NVIDIA GT620M
(Optimus) NVIDIA 610M
(PowerXpress) AMD Radeon HD 6470M
(PowerXpress) AMD Radeon HD 7450M
(PowerXpress) AMD Radeon HD 7470M
(PowerXpress) AMD Dual Radeon HD 6380G/6480G/6520G/6620G
(داخلي) AMD Radeon HD 6380G/6480G/6520G/6620G
بطاقة الرسومات (اختيارية)
درجة احلرارة: 5 ~ 40- درجة مئوية عند التخزين و 32 ~ 10 درجة مئوية عند التشغيل
الرطوبة: 90 ~ 5 باملائة عند التخزين و80 ~ 20 باملائة عند التشغيل
بيئة التشغيل
املدخالت : 240 - 100 فولت تيار متردد, 60 / 50 هرتز
اخملرجات : 19 فولت و 3,16 أمبير
معدل التيار املتردد/التيار املستمر
معدل اجلهد الكهربي للكمبيوتر 19 فولت و 3,16 أمبير (60 واط)
قد تكون املكونات االختيارية غير متوفرة أو قد يتوفر مكونات أخرى حسب طراز الكمبيوتر.
قد تتعرض مواصفات النظام للتغيير بدون إشعار.
●
●
ARA17
Installation
• Use and put the product in a safe location and avoid contact with the human body to the heat from the
computer vent or AC adapter for long time.
• Take care when handling the plastic bag.
Electric shock, damage, suffocation,
over-heating, burns
CHS 安装:触电、
损害、窒息、
过热、灼伤
THA การติดตั้ง: ไฟฟ้า
ช็อต ความเสียหาย
การปิดช่องทาง
เดินหายใจ การเกิด
ความร้อนสูง การ
ร้อนลวก
IND Pemasangan: Sengatan
listrik, kerusakan,
kehabisan napas, panas
berlebihan, luka bakar
KAZ Орнату: Электр
қатері, зақым
келу, тұншығып
қалу, қатты қызу,
күйіп қалу
CHT 安裝:觸電、
損壞、窒息、
過熱、灼傷
KOR 설치 : 감전,
손상, 질식사,
지나친 난방, 화상
VIE Lắp đặt: Điện giật,
hư hỏng, ngạt
thở, quá nhiệt,
phỏng (bỏng)
RUS Установка: Поражение
электрическим током,
повреждение, удушье,
перегрев, ожоги
TUR Yükleme: Elektrik
çarpması, hasar,
boğulma, aşırı
ısınma, yanıklar
ARA التركيب:
صدمة كهربية، تلف
اجلهاز، االختناق،
سخونة زائدة، حروق
CHS • 请在安全位置使用和存放本产品,并避免长时间与人体接触,以防止遭受计算机通风孔或 AC 适配器释放热量产生的影响。
• 请小心处理塑料袋。
KOR • 안전한 곳에서 사용 및 보관하고, 발열 부위에 장시간 신체 접촉을 피하세요.
• 비닐 포장지 취급에 주의하세요.
THA • โปรดใช้และวางผลิตภัณฑ์ในที่ปลอดภัย
และหลีกเลี่ยงการสัมผัสร่างกายกับส่วนที่ร้อนจัดของช่องระบายอากาศคอมพิวเตอร์หรืออะแดปเตอร์ AC เป็นเวลานาน
• ใช้ความระมัดระวังเมื่อจัดการกับถุงพลาสติก
VIE • Sử dụng và đặt sản phẩm ở vị trí an toàn và tránh để cơ thể người tiếp xúc với hơi nóng từ khe thông gió của máy tính hay bộ tích
hợp AC trong thời gian dài.
• Cẩn trọng khi sử dụng túi nhựa.
IND • Gunakan dan letakkan produk di tempat yang aman dan jangan sampai panas dari ventilasi komputer atau adaptor AC mengenai
tubuh manusia dalam waktu lama.
• Будьте осторожны при обращении с пластиковым пакетом.
RUS • Следует размещать и использовать устройство в безопасном месте, а также избегать длительного контакта с телом человека
теплого воздуха, исходящего из вентиляционных отверстий компьютера или адаптера переменного тока.
• Избегайте поражения электрическим током и убедитесь, что устройство заземлено.
KAZ • Компьютерді қауіпсіз жерге орнатып пайдаланыңыз және оның желдеткіш саңылауынан шығатын қызуға немесе АТ
адаптерінің қызуына денеңізді ұзақ уақыт жақын ұстамауға тырысыңыз.
• Пластик қалтаны абайлап қолданыңыз.
TUR • Ürünü güvenli bir konuma yerleştirin ve kullanın; bilgisayarın havalandırma deliklerinden veya AC adaptörden gelen ısının insan
vücuduyla uzun süre temasından kaçının.
• Plastik torbayı taşırken dikkatli olun.
CHT • 在安全位置使用和存放本產品,並避免與人體長時間接觸,以防受到電腦通風孔或變電器所散發出來的熱氣的烘烤。
• 請小心處理塑膠袋。
للحرارة املنبعثة من فتحات التهوية أو حملول التيار املتردد للكمبيوتر.
ٍ
• ٍ استخدم املنتج وضعه فى مكان آمن، واحرص أال يتعرض جسمك لوقت طويل
• احلرص عند استعمال الغطاء البالستيك.
ARA
18
Power cord
CHS 电源线:
火灾、触电
THA สายไฟ: เพลิงไหม้
ไฟฟ้าช็อต
IND Kabel listrik:
Kebakaran,
sengatan listrik
KAZ Қуат сымы:
Өрт, электр
қатері
CHT 電源線:
火災、觸電
KOR 파워코드:
화재, 감전
VIE Dây nguồn: Hỏa
hoạn, điện giật
RUS Кабель питания:
Возгорание,
поражение
электротоком
TUR Güç kablosu:
Yangın, elektrik
çarpması
ARA سلك التيار الكهربي:
اندالع حريق،
حدوث صدمة كهربية
Fire, electric shock
●
Avoid bending or damaging the power cord and adapter cable.
●
Take care not to cause an electric shock and make sure to ground the product.
CHS • 避免弯曲或损坏电源线和适配器线缆。
• 请小心操作以防引起触电并确保产品接地。
KOR • 파워코드와 어댑터 케이블의 찍힘, 꺾임, 손상에 주의하세요.
• 감전에 주의하고, 반드시 접지를 연결하세요.
THA • โปรดอย่าหัก งอ หรือท�าให้สายไฟและสายอะแดปเตอร์เสียหาย
• โปรดอย่าท�าให้เกิดไฟฟ้าช็อต และโปรดลงกราวด์ผลิตภัณฑ์ด้วย
VIE • Tránh làm cong hay hư hỏng dây nguồn và cáp của bộ tích hợp.
• Cẩn trọng để không gây điện giật và đảm bảo sản phẩm được nối đất.
IND • Jangan sampai kabel listrik dan kabel adaptor tertekuk atau rusak.
• Berhati-hatilah agar tidak menyebabkan sengatan listrik dan pastikan produk ditanahkan.
RUS • Не допускайте перегибов или повреждений кабеля питания и адаптера.
• Избегайте поражения электрическим током и убедитесь, что устройство заземлено.
KAZ • Қуат сымы мен адаптер сымын майыстырмауға немесе нұқсан келтірмеуге тырысыңыз.
• Электр қатерінің пайда болуына жол бермеңіз және құрылғыны жерге қосыңыз.
TUR • Güç kablosunu veya adaptör kablosunu kıvırmayın veya bunlara zarar vermeyin.
• Elektrik çarpmasına neden olmamaya dikkat edin ve ürünü topraklamayı unutmayın.
CHT • 避免彎曲或損壞電源線和變電器纜線。
• 請小心防止觸電並確保產品接地連接。
• جتنب ثني سلك التيار الكهربي أو كبل احملول أو اتالفهما.
• احلرص على عدم التسبب في حدوث صدمة كهربائية والتأكد من توصيل املنتج بسلك أرضي.
ARA
19
CHS 适配器 :
火灾、触电
THA อะแดปเตอร์:
เพลิงไหม้
ไฟฟ้าช็อต
IND Adaptor: Kebakaran,
sengatan listrik
KAZ Адаптер: Өрт,
электр қатері
CHT 變電器:
火災、觸電
KOR 어댑터:
화재, 감전
VIE Bộ tích hợp: Hỏa
hoạn, điện giật
RUS Адаптер: Возгорание,
поражение
электротоком
TUR Adaptör: Yangın,
elektrik çarpması
ARA احملول: اندالع حريق،
حدوث صدمة كهربية
CHS • 连接授权使用的适配器和电池,切勿拆卸或导致其损坏。
• 紧密连接。
KOR • 정품 어댑터와 배터리를 사용하고 분해하거나 충격을 주지 마세요.
• 연결부는 밀착해서 사용하세요.
THA • ต่ออะแดปเตอร์และแบตเตอรี่ที่ได้รับอนุญาต และห้ามถอดประกอบหรือท�าให้เกิดการเสียหาย
• เชื่อมต่อให้แน่นหนา
VIE • Kết nối bộ tích hợp và pin được chấp thuận và không tháo rời hay gây hư hỏng các bộ phận này.
• Kết nối chặt các bộ phận.
IND • Sambungkan adaptor dan baterai yang disetujui dan jangan dibongkar atau dirusak.
• Sambungkan dengan kuat.
RUS • Подключите штатный адаптер и аккумулятор, не разбирайте и старайтесь не повредить их.
• Убедитесь в надежности подключений.
KAZ • Қолдануға рұқсат етілген адаптерді және батареяны пайдаланыңыз, оларды бөлшектемеуге немесе
зақымдамауға тырысыңыз.
• Қосылымды мықтап жүзеге асырыңыз.
TUR • Onaylı bir adaptör ve pil kullanın ve bunları parçalarına ayırmayın veya bunlara zarar vermeyin.
• Bağlantıyı sıkıca yapın.
CHT • 連接授權使用的變電器和電池,並且請勿拆解或導致其損壞。
• 連接牢固。
• استخدام بطارية ومحول معتمدان، مع عدم فكهما أو تعرضيهما للتلف.
• قم بهذا اإلجراء بإحكام.
ARA
AC Adapter
●
Connect an authorized adapter and battery and do not disassemble or damage them.
●
Connect the connection tightly.
Fire, electric shock20
CHS • 请小心处理电池,如果出现问题,请不要使用电池。
KOR • 배터리 취급에 주의하고, 이상이 발생되면 사용하지 마세요.
THA • ใช้ความระมัดระวังเมื่อจัดการกับแบตเตอรี่ และโปรดอย่าใช้งาน ถ้าเกิดปัญหากับแบตเตอรี่
VIE • Cẩn trọng khi sử dụng pin, không sử dụng pin khi có sự cố xảy ra.
IND • Berhati-hatilah ketika menangani baterai, dan jika terjadi masalah, jangan gunakan baterai tersebut.
RUS • Осторожно обращайтесь с аккумулятором, при возникновении проблем не используйте аккумулятор.
KAZ • Батареяны абайлап ұстаңыз, ақау пайда болған батареяны пайдаланбаңыз.
TUR • Pili kullanırken dikkatli olun ve bir sorun oluşursa pili kullanmayın.
CHT • 請小心處理電池,如果發生問題,請勿使用電池。
ARA • احلرص عند استعمال البطارية وال تستخدم البطارية، في حالة حدوث مشكلة.
Battery
Explosion, fire
CHS 电池:爆炸、
火灾
THA แบตเตอรี่:
การระเบิด
เพลิงไหม้
IND Baterai: Ledakan,
kebakaran
KAZ Батарея:
Жарылыс, өрт
CHT 電池:爆炸、
火災
KOR 배터리: 폭발,
화재
VIE Pin: Phát nổ, hỏa
hoạn
RUS Батарея: Взрыв,
возгорание
TUR Pil: Patlama,
yangın
ARA البطارية: حدوث انفجار،
اندالع حريق
●
Take care when handling the battery, and if a problem occurs, do not use the battery.21
CHS • 为了防止发生诸如火灾或灼伤等危险,请务必遵守以下原则。
有关更多信息,请参阅用户指南中的安全注意事项。
• 由于此处使用的是代表性图片,视国家/地区不同,所有图片都可能会有所不同。
KOR • 화재나 화상을 위험을 피하기 위해 본 가이드를 준수해 주세요.
더 자세한 정보는 사용설명서의 안전을 위한 주의사항을 참고하세요.
• 이 가이드에 포함된 그림은 대표 그림이므로, 국가에 따라 모든 그림은 다릅니다.
THA • เพื่อป้องกันอันตราย เช่น เพลิงไหม้หรือการร้อนลวก โปรดปฏิบัติตามหลักเกณฑ์ต่อไปนี้
ส�าหรับข้อมูลเพิ่มเติม โปรดดูที่ข้อควรระวังเพื่อความปลอดภัยในคู่มือผู้ใช้
• เนื่องจากภาพนี้เป็นภาพทั่วไป ภาพทั้งหมดอาจแตกต่างกันไปในแต่ละประเทศ
VIE • Để phòng tránh các nguy cơ như hỏa hoạn hoặc phỏng (bỏng), hãy đảm bảo tuân thủ các hướng dẫn sau.
Để biết thêm thông tin, hãy tham khảo phần các khuyến cáo về an toàn trong tài liệu hướng dẫn sử dụng.
• Bởi vì đây là thông số đại diện, nên tất cả các thông số này có thể khác tùy theo từng quốc gia.
IND • Untuk mencegah bahaya seperti kebakaran atau luka bakar, pastikan untuk mematuhi pedoman berikut.
Untuk informasi lebih lanjut, lihat pencegahan keselamatan pada panduan pengguna.
• Karena hanya ditampilkan sebagai contoh, semua gambar mungkin berbeda tergantung negara.
RUS • Во избежание возникновения опасных ситуаций (возгорание или ожоги), ознакомьтесь со следующей информацией.
Подробнее см. в указания по технике безопасности в данном руководстве.
• Это только схематичное изображение, все изображения могут отличаться в зависимости от страны.
KAZ • Өрт немесе күйіп қалу тәрізді қатерлерді болдырмау үшін келесі нұсқауларды орындауды ұмытпаңыз.
Қосымша ақпаратты пайдаланушы нұсқаулығының сақтық шаралары бөлімінен қараңыз.
• Бұл үлгі ретінде көрсетілген құрылғы болғандықтан, суреттер елге байланысты әр түрлі болуы мүмкін.
TUR • Yangın veya yanıklar gibi tehlikeleri önlemek için, aşağıdaki yönergeleri izlediğinizden emin olun.
Daha fazla bilgi için, kullanıcı kılavuzundaki güvenlik önlemleri bölümüne bakın.
• Bu temsili bir şekil olduğundan, tüm şekiller ülkeye bağlı olarak değişebilir.
CHT • 為防止發生諸如火災或灼傷等危險,請務必遵守下列準則。
要獲得詳細資訊,請參閱使用者指南中的安全注意事項。
• 由於此處使用的是代表性圖片,根據不同的國家/地區,所有圖片都可能會有所不同。
• يلزم مراعاة اإلرشادات التالية، لتجنب حدوث بعض اخملاطر مثل نشوب حريق أو اإلصابة باحلروق.
ملزيد من املعلومات، يُ ّ رجى الرجوع إلى إحتياطات األمان املضمنة في دليل املستخدم.
• ً قد تختلف صورة اجلهاز هنا عن صورة املنتج احلقيقي وفقا لكل بلد.
ARA
To prevent dangers such as fire or burns, be sure to observe the following guidelines.
For more information, refer to the Safety Precautions in the in the user guide.
Since this is a representative figure, all figures may differ depending on the country.
USER GUIDE ENG
www.samsungcomputer.com Modelo: NP300E4Z/NP300E5Z/NP300E7Z/
NP305E4Z/NP305E5Z/NP305E7Z/
NP300E4X/NP300E5X/NP300E7X
Guide de l’utilisateur FRE
Benutzerhandbuch GER
Guía del usuario SPA
Guida dell’utente ITA
Handleiding DUT
Podręcznik użytkownika POL
Manual do utilizador POR
Οδηγός χρήσης GRE
Guia do Usuário BRA
BA68-07938A13 120315
BA68- 07938A13
300E4Z/300E5Z/300E7Z/
305E4Z/305E5Z/305E7Z/
300E4X/300E5X/300E7X
Thank you for purchasing a Samsung Computer2 332 3
Contents
Sommaire / Inhalt / Contenido / Sommario / Inhoud / Spis treści / Índice / Περιεχόμενα / Índice
1. Basic Items........................................................................................5
Eléments livrés de série / Hauptkomponenten / Elementos básicosa / Componenti principali / Standaarditems /
Elementy podstawowe / Acessórios básicos / Βασικά αντικείμενα / Itens básicos
2. Overview ..........................................................................................6
Présentation / Übersicht / Descripción / Panoramica / Overzicht / Przegląd / Apresentação geral /
Επισκόπηση / Visão geral
3. Turn on the computer......................................................................9
Allumer l’ordinateur / Computer einschalten / Encender el equipo / Accendere il computer /
De computer inschakelen / Włączanie komputera / Ligar o computador / Ενεργοποίηση του υπολογιστή /
Ligar o computador
4. Product Specifications...................................................................10
Product Specifications........................................................................................................................................................................................10
Caractéristiques techniques du produit.......................................................................................................................................................10
Produktspezifikationen ......................................................................................................................................................................................11
Especificaciones del producto.........................................................................................................................................................................11
Specifiche del prodotto......................................................................................................................................................................................12
Productspecificaties............................................................................................................................................................................................12
Dane techniczne produktu ...............................................................................................................................................................................13
Especificações do produto................................................................................................................................................................................13
Προδιαγραφές Προϊόντος.................................................................................................................................................................................14
Especificações de produto................................................................................................................................................................................14
5. Safety Precautions..........................................................................15
Consignes de sécurité.........................................................................................................................................................................................15
Sicherheitshinweise.............................................................................................................................................................................................15
Precauciones de seguridad...............................................................................................................................................................................15
Precauzioni di sicurezza .....................................................................................................................................................................................15
Veiligheidsinstructies..........................................................................................................................................................................................15
Zasady bezpieczeństwa .....................................................................................................................................................................................15
Precauções de segurança ..................................................................................................................................................................................15
Μέτρα Προφύλαξης.............................................................................................................................................................................................15
Cuidados de segurança......................................................................................................................................................................................154 5
For more information, please refer to a PDF manual by DVD.
You need to install Adobe Reader to read the user manual.
The items included in the package may vary depending on your selection of the optional items.
The appearance, color and locations of the port in the pictures may differ from those of your computer.
Charge the battery fully when using the computer for the first time.
Pour plus d’informations, consultez le manuel PDF disponible sur DVD.
Vous devez installer Adobe Reader pour pouvoir consulter le manuel utilisateur.
Les éléments compris dans l’emballage peuvent varier en fonction de votre sélection d’éléments optionnels.
L’apparence, la couleur et les emplacements du port dans les images peuvent di érer de votre ordinateur.
Chargez entièrement la batterie à la première utilisation de l’ordinateur.
Weitere Informationen entnehmen Sie bitte dem PDF-Handbuch auf der DVD.
Sie müssen Adobe Reader installieren, damit Sie das Benutzerhandbuch lesen können.
Der Lieferumgang des Produkts kann sich je nach den von Ihnen ausgewählten optionalen Teilen unterscheiden.
Das Aussehen, die Farben und die Standorte des Anschlusses in den Abbildungen können sich von denen des tatsächlichen
Computers unterscheiden.
Laden Sie die Batterie voll auf, wenn Sie den Computer das erste Mal einschalten,
Para obtener más información consulte el manual PDF del DVD.
Se debe instalar Adobe Reader para leer el manual del usuario.
Los elementos incluidos en el embalaje pueden variar según la selección que el usuario haga de elementos adicionales.
El aspecto, el color y la ubicación del puerto que se presentan en las imágenes pueden diferir de los de su equipo.
Cargue la batería completamente cuando use el ordenador (computador) por primera vez.
Per ulteriori informazioni vedere il manuale in PDF disponibile sul DVD.
E' necessario installare Adobe Reader per poter leggere il manuale dell'utente in formato elettronico.
I componenti inclusi nella confezione possono variare in base alla scelta degli optional.
L’aspetto, il colore e la posizione delle porte così come indicate nelle immagini possono di erire da quelle del computer in uso.
Caricare completamente la batteria quando si utilizza il computer per la prima volta.
Raadpleeg de PDF-handleiding op de DVD voor meer informatie.
U moet Adobe Reader installeren om de gebruikershandleiding te lezen.
De items in het pakket kunnen verschillen, afhankelijk van uw selectie van de optionele items.
Het uiterlijk, de kleur en de locaties van de poort in de afbeeldingen kunnen afwijken van die van de poorten op uw computer.
Laad de accu volledig op wanneer u de computer voor de eerste keer gebruikt.
Więcej informacji znajduje się w instrukcji PDF na płycie DVD.
Aby odczytać instrukcję obsługi, należy zainstalować program Adobe Reader.
Zawartość opakowania może różnić się w zależności od elementów opcjonalnych wybranych przez użytkownika.
Wyglad, kolor i lokalizacja portu na zdjeciach moze róznic sie od portu w Twoim komputerze.
Przed pierwszym uruchomieniem komputera należy całkowicie naładować akumulator.
Para obter mais informações, consulte o manual em PDF no DVD.
É necessário instalar o Adobe Reader para ler o manual do utilizador.
Os acessórios incluídos na embalagem podem variar consoante a selecção dos acessórios opcionais.
O aspecto, cor e localização da porta indicados nas imagens podem ser diferentes no seu computador.
Carregue totalmente a bateria quando utilizar o computador pela primeira vez.
Για περισσότερες πληροφορίες, ανατρέξτε στο εγχειρίδιο χρήσης σε μορφή PDF που θα βρείτε στο DVD.
Για την ανάγνωση του εγχειριδίου χρήσης, απαιτείται η εγκατάσταση του Adobe Reader.
Τα αντικείμενα που περιέχονται στη συσκευασία ενδέχεται να διαφέρουν, ανάλογα με τις επιλογές προαιρετικών αντικειμένων
που έχετε κάνει.
Η εμφάνιση, το χρώμα και οι θέσεις των θυρών στις εικόνες ενδέχεται να διαφέρουν από εκείνα του υπολογιστή σας.
Φορτίστε πλήρως την μπαταρία προτού χρησιμοποιήσετε τον υπολογιστή για πρώτη φορά.
Para obter mais informações, consulte um manual em PDF no DVD.
É necessário instalar o Adode Reader para ler o manual do usuário.
Os itens incluídos no pacote podem variar dependendo da sua seleção de itens opcionais.
A aparência, a cor e as localizações da porta nas figuras poderão diferir em relação ao seu computador.
Carregue totalmente a bateria ao usar o computador pela primeira vez.4 5
AC Adapter
Adaptateur CA / Wechselstromadapter /
Adaptador CA/CC (Fuente de alimentación) /
Adattatore CA / AC-adapter /
Zasilacz sieciowy / Transformador de CA /
Τροφοδοτικό AC / Adaptador CA
Power Cable
cordon d’alimentation / Netzkabel /
Cable de alimentación /
Cavo di alimentazione /
Voedingskabel / Przewód zasilający /
Cabo de alimentação /
Καλώδιο ρεύματος /
Cabo de alimentação
Computer
Ordinateur / Computer /
Ordenador(computador) /
Computer / Computer /
Komputer / Computador /
Υπολογιστής / Computador
Standard Battery
Batterie standard / Standardakku /
Batería estándar / Batteria standard /
Standaardaccu /
Akumulator standardowy /
Bateria padrão / Τυπική μπαταρία /
Bateria padrão
PUSH
20% 40% 60% 80% 100%
Basic Items
Eléments livrés de série / Hauptkomponenten / Elementos básicosa / Componenti principali / Standaarditems /
Elementy podstawowe / Acessórios básicos / Βασικά αντικείμενα / Itens básicos6 7
Overview
Présentation / Übersicht / Descripción / Panoramica / Overzicht / Przegląd / Apresentação geral /
Επισκόπηση / Visão geral
z Camera (Optional)
Lentille photo (en option) / Kameraobjektiv (Optional) / Objetivo de la cámara (opcional) /
Obiettivo videocamera (Opzionale) / Camera (optioneel) / Kamera (opcja) / Câmara (opcional) /
Κάμερα (Προαιρετικό) / Câmera (opcional)
x Power Button
Bouton d’ alimentation électrique / Netzschalter / Botón de encendido / Tasto di accensione /
Aan/Uit-knop / Przycisk zasilania / Botão de alimentação / Κουμπί Λειτουργίας / Botão Power
c Speaker
Haut-parleur / Lautsprecher / Altavoz / Altoparlante / Luidspreker / Głośnik / Altifalante / Ηχείο / Alto-falante
v Touchpad/Touchpad buttons
Touchpad/Boutons du Touchpad / Touchpad/Touchpad-Tasten /
Almohadilla táctil/botones de laalmohadilla táctil / Touchpad/Tasti Touchpad / Touchpad/Touchpadknoppen /
Tabliczka dotykowa/Przyciski tabliczki dotykowej / Consola/Botões da consola /
Επιφάνεια αφής/Κουμπιά επιφάνειας αφής / Touchpad/Botões do Touchpad
b Microphone
Microphone / Mikrofon / Micrófono / Microfono / Microfoon / Mikrofon / Microfone / Μικρόφωνο / Microfone
n Multi Card Slot (Optional)
Logement pour carte multiple (en option) / Multischacht (Optional) / Ranura multitarjeta (opcional) /
Slot multischeda (Opzionale) / Multicardsleuf (optioneel) / Gniazdo kart pamięci (opcja) /
Ranhura multi-card (opcional) / Υποδοχή κάρτας πολλαπλής χρήσης (Προαιρετικό) /
Slot para múltiplas placas (opcional)
m Status Indicators
Indicateurs d’état / Statusanzeigen / Indicadores de estado / Indicatori di stato / Statusindicatoren /
Wskaźniki stanu / Indicadores de estado / Ενδείξεις Κατάστασης / Indicadores de status
Front View
Vue avant / Vorderansicht / Vista frontal / Vista anteriore / Vooraanzicht / Widok z przodu / Vista frontal / Εμπρός Όψη / Visão dianteira
z Camera (Optional)
x Power Button
c Speaker
v Touchpad/Touchpad buttons
b Microphone
n Multi Card Slot (Optional)
m Status Indicators6 7
Left View
Vue latérale gauche / Ansicht von links / Vista izquierda / Vista sinistra / Linker aanzicht / Widok z lewej strony /
Vista esquerda / Αριστερή Όψη / Visão esquerda
z DC Jack
Prise CC / Gleichstromeingang / Conector CC / Jack CC / Voedingsaansluiting / Gniazdo zasilacza /
Tomada CC / Υποδοχή DC / Tomada CC
x Wired LAN Port
Port LAN câblé / LAN-Anschluss / Puerto de LAN cableada / Porta LAN cablata / Netwerkpoort /
Port sieci przewodowej / Porta de LAN com fios / Θύρα Ενσύρματου Δικτύου LAN / Porta de LAN com fio
c Fan Vents
Sorties du ventilateur / Lüftungsschlitze / Rejillas de ventilación / Uscite di ventilazione / Ventilatieopeningen /
Otwory wentylacyjne / Aberturas de ventilação / Αεραγωγοί Ανεμιστήρα / Aberturas do ventilador
v Monitor Port
Port moniteur / Monitoranschluss / Puerto del monitor / Porta del monitor / Monitorpoort / Port monitora /
Porta do monitor / Θύρα Οθόνης / Porta do monitor
b Digital Video, Audio Port (HDMI) (Optional)
Port audio-vidéo numérique (HDMI) (en option) / Anschluss für Digital Video, Audio (HDMI) (optional) /
Vídeo digital, puerto de audio (HDMI) (opcional) / Porta video, audio digitale (HDMI) (opzionale) /
Digitale audio-, videopoort Port (HDMI) (optioneel) / Port cyfrowej transmisji audio- wideo (HDMI) (opcja) /
Porta áudio, vídeo digital (HDMI) (opcional) / Θύρα ψηφιακού βίντεο, ήχου (HDMI) (Προαιρετικό) /
Porta de áudio, vídeo digital (HDMI) (opcional)
n USB Port (Optional)
Port USB (en option) / USB-Anschluss (optional) / Puerto USB (opcional) / Porta USB (opzionale) /
USB-poort (optioneel) / Port USB (opcja) / Porta USB (opcional) / Θύρα USB (Προαιρετικό) / Porta USB (opcional)
m Microphone Jack
Prise microphone / Mikrofonbuchse / Conector para micrófono / Jack del microfono / Microfoonaansluiting /
Gniazdo mikrofonu / Tomada para microfone / Υποδοχή Μικροφώνου / Saída do microfone
, Headphone Jack
Prise casque / Kopfhörerbuchse / Conector para auricular / Jack della cuffia / Hoofdtelefoonaansluiting /
Gniazdo słuchawek / Tomada para auscultadores / Υποδοχή Ακουστικών / Saída do fone
zDC Jack cFan Vents
xWired LAN Port vMonitor Port ,Headphone Jack
bDigital Video/Audio Port m Microphone Jack
(HDMI) (Optional)
nUSB Port (Optional)8 9
Right View
Vue latérale droite / Ansicht von rechts / Vista derecha / Vista destra / Rechter aanzicht / Widok z prawej strony /
Vista direita / Δεξιά Όψη / Visão direita
z CD Drive (ODD) (Optional)
Lecteur de CD(ODD) (en option) / CD-Laufwerk(ODD) (Optional) / Unidad de CD (opcional) /
Unità CD(ODD) (opzionale) / Cd-station (optische schijf) (optioneel) / Napęd CD (ODD) (opcja) /
Unidade de CD (ODD) (opcional) / Μονάδα ανάγνωσης CD (ODD) (Προαιρετική) / Drive de CD (ODD) (opcional)
x USB Port (Optional)
Port USB (en option) / USB-Anschluss (optional) / Puerto USB (opcional) / Porta USB (opzionale) /
USB-poort (optioneel) / Port USB (opcja) / Porta USB (opcional) / Θύρα USB (Προαιρετικό) / Porta USB (opcional)
c Security Slot
Logement de sécurité / Sicherheitssteckplatz / Ranura de seguridad / Slot di sicurezza / Beveiligingssleuf /
Gniazdo bezpieczenstwa / Ranhura de segurança / Υποδοχή ασφαλείας / Slot de segurança
cSecurity Slot
z CD Drive (ODD) (Optional) x USB Port (Optional)8 9
Connect the AC adapter
Raccorder l’adaptateur CA / Wechselstromadapter anschließen / Conectar el adaptador CA/CC (Fuente de alimentación) /
Collegamento dell’adattatore CA / De AC-adapter aansluiten / Podłączanie zasilacza / Ligar o transformador de CA /
Σύνδεση του τροφοδοτικού AC / Conecte o adaptador CA
x Power Cable
cordon d’alimentation / Netzkabel /
Cable de alimentación /
Cavo di alimentazione /
Voedingskabel / Przewód zasilający /
Cabo de alimentação /
Καλώδιο ρεύματος /
Cabo de alimentação
AC Adapter
Adaptateur CA / Wechselstromadapter /
Adaptador CA/CC (Fuente de alimentación) /
Adattatore CA / AC-adapter /
Zasilacz sieciowy / Transformador de CA /
Τροφοδοτικό AC / Adaptador CA
z
DC Jack
Prise CC / Gleichstromeingang /
Conector CC / Jack CC /
Voedingsaansluiting /
Gniazdo zasilacza / Tomada CC /
Υποδοχή DC / Tomada CC
Turn on the computer
Allumer l’ordinateur / Computer einschalten / Encender el equipo / Accendere il computer / De computer inschakelen /
Włączanie komputera / Ligar o computador / Ενεργοποίηση του υπολογιστή / Ligar o computador
z
x
Turn on the computer
Allumer l’ordinateur / Computer einschalten / Encender el equipo / Accendere il computer / De computer inschakelen /
Włączanie komputera / Ligar o computador / Ενεργοποίηση του υπολογιστή / Ligar o computador10 11
Product Specifications
Product Specifications ENG
The system specifications may differ depending on the derived models. For detailed system specifications, refer to the product catalogue.
CPU (Optional) Intel Core i3/i5 Processor
Intel Pentium/Celeron Processor
AMD Dual-Core Processor
AMD Quad-Core Processor
Main Memory Memory type: DDR3 SODIMM
Main Chipset (Optional) Intel HM65 / Intel HM70 / Intel HM75
AMD A60M
Hard Disk Drive 9.5mmH SATA HDD
Graphics (Optional) Intel HD Graphics (Internal)
Nvidia Geforce 315M (Optimus)
Nvidia Geforce GT 520MX (Optimus)
NVIDIA GT620M (Optimus)
NVIDIA 610M (Optimus)
AMD Radeon HD 6470M (PowerXpress)
AMD Radeon HD 7450M (PowerXpress)
AMD Radeon HD 7470M (PowerXpress)
AMD Dual Radeon HD 6380G/6480G/6520G/6620G (PowerXpress)
AMD Radeon HD 6380G/6480G/6520G/6620G (Internal)
Operating Environment Temperature : -5~40°C for storage, 10~32°C when operating
Humidity : 5~90% for storage, 20~80% when operating
AC/DC Rating Input: 100-240VAC, 50/60Hz,
Output: 19VDC 3.16A
PC Rating 19VDC 3.16A (60W)
● Optional components may not be provided or different components may be provided depending on the computer model.
● The system specifications are subject to change without notice.
Caractéristiques techniques du produit FRE
Les caractéristiques du système peuvent varier d’un modèle à l’autre.
Pour obtenir les caractéristiques détaillées du système, reportez-vous au catalogue du produit.
Processeur (en option) Processeur Intel Core i3/i5
Processeur Intel Pentium/Celeron
Processeur AMD Dual-Core
Processeur AMD Quad-Core
Mémoire principale Type de mémoire : DDR3 SODIMM
Chipset principal (en option) Intel HM65 / Intel HM70 / Intel HM75
AMD A60M
Disque dur 9.5mmH SATA HDD
Carte graphique (en option) Intel HD Graphics (Interne)
Nvidia Geforce 315M (Optimus)
Nvidia Geforce GT 520MX (Optimus)
NVIDIA GT620M (Optimus)
NVIDIA 610M (Optimus)
AMD Radeon HD 6470M (PowerXpress)
AMD Radeon HD 7450M (PowerXpress)
AMD Radeon HD 7470M (PowerXpress)
AMD Dual Radeon HD 6380G/6480G/6520G/6620G (PowerXpress)
AMD Radeon HD 6380G/6480G/6520G/6620G (Interne)
Environnement d’utilisation Temperature : -5~40°C for storage, 10~32°C when operating
Humidity : 5~90% for storage, 20~80% when operating
Caractéristiques c.a. / c.c. Entrée) 100 - 240 VCA, 50/60Hz,
Sortie) 19VDC 3.16A
Caractéristiques PC 19VDC 3.16A (60W)
● Il est possible que les composants en option ne soient pas fournis ou que d’autres composants soient fournis en fonction du modèle
d’ordinateur.
● Les caractéristiques du système sont soumises à modification sans préavis.10 11
Produktspezifikationen GER
Die technischen Daten des Geräts können je nach Modell unterschiedlich sein. Detaillierte technische Daten zum Gerät finden Sie im
Produktkatalog.
Prozessor (optional) Intel Core i3/i5-Prozessor
Intel Pentium/Celeron-Prozessor
AMD Dual-Core-Prozessor
AMD Quad-Core-Prozessor
Hauptspeicher Speichertyp: DDR3 SODIMM
Hauptchipsatz (optional) Intel HM65 / Intel HM70 / Intel HM75
AMD A60M
Festplatten-Laufwerk 9.5mmH SATA HDD
Grafik (optional) Intel HD Graphics (Intern)
Nvidia Geforce 315M (Optimus)
Nvidia Geforce GT 520MX (Optimus)
NVIDIA GT620M (Optimus)
NVIDIA 610M (Optimus)
AMD Radeon HD 6470M (PowerXpress)
AMD Radeon HD 7450M (PowerXpress)
AMD Radeon HD 7470M (PowerXpress)
AMD Dual Radeon HD 6380G/6480G/6520G/6620G (PowerXpress)
AMD Radeon HD 6380G/6480G/6520G/6620G (Intern)
Betriebsumgebung Temperature : -5~40°C for storage, 10~32°C when operating
Humidity : 5~90% for storage, 20~80% when operating
Nennspannungen (AC/DC) Eingang) 100-240VAC, 50/60Hz,
Ausgang) 19VDC 3.16A
PC-Spezifikationen 19VDC 3.16A (60W)
● Je nach Modell des Computers wird manches Zubehör gar nicht oder in anderer Ausführung bzw. Kombination bereitgestellt.
● Änderungen der technischen Daten des Geräts vorbehalten.
Especificaciones del producto
Las especificaciones del sistema pueden diferir según los modelos. Si desea información detallada sobre el sistema, consulte el catálogo del producto.
CPU (opcional) Intel Core i3/i5 Processor
Intel Pentium/Celeron Processor
AMD Dual-Core Processor
AMD Quad-Core Processor
Memoria principal Tipo de memoria: DDR3 SODIMM
Conjunto de chips principal (opcional) Intel HM65 / Intel HM70 / Intel HM75
AMD A60M
Unidad de disco duro 9.5mmH SATA HDD
Gráficos (opcional) Intel HD Graphics (interno)
Nvidia Geforce 315M (Optimus)
Nvidia Geforce GT 520MX (Optimus)
NVIDIA GT620M (Optimus)
NVIDIA 610M (Optimus)
AMD Radeon HD 6470M (PowerXpress)
AMD Radeon HD 7450M (PowerXpress)
AMD Radeon HD 7470M (PowerXpress)
AMD Dual Radeon HD 6380G/6480G/6520G/6620G (PowerXpress)
AMD Radeon HD 6380G/6480G/6520G/6620G (interno)
Entorno de funcionamiento Temperatura: -5~40°C durante almacenamiento, 10~32°C durante funcionamiento
Humedad: 5~90% durante almacenamiento, 20~80% durante funcionamiento
Tensión CA/CC Entrada) 100 ~ 240 Vca, 50/60Hz,
Salida) 19VDC 3.16A
Tensión PC 19VDC 3.16A (60W)
Utilice sólo fuentes de alimentación con las siguientes características eléctricas y que estén debidamente certificadas de acuerdo a la legislación
vigente. El uso de otras fuentes de alimentación podría dañar el dispositivo y anular la garantía además de provocar riesgos al usuario.
Características de entrada: AC 100-240V, 50-60 Hz, 1,5A, CLASE I
Características de salida: DC 19V, 3,16A
● Los componentes opcionales puede ser que no se suministren o que se suministren otros distintos según el modelo de
ordenador(computador).
● Las especificaciones del sistema pueden cambiar sin previo aviso.
SPA12 13
ITA
DUT
Specifiche del prodotto
Le specifiche del sistema possono variare in base al modello. Per informazioni dettagliate sulle specifiche del sistema, consultare il catalogo del
prodotto.
CPU (Opzionale) Processore Intel Core i3/i5
Processore Intel Pentium/Celeron
Processore AMD Dual-Core
Processore AMD Quad-Core
Memoria principale Tipo di memoria: DDR3 SODIMM
Chipset principale (Opzionale) Intel HM65 / Intel HM70 / Intel HM75
AMD A60M
Unità disco rigido 9.5mmH SATA HDD
Grafica (Opzionale) Intel HD Graphics (Interna)
Nvidia Geforce 315M (Optimus)
Nvidia Geforce GT 520MX (Optimus)
NVIDIA GT620M (Optimus)
NVIDIA 610M (Optimus)
AMD Radeon HD 6470M (PowerXpress)
AMD Radeon HD 7450M (PowerXpress)
AMD Radeon HD 7470M (PowerXpress)
AMD Dual Radeon HD 6380G/6480G/6520G/6620G (PowerXpress)
AMD Radeon HD 6380G/6480G/6520G/6620G (Interna)
Ambiente di funzionamento Temperatura: -5~40°C per stoccaggio, 10~32°C per l’uso
Umidità: 5~90% per stoccaggio, 20~80% per l’uso
Potenza CA/CC Ingresso) 100-240VCA, 50/60Hz,
Uscita) 19VDC 3.16A
Potenza PC 19VDC 3.16A (60W)
● I componenti opzionali potrebbero non essere forniti oppure potrebbero essere forniti componenti diversi a seconda del modello del
computer.
● Le specifiche del sistema sono soggette a modifiche senza preavviso.
Productspecificaties
De systeemspecificaties kunnen per modelvariant verschillen. Raadpleeg de productcatalogus voor gedetailleerde systeemspecificaties.
Processor (optioneel) Intel Core i3/i5 Processor
Intel Pentium/Celeron Processor
AMD Dual-Core Processor
AMD Quad-Core Processor
Werkgeheugen Geheugentype: DDR3 SODIMM
Hoofdchipset (optioneel) Intel HM65 / Intel HM70 / Intel HM75
AMD A60M
Vasteschijfstation 9.5mmH SATA HDD
Grafische kaart (optioneel) Intel HD Graphics (intern)
Nvidia Geforce 315M (Optimus)
Nvidia Geforce GT 520MX (Optimus)
NVIDIA GT620M (Optimus)
NVIDIA 610M (Optimus)
AMD Radeon HD 6470M (PowerXpress)
AMD Radeon HD 7450M (PowerXpress)
AMD Radeon HD 7470M (PowerXpress)
AMD Dual Radeon HD 6380G/6480G/6520G/6620G (PowerXpress)
AMD Radeon HD 6380G/6480G/6520G/6620G (intern)
Gebruiksomgeving Temperatuur: -5~40°C voor opslag, 10~32°C in bedrijf
Luchtvochtigheid: 5~90% voor opslag, 20~80% in bedrijf
Classificatie wisselstroom /gelijkstroom Invoer) 100-240VAC, 50/60Hz,
Uitvoer) 19VDC 3.16A
Classificatie pc 19VDC 3.16A (60W)
● Optionele componenten worden mogelijk niet meegeleverd, of mogelijk worden andere componenten geleverd, afhankelijk van het
computermodel.
● De systeemspecificaties kunnen zonder voorafgaande kennisgeving worden gewijzigd.12 13
POL
POR
Dane techniczne produktu
Dane techniczne systemu mogą się różnić w zależności od modelu komputera. Szczegółowe informacje dotyczące parametrów można znaleźć w
katalogu produktów.
Procesor (opcja) Procesor Intel Core i3/i5
Procesor Intel Pentium/Celeron
Procesor AMD Dual-Core
Procesor AMD Quad-Core
Pamięć główna Typ pamięci: DDR3 SODIMM
Główny chipset (opcja) Intel HM65 / Intel HM70 / Intel HM75
AMD A60M
Dysk twardy 9.5mmH SATA HDD
Karta grafiki (opcja) Intel HD Graphics (wewnętrzna)
Nvidia Geforce 315M (Optimus)
Nvidia Geforce GT 520MX (Optimus)
NVIDIA GT620M (Optimus)
NVIDIA 610M (Optimus)
AMD Radeon HD 6470M (PowerXpress)
AMD Radeon HD 7450M (PowerXpress)
AMD Radeon HD 7470M (PowerXpress)
AMD Dual Radeon HD 6380G/6480G/6520G/6620G (PowerXpress)
AMD Radeon HD 6380G/6480G/6520G/6620G (wewnętrzna)
Środowisko pracy Temperatura: -5~40°C podczas przechowywania, 10~32°C podczas użytkowania
Wilgotność: 5~90% podczas przechowywania, 20~80% podczas użytkowania
Wartość znamionowa prądu zmiennego/
stałego
Prąd wejściowy) 100-240VAC, 50/60Hz,
Prąd wyjściowy) 19VDC 3.16A
Ocena produktu 19VDC 3.16A (60W)
● Komponenty opcjonalne mogą nie być dostępne; istnieje także możliwość dostarczenia innych komponentów, w zależności od
modelu komputera.
● Dane techniczne mogą ulec zmianie, bez konieczności powiadomienia użytkownika.
Especificações do produto
As especificações do sistema podem variar em função dos modelos. Para obter especificações pormenorizadas sobre o sistema, consulte o
catálogo de produto.
CPU (opcional) Processador Intel Core i3/i5
Processador Intel Pentium/Celeron
Processador AMD Dual-Core
Processador AMD Quad-Core
Memória principal Tipo de memória: DDR3 SODIMM
Chipset principal (opcional) Intel HM65 / Intel HM70 / Intel HM75
AMD A60M
Unidade de disco rígido 9.5mmH SATA HDD
Gráficos (opcional) Intel HD Graphics (Interna)
Nvidia Geforce 315M (Optimus)
Nvidia Geforce GT 520MX (Optimus)
NVIDIA GT620M (Optimus)
NVIDIA 610M (Optimus)
AMD Radeon HD 6470M (PowerXpress)
AMD Radeon HD 7450M (PowerXpress)
AMD Radeon HD 7470M (PowerXpress)
AMD Dual Radeon HD 6380G/6480G/6520G/6620G (PowerXpress)
AMD Radeon HD 6380G/6480G/6520G/6620G (Interna)
Ambiente de funcionamento Temperatura : -5~40 °C para armazenamento, 10~32 °C durante o funcionamento
Humidade : 5~90% para armazenamento, 20~80% durante o funcionamento
Classificação CA/DC Entrada) 100 - 240 V CA, 50/60Hz,
Saída) 19VDC 3.16A
Classificação PC 19VDC 3.16A (60W)
● Os componentes opcionais podem não ser fornecidos ou podem ser fornecidos componentes diferentes consoante o modelo do
computador.
● As especificações do sistema estão sujeitas a alterações sem aviso prévio.14 PB
Προδιαγραφές Προϊόντος
Οι προδιαγραφές του συστήματος ενδέχεται να διαφέρουν, ανάλογα με τα μοντέλα που θα κυκλοφορήσουν. Για λεπτομερείς προδιαγραφές
συστήματος, ανατρέξτε στον κατάλογο προϊόντων.
Κεντρική Μονάδα Επεξεργασίας (CPU) (Προαιρετική) Επεξεργαστής Intel Core i3/i5
Επεξεργαστής Intel Pentium/Celeron
Επεξεργαστής AMD Dual-Core
Επεξεργαστής AMD Quad-Core
Κύρια Μνήμη Τύπος μνήμης: DDR3 SODIMM
Κύριο σετ ολοκληρωμένων Σύνολο Τσιπ (Προαιρετική) Intel HM65 / Intel HM70 / Intel HM75
AMD A60M
Μονάδα Σκληρού Δίσκου 9.5mmH SATA HDD
Κάρτα Γραφικών (Προαιρετική) Intel HD Graphics (Εσωτερικός)
Nvidia Geforce 315M (Optimus)
Nvidia Geforce GT 520MX (Optimus)
NVIDIA GT620M (Optimus)
NVIDIA 610M (Optimus)
AMD Radeon HD 6470M (PowerXpress)
AMD Radeon HD 7450M (PowerXpress)
AMD Radeon HD 7470M (PowerXpress)
AMD Dual Radeon HD 6380G/6480G/6520G/6620G (PowerXpress)
AMD Radeon HD 6380G/6480G/6520G/6620G (Εσωτερικός)
Περιβάλλον Λειτουργίας Θερμοκρασία: -5~40°C για αποθήκευση, 10~32°C κατά τη λειτουργία
Υγρασία: 5~90% για αποθήκευση, 20~80% κατά τη λειτουργία
Ονομαστική τιμή AC/DC Είσοδος) 100-240VAC, 50/60Hz,
Έξοδος) 19VDC 3.16A
Ονομαστική τιμή υπολογιστή 19VDC 3.16A (60W)
● Τα προαιρετικά στοιχεία ενδέχεται να μην παρέχονται ή να παρέχονται διαφορετικά στοιχεία, ανάλογα με το μοντέλο του υπολογιστή.
● Οι προδιαγραφές του συστήματος υπόκεινται σε αλλαγή χωρίς προειδοποίηση.
Especificações de produto
As especificações do sistema podem ser diferentes dependendo dos modelos derivados. Para obter especificações detalhadas sobre o sistema,
consulte o catálogo do produto.
CPU (opcional) Processador Intel Core i3/i5
Processador Intel Pentium/Celeron
Processador AMD Dual-Core
Processador AMD Quad-Core
Memória principal Tipo de memória: DDR3 SODIMM
Conjunto principal de chips (opcional) Intel HM65 / Intel HM70 / Intel HM75
AMD A60M
Unidade de disco rígido 9.5mmH SATA HDD
Gráficos (opcional) Intel HD Graphics (interno)
Nvidia Geforce 315M (Optimus)
Nvidia Geforce GT 520MX (Optimus)
NVIDIA GT620M (Optimus)
NVIDIA 610M (Optimus)
AMD Radeon HD 6470M (PowerXpress)
AMD Radeon HD 7450M (PowerXpress)
AMD Radeon HD 7470M (PowerXpress)
AMD Dual Radeon HD 6380G/6480G/6520G/6620G (PowerXpress)
AMD Radeon HD 6380G/6480G/6520G/6620G (interno)
Ambiente operacional Temperatura: -5 a 40°C para armazenamento, 10 a 32°C ao operar
Umidade: 5 a 90% para armazenamento, 20 a 80% ao operar
Classificação CA/CC Entrada) 100-240VAC, 50/60Hz,
Saída) 19VDC 3.16A
Classificação PC 19VDC 3.16A (60W)
● Os componentes opcionais podem não ser fornecidos ou componentes diferentes poderão ser fornecidos dependendo do modelo
do computador.
● As especificações do sistema estão sujeitas a alterações sem aviso prévio.
GRE
BRAPB 15
Installation
• Use and put the product in a safe location and avoid contact with the human body to the heat from the computer
vent or AC adapter for long time.
• Take care when handling the plastic bag.
Electric shock, damage, suffocation,
over-heating, burns
FRE Installation: Choc
électrique, dégâts,
étouffement,
surchauffe, brûlures
SPA Instalación:
Descargas eléctricas,
daños, asfixia,
sobrecalentamiento,
quemaduras
DUT Installatie: elektrische
schokken, schade,
verstikking,
oververhitting,
brandwonden
POR Instalação:
choque eléctrico,
danos, asfixia,
sobreaquecimento
e queimaduras
BRA Instalação:
choque elétrico,
danos, asfixia,
superaquecimento,
queimaduras
GER Installation:
Stromschlag,
Sachschäden,
Erstickung,
Überhitzung,
Verbrennungen
ITA Installazione:
Scariche elettriche,
danni, soffocamento,
surriscaldamento,
bruciature
POL Instalacja urządzenia:
Zagrożenie porażeniem
prądem, uszkodzeniem
ciała, uduszeniem
się, przegrzaniem,
oparzeniami
GRE Εγκατάσταση:
Ηλεκτροπληξία,
ζημιά, ασφυξία,
υπερθέρμανση,
εγκαύματα
FRE
• Utilisez et stockez le produit dans un endroit sûr. Evitez en outre d’exposer toute partie de votre corps à la chaleur émanant de l’adaptateur
secteur ou du ventilateur de l’ordinateur pendant une durée prolongée.
• Manipulez le sac en plastique avec précaution.
GER
• Stellen Sie das Gerät an einem sicheren Ort auf und verwenden Sie es nur dort. Vermeiden Sie längeren Kontakt des menschlichen
Körpers mit der aus den Abluftöffnungen austretenden Wärme und dem heißen Netztei.
• Achtung beim Umgang mit der Kunststofftüte.
SPA
• Utilice y coloque el producto en un lugar seguro y evite el contacto prolongado del cuerpo humano con el calor procedente del
ventilador del equipo o del adaptador CA.
• Tenga cuidado cuando manipule la bolsa de plástico.
ITA
• Utilizzare e conservare il prodotto in un luogo sicuro ed evitare un contatto prolungato con il corpo a causa del calore generato dalla
ventola del computer o dall’adattatore CA.
• Prestare attenzione durante la manipolazione dell’involucro di plastica.
DUT
• Gebruik en bewaar het product op een veilige locatie en voorkom het langdurig blootstellen van een lichaamsdeel aan de warme lucht
uit de ventilatieopening van de computer of de warme netspanningsadapter.
• Let goed op wat u met de plastic zak doet.
POL
• Produkt należy używać i przechowywać w bezpiecznym miejscu. Należy także unikać narażania jakiejkolwiek części ciała na długotrwałe
działanie gorącego powietrza z otworu wentylacyjnego komputera lub zasilacza sieciowego.
• Zaleca się ostrożne obchodzenie się z torbą plastikową.
POR
• Utilize e coloque o produto num local seguro e evite expor qualquer parte do seu corpo ao calor do ventilador do computador ou do
transformador de CA durante muito tempo.
• Tenha cuidado ao manusear o saco de plástico.
GRE
• Χρησιμοποιείτε και τοποθετείτε το προϊόν σε μια ασφαλή θέση, αποφεύγετε την παρατεταμένη έκθεση του σώματος στη θερμότητα από
τα ανοίγματα εξαερισμού ή το τροφοδοτικό του υπολογιστή.
• Να χειρίζεστε τον πλαστικό σάκο με προσοχή.
BRA
• Use e coloque o produto em um local seguro e evite expor qualquer parte do corpo ao calor da ventilação do computador ou do
adaptador CA por longos períodos.
• Cuidado ao manusear o saco plástico.
16 17
Power cord
FRE Cordon
d’alimentation:
Incendie, choc
électrique
SPA Cable de alimentación:
Incendio, descarga
eléctrica
DUT Voedingskabel:
brand, elektrische
schokken
POR Cabo de alimentação:
incêndio, choque
eléctrico
BRA Cabo de
alimentação:
incêndio, choque
elétrico
GER Netzkabel: Brand,
Stromschlag
ITA Cavo di alimentazione:
Incendio, scarica
elettrica
POL Przewód zasilający:
Zagrożenie pożarem,
porażeniem prądem
GRE Καλώδιορε
ύματος: Πυρκαγιά,
ηλεκτροπληξία
Fire, electric shock
●
Avoid bending or damaging the power cord and adapter cable.
●
Take care not to cause an electric shock and make sure to ground the product.
FRE
• Evitez de plier ou d’endommager le cordon d’alimentation ou le câble de l’adaptateur.
• Veillez à ne pas provoquer un choc électrique et à relier le produit à la terre.
GER
• Vermeiden Sie jegliches Verbiegen oder Beschädigen des Netzkabels und des Anschlusskabels.
• Achten Sie darauf, dass Sie keinen Kurzschluss verursachen und erden Sie das Gerät unbedingt.
SPA
• No doble ni dañe el cable de alimentación ni el del adaptador.
• Asegúrese de que no se produzcan descargas eléctricas y de que el producto tenga una toma de tierra.
ITA
• Evitare di piegare o danneggiare il cavo di alimentazione e il cavo dell'adattatore.
• Prestare attenzione a non causare una scarica elettrica ed effettuare il collegamento a terra del prodotto.
DUT
• De voedingskabel en adapterkabel niet buigen of beschadigen.
• Wees voorzichtig om elektrische schokken te vermijden en zorg ervoor dat het product geaard is.
POL
• Przewodu zasilającego i przewodu zasilacza nie wolno zginać ani uszkadzać.
• Należy uważać, aby nie spowodować zagrożenia porażeniem prądem elektrycznym. Produkt musi być uziemiony.
POR
• Evite dobrar ou danificar o cabo de alimentação e o cabo do transformador.
• Tenha cuidado para não causar um choque eléctrico e certifique-se de que o produto é devidamente ligado à terra.
GRE
• Αποφεύγετε την πρόκληση κάμψης ή ζημιάς στο καλώδιο ρεύματος και το καλώδιο του προσαρμογέα.
• Προσέχετε να μην προκληθεί ηλεκτροπλημία και φροντίστε να γειώσετε το προϊόν.
BRA
• Evite dobrar ou danificar o cabo de alimentação e o cabo adaptador.
• Cuidado para não causar choques elétricos e não se esqueça de aterrar o produto.16 17
FRE Adaptateur:
Incendie, choc
électrique
SPA Adaptador: Incendio,
descarga eléctrica
DUT Adapter: brand,
elektrische schokken
POR Zasilacz: Zagro
żenie pożarem,
porażeniem prądem
BRA Adaptador:
incêndio, choque
elétrico
GER Netzteil: Brand,
Stromschlag
ITA Adattatore: Incendio,
scarica elettrica
POL Zasilacz: Zagrożenie
poża rem,
porażeniem prądem
GRE Προσαρμογέας:
Πυρκαγιά,
ηλεκτροπληξία
FRE
• Utilisez une batterie et un adaptateur agréés, ne les démontez et ne les endommagez pas.
• Vérifiez que le branchement est correct.
GER
• Schließen Sie nur ein zugelassenes Netzteil und eine zugelassene Batterie an und zerlegen bzw.
• Beschädigen Sie sie nicht. Sorgen Sie für eine haltbare Verbindung.
SPA
• Conecte un adaptador y una batería homologados; no los desmonte ni los dañe.
• Asegure firmemente la conexión.
ITA
• Collegare un adattatore e una batteria di tipo approvato e non disassemblarli o danneggiarli.
• Verificare che il collegamento sia saldo.
DUT
• Een goedgekeurde adapter en batterij aansluiten en deze niet demonteren of beschadigen.
• De erbinding stevig aansluiten.
POL
• Należy korzystać wyłącznie z zasilaczy i akumulatorów zatwierdzonych przez producenta. Nie wolno ich rozmontowywać ani uszkadzać.
• Powinny one być odpowiednio podłączone.
POR
• Ligue um transformador e uma bateria autorizados e não os desmonte nem os danifique.
• Conecte todas as ligações firmemente.
GRE
• Συνδέστε έναν εξουσιοδοτημένο προσαρμογέα και μπαταρία, μην τα αποσυναρμολογείτε και μην τους προκαλείτε ζημιές.
• Συνδέστε καλά το βύσμα.
BRA
• Conecte um adaptador e uma bateria autorizados, não os desmonte ou danifique.
• Não deixe a conexão frouxa.
AC Adapter
●
Connect an authorized adapter and battery and do not disassemble or damage them.
●
Connect the connection tightly.
Fire, electric shock18 19
FRE
• Manipulez la batterie avec précaution et, en cas de problème, cessez de l’utiliser.
GER
• Vorsicht beim Umgang mit der Batterie, und verwenden Sie die Batterie bei Problem nicht.
SPA
• Tenga cuidado cuando manipule la batería; si ocurre algún problema, no la utilice.
ITA
• Prestare attenzione durante la manipolazione della batteria e, se dovesse presentare danni o problemi, non usarla.
DUT
• Wees voorzichtig bij het omgaan met de batterij. Als zich problemen voordoen, de batterij niet gebruiken.
POL
• Zaleca się ostrożne postępowanie z akumulatorem. W razie problemów należy przerwać korzystanie z akumulatora.
POR
• Tenha cuidado ao manusear a bateria, e caso ocorram problemas, não a utilize.
GRE
• Να χειρίζεστε την μπαταρία με προσοχή και, εάν προκύψει πρόβλημα, μην τη χρησιμοποιείτε.
BRA
• Cuidado ao manusear a bateria e, caso ocorra algum problema, não a utilize.
Battery
Explosion, fire
FRE Batterie: Explosion,
incendie
SPA Batería: Explosión,
incendio
DUT Batterij: ontploffing,
brand
POR Bateria: explosão,
incêndio
BRA Bateria: explosão,
incêndio
GER Batterie: Explosion,
Brand
ITA Batteria: Esplosione,
incendio
POL Akumulator:
Zagrożenie wybuch
em, pożarem
GRE Μπαταρία: Έκρηξη,
πυρκαγι
●
Take care when handling the battery, and if a problem occurs, do not use the battery.18 19
FRE
• Pour éviter tout risque d’incendie ou de brûlures, par exemple, veillez à respecter les directives suivantes.
Pour plus d’informations, reportez-vous aux instructions de sécurité du manuel d’utilisation.
• Les images représentant le produit peuvent varier en fonction du pays.
GER
• Zur Vermeidung von Gefahren wie Feuer oder Verbrennungen beachten Sie die folgenden Richtlinien.
Weitere Informationen finden Sie im Benutzerhandbuch im Abschnitt mit den Sicherheitshinweisen.
• Da diese Abbildung repräsentativ ist, können alle Abbildungen je nach Land unterschiedlich sein.
SPA
• Para prevenir riesgos de incendio o quemaduras observe las siguientes indicaciones.
Para obtener más información, consulte las precauciones de seguridad de la guía del usuario.
• Dado que esta ilustración es representativa, todas las ilustraciones pueden diferir según el país.
ITA
• Per evitare incendi o scottature, osservare le seguenti istruzioni.
Per maggiori informazioni, vedere la sezione Precauzioni di sicurezza nella guida dell’utente.
• Poiché questa è una immagine rappresentativa del prodotto, le immagini possono variare a seconda del paese.
DUT
• Houdt u aan de volgende richtlijnen om risico’s als brand en brandwonden te vermijden.
Raadpleeg de veiligheidsinstructies in de gebruikershandleiding voor meer informatie.
• Deze afbeelding is slechts bedoeld als voorbeeld en kan afwijken van wat u zien, afhankelijk van het land waarin u het product hebt
aangeschaft.
POL
• Aby uniknąć ryzyka pożaru lub oparzenia, należy stosować się do następujących zasad.
Aby uzyskać dodatkowe informacje, należy zapoznać się z sekcją Zasady bezpieczeństwa w Instrukcji obsługi.
• Ilustracja służy wyłącznie jako przykład; wygląd rzeczywistego produktu może się w niektórych krajach od niej różnić.
POR
• Para evitar situações perigosas como incêndios ou queimaduras, respeite as seguintes directrizes.
Para obter mais informações, consulte as precauções de segurança no manual do utilizador.
• Uma vez que se trata de uma imagem representativa, todas as imagens podem variar consoante o país.
GRE
• Προκειμένου να αποτραπούν κίνδυνοι όπως πυρκαγιά ή εγκαύματα, φροντίστε να ακολουθήσετε τις παρακάτω οδηγίες.
Για περισσότερες πληροφορίες, ανατρέξτε στην ενότητα Μέτρα προφύλαξης του εγχειριδίου χρήσης.
• Αυτήείναι μόνομια αντιπροσωπευτική εικόνα τηςσυσκευής. Οιεικόνεςενδέχεται να διαφέρουν, ανάλογα μετηχώρα.
BRA
• Para prevenir riscos, como incêndio ou queimaduras, lembre-se de seguir estas diretrizes.
Para obter mais informações, consulte as precauções de segurança no guia do usuário.
• Como esta é uma figura representativa, todas as figuras podem variar dependendo do país.
To prevent dangers such as fire or burns, be sure to observe the following guidelines.
For more information, refer to the Safety Precautions in the in the user guide.
Since this is a representative figure, all figures may differ depending on the country.
Declaration of Conformity
For the following
Product : Notebook PC
Model(s) : NP300E5C, NP300E5X
Manufactured at:
Samsung Electronics Co., Ltd.
416, Maetan 3-Dong, Yeongtong-Gu, Suwon-Si, Gyeonggi-Do, 443-742 Korea
Samsung Electronics Suzhou Computer Co., Ltd.
No. 198, Fangzhou Road, Suzhou Industrial Park, Jiangsu Province, 215021, China
(Factories name and address)
We hereby declare, that the product above is in compliance with the essential requirements of the
R&TTE Directive (1999/5/EC) by application of the standards below.
This product also meets the essential requirements and other relevant provisions of the EMC
Directive (2004/108/EC) and the LVD Directive (2006/95/EC).
EN 60950-1:2006+A11:2009 EN 62311 : 2008
EN 55022:2006+A1:2007 EN 55024:1998+A1:2001+A2:2003
EN 61000-3-2:2006+A2:2009 EN 61000-3-3:2008
EN 301 489-01 V1.8.1 (04-2008) EN 301 489-17 V2.1.1 (05-2009)
EN 300 328 V1.7.1 (10-2006) EN 301 893 V1.5.1 (12-2008)
and the Eco-Design Directive (2009/125/EC) implemented by Regulations (EC) No 1275/2008 for
standby and off mode electric power consumption and (EC) No 278/2009 for external power
supplies.
(YEAR TO BEGIN AFFIXING CE MARKING 2012)
Samsung Electronics Euro QA Lab.
Blackbushe Business Park
Saxony Way, Yateley, Hampshire
GU46 6GG, UK
20 April 2012 Joong-Hoon Choi / Lab. Manager
(Place and date of issue) (Name and signature of authorized person)
Product details
Declaration & Applicable standards
Representative in the EU
LED TV
User Manual
imagine the possibilities
Thank you for purchasing this Samsung product.
To receive more complete service, please register
your product at
www.samsung.com/register
Model _____________Serial No. _____________
E-MANUAL
© 2011 Samsung Electronics Co., Ltd. All rights reserved.
Contact SAMSUNG WORLDWIDE
If you have any questions or comments relating to Samsung products, please contact the SAMSUNG customer care centre.
Country Customer Care Centre Web Site
ALBANIA 42 27 5755 -
AUSTRIA 0810 - SAMSUNG (7267864, € 0.07/min) www.samsung.com
BELGIUM 02-201-24-18 www.samsung.com/be (Dutch)
www.samsung.com/be_fr (French)
BOSNIA 05 133 1999 -
BULGARIA 07001 33 11 www.samsung.com
CROATIA 062 SAMSUNG (062 726 7864) www.samsung.com
CZECH 800 - SAMSUNG (800-726786) www.samsung.com
Samsung Zrt., česká organizační složka, Oasis Florenc, Sokolovská394/17, 180 00, Praha 8
DENMARK 70 70 19 70 www.samsung.com
FINLAND 030 - 6227 515 www.samsung.com
FRANCE 01 48 63 00 00 www.samsung.com
GERMANY 01805 - SAMSUNG(726-7864 € 0,14/Min) www.samsung.com
GREECE "1. Για προϊόντα πληροφορικής και κινητής τηλεφωνίας
Από σταθερό 80111-SAMSUNG (80111 7267864), αστική χρέωση
Από κινητό 210 6897691
2. Για φωτογραφικές μηχανές, βιντεοκάμερες, τηλεοράσεις & οικιακές
συσκευές
Από κινητό και σταθερό 2106293100"
www.samsung.com
HUNGARY 06-80-SAMSUNG(726-7864) www.samsung.com
ITALIA 800-SAMSUNG(726-7864) www.samsung.com
KOSOVO +381 0113216899 -
LUXEMBURG 261 03 710 www.samsung.com
MACEDONIA 023 207 777 -
MONTENEGRO 020 405 888 -
NETHERLANDS 0900-SAMSUNG (0900-7267864) (€ 0,10/Min) www.samsung.com
NORWAY 815-56 480 www.samsung.com
POLAND 0 801 1SAMSUNG(172678) / 022-607-93-33 www.samsung.com
PORTUGAL 80820-SAMSUNG(726-7864) www.samsung.com
RUMANIA "1. 08010 SAMSUNG (72678) – doar din reţeaua Romtelecom, tarif local;
2. 021.206.01.10 – din orice reţea, tarif normal "
www.samsung.com
SERBIA 0700 Samsung (0700 726 7864) www.samsung.com
SLOVAKIA 0800 - SAMSUNG(0800-726 786) www.samsung.com/sk
SPAIN 902 - 1 - SAMSUNG (902 172 678) www.samsung.com
SWEDEN 0771 726 7864 (SAMSUNG) www.samsung.com
SWITZERLAND 0848 - SAMSUNG(7267864, CHF 0.08/min) www.samsung.com/ch
www.samsung.com/ch_fr/(French)
U.K 0330 SAMSUNG (7267864) www.samsung.com
EIRE 0818 717100 www.samsung.com
LITHUANIA 8-800-77777 www.samsung.com
LATVIA 8000-7267 www.samsung.com
ESTONIA 800-7267 www.samsung.com
TURKEY 444 77 11 www.samsung.com
BN68-03426E BN68-03426E-03
[UD4000-XNZF]BN68-03426E.indb 1 2011-05-17 �� 6:33:27English - 2
For more information on how to use e-Manual (P.12)
Figures and illustrations in this User Manual are provided for reference only and may differ from actual product appearance.
Product design and specifications may be changed without notice.
Important Warranty Information Regarding Television Format Viewing
1. Functionalities related to Digital TV (DVB) are only available in countries/areas where DVB-T (MPEG2 and MPEG4 AVC) digital terrestrial
signals are broadcasted or where you are able to access to a compatible DVB-C (MPEG2 and MPEG4 AAC) cable-TV service. Please check
with your local dealer the possibility to receive DVB-T or DVB-C signal.
2. DVB-T is the DVB European consortium standard for the broadcast transmission of digital terrestrial television and DVB-C is that for the broadcast
transmission of digital TV over cable. However, some differentiated features like EPG (Electric Programme Guide), VOD (Video On Demand) and so
on, are not included in this specification. So, they cannot be workable at this moment.
3. Although this TV set meets the latest DVB-T and DVB-C standards, as of [August, 2008], the compatibility with future DVB-T digital terrestrial
and DVB-C digital cable broadcasts cannot be guaranteed.
4. Depending on the countries/areas where this TV set is used some cable-TV providers may charge an additional fee for such a service and
you may be required to agree to terms and conditions of their business.
5. Some Digital TV functions might be unavailable in some countries or regions and DVB-C might not work correctly with some cable service
providers.
6. For more information, please contact your local Samsung customer care centre.
✎ The reception quality of TV may be affected due to differences in broadcasting method between the countries. Please check the TV
performance in the local SAMSUNG Authorized Dealer, or the Samsung Call Centre whether it can be improved by reconfiguring TV
setting or not.
Still image warning
Avoid displaying still images (like jpeg picture files) or still image element (like TV programme logo, panorama or 4:3 image format, stock or news
bar at screen bottom etc.) on the screen. Constant displaying of still picture can cause ghosting of LED screen, which will affect image quality. To
reduce risk of this effect, please follow below recommendations:
• Avoid displaying the same TV channel for long periods.
• Always try do display any image on full screen, use TV set picture format menu for best possible match.
• Reduce brightness and contrast values to minimum required to achieve desired picture quality, exceeded values may speed up the burnout
process.
• Frequently use all TV features designed to reduce image retention and screen burnout, refer to proper user manual section for details.
Securing the Installation Space
Keep the required distances between the product and other objects (e.g. walls) to ensure proper ventilation.
Failing to do so may result in fire or a problem with the product due to an increase in the internal temperature of the product.
✎ When using a stand or wall-mount, use parts provided by Samsung Electronics only.
• If you use parts provided by another manufacturer, it may result in a problem with the product or an injury due to the product falling.
✎ The appearance may differ depending on the product.
✎ Be careful when you contact the TV because some parts can be somewhat hot.
Installation with a stand. Installation with a wall-mount.
10 cm 10 cm
10 cm
10 cm
10 cm
10 cm
10 cm
Correct Disposal of This Product (Waste Electrical & Electronic Equipment)
(Applicable in the European Union and other European countries with separate collection systems)
This marking on the product, accessories or literature indicates that the product and its electronic accessories (e.g. charger,
headset, USB cable) should not be disposed of with other household waste at the end of their working life. To prevent
possible harm to the environment or human health from uncontrolled waste disposal, please separate these items from
other types of waste and recycle them responsibly to promote the sustainable reuse of material resources. Household users
should contact either the retailer where they purchased this product, or their local government office, for details of where and
how they can take these items for environmentally safe recycling. Business users should contact their supplier and check
the terms and conditions of the purchase contract. This product and its electronic accessories should not be mixed with
other commercial wastes for disposal.
Correct disposal of batteries in this product
(Applicable in the European Union and other European countries with separate battery return systems)
This marking on the battery, manual or packaging indicates that the batteries in this product should not be disposed of
with other household waste at the end of their working life. Where marked, the chemical symbols Hg, Cd or Pb indicate
that the battery contains mercury, cadmium or lead above the reference levels in EC Directive 2006/66. If batteries are not
properly disposed of, these substances can cause harm to human health or the environment. To protect natural resources
and to promote material reuse, please separate batteries from other types of waste and recycle them through your local, free
battery return system.
[UD4000-XNZF]BN68-03426E.indb 2 2011-05-17 �� 6:33:28English - 3
Accessories
✎Please make sure the following items are included with your TV. If any items are missing, contact your dealer.
✎The items’ colours and shapes may vary depending on the models.
✎Cables not included in the package contents can be purchased separately.
CAUTION: INSERT SECURELY LEST SHOULD BE DETACHED IN SET
y Remote Control & Batteries (AAA x 2)
y Owner’s Instructions
y Warranty Card / Safety Guide (Not available in some locations)
y Power Cord
y Cleaning Cloth
y Holder Ring (4EA) y Holder-Wire Stand y CI Card Adapter
y Component / AV Adapter y Scart Adapter
✎An administration fee may be charged if either
(a) an engineer is called out at your request and there is no defect in the product
(i.e. where you have failed to read this user manual)
(b) you bring the unit to a repair centre and there is no defect in the product
(i.e. where you have failed to read this user manual).
✎The amount of such administration charge will be advised to you before any work or home visit is carried out.
Assembling the Holder-Wire stand
[UD4000-XNZF]BN68-03426E.indb 3 2011-05-17 �� 6:33:29English - 4
Viewing the Control Panel
✎The product colour and shape may vary depending on the model.
Control Panel
Speakers
Remote control sensor Aim the remote control towards this spot on the TV.
Power Indicator Blinks and turns off when the power is on and lights up in standby mode.
SOURCEE Toggles between all the available input sources. In the on-screen menu, use this
button as you would use the ENTERE button on the remote control.
YMENU Displays an on-screen menu, the OSD (on screen display) of your TV’s features.
Adjusts the volume. In the OSD, use the Y buttons as you would use the ◄
z and ► buttons on the remote control.
Changes the channels. In the OSD, use the z buttons as you would use the
▼ and ▲ buttons on the remote control.
P (Power) Turns the TV on or off.
Standby mode
Do not leave your TV in standby mode for long periods of time (when you are away on a holiday, for example). A small amount
of electric power is still consumed even when the power button is turned off. It is best to unplug the power cord.
[UD4000-XNZF]BN68-03426E.indb 4 2011-05-17 �� 6:33:29English - 5
Viewing the Remote Control
✎This is a special remote control for the visually impaired persons and has Braille points on the Power, Channel, and
Volume buttons.
A B C D
P.MODE SRS
E-MANUAL AD/SUBT.
CONTENT
DUAL I-II
HDMI
Turns the TV on and off.
Displays and selects the available
video sources.
Selects the HDMI mode directly.
Returns to the previous channel.
Cuts off the sound temporarily.
Changes channels.
Displays channel lists on the screen.
Displays the EPG (Electronic
Programme Guide).
Displays information on the TV
screen.
Exits the menu.
Press to directly access to channels.
Adjusts the volume.
Alternately select Teletext ON,
Double, Mix or OFF.
Displays the main on-screen menu.
Quickly select frequently used functions.
Displays the My Downloads, Watch TV
and Source.
Returns to the previous menu.
Selects the on-screen menu items and
changes the values seen on the menu.
Buttons used in the Channel List,
Channel Manager, My Downloads
menu, etc.
Use these buttons in a specific feature.
For details, refer to the e-Manual.
P.MODE: Selects picture mode.
SRS: Selects the TruSurround HD
mode.
DUAL I-II: Select Dual sound mode.
E-MANUAL: Displays the e-Manual
guide.
P.SIZE: Selects the picture size.
AD: Audio Description selection.
(Not available in some locations)
SUBT.: Displays digital subtitles.
Installing batteries (Battery size: AAA)
[UD4000-XNZF]BN68-03426E.indb 5 2011-05-17 �� 6:33:30English - 6
Connecting to an Antenna
When the TV is initially powered on, basic settings proceed automatically.
✎Preset: Connecting the mains and antenna.
Plug & Play (Initial Setup)
When the TV is initially powered on, a sequence of on-screen prompts will assist in configuring basic settings. Press the
POWERP button. Plug & Play is available only when the Input source is set to TV.
✎To return to the previous step, press the Red button.
1
Selecting a language Press the ▲ or ▼ button, then press the ENTERE button.
Select the desired OSD (On Screen Display) language.
P
POWER
2
Selecting Store Demo
or Home Use
Press the ◄ or ► button, then press the ENTERE button.
Select the Home Use mode. Store Demo mode is for retail
environments.
To return the unit’s settings from Store Demo to Home Use (standard):
Press the volume button on the TV. When the OSD volume is displayed,
press and hold MENU for 5 sec.
Store Demo is only for shop display. If you select it, several functions
are not able to use. Please select Home Use when you watch at home.
3
Selecting a country Press the ▲ or ▼ button, then press the ENTERE button.
Select the appropriate country.
✎After selecting the country in the Country menu, some models may proceed with an
additional option to setup the pin number.
✎When you input the PIN number, 0-0-0-0 is not available.
✎The option may differ depending on country.
4
Setting the Clock
Mode
Set the Clock Mode automatically or manually.
Auto: Select the time zone (depending on the country) where you are located.
Manual: Allows you to manually set the current date and time.
5
Selecting an antenna Press the ▲ or ▼ button, then press the ENTERE button.
Select the desired broadcasting signal.
6
Selecting a channel Press the ▲ or ▼ button, then press the ENTERE button.
Select the channel source to memorise. When setting the antenna source to Cable, a step
appears allowing you to assign numerical values (channel frequencies) to the channels. For
more information, refer to Channel → Auto Tuning.
Press the ENTERE button at any time to interrupt the memorisation process.
7
Enjoy your TV. Select the Watch TV. Press the ENTERE button.
If You Want to Reset This Feature...
You should do Plug & Play (MENU → System) again at home although you did in shop.
Select System - Plug & Play (Initial Setup). Enter your 4 digit PIN number. The default PIN number is “0-0-0-0” (except
France). If you want to change the PIN number, use the Change PIN function.
✎If you forget the PIN code, press the remote control buttons in the following sequence in Standby mode, which resets
the PIN to “0-0-0-0” (France: “1-1-1-1”): POWER (off) → MUTE → 8 → 2 → 4 → POWER (on).
VHF/UHF Antenna Cable
or
TV Rear Panel
[UD4000-XNZF]BN68-03426E.indb 6 2011-05-17 �� 6:33:32English - 7
Connecting to an AV devices
¦ Available devices: DVD, Blu-ray player, HD cable box, HD STB (Set-Top-Box) satellite
receiver, VCR, Digital Audio System, Amplifier, DVD Home Theatre, PC
HDMI OUT
DVI OUT
AUDIO OUT
R-AUDIO-L
HDMI, HDMI/DVI connection
Using an HDMI cable or HDMI to DVI Cable (up to 1080p)
✎HDMI IN 1(DVI), 2, 3, 4, PC/DVI AUDIO IN
x For better picture and audio quality, connect to a digital device using an HDMI cable.
x An HDMI cable supports digital video and audio signals, and does not require an audio cable.
– To connect the TV to a digital device that does not support HDMI output, use an HDMI/DVI and audio cables.
x The picture may not display normally (if at all) or the audio may not work if an external device that uses an older
version of HDMI mode is connected to the TV. If such a problem occurs, ask the manufacturer of the external
device about the HDMI version and, if out of date, request an upgrade.
x Be sure to use an HDMI cable with a thickness of 14 mm or less.
x Be sure to purchase a certified HDMI cable. Otherwise, the picture may not display or a connection error may
occur.
x A basic high-speed HDMI cable or one with ethernet is recommended. This product does not support the
ethernet function via HDMI.
[UD4000-XNZF]BN68-03426E.indb 7 2011-05-17 �� 6:33:33English - 8
AUDIO OUT
R-AUDIO-L
VIDEO OUT
AUDIO OUT
R-AUDIO-L
PR PB Y
COMPONENT OUT
W R G R B
W R G R B
R W
R W
EXT
Y
Y
Component connection
AV connection
SCART connection
Using a Component (up to 1080p) or Audio/Video (480i only) and Scart Cable
✎In Ext. mode, DTV Out supports MPEG SD Video and Audio only.
✎To obtain the best picture quality, the Component connection is recommended over the A/V connection.
[UD4000-XNZF]BN68-03426E.indb 8 2011-05-17 �� 6:33:34English - 9
Connecting to a PC and Audio device
¦ Available devices: Digital Audio System, Amplifier, DVD Home Theatre
OPTICAL
Audio connection
Headphones connection
Using an Optical (Digital) or Headphone Cable Connection
✎DIGITAL AUDIO OUT (OPTICAL)
x When a digital audio system is connected to the DIGITAL AUDIO OUT (OPTICAL) jack, decrease the volume
of both the TV and the system.
x 5.1 CH (channel) audio is available when the TV is connected to an external device supporting 5.1 CH.
x When the receiver (home theatre) is set to on, you can hear sound output from the TV’s optical jack. When the
TV is receiving a DTV signal, the TV will send 5.1 CH sound to the home theatre receiver. When the source is
a digital component such as a DVD / Blu-ray player / cable box / STB (Set-Top-Box) satellite receiver and is
connected to the TV via HDMI, only 2 CH audio will be heard from the home theatre receiver. If you want to
hear 5.1 CH audio, connect the digital audio out jack from your DVD / Blu-ray player / cable box / STB satellite
receiver directly to an amplifier or home theatre.
✎Headphones H: You can connect your headphones to the headphones output on your set. While the
headphones are connected, the sound from the built-in speakers will be disabled.
x Sound function may be restricted when connecting headphones to the TV.
x Headphone volume and TV volume are adjusted separately.
[UD4000-XNZF]BN68-03426E.indb 9 2011-05-17 �� 6:33:35English - 10
Display Modes (D-Sub and HDMI/DVI Input)
Optimal resolution is 1360 x 768 @ 60Hz.
Mode Resolution
Horizontal Frequency
(KHz)
Vertical Frequency (Hz)
Pixel Clock Frequency
(MHz)
Sync Polarity (H / V)
IBM
640 x 350 31.469 70.086 25.175 + / -
720 x 400 31.469 70.087 28.322 - / +
MAC
640 x 480 35.000 66.667 30.240 - / -
832 x 624 49.726 74.551 57.284 - / -
VESA DMT
640 x 480
31.469 59.940 25.175 - / -
37.861 72.809 31.500 - / -
37.500 75.000 31.500 - / -
800 x 600
37.879 60.317 40.000 + / +
48.077 72.188 50.000 + / +
46.875 75.000 49.500 + / +
1024 x 768
48.363 60.004 65.000 - / -
56.476 70.069 75.000 - / -
60.023 75.029 78.750 + / +
1360 x 768 47.712 60.015 85.500 + / +
✎NOTE
x For HDMI/DVI cable connection, you must use the HDMI IN 1(DVI) jack.
x The interlace mode is not supported.
x The set might operate abnormally if a non-standard video format is selected.
x Separate and Composite modes are supported. SOG(Sync On Green) is not supported.
¦ Using an HDMI cable or HDMI to DVI Cable / a D-sub Cable
✎Connecting through the HDMI cable may not be supported depending on the PC.
✎An HDMI cable supports digital video and audio signals, and does not require an audio cable.
AUDIO OUT
AUDIO OUT
DVI OUT
PC OUT
HDMI OUT
PC connection
[UD4000-XNZF]BN68-03426E.indb 10 2011-05-17 �� 6:33:39English - 11
Changing the Input Source
¦ Source List
Use to select TV or other external input sources such as DVD / Blu-ray players / cable box / STB satellite receiver
connected to the TV.
■ TV / Ext. / PC / AV / Component / HDMI1/DVI / HDMI2 / HDMI3 / HDMI4 / USB
✎ In the Source List, connected inputs will be highlighted.
✎ If you want to see connected devices only, move to Connected using ◄ or ► button.
✎ Ext. and PC always stay activated.
✎ If the connected external devices are not highlighted, press the red button. The TV will search for connected
devices.
How to use Edit Name
In the Source, press the TOOLS button, and then you can set an external input sources name you want.
■ VCR / DVD / Cable STB / Satellite STB / PVR STB / AV Receiver / Game / Camcorder / PC / DVI PC / DVI Devices / TV / IPTV / Blu-ray /
HD DVD / DMA: Name the device connected to the input jacks to make your input source selection easier.
✎ When connecting a PC to the HDMI IN 1(DVI) port with HDMI cable, you should set the TV to PC mode under Edit Name.
✎ When connecting a PC to the HDMI IN 1(DVI) port with HDMI to DVI cable, you should set the TV to DVI PC mode under Edit Name.
✎ When connecting an AV devices to the HDMI IN 1(DVI) port with HDMI to DVI cable, you should set the TV to DVI Devices mode under
Edit Name.
Information
You can see detailed information about the selected external device.
✎For best cable connection to this product, be sure to use cables with a maximum thickness as below:
x Maximum thickness - 0.55 inches (14mm)
Connecting to a COMMON INTERFACE slot
Attaching the CI Card Adaptor
Attach the adapter as shown in the right.
To connect the CI CARD Adapter, follow these steps.
✎Make sure that you attach the adaptor before you mount the TV on a wall.
1. Insert the CI CARD Adapter into the two holes on the product 1.
✎ Please find a two hole on the rear of the TV. A two holes is beside the COMMON
INTERFACE port.
✎ Press it firmly at center of adapter to ensure it is fully lock.
2. Connect the CI CARD Adapter into the COMMON INTERFACE port.
3. Insert the “CI or CI+ CARD”.
Using the “CI or CI+ CARD”
To watch paid channels, the “CI or CI+ CARD” must be inserted.
y If you do not insert the “CI or CI+ CARD,” some channels will display the message “Scrambled
Signal”.
y The pairing information containing a telephone number, the “CI or CI+ CARD” ID the Host ID and other
information will be displayed in about 2~3 minutes. If an error message is displayed, please contact
your service provider.
y When the configuration of channel information has finished, the message “Updating Completed” is
displayed, indicating the channel list is updated.
✎NOTE
x You must obtain a “CI or CI+ CARD” from a local cable service provider.
x When removing the “CI or CI+ CARD”, carefully pull it out with your hands since dropping the “CI or CI+ CARD” may cause damage
to it.
x Insert the “CI or CI+ CARD” in the direction marked on the card.
x The location of the COMMON INTERFACE slot may be different depending on the model.
x “CI or CI+ CARD” is not supported in some countries and regions; check with your authorized dealer.
x If you have any problems, please contact a service provider.
x Insert the “CI or CI+ CARD” that supports the current antenna settings. The screen will be distorted or will not be seen.
[UD4000-XNZF]BN68-03426E.indb 11 2011-05-17 �� 6:33:41English - 12
How to view the e-Manual
Screen Display
1
4 5 6
2
3
Basic Features
Picture Menu
Sound Menu
} Index E Enter e Exit
1 Currently displayed video, TV Programme, etc.
2 The category list. Press ◄ or ► button to select
category you want.
3 Displays the sub-menu list. Use the arrow buttons on
your remote to move the cursor. Press ENTERE
button to select the sub-menu you want.
4 } Blue (Index): Displays the index screen.
5 E Enter: Selects a category or sub-menu.
6 e Exit: Exit the e-Manual.
How to toggle between an e-Manual topic and the corresponding OSD menu(s).
Picture
Picture Mode : Standard ►
Backlight : 7
Contrast : 95
Brightness : 45
Sharpness : 50
Colour : 50
Tint (G/R) : G50/R50
Screen Adjustment
E-MANUAL
a Try Now
Basic Features > Picture Menu (3/17)
a Try Now b Home { Zoom } Index L Page e Exit
✎This function is not enabled in some menus.
Method 1 Method 2
1. If you want to use the menu that corresponds to an
e-Manual topic, press the red button to select Try Now.
2. To return to the e-Manual screen, press the E-MANUAL
button.
1. Press the ENTERE button when a topic is displayed.
“Are you sure?” appears. Select Yes, and then press the
ENTERE button. The OSD window appears.
2. To return to the e-Manual screen, press the E-MANUAL
button.
E-MANUAL You can find instructions about your TV’s features in the e-Manual in your TV. To
use, press the E-MANUAL button on your remote. Move the cursor using the up/
down/right/left buttons to highlight a category, then a topic, and then press the
ENTERE button. The e-Manual displays the page you want to see.
You can also access it through the menu:
O MENUm→ Support → e-Manual → ENTERE
✎To return to the e-Manual main menu, press the E-MANUAL button on the remote.
✎You cannot use Try Now directly if the TV is set to an external input source.
[UD4000-XNZF]BN68-03426E.indb 12 2011-05-17 �� 6:33:44English - 13
Viewing the Contents
Basic Features > Picture Menu (3/17)
2 3 4 5
a Try Now b Home { Zoom } Index L Page e Exit
1
1 Contents Area: Contains the topic contents, if you
selected a sub-menu. To move previous or next
page, press the ◄ / ► button.
2 Try Now: Displays the OSD menu that corresponds
to the topic. To return to the e-Manual screen, press
the E-MANUAL button.
3 Home: Moves to the e-Manual home screen.
4 Zoom: Magnifies a screen. You can scroll through the
magnified screen by using ▲ / ▼ buttons.
5 L (Page): Moves to previous or next page.
Using the Zoom mode
UMove R Return
Select the Zoom, and then press ENTERE to magnify
the screen. You can scroll through the magnified screen
by using the ▲ or ▼ buttons.
✎To return to the screen to normal size, press the
RETURN button.
How to search for a topic on the index page
✎This function may not be supported depending on the language.
1. If you want to search a keyword, press the blue button to select Index.
2. Press the ◄ or ► button to select a character order you want.
3. Press the ▲ or ▼ button to select a keyword you want to see, and then press the ENTERE button.
4. You can view the corresponding e-Manual instruction screen.
✎To close the Index screen, press the RETURN button.
[UD4000-XNZF]BN68-03426E.indb 13 2011-05-17 �� 6:33:48English - 14
Installing the Wall Mount
The wall mount kit (sold separately) allows you to mount the TV on the wall.
For detailed information on installing the wall mount, see the instructions provided with the wall mount. Contact a technician for
assistance when installing the wall mount bracket.
Samsung Electronics is not responsible for any damage to the product or injury to yourself or others if you elect to install the
TV on your own.
Wall Mount Kit Specifications (VESA)
Case A. Installing the SAMSUNG Wall-Mount Case B. Installing another company’s Wall-Mount
1 1 1 1
✎Wall mount kit is not supplied but sold separately.
Install your wall mount on a solid wall perpendicular to the floor. When attaching to other building materials, please contact
your nearest dealer. If installed on a ceiling or slanted wall, it may fall and result in severe personal injury.
✎NOTE
x Standard dimensions for wall mount kits are shown in the table below.
x When purchasing our wall mount kit, a detailed installation manual and all parts necessary for assembly are provided.
x Do not use screws that do not comply with the VESA standard screw specifications.
x Do not use screws longer than the standard dimension, as they may cause damage to the inside of the TV set.
x For wall mounts that do not comply with the VESA standard screw specifications, the length of the screws may differ
depending on their specifications.
x Do not fasten the screws too strongly, this may damage the product or cause the product to fall, leading to personal
injury. Samsung is not liable for these kinds of accidents.
x Samsung is not liable for product damage or personal injury when a non-VESA or non-specified wall mount is used or
the consumer fails to follow the product installation instructions.
x Do not exceed 15 degrees tilt when mounting this TV.
Product
Family
inches VESA Spec. (A * B)
Standard
Screw
Quantity
LED-TV
19~22 75 X 75
M4
4
27 200 X 100
32~40 200 X 200
46~60 400 X 400 M8
65~75 600 X 400
Do not install your Wall Mount Kit while your TV is turned on. It may result in personal injury due to electric
shock.
[UD4000-XNZF]BN68-03426E.indb 14 2011-05-17 �� 6:33:50English - 15
Troubleshooting
If the TV seems to have a problem, first try this list of possible problems and solutions. If none of these troubleshooting tips
apply, visit “www.samsung.com,” then click on Support, or call Samsung customer service centre.
Issues Solutions and Explanations
The TV will not turn on. • Make sure the AC power cord is securely plugged in to the wall outlet and the TV.
• Make sure the wall outlet is working.
• Try pressing the POWER button on the TV to make sure the problem is not the remote. If
the TV turns on, refer to “Remote control does not work” below.
There is no picture/video. • Check cable connections (remove and reconnect all cables connected to the TV and
external devices).
• Set your external device’s (Cable/Set top Box, DVD, Blu-ray etc) video outputs to match
the connections to the TV input. For example, if an external device’s output is HDMI, it
should be connected to an HDMI input on the TV.
• Make sure your connected devices are powered on.
• Be sure to select the TV’s correct source by pressing the SOURCE button on the remote
control.
• Reboot the connected device by reconnecting the device’s power cable.
The remote control does not work. • Replace the remote control batteries with the poles (+/–) in the right direction.
• Clean the sensor’s transmission window on the remote.
• Try pointing the remote directly at the TV from 5~6 feet away.
The cable/set top box remote control
doesn’t turn the TV on or off, or
adjust the volume.
• Programme the Cable/Set top box remote control to operate the TV. Refer to the Cable/
Set user manual for the SAMSUNG TV code.
✎You can keep your TV as optimum condition to upgrade the latest firmware on web site (samsung.com -> Support ->
Downloads) by USB.
✎This TFT LED panel uses a panel consisting of sub pixels which require sophisticated technology to produce. However,
there may be a few bright or dark pixels on the screen. These pixels will have no impact on the performance of the
product.
Licence
List of Features
Excellent Digital Interface & Networking: With a built-in HD digital tuner, nonsubscription HD broadcasts can be viewed without
a cable box / STB (Set-Top-Box) satellite receiver.
My Downloads
Allows you to play music files, pictures, and movies saved on a USB device.
Anynet+(HDMI-CEC)
Allows you to control all connected Samsung devices that support Anynet+ with your Samsung TV’s remote.
[UD4000-XNZF]BN68-03426E.indb 15 2011-05-17 �� 6:33:51English - 16
Securing the TV to the Wall
Caution: Pulling, pushing, or climbing onto the TV may cause the TV to fall. In particular, ensure that your
children do not hang over or destabilize the TV; doing so may cause the TV to tip over, resulting in serious
injuries or death. Follow all safety precautions provided on the included Safety Flyer. For added stability, install
the anti-fall device for safety purposes, as follows.
To avoid the TV from falling
1. Put the screws into the clamps and firmly fasten them onto the
wall. Confirm that the screws have been firmly installed onto the
wall.
✎ You may need additional material such as an anchor
depending on the type of wall.
✎ Since the necessary clamps, screws, and string are not
supplied, please purchase these additionally.
2. Remove the screws from the centre back of the TV, put the
screws into the clamps, and then fasten the screws onto the TV
again.
✎ Screws may not be supplied with the product. In this case,
please purchase the screws of the following specifications.
✎ Screw Specifications
x For a 32 ~ 75 inch LED TV: M8
3. Connect the clamps fixed onto the TV and the clamps fixed onto
the wall with a strong string and then tie the string tightly.
✎ NOTE
x Install the TV near to the wall so that it does not fall backwards.
x It is safe to connect the string so that the clamps fixed on the wall are equal to or lower than the clamps fixed on
the TV.
x Untie the string before moving the TV.
4. Verify all connections are properly secured. Periodically check connections for any sign of fatigue for failure. If you have any
doubt about the security of your connections, contact a professional installer.
Storage and Maintenance
✎If you remove the attached sticker on the TV screen, clean the residues and then watch TV.
Do not spray water or a cleaning agent directly onto the
product. Any liquid that goes into the product may cause a
failure, fire, or electric shock.
Clean the product with a soft cloth dapped in a small amount
of water.
Wall
[UD4000-XNZF]BN68-03426E.indb 16 2011-05-17 �� 6:33:52English - 17
Specifications
Display Resolution 1360 x 768
Environmental Considerations
Operating Temperature
Operating Humidity
Storage Temperature
Storage Humidity
10°C to 40°C (50°F to 104°F)
10% to 80%, non-condensing
-20°C to 45°C (-4°F to 113°F)
5% to 95%, non-condensing
TV System
Analogue: B/G, D/K, L, I (Depending on your country selection)
Digital: DVB-T/DVB-C
Colour/Video System
Analogue: PAL, SECAM, NTSC-4.43, NTSC-3.58, PAL60
Digital: MPEG-2 MP@ML, MPEG-4, H.264/AVC MP@L3, MP@L4.0, HP@L4.0
Sound System BG, DK, L, NICAM, MPEG1, DD, DD+, HEAAC
HDMI IN
Video: 1080 24p, 1080p, 1080i, 720p, 576p, 480p
Audio: 2Ch Linear PCM 32/44.1/48kHz, 16/20/24bits.
Model Name UE32D4000 / UE32D4010 / UE32D4020
Screen Size 32 inches (80 cm)
Sound
(Output) 10 W X 2
Dimensions (WxDxH)
Body
With stand
763.6 X 29.9 X 463.1 (mm)
763.6 X 222.7 X 527.1 (mm)
Weight
Without Stand
With Stand
7.0 kg
9.0 kg
✎Design and specifications are subject to change without prior notice.
✎For information about power supply, and more about power consumption, refer to the label attached to the product.
[UD4000-XNZF]BN68-03426E.indb 17 2011-05-17 �� 6:33:53Français - 2
Pour plus d'informations sur l'utilisation du e-Manual (P.12)
Les figures et illustrations contenues dans ce mode d’emploi sont fournies pour référence uniquement. Elles peuvent différer
de l’aspect réel du produit. La conception et les spécifications du produit sont susceptibles d’être modifiées sans préavis.
Informations importantes relatives à la garantie de votre téléviseur (format d'affichage)
1. Les fonctions relatives à la télévision numérique (DVB) ne sont disponibles que dans les pays ou régions où des signaux terrestres numériques de
type DVB-T (MPEG2 et MPEG4 AVC) sont diffusés ou dans lesquels vous avez accès à un service de télévision par câble compatible DVB-C (MPEG2
et MPEG4 AAC). Consultez votre distributeur local pour connaître les possibilités en matière de réception des signaux DVB-T ou DVB-C.
2. DVB-T est la norme du consortium européen DVB pour la diffusion de signaux terrestres de télévision numérique. La norme DVB-C est, quant à
elle, prévue pour la diffusion des signaux de télévision numérique par câble. Certaines fonctions particulières, telles que le guide électronique des
programmes (Electric Program Guide - EPG) ou encore la vidéo à la demande (Video On Demand - VOD), ne sont toutefois pas incluses dans cette
spécification. Dès lors, elles ne seront pas traitées pour l’instant.
3. Bien que ce téléviseur soit conforme aux dernières normes DVB-T et DVB-C (août 2008), il n’est pas garanti qu’il soit compatible avec les futures
diffusions de signaux numériques terrestres DVB-T et par câble DVB-C.
4. En fonction du pays ou de la région où vous vous trouvez, certains opérateurs de télévision par câble peuvent facturer des frais supplémentaires pour
un tel service. Il se peut également que vous deviez accepter les termes et conditions de ces sociétés.
5. Il se peut que certaines fonctions de TV numérique ne soient pas disponibles dans certains pays ou certaines régions et que la réception des signaux
DVB-C ne soit pas correcte avec tous les opérateurs.
6. Pour plus d’informations, contactez votre service client Samsung.
✎ Les différentes méthodes de diffusion adoptées en fonction des pays peuvent affecter la qualité de réception du téléviseur. Vérifiez le
fonctionnement du téléviseur chez votre revendeur agréé SAMSUNG ou contactez le centre d’appel de Samsung pour savoir s’il est possible
d’en améliorer les performances en reconfigurant les réglages.
Avertissement d’image fixe
Evitez d'afficher sur l'écran des images fixes (telles que des photos au format JPEG) ou des éléments d'images fixes (tels que des logos de programmes
TV, un format d'image 4:3 ou panoramique, des bandeaux d'actualités ou d'informations boursières au bas de l'écran, etc.). L'affichage permanent
d'images fixes risque, en effet, d'entraîner l'apparition d'images fantôme à l'écran, ce qui peut se traduire par une dégradation de la qualité d'image. Pour
atténuer les risques, suivez scrupuleusement les recommandations suivantes :
• Evitez d’afficher le même canal de télévision pendant de longues périodes.
• Essayez toujours d’afficher l’image en plein écran ; pour obtenir une correspondance optimale, utilisez le menu de format d’image du téléviseur.
• Réduisez les valeurs de luminosité et de contraste sur le minimum requis pour obtenir la qualité d’image souhaitée. L’utilisation de valeurs trop
élevées risque d’accélérer le processus de brûlure.
• Utilisez fréquemment toutes les fonctions du téléviseur conçues pour réduire le phénomène de rémanence et la brûlure d’écran. Pour plus
d’informations à ce sujet, consultez la section appropriée du mode d’emploi.
Sécurisation de l’espace d’installation
Maintenez les distances requises entre le produit et les autres objets (par exemple, les murs) afin de garantir une ventilation adaptée.
Le non-respect de ces distances peut provoquer un incendie ou un problème au produit en raison d’une augmentation de la température interne de celui-ci.
✎ Lors de l’utilisation d’un pied ou d’un support mural, utilisez uniquement les pièces fournies par Samsung Electronics.
• L’utilisation de pièces fournies par un autre fabricant peut occasionner un problème au niveau du produit ou la chute de celui-ci, ce qui pourrait vous
blesser.
✎ L’aspect peut varier en fonction du produit.
✎ Soyez prudent lorsque vous touchez le téléviseur, car certaines parties peuvent être brûlantes.
Installation avec un pied. Installation avec un support de montage mural.
10 cm 10 cm
10 cm
10 cm
10 cm
10 cm
10 cm
Instructions de mise au rebut de ce produit (Déchets d'équipements électriques et électroniques)
(Applicable dans les pays de l'Union Européenne et dans d'autres pays européens pratiquant la collecte sélective de déchets)
Ce symbole sur le produit, ses accessoires ou sa documentation indique que ni le produit, ni ses accessoires électroniques usagés
(chargeur, casque audio, câble USB, etc.) ne peuvent être jetés avec les autres déchets ménagers. La mise au rebut incontrôlée
des déchets présentant des risques pour l'environnement et la santé publique, veuillez séparer vos produits et accessoires usagés
des autres déchets. Vous favoriserez ainsi le recyclage de la matière qui les compose dans le cadre d'un développement durable.
Les particuliers sont invités à contacter le magasin leur ayant vendu le produit ou à se renseigner auprès des autorités locales pour
connaître les procédures et les points de collecte de ces produits en vue de leur recyclage. Les utilisateurs professionnels doivent
contacter leur fournisseur et consulter les conditions générales du contrat d'achat. Ce produit et ses accessoires ne peuvent être jetés
avec les autres déchets professionnels et commerciaux.
Élimination des batteries de ce produit
(Applicable aux pays de l'Union européenne et aux autres pays européens dans lesquels des systèmes de collecte sélective
sont mis en place.)
Le symbole sur la pile, le manuel ou l'emballage indique que les batteries de ce produit ne doivent pas être éliminées en fin de vie avec
les autres déchets ménagers. L'indication éventuelle des symboles chimiques Hg, Cd ou Pb signifie que la pile ou l'accumulateur
contient des quantités de mercure, de cadmium ou de plomb supérieures aux niveaux de référence stipulés dans la directive
CE 2006/66. Si les piles ne sont pas correctement éliminées, ces substances peuvent porter préjudice à la santé humaine ou à
l'environnement. Afin de protéger les ressources naturelles et de favoriser la réutilisation du matériel, veillez à séparer les batteries des
autres types de déchets et à les recycler via votre système local de collecte gratuite des piles et accumulateurs.
[UD4000-XNZF]BN68-03426E.indb 2 2011-05-17 �� 6:33:54Français - 3
Accessories
✎Vérifiez que les éléments suivants sont inclus avec votre téléviseur. S’il manque des éléments, contactez votre revendeur.
✎La couleur et la forme des éléments peuvent varier en fonction du modèle.
✎Les câbles qui ne se trouvent pas dans le contenu de l'emballage peuvent être achetés séparément.
ATTENTION: INSERT SECURELY LEST SHOULD BE DETACHED IN SET
y Télécommande et piles (AAA x 2)
y Instructions d’utilisation
y Carte de garantie / Manuel de sécurité (non disponible dans certains pays)
y Câble d’alimentation
y Chiffon de nettoyage
y Anneau de support (4EA) y Support du serre-câble y Adaptateur de carte CI
y Adaptateur Composant / AV y Adaptateur Scart
✎Des frais d'administration peuvent vous être facturés si :
(a) un technicien intervient à votre demande et que le produit ne comporte aucun défaut
(c.-à-d; si vous n'avez pas pris la peine de lire le présent manuel d'utilisation)
(b) vous amenez le produit dans un centre de réparation alors qu'il ne comporte aucun défaut
(c.-à-d; si vous n'avez pas pris la peine de lire le présent manuel d'utilisation)
✎Le montant de ces frais d'administration vous sera signifié avant la réalisation de toute prestation ou visite à domicile.
Installation du support du serre-câble
[UD4000-XNZF]BN68-03426E.indb 3 2011-05-17 �� 6:33:55Français - 4
Présentation du panneau de commande
✎La couleur et la forme du produit peuvent varier en fonction du modèle.
Panneau de configuration
Haut-parleurs
Capteur de la télécommande Dirigez la télécommande vers ce point du téléviseur.
Témoin d’alimentation Clignote, puis s'arrête lorsque le téléviseur est allumé. S'allume en mode Veille.
SOURCEE Bascule entre toutes les sources d'entrée disponibles. Dans le menu à l'écran, utilisez
ce bouton de la même façon que le bouton ENTERE de la télécommande.
MENU Y Affiche un menu à l'écran (ou OSD) reprenant les fonctions de votre téléviseur.
Permet de régler le volume. Dans le menu à l'écran, utilisez les boutons Y de
z la même façon que les boutons ◄ et ► de la télécommande.
zPermet de modifier les chaînes. Dans le menu à l'écran, utilisez les boutons
de la même façon que les boutons ▼ et ▲ de la télécommande.
P (Alimentation) Permet d’allumer et éteindre la télévision.
Mode Veille
Ne laissez pas le téléviseur en mode Veille pendant de longues périodes (lorsque vous partez en vacances, par exemple).
L’appareil consomme toujours une petite quantité d’énergie, même lorsque le bouton marche/arrêt est en position Off. Il est
préférable de débrancher le cordon d’alimentation.
[UD4000-XNZF]BN68-03426E.indb 4 2011-05-17 �� 6:33:56Français - 5
Présentation de la télécommande
✎Ceci est une télécommande spéciale destinée aux malvoyants. Elle dispose de points Braille sur les boutons Power,
Channel et Volume.
A B C D
P.MODE SRS
E-MANUAL AD/SUBT.
CONTENT
DUAL I-II
HDMI
Permet d’allumer et éteindre la
télévision.
Permet d’afficher et de sélectionner
les sources vidéo disponibles.
Permet de sélectionner directement
le mode HDMI.
Permet de revenir à la chaîne
précédente.
Permet de couper temporairement
le son.
Permet de changer de chaîne.
Affiche la liste des chaînes à l’écran.
Permet d’afficher le Guide
électronique des programmes (EPG).
Permet d’afficher des informations
sur l’écran du téléviseur.
Permet de quitter le menu.
Appuyez pour atteindre les chaînes
directement.
Permet de régler le volume.
Choisissez Teletext Activé, Double,
Mix ou ARRET.
Permet d’afficher le menu principal à
l’écran.
Permet de sélectionner rapidement les
fonctions fréquemment utilisées.
Affiche les fonctions Mon contenu,
Regarder la TV et Source.
Permet de revenir au menu précédent.
Permettent de sélectionner des
éléments de menu à l’écran et de
modifier les valeurs des menus.
Boutons utilisés dans les menus
Liste des chaînes, Gestion
chaînes, Mon contenu.
Ces boutons ont des fonctions
spécifiques.
Pour plus d’informations, reportezvous au manuel électronique.
P.MODE: permet de sélectionner le
mode image.
SRS: sélectionne le mode
TruSurround HD.
DUAL I-II : permet de sélectionner le
mode son Dual.
E-MANUAL : affiche le Guide
e-Manual.
P.SIZE: permet de sélectionner le
format de l'image.
AD: sélection de la description
audio. (Non disponible dans
tous les pays)
SUBT.: permet d'afficher les soustitres numériques.
Installation des piles (type de pile : AAA)
[UD4000-XNZF]BN68-03426E.indb 5 2011-05-17 �� 6:33:57Français - 6
Raccordement à une antenne
Lorsque vous allumez le téléviseur pour la première fois, des réglages de base s’effectuent de manière automatique.
✎Préréglage : connexion du câble d’alimentation et de l’antenne.
Plug & Play (configuration initiale)
Lorsque le téléviseur est allumé pour la première fois, plusieurs invites s’affichent pour vous aider à configurer les réglages de
base. Appuyez sur le bouton POWERP. Plug & Play est disponible uniquement si la source Entrée est définie sur TV.
✎Pour revenir à l'étape précédente, appuyez sur le bouton rouge.
1 Choix d’une langue Appuyez sur le bouton ▲ ou ▼, puis sur ENTERE.
Sélectionnez la langue de votre choix pour le menu à l'écran.
P
POWER
2
Sélection du mode Enr.
démo ou Util. domicile
Appuyez sur le bouton ◄ ou ►, puis sur ENTERE.
Sélectionnez le mode Util. domicile. Le mode Enr. démo est prévu
pour un usage en magasin.
Pour rétablir les paramètres du téléviseur de Enr. démo à Util. domicile
(standard): Press the volume button on the TV. When the OSD volume is
displayed, press and hold MENU for 5 sec.
Enr. démo est disponible uniquement pour une exposition en magasin.
Si vous sélectionnez cette option, plusieurs fonctions ne sont pas
disponibles. Sélectionnez Util. domicile lorsque vous regardez le
téléviseur à la maison.
3
Sélection d'un pays Appuyez sur le bouton ▲ ou ▼, puis sur ENTERE.
Sélectionnez le pays de votre choix.
✎Après la sélection du pays dans le menu Pays, certains modèles peuvent demander,
en plus, le code PIN.
✎Lors de l'entrée du code PIN, 0-0-0-0 n'est pas disponible.
✎L’option peut varier en fonction du pays.
4 Réglage du Mode
Horloge
Réglez le Mode Horloge automatiquement ou manuellement.
Auto.: Sélectionnez le fuseau horaire dans lequel vous vous trouvez. (en fonction du pays)
Manuel: Vous permet de définir manuellement la date et l’heure actuelles.
5
Sélection d'une antenne Appuyez sur le bouton ▲ ou ▼, puis sur ENTERE.
Permet de sélectionner le signal de diffusion souhaité.
6
Sélection d'une chaîne Appuyez sur le bouton ▲ ou ▼, puis sur ENTERE.
Sélectionnez la source de la chaîne à mémoriser. Lors du réglage de la source d’antenne
sur Câble, une fenêtre s’affiche pour vous permettre d’attribuer des valeurs numériques
(fréquences de station) aux chaînes. Pour plus d'informations, reportez-vous à Canal →
Recherche automatique.
Appuyez sur le bouton ENTERE à tout moment pour interrompre la mémorisation.
7 Profitez de votre
téléviseur.
Sélectionnez Regarder TV. Appuyez sur le bouton ENTERE.
Si vous souhaitez réinitialiser cette fonction...
Vous devez à nouveau sélectionner Plug & Play (MENU → Système) chez vous, bien que vous l’ayez fait en magasin.
Sélectionnez Système - Plug & Play (Configuration initiale). Entrez votre code PIN à quatre chiffres. Le code PIN par défaut
est “0-0-0-0” (excepte France) Si vous souhaitez modifier le code PIN, utilisez la fonction Modifier PIN.
✎Si vous avez oublié le code PIN, appuyez sur les boutons de la télécommande dans l’ordre suivant, ce qui remet le code
PIN à “0-0-0-0” (France: “1-1-1-1”): POWER (arrêt) → MUTE → 8 → 2 → 4 → POWER (marche).
Antenne VHF/UHF Câble
ou
Panneau arrière du téléviseur
[UD4000-XNZF]BN68-03426E.indb 6 2011-05-17 �� 6:33:57Français - 7
Connexion à un périphérique AV
¦ Périphériques disponibles : DVD, Lecteur Blu-ray, décodeur câble HD, récepteur satellite HD (boîtier
décodeur), magnétoscope, système audio numérique, amplificateur, home cinéma DVD, PC
HDMI OUT
DVI OUT
AUDIO OUT
R-AUDIO-L
Connexion HDMI, HDMI/DVI
Utilisation d’un câble HDMI/DVI : connexion HD (jusqu’à 1080p)
✎HDMI IN 1(DVI), 2, 3, 4, PC/DVI AUDIO IN
x Pour une meilleure qualité d'image et de son, effectuez la connexion au moyen d'un câble HDMI.
x Un câble HDMI prend en charge les signaux vidéo et audio numériques, et ne nécessite aucun câble audio.
– Pour connecter le téléviseur à un appareil numérique dépourvu de sortie HDMI, utilisez une prise HDMI/DVI et
des câbles audio.
x Il se peut que l'affichage soit médiocre, voire inexistant, ou que le son soit de mauvaise qualité si un
périphérique externe connecté au téléviseur utilise un mode HDMI d'une ancienne version. Dans ce cas,
demandez au fabricant du périphérique externe de vous communiquer la version HDMI et, dans l'hypothèse où
elle serait obsolète, demandez-lui une mise à niveau.
x Veillez à utiliser un câble HDMI de maximum 14 mm de diamètre.
x Veillez également à acheter un câble HDMI certifié. Dans le cas contraire, il se peut que l'écran n'affiche aucune
image ou qu'une erreur de connexion se produise.
x Il est recommandé d'employer un câble HDMI haut débit de base ou un câble possédant une fiche Ethernet. Ce
produit ne prend pas en charge la fonction Ethernet via HDMI.
[UD4000-XNZF]BN68-03426E.indb 7 2011-05-17 �� 6:33:58Français - 8
AUDIO OUT
R-AUDIO-L
VIDEO OUT
AUDIO OUT
R-AUDIO-L
PR PB Y
COMPONENT OUT
W R G R B
W R G R B
R W
R W
EXT
Y
Y
Connexion à composantes
Connexion AV
Connexion SCART
Utilisation d’un câble Composante (jusqu’à 1080p) ou Audio / Vidéo (480i uniquement) et utilisation d’un câble Péritel
✎En mode Ext., la sortie DTV prend uniquement en charge les signaux audio et vidéo MPEG SD.
✎Pour obtenir une qualité d’image optimale, il est préférable d’opter pour la connexion Composante (plutôt que la
connexion A/V).
[UD4000-XNZF]BN68-03426E.indb 8 2011-05-17 �� 6:33:59Français - 9
Connexion entre un PC et un périphérique audio
¦
Périphériques disponibles : système audio numérique, amplificateur, système home
cinéma DVD
OPTICAL
Connexion audio
Connexion de Casque
Utilisation d’un câble optique (numérique) ou d’une sortie casque
✎DIGITAL AUDIO OUT (OPTICAL)
x Lorsqu’un système audio numérique est connecté à la prise DIGITAL AUDIO OUT (OPTICAL), diminuez le
volume du téléviseur et du système.
x Le mode audio 5.1 est disponible uniquement si le téléviseur est relié à un dispositif externe prenant en charge
ce mode.
x Lorsque le récepteur ( home cinéma) est activé, vous pouvez écouter le son sortant de la prise optique du
téléviseur. Lorsque le téléviseur reçoit un signal DTV, il envoie du son 5.1 canaux au récepteur du système
home cinéma. Si la source est un composant numérique (par exemple, un lecteur DVD, un lecteur Blu-ray,
un décodeur câble ou un récepteur satellite) connecté au téléviseur en HDMI, le récepteur home cinéma émet
uniquement du son sur 2 canaux. Pour obtenir du son en mode 5.1 canaux, connectez directement la prise de
sortie audio numérique du lecteur DVD, du lecteur Blu-Ray, du décodeur câble ou du décodeur satellite à un
amplificateur ou un système home cinéma.
✎Ecouteurs H: vous pouvez brancher vos écouteurs sur la prise casque du téléviseur. Lorsque le casque est
branché, les enceintes intégrées n’émettent plus de son.
x La fonction Son peut être limitée lorsque des écouteurs sont connectés au téléviseur.
x Le volume des écouteurs et celui du téléviseur sont réglés séparément.
[UD4000-XNZF]BN68-03426E.indb 9 2011-05-17 �� 6:34:00Français -
Modes d’affichage (Entrées D-Sub et HDMI/DVI)
La résolution optimale est de 1360 x 768 à 60 Hz.
Mode Résolution
Fréquence horizontale
(kHz)
Fréquence verticale (Hz)
Fréquence d'horloge
pixels (MHz)
Polarité de
synchronisation (H/V)
IBM
640 x 350 31,469 70,086 25,175 + / -
720 x 400 31,469 70,087 28,322 - / +
MAC
640 x 480 35,000 66,667 30,240 - / -
832 x 624 49,726 74,551 57,284 - / -
VESA DMT
640 x 480
31,469 59,940 25,175 - / -
37,861 72,809 31,500 - / -
37,500 75,000 31,500 - / -
800 x 600
37,879 60,317 40,000 + / +
48,077 72,188 50,000 + / +
46,875 75,000 49,500 + / +
1024 x 768
48,363 60,004 65,000 - / -
56,476 70,069 75,000 - / -
60,023 75,029 78,750 + / +
1360 x 768 47,712 60,015 85,500 + / +
✎REMARQUE
x Dans le cas d’une connexion avec câble HDMI/DVI, vous devez utiliser la prise HDMI IN 1(DVI).
x Le mode entrelacé n’est pas pris en charge.
x Le téléviseur peut fonctionner de façon anormale si le format vidéo sélectionné n’est pas standard.
x Les modes Séparé et Composite sont pris en charge. Le mode SOG (Sync On Green) n’est pas pris en charge.
¦ Utilisation d'un câble HDMI ou HDMI vers DVI/D-Sub
✎En fonction du PC, la connexion à l'aide du câble HDMI peut ne pas être prise en charge.
✎Un câble HDMI prend en charge les signaux vidéo et audio numériques, et ne nécessite aucun câble audio.
AUDIO OUT
AUDIO OUT
DVI OUT
PC OUT
HDMI OUT
Connexion PC
[UD4000-XNZF]BN68-03426E.indb 10 2011-05-17 �� 6:34:04Français -
Changement de la source d'entrée
¦ Liste Source
Permet de sélectionner le téléviseur ou d’autres sources d’entrée externes (telles qu’un lecteur DVD, un lecteur Blu-ray, un
décodeur câble ou un récepteur décodeur) connectées au téléviseur.
■ TV / Ext. / PC / AV / Composant, HDMI1/DVI / HDMI2 / HDMI3 / HDMI4 / USB
✎ Les entrées connectées sont mises en surbrillance dans la Liste Source.
✎ Pour afficher les périphériques connectés uniquement, accédez à la fonction Connecté à l'aide du bouton ◄ ou ►.
✎ Ext. et PC restent toujours activés.
✎ Si les périphériques externes connectés ne sont pas mis en surbrillance, appuyez sur le bouton rouge. Le téléviseur
lance une recherche des périphériques connectés.
Utilisation de la fonction Modif. Nom
Dans Source, appuyez sur le bouton TOOLS. Vous pouvez ensuite définir le nom de la source d'entrée externe de votre choix.
■ VCR / DVD / Décodeur Cab. / Décodeur sat. / Décodeur PVR / Récepteur AV / Jeu / Caméscope / PC / DVI PC / Périph. DVI / TV / IPTV /
Blu-ray / HD DVD / DMA: Nommez le périphérique connecté aux prises d’entrée pour faciliter la sélection de la source d’entrée.
✎ Lorsque vous connectez un PC au port HDMI IN 1(DVI) avec un câble HDMI, vous devez définir le téléviseur en mode PC sous Modif.
Nom.
✎ Lorsque vous connectez un PC au port HDMI IN 1(DVI) avec un câble HDMI vers DVI, vous devez définir le téléviseur en mode DVI PC
sous Modif. Nom.
✎ Lorsque vous connectez un périphérique AV au port HDMI IN 1(DVI) avec un câble HDMI vers DVI, vous devez définir le téléviseur en mode
Périph. DVI sous Modif. Nom.
Informations
Vous pouvez afficher des informations détaillées sur le périphérique externe sélectionné.
✎Pour obtenir la meilleure connexion câblée possible avec cet appareil, utilisez des câbles dont le diamètre ne dépasse pas la valeur
maximale indiquée ci-dessous.
x Epaisseur maximale : 0,55 pouce (14 mm)
Connexion à un port COMMON INTERFACE
Connexion de l'adaptateur de carte CI
Connectez l'adaptateur comme indiqué sur la droite.
Pour connecter l'adaptateur de carte CI, procédez comme suit :
✎Assurez-vous d'avoir connecté l'adaptateur avant de fixer le téléviseur sur un mur.
1. Insérez l'adaptateur de carte CI dans les deux trous du produit 1.
✎ Deux trous sont présents à l'arrière du téléviseur. Ils sont situés à proximité du port
COMMON INTERFACE.
✎ Appuyez fermement au centre de l’adaptateur pour s’assurer qu’il est bien inséré.
2. Reliez l'adaptateur de CARTE CI au port COMMON INTERFACE.
3. Insérez la "CARTE CI ou CI+".
Utilisation de la "CARTE CI ou CI+"
Pour regarder les chaînes payantes, la carte CI ou CI+ doit être insérée.
y Si vous ne l'insérez pas, certaines chaînes afficheront le message "Signal brouillé".
y Les informations de pairage contenant un numéro de téléphone, l'ID de la carte CI ou CI+, l'ID de
l'hôte et d'autres informations s'afficheront après 2 ou 3 minutes. Si un message d'erreur s'affiche,
contactez votre fournisseur de service.
y Lorsque la configuration des informations sur les canaux est terminée, le message "Mise à jour
terminée" s'affiche, indiquant que la liste des chaînes est mise à jour.
✎REMARQUE
x Vous devez vous procurer une "Carte CI ou CI+" auprès d’un câblo-opérateur local.
x Lorsque vous sortez la "Carte CI ou CI+", tirez-la délicatement avec vos doigts. Une chute pourrait l’endommager.
x Insert the “CI or CI+ CARD” that supports the current antenna settings.
x L'emplacement de la fente COMMON INTERFACE peut varier en fonction du modèle.
x La "Carte CI ou CI+" n’est pas prise en charge dans certains pays et certaines régions ; vérifiez auprès de votre revendeur agréé.
x Si vous rencontrez des problèmes, contactez le prestataire de service.
x Insérez la carte CI ou CI+, qui prend en charge les paramètres actuels de l'antenne. L'image sera déformée, voire invisible.
[UD4000-XNZF]BN68-03426E.indb 11 2011-05-17 �� 6:34:06Français -
Consultation du e-Manual
Affichage
1
4 5 6
2
3
Fonctions de base
Menu Image
Menu Son
} Index E Entrer e Quitter
1 Vidéo, programme télévisé, etc actuellement
affiché.
2 Liste des catégories. Appuyez sur le bouton ◄ ou
► pour sélectionner la catégorie de votre choix.
3 Affiche la liste des sous-menus. Utilisez les touches
fléchées de votre télécommande pour déplacer le
curseur. Appuyez sur le bouton ENTERE pour
sélectionner le sous-menu de votre choix.
4 } Bleu (Index) : affiche l'écran d'index.
5 E Entrer : sélectionne une catégorie ou un sousmenu.
6 e Quitter : permet de quitter le e-Manual.
Comment basculer entre une rubrique du e-Manual et le(s) menu(s) correspondant(s) affiché(s) à l'écran
Image
Mode Image : Standard ►
Rétroéclairage : 7
Contraste : 95
Luminosité : 45
Netteté : 50
Couleur : 50
Teinte (V/R) : G50/R50
Réglage de l’écran
E-MANUAL
a Essayer
Fonctions de base > Menu Image (3/17)
a Essayer b Accueil { Zoom } Index L Page e Quitter
✎Cette fonction n’est pas disponible dans certains menus.
Méthode 1 Méthode 2
1. Si vous souhaitez utiliser le menu correspondant à une
rubrique du e-Manual, appuyez sur le bouton rouge afin
de sélectionner l'option Essayer.
2. Pour revenir à l'écran du e-Manual, appuyez sur le
bouton E-MANUAL.
1. Appuyez sur le bouton ENTERE lorsqu'une
rubrique s'affiche. Le message "Exécuter?" s'affiche.
Sélectionnez Oui, puis appuyez sur le bouton
ENTERE. La fenêtre des menus à l'écran s'affiche.
2. Pour revenir à l'écran du e-Manual, appuyez sur le
bouton E-MANUAL.
E-MANUAL
Vous trouverez des instructions sur les caractéristiques de votre téléviseur dans le
e-Manual de ce dernier. Pour l'utiliser, appuyez sur le bouton E-MANUAL de votre
télécommande. Déplacez le curseur à l'aide des boutons Haut/Bas/Gauche/Droite
afin de mettre en surbrillance une catégorie, puis une rubrique. Appuyez ensuite
sur le bouton ENTERE. Le e-Manual affiche la page souhaitée.
Vous pouvez également y accéder via le menu :
O MENUm→ Assistance → e-Manual → ENTERE
✎Pour revenir au menu principal du e-Manual, appuyez sur le bouton E-MANUAL de la
télécommande.
✎La fonction Essayer n'est pas directement disponible si le téléviseur est défini avec une source
d'entrée externe.
[UD4000-XNZF]BN68-03426E.indb 12 2011-05-17 �� 6:34:08Français -
Affichage du contenu
Fonctions de base > Menu Image (3/17)
2 3 4 5
a Essayer b Accueil { Zoom } Index L Page e Quitter
1
1 Zone de contenu : Inclut le contenu d'une rubrique,
si vous avez sélectionné un sous-menu. Pour
accéder à la page précédente ou suivante, appuyez
sur le bouton ◄ / ►.
2 Essayer: affiche le menu à l’écran, associé à la
rubrique. Pour revenir à l’écran du e-Manual,
appuyez sur le bouton E-MANUAL.
3 Accueil: permet d'accéder à l'écran d'accueil du
e-Manual.
4 Zoom: Magnifies a screen. Pour parcourir l'écran
agrandi, utilisez les boutons ▲ / ▼.
5 L (Page): permet de passer à la page précédente
ou suivante.
Utilisation du mode Zoom
UMove R Return
Sélectionnez l'option Zoom souhaitée, puis appuyez sur
ENTERE pour agrandir l'écran. Pour parcourir l'écran
agrandi, utilisez le bouton ▲ ou ▼.
✎Pour revenir à un affichage normal de l'écran,
appuyez sur le bouton RETURN.
Recherche d'une rubrique dans la page d'index
✎Cette fonction n’est peut-être pas prise en charge dans cette langue.
1. Si vous souhaitez rechercher un mot-clé, appuyez sur le bouton bleu afin d’ouvrir l’écran Index.
2. Appuyez sur le bouton ◄ ou ► pour sélectionner l’ordre des caractères de votre choix.
3. Appuyez sur le bouton ▲ ou ▼ pour sélectionner le mot-clé à afficher et appuyez ensuite sur ENTERE.
4. Vous accédez alors à l’écran d’instructions correspondant du manuel électronique.
✎Pour fermer l’écran Index, appuyez sur le bouton RETURN.
[UD4000-XNZF]BN68-03426E.indb 13 2011-05-17 �� 6:34:09Français -
Installation du support mural
Les éléments du support mural (vendus séparément) permettent de fixer le téléviseur au mur.
Pour plus d’informations sur l’installation du support mural, reportez-vous aux instructions fournies avec les éléments du
support mural. Faites appel à un technicien pour installer la fixation murale.
Si vous choisissez d’effectuer vous-même l’installation murale, Samsung Electronics ne saurait être tenue responsable des
éventuels dommages matériels ou des éventuelles blessures dont vous, ou d’autres personnes, pourriez être victimes.
Caractéristiques du kit de fixation murale (VESA)
Cas A. Installation du dispositif de fixation murale SAMSUNG Cas B. Installation du support mural d'un autre fabricant
1 1
1 1
✎Le kit de fixation murale est vendu séparément.
Installez votre fixation murale sur un mur solide perpendiculaire au sol. Si vous souhaitez la fixer sur d’autres matériaux de
construction, veuillez prendre contact avec votre revendeur le plus proche. Si vous l’installez au plafond ou sur un mur non
droit, la fixation risque de tomber et de provoquer de graves blessures.
✎REMARQUE
x Les dimensions standard pour tous les kits de fixation murale sont indiquées dans le tableau ci-dessous.
x Le kit de fixation murale s’accompagne d’un manuel d’installation détaillé et de toutes les pièces nécessaires au
montage.
x N’utilisez pas de vis plus longues que la dimension standard, car elles pourraient endommager l’intérieur du téléviseur.
x N’utilisez pas de vis non conformes aux spécifications des vis VESA standard.
x Pour les fixations murales non conformes aux spécifications des vis VESA standard, la longueur des vis peut varier,
selon leurs caractéristiques.
x Ne serrez pas trop les vis ; cela pourrait, en effet, endommager le produit ou provoquer sa chute, entraînant des
blessures. Samsung ne peut être tenue responsable de ce type d’accident.
x Samsung ne peut être tenue responsable de tout dommage au produit ou toute blessure corporelle dans le cas de
l’utilisation d’une fixation murale non-VESA ou non spécifiée, ou si l’utilisateur ne suit pas les instructions d’installation
du produit.
x Lors du montage, l’inclinaison du téléviseur ne doit pas dépasser 15 degrés.
Famille de
produits
pouces Spéc. VESA (A * B) Vis standard Quantité
TéléviseurLED
19~22 75 X 75
M4
4
27 200 X 100
32~40 200 X 200
46~60 400 X 400 M8
65~75 600 X 400
N’installez pas votre kit de fixation murale lorsque le téléviseur est allumé. Vous risqueriez de vous
électrocuter.
[UD4000-XNZF]BN68-03426E.indb 14 2011-05-17 �� 6:34:11Français -
Résolution des problèmes
En cas de problème, consultez d’abord la liste des problèmes potentiels et des solutions. Si aucune de ces astuces de
dépannage ne s’applique à votre problème, rendez-vous sur le site www.samsung.com, puis cliquez sur Assistance ou
contactez le service clientèle de Samsung.
Problèmes Solutions et explications
Le téléviseur ne s'allume pas. • Vérifiez que le cordon d'alimentation secteur est branché correctement sur la prise
murale et sur le téléviseur.
• Vérifiez que la prise murale est opérationnelle.
• Essayez d'appuyer sur le bouton POWER du téléviseur pour vous assurer que le
problème n'est pas dû à la télécommande. Si le téléviseur s'allume, reportez-vous au
problème "La télécommande ne fonctionne pas" ci-après.
Aucune image/vidéo n'est affichée. • Vérifiez le raccordement des câbles (retirez tous les câbles connectés au téléviseur et aux
appareils externes, puis rebranchez-les).
• Réglez les sorties vidéo de votre périphérique externe (décodeur câble/boîtier décodeur,
DVD, Blu-ray, etc.) pour faire correspondre les connexions à l'entrée du téléviseur.
Par exemple, si la sortie d'un périphérique externe est HDMI, vous devez établir une
connexion avec une entrée HDMI du téléviseur.
• Vérifiez que les appareils connectés sont sous tension.
• Veillez à sélectionner la source appropriée du téléviseur en appuyant sur la touche
SOURCE de la télécommande.
• Redémarrez le périphérique connecté en rebranchant le câble d'alimentation du
périphérique.
La télécommande ne fonctionne pas. • Vérifiez que la polarité (+/–) des piles de la télécommande est respectée.
• Nettoyez la lentille de la télécommande.
• Essayez de diriger directement la télécommande vers le téléviseur à une distance de 1,5
à 1,8 m.
La télécommande du décodeur câble
/boîtier décodeur ne permet pas
d'allumer ou d'éteindre le téléviseur,
ni de régler le volume.
• Programmez la télécommande du décodeur câble/boîtier décodeur de telle sorte qu'elle
puisse commander le téléviseur. Consultez le mode d'emploi du décodeur câble/boîtier
décodeur pour obtenir le code du téléviseur SAMSUNG.
✎Vous pouvez maintenir votre téléviseur dans des conditions optimales en le mettant à niveau avec le dernier
micrologiciel (samsung.com -> Assistance -> Téléchargements) par le biais d'un périphérique USB.
✎Ce téléviseur LED TFT est équipé d'un écran constitué de sous-pixels dont la fabrication nécessite une technologie
sophistiquée. Il se peut toutefois que quelques points clairs ou sombres apparaissent à l'écran. Ils n'ont aucune
incidence sur la performance du produit.
License
Liste des fonctions
Interface numérique et réseau excellents : Avec un syntoniseur numérique HD intégré, le visionnage des émissions HD sans
abonnement ne nécessite pas de décodeur câble/récepteur satellite (boîtier décodeur).
Mon contenu
Vous permet de lire des fichiers audio et des images sauvegardés sur un périphérique USB.
Anynet+ (HDMI-CEC)
Vous permet de contrôler tous les appareils Samsung connectés compatibles Anynet+ à l'aide de votre télécommande
Samsung.
[UD4000-XNZF]BN68-03426E.indb 15 2011-05-17 �� 6:34:11Français -
Fixation du téléviseur au mur
Attention: si vous tirez ou poussez le téléviseur ou si vous grimpez dessus, il risque de tomber. Veillez
notamment à ce que vos enfants ne se suspendent pas au téléviseur, ni ne le déséquilibrent, car cela
pourrait le faire basculer et occasionner des blessures graves, voire entraîner la mort. Respectez toutes les
précautions de sécurité indiquées dans la brochure relative à la sécurité. Pour une stabilité accrue, installez le
dispositif antichute comme indiqué ci-après.
Pour éviter toute chute du téléviseur
1. Placez les vis dans les colliers et fixez-les fermement au mur.
Assurez-vous que les vis ont été fermement fixées au mur.
✎ En fonction du type de mur, il est possible que vous ayez
besoin de matériel supplémentaire, tel que des chevilles.
✎ Les colliers, vis et chaînettes n’étant pas fournis, vous
devez les acheter séparément.
2. Retirez les vis situées sur la partie centrale arrière du téléviseur,
placez-les dans les colliers, puis fixez-les à nouveau sur le
téléviseur.
✎ Il se peut que les vis ne soient pas fournies avec le
produit. Dans ce cas, achetez des vis présentant les
caractéristiques suivantes.
✎ Caractéristiques des vis
x Pour un téléviseur de 32 ~ 75 pouces: M8
3. Reliez les colliers fixés au téléviseur et ceux fixés sur le mur à
l’aide de chaînettes, puis attachez-les fermement.
✎ REMARQUE
x Placez le téléviseur à proximité du mur afin qu’il ne bascule pas vers l’arrière.
x Il est recommandé de placer la chaînette de façon à ce que les colliers fixés au mur soient placés à la même
hauteur ou plus bas que ceux fixés au téléviseur.
x Détachez la chaînette avant de déplacer le téléviseur.
4. Vérifiez que toutes les connexions sont fixées correctement. Vérifiez régulièrement que les connexions ne présentent
aucun signe d’usure. Si vous avez un doute quant à la sécurité des connexions, contactez un installateur professionnel.
Stockage et entretien
✎Si vous enlevez l'autocollant appliqué sur l'écran du téléviseur, éliminez les traces puis nettoyez le téléviseur.
Ne vaporisez pas d’eau ni d’agent nettoyant directement
sur le produit. Tout liquide qui entre dans le produit peut
engendrer une défaillance, un incendie ou une électrocution.
Nettoyez le produit à l’aide d’un chiffon doux imprégné d’une
petite quantité d’eau.
Mur
[UD4000-XNZF]BN68-03426E.indb 16 2011-05-17 �� 6:34:13Français -
Specifications
Résolution de l’affichage 1360 x 768
Conditions ambiantes
Température en service
Humidité en fonctionnement
Température de stockage
Humidité sur le lieu de stockage
10°C à 40°C (50°F à 104°F)
10% à 80%, sans condensation
-20°C à 45°C (-4°F à 113°F)
5% à 95%, sans condensation
Système TV
Analogique : B/G, D/K, L, I (en fonction du pays sélectionné)
Numérique: DVB-T/DVB-C
Système de couleur/vidéo
Analogique : PAL, SECAM, NTSC-4.43, NTSC-3.58, PAL60
Numérique: MPEG-2 MP@ML, MPEG-4, H.264/AVC MP@L3, MP@L4.0, HP@L4.0
Système Sonore BG, DK, L, NICAM, MPEG1, DD, DD+, HEAAC
HDMI IN
Vidéo: 1080 24p, 1080p, 1080i, 720p, 576p, 480p
Audio: PCM linéaire sur deux voies 32/44.1/48kHz, 16/20/24bits.
Nom du modèle UE32D4000 / UE32D4010 / UE32D4020
Taille de l’écran 32 pouce (80 cm)
Sound
(Sortie) 10 W X 2
Dimensions (L x P x H)
Corps
Avec socle
763,6 X 29,9 X 463,1 (mm)
763,6 X 222,7 X 527,1 (mm)
Poids
Sans socle
Avec socle
7,0 kg
9,0 kg
✎La conception et les spécifications peuvent être modifiées sans préavis.
✎Pour plus d’informations sur les caractéristiques d’alimentation et de consommation électrique, reportez-vous à
l’étiquette fixée au produit.
[UD4000-XNZF]BN68-03426E.indb 17 2011-05-17 �� 6:34:13Deutsch - 2
Weitere Informationen zur Verwendung des e-Manuals (S. 12)
Die Abbildungen und Illustrationen in diesem Handbuch dienen nur zur Information und können vom tatsächlichen Aussehen
des Geräts abweichen. Änderungen an Ausführung und technischen Daten vorbehalten.
Wichtige Garantieinformationen zum Bildschirmformat des Fernsehers
1. Die Funktionalitäten für Digitalfernsehen (DVB) stehen nur in Ländern/Regionen zur Verfügung, in denen digitale terrestrische DVB-T-Signale (MPEG2
und MPEG4 AVC) gesendet werden oder in denen Sie Zugang zu einem kompatiblen Kabelfernsehdienst mit DVB-C (MPEG2 und MPEG4 AAC) haben
können. Fragen Sie Ihren örtlichen Händler, wenn Sie Informationen über die Verfügbarkeit von DVB-T oder DVB-C in Ihrer Gegend benötigen.
2. DVB-T ist der Standard des europäischen DVB-Konsortiums für die terrestrische Versorgung mit digitalem terrestrischem Fernsehen, und DVB-C
ist das Konsortium für die Versorgung mit digitalem Kabelfernsehen. Allerdings werden manche Unterscheidungsmerkmale wie EPG (elektrische
Programmzeitschrift), VOD (Video on Demand) usw. in dieser Spezifikation nicht berücksichtigt. Deshalb können sie zum jetzigen Zeitpunkt noch nicht
eingesetzt werden.
3. Zwar hält dieses Fernsehgerät die aktuellen Standards der DVB-T- und DVB-C-Spezifikationen [Version August 2008] ein, aber es kann nicht garantiert
werden, dass die Kompatibilität mit zukünftigen digitalen terrestrischen DVB-T und DBV-C-Signalen gewahrt bleibt.
4. In Abhängigkeit von den Ländern/Regionen, in denen dieses Fernsehgerät eingesetzt wird, verlangen manche Kabelfernsehanbieter zusätzliche Gebühren
für solch einen Dienst, und möglicherweise wird verlangt, dass Sie den Vertragsbedingungen des Unternehmens zustimmen.
5. Manche Digitalfernsehfunktionen sind in einigen Ländern oder Regionen möglicherweise nicht verfügbar, und DVB-C-Signale kann das Gerät bei manchen
Kabelfernsehanbietern möglicherweise nicht fehlerfrei verarbeiten.
6. Für weitere Informationen setzen Sie sich bitte mit dem Samsung-Kundendienstzentrum in Verbindung.
✎ Die Empfangsqualität des Fernsehgeräts kann durch Unterschiede bei den Sendeverfahren in verschiedenen Ländern beeinträchtigt werden.
Kontrollieren Sie die Leistung des Fernsehgeräts bei Ihrem örtlichen SAMSUNG-Händler oder wenden Sie sich an das Samsung-Callcenter um
festzustellen, ob sich die Empfangsqualität durch Ändern der Fernseheinstellungen verbessern lässt.
Warnung bei Standbildern
Vermeiden Sie die Anzeige von Standbildern (wie z. B. JPEG-Bilddateien) oder Standbildelementen (wie z. B. Senderlogos, Panorama- oder 4:3-Bilder, Aktien- oder
Laufschriften mit Nachrichten am unteren Bildschirmrand usw.) auf dem Bildschirm. Durch lang anhaltende Anzeige von Standbildern kann es zu Schattenbildern
auf dem LED-Bildschirm kommen, wodurch die Bildqualität beeinträchtigt wird. Um die Gefahr dieses Effekts zu vermindern, befolgen Sie bitte die nachfolgenden
Empfehlungen:
• Vermeiden Sie es, für lange Zeit denselben Fernsehsender anzuzeigen.
• Versuchen Sie, Abbildungen immer als Vollbild anzuzeigen. Verwenden Sie das Bildformatmenü des Fernsehgeräts, um die beste Anzeigemöglichkeit zu finden.
• Reduzieren Sie die Helligkeits- und Kontrastwerte soweit wie möglich, um immer noch die gewünschte Bildqualität zu erreichen. Zu hohe Werte können das
Ausbrennen beschleunigen.
• Verwenden Sie regelmäßig alle Funktionen Ihres Fernsehgeräts, die dazu dienen, das Einbrennen von Bildern und das Ausbrennen des Bildschirms zu
reduzieren. Weitere Informationen hierzu finden Sie in den entsprechenden Abschnitten des Benutzerhandbuchs.
Absichern des Aufstellbereichs
Halten Sie die erforderlichen Abstände zwischen dem Gerät und anderen Objekten (z.B. Wänden) ein, um eine ausreichende Lüftung sicherzustellen.
Wenn Sie dies nicht tun, besteht die Gefahr, dass aufgrund eines Anstiegs der Temperatur im Innern des Geräts ein Brand ausbricht oder andere Probleme mit
dem Gerät auftreten.
✎ Wenn Sie einen Standfuß oder eine Wandhalterung einsetzen, verwenden Sie ausschließlich Teile von Samsung Electronics.
• Wenn Sie Teile eines anderen Herstellers verwenden, kann es zu Problemen mit dem Gerät oder zu Verletzungen kommen, weil das Gerät herunterfällt.
✎ Das Aussehen kann sich je nach Gerät unterscheiden.
✎ Gehen Sie beim Anschließen des Fernsehgeräts vorsichtig vor, da einige Teile warm werden können.
Aufstellen des Geräts mit dem Standfuß Installation des Geräts mit der Wandhalterung
10 cm 10 cm
10 cm
10 cm
10 cm
10 cm
10 cm
Ordnungsgemäße Entsorgung dieses Geräts (Elektro- und Elektronik-Altgeräte)
(Anwendbar in der Europäischen Union und anderen europäischen Staaten mit Systemen zur getrennten Sammlung von Wertstoffen)
Diese Kennzeichnung auf dem Gerät, dem Zubehör oder der Dokumentation bedeutet, dass das Gerät sowie das elektronische Zubehör (z. B.
Ladegerät, Headset, USB-Kabel) am Ende ihrer Lebensdauer nicht im normalen Hausmüll entsorgt werden dürfen. Entsorgen Sie diese Geräte bitte
getrennt von anderen Abfällen, um der Umwelt bzw. der menschlichen Gesundheit nicht durch unkontrollierte Müllbeseitigung zu schaden. Recyceln
Sie das Gerät, um die nachhaltige Wiederverwertung von stofflichen Ressourcen zu fördern. Private Nutzer sollten den Händler, bei dem das
Produkt gekauft wurde, oder die zuständigen Behörden kontaktieren, um in Erfahrung zu bringen, wie sie das Gerät auf umweltfreundliche Weise
recyceln können. Gewerbliche Benutzer wenden sich an ihren Lieferanten und überprüfen die Konditionen Ihres Kaufvertrags. Dieses Gerät und
seine elektronischen Zubehörteile dürfen nicht zusammen mit anderem Gewerbemüll entsorgt werden.
Ordnungsgemäße Entsorgung der Batterien dieses Produkts
(Anzuwenden in den Ländern der Europäischen Union und anderen europäischen Ländern mit einem separaten Sammelsystem für
Batterien)
Diese Kennzeichnung auf der Batterie, dem Handbuch oder der Verpackung bedeutet, dass die Batterie am Ende ihrer Lebensdauer nicht
im normalen Hausmüll entsorgt werden darf. Die Kennzeichnung mit den chemischen Symbolen für Hg, Cd oder Pb bedeutet, dass die
Batterie Quecksilber, Cadmium oder Blei in Mengen enthält, die die Grenzwerte der EU-Direktive 2006/66 übersteigen. Wenn Batterien nicht
ordnungsgemäß entsorgt werden, können diese Substanzen die Gesundheit von Menschen oder die Umwelt gefährden. Zum Schutz der
natürlichen Ressourcen und zur Förderung der Wiederverwertung von Materialien trennen Sie die Batterien von anderem Müll und führen Sie sie
Ihrem örtlichen Recyclingsystem zu.
[UD4000-XNZF]BN68-03426E.indb 2 2011-05-17 �� 6:34:14Deutsch - 3
Zubehör
✎Vergewissern Sie sich, dass im Lieferumfang des Fernsehgeräts folgende Komponenten enthalten sind. Falls irgendwelche Teile fehlen
sollten, setzen Sie sich bitte mit Ihrem Händler in Verbindung.
✎Die Farbe und die Form der Teile können sich je nach Modell unterscheiden.
✎Kabel, die nicht zum Paketinhalt gehören, können gesondert erworben werden.
ACHTUNG: STELLEN SIE DIE VERBINDUNG DAUERHAFT HER, DAMIT DAS NETZTEIL NICHT VOM GERÄT GETRENNT WERDEN KANN
y Fernbedienung und 2 Batterien (Typ AAA)
y Bedienungsanleitung
y Garantiekarte / Sicherheitshinweise (nicht überall verfügbar)
y Netzkabel
y Reinigungstuch
y Haltering (4 Stk.) y Standfuß mit Kabelhalter y CI-Kartenadapter
y Komponenten-/AV-Adapter y Scart-Adapter
✎Verwaltungskosten werden abgerechnet, wenn:
(a) auf Ihren Wunsch ein Techniker gerufen wird und kein Defekt des Geräts vorliegt
(d.h. wenn Sie dieses Benutzerhandbuch nicht gelesen haben).
(b) Sie das Gerät in eine Reparaturwerkstatt bringen und kein Defekt des Geräts vorliegt
(d.h. wenn Sie dieses Benutzerhandbuch nicht gelesen haben).
✎Der abgerechnete Betrag wird Ihnen mitgeteilt, ehe irgendwelche Arbeiten oder Kundenbesuche ausgeführt werden.
Montieren des Standfußes mit Kabelhalter
[UD4000-XNZF]BN68-03426E.indb 3 2011-05-17 �� 6:34:16Deutsch - 4
Bedienfeld
✎Form und Farbe des Geräts können sich je nach Modell unterscheiden.
Systemsteuerung
Lautsprecher
Fernbedienungssensor Richten Sie die Fernbedienung auf diesen Sensor am Fernsehgerät.
Netzanzeige Beim Einschalten des Fernsehgeräts blinkt die Netzleuchte kurz und erlischt
anschließend. Im Standby-Modus leuchtet die Anzeige permanent.
SOURCEE Umschalten zwischen allen verfügbaren Signalquellen. Im Bildschirmmenü können
Sie diese Schaltfläche genauso wie die ENTERE-Taste auf der Fernbedienung
verwenden.
MENU Drücken Sie diese Taste, um die Funktionen des Fernsehgeräts in einem
Y Bildschirmmenü anzuzeigen.
Einstellen der Lautstärke. Im Bildschirmmenü können Sie die Y-Schaltflächen
z wie die Tasten ◄ und ► auf der Fernbedienung verwenden.
Wechseln des Senders. Im Bildschirmmenü können Sie die z-Schaltflächen
wie die Tasten ▼ und ▲ auf der Fernbedienung verwenden.
P (Netz) Ein- oder Ausschalten des Fernsehgeräts.
Standby-Modus
Der Standby-Modus ist nicht für längere Phasen der Abwesenheit gedacht (z. B. wenn Sie verreist sind). Eine kleine Menge
Strom wird auch dann noch verbraucht, wenn das Gerät mit dem Netzschalter ausgeschaltet wurde. Es ist am besten, das
Netzkabel aus der Steckdose zu ziehen.
[UD4000-XNZF]BN68-03426E.indb 4 2011-05-17 �� 6:34:16Deutsch - 5
Fernbedienung
✎Dies ist eine spezielle Fernbedienung für Personen mit eingeschränktem Sehvermögen. Die Netztaste sowie die Tasten
zum Einstellen des Senders und der Lautstärke sind in Braille beschriftet.
A B C D
P.MODE SRS
E-MANUAL AD/SUBT.
CONTENT
DUAL I-II
HDMI
Ein- und Ausschalten des
Fernsehgeräts.
Anzeigen und Auswählen der
verfügbaren Videosignalquellen.
Hiermit aktivieren Sie den HDMIModus direkt.
Zurück zum vorherigen Sender.
Drücken Sie diese Taste, um den
Ton vorübergehend auszuschalten.
Wechseln des Senders.
Anzeigen der Senderlisten auf dem
Bildschirm.
Anzeigen des elektronischen
Programmführers.
Anzeigen von Informationen auf dem
Bildschirm
Schließen des Menüs.
Hiermit wechseln Sie direkt zu einem
Kanal.
Einstellen der Lautstärke.
Alternativ wählen Sie „Videotext ein“,
„Doppel“, „Mix“ oder „Aus“
Anzeigen des Bildschirmmenüs.
Hiermit können Sie häufig verwendete
Funktionen schnell auswählen.
Anzeigen von Eigene Inhalte,
Fernsehen und Quelle.
Zurück zum vorherigen Menü.
Auswählen von Optionen im
Bildschirmmenü und Ändern von
Menüwerten.
Tasten, die in den Menüs Senderliste,
Kanal-Manager, Eigene Inhalte usw.
Verwenden Sie diese Tasten innerhalb
einer bestimmten Funktion.
Einzelheiten entnehmen Sie dem
e-Manual.
✎Batterien und Akkus gehören nicht in den Hausmüll. Als Verbraucher sind Sie verpflichtet, alte Batterien und Akkus zur
umweltschonenden Entsorgung zurückzugeben. Sie können alte Batterien und Akkus bei den öffentlichen Sammelstellen
in Ihrer Gemeinde oder überall dort abgeben, wo Batterien und Akkus der betreffenden Art verkauft werden.
P.MODE: Hiermit wählen Sie einen
Bildmodus.
SRS: Hiermit aktivieren Sie SRS
TruSurround HD.
DUAL I-II: Hiermit wählen Sie den
Tonmodus „DuaL“.
E-MANUAL: Anzeigen des
e-Manual.
P.SIZE: Hiermit wählen Sie das
Bildformat.
AD: Auswahl des Audios für
Sehgeschädigte. (Nicht überall
verfügbar)
SUBT.: Anzeigen digitaler Untertitel.
Einlegen von Batterien (Batteriegröße: AAA)
[UD4000-XNZF]BN68-03426E.indb 5 2011-05-17 �� 6:34:17Deutsch - 6
Anschließen an eine Antenne
Wenn das Fernsehgerät zum ersten Mal eingeschaltet wird, werden automatisch die Grundeinstellungen vorgenommen.
✎Voreinstellung: Anschließen ans Stromnetz und an die Fernsehantenne.
Plug & Play (Anfangseinstellung)
Wenn das Fernsehgerät erstmals eingeschaltet wird, helfen eine Reihe aufeinanderfolgender Abfragen beim Durchführen der
Grundeinstellungen. Drücken Sie die Netztaste P. Plug & Play ist nur verfügbar, wenn die eingangsquelle auf TV eingestellt ist.
✎Um zum vorherigen Schritt zurückzukehren, drücken Sie die rote Taste.
1
Auswählen der Sprache Drücken Sie die Taste ▲ oder ▼, und drücken Sie dann auf die Taste
ENTERE.
Wählen Sie die gewünschte Sprache des Bildschirmmenüs (OSD) aus.
P
POWER
2
Auswählen von
Shop-Demo oder
Privatgebrauch
Drücken Sie die Taste ◄ oder ►, und drücken Sie dann auf die ENTERE.
Wählen Sie den Modus Privatgebrauch aus. Der Modus Shop-Demo ist für
den Betrieb in Einzelhandelsgeschäften bestimmt.
Zurücksetzen der Geräteeinstellungen von Shop-Demo auf Privatgebrauch
(Standard): Drücken Sie die Lautstärketaste am Fernsehgerät. Wenn das
Menü „Lautstärke“ angezeigt wird, halten Sie die Taste MENU 5 Sekunden
lang gedrückt.
Shop-Demo ist ausschließlich für den Betrieb in Geschäften bestimmt.
Wenn Sie diese Option dennoch auswählen, stehen einige Funktionen nicht
zur Verfügung. Wählen Sie Privatgebrauch, wenn Sie zuhause fernsehen
möchten.
3
Auswählen eines Landes Drücken Sie die Taste ▲ oder ▼, und drücken Sie dann auf die Taste ENTERE.
Wählen Sie das gewünschte Land aus.
✎Nachdem Sie das Land im Menü Land eingestellt haben, werden Sie bei manchen
Modellen aufgefordert, die PIN-Nummer einzurichten.
✎Die Ziffernkombination 0-0-0-0 dürfen Sie als PIN-Nummer nicht eingeben.
✎Diese Option kann je nach Land unterschiedlich sein.
4
Einstellen des Uhrmodus Stellen Sie den Uhrmodus automatisch oder manuell ein.
Auto: Wählen Sie die Zeitzone für Ihre Region. (je nach Land)
Manuell: Hiermit können Sie das Datum und die Uhrzeit manuell einstellen.
5
Auswählen des TVEmpfangs
Drücken Sie die Taste ▲ oder ▼, und drücken Sie dann auf die Taste ENTERE.
Wählen Sie das gewünschte Sendesignal.
6
Auswählen eines Senders Drücken Sie die Taste ▲ oder ▼, und drücken Sie dann auf die Taste ENTERE.
Wählen Sie den Sendertyp für den Suchlauf aus. Wenn Sie den Antennentyp auf Cable (Kabel)
einstellen, können Sie den Kanälen im nächsten Schritt einen Zahlenwert (Senderfrequenzen)
zuweisen. Weitere Informationen hierzu finden Sie unter Sender→ Autom. Sendersuchlauf.
Zum Unterbrechen des Speichervorgangs drücken Sie die ENTERE zu einem beliebigen
Zeitpunkt.
7 Gute
Fernsehunterhaltung!
Wählen Sie Fernsehen. Drücken Sie die ENTERE.
So setzen Sie diese Funktion zurück:
Sie sollten das Plug & Play-Verfahren (MENU → System) zuhause erneut durchführen, selbst wenn Sie es bereits im Geschäft
durchgeführt haben.Wählen Sie System - Plug & Play (Anfangseinstellung). Geben Sie Ihre vierstellige PIN ein. Die StandardPIN lautet „0-0-0-0“ (außer Frankreich). Wenn Sie die PIN ändern möchten, verwenden Sie die Funktion PIN ändern.
✎Wenn Sie den PIN-Code vergessen haben, drücken Sie die Tasten auf der Fernbedienung im Standby-Modus in der
angegebenen Reihenfolge, um die PIN auf „0-0-0-0“ (Frankreich: „1-1-1-1“) zurückzusetzen: POWER (Aus) → MUTE →
8 → 2 → 4 → POWER (Ein).
VHF/UHF-Antenne Kabel
oder
Rückseite des Fernsehgeräts
[UD4000-XNZF]BN68-03426E.indb 6 2011-05-17 �� 6:34:18Deutsch - 7
Anschließen an ein AV-Gerät
¦ Verfügbare Geräte: DVD, Blu-ray-Player, HD-Kabelreceiver, HD-Satellitenreceiver,
Videorekorder, Digital-Audiosystem, Verstärker, DVD-Heimkinosystem, PC
HDMI OUT
DVI OUT
AUDIO OUT
R-AUDIO-L
HDMI, HDMI/DVI-Anschluss
Mit Hilfe eines HDMI- oder HDMI/DVI-Kabels (bis zu 1080p)
✎HDMI IN 1 (DVI), 2, 3, 4, PC/DVI AUDIO IN
x Für bessere Bild- und Tonqualität stellen Sie die Verbindung zu digitalen Geräten mit Hilfe eines HDMI-Kabels
her.
x HDMI-Kabel unterstützen digitale Video- und Audiosignale, und Sie benötigen dann kein Audiokabel mehr.
– Um das Fernsehgerät mit einem digitalen Gerät zu verbinden, das keine HDMI-Ausgabe unterstützt, verwenden
Sie ein HDMI/DVI- und ein Audiokabel.
x Das Bild wird möglicherweise nicht normal (wenn überhaupt) angezeigt oder es erfolgt keine Tonausgabe, wenn
ein externes Gerät an den Fernseher angeschlossen wird, das eine ältere HDMI-Version verwendet. Wenn solch
ein Problem auftritt, erfragen Sie die HDMI-Version beim Hersteller des externen Geräts und bitten Sie, wenn
veraltet, um ein Upgrade.
x Verwenden Sie auf jeden Fall ein HDMI-Kabel mit einer Dicke von maximal 14 mm.
x Achten Sie darauf, nur ein zertifiziertes HDMI-Kabel zu kaufen. Andernfalls kann es passieren, dass kein Bild
angezeigt wird oder ein Verbindungsfehler auftritt.
x Es wird ein einfaches Hochgeschwindigkeits-HDMI-Kabel oder eines mit Ethernet-Anschluss empfohlen. Dieses
Gerät unterstützt die Netzwerkfunktion nicht über HDMI.
[UD4000-XNZF]BN68-03426E.indb 7 2011-05-17 �� 6:34:18Deutsch - 8
AUDIO OUT
R-AUDIO-L
VIDEO OUT
AUDIO OUT
R-AUDIO-L
PR PB Y
COMPONENT OUT
W R G R B
W R G R B
R W
R W
EXT
Y
Y
Komponentenanschluss
AV-Anschluss
SCART-Anschluss
Verwenden von Komponentenkabeln (bis 1080p) oder Audio/Video- (nur 480i) und Scartkabel
✎Im Modus Ext. unterstützt DTV Out nur MPEG SD-Video und -Audio.
✎Um die beste Bildqualität zu erhalten, wird eine Komponentenverbindung über den A/V-Anschluss empfohlen.
[UD4000-XNZF]BN68-03426E.indb 8 2011-05-17 �� 6:34:20Deutsch - 9
Anschließen an einen PC und ein Audiogerät
¦ Verfügbare Geräte: Digital-Audiosystem, Verstärker, DVD-Heimkino
OPTICAL
Audio-Anschluss
Kopfhörer-Anschluss
Mit Hilfe des optischen (digitalen) Kabels oder des Kopfhöreranschlusses
✎DIGITAL AUDIO OUT (OPTICAL)
x Wenn ein Digital Audio-System mit dem DIGITAL AUDIO OUT (OPTICAL)-Anschluss verbunden ist, reduzieren
Sie die Lautstärke von Fernsehgerät und System.
x 5.1-Kanalton ist möglich, wenn das Fernsehgerät an ein externes Gerät angeschlossen ist, das 5.1-Kanalton
unterstützt.
x Wenn der Receiver (d. h. Heimkinosystem) angeschaltet ist, können Sie den Ton so hören, wie er vom optischen
Ausgang der Fernsehgeräts zur Verfügung gestellt wird. Wenn das Fernsehgerät ein (terrestrisches) DTV-Signal
empfängt, überträgt das Fernsehgerät 5.1-Kanalton an den Receiver des Heimkinosystems. Wenn es sich bei
der Signalquelle um eine digitale Komponente wie beispielsweise einen DVD-Player/Blu-Ray-Player/Kabel- /
Satellitenreceiver (Set-Top-Box) handelt, der über HDMI an das Fernsehgerät angeschlossen ist, kann der
Receiver des Heimkinosystems nur Zweikanalton wiedergeben. Wenn Sie 5.1-Kanalton wünschen, müssen Sie
den digitalen Ausdioausgang am DVD-/Blu-Ray-Player / Kabel- / Satellitenreceiver (Set-Top-Box) direkt an einen
Verstärker oder ein Heimkinosystem anschließen.
✎Kopfhörer H: Sie können Ihre Kopfhörer an den Kopfhörer-Ausgang Ihres Fernsehgeräts anschließen. Wenn
Kopfhörer angeschlossen sind, ist die Tonwiedergabe über die eingebauten Lautsprecher ausgeschaltet.
x Wenn Sie Kopfhörer an das Fernsehgerät anschließen, ist die Tonfunktion eingeschränkt.
x Die Lautstärke der Kopfhörer und des Fernsehgeräts werden getrennt geregelt.
[UD4000-XNZF]BN68-03426E.indb 9 2011-05-17 �� 6:34:21Deutsch -
Anzeigemodi (D-Sub- und HDMI/DVI-Eingang)
Die optimale Auflösung beträgt 1360 x 768 bei 60Hz.
Modus Auflösung Horizontalfrequenz (kHz) Vertikalfrequenz (Hz) Pixeltakt (MHz)
Synchronisationspolarität
(H/V)
IBM
640 x 350 31,469 70,086 25,175 + / -
720 x 400 31,469 70,087 28,322 - / +
MAC
640 x 480 35,000 66,667 30,240 - / -
832 x 624 49,726 74,551 57,284 - / -
VESA DMT
640 x 480
31,469 59,940 25,175 - / -
37,861 72,809 31,500 - / -
37,500 75,000 31,500 - / -
800 x 600
37,879 60,317 40,000 + / +
48,077 72,188 50,000 + / +
46,875 75,000 49,500 + / +
1024 x 768
48,363 60,004 65,000 - / -
56,476 70,069 75,000 - / -
60,023 75,029 78,750 + / +
1360 x 768 47,712 60,015 85,500 + / +
✎HINWEIS
x Bei Anschluss über ein HDMI/DVI-Kabel müssen Sie die HDMI IN 1 (DVI)-Buchse verwenden.
x Das Zeilensprungverfahren wird nicht unterstützt.
x Das Fernsehgerät funktioniert möglicherweise nicht ordnungsgemäß, wenn kein Standardmodus ausgewählt
wird.
x Separate- und Composite-Modus werden unterstützt. SOG (Sync On Green) wird nicht unterstützt.
¦ Mit Hilfe eines HDMI-, HDMI/DVI- oder D-Sub-Kabels
✎Der Anschluss über ein HDMI-Kabel wird je nach PC möglicherweise nicht unterstützt.
✎HDMI-Kabel unterstützen digitale Video- und Audiosignale, und Sie benötigen dann kein Audiokabel mehr.
AUDIO OUT
AUDIO OUT
DVI OUT
PC OUT
HDMI OUT
PC-Anschluss
[UD4000-XNZF]BN68-03426E.indb 10 2011-05-17 �� 6:34:24Deutsch -
Ändern der Eingangsquelle
¦ Quellen
Hiermit wählen Sie, ob das Fernsehgerät mit einem Fernsehsignal versorgt wird oder an andere externe Signaleingänge wie
z. B. DVD- / Blu-Ray-Player / Kabelreceiver / Satellitenreceiver (Set-Top Box) angeschlossen ist.
■ TV / Ext. / PC / AV / Component / HDMI1/DVI / HDMI2 / HDMI3 / HDMI4 / USB
✎ In der Liste der Quellen werden die angeschlossenen Signalquellen hervorgehoben.
✎ Wenn Sie nur die angeschlossenen Geräte anzeigen möchten, wechseln Sie mit der Taste ◄ oder ► zu
Verbunden.
✎ Ext. und PC bleiben immer aktiviert.
✎ Wenn die angeschlossenen externen Geräte nicht hervorgehoben werden, drücken Sie den roten Knopf. Das
Fernsehgerät sucht nach angeschlossenen Geräten.
So verwenden Sie die Option „Name bearb.“
Drücken Sie im Fenster „Quelle“ die Taste TOOLS, um die gewünschten externen Eingangsquellen einzustellen.
■ VCR / DVD / Kabelreceiver / Satellitenreceiver / PVR-Receiver / AV-Receiver / Spiele / Camcorder / PC / DVI PC / DVI-Geräte / TV / IPTV
/ Blu-ray / HD DVD / DMA: Vergeben Sie Namen für die an die Eingangsbuchsen angeschlossenen Geräte, um die Auswahl der Signalquelle zu
vereinfachen.
✎ Wenn Sie einen PC über ein HDMI-Kabel mit dem HDMI IN 1 (DVI)-Anschluss verbinden, müssen Sie unter Name bearb. den PC-Modus
des Fernsehgeräts aktivieren.
✎ Wenn Sie einen PC über ein HDMI/DVI-Kabel mit dem HDMI IN 1 (DVI)-Anschluss verbinden, müssen Sie unter Name bearb. den DVI
PC-Modus des Fernsehgeräts aktivieren.
✎ Wenn Sie ein AV-Gerät über ein HDMI/DVI-Kabel mit dem HDMI IN 1 (DVI)-Anschluss verbinden, müssen Sie unter Name bearb. den DVIGeräte-Modus des Fernsehgeräts aktivieren.
Informationen
Sie können detaillierte Informationen zum gewälten externen Gerät anzeigen.
✎Die optimale Kabelverbindung ist bei diesem Gerät gewährleistet, wenn Sie Kabel mit den nachfolgend angegebenen Maßen verwenden.
x Maximaler Durchmesser - 14 mm
Anschließen an den COMMON INTERFACE-Steckplatz
Befestigen des CI-Kartenadapters
Schließen Sie den Adapter an wie in der rechten Abbildung gezeigt.
Gehen Sie folgendermaßen vor, um den CI-Kartenadapter anzuschließen.
✎Achten Sie darauf, dass Sie den Adapter anschließen, bevor Sie das Fernsehgerät an der Wand
befestigen.
1. Setzen Sie den CI-Kartenadapter in die beiden Bohrungen am Gerät 1 ein.
✎ Suchen Sie die beiden Bohrungen auf der Rückseite des Fernsehgeräts. Die Bohrungen
befinden sich neben dem COMMON INTERFACE-Anschluss.
✎ Drücken Sie fest auf die Mitte des Adapters, um sicherzustellen, dass er vollständig
geschlossen ist.
2. Stecken Sie den CI-Kartenadapter in den COMMON INTERFACE-Anschluss.
3. Stecken Sie die „CI“- oder „CI+“-Karte ein.
Verwenden der „CI“- oder „CI+“-Karte
Um Bezahlsender zu sehen, müssen Sie eine „CI“ oder „CI+“-Karte einsetzen.
y Wenn Sie keine „CI“ oder „CI+“-Karte einsetzen, wird bei einigen Kanälen die Meldung „Gestörtes
Signal“ angezeigt.
y Die Verbindungsinformationen mit Telefonnummer, Kennung der „CI“- oder „CI+“-Karten und
Hostkennung sowie anderen Angaben werden nach ungefähr 2 bis 3 Minuten angezeigt. Wenn eine
Fehlermeldung angezeigt wird, wenden Sie sich bitte an Ihren Dienstanbieter.
y Wenn das Konfigurieren der Kanalinformationen abgeschlossen ist, wird die Meldung „Udating
Completed“ (Aktualisierung abgeschlossen) angezeigt. Dies bedeutet, dass die Kanalliste aktualisiert ist.
✎HINWEIS
x Sie können die „CI“ oder „CI+“-Karte bei einem der örtlichen Kabelnetzbetreiber erwerben.
x Ziehen Sie die „CI“ oder „CI+“-Karte vorsichtig mit den Händen heraus. Sie könnte beim Herunterfallen ansonsten beschädigt werden.
x Die Richtung, in der Sie die „CI“ oder „CI+“-Karte einsetzen müssen, ist auf der Karte markiert.
x Die Position des COMMON INTERFACE-Steckplatzes ist modellabhängig.
x „CI“ oder „CI+“-Karten werden in einigen Ländern und Regionen nicht unterstützt. Fragen Sie diesbezüglich Ihren offiziellen Händler.
x Wenden Sie sich bei Problemen an den Dienstanbieter.
x Setzen Sie eine „CI“ oder „CI+“-Karte ein, die für die aktuellen Antenneneinstellungen geeignet ist. Andernfalls ist das Bild gestört oder es
fällt aus.
[UD4000-XNZF]BN68-03426E.indb 11 2011-05-17 �� 6:34:26Deutsch -
So zeigen Sie das e-Manual an
Bildschirmanzeige
1
4 5 6
2
3
Grundfunktionen
Bildmenü
Tonmenü
} Index E Eingabe eBeenden
1 Aktuell angezeigtes Video, Fernsehprogramm usw.
2 Die Kategorieliste. Drücken Sie die Taste ◄ oder
►, um die gewünschte Kategorie auszuwählen.
3 Anzeigen der Untermenüliste Bewegen Sie
den Cursor mithilfe der Pfeiltasten auf Ihrer
Fernbedienung. Drücken Sie die Taste ENTERE,
um das gewünschte Untermenü auszuwählen.
4 } Blau (Index): Anzeigen des Index-Fensters.
5 E Eingabe: Wählen Sie eine Kategorie oder ein
Untermenü.
6 e Beenden: Schließen des e-Manual.
So wechseln Sie zwischen den e-Manual-Themen und den entsprechenden Bildschirmmenüs.
Bild
Bildmodus : Standard ►
Hintergrundbel. : 7
Kontrast : 95
Helligkeit : 45
Schärfe : 50
Farbe : 50
Farbton (G/R) : G50/R50
Bildschirmanpassung
E-MANUAL
a Jetzt test.
Grundfunktionen > Bildmenü (3/17)
a Jetzt test. b Start { Zoom } Index L Seite e Beenden
✎Diese Funktion ist in manchen Menüs nicht verfügbar.
Methode 1 Methode 2
1. Wenn Sie das entsprechende Menü zu einem Thema
im e-Manual ausführen möchten, drücken Sie die rote
Taste, um Jetzt test. auszuwählen.
2. Drücken Sie die Taste E-MANUAL, um zum Fenster des
e-Manual zurückzukehren.
1. Drücken Sie die Taste ENTERE, wenn ein Thema
angezeigt wird. “Die Meldung Sicher? wird angezeigt.
Wählen Sie Ja, und drücken Sie dann die Taste
ENTERE. Das Fenster des Bildschirmmenüs wird
angezeigt.
2. Drücken Sie die Taste E-MANUAL, um zum Fenster des
e-Manual zurückzukehren.
E-MANUAL Die Anweisungen zu den Funktionen Ihres Fernsehgeräts finden Sie im e-Manual.
Drücken Sie dazu die Taste E-MANUAL auf Ihrer Fernbedienung. Bewegen Sie
den Cursor mithilfe der Pfeiltasten, um eine Kategorie und ein Thema auszuwählen,
und drücken Sie dann die Taste ENTERE. Die gewünschte e-Manual-Seite wird
angezeigt.
Sie können auch über das entsprechende Menü darauf zugreifen:
O MENUm→ Unterstützung → e-Manual → ENTERE
✎Drücken Sie die Taste e-Manual, um zum Hauptmenü des E-MANUAL zurückzukehren.
✎Wenn das Fernsehgerät an eine externe Eingangsquelle angeschlossen ist, könen Sie die
Funktion Jetzt test. nicht direkt verwenden.
[UD4000-XNZF]BN68-03426E.indb 12 2011-05-17 �� 6:34:28Deutsch -
Anzeigen der Inhalte
Grundfunktionen > Bildmenü (3/17)
2 3 4 5
a Jetzt test. b Start { Zoom } Index L Seite e Beenden
1
1 Inhaltsfenster: Anzeigen der Themeninhalte beim
Auswählen eines Untermenüs. Mit der Taste
◄ / ► wechseln Sie zur vorherigen oder zur
nächsten Seite.
2 Jetzt test.: Anzeigen des zum Thema passenden
Bildschirmmenüs. Drücken Sie die Taste
E-MANUAL, um zum Fenster des e-Manual
zurückzukehren.
3 Start: Wechseln zum Startfenster des e-Manual.
4 Zoom: Vergrößern des Fensters. Mit der Taste
▲ / ▼ können Sie durch das vergrößerte Fenster
blättern.
5 L (Seite): Wechseln zur vorherigen oder zur
nächsten Seite.
Verwenden des Zoommodus
UVersch. R Zurück
Wählen Sie Zoom, und drücken Sie dann die Taste
ENTERE, um das Fenster zu vergrößern. Mit der
Taste ▲ oder ▼ können Sie durch das vergrößerte
Fenster blättern.
✎Drücken Sie die Taste RETURN, um das Fenster
auf die normale Größe zurückzusetzen.
So suchen Sie auf der Indexseite nach einem Thema
✎Diese Funktion wird, je nach Sprache, möglicherweise nicht unterstützt.
1. Wenn Sie nach einem Stichwort suchen möchten, wählen Sie mit der blauen Taste Index.
2. Drücken Sie die Taste ◄ oder ►, um die gewünschte Zeichenfolge auszuwählen.
3. Wählen Sie mit der Taste ▲ oder ▼ das gewünschte Stichwort aus, und drücken Sie dann die Taste ENTERE.
4. Sie können das Fenster der entsprechenden Anweisung im e-Manual anzeigen.
✎Drücken Sie die Taste RETURN, um das Index-Fenster zu schließen.
[UD4000-XNZF]BN68-03426E.indb 13 2011-05-17 �� 6:34:29Deutsch -
Anbringen der Wandhalterung
Mit der (separat erhältlichen) Wandhalterung können Sie das Fernsehgerät an einer Wand befestigen.
Detaillierte Informationen zum Montieren der Wandhalterung finden Sie in den Anweisungen, die im Lieferumfang der
Wandhalterung enthalten sind. Lassen Sie sich beim Anbringen der Wandhalterung von einem Techniker helfen.
Samsung Electronics haftet nicht für Schäden an Gerät oder Personen, wenn die Montage vom Kunden selbst durchgeführt
wird.
Spezifikation (VESA) der Wandhalterung
Fall A. Anbringen der SAMSUNG-Wandhalterung
Fall B. Anbringen der Wandhalterung eines anderen
Unternehmens
1 1 1 1
✎Die Wandhalterung wird nicht mitgeliefert, ist aber gesondert erhältlich.
Montieren Sie die Wandhalterung an einer soliden Wand, die senkrecht zum Boden steht. Bei Installation auf anderen
Trägermaterialien wenden Sie sich bitte an Ihren Fachhändler. Bei Montage an einer Decke oder schrägen Wand kann das
Fernsehgerät herunterfallen und zu Verletzungen führen.
✎HINWEIS
x Die Standardabmessungen der Wandhalterung finden Sie in der nachfolgenden Tabelle.
x Beim Kauf unserer Wandhalterung erhalten Sie ein detailliertes Installationshandbuch sowie alle für die Montage
erforderlichen Teile.
x Verwenden Sie keine Schrauben, die nicht der VESA-Standardspezifikation für Schrauben entsprechen.
x Verwenden Sie keine Schrauben, die länger sind als hier angegeben, da damit innen liegende Bauteile des Fernsehers
beschädigt werden können.
x Bei Wandhalterungen, die nicht der VESA-Standardspezifikation für Schrauben entsprechen, kann die Länge der
Schrauben je nach Spezifikation unterschiedlich sein.
x Ziehen Sie die Schrauben nicht zu fest an, weil Sie so möglicherweise das Gerät beschädigen, oder es dadurch
herunterfallen und Verletzungen verursachen könnte. Samsung haftet nicht bei derartigen Unfällen.
x Samsung haftet nicht für Geräteschäden oder Verletzungen, wenn eine Wandhalterung verwendet wird, die nicht
dem VESA-Standard entspricht oder nicht spezifiziert ist, oder wenn der Verbraucher die Installationsanleitung für das
Produkt nicht befolgt.
x Bei der Montage dieses Fernsehgeräts darf eine Neigung von 15 Grad nicht überschritten werden.
Produktfamilie Zoll
VESASpezifikation
(A * B)
Standardschraube Menge
LED-Fernseher
19~22 75 X 75
M4
4
27 200 X 100
32~40 200 X 200
46~60 400 X 400 M8
65~75 600 X 400
Installieren Sie die Wandhalterung nicht bei eingeschaltetem Fernsehgerät. Sie könnten dabei einen
Stromschlag erhalten und sich verletzen.
[UD4000-XNZF]BN68-03426E.indb 14 2011-05-17 �� 6:34:31Deutsch -
Fehlerbehebung
Wenn das Fernsehgerät scheinbar ein Problem aufweist, schlagen Sie zunächst in dieser Liste der möglichen Probleme und
Lösungen nach. Wenn keiner dieser Tipps zur Fehlerbehebung weiterhilft, öffnen Sie die Website www.samsung.com und
klicken Sie dort auf „Support“ oder wenden Sie sich an ein Samsung-Kundendienstcenter.
Probleme Lösungen und Erklärungen
Der Fernseher kann nicht
eingeschaltet werden.
• Vergewissern Sie sich, dass das Netzkabel sicher mit der Wandsteckdose und dem
Fernsehgerät verbunden ist.
• Vergewissern Sie sich, dass die Netzsteckdose Strom liefert.
• Drücken Sie die Netztaste (POWER) am Fernsehgerät, um zu prüfen, ob die
Fernbedienung richtig funktioniert. Wenn das Fernsehgerät eingeschaltet wird, lesen Sie
den Abschnitt „Die Fernbedienung funktioniert nicht“ weiter unten.
Kein Bild/Video. • Überprüfen Sie die Kabelverbindungen. Unterbrechen Sie kurzzeitig alle
Kabelverbindungen zwischen dem Fernsehgerät und den externen Geräten.
• Stellen Sie die Videoausgänge Ihres externen Geräts (Kabel-/Satellitenreceiver, DVD-/
Blu-ray-Player) so ein, dass sie zu den Verbindungen mit dem Fernsehgerät passen. Zum
Beispiel: Wenn der HDMI-Ausgang des externen Geräts verwendet wird, schließen Sie
es an den HDMI-Eingangs Ihres Fernsehers an.
• Stellen Sie sicher, dass die angeschlossenen Geräte eingeschaltet sind.
• Vergewissern Sie sich, dass die richtige Signalquelle für den Fernseher eingestellt ist.
Drücken Sie dazu die Taste SOURCE auf der Fernbedienung.
• Schließen Sie das Netzkabel an, um das angeschlossene Gerät neu zu starten.
Die Fernbedienung funktioniert nicht. • Ersetzen Sie die Batterien der Fernbedienung, und achten Sie dabei auf die richtige
Polung (+/-).
• Reinigen Sie das Sendefenster der Fernbedienung.
• Versuchen Sie, die Fernbedienung von 1,5 bis 1,8 Meter Entfernung aus direkt auf das
TV-Gerät zu richten.
Die Fernbedienung des Kabel-/
Satellitenreceivers schaltet das
Fernsehgerät nicht ein/aus oder regelt
auch nicht die Lautstärke.
• Programmieren Sie die Fernbedienung des Kabel-/Satellitenreceivers so, dass
sie das Fernsehgerät anspricht. Den Code für SAMSUNG TV finden Sie in der
Bedienungsanleitung für Ihren Kabel-/Satellitenreceiver.
✎Sie können den optimalen Zustand Ihres Fernsehgeräts erhalten, indem Sie die aktuelle Firmware per USB von der
Website (samsung.com -> Support -> Downloads) herunterladen.
✎Der TFT-LED-Bildschirm enthält Unterpixel. Hierfür ist eine ausgefeilte Fertigungstechnologie erforderlich ist. Allerdings
können ein paar zu helle oder zu dunkle Pixel auf der Bildfläche zu sehen sein. Diese Pixelfehler haben keinen Einfluss
auf die Geräteleistung.
Lizenz
Liste der Funktionen
Hervorragende digitale Schnittstelle und Netzwerkverbindung: Mit dem eingebauten digitalen HDTV-Tuner können Sie
unverschlüsselte HDTV-Sendungen ohne zusätzlichen Kabel-/Satellitenreceiver empfangen.
Eigene Inhalte
Hiermit können Sie Musikdateien, Bilder und Filme abspielen, die auf einem USB-Gerät gespeichert sind.
Anynet+ (HDMI-CEC)
Dabei handelt es sich um eine Funktion, mit der Sie alle angeschlossenen Samsung-Geräte, die Anynet+ unterstützen, mit der
Fernbedienung für Ihr Samsung-Fernsehgerät steuern können.
[UD4000-XNZF]BN68-03426E.indb 15 2011-05-17 �� 6:34:31Deutsch -
Befestigen des Fernsehgeräts an der Wand
Achtung: Das Fernsehgerät kann hinfallen, wenn Sie daran ziehen, es schieben oder darauf klettern. Stellen
Sie insbesondere sicher, dass sich keine Kinder an das Gerät hängen oder es aus dem Gleichgewicht bringen.
Anderenfalls könnte das Gerät umkippen und zu schweren Verletzungen oder dem Tod führen. Beachten
Sie alle Anweisungen der beigefügten Sicherheitshinweise. Noch mehr Stabilität erreichen Sie, wenn Sie den
Kippschutz installieren. Gehen Sie hierzu folgendermaßen vor.
So verhindern Sie, dass das Fernsehgerät umkippt
1. Stecken Sie die Schrauben durch die Halterungen und
befestigen Sie sie fest an der Wand. Vergewissern Sie sich, dass
die Schrauben gut halten.
✎ Je nach Ausführung der Wand benötigen Sie zum
Befestigen weiteres Material, wie z. B. Dübel.
✎ Da die benötigten Halterungen, Schrauben und das Band
nicht zum Lieferumfang gehören, müssen Sie diese Teile
gesondert erwerben.
2. Entfernen Sie die Schrauben in der Mitte der Geräterückseite.
Setzen Sie die Schrauben in die Halterungen ein und befestigen
Sie die Schrauben dann wieder am Fernsehgerät.
✎ Die Schrauben werden möglicherweise nicht zusammen
mit dem Gerät geliefert. Kaufen Sie in diesem Fall
Schrauben entsprechend den folgenden Angaben.
✎ Daten der Schrauben
x Für LED-Fernseher von 32 bis 75 Zoll: M8
3. Verbinden Sie die Halterungen an der Wand und die Halterungen am Fernsehgerät mit einem festen Band und ziehen Sie
das Band dann fest.
✎ HINWEIS
x Stellen Sie das Fernsehgerät in der Nähe der Wand auf, damit es nicht nach hinten kippen kann.
x Es ist noch sicherer, wenn die Halterungen an der Wand niedriger als die Halterungen am Fernsehgerät sind.
x Lösen Sie das Band, ehe Sie den Fernseher bewegen.
4. Kontrollieren Sie, ob alle Befestigungen ordnungsgemäß gesichert sind. Prüfen Sie regelmäßig die Verbindungen auf
Zeichen von Ermüdung oder Versagen. Bei Zweifeln hinsichtlich der Sicherheit Ihrer Halterungen wenden Sie sich an einen
professionellen Installationsbetrieb.
Lagerung und Wartung
✎Wenn Sie den Aufkleber vom Bildschirm abnehmen, entfernen Sie die Kleberückstände, ehe Sie fernsehen.
Sprühen Sie kein Wasser oder Reinigungsmittel direkt auf
das Gerät. Jede Flüssigkeit, die in das Gerät eindringt,
kann zu einer Funktionsstörung, einem Brand oder einem
Stromschlag führen.
Reinigen Sie das Gerät mit einem weichen Tuch, das Sie
vorher mit einer kleinen Menge Wasser anfeuchten.
Wand
[UD4000-XNZF]BN68-03426E.indb 16 2011-05-17 �� 6:34:33Deutsch -
Technische Daten
Anzeigeauflösung 1360 x 768
Umgebungsbedingungen
Betriebstemperatur
Luftfeuchtigkeit (bei Betrieb)
Temperatur (Lagerung)
Luftfeuchtigkeit (Lagerung)
10°C bis 40°C (50°F bis 104°F)
10% bis 80%, nicht kondensierend
-20°C bis 45°C (-4°F bis 113°F)
5 % bis 95 %, nicht kondensierend
TV-System
Analog: B/G, D/K, L, I (je nach eingestelltem Land)
Digital: DVB-T/DVB-C
Fernsehnorm/Videosystem
Analog: PAL, SECAM, NTSC-4.43, NTSC-3.58, PAL60
Digital: MPEG-2 MP@ML, MPEG-4, H.264/AVC MP@L3, MP@L4.0, HP@L4.0
Audiosystem BG, DK, L, NICAM, MPEG1, DD, DD+, HEAAC
HDMI IN
Video: 1080 24p, 1080p, 1080i, 720p, 576p, 480p
Audio: 2-Kanal-Linear-PCM 32/44.1/48 kHz, 16/20/24 Bit.
Modellname UE32D4000 / UE32D4010 / UE32D4020
Bildschirmgröße 32 Zoll (80 cm)
Ton
(Ausgang) 10 W x 2
Abmessungen (BxTxH)
Gehäuse
Mit Fuß
763,6 x 29,9 x 463,1 (mm)
763,6 x 222,7 x 527,1 (mm)
Gewicht
Ohne Fuß
Mit Fuß
7,0 kg
9,0 kg
✎Änderungen der technischen Daten und des Geräte-Designs vorbehalten.
✎Die technischen Daten zur benötigten Netzspannung und zum Energieverbrauch finden Sie auf dem Etikett am Produkt.
[UD4000-XNZF]BN68-03426E.indb 17 2011-05-17 �� 6:34:34Nederlands - 2
Voor meer informatie over het gebruik van de E-handleiding (p. 12)
De figuren en illustraties in deze gebruikershandleiding dienen alleen ter referentie en kunnen afwijken van het werkelijke
uiterlijk van het product. Het ontwerp en de specificaties van het product kunnen zonder kennisgeving worden gewijzigd.
Belangrijke informatie met betrekking tot de garantie voor bekijken beeldschermformaat
1. Functionaliteit betreffende digitale televisie (DVB) is alleen beschikbaar in landen/gebieden waar digitale DVB-T-televisiesignalen (MPEG2 en
MPEG4 AVC) per zendmast worden uitgezonden of waar u toegang hebt tot een compatibele DVB-C-service (MPEG2 en MPEG4 AAC) voor
kabel-tv. Vraag aan uw plaatselijke aanbieder of u DVB-T- of DVB-C-signalen kunt ontvangen.
2. DVB-T is de Europese DVB-consortiumstandaard voor de uitzending van digitale televisie via de zendmast en DVB-C voor de uitzending van digitale
televisie via de kabel. Bepaalde specifieke functies, zoals EPG (Elektronische programmagids), VOD (Video on Demand) enzovoort, zijn echter niet
opgenomen in deze specificatie. Deze werken dus mogelijk niet.
3. Hoewel dit televisietoestel voldoet aan de huidige DVB-T- en DVB-C-standaarden vanaf [augustus 2008], kan de compatibiliteit met
toekomstige digitale DVB-T-signalen via de zendmast en digitale DVB-C-signalen via de kabel niet worden gegarandeerd.
4. Afhankelijk van de landen/gebieden waar dit televisietoestel wordt gebruikt, kunnen aanbieders van kabeltelevisie extra kosten voor dergelijke
services in rekening brengen en moet u wellicht akkoord gaan met hun voorwaarden en bepalingen.
5. Bepaalde digitale televisiefuncties zijn mogelijk niet beschikbaar in bepaalde landen of regio's en DVB-C werkt mogelijk niet goed bij bepaalde
leveranciers van kabelservices.
6. Neem voor meer informatie contact op met de klantenservice van Samsung.
✎ De ontvangstkwaliteit van televisie-uitzendingen kan minder goed zijn door verschil in uitzendmethode tussen landen. Controleer de
televisieprestaties bij uw plaatselijke geautoriseerde SAMSUNG-dealer of bel de klantenservice van Samsung om te informeren of u de
kwaliteit kunt verbeteren door de tv-instellingen aan te passen.
Waarschuwing over stilstaand beeld
Vermijd de weergave op het scherm van stilstaande beelden (zoals jpeg-foto's) of statische beeldelementen (zoals het logo van tv-programma's,
een panorama- of 4:3-beeldverhouding, een aandelen- of nieuwsticker onder in het scherm, enz.). Wanneer er langdurig een statisch beeld op het
LED-scherm wordt weergegeven, kan het beeld inbranden. Dit kan ten koste gaan van de beeldkwaliteit. Volg de onderstaande aanbevelingen op
om de kans hierop te verkleinen:
• Vermijd langdurige weergave van hetzelfde tv-kanaal.
• Probeer beelden altijd schermvullend weer te geven; gebruik het beeldformaatmenu voor de beste optie.
• Reduceer de helderheid en het contrast tot de minimaal benodigde waarden voor de gewenste beeldkwaliteit; hogere waarden kunnen het
opbrandproces versnellen.
• Gebruik regelmatig alle tv-functies die bedoeld zijn voor het tegengaan van beeldretentie en het opbranden van het scherm; raadpleeg de
desbetreffende pagina's in de gebruikershandleiding voor meer informatie.
Installatieruimte
Bewaar de nodige afstand tussen het product en andere objecten (bijvoorbeeld muren) zodat er een goede ventilatie mogelijk is.
Wanneer u dit niet doet, kunnen er door een stijging van de interne temperatuur brand of problemen bij het product ontstaan.
✎ Bij gebruik van een voet of wandbevestiging mogen er alleen onderdelen worden gebruikt die door Samsung Electronics zijn geleverd.
• Het gebruik van onderdelen van een andere fabrikant kan leiden tot problemen met het product of zelfs tot lichamelijk letsel doordat het product
valt.
✎ Het uiterlijk van het product kan afwijken van het afgebeelde apparaat.
✎ Wees voorzichtig wanneer u de tv aanraakt. Sommige onderdelen kunnen heet zijn.
Plaatsing op een voet. Plaatsing met een wandbevestiging.
10 cm 10 cm
10 cm
10 cm
10 cm
10 cm
10 cm
Juiste afvoer van dit product (afvalverwerking van elektrische en elektronische apparatuur)
(Van toepassing in de Europese Unie en overige Europese landen met gescheiden inzamelingssystemen)
Dit label op het product, de accessoires of de documentatie bij dit product duidt erop dat het product en de bijbehorende
elektronische accessoires (bijvoorbeeld de oplader, headset of USB-kabel) aan het eind van de levensduur niet mogen worden
afgevoerd met het huishoudelijk afval. Om milieuverontreiniging of problemen voor de volksgezondheid als gevolg van ongeregelde
afvalverwerking te voorkomen, dient u deze items van het andere afval te scheiden zodat de materialen op verantwoorde wijze
kunnen worden hergebruikt. Thuisgebruikers moeten contact opnemen met de winkel waar ze het product gekocht hebben of met
de plaatselijke overheidsinstanties als ze willen weten waar en hoe ze deze items op milieuvriendelijke wijze kunnen recyclen. Zakelijke
gebruikers dienen contact op te nemen met de leverancier en de voorwaarden en bepalingen van het koopcontract te raadplegen. Dit
product en de bijbehorende elektronische accessoires mogen niet samen met ander commercieel afval worden afgevoerd.
Juiste afvoer van de batterijen in dit product
(Van toepassing in de Europese Unie en andere Europese landen met systemen voor batterij-inzameling)
Wanneer deze markering op de batterij, de handleiding of de verpakking wordt weergegeven, geeft dit aan dat de batterijen in dit
product aan het einde van hun levensduur niet samen met het gewone huishoudelijke afval mogen worden afgevoerd. Wanneer u de
chemische symbolen Hg, Cd of Pb ziet, betekent dit dat de batterij respectievelijk kwik, cadmium of lood boven de referentieniveaus
in EU-richtlijn 2006/66 bevat. Als batterijen niet op de juiste wijze worden afgevoerd, kunnen deze stoffen schade aanrichten aan het
milieu of de menselijke gezondheid. Om de natuurlijke hulpbronnen te beschermen en hergebruik van materiaal te bevorderen, moet u
batterijen scheiden van andere soorten afval en ze via uw plaatselijke, gratis batterij-inzamelsysteem recyclen.
[UD4000-XNZF]BN68-03426E.indb 2 2011-05-17 �� 6:34:34Nederlands - 3
Accessoires
✎Controleer of de volgende onderdelen bij uw tv geleverd zijn. Neem contact op met uw verkoper als er onderdelen ontbreken.
✎De vorm en kleur van de items kunnen enigszins afwijken. Dit is afhankelijk van het model.
✎Kabels die niet bij het product worden geleverd, kunnen apart worden aangeschaft.
LET OP: STEVIG BEVESTIGEN ZODAT DE ADAPTER GOED IS VASTGEKOPPELD
y Afstandsbediening en batterijen (AAA x 2)
y Gebruikershandleiding
y Garantiekaart/veiligheidsvoorschriften (niet op alle locaties beschikbaar)
y Netsnoer
y Schoonmaakdoekje
y Houderring (4x) y Snoervoet y CI Card-adapter
y Component-/AV-adapter y Scart-adapter
✎In de volgende gevallen kunnen administratiekosten in rekening worden gebracht:
(a) er wordt op uw verzoek een engineer gestuurd, maar het product is niet defect
(wanneer u deze gebruikershandleiding niet hebt gelezen)
(b) U brengt het apparaat naar een reparatiecentrum, maar het product is niet defect
(wanneer u deze gebruikershandleiding niet hebt gelezen)
✎U wordt op de hoogte gesteld van deze administratiekosten voordat een dergelijke reparatie of bezoek wordt
uitgevoerd.
De snoervoet monteren
[UD4000-XNZF]BN68-03426E.indb 3 2011-05-17 �� 6:34:36Nederlands - 4
Overzicht van het bedieningspaneel
✎De vorm en kleur van het product kunnen afhankelijk van het model variëren.
Configuratiescherm
Luidsprekers
Sensor voor de
afstandsbediening
Richt de afstandsbediening op dit punt van de tv.
Aan/uit-lampje Als de stroom is ingeschakeld, knippert het lampje even en gaat het vervolgens uit. In
de stand-bymodus blijft het aan.
SOURCEE Hiermee schakelt u tussen de beschikbare ingangsbronnen. Gebruik deze knop in het
schermmenu zoals u de toets ENTERE op de afstandsbediening gebruikt.
MENU Y Hiermee wordt het schermmenu met de functies van de tv weergegeven.
Hiermee regelt u het volume. Gebruik de Y-toetsen in het schermmenu zoals
z u de toetsen ◄ en ► op de afstandsbediening gebruikt.
Hiermee wisselt u van kanaal. Gebruik de z-toetsen in het schermmenu
zoals u de toetsen ▼ en ▲ op de afstandsbediening gebruikt.
P (Aan/uit) Hiermee schakelt u de tv in en uit.
Stand-bymodus
Laat de tv niet gedurende langere tijd in de stand-bymodus staan (bijvoorbeeld wanneer u op vakantie bent). Zelfs wanneer het
apparaat via de aan/uit-knop is uitgeschakeld, wordt een kleine hoeveelheid stroom gebruikt. U kunt het netsnoer het beste
loskoppelen.
[UD4000-XNZF]BN68-03426E.indb 4 2011-05-17 �� 6:34:36Nederlands - 5
Overzicht van de afstandsbediening
✎Dit is een speciale afstandsbediening voor visueel gehandicapten en is voorzien van brailletekens bij de POWER-,
kanaal- en volumetoetsen.
A B C D
P.MODE SRS
E-MANUAL AD/SUBT.
CONTENT
DUAL I-II
HDMI
Hiermee schakelt u de tv in en uit.
De beschikbare videobronnen
weergeven en selecteren.
Hiermee selecteert u rechtstreeks de
HDMI-modus.
Hiermee gaat u terug naar het vorige
kanaal.
Hiermee wordt het geluid tijdelijk
uitgeschakeld.
Hiermee worden kanalen gewijzigd.
Hiermee wordt de kanaallijst op het
scherm weergegeven.
De EPG (elektronische
programmagids) weergeven.
Hiermee wordt informatie op het
tv-scherm weergegeven.
Hiermee kunt u het menu afsluiten.
Druk op deze toets voor directe
toegang tot kanalen.
Hiermee regelt u het volume.
Wisselen tussen Teletekst AAN,
Dubbel, Mix of UIT.
Hiermee geeft u het hoofdmenu weer.
Snel veelgebruikte functies selecteren.
Hiermee geeft u Mijn inhoud, Tv kijken
en Bron weer.
Hiermee gaat u terug naar het vorige menu.
Hiermee kunt u de opties in het schermmenu
selecteren en de waarden wijzigen die in het
menu worden weergegeven.
Toetsen die worden gebruikt in het
menu Kanalenlijst, Kanaalbeheer, Mijn
inhoud enzovoort.
Gebruik deze knoppen in een specifieke
functie.
Raadpleeg de elektronische handleiding
voor meer informatie.
P.MODE: hiermee selecteert u de
beeldmodus.
SRS: hiermee selecteert u de modus
TruSurround HD.
DUAL I-II: hiermee selecteert u de
duale geluidmodus.
E-MANUAL: hiermee geeft u de
e-Manual weer.
P.SIZE: hiermee selecteert u het
beeldformaat.
AD: selectie audiobeschrijving. (Niet
overal beschikbaar.)
SUBT.: hiermee geeft u digitale
ondertiteling weer.
Batterijen plaatsen (batterijformaat: AAA)
[UD4000-XNZF]BN68-03426E.indb 5 2011-05-17 �� 6:34:37Nederlands - 6
Aansluiten op een antenne
Wanneer u de tv voor het eerst inschakelt, worden er automatisch enkele basisinstellingen uitgevoerd.
✎Vooraf doen: het netsnoer en de antenne aansluiten.
Plug & Play (eerste instelling)
Wanneer de tv voor het eerst wordt ingeschakeld, verschijnen er een enkele instructies op het scherm die u helpen de
basisinstellingen te configureren. Druk op de toets POWER P. Plug & Play is alleen beschikbaar wanneer de invoer is
ingesteld op TV (Tv).
✎Om terug te keren naar het vorige menu drukt u op de rode toets.
1
Een taal selecteren Druk op de toets ▲ of ▼ en druk vervolgens op de toets ENTERE.
Selecteer de gewenste taal voor het schermmenu.
P
POWER
2
Selecteer Winkeldemo
of Thuisgebruik.
Druk op de toets ◄ of ► en druk vervolgens op de toets ENTERE.
Selecteer de modus Thuisgebruik. De modus Winkeldemo is alleen
bedoeld voor gebruik in winkels.
De instellingen van het apparaat van Winkeldemo terugzetten op
Thuisgebruik (standaard): druk op de volumeknop op de tv. Wanneer
het schermmenu voor het volume wordt weergegeven, houdt u de toets
MENU 5 seconden ingedrukt.
Winkeldemo is alleen bedoeld voor winkels. Als u deze modus
selecteert, zijn verschillende functies niet beschikbaar. Selecteer
Thuisgebruik als u thuis tv kijkt.
3 Uw land selecteren Druk op de toets ▲ of ▼ en druk vervolgens op de toets ENTERE.
Selecteer uw land.
✎Bij bepaalde modellen kunt u ervoor kiezen om een pincode in te stellen nadat u in
het menu Land uw land hebt geselecteerd.
✎Bij het invoeren van de pincode is 0-0-0-0 niet beschikbaar.
✎Deze optie kan afwijken, afhankelijk van het land.
4 De Klokmodus instellen Stel de Klokmodus automatisch of handmatig in.
Auto: Selecteer de tijdzone waarin u zich bevindt. (afhankelijk van het land)
Handm.: Hiermee kunt u de huidige datum en tijd handmatig instellen.
5
Een antenne selecteren Druk op de toets ▲ of ▼ en druk vervolgens op de toets ENTERE.
Selecteer het gewenste uitzendsignaal.
6
Een kanaal selecteren Druk op de toets ▲ of ▼ en druk vervolgens op de toets ENTERE.
Selecteer de kanaalbron die moet worden opgeslagen. Wanneer u de antennebron als
Kabel instelt, kunt u numerieke waarden (kanaalfrequenties) voor de kanalen opgeven. Zie
voor meer informatie Kanaal → Automatisch afstemmen.
Druk op elk gewenst moment op de toets ENTERE om de opslagprocedure te onderbreken.
7
Veel kijkplezier. Selecteer Tv kijken. Druk op de toets ENTERE.
Als u deze functie wilt resetten...
Ook al hebt u dit al in de winkel gedaan, moet u nogmaals Plug & Play (MENU → Systeem) uitvoeren.
Selecteer Systeem – Plug & Play (eerste instelling). Voer uw viercijferige pincode in. De standaardpincode is ‘0-0-0-0’
(behalve Frankrijk). Als u de pincode wilt wijzigen, gebruikt u de functie PIN wijzigen.
✎Als u de pincode bent vergeten, drukt u in de stand-bymodus achtereenvolgens op de volgende toetsen van de
afstandsbediening zodat de pincode opnieuw wordt ingesteld op ‘0-0-0-0’ (Frankrijk: ‘1-1-1-1’): POWER (uit) →
MUTE → 8 → 2 → 4 → POWER (aan).
VHF/UHF-antenne Kabel
of
Achterpaneel tv
[UD4000-XNZF]BN68-03426E.indb 6 2011-05-17 �� 6:34:38Nederlands - 7
Aansluiten op een AV-apparaat
¦ Beschikbare apparaten: dvd-speler, Blu-ray-speler, HD-kabelbox, HD STB-satellietontvanger
(settopbox), VCR, digitaal audiosysteem, versterker, DVD-thuisbioscoop, pc
HDMI OUT
DVI OUT
AUDIO OUT
R-AUDIO-L
HDMI, HDMI/DVI-verbinding
Een HDMI- kabel of een HDMI-naar-DVI-kabel gebruiken (tot 1080p)
✎HDMI IN 1(DVI), 2, 3, 4, PC/DVI AUDIO IN
x Voor een betere beeld- en geluidskwaliteit maakt u via een HDMI-kabel verbinding met een digitaal apparaat.
x Een HDMI-kabel ondersteunt digitale video- en audiosignalen en vereist geen aparte audiokabel.
– Als u de televisie wilt aansluiten op een digitaal apparaat dat geen HDMI-uitvoer ondersteunt, gebruikt u een
HDMI/DVI-kabel en een audiokabel.
x Mogelijk wordt het beeld niet normaal (of helemaal niet) weergegeven of werkt het geluid niet als een extern
apparaat dat met een oudere versie van HDMI werkt, op de televisie wordt aangesloten. Als een dergelijk
probleem zich voordoet, informeert u bij de fabrikant van het externe apparaat naar de HDMI-versie die wordt
ondersteund en vraagt u, als deze verouderd is, om een upgrade.
x Gebruik een HDMI-kabel met een dikte van 14 mm of minder.
x Let op dat u een goedgekeurde HDMI-kabel aanschaft. Anders wordt het beeld mogelijk niet weergegeven of
treedt er een verbindingsfout op.
x Een elementaire high-speed HDMI-kabel of een Ethernet-kabel wordt aanbevolen. Dit product biedt geen
ondersteuning voor de Ethernet-functie via HDMI.
[UD4000-XNZF]BN68-03426E.indb 7 2011-05-17 �� 6:34:38Nederlands - 8
AUDIO OUT
R-AUDIO-L
VIDEO OUT
AUDIO OUT
R-AUDIO-L
PR PB Y
COMPONENT OUT
W R G R B
W R G R B
R W
R W
EXT
Y
Y
Component-verbinding
AV-verbinding
SCART-verbinding
Gebruik van een componentkabel (max. 1080p) of een audio/video-kabel (alleen 480i) en een scartkabel
✎In de modus Ext. ondersteunt DTV Out alleen MPEG SD-video en -audio.
✎Voor de beste beeldkwaliteit kunt u beter de componentaansluiting in plaats van de A/V-aansluiting gebruiken.
[UD4000-XNZF]BN68-03426E.indb 8 2011-05-17 �� 6:34:39Nederlands - 9
Verbinding maken met een pc en audio-apparaat
¦ Beschikbare apparaten: digitaal audiosysteem, versterker, dvd-thuisbioscoop
OPTICAL
Audioaansluiting
Hoofdtelefoonsaansluiting
Een optische (digitale) kabel of een hoofdtelefoonaansluiting gebruiken
✎DIGITAL AUDIO OUT (OPTICAL)
x Wanneer een digitaal audiosysteem op de DIGITAL AUDIO OUT (OPTICAL)-aansluiting wordt aangesloten,
moet u het volume van zowel de tv als het audiosysteem reduceren.
x 5.1-kanaals audio is mogelijk wanneer de tv op een extern apparaat is aangesloten dat dit ondersteunt.
x Wanneer de ontvanger (thuisbioscoop) is ingesteld op Aan, hoort u alleen geluid via de optische aansluiting van
de tv. Wanneer de tv een DTV-signaal ontvangt, zendt de tv een 5.1-kanaalsgeluid naar de ontvanger van de
thuisbioscoop. Wanneer de bron een digitale component is, zoals een dvd-speler/blu-rayspeler/kabelbox/STBsatellietontvanger (settopbox) en via HDMI op de tv is aangesloten, geeft de ontvanger van de thuisbioscoop
alleen 2-kanaalsgeluid weer. Als u 5.1-kanaalsgeluid wilt horen, sluit u de digitale uitgang van de dvd-speler/Blurayspeler/kabelbox/STB-satellietontvanger (settopbox) rechtstreeks op een versterker of thuisbioscoop aan.
✎Hoofdtelefoons H: u kunt een hoofdtelefoon op de desbetreffende uitgang van uw set aansluiten. Wanneer de
hoofdtelefoon is aangesloten, worden de ingebouwde luidsprekers uitgeschakeld.
x Mogelijk kunt u de geluidsfunctie beperkt gebruiken wanneer er een hoofdtelefoon op de tv is aangesloten.
x Het volume van de hoofdtelefoon en het volume van de tv worden apart geregeld.
[UD4000-XNZF]BN68-03426E.indb 9 2011-05-17 �� 6:34:40Nederlands -
Weergavemodi (D-Sub en HDMI/DVI-invoer)
De optimale resolutie is 1360 x 768 bij 60Hz.
Modus Resolutie
Horizontale frequentie
(kHz)
Verticale frequentie (Hz)
Pixelklokfrequentie
(MHz)
Synchronisatie-
polariteit (H/V)
IBM
640 x 350 31,469 70,086 25,175 + / -
720 x 400 31,469 70,087 28,322 - / +
MAC
640 x 480 35,000 66,667 30,240 - / -
832 x 624 49,726 74,551 57,284 - / -
VESA DMT
640 x 480
31,469 59,940 25,175 - / -
37,861 72,809 31,500 - / -
37,500 75,000 31,500 - / -
800 x 600
37,879 60,317 40,000 + / +
48,077 72,188 50,000 + / +
46,875 75,000 49,500 + / +
1024 x 768
48,363 60,004 65,000 - / -
56,476 70,069 75,000 - / -
60,023 75,029 78,750 + / +
1360 x 768 47,712 60,015 85,500 + / +
✎OPMERKING
x Bij gebruik van de HDMI/DVI-kabelaansluiting moet u de HDMI IN 1(DVI)-aansluiting gebruiken.
x De interlace-modus wordt niet ondersteund.
x De tv werkt mogelijk niet normaal als een afwijkend videoformaat wordt geselecteerd.
x Afzonderlijke modus en compositemodus worden ondersteund. SOG (Sync On Green) wordt niet ondersteund.
¦ Een HDMI-kabel of HDMI-naar-DVI-kabel/D-sub-kabel gebruiken
✎Verbinding maken via de HDMI-kabel wordt mogelijk niet ondersteund, afhankelijk van de pc.
✎Een HDMI-kabel ondersteunt digitale video- en audiosignalen en vereist geen aparte audiokabel.
AUDIO OUT
AUDIO OUT
DVI OUT
PC OUT
HDMI OUT
pc-verbinding
[UD4000-XNZF]BN68-03426E.indb 10 2011-05-17 �� 6:34:43Nederlands -
De ingangsbron wijzigen
¦ Bronlijst
Hiermee kunt u de tv of andere externe ingangsbronnen zoals dvd-spelers/Blu-rayspelers/kabelboxen/STBsatellietontvangers die op de tv zijn aangesloten, selecteren.
■ TV / Ext. / PC / AV / Component / HDMI1/DVI / HDMI2 / HDMI3 / HDMI4 / USB
✎ In de Bronlijst worden aangesloten ingangen gemarkeerd.
✎ Als u alleen aangesloten apparaten wilt zien, gaat u naar Verbonden met behulp van de toets ◄ of ►.
✎ Ext. en PC blijven altijd geactiveerd.
✎ Als de aangesloten externe apparaten niet zijn gemarkeerd, druk dan op de rode toets. De tv zoekt dan naar
aangesloten apparaten.
Naam bewerken gebruiken
Druk in Bron op de toets TOOLS. Vervolgens kunt u de gewenste naam van de externe invoerbron instellen.
■ VCR / DVD / Kabel STB / Satelliet STB / PVR STB / AV-ontvanger / Spelcomputer / Camcorder / PC / DVI PC / DVI-apparaten / TV / IPTV
/ Blu-ray / HD DVD / DMA: geef het apparaat dat op de ingangen is aangesloten een naam om de selectie van de ingangsbron gemakkelijker te
maken.
✎ Wanneer u een pc op de HDMI IN 1 (DVI) aansluit met de HDMI-kabel, moet u de tv op de modus PC instellen onder Naam bewerken.
✎ Wanneer u een pc op de HDMI IN 1 (DVI) aansluit met de HDMI-naar-DVI-kabel, moet u de tv op de modus DVI PC instellen onder Naam
bewerken.
✎ Wanneer u een AV-apparaat op de HDMI IN 1 (DVI) aansluit met de HDMI-naar-DVI-kabel, moet u de tv op de modus DVI-apparaten
instellen onder Naam bewerken.
Informatie
Hiermee kunt u gedetailleerde informatie over het geselecteerde externe apparaat weergeven.
✎Gebruik voor de beste kabelverbinding van dit product kabels met een maximale dikte die hieronder wordt aangegeven:
x Maximale dikte - 0,55 inches (14 mm)
Aansluiten op een aansluiting voor COMMON INTERFACE
De CI-kaartadapter bevestigen
Bevestig de adapter zoals aan de rechterzijde wordt weergegeven.
Voor het aansluiten van de CI-kaartadapter volgt u deze stappen.
✎Breng de adapter aan voordat u de tv aan een muur bevestigt.
1. Plaats de CI CARD-adapter in de twee openingen in het product 1.
✎ Zoek twee openingen aan de achterkant van de tv. De twee openingen bevinden zich naast
de COMMON INTERFACE-poort.
✎ Druk midden op de adapter stevig aan voor volledige vergrendeling.
2. Sluit de CI CARD-adapter aan op de COMMON INTERFACE-poort.
3. Plaats de CI of CI+-kaart.
De CI of CI+ CARD gebruiken
Voor betaalde kanalen moet een CI of CI+ CARD zijn geplaatst.
y Als u de CI-/CI+-kaart niet plaatst, wordt bij sommige kanalen het bericht "Gecodeerd signaal"
weergegeven.
y De koppelingsgegevens met een telefoonnummer, de ID van de CI of CI+ CARD, de host-ID
en andere informatie worden na circa 2-3 minuten weergegeven. Als een foutmelding wordt
weergegeven, moet u contact opnemen met uw serviceprovider.
y Wanneer de kanaalgegevens zijn geconfigureerd, wordt het bericht Update voltooid weergegeven.
Hiermee wordt aangegeven dat de kanalenlijst is bijgewerkt.
✎OPMERKING
x U kunt een CI of CI+ CARD bij een lokale kabelaanbieder aanschaffen.
x Wanneer u de CI of CI+ CARD wilt verwijderen, doet u dat door de kaart er met uw handen voorzichtig uit te trekken, want de kaart
kan beschadigen als u deze laat vallen.
x Plaats de CI of CI+ CARD in de richting die op de kaart staat gemarkeerd.
x De plaats van de COMMON INTERFACE-aansluiting kan per model verschillen.
x CI of CI+ CARD wordt in sommige landen en regio's niet ondersteund. Controleer dit bij uw geautoriseerde verkoper.
x Neem contact op met uw serviceprovider als u problemen ondervindt.
x Plaats de CI- of CI+-kaart die de huidige antenne-instellingen ondersteunt. Er wordt een vervormd beeld of helemaal geen beeld
weergegeven.
[UD4000-XNZF]BN68-03426E.indb 11 2011-05-17 �� 6:34:45Nederlands -
De e-Manual weergeven
Schermweergave
1
4 5 6
2
3
Basisfuncties
Het menu Beeld
Het menu Geluid
} Index E Enter e Afsl.
1 Momenteel weergegeven video, tv-programma enzovoort.
2 De categorielijst. Druk op de toets ◄ of ► of om de
gewenste categorie te selecteren.
3 De lijst met submenu's wordt weergegeven. Gebruik
de pijltoetsen op de afstandsbediening om de cursor
te verplaatsen. Druk op de toets ENTERE om het
gewenste submenu te selecteren.
4 } Blauw (Index): Hiermee geeft u het indexscherm weer.
5 E Enter: hiermee selecteert u een categorie of submenu.
6 e Afsl.: De e-Manual sluiten.
Schakelen tussen een e-Manual en de bijbehorende schermmenu's.
Beeld
Beeldmodus : Standaard ►
Backlight : 7
Contrast : 95
Helderheid : 45
Scherpte : 50
Kleur : 50
Tint (G/R) : G50/R50
Schermaanpassing
E-MANUAL
aProbeer nu
Basisfuncties > Het menu Beeld (3/17)
a Probeer nu b Start { Zoom } Index L Pagina e Afsl
✎Deze functie is niet beschikbaar sommige menu’s.
Methode 1 Methode 2
1. Als u het menu wilt gebruiken dat correspondeert met een
e-Manual-onderwerp, drukt u op de rode toets om Probeer nu
te selecteren.
2. Als u wilt terugkeren naar het e-Manual-scherm, drukt u op de
toets E-MANUAL.
1. Druk op de toets ENTERE als een onderwerp wordt
weergegeven. “Wilt u dit uitvoeren?” wordt weergegeven.
Selecteer Ja, en druk vervolgens op de toets ENTERE. Het
schermvenster verschijnt.
2. Als u wilt terugkeren naar het e-Manual-scherm, drukt u op de
toets E-MANUAL.
E-MANUAL U vindt de instructies over de functies van uw tv in de e-Manual van uw tv. Druk
hiervoor op de toets E-MANUAL op uw afstandsbediening. Verplaats de cursor
met de toetsen omhoog/omlaag/rechts/links om een categorie en vervolgens een
onderwerp te markeren en druk vervolgens op de toets ENTERE. De gewenste
pagina van de e-Manual wordt weergegeven.
U kunt de handleiding ook via het menu starten:
O MENUm→ Ondersteuning → e-Manual → ENTERE
✎Als u wilt terugkeren naar het hoofdmenu van de e-Manual, drukt u op de toets E-MANUAL op de
afstandsbediening.
✎U kunt Probeer nu niet direct gebruiken als de tv is ingesteld op een externe invoerbron.
[UD4000-XNZF]BN68-03426E.indb 12 2011-05-17 �� 6:34:47Nederlands -
De inhoud weergeven
Basisfuncties > Het menu Beeld (3/17)
2 3 4 5
a Probeer nu b Start { Zoom } Index L Pagina e Afsl.
1
1 Inhoudsgebied: bevat de onderwerpen, als u een submenu
hebt geselecteerd. Druk op de toets ◄/► om naar de
vorige of volgende pagina te gaan.
2 Probeer nu: hiermee geeft u het schermmenu weer dat
correspondeert met het onderwerp. Als u wilt terugkeren
naar het e-Manual-scherm, drukt u op de toets
E-MANUAL.
3 Start: het startscherm van de e-Manual weergeven.
4 Zoom: een beeld vergroot weergeven. U kunt door het
vergrote scherm schuiven met de toetsen ▲/▼.
5 L (Pagina): de vorige of volgende pagina weergeven.
De zoomfunctie gebruiken
UVerplts R Terug
Selecteer Zoom en druk vervolgens op ENTERE om het
scherm te vergroten. U kunt door het vergrote scherm schuiven
met de toetsen ▲ en ▼.
✎Als u het scherm weer de normale grootte wilt geven,
drukt u op de toets RETURN.
Een onderwerp zoeken op de indexpagina
✎Deze functie wordt mogelijk niet ondersteund, afhankelijk van de taal.
1. Als u een trefwoord wilt zoeken, drukt u op de blauwe toets om het scherm Index te openen.
2. Druk op de toets ◄ en ► om het gewenste teken te selecteren.
3. Druk op de toets ▲ en ▼ om een trefwoord te selecteren en druk vervolgens op de toets ENTERE.
4. U kunt nu het bijbehorende scherm met e-Manual-instructies bekijken.
✎Als u het scherm Index wilt sluiten, drukt u op de toets RETURN.
[UD4000-XNZF]BN68-03426E.indb 13 2011-05-17 �� 6:34:48Nederlands -
De wandbevestiging plaatsen
Met de wandbevestigingsset (apart verkrijgbaar) kunt u de tv aan de muur bevestigen.
Zie de instructies bij de onderdelen voor wandbevestiging als u wilt weten hoe u de wandbevestiging installeert. Neem contact
op met een technicus voor hulp alvorens de wandbeugel te bevestigen.
Samsung Electronics is niet verantwoordelijk voor schade aan het product of voor verwondingen die u zelf of anderen oplopen
wanneer u besluit de tv zelfstandig te installeren.
Specificaties voor de wandbevestigingsset (VESA)
Situatie A. De muurbevestiging van SAMSUNG plaatsen
Situatie B. De muurbevestiging van een andere fabrikant
plaatsen
1 1 1 1
✎De wandbevestigingsset is niet meegeleverd, maar wordt apart verkocht.
Monteer de wandbevestiging op een stevige wand die loodrecht op de vloer staat. Wanneer de steun aan andere
bouwmaterialen bevestigd moet worden, dient u contact op te nemen met de dichtstbijzijnde leverancier. Als u de
wandbevestiging aan het plafond of een schuine wand monteert, kan de tv vallen en daarmee tot zwaar lichamelijk letsel
leiden.
✎OPMERKING
x In de onderstaande tabel vindt u de standaardafmetingen voor wandbevestigingssets.
x Wanneer u onze wandbevestigingsset aanschaft, zijn een gedetailleerde installatiegids en alle vereiste
montageonderdelen daarbij inbegrepen.
x Gebruik geen schroeven die niet aan de standaard VESA-schroefspecificaties voldoen.
x Gebruik geen schroeven die langer zijn dan de standaardafmetingen, omdat anders de binnenkant van de tv
beschadigd kan raken.
x Voor wandbevestigingen die niet voldoen aan de standaardspecificaties voor VESA-schroeven, kan de lengte van de
schroeven afhankelijk van de specificaties afwijken.
x Draai de schroeven niet te vast. Dit zou ertoe kunnen leiden dat het product beschadigt of valt, resulterend in lichamelijk
letsel. Samsung is voor dit soort ongevallen niet aansprakelijk.
x Samsung is niet aansprakelijk voor productschade of lichamelijk letsel wanneer een niet-VESA of niet-gespecificeerde
wandbevestiging is gebruikt of wanneer de consument de installatie-instructies voor het product niet in acht heeft
genomen.
x Kantel deze tv voor de bevestiging nooit meer dan 15 graden.
Productgroep inches VESA-spec. (A * B) Standaardschroef Aantal
LED-tv
19~22 75 X 75
M4
4
27 200 X 100
32~40 200 X 200
46~60 400 X 400 M8
65~75 600 X 400
Monteer de wandbevestigingsset niet terwijl de tv is ingeschakeld. Dit kan resulteren in lichamelijk letsel door
elektrische schokken.
[UD4000-XNZF]BN68-03426E.indb 14 2011-05-17 �� 6:34:49Nederlands -
Problemen oplossen
Als er een probleem lijkt te zijn met de tv, probeert u eerst deze lijst met mogelijke problemen en oplossingen. Als geen
van deze tips voor het oplossen van problemen van toepassing is, gaat u naar 'www.samsung.com' en klikt u op Support
(Ondersteuning) of neemt u contact op met de klantenservice van Samsung.
Probleem Oplossingen en uitleg
De tv wordt niet ingeschakeld. • Controleer of het netsnoer stevig op het stopcontact en op de tv is aangesloten.
• Controleer of het stopcontact werkt.
• Druk op de POWER-toets op de tv om te controleren of het probleem niet bij de
afstandsbediening ligt. Als de tv wordt ingeschakeld, raadpleegt u 'De afstandsbediening
werkt niet' hieronder.
Er is geen beeld/video. • Controleer de kabelverbindingen (haal alle kabels die op de tv en externe apparaten zijn
aangesloten, los en sluit ze vervolgens weer aan).
• Stel de video-uitgang van het externe apparaat (kabelbox/settopbox, dvd, Blu-ray
enzovoort) in zodat deze overeenkomt met de aansluitingen van de tv-ingang. Als
bijvoorbeeld de HDMI-uitgang van een extern apparaat wordt gebruikt, moet deze op de
HDMI-ingang van de tv worden aangesloten.
• Controleer of de aangesloten apparaten zijn ingeschakeld.
• Selecteer de juiste bron voor de tv door op de toets SOURCE op de afstandsbediening
te drukken.
• Start het aangesloten apparaat opnieuw op door het netsnoer van het apparaat opnieuw
aan te sluiten.
De afstandsbediening werkt niet. • Vervang de batterijen van de afstandsbediening en plaats de batterijen met de polen (+/–)
in de juiste richting.
• Reinig het venster van de zender op de afstandsbediening.
• Richt vanaf circa 1,5 tot 2 meter afstand de afstandsbediening direct naar de televisie.
Met de afstandsbediening van de
kabelbox/settopbox kan de tv niet
worden in- of uitgeschakeld of kan
het volume niet worden geregeld.
• Programmeer de afstandsbediening voor de kabelbox/settopbox zodanig dat deze werkt
voor de tv. Raadpleeg de gebruikershandleiding van uw kabelbox/settopbox voor de
code voor de SAMSUNG-tv.
✎U kunt de tv in optimale conditie houden door op de website via USB een upgrade naar de nieuwste firmware uit te
voeren (samsung.com -> Support -> Downloads).
✎Het paneel van dit TFT LED-scherm bestaat uit subpixels die met geavanceerde technologie zijn geproduceerd. Het
scherm kan echter enkele heldere of donkere pixels bevatten. Deze pixels zijn niet van invloed op de prestaties van het
product.
Licentie-informatie
Lijst met functies
Excellent Digital Interface & Networking: Met een ingebouwde digitale HD-tuner kunnen HD-uitzendingen zonder abonnement
worden bekeken zonder kabelbox/STB-satellietontvanger (settopbox).
Mijn inhoud
Hiermee kunt u muziekbestanden, beelden en films bekijken die op een USB-apparaat zijn opgeslagen.
Anynet+ (HDMI-CEC)
Met Anynet+ kunt u alle aangesloten Samsung-apparaten die Anynet+ ondersteunen, met de afstandsbediening van de
Samsung-tv bedienen.
[UD4000-XNZF]BN68-03426E.indb 15 2011-05-17 �� 6:34:50Nederlands -
De tv vastzetten aan de wand
Let op: als u duwt of trekt aan de tv of op de tv klimt, kan deze vallen. Zie er met name op toe dat uw
kinderen niet aan de tv gaan hangen of deze uit balans brengen. De tv kan dan omvallen, wat verwondingen
kan veroorzaken of zelfs fatale gevolgen kan hebben. Neem alle voorzorgsmaatregelen die in de bijgesloten
veiligheidsfolder worden genoemd. Om veiligheidsredenen is het raadzaam de antivalvoorziening te installeren
om de stabiliteit van het toestel te verhogen.
Voorkomen dat de tv valt
1. Plaats de schroeven in de beugels en bevestig deze stevig aan
de wand. Controleer of de schroeven stevig in de wand zijn
gedraaid.
✎ Afhankelijk van het wandtype hebt u mogelijk aanvullend
materiaal nodig om het geheel te verankeren.
✎ De benodigde beugels, schroeven en draad worden niet
meegeleverd. Deze moeten apart worden aangeschaft.
2. Verwijder de schroeven in het midden aan de achterkant van de
tv, steek de schroeven door de beugels en draai de schroeven
weer vast in de tv.
✎ Het is mogelijk dat de schroeven niet bij het product
worden meegeleverd. In dat geval moet u schroeven met
de volgende specificaties aanschaffen.
✎ Specificaties van de schroeven
x Voor een LED-tv van 32-75 inch: M8
3. Verbind de beugels die aan de tv zijn bevestigd met een sterke
draad aan de beugels die aan de muur zijn bevestigd en knoop de draad stevig vast.
✎ OPMERKING
x Plaats de tv dicht bij de muur zodat deze niet achterover kan vallen.
x Het is veilig om de draad zodanig aan te brengen dat de beugels die aan de muur zijn bevestigd zich boven de
beugels op de tv of op gelijke hoogte daarmee bevinden.
x Haal de draad los voordat u de tv verplaatst.
4. Controleer of alle bevestigingen goed zijn aangebracht. Controleer de bevestigingspunten regelmatig op tekenen van
moeheid of verzwakking. Neem in geval van twijfel over de veiligheid van de bevestiging contact op met een professionele
installateur.
Opslag en onderhoud
✎Als u de sticker op het tv-scherm verwijdert, moet u de lijmresten weghalen alvorens tv te kijken.
Spuit geen water of reinigingsmiddel rechtstreeks op het
product. Vloeistoffen die in het product terechtkomen kunnen
een storing, brand of elektrische schok veroorzaken.
Reinig het product met een zachte doek die licht met water
is bevochtigd.
Muur
[UD4000-XNZF]BN68-03426E.indb 16 2011-05-17 �� 6:34:52Nederlands -
Specificaties
Beeldresolutie 1360 x 768
Omgevingsvereisten
Bedrijfstemperatuur
Gebruiksvochtigheid
Opslagtemperatuur
Opslagvochtigheid
10°C tot 40°C (50°F tot 104°F)
10% tot 80%, niet-condenserend
-20°C tot 45°C (-4°F tot 113°F)
5% tot 95%, niet-condenserend
Tv-systeem
Analoog: B/G, D/K, L, I (afhankelijk van de landkeuze)
Digitaal: DVB-T/DVB-C
Kleuren-/videosysteem
Analoog: PAL, SECAM, NTSC-4.43, NTSC-3.58, PAL60
Digitaal: MPEG-2 MP@ML, MPEG-4, H.264/AVC MP@L3, MP@L4.0, HP@L4.0
Geluidssysteem BG, DK, L, NICAM, MPEG1, DD, DD+, HEAAC
HDMI IN
Video: 1080 24p, 1080p, 1080i, 720p, 576p, 480p
Audio: 2-kan. lineair PCM 32/44.1/48 kHz, 16/20/24 bits.
Modelnaam UE32D4000 / UE32D4010 / UE32D4020
Schermformaat 32 inches (80 cm)
Geluid
(Uitgang) 10 W x 2
Afmetingen (BxHxD)
Behuizing
Met voet
763,6 X 29,9 X 463,1 (mm)
763,6 X 222,7 X 527,1 (mm)
Gewicht
Zonder voet
Met voet
7,0 kg
9,0 kg
✎Vormgeving en specificaties kunnen zonder kennisgeving worden gewijzigd.
✎Zie voor informatie over de stroomvoorziening en het energieverbruik het etiket op het product.
[UD4000-XNZF]BN68-03426E.indb 17 2011-05-17 �� 6:34:53
E-MANUAL
imagine the possibilities
Thank you for purchasing this Samsung
product. To receive more complete service,
please register your product at
www.samsung.com/register
Model __________ Serial No.____________Sommaire
Réglage des canaux
• Utilisation du bouton INFO (Guide
Maintenant et Après)
• Utilisation du menu Canal (Regarder TV)
• Gestionnaire prog.
• Liste des chaînes
• Gestion chaînes
• Nouvelle recherche des chaînes
1
2
5
7
11
17
Fonctions de base
• Menu Image
• Menu Son
27
44
Fonctions de préférence
• Réseau
pour les téléviseurs de la série LED 5 de 32 à 46 pouces
• Menu Système
• Menu Assistance
56
84
108
Fonctions avancées
• Mon contenu
• Anynet+
• AllShare™
pour les téléviseurs de la série LED 5 de 32 à 46 pouces
116
143
157
Informations supplémentaires
• Fonction de télétexte Chaîne analogique
• Verrou antivol Kensington
• Emplacement pour interface commune
pour les connexions
• Résolution des problèmes
• Licence
161
165
167
170
187❑ Utilisation du bouton INFO (Guide Maintenant et Après)
L'affichage identifie la chaîne en cours et l'état de certains paramètres audio et
vidéo.
Le Guide Maintenant et Après affiche des informations quotidiennes sur les
programmes de télévision pour chaque chaîne en fonction de l'heure de diffusion.
● Faites défiler à l'aide des boutons ◄ et ► pour afficher des informations sur
le programme de votre choix, tout en regardant la chaîne actuelle.
● Faites défiler à l'aide des boutons ▲ et ▼ pour afficher des informations
sur d'autres chaînes. Pour accéder à la chaîne actuellement sélectionnée,
appuyez sur le bouton ENTERE.
*
Susceptible de varier en fonction du modèle.
Tous
Informations
◀ ▶
Français❑ Utilisation du menu Canal (Regarder TV)
O MENUm → Support technique → Accueil du contenu → ENTERE
Appuyez sur le bouton CONTENT pour sélectionner l'option Regarder TV, puis
sélectionnez le menu de votre choix. L'écran correspondant s'affiche alors.
■ Guide
Les informations du Guide électronique des programmes (EPG) sont fournies
par les diffuseurs. Les programmes
planifiés fournis par les diffuseurs vous
permettent de planifier les émissions
que vous souhaitez regarder, de
telle sorte que le téléviseur change
automatiquement de chaîne à l'heure
indiquée. Des entrées de programmes
peuvent être vides ou ne pas être à jour
en raison de l'état d'une chaîne.
Guide
Gestionnaire prog.
Liste des chaînes
Gestion chaînes
Mon contenu
Regarder TV
Source
*
Susceptible de varier en fonction du modèle.
◀ ▶
Français
◀
FrançaisUtilisation de la fonction Vue chaînes
C A Gest. B prog D C A B -24 heures D C +24 heures A CB A BD D Mode CH ; Informations k Page EProgrammer
DTV Air 3 five
Home and Away
19:00 - 19:30
Théâtre
Dani is devastated when scott makes clear his views on marriage...
3 five
Guide 19:10 Mar 1 Jui
Vue chaînes - Tous
*
Susceptible de varier en fonction du modèle.
Today
19:00 19:30 20:00 20:30
Tsunami Pri... The Curious...
No Information
No Information
No Information
1❑❑❑❑❑❑❑❑❑❑Discovery
2 DiscoveryH&L
3 five
4 price-drop.tv
5 QVC
▼ 6 R4DTT
Tine Team
Fiv...
No Information
Dark Angel
American Chopper
Home and...
1 2 3 4 5 6 7
▶
Français
◀ ▶
Français1C A Rouge ( B D Gest. prog) : permet d'accéder aux programmes réservés dans Gest.
prog.
C2A B Vert ( D -24 heures) : affiche la liste des programmes qui seront diffusés dans les
24 heures.
3 C Jaune ( A B +24 heures D ) : affiche la liste des programmes qui seront diffusés dans
plus de 24 heures.
C A B4 D Bleu (Mode CH) : sélectionnez le type des chaînes à afficher dans la fenêtre
Liste des chaînes. (Tous, TV, Radio, Donn/autre, Favoris 1-5)
5 j(Informations) : affiche des détails sur le programme sélectionné.
6 k (Page) : permet de passer à la page suivante ou précédente.
7 E (Regarder / Programmer)
● si vous sélectionnez le programme en cours, vous pouvez le regarder.
● Si vous sélectionnez un programme à venir, vous pouvez le réserver. Pour
annuler la programmation, appuyez de nouveau sur le bouton ENTERE et
sélectionnez Annuler progr..
◀ ▶
Français
◀
Français■ Gestionnaire prog.
Désactivez ou activez la fonction Rappel programme pour afficher la chaîne
souhaitée à l'heure prévue.
Utilisation du Rappel programme
Vous pouvez programmer l'affichage automatique d'une chaîne de votre choix à
l'heure prévue. Avant d'utiliser cette fonction, vous devez régler l'heure.
1. Appuyez sur le bouton ENTERE pour ajouter un programme à planifier
manuellement.
2. Appuyez sur les boutons ◄/►/▲/▼ pour définir les options Antenne,
Canal, Répétition, Date et Heure démarrage.
● Antenne : permet de sélectionner le signal de diffusion souhaité.
● Canal : permet de sélectionner la chaîne souhaitée.
▶
Français
◀ ▶
Français● Répétition : Sélectionnez Une fois, Manuel, Sam~Dim, Lun~Ven ou
Quotid. pour définir l'option suivant vos besoins. Si vous sélectionnez
Manuel, vous pouvez définir le jour de votre choix.
N Le symbole (c) indique le jour sélectionné.
● Date : permet de définir la date de votre choix.
N Cette option est disponible lorsque vous sélectionnez Une fois sous
Répétition.
● Heure démarrage : permet de définir l'heure de démarrage de votre
choix.
N Pour modifier ou annuler la programmation, sélectionnez le programme
réservé dans la liste Liste program., puis sélectionnez l'option Editer ou
Annuler progr..
◀ ▶
Français
◀
Français■ Liste des chaînes
Vous pouvez afficher les informations sur
les chaînes : Tous, TV, Radio, Donn/
autre, Analogique ou Favoris 1-5.
N Lorsque vous appuyez sur la touche
CH LIST de la télécommande,
l'écran Liste des chaînes s'affiche.
● Tous : affiche toutes les chaînes
actuellement disponibles.
● TV : affiche toutes les chaînes de télévision actuellement disponibles.
● Radio : affiche toutes les stations de radio actuellement disponibles.
● Donn/autre : affiche toutes les chaînes MHP ou autres actuellement
disponibles.
● Analogique : affiche toutes les chaînes analogiques actuellement disponibles.
● Favoris 1-5 : affiche toutes les chaînes favorites.
Hertzien C A Antenne B CD VueA progr. B L Mode CH D ERegarder k Page
Liste des chaînes
Tous
1 TV#1
2 The Spo...
BBC ONE glogal News
3 Pardon...
4 Real Sp...
6 The Daily
7 Pros vs.
8 Aujourd'hui
9 Pardon...
▶
Français
◀ ▶
FrançaisN Favoris 1-5 s'affiche si l'option Ajouter aux favoris est définie.
N Pour visualiser les chaînes favorites que vous avez ajoutées, appuyez sur
le bouton CH LIST et utilisez le bouton L (Mode CH) pour accéder à
l'option Favoris 1-5.
N Utilisation des touches de la télécommande avec la Liste des chaînes.
●C A Rouge ( B D Antenne) : permet de basculer entre Hertzien ou Câble.
● C Jaune ( A B VueD progr. / Vue chaînes) : affiche le programme lorsqu'une
chaîne numérique est sélectionnée. Revient à l'affichage des chaînes.
● L (Mode CH / Canal) : permet d'accéder aux options Tous, TV, Radio,
Donn/autre ou Favoris 1~5.
N Lorsque vous appuyez sur le bouton C (Vue A B progr. D ), vous pouvez
changer de chaîne au moyen du bouton L (Canal).
◀ ▶
Français
◀
Français● E(Regarder / Information) : vous permet de regarder la chaîne que vous
sélectionnez. / affiche des détails sur le programme sélectionné.
● k (Page) : permet de passer à la page suivante ou précédente.
Icônes d'affichage de l'état des chaînes
Icône Description
a Chaîne analogique.
) Programme réservé.
▶ \ Chaîne verrouillée.
Français
◀ ▶
FrançaisUtilisation de la fonction de rappel de programme dans la liste des
chaînes (chaînes numériques uniquement)
Lorsque vous définissez la fonction Rappel progr. dans l'écran Liste des chaînes,
vous pouvez uniquement définir le programme via l'option Vue progr..
1. Appuyez sur le bouton CH LIST, puis sélectionnez la chaîne numérique
souhaitée.
2. Appuyez sur le bouton C (Vue A B progr. D ).
3. Appuyez sur les boutons ▲ / ▼ pour sélectionner le programme souhaité, puis
appuyez sur le bouton ENTERE ou INFO.
4. Sélectionnez Rappel progr., puis appuyez sur le bouton ENTERE lorsque vous
avez terminé.
N Si vous souhaitez désactiver la fonction Rappel progr., suivez les étapes 1 à 3.
Sélectionnez l'option Annuler progr..
◀ ▶
Français
◀
Français■ Gestion chaînes
Vous pouvez gérer les chaînes selon vos préférence.
● ( ) Chaînes : affiche la liste des
chaînes selon le type de chaîne.
● ( ) Favoris 1-5 : affiche les
chaînes favorites.
N Utilisation des boutons de couleur
avec la fonction Gestion chaînes.
●C A Rouge ( B D Antenne) : permet
de basculer entre Hertzien ou
Câble.
C A B ● D Bleu (Tri) : permet de changer
l'ordre des chaînes classées par numéro ou par nom.
HertzienC A Antenne B D C A B D Tri❑❑❑ESélectionner❑❑❑TOutils❑❑❑R Retour
Gestion chaînes Tous
Elément sélectionné : 4 Numéro du canal
*
Susceptible de varier en fonction du modèle.
▶
Français
◀ ▶
FrançaisIcônes d'affichage de l'état des chaînes
Icône Description
a Chaîne analogique.
c Chaîne sélectionnée.
F Chaîne définie comme favorite.
\ Chaîne verrouillée.
T Affiche le menu d'options Gestion chaînes.
◀ ▶
Français
◀
FrançaisDéfinissez chaque chaîne à l'aides des options du menu
Menu d'options Gestion chaînest Gestion chaînes (Regarder,
Ajouter aux favoris/Modif. favoris, Verrouil. / Déverr., Modif. nom de chaîne,
Modif. num. chaîne, Supprimer, Sélectionner tout/Désélectionner tout).
Les options de menu peuvent varier selon l'état de la chaîne.
1. Sélectionnez une chaîne et appuyez sur le bouton TOOLS.
2. Sélectionnez une fonction et modifiez ses réglages.
▶
Français
◀ ▶
Français● Regarder : permet de regarder la chaîne sélectionnée.
● Ajouter aux favoris/Modif. favoris : Permet de définir comme favorites les
chaînes que vous regardez souvent. / Permet d’ajouter ou de retirer les chaînes
sélectionnées de Favoris 1-5.
1. Sélectionnez Ajouter aux favoris/Modif. favoris, puis appuyez sur le bouton
ENTERE.
N Si la chaîne a déjà été ajoutée comme favorite, l'option Modif. favoris
s'affiche.
2. Appuyez sur le bouton ENTERE pour sélectionner l'option Favoris 1-5,
puis appuyez sur le bouton OK.
N Vous pouvez affecter une chaîne favorite qui sera incluse dans la liste
Favoris 1-5.
◀ ▶
Français
◀
Français● Verrouil. / Déverr. : vous pouvez verrouiller une chaîne afin qu'elle ne puisse pas
être sélectionnée ni visualisée.
N REMARQUE
● Cette fonction n'est disponible que si l'option Verr. chaîne est définie sur
Marche.
● L’écran de saisie du code PIN apparaît. Entrez votre code PIN à 4
chiffres. Modifiez le code PIN à l’aide de l’option Modifier PIN.
● Modif. nom de chaîne (chaînes analogiques uniquement) : attribuez le nom de
votre choix à la chaîne.
● Modif. num. chaîne : modifiez le numéro en appuyant sur les boutons numériques
appropriés.
N Il se peut que les fonctions Modif. nom de chaîne et Modif. num. chaîne
ne soient pas prises en charge dans certaines régions.
▶
Français
◀ ▶
Français● Supprimer : vous pouvez supprimer une chaîne afin d'afficher celles de votre
choix.
● Désélectionner tout : désélectionne toutes les chaînes sélectionnées.
N L'option Désélectionner tout n'est disponible que si une ou plusieurs
chaînes sont sélectionnées.
● Sélectionner tout : permet de sélectionner toutes les chaînes de la liste des
chaînes.
◀ ▶
Français
◀
Français❑ Nouvelle recherche des chaînes
O MENUm → Canal → ENTERE
■
Avant que votre téléviseur ne puisse commencer à mémoriser les chaînes
Antenne (Hertzien / Câble)t
disponibles, vous devez spécifier le type de source du signal connecté au téléviseur
(c'est-à-dire un système Hertzien ou Câble).
▶
Français
◀ ▶
Français■ Pays
(selon le pays)
L’écran de saisie du code PIN apparaît. Entrez votre code PIN à quatre chiffres.
● Chaîne numérique : modifiez le pays pour obtenir ses chaînes numériques.
● Chaîne analogique : modifiez le pays pour obtenir ses chaînes analogiques.
◀ ▶
Français
◀
Français■ Recherche automatique
(selon le pays)
Recherche automatiquement une chaîne et l’enregistre dans le téléviseur.
N Il est possible que les numéros de programme attribués automatiquement ne
correspondent pas aux numéros de programme souhaités ou réels. Si une
chaîne est verrouillée, la fenêtre de saisie du code PIN s’affiche.
● Recherche automatique
Hertzien / Câble: sélectionner les antennes à mettre en mémoire.
Numér. et Anal. / Numérique / Analogique : sélectionner la source de
chaîne à mémoriser.
▶
Français
◀ ▶
FrançaisLorsque l’option Antennes est réglée sur Hertzien ou Câble :
Lors de la sélection de Câble → Numér. et Anal. ou Numérique : indiquer
une valeur pour la recherche des chaînes câblées.
– Mode de rech. (Complet / Réseau / Quick) : permet de rechercher
toutes les chaînes dont les stations émettent et les enregistre.
N Si vous sélectionnez Quick, vous pouvez définir Réseau, ID réseau,
Fréquence, Modulation et Taux de symbole manuellement en
appuyant sur les boutons numériques de la télécommande.
– Réseau (Auto/Manuel) : permet de sélectionner le mode de réglage ID
réseau Auto ou Manuel.
– ID réseau : Si Réseau est défini sur Manuel, vous pouvez configurer un
ID réseau à l’aide des boutons numériques.
◀ ▶
Français
◀
Français– Fréquence : affiche la fréquence correspondant à la chaîne. (Varie d’un
pays à l’autre.)
– Modulation : affiche les valeurs de modulation disponibles.
– Taux de symbole : affiche les débits de symboles disponibles.
● Option de rech. de câble
(Varie d’un pays à l’autre et pour les chaînes câblées uniquement.)
Définit des options de recherche supplémentaires, telles que la fréquence et le
taux de symboles pour la recherche de réseaux câblés.
Fréq. de départ / Fréquence de fin. : définit la fréquence de départ ou de fin
(différente dans chaque pays).
Taux de symbole : affiche les débits de symboles disponibles.
Modulation : affiche les valeurs de modulation disponibles.
▶
Français
◀ ▶
Français■ Recherche manuelle
Recherche manuellement une chaîne et la mémorise dans le téléviseur.
N Si une chaîne est verrouillée, la fenêtre de saisie du code PIN s’affiche.
N En fonction de la source des chaînes, il se peut que la fonction Recherche
manuelle soit prise en charge.
Lorsque l’option Antennes est réglée sur Hertzien ou Câble:
● Réglage des chaînes numériques : recherche manuellement une chaîne
numérique et la mémorise dans le téléviseur. Appuyez sur le bouton C A B D
(Nouveau) pour démarrer la recherche des chaînes numériques. Au terme de
la recherche, les chaînes de la liste sont mises à jour.
– Lorsque vous sélectionnez Antenne → Hertzien : Canal, Fréquence,
Bande passante
– Lorsque vous sélectionnez Antenne → Câble : Fréquence, Modulation,
Taux de symbole
◀ ▶
Français
◀
Français● Réglage des chaînes analogiques : recherche une chaîne analogique.
Appuyez sur le bouton C A (Nouveau B D ) pour démarrer la recherche des chaînes
numériques en réglant Programme, Système de Couleur, Système Sonore,
Canal, Recherche.
N Mode Canal
– P (mode de programme) : A la fin du réglage, des numéros de
position compris entre P0 et P99 sont attribués aux stations
de radiodiffusion de votre région. Dans ce mode, vous pouvez
sélectionner une chaîne en saisissant son numéro de position.
– C (mode de canal Hertzien) / S (mode de canal Câble) : ces deux
modes vous permettent de sélectionner une chaîne en entrant le
numéro attribué à chaque chaîne câblée ou station de radiodiffusion
hertzienne.
▶
Français
◀ ▶
Français■ Modif. num. chaîne (Désactiver / Activer)
(selon le pays)
Utilisez cette option pour modifier le numéro des chaînes. Lorsque vous
modifiez des numéros, les informations des chaînes ne sont pas mises à jour
automatiquement.
◀ ▶
Français
◀
Français■ Réglage fin
(chaînes analogiques uniquement)
Si le signal est faible ou déformé, vous devez effectuer manuellement un réglage
fin de la chaîne.
N Les chaînes finement réglées sont marquées par un astérisque "*".
N Pour réinitialiser le réglage fin, sélectionnez Réinitialiser.
▶
Français
◀ ▶
Français■ Transf. liste chaînes
(selon le pays)
Importe ou exporte la carte des chaînes. Vous devez connecter un périphérique
de stockage USB pour utiliser cette fonction.
N L'écran de saisie du code PIN s'affiche. Entrez votre code PIN à quatre
chiffres.
● Importer depuis le périphérique USB: importer la liste des chaînes depuis le
périphérique USB.
● Exporter vers le périphérique USB: exporter la liste des chaînes vers le
◀ périphérique USB. ▶
Français
◀
Français❑ Changement du mode Image prédéfini
O MENUm → Image → Mode Image → ENTERE
■ Mode Image
Sélectionnez le type d’image que vous préférez.
N Si vous connectez un PC, vous ne pouvez modifier que Loisirs et Standard.
● Dynamique: adapté à un environnement lumineux.
● Standard: adapté à un environnement normal.
● Naturel pour les téléviseurs de la série LED 5 de 32 à 46 pouces : permet de réduire
la fatigue oculaire.
● Cinéma: convient au visionnage de films dans une pièce sombre.
● Loisirs: adapté au visionnage de films et de jeux vidéo.
N Cette option n’est disponible que si vous connectez un PC.
▶
Français
◀ ▶
Français❑ Réglages des paramètres de l’image
■ Samsung MagicAngle
pour les téléviseurs de la série LED 4 de 19 pouces et de la série 5 de 22 à 27 pouces
O MENUm → Image → Samsung MagicAngle → ENTERE
Ajustez l’angle de visualisation afin d’optimiser la qualité d’image en fonction de
votre angle de vue.
● Samsung MagicAngle: lorsque vous visionnez l'écran d'un point de vue
inférieur ou supérieur à celui-ci, vous pouvez obtenir une qualité d'image
similaire à celle que vous auriez en face de l'écran, et ce en le réglant sur le
mode approprié à chaque position.
Arrêt: sélectionnez cette option pour la vue de face.
Mode Penché: sélectionnez ce bouton lorsque vous vous situez d’un point
de vue légèrement inférieur à l’écran.
Mode Debout: sélectionnez cette option pour une vue supérieure.
● Mode: règle l'angle de visualisation de l'écran.
N Lorsque l'option Samsung MagicAngle est définie sur Mode Penché ou
Mode Debout, la fonction Gamma n'est pas disponible.
◀ ▶
Français
◀
Français■ Rétroéclairage / Contraste / Luminosité / Netteté / Couleur /
Teinte (V/R)
Votre téléviseur dispose de plusieurs options de réglage pour le contrôle de la
qualité d’image.
O MENUm → Image → Rétroéclairage → ENTERE
N REMARQUE
● La fonction Teinte (V/R) n’est pas disponible dans les modes TV, Ext.,
AV analogiques du système PAL.
● Si vous connectez un PC, vous ne pouvez modifier que Rétroéclairage,
Contraste, Luminosité et Netteté.
● Les paramètres peuvent être réglés et mémorisés pour chaque dispositif
externe connecté au téléviseur.
▶
Français
◀ ▶
Français■ Réglage de l’écran
Définissez les différentes options d'image (par exemple, le format de l'image et le
rapport de format).
● Format de l'image: il se peut que votre décodeur câble / récepteur satellite
dispose de son propre jeu de tailles d’écran. Il est toutefois vivement conseillé
d’utiliser le mode 16:9.
16:9 Auto: règle automatiquement la taille de l'image sur le format 16:9.
16:9: règle l'image en mode large, c'est-à-dire en 16:9.
Zoom large: agrandit l’image à une taille supérieure à 4:3.
N Réglez la Position à l’aide des boutons ▲, ▼.
Zoom: agrandit l’image en 16:9 (dans le sens vertical) pour l’adapter à la taille
de l’écran.
N Réglez la Position ou la Taille à l’aide des boutons ▲, ▼.
◀ ▶
Français
◀
Français4:3: règle l'image en mode normal, c'est-à-dire en 4:3.
N Ne regardez pas un film au format 4:3 pendant une période prolongée.
Les traces de bordures situées sur la gauche, sur la droite et au centre
de l’écran peuvent donner lieu au phénomène de rémanence (brûlure
d’écran) non couvert par la garantie.
Adapter à l’écran: affiche l’intégralité de l’image sans coupure lors de l’entrée
de signaux HDMI (720p / 1080i / 1080p) ou Composant (1080i / 1080p).
Vue intell. 1 pour les téléviseurs de la série LED 5 de 32 à 46 pouces : permet de réduire la
taille de l'écran de 50%.
Vue intell. 2 pour les téléviseurs de la série LED 5 de 32 à 46 pouces : permet de réduire la
taille de l'écran de 25%.
N REMARQUE
● L'option Vue intell. 1 est uniquement activée en mode HDMI.
● L'option Vue intell. 2 est uniquement activée avec les modes DTV et
HDMI.
● Le format de l'image peut varier en fonction de la résolution d'entrée
en cas de lecture du contenu à l'aide de l'option Vidéos sous Mon
contenu.
▶
Français
◀ ▶
Français● Position: permet de régler la position de l'image. Cette option est uniquement
disponible avec la fonction Adapter à écran ou Zoom large.
● Zoom/Position: permet de régler la position de l'image. Cette option est
uniquement disponible avec la fonction Zoom.
N REMARQUE
● Après avoir sélectionné Adapter à l’écran en mode HDMI (1080i /
1080p) ou Composant (1080i / 1080p), il se peut que vous deviez centrer
l’image:
1. Appuyez sur le bouton u ou d pour sélectionner Position.
2. Appuyez sur le bouton ENTERE.
3. Appuyez sur le bouton u, d, l ou r pour déplacer l’image.
● Les options de taille de l’image peuvent varier en fonction de la source
d’entrée.
● Si vous souhaitez réinitialiser la position que vous avez réglée,
sélectionnez l'option Réinitialiser de l'écran Position. L'image est alors
définie sur sa position par défaut.
◀ ▶
Français
◀
Français● Les options disponibles peuvent varier en fonction du mode sélectionné.
● En mode PC, seuls les modes 16:9 et 4:3 peuvent être définis.
● Les paramètres peuvent être réglés et mémorisés pour chaque dispositif
externe connecté à une entrée du téléviseur.
● Si vous utilisez la fonction Adapter à l’écran avec l’entrée HDMI 720p,
une ligne sera coupée en haut, en bas, à gauche et à droite, comme c’est
le cas avec la fonction Overscan.
● Taille d'écran 4:3 (16:9 / Zoom large / Zoom / 4:3): disponible uniquement
lorsque la taille d’image est définie sur 16:9 Auto. Vous pouvez déterminer
la taille d’image souhaitée sur 4:3 WSS (Wide Screen Service) ou sur la taille
d’origine. Chaque pays européen impose une taille d’image différente.
▶
Français
◀ ▶
Français● Réglage écran PC
N Disponible uniquement en mode PC.
Régl. Base / Regl. Préc: élimine ou réduit les parasites visuels. Si vous ne
pouvez pas éliminer ces parasites au moyen d’un réglage précis uniquement,
réglez la fréquence (Régl. Base) au mieux, puis effectuez de nouveau un ré-
glage précis. Une fois les parasites réduits, effectuez un nouveau réglage de
l’image pour l’aligner au centre de l’écran.
Position : permet de régler la position de l'écran du PC si elle ne convient pas
à l'écran du téléviseur. Appuyez sur le bouton ▲ ou ▼ pour régler la position
verticale. Appuyez sur le bouton◄ ou ► pour régler la position horizontale.
Réinitialiser Image: rétablit les paramètres d’image par défaut.
◀ ▶
Français
◀
Français■
O
Réglage
MENUm
Automatique
→ Image → Réglage
tAutomatique → ENTERE
Cette option permet de régler les positions/valeurs de fréquence et d’affiner automatiquement les paramètres.
N Disponible uniquement en mode PC.
N on disponible en cas de connexion à l’aide d’un câble HDMI/DVI.
Utilisation de votre téléviseur comme écran d’ordinateur (PC)
Configuration de votre logiciel PC (instructions basées sur Windows XP)
En fonction de la version de Windows et de la carte graphique utilisées, les écrans
affichés sur votre PC peuvent être différents. Cependant, les mêmes informations de
configuration de base seront généralement appliquées. Dans le cas contraire, contactez le fabricant de votre ordinateur ou votre revendeur Samsung.
▶
Français
◀ ▶
Français1. Cliquez sur "Panneau de configuration" dans le menu Démarrer de Windows.
2. Cliquez sur "Apparence et thèmes" dans la fenêtre "Panneau de configuration".
Une boîte de dialogue s’ouvre alors.
3. Cliquez sur "Affichage" pour ouvrir une autre boîte de dialogue.
4. Accédez à l’onglet "Paramètres" dans la boîte de dialogue Propriétés de l’Affichage.
● Réglage correct de la taille (résolution)
● S’il existe une option de fréquence verticale dans la boîte de dialogue des paramètres d’affichage, la valeur correcte est "60" ou "60Hz". Sinon, cliquez sur
"OK" et quittez la boîte de dialogue.
◀ ▶
Français
◀
Français❑ Modification des options d’image
■ Paramètres avancés
O MENUm → Image → Paramètres avancés → ENTERE
(Disponible en mode Standard /
Cinéma)
Vous pouvez régler les paramètres
avancés de votre écran, notamment la
couleur et le contraste.
N Si vous connectez un PC, vous ne
pouvez modifier que Gamma et
Balance blancs.
● Nuance de noir (Arrêt / Sombre /
Plus sombre / Le plus sombre):
sélectionnez le niveau de noir afin de
régler la profondeur d’écran.
U Déplacer EEntrer R Retour
Paramètres avancés
Nuance de noir : Arrêt ►
Contraste Dyn. : Moyen
Réglage Luminosité : 0
Gamma : 0
RVB uniquement : Arrêt
Espace de couleur : Natif
Balance blancs
▼
▶
Français
◀ ▶
Français● Contraste Dyn. (Arrêt / Bas / Moyen / Elevé): permet de régler le contraste
de l’écran.
● Réglage Luminosité: permet d’augmenter la luminosité des images sombres.
● Gamma: permet de régler l’intensité des couleurs primaires.
● RVB uniquement (Arrêt / Rouge / Vert / Bleu): affiche les couleurs Rouge,
Vert et Bleu afin de permettre un réglage précis de la teinte et de la saturation.
● Espace de couleur (Auto / Natif): permet de régler la gamme des couleurs
disponibles pour créer l'image.
◀ ▶
Français
◀
Français● Balance blancs: permet de régler la température des couleurs afin d’obtenir
une image plus naturelle.
Aj. Rouge / Aj. Vert / Aj. Bleu: permet de régler la profondeur de chaque
couleur (rouge, vert, bleu).
Régl. Rouge / Régl. vert / Régl. bleu: permet de régler la profondeur de
chaque couleur (rouge, vert, bleu).
Réinitialiser: rétablit les paramètres par défaut de l’option Balance blancs.
● Carnation: accentue le "Ton chair" rose.
● Netteté des contours (Arrêt / Marche): fait ressortir les contours des objets.
● Lumin./Mouvement (Arrêt / Marche): permet de réduire la consommation
d'énergie en contrôlant la luminosité par rapport au mouvement.
● Motion Plus LED (Arrêt / Activé) pour les téléviseurs de la série LED 5 de 32 à 46 pouces :
supprime les traînées des scènes rapides avec beaucoup de mouvements, ce
qui rend l’image plus claire.
▶
Français
◀ ▶
Français■ Options d'image
O MENUm → Image → Options d’image → ENTERE
N Si vous connectez un PC, vous ne
pouvez modifier que Nuance Coul.
● Nuance Coul (Froide / Standard /
Chaude1 / Chaude2)
N Les options Chaude1 ou
Chaude2 sont désactivées
lorsque le mode d’image est
Dynamique.
N Les paramètres peuvent être
réglés et mémorisés pour chaque
dispositif externe connecté à une entrée du téléviseur.
U Déplacer E Entrer R Retour
Options d'image
Nuance Coul : Standard ►
Filtre Bruit num. : Auto
Filtre Bruit MPEG : Auto
Niveau noir HDMI : Normal
Mode Film : Arrêt
◀ ▶
Français
◀
Français● Filtre Bruit num. (Arrêt / Bas / Moyen / Elevé / Auto / Visualisation auto):
Si le signal de radiodiffusion reçu par votre téléviseur est faible, vous pouvez
activer la fonction Filtre Bruit num. pour faciliter la réduction d'images
fantômes ou statiques qui peuvent apparaître à l'écran.
N Lorsque le signal est faible, sélectionnez une autre option jusqu'à
obtention de la meilleure image possible.
Visualisation auto: Lors du changement des chaînes analogiques, il affiche
l'intensité du signal.
N Disponible uniquement pour les chaînes analogiques.
N Une pression sur le bouton INFO affiche la barre de puissance du signal.
N Lorsque la barre est verte, vous recevez le meilleur signal possible.
● Filtre Bruit MPEG (Arrêt / Bas / Moyen / Elevé / Auto): réduit le bruit MPEG
afin d’offrir une meilleure qualité d’image.
▶
Français
◀ ▶
Français● Niveau noir HDMI (Bas / Normal): permet de choisir le niveau de noir pour
régler la profondeur de l’écran.
N Disponible uniquement en mode HDMI (signaux RVB).
● Mode Film (Arrêt / Auto.1 / Auto.2): règle le téléviseur de sorte qu’il détecte
et traite automatiquement les signaux de cinéma en provenance de toutes les
sources et adapte l’image afin d’obtenir une qualité optimale.
N Disponible en modes TV, AV, COMPOSANT (480i / 1080i) et HDMI (1080i).
N Si l’image à l’écran ne semble pas naturelle, définissez sa configuration
◀ sur Arrêt / Auto.1 / Auto.2 dans Mode Film. ▶
Français
◀
Français■ Réinit. param. img (OK / Annuler)
Rétablit les paramètres par défaut du mode d’image actuel.
▶
Français
◀ ▶
Français❑ Changement du mode Son prédéfini
O MENUm → Son → Mode Son → ENTERE
■ Mode
● Standard
Son
: sélectionne le mode son normal.
t
● Musique: accentue la musique par rapport aux voix.
● Cinéma: offre le meilleur son pour les films.
● Voix claire: accentue les voix par rapport aux autres sons.
● Amplifier: augmente l’intensité du son aigu pour garantir une meilleure écoute
aux personnes malentendantes.
N Si l’option Sélection Haut-parleur est définie sur Ht-parl ext, Mode Son est
désactivé.
◀ ▶
Français
◀
Français❑ Systèmes sonores, etc.
O MENUm → Son → Effet sonore → ENTERE
■ Effet sonore
(mode de son standard uniquement)
Utilisez les touches fléchées vers le haut et le bas pour sélectionner une option,
puis appuyez sur le bouton ENTERE.
● SRS TruSurround HD (Arrêt / Marche)
(mode de son standard uniquement)
Cette fonction garantit un son surround virtuel 5.1 canaux par le biais de deux
haut-parleurs grâce à la technologie HRTF (Head Related Transfer Function -
Fonction de transfert asservie aux mouvements de la tête).
▶
Français
◀ ▶
Français● SRS TruDialog (Arrêt / Marche)
(mode de son standard uniquement)
Cette fonction permet d’accentuer l’intensité d’une voix par rapport au fond
musical ou aux effets sonores, de manière à rendre les dialogues plus clairs
lorsque vous regardez une émission.
● Egaliseur
Utilisez l’égaliseur pour personnaliser les paramètres de son de chaque hautparleur.
Balance: règle la balance entre les haut-parleurs droit et gauche.
100Hz / 300Hz / 1kHz / 3kHz / 10kHz (Réglage de la bande passante): règle
le niveau des fréquences de bande passante spécifiques.
Réinitialiser: rétablit les paramètres par défaut de l’égaliseur.
N Si l’option Sélection Haut-parleur est définie sur Ht-parl ext, Effet sonore
est désactivé.
◀ ▶
Français
◀
Français■ Options diffusion du son
● Langue Audio
(chaînes numériques uniquement)
Permet de modifier la valeur par défaut des langues audio.
N La langue disponible peut varier en fonction de l’émission.
● Format Audio
(chaînes numériques uniquement)
Lorsque le son est émis à la fois par le haut-parleur principal et le récepteur
audio, un effet d’écho peut se produire en raison de la différence de vitesse
de décodage entre le hautparleur principal et le récepteur audio. Dans ce cas,
utilisez la fonction Haut-parleur TV.
N L’option Format Audio peut varier en fonction de l’émission. Le son
Dolby Digital 5.1 est disponible uniquement en cas de connexion d’un
haut parleur externe au moyen d’un câble optique.
▶
Français
◀ ▶
Français● Description audio
(non disponible dans toutes les régions) (chaînes numériques uniquement)
Cette fonction traite le flux audio relatif à la description audio (AD) lorsqu’il est
envoyé avec le son principal par le radiodiffuseur.
N Description audio (Arrêt / Marche): active ou désactive la fonction de
description audio.
N Volume: permet de régler le volume de description audio.
◀ ▶
Français
◀
Français■ Paramètre supp.
● Niveau Audio DTV (MPEG / HE-AAC) (chaînes numériques uniquement):
cette fonction vous permet de réduire la disparité d’un signal vocal (à savoir l’un
des signaux reçus lors d’une émission de télévision numérique) sur le niveau
souhaité.
N En fonction du type de signal de radiodiffusion, les options MPEG / HEAAC peuvent être réglées sur une valeur comprise entre -10 dB et 0 dB.
N Pour augmenter ou diminuer le volume, réglez ces valeurs entre 0 et -10,
respectivement.
▶
Français
◀ ▶
Français● Sortie SPDIF: le format SPDIF (Sony Philips Digital InterFace) est utilisé pour
fournir du son numérique, en réduisant les interférences vers les haut-parleurs
et divers dispositifs numériques, tels qu’un lecteur DVD.
Format Audio: vous pouvez sélectionner le format de sortie audio numérique
(SPDIF). Le format SPDIF disponible peut varier en fonction de la source
d'entrée.
N La connexion de haut-parleurs 5.1 canaux dans un environnement Dolby
Digital vous permet d’optimiser votre environnement sonore 3D interactif.
Retard Audio: cette option permet de corriger le décalage audio/vidéo
lorsque vous regardez la télévision ou une vidéo et diffusez la sortie audio
numérique sur un dispositif externe tel qu’un récepteur AV (0ms ~ 250ms).
◀ ▶
Français
◀
Français● Comp Dolby Digital (Line / RF): cette fonction réduit la disparité entre un
signal Dolby Digital et un signal vocal (à savoir, Audio MPEG, HE-AAC, Son
ATV).
N Sélectionnez Line pour obtenir un son dynamique et RF pour réduire la
différence entre les sons forts et faibles pendant la nuit.
Line: permet de définir le niveau de sortie des signaux supérieurs ou inférieurs
à -31 dB (référence) sur -20 dB ou -31 dB.
RF: permet de définir le niveau de sortie des signaux supérieurs ou inférieurs
à -20 dB (référence) sur -10 dB ou -20 dB.
▶
Français
◀ ▶
Français■ Paramètres haut-parleur
● Sélection Haut-parleur (Haut-parleur ext / Haut-parleur TV)
Un effet d’écho peut se produire en raison de la différence de vitesse de
décodageentre le haut-parleur principal et le récepteur audio. Dans ce cas,
réglez le téléviseur sur Haut-parleur ext.
N Lorsque l'option Sélection Haut-parleur est définie sur Haut-parleur
ext, les boutons de volume et MUTE ne sont pas opérationnels et les
paramètres sonores sont limités.
N Lorsque l'option Sélection Haut-parleur est définie sur Haut-parleur
ext.
● Haut-parleur TV: Arrêt, Haut-parleur ext : Marche
N Lorsque l'option Sélection Haut-parleur est définie sur Haut-parleur
TV.
● Haut-parleur TV: Marche, Haut-parleur ext : Marche
N En l’absence de signal vidéo, les deux haut-parleurs sont coupés.
◀ ▶
Français
◀
Français● Volume auto (Arrêt / Normal / Nuit)
Pour équilibrer le niveau de volume sur chaque canal, définissez cette option
sur Normal.
Nuit: ce mode garantit un environnement sonore de meilleure qualité que le
mode Normal, avec une absence pratiquement totale de parasites. Il s’avère
particulièrement utile pendant la nuit.
N Pour contrôler le niveau de volume sur le périphérique source connecté
au téléviseur, définissez l’option Volume auto sur Arrêt sur le téléviseur.
Sinon, il se peut que les réglages du volume du périphérique source ne
▶ soient pas appliqués.
Français
◀ ▶
Français■ Réinit. Son (OK / Annuler)
Rétablit les paramètres sonores par défaut définis en usine.
◀ ▶
Français
◀
Français▶
Français
◀ ▶
Français
❑ Sélection du mode son
O DUAL I-II → ENTERE
Lorsque vous définissez cette option sur Dual I-II, le mode son actuel est affiché
à l’écran.
Type d'audio Dual I-II Par défaut
Stéréo A2
Mono Mono
Changement
automatique
Stéréo Stéréo ↔ Mono
Dual Dual I ↔ Dual II Dual I
NICAM Stéréo
Mono Mono
Changement
automatique
Stéréo Mono ↔ Stéréo
Dual
Mono → Dual I
Dual II
Dual I
NSi le signal stéréo est faible et qu’une commutation automatique se produit,
passez en Mono.
NCette fonction n’est activée qu’avec un signal sonore stéréo.
NAccessible uniquement lorsque la Source est définie sur TV.◀ ▶
Français
◀
Français
❑ Configuration du réseau
pour les téléviseurs de la série LED 5 de 32 à 46 pouces
■ Paramètres réseau
O MENUm → Réseau → Paramètre réseau → ENTERE
Définissez la connexion réseau pour utiliser AllShare™ et effectuer des mises à
niveau logicielles.
■ Etat du réseau
O MENUm → Réseau → Etat du réseau → ENTERE
Vérifiez l'état Internet et du réseau.
■ Paramètres AllShare
O MENUm → Réseau → Paramètres AllShare → ENTERE
Sélectionne l’utilisation de fonctions média sur le réseau. Pour plus d'informations
sur les options de configuration, reportez-vous à la section "AllShare™". ▶
Français
◀ ▶
Français
❑ Connexion à un réseau câblé
Vous pouvez connecter votre téléviseur au réseau local avec un câble de trois
manières différentes :
● En connectant le port LAN situé à l'arrière du téléviseur à un modem externe
à l'aide d'un câble LAN. Reportez-vous au schéma ci-dessous.
Connecteur Modem mural
Modem externe
(ADSL / VDSL / TV par câble)
Panneau arrière du
téléviseur
Câble Modem Câble LAN◀ ▶
Français
◀
Français
● En connectant le port LAN situé à l'arrière du téléviseur à un routeur IP
connecté, à son tour, à un modem externe. Pour cela, utilisez le câble LAN.
Reportez-vous au schéma ci-dessous.
Connecteur Modem mural
Modem externe
(ADSL / VDSL / TV par câble)
Routeur IP
(avec serveur DHCP)
Panneau arrière du
téléviseur
Câble Modem Câble LAN Câble LAN▶
Français
◀ ▶
Français
● En fonction de la configuration de votre réseau, il se peut que vous puissiez
connecter directement le port LAN situé à l'arrière du téléviseur à une prise
réseau murale à l'aide d'un câble LAN. Reportez-vous au schéma ci-dessous.
Notez que la prise murale est reliée à un modem ou un routeur installé
quelque part chez vous.
Port LAN mural
Panneau arrière du
téléviseur
Câble LAN◀ ▶
Français
◀
Français
● Si vous disposez d'un réseau dynamique, vous devez utiliser un routeur
ou un modem ADSL prenant en charge le protocole DHCP (Dynamic Host
Configuration Protocol). Les modems de ce type fournissent automatiquement
l'adresse IP, le masque de sous-réseau, la passerelle et les valeurs DNS dont
votre téléviseur a besoin pour accéder à Internet. Aucune saisie manuelle
n'est donc requise. La plupart des réseaux domestiques sont de type
dynamique. Certains réseaux nécessitent une adresse IP statique. Si tel est
votre cas, vous devez saisir manuellement l'adresse IP, le masque de sousréseau, la passerelle et les valeurs DNS dans l'écran de configuration câblée
de votre téléviseur lors de la configuration de la connexion réseau. Pour
obtenir l'adresse IP, le masque de sous-réseau, la passerelle et les valeurs
DNS, contactez votre fournisseur d'accès Internet. Si vous possédez un
ordinateur Windows, vous pouvez également obtenir ces valeurs par le biais
de ce dernier.
N Si votre réseau nécessite une adresse IP statique, vous pouvez utiliser un
modem ADSL prenant en charge le protocole DHCP. Les modems ADSL
prenant en charge le protocole vous permettent également d'utiliser des
adresses IP statiques.
N Une vitesse de réseau inférieure à 10 Mbit/s n’est pas prise en charge.▶
Français
◀ ▶
Français
■ Configuration du réseau (Auto)
Utilisez l'option de configuration automatique du réseau lors de la connexion du
téléviseur à un réseau prenant en charge le protocole DHCP. Pour configurer
automatiquement la connexion réseau par câble de votre téléviseur, procédez
comme suit :
Procédure de configuration automatique
1. Accédez à l'écran Paramètres réseau. Pour ce faire, suivez les instructions
de la section Paramètres réseau.
2. Sélectionnez l'option Câble.
3. L'écran de connexion réseau
s'affiche et la configuration du
réseau est effectuée.
U Déplacer E Entrer e Quitter
Paramètres réseau
Sélectionnez un type de connexion réseau.
Câble
Sans fil
(Général)
WPS(PBC)
One Foot
Connection
Connectez-vous au réseau en utilisant un câble
LAN. Assurez-vous que le câble LAN est branché.◀ ▶
Français
◀
Français
N Si la configuration automatique
échoue, vérifiez la connexion du
port LAN.
N Si les valeurs de connexion réseau
sont introuvables ou si vous
souhaitez définir la connexion
manuellement, définissez cette
option sur Manuel. Reportezvous à la section "Procédure de
configuration manuelle" ci-après.
a Précéd. L Déplacer E Entrer R Retour
Paramètres réseau
Connexions Internet et au réseau câblé établies.
Param. IP OK
Adresse MAC 00:40:30:30:20:10
Adresse IP 192.168.10.21
Masque sous-réseau 255.255.255.0
Passerelle 192.168.10.1
Serveur DNS 203.248.252.2
Connexion à Internet effectuée.
Si vous rencontrez des problèmes lors de l'utilisation du service Internet,
contactez votre fournisseur d'accès.▶
Français
◀ ▶
Français
■ Configuration du réseau (Manuel)
Utilisez l'option de configuration manuelle du réseau lors de la connexion du
téléviseur à un réseau qui nécessite une adresse IP statique.
Obtention des valeurs de connexion au réseau
Pour obtenir les valeurs de connexion au réseau sur la plupart des ordinateurs
Windows, procédez comme suit :
1. Cliquez avec le bouton droit de la souris sur l'icône Réseau située dans le
coin inférieur droit de l'écran.
2. Cliquez sur Etat dans le menu contextuel.
3. Cliquez sur l'onglet Assistance dans la boîte de dialogue affichée.
4. Cliquez sur le bouton Détails de l'onglet Assistance. Les valeurs de
connexion au réseau sont affichées.◀ ▶
Français
◀
Français
Procédure de configuration manuelle
Pour configurer automatiquement la connexion réseau par câble de votre
téléviseur, procédez comme suit :
1. Suivez les étapes 1 et 2 de la "Procédure de configuration automatique".
2. Sélectionnez Param. IP dans l'écran de test du réseau.
3. Définissez l'option Mode IP sur
Manuel.
4. Appuyez sur le bouton ▼ de votre
télécommande pour accéder au
premier champ de saisie.
U Déplacer E Entrer R Retour
Param. IP
Mode IP Manuel ►
Adresse IP
0
.
0
.
0
.
0
Masque sous-réseau
0
.
0
.
0
.
0
Passerelle
0
.
0
.
0
.
0
Mode DNS Manuel
Serveur DNS
0
.
0
.
0
.
0
OK▶
Français
◀ ▶
Français
5. Entrez les valeurs Adresse IP, Masque ss-réseau, Passerelle et Serveur
DNS. Utilisez les touches numériques de votre télécommande pour saisir
des chiffres et les touches fléchées pour passer d'un champ de saisie à un
autre.
6. Lorsque vous avez terminé, sélectionnez OK.
7. L'écran de connexion réseau s'affiche et la configuration du réseau est
effectuée.◀ ▶
Français
◀
Français
❑ Connexion à un réseau sans fil
pour les téléviseurs de la série LED 5 de 32 à 46 pouces
Pour établir une connexion sans fil entre le téléviseur et le réseau, vous avez
besoin d'un routeur ou d'un modem sans fil et d'un adaptateur LAN sans fil
Samsung (WIS09ABGN, WIS09ABGN2, WIS10ABGN), que vous connectez au
port USB situé sur le panneau latéral ou arrière du téléviseur. Reportez-vous à
l'illustration ci-dessous.
Câble LAN
Routeur IP sans fil
(routeur sans fil avec
serveur DHCP)
Adaptateur sans fil
Samsung
Adaptateur LAN
Panneau latéral
du téléviseur
ou
Port LAN mural▶
Français
◀ ▶
Français
L’adaptateur LAN sans fil de Samsung est vendu séparément, et est disponible
auprès de certains revendeurs et sur les sites de commerce électronique. Cet
adaptateur prend en charge les protocoles de communication IEEE 802.11a/b/
g et n. Samsung vous conseille d'utiliser le protocole IEEE 802.11n. Si vous lisez
une vidéo sur une connexion réseau, des saccades risquent d’apparaître.
N REMARQUE
● Vous devez employer l'adaptateur LAN sans fil Samsung (WIS09ABGN,
WIS09ABGN2, WIS10ABGN) pour utiliser un réseau sans fil.
● L’adaptateur LAN sans fil Samsung et le câble d’extension USB sont
vendus séparément, et sont disponibles auprès de certains revendeurs et
sur les sites de commerce électronique.◀ ▶
Français
◀
Français
● Pour utiliser un réseau sans fil, vous devez connecter le téléviseur à
un routeur IP sans fil (un routeur ou un modem). Si ce routeur prend
en charge le protocole DHCP, le téléviseur peut utiliser DHCP ou une
adresse IP statique pour se connecter au réseau sans fil.
● Sélectionnez un canal inutilisé pour le routeur IP sans fil. Si le canal affecté
au routeur IP sans fil est actuellement utilisé par un autre périphérique
dans le voisinage, il y aura des interférences et la communication peut
échouer.
● Si vous utilisez des paramètres de sécurité différents de ceux indiqués cidessous, le routeur ne fonctionnera pas avec le téléviseur.▶
Français
◀ ▶
Français
● Si le mode HIGH PURE THROUGHPUT (Greenfield) 802.11N est
sélectionné et que le type de cryptage est défini sur WEP, TKIP ou TKIPAES (WPS2Mixed) pour votre routeur sans fil, les téléviseurs Samsung
ne prendront pas en charge la connexion, conformément aux nouvelles
spécifications de certification Wi-Fi.
● Si votre routeur sans fil prend en charge le WPS (Wi-Fi Protected
Setup), vous pouvez vous connecter au réseau via PBC (Push Button
Configuration) ou à l'aide d'un code PIN (Personal Indentification
Number). La fonction WPS configurera automatiquement le SSID et la clé
WPA dans ces deux modes.◀ ▶
Français
◀
Français
● Si votre routeur, modem ou appareil n'est pas certifié, il risque de ne pas
pouvoir se connecter au téléviseur via l'adaptateur LAN sans fil Samsung.
● Veillez à ce que le téléviseur soit éteint avant de connecter l’adaptateur
LAN sans fil Samsung.
● Méthodes de connexion: vous pouvez configurer la connexion réseau
sans fil de cinq façons différentes.
– Auto. (Utilisation de la fonction Auto Network Search)
– Manuel
– WPS(PBC)
– One Foot Connection
– Ad hoc
● L'adaptateur LAN sans fil Samsung peut ne pas être reconnu si vous
utilisez une connexion par hub USB ou par câble d'extension USB autre
que le câble fourni.▶
Français
◀ ▶
Français
Avis
L'image peut apparaître altérée ou statique pour certaines chaînes lorsque le téléviseur
est connecté à l'adaptateur LAN sans fil Samsung. Le cas échéant, établissez une
connexion à l'aide de l'une des méthodes suivantes ou branchez l'adaptateur LAN
sans fil Samsung avec un câble USB à un emplacement préservé de toute interférence
radio.
Méthode 1
Connexion à l'aide de l'adaptateur USB à angle
droit Pour brancher l'adaptateur LAN sans fil
Samsung avec l'adaptateur USB à angle droit,
procédez comme suit :
1. Connectez l'adaptateur USB à angle droit à
l'adaptateur LAN sans fil Samsung.
2. Connectez l'autre partie de l'adaptateur
USB à angle droit au port USB.◀ ▶
Français
◀
Français
Méthode 2
Connexion via un câble d'extension
Pour rebrancher l'adaptateur LAN sans fil
Samsung avec le câble d'extension, procédez
comme suit :
1. Connectez le câble d'extension au port
USB.
2. Connectez le câble d'extension à
l'adaptateur LAN sans fil Samsung.
3. Attachez l'adaptateur LAN sans fil Samsung à l'arrière du téléviseur vers le haut
avec du ruban adhésif double face.
N L’adaptateur LAN sans fil Samsung doit être installé dans une zone préservée
de toute interférence afin d’éviter toute interférence entre l’adaptateur et le
syntoniseur.
ou▶
Français
◀ ▶
Français
■ Configuration du réseau (Auto)
La plupart des réseaux sans fil disposent d'un système de sécurité en option
nécessitant l'accès de périphériques au réseau pour transmettre un code de
sécurité crypté appelé clé d'accès ou de sécurité. La clé de sécurité repose
sur une phrase secrète, qui correspond généralement à un mot ou une série
de lettres et de chiffres d'une longueur définie, que vous devez saisir lors de la
configuration de la sécurité au niveau de votre réseau sans fil. Si vous optez pour
cette méthode de configuration pour la connexion réseau et que vous disposez
d'un code de sécurité pour votre réseau sans fil, vous devrez entrer la phrase
secrète lors de la procédure de configuration.
Procédure de configuration automatique
1. Accédez à l'écran Paramètres réseau. Pour ce faire, suivez les instructions
de la section Paramètres réseau.◀ ▶
Français
◀
Français
2. Sélectionnez Sans fil (Général).
3. La fonction Réseau recherche
les réseaux sans fil disponibles.
Lorsque vous avez terminé, la
liste des réseaux disponibles
s'affiche.
4. Dans la liste des réseaux,
appuyez sur le bouton ▲ ou ▼
pour sélectionner un réseau, puis
sur le bouton ENTERE.
N Si le routeur sans fil est caché (Invisible), vous devez sélectionner l'option
Ajouter réseau, et entrer le Nom (SSID) et le code de sécurité pour
établir la connexion.
5. Si la fenêtre contextuelle Sécurité s'affiche, passez à l'étape 6. Si vous
sélectionnez le routeur sans fil non sécurisé, passez à l'étape 7.
U Déplacer E Entrer R Retour
Paramètres réseau
Sélectionnez un type de connexion réseau.
Câble
Sans fil
(Général)
WPS(PBC)
One Foot
Connection
Définissez le réseau sans fil en sélectionnant
votre point d'accès. En fonction de sa configuration, il vous sera peut-être demandé d'entrer un
code de sécurité.▶
Français
◀ ▶
Français
6. Si le routeur sans fil est
sécurisé, entrez le code de
sécurité (Sécurité ou PIN), puis
sélectionnez Terminé.
N Lors de la saisie du code de
sécurité (Sécurité ou PIN),
utilisez les touches ▲/▼/◄/►
de votre télécommande pour
sélectionner des chiffres/
caractères.
N Vous devriez retrouver la phrase secrète dans l'un des écrans de
configuration utilisés pour la configuration de votre routeur ou modem.
7. L'écran de connexion réseau s'affiche et la configuration du réseau est
effectuée.
N Si la définition du code de sécurité (Sécurité ou PIN) échoue, sélectionnez
Réessayer ou Param. IP.
N Si vous souhaitez définir manuellement la connexion, sélectionnez l'option
Param. IP. Reportez-vous à la section "Procédure de configuration
manuelle" ci-après.
a Précéd. n Déplacer E Entrer R Retour
Paramètres réseau
Entrez clé de sécurité. 0 entered
a
g
m
s
a/A
b
h
n
t
c
i
o
u
F
d
j
p
v
Supprimer
e
k
q
w
f
l
r
x
Espace
1
4
7
y
2
5
8
z
Terminé
3
6
9
0◀ ▶
Français
◀
Français
■ Configuration du réseau (Manuel)
Utilisez l'option de configuration manuelle du réseau lors de la connexion du
téléviseur à un réseau qui nécessite une adresse IP statique.
Obtention des valeurs de connexion au réseau
Pour obtenir les valeurs de connexion au réseau sur la plupart des ordinateurs
Windows, procédez comme suit :
1. Cliquez avec le bouton droit de la souris sur l'icône Réseau située dans le
coin inférieur droit de l'écran.
2. Cliquez sur Etat dans le menu contextuel.
3. Cliquez sur l'onglet Assistance dans la boîte de dialogue affichée.
4. Cliquez sur le bouton Détails de l'onglet Assistance. Les valeurs de
connexion au réseau sont affichées.▶
Français
◀ ▶
Français
Procédure de configuration manuelle
Pour configurer automatiquement la connexion réseau par câble de votre
téléviseur, procédez comme suit :
1. Suivez les étapes 1 et 7 de la "Procédure de configuration automatique".
2. Sélectionnez Param. IP dans l'écran de test du réseau.
3. Définissez l'option Mode IP sur Manuel.
4. Appuyez sur le bouton ▼ de votre télécommande pour accéder au premier
champ de saisie.
5. Entrez les valeurs Adresse IP, Masque ss-réseau, Passerelle et Serveur
DNS. Utilisez les touches numériques de votre télécommande pour saisir
des chiffres et les touches fléchées pour passer d'un champ de saisie à un
autre.
6. Lorsque vous avez terminé, sélectionnez OK.
7. L'écran de connexion réseau s'affiche et la configuration du réseau est
effectuée.◀ ▶
Français
◀
Français
■ Configuration du réseau (WPS(PBC))
Configuration à l'aide de la méthode WPS(PBC)
Si votre routeur est pourvu d'un bouton PBC(WPS), procédez comme suit :
1. Accédez à l'écran Paramètres réseau. Pour ce faire, suivez les instructions
de la section Paramètres réseau.
2. Sélectionnez l'option WPS(PBC).
3. Appuyez sur le bouton WPS(PBC)
de votre routeur dans les
deux minutes. Votre téléviseur
récupère automatiquement tous
les paramètres réseau dont il a
besoin et se connecte à votre
réseau.
4. L'écran de connexion réseau s'affiche et la configuration du réseau est
effectuée.
U Déplacer E Entrer R Retour
Paramètres réseau
Sélectionnez un type de connexion réseau.
Câble
Sans fil
(Général)
WPS(PBC)
One Foot
Connection
Appuyez sur le bouton WPS(PBC) pour vous
connecter facilement au point d'accès. Choisissez
cette option si votre point d'accès prend en charge
la méthode PBC (Push Button Configuration).▶
Français
◀ ▶
Français
■ Configuration du réseau (One Foot Connection)
L'option One Foot Connection vous permet de connecter aisément un téléviseur
Samsung et un routeur sans fil Samsung si vous placez ce dernier à moins d'un
pied (25 cm) du téléviseur. Si votre routeur sans fil ne prend pas en charge la
fonction One Foot Connection, vous devez vous connecter en utilisant l'une des
autres méthodes.
N Vous pouvez rechercher du matériel prenant en charge la fonction One Foot
Connection sur le site Web www.samsung.com.
Configuration à l'aide de la méthode One Foot Connection
Mettez le routeur et le téléviseur sous tension.
1. Accédez à l'écran Paramètres réseau. Pour ce faire, suivez les instructions
de la section Paramètres réseau.◀ ▶
Français
◀
Français
2. Sélectionnez One Foot
Connection.
3. Placer le routeur sans fil en
parallèle avec l'adaptateur LAN
sans fil Samsung à une distance
inférieure à 25 cm.
4. Attendez que la connexion soit
établie automatiquement.
5. L'écran de connexion réseau s'affiche et la configuration du réseau est
effectuée.
6. Placez le routeur sans fil à l'emplacement souhaité.
N En cas de modification des paramètres du routeur sans fil ou d'installation
d'un nouveau routeur sans fil, vous devez effectuer à nouveau la
procédure One Foot Connection, en commençant à l'étape 1.
U Déplacer E Entrer R Retour
Paramètres réseau
Sélectionnez un type de connexion réseau.
Câble
Sans fil
(Général)
WPS(PBC)
One Foot
Connection
Connectez-vous automatiquement au réseau sans
fil si votre point d'accès prend en charge la fonction One Foot Connection. Pour sélectionner ce
type de connexion, positionnez le point d'accès à
25 cm du produit.▶
Français
◀ ▶
Français
■ Configuration du réseau (Ad hoc)
Vous pouvez établir une connexion à un appareil mobile prenant en charge le
mode Ad hoc sans utiliser un routeur sans fil en passant par l'adaptateur LAN
sans fil Samsung. Lors de la connexion d'un appareil mobile, vous pouvez utiliser
des fichiers qui y sont stockés ou vous connecter à Internet à l'aide de la fonction
AllShare ou Multimédia.
Comment établir une nouvelle connexion Ad hoc
1. Accédez à l'écran Paramètres réseau. Pour ce faire, suivez les instructions
de la section Paramètres réseau.
2. Sélectionnez Sans fil (Général).
3. Lorsque vous sélectionnez l'option Ad hoc, le message "Le service ad
hoc prend en charge la connexion directe avec les périphériques
compatibles Wi-Fi, tels qu'un téléphone portable ou un PC. La
fonctionnalité du système de réseau existant est peut-être restreinte.
Souhaitez-vous changer la connexion réseau?" s'affiche.◀ ▶
Français
◀
Français
4. Saisissez les valeurs Nom du réseau (SSID) et Code de sécurité générées
dans le périphérique auquel vous souhaitez vous connecter.
N Si le réseau ne fonctionne pas correctement, vérifiez de nouveau les
options Nom du réseau (SSID) et Code de sécurité. Un Code de
sécurité incorrect peut en effet provoquer un dysfonctionnement.
N Si un périphérique a déjà été connecté, celui-ci est affiché dans la liste
Paramètre réseau. Ce périphérique est affiché dans cette liste lorsque
vous le connectez de nouveau.▶
Français
◀ ▶
Français
Si le téléviseur ne parvient pas à se connecter à Internet
Il se peut que votre téléviseur ne parvienne pas à se connecter à Internet du fait
que votre fournisseur d'accès a enregistré de manière permanente l'adresse MAC
(numéro d'identification unique) de votre PC ou modem, qui est authentifiée à
chaque connexion à Internet afin d'éviter tout accès non autorisé. Dans la mesure
où votre téléviseur possède une adresse MAC différente, votre fournisseur d'accès
Internet ne peut pas l'authentifier, ce qui rend impossible toute connexion.
Pour remédier à ce problème, demandez à votre fournisseur d’accès la procédure
à suivre pour connecter des appareils autres que votre PC (votre téléviseur, par
exemple) à Internet.
Si votre fournisseur d'accès exige un identifiant (ID) ou un mot de passe pour
la connexion à Internet, votre téléviseur ne pourra peut-être pas se connecter à
Internet. Si tel est le cas, vous devez entrer l'identifiant ou le mot de passe lors de la
connexion à Internet.
La connexion à Internet peut échouer à cause d’un problème de pare-feu. Dans ce
cas, contactez votre fournisseur d'accès Internet.
Si vous ne parvenez toujours pas à vous connecter à Internet après avoir suivi
les procédures indiquées par votre fournisseur d'accès, contactez Samsung
Electronics.◀ ▶
Français
◀
Français
❑ Réglage de l’heure
O MENUm → Système → Heure → ENTERE
■ Heure
N L’heure actuelle s’affiche à chaque fois que vous appuyez sur le bouton
INFO.
● Horloge: le réglage de l’heure est nécessaire pour utiliser différentes fonctions
de minuterie du téléviseur.
N Si vous débranchez le cordon d’alimentation, vous devez régler de
nouveau l’horloge.
Mode Horloge: permet de définir l'heure manuellement ou automatiquement.
– Auto: règle automatiquement l'heure en fonction des signaux diffusés par
une chaîne numérique.
N L’antenne doit être connectée pour permettre le réglage automatique de
l’heure.– Manuel : permet de régler l'heure manuellement.
N En fonction du signal et de la station de diffusion, il se peut que la
configuration automatique de l’heure soit incorrecte. Dans ce cas, réglez
l’heure manuellement.
Réglage Horloge: définissez manuellement les paramètres Jour, Mois,
Année, Heure et Minute.
N Disponible uniquement lorsque l’option Mode Horloge est définie sur
Manuel.
Fuseau Horaire (en fonction du pays) : sélectionnez votre fuseau horaire.
N Cette fonction est uniquement disponible lorsque Mode Horloge est
défini sur Auto.
N Si vous sélectionnez l’option Manuel dans Fuseau Horaire, GMT et
DST sont activés.
▶
Français
◀ ▶
Français❑ Utilisation de la veille
O MENUm → Système → Heure → Veille → ENTERE
● Veillet: éteint automatiquement le téléviseur après une période
déterminée. (30, 60, 90, 120, 150 ou 180 minutes).
N Pour annuler la fonction Veille, sélectionnez Arrêt.
◀ ▶
Français
◀
Français❑ Réglage de la minuterie de mise en marche / arrêt
O MENUm → Système → Heure → Progr. activ. Progr. désact.
→ ENTERE
● Progr. activ. 1 / Progr. activ. 2 /
Progr. activ. 3: Vous pouvez définir
trois réglages de mise en marche
différents. Vous devez d'abord régler
l'horloge.
– Configuration: Sélectionnez
Une fois, Quotid., Lun~Ven,
Lun~Sam, Sam~Dim ou Manuel
pour définir l'option suivant vos
besoins. Si vous sélectionnez
Manuel, vous pouvez choisir le
jour d'activation de la minuterie.
N Le symbole c indique le jour sélectionné.
U Régler❑❑❑LDéplacer❑❑EEntrer❑❑❑R Retour
Progr. activ. 1
Configuration
Une fois
Source
H. march Volume
Antenne Canal
TV
04 00 20
ATV 3
Dim Lun Mar Mer Jeu Ven Sam
▶
Français
◀ ▶
Français– H. march: Réglez les heures et les minutes.
– Volume: sélectionnez le niveau de volume désiré.
– Source: sélectionnez le contenu TV ou USB à lire lors de la mise sous
tension automatique du téléviseur. (L’option USB peut uniquement être
sélectionnée lorsqu’un périphérique USB est connecté au téléviseur.)
– Antenne (lorsque Source est réglé sur TV): sélectionnez ATV ou DTV.
– Canal (lorsque Source est réglé sur TV): permet de sélectionner la chaîne
souhaitée.
– Musique / Photo (lorsque Source est réglé sur USB): sélectionnez un
dossier de la clé USB contenant les fichiers de musique ou les photos qui
doivent être lus lors de la mise sous tension automatique du téléviseur.
◀ ▶
Français
◀
FrançaisN REMARQUE
● Si la clé USB ne contient aucun fichier musical ou si le dossier
contenant un fichier musical n’est pas sélectionné, la fonction de
veille ne fonctionne pas correctement.
● Si le périphérique USB ne contient qu’une seule photo, la
fonction Diaporama ne démarre pas.
● Les dossiers dont le nom est trop long ne peuvent pas être
sélectionnés.
● Chaque périphérique USB utilisé se voit attribuer son propre
dossier. Si vous utilisez plusieurs périphériques USB du même
type, assurez-vous que les dossiers affectés à chacun d’eux
portent des noms différents.
● Il est conseillé d'utiliser une clé USB et un lecteur de cartes
multiformat lors de l'utilisation de la fonction Progr. activ..
● Il se peut que l'option Progr. activ. ne fonctionne pas avec
certains périphériques USB équipés d'une batterie intégrée,
ainsi que des lecteurs MP3 et lecteurs multimédias portables de
certains fabricants, car leur reconnaissance prend trop de temps.
▶
Français
◀ ▶
Français● Progr. désact. 1 / Progr. désact.
2 / Progr. désact. 3: Vous pouvez
définir trois réglages de mise à l'arrêt
différents. Vous devez d'abord régler
l'horloge.
Configuration: Sélectionnez Une
fois, Quotid., Lun~Ven, Lun~Sam,
Sam~Dim ou Manuel pour définir
l'option suivant vos besoins. Si vous
sélectionnez Manuel, vous pouvez
choisir le jour d'activation de la minuterie.
N Le symbole c indique le jour sélectionné.
H. arrêt: Réglez les heures et les minutes.
LDéplacer❑❑ U Régler❑❑❑EEntrer❑❑❑R Retour
Progr. désact. 1
Configuration
Une fois
H. arrêt
04 00
Dim Lun Mar Mer Jeu Ven Sam
◀ ▶
Français
◀
Français❑ Verrouillage des programmes
O MENUm → Système → Sécurité → ENTERE
■ Sécurité
N L’écran de saisie du code PIN s’affiche après l’écran de configuration.
N Entrez votre code PIN à 4 chiffres. Modifiez le code PIN à l’aide de l’option
Modifier PIN.
● Verr. chaîne (Arrêt / Marche): Vous pouvez verrouiller des chaînes dans la
fonction Gestion chaînes afin d’empêcher certains utilisateurs, tels que des
enfants, de regarder des émissions qui ne leur sont pas destinées.
N Disponible uniquement lorsque la source Entrée est définie sur TV.
▶
Français
◀ ▶
Français● Contrôle Parental (en fonction du pays) : cette fonction permet d'empêcher
certains utilisateurs, tels que des enfants, de regarder des émissions qui
ne leur sont pas destinées, à l'aide d'un code PIN à 4 chiffres défini par
l'utilisateur. Si la chaîne sélectionnée est verrouillée, le symbole "\" apparaît.
N Les options de Contrôle Parental diffèrent selon le pays.
● Modifier PIN: Une modification de votre mot de passe est requise pour
pouvoir configurer le téléviseur.
◀ ▶
Français
◀
Français❑ Incrustation d’image (PIP)
O MENUm → Système → PIP → ENTERE
■
Permet de regarder simultanément le tuner TV et une source vidéo externe.
PIPt PIP
(Incrustation d’image) ne fonctionne pas dans le même mode.
N REMARQUE
● Pour le son PIP, reportez-vous aux instructions de la section Sélection
du son.
● Si vous éteignez le téléviseur alors que le mode PIP est activé, la fenêtre
PIP disparaît lorsque vous le rallumez.
● Il est possible que l’image affichée dans la fenêtre PIP semble légèrement
moins naturelle lorsque vous utilisez l’écran principal pour un jeu ou un
karaoké.
▶
Français
◀ ▶
Français● Réglages PIP
Image principale Image secondaire
Composant, HDMI, PC TV
● PIP (Arrêt / Marche): active ou désactive la fonction PIP.
● Canal: permet de choisir la chaîne affichée dans l’écran secondaire.
● Taille (Õ / Ã): sélectionnez la taille de l’image secondaire.
● Position (à / – / — / œ) : sélectionnez la position de l’image
secondaire.
● Sélection du son (Principal / Secondaire): vous pouvez sélectionner le
mode audio de votre choix (Principal / Secondaire) en mode PIP.
◀ ▶
Français
◀
Français❑ Solutions économiques
O MENUm → Système → Solution Eco → ENTERE
■ Solution Eco
● Mode éco. (Arrêt / Bas / Moyen / Elevé / Image désactivée)t:
permet de régler la luminosité du téléviseur afin de réduire la consommation
d’énergie. Si vous sélectionnez Image désactivée, l’écran est éteint, mais le
son reste actif. Appuyez sur n'importe quel bouton, excepté celui du volume,
pour allumer l'écran.
● Capteur Eco (Arrêt / Marche) pour les téléviseurs de la série LED 5 de 32 à 46 pouces :
cette fonction permet d’optimiser vos économies d’énergie ; les réglages de
l’image s’adaptent automatiquement en fonction de la luminosité de la pièce.
N L'Capteur Eco se coupe lors du réglage du Rétroéclairage.
Rétro-écl. min: lorsque Capteur Eco est défini sur Marche, la luminosité
d’écran minimale peut être réglée manuellement.
N Si Capteur Eco est Marche, la luminosité de l'écran peut changer (il
devient plus ou moins lumineux) en fonction de l'intensité de la lumière
environnante.
▶
Français
◀ ▶
Français● Veille si aucun signal (Arrêt / 15 min / 30 min / 60 min):
pour éviter toute consommation d'énergie inutile, définissez la durée
d'activation du téléviseur lorsqu'il ne reçoit pas de signal.
N Il est désactivé lorsque le PC est en mode d’économie d’énergie.
● Hors ten. auto (Arrêt / Marche): le téléviseur s'éteint automatiquement si
aucune activité n'est détectée pendant 4 heures.
◀ ▶
Français
◀
Français❑ Autres fonctionnalités
O MENUm → Système → ENTERE
■ Langue
● Langue des menus: définissez la langue des menus.
● Langue du télétexte (selon le pays): sélectionnez la langue de votre choix
pour le télétexte.
N L’anglais est utilisé par défaut si la langue sélectionnée n’est pas diffusée.
▶
Français
◀ ▶
Français● Préférence (Langue Audio principale / Langue Audio secondaire /
Langue princ. sous-titres / Langue sec. sous-titres / Langue Télétexte
principale / Langue Télétexte secondaire): sélectionnez la langue qui sera
utilisée par défaut lors de la sélection d’une chaîne.
N Il se peut que les options Langue Télétexte principale et Langue
Télétexte secondaire ne soient pas prises en charge dans tous les pays.
◀ ▶
Français
◀
Français■ Sous-titres
Utilisez ce menu pour définir le mode Sous-titres.
● Sous-titres (Arrêt / Marche): active ou désactive les sous-titres.
● Mode sous-titre (Normal / Malentendant): configure le mode des soustitres.
● Langue des sous-titres: définit la langue des sous-titres.
N Si le programme visionné ne prend pas en charge la fonction
Malentendant, le mode Normal est automatiquement activé, même si le
mode Malentendant est sélectionné.
N L’anglais est utilisé par défaut si la langue sélectionnée n’est pas diffusée.
▶
Français
◀ ▶
Français■ Texte numérique (Désactiver / Activer)
(Royaume-Uni uniquement)
Si le programme diffuse du texte numérique, cette fonction est activée.
N MHEG (Multimedia and Hypermedia Information Coding Experts Group)
Norme internationale pour les systèmes de codage des données utilisés
avec le multimédia et l'hypermédia. Niveau supérieur à celui du système
MPEG, qui inclut de l'hypermédia à liaison de données tel que des images
fixes, le service de caractères, l'animation, les fichiers graphiques et vidéo
et les données multimédia. MHEG est une technologie d'interaction de
l'utilisateur en cours d'utilisation appliquée à divers domaines, dont la vidéo à
la demande (VOD), la télévision interactive (ITV), le commerce électronique, la
téléformation, la téléconférence, les bibliothèques numériques et les jeux en
réseau.
◀ ▶
Français
◀
Français■ Temps protection auto
● Temps protection auto (Arrêt / 2 heures / 4 heures / 8 heures / 10
heures): Si l’écran est inutilisé et affiche une image fixe pendant une durée
définie par l’utilisateur, l’économiseur d’écran est activé de manière à prévenir
la formation d’images parasites sur l’écran.
▶
Français
◀ ▶
Français■ Général
● Mode Jeu (Arrêt / Marche): lorsque vous connectez une console de
jeux, telle qu’une PlayStation™ ou Xbox™, vous pouvez bénéficier d’une
expérience ludique encore plus réaliste en sélectionnant le mode Jeu.
N REMARQUE
● Précautions et restrictions du mode Jeu
– Pour déconnecter la console de jeux et connecter un autre
périphérique externe, définissez Mode jeu sur Arrêt dans le menu
de configuration.
– Si vous affichez le menu du téléviseur en Mode Jeu, l’écran
tremble légèrement.
● L'option Mode Jeu n'est pas disponible dans les modes TV et PC.
◀ ▶
Français
◀
Français● Après avoir connecté la console de jeux, définissez Mode Jeu sur
Marche pour disposer d’une bonne qualité d’image.
● Si Mode Je u est défini sur Marche:
– le Mode Image est défini sur Standard et le Mode Son sur
Cinéma.
● Transparence menu (Lumineux / Sombre): permet de définir la transparence
du menu.
● Affich. logo (Arrêt / Marche): affichez le logo Samsung au démarrage de la
TV.
● Nom TV pour les téléviseurs de la série LED 5 de 32 à 46 pouces : permet de modifier
l'option Nom TV.
N Si vous sélectionnez l'option Entrée util., vous pouvez nommer
manuellement le téléviseur.
▶
Français
◀ ▶
Français■ Anynet+ (HDMI-CEC)
Pour plus d'informations sur les options de configuration, reportez-vous à la
section "Anynet+(HDMI-CEC)".
◀ ▶
Français
◀
Français■ DivX® Vidéo à la demande
Affiche le code d'enregistrement autorisé pour le téléviseur. Connectezvous au site Web DivX et enregistrez-vous pour pouvoir télécharger le fichier
d'enregistrement VOD. Si vous lisez l'enregistrement VOD à l'aide de Mon
contenu, l'enregistrement est terminé.
N Pour plus d'informations sur DivX® VOD, rendez-vous sur le site Web "http://
vod.divx.com".
▶
Français
◀ ▶
Français■ Interface commune
● CI Menu: permet à l’utilisateur d’opérer une sélection dans le menu du
module CAM. Sélectionnez le menu CI en fonction du menu PC Card.
● Infos sur l’application: affiche des informations sur le module CAM inséré
dans l’emplacement CI et sur la "CARTE CI ou CI+" insérée dans le module
CAM. Vous pouvez installer le module CAM, que le téléviseur soit allumé ou
éteint.
1. Vous pouvez acheter un module CI CAM chez le revendeur le plus
proche ou le commander par téléphone.
2. Insérez fermement la "CARTE CI ou CI+" dans le module CAM en suivant
le sens de la flèche.
3. Insérez le module CAM avec la "CARTE CI ou CI+" dans la fente de
l’interface commune (dans le sens de la flèche), de telle sorte qu’il soit
aligné parallèlement à la fente.
4. Vérifiez si une image est visible sur une chaîne à signal brouillé.
◀ ▶
Français
◀
Français■ Télécommande réseau
pour les téléviseurs de la série LED 5 de 32 à 46 pouces
Permet d'activer/de désactiver ou d'autoriser les téléphones portables Samsung
à se connecter au téléviseur, ainsi qu'à le contrôler.
Vous devez disposer d'un appareil/téléphone mobile Samsung prenant en charge
la fonction Télécommande réseau. Pour plus d'informations à ce sujet, reportezvous au manuel qui accompagne l'appareil mobile.
▶
Français
◀ ▶
Français❑ Menu Assistance
O MENUm → Support technique → e-Manual → ENTERE
■ e-Manual
Vous pouvez lire l'introduction et les instructions relatives aux fonctions de votre
TV.
N Pour plus d'informations sur l'écran du Manuel électronique, reportez-vous à
la section "Consultation du manuel électronique" du Manuel de l'utilisateur.
◀ ▶
Français
◀
Français■ Diagnost. auto.
N Le Diagnost. auto. peut prendre quelques secondes ; ce phénomène est
normal.
● Test de l’image (Oui / Non): Utilisez cette option pour rechercher d'éventuels
problèmes d'image.
● Test du son (Oui / Non): utilisez la mélodie intégrée pour rechercher
d’éventuels problèmes sonores.
N Si les haut-parleurs du téléviseur restent muets, avant d’effectuer le test
du son, vérifiez que l’option Sélection Haut-parleur est réglée sur Hautparleur TV dans le menu Son.
N La mélodie est diffusée pendant le test, même si l’option Sélection
Haut-parleur est réglée sur Haut-parleur ext ou si le son a été désactivé
en appuyant sur le bouton MUTE.
▶
Français
◀ ▶
Français● Informations de signal : (chaînes numériques uniquement) soit la qualité
de réception des chaînes HDTV est parfaite, soit les chaînes ne sont pas
disponibles. Réglez votre antenne afin d’augmenter l’intensité du signal.
● Résolution des problèmes: consultez cette description s’il vous semble que
le téléviseur rencontre un problème.
N Si aucun des conseils de dépannage ne s’applique au problème
rencontré, contactez le service clientèle de Samsung.
◀ ▶
Français
◀
Français■ Mise à niveau du logiciel
La Mise à niveau du logiciel peut être
effectuée en téléchargeant le dernier
micrologiciel depuis le site "www.
samsung.com" vers une unité de
stockage USB.
Version actuelle-indique que le logiciel
est déjà installé sur votre téléviseur.
N Le numéro de version est affiché au
format suivant : "année/mois/jour_
version".
U Déplacer❑❑❑❑EEntrer❑❑❑❑R Retour
Mise à niveau du logiciel
Version actuelle 2011/01/18_000001
USB
En ligne
Canal
Autre logiciel ----/--/--_------
Mise à niveau en mode veille : Arrêt
*
Susceptible de varier en fonction du modèle.
▶
Français
◀ ▶
FrançaisInstallation de la version la plus récente
● USB: insérez la clé USB contenant
le fichier de mise à niveau du
microprogramme téléchargé sur www.
samsung.com dans le téléviseur. Veillez
à ne pas couper l’alimentation, ni retirer
la clé USB tant que les mises à niveau
ne sont pas terminées. Une fois la mise à
niveau du microprogramme terminée, le
téléviseur se met automatiquement hors
tension, puis se rallume. Lorsque la mise à niveau du logiciel est terminée,
les paramètres vidéo et audio par défaut sont réinitialisés. Il est conseillé de
prendre note des paramètres afin de pouvoir les rétablir facilement après la
mise à niveau.
*
Susceptible de varier en fonction du
modèle.
Panneau latéral du téléviseur
◀ ▶
Français
◀
Français● En ligne pour les téléviseurs de la série LED 5 de 32 à 46 pouces : permet de mettre le
logiciel à niveau par Internet.
N Commencez par configurer votre réseau. Pour plus d’informations sur
l’utilisation de la fonction Config. du réseau, reportez-vous à la section
"Connexion réseau".
N Si la connexion Internet ne fonctionne pas correctement, il se peut que la
connexion soit interrompue. Réessayez le téléchargement. Si le problème
persiste, effectuez la procédure de téléchargement USB et procédez à la
mise à niveau.
● Canal: met à niveau le logiciel en utilisant le signal de télédiffusion.
N Si la fonction est sélectionnée pendant la période de transmission du
logiciel, ce dernier est automatiquement recherché et téléchargé.
N Le temps nécessaire au téléchargement du logiciel dépend de l’état du
signal.
▶
Français
◀ ▶
Français● Autre logiciel (sauvegarde): En cas de problème avec le nouveau micrologiciel
(si, par exemple, le téléviseur ne fonctionne plus correctement), vous pouvez
revenir à la version précédente.
N Si le logiciel a été modifié, la version existante s’affiche.
● Mise à niveau en mode veille (Arrêt /1 h. plus tard / 2 h. plus tard /
00:00 matin / 02:00 / 12:00 / 14:00): Une mise à niveau manuelle sera
automatiquement effectuée au moment que vous avez choisi. Etant donné
que le courant est activé de façon interne, l'écran peut s'allumer brièvement
pour le produit. Ce phénomène peut se produire pendant plus d'une heure,
◀ jusqu'à ce que la mise à jour logiciel soit terminée. ▶
Français
◀
Français■ Contacter Samsung
Consultez ces informations si le téléviseur ne fonctionne pas correctement ou
si vous voulez mettre à niveau le logiciel. Vous y trouverez des informations
concernant nos centres d’appel, ainsi que le téléchargement de nos produits et
logiciels.
■ Accueil du contenu
Vous bénéficiez de contenu utile et varié.
▶
Français
◀ ▶
Français◀ ▶
Français
◀
Français
❑ Utilisation de Mon contenu
Vous pouvez lire les photos, la musique et les films enregistrés sur un
périphérique USB de type MSC et sur votre ordinateur.
1. Appuyez sur le bouton CONTENT pour sélectionner l'option Mon contenu.
2. Appuyez sur le bouton ▲/▼ afin de
sélectionner le menu de votre choix
(Vidéos, Photos, Musique), puis
appuyez sur le bouton ENTERE.
*
Susceptible de varier en fonction du modèle.
Vidéos
Photos
Musique
Source Regarder TV
Mon contenu▶
Français
◀ ▶
Français
❑ Connexion d'un périphérique USB
1. Allumez votre téléviseur.
2. Connectez un périphérique USB
contenant des photos et des fichiers de
musique/film au port USB sur le côté du
téléviseur.
3. Lorsqu'un périphérique USB est
connecté au téléviseur, une fenêtre
contextuelle s'ouvre. Vous pouvez alors
sélectionner Périph. connecté.
Panneau latéral du téléviseur
*
Susceptible de varier en fonction du
modèle.◀ ▶
Français
◀
Français
N Il se peut que le fonctionnement ne soit pas correct avec des fichiers multimédia
sans licence.
N Ce qu'il faut savoir avant d'utiliser la fonction Mon contenu
● Le protocole MTP (Media Transfer Protocol) n'est pas pris en charge.
● Le système de fichiers prend en charge les formats FAT16, FAT32 et NTFS.
● Il est possible que certains types d'appareils photo numériques et de
périphériques audio USB ne soient pas compatibles avec ce téléviseur.
● Mon contenu ne prend en charge que les périphériques de stockage de
masse USB de la catégorie MSC. Cette dernière est dédiée aux périphériques
de transport de masse uniquement. Il s'agit notamment des clés USB,
lecteurs de cartes Flash et disques durs USB (les concentrateurs USB ne sont
pas pris en charge). Les périphériques doivent être connectés directement au
port USB du téléviseur.
● Avant de connecter l'appareil au téléviseur, sauvegardez vos fichiers afin
d'éviter qu'ils ne soient endommagés ou que des données ne soient perdues.
SAMSUNG ne saurait, en aucun cas, être tenu responsable de la perte de
données ou de l'endommagement d'un fichier de données.▶
Français
◀ ▶
Français
● Le type USB (HDD) n'est pas pris en charge.
pour les téléviseurs de la série LED 4 de 19 à 32 pouces et de la série 5 de 22 à 27 pouces
● Connectez un disque dur USB au port dédié, le port USB 1 (HDD).
pour les téléviseurs de la série LED 5 de 32 à 46 pouces
● Ne déconnectez pas le périphérique USB en cours de chargement.
● Plus la résolution de l'image est élevée, plus le temps d'affichage à l'écran
sera long.
● La résolution JPEG maximale prise en charge est de 15360 x 8640 pixels.
● Pour les fichiers non pris en charge ou endommagés, le message "Not
Supported File Format" s'affiche.
● Si le critère de tri est défini sur Vue Dossier, il est possible d'afficher jusqu'à
1000 fichiers dans chaque dossier.◀ ▶
Français
◀
Français
● Les fichiers MP3 avec gestion des droits numériques (DRM) téléchargés à
partir d'un site payant ne peuvent pas être lus. La technologie DRM (Gestion
des droits numériques) prend en charge la création de contenu, la distribution
et la gestion intégrales du contenu (par exemple, la protection des droits et
des intérêts des fournisseurs de contenu, la prévention de la copie illégale du
contenu), ainsi que la gestion de la facturation et des règlements.
● Si plusieurs périphériques PTP sont connectés, vous ne pouvez en utiliser
qu'un à la fois.
● Si plusieurs périphériques MSC sont connectés, certains d'entre eux peuvent
ne pas être reconnus. Un périphérique USB nécessitant beaucoup de
puissance (plus de 500 mA ou 5 V) ne sera peut-être pas pris en charge.▶
Français
◀ ▶
Français
● Si un message d'avertissement de surcharge s'affiche lorsque vous connectez
ou utilisez un périphérique USB, il se peut que le périphérique ne soit pas
reconnu ou qu'il fonctionne mal.
● Si le téléviseur ne reçoit aucun signal d'entrée pendant la période configurée
sous l'option Temps protection auto, l'économiseur d'écran s'active.
● Le mode d'économie d'énergie de certains disques durs externes peut être
désactivé automatiquement lors d'une connexion au téléviseur.◀ ▶
Français
◀
Français
● Si un câble d'extension USB est utilisé, il se peut que le périphérique USB ne
soit pas reconnu ou que les fichiers qui y sont stockés ne soient pas lus.
● Si un périphérique USB connecté au téléviseur n'est pas reconnu, si la liste
des fichiers qui y sont stockés est altérée ou si un fichier de la liste est illisible,
connectez le périphérique en question à l'ordinateur, formatez le périphérique
et vérifiez la connexion.
● Si un fichier supprimé depuis le PC apparaît encore lors de l'utilisation de
Mon contenu, utilisez la fonction "Vider la Corbeille" de l'ordinateur pour le
supprimer définitivement.
● Mon contenu prend uniquement en charge le format JPEG séquentiel.
● Les fonctions de recherche de scène et de miniature ne sont pas prises en
charge dans l'option Vidéos.
● Si le nombre de fichiers et dossiers enregistrés sur un périphérique de
stockage USB est supérieur à environ 4 000, certains peuvent ne pas
apparaître et certains dossiers sont susceptibles de ne pas pouvoir être
ouverts.▶
Français
◀ ▶
Français
■ Connexion à l'ordinateur par le biais du réseau
pour les téléviseurs de la série LED 5 de 32 à 46 pouces
Vous pouvez lire les images, la musique et les vidéos enregistrées sur votre
ordinateur ou votre téléviseur à l'aide d'une connexion réseau en mode Mon
contenu.
N Si vous souhaitez utiliser la fonction Mon contenu pour lire sur votre
téléviseur des fichiers enregistrés sur votre PC, vous devez télécharger
"AllShare PC Software" et le manuel utilisateur sur le site Web "www.
samsung.com".
1. Pour plus d'informations sur la configuration de votre réseau, reportez-vous
à la section "Connexion réseau".
– Nous recommandons de placer le téléviseur et l'ordinateur sur le même
sous-réseau. Les 3 premières parties de l’adresse IP du téléviseur et de
l’ordinateur doivent être les mêmes. Seule la dernière partie (adresse de
l’hôte) doit être modifiée. (par exemple, Adresse IP : 123.456.789.**)◀ ▶
Français
◀
Français
2. A l'aide d'un câble réseau, connectez le modem externe et l'ordinateur sur
lequel le programme AllShare PC Software sera installé.
– Vous pouvez connecter directement le téléviseur à un ordinateur sans
passer par un routeur.
N Fonctions non prises en charge lors de la connexion à un ordinateur via un
réseau :
● Les fonctions Fond musical et Paramètres de musique de fond.
● Le bouton � (Retour arrière) ou µ (Avance rapide) pendant la lecture
d'un film.
N Les sous-titres intégrés multi-audio DivX DRM ne sont pas pris en charge.
N AllShare PC Software doit être autorisé par le pare-feu de l'ordinateur.▶
Français
◀ ▶
Français
N Lors de l'utilisation du mode Mon contenu sur une connexion réseau, selon les
fonctions du serveur fourni :
● La méthode de tri peut varier.
● Il se peut que le bouton � (Retour arrière), µ (Avance rapide) ou � (Pause)
ne fonctionne pas suivant les informations de contenu.
N Si la vidéo est saccadée lors de la lecture sur un réseau sans fil, nous vous
recommandons d’utiliser un réseau câblé.◀ ▶
Français
◀
Français
❑ Affichage
Accédez au fichier souhaité à l'aide des boutons ◄/►/▲/▼, puis appuyez sur le
bouton ENTERE ou � (Lecture). Le fichier est lu. L'écran Mon contenu peut
varier en fonction du mode d'accès utilisé.
Information :
Vous pouvez vérifier le
nom du périphérique,
le mode de contenu, le
nom du dossier/fichier,
la page et la liste de tri.
Mode Contenu/Nom périph. :
Vous pouvez sélectionner le
mode Contenu ou le nom de
périphérique souhaité. .
Boutons de fonctionnement :
- C Jaune ( A B ModeD édit.) : permet de sélectionner la musique souhaitée.
La case à cocher figure à l'écran afin que vous puissiez sélectionner la
musique de votre choix. Cette fonction n'est disponible qu'en mode Musique.
- (Page) : permet de passer à la page suivante ou précédente.
- T Outils : affiche le menu d'options.
- R Retour : permet de revenir à l'étape précédente.
Section Liste des
fichiers :
vous pouvez vérifier
les fichiers et groupes
classés par catégorie.
Page T Outils R Retour
Vidéos 1/1 page▶
Français
◀ ▶
Français
■ Vidéos
Lecture d'une vidéo
1. Appuyez sur le bouton
◄/►/▲/▼ afin de sélectionner
la vidéo de votre choix dans la
liste des fichiers.
2. Appuyez sur le bouton
ENTERE ou � (Lecture).
– Le nom du fichier sélectionné
s'affiche en haut de l'écran
avec le temps de lecture.
– Si les informations sur la durée de la vidéo sont inconnues, la durée de
lecture et la barre de progression ne s'affichent pas.
L Passer T Outils R Retour◀ ▶
Français
◀
Français
– Pendant la lecture d'une vidéo, vous pouvez effectuer une recherche à
l'aide des boutons ◄ et ►.
– Vous pouvez utiliser les boutons (�) (Retour rapide) et (µ) (Avance
rapide) lors de la lecture.
N Ce mode vous permet de profiter des séquences vidéo d'un jeu vidéo, mais
pas de jouer au jeu proprement dit.
● Formats de sous-titres pris en charge
Nom Extension de fichier Format
Texte temporel MPEG-4 .ttxt XML
SAMI .smi HTML
SubRip .srt chaînes
SubViewer .sub chaînes
Micro DVD .sub ou .txt chaînes▶
Français
◀ ▶
Français
● Formats vidéo pris en charge
Extension de
fichier
Conteneur Codec vidéo Résolution
Fréquence
d'images (i/
s)
Débit
binaire
(Mbit/s)
Codec audio
*.avi
*.mkv
AVI
MKV
DivX 3.11/4.
x/5.1/6.0
1920 x 1080 6 ~ 30 8
MP3 / AC3 /
LPCM / ADPCM
/ DTS Core
XviD 1920 x 1080 6 ~ 30 8
H.264 BP/MP/
HP
1920 x 1080 6 ~ 30 25
MPEG4 SP /
ASP
1920 x 1080 6 ~ 30 8
Motion JPEG 640 x 480 6 ~ 30 8◀ ▶
Français
◀
Français
Extension de
fichier
Conteneur Codec vidéo Résolution
Fréquence
d'images (i/
s)
Débit
binaire
(Mbit/s)
Codec audio
*.asf ASF
DivX 3.11/4.
x/5.1/6.0
1920 x 1080 6 ~ 30 8
MP3 / AC3 /
LPCM / ADPCM
/ WMA
XviD 1920 x 1080 6 ~ 30 8
H.264 BP/MP/
HP
1920 x 1080 6 ~ 30 25
MPEG4 SP /
ASP
1920 x 1080 6 ~ 30 8
Motion JPEG 640 x 480 6 ~ 30 8
*.wmv ASF
Window Media
Video v9
1920 x 1080 6 ~ 30 25 WMA▶
Français
◀ ▶
Français
Extension de
fichier
Conteneur Codec vidéo Résolution
Fréquence
d'images (i/
s)
Débit
binaire
(Mbit/s)
Codec audio
*.mp4 MP4
H.264 BP/MP/
HP
1920 x 1080 6 ~ 30 25
MP3 / ADPCM /
AAC
MPEG4 SP /
ASP
1920 x 1080 6 ~ 30 8
XVID 1920 x 1080 6 ~ 30 8
*.3gp 3GPP
H.264 BP/MP/
HP
1920 x 1080 6 ~ 30 25
ADPCM / AAC /
MPEG4 SP / HE-AAC
ASP
1920 x 1080 6 ~ 30 8
*.vro
VRO
VOB
MPEG2 1920 x 1080 24/25/30 30
AC3 / MPEG /
LPCM
MPEG1 1920 x 1080 24/25/30 30◀ ▶
Français
◀
Français
Extension de
fichier
Conteneur Codec vidéo Résolution
Fréquence
d'images (i/
s)
Débit
binaire
(Mbit/s)
Codec audio
*.mpg
*.mpeg
PS
MPEG1 1920 x 1080 24/25/30 30
AC3 / MPEG /
LPCM / AAC
MPEG2 1920 x 1080 24/25/30 30
H.264 1920 x 1080 6 ~ 30 25
*.ts
*.tp
*.trp
TS
MPEG2 1920 x 1080 24/25/30 30
AC3 / AAC /
MP3 / DD+ /
HE-AAC
H.264 1920 x 1080 6 ~ 30 25
VC1 1920 x 1080 6 ~ 30 25▶
Français
◀ ▶
Français
Autres restrictions
N REMARQUE
● Le contenu vidéo ne sera pas lu, ou ne sera pas lu correctement, si une
erreur est présente dans le contenu ou sur le suport.
● Il se peut que le son ou la vidéo ne fonctionne pas si le contenu présente
un débit binaire/une fréquence d'images standard supérieur au taux
d'images par seconde repris dans le tableau ci-dessus.
● Si une erreur survient dans la table d'index, la fonction de recherche (saut)
n'est pas prise en charge.
● Lors de la lecture de la vidéo via le réseau, il se peut que celleci échoue en fonction de l'état du réseau. Si vous lisez une
vidéo sur une connexion réseau, des saccades risquent
d’apparaître. pour les téléviseurs de la série LED 5 de 32 à 46 pouces
● Le menu risque de s'afficher au bout d'un certain temps si la vidéo
dépasse 10Mbit/s (débit binaire).
● Certains périphériques USB/caméra numériques peuvent ne pas être
compatibles avec le lecteur.
● Le contenu vidéo ne peut pas être lu si plusieurs contenus existent dans
un fichier. ◀ ▶
Français
◀
Français
Décodeur vidéo Décodeur audio
● Prise en charge jusqu'à H.264 niveau 4.1
● Les normes H.264 FMO / ASO / RS, VC1 SP
/ MP / AP L4 et AVCHD ne sont pas prises en
charge.
● XVID, MPEG4 SP, ASP :
– Inférieur à 1280 x 720 : 60 images max.
– Supérieur à 1280 x 720 : 30 images max.
● GMC n'est pas pris en charge.
● Prise en charge jusqu'à WMA 7, 8, 9,
STD, 9 PRO
● WMA Lossless, Voice Lossless, Voice ne
sont pas pris en charge.
● Le taux d'échantillonnage WMA
22 050 Hz mono n'est pas pris en charge.▶
Français
◀ ▶
Français
■ Musique
Lecture d'un fichier musical
1. Appuyez sur le bouton
◄/►/▲/▼ pour sélectionner
le fichier musical de votre choix
dans la liste des fichiers.
2. Appuyez sur le bouton ENTERE
ou � (Lecture).
– Vous pouvez utiliser les
boutons � (Retour rapide)
et µ (Avance rapide) lors de
la lecture.
E Lecture L Pages T Outils R Retour
Musique◀ ▶
Français
◀
Français
N Seuls les fichiers portant l’extension MP3 sont affichés. Les autres extensions
de fichier ne sont pas affichées, même si elles sont enregistrées sur le même
périphérique USB.
N Si le son est déformé lors de la lecture de fichiers MP3, réglez l'option
Egaliseur dans le menu Son. (Un fichier MP3 surmodulé peut être à l'origine
d'un problème sonore.)
Lecture d'un fichier musical sélectionné
1. Appuyez sur le bouton C (Mode A B édit. D ).
2. Sélectionnez le fichier musical souhaité.
N Une marque de sélection s'affiche à gauche des fichiers sélectionnés.
3. Appuyez sur le bouton TOOLS, puis sélectionnez Lire contenu sélectionné.
N Vous pouvez sélectionner ou désélectionner toute la musique en
appuyant sur Sélectionner tout/Désélectionner tout. ▶
Français
◀ ▶
Français
■ Photos
Visualisation d'une photo (ou d'un diaporama)
1. Appuyez sur le bouton
◄/►/▲/▼ afin de sélectionner la
photo souhaitée dans la liste des
fichiers.
2. Appuyez sur le bouton
ENTERE.
● Lorsqu'une photo
sélectionnée est affichée,
appuyez sur le bouton
ENTERE pour lancer le diaporama.
● Pendant le diaporama, tous les fichiers de la liste sont affichés dans
l'ordre.
N Lorsque vous appuyez sur le bouton � (Lecture) dans la liste des
fichiers, le diaporama démarre immédiatement.
E Pause L Précédent/Suivant T Outils R Retour
Normal◀ ▶
Français
◀
Français
N Des fichiers musicaux peuvent être lus automatiquement pendant le
diaporama, si l'option Fond musical est définie sur Marche.
❑ Mon contenu - Fonctions supplémentaires
Menu d'options pour la lecture de Vidéos/Musique/Photos
Pendant la lecture d'un fichier, appuyez sur le bouton TOOLS.
Catégorie Description Vidéos Musique Photos
Recherche titre
Vous pouvez directement
déplacer l'autre fichier.
c
Recher. temps
Vous pouvez rechercher la
vidéo à l'aide des boutons
◄ et ► toutes les minutes
ou en entrant directement le
numéro correspondant.
c
Mode aléatoire
Vous pouvez lire la musique de
manière aléatoire.
c▶
Français
◀ ▶
Français
Catégorie Description Vidéos Musique Photos
Mode Répétition
Vous pouvez lire des fichiers
musicaux et vidéo à plusieurs
reprises.
c c
Format de l'image
Vous pouvez régler le format
de l'image selon vos besoins.
c
Mode Image
Vous pouvez régler les
paramètres d'image.
c c
Mode Son
Vous pouvez régler les
paramètres sonores.
c c c◀ ▶
Français
◀
Français
Catégorie Description Vidéos Musique Photos
Langue des
sous-titres
Vous pouvez visionner la vidéo
avec des sous-titres. Cette
fonction peut uniquement être
exécutée si le fichier de soustitres et la vidéo possèdent des
noms identiques.
c
Param. de
sous-titres
Vous pouvez regarder une
vidéo dans une des langues
prises en charge. Cette
fonction n'est active que lors
de la lecture de fichiers de type
streaming prenant en charge
plusieurs formats audio.
c▶
Français
◀ ▶
Français
Catégorie Description Vidéos Musique Photos
Lancer le
diaporama /
Suspendre
diaporama
Vous pouvez lancer ou arrêter
un diaporama.
c
Vit. diaporama
Vous pouvez sélectionner la
vitesse du diaporama pendant
sa diffusion.
c
Fond musical
Vous pouvez activer/désactiver
le fond musical lors du
visionnage d'un diaporama.
c◀ ▶
Français
◀
Français
Catégorie Description Vidéos Musique Photos
Paramètres de
musique de fond
Vous pouvez sélectionner le
fond musical d'un diaporama.
c
Zoom
Vous pouvez effectuer un
zoom sur des images lorsque
vous êtes en mode Plein
écran.
c
Pivoter
Vous pouvez faire pivoter des
images lorsque vous êtes en
mode Plein écran.
c
Informations
Vous pouvez consulter des
informations détaillées sur le
fichier en cours de lecture.
c c c▶
Français
◀ ▶
Français
Anynet+ est une fonction qui vous permet de contrôler tous les appareils Samsung
En quoi consiste Anynet+ ?t
connectés compatibles Anynet+ à l’aide de votre télécommande Samsung. Le
système Anynet+ peut être utilisé uniquement avec les appareils Samsung disposant
de la fonction Anynet+. Anynet+ est une fonction qui vous permet de contrôler tous les
appareils Samsung connectés compatibles Anynet+ à l’aide de votre télécommande
Samsung.
N Pour plus d'informations sur la méthode de connexion des périphériques externes, consultez le manuel de l'utilisateur approprié.
N REMARQUE
● Connectez le câble optique entre la prise DIGITAL AUDIO OUT (OPTICAL) de
votre téléviseur et l’entrée Audio numérique de votre système home cinéma.◀ ▶
Français
◀
Français
● En suivant les instructions de connexion ci-dessus, la prise Optique diffuse
uniquement du son sur 2 canaux. Vous n’entendrez donc du son qu’au niveau des haut-parleurs avant gauche et droit et du caisson de basses de
votre système home cinéma. Pour écouter du contenu audio 5.1, branchez la
prise DIGITAL AUDIO OUT (OPTICAL) du lecteur DVD ou du décodeur satellite (c’est-à-dire, le périphérique Anynet 1 ou 2) directement sur l’amplificateur
ou sur le système home cinéma, et non sur le téléviseur.
● Ne connectez qu’un seul système home cinéma.
● Vous pouvez connecter un appareil Anynet+ à l’aide du câble HDMI. Il se peut
que certains câbles HDMI ne prennent pas en charge les fonctions Anynet+.
● Anynet+ fonctionne lorsque l’appareil AV compatible est en veille ou en
marche.
● Le système Anynet+ prend en charge jusqu’à 12 appareils AV. Vous pouvez
connecter jusqu’à 3 appareils du même type.▶
Français
◀ ▶
Français
Menu Anynet+
O TOOLST → Anynet+ (HDMI-CEC) → ENTERE
Le menu Anynet+ varie selon le type et l’état des appareils Anynet+ connectés au
téléviseur.
Menu Anynet+ Description
Voir télévision Fait basculer le mode Anynet+ en mode de diffusion TV.
Liste d'appareils Affiche la liste des appareils Anynet+.
(nom_appareil)
MENU
Affiche les menus de l'appareil connecté. Par exemple, si un
graveur DVD est connecté, son menu de disque s'affiche.◀ ▶
Français
◀
Français
Menu Anynet+ Description
(nom_appareil)
OUTILS
Affiche les menus de l'appareil connecté. Par exemple, si un
graveur DVD est connecté, son menu de disque s'affiche.
Menu titre
(nom_périphérique)
Affiche le menu de titres de l'appareil connecté. Par exemple, si
un graveur DVD est connecté, son menu de titres s'affiche.
N En fonction du type d'appareil, il se peut que ce menu ne
soit pas disponible.
Récepteur Le son est diffusé par l'intermédiaire du récepteur.▶
Français
◀ ▶
Français
❑ Configuration d’Anynet+
O MENUm → Système → Anynet+ (HDMI-CEC) → ENTERE
■ Anynet+ (HDMI-CEC)
Anynet+ (HDMI-CEC) (Arrêt / Marche): pour utiliser la fonction Anynet+, l’option
Anynet+ (HDMI-CEC) doit être définie sur Marche.
N Lorsque la fonction Anynet+ (HDMI-CEC) est désactivée, toutes les activités
qui y sont associées sont indisponibles.
Arrêt automatique (Non / Oui): configuration de l’arrêt automatique d’un appareil
Anynet+ lorsque le téléviseur est mis hors tension.
N Si la fonction Arrêt automatique est définie sur Oui, les périphériques
externes en cours d’exécution s’éteindront en même temps que le téléviseur.
N N’est peut-être pas pris en charge selon le périphérique.◀ ▶
Français
◀
Français
❑ Basculement entre des appareils Anynet+
1. Appuyez sur le bouton TOOLS, puis sélectionnez Anynet+ (HDMI-CEC).
2. La Liste d'appareils appareils Anynet+ connectés au téléviseur s’affiche.
N Si l’appareil recherché est introuvable, appuyez sur le bouton rouge C A pour B D
actualiser la liste.
3. Sélectionnez un appareil et appuyez sur le bouton ENTERE. Vous pouvez
basculer vers l’appareil sélectionné.
N Le menu Liste d'appareils s’affiche uniquement si Anynet+ (HDMI-CEC)
est défini sur Marche dans le menu Système.
● Le basculement vers l’appareil sélectionné peut prendre 2 minutes. Il est
impossible d’annuler l’opération de basculement.
● avez choisi un mode d’entrée externe en appuyant sur le bouton
SOURCE, il est impossible d’utiliser la fonction Anynet+. Veillez à
basculer vers un appareil Anynet+ à l’aide de la Liste d’appareils.▶
Français
◀ ▶
Français
❑ Ecoute via un récepteur
Vous pouvez écouter du son via un récepteur (c’est-à-dire un système home
cinéma) au lieu du haut-parleur du téléviseur.
1. Sélectionnez Récepteur et définissez l’option sur Marche.
2. Appuyez sur le bouton EXIT pour quitter le menu.
N Si votre récepteur ne prend en charge que l’audio, il se peut qu’il ne
figure pas dans la liste d’appareils.
N Le récepteur fonctionnera lorsque vous aurez correctement raccordé la
prise d’entrée optique du récepteur à la prise DIGITAL AUDIO OUT
(OPTICAL) du téléviseur.
N Lorsque le récepteur (système home cinéma) est Marche, vous pouvez
écouter le son sortant de la prise optique du téléviseur. Lorsque le
téléviseur affiche un signal DTV (antenne), il envoie un son 5.1 canaux au
récepteur. Lorsque la source est un composant numérique (un lecteur
DVD, par exemple) connecté au téléviseur via HDMI, seul un son 2
canaux est diffusé par le récepteur.◀ ▶
Français
◀
Français
N REMARQUE
● Vous pouvez commander n’importe quel appareil Anynet+ à l’aide de la
télécommande, et non des boutons du téléviseur.
● Il se peut que la télécommande du téléviseur ne fonctionne pas dans
certaines situations. Dans ce cas, sélectionnez à nouveau l’appareil
Anynet+▶
Français
◀ ▶
Français
❑ Résolution des problèmes Anynet+
Problème Solution possible
Anynet+ ne fonctionne
pas.
● Vérifiez si l'appareil est compatible Anynet+. Le
système Anynet+ ne prend en charge que les appareils
compatibles Anynet+.
● Ne connectez qu'un seul récepteur (home Cinéma).
● Vérifiez que le cordon d'alimentation de l'appareill
Anynet+ est bien connecté.
● Vérifiez la connexion des câbles vidéo / audio / HDMI
de l'appareil Anynet+.
● Vérifiez que l'option Anynet+ (HDMI-CEC) est définie
sur Marche dans le menu Système.◀ ▶
Français
◀
Français
Problème Solution possible
Anynet+ ne fonctionne
pas.
● Vérifiez si la télécommande du téléviseur est en mode
TV.
● Vérifiez qu'il s'agit d'une télécommande exclusive
Anynet+.
● Anynet+ ne fonctionne pas dans certains cas.
(Recherche de chaînes, fonctionnement de Mon
contenu ou Plug & Play (configuration initiale), etc.)
● Lorsque vous branchez ou retirez le câble HDMI, veillez
à relancer une recherche d'appareils ou à éteindre et
rallumer votre téléviseur.
● Vérifiez que la fonction Anynet+ de l'appareil Anynet+
est activée.▶
Français
◀ ▶
Français
Problème Solution possible
Je veux quitter Anynet+. ● Assurez-vous que l'appareil AV est correctement
connecté au téléviseur et vérifiez que la fonction
Anynet+ (HDMI-CEC) est définie sur Marche dans le
menu Système.
● Appuyez sur le bouton TOOLS pour afficher le menu
Anynet+ et sélectionner le menu de votre choix.
Je veux quitter Anynet+. ● Sélectionnez Voir télévision dans le menu Anynet+.
● Appuyez sur le bouton SOURCE de la télécommande
et choisissez un appareil non compatible Anynet+.
● Appuyez sur > CH < pour changer de mode TV.
(Remarque: le bouton de chaîne ne fonctionne que
si aucun appareil Anynet+ à tuner incorporé n'est
connecté.)◀ ▶
Français
◀
Français
Problème Solution possible
Le message "Connexion
à Anynet+…" s'affiche.
● Il est impossible d'utiliser la télécommande lorsque
vous configurez Anynet+ ou basculez vers un mode
d'affichage.
● La télécommande n'est utilisable qu'au terme de la
configuration d'Anynet+ ou du passage vers un mode
d'affichage.
La lecture ne démarre pas
sur l'appareil Anynet+.
● Vous ne pouvez pas utiliser la fonction de lecture
lorsque Plug & Play (configuration initiale) est en cours.▶
Français
◀ ▶
Français
Problème Solution possible
Le périphérique connecté
ne s'affiche pas.
● Vérifiez si l'appareil est ou non compatible avec les
fonctions Anynet+.
● Vérifiez que le câble HDMI est bien connécte.
● Vérifiez que l'option Anynet+ (HDMI-CEC) est définie
sur Marche dans le menu Système.
● Lancez une nouvelle recherche d'appareils Anynet+.
● Vous pouvez connecter un appareil Anynet+ à l’aide
du câble HDMI. Il se peut que certains câbles HDMI ne
prennent pas en charge les fonctions Anynet+.
● En cas d'arrêt anormal résultant d'une déconnexion
du câble HDMI ou du câble d'alimentation, ou encore
d'une panne de courant, effectuez une nouvelle
recherche d'appareils.◀ ▶
Français
◀
Français
Problème Solution possible
Le son du téléviseur
n'est pas diffusé par le
récepteur.
● Reliez le téléviseur au récepteur à l'aide du câble
optique.▶
Français
◀ ▶
Français
❑ A props de AllShare™
pour les téléviseurs de la série LED 5 de 32 à 46 pouces
AllShare™ connecte votre téléviseur et vos téléphones portables/appareils
Samsung compatibles via un réseau. Vous pouvez lire du contenu multimédia
(photos, vidéos et musique) enregistré sur votre téléphone portable ou d'autres
appareils (un PC, par exemple) en le contrôlant sur le téléviseur via le réseau.
N Pour plus d’informations, rendez-vous sur "www.samsung.com" ou
contactez le centre d’appel Samsung. Il peut s’avérer nécessaire d’installer
des logiciels supplémentaires sur l’appareil mobile. Pour plus d’informations à
ce sujet, reportez-vous au mode d’emploi qui accompagne l’appareil mobile.◀ ▶
Français
◀
Français
❑ Setting Up AllShare™
O MENUm → Réseau → Paramètres AllShare → ENTERE
■ Paramètres AllShare
● Média (Marche / Arrêt): active ou
désactive la fonction multimédia.
lorsque la fonction Média est activée,
la lecture du contenu multimédia peut
être contrôlée par les téléphones
portables et d'autres appareils
prenant en charge la fonction DLNA
DMC.
U Déplacer E Entrer R Retour
Paramètres AllShare
Média : Marche ►▶
Français
◀ ▶
Français
■ Média
Affiche la liste des téléphones portables ou appareils connectés qui ont été
configurés avec ce téléviseur en vue d'utiliser la fonction Média.
N La fonction Média est disponible sur tous les appareils prenant en charge la
fonction DLNA DMC.
● Autor. / Refuser : autorise/bloque les appareils.
●C A Supprimer B D : supprime les appareils de la liste.
N Cette fonction efface uniquement de la liste le nom des appareils. Si
l'appareil effacé s'allume ou tente de se reconnecter au téléviseur, il est
possible qu'il s'affiche à nouveau.◀ ▶
Français
◀
Français
Utilisation de la fonction Média
Vous pouvez lire du contenu multimédia (photos, vidéos et musique) enregistré
sur votre téléphone portable ou d'autres appareils (un PC, par exemple) en le
contrôlant sur le téléviseur via le réseau.
● Pour désactiver la transmission du contenu multimédia en provenance des
appareils, définissez l'option Média sur Arrêt dans le menu Paramètres
AllShare.
● En fonction de sa résolution et de son format, il se peut que le contenu ne soit
pas lu sur le téléviseur.
● se peut que les boutons ENTERE et ◄ / ►ne fonctionnent pas avec
certains types de contenu multimédia.
● Il est possible de contrôler la lecture de contenu multimédia à l'aide des
appareils. Pour plus d’informations, reportez-vous au mode d’emploi de
l’appareil concerné.▶
Français
◀ ▶
Français
❑ Fonction de télétexte Chaîne analogique
La page d’index du télétexte contient des instructions sur l’utilisation du service.
Pour que les informations du télétexte s'affichent correctement, la réception des
chaînes doit être stable. Autrement, des informations pourraient manquer ou
certaines pages ne pas s’afficher.
Vous pouvez changer de page de télétexte en appuyant sur les boutons
numériques de la télécommande.
● 0 (mode): permet de sélectionner le mode Télétexte (LISTE/FLOF). Si vous
appuyez sur ce bouton alors que le mode LISTE est sélectionné, il passe en
mode d'enregistrement de liste. Dans ce mode, vous pouvez enregistrer une
page télétexte dans une liste à l'aide du bouton 8 (mémoriser).
● /(Télétexte activé/mix/désactivé) : active le mode télétexte pour la
chaîne choisie. Appuyez deux fois sur ce bouton pour superposer le mode Té-
létexte à l'émission en cours de diffusion. Appuyez sur le bouton une nouvelle
fois pour quitter le système télétexte.◀ ▶
Français
◀
Français
● 1 (sous-page) : permet d'afficher une page secondaire.
● 8 (mémoriser) : permet de mémoriser les pages télétexte.
● 6 (index) : permet d'afficher la page d'index du télétexte (sommaire).
● 4 (taille) : permet d'afficher la moitié supérieure de l'écran en caractères
deux fois plus grands. Pour afficher le texte dans la moitié inférieure de
l'écran, appuyez une nouvelle fois sur ce bouton. Pour rétablir l'affichage
normal, appuyez dessus une fois de plus.
● 9 (maintenir) : arrête l'affichage sur la page en cours, au cas où plusieurs
pages secondaires suivraient automatiquement. Pour annuler, appuyez de
nouveau sur cette touche.
● 2 (page suivante) : affiche la page suivante du télétexte.
● 3 (page précédente) : affiche la page précédente du télétexte.▶
Français
◀ ▶
Français
● 5 (révéler) : affiche le texte masqué (les réponses à un questionnaire, par
exemple). Appuyez à nouveau sur ce bouton Appuyez à nouveau sur ce
bouton pour rétablir le mode d'affichage normal.
● 7 (annuler) : réduit l'écran télétexte pour le superposer sur l'émission en
cours.
● Boutons de couleur (rouge, vert, jaune, bleu) : si la société de radiodiffusion
utilise le système FASTEXT, les différents sujets traités dans la page télétexte
disposent d'un code couleur et peuvent être sélectionnés à l'aide des
boutons de couleur de la télécommande. Appuyez sur la couleur
correspondant au sujet de votre choix. Une nouvelle page avec code couleur
est affichée. Les éléments peuvent être sélectionnés de la même manière.
Pour afficher la page précédente ou suivante, appuyez sur le bouton de
couleur correspondant.◀ ▶
Français
◀
Français
Les pages de télétexte sont organisées en six catégories :
Catégorie Contenu
A Numéro de la page sélectionnée.
B Identité de la chaîne émettrice.
C
Numéro de la page actuelle ou indications de
recherche.
D Date et heure.
E Texte.
F Informations sur l'état. Informations FASTEXT.
A B C D
E
F▶
Français
◀ ▶
Français
❑ Verrou antivol Kensington
Il s'agit d'un dispositif utilisé pour fixer physiquement le système dans le cas
d'une utilisation dans un endroit public. L'aspect du verrou et la méthode de
verrouillage peuvent différer de l'illustration en fonction du fabricant.
N Une icône “K” est présente à l’arrière du téléviseur. Un verrou Kensington se
trouve à côté de l’icône “K”.
N L’emplacement et la couleur peuvent varier en fonction du modèle.
Pour verrouiller l'appareil, procédez
comme suit :
1. Enroulez le câble de verrouillage
Kensington autour d’un objet
large et fixe tel qu’un bureau ou
une chaise.
1
Arrière du téléviseur
Optionnel◀ ▶
Français
◀
Français
2. Glissez le bout du câble auquel est attaché le verrou dans la boucle du câble
de verrouillage Kensington.
3. Insérez le dispositif de verrouillage dans la fente Kensington de l’appareil (1).
4. Fermez le verrou.
N REMARQUE
● Ces instructions sont d’ordre général. Pour de plus amples informations,
consultez le manuel d’utilisation fourni avec le dispositif de verrouillage.
● Le dispositif de verrouillage est vendu séparément.
● L'emplacement du verrou Kensington peut varier en fonction du modèle.▶
Français
◀ ▶
Français
❑ Emplacement pour interface commune pour les connexions
Connexion de l'adaptateur de carte CI
Connectez l'adaptateur comme indiqué sur la droite.
Pour connecter l'adaptateur de carte CI, procédez
comme suit :
N Assurez-vous d'avoir connecté l'adaptateur
avant de fixer le téléviseur sur un mur.
1. Insérez l'adaptateur de carte CI dans les deux
trous du produit 1.
N Deux trous sont présents à l'arrière du télé-
viseur. Ils sont situés à proximité du port INTERFACE COMMUNE.
N Appuyez fermement au centre de l’adaptateur pour s’assurer qu’il est bien
inséré.
2. Reliez l'adaptateur de carte CI au port INTERFACE COMMUNE.
3. Insérez la "CARTE CI ou CI+".
◀ ▶
Français
◀
Français
Pour regarder les chaînes payantes, la carte CI ou CI+ doit être insérée.
● Si vous ne l'insérez pas, certaines chaînes
afficheront le message "Signal brouillé".
● Les informations de pairage contenant un
numéro de téléphone, l'ID de la carte CI ou
CI+, l'ID de l'hôte et d'autres informations
s'afficheront après 2 ou 3 minutes. Si un
message d'erreur s'affiche, contactez votre
fournisseur de service.
● Lorsque la configuration des informations sur les canaux est terminée, le message
"Mise à jour terminée" s'affiche, indiquant que la liste des chaînes est mise à jour.
▶
Français
◀ ▶
Français
N REMARQUE
● Vous devez vous procurer une "Carte CI ou CI+" auprès d’un câblo-opérateur
local.
● Lorsque vous sortez la "Carte CI ou CI+", tirez-la délicatement avec vos
doigts. Une chute pourrait l’endommager.
● Insérez la "Carte CI ou CI+" dans le sens indiqué sur celle-ci.
● L'emplacement de la fente INTERFACE COMMUNE peut varier en fonction du
modèle.
● La "Carte CI ou CI+" n’est pas prise en charge dans certains pays et certaines
régions ; vérifiez auprès de votre revendeur agréé.
● Si vous rencontrez des problèmes, contactez le prestataire de service.
● Insérez la carte d'interface commune (CI ou CI+ CARD), qui prend en charge
les paramètres actuels de l'antenne. L'image sera déformée, voire invisible.◀ ▶
Français
◀
Français
❑ Résolution des problèmes
Si vous avez des questions sur le téléviseur, commencez par consulter la liste cidessous. Si aucun de ces conseils de dépannage ne s’applique, rendez-vous sur le
site www.samsung.com et cliquez sur Support.
Problèmes Solutions et explications
Qualité de l'image Exécutez tout d'abord le Test de l'image pour vérifier
que votre téléviseur affiche correctement l'image de test.
(Accédez à MENU - Assistance - Diagnost. auto. - Test
de l'image) Si l'image de test s'affiche correctement, sa
qualité médiocre peut être due à la source ou au signal.▶
Français
◀ ▶
Français
Problèmes Solutions et explications
La qualité de l'image
affichée par le
téléviseur n'est pas
aussi bonne que dans
le magasin.
● Si vous possédez un décodeur câble / boîtier décodeur
analogique, passez à un décodeur numérique. Utilisez
des câbles HDMI ou Composant pour fournir une qualité
d'image HD (haute définition).
● Abonnés câble / satellite : essayez les chaînes HD dans
la liste des canaux.
● Connexion de l'antenne : essayez les chaînes HD après
avoir effectué une mémorisation automatique.
N De nombreuses chaînes HD sont mises à niveau
par rapport à du contenu SD (définition standard).
● Réglez la résolution de sortie vidéo du décodeur câble/
boîtier décodeur sur 1080i ou 720p.
● Veillez à respecter la distance minimale recommandée
entre vous et le téléviseur (distance basée sur la taille et
la définition du signal).◀ ▶
Français
◀
Français
Problèmes Solutions et explications
L'image est
déformée :
macrobloc, petit bloc,
points, pixellisation
● La compression de contenu vidéo peut engendrer
une déformation de l'image, en particulier pour les
mouvements rapides comme le sport et les films
d'action.
● Un niveau de signal faible ou de mauvaise qualité peut
déformer l'image. Il ne s'agit pas d'un problème lié au
téléviseur.
● Utiliser un téléphone portable à proximité d’un téléviseur
(jusqu’à 1 m environ) peut être source de parasites
visuels sur les téléviseurs analogiques et numériques.
Couleur incorrecte ou
manquante.
● Si vous utilisez une connexion Composant, assurezvous que les câbles Composant sont raccordés aux
prises appropriées. Des raccordements desserrés ou
incorrects peuvent engendrer des problèmes au niveau
de la couleur ou un écran vide.▶
Français
◀ ▶
Français
Problèmes Solutions et explications
La couleur ou la
luminosité est de
mauvaise qualité.
● Réglez les options Image dans le menu du téléviseur
(accédez au Mode Image / Couleur / Luminosité /
Netteté)
● Réglez l'option Mode éco dans le menu du téléviseur.
(accédez à MENU - Système - Solution Eco - Mode
éco.)
● Essayez de réinitialiser l'image pour en afficher les
paramètres par défaut. (accédez à MENU - Image -
Réinit. param. img)
Il y a une ligne
pointillée sur les bords
de l'écran.
● Si la taille de l'image est définie sur Adapter à l’écran,
réglez le paramètre sur 16:9.
● Changez la résolution du décodeur câble/boîtier
décodeur.
L'image est en noir et
blanc.
Si vous utilisez une entrée composite AV, connectez le câble
vidéo (jaune) au connecteur vert de l'entrée composant 1
du téléviseur.◀ ▶
Français
◀
Français
Problèmes Solutions et explications
Lors d'un changement
de chaîne, l'image se
bloque, est déformée
ou s'affiche avec un
léger décalage.
● En cas de raccordement à un décodeur câble, essayez
de réinitialiser ce dernier. Rebranchez le cordon
d'alimentation secteur et patientez jusqu'au redémarrage
du décodeur câble. Cette opération peut prendre
jusqu'à 20 minutes.
● Réglez la résolution de sortie du décodeur câble sur
1080i ou 720p.
Qualité sonore Exécutez tout d'abord le Test du son pour vérifier que le
système audio de votre téléviseur fonctionne correctement.
(Accédez à MENU - Assistance - Diagnost. auto. - Test
du son)
Si le système audio fonctionne correctement, le problème
lié au son peut provenir de la source ou du signal.
Il n'y a aucun son ou
celui-ci est trop faible
au volume maximum.
● Vérifiez le volume de l'appareil externe connecté à votre
téléviseur. ▶
Français
◀ ▶
Français
Problèmes Solutions et explications
La qualité d'image est
bonne, mais aucun
son n'est émis.
● Réglez l'option Sélection Haut-parleur sur Hautparleur TV dans le menu Son.
● Si vous utilisez un appareil externe, assurez-vous que les
câbles audio sont raccordés aux prises d'entrée audio
appropriées du téléviseur.
● Si vous utilisez un appareil externe, vérifiez l'option
de sortie audio de l'appareil connecté (il se peut, par
exemple, que vous deviez définir l'option audio de votre
décodeur câble sur HDMI si vous utilisez une connexion
HDMI).
● Si vous utilisez un câble DVI-HDMI, un câble audio
distinct est requis.
● Redémarrez le périphérique connecté en rebranchant le
câble d'alimentation du périphérique.
● Si votre téléviseur est équipé d'une prise casque,
assurez-vous que rien n'y est connecté.◀ ▶
Français
◀
Français
Problèmes Solutions et explications
Les haut-parleurs
émettent un son
inhabituel.
● Vérifiez les connexions des câbles. Vérifiez qu'aucun
câble vidéo n'est raccordé à une entrée audio.
● Pour les connexions de télédistribution ou antenne,
vérifiez l'intensité du signal. Un niveau de signal faible
peut provoquer une distorsion sonore.
Aucune image, aucune vidéo
Le téléviseur ne
s'allume pas.
● Vérifiez que le cordon d'alimentation secteur est branché
correctement sur la prise murale et sur le téléviseur.
● Vérifiez que la prise murale est opérationnelle.
● Essayez d'appuyer sur le bouton POWER du téléviseur
pour vous assurer que le problème n'est pas dû à la
télécommande. Si le téléviseur s'allume, reportez-vous
au problème "La télécommande ne fonctionne pas" ciaprès.▶
Français
◀ ▶
Français
Problèmes Solutions et explications
Le téléviseur s'éteint
automatiquement.
● Vérifiez que la fonction Veille est réglée sur Arrêt dans le
menu Heure.
● Si votre PC est connecté au téléviseur, vérifiez les
paramètres d'alimentation de votre PC.
● Vérifiez que le cordon d'alimentation secteur est branché
correctement sur la prise murale et sur le téléviseur.
● Lorsque vous regardez la télévision sur une connexion
de télédistribution ou antenne, le téléviseur s'éteint après
10 à 15 minutes en l'absence de signal.◀ ▶
Français
◀
Français
Problèmes Solutions et explications
Aucune image/vidéo
n'est affichée.
● Vérifiez le raccordement des câbles (retirez tous les
câbles connectés au téléviseur et aux appareils externes,
puis rebranchez-les).
● Réglez les sorties vidéo de vos périphériques externes
(décodeur câble / boîtier décodeur, lecteur DVD, lecteur
Blu-ray, etc.) pour faire correspondre les connexions
à l'entrée du téléviseur Par exemple, si la sortie d'un
périphérique externe est HDMI, vous devez établir une
connexion avec une entrée HDMI du téléviseur.
● Vérifiez que les appareils connectés sont sous tension.
● Veillez à sélectionner la source appropriée du
téléviseur en appuyant sur le bouton SOURCE de la
télécommande du téléviseur.
● Redémarrez le périphérique connecté en rebranchant le
câble d'alimentation du périphérique.▶
Français
◀ ▶
Français
Problèmes Solutions et explications
Connexion RF (câble / antenne)
Le téléviseur ne
reçoit pas toutes les
chaînes.
● Vérifiez que le câble de l'antenne est raccordé
correctement.
● Essayez la fonction Plug & Play (configuration initiale)
pour ajouter des chaînes disponibles à la liste. Accédez
à MENU - Système - Plug & Play (configuration initiale)
et attendez que toutes les chaînes disponibles soient
mémorisées.
● Vérifiez que l'antenne est positionnée correctement.
L'image est
déformée :
macrobloc, petit bloc,
points, pixellisation
● La compression de contenu vidéo peut provoquer
une déformation de l'image, en particulier pour les
mouvements rapides comme le sport et les films
d'action.
● Un niveau de signal faible peut déformer l'image. Il ne
s'agit pas d'un problème lié au téléviseur.◀ ▶
Français
◀
Français
Problèmes Solutions et explications
Connexion PC
Le message "Mode
non pris en charge"
est affiché.
● Réglez la fréquence et la résolution de sortie de votre
PC, de telle sorte que ces paramètres correspondent
aux résolutions prises en charge par le téléviseur.
“PC" reste affiché
dans la liste Source,
même si aucun
ordinateur n'est
connecté.
● Cela est tout à fait normal ; la mention "PC" apparaît
toujours dans la liste Source.
La qualité de la vidéo
est bonne, mais
aucun son n'est émis.
● Si vous utilisez une connexion HDMI, vérifiez le
paramètre de sortie audio sur votre PC.▶
Français
◀ ▶
Français
Problèmes Solutions et explications
Connexion réseau pour les téléviseurs de la série LED 5 de 32 à 46 pouces
La connexion au
réseau sans fil a
échoué.
● La clé USB sans fil Samsung est requise pour utiliser un
réseau sans fil.
● Assurez-vous que le paramètre de connexion réseau est
défini sur Sans fil.
● Assurez-vous que le téléviseur est connecté à un
routeur IP sans fil.
Echec de la mise à
niveau du logiciel sur
le réseau.
● Essayez l'option Paramètres réseau dans le menu
Réseau.
● Si vous disposez de la dernière version du logiciel, la
mise à niveau ne sera pas effectuée.◀ ▶
Français
◀
Français
Problèmes Solutions et explications
Autres
L'image ne s'affiche
pas en mode plein
écran.
● Des barres noires s'affichent de chaque côté des
chaînes HD lors de l'affichage de contenu SD (4:3) mis à
niveau.
● Des barres noires s'affichent en haut et en bas des films
dont le format d'image est différent de celui de votre
téléviseur.
● Définissez les options de taille de l'image de votre
appareil externe ou téléviseur sur Plein écran.
La télécommande ne
fonctionne pas.
● Vérifiez que la polarité (+/–) des piles de la
télécommande est respectée.
● Nettoyez la lentille de la télécommande.
● Essayez de diriger directement la télécommande vers le
téléviseur à une distance de 1,5 à 1,8 m.▶
Français
◀ ▶
Français
Problèmes Solutions et explications
La télécommande
du décodeur câble /
boîtier décodeur ne
permet pas d'allumer
ou d'éteindre le
téléviseur, ni de régler
le volume.
● Programmez la télécommande du décodeur câble/
boîtier décodeur de telle sorte qu'elle puisse commander
le téléviseur. Consultez le mode d'emploi du décodeur
câble/boîtier décodeur pour obtenir le code du téléviseur
SAMSUNG.
Le message "Mode
non pris en charge"
est affiché.
● Vérifiez la résolution prise en charge par le téléviseur et
réglez la résolution de sortie du périphérique externe en
conséquence.
Une odeur de
plastique se dégage
du téléviseur.
● Cette odeur est normale et s'atténuera avec le temps.
L'option Informations
de signal du téléviseur
n'est pas disponible
dans le menu de test
du Diagnost. auto..
● Cette fonction n'est disponible qu'avec des chaînes
numériques diffusées sur une connexion d'antenne / RF/
coaxiale.◀ ▶
Français
◀
Français
Problèmes Solutions et explications
Le téléviseur penche
sur le côté.
● Retirez le support de base du téléviseur et réassemblez-le.
Le montage
du support de
base s'effectue
difficilement.
● Veillez à placer le téléviseur sur une surface plane. Si
vous ne parvenez pas à retirer les vis du téléviseur,
utilisez un tournevis aimanté.
Le menu des
Canal est grisé
(indisponible).
● Le menu Canal n'est disponible que si la source TV est
sélectionnée.
Vos paramètres
sont perdus après
30 minutes ou à
chaque mise hors
tension du téléviseur.
● Si le téléviseur est en mode Démo. magasin, les
paramètres audio et vidéo sont réinitialisés toutes les
30 minutes. Remplacez le mode Démo. magasin par
le mode Util. domicile dans la procédure Plug & Play
(configuration initiale). Appuyez sur le bouton SOURCE
pour sélectionner le mode TV et accédez à MENU
→ Système → Plug & Play (configuration initiale) →
ENTERE.▶
Français
◀ ▶
Français
Problèmes Solutions et explications
Perte intermittente du
signal audio ou vidéo.
● Vérifiez le raccordement des câbles ; rebranchez-les au
besoin.
● Une perte de l'image ou du son peut être provoquée
par l'utilisation de câbles trop rigides ou épais. Veillez à
ce que les câbles soient suffisamment souples pour une
utilisation à long terme. En cas d'installation du téléviseur
au mur, nous vous recommandons d'utiliser des câbles
avec des connecteurs de 90 degrés.
Des petites particules
sont visibles lorsque
vous observez de
près le bord du cadre
du téléviseur.
● Elles font partie de la conception du produit et ne
constituent pas un défaut.
Le menu PIP n'est
pas disponible.
● La fonctionnalité PIP n'est disponible que lorsque vous
utilisez une source HDMI, PC ou Composant.◀ ▶
Français
◀
Français
Problèmes Solutions et explications
Le téléviseur s'est
rallumé 45 minutes
après sa mise hors
tension.
● Cela est tout à fait normal. Le téléviseur exécute, en
effet, la fonction de liaison radio (OTA) pour mettre à
niveau le microprogramme téléchargé au cours de son
utilisation.
Le message "Signal
brouillé" ou "Signal
faible/Aucun signal"
s'affiche.
● Si vous utilisez une CARTE CAM (CI/CI+), vérifiez qu'elle
est installée dans la fente de l'interface commune.
● Si le problème persiste, retirez la CARTE CAM du
téléviseur et réintroduisez-la dans la fente.
Problèmes récurrents
liés à l'image/au son.
● Vérifiez et modifiez le signal/la source.
Il peut y avoir une
réaction entre les
coussinets en
caoutchouc situés sur
le support de base et
la finition de certains
meubles.
● Pour éviter que cela ne se produise, utilisez des
coussinets de feutre sur toute surface du téléviseur en
contact direct avec un meuble.▶
Français
◀ ▶
Français
❑ License
Fabriqué sous licence de Dolby Laboratories. Dolby et le symbole du double
D sont des marques déposées de Dolby Laboratories.
Manufactured under licence under U.S. Patent #’s: 5,451,942; 5,956,674;
5,974,380; 5,978,762; 6,487,535 & other U.S. and worldwide patents issued
& pending. DTS and the Symbol are registered trademarks. & DTS 2.0+
Digital Out and the DTS logos are trademarks of DTS, Inc. Product Includes
software. © DTS, Inc. All Rights Reserved.◀ ▶
Français
◀
Français
DivX Certified to play DivX video up to HD 1080p, including premium content.
ABOUT DIVX VIDEO: DivX
®
is a digital video format created by DivX,Inc. This is an official
DivX Certified device that plays DivX video. Visit www.divx.com for more information and
software tools to convert your files into DivX video. ABOUT DIVX VIDEO-ON-DEMAND: This
DivX Certified
®
device must be registered in order to play DivX Video-on-Demand (VOD)
content. To generate the registration code, locate the DivX VOD section in the device setup
menu. Go to vod.divx.com with this code to complete the registration process and learn
more about DivX VOD. Pat. 7,295,673;7,460,688; 7,519,274▶
Français
◀ ▶
Français
TheaterSound, SRS and symbol are trademarks of SRS Labs, Inc.
TheaterSound technology is incorporated under licence from SRS Labs, Inc.
Avis concernant les Licences libres
En cas d’utilisation d’un logiciel libre (Open Source), les licences correspondantes sont
disponibles dans le menu du produit. L’avis concernant les Licences libres est uniquement
disponible en anglais.
E-MANUAL
imagine the possibilities
Thank you for purchasing this Samsung
product. To receive more complete service,
please register your product at
www.samsung.com/register
Model __________ Serial No.____________Contents
Channel Setting
• Using the INFO button (Now & Next
guide)
• Using Channel menu (Watch TV)
• Schedule Manager
• Channel List
• Channel Manager
• Retuning Channels
1
2
5
7
11
17
Basic Features
• Picture Menu
• Sound Menu
27
44
Preference Features
• Network for LED 5 series 32-46 inches
• System Menu
• Support Menu
56
84
108
Advanced Features
• My Contents
• Anynet+
• AllShare™ for LED 5 series 32-46 inches
116
143
157
Other Information
• Analogue Channel Teletext Feature
• Anti-theft Kensington Lock
• Connections Common Interface Slot
• Troubleshooting
• Licence
161
165
167
170
187▶
❑ Using the INFO button (Now & Next guide)
The display identifies the current channel and the status of certain audio-video
settings.
The Now & Next guide shows daily TV programme information for each channel
according to the broadcasting time.
● Scroll ◄, ► to view information for a desired programme while watching the
current channel.
● Scroll ▲, ▼ to view information for other channels. If you want to move to the
currently selected channel, press the ENTERE button.
*
It may differ depending on the model.
All
Information
English◀ ▶ ◀
❑ Using Channel menu (Watch TV)
O MENUm → Support → Contents Home → ENTERE
Press the CONTENT button to select Watch TV, then select the desired menu.
Each screen will be displayed.
■ Guide
The EPG (Electronic Programme
Guide) information is provided by
broadcasters. Using programme
schedules provided by broadcasters,
you can specify programmes you want
to watch in advance so that the channel
automatically changes to the selected
programme channel at the specified
time. Programme entries may appear
blank or out of date depending on a
channel status.
Guide
Schedule Manager
Channel List
Channel Manager
My Downloads
Watch TV
Source
English English▶ ◀ ▶
Using Guide
AC B D Sche.Mgr AC B D -24 Hours +24 Hours AC B D Ch. Mode ; Information k Page ESchedule
DTV Air 3 five
Home and Away
19:00 - 19:30
Drama
Dani is devastated when scott makes clear his views on marriage...
3 five
Guide 19:10 Tue 1 Jun
Channel View - All
1 2 3 4 5 6 7
*
It may differ depending on the model.
Today
19:00 19:30 20:00 20:30
Tsunami Pri... The Curious...
No Information
No Information
No Information
1 Discovery
2 DiscoveryH&L
3 five
4 price-drop.tv
5 QVC
▼ 6 R4DTT
Tine Team
Fiv...
No Information
Dark Angel
American Chopper
Home and...
English English◀ ▶ ◀
1C B D A Red (Sche.Mgr): Moves to the reserved programmes in Sche.Mgr.
2AC B Green ( D -24 Hours): Viewing the list of programmes to be broadcasted before 24
hours.
3 C Yellow ( A B D +24 Hours): Viewing the list of programmes to be broadcasted after 24
hours.
AC B4 D Blue (Ch. Mode): Select the type of channels you want to display on the
Channel List window. (All, TV, Radio, Data/Other, Analogue, Favourites 1-5)
5 j (Information): Displays details of the selected programme.
6 k (Page): Move to previous or next page.
7 E (Watch / Schedule)
● When selecting the current programme, you can watch the selected
programme.
● When selecting the future programme, you can reserve to watch the selected
programme. To cancel the schedule, press the ENTERE button again and
select Cancel Schedules.
English English▶ ◀ ▶
■ Schedule Manager
Cancel or set the Timer Viewing to display the channel you want at the intended
time.
Using Timer Viewing
You can set a desired channel to be displayed automatically at the intended time.
Set the current time first to use this function.
1. Press the ENTERE button to add programme to schedule manually.
2. Press the ◄/►/▲/▼ button to set the Antenna, Channel, Repeat, Date,
Start Time.
● Antenna: Select the desired broadcasting signal.
● Channel: Select the desired channel.
English English◀ ▶ ◀
● Repeat: Select Once, Manual, Sat~Sun, Mon~Fri or Everyday to set at
your convenience. If you select Manual, you can set the day you want.
N The (c) mark indicates the day you’ve selected.
● Date: You can set the desired date.
N It is available when you select Once in Repeat.
● Start Time: You can set the start time you want.
N If you want to edit or cancel the schedule, select the reserved schedule on
the Schedule List, and select the Edit or Cancel Schedules.
English English▶ ◀ ▶
■ Channel List
You can view channel information, All,
TV, Radio, Data/Other, Analogue or
Favourites 1-5.
N When you press the CH LIST
button on the remote control,
Channel List screen will be
displayed at once.
● All: Shows all currently available
channels.
● TV: Shows all currently available TV channels.
● Radio: Shows all currently radio channels.
● Data/Other: Shows all currently available MHP or other channels.
● Analogue: Shows all currently available analogue channels.
● Favourites 1-5: Shows all favourite channels.
Air AC B D Antenna Programme View AC B D L Ch.Mode EWatch k Page
Channel List
All
1 TV#1
2 The Spo...
BBC ONE glogal News
3 Pardon...
4 Real Sp...
6 The Daily
7 Pros vs.
8 Today
9 Pardon...
English English◀ ▶ ◀
N Favourites 1-5 will be displayed when you set Add to Favourites.
N If you want to view favourite channels you added, press the CH LIST button
and use L (Ch.Mode) button to move Favourites 1-5.
N Using the remote control buttons with the Channel List.
● AC B D Red (Antenna): Switches to Air or Cable.
● C Yellow ( A B D Programme View / Channel View): Displays the programme
when digital channel is selected. Returns to the channel view.
● L (Ch.Mode / Channel): Move to the All, TV, Radio, Data/Other,
Analogue or Favourites 1-5.
N When you press the C (Programme View A B D ) button, you can move to
other channels using L (Channel) button.
English English▶ ◀ ▶
● E (Watch / Information): Watches the channel you select. / Displays
details of the selected programme.
● k (Page): Move to next or previous page.
Channel Status Display Icons
Icon Operations
a An analogue channel.
) A reserved programme.
\ A locked channel.
English English◀ ▶ ◀
How to use Timer Viewing in Channel List (digital channels only)
When you set the Timer Viewing in Channel List, you can only set the programme in
Programme View.
1. Press the CH LIST button, then select a desired digital channel.
2. Press the C (Programme View A B D ) button.
3. Press the ▲ / ▼ buttons to select the desired programme, then press the
ENTERE (Information) or INFO button.
4. Select Timer Viewing, then press the ENTERE button when done.
N If you want to cancel Timer Viewing, follow steps 1 through 3. Select Cancel
Schedules.
English English▶ ◀ ▶
■ Channel Manager
You can edit the channel to your preference.
● ( ) Channels: Shows the channel
list according to the channel type.
● ( ) Favourites 1-5: Shows
favourite channels.
N Using the colour buttons with the
Channel Manager.
●C B D A Red (Antenna): Switches to
Air or Cable.
AC B ● D Blue (Sorting): Changes the
list ordered by number or name.
Air AC B D Antenna AC B D Sorting E Select T Tools R Return
Channel Manager All
Selected item: 4 Channel Number
*
It may differ depending on the model.
English English◀ ▶ ◀
Channel Status Display Icons
Icon Operations
a An analogue channel.
c A channel selected.
F A channel set as a favourite.
\ A locked channel.
T Displays the Channel Manager option menu.
English English▶ ◀ ▶
Set each channel using the
Channel Manager Option Menu
Channel Manager t menu options (Watch, Add to
Favourites/Edit Favourites, Lock/Unlock, Edit Channel Name, Edit Channel
Number, Delete, Select All/Deselect All).
Option menu items may differ depending on the channel status.
1. Select a channel and press the TOOLS button.
2. Select a function and change its settings.
English English◀ ▶ ◀
● Watch: Watch the selected channel.
● Add to Favourites/Edit Favourites: Set channels you watch frequently as
favourites. / Add or Delete the selected channel in Favourites 1-5.
1. Select the Add to Favourites/Edit Favourites, then press the ENTERE
button.
N If the channel is already added to favourite channel, Edit Favourites will
be shown.
2. Press the ENTERE button to select Favourites 1-5, then press the OK
button.
N One favourite channel can be added in several of Favourites among
Favourites 1-5.
English English▶ ◀ ▶
● Lock/Unlock: Lock a channel so that the channel cannot be selected and viewed.
N NOTE
● This function is available only when the Channel Lock is set to On.
● The PIN input screen appears. Enter your 4-digit PIN. Change the PIN
using the Change PIN option.
● Edit Channel Name (analogue channels only): Assign your own channel name.
● Edit Channel Number: Edit the number by pressing the number buttons desired.
N Some area may not be able to support Edit Channel Name and Edit
Channel Number function.
English English◀ ▶ ◀
● Delete: You can delete a channel to display the channels you want.
● Deselect All: Deselect all the selected channels.
N You can only select Deselect All when one or more channels are selected.
● Select All: Select all the channels in the channel list.
English English▶ ◀ ▶
❑ Retuning Channels
O MENUm → Channel → ENTERE
■
Before your television can begin memorising the available channels, you must
Antenna (Air / Cable) t
specify the type of signal source that is connected to the TV (i.e. an Air or Cable
system).
English English◀ ▶ ◀
■ Country
(depending on the country)
The PIN input screen appears. Enter your 4 digit PIN number.
● Digital Channel: Change the country for digital channels.
● Analogue Channel: Change the country for analogue channels.
English English▶ ◀ ▶
■ Auto Tuning
(depending on the country)
Scans for a channel automatically and stores in the TV.
N Automatically allocated programme numbers may not correspond to actual
or desired programme numbers. If a channel is locked, the PIN input window
appears.
● Auto Tuning
Air / Cable: Select the antenna source to memorise.
Digital & Analogue / Digital / Analogue: Select the channel source to
memorise.
English English◀ ▶ ◀
When Antenna Source is set to Air or Cable:
When selecting Cable → Digital & Analogue or Digital: Provide a value to
scan for cable channels.
– Search Mode (Full / Network / Quick): Scans for all channels with active
broadcast stations and stores them in the TV.
N If you select Quick, you can set up the Network, Network ID,
Frequency, Modulation and Symbol Rate manually by pressing the
button on the remote control.
– Network (Auto / Manual): Selects the Network ID setting mode among
Auto or Manual.
– Network ID: When Network is Manual, you can set up Network ID using
the numeric buttons.
English English▶ ◀ ▶
– Frequency: Displays the frequency for the channel. (differs in each
country)
– Modulation: Displays available modulation values.
– Symbol Rate: Displays available symbol rates.
● Cable Search Option
(depending on the country & cable channels only)
Sets additional search options such as the frequency and symbol rate for a
cable network search.
Start frequency / Stop frequency: Set the start or stop frequency (differs in
each country).
Symbol Rate: Displays available symbol rates.
Modulation: Displays available modulation values.
English English◀ ▶ ◀
■ Manual Tuning
Scans for a channel manually and stores in the TV.
N If a channel is locked, the PIN input window appears.
N According to the channel source, Manual Tuning may be supported.
When Antenna Source is set to Air or Cable:
● Digital Channel Tuning: Scans for a digital channel manually and stores
in the TV. Press the AC B D (New) button to search the digital channels. When
scanning has finished, a channel is updated in the channel list.
– When selecting Antenna → Air: Channel, Frequency, Bandwidth
– When selecting Antenna → Cable: Frequency, Modulation, Symbol
Rate
English English▶ ◀ ▶
● Analogue Channel Tuning: Scans for an analogue channel. Press the C B D A (New)
button to search the digital channels by adjusting the Programme, Colour
System, Sound System, Channel, Search.
N Channel mode
– P (programme mode): When tuning is complete, the broadcasting
stations in your area have been assigned to the position numbers
from P0 to P99. You can select a channel by entering the position
number in this mode.
– C (aerial channel mode) / S (cable channel mode): These two modes
allow you to select a channel by entering the assigned number for
each aerial broadcasting station or cable channel.
English English◀ ▶ ◀
■ Edit Channel Number (Disable / Enable)
(depending on the country)
Use this to change channel number. When channel number is changed, channel
information is not updated automatically.
English English▶ ◀ ▶
■ Fine Tune
(analogue channels only)
If the signal is weak or distorted, fine tune the channel manually.
N Fine tuned channels are marked with an asterisk “*”.
N To reset the fine-tuning, select Reset.
English English◀ ▶ ◀
■ Transfer Channel List
(depending on the country)
Imports or exports the channel map. You should connect a USB storage to use
this function.
N The PIN number input screen appears. Enter your 4 digit PIN number.
● Import from USB: Import channel list from USB.
● Export to USB: Export channel list to USB.
English English▶ ◀ ▶
❑ Changing the Preset Picture Mode
O MENUm → Picture → Picture Mode → ENTERE
■ Picture Mode
Select your preferred picture type.
N When connecting a PC, you can only make changes to the Entertain and
Standard.
● Dynamic: Suitable for a bright room.
● Standard: Suitable for a normal environment.
● Natural for LED 5 series 32-46 inches : Suitable for reducing eye strain.
● Movie: Suitable for watching movies in a dark room.
● Entertain: Suitable for watching movies and games.
N It is only available when connecting a PC.
English English◀ ▶ ◀
❑ Adjusting Picture Settings
■ Samsung MagicAngle for LED 4 series 19 inches, 5 series 22-27 inches
O MENUm → Picture → Samsung MagicAngle → ENTERE
Adjust screen viewing Angle to optimize screen quality according to your viewing
position.
● Samsung MagicAngle: When viewing the screen at an angle from below or
above by setting the appropriate mode for each position you can obtain a
similar picture quality as viewing the screen directly from the front.
Off: Select when viewing from the front position.
Lean Back Mode: Select when viewing from a slightly lower position.
Standing Mode: Select when viewing from the upper position.
● Mode: Adjust screen viewing angle.
N When Samsung MagicAngle is set to Lean Back Mode or Standing Mode,
Gamma is not available.
English English▶ ◀ ▶
■ Backlight / Contrast / Brightness / Sharpness / Colour / Tint (G/R)
Your television has several setting options for picture quality control.
O MENUm → Picture → Backlight → ENTERE
N NOTE
● In analogue TV, Ext., AV modes of the PAL system, the Tint (G/R)
function is not available.
● When connecting a PC, you can only make changes to Backlight,
Contrast, Brightness and Sharpness.
● Settings can be adjusted and stored for each external device connected
to the TV.
English English◀ ▶ ◀
■ Screen Adjustment
Set the various picture options such as picture size and aspect ratio.
● Picture Size: Your cable box/satellite receiver may have its own set of screen
sizes as well. However, we highly recommend you use 16:9 mode most of the
time.
Auto Wide: Automatically adjusts the picture size to the 16:9 aspect ratio.
16:9: Sets the picture to 16:9 wide mode.
Wide Zoom: Magnifies the picture size more than 4:3.
N Adjusts the Position by using ▲, ▼ buttons.
Zoom: Magnifies the 16:9 wide pictures vertically to fit the screen size.
N Adjusts the Zoom or Position by using ▲, ▼ button.
English English▶ ◀ ▶
4:3: Sets the picture to basic (4:3) mode.
N Do not watch in 4:3 format for a long time. Traces of borders displayed
on the left, right and centre of the screen may cause image retention
(screen burn) which are not covered by the warranty.
Screen Fit: Displays the full image without any cut-off when HDMI (720p /
1080i / 1080p) or Component (1080i / 1080p) signals are inputted.
Smart View1 for LED 5 series 32-46 inches : Reduces original screen by 50%.
Smart View2 for LED 5 series 32-46 inches : Reduces original screen by 25%.
N NOTE
● Smart View1 is enabled only in HDMI mode.
● Smart View2 is enabled only in DTV and HDMI modes.
● The picture size can vary depending on the input resolution when
content is played using Videos under My Downloads.
English English◀ ▶ ◀
● Position: Adjust the picture position. It is only available in Screen Fit or Wide
Zoom.
● Zoom/Position: Adjust the picture position. It is only available in Zoom.
N NOTE
● After selecting Screen Fit in HDMI (1080i / 1080p) or Component (1080i
/ 1080p) mode, you may need to centre the picture:
1. Press the u or d button to select Position.
2. Press the ENTERE button.
3. Press the u, d, l or r button to move the picture.
● Depending on the input source, the picture size options may vary.
● If you want to reset the position you adjusted, select Reset in the
Position screen. The picture will be set to its default position.
English English▶ ◀ ▶
● The available items may differ depending on the selected mode.
● When connecting a PC, only 16:9 and 4:3 modes can be adjusted.
● Settings can be adjusted and stored for each external device connected
to an input on the TV.
● If you use the Screen Fit function with HDMI 720p input, 1 line will be cut
at the top, bottom, left and right as in the overscan function.
● 4:3 Screen Size (16:9 / Wide Zoom / Zoom / 4:3): Available only when
picture size is set to Auto Wide. You can determine the desired picture size
at the 4:3 WSS (Wide Screen Service) size or the original size. Each European
country requires different picture size.
English English◀ ▶ ◀
● PC Screen Adjustment
N It is available in PC mode.
Coarse / Fine: Removes or reduces picture noise. If the noise is not removed
by Fine-tuning alone, then adjust the frequency as best as possible (Coarse)
and Fine-tune again. After the noise has been reduced, readjust the picture so
that it is aligned to the centre of screen.
Position: Adjust the PC’s screen positioning if it does not fit the TV screen.
Press the ▲ or ▼ button to adjust the Vertical-Position. Press the ◄ or ►
button to adjust the Horizontal-Position.
Image Reset: Resets the image to default settings.
English English▶ ◀ ▶
■
O
Auto Adjustment
MENUm → Picture
t→ Auto Adjustment → ENTERE
Adjust frequency values/positions and fine tune the settings automatically.
N It is available in PC mode.
N Not available when connecting with an HDMI/DVI cable.
Using Your TV as a Computer (PC) Display
Setting Up Your PC Software (Based on Windows XP)
Depending on the version of Windows and the video card, the actual screens on your
PC may differ in which case the same basic set-up information will almost always be
applied. (If not, contact your computer manufacturer or Samsung Dealer.)
English English◀ ▶ ◀
1. Click on “Control Panel” on the Windows start menu.
2. Click on “Appearance and Themes” in the “Control Panel” window and a display
dialog-box will appear.
3. Click on “Display” and a display dialog box will appear.
4. Navigate to the “Settings” tab on the display dialog-box.
● The correct size setting (resolution)
● If a vertical-frequency option exists on your display settings dialog box, the
correct value is “60” or “60 Hz”. Otherwise, just click “OK” and exit the dialog
box.
English English▶ ◀ ▶
❑ Changing the Picture Options
■ Advanced Settings
O MENUm → Picture → Advanced Settings → ENTERE
(available in Standard / Movie mode)
You can adjust the detailed setting for the
screen including colour and contrast.
N When connecting a PC, you can
only make changes to Gamma and
White Balance.
● Black Tone (Off / Dark / Darker /
Darkest): Select the black level to
adjust the screen depth.
U Move EEnter R Return
Advanced Settings
Black Tone : Off ►
Dynamic Contrast : Medium
Shadow Detail : 0
Gamma : 0
RGB Only Mode : Off
Colour Space : Native
White Balance
▼
English English◀ ▶ ◀
● Dynamic Contrast (Off / Low / Medium / High): Adjust the screen contrast.
● Shadow Detail: Increase the brightness of dark images.
● Gamma: Adjust the primary colour intensity.
● RGB Only Mode (Off / Red / Green / Blue): Displays the Red, Green and
Blue colour for making fine adjustments to the hue and saturation.
● Colour Space (Auto / Native): Adjust the range of colours available to create
the image.
English English▶ ◀ ▶
● White Balance: Adjust the colour temperature for a more natural picture.
R-Offset / G-Offset / B-Offset: Adjust each colour’s (red, green, blue)
darkness.
R-Gain / G-Gain / B-Gain: Adjust each colour’s (red, green, blue) brightness.
Reset: Resets the White Balance to its default settings.
● Flesh Tone: Emphasize pink “Flesh Tone.”
● Edge Enhancement (Off / On): Emphasize object boundaries.
● Motion Lighting (Off / On): Reduce power consumption by brightness
control adapted motion.
● LED Motion Plus (Off / On) for LED 5 series 32-46 inches : Removes drag from
fast scenes with a lot of movement to provide a clear picture.
English English◀ ▶ ◀
■ Picture Options
O MENUm → Picture → Picture Options → ENTERE
N When connecting a PC, you can only
make changes to the Colour Tone.
● Colour Tone (Cool / Standard /
Warm1 / Warm2)
N Warm1 or Warm2 will be
deactivated when the picture
mode is Dynamic.
N Settings can be adjusted and
stored for each external device
connected to an input on the TV.
U Move E Enter R Return
Picture Options
Colour Tone : Standard ►
Digital Noise Filter : Auto
MPEG Noise Filter : Auto
HDMI Black Level : Normal
Film Mode : Off
English English▶ ◀ ▶
● Digital Noise Filter (Off / Low / Medium / High / Auto / Auto Visualisation):
If the broadcast signal received by your TV is weak, you can activate the
Digital Noise Filter feature to reduce any static and ghosting that may appear
on the screen.
N When the signal is weak, try other options until the best picture is
displayed.
Auto Visualisation: When changing analogue channels, displays signal
strength.
N Only available for analogue channels.
N When the INFO button is pressed, the signal strength bar is displayed.
N When bar is green, you are receiving the best possible signal.
● MPEG Noise Filter (Off / Low / Medium / High / Auto): Reduces MPEG
noise to provide improved picture quality.
English English◀ ▶ ◀
● HDMI Black Level (Low / Normal): Selects the black level on the screen to
adjust the screen depth.
N Available only in HDMI mode (RGB signals).
● Film Mode (Off / Auto1 / Auto2): Sets the TV to automatically sense and
process film signals from all sources and adjust the picture for optimum
quality.
N Available in TV mode, AV, COMPONENT (480i / 1080i) and HDMI (1080i).
N If the screen does not seem natural, change its option to Off / Auto1 /
Auto2 in Film Mode.
English English▶ ◀ ▶
■ Reset Picture (OK / Cancel)
Resets your current picture mode to its default settings.
English English◀ ▶ ◀
❑ Changing the Preset Sound Mode
O MENUm → Sound → Sound Mode → ENTERE
■ Sound Mode
● Standard: Selects the normal sound mode. t
● Music: Emphasizes music over voices.
● Movie: Provides the best sound for movies.
● Clear Voice: Emphasizes voices over other sounds.
● Amplify: Increase the intensity of high-frequency sound to allow a better
listening experience for the hearing impaired.
N If Speaker Select is set to External Speaker, Sound Mode is disabled.
English English▶ ◀ ▶
❑ Sound Systems, Etc.
O MENUm → Sound → Sound Effect → ENTERE
■ Sound Effect
(standard sound mode only)
Use the up and down arrow keys to select an option, and then press ENTERE.
● SRS TruSurround HD (Off / On)
(standard sound mode only)
This function provides a virtual 5.1 channel surround sound experience
through a pair of speakers using HRTF (Head Related Transfer Function)
technology.
English English◀ ▶ ◀
● SRS TruDialog (Off / On)
(standard sound mode only)
This function allows you to increase the intensity of a voice over background
music or sound effects so that dialog can be heard more clearly.
● Equalizer
Use Equalizer to customize sound setting for each speaker.
Balance: Adjusts the balance between the right and left speaker.
100Hz / 300Hz / 1kHz / 3kHz / 10kHz (Bandwidth Adjustment): Adjusts the
level of specific bandwidth frequencies.
Reset: Resets the equalizer to its default settings.
N If Speaker Select is set to External Speaker, Sound Effect is disabled.
English English▶ ◀ ▶
■ Broadcast Audio Options
● Audio Language
(digital channels only)
Change the default value for audio languages.
N The available language may differ depending on the broadcast.
● Audio Format
(digital channels only)
When sound is emitted from both the main speaker and the audio receiver,
a sound echo may occur due to the decoding speed difference between
the main speaker and the audio receiver. In this case, use the TV Speaker
function.
N Audio Format option may differ depending on the broadcast. 5.1ch
Dolby digital sound is only available when connecting an external speaker
through an optical cable.
English English◀ ▶ ◀
● Audio Description
(not available in all locations) (digital channels only)
This function handles the Audio Stream for the AD (Audio Description) which
is sent along with the Main audio from the broadcaster.
N Audio Description (Off / On): Turn the audio description function on or
off.
N Volume: Adjust the audio description volume.
English English▶ ◀ ▶
■ Additional Settings
● DTV Audio Level (MPEG / HE-AAC) (digital channels only): This function
allows you to reduce the disparity of a voice signal (which is one of the signals
received during a digital TV broadcast) to a desired level.
N According to the type of broadcast signal, MPEG / HE-AAC can be
adjusted between -10dB and 0dB.
N To increase or decrease the volume, adjust between the range 0 and -10
respectively.
English English◀ ▶ ◀
● SPDIF Output: SPDIF (Sony Philips Digital InterFace) is used to provide digital
sound, reducing interference going to speakers and various digital devices
such as a DVD player.
Audio Format: You can select the Digital Audio output(SPDIF) format. The
available Digital Audio output(SPDIF) format may differ depending on the input
source.
N By connecting to 5.1ch speakers in a Dolby Digital setup, maximize your
interactive 3D sound experience.
Audio Delay: Correct audio-video sync problems, when watching TV or
video, and when listening to digital audio output using an external device such
as an AV receiver (0ms ~ 250ms).
English English▶ ◀ ▶
● Dolby Digital Comp (Line / RF): This function minimizes signal disparity
between a dolby digital signal and a voice signal (i.e. MPEG Audio, HE-AAC,
ATV Sound).
N Select Line to obtain dynamic sound, and RF to reduce the difference
between loud and soft sounds at night time.
Line: Set the output level for signals greater or less than -31dB (reference) to
either -20dB or -31dB.
RF: Set the output level for signals greater or less than -20dB (reference) to
either -10dB or -20dB.
English English◀ ▶ ◀
■ Speaker Settings
● Speaker Select (External Speaker / TV Speaker)
A sound echo may occur due to a difference in decoding speed between
the main speaker and the audio receiver. In this case, set the TV to External
Speaker.
N When Speaker Select is set to External Speaker, the volume and
MUTE buttons will not operate and the sound settings will be limited.
N When Speaker Select is set to External Speaker.
● TV Speaker: Off, External Speaker: On
N When Speaker Select is set to TV Speaker.
● TV Speaker: On, External Speaker: On
N If there is no video signal, both speakers will be mute.
English English▶ ◀ ▶
● Auto Volume (Off / Normal / Night)
To equalize the volume level on each channel, set to Normal.
Night: This mode provides an improved sound experience compared to
Normal mode, making almost no noise. It is useful at night.
N To use the volume control on the source device connected to the TV,
set Auto Volume to Off on the TV. Otherwise, a change to the volume
control of the source device may not be applied.
English English◀ ▶ ◀
■ Reset Sound (OK / Cancel)
Reset all sound settings to the factory defaults.
English English▶ ◀ ▶
❑ Selecting the Sound Mode
O DUAL I-II → ENTERE
When you set to Dual I-II, the current sound mode is displayed on the screen.
Audio Type Dual I-II Default
A2 Stereo
Mono Mono
Automatic change
Stereo Stereo ↔ Mono
Dual Dual I ↔ Dual II Dual I
NICAM Stereo
Mono Mono
Automatic change
Stereo Mono ↔ Stereo
Dual
Mono → Dual I
Dual II
Dual I
NIf the stereo signal is weak and an automatic switching, occurs, then switch to
the mono.
NOnly activated in stereo sound signal.
NOnly available when the Source is set to TV.
English English◀ ▶ ◀
❑ Setting the Network for LED 5 series 32-46 inches
■ Network Settings
O MENUm → Network → Network Settings → ENTERE
Set the network connection to use AllShare™ and perform software upgrade.
■ Network Status
O MENUm → Network → Network Status → ENTERE
You can check the current network and Internet status.
■ AllShare Settings
O MENUm → Network → AllShare Settings → ENTERE
Selects whether to use media functions on the network. For details on set up
options, refer to the “AllShare™” instructions.
English English▶ ◀ ▶
❑ Connecting to a Wired Network
You can attach your TV to your LAN using cable in three ways:
● You can attach your TV to your LAN by connecting the LAN port on the back
of your TV to an external modem using a LAN cable. See the diagram below.
The Modem Port on the Wall
External Modem
(ADSL / VDSL / Cable TV)
TV Rear Panel
Modem Cable LAN Cable
English English◀ ▶ ◀
● You can attach your TV to your LAN by connecting the LAN port on the back
of your TV to a IP Sharer which is connected to an external modem. Use LAN
cable for the connection. See the diagram below.
The Modem Port on the Wall
External Modem
(ADSL / VDSL / Cable TV)
IP Sharer
(having DHCP server)
TV Rear Panel
Modem Cable LAN Cable LAN Cable
English English▶ ◀ ▶
● Depending on how your network is configured, you may be able to attach
your TV to your LAN by connecting the LAN port on the back of your TV
directly to a network wall outlet using a LAN cable. See the diagram below.
Note that the wall outlet is attached to a modem or router elsewhere in your
house.
The LAN Port on the Wall
TV Rear Panel
LAN Cable
English English◀ ▶ ◀
● If you have a Dynamic Network, you should use an ADSL modem or router
that supports Dynamic Host Configuration Protocol (DHCP). Modems and
routers that support DHCP automatically provide the IP address, subnet mask,
gateway, and DNS values your TV needs to access the Internet so you do not
have to enter them manually. Most home networks are Dynamic Networks.
Some networks require a Static IP address. If your network requires a Static
IP address, you must enter the IP address, subnet mask, gateway, and DNS
values manually on your TV’s Cable Setup Screen when you set up the
network connection. To get the IP address, subnet mask, gateway, and DNS
values, contact your Internet Service Provider (ISP). If you have a Windows
computer, you can also get these values through your computer.
N You can use ADSL modems that support DHCP if your network requires
a Static IP address. ADSL modems that support DHCP also let you use
Static IP addresses.
N A network speed of lower than 10 Mbps is not supported.
English English▶ ◀ ▶
■ Network Setup (Auto)
Use the Automatic Network Setup when connecting your TV to a network that
supports DHCP. To set up your TV’s cable network connection automatically,
follow these steps:
How to set up automatically
1. Go to Network Settings screen. To enter it, follow the directions of Network
Settings.
2. Select the Wired.
3. The network connection screen
appears, and network setting is
done.
U Move E Enter e Exit
Network Settings
Select a network connection type.
Wired
Wireless
(general)
WPS(PBC)
One Foot
Connection
Connect to the network using a LAN cable.
Please make sure that the LAN cable is
connected.
English English◀ ▶ ◀
N If it fails to set automatically, check
the connection of LAN port.
N If you cannot find network
connection values or if you want
to set connection manually, set it
to Manual. Refer to following “How
to set up manually”.
a Previous L Move E Enter R Return
Network Settings
Wired network and Internet connection completed.
IP Settings OK
MAC Address 00:40:30:30:20:10
IP Address 192.168.10.21
Subnet Mask 255.255.255.0
Gateway 192.168.10.1
DNS Server 203.248.252.2
Internet is connected successfully.
If you have a problem with using Internet service, contact your Internet service
provider.
English English▶ ◀ ▶
■ Network Setup (Manual)
Use the Manual Network Setup when connecting your TV to a network that
requires a Static IP address.
Getting the Network Connection Values
To get the Network connection values on most Windows computers, follow these
steps:
1. Right click the Network icon on the bottom right of the screen.
2. In the pop-up menu that appears, click Status.
3. On the dialog that appears, click the Support tab.
4. On the Support Tab, click the Details button. The Network connection values
are displayed.
English English◀ ▶ ◀
How to set up manually
To set up your TV’s cable network connection manually, follow these steps:
1. Follow Steps 1 through 2 in the “How to set up automatically” procedure.
2. Select the IP Settings on network test screen.
3. Set IP Mode to Manual.
4. Press the ▼ button on your remote
to go to the first entry field.
U Move E Enter R Return
IP Settings
IP Mode Manual ►
IP Address
0
.
0
.
0
.
0
Subnet Mask
0
.
0
.
0
.
0
Gateway
0
.
0
.
0
.
0
DSN Mode Manual
DNS Server
0
.
0
.
0
.
0
OK
English English▶ ◀ ▶
5. Enter the IP Address, Subnet Mask, Gateway, and DNS Server values.
Use the number buttons on your remote to enter numbers and the arrow
buttons to move from one entry field to another.
6. When done, select the OK.
7. The network connection screen appears, and network setting is done.
English English◀ ▶ ◀
❑ Connecting to a Wireless Network for LED 5 series 32-46 inches
To connect your TV to your network wireless, you need a wireless router or modem
and a Samsung Wireless LAN Adapter (WIS09ABGN, WIS09ABGN2, WIS10ABGN),
which you connect to your TV’s back or side panel USB port. See the illustration
below.
LAN Cable
Wireless IP sharer
(Wireless router having DHCP
Server)
Samsung Wireless
LAN Adapter
TV Side Panel
or
The LAN Port on the Wall
English English▶ ◀ ▶
Samsung’s Wireless LAN adapter is sold separately and is offered by select
retailers and Ecommerce sites. Samsung’s Wireless LAN adapter supports the
IEEE 802.11a/b/g and n communication protocols. Samsung recommends using
IEEE 802.11n. When you play video over a network connection, the video may
not be played smoothly.
N NOTE
● You must use the “Samsung Wireless LAN Adapter” (WIS09ABGN,
WIS09ABGN2, WIS10ABGN) to use a wireless network.
● Samsung Wireless LAN Adapter and the USB extension Cable are sold
separately and are offered by select retailers and Ecommerce sites.
English English◀ ▶ ◀
● To use a wireless network, your TV must be connected to a wireless IP
sharer (either a router or a modem). If the wireless IP sharer supports
DHCP, your TV can use a DHCP or static IP address to connect to the
wireless network.
● Select a channel for the wireless IP sharer that is not currently being used.
If the channel set for the wireless IP sharer is currently being used by
another device nearby, this will result in interference and communication
failure.
● If you apply a security system other than the systems listed below, it will
not work with the TV.
English English▶ ◀ ▶
● If HIGH PURE THROUGHPUT (Greenfield) 802.11n mode is selected
and the Encryption type is set to WEP, TKIP or TKIP AES (WPS2Mixed)
for your wireless router, Samsung TVs will not support a connection in
compliance with new Wi-Fi certification specifications.
● If your wireless router supports WPS (Wi-Fi Protected Setup), you can
connect to the network via PBC (Push Button Configuration) or PIN
(Personal Identification Number). WPS will automatically configure the
SSID and WPA key in either mode.
English English◀ ▶ ◀
● If your router, modem, or device is not certified, it may not connect to the
TV via the “Samsung Wireless LAN Adapter.”
● Ensure the TV is turned off before you connect the Samsung Wireless
LAN Adapter.
● Connection Methods: You can setup the wireless network connection on
five ways.
– Auto Setup (Using the Auto Network Search function)
– Manual Setup
– WPS (PBC)
– One Foot Connection
– Ad hoc
● The Samsung Wireless LAN Adapter may not be recognized when using
a connection via a USB hub or via a USB extension cable other than the
cable supplied.
English English▶ ◀ ▶
Notice
The picture may appear corrupted or have static for some channels when the TV
is connected to the Samsung Wireless LAN Adapter. In such a case, establish a
connection using one of the following methods or connect the Samsung Wireless LAN
Adapter using a USB cable in a place that is not affected by radio interference.
Method 1
Connect using the USB right angle adapter To connect the Samsung Wireless LAN
Adapter using the USB right angle adapter, follow these steps:
1. Connect the USB right angle adapter to the
Samsung Wireless LAN Adapter.
2. Connect the other end of the right angle
adapter to the USB port.
English English◀ ▶ ◀
Method 2
Connect via an extension cable
To reconnect the Samsung Wireless LAN
Adapter using the extension cable, follow these
steps:
1. Connect the extension cable to the USB
port.
2. Connect the extension cable and Samsung
Wireless LAN Adapter.
3. Attach the Samsung Wireless LAN Adapter to the back of the TV near the top,
using double-sided adhesive tape.
N The Samsung Wireless LAN Adapter should be installed in an interferencefree area in order to avoid interference between the adapter and tuner.
or
English English▶ ◀ ▶
■ Network Setup (Auto)
Most wireless networks have an optional security system that requires devices
that access the network to transmit an encrypted security code called an Access
or Security Key. The Security Key is based on a Pass Phrase, typically a word or a
series of letters and numbers of a specified length you were asked to enter when
you set up security for your wireless network. If you use this method of setting up
the network connection, and have a Security Key for your wireless network, you
will have to enter the Pass Phrase during the setup process.
How to set up automatically
1. Go to Network Settings screen. To enter it, follow the directions of Network
Settings.
English English◀ ▶ ◀
2. Select the Wireless(general).
3. The Network function searches
for available wireless networks.
When done, it displays a list of
the available networks.
4. In the list of networks, press
the ▲ or ▼ button to select a
network, and then press the
ENTERE button.
N If the wireless router is set to Hidden (Invisible), you have to select Add
Network and enter the correct network Name (SSID) and Security key to
establish the connection.
5. If the Security screen pop-up appears, go to step 6. If you select the wireless
router which does not have security, go to step 7.
English English
U Move E Enter R Return
Network Settings
Select a network connection type.
Wired
Wireless
(general)
WPS(PBC)
One Foot
Connection
Set up wireless network by selecting your wireless router.
You may need to enter security key depending on the
setting of the wireless router.▶ ◀ ▶
6. If the wireless router has security,
enter the Security key(Security or
PIN), then select Done.
N When you enter the Security
key(Security or PIN), use
▲/▼/◄ /► buttons on your
remote to select number/
characters.
N You should be able to find the
Pass Phrase on one of the set up screens you used to set up your router
or modem.
7. The network connection screen appears, and network setting is done.
N If it fails to set Security key(Security or PIN), select Retry or IP Settings.
N If you want to set connection manually, select the IP Settings. Refer to
following “How to set up manually”.
a Previous n Move E Enter R Return
Network Settings
Enter security key. 0 entered
a
g
m
s
a/A
b
h
n
t
c
i
o
u
F
d
j
p
v
e
k
q
w
Delete
f
l
r
x
Space
1
4
7
y
2
5
8
z
Done
3
6
9
0
English English◀ ▶ ◀
■ Network Setup (Manual)
Use the Manual Network Setup when connecting your TV to a network that
requires a Static IP address.
Getting the Network Connection Values
To get the Network connection values on most Windows computers, follow these
steps:
1. Right click the Network icon on the bottom right of the screen.
2. In the pop-up menu that appears, click Status.
3. On the dialog that appears, click the Support tab.
4. On the Support Tab, click the Details button. The Network connection values
are displayed.
English English▶ ◀ ▶
How to set up manually
To set up your TV’s cable network connection manually, follow these steps:
1. Follow Steps 1 through 7 in the “How to set up automatically” procedure.
2. Select the IP Settings on network test screen.
3. Set IP Mode to Manual.
4. Press the ▼ button on your remote to go to the first entry field.
5. Enter the IP Address, Subnet Mask, Gateway, and DNS Server values.
Use the number buttons on your remote to enter numbers and the arrow
buttons to move from one entry field to another.
6. When done, select the OK.
7. The network connection screen appears, and network setting is done.
English English◀ ▶ ◀
■ Network Setup (WPS(PBC))
How to set up using WPS(PBC)
If your router has a WPS(PBC) button, follow these steps:
1. Go to Network Settings screen. To enter it, follow the directions of Network
Settings.
2. Select the WPS(PBC).
3. Press the WPS(PBC) button on
your router within 2 minutes. Your
TV automatically acquires all the
network setting values it needs
and connects to your network.
4. The network connection screen
appears, and network setting is
done.
U Move E Enter R Return
Network Settings
Select a network connection type.
Wired
Wireless
(general)
WPS(PBC)
One Foot
Connection
Connect to the wireless router easily by pressing the
WPS(PBC) button. Choose this if your wireless router
supports Push button configuration(PBC).
English English▶ ◀ ▶
■ Network Setup (One Foot Connection)
The One Foot Connection make you easy to connect samsung TV and samsung
wireless router by placing samsung wireless router within 1foot(25cm) from
samsung TV. If your wireless router does not support One Foot Connection, you
must connect using one of the other methods.
N You can check for equipment that supports One Foot Connection on www.
samsung.com.
How to set up using One Foot Connection
Turn on the power of wireless router and TV.
1. Go to Network Settings screen. To enter it, follow the directions of Network
Settings.
English English◀ ▶ ◀
2. Select the One Foot Connection.
3. Place the wireless router in parallel
with the Samsung Wireless LAN
Adapter giving a gap no larger
than 25cm.
4. Wait until the connection is
automatically established.
5. The network connection screen
appears, and network setting is done.
6. Place the wireless router in a desired location.
N If the wireless router settings change or you install a new wireless router,
you must perform the One Foot Connection procedure again, beginning
from Step 1.
U Move E Enter R Return
Network Settings
Select a network connection type.
Wired
Wireless
(general)
WPS(PBC)
One Foot
Connection
Connect to wireless network automatically if your
wireless router supports One Foot Connection. Select this
connection type after placing the wireless router within 10
inches(25 cm) of your TV.
English English▶ ◀ ▶
■ Network Setup (Ad-Hoc)
You can connect to a mobile device supporting Ad-hoc without an wireless router
through the “Samsung Wireless LAN Adapter”. When connecting mobile device,
you can use files on device or connect internet using AllShare or Multimedia
function.
How to connect to new Ad-hoc
1. Go to Network Settings screen. To enter it, follow the directions of Network
Settings.
2. Select the Wireless(general).
3. When select the Ad hoc, the message "Ad hoc service supports a direct
connection with Wi-Fi compatible devices like a cell phone or PC. The
existing network system may have limited functionality. Do you want to
change the network connection?". is displayed.
English English◀ ▶ ◀
4. Input the generated Network Name (SSID) and Security Key into the
device you want to connect.
N If network does not operate normally, check the Network Name
(SSID) and Security key again. An incorrect Security key may cause a
malfunction.
N If a device is connected once, it is displayed in Network Setting list.
When you connect it again, you can find it in network setting list.
English English▶ ◀ ▶
If Your TV Fails to Connect to the Internet
Your TV may not be able to connect to the Internet because your ISP has permanently
registered the MAC address (a unique identifying number) of your PC or modem, which
it then authenticates each time you connect to the Internet as a way of preventing
unauthorized access. As your TV has a different MAC address, your ISP can not
authenticate its MAC address, and your TV can not connect.
To resolve this problem, ask your ISP about the procedures required to connect devices
other than a PC (such as your TV) to the Internet.
If your Internet service provider requires an ID or password to connect to the Internet,
your TV may not be able to connect to the Internet. If this is the case, you must enter
your ID or password when connecting to the Internet.
The internet connection may fail because of a firewall problem. If this is the case, contact
your Internet service provider.
If you cannot connect to the Internet even after you have followed the procedures of
your Internet service provider, please contact Samsung Electronics.
English English◀ ▶ ◀
❑ Setting the Time
O MENUm → System → Time → ENTERE
■ Time
N The current time will appear every time you press the INFO button.
● Clock: Setting the clock is for using various timer features of the TV.
N If you disconnect the power cord, you have to set the clock again.
Clock Mode: Set up the current time manually or automatically.
– Auto: Set the current time automatically using the time from a digital
channel.
N The antenna must be connected in order to set the time automatically.
English English▶ ◀ ▶
– Manual: Set the current time manually.
N Depending on the broadcast station and signal, the auto time set up may
not be correct. In this case, set the time manually.
Clock Set: Set the Day, Month, Year, Hour and Minute manually.
N Available only when Clock Mode is set to Manual.
Time Zone (depending on the country): Select your time zone.
N This function is only available when the Clock Mode is set to Auto.
N When selecting Manual in Time Zone, GMT and DST will be activated.
English English◀ ▶ ◀
❑ Using the Sleep Timer
O MENUm → System → Time → Sleep Timer → ENTERE
● Sleep Timert: Automatically shuts off the TV after a preset period of
time. (30, 60, 90, 120, 150 and 180 minutes).
N To cancel Sleep Timer, select Off.
English English▶ ◀ ▶
❑ Setting the On / Off Timer
O MENUm → System → Time → On Timer Off Timer → ENTERE
● On Timer 1 / On Timer 2 / On Timer
3: Three different on timer settings
can be made. You must set the clock
first.
– Setup: Select Off, Once,
Everyday, Mon~Fri, Mon~Sat,
Sat~Sun or Manual to set at
your convenience. If you select
Manual, you can set up the day
you want to activate the timer.
N The c mark indicates the
day you’ve selected.
U Adjust L Move E Enter R Return
On Timer 1
Setup
Once
Source
On Time Volume
Antenna Channel
TV
04 00 20
ATV 3
Sun Mon Tue Wed Thu Fri Sat
English English◀ ▶ ◀
– On Time: Set the hour and minute.
– Volume: Set the desired volume level.
– Source: Select TV or USB content to be played when the TV is turned
on automatically. (USB can be selected only when a USB device is
connected to the TV)
– Antenna (when the Source is set to TV): Select ATV or DTV.
– Channel (when the Source is set to TV): Select the desired channel.
– Music / Photo (when the Source is set to USB): Select a folder in the
USB device containing music or photo files to be played when the TV is
turned on automatically.
English English▶ ◀ ▶
N NOTE
● If there is no music file on the USB device or the folder containing
a music file is not selected, the Timer function does not operate
correctly.
● When there is only one photo file in the USB device, the Slide
Show will not play.
● If a folder name is too long, the folder cannot be selected.
● Each USB you use is assigned its own folder. When using
more than one of the same type of USB, make sure the folders
assigned to each USB have different names.
● It is recommended that you use a USB memory stick and a multi
card reader when using On Timer.
● The On Timer function may not work with USB devices with
a built-in battery, MP3 players, or PMPs made by some
manufacturers because these devices take a long time to be
recognized.
English English◀ ▶ ◀
● Off Timer 1 / Off Timer 2 / Off Timer 3:
Three different off timer settings can be
made. You must set the clock first.
Setup: Select Off, Once, Everyday,
Mon~Fri, Mon~Sat, Sat~Sun or
Manual to set at your convenience. If
you select Manual, you can set up the
day you want to activate the timer.
N The c mark indicates the day
you’ve selected.
Off Time: Set the hour and minute.
L Move U Adjust E Enter R Return
Off Timer 1
Setup
Once
Off Time
04 00
Sun Mon Tue Wed Thu Fri Sat
English English▶ ◀ ▶
❑ Locking Programme
O MENUm → System → Security → ENTERE
■ Security
N The PIN input screen appears before the setup screen.
N Enter your 4-digit PIN. Change the PIN using the Change PIN option.
● Channel Lock (Off / On): Lock channels in Channel Manager, to prevent
unauthorized users, such as children, from watching unsuitable programme.
N Only available when the Input source is set to TV.
English English◀ ▶ ◀
● Program Rating Lock (depending on the country): Prevent unauthorized
users, such as children, from watching unsuitable programme with a userdefined 4-digit PIN code. If the selected channel is locked, the “\” symbol will
be displayed.
N The items of Program Rating Lock differs depending on the country.
● Change PIN: Change your password required to set up the TV.
English English▶ ◀ ▶
❑ Picture In Picture (PIP)
O MENUm → System → PIP → ENTERE
■
You can watch the TV tuner and one external video source simultaneously.
PIP t PIP
(Picture-in-Picture) does not function in the same mode.
N NOTE
● For PIP sound, refer to the Sound Select instructions.
● If you turn the TV off while watching in PIP mode, the PIP window will
disappear.
● You may notice that the picture in the PIP window becomes slightly
unnatural when you use the main screen to view a game or karaoke.
English English◀ ▶ ◀
● PIP settings
Main picture Sub picture
Component, HDMI, PC TV
● PIP (Off / On): Activate or deactivate the PIP function.
● Channel: Select the channel for the sub-screen.
● Size (Õ / Ã): Select a size for the sub-picture.
● Position (à / – / — / œ): Select a position for the sub-picture.
● Sound Select (Main / Sub): You can choose the desired sound (Main /
Sub) in PIP mode.
English English▶ ◀ ▶
❑ Economical Solutions
O MENUm → System → Eco Solution → ENTERE
■ Eco Solution
● Energy Saving (Off / Low / Medium / High / Picture Off)t: This
adjusts the brightness of the TV in order to reduce power consumption. If you
select Picture Off, the screen is turned off, but the sound remains on. Press
any button except volume button to turn on the screen.
● Eco Sensor (Off / On) for LED 5 series 32-46 inches : To enhance your power
savings; the picture settings will automatically adapt to the light in the room.
N If you adjust the Backlight, the Eco Sensor will be set to Off.
Min Backlight: When Eco sensor is On, the minimum screen brightness can
be adjusted manually.
N If Eco Sensor is On, the display brightness may change (become slightly
darker or brighter) depending on the surrounding light intensity.
English English◀ ▶ ◀
● No-Signal Power Off (Off / 15 min / 30 min / 60 min):
To avoid unnecessary energy consumption, set how long you want the TV to
remain on if it’s not receiving a signal.
N Disabled when the PC is in power saving mode.
● Auto Power Off (Off / On): The TV will be automatically turned off when no
user operation is received for 4 hours.
English English▶ ◀ ▶
❑ Other Features
O MENUm → System → ENTERE
■ Language
● Menu Language: Set the menu language.
● Teletext Language (depending on the country): Set a desired language for
teletext.
N English is the default in cases where the selected language is unavailable
in the broadcast.
English English◀ ▶ ◀
● Preference (Primary Audio Language / Secondary Audio Language /
Primary Subtitle Language / Secondary Subtitle Language / Primary
Teletext Language / Secondary Teletext Language): Select a language,
which will be the default language when a channel is selected.
N Primary Teletext Language and Secondary Teletext Language may
not be supported in some locations.
English English▶ ◀ ▶
■ Subtitle
Use this menu to set the Subtitle mode.
● Subtitle (Off / On): Switches subtitles on or off.
● Subtitle Mode (Normal / Hearing Impaired): Sets the subtitle mode.
● Subtitle Language: Sets the subtitle language.
N If the programme you are watching does not support the Hearing
Impaired function, Normal automatically activates even if the Hearing
Impaired mode is selected.
N English is the default in cases where the selected language is unavailable
in the broadcast.
English English◀ ▶ ◀
■ Digital Text (Disable / Enable)
(UK only)
If the programme broadcasts with digital text, this feature is enabled.
N MHEG (Multimedia and Hypermedia Information Coding Experts Group)
An International standard for data encoding systems used in multimedia
and hypermedia. This is at a higher level than the MPEG system which
includesdata-linking hypermedia such as still images, character service,
animation, graphic and video files as well as multimedia data. MHEG is user
runtime interaction technology and is being applied to various fields including
VOD (Video-On-Demand), ITV (Interactive TV), EC (Electronic Commerce),
teleeducation, tele-conferencing, digital libraries and network games.
English English▶ ◀ ▶
■ Auto Protection Time
● Auto Protection Time (Off / 2 hours / 4 hours / 8 hours / 10 hours): If the
screen remains idle with a still image for a certain period of time defined by the
user, the screen saver is activated to prevent the formation of ghost images
on the screen.
English English◀ ▶ ◀
■ General
● Game Mode (Off / On): When connecting to a game console such as
PlayStation™ or Xbox™, you can enjoy a more realistic gaming experience by
selecting game mode.
N NOTE
● Precautions and limitations for game mode
– To disconnect the game console and connect another external
device, set Game Mode to Off in the setup menu.
– If you display the TV menu in Game Mode, the screen shakes
slightly.
● Game Mode is not available in PC and TV mode.
English English▶ ◀ ▶
● After connecting the game console, set Game Mode to On to
prevent poor picture quality.
● If Game Mode is On:
– Picture Mode is set to Standard and Sound Mode is set to
Movie.
● Menu Transparency (Bright / Dark): Set the Transparency of the menu.
● Boot Logo (Off / On): Display Samsung logo when the TV is turned on.
● TV Name for LED 5 series 32-46 inches : Make changes the TV Name.
N If you select User Input, you can make TV name manually.
English English◀ ▶ ◀
■ Anynet+(HDMI-CEC)
For details on set up options, refer to the “Anynet+(HDMI-CEC)” instructions.
English English▶ ◀ ▶
■ DivX® Video On Demand
Shows the registration code authorized for the TV. If you connect to the DivX web
site and register, you can download the VOD registration file. If you play the VOD
registration using My Downloads, the registration is completed.
N For more information on DivX® VOD, visit “http://vod.divx.com”.
English English◀ ▶ ◀
■ Common Interface
● CI Menu: This enables the user to select from the CAM-provided menu.
Select the CI Menu based on the menu PC Card.
● Application Info: View information on the CAM inserted into the CI slot and
on the “CI or CI+ CARD” which is inserted into the CAM. You can install the
CAM anytime whether the TV is on or off.
1. Purchase a CI CAM module at your nearest dealer or by phone.
2. Firmly insert the “CI or CI+ CARD” into the CAM in the direction of the
arrow.
3. Insert the CAM with the “CI or CI+ CARD” into the common interface
slot, in the direction of the arrow so that it aligns parallel with the slot.
4. Check if you can see a picture on a scrambled signal channel.
English English▶ ◀ ▶
■ Network Remote Control for LED 5 series 32-46 inches
Turn on/off or give permission to Samsung mobile phones devices to connect
with and control the TV.
You must have a Samsung Mobile phone/device which supports Network Remote
Control. For more details, refer to each device’s manual.
English English◀ ▶ ◀
❑ Support Menu
O MENUm → Support → e-Manual → ENTERE
■ e-Manual
You can read the introduction and instructions about the TV features stored in
your TV.
N For the detailed information about e-Manual Screen, refer to “How to view the
e-Manual” in User Manual.
English English▶ ◀ ▶
■ Self Diagnosis
N Self Diagnosis might take few seconds, this is part of the normal operation
of the TV.
● Picture Test (Yes / No): Use to check for picture problems.
● Sound Test (Yes / No): Use the built-in melody sound to check for sound
problems.
N If you hear no sound from the TV’s speakers, before performing the
sound test, make sure Speaker Select is set to TV Speaker in the
Sound menu.
N The melody will be heard during the test even if Speaker Select is set to
External Speaker or the sound is muted by pressing the MUTE button.
English English◀ ▶ ◀
● Signal Information: (digital channels only) HDTV channel’s reception quality is
either perfect or the channels are unavailable. Adjust your antenna to increase
signal strength.
● Troubleshooting: If the TV seems to have a problem, refer to this description.
N If none of these troubleshooting tips apply, contact the Samsung
customer service centre.
English English▶ ◀ ▶
■ Software Upgrade
Software Upgrade can be performed
by downloading the latest firmware from
“www.samsung.com” to a USB memory
device.
Current Version-the software already
installed in the TV.
N Software is represented as “Year/
Month/Day_Version”.
U Move E Enter R Return
Software Upgrade
Current Version 2011/01/18_000001
By USB
By Online
By Channel
Alternative Software ----/--/--_------
Standby Mode Upgrade : Off
*
It may differ depending on the model.
English English◀ ▶ ◀
Installing the Latest Version
● By USB: Insert a USB drive containing the
firmware upgrade file, downloaded from
“www.samsung.com” into the TV. Please
be careful not to disconnect the power
or remove the USB drive until upgrades
are complete. The TV will be turned off
and on automatically after completing
the firmware upgrade. When software is
upgraded, video and audio settings you
have made will return to their default settings. We advise you to write down
your settings so that you can easily reset them after the upgrade.
*
It may differ depending on the model.
TV Side Panel
English English▶ ◀ ▶
● By Online for LED 5 series 32-46 inches : Upgrade the software using the Internet.
N First, configure your network. For detailed procedures on using the
Network Setup, refer to the “Network Connection” instructions.
N If the internet connection doesn’t operate properly, the connection may
be broken. Please retry downloading. If the problem persists, download
by USB and upgrade.
● By Channel: Upgrade the software using the broadcasting signal.
N If the function is selected during the software transmission period,
software will be automatically searched and downloaded.
N The time required to download the software is determined by the signal
status.
English English◀ ▶ ◀
● Alternative Software (backup): If there is an issue with the new firmware and
it is affecting operation, you can change the software to the previous version.
N If the software was changed, existing software is displayed.
● Standby Mode Upgrade (Off / 1 hour later / 2 hours later/ 00:00 / 02:00 /
12:00 / 14:00): A manual upgrade will be automatically performed at selected
time. Since the power of the unit is turned on internally, the screen may be
turned on slightly for the product. This phenomenon may continue for more
than 1 hour until the software upgrade is complete.
English English▶ ◀ ▶
■ Contact Samsung
View this information when your TV does not work properly or when you want to
upgrade the software. You can find information regarding our call centres, and
how to download products and software.
■ Contents Home
You can enjoy useful and various contents.
English English◀ ▶ ◀
❑ Using the My Downloads
Enjoy photos, music and movie files saved on a USB Mass Storage Class (MSC)
device and your PC.
1. Press the CONTENT button to
select My Downloads.
2. Press ▲/▼ button to select desired
menu (Videos, Photos, Music),
then press the ENTERE button.
Videos
Photos
Music
Source Watch TV
*
It may differ depending on the model.
My Downloads
English English▶ ◀ ▶
❑ Connecting a USB Device
1. Turn on your TV.
2. Connect a USB device containing photo,
music and movie files to the USB jack on
the side of the TV.
3. When USB is connected to the TV,
popup window appears. Then you can
select New device connected.
TV Side Panel
*
It may differ depending on the model.
English English◀ ▶ ◀
N It might not work properly with unlicenced multimedia files.
N Need-to-Know List before using My Downloads
● MTP (Media Transfer Protocol) is not supported.
● The file system supports FAT16, FAT32 and NTFS.
● Certain types of USB Digital camera and audio devices may not be compatible
with this TV.
● My Downloads only supports USB Mass Storage Class (MSC) devices.
MSC is a Mass Storage Class Bulk-Only Transport device. Examples of MSC
are Thumb drives, Flash Card Readers and USB HDD (USB HUB are not
supported). Devices should be connected directly to the TV’s USB port.
● Before connecting your device to the TV, please back up your files to prevent
them from damage or loss of data. SAMSUNG is not responsible for any data
file damage or data loss.
English English▶ ◀ ▶
● USB (HDD) is not supported. for LED 4 series 19-32 inches, 5 series 22-27 inches
● Connect a USB HDD to the dedicated port, USB 1 (HDD) port.
for LED 5 series 32-46 inches
● Do not disconnect the USB device while it is loading.
● The higher the resolution of the image, the longer it takes to display on the
screen.
● The maximum supported JPEG resolution is 15360 x 8640 pixels.
● For unsupported or corrupted files, the “Not Supported File Format” message
is displayed.
● If the files are sorted by Folder View, up to 1000 files can be displayed in
each folder.
English English◀ ▶ ◀
● MP3 files with DRM that have been downloaded from a non-free site cannot
be played. Digital Rights Management (DRM) is a technology that supports
the creation, distribution and management of the content in an integrated and
comprehensive way, including the protection of the rights and interests of the
content providers, the prevention of the illegal copying of contents, as well as
managing billings and settlements.
● If more than 2 PTP devices are connected, you can only use one at a time.
● If more than two MSC devices are connected, some of them may not be
recognized. A USB device that requires high power (more than 500mA or 5V)
may not be supported.
English English▶ ◀ ▶
● If an over-power warning message is displayed while you are connecting or
using a USB device, the device may not be recognized or may malfunction.
● If the TV has been no input during time set in Auto Protection Time, the
Screensaver will run.
● The power-saving mode of some external hard disk drives may be released
automatically when connected to the TV.
English English◀ ▶ ◀
● If a USB extension cable is used, the USB device may not be recognized or
the files on the device may not be read.
● If a USB device connected to the TV is not recognized, the list of files on the
device is corrupted or a file in the list is not played, connect the USB device to
the PC, format the device and check the connection.
● If a file deleted from the PC is still found when My Downloads is run, use the
“Empty the Recycle Bin” function on the PC to permanently delete the file.
● My Downloads only supports sequential jpeg format.
● The scene search and thumbnail functions are not supported in the Videos.
● If the number of files and folders saved on a USB storage device is
approximately over 4000, the files and folders may not appear and some
folders may not be opened.
English English▶ ◀ ▶
❑ Connecting to the PC through network for LED 5 series 32-46 inches
You can play pictures, music and videos saved on your PC through a network
connection in the My Downloads mode over your TV.
N If you want to use My Downloads to play files saved on your PC over your
TV, you should download “AllShare PC Software” and users manual from
“www.samsung.com.”
1. For more information on how to configure your network, refer to ‘Network
Connection’.
– You are recommended to locate both TV and PC in same subnet. The
first 3 parts of the IP address of the TV and PC should be the same and
only the last part (the host address) should be changed. (e.g. IP Address:
123.456.789.**)
English English◀ ▶ ◀
2. Using a LAN cable, connect between the external modem and the PC onto
which the AllShare PC Software programme will be installed.
– You can connect the TV to the PC directly without connecting it through a
Sharer (Router).
N Functions that are not supported when connecting to a PC through a
network:
● The Background Music and Background Music Setting functions.
● The � (REW) or µ (FF) button while a movie is playing.
N The DivX DRM, Multi-audio, embedded caption does not supported.
N AllShare PC Software should be permitted by the firewall programme on your PC.
English English▶ ◀ ▶
N When you use My Downloads mode through a network connection, according
to functions of the provided server:
● The sorting method may vary.
● The � (REW), µ (FF) or � (Pause) buttons may not work depending on
the content information.
N If you experience any file stuttering issue while playing a video over a wireless
network, we recommend using a wired network.
English English◀ ▶ ◀
❑ Screen Display
Move to the desired file using the ◄/►/▲/▼ buttons and then press the
ENTERE or � (Play) button. The file is played. My Downloads screen may
differ depending on the way to enter the screen.
Information:
You can ascertain the
selected device name,
contents mode, folder/
file name, page and
sorting list.
Contents mode / Device name:
You can select the desired
Contents mode or Device name.
Operation Buttons:
- Yellow ( AC B D Edit Mode): Selects the desired music. The check
box is shown in the screen to check the music you want. It is only
available in Music.
- (Page): Move to next or previous page.
- T Tools: Displays the option menu.
- R Return: Move to the previous step.
File List Section:
You can confirm the
files and groups that are
sorted by category.
Page T Tools R Return
Videos 1/1 page
English English▶ ◀ ▶
■ Videos
Playing Video
1. Press the ◄/►/▲/▼ button to
select the desired video in the file
list.
2. Press the ENTERE button or
� (Play) button.
– The selected file name is
displayed on the top with its
playing time.
– If video time information is unknown, play time and progress bar are not
displayed.
L Jump T Tools R Return
English English◀ ▶ ◀
– During video playback, you can search using ◄ and ► button.
– You can use (�) (REW) and (µ) (FF) buttons during playback.
N In this mode, you can enjoy movie clips contained on a Game, but you
cannot play the Game itself.
● Supported Subtitle Formats
Name File extension Format
MPEG-4 time-based text .ttxt XML
SAMI .smi HTML
SubRip .srt string-based
SubViewer .sub string-based
Micro DVD .sub or .txt string-based
English English▶ ◀ ▶
● Supported Video Formats
File Extention Container Video Codec Resolution
Frame rate
(fps)
Bit rate
(Mbps)
Audio Codec
*.avi
*.mkv
AVI
MKV
DivX 3.11/4.
x/5.1/6.0
1920 x 1080 6 ~ 30 8
MP3 / AC3 /
LPCM / ADPCM /
DTS Core
XviD 1920 x 1080 6 ~ 30 8
H.264 BP/MP/
HP
1920 x 1080 6 ~ 30 25
MPEG4 SP/ASP 1920 x 1080 6 ~ 30 8
Motion JPEG 640 x 480 6 ~ 30 8
English English◀ ▶ ◀
File Extention Container Video Codec Resolution
Frame rate
(fps)
Bit rate
(Mbps)
Audio Codec
*.asf ASF
DivX 3.11/4.
x/5.1/6.0
1920 x 1080 6 ~ 30 8
MP3 / AC3 /
LPCM / ADPCM /
WMA
XviD 1920 x 1080 6 ~ 30 8
H.264 BP/MP/
HP
1920 x 1080 6 ~ 30 25
MPEG4 SP/ASP 1920 x 1080 6 ~ 30 8
Motion JPEG 640 x 480 6 ~ 30 8
*.wmv ASF
Window Media
Video v9
1920 x 1080 6 ~ 30 25 WMA
English English▶ ◀ ▶
File Extention Container Video Codec Resolution
Frame rate
(fps)
Bit rate
(Mbps)
Audio Codec
*.mp4 MP4
H.264 BP/MP/
HP
1920 x 1080 6 ~ 30 25
MP3 / ADPCM /
AAC
MPEG4 SP/
ASP
1920 x 1080 6 ~ 30 8
XVID 1920 x 1080 6 ~ 30 8
*.3gp 3GPP
H.264 BP/MP/
HP
1920 x 1080 6 ~ 30 25
ADPCM / AAC /
MPEG4 SP/ HE-AAC
ASP
1920 x 1080 6 ~ 30 8
*.vro
VRO
VOB
MPEG2 1920 x 1080 24/25/30 30
AC3 / MPEG /
LPCM
MPEG1 1920 x 1080 24/25/30 30
English English◀ ▶ ◀
File Extention Container Video Codec Resolution
Frame rate
(fps)
Bit rate
(Mbps)
Audio Codec
*.mpg
*.mpeg
PS
MPEG1 1920 x 1080 24/25/30 30
AC3 / MPEG /
LPCM / AAC
MPEG2 1920 x 1080 24/25/30 30
H.264 1920 x 1080 6 ~ 30 25
*.ts
*.tp
*.trp
TS
MPEG2 1920 x 1080 24/25/30 30
AC3 / AAC /
MP3 / DD+ /
HE-AAC
H.264 1920 x 1080 6 ~ 30 25
VC1 1920 x 1080 6 ~ 30 25
English English▶ ◀ ▶
Other Restrictions
N NOTE
● Video content will not play, or not play correctly, if there is an error in the
content or the container.
● Sound or video may not work if the contents have a standard bit rate/
frame rate above the compatible Frame/sec listed in the table above.
● If the Index Table is in error, the Seek (Jump) function is not supported.
● When playing the video through network, it may not work depending on
the network status. When you play video over a network connection, the
video may not be played smoothly. for LED 5 series 32-46 inches
● The menu can be displayed late if the video is over 10Mbps(bit rate).
● Some USB/digital camera devices may not be compatible with the player.
● Video content can not be played, if there are many contents in one file.
English English◀ ▶ ◀
Video Decoder Audio Decoder
● Supports up to H.264, Level 4.1
● H.264 FMO / ASO / RS, VC1 SP / MP / AP L4
and AVCHD are not supported.
● XVID, MPEG4 SP, ASP:
– Below 1280 x 720: 60 frame max
– Above 1280 x 720: 30 frame max
● GMC is not supported.
● Supports up to WMA 7, 8, 9, STD, 9 PRO
● WMA Lossless, Voice Lossless, Voice is
not supported.
● WMA sampling rate 22050 Hz mono is not
supported.
English English▶ ◀ ▶
■ Music
Playing Music
1. Press the ◄/►/▲/▼ button to
select the desired Music in the file
list.
2. Press the ENTERE button or
� (Play) button.
– You can use � (REW)
andµ(FF) buttons during
playback. E Play L Pages T Tools R Return
Music
English English◀ ▶ ◀
N Only displays the files with MP3 file extension. Other file extensions are not
displayed, even if they are saved on the same USB device.
N If the sound is abnormal when playing MP3 files, adjust the Equalizer in the
Sound menu. (An over-modulated MP3 file may cause a sound problem.)
Playing the selected music
1. Press the C (Edit Mode A B D ) button.
2. Select the desired music.
N The check box appears to the left of the selected files.
3. Press the TOOLS button and select Play Selected Contents.
N You can select or deselect all music pressing the Select All / Deselect
All.
English English▶ ◀ ▶
■ Photos
Viewing a Photo (or Slide Show)
1. Press the ◄/►/▲/▼ button to
select the desired photo in the file
list.
2. Press the ENTERE button.
● When a selected photo
is displayed, press the
ENTERE button to start the
slide show.
● During the slide show, all files in the file list will be displayed in order.
N When you press the � (Play) button in the file list, slide show will be
started immediately.
E Pause L Previous/Next T Tools R Return
Nomal
English English◀ ▶ ◀
N Music files can be automatically played during the Slide Show if the
Background Music is set to On.
❑ My Downloads - Additional Functions
Videos/Music/Photos Play Option menu
During playing a file, press the TOOLS button.
Category Operation Videos Music Photos
Title Search
You can move the other file
directly.
c
Time Search
You can search the video using
◄ and ► button at one minute
interval or entering the number
directly.
c
Shuffle Mode
You can play the music
randomly.
c
English English▶ ◀ ▶
Category Operation Videos Music Photos
Repeat Mode
You can play movie and music
files repeatedly.
c c
Picture Size
You can adjust the picture size to
your preference.
c
Picture Mode
You can adjust the picture
setting.
c c
Sound Mode You can adjust the sound setting. c c c
English English◀ ▶ ◀
Category Operation Videos Music Photos
Subtitle Language
You can enjoy video in one
of supported languages as
required. The function is only
enabled when stream-type files
which support multiple audio
formats are played.
c
Subtitle Setting
You can play the video with
Subtitles. This function only
works if the subtitles are the
same file name as the video.
c
English English▶ ◀ ▶
Category Operation Videos Music Photos
Start Slide Show /
Pause Slide Show
You can start or pause a Slide
Show.
c
Slide Show Speed
You can select the slide show
speed during the slide show.
c
Background Music
You can on/off background
music when watching a Slide
Show.
c
English English◀ ▶ ◀
Category Operation Videos Music Photos
Background Music
Setting
You can select background
music when watching a Slide
Show.
c
Zoom
You can zoom into images in full
screen mode.
c
Rotate
You can rotate images in full
screen mode.
c
Information
You can see detailed information
about the played file.
c c c
English English▶ ◀ ▶
Anynet+ is a function that enables you to control all connected Samsung devices that
What is Anynet+? t
support Anynet+ with your Samsung TV’s remote. The Anynet+ system can be used
only with Samsung devices that have the Anynet+ feature. To be sure your Samsung
device has this feature, check if there is an Anynet+ logo on it.
N For the method of connecting external devices, refer to the supported user
manual.
N NOTE
● Connect the Optical cable between the DIGITAL AUDIO OUT (OPTICAL) jack
on your TV and the Digital Audio Input on the Home Theatre.
English English◀ ▶ ◀
● When following the connection above, the Optical jack only outputs 2 channel
audio. You will only hear sound from the Home Theatre’s Front Left and Right
speakers and the subwoofer. If you want to hear 5.1 channel audio, connect
the DIGITAL AUDIO OUT (OPTICAL) jack on the DVD / Satellite Box (i.e.
Anynet Device 1 or 2) directly to the Amplifier or Home Theatre, not the TV.
● You can connect only one Home Theatre.
● You can connect an Anynet+ device using the HDMI cable. Some HDMI
cables may not support Anynet+ functions.
● Anynet+ works when the AV device supporting Anynet+ is in the standby or
on status.
● Anynet+ supports up to 12 AV devices in total. Note that you can connect up
to 3 devices of the same type.
English English▶ ◀ ▶
Anynet+ Menu
O TOOLST → Anynet+ (HDMI-CEC) → ENTERE
The Anynet+ menu changes depending on the type and status of the Anynet+ devices
connected to the TV.
Anynet+ Menu Description
View TV Changes Anynet+ mode to TV broadcast mode.
Device List Shows the Anynet+ device list.
(device_name)
MENU
Shows the connected device menus. E.g. If a DVD recorder is
connected, the disc menu of the DVD recorder will appear.
English English◀ ▶ ◀
Anynet+ Menu Description
(device_name)
TOOLS
Shows the play menu of the connected device. E.g. If a DVD
recorder is connected, the play menu of the DVD recorder will
appear.
(device_name) Title
Menu
Shows the title menu of the connected device. E.g. If a DVD
recorder is connected, the title menu of the DVD recorder will
appear.
N Depending on the device, this menu may not be available.
Receiver Sound is played through the receiver.
English English▶ ◀ ▶
❑ Setting Up Anynet+
O MENUm → System → Anynet+ (HDMI-CEC) → ENTERE
■ Anynet+ (HDMI-CEC)
Anynet+ (HDMI-CEC) (Off / On): To use the Anynet+ Function, Anynet+ (HDMICEC) must be set to On.
N When the Anynet+ (HDMI-CEC) function is disabled, all the Anynet+ related
operations are deactivated.
Auto Turn Off (No / Yes): Setting an Anynet+ Device to turn off automatically
when the TV is turned off.
N If Auto Turn Off is set to Yes, running external devices will turn off at the
same time as the TV powers off.
N May not be enabled depending on the device.
English English◀ ▶ ◀
❑ Switching between Anynet+ Devices
1. Press the TOOLS button, then select Anynet+ (HDMI-CEC).
2. Anynet+ devices connected to the TV are listed in Device List.
N If you cannot find a device you want, press the C B D A button to refresh the list.
3. Select a device and press the ENTERE button. You can switch to the selected
device.
N Only when you set Anynet+ (HDMI-CEC) to On in the System menu, the
Device List menu appears.
● Switching to the selected device may take up to 2 minutes. You cannot
cancel the operation during the switching operation.
● If you have selected external input mode by pressing the SOURCE
button, you cannot use the Anynet+ function. Make sure to switch to an
Anynet+ device by using the Device List.
English English▶ ◀ ▶
❑ Listening through a Receiver
You can listen to sound through a receiver (i.e Home Theatre) instead of the TV
speaker.
1. Select Receiver and set to On.
2. Press the EXIT button to exit.
N If your receiver supports audio only, it may not appear in the device list.
N The receiver will work when you have properly connected the optical in
jack of the receiver to the DIGITAL AUDIO OUT (OPTICAL) jack of the TV.
N When the receiver (i.e Home Theatre) is set to On, you can hear sound
output from the TV’s Optical jack. When the TV is displaying a DTV (air)
signal, the TV will send out 5.1 channel sound to the receiver. When the
source is a digital component such as a DVD and is connected to the TV
via HDMI, only 2 channel sound will be heard from the receiver.
English English◀ ▶ ◀
N NOTE
● You can only control Anynet+ devices using the TV remote control, not
the buttons on the TV.
● The TV remote control may not work under certain conditions. If this
occurs, reselect the Anynet+ device.
English English▶ ◀ ▶
❑ Troubleshooting for Anynet+
Problem Possible Solution
Anynet+ does not work. ● Check if the device is an Anynet+ device. The Anynet+
system supports Anynet+ devices only.
● Only one receiver (home theatre) can be connected.
● Check if the Anynet+ device power cord is properly
connected.
● Check the Anynet+ device’s Video/Audio/HDMI cable
connections.
● Check whether Anynet+ (HDMI-CEC) is set to On in
the System menu.
English English◀ ▶ ◀
Problem Possible Solution
Anynet+ does not work. ● Check whether the TV remote control is in TV mode.
● Check whether the remote control is Anynet+
compatible.
● Anynet+ does not work in certain situations. (Searching
channels, operating My Downloads or Plug & Play
(initial setup), etc.)
● When connecting or removing the HDMI cable, please
make sure to search devices again or turn your TV off
and on again.
● Check if the Anynet+ Function of Anynet+ device is set
on.
English English▶ ◀ ▶
Problem Possible Solution
I want to start Anynet+. ● Check if the Anynet+ device is properly connected to
the TV and check if the Anynet+ (HDMI-CEC) is set to
On in the System menu.
● Press the TOOLS button to display the Anynet+ menu
and select a menu you want.
I want to exit Anynet+. ● Select View TV in the Anynet+ menu.
● Press the SOURCE button on the TV remote control
and select a device other than Anynet+ devices.
● Press > CH < button to change the TV mode. (Note
that the channel button operates only when a tunerembedded Anynet+ device is not connected.)
English English◀ ▶ ◀
Problem Possible Solution
The message
“Connecting to Anynet+
device...” appears on the
screen.
● You cannot use the remote control when you are
configuring Anynet+ or switching to a view mode.
● Use the remote control when the Anynet+ setting or
switching to view mode is complete.
The Anynet+ device does
not play.
● You cannot use the play function when Plug & Play
(initial setup) is in progress.
English English▶ ◀ ▶
Problem Possible Solution
The connected device is
not displayed.
● Check whether or not the device supports Anynet+
functions.
● Check whether or not the HDMI cable is properly
connected.
● Check whether Anynet+ (HDMI-CEC) is set to On in
the System menu.
● Search Anynet+ devices again.
● You can connect an Anynet+ device using the HDMI
cable only. Some HDMI cables may not support
Anynet+ functions.
● If it is terminated by an abnormal situation such as
disconnecting the HDMI cable or power cord or a
power failure, please repeat the device scan.
English English◀ ▶ ◀
Problem Possible Solution
The TV sound is not
output through the
receiver.
● Connect the optical cable between TV and the receiver.
English English▶ ◀ ▶
❑ About AllShare™ for LED 5 series 32-46 inches
AllShare™ connects your TV and compatible Samsung mobile phones / devices
through a network. You can play media contents including videos, photos and
music saved on your mobile phones or the other devices (such as your PC) by
controlling them on the TV via the network.
N For more information, visit “www.samsung.com” or contact the Samsung call
centre. Mobile devices may need additional software installation. For details,
refer to each device’s user’s guide.
English English◀ ▶ ◀
❑ Setting Up AllShare™
O MENUm → Network → AllShare Settings → ENTERE
■ AllShare Settings
● Media (On / Off): Enables or disables
the media function. When the media
function is on, Media contents play
can be controlled by mobile phones
or other devices that support DLNA
DMC.
U Move E Enter R Return
AllShare Settings
Media : On ►
English English▶ ◀ ▶
■ Media
Shows a list of mobile phones or connected devices which have been set up with
this TV for using the Media function.
N The Media function is available in all devices which support DLNA DMC.
● Allow / Deny: Allows/Blocks the devices.
●C B D A Delete: Deletes the devices from the list.
N This function only deletes the name of the devices from the list. If the
deleted device is turned on or tries to connect to the TV, it may appear
on the list again.
English English◀ ▶ ◀
Using the Media Function
You can play media contents including videos, photos and music saved on your
mobile phones or the other devices (such as your PC) by controlling them on the TV
via the network.
● To turn off the media contents transmission from the devices, set Media to
Off in the AllShare Settings.
● Contents may not be played on your TV depending on their resolution and
format.
● The ENTERE and ◄ / ► buttons may not work depending on the type of
media content.
● Using the devices, you can control the media playing. For details, refer to each
device’s user’s guide.
English English▶ ◀ ▶
❑ Analogue Channel Teletext Feature
The index page of the Teletext service gives you information on how to use the
service. For Teletext information to be displayed correctly, channel reception must
be stable. Otherwise, information may be missing or some pages may not be
displayed.
You can change Teletext pages by pressing the numeric buttons on the remote
control.
● 0 (mode): Selects the Teletext mode (LIST/FLOF). If pressed during LIST
mode, switches the mode to List save mode. In List save mode, you can save
a Teletext page into a list using the 8(store) button.
● / (Teletext on/mix/off): Activates the Teletext mode for the current
channel. Press the button twice to overlap the Teletext mode with the current
broadcasting screen. Press it one more time to exit teletext.
English English◀ ▶ ◀
● 1 (sub-page): Displays the available sub-page.
● 8 (store): Stores the Teletext pages.
● 6 (index): Displays the index (contents) page at any time while you are
viewing Teletext.
● 4 (size): Displays the teletext on the upper half of the screen in double-size.
To move the text to the lower half of the screen, press it again. For normal
display, press it once again.
● 9 (hold): Holds the display at the current page, in the case that there are
several secondary pages that follow automaticially. To undo, press it again.
● 2 (page up): Displays the next Teletext page.
● 3 (page down): Displays the previous Teletext page.
English English▶ ◀ ▶
● 5 (reveal): Displays the hidden text (answers to quiz games, for example). To
display the normal screen, press it again.
● 7 (cancel): Shrinks the Teletext display to overlap with the current broadcast.
● Colour buttons (red, green, yellow, blue): If the FASTEXT system is used by
the broadcasting company, the different topics on a Teletext page are colourcoded and can be selected by pressing the coloured buttons. Press the
colour corresponding to the topic of your choice. A new colourcoded page is
displayed. Items can be selected in the same way. To display the previous or
next page, press the corresponding coloured button.
English English◀ ▶ ◀
The Teletext pages are organized according to six categories:
Part Contents
A Selected page number.
B Broadcasting channel identity.
C Current page number or search indications.
D Date and time.
E Text.
F Status information. FASTEXT information.
A B C D
E
F
English English▶ ◀ ▶
❑ Anti-theft Kensington Lock
The Kensington Lock is not supplied by Samsung. It is a device used to physically
fix the system when using it in a public place. The appearance and locking
method may differ from the illustration depending on the manufacturer. Refer
to the manual provided with the Kensington Lock for additional information on
proper use.
N Please find a “K” icon on the rear of the TV. A kensington slot is beside the “K”
icon.
N The position and colour may
differ depending on the model.
To lock the product, follow these
steps:
1. Wrap the Kensington lock
cable around a large, stationary
object such as desk or chair.
1
TV Rear
Optional
English English◀ ▶ ◀
2. Slide the end of the cable with the lock attached through the looped end of
the Kensington lock cable.
3. Insert the locking device into the Kensington slot on the product 1.
4. Lock the lock.
N NOTE
● These are general instructions. For exact instructions, see the User
manual supplied with the locking device.
● The locking device has to be purchased separately.
● The location of the Kensington slot may be different depending on the TV
model.
English English▶ ◀ ▶
❑ Connections Common Interface Slot
Attaching the CI Card Adaptor
Attach the adapter as shown in the right.
To connect the CI CARD Adapter, follow these steps.
N Make sure that you attach the adaptor before
you mount the TV on a wall.
1. Insert the CI CARD Adapter into the two holes
on the product 1.
N Please find the two holes on the rear of the
TV. The two holes are beside the COMMON
INTERFACE port.
N Press it firmly at center of adapter to ensure it is fully lock.
2. Connect the CI CARD Adapter into the COMMON INTERFACE port.
3. Insert the “CI or CI+ CARD”.
English English◀ ▶ ◀
To watch paid channels, the “CI or CI+ CARD” must be inserted.
● If you do not insert the “CI or CI+ CARD”,
some channels will display the message
“Scrambled Signal”.
● The pairing information containing a
telephone number, the “CI or CI+ CARD”
ID, the Host ID and other information will
be displayed in about 2~3 minutes. If an
error message is displayed, please contact
your service provider.
● When the configuration of channel information has finished, the message “Updating
Completed” is displayed, indicating the channel list is updated.
English English▶ ◀ ▶
N NOTE
● You must obtain a “CI or CI+ CARD” from a local cable service provider.
● When removing the “CI or CI+ CARD”, carefully pull it out with your hands
since dropping the “CI or CI+ CARD” may cause damage to it.
● Insert the “CI or CI+ CARD” in the direction marked on the card.
● The location of the COMMON INTERFACE slot may be different depending on
the model.
● “CI or CI+ CARD” is not supported in some countries and regions; check with
your authorized dealer.
● If you have any problems, please contact a service provider.
● Insert the “CI or CI+ CARD” that supports the current antenna settings. The
screen will be distorted or will not be seen.
English English◀ ▶ ◀
❑ Troubleshooting
If you have any questions about the TV, first refer to this list. If none of these
troubleshooting tips apply, please visit “www.samsung.com”, then click on
Support.
Issues Solutions and Explanations
Picture Quality First of all, please perform the Picture Test and confirm that
your TV is properly displaying test image. (go to MENU -
Support - Self Diagnosis - Picture Test) If the test image
is properly displayed, the poor picture may caused by the
source or signal.
English English▶ ◀ ▶
Issues Solutions and Explanations
The TV image does
not look as good as it
did in the store.
● If you have an analogue cable/set top box, upgrade to a
digital set top box. Use HDMI or Component cables to
deliver HD (high definition) picture quality.
● Cable/Satellite subscribers: Try HD stations from the
channel line up.
● Antenna connection: Try HD stations after performing
Auto tuning.
N Many HD channels are up scaled from
SD(Standard Definition) contents.
● Adjust the Cable/Set top box video output resolution to
1080i or 720p.
● Make sure you are watching the TV at the minimum
recommended distance based on the size and definition
of the signal.
English English◀ ▶ ◀
Issues Solutions and Explanations
The picture is
distorted: macroblock
error, small block,
dots, pixelization
● Compression of video contents may cause picture
distortion especially in fast moving pictures such as
sports and action movies.
● Low signal level or bad quality can cause picture
distortion. This is not a TV issue.
● Mobile phones used close to the TV (cca up to 1m) may
cause noise in picture on analogue and digital TV.
Colour is wrong or
missing.
● If you’re using a component connection, make sure
the component cables are connected to the correct
jacks. Incorrect or loose connections may cause colour
problems or a blank screen.
English English▶ ◀ ▶
Issues Solutions and Explanations
There is poor colour
or brightness.
● Adjust the Picture options in the TV menu. (go to Picture
Mode / Colour / Brightness / Sharpness)
● Adjust Energy Saving option in the TV menu. (go to
MENU - System - Eco Solution - Energy Saving)
● Try resetting the picture to view the default picture
settings. (go to MENU - Picture - Reset Picture)
There is a dotted line
on the edge of the
screen.
● If the picture size is set to Screen Fit, change it to 16:9.
● Change cable/satellite box resolution.
The picture is black
and white.
If you are using an AV composite input, connect the video
cable (yellow) to the Green jack of component input 1 on
the TV.
English English◀ ▶ ◀
Issues Solutions and Explanations
When changing
channels, the picture
freezes or is distorted
or delayed.
● If connected with a cable box, please try to reset the
cable box. Reconnect the AC cord and wait until the
cable box reboots. It may take up to 20 minutes.
● Set the output resolution of the cable box to 1080i or
720p.
Sound Quality First of all, please perform the Sound Test to confirm
that your TV audio is properly operating. (go to MENU -
Support - Self Diagnosis - Sound Test)
If the audio is OK, the sound problem may caused by the
source or signal.
There is no sound or
the sound is too low
at maximum volume.
● Please check the volume of the device (Cable/Sat Box,
DVD, Blu-ray etc) connected to your TV.
English English▶ ◀ ▶
Issues Solutions and Explanations
The picture is good
but there is no sound.
● Set the Speaker Select option to TV Speaker in the
sound menu.
● If you are using an external device, make sure the audio
cables are connected to the correct audio input jacks on
the TV.
● If you are using an external device, check the device’s
audio output option (ex. you may need to change your
cable box’s audio option to HDMI when you have a
HDMI connected to your TV).
● If you are using a DVI to HDMI cable, a separate audio
cable is required.
● Reboot the connected device by reconnecting the
device’s power cable.
● If your TV has a headphone jack, make sure there is
nothing plugged into it.
English English◀ ▶ ◀
Issues Solutions and Explanations
The speakers
are making an
inappropriate noise.
● Check the cable connections. Make sure a video cable
is not connected to an audio input.
● For antenna or cable connections, check the signal
strength. Low signal level may cause sound distortion.
No Picture, No Video
The TV will not turn
on.
● Make sure the AC power cord is securely plugged in to
the wall outlet and the TV.
● Make sure the wall outlet is working.
● Try pressing the POWER button on the TV to make sure
the problem is not the remote. If the TV turns on, refer to
“The remote control does not work” below.
English English▶ ◀ ▶
Issues Solutions and Explanations
The TV turns off
automatically.
● Ensure the Sleep Timer is set to Off in the Time menu.
● If your PC is connected to the TV, check your PC power
settings.
● Make sure the AC power cord is plugged in securely to
the wall outlet and the TV.
● When watching TV from an antenna or cable connection,
the TV will turn off after 10 ~ 15 minutes if there is no
signal.
English English◀ ▶ ◀
Issues Solutions and Explanations
There is no picture/
video.
● Check cable connections (remove and reconnect all
cables connected to the TV and external devices).
● Set your external devices’ (Cable/Set top Box, DVD,
Blu-ray etc) video outputs to match the connections to
the TV input. For example, if an external device’s output
is HDMI, it should be connected to an HDMI input on
the TV.
● Make sure your connected devices are powered on.
● Be sure to select the TV’s correct source by pressing the
SOURCE button on the TV remote.
● Reboot the connected device by reconnecting the
device’s power cable.
English English▶ ◀ ▶
Issues Solutions and Explanations
RF(Cable/Antenna) Connection
The TV is not receiving
all channels.
● Make sure the Antenna cable is connected securely.
● Please try Plug & Play (Initial setup) to add available
channels to the channel list. Go to MENU - System
- Plug & Play (Initial setup) and wait for all available
channels to be stored.
● Verify the Antenna is positioned correctly.
The picture is
distorted: macro block
error small block,
dots, pixelization
● Compression of video contents may cause picture
distortion, especially on fast moving pictures such as
sports and action movies.
● A low signal can cause picture distortion. This is not a
TV issue.
English English◀ ▶ ◀
Issues Solutions and Explanations
PC Connection
A “Mode Not
Supported” message
appears.
● Set your PC’s output resolution so it matches the
resolutions supported by the TV.
“PC” is always shown
on the source list,
even if a PC is not
connected.
● This is normal; “PC” is always shown on the source list,
regardless of whether a PC is connected.
The video is OK but
there is no audio.
● If you are using a HDMI connection, check the audio
output setting on your PC.
English English▶ ◀ ▶
Issues Solutions and Explanations
Network Connection for LED 5 series 32-46 inches
The wireless network
connection failed.
● Samsung Wireless USB dongle is required to use a
wireless network.
● Make sure the Network Connection is set to Wireless.
● Make sure the TV is connected to a wireless IP sharer
(Router).
Software Upgrade
over the network fails.
● Try Network Settings in Network menu.
● If you have latest SW version, SW upgrade will not
proceed.
English English◀ ▶ ◀
Issues Solutions and Explanations
Others
The picture will not
display in full screen.
● HD channels will have black bars on either side of the
screen when displaying up scaled SD (4:3) contents.
● Black bars on the top and bottom will appear during
movies that have aspect ratios different from your TV.
● Adjust the picture size options on your external device or
TV to full screen.
The remote control
does not work.
● Replace the remote control batteries with the poles (+/–)
in the right direction.
● Clean the sensor’s transmission window on the remote.
● Try pointing the remote directly at the TV from 5~6 feet
away.
English English▶ ◀ ▶
Issues Solutions and Explanations
The cable/set top box
remote control doesn’t
turn the TV on or off,
or adjust the volume.
● Programme the Cable/Set top box remote control to
operate the TV. Refer to the Cable/Set user manual for
the SAMSUNG TV code.
A “Mode Not
Supported” message
appears.
● Check the supported resolution of the TV, and adjust the
external device’s output resolution accordingly.
There is a plastic smell
from the TV.
● This smell is normal and will dissipate over time.
The TV Signal
Information is
unavailable in the Self
Diagnosis Test menu.
● This function is only available with digital channels from
an Antenna / RF / Coax connection.
English English◀ ▶ ◀
Issues Solutions and Explanations
TV is tilted to the right
or left side.
● Remove the stand base from the TV and reassemble it.
There are difficulties
assembling the stand
base.
● Make sure the TV is placed on a flat surface. If you
can not remove the screws from the TV, please use a
magnetized screw driver.
The Channel menu is
grey out (unavailable).
● The Channel menu is only available when the TV source
is selected.
Your settings are lost
after 30 minutes or
every time the TV is
turned off.
● If the TV is in the Store Demo mode, it will reset audio
and picture settings every 30 minutes. Change the
settings from Store Demo mode to Home Use mode
in the Plug & Play (Initial setup) procedure. Press the
SOURCE button to select TV mode, and go to MENU
→ System → Plug & Play (Initial setup) → ENTERE.
English English▶ ◀ ▶
Issues Solutions and Explanations
You have intermittent
loss of audio or video.
● Check the cable connections and reconnect them.
● Loss of audio or video can be caused by using overly
rigid or thick cables. Make sure the cables are flexible
enough for long term use. If mounting the TV to the wall,
we recommend using cables with 90 degree connectors.
You see small particles
when you look closely
at the edge of the
frame of the TV.
● This is part of the product’s design and is not a defect.
The PIP menu is not
available.
● PIP functionality is only available when you are using a
HDMI, PC or components source.
English English◀ ▶ ◀
Issues Solutions and Explanations
You turned the TV off
45 minutes ago, and it
turned on again.
● It is normal. The TV operates the OTA (Over The Aerial)
function itself to upgrade firmware downloaded whilst
your watching TV.
The message
“Scramble signal”
or “Weak Signal/No
Signal” appears.
● If you are using a CAM CARD (CI/CI+), check that it is
installed into the common interface slot.
● If there is still a problem, pull the CAM CARD out of the
TV and insert it into the slot again.
There are recurrent
picture/sound issues.
● Check and change the signal/source.
A reaction may occur
between the rubber
cushion pads on the
base stand and the
top finish of some
furniture.
● To prevent this, use felt pads on any surface of the TV
that comes in direct contact with furniture.
English English▶ ◀ ▶
❑ Licence
Manufactured under licence from Dolby Laboratories. Dolby and the
double-D symbol are trademarks of Dolby Laboratories.
Manufactured under licence under U.S. Patent #’s: 5,451,942; 5,956,674;
5,974,380; 5,978,762; 6,487,535 & other U.S. and worldwide patents issued
& pending. DTS and the Symbol are registered trademarks. & DTS 2.0+
Digital Out and the DTS logos are trademarks of DTS, Inc. Product Includes
software. © DTS, Inc. All Rights Reserved.
English English◀ ▶ ◀
DivX Certified to play DivX video up to HD 1080p, including premium content.
ABOUT DIVX VIDEO: DivX
®
is a digital video format created by DivX,Inc. This is an official
DivX Certified device that plays DivX video. Visit www.divx.com for more information and
software tools to convert your files into DivX video. ABOUT DIVX VIDEO-ON-DEMAND: This
DivX Certified
®
device must be registered in order to play DivX Video-on-Demand (VOD)
content. To generate the registration code, locate the DivX VOD section in the device setup
menu. Go to vod.divx.com with this code to complete the registration process and learn
more about DivX VOD. Pat. 7,295,673;7,460,688; 7,519,274
English English▶ ◀
TheaterSound, SRS and symbol are trademarks of SRS Labs, Inc.
TheaterSound technology is incorporated under licence from SRS Labs, Inc.
Open Source Licence Notice
In the case of using open source software, Open Source Licences are available on the
product menu. Open Source Licence Notice is written only English.
English English
© 2010 Samsung Electronics Co., Ltd. All rights reserved.
LCD TV user manual
LCD TV
user manual
imagine the possibilities
Thank you for purchasing this Samsung product.
To receive more complete service, please register
your product at
www.samsung.com/register
Model _____________Serial No. _____________
Contact SAMSUNG WORLDWIDE
If you have any questions or comments relating to Samsung products, please contact the SAMSUNG customer care centre.
Country Customer Care Centre Web Site
ArMENIA 0-800-05-555 -
AUSTrIA 0810 - SAMSUNG (7267864, € 0.07/min) www.samsung.com/at
AzErbAIjAN 088-55-55-555 -
bELArUS 810-800-500-55-500 -
bELGIUM 02-201-24-18
www.samsung.com/be (Dutch)
www.samsung.com/be_fr (French)
CzECH
800 - SAMSUNG (800-726786) www.samsung.com
Samsung Zrt., česká organizační složka, Oasis Florenc, Sokolovská394/17, 180 00, Praha 8
DENMArK 70 70 19 70 www.samsung.com/dk
ESTONIA 800-7267 www.samsung.com
FINLAND 030 - 6227 5 15 www.samsung.com/fi
FrANCE 01 48 63 00 00 www.samsung.com/fr
GErMANY 01805 - SAMSUNG(726-7864 € 0,14/Min) www.samsung.com/de
GEOrGIA 8-800-555-555 -
HUNGArY 06-80-SAMSUNG(726-7864) www.samsung.com/hu
IrELAND 0818 717100 www.samsung.com/ie
ITALIA 800-SAMSUNG(726-7864) www.samsung.com/it
KAzAKHSTAN 8-10-800-500-55-500 -
KYrGYzSTAN 00-800-500-55-500 www.samsung.com
LATVIA 8000-7267 www.samsung.com
LITHUANIA 8-800-77777 www.samsung.com
LUXEMbUrG 261 03 710 www.samsung.com/lu
MOldOvA 00-800-500-55-500 -
NETHErLANDS 0900-SAMSUNG (0900-7267864) (€ 0,10/Min) www.samsung.com/nl
NOrWAY 815-56 480 www.samsung.com/no
POlANd
0 801 1SAMSUNG(172678)
022-607-93-33
www.samsung.com/pl
POrTUGAl 80820-SAMSUNG(726-7864) www.samsung.com/pt
rUSSIA 8-800-555-55-55 www.samsung.com
SlOvAKIA 0800-SAMSUNG(726-7864) www.samsung.com/sk
SPAIN 902 - 1 - SAMSUNG (902 172 678) www.samsung.com/es
SWEdEN 0771 726 7864 (SAMSUNG) www.samsung.com/se
SWITZErlANd 0848 - SAMSUNG(7267864, CHF 0.08/min)
www.samsung.com/ch
www.samsung.com/ch_fr/(French)
TADjIKISTAN 8-10-800-500-55-500 www.samsung.com
U.K 0845 SAMSUNG (7267864) www.samsung.com/uk
UKrAINE 0-800-502-000
www.samsung.ua
www.samsung.com/ua_ru
UzbEKISTAN 8-10-800-500-55-500 www.samsung.com
bN68-02588F-00
BN68-02588F_Eng.indb 1 2010-3-19 15:41:512 English
Figures and illustrations in this User Manual are provided for reference only and may differ from actual product appearance.
Product design and specifications may be changed without notice.
Digital TV notice
1. Functionalities related to Digital TV (DVB) are only available in countries/areas where DVB-T (MPEG2 and MPEG4 AVC) digital terrestrial signals are
broadcasted or where you are able to access to a compatible DVB-C (MPEG2 and MPEG4 AAC) cable-TV service. Please check with your local
dealer the possibility to receive DVB-T or DVB-C signal.
2. DVB-T is the DVB European consortium standard for the broadcast transmission of digital terrestrial television and DVB-C is that for the broadcast
transmission of digital TV over cable. However, some differentiated features like EPG (Electric Programme Guide), VOD (Video On Demand) and so
on, are not included in this specification. So, they cannot be workable at this moment.
3. Although this TV set meets the latest DVB-T and DVB-C standards, as of [August, 2008], the compatibility with future DVB-T digital terrestrial and
DVB-C digital cable broadcasts cannot be guaranteed.
4. Depending on the countries/areas where this TV set is used some cable-TV providers may charge an additional fee for such a service and you may
be required to agree to terms and conditions of their business.
5. Some Digital TV functions might be unavailable in some countries or regions and DVB-C might not work correctly with some cable service providers.
6. For more information, please contact your local Samsung customer care centre.
✎ The reception quality of TV may be affected due to differences in broadcasting method between the countries. Please check the TV performance in
the local SAMSUNG Authorized Dealer, or the Samsung Call Centre whether it can be improved by reconfiguring TV setting or not.
Still image warning
Avoid displaying still images (like jpeg picture files) or still image element (like TV programme logo, panorama or 4:3 image format, stock or news bar at
screen bottom etc.) on the screen. Constant displaying of still picture can cause ghosting of LCD screen, which will affect image quality. To reduce risk of
this effect, please follow below recommendations:
• Avoid displaying the same TV channel for long periods.
• Always try do display any image on full screen, use TV set picture format menu for best possible match.
• Reduce brightness and contrast values to minimum required to achieve desired picture quality, exceeded values may speed up the burnout process.
• Frequently use all TV features designed to reduce image retention and screen burnout, refer to proper user manual section for details.
Securing the Installation Space
Keep the required distances between the product and other objects (e.g. walls) to ensure proper ventilation.
Failing to do so may result in fire or a problem with the product due to an increase in the internal temperature of the product.
✎ When using a stand or wall-mount, use parts provided by Samsung Electronics only.
x If you use parts provided by another manufacturer, it may result in a problem with the product or an injury due to the product falling.
✎ The appearance may differ depending on the product.
Installation with a stand. Installation with a wall-mount.
10 cm
10 cm 10 cm
10 cm
10 cm
10 cm
10 cm
Correct Disposal of This Product (Waste Electrical & Electronic Equipment)
(Applicable in the European Union and other European countries with separate collection systems)
This marking on the product, accessories or literature indicates that the product and its electronic accessories (e.g. charger,
headset, USB cable) should not be disposed of with other household waste at the end of their working life. To prevent possible
harm to the environment or human health from uncontrolled waste disposal, please separate these items from other types of waste
and recycle them responsibly to promote the sustainable reuse of material resources. Household users should contact either the
retailer where they purchased this product, or their local government office, for details of where and how they can take these items
for environmentally safe recycling. Business users should contact their supplier and check the terms and conditions of the purchase
contract. This product and its electronic accessories should not be mixed with other commercial wastes for disposal.
Correct disposal of batteries in this product
(Applicable in the European Union and other European countries with separate battery return systems)
This marking on the battery, manual or packaging indicates that the batteries in this product should not be disposed of with other
household waste at the end of their working life. Where marked, the chemical symbols Hg, Cd or Pb indicate that the battery
contains mercury, cadmium or lead above the reference levels in EC Directive 2006/66. If batteries are not properly disposed of,
these substances can cause harm to human health or the environment. To protect natural resources and to promote material
reuse, please separate batteries from other types of waste and recycle them through your local, free battery return system.
BN68-02588F_Eng.indb 2 2010-3-19 15:41:52English 3
Contents
Getting Started
4
4 Accessories
4 Viewing the Control Panel
5 Viewing the Remote Control
6 Connecting to an Antenna
6 Plug & Play (Initial Setup)
Connections
7
7 Connecting to an AV Device
8 Connecting to an Audio Device
8 Connecting to a PC
10 Changing the Input Source
Basic Features
10
10 How to Navigate Menus
11 Using the INFO button (Now & Next guide)
11 Planning Your Viewing
12 Channel Menu
14 Picture Menu
17 Sound Menu
19 Setup Menu
21 Support Menu
Advanced Features
22
22 Media Play
Other Information
26
26 Analogue Channel Teletext Feature
27 Installing the Wall Mount
28 Anti-Theft Kensington Lock
28 Securing the TV to the Wall
29 Troubleshooting
32 Specifications
33 Index
Check the Symbol!
This function can be used by
t
pressing the TOOLS button on
the remote control.
Note One-Touch Button
P
POWER
BN68-02588F_Eng.indb 3 2010-3-19 15:41:534 English
Getting Started
Accessories
✎Please make sure the following items are included with your LCD TV. If any items are missing, contact your dealer.
✎The items’ colours and shapes may vary depending on the models.
y Remote Control & Batteries (AAA x 2)
y Owner’s Instructions
y Warranty Card / Safety Guide (Not available in some locations)
y Cleaning Cloth
y Power Cord
✎See separate guide for installing the stand.
1 EA
(M4 X L16)
y Stand (1EA) y Stand Screws (2EA)
Viewing the Control Panel
✎The product colour and shape may vary depending on the model.
P (Power) Turns the TV on or off.
Power Indicator Blinks and turns off when the power is on and lights up in standby mode.
SOURCEE Toggles between all the available input sources. In the on-screen menu, use this
button as you would use the ENTERE button on the remote control.
MENU Y Displays an on-screen menu, the OSD (on screen display), of your TV’s features.
Adjusts the volume. In the OSD, use the Y buttons as you would use the ◄
z and ► buttons on the remote control.
Changes the channels. In the OSD, use the z buttons as you would use the
▼ and ▲ buttons on the remote control.
Remote control sensor Aim the remote control towards this spot on the TV.
Standby mode
Do not leave your TV in standby mode for long periods of time (when you are away on a holiday, for example). A small amount
of electric power is still consumed even when the power button is turned off. It is best to unplug the power code.
Display the main on-screen menu.
(P. 10)
Y
Speakers
Remote control sensor Power Indicator
BN68-02588F_Eng.indb 4 2010-3-19 15:41:545
01 Getting Started
English
Viewing the Remote Control
Installing batteries (Battery size: AAA)
✎NOTE
x Use the remote control within 23 feet from the TV.
x Bright light may affect the performance of the remote
control. Avoid using nearby special fluorescent light or neon
signs.
x The colour and shape may vary depending on the model.
MEDIA.P
A B C D
Display and select the available video
sources. (P. 10)
Turn the TV on and off. (P. 6)
Change the channel.
Display the EPG (Electronic Programme
Guide). (P. 11)
Display Channel Lists on the
screen. (P. 14)
Change channels.
Quickly select frequently used
functions.
Display information on the
TV screen.
Display the main on-screen menu.
(P. 10)
Adjust the volume.
Return to the previous channel.
Buttons in the Channel Manager,
Media Play menu, etc.
AD: Audio Description selection. (Not
available in some locations) (P. 18)
P.SIZE: Choose the picture size. (P. 16)
SUBT.: Digital subtitle display (P. 20)
Cut off the sound temporarily.
Return to the previous menu. (P. 10)
Select on-screen menu items and
change menu values.
Exit the menu. (P. 10)
Alternately select Teletext,
Double or MiX.
View the Media play.
BN68-02588F_Eng.indb 5 2010-3-19 15:41:546
Getting Started
English
Connecting to an Antenna
When the TV is initially powered on, basic settings proceed automatically.
✎Preset: Connecting the mains and antenna.
Plug & Play (Initial Setup)
When the TV is initially powered on, a sequence of on-screen prompts will assist in confi guring basic settings. Press the
POWERP button. Plug & Play is available only when the Input source is set to TV.
1
Selecting a language Press the ▲ or ▼ button, then press the ENTERE button.
Select the desired OSD (On Screen Display) language.
2
Selecting Store Demo
or Home Use
Press the ◄ or ► button, then press the ENTERE button.
y Select the Home Use mode. Store Demo Mode is for retail
environments.
y Return the unit’s settings from Store Demo to Home Use
(standard): Press the volume button on the TV. When the OSD
volume is displayed, press and hold MENU for 5 sec.
3
Selecting a country Press the ▲ or ▼ button, then press the ENTERE button.
Select the appropriate country. If the desired country does not exist on the menu, select
Others.
✎After selecting the country in the Country menu, some models may proceed with an
additional option to setup the pin number.
✎When you input the PIN number, 0-0-0-0 is not available.
4
Selecting an antenna Press the ▲ or ▼ button, then press the ENTERE button.
Select Air or Cable.
5
Selecting a channel Press the ▲ or ▼ button, then press the ENTERE button.
Select the channel source to memorise. When setting the antenna source to Cable, a step
appears allowing you to assign numerical values (channel frequencies) to the channels. For
more information, refer to Channel → Auto Store. (P. 13)
✎Press the ENTERE button at any time to interrupt the memorisation process.
6
Setting the Clock
Mode
Set the Clock Mode automatically or manually.
✎If you select the Auto, select the time zone where you live.
7
Viewing the HD
Connection Guide.
The connection method for the best HD screen quality is displayed.
8
Enjoy your TV. Press the ENTERE button.
If You Want to Reset This Feature...
Select Setup - Plug & Play (Initial Setup). Enter your 4 digit PIN number. The default PIN number is “0-0-0-0.” If you want to
change the PIN number, use the Change PIN function.
Power Input
P
POWER
MEDIA.P
FAV.CH
P.MODE
DUAL
MTS
VHF/UHF Antenna
or
Cable
R-AUDIO-L PR PB Y
ANT OUT
BN68-02588F_Eng.indb 6 2010-3-19 15:41:56English 7
02 Connections
Connections
Connecting to an AV Device
Using an HDMI / DVI Cable: HD connection (up to 1080p)
Available devices: DVD, Blu-ray player, HD cable box, HD STB (Set-Top-Box) satellite receiver, cable box, satellite receiver (STB)
✎HDMI (DVI) IN / PC/DVI AUDIO IN
x When using an HDMI/DVI cable connection, you must use the HDMI (DVI) IN jack. For the DVI cable
connection, use a DVI to HDMI cable or DVI-HDMI (DVI to HDMI) adapter for video connection and the PC/DVI
AUDIO IN jacks for audio.
x If an external device such as a DVD / Blu-ray player / cable box / STB satellite receiver supporting a HDMI
versions older than 1.3 is connected, the TV may operate abnormally (e.g. no screen display / no sound /
annoying flicker / abnormal colour).
x If there is no sound after connecting an HDMI cable, check the HDMI version of the external device. If you
suspect the version is older than 1.3, contact the provider of the device to confirm the HDMI version and
request an upgrade.
x It is recommended you purchase an HDMI-certified cable. Otherwise, the screen may appear blank or a
connection error may occur.
Using a Component (up to 1080p) or Audio/Video (480i only) Cable and Using a Scart Cable
Available devices: VCR, DVD, Blu-ray player, cable box, STB satellite receiver
✎In Ext. mode, DTV Out supports MPEG SD Video and Audio only.
✎To obtain the best picture quality, the Component connection is recommended over the A/V connection.
R-AUDIO-L PR PB Y
AUDIO OUT
R-AUDIO-L PR PB Y
DVI OUT
R-AUDIO-L PR PB Y
HDMI OUT
Y
W R
R W R G B
R W R G
R W Y
R W Y B
R-AUDIO-L PR PB Y
COMPONENT OUT
R-AUDIO-L PR PB Y
AUDIO OUT
R-AUDIO-L PR PB Y
EXT
R-AUDIO-L PR PB Y
AUDIO OUT
R-AUDIO-L PR PB Y
VIDEO OUT
WY WR W R B G
Yellow Red White
WY WR W R B G
Red Blue Green
WY WR W R B G
Red White
DVD
VCR Blu-ray player DVD
BN68-02588F_Eng.indb 7 2010-3-19 15:42:008 English
Connections
Connecting to an Audio Device
Using an Optical or Audio Cable Connection
Available devices: digital audio system, amplifi er, DVD home theatre
✎DIGITAL AUDIO OUT (OPTICAL)
x When a digital audio system is connected to the DIGITAL AUDIO OUT (OPTICAL) jack, decrease the volume
of both the TV and the system.
x 5.1 CH (channel) audio is available when the TV is connected to an external device supporting 5.1 CH.
x When the receiver (home theatre) is set to on, you can hear sound output from the TV’s optical jack. When the
TV is receiving a DTV signal, the TV will send 5.1 CH sound to the home theatre receiver. When the source is
a digital component such as a DVD / Blu-ray player / cable box / STB (Set-Top-Box) satellite receiver and is
connected to the TV via HDMI, only 2 CH audio will be heard from the home theatre receiver. If you want to
hear 5.1 CH audio, connect the digital audio out jack from your DVD / Blu-ray player / cable box / STB satellite
receiver directly to an amplifier or home theatre.
Connecting to a PC
Using an HDMI/DVI Cable / a D-sub Cable
R-AUDIO-L PR PB Y
OPTICAL
R-AUDIO-L PR PB Y
AUDIO OUT
R-AUDIO-L PR PB Y
AUDIO OUT
R-AUDIO-L PR PB Y
DVI OUT
R-AUDIO-L PR PB Y
PC OUT
Digital Audio
System
BN68-02588F_Eng.indb 8 2010-3-19 15:42:03English 9
02 Connections
Display Modes (D-Sub and HDMI/DVI Input)
Optimal resolution is 1360 X 768 @ 60 Hz.1920X1080@60Hz.
Mode Resolution
Horizontal Frequency
(KHz)
Vertical Frequency (Hz)
Pixel Clock Frequency
(MHz)
Sync Polarity
(H / V)
IBM
640 x 350 31.469 70.086 25.175 +/-
720 x 400 31.469 70.087 28.322 -/+
MAC
640 x 480 35.000 66.667 30.240 -/-
832 x 624 49.726 74.551 57.284 -/-
VESA DMT
640 x 480
31.469 59.940 25.175 -/-
37.861 72.809 31.500 -/-
37.500 75.000 31.500 -/-
800 x 600
37.879 60.317 40.000 +/+
48.077 72.188 50.000 +/+
46.875 75.000 49.500 +/+
1024 x 768
48.363 60.004 65.000 -/-
56.476 70.069 75.000 -/-
60.023 75.029 78.750 +/+
1280 x 720 45.000 60.000 74.250 +/+
1360 x 768 47.712 60.015 85.500 +/+
VESA GTF
720 x 576 35.910 59.950 32.750 -/+
1280 x 720 56.456 74.777 97.750 -/-
VESA GTF 1280 x 720 52.500 70.000 89.040 +/+
✎NOTE
x For HDMI/DVI cable connection, you must use the HDMI (DVI) IN jack.
x The interlace mode is not supported.
x The set might operate abnormally if a non-standard video format is selected.
x Separate and Composite modes are supported. SOG(Sync On Green) is not supported.
CONNECTIONS COMMON INTERFACE Slot
To watch paid channels, the “CI or CI+ CARD” must be inserted.
y If you don’t insert the “CI or CI+ CARD,” some channels will
display the message “Scrambled Signal”.
y The pairing information containing a telephone number, the “CI or
CI+ CARD” ID the Host ID and other information will be displayed
in about 2~3 minutes. If an error message is displayed, please
contact your service provider.
y When the configuration of channel information has finished, the
message “Updating Completed” is displayed, indicating the
channel list is updated.
✎NOTE
x You must obtain a “CI or CI+ CARD” from a local cable service provider.
x When removing the “CI or CI+ CARD”, carefully pull it out with your hands since dropping the “CI or CI+ CARD” may
cause damage to it.
x Insert the “CI or CI+ CARD” in the direction marked on the card.
x The location of the COMMON INTERFACE slot may be different depending on the model.
x “CI or CI+ CARD” is not supported in some countries and regions; check with your authorized dealer.
x If you have any problems, please contact a service provider.
BN68-02588F_Eng.indb 9 2010-3-19 15:42:0510 English
Connections
Changing the Input Source
Source List
Use to select TV or other external input
sources such as DVD / Blu-ray players /
cable box / STB satellite receiver connected
to the TV.
■ TV / Ext. / AV / Component / PC /
HDMI/DVI / USB
✎ In the Source List, connected
inputs will be highlighted.
✎ Ext. always stay activated.
Edit Name
■ VCR / DVD / Cable STB / Satellite STB / PVR STB /
AV Receiver / Game / Camcorder / PC / DVI PC / DVI
Devices / TV / IPTV / Blu-ray / HD DVD / DMA: Name
the device connected to the input jacks to make your
input source selection easier.
✎ When connecting an HDMI/DVI cable to the HDMI
(DVI) IN port, you should set the port to
HDMI/DVI mode under Edit Name.
Basic Features
How to Navigate Menus
Before using the TV, follow the steps below to learn how to
navigate the menu and select and adjust different functions.
1 MENU button: Displays the main on-screen menu.
2 ENTERE / Direction button: Move the cursor and
select an item. Confi rm the setting.
3 RETURN button: Returns to the previous menu.
4 EXIT button: Exits the on-screen menu.
How to Operate the OSD (On Screen Display)
The access step may differ depending on the selected menu.
1 MENU m
The main menu options appears on
the screen:
Picture, Sound, Channel, Setup,
Input, Application, Support.
2 ▲ / ▼
Select an icon with the ▲ or ▼
button.
3 ENTERE Press ENTERE to access the
sub-menu.
4 ▲ / ▼
Select the desired submenu with
the ▲ or ▼ button.
5 ◄ / ►
Adjust the value of an item with the
◄ or ► button. The adjustment in
the OSD may differ depending on
the selected menu.
6 ENTERE Press ENTERE to complete the
confi guration.
7 EXIT e Press EXIT.
P
POWER
MEDIA.P
FAV.CH
P.MODE
DUAL
MTS
MEDIA.P
A B C D
4
1
2
3
BN68-02588F_Eng(1-25).indd 10 2010-3-22 20:08:54English 11
03 Basic Features
Using the INFO button (Now & Next guide)
The display identifies the current channel
and the status of certain audio-video
settings.
The Now & Next guide shows daily TV
programme information for each channel
according to the broadcasting time.
y Scroll ◄, ► to view information for a
desired programme while watching the
current channel.
y Scroll ▲, ▼ to view information for other channels. If you
want to move to the currently selected channel, press
the ENTERE button.
Planning Your Viewing
Guide
The EPG (Electronic Programme Guide)
information is provided by broadcasters.
Using programme schedules provided
by broadcasters, you can specify
programmes you want to watch in
advance so that the channel automatically
changes to the selected programme
channel at the specified time. Programme
entries may appear blank or out of date
depending on a channel status.
Using Channel View
Using Scheduled View
1 Red (View Mode): View the list of programmes that
are playing now or coming up.
2 Yellow (+24 hours): Viewing the list of programmes to
be broadcasted after 24 hours.
3 Blue (Ch.Mode): Select the type of channels you want
to display on the Channel View window.
– The Ch. Mode differs according to the antenna
source.
4 Information: Displays details of the selected
programme.
5 (Page): Moves to the previous / next page.
6 ENTERE button
– When selecting the current programme, you can
watch the selected programme.
– When selecting the future programme, you can
reserve to watch the selected programme. To cancel
the schedule, press the ENTERE button again and
select Cancel Schedules.
P
POWER
MEDIA.P
FAV.CH
P.MODE
DUAL
MTS
P
POWER
MEDIA.P
FAV.CH
P.MODE
DUAL
MTS
DTV Air
15
abc1
l 18:00 ~ 6:00
ife On venus Avenue
Unclassified
No Detaild Information
E Watch
' Information
DTV Air 800 five
Family Affairs
18:00 - 18:30
Drama
Tanya confesses all to a stunned Babs. Conrad is anxious to hear...
18:30
19:15
Today
Today
)Family Affairs
)Dark Angel
800
800
five
five
800 five
View Mode Information E Cancel
Guide 2:10 Tue 1 jun
Scheduled View
1 4 6
DTV Air 800 five
Home and Away
18:00 - 18:30
Drama
Dani is devastated when scott makes clear his views on marriage...
27
28
800
24
16
6
Discovery
DiscoveryH&L
five
price-drop.tv
QVC
R4DTT
American Chopper
Programmes resume at 06:00
Home and...
No Information
QVC Selection
No Information
Tine Team
Fiv...
Today 18:00 - 19:00 19:00 - 20:00
)Family Affairs )Dark Angel
800 five
View Mode +24 Hours Ch. Mode Information Page E Watch
Guide 2:10 Tue 1 jun
Channel View - TV
1 2 3 4 5 6
18:11 Thu 6 jan
BN68-02588F_Eng.indb 11 2010-3-19 15:42:0712 English
Basic Features
Channel Manager
Delete or set favourites channels and use the programme
guide for digital broadcasts. Select a channel in the
Channels, My Channels or Scheduled screen.
■ Channels: Shows the channel list according to
channel type.
■ * My Channels: Shows the group of the channel.
■ Scheduled: Shows all the currently reserved
programmes.
✎Using the colour buttons with the Channel Manager
x Red (Antenna): Toggle among Air or Cable.
x B Green (Zoom): Enlarges or shrinks a channel
number.
x Yellow (Select): Select desired channels and press
the Yellow button to set all the selected channels at
the same time. The c mark appears to the left of
the selected channels.
x (Page): Move to next or previous page.
x T (Tools): Displays the Channel Manager option
menu. (The Options menus may differ depending on
the situation.)
Channel Status Display Icons
Icons Operations
A An Analogue channel.
c A channel selected.
* A channel set as a Favourite.
( A programme currently being broadcast.
\ A locked channel.
) A reserved programme.
¦ Using Favourite Channels
* My Channels
(in Channel Manager)
Shows all favourite channels.
■ Edit My Channels t : You can set the selected
channels to desired my channels group.
✎The “*” symbol will be displayed and the channel will
be set as a my channel.
1. Select a channel and press the TOOLS button.
2. Add or delete a channel in the my channel groups
you want among 1, 2, 3 and 4.
x One or more groups can be selected.
3. After you have changed the settings, the channel list
for each group can be viewed in My Channels.
Channel Menu
¦ Retuning channels
Antenna (Air / Cable)
Before your television can begin memorizing the available
channels, you must specify the type of signal source that is
connected to the TV (i.e. an Air or a Cable system).
Country
The PIN input screen appears. Enter your 4 digit PIN number.
■ Digital Channel: Change the country for digital
channels.
■ Analogue Channel: Change the country for analogue
channels.
c1 1futech
c 2 * 24ore.tv
15 abc1
3 BBC World
23 bid-up.tv
33 Boonerang
32 Cartoon Nwk
5 Class News
4 \ Coming Soon
27 Discovery
All
TV
Radio
Data/Other
Analogue
r
Air Antena B zoom Select Page T Tools
Channels
c1 1futech
c 2 * 24ore.tv
15 abc1
3 BBC World
23 bid-up.tv
33 Boonerang
32 Cartoon Nwk
5 Class News
4 \ Coming Soon
27 Discovery
All
TV
Radio
Data/Other
Analogue
r
Air Antena B zoom Select Page T Tools
Channels
Edit My Channels
lock
Delete
Deselect All
Select All
BN68-02588F_Eng.indb 12 2010-3-19 15:42:09English 13
03 Basic Features
Auto Store
Scans for a channel automatically and stores in the TV.
✎Automatically allocated programme numbers may not
correspond to actual or desired programme numbers. If
a channel is locked using the Child Lock function, the
PIN input window appears.
■ Antenna Source (Air / Cable): Select the antenna
source to memorise.
■ Channel Source (Digital & Analogue / Digital /
Analogue): Select the channel source to memorise.
When selecting Cable → Digital & Analogue or Digital:
Provide a value to scan for cable channels.
Search Mode (Full / Network / Quick): Scans for all
channels with active broadcast stations and stores them
in the TV.
✎ If you set Quick, you can set up Network,
Network ID, Frequency, Modulation, Symbol
Rate manually by press the button on the remote
control.
Network (Auto / Manual): Selects the Network ID
setting mode among Auto or Manual.
Network ID: When Network is Manual, you can set up
Network ID using the numeric buttons.
Frequency: Displays the frequency for the channel.
(differs in each country)
Modulation: Displays available modulation values.
Symbol Rate: Displays available symbol rates.
Manual Store
Scans for a channel manually and stores in the TV.
✎If a channel is locked using the Child Lock function,
the PIN input window appears.
■ Digital Channel (Channel, Frequency, Bandwidth):
When scanning has finished, channels are updated in
the channel list.
✎When selecting Antenna → Air: Channel, Frequency,
Bandwidth
✎When selecting Antenna → Cable: Frequency,
Modulation, Symbol Rate
■ Analogue Channel (Programme, Colour System,
Sound System, Channel, Search, Store): If there
is abnormal sound or no sound, reselect the sound
standard required.
✎Channel mode
x P (programme mode): When tuning is complete,
the broadcasting stations in your area have been
assigned to position numbers from P0 to P99. You
can select a channel by entering the position number
in this mode.
x C (aerial channel mode) / S (cable channel mode):
These two modes allow you to select a channel
by entering the assigned number for each aerial
broadcasting station or cable channel.
¦ Editing channels
Channel Manager Option Menu
(in Channel Manager)
1. Select a channel and press the TOOLS button.
2. Edit the channel name or number using the Edit
Channel Name or Edit Channel Number menu.
■ Edit Channel Name (analogue channels only): Assign
your own channel name.
■ Edit Channel Number (digital channels only): Edit the
number by pressing the number buttons desired.
¦ Other Features
Cable Search Option
(depending on the country)
Sets additional search options such as the frequency and
symbol rate for a cable network search.
■ Freq.Start / Freq.Stop: Set the start or stop frequency
(differs in each country)
■ Modulation: Displays available modulation values.
■ Symbol Rate: Displays available symbol rates.
BN68-02588F_Eng.indb 13 2010-3-19 15:42:0914 English
Basic Features
Channel Manager Option Menu
(in Channel Manager)
Set each channel using the Channel Manager menu options
(Lock / Unlock, Timer Viewing, Sort, Delete, Select All /
Deselect All). Option menu items may differ depending on
the channel status.
1. Select a channel and press the TOOLS button.
2. Select a function and change its settings.
■ Lock / Unlock: Lock a channel so that the channel
cannot be selected and viewed.
✎NOTE
x This function is available only when the Child Lock
is set to On.
x The PIN input screen appears. Enter your 4-digit PIN,
the default of which is “0-0-0-0”. Change the PIN
using the Change PIN option.
■ Timer Viewing: You can set a desired channel to be
displayed automatically at the intended time. Set the
current time first to use this function.
✎ When a digital channel is selected, press the ►
button to view the digital Programme.
■ Sort (analogue channels only): This operation allows
you to change the programme numbers of the stored
channels. This operation may be necessary after using
the auto store.
■ Delete: You can delete a channel to display the channels
you want.
■ Select All / Deselect All: Select all the channels
or deselect all the selected channels in the channel
manager.
Scheduled
(in Channel Manager)
You can view, modify or delete a a show you have reserved
to watch.
■ Change Info: Change a a show you have reserved to
watch.
■ Cancel Schedules: Cancel a show you have reserved
to watch.
■ Information: Display a show you have reserved
to watch. (You can also change the reservation
information.)
■ Select All / Deselect All: Select or deselect all reserved
programmes.
Channel List
You can see all the channels searched.
Channel List Transfer
Imports or exports the channel map. You should connect a
USB storage to use this function.
✎The PIN number input screen appears. Enter your 4
digit PIN number.
✎The default PIN number of a new TV set is ‘0-0-0-0’.
■ Import from USB: Import channel list from USB.
■ Export to USB: Export channel list to USB.
Fine Tune
(analogue channels only)
If the signal is weak or distorted, fine tune the channel
manually.
✎Fine tuned channels are marked with an asterisk “*”.
✎To reset the fine-tuning, select Reset.
Picture Menu
¦ Changing the Preset Picture Mode
Select your preferred picture type.
Mode t
■ Dynamic: Suitable for a bright room.
■ Standard: Suitable for a normal environment.
■ Movie: Suitable for watching movies in a dark room.
¦ Adjusting picture settings
Backlight / Contrast / Brightness /
Sharpness / Colour / Tint (G/R)
Your television has several setting options for picture quality
control.
✎NOTE
x In analogue TV, Ext., AV modes of the PAL system,
the Tint (G/R) function is not available.
x In PC mode, you can only make changes to
Backlight, Contrast and Brightness.
x Settings can be adjusted and stored for each
external device connected to the TV.
x Lowering picture brightness reduces power
consumption.
P
POWER
MEDIA.P
FAV.CH
P.MODE
DUAL
MTS
BN68-02588F_Eng.indb 14 2010-3-19 15:42:09English 15
03 Basic Features
¦ Economical Solutions
ECO Solution
■ Energy Saving (Off / Low / Medium / High / Picture
Off / Auto) t: Adjust the brightness of the TV
in order to reduce power consumption. If you select
Picture Off, the screen is turned off, but the sound
remains on. Press any button to turn on the screen again.
■ No Signal Power Off (Off / 15 min / 30 min / 60 min):
Activates the Stand-by mode, in the case of “No Signal”
or “Check Signal Cable” status for a certain period of
time defined by the user.
✎ Disabled when the PC is in power saving mode.
¦ Changing the Picture Options
Advanced Settings
(available in Standard / Movie mode)
You can adjust the detailed setting for the screen including
colour and contrast.
✎In PC mode, you can only make changes to Dynamic
Contrast, Gamma and White Balance.
Advanced Settings
Black Tone : Off ►
Dynamic Contrast : Medium
Shadow Detail : 0
Gamma : 0
rGB Only Mode : Off
Colour Space : Native
White Balance
▼
U Move E Enter R return
■ Black Tone (Off / Dark / Darker / Darkest): Select the
black level to adjust the screen depth.
■ Dynamic Contrast (Off / Low / Medium / High): Adjust
the screen contrast.
■ Shadow Detail (-2~+2): Increase the brightness of dark
images.
✎ Disabled under PC mode.
■ Gamma: Adjust the primary colour intensity.
■ RGB Only Mode (Off / Red / Green / Blue): You can
adjust Colour or Tint of Red, Green or Blue for the
picture from an external device (DVD player, home
theatre, etc.).
■ Colour Space (Auto / Native): Adjust the range of
colours available to create the image.
■ White Balance: Adjust the colour temperature for a
more natural picture.
R-Offset / G-Offset / B-Offset: Adjust each colour’s
(red, green, blue) darkness.
R-Gain/G-Gain/B-Gain: Adjust each colour’s
(red, green, blue) brightness.
Reset: Resets the White Balance to it’s default settings.
■ Flesh Tone: Emphasize pink “Flesh Tone.”
■ Edge Enhancement (Off / On): Emphasize object
boundaries.
Picture Options
✎In PC mode, you can only make changes to the Colour
Tone, Size and Auto Protection Time.
■ Colour Tone (Cool / Normal / Warm1 / Warm2)
✎ Warm1 or Warm2 will be deactivated when the
picture mode is Dynamic.
✎ Settings can be adjusted and stored for each
external device connected to an input on the TV.
Picture Options
Colour Tone : Normal ►
Size : 16:9
Screen Mode : 16:9
Digital Noise Filter : Auto
MPEG Nosie Filter : Auto
HdMI Black level : Normal
Film Mode : Off
▼
U Move E Enter R return
BN68-02588F_Eng.indb 15 2010-3-19 15:42:1016 English
Basic Features
■ Size: Your cable box/satellite receiver
may have its own set of screen
sizes as well. However, we highly
recommend you use 16:9 mode most
of the time.
Auto Wide: Automatically adjusts the
picture size to the 16:9 aspect ratio.
16:9 : Adjusts the picture size to 16:9 for DVDs or wide
broadcasting.
Wide Zoom: Magnifies the picture size more than 4:3.
✎ Adjusts the Position by using ▲, ▼ buttons.
Zoom: Magnifies the 16:9 wide pictures vertically to fit
the screen size.
✎ Adjusts the Position or Size by using ▲, ▼ button.
4:3 : The default setting for a movie or normal
broadcasting.
✎ Do not watch in 4:3 format for a long time. Traces
of borders displayed on the left, right and centre
of the screen may cause image retention(screen
burn) which are not covered by the warranty.
Screen Fit: Displays the full image without any cut-off
when HDMI (720p / 1080i / 1080p) or Component
(1080i / 1080p) signals are inputted.
✎NOTE
x After selecting Screen Fit in HDMI (1080i/1080p) or
Component (1080i/1080p) mode, you may need to
centre the picture:
1. Press the ◄ or ► button to select Position.
2. Press the ENTERE button.
3. Press the ▲, ▼, ◄ or ► button to move the
picture.
x Depending on the input source, the picture size
options may vary.
x The available items may differ depending on the
selected mode.
x In PC mode, only 16:9 and 4:3 modes can be
adjusted.
x Settings can be adjusted and stored for each
external device connected to an input of the TV.
x If you use the Screen Fit function with HDMI 720p
input, 1 line will be cut at the top, bottom, left and
right as in the overscan function.
■ Screen Mode (16:9 / Wide Zoom / Zoom / 4:3):
Available only when picture size is set to Auto Wide.
You can determine the desired picture size at the 4:3
WSS (Wide Screen Service) size or the original size.
Each European country requires different picture size.
✎ Not available in PC, Component or HDMI mode.
■ Digital Noise Filter (Off / Low / Medium / High / Auto
/ Auto Visualisation): When the broadcast signal is
weak, some static and ghosting may appear. Select one
of the options until the best picture is displayed.
Auto Visualisation: When changing analogue channels,
displays signal strength.
✎ Only available for analogue channels.
✎ When bar is green, you are receiving the best
possible signal.
■ MPEG Noise Filter (Off / Low / Medium / High /
Auto): Reduces MPEG noise to provide an improved
picture quality.
✎ Disabled under PC mode.
■ HDMI Black Level (Normal / Low): Selects the black
level on the screen to adjust the screen depth.
✎ Available only in HDMI mode (RGB signals).
■ Film Mode (Off / Auto1 / Auto2): Sets the TV to
automatically sense and process film signals from all
sources and adjust the picture for optimum quality.
✎ Available in TV, AV, COMPONENT (480i / 1080i)
and HDMI (480i / 1080i).
■ Auto Protection Time (2 hours / 4 hours / 8 hours
/ 10 hours / Off) : If the same image remains on the
screen, Auto Screen Burn Protector will work.
Picture Reset (OK / Cancel)
Resets your current picture mode to its default settings.
P
POWER
MEDIA.P
FAV.CH
P.MODE
DUAL
MTS
BN68-02588F_Eng.indb 16 2010-3-19 15:42:10English 17
03 Basic Features
¦ Setting up the TV with Your PC
Set the input source to PC.
Adjust frequency values/positions and fine tune the settings
Auto Adjustment t
automatically.
✎Not available when connecting through HDMI/DVI
cable.
Screen
■ Coarse / Fine: Removes or reduces picture noise. If the
noise is not removed by Fine-tuning alone, then adjust
the frequency as best as possible (Coarse) and Finetune again. After the noise has been reduced, readjust
the picture so that it is aligned to the centre of screen.
■ Position: Adjust the PC screen position with direction
button (▲ / ▼ / ◄ / ►).
■ Image Reset: Resets the image to default settings.
Using Your TV as a Computer (PC) Display
Setting Up Your PC Software (Based on Windows XP)
Depending on the version of Windows and the video card,
the actual screens on your PC may differ in which case the
same basic set-up information will almost always be applied.
(If not, contact your computer manufacturer or Samsung
Dealer.)
1. Click on “Control Panel” on the Windows start menu.
2. Click on “Appearance and Themes” in the “Control
Panel” window and a display dialog-box will appear.
3. Click on “Display” and a display dialog box will appear.
4. Navigate to the “Settings” tab on the display dialog-box.
y The correct size setting (resolution) [Optimum: 1360 X
768 pixels]
y If a vertical-frequency option exists on your display
settings dialog box, the correct value is “60” or “60 Hz”.
Otherwise, just click “OK” and exit the dialog box.
Sound Menu
¦ Changing the Preset Sound Mode
Mode t
■ Standard: Selects the normal sound mode.
■ Music: Emphasizes music over voices.
■ Movie: Provides the best sound for movies.
■ Clear Voice: Emphasizes voices over other sounds.
■ Amplify: Increase the intensity of high-frequency sound
to allow a better listening experience for the hearing
impaired.
¦ Adjusting sound settings
Equalizer
Adjusts the sound mode.
■ Balance L/R: Adjusts the balance between the right and
left speaker.
■ 100Hz / 300Hz / 1KHz / 3KHz / 10KHz (Bandwidth
Adjustment): Adjusts the level of specific bandwidth
frequencies.
■ Reset: Resets the equalizer to its default settings.
¦ Sound Systems, Etc.
Virtual Surround (Off / On)
This function provides a virtual 5.1 channel surround sound
experience through a pair of speakers or headphones using
HRTF (Head Related Transfer Function) technology.
✎If Speaker Select is set to External Speaker, Virtual
Surround is disabled.
Dialog Clarity (Off / On)
This function allows you to increase the intensity of a voice
over background music or sound effects so that dialog can
be heard more clearly when viewing a show.
Audio Language
(digital channels only)
Change the default value for audio languages.
✎The available language may differ depending on the
broadcast.
Audio Format (MPEG / Dolby Digital 5.1)
(digital channels only)
When sound is emitted from both the main speaker and the
audio receiver, a sound echo may occur due to the decoding
speed difference between the main speaker and the audio
receiver. In this case, use the TV Speaker function.
✎Audio Format option may differ depending on the
broadcast. 5.1ch Dolby digital sound is only available
when connecting an external speaker through an
optical cable.
BN68-02588F_Eng.indb 17 2010-3-19 15:42:1018 English
Basic Features
Audio Description
(not available in all locations)
(digital channels only)
This function handles the Audio Stream
for the AD (Audio Description) which is
sent along with the Main audio from the
broadcaster.
■ Audio Description (Off / On): Turn the audio description
function on or off.
■ Volume: Adjust the audio description volume.
Auto Volume (Off / Normal / Night)
To equalize the volume level on each channel, set to Normal.
■ Night: This mode provides an improved sound
experience compared to Normal mode, making almost
no noise. It is useful at night.
Speaker Select
(External speaker / TV speaker)
A sound echo may occur due to a difference in decoding
speed between the main speaker and the audio receiver. In
this case, set the TV to External Speaker.
✎When Speaker Select is set to External Speaker, the
volume and MUTE buttons will not operate and the
sound settings will be limited.
✎When Speaker Select is set to External Speaker, you
should use these settings.
x TV Speaker: Off , External Speaker: On
✎When Speaker Select is set to TV Speaker, you
should use these settings.
x TV Speaker: On , External Speaker: On
✎If there is no video signal, both speakers will be mute.
Additional Setting
(digital channels only)
■ DTV Audio Level (MPEG / HE-AAC): This function
allows you to reduce the disparity of a voice signal
(which is one of the signals received during a digital TV
broadcast) to a desired level.
✎ According to the type of broadcast signal, MPEG
/ HE-AAC can be adjusted between -10dB and
0dB.
✎ To increase or decrease the volume, adjust
between the range 0 and -10 respectively.
■ SPDIF Output: SPDIF (Sony Philips Digital InterFace)
is used to provide digital sound, reducing interference
going to speakers and various digital devices such as a
DVD player.
Audio Format: During the reception of a digital TV
broadcast, you can select the Digital Audio output
(SPDIF) format from the options PCM, Dolby Digital or
DTS.
✎ By connecting to 5.1ch speakers in a Dolby
Digital setup, maximize your interactive 3D sound
experience.
Audio Delay: Correct audio-video mismatch, when
watching TV or video, and listening to digital audio
output using an external device such as an AV receiver.
■ Dolby Digital Comp (Line / RF): This function minimizes
signal disparity between a dolby digital signal and a
voice signal (i.e. MPEG Audio, HE-AAC, ATV Sound).
✎ Select Line to obtain dynamic sound, and RF
to reduce the difference between loud and soft
sounds at night time.
Line: Set the output level for signals greater or less than
-31dB (reference) to either -20dB or -31dB.
RF: Set the output level for signals greater or less than
-20dB (reference) to either -10dB or -20dB.
Sound Reset (OK / Cancel)
Reset all sound settings to the factory defaults.
P
POWER
MEDIA.P
FAV.CH
P.MODE
DUAL
MTS
BN68-02588F_Eng.indb 18 2010-3-19 15:42:11English 19
03 Basic Features
Setup Menu
¦ Setting the Time
Time
■ Clock: Setting the clock is for using various timer
features of the TV.
The current time will appear every time you press
the INFO button.
✎ If you disconnect the power cord, you have to set
the clock again.
Clock Mode (Auto / Manual)
✎ Depending on the broadcast station and signal,
the auto time set up may not be correct. In this
case, set the time manually.
✎ The antenna must be connected in order to set
the time automatically.
Clock Set: Set the Day, Month, Year, Hour and Minute
manually.
✎ Available only when Clock Mode is set to
Manual.
¦ Using the Sleep Timer
■ Sleep Timer t: Automatically shuts off the TV
after a preset period of time. (30, 60, 90, 120, 150 and
180 minutes).
✎ To cancel Sleep Timer, select Off.
¦ Setting the On/Off Timer
■ Timer 1 / Timer 2 / Timer 3: Three different on / off
timer settings can be made. You must set the clock first.
On Time / Off Time: Set the hour, minute, and activate
/ inactivate. (To activate timer with the setting you’ve
chosen, set to Activate.)
Volume: Set the desired volume level.
Source: Select TV or USB content to be played when
the TV is turned on automatically. (USB can be selected
only when a USB device is connected to the TV)
Antenna (when the Source is set to TV): Select ATV or
DTV.
Channel (when the Source is set to TV): Select the
desired channel.
Contents (when the Source is set to USB): Select a
folder in the USB device containing music or photo files
to be played when the TV is turned on automatically.
✎ If there is no music file on the USB device or the
folder containing a music file is not selected, the
Timer function does not operate correctly.
✎ When there is only one photo file in the USB
device, the Slide Show will not play.
✎ If a folder name is too long, the folder cannot be
selected.
✎ Each USB you use is assigned its own folder.
When using more than one of the same type of
USB, make sure the folders assigned to each USB
have different names.
Repeat: Select Once, Everyday, Mon~Fri, Mon~Sat,
Sat~Sun or Manual to set at you convenience. If you
select Manual, you can set up the day you want to
activate the timer.
✎ The c mark indicates the day is selected.
✎Auto Power Off (available only when the TV is turned on
by Timer): The TV will be automatically turned off after 3
hours of being left idle to prevent overheating.
¦ Locking Programs
Security
✎The PIN input screen appears before the setup screen.
✎Enter your 4-digit PIN, the default of which is “0-0-0-0”.
Change the PIN using the Change PIN option.
■ Child Lock (Off / On): Lock channels in Channel
Manager, to prevent unauthorized users, such as
children, from watching unsuitable programme.
✎ Available only when the Input source is set to TV.
■ Parental Lock (Parental Rating): Prevent unauthorized
users, such as children, from watching unsuitable
programme with a user-defined 4-digit PIN code.
Allow All: Unlock all TV ratings.
✎ The items of Parental Lock differs depending on
the country.
10 TV ATV 2
00 00
▲
▼
00 00
▲
▼
Timer 1
On Time
Off Time
Volume
Inactivate
Inactivate
Sun Mon Tue Wed Thu Fri Sat
Once
Source Antenna Channel
repeat
L Move U Adjust E Enter R return
BN68-02588F_Eng.indb 19 2010-3-19 15:42:1120 English
Basic Features
■ Change PIN: Change your personal ID number required
to set up the TV.
✎ If you forget the PIN code, press the remote
control buttons in the following sequence, which
resets the PIN to “0-0-0-0”: POWER (off) →
MUTE → 8 → 2 → 4 → POWER (on).
¦ Other Features
Language
■ Menu Language: Set the menu language.
■ Teletext Language: Set a desired language for teletext.
✎ English is the default in cases where the selected
language is unavailable in the broadcast.
■ Preference (Primary Audio Language / Secondary
Audio Language / Primary Subtitle Language /
Secondary Subtitle Language / Primary Teletext
Language / Secondary Teletext Language): Select
a language, which will be the default language when a
channel is selected.
Subtitle
Use this menu to set the Subtitle mode.
✎ The subtitle feature doesn’t work in
Component or HDMI modes.
■ Subtitle (Off / On): Switches subtitles
on or off.
■ Mode (Normal / Hearing Impaired):
Sets the subtitle mode.
■ Subtitle Language: Sets the subtitle language.
✎ If the programme you are watching does not
support the Hearing Impaired function, Normal
automatically activates even if the Hearing
Impaired mode is selected.
✎ English is the default in cases where the selected
language is unavailable in the broadcast.
Digital Text (Disable / Enable) (UK only)
If the programme broadcasts with digital text, this feature is
enabled.
General
■ Game Mode (Off / On): When connecting to a game
console such as PlayStation™ or Xbox™, you can enjoy
a more realistic gaming experience by selecting game
mode.
✎NOTE
x Precautions and limitations for game mode
– To disconnect the game console and connect
another external device, set Game Mode to Off in
the setup menu.
– If you display the TV menu in Game Mode, the
screen shakes slightly.
x Game Mode is not available in TV, and PC mode.
x After connecting the game console, set Game Mode
to On to prevent poor picture quality.
x If Game Mode is On: Picture mode is set to
Standard and Sound mode is set to Movie.
■ Menu Transparency (Bright / Dark): Set the
Transparency of the menu.
■ Melody (Off / Low / Medium / High): Set so that a
melody plays when the TV is turned on or off.
Common Interface
■ CI Menu: This enables the user to select from the CAMprovided menu. Select the CI Menu based on the menu
PC Card.
■ Application Info.: View information on the CAM inserted
into the CI slot and on the “CI or CI+ CARD” which is
inserted into the CAM. You can install the CAM anytime
whether the TV is on or off.
1. Purchase a CI CAM module at your nearest dealer or by
phone.
2. Firmly insert the “CI or CI+ CARD” into the CAM in the
direction of the arrow.
3. Insert the CAM with the “CI or CI+ CARD” into the
common interface slot, in the direction of the arrow so
that it aligns parallel with the slot.
4. Check if you can see a picture on a scrambled signal
channel.
P
POWER
MEDIA.P
FAV.CH
P.MODE
DUAL
MTS
BN68-02588F_Eng(1-25).indd 20 2010-3-23 12:36:52English 21
03 Basic Features
Support Menu
Self Diagnosis
Self Diagnostic might take few seconds, this is part of the
normal operation of the TV.
■ Picture Test (Yes / No): Use to check for picture
problems and if the problem continues to occur check
the colour pattern.
■ Sound Test (Yes / No): Use the built-in melody sound to
check for sound problems.
✎ If you hear no sound from the TV’s speakers,
before performing the sound test, make sure
Speaker Select is set to TV speaker in the
Sound menu.
✎ The melody will be heard during the test even if
Speaker Select is set to External Speaker or the
sound is muted by pressing the MUTE button.
■ Signal Information: (digital channels only) HDTV
channel’s reception quality is either perfect or the
channels are unavailable. Adjust your antenna to
increase signal strength.
■ Troubleshooting: If the TV seems to have a problem,
refer to this description.
✎ If none of these trouble shooting tips apply,
contact the Samsung customer service centre.
Software Upgrade
Software Upgrade can be performed via a broadcasting
signal or by downloading the latest firmware from samsung.
com to a USB memory device.
Current Version the software already installed in the TV.
✎Software is represented as “Year/Month/Day_Version”.
Software Upgrade
Current Version 2010/01/18_000001
U Move E Enter R return
By USB ►
by Channel
Standby Mode Upgrade 2 Hours Later
Alternative Software
Installing the Latsted Version
■ By USB: Insert a USB drive
containing the firmware
upgrade file, downloaded
from www.samsung.com,
into the TV. Please be careful
not to disconnect the power
or remove the USB drive
until upgrades are complete.
The TV will be turned off
and on automatically after
completing the firmware
upgrade. When software is upgraded, video and audio
settings you have made will return to their default
settings. We advise you to to write down your settings
so that you can easily reset them after the upgrade.
■ By Channel: Upgrade the software using the
broadcasting signal.
✎ If the function is selected during the software
transmission period, software will be automatically
searched and downloaded.
✎ The time required to download the software is
determined by the signal status.
■ Standby Mode Upgrade: A manual upgrade will be
automatically performed at selected time. Since the
power of the unit is turned on internally, the screen
may be turned on slightly for the LCD product. This
phenomenon may continue for more than 1 hour until
the software upgrade is complete.
■ Alternative Software (backup): If there is an issue with
the new firmware and it is affecting operation, you can
change the software to the previous version.
✎ If the software was changed, existing software is
displayed.
HD Connection Guide
Refer to this information when connecting external devices
to the TV.
Contact Samsung
View this information when your TV does not work properly
or when you want to upgrade the software. You can find
information regarding our call centres, and how to download
products and software.
TV Rear Panel
USB Drive
BN68-02588F_Eng.indb 21 2010-3-19 15:42:1222 English
Advanced Features
Media Play
¦ Connecting a USB Device
1. Turn on your TV.
2. Connect a USB device containing photo and/or music fi les to the USB jack on the
rear of the TV.
3. When USB is connected to the TV, popup window appears. Then you can select
Media Play.
Enjoy photos and/or music fi les saved on a USB
Mass Storage Class (MSC) device.
✎It might not work properly with unlicensed multimedia files.
✎Need-to-Know List before using Media Play
x MTP (Media Transfer Protocol) is not supported.
x The file system supports FAT16, FAT32 and NTFS.
x Certain types of USB Digital camera and audio devices may not be compatible with this TV.
x Media Play only supports USB Mass Storage Class (MSC) devices. MSC is a Mass Storage Class Bulk-Only
Transport device. Examples of MSC are Thumb drives, Flash Card Readers and USB HDD (USB HUB are not
supported). Devices should be connected directly to the TV’s USB port.
x Before connecting your device to the TV, please back up your files to prevent them from damage or loss of data.
SAMSUNG is not responsible for any data file damage or data loss.
x Do not disconnect the USB device while it is loading.
x The higher the resolution of the image, the longer it takes to display on the screen.
x The maximum supported JPEG resolution is 15360X8640 pixels.
x For unsupported or corrupted files, the “Not Supported File Format” message is displayed.
x If the files are sorted by Basic View, up to 1000 files can be displayed in each folder.
x MP3 files with DRM that have been downloaded from a non-free site cannot be played. Digital Rights Management
(DRM) is a technology that supports the creation, distribution and management of the content in an integrated and
comprehensive way, including the protection of the rights and interests of the content providers, the prevention of the
illegal copying of contents, as well as managing billings and settlements.
x If more than 2 PTP devices are connected, you can only use one at a time.
x If more than two MSC devices are connected, some of them may not be recognized. A USB device that requires high
power (more than 500mA or 5V) may not be supported.
x If an over-power warning message is displayed while you are connecting or using a USB device, the device may not
be recognized or may malfunction.
x If the TV has been no input during time set in Auto Protection Time, the Screensaver will run.
x The power-saving mode of some external hard disk drives may be released automatically when connected to the TV.
x If a USB extension cable is used, the USB device may not be recognized or the files on the device may not be read.
x If a USB device connected to the TV is not recognized, the list of files on the device is corrupted or a file in the list is
not played, connect the USB device to the PC, format the device and check the connection.
x If a file deleted from the PC is still found when Media Play is run, use the “Empty the Recycle Bin” function on the PC
to permanently delete the file.
P
POWER
MEDIA.P
FAV.CH
P.MODE
DUAL
MTS
Devicename A Change Device D Device Mode EEnter R return
MediaPlay
USB Drive
TV Rear Panel
BN68-02588F_Eng.indb 22 2010-3-19 15:42:14English 23
04 Advanced Features
¦ Screen Display
Move to the file you desired using the up/down/right/left buttons and then press the ENTERE button. The file is played.
✎Supports the Device Mode and Contents Mode in Media Play homepage.
Music
Playing a Music
1. Press the ◄ or ► button to select Music, then press the ENTERE
button in the Media Play menu.
2. Press the ◄/►/▲/▼ button to select the desired Music in the file
list.
3. Press the ENTERE button.
– During music playback, you can search using ◄ and ► button.
✎Only displays files with the MP3 file extension. Other file extensions
are not displayed, even if they are saved on the same USB device.
✎If the sound is strange when playing MP3 files, adjust the Equalizer
in the Sound menu. (An over-modulated MP3 file may cause a
sound problem.)
Devicename A Change Device C Select D Sorting T Tools
c
c
c
Music 01 2010
no singer other
Music 02 2010
no singer other
Music 03 2010
no singer other
Music 04 2010
no singer other
Music 05 2010
no singer other
Music 06 2010
no singer other
Music 07 2010
no singer other
Music 08 2010
no singer other
Music Music 01.mp3 1/2
Only you
Jason
1st Album
Pop
2010
4.2MB
3/15
Only you
Jason
Music 1
No Singer
Music 2
No Singer
Music 3
No Singer
Music 4
No Singer
Music 5
No Singer
01:10 / 04:02
Playlist
Devicename E Pause L Jump T Tools R Return
File List Section :
You can confirm the files and
groups that are sorted by each
category.
Operation Button
A Red (Change Device): Selects a connected device.
B Green (Preference): Sets the file preference. (not supported in Basic view)
C Yellow (Select): Selects multiple files from file list. Selected files are marked
with a symbol.
D Blue (Sorting): Selects the sort list.
T Tools: Displays the option menu.
Information :
You can ascertain the selected file
name and the number of files and
page.
Sort List Section :
Displays the sorting standard.
✎ The sorting standard is
different depending on the
contents.
BN68-02588F_Eng(26-).indd 23 2010-3-23 15:24:3524 English
Advanced Features
Photos
Viewing a Photo (or Slide Show)
1. Press the ◄ or ► button to select Photos, then press the
ENTERE button in the Media Play menu.
2. Press the ◄/►/▲/▼ button to select the desired photo in the file list.
3. Press the ENTERE button.
– While a photo list is displayed, press the ENTERE button on the
remote control to start slide show.
– All files in the file list section will be displayed in the slide show.
– During the slide show, files are displayed in order.
✎Music files can be automatically played during the Slide Show if the
Background Music is set to On.
✎The BGM Mode cannot be changed until the BGM has finished
loading.
¦ Playing the multiple files
Playing the selected music/photo files
1. Press the Yellow button in the file list to select the desired file.
2. Repeat the above operation to select multiple files.
✎ NOTE
x The c mark appears to the left of the selected files.
x To cancel a selection, press the yellow button again.
x To deselect all selected files, press the TOOLS button and
select Deselect All.
3. Press the TOOLS button and select Play Selected Contents.
Playing the music/photo file group
1. While a file list is displayed, move to the any file in desired group.
2. Press the TOOLS button and select Play Current Group.
¦ Media Play Additional Function
Sorting the file list
Press the blue button in the file list to sort the files.
Category Operations Music Photos
Basic View Displays the whole folder. You can view the photo by selecting the folder. ✓ ✓
Title Sorts and displays the file title in Symbol/Number/Alphabet/Special order. ✓ ✓
Preference
Sorts and displays the file by preference. You can change the file preference
in the file list section using the Green button.
✓ ✓
Latest Date Sorts and shows files by the latest date. ✓
Earliest Date Sorts and shows files by the earliest date. ✓
Artist Sorts the music file by artist in alphabetical order. ✓
Album Sorts the music file by album in alphabetical order. ✓
Genre Sorts music files by the genre. ✓
Mood
Sorts music files by the mood. You can change the music mood
information.
✓
Monthly Sorts and shows photo files by month. ✓
Normal Image1024.jpg 1024x768 2010/2/1 3/15
Devicename E Pause L Previous/Next T Tools R Return
Devicename A Change Device C Select D Sorting T Tools
c
c
c
Music 01 2010
no singer other
Music 02 2010
no singer other
Music 03 2010
no singer other
Music 04 2010
no singer other
Music 05 2010
no singer other
Music 06 2010
no singer other
Music 07 2010
no singer other
Music 08 2010
no singer other
Music Music 01.mp3 1/2
BN68-02588F_Eng(26-).indd 24 2010-3-23 15:03:49English 25
04 Advanced Features
Music/Photos Play Option menu
Option menu Operations Music Photos
Repeat Mode You can play movie and music files repeatedly. ✓
Picture Setting You can adjust the picture setting. (P. 14, 15, 16) ✓
Sound Setting You can adjust the sound setting. (P. 17, 18) ✓ ✓
Stop Slide Show / Start
Slide Show
You can start or stop a Slide Show. ✓
Slide Show Speed You can select the slide show speed during the slide show. ✓
Background Music
You can set and select background music when watching a Slide
Show.
✓
Zoom You can zoom into images in full screen mode. ✓
Rotate You can rotate images in full screen mode. ✓
Information You can see detailed information about the played file. ✓ ✓
Settings
Using the Setup Menu
■ Information: Select to view information about the connected device.
BN68-02588F_Eng.indb 25 2010-3-19 15:42:1726 English
Other Information
Analogue Channel Teletext Feature
The index page of the Teletext service gives you information on how to use the service. For Teletext information to be displayed
correctly, channel reception must be stable. Otherwise, information may be missing or some pages may not be displayed.
✎You can change Teletext pages by pressing the numeric buttons on the remote control.
Other Information
The Teletext pages are organized according to six categories:
Part Contents Part Contents
A Selected page number. D Date and time.
B Broadcasting channel identity. E Text.
C
Current page number or
search indications.
F
Status information. FASTEXT
information.
MEDIA.P
A B C D
1
3
4
2
5
8
7
0
!
@
6
9
1 / (Teletext on/mix):
Activate the Teletext mode after
selecting the channel providing the
Teletext service. Press it twice to
overlap the Teletext mode with the
current broadcasting screen.
2 8 (store): Store the Teletext
pages.
3 4 (size): Display the doublesize letters on the upper half of the
screen. For the lower half of the
screen, press it again. To display
the normal screen, press it once
again.
4 9 (hold): Hold the display
on a given page if the selected
page is linked with several
secondary pages which follow on
automatically. To resume, press it
again
5 0 (mode): Select the Teletext
mode (LIST/ FLOF).
If you press this button in the LIST
mode, the mode is switched into
the List save mode. In the List save
mode, you can save a Teletext
page into list using the 8(store)
button.
6 1 (sub-page): Display the
available sub-page.
2 (page up): Display the next
Teletext page.
7
3 (page down): Display the
previous Teletext page.
8
6 (index): Display the index
(contents) page at any time while
you are viewing Teletext.
9
5 (reveal): Display the hidden
text (answers to quiz games, for
example). To display the normal
screen, press it again.
0
7 (cancel): Display the current
broadcast when searching for a
page.
!
Colour buttons (red/green/
yellow/blue): If the FASTEXT
system is used by a broadcasting
company, the different topics
covered on a Teletext page are
colour-coded and can be selected
by pressing the coloured buttons.
Press one of them corresponding
to the required. The page is
displayed with other coloured
information that can be selected
in the same way. To display the
previous or next page, press the
corresponding coloured button.
@
BN68-02588F_Eng.indb 26 2010-3-19 15:42:18English 27
05 Other Information
Installing the Wall Mount
¦ Installing the Wall Mount Kit
Wall mount items (sold separately) allow you to mount the TV on the wall.
For detailed information on installing the wall mount, see the instructions provided with the Wall Mount items. Contact a
technician for assistance when installing the wall mount bracket.
Samsung Electronics is not responsible for any damage to the product or injury to yourself or others if you elect to install the
TV on your own.
¦ Wall Mount Kit Specifications (VESA)
✎Wall mount kit is not supplied but sold separately.
Install your wall mount on a solid wall perpendicular to the floor. When attaching to other building materials, please contact
your nearest dealer. If installed on a ceiling or slanted wall, it may fall and result in severe personal injury.
✎NOTE
x Standard dimensions for wall mount kits are shown in the table below.
x When purchasing our wall mount kit, a detailed installation manual and all parts necessary for assembly are provided.
x Do not use screws longer than the standard dimension, as they may cause damage to the inside of the TV set.
x For wall mounts that do not comply with the VESA standard screw specifications, the length of the screws may differ
depending on their specifications.
x Do not use screws that do not comply with the VESA standard screw specifications.
x Do not fasten the screws too strongly, this may damage the product or cause the product to fall, leading to personal
injury. Samsung is not liable for these kinds of accidents.
x Samsung is not liable for product damage or personal injury when a non-VESA or non-specified wall mount is used or
the consumer fails to follow the product installation instructions.
x Our 57” and 63” models do not comply with VESA Specifications. Therefore, you should use our dedicated wall mount
kit for this model.
x Do not exceed 15 degrees tilt when mounting this TV.
Product
Family
inches VESA Spec. (A * B) Standard Screw Quantity
LCD-TV
19~22
75 X 75
100 X 100 M4
4
23~29 200 X 100
30~40 200 X 200 M6
46~55 400 X 400
M8
57~65 600 X 400
70~80 800 X 400
80~ 1400 X 800
Do not install your Wall Mount Kit while your TV is turned on. It may result in personal injury due to electric
shock.
BN68-02588F_Eng.indb 27 2010-3-19 15:42:1828 English
Other Information
Anti-Theft Kensington Lock
The Kensington Lock is a device used to physically fix the system when using
it in a public place. The appearance and locking method may differ from the
illustration depending on the manufacturer. Refer to the manual provided with the
Kensington Lock for proper use.
✎Please find a “
1
2
3
” icon on the rear of the TV. A kensington slot is beside the
“
1
2
3
” icon.
1. Insert the locking device into the Kensington slot on the LCD TV 1 and turn
it in the locking direction 2.
2. Connect the Kensington Lock cable 3.
3. Fix the Kensington Lock to a desk or a heavy stationary object.
✎The locking device has to be purchased separately.
✎The location of the Kensington Lock may be different depending on its
model.
1
2
3
Securing the TV to the Wall
Caution: Pulling, pushing, or climbing onto the TV may cause the TV to fall. In particular, ensure that your
children do not hang over or destabilize the TV; doing so may cause the TV to tip over, resulting in serious
injuries or death. Follow all safety precautions provided on the included Safety Flyer. For added stability, install
the anti-fall device for safety purposes, as follows.
To avoid the TV from falling
✎Since the necessary clamps, screws, and string are not supplied,
please purchase these additionally.
1. Drive the screws into the clamps and firmly fasten them onto the
wall. Make sure the screws are firmly fixed into the wall.
✎ Screw Specifications
x For a 17 ~ 29 Inch LCD TV: M4
x For a 32 ~ 40 Inch LCD TV: M6
2. Remove the screws from the centre back of the TV, put the
screws into the clamps, and then fasten the screws onto the TV
again.
3. Connect the clamps fixed onto the TV and the clamps fixed onto
the wall with a strong string and then tie the string tightly.
✎Verify all connections are properly secured. Periodically check
connections for any sign of fatigue for failure. If you have
any doubt about the security of your connections, contact a
professional installer.
✎Install the TV near to the wall so that it does not fall backwards.
✎It is safe to connect the string so that the clamps fixed on the wall are equal to or lower than the clamps fixed on the TV.
✎Untie the string before moving the TV.
Wall
TV Rear
BN68-02588F_Eng.indb 28 2010-3-19 15:42:20English 29
05 Other Information
Troubleshooting
If you have any questions about the TV, first refer to this list. If none of these troubleshooting tips apply, please visit “www.
samsung.com,” then click on Support, or contact the call centre listed on the back-cover of this manual.
Issues Solutions and Explanations
Picture Quality First of all, please perform the Picture Test and confirm that your TV is properly displaying test image.
(go to MENU - Support - Self Diagnosis - Picture Test) (P. 21)
If the test image is properly displayed, the poor picture may caused by the source or signal.
The TV image does not look as good as it
did in the store.
• If you have an analogue cable/set top box, upgrade to a digital set top box. Use HDMI or Component
cables to deliver HD (high definition) picture quality.
• Cable/Satellite subscribers: Try HD stations from the channel line up.
• Antenna connection: Try HD stations after performing Auto programme.
✎ Many HD channels are upscaled from SD(Standard Definition) contents.
• Adjust the Cable/Set top box video output resolution to 1080i or 720p.
• Make sure you are watching the TV at the minimum recommended distance based on the size and
definition of the signal.
The picture is distorted: macroblock error,
small block, dots, pixelization
• Compression of video contents may cause picture distortion especially in fast moving pictures such
as sports and action movies.
• Low signal level or bad quality can cause picture distortion. This is not a TV issue.
Colour is wrong or missing. • If you’re using a component connection, make sure the component cables are connected to the
correct jacks. Incorrect or loose connections may cause colour problems or a blank screen.
There is poor colour or brightness. • Adjust the Picture options in the TV menu. (go to Picture mode / Colour / Brightness / Sharpness)
• Adjust Energy Saving option in the TV menu. (go to MENU - Picture - ECO solution - Energy
Saving)
• Try resetting the picture to view the default picture settings. (go to MENU - Picture - Picture Reset)
There is a dotted line on the edge of the
screen.
• If the picture size is set to Screen Fit, change it to 16:9. (P. 16)
• Change cable/set top box resolution.
The picture is black and white. • If you are using an AV composite input, connect the video cable (yellow) to the Green jack of
component input 1 on the TV.
When changing channels, the picture
freezes or is distorted or delayed.
• If connected with a cable box, please try to reset the cable box. Reconnect the AC cord and wait until
the cable box reboots. It may take up to 20 minutes.
• Set the output resolution of the cable box to 1080i or 720p.
Sound Quality First of all, please perform the Sound Test to confirm that your TV audio is properly operating.
(go to MENU - Support - Self Diagnosis - Sound Test) (P. 21)
If the audio is OK, the sound problem may caused by the source or signal.
There is no sound or the sound is too low
at maximum volume.
• Please check the volume the of external device connected to your TV.
The picture is good but there is no sound. • Set the Speaker Select option to TV speaker in the sound menu. (P. 18)
• If you are using an external device, make sure the audio cables are connected to the correct audio
input jacks on the TV.
• If you are using an external device, check the device’s audio output option (ex. you may need to
change your cable box’s audio option to HDMI when you have a HDMI connected to your TV).
• If you are using a DVI to HDMI cable, a separate audio cable is required.
• If your TV has a headphone jack, make sure there is nothing plugged into it.
The speakers are making an inappropriate
noise.
• Check the cable connections. Make sure a video cable is not connected to an audio input.
• For antenna or cable connections, check the signal strength. Low signal level may cause sound
distortion.
BN68-02588F_Eng.indb 29 2010-3-19 15:42:2030 English
Other Information
Issues Solutions and Explanations
No Picture, No Video
The TV won’t turn on. • Make sure the AC power cord is securely plugged in to the wall outlet and the TV.
• Make sure the wall outlet is working.
• Try pressing the POWER button on the TV to make sure the problem is not the remote. If the TV turns
on, refer to “The remote control does not work” below.
The TV turns off automatically. • Ensure the Sleep Timer is set to Off in the Setup menu. (P. 19)
• If your PC is connected to the TV, check your PC power settings.
• Make sure the AC power cord is plugged in securely to the wall outlet and the TV.
• When watching TV from an antenna or cable connection, the TV will turn off after 10 ~ 15 minutes if
there is no signal.
There is picture/Video. • Check cable connections (remove and reconnect all cables connected to the TV and external
devices).
• Set your external devices’ (Cable/Set top Box, DVD, Blu-ray etc) video outputs to match the
connections to the TV input. For example, if an external device’s output is HDMI, it should be connect
to an HDMI input on the TV.
• Make sure your connected devices are powered on.
• Be sure to select the TV’s correct source by pressing the SOURCE button on the TV remote.
RF(Cable/Antenna) Connection
The TV is not receiving all channels. • Make sure the Antenna cable is connected securely.
• Please try Plug & Play (Initial setup) to add available channels to the channel list. Go to MENU -
Setup - Plug & Play (Initial setup) and wait for all available channels to be stored.
• Verify the Antenna is positioned correctly.
The picture is distorted: macroblock error
small block, dots, pixelization
• Compression of video contents may cause picture distortion, especially with fast moving pictures
such as sports and action movies.
• A low signal can cause picture distortion. This is not a TV issue.
PC Connection
A “Not Supported Mode” message
appears.
• Set your PC’s output resolution and frequency so they match the resolutions supported by the TV. (P.
9)
“PC” is always shown on the source list,
even if a PC is not connected.
• This is normal; “PC” is always shown on the source list, regardless of whether a PC is connected.
The video is OK but there is no audio. • If you are using a HDMI connection, check the audio output setting on your PC.
Others
The picture won’t display in full screen. • HD channels will have black bars on either side of the screen when displaying upscaled SD (4:3)
contents.
• Black bars on the top and bottom will appear during movies that have aspect ratios different from
your TV.
• Adjust the picture size options on your external device or TV to full screen.
The remote control does not work. • Replace the remote control batteries with the poles (+/–) in the right direction.
• Clean the sensor’s transmission window on the remote.
• Try pointing the remote directly at the TV from 5~6 feet away.
The cable/set top box remote control
doesn’t turn the TV on or off, or adjust the
volume.
• Programme the Cable/Set top box remote control to operate the TV. Refer to the Cable/Set user
manual for the SAMSUNG TV code.
A “Not Supported Mode” message
appears.
• Check the supported resolution of the TV, and adjust the external device’s output resolution
accordingly. Refer to the resolution settings on page 9 of this manual.
There is a plastic smell from the TV. • This smell is normal and will dissipate over time.
The TV Signal Information is unavailable
in the Self Diagnostic Test menu.
• This function is only available with digital channels from an Antenna / RF/Coax connection. (P. 21)
The TV is tilted to the side. • Remove the base stand from the TV and reassemble it.
There are difficulties assembling the stand
base.
• Make sure the TV is placed on a flat surface. If you can not remove the screws from the TV,
unnecessary use a magnetized screw driver.
The channel menu is greyed out.
(unavailable)
• The Channel menu is only available when the TV source is selected.
BN68-02588F_Eng.indb 30 2010-3-19 15:42:21English 31
05 Other Information
Issues Solutions and Explanations
Your settings are lost after 30 minutes or
every time the TV is turned off.
• If the TV is in the Store Demo mode, it will reset audio and picture settings every 30 minutes. Change
the settings from Store Demo mode to Home Use mode in the Plug & Play (Initial setup) procedure.
Press the SOURCE button to select TV mode, and go to MENU → Setup → Plug & Play (Initial
setup) → ENTERE.
You have intermittent loss of audio or
video.
• Check the cable connections and reconnect them.
• Loss of audio or video can be caused by using overly rigid or thick cables. Make sure the cables are
flexible enough for long term use. If mounting the TV to the wall, we recommend using cables with 90
degree connectors.
You see small particles when you look
closely at the edge of the frame of the TV.
• This is part of the product’s design and is not a defect.
The message “Scramble signal” or “Weak
Signal/No Signal” appears.
• If you are using a CAM CARD (CI/CI+), check that it is installed into the common interface slot.
• If there is still a problem, pull the CAM CARD out of the TV and insert it into the slot again.
You turned the TV off 45 minutes ago, and
it turned on again.
• It is normal. The TV operates the OTA (Over The Aerial) function itself to upgrade firmware
downloaded whilst your watching TV.
There are recurrent picture/sound issues. • Check and change the signal/source.
A reaction may occur between the rubber
cushion pads on the base stand and the
top finish of some furniture.
• To prevent this, use felt pads on any surface of the TV that comes in direct contact with furniture.
✎This TFT LCD panel uses a panel consisting of sub pixels which require sophisticated technology to produce. However,
there may be a few bright or dark pixels on the screen. These pixels will have no impact on the performance of the
product.
¦ Licence
Manufactured under license from Dolby Laboratories.
dolby and the double-d symbol are trademarks of dolby laboratories.
Open source license notice
In the case of using open source software, Open Source Licenses are available on the product menu.
BN68-02588F_Eng.indb 31 2010-3-19 15:42:2132 English
Other Information
Specifications
Panel native 1360 x 768 @ 60 Hz
Environmental Considerations
Operating Temperature
Operating Humidity
Storage Temperature
Storage Humidity
10°C to 40°C (50°F to 104°F)
10% to 80%, non-condensing
-20°C to 45°C (-4°F to 113°F)
5% to 95%, non-condensing
TV System Analogue : Depending on your country selection
Digital : DVB-T/DVB-C
Colour/video system Analogue: PAL, SECAM, NTSC-4.43, NTSC-3.58, PAL60
Digital: MPEG-2 MP@ML, MPEG-4, H.264/AVC MP@L3, MP@L4.0, HP@L4.0
Sound System BG. OK NICAM. MPEGl
HDMI IN Video : 1080/24p, 1080p, 1080i, 720p, 576p, 576i, 480p, 480i
Audio : Two Channel Linear PCM 32/44.1/48 kHz, 16/20/24bits
Analogue audio input (HDMI IN only)
PC Input
Stand Swivel
(Left / Right) 0˚
Model Name LE19C350 LE22C350
Screen Size
(Diagonal) 19 inch 22 inch
Sound
Output 3W X 2 3W X 2
Dimensions (WxDxH)
Body
With stand
461.2 x 59.5 x 322.2 mm
461.2 x 161 x 364 mm
535.3 x 82.2 x 365.8 mm
535.5 x 171.8 x 420.9 mm
Weight
With Stand
3.9 kg
4.2 kg
3.9 kg
4.1 kg
✎Design and specifications are subject to change without prior notice.
✎For the power supply and power consumption, refer to the label attached to the product.
BN68-02588F_Eng(26-).indd 32 2010-3-19 17:29:22English 33
05 Other Information
Index
A
Amplify 17
Antenna 12
Auto Adjustment 17
Auto Volume 18
B
Background Music 25
Balance L/R 17
Basic View 24
Batteries 5
Black Tone 15
Brightness 14
C
Change PIN 20
Channel Manager 12
Clock 19
Colour Tone 15
Component 7
Connecting to a PC 8
Connecting to an Audio Device 8
D
Digital Audio out 8
D-sub 8
Dynamic 14
Dynamic Contrast 15
E
Edit Name 10
Editing channels 13
Energy Saving 15
EPG 11
Equalizer 17
External Speaker 18
F
Favourites Channel 12
Film Mode 15
Fine Tune 14
Flesh Tone 15
Frequency 12
H
HDMI 7
I
Installation Space 2
L
Language 20
Licence 31
Lock 14
M
Media Play 22
Melody 20
Menu Transparency 20
Music 23
N
Navigate 10
Now & Next guide 11
O
ON/OFF button 5
Optimal resolution 9
P
Photos 24
Picture Size 16
Plug & Play 6
Power Indicator 4
R
Remote Control 5
Repeat Mode 25
RGB Only Mode 15
Rotate 25
S
Select All 14
Self Diagnosis 21
Sharpness 14
Signal Information 21
Sleep Timer 19
Slide Show 24
Software Upgrade 21
Source List 10
Speaker Select 18
Specifications 32
Standby mode 4
Subtitle 20
T
Timer 19
Title 34
Tools 3
Troubleshooting 29
TV Speaker 18
U
USB 21, 22
Using Channel View 11
Using Scheduled View 11
Using the Favourite Channels 12
V
VCR 10
Volume 4, 5
W
Wall Mount 27
White Balance 15
BN68-02588F_Eng.indb 33 2010-3-19 15:42:21This page is intentionally left blank.
BN68-02588F_Eng.indb 34 2010-3-19 15:42:212 Français
Les figures et illustrations contenues dans ce mode d’emploi sont fournies pour référence uniquement. Elles peuvent différer
de l’aspect réel du produit. La conception et les spécifications du produit sont susceptibles d’être modifiées sans préavis.
Avis concernant le téléviseur numérique
1. Les fonctions relatives à la télévision numérique (DVB) ne sont disponibles que dans les pays ou régions où des signaux terrestres numériques de
type DVB-T (MPEG2 et MPEG4 AVC) sont diffusés ou dans lesquels vous avez accès à un service de télévision par câble compatible DVB-C (MPEG2
et MPEG4 AAC). Consultez votre distributeur local pour connaître les possibilités en matière de réception des signaux DVB-T ou DVB-C.
2. DVB-T est la norme du consortium européen DVB pour la diffusion de signaux terrestres de télévision numérique. La norme DVB-C est, quant à
elle, prévue pour la diffusion des signaux de télévision numérique par câble. Certaines fonctions particulières, telles que le guide électronique des
programmes (Electric Program Guide - EPG) ou encore la vidéo à la demande (Video On Demand - VOD), ne sont toutefois pas incluses dans cette
spécification. Dès lors, elles ne seront pas traitées pour l’instant.
3. Bien que ce téléviseur soit conforme aux dernières normes DVB-T et DVB-C (août 2008), il n’est pas garanti qu’il soit compatible avec les futures
diffusions de signaux numériques terrestres DVB-T et par câble DVB-C.
4. En fonction du pays ou de la région où vous vous trouvez, certains opérateurs de télévision par câble peuvent facturer des frais supplémentaires pour
un tel service. Il se peut également que vous deviez accepter les termes et conditions de ces sociétés.
5. Il se peut que certaines fonctions de TV numérique ne soient pas disponibles dans certains pays ou certaines régions et que la réception des signaux
DVB-C ne soit pas correcte avec tous les opérateurs.
6. Pour plus d’informations, contactez votre service client Samsung.
✎ Les différentes méthodes de diffusion adoptées en fonction des pays peuvent affecter la qualité de réception du téléviseur. Vérifiez le fonctionnement
du téléviseur chez votre revendeur agréé SAMSUNG ou contactez le centre d’appel de Samsung pour savoir s’il est possible d’en améliorer les
performances en reconfigurant les réglages.
Avertissement d’image fixe
Evitez d’afficher sur l’écran des images fixes (telles que des photos au format JPEG) ou des éléments d’images fixes (tels que des logos de programmes
TV, un format d’image 4:3 ou panoramique, bandeaux d’actualités ou d’informations boursières au bas de l’écran, etc.). L’affichage permanent d’images
fixes risque, en effet, d’entraîner une usure irrégulière du phosphore d’écran, ce qui peut se traduire par une dégradation de la qualité d’image.
Pour atténuer les risques, suivez scrupuleusement les recommandations suivantes :
• Evitez d’afficher le même canal de télévision pendant de longues périodes.
• Essayez toujours d’afficher l’image en plein écran ; pour obtenir une correspondance optimale, utilisez le menu de format d’image du téléviseur.
• Réduisez les valeurs de luminosité et de contraste sur le minimum requis pour obtenir la qualité d’image souhaitée. L’utilisation de valeurs trop
élevées risque d’accélérer le processus de brûlure.
• Utilisez fréquemment toutes les fonctions du téléviseur conçues pour réduire le phénomène de rémanence et la brûlure d’écran. Pour plus
d’informations à ce sujet, consultez la section appropriée du mode d’emploi.
Sécurisation de l’espace d’installation
Maintenez les distances requises entre le produit et les autres objets (par exemple, les murs) afin de garantir une ventilation adaptée.
Le non-respect de ces distances peut provoquer un incendie ou un problème au produit en raison d’une augmentation de la température interne de celui-ci.
✎ Lors de l’utilisation d’un pied ou d’un support mural, utilisez uniquement les pièces fournies par Samsung Electronics.
x L’utilisation de pièces fournies par un autre fabricant peut occasionner un problème au niveau du produit ou la chute de celui-ci, ce qui pourrait
vous blesser.
✎ L’aspect peut varier en fonction du produit.
Installation avec un pied. Installation avec un support de montage mural.
10 cm
10 cm 10 cm
10 cm
10 cm
10 cm
10 cm
Instructions de mise au rebut de ce produit (Déchets d'équipements électriques et électroniques)
(Applicable dans les pays de l'Union Européenne et dans d'autres pays européens pratiquant la collecte sélective de déchets)
Ce symbole sur le produit, ses accessoires ou sa documentation indique que ni le produit, ni ses accessoires électroniques usagés
(chargeur, casque audio, câble USB, etc.) ne peuvent être jetés avec les autres déchets ménagers. La mise au rebut incontrôlée
des déchets présentant des risques pour l'environnement et la santé publique, veuillez séparer vos produits et accessoires usagés
des autres déchets. Vous favoriserez ainsi le recyclage de la matière qui les compose dans le cadre d'un développement durable.
Les particuliers sont invités à contacter le magasin leur ayant vendu le produit ou à se renseigner auprès des autorités locales pour
connaître les procédures et les points de collecte de ces produits en vue de leur recyclage. Les utilisateurs professionnels doivent
contacter leur fournisseur et consulter les conditions générales du contrat d'achat. Ce produit et ses accessoires ne peuvent être
jetés avec les autres déchets professionnels et commerciaux.
Élimination des batteries de ce produit
(Applicable aux pays de l'Union européenne et aux autres pays européens dans lesquels des systèmes de collecte
sélective sont mis en place.)
Le symbole sur la pile, le manuel ou l'emballage indique que les batteries de ce produit ne doivent pas être éliminées en fin
de vie avec les autres déchets ménagers. L'indication éventuelle des symboles chimiques Hg, Cd ou Pb signifie que la pile ou
l'accumulateur contient des quantités de mercure, de cadmium ou de plomb supérieures aux niveaux de référence stipulés dans la
directive CE 2006/66. Si les piles ne sont pas correctement éliminées, ces substances peuvent porter préjudice à la santé humaine
ou à l'environnement. Afin de protéger les ressources naturelles et de favoriser la réutilisation du matériel, veillez à séparer les
batteries des autres types de déchets et à les recycler via votre système local de collecte gratuite des piles et accumulateurs.
BN68-02588ABF-Fre.indb 2 2010-3-23 15:16:32Français 3
Sommaire
Mise en route
4
4 Accessoires
4 Présentation du panneau de commande
5 Présentation de la télécommande
6 Raccordement à une antenne
6 Plug & Play (configuration initiale)
Connexions
7
7 Connexion à un périphérique AV
8 Connexion à un système audio
8 Connexion à un ordinateur
10 Changement de la source d’entrée
Fonctions de base
10
10 Navigation dans les menus
11 Utilisation du bouton INFO (Guide Now & Next)
11 Planification des émissions à regarder
12 Menus Chaîne
14 Menu Image
17 Menu Son
19 Menu Configuration
21 Menu Assistance
Fonctions avancées
22
22 Media Play
Informations supplémentaires
26
26 Fonction Télétexte de chaîne analogique
27 Installation du support mural
28 Verrou antivol Kensington
28 Fixation du téléviseur au mur
39 Dépannage
32 Caractéristiques techniques
33 Index
Vérifiez la présence du symbole !
Vous pouvez utiliser cette fonction en
t
appuyant sur le bouton TOOLS de la
télécommande.
Remarque Guide étape par étape
P
POWER
GUIDE AD
MEDIA.P
SUBT.
DUAL
I-II
P.SIZE S.MODE P.MODE
BN68-02588ABF-Fre.indb 3 2010-3-23 15:16:334 Français
Mise en route
Accessories
✎Vérifiez que les éléments suivants sont inclus avec votre téléviseur LCD. S’il manque des éléments, contactez votre
revendeur.
✎La couleur et la forme des éléments peuvent varier en fonction du modèle.
y Télécommande et piles (AAA x 2)
y Instructions d’utilisation
y Carte de garantie / Manuel de sécurité (non disponible dans certains pays)
y Chiffon de nettoyage
y Câble d’alimentation
Pour installer le pied, consultez le guide approprié.
1 EA
(M4 X L16)
y Pied (1EA) y Vis (2EA)
Présentation du panneau de commande
✎La couleur et la forme du produit peuvent varier en fonction du modèle.
Haut-parleurs
Capteur de la télécommande
Capteur de la
télécommande
P (Alimentation) Permet d’allumer ou d’éteindre le téléviseur.
Témoin d’alimentation Clignote, puis s'arrête lorsque le téléviseur est allumé. S'allume en mode Veille.
SOURCEE Bascule entre toutes les sources d'entrée disponibles. Dans le menu à l'écran, utilisez
ce bouton de la même façon que le bouton ENTERE de la télécommande.
MENU Affi che un menu à l'écran (ou OSD) reprenant les fonctions de votre téléviseur.
Y Règle le volume. Dans le menu à l'écran, utilisez les boutons Y de la même
z façon que les boutons ◄ et ► de la télécommande.
Permet de modifi er les chaînes. Dans le menu à l'écran, utilisez les boutons
de la même façon que les boutons ▼ et ▲ de la télécommande.
Capteur de la télécommande Dirigez la télécommande vers ce point du téléviseur.
Mode Veille
Ne laissez pas le téléviseur en mode Veille pendant de longues périodes (lorsque vous partez en vacances, par exemple).
L’appareil consomme toujours une petite quantité d’énergie, même lorsque le bouton marche/arrêt est en position Off. Il est
préférable de débrancher le cordon d’alimentation.
MEDIA.P
A B C D
Permet d’affi cher et de sélectionner les sources
vidéo disponibles. (P. 10)
Permet d’allumer et éteindre la télévision. (P. 6)
Permet de changer de chaîne.
Permet d’affi cher le Guide électronique des
programmes (EPG). (P. 11)
Affi che la liste des chaînes à l’écran. (P. 14)
Permet de changer de chaîne.
Permettent de sélectionner des éléments de menu
à l’écran et de modifi er les valeurs des menus.
Permet d’affi cher des informations sur l’écran
du téléviseur.
Permet d’affi cher le menu principal à l’écran.
(P. 10)
Permet de régler le volume.
Permet de couper temporairement le son.
Boutons des menus Gestion chaînes,
Media Play, etc.
AD: sélection de la description audio.
(Non disponible dans certains pays) (P. 18)
P.SIZE: permet de choisir la taille d’image. (P. 16)
SUBT.: affi chage numérique des sous-titres (P. 20)
Permet de couper temporairement le son.
Permet de revenir au menu précédent. (P. 10)
Permet de sélectionner rapidement les
fonctions fréquemment utilisées.
Permet de quitter le menu. (P. 10)
Permet de choisir Télétexte,
Double ou Mixte.
permet d’affi cher l’application Media Play.
BN68-02588ABF-Fre.indb 4 2010-3-23 15:16:345
01 Mise en route
Français
Présentation de la télécommande
Installation des piles (type de pile : AAA)
✎REMARQUE
x Utilisez la télécommande à une distance maximale de
7 mètres du téléviseur.
x Une lumière intense peut affecter le bon fonctionnement de
la télécommande. Evitez de l’utiliser à proximité d’une lampe
fluorescente spéciale ou d’une enseigne au néon.
x La couleur et la forme peuvent varier en fonction du modèle.
MEDIA.P
A B C D
Permet d’affi cher et de sélectionner les sources
vidéo disponibles. (P. 10)
Permet d’allumer et éteindre la télévision. (P. 6)
Permet de changer de chaîne.
Permet d’affi cher le Guide électronique des
programmes (EPG). (P. 11)
Affi che la liste des chaînes à l’écran. (P. 14)
Permet de changer de chaîne.
Permettent de sélectionner des éléments de menu
à l’écran et de modifi er les valeurs des menus.
Permet d’affi cher des informations sur l’écran
du téléviseur.
Permet d’affi cher le menu principal à l’écran.
(P. 10)
Permet de régler le volume.
Permet de couper temporairement le son.
Boutons des menus Gestion chaînes,
Media Play, etc.
AD: sélection de la description audio.
(Non disponible dans certains pays) (P. 18)
P.SIZE: permet de choisir la taille d’image. (P. 16)
SUBT.: affi chage numérique des sous-titres (P. 20)
Permet de couper temporairement le son.
Permet de revenir au menu précédent. (P. 10)
Permet de sélectionner rapidement les
fonctions fréquemment utilisées.
Permet de quitter le menu. (P. 10)
Permet de choisir Télétexte,
Double ou Mixte.
permet d’affi cher l’application Media Play.
BN68-02588ABF-Fre.indb 5 2010-3-23 15:16:346
Mise en route
Français
Raccordement à une antenne
Lorsque vous allumez le téléviseur pour la première fois, des réglages de base s’effectuent de manière automatique.
✎Préréglage : connexion du câble d’alimentation et de l’antenne.
Prise D'alimentation
Antenne VHF/UHF
ou
Câble
R-AUDIO-L PR PB Y
ANT OUT
Plug & Play (confi guration initiale)
Lorsque le téléviseur est allumé pour la première fois, plusieurs invites s’affi chent pour vous aider à confi gurer les réglages de
base. Appuyez sur le bouton POWERP. Plug & Play est disponible uniquement si la source Entrée est défi nie sur TV.
1
Choix d’une langue Appuyez sur le bouton ▲ ou ▼, puis sur ENTERE.
Sélectionnez la langue de votre choix pour le menu à l'écran.
P
POWER
GUIDE AD
MEDIA.P
SUBT.
DUAL
I-II
P.SIZE S.MODE P.MODE
2
Sélection du mode
Démo. magasin ou
Util. domicile
Appuyez sur le bouton ◄ ou ►, puis sur ENTERE.
y Sélectionnez le mode Util. domicile. Le mode Démo. magasin est
prévu pour un usage en magasin.
y Rétablissez les paramètres du téléviseur de Démo. magasin
sur Util. domicile (standard) : appuyez sur le bouton Volume du
téléviseur. Lorsque le menu du volume s'affi che, appuyez pendant
5 secondes sur le bouton MENU.
3
Sélection d'un pays Appuyez sur le bouton ▲ ou ▼, puis sur ENTERE.
Sélectionnez le pays de votre choix. Si le pays ne fi gure pas dans le menu, sélectionnez
Autre.
✎Après la sélection du pays dans le menu Pays, certains modèles peuvent demander, en
plus, le code PIN.
✎Lors de l'entrée du code PIN, 0-0-0-0 n'est pas disponible.
4
Sélection d'une antenne Appuyez sur le bouton ▲ ou ▼, puis sur ENTERE.
Sélectionnez Hertzien ou Câble.
5
Sélection d'une chaîne Appuyez sur le bouton ▲ ou ▼, puis sur ENTERE.
Sélectionnez la source de la chaîne à mémoriser. Lors du réglage de la source d'antenne
sur Câble, une fenêtre s'affi che pour vous permettre d'attribuer des valeurs numériques
(fréquences de station) aux chaînes.
Pour plus d'informations, reportez-vous au menu Chaîne → Mémorisation Auto (P. 12).
✎Appuyez sur le bouton ENTERE à tout moment pour interrompre la mémorisation.
6
Réglage du Mode
Horloge
Réglez le Mode Horloge automatiquement ou manuellement.
Appuyez sur le bouton ▲ ou ▼ pour sélectionner Auto., puis appuyez sur le bouton
ENTERE.
7
Affi chage du Guide de
connexion HD
La méthode de connexion assurant la meilleure qualité d'image en HD s'affi che à l'écran.
8
Profi tez de votre
téléviseur.
Appuyez sur le bouton ENTERE.
Si vous souhaitez réinitialiser cette fonction...
Sélectionnez Confi guration - Plug & Play (Confi guration initiale). Entrez votre code PIN à quatre chiffres. Le code PIN par
défaut est "0-0-0-0". Si vous souhaitez modifi er le code PIN, utilisez la fonction Modifi er PIN.
BN68-02588ABF-Fre.indb 6 2010-3-23 15:16:35Français 7
02 Connexions
Connexions
Connexion à un périphérique AV
Utilisation d’un câble HDMI/DVI : connexion HD (jusqu’à 1080p)
Périphériques disponibles : lecteur DVD, lecteur Blu-ray, décodeur câble HD, décodeur HD, récepteur satellite, décodeur
câble, récepteur satellite (décodeur)
✎HDMI (DVI) IN / PC/DVI AUDIO IN
x Lorsque vous utilisez une connexion avec câble HDMI/DVI, vous devez utiliser la prise HDMI (DVI) IN. Dans
le cas d’une connexion avec câble DVI, utilisez un câble DVI vers HDMI ou un adaptateur DVI-HDMI (DVI vers
HDMI) pour la connexion vidéo et les prises PC / DVI AUDIO IN pour le son.
x Si vous connectez un dispositif externe, tel qu’un lecteur DVD / un lecteur Blu-ray / un décodeur câble / un
décodeur satellite prenant en charge une version HDMI antérieure à 1.3, il se peut que le téléviseur ne fonctionne
pas correctement (par exemple : absence d’image / absence de son / scintillement / couleurs anormales).
x Si aucun son n’est émis après la connexion d’un câble HDMI, vérifiez la version HDMI du dispositif externe.
Si vous pensez qu’il utilise peut-être une version HDMI antérieure à 1.3, contactez le fabricant pour en avoir la
confirmation et demander une mise à niveau.
x Il est conseillé d'acheter un câble certifi é HDMI. Dans le cas contraire, il se peut que l'écran n'affi che aucune
image ou qu'une erreur de connexion se produise.
Utilisation d’un câble Composante (jusqu’à 1080p) ou Audio/Vidéo (480i uniquement) et utilisation d’un câble Péritel
Périphériques disponibles : magnétoscope, lecteur DVD, lecteur Blu-ray, décodeur câble, récepteur décodeur
✎En mode Ext., la sortie DTV prend uniquement en charge les signaux audio et vidéo MPEG SD.
✎Pour obtenir une qualité d’image optimale, il est préférable d’opter pour la connexion Composante (plutôt que la
connexion A/V).
R-AUDIO-L PR PB Y
AUDIO OUT
R-AUDIO-L PR PB Y
DVI OUT
R-AUDIO-L PR PB Y
HDMI OUT
Y
W R
WY WR W R B G
Rouge Blancs
DVD
R W R G B
R W R G
R W Y
R W Y B
R-AUDIO-L PR PB Y
COMPONENT OUT
R-AUDIO-L PR PB Y
AUDIO OUT
R-AUDIO-L PR PB Y
EXT
R-AUDIO-L PR PB Y
AUDIO OUT
R-AUDIO-L PR PB Y
VIDEO OUT
WY WR W R B G
Jaune Rouge Blancs
WY WR W R B G
Rouge Bleu Vert
VCR Lecteur Blu-ray DVD
BN68-02588ABF-Fre.indb 7 2010-3-23 15:16:398 Français
Connexions
Connexion à un système audio
Utilisation d’une connexion par câble audio ou optique
Périphériques disponibles : système audio numérique, amplifi cateur, système home cinéma DVD
✎DIGITAL AUDIO OUT (OPTICAL)
x Lorsqu’un système audio numérique est connecté à la prise DIGITAL AUDIO OUT (OPTICAL), diminuez le
volume du téléviseur et du système.
x Le mode audio 5.1 est disponible uniquement si le téléviseur est relié à un dispositif externe prenant en charge
ce mode.
x Lorsque le récepteur (home cinéma) est activé, vous pouvez écouter le son sortant de la prise optique du
téléviseur. Lorsque le téléviseur reçoit un signal DTV, il envoie du son 5.1 canaux au récepteur du système
home cinéma. Si la source est un composant numérique (par exemple, un lecteur DVD, un lecteur Blu-ray, un
décodeur câble ou un récepteur satellite) connecté au téléviseur en HDMI, le récepteur home cinéma émet
uniquement du son sur 2 canaux. Pour obtenir du son en mode 5.1 canaux, connectez directement la prise de
sortie audio numérique du lecteur DVD, du lecteur Blu-Ray, du décodeur câble ou du décodeur satellite à un
amplificateur ou un système home cinéma.
Connexion à un ordinateur
Utilisation d’un câble HDMI/DVI / D-Sub
R-AUDIO-L PR PB Y
OPTICAL
Système audio
numérique
R-AUDIO-L PR PB Y
AUDIO OUT
R-AUDIO-L PR PB Y
AUDIO OUT
R-AUDIO-L PR PB Y
DVI OUT
R-AUDIO-L PR PB Y
PC OUT
BN68-02588ABF-Fre.indb 8 2010-3-23 15:16:41Français 9
02 Connexions
Modes d’affichage (Entrées D-Sub et HDMI/DVI)
La résolution optimale est de 1360 x 768 @ 60 Hz.
Mode Résolution
Fréquence horizontale
(kHz)
Fréquence verticale (kHz)
Fréquence d'horloge pixels
(MHz)
Polarité de
synchronisation
(H/V)
IBM
640 x 350 31.469 70.086 25.175 + / -
720 x 400 31.469 70.087 28.322 - / +
MAC
640 x 480 35.000 66.667 30.240 - / -
832 x 624 49.726 74.551 57.284 - / -
VESA DMT
640 x 480
31.469 59.940 25.175 - / -
37.861 72.809 31.500 - / -
37.500 75.000 31.500 - / -
800 x 600
37.879 60.317 40.000 + / +
48.077 72.188 50.000 + / +
46.875 75.000 49.500 + / +
1024 x 768
48.363 60.004 65.000 - / -
56.476 70.069 75.000 - / -
60.023 75.029 78.750 + / +
1280 x 720 45.000 60.000 74.250 + / +
1360 x 768 47.712 60.015 85.500 + / +
VESA CVT
720 x 576 35.910 59.950 32.750 - / +
1280 x 720 56.456 74.777 95.750 - / +
VESA GTF 1280 x 720 52.500 70.000 89.040 - / +
✎REMARQUE
x Dans le cas d’une connexion avec câble HDMI/DVI, vous devez utiliser la prise HDMI (DVI) IN.
x Le mode entrelacé n’est pas pris en charge.
x Le téléviseur peut fonctionner de façon anormale si le format vidéo sélectionné n’est pas standard.
x Les modes Séparé et Composite sont pris en charge. Le mode SOG (Sync On Green) n’est pas pris en charge.
Emplacement COMMON INTERFACE pour les connexions
Pour regarder des chaînes cryptées, vous devez insérer la "CARTE CI
ou CI+".
y Si vous n’insérez pas la "CARTE CI ou CI+", le message "Signal
brouillé’’ sera affiché pour certaines chaînes.
y Les informations de pairage contenant un numéro de téléphone,
l’ID de la "CARTE CI ou CI+", l’ID hôte, ainsi que d’autres
informations, s’afficheront après environ 2 ou 3 minutes. Si un
message d’erreur s’affiche, contactez votre prestataire de service.
y Lorsque la configuration des informations sur les canaux est
terminée, le message "Mise à jour terminée" s’affiche, indiquant
que la liste des chaînes est désormais à jour.
✎REMARQUE
x Vous devez vous procurer une "Carte CI ou CI+" auprès d’un câblo-opérateur local.
x Lorsque vous sortez la "Carte CI ou CI+", tirez-la délicatement avec vos doigts. Une chute pourrait l’endommager.
x Insérez la "Carte CI ou CI+" dans le sens indiqué sur celle-ci.
x L’emplacement de la fente COMMON INTERFACE peut varier en fonction du modèle.
x La "Carte CI ou CI+" n’est pas prise en charge dans certains pays et certaines régions ; vérifiez auprès de votre
revendeur agréé.
x Si vous rencontrez des problèmes, contactez le prestataire de service.
BN68-02588ABF-Fre.indb 9 2010-3-23 15:16:4210 Français
Connexions
Changement de la source d’entrée
Liste Source
Permet de sélectionner le téléviseur ou
d’autres sources d’entrée externes (telles
qu’un lecteur DVD, un lecteur Blu-ray, un
décodeur câble ou un récepteur décodeur)
connectées au téléviseur.
■ TV / Ext. / AV / Composant / PC /
HDMI/DVI / USB
✎ Les entrées connectées sont
mises en surbrillance dans la Liste Source.
✎ L’option Ext. reste activée en permanence.
Modif. nom
■ VCR / DVD / Décodeur Câble / Décodeur satellite /
Décodeur PVR / Récepteur AV / Jeux / Caméscope
/ PC / DVI PC / Périph. DVI / TV / IPTV / Blu-ray / HD
DVD / DMA Nommez le périphérique connecté aux
prises d’entrée pour faciliter la sélection de la source
d’entrée.
✎ Lorsque vous connectez un câble HDMI/DVI au
port HDMI (DVI) IN , vous devez régler le port en
mode DVI PC ou Périph. DVI sous Modif. Nom.
Fonctions de base
Navigation dans les menus
Avant d’utiliser le téléviseur, procédez comme suit pour
apprendre à naviguer dans le menu afi n de sélectionner et de
régler les différentes fonctions.
MEDIA.P
A B C D
4
1
2
3
1 Bouton MENU : affi che le menu principal à l’écran.
2 Bouton ENTERE / Bouton directionnel : déplacez
le curseur pour sélectionner un élément. Confi rmez le
réglage.
3 Bouton RETURN : revient au menu précédent.
4 Bouton EXIT : ferme le menu affi ché à l’écran.
Utilisation de l’affi chage à l’écran (OSD)
La méthode d’accès peut varier en fonction du menu
sélectionné.
1 MENU m
Les options du menu principal
s'affi chent sur l'écran :
Image, Son, Chaîne,
Confi guration, Entrée,
Application et Assistance.
2 ▲ / ▼
Sélectionnez une icône à l'aide du
bouton ▲ ou ▼.
3 ENTERE Appuyez sur ENTERE pour
accéder au sous-menu.
4 ▲ / ▼
Sélectionnez le sous-menu de votre
choix à l'aide du bouton ▲ ou ▼.
5 ◄ / ►
Réglez la valeur d'un élément à
l'aide du bouton ◄ ou ►. Les
informations de réglage affi chées à
l'écran peuvent varier en fonction
du menu sélectionné.
6 ENTERE Appuyez sur le bouton ENTERE
pour terminer la confi guration.
7 EXIT e Appuyez sur EXIT.
P
POWER
MEDIA.P
FAV.CH
P.MODE
DUAL
MTS
BN68-02588ABF-Fre.indb 10 2010-3-23 15:16:43Français 11
03 Fonctions de base
Utilisation du bouton INFO (Guide Now & Next)
L’affichage identifie la chaîne en cours et
l’état de certains paramètres audio et vidéo.
Le Guide Now & Next affiche des
informations quotidiennes sur les
programmes de télévision en fonction de
l’heure de diffusion.
y Faites défiler à l’aide des boutons ◄,
►
pour afficher des informations sur le programme
de votre choix, tout en regardant la chaîne actuelle.
y Faites défiler à l’aide des boutons ▲, ▼ pour afficher
des informations sur d’autres chaînes. Pour accéder à la
chaîne actuellement sélectionnée, appuyez sur le bouton
ENTERE.
DTV Air
15
abc1
Life On Venus Avenue 18:00 ~ 6:00
Unclassified
No Detaild Information
E Watch
' Information
Planification des émissions à regarder
Guide
Les informations du Guide électronique
des programmes (EPG) sont fournies par
les diffuseurs. Les programmes planifiés
fournis par les diffuseurs vous permettent
de planifier les émissions que vous
souhaitez regarder, de telle sorte que le
téléviseur change automatiquement de
chaîne à l’heure indiquée. Des entrées
de programmes peuvent être vides ou ne pas être à jour en
raison de l’état d’une chaîne.
Utilisation de la Vue chaînes
Utilisation de l’option Diffusion programmée
DTV Air 800 five
Family Affairs
18:00 - 18:30
Drama
Tanya confesses all to a stunned Babs. Conrad is anxious to hear...
18:30
19:15
Today
Today
)Family Affairs
)Dark Angel
800
800
five
five
800 five
Mode aff. Information E Annuler
Guide 2:10 Mar 1 Jui
Diffusion programmée
1 4 6
1 Rouge (Mode aff.) : affiche la liste des programmes en
cours de diffusion ou à venir.
2 Jaune (+24 heures) : affiche la liste des programmes
qui seront diffusés dans plus de 24 heures.
3 Bleu (Mode CH.): Sélectionnez le type des chaînes à
afficher dans la fenêtre Vue chaînes.
– Le Mode CH varie en fonction de la source d'antenne.
4 Information : affiche des détails sur le programme
sélectionné.
5 (Page) : permet d’accéder à la page
précédente / suivante.
6 Bouton ENTERE
– Si vous sélectionnez le programme en cours, vous
pouvez le regarder.
– Si vous sélectionnez un programme à venir, vous
pouvez le réserver. Pour annuler la programmation,
appuyez à nouveau sur la touche ENTERE et
sélectionnez Annuler progr..
DTV Air 800 five
Home and Away
18:00 - 18:30
Drama
Dani is devastated when scott makes clear his views on marriage...
27
28
800
24
16
6
Discovery
DiscoveryH&L
five
price-drop.tv
QVC
R4DTT
American Chopper
Programmes resume at 06:00
Home and...
No Information
QVC Selection
No Information
Tine Team
Fiv...
Today 18:00 - 19:00 19:00 - 20:00
)Family Affairs )Dark Angel
800 five
Mode aff. +24 heures Mode Ch. Information Page E Regarder
Guide 2:10 Mar 1 Jui
Vue chaînes - TV
1 2 3 4 5 6
18:11 Thu 6 Jan
P
POWER
MEDIA.P
FAV.CH
P.MODE
DUAL
MTS
P
POWER
MEDIA.P
FAV.CH
P.MODE
DUAL
MTS
BN68-02588ABF-Fre.indb 11 2010-3-23 15:16:4412 Français
Fonctions de base
Gestionnaire de chaînes
Supprimez ou définissez des chaînes favorites et utilisez
le guide des programmes pour les émissions numériques.
Sélectionnez une chaîne dans l’écran Chaînes, Mes
chaînes ou Programmé.
c1 1futech
c 2 * 24ore.tv
15 abc1
3 BBC World
23 bid-up.tv
33 Boonerang
32 Cartoon Nwk
5 Class News
4 \ Coming Soon
27 Discovery
All
TV
Radio
Data/Other
Analogue
r
Hertzien Antenne B Zoom Sélectionner Page TOutils
Chaînes
■ Chaînes : affiche la liste des chaînes selon le type
de chaîne.
■ * Mes chaînes : affiche le groupe de la chaîne.
■ Programmé : affiche tous les programmes réservés
actuellement.
✎Utilisation des boutons de couleur avec la fonction
Gestion chaînes
x Rouge (Antenne) : permet de basculer entre
Hertzien et Câble.
x B Vert (Zoom) : agrandit ou réduit un numéro de
chaîne.
x Jaune (Sélectionner) : Sélectionnez les chaînes
voulues, puis appuyez sur le bouton jaune pour
traiter toutes les chaînes sélectionnées en même
temps. La marque c s’affiche à gauche des
chaînes sélectionnées.
x (Page) : PERMET d’accéder à la page suivante/
précédente.
x T (Outils) : affiche le menu d’options Gestion
chaînes. (Les menus Options peuvent varier en
fonction de la situation.)
Icônes d’état des chaînes
Icônes Opération
A Chaîne analogique.
c Chaîne sélectionnée.
* Chaîne définie comme favorite.
( Programme en cours de diffusion.
\ Chaîne verrouillée.
) Programme réservé.
¦ Utilisation des chaînes favorites
* Mes chaînes
(dans Gestion chaînes)
Affiche toutes les chaînes favorites.
■ Modifier mes chaînes t : vous pouvez définir
les chaînes sélectionnées dans le groupe Mes chaînes
souhaité.
✎Le symbole "*" s’affiche et la chaîne est définie en tant
que Ma chaîne.
1. Sélectionnez une chaîne et appuyez sur le bouton
TOOLS.
2. Ajoutez ou supprimez une chaîne dans les groupes
Ma chaîne de votre choix : 1, 2, 3 ou 4.
x Vous pouvez sélectionner un ou plusieurs
groupes.
3. Après avoir modifié les réglages, vous pouvez
afficher la liste des chaînes de chaque groupe dans
Mes chaînes.
c1 1futech
c 2 * 24ore.tv
15 abc1
3 BBC World
23 bid-up.tv
33 Boonerang
32 Cartoon Nwk
5 Class News
4 \ Coming Soon
27 Discovery
All
TV
Radio
Data/Other
Analogue
r
Hertzien Antenne B Zoom Sélectionner Page TOutils
Chaînes
Modifier mes chaînes
Verrouil.
Supprimer
Désélect. Tout
Choisir tout
Menu Chaîne
¦ Nouvelle syntonisation des chaînes
Antenne (Hertzien / Câble)
Avant que votre téléviseur ne puisse commencer à
mémoriser les chaînes disponibles, vous devez spécifier le
type de la source du signal reliée au téléviseur (c’est-à-dire :
soit une antenne, soit le câble).
Pays
L’écran de saisie du code PIN apparaît. Entrez votre code
PIN à quatre chiffres.
■ Chaîne numérique : permet de changer de pays pour
les chaînes numériques.
■ Chaîne analogique : permet de changer de pays pour
les chaînes analogiques.
BN68-02588ABF-Fre.indb 12 2010-3-23 15:16:45Français 13
03 Fonctions de base
Mémorisation Auto
Recherche automatiquement une chaîne et la mémorise
dans le téléviseur.
✎Il est possible que les numéros de programme attribués
automatiquement ne correspondent pas aux numéros
de programme souhaités ou réels. Si une chaîne est
verrouillée par la fonction Verrouillage Parental, la
fenêtre de saisie du code PIN s’affiche.
■ Antennes Source (Hertzien / Câble) Sélectionnez la
source d’antenne à mémoriser.
■ Source des chaînes (Numérique et Analogique /
Numérique / Analogique) : sélectionnez la source des
chaînes à mémoriser.
Lors de la sélection de Câble → Numérique et
Analogique ou Numérique : Fournissez une valeur à
rechercher pour les chaînes câblées.
Mode de recherche (Complet / Réseau / Rapide) :
recherche toutes les chaînes avec des stations de diffusion
actives et les enregistre dans la mémoire du téléviseur.
✎ Si vous choisissez le mode Rapide, vous pouvez
configurer Réseau, ID réseau, Fréquence,
Modulation, Taux de symbole manuellement en
appuyant sur le bouton de la télécommande.
Réseau (Auto / Manuel) : sélectionnez le mode de
réglage NID réseau Auto ou Manuel.
ID réseau : si Réseau est défini sur Manuel, vous
pouvez configurer un ID réseau à l’aide des boutons
numériques.
Fréquence : affiche la fréquence correspondant à la
chaîne (varie d’un pays à l’autre).
Modulation : affiche les valeurs de modulation disponibles.
Taux de symbole : affiche les taux de symboles
disponibles.
Mémorisation Manuelle
Recherche manuellement une chaîne et la mémorise dans le
téléviseur.
✎Si une chaîne est verrouillée par la fonction Verrouillage
Parental, la fenêtre de saisie du code PIN s’affiche.
■ Chaîne numérique (Chaîne, Fréquence, Bande
passante): (disponible en mode DTV) Une fois la recherche
terminée, les chaînes de la liste sont mises à jour.
✎Lorsque vous sélectionnez Antenne → Hertzien :
Chaîne, Fréquence, Bande passante.
✎Lorsque vous sélectionnez Antenne → Câble :
Fréquence, Modulation, Taux de symbole.
■ Chaîne analogique (Programme, Système de
Couleur, Système Sonore, Chaîne, Rechercher) :
Si aucun son ne sort ou si le son produit est anormal,
sélectionnez de nouveau la norme son requise.
✎Mode Canal
x P (mode Programme) : à la fin du réglage, des
numéros de position compris entre P00 et P99 sont
attribués aux stations de radiodiffusion de votre
région. Dans ce mode, vous pouvez sélectionner une
chaîne en saisissant son numéro de position.
x C (Mode canal Hertzien) / S (Mode canal Câble) : ces
deux modes vous permettent de sélectionner une
chaîne en entrant le numéro attribué à chaque chaîne
câblée ou station de radiodiffusion hertzienne.
¦ Modification des chaînes
Menu d’options Gestion chaînes
(dans Gestion chaînes)
1. Sélectionnez une chaîne et appuyez sur le bouton TOOLS.
2. Modifiez le nom ou le numéro de la chaîne à l’aide du
menu Modif. nom chaîne ou Modif. num. chaîne.
■ Modif. nom chaîne (chaînes analogiques uniquement) :
attribuez le nom de votre choix à la chaîne.
■ Modif. num. chaîne (chaînes numériques uniquement) :
modifiez le numéro en appuyant sur les boutons
numériques appropriés.
¦ Autres fonctionnalités
Option de recherche du câble
(en fonction du pays)
Définit des options de recherche supplémentaires, telles que
la fréquence et le taux de symbole pour une recherche sur
un réseau câblé.
■ Fréq. début / Fréq. fin : définit la fréquence dé début
ou de fin (différente dans chaque pays).
■ Modulation : affiche les valeurs de modulation disponibles.
■ Taux de symbole : affiche les taux de symboles disponibles.
BN68-02588ABF-Fre.indb 13 2010-3-23 15:16:4614 Français
Fonctions de base
Menu d’options Gestion chaînes
(dans Gestion chaînes)
Définissez chaque chaîne à l’aide des options du menu Gestion
chaînes (Verrouiller / Déverrouiller, Rappel programme, Tri des
canaux, Supprimer, Sélectionner tout / Désélectionner tout).
Les options de menu peuvent varier selon l’état de la chaîne.
1. Sélectionnez une chaîne et appuyez sur le bouton TOOLS.
2. Sélectionnez une fonction et modifiez ses réglages.
■ Verrouiller / Déverrouiller : vous pouvez verrouiller une chaîne
afin qu’elle ne puisse pas être sélectionnée ni visualisée.
✎REMARQUE
x Cette fonction n’est disponible que si l’option
Verrouillage Parental est définie sur Activé
x L’écran de saisie du code PIN apparaît. Entrez votre
code PIN à 4 chiffres ; "par défaut "0-0-0-0". Modifiez le
code PIN à l’aide de l’option Modifier PIN.
■ Rappel programme : vous pouvez programmer l’affichage
automatique d’une chaîne déterminée à l’heure prévue.
Avant d’utiliser cette fonction, vous devez régler l’heure.
✎ Lorsqu’une chaîne numérique est sélectionnée, appuyez
sur le bouton ► pour afficher le programme numérique.
■ Tri des canaux (chaînes analogiques uniquement) :
cette opération vous permet de changer les numéros de
programme des chaînes mémorisées. Cela peut s’avérer
nécessaire après avoir utilisé la mémorisation automatique.
■ Supprimer: Vous pouvez supprimer une chaîne afin
d'afficher les chaînes de votre choix.
■ Sélectionner tout / Désélectionner tout : permet de
sélectionner toutes les chaînes ou de désélectionner celles
sélectionnées dans le gestionnaire de chaînes.
Programmé
(dans Gestion chaînes)
Vous pouvez visualiser, modifier ou supprimer une émission dont
vous avez réservé l’affichage.
■ Infos modif. : permet de modifier une émission dont vous
avez réservé l’affichage.
■ Annuler progr. : permet d’annuler une émission dont vous
avez réservé l’affichage.
■ Information : permet d’afficher une émission dont vous
avez réservé l’affichage (et d’en modifier les informations de
réservation).
■ Sélectionner tout / Désélectionner tout : sélectionne ou
désélectionne tous les programmes réservés.
Liste des chaînes
Vous pouvez afficher toutes les chaînes
recherchées.
Transfert liste chaînes
Importe ou exporte la carte des chaînes. Vous devez
connecter un périphérique de stockage USB pour utiliser
cette fonction.
✎L'écran de saisie du code PIN apparaît. Entrez votre
code PIN à quatre chiffres.
✎Le code PIN par défaut d'un nouveau téléviseur est
"0-0-0-0".
■ Importer depuis le périphérique USB : permet
d'importer une liste de chaînes depuis un périphérique
USB.
■ Exporter vers le périphérique USB : permet d'exporter
une liste de chaînes vers un périphérique USB.
Réglage fin
(Chaînes analogiques uniquement)
Si le signal est faible ou déformé, vous pouvez effectuer
manuellement un réglage fin du canal.
✎Les chaînes qui ont fait l’objet d’un réglage fin sont
indiquées par un astérisque "*".
✎Pour réinitialiser le réglage précis, sélectionnez Réinit..
Menu Image
¦ Changement du mode Image prédéfini
Sélectionnez le type d’image que vous préférez.
Mode t
■ Dynamique : adapté à un environnement lumineux.
■ Standard : adapté à un environnement normal.
■ Cinéma : convient au visionnage de films dans une
pièce sombre.
¦ Réglages des paramètres de l’image
Rétroéclairage / Contraste / Luminosité /
Netteté / Couleur / Teinte (V/R)
Votre téléviseur dispose de plusieurs options de réglage pour
le contrôle de la qualité d’image.
✎REMARQUE
x La fonction Teinte (V/R) n’est pas disponible dans les
modes TV, Ext., AV analogiques du système PAL.
x En mode PC, vous ne pouvez modifier que les
options Rétroéclairage, Contraste et Luminosité.
x Les paramètres peuvent être réglés et mémorisés
pour chaque dispositif externe connecté au
téléviseur.
x La réduction de la luminosité de l’image se traduit
P par une consommation d’énergie moindre.
POWER
GUIDE AD
MEDIA.P
SUBT.
DUAL
I-II
BN68-02588ABF-Fre.indb 14 P.SIZE S.MODE P.MODE 2010-3-23 15:16:46Français 15
03 Fonctions de base
¦ Solutions économiques
Solution Eco
■ Mode éco. (Arrêt / Bas / Moyen / Elevé / Image
désactivée / Auto.) t: permet de régler la
luminosité du téléviseur afin de réduire la consommation
d’énergie. Si vous sélectionnez Image désactivée,
l’écran est éteint, mais le son reste actif. Appuyez sur
n'importe quel bouton, excepté celui du volume, pour
allumer l'écran.
■ Pas signal veille (Arrêt / 15 min / 30 min / 60 min) :
active le mode Veille si l’état "Absence de signal" ou
"Vérifier le signal du câble" reste actif pendant une
période définie par l’utilisateur.
✎ Il est désactivé lorsque le PC est en mode
d’économie d’énergie.
¦ Modification des options d’image
Paramètres avancés
(Disponible en mode Standard / Cinéma)
Vous pouvez régler les paramètres avancés de votre écran,
notamment la couleur et le contraste.
✎En mode PC, vous ne pouvez modifier que les options
Contraste Dynamique, Gamma et Balance blancs.
Paramètres avancés
Nuance de noir : Arrêt ►
Contraste Dynamique : Moyen
Réglage Luminosité : 0
Gamma : 0
RVB uniquement : Arrêt
Espace de couleur : Natif
Balance blancs
▼
U Déplacer E Entrer R Retour
■ Nuance de noir (Arrêt / Sombre / Plus sombre / Le
plus sombre) : sélectionnez le niveau de noir afin de
régler la profondeur d’écran.
■ Contraste Dynamique (Arrêt / Bas / Moyen / Elevé) :
permet de régler le contraste de l’écran.
■ Réglage Luminosité (-2~+2) : permet d’augmenter la
luminosité des images sombres.
✎ Désactivé en mode PC.
■ Gamma : permet de régler l’intensité des couleurs
primaires.
■ RVB uniquement (Arrêt / Rouge / Vert / Bleu) : vous
pouvez régler la Couleur ou la Teinte du Rouge, Vert ou
Bleu pour l’image d’un dispositif externe (lecteur DVD,
système home cinéma, etc.).
■ Espace de couleur (Auto / Natif ) : Permet de régler la
gamme des couleurs disponibles pour créer l'image.
■ Balance blancs : permet de régler la température des
couleurs afin d’obtenir une image plus naturelle.
Aj. Rouge / Aj. Vert / Aj. Bleu : permet de régler la
profondeur de chaque couleur (rouge, vert, bleu).
Régl. Rouge / Régl. vert / Régl. bleu : permet de régler
la luminosité de chaque couleur (rouge, vert, bleu).
Réinit. : rétablit les paramètres par défaut de l’option
Balance blancs.
■ Ton chair : accentue le "Ton chair" rose.
■ Netteté des contours (Arrêt / Activé) : fait ressortir les
contours des objets.
Options d’image
✎En mode PC, vous pouvez uniquement apporter des
modifications aux options Nuance Coul. et Taille et
Temps Protection auto.
Options d’image
Nuance Coul. : Normal ►
Taille : 16:9
Mode écran : 16:9
Filtre Bruit num. : Auto.
MPEG Nosie Filter : Auto.
Niv. noir HDMI : Normal
Mode Film : Arrêt
▼
U Déplacer E Entrer R Retour
■ Nuance Coul. (Froide / Normal / Chaude1 / Chaude2)
✎ Les options Chaude1 ou Chaude2 sont
désactivées lorsque le mode d’image est
Dynamique.
✎ Les paramètres peuvent être réglés et mémorisés
pour chaque dispositif externe connecté à une
entrée du téléviseur.
BN68-02588ABF-Fre.indb 15 2010-3-23 15:16:4616 Français
Fonctions de base
■ Taille : il se peut que votre décodeur
câble / récepteur satellite dispose de
son propre jeu de tailles d’écran. Il est
toutefois vivement conseillé d’utiliser le
mode 16:9.
16:9 Auto : règle automatiquement la
taille de l’image sur le format 16:9.
16:9 : règle la taille de l’image sur 16:9 pour les DVD ou
la diffusion au format grand écran.
Zoom large : agrandit l’image à une taille supérieure à 4:3.
✎ Réglez la position à l’aide des boutons ▲, ▼.
Zoom : agrandit l’image en 16:9 (dans le sens vertical)
pour l’adapter à la taille de l’écran.
✎ Réglez la position ou la taille à l’aide des boutons
▲, ▼.
4:3 : il s’agit du paramètre par défaut pour un film ou
une diffusion normale.
✎ Ne regardez pas un film au format 4:3 pendant une
période prolongée. Les traces de bordures situées
sur la gauche, sur la droite et au centre de l’écran
peuvent donner lieu au phénomène de rémanence
(brûlure d’écran) non couvert par la garantie.
Adapter écran : affiche l’intégralité de l’image sans
coupure lors de l’entrée de signaux HDMI (720p / 1080i
/ 1080p) ou Composant (1080i / 1080p).
✎REMARQUE
x Après avoir sélectionné Adapter écran en mode HDMI
(720p / 1080i / 1080p) ou Composant (1080i/1080p), il
se peut que vous deviez centrer l’image :
1. Appuyez sur le bouton ◄ ou ► pour sélectionner
Position.
2. Appuyez sur le bouton ENTERE.
3. Appuyez sur le bouton ▲, ▼, ◄ ou ► pour
déplacer l’image.
x Les options de taille de l’image peuvent varier en
fonction de la source d’entrée.
x Les options disponibles peuvent varier en fonction
du mode sélectionné.
x En mode PC, seuls les modes 16:9 et 4:3 peuvent
être réglés.
x Les paramètres peuvent être réglés et mémorisés
pour chaque dispositif externe connecté à une
entrée du téléviseur.
x Si vous utilisez la fonction Adapter écran avec
l’entrée HDMI 720p, une ligne sera coupée en haut,
en bas, à gauche et à droite, comme c’est le cas
avec la fonction Overscan.
■ Mode écran (16:9 / Zoom large / Zoom / 4:3) :
disponible uniquement lorsque la taille d’image est
définie sur 16:9 Auto. Vous pouvez déterminer la taille
d’image souhaitée sur 4:3 WSS (Wide Screen Service)
ou sur la taille d’origine. Chaque pays européen impose
une taille d’image différente.
✎ Non disponible en mode PC, Composant et HDMI.
■ Filtre Bruit num. (Arrêt / Bas / Moyen / Elevé / Auto
/ Visualisation auto.) : lorsque le signal de diffusion est
faible, des bruits parasites ou une impression fantôme
peuvent apparaître. Sélectionnez l’une des options
jusqu’à l’obtention d’une image de qualité optimale.
Visualisation auto. : Lors du changement des chaînes
analogiques, il affiche l'intensité du signal.
✎ Disponible uniquement pour les chaînes analogiques.
✎ Lorsque la barre est verte, vous recevez le meilleur
signal possible.
■ Filtre Bruit MPEG (Arrêt / Bas / Moyen / Elevé /
Auto.) : réduit le bruit MPEG afin d’offrir une meilleure
qualité d’image.
✎ Désactivé en mode PC.
■ Niv. noir HDMI (Normal / Bas) : permet de choisir le
niveau de noir pour régler la profondeur de l’écran.
✎ Disponible uniquement en mode HDMI (signaux
RVB).
■ Mode Film (Arrêt / Auto.1 / Auto.2) : règle le téléviseur
de sorte qu’il détecte et traite automatiquement les
signaux de cinéma en provenance de toutes les sources
et adapte l’image afin d’obtenir une qualité optimale.
✎ Disponible en modes TV, AV, COMPOSANT (480i
/ 1080i) et HDMI (480i / 1080i).
■ Temps protection auto (2 heures / 4 heures / 8
heures / 10 heures / Arrêt) : si la même image reste
affichée à l'écran, le dispositif de protection automatique
contre les brûlures d'écran sera activé.
Réinitialisation de l’image (OK / Annuler)
Rétablit les paramètres par défaut du mode d’image actuel.
P
POWER
GUIDE AD
MEDIA.P
SUB.T
DUAL
P.SIZE S.MODE P.MODE
BN68-02588ABF-Fre.indb 16 2010-3-23 15:16:47Français 17
03 Fonctions de base
¦ Configuration du téléviseur avec le PC
Réglez le mode d’entrée sur PC.
Cette option permet de régler les positions/valeurs de
Réglage Automatique t
fréquence et d’affiner automatiquement les paramètres.
✎Non disponible en cas de connexion à l’aide d’un câble
HDMI/DVI.
Ecran
■ Régl. Base / Regl. Préc : élimine ou réduit les parasites
visuels. Si vous ne pouvez pas éliminer ces parasites
au moyen d’un réglage précis uniquement, réglez
la fréquence (Régl. Base) au mieux, puis effectuez
de nouveau un réglage précis. Une fois les parasites
réduits, effectuez un nouveau réglage de l’image pour
l’aligner au centre de l’écran.
■ Position : réglez la position de l’écran du PC à l’aide
des boutons directionnels (▲ / ▼ / ◄ / ►).
■ Réinitialiser Image : rétablit les paramètres d’image par
défaut.
Utilisation de votre téléviseur comme écran d’ordinateur (PC)
Configuration de votre logiciel PC (instructions basées sur
Windows XP)
En fonction de la version de Windows et de la carte
graphique utilisées, les écrans affichés sur votre PC peuvent
être différents. Cependant, les mêmes informations de
configuration de base seront généralement appliquées. Dans
le cas contraire, contactez le fabricant de votre ordinateur ou
votre revendeur Samsung.
1. Cliquez sur "Panneau de configuration" dans le menu
Démarrer de Windows.
2. Cliquez sur "Apparence et thèmes" dans la fenêtre
"Panneau de configuration". Une boîte de dialogue
s’ouvre alors.
3. Cliquez sur "Affichage" pour ouvrir une autre boîte de
dialogue.
4. Accédez à l’onglet "Paramètres" dans la boîte de
dialogue Propriétés de l’Affichage.
y Réglage correct de la taille (résolution) [Optimal : 1360 x
768 pixels]
y S’il existe une option de fréquence verticale dans la
boîte de dialogue des paramètres d’affichage, la valeur
correcte est "60" ou "60 Hz". Sinon, cliquez sur "OK" et
quittez la boîte de dialogue.
Menu Son
¦ Changement du mode Son prédéfini
Mode t
■ Standard : sélectionne le mode son normal.
■ Musique : accentue la musique par rapport aux voix.
■ Cinéma : offre le meilleur son pour les films.
■ Voix claire : accentue les voix par rapport aux autres
sons.
■ Amplifier : augmente l’intensité du son aigu pour
garantir une meilleure écoute aux personnes
malentendantes.
¦ Réglage des paramètres sonores
Egaliseur
Règle le mode Son.
■ Balance G/D : règle la balance entre les haut-parleurs
droit et gauche.
■ 100Hz / 300Hz / 1kHz / 3kHz / 10kHz (Réglage de la
bande passante) : règle le niveau des fréquences de
bande passante spécifiques.
■ Réinit. : rétablit les paramètres par défaut de l’égaliseur.
¦ Systèmes sonores, etc.
Virtual Surround (Arrêt / Activé)
Cette fonction garantit un son surround virtuel 5.1 canaux
par le biais de deux haut-parleurs ou d’un casque grâce
à la technologie HRTF (Head Related Transfer Function -
Fonction de transfert asservie aux mouvements de la tête).
✎Si l’option Sélection Haut-parleur est définie sur
Ht-parl ext, Virtual Surround est désactivé.
Clarté Dialogues (Arrêt / Activé)
Cette fonction permet d’accentuer l’intensité d’une voix par
rapport au fond musical ou aux effets sonores, de manière
à rendre les dialogues plus clairs lorsque vous regardez une
émission.
Langue Audio
(chaînes numériques uniquement)
Permet de modifier la valeur par défaut des langues audio.
✎La langue disponible peut varier en fonction de
l’émission.
Format Audio (MPEG / Dolby Digital 5.1)
(chaînes numériques uniquement)
Lorsque le son est émis à la fois par le haut-parleur principal
et le récepteur audio, un effet d’écho peut se produire en
raison de la différence de vitesse de décodage entre le hautparleur principal et le récepteur audio. Dans ce cas, utilisez la
fonction Haut-parleur TV.
✎L’option Audio Format peut varier en fonction de
l’émission. Le son Dolby Digital 5.1 est disponible
uniquement en cas de connexion d’un haut parleur
externe au moyen d’un câble optique.
BN68-02588ABF-Fre.indb 17 2010-3-23 15:16:4718 Français
Fonctions de base
Description audio
(non disponible dans tous les pays)
(chaînes numériques uniquement)
Cette fonction traite le flux audio relatif à la
description audio (AD) lorsqu’il est envoyé
avec le son principal par le radiodiffuseur.
■ Description audio (Arrêt / Activé) :
active ou désactive la fonction de description audio.
■ Volume : permet de régler le volume de description
audio.
Volume auto (Arrêt / Normal / Nuit)
Pour équilibrer le niveau de volume sur chaque canal,
définissez cette option sur Normal.
■ Nuit : ce mode garantit un environnement sonore
de meilleure qualité que le mode Normal, avec une
absence pratiquement totale de parasites. Il s’avère
particulièrement utile pendant la nuit.
Sélection Haut-parleur
(Ht-parl ext / Haut-parleur TV)
Un effet d’écho peut se produire en raison de la différence
de vitesse de décodage entre le haut-parleur principal et le
récepteur audio. Dans ce cas, réglez le téléviseur sur Ht-parl
ext.
✎Lorsque l’option Sélection Haut-parleur est définie
sur Ht-parl ext, les boutons de volume et MUTE ne
sont pas opérationnels et les paramètres sonores sont
limités.
✎Lorsque l’option Sélection Haut-parleur est définie
sur Ht-parl ext, vous devez utiliser les paramètres
suivants :
x Haut-parleur TV : Arrêt, Ht-parl ext : Activé
✎Lorsque l’option Sélection Haut-parleur est définie
sur Haut-parleur TV, vous devez utiliser les paramètres
suivants :
x Haut-parleur TV : Activé, Ht-parl ext : Activé
✎En l’absence de signal vidéo, les deux haut-parleurs
sont coupés.
Paramètre supp.
(chaînes numériques uniquement)
■ Niveau Audio DTV (MPEG / HE-AAC) : cette fonction
vous permet de réduire la disparité d’un signal vocal
(à savoir l’un des signaux reçus lors d’une émission de
télévision numérique) sur le niveau souhaité.
✎ En fonction du type de signal de radiodiffusion, les
options MPEG / HE-AA) peuvent être réglées sur
une valeur comprise entre -10 dB et 0 dB.
✎ Pour augmenter ou diminuer le volume, réglez ces
valeurs entre 0 et -10, respectivement.
■ Sortie SPDIF : le format SPDIF (Sony Philips Digital
InterFace) est utilisé pour fournir du son numérique,
en réduisant les interférences vers les haut-parleurs et
divers dispositifs numériques, tels qu’un lecteur DVD.
Format Audio : lors de la réception d’une émission
de télévision numérique, vous avez le choix entre les
options PCM, Dolby Digital ou DTS. pour le format de
sortie audio numérique (SPDIF).
✎ La connexion de haut-parleurs 5.1 canaux dans un
environnement Dolby Digital vous permet d’optimiser
votre environnement sonore 3D interactif.
Retard Audio : cette option permet de corriger le
décalage audio/vidéo lorsque vous regardez la télévision
ou une vidéo et diffusez la sortie audio numérique sur un
dispositif externe tel qu’un récepteur AV.
■ Comp Dolby Digital (Ligne / RF) : cette fonction réduit
la disparité entre un signal Dolby Digital et un signal
vocal (à savoir, Audio MPEG, HE-AAC, Son ATV).
✎ Sélectionnez Ligne pour obtenir un son
dynamique et RF pour réduire la différence entre
les sons forts et faibles pendant la nuit.
Ligne : permet de définir le niveau de sortie des signaux
supérieurs ou inférieurs à -31 dB (référence) sur -20 dB
ou -31 dB.
RF : permet de définir le niveau de sortie des signaux
supérieurs ou inférieurs à -20 dB (référence) sur -10 dB
ou -20 dB.
Réinitialisation du son (OK / Annuler)
Rétablit les paramètres sonores par défaut définis en usine.
P
POWER
GUIDE AD
MEDIA.P
SUBT.
DUAL
I-II
P.SIZE S.MODE P.MODE
BN68-02588ABF-Fre.indb 18 2010-3-23 15:16:47Français 19
03 Fonctions de base
Menu Configuration
¦ Réglage de l’heure
Heure
■ Horloge : le réglage de l’heure est nécessaire pour
utiliser différentes fonctions de minuterie du téléviseur.
O L’heure actuelle s’affiche à chaque fois que vous
appuyez sur le bouton INFO.
✎ Si vous débranchez le cordon d’alimentation, vous
devez régler de nouveau l’horloge.
Mode Horloge (Auto. / Manuel)
✎ En fonction du signal et de la station de diffusion,
il se peut que la configuration automatique de
l’heure soit incorrecte. Dans ce cas, réglez l’heure
manuellement.
✎ L’antenne doit être connectée pour permettre le
réglage automatique de l’heure.
Réglage Horloge : Définissez manuellement les
paramètres Jour, Mois, Année, Heure et Minute.
✎ Disponible uniquement lorsque l’option Mode
Horloge est définie sur Manuel.
¦ Utilisation de la veille
■ Veille t: éteint automatiquement le téléviseur
après une période déterminée (30, 60, 90, 120, 150 ou
180 minutes).
✎ Pour annuler la fonction Veille, sélectionnez Arrêt.
Réglage de la minuterie de mise en
marche / arrêt
■ Minuteur 1 / Minuteur 2 / Minuteur 3 : vous pouvez
définir trois réglages de mise en marche/arrêt différents.
Vous devez, au préalable, régler l’horloge.
10 TV ATV 0
00 00
▲
▼
00 00
▲
▼
Minuteur 1
Période d’activation
Période de désactivation
Volume
Désactiver
Désactiver
Dim Lun Mar Mer Jeu Ven Sam
Une fois
Source Antenne Canal
Répétition
L Déplacer U Régler E Entrer R Retour
Période d’activation / Période de désactivation :
sélectionnez l’heure, les minutes et l’action Activer /
Désactiver. (Pour activer le minuteur selon les réglages
définis, choisissez Activer.)
Volume : sélectionnez le niveau de volume désiré.
Source : sélectionnez le contenu TV ou USB à lire lors de la
mise sous tension automatique du téléviseur. (L’option USB
peut uniquement être sélectionnée lorsqu’un périphérique
USB est connecté au téléviseur.)
Antenne (lorsque Source est réglé sur TV) : sélectionnez
ATV ou DTV.
Chaîne (lorsque Source est réglé sur TV) : sélectionnez la
chaîne de votre choix.
Contenu (lorsque Source est réglé sur USB) : sélectionnez
un dossier de la clé USB contenant les fichiers de musique
ou les photos qui doivent être lus lors de la mise sous
tension automatique du téléviseur.
✎ Si la clé USB ne contient aucun fichier musical ou
si le dossier contenant un fichier musical n’est pas
sélectionné, la fonction de veille ne fonctionne pas
correctement.
✎ Si le périphérique USB ne contient qu’une seule
photo, la fonction Diaporama ne démarre pas.
✎ Les dossiers dont le nom est trop long ne peuvent
pas être sélectionnés.
✎ Chaque périphérique USB utilisé se voit attribuer son
propre dossier. Si vous utilisez plusieurs périphériques
USB du même type, assurez-vous que les dossiers
affectés à chacun d’eux portent des noms différents.
Répétition : Sélectionnez Une fois, Quotid., Lun~Ven,
Lun~Sam, Sam~Dim ou Manuel pour définir l'option
suivant vos besoins. Si vous sélectionnez Manuel, vous
pouvez choisir le jour d'activation de la minuterie.
✎ Le symbole c indique le jour sélectionné.
✎Mise hors tension auto. (disponible uniquement lorsque
le téléviseur est allumé par le minuteur) : le téléviseur
est mis hors tension automatiquement après trois
heures d’inactivité pour éviter toute surchauffe.
¦ Verrouillage des programmes
Sécurité
✎L’écran de saisie du code PIN s’affiche après l’écran de
configuration.
✎Entrez votre code PIN à 4 chiffres ; "par défaut "0-0-0-0".
Modifiez le code PIN à l’aide de l’option Modifier PIN.
■ Verrouillage Parental (Arrêt / Activé) Vous pouvez
verrouiller des chaînes dans la fonction Gestion chaînes
afin d’empêcher certains utilisateurs, tels que des enfants,
de regarder des émissions qui ne leur sont pas destinées.
✎ Disponible uniquement lorsque la source Entrée
est définie sur TV.
■ Verrouillage parental (Niveau parental) Cette fonction
permet d’empêcher certains utilisateurs, tels que des
enfants, de regarder des émissions qui ne leur sont pas
destinées, à l’aide d’un code PIN à 4 chiffres défini par
l’utilisateur.
Autor. tout : déverrouille toutes les évaluations TV.
✎ Les options du menu Verrouillage parental
diffèrent selon les pays.
BN68-02588ABF-Fre.indb 19 2010-3-23 15:16:4820 Français
Fonctions de base
■ Modifier PIN : permet de modifier le code personnel
demandé pour pouvoir configurer le téléviseur.
✎ Si vous avez oublié le code PIN, appuyez sur les
boutons de la télécommande dans l’ordre suivant,
ce qui a pour effet de le réinitialiser sur "0-0-0-0" :
POWER (Arrêt) → MUTE → 8 → 2 → 4 → POWER
(Marche).
¦ Autres fonctionnalités
Langue
■ Langue des menus : définissez la langue des menus.
■ Langue du télétexte : sélectionnez la langue de votre
choix pour le télétexte.
✎ L’anglais est utilisé par défaut si la langue
sélectionnée n’est pas diffusée.
■ Préférence (Langue Audio principale / Langue Audio
secondaire / Langue princ. sous-titres / Langue sec.
sous-titres / Langue Télétexte principale / Langue
Télétexte secondaire) : sélectionnez la langue qui sera
utilisée par défaut lors de la sélection d’une chaîne.
Sous-titres
Utilisez ce menu pour définir le mode
Sous-titres.
✎La fonctionnalité sous-titres n'est
pas opérationnelle avec les modes
Composant, ou HDMI.
■ Sous-titres (Arrêt / Activé) : active ou
désactive les sous-titres.
■ Mode (Normal / Malentendant) : configure le mode
des sous-titres.
■ Langue des sous-titres : définit la langue des soustitres.
✎ Si le programme visionné ne prend pas en charge
la fonction Malentendant, le mode Normal
est automatiquement activé, même si le mode
Malentendant est sélectionné.
✎ L’anglais est utilisé par défaut si la langue
sélectionnée n’est pas diffusée.
Texte numérique (Désactiver / Activer)
(Royaume-Uni uniquement)
Si le programme diffuse du texte numérique, cette fonction
est activée.
Général
■ Mode Jeu (Arrêt / Activé) : lorsque vous connectez une
console de jeux, telle qu’une PlayStation™ ou Xbox™,
vous pouvez bénéficier d’une expérience ludique encore
plus réaliste en sélectionnant le mode Jeu.
✎REMARQUE
x Précautions et restrictions du mode Jeu
– Pour déconnecter la console de jeux et connecter
un autre périphérique externe, définissez Mode jeu
sur Arrêt dans le menu de configuration.
– Si vous affichez le menu du téléviseur en Mode
Jeu, l’écran tremble légèrement.
x L'option Mode Jeu n'est pas disponible dans les
modes TV et PC.
x Après avoir connecté la console de jeux, définissez
Mode Jeu sur Activé pour disposer d’une bonne
qualité d’image.
x Si Mode Jeu est défini sur Activé : le mode Image
est défini sur Standard et le mode Son, sur Cinéma.
■ Transparence menu (Lumineux / Sombre) : permet de
définir la transparence du menu.
■ Mélodie (Arrêt / Bas / Moyen / Elevé) : cette option
permet de définir la lecture d’une mélodie lors de la mise
en marche ou l’arrêt du téléviseur.
Interface commune
■ CI Menu : permet à l’utilisateur d’opérer une sélection
dans le menu du module CAM. Sélectionnez le menu CI
en fonction du menu PC Card.
■ Infos sur l’application : affiche des informations sur
le module CAM inséré dans l’emplacement CI et sur la
"CARTE CI ou CI+" insérée dans le module CAM. Vous
pouvez installer le module CAM, que le téléviseur soit
allumé ou éteint.
1. Vous pouvez acheter un module CI CAM chez le
revendeur le plus proche ou le commander par
téléphone.
2. Insérez fermement la "CARTE CI ou CI+" dans le module
CAM en suivant le sens de la flèche.
3. Insérez le module CAM avec la "CARTE CI ou CI+" dans
la fente de l’interface commune (dans le sens de la flèche),
de telle sorte qu’il soit aligné parallèlement à la fente.
4. Vérifiez si une image est visible sur une chaîne à signal
brouillé.
P
POWER
GUIDE AD
MEDIA.P
SUBT.
DUAL
I-II
P.SIZE S.MODE P.MODE
BN68-02588ABF-Fre.indb 20 2010-3-23 15:16:48Français 21
03 Fonctions de base
¦ Incrustation d’image (PIP)
Assistance
Diagnostic automatique
Le diagnostic automatique peut prendre quelques secondes;
ce phénomène est normal.
■ Test de l’image (Oui / Non) : utilisez cette option pour
rechercher d’éventuels problèmes d’image et, si les
problèmes persistent, vérifier la mire de couleur.
■ Test du son (Oui / Non) : utilisez la mélodie intégrée
pour rechercher d’éventuels problèmes sonores.
✎ Si les haut-parleurs du téléviseur restent muets,
avant d’effectuer le test du son, vérifiez que
l’option Sélection Haut-parleur est réglée sur
Haut-parleur TV dans le menu Son.
✎ La mélodie est diffusée pendant le test, même si
l’option Sélection Haut-parleur est réglée sur
Ht-parl ext. ou si le son a été désactivé en
appuyant sur le bouton MUTE.
■ Informations de signal : (chaînes numériques
uniquement) soit la qualité de réception des chaînes
HDTV est parfaite, soit les chaînes ne sont pas
disponibles. Réglez votre antenne afin d’augmenter
l’intensité du signal.
■ Résolution des problèmes : consultez cette description
s’il vous semble que le téléviseur rencontre un problème.
✎ Si aucun des conseils de dépannage ne
s’applique au problème rencontré, contactez le
service clientèle de Samsung.
Mise à niveau du logiciel
Une Mise à niveau du logiciel peut être effectuée
via un signal de radiodiffusion ou en téléchargeant le
microprogramme le plus récent sur une clé USB à partir du
site Web samsung.com.
Version actuelle indique que le logiciel est déjà installé sur
votre téléviseur.
✎Le numéro de version est affiché au format suivant :
"année/mois/jour_version".
Mise à niveau du logiciel
Version actuelle 2010/01/18_000001
U Déplacer E Entrer R Retour
USB ►
Canal
Mise à niveau en mode veille Arrêt
Autre logiciel ----/--/--/--_------
Installation de la version la plus récente
■ USB : insérez la clé USB
contenant le fichier de mise à
niveau du microprogramme
téléchargé sur www.samsung.
com dans le téléviseur. Veillez
à ne pas couper l’alimentation,
ni retirer la clé USB tant que
les mises à niveau ne sont pas
terminées. Une fois la mise à
niveau du microprogramme
terminée, le téléviseur se met
automatiquement hors tension, puis se rallume. Lorsque
la mise à niveau du logiciel est terminée, les paramètres
vidéo et audio par défaut sont réinitialisés. Il est conseillé
de prendre note des paramètres afin de pouvoir les rétablir
facilement après la mise à niveau.
■ Canal : met à niveau le logiciel en utilisant le signal de
radiodiffusion.
✎ Si la fonction est sélectionnée pendant la période
de transmission du logiciel, ce dernier est
automatiquement recherché et téléchargé.
✎ Le temps nécessaire au téléchargement du
logiciel dépend de l’état du signal.
■ Mise à niveau en mode veille : une mise à niveau
manuelle est automatiquement effectuée à l’heure
indiquée. Etant donné que la mise sous tension
s’effectue de façon interne, il se peut que l’écran LCD
s’allume légèrement. Le phénomène peut se poursuivre
pendant plus d’une heure jusqu’à ce que la mise à jour
du logiciel soit terminée.
■ Autre logiciel (sauvegarde) : En cas problème avec le
nouveau microprogramme (si, par exemple, le téléviseur
ne fonctionne plus correctement), vous pouvez revenir à
la version précédente.
✎ Si le logiciel a été modifié, la version existante
s’affiche.
Guide de connexion HD
Consultez ces informations lors de la connexion de
périphériques externes au téléviseur.
Contacter Samsung
Consultez ces informations si le téléviseur ne fonctionne pas
correctement ou si vous voulez mettre à niveau le logiciel.
Vous y trouverez des informations concernant nos centres
d’appel, ainsi que le téléchargement de nos produits et
logiciels.
Panneau arrière du téléviseur
Clé USB
BN68-02588ABF-Fre.indb 21 2010-3-23 15:16:4822 Français
Fonctions avancées
Media Play
¦ Connexion d’un périphérique USB
1. Allumez votre téléviseur.
2. Connectez un périphérique USB contenant des fi chiers photo, de la musique et/ou
des fi lms à la prise USB (HDD) située sur le côté du téléviseur.
3. Lorsqu’un périphérique USB est connecté au téléviseur, une fenêtre contextuelle
s’ouvre. Vous pouvez alors sélectionner Media Play.
✎Il se peut que le fonctionnement ne soit pas correct avec des fichiers multimédia
sans licence.
✎Ce qu’il faut savoir avant d’utiliser la fonction Media Play
x Le protocole MTP (Media Transfer Protocol) n’est pas pris en charge.
x Le système de fichiers prend en charge les formats FAT16, FAT32 et NTFS.
x Il est possible que certains types d’appareils photo numériques et de périphériques audio
USB ne soient pas compatibles avec ce téléviseur.
x Media Play ne prend en charge que les périphériques de stockage de masse USB de la catégorie MSC. Cette dernière
est dédiée aux périphériques de transport de masse uniquement. Il s’agit notamment des clés USB, lecteurs de cartes
Flash et disques durs USB (les concentrateurs USB ne sont pas pris en charge). Les périphériques doivent être connectés
directement au port USB du téléviseur.
x Avant de connecter l’appareil au téléviseur, sauvegardez vos fichiers afin d’éviter qu’ils ne soient endommagés ou que des
données ne soient perdues. SAMSUNG ne saurait, en aucun cas, être tenue responsable de la perte de données ou de
l’endommagement d’un fichier de données.
x Ne déconnectez pas le périphérique USB en cours de chargement.
x Plus la résolution de l’image est élevée, plus le temps d’affichage à l’écran sera long.
x La résolution JPEG maximale prise en charge est de 15 360 x 8 640 pixels.
x Pour les fichiers non pris en charge ou endommagés, le message «Format de fichier non compatible» s’affiche.
x Si le critère de tri est défini sur Aff. de base, il est possible d’afficher jusqu’à 1 000 fichiers dans chaque dossier.
x Les fichiers MP3 avec gestion des droits numériques (DRM) téléchargés à partir d’un site payant ne peuvent pas être lus.
La technologie gestion numérique des droits (DRM) prend en charge la création de contenu, la distribution et la gestion du
contenu de manière intégrée et complète (par exemple, la protection des droits et des intérêts des fournisseurs de contenu,
la prévention de la copie illégale du contenu), ainsi que la gestion de la facturation et des règlements.
x Si plusieurs périphériques PTP sont connectés, vous ne pouvez en utiliser qu’un à la fois.
x Si plusieurs périphériques MSC sont connectés, il se peut que certains d’entre eux ne soient pas reconnus. Un périphérique
USB nécessitant beaucoup de puissance (plus de 500 mA ou 5 V) ne sera peut-être pas pris en charge.
x Si un message d’avertissement de surcharge s’affiche lorsque vous connectez ou utilisez un périphérique USB, il se peut
que le périphérique ne soit pas reconnu ou qu’il fonctionne mal.
x Si aucune entrée n’a été reçue au cours de la période définie dans le paramètre Temps protection auto,
l’économiseur d’écran s’active.
x Si un câble d’extension USB est utilisé, il se peut que le périphérique USB ne soit pas reconnu ou que les fichiers qui
y sont stockés ne soient pas lus.
x Si un périphérique USB connecté au téléviseur n’est pas reconnu, si la liste des fichiers qui y sont stockés est
corrompue ou si un fichier de la liste est illisible, connectez le périphérique en question à l’ordinateur, formatez le
périphérique et vérifiez la connexion.
x S’il s’avère qu’un fichier supprimé de l’ordinateur est encore présent lors de l’exécution de Media Play, utilisez la
fonction «Vider la Corbeille» de l’ordinateur pour le supprimer définitivement.
Vous pouvez lire les photos, la musique et/ou les
fi lms enregistrés sur un périphérique USB de type
MSC.
P
POWER
GUIDE AD
MEDIA.P
SUBT.
DUAL
P.SIZE S.MODE P.MODE
Devicename A Changer pér. D Mode Périphérique EEntrer R Retour
MediaPlay
Clé USB
Panneau latéral du téléviseur
BN68-02588ABF-Fre.indb 22 2010-3-23 15:16:50Français 23
04 Fonctions avancées
¦ Affichage
Accédez au fichier de votre choix à l’aide des boutons haut/bas/droite/gauche et appuyez ensuite sur le bouton ENTERE.
La lecture du fichier commence.
✎Prise en charge de Mode Périphérique et Mode Contenu dans la page d’accueil Media Play.
Devicename A Changer pér. C Sélectionner D Tri T Outils
c
c
c
Music 01 2010
no singer other
Music 02 2010
no singer other
Music 03 2010
no singer other
Music 04 2010
no singer other
Music 05 2010
no singer other
Music 06 2010
no singer other
Music 07 2010
no singer other
Music 08 2010
no singer other
Music /Music 01.mp3 1/2
Section Liste des fichiers :
Vous pouvez vérifier les
fichiers et groupes classés par
catégorie.
Boutons d’opérations
A Rouge (Changer périph) : sélectionne un appareil connecté.
B Vert (Préférence) : définit la préférence du fichier (non pris en charge en mode
Aff. de base).
C Jaune (Sélectionner) : sélectionne plusieurs fichiers dans la liste. Les fichiers
sélectionnés sont marqués à l’aide d’un symbole.
D Bleu (Tri) : sélectionne la liste de tri.
TOutils : affiche le menu d’options.
Informations :
Vous pouvez vérifier le nom du
fichier sélectionné, le nombre de
fichiers, ainsi que la page.
Section Liste de tri :
Affiche l’ordre de tri standard.
✎ Cet ordre de tri varie en
fonction du contenu.
Musique
Lecture de musique
1. Appuyez sur le bouton ◄ ou ► pour sélectionner Musique et
appuyez ensuite sur ENTERE dans le menu Media Play.
2. Appuyez sur le bouton ◄/►/▲/▼ pour sélectionner le fichier musical
(Music) de votre choix dans la liste des fichiers.
3. Appuyez sur le bouton ENTERE.
– Pendant la lecture d’un fichier audio, vous pouvez effectuer une
recherche à l’aide des boutons ◄ et ►.
✎Seuls les fichiers portant l’extension MP3 sont affichés. Les fichiers
portant d’autres extensions ne s’affichent pas, même s’ils sont
enregistrés sur le même périphérique USB.
✎Si le son est déformé lors de la lecture de fichiers MP3, réglez
l’option Egaliseur dans le menu Son. (Un fichier MP3 surmodulé
peut être à l’origine d’un problème sonore.)
Only you
Jason
1st Album
Pop
2010
4.2MB
3/15
Only you
Jason
Music 1
No Singer
Music 2
No Singer
Music 3
No Singer
Music 4
No Singer
Music 5
No Singer
01:10 / 04:02
Liste éc.
Devicename E Pause L Passer T Outils R Retour
BN68-02588ABF-Fre.indb 23 2010-3-23 15:16:5124 Français
Fonctions avancées
Photos
Visualisation d’une photo (ou d’un diaporama)
1. Appuyez sur le bouton ◄ ou ► pour sélectionner Photo et appuyez
ensuite sur ENTERE dans le menu Media Play.
2. Appuyez sur le bouton ◄/►/▲/▼ pour sélectionner la photo de votre
choix dans la liste des fichiers.
3. Appuyez sur le bouton ENTERE.
– Lorsqu’une liste de photos est affichée, appuyez sur le ENTERE de
la télécommande pour lancer le diaporama.
– Tous les fichiers de la section Liste des fichiers seront affichés dans le
diaporama.
– Pendant le diaporama, les fichiers apparaissent dans l’ordre, à partir
de celui en cours d’affichage.
✎Des fichiers musicaux peuvent être lus automatiquement pendant le
diaporama, si l’option Fond musical est définie sur Activé.
✎Il n’est pas possible de changer le Mode mus. de fond tant que le
chargement de BGM n’est pas terminé.
Normal Image1024.jpg 1024x768 2010/2/1 3/15
Devicename E Pause L Préc./Suivant T Outils R Retour
¦ Lecture de plusieurs fichiers
Lecture des fichiers musicaux / vidéos / photos sélectionnés
1. Appuyez sur le bouton jaune dans la liste des fichiers pour sélectionner
le fichier de votre choix.
2. Répétez l’opération ci-dessus pour sélectionner plusieurs fichiers.
✎ REMARQUE
x La marque (c) s’affiche à gauche des fichiers sélectionnés.
x Pour annuler une sélection, appuyez à nouveau sur le bouton jaune.
x Pour désélectionner tous les fichiers, appuyez sur le bouton
TOOLS et sélectionnez Désélectionner tout.
3. Appuyez sur le bouton TOOLS et sélectionnez ensuite Lire contenu
sélectionné.
Lecture du groupe de fichiers musicaux / vidéos / photos
1. Lorsqu’une liste de fichiers est affichée, vous pouvez accéder à n’importe
quel fichier dans le groupe de votre choix.
2. Appuyez sur le bouton TOOLS et sélectionnez ensuite Lire le groupe actuel.
Devicename A Changer pér. Sélectionner Tri T Outils
c
c
c
Music 01 2010
no singer other
Music 02 2010
no singer other
Music 03 2010
no singer other
Music 04 2010
no singer other
Music 05 2010
no singer other
Music 06 2010
no singer other
Music 07 2010
no singer other
Music 08 2010
no singer other
Music /Music 01.mp3 1/2
¦ Fonctions supplémentaires de Media Play
Tri de la liste des fichiers
Appuyez sur le bouton bleu dans la liste pour trier les fichiers.
Catégorie Opérations Musique Photos
Aff. de base Affiche le dossier complet. Pour regarder les photos, sélectionnez le dossier. ✓ ✓
Titre
Les titres des fichiers sont triés et affichés par symbole / numéro / ordre alphabétique /ordre
spécial.
✓ ✓
Préférence
Les fichiers sont triés et affichés par préférence. Les préférences d'un fichier peuvent être
modifiées dans la section Liste de fichiers à l'aide du bouton vert.
✓ ✓
Le plus récent Trie et affiche les fichiers selon la date la plus récente. ✓
Le plus ancien Trie et affiche les fichiers selon la date la plus ancienne. ✓
Artiste Les fichiers musicaux sont triés par artiste dans l'ordre alphabétique. ✓
Album Trie les fichiers musicaux par album et par ordre alphabétique. ✓
Genre Trie les fichiers musicaux par genre. ✓
Humeur
Trie les fichiers musicaux par ambiance. Vous pouvez modifier les informations d'ambiance
de la musique.
✓
Mensuel Trie et affiche les photos par mois. ✓
BN68-02588ABF-Fre(22-).indd 24 2010-3-23 16:42:12Français 25
04 Fonctions avancées
Menu des options de lecture de musique / photos
Menu d’options Opérations Music Photos
Mode de répétition Vous pouvez lire des fichiers musicaux, vidéo et en boucle. ✓
Réglage de l'image Vous pouvez régler les paramètres d'image. (p. 14, 15, 16) ✓
Réglage du son Vous pouvez régler les paramètres sonores. (p. 17, 18) ✓ ✓
Arrêter le diaporama /
Lancer le diaporama
Vous pouvez lancer ou arrêter un diaporama. ✓
Effet du diaporama
Vous pouvez définir l'effet utilisé lors du changement d'image dans le
diaporama.
✓
Zoom Vous pouvez zoomer sur les images lorsque vous êtes en mode Plein écran. ✓
Arr.-plan Acc. Vous pouvez faire pivoter les images lorsque vous êtes en mode Plein écran. ✓
Information Vous pouvez afficher des informations détaillées sur le fichier lu. ✓ ✓
Paramètres
Utilisation du menu Configuration
■ Information : sélectionnez cette option pour afficher des informations sur le périphérique connecté.
BN68-02588ABF-Fre.indb 25 2010-3-23 15:16:5326 Français
Informations supplémentaires
Fonction Télétexte de chaîne analogique
La page d’index du télétexte contient des instructions sur l’utilisation du service. Pour que les informations du télétexte
s’affi chent correctement, la réception des chaînes doit être stable. Autrement, des informations pourraient manquer ou
certaines pages ne pas s’affi cher.
✎Vous pouvez changer de page de télétexte en appuyant sur les boutons numériques de la télécommande.
Informations supplémentaires
Les pages de télétexte sont organisées en six catégories :
Catégorie Contenu Catégorie Contenu
A
Numéro de la page
sélectionnée.
D Date et heure
B Identité de la chaîne émettrice. E Texte.
C
Numéro de la page actuelle
ou indications de recherche.
F
Informations sur l'état.
Informations FASTEXT.
1 / (Télétexte actif / Mixte) :
permet d'activer le mode Télétexte
après avoir choisi la chaîne
diffusant le service. Appuyez deux
fois sur ce bouton pour superposer
le mode Télétexte à l'émission en
cours de diffusion.
2 8 (mémoriser) : stocke les
pages du télétexte.
3 4 (taille) : permet d'affi cher la
moitié supérieure de l'écran en
caractères deux fois plus grands.
Pour affi cher la moitié inférieure de
l'écran au même format, appuyez
une nouvelle fois sur ce bouton.
Appuyez à nouveau pour rétablir le
mode d'affi chage normal.
4 9 (maintenir) : permet de
bloquer l'affi chage sur une page
précise, si celle-ci est reliée à
plusieurs pages secondaires
qui s'affi chent automatiquement
les unes après les autres. Pour
reprendre l'affi chage des autres
pages, appuyez à nouveau sur ce
bouton.
5 0 (mode) : permet de
sélectionner le mode Télétexte
(LIST/FLOF).
si vous appuyez sur ce bouton
en mode LISTE, vous accédez
au mode d'enregistrement de
liste. Dans ce mode, vous pouvez
enregistrer une page télétexte dans
une liste à l'aide du bouton 8
(mémoriser).
6 1 (sous-page) : affi che la souspage disponible.
2 (page suivante) : affi che la
page suivante du télétexte.
7
3 (page précédente) : affi che la
page précédente du télétexte.
8
6 (index) : affi che, à tout
moment, la page d'index
(sommaire) du télétexte.
9
5 (révéler) : affi che le texte
masqué (les réponses à un
questionnaire, par exemple).
Appuyez à nouveau sur ce bouton
pour rétablir le mode d'affi chage
normal.
0
7 (annuler) : affi che le
programme en cours pendant la
recherche d'une page
!
Boutons de couleur (rouge /
vert / jaune / bleu) : si la société
de radiodiffusion utilise le système
FASTEXT, les différents sujets
traités dans la page télétexte
disposent d'un code couleur et
peuvent être sélectionnés à l'aide
des boutons de couleur de la
télécommande. Appuyez sur le
bouton dont la couleur correspond
à celle de la rubrique souhaitée. La
page affi che d'autres informations
en couleur que vous pouvez
sélectionner de la même manière.
Pour affi cher la page précédente
ou suivante, appuyez sur le bouton
de la couleur correspondante.
@
MEDIA.P
A B C D
1
3
4
2
5
8
7
0
!
@
6
9
BN68-02588ABF-Fre.indb 26 2010-3-23 15:16:53Français 27
05 Informations supplémentaires
Installation du support mural
¦ Installation du kit de montage mural
Les éléments du support mural (vendus séparément) permettent de fixer le téléviseur au mur.
Pour plus d’informations sur l’installation du support mural, reportez-vous aux instructions fournies avec les éléments du
support mural. Faites appel à un technicien pour installer la fixation murale.
Si vous choisissez d’effectuer vous-même l’installation murale, Samsung Electronics ne saurait être tenue responsable des
éventuels dommages matériels ou des éventuelles blessures dont vous, ou d’autres personnes, pourriez être victimes.
¦ Caractéristiques du kit de fixation murale (VESA)
✎Le kit de fixation murale est vendu séparément.
Installez votre fixation murale sur un mur solide perpendiculaire au sol. Si vous souhaitez la fixer sur d’autres matériaux de
construction, veuillez prendre contact avec votre revendeur le plus proche. Si vous l’installez au plafond ou sur un mur non
droit, la fixation risque de tomber et de provoquer de graves blessures.
✎REMARQUE
x Samsung Electronics ne saurait être tenu responsable de tout dommage sur le produit ni de toute blessure subie par vous
ou par d’autres personnes si vous choisissez d’effectuer l’installation murale.
x Les dimensions standard pour tous les kits de fixation murale sont indiquées dans le tableau ci-dessous.
x Le kit de fixation murale s’accompagne d’un manuel d’installation détaillé et de toutes les pièces nécessaires au montage.
x N’utilisez pas de vis plus longues que la dimension standard, car elles pourraient endommager l’intérieur du téléviseur.
x Pour les fixations murales non conformes aux spécifications des vis VESA standard, la longueur des vis peut varier, selon
leurs caractéristiques.
x N’utilisez pas de vis non conformes aux spécifications des vis VESA standard.
x Ne serrez pas trop les vis ; cela pourrait, en effet, endommager le produit ou provoquer sa chute, entraînant des blessures.
Samsung ne peut être tenue responsable de ce type d’accident.
x Samsung ne peut être tenue responsable de tout dommage au produit ou toute blessure corporelle dans le cas de
l’utilisation d’une fixation murale non-VESA ou non spécifiée, ou si l’utilisateur ne suit pas les instructions d’installation du
produit.
x Lors du montage, l’inclinaison du téléviseur ne doit pas dépasser 15 degrés.
Famille de
produits
pouces Spéc. VESA (A * B) Vis standard Quantité
TELEVISEUR LCD
19~22
75 X 75
100 X 100 M4
4
23~29 200 X 100
30~40 200 X 200 M6
46~55 400 X 400
M8
57~65 600 X 400
70~80 800 X 400
80~ 1400 X 800
N’installez pas votre kit de fixation murale lorsque le téléviseur est allumé. Vous risqueriez de vous
électrocuter.
BN68-02588ABF-Fre.indb 27 2010-3-23 15:16:5428 Français
Informations supplémentaires
Verrou antivol Kensington
L’antivol Kensington est un dispositif utilisé pour fixer physiquement le système
lorsqu’il est utilisé dans un endroit public. L’aspect et la méthode de verrouillage
peuvent différer de l’illustration en fonction du fabricant. Consultez le manuel
fourni avec le verrou Kensington pour obtenir des instructions d’utilisation.
✎Une icône “
1
2
3
” est présente à l’arrière du téléviseur.
Un verrou Kensington se trouve à côté de l’icône “
1
2
3
”.
1. Insérez le dispositif de verrouillage dans la fente Kensington du
téléviseur LCD 1, puis tournez-le dans le sens de verrouillage 2.
2. Branchez le câble du verrou Kensington 3.
3. Fixez le verrou Kensington à un bureau ou tout autre objet lourd
inamovible.
✎Le dispositif de verrouillage est vendu séparément.
✎L’emplacement du verrou Kensington peut varier en fonction du modèle.
Fixation du téléviseur au mur
Attention : si vous tirez ou poussez le téléviseur ou si vous grimpez dessus, il risque de tomber. Veillez notamment
à ce que vos enfants ne se suspendent pas au téléviseur, ni ne le déséquilibrent, car cela pourrait le faire basculer et
occasionner des blessures graves, voire entraîner la mort. Respectez toutes les précautions de sécurité indiquées dans
la brochure relative à la sécurité. Pour une stabilité accrue, installez le dispositif antichute comme indiqué ci-après.
¦ Pour éviter toute chute du téléviseur
✎Les colliers, vis et chaînettes n’étant pas fournis, vous devez les
acheter séparément.
1. Faites passer les vis dans les colliers et fixez-les fermement au
mur. Assurez-vous que les vis sont bien fixées.
✎ Caractéristiques des vis
x Pour un téléviseur LCD de 23 à 29 pouces : M4
x Pour un téléviseur LCD de 30 à 40 pouces : M6
2. Retirez les vis situées sur la partie centrale arrière du téléviseur,
placez-les dans les colliers, puis fixez-les à nouveau sur le téléviseur.
3. Reliez les colliers fixés au téléviseur et ceux fixés sur le mur à
l’aide de chaînettes, puis attachez-les fermement.
✎Vérifiez que toutes les connexions sont fixées correctement.
Vérifiez régulièrement que les connexions ne présentent aucun
signe d’usure. Si vous avez un doute quant à la sécurité des
connexions, contactez un installateur professionnel.
✎Placez le téléviseur à proximité du mur afin qu’il ne bascule pas
vers l’arrière.
✎Il est recommandé de placer la chaînette de façon à ce que les colliers fixés au mur soient placés à la même hauteur ou
plus bas que ceux fixés au téléviseur.
✎Détachez la chaînette avant de déplacer le téléviseur.
Mur
1
2
3
BN68-02588ABF-Fre.indb 28 2010-3-23 15:16:55Français 29
05 Informations supplémentaires
Dépannage
Si vous avez des questions sur le téléviseur, commencez par consulter la liste ci-dessous. Si aucune de ces astuces de
dépannage ne s’applique à votre problème, rendez-vous sur le site "www.samsung.com", puis cliquez sur Service ou
contactez le centre d’appel dont les coordonnées figurent sur la couverture arrière du présent manuel.
Problèmes Solutions et explications
Qualité de l'image Exécutez tout d'abord le Test de l'image pour vérifier que votre téléviseur affiche correctement l'image de
test.
(Accédez à MENU - Assistance - Diagnostic automatique - Test de l'image) (P. 21)
Si l'image de test s'affiche correctement, sa qualité médiocre peut être due à la source ou au signal.
La qualité de l'image affichée par le
téléviseur n'est pas aussi bonne que dans
le magasin.
• Si vous possédez un décodeur câble / boîtier décodeur analogique, passez à un décodeur numérique.
Utilisez des câbles HDMI ou Composant pour fournir une qualité d'image HD (haute définition).
• Abonnés câble / satellite : essayez les chaînes HD dans la liste des canaux.
• Connexion de l'antenne : essayez les chaînes HD après avoir effectué une mémorisation automatique.
✎ De nombreuses chaînes HD sont mises à niveau par rapport à du contenu SD (définition
standard).
• Réglez la résolution de sortie vidéo du décodeur câble/boîtier décodeur sur 1080i ou 720p.
• Veillez à respecter la distance minimale recommandée entre vous et le téléviseur (distance basée sur
la taille et la définition du signal).
L'image est déformée : macrobloc, petit
bloc, points, pixellisation
• La compression de contenu vidéo peut engendrer une déformation de l'image, en particulier pour les
mouvements rapides comme le sport et les films d'action.
• Un niveau de signal faible ou de mauvaise qualité peut déformer l'image. Il ne s'agit pas d'un
problème lié au téléviseur.
Couleur incorrecte ou manquante. • Si vous utilisez une connexion Composant, assurez-vous que les câbles Composant sont raccordés
aux prises appropriées. Des raccordements desserrés ou incorrects peuvent engendrer des
problèmes au niveau de la couleur ou un écran vide.
La couleur ou la luminosité est de
mauvaise qualité.
• Réglez les options Image dans le menu du téléviseur (accédez au mode Image / Couleur /
Luminosité / Netteté)
• Réglez l'option Mode éco. dans le menu du téléviseur (accédez à MENU - Image - Solution Eco -
Mode éco.)
• Essayez de réinitialiser l'image pour en afficher les paramètres par défaut (accédez à MENU - Image
- Réinitialisation de l'image)
Il y a une ligne pointillée sur les bords de
l'écran.
• Si la taille de l'image est définie sur Adapter écran, réglez le paramètre sur 16:9. (P. 16)
• Changez la résolution du décodeur câble/boîtier décodeur.
L'image est en noir et blanc. • Si vous utilisez une entrée composite AV, connectez le câble vidéo (jaune) au connecteur vert de
l'entrée composant 1 du téléviseur.
Lors d'un changement de chaîne, l'image
se bloque, est déformée ou s'affiche avec
un léger décalage.
• En cas de raccordement à un décodeur câble, essayez de réinitialiser ce dernier. Rebranchez le
cordon d'alimentation secteur et patientez jusqu'au redémarrage du décodeur câble. Cette opération
peut prendre jusqu'à 20 minutes.
• Réglez la résolution de sortie du décodeur câble sur 1080i ou 720p.
Qualité sonore Exécutez tout d'abord le Test du son pour vérifier que le système audio de votre téléviseur fonctionne
correctement.
(Accédez à MENU - Assistance - Diagnostic automatique - Test du son) (P. 21)
Si le système audio fonctionne correctement, le problème lié au son peut provenir de la source ou du
signal.
Il n'y a aucun son ou celui-ci est trop faible
au volume maximum.
• Vérifiez le volume de l'appareil externe connecté à votre téléviseur.
La qualité d'image est bonne, mais aucun
son n'est émis.
• Réglez l'option Sélection Haut-parleur sur Haut-parleur TV dans le menu Son. (P. 18)
• Si vous utilisez un appareil externe, assurez-vous que les câbles audio sont raccordés aux prises
d'entrée audio appropriées du téléviseur.
• Si vous utilisez un appareil externe, vérifiez l'option de sortie audio de l'appareil connecté (il se peut,
par exemple, que vous deviez définir l'option audio de votre décodeur câble sur HDMI si vous utilisez
une connexion HDMI).
• Si vous utilisez un câble DVI-HDMI, un câble audio distinct est requis.
• Si votre téléviseur est équipé d'une prise casque, assurez-vous que rien n'y est connecté.
Les haut-parleurs émettent un son
inhabituel.
• Vérifiez les connexions des câbles. Vérifiez qu'aucun câble vidéo n'est raccordé à une entrée audio.
• Pour les connexions de télédistribution ou antenne, vérifiez l'intensité du signal. Un niveau de signal
faible peut provoquer une distorsion sonore.
BN68-02588ABF-Fre.indb 29 2010-3-23 15:16:5530 Français
Informations supplémentaires
Problèmes Solutions et explications
Aucune image, aucune vidéo
Le téléviseur ne s'allume pas. • Vérifiez que le cordon d'alimentation secteur est branché correctement sur la prise murale et sur le
téléviseur.
• Vérifiez que la prise murale est opérationnelle.
• Essayez d'appuyer sur le bouton POWER du téléviseur pour vous assurer que le problème n'est pas
dû à la télécommande. Si le téléviseur s'allume, reportez-vous au problème "La télécommande ne
fonctionne pas" ci-après.
Le téléviseur s'éteint automatiquement. • Vérifiez que la fonction Veille est réglée sur Arrêt dans le menu Configuration. (P. 19)
• Si votre PC est connecté au téléviseur, vérifiez les paramètres d'alimentation de votre PC.
• Vérifiez que le cordon d'alimentation secteur est branché correctement sur la prise murale et sur le
téléviseur.
• Lorsque vous regardez la télévision sur une connexion de télédistribution ou antenne, le téléviseur
s'éteint après 10 à 15 minutes en l'absence de signal.
Aucune image / vidéo n’est affichée. • Vérifiez le raccordement des câbles (retirez tous les câbles connectés au téléviseur et aux appareils
externes, puis rebranchez-les).
• Réglez les sorties vidéo de vos périphériques externes (décodeur câble / boîtier décodeur, lecteur
DVD, lecteur Blu-ray, etc.) pour faire correspondre les connexions à l'entrée du téléviseur. Par
exemple, si la sortie d'un périphérique externe est HDMI, vous devez établir une connexion avec une
entrée HDMI du téléviseur.
• Vérifiez que les appareils connectés sont sous tension.
• Veillez à sélectionner la source appropriée du téléviseur en appuyant sur le bouton SOURCE de la
télécommande du téléviseur.
Connexion RF (câble/antenne)
Le téléviseur ne reçoit pas toutes les
chaînes.
• Vérifiez que le câble de l'antenne est raccordé correctement.
• Essayez la fonction Plug & Play (configuration initiale) pour ajouter des chaînes disponibles à la liste.
Accédez à MENU - Configuration - Plug & Play (configuration initiale) et attendez que toutes les
chaînes disponibles soient mémorisées.
• Vérifiez que l'antenne est positionnée correctement.
L'image est déformée : macrobloc, petit
bloc, points, pixellisation
• La compression de contenu vidéo peut provoquer une déformation de l'image, en particulier pour les
mouvements rapides comme le sport et les films d'action.
• Un niveau de signal faible peut déformer l'image. Il ne s'agit pas d'un problème lié au téléviseur.
Connexion PC
Le message "Mode non pris en charge"
est affiché.
• Réglez la fréquence et la résolution de sortie de votre PC, de telle sorte que ces paramètres
correspondent aux résolutions prises en charge par le téléviseur. (P. 22)
"PC" reste affiché dans la liste Source,
même si aucun ordinateur n'est connecté.
• Cela est tout à fait normal ; la mention "PC" apparaît toujours dans la liste Source.
La qualité de la vidéo est bonne, mais
aucun son n'est émis.
• Si vous utilisez une connexion HDMI, vérifiez le paramètre de sortie audio sur votre PC.
Autres
L'image ne s'affiche pas en mode plein
écran.
• Des barres noires s'affichent de chaque côté des chaînes HD lors de l'affichage de contenu SD (4:3)
mis à niveau.
• Des barres noires s'affichent en haut et en bas des films dont le format d'image est différent de celui
de votre téléviseur.
• Définissez les options de taille de l'image de votre appareil externe ou téléviseur sur Plein écran.
La télécommande ne fonctionne pas. • Remplacez les piles de la télécommande en respectant la polarité (+/-).
• Nettoyez la lentille de la télécommande.
• Essayez de diriger directement la télécommande vers le téléviseur à une distance de 1,5 à 1,8 m.
La télécommande du décodeur câble/
boîtier décodeur ne permet pas d'allumer
ou d'éteindre le téléviseur, ni de régler le
volume.
• Programmez la télécommande du décodeur câble/boîtier décodeur de telle sorte qu'elle puisse
commander le téléviseur. Consultez le mode d'emploi du décodeur câble/boîtier décodeur pour
obtenir le code du téléviseur SAMSUNG.
Le message "Mode non pris en charge"
est affiché.
• Vérifiez la résolution prise en charge par le téléviseur et réglez la résolution de sortie du périphérique
externe en conséquence. Reportez-vous aux paramètres de résolution à la page 9 du présent manuel.
Une odeur de plastique se dégage du
téléviseur.
• Cette odeur est normale et s'atténuera avec le temps.
L'option Informations de signal du
téléviseur n'est pas disponible dans le
menu de test du diagnostic automatique.
• Cette fonction n'est disponible qu'avec des chaînes numériques diffusées sur une connexion
d'antenne / RF/coaxiale. (P. 21)
Le téléviseur penche sur le côté. • Retirez le support de base du téléviseur et réassemblez-le.
L'assemblage du support de base
s'effectue difficilement.
• Veillez à placer le téléviseur sur une surface plane. Si vous ne parvenez pas à retirer les vis du
téléviseur, utilisez un tournevis aimanté.
Le menu des chaînes est grisé
(indisponible).
• Le menu Chaîne n'est disponible que si la source TV est sélectionnée.
BN68-02588ABF-Fre.indb 30 2010-3-23 15:16:55Français 31
05 Informations supplémentaires
Problèmes Solutions et explications
Vos paramètres sont perdus après
30 minutes ou à chaque mise hors tension
du téléviseur.
• Si le téléviseur est en mode Démo. magasin, les paramètres audio et vidéo sont réinitialisés toutes
les 30 minutes. Remplacez le mode Démo. magasin par le mode Util. domicile dans la procédure
Plug & Play (configuration initiale). Appuyez sur le bouton SOURCE pour sélectionner le mode TV et
accédez à MENU → Configuration → Plug & Play (configuration initiale) → ENTERE
Perte intermittente du signal audio ou
vidéo.
• Vérifiez le raccordement des câbles ; rebranchez-les au besoin.
• Une perte de l'image ou du son peut être provoquée par l'utilisation de câbles trop rigides ou épais.
Veillez à ce que les câbles soient suffisamment souples pour une utilisation à long terme. En cas
d'installation du téléviseur en position murale, nous vous recommandons d'utiliser des câbles avec
des connecteurs de 90 °degrés.
Des petites particules sont visibles lorsque
vous observez de près le bord du cadre
du téléviseur.
• Elles font partie de la conception du produit et ne constituent pas un défaut.
Le menu PIP n'est pas disponible. • La fonctionnalité PIP n'est disponible que lorsque vous utilisez une source HDMI, PC ou
Composant.
Le message "Signal brouillé" ou "Signal
faible/Aucun signal" s'affiche.
• Si vous utilisez une CARTE CAM (CI/CI+), vérifiez qu'elle est installée dans la fente de l'interface
commune.
• Si le problème persiste, retirez la CARTE CAM du téléviseur et réintroduisez-la dans la fente.
Le téléviseur s'est rallumé 45 minutes
après sa mise hors tension.
• Cela est tout à fait normal. Le téléviseur exécute, en effet, la fonction de liaison radio (OTA) pour
mettre à niveau le microprogramme téléchargé au cours de son utilisation.
Problèmes récurrents liés à l'image/au son. Vérifiez et modifiez le signal/la source. •
Il peut y avoir une réaction entre les
coussinets en caoutchouc situés sur le
support de base et la finition de certains
meubles.
• Pour éviter que cela ne se produise, utilisez des coussinets de feutre sur toute surface du téléviseur
en contact direct avec un meuble.
✎Ce téléviseur LCD TFT est équipé d’un écran constitué de sous-pixels dont la fabrication nécessite une technologie
sophistiquée. Il se peut toutefois que quelques points clairs ou sombres apparaissent à l’écran. Ils n’ont aucune
incidence sur la performance du produit.
¦ Licence
Manufactured under license from Dolby Laboratories.
Dolby and the double-D symbol are trademarks of Dolby Laboratories.
BN68-02588ABF-Fre.indb 31 2010-3-25 10:45:4632 Français
Informations supplémentaires
Caractéristiques techniques
Résolution native du panneau 1360 X 768 @ 60 Hz
Conditions ambiantes
Température en service
Humidité en fonctionnement
Température de stockage
Humidité sur le lieu de stockage
10°C à 40°C (50°F à 104°F)
10% à 80%, sans condensation
-20°C à 45°C (-4°F à 113°F)
5% à 95%, sans condensation
Système TV Analogique : en fonction du pays sélectionné
Numérique : DVB-T/DVB-C
Système de couleur/vidéo Analogique : PAL, SECAM, NTSC-4.43, NTSC-3.58, PAL60
Numérique : MPEG-2 MP@ML, MPEG-4, H.264/AVC MP@L3, MP@L4.0, HP@L4.0
Sound System BG. OK NICAM. MPEGl
HDMI IN Vidéo : 1080/24p, 1080p, 1080i, 720p, 576p, 576i, 480p, 480i
Audio : PCM linéaire sur deux voies 32/44.1/48 kHz, 16/20/24bits
Entrée audio analogique (HDMI IN uniquement)
Entrée PC
Socle orientable
(Gauche / droite) 0˚
Nom du modèle LE19C350 LE22C350
Taille de l'écran
(Diagonale) 19 pouces 22 pouces
Son
Sortie 3W X 2 3W X 2
Dimensions (L x P x H)
Corps
Avec socle
461.2 x 59.5 x 322.2 mm
461.2 x 161 x 364 mm
535.3 x 82.2 x 365.8 mm
535.5 x 171.8 x 420.9 mm
Poids
Corps
Avec socle
3.9 kg
4.2 kg
3.9 kg
4.1 kg
✎La conception et les spécifications peuvent être modifiées sans préavis.
✎Pour en savoir plus sur l’alimentation et la consommation électrique, consultez l’étiquette apposée sur le produit.
BN68-02588ABF-Fre.indb 32 2010-3-23 15:16:55Français 33
05 Informations supplémentaires
Index
A
Aff. de base 25
Amplifier 17
Antenne 12
Arr.-plan Acc. 25
B
Balance 17
Balance blancs 15
C
Caractéristiques techniques 32
Chaîne favorite 12
Composant 7
Connexion à un ordinateur 8
Connexion à un système audio 8
Contraste Dynamique 15
D
Diagnostic automatique 21
Diaporama 24
D-sub 8
Dynamique 14
E
Egaliseur 17
EPG 11
F
Fond musical 25
Format de l’image 16
Fréquence 12
G
Gestion chaînes 12
Guide Now & Next 11
H
Haut-parleur TV 18
HDMI 7
Horloge 19
Ht-parl ext. 18
I
Informations de signal 21
L
L’espace d’installation 2
Langue 20
Licens 31
Liste Source 10
Luminosité 14
M
Magnétoscope 10
Media Play 22
Mélodie 20
Minuteur 19
Mise à niveau du logiciel 21
Mode de répétition 25
Mode éco. 15
Mode Film 15
Mode Veille 4
Modif. Nom 10
Modifier PIN 20
Musique 23
N
Navigation 10
Netteté 14
Nouvelle syntonisation des chaînes 13
Nuance Coul. 15
Nuance de noir 15
O
ON/OFF, bouton 5
Outils 3
P
Photos 24
Piles 5
Plug & Play 6
R
Réglage Automatique 17
Réglage fin 14
Résolution des problèmes 29
Résolution optimale 9
RVB 15
S
Sélection Haut-parleur 18
Sélectionner tout 14
Sortie audio numérique 8
Sous-titres 20
Support mural 27
T
Télécommande 5
Témoin d’alimentation 4
Titre 25
Ton chair 15
Transparence menu 20
U
USB 21, 22
Utilisation de l’option Diffusion
programmée 11
Utilisation de la Vue chaînes 11
Utilisation des chaînes favorites 12
V
Veille 19
Verrouiller 14
Volume 4, 5
Volume auto 18
BN68-02588ABF-Fre.indb 33 2010-3-23 15:16:56Cette page est laissée
intentionnellement
vierge.
BN68-02588ABF-Fre.indb 34 2010-3-23 15:16:562 Deutsch
Die Abbildungen und Illustrationen in diesem Handbuch dienen nur zur Information und können vom tatsächlichen Aussehen
des Geräts abweichen. Änderungen an Ausführung und technischen Daten vorbehalten.
Hinweis zu Digitalfernsehen
1. Die Funktionalitäten für Digitalfernsehen (DVB) stehen nur in Ländern/Regionen zur Verfügung, in denen digitale terrestrische DVB-T-Signale (MPEG2 und
MPEG4 AVC) gesendet werden oder in denen Sie Zugang zu einem kompatiblen Kabelfernsehdienst mit DVB-C (MPEG2 und MPEG4 AAC) haben können.
Fragen Sie Ihren örtlichen Händler, wenn Sie Informationen über die Verfügbarkeit von DVB-T oder DVB-C in Ihrer Gegend benötigen.
2. DVB-T ist der Standard des europäischen DVB-Konsortiums für die terrestrische Versorgung mit digitalem terrestrischem Fernsehen, und DVB-C ist das
Konsortium für die Versorgung mit digitalem Kabelfernsehen. Allerdings werden manche Unterscheidungsmerkmale wie EPG (elektrische Programmzeitschrift),
VOD (Video on Demand) usw. in dieser Spezifikation nicht berücksichtigt. Deshalb können sie zum jetzigen Zeitpunkt noch nicht eingesetzt werden.
3. Zwar hält dieses Fernsehgerät die aktuellen Standards der DVB-T- und DVB-C-Spezifikationen [Version August 2008] ein, aber es kann nicht garantiert
werden, dass die Kompatibilität mit zukünftigen digitalen terrestrischen DVB-T und DBV-C-Signalen gewahrt bleibt.
4. In Abhängigkeit von den Ländern/Regionen, in denen dieses Fernsehgerät eingesetzt wird, verlangen manche Kabelfernsehanbieter zusätzliche Gebühren für
solch einen Dienst, und möglicherweise wird verlangt, dass Sie den Vertragsbedingungen des Unternehmens zustimmen.
5. Manche Digitalfernsehfunktionen sind in einigen Ländern oder Regionen möglicherweise nicht verfügbar, und DVB-C-Signale kann das Gerät bei manchen
Kabelfernsehanbietern möglicherweise nicht fehlerfrei verarbeiten.
6. Für weitere Informationen setzen Sie sich bitte mit dem Samsung-Kundendienstzentrum in Verbindung.
✎ Die Empfangsqualität des Fernsehgeräts kann durch Unterschiede bei den Sendeverfahren in verschiedenen Ländern beeinträchtigt werden. Kontrollieren
Sie die Leistung des Fernsehgeräts bei Ihrem örtlichen SAMSUNG-Händler oder wenden Sie sich an das Samsung-Callcenter um festzustellen, ob sich die
Empfangsqualität durch Ändern der Fernseheinstellungen verbessern lässt.
Warnung bei Standbildern
Vermeiden Sie die Anzeige von Standbildern (wie z. B. JPEG-Bilddateien) oder Standbildelementen (wie z. B. Senderlogos, Panorama- oder 4:3-Bilder, Aktien-
oder Laufschriften mit Nachrichten am unteren Bildschirmrand usw.) auf dem Bildschirm. Durch lang anhaltende Anzeige von Standbildern kann es zu einem
ungleichmäßigen Verbrauch des Phosphors im Bildschirm kommen, wodurch die Bildqualität beeinträchtigt wird. Um die Gefahr dieses Effekts zu vermindern,
befolgen Sie bitte die nachfolgenden Empfehlungen:
• Vermeiden Sie es, für lange Zeit denselben Fernsehsender anzuzeigen.
• Versuchen Sie immer, Abbildung als Vollbild anzuzeigen. Verwenden Sie das Bildformatmenü des Fernsehgeräts um die beste Anzeigemöglichkeit zu finden.
• Reduzieren Sie die Helligkeits- und Kontrastwerte soweit wie möglich, um immer noch die gewünschte Bildqualität zu erreichen. Zu hohe Werte können das
Ausbrennen beschleunigen.
• Verwenden Sie häufiger alle Funktionen Ihres Fernsehgeräts, die dazu dienen, das Einbrennen von Bildern und das Ausbrennen des Bildschirms zu reduzieren.
Weitere Informationen hierzu finden Sie in den entsprechenden Abschnitten des Benutzerhandbuchs.
Absichern des Aufstellbereichs
Halten Sie die erforderlichen Abstände zwischen dem Gerät und anderen Objekten (z.B. Wänden) ein, um ausreichende Lüftung sicherzustellen.
Wenn Sie dies nicht tun, besteht die Gefahr, dass aufgrund eines Anstiegs der Temperatur im Innern des Geräts ein Brand ausbricht oder andere Probleme mit dem
Gerät auftreten.
✎ Wenn Sie einen Standfuß oder eine Wandhalterung einsetzen, verwenden Sie ausschließlich Teile von Samsung Electronics.
x Wenn Sie Teile eines anderen Herstellers verwenden, kann es zu Problemen mit dem Gerät oder zu Verletzungen kommen, weil das Gerät herunterfällt.
✎ Das Aussehen kann sich je nach Gerät unterscheiden.
Aufstellen des Geräts mit dem Standfuß Installation des Geräts mit der Wandhalterung
10 cm
10 cm 10 cm
10 cm
10 cm
10 cm
10 cm
Ordnungsgemäße Entsorgung dieses Geräts (Elektro- und Elektronik-Altgeräte)
(Anzuwenden in den Ländern der Europäischen Union und anderen europäischen Ländern mit einem separaten Sammelsystem)
Diese Kennzeichnung auf dem Gerät, dem Zubehör oder der Dokumentation bedeutet, dass das Gerät sowie das elektronische Zubehör
(z. B. Ladegerät, Headset, USB-Kabel) am Ende ihrer Lebensdauer nicht im normalen Hausmüll entsorgt werden dürfen. Entsorgen
Sie diese Geräte bitte getrennt von anderen Abfällen, um der Umwelt bzw. der menschlichen Gesundheit nicht durch unkontrollierte
Müllbeseitigung zu schaden. Recyceln Sie das Gerät, um die nachhaltige Wiederverwertung von stofflichen Ressourcen zu fördern. Private
Nutzer sollten den Händler, bei dem das Produkt gekauft wurde, oder die zuständigen Behörden kontaktieren, um in Erfahrung zu bringen,
wie sie das Gerät auf umweltfreundliche Weise recyceln können. Gewerbliche Benutzer wenden sich an ihren Lieferanten und überprüfen
die Konditionen Ihres Kaufvertrags. Dieses Gerät und seine elektronischen Zubehörteile dürfen nicht zusammen mit anderem Gewerbemüll
entsorgt werden.
Ordnungsgemäße Entsorgung der Batterien dieses Produkts
(Anwendbar in der Europäischen Union und anderen europäischen Staaten mit Systemen zur getrennten Sammlung von Batterien.)
Diese Kennzeichnung auf der Batterie, dem Handbuch oder der Verpackung bedeutet, dass die Batterie am Ende ihrer Lebensdauer nicht
im normalen Hausmüll entsorgt werden darf. Die Kennzeichnung mit den chemischen Symbolen für Hg, Cd oder Pb bedeutet, dass die
Batterie Quecksilber, Cadmium oder Blei in Mengen enthält, die die Grenzwerte der EU-Direktive 2006/66 übersteigen. Wenn Batterien
nicht ordnungsgemäß entsorgt werden, können diese Substanzen die Gesundheit von Menschen oder die Umwelt gefährden. Zum Schutz
der natürlichen Ressourcen und zur Förderung der Wiederverwertung von Materialien trennen Sie die Batterien von anderem Müll und
führen Sie sie Ihrem örtlichen Recyclingsystem zu.
BN68-02588BF-Ger.indb 2 2010-3-23 13:54:40Deutsch 3
Inhalt
Erste Schritte
4
4 Zubehör
4 Bedienfeld
5 Fernbedienung
6 Verbinden mit einer Antenne
6 Plug & Play (Anfangseinstellung)
Anschlüsse
7
7 Anschließen an ein AV-Gerät
8 Anschließen an ein Audiogerät
8 Anschließen an einen PC
10 Signalquellen wählen
Grundfunktionen
10
10 Navigieren in den Menüs
11 Verwenden der INFO-Taste
(Elektronische Programmzeitschrift)
11 Fernsehplanung
12 Kanalmenü
14 Bildmenü
17 Tonmenü
19 Einstellungsmenü
21 Unterstützungsmenü
Erweiterte Funktionen
22
22 Media Play
Weitere Informationen
26
26 Teletext für Analogkanäle
27 Anbringen der Wandhalterung
28 Kensington-Schloss als Diebstahlsicherung
28 Befestigen des Fernsehgeräts an der Wand
29 Fehlerbehebung
32 Technische Daten
33 Index
Achten Sie auf das Symbol!
Diese Funktion können Sie durch
t
Drücken der Taste TOOLS auf der
Fernbedienung aufrufen.
Hinweis Schrittweise Darstellung der
Vorgehensweisen
P
POWER
GUIDE AD
MEDIA.P
SUBT.
DUAL
I-II
P.SIZE S.MODE P.MODE
BN68-02588BF-Ger.indb 3 2010-3-23 13:54:404 Deutsch
Erste Schritte
Zubehör
✎Überprüfen Sie die Verpackung Ihres LCD-Fernsehgeräts auf Vollständigkeit. Falls Komponenten fehlen sollten, setzen
Sie sich bitte mit Ihrem Händler in Verbindung.
✎Die Farbe und die Form der Teile können sich je nach Modell unterscheiden.
y Fernbedienung und 2 Batterien (Typ AAA)
y Bedienungsanleitung
y Garantiekarte / Sicherheitshinweise (nicht überall verfügbar)
y Reinigungstuch
y Power Cord
Weitere Informationen fi nden Sie im Installationshandbuch für den Standfuß.
1 EA
(M4 X L16)
y Standfuß (1 Stck) y Schrauben (2 Stk.)
Bedienfeld
✎Form und Farbe des Geräts können sich je nach Modell unterscheiden.
P (Netz)
Ein- und Ausschalten des Fernsehgeräts.
Netzanzeige
Beim Einschalten des Fernsehgeräts blinkt die Netzleuchte kurz und erlischt
anschließend. Im Standbymodus leuchtet die Anzeige permanent.
SOURCEE Schaltet zwischen allen verfügbaren Signalquellen um. Im Bildschirmmenü können Sie
diese Taste wie die ENTERE auf der Fernbedienung verwenden.
MENU
Drücken Sie diese Taste, um die Funktionen des Fernsehgeräts in einem
Y Bildschirmmenü anzuzeigen.
YHiermit stellen Sie die Lautstärke ein. Im Bildschirmmenü können Sie die
z -Schaltfl ächen wie die Tasten ◄ und ► auf der Fernbedienung verwenden.
Wechseln des Kanals. Im Bildschirmmenü können Sie die z-Schaltfl ächen
wie die Tasten ▼ und ▲ auf der Fernbedienung verwenden.
Fernbedienungssensor Richten Sie die Fernbedienung auf diesen Sensor am Fernsehgerät.
Standby-Modus
Der Standby-Modus ist nicht für längere Phasen der Abwesenheit gedacht (z. B. wenn Sie verreist sind). Eine kleine Menge
Strom wird auch dann noch verbraucht, wenn das Gerät mit dem Netzschalter ausgeschaltet wurde. Es ist am besten, das
Netzkabel aus der Steckdose zu ziehen.
Ein- und Ausschalten des Fernsehgeräts.
Lautsprecher
Fernbedienungssensor Netzanzeige
Bildschirmmenü anzeigen. (Seite 10)
BN68-02588BF-Ger.indb 4 2010-3-23 13:54:415
01 Erste Schritte
Deutsch
Fernbedienung
Einlegen von Batterien (Batteriegröße: AAA)
✎HINWEIS
x Setzen Sie die Fernbedienung bis zu einer Entfernung von
maximal 23 m ein.
x Helles Licht kann die Leistung der Fernbedienung
verschlechtern. Vermeiden Sie Leuchtstoffröhren oder ein
Neonschild in der Nähe der Fernbedienung.
x Form und Farbe können sich je nach Modell unterscheiden.
Batterien und Akkus gehören nicht in den Hausmüll. Als Verbraucher sind Sie verpfl ichtet, alte Batterien und Akkus zur
umweltschonenden Entsorgung zurückzugeben. Sie können alte Batterien und Akkus bei den öffentlichen Sammelstellen in
Ihrer Gemeinde oder überall dort abgeben, wo Batterien und Akkus der betreffenden Art verkauft werden.
MEDIA.P
A B C D
Anzeigen und Auswählen aller verfügbaren
Anzeigen und Auswählen aller verfügbaren Videosignalquellen. (Seite 10)
Videosignalquellen. (Seite 6)
Hiermit wechseln Sie direkt zu einem Kanal.
Anzeigen des elektronischen Programmführers
(Seite 11)
Anzeige der Senderliste auf dem Bildschirm. (Seite 14)
Wechseln des Kanals
Hiermit können Sie häufi g verwendete
Funktionen schnell auswählen.
Anzeigen von Informationen auf dem Bildschirm
Bildschirmmenü anzeigen. (Seite 10)
Lautstärke einstellen
Zurück zum vorherigen Kanal.
Tasten in den Menüs Kanal-Manager, Media
Play usw.
AD: Auswahl der Audio-Beschreibung. (nicht
überall verfügbar) (Seite 18)
P.SIZE: Wählen des Bildformats. (Seite 16)
SUBT.: Anzeigen der digitalen Untertitel (Seite 20)
Drücken Sie diese Taste, um den Ton
vorübergehend auszuschalten.
Zurück zum vorherigen Menü. (Seite 10)
Auswählen von Optionen im Bildschirmmenü
und Ändern von Menüwerten.
Schließen des Menüs. (Seite 10)
Abwechselnde Auswahl von
„Teletext“, „Doppel“ oder „Mix“.
Anzeigen von Media Play.
BN68-02588BF-Ger.indb 5 2010-3-23 13:54:426
Erste Schritte
Deutsch
Verbinden mit einer Antenne
Wenn das Fernsehgerät zum ersten Mal eingeschaltet wird, werden automatisch die Grundeinstellungen vorgenommen.
✎Voreinstellung: Anschließen ans Stromnetz und an die Fernsehantenne.
Plug & Play (Anfangseinstellung)
Wenn das Fernsehgerät erstmals eingeschaltet wird, helfen eine Reihe aufeinanderfolgender Abfragen beim Durchführen der
Grundeinstellungen. Drücken Sie die POWERP. Plug & Play ist nur verfügbar, wenn die Eingang squelle auf TV eingestellt ist.
1
Auswählen der Sprache Drücken Sie die Taste ▲ oder ▼, und drücken Sie dann auf die
ENTERE.
P
POWER
GUIDE AD
MEDIA.P
SUB.T
DUAL
P.SIZE S.MODE P.MODE
2
Auswählen von
Shop-Demo oder
Privatgebrauch
Drücken Sie die Taste ◄ oder ►, und drücken Sie dann auf die
ENTERE.
y Wählen Sie den Modus Privatgebrauch. Der Modus Shop-Demo
ist für den Betrieb in Einzelhandelsgeschäften bestimmt.
y Zurückstellen des Geräts von Shop-Demo auf Privatgebrauch
(Standard): Drücken Sie die Lautstärketaste am Fernsehgerät.
Wenn das Menü Lautstärke angezeigt wird, halten Sie die Taste
MENU 5 Sekunden lang gedrückt.
3 Wählen eines Landes Drücken Sie die Taste ▲ oder ▼, und drücken Sie dann auf die ENTERE.
Wählen Sie das gewünschte Land. Wenn es das gewünschte Land im Menü nicht gibt,
wählen Sie Sonstiges.
✎Nachdem Sie im Menü Land das Land eingestellt haben, werden Sie bei manchen
Modellen anschließend aufgefordert, die PIN-Nummer einzurichten.
✎Die Ziffernkombination 0-0-0-0 dürfen Sie als PIN-Nummer nicht eingeben.
4
Auswählen einer
Antenne
Drücken Sie die Taste ▲ oder ▼, und drücken Sie dann auf die ENTERE.
Wählen Sie Terrestrisch oder Kabel.
5
Auswählen eines
Senders
Drücken Sie die Taste ▲ oder ▼, und drücken Sie dann auf die ENTERE.
Wählen Sie den Sendertyp zum Speichern aus. Wenn Sie den Sendertyp auf
Kabel einstellen, können Sie den Sendern im nächsten Schritt einen Zahlenwert
(Senderfrequenzen) zuweisen. Weitere Informationen hierzu fi nden Sie unter Kanal →
Autom. Senderspeich. (Seite 12).
✎Zum Unterbrechen des Speichervorgangs zu einem beliebigen Zeitpunkt drücken Sie
die ENTERE.
6
Einstellen des UhrModus
Stellen Sie den Uhr-Modus automatisch oder manuell ein.
Wählen Sie durch Drücken der Tasten ▲ oder▼ die Option Auto, und drücken Sie dann die
ENTERE.
7
Anzeigen des HDAnschlussplans.
Die Verbindungsmethode für optimale HD-Bildqualität wird angezeigt.
8
Gute
Fernsehunterhaltung!
Drücken Sie die Taste ENTERE .
So setzen Sie diese Funktion zurück...
Wählen Sie Setup - Plug & Play (Einstell. - Plug & Play) (Anfangseinstellung). Geben Sie nun Ihre vierstellige PIN ein. Die
Standard-PIN lautet „0-0-0-0“. Wenn Sie die PIN ändern möchten, verwenden Sie die Funktion PIN ändern.
Netzanschluss
VHF/UHF-Antenne
oder
Kabel
R-AUDIO-L PR PB Y
ANT OUT
BN68-02588BF-Ger.indb 6 2010-3-23 13:54:43Deutsch 7
02 Anschlüsse
Anschlüsse
Anschließen an ein AV-Gerät
Mit Hilfe eines HDMI/DVI-Kabels: HD-Anschluss (max. 1080p)
Verfügbare Geräte: DVD, Blu-ray-Player, HD-Kabelreceiver, HD-Satellitenreceiver, Kabelreceiver, Satellitenreceiver
✎HDMI (DVI) IN / PC/DVI AUDIO IN
x Eine Verbindung über HDMI/DVI-Kabel kann nur über HDMI (DVI) IN erfolgen. Verwenden Sie ein DVI/HDMIKabel oder einen DVI/HDMI-Adapter (DVI auf HDMI) für den DVI-Kabelanschluss und die PC/DVI AUDIO
IN-Anschlüsse für die Audioverbindung.
x Wenn ein externes Gerät wie ein DVD-/Blu-Ray-Player/Kabelreceiver/Satellitenreceiver mit Untertsützung für
HDMI-Versionen älter als 1.3 angeschlossen wird, funktioniert das Fernsehgerät möglicherweise nicht wie
erwartet (z. B. kein Bild/kein Ton/störendes Flackern/falsche Farben).
x Wenn es nach dem Anschließen eines HDMI-Kabels keinen Ton gibt, überprüfen Sie die HDMI-Version des
externen Geräts. Wenn Sie vermuten, dass die Version älter als 1.3 ist, wenden Sie sich an den Lieferanten
des Geräts, um die HDMI-Version zu bestätigen und ein Upgrade anzufordern.
x Es wird empfohlen ein zertifiziertes HDMI-Kabel zu erwerben. Andernfalls kann es passieren, dass der
Bildschirm leer bleibt oder ein Verbindungsfehler auftritt.
Mit Hilfe eines Komponentenkabels (bix 1080p) oder eines Audio/Video-Kabels (nur 480i) und eines Scartkabels
Verfügbare Geräte: Videorekorder, DVD-Player, Blu-ray-Player, Kabelreceiver, Satellitenreceiver
✎Im Ext.-Modus unterstützt DTV Out nur MPEG SD-Video und -Audio.
✎Um die beste Bildqualität zu erhalten, wird eine Komponentenverbindung über den A/V-Anschluss empfohlen.
R-AUDIO-L PR PB Y
AUDIO OUT
R-AUDIO-L PR PB Y
DVI OUT
R-AUDIO-L PR PB Y
HDMI OUT
Y
W R
WY WR W R B G
Red White
DVD
R W R G B
R W R G
R W Y
R W Y B
R-AUDIO-L PR PB Y
COMPONENT OUT
R-AUDIO-L PR PB Y
AUDIO OUT
R-AUDIO-L PR PB Y
EXT
R-AUDIO-L PR PB Y
AUDIO OUT
R-AUDIO-L PR PB Y
VIDEO OUT
WY WR W R B G
Yellow Red White
WY WR W R B G
Red Blue Green
Videorekorder Blu-ray player DVD
BN68-02588BF-Ger.indb 7 2010-3-23 13:54:468 Deutsch
Anschlüsse
Anschließen an ein Audiogerät
Mit Hilfe eines Glasfaserkabels oder eines Audiokabels
Verfügbare Geräte: Digital-Audiosystem, Verstärker, DVD-Heimkino
✎DIGITAL AUDIO OUT (OPTICAL)
x Wenn ein Digital Audio-System mit dem DIGITAL AUDIO OUT (OPTICAL)-Anschluss verbunden ist, reduzieren Sie die
Lautstärke von Fernsehgerät und System.
x 5.1-Kanalton ist möglich, wenn das Fernsehgerät an ein externes Gerät angeschlossen ist, das 5.1-Kanalton unterstützt.
x Wenn der Receiver (Heimkinosystem) angeschaltet ist, können Sie den Ton hören, der vom optischen Ausgang
der Fernsehgeräts zur Verfügung gestellt wird. Wenn das Fernsehgerät ein (terrestrisches) DTV-Signal empfängt,
überträgt das Fernsehgerät 5.1-Kanalton an den Receiver des Heimkinosystems. Wenn es sich bei der Signalquelle
um eine digitale Komponente wie beispielsweise einen DVD-Player/Blu-Ray-Player/Kabel- / Satellitenreceiver (Set-TopBox) handelt, der über HDMI an das Fernsehgerät angeschlossen ist, kann der Receiver des Heimkinosystems nur
Zweikanalton wiedergeben. Wenn Sie 5.1-Kanalton wünschen, müssen Sie den digitalen Ausdioausgang am DVD-/BluRay-Player / Kabel- / Satellitenreceiver (Set-Top-Box) direkt an einen Verstärker oder ein Heimkinosystem anschließen.
Anschließen an einen PC
Mit Hilfe eines HDMI/DVI-Kabels oder eines D-Sub-Kabels
R-AUDIO-L PR PB Y
OPTICAL
Digital Audio
System
R-AUDIO-L PR PB Y
AUDIO OUT
R-AUDIO-L PR PB Y
AUDIO OUT
R-AUDIO-L PR PB Y
DVI OUT
R-AUDIO-L PR PB Y
PC OUT
BN68-02588BF-Ger.indb 8 2010-3-23 13:54:48Deutsch 9
02 Anschlüsse
ANSCHLÜSSE COMMON INTERFACE-STECKPLATZ
Um Bezahlsender zu sehen, müssen Sie eine „CI“ oder „CI+“-Karte
einsetzen.
y Wenn Sie keine „CI“ oder „CI+“-Karte einsetzen, wird bei einigen
Kanäle die Meldung „Gestörtes Signal“ angezeigt.
y Die Verbindungsinformationen mit Telefonnummer, Kennung der
„CI“ oder „CI+“-Karte, Hostkennung und anderen Angaben wird
nach ungefähr 2 bis 3 Minuten angezeigt. Wenn eine Fehlermeldung
angezeigt wird, wenden Sie sich bitte an Ihren Dienstanbieter.
y Wenn das Konfigurieren der Kanalinformationen abgeschlossen ist,
wird die Meldung „Aktualisierung abgeschlossen“ angezeigt. Dies
bedeutet, dass die Kanalliste aktualisiert ist.
✎HINWEIS
x Sie können die „CI“ oder „CI+“-Karte bei einem der örtlichen Kabelnetzbetreiber erwerben.
x Ziehen Sie die „CI“ oder „CI+“-Karte vorsichtig mit den Händen heraus. Sie könnte beim Herunterfallen ansonsten
beschädigt werden.
x Die Richtung, in der Sie die „CI“ oder „CI+“-Karte einsetzen müssen, ist auf der Karte markiert.
x Die Position des COMMON INTERFACE-Steckplatzes ist modellabhängig.
x „CI“ oder „CI+“-Karten werden in einigen Ländern und Regionen nicht unterstützt. Fragen Sie diesbezüglich Ihren offiziellen
Händler.
x Bei Problemen wenden Sie sich an den Dienstanbieter.
Anzeigemodi (D-Sub- und HDMI/DVI-Eingang)
Die optimale Auflösung beträgt 1360 x 768 @ 60 Hz
Modus Auflösung Horizontalfrequenz (kHz) Vertikalfrequenz (Hz) Pixeltakt (MHz)
Synchronisationspolarität
(H/V)
IBM
640 x 350 31.469 70.086 25.175 + / -
720 x 400 31.469 70.087 28.322 - / +
MAC
640 x 480 35.000 66.667 30.240 - / -
832 x 624 49.726 74.551 57.284 - / -
VESA DMT
640 x 480
31.469 59.940 25.175 - / -
37.861 72.809 31.500 - / -
37.500 75.000 31.500 - / -
800 x 600
37.879 60.317 40.000 + / +
48.077 72.188 50.000 + / +
46.875 75.000 49.500 + / +
1024 x 768
48.363 60.004 65.000 - / -
56.476 70.069 75.000 - / -
60.023 75.029 78.750 + / +
1280 x 720 45.000 60.000 74.250 + / +
1360 x 768 47.712 60.015 85.500 + / +
VESA CVT
720 x 576 35.910 59.950 32.750 - / +
1280 x 720 56.456 74.777 95.750 - / +
VESA GTF 1280 x 720 52.500 70.000 89.040 - / +
✎HINWEIS
x Bei einem Anschluss über HDMI/DVI-Kabel müssen Sie den HDMI (DVI) IN-Anschluss verwenden.
x Das Zeilensprungverfahren wird nicht unterstützt.
x Das Fernsehgerät funktioniert möglicherweise nicht ordnungsgemäß, wenn kein Standardmodus ausgewählt wird.
x Separate- und Composite-Modus werden unterstützt. SOG (Sync On Green) wird nicht unterstützt.
BN68-02588BF-Ger.indb 9 2010-3-23 13:54:4910 Deutsch
Anschlüsse
Signalquellen wählen
Quellen
Hiermit wählen Sie, ob das Fernsehgerät
mit einem Fernsehsignal versorgt wird oder
an andere externe Signaleingänge wie
z. B. DVD- / Blu-Ray-Player / Kabelreceiver
/ Satellitenreceiver (Set-Top Box)
angeschlossen ist.
■ TV / Ext. / AV / Komponenten / PC /
HDMI/DVI / USB
✎ Bei Liste der Signalquellen werden die
angeschlossenen Signalquellen hervorgehoben.
✎ Ext. bleiben immer aktiviert.
Name bearbeiten
■ Videorekorder / DVD / Kabelreceiver /
Satellitenreceiver / PVR-Receiver / AV-Receiver
/ Spiel / Camcorder / PC / DVI PC / DVI-Geräte
/ TV / IPTV / Blu-Ray / HD DVD / DMA Vergeben
Sie Namen für die an die Eingangsbuchsen
angeschlossenen Geräte, um die Auswahl der
Signalquelle zu vereinfachen.
✎ Wenn Sie ein HDMI/DVI-Kabel mit dem HDMI
(DVI) IN-Anschluss verbinden, stellen Sie den
Anschluss unter Name bearb. auf den Modus
DVI PC oder DVI-Geräte ein.
Grundfunktionen
Navigieren in den Menüs
Vor dem ersten Einsatz des Fernsehgeräts führen Sie die
folgenden Schritte aus, um zu erfahren, wie Sie im Menü
navigieren und verschiedene Funktionen auswählen und
einstellen.
1 Taste MENU: Erste Ebene des Bildschirmmenüs
anzeigen.
2 ENTERE/ Navigationstasten: Cursor bewegen und
Elemente auswählen. Einstellungen bestätigen.
3 Taste RETURN: Zurück zum vorherigen Menü.
4 Taste EXIT: Bildschirmmenü schließen.
Bedienung des Bildschirmmenüs (OSD)
Die Zugriffsmethoden können in Abhängigkeit vom jeweiligen
Menü variieren.
1 MENU m
Das Hauptmenü mit seinen
Optionen wird auf dem Bildschirm
angezeigt:
Bild, Ton, Kanal, Einstell.,
Eingang, Anwendung,
Unterstützung
2 ▲ / ▼
Wählen Sie durch Drücken der
Tasten ▲ oder ▼ ein Symbol.
3 ENTERE
Drücken Sie die Taste ENTERE,
um das Untermenü zu einem
Symbol anzuzeigen.
4 ▲ / ▼
Wählen Sie durch Drücken der
Tasten ▲ oder ▼ das gewünschte
Untermenü.
5 ◄ / ►
Wählen Sie durch Drücken der
Tasten ◄ oder ► den Wert für
ein bestimmtes Element. Die
Methoden zum Anpassen der
Werte im Bildschirmmenü können in
Abhängigkeit vom jeweiligen Menü
variieren.
6 ENTERE Drücken Sie die Taste ENTERE,
um die Konfi guraton abzuschließen.
7 EXIT e Drücken Sie die Taste EXIT zum
Beenden.
P
POWER
MEDIA.P
FAV.CH
P.MODE
DUAL
MTS
MEDIA.P
A B C D
4
1
2
3
BN68-02588BF-Ger.indb 10 2010-3-23 13:54:50Deutsch 11
03 Grundfunktionen
Verwenden der INFO-Taste (Elektronische
Programmzeitschrift)
Auf dem Bildschirm werden der aktuelle Kanal
und bestimmte Audio/Video-Einstellungen
angezeigt.
Die elektronische Programmführer zeigt
entsprechend der Sendezeit für jeden Kanal
tagesaktuelle Fernsehprogramminformation an.
y Blättern Sie mit ◄, ►, um
Informationen zu einem gewünschten Programm
anzuzeigen, während Sie einen anderen Sender
anzeigen.
y Blättern Sie mit ▲, ▼, um Informationen für andere
Kanäle anzuzeigen. Wenn Sie zum ausgewählten Sender
wechseln möchten, drücken Sie auf die ENTERE.
DTV Air
15
abc1
Life On Venus Avenue 18:00 ~ 6:00
Unclassified
No Detaild Information
E Watch
' Informationen
Fernsehplanung
Programmführer
Die Informationen des elektronischen
Programmführers werden von den
Sendern zur Verfügung gestellt. Mit Hilfe
der von den Sendern zur Verfügung
gestellten Programmpläne können Sie
im Voraus Programme angeben, die Sie
sehen möchten, so dass das Fernsehgerät
zur angegebenen Zeit automatisch
zum Kanal des gewählten Programms wechselt. Je nach
Aktualität der Senderinformationen können Programmplätze
leer oder veraltet sein.
Verwenden der Kanalansicht
DTV Air 800 five
Home and Away
18:00 - 18:30
Drama
Dani is devastated when scott makes clear his views on marriage...
27
28
800
24
16
6
Discovery
DiscoveryH&L
five
price-drop.tv
QVC
R4DTT
American Chopper
Programmes resume at 06:00
Home and...
No Information
QVC Selection
No Information
Tine Team
Fiv...
Today 18:00 - 19:00 19:00 - 20:00
)Family Affairs )Dark Angel
800 five
Ansichts. +24 Std. CH-Modus Informationen Seite E Ansehen
TV-Programm 2:10 Tue 1 Jun
Kanalansicht - TV
1 2 3 4 5 6
Verwenden der Programmieransicht
DTV Air 800 five
Family Affairs
18:00 - 18:30
Drama
Tanya confesses all to a stunned Babs. Conrad is anxious to hear...
18:30
19:15
Today
Today
)Family Affairs
)Dark Angel
800
800
five
five
800 five
Ansichts. Informationen E Abbrechen
TV-Programm 2:10 Tue 1 Jun
Programmieransicht
1 4 6
1 Rot (Ansichts.): Anzeigen der Programme, die gerade
laufen oder demnächst anfangen.
2 Gelb (+24 Std.): Anzeigen der Programme, die nach
24 Stunden gesendet werden.
3 Blau (CH-Modus): Wählen Sie die Art der Kanäle aus,
die Sie im Fenster Kanalansicht anzeigen möchten.
– Der Kanalmodus unterscheidet sich je nach
Antennensignal.
4 Informationen: Anzeigen von Details zum
ausgewählten Programm.
5 (Seite): Wechseln zur vorherigen/nächsten Seite.
6 Taste ENTERE
– Wenn Sie ein laufendes Programm auswählen,
können Sie es ansehen.
– Wenn Sie ein zukünftiges Programm auswählen,
können Sie es vormerken. Um die Programmierung
abzubrechen, drücken Sie erneut auf die ENTERE
und wählen Sie Programmierung abbrechen.
18:11 Thu 6 Jan
P
POWER
MEDIA.P
FAV.CH
P.MODE
DUAL
MTS
P
POWER
MEDIA.P
FAV.CH
P.MODE
DUAL
MTS
BN68-02588BF-Ger.indb 11 2010-3-23 13:54:5112 Deutsch
Grundfunktionen
Kanal-Manager
Mit diesem Menü können Sie Favoriten löschen oder
einstellen und den Programmführer für digitale Sendungen
verwenden. Wählen Sie im Fenster Sender, Eigene Kanäle
oder Vorgemerkt einen Sender.
c1 1futech
c 2 * 24ore.tv
15 abc1
3 BBC World
23 bid-up.tv
33 Boonerang
32 Cartoon Nwk
5 Class News
4 \ Coming Soon
27 Discovery
All
TV
Radio
Data/Other
Analogue
r
Terrestrisch TV-Empfang B Zoom Auswählen Seite T Extras
Sender
■ Sender: Anzeigen der Senderliste anhand des
Sendertyps.
■ * Eigene Kanäle: Anzeigen der Gruppe des Senders.
■ Vorgemerkt: Anzeigen aller vorgemerkten
Programme.
✎Verwenden der Farbtasten in Verbindung mit dem
Kanal-Manager
x Rot (TV-Empfang): Wählen Sie abwechselnd
Terrestrisch oder Kabel.
x B Grün (Zoom): Hiermit vergrößern oder verkleinern
Sie die Sendernummer.
x Gelb (Auswählen): Markieren Sie die gewünschten
Kanäle und drücken Sie die gelbe Taste, um alle
markierten Kanäle zugleich einzustellen. Links neben
dem Namen der gewählten Kanäle wird das Zeichen
c angezeigt.
x (Seite): Weiter zur nächsten oder vorherigen Seite.
x T (Extras): Hiermit zeigen Sie das Optionsmenü
Kanal-Manager an. (Der Inhalt des Menüs
„Optionen“ hängt von der jeweiligen Situation ab.)
Symbole zur Anzeige des Kanalstatus
Symbole Vorgang
A Ein analoger Kanal.
c Ein ausgewählter Sender.
* Ein Kanal, der als Favorit eingestellt ist.
( Ein Programm, das gerade gesendet wird.
\ Ein gesperrter Kanal.
) Ein vorgemerktes Programm.
¦ Verwenden von Favoriten
* Eigene Kanäle
(im Kanal-Manager)
Hiermit zeigen Sie alle Favoritenkanäle an.
■ Eigene Kanäle bearbeiten t : Sie können die
gewählten Sender zu der gewünschten Gruppe eigener
Sender hinzufügen.
✎Das Symbol „*“ wird angezeigt, und der Sender wird
als eigener Kanal festgelegt.
1. Wählen Sie einen Kanal und drücken Sie die Taste
TOOLS.
2. Sie können einen Kanal der Gruppen 1, 2, 3 und 4
der eigenen Kanäle hinzufügen oder löschen.
x Sie können eine oder mehrere Gruppen
auswählen.
3. Nachdem Sie die Einstellungen geändert haben,
kann die Senderliste für jede Gruppe in Eigene
Kanäle angezeigt werden.
c1 1futech
c 2 * 24ore.tv
15 abc1
3 BBC World
23 bid-up.tv
33 Boonerang
32 Cartoon Nwk
5 Class News
4 \ Coming Soon
27 Discovery
All
TV
Radio
Data/Other
Analogue
r
Terrestrisch TV-Empfang B Zoom Auswählen Seite T Extras
Sender
Eigene Kanäle bearbeiten
Sperren
Entfernen
Alle abwählen
Alle wählen
Kanalmenü
¦ Kanäle neu einstellen
Antennentyp (Terrestrisch / Kabel)
Ehe Ihr Fernseher beginnen kann, die verfügbaren Kanäle zu
speichern, müssen Sie die Art der Signalquelle angeben, die
an das Fernsehgerät angeschlossen ist (z. B.: Terrestrisch
oder Kabel).
Land
Der Eingabefenster für die PIN wird geöffnet. Geben Sie nun
Ihre vierstellige PIN ein.
■ Digitaler Sender: Sie können das Land für die digitalen
Sender ändern.
■ Analogsender: Sie können das Land für die analogen
Sender ändern.
BN68-02588BF-Ger.indb 12 2010-3-23 13:54:52Deutsch 13
03 Grundfunktionen
Automatisch speichern
Automatisches Suchen nach einem Kanal und Speichern im
Fernsehgerät.
✎Die automatisch zugewiesenen Programmplätze
entsprechen unter Umständen nicht den
gewünschten Programmplätzen. Wenn ein Kanal
mit der Kindersicherung gesperrt wurde, wird das
Eingabefenster für die PIN geöffnet.
■ Antennentyp (Terrestrisch/Kabel): Wählen Sie einen
Antennentyp zum Speichern aus.
■ Sendertyp (Digital und Analog / Digital / Analog):
Wählen Sie den Sendertyp zum Speichern aus.
Bei Auswahl von Kabel → Digital und Analog oder
Digital: Wert für die Suche nach Kabelkanälen eingeben.
Suchlaufmodus (Voll / Netzwerk / Schnell): Das
Fernsehgerät durchsucht automatisch alle Kanäle mit
aktiven Sendern und speichert sie im Fernsehgerät.
✎ Wenn Sie Schnell wählen, können Sie Netzwerk,
Netzwerk-ID, Frequenz, Modulation,
Symbolrate durch Drücken der Taste auf der auf
der Fernbedienung manuell einstellen.
Netzwerk (Auto / Manuell): Auswählen der
Einstellmethode für die Netzwerk-ID zwischen Auto
oder Manuell.
Netzwerk-ID: Wenn das Netzwerk auf Manuell
eingestellt ist, können Sie die Netzwerk-ID mit den
Zifferntasten eingeben.
Frequenz: Hiermit zeigen Sie die Frequenz des Kanals
an. (Je nach Land unterschiedlich)
Modulation: Hiermit zeigen Sie die verfügbaren
Modulationswerte an.
Symbolrate: Hiermit zeigen Sie die verfügbaren
Symbolraten an.
Sender manuell speichern
Manuelle Suche nach einem Kanal und Speichern im
Fernsehgerät.
✎Wenn ein Kanal mit der Kindersicherung gesperrt
wurde, wird das Eingabefenster für die PIN geöffnet.
■ Digitaler Sender: (verfügbar im DTV-Modus) Nach
Abschluss des Suchlaufs werden die Kanäle in der
Kanalliste aktualisiert.
✎Bei Auswahl von TV-Empfang → Terrestrisch: Kanal,
Frequenz, Bandbreite.
✎Bei Auswahl von TV-Empfang → Kabel: Frequenz,
Modulation, Symbolrate.
■ Analoger Sender (Programm, Fernsehnorm,
Tonsystem, Kanal, Suchen): Falls kein oder nur
schlechter Ton zu hören sein sollte, wählen Sie einen
anderen Audiostandard aus.
✎Kanalmodus
x P (Programm-Modus): Nach Abschluss der
Einstellungen sind die Sender lhrer Region auf den
Programmplätzen P0 bis maximal P99 gespeichert.
In diesem Modus können Sie Sender durch Eingabe
des Programmplatzes auswählen.
x C (Terrestrische Kanäle) / S (Kabelkanäle): In diesen
beiden Modi können Sie Sender durch Eingabe der
Nummer anwählen, die dem terrestischen Sender
oder dem Kabelkanal zugeordnet ist.
¦ Bearbeiten von Sendern
Optionsmenü Kanal-Manager
(im Kanal-Manager)
1. Wählen Sie einen Kanal und drücken Sie die Taste
TOOLS.
2. Bearbeiten Sie den Namen oder die Nummer des Kanals
mit den Menübefehlen Kanalnamen bearbeiten oder
Kanalnr. bearbeiten.
■ Kanalnamen bearbeiten (nur Analogkanäle): Weisen
Sie einen Kanalnamen nach Ihrer Wahl zu.
■ Kanalnr. bearbeiten(nur Digitalkanäle): Bearbeiten
Sie die Nummer durch Drücken der gewünschten
Zifferntasten.
¦ Weitere Funktionen
Kabelsuchoption
(je nach Land)
Einstellen weiterer Suchoptionen für die Kanalsuche im
Kabelnetz (z. B. Frequenz oder Symbolrate).
■ Startfrequenz/Stoppfrequenz: Einstellen der Start- und
Stoppfrequenz (je nach Land unterschiedlich)
■ Modulation: Hiermit zeigen Sie die verfügbaren
Modulationswerte an.
■ Symbolrate: Hiermit zeigen Sie die verfügbaren
Symbolraten an.
BN68-02588BF-Ger.indb 13 2010-3-23 13:54:5314 Deutsch
Grundfunktionen
Optionsmenü Kanal-Manager
(im Kanal-Manager)
Stellen Sie den Kanal mit den Menübefehlen im KanalManager ein (Sperren / Freigabe / Timer-Wiedergabe,
Sortieren, Entfernen / Alle wählen / Alle abwählen). Der
Inhalt des Optionsmenüs hängt vom jeweiligen Kanalstatus ab.
1. Wählen Sie einen Kanal und drücken Sie die Taste
TOOLS.
2. Wählen Sie eine Funktion aus, und ändern Sie deren
Einstellungen.
■ Sperren / Freigabe: Sie können einen Kanal sperren,
sodass er nicht ausgewählt und angezeigt werden kann.
✎HINWEIS
x Diese Funktion ist nur verfügbar, wenn die
Kindersicherung aktiviert ist (Ein).
x Der Eingabefenster für die PIN wird geöffnet. Geben
Sie die vierstellige Standard-PIN ein: „0-0-0-0“.
Ändern Sie die PIN mit der Option PIN ändern.
■ Timer-Wiedergabe: Sie können einen Kanal einstellen,
der bei Erreichen einer bestimmten Zeit automatisch
angezeigt wird. Um diese Funktion verwenden zu
können, müssen Sie zuerst die aktuelle Uhrzeit
einstellen.
✎ Wenn Sie einen digitalen Kanal gewählt haben und
die Taste ► drücken, wird das digitale Programm
angezeigt.
■ Sortieren (nur Analogkanäle): Mit diesem Vorgang
können Sie die Programmnummern gespeicherter
Sender ändern. Das ist möglicherweise nach dem
automatischen Speichern von Sendern erforderlich.
■ Entfernen: Sie können Kanäle löschen, damit nur die
gewünschten Kanäle angezeigt werden.
■ Alle wählen / Alle abwählen: Wählen Sie alle Kanäle
aus oder deaktivieren Sie alle im Kanal-Manager
ausgewählten Kanäle.
Vorgemerkt
(im Kanal-Manager)
Mit dieser Menüoption können Sie eine vorgemerkte
Sendung anzeigen, ändern oder löschen.
■ Info ändern: Mit dieser Menüoption können Sie eine
vorgemerkte Sendung ändern.
■ Programmierung abbrechen: Mit dieser Menüoption
können Sie die Vormerkrung einer Sendung stornieren.
■ Informationen: Anzeigen einer vorgemerkten Sendung.
(Sie können auch die Vormerkinformationen auswählen).
■ Alle wählen / Alle abwählen: Wählen oder Abwählen
aller vorgemerkten Programme.
Senderliste
Sie können alle gesuchten Kanäle
anzeigen.
Listenübertr. abbrechen
Importieren oder Exportieren der Kanaltabelle. Schließen Sie
einen USB-Speicher an, um diese Funktion zu verwenden.
✎Der Eingabebildschirm für die PIN wird geöffnet. Geben
Sie nun Ihre vierstellige PIN ein.
✎Der Standard-PIN-Code eines neuen Fernsehgeräts
lautet 0000.
■ Von USB importieren: Importieren der Kanalliste vom
USB-Speicher:
■ Auf USB exportieren: Exportieren der Kanalliste auf den
USB-Speicher:
Feinabstimmung
(nur analoge Kanäle)
Wenn das Signal schwach oder gestört ist, können Sie die
Feinabstimmung manuell vornehmen.
✎Fein abgestimmte Kanäle sind mit einem Sternchen
markiert “*”.
✎Wählen Sie Zurückset., wenn Sie die Feinabstimmung
zurücksetzen möchten.
Bildmenü
¦ Ändern des voreingestellten Bildmodus
Wählen Sie Ihren bevorzugten Bildtyp aus.
Modust
■ Dynamisch: Für helle Zimmer geeignet.
■ Standard: Für normale Umgebungen geeignet.
■ Film: Geeignet für das Anzeigen von Filmen in einem
abgedunkelten Zimmer.
¦ Anpassen der Bildeinstellungen
Hintergrundbeleuchtung / Kontrast /
Helligkeit / Schärfe / Farbe / Farbton
(G/R)
Das Gerät verfügt über mehrere Einstellmöglichkeiten für die
Bildqualität.
✎HINWEIS
x Im Modus TV, Ext., AV des PAL-Systems steht die
Funktion Farbton (G/R) nicht zur Verfügung.
x Im PC-Modus können Sie nur Hintergrundbel.,
Kontrast und Helligkeit einstellen.
x Sie können die Einstellungen für jedes an das
Fernsehgerät angeschlossene externe Gerät
festlegen und speichern.
x Durch geringere Bildhelligkeit reduzieren Sie den
P Stromverbrauch.
POWER
GUIDE AD
MEDIA.P
SUBT.
DUAL
I-II
P.SIZE S.MODE P.MODE BN68-02588BF-Ger.indb 14 2010-3-23 13:54:53Deutsch 15
03 Grundfunktionen
¦ Möglichkeiten zum Sparen
Öko-Lösung
■ Energiesparmod. (Aus / Gering / Mittel / Hoch /
Bild aus / Auto) t: Mit dieser Funktion stellen
Sie die Helligkeit des Fernsehgeräts ein, um den
Stromverbrauch zu senken. Wenn Sie Bild aus wählen,
wird der Bildschirm abgeschaltet, aber der Ton bleibt an.
Drücken Sie eine beliebige Taste außer der Lautstärketaste,
um den Bildschirm wieder anzuschalten.
■ Kein Signal Standby (Aus / 15 min / 30 min / 60 min):
Löst den Standbymodus aus, wenn für einen gewissen,
benutzerdefinierten Zeitraum der Status „Kein Signal“
oder „Signalkabel prüfen“ ansteht.
✎ Deaktiviert, wenn der PC im Stromsparmodus
läuft.
¦ Ändern der Bildoptionen
Erweiterte Einstellungen
(verfügbar nur im Modus Standard / Film)
Sie können verschiedene Detaileinstellungen für Ihren
Fernseher vornehmen, unter anderem für Farbe und Kontrast.
✎An Im PC-Modus können Sie nur Optimalkontrast.,
Gamma und Weißabgleich einstellen.
Erweiterte Einstellungen
Schwarzton : Aus ►
Optimalkontrast : Mittel
Schattendurchzei. : 0
Gamma : 0
Nur RGB-Modus : Aus
Farbraum : Nativ
Weißabgleich
▼
U Verschieben E Eingabe R Zurück
■ Schwarzton (Aus / Dunkel / Dunkler / Max. dunkel):
Wählen Sie den Schwarzwert aus, um die Bildschirmtiefe
einzustellen.
■ Optimalkontrast (Aus / Gering / Mittel / Hoch): Stellen
Sie den Bildkontrast ein.
■ Detailtreue bei Schatten (-2~+2): Erhöhen Sie die
Helligkeit dunkler Bilder.
✎ Im PC-Modus deaktiviert.
■ Gamma: Einstellen der Intensität der Primärfarbe.
■ Nur RGB-Modus (Aus / Rot / Grün / Blau): Sie können
die Farbe oder den Farbton der Bildanteile Rot, Grün
oder Blau von einem externen Gerät (DVD-Player,
Heimkinosystem usw.) einstellen.
■ Farbraum (Auto / Nativ): Stellen Sie den Bereich der
Farben ein, aus denen das Bild erstellt wird.
■ Weißabgleich: Einstellen der Farbtemperatur für ein
natürlicheres Bild.
R-Offset / G-Offset / B-Offset: Sie können die
Dunkelheit jeder Farbe (Rot, Grün und Blau) einstellen.
R-Gain/G-Gain/B-Gain: Sie können die Helligkeit jeder
Farbe (Rot, Grün und Blau) einstellen.
Zurücksetzen: Hiermit setzen Sie den Weißabgleich
auf die Standardwerte zurück.
■ Hautton: Betonen des Rosaanteils im „Hautton“.
■ Kantenglättung (Aus / Ein): Hervorheben von
Objektbegrenzungen.
Bildoptionen
✎Im PC-Modus können Sie nur Farbtemp., Größe und
Aktivierung des Einbrennschutzes nach einstellen.
Bildoptionen
Farbtemp. : Normal ►
Größe : 16:9
Bildschirmmodus : 16:9
Digit. Rauschfilter : Auto
MPEG-Rauschfilter : Auto
HDMI-Schwarzp. : Normal
Filmmodus : Aus
▼
U Verschieben E Eingabe R Zurück
■ Farbtemperatur (Kalt / Normal / Warm1 / Warm2)
✎ Warm1 oder Warm2 werden nur aktiviert, wenn
der Bildmodus auf Dynamisch eingestellt ist.
✎ Sie können die Einstellungen für jedes externe
Gerät einstellen und speichern, das Sie an das
Fernsehgerät angeschlossen haben.
BN68-02588BF-Ger.indb 15 2010-3-23 13:54:5316 Deutsch
Grundfunktionen
■ Größe: Möglicherweise verfügt auch Ihr
Kabel-/Satellitenreceiver über eigene
Bildschirmformate. Allerdings empfehlen
wir dringend, dass Sie die meiste Zeit
den 16:9-Modus verwenden.
Automatische Breite: Mit dieser Option
stellen Sie das Bildformat automatisch
auf das Seitenverhältnis 16:9 ein.
16:9 : Wählen Sie diese Option aus, um als Bildformat das
Seitenverhältnis 16:9 für DVDs oder Breitbildsendungen
einzustellen.
Breitenzoom: Diese Option vergrößert das Bild auf mehr
als 4:3.
✎ Einstellen der Position mit den Tasten ▲, ▼.
Zoom: Wählen Sie diese Option aus, um das 16:9-Breitbild
auf die volle Bildschirmhöhe zu vergrößern.
✎ Einstellen der Position oder Größe mit den Tasten
▲, ▼.
4:3 : Dies ist die Standardeinstellung zum Anzeigen von
Filmen und herkömmlichen Fernsehsendungen.
✎ Verwenden Sie nicht über längere Zeit hinweg das
4:3-Format. Spuren der links, rechts und in der
Mitte angezeigten Rahmen können zum Einbrennen
von Bildern (Einbrennen) führen, was nicht von der
Garantie abgedeckt ist.
Bildanpassung: Mit dieser Funktion wird das ganze Bild
auch bei Versorgung mit HDMI- (720p / 1080i / 1080p) oder
Komponentensignalen (1080i / 1080p) vollständig und ohne
Beschneidung angezeigt.
✎HINWEIS
x Nach Auswahl von Bildschirmanpassung im Modus HDMI
(720p / 1080i / 1080p) oder Component (1080i / 1080p):
1. Drücken Sie die Taste ◄ oder ►, um die Option
Position auszuwählen.
2. Drücken Sie die ENTERE.
3. Positionieren Sie das Bild mit den Tasten
▲, ▼, ◄ oder ►.
x Je nach Signalquelle können die Bildgrößenoptionen
variieren.
x Die verfügbaren Elemente können in Abhängigkeit vom
ausgewählten Modus variieren.
x Im PC-Modus können nur die Modi 16:9 und 4:3
eingestellt werden.
x Sie können die Einstellungen für jedes externe Gerät
einstellen und speichern, das Sie an einen Eingang des
Fernsehgeräts angeschlossen haben.
x Wenn Sie die Funktion Bildschirmanpassung
zusammen mit einem HDMI 720p-Signal verwenden,
wird eine Zeile wie bei Overscan oben, unten, links und
rechts abgeschnitten.
■ Bildschirmmodus (16:9 / Breitenzoom / Zoom / 4:3)
Verfügbar nur, wenn die Bildgröße auf Autom. Breit
eingestellt ist. Sie können die gewünschte Bildgröße beim
4:3-Breitbilddienst oder der Originalgröße bestimmen.
Für jedes Europäische Land ist eine andere Bildgröße
erforderlich.
✎ Diese Funktion ist im PC-, Komponenten- oder
HDMI-Modus nicht verfügbar.
■ Digit. Rauschfilter (Aus / Gering / Mittel / Hoch / Auto /
Auto-Anzeige): Wenn das Sendesignal schwach ist,
können statisches Rauschen und Geisterbilder erscheinen.
Wählen Sie diejenige der Optionen, bei der das beste Bild
angezeigt wird.
Auto-Anzeige: Anzeige der Signalstärke beim Wechseln
zwischen Analogkanälen.
✎ Nur für Analogkanäle verfügbar.
✎ Wenn die Säule grün ist, empfangen Sie das
bestmögliche Signal.
■ MPEG-Rauschfilter (Aus / Gering / Mittel / Hoch / Auto):
Reduziert das MPEG-Rauschen, um besserte Bildqualität
zu ermöglichen.
✎ Im PC-Modus deaktiviert.
■ HDMI-Schwarzpegel (Normal / Gering): Sie können den
Schwarzwert direkt auf dem Bildschirm auswählen, um die
Bildschirmtiefe anzupassen.
✎ Nur im HDMI-Modus (RGB-Signale) verfügbar.
■ Filmmodus (Aus / Auto1 / Auto2): Sie können das
Fernsehgerät so einstellen, dass eine Filmsignal aus allen
Quellen automatisch empfangen und verarbeitet und das
Bild auf die optimale Qualität eingestellt werden kann.
✎ Verfügbar bei TV, AV, COMPONENT (480i / 1080i)
und HDMI (480i / 1080i).
■ Aktivierung des Einbrennschutzes nach (2 Std. / 4 Std.
/ 8 Std. / 10 Std. / Aus) Wenn längere Zeit das gleiche Bild
angezeigt wird, greift der Einbrennschutz.
Bild zurücksetzen (OK / Abbrechen)
Zurücksetzeb Ihres aktuellen Bildmodus auf ihre
Standardeinstellungen.
P
POWER
GUIDE AD
MEDIA.P
SUB.T
DUAL
P.SIZE S.MODE P.MODE
BN68-02588BF-Ger.indb 16 2010-3-23 13:54:53Deutsch 17
03 Grundfunktionen
Einstellen des Fernsehgeräts mithilfe
Ihres PCs
Stellen Sie die Signalquelle auf PC ein.
Stellen Sie die Frequenzen/Positionen ein und lassen Sie die
Autom. Einstellung t
Feinstellung automatisch durchführen.
✎Nicht verfügbar bei Anschluss mit einem HDMI/DVI-Kabel.
Bildschirm
■ Grob / Fein: Entferneb oder Reduzieren von
Bildrauschen. Falls sich das Bildrauschen durch die
Feinabstimmung allein nicht beheben lässt, stellen Sie
zunächst die Frequenz möglichst genau ein (Coarse
(Grob). Führen Sie dann erneut eine Feinabstimmung
durch. Nachdem Sie das Bildrauschen durch die Grob-
und Feinabstimmung des Bildes verringert haben, stellen
Sie die Position des Bildes so ein, dass es auf dem
Bildschirm zentriert ist.
■ Position: Einstellen der Position des PC-Fensters mit
den Richtungstasten (▲ / ▼ / ◄ / ►).
■ Bild zurücksetzen: Zurücksetzen des Bilds auf die
Standardwerte.
Verwenden Ihres Computers als Computerbildschirm (PC)
Konfigurieren Ihrer PC-Software (unter Windows XP) Je nach
der Version von Windows und der Grafikkarte können die
tatsäch angezeigten Dialogfelder auf Ihrem PC abweichen.
In fast jedem Fall aber werden die gleichen grundlegenden
Einstellungen vorgenommen. (Wenden Sie sich andernfalls
an den Computerhersteller oder Samsung-Händler.)
1. Klicken Sie im Startmenü von Windows auf
„Systemsteuerung”.
2. Wenn das Fenster der Systemsteuerung angezeigt wird,
klicken Sie auf „Darstellung und Designs”. Ein Dialogfeld
wird geöffnet.
3. Klicken Sie auf „Anzeige“. Anschließend wird ein
Dialogfeld angezeigt.
4. Klicken Sie im Dialogfeld Anzeige auf die Registerkarte
„Einstellungen”.
y Stellen Sie die richtige Größe (Bildschirmauflösung) ein
[Optimal: 1360 x 768 Pixel]
y Wenn das Dialogfeld eine Option für die
Bildschirmfrequenz enthält, muss als Einstellung “60”
oder “60 Hz” ausgewählt werden. Andernfalls klicken Sie
einfach auf OK, um das Dialogfeld zu schließen.
Tonmenü
¦ Ändern des Tonmodus
■
Modus
Standard
t: Auswahl des normalen Tonmodus.
■ Musik: Betont die Musik im Verhältnis zu Stimmen.
■ Film: Ermöglicht optimale Tonwiedergabe für Filme.
■ Klare Stimme: Betont Stimmen im Verhältnis zu
anderen Geräuschen.
■ Verstärken: Erhöht die Lautstärke hochfrequenter
Töne, damit hörgeschädigte Personen den Ton besser
verstehen können.
¦ Anpassen der Toneinstellungen
Equalizer
Anpassen des Tonmodus
■ Balance L/R: Anpassen der Balance zwischen dem
linken und dem rechten Lautsprecher.
■ 100Hz / 300Hz / 1kHz / 3kHz / 10kHz (Einstellung
der Frequenzbänder): Einstellen der Lautstärke für die
unterschiedlichen Frequenzbänder.
■ Zurücksetzen: Zurücksetzen der Equalizereinstellungen
auf die Standardwerte.
¦ Tonsystem, usw.
Virtual Surround (Aus / Ein)
Diese Funktion ermöglicht durch HRTF-Technologie (Head
Related Trasfer Function) virtuellen 5.1 Kanalton bei einem
einzigen Lautsprecherpaar oder Kopfhörer.
✎Wenn Lautsprecher auswählen auf Ext.
Lautsprecher eingestellt ist, wird Virtual Surround
deaktiviert.
Dialog-Klarheit (Aus / Ein)
Mitr dieser Funktion können SIe die Lautstärke einer Stimme
gegenüber der Hintergrundmusik oder den Toneffekten
erhöhen, so dass Dialoge während einer Show besser zu
verstehen sind.
Wiedergabesprache
(nur digitale Sender)
Sie können die Standardsprache für Audio ändern.
✎Welche Sprache verfügbar ist, hängt von der jeweiligen
Sendung ab.
Audioformat (MPEG / Dolby Digital 5.1)
(nur digitale Sender)
Wenn Sie für die Tonausgabe sowohl den Hauptlautsprecher
als auch den Audioreceiver verwenden, kann es aufgrund
der Geschwindigkeitsunterschiede beim Dekodieren
durch die beiden Systeme zu einem Echoeffekt kommen.
Verwenden Sie in diesen Fall die TV-Lautsprecher.
✎Die Audioformat-Option richtet sich nach der
jeweiligen Sendung. Dolby Digital-5.1-Kanalton
steht nur zur Verfügung, wenn Sie einen externer
Lautsprecher über ein optisches Kabel anschließen.
BN68-02588BF-Ger.indb 17 2010-3-23 13:54:5418 Deutsch
Grundfunktionen
Audio für Sehgeschädigte
(nicht überall verfügbar) (nur Digitalkanäle)
Diese Funktion verarbeitet den Audiostream
für den Audiokommentar (Audio für
Sehgeschädigte), der vom Sender
zusammen mit dem Vordergrundton
übertragen wird.
■ Audio für Sehgeschädigte (Aus / Ein): Hiermit wird
der Audiokommentar für Sehbehinderte ein- und
ausgeschaltet.
■ Lautstärke: Hiermit regeln Sie die Lautstärke des
Audiokommentars für Sehgeschädigte.
Automatische Lautstärke (Aus / Normal /
Nacht)
Wählen Sie Normal, um die verschiedenen Kanäle auf die
gleiche Lautstärke einzustellen.
■ Nacht: Dieser Modus ermöglicht besseren Ton als im
Modus Normal, denn er ist fast rauschfrei. Das ist
beispielsweise bei Nacht nützlich.
Lautsprecherauswahl
(Ext. Lautsprecher / TV-Lautsprecher)
Es kann aufgrund unterschiedlicher
Decodierungsgeschwindigkeiten des Hauptlautsprechers
und des Audioreceivers zu Echoeffekten kommen. Stellen Sie
das Fernsehgerät in diesem Fall auf Ext. Lautsprecher ein.
✎Wenn Lautsprecher auswählen auf Ext.
Lautsprecher eingestellt ist, funktionieren die
Lautstärketasten und die Stummschaltung (MUTETaste) nicht und die Einstellmöglichkeiten für den Ton
sind beschränkt.
✎Prüfen Sie, ob Lautsprecher auswählen auf Ext.
Lautsprecher eingestellt ist.
x TV-Lautsprecher: Aus, Ext. Lautsprecher: Ein
✎Wenn Lautsprecher auswählen auf Ext.
Lautsprecher eingestellt ist, verwenden Sie die
folgenden Einstellungen.
x TV-Lautsprecher: Ein, Ext. Lautsprecher: Ein
✎Ohne Videosignal werden beide Lautsprecher
stummgeschaltet.
Zusätzliche Einstellung
(nur digitale Sender)
■ DTV-Audiolautstärke (MPEG / HE-AAC): Mit
dieser Funktion können Sie die Ungleichheit eines
Stimmensignals (dies ist eines der bei einer digitalen
Fernsehsendung empfangenen Signale) auf die
gewünschte Höhe reduzieren.
✎ Entsprechend dem Typ des Sendesignals kann
MPEG / HE-AAC im Bereich von -10 dB bis 0 dB
eingestellt werden.
✎ Um die Lautstärke zu erhöhen oder zu
vermindern, stellen Sie den Bereich zwischen 0
bzw. -10 ein.
■ SPDIF-Ausgabe: SPDIF (Sony Philips Digital
InterFace) ermöglicht digitalen Ton und reduziert die an
Lautsprecher und verschiedene andere digitale Geräte
(z. B. DVD-Player) übertragenen Störungen.
Audioformat: Während des Empfangs einer
digitalen Fernsehsendung können Sie bei den
Optionen PCM, Dolby Digital oder DTS. das digitale
Audioausgabeformat (SPDIF) auswählen.
✎ Durch Anschließen von 5.1-Kanallautsprechern in
einer Dolby Digital-Konfiguration maximieren Sie
Ihre interaktive 3D-Raumerfahrung.
Audioverzögerung: Korrektur von Audio/VideoFehlsynchronisierungen, wenn Sie Fernsehsendungen
oder Videos ansehen und die digitalen Audiosignale
mit einem externen Gerät (z, B. einem AV-Receiver)
ausgeben.
■ Dolby Digital-Komp. (Line / RF): Diese Funktion
minimiert die Lautstärkeunterschiede zwischen einem
Dolby Digital-Signal und einem Sprachsignal (d.h.
MPEG-Audio, HE-AAC, ATV-Ton).
✎ Wählen Sie Line, um Ton mit großer Dynamik zu
erzielen, und RF, um beispielsweise bei Nacht
die Lautstärkeunterschiede zwischen lauten und
leisen Tönen zu reduzieren.
Line: Hiermit stellen Sie die Lautstärke von Signalen
mit mehr oder weniger als -31 dB (Bezugswert) auf
entweder -20 dB oder -31 dB ein.
RF: Hiermit stellen Sie die Lautstärke von Signalen
mit mehr oder weniger als -20 dB (Bezugswert) auf
entweder -10 dB oder -20 dB ein.
Ton zurücksetzen (OK / Abbr.)
Hiermit setzen Sie alle Toneinstellungen auf die
Standardwerte zurück.
P
POWER
GUIDE AD
MEDIA.P
SUBT.
DUAL
I-II
P.SIZE S.MODE P.MODE
BN68-02588BF-Ger.indb 18 2010-3-23 13:54:54Deutsch 19
03 Grundfunktionen
Einstellungsmenü
¦ Einstellen der Uhrzeit
Zeit
■ Uhr: Die Uhr muss eingestellt werden, damit Sie die
verschiedenen Timerfunktionen des Fernsehgeräts
verwenden können.
O Jedes Mal, wenn Sie die Taste INFO drücken, wird die
aktuelle Zeit angezeigt.
✎ Wenn Sie das Netzkabel ziehen, müssen Sie die
Uhr erneut einstellen.
Uhr-Modus (Auto / Manuell)
✎ Je nach Sendestation und Signal ist die automatisch
eingestellte Zeit möglicherweise nicht korrekt. In
diesem Fall müssen Sie die Zeit manuell einstellen.
✎ Die Antenne muss angeschlossen sein, damit die
Zeit automatisch eingestellt werden kann.
Uhrzeit einstellen: Manuelles Einstellen von Tag,
Monat, Jahr, Stunde und Minute.
✎ Verfügbar nur, wenn der Uhr-Modus auf Manuell
eingestellt ist.
¦ Verwenden des Sleep-Timers
■ Sleep-Timer t: Mit dieser Funktion wird das
Fernsehgerät nach Ablauf einer vorher eingestellten Zeit
automatisch abgeschaltet. (30, 60, 90, 120, 150 und
180 Minuten).
✎ Um den Sleep-Timer abzubrechen, wählen Sie
Aus.
¦ Einstellen des Ein- / Ausschalttimers
■ Timer 1 / Timer 2 / Timer 3: Sie können drei
verschiedene Einstellungen für den Ein-/Ausschalttimer
vornehmen. Voraussetzung dafür ist, dass Sie die Uhr
gestellt haben.
10 TV ATV 0
00 00
▲
▼
00 00
▲
▼
Timer 1
Anschaltzeit
Ausschaltzeit
Lautstärke
Deaktiv.
Deaktiv.
So Mo. Di. Mi. Do. Fr. Sa
Einmal
Quelle TV-Empfang Kanal
Wiederh.
L Verschieben U Einstellen E Eingabe R Zurück
Anschaltzeit / Ausschaltzeit:Stellen Sie Stunde und Minute
ein und aktivieren bzw. deaktivieren Sie die Funktion. (Wenn
Sie mit den Einstellungen fertig sind, aktivieren Sie den Timer
mit Aktivieren.
Lautstärke: Stellen Sie die gewünschte Lautstärke ein.
Source: Sie können den TV oder USB-Inhalt einstellen,
der beim automatischen Einschalten des Fernsehers
wiedergegeben wird. (USB kann nur dann ausgewählt werden,
wenn ein USB-Gerät an den Fernseher angeschlossen ist)
TV-Empfang (wenn die Quelle auf TV eingestellt ist): Wählen
Sie ATV oder DTV.
Kanal (wenn die Quelle auf TV eingestellt ist): Wählen Sie den
gewünschten Kanal.
Inhalt (wenn die Quelle auf USB eingestellt ist): Wählen
Sie auf dem USB-Gerät einen Ordner mit Musik- oder
Fotodateien, die beim automatischen Anschalten des
Fernsehgeräts angezeigt werden.
✎ Die Timerfunktion arbeitet nicht fehlerfrei, wenn es auf
dem USB-Gerät keine Musikdatei gibt oder der Ordner
mit der Musikdatei nicht markiert ist.
✎ Wenn auf dem USB-Gerät nur eine Fotodatei
gespeichert ist, wird keine Diashow gestartet.
✎ Wenn der Ordnername zu lang ist, kann der Ordner nicht
ausgewählt werden.
✎ Jedem USB-Gerät, das Sie verwenden, wird ein eigener
Ordner zugewiesen. Wenn Sie mehr als eine SUB-Gerät
den selben Typs verwenden, vergewissern Sie sich, dass
die den einzelnen USB-Geräten zugewiesenen Ordner
unterschiedliche Namen tragen.
Wiederholen: Wählen Sie Einmal, Täglich, Mo~Fr, Mo~Sa,
Sa~So oder Manuell, um den Wert Ihren Wünschen
entsprechend einzustellen. Wenn Sie Manuell wählen, können
Sie den Tag einstellen, an dem der Timer aktiviert werden soll.
✎ Das Symbol c zeigt an, dass der Tag gewählt ist.
✎Automatische Ausschaltung (nur dann verfügbar, wenn
das Fernsehgerät von Timer eingeschaltet wurde): Um eine
eventuelle Überhitzung zu verhindern, wird das Fernsehgerät
nach 3 Stunden im Leerlauf automatisch ausgeschaltet.
¦ Sperren von Programmen
Sicherheit
✎Der Eingabefenster für die PIN wird angezeigt, ehe das
Einstellungsfenster geöffnet wird.
✎Geben Sie die vierstellige Standard-PIN ein: „0-0-0-0“. Ändern
Sie die PIN mit der Option PIN ändern.
■ Kindersicherung (Aus / Ein): Sie können Kanäle im KanalManager sperren, damit unberechtigte Benutzer, z. B. Kinder,
für sie nicht geeignete Sendungen sehen.
✎ Nur verfügbar, wenn die Eingang squelle auf TV
eingestellt ist.
■ Sicherungsstufe (Alterseinstellung): Mit einem
benutzerdefinierten 4-stelligen PIN-Code verhindern Sie, dass
unbefugte Benutzer (z. B. Kinder), ungeeignete Sendungen
sehen.
Alle zulassen: Hiermit können Sie alle Altersbeschränkungen
aufheben.
✎ Die Optionen für die Sicherungsstufe können in
Abhängigkeit vom jeweiligen Land variieren.
BN68-02588BF-Ger.indb 19 2010-3-23 13:54:5420 Deutsch
Grundfunktionen
■ PIN ändern: Sie können Ihre zum Einrichten des
Fernsehgeräts benötigte persönliche Kennnummer
ändern.
✎ Wenn Sie den PIN-Code vergessen haben,
drücken Sie die Fernbedienungstasten in der
angegebenen Reihenfolge, um die PIN auf „0-0-0-
0“ zurückzusetzen: POWER (Aus) → MUTE → 8
→ 2 → 4 → POWER (Ein).
¦ Weitere Funktionen
Sprache
■ Menüsprache: Stellen Sie die Menüsprache ein.
■ Teletextsprache: Einstellen der gewünschten
Teletextsprache.
✎ Englisch ist der Standardwert in Fällen, wo die
ausgewählte Sprache für die Sendung nicht
verfügbar ist.
■ Voreinstellung (Primäre Wiedergabesprache
/ Sekundäre Wiedergabesprache / Primäre
Untertitelsprache / Sekundäre Untertitelsprache
/ Primäre Teletextsprache / Sekundäre
Teletextsprache): Wählen Sie eine Sprache aus, die als
Standardsprache verwendet wird, wenn Sie einen Kanal
auswählen.
Untertitel
Mit diesem Menü legen Sie den Untertitel
modus fest.
✎Die Untertitelfunktion kann nicht
verwendet werden, wenn sich die
Quelle im Modus Component oder
HDMI befindet.
■ Untertitel (Aus / Ein): Untertitel aktivieren oder
deaktivieren.
■ Modus (Normal / Schwerhörig): Hiermit können Sie
den Modus der Untertitelfunktion einstellen.
■ Untertitelsprache: Hiermit können Sie die
Untertitelsprache festlegen.
✎ Wenn das Programm, das Sie gerade sehen, die
Funktion Schwerhörig nicht unterstützt, wird
selbst bei der Einstellung Normal automatisch die
Einstellung Scshwerhörig aktiviert.
✎ Englisch ist der Standardwert in Fällen, wo die
ausgewählte Sprache für die Sendung nicht
verfügbar ist.
Digitaltext (Deaktivieren / Aktivieren) (nur
Großbritannien)
Wenn das Programm mit Digitaltext gesendet wird, ist diese
Funktion aktiviert.
Allgemein
■ Spielemodus (Aus / Ein): Wenn Sie eine Spielekonsole
wie PlayStation™ oder Xbox™ anschließen, können Sie
durch Auswählen des Spielemodus ein realitätsnaheres
Spielerlebnis genießen.
✎HINWEIS
x Vorsichtsmaßnahmen und Einschränkungen im
Spielemodus
– Wenn Sie die Spielekonsole wieder vom Gerät trennen
und ein anderes externes Gerät anschließen möchten,
deaktivieren (Aus) Sie den Spielemodus mit Hilfe des
Einrichtmenüs.
– Wenn Sie im Spielemodus das TV-Menü anzeigen,
zittert das Bild leicht.
x Spielemodus ist im TV und PC nicht verfügbar.
x Nach dem Anschließen der Spielekonsole aktivieren
(Ein) Sie den Spielemodus, um schlechte Bildqualität zu
verhindern.
x Bei aktiviertem (Ein) Spielemodus: Der Bildmodus ist
eingestellt auf Standard und der Tonmodus auf Film.
■ Menütransparenz (Hell / Dunkel): Stellen Sie die
Transparenz des Menüs ein.
■ Melodie (Aus / Gering / Mittel / Hoch): Verwenden Sie
diese Funktion, wenn Sie möchten, dass beim Ein- oder
Ausschalten des Fernsehgeräts eine Melodie abgespielt wird.
Common Interface
■ CI-Menü: Hiermit kann der Benutzer seine Auswahl in dem
vom CAM-Modul bereitgestellten Menü treffen. Wählen Sie
das CI-Menü ausgehend vom Menü „PC Card“ (PC-Karte).
■ Anwendungsinformationen: Anzeigen von Informationen
zu dem in den CI Steckplatz eingesetzen CAM und zur „CI“
oder „CI+“-Karte, die in das CAM eingesetzt wurde. Sie
können das CAM-Modul unabhängig davon anschließen,
ob das Fernsehgerät angeschaltet ist oder nicht.
1. Sie können das CI-CAM-Modul bei Ihrem nächsten Händler
oder durch telefonische Bestellung erwerben.
2. Schieben Sie die „CI“ oder „CI+“-Karte in Richtung des
Pfeils in das CAM-Modul ein, bis sie fest sitzt.
3. Setzen Sie das CAM mit der „CI“ oder „CI+“-Karte in
Richtung des Pfeils so in den Common Interface-Steckplatz
ein, dass es parallel zum Steckplatz ausgerichtet ist.
4. Kontrollieren Sie, ob Sie ein Bild sehen oder ein gestörtes
Signal.
P
POWER
GUIDE AD
MEDIA.P
SUBT.
DUAL
I-II
P.SIZE S.MODE P.MODE
BN68-02588BF-Ger.indb 20 2010-3-23 13:54:55Deutsch 21
03 Grundfunktionen
¦ Bild-im-Bild (PIP)
Unterstützungsmenü
Eigendiagnose
■ Bildtest (Ja / Nein): Verwenden Sie diese Funktion, um
Bildprobleme zu analysieren, und kontrollieren Sie das
Farbmuster, wenn das Problem fortbesteht.
■ Audiotest (Ja / Nein): Verwenden Sie die integrierte
Melodie, um Tonprobleme zu ermitteln.
✎ Wenn die Fernsehlautsprecher keinen Ton
ausgeben, müssen Sie vor dem Audiotest
sicherstellen, dass Lautsprecher auswählen im
Tonmenü auf TV-Lautsprecher eingestellt ist.
✎ Die Melodie ist im Test auch dann zu hören, wenn
Lautsprecher auswählen auf Ext. Lautsprecher
eingestellt ist, oder wenn der Ton mit der Taste
MUTE stumm geschaltet wurde.
■ Signalinformation: (Nur digitale Kanäle nur) Die
Empfangsqualität des HDTV-Kanals ist entweder perfekt,
oder die Kanäle sind nicht verfügbar. Stellen Sie Ihre
Antenne so ein, dass die Signalstärke zunimmt.
■ Fehlerbehebung: Wenn das Fernsehgerät scheinbar
ein Problem hat, schlagen Sie zuerst bei diesen
Beschreibungen nach.
✎ Wenn keiner dieser Tipps zur Fehlerbehebung
hilft, wenden Sie sich an das SamsungKundendienstzentrum.
Software-Update
Das Software-Update kann über das Fernsehsignal
durchgeführt werden, oder durch Herunterladen der
neuesten Firmware von samsung.com auf ein USBSpeichergerät.
Aktuelle Version gibt die Version der Software an, die bereits
im Fernsehgerät installiert ist.
✎Die Software wird angegeben als „Jahr/Monat/Tag_
Version“.
Software-Update
Aktuelle Version 2010/01/18_000001
U Verschieben E Eingabe R Zurück
PER USB ►
PER Channel
Update im Standby Aus
Alternative Software ----/--/--/--_------
Installieren der aktuellsten Version
■ Über USB: Legen Sie ein
USB-Laufwerk mit der
Datei des gespeicherten
Firmwareupgrades
(heruntergeladen von
www.samsung.com,) in
das Fernsehgerät ein.
Achten Sie beim Einspielen
des Updates darauf, die
Stromversorgung nicht
zu unterbrechen und das
USB-Laufwerk nicht zu entfernen, bis das Update
abgeschlossen ist. Das Fernsehgerät wird automatisch
ab- und wieder angeschaltet, wenn das Firmwareupdate
abgeschlossen ist. Nachdem die Software aktualisiert
wurde, sind die Video- und Audioeinstellungen wieder
auf die Standardwerte zurückgesetzt. Wir empfehlen,
Ihre Einstellungen aufzuschreiben, damit Sie sie nach
dem Update einfach wieder einstellen können.
■ Über Sendesignal: Aktualisierung der Software über das
Sendesignal.
✎ Wenn Sie diese Funktion während des
Übertragungszeitraums für Software wählen, sucht die
Funktion automatisch nach neuer Software und lädt
sie herunter.
✎ Die zum Herunterladen der Software erforderliche Zeit
hängt vom Signalstatus ab.
■ Update im Standby: Zur gewählten Zeit erfolgt das
manuelle Update automatisch. Da die Stromversorgung des
Geräts intern eingeschaltet wird, kann der LCD-Bildschirm
ein wenig beleuchtet sein. Dieser Zustand kann etwas mehr
als eine Stunde andauern, bis die Softwareaktualisierung
abgeschlossen ist.
■ Alternative Software (Backup): Wenn es ein Problem mit
der neuen Firmware gibt, durch das der Betrieb beeinflusst
wird, können Sie die neue Software durch die vorherige
Version ersetzen.
✎ Wenn die Software geändert wurde, wird die
vorhandene Software angezeigt.
HD-Anschlussplan
Beachten Sie diese Informationen, wenn Sie externe Geräte an
den Fernseher anschließen.
Samsung kontaktieren
Zeigen Sie diese Informationen an, wenn Ihr Fernseher
nicht ordnungsgemäß arbeitet oder wenn Sie die Software
aktualisieren möchten. Sie können Informationen zu unseren
Callcentern und zum Herunterladen von Produkten und
Software finden.
Seitenverkleidung des
Fernsehgeräts
USB-Laufwerk
BN68-02588BF-Ger.indb 21 2010-3-23 13:54:5522 Deutsch
Erweiterte Funktionen
Media Play
¦ Anschließen eines USB-Geräts
1. Schalten Sie den Fernseher ein.
2. Schließen Sie ein USB-Gerät mit Foto- und/oder Musik an die USB- Buchse seitlich am
Fernsehgerät an.
3. Wenn ein USB-Gerät an den Fernseher angeschlossen ist, wird ein Fenster geöffnet.
Nun können Sie Media Play wählen.
✎Möglicherweise treten bei lizenzfreien Multimediadateien weniger Probleme auf.
✎Das sollten Sie vor dem Einsatz von Media Play unbedingt wissen
x MTP (Media Transfer Protocol) wird nicht unterstützt.
x Als Dateisystem wird ausschließlich FAT16, FAT32 und NTFS unterstützt.
x Einige Typen von USB-Digitalkameras und -Audiogeräten sind eventuell nicht mit diesem
Fernseher kompatibel.
x Media Play unterstützt ausschließlich USB-Massenspeichergeräte vom Typ MSC (Mass Storage Class). MSC-Geräte sind
Massenspeicher zur Übertragung von Daten. Beispiele für MSC sind Thumb-Laufwerke und Flash Card-Lesegeräte sowie
(USB-HUB wird nicht unterstützt). Die Geräte müssen direkt mit dem USB-Anschluss des Fernsehers verbunden werden.
x Ehe Sie Ihr Gerät an das Fernsehgerät anschließen, sichern Sie Ihre Dateien, um eventuellem Datenverlust vorzubeugen.
SAMSUNG haftet nicht für Verlust und Beschädigung von Daten.
x Trennen Sie das USB-Gerät nicht, solange Daten geladen werden.
x Je höher die Auflösung des Bilds, desto länger dauert es, um es auf dem Bildschirm anzuzeigen.
x Die maximal unterstützte JPEG-Auflösung beträgt 15360x8640 Pixel.
x Bei nicht unterstützten oder beschädigten Dateien wird die Meldung „Dateiformat wird nicht unterstützt“ angezeigt.
x Wenn der Sortierschlüssel auf Basic View (Basisansicht) eingestellt ist, können bis zu 1000 Dateien in einem Ordner
angezeigt werden.
x MP3-Dateien mit DRM, die von einer nicht-lizenzfreien Site heruntergeladen worden sind, können nicht abgespielt
werden. Digital Rights Management (DRM) ist eine Technologie, die das Erstellen von Inhalten und die Distribution und das
Management der Inhalte integriert und umfassend unterstützt. Dies beinhaltet den Schutz der Rechte und der Interessen
der Content-Provider, die Verhütung von unerlaubtem Kopieren der Inhalte sowie das Management von Abrechnung und
Bezahlung.
x Wenn mehr als 2 PTP Geräte angeschlossen sind, können Sie nur jeweils eines verwenden.
x Wenn mehr als zwei MSC-Geräte angeschlossen sind, werden einige davon möglicherweise nicht anerkannt. Ein USB-Gerät,
das hohe elektrische Leistung (mehr als 500 mA oder 5 V) abfordert, wird möglicherweise nicht unterstützt.
x Wenn eine Überstrom-Warnung angezeigt wird, während Sie ein USB-Gerät anschließen oder verwenden, wird das Gerät
möglicherweise nicht erkannt oder weist eine Störung auf.
x Wenn während der in Autom. Schutzzeit eingestellten Zeit kein Fernsehsignal ansteht, wird der Bildschirmschoner aktiviert.
x Bei Verwendung eines USB-Verlängerungskabels wird das USB-Gerät möglicherweise nicht erkannt, oder die auf dem Gerät
gespeicherten Dateien können nicht gelesen werden.
x Wenn das an das Fernsehgerät angeschlossene USB-Gerät nicht erkannt wird, die Liste der Dateien auf dem Gerät
beschädigt aussieht oder eine Datei in der Liste nicht abgespielt wird, schließen Sie das USB-Gerät an den PC an,
formatieren Sie das Gerät und überprüfen Sie die Verbindung.
x Wenn eine mit dem PC gelöschte Datei unter Media Play weiterhin gefunden wird, verwenden Sie die Funktion „Papierkorb
leeren“ des PCs, um die Datei dauerhaft zu löschen.
Mit dieser Funktion können Sie auf einem USBSpeichermedium (MSC) Foto-, Musik und/oder
Filmdateien anzeigen bzw. wiedergeben.
P
POWER
Gerätename A Gerät wechseln D Gerätemodus EEingabe R Zurück
MediaPlay
USB-Laufwerk
Seitenverkleidung des
Fernsehgeräts
BN68-02588BF-Ger.indb 22 2010-3-23 13:54:56Deutsch 23
04 Erweiterte Funktionen
Musik
Wiedergeben von Musik
1. Wählen Sie durch Drücken der Tasten ◄ oder ► die Option Musik,
und drücken Sie dann im Media Play-Menü auf die ENTERE.
2. Wählen Sie die gewünschte Musik mit den Tasten ◄/►/▲/▼ aus
der Dateiliste aus.
3. Drücken Sie die ENTERE die Taste.
– Bei der Wiedergabe eines musik können Sie mit den Tasten
◄ und ► suchen.
✎Angezeigt werden nur Dateien mit der Dateinamenserweiterung
MP3. Dateien mit anderer Dateinamenserweiterung werden nicht
angezeigt, auch wenn sie auf dem gleichen USB-Gerät gespeichert
sind.
✎Wenn der Ton beim Abspielen von MP3-Dateien „schräg“ klingt,
stellen Sie im Menü Ton den Equalizer ein. (Bei übermodulierten
MP3-Dateien kann es zu Tonproblemen kommen.)
Only you
Jason
1st Album
Pop
2010
4.2MB
3/15
Only you
Jason
Music 1
No Singer
Music 2
No Singer
Music 3
No Singer
Music 4
No Singer
Music 5
No Singer
01:10 / 04:02
Playlist
Gerätename EPause LWechseln TExtras R Zurück
¦ Bildschirmanzeige
Navigieren Sie mit den Pfeiltasten (Auf / Ab / Rechts / Links) zu der gewünschten Datei und drücken Sie dann die ENTERE
die Taste. Die Datei wird wiedergegeben.
✎Unterstützt den Gerätemodus und den Inhaltsmodus auf der Startseite von Media Play.
Abschnitt mit der
Dateiliste :
Sie können die nach
den verschiedenen
Kategorien sortierten
Dateien und Gruppen
bestätigen.
Bedienung
A Rote (Gerät wechseln) : Dient zur Auswahl eines angeschlossenen Geräts.
B Grüne (Voreinstellungen) : Festlegen der Voreinstellungen für Dateien (in der
Basisansicht nicht unterstützt)
C Gelbe (Auswählen): Auswählen mehrerer Dateien aus der Dateiliste. Die ausgewählten
Dateien werden mit einem Symbol gekennzeichnet.
D Blaue (Sortieren): Auswählen der Sortierliste
T Schaltfläche Extras Anzeigen des Optionsmenüs.
Informationen :
Hier können Sie den Namen der
gewählten Datei sowie die Anzahl
der Dateien und Seiten überprüfen.
Abschnitt mit der Sortierliste:
Anzeige der Sortierreihenfolge.
✎ Die Sortierreihenfolge
unterscheidet sich je nach
Inhalt. Gerätename A Gerät wechseln C Auswählen D Sortieren T Extras
c
c
c
Music 01 2010
no singer other
Music 02 2010
no singer other
Music 03 2010
no singer other
Music 04 2010
no singer other
Music 05 2010
no singer other
Music 06 2010
no singer other
Music 07 2010
no singer other
Music 08 2010
no singer other
Music /Music 01.mp3 1/2
BN68-02588BF-Ger.indb 23 2010-3-23 13:54:5824 Deutsch
Erweiterte Funktionen
Fotos
Anzeigen eines Fotos (oder einer Diashow)
1. Wählen Sie durch Drücken der Tasten ◄ oder ► die Option Foto, und
drücken Sie dann im Media Play-Menü auf die ENTERE.
2. Wählen Sie das gewünschte Foto mit den Tasten ◄/►/▲/▼ aus der
Dateiliste aus.
3. Drücken Sie die ENTERE die Taste.
– Drücken Sie die ENTERE auf der Fernbedienung, um die Diashow
zu starten.
– Alle Dateien in der Dateiliste werden für in der Diashow angezeigt.
– Die Bilder werden nacheinander, beginnend mit der aktuell
angezeigten Datei angezeigt.
✎Musikdateien können während der Diashow automatisch abgespielt
werden, wenn die Hintergrundmusik aktiviert Ein ist.
✎Der HGM-Modus kann erst gewechselt werden, wenn die
Hintergrundmusik vollständig geladen ist.
Normal Image1024.jpg 1024x768 2010/2/1 3/15
Gerätename EPause LZurück/Weiter TExtras R Zurück
¦ Wiedergabe mehrerer Dateien
Abspielen ausgewählter Video / Musik / Fotodateien
1. Drücken Sie die gelbe Taste in der Dateiliste, um die gewünschte Datei
auszuwählen.
2. Wiederholen Sie den obigen Vorgang, um mehrere Dateien auszuwählen.
✎ HINWEIS
x Links neben dem Namen der gewähten Datei wird das Symbol
c angezeigt.
x Drücken Sie die gelbe Taste noch einmal, um die Auswahl einer
Datei zu stornieren.
x Um die Auswahl sämtlicher Dateien aufzuheben, drücken Sie
die Taste TOOLS und wählen Sie dann Alle abwählen.
3. Drücken Sie auf �(Wiedergabetaste) / ENTERE.
Abspielen einer Video/Musik/Fotodateigruppe
1. Während eine Dateiliste angezeigt wird, navigieren Sie zu einer Datei aus
der gewünschten Gruppe.
2. Drücken Sie die Taste TOOLS und wählen Sie Aktuelle Gruppe
abspielen.
¦ Media Play-Zusatzfunktionen
Sortieren der Dateiliste
Drücken Sie in der Dateiliste die blaue Taste, um die Dateien zu sortieren.
Kategorie Vorgang Musik Fotos
Basisansicht Anzeige des gesamten Ordners. Sie können das Foto durch Auswählen des Ordners abspielen. ✓ ✓
Titel Sortieren der Filmtitel nach Symbol/Nummer/Anfangsbuchstabe/Spezial. ✓ ✓
Voreinstellung
Sortiert die Kanäle und zeigt sie in der Reihenfolge der Voreinstellung an. Sie können die
Dateivoreinstellung in der Dateiliste mit Hilfe der grünen Taste ändern.
✓ ✓
Datum
absteigend
Sortieren und Anzeigen der Filme absteigend nach dem Datum. ✓
Datum
aufsteigend
Sortieren und Anzeigen der Filme aufsteigend nach dem Datum. ✓
Interpret Sortieren der Musikdateien in alphabetischer Reihenfolge nach dem Namen des Interpreten. ✓
Album Sortieren der Musikdateien in alphabetischer Reihenfolge nach dem Namen des Albums. ✓
Genre Sortierung der Musikdateien nach dem Genre. ✓
Stimmung
Sortierung der Musikdateien nach der Stimmung. Sie können die Informationen zur Stimmung der
Musik ändern.
✓
Monatlich Sortieren und Anzeigen der Fotos nach dem Monat. ✓
Gerätename A Change Device C Auswählen D Sortieren T Extras
c
c
c
Music 01 2010
no singer other
Music 02 2010
no singer other
Music 03 2010
no singer other
Music 04 2010
no singer other
Music 05 2010
no singer other
Music 06 2010
no singer other
Music 07 2010
no singer other
Music 08 2010
no singer other
Music /Music 01.mp3 1/2
BN68-02588BF-Ger.indb 24 2010-3-23 13:54:59Deutsch 25
04 Erweiterte Funktionen
Optionsmenü für die Musik / Fotowiedergabe
Kategorie Vorgang Musik Fotos
Wiederholungsmodus Sie können Film- und Musikdateien wiederholt abspielen. ✓
Bildeinstellungen Sie können die Bildeinstellungen festlegen. (S. 14, 15, 16) ✓
Toneinstellungen Sie können die Toneinstellungen festlegen. (S. 17, 18) ✓ ✓
Diashow anhalten /
Diashow starten
Sie können eine Diashow starten und anhalten.
✓
Geschwindigkeit der
Diashow
Sie können die Geschwindigkeit der Diashow während der Diashow auswählen.
✓
Zoom Sie können Bilder im Vollbildmodus vergrößern. ✓
Drehen Sie können Bilder im Vollbildmodus drehen. ✓
Informationen Sie können detaillierte Informationen zur abgespielten Datei anzeigen. ✓ ✓
Einstellungen
Verwenden des Menüs Einstellungen
■ Informationen: Hiermit zeigen Sie die Informationen zum angeschlossenen Gerät an.
BN68-02588BF-Ger.indb 25 2010-3-23 13:54:5926 Deutsch
Weitere Informationen
Teletext für Analogkanäle
Auf der Videotext-Indexseite fi nden Sie Verwendungshinweise zum Videotext. Für die korrekte Anzeige von Teletextinformationen muss
der Senderempfang einwandfrei sein. Andernfalls können Informationen unvollständig sein oder einige Seiten nicht angezeigt werden.
✎Sie können die Videotextseiten durch Drücken der Zifferntasten auf der Fernbedienung wechseln.
Weitere Informationen
Die Videotextseiten sind in sechs Kategorien unterteilt:
Sportergebnisse Inhalt Sportergebnisse Inhalt
A Gewählte Seitennummer. D Datum und Uhrzeit.
B Senderkennung. E Text.
C
Aktuelle Seitenzahl oder
Suchhinweise.
F
Statusinformation FASTEXTInformationen.
MEDIA.P
A B C D
1
3
4
2
5
8
7
0
!
@
6
9
1 / (Videotext an/
mix): Aktivieren Sie den
Videotextmodus, nachdem Sie
einen Sender ausgewählt haben,
der Videotext anbietet. Drücken
Sie die Taste zweimal, um die
Videotextinformationen gleichzeitig
mit der aktuellen Sendung auf dem
Bildschirm anzuzeigen.
2 8 (Speichern): Videotextseiten
speichern.
3 4 (Größe): Anzeige von Videotext
in doppelt großen Buchstaben in
der oberen Hälfte des Bildschirms.
Drücken Sie die Taste erneut, um
den Text auch in der unteren Hälfte
des Bildschirms groß anzuzeigen.
Zum Ausblenden des Videotextes
drücken Sie die Taste erneut.
4 9 (halten): Halten einer
angezeigten Seite, die mit weiteren,
untergeordnete Seiten verknüpft ist,
um das automatische Umblättern
zu verhindern. Drücken Sie zum
Fortfahren die Taste erneut.
5 0 (Modus): Wählen Sie den
Videotextmodus (LISTE/FLOF).
Wenn Sie diese Taste im Modus
LIST (Liste) drücken, wird in den
Listenspeichermodus umgeschaltet.
Im Listenspeichermodus können
Sie mit der Taste 8 (Speichern)
Videotextseiten in einer Liste
speichern.
6 1 (Unterseite) Anzeigen eine
verfügbaren Unterseite.
2 (Nächste Seite anzeigen)
Anzeigen der nächsten
Videotextseite.
7
3 (Vorherige Seite anzeigen):
Anzeigen der vorherigen
Videotextseite.
8
6 (Index) Anzeigen der VideotextIndexseite (Inhalt) während Sie
Teletext verwenden
9
5 (Verborgenen Inhalt einblenden)
Anzeigen von verborgenem Text
(z. B. Antworten bei Quizsendungen).
Drücken Sie die Taste erneut, um
Videotext auszublenden.
0
7 (Abbrechen): Während der
Suche nach einer Seite die laufende
Fernsehsendung anzeigen.
!
Farbtasten (rot/grün/gelb/
blau): Wenn der Sender das
FASTEXT-System verwendet,
sind die verschiedenen Themen
auf den Videotextseiten farbig
gekennzeichnet und können mit den
Farbtasten auf der Fernbedienung
angewählt werden. Drücken Sie
die Farbtaste, die dem Thema
entspricht, das Sie anzeigen
möchten. Die Seite wird mit anderen
farbig markierten Informationen
angezeigt, die auf dieselbe Art
ausgewählt werden können. Drücken
Sie die entsprechende Farbtaste,
um die vorherige oder nächste Seite
anzuzeigen.
@
BN68-02588BF-Ger.indb 26 2010-3-23 13:54:59Deutsch 27
05 Weitere Informationen
Anbringen der Wandhalterung
¦ Anbringen der Wandhalterung
Mit der separat erhältlichen Wandhalterung können Sie das Fernsehgerät an einer Wand befestigen.
Detaillierte Informationen zum Montieren der Wandhalterung finden Sie in den Anweisungen, die im Lieferumfang der Wandhalterung
enthalten sind. Lassen Sie sich beim Anbringen der Wandhalterung von einem Techniker helfen.
Samsung Electronics haftet nicht für Schäden an Gerät oder Personen, wenn die Montage vom Kunden selbst durchgeführt wird.
¦ Spezifikation (VESA) der Wandhalterung
✎Die Wandhalterung wird nicht mitgeliefert, ist aber gesondert erhältlich.
Montieren Sie die Wandhalterung an einer soliden Wand, die senkrecht zum Boden steht. Bei Installation auf anderen
Trägermaterialien wenden Sie sich bitte an Ihren Fachhändler. Bei Montage an einer Decke oder schrägen Wand kann es
herunterfallen und zu Verletzungen kommen.
✎HINWEIS
x Samsung Electronics haftet nicht für Schäden an Gerät oder Personen, wenn die Montage vom Kunden selbst durchgeführt
wird.
x Die Standardabmessungen der Wandhalterung finden Sie in der nachfolgenden Tabelle.
x Beim Kauf unserer Wandhalterung erhalten Sie ein detailliertes Installationshandbuch sowie alle für die Montage
erforderlichen Teile.
x Verwenden Sie keine Schrauben, die länger sind als hier angegeben, da damit innen liegende Bauteile des Fernsehers
beschädigt werden können.
x Bei Wandhalterungen, die nicht der VESA-Standardspezifikation für Schrauben entsprechen, kann die Länge der
Schrauben je nach Spezifikation unterschiedlich sein.
x Verwenden Sie keine Schrauben, die nicht der VESA-Standardspezifikation für Schrauben entsprechen.
x Ziehen Sie die Schrauben nicht zu fest an, weil Sie so möglicherweise das Gerät beschädigen, oder es dadurch
herunterfallen und Verletzungen verursachen könnte. Samsung haftet nicht bei derartigen Unfällen.
x Samsung haftet nicht für Geräteschäden oder Verletzungen, wenn eine Wandhalterung verwendet wird, die nicht dem
VESA-Standard entspricht oder nicht spezifiziert ist, oder wenn der Verbraucher die Installationsanleitung für das Produkt
nicht befolgt.
x Bei der Montage dieses Fernsehgeräts dürfen Sie eine Neigung von 15 Grad nicht überschreiten.
Produktfamilie Zoll VESA-Spezifikation (A * B) Standardschraube Menge
LCD-Fernsehgerät
19~22
75 X 75
100 X 100 M4
4
23~29 200 X 100
30~40 200 X 200 M6
46~55 400 X 400
M8
57~65 600 X 400
70~80 800 X 400
80~ 1400 X 800
Installieren Sie die Wandhalterung nicht bei angeschaltetem Fernsehgerät. Sie könnten dabei einen Stromschlag
erhalten und sich verletzen.
BN68-02588BF-Ger.indb 27 2010-3-23 13:55:0028 Deutsch
Weitere Informationen
Kensington-Schloss als Diebstahlsicherung
Ein Kensington-Schloss dient zur physischen Sicherung des Systems
bei Verwendung in öffentlichen Bereichen. Je nach Hersteller können
Aussehen und Verriegelungsverfahren von der Abbildung abweichen.
Informationen zur richtigen Anwendung entnehmen Sie bitte der
Bedienungsanleitung des Kensington-Schlosses.
✎Suchen Sie das Symbol „ K “ auf der Rückseite des Fernsehgeräts.
Neben diesem „ K “-Symbol befindet sich der Steckplatz für das
Kensington-Schloss.
1. Führen Sie das Schloss in den Kensington-Einschub am LCDFernseher ein 1, und drehen Sie es in die Verriegelungsposition 2.
2. Schließen Sie das Kabel für das Kensington-Schloss an 3.
3. Befestigen Sie das Kensington-Schloss an einem Tisch oder einem
schweren feststehenden Objekt.
✎Das Schloss muss separat erworben werden.
✎Die Position des Kensington-Schlosses ist modellabhängig.
1
2
3
Befestigen des Fernsehgeräts an der Wand
Achtung: Das Fernsehgerät kann hinfallen, wenn Sie daran ziehen, es schieben oder darauf klettern. Stellen
Sie insbesondere sicher, dass sich keine Kinder an das Gerät hängen oder es aus dem Gleichgewicht bringen.
Anderenfalls könnte das Gerät umkippen und schwere Verletzungen oder den Tod verursachen. Beachten Sie alle
Anweisungen der beigefügten Sicherheitshinweise. Noch mehr Stabilität erreichen Sie, wenn Sie den Kippschutz
installieren. Gehen Sie hierzu folgendermaßen vor.
¦ So verhindern Sie, dass das Fernsehgerät umkippt
✎Da die benötigten Halterungen, Schrauben und das Band nicht zum
Lieferumfang gehören, müssen Sie diese Teile gesondert erwerben.
1. Drehen Sie die Schrauben durch die Halterungen und befestigen Sie
sie fest an der Wand. Stellen Sie sicher, dass die Schrauben fest mit
der Wand verbunden sind.
✎ Daten der Schrauben
x Für LCD-Fernsehgeräte von 23 – 29 Zoll: M4
x Für LCD-Fernsehgeräte von 30 – 40 Zoll: M6
2. Entfernen Sie die Schrauben in der Mitte auf der Rückseite des
Fernsehgeräts. Setzen Sie diese Schrauben in die Halterungen ein und
befestigen Sie die Schrauben dann wieder am Fernsehgerät.
3. Verbinden Sie die Halterungen an der Wand und die Halterung am
Fernsehgerät mit einem festen Band miteinander und ziehen Sie das
Band dann fest.
✎Kontrollieren Sie, ob alle Anschlüsse weiterhin fest verbunden sind.
Prüfen Sie regelmäßig die Verbindungen auf Zeichen von Ermüdung
oder Versagen. Bei Zweifeln hinsichtlich der Sicherheit Ihrer Halterung
wenden Sie sich an einen professionellen Installationsbetrieb.
✎Stellen Sie das Fernsehgerät in der Nähe der Wand auf, damit es nicht nach hinten kippen kann.
✎Es ist noch sicherer, wenn die Halterungen an der Wand niedriger als die Halterungen am Fernsehgerät sind.
✎Lösen Sie das Band, ehe Sie den Fernsehapparat bewegen.
Wand
BN68-02588BF-Ger.indb 28 2010-3-23 13:55:01Deutsch 29
05 Weitere Informationen
Fehlerbehebung
Bei Fragen zum Fernsehgerät schauen Sie zuerst in dieser Liste nach. Wenn keiner dieser Tipps zur Fehlerbehebung weiterhilft, öffnen
Sie die Website „www.samsung.com“ und klicken Sie dort auf „Support“ oder wenden Sie sich an das in der Liste auf der letzten
Seite angegebene Callcenter.
Problem Lösungen und Erklärungen
Bildqualität Führen Sie zu allererst den Bildtest durch, um zu bestätigen, dass Ihr Fernsehgerät das Testbild korrekt
anzeigt.
(Wechseln Sie zu MENU - Unterstützung - Eigendiagnose - Bildtest) (Seite 21).
Wenn das Testbild richtig angezeigt wird, kann das schlechte Bild durch die Signalquelle oder das Signal
verursacht sein.
Das Fernsehbild ist nicht so gut wie im
Geschäft.
• Wenn Sie einen analogen Kabel-/Satellitenreceiver verwenden, ersetzen Sie diesen durch einen
digitalen. Verwenden Sie HDMI- oder Komponentenkabel, um Bildqualität in HD (hohe Auflösung) zu
ermöglichen.
• Kabel-/Satellitenanschluss: Probieren Sie HD-Sender aus der Kanalliste.
• Antennenanschluss: Probieren Sie HD-Sender, nachdem Sie die Autoprogrammierung durchgeführt
haben.
✎ Viele HD-Kanäle senden aufbereitete SD-Inhalte (Standardauflösung).
• Stellen Sie den Kabel-/Satellitenreceiver auf eine Bildauflösung von 1080i oder 720p ein.
• Achten Sie darauf, dass Sie beim Fernsehen den Mindestabstand entsprechend der Größe des
Fernsehers und der Auflösung des angezeigten Signals einhalten.
Das Bild ist verzerrt: Macroblock-Fehler,
Smallblock-Fehler, Punkte, Pixelfehler
• Durch die Kompression der Videoinhalts kann es zu Bildverzerrungen kommen, insbesondere bei
schnellen Bildern wie bei Sportsendungen und Actionfilmen.
• Ein niedriger Signalpegel oder schlechte Qualität kann Bildverzerrungen verursachen. Das ist kein
Problem des Fernsehgeräts.
Farbe ist falsch oder gfehlt. • Wenn Sie einen Komponentenanschluss verwenden, wergewissern Sie sich, ob die
Komponentenkabel mit den richtigen Anschlüssen verbunden sind. Falsche oder lose Kontakte
können Farbprobleme verursachen oder dazu führen, dass auf dem Bildschirm gar kein Bild
angezeigt wird.
Schlechte Farbwiedergabe oder Helligkeit. • Stellen Sie die Bild-Optionen im Fernsehmenü ein. (wechseln Sie zum Bild-Modus / Farbe /
Helligkeit / Schärfe
• Stellen Sie im Fernsehmenü die Optionen für den Energiesparmod. ein. (Wechseln Sie zu MENU -
Bild - Öko-Lösung - Energiesparmod.).
• Versuchen Sie, die Grundstellung für das Bild wieder herzustellen, damit die Standardbildeinstellungen
verwendet werden. (Wechseln Sie zu MENU - Bild - Bild zurücksetzen.
Gepunktete Linie am Bildschirmrand. • Wenn die Bildgröße auf Bildschirmanpassung eingestellt ist, ändern Sie dies in 16:9. (Seite 16)
• Ändern Sie die Kabel-/Satellitenauflösung.
Das Bild ist schwarzweiß. • Wenn Sie einen AV-Composite-Eingang verwenden, schließen Sie das Videokabel (Gelb) an die grüne
Buchse des Komponenteneingangs 1 am Fernsehgerät an.
Beim Kanalwechsel friert das Bild ein bzw.
ist verzerrt, oder die Bildanzeige erfolgt
verzögert.
• Bei Anschluss an einen Kabelreceiver versuchen Sie, den Kabelreceiver zurückzusetzen. Schließen
Sie das Netzkabel wieder an und warten Sie, bis der Kabelreceiver neu startet. Dies kann bis zu 20
Minuten dauern.
• Stellen Sie die Bildauflösung des Kabelreceivers auf 1080i oder 720p ein.
Tonqualität Führen Sie zu allererst den Audiotest durch, um zu bestätigen, dass Ihr Fernsehgerät den Ton korrekt
ausgibt.
(Wechseln Sie zu MENU - Unterstützung - Eigendiagnose - Audiotest) (Seite 21).
Wenn der Ton richtig ausgegeben wird, kann das Tonproblem möglicherweise durch die Signalquelle oder
das Signal verursacht sein.
Kein Ton oder Ton zu leise bei maximaler
Lautstärke.
• Überprüfen Sie die Lautstärke des externen Geräts, das an Ihren Fernseher angeschlossen ist.
Bild ist gut, aber kein Ton. • Stellen Sie die Option Lautsprecher auswählen im Tonmenü auf TV-Lautsprecher ein. (Seite 18)
• Wenn Sie ein externes Gerät verwenden, vergewissern Sie sich, dass die Audiokabel an die richtigen
Audioeingänge am Fernsehgerät angeschlossen sind.
• Wenn Sie ein externes Gerät verwenden, überprüfen Sie die Einstellungen für die Tonausgabe des
Geräts (z. B. müssen Sie die Toneinstellungen Ihres Kabelreceivers möglicherweise in HDMI ändern,
wenn das Gerät über HDMI an Ihr Fernsehgerät angeschlossen ist).
• Wenn Sie ein DVI/HDMI-Kabel verwenden, ist ein separates Audiokabel erforderlich.
• Wenn Ihr Fernsehgerät über eine Kopfhörerbuchse verfügt, vergewissern Sie sich, dass nichts
eingesteckt ist.
Die Lautsprecher geben ein unerwünschtes
Geräusch von sich.
• Überprüfen Sie die Kabelverbindungen. Vergewissern Sie sich, dass kein Videokabel an einen
Audioeingang angeschlossen ist.
• Überprüfen Sie die Signalstärke des Antennen-/Kabelanschlusses. Ein schwaches Signal kann
Verzerrungen verursachen.
BN68-02588BF-Ger.indb 29 2010-3-23 13:55:0130 Deutsch
Weitere Informationen
Problem Lösungen und Erklärungen
Kein Bild, kein Video
Der Fernseher kann nicht eingeschaltet
werden.
• Vergewissern Sie sich, dass das Netzkabel sicher mit der Wandsteckdose und dem Fernsehgerät
verbunden ist.
• Vergewissern Sie sich, dass die Netzsteckdose Strom liefert.
• Drücken Sie die POWER am Fernsehgerät, um zu prüfen, ob die Fernbedienung richtig funktioniert.
Wenn das Fernsehgerät angeht, lesen Sie den Abschnitt „Die Fernbedienung funktioniert nicht“ weiter
unten.
Das Fernsehgerät schaltet sich
automatisch aus.
• Stellen Sie im Menü Einstell. sicher, dass der Sleep-Timer deaktiviert (Aus) ist. (Seite 19)
• Wenn das Fernsehgerät an Ihren PC angeschlossen ist, überprüfen Sie die Energiespareinstellungen
Ihres PCs.
• Vergewissern Sie sich, dass das Netzkabel sicher mit der Wandsteckdose und dem Fernsehgerät
verbunden ist.
• Wenn Sie über Kabel oder Antenne fernsehen, schaltet sich das Fernsehgerät nach 10 – 15 Minuten
ohne Signal aus.
Kein Bild/Video. • Überprüfen Sie die Kabelverbindungen. Unterbrechen Sie kurzzeitig alle Kabelverbindungen zwischen
dem Fernsehgerät und den externen Geräten.
• Stellen Sie den Videoausgang Ihres externen Geräts (Kabel-/Satellitenreceiver, DVD-/Blu-ray-Player)
so ein, dass er zur Verbindung mit dem Fernsehgerät passt. Zum Beispiel: Wenn der HDMI-Ausgang
des externen Geräts verwendet wird, schließen Sie es an den HDMI-Eingangs Ihres Fernsehers an.
• Stellen Sie sicher, dass die angeschlossenen Geräte angeschaltet sind.
• Vergewissern Sie sich, dass die richtige Signalquelle für den Fernseher eingestellt ist. Drücken Sie
dazu die Taste SOURCE auf der Fernbedienung des Fernsehers.
HF-Anschluss (Terrestrisch/Kabel)
Das Fernsehgerät empfängt nicht alle
Kanäle.
• Vergewissern Sie sich, dass das Antennenkabel korrekt angeschlossen ist.
• Probieren Sie es mit Plug & Play (Erstmaliges Einrichten) um die verfügbaren Kanäle zur Kanalliste
hinzuzufügen. Wechseln Sie zu MENU - Plug & Play (Erstmaliges Einrichten) und warten Sie, bis alle
verfügbaren Kanäle gespeichert sind.
• Prüfen Sie, ob die Antenne korrekt angeordnet ist.
Das Bild ist verzerrt: Macroblock-Fehler,
Smallblock-Fehler, Punkte, Pixelfehler
• Durch die Kompression der Videoinhalts kann es zu Bildverzerrungen kommen, insbesondere bei
schnellen Bildern wie bei Sportsendungen und Actionfilmen.
• Ein schwaches Signal kann Verzerrungen verursachen. Das ist kein Problem des Fernsehgeräts.
PC-Verbindung
Meldung „Modus nicht unterstützt“ wird
angezeigt.
• Stellen Sie die Ausgangsauflösung und Frequenz Ihres PCs so ein, dass sie zu den vom Fernsehgerät
unterstützten Auflösungen passen. (Seite 22)
Der PC wird immer in der Liste der
Signalquellen angezeigt, auch wenn keiner
angeschlossen ist.
• Das ist normal. Der PC wird immer in der Liste der Signalquellen angezeigt, auch wenn keiner
angeschlossen ist.
Bild ist gut, aber kein Ton. • Wenn Sie eine HDMI-Verbindung verwenden, prüfen Sie die Einstellungen des Audioausgangs für
Ihren PC.
Andere
Das Bild wird nicht als Vollbild angezeigt. • Bei HD-Kanälen werden auf beiden Seiten schwarze Balken angezeigt, wenn Sie aufbereitete SDInhalte (4:3) wiedergeben.
• Bei Filmen mit einem anderen Seitenverhältnis als am Fernsehgerät eingestellt werden oben und
unten schwarze Balken angezeigt.
• Stellen Sie die Bildgröße an Ihrem externen Gerät oder am Fernseher auf Vollbild ein.
Die Fernbedienung funktioniert nicht. • Ersetzen Sie die Batterien der Fernbedienung, und achten Sie dabei auf die richtige Polung (+/-).
• Reinigen Sie das Sendefenster der Fernbedienung.
• Zeigen Sie mit der Fernbedienung aus 1,5 bis 2 m Enternung direkt auf das Fernsehgerät.
Die Fernbedienung des Kabel-/
Satellitenreceivers schaltet das
Fernsehgerät nicht ein/aus oder regelt
auch nicht die Lautstärke.
• Programmieren Sie die Fernbedienung des Kabel-/Satellitenreceivers so, dass sie das Fernsehgerät
anspricht. Den Code für SAMSUNG TV finden Sie in der Bedienungsanleitung für Ihren Kabel-/
Satellitenreceiver.
Meldung „Modus nicht unterstützt“ wird
angezeigt.
• Überprüfen Sie die unterstützte Auflösung des Fernsehgeräts und stellen Sie die Ausgangsauflösung
des externen Geräts dementsprechend ein. Weitere Informationen erhalten Sie auf Seite 9 dieses
Handbuchs.
Kunststoffgeruch tritt aus dem
Fernsehgerät aus.
• Dieser Geruch ist normal und verschwindet im Lauf der Zeit.
Die Option Signalinformation steht für das
Fernsehgerät im Menü Eigendiagnose
nicht zur Verfügung.
• Diese Funktion ist nur bei digitalen Kanälen mit Antennenanschluss (HF/Koax) verfügbar. (Seite 21)
Das Fernsehgerät ist seitlich geneigt. • Lösen Sie den Sockel des Standfußes vom Fernsehgerät und wiederholen Sie die Montage.
Es gibt Schwierigkeiten, den Sockel des
Standfußes zu montieren.
• Stellen Sie sicher, dass Ihr Fernsehgerät auf einer ebenen Fläche steht. Wenn Sie die Schrauben nicht
vom Fernseher lösen können, verwenden Sie einen magnetischen Schraubendreher.
Das Kanalmenü wird grau angezeigt. (nicht
verfügbar)
• Das Menü Kanal ist nur dann verfübgar, wenn eine TV-Signalquelle ausgewählt wurde.
BN68-02588BF-Ger.indb 30 2010-3-23 13:55:01Deutsch 31
05 Weitere Informationen
Problem Lösungen und Erklärungen
Ihre Einstellungen gehen nach 30 Minuten
oder bei jedem Abschalten des Fernsehers
verloren.
• Wenn das Fernsehgerät im Modus Shop-Demo läuft, werden die Ton- und Bildeinstellungen alle
30 Minuten zurückgesetzt. Wechseln Sie mit dem Plug & Play-Prozess (erstmals einrichten) vom
Modus Shop-Demo zu Privatgebrauch. Drücken Sie diese Taste SOURCE, um den TV-Modus
auszuwählen. Wechseln Sie dann zu MENU → Einstell. → Plug & Play (erstmals einrichten) →
ENTERE.
Vorübergehender Ausfall von Bild oder Ton. Überprüfen und korrigieren Sie ggf. die Kabelverbindungen. •
• Der Ausfall von Ton oder Bild kann durch Einsatz übermäßig starrer oder dicker Kabel verursacht
werden. Vergewissern Sie sich, dass die Kabel für langfristigen Gebrauch flexibel genug sind. Bei
Wandmontage empfehlen wir, Kabel mit 90 Grad-Steckern zu verwenden.
Sie sehen kleine Partikel, wenn Sie den
Rahmen um den Bildschirm herum genau
betrachten.
• Dies ist Teil des Produktdesigns und kein Defekt.
Das PIP-Menü ist nicht verfügbar. • PIP-Funktionen stehen nur zur Verfügung, wenn Sie eine HDMI-, PC- oder Komponentensignalquelle
anzeigen.
Die Meldung „Verschlüsseltes Signal“
oder „Kein Signal/Schwaches Signal“ wird
angezeigt.
• Wenn Sie ein CAM (mit „CI“ oder „CI+“-Karte) verwenden, überprüfen Sie, ob es richtig in den CISteckplatz (Common Interface) eingesetzt wurde.
• Wenn das Problem fortbesteht, ziehen Sie das CAM aus dem Fernseher heraus und setzen Sie es
erneut ein.
Sie haben das Fernsehgerät vor 45
Minuten ausgeschaltet, es schaltet sich
aber von selbst wieder ein.
• Dies ist normal. Das Fernsehgerät aktiviert die OTA-Funktion (Over-the-Air) Funktion selbst, um die
Firmware für die Aktualisierung beim Fernsehen herunterzuladen.
Es gibt wiederholte Bild-/Tonprobleme. • Überprüfen und ändern Sie Signal/Signalquelle.
Es kann eine Reaktion zwischen dem
Gummipolster des Sockels und der
Oberfläche mancher Möbel geben.
• Um dies zu verhindern, bringen Sie Filzblöcke an jeder Fläche des Fernsehers an, die in direkten
Kontakt mit Möbeln gerät.
✎Der TFT-LCD-Bildschirm enthält Unterpixel. Hierfür ist eine ausgefeilte Fertigungstechnologie erforderlich ist. Allerdings
können ein paar zu helle oder zu dunkle Pixel auf der Bildfläche zu sehen sein. Diese Pixelfehler haben keinen Einfluss
auf die Geräteleistung.
¦ Lizenz
Manufactured under licence from Dolby Laboratories.
Dolby and the double-D symbol are trademarks of Dolby Laboratories.
BN68-02588BF-Ger.indb 31 2010-3-25 12:14:4132 Deutsch
Weitere Informationen
Technische Daten
Bildschirm (nativ) 1360 x 768 bei 60 Hz
Umgebungsbedingungen
Betriebstemperatur
Luftfeuchtigkeit (bei Betrieb)
Lagerungstemperatur
Luftfeuchtigkeit (Lagerung)
10° C bis 40° C
10% bis 80%, nicht kondensierend
-20° C bis 45° C
5% bis 95%, nicht kondensierend
TV-System Analog: Je nach eingestelltem Land.
Digital: DVB-T/DVB-C
Fernsehnorm/Videosystem Analog: PAL, SECAM, NTSC-4.43, NTSC-3.58, PAL60
Digital: MPEG-2 MP@ML, MPEG-4, H.264/AVC MP@L3, MP@L4.0, HP@L4.0
Audiosystem BG. OK NICAM. MPEGl
HDMI IN Video: 1080/24p, 1080p, 1080i, 720p, 576p, 576i, 480p, 480i
Audio: Lineares Zweikanal-PCM-System für 32/44.1/48 kHz, 16/20/24bits
Analoger Audioeingang (nur HDMI IN)
PC-Anschluss
Drehbarer Fuß
(Links und rechts) 0˚
Modellname LE19C350 LE22C350
Bildschirmgröße
(Diagonal) 19 inch 22 inch
Ton
Ausgang 3W X 2 3W X 2
Abmessungen (BxTxH)
Gehäuse
Mit Fuß
461.2 x 59.5 x 322.2 mm
461.2 x 161 x 364 mm
535.3 x 82.2 x 365.8 mm
535.5 x 171.8 x 420.9 mm
Gewicht
Gehäuse
Mit Fuß
3.9 kg
4.2 kg
3.9 kg
4.1 kg
✎Änderungen der technischen Daten und des Geräte-Designs vorbehalten.
✎Die technischen Daten zur benötigten Netzspannung finden Sie auf dem Etikett am Produkt.
BN68-02588BF-Ger.indb 32 2010-3-23 13:55:02Deutsch 33
05 Weitere Informationen
Index
A
Alle wählen 14
Anschließen an ein Audiogerät 8
Autom. Einstellung 17
Automatische Lautstärke 18
B
Balance 17
Basisansicht 25
Batterien 5
Bearbeiten von Sendern 13
Bildformat 16
D
Diashow 24
Digitaler Audioausgang 8
D-Sub 8
Dynamisch 14
E
Eigendiagnose 21
EIN/AUS-Taste 5
Elektronischer Programmführer 11
Energiesparmod. 15
EPG 11
Equalizer 17
Ext. Lautsprecher 18
Extras 3
F
Farbtemperatur 15
Farbtemperatur 8
Favoritenkanal 12
Fehlerbehebung 29
Feinabstimmung 14
Fernbedienung 5
Filmmodus 15
Fotos 24
Frequenz 12
H
Hautton 15
HDMI 7
Helligkeit 14
Hintergrundbild 25
Hintergrundmusik 25
K
Kanal-Manager 12
Komp. 7
L
Lautsprecherauswahl 18
Lautstärke 4, 5
Lizenz 31
M
Media Play 20
Media Play 22
Menütransparenz 20
Musik 23
N
Name bearbeiten 10
Navigieren 10
Netzanzeige 4
O
Optimale Auflösung 9
Optimalkontrast 15
P
PIN ändern 20
Plug & Play 6
Q
Quellen 10
R
RGB 15
S
Schärfe 14
Schwarzton 15
Signalinformation 21
Sleep-Timer 19
Software-Update 21
Sperren 14
Sprache 20
Standby-Modus 4
T
Technische Daten 32
Timer 19
Titel 25
TV-Empfang 12
TV-Lautsprecher 18
U
Uhr 19
Untertitel 20
USB 21, 22
V
Verstärken 17
Verwenden der
Programmieransicht 11
Verwenden der Kanalansicht 11
Verwenden von Favoriten 10
Verwenden von Favoriten 12
W
Wandhalterung 27
Weißabgleich 15
Wiederholungsmodus 25
BN68-02588BF-Ger.indb 33 2010-3-23 13:55:02Diese Seite wurde absichtlich leer belassen.
BN68-02588BF-Ger.indb 34 2010-3-23 13:55:022 Nederlands
De afbeeldingen en illustraties in deze gebruiksaanwijzing dienen alleen ter referentie en kunnen afwijken van het werkelijke uiterlijk
van het product. Productontwerp en -specificaties kunnen zonder kennisgeving worden gewijzigd.
Opmerking over digitale tv
1. Functionaliteit betreffende digitale televisie (DVB) is alleen beschikbaar in landen/gebieden waar digitale DVB-T-televisiesignalen (MPEG2 en MPEG4 AVC)
via de zendmast worden uitgezonden of waar u toegang hebt tot een compatibele DVB-C-service (MPEG2 en MPEG4 AAC) voor kabel-tv. Vraag aan uw
plaatselijke aanbieder of u DVB-T- of DVB-C-signalen kunt ontvangen.
2. DVB-T is de Europese DVB-consortiumstandaard voor de uitzending van digitale televisie via de zendmast en DVB-C voor de uitzending van digitale televisie
via de kabel. Bepaalde afzonderlijke functies, zoals EPG (Electric Programme Guide), VOD (Video on Demand) enzovoort, zijn echter niet opgenomen in deze
specificatie. Deze werken dus mogelijk nog niet.
3. Hoewel dit televisietoestel aan de huidige DVB-T- en DVB-C-standaarden vanaf [augustus 2008] voldoet, kan de compatibiliteit met toekomstige digitale DVBT-signalen via de zendmast en digitale DVB-C-signalen via de kabel niet worden gegarandeerd.
4. Afhankelijk van de landen/gebieden waar dit televisietoestel wordt gebruikt, kunnen leveranciers van kabeltelevisie aanvullende kosten voor dergelijke services
in rekening brengen en moet u wellicht akkoord gaan met hun voorwaarden en bepalingen.
5. Bepaalde digitale televisiefuncties zijn mogelijk niet beschikbaar in bepaalde landen of regio’s en DVB-C werkt mogelijk niet goed met bepaalde leveranciers
van kabelservices.
6. Neem voor meer informatie contact op met de klantenservice van Samsung.
✎ De ontvangstkwaliteit van televisieuitzendingen kan minder goed zijn door verschil in uitzendmethode tussen landen. Controleer de televisieprestaties bij uw
plaatselijke geautoriseerde SAMSUNG-dealer, of bel de klantenservice van Samsung om te informeren of de kwaliteit zou kunnen worden verbeterd door de
tv-instellingen aan te passen.
Waarschuwing over stilstaand beeld
Vermijd de weergave op het scherm van stilstaand beeld (zoals jpeg-foto’s) of statische beeldelementen (zoals het logo van tv-programma’s, een panorama- of
4:3-beeldverhouding, een aandelen- of nieuwsticker onder in het scherm, enz.). De voortdurende weergave van een statisch beeld(element) kan ertoe leiden dat de
fosforlaag van het scherm ongelijkmatig slijt, waardoor de beeldkwaliteit wordt aangetast. Volg de onderstaande aanbevelingen op om de kans hierop te verkleinen:
• Vermijd langdurige weergave van hetzelfde tv-kanaal.
• Probeer beelden altijd schermvullend weer te geven; gebruik het beeldformaatmenu voor de beste optie.
• Verminder helderheid en contrast tot de minimaal benodigde waarden voor de gewenste beeldkwaliteit; hogere waarden kunnen het opbrandproces
versnellen.
• Gebruik regelmatig alle tv-functies die bedoeld zijn voor het tegengaan van beeldbehoud en opbranden van het scherm; raadpleeg de desbetreffende pagina’s
in de gebruiksaanwijzing voor meer informatie.
Installatieruimte
Bewaar de nodige afstand tussen het product en andere objecten (bijv. muren) zodat er een goede ventilatie mogelijk is.
Wanneer u dat niet doet, kunnen er door een stijging van de interne temperatuur brand of problemen bij het product ontstaan.
✎ Bij gebruik van een voet of wandbevestiging mogen er alleen onderdelen worden gebruikt die door Samsung Electronics zijn geleverd.
x Het gebruik van onderdelen van een andere fabrikant kan leiden tot problemen met het product of zelfs tot lichamelijk letsel doordat het product valt.
✎ Het uiterlijk van het product kan van het afgebeelde apparaat afwijken.
Plaatsing op een voet. Plaatsing met een wandbevestiging.
10 cm
10 cm 10 cm
10 cm
10 cm
10 cm
10 cm
Juiste afvoer van dit product (afvalverwerking van elektrische en elektronische apparatuur)
(Van toepassing in de Europese Unie en andere Europese landen met systemen voor afvalinzameling)
Dit label op het product, de accessoires of de documentatie bij dit product duidt erop dat het product en de bijbehorende elektronische
accessoires (bijvoorbeeld de oplader, headset of USB-kabel) aan het eind van de levensduur niet mag worden afgevoerd met het
huishoudelijk afval. Om milieuverontreiniging of problemen voor de volksgezondheid als gevolg van ongeregelde afvalverwerking te
voorkomen, dient u deze items van het andere afval te scheiden zodat de materialen op verantwoorde wijze kunnen worden hergebruikt.
Thuisgebruikers moeten contact opnemen met de winkel waar ze het product gekocht hebben of met de plaatselijke overheidsinstanties
als ze willen weten waar en hoe ze deze items op milieuvriendelijke wijze kunnen recyclen. Zakelijke gebruikers dienen contact op te nemen
met de leverancier en de voorwaarden en bepalingen van het koopcontract te raadplegen. Dit product en de bijbehorende elektronische
accessoires mogen niet samen met ander commercieel afval worden afgevoerd.
Juiste afvoer van de batterijen in dit product
(Van toepassing in de Europese Unie en andere Europese landen met systemen voor batterij-inzameling)
Wanneer deze markering op de batterij, de gebruiksaanwijzing of de verpakking wordt weergegeven, geeft dit aan dat de batterijen in dit
product aan het einde van hun levensduur niet samen met het gewone huishoudelijke afval mogen worden weggeworpen. Wanneer u de
chemische symbolen Hg, Cd of Pb ziet, betekent dit dat de batterij respectievelijk kwik, cadmium of lood boven de referentieniveaus in
EU-richtlijn 2006/66 bevat. Als batterijen niet op de juiste wijze worden afgevoerd, kunnen deze stoffen schade aanrichten aan het milieu
of de menselijke gezondheid. Om de natuurlijke hulpbronnen te beschermen en hergebruik van materiaal te bevorderen, moet u batterijen
scheiden van andere soorten afval en ze via uw plaatselijke, gratis batterij-inzamelsysteem recyclen.
BN68-02588F-Dut.indb 2 2010-03-26 �� 1:45:02Nederlands 3
Inhoud
Aan de slag
4
4 Accesoires
4 Overzicht van het bedieningspaneel
5 Overzicht van de afstandsbediening
6 Aansluiten op een antenne
6 Plug & Play (eerste instelling)
Aansluiten
7
7 Aansluiten op een AV-apparaat
8 Aansluiten op een audioapparaat
8 Aansluiten op een pc
10 De ingangsbron wijzigen
Basisfuncties
10
10 De menu’s gebruiken
11 De INFO-knop gebruiken (Now & Next-gids)
11 Programma’s plannen
12 Het menu Kanaal
14 Het menu Beeld
17 Het menu Geluid
19 Het menu Instellingen
21 Het menu Ondersteuning
Uitgebreide functies
22
22 Media Play
Overige informatie
26
26 De teletekstfunctie van het analoge kanaal
27 De wandbevestiging plaatsen
28 Kensington-slot tegen diefstal
28 De tv vastzetten aan de wand
29 Problemen oplossen
32 Specificaties
33 Index
Let op deze symbolen!
t O
Deze functie kan met een druk
op de toets TOOLS op de
afstandsbediening worden gebruikt.
Opmerking Stapsgewijze procedure
P
POWER
GUIDE AD
MEDIA.P
SUBT.
DUAL
I-II
P.SIZE S.MODE P.MODE
BN68-02588F-Dut.indb 3 2010-03-26 �� 1:45:034 Nederlands
Aan de slag
Accesoires
✎Controleer of de volgende onderdelen bij uw lcd-tv zijn geleverd. Neem contact op met uw verkoper als er onderdelen
ontbreken.
✎De vorm en kleur van items kunnen variëren, afhankelijk van de modellen.
Afstandsbediening en batterijen (AAA x 2)
Gebruiksaanwijzing
Garantiekaart/Veiligheidsvoorschriften
(niet op alle locaties beschikbaar)
Schoonmaakdoekje
Netsnoer
Zie de aparte gebruiksaanwijzing voor plaatsing van de voet.
1 EA
(M4 X L16)
Voet (1EA) Schroeven (2EA)
Overzicht van het bedieningspaneel
✎De vorm en kleur van het product kunnen variëren, afhankelijk van het model.
P (Aan-uit) Hiermee schakelt u de tv in en uit.
Aan-uitlampje
Als de stroom is ingeschakeld, knippert het lampje even en gaat het vervolgens uit. In de
standbystand blijft het aan.
SOURCEE Hiermee wisselt u tussen alle beschikbare ingangsbronnen. Gebruik deze toets in het schermmenu
zoals u de toets ENTERE op de afstandsbediening gebruikt.
MENU Hiermee wordt het schermmenu (OSD, on screen display) met de functies van de tv weergegeven.
Y Hiermee regelt u het volume. In het schermmenu kunt u de knoppen Y op dezelfde manier
z gebruiken als de toetsen ◄ en ► op de afstandsbediening.
Hiermee wisselt u van kanaal. In het schermmenu kunt u de knoppen z op dezelfde
manier gebruiken als de toetsen ▼ en ▲ op de afstandsbediening.
Sensor voor de
afstandsbediening
Richt de afstandsbediening op dit punt van de tv.
Standbystand
Laat de tv niet gedurende langere tijd in de standbystand staan (bijvoorbeeld wanneer u op vakantie bent). Zelfs wanneer het
apparaat via de aan-uitknop is uitgeschakeld, wordt een kleine hoeveelheid stroom gebruikt. Het is het beste om het netsnoer
los te koppelen.
(Aan-uit) Hiermee schakelt u de tv in en uit.
Luidsprekers
Aan-uitlampje
Sensor voor de
afstandsbediening
Het hoofdmenu weergeven. (P. 10)
BN68-02588F-Dut(1-25).indd 4 2010-3-29 9:43:065
01 Aan de slag
Nederlands
Overzicht van de afstandsbediening
Batterijen plaatsen (batterijformaat: AAA)
✎OPMERKING
x Gebruik de afstandsbediening binnen een afstand van
7 meter van de televisie.
x Fel licht kan de werking van de afstandsbediening
beïnvloeden. Vermijd gebruik in de nabijheid van speciaal
tl-licht of neonborden.
x De vorm en kleur kunnen variëren, afhankelijk van het model.
MEDIA.P
A B C D
De beschikbare videobronnen weergeven en
De tv in- en uitschakelen. (P. 6)
selecteren. (P. 10)
Druk op deze toets voor directe toegang tot
kanalen.
De EPG (Electronic Programme Guide) weergeven.
(P. 11)
De kanaallijst op het scherm weergeven. (P. 14)
Van kanaal wisselen.
Snel veelgebruikte functies selecteren.
Items in het schermmenu selecteren en
menuopties wijzigen.
Het hoofdmenu weergeven. (P. 10)
Het volume bedienen.
Terug naar het vorige kanaal.
Toetsen voor het menu van Kanaalbeheer,
Media Play, enz.
AD: Audiobeschrijving selecteren. (Niet op alle
plaatsen beschikbaar) (P. 18)
P.SIZE: Het beeldformaat instellen. (P. 16)
SUB.T: Digitale ondertiteling weergeven (P. 20)
Geluid tijdelijk uitschakelen.
Terug naar het vorige menu. (P. 10)
Items in het schermmenu selecteren en
menuopties wijzigen.
Het menu verlaten. (P. 10)
Wisselen tussen Teletekst, Dubbel
en Mix.
Media Play weergeven.
BN68-02588F-Dut.indb 5 2010-03-26 �� 1:45:056
Aan de slag
Nederlands
Aansluiten op een antenne
Wanneer u de tv voor het eerst inschakelt, worden er automatisch enkele basisinstellingen uitgevoerd.
✎Vooraf doen: Het netsnoer en de antenne aansluiten.
Plug & Play (eerste instelling)
Wanneer de tv voor het eerst wordt ingeschakeld, verschijnt er een reeks instructies op het scherm die u helpen de
basisinstellingen te configureren. Druk op de toets POWERP. Plug & Play is alleen beschikbaar wanneer de Invoer op Tv is
ingesteld.
1
Een taal selecteren. Druk op de toets ▲ of ▼ en vervolgens op ENTERE.
Selecteer de gewenste taal voor het schermmenu.
P
POWER
GUIDE AD
MEDIA.P
SUBT.
DUAL
I-II
P.SIZE S.MODE P.MODE
2 Winkeldemo of
Thuisgebruik
selecteren
Druk op de toets ◄ of ► en vervolgens op ENTERE.
y Selecteer de modus Thuisgebruik. De modus Winkeldemo is
alleen bedoeld voor gebruik in winkels.
y Zet de instellingen van het apparaat van Winkeldemo terug op
Thuisgebruik (standaard): druk u op de volumeknop op de tv.
Wanneer het schermmenu voor het volume wordt weergegeven,
houdt u MENU 5 seconden ingedrukt.
3
Uw land selecteren Druk op de toets ▲ of ▼ en vervolgens op ENTERE.
Selecteer uw land. Als uw land niet in het menu voorkomt, selecteert u Overige.
✎Na het selecteren van uw land in het menu Land moet u op sommige modellen
vervolgens een pincode instellen.
✎Bij het invoeren van de pincode is 0-0-0-0 niet beschikbaar.
4
Een antenne selecteren Druk op de toets ▲ of ▼ en vervolgens op ENTERE.
Selecteer Ant of Kabel.
5
Een kanaal selecteren Druk op de toets ▲ of ▼ en vervolgens op ENTERE.
Selecteer de kanaalbron die moet worden onthouden. Wanneer u de antennebron als Kabel
instelt, kunt u numerieke waarden (kanaalfrequenties) voor de kanalen opgeven.
Zie voor meer informatie Kanaal → Automatisch opslaan. (P. 12)
✎Druk op elk gewenst moment op de toets ENTERE om de opslagprocedure te
onderbreken.
6
De Klokmodus
instellen
Stel de Klokmodus automatisch of handmatig in.
Druk op de toets ▲ of ▼ om Auto te selecteren en druk vervolgens op de toets
ENTERE.
7
De Gebruiksaanwijzing
HD-verbinding
weergeven.
De verbindingsmethode die de beste HD-schermkwaliteit biedt, wordt weergegeven.
8
Veel kijkplezier. Druk op de toets ENTERE.
Als u de fabrieksinstellingen wilt terugzetten...
Selecteer Instellingen - Plug & Play (eerste instelling) Voer uw viercijferige pincode in. De standaardpincode is “0-0-0-0”. Als u
de pincode wilt wijzigen, gebruikt u de functie PIN wijzigen.
Netvoeding
VHF/UHF-antenne
of
Kabel
R-AUDIO-L PR PB Y
ANT OUT
BN68-02588F-Dut.indb 6 2010-03-26 �� 1:45:06Nederlands 7
02 Aansluitingen
Aansluiten op een AV-apparaat
Gebruik van een HDMI/DVI-kabel: HD-aansluiting (tot 1080p)
Beschikbare apparaten: dvd-speler/blu-rayspeler/HD-kabelbox/HD STB-satellietontvanger (set-top-box), kabelbox,
satellietontvanger (STB)
✎HDMI (DVI) IN / PC/DVI AUDIO IN
x Bij gebruik van de HDMI/DVI-kabelaansluiting moet u de HDMI (DVI) IN-aansluiting gebruiken. Gebruik voor de
DVI-kabelaansluiting een DVI-naar-HDMI-kabel of een DVI-naar-HDMI voor video-aansluiting en de PC/DVI AUDIO
IN-ingangen voor audio.
x Als een extern apparaat zoals een dvd-speler/blu-rayspeler/kabelbox/STB-satellietontvanger is aangesloten dat een
HDMI-versie ondersteunt die lager is dan 1.3, kan het gebeuren dat de tv niet naar behoren werkt (bijv. geen beeld,
geen geluid, geflikker of een abnormale kleur).
x Als er na het aansluiten van een HDMI-kabel geen geluid is, moet u de HDMI-versie van het externe apparaat
controleren. Als u denkt dat het een oudere versie dan 1.3 betreft, neemt u contact op met de leverancier van het
apparaat om de versie te controleren en om een upgrade te verzoeken.
x We adviseren u een gecertificeerde HDMI-kabel aan te schaffen. Anders wordt er mogelijk niets weergegeven
op het scherm of treedt er een verbindingsfout op.
Gebruik van een componentkabel (max. 1080p), audio/video-kabel (alleen 480i) en een scartkabel
Beschikbare apparaten: videorecorder, dvd-speler, blu-rayspeler, kabelbox, STB-satellietontvanger
✎In de Ext.-modus ondersteunt DTV Out alleen MPEG SD-video en -audio.
✎Voor de beste beeldkwaliteit is het aan te raden om niet de A/V-aansluiting, maar de componentaansluiting te gebruiken.
Aansluiten
R-AUDIO-L PR PB Y
AUDIO OUT
R-AUDIO-L PR PB Y
DVI OUT
R-AUDIO-L PR PB Y
HDMI OUT
Y
W R
WY WR W R B G
Red White
DVD
R W R G B
R W R G
R W Y
R W Y B
R-AUDIO-L PR PB Y
COMPONENT OUT
R-AUDIO-L PR PB Y
AUDIO OUT
R-AUDIO-L PR PB Y
EXT
R-AUDIO-L PR PB Y
AUDIO OUT
R-AUDIO-L PR PB Y
VIDEO OUT
WY WR W R B G
Yellow Red White
WY WR W R B G
Red Blue Green
Videorecorder Blu-rayspeler DVD
BN68-02588F-Dut.indb 7 2010-03-26 �� 1:45:098 Nederlands
Aansluitingen
Aansluiten op een audioapparaat
Gebruik van een optische of audiokabelaansluiting
Beschikbare apparaten: digitaal audiosysteem, versterker, dvd-thuisbioscoop.
✎DIGITAL AUDIO OUT (OPTICAL)
x Wanneer een digitaal audiosysteem op de DIGITAL AUDIO OUT (OPTICAL)-aansluiting wordt aangesloten,
moet u het volume van zowel de tv als het audiosysteem verlagen.
x 5.1-kanaals audio (5.1 CH) is mogelijk wanneer de tv op een extern apparaat is aangesloten dat dit
ondersteunt.
x Wanneer de ontvanger (thuisbioscoop) is ingeschakeld, hoort u alleen geluid via Optische aansluiting van
de tv. Wanneer de tv een DTV-signaal ontvangt, zendt de tv een 5.1-kanaalsgeluid naar de ontvanger van
de thuisbioscoop. Wanneer de bron een digitaal apparaat is, zoals een dvd-speler/blu-rayspeler/kabelbox/
satellietontvanger (STB) en dit via HDMI op de tv is aangesloten, geeft de ontvanger van de thuisbioscoop
alleen 2-kanaalsgeluid weer. Als u 5.1-kanaalsgeluid wilt horen, sluit u de digitale uitgang van de dvd-speler/
blu-rayspeler/kabelbox/satellietontvanger (STB) rechtstreeks op een versterker of thuisbioscoop aan.
Aansluiten op een pc
Gebruik van een HDMI/DVI-kabel of D-Sub-kabel
R-AUDIO-L PR PB Y
OPTICAL
Digitaal
audiosysteem
R-AUDIO-L PR PB Y
AUDIO OUT
R-AUDIO-L PR PB Y
AUDIO OUT
R-AUDIO-L PR PB Y
DVI OUT
R-AUDIO-L PR PB Y
PC OUT
BN68-02588F-Dut.indb 8 2010-03-26 �� 1:45:11Nederlands 9
02 Aansluitingen
De COMMON INTERFACE-aansluiting
Voor betaalde kanalen moet een CI-/CI+-kaart zijn geplaatst.
y Als u de CI-/CI+-kaart niet plaatst, wordt bij sommige kanalen het
bericht “Gestoord signaal” weergegeven.
y De koppelingsgegevens met een telefoonnummer, de id van
de CI-/CI+-kaart, de host-id en andere informatie worden over
ongeveer 2-3 minuten weergegeven. Neem contact op met uw
serviceprovider als er een foutmelding wordt weergegeven.
y Wanneer de kanaalgegevens zijn geconfigureerd, wordt
het bericht “Update voltooid” weergegeven. Hiermee wordt
aangegeven dat de kanaallijst is bijgewerkt.
✎OPMERKING
x U kunt een CI-/CI+-kaart bij een lokale kabelaanbieder aanschaffen.
x Wanneer u de CI-/CI+-kaart wilt verwijderen, doet u dat door de kaart er met uw handen voorzichtig uit te trekken; de
kaart kan beschadigen als u deze laat vallen.
x Plaats de CI-/CI+-kaart in de richting die op de kaart staat gemarkeerd.
x De plaats van de COMMON INTERFACE-aansluiting kan per model verschillen.
x CI-/CI+-kaarten worden in sommige landen en regio’s niet ondersteund. Controleer dit bij uw geautoriseerde
verkoper.
x Neem contact op met uw serviceprovider als u problemen ondervindt
Weergavemodi (D-Sub en HDMI/DVI-invoer)
De optimale resolutie is 1360 X 768 bij 60.
Modus Resolutie
Horizontale frequentie
(kHz)
Verticale frequentie (Hz) Pixelklokfrequentie (MHz)
Synchronisatie-
polariteit (H/V)
IBM
640 x 350 31.469 70.086 25.175 + / -
720 x 400 31.469 70.087 28.322 - / +
MAC
640 x 480 35.000 66.667 30.240 - / -
832 x 624 49.726 74.551 57.284 - / -
VESA DMT
640 x 480
31.469 59.940 25.175 - / -
37.861 72.809 31.500 - / -
37.500 75.000 31.500 - / -
800 x 600
37.879 60.317 40.000 + / +
48.077 72.188 50.000 + / +
46.875 75.000 49.500 + / +
1024 x 768
48.363 60.004 65.000 - / -
56.476 70.069 75.000 - / -
60.023 75.029 78.750 + / +
1280 x 720 45.000 60.000 74.250 + / +
1360 x 768 47.712 60.015 85.500 + / +
VESA CVT
720 x 576 35.910 59.950 32.750 - / +
1280 x 720 56.456 74.777 95.750 - / +
VESA GTF 1280 x 720 52.500 70.000 89.040 - / +
✎OPMERKING
x Bij gebruik van de HDMI/DVI-kabelaansluiting moet u de HDMI (DVI) IN-aansluiting gebruiken.
x De interlace-modus wordt niet ondersteund.
x De tv werkt mogelijk niet normaal als een afwijkend videoformaat wordt geselecteerd.
x Afzonderlijke modus en composietmodus worden ondersteund. SOG (Sync On Green) wordt niet ondersteund.
BN68-02588F-Dut.indb 9 2010-03-26 �� 1:45:1210 Nederlands
Aansluitingen
De ingangsbron wijzigen
Bronlijst
Hiermee kunt u de tv of andere externe
ingangsbronnen zoals dvd-spelers,
blu-rayspelers, kabelboxen en STBsatellietontvangers die op de tv zijn
aangesloten, selecteren.
■ Tv / Ext. / AV / Component / PC /
HDMI/DVI / USB
✎ In de Bronlijst worden
aangesloten ingangen gemarkeerd.
✎ Ext. blijven altijd geactiveerd.
Naam wijzigen
■ VCR / DVD / Kabel STB / Satelliet STB / PVR STB
/ AV-ontvanger / Spelcomputer / Camcorder / PC
/ DVI PC / DVI-apparaten / TV / IPTV / Blu-ray /
HD DVD / DMA: Geef het apparaat dat op de ingang
is aangesloten een naam om de selectie van de
ingangsbron gemakkelijker te maken.
✎ Wanneer u een HDMI/DVI-kabel op de
HDMI (DVI) IN-poort aansluit, moet u bij Naam
wijzigen de poort instellen op de modus DVI-pc
of DVI-apparaten.
Basisfuncties
De menu’s gebruiken
Voordat u de tv gebruikt, moet u de stappen hieronder
volgen om te leren hoe u het menu kunt gebruiken en hoe u
verschillende functies kunt selecteren en aanpassen.
1 MENU-toets: Het hoofdmenu weergeven.
2 ENTERE / pijltoetsen: De cursor verplaatsen en een
item selecteren. De instelling bevestigen.
3 RETURN-toets: Teruggaan naar het vorige menu.
4 EXIT-toets: Het schermmenu verlaten.
Met het schermmenu werken
Afhankelijk van het geselecteerde menu kunnen de
toegangsstappen verschillen.
1 MENU m
Het hoofdmenu verschijnt op het
scherm:
Beeld, Geluid, Kanaal,
Instellingen, Invoer, Toepassing,
Ondersteuning.
2 ▲ / ▼
Selecteer een pictogram met de
toets ▲ of ▼.
3 ENTERE Druk op de toets ENTERE om
het submenu te openen.
4 ▲ / ▼
Selecteer het gewenste submenu
met de toets ▲ of ▼.
5 ◄ / ►
Pas de waarde van een item aan
met de toets ◄ of ►. Afhankelijk
van het geselecteerde menu kan de
aanpassing verschillen.
6 ENTERE Druk op de toets ENTERE om de
configuratie te voltooien.
7 EXIT e Druk op EXIT.
MEDIA.P
A B C D
4
1
2
3
P
POWER
MEDIA.P
FAV.CH
P.MODE
DUAL
MTS
BN68-02588F-Dut.indb 10 2010-03-26 �� 1:45:13Nederlands 11
03 Basisfuncties
De INFO-knop gebruiken (Now & Next-gids)
Op het scherm worden het op dat moment
kanaal en de status van bepaalde audio-/
video-instellingen weergegeven.
In de Now & Next-gids vindt u de dagelijkse
programma-informatie voor elk kanaal op
basis van het uitzendtijdstip.
y Scroll ◄ of ► om informatie over een
gewenst programma te bekijken terwijl
u naar het op dat moment kanaal kijkt.
y Scroll ▲ of ▼ om informatie over andere kanalen te
bekijken. Als u naar het op dat moment geselecteerde
kanaal wilt gaan, drukt u op de toets ENTERE.
DTV Air
15
abc1
Life On Venus Avenue 18:00 ~ 6:00
Unclassified
No Detaild Information
E Watch
' Informatie
18:11 Do 6 Jan
Programma’s plannen
Gids
De EPG (elektronische programmagids)-
informatie wordt door de omroepen
verstrekt. Met behulp van de
programmaschema’s van de omroepen
kunt u van tevoren instellen welke
programma’s u wilt kijken, zodat u op het
ingestelde tijdstip automatisch naar het
geselecteerde programmakanaal gaat.
Afhankelijk van de kanaalstatus kunnen
programmaopties blanco of overtijd zijn.
Kan.weergave gebruiken
Geplande weergave gebruiken
1 Rood Weergave: Een lijst met programma’s die nu of
binnenkort worden uitgezonden.
2 Geel Meer dan 24 uur: Een lijst met programma’s die
over 24 uur en later worden uitgezonden.
3 Blauw (Kanaalmodus): Selecteer het type kanalen dat
u in het venster Kan.weergave wilt weergeven.
– Welke Kanaalmodus wordt weergegeven, is
afhankelijk van de antennebron.
4 Informatie: Meer informatie over het geselecteerde
programma weergeven.
5 Pagina: De volgende of vorige pagina weergeven.
6 De toets ENTERE.
– Wanneer u het op dat moment programma selecteert,
kunt u het geselecteerde programma kijken.
– Wanneer u een later programma selecteert, kunt u dit
reserveren om te kijken. U kunt de planning annuleren
door nogmaals op de toets ENTERE te drukken en
Prog. annuleren te selecteren.
P
POWER
MEDIA.P
FAV.CH
P.MODE
DUAL
MTS
P
POWER
MEDIA.P
FAV.CH
P.MODE
DUAL
MTS
DTV Air 800 five
Family Affairs
18:00 - 18:30
Drama
Tanya confesses all to a stunned Babs. Conrad is anxious to hear...
18:30
19:15
Today
Today
)Family Affairs
)Dark Angel
800
800
five
five
800 five
Weergave Informatie E Annuleren
Gids 2:10 Di 1 Jun
Geplande weergave
1 4 6
DTV Air 800 five
Home and Away
18:00 - 18:30
Drama
Dani is devastated when scott makes clear his views on marriage...
27
28
800
24
16
6
Discovery
DiscoveryH&L
five
price-drop.tv
QVC
R4DTT
American Chopper
Programmes resume at 06:00
Home and...
No Information
QVC Selection
No Information
Tine Team
Fiv...
Today 18:00 - 19:00 19:00 - 20:00
)Family Affairs )Dark Angel
800 five
Weergave +24 heures CH-modus Informatie Pagina E Bekijken
Gids 2:10 Di 1 Jun
Kan.weergave - TV
1 2 3 4 5 6
BN68-02588F-Dut.indb 11 2010-03-26 �� 1:45:1412 Nederlands
Basisfuncties
Kanaalbeheer
U kunt favoriete kanalen toevoegen of verwijderen en de
programmagids voor digitale uitzendingen gebruiken.
Selecteer een kanaal in het scherm Kanalen, Mijn kanalen
of Gepland.
c 1 1futech
c 2 * 24ore.tv
15 abc1
3 BBC World
23 bid-up.tv
33 Boonerang
32 Cartoon Nwk
5 Class News
4 \ Coming Soon
27 Discovery
All
TV
Radio
Data/Other
Analogue
r
Ant Antenne B Zoom Selecteren Pagina T Tools
Kanalen
■ Kanalen: Hier ziet u de kanalenlijst op basis van het
kanaaltype.
■ * Mijn kanalen: Hier ziet u de groep van het kanaal.
■ Gepland: Hier ziet u alle momenteel
geplandeprogramma’s.
✎De gekleurde toetsen met Kanaalbeheer gebruiken
x Red (Antenne): Wisselen tussen Ant en Kabel.
x B Groen (Zoom): Een kanaalnummer vergroten of
verkleinen.
x Geel (Selecteren): Selecteer de gewenste kanalen
en druk op de gele toets om alle geselecteerde
kanalen tegelijkertijd te selecteren. Het symbool c
verschijnt links van de geselecteerde kanalen.
x (Pagina): Naar de volgende of vorige pagina gaan.
x T (Tools): Het optiemenu van Kanaalbeheer
openen. (De optiemenu’s kunnen per situatie
verschillen.)
Pictogrammen van de kanaalstatus
Pictogram Betekenis
A Een analoog kanaal.
c Een geselecteerd kanaal.
* Een als favoriet ingesteld kanaal.
( Een programma dat momenteel wordt
uitgezonden.
\ Een vergrendeld kanaal.
) Een gereserveerd programma.
¦ Favoriete kanalen gebruiken
* Mijn kanalen
(In Kanaalbeheer)
Hier ziet u alle favoriete kanalen.
■ Mijn kanalen bewerken t: u kunt de
geselecteerde kanalen aan de gewenste Mijn kanalengroep toevoegen.
✎Het symbool “*” wordt weergegeven en het kanaal
wordt als een van de ‘Mijn kanalen’ ingesteld.
1. Selecteer een kanaal en druk op de toets TOOLS.
2. Voeg een kanaal toe of verwijder een kanaal in de
Mijn kanaal-groepen tussen 1, 2, 3 en 4.
x U kunt een of meer groepen selecteren.
3. Nadat u de instellingen hebt gewijzigd, kunt u
de kanalenlijst voor elke groep in Mijn kanalen
bekijken.
c 1 1futech
c 2 * 24ore.tv
15 abc1
3 BBC World
23 bid-up.tv
33 Boonerang
32 Cartoon Nwk
5 Class News
4 \ Coming Soon
27 Discovery
All
TV
Radio
Data/Other
Analogue
r
Ant Antenne B Zoom Selecteren Pagina T Tools
Kanalen
Mijn kanalen bewerken
Vergrend.
Verwijderen
Niets select.
Alles select.
Het menu Kanaal
¦ Kanalen opnieuw afstemmen
Antenne (Ant / Kabel)
Voordat de beschikbare kanalen in het geheugen van uw
televisie kunnen worden opgeslagen, moet u het type
signaalbron opgeven dat op de tv is aangesloten (antenne
of kabel).
Land
Het invoerscherm voor de pincode verschijnt. Voer uw
viercijferige pincode in.
■ Digitaal kanaal: Hier kunt u het land voor digitale
kanalen wijzigen.
■ Analoog kanaal: Hier kunt u het land voor analoge
kanalen wijzigen.
BN68-02588F-Dut.indb 12 2010-03-26 �� 1:45:16Nederlands 13
03 Basisfuncties
Automatisch opslaan
Scant automatisch op een kanaal en slaat het op in het
geheugen van de tv.
✎Automatisch toegewezen programmanummers komen
mogelijk niet overeen met de feitelijke of gewenste
programmanummers. Wanneer een kanaal met de
functie Kinderslot is vergrendeld, verschijnt het
invoerscherm voor de pincode.
■ Antennebron (Ant / Kabel): selecteer de antennebron
die moet worden onthouden.
■ Kanaalbron (Digitaal en Analoog / Digitaal /
Analoog): Selecteer de kanaalbron die moet worden
onthouden.
Wanneer u Kabel → Digitaal en Analoog of Digitaal
selecteert: Geef een waarde op voor het scannen van
kabelkanalen.
Zoekmodus (Volledig / Netwerk / Snel): Scant op alle
kanalen met actieve zenders en slaat deze op in het
geheugen van de tv.
✎ Als u Snel kiest, kunt u Netwerk, Netwerk-ID,
Frequentie, Modulatie, Symboolfrequentie met
de toets van de afstandsbediening handmatig
instellen.
Netwerk (Auto / Handm.): Hiermee selecteert u de
instelmodus voor Netwerk-ID tussen Auto of Handm..
Netwerk-ID: Als Netwerk Handm. is, kunt u met de
cijfertoetsen de Netwerk-ID instellen.
Frequentie: Geeft de frequentie voor het kanaal weer.
(Verschilt per land)
Modulatie: Geeft de beschikbare modulatiewaarden
weer.
Symboolfrequentie: Geeft de beschikbare
symboolfrequenties weer.
Handm. opslaan
Scant handmatig op een kanaal en slaat het op in het
geheugen van de tv.
✎Wanneer een kanaal is vergrendeld met de functie
Kinderslot, wordt er een venster weergegeven waarin
u een pincode kunt opgeven.
■ Digitaal kanaal: (beschikbaar in DTV-modus) Wanneer
het scannen is voltooid, worden de kanalen in de
kanalenlijst bijgewerkt.
✎Wanneer u Antenne → Ant selecteert: Kanaal,
Frequentie, Bandbreedte.
✎Wanneer u Antenne selecteert → Kabel: Frequentie,
Modulatie, Symboolfrequentie.
■ Analoog kanaal (Prog., Kleursysteem,
Geluidssysteem, Kanaal, Zoeken ): Als er geen
geluid is of als het geluid vervormd klinkt, selecteert u
nogmaals de gewenste geluidsstandaard.
✎Kanaalmodus
x P (programmamodus): Als u klaar bent met
afstemmen, zijn de zenders die u kunt ontvangen
toegewezen aan de positienummers P0 tot P99. In
deze modus kunt u een kanaalnummer selecteren
door het positienummer in te toetsen.
x C (antennekanaalmodus) / S (kabelkanaalmodus): In
deze twee modi kunt u een kanaal selecteren door
het nummer in te toetsen dat aan de antenne- of
kabelzender is toegewezen.
¦ Kanalen bewerken
Het optiemenu van Kanaalbeheer gebruiken
(in Kanaalbeheer)
1. Selecteer een kanaal en druk op de toets TOOLS.
2. Wijzig de naam of het nummer van het kanaal via het
menu Kanaalnaam wijzigen of Kanaalnr. wijzigen.
■ Kanaalnaam wijzigen (alleen analoge kanalen): Zelf een
kanaalnaam invoeren.
■ Kanaalnr. wijzigen (alleen digitale kanalen): Het nummer
instellen met de toepasselijke nummertoetsen.
¦ Andere functies
Optie Kabel zoeken
(afhankelijk van het land)
Hiermee worden extra opties voor het zoeken naar
een kabelnetwerk ingesteld, zoals de frequentie en de
symboolfrequentie.
■ FStartfrequentie / Stopfrequentie: Hier stelt u de start-
en stopfrequentie in (verschilt per land).
■ Modulatie: Geeft de beschikbare modulatiewaarden
weer.
■ Symboolfrequentie: Geeft de beschikbare
symboolfrequenties weer.
BN68-02588F-Dut.indb 13 2010-03-26 �� 1:45:1614 Nederlands
Basisfuncties
Het optiemenu van Kanaalbeheer
(in Kanaalbeheer)
Stel de diverse kanalen in met behulp van de opties in
het menu Kanaalbeheer (Vergrendelen / Ontgrendelen,
Timerweergave) Sorteren, Verwijderen, Alles select.
/ Niets select.). Menuopties kunnen, afhankelijk van de
kanaalstatus, verschillen.
1. Selecteer een kanaal en druk op de toets TOOLS.
2. Selecteer een functie en wijzig eventueel de instelling.
■ Vergrendelen / Ontgrendelen: U kunt een kanaal
vergrendelen, zodat het niet geselecteerd en bekeken
kan worden.
✎OPMERKING
x Deze functie is alleen beschikbaar wanneer
Kinderslot is ingesteld op Aan.
x Het invoerscherm voor de pincode verschijnt. Voer
uw viercijferige pincode in (standaard is dit
“0-0-0-0”). U kunt de pincode veranderen met de
optie PIN wijzigen.
■ Timerweergave: U kunt instellen dat een kanaal
automatisch op een ingesteld tijdstip wordt
weergegeven. Om deze optie te kunnen gebruiken,
moet u eerst de huidige tijd instellen.
✎ Wanneer een digitaal kanaal is geselecteerd, drukt
u op de toet ► en om het digitale programma te
kijken.
■ Sorteren (alleen analoge kanalen): Hiermee kunt u
de programmanummers van de opgeslagen kanalen
wijzigen. Deze bewerking kan nodig zijn nadat u de
functie voor het automatisch opslaan van kanalen hebt
gebruikt.
■ Verwijderen: u kunt een kanaal verwijderen om de
gewenste kanalen weer te geven.
■ Alles select. / Niets select.: Selecteer alle kanalen of
geen van de kanalen in Kanaalbeheer.
Gepland
(in Kanaalbeheer)
U kunt een programma dat u hebt gereserveerd bekijken,
bewerken of verwijderen.
■ Info wijzigen: Een programma dat u hebt gereserveerd
wijzigen.
■ Progr. annuleren: Een programma dat u hebt
gereserveerd annuleren.
■ Informatie: Een programma dat u hebt gereserveerd
weergeven. (U kunt de reserveringsinformatie ook
wijzigen.)
■ Alles select. / Niets select.: Alle geplandeprogramma’s
selecteren of de selectie ervan opheffen.
Kanalenlijst
Hier kunt u alle gezochte kanalen zien.
Overdracht kanalenlijst
Hiermee kunt u het kanalenoverzicht importeren of
exporteren. U moet een USB-opslagapparaat aansluiten om
deze functie te kunnen gebruiken.
✎Het invoerscherm voor de pincode verschijnt. Geef uw
viercijferige pincode op.
✎ De standaardpincode van een nieuw tv-toestel is ‘0-0-
0-0’.
■ Importeren via USB: hiermee kunt u de lijst met kanalen
van uw USB-apparaat importeren.
■ Exporteren via USB: hiermee kunt u de lijst met
kanalen naar een USB-apparaat exporteren.
Fijnafstemming
(alleen analoge kanalen)
Als de ontvangst zwak is of wordt gestoord, kunt u een
kanaal handmatig nauwkeuriger instellen.
✎Fijnafgestemde kanalen zijn met een sterretje “*”
gemarkeerd.
✎ Als u de fijnafstellingen wilt resetten, selecteert u
Resetten.
Het menu Beeld
¦ De vooraf ingestelde beeldmodus wijzigen
Selecteer het beeldtype dat uw voorkeur heeft.
Modus t
■ Dynamisch: Geschikt voor een heldere kamer.
■ Standaard: Geschikt voor een normale omgeving.
■ Film: Geschikt om films in een donkere kamer te kijken.
¦ De beeldinstellingen aanpassen
Backlight / Contrast / Helderheid /
Scherpte / Kleur / Tint (G/R)
De tv heeft verschillende instelmogelijkheden voor de
beeldkwaliteit.
✎OPMERKING
x In de analoge modi TV, Ext., AV van het PALsysteem kunt u de functie Tint (G/R) niet gebruiken.
x In de PC-modus kunt u alleen wijzigingen
aanbrengen in Backlight, Contrast en Helderheid.
x Voor elk extern apparaat dat u op de tv hebt
aangesloten, kunt u de instellingen aanpassen en
opslaan.
x Als u de helderheid van het beeld omlaag brengt,
P daalt het energieverbruik.
POWER
GUIDE AD
MEDIA.P
SUBT.
DUAL
I-II
P.SIZE S.MODE P.MODE
BN68-02588F-Dut.indb 14 2010-03-26 �� 1:45:16Nederlands 15
03 Basisfuncties
¦ Economische oplossingen
ECO-oplossing
■ Spaarstand (Uit / Laag / Middel / Hoog / Beeld uit /
Auto)t: De helderheid van de tv aanpassen om
het energieverbruik te verminderen. Als u de optie Beeld
uit selecteert, wordt het scherm uitgeschakeld, maar
blijft u het geluid horen. Druk op een willekeurige knop
behalve de volumeknop om het scherm in te schakelen.
■ Geen signaal stdby (Uit / 15 min / 30 min / 60
min): Hiermee wordt de standbystand geactiveerd als
gedurende een door de gebruiker ingestelde tijd de status
“Geen signaal” of “Controleer signaalkabel” actief is.
✎ Deze optie is uitgeschakeld wanneer de pc zich in
de energiespaarstand bevindt.
¦ De beeldopties wijzigen
Geavanceerde instellingen
(beschikbaar in de modi Standaard / Film)
U kunt de gedetailleerde instellingen voor uw scherm
wijzigen, waaronder kleur en contrast.
✎In de PC-modus kunt u alleen wijzigingen aanbrengen
in Dynamisch contrast, Gamma en Witbalans.
Geavanceerde instellingen
Zwarttinten : Uit ►
Dynamisch contrast : Middel
Schaduwdetail : 0
Gamma : 0
RGB-modus : Uit
Kleurruimte : Eigen
Witbalans
▼
U Verplaatsen E Enter R Terug
■ Zwarttinten (Uit / Donker / Donkerder / Donkerste):
Selecteer het zwartniveau om de schermdiepte aan te
passen.
■ Dynamisch contrast (Uit / Laag / Middel / Hoog): Het
schermcontrast aanpassen.
■ Schaduwdetail (-2 – +2): De helderheid van donkere
beelden aanpassen.
✎ Uitgeschakeld in de PC-modus.
■ Gamma: de intensiteit van primaire kleuren aanpassen.
■ RGB-modus (Uit / Rood / Groen / Blauw): U kunt de
Kleur of Tint van Rood, Groen en Blauw voor het beeld
van een extern apparaat (dvd-speler, thuisbioscoop,
enz.) aanpassen.
■ Kleurruimte (Auto / Eigen): de reeks beschikbare
kleuren voor het beeld instellen.
■ Witbalans: De kleurtemperatuur aanpassen voor een
natuurlijker beeld.
R-basis/G-basis/B-basis: De donkerte voor elke kleur
(rood, groen, blauw) aanpassen.
R-niveau/G-niveau/B-niveau: De helderheid voor elke
kleur (rood, groen, blauw) aanpassen.
Resetten: Hiermee zet u de Witbalans terug op de
standaardinstellingen.
■ Huidkleur: Benadrukken van de roze “Huidkleur”.
■ Randverbetering (Uit / Aan): De randen van objecten
versterken.
Afbeeldingsopties
✎In de PC-modus kunt u alleen wijzigingen aanbrengen
in Kleur tint, Grootte en Autom. beveilig.tijd..
Afbeeldingsopties
Kleur tint : Normaal ►
Grootte : 16:9
Schermmodus : 16:9
Digitale ruisfilter : Auto
MPEG-ruisfilter : Auto
HDMI-zwartniveau : Normaal
Filmmodus : Uit
▼
U Verplaatsen E Enter R Terug
■ Kleur tint (Koel / Normaal / Warm1 / Warm2)
✎ Warm1 of Warm2 wordt in de afbeeldingsmodus
Dynamisch uitgeschakeld.
✎ Voor elk extern apparaat dat u op een van de tvingangen hebt aangesloten, kunt u de instellingen
aanpassen en opslaan..
BN68-02588F-Dut.indb 15 2010-03-26 �� 1:45:1716 Nederlands
Basisfuncties
■ Grootte: De kabelbox /
satellietontvanger heeft mogelijk ook een
eigen reeks schermformaten. U wordt
echter ten sterkste aangeraden om
meestal de 16:9-modus te gebruiken.
Auto-breed: Hiermee wordt het
beeldformaat automatisch op 16:9 ingesteld.
16:9 : Hiermee wordt het beeldformaat op 16:9 ingesteld
voor dvd’s of breedbeelduitzendingen.
Breedbeeldzoom: Hiermee wordt het beeld verder dan
4:3 vergroot.
✎ Pas de positie aan met de toetsen ▲ en ▼.
Zoom: Hiermee vergroot u het 16:9-breedbeeldformaat
verticaal zodat het schermvullend wordt.
✎ Pas de positie of grootte aan met de toetsen
▲ en ▼.
4:3 : Dit is de standaardinstelling voor een film of
normale uitzending.
✎ Gebruik de tv niet langdurig in 4:3-formaat.
Randen kunnen links, rechts en midden in het
scherm zichtbaar blijven en inbranden, en dit
wordt niet door de garantie gedekt.
Volledig scherm: Geeft het volledige, nietafgekapte beeld weer wanneer er een HDMIsignaal (720p/1080i/1080p) of Component-signaal
(1080i/1080p) wordt ontvangen.
✎OPMERKING
x Nadat u Volledig scherm in de modus HDMI
(1080i/1080p) of Component (1080i/1080p) hebt
gekozen:
1. Druk op de toets ◄ of ► om Positie te
selecteren.
2. Druk op de toets ENTERE.
3. Druk op de toets ▲, ▼, ◄ of ► om het beeld te
verplaatsen.
x Afhankelijk van de ingangsbron kunnen de opties
voor beeldformaat variëren.
x De beschikbare onderdelen kunnen, afhankelijk van
de geselecteerde modus, verschillen.
x In de PC-modus kunt u alleen de modi 16:9 en 4:3
aanpassen.
x Voor elk extern apparaat dat u op een van de tvingangen hebt aangesloten, kunt u de instellingen
aanpassen en opslaan..
x Als u de functie Volledig scherm gebruikt met
een ingangssignaal HDMI 720p, wordt 1 kaderlijn
verwijderd aan de bovenkant, onderkant, linkerkant
en rechterkant, zoals in de functie Overscan.
■ Schermmodus (16:9 / Breedbeeldzoom / Zoom /
4:3): Alleen beschikbaar wanneer het beeldformaat
is ingesteld op Auto-breed. U kunt de gewenste
beeldgrootte bepalen op het 4:3 WSS-formaat (Wide
Screen Service) of het originele formaat. De diverse
Europese landen hanteren verschillende beeldformaten.
✎ Niet beschikbaar in de PC-, Component- of HDMImodus.
■ Digitale ruisfilter (Uit / Laag / Middel / Hoog / Auto /
Automatische visualisatie): Als het uitgezonden signaal
zwak is, kunnen er ruis en echobeelden optreden.
Probeer de verschillende opties totdat het beeld het best
wordt weergegeven.
Automatische visualisatie: Geeft bij het wijzigen van
analoge kanalen de signaalsterkte weer.
✎ Alleen beschikbaar voor analoge kanalen.
✎ Wanneer de balk groen is, ontvangt u het best
mogelijke signaal.
■ MPEG-ruisfilter (Uit / Laag / Middel / Hoog / Auto):
Vermindert MPEG-ruis voor een betere beeldkwaliteit.
✎ Uitgeschakeld in de PC-modus.
■ HDMI-zwartniveau (Normaal / Laag): Selecteert het
zwartniveau op het scherm om de schermdiepte aan te
passen.
✎ Alleen beschikbaar in de HDMI-modus (RGBsignalen).
■ Filmmodus (Uit / Auto1 / Auto2): Stelt de tv in om
filmsignalen van alle bronnen automatisch te herkennen
en te verwerken en om het beeld aan te passen voor
optimale kwaliteit.
✎ Beschikbaar in de modi TV, AV, COMPONENT
(480i/1080i) en HDMI (480i/1080i).
■ Autom. beveilig.tijd (2 uur / 4 uur / 8 uur / 10 uur
/ Uit): Als hetzelfde beeld op het scherm blijft, wordt
de automatische beveiliging tegen inbranden van het
scherm geactiveerd.
Beeld resetten (OK / Annuleren)
Zet de huidige beeldmodus op de standaardinstellingen
terug.
P
POWER
GUIDE AD
MEDIA.P
SUB.T
DUAL
P.SIZE S.MODE P.MODE
BN68-02588F-Dut.indb 16 2010-03-26 �� 1:45:17Nederlands 17
03 Basisfuncties
¦ De tv instellen voor uw pc
Stel de ingangsbron in op PC.
Pas de frequentiewaarden/posities aan en stem de
Autom. afstellen t
instellingen automatisch fijn af.
✎Niet beschikbaar bij een aansluiting met een HDMI-/
DVI-kabel.
Scherm
■ Grof / Fijn: beeldruis verwijderen of verminderen. Als
door een fijnafstemming van het kanaal de ruis niet
verdwijnt, stelt u de frequentie zo goed mogelijk in (Grof)
en voert u opnieuw een fijnafstemming uit. Stel het beeld
opnieuw in het midden van het scherm in nadat de ruis
is verminderd.
■ Positie: Pas de positie van het pc-scherm aan met de
pijltoetsen (▲ / ▼ / ◄ / ►).
■ Beeld resetten: Het beeld wordt op de
standaardinstellingen teruggezet.
Uw tv als een computermonitor (pc) gebruiken
Software configureren (gebaseerd op Windows XP)
Afhankelijk van de Windows-versie en de videokaart kunnen
de schermen op de pc verschillen. Desondanks moeten
bijna altijd dezelfde basisinstellingen worden toegepast.
(Neem contact op met de computerfabrikant of Samsungleverancier als dit niet het geval is.)
1. Klik eerst op “Configuratiescherm” in het menu Start van
Windows.
2. Klik op “beeldscherm” in het “Configuratiescherm”. Er
verschijnt een dialoogvenster.
3. Klik op “Monitor”, waarna er een dialoogvenster
verschijnt.
4. Selecteer het tabblad “Instellingen” in het dialoogvenster.
y Selecteer de juiste beeldgrootte (resolutie) [Optimaal:
1360 x 768 pixels]
y Als het dialoogvenster een optie bevat voor het instellen
van de verticale frequentie, is de juiste waarde “60” of “60
Hz”. Klik anders op “OK” om het dialoogvenster te sluiten.
Het menu Geluid
¦ De vooraf ingestelde geluidsmodus wijzigen
■
Modus
Standaard
t: Selecteert de normale geluidsmodus.
■ Muziek: geeft voorrang aan muziek ten opzichte van
stemmen.
■ Film: geeft optimaal geluid voor films.
■ Heldere spraak: Hiermee legt u meer nadruk op
stemmen dan op andere geluiden.
■ Versterken: Hiermee versterkt u de intensiteit van hoge
frequenties in het geluid zodat slechthorenden het beter
kunnen volgen.
¦ Geluidsinstellingen aanpassen
Toonregeling
Past de geluidsmodus aan.
■ Balans L / R: regelt de balans tussen de linker- en de
rechterluidspreker.
■ 100Hz / 300Hz / 1kHz / 3kHz / 10kHz
(bandbreedteaanpassing): Past het niveau van specifieke
bandbreedtefrequenties aan.
■ Resetten: De equalizer op de standaardinstellingen
terugzetten.
¦ Geluidssystemen e.d.
Virtual Surround (Uit / Aan)
Deze functie zorgt door middel van HrTF-technologie (Head
related Transfer Function) voor een virtuele beleving van
5.1-kanaals surroundgeluid via een paar luidsprekers of een
koptelefoon.
✎Als Luidspreker selecteren is ingesteld op Ext.
luidspreker is Virtual Surround uitgeschakeld.
Heldere spraak (Uit / Aan)
Met deze functie kunt u de intensiteit van een stem
versterken zodat deze boven achtergrondmuziek of
geluidseffecten uitkomt en dialogen tijdens een programma
beter te volgen zijn.
Taal voor audio
(alleen digitale kanalen)
Wijzig de standaardinstelling voor audiotalen.
✎Welke taal beschikbaar is, kan per uitzending
verschillen.
Geluidsformaat (MPEG / Dolby Digital 5.1)
(alleen digitale kanalen)
Wanneer de hofdluidspreker en de audio-ontvanger beide
geluid voortbrengen, kan er echo optreden omdat geluid in
de hoofdluidspreker en de audio-ontvanger niet op gelijke
snelheid wordt gedecodeerd. gebruik in dat geval de functie
TV-luidspreker.
✎De optie van Geluidsformaat kan per uitzending
verschillen. 5.1-kanaals Dolby digital-geluid is alleen
beschikbaar wanneer u een externe luidspreker via een
optische kabel aansluit.
BN68-02588F-Dut(1-25).indd 17 2010-3-29 9:43:5718 Nederlands
Basisfuncties
Audiobeschrijving
(niet overal beschikbaar)
(alleen digitale kanalen)
Deze functie verwerkt het geluidsspoor
(Audio Stream) voor de AD (Audio
Description), dat samen met het
hoofdgeluid (Main audio) wordt
uitgezonden.
■ Audiobeschrijving (Uit / Aan): De geluidsbeschrijving
in- of uitschakelen.
■ Volume: Het volume voor de audiobeschrijving
bedienen.
Auto Volume (Uit / Normaal / Nacht)
Als u het volume op elk kanaal gelijk wilt zetten, stelt u
Normaal in.
■ Nacht: Deze modus biedt een verbeterde
geluidsbeleving in vergelijking met de modus Normaal,
maar met weinig geluid. Dit is ‘s nachts erg handig.
Luidspreker selecteren
(Ext. luidspreker / TV-luidspreker)
Door een verschil in decodeersnelheid tussen de
hoofdluidspreker en de audio-ontvanger kan er een echo
ontstaan. Zet de tv in dat geval op Ext. luidspreker.
✎Als Luidspreker selecteren is ingesteld op Ext.
luidspreker werken de volume- en MUTE-toetsen niet
en zijn de geluidsinstellingen beperkt.
✎Als Luidspreker selecteren is ingesteld op Ext.
luidspreker kunt u het beste deze instellingen
gebruiken.
x TV-luidspreker: Uit, Ext. luidspreker: Aan
✎Als Luidspreker selecteren is ingesteld op TVluidspreker kunt u het beste deze instellingen
gebruiken.
x TV-luidspreker: Aan, Ext. luidspreker: Aan
✎Als er geen videosignaal is, komt er uit beide
luidsprekers geen geluid.
Extra instelling
(alleen digitale kanalen)
■ DTV-geluidsniveau (MPEG / HE-AAC): met deze
functie kunt u de ongelijkheid van een spraaksignaal
(een van de signalen die tijdens een digitale tv-uitzending
worden ontvangen) omlaagbrengen tot een gewenst
niveau.
✎ Afhankelijk van het uitgezonden signaaltype kan
MPEG / HE-AAC tussen -10 dB en 0 dB worden
afgesteld.
✎ Als u het volume wilt verhogen of verlagen, stelt u
dit bij tussen 0 en -10.
■ SPDIF-uitvoer: SPDIF (Sony Philips Digital InterFace)
wordt gebruikt voor de levering van digitaal geluid,
waardoor de interferentie naar luidsprekers en diverse
digitale apparaten zoals dvd-spelers wordt tegengegaan.
Geluidsformaat: Tijdens de ontvangst van een digitale
tv-uitzending kunt u SPDIF-uitvoer (Digital Audioformaat) kiezen bij de opties PCM, Dolby Digital of
DTS.
✎ Wanneer u 5.1-kanaals luidsprekers op een Dolby
Digital-installatie aansluit, haalt u het maximale uit
uw interactieve 3D-geluidsbeleving.
Geluidsvertraging: Corrigeert verschil tussen beeld en
geluid wanneer u een tv-programma of een video bekijkt
en luistert naar digitale audio via een extern apparaat
zoals een AV-ontvanger.
■ Dolby Digital Comp (Line / RF): Met deze functie
minimaliseert u signaalongelijkheid tussen een Dolby
digital-signaal en een spraaksignaal (MPEG Audio, HEAAC, ATV Sound).
✎ Selecteer Line voor een dynamisch geluid en RF
om het verschil tussen harde en zachte geluiden ‘s
nachts te verkleinen.
Line: Stel het uitvoerniveau voor signalen van meer of
minder dan -31 dB (referentie) op -20 dB of -31 dB.
RF: Stel het uitvoerniveau voor signalen van meer of
minder dan -20 dB (referentie) op -10 dB of -20 dB.
Geluid resetten (OK / Annuleren)
Zet alle geluidsinstellingen terug op de standaard
fabrieksinstellingen.
P
POWER
GUIDE AD
MEDIA.P
SUBT.
DUAL
I-II
P.SIZE S.MODE P.MODE
BN68-02588F-Dut.indb 18 2010-03-26 �� 1:45:17Nederlands 19
03 Basisfuncties
Het menu Instellingen
¦ De tijd instellen
Tijd
■ Klok: Het instellen van de klok is belangrijk voor de
diverse timerfuncties van de tv.
O De huidige tijd wordt telkens weergegeven
wanneer u op de toets INFO drukt.
✎ Als u het netsnoer hebt losgekoppeld, moet u de
klok opnieuw instellen.
Klokmodus (Auto / Handmatig)
✎ Afhankelijk van de zender en het signaal wordt de
tijd wellicht niet juist ingesteld. In dat geval stelt u
de tijd handmatig in.
✎ De antenne moet aangesloten zijn als u de tijd
automatisch wilt kunnen instellen.
Klok instelle: stel Dag, Maand, Jaar, Uur en Minuut
handmatig in.
✎ Alleen beschikbaar als Klokmodus op
Handmatig is ingesteld.
¦ De Slaaptimer gebruiken
■ Slaaptimer t: De tv wordt hiermee
automatisch na een ingestelde tijdsduur uitgeschakeld.
(30, 60, 90, 120, 150 en 180 minuten).
✎ Om de functie Slaaptimer te annuleren, selecteert
u Uit.
¦ De In- / uitschakeltijd instellen
■ Timer 1 / Timer 2 / Timer 3: U kunt drie verschillende
timerinstellingen opgeven. Daarvoor moet u wel eerst de
klok instellen.
10 TV ATV 0
00 00
▲
▼
00 00
▲
▼
Timer 1
Inschakeltijd
Uitschakeltijd
Volume
Deactiv.
Deactiv.
Zo Ma Di Wo Do Vrij Za
Eenmaal
Bron Antenne Kanaal
Herhalen
L Verplaatsen U Instellen E Enter R Terug
Inschakeltijd / Uitschakeltijd: Het uur en de minuut
instellen en activeren/deactiveren. (Als u de timer met de
gewenste instelling wilt activeren, kiest u Activeren.)
Volume: Het gewenste geluidsvolume instellen.
Bron: Selecteer Tv- of USB-inhoud om af te spelen
wanneer de tv automatisch wordt ingeschakeld. (USB
kan alleen worden geselecteerd als er een USBapparaat op de tv is aangesloten)
Antenne (wanneer Bron is ingesteld op Tv): Selecteer
ATV of DTV.
Kanaal (wanneer Bron is ingesteld op Tv): Selecteer het
gewenste kanaal.
Inhoud (wanneer Bron is ingesteld op USB): Selecteer
een map op het USB-apparaat met muziek- of
fotobestanden die u wilt afspelen wanneer de tv
automatisch wordt ingeschakeld.
✎ Als het USB-apparaat geen muziekbestanden
bevat of de map met muziekbestanden niet is
geselecteerd, werkt de timerfunctie niet goed.
✎ Als er slechts één fotobestand op het USBapparaat aanwezig is, wordt er geen Diashow
weergegeven.
✎ Als een mapnaam te lang is, kan de map niet
worden geselecteerd.
✎ Elk USB-apparaat dat u gebruikt krijgt een
eigen map toegewezen. Gebruikt u meerdere
USB-apparaten van hetzelfde type, zorg dan
dat de mappen die eraan zijn toegewezen een
verschillende naam hebben.
Herhalen: Selecteer Eenmaal, Dagelijks, Ma-Vr,
Ma-Za, Za-Zo of Handmatig. Wanneer u Handmatig
selecteert, kunt de dag instellen waarop u de timer wilt
activeren.
✎ De markering c geeft aan dat de dag is
geselecteerd.
✎Automatisch uitschakelen (alleen beschikbaar als de
tv door de timer wordt ingeschakeld): de tv wordt
automatisch na 3 uur inactiviteit uitgeschakeld om
oververhitting te voorkomen.
¦ Programma’s vergrendelen
Beveiliging
✎Voordat het instellingenscherm wordt geopend,
verschijnt het invoerscherm voor de pincode.
✎Voer uw viercijferige pincode in (standaard is dit “0-0-
0-0”). U kunt de pincode veranderen met de optie PIN
wijzigen.
■ Kinderslot (Uit / Aan): Kanalen in Kanaalbeheer
vergrendelen om te voorkomen dat ongeautoriseerde
gebruikers, zoals kinderen, naar ongeschikte
programma’s kijken.
✎ Alleen beschikbaar als de Invoer is ingesteld op Tv.
■ Kinderslot (Ouderlijke classificering): Met een zelf
ingestelde viercijferige pincode kunt u voorkomen dat
ongeautoriseerde gebruikers, zoals kinderen, naar
ongeschikte programma’s kijken.
Alles toestn: Alle tv-classificaties ontgrendelen.
✎ De opties van Kinderslot kunnen per land
verschillen.
BN68-02588F-Dut.indb 19 2010-03-26 �� 1:45:1820 Nederlands
Basisfuncties
■ PIN wijzigen: Uw persoonlijke code wijzigen die vereist
is voor het instellen van de tv.
✎ Als u de pincode bent vergeten, drukt u
achtereenvolgens op de volgende toetsen van
de afstandsbediening zodat de pincode opnieuw
wordt ingesteld op ‘0-0-0-0’: POWER (uit) →
MUTE → 8 → 2 → 4 → POWER (aan).
¦ Andere functies
Taalkeuze
■ Taalkeuze: De menutaal instellen.
■ Teleteksttaal: De gewenste taal voor teletekst instellen.
✎ Engels is de standaardtaal als de geselecteerde
taal niet beschikbaar is in de uitzending.
■ Voorkeur (Eerste taal voor audio / Tweede taal voor
audio / Eerste taal ondertitel / Tweede taal ondertitel
/ Eerste taal teletekst / Tweede taal teletext):
Selecteer een taal als standaardtaal voor wanneer een
kanaal wordt geselecteerd.
Ondertiteling
Gebruik dit menu om de modus
Ondertiteling in te stellen.
✎De ondertitelingsfunctie werkt niet in
de modi Component of HDMI.
■ Ondertiteling (Uit / Aan): Ondertitels
in- of uitschakelen.
■ Modus (Normaal / Slechthorenden): De
ondertitelingsmodus instellen.
■ Ondertitelingstaal: De ondertitelingstaal instellen.
✎ Wanneer u naar een programma kijkt dat de
functie Slechthorenden niet ondersteunt, wordt
Normaal automatisch geactiveerd, zelfs wanneer
de modus Slechthorenden is geselecteerd.
✎ Engels is de standaardtaal als de geselecteerde
taal niet beschikbaar is in de uitzending.
Digitale tekst (Uitschakelen / Inschakelen)
(alleen UK)
Als het programma wordt uitgezonden met digitale tekst, is
deze functie beschikbaar.
Algemeen
■ Spelmodus (Uit / Aan): Als u een spelcomputer
aansluit, zoals de PlayStation™ of Xbox™, kunt u een
realistischere spelbeleving krijgen door deze modus te
selecteren.
✎OPMERKING
x Voorzorgen en beperkingen voor Spelmodus
– Als u de spelcomputer wilt loskoppelen en een
ander extern apparaat aansluiten, zet u in het
instellingenmenu Spelmodus op Uit.
– Als u in de Spelmodus het tv-menu weergeeft, zal
het beeld een beetje trillen.
x Spelmodus is niet beschikbaar in de normale modi
Tv en PC.
x Nadat u de spelconsole hebt aangesloten, stelt u
Spelmodus in op Aan om een slechte beeldkwaliteit
te voorkomen.
x Als Spelmodus is ingesteld op Aan: De modus
Beeld is ingesteld op Standaard en de modus
Geluid is ingesteld op Film.
■ Transp. menu (Helder / Donker): De transparantie van
het menu instellen.
■ Melodie (Uit / Laag / Middel / Hoog): Instellen dat
een melodie wordt afgespeeld als de tv wordt in- of
uitgeschakeld.
Algemene interface
■ CI-menu: Hiermee kunt u het CAM-menu selecteren.
Selecteer het CI-menu op basis van het menu PC Card.
■ Toepassingsinfo: Informatie bekijken op de CAM die
in de CI-sleuf is geplaatst en op de CI-/CI+-kaart die in
de CAM is geplaatst. U kunt de CAM altijd installeren,
ongeacht of de tv is in- of uitgeschakeld.
1. De CI CAM-module kunt u verkrijgen bij uw lokale
leverancier of door deze telefonisch te bestellen.
2. Steek de CI-/CI+-kaart stevig in de CAM in de richting
van de pijl.
3. Steek de CAM met de CI-/CI+-kaart in de COMMON
INTERFACE-aansluiting, in de richting van de pijl, zodat
de kaart parallel met de sleuf is.
4. Controleer of u een beeld op een kanaal met een
gecodeerd signaal kunt bekijken.
P
POWER
GUIDE AD
MEDIA.P
SUBT.
DUAL
I-II
P.SIZE S.MODE P.MODE
BN68-02588F-Dut.indb 20 2010-03-26 �� 1:45:18Nederlands 21
03 Basisfuncties
Het menu Ondersteuning
Zelfdiagnose
■ Het beeld testen (Ja / Nee): Controleer hiermee of
er problemen met het beeld zijn en als een probleem
aanhoud, het kleurpatroon.
■ Het geluid testen (Ja / Nee): Gebruik de ingebouwde
melodie om te controleren of er geluidsproblemen zijn.
✎ Als u geen geluid hoort via de luidsprekers van de
tv controleert u voordat u de geluidstest uitvoert
of in het menu Geluid de optie Luidspreker
selecteren is ingesteld op TV-luidspreker.
✎ De melodie kunt u zelfs tijdens de test horen als
Luidpreker selecteren is ingesteld op Externe
luidspreker of als het geluid is gedempt doordat
er op de toets MUTE is gedrukt.
■ Signaalinformatie: (alleen digitale kanalen) De
ontvangstkwaliteit van het HDTV-kanaal is ofwel perfect,
ofwel de kanalen zijn niet beschikbaar. Stel de antenne
bij om de signaalsterkte te vergroten.
■ Problemen oplossen: Raadpleeg deze beschrijving als
er een probleem met de tv lijkt te zijn.
✎ Als geen van deze tips om problemen op te lossen
van toepassing is kunt u contact opnemen met de
klantenservice van Samsung.
Software-upgrade
Een Software-upgrade kan worden uitgevoerd via een
uitzendsignaal of door de nieuwste firmware van samsung.
com op een USB-stick te downloaden.
Huidige versie is de software die al op de tv is geïnstalleerd.
✎De software wordt weergegeven als “Jaar/Maand/
Dag_Versie”.
Software-upgrade
Huidige versie 2010/01/18_000001
U Verplaatsen E Enter R Terug
Via USB ►
Via kanaal
Upgrade standby-modus Uit
Alternatieve software ----/--/--/--_------
De nieuwste versie installeren
■ Via USB: steek een USBstick met het bestand van
de firmware-upgrade dat
u van www.samsung.com
hebt gedownload in de tv.
Let op dat u het apparaat
niet uitschakelt of de USBgeheugenschijf verwijdert
totdat de upgrade is
voltooid. Nadat de firmwareupgrade is voltooid, wordt
de tv automatisch uit- en weer ingeschakeld. Bij een
software-upgrade worden de standaard video- en audioinstellingen (fabrieksinstellingen) weer teruggezet. Het is
dan ook raadzaam om uw instellingen te noteren, zodat
u deze na de upgrade eenvoudig kunt terugzetten.
■ Via kanaal: Hiermee worden firmware-upgrades via het
uitzendkanaal uitgevoerd.
✎ Als de functie tijdens de softwareoverdrachtsperiode
wordt geselecteerd, wordt er automatisch naar
software gezocht en wordt deze gedownload.
✎ De benodigde tijd voor het downloaden van de
software wordt door de signaalstatus bepaald.
■ Upgrade standby-modus: Er wordt op de
geselecteerde tijd automatisch een handmatige upgrade
uitgevoerd. Omdat de tv intern wordt ingeschakeld, kan
dit ertoe leiden dat op het lcd-scherm vage beelden
verschijnen. Dit kan meer dan een uur duren totdat de
software-upgrade is voltooid.
■ Alternative Software (back-up): Als er een probleem
is met de nieuwe firmware en dit de werking van de tvfuncties beïnvloedt, kunt u de voorgaande versie van de
software weer terugzetten.
✎ Als de software was gewijzigd, wordt de huidige
software weergegeven.
Gebruiksaanwijzing HD-verbinding
Raadpleeg deze informatie wanneer u externe apparaten op
de tv aansluit.
Contact opnemen met Samsung
Bekijk deze informatie wanneer uw tv niet naar behoren
werkt of wanneer u de software wilt bijwerken. U vindt hier
informatie over onze klantenservice en over hoe u producten
en software kunt downloaden.
Zijpaneel van de tv
USB-stick
BN68-02588F-Dut.indb 21 2010-03-26 �� 1:45:1922 Nederlands
Uitgebreide functies
Geniet van foto-, muziek- en filmbestanden die op
een USB MSC-apparaat en.
Media Play
¦ Een USB-apparaat aansluiten
1. Zet de tv aan.
2. Sluit een USB-apparaat met foto- en/of muziek aan op de
USB -aansluiting aan de zijkant van de tv.
3. Wanneer het USB-apparaat op de tv is aangesloten, verschijnt er een popupvenster. Vervolgens kunt u Media Play selecteren.
✎Dit werkt mogelijk niet naar behoren bij multimediabestanden zonder licentie.
✎Wat u moet weten voordat u Media Play gaat gebruiken
x MTP (Media Transfer Protocol) wordt niet ondersteund.
x Het bestandssysteem ondersteunt FAT16, FAT32 en NTFS.
x Bepaalde types digitale camera’s en geluidsapparatuur zijn mogelijk niet
compatibel met dit toestel.
x Media Play ondersteunt alleen USB-massaopslagapparatuur (MSC). MSC staat voor Mass Storage Class,
een apparaat waarop grote hoeveelheden gegevens tegelijk kunnen worden opgeslagen en getransporteerd.
Voorbeelden van MSC’s zijn USB-sticks, Flash-kaartlezers schijven (USB-HUB’s worden niet ondersteund.)
Apparaten moeten rechtstreeks op de USB-aansluiting van de tv worden aangesloten.
x Maak een back-up van uw bestanden voordat u het apparaat aansluit op de tv om beschadiging of verlies van uw
gegevens te voorkomen. SAMSUNG is niet verantwoordelijk voor beschadiging of verlies van gegevens.
x Verwijder het USB-apparaat niet terwijl gegevens worden geladen.
x Hoe hoger de resolutie van het beeld, des te langer duurt het voordat het op het scherm wordt weergegeven.
x De maximaal ondersteunde JPEG-resolutie is 15.360 x 8640 pixels.
x Bij bestanden die niet worden ondersteund of die zijn beschadigd wordt de boodschap “Niet-ondersteunde
bestandsindeling” weergegeven.
x Als de bestanden op Alg. weergave zijn gesorteerd, kunnen er in elke map maximaal 1000 bestanden worden
weergegeven.
x MP3-bestanden met DRM die tegen betaling zijn gedownload kunnen niet worden afgespeeld. Digital Rights
Management (DRM) is een technologie voor het creëren van inhoud en de distributie en het beheer van de inhoud
op een geïntegreerde en veelzijdige wijze, met inbegrip de bescherming van de rechten en belangen van de
producenten, het voorkomen van het illegaal kopiëren van de inhoud en het beheren van rekeningen en betalingen.
x Als er meer dan 2 PTP-apparaten zijn aangesloten, kunt u er slechts één tegelijk gebruiken.
x Als er meer dan twee MSC-apparaten zijn aangesloten, worden sommige mogelijk niet herkend. Als een USBapparaat meer energie nodig heeft (meer dan 500 mA of 5 V), wordt het mogelijk niet ondersteund.
x Als er een waarschuwing van te veel energie wordt weergegeven wanneer u een USB-apparaat aansluit, wordt het
apparaat mogelijk niet herkend of werkt het mogelijk niet goed.
x Als de tv gedurende de tijd die is opgegeven bij Autom. beveilig.tijd, geen invoer ontvangt, wordt de
schermbeveiliging uitgevoerd.
x Als er een USB-verlengkabel wordt gebruikt, wordt het USB-apparaat mogelijk niet herkend of kunnen de bestanden
op het apparaat mogelijk niet worden gelezen.
x Als het USB-apparaat dat op de tv is aangesloten niet wordt herkend, is de lijst met bestanden op het apparaat
mogelijk beschadigd of wordt een bestand in de lijst niet afgespeeld. Sluit het USB-apparaat aan op de pc,
formatteer het apparaat en controleer de aansluiting.
x Als een bestand dat van de pc is verwijderd nog steeds wordt gevonden wanneer Media Play wordt uitgevoerd,
gebruikt u de functie ‘Prullenbak leegmaken’ m het bestand definitief te verwijderen.
P
POWER
GUIDE AD
MEDIA.P
SUBT.
DUAL
P.SIZE S.MODE P.MODE
Apparaatnaam A Apparaat wijzigen D Apparaatmodus EEnter R Terug
MediaPlay
USB-stick
Zijpaneel van de tv
BN68-02588F-Dut.indb 22 2010-03-26 �� 1:45:20Nederlands 23
04 Uitgebreide functies
¦ Schermweergave
Ga naar het gewenste bestand met de toetsen voor omhoog / omlaag / links / rechts en druk op de toets ENTERE.
Het bestand wordt afgespeeld.
✎Ondersteunt de Apparaatmodus en Inhoudsmodus voor de homepage van Media Play.
Muziek
Muziek afspelen
1. Druk op de toets ◄ of ► om Muziek te selecteren en druk
vervolgens op de toets ENTERE in het menu Media Play.
2. Druk op de toets ◄/►/▲/▼ om de gewenste Muziek in de
bestandenlijst te selecteren.
3. Druk op de toets ENTERE.
– Tijdens het afspelen van muziek kunt u zoeken met de toetsen
◄ en ►.
✎U ziet hier alleen bestanden met de extensie .MP3 en .PCM.
Bestanden met andere extensies worden niet weergeven, ook al
staan ze wel op het USB-apparaat.
✎Als het geluid bij het afspelen van MP3-bestanden ongewoon
klinkt, past u de Toonregeling in het menu Geluid aan.
(Een overgemoduleerd MP3-bestand kan geluidsproblemen
veroorzaken.)
Only you
Jason
1st Album
Pop
2010
4.2MB
3/15
Only you
Jason
Music 1
No Singer
Music 2
No Singer
Music 3
No Singer
Music 4
No Singer
Music 5
No Singer
01:10 / 04:02
Playlist
Apparaatnaam EPauze LSpringen TTools R Terug
Bestandenlijst:
Hier kunt u de bestanden
en groepen die in de diverse
categorieën zijn gesorteerd,
controleren.
Bedieningstoetsen
A Rood (Apparaat wijzigen): Hiermee selecteert u een aangesloten apparaat.
B Groen (Voorkeur): Hiermee stelt u de bestandsvoorkeur in. (niet ondersteund in de algemene
weergave)
C Geel (Selecteren): Hiermee selecteert u meerdere bestanden in de lijst. De geselecteerde bestanden
worden gemarkeerd met een symbool.
D Blauw (Sorteren): Hiermee selecteert u de sorteerlijst.
T (Tools): Hiermee opent u het optiemenu.
Informatie:
Hier ziet u de naam van het
geselecteerde bestand en het
aantal bestanden en pagina’s.
Sorteerlijst:
Hier ziet u de sorteervolgorde.
✎ De sorteervolgorde kan
afhankelijk van de inhoud
verschillend zijn.
Apparaatnaam A Apparaat wijzigen C Selecteren D Sorteren T Tools
c
c
c
Music 01 2010
no singer other
Music 02 2010
no singer other
Music 03 2010
no singer other
Music 04 2010
no singer other
Music 05 2010
no singer other
Music 06 2010
no singer other
Music 07 2010
no singer other
Music 08 2010
no singer other
Music /Music 01.mp3 1/2
BN68-02588F-Dut.indb 23 2010-03-26 �� 1:45:2124 Nederlands
Uitgebreide functies
Foto’s
Een foto (of Diashow) bekijken
1. Druk op de toets ◄ of ► om Foto's te selecteren en druk vervolgens op
de toets ENTERE in het menu Media Play.
2. Druk op de toets ◄/►/▲/▼ om de gewenste foto in de bestandenlijst te
selecteren.
3. Druk op de toets ENTERE.
– Druk op het moment dat een fotolijst wordt weergegeven op de toets
ENTERE op de afstandsbediening om de Diashow te starten.
– Alle bestanden in de bestandenlijst worden in de Diashow
weergegeven.
– Tijdens de Diashow worden de bestanden in volgorde afgebeeld vanaf
het op dat moment bestand.
✎U kunt automatisch muziekbestanden laten afspelen tijdens een diashow
als de instelling Achtergrondmuziek op Aan is gezet.
✎De Achtergrondmuziek-modus kan niet worden gewijzigd voordat de
achtergrondmuziek is geladen.
¦ Meerdere bestanden afspelen
De geselecteerde video- / muziek- / fotobestanden afspelen
1. Druk op de gele toets om het gewenste bestand in de bestandenlijst te
selecteren.
2. Herhaal deze procedure om meerdere bestanden te selecteren.
✎ OPMERKING
x Het symbool (c) verschijnt links van de geselecteerde
bestanden.
x U annuleert een selectie door nogmaals op de gele toets te
drukken.
x Als u de selectie van alle bestanden ongedaan wilt maken,
drukt u op de toets TOOLS en selecteert u Niets selecteren.
3. Druk op de toets TOOLS en selecteer Geselecteerde inhoud afspelen.
De groep video- / muziek- / fotobestanden afspelen
1. Ga terwijl er een bestandenlijst wordt weergegeven naar een willekeurig
bestand in de gewenste groep.
2. Druk op de toets TOOLS en selecteer Huidige groep afspelen.
¦ Andere functies van Media Play
De bestandslijst sorteren
Druk in de bestandslijst op de blauwe knop om de bestanden te sorteren.
Categorie Betekenis Muziek Foto's
Alg. weergave
Hiermee wordt de volledige map weergegeven. U kunt de foto weergeven door de map te
selecteren.
✓ ✓
Titel
De bestanden worden op titel gesorteerd en weergegeven in de volgorde symbool / cijfer / letter
/ speciaal.
✓ ✓
Voorkeur
Hiermee worden bestanden op voorkeur gesorteerd en weergegeven. U kunt de
bestandsvoorkeur in de bestandslijst aanpassen met behulp van de groene toets.
✓ ✓
Recentste datum Hiermee worden foto's aflopend op datum gesorteerd en weergegeven. ✓
Oudste datum Hiermee worden foto's oplopend op datum gesorteerd en weergegeven. ✓
Artiest Hiermee wordt de muziek in alfabetische volgorde op artiest gesorteerd. ✓
Album Hiermee wordt de muziek in alfabetische volgorde op album gesorteerd. ✓
Genre Hiermee worden de muziekbestanden op genre gesorteerd. ✓
Stemming
Hiermee worden de muziekbestanden op stemming gesorteerd. U kunt de stemminginfo van de
muziek zelf instellen.
✓
Maand. Hiermee worden de foto's op maand gesorteerd en weergegeven. ✓
Normaal Image1024.jpg 1024x768 2010/2/1 3/15
Apparaatnaam EPauze LVorige/Volgende TTools R Terug
Apparaatnaam A Apparaat wijzigen C Selecteren D Sorteren T Tools
c
c
c
Music 01 2010
no singer other
Music 02 2010
no singer other
Music 03 2010
no singer other
Music 04 2010
no singer other
Music 05 2010
no singer other
Music 06 2010
no singer other
Music 07 2010
no singer other
Music 08 2010
no singer other
Music /Music 01.mp3 1/2
BN68-02588F-Dut.indb 24 2010-03-26 �� 1:45:22Nederlands 25
04 Uitgebreide functies
Opties voor het afspelen van muziek / foto’s
Categorie Betekenis Muziek Foto's
Herhalingsmodus Hiermee kunt u film- en muziekbestanden herhaald afspelen. ✓
Beeldinstelling Hiermee kunt u de beeldinstelling aanpassen. (pag. 14, 15 16) ✓
Geluidinstelling Hiermee kunt u de geluidsinstelling aanpassen. (pag. 17, 18) ✓ ✓
Diashow stoppen /
Diashow starten
Hiermee kunt u een Diashow starten en stoppen. ✓
Diashowsnelheid Hiermee kunt u tijdens een Diashow de snelheid van de weergave bedienen. ✓
Zoom Hiermee kunt u in de volledige-schermmodus op afbeeldingen inzoomen. ✓
Draaien Hiermee kunt u de afbeeldingen in de volledige-schermmodus draaien. ✓
Informatie Hiermee kunt u gedetailleerde informatie over het actuele bestand krijgen. ✓ ✓
Instellingen
Instellingen gebruiken
■ Informatie: hiermee kunt u informatie over het aangesloten apparaat weergeven.
BN68-02588F-Dut.indb 25 2010-03-26 �� 1:45:2226 Nederlands
Overige informatie
De teletekstfunctie van het analoge kanaal
Op de indexpagina van de teletekstdienst vindt u informatie over het gebruik van teletekst. Voor een juiste weergave van
teletekstinformatie is een stabiele kanaalontvangst vereist. Anders kan bepaalde informatie ontbreken of worden bepaalde
pagina’s niet weergegeven.
✎U kunt de teletekstpagina’s veranderen met de cijfertoetsen op de afstandsbediening.
Overige informatie
De teletekstpagina’s zijn in zes categorieën verdeeld:
Onderdee Inhoud Onderdeel Inhoud
A Geselecteerd paginanummer. D Datum en tijd.
B Aanduiding zendkanaal. E Tekst.
C
Huidig paginanummer of
zoekindicaties.
F
Statusinformatie.
FASTEXT-informatie.
MEDIA.P
A B C D
1
3
4
2
5
8
7
0
!
@
6
9
1 /(Teletekst aan/mix):
Activeer teletekst nadat u het
kanaal dat de teletekstdienst
aanbiedt, hebt geselecteerd. Druk
tweemaal op deze toets om het
op dat moment televisiebeeld over
de teletekstpagina heen weer te
geven.
2 8(opslaan): De
teletekstpagina's opslaan.
3 4(grootte): De tekst in de
bovenste helft van het scherm
twee keer zo groot weergeven.
Druk nogmaals op deze toets voor
de onderste helft van het scherm.
Druk nogmaals op deze toets voor
de normale weergave.
4 9(vastzetten): Een roulerende
pagina vastzetten. Druk nogmaals
op deze toets om het rouleren te
hervatten.
5 0(modus): De teletekstmodus
(LIST/FLOF) selecteren.
Als u in de LIST-modus op deze
toets drukt, wordt overgeschakeld
naar de List-opslagmodus. In deze
modus kunt u teletekstpagina's
met behulp van de toets
8(opslaan) in een lijst opslaan.
6 1(subpagina): De beschikbare
subpagina weergeven.
2(volgende pagina): De
volgende teletekstpagina
weergeven.
7
3(vorige pagina): De vorige
teletekstpagina weergeven.
8
6(index): De indexpagina
(inhoudspagina) tijdens het gebruik
van teletekst weergeven.
9
5(tonen): Verborgen tekst
weergeven (bijvoorbeeld
antwoorden op quizvragen). Druk
nogmaals op deze toets voor de
normale weergave.
0
7(annuleren): De huidige
uitzending weergeven terwijl u een
pagina zoekt.
!
Gekleurde toetsen (rood/
groen/geel/blauw): Als een
omroep gebruikmaakt van het
FASTEXT-systeem, worden de
verschillende onderwerpen op
een teletekstpagina van een
kleurcodering voorzien, die u kunt
selecteren met behulp van de
gekleurde toetsen. Druk op de
gewenste toets. De pagina wordt
weergegeven met aanvullende
kleurcodegegevens, die op
dezelfde wijze kunnen worden
geselecteerd. Om de vorige of
volgende pagina weer te geven
drukt u op de toets met de
overeenkomstige kleur.
@
BN68-02588F-Dut.indb 26 2010-03-26 �� 1:45:23Nederlands 27
05 Overige informatie
De wandbevestiging plaatsen
¦ De wandbevestigingsset monteren
Met de onderdelen voor wandbevestiging (apart verkrijgbaar) kunt u de tv aan de muur bevestigen.
Zie de instructies bij de onderdelen voor wandbevestiging als u wilt weten hoe u de wandbevestiging installeert. Neem contact
op met een technicus voor hulp alvorens de wandbeugel te bevestigen.
Samsung Electronics is niet verantwoordelijk voor schade aan het product of voor verwondingen die u zelf of anderen oplopen
wanneer u besluit de tv zelfstandig te installeren.
¦ Specificaties voor de wandbevestigingsset (VESA)
✎De wandbevestigingsset is niet meegeleverd, maar wordt apart verkocht.
Monteer de wandbevestiging op een stevige muur die haaks op de vloer staat. Wanneer de steun aan andere bouwmaterialen
bevestigd moet worden, dient u contact op te nemen met de leverancier. Als u de wandbevestiging aan het plafond of een
schuine muur monteert, kan de tv vallen en daarmee tot zwaar lichamelijk letsel leiden.
✎OPMERKING
x Samsung Electronics is niet verantwoordelijk voor schade aan het product of voor verwondingen die u zelf of anderen
oplopen wanneer u besluit de tv zelfstandig te installeren.
x In de onderstaande tabel vindt u de standaardafmetingen voor wandbevestigingssets.
x Wanneer u onze wandbevestigingsset aanschaft, zijn een gedetailleerde installatiegids en alle vereiste
montageonderdelen daarbij inbegrepen.
x Gebruik geen schroeven die langer zijn dan de standaardafmetingen, omdat anders de binnenkant van de tv
beschadigd kan raken.
x Voor wandbevestigingen die niet voldoen aan de standaardspecificaties voor VESA-schroeven, kan de lengte van de
schroeven afhankelijk van de specificaties afwijken.
x Gebruik geen schroeven die niet aan de standaard VESA-schroefspecificaties voldoen.
x Draai de schroeven niet te vast. Dit zou ertoe kunnen leiden dat het product beschadigt of valt, resulterend in
lichamelijk letsel. Samsung is voor dit soort ongevallen niet aansprakelijk.
x Samsung is niet aansprakelijk voor productschade of lichamelijk letsel wanneer een niet-VESA of niet-gespecificeerde
wandbevestiging is gebruikt of wanneer de consument de installatie-instructies voor het product niet in acht heeft
genomen.
x Kantel deze tv voor de bevestiging nooit meer dan 15 graden.
Productgroep
formaat
in cm
VESA-spec. (A * B) Standaardschroef Aantal
LCD-TV
19~22
75 X 75
100 X 100 M4
4
23~29 200 X 100
30~40 200 X 200 M6
46~55 400 X 400
M8
57~65 600 X 400
70~80 800 X 400
80~ 1400 X 800
Monteer de wandbevestigingsset niet terwijl de tv is ingeschakeld. Dit kan resulteren in lichamelijk letsel door
elektrische schokken.
BN68-02588F-Dut.indb 27 2010-03-26 �� 1:45:2328 Nederlands
Overige informatie
Kensington-slot tegen diefstal
Het Kensington-slot is een vergrendeling waarmee u het systeem
fysiek kunt vastzetten voor gebruik op een openbare plaats. Afhankelijk
van de fabrikant, kan het uiterlijk en de vergrendelmethode enigszins
afwijken van de afbeelding. Raadpleeg de gebruiksaanwijzing bij het
Kensington-slot voor het juiste gebruik.
✎Zoek het “
1
2
3
”-symbool aan de achterkant van de tv. Naast het
“
1
2
3
”-symbool bevindt zich een Kensington-slot.
1. Plaats het vergrendelingsapparaat in het Kensington-slot 1 en
draai deze in de vergrendelrichting 2.
2. Sluit de Kensington-vergrendelingskabel aan 3.
3. Maak het Kensington-slot vast aan een bureau of een ander zwaar
voorwerp dat niet kan worden verplaatst.
✎De vergrendeling moet apart worden aangeschaft.
✎De plaats van het Kensington-slot kan per model verschillen.
3 2 1
1
2
3
De tv vastzetten aan de wand
Let op: als u duwt of trekt aan de tv of op de tv klimt, kan deze vallen. Zie er met name op toe dat uw kinderen
niet aan de tv gaan hangen of deze uit balans brengen. De tv kan dan omvallen, hetgeen verwondingen kan
veroorzaken of zelfs fatale gevolgen kan hebben. Neem alle voorzorgsmaatbedienen die in de bijgesloten
veiligheidsfolder worden genoemd. Om veiligheidsredenen is het raadzaam de antivalvoorziening te installeren
om de stabiliteit van het toestel te verhogen.
¦ Voorkomen dat de tv valt
✎De benodigde beugels, schroeven en draad worden niet
meegeleverd. Deze moeten apart worden aangeschaft.
1. Plaats de schroeven in de beugels en bevestig deze stevig aan
de muur. Zorg dat de schroeven stevig in de muur vastzitten.
✎ Specificaties van de schroeven
x Voor een lcd-tv van 23 ~ 29 Inch: M4
x Voor een lcd-tv van 30 ~ 40 Inch: M6
2. Verwijder de schroeven in het midden aan de achterkant van de
tv, steek de schroeven door de beugels en draai de schroeven
weer vast in de tv.
3. Verbind de beugels die aan de tv zijn bevestigd met een sterke
draad aan de beugels die aan de muur zijn bevestigd en knoop
de draad stevig vast.
✎Controleer of alle bevestigingen goed zijn aangebracht.
Controleer de bevestigingspunten regelmatig op tekenen van
moeheid of verzwakking. Neem in geval van twijfel over de
veiligheid van de bevestiging contact op met een professionele
installateur.
✎Plaats de tv dicht bij de muur zodat deze niet achterover kan vallen.
✎Het is veilig om de draad zodanig aan te brengen dat de beugels die aan de muur zijn bevestigd zich boven de beugels
op de tv of op gelijke hoogte daarmee bevinden.
✎Haal de draad los voordat u de tv verplaatst.
Muur
BN68-02588F-Dut(26-).indd 28 2010-3-29 9:46:57Nederlands 29
05 Overige informatie
Problemen oplossen
Wanneer u vragen over deze televisie hebt, kunt u eerst deze lijst raadplegen. Als geen van de tips in deze lijst van toepassing
zijn, gaat u naar “www.samsung.com” en klikt u daar op Ondersteuning, of neemt u contact op met een van de klantenservice
die u op de achterkant van deze gebruiksaanwijzing vindt.
Probleem Oplossingen en uitleg
Beeldkwaliteit Voer eerst de functie Het beeld testen uit om te controleren of uw televisie het testbeeld juist weergeeft.
(Ga naar MENU - Ondersteuning - Zelfdiagnose - Het beeld testen) (P. 21)
Als het testbeeld correct wordt weergegeven, wordt het slechte beeld mogelijk veroorzaakt door de bron
of het signaal.
Het tv-beeld ziet er niet zo fraai uit als in
de winkel.
• Hebt u een analoge kabelbox of set-top-box? Upgrade dan naar een digitale settopbox. Gebruik
HDMI- of Component-kabel om beeld van HD-kwaliteit (high-definition) weer te geven.
• Abonnees kabel/satelliet: probeer HD-zenders uit het kanalenoverzicht.
• Antenneverbinding: probeer HD-zenders weer te geven nadat u de automatische
zenderprogrammering hebt uitgevoerd.
✎ Veel HD-kanalen zijn geüpgraded van SD-inhoud (Standard Definition).
• Stel de resolutie voor de video-uitvoer van de kabelbox/set-top-box in op 1080i of 720p.
• Controleer of u naar de tv kijkt op de aanbevolen minimumafstand, die gebaseerd is op het tv-formaat
en de definitie van het signaal.
Het beeld is vervormd: macroblok, klein
blok, puntjes, pixelvorming
• Compressie van video-inhoud kan tot beeldvervorming leiden, met name bij uitzendingen met snelle
bewegingen, zoals sportprogramma's en actiefilms.
• Een laag signaalniveau of slechte signaalkwaliteit kan beeldvervorming veroorzaken. Dit is geen defect
van de tv.
De kleuren zijn verkeerd of ontbreken. • Als u gebruikmaakt van een componentaansluiting, controleert u of de componentkabels op de juiste
ingangen zijn aangesloten. Onjuiste of losse Aansluiten kunnen tot kleurproblemen of een leeg scherm
leiden.
De helderheid of kleuren laten te wensen
over.
• Pas de opties voor Beeld aan in het tv-menu. (ga naar de modus Beeld / Kleur / Helderheid /
Scherpte)
• Pas de optie voor Spaarstand aan in het tv-menu. (ga naar MENU - Beeld - ECO-oplossing -
Spaarstand)
• Zet het beeld terug op de standaardbeeldinstellingen. (ga naar MENU - Beeld - Beeld resetten)
Aan de rand van het scherm is een
streepjeslijn zichtbaar.
• Als het beeldformaat is ingesteld op Volledig scherm, wijzigt u deze in 16:9. (P. 16)
• Wijzig de resolutie van de kabelbox/set-top-box.
Het beeld is zwart-wit. • Als u gebruikmaakt van een AV composiet-invoer, sluit u de videokabel (geel) aan op de groene
aansluiting van component ingang 1 op de tv.
Bij het van kanaal wisselen bevriest het
beeld of wordt het vervormd of vertraagd.
• Wanneer de tv is aangesloten met een kabelbox kunt u proberen de kabelbox te resetten. Sluit het
netsnoer opnieuw aan en wacht totdat de kabelbox opnieuw wordt opgestart. Dit kan tot 20 minuten
duren.
• Stel de uitvoerresolutie van de kabelbox in op 1080i of 720p.
Geluidskwaliteit Voer eerst de functie Het geluid testen uit om te controleren of het geluid van uw televisie naar behoren
werkt. (Ga naar MENU - Ondersteuning - Zelfdiagnose - Het geluid testen) (P. 21)
Als het geluid in orde is, wordt het geluidsprobleem mogelijk veroorzaakt door de bron of het signaal.
Er is geen geluid of het geluid is op het
maximale volume te zacht.
• Controleer het volume van het externe apparaat dat op de tv is aangesloten.
Het beeld is goed, maar er is geen geluid. • Stel in het geluidsmenu de optie Luidspreker selecteren in op TV-luidspreker. (P. 18)
• Als u een extern apparaat gebruikt, controleert u of de audiokabels op de juiste audioAansluiten van
de tv zijn aangesloten.
• Als u een extern apparaat gebruikt, controleert u de audio-uitvoeroptie van dat apparaat (mogelijk
moet u de audio-optie van de kabelbox op HDMI instellen als u een HDMI-kabel op de tv hebt
aangesloten).
• Wanneer u een een DVI-HDMI-kabel gebruikt, is een afzonderlijke audiokabel vereist.
• Als de tv een koptelefoonaansluiting heeft, controleert u of daar niets op is aangesloten.
Er komt ongewenst geluid uit de
luidsprekers.
• Controleer de kabelAansluiten. Controleer of een videokabel niet is aangesloten op een audio-ingang.
• Controleer bij antenne- of kabelAansluiten de signaalsterkte. Een zwak signaal kan geluidsvervorming
veroorzaken.
BN68-02588F-Dut.indb 29 2010-03-26 �� 1:45:2530 Nederlands
Overige informatie
Probleem Oplossingen en uitleg
Geen beeld, geen video
De tv kan niet worden ingeschakeld. • Controleer of het netsnoer stevig op het stopcontact en op de tv is aangesloten.
• Controleer of het stopcontact werkt.
• Druk op de POWER-knop op de tv om te controleren of het probleem niet bij de afstandsbediening
ligt. Als de tv wordt ingeschakeld, raadpleegt u “De afstandsbediening werkt niet” hieronder.
De tv wordt automatisch uitgeschakeld. • Zorg dat de Slaaptimer in het menu Instellingen is ingesteld op Uit. (P. 19)
• Als de tv is aangesloten op uw pc, controleert u de voedingsinstellingen van de pc.
• Controleer of de stekker op de juiste wijze in het stopcontact is gestoken en op de televisie is
aangesloten.
• Wanneer u tv-kijkt via een antenne of kabelaansluiting, wordt de tv uitgeschakeld als er 10-15 minuten
geen signaal is.
Er is geen beeld/video. • Controleer de kabelverbindingen (haal alle kabels die op de tv en externe apparaten zijn aangesloten
los en sluit ze vervolgens weer aan).
• Stel de video-uitgang van de externe apparaten (kabelbox, set-top-box, dvd-speler, blu-rayspeler,
enzovoort) zodanig in dat de Aansluiten van de tv-ingang hiermee overeenkomen. Als bijvoorbeeld
de HDMI-uitgang van een extern apparaat wordt gebruikt, moet deze op de HDMI-ingang van de tv
worden aangesloten.
• Controleer of de aangesloten apparaten zijn ingeschakeld.
• Selecteer de juiste bron voor de tv door op de knop SOURCE op de afstandsbediening van de tv te
drukken.
RF-aansluiting (kabel/antenne)
De tv ontvangt niet alle kanalen. • Zorg dat de antennekabel stevig is aangesloten.
• Voer de functie Plug & Play (eerste instelling) uit om beschikbare zenders aan de kanalenlijst toe te
voegen. Ga naar MENU - Instellingen - Plug & Play (eerste instelling) en wacht tot alle beschikbare
kanalen zijn opgeslagen.
• Controleer of de antenne juist is geplaatst.
Het beeld is vervormd: macroblok, klein
blok, puntjes, pixelvorming
• Compressie van video-inhoud kan tot beeldvervorming leiden, met name bij uitzendingen met snelle
bewegingen, zoals sportprogramma's en actiefilms.
• Een zwak signaal kan tot beeldvervorming leiden. Dit is geen defect van de tv.
Pc-aansluiting
De melding 'Not Supported Mode' (Nietondersteunde modus) verschijnt.
• Stel de uitvoerresolutie en frequentie van uw pc zodanig in dat deze overeenkomen met de resoluties
die door de tv worden ondersteund. (P. 22)
“PC” wordt altijd in de bronnenlijst
weergegeven, ook als er geen pc is
aangesloten.
• Dit is normaal; “PC” wordt altijd in de bronnenlijst weergegeven, ongeacht of er een pc is aangesloten.
De video is prima, maar er is geen audio. • Als u een HDMI-aansluiting gebruikt, controleert u de audio-uitvoerconfiguratie op de pc.
Overige
Het beeld kan niet schermvullend worden
weergegeven.
• HD-kanalen hebben zwarte balken aan beide zijden van het scherm wanneer ze opgewaardeerde
SD-inhoud (4:3) weergeven.
• Zwarte balken onder en boven in het scherm worden weergegeven bij films die beeldformaten
hebben die afwijken van die van uw televisie.
• Stel de optie voor het beeldformaat op uw externe apparaat of tv in op volledig scherm.
De afstandsbediening werkt niet. • Vervang de batterijen van de afstandsbediening en plaats de batterijen met de polen (+/–) in de juiste
richting.
• Reinig het venster van de zender op de afstandsbediening.
• Richt vanaf circa 1,5 tot 2 meter afstand de afstandsbediening rechtstreeks op de televisie.
Met de afstandsbediening van de
kabelbox/set-top-box kan de tv niet
worden in- of uitgeschakeld of kan het
volume niet worden geregeld.
• Programmeer de afstandsbediening voor de kabelbox/set-top-box zodanig dat deze werkt voor de tv.
Raadpleeg de gebruiksaanwijzing van uw kabelbox/set-top-box voor de code voor de SAMSUNG-tv.
De melding 'Niet-ondersteunde modus'
verschijnt.
• Controleer de ondersteunde resolutie van de tv en pas de uitgangsresolutie van het externe apparaat
daaraan aan. Raadpleeg de resolutie-instellingen op pagina 9 van deze gebruiksaanwijzing.
De tv geeft een plasticgeur af. • Deze geur is normaal en verdwijnt na verloop van tijd.
De Signaalinformatie van de tv is niet
beschikbaar in het testmenu Zelfdiagnose.
• Deze functie is alleen beschikbaar voor digitale zenders met een antenne-/RF-/coaxaansluiting. (P. 21)
De tv staat schuin naar een kant. • Verwijder de voet van de tv en monteer deze opnieuw.
Er zijn problemen bij het monteren van
de voet.
• Zorg dat de tv op een vlakke ondergrond staat. Als u de schroeven niet uit de tv kunt verwijderen,
gebruikt u zo nodig een magnetische schroevendraaier.
Het menu Kanaal wordt grijs weergegeven.
(niet beschikbaar)
• Het menu Kanaal is alleen beschikbaar als de tv-bron is geselecteerd.
BN68-02588F-Dut.indb 30 2010-03-26 �� 1:45:25Nederlands 31
05 Overige informatie
Probleem Oplossingen en uitleg
Uw instellingen verdwijnen na 30 minuten
of telkens wanneer de televisie wordt
uitgeschakeld.
• Als de tv zich in de modus Winkeldemo bevindt, worden de audio- en beeldinstellingen elke 30
minuten gereset. Wijzig de modus in de procedure Plug & Play (eerste instelling) van Winkeldemo
in Thuisgebruik. Druk op de toets SOURCE om de modus Tv te selecteren en ga naar MENU →
Instellingen → Plug & Play (eerste instelling) → ENTERE.
Met tussenpozen valt het geluid of beeld
weg.
• Controleer de kabelAansluiten en sluit de kabels eventueel opnieuw aan.
• Verlies van audio of video kan het gevolg zijn van te stijve of dikke kabels. Zorg ervoor dat de kabels
flexibel genoeg zijn voor langdurig gebruik. Bij bevestiging van de tv aan de muur raden we het
gebruik van kabels met 90-gradenAansluiten aan.
U ziet kleine deeltjes als u de rand van de
tv van dichtbij bekijkt.
• Dit maakt deel uit van het productontwerp en is geen defect.
Het menu PIP is niet beschikbaar. • PIP-functionaliteit is alleen beschikbaar als u een HDMI-, PC- of Component-bron gebruikt.
Het bericht “Vervormd signaal” of “Zwak
signaal/geen signaal” wordt weergeven.
• Als u gebruikmaakt van een CAM CARD (CI/CI+), controleert u of deze op de COMMON INTERFACEaansluiting is aangesloten.
• Als het probleem aanhoudt, haalt u de CAM CARD uit de tv en plaatst u de kaart vervolgens weer
terug in de aansluiting.
U hebt de tv 45 minuten geleden uitgezet
en het apparaat is weer ingeschakeld.
• Dit is normaal. De tv gebruikt zelfstandig de OTA-functie (Over The Air) voor het upgraden van
firmware die tijdens het tv-kijken is gedownload.
Er zijn herhaaldelijk problemen met beeld
en/of geluid.
• Controleer het signaal of de bron en wijzig deze indien nodig.
Er kan soms een reactie optreden tussen
de rubber kussentjes op de voet en de
toplaag van bepaald meubilair.
• U kunt dit voorkomen door viltkussentjes te gebruiken op oppervlakken waar de tv in direct contact
komt met het meubilair.
✎Het paneel van dit TFT lcd-scherm bestaat uit subpixels die met geavanceerde technologie zijn geproduceerd. Het
scherm kan echter enkele heldere of donkere pixels bevatten. Deze pixels zijn niet van invloed op de prestaties van het
product.
¦ Licentie-informatie
Manufactured under licence from Dolby Laboratories.
Dolby and the double-D symbol are trademarks of Dolby Laboratories.
BN68-02588F-Dut.indb 31 2010-03-26 �� 1:45:2532 Nederlands
Overige informatie
Specificaties
Scherm hardwarematig 1360 x 768 bij 60 Hz
Omgevingsvereisten
Gebruikstemperatuur
Gebruiksvochtigheid
Opslagtemperatuur
Opslagvochtigheid
10 °C tot 40 °C
10% tot 80%, niet-condenserend
-20 °C tot 45 °C
5% tot 95%, niet-condenserend
Tv-systeem Analoog: afhankelijk van de landkeuze
Digitaal: DVB-T/DVB-C
Kleuren-/videosysteem Analoog: PAL, SECAM, NTSC-4.43, NTSC-3.58, PAL60
Digitaal: MPEG-2 MP@ML, MPEG-4, H.264/AVC MP@L3, MP@L4.0, HP@L4.0
Geluidssysteem BG. OK NICAM. MPEGl
HDMI IN Video: 1080/24p, 1080p, 1080i, 720p, 576p, 576i, 480p, 480i
Audio: tweekanaals lineair PCM 32/44.1/48 kHz, 16/20/24bits
Analoge audio-ingang (alleen HDMI IN)
PC-ingang
Draaivoet
(Links/rechts) 0˚
Modelnaam LE19C350 LE22C350
Schermformaat
(Diagonaal) 19 inch 22 inch
Geluid
Uitgang 3W X 2 3W X 2
Afmetingen (BxDxH)
Behuizing
Met voet
461.2 x 59.5 x 322.2 mm
461.2 x 161 x 364 mm
535.3 x 82.2 x 365.8 mm
535.5 x 171.8 x 420.9 mm
Gewicht
Behuizing
Met voet
3.9 kg
4.2 kg
3.9 kg
4.1 kg
✎Vormgeving en specificaties kunnen zonder kennisgeving worden gewijzigd.
✎Zie voor informatie over de stroomvoorziening en het energieverbruik het etiket op het product.
BN68-02588F-Dut(26-).indd 32 2010-03-26 �� 1:48:25Nederlands 33
05 Overige informatie
Index
A
Aansluiten op een audioapparaat 8
Aansluiten op een pc 8
Aan-uitlampje 4
achtergrond muziek 25
afstandsbediening 5
Alg. weergave 25
Alles select 14
antenne 12
Auto Volume 18
Autom. afstellen 17
B
Balans 17
batterijen 5
Beeldformaat 16
Bronlijst 10
C
Component 7
D
Digitale audio-uitgang 8
D-sub 8
Dynamisch contrast 15
Dynamisch 14
E
EPG 11
Ext. luidspreker 18
F
Favoriete kanalen gebruiken 12
Fijnafstemming 14
Filmmodus 15
Foto’s 24
Frequentie 12
G
Geplande weergave gebruiken 11
H
HDMI 7
Helderheid 14
Herhalingsmodus 25
Huidkleur 15
K
Kan.weergave gebruiken 11
Kanaalbeheer 12
Kanalen bewerken 13
Kleur tint 15
Klok 19
L
Licentie-Informatie 31
Lock 14
Luidspreker selecteren 18
M
Media Play 22
Melodie 20
Muziek 23
N
Naam wijzigen 10
Navigate 10
Now & Next-gids 11
O
Aan/Uit-toets 5
Ondertiteling 20
Optimale resolutie 9
P
PIN wijzigen 20
Plug & Play 6
Diashow 24
Problemen oplossen 29
R
RGB 15
S
Scherpte 14
Signaalinformatie 21
Slaaptimer 19
Software-upgrade 21
Spaarstand 15
Specificaties 32
Standbystand 4
Startachtergrond 25
T
Taalkeuze 20
Timer 19
Titel 25
Tools 3
Toonregeling 17
Transp. menu 20
TV-luidspreker 18
U
USB 21, 22
V
Versterken 17
videorecorder 10
Volume 4, 5
Voorkeurskanaal 12
W
Wandbevestiging 27
Witbalans 15
Z
Zelfdiagnose 21
Zwarttinten 15
BN68-02588F-Dut.indb 33 2010-03-26 �� 1:45:25Deze pagina is
opzettelijk leeg gelaten.
BN68-02588F-Dut.indb 34 2010-03-26 �� 1:45:25
© 2010 Samsung Electronics Co., Ltd. All rights reserved.
LCD TV user manual
LCD TV
user manual
imagine the possibilities
Thank you for purchasing this Samsung product.
To receive more complete service, please register
your product at
www.samsung.com/register
Model _____________Serial No. _____________
Contact SAMSUNG WORLDWIDE
If you have any questions or comments relating to Samsung products, please contact the SAMSUNG customer care centre.
Country Customer Care Centre Web Site
ArMENIA 0-800-05-555 -
AUSTrIA 0810 - SAMSUNG (7267864, € 0.07/min) www.samsung.com/at
AzErbAIjAN 088-55-55-555 -
bELArUS 810-800-500-55-500 -
bELGIUM 02-201-24-18
www.samsung.com/be (Dutch)
www.samsung.com/be_fr (French)
CzECH
800 - SAMSUNG (800-726786) www.samsung.com
Samsung Zrt., česká organizační složka, Oasis Florenc, Sokolovská394/17, 180 00, Praha 8
DENMArK 70 70 19 70 www.samsung.com/dk
ESTONIA 800-7267 www.samsung.com
FINLAND 030 - 6227 5 15 www.samsung.com/fi
FrANCE 01 48 63 00 00 www.samsung.com/fr
GErMANY 01805 - SAMSUNG(726-7864 € 0,14/Min) www.samsung.com/de
GEOrGIA 8-800-555-555 -
HUNGArY 06-80-SAMSUNG(726-7864) www.samsung.com/hu
IrELAND 0818 717100 www.samsung.com/ie
ITALIA 800-SAMSUNG(726-7864) www.samsung.com/it
KAzAKHSTAN 8-10-800-500-55-500 -
KYrGYzSTAN 00-800-500-55-500 www.samsung.com
LATVIA 8000-7267 www.samsung.com
LITHUANIA 8-800-77777 www.samsung.com
LUXEMbUrG 261 03 710 www.samsung.com/lu
MOldOvA 00-800-500-55-500 -
NETHErLANDS 0900-SAMSUNG (0900-7267864) (€ 0,10/Min) www.samsung.com/nl
NOrWAY 815-56 480 www.samsung.com/no
POlANd
0 801 1SAMSUNG(172678)
022-607-93-33
www.samsung.com/pl
POrTUGAl 80820-SAMSUNG(726-7864) www.samsung.com/pt
rUSSIA 8-800-555-55-55 www.samsung.com
SlOvAKIA 0800-SAMSUNG(726-7864) www.samsung.com/sk
SPAIN 902 - 1 - SAMSUNG (902 172 678) www.samsung.com/es
SWEdEN 0771 726 7864 (SAMSUNG) www.samsung.com/se
SWITZErlANd 0848 - SAMSUNG(7267864, CHF 0.08/min)
www.samsung.com/ch
www.samsung.com/ch_fr/(French)
TADjIKISTAN 8-10-800-500-55-500 www.samsung.com
U.K 0845 SAMSUNG (7267864) www.samsung.com/uk
UKrAINE 0-800-502-000
www.samsung.ua
www.samsung.com/ua_ru
UzbEKISTAN 8-10-800-500-55-500 www.samsung.com
bN68-02588H-00
BN68-02588H_Eng.indb 1 2010-3-19 15:48:532 English
Figures and illustrations in this User Manual are provided for reference only and may differ from actual product appearance.
Product design and specifications may be changed without notice.
Digital TV notice
1. Functionalities related to Digital TV (DVB) are only available in countries/areas where DVB-T (MPEG2 and MPEG4 AVC) digital terrestrial signals are
broadcasted or where you are able to access to a compatible DVB-C (MPEG2 and MPEG4 AAC) cable-TV service. Please check with your local
dealer the possibility to receive DVB-T or DVB-C signal.
2. DVB-T is the DVB European consortium standard for the broadcast transmission of digital terrestrial television and DVB-C is that for the broadcast
transmission of digital TV over cable. However, some differentiated features like EPG (Electric Programme Guide), VOD (Video On Demand) and so
on, are not included in this specification. So, they cannot be workable at this moment.
3. Although this TV set meets the latest DVB-T and DVB-C standards, as of [August, 2008], the compatibility with future DVB-T digital terrestrial and
DVB-C digital cable broadcasts cannot be guaranteed.
4. Depending on the countries/areas where this TV set is used some cable-TV providers may charge an additional fee for such a service and you may
be required to agree to terms and conditions of their business.
5. Some Digital TV functions might be unavailable in some countries or regions and DVB-C might not work correctly with some cable service providers.
6. For more information, please contact your local Samsung customer care centre.
✎ The reception quality of TV may be affected due to differences in broadcasting method between the countries. Please check the TV performance in
the local SAMSUNG Authorized Dealer, or the Samsung Call Centre whether it can be improved by reconfiguring TV setting or not.
Still image warning
Avoid displaying still images (like jpeg picture files) or still image element (like TV programme logo, panorama or 4:3 image format, stock or news bar at
screen bottom etc.) on the screen. Constant displaying of still picture can cause ghosting of LCD screen, which will affect image quality. To reduce risk of
this effect, please follow below recommendations:
• Avoid displaying the same TV channel for long periods.
• Always try do display any image on full screen, use TV set picture format menu for best possible match.
• Reduce brightness and contrast values to minimum required to achieve desired picture quality, exceeded values may speed up the burnout process.
• Frequently use all TV features designed to reduce image retention and screen burnout, refer to proper user manual section for details.
Securing the Installation Space
Keep the required distances between the product and other objects (e.g. walls) to ensure proper ventilation.
Failing to do so may result in fire or a problem with the product due to an increase in the internal temperature of the product.
✎ When using a stand or wall-mount, use parts provided by Samsung Electronics only.
x If you use parts provided by another manufacturer, it may result in a problem with the product or an injury due to the product falling.
✎ The appearance may differ depending on the product.
Installation with a stand. Installation with a wall-mount.
10 cm
10 cm 10 cm
10 cm
10 cm
10 cm
10 cm
Correct Disposal of This Product (Waste Electrical & Electronic Equipment)
(Applicable in the European Union and other European countries with separate collection systems)
This marking on the product, accessories or literature indicates that the product and its electronic accessories (e.g. charger,
headset, USB cable) should not be disposed of with other household waste at the end of their working life. To prevent possible
harm to the environment or human health from uncontrolled waste disposal, please separate these items from other types of waste
and recycle them responsibly to promote the sustainable reuse of material resources. Household users should contact either the
retailer where they purchased this product, or their local government office, for details of where and how they can take these items
for environmentally safe recycling. Business users should contact their supplier and check the terms and conditions of the purchase
contract. This product and its electronic accessories should not be mixed with other commercial wastes for disposal.
Correct disposal of batteries in this product
(Applicable in the European Union and other European countries with separate battery return systems)
This marking on the battery, manual or packaging indicates that the batteries in this product should not be disposed of with other
household waste at the end of their working life. Where marked, the chemical symbols Hg, Cd or Pb indicate that the battery
contains mercury, cadmium or lead above the reference levels in EC Directive 2006/66. If batteries are not properly disposed of,
these substances can cause harm to human health or the environment. To protect natural resources and to promote material
reuse, please separate batteries from other types of waste and recycle them through your local, free battery return system.
BN68-02588H_Eng.indb 2 2010-3-19 15:48:53English 3
Contents
Getting Started
4
4 Accessories
4 Viewing the Control Panel
5 Viewing the Remote Control
6 Connecting to an Antenna
6 Plug & Play (Initial Setup)
Connections
7
7 Connecting to an AV Device
8 Connecting to an Audio Device
8 Connecting to a PC
10 Changing the Input Source
Basic Features
10
10 How to Navigate Menus
11 Using the INFO button (Now & Next guide)
11 Planning Your Viewing
12 Channel Menu
14 Picture Menu
17 Sound Menu
19 Setup Menu
21 Support Menu
Advanced Features
22
22 Media Play
Other Information
26
26 Analogue Channel Teletext Feature
27 Installing the Wall Mount
28 Anti-Theft Kensington Lock
28 Securing the TV to the Wall
29 Troubleshooting
32 Specifications
33 Index
Check the Symbol!
This function can be used by
t
pressing the TOOLS button on
the remote control.
Note One-Touch Button
P
POWER
BN68-02588H_Eng.indb 3 2010-3-19 15:48:544 English
Getting Started
Accessories
✎Please make sure the following items are included with your LCD TV. If any items are missing, contact your dealer.
✎The items’ colours and shapes may vary depending on the models.
y Remote Control & Batteries (AAA x 2)
y Owner’s Instructions
y Warranty Card / Safety Guide (Not available in some locations)
y Cleaning Cloth
y Power Cord
✎See separate guide for installing the stand.
1 EA
(M4 X L16)
y Stand (1EA) y Stand Screws (2EA)
Viewing the Control Panel
✎The product colour and shape may vary depending on the model.
P (Power) Turns the TV on or off.
Power Indicator Blinks and turns off when the power is on and lights up in standby mode.
SOURCEE Toggles between all the available input sources. In the on-screen menu, use this
button as you would use the ENTERE button on the remote control.
MENU Y Displays an on-screen menu, the OSD (on screen display), of your TV’s features.
Adjusts the volume. In the OSD, use the Y buttons as you would use the ◄
z and ► buttons on the remote control.
Changes the channels. In the OSD, use the z buttons as you would use the
▼ and ▲ buttons on the remote control.
Remote control sensor Aim the remote control towards this spot on the TV.
Standby mode
Do not leave your TV in standby mode for long periods of time (when you are away on a holiday, for example). A small amount
of electric power is still consumed even when the power button is turned off. It is best to unplug the power code.
Display the main on-screen menu.
(P. 10)
Y
Speakers
Remote control sensor Power Indicator
BN68-02588H_Eng.indb 4 2010-3-19 15:48:555
01 Getting Started
English
Viewing the Remote Control
Installing batteries (Battery size: AAA)
✎NOTE
x Use the remote control within 23 feet from the TV.
x Bright light may affect the performance of the remote
control. Avoid using nearby special fluorescent light or neon
signs.
x The colour and shape may vary depending on the model.
MEDIA.P
A B C D
Display and select the available video
sources. (P. 10)
Turn the TV on and off. (P. 6)
Change the channel.
Display the EPG (Electronic Programme
Guide). (P. 11)
Display Channel Lists on the
screen. (P. 14)
Change channels.
Quickly select frequently used
functions.
Display information on the
TV screen.
Display the main on-screen menu.
(P. 10)
Adjust the volume.
Return to the previous channel.
Buttons in the Channel Manager,
Media Play menu, etc.
AD: Audio Description selection. (Not
available in some locations) (P. 18)
P.SIZE: Choose the picture size. (P. 16)
SUBT.: Digital subtitle display (P. 20)
Cut off the sound temporarily.
Return to the previous menu. (P. 10)
Select on-screen menu items and
change menu values.
Exit the menu. (P. 10)
Alternately select Teletext,
Double or MiX.
View the Media play.
BN68-02588H_Eng.indb 5 2010-3-19 15:48:566
Getting Started
English
Connecting to an Antenna
When the TV is initially powered on, basic settings proceed automatically.
✎Preset: Connecting the mains and antenna.
Plug & Play (Initial Setup)
When the TV is initially powered on, a sequence of on-screen prompts will assist in confi guring basic settings. Press the
POWERP button. Plug & Play is available only when the Input source is set to TV.
1
Selecting a language Press the ▲ or ▼ button, then press the ENTERE button.
Select the desired OSD (On Screen Display) language.
2
Selecting Store Demo
or Home Use
Press the ◄ or ► button, then press the ENTERE button.
y Select the Home Use mode. Store Demo Mode is for retail
environments.
y Return the unit’s settings from Store Demo to Home Use
(standard): Press the volume button on the TV. When the OSD
volume is displayed, press and hold MENU for 5 sec.
3
Selecting a country Press the ▲ or ▼ button, then press the ENTERE button.
Select the appropriate country. If the desired country does not exist on the menu, select
Others.
✎After selecting the country in the Country menu, some models may proceed with an
additional option to setup the pin number.
✎When you input the PIN number, 0-0-0-0 is not available.
4
Selecting an antenna Press the ▲ or ▼ button, then press the ENTERE button.
Select Air or Cable.
5
Selecting a channel Press the ▲ or ▼ button, then press the ENTERE button.
Select the channel source to memorise. When setting the antenna source to Cable, a step
appears allowing you to assign numerical values (channel frequencies) to the channels. For
more information, refer to Channel → Auto Store. (P. 13)
✎Press the ENTERE button at any time to interrupt the memorisation process.
6
Setting the Clock
Mode
Set the Clock Mode automatically or manually.
✎If you select the Auto, select the time zone where you live.
7
Viewing the HD
Connection Guide.
The connection method for the best HD screen quality is displayed.
8
Enjoy your TV. Press the ENTERE button.
If You Want to Reset This Feature...
Select Setup - Plug & Play (Initial Setup). Enter your 4 digit PIN number. The default PIN number is “0-0-0-0.” If you want to
change the PIN number, use the Change PIN function.
Power Input
P
POWER
MEDIA.P
FAV.CH
P.MODE
DUAL
MTS
VHF/UHF Antenna
or
Cable
R-AUDIO-L PR PB Y
ANT OUT
BN68-02588H_Eng.indb 6 2010-3-19 15:48:57English 7
02 Connections
Connections
Connecting to an AV Device
Using an HDMI / DVI Cable: HD connection (up to 1080p)
Available devices: DVD, Blu-ray player, HD cable box, HD STB (Set-Top-Box) satellite receiver, cable box, satellite receiver (STB)
✎HDMI (DVI) IN / PC/DVI AUDIO IN
x When using an HDMI/DVI cable connection, you must use the HDMI (DVI) IN jack. For the DVI cable
connection, use a DVI to HDMI cable or DVI-HDMI (DVI to HDMI) adapter for video connection and the PC/DVI
AUDIO IN jacks for audio.
x If an external device such as a DVD / Blu-ray player / cable box / STB satellite receiver supporting a HDMI
versions older than 1.3 is connected, the TV may operate abnormally (e.g. no screen display / no sound /
annoying flicker / abnormal colour).
x If there is no sound after connecting an HDMI cable, check the HDMI version of the external device. If you
suspect the version is older than 1.3, contact the provider of the device to confirm the HDMI version and
request an upgrade.
x It is recommended you purchase an HDMI-certified cable. Otherwise, the screen may appear blank or a
connection error may occur.
Using a Component (up to 1080p) or Audio/Video (480i only) Cable and Using a Scart Cable
Available devices: VCR, DVD, Blu-ray player, cable box, STB satellite receiver
✎In Ext. mode, DTV Out supports MPEG SD Video and Audio only.
✎To obtain the best picture quality, the Component connection is recommended over the A/V connection.
R-AUDIO-L PR PB Y
AUDIO OUT
R-AUDIO-L PR PB Y
DVI OUT
R-AUDIO-L PR PB Y
HDMI OUT
Y
W R
R W R G B
R W R G
R W Y
R W Y B
R-AUDIO-L PR PB Y
COMPONENT OUT
R-AUDIO-L PR PB Y
AUDIO OUT
R-AUDIO-L PR PB Y
EXT
R-AUDIO-L PR PB Y
AUDIO OUT
R-AUDIO-L PR PB Y
VIDEO OUT
WY WR W R B G
Yellow Red White
WY WR W R B G
Red Blue Green
WY WR W R B G
Red White
DVD
VCR Blu-ray player DVD
BN68-02588H_Eng.indb 7 2010-3-19 15:49:028 English
Connections
Connecting to an Audio Device
Using an Optical or Audio Cable Connection
Available devices: digital audio system, amplifi er, DVD home theatre
✎DIGITAL AUDIO OUT (OPTICAL)
x When a digital audio system is connected to the DIGITAL AUDIO OUT (OPTICAL) jack, decrease the volume
of both the TV and the system.
x 5.1 CH (channel) audio is available when the TV is connected to an external device supporting 5.1 CH.
x When the receiver (home theatre) is set to on, you can hear sound output from the TV’s optical jack. When the
TV is receiving a DTV signal, the TV will send 5.1 CH sound to the home theatre receiver. When the source is
a digital component such as a DVD / Blu-ray player / cable box / STB (Set-Top-Box) satellite receiver and is
connected to the TV via HDMI, only 2 CH audio will be heard from the home theatre receiver. If you want to
hear 5.1 CH audio, connect the digital audio out jack from your DVD / Blu-ray player / cable box / STB satellite
receiver directly to an amplifier or home theatre.
Connecting to a PC
Using an HDMI/DVI Cable / a D-sub Cable
R-AUDIO-L PR PB Y
OPTICAL
R-AUDIO-L PR PB Y
AUDIO OUT
R-AUDIO-L PR PB Y
AUDIO OUT
R-AUDIO-L PR PB Y
DVI OUT
R-AUDIO-L PR PB Y
PC OUT
Digital Audio
System
BN68-02588H_Eng.indb 8 2010-3-19 15:49:05English 9
02 Connections
Display Modes (D-Sub and HDMI/DVI Input)
Optimal resolution is 1360 X 768 @ 60 Hz.1920X1080@60Hz.
Mode Resolution
Horizontal Frequency
(KHz)
Vertical Frequency (Hz)
Pixel Clock Frequency
(MHz)
Sync Polarity
(H / V)
IBM
640 x 350 31.469 70.086 25.175 +/-
720 x 400 31.469 70.087 28.322 -/+
MAC
640 x 480 35.000 66.667 30.240 -/-
832 x 624 49.726 74.551 57.284 -/-
VESA DMT
640 x 480
31.469 59.940 25.175 -/-
37.861 72.809 31.500 -/-
37.500 75.000 31.500 -/-
800 x 600
37.879 60.317 40.000 +/+
48.077 72.188 50.000 +/+
46.875 75.000 49.500 +/+
1024 x 768
48.363 60.004 65.000 -/-
56.476 70.069 75.000 -/-
60.023 75.029 78.750 +/+
1280 x 720 45.000 60.000 74.250 +/+
1360 x 768 47.712 60.015 85.500 +/+
VESA GTF
720 x 576 35.910 59.950 32.750 -/+
1280 x 720 56.456 74.777 97.750 -/-
VESA GTF 1280 x 720 52.500 70.000 89.040 +/+
✎NOTE
x For HDMI/DVI cable connection, you must use the HDMI (DVI) IN jack.
x The interlace mode is not supported.
x The set might operate abnormally if a non-standard video format is selected.
x Separate and Composite modes are supported. SOG(Sync On Green) is not supported.
CONNECTIONS COMMON INTERFACE Slot
To watch paid channels, the “CI or CI+ CARD” must be inserted.
y If you don’t insert the “CI or CI+ CARD,” some channels will
display the message “Scrambled Signal”.
y The pairing information containing a telephone number, the “CI or
CI+ CARD” ID the Host ID and other information will be displayed
in about 2~3 minutes. If an error message is displayed, please
contact your service provider.
y When the configuration of channel information has finished, the
message “Updating Completed” is displayed, indicating the
channel list is updated.
✎NOTE
x You must obtain a “CI or CI+ CARD” from a local cable service provider.
x When removing the “CI or CI+ CARD”, carefully pull it out with your hands since dropping the “CI or CI+ CARD” may
cause damage to it.
x Insert the “CI or CI+ CARD” in the direction marked on the card.
x The location of the COMMON INTERFACE slot may be different depending on the model.
x “CI or CI+ CARD” is not supported in some countries and regions; check with your authorized dealer.
x If you have any problems, please contact a service provider.
BN68-02588H_Eng.indb 9 2010-3-19 15:49:0610 English
Connections
Changing the Input Source
Source List
Use to select TV or other external input
sources such as DVD / Blu-ray players /
cable box / STB satellite receiver connected
to the TV.
■ TV / Ext. / AV / Component / PC /
HDMI/DVI / USB
✎ In the Source List, connected
inputs will be highlighted.
✎ Ext. always stay activated.
Edit Name
■ VCR / DVD / Cable STB / Satellite STB / PVR STB /
AV Receiver / Game / Camcorder / PC / DVI PC / DVI
Devices / TV / IPTV / Blu-ray / HD DVD / DMA: Name
the device connected to the input jacks to make your
input source selection easier.
✎ When connecting an HDMI/DVI cable to the HDMI
(DVI) IN port, you should set the port to
HDMI/DVI mode under Edit Name.
Basic Features
How to Navigate Menus
Before using the TV, follow the steps below to learn how to
navigate the menu and select and adjust different functions.
1 MENU button: Displays the main on-screen menu.
2 ENTERE / Direction button: Move the cursor and
select an item. Confi rm the setting.
3 RETURN button: Returns to the previous menu.
4 EXIT button: Exits the on-screen menu.
How to Operate the OSD (On Screen Display)
The access step may differ depending on the selected menu.
1 MENU m
The main menu options appears on
the screen:
Picture, Sound, Channel, Setup,
Input, Application, Support.
2 ▲ / ▼
Select an icon with the ▲ or ▼
button.
3 ENTERE Press ENTERE to access the
sub-menu.
4 ▲ / ▼
Select the desired submenu with
the ▲ or ▼ button.
5 ◄ / ►
Adjust the value of an item with the
◄ or ► button. The adjustment in
the OSD may differ depending on
the selected menu.
6 ENTERE Press ENTERE to complete the
confi guration.
7 EXIT e Press EXIT.
P
POWER
MEDIA.P
FAV.CH
P.MODE
DUAL
MTS
MEDIA.P
A B C D
4
1
2
3
BN68-02588H_Eng(1-25).indd 10 2010-3-22 20:14:35English 11
03 Basic Features
Using the INFO button (Now & Next guide)
The display identifies the current channel
and the status of certain audio-video
settings.
The Now & Next guide shows daily TV
programme information for each channel
according to the broadcasting time.
y Scroll ◄, ► to view information for a
desired programme while watching the
current channel.
y Scroll ▲, ▼ to view information for other channels. If you
want to move to the currently selected channel, press
the ENTERE button.
Planning Your Viewing
Guide
The EPG (Electronic Programme Guide)
information is provided by broadcasters.
Using programme schedules provided
by broadcasters, you can specify
programmes you want to watch in
advance so that the channel automatically
changes to the selected programme
channel at the specified time. Programme
entries may appear blank or out of date
depending on a channel status.
Using Channel View
Using Scheduled View
1 Red (View Mode): View the list of programmes that
are playing now or coming up.
2 Yellow (+24 hours): Viewing the list of programmes to
be broadcasted after 24 hours.
3 Blue (Ch.Mode): Select the type of channels you want
to display on the Channel View window.
– The Ch. Mode differs according to the antenna
source.
4 Information: Displays details of the selected
programme.
5 (Page): Moves to the previous / next page.
6 ENTERE button
– When selecting the current programme, you can
watch the selected programme.
– When selecting the future programme, you can
reserve to watch the selected programme. To cancel
the schedule, press the ENTERE button again and
select Cancel Schedules.
P
POWER
MEDIA.P
FAV.CH
P.MODE
DUAL
MTS
P
POWER
MEDIA.P
FAV.CH
P.MODE
DUAL
MTS
DTV Air
15
abc1
l 18:00 ~ 6:00
ife On venus Avenue
Unclassified
No Detaild Information
E Watch
' Information
DTV Air 800 five
Family Affairs
18:00 - 18:30
Drama
Tanya confesses all to a stunned Babs. Conrad is anxious to hear...
18:30
19:15
Today
Today
)Family Affairs
)Dark Angel
800
800
five
five
800 five
View Mode Information E Cancel
Guide 2:10 Tue 1 jun
Scheduled View
1 4 6
DTV Air 800 five
Home and Away
18:00 - 18:30
Drama
Dani is devastated when scott makes clear his views on marriage...
27
28
800
24
16
6
Discovery
DiscoveryH&L
five
price-drop.tv
QVC
R4DTT
American Chopper
Programmes resume at 06:00
Home and...
No Information
QVC Selection
No Information
Tine Team
Fiv...
Today 18:00 - 19:00 19:00 - 20:00
)Family Affairs )Dark Angel
800 five
View Mode +24 Hours Ch. Mode Information Page E Watch
Guide 2:10 Tue 1 jun
Channel View - TV
1 2 3 4 5 6
18:11 Thu 6 jan
BN68-02588H_Eng.indb 11 2010-3-19 15:49:0912 English
Basic Features
Channel Manager
Delete or set favourites channels and use the programme
guide for digital broadcasts. Select a channel in the
Channels, My Channels or Scheduled screen.
■ Channels: Shows the channel list according to
channel type.
■ * My Channels: Shows the group of the channel.
■ Scheduled: Shows all the currently reserved
programmes.
✎Using the colour buttons with the Channel Manager
x Red (Antenna): Toggle among Air or Cable.
x B Green (Zoom): Enlarges or shrinks a channel
number.
x Yellow (Select): Select desired channels and press
the Yellow button to set all the selected channels at
the same time. The c mark appears to the left of
the selected channels.
x (Page): Move to next or previous page.
x T (Tools): Displays the Channel Manager option
menu. (The Options menus may differ depending on
the situation.)
Channel Status Display Icons
Icons Operations
A An Analogue channel.
c A channel selected.
* A channel set as a Favourite.
( A programme currently being broadcast.
\ A locked channel.
) A reserved programme.
¦ Using Favourite Channels
* My Channels
(in Channel Manager)
Shows all favourite channels.
■ Edit My Channels t : You can set the selected
channels to desired my channels group.
✎The “*” symbol will be displayed and the channel will
be set as a my channel.
1. Select a channel and press the TOOLS button.
2. Add or delete a channel in the my channel groups
you want among 1, 2, 3 and 4.
x One or more groups can be selected.
3. After you have changed the settings, the channel list
for each group can be viewed in My Channels.
Channel Menu
¦ Retuning channels
Antenna (Air / Cable)
Before your television can begin memorizing the available
channels, you must specify the type of signal source that is
connected to the TV (i.e. an Air or a Cable system).
Country
The PIN input screen appears. Enter your 4 digit PIN number.
■ Digital Channel: Change the country for digital
channels.
■ Analogue Channel: Change the country for analogue
channels.
c1 1futech
c 2 * 24ore.tv
15 abc1
3 BBC World
23 bid-up.tv
33 Boonerang
32 Cartoon Nwk
5 Class News
4 \ Coming Soon
27 Discovery
All
TV
Radio
Data/Other
Analogue
r
Air Antena B zoom Select Page T Tools
Channels
c1 1futech
c 2 * 24ore.tv
15 abc1
3 BBC World
23 bid-up.tv
33 Boonerang
32 Cartoon Nwk
5 Class News
4 \ Coming Soon
27 Discovery
All
TV
Radio
Data/Other
Analogue
r
Air Antena B zoom Select Page T Tools
Channels
Edit My Channels
lock
Delete
Deselect All
Select All
BN68-02588H_Eng.indb 12 2010-3-19 15:49:10English 13
03 Basic Features
Auto Store
Scans for a channel automatically and stores in the TV.
✎Automatically allocated programme numbers may not
correspond to actual or desired programme numbers. If
a channel is locked using the Child Lock function, the
PIN input window appears.
■ Antenna Source (Air / Cable): Select the antenna
source to memorise.
■ Channel Source (Digital & Analogue / Digital /
Analogue): Select the channel source to memorise.
When selecting Cable → Digital & Analogue or Digital:
Provide a value to scan for cable channels.
Search Mode (Full / Network / Quick): Scans for all
channels with active broadcast stations and stores them
in the TV.
✎ If you set Quick, you can set up Network,
Network ID, Frequency, Modulation, Symbol
Rate manually by press the button on the remote
control.
Network (Auto / Manual): Selects the Network ID
setting mode among Auto or Manual.
Network ID: When Network is Manual, you can set up
Network ID using the numeric buttons.
Frequency: Displays the frequency for the channel.
(differs in each country)
Modulation: Displays available modulation values.
Symbol Rate: Displays available symbol rates.
Manual Store
Scans for a channel manually and stores in the TV.
✎If a channel is locked using the Child Lock function,
the PIN input window appears.
■ Digital Channel (Channel, Frequency, Bandwidth):
When scanning has finished, channels are updated in
the channel list.
✎When selecting Antenna → Air: Channel, Frequency,
Bandwidth
✎When selecting Antenna → Cable: Frequency,
Modulation, Symbol Rate
■ Analogue Channel (Programme, Colour System,
Sound System, Channel, Search, Store): If there
is abnormal sound or no sound, reselect the sound
standard required.
✎Channel mode
x P (programme mode): When tuning is complete,
the broadcasting stations in your area have been
assigned to position numbers from P0 to P99. You
can select a channel by entering the position number
in this mode.
x C (aerial channel mode) / S (cable channel mode):
These two modes allow you to select a channel
by entering the assigned number for each aerial
broadcasting station or cable channel.
¦ Editing channels
Channel Manager Option Menu
(in Channel Manager)
1. Select a channel and press the TOOLS button.
2. Edit the channel name or number using the Edit
Channel Name menu.
■ Edit Channel Name (analogue channels only): Assign
your own channel name.
BN68-02588H_Eng.indb 13 2010-3-19 15:49:1014 English
Basic Features
¦ Other Features
Channel Manager Option Menu
(in Channel Manager)
Set each channel using the Channel Manager menu options
(Lock / Unlock, Timer Viewing, Sort, Delete, Select All /
Deselect All). Option menu items may differ depending on
the channel status.
1. Select a channel and press the TOOLS button.
2. Select a function and change its settings.
■ Lock / Unlock: Lock a channel so that the channel
cannot be selected and viewed.
✎NOTE
x This function is available only when the Child Lock
is set to On.
x The PIN input screen appears. Enter your 4-digit PIN,
the default of which is “0-0-0-0”. Change the PIN
using the Change PIN option.
■ Timer Viewing: You can set a desired channel to be
displayed automatically at the intended time. Set the
current time first to use this function.
✎ When a digital channel is selected, press the ►
button to view the digital Programme.
■ Sort (analogue channels only): This operation allows
you to change the programme numbers of the stored
channels. This operation may be necessary after using
the auto store.
■ Delete: You can delete a channel to display the channels
you want.
■ Select All / Deselect All: Select all the channels
or deselect all the selected channels in the channel
manager.
Scheduled
(in Channel Manager)
You can view, modify or delete a a show you have reserved
to watch.
■ Change Info: Change a a show you have reserved to watch.
■ Cancel Schedules: Cancel a show you have reserved
to watch.
■ Information: Display a show you have reserved
to watch. (You can also change the reservation
information.)
■ Select All / Deselect All: Select or deselect all reserved
programmes.
Channel List
You can see all the channels searched.
Channel List Transfer
Imports or exports the channel map. You should connect a
USB storage to use this function.
✎The PIN number input screen appears. Enter your 4
digit PIN number.
✎The default PIN number of a new TV set is ‘0-0-0-0’.
■ Import from USB: Import channel list from USB.
■ Export to USB: Export channel list to USB.
Fine Tune
(analogue channels only)
If the signal is weak or distorted, fine tune the channel
manually.
✎Fine tuned channels are marked with an asterisk “*”.
✎To reset the fine-tuning, select Reset.
Picture Menu
¦ Changing the Preset Picture Mode
Select your preferred picture type.
Mode t
■ Dynamic: Suitable for a bright room.
■ Standard: Suitable for a normal environment.
■ Movie: Suitable for watching movies in a dark room.
¦ Adjusting picture settings
Backlight / Contrast / Brightness /
Sharpness / Colour / Tint (G/R)
Your television has several setting options for picture quality
control.
✎NOTE
x In analogue TV, Ext., AV modes of the PAL system,
the Tint (G/R) function is not available.
x In PC mode, you can only make changes to
Backlight, Contrast and Brightness.
x Settings can be adjusted and stored for each
external device connected to the TV.
x Lowering picture brightness reduces power
consumption.
P
POWER
MEDIA.P
FAV.CH
P.MODE
DUAL
MTS
BN68-02588H_Eng.indb 14 2010-3-19 15:49:11English 15
03 Basic Features
¦ Economical Solutions
ECO Solution
■ Energy Saving (Off / Low / Medium / High / Picture
Off / Auto) t: Adjust the brightness of the TV
in order to reduce power consumption. If you select
Picture Off, the screen is turned off, but the sound
remains on. Press any button to turn on the screen again.
■ No Signal Power Off (Off / 15 min / 30 min / 60 min):
Activates the Stand-by mode, in the case of “No Signal”
or “Check Signal Cable” status for a certain period of
time defined by the user.
✎ Disabled when the PC is in power saving mode.
¦ Changing the Picture Options
Advanced Settings
(available in Standard / Movie mode)
You can adjust the detailed setting for the screen including
colour and contrast.
✎In PC mode, you can only make changes to Dynamic
Contrast, Gamma and White Balance.
Advanced Settings
Black Tone : Off ►
Dynamic Contrast : Medium
Shadow Detail : 0
Gamma : 0
rGB Only Mode : Off
Colour Space : Native
White Balance
▼
U Move E Enter R return
■ Black Tone (Off / Dark / Darker / Darkest): Select the
black level to adjust the screen depth.
■ Dynamic Contrast (Off / Low / Medium / High): Adjust
the screen contrast.
■ Shadow Detail (-2~+2): Increase the brightness of dark
images.
✎ Disabled under PC mode.
■ Gamma: Adjust the primary colour intensity.
■ RGB Only Mode (Off / Red / Green / Blue): You can
adjust Colour or Tint of Red, Green or Blue for the
picture from an external device (DVD player, home
theatre, etc.).
■ Colour Space (Auto / Native): Adjust the range of
colours available to create the image.
■ White Balance: Adjust the colour temperature for a
more natural picture.
R-Offset / G-Offset / B-Offset: Adjust each colour’s
(red, green, blue) darkness.
R-Gain/G-Gain/B-Gain: Adjust each colour’s
(red, green, blue) brightness.
Reset: Resets the White Balance to it’s default settings.
■ Flesh Tone: Emphasize pink “Flesh Tone.”
■ Edge Enhancement (Off / On): Emphasize object
boundaries.
Picture Options
✎In PC mode, you can only make changes to the Colour
Tone, Size and Auto Protection Time.
■ Colour Tone (Cool / Normal / Warm1 / Warm2)
✎ Warm1 or Warm2 will be deactivated when the
picture mode is Dynamic.
✎ Settings can be adjusted and stored for each
external device connected to an input on the TV.
Picture Options
Colour Tone : Normal ►
Size : 16:9
Screen Mode : 16:9
Digital Noise Filter : Auto
MPEG Nosie Filter : Auto
HdMI Black level : Normal
Film Mode : Off
▼
U Move E Enter R return
BN68-02588H_Eng.indb 15 2010-3-19 15:49:1116 English
Basic Features
■ Size: Your cable box/satellite receiver
may have its own set of screen
sizes as well. However, we highly
recommend you use 16:9 mode most
of the time.
Auto Wide: Automatically adjusts the
picture size to the 16:9 aspect ratio.
16:9 : Adjusts the picture size to 16:9 for DVDs or wide
broadcasting.
Wide Zoom: Magnifies the picture size more than 4:3.
✎ Adjusts the Position by using ▲, ▼ buttons.
Zoom: Magnifies the 16:9 wide pictures vertically to fit
the screen size.
✎ Adjusts the Position or Size by using ▲, ▼ button.
4:3 : The default setting for a movie or normal
broadcasting.
✎ Do not watch in 4:3 format for a long time. Traces
of borders displayed on the left, right and centre
of the screen may cause image retention(screen
burn) which are not covered by the warranty.
Screen Fit: Displays the full image without any cut-off
when HDMI (720p / 1080i / 1080p) or Component
(1080i / 1080p) signals are inputted.
✎NOTE
x After selecting Screen Fit in HDMI (1080i/1080p) or
Component (1080i/1080p) mode, you may need to
centre the picture:
1. Press the ◄ or ► button to select Position.
2. Press the ENTERE button.
3. Press the ▲, ▼, ◄ or ► button to move the
picture.
x Depending on the input source, the picture size
options may vary.
x The available items may differ depending on the
selected mode.
x In PC mode, only 16:9 and 4:3 modes can be
adjusted.
x Settings can be adjusted and stored for each
external device connected to an input of the TV.
x If you use the Screen Fit function with HDMI 720p
input, 1 line will be cut at the top, bottom, left and
right as in the overscan function.
■ Screen Mode (16:9 / Wide Zoom / Zoom / 4:3):
Available only when picture size is set to Auto Wide.
You can determine the desired picture size at the 4:3
WSS (Wide Screen Service) size or the original size.
Each European country requires different picture size.
✎ Not available in PC, Component or HDMI mode.
■ Digital Noise Filter (Off / Low / Medium / High / Auto
/ Auto Visualisation): When the broadcast signal is
weak, some static and ghosting may appear. Select one
of the options until the best picture is displayed.
Auto Visualisation: When changing analogue channels,
displays signal strength.
✎ Only available for analogue channels.
✎ When bar is green, you are receiving the best
possible signal.
■ MPEG Noise Filter (Off / Low / Medium / High /
Auto): Reduces MPEG noise to provide an improved
picture quality.
✎ Disabled under PC mode.
■ HDMI Black Level (Normal / Low): Selects the black
level on the screen to adjust the screen depth.
✎ Available only in HDMI mode (RGB signals).
■ Film Mode (Off / Auto1 / Auto2): Sets the TV to
automatically sense and process film signals from all
sources and adjust the picture for optimum quality.
✎ Available in TV, AV, COMPONENT (480i / 1080i)
and HDMI (480i / 1080i).
■ Auto Protection Time (2 hours / 4 hours / 8 hours
/ 10 hours / Off) : If the same image remains on the
screen, Auto Screen Burn Protector will work.
Picture Reset (OK / Cancel)
Resets your current picture mode to its default settings.
P
POWER
MEDIA.P
FAV.CH
P.MODE
DUAL
MTS
BN68-02588H_Eng.indb 16 2010-3-19 15:49:12English 17
03 Basic Features
¦ Setting up the TV with Your PC
Set the input source to PC.
Adjust frequency values/positions and fine tune the settings
Auto Adjustment t
automatically.
✎Not available when connecting through HDMI/DVI
cable.
Screen
■ Coarse / Fine: Removes or reduces picture noise. If the
noise is not removed by Fine-tuning alone, then adjust
the frequency as best as possible (Coarse) and Finetune again. After the noise has been reduced, readjust
the picture so that it is aligned to the centre of screen.
■ Position: Adjust the PC screen position with direction
button (▲ / ▼ / ◄ / ►).
■ Image Reset: Resets the image to default settings.
Using Your TV as a Computer (PC) Display
Setting Up Your PC Software (Based on Windows XP)
Depending on the version of Windows and the video card,
the actual screens on your PC may differ in which case the
same basic set-up information will almost always be applied.
(If not, contact your computer manufacturer or Samsung
Dealer.)
1. Click on “Control Panel” on the Windows start menu.
2. Click on “Appearance and Themes” in the “Control
Panel” window and a display dialog-box will appear.
3. Click on “Display” and a display dialog box will appear.
4. Navigate to the “Settings” tab on the display dialog-box.
y The correct size setting (resolution) [Optimum: 1360 X
768 pixels]
y If a vertical-frequency option exists on your display
settings dialog box, the correct value is “60” or “60 Hz”.
Otherwise, just click “OK” and exit the dialog box.
Sound Menu
¦ Changing the Preset Sound Mode
Mode t
■ Standard: Selects the normal sound mode.
■ Music: Emphasizes music over voices.
■ Movie: Provides the best sound for movies.
■ Clear Voice: Emphasizes voices over other sounds.
■ Amplify: Increase the intensity of high-frequency sound
to allow a better listening experience for the hearing
impaired.
¦ Adjusting sound settings
Equalizer
Adjusts the sound mode.
■ Balance L/R: Adjusts the balance between the right and
left speaker.
■ 100Hz / 300Hz / 1KHz / 3KHz / 10KHz (Bandwidth
Adjustment): Adjusts the level of specific bandwidth
frequencies.
■ Reset: Resets the equalizer to its default settings.
¦ Sound Systems, Etc.
Virtual Surround (Off / On)
This function provides a virtual 5.1 channel surround sound
experience through a pair of speakers or headphones using
HRTF (Head Related Transfer Function) technology.
✎If Speaker Select is set to External Speaker, Virtual
Surround is disabled.
Dialog Clarity (Off / On)
This function allows you to increase the intensity of a voice
over background music or sound effects so that dialog can
be heard more clearly when viewing a show.
Audio Language
(digital channels only)
Change the default value for audio languages.
✎The available language may differ depending on the
broadcast.
Audio Format (MPEG / Dolby Digital 5.1)
(digital channels only)
When sound is emitted from both the main speaker and the
audio receiver, a sound echo may occur due to the decoding
speed difference between the main speaker and the audio
receiver. In this case, use the TV Speaker function.
✎Audio Format option may differ depending on the
broadcast. 5.1ch Dolby digital sound is only available
when connecting an external speaker through an
optical cable.
BN68-02588H_Eng.indb 17 2010-3-19 15:49:1218 English
Basic Features
Audio Description
(not available in all locations)
(digital channels only)
This function handles the Audio Stream
for the AD (Audio Description) which is
sent along with the Main audio from the
broadcaster.
■ Audio Description (Off / On): Turn the audio description
function on or off.
■ Volume: Adjust the audio description volume.
Auto Volume (Off / Normal / Night)
To equalize the volume level on each channel, set to Normal.
■ Night: This mode provides an improved sound
experience compared to Normal mode, making almost
no noise. It is useful at night.
Speaker Select
(External speaker / TV speaker)
A sound echo may occur due to a difference in decoding
speed between the main speaker and the audio receiver. In
this case, set the TV to External Speaker.
✎When Speaker Select is set to External Speaker, the
volume and MUTE buttons will not operate and the
sound settings will be limited.
✎When Speaker Select is set to External Speaker, you
should use these settings.
x TV Speaker: Off , External Speaker: On
✎When Speaker Select is set to TV Speaker, you
should use these settings.
x TV Speaker: On , External Speaker: On
✎If there is no video signal, both speakers will be mute.
Additional Setting
(digital channels only)
■ DTV Audio Level (MPEG / HE-AAC): This function
allows you to reduce the disparity of a voice signal
(which is one of the signals received during a digital TV
broadcast) to a desired level.
✎ According to the type of broadcast signal, MPEG
/ HE-AAC can be adjusted between -10dB and
0dB.
✎ To increase or decrease the volume, adjust
between the range 0 and -10 respectively.
■ SPDIF Output: SPDIF (Sony Philips Digital InterFace)
is used to provide digital sound, reducing interference
going to speakers and various digital devices such as a
DVD player.
Audio Format: During the reception of a digital TV
broadcast, you can select the Digital Audio output
(SPDIF) format from the options PCM, Dolby Digital or
DTS.
✎ By connecting to 5.1ch speakers in a Dolby
Digital setup, maximize your interactive 3D sound
experience.
Audio Delay: Correct audio-video mismatch, when
watching TV or video, and listening to digital audio
output using an external device such as an AV receiver.
■ Dolby Digital Comp (Line / RF): This function minimizes
signal disparity between a dolby digital signal and a
voice signal (i.e. MPEG Audio, HE-AAC, ATV Sound).
✎ Select Line to obtain dynamic sound, and RF
to reduce the difference between loud and soft
sounds at night time.
Line: Set the output level for signals greater or less than
-31dB (reference) to either -20dB or -31dB.
RF: Set the output level for signals greater or less than
-20dB (reference) to either -10dB or -20dB.
Sound Reset (OK / Cancel)
Reset all sound settings to the factory defaults.
P
POWER
MEDIA.P
FAV.CH
P.MODE
DUAL
MTS
BN68-02588H_Eng.indb 18 2010-3-19 15:49:12English 19
03 Basic Features
Setup Menu
¦ Setting the Time
Time
■ Clock: Setting the clock is for using various timer
features of the TV.
The current time will appear every time you press
the INFO button.
✎ If you disconnect the power cord, you have to set
the clock again.
Clock Mode (Auto / Manual)
✎ Depending on the broadcast station and signal,
the auto time set up may not be correct. In this
case, set the time manually.
✎ The antenna must be connected in order to set
the time automatically.
Clock Set: Set the Day, Month, Year, Hour and Minute
manually.
✎ Available only when Clock Mode is set to
Manual.
¦ Using the Sleep Timer
■ Sleep Timer t: Automatically shuts off the TV
after a preset period of time. (30, 60, 90, 120, 150 and
180 minutes).
✎ To cancel Sleep Timer, select Off.
¦ Setting the On/Off Timer
■ Timer 1 / Timer 2 / Timer 3: Three different on / off
timer settings can be made. You must set the clock first.
On Time / Off Time: Set the hour, minute, and activate
/ inactivate. (To activate timer with the setting you’ve
chosen, set to Activate.)
Volume: Set the desired volume level.
Source: Select TV or USB content to be played when
the TV is turned on automatically. (USB can be selected
only when a USB device is connected to the TV)
Antenna (when the Source is set to TV): Select ATV or
DTV.
Channel (when the Source is set to TV): Select the
desired channel.
Contents (when the Source is set to USB): Select a
folder in the USB device containing music or photo files
to be played when the TV is turned on automatically.
✎ If there is no music file on the USB device or the
folder containing a music file is not selected, the
Timer function does not operate correctly.
✎ When there is only one photo file in the USB
device, the Slide Show will not play.
✎ If a folder name is too long, the folder cannot be
selected.
✎ Each USB you use is assigned its own folder.
When using more than one of the same type of
USB, make sure the folders assigned to each USB
have different names.
Repeat: Select Once, Everyday, Mon~Fri, Mon~Sat,
Sat~Sun or Manual to set at you convenience. If you
select Manual, you can set up the day you want to
activate the timer.
✎ The c mark indicates the day is selected.
✎Auto Power Off (available only when the TV is turned on
by Timer): The TV will be automatically turned off after 3
hours of being left idle to prevent overheating.
¦ Locking Programs
Security
✎The PIN input screen appears before the setup screen.
✎Enter your 4-digit PIN, the default of which is “0-0-0-0”.
Change the PIN using the Change PIN option.
■ Child Lock (Off / On): Lock channels in Channel
Manager, to prevent unauthorized users, such as
children, from watching unsuitable programme.
✎ Available only when the Input source is set to TV.
■ Parental Lock (Parental Rating): Prevent unauthorized
users, such as children, from watching unsuitable
programme with a user-defined 4-digit PIN code.
Allow All: Unlock all TV ratings.
✎ The items of Parental Lock differs depending on
the country.
10 TV ATV 2
00 00
▲
▼
00 00
▲
▼
Timer 1
On Time
Off Time
Volume
Inactivate
Inactivate
Sun Mon Tue Wed Thu Fri Sat
Once
Source Antenna Channel
repeat
L Move U Adjust E Enter R return
BN68-02588H_Eng.indb 19 2010-3-19 15:49:1320 English
Basic Features
■ Change PIN: Change your personal ID number required
to set up the TV.
✎ If you forget the PIN code, press the remote
control buttons in the following sequence, which
resets the PIN to “0-0-0-0”: POWER (off) →
MUTE → 8 → 2 → 4 → POWER (on).
¦ Other Features
Language
■ Menu Language: Set the menu language.
■ Teletext Language: Set a desired language for teletext.
✎ English is the default in cases where the selected
language is unavailable in the broadcast.
■ Preference (Primary Audio Language / Secondary
Audio Language / Primary Subtitle Language /
Secondary Subtitle Language / Primary Teletext
Language / Secondary Teletext Language): Select
a language, which will be the default language when a
channel is selected.
Subtitle
Use this menu to set the Subtitle mode.
✎ The subtitle feature doesn’t work in
Component or HDMI modes.
■ Subtitle (Off / On): Switches subtitles
on or off.
■ Mode (Normal / Hearing Impaired):
Sets the subtitle mode.
■ Subtitle Language: Sets the subtitle language.
✎ If the programme you are watching does not
support the Hearing Impaired function, Normal
automatically activates even if the Hearing
Impaired mode is selected.
✎ English is the default in cases where the selected
language is unavailable in the broadcast.
General
■ Game Mode (Off / On): When connecting to a game
console such as PlayStation™ or Xbox™, you can enjoy
a more realistic gaming experience by selecting game
mode.
✎NOTE
x Precautions and limitations for game mode
– To disconnect the game console and connect
another external device, set Game Mode to Off in
the setup menu.
– If you display the TV menu in Game Mode, the
screen shakes slightly.
x Game Mode is not available in TV, and PC mode.
x After connecting the game console, set Game Mode
to On to prevent poor picture quality.
x If Game Mode is On: Picture mode is set to
Standard and Sound mode is set to Movie.
■ Menu Transparency (Bright / Dark): Set the
Transparency of the menu.
■ Melody (Off / Low / Medium / High): Set so that a
melody plays when the TV is turned on or off.
Common Interface
■ CI Menu: This enables the user to select from the CAMprovided menu. Select the CI Menu based on the menu
PC Card.
■ Application Info.: View information on the CAM inserted
into the CI slot and on the “CI or CI+ CARD” which is
inserted into the CAM. You can install the CAM anytime
whether the TV is on or off.
1. Purchase a CI CAM module at your nearest dealer or by
phone.
2. Firmly insert the “CI or CI+ CARD” into the CAM in the
direction of the arrow.
3. Insert the CAM with the “CI or CI+ CARD” into the
common interface slot, in the direction of the arrow so
that it aligns parallel with the slot.
4. Check if you can see a picture on a scrambled signal
channel.
P
POWER
MEDIA.P
FAV.CH
P.MODE
DUAL
MTS
BN68-02588H_Eng(1-25).indd 20 2010-3-23 12:42:05English 21
03 Basic Features
Support Menu
Self Diagnosis
Self Diagnostic might take few seconds, this is part of the
normal operation of the TV.
■ Picture Test (Yes / No): Use to check for picture
problems and if the problem continues to occur check
the colour pattern.
■ Sound Test (Yes / No): Use the built-in melody sound to
check for sound problems.
✎ If you hear no sound from the TV’s speakers,
before performing the sound test, make sure
Speaker Select is set to TV speaker in the
Sound menu.
✎ The melody will be heard during the test even if
Speaker Select is set to External Speaker or the
sound is muted by pressing the MUTE button.
■ Signal Information: (digital channels only) HDTV
channel’s reception quality is either perfect or the
channels are unavailable. Adjust your antenna to
increase signal strength.
■ Troubleshooting: If the TV seems to have a problem,
refer to this description.
✎ If none of these trouble shooting tips apply,
contact the Samsung customer service centre.
Software Upgrade
Software Upgrade can be performed via a broadcasting
signal or by downloading the latest firmware from samsung.
com to a USB memory device.
Current Version the software already installed in the TV.
✎Software is represented as “Year/Month/Day_Version”.
Software Upgrade
Current Version 2010/01/18_000001
U Move E Enter R return
By USB ►
by Channel
Standby Mode Upgrade 2 Hours Later
Alternative Software
Installing the Latsted Version
■ By USB: Insert a USB drive
containing the firmware
upgrade file, downloaded
from www.samsung.com,
into the TV. Please be careful
not to disconnect the power
or remove the USB drive
until upgrades are complete.
The TV will be turned off
and on automatically after
completing the firmware
upgrade. When software is upgraded, video and audio
settings you have made will return to their default
settings. We advise you to to write down your settings
so that you can easily reset them after the upgrade.
■ By Channel: Upgrade the software using the
broadcasting signal.
✎ If the function is selected during the software
transmission period, software will be automatically
searched and downloaded.
✎ The time required to download the software is
determined by the signal status.
■ Standby Mode Upgrade: A manual upgrade will be
automatically performed at selected time. Since the
power of the unit is turned on internally, the screen
may be turned on slightly for the LCD product. This
phenomenon may continue for more than 1 hour until
the software upgrade is complete.
■ Alternative Software (backup): If there is an issue with
the new firmware and it is affecting operation, you can
change the software to the previous version.
✎ If the software was changed, existing software is
displayed.
HD Connection Guide
Refer to this information when connecting external devices
to the TV.
Contact Samsung
View this information when your TV does not work properly
or when you want to upgrade the software. You can find
information regarding our call centres, and how to download
products and software.
TV Rear Panel
USB Drive
BN68-02588H_Eng.indb 21 2010-3-19 15:49:1422 English
Advanced Features
Media Play
¦ Connecting a USB Device
1. Turn on your TV.
2. Connect a USB device containing photo and/or music fi les to the USB jack on the
rear of the TV.
3. When USB is connected to the TV, popup window appears. Then you can select
Media Play.
Enjoy photos and/or music fi les saved on a USB
Mass Storage Class (MSC) device.
✎It might not work properly with unlicensed multimedia files.
✎Need-to-Know List before using Media Play
x MTP (Media Transfer Protocol) is not supported.
x The file system supports FAT16, FAT32 and NTFS.
x Certain types of USB Digital camera and audio devices may not be compatible with this TV.
x Media Play only supports USB Mass Storage Class (MSC) devices. MSC is a Mass Storage Class Bulk-Only
Transport device. Examples of MSC are Thumb drives, Flash Card Readers and USB HDD (USB HUB are not
supported). Devices should be connected directly to the TV’s USB port.
x Before connecting your device to the TV, please back up your files to prevent them from damage or loss of data.
SAMSUNG is not responsible for any data file damage or data loss.
x Do not disconnect the USB device while it is loading.
x The higher the resolution of the image, the longer it takes to display on the screen.
x The maximum supported JPEG resolution is 15360X8640 pixels.
x For unsupported or corrupted files, the “Not Supported File Format” message is displayed.
x If the files are sorted by Basic View, up to 1000 files can be displayed in each folder.
x MP3 files with DRM that have been downloaded from a non-free site cannot be played. Digital Rights Management
(DRM) is a technology that supports the creation, distribution and management of the content in an integrated and
comprehensive way, including the protection of the rights and interests of the content providers, the prevention of the
illegal copying of contents, as well as managing billings and settlements.
x If more than 2 PTP devices are connected, you can only use one at a time.
x If more than two MSC devices are connected, some of them may not be recognized. A USB device that requires high
power (more than 500mA or 5V) may not be supported.
x If an over-power warning message is displayed while you are connecting or using a USB device, the device may not
be recognized or may malfunction.
x If the TV has been no input during time set in Auto Protection Time, the Screensaver will run.
x The power-saving mode of some external hard disk drives may be released automatically when connected to the TV.
x If a USB extension cable is used, the USB device may not be recognized or the files on the device may not be read.
x If a USB device connected to the TV is not recognized, the list of files on the device is corrupted or a file in the list is
not played, connect the USB device to the PC, format the device and check the connection.
x If a file deleted from the PC is still found when Media Play is run, use the “Empty the Recycle Bin” function on the PC
to permanently delete the file.
P
POWER
MEDIA.P
FAV.CH
P.MODE
DUAL
MTS
Devicename A Change Device D Device Mode EEnter R return
MediaPlay
USB Drive
TV Rear Panel
BN68-02588H_Eng.indb 22 2010-3-19 15:49:15English 23
04 Advanced Features
¦ Screen Display
Move to the file you desired using the up/down/right/left buttons and then press the ENTERE button. The file is played.
✎Supports the Device Mode and Contents Mode in Media Play homepage.
Music
Playing a Music
1. Press the ◄ or ► button to select Music, then press the ENTERE
button in the Media Play menu.
2. Press the ◄/►/▲/▼ button to select the desired Music in the file
list.
3. Press the ENTERE button.
– During music playback, you can search using ◄ and ► button.
✎Only displays files with the MP3 file extension. Other file extensions
are not displayed, even if they are saved on the same USB device.
✎If the sound is strange when playing MP3 files, adjust the Equalizer
in the Sound menu. (An over-modulated MP3 file may cause a
sound problem.)
Devicename A Change Device C Select D Sorting T Tools
c
c
c
Music 01 2010
no singer other
Music 02 2010
no singer other
Music 03 2010
no singer other
Music 04 2010
no singer other
Music 05 2010
no singer other
Music 06 2010
no singer other
Music 07 2010
no singer other
Music 08 2010
no singer other
Music Music 01.mp3 1/2
Only you
Jason
1st Album
Pop
2010
4.2MB
3/15
Only you
Jason
Music 1
No Singer
Music 2
No Singer
Music 3
No Singer
Music 4
No Singer
Music 5
No Singer
01:10 / 04:02
Playlist
Devicename E Pause L Jump T Tools R Return
File List Section :
You can confirm the files and
groups that are sorted by each
category.
Operation Button
A Red (Change Device): Selects a connected device.
B Green (Preference): Sets the file preference. (not supported in Basic view)
C Yellow (Select): Selects multiple files from file list. Selected files are marked
with a symbol.
D Blue (Sorting): Selects the sort list.
T Tools: Displays the option menu.
Information :
You can ascertain the selected file
name and the number of files and
page.
Sort List Section :
Displays the sorting standard.
✎ The sorting standard is
different depending on the
contents.
BN68-02588H_Eng(26-).indd 23 2010-3-23 15:13:0624 English
Advanced Features
Photos
Viewing a Photo (or Slide Show)
1. Press the ◄ or ► button to select Photos, then press the
ENTERE button in the Media Play menu.
2. Press the ◄/►/▲/▼ button to select the desired photo in the file list.
3. Press the ENTERE button.
– While a photo list is displayed, press the ENTERE button on the
remote control to start slide show.
– All files in the file list section will be displayed in the slide show.
– During the slide show, files are displayed in order.
✎Music files can be automatically played during the Slide Show if the
Background Music is set to On.
✎The BGM Mode cannot be changed until the BGM has finished
loading.
¦ Playing the multiple files
Playing the selected music/photo files
1. Press the Yellow button in the file list to select the desired file.
2. Repeat the above operation to select multiple files.
✎ NOTE
x The c mark appears to the left of the selected files.
x To cancel a selection, press the yellow button again.
x To deselect all selected files, press the TOOLS button and
select Deselect All.
3. Press the TOOLS button and select Play Selected Contents.
Playing the music/photo file group
1. While a file list is displayed, move to the any file in desired group.
2. Press the TOOLS button and select Play Current Group.
¦ Media Play Additional Function
Sorting the file list
Press the blue button in the file list to sort the files.
Category Operations Music Photos
Basic View Displays the whole folder. You can view the photo by selecting the folder. ✓ ✓
Title Sorts and displays the file title in Symbol/Number/Alphabet/Special order. ✓ ✓
Preference
Sorts and displays the file by preference. You can change the file preference
in the file list section using the Green button.
✓ ✓
Latest Date Sorts and shows files by the latest date. ✓
Earliest Date Sorts and shows files by the earliest date. ✓
Artist Sorts the music file by artist in alphabetical order. ✓
Album Sorts the music file by album in alphabetical order. ✓
Genre Sorts music files by the genre. ✓
Mood
Sorts music files by the mood. You can change the music mood
information.
✓
Monthly Sorts and shows photo files by month. ✓
Normal Image1024.jpg 1024x768 2010/2/1 3/15
Devicename E Pause L Previous/Next T Tools R Return
Devicename A Change Device C Select D Sorting T Tools
c
c
c
Music 01 2010
no singer other
Music 02 2010
no singer other
Music 03 2010
no singer other
Music 04 2010
no singer other
Music 05 2010
no singer other
Music 06 2010
no singer other
Music 07 2010
no singer other
Music 08 2010
no singer other
Music Music 01.mp3 1/2
BN68-02588H_Eng(26-).indd 24 2010-3-23 15:13:08English 25
04 Advanced Features
Music/Photos Play Option menu
Option menu Operations Music Photos
Repeat Mode You can play movie and music files repeatedly. ✓
Picture Setting You can adjust the picture setting. (P. 14, 15, 16) ✓
Sound Setting You can adjust the sound setting. (P. 17, 18) ✓ ✓
Stop Slide Show / Start
Slide Show
You can start or stop a Slide Show. ✓
Slide Show Speed You can select the slide show speed during the slide show. ✓
Background Music
You can set and select background music when watching a Slide
Show.
✓
Zoom You can zoom into images in full screen mode. ✓
Rotate You can rotate images in full screen mode. ✓
Information You can see detailed information about the played file. ✓ ✓
Settings
Using the Setup Menu
■ Information: Select to view information about the connected device.
BN68-02588H_Eng.indb 25 2010-3-19 15:49:1926 English
Other Information
Analogue Channel Teletext Feature
The index page of the Teletext service gives you information on how to use the service. For Teletext information to be displayed
correctly, channel reception must be stable. Otherwise, information may be missing or some pages may not be displayed.
✎You can change Teletext pages by pressing the numeric buttons on the remote control.
Other Information
The Teletext pages are organized according to six categories:
Part Contents Part Contents
A Selected page number. D Date and time.
B Broadcasting channel identity. E Text.
C
Current page number or
search indications.
F
Status information. FASTEXT
information.
MEDIA.P
A B C D
1
3
4
2
5
8
7
0
!
@
6
9
1 / (Teletext on/mix):
Activate the Teletext mode after
selecting the channel providing the
Teletext service. Press it twice to
overlap the Teletext mode with the
current broadcasting screen.
2 8 (store): Store the Teletext
pages.
3 4 (size): Display the doublesize letters on the upper half of the
screen. For the lower half of the
screen, press it again. To display
the normal screen, press it once
again.
4 9 (hold): Hold the display
on a given page if the selected
page is linked with several
secondary pages which follow on
automatically. To resume, press it
again
5 0 (mode): Select the Teletext
mode (LIST/ FLOF).
If you press this button in the LIST
mode, the mode is switched into
the List save mode. In the List save
mode, you can save a Teletext
page into list using the 8(store)
button.
6 1 (sub-page): Display the
available sub-page.
2 (page up): Display the next
Teletext page.
7
3 (page down): Display the
previous Teletext page.
8
6 (index): Display the index
(contents) page at any time while
you are viewing Teletext.
9
5 (reveal): Display the hidden
text (answers to quiz games, for
example). To display the normal
screen, press it again.
0
7 (cancel): Display the current
broadcast when searching for a
page.
!
Colour buttons (red/green/
yellow/blue): If the FASTEXT
system is used by a broadcasting
company, the different topics
covered on a Teletext page are
colour-coded and can be selected
by pressing the coloured buttons.
Press one of them corresponding
to the required. The page is
displayed with other coloured
information that can be selected
in the same way. To display the
previous or next page, press the
corresponding coloured button.
@
BN68-02588H_Eng.indb 26 2010-3-19 15:49:19English 27
05 Other Information
Installing the Wall Mount
¦ Installing the Wall Mount Kit
Wall mount items (sold separately) allow you to mount the TV on the wall.
For detailed information on installing the wall mount, see the instructions provided with the Wall Mount items. Contact a
technician for assistance when installing the wall mount bracket.
Samsung Electronics is not responsible for any damage to the product or injury to yourself or others if you elect to install the
TV on your own.
¦ Wall Mount Kit Specifications (VESA)
✎Wall mount kit is not supplied but sold separately.
Install your wall mount on a solid wall perpendicular to the floor. When attaching to other building materials, please contact
your nearest dealer. If installed on a ceiling or slanted wall, it may fall and result in severe personal injury.
✎NOTE
x Standard dimensions for wall mount kits are shown in the table below.
x When purchasing our wall mount kit, a detailed installation manual and all parts necessary for assembly are provided.
x Do not use screws longer than the standard dimension, as they may cause damage to the inside of the TV set.
x For wall mounts that do not comply with the VESA standard screw specifications, the length of the screws may differ
depending on their specifications.
x Do not use screws that do not comply with the VESA standard screw specifications.
x Do not fasten the screws too strongly, this may damage the product or cause the product to fall, leading to personal
injury. Samsung is not liable for these kinds of accidents.
x Samsung is not liable for product damage or personal injury when a non-VESA or non-specified wall mount is used or
the consumer fails to follow the product installation instructions.
x Our 57” and 63” models do not comply with VESA Specifications. Therefore, you should use our dedicated wall mount
kit for this model.
x Do not exceed 15 degrees tilt when mounting this TV.
Product
Family
inches VESA Spec. (A * B) Standard Screw Quantity
LCD-TV
19~22
75 X 75
100 X 100 M4
4
23~29 200 X 100
30~40 200 X 200 M6
46~55 400 X 400
M8
57~65 600 X 400
70~80 800 X 400
80~ 1400 X 800
Do not install your Wall Mount Kit while your TV is turned on. It may result in personal injury due to electric
shock.
BN68-02588H_Eng.indb 27 2010-3-19 15:49:2028 English
Other Information
Anti-Theft Kensington Lock
The Kensington Lock is a device used to physically fix the system when using
it in a public place. The appearance and locking method may differ from the
illustration depending on the manufacturer. Refer to the manual provided with the
Kensington Lock for proper use.
✎Please find a “
1
2
3
” icon on the rear of the TV. A kensington slot is beside the
“
1
2
3
” icon.
1. Insert the locking device into the Kensington slot on the LCD TV 1 and turn
it in the locking direction 2.
2. Connect the Kensington Lock cable 3.
3. Fix the Kensington Lock to a desk or a heavy stationary object.
✎The locking device has to be purchased separately.
✎The location of the Kensington Lock may be different depending on its
model.
1
2
3
Securing the TV to the Wall
Caution: Pulling, pushing, or climbing onto the TV may cause the TV to fall. In particular, ensure that your
children do not hang over or destabilize the TV; doing so may cause the TV to tip over, resulting in serious
injuries or death. Follow all safety precautions provided on the included Safety Flyer. For added stability, install
the anti-fall device for safety purposes, as follows.
To avoid the TV from falling
✎Since the necessary clamps, screws, and string are not supplied,
please purchase these additionally.
1. Drive the screws into the clamps and firmly fasten them onto the
wall. Make sure the screws are firmly fixed into the wall.
✎ Screw Specifications
x For a 17 ~ 29 Inch LCD TV: M4
x For a 32 ~ 40 Inch LCD TV: M6
2. Remove the screws from the centre back of the TV, put the
screws into the clamps, and then fasten the screws onto the TV
again.
3. Connect the clamps fixed onto the TV and the clamps fixed onto
the wall with a strong string and then tie the string tightly.
✎Verify all connections are properly secured. Periodically check
connections for any sign of fatigue for failure. If you have
any doubt about the security of your connections, contact a
professional installer.
✎Install the TV near to the wall so that it does not fall backwards.
✎It is safe to connect the string so that the clamps fixed on the wall are equal to or lower than the clamps fixed on the TV.
✎Untie the string before moving the TV.
Wall
TV Rear
BN68-02588H_Eng.indb 28 2010-3-19 15:49:21English 29
05 Other Information
Troubleshooting
If you have any questions about the TV, first refer to this list. If none of these troubleshooting tips apply, please visit “www.
samsung.com,” then click on Support, or contact the call centre listed on the back-cover of this manual.
Issues Solutions and Explanations
Picture Quality First of all, please perform the Picture Test and confirm that your TV is properly displaying test image.
(go to MENU - Support - Self Diagnosis - Picture Test) (P. 21)
If the test image is properly displayed, the poor picture may caused by the source or signal.
The TV image does not look as good as it
did in the store.
• If you have an analogue cable/set top box, upgrade to a digital set top box. Use HDMI or Component
cables to deliver HD (high definition) picture quality.
• Cable/Satellite subscribers: Try HD stations from the channel line up.
• Antenna connection: Try HD stations after performing Auto programme.
✎ Many HD channels are upscaled from SD(Standard Definition) contents.
• Adjust the Cable/Set top box video output resolution to 1080i or 720p.
• Make sure you are watching the TV at the minimum recommended distance based on the size and
definition of the signal.
The picture is distorted: macroblock error,
small block, dots, pixelization
• Compression of video contents may cause picture distortion especially in fast moving pictures such
as sports and action movies.
• Low signal level or bad quality can cause picture distortion. This is not a TV issue.
Colour is wrong or missing. • If you’re using a component connection, make sure the component cables are connected to the
correct jacks. Incorrect or loose connections may cause colour problems or a blank screen.
There is poor colour or brightness. • Adjust the Picture options in the TV menu. (go to Picture mode / Colour / Brightness / Sharpness)
• Adjust Energy Saving option in the TV menu. (go to MENU - Picture - ECO solution - Energy
Saving)
• Try resetting the picture to view the default picture settings. (go to MENU - Picture - Picture Reset)
There is a dotted line on the edge of the
screen.
• If the picture size is set to Screen Fit, change it to 16:9. (P. 16)
• Change cable/set top box resolution.
The picture is black and white. • If you are using an AV composite input, connect the video cable (yellow) to the Green jack of
component input 1 on the TV.
When changing channels, the picture
freezes or is distorted or delayed.
• If connected with a cable box, please try to reset the cable box. Reconnect the AC cord and wait until
the cable box reboots. It may take up to 20 minutes.
• Set the output resolution of the cable box to 1080i or 720p.
Sound Quality First of all, please perform the Sound Test to confirm that your TV audio is properly operating.
(go to MENU - Support - Self Diagnosis - Sound Test) (P. 21)
If the audio is OK, the sound problem may caused by the source or signal.
There is no sound or the sound is too low
at maximum volume.
• Please check the volume the of external device connected to your TV.
The picture is good but there is no sound. • Set the Speaker Select option to TV speaker in the sound menu. (P. 18)
• If you are using an external device, make sure the audio cables are connected to the correct audio
input jacks on the TV.
• If you are using an external device, check the device’s audio output option (ex. you may need to
change your cable box’s audio option to HDMI when you have a HDMI connected to your TV).
• If you are using a DVI to HDMI cable, a separate audio cable is required.
• If your TV has a headphone jack, make sure there is nothing plugged into it.
The speakers are making an inappropriate
noise.
• Check the cable connections. Make sure a video cable is not connected to an audio input.
• For antenna or cable connections, check the signal strength. Low signal level may cause sound
distortion.
BN68-02588H_Eng.indb 29 2010-3-19 15:49:2230 English
Other Information
Issues Solutions and Explanations
No Picture, No Video
The TV won’t turn on. • Make sure the AC power cord is securely plugged in to the wall outlet and the TV.
• Make sure the wall outlet is working.
• Try pressing the POWER button on the TV to make sure the problem is not the remote. If the TV turns
on, refer to “The remote control does not work” below.
The TV turns off automatically. • Ensure the Sleep Timer is set to Off in the Setup menu. (P. 19)
• If your PC is connected to the TV, check your PC power settings.
• Make sure the AC power cord is plugged in securely to the wall outlet and the TV.
• When watching TV from an antenna or cable connection, the TV will turn off after 10 ~ 15 minutes if
there is no signal.
There is picture/Video. • Check cable connections (remove and reconnect all cables connected to the TV and external
devices).
• Set your external devices’ (Cable/Set top Box, DVD, Blu-ray etc) video outputs to match the
connections to the TV input. For example, if an external device’s output is HDMI, it should be connect
to an HDMI input on the TV.
• Make sure your connected devices are powered on.
• Be sure to select the TV’s correct source by pressing the SOURCE button on the TV remote.
RF(Cable/Antenna) Connection
The TV is not receiving all channels. • Make sure the Antenna cable is connected securely.
• Please try Plug & Play (Initial setup) to add available channels to the channel list. Go to MENU -
Setup - Plug & Play (Initial setup) and wait for all available channels to be stored.
• Verify the Antenna is positioned correctly.
The picture is distorted: macroblock error
small block, dots, pixelization
• Compression of video contents may cause picture distortion, especially with fast moving pictures
such as sports and action movies.
• A low signal can cause picture distortion. This is not a TV issue.
PC Connection
A “Not Supported Mode” message
appears.
• Set your PC’s output resolution and frequency so they match the resolutions supported by the TV. (P.
9)
“PC” is always shown on the source list,
even if a PC is not connected.
• This is normal; “PC” is always shown on the source list, regardless of whether a PC is connected.
The video is OK but there is no audio. • If you are using a HDMI connection, check the audio output setting on your PC.
Others
The picture won’t display in full screen. • HD channels will have black bars on either side of the screen when displaying upscaled SD (4:3)
contents.
• Black bars on the top and bottom will appear during movies that have aspect ratios different from
your TV.
• Adjust the picture size options on your external device or TV to full screen.
The remote control does not work. • Replace the remote control batteries with the poles (+/–) in the right direction.
• Clean the sensor’s transmission window on the remote.
• Try pointing the remote directly at the TV from 5~6 feet away.
The cable/set top box remote control
doesn’t turn the TV on or off, or adjust the
volume.
• Programme the Cable/Set top box remote control to operate the TV. Refer to the Cable/Set user
manual for the SAMSUNG TV code.
A “Not Supported Mode” message
appears.
• Check the supported resolution of the TV, and adjust the external device’s output resolution
accordingly. Refer to the resolution settings on page 9 of this manual.
There is a plastic smell from the TV. • This smell is normal and will dissipate over time.
The TV Signal Information is unavailable
in the Self Diagnostic Test menu.
• This function is only available with digital channels from an Antenna / RF/Coax connection. (P. 21)
The TV is tilted to the side. • Remove the base stand from the TV and reassemble it.
There are difficulties assembling the stand
base.
• Make sure the TV is placed on a flat surface. If you can not remove the screws from the TV,
unnecessary use a magnetized screw driver.
The channel menu is greyed out.
(unavailable)
• The Channel menu is only available when the TV source is selected.
BN68-02588H_Eng.indb 30 2010-3-19 15:49:22English 31
05 Other Information
Issues Solutions and Explanations
Your settings are lost after 30 minutes or
every time the TV is turned off.
• If the TV is in the Store Demo mode, it will reset audio and picture settings every 30 minutes. Change
the settings from Store Demo mode to Home Use mode in the Plug & Play (Initial setup) procedure.
Press the SOURCE button to select TV mode, and go to MENU → Setup → Plug & Play (Initial
setup) → ENTERE.
You have intermittent loss of audio or
video.
• Check the cable connections and reconnect them.
• Loss of audio or video can be caused by using overly rigid or thick cables. Make sure the cables are
flexible enough for long term use. If mounting the TV to the wall, we recommend using cables with 90
degree connectors.
You see small particles when you look
closely at the edge of the frame of the TV.
• This is part of the product’s design and is not a defect.
The message “Scramble signal” or “Weak
Signal/No Signal” appears.
• If you are using a CAM CARD (CI/CI+), check that it is installed into the common interface slot.
• If there is still a problem, pull the CAM CARD out of the TV and insert it into the slot again.
You turned the TV off 45 minutes ago, and
it turned on again.
• It is normal. The TV operates the OTA (Over The Aerial) function itself to upgrade firmware
downloaded whilst your watching TV.
There are recurrent picture/sound issues. Check and change the signal/source. •
A reaction may occur between the rubber
cushion pads on the base stand and the
top finish of some furniture.
• To prevent this, use felt pads on any surface of the TV that comes in direct contact with furniture.
✎This TFT LCD panel uses a panel consisting of sub pixels which require sophisticated technology to produce. However,
there may be a few bright or dark pixels on the screen. These pixels will have no impact on the performance of the
product.
¦ Licence
Manufactured under license from Dolby Laboratories.
Dolby and the double-D symbol are trademarks of Dolby Laboratories.
Open source license notice
In the case of using open source software, Open Source Licenses are available on the product menu.
BN68-02588H_Eng(26-).indd 31 2010-3-25 11:58:1832 English
Other Information
Specifications
Panel native 1360 x 768 @ 60 Hz
Environmental Considerations
Operating Temperature
Operating Humidity
Storage Temperature
Storage Humidity
10°C to 40°C (50°F to 104°F)
10% to 80%, non-condensing
-20°C to 45°C (-4°F to 113°F)
5% to 95%, non-condensing
TV System Analogue : Depending on your country selection
Digital : DVB-T/DVB-C
Colour/video system Analogue: PAL, SECAM, NTSC-4.43, NTSC-3.58, PAL60
Digital: MPEG-2 MP@ML, MPEG-4, H.264/AVC MP@L3, MP@L4.0, HP@L4.0
Sound System BG. OK NICAM. MPEGl
HDMI IN Video : 1080/24p, 1080p, 1080i, 720p, 576p, 576i, 480p, 480i
Audio : Two Channel Linear PCM 32/44.1/48 kHz, 16/20/24bits
Analogue audio input (HDMI IN only)
PC Input
Stand Swivel
(Left / Right) 0˚
Model Name LE19C355 LE22C355
Screen Size
(Diagonal) 19 inch 22 inch
Sound
Output 3W X 2 3W X 2
Dimensions (WxDxH)
Body
With stand
461.2 x 59.5 x 322.2 mm
461.2 x 161 x 364 mm
535.3 x 82.2 x 365.8 mm
535.5 x 171.8 x 420.9 mm
Weight
With Stand
3.9 kg
4.2 kg
3.9 kg
4.1 kg
✎Design and specifications are subject to change without prior notice.
✎For the power supply and power consumption, refer to the label attached to the product.
BN68-02588H_Eng(26-).indd 32 2010-3-19 17:33:35English 33
05 Other Information
Index
A
Amplify 17
Antenna 12
Auto Adjustment 17
Auto Volume 18
B
Background Music 25
Balance L/R 17
Basic View 24
Batteries 5
Black Tone 15
Brightness 14
C
Change PIN 20
Channel Manager 12
Clock 19
Colour Tone 15
Component 7
Connecting to a PC 8
Connecting to an Audio Device 8
D
Digital Audio out 8
D-sub 8
Dynamic 14
Dynamic Contrast 15
E
Edit Name 10
Editing channels 13
Energy Saving 15
EPG 11
Equalizer 17
External Speaker 18
F
Favourites Channel 12
Film Mode 15
Fine Tune 14
Flesh Tone 15
Frequency 12
H
HDMI 7
I
Installation Space 2
L
Language 20
Licence 31
Lock 14
M
Media Play 22
Melody 20
Menu Transparency 20
Music 23
N
Navigate 10
Now & Next guide 11
O
ON/OFF button 5
Optimal resolution 9
P
Photos 24
Picture Size 16
Plug & Play 6
Power Indicator 4
R
Remote Control 5
Repeat Mode 25
RGB Only Mode 15
Rotate 25
S
Select All 14
Self Diagnosis 21
Sharpness 14
Signal Information 21
Sleep Timer 19
Slide Show 24
Software Upgrade 21
Source List 10
Speaker Select 18
Specifications 32
Standby mode 4
Subtitle 20
T
Timer 19
Title 34
Tools 3
Troubleshooting 29
TV Speaker 18
U
USB 21, 22
Using Channel View 11
Using Scheduled View 11
Using the Favourite Channels 12
V
VCR 10
Volume 4, 5
W
Wall Mount 27
White Balance 15
BN68-02588H_Eng.indb 33 2010-3-19 15:49:23This page is intentionally left blank.
BN68-02588H_Eng.indb 34 2010-3-19 15:49:232 Svenska
Siffror och bilder i den här bruksanvisningen är endast för referens och kan skilja sig från den verkliga produkten.
Produktdesign och -specifikationer kan ändras utan föregående meddelande.
Digital-TV-meddelande
1. Funktionalitet som är relaterat till Digital TV(DVB) är endast tillgängligt i länder/områden där DVB-T (MPEG2 och MPEG4 AVC) digitala signaler sänds
eller där du har åtkomst till en kompatibel DVB-C(MPEG2 och MPEG4 AAC) kabel-TV-tjänst. Kontakta din lokala återförsäljare angående möjligheten
att ta emot DVB-T- och DVB-C-signal.
2. DVB-T är DVB EU-konsortiumstandard för sändningen av digital, satellit-tv och DVB-C är sändning av TV via kabel. Vissa differentierade funktioner
som EPG (Electric Programme Guide), VOD (Video On Demand) etc. är inte inkluderade i den här specifikationen. De fungerar inte just nu.
3. Även om den här TV:n uppfyller de senaste standarder för DVB-T och DVB-C [augusti, 2008] kan inte framtida kompatibilitet med DVB-T digital
markbunden sändning och DVB-C digitalkabelsändning inte garanteras.
4. Beroende på vilket land/område som TV:n används i kan vissa kabel-tv-leverantörer ta extra avgifter för en sådan tjänst och du kanske måste ingå ett
avtal med företaget.
5. Vissa digital-TV-funktioner kanske inte är tillgängliga i vissa länder eller regioner och DVB-C kanske inte fungerar som det ska med alla kabel-tvleverantörer.
6. För ytterligare information, kontakta ditt lokala kundcenter för Samsung.
✎ TV:ns mottagningskvalitet kan variera beroende på olika sändningssätt i olika länder. Kontrollera TV:ns prestanda hos din lokala SAMSUNGauktoriserade återförsäljare eller hos Samsungs kundcenter för att se om den kan förbättras genom att omkonfigurera TV-inställningarna.
Stillbildsvarning
Undvik att visa stillbilder (t.ex. jpeg-filer) eller andra objekt som ligger stilla på skärmen (t.ex. programlogotyper, bilformat med panorama eller 4:3, eller
aktieinformation längst ner på skärmen). Om stillbilder visas för länge kan skärmens fosfor slitas ojämnt och det kan påverka bildkvaliteten.
För att minska risken för detta ska du följa rekommendationerna nedan:
• Titta inte på samma TV-kanal under längre perioder.
• Försök alltid att visa en bild i helskärm, används TV:ns inställning för bildformat för bästa möjliga matchning.
• Minska värdena för ljusstyrka och kontrast till minimikravet för att få önskad bildkvalitet, överdrivet höga värden kan skynda på brännprocessen.
• Använd de TV-funktioner som utformade speciellt för att minska bild- och skärmbränning, mer information finns i bruksanvisningen.
Säkra installationsutrymmet
Se till att hålla angivet avstånd mellan produkten och andra föremål (t.ex. väggar) för att ventilationen ska vara tillräcklig.
Om detta inte följs kan det orsaka brand eller produktproblem på grund av för hög inre temperatur i produkten.
✎ När du använder ett stativ eller ett väggstativ ska du endast använda delar som tillhandahålls av Samsung Electronics.
x Om du använder delar från en annan tillverkare kan det orsaka problem med produkten eller skador på grund av att produkten faller.
✎ Utseendet kan skilja sig beroende på produkt.
Installation med stativ. Installation med väggfäste.
10 cm
10 cm 10 cm
10 cm
10 cm
10 cm
10 cm
Korrekt avfallshantering av produkten (Elektriskt och elektroniskt avfall)
(Gäller i Europeiska unionen och andra länder i Europa med separata insamlingssystem)
Märkningen på produkten, tillbehören eller dokumentationen anger att produkten och dess elektroniska tillbehör (t.ex. laddare,
headset, USB-kabel) inte får slängas i hushållssoporna vid livsslut. För att förhindra skada på miljön eller den mänskliga hälsan
är det viktigt att sortera utrustningen från andra typer av avfall. Hemmaanvändare skall antingen kontakta sin återförsäljare, eller
den lokala renhållningsmyndigheten för att få information om hur och var de kan göra sig av med produkten på ett säkert sätt.
Företagsanvändare skall kontakta sina leverantörer och kontrollera vilka regler som anges på köpekontraktet. Den här produkten
och dess elektroniska tillbehör får inte blandas med andra kommersiella avfallstyper.
Korrekt avfallshantering av batterierna i produkten
(Gäller i Europeiska unionen och andra länder i Europa med separata batteriinsamlingssystem)
Märkningen på batteriet, bruksanvisningen eller förpackningen anger att batteriet i den här produkten inte får slängas bland
hushållssoporna vid livsslut. Om märkning med de kemiska symbolerna Hg, Cd eller Pb finns anger det att batteriet innehåller
kvicksilver, kadmium eller bly som överskrider referensnivåerna enligt EU-direktivet 2006/66. Om batterierna inte avfallshanteras på
rätt sätt kan de orsaka skador på miljön och på den mänskliga hälsan. För att skydda våra naturresurser och främja återvinning ska
batterierna lämnas till det lokala batteriinsamlingssystemet.
BN68-02588H-Swe.indb 2 2010-3-18 21:41:44Svenska 3
Innehåll
Komma igång
4
4 Tillbehör
4 Visa kontrollpanelen
5 Översikt av fjärrkontrollen
6 Ansluta till en antenn
6 Plug & Play (initial inställning)
Anslutningar
7
7 Ansluta till en AV-enhet
8 Ansluta till en ljudenhet
8 Ansluta till en dator
10 Ändra ingångskällan
Grundfunktioner
10
10 Navigera i menyerna
11 Använda INFO-knappen (Nu och nästa guide)
11 Planera tittandet
12 Kanalmeny
14 Bildmeny
17 Ljudmeny
19 Inställningsmeny
21 Stödmeny
Avancerade funktioner
22
22 Media Play
Övrig information
26
26 Text-tv-funktion för analog kanal
27 Installera väggfästessatsen
28 Antistöld Kensington-lås
28 Montera TV:n på väggen
29 Felsökning
32 Specifikationer
33 Index
Kontrollera symbolen!
Den här funktionen kan användas
t
genom att trycka på TOOLSknappen på fjärrkontrollen.
Obs! Steg-för-steg-guide
P
POWER
GUIDE AD
MEDIA.P
SUBT.
DUAL
I-II
P.SIZE S.MODE P.MODE
BN68-02588H-Swe.indb 3 2010-3-18 21:41:454 Svenska
Komma igång
Tillbehör
✎Försäkra dig om att följande delar följer med din LCD-TV. Kontakta din återförsäljare om det saknas något.
✎Produktens färg och form kan variera beroende på modell.
y Fjärrkontroll och batterier (AAA x 2)
y Ägarens bruksanvisning
y Garantibevis / Säkerhetsmanual (inte tillgänglig på alla platser)
y Rengöringstrasa
y Strömsladd
Se separat guide för installation av stativet.
1 EA
(M4 X L16)
y Stativ (1EA) y Skruvar (2EA)
Visa kontrollpanelen
✎Produktens färg och form kan variera beroende på modell.
P (Power) Slår på och stänger av TV:n.
Strömindikator Blinkar och stängs av när strömmen är på och tänds i standbyläge.
SOURCEE Växlar mellan alla tillgängliga ingångskällor. På skärmmenyn används den här knappen
när du använder ENTERE på fjärrkontrollen.
MENU Visar skämmeny, OSD (on screen display) med TV:ns funktioner.
Y Justera volymen. I OSD använder du knapparna Ysom du använder
z knapparna ◄ och ► på fjärrkontrollen.
Byt kanal. I OSD använder du knapparna z som du använder knapparna
▼ och ▲ på fjärrkontrollen.
Mottagare för fjärrkontrollen Rikta fjärrkontrollen mot den här punkten på TV:n.
Standbyläge
Låt inte TV:n vara i standbyläget under en längre tid (t.ex. när du är på semester). Apparaten drar ström även när powerknappen är avstängd. Det bästa är att dra ur strömsladden.
(Power) Slår på och stänger av TV:n.
Högtalare
Strömindikator
Mottagare för
fjärrkontrollen
Visar huvudmenyn på skärmen. (sid 10)
BN68-02588H-Swe.indb 4 2010-3-18 21:41:465
01 Komma igång
Svenska
Översikt av fjärrkontrollen
Sätta i batterier (batteristorlek: AAA)
✎OBS!
x Använd fjärrkontrollen inom 23 feet från TV.
x Starkt ljus kan påverka fjärrkontrollens prestanda. Undvik
att använda den nära speciellt fluorescerande ljus och
neonskyltar.
x Produktens färg och form kan variera beroende på modell.
MEDIA.P
A B C D
Visa och välja tillgängliga videokällor. (sid 10)
Slå på och stänger av TV:n. (sid 6)
Byta kanal.
Visa EPG-information (Elektronisk programguide).
(sid 11)
Visar kanallistan på skärmen. (sid 14).
Byta kanal.
Välj enkelt funktioner som används ofta.
Visa information på TV-skärmen.
Visar huvudmenyn på skärmen. (sid 10)
Justera volymen.
Gå tillbaka till föregående kanal.
Knappar i menyn Kanalhantering, Media
Play etc.
AD: Val av ljudbeskrivning. (Inte tillgänglig på
alla platser) (sid 18)
P.SIZE: Välj bildstorlek. (sid 16)
SUBT.: Digital textning (sid 20)
Stänger av ljudet tillfälligt.
Gå tillbaka till föregående meny. (sid 10)
Välj poster i skärmmenyn och ändra
menyvärdena.
Stäng menyn. (sid 10)
Alternativt väljer du text-tv, dubbel
eller mix.
Visa Media play.
BN68-02588H-Swe.indb 5 2010-3-18 21:41:466
Komma igång
Svenska
Ansluta till en antenn
När TV:n slås på för första gången visas grundinställningar automatiskt.
✎Förinställning: Ansluta ström och antenn.
✎Utrustning som är kopplad till skyddsjord via jordat vägguttag och/eller via annan utrustning och samtidigt är
kopplad till kabel-TV nät kan i vissa fall medfőra risk főr brand.
Plug & Play (initial inställning)
När TV:n slås på första gången visas en sekvens med uppmaningar på skärmen som hjälper dig att konfi gurera grundinställningarna.
Tryck på knappen POWERP. Plug & Play är endast tillgänglig när källan Input (Ingångar) är inställd på TV:n.
1
Välja språk
Använd knapparna ▲ och ▼ och tryck sedan på knappen ENTERE.
Välj önskat skärmspråk (OSD-språk).
2
Välja Butiksdemo eller
Hemmabruk
Använd knapparna ◄ och ► och tryck sedan på knappen ENTERE.
y Välj läget Hemmabruk. Läget Butiksdemo är avsett för
återförsäljarmiljöer.
y Återställ enhetens inställningar från Butiksdemo till Hemmabruk
(standard): Tryck på volymknappen på TV:n. När skärmmenyn för
volym visas trycker du och håller ned knappen MENU i 5 sekunder.
3
Välja land Använd knapparna ▲ och ▼ och tryck sedan på knappen ENTERE.
Välj land. Om önskat land inte fi nns med i menyn väljer du Övrigt.
✎Efter att du har valt land på menyn Land kan vissa modeller fortsätta med ett extra
alternativ för att ställa in pinkod.
✎När du matar in pinkoden är 0-0-0-0 inte tillgängligt.
4
Välj antenn Använd knapparna ▲ och ▼ och tryck sedan på knappen ENTERE.
Välj Antenn eller Kabel.
5
Välja kanal Använd knapparna ▲ och ▼ och tryck sedan på knappen ENTERE.
Välj kanalkälla för memorering. Om du ställer in antennkällan som Kabel visas ett steg där
du kan tilldela kanalerna numeriska värden (kanalfrekvenser).
Mer information fi nns under Kanal → Autolagring (sid. 12).
✎Tryck på ENTERE när som helst för att avbryta lagringsprocessen.
6
Ställa in Klockläge Ställ in Klockläge automatiskt eller manuellt.
Tryck på knappen ▲ eller ▼ för att välja Auto och tryck sedan på knappen ENTERE.
7
Visa HD
anslutningsguide.
Anslutningssättet för bästa HD-skärmkvalitet visas.
8
Njut av TV-tittandet! Tryck på knappen ENTERE.
Om du vill återställa denna funktion ...
Välj Inställning - Plug & Play (initial inställning). Ange din 4-siffriga PIN-kod. Standard-PIN-koden är ”0-0-0-0”. Om du vill
ändra PIN-koden använder du funktionen Ändra PIN.
P
POWER
MEDIA.P
FAV.CH
P.MODE
DUAL
MTS
Kabel
Strömanslutning
VHF/UHF-antenn
eller
Kable
R-AUDIO-L PR PB Y
ANT OUT
BN68-02588H-Swe.indb 6 2010-3-18 21:41:48Svenska 7
02 Anslutningar
Anslutningar
Ansluta till en AV-enhet
Använda en HDMI/DVI-kabel: HD-anslutning (upp till 1080p)
Tillgängliga enheter: DVD, Blu-ray-spelare, HD-kabelbox, HD STB (digital-TV-box) satellitmottagare, kabelbox, satellitmottagare (STB)
✎HDMI (DVI) IN / PC/DVI AUDIO IN
x När du använder en anslutning med HDMI/DVI-kabel måste du använda uttaget HDMI (DVI) IN. För
DVI-kabelanslutningen ska du använda en DVI till HDMI-kabel eller DVI-HDMI-adapter (DVI till HDMI) för
videoanslutning och PC/DVI AUDIO IN -uttagen för ljud.
x Om en extern enhet, t.ex. DVD / Blu-ray-spelare / kabelbox / STB satellitmottagare som stöder HDMI-versioner äldre
än 1.3, ansluts kan TV:n uppföra sig onormalt (t.ex. ingen skärmbild / inget ljud / störningar / felaktiga färger).
x Om det inte är något ljud när du ansluter med HDMI-kabel ska du kontrollera den externa enhetens HDMIversion. Om du misstänker att versionen är äldre än 1.3 ska du kontakta leverantören av enheten för att
bekräfta HDMI-versionen och begära en uppdatering.
x Vi rekommenderar att du köper en HDMI-certifierad kabel. Annars kan skärmen bli tom eller så kan det uppstå
ett anslutningsfel.
Använda en komponentkabel (upp till 1080p) eller A/V-kabel (endast 480i) och använda en scartkabel
Tillgängliga enheter: VCR, DVD, Blu-ray-spelare, kabelbox, STB satellitmottagare
✎I Ext.-läge stöder DTV Out endast MPEG SD Video och Audio.
✎För bästa bildkvalitet rekommenderas komponentanslutningen framför A/V-anslutningen.
R-AUDIO-L PR PB Y
AUDIO OUT
R-AUDIO-L PR PB Y
DVI OUT
R-AUDIO-L PR PB Y
HDMI OUT
Y
W R
WY WR W R B G
Röd Vit
DVD
R W R G B
R W R G
R W Y
R W Y B
R-AUDIO-L PR PB Y
COMPONENT OUT
R-AUDIO-L PR PB Y
AUDIO OUT
R-AUDIO-L PR PB Y
EXT
R-AUDIO-L PR PB Y
AUDIO OUT
R-AUDIO-L PR PB Y
VIDEO OUT
WY WR W R B G
Gul Röd Vit
WY WR W R B G
Röd Blå Grön
Videobandspelare Blu-ray-spelare DVD
BN68-02588H-Swe.indb 7 2010-3-18 21:41:528 Svenska
Anslutningar
Ansluta till en ljudenhet
Använda en optisk eller ljudkabelanslutning
Tillgängliga enheter: digitalt ljudsystem, förstärkare, DVD-hemmabio
✎DIGITAL AUDIO OUT (OPTICAL)
x När ett digitalt ljudsystem ansluts till uttaget DIGITAL AUDIO OUT (OPTICAL) sänks volymen på både TV:n
och systemet.
x 5.1 CH (kanals) ljud är tillgängligt när TV:n är ansluten till en extern enheter som stöder 5.1 CH.
x När mottagaren (hemmabion) är påslagen kommer ljud från TV:ns optiska uttag. När TV:n tar emot en DTVsignal skickar TV:n ut 5.1-kanalsljud till hemmabions mottagare. När källan är en digital komponent, såsom en
DVD/Blu-Ray-spelare/kabel-TV-box/STB (digital-TV-box) satellitmottagare och är ansluten till TV:n via HDMI
kommer endast 2-kanalsljud att höras från hemmabiomottagaren. Om du vill ha 5.1-kanalsljud ska du ansluta
den digitala ljudutgången från DVD/Blu-ray-spelare / kabelbox / STB satellitmottagare direkt till en förstärkare
eller hemmabio.
Ansluta till en dator
Använda en HDMI/DVI-kabel/en D-sub-kabel
R-AUDIO-L PR PB Y
AUDIO OUT
R-AUDIO-L PR PB Y
AUDIO OUT
R-AUDIO-L PR PB Y
DVI OUT
R-AUDIO-L PR PB Y
PC OUT
R-AUDIO-L PR PB Y
OPTICAL
Digitalt ljudsystem
BN68-02588H-Swe.indb 8 2010-3-18 21:41:55Svenska 9
02 Anslutningar
Visningslägen (D-Sub- och HDMI/DVI-ingång)
Optimal upplösning är 1360 X 768 @ 60 Hz.
Läge Upplösning Horisontal frekvens (kHz) Vertikal frekvens (Hz)
Pixlar, klockhastighet
(MHz)
Synkpolaritet (H/V)
IBM
640 x 350 31.469 70.086 25.175 + / -
720 x 400 31.469 70.087 28.322 - / +
MAC
640 x 480 35.000 66.667 30.240 - / -
832 x 624 49.726 74.551 57.284 - / -
VESA DMT
640 x 480
31.469 59.940 25.175 - / -
37.861 72.809 31.500 - / -
37.500 75.000 31.500 - / -
800 x 600
37.879 60.317 40.000 + / +
48.077 72.188 50.000 + / +
46.875 75.000 49.500 + / +
1024 x 768
48.363 60.004 65.000 - / -
56.476 70.069 75.000 - / -
60.023 75.029 78.750 + / +
1280 x 720 45.000 60.000 74.250 + / +
1360 x 768 47.712 60.015 85.500 + / +
VESA CVT
720 x 576 35.910 59.950 32.750 - / +
1280 x 720 56.456 74.777 95.750 - / +
VESA GTF 1280 x 720 52.500 70.000 89.040 - / +
✎OBS!
x Vid en HDMI/DVI-kabelanslutning måste du använda HDMI (DVI) IN-uttaget.
x Läget för radsprång kan inte användas.
x Om ett videoformat som inte är standard väljs, kan det hända att enheten inte fungerar som den ska.
x Separat läge och kompositläge stöds. SOG(Sync On Green) stöds inte.
ANSLUTNINGAR COMMON INTERFACE-plats
För att kunna titta på betalkanaler måste ”CI eller CI+ CARD” matas in.
y Om du inte matar in ”CI or CI+ CARD” kommer vissa kanaler att
visa meddelandet ”Förvrängd signal”.
y Information som bland annat omfattar ett telefonnummer,
”CI eller CI+ CARD” ID, värd-ID och annan information som visas
i ungefär 2-3 minuter. Om ett felmeddelande visas kontaktar du
tjänsteleverantören.
y När konfigurationen av kanalinformationen slutförts visas
meddelandet ”Uppdateringen klar”, vilket innebär att kanallistan
uppdaterats.
✎OBS!
x Du behöver ett ”CI eller CI+ CARD” från en lokal kabeltjänstleverantör.
x Ta ut ”CI eller CI+ CARD” genom att försiktigt dra ut det för hand. Om du tappar ”CI eller CI+ CARD” kan det skadas.
x Sätt i ”CI or CI+ CARD” i pilens riktning på kortet.
x Placeringen av platsen COMMON INTERFACE kan variera beroende på modell.
x ”CI eller CI+ CARD” stöds inte i alla länder och regioner, kontrollera med din auktoriserade återförsäljare.
x Om du har några problem ska du kontakta ett serviceställe.
BN68-02588H-Swe.indb 9 2010-3-18 21:41:5610 Svenska
Anslutningar
Ändra ingångskällan
Källa
Används för att välja TV eller annan extern
ingångskälla såsom DVD/Blu-ray-spelare/
kabelbox/STB satellitmottagare som är
ansluten till TV:n.
■ TV / Ext. / AV / Component / PC /
HDMI/DVI / USB
✎ I Källa markeras ansluta
ingångar.
✎ Ext. är alltid aktiverade.
Ändra namn
■ VCR / DVD / Kabel-STB / Satellit-STB / PVR STB
/ AV-mottagare / Spel / Kamera / PC / DVI PC /
DVI-enheter / TV / IPTV / Blu-ray / HD DVD / DMA:
Namnge den enhet som är ansluten insignalingången för
att det skall bli lättare för dig att välja ingångskälla.
✎ När du ansluter en HDMI-/DVI-kabel till porten
HDMI (DVI) IN ska du ställa in DVI PC eller
DVI-enheter under Ändra namn.
Grundfunktioner
Navigera i menyerna
Innan du använder TV:n ska du följa stegen nedan för att
bekanta dig med hur du navigerar i menyn och välja och
ändra olika funktioner.
1 MENU-knapp: Visar huvudmenyn på skärmen.
2 ENTERE / Pilknapp: Flytta markören och markera en
post. Bekräfta inställningen.
3 RETURN-knapp: Återgår till föregående meny.
4 EXIT-knapp: Stänger skärmmenyn.
Hur OSD (On Screen Display) används
Det tillgängliga steget kan variera beroende på vald meny.
1 MENU m
Huvudmenyns alternativ visas på
skärmen:
Bild, Ljud, Kanal, Inställning,
Ingångar, Applikation, Support.
2 ▲ / ▼
Välj en ikon med knappen ▲ eller ▼.
3 ENTERE Tryck på ENTERE för att gå till
undermenyn.
4 ▲ / ▼
Välj önskad undermeny men
knapparna ▲ och ▼.
5 ◄ / ►
Ändra värdet på en post med
knappen ◄ eller ►. Hur OSD
ändras kan variera beroende på
vald meny.
6 ENTERE Tryck på ENTERE för att slutföra
konfi gureringen.
7 EXIT e Tryck på EXIT.
MEDIA.P
A B C D
4
1
2
3
P
POWER
MEDIA.P
FAV.CH
P.MODE
DUAL
MTS
BN68-02588H-Swe(1-25).indd 10 2010-3-22 19:09:52Svenska 11
03 Grundfunktioner
Använda INFO-knappen (Nu och nästa guide)
Skärmen identifierar aktuell kanal och status
för vissa inställningar av ljud och bild.
Nu och nästa guiden visar daglig
information om TV-program för varje kanal
ordnat efter sändningstid.
y Bläddra med ◄, ► för att visa
information om ett önskat program
medan du tittar på aktuell kanal.
y Bläddra med ▲, ▼ för att visa information om andra
kanaler. Om du vill gå till den kanal som är vald ska du
trycka på knappen ENTERE.
Planera tittandet
Guide
EPG-information (elektronisk
programguide) ställs till förfogande av
den som sänder kanalen. Med hjälp av
programscheman från den som sänder
kanalen kan du i förväg ställa in vilka
program du vill titta på så ändras kanalen
automatiskt till vald programkanal vid
angiven tidpunkt. Programposter kan vara
tomma eller inaktuella beroende på en kanalstatus.
Använda kanalvy
Använda schemavy
1 Röd (visningsläge): Visar en lista över program som
körs nu eller är kommande.
2 Gul (+24 timmar): Visar en lista med program som
kommer att sändas efter 24 timmar.
3 Blå (Kanalläge): Välj den typ av kanaler du vill visa i
fönstret Kanalvy.
– Kanalläge varierar beroende på antennkälla.
4 Information: Visar detaljerad information om valt
program.
5 (sidan): Går till föregående/nästa sida.
6 ENTERE-knapp
– När du väljer aktuellt program kan du titta på valt
program.
– När du väljer ett program som ska sändas senare
kan du reservera det valda programmet. För att
avbryta schemat trycker du en gång till på knappen
ENTERE och väljer Avbryt scheman.
P
POWER
MEDIA.P
FAV.CH
P.MODE
DUAL
MTS
P
POWER
MEDIA.P
FAV.CH
P.MODE
DUAL
MTS
DTV Air 800 five
Family Affairs
18:00 - 18:30
Drama
Tanya confesses all to a stunned Babs. Conrad is anxious to hear...
18:30
19:15
Today
Today
)Family Affairs
)Dark Angel
800
800
five
five
800 five
Visn.läge Information E Avbryt
Guide 2:10 Tis 1 Juni
Scheduled View
1 4 6
DTV Air 800 five
Home and Away
18:00 - 18:30
Drama
Dani is devastated when scott makes clear his views on marriage...
27
28
800
24
16
6
Discovery
DiscoveryH&L
five
price-drop.tv
QVC
R4DTT
American Chopper
Programmes resume at 06:00
Home and...
No Information
QVC Selection
No Information
Tine Team
Fiv...
Today 18:00 - 19:00 19:00 - 20:00
)Family Affairs )Dark Angel
800 five
Visn.läge +24 timmar Kanalläge Information k Sida E Titta
Guide 2:10 Tis 1 Juni
Channel View - TV
1 2 3 4 5 6
DTV Air
15
abc1
Life On Venus Avenue 18:00 ~ 6:00
Unclassified
No Detaild Information
E Watch
' Information
18:11 Thu 6 Jan
BN68-02588H-Swe.indb 11 2010-3-18 21:41:5812 Svenska
Grundfunktioner
Kanalhanteraren
Ta bort eller ställ in favoritkanaler och använd programguiden
för digitala sändningar. Välj en kanal i skärmvisningen
Kanaler, Mina kanaler eller Schemalagd.
■ Kanaler: Visar kanallistan enligt kanaltyp.
■ * Mina kanaler: Visar kanalgruppen.
■ Schemalagd: Visar alla aktuella reserverade
program.
✎Använda färgknapparna med Kanalhantering
x Röd (Antenn): Växla mellan Antenn och Kabel.
x B Grön (Zoom): Förstorar eller förminskar ett
kanalnummer.
x Gul (välj): Välj önskade kanaler och tryck på
den gula knappen för att ange alla valda kanaler
samtidigt. Markeringen c visas till vänster om de
valda kanalerna.
x (Sidan): Gå till nästa eller föregående sida.
x T (Verktyg): Visar menyn Kanalhantering.
(Alternativmenyn kan se olika ut beroende på
situation.)
Ikoner för kanalstatus
Ikoner Användning
A En analog kanal.
c En vald kanal.
* En kanal som är inställd som favorit.
( Ett program som sänds.
\ En låst kanal.
) Ett reserverat program.
¦ Använda favoritkanaler
* Mina kanaler
(i Kanalhantering)
Visar alla favoritkanaler.
■ Redigera mina kanaler t : Du kan ställa in
valda kanaler till önskad kanalgrupp.
✎Symbolen ”*” visas och kanalen anges som favorit.
1. Välj en kanal och tryck på TOOLS-knappen.
2. Lägg till eller ta bort önskad kanal i mina
kanalgrupper 1, 2, 3 och 4.
x Du kan välja en eller flera grupper.
3. Efter att du ändrat inställningarna kan kanallistan för
varje grupp visas i Mina kanaler.
Kanalmeny
¦ Söka om kanaler
Antenn (Antenn / Kabel)
Innan din TV kan börja memorera tillgängliga kanaler måste
du ange typ av signalkälla som är ansluten till TV:n (dvs.
antenn eller kabelsystem).
Land
PIN-inmatningsfönstret visas. Ange din 4-siffriga PIN-kod.
■ Digital kanal: Byt land för digitala kanaler.
■ Analog kanal: Byt land för analoga kanaler.
c1 1futech
c 2 * 24ore.tv
15 abc1
3 BBC World
23 bid-up.tv
33 Boonerang
32 Cartoon Nwk
5 Class News
4 \ Coming Soon
27 Discovery
All
TV
Radio
Data/Other
Analogue
r
Antenn Antenn B Zoom Välj k Sida T Verktyg
Kanaler
c1 1futech
c 2 * 24ore.tv
15 abc1
3 BBC World
23 bid-up.tv
33 Boonerang
32 Cartoon Nwk
5 Class News
4 \ Coming Soon
27 Discovery
All
TV
Radio
Data/Other
Analogue
r
Antenn Antenn B Zoom Välj k Sida T Verktyg
Kanaler
Ändra favoritkanaler
Lås
Ta bort
Avmarkera alla
Markera alla
BN68-02588H-Swe.indb 12 2010-3-18 21:41:59Svenska 13
03 Grundfunktioner
Autolagring
Söker efter kanaler och lagrar dem automatiskt i TV:n
✎Automatiskt tilldelade programnummer
överensstämmer kanske inte med faktiska eller
önskade programnummer. Om en kanal är låst med
funktionen Barnlås visas PIN-inmatningsfönstret.
■ Antennkälla (Antenn / Kabel): Välj antennkälla för
memorering.
■ Kanalkälla (Digital och Analog / Digital / Analog): Välj
kanalkälla för memorering.
När du väljer Kabel → Digital och Analog eller Digital:
Ge ett sökvärde för kabelkanaler.
Sökläge (Full / Nätverk / Snabb): Söker alla kanaler
med aktiva sändningsstationer och lagrar dem i TV:n.
✎ Om du ställer in Snabb kan du ställa in
Nätverk, Nätverks-ID, Frekvens, Modulering,
Symbolhastighet manuellt genom att trycka på
knappen på fjärrkontrollen.
Nätverk (Auto / Manuellt): Väljer inställningsläge för
Nätverks-ID, antingen Auto eller Manuellt.
Nätverks-ID: Om Nätverk är inställt på Manuellt kan du
ställa in Nätverks-ID med hjälp av sifferknapparna.
Frekvens: Visar kanalens frekvens. (Varierar beroende
på land)
Modulering: Visar tillgängliga moduleringsvärden.
Symbolhastighet: Visar tillgängliga symbolhastigheter.
Manuell lagring
Söker manuellt efter kanaler och lagrar dem i TV:n
✎Om en kanal är låst med funktionen Barnlås visas
PIN-inmatningsfönstret.
■ Digital kanal: (tillgänglig i DTV-läge) När sökningen är
klar uppdateras kanalerna i kanallistan.
✎När du väljer Antenn → Antenn: Kanal, Frekvens,
Bandbredd.
✎När du väljer Antenn → Kabel: Frekvens, Modulering,
Symbolhastighet.
■ Analog kanal (program, färgsystem, ljudsystem,
kanal, sök): Om du inte hör något ljud eller om ljudet är
onormalt väljer du ett annat ljudsystem.
✎Kanalläge
x P (programläge): När inställningen är klar har
sändarna i ditt område tilldelats positionsnummer
från P0 till maximalt P99. Du kan välja en kanal
genom att ange positionsnumret i det här läget.
x C (antennkanalläge) / S (kabelkanalläge): I dessa
två lägen kan du välja en kanal genom att ange
det tilldelade numret för antennsändaren eller
kabelkanalen.
¦ Redigera kanaler
Alternativmenyn för kanalhantering
(i Kanalhantering)
1. Välj en kanal och tryck på TOOLS-knappen.
2. Redigera kanalnamnet eller numret med hjälp av menyn
Redigera kanalnamn.
■ Redigera kanalnamn (endast analoga kanaler): Tilldela
kanalen ett eget namn.
BN68-02588H-Swe.indb 13 2010-3-18 21:42:0014 Svenska
Grundfunktioner
¦ Övriga funktioner
Alternativmenyn för kanalhantering
(i Kanalhantering)
Ställ in var och en av kanalerna med hjälp av menyalternativen
för Kanalhantering (Lås / Lås upp, Timervisning, Sortera,
Ta bort, Markera alla / Avmarkera alla). Alternativmenyn kan
variera beroende på kanalstatus.
1. Välj en kanal och tryck på TOOLS-knappen.
2. Välj en funktion och ändra inställningen för den.
■ Lås / Lås upp: Låser en kanal så att kanalen inte kan
markeras och visas.
✎OBS!
x Den här funktionen är bara tillgänglig när Barnlås är
inställt som På.
x PIN-inmatningsfönstret visas. Ange den 4-siffriga
PIN-koden, standardkoden är ”0-0-0-0”. Ändra
PIN-koden med alternativet Ändra PIN.
■ Timervisning: Du kan ställa in en valfri kanal som visas
automatiskt vid den angivna tiden. Ställ först in tiden
med den här funktionen.
✎ När en digital kanal är vald trycker du på knappen
► för att visa det digitala programmet.
■ Sortera (endast analoga kanaler): Med den här
funktionen kan du ändra programnumren på lagrade
kanaler. Det kan vara nödvändigt när du har använt den
automatiska lagringen.
■ Ta bort: Du kan ta bort en kanal för att visa de kanaler
du önskar.
■ Markera alla / Avmarkera alla: Markera alla
kanaler eller avmarkera alla markerade kanaler i
kanalhanteringen.
Schemalagd
(i Kanalhantering)
Du kan visa, ändra eller ta bort ett program som du har
reserverat för att se.
■ Ändra info: Ändra ett program som du har reserverat
för att se.
■ Avbryt scheman: Avbryt ett program som du har
reserverat för att se.
■ Information: Visa ett program som du har reserverat för
att se. (Du kan också ändra reservationsinformation.)
■ Markera alla / Avmarkera alla: Markera eller avmarkera
alla reserverade program.
Kanallista
Du kan se alla kanaler som har sökts.
Överföring av kanallista
Importerar eller exporterar kanalkartan. Anslut en
USBlagringsenhet för att använda den här funktionen.
✎Inmatningsskärmen för PIN-kod visas. Ange din
4-siffriga PIN-kod.
✎Standard-PIN-koden för en ny TV är ‘0-0-0-0’.
■ Importera från USB: Importera kanallista från USB.
■ Exportera till USB: Exportera kanallista till USB.
Fininst.
(endast analoga kanaler)
Om signalen är svag eller det är störningar kan du finjustera
en kanal manuellt.
✎Fininställda kanaler markeras med en asterisk ”*”.
✎ Om du vill återställa fininställningen väljer du Återställ.
Bildmeny
¦ Ändra det förinställda bildläget
Välj önskad bildtyp.
Läge t
■ Dynamisk: Passar ett ljust rum.
■ Standard: Passar i normala ljusförhållanden.
■ Film: Passar när du ska titta på film i ett mörkt rum.
¦ Ändra bildinställningar
Bakgrundsljus / Kontrast / Ljusstyrka /
Skärpa / Färg / Ton (G/R)
TV:n har flera inställningsalternativ för bildkvalitetskontroll.
✎OBS!
x I analoga lägen, TV, Ext., AV, i PAL-systemet är inte
funktionen Ton (G/R) tillgänglig.
x I PC-läget kan de bara göra ändringar för
Bakgrundsljus, Kontrast och Ljusstyrka.
x Inställningarna kan ändras och lagras för varje extern
enhet som är ansluten till TV:n
x Om du sänker bildens ljusstyrka minskar
energiförbrukningen.
P
POWER
MEDIA.P
FAV.CH
P.MODE
DUAL
MTS
BN68-02588H-Swe.indb 14 2010-3-18 21:42:00Svenska 15
03 Grundfunktioner
¦ Ekonomiska lösningar
Ekolösningar
■ Energispar (Av / Låg / Medium / Hög / Bild av /
Auto) t: Justera ljusstyrkan för TV:n för att ge
minskad energiförbrukning. Om du väljer Bild av stängs
skärmen av medan ljudet är på. Tryck på valfri knapp
förutom volymknappen för att slå på skärmen.
■ Standby, ej sign. (Av / 15 min / 30 min / 60 min):
Aktiverar standbyläget i status ”Ingen signal” eller
”Kontrollera signalkabel” under en viss tidsperiod som
angivits av användaren.
✎ Avaktiverad när datorn är i energisparläge.
¦ Ändra bildalternativen
Avancerade inställningar
(tillgänglig i läget Standard / Film)
Du kan justera detaljerade inställningar för skärmen inklusive
färg och kontrast.
✎I PC-läget kan du bara ändra Dynamisk kontrast,
Gamma och Vitbalans.
■ Svärta (Av / Mörk / Mörkare / Mörkast): Välj
svärtningsnivå för att ändra skärmdjupet.
■ Dynamisk kontrast (Av / Låg / Medium / Hög): Justera
skärmens kontrast.
■ Skuggdetalj (-2~+2): Ökar ljusstyrkan på mörka bilder.
✎ Avaktiverad i PC-läget.
■ Gamma: Ändrar primärfärgernas intensitet.
■ Läget Endast RGB (Av / Röd / Grön / Blå): Du kan
ändra Färg eller Ton för Röd, Grön eller Blå för bilden
från en extern enhet (DVD-spelare, hemmabio, etc.).
■ Färgområde (Auto / Ursprunglig): Ändra den färgrymd
som finns för att skapa bilden.
■ Vitbalans: Ändra färgtemperaturen för mer naturlig bild.
R-Offset / G-Offset / B-Offset: Ändra respektive färgs
(röd, grön, blå) djup.
R-Gain / G-Gain / B-Gain: Ändra respektive färgs (röd,
grön, blå) ljusstyrka.
Återställ: Återställer Vitbalans till standardvärdena.
■ Hudfärg: Förstärker rosa ”Hudfärg”.
■ Kantförbättring (av / på): Förstärker objektets kanter.
Bildalternativ
✎I PC-läget kan du bara ändra Färgton, Storlek, brus
och Autoskyddstid.
Bildalternativ
Färgton : Normal ►
Storlek : 16:9
Skärmläge : 16:9
Filter för dig. brus : Auto
MPEG-brusfilter : Auto
HDMI svärta : Normal
Filmläge : Av
▼
U Flytta E Enter R Tillbaka
■ Färgton (Sval / Normal / Varm1 / Varm2)
✎ Varm1 och Varm2 avaktiveras när bildläget är
Dynamisk.
✎ Inställningarna kan ändras och lagras för varje
extern enhet som är ansluten till en ingång på TV:n.
Avancerade inställningar
Svärta : Av ►
Dynamisk kontrast : Medium
Skuggdetalj : 0
Gamma : 0
Läget Endast RGB : Av
Färgområde : Ursprunglig
White Balance
▼
U Flytta E Enter R Tillbaka
BN68-02588H-Swe.indb 15 2010-3-18 21:42:0016 Svenska
Grundfunktioner
■ Storlek: Kabel-TV-boxen/
satellitmottagaren kan ha en egen
uppsättning skärmstorlekar. Dock
rekommenderar vi att du använder
läget 16:9 för det mesta.
Auto Wide: Justerar automatiskt
bildstorleken till förhållandet 16:9.
16:9 : Justerar bildstorleken till 16:9 för DVD eller
bredbildssändningar.
Wide Zoom: Förstorar bildstorleken mer än 4:3.
✎ Ändrar positionen genom att använda knapparna
▲, ▼.
Zoom: Förstorar bredbild i storleken 16:9 vertikalt för att
anpassas till skärmstorleken.
✎ Ändrar positionen eller storleken genom att
använda knapparna ▲, ▼.
4:3 : Standardinställningen för en film eller normal
sändning.
✎ Titta inte för läge i formatet 4:3. Spår av kanter
som visas till vänster, höger och i mitten på
skärmen kan brännas in i skärmen och det täcks
inte av garantin.
Anpassa till skärm: Visar hela bilden utan att beskära
när insignalen HDMI (720p / 1080i / 1080p) eller
Komponent (1080i / 1080p) används.
✎OBS!
x Efter att du valt att anpassa till skärm i läget HDMI
(720p / 1080i / 1080p) eller Komponent (1080i /
1080p) kan du behöva centrera bilden:
1. Tryck på ◄ eller ► för att välja Position.
2. Tryck på knappen ENTERE.
3. Tryck på knappen ▲, ▼, ◄ eller ► för att flytta
bilden.
x Alternativen för bildstorleken kan variera beroende
på storleken på källan för indata.
x De tillgängliga alternativen kan variera beroende på
valt läge.
x I PC-läget kan endast läget 16:9 och 4:3 ändras.
x Inställningarna kan ändras och lagras för varje extern
enhet som är ansluten till en ingång på TV:n
x Om du använder funktionen Anpassa till skärm
med HDMI 720p-ingång kommer 1 rad att bli
beskuren överst, nederst, till vänster och till höger
som i överskanningsfunktionen.
■ Skärmläge (16:9 / Wide Zoom / Zoom / 4:3): Endast
tillgängligt när bildstorleken är inställd på Auto Wide. Du
kan bestämma önskad bildstorlek som 4:3 WSS (Wide
Screen Service) eller originalstorlek. Olika europeiska
länder kräver olika bildstorlekar.
✎ Ej tillgängligt i läget PC, Component eller HDMI.
■ Filter för dig. brus (Av / Låg / Medium / Hög / Auto /
Autovisualisering): Om sändningssignalen är svag kan
det uppstå störningar eller spökbilder på skärmen. Välj
vart och ett av alternativen tills du får bästa bildkvaliteten.
Autovisualisering: När du ändrar analoga kanaler visas
signalljusstyrkan.
✎ Endast tillgänglig för analoga kanaler.
✎ När fältet är grönt tar du emot bästa möjliga signal.
■ MPEG-brusfilter (Av / Låg / Medium / Hög / Auto):
Minskar MPEG-bruset för att få bättre bildkvalitet.
✎ Avaktiverad i PC-läget.
■ HDMI svärta (Normal / Låg): Väljer svärtningsnivå på
skärmen för att justera skärmdjupet.
✎ Endast tillgängligt i HDMI-läget (RGB-signaler).
■ Filmläge (Av / Auto1 / Auto2): Ställer in TV:n för att
automatiskt känna av och bearbeta filmsignaler från alla
källor och justera till optimal bildkvalitet.
✎ Tillgängligt i lägena TV, AV, COMPONENT (480i /
1080i) och HDMI (480i / 1080i).
■ Autoskyddstid (2 timmar / 4 timmar / 8 timmar
/ 10 timmar / Av): Om samma bild ligger kvar på
skärmen fungerar det automatiska skyddet mot
bildskärmsbränning.
Bildåterställning (OK / Avbryt)
Återställer aktuellt bildläge till dess standardinställningar.
P
POWER
MEDIA.P
FAV.CH
P.MODE
DUAL
MTS
BN68-02588H-Swe.indb 16 2010-3-18 21:42:00Svenska 17
03 Grundfunktioner
¦ Installera TV: n med datorn
Ställ in ingångskällan på datorn.
Ändrar frekvensvärden / positioner och fininställer
Autojustering t
inställningar automatiskt.
✎Ej tillgängligt vid anslutning via HDMI/DVI-kabel.
Skärm
■ Grov / Fin: Tar bort eller minskar bildstörningar. Om
inte störningen försvinner vid fininställningen, justera
då frekvensinställningen (Grov) och gör sedan om
fininställningen. När störningen har reducerats, ställer du
in bilden igen så att den är placerad mitt på bildskärmen.
■ Position: Ändra PC-skärmens position med
pilknapparna (▲ / ▼ / ◄ / ►).
■ Återställ bild: Återställer bilden till standardinställningar.
Använda TV:n som datorskärm (PC)
Installera programvaran (baserad på Windows XP)
Hur det faktiskt ser ut på datorns skärm beror på vilken
Windows-version och vilket videokort datorn har, men
samma grundinställningar gäller nästan alltid. (Om inte
kontaktar du din datortillverkare eller din Samsung-
återförsäljare.)
1. Klicka på ”Kontrollpanelen” i Windows startmeny.
2. Klicka på ”Utseende och teman” i fönstret
”Kontrollpanelen” för att öppna en dialogruta.
3. Klicka på ”Bildskärm” för att öppna en dialogruta.
4. Gå till fliken ”Inställningar” i den dialogruta som öppnats.
y Rätt storleksinställning (upplösning) [Optimalt: 1360 x
768 pixlar]
y Om det finns ett alternativ för vertikal frekvens i
dialogrutan för bildskärmsinställningar är det korrekta
värdet ”60” eller ”60 Hz”. I annat fall klickar du bara på
”OK” och lämnar dialogrutan.
Ljudmeny
¦ Ändra förinställt ljudläge
Läge t
■ Standard: Väljer normalt ljudläge.
■ Musik: Förstärker musik och inte röst.
■ Film: Ger det bästa filmljudet.
■ Klar röst: Förstärker röster i förhållande till andra ljud.
■ Förstärk: Ökar intensiteten på högfrekvensljud så att
personer med nedsatt hörsel kan höra bättre.
¦ Ändra ljudinställningar
Equalizer
Ändrar ljudläget.
■ Balans V/H: Ändrar balansen mellan höger och vänster
högtalare.
■ 100Hz / 300Hz / 1kHz / 3kHz / 10kHz
(bandbreddsjustering): Ändrar nivån på specifika
bandbreddsfrekvenser.
■ Återställ: Återställer equalizern till standardinställningar.
¦ Ljudsystem, etc.
Virtual Surround (Av / På)
Den här funktionen ger en virtuell 5.1-kanals
surroundljudsupplevelse via ett par högtalare eller hörlurar
tack vare HRTF-teknik (Head Related Transfer Function).
✎Om Högtalarval är inställt på Extern högtalare är
Virtual Surround avaktiverat.
Dialogskärpa (Av / På)
Med den här funktionen kan du öka intensiteten på en röst
i förhållande till bakgrundsmusik eller ljudeffekter så att
dialogen kan höras bättre under ett program.
Ljudspråk
(endast digitala kanaler)
Ändra standardinställning för ljudspråk.
✎Det tillgängliga språket kan skilja sig beroende på
sändning.
Ljudformat (MPEG / Dolby Digital 5.1)
(endast digitala kanaler)
När ljudet sänds ut från både huvudhögtalaren och
ljudmottagaren kan det uppstå ett eko på grund av
dekoderhastigheten mellan huvudhögtalare och
ljudmottagare. I så fall ska du använda funktionen
TV-högtalare.
✎Alternativet Ljudformat kan skilja sig beroende
på sändning. 5.1-kanals Dolby digitalljud är endast
tillgängligt vid anslutning till en extern högtalare med
enoptisk kabel.
BN68-02588H-Swe.indb 17 2010-3-18 21:42:0118 Svenska
Grundfunktioner
Ljudbeskrivning
(ej tillgängligt på alla platser) (endast digitala
kanaler)
Funktionen hanterar ljudströmmen för
ljudbeskrivningen (AD) när den skickas
med huvudljudet från avsändaren.
■ Ljudbeskrivning (Av / På): Slår av och
på funktionen för ljudbeskrivning.
■ Volym: Ändra volymen för ljudbeskrivning.
Autovolym (Av / Normal / Natt)
För equalize av volymnivå på respektive kanal, ställ in som
Normal.
■ Natt: Det här läget ger en förbättrad ljudupplevelse
jämfört med läget Normal och ger nästan inget oljud.
Det är användbart på natten.
Högtalarval
(Extern Högtalare / TVHögtalare)
Ett eko kan uppstå på grund av annan avkodningshastighet
mellan huvudhögtalaren och ljudmottagaren. I så fall ska du
ställa in TV:n till Extern högtalare.
✎Om Högtalarval är inställt på Extern högtalare är inte
volymknapparna och MUTE-knappen aktiverad, och
ljudinställningarna är begränsade.
✎När Högtalarval är inställt på Extern högtalare ska du
använda dessa inställningar.
x TV-högtalare: Av, Extern högtalare: På
✎När Högtalarval är inställt på TV-högtalare ska du
använda dessa inställningar.
x TV-högtalare: På, Extern högtalare: På
✎Om det inte finns någon videosignal kommer båda
högtalarna att vara tysta.
Extra inställning
(endast digitala kanaler)
■ DTV-ljudnivå (MPEG / HE-AAC): Med den här
funktionen kan du minska skillnaderna för en röstsignal
(där en av signalerna tas emot under en digital TVsändning) till önskad nivå.
✎ Beroende på typ av sändningssignal kan MPEG /
HE-AAC justeras mellan -10dB och 0dB.
✎ Ändra i intervallet 0 och -10 för att öka eller minska
volymen.
■ SPDIF-utmatning: SPDIF (Sony Philips Digital InterFace)
används för att ge digitalt ljud, minska störningar till
högtalare och olika digitala enheter som exempelvis en
DVD-spelare.
Ljudformat: Under mottagning av en digital TV-sändning
kan du välja digitalt ljudformat (SPDIF) bland alternativen
PCM Dolby Digital och DTS.
✎ Genom att ansluta 5.1-kanals högtalare i en Dolby
Digital-inställning kan du maximera den interaktiva
3D-ljudupplevelsen.
Ljudfördröjning: Justera skillnader mellan ljud och bild
när du tittar på TV eller video och lyssnar på digitalt ljud
via en extern enhet som exempelvis en AV-mottagare.
■ Dolby Digital-komp (Line / RF): Den här funktionen
minimerar signalskillnader mellan en dolby digital-signal
och en röstsignal (t.ex. MPEG-ljud, HE-AAC, ATV-ljud).
✎ Välj Line för att få ett dynamiskt ljud och RF för
att minska skillnaden mellan högt och lågt ljud
nattetid.
Line: Ställ in utnivå för signaler som är högre eller mindre
än -31dB (referens) antingen till -20dB eller -31dB.
RF: Ställ in utnivå för signaler som är högre eller mindre
än -20dB (referens) antingen till -10dB eller -20dB.
Ljudåterställning (OK / Avbryt)
Återställ alla ljudinställningar till fabriksstandard.
P
POWER
MEDIA.P
FAV.CH
P.MODE
DUAL
MTS
BN68-02588H-Swe.indb 18 2010-3-18 21:42:01Svenska 19
03 Grundfunktioner
Inställningsmeny
¦ Ställa klockan
Tid
■ Klocka: Att ställa klockan är nödvändigt för att kunna
använda olika timerfunktioner på TV:n.
O Den aktuella tiden visas varje gång du trycker på
knappen INFO.
✎ Om du drar ur strömsladden måste du ställa
klockan igen.
Klockläge (Auto / Manuellt)
✎ Beroende på sändningsstation och -signal kanske
den automatiska tiden inte ställs som den ska. I så
fall ska du ställa tiden manuellt.
✎ Antennen måste anslutas för att ställa tiden
automatiskt.
Ställ klockan: Ställ in Dag, Månad, År, Timme och
Minut manuellt.
✎ Endast tillgängligt när Klockläge är inställt på
Manuellt.
¦ Använda sovtimern
■ Sovtimer t: Stänger automatiskt av TV:n efter
en förinställd tidsperiod. (30, 60, 90, 120, 150 eller 180
minuter).
✎ För att avbryta Sovtimer väljer du Av.
¦ Ställa in timern som På / Av
■ Timer 1 / Timer 2 / Timer 3: Tre olika timerinställningar
kan göras för på/av. Ställ in klockan först!
Påslagningstid / Avstängningstid: Välj timme, minut
och aktivera/inaktivera. (För att aktivera timern med
valda inställningar väljer du Aktivera.)
Volym: Välj önskad ljudnivå.
Källa: Välj TV- eller USB-innehåll som ska spelas när
TV:n slås på automatiskt. (USB kan bara väljas när en
USB-enhet är ansluten till TV:n)
Antenn (när Källa är inställt på TV): Välj ATV eller DTV.
Kanal (när Käll är inställt på TV): Välj önskad kanal.
Innehåll (när Källa är inställt på USB): Välj en mapp i
USB-enheten som innehåller musik- eller fotofiler som
ska spelas upp när TV:n slås på automatiskt.
✎ Om det inte finns några musikfiler på USB-enheten
eller om mappen som innehåller musikfiler inte har
valt kommer inte timerfunktionen att fungera som
den ska.
✎ Om det bara finns en fotofil på USB-enheten kan
inget bildspel visas.
✎ Om mappnamnet är för långt kan mappen inte
väljas.
✎ Varje USB du använder tilldelas en egen mapp.
Om du använder mer än en USB av samma typ
ska du se till att mapparna som tilldelas USBenheterna har olika namn.
Upprepa: Välj En gång, Varje dag, Mån~Fre, Mån~Lör,
Lör~Sön eller Manuellt. Om du väljer Manuellt, kan du
ange den dag du vill aktivera timern.
✎ Märket c anger att dagen är vald.
✎Automatisk avstängning (endast tillgänglig när TV:n
slås på av timern): TV:n kommer att slås av automatiskt
efter 3 timmar, om den lämnas i viloläge, för att undvika
överhettning.
¦ Låsprogram
Säkerhet
✎Inmatning av PIN-kod visas innan inställningsskärmen.
✎Ange den 4-siffriga PIN-koden, standardkoden är
”0-0-0-0”. Ändra PIN-koden med alternativet Ändra
PIN.
■ Barnlås (Av / På): Lås kanaler i Kanalhantering för att
förhindra obehöriga användare, t.ex. barn, att titta på
olämpliga program.
✎ Endast tillgänglig när källan för ingångar är inställt
på TV.
■ Barnlås (Klassificering): Förhindrar med hjälp av
en användarinställd 4-siffrig PIN-kod att obehöriga
användare, t.ex. barn, tittar på olämpliga program.
Tillåt alla: Lås upp alla TV-klassificeringar.
✎ Posterna för Barnlås varierar beroende på land.
10 TV ATV 0
00 00
▲
▼
00 00
▲
▼
Timer 1
Påslagningstid
Avstängningstid
Volym
Inaktivera
Inaktivera
Sön Mån Tis Ons Tor Fre Lör
Once
Källa Antenn Kanal
Upprepa
L Flytta U Justera E Enter R Tillbaka
BN68-02588H-Swe.indb 19 2010-3-18 21:42:0120 Svenska
Grundfunktioner
■ Ändra PIN: Ända det personliga ID-numret som krävs
för TV-inställningar.
✎ Om du har glömt PIN-numret trycker du på
fjärrkontrollens knappar i följande ordning, vilket
återställer PIN-numret till ”0-0-0-0”: POWER (av)
→ MUTE → 8 → 2 → 4 → POWER (på).
¦ Övriga funktioner
Språk
■ Menyspråk: Ställ in menyspråket.
■ Text-TV-språk: Ställ in önskat språk för text-tv.
✎ Engelska är standard om det valda språket saknas
för sändningen.
■ Inställning (Huvudspråk för ljud / Andraspråk för ljud
/ Huvudspråk för textning / Andraspråk för textning /
Huvudspråk för text-tv / Andraspråk för text-tv): Välj
ett språk som kommer att vara standardspråket när en
kanal väljs.
Undertext
Använd den här menyn för att ställa in läge
för Undertext.
✎Undertextfunktionen fungerar inte i
läget Komponent eller HDMI.
■ Undertext (Av / På): Slår på och av
undertexter.
■ Läge (Normal / Nedsatt hörsel): Ställer in läge för
undertext.
■ Textningsspråk: Ställer in språk för undertext.
✎ Om programmet du tittar på saknar stöd för
funktionen Nedsatt hörsel aktiveras Normal
automatiskt även om Nedsatt hörsel har valts.
✎ Engelska är standard om det valda språket saknas
för sändningen.
Allmänt
■ Spelläge (Av / På): När du ansluter till en spelenhet,
t.ex. PlayStation™ eller Xbox™, kan du njuta av en mer
verklig upplevelse genom att välja spelläget.
✎OBS!
x Säkerhetsföreskrifter och begränsningar i spelläget
– Om du vill koppla ur spelkonsolen och ansluta en
annan extern enhet ska du ställa in Spelläge som
Av i inställningsmenyn.
– Om du visar TV-menyn i Spelläge kan skärmen
skaka något.
x Spelläge är inte tillgängligt i TV-läge och PC-läge.
x Efter att du anslutit spelkonsolen ska du ställa in
Spelläge som På för att förhindra dålig bildkvalitet.
x Om Spelläge är På: Läget Bild är inställt på
Standard och läget Ljud är inställt på Film.
■ Menytransparens (Ljus / Mörk): Ställ in menyns
genomskinlighet.
■ Melodi (Av / Låg / Medium / Hög): Ställer in så att en
melodi spelas när TV:n slås på eller av.
Common Interface
■ CI-meny: Här kan användaren välja alternativ på CAMmenyn. Välj CI-menyn från menyn PC Card (pc-kort).
■ Applikationsinfo: Visa information på det CAM som är
isatt på CI-platsen och på ”CI or CI+ CARD” som är isatt
i CAM. Du kan installera en CAM när som helst, oavsett
om TV:n är på eller av.
1. Köp en CI CAM-modul hos närmaste handlare eller
beställ den via telefon.
2. Sätt in ”CI or CI+ CARD” i CAM i pilens riktning.
3. För in CAM med ”CI or CI+ CARD” på Common
Interface-platsen i pilens riktning så att den passas in
parallellt med platsen.
4. Kontrollera om du kan se bilder på en kodad kanal.
P
POWER
MEDIA.P
FAV.CH
P.MODE
DUAL
MTS
BN68-02588H-Swe(1-25).indd 20 2010-3-23 11:58:03Svenska 21
03 Grundfunktioner
Stödmeny
Självdiagnos
■ Bildtest Ja / Nej: Använd för att kontrollera bildproblem
och om problemet kvarstår ska du kontrollera
färgmönstret.
■ Ljudtest Ja / Nej: Använd den inbyggda melodin för att
kontrollera ljudproblem.
✎ Om du inte hör något ljud från TV-högtalarna ska
du säkerställa att Högtalarval är inställt på TVhögtalare i menyn Ljud.
✎ Melodin blir svår att höra under testet även om
Högtalarval är inställt på Extern högtalare
eller om ljudet tystas under tiden du trycker på
knappen MUTE.
■ Signalinformation: (endast digitala kanaler) HDTVkanalsmottagningens kvalitet är antingen perfekt eller så
är kanalerna ej tillgängliga. Justera antennen för att öka
signalstyrkan.
■ Felsökning: Om det är några problem med TV:n ska du
gå till den här beskrivningen.
✎ Om inget av dessa felsökningstips är användbara
ska du kontakta Samsungs kundcenter.
Programuppgradering
Programuppgradering kan utföras via en sändningssignal
eller genom att ladda ner senaste firmware från samsung.
com till ett USB-minne.
Aktuell version programmet är redan installerat på TV:n.
✎Program visas som ”År / Månad / Dag_Version”.
Installera den senaste versionen
■ Via USB: Sätt i en USBenhet som innehåller
firmware-uppgraderingsfilen
som laddats
ner från www.samsung.
com, till TV:n. Var försiktig så
du inte
kopplar ur strömmen eller
plockar bort USB-enheten
tills uppgraderingen är
klar. TV:n slås av och på
automatiskt efter att firmware-uppgraderingen är klar.
När programvaran har uppgraderats återgår video- och
audioinställningar till fabriksstandard. Vi rekommenderar
att du skriver ner de inställningar du har gjort så att du
enkelt kan återställa dem efter uppgraderingen.
■ Via kanal: Uppgradera programvaran med
sändningssignalen.
✎ Om funktionen väljs under programöverföringen
kommer programvaran att sökas automatiskt och
laddar ner.
✎ Tiden som krävs för nedladdning av program
bestäms av signalstatus.
■ Uppgradering i standbyläge: En manuell uppgradering
utförs automatiskt vid vald tidpunkt. Eftersom enhetens
ström slås på internt, kan skärmen lysa svagt. Det
här fenomenet kan fortsätta i mer än 1 timme, tills
uppgraderingen är klar.
■ Alternativt program (backup): Om det uppstår problem
med det nya firmware och det påverkar funktionerna kan
du ändra programvaran till föregående version.
✎ Om programvaran har ändrats visas aktuell
programvara.
HD-anslutningsguide
Läs den här informationen när du ska ansluta externa
enheter till TV:n.
Kontakta Samsung
Visa den här informationen om TV:n inte fungerar som
den ska eller om du ska uppgradera programvaran. Du
hittar information om vår kundcenter och hur du laddar ner
produkter och program.
TV-sidopanel
USB-enhet
Programuppgradering
Aktuell version 2010/01/18_000001
U Flytta E Enter R Tillbaka
Via USB ►
Via kanal
Uppgradering i standbyläge Off
Alternativt program ----/--/--/--_------
BN68-02588H-Swe.indb 21 2010-3-18 21:42:0222 Svenska
Avancerade funktioner
Media Play
¦ Ansluta en USB-enhet
1. Slå på tv:n.
2. Anslut en USB-enhet som innehåller foton och/eller musik till uttaget USB (HDD) på
TV:ns sida.
3. När USB är ansluten till TV:n visas popupfönstret. Sedan kan du välja Media Play.
✎Det kanske inte fungerar med olicensierade multimediefiler.
✎Vad du behöver veta före användning av Media Play
x MTP (Media Transfer Protocol) stöds inte.
x Filsystem som stöds är FAT16, FAT32 och NTFS.
x Vissa typer av USB-digitalkameror och ljudenheter är kanske inte kompatibla med
den här TV:n.
x Media Play stöder endast USB-lagringsenheter (MSC). MSC står för Mass Storage Class Bulk-Only Transport device.
Exempel på MSC är Thumb-enheter, flashkortläsare och USB-hårddisk (USB-hubb stöds inte). Enheter ska anslutas
direkt till TV:ns USB-port.
x Innan du ansluter enheten till TV:n ska du säkerhetskopiera dina filer för att förhindra dataförlust eller att de skadas.
SAMSUNG ansvarar inte för skada på datafiler eller dataförluster.
x Koppla inte ur USB-enheten när den laddas.
x Ju högre bildupplösning desto längre tid tar det att visa bilden på skärmen.
x Maximal JPEG-upplösning som stöds är 15360X8640 pixlar.
x För filer som inte stöds eller är korrupta visas meddelandet “Filformatet stöds ej.”.
x Om filerna sorteras enligt Basic View (grundvy) kan upp till 1000 filer visas i varje mapp.
x MP3-filer med DRM som har laddats ned från en icke-gratis plats kan inte spelas. DRM (Digital Rights Management)
är en teknik som stöder skapande av innehåll, distribution och hantering av innehållet på ett integrerat och mångsidigt
sätt, inklusive skydd av olika rättigheter, skydd mot illegal kopiering liksom betalnings- och villkorshantering.
x Om fler än 2 PTP-enheter ansluts kan du bara använda en åt gången.
x Om fler än två MSC-enheter ansluts kanske vissa av dem inte känns igen. Om en USB-enhet kräver högspänning
(mer än 500mA eller 5V) kanske den inte stöds.
x Om ett varningsmeddelande om överspänning visas när du ansluter eller använder en USB-enhet kanske enheten
inte känns igen eller inte fungerar som den ska.
x Om TV:n inte har haft någon ingång under tidsinställning i Tid för autoskydd, så slås skärmsläckaren på.
x Om en USB-förlängningskabel används kanske USB-enheten inte identifieras eller så kanske filerna på enheten inte
läses.
x Om en USB-enhet som är ansluten till TV:n inte identifieras, fillistan på enheten är korrupt eller en fil i listan inte spelas
ansluter du USB-enheten till datorn, formaterar enheten och kontrollerar anslutningen.
x Om en fil som raderas från datorn hittas när Media Play körs använder du funktionen “Töm papperskorgen” på datorn
för att permanent radera fi len.
Titta på bilder, musik och / eller fi lmfi ler som fi nns
sparat på en USB-lagringsenhet (MSC).
Enhetsnamn A Ändra enhet D Visa enheter EEnter R Tillbaka
MediaPlay
P
POWER
MEDIA.P
FAV.CH
P.MODE
DUAL
MTS
USB-enhet
TV Sidopanel
BN68-02588H-Swe.indb 22 2010-3-18 21:42:03Svenska 23
04 Avancerade funktioner
Musik
Spela upp musik
1. Tryck på knappen ◄ eller ► för att välja Musik och tryck sedan på
knappen ENTERE på menyn Media Play.
2. Tryck på knappen ◄/►/▲/▼ för att välja önskad Musik i fillistan.
3. Tryck på knappen ENTERE.
– Under musikuppspelning kan du söka med knappen ◄ och ►.
✎Visar bara filer med MP3-filtillägg. Filer med andra filtillägg visas
inte, även om de är lagrade på samma USB-enhet.
✎Om ljudet låter konstigt under uppspelning av MP3-filer ska du
justera Equalizer på menyn Ljud (En övermodulerad MP3-fil kan
orsaka ljudproblem.)
Only you
Jason
1st Album
Pop
2010
4.2MB
3/15
Only you
Jason
Music 1
No Singer
Music 2
No Singer
Music 3
No Singer
Music 4
No Singer
Music 5
No Singer
01:10 / 04:02
Playlist
Enhetsnamn EPaus LHoppa TVerktyg R Tillbaka
¦ Bildskärm
Gå till filen du vill ha med pilknapparna upp/ned/höger/vänster och tryck sedan på knappen ENTERE. Filen spelas upp.
✎Stöder Enhetsläge och Innehållsläge på hemsidan för Media Play.
Enhetsnamn A Ändra enhet C Välj D Sorterar T Verktyg
c
c
c
Music 01 2010
no singer other
Music 02 2010
no singer other
Music 03 2010
no singer other
Music 04 2010
no singer other
Music 05 2010
no singer other
Music 06 2010
no singer other
Music 07 2010
no singer other
Music 08 2010
no singer other
Music /Music 01.mp3 1/2
Fillistavsnitt:
Du kan bekräfta filer och
grupper som sorteras enligt
kategori.
Knappanvändning
A Röd (Ändra enhet): Väljer en ansluten enhet.
B Grön (Inställning): Ställer in filinställning. (stöds ej i grundvyn)
C Gul (Välj): Markerar flera filer från fillistan. Valda filer markeras med en symbol
D Blå (Sorterar): Markera sorteringslistan
TTools-knappen: Visar alternativmenyn.
Information:
Du kan säkerställa det valda
filnamnet och antalet filer samt
sidan.
Avsnittet för att sortera lista:
Visar sorteringsstandard.
✎ Sorteringsstandard varierar
beroende på innehåll.
BN68-02588H-Swe(26-).indd 23 2010-3-23 14:38:0224 Svenska
Avancerade funktioner
Foton
Visa en bild (eller ett bildspel)
1. Tryck på knappen ◄ eller ► för att välja Foto och tryck sedan på
knappen ENTERE på menyn Media Play.
2. Tryck på knappen ◄/►/▲/▼ för att välja önskat foto i fillistan.
3. Tryck på knappen ENTERE.
– När en fotolista visas trycker du på knappen ENTERE på
fjärrkontrollen för att starta bildspelet.
– Alla filer i fillistan visas i bildspelet.
– Under bildspelet visas filerna i ordning efter den fil som visas.
✎Musikfiler kan spelas upp automatiskt under bildspelet om
“Bakgrundsmusik” är inställd på “På”.
✎BGM-läge kan inte ändras förrän BGM har slutat läsas in.
¦ Spela upp flera filer
Spela upp valda video- / musik- / fotofiler
1. Tryck på den gula knappen i fillistan för att välja önskad fil.
2. Upprepa arbetsgången ovan om du vill välja fler filer.
✎ OBS!
x Markeringen (c) visas till vänster om de valda filerna.
x För att avbryta ett val trycker du på gul knapp igen.
x För att avmarkera alla valda filer trycker du på knappen
TOOLS och väljer Avmarkera alla.
3. Tryck på knappen TOOLS och välj Spela aktuell grupp.
Spela upp video- / musik- / fotofilsgrupp
1. När en fillista visas ska du gå till valfri fil i den önskade gruppen.
2. Tryck på knappen TOOLS och välj Spela aktuell grupp.
¦ Media Play-funktion som tillbehör
Sortera fillistan
Tryck på den blå knappen i fillistan för att sortera filerna.
Kategori Användning Musik Foton
Grundvy Visar hela mappen. Du kan visa bilden genom att välja mappen. ✓ ✓
Titel Sorterar och visar filmtitlar i ordningen symbol / nummer / alfabetiskt / special. ✓ ✓
Inställning
Sorterar och visar filer enligt inställningar. Du kan ändra filinställningarna i
avsnittet för fillistan genom att använda den gröna knappen.
✓ ✓
Senaste
datum
Sorterar och visar filer enligt senaste datum. ✓
Tidigaste
datum
Sorterar och visar filer enligt tidigaste datum. ✓
Artist Sorterar musikfilen enligt artist i bokstavsordning. ✓
Album Sorterar musikfilen enligt album i bokstavsordning. ✓
Genre Sorterar musikfiler enligt genre. ✓
Stämning
Sorterar musikfiler enligt stämning. Du kan ändra stämningsinformationen för
musik.
✓
Månadsvis
Sorterar och visar bilder enligt månad. Sorterar endast enligt månad (från
januari till december) oavsett år.
✓
Normal Image1024.jpg 1024x768 2010/2/1 3/15
Enhetsnamn EPaus LFöregående/Nästa TVerktyg R Tillbaka
Enhetsnamn A Ändra enhet C Välj D SorterarT Verktyg
c
c
c
Music 01 2010
no singer other
Music 02 2010
no singer other
Music 03 2010
no singer other
Music 04 2010
no singer other
Music 05 2010
no singer other
Music 06 2010
no singer other
Music 07 2010
no singer other
Music 08 2010
no singer other
Musik /Musik 01.mp3 1/2
BN68-02588H-Swe(26-).indd 24 2010-3-23 18:38:02Svenska 25
04 Avancerade funktioner
Spelalternativmenyn Musik / Foton
Alternativmeny Användning Musik Foton
Upprepningsläget Du kan spela upp filmfiler upprepat. ✓
Bildinställning Du kan justera inställningen. (S.14, 15, 16) ✓
Ljudinställning Du kan justera ljudinställningen. (S. 17, 18) ✓ ✓
Stoppa bildspel /
Starta bildspel
Du kan starta eller stoppa ett bildspel. ✓
Bildspelshastighet Du kan endast välja bildspelshastighet under bildspelet. ✓
Zoom Du kan zooma i bilder i helskärmsläget. ✓
Rotera Du kan rotera bilder i helskärmsläget. ✓
Information Du kan se detaljerad information om den fil som spelas upp. ✓ ✓
Inställningar
Använda inställningsmenyn
■ Information: Välj detta för att visa information för ansluten enhet.
BN68-02588H-Swe.indb 25 2010-3-18 21:42:0626 Svenska
Övrig information
Text-tv-funktion för analog kanal
Indexsidan på text-tv ger dig information om hur du använder tjänsten. Om text-tv-informationen ska visas korrekt måste
kanalmottagningen vara stabil. Annars kanske information saknas eller så går det kanske inte att visa alla sidor.
✎Du kan ändra text-tv-sidor genom att trycka på sifferknapparna på fjärrkontrollen.
Text-tv-sidorna är uppdelade i följande sex kategorier:
Del Innehåll Del Innehåll
A Utvalda sidnummer. D Datum och tid.
B TV-kanalens identitet. E Text.
C
Aktuellt sidnummer eller
sökindikeringar.
F
Statusinformation. Text-tvinformation.
MEDIA.P
A B C D
1
3
4
2
5
8
7
0
!
@
6
9
1 /(text-tv på / mix): Tryck
på knappen för att aktivera texttv-läget efter att kanalen har valts
som tillhandahåller tjänsten. Tryck
på den två gånger för att överlappa
text-tv:n med den aktuella
TV-bilden.
2 8(lagra): Lagra text-tv-sidor.
3 4(storlek): Tryck på den här
knappen för att visa bokstäverna
i dubbel storlek i skärmens övre
del. För att visa på den nedre delen
trycker du på den igen. För att
återgå till normal visning trycker du
på den igen.
4 9 (håll): Används för att stoppa
bilden på en viss sida om den
markerade sidan är länkad till fl era
underordnade sidor som följer
automatiskt. Tryck på knappen
igen om du vill fortsätta
5 0(läge): Används för att välja
text-tv-läget (LIST / FLOF).
Om du trycker på den här knappen
i läget LIST växlar den till läget
för att spara lista. I läget för att
spara lista kan du välja text-tv-sida
genom att trycka på knappen 8
(lagra).
6 1 (sub-page): Visar den
tillgängliga undersidan.
2(page up): Visar den nya
text-tv-sidan.
7
3(page down): Visar den
föregående text-tv-sidan.
8
6(index): Används för att visa
innehållet på sidan när du visar
text-tv.
9
5(reveal): Används för att visa
dold text (t.ex. svar på frågelekar).
För att återgå till normal visning
trycker du på den igen.
0
7(cancel): Visar den aktuella
sändningen medan du letar efter
en sida.
!
Färgade knappar (röd / grön /gul
/ blå): Om tv-sändaren använder
FASTEXT-systemet, kommer de
olika ämnena på en text-tv-sida att
vara färgkodade. Du kan välja dem
genom att trycka på de färgade
knapparna. Tryck på den av dem
som matchar det du vill se. Sidan
visas med ytterligare färgkodad
information som du kan välja
på samma sätt. Om du vill visa
föregående eller nästa sida trycker
du på motsvarande färgade knapp.
@
BN68-02588H-Swe.indb 26 2010-3-18 21:42:07Svenska 27
05 Övrig information
Installera väggfästessatsen
¦ Installera väggfästessatsen
Objekt för väggmontering (säljs separat) gör det möjligt för dig att montera TV:n på väggen.
För detaljerad information om hur du utför en väggmontering, se de medföljande anvisningarna för väggmontering. Kontakta
en tekniker för montering av väggfästet.
Samsung Electronics är inte ansvariga för skador på produkten eller personlig skada på dig själv eller andra om du väljer att
montera TV:n själv.
¦ Specifikationer för väggmonteringssats (VESA)
✎Väggmonteringssatsen medföljer inte utan säljs separat.
Installera väggfästet på en fast vägg som är helt lodrät mot golvet. Vid montering i andra byggmaterial, kontakta närmaste
återförsäljare. Om den har installerats i ett tak eller en vägg som lutar kan det resultera i allvarlig personskada.
✎OBS!
x Samsung Electronics är inte ansvariga för skador på produkten eller personlig skada på dig själv eller andra om du
väljer att montera TV:n själv.
x Standardmåtten för väggfästessatser visas i tabellen nedan.
x Vid köp av vår väggmonteringssats, medföljer en detaljerad installationsmanual och alla nödvändiga delar för montering.
x Använd inte skruvar som är längre än standardmåtten, eftersom de kan orsaka skada inne i TV:n.
x För väggmonteringar som inte efterlever VESA-standard för skruvspecifikationer kan skruvarnas längd variera
beroende på specifikationerna.
x Använd inte skruvar som inte efterlever VESA-standard för skruvspecifikationer.
x Fäst inte skruvarna för hårt, då det kan skada produkten eller göra att den ramlar ned och leda till personskada.
Samsung ansvarar inte för den här typen av olyckor.
x Samsung ansvarar inte för produkt- eller personskada som uppstår till följd av att en väggmontering används som
inte är VESA-certifierad eller om kunden underlåter att följa produktinstallationsbeskrivningarna.
x Överskrid inte 15 graders lutning vid montering av den här TV:n.
Produktfamilj tum VESA-spec. (A * B) Standardskruv Kvantitet
LCD-TV
19~22
75 X 75
100 X 100 M4
4
23~29 200 X 100
30~40 200 X 200 M6
46~55 400 X 400
M8
57~65 600 X 400
70~80 800 X 400
80~ 1400 X 800
Installera inte väggmonteringssatsen när TV:n är påslagen. Det kan leda till personskada på grund av
elektriska stötar.
BN68-02588H-Swe.indb 27 2010-3-18 21:42:0728 Svenska
Övrig information
Antistöld Kensington-lås
Kensington-låset är en enhet som används för att fysiskt låsa systemet
när det används på en allmän plats. Utseende och låsmetod kan
variera beroende på tillverkare. Se bruksanvisningen som medföljer
Kensington-låset för rätt användning.
✎Titta efter symbolen “K” på TV:ns baksida.
Intill symbolen “K” finns en Kensingtonskåra.
1. För in låsenheten i Kensington-låset på LCD-TV:n 1 och vrid den i
låsriktning 2.
2. Anslut Kensington-låskabeln 3.
3. Säkra Kensington-låset mot en skiva eller något annat tungt och
fast föremål.
✎Låsenheten måste köpas separat.
✎Placeringen av Kensington-låset kan variera beroende på modell.
Montera TV:n mot väggen
Varning!: Om du drar i, trycker på eller klättrar på TV:n kan det göra att den faller ned. Se till att barn inte hänger
på eller ruckar på TV:n; om de gör det kan det göra att TV:n välter och detta kan leda till allvarlig skada eller till
och med dödsfall. Följ alla säkerhetsanvisningar som medföljer i säkerhetsflyern. För ökad stabilitet, installera
antifallenheten, enligt följande.
¦ Så här gör du för att undvika att TV:n faller ned:
✎Eftersom nödvändiga klämmor, skruvar och band inte medföljer
måste dessa köpas separat.
1. Skruva i skruvarna ordentligt i klämmorna och dra åt dem mot
väggen. Se till att skruvarna är ordentligt fastskruvade i väggen.
✎ Specifikationer för skruvar
x För en 23 ~ 29 tums LCD-TV: M4
x För en 30 ~ 40 tums LCD-TV: M6
2. Ta bort skruvarna från TV:ns baksida i mitten, skruva fast dem i
klämmorna och dra sedan åt skruvarna i TV:n igen.
3. Anslut klämmorna ordentligt mot TV:n och dra sedan åt med ett
starkt band och knyt bandet ordenligt.
✎Se till att alla anslutningar sitter fast ordentligt. Kontrollera
anslutningarna så att det inte finns risk att de släpper eller sitter
för löst. Om du har några frågor angående säkerheten för dina
anslutningar ska du kontakta en professionell fackman.
✎Installera TV:n ordentligt mot väggen så att den inte faller ned
baklänges.
✎Det är säkert att ansluta bandet så att klämmorna som sitter fast i väggen är i samma nivå eller lägre än klämmorna
som sitter fast i TV:n.
✎Knyt upp bandet innan du flyttar på TV:n.
1
2
3
Vägg
BN68-02588H-Swe.indb 28 2010-3-18 21:42:08Svenska 29
05 Övrig information
Felsökning
Läs listan först om du har några frågor om TV:n. Om ingen av de här felsökningstipsen stämmer, besök webbsidan
”www.samsung.com”, klicka på Support eller kontakta kundsupport på listan på sista sidan.
Problem Lösningar och förklaringar
Bildkvalitet Prova först av allt att utföra ett bildtest för att bekräfta att TV:n visar testbilden korrekt.
(gå till MENU - Support - Självdiagnos - Bildtest) (s. 21)
Om testbilden visas korrekt kanske den dåliga bilden orsakats av källan eller signalen.
TV-bilden ser inte så bra ut som den gjorde
i butiken.
• Om du har en analog kabelbox kan du uppgradera den till en digital box. Använd HDMI- eller
komponentkablar för att få HD-kvalitet på bilden.
• Kabel-/satellitabonnent: Prova HD-stationer från kanalutbudet.
• Antennanslutning: Försök med HD-stationer efter att ha utfört autoprogram.
✎ Många HD-kanaler skalas upp från SD-innehåll (Standard Definition).
• Ändra kabel-tv-boxens videoupplösning till 1080i eller 720p.
• Bekräfta att du tittar på TV på minsta rekommenderade avstånd baserat på storleken och definitionen
av den signal du visar.
Bilden blir förvriden: makroblock, små
block, prickar, pixligt
• Komprimering av videoinnehåll kan orsaka att bilden förvrids, speciellt på snabbt rörliga bilder, såsom
idrott och actionfilmer.
• Låg signalnivå eller dålig kvalitet kan orsaka bildstörningar. Det här är inte ett problem med TV:n.
Färgen blir felaktig eller det visas ingen
färg.
• Om du använder en komponentanslutning ska du se till att komponentkablarna är anslutna till rätt
uttag. Felaktiga eller lösa anslutningar kan orsaka färgfel eller en tom skärm.
Det är dålig ljusstyrka på färgerna. • Ändra alternativen för Bild i TV-menyn. (gå till läget Bild / Färg / Ljusstyrka / Skärpa)
• Ändra alternativen för Energibesparing i TV-menyn. (gå till MENU - Bild - Ekolösning - Energispar)
• Prova bildåterställning för att visa standardbildinställningen. (gå till MENU - Bild - Bildåterställning)
Det finns en liten prickad linje i skärmens
kant.
• Om bildstorleken är inställd på Anpassa till skärm ändrar du till 16:9. (S. 16)
• Ändra upplösningen för kabel-tv-box.
Bilden är svartvit. • Om du använder en AV-kompositingång ska du ansluta videokabeln (gul) till det gröna uttaget på
komponentingång 1 på TV:n.
När du byter kanaler fryser bilden eller
förvrids och fördröjs.
• Om den är ansluten med kabelbox kan du prova att återställa kabelboxen. Anslut strömsladden igen
och vänta tills kabelboxen startar om. Det kan ta upp till 20 minuter.
• Ställ in upplösningen för kabelboxen som 1080i eller 720p.
Ljudkvalitet Först av allt, utför Ljudtest för att se att TV:ns ljud fungerar.
(gå till MENU - Support - Självdiagnos - SLjudtest) (s. 21)
Om ljudet är OK kan ljudproblemet har orsakats av källan eller signalen.
Inget ljud eller för lågt ljud på maximal
volym.
• Kontrollera volymen på den externa enhet som är ansluten till din TV.
Bilden är bra, men det hörs inget ljud. • Ställ in alternativet Högtalarval till TV-högtalare på ljudmenyn. (S. 18)
• Om du använder en extern enhet ska du se till att ljudkablarna är anslutna till rätt ljudingångar på TV:n.
• Om du använder en extern enhet ska du kontrollera enhetens ljudutgångsalternativ (du kanske
exempelvis behöver ändra kabelboxens ljudalternativ till HDMI när du har en HDMI ansluten till din TV).
• Om du använder en DVI till HDMI-kabel krävs en separat ljudkabel.
• Om TV:n har ett hörlursuttag ska du se till att inget finns inkopplat i det.
Högtalarna avger fel ljud. • Kontrollera kabelanslutningarna. Se till att videokabeln inte är ansluten till en ljudingång.
• För antenn-/kabelanslutning, kontrollera signalstyrkan. Låg signal kan orsaka förvridet ljud.
BN68-02588H-Swe.indb 29 2010-3-18 21:42:0930 Svenska
Övrig information
Problem Lösningar och förklaringar
Ingen bild, ingen video
Det går inte att slå på TV:n. • Se till att strömsladden sitter i ordentligt i vägguttaget och TV:n.
• Kontrollera att det finns ström i vägguttaget.
• Prova att trycka på POWER-knappen på TV:n för att se till problemet inte ligger i fjärrkontrollen. Om
TV:n slås på ska du se avsnittet "Fjärrkontrollen fungerar inte" nedan.
TV:n slås av automatiskt. • Kontrollera om Sovtimer är inställd på Av i menyn Inställning. (S. 19)
• Om det finns en anslutning mellan TV och dator ska du kontrollera datorns ströminställningar.
• Se till att strömsladden sitter i ordentligt i vägguttaget och TV:n.
• När du tittar på TV via en antenn- eller kabelanslutning slås TV:n av efter 10 ~ 15 minuter om det
saknas signal.
Det finns ingen bild / video. • Kontrollera kabelanslutningarna (ta ur och koppla in alla kablar på TV:n och de externa enheterna)
• Ställ in din externa enhets (kabel-/digital-tv-box, DVD, Blu-ray etc) videoutgång för att matcha
anslutningarna till TV-ingången. Om exempelvis en utgång för en extern enhet är HDMI, ska den
anslutas till en HDMI-ingång på TV:n.
• Se till att de anslutna enheterna är påslagna.
• Se till att välja TV:ns rätta källa genom att trycka på knappen SOURCE på TV:ns fjärrkontroll.
RF-anslutning (kabel / antenn)
TV:n tar inte emot alla kanaler. • Se till att antennkabeln är korrekt ansluten.
• Försök med Plug & Play (initial installation) för att lägga till tillgängliga kanaler i kanallistan. Gå till
MENU - Inställning - Plug & Play (initial inställning) och vänta på att alla tillgängliga kanaler ska
lagras.
• Verifiera att antennen sitter rätt placerad.
Bilden blir förvriden: makroblock, små
block, prickar, pixligt
• Komprimering av videoinnehåll kan orsaka att bilden förvrids, speciellt på snabbt rörliga bilder, såsom
idrott och actionfilmer.
• Låg signal kan orsaka förvriden bild. Det här är inte ett problem med TV:n.
PC-anslutning
Meddelandet “Läget stöds inte” visas. • Ställ in datorn utgående upplösning och frekvens så att det matchar upplösningen som stöds av TV:n.
(S. 9)
“PC” visas alltid i källistan, även om en
dator inte är ansluten.
• Detta är normalt; "PC" visas alltid i källistan, även om en dator inte är ansluten.
Videon är bra, men det hörs inget ljud. • Om du använder en HDMI-anslutning ska du kontrollera ljudutgångsinställningen på din dator.
Övrigt
Bilden går inte att visa på helskärm. • HD-kanaler har svarta streck på båda sidor om skärmen vid visning av uppskalat SD-innehåll (4:3).
• Svarta streck uppe och nere visas på filmer som har bildförhållande som skiljer sig från din TV.
• Justera alternativet för bildstorlek på din externa enhet eller TV till helskärm.
Fjärrkontrollen fungerar inte. • Byt fjärrkontrollens batterier och sätt polerna (+/–) åt rätt håll.
• Rengör sensorns sändningsfönster på fjärrkontrollen.
• Prova att rikta fjärrkontrollen direkt mot TV på 5~6 fots avstånd.
Kabelboxens fjärrkontroll slås inte TV:n på
eller av, eller så justeras inte volymen.
• Programmera kabel-tv-boxens fjärrkontroll så att den även fungerar till TV:n. Mer information om
SAMSUNG TV-kod finns i bruksanvisningen till kabel-tv-boxen.
Meddelandet “Läget stöds inte” visas. • Kontrollera vilken upplösning som stöds för TV:n och justera den externa enhetens utgående
upplösning i enlighet med det. Se inställningarna för upplösning på sidan 9 i den här
bruksanvisningen.
Det utsöndras en plastodör från TV:n. • Den här lukten är helt normal och försvinner med tiden.
TV:ns Signalinformation är inte tillgänglig i
den självdiagnostiska testmenyn.
• Den här funktionen är endast tillgänglig med digitala kanaler med en antennanslutning / RF / Coax.
(S. 21)
TV:n lutar åt sidan. • Ta bort stativbasen från TV:n och montera på nytt.
Det är svårt att montera stativbasen. • Kontrollera att TV:n är placerad på ett plant underlag. Om du inte kan avlägsna skruvarna från TV:n
kan du använda en magnetisk skruvmejsel.
Kanalmenyn är gråmarkerad. (ej tillgänglig) • Menyn Kanal är endast tillgänglig när TV-källa är vald.
BN68-02588H-Swe.indb 30 2010-3-18 21:42:09Svenska 31
05 Övrig information
Problem Lösningar och förklaringar
Dina inställningar försvinner efter 30
minuter eller varje gång TV:n slås av.
• Om TV:n är i läget Butiksdemo kommer ljud- och bildinställningar att återställas var 30:e minut. Ändra
inställningarna från Butiksdemo till Hemmabruk i uppgiften för Plug & Play (initial installation). Tryck
på SOURCE-knappen för att välja TV och gå sedan till MENU → Inställning → Plug & Play (initial
inställning) → ENTERE.
Oavbruten ljud- eller videoförlust. • Kontrollera kabelanslutningar och anslut igen.
• Avbrott på ljud eller video kan orsakas av att man använder alltför starka eller tjocka kablar. Kontrollera
att kablarna är tillräckligt flexibla för att att användas en längre tid. Vid väggmontering rekommenderar
vi att du använder kablar med 90 graders anslutare.
Du ser små partiklar när du tittar nära i
TV:ns kanter.
• Det är en del av produktens design och inte något fel.
Menyn PIP är inte tillgänglig. • PIP-funktionaliteten är endast tillgänglig när du tittar på en HDMI-, PC- eller komponentkälla.
Meddelandet “Förvrängd signal” eller “Svag
signal / ingen signal” visas.
• Om du använder ett CAM CARD (CI/CI+), ska du kontrollera att det är installerat i den gemensamma
gränssnittsplatsen.
• Om det fortfarande förekommer problem drar du ur CAM CARD från TV:n och för in det i kortplatsen
igen.
Du slog av TV:n för 45 minuter sedan och
sedan slogs den på igen.
• Det är normalt. TV:n har OTA-funktion (Over The Aerial) och driver sig själv för att uppgradera firmware
som hämtas under tiden du tittar på TV.
Det finns återkommande bild-/ljudproblem. Kontrollera och ändra signal/källa. •
En reaktion kan inträffa mellan
gummidynorna på basstativet och det
översta lagret på vissa möbler.
• För att förhindra detta ska du använda dynor på den yta på TV:n som kommer i direkt kontakt med
möbler.
✎TFT LCD-panelen har en panel som består av underpixlar som kräver sofistikerad teknik för produktionen. Det kan dock
finnas några få mörka eller ljusa pixlar på skärmen. Dessa pixlar har ingen inverkan på produktens prestanda.
¦ Licens
Manufactured under license from Dolby Laboratories.
Dolby and the double-D symbol are trademarks of Dolby Laboratories.
BN68-02588H-Swe.indb 31 2010-3-25 11:10:4932 Svenska
Övrig information
Specifikationer
Panel 1360 X 768 @ 60 Hz
Miljöfaktorer
Temperatur vid drift
Luftfuktighet vid drift
Temperatur vid förvaring
Luftfuktighet vid förvaring
10°C till 40°C (50°F till 104°F)
10% till 80%, icke kondenserande
-20°C till 45°C (-4°F till 113°F)
5% till 95%, icke kondenserande
TV-system Analogt: Beroende på ditt landsval
Digital: DVB-T/DVB-C
Färg-/videosystem Analogt : PAL, SECAM, NTSC-4.43, NTSC-3.58, PAL60
Digital : MPEG-2 MP@ML, MPEG-4, H.264/AVC MP@L3, MP@L4.0, HP@L4.0
Ljudsystem BG. OK NICAM. MPEGl
HDMI IN Video : 1080/24p, 1080p, 1080i, 720p, 576p, 576i, 480p, 480i
Ljud: Tvåkanaligt, linjärt PCM 32/44.1/48 kHz, 16/20/24bits
Analog ljudingång (endast HDMI IN)
Datoringång
Vridstativ
(Vänster och höger) 0°
Modellnamn LE19C355 LE22C355
Skärmstorlek
(Diagonal) 19 inch 22 inch
Ljud
Utgång 3W X 2 3W X 2
Mått (BxDxH)
Stomme
Med stativ
461.2 x 59.5 x 322.2 mm
461.2 x 161 x 364 mm
535.3 x 82.2 x 365.8 mm
535.5 x 171.8 x 420.9 mm
Vikt
Stomme
Med stativ
3.9 kg
4.2 kg
3.9 kg
4.1 kg
✎Design och specifikationer kan ändras utan föregående meddelande.
✎Effektspecifikationer och effektförbrukningen finns på etiketten som sitter på produkten.
BN68-02588H-Swe.indb 32 2010-3-18 21:42:09Svenska 33
05 Övrig information
Index
A
Ansluta till en dator 8
Ansluta till en ljudenhet 8
Antenn 12
Använda favoritkanaler 12
Använda kanalvy 11
Använda schemavy 11
Autojustering 17
Autovolym 18
B
Bakgrundsmusik 25
Balans 17
Batterier 5
Bildinställning 16
Bildspel 24
D
Digital ljudutgång 8
D-sub 8
Dynamisk kontrast 15
Dynamisk 14
E
Energispar 15
EPG 11
Equalizer 17
Extern Högtalare 18
F
Favoritkanal 12
Felsökning 29
Filmläge 15
Fininst. 14
Fjärrkontroll 5
Foton 24
Frekvens 12
Färgton 15
Förstärk 17
G
Grundvy 25
H
HDMI 7
Hudfärg 15
Högtalarval 18
I
Installationsutrymmet 2
K
Kanalhanteraren 12
Klocka 19
Komponent 7
Källa 10
L
License 31
Ljusstyrka 14
Lås 14
M
Markera alla 14
Media Play 22
Melodi 20
Menytransparens 20
Musik 23
N
Navigera 10
Now & Next Guide 11
O
ON-/OFF-knapp 5
Optimal upplösning 9
P
Plug & Play 6
Programuppgradering 21
R
Redigera kanaler 13
RGB 15
Rotera 25
S
Signalinformation 21
Självdiagnos 21
Skärpa 14
Sovtimer 19
Specifikationer 32
Språk 20
Standbyläge 4
Strömindikator 4
Svärta 15
T
Timer 19
Titel 25
TV-högtalare 18
U
Undertext 20
Upprepningsläge 25
USB 21, 22
V
VCR 10
verktyg 3
Vitbalans 15
Volym 4, 5
Väggmontering 27
Ä
Ändra namn 10
Ändra PIN 20
BN68-02588H-Swe.indb 33 2010-3-18 21:42:09Den här sidan är tom.
BN68-02588H-Swe.indb 34 2010-3-18 21:42:092 Dansk
Figurer og illustrationer i denne brugervejledning er kun til reference og kan afvige fra produktets virkelige udseende.
Produktdesign og -specifikationer kan ændres uden forudgående varsel.
Bemærkning om digitalt tv
1. Funktioner i forbindelse med digitalt tv (DVB) er kun tilgængelige i lande/områder, hvor der udsendes digitale, terrestriske DVB-T (MPEG2 og MPEG4
AVC) udsendelser, eller hvor du har adgang til en kompatibel DVB-C (MPEG2 og MPEG4 AAC) kabel-tv-tjeneste. Spørg din lokale forhandler om
muligheden for at modtage DVB-T- eller DVB-C-signaler.
2. DVB-T er den europæiske konsortiumstandard for udsendelse af digitalt terrestrisk tv, og DVB-C er standarden for udsendelse af digitalt tv via
kabel. Men en række forskellige funktioner, som f.eks. EPG (Elektronisk Program Guide), VOD (Video On Demand) mv., er ikke inkluderet i denne
specifikation. Derfor fungerer de ikke i øjeblikket.
3. Selvom dette tv opfylder de nyeste DVB-T- og DVB-C-standarder pr. [august 2008], kan kompatibilitet med fremtidigt digitalt terrestrisk tv (DVB-T) og
kabel-tv (DVB-C) ikke garanteres.
4. Afhængigt af de lande/områder, hvor dette tv-apparat anvendes, opkræver visse kabel-tv-operatører et ekstra gebyr for en sådan tjeneste, og du skal
muligvis acceptere deres vilkår og betingelser for deres virksomhed.
5. Visse digital tv-funktioner er ikke tilgængelige i visse lande eller områder, og DVB-C fungerer måske ikke korrekt med nogle leverandører.
6. For flere informationer bedes du kontakte dit lokale Samsung kundeservicecenter.
✎ Tv’ets modtagelseskvalitet er muligvis påvirket på grund af de forskellige landes udsendelsesmetoder. Kontakt SAMSUNG-forhandleren eller
Samsungs Kundeservice for at undersøge, om tv’ets ydelse kan forbedres ved at omkonfigurere tv’ets opsætning.
Advarsel om stillbilleder
Undgå at vise stillbilleder (f.eks. jpeg-billedfiler) eller stillbilledelementer (f.eks. tv-programmets logo, panorama- eller 4:3-billedformater, børs- eller
nyhedsbjælke nederst på skærmen osv.) på skærmen. En konstant visning af stillbilleder kan medføre et ujævnt slid af skærmen phosphor, som påvirker
billedkvaliteten. For at nedsætte risikoen for denne påvirkning skal du følge nedenstående anbefalinger:
• Undgå at vise samme tv-kanal i længere tid ad gangen.
• Prøv altid at vise et billede på fuld skærm, brug menuen for tv’ets indstillede billedformat for at få den bedste overensstemmelse.
• Reducer lysstyrke- og kontrastværdierne til et minimum for at opnå den ønskede billedkvalitet, da værdier herover kan øge udbrændingsprocessen.
• Brug alle de tv-funktioner, der er udviklet til at reducere billedindbrænding og skærmudbrænding, hyppigt. Der henvises til det relevante afsnit i
brugervejledningen for flere informationer.
Sikring af installationspladsen
Bevar de krævede afstande mellem produktet og andre genstande (f.eks. vægge) for at sikre korrekt ventilation.
I modsat fald kan det medføre brand eller et problem med produktet pga. en øget indre temperatur i produktet.
✎ Når du anvender et stativ eller vægbeslag, bør du kun anvende dele leveret af Samsung Electronics.
x Hvis du anvender dele leveret af en anden producent, kan det medføre problemer med produktet eller personskade, fordi produktet falder ned
eller vælter.
✎ Udseendet kan være anderledes. Det afhænger af produktet.
Montering med stativ. Montering med vægbeslag.
10 cm
10 cm 10 cm
10 cm
10 cm
10 cm
10 cm
Korrekt bortskaffelse af dette produkt (Waste Electrical & Electronic Equipment)
(Gælder i EU og andre europæiske lande med separate indsamlingssystemer)
Mærkning af produktet, tilbehør eller litteratur angiver, at produktet og dets elektroniske tilbehør (dvs. oplader,
hovedtelefon, USB-kabel) ikke må bortskaffes sammen med andet husholdningsaffald efter endt brugstid. For at
forhindre mulig skade på miljø eller menneskers sundhed pga. ukontrolleret affaldsbortskaffelse bedes du adskille disse
elementer fra andre typer affald og genbruge dem ansvarligt for at fremme vedvarende genbrug af materielle ressourcer.
Husholdninger bør kontakte enten den forhandler, hvor produktet blev købt, eller de lokale myndigheder for detaljede
oplysninger om, hvordan og hvor de kan aflevere disse elementer for miljørigtig genbrug, Virksomheder bør kontakte
deres leverandør og undersøge betingelser og vilkår i indkøbsaftalen. Dette produkt og dets elektroniske tilbehør bør ikke
blandes med andet kommercielt affald.
Korrekt bortskaffelse af batterierne i dette produkt
(Gælder i EU og andre europæiske lande med separate batteriindsamlingssystemer)
Mærkningen af batteriet, vejledningen eller emballagen angiver, at batterierne indeholdt i dette produkt ikke må
bortskaffes sammen med andet husholdningsaffald efter endt brugstid. Hvis mærkningen omfatter de kemiske
symboler Hg, Cd eller Pb skal dette forstås som en angivelse at, at batteriet indeholder kviksølv, kadmium eller bly over
referenceniveauerne i direktiv 2006/66/EF. Hvis batterierne ikke bortskaffes korrekt, kan disse stoffer skade menneskers
sundhed elller miljøet. For at beskytte naturressourcer og fremme genanvendelse af materialer skal du adskille batterierne
fra andre typer affald og aflevere dem til genbrug igennem det lokale, gratis retursystem.
BN68-02588H-Dan.indb 2 2010-3-23 15:57:05Dansk 3
Indhold
Sådan kommer du igang
4
4 Tilbehør
4 Kontrolpaneletl
5 Fjernbetjeningen
6 Tilslutning til en antenne
6 Plug & Play-funktionen (første opsætning)
Tilslutninger
7
7 Tilslutning til en AV-enhed
8 Tilslutning til en lydenhed
8 Tilslutning til en pc
10 Ændring af indgangskilde
Grundlæggende funktioner
10
10 Sådan navigerer du i menuerne
11 Brug af knappen INFO (Now & Next Guide)
11 Planlægning af det, du vil se
12 Menuen Kanal
14 Menuen Billede
17 Menuen Lyd
19 Menuen Indstillinger
21 Menuen Support
Avancerede funktioner
22
22 Media Play
Andre informationer
26
26 Tv-tekstfunktion for analog kanal
27 Installation af vægbeslag
28 Kensington-tyverisikring
28 Fastgørelse af tv’et til væggen
29 Fejlfinding
32 Specifikationer
33 Indeks
Kontroller symbolet!
t O
Denne funktion kan anvendes, hvis
du trykker på knappen TOOLS på
fjernbetjeningen.
Pastaba Vejledning trin-for-trin
P
POWER
GUIDE AD
MEDIA.P
SUBT.
DUAL
I-II
P.SIZE S.MODE P.MODE
BN68-02588H-Dan.indb 3 2010-3-23 15:57:064 Dansk
Sådan kommer du i gang
Tilbehør
✎Kontroller, at følgende dele er blevet leveret sammen med dit LCD-tv. Kontakt forhandleren, hvis der mangler nogle dele.
✎Farve og form på elementer kan variere fra model til model.
y Fjernbetjening og batterier (2 x AAA)
y Brugervejledning
y Garantikort/sikkerhedsvejledning (ikke tilgængelig alle steder)
y Rengøringsklud
y Netledning
Se den separate vejledning for montering af stativet.
1 EA
(M4 X L16)
y Stativ (1 stk.) y Skruer (2 stk.)
Kontrolpaneletl
✎Produktets farve og form kan variere fra model til model.
Højttalere
Fjernbetjeningssensor Strømindikator
P (Strøm) Tænder eller slukker for tv’et.
Strømindikator Blinker og slukkes, når der er tændt, og lyser i standbytilstand.
SOURCEE Skifter mellem alle tilgængelige indgangskilder. På skærmmenuen kan du bruge
denne knap, ligesom du bruger knappen ENTERE på fjernbetjeningen.
YMENU Viser en skærmmenu (OSD = On Screen Disply) med tv’ets funktioner.
Justerer lydstyrken. På skærmmenuen skal du bruge Y knapperne, ligesom du
z ville bruge knapperne ◄ og ► på fjernbetjeningen.
Skifter kanal. På skærmmenuen skal du bruge z knapperne, ligesom du ville
bruge knapperne ▼ og ▲ på fjernbetjeningen.
Fjernbetjeningssensor Ret fjernbetjeningen mod dette sted på dit tv.
Standby-tilstand
Fjernsynet må ikke være i standby i længere tid ad gangen (for eksempel mens du er på ferie). Der bruges stadig en lille smule
strøm, når strømknappen er slukket. Det er bedst at tage ledningen ud.
Vis hovedskærmmenuen. (P. 10)
BN68-02588H-Dan.indb 4 2010-3-23 15:57:075
01 Sådan kommer du i gang
Dansk
Fjernbetjeningen
Montering af batterier (Batteristørrelse: AAA)
✎BEMÆRK
x Brug fjernbetjeningen inden for en afstand på ca. 7 m fra
tv-apparatet.
x Stærkt lys kan påvirke fjernbetjeningens ydelse. Undgå at
bruge fjernbetjeningen i nærheden af fluorescerende lys eller
neonskilte.
x Farve og form kan variere fra model til model.
MEDIA.P
A B C D
Tænd og sluk for tv-apparatet. (P. 6) Vis og vælg de tilgængelige videokilder. (P. 10)
Skift kanaler.
Vis EPG (Elektronisk Program Guide). (P. 11)
Viser kanallisten på skærmen. (P. 14)
Skift kanaler.
Lynvalg af de mest anvendte funktioner.
Vis information på tv-skærmen.
Vis hovedskærmmenuen. (P. 10)
Juster lydstyrken.
Gå tilbage til den forrige kanal.
Knapperne på menuen Kanalliste,
Media Play osv.
AD: Valg af lydbeskrivelse.
(Ikke tilgængelig visse steder) (P. 18)
P.SIZE: Vælger billedstørrelse. (P. 16)
SUB.T: Viser digitale undertekster. (P. 20)
Afbryder lyden midlertidigt.
Gå tilbage til den forrige menu. (P. 10)
Vælg elementer på skærmmenuen, og skift
menuværdier.
Afslut menuen. (P. 10)
Alternativt kan du vælge Teletext,
Double eller MiX.
Viser funktionen Media Play.
BN68-02588H-Dan.indb 5 2010-3-23 15:57:076
Sådan kommer du i gang
Dansk
Tilslutning til en antenne
Når du første gang tænder for dit tv, aktiveres de grundlæggende indstillinger automatisk.
✎Forudindstilling: Tilslutning til stikkontakten og antennen.
Strømindgang
VHF/UHF-antenne
eller
Kabel
R-AUDIO-L PR PB Y
ANT OUT
Plug & Play-funktionen (første opsætning)
Når du tænder for tv’et første gang, viser en række instruktioner på skærmen, som hjælper dig med at konfi gurere de
grundlæggende indstillinger. Tryk på knappen POWERP. Plug & Play-funktionen er kun tilgængelig, når indgangskilden er
indstillet på TV.
1
Valg af et sprog Tryk på knappen ▲ eller ▼, og tryk derefter på knappen ENTERE.
Vælg det ønskede sprog til skærmmenuen OSD (On Screen Display).
2
Valg af tilstanden
Butiksdemo eller
Hjemmebrug
Tryk på knappen ◄ eller ►, og tryk derefter på knappen ENTERE.
y Vælg tilstanden Hjemmebrug. Butiksdemo er til brug i butikker.
y Sæt enhedens indstillinger tilbage fra Butiksdemo til Hjemmebrug
(standard): Tryk på lydstyrkeknappen på tv’et. Når skærmmenuens
lydstyrke vises, skal du trykke på og holde knappen MENU inde i
5 sek.
3
Valg af et land Tryk på knappen ▲ eller ▼, og tryk derefter på knappen ENTERE.
Vælg det relevante land. Hvis det ønskede land ikke fi ndes på menuen, vælg Andre.
✎Når du har valgt landet i menuen Land, forsætter visse modeller muligvis med en
yderligere mulighed for at indstille PIN-koden.
✎Du kan ikke indtaste 0-0-0-0 som din PIN-kode.
4
Valg af en antenne Tryk på knappen ▲ eller ▼, og tryk derefter på knappen ENTERE.
Vælg Luft eller Kabel.
5
Valg af en kanal. Tryk på knappen ▲ eller ▼, og tryk derefter på knappen ENTERE.
Vælg den kanalkilde, der skal gemmes. Når du indstiller antennekilden til Kabel, vises et trin,
hvor du kan tildele talværdier (kanalfrekvenser) til kanalerne. For fl ere informationer skal du
se Kanal → Autolagring. (P. 12)
✎Tryk når som helst på knappen ENTERE for at afbryde lagringsprocessen.
6
Indstilling af Urtilstand Indstiller Urtilstand automatisk eller manuelt.
Tryk på knappen ▲ eller ▼ for at vælge Auto, og tryk derefter på knappen ENTERE.
7
Visning af HDtilslutningsvejledning.
Tilslutningsmetoden for den bedste HD-skærmkvalitet vises.
8
Få glæde af dit tv. Tryk på knappen ENTERE.
Hvis du ønsker at nulstille denne funktion...
Vælg Opsætning - Plug & Play (første opsætning). Indtast din fi rcifrede PIN-kode. Standard PIN-nummeret er “0-0-0-0”.
Hvis du vil ændre PIN-koden, skal du anvende funktionen Skift PIN.
BN68-02588H-Dan.indb 6 2010-3-23 15:57:08Dansk 7
02 Tilslutninger
Tilslutninger
Tilslutning til en AV-enhed
Brug af et HDMI/DVI-kabel: HD-tilslutning (op til 1080p)
Tilgængelige enheder: DVD, Blu-ray-afspiller, HD-kabelboks, HD STB-satellitmodtager (Set-Top-Box), kabelboks,
STB-satellitmodtager
✎HDMI (DVI) IN / PC/DVI AUDIO IN
x Ved brug af en HDMI/DVI-kabelforbindelse, skal du anvende HDMI (DVI) IN -stikket. Til DVI-kabelforbindelsen
bruges et DVI-til-HDMI-kabel eller en DVI-HDMI-adapter (DVI til HDMI) til videotilslutningen og PC / DVI AUDIO
IN -stikket til lyd.
x Hvis en ekstern enhed, såsom en DVD / Blu-ray-afspiller / kabelboks / STB-satellitmodtager, som understøtter
ældre HDMI-versioner end 1.3, tilsluttes, virker tv’et muligvis ikke korrekt (f.eks. intet skærmvisning / ingen lyd /
fl imren / forkert farve).
x Hvis der ikke er lyd efter tilslutning af et HDMI-kabel, kontroller da HDMI-versionen af den eksterne enhed.
Hvis du har mistanke om, at versionen er ældre end 1.3, kontakt da enhedens udbyder for at få bekræftet
HDMI-versionen og anmode om en opgradering.
x Det anbefales, at du køber et HDMI-certifi ceret kabel. Ellers kan skærmen være tom, eller der kan opstå en
tilslutningsfejl.
Brug af et komponent- (op til 1080p) eller lyd-/videokabel (kun 480i) og brug af et Scart-kabel
Tilgængelige enheder: VCR, DVD, Blu-ray-afspiller, kabelboks, STB-satellitmodtager
✎I tilstanden Ext. understøtter DTV-ud kun MPEG video og lyd i standardopløsning (SD).
✎For at opnå den bedste billedkvalitet anbefales komponenttilslutning via A/V-forbindelsen.
R-AUDIO-L PR PB Y
AUDIO OUT
R-AUDIO-L PR PB Y
DVI OUT
R-AUDIO-L PR PB Y
HDMI OUT
Y
W R
WY WR W R B G
Rød Hvid
DVD
R W R G B
R W R G
R W Y
R W Y B
R-AUDIO-L PR PB Y
COMPONENT OUT
R-AUDIO-L PR PB Y
AUDIO OUT
R-AUDIO-L PR PB Y
EXT
R-AUDIO-L PR PB Y
AUDIO OUT
R-AUDIO-L PR PB Y
VIDEO OUT
WY WR W R B G
Gul Rød Hvid
WY WR W R B G
Rød Blå Grøn
VCR Blu-ray-afspiller DVD
BN68-02588H-Dan.indb 7 2010-3-23 15:57:128 Dansk
Tilslutninger
Tilslutning til en lydenhed
Brug af en optisk eller lydkabelforbindelse
Tilgængelige enheder: digitalt lydsystem, forstærker, DVD-hjemmebiograf
✎DIGITAL AUDIO OUT (OPTICAL)
x Når du tilslutter et digitalt lydsystem til DIGITAL AUDIO OUT (OPTICAL)-stikket, skal du sænke lydstyrken på
både tv’et og systemet.
x 5.1 CH (kanal) lyd er tilgængelig, når tv’et tilsluttes en ekstern enhed, som understøtter 5.1 CH.
x Når modtageren (hjemmebiograf) er indstillet til Til, kan du høre lyd via tv’ets optisk stik. Hvis tv’et modtager et
DTV-signal, udsender tv’et 5.1 CH-lyd til hjemmebiografmodtageren. Hvis kilden er en digital komponent, som
f.eks. en DVD/Blu-ray-afspiller/kabelboks/STB-satellitmodtager (Set-Top-Box), og er tilsluttet til tv’et via HDMI,
udsendes der kun 2 CH-lyd fra hjemmebiografmodtageren. Hvis du vil høre 5.1-kanallyd, skal du tilslutte det
digitale lydudgangsstik fra din DVD/Blu-ray-afspiller/kabelboks/STB-satellitmodtager direkte til en forstærker
eller hjemmebiograf.
Tilslutning til en pc
Brug af et HDMI/DVI-kabel/D-sub-kabel
R-AUDIO-L PR PB Y
OPTICAL
Digitalt lydsystem
R-AUDIO-L PR PB Y
AUDIO OUT
R-AUDIO-L PR PB Y
AUDIO OUT
R-AUDIO-L PR PB Y
DVI OUT
R-AUDIO-L PR PB Y
PC OUT
BN68-02588H-Dan.indb 8 2010-3-23 15:57:14Dansk 9
02 Tilslutninger
Visningstilstande (D-Sub- og HDMI/DVI-input)
Den optimale opløsning er 1360 x 768 @ 60 Hz.
Tilstand Opløsning Horisontal frekvens (kHz) Vertikal frekvens (Hz) Pixel clockfrekvens (MHz)
Synkroniseringspolaritet
(H/V)
IBM
640 x 350 31.469 70.086 25.175 + / -
720 x 400 31.469 70.087 28.322 - / +
MAC
640 x 480 35.000 66.667 30.240 - / -
832 x 624 49.726 74.551 57.284 - / -
VESA DMT
640 x 480
31.469 59.940 25.175 - / -
37.861 72.809 31.500 - / -
37.500 75.000 31.500 - / -
800 x 600
37.879 60.317 40.000 + / +
48.077 72.188 50.000 + / +
46.875 75.000 49.500 + / +
1024 x 768
48.363 60.004 65.000 - / -
56.476 70.069 75.000 - / -
60.023 75.029 78.750 + / +
1280 x 720 45.000 60.000 74.250 + / +
1360 x 768 47.712 60.015 85.500 + / +
VESA CVT
720 x 576 35.910 59.950 32.750 - / +
1280 x 720 56.456 74.777 95.750 - / +
VESA GTF 1280 x 720 52.500 70.000 89.040 - / +
✎BEMÆRK
x For en HDMI/DVI-kabelforbindelse skal du bruge HDMI (DVI) IN-stikket.
x Tilstanden Interlace understøttes ikke.
x Apparatet kan vise et unormalt billede, hvis der vælges andet end et standardvideoformat.
x Tilstandene Separate og Composite understøttes ikke. SOG (Sync On Green) understøttes ikke.
CONNECTIONS COMMON INTERFACE-slot
y Hvis du vil se betalte kanaler, skal “CI eller CI+ CARD” være isat.
y Hvis du ikke isætter “CI eller CI+ CARD”, viser nogle kanaler
meddelelsen “Forvrænget signal”.
y Clearinginformationerne omfatter et telefonnummer, “CI eller CI+
CARD” ID Host-ID og andre informationer og vises i ca.
2-3 minutter. Hvis der vises en fejlmeddelelse, skal du kontakte
din serviceleverandør.
y Når konfigurationen af kanalinformationen er færdig, vises
meddelelsen “Opdatering færdig”, som indikerer, at kanallisten nu
er opdateret.
✎BEMÆRK
x Du skal anskaffe et “CI eller CI+ CARD” fra en lokal serviceleverandør.
x Fjern dit “CI eller CI+ CARD” forsigtigt ved at trække det ud med fingrene, for hvis du taber dit “CI eller CI+ CARD”,
kan det blive beskadiget.
x Indsæt dit “CI eller CI+ CARD” i den retning, der er markeret på kortet.
x Placeringen af COMMON INTERFACE-slotten kan variere afhængigt af modellen.
x “CI eller CI+ CARD” understøttes ikke i visse lande og områder. Kontakt din autoriserede forhandler.
x Hvis du oplever problemer, skal du kontakte din serviceleverandør.
BN68-02588H-Dan.indb 9 2010-3-23 15:57:1410 Dansk
Tilslutninger
Ændring af indgangskilde
Liste over kilder
Bruges til at vælge TV eller andre
indgangskilder, som f.eks. DVD /
Blu-ray-afspillere / kabelboks / STBsatellitmodtager, der er tilsluttet tv’et.
■ TV / Ext. / AV / Component / PC /
HDMI/DVI / USB
✎ Tilsluttede indgange er
fremhævet på Liste over kilder.
✎ Ekstern forbliver altid aktiveret.
Rediger navn
■ VCR / DVD / Cable STB / Satellite STB / PVR STB /
AV Receiver / Game / Camcorder / PC / DVI PC / DVI
Devices / TV / IPTV / Blu-ray / HD DVD / DMA: Giv
den enhed, der er tilsluttet indgangsstikkene, et navn for
at gøre det lettere at vælge en indgangskilde.
✎ Når du slutter et HDMI/DVI-kabel til HDMI (DVI) IN
-stikket, skal du indstille til tilstanden DVI PC eller
DVI-enheder under Rediger navn.
Grundlæggende funktioner
Sådan navigerer du i menuerne
Inden du anvender tv’et, skal du følge trinnene herunder for
at lære at navigere i menuen og vælge og justere forskellige
funktioner.
MEDIA.P
A B C D
4
1
2
3
1 MENU Knappen: Viser hovedskærmmenuen.
2 ENTERE / Retningspil: Flytter markøren og vælger et
element. Bekræfter indstillingen.
3 RETURN Knappen: Vender tilbage til den forrige menu.
4 EXIT Knappen: Afslutter skærmmenuen.
Sådan bruger du skærmmenuen OSD - On Screen Display
Trinnene til adgang afhænger af den valgte menu.
1 MENU m
Hovedmenuens elementer vises på
skærmen:
Billede, Lyd, Kanal, Indstillinger,
Input, Program, Support.
2 ▲ / ▼
Vælg et ikon ved hjælp af knappen
▲ eller ▼.
3 ENTERE Tryk på ENTERE for at få adgang
til undermenuen.
4 ▲ / ▼
Vælg den ønskede undermenu ved
hjælp af knappen ▲ eller ▼.
5 ◄ / ►
Juster værdien for et element
ved hjælp af knappen ◄ eller ►.
Justeringen af skærmmenuen kan
afhænge af den valgte menu.
6 ENTERE Tryk på ENTERE for at fuldføre
konfi gurationen.
7 EXIT e Tryk på EXIT.
P
POWER
MEDIA.P
FAV.CH
P.MODE
DUAL
MTS
BN68-02588H-Dan.indb 10 2010-3-23 15:57:15Dansk 11
03 Grundlæggende funktioner
Brug af knappen INFO (Now & Next Guide)
Displayet viser den aktuelle kanal
og statussen for visse audio/visuelle
indstillinger.
Now & Next-vejledningen viser tvprograminformationer dagligt for hver kanal i
henhold til udsendelsestidspunktet.
y Rul med ◄, ► for at få vist information
om et ønsket program, mens du ser
den aktuelle kanal.
y Rul med ▲, ▼ for at få vist information om andre
kanaler. Hvis du vil flytte til den aktuelt valgte kanal,
skal du trykke på knappen ENTERE.
DTV Air
15
abc1
Life On Venus Avenue 18:00 ~ 6:00
Unclassified
No Detaild Information
EWatch
' Information
18:11 Thu 6 Jan
Planlægning af det, du vil se
Vejledning
EPG-informationerne (Elektronisk Program
Guide) leveres af tv-stationerne. Ved hjælp
af tv-stationernes programplanlægning
kan du på forhånd angive, hvilke
programmer du vil se, således at
kanalen automatisk skifter til den valgte
programkanal på det angivne tidspunkt.
Programinformationerne kan være tomme
eller ikke ajourførte, afhængigt af en kanals status. Brug af
Kanalvisning
DTV Air 800 five
Home and Away
18:00 - 18:30
Drama
Dani is devastated when scott makes clear his views on marriage...
27
28
800
24
16
6
Discovery
DiscoveryH&L
five
price-drop.tv
QVC
R4DTT
American Chopper
Programmes resume at 06:00
Home and...
No Information
QVC Selection
No Information
Tine Team
Fiv...
Today 18:00 - 19:00 19:00 - 20:00
)Family Affairs )Dark Angel
800 five
Vis tilst +24 timer Kanaltilst. Information Side E Annuller
Vejledning 2:10 Tirs 1 Jun
Kanalvisning - TV
1 2 3 4 5 6
Brug af Planlagt visning
DTV Air 800 five
Family Affairs
18:00 - 18:30
Drama
Tanya confesses all to a stunned Babs. Conrad is anxious to hear...
18:30
19:15
Today
Today
)Family Affairs
)Dark Angel
800
800
five
five
800 five
Vis tilst Information E Annuller
Vejledning 2:10 Tirs 1 Jun
Planlagt visning
1 4 6
1 Rød (Vis tilstand): Viser listen over de programmer,
der aktuelt spiller eller kommer snart.
2 Gul (+24 timer): Viser listen over de programmer,
der skal udsendes efter 24 timer.
3 Blå (Kanaltilst.): Vælg den type kanaler, du vil have vist
i vinduet Kanalvisning.
– Kanaltilst. er forskellig, afhængig af antennekilden.
4 (Information): Viser detaljerne om det valgte
program.
5 (Side): Flytter til den forrige/næste side.
6 Knappen ENTERE
– Når du vælger det aktuelle program, kan du se det
valgte program.
– Når du vælger det fremtidige program, kan du
reservere det valgte program, du vil se. For at
annullere planlægningen skal du trykke på knappen
ENTERE igen og vælge Annuller planlægning.
P
POWER
MEDIA.P
FAV.CH
P.MODE
DUAL
MTS
P
POWER
MEDIA.P
FAV.CH
P.MODE
DUAL
MTS
BN68-02588H-Dan.indb 11 2010-3-23 15:57:1712 Dansk
Grundlæggende funktioner
Kanaladministration
Sletter eller indstiller favoritkanalerne og bruger
programguiden til digitale udsendelser. Vælg en kanal på
skærmen Kanaler, Mine kanaler eller Planlagt.
c1 1futech
c 2 * 24ore.tv
15 abc1
3 BBC World
23 bid-up.tv
33 Boonerang
32 Cartoon Nwk
5 Class News
4 \ Coming Soon
27 Discovery
All
TV
Radio
Data/Other
Analogue
r
Luft Antenne B Zoom Vælg Side T Værktøjer
Kanaler
■ Kanaler: Viser kanallisten i henhold til kanaltype.
■ * Mine kanaler: Viser kanalens gruppe.
■ Planlagt: Viser alle de programmer, der er reserveret
pt.
✎Brug af farveknapperne med Kanaladministrat.
x Rød (Antenne): Skifter mellem Luft eller Kabel.
x B Grøn (Zoom): Forstørrer eller formindsker
kanalnummeret.
x Gul (Vælg): Vælg de ønskede kanaler, og tryk på
den gule knap for at indstille alle de valgte kanaler
på samme tid. Symbolet c vises til venstre for de
valgte kanaler.
x (Side): Flytter til næste eller forrige side.
x T (Værktøjer): Viser funktionsmenuen
Kanaladministration. (Funktionsmenuerne kan
variere alt efter situationen)
Ikoner i kanalstatusdisplayet
Ikoner Handlinger
A En analog kanal.
c En kanal er valgt.
* En kanal der er indstillet som en favorit.
( Et program der aktuelt udsendes.
\ En låst kanal.
) Et reserveret program.
¦ Brug af favoritkanaler
* Mine kanaler
(Kanaladministration)
Viser alle favoritkanaler.
■ Rediger Mine kanaler t : Du kan indstille de
valgte kanaler til den ønskede Mine kanaler-gruppe.
✎Symbolet “*” vises, og kanalen indstilles som min
kanal.
1. Vælg en kanal, og tryk på knappen TOOLS.
2. Tilføj eller slet en kanal i mine kanalgrupper, som du
vil have blandt 1, 2, 3 og 4.
x Du kan vælge en eller flere grupper.
3. Efter at du har ændret denne indstilling, kan du få
vist kanallisten for hver gruppe i Mine kanaler.
c1 1futech
c 2 * 24ore.tv
15 abc1
3 BBC World
23 bid-up.tv
33 Boonerang
32 Cartoon Nwk
5 Class News
4 \ Coming Soon
27 Discovery
All
TV
Radio
Data/Other
Analogue
r
Luft Antenne B Zoom Vælg Side T Værktøjer
Kanaler
Rediger mine kanaler
Lås
Slet
Fravælg alle
Vælg alle
Menuen Kanal
¦ Ny indstilling af kanaler
Antenne (Luft / Kabel)
Inden dit tv kan gemme de tilgængelige kanaler, skal du
angive den type signalkilde, der er sluttet til tv’et (f.eks. et
luft- eller et kabelsystem).
Land
Skærmbilledet til indtastning af PIN-kode vises. Indtast din
fircifrede PIN-kode.
■ Digital kanal: Skift land for digitale kanaler.
■ Analog kanal: Skift land for analoge kanaler.
BN68-02588H-Dan.indb 12 2010-3-23 15:57:18Dansk 13
03 Grundlæggende funktioner
Autolagring
Skanner automatisk efter en kanal og lagrer den i tv’et.
✎Automatisk tildelte programnumre stemmer ikke
nødvendigvis overens med de faktiske eller ønskede
programnumre. Hvis en kanal er låst med funktionen
Børnesikring, vises vinduet for indtastning af PINkoden.
■ Antennekilde (Luft / Kabel): Vælg den antennekilde,
der skal gemmes.
■ Kanalkilde (Digital og Analog / Digital / Analog):
Vælg den kanalkilde, der skal gemmes.
Ved valg af Kabel → Digital og Analog eller Digital:
Angiv en værdi til scanning efter kabelkanaler.
Search Mode (Full / Network / Quick): Scanner efter
alle kanaler med aktive tv-stationer og gemmer dem i
tv´et.
✎ Hvis du vælger Quick, kan du indstille Netværk,
Netværks-id, Frekvens, Modulation,
Symbolfrekvens manuelt ved at trykke på
knappen på fjernbetjeningen.
Netværk (Auto / Manuelt): Vælger indstillingstilstanden
Netværks-id mellem Auto eller Manuelt.
Netværks-id: Hvis Netværk er Manuelt, kan du installere
Netværks-id ved hjælp af talknapperne.
Frekvens: Viser kanalens frekvens. (varierer for hvert
land)
Modulation: Viser tilgængelige modulationsværdier.
Symbolfrekvens: Viser tilgængelige symbolhastigheder.
Manuel lagring
Skanner manuelt efter en kanal og lagrer den i tv’et.
✎Hvis en kanal er låst med funktionen Børnesikring,
vises vinduet til indtastning af PIN-kode.
■ Digital kanal (Kanal, Frekvens, Båndbredde):
(tilgængelig i DTV-tilstand) Når skanningen er afsluttet,
opdateres kanalerne på kanallisten.
✎Når du vælger Antenne → Luft: Kanal, Frekvens,
Båndbredde.
✎Når du vælger Antenne → Kabel: Frekvens,
Modulation, Symbolfrekvens.
■ Analog kanal (Program, Farvesystem, Lydsystem,
Kanal, Søg): Hvis der ingen lyd er, eller hvis lyden er
unormal, skal lydstandarden vælges igen.
✎Kanaltilstand
x P (programtilstand): Når indstillingen er fuldført, bliver
sendestationerne i dit område tildelt programnumre
fra P0 til P99. Du kan vælge en kanal ved at indtaste
programnummeret i denne tilstand.
x C (antennekanaltilstand)/S (kabelkanaltilstand): Med
disse to tilstande kan du vælge en kanal ved at
indtaste det tildelte nummer for hver tv-station eller
kabelkanal.
¦ Redigering af kanaler
Funktionmenuen Kanaladministration
(n Kanaladministration)
1. Vælg en kanal, og tryk på knappen TOOLS.
2. Rediger kanalnavnet eller -nummeret ved hjælp af
menuen Rediger kanalnavn.
■ Rediger kanalnavn (kun analoge kanaler): Tildel dit eget
kanalnavn.
BN68-02588H-Dan.indb 13 2010-3-23 15:57:1814 Dansk
Grundlæggende funktioner
Funtionsmenuen Kanaladministration
(n Kanaladministration)
Indstil hver kanal ved hjælp af menupunkterne
Kanaladministration (Lås / Lås op, Timervisning, Sorter,
Slet, Vælg alle / Fravælg alle). Emnerne i indstillingsmenuen
kan variere alt efter kanalstatus.
1. Vælg en kanal, og tryk på knappen TOOLS.
2. Vælg en funktion, og ændr dens indstillinger.
■ Lås / Lås op: Lås en kanal, så kanalen ikke kan vælges
og vises.
✎BEMÆRK
x Denne funktion er kun tilgængelig, når Børnesikring
er indstillet til Til.
x Skærmbilledet til indtastning af PIN-kode vises.
Indtast din fircifrede PIN-kode. Standard er
“0-0-0-0”. Ændr PIN-koden ved hjælp af indstillingen
Skift PIN.
■ Timervisning: Du kan indstille en ønsket kanal, som skal
vises automatisk på det ønskede tidspunkt. Indstil det
aktuelle klokkeslæt, som først skal anvendes til denne
funktion.
✎ Når du vælger en digital kanal, skal du trykke på
knappen ► for at få vist det digitale program.
■ Sorter (kun analoge kanaler): Sorteringsfunktionen gør
det muligt at ændre programnumrene for de lagrede
kanaler. Dette kan være nødvendigt, efter at du har brugt
auto-lagringsfunktionen.
■ Slet: Du kan slette en kanal for at få vist de kanaler,
du ønsker.
■ Vælg alle / Fravælg alle: Vælg alle kanaler, eller fravælg
alle de valgte kanaler i kanaladministrationen.
Planlagt
(i Kanaladministration)
Du kan få vist, redigere eller slette en forestilling,
du har reserveret.
■ Ændring af Info: Ændr en forestilling, du har reserveret.
■ Annuller planlægning: Ændr en forestilling, du har
annulleret .
■ Information: Vis en forestilling, du har reserveret.
(Du kan også ændre visningsinformationerne.)
■ Vælg alle / Fravælg alle): Vælg eller fravælg alle
reserverede programmer.
Kanalliste
Du kan se alle de kanaler, der er søgt efter.
Overfør kanalliste
Importerer eller eksporterer kanalkortet. Du kan tilslutte en
USB-lagerenhed for at anvende denne funktion.
✎ Skærmbilledet til indtastning af PIN-kode vises. Indtast
din fircifrede PIN-kode.
✎ Standard-PIN-koden på et nyt tv er ‘0-0-0-0’.
■ Importer fra USB: Importer kanalliste fra USB.
■ Exporter til USB: Eksporter kanalliste til USB.
Finindstilling
(kun analoge kanaler)
Hvis signalet er svagt eller forvrænget, kan du finindstille
kanalen manuelt.
✎ Finindstillede kanaler er markeret med en stjerne “*”.
✎ For at nulstille finindstillingen skal du vælge Nulstil.
Menuen Billede
Ændring af den forudindstillede
billedtilstand
Vælg din foretrukne billedtype.
Tilstand t
■ Dynamisk: Egnet til et meget lyst lokale.
■ Standard: Egnet til et normalt miljø.
■ Film: Egnet til at se film i et mørkt lokale.
¦ Justering af billedindstillinger
Baggrundslys / Kontrast / Lysstyrke /
Skarphed / Farve / Tone (G/R)
Dit tv-apparat har forskellige indstillinger til regulering af
billedkvaliteten.
✎BEMÆRK
x I analoge TV, Ext., AV tilstande af PAL-systemet er
funktionen Tone (G/R) ikke tilgængelig.
x I pc-tilstand kan du kun foretage ændringer i
Baggrundslys, Kontrast og Lysstyrke.
x Indstillinger kan justeres og lagres for hver ekstern
enhed, der er tilsluttet tv’et.
x En reduktion af billedets lysstyrke reducerer ligeledes
P strømforbruget.
POWER
GUIDE AD
MEDIA.P
SUBT.
DUAL
I-II
P.SIZE S.MODE P.MODE
BN68-02588H-Dan.indb 14 2010-3-23 15:57:18Dansk 15
03 Grundlæggende funktioner
¦ Økonomiske løsninger
ECO Økoløsning
■ Energibesparelse (Fra / Lav / Medium / Høj / Sluk
billede / Auto) t:Justerer tv’ets lysstyrke
til nedsættelse af strømforbruget. Hvis du vælger
Sluk billede, slukkes skærmen, men lyden forbliver
tændt. Tryk på en vilkårlig knap med undtagelse af
lydstyrkeknappen for at tænde for skærmen.
■ Intet standbysig (Off / 15 min / 30 min / 60 min):
Aktiverer standby-tilstanden ved statussen “Intet signal”
eller “Kontroller signalkabel” for en bestemt tidsperiode
som defineret af brugeren.
✎ Deaktiveres, når pc’en er i energisparetilstand.
¦ Ændring af billedindstillingerne
Avancerede indstillinger
(tilgængelig i Standard-/Film-tilstand)
Du kan justere de detaljerede indstillinger for din skærm,
inkl. farve og kontrast.
✎I pc-tilstand kan du kun foretage ændringer i Dynamisk
kontrast, Gamma og Hvidbalance.
Avancerede indstillinger
Sort tone : Fra ►
Dynamisk kontrast : Medium
Skyggedetalje : 0
Gamma : 0
Kun RGB-tilstand : Fra
Farverum : Indbygget
Hvidbalance
▼
U Flyt E Enter R Retur
■ Sort tone (Fra / Mørk / Mørkere / Mørkest):
Vælg det mørkeste niveau for at justere skærmdybden.
■ Dynamisk kontrast (Fra / Lav / Medium / Høj):
Justerer skærmens kontrast.
■ Skyggedetalje (-2~+2): Øger klarheden på mørke
billeder.
✎ Deaktiveret i pc-tilstand.
■ Gamma: Justerer farveintensiteten af den primære farve.
■ Kun RGB-tilstand (Fra / Rød / Grøn / Blå): Du kan
justere Farve eller Tone af rød, grøn eller blå for billedet
fra en ekstern enhed (DVD-afspiller, hjemmebiograf osv)
■ Farverum (Auto / Indbygget): Justerer det tilgængelige
farveområde for at oprette billedet.
■ Hvidbalance: Justerer farvetemperaturen for at få et
mere naturligt billede.
Tilpas - rød / Tilpas - grøn / Tilpas - blå: Justerer
mørkheden af hver farve (rød, grøn, blå).
Tilpas + rød / Tilpas + grøn / Tilpas + blå: Justerer
lysstyrken af hver farve (rød, grøn, blå).
Nulstil: Nulstiller hvidbalancen til
standardindstillingerne.
■ Hudfarve: Fremhæver den lyserøde farve i “Hudfarve”.
■ Kantforbedring (Fra / Til): Fremhævet motivets
afgrænsninger.
Billedindstillinger
✎I pc-tilstand kan du kun foretage ændringer i
Farvetone, Størrelse og Autobeskyttelsestid.
Billedindstillinger
Farvetone : Normal ►
Størrelse : 16:9
Skærmtilstand : 16:9
Digitalt støjfilter : Auto
MPEG-støjfilter : Auto
HDMI, sort niveau : Normal
Film : Fra
▼
U Flyt E Enter R Retur
■ Farvetone (Kold / Normal / Varm1 / Varm2)
✎ Varm1 eller Varm2deaktiveres, når billedtilstanden
er Dynamisk.
✎ Indstillinger kan justeres og lagres for hver ekstern
enhed, der er tilsluttet en indgang til tv’et.
BN68-02588H-Dan.indb 15 2010-3-23 15:57:1916 Dansk
Grundlæggende funktioner
■ Størrelse: Du kan måske også
indstille skærmstørrelsen i din kabel/
satellitboksmodtager. Men vi anbefaler
kraftigt, at du bruger 16:9-formatet
det meste af tiden.
Auto - Bred: Justerer automatisk
billedstørrelsen til billedformatet 16:9.
16:9 : Justerer billedstørrelsen til 16:9 for DVD’er eller
tv-udsendelser i bredformat.
Zoom (bred): Forstørrer billedstørrelsen mere end 4:3.
✎ Justerer positionen ved hjælp af knapperne ▲, ▼.
Zoom: Forstørrer 16:9-billeder lodret, så de passer til
skærmstørrelsen.
✎ Justerer positionen eller størrelsen ved hjælp af
knapperne ▲, ▼.
4:3 : Standardindstillingen for en film eller normal tvudsendelse.
✎ Du må ikke se fjernsyn i 4:3-format for længe
ad gangen. Kanter, der vises til venstre, højre
og på midten af skærmen kan forårsage
billedindbrændning (screen burn), som ikke
dækkes af garantien.
Skærmtilpasning: Viser det komplette billede uden
nogen afskæring, når der tilføres HDMI-signaler (720p /
1080i / 1080p) eller Komponentsignaler (1080i / 1080p).
✎BEMÆRK
x Når du har valgt Skærmtilpasning i tilstanden HDMI
(720p / 1080i / 1080p) eller Component (1080i /
1080p), skal du muligvis centrere billedet:
1. Tryk på knappen ◄ eller ► for at vælge
Placering.
2. Tryk på knappen ENTERE.
3. Tryk på knappen ▲, ▼, ◄ eller ► for at flytte
billedet.
x Afhængigt af indgangskilden kan indstillingerne for
billedstørrelsen variere.
x De tilgængelige elementer afhænger af den valgte
tilstand.
x I pc-tilstanden kan kun tilstandene 16:9 og 4:3
justeres.
x Indstillinger kan justeres og lagres for hver ekstern
enhed, der er tilsluttet en indgang til tv’et.
x Hvis du bruger funktionen Skærmtilpasning med
HDMI 720p input, afskæres én linje øverst, nederst
og til højre og venstre som ved Overscan-funktionen.
■ Skærmtilstand (16:9/ Zoom (bred) / Zoom / 4:3):
Kun tilgængelig, når billedstørrelsen er indstillet på
Auto - Bred. Du kan bestemme det ønskede
billedstørrelse i henhold til 4:3 WSS (Wide Screen
Service) eller som den oprindelige størrelse. Alle lande i
Europa kræver forskellige billedstørrelser.
✎ Ikke tilgængelig i tilstandene Pc, Komponent
eller HDMI.
■ Digitalt støjfilter (Fra / Lav / Medium / Høj / Auto /
Autovisualisering): Hvis tv-stationens signal er svagt,
kan der fremkomme statisk støj og skyggeeffekter på
skærmen. Vælg en af indstillingerne, indtil den bedste
billedkvalitet vises.
Autovisualisering: Ved ændring af analoge kanaler vises
signalstyrken.
✎ Kun tilgængelig for analoge kanaler.
✎ Når linjen er grøn, modtager du det bedst mulige
signal.
■ MPEG-støjfilter (Fra / Lav/ Medium / Høj / Auto):
Reducerer MPEG-støjen for at give en forbedret
billedkvalitet.
✎ Deaktiveret i pc-tilstand.
■ HDMI, sort niveau (Normal / Lav): Vælger sortniveauet
på skærmen for at justere skærmdybden.
✎ Kun tilgængelig i HDMI-tilstand (RGB-signaler).
■ Film ( Fra / Auto1 / Auto2): Indstiller tv’et til automatisk
at detektere og behandle filmsignaler fra alle kilder og
justere billedet for den allerbedste kvalitet.
✎ Kun tilgængelig i TV, AV, COMPONENT
(480i / 1080i) og HDMI(480i / 1080i).
■ Autobeskyttelsestid (2 timer / 4 timer / 8 timer
/ 10 timer / Fra): Hvis samme billede forbliver på
skærmen i 10 minutter, aktiveres den automatiske
skærmbeskyttelse.
Billednulstilling (OK / Annuller)
Nulstiller den aktuelle billedtilstand til standardindstillingerne.
¦ Opsætning af tv’et sammen med din pc
Sæt indgangskilden til PC.
P
POWER
GUIDE AD
MEDIA.P
SUBT.
DUAL
I-II
P.SIZE S.MODE P.MODE
BN68-02588H-Dan.indb 16 2010-3-23 15:57:19Dansk 17
03 Grundlæggende funktioner
Justerer frekvensværdier/-positioner og finindstiller
Autojustering t
automatisk indstillingerne.
✎Ikke tilgængelig ved tilslutning via HDMI/DVI-kabel.
Skærm
■ Grov / Fin: Fjerner eller reducerer billedstøj. Hvis støjen
ikke går væk ved hjælp af finindstilling alene, justerer
du frekvensen så godt som muligt (Grov) og finindstiller
igen. Når støjen er reduceret, skal du justere billedet
igen, så det er rettet ind på midten af skærmen.
■ Position: Justerer pc’ens skærmposition med
retningsknapperne (▲ / ▼ / ◄ / ►).
■ Nulstil billede: Nulstiller billedet til
standardindstillingerne.
Brug af dit tv som computer / pc-skærm
Installation af pc’ens software (baseret på Windows XP)
Afhængigt af Windows-versionen og versionen af
videokortet, kan de aktuelle skærmbilleder på pc’en være
forskellige, og i så fald vil den samme grundlæggende
opsætningsinformation næsten altid gælde. (Hvis dette ikke
er tilfældet, skal du kontakte din computer- eller Samsungforhandler).
1. Klik på “Kontrolpanel” i startmenuen i Microsoft
Windows.
2. Klik på “Udseende og temaer” i vinduet “Kontrolpanel”.
Du får vist en dialogboks.
3. Klik på “Vis”. Du får vist en dialogboks.
4. Naviger til fanen “Indstillinger” i den viste dialogboks.
y Den korrekte indstilling af størrelse (opløsning) - bedste:
1360 x 768 pixels]
y Hvis der i denne dialogboks er mulighed for indstilling
af vertikal frekvens, skal den korrekte værdi være “60”
eller “60 Hz”. Ellers klikker du bare på ”OK” og gå ud af
dialogboksen.
Menuen Lyd
¦ Ændring af den forudindstillede lydtilstand
Tilstand t
■ Standard: Vælger den normale lydtilstand.
■ Musik: Fremhæver musik i forhold til stemmer.
■ Film: Giver den bedste lyd til film.
■ Tydelig stemme: Fremhæver stemmer over andre lyde.
■ Forstærket: Øger intensiteten af højfrekvens lyd, så
personer, som har nedsat hørelse, bedre kan høre lyden.
¦ Justering af lydindstillinger
Equalizer
Justerer lydtilstanden.
■ Balance V/H: Justerer balancen mellem højre og
venstre højttaler.
■ 100Hz / 300Hz / 1kHz / 3kHz / 10kHz
(Båndbreddejustering): Justerer niveauet af specifikke
båndbreddefrekvenser.
■ Nulstil: Nulstiller equalizeren til standardindstillingerne.
¦ Lydsystemer osv.
Virtual Surround (Fra / Til)
Med denne funktion får du en ægte virtuel 5.1 kanals
Surround Sound-lyd gennem et par højttalere eller et sæt
hovedtelefoner ved hjælp af HRTF-teknologi (Head Related
Transfer Function).
✎Hvis Vælg højttaler er indstillet på Ekstern højttaler,
er Virtual Surround deaktiveret.
Tydelig dialog (Fra / Til)
Med denne funktion kan du øge en stemmes intensitet hen
over baggrundsmusik eller lydeffekter, så dialogen tyderligere
kan høres, når du ser en udsendelse.
Lydsprog
(kun digitale kanaler)
Skift standardværdien for lydsprog.
✎Det tilgængelige sprog kan variere, afhængigt af
udsendelsen.
Lydformat (MPEG / Dolby Digital 5.1)
(kun digitale kanaler)
Når lyden udsendes fra såvel hovedhøjttaleren og
audioreceiveren, kan der forekomme lydekko pga.
forskelle i dekodningshastigheden i hovedhøjttaleren
og audioreceiveren. I dette tilfælde skal du bruge tvhøjttalerfunktionen.
✎Indstillingen Lydformat kan variere, afhængigt
af udsendelsen. 5.1 kanals Dolby digitallyd er kun
tilgængelig, hvis du tilslutter til en ekstern højttaler
gennem et optisk kabel.
BN68-02588H-Dan.indb 17 2010-3-23 15:57:1918 Dansk
Grundlæggende funktioner
Lydbeskrivelse
(ikke tilgængelige alle steder)
(kun digitale kanaler)
Funktionen håndterer streaming af
lydindholdet til Lydbeskrivelse, som sendes
sammen med hovedlyden fra senderen.
■ Lydbeskrivelse (Fra / Til): Aktiverer
eller deaktiverer funktionen Lydbeskrivelse.
■ Lydstyrke: Justerer lydstyrken for lydbeskrivelse.
Auto-lydstyrke (Fra / Normal / Nat)
For at udglatte lydstyrkeniveauet for hver kanal skal du
indstille på Normal.
■ Nat: Denne funktion giver en forbedret lydoplevelse
sammenlignet med Normal-tilstand og frembringer
næsten ingen støj. Dette er nyttigt om natten.
Vælg højttaler
(Ekstern højttaler / Tv-højttaler)
Der kan forekomme lydekko pga. forskelle i
dekodningshastigheden i hovedhøjttaleren og
audioreceiveren. I dette tilfælde skal du indstille tv’et til
Ekstern højttaler.
✎Når Vælg højttaler er indstillet på Ekstern højttaler,
virker lydstyrken og MUTE-knapperne ikke, og
lydindstillingerne er begrænset.
✎Hvis Vælg højttaler er indstillet på Ekstern højttaler,
skal du bruge disse indstillinger.
x Tv-højttaler: Fra, Ekstern højttaler: Til
✎Hvis Vælg højttaler er indstillet på Tv-højttaler,
bør du bruge disse indstillinger.
x Tv-højttaler: Til, Ekstern højttaler: Til
✎Hvis der slet ikke er et videosignal, slås begge
højttalere fra.
Yderligere indstilling
(kun digitale kanaler)
■ DTV-lydniveau (MPEG / HE-AAC): Med denne funktion
kan du reducere et stemmesignals ulighed (som er
et af de signaler, der modtages under en digital
tv-udsendelse) til det ønskede niveau.
✎ I henhold til sendesignalets type kan MPEG/
HE-AAC justeres mellem -10dB og 0dB.
✎ For at øge eller sænke lydstyrken skal du justere
mellem området på henholdsvis 0 og -10.
■ SPDIF-output: SPDIF (Sony Philips Digital InterFace)
anvendes til at give digital lyd og reducerer dermed
interferensen til højttalerne og forskellige digitale
enheden, såsom en DVD-afspiller.
Lydformat: Under modtagelsen af en digital tvudsendelse kan du vælge det digitale outputformat
(SPDIF) blandt indstillingerne PCM, Dolby Digital eller
DTS.
✎ Ved at tilslutte 5.1 kanals højttalere i en Dolby
Digital-opsætning maksimeres din interaktive
3D-lydoplevelse.
Lydforsinkelse: Korriger audio-video
uoverensstemmelsen, når du ser tv eller video og lytter til
digitalt output ved hjælp af en ekstern enhed, såsom en
AV-modtager.
■ Dolby Digital-komp (Line / RF): Med denne funktion
minimeres signaldispariteten mellem et Dolby Digitalsignal og et stemmesignal (dvs. MPEG Audio, HE-AAC,
ATV Sound).
✎ Vælg Line for at få en dynamisk lyd og RF for at
nedsætte forskellen mellem høje og bløde lyde om
natten.
Line: Indstiller outputniveauet for signaler, der er større
eller mindre end -31dB (reference) til enten -20dB eller
-31dB.
RF: Indstiller outputniveauet for signaler, der er større
eller mindre end -20dB (reference) til enten -10dB eller
-20dB.
P
POWER
GUIDE AD
MEDIA.P
SUBT.
DUAL
I-II
P.SIZE S.MODE P.MODE
BN68-02588H-Dan.indb 18 2010-3-23 15:57:20Dansk 19
03 Grundlæggende funktioner
Menuen Indstillinger
¦ Indstilling af tid
Time
■ Ur: Indstilling af uret anvendes til forskellige timerfunktioner på tv’et.
O Det aktuelle klokkeslæt vises, hver gang du trykker
på knappen INFO.
✎ Hvis du fjerner netledningen, skal du indstille uret
igen.
Urtilstand (Auto / Manual)
✎ Afhængigt af tv-stationen og -signalet indstilles
klokkeslættet muligvis ikke automatisk korrekt.
Hvis dette forekommer, skal du indstille
klokkeslættet manuelt.
✎ Antennen skal være tilslutttet for at indstille
klokkeslættet automatisk.
Indstil ur: Indstil Dag, Måned, År, Time og Minut
manuelt.
✎ Kun tilgængelig, hvis Urtilstand er indstillet på
Manuelt.
¦ Indstilling af Sleep-timeren
■ Sleep-timer t: Slukker automatisk for tv’et
efter en forudindstillet tidsperiode. (30, 60, 90, 120, 150
og 180 minutter).
✎ For at annullere funktionen Sleep-timer skal du
vælge Fra.
¦ Indstilling af Til / Fra Timer
■ Timer 1 / Timer 2 / Timer 3: Der kan foretages tre
forskellige Til/Fra timerindstillinger. Du skal indstille uret
først.
10 TV ATV 0
00 00
▲
▼
00 00
▲
▼
Timer 1
Tændtid
Sluktid
Lydstyrke
Deaktiver
Deaktiver
Søn Man Tirs Ons Tors Fre Lør
Én gang
Kilde Antenne Kanal
Gentag
L Flyt U Juster E Enter R Retur
Tændtid / Sluktid: Indstil time, minut og deaktiver/
aktiver. (For at aktivere timeren med den valgte indstilling
skal du vælge Aktiver).
Lydstyrke: Indstiller den ønskede lydstyrke.
Kilde: Vælg det TV eller USB indhold, der skal afspilles,
når tv’et automatisk tændes. (USB kan kun vælges,
hvis en USB-enhed tilsluttes tv’et)
Antenne (når kilden er indstillet til TV): Vælg ATV eller
DTV.
Kanal (når kilden er indstillet til TV): Vælg den ønskede
kanal.
Indhold (nårkilden er indstillet på USB): Vælg en mappe
i USB-enheden, som indeholder musik- eller fotofiler,
der skal afspilles, når tv’et tændes automatisk.
✎ Hvis der slet ikke er musikfiler på USB-enheden,
eller mappen, som indeholder en musikfil, ikke er
valgt, virker Timer-funktionen ikke korrekt.
✎ Når der kun er én fotofil på din USB-enhed,
afspilles diasshowet ikke.
✎ Hvis mappenavnet er for langt, kan mappen ikke
vælges.
✎ Alle de USB-enheder, du anvender, har deres egen
mappe. Hvis du anvender flere USB-enheder af
samme type, skal du sørge for, at mapperne, der er
tildelt samme USB-enhed, har forskellige navne.
Gentag: Vælg Én gang, Hver dag, Man~Fre, Man~Lør,
Lør~Søn eller Manuel efter behov. Hvis du vælger
Manuel, kan du indstille den dag, hvor du ønsker at
aktivere timeren.
✎ c-mærket angiver den dag, der er valgt.
✎Auto Power Off (kun tilgængelig, hvis tv’et tændes af
timeren): Tv’et slukkes automatisk, hvis den ikke har
været brugt i 3 timer for at forhindre, at det overopheder.
¦ Låsning af programmer
Sikkerhed
✎Skærmbilledet til indtastning af PIN-kode vises før
indstillingsskærmen.
✎Indtast din fircifrede PIN-kode. Standard er “0-0-0-0”.
Ændr PIN-koden ved hjælp af indstillingen Skift PIN.
■ Børnesikring (Fra / Til): Låser kanalerne i
Kanaladministration for at forhindre, at uautoriserede
brugere, f.eks. børn, ser uegnede programmer.
✎ Kun tilgængelig, hvis Input-kilden er indstillet på TV.
■ Børnelås (Spærringsniveau): Forhindrer, at
uautoriserede brugere, f.eks. børn, ser uegnede
programmer, ved hjælp af en brugerdefineret 4-cifret
PIN-kode.
Tillad alle: Låser alle tv-programmer op.
✎ Elementerne under Børnelås-funktionen
afhænger af det enkelte land.
BN68-02588H-Dan.indb 19 2010-3-23 15:57:2020 Dansk
Grundlæggende funktioner
■ Skift PIN: Skift dit personlige id-nummer, som er
påkrævet til indstilling af tv’et.
✎ Hvis du glemmer din PIN-kode, skal du trykke på
fjernbetjeningens knapper i følgende rækkefølge,
der nulstiller PIN-koden til “0-0-0-0”: POWER
(slukket) → MUTE → 8 → 2 → 4 → POWER
(tændt).
¦ Andre funktioner
Sprog
■ Menusprog: Indstiller menusproget.
■ Sprog på tekst-tv: Indstiller et ønsket sprog for tekst-tv.
✎ Engelsk er standard i tilfælde, hvor det valgte
sprog ikke er tilgængeligt i udsendelsen.
■ Præference (Primært lydsprog / Sekundært
lydsprog / Primært undertekstsprog / Sekundært
undertekstsprog / Primært tekst-tv-sprog /
Sekundært tekst-tv-sprog): Vælg et sprog, som skal
være standardsprog, når der vælges en kanal.
Undertekst
Brug denne menu for at indstille tilstanden
Undertekst.
✎Undertekstfunktionen fungerer ikke i
tilstandene Komponent eller HDMI.
■ Undertekst (Fra / Til): Aktiverer eller
deaktiverer undertekster.
■ Tilstand (Normal / Hørehæmmet): Indstiller tilstanden
for undertekster.
■ Undertekstsprog: Indstiller undertekstsproget.
✎ Hvis det program, du ser, ikke understøtter
funktionen Hørehæmmet, aktiveres Normal
automatisk, selv om tilstanden Hørehæmmet er
valgt.
✎ Engelsk er standard i tilfælde, hvor det valgte
sprog ikke er tilgængeligt i udsendelsen.
Generelt
■ Spiltilstand (Fra / Til): Ved tilslutning til en spillekonsol,
som f.eks. PlayStation™ eller Xbox™, kan du få en mere
realistisk spiloplevelse ved at vælge spiltilstanden.
✎BEMÆRK
x Forholdsregler og begrænsninger for spiltilstand
– For at frakoble spillekonsollen og tilslutte en anden
ekstern enhed skal du indstille Spiltilstand på Fra i
indstillingsmenuen.
– Hvis du viser menuen TV i Spiltilstand, ryster
skærmen en anelse.
x Spiltilstand er ikke tilgængelig i tilstanden TV og PC.
x Når du har tilsluttet spillekonsollen, skal du
indstille Spiltilstand til Til for at forhindre en dårlig
billedkvalitet.
x Hvis Spiltilstand er indstillet til Til:
– Tilstanden Picture (Billede) er indstillet på
Standard, og tilstanden Lyd er indstillet til
Brugerdefineret.
■ Menugennemsigtig (Lys / Mørk): Indstiller
menugennemsigtigheden.
■ Melodi (Fra / Lav / Medium / Høj): Denne indstilling
vælges, således at en melodi afspilles, når tv’et tændes
eller slukkes.
Fælles interface
■ CI-menu: Med denne funktion kan brugeren vælge fra
den menu, CAM’et leverer. Vælg CI -menuen baseret på
menuen PC Card (Pc-kort).
■ Programinfo: Viser oplysninger om det CAM, der er
indsat i CI-slotten og på “CI eller CI+ CARD”, som er
indsat i CAM’et. Du kan installere CAM’et når som helst,
uanset om tv’et er tændt eller slukket.
1. Køb CI CAM-modulet hos din nærmeste forhandler eller
pr. telefon.
2. Sæt “CI eller CI+ CARD” i CAM’et i pilens retning.
3. Indsæt CAM’et sammen med “CI eller CI+ CARD” i
CI-slotten i pilens retning, så det justeres parallelt med
slotten.
4. Kontroller, om du kan se et billede på en kodet kanal.
P
POWER
GUIDE AD
MEDIA.P
SUBT.
DUAL
I-II
P.SIZE S.MODE P.MODE
BN68-02588H-Dan.indb 20 2010-3-23 15:57:20Dansk 21
03 Grundlæggende funktioner
¦ Billede i billede (PIP)
Menuen Support
Selvdiagnose
Selvdiagnose kan tage nogle få sekunder. Dette er en del af
tv’ets normale funktion.
■ Billedtest (Ja / Nej): Anvendes til at kontrollere, om der
er problemer med billedet, og hvis problemet opstår
igen, skal farvemønsteret kontrolleres.
■ Lydtest (Ja/ Nej): Brug den indbyggede melodi for at
kontrollere lydproblemer.
✎ Hvis du ikke hører lyd fra tv’ets højttalere, skal du,
inden du udfører lydtesten, kontrollere, at Vælg
højttaler er indstillet til Tv-højttaler i menuen Lyd.
✎ Melodien høres under testen, også selvom Vælg
højttaler er indstillet til Ekstern højttaler, eller
lyden dæmpes ved et tryk på knappen MUTE.
■ Signalinformation: (kun digitale kanaler) HDTV-kanalens
modtagekvalitet er enten perfekt, eller kanalerne er ikke
tilgængelige. Juster din antenne for at øge signalstyrken.
■ Fejlfinding: Se denne beskrivelse, hvis der synes at
være et problem med dit tv.
✎ Hvis ingen af fejlfindingstippene gælder for dit tv,
skal du kontakte Samsungs kundeservicecenter.
Softwareopgradering
Softwareopgradering kan udføres ved hjælp af et
sendesignal eller ved at downloade den seneste firmware fra
samsung.com til en USB-hukommelsesenhed.
Aktuel version er den software, der allerede findes i tv’et.
✎Software repræsenteres som ”År/måned/dag_version”.
Softwareopgradering
Aktuel version 2010/01/18_000001
LFlyt EEnter R Retur
Via USB ►
Via kanal
Ventetilstand Opgradering Fra
Alternativt software ----/--/--/--_------
Installation af den seneste version
■ Via USB: Indsæt et
USB-drev, der indeholder
firmwareopgraderingsfilen
fra www.samsung.com,
i tv’et. Pas på ikke at
afbryde for strømmen eller
fjerne USB-drevet, mens
opgraderinger fuldføres.
Tv’et slukkes og tændes
automatisk efter afslutning
af firmwareopgraderingen.
Når softwaren er opgraderet,
vender de video- og lydindstillinger, du har foretaget,
tilbage til deres standardindstillinger. Vi anbefaler, at du
noterer dine indstillinger, så du nemt kan gendanne dem
efter opgraderingen.
■ Via kanal: Opgrader softwaren vha. sendesignalet.
✎ Hvis denne funktion vælges i perioden for
softwareoverførsel, søger funktionen efter
tilgængelig software og downloader softwaren.
✎ Den tid, der tager at downloade softwaren,
bestemmes af signalstatussen.
■ Ventetilstand Opgradering: En manuel opgradering
udføres automatisk på det valgte tidspunkt.
Da strømmen til enheden er tændt internt,
tændes LCD-skærmen muligvis en anelse. Dette
fænomen kan fortsætte i mere end en time, indtil
softwareopgraderingen er udført.
■ Alternativt software (Backup): Hvis der er et problem
med den nye firmware, og det påvirker funktionen, kan
du ændre softwaren til den forrige version.
✎ Hvis softwaren er blevet ændret, vises den
eksisterende version.
HD-tilslutningsvejledning
Se disse informationer ved tilslutning af eksterne enheder til
tv’et.
Kontakt Samsung
Se disse informationer, når dit tv ikke fungerer korrekt, eller
hvis du vil opgradere softwaren. Du kan finde information
vedrørende vorescallcentre, og hvordan du downloader
produkter og software.
Tv’et set bagfra
USB-drev
BN68-02588H-Dan.indb 21 2010-3-23 15:57:2122 Dansk
Avancerede funktioner
Media Play
¦ Tilslutning til en USB-enhed
1. Tænd for tv’et.
2. Tilslut en USB-enhed med foto-, musik- og/eller fi lmfi ler i USB-stikket på siden
af tv’et.
3. Når USB-enheden er blevet tilsluttet tv’et, vises et pop-up-vindue. Så kan du
vælge Media Play.
✎Fungerer muligvis ikke korrekt med multimediefiler uden licens.
✎Liste med ting, du skal vide, før du bruger Media Play
x MTP (Media Transfer Protocol) er ikke understøttet.
x Filsystemet understøtter FAT16, FAT32 og NTFS.
x Visse typer af USB-enheder (digitale kameraer og lydenheder) er muligvis
ikke kompatible med dette tv.
x Media Play understøtter kun USB Mass Storage Class-enheder (MSC). MSC er en Mass Storage Class Bulk-Only
Transport-enhed. Eksempler på MSC er Thumb-drev og flash-kortlæsere (USB-HUB’er understøttes ikke). Enheder
må kun tilsluttes direkte til tv’ets USB-port.
x Inden du tilslutter din enhed til tv’et, bør du sikkerhedskopiere dine filer for at forhindre beskadigelse eller datatab.
SAMSUNG er ikke ansvarlig for datafiler, der beskadiges eller mistes.
x Afbryd ikke USB-enheden, mens den indlæser.
x Jo højere billedopløsning, jo længere tid tager det at vise det på skærmen.
x Der maksimale understøttede JPEG-opløsning er 15.360 X 8.640 pixels.
x Ved ikke-understøttede eller ødelagte filer vises meddelelsen “Ikke understøttet filformat”.
x Hvis filerne sorteres efter Basic View (Basis visning), kan der vises op til 1.000 filer i hver mappe.
x MP3-filer med DRM, der er blevet downloadet fra et ikke-gratis sted, kan ikke afspilles. Digital Rights Management
(DRM) er en teknologi, der understøtter oprettelse af indhold, distribution og administration af indholdet på en
integreret og omfattende måde, herunder med beskyttelse af indholdsleverandørens rettigheder og interesser,
forhindring af ulovlig kopiering af indhold, samt administration af fakturering og afregning.
x Hvis der er tilsluttet mere end 2 PTP-enheder, kan du kun anvende én ad gangen.
x Hvis der er tilsluttet mere end to MSC-enheder, vil nogle af dem muligvis ikke blive genkendt. Hvis en USB-enhed
kræver megen strøm (mere end 500 mA eller 5 V), understøttes den muligvis ikke.
x Hvis der vises en advarselsmeddelelse om for stort strømforbrug, når du tilslutter eller bruger en USB-enhed,
genkendes enheden muligvis ikke, eller den fungerer ikke korrekt.
x Hvis tv’et ikke har haft noget input i den tid, der er indstillet i Autobeskyttelsestid, kører pauseskærmen.
x Hvis der anvendes et USB-forlængerkabel, genkendes USB-enheden muligvis ikke, eller filerne på enheden kan ikke
læses.
x Hvis en USB-enhed sluttet til tv’et ikke genkendes, hvis listen med filer på enheden er ødelagt, eller en fil på listen ikke
kan afspilles, skal du slutte USB-enheden til pc’en, formatere enheden og kontrollere tilslutningen.
x Hvis en fil slettet fra pc’en stadig findes, mens Media Play kører, skal du anvende pc’ens funktion “Tøm papirkurv” til
at slette filen permanent.
Få glæde af fotos, musik- og/eller fi lmfi ler på en
USB Mass Storage Class-enhed (MSC).
USB-drev
Tv’et set bagfra
P
POWER
GUIDE AD
MEDIA.P
SUBT.
DUAL
I-II
P.SIZE S.MODE P.MODE
Devicename A Skift enhed D Enhedstilstand EEnter R Retur
MediaPlay
BN68-02588H-Dan.indb 22 2010-3-23 15:57:22Dansk 23
04 Avancerede funktioner
¦ Skærmvisning
Flyt til den ønskede fil ved hjælp af op/ned/højre/venstreknap, og tryk derefter på knappen ENTERE.
Filen afspilles.
✎Understøtter Enhedstilstand og Indholdstilstand på Media Play-hjemmesiden.
Musik
Afspilning af musik
1. Tryk på knappen ◄ eller ► for at vælge Musik, og tryk derefter på
knappen ENTERE i menuen Media Play.
2. Tryk på knappen ◄/►/▲/▼ for at vælge den ønskede fil på fillisten
3. Tryk på knappen ENTERE.
– Under musikafspilning kan du søge med knappen ◄ og ►
✎Viser kun filer med filtypenavnet MP3 og PCM. Filer med andre
filtypenavne vises ikke, heller ikke selvom de er gemt på den
samme USB-enhed.
✎Hvis lyden er mærkelig under afspilningen af MP3-filer, skal du
justere Equalizer i menuen Lyd. (En overmoduleret MP3-fil kan
være skyld i lydproblemet).
Only you
Jason
1st Album
Pop
2010
4.2MB
3/15
Only you
Jason
Music 1
No Singer
Music 2
No Singer
Music 3
No Singer
Music 4
No Singer
Music 5
No Singer
01:10 / 04:02
Afsp.liste
Devicename E Pause L Spring T Værktøjer R Retur
Devicename A Skift enhed C Vælg D Sorterer T Værktøjer
c
c
c
Music 01 2010
no singer other
Music 02 2010
no singer other
Music 03 2010
no singer other
Music 04 2010
no singer other
Music 05 2010
no singer other
Music 06 2010
no singer other
Music 07 2010
no singer other
Music 08 2010
no singer other
Music /Music 01.mp3 1/2
Fillisteområde:
Du kan bekræfte de filer og
grupper, der skal sorteres efter
hver kategori.
Betjening af knapper
Rød (Skift enhed): Vælger en tilsluttet enhed.
B Grøn (Foretrukket): Indstiller filpræference. (understøttes ikke i basis visning)
Gul (Vælg): Vælger flere filer fra fillisten. Valgte filer er markeret med et symbol.
Blå (Sorter): Vælger sorteringslisten.
TVærktøjer: Viser indstillingsmenuen.
Information:
Du kan kontrollere det valgte filnavn
og antallet af filer og sider.
Sorteringslisteområde:
Viser sorteringsstandarden.
✎ Sorteringsstandarden varierer
afhængigt af indholdet.
BN68-02588H-Dan.indb 23 2010-3-23 15:57:2424 Dansk
Avancerede funktioner
Fotos
Visning af et foto (eller diasshow)
1. Tryk på knappen ◄ eller ► for at vælge Fotos, og tryk derefter på
knappen ENTERE i menuen Media Play.
2. Tryk på knappen ◄/►/▲/▼ for at vælge den ønskede fil på fillisten
3. Tryk på knappen ENTERE.
– Når en fotoliste vises, kan du trykke på knappen ENTERE på
fjernbetjeningen for at starte diasshowet.
– Alle filer i fillisteområdet bliver vist i diasshowet.
– Under diasshowet vises filer i rækkefølge fra den fil, der aktuelt
vises.
✎Musikfiler kan afspilles automatisk under diasshowet, hvis
Baggrundsmusik er indstillet til Til.
✎BGM-tilstand kan ikke ændres, før BGM er færdig med indlæsning.
Normal Image1024.jpg 1024x768 2010/2/1 3/15
Devicename E Pause L Tidligere/Næste T Værktøjer R Retur
¦ Afspilning af flere filer
Afspilning af de valgte optagede / video / musik / fotofiler
1. Tryk på den gule knap på fillisten for at vælge den ønskede fil.
2. Gentag ovenstående handling for at vælge flere filer.
✎ BEMÆRK
x Symbolet (c) vises til venstre for de valgte filer.
x Tryk på den gule knap igen for at annullere et valg.
x For at fravælge alle filer skal du trykke på knappen TOOLS
og vælge Fravælg alle.
3. Tryk på knappen TOOLS, og vælg Afspil valgt indhold.
Afspilning af video- / musik- / fotofilgruppen
1. Mens en filliste vises, kan du flytte en hvilken som helst fil til den
ønskede gruppe.
2. Tryk på knappen TOOLS, og vælg Afspil aktuelle gruppe.
Devicename A Skift enhed C Vælg D Sorterer T Værktøjer
c
c
c
Music 01 2010
no singer other
Music 02 2010
no singer other
Music 03 2010
no singer other
Music 04 2010
no singer other
Music 05 2010
no singer other
Music 06 2010
no singer other
Music 07 2010
no singer other
Music 08 2010
no singer other
Music /Music 01.mp3 1/2
¦ Ekstra Media Play-funktion
Sortering af fillisten
Tryk på den blå knap på fillisten for at sortere filerne.
Kategori Handlinger Musik Fotos
Basis visning Viser hele mappen. Du kan vise fotoet ved at vælge mappen. ✓ ✓
Titel Sorterer og viser filtitlerne i symbol / nummer / alfabetisk / særlig rækkefølge. ✓ ✓
Foretrukket
Sorterer og viser filen efter præference. Du kan ændre filpræferencen i fillisteområdet
ved hjælp af den grønne knap.
✓ ✓
Seneste dato Sorterer og viser filer efter den seneste dato. ✓
Tidligste dato Sorterer og viser filer efter den tidligste dato. ✓
Kunstner Sorterer musikfiler efter kunstner i alfabetisk rækkefølge. ✓
Album Sorterer musikfiler efter album i alfabetisk rækkefølge. ✓
Genre Sorterer musikken efter genre. ✓
Stil Sorterer musikken efter stilen. Du kan ændre informationerne om musikstilen. ✓
Månedlig Sorterer og viser fotos efter måned. ✓
BN68-02588H-Dan_(22-).indd 24 2010-3-23 16:55:04Dansk 25
04 Avancerede funktioner
Indstillingsmenu til afspilning af musik / fotos
Kategori Handlinger Musik Fotos
Gentag-tilstand Du kan afspille, film- og musikfiler igen og igen. ✓
Billedindstilling Du kan justere billedindstillingen. (s.14, 15, 16) ✓
Lydindstilling Du kan justere lydindstillingen. (s. 17, 18) ✓ ✓
Stop diasshow /
Start diasshow
Du kan starte eller stoppe et diasshow.
✓
Diasshowhastighed Du kan vælge diasshowhastigheden under diasshowet. ✓
Zoom Du kan zoome billeder ind i tilstanden fuld skærm. ✓
Roter Du kan rotere billeder i tilstanden fuld skærm. ✓
Information Du kan få vist detaljerede informationer om den fil, der afspilles. ✓ ✓
Indstillinger
Brug af menuen Indstilling
■ Information: Vælges for at få vist information om den tilsluttede enhed.
BN68-02588H-Dan.indb 25 2010-3-23 15:57:2526 Dansk
Andre informationer
Tv-tekstfunktion for analog kanal
Indekssiden på tekst-tv-tjenesten indeholder oplysninger om, hvordan tjenesten bruges. Modtageforholdene skal være stabile,
hvis tekst-tv skal kunne vises korrekt. Ellers kan informationer mangle, eller nogle sider vises muligvis ikke.
✎Du kan ændre tekst-tv-sider ved at trykke på de numeriske knapper på fjernbetjeningen.
MEDIA.P
A B C D
1
3
4
2
5
8
7
0
!
@
6
9
Tekst-tv-siderne er inddelt i seks kategorier:
Område Indhold Område Indhold
A Valgt sidenummer. D Dato og klokkeslæt.
B Tv-stationens navn. E Tekst.
C
Aktuelt sidenummer eller
søgestatus.
F
Statusinformationer.
FASTEXT-information.
1 / (Tekst-tv til/bland):
Aktiver tekst-tv-tilstanden, efter at
du har valgt kanalen med tekst-tv.
Tryk to gange for at overlappe
tekst-tv-tilstanden med det aktuelle
tv-billede.
2 8 (gem): Gem tekst-tv siderne.
3 4 (størrelse): Viser bogstaver
i dobbelt størrelse af skærmens
øverste halvdel. Tryk på den igen
for at vise skærmens nederste
halvdel. Tryk på den en gang mere
for at vise den normale skærm.
4 9 (hold): Anvendes til at “holde”
visningen af en given side, hvis
den valgte side er kædet med
fl ere sekundære sider, der vises
automatisk. Tryk på den igen for at
fortsætte.
5 0 (tilstand): Vælger tekst-tvtilstand (LIST/FLOF).
Hvis du trykker på denne
knap i tilstanden LIST, skifter
tilstanden til List-lagringstilstand.
I listelagringstilstand kan du lagre
tekst-tv-siden med knappen 8
(gem).
6 1 (underside): Viser den
tilgængelige underside.
2 (side op): Viser den næse
tekst-tv-side.
7
3 (side ned): Viser den forrige
tekst-tv-side.
8
6 (indeks): Viser indekssiden
(indhold) når som helst, når du ser
tekst-tv.
9
5 (afslør): Viser skjult tekst
(f.eks. svar på quizspørgsmål). Tryk
på den igen for at vise den normale
skærm.
0
7(annuller): Viser den aktuelle
udsendelse, mens du søger efter
en side
!
Farveknapper (rød / grøn /
gul / blå): Hvis en sendestation
anvender FASTEXT-systemet,
er de forskellige emner på siden
farvekodede og kan vælges ved at
trykke på den tilsvarende farveknap
på fjernbetjeningen. Tryk på den
ønskede knap. Siden vises med
anden farvekodet information,
som kan vælges på samme måde.
For at få vist den foregående eller
næste side skal du trykke på den
tilsvarende farveknap.
@
BN68-02588H-Dan.indb 26 2010-3-23 15:57:26Dansk 27
05 Andre informationer
Installation af vægbeslag
¦ Montering af vægbeslaget
Du kan montere dit tv på væggen ved hjælp af et vægbeslag (sælges separat).
For detaljerede informationer om installation af vægbeslaget skal du se de instruktioner, der leveres med vægbeslaget. Kontakt
en tekniker for hjælp til installation af vægbeslaget.
Samsung Electronics er ikke ansvarlig for nogen skade på produktet eller personskade, hvis du vælger at installere tv’et selv.
¦ Specifikationer for vægbeslag (VESA)
✎Vægbeslaget medfølger ikke, men sælges separat.
Monter vægbeslaget på en fast væg, som er vinkelret med gulvet. Ved fastgøring på andre byggematerialer skal du kontakte
din nærmeste forhandler. Hvis det monteres i et loft eller på en skrå væg, kan det falde ned og medfører personskade.
✎BEMÆRK
x Samsung Electronics er ikke ansvarlig for nogen skade på produktet eller personskade, hvis du vælger at installere
tv’et selv.
x Standarddimensioner til vægbeslag ses i tabellen nedenfor.
x Når du køber vores vægmonteringsbeslag, medfølger en detaljeret installationsvejledning og alle nødvendige dele til
samlingen.
x Brug ikke skruer, der er længere end standarddimensionen, da lange skruer kan medføre skade inde i tv’et.
x For vægbeslag, som ikke opfylder VESA-standardens skruespecifikationer, kan længden af skruerne variere,
afhængigt af deres specifikationer.
x Du må ikke anvende skruer, som ikke opfylder VESA-standardens skruespecifikationer.
x Skruerne må ikke skrues for stramt, da det kan forårsage en beskadigelse af produktet. Produktet kan også falde
ned og medføre personskade. Samsung er ikke ansvarlig for uheld af denne type.
x Samsung er ikke ansvarlig for beskadigelse af produkter eller personskade, hvis der anvendes andre vægbeslag end
VESA eller ikke-specificerede vægbeslag, eller forbrugeren ikke følger installationsvejledningen for produktet.
x Dette tv-apparat må ikke vippes mere end 15 grader, når det monteres.
Produktfamilie Tommer VESA-spec. (A * B) Standardskrue Quantity
LCD-TV
19~22
75 X 75
100 X 100 M4
4
23~29 200 X 100
30~40 200 X 200 M6
46~55 400 X 400
M8
57~65 600 X 400
70~80 800 X 400
80~ 1400 X 800
Monter ikke dit vægmonteringssæt, mens dit tv er tændt. Det kan medføre personskade pga. elektrisk stød.
BN68-02588H-Dan.indb 27 2010-3-23 15:57:2628 Dansk
Andre informationer
Kensington-tyverisikring
Kensington-låsen bruges til fysisk at fastlåse systemet, når det
anvendes et offentligt sted. Låsens udseende og låsemetoden
kan være forskellig fra tegningen afhængig af producenten. Se
vejledningen, der følger med Kensington-låsen, for at få oplysninger
om korrekt brug.
✎Find et “
1
2
3
”-ikon bag på tv’et. Der er en Kensington-lås ved siden
af “
1
2
3
”-ikonet.
1. Isæt låseenheden i Kensington-låsen på LCD-tv’et 1, og drej den
i låseretningen 2.
2. Forbind Kensington-låsekablet 3.
3. Fastgør Kensington-låsen til et bord eller et tungt møbel.
✎Låsen sælges separat.
✎Kensington-låsens placering kan variere, afhængigt af modellen.
1
2
3
Fastgørelse af tv’et til væggen
Forsigtig: Hvis du trækker, skubber eller klatrer på tv’et, kan det falde ned. I særdeleshed skal du sørge
for, at dine børn ikke hænger på eller destabliserer tv’et. Hvis de gør det, kan det medføre, at tv’et vælter
og medføre alvorlig personskade eller død. Følg alle de sikkerhedsforskrifter, der findes i den medfølgende
sikkerhedsbrochure. For forøget stabilitet kan du af sikkerhedsmæssige hensyn installere en enhed, der
forhindrer, at enheden vælter, således.
¦ For at forhindre at tv’et vælter
✎Da disse nødvendige klammer, skruer og bånd ikke medfølger,
skal du købe dem separat.
1. Anbring skruerne i klammerne, og fastgør dem forsvarligt til
væggen. Sørg for, at skruerne er strammet korrekt i væggen.
✎ Skruespecifikationer
x Til et 23 ~ 29 tommers LCD-tv: M4
x Til et 30 ~ 40 tommers LCD-tv: M6
2. Fjern skruerne fra midten af tv’ets bagside, sæt skruerne i
klammerne, og fastgør herefter skruerne til tv’et igen.
3. Forbind klammerne, der er fastgjort på tv’et, og klammerne, der
er fastgjort på væggen, med et stærkt bånd, og bind det stramt.
✎Kontroller, at alle forbindelser er sikre. Kontroller med
regelmæssige mellemrum for tegn på anstrengelse eller
fejl. Hvis du har betænkeligheder med sikkerheden af din
montering, skal du kontakte en professionel installatør.
✎Placer tv’et tæt på væggen, så det ikke vælter bagover.
✎Det er sikkert at forbinde båndene, når de klammer, der er monteret på væggen har samme eller lavere højde end
klammerne, der er monteret på tv’et.
✎Fjern båndene, inden du fjerner tv’et.
Væg
BN68-02588H-Dan.indb 28 2010-3-23 15:57:27Dansk 29
05 Andre informationer
Fejlfinding
Hvis du har spørgsmål til dit tv, så se først i denne liste. Hvis ingen af disse fejlfindingstips gælder, besøg da “www.samsung.com”,
og klik på Support, eller kontakt Kundeservice, som angivet på bagsiden af denne vejledning.
Spørgsmål Løsninger og forklaringer
Billedkvalitet Start med at udføre en Billedtest for at sikre, at dit tv viser et korrekt testbillede.
(gå til MENU - Support - Selvdiagnose - Billedtest) (P. 21)
Hvis testbilledet vises korrekt, kan den ringe billedkvalitet skyldes kilden eller signalet.
Tv-billedet er ikke så flot, som det var i
butikken.
• Hvis du har et analog kabel/STB, skal du opgradere til en digital STB. Brug HDMI- eller
komponentkabler for at levere HD-billedkvalitet (High Definition).
• Kabel/satellitabonnenter: Prøv HD-stationer fra kanaloversigten.
• Antennetilslutning: Prøv HD-stationer, når du har udført en automatisk programsøgning.
✎ Mange HD-kanaler har indhold, der er opskaleret fra SD (standardopløsning).
• Juster kabel/set-top-boksens videoudgangsopløsning til 1080i eller 720p.
• Sørg for at se tv ved den mindste anbefalede afstand baseret på signalstørrelsen og -definitionen.
Billedet er forvrænget: makroblokke, små
blokke, prikker, pixelering
• Komprimering af videoindhold kan skabe billedforvrængning, specielt ved billeder med hurtige
bevægelser, som f.eks. sport og actionfilm.
• Lavt signalniveau eller dårlig kvalitet kan medføre billedforvrængning. Dette er ikke et tv-problem.
Farven er forkert eller mangler. • Hvis du anvender en komponentforbindelse, skal du sørge for, at komponentkablerne er tilsluttet de
korrekte stik. Forkerte eller løse forbindelser kan medføre farveproblemer eller en tom skærm.
Dårlig farve eller lysstyrke. • Juster indstillingerne for Billede i tv-menuen. (gå til tilstanden Billede / Farve / Lysstyrke /
Skarphed)
• Juster indstillingen Energibesparelse i tv-menuen. (gå til MENU - Billede - Økoløsning -
Energibesparelse)
• Prøv at nulstille billedet for at vise standardbilledindstillinger. (gå til MENU - Billede - Billednulstilling)
Der er en prikket linje langs skærmens
kant.
• Hvis billedstørrelsen er indstillet til Skærmtilpasning, skal den ændres til 16:9. (P. 16)
• Skift opløsningen på kabel/set-top-boksen.
Billedet er i sort-hvid. • Hvis du bruger en AV-komponentindgang, skal du tilslutte videokablet (gult) til det grønne stik på
Component Input 1 på tv'et.
Når du skifter kanal, fryser billedet, eller det
forvrænges eller forsinkes.
• Hvis tilsluttet til en kabelboks, så prøv at nulstille kabelboksen. Gentilslut strømkabel, og vent, indtil
kabelboksen genstarter. Det kan tage op til 20 minutter.
• Indstil kabelboksens opløsning til 1080i eller 720p.
Lydkvalitet Start med at udføre en Lydtest for at bekræfte, at dit tv's lyd fungerer korrekt.
(gå til MENU - Support - Selvdiagnose - Lydtest) (P. 21)
Hvis lyden er i orden, kan lydproblemet skyldes kilden eller signalet.
Der er ingen lyd, eller lyden er for lav ved
den maksimale lydstyrke.
• Kontroller lydstyrken af den eksterne enhed, som er tilsluttet dit tv.
Billedet er godt, men der er ingen lyd. • Sæt indstillingen Valg af højttaler til Tv-højttaler i lydmenuen. (P. 18)
• Hvis du bruger en ekstern enhed, skal du sørge for, at lydkablerne er tilsluttet de korrekte
lydindgangsstik på tv'et.
• Hvis du bruger en ekstern enhed, skal du kontrollere indstillingen på enhedens lydudgang (du skal
måske ændre kabelboksens lydindstilling til HDMI, hvis du har tilsluttet en HDMI til dit tv).
• Hvis du anvender et DVI-til-HDMI-kabel, skal du anvende et separat lydkabel.
• Hvis dit tv har et stik til hovedtelefon, skal du sikre, at der ikke er noget tilsluttet i stikket.
Højttalerne udsender en uacceptabel lyd. • Kontroller kabeltilslutningerne. Sørg for, at videokablerne ikke er sluttet til en lydindgang.
• Kontroller signalstyrken for antenne- eller kabelforbindelser. Lav signalstyrke kan medføre
lydforvrængning.
BN68-02588H-Dan.indb 29 2010-3-23 15:57:2730 Dansk
Andre informationer
Spørgsmål Løsninger og forklaringer
Intet billede, ingen video
Tv'et vil ikke tænde. • Sørg for, at strømkablet er sluttet korrekt til både stikkontakten og tv'et.
• Kontrollér, at der er strøm i stikkontakten.
• Prøv at trykke på knappen POWER på tv'et for at sikre, at problemet ikke er fjernbetjeningen. Se
“Fjernbetjeningen virker ikke” nedenfor, hvis tv'et tændes.
Tv'et slukker automatisk. • Sørg for, at Sleep-timer er indstillet til Fra i menuen Indstillinger. (P. 19)
• Hvis din pc er tilsluttet tv'et, skal du kontrollere strømindstillingerne for din pc.
• Sørg for, at strømkablet er sluttet korrekt til både stikkontakten og tv'et.
• Hvis du ser tv fra en antenne eller kabelforbindelse, slukker tv'et efter 10-15 minutter, hvis der intet
signal er.
Der er et billede/en video. • Kontroller kabeltilslutningerne. (Fjern og gentilslut alle kabler tilsluttet tv'et og eksterne enheder)
• Indstil dine eksterne enheders (kabel/set-top-boks, dvd, Blu-ray mv.) videoindgang, så de svarer til
tilslutningerne på tv-indgangen. Hvis en ekstern enheds udgang f.eks. er HDMI, skal den tilsluttes en
HDMI-indgang på tv'et.
• Sørg for, at der er tændt for dine tilsluttede enheder.
• Sørg for at vælge den korrekte indgang på tv'et ved at trykke på knappen SOURCE på tv'ets
fjernbetjening.
Antennetilslutning (kabel/antenne)
Tv'et modtager ikke alle kanaler. • Sørg for, at antennekablet er tilsluttet korrekt.
• Prøv Plug & Play (første opsætning) for at føje tilgængelige kanaler til kanallisten. Gå til MENU -
Opsætning - Plug & Play (første opsætning), og vent, indtil alle de tilgængelige kanaler er lagret.
• Kontroller, at antennen vender rigtigt.
Billedet er forvrænget: makroblokke, små
blokke, prikker, pixelering
• Komprimering af videoindhold kan skabe billedforvrængning, specielt ved billeder med hurtige
bevægelser, som f.eks. sport og actionfilm.
• Et lavt signal kan forårsage billedforvrængning. Dette er ikke et tv-problem.
Pc-tilslutning
Meddelelsen “Ikke understøttet tilstand”
vises.
• Indstil din pc's udgangsopløsning og -frekvens, så disse passer med de opløsninger, som tv'et
understøtter. (P. 22)
“PC” vises altid på kildelisten, også selvom
der ikke er tilsluttet en pc.
• Dette er normalt. “PC” vises altid på kildelisten, også selvom der ikke er tilsluttet en pc.
Videoen er OK, men der er ingen lyd. • Hvis du bruger en HDMI-forbindelse, skal du kontrollere lydudgangsindstillingen på din pc.
Andet
Billedet kan ikke vises på fuld skærm. • HD-kanaler har sorte bånd på hver side af skærmen, når de viser opskaleret SD-indhold (4:3).
• Der vises sorte bjælker øverst og nederst ved film, der har et formatforhold, der er anderledes end tv.
• Juster muligheden for billedstørrelse på din eksterne enhed eller tv til fuld skærm.
Fjernbetjening fungerer ikke. • Udskift fjernbetjeningens batterier med polerne (+/–) anbragt i den rigtige retning.
• Rens sensorens sendervindue på fjernbetjeningen.
• Forsøg at rette fjernbetjeningen direkte mod tv'et med en afstand på 1,5 - 2 m.
Fjernbetjeningen til kabel/set-top-boksen
tænder eller slukker ikke for tv'et eller
justerer ikke lydstyrken.
• Programmer fjernbetjeningen til kabel/set-top-boksen til at kunne styre tv'et. Se i brugervejledningen
til kabel/satellitmodtageren for koden til SAMSUNG tv.
Meddelelsen “Ikke understøttet tilstand”
vises.
• Kontroller den understøttede opløsning på tv'et, og justér den eksterne enheds udgangsopløsning
tilsvarende. Se opløsningsindstillingerne på side 9 i denne vejledning.
Der kommer en plasticlugt fra tv'et. • Denne lugt er almindelig og forsvinder med tiden.
Tv'ets signaloplysninger er ikke
tilgængelige i testmenuen Self Diagnostic.
• Denne funktion er kun tilgængelig med digitale kanaler fra en antennetilslutning (antenne / koaksial).
(P. 21)
Tv'et hælder til den ene side. • Fjern soklen fra tv'et, og montér den igen.
Der er problemer med at montere soklen. • Sørg for, at tv'et er anbragt på en flad overflade. Hvis du ikke kan fjerne skruerne fra tv'et, så brug en
magnetisk skruetrækker.
Kanalmenuen er gråtonet. (utilgængelig) • Menuen Channel (Kanal) er kun tilgængelig, når der er valgt en tv-kilde.
BN68-02588H-Dan.indb 30 2010-3-23 15:57:28Dansk 31
05 Andre informationer
Spørgsmål Løsninger og forklaringer
Dine indstillinger forsvinder efter 30
minutter, eller hver gang der slukkes for
tv'et.
• Hvis tv'er er i tilstanden Butiksdemo, nulstilles lyd- og billedindstillinger hver 30. minut. Skift fra
tilstanden Butiksdemo til tilstanden Hjemmebrug i fremgangsmåden Plug & Play (første opsætning).
Tryk på knappen SOURCE for at vælge tilstanden TV, og gå til MENU → Opsætning → Plug & Play
(første opsætning) → ENTERE.
Der er periodisk tab af lyd eller video. • Kontroller kabeltilslutningerne, og gentilslut.
• Tab af lyd eller billede kan være forårsaget af meget stive eller tykke kabler. Sørg for, at kablerne er
tilstrækkeligt fleksible til langtidsbrug. Hvis tv'et monteres på væggen, anbefaler vi brug af kabler med
90 graders-stik.
Du kan se små partikler, hvis du ser nøjere
på kanten af den ramme, der omgiver
tv-skærmen.
• Dette er en del af produktets design, og det er ikke en fejl.
PIP-menuen er ikke tilgængelig. • PIP-funktionaliteten er kun tilgængelig, når du bruger en HDMI-, pc- eller komponentindgangskilde.
Meddelelsen “Scramble signal” (Kodet
signal) eller “Weak Signal/No Signal” (Intet
signal/svagt signal) vises.
• Hvis du bruger et CAM CARD (CI/CI+), skal du kontrollere, at det er isat i fælles interface-slotten.
• Hvis problemet opstår igen, skal du tage CAM CARD ud af tv'et og indsætte det i slotten igen.
Du slukkede for tv'et for 45 minutter siden,
og det tændte igen.
• Det er helt normalt. Tv'et betjener selv OTA-funktionen (Over The Aerial) for at opgradere firmware,
der downloades, mens du ser tv.
Der er tilbagevendende billede-/
lydproblemer.
• Kontroller og skift signal/kilde.
Der kan opstå en reaktion mellem soklens
gummipuder og toppladen på visse
møbler.
• For at undgå dette skal du bruge filtpuder på alle overflader, som tv'et kommer i direkte berøring med
på møbler.
✎Dette TFT-LCD-panel anvender et panel, der består af underpixels, som kræver avanceret teknologi ved produktionen.
Der kan imidlertid været nogle få lyse eller mørke pixels på skærmen. Disse pixels har ingen indflydelse på produktets
ydeevne.
¦ Licens
Manufactured under license from Dolby Laboratories.
Dolby and the double-D symbol are trademarks of Dolby Laboratories.
BN68-02588H-Dan.indb 31 2010-3-25 10:52:5232 Dansk
Andre informationer
Specifikationer
Panel native 1360 X 768 @ 60 Hz
Miljømæssige betragtninger
Driftstemperatur
Driftsfugtighed
Opbevaringstemperatur
Opbevaringsfugtighed
10°C til 40°C (50°F til 104°F)
10% til 80%, ikke-kondenserende
-20°C til 45°C (-4°F til 113°F)
5% til 95%, ikke-kondenserende
TV-system Analog: Afhænger af dit landevalg
Digital: DVB-T/DVB-C
Farve-/videosystem Analog: PAL, SECAM, NTSC-4.43, NTSC-3.58, PAL60
Digital: MPEG-2 MP@ML, MPEG-4, H.264/AVC MP@L3, MP@L4.0, HP@L4.0
Lydsystem BG OK NICAM. MPEGl
HDMI IN Video: 1080/24p, 1080p, 1080i, 720p, 576p, 576i, 480p, 480i
Lyd: Tokanals lineær PCM 32/44.1/48 kHz, 16/20/24bits
Analog lydindgang (kun HDMI IN)
PC-indgang
Drejefod
(venstre / højre) 0˚
Modelnavn LE19C355 LE22C355
Skærmstørrelse
(diagonal) 19 tommer 22 tommer
Sound
Udgang 3W X 2 3W X 2
Dimensioner (BxDxH)
Hovedenhed
Med sokkel
461.2 x 59.5 x 322.2 mm
461.2 x 161 x 364 mm
535.3 x 82.2 x 365.8 mm
535.5 x 171.8 x 420.9 mm
Vægt
Hovedenhed
Med sokkel
3.9 kg
4.2 kg
3.9 kg
4.1 kg
✎Design og specifikationer kan ændres uden forudgående varsel.
✎For strømforsyningen og energiforbrug henvises der til mærkaten, der er påklæbet produktet.
BN68-02588H-Dan.indb 32 2010-3-23 15:57:28Dansk 33
05 Andre informationer
Indeks
A
Antenne 17
Autojustering 12
Auto-lydstyrke. 25
B
Baggrundsmusik 25
Balance 17
Basis visning 25
Batterier 5
Billedstørrelse 16
Brug af favoritkanaler 12
Brug af Kanalvisning 11
Brug af Planlagt visning 11
C
Component 7
D
Diasshow 24
Digitale lydudgang 8
D-sub 8
Dynamisk kontrast 15
Dynamisk 14
E
Ekstern højttaler 18
Energibesparelse 15
EPG 11
Equalizer 17
F
Farvetone 15
Favoritkanaler 12
Fejlfinding 29
Film 15
Finindstilling 14
Fjernbetjening 5
Forstærket 24
Fotos 24
Frekvens 12
G
Gentag-tilstand 25
H
HDMI 7
Hjemmebaggrund 25
Hudfarve 15
Hvidbalance 15
I
Installationspladsen 2
K
Kanaladministration 12
L
Lås 14
Licens 31
Liste over kilder 10
Lydstyrke 4, 5
Lysstyrke 14
M
Media Play 22
Melodi 20
Menugennemsigtig 20
Musik 23
N
Navigerer 10
Now & Next Guide 11
O
ON/OFF-knap 5
Optimal opløsning 9
P
Plug & Play 6
R
Rediger navn 10
Redigering af kanaler 13
RGB 15
S
Selvdiagnose 21
Signalinformation 21
Skarphed 14
Skift PIN 20
Sleep-timeren 19
Softwareopgradering 21
Sort tone 15
Specifikationer 32
Sprog 20
Standby-tilstand 4
Strømindikator 4
T
Tilslutning til en lydenhed 8
Tilslutning til en pc 8
Timer 19
Titel 25
Tv-højttaler 18
U
Undertekst 20
Ur 19
USB 21, 22
V
Vægbeslag 27
Vælg alle 14
Vælg højttaler 18
Værktøjer 3
VCR 10
BN68-02588H-Dan.indb 33 2010-3-23 15:57:28Denne side skal være
tom.
BN68-02588H-Dan.indb 34 2010-3-23 15:57:282 Norsk
Figurer og illustrasjoner i denne brukerhåndboken er bare til referanse og kan være forskjellig fra faktisk produktutseende.
Produktdesign og -spesifikasjoner kan endres uten forvarsel.
Digital-TV-merknad
1. Funksjoner som er forbundet med digital-TV (DVB) er bare tilgjengelige i land eller områder hvor det sendes digitale bakkesignaler av typen DVB-T
(MPEG2 og MPEG4 AVC) eller hvor du har tilgang til en kabel-TV-tjeneste som er kompatibel med DVB-C (MPEG2 og MPEG4 AAC). Kontakt din
lokale forhandler og forhør deg om muligheten til å motta DVB-T- eller DVB-C-signal.
2. DVB-T er den felles europeiske DVB-betegnelsen for den sendte overføringen av digital bakke-TV og DVB-C er betegnelsen for den sendte
overføringen av digital-TV over kabel. Men noen forskjellige funksjoner som EPG (elektronisk programguide), VOD (Video On Demand) og så videre, er
ikke inkludert i denne spesifikasjonen. Så for øyeblikket fungerer de ikke.
3. Selv om denne TV-en følger de nyeste DVB-T- og DVB-C-standardene [august 2008], kan ikke kompatibiliteten med fremtidige sendte overføringer
med DVB-T digital bakke-TV og DVB-C digital kabel-TV garanteres.
4. Avhengig av landene eller områdene hvor denne TV-en brukes kan noen kabel-TV-leverandørerer kreve en ekstra avgift for en slik tjeneste, og du kan
måtte samtykke i firmaets betingelser og vilkår.
5. Noen digital-TV-funksjoner kan være utilgjengelige i noen land eller regioner og DVB-C fungerer kanskje ikke riktig med noen kabel-TV-leverandører.
6. Du får mer informasjon ved å kontakte ditt lokale Samsung-kundesenter.
✎ Mottakskvaliteten til TV-en kan påvirkes av forskjellige kringkastingsmetoder i forskjellige land. Spør hos den lokale autoriserte SAMSUNGforhandleren eller Samsungs callsenter om TV-ytelsen kan forbedres ved å rekonfigurere TV-innstillingen eller ikke.
Stillbildevarsel
Unngå å vise stillbilder (som jpeg-bildefiler) eller stillbildeelementer (som TV-programlogo, panorama eller 4:3-bildeformat, aksje- eller nyhetslinje nederst på
skjermen osv.) på skjermen. Konstant visning av et stillbilde kan føre til ujevn slitasje av skjermfosfor, noe som kan påvirke bildekvaliteten.
For å redusere risikoen for dette bør du følge anbefalingene nedenfor:
• Unngå å vise samme TV-kanal over lengre perioder.
• Prøv alltid å vise bilder på fullskjerm, og bruk TV-ens bildeformatmeny for å finne best mulig visning.
• Reduser lysstyrke- og kontrastverdiene til minimumskravet for å oppnå ønsket bildekvalitet. For høye verdier kan fremskynde utbrenningsprosessen.
• Bruk alle TV-funksjonene som er designet for å redusere bilderetensjon og skjermutbrenning. Se i riktig del av denne veiledningen for mer informasjon.
Sikre installasjonsområdet
Hold nødvendig avstand mellom produktet og andre gjenstander (f.eks. vegger) for å sikre skikkelig ventilasjon.
Hvis du ikke gjør det, kan det føre til brann eller problemer med produktet på grunn av en økning i den interne temperaturen til produktet.
✎ Når du bruker et stativ eller veggfeste, må du kun bruke deler fra Samsung Electronics.
x Hvis du bruker deler fra andre produsenter, kan det føre til problemer med produktet eller personskader på grunn av at produktet faller.
✎ Utseendet kan variere avhengig av produktet.
Installasjon med et stativ. Installasjon med et veggfeste.
10 cm
10 cm 10 cm
10 cm
10 cm
10 cm
10 cm
Kaste produktet på riktig måte (Avhending av elektrisk og elektronisk utstyr)
(Gjelder i EU og i andre europeiske land med avfallssortering)
Dette merket på produktet, tilbehøret eller i dokumentasjonen indikerer at produktet og det elektroniske tilbehøret (f.eks. lader,
hodetelefon, USB-kabel) ikke skal kastes som vanlig husholdingsavfall når det ikke lenger er i bruk. For å unngå skade på miljøet
eller menneskers helse som følge av ukontrollert avfall, må disse elementene skilles fra andre typer avfall og resirkuleres på en
ansvarlig måte som fremmer gjenbruk av materialressurser. Husholdingsbrukere kontakter forhandleren der produktet ble kjøpt eller
de lokale renovasjonsmyndighetene for å få informasjon om miljømessig sikker resirkulering. Firmabrukere kontakter leverandøren
og kontrollerer betingelsene i kjøpskontrakten. Dette produktet og dets elektriske tilbehør må ikke blandes med annet kommersielt
avfall.
Kaste batteriene i produktet på riktig måte
(Gjelder i EU og i andre europeiske land med systemer for batterireturnering)
Dette merket på produktet, veiledningen eller emballasjen indikerer at batteriene i dette produktet ikke skal kastes som vanlig
husholdingsavfall når det ikke lenger er i bruk. Der det er merket, angir de kjemiske symbolene Hg, Cd eller Pb at batteriet
inneholder kvikksølv, kadmium eller bly over referansenivåene i EC-direktiv 2006/66. Hvis batteriene ikke avhendes på riktig måte,
kan innholdet skade miljøet eller menneskers helse. For å beskytte naturressurser og fremme materialgjenbruk må du separere
batterier fra andre typer avfall og resirkulere dem gjennom ditt gratis, lokale system for batterireturnering.
BN68-02588H-Nor.indb 2 2010-3-23 19:09:20Norsk 3
Innhold
Komme i gang
4
4 Tilbehør
4 Oversikt over kontrollpanelet
5 Oversikt over fjernkontrollen
6 Koble til en antenne
6 Plug & Play (første oppsett)
Tilkoblinger
7
7 Koble til en AV-enhet
8 Koble til en lydenhet
8 Koble til en PC
10 Endre inndatakilden
Grunnleggende funksjoner
10
10 Slik navigerer du på menyene
11 Bruke INFO-knappen (Nå og neste-oversikt)
11 Planlegge seeropplevelsen
12 Kanalmeny
14 Bildemeny
17 Lydmeny
19 Oppsettmeny
21 Støttemeny
Avanserte funksjoner
22
22 Media Play
Annen informasjon
26
26 Tekst-TV-funksjon for analog kanal
27 Montere veggfestet
28 Antityverilås fra Kensington
28 Feste TV-en til veggen
29 Feilsøking
32 Spesifikasjoner
33 Indeks
Sjekk symbolet!
t O
Denne funksjonen kan brukes ved
å trykke på TOOLS-knappen på
fjernkontrollen.
Merk Trinn for trinn-veiledning
P
POWER
BN68-02588H-Nor.indb 3 2010-3-23 19:09:214 Norsk
Komme i gang
Tilbehør
✎Vennligst kontroller at følgende deler følger med LCD-TV-en. Kontakt forhandleren hvis det mangler noen deler.
✎Elementenes farge og utforming kan variere, avhengig av modell.
y Fjernkontroll og batterier (AAA x 2)
y Brukerhåndbok
y Garantikort / Sikkerhetsveiledning
(ikke tilgjengelig alle steder)
y Rengjøringsklut
y Strømledning
✎Se separat veiledning for installasjon av stativet.
1 EA
(M4 X L16)
y Stativ (1EA) y Skruer (2EA)
Oversikt over kontrollpanelet
✎Produktets farge og utforming kan variere, avhengig av modell.
P (Strøm) Slår TV-en på eller av.
Strømindikator Blinker og slukker når strømmen er på, og lyser i standbymodus.
SOURCEE Veksler mellom alle de tilgjengelige inndatakildene. På skjermmenyen bruker du denne
knappen slik du bruker ENTERE-knappen på fjernkontrollen.
MENU Y Viser en skjermmeny med oversikt over TV-ens funksjoner.
Justerer volumet. I skjermmenyen bruker du Y-knappene slik du ville brukt
z ◄ og ► på fjernkontrollen.
Endrer kanalene. I skjermmenyen bruker du z-knappene slik du ville brukt
▼ og ▲ på fjernkontrollen.
Sensor for fjernkontroll Rett fjernkontrollen mot dette punktet på TV-en.
Standbymodus
Ikke la TV-en stå i standby-modus i lang tid (for eksempel når du er på ferie). Det forbrukes fremdeles litt elektrisk strøm selv
når På/Av-knappen er slått av. Det er best å koble fra strømkoden.
Høyttalere
Sensor for fjernkontroll Strømindikator
BN68-02588H-Nor.indb 4 2010-3-23 19:09:225
01 Komme i gang
Norsk
Oversikt over fjernkontrollen
✎Dette er en spesiell fjernkontroll for synshemmede med Braille-punkter på Power- (På/Av), kanal-, Stopp, Spill av / pause
og volumknappene.
Installere batterier (Batteristørrelse: AAA)
✎MERK
x Bruk fjernkontrollen innenfor et område på 7 meter fra TV-en.
x Skarpt lys kan påvirke fjernkontrollens ytelse. Unngå å bruke
spesielle fluoriserende lys eller neonskilt i nærheten.
x Fargen og utformingen kan variere avhengig av modell.
MEDIA.P
A B C D
Slå TV-en på og av. (s. 6) Vis og velg tilgjengelige videokilder. (s. 10)
Skift kanal.
Vis EPG (Electronic Programme Guide). (s. 11)
Viser kanalliste på skjermen. (s. 14)
Bytt kanaler.
Quickly select frequently used
functions.
Vis informasjon på TV-skjermen.
Vis hovedmenyen på skjermen. (s. 10)
Juster volumet.
Gå tilbake til forrige kanal.
Knappene i menyen Kanalstyring,
Media Play osv.
AD: Valg av lydbeskrivelse. (Ikke
tilgjengelig alle steder) (s. 18)
P.SIZE: Velg bildestørrelsen. (s. 16)
SUBT.: Digital undertekstvisning (s. 20)
Demp lyden midlertidig.
Gå tilbake til forrige meny. (s. 10)
Velg elementer på skjermmenyen og
endre menyverdier.
Gå ut av menyen. (s. 10)
Du kan også velge tekst-TV,
dobbel eller blandet.
Velg ofte brukte funksjoner raskt.
BN68-02588H-Nor.indb 5 2010-3-23 19:09:236
Komme i gang
Norsk
Koble til en antenne
Første gang TV-en slås på, settes grunnleggende innstillinger i gang automatisk.
✎Forhåndsinnstilt: Kobler til strømmen og antennen.
Plug & Play (første oppsett)
Første gang TV-en slås på, vises en rekke instruksjoner på skjermen som hjelper deg i å konfi gurere grunnleggende
innstillinger. Trykk på POWERP-knappen. Plug & Play er bare tilgjengelig når Inndata er angitt til TV.
1
Velge et språk Trykk på ▲ eller ▼ og trykk deretter på ENTERE-knappen.
Velg ønsket språk på skjermmenyen.
P
POWER
MEDIA.P
FAV.CH
P.MODE
DUAL
MTS
2
Velge Butikkdemo eller
Hjemmebruk
Trykk på ◄ eller ► og trykk deretter på ENTERE-knappen.
y Velg modusen Hjemmebruk. Modusen Butikkdemo er beregnet
på butikker o.l.
y Returner enhetens innstillinger fra Butikkdemo til Hjemmebruk
(standard): Trykk på volumknappen på TV-en. Når volumet på
skjermmenyen vises, trykker og holder du MENU-knappen nede i
5 sekunder.
3
Velge et land Trykk på ▲ eller ▼ og trykk deretter på ENTERE-knappen.
Velg riktig land. Hvis ønsket land ikke eksisterer på menyen, velger du Annet.
✎Etter at du har valgt landet i menyen Land, går noen modeller videre til et ekstra
alternativ om å konfigurere PIN-koden.
✎Når du skriver inn PIN-koden er ikke 0-0-0-0 tilgjengelig.
4
Velge en antenne Trykk på ▲ eller ▼ og trykk deretter på ENTERE-knappen.
Velg Antenne eller Kabel.
5
Velge en kanal Trykk på ▲ eller ▼ og trykk deretter på ENTERE-knappen.
Velg kanalkilden du vil lagre. Når du angir kanalkilden til Kabel, vises et trinn som lar deg
tilordne numeriske verdier (kanalfrekvenser) til kanalene.
Du fi nner mer informasjon under Kanal → Autolagring. (s. 12)
✎Trykk på ENTERE-knappen dersom du vil avbryte lagringsprosessen.
6
Stille inn Klokkemodus Still inn Klokkemodus automatisk eller manuelt.
Trykk på ▲ eller ▼ for å velge Auto, og trykk deretter på ENTERE-knappen.
7
Vise Veiledning for HDtilkobling.
Tilkoblingsmetoden for den beste HD-skjermkvaliteten vises.
8
God fornøyelse med
TV-en!
Trykk på ENTERE-knappen.
Slik tilbakestiller du denne funksjonen...
Velg Oppsett - Plug & Play (første oppsett). Angi din 4-sifrede PIN-kode. Standard PIN-kode er “0-0-0-0.” Hvis du vil endre
PIN-koden, bruker du funksjonen Endre PIN-kode.
Strøminngang
VHF/UHF Antenna
eller
Cable
R-AUDIO-L PR PB Y
ANT OUT
✎“Utstyr som er koplet til beskyttelsesjord via nettplugg og/eller via annet jordtilkoplet utstyr – og er tilkoplet et kabelTV nett, kan forårsake brannfare. For å unngå dette skal det ved tilkopling av utstyret til kabel-TV nettet installeres
en galvanisk isolator mellom utstyret og kabel-TV nettet.”
BN68-02588H-Nor.indb 6 2010-3-23 19:09:24Norsk 7
02 Tilkoblinger
Tilkoblinger
Koble til en AV-enhet
Bruke en HDMI/DVI-kabel: HD-tilkobling (opptil 1080p)
Tilgjengelige enheter: DVD-spiller, Blu-ray-spiller, HD-kabelboks, HD STB (digitalboks) satellittmottaker, kabelboks,
satellittmottaker (digitalboks)
✎HDMI (DVI) IN / PC/DVI AUDIO IN
x Når du bruker en HDMI/DVI-kabeltilkobling, må du bruke kontakten HDMI (DVI) IN. Bruk en DVI-kabeltilkobling,
en DVI-til-HDMI-kabel eller DVI-til-HDMI-adapter for videotilkobling og PC/DVI AUDIO IN-kontaktene til lyd.
x Hvis en ekstern enhet, som en DVD-spiller/Blu-ray-spiller/kabelboks/satellittmottaker for digitalboks, som
støtter HDMI-versjoner som er eldre enn 1.3, er tilkoblet kan det hende at TV-en ikke fungerer som normalt
(f.eks. ingen skjermbilder/ingen lyd/irrirterende flimring/unormal farge).
x Hvis det ikke kommer lyd etter at du har koblet til en HDMI-kabel, kontrollerer du HDMI-versjonen til den
eksterne enheten. Hvis du mistenker at versjonen er eldre enn 1.3, kontakter du leverandøren av enheten for å
bekrefte HDMI-versjonen og be om en oppgradering.
x Det anbefales at du kjøper en HDMI-sertifisert kabel. Ellers kan det hende at skjermen blir tom eller at det
oppstår en tilkoblingsfeil.
Bruke en Komponent-kabel (opptil 1080p) eller lyd-/videokabel (kun 480i) og bruke en Scart-kabel
Tilgjengelige enheter: Videospiller, DVD-spiller, Blu-ray-spiller, kabelboks, satellittmottaker for digitalboks
✎I Ext-modus støtter DTV Out bare MPEG SD-video og -lyd.
✎For å oppnå best mulig bildekvalitet, anbefales Komponent-tilkoblingen fremfor lyd-/video-tilkoblingen.
R-AUDIO-L PR PB Y
AUDIO OUT
R-AUDIO-L PR PB Y
DVI OUT
R-AUDIO-L PR PB Y
HDMI OUT
Y
W R
WY WR W R B G
Rød Hvit
DVD
R W R G B
R W R G
R W Y
R W Y B
R-AUDIO-L PR PB Y
COMPONENT OUT
R-AUDIO-L PR PB Y
AUDIO OUT
R-AUDIO-L PR PB Y
EXT
R-AUDIO-L PR PB Y
AUDIO OUT
R-AUDIO-L PR PB Y
VIDEO OUT
WY WR W R B G
Gul Rød Hvit
WY WR W R B G
Rød Blå Grønn
VCR Blu-ray player DVD
BN68-02588H-Nor.indb 7 2010-3-23 19:09:308 Norsk
Tilkoblinger
Koble til en lydenhet
Bruke en optisk kabeltilkobling eller en lydkabeltilkobling
Tilgjengelige enheter: Digitalt lydsystem, forsterker, DVD-hjemmekino
✎DIGITAL AUDIO OUT (OPTICAL)
x Når et digitalt lydsystem er koblet til DIGITAL AUDIO OUT (OPTICAL)-kontakten, demper du volumet på
både TV-en og systemet.
x 5,1-kanalers lyd er tilgjengelig når TV-en er koblet til en ekstern enhet som støtter 5,1-kanalers lyd.
x Når mottakeren (hjemmekino) er angitt til på, kan du høre lyd fra TV-ens optiske kontakt. Når TV-en mottar
et DTV-signal, sender TV-en 5,1-kanalers lyd til hjemmekinoens mottaker. Når kilden er en digital komponent
som en DVD-spiller / Blu-ray-spiller / kabelboks / satellittmottaker for digitalboks og er koblet til TV-en via
HDMI, høres bare 2-kanalers lyd fra hjemmekinoens mottaker. Hvis du ønsker å høre 5,1-kanalers lyd, kobler
du den digitale lydutgangskontakten fra DVD-spilleren / Blu-ray-spilleren / kabelboksen / satellittmottaker for
digitalboks direkte til en forsterker eller hjemmekino.
Koble til en PC
Bruke en HDMI/DVI-kabel / en D-sub-kabel
R-AUDIO-L PR PB Y
OPTICAL
Digitalt Lydsystem
R-AUDIO-L PR PB Y
AUDIO OUT
R-AUDIO-L PR PB Y
AUDIO OUT
R-AUDIO-L PR PB Y
DVI OUT
R-AUDIO-L PR PB Y
PC OUT
BN68-02588H-Nor.indb 8 2010-3-23 19:09:33Norsk 9
02 Tilkoblinger
TILKOBLINGER COMMON INTERFACE-åpning
For å se på betalingskanaler må ”CI eller CI+ CARD” være satt inn.
y Hvis du ikke setter inn ”CI eller CI+ CARD”, vil noen kanaler vise
meldingen ”Kryptert signal”.
y Paringsinformasjonen som inneholder et telefonnummer, ”CI
eller CI+ CARD”, ID, verts-ID og annen informasjon, vises i
omtrent 2~3 minutter. Hvis det vises en feilmelding, kontakter du
tjenesteleverandøren.
y Når konfigurasjonen av kanalinformasjon er ferdig, vises
meldingen ”Oppdatering fullført” og angir at kanallisten er
oppdatert.
✎MERK
x Du må kjøpe et ”CI eller CI+ CARD” hos en lokal tjenesteleverandør.
x Når du fjerner ”CI eller CI+ CARD” må du dra det forsiktig ut med hendene. Hvis du mister ”CI eller CI+ CARD”, kan
det forårsake skader på det.
x Sett inn ”CI eller CI+ CARD” i retningen som er avmerket på kortet.
x Plasseringen av COMMON INTERFACE-åpningen kan variere, avhengig av modellen.
x ”CI eller CI+ CARD” støttes ikke i alle land og regioner. Forhør deg med din autoriserte forhandler.
x Hvis du har problemer, kontakter du tjenesteleverandøren.
Skjermmoduser (D-Sub- og HDMI/DVI-inngang)
Optimal oppløsning er 1360 x 768 @ 60 Hz.
Modus Oppløsning Horisontal frekvens (kHz) Vertikal frekvens (Hz)
Klokkefrekvens for piksler
(MHz)
Synk.polaritet (H/V)
IBM
640 x 350 31.469 70.086 25.175 + / -
720 x 400 31.469 70.087 28.322 - / +
MAC
640 x 480 35.000 66.667 30.240 - / -
832 x 624 49.726 74.551 57.284 - / -
VESA DMT
640 x 480
31.469 59.940 25.175 - / -
37.861 72.809 31.500 - / -
37.500 75.000 31.500 - / -
800 x 600
37.879 60.317 40.000 + / +
48.077 72.188 50.000 + / +
46.875 75.000 49.500 + / +
1024 x 768
48.363 60.004 65.000 - / -
56.476 70.069 75.000 - / -
60.023 75.029 78.750 + / +
1280 x 720 45.000 60.000 74.250 + / +
1360 x 768 47.712 60.015 85.500 + / +
VESA CVT
720 x 576 35.910 59.950 32.750 - / +
1280 x 720 56.456 74.777 95.750 - / +
VESA GTF 1280 x 720 52.500 70.000 89.040 - / +
✎MERK
x Når du bruker en HDMI/DVI-kabeltilkobling, må du bruke kontakten HDMI (DVI) IN.
x Linjesprangmodus støttes ikke.
x Det kan hende at systemet ikke fungerer normalt hvis du velger et videoformat som ikke er standard.
x Separat og sammensatt modus støttes. SOG (Sync On Green) støttes ikke.
BN68-02588H-Nor.indb 9 2010-3-23 19:09:3410 Norsk
Tilkoblinger
Endre inndatakilden
Kildeliste
Bruk for å velge TV eller andre eksterne
inndatakilder som en DVD-spiller, Blu-Rayspiller / kabelboks / satellittmottaker for
digitalboks som er koblet til TV-en.
■ TV / Ext. / AV / Komponent / PC /
HDMI/DVI / USB
✎ I Kildeliste vil tilkoblede
inndatakilder være uthevet.
✎ Ext. er alltid aktivert.
Rediger navn
■ Videospiller / DVD-spiller / Kabeldigitalboks /
Satellittdigitalboks / PVR STB / AV-mottaker / Spill
/ Videokamera / PC / DVI PC / DVI Devices / TV /
IPTV / Blu-ray / HD DVD / DMA Navngi enheten som
er koblet til inngangene, så blir det lettere å velge
inndatakilde.
✎ Når du kobler en HDMI/DVI-kabel til HDMI (DVI)
IN-porten, bør du angi den til modusen DVI PC
eller DVI-enheter under Rediger navn.
Grunnleggende funksjoner
Slik navigerer du på menyene
Før du bruker TV-en følger du trinnene nedenfor for å
lære hvordan du navigerer i menyen og velger og justerer
forskjellige funksjoner.
1 MENU-knapp: Viser hovedmenyen på skjermen.
2 ENTERE / retningsknapp: Beveg markøren og velg et
element. Bekreft innstillingen.
3 RETURN-knapp: Går tilbake til forrige meny.
4 EXIT-knapp: Går ut av skjermmenyen.
Slik bruker du skjermmenyen
Tilgangstrinnet kan variere avhengig av den valgte menyen.
1 MENU m
Hovedmenyens alternativer vises på
skjermen:
Bilde, Lyd, Kanal, Oppsett,
Inndata, Applikasjon,
Kundesupport.
2 ▲ / ▼
Velg et ikon med ▲ eller ▼.
3 ENTERE Trykk på ENTERE for å få tilgang
til undermenyen.
4 ▲ / ▼
Velg ønsket undermeny med
▲ eller ▼.
5 ◄ / ►
Juster verdien på et element
med ◄ eller ►. Justeringen i
skjermmenyen kan variere avhengig
av den valgte menyen.
6 ENTERE Trykk på ENTERE for å
konfi gurere konfi gurasjonen.
7 EXIT e Trykk på EXIT.
MEDIA.P
A B C D
3 4
2
1
P
POWER
MEDIA.P
FAV.CH
P.MODE
DUAL
MTS
BN68-02588H-Nor.indb 10 2010-3-23 19:09:35Norsk 11
03 Grunnleggende funksjoner
Bruke INFO-knappen (Nå og neste-oversikt)
Skjermen identifiserer gjeldende kanal og
statusen for enkelte innstillinger for lyd og
video.
Nå og neste-oversikten viser daglig TVprograminformasjon for hver kanal i henhold
til kringkastingstidspunktet.
y Bla med ◄, ► for å vise informasjon
om et ønsket program mens du ser på
den gjeldende kanalen.
y Bla med ▲, ▼ for å vise informasjon for andre kanaler.
Hvis du vil gå til kanalen som er valgt, trykker du på
ENTERE-knappen.
Planlegge seeropplevelsen
Veiledning
EPG-informasjonen tilbys av kringkasterne.
Ved hjelp av programoversikter fra
kringkasterne kan du spesifisere
programmer du ønsker å se på forhånd
slik at TV-en automatisk bytter til den
valgte programkanalen til angitt tid.
Programinformasjon kan være tom eller
utdatert avhengig av kanalstatusen.
Bruke Kanalvisning
DTV Air 800 five
Home and Away
18:00 - 18:30
Drama
Dani is devastated when scott makes clear his views on marriage...
27
28
800
24
16
6
Discovery
DiscoveryH&L
five
price-drop.tv
QVC
R4DTT
American Chopper
Programmes resume at 06:00
Home and...
No Information
QVC Selection
No Information
Tine Team
Fiv...
Today 18:00 - 19:00 19:00 - 20:00
)Family Affairs )Dark Angel
800 five
Visnmodus +24 Timer Kanalmod Informasjon Side E Se
Veiledning 2:10 Tir 1 Jun
Kanalvisning - TV
1 2 3 4 5 6
Using Scheduled View
1 Rød (Visnmodus): Vis listen over programmer som
spilles nå eller senere.
2 Gul (+24 timer): Viser listen over programmer som skal
kringkastes om 24 timer.
3 Blå (Kanalmod): Velg typen kanaler du vil vise på
vinduet Kanalvisning.
– Kanalmodus varierer avhengig av antennekilden.
4 (Informasjon): Viser opplysninger om det valgte
programmet.
5 (Side): Går til forrige/neste side.
6 ENTERE-knappen
– Når du velger gjeldende program, kan du se på det
valgte programmet.
– Når du velger et fremtidig program, kan du reservere
at du skal se på det valgte programmet. For å avbryte
trykker du på ENTERE-knappen på nytt og velger
Avbryt timeplan.
P
POWER
MEDIA.P
FAV.CH
P.MODE
DUAL
MTS
P
POWER
MEDIA.P
FAV.CH
P.MODE
DUAL
MTS
DTV Air
15
abc1
18:00 ~ 6:00
18:11 Tor 6 Jan
Life On Venus Avenue
Unclassified
No Detaild Information
E Watch
' Informasjon
DTV Air 800 five
Family Affairs
18:00 - 18:30
Drama
Tanya confesses all to a stunned Babs. Conrad is anxious to hear...
18:30
19:15
Today
Today
)Family Affairs
)Dark Angel
800
800
five
five
800 five
Visnmodus Informasjon E Avbryt
Veiledning 2:10 Tir 1 Jun
Planlagt visning
1 4 6
BN68-02588H-Nor.indb 11 2010-3-23 19:09:3712 Norsk
Grunnleggende funksjoner
Kanalstyring
Eller angi favorittkanaler og bruk programguiden for digitale
sendinger. Velg en kanal i skjermbildet Kanaler, Mine
kanaler eller Tidsplanlagt.
c1 1futech
c 2 * 24ore.tv
15 abc1
3 BBC World
23 bid-up.tv
33 Boonerang
32 Cartoon Nwk
5 Class News
4 \ Coming Soon
27 Discovery
All
TV
Radio
Data/Other
Analogue
r
Antenne Antenne B Zoom Velg Side T Verktøy
Kanaler
■ Kanaler: Viser kanallisten i henhold til kanaltype.
■ * Mine kanaler: Viser gruppen til kanalen.
■ Tidsplanlagt: Viser alle reserverte programmer.
✎Bruke fargeknappene med Kanalstyring
x Rød (Antenne): Veksle mellom Antenne eller
Kabel.
x B Grønn (Zoom): Forstørrer eller forminsker et
kanalnummer.
x Gul (Velg): Velg ønskede kanaler og trykk på den
gule knappen for å angi alle de valgte kanalene
samtidig. Merket c vises til venstre for de valgte
kanalene.
x (Side): Gå til neste eller forrige side.
x T (Verktøy): Viser alternativmenyen for
Kanalstyring. (Alternativmenyene kan være
forskjellige avhengig av situasjonen.)
Visningsikoner for kanalstatus
Ikoner Funksjoner
A En analog kanal.
c En valgt kanal.
* En kanal som er angitt som en favoritt.
( Et program som sendes nå.
\ En låst kanal.
) Et reservert program.
¦ Bruke Favorittkanaler
* Mine kanaler
(i Kanalstyring)
Viser alle favorittkanaler.
■ Rediger mine kanaler t : Du kan angi de
valgte kanalene til ønsket gruppe for mine kanaler.
✎“*”-symbolet vises og kanalen angis som en av mine
kanaler.
1. Velg en kanal og trykk på TOOLS-knappen.
2. Legg til eller slett en kanal i min kanal-gruppene du
ønsker blant 1, 2, 3 og 4.
x En eller flere grupper kan velges.
3. Etter at du har endret innstillingene kan kanallisten
for hver gruppe vises i Mine kanaler.
c1 1futech
c 2 * 24ore.tv
15 abc1
3 BBC World
23 bid-up.tv
33 Boonerang
32 Cartoon Nwk
5 Class News
4 \ Coming Soon
27 Discovery
All
TV
Radio
Data/Other
Analogue
r
Antenne Antenne B Zoom Velg Side T Verktøy
Kanaler
Rediger mine kanaler
Lås
Slett
Avmerk alle
Velg alle
Kanalmeny
¦ Stille inn kanaler på nytt
Antenne (Antenne / Kabel)
Før TV-en kan begynne å memorisere de tilgjengelige
kanalene, må du spesifisere typen signalkilde som er koblet
til TV-en (f.eks. et antenne- eller et kabelsystem).
Land
Inndataskjermen for PIN-kode vises. Angi din 4-sifrede PINkode.
■ Digital kanal: Endre landet for digitale kanaler.
■ Analog kanal: Endre landet for analoge kanaler.
BN68-02588H-Nor.indb 12 2010-3-23 19:09:39Norsk 13
03 Grunnleggende funksjoner
Autolagring
Søker automatisk etter en kanal og lagrer i TV-en.
✎Automatisk tildelte programnumre stemmer ikke
nødvendigvis overens med faktiske eller ønskede
programnumre. Hvis en kanal er låst med funksjonen
Barnesikring, vises inndatavinduet for PIN-kode.
■ Antennekilde (Antenne / Kabel): Velg antennekilden du
vil lagre.
■ Kanalkilde (Digital og Analog / Digital / Analog): Velg
kanalkilden du vil lagre.
Når du velger Kabel → Digital og Analog eller Digital:
Oppgi en verdi for å skanne etter kabelkanaler.
Søkemodus (Full / Nettverk / Rask): Søker etter alle
kanaler med aktive kringkastingsstasjoner og lagrer dem
på TV-en.
✎ Hvis du angir Rask, kan du konfigurere Nettverk,
Nettverks-ID, Frekvens, Modulasjon,
Symbolhastighet manuelt ved å trykke på
knappen på fjernkontrollen.
Nettverk (Auto / Manuell): Velger innstillingsmodusen
Nettverks-ID fra Auto eller Manuell.
Nettverks-ID: Når Nettverk er Manuell, kan du
konfigurere Nettverks-ID med nummertastene.
Frekvens: Viser kanalens frekvens.
(Forskjellig i hvert land)
Modulasjon: Viser tilgjengelige modulasjonsverdier.
Symbolhastighet: Viser tilgjengelige symbolhastigheter.
Manuell lagring
Søker manuelt etter en kanal og lagrer i TV-en.
✎Hvis en kanal er låst med funksjonen Barnesikring,
vises inndatavinduet for PIN-kode.
■ Digital kanal: (tilgjengelig i DTV-modus) Når søket er
ferdig, oppdateres kanalene i kanallisten.
✎Når du velger Antenne → Antenne: Kanal, Frekvens,
Båndbredde
✎Når du velger Antenne → Kabel: Frekvens,
Modulasjon, Symbolhastighet
■ Analog kanal (Program, Fargesystem, Lydsystem,
Kanal, Søk): Hvis det ikke er lyd eller lyden er unormal,
velger du den aktuelle lydstandarden på nytt.
✎Kanalmodus
x P (programmodus): Når du er ferdig med
innstillingen, er kringkastingsstasjonene i ditt område
tildelt plassnumre fra P0 til P99. I denne modusen
kan du velge en kanal ved å angi posisjonsnummeret
til kanalen.
x C (antennekanalmodus) / S (kabelkanalmodus):
Med disse to modusene kan du velge en kanal
ved å legge inn det tilhørende nummeret for hver
antennekringkastingsstasjon eller kabelkanal.
¦ Redigere kanaler
Alternativmeny for Kanalstyring
(i Kanalstyring)
1. Velg en kanal og trykk på TOOLS-knappen.
2. Rediger kanalnavnet eller -nummeret med menyen
Rediger kanalnavn.
■ Rediger kanalnavn (bare analoge kanaler): Tildel ditt
eget kanalnavn.
BN68-02588H-Nor.indb 13 2010-3-23 19:09:4014 Norsk
Grunnleggende funksjoner
¦ Andre funksjoner
Alternativmeny for Kanalstyring
(i Kanalstyring)
Still inn hver kanal med menyalternativene for Kanalstyring
(Lås / Lås opp, Timer-visning, Sorter, Slett, Velg alle /
Velg bort alle). Elementer på alternativmenyen kan variere
avhengig av kanalstatus.
1. Velg en kanal og trykk på TOOLS-knappen.
2. Velg en funksjon og endre innstillingene.
■ Lås / Lås opp: Du kan låse en kanal slik at kanalen ikke
kan velges eller ses på.
✎MERK
x Denne funksjonen er bare tilgjengelig når
Barnesikring er angitt til På.
x Inndataskjermen for PIN-kode vises. Skriv inn din
4-sifrede PIN-kode. Standardkoden er “0-0-0-0”.
Endre PIN-koden med alternativet Endre PIN-kode.
■ Timer-visning: Du kan angi at en ønsket kanal vises
automatisk til ønsket tid. Still inn gjeldende klokkeslett
først for å bruke denne funksjonen.
✎ Når en digital kanal er valgt, trykker du på
►-knappen for å vise det digitale programmet.
■ Sorter (bare analoge kanaler): Med sorteringsfunksjonen
kan du endre programnumrene på de lagrede kanalene.
Denne operasjonen kan bli nødvendig etter at du har
brukt automatisk lagring.
■ Slett: Du kan slette en kanal for å vise kanalene du
ønsker.
■ Velg alle / Velg bort alle: Velg alle kanalene eller velg
bort alle de valgte kanalene i kanalstyring.
Tidsplanlagt
(i Kanalstyring)
Du kan vise, endre eller slette et program du har reservert til
å se.
■ Endre info: Endre et program du har reservert til å se.
■ Avbryt timeplan: Avbryt et program du har reservert til
å se.
■ Informasjon: Vis et program du har reservert til å se. (Du
kan også endre reservasjonsinformasjonen.)
■ Velg alle / Velg bort alle: Velg eller velg bort alle
reserverte programmer.
Kanalliste
Du kan se alle de søkte kanalene.
Overføring av kanalliste
Importerer eller eksporterer kanalkartet. Du må koble til en
USB-lagringsenhet for å bruke denne funksjonen.
✎Inndataskjermen for PIN-koden vises. Angi din 4-sifrede
PIN-kode.
✎Standard-PIN-koden på en ny TV er ‘0-0-0-’.
■ Importer fra USB: Importer kanalliste fra USB.
■ Eksporter til USB: Eksporter kanalliste til USB.
Finjuster
(bare analoge kanaler)
Hvis signalet er dårlig eller forvrengt, kan du finjustere
kanalene manuelt.
✎Finjusterte kanaler er merket med en asterisk “*”.
✎For å tilbakestille finjusteringen velger du Tilbakest.
Bildemeny
¦ Endre forhåndsinnstilt bildemodus
Velg din foretrukne bildetype.
Modus t
■ Dynamisk: Passer til lyse rom.
■ Standard: Passer til vanlige omgivelser.
■ Film: Passer til å se på filmer i mørke rom.
¦ Justere bildeinnstillinger
Bakgrunnsbelysning / Kontrast /
Lysstyrke / Skarphet / Farge / Nyanse
(G/R)
TV-en har flere innstillingsalternativer for bildekvalitetskontroll.
✎MERK
x I de analoge modusene TV, Ekst., AV til PALsystemet er ikke funksjonen Nyanse (G/R)
tilgjengelig.
x I PC-modus kan du bare gjøre endringer på Bakg.
belysn., Kontrast og Lysstyrke.
x Innstillinger kan justeres og lagres for hver eksterne
enhet som er koblet til TV-en.
x Hvis du senker bildets lysstyrke, reduseres
strømforbruket.
P
POWER
MEDIA.P
FAV.CH
P.MODE
DUAL
MTS
BN68-02588H-Nor.indb 14 2010-3-23 19:09:40Norsk 15
03 Grunnleggende funksjoner
¦ Økonomiske løsninger
ECO-løsning
■ Energisparing (Av / Lav / Medium / Høy / Bilde av
/ Auto) t: Juster lysstyrken på TV-en for å
redusere strømforbruket. Hvis du velger Bilde av, slås
skjermen av, men lyden forblir på. Trykk på en hvilken
som helst knapp unntatt volumknappen for å skru på
skjermen.
■ Ingen sign.standby (Av / 15 min / 30 min / 60 min):
Aktiverer standbymodus i tilfelle statusen “Ingen signaler”
eller “Kontroller signalkabel” vises i en bestemt tid som
definert av brukeren.
✎ Deaktivert når PC-en er i strømsparingsmodus.
¦ Endre Bildealternativer
Avanserte innstillinger
(tilgjengelig i modusene Standard / Film)
Du kan justere den detaljerte innstillingen for skjermen,
inkludert farge og kontrast.
✎I PC-modus kan du bare gjøre endringer på Dynamisk
kontrast, Gamma og Hvitbalanse.
Avanserte innstillinger
Svarttone : Av ►
Dynamisk kontrast : Medium
Skyggedetalj : 0
Gamma : 0
Bare RGB-modus : Av
Fargerom : Naturlig
Hvitbalanse
▼
U Flytt E Enter R Tilbake
■ Svarttone (Av / Mørk / Mørkere / Mørkest): Velg
svartnivået for å justere skjermdybden.
■ Dynamisk kontrast (Av / Lav / Medium / Høy): Juster
skjermkontrasten.
■ SSkyggedetalj (-2~+2): Øk lysstyrken for mørke bilder.
✎ Deaktivert i PC-modus.
■ Gamma: Juster den primære fargeintensiteten.
■ Bare RGB-modus (Av / Rød / Grønn / Blå): Du kan
justere Farge eller Nyanse for Rød, Grønn eller Blå
for bildet fra en ekstern enhet (DVD-spiller, hjemmekino
osv.).
■ Fargerom (Auto / Naturlig): Juster fargeområdet som
er tilgjengelig for å skape bildet.
■ Hvitbalanse: Juster fargetemperaturen for et mer
naturlig bilde.
R-Kontrast / G-Kontrast / B-Kontrast: Juster hver
farges mørkhet (rød, grønn, blå).
R-Økning / G-Økning / B-Økning: Juster hver farges
lyshet (rød, grønn, blå).
Tilbakest.: Tilbakestiller Hvitbalanse til
standardinnstillingene.
■ Hudfarge: Fremhev rosa “Hudfarge.”
■ Kantforbedring (Av / På): Fremhev grenser mellom
gjenstander.
Bildealternativer
✎I PC-modus kan du bare gjøre endringer på Fargetone,
Størrelse og Autobeskyttelsestid.
Bildealternativer
Svarttone : Normal ►
Størrelse : 16:9
Skjermmodus : 16:9
Digitalt støyfilter : Auto
MPEG-støyfilter : Auto
Svartnivå for HDMI : Normal
Filmmodus : Av
▼
U Flytt E Enter R Tilbake
■ Fargetone (Kjølig / Normal / Varm1 / Varm2)
✎ Varm1 eller Varm2 vil bli deaktivert når
bildemodusen er Dynamisk.
✎ Innstillinger kan justeres og lagres for hver
eksterne enhet som er koblet til en inngang på
TV-en.
BN68-02588H-Nor.indb 15 2010-3-23 19:09:4116 Norsk
Grunnleggende funksjoner
■ Størrelse: Kabelboksen /
satellittmottakeren kan ha sine egne sett
med skjermstørrelser i tillegg. Men vi
anbefaler deg å bruke 16:9-modus det
meste av tiden.
Autobredde: Justerer automatisk
bildestørrelsen til forholdet 16:9.
16:9 : Justerer bildestørrelsen til 16:9 for
DVD-er eller bredskjermkringkasting.
Bred zoom: Forstørrer bildestørrelsen mer enn 4:3.
✎ Justerer Plassering ved å bruke knappene ▲, ▼.
Zoom: Forstørrer 16:9-bredskjermbildene i loddrett
retning for at de skal passe til skjermstørrelsen.
✎ Justerer Plassering eller Størrelse ved å bruke
knappene ▲, ▼.
4:3 : Standardinnstillingen for en film eller vanlig
kringkasting.
✎ Ikke bruk 4:3-format over lengre perioder. Spor av
linjer til venstre, høyre og i midten av skjermen kan
føre til ekkobilde (innbrenning), og dette dekkes
ikke av garantien.
Skjermtilpasning: Viser det fullstendige bildet uten
avkutting ved HDMI- (720p / 1080i / 1080p) eller
Komponent-innsignaler (1080i / 1080p).
✎MERK
x Når du har valgt Skjermtilpasning i HDMI- (720p
/ 1080i / 1080p) eller Komponent-modus (1080i /
1080p):
1. Trykk på ◄ eller ► for å velge Posisjon.
2. Trykk på knappen ENTERE.
3. Trykk på ▲, ▼, ◄ eller ► for å flytte bildet.
x Avhengig av innsignalets kilde kan alternativene for
bildestørrelse variere.
x De tilgjengelige elementene kan variere, avhengig av
hvilken modus som er valgt.
x I PC-modus kan bare modusene 16:9 og 4:3
justeres.
x Innstillinger kan justeres og lagres for hver eksterne
enhet som er koblet til en inngang på TV-en.
x Hvis du bruker funksjonen Skjermtilpasning
med HDMI 720p-inngang, vil en linje kuttes
øverst, nederst, til venstre og til høyre i
overskanningsfunksjonen.
■ Skjermmodus (16:9 / Bred zoom / Zoom / 4:3): Bare
tilgjengelig når bildestørrelsen er angitt til Autobredde.
Du kan bestemme ønsket bildestørrelse i størrelsen 4:3
WSS (Wide Screen Service) eller i originalstørrelsen. Alle
europeiske land krever forskjellige bildestørrelser.
✎ Ikke tilgjengelig i PC-, Komponent- eller HDMImodus.
■ Digitalt støyfilter (Av / Lav / Medium / Høy /
Autovisualisering): Når kringkastingssignalet er svakt,
kan det oppstå statiske bilder og skygger. Velg et av
alternativene til best mulig bilde vises.
Autovisualisering: Når du bytter analoge kanaler, vises
signalstyrken.
✎ Bare tilgjengelig for analoge kanaler.
✎ Når linjen er grønn, mottar du best mulig signal.
■ MPEG-støyfilter (Av / Lav / Medium / Høy / Auto):
Reduserer MPEG-støy for å gi en forbedret bildekvalitet.
✎ Deaktivert i PC-modus.
■ Svartnivå for HDMI (Normal / Lav): Velger svartnivå på
skjermen for å justere skjermdybden.
✎ Bare tilgjengelig i HDMI-modus (RGB-signaler).
■ Filmmodus (Av / Auto1 / Auto2): Angir TV-en til
automatisk registrering og behandling av filmsignaler fra
alle kilder og justering av bildet for optimal kvalitet.
✎ Tilgjengelig i TV, AV, KOMPONENT(480i / 1080i)
og HDMI(480i / 1080i).
■ Autobeskyttelsestid (2 timer / 4 timer / 8 timer /
10 timer / Av): Hvis det samme bildet blir stående
på skjermen, vil automatisk beskyttelse mot
bildeinnbrenning starte.
Tilbakestill bilde (OK / Avbryt)
Tilbakestiller gjeldende bildemodus til standardinnstillinger.
P
POWER
MEDIA.P
FAV.CH
P.MODE
DUAL
MTS
BN68-02588H-Nor.indb 16 2010-3-23 19:09:41Norsk 17
03 Grunnleggende funksjoner
¦ Slik konfigurerer du TV-en med PC-en
Angi inndatakilde til PC.
Juster frekvensverdier/-plasseringer og finjuster innstillingene
Autojustering t
automatisk.
✎Ikke tilgjengelig når du kobler til gjennom HDMI/DVIkabel.
Skjerm
■ Grov / Fin: Fjerner eller reduserer bildestøy. Hvis støyen
ikke fjernes av fininnstillingen, justerer du frekvensen
så godt som mulig (Grov) og finjusterer igjen. Etter at
støyen har blitt redusert, må du justere bildet igjen slik at
det er rettet inn på midten av skjermen.
■ Plassering: Juster PC-skjermens plassering med
retningsknappene (▲ / ▼ / ◄ / ►).
■ Tilb.still bilde: Tilbakestiller bildet til
standardinnstillingene.
Bruke TV-en som PC-skjerm
Installere PC-programvaren (Windows XP-basert)
Avhengig av Windows-versjonen og videokortet kan de
faktiske skjermbildene på PC-en variere, men den samme
grunnleggende oppsettinformasjonen vil nesten alltid gjelde.
(Hvis ikke, kan du ta kontakt med datamaskinprodusenten
eller Samsung-forhandleren.)
1. Først går du til “Kontrollpanel” på startmenyen i
Windows.
2. Klikk på “Utseende og temaer” i vinduet “Kontrollpanel”
og en skjermdialogboks vises.
3. Klikk på “Skjerm” og en skjermdialogboks vises.
4. Gå til kategorien “Innstillinger” i skjermdialogboksen.
y Riktig størrelsesinnstilling (oppløsning)
[Optimal: 1360 x 768 piksler]
y Hvis det finnes et alternativ for vertikal frekvens i
dialogboksen for skjerminnstillinger, skal den riktige
verdien være “60” eller “60 Hz”. Ellers klikker du bare på
“OK” og går ut av dialogboksen.
Lydmeny
¦ Endre forhåndsinnstilt lydmodus
Modus t
■ Standard: Velger normal lydmodus.
■ Musikk: Fremhever musikken over stemmer.
■ Film: Gir den beste lydkvaliteten for filmer.
■ Klar tale: Fremhever stemmer over andre lyder.
■ Forsterk: Øk intensiteten til høyfrekvenslyd for å gi en
bedre lytteropplevelse for hørselssvekkede.
¦ Justere lydinnstillinger
Equalizer
Justerer lydmodusen.
■ Balanse V/H: Justerer balansen mellom høyre og
venstre høyttaler.
■ 100Hz / 300Hz / 1kHz / 3kHz / 10kHz (justering
av båndbredde): Justerer nivået for spesifikke
båndbredefrekvenser.
■ Tilbakest.: Tilbakestiller equalizeren til
standardinnstillingene.
¦ Lydsystemer osv.
Virtual Surround (Av / På)
Denne funksjonen tilbyr en virtuell 5.1-kanalers
surroundlydopplevelse gjennom et par høyttalere eller
hodetelefoner med HRTF-teknologi (Head Related Transfer
Function).
✎Hvis Velg høyttaler er angitt til Ekstern høyttaler, er
Virtual Surround deaktivert.
Dialog Clarity (Av / På)
Med denne funksjonen kan du øke intensiteten til en stemme
over bakgrunnsmusikk eller lydeffekter slik at dialogen høres
tydeligere når du ser på et program.
Lydspråk
(bare digitale kanaler)
Endre standardverdien for lydspråk.
✎Det tilgjengelige språket kan være forskjellige avhengig
av kringkastingen.
Lydformat (MPEG / Dolby Digital 5.1)
(bare digitale kanaler)
Hvis det sendes lyd til både hovedhøyttaleren og en
lydforsterker, kan det oppstå en ekkoeffekt på grunn av
ulik dekodingshastighet mellom hovedhøyttaleren og
lydforsterkeren. I så fall bruker du TV-høyttalerfunksjonen.
✎Lydformat kan variere avhengig av kringkastingen.
5.1-kanalers Dolby digital-lyd er bare tilgjengelig når du
kobler til en ekstern høyttaler gjennom en optisk kabel.
BN68-02588H-Nor.indb 17 2010-3-23 19:09:4118 Norsk
Grunnleggende funksjoner
Lydbeskrivelse
(ikke tilgjengelig i alle regioner)
(bare digitale kanaler)
Denne funksjonen håndterer
lydstrømningen for AD (lydbeskrivelse)
som sendes sammen med hovedlyden fra
kringkasteren.
■ Lydbeskrivelse (Av / På): Slå lydbeskrivelsesfunksjonen
på eller av.
■ Volum: Juster volumet på lydbeskrivelsen.
Auto-volum (Av / Normal / Natt)
For å utjevne volumnivået på hver kanal angir du til Normal.
■ Natt: Denne modusen tilbyr en forbedret lydopplevelse
sammenlignet med Normal modus, og lager nesten ikke
støy. Den er nyttig om natten.
Velg høyttaler
(Ekstern høyttaler / TV-høyttaler)
Et lydekko kan oppstå på grunn av en forskjell i
dekodingshastighet mellom hovedhøyttaleren og
lydmottakeren. I dette tilfellet angir du TV-en til Ekstern
høyttaler.
✎Når Velg høyttaler er angitt til Ekstern høyttaler, vil
ikke volumknappene og MUTE-knappen fungere og
lydinnstillingene er begrenset.
✎Når Velg høyttaler er angitt til Ekstern høyttaler, bør
du bruke disse innstillingene.
x TV-høyttaler: Av, Ekstern høyttaler: På
✎Når Velg høyttaler er angitt til TV-høyttaler, bør du
bruke disse innstillingene.
x TV-høyttaler: På, Ekstern høyttaler: På
✎Hvis det ikke er et videosignal, vil begge høyttalerne
være dempet.
Ekstra innstilling
(bare digitale kanaler)
■ DTV-lydnivå (MPEG / HE-AAC): Med denne funksjonen
kan du redusere forskjellen på et stemmesignal (som er
et av signalene som mottas under en digital TV-sending)
til et ønsket nivå.
✎ Avhengig av typen kringkastingssignal kan MPEG
/ HE-AAC justeres til mellom -10dB og 0dB.
✎ For å øke eller dempe volumet justerer du mellom
området 0 og -10.
■ SPDIF-utgang: SPDIF (Sony Philips Digital InterFace)
brukes til å skape digital lyd, mens interferensen som går
til høyttalerne og forskjellige digitale enheter som DVDspillere, reduseres.
Lydformat: Under mottak av en digital TV-sending, kan
du velge det digitale lydutgangsformatet (SPDIF) fra
alternativene PCM, Dolby Digital eller DTS.
✎ Ved å koble til 5.1-kanalers høyttalere i et Dolby
Digital-oppsett, maksimerer du din interaktive 3Dlydopplevelse.
Lydforsinkelse: Korriger ujevnheter mellom lyd og
video når du ser på TV eller video, og lytter til digitale
lydutganger med en ekstern enhet som en AV-mottaker.
■ Dolby Digital-komp (Linje / RF): Denne funksjonen
minimerer signalforskjeller mellom et dolby digital-signal
og et stemmesignal (f.eks. MPEG-lyd, HE-AAC, ATV-lyd).
✎ Velg Linje for å få dynamisk lyd og RF for å
redusere forskjellen mellom høye og lave lyder om
natten.
Linje: Angi utgangsnivået for signaler til større eller
mindre enn -31 dB (referanse) til enten -20 dB eller -31
dB.
RF: Angi utgangsnivået for signaler til større eller mindre
enn -20 dB (referanse) til enten -10 dB eller -20 dB.
Tilbakestill lyd (OK / Avbryt)
Tilbakestill alle lydinnstillinger til fabrikkstandarder.
P
POWER
MEDIA.P
FAV.CH
P.MODE
DUAL
MTS
BN68-02588H-Nor.indb 18 2010-3-23 19:09:42Norsk 19
03 Grunnleggende funksjoner
Oppsettmeny
¦ Stille inn tiden
Tid
■ Klokke: Du stiller inn klokken for å bruke forskjellige
timerfunksjoner på TV-en.
O Gjeldende tid vises hver gang du trykker på INFOknappen.
✎ Hvis du kobler fra strømledningen, må du stille
klokken på nytt.
Klokkemodus (Auto / Manuell)
✎ Avhengig av kringkastingsstasjon og signal vil den
automatiske tiden kanskje ikke være korrekt. I
dette tilfellet angir du tiden manuelt.
✎ Antennen eller kabelen må være koblet til for å
angi tiden automatisk.
Still klokke: Angi Dag, Måned, År, Time og Minutt
manuelt.
✎ Bare tilgjengelig når Klokkemodus er angitt til
Manuell.
¦ Deaktiveringstimer
■ Deaktiveringstimer t: Slår av TV-en
automatisk etter en forhåndsinnstilt tidsperiode. (30, 60,
90, 120, 150 og 180 minutter).
✎ Hvis du vil avbryte Deaktiveringstimer, velger
du Av.
¦ Stille inn På / Av-timer
■ Timer 1 / Timer 2 / Timer 3: Tre forskjellige på/avinnstillinger kan utføres. Du må stille klokken først.
10 TV ATV 0
00 00
▲
▼
00 00
▲
▼
Timer 1
Tid på
Tid av
Volum
Deaktiver
Deaktiver
Søn Man Tir Ons Tor Fre Lør
Én gang
Kilde Antenne Kanal
Gjenta
L Flytt U Juster E Enter R Tilbake
Tid på / Tid av: Angi time, minutt og aktiver/deaktiver.
(For å aktivere timeren med innstillingen du har valgt,
angir du til Aktiver.)
Volum: Angi ønsket volumnivå.
Kilde: Velg TV- eller USB-innhold som skal spilles når
TV-en slås på automatisk. USB kan bare velges når en
USB-enhet er koblet til TV-en
Antenne (når Kilde er angitt til TV): Velg ATV eller DTV.
Kanal (når Kilde er angitt til TV): Velg ønsket kanal.
Innhold (når Kilde er angitt til USB): Velg en mappe i
USB-enheten som inneholder musikk- eller bildefiler som
skal spilles av når TV-en slås på automatisk.
✎ Hvis det ikke er noen musikkfil på USB-enheten
eller mpapen som inneholder en musikkfil, ikke
velges, fungerer ikke Timer-funksjonen som den
skal.
✎ Når det bare er en bildefil i USB-enheten, vil ikke
lysbildefremvisningen starte.
✎ Hvis et mappenavn er for langt, kan ikke mappen
velges.
✎ Hver USB du bruker er tildelt sin egen mappe. Når
du bruker mer enn en av samme USB-type, må du
kontrollere at mappene som er tildelt til hver USB,
har forskjellige navn.
Gjenta: Velg Én gang, Man~Fre, Man~Lør, Lør~Søn
eller Manuell etter ønske. Hvis du velger Manuell, kan
du angi dagen du ønsker å aktivere timeren på.
✎ c-merket indikerer at dagen er valgt.
✎Automatisk av (bare tilgjengelig når TV-en er slått på av
timeren): TV-en vil automatisk slås av etter 3 timer hvis
den ikke er i bruk for å unngå overoppheting.
¦ Låse programmer
Sikkerhet
✎Inndataskjermen for PIN-kode vises før
oppsettskjermen.
✎Skriv inn din 4-sifrede PIN-kode. Standardkoden er
“0-0-0-0”. Endre PIN-koden med alternativetEndre
PIN-kode.
■ Barnesikring (Av / På): Lås kanaler i Kanalstyring
for å hindre uautoriserte brukere, som barn, i å se på
upassende programmer.
✎ Bare tilgjengelig når kilden Inndata er angitt til TV.
■ Barnesikringsgrad: Hindre uautoriserte brukere,
som barn, i å se på upassende programmer med en
brukerdefinert 4-sifret PIN-kode.
Tillat alle: Lås opp alle TV-sikringer.
✎ Elementene i Barnelås varierer fra land til land.
BN68-02588H-Nor.indb 19 2010-3-23 19:09:4220 Norsk
Grunnleggende funksjoner
■ Endre PIN-kode: Endre ditt personlige ID-nummer som
kreves for å konfigurere TV-en.
✎ Hvis du glemmer PIN-koden, trykker du på
fjernkontrollens knapper i rekkefølgen nedenfor.
Da tilbakestilles PIN-koden til “0-0-0-0”: POWER
(av) → MUTE → 8 → 2 → 4 → POWER (på).
¦ Andre funksjoner
Språk
■ Menyspråk: Angi menyspråket.
■ Språk, tekst-TV: Angi et ønsket språk for tekst-TV.
✎ Engelsk er standard i tilfeller hvor det valgte
språket ikke er tilgjengelig i kringkastingen.
■ Foretrukket (Primærspråk, lyd / Sekundærspråk,
lyd / Primærspråk, undertekster / Sekundærspråk,
undertekster / Primærspråk, tekst-TV /
Sekundærspråk, tekst-TV): Velg et språk som blir
standardspråket når en kanal velges.
Undertekst
Bruk denne menyen til å stille inn modusen
Undertekst.
✎Undertekstfunksjonen fungerer ikke i
modusene Komponent eller HDMI.
■ Undertekst (Av / På): Slår
undertekster på eller av.
■ Modus (Normal / Hørselssvekkede): Angir
undertekstmodus.
■ Språk, undertekster: Angir undertekstspråket.
✎ Hvis programmet du ser på ikke støtter funksjonen
Hørselssvekkede, aktiveres Normal automatisk
selv om modusen Hørselssvekkede er valgt.
✎ Engelsk er standard i tilfeller hvor det valgte
språket ikke er tilgjengelig i kringkastingen.
Generelt
■ Spillmodus (Av / På): Når du kobler til en spillkonsoll,
som for eksempel PlayStation™ eller Xbox™, får du en
mer realistisk spillopplevelse hvis du velger spillmodusen.
✎MERK
x Forholdsregler og begrensninger for spillmodus
– Hvis du vil koble fra spillkonsollen og koble til en
annen ekstern enhet, angir du Spillmodus til Av i
oppsettmenyen.
– Hvis du viser TV-menyen i Spillmodus, rister
skjermen litt.
x Spillmodus er ikke tilgjengelig i TV- og PC.
x Etter at du har koblet til spillkonsollen angir du
Spillmodus til På for å hindre dårlig bildekvalitet.
x Hvis Spillmodus er På: Modusen Bilde er angitt til
Standard og modusen Lyd er angitt til Film.
■ Gj.siktig meny (Lys / Mørk): Angi menyens
gjennomsiktighet.
■ Melodi (Av / Lav / Medium / Høy): Angi slik at melodien
spiller når TV-en slås på eller av.
Common Interface
■ CI-meny: Dette gjør at brukeren kan velge fra CAMmenyen. Velg CI-meny basert på menyen PC-kort.
■ Programinformasjon: Vis informasjonen på CAM som
er satt inn i CI-sporet og på “CI eller CI+ CARD” som er
satt inn i. Du kan installere CAM både når TV-en er på
eller av.
1. Kjøp en CI CAM-modul hos din nærmeste forhandler
eller på telefon.
2. Sett “CI eller CI+ CARD” inn i CAM i pilretningen.
3. Sett CAM med “CI eller CI+ CARD” inn i common
interface-sporet i pilretningen slik at det er parallellt med
sporet.
4. Kontroller om du kan se et bilde på en forvrengt
signalkanal.
P
POWER
MEDIA.P
FAV.CH
P.MODE
DUAL
MTS
BN68-02588H-Nor.indb 20 2010-3-23 19:09:43Norsk 21
03 Grunnleggende funksjoner
Støttemeny
Selvdiagnose
■ Bildetest (Ja / Nei): Bruk til å kontrollere bildeproblemer
og hvis problemet vedvarer, kontrollerer du
fargemønsteret.
■ Lydtest (Ja / Nei): Bruk den innebygde melodilyden til å
kontrollere lydproblemer.
✎ Hvis du ikke hører lyd fra TV-ens høyttalere før
du utfører lydtesten, må du sørge for at Velg
høyttaler er angitt til TV-høyttaler i menyen Lyd.
✎ Melodien vil høres under testen selv om Velg
høyttaler er angitt til Ekstern høyttaler eller lyden
er dempet ved å trykke på MUTE-knappen.
■ Signalinformasjon: (bare digitale kanaler) HDTVkanalens mottakskvalitet er enten perfekt eller kanalene
er utilgjengelige. Juster antennen for å øke signalstyrken.
■ Feilsøking: Hvis det ser ut til at TV-en har et problem,
ser du i denne beskrivelsen.
✎ Hvis ingen av disse feilsøkingstipsene hjelper,
kontakter du Samsungs kundesenter.
Programvareoppgradering
Programvareoppgradering kan utføres gjennom et
kringkastingssignal eller ved å laste ned den nyeste fastvaren
fra samsung.com til en USB-minneenhet.
Gjeldende versjon er programvaren som allerede er
installert på TV-en.
✎Programvare representeres som ”År / Måned / Dag_
Versjon”.
Programvareoppgradering
Gjeldende versjon 2010/01/18_000001
U Flytt E Enter R Tilbake
Via USB ►
Via kanal
Oppgradering i standbymodus Av
Alternativ programvare ----/--/--/--_------
Installere den nyeste versjonen
■ Via USB: Sett inn
en USB-driver med
fastvareoppgraderingesfilen
som er lastet ned fra
www.samsung.com, i
TV-en. Vær forsiktig så du
ikke kobler fra strømmen
eller fjerner USB-driveren
før oppgraderinger er
ferdige. TV-en slår seg av
og på igjen automatisk når
fastvareoppgraderingen er fullført. Når programvaren er
oppgradert, vil video- og lydinnstillingene dine returnere
til standardinnstillingene. Vi råder deg til å skrive ned
innstillingene så du enkelt kan tilbakestille dem etter
oppgraderingen.
■ Via kanal: Oppgrader programvaren med
kringkastingssignalet.
✎ Hvis funksjonen velges under
programvareoverføringsperioden, vil programvaren
automatisk søkes opp og lastes ned.
✎ Tiden som kreves til å laste ned programvaren
bestemmes av signalstatusen.
■ Oppgradering i standbymodus: En manuell
oppgradering vil bli automatisk utført til et valgt
tidspunkt. Siden strømmen til enheten slås på internt,
kan skjermen være noe på for LCD-produktet.
Dette fenomenet kan fortsette i mer enn 1 time til
programvareoppgraderingen er fullført.
■ Alternativ programvare (sikkerhetskopi): Hvis det
er problemer med den nye fastvaren og den påvirker
bruken, kan du endre programvaren til forrige versjon.
✎ Hvis programvaren er endret, vises eksisterende
programvare.
Veiledning for HD-tilkobling
Se i denne informasjonen når du kobler eksterne enheter til
TV-en.
Kontakt Samsung
Vis denne informasjonen når TV-en ikke fungerer som den
skal eller når du vil oppgradere programvaren. Du kan finne
informasjon om våre callsentre og hvordan du laster ned
produkter og programvare.
TV-sidepanel
USB-stasjon
BN68-02588H-Nor.indb 21 2010-3-23 19:09:4422 Norsk
Avanserte funksjoner
Media Play
¦ Koble til en USB-enhet
1. Slå på TV-en.
2. Koble til en USB-enhet som inneholder bilde- og/eller musikk- til
USB-kontakten på siden av TV-en.
3. Når en USB-enhet er koblet til TV-en, vises et vindu. Deretter kan du velge Media Play.
✎Den fungerer kanskje ikke som den skal med ulisensierte multimediefiler.
✎Viktig informasjon før du bruker Media Play.
x MTP (overføringsprotokoll for media) støttes ikke.
x Filsystemet støtter FAT16, FAT32 og NTFS.
x Enkelte typer digitale kameraer med USB-tilkobling er kanskje ikke kompatible med denne TV-en.
x Media Play støtter bare USB MSC-enheter (Mass Storage Class). MSC er en lagringsklasse kun for lagring og flytting
av filer. Eksempler på MSC er minnepinner, Flash-minnekortlesere (USB HUB støttes ikke.) Enheter skal kobles
direkte til TV-ens USB-port.
x Før du kobler enheten til TV-en bør du ta sikkerhetskopi av filene for å hindre skader eller tap av data. SAMSUNG er
ikke ansvarlig for skade på datafiler eller tap av data.
x Ikke koble fra USB-enheten mens den laster.
x Jo høyere bildeoppløsningen er, jo lenger tid tar det å vise det på skjermen.
x Den maksimalt støttede JPEG-oppløsningen er 15360X8640 piksler.
x For filer som ikke støttes eller som er skadet, vises meldingen ”Filformatet støttes ikke”.
x Hvis filene er sortert etter Enkel visning, kan opptil 1000 filer vises i hver mappe.
x MP3-filer med DRM som har blitt lastet ned fra en side som ikke er gratis, kan ikke spilles. DRM (Digital Rights
Management, digital rettighetsadministrasjon) er en teknologi som støtter oppretting av innhold, distribuering og
administrering av innholdet på en integrert og omfattende måte, inkludert beskyttelse av rettighetene og interessene
til innholdsleverandørene, forhindring av ulovlig kopiering av innholdet samt administrering av fakturering og oppgjør.
x Hvis mer enn 2 PTP-enheter er koblet til, kan du bare bruke én om gangen.
x Hvis mer enn to MSC-enheter er koblet til, kan det hende at noen av dem ikke blir gjenkjent. Hvis en USB-enhet
krever mye strøm (mer enn 500 mA eller 5 V), kan det hende at den ikke støttes.
x Hvis en varselsmelding om overstrøm vises mens du kobler til eller bruker en USB-enhet, kan det hende at enheten
ikke blir gjenkjent eller ikke fungerer.
x Hvis TV-en ikke brukes i løpet av tiden som er angitt i Autobeskyttelsestid, vil skjermspareren kjøre.
x Hvis en USB-forlengelseskabel brukes, kan det hende at USB-enheten ikke gjenkjennes eller at filene på enheten
ikke blir lest.
x Hvis en USB-enhet som er koblet til TV-en, ikke gjenkjennes, listen over filer på enheten er ødelagt eller en fil på listen
ikke spilles, kobler du USB-enheten til PC-en, formaterer enheten og kontrollerer tilkoblingen.
x Hvis en fil som er slettet fra PC-en fremdeles finnes når Media Play kjøres, bruker du funksjonen “Tøm papirkurv” på
PC-en for å slette filen permanent.
Nyt bilder, musikk og/eller fi lmfi ler som er lagret på
en USB MSC-enhet (Mass Storage Class).
Enhetsnavn A Bytt enhet D Enhetsmodus EEnter R Tilbake
MediaPlay
USB-stasjon
TV-sidepanel
P
POWER
MEDIA.P
FAV.CH
P.MODE
DUAL
MTS
BN68-02588H-Nor.indb 22 2010-3-23 19:09:46Norsk 23
04 Avanserte funksjoner
Musikk
Spille musikk
1. Trykk på ◄ eller ► for å velge Musikk, og trykk deretter på
ENTERE-knappen i Media Play-menyen.
2. Trykk på ◄/►/▲/▼ for å velge ønsket Music fra fillisten.
3. Trykk på ENTERE-knappen.
– Under musikkavspilling kan du søke ved hjelp av knappene
◄ og ►.
✎Viser bare filer med filendelsen MP3. Andre filendelser vises ikke,
selv om de er lagret på samme USB-enhet.
✎Hvis lyden er merkelig når du spiller MP3-filer, justerer du Equalizer
i menyen Lyd. (En overmodulert MP3-fil kan føre til et lydproblem.)
Only you
Jason
1st Album
Pop
2010
4.2MB
3/15
Only you
Jason
Music 1
No Singer
Music 2
No Singer
Music 3
No Singer
Music 4
No Singer
Music 5
No Singer
01:10 / 04:02
Playlist
Enhetsnavn EPause LHopp TVerktøy R Tilbake
¦ Skjermvisning
Gå til filen du ønsket med opp / ned / venstre / høyre-knappene og trykk deretter på ENTERE-knappen. Filen spilles av.
✎Støtter Enhetsmodus og Innholdsmodus på Media Play-hjemmesiden.
Informasjon:
Du kan bestemme det valgte
filnavnet og antall filer og side.
Delen Sorteringsliste:
Viser sorteringsstandard.
✎ Sorteringsstandard er
forskjellig avhengig av
innholdet.
Driftsknapper
A Rød (Bytt enhet): Velger en tilkoblet enhet.
B Grønn (Foretrukket): Angir filpreferansen. (støttes ikke i Enkel visning)
C Gul (Velg): Velger flere filer fra fillisten. Valgte filer er merket med et symbol.
D Blå (Sortering): Velg sorteringslisten.
TVerktøy: Viser alternativmenyen.
Delen Filliste:
Du kan bekrefte filene og
gruppene som er sortert
etter hver kategori.
c
c
c
Music 01 2010
no singer other
Music 02 2010
no singer other
Music 03 2010
no singer other
Music 04 2010
no singer other
Music 05 2010
no singer other
Music 06 2010
no singer other
Music 07 2010
no singer other
Music 08 2010
no singer other
Music /Music 01.mp3 1/2
Enhetsnavn A Bytt enhet C Velg D Sorterer T Verktøy
BN68-02588H-Nor.indb 23 2010-3-23 19:09:4824 Norsk
Avanserte funksjoner
Bilder
Vise et bilde (eller en lysbildefremvisning)
1. Trykk på ◄ eller ► for å velge Bilder, og trykk deretter på
ENTERE-knappen i Media Play-menyen.
2. Trykk på ◄/►/▲/▼ for å velge ønsket bilde i fillisten.
3. Trykk på ENTERE-knappen.
– Mens en bildeliste vises trykker du på ENTERE-knappen på
fjernkontrollen for å starte lysbildefremvisning.
– Alle filer i fillistedelen vises i lysbildefremvisningen.
– Under lysbildefremvisningen vises alle filer i rekkefølge etter filen
som vises nå.
✎Musikkfiler kan spilles av automatisk under lysbildefremvisningen
hvis Bakgrunnsmusikk er angitt til På.
✎BGM-modus kan ikke endres før BGM er ferdig lastet.
Normal Image1024.jpg 1024x768 2010/2/1 3/15
Enhetsnavn EPause LForrige/Neste TVerktøy R Tilbake
¦ Spille flere filer
Spille valgte video- / musikk- / bildefiler
1. Trykk på den gule knappen i fillisten for å velge ønsket fil.
2. Gjenta trinnet over for å velge flere filer.
✎ MERK
x Merket (c) vises til venstre for de valgte filene.
x For å avbryte et valg trykker du på den gule knappen igjen.
x For å velge bort alle valgte filer trykker du på TOOLSknappen og velger Avmerk alle.
3. Trykk på TOOLS-knappen og velg Spill valgt innhold.
Spille video- / musikk- / bildefilgruppen
1. Mens en filliste vises, går du til en fil i den ønskede gruppen.
2. Trykk på TOOLS-knappen og velg Spill gruppe.
¦ Ekstra funksjon for mediespilling
Sortere fillisten
Trykk på den blå knappen i fillisten for å sortere filene.
Kategori Funksjoner Musikk Bilder
Enkel visning Viser hele mappen. Du kan vise bildet ved å velge mappen. ✓ ✓
Tittel Sorterer og viser filtittelen sortert etter symbol / nummer / alfabetet. ✓ ✓
Foretrukket
Sorterer og viser filen etter preferanse. Du kan endre filpreferansen i fillistedelen med den
grønne knappen.
✓ ✓
Siste dato Sorterer og viser filer etter siste dato. ✓
Tidligste dato Sorterer og viser filer etter tidligste dato. ✓
Artist Sorterer musikkfilen etter artist i alfabetisk rekkefølge. ✓
Album Sorterer musikkfilen etter album i alfabetisk rekkefølge. ✓
Sjang. Sorterer musikkfiler etter sjanger. ✓
Stemning Sorterer musikkfiler etter stemning. Du kan endre informasjon om musikkstemning. ✓
Månedlig Sorterer og viser bildefiler etter måned. ✓
Enhetsnavn A Bytt enhet C Velg D SortererT Verktøy
c
c
c
Music 01 2010
no singer other
Music 02 2010
no singer other
Music 03 2010
no singer other
Music 04 2010
no singer other
Music 05 2010
no singer other
Music 06 2010
no singer other
Music 07 2010
no singer other
Music 08 2010
no singer other
Music /Music 01.mp3 1/2
BN68-02588H-Nor.indb 24 2010-3-23 19:09:50Norsk 25
04 Avanserte funksjoner
musikk-/bildeavspilling
Alternativmeny Funksjoner Musikk Bilder
Gjenta modus Du kan spille filmfiler og musikkfiler gjentatte ganger. ✓
Bildeinnstilling Du kan justere bildeinnstillingen. (s. 14, 15, 16) ✓
Lydinnstilling Du kan justere lydinnstillingen. (s. 17, 18) ✓ ✓
Stopp bildefremvisning /
Start bildefremvisning
Du kan starte eller stoppe en lysbildefremvisning. ✓
Hastighet for
lysbildefremvisning
Du kan velge hastigheten på lysbildefremvisningen mens den vises. ✓
Bakgrunnsmusikk Du kan angi og velge bakgrunnsmusikk når du ser på en lysbildefremvisning. ✓
Zoom Du kan zoome inn på bilder i fullskjermmodus. ✓
Roter Du kan rotere bilder i fullskjermmodus. ✓
Informasjon Du kan se detaljert informasjon om filen som spilles av. ✓ ✓
Innst.
Bruke Oppsett-menyen
■ Informasjon: Velg når du vil vise informasjon om den tilkoblede enheten.
BN68-02588H-Nor.indb 25 2010-3-23 19:09:5026 Norsk
Annen informasjon
Tekst-TV-funksjon for analog kanal
Indekssiden i tekst-TV-tjenesten inneholder informasjon om bruk av tjenesten. For at tekst-TV-informasjon skal vises korrekt,
må mottaket av kanalen være stabilt. Ellers kan det være at informasjon mangler eller at enkelte sider ikke vises.
✎Du kan endre tekst-TV-side direkte ved å trykke på nummertastene på fjernkontrollen.
Tekst-tv-sidene er organisert i seks kategorier:
Del Innhold Del Innhold
A Valgt sidenummer. D Dato og klokkeslett.
B Sendestasjonsidentitet. E Tekst.
C
Gjeldende sidenummer eller
søkestatus.
F
Statusinformasjon. FASTEXTinformasjon.
MEDIA.P
A B C D
1
3
4
2
5
8
7
0
!
@
6
9
1 / (Tekst-TV på/blandet):
Aktiver tekst-TV-modus etter at
du har valgt kanalen som sender
tekst-TV-tjenesten. Trykk to ganger
for å overlappe tekst-TV-modus
med det vanlige TV-bildet.
2 8 (Lagre): Lagre tekst-TVsidene.
3 4 (størrelse): Vis bokstavene på
øvre halvdel av skjermen i dobbel
størrelse. Trykk en gang til for å
vise nedre halvdel av skjermen.
Trykk en gang til for å vise
skjermbildet normalt.
4 9 (hold): Hold visningen på en
bestemt side hvis den valgte siden
erstattes av fl ere etterfølgende
sider automatisk. Trykk igjen for å
gjenoppta
5 0(modus): Velg tekst-TVmodus (LISTE/FLOF).
Hvis du trykker på denne
knappen i LISTE-modus, endres
modusen til listelagringsmodus. I
listelagringsmodus kan du lagre
tekst-tv-siden med knappen
8(lagre).
6 1 (underside): Vis den
tilgjengelige undersiden.
2 (side opp): Vis neste tekstTV-side.
7
3 (side ned): Vis forrige tekstTV-side.
8
6 (indeks): Vis indekssiden
(innholdsfortegnelsen) når du
bruker tekst-TV.
9
5 (vis): Vis skjult tekst
(for eksempel svar på
spørrekonkurranser). Trykk en gang
til for å vise skjermbildet normalt.
0
7 (avbryt): Vis gjeldende
sending mens du søker etter en
side.
!
Fargeknapper (rød/grønn/gul/
blå): Hvis FASTEXT-systemet
brukes av kringkastingsselskapet,
er de forskjellige emnene på en
tekst-TV-side fargekodet og kan
velges ved å trykke på de fargede
tastene. Trykk på en av knappene
for å utføre funksjonen. Siden vises
med annen fargekodet informasjon
som kan velges på samme måte.
Hvis du vil vise forrige eller neste
side, trykker du på tasten med
tilsvarende farge.
@
BN68-02588H-Nor.indb 26 2010-3-23 19:09:51Norsk 27
05 Annen informasjon
¦ Montere veggfestesettet
Veggfesteelementer (selges separat) gjør at du kan montere TV-en på veggen.
Du finner detaljert informasjon om montering av veggfestet i monteringsanvisningen for festet. Kontakt en tekniker for å få hjelp
til montering av veggbraketten.
Samsung Electronics er ikke ansvarlig for skader som måtte oppstå på produktet, eller personskader, som følge av at du selv
installerer TV-en.
¦ Spesifikasjoner for veggfestesett (VESA)
✎Veggfestesett medfølger ikke, men selges separat.
Monter veggfestet på en solid vegg vinkelrett med gulvet. Ta kontakt med nærmeste forhandler hvis du skal montere festet i
andre byggmaterialer. Hvis den monteres på et tak eller en skjev vegg, kan den falle og føre til alvorlige personskader.
✎MERK
x Samsung Electronics er ikke ansvarlig for skader som måtte oppstå på produktet, eller personskader, som følge av at
du selv installerer TV-apparatet.
x Standard dimensjoner for veggfestesett vises i tabellen nedenfor.
x Ved innkjøp av veggfestesettet medfølger en detaljert monteringsanvisning og alle nødvendige deler.
x Unngå å bruke skruer som er lenger enn standardskruene. Dette kan føre til skade inne i TV-en.
x For veggfester som ikke samsvarer med VESA-standarden for skruespesifikasjoner, kan lengden på skruene variere
avhengig av spesifikasjonene.
x Ikke bruk skruer som ikke samsvarer med VESA-standarden for skruespesifikasjoner.
x Ikke fest skruene for stramt, da dette kan skade produktet eller føre til at det faller og skade personer. Samsung er
ikke ansvarlig for denne typen ulykker.
x Samsung er ikke ansvarlig for produktskader eller personskader som oppstår som en følge av bruk av et ikke-VESA-
eller ikkespesifisert-veggfeste eller at forbrukeren ikke følger instruksjonene for produktinstallasjon.
x Ikke overstig 15 grader helling når du monterer denne TV-en.
Produktfamilie tommer VESA-spes. (A * B) Standardskrue Mengde
LCD-TV
19~22
75 X 75
100 X 100 M4
4
23~29 200 X 100
30~40 200 X 200 M6
46~55 400 X 400
57~70 800 X 400 M8
80~ 1400 X 800
Ikke installer veggmonteringssettet mens TV-en din står på. Det kan føre til personskade på grunn av elektrisk
støt.
BN68-02588H-Nor.indb 27 2010-3-23 19:09:5228 Norsk
Annen informasjon
Antityverilås fra Kensington
Kensington-låsen er en innretning som brukes til å feste TV-en fysisk når
den er plassert på et offentlig sted. Utseende og låsemetode kan variere
fra illustrasjonen avhengig av produsent. Se i veiledningen som følger med
Kensington-låsen for riktig bruk.
✎Finn et “ ”-ikon på baksiden av TV-en.
Du finner et Kensington-spor ved siden av “ ”-ikonet.
1. Sett låseinnretningen i Kensington-sporet på LCD TV-en 1, og skru i
låseretningen 2.
2. Koble til Kensington-låsekabelen 3.
3. Fest Kensington-låsen til et skrivebord eller annen tung stasjonær gjenstand.
✎Låseinnretningen må kjøpes separat.
✎Plasseringen av Kensington-låsen kan variere, avhengig av modellen.
Feste TV-en til veggen
Forsiktig: Hvis du drar i, dytter på eller klatrer på TV-en, kan den falle. Pass særlig på at ikke barn henger over
eller destabiliserer TV-en. Dette kan gjøre at TV-en tipper over og fører til alvorlige skader eller død. Følg alle
sikkerhetsforanstaltninger i det medfølgende sikkerhetsarket. For ytterligere stabilitet installerer du antifallenheten
av sikkerhetsmessige årsaker, som følger:
¦ Slik hindrer du TV-en i å falle
✎Siden de nødvendige skruene, klemmene og strengen ikke
følger med, må du kjøpe disse i tillegg.
1. Sett skruene i klemmene og fest dem skikkelig til veggen.
Kontroller at skruene er festet skikkelig i veggen.
✎ Skruespesifikasjoner
x For a 23 ~ 29 tommers LCD-TV: M4
x For a 30 ~ 40 tommers LCD-TV : M6
2. Fjern skruene fra midten bak på TV-en, fest skruene i klemmene
og fest deretter skruene på TV-en igjen.
3. Sett sammen klemmene som er festet på TV-en og klemmene
som er festet i veggen, med en sterk streng og knyt deretter
strengen stramt.
✎Kontroller at alle tilkoblinger er skikkelig sikret. Kontroller
tilkoblinger periodevis for tegn på slitasje eller feil. Hvis du
er i tvil om sikkerheten til dine tilkoblinger, kontakter du en
profesjonell installatør.
✎Installer TV-en nær veggen slik at den ikke faller bakover.
✎Det er trygt å feste strengen slik at klemmene som er festet i veggen, er i lik høyde som eller lavere enn klemmene som
er festet på TV-en.
✎Fjern strengen før du flytter TV-en.
Vegg
1
2
3
BN68-02588H-Nor.indb 28 2010-3-23 19:09:54Norsk 29
05 Annen informasjon
Feilsøking
Bruk denne listen dersom du har spørsmål om TV-en. Hvis ingen av disse feilsøkingstipsene hjelper, går du til
“www.samsung.com,” og klikker deretter på Support (Kundesupport) eller kontakter callsenteret som er listet opp på baksiden
av denne veiledningen.
Problemer Løsninger og forklaringer
Bildekvalitet Begynn med å utføre en Bildetest for å kontrollere om TV-en viser testbildet på riktig måte.
(gå til MENU - Kundesupport - Egendiagnose - Bildetest) (s. 21)
Hvis testbildet vises korrekt, kan det dårlige bildet skyldes kilden eller signalet.
TV-bildet ser ikke like bra ut som i butikken. • Hvis du har en analog kabel/digitalboks, oppgraderer du til en digital digitalboks. Bruk HDMI- eller
Komponent-kabler til å levere HD-bildekvalitet (høydefinisjon).
• Kabel-/satellittabonnement: Prøv HD-stasjoner fra kanaloppsettet.
• Antennetilkobling: Prøv HD-stasjoner etter at du har kjørt autoprogram.
✎ Mange HD-kanaler er oppgradert fra SD-innhold (Standard Definition).
• Juster videooppløsningen for kabelboksen/digitalboksen til 1080i eller 720p.
• Kontroller at du ser på TV-en i den minste anbefalte avstanden basert på størrelsen og definisjonen
for signalet.
Forvrengt bilde: Feil med store blokker,
små blokker, prikker, synlige piksler
• Komprimering av videoinnhold kan forårsake bildeforvrengninger, spesielt på hurtig bildevisning, for
eksempel sport og actionfilmer.
• Lavt signalnivå eller dårlig kvalitet kan føre til bildeforvrenging. Dette problemet skyldes ikke TV-en.
Fargen er feil eller mangler. • Hvis du bruker en komponenttilkobling, må du kontrollere at komponentkablene er koblet til riktige
kontakter. Feil eller løse tilkoblinger kan føre til fargeproblemer eller en tom skjerm.
Det er dårlig farge eller lysstyrke. • Juster alternativene for Bilde i TV-menyen. (gå til modusen Bilde / Farge / Lysstyrke / Skarphet)
• Juster alternativet Energisparing i TV-menyen. (gå til MENU - Bilde - Økoløsning - Energisparing)
• Prøv å stille tilbake bildet for å vise standard bildeinnstillinger. (gå til MENU - Bilde - Tilbakestill bilde)
Det er en prikkete linje på kanten av
skjermen.
• Dersom bildestørrelsen er satt til Skjermtilpasning, kan du endre den til 16:9. (s. 16)
• Endre oppløsningen for kabel-/digitalboks.
Bildet er svart/hvitt. • Hvis du bruker en AV-komposittinngang, kobler du videokabelen (gul) til den grønne kontakten til
komponentinngang 1 på TV-en.
Når du endrer kanaler, fryser bildet eller blir
forvrengt eller forsinket.
• Hvis du er tilkoblet via en kabelboks, kan du prøve å tilbakestille den. Koble til strømledningen igjen og
vent til kabelboksen starter på nytt. Det kan ta opp til 20 minutter.
• Still kabelboksens utgangsoppløsning til 1080i eller 720p.
Lydkvalitet Først bør du utføre Lydtest for å kontrollere at TV-ens lyd fungerer korrekt.
(gå til MENU - Kundesupport - Egendiagnose - Lydtest) (s. 21)
Hvis lyden er OK, skyldes kanskje lydproblemet kilden eller signalet.
Det er ingen lyd eller lyden er for lav på
maksimalt volum.
• Kontroller volumet til den eksterne enheten som er koblet til TV-en.
Bildet er bra, men det er ingen lyd. • Still inn alternativet Velg høyttaler til TV-høyttaler i lydmenyen. (s. 18)
• Hvis du bruker en ekstern enhet, må du kontrollere at lydkablene er koblet til riktig
lydinngangskontakter på TV-en.
• Hvis du bruker en ekstern enhet, kontrollerer du enhetens lydutgangsalternativ (det kan f.eks. hende
at du må endre kabelboksens lydalternativ til HDMI når du har en HDMI koblet til TV-en).
• Hvis du bruker en DVI-til-HDMI-kabel, må du bruke en separat lydkabel.
• Hvis TV-en har en hodetelefonkontakt, må du kontrollere at ingenting er koblet til den.
Høyttalerne lager for mye støy. • Kontroller kabeltilkoblingene. Sørg for at det ikke er koblet til en videokabel i en lydinngang.
• For antenne- eller kabeltilkoblinger kontrollerer du signalstyrken. Et lavt signalnivå kan forårsake
lydforvrengninger.
BN68-02588H-Nor.indb 29 2010-3-23 19:09:5430 Norsk
Annen informasjon
Problemer Løsninger og forklaringer
Mangler bilde og video
TV-en slår seg ikke på. • Sørg for at strømkabelen er satt ordentlig inn i stikkontakten og TV-en.
• Sørg for at stikkontakten virker.
• Prøv å trykke på POWER-knappen på TV-en for å kontrollere at problemet ikke er fjernkontrollen. Hvis
TV-en slår seg på, ser du under "Fjernkontrollen fungerer ikke" nedenfor.
TV-en slår seg av automatisk. • Kontroller at Deaktiveringstimer er angitt til Av i menyen Oppsett. (s. 19)
• Hvis PC-en er tilkoblet TV-en, må du kontrollere PC-ens strøminnstillinger.
• Sørg for at strømkabelen er satt ordentlig inn i stikkontakten og TV-en.
• Når du ser på TV fra en antenne- eller kabeltilkobling, slår TV-en seg av etter 10 ~ 15 minutter hvis det
ikke er noe signal.
Det er ikke noe bilde/video. • Kontroller kabeltilkoblingene (ta alle kablene som er koblet til TV-en og eksterne enheter ut, og sett
dem inn igjen).
• Kontroller at videoutgangssignalet til de eksterne enhetene (kabel-/digitalboks, DVD, Blu-ray osv.),
samsvarer med tilkoblingene til TV-inngangen. Hvis for eksempel en ekstern enhets utgang er HDMI,
bør den kobles til en HDMI-inngang på TV-en.
• Sørg for at de tilkoblede enhetene er slått på.
• Sørg for å velge riktig TV-kilde ved å trykke på SOURCE-knappen på TV-ens fjernkontroll.
RF-tilkobling (kabel/antenne)
TV-en mottar ikke alle kanaler. • Kontroller at antennekabelen er riktig tilkoblet.
• Prøv Plug & Play (første oppsett) for å legge tilgjengelige kanaler til i listen. Gå til MENU - Oppsett -
Plug & Play (første oppsett) og vent på at alle tilgjengelige kanaler lagres.
• Kontroller at antennen er riktig posisjonert.
Forvrengt bilde: Feil med store blokker,
små blokker, prikker, synlige piksler
• Komprimering av videoinnhold kan forårsake bildeforvrengninger, spesielt på hurtig bildevisning, for
eksempel sport og actionfilmer.
• Et lavt signal kan føre til bildeforvrengning. Dette problemet skyldes ikke TV-en.
PC-tilkobling
Meldingen "Modus støttes ikke" vises. • Konfigurer oppløsningen og frekvensen til signalet fra PC-en slik at det samsvarer med oppløsningene
som støttes av TV-en. (s. 9)
“PC” vises alltid på kildelisten, selv om det
ikke er koblet til en PC.
• Dette er vanlig; “PC” vises alltid på kildelisten, uavhengig av om PC-en er tilkoblet.
Videoen er OK, men det er ingen lyd. • Hvis du bruker en HDMI-tilkobling, kontrollerer du lydutgangsinnstillingen på PC-en.
Annet
Bildet vises ikke i fullskjerm. • HD-kanaler har svarte linjer på begge sider av skjermen når oppskalert SD-innhold (4:3) vises.
• Det vises svarte felter øverst og nederst på filmer som er produsert i andre størrelsesforhold enn
TV-en.
• Juster alternativene for bildestørrelse på den eksterne enheten eller TV-en til fullskjerm.
Fjernkontrollen fungerer ikke. • Bytt ut fjernkontrollens batterier med riktig polaritet (+/–) i riktig retning.
• Rens sensorens overføringsvindu på fjernkontrollen.
• Stå 150–180 cm fra TV-en og rett fjernkontrollen direkte mot den.
Kabel-/digitalboksens fjernkontroll slår ikke
TV-en på eller av eller justerer volumet.
• Programmer kabel-/dialogboksens fjernkontroll slik at du kan betjene TV-en med den. Se kabel-/
digitalboksens brukerhåndbok for informasjon om SAMSUNG TV-kode.
Meldingen "Modus støttes ikke" vises. • Kontroller hvilken oppløsning som støttes for TV-en, og justerer oppløsningen til signalet fra den
eksterne enheten slik at det samsvarer. Se oppløsningsinnstillinger på side 9 i denne veiledningen.
Det kommer en plastikklukt fra TV-en. • Denne lukten er normal, og vil med tiden forsvinne.
TV-ens Signalinformasjon er ikke
tilgjengelig i menyen Selvdiagnosetest.
• Denne funksjonen er bare tilgjengelig med digitale kanaler fra en antennetilkobling (RF/Coax). (s. 21)
TV-en vipper mot en side. • Fjern stativsokkelen fra TV-en og sett den sammen igjen.
Det er problemer ved montering av
stativsokkelen.
• Sørg for at TV-en er plassert på en jevn overflate. Hvis du ikke kan fjerne skruene fra TV-en, bruker du
en magnetisert skrutrekker.
Kanalmenyen er grå (utilgjengelig). • Menyen Kanal er bare tilgjengelig hvis du har valgt en TV-kilde.
BN68-02588H-Nor.indb 30 2010-3-23 19:09:54Norsk 31
05 Annen informasjon
Problemer Løsninger og forklaringer
Innstillingene går tapt etter 30 minutter,
eller hver gang TV-en slås av.
• Hvis TV-en er i modusen Butikkdemo, stilles lyd- og bildeinnstillingene tilbake hvert 30. minutt.
Endre innstillingene fra modusen Butikkdemo til Hjemmebruk i prosedyren første oppsett. Trykk på
SOURCE-knappen for å velge TV-modus og gå til MENU → Oppsett → Plug & Play (første oppsett)
→ ENTERE.
Du har periodevis tap av lyd eller bilde. • Kontroller kabeltilkoblingene og koble dem til på nytt.
• Ta av lyd eller bilde kan forårsakes av bruk av for stive eller tykke kabler. Sørg for at kablene er
fleksible nok for bruk over lengre tid. Hvis du monterer TV-en på veggen, anbefaler vi at du bruker
kabler med 90-graders forbindere.
Du ser små partikler når du ser nøye på
kanten til TV-ens ramme.
• Dette er en del av produktets design og er ikke en feil.
PIP-menyen er ikke tilgjengelig. • PIP-funksjonen er bare tilgjengelig hvis kilden er HDMI, PC eller Komponent.
Meldingen "Kryptert signal" eller "Svakt
signal/Intet signal" vises.
• Hvis du bruker et CAM CARD (CI/CI+), kontrollerer du at det er installert i common interface-sporet.
• Hvis det fremdeles er et problem, drar du CAM CARD ut av TV-en og setter det inn i sporet igjen.
Du slo av TV-en for 45 minutter siden og
slo den på igjen.
• Dette er normalt. TV-en bruker selv OTA-funksjonen (Over The Aerial) for å oppgradere fastvare som
er lastet ned mens du ser på TV.
Det er gjentakende bilde-/lydproblemer. Kontroller og endre signal/kilde. •
Det kan oppstå en reaksjon mellom
gummiputene på stativsokkelen og
toppdekoren på noen møbler.
• For å hindre dette, bruker du filtputer på TV-ens overflater som kommer i direkte kontakt med møbler.
✎Dette TFT LCD-panelet bruker et panel som bestående av delpiksler som krever avansert teknologi for å produseres.
Det kan imidlertid være noen lyse eller mørke piksler på skjermen. Disse pikslene har ingen innvirkning på produktets
ytelse.
¦ Lisens
Manufactured under license from Dolby Laboratories.
Dolby and the double-D symbol are trademarks of Dolby Laboratories.
BN68-02588H-Nor(26-).indd 31 2010-3-25 11:25:4632 Norsk
Annen informasjon
Spesifikasjoner
Panel naturlig 1360 x 768 @ 60 Hz
Miljøhensyn
Driftstemperatur
Luftfuktighet ved drift
Lagringstemperatur
Luftfuktighet ved lagring
10 °C til 40 °C (50 °F til 104 °F)
10 % til 80 %, ikke-kondenserende
-20 °C til 45 °C (-4 °F til 113 °F)
5 % til 95 %, ikke-kondenserende
TV-system Analog: Avhengig av ditt valg av land
Digital: DVB-T/DVB-C
Farge-/videosystem Analog: PAL, SECAM, NTSC-4.43, NTSC-3.58, PAL60
Digital: MPEG-2 MP@ML, MPEG-4, H.264/AVC MP@L3, MP@L4.0, HP@L4.0
Lydsystem BG. OK NICAM. MPEGl
HDMI IN Video: 1080/24p, 1080p, 1080i, 720p, 576p, 576i, 480p, 480i
Lyd: Tokanals lineær PCM 32/44.1/48 kHz, 16/20/24bits
Analog lydinngang (bare HDMI IN)
PC-inngang
Dreibar sokkel
(Venstre/Høyre) 0˚
Modellnavn LE19C355 LE22C355
Skjermstørrelse
(Diagonal) 19 tommer 22 tommer
Lyd
Utsignal 3W X 2 3W X 2
Dimensjoner (BxDxH)
Hoveddel
Med stativ
461.2 x 59.5 x 322.2 mm
461.2 x 161 x 364 mm
535.3 x 82.2 x 365.8 mm
535.5 x 171.8 x 420.9 mm
Vekt
Hoveddel
Med stativ
3.9 kg
4.2 kg
3.9 kg
4.1 kg
✎Design og spesifikasjoner kan endres uten forvarsel.
✎Strømforsyningen og strømforbruket står oppgitt på etiketten som er festet på produktet.
BN68-02588H-Nor.indb 32 2010-3-23 19:09:55Norsk 33
05 Annen informasjon
Indeks
A
Antenne 12
Autojustering 17
Auto-volum 18
B
Bakgrunnsmusikk 25
Balanse 17
Batterier 5
Bilder 24
Bildestørrelse 16
Bruke Favorittkanaler 12
Bruke Kanalvisning 11
D
Deaktiveringstimer 19
Digital lydutgang 8
D-sub 8
Dynamisk 14
Dynamisk kontrast 15
E
Ekstern høyttaler 18
Endre PIN-kode 20
Energisparing 15
Enkel visning 25
EPG 11
Equalizer 17
F
Favorittkanal 12
Feilsøking 29
Filmmodus 15
Finjuster 14
Forsterk 17
Frekvens 12
G
Gj.siktig meny 20
Gjenta modus 25
H
HDMI 7
Hjemmebakgrunn 25
Hudfarge 15
Hvitbalanse 15
I
Installasjonsområdet 2
K
Kanalstyring 12
Kildeliste 10
Klokke 19
Koble til en lydenhet 8
Koble til en PC 8
Komponent 7
L
Lisens 31
Lysbildefremvisning 24
Lysstyrke 14
Lås 14
M
Media Play 22
Melodi 20
Mottaker 5
Musikk 23
N
Navigerer 10
Nå og neste-oversikt 11
O
Optimal oppløsning 9
P
Plug & Play 6
Programvareoppgradering 21
PÅ/AV-knapp 5
R
Rediger navn 10
Redigere kanaler 13
RGB 15
S
Selvdiagnose 21
Signalinformasjon 21
Skarphet 14
Spesifikasjoner 32
Språk 20
Standbymodus 4
Strømindikator 4
Svarttone 15
T
Timer 19
Tittel 25
TV-høyttaler 18
U
Undertekst 20
USB 21, 22
V
Veggfeste 27
Velg alle 14
Velg høyttaler 18
Verktøy 3
Videospiller 10
Volum 4, 5
BN68-02588H-Nor.indb 33 2010-3-23 19:09:55Denne siden er tom
med hensikt.
BN68-02588H-Nor.indb 34 2010-3-23 19:09:552 Suomi
Tämän käyttöohjeen kuvat ja piirrokset ovat vain viitteellisiä ja ne saattavat olla erilaisia kuin varsinainen tuote. Tuotteen
ulkoasu ja tekniset ominaisuudet saattavat muuttua ilman erillistä ilmoitusta.
Huomautus digitaalisesta televisiosta
1. Digitaaliseen televisioon (DVB) liittyvät toiminnot ovat käytettävissä vain niissä maissa tai niillä alueilla, joilla lähetetään maanpäällistä digitaalista DVBT-signaalia (MPEG2 ja MPEG4 AVC) tai joissa voit käyttää yhteensopivaa DVB-C-kaapelitelevisiopalvelua (MPEG2 ja MPEG4 AAC). Tarkista DVB-T- ja
DVB-C-signaalien saatavuus lähimmältä jälleenmyyjältä.
2. DVB-T on eurooppalainen digitaalisen maanpäällisen televisiolähetysjärjestelmän standardi ja DVB-C taas digitaalisen kaapelitelevision vastaava
standardi. Jotkin erityispalvelut, esim. EPG (elektroninen ohjelmaopas), VOD (tilausvideo) jne. eivät kuitenkaan sisälly tähän standardiin. Tästä syystä
niitä ei voi toistaiseksi käyttää.
3. Vaikka tämä televisiovastaanotin täyttää tämänhetkiset DVB-T- ja DVB-C-standardit [elokuu 2008], yhteensopivuutta tulevaisuuden digitaalisten
maanpäällisten DVB-T-lähetysten tai DVB-C-kaapelilähetysten kanssa ei voida taata.
4. Joissakin maissa ja alueilla kaapelitelevisiopalveluiden tarjoajat saattavat veloittaa lisämaksun tällaisista palveluista ja sinua saatetaan myös pyytää
hyväksymään heidän määrittelemänsä palveluehdot.
5. Jotkut digitaalitelevision toiminnot eivät ole käytettävissä joissakin maissa ja DVB-C ei saata toimia oikein joidenkin kaapeliyhtiöiden järjestelmissä.
6. Jos sinulla on jotakin kysyttävää, ota yhteyttä lähimpään Samsungin asiakaspalveluun.
✎ Eri maissa käytettävien lähetysjärjestelmien erot saattavat vaikuttaa televisiolähetysten vastaanoton laatuun. Tarkista lähimmältä SAMSUNGin
valtuuttamalta jälleenmyyjältä tai Samsungin teknisestä tuesta, voiko television suorituskykyä parantaa jollakin tavoin muuttamalla sen asetuksia.
Pysäytettyjä kuvia koskeva varoitus
Vältä pysäytettyjen kuvien (esim. jpeg-kuvatiedostojen) tai niiden osien (esim. televisio-ohjelman logo, panoraamakuva tai 4:3-kuvamuoto, näytön
alalaidassa näkyvä uutis- tai osakekurssipalkki jne.) näyttämistä kuvaruudulla. Pysäytettyjen kuvien jatkuva näyttäminen saattaa kuluttaa kuvaruudun
fosforia epätasaisesti, mikä taas vaikuttaa kuvanlaatuun. Jotta voisit välttyä tältä ilmiöltä, noudata alla olevia suosituksia:
• Vältä saman televisiokanavan näyttämistä pitkän aikaa.
• Yritä aina näyttää kaikki kuvat koko näytön alueella. Etsi sopiva koko television kuvakokovalikon avulla.
• Aseta kuvaruudun kirkkaus ja kontrasti pienimpiin mahdollisiin arvoihin, joilla saat haluamasi kuvanlaadun. Liian korkeat arvot saattavat nopeuttaa
näytön palamisprosessia.
• Käytä säännöllisesti kaikkia niitä television ominaisuuksia, jotka on tarkoitettu jäännöskuvien ja näytön palamisen vähentämiseen. Katso lisätietoja
käyttöoppaan vastaavasta kohdasta.
Asennusalueen turvaaminen
Pidä laitteen ja muiden kohteiden (esim. seinien) väli riittävänä, jotta ilma pääsee kiertämään.
Jos et toimi näin, laitteen sisäinen lämpötila voi nousta liian suureksi ja seurauksena saattaa olla tulipalo tai laitevaurio.
✎ Jos käytät jalustaa tai seinätelinettä, käytä vain Samsung Electronicsin toimittamia osia.
x Jos käytät jonkin muun valmistajan toimittamia osia, laitteen kanssa voi esiintyä ongelmia tai se saattaa pudota ja aiheuttaa vammoja.
✎ Laitteen ulkonäkö voi vaihdella.
Asennus jalustan kanssa. Asennus seinätelineen kanssa.
10 cm
10 cm 10 cm
10 cm
10 cm
10 cm
10 cm
Laitteen oikea hävittämistapa (sähkö- ja elektroniikkalaiteromu)
(Voimassa Euroopan unionissa ja muissa Euroopan maissa, joissa jätteitä lajitellaan.)
Jos laitteessa, sen lisätarvikkeissa tai sen mukana tulevissa asiakirjoissa on tämä merkki, se tarkoittaa, että laitetta ja sen
elektronisia lisätarvikkeita (esim. laturia, kuulokkeita tai USB-kaapelia) ei saa hävittää kotitalousjätteen mukana, kun laitteet
tulevat elinkaarensa päähän. Älä hävitä näit osia muiden jätteiden mukana, sillä tämä voi saastuttaa luontoa ja aiheuttaa
terveysriskejä. Kierrätä nämä osat vastuullisesti edistääksesi materiaalien uusiokäyttöä. Kotitalouskäyttäjien tulisi ottaa yhteyttä
joko tuotteen myyneeseen jälleenmyyjään tai paikalliseen ympäristöviranomaiseen, jotka antavat lisätietoja osien turvallisista
kierrätysmahdollisuuksista. Yritysasiakkaiden tulisi ottaa yhteyttä jälleenmyyjään ja tarkistaa ostosopimuksen ehdot. Tätä laitetta ja
sen elektronisia lisätarvikkeita ei tule hävittää muun yritysjätteen seassa.
Laitteen akkujen ja paristojen oikea hävittämistapa
(Voimassa Euroopan unionissa ja muissa Euroopan maissa, joissa paristoja kierrätetään.)
Jos akussa tai paristossa, käyttöoppaassa tai pakkauksessa on tämä merkki, se tarkoittaa, että akkuja ja paristoja ei saa hävittää
kotitalousjätteen mukana, kun ne tulevat elinkaarensa päähän. Kemialliset merkinnät Hg, Cd tai Pb ilmaisevat, että akku tai
paristo sisältää elohopeaa, kadmiumia tai lyijyä yli Euroopan yhteisön direktiivin 2006/66 vertailutasojen. Jos akkuja tai paristoja
ei hävitetä asianmukaisesti, nämä ainesosat saattavat vahingoittaa ihmisten terveyttä tai luontoa. Luonnonvarojen suojelemiseksi
ja materiaalien uudelleenkäytön edistämiseksi erottele akut tai paristot muusta jätteestä ja toimita ne maksuttomaan paikalliseen
keräyspisteeseen.
BN68-02588H-Fin.indb 2 2010-3-23 19:29:17Suomi 3
Sisältö
Alkutoimenpiteet
4
4 Lisätarvikkeet
4 Ohjauspaneeli
5 Kaukosäädin
6 Kytkeminen antenniin
6 Plug & Play (alkuasetukset)
Liitännät
7
7 Kytkeminen AV-laitteeseen
8 Kytkeminen äänilaitteeseen
8 Kytkeminen tietokoneeseen
10 Tulolähteen muuttaminen
Perusominaisuudet
10
10 Valikoissa liikkuminen
11 INFO-painikkeen käyttäminen (Nykyinen ja seuraava
-opas)
11 Katselun suunnittelu
12 Kanavavalikko
14 Kuvavalikko
17 Äänivalikko
19 Asetusvalikko
21 Tukivalikko
Lisäominaisuudet
22
22 Media Play
Muut tiedot
26
26 Analogisten kanavien tekstitelevisio-ominaisuus
27 Seinätelineen asentaminen
28 Kensington-varkaudenestolukko
28 Television kiinnittäminen seinään
29 Vianetsintä
32 Tekniset tiedot
33 Hakemisto
Tarkista merkit!
t O
Tätä toimintoa voi käyttää painamalla
kaukosäätimen TOOLS-painiketta.
Huomautus Vaiheittainen opas
P
POWER
BN68-02588H-Fin.indb 3 2010-3-23 19:29:184 Suomi
Alkutoimenpiteet
Lisätarvikkeet
✎Varmista, että nestekidetelevision mukana toimitetaan seuraavat osat. Jos osia puuttuu, ota yhteyttä jälleenmyyjään.
✎Osien väri ja muoto voivat vaihdella mallista riippuen.
y Kaukosäädin ja paristot (AAA, 2 kpl)
y Omistajan ohjeet
y Takuukortti ja turvallisuusopas
(ei saatavissa kaikkialla)
y Puhdistusliina
y Virtajohto
✎Katso erillisestä oppaasta, kuinka jalusta asennetaan.
1 EA
(M4 X L16)
y Jalusta (1EA) y Ruuvit (2EA)
Ohjauspaneeli
✎Tuotteen väri ja muoto voivat vaihdella mallista riippuen.
P (virtapainike) Kytkee television päälle ja pois päältä.
Virtavalo Vilkkuu ja sammuu, kun virta on päällä ja syttyy valmiustilassa.
SOURCEE Aktivoi vuorotellen kaikki valittavissa olevat kuvalähteet. Käytä tätä painiketta
kuvaruutuvalikossa samalla tavoin kuin kaukosäätimen ENTERE -painiketta.
MENU Näyttää kuvaruudulla television toimintojen valikon eli kuvaruutuvalikon.
Y Säätää äänenvoimakkuutta. KäytäYpainikkeita kuvaruutuvalikossa samalla
z tavoin kuin kaukosäätimen ◄ ja ►-painikkeita.
Vaihtaa kanavaa. Käytäzpainikkeita kuvaruutuvalikossa samalla tavoin
kuin kaukosäätimen ▼ ja ▲-painikkeita.
Kaukosäätimenvastaanottosensori Suuntaa kaukosäädin tähän kohtaan televisiossa.
Valmiustila
Älä jätä televisiota valmiustilaan pitkäksi ajaksi (esimerkiksi loman ajaksi). Laite kuluttaa pienen määrän sähkövirtaa myös silloin,
kun se on sammutettu virtapainikkeesta. On parempi irrottaa virtajohto pistorasiasta.
Kaiuttimet
Virtavalo
Kaukosäätimen
vastaanottosensori
Näytä päävalikko näkyviin. (s. 10)
BN68-02588H-Fin.indb 4 2010-3-23 19:29:195
01 Alkutoimenpiteet
Suomi
Kaukosäädin
Paristojen asentaminen (paristokoko: AAA)
✎HUOMAUTUS
x Käytä kaukosäädintä noin 7 metrin päässä televisiosta.
x Kirkas valo saattaa haitata kaukosäätimen toimintaa.
Vältä erikoisloistevalaisinten tai neonvalojen käyttöä
kaukosäätimen lähellä.
x Väri ja muoto voivat vaihdella mallista riippuen.
MEDIA.P
A B C D
Näytä ja valitse käytettävissä olevat kuvalähteet.
(s. 10)
Kytke televisio päälle ja pois päältä. (s. 6)
Vaihda kanavaa.
Näytä elektroninen ohjelmaopas (EPG). (s. 11)
Display Channel Lists on the
screen. (P. 14)
Vaihda kanavaa.
Valitse nopeasti usein käyttämiäsi toimintoja.
Näytä tietoja kuvaruudulla.
Näytä päävalikko näkyviin. (s. 10)
Säädä äänenvoimakkuutta.
Palaa edelliselle kanavalle.
Näitä painikkeita käytetään Kanavaluettelo-,
Media Play -valikoissa..
AD: Kuvailutulkkauksen valinta.
(Ei saatavissa kaikkialla.) (s. 18)
P.SIZE: Valitse kuvakoko. (s. 16)
SUBT.: Digitaalisen tekstityksen näyttö (s. 20)
Mykistä ääni tilapäisesti.
Palaa edelliseen valikkoon. (s. 10)
Valitse kuvaruutuvalikon kohteita ja muuta
valikkojen arvoja.
Poistu valikosta. (s. 10)
Valitse vuorotellen teksti-tv,
kaksoiskuva tai samanaikainen katselu.
Käytä Media Play -toimintoa.
BN68-02588H-Fin.indb 5 2010-3-23 19:29:206
Alkutoimenpiteet
Suomi
Kytkeminen antenniin
Kun televisio kytketään päälle ensimmäistä kertaa, se opastaa sinua tekemään perusasetukset automaattisesti.
✎Esiasetus: Virtajohdon ja antennin kytkeminen.
Plug & Play (alkuasetukset)
Kun televisio kytketään päälle ensimmäistä kertaa, näytöllä näkyvät toimintaohjeet auttavat sinua perusasetusten tekemisessä.
Paina POWERP -painiketta. Plug & Play on käytettävissä vain, kun kohdan Tulo tulolähteeksi on asetettu televisio.
1
Kielen valitseminen Paina ensin ▲ tai ▼ painiketta ja sen jälkeen ENTERE -painiketta.
Valitse haluamasi kieli kuvaruutuvalikolle (OSD).
P
POWER
MEDIA.P
FAV.CH
P.MODE
DUAL
MTS
2 Myymälädemon
tai Kotikäytön
valitseminen
Paina ensin ◄ tai ► painiketta ja sen jälkeen ENTERE -painiketta.
y Valitse tilaksi Kotikäyttö. Myymälädemo-tila on tarkoitettu
käytettäväksi vain myymälöissä.
y Palauta laitteen asetukset Myymälädemo-tilasta Kotikäyttö-
tilaan (vakio): Paina television äänenvoimakkuuspainiketta. Kun
äänenvoimakkuuden kuvaruutuvalikko ilmestyy näytölle, pidä
MENU-painiketta painettuna 5 sekuntia.
3
Maan valitseminen Paina ensin ▲ tai ▼ painiketta ja sen jälkeen ENTERE -painiketta.
Valitse haluamasi maa. Jos valikossa ei näy haluamaasi maata, valitse Muu.
✎Kun maavalikosta on valittu haluttu maa, jotkin mallit saattavat siirtyä lisäasetukseen,
jossa asetetaan PIN-koodi.
✎Kun kirjoitat PIN-koodia, 0-0-0-0 ei ole käytettävissä.
4
Antennin valitseminen Paina ensin ▲ tai ▼ painiketta ja sen jälkeen ENTERE -painiketta.
Valitse Antenni tai Kaapeli.
5
Kanavan valitseminen Paina ensin ▲ tai ▼ painiketta ja sen jälkeen ENTERE -painiketta.
Valitse tallennettava kanavalähde. Jos valitset antennilähteeksi asetuksen Kaapeli, voit
seuraavassa vaiheessa asettaa kanavien arvot (kanavataajuudet) numeroina.
Saat lisätietoja kohdasta Kanava → Autom. tallennus. (s. 12)
✎Voit keskeyttää tallennuksen milloin tahansa painamalla ENTERE -painiketta.
6
Kellon tilan
asettaminen
Aseta CKellon tila automaattisesti tai manuaalisesti.
Valitse ▲ tai ▼ painikkeella Automaattinen ja paina sen jälkeen ENTERE -painiketta.
7
HD-liitäntäoppaan
tarkastelu
Kuvaruudulla näkyy parhaan mahdollisen HD-kuvan tuottava kytkentätapa.
8
Nauti televisiostasi. Paina ENTERE -painiketta.
Jos haluat asettaa tämän toiminnon uudelleen...
Valitse Asetukset - Plug & Play (alkuasetukset). Syötä nelinumeroinen PIN-koodi. Oletus-PIN-koodi on ”0-0-0-0”. Jos haluat
muuttaa PIN-koodia, käytä Vaihda PIN -toimintoa.
Virtaliitin
VHF/UHF-antenni
tai
Kaapeli
R-AUDIO-L PR PB Y
ANT OUT
BN68-02588H-Fin.indb 6 2010-3-23 19:29:21Suomi 7
02 Liitännät
Liitännät
Kytkeminen AV-laitteeseen
HDMI/DVI-kaapelin käyttäminen: HD-liitäntä (enintään 1080p)
Käytettävissä olevat laitteet: DVD, Blu-ray-soitin, HD-kaapelisovitin, HD-satelliittivastaanotin (STB), kaapelisovitin,
satelliittivastaanotin (STB)
✎HDMI (DVI) IN / PC / DVI AUDIO IN
x Jos käytät HDMI/DVI-kaapeliliitäntää, sinun täytyy käyttää HDMI (DVI) IN -liitintä. Jos käytät DVIkaapeliliitäntää, käytä DVI–HDMI-kaapelia tai DVI–HDMI-sovitinta (DVI: Stä HDMI: Hin) kuvaliitännälle ja
PC/DVI AUDIO IN -liittimiä äänelle.
x Jos televisioon on kytketty jokin ulkoinen laite, esimerkiksi DVD- tai Blu-ray-soitin tai kaapelisovitin tai
satelliittivastaanotin (STB), joka tukee HDMI: N versiota 1.3 vanhempaa liitäntää, televisio saattaa toimia väärin
(esim. kuvaa ei näy, ääntä ei kuulu, kuva välkkyy tai sen värit ovat omituiset).
x Jos televisiosta ei HDMI-kaapelin kytkemisen jälkeen kuulu ääntä, tarkista ulkoisen laitteen HDMI-versio. Jos
epäilet, että versio on vanhempi kuin 1.3, ota yhteyttä laitteen toimittaneeseen yritykseen, varmista heiltä
laitteen tukema HDMI-versio ja pyydä päivitystä.
x Suosittelemme hankkimaan sertifi oidun HDMI-kaapelin. Muutoin kuvaruutu saattaa näkyä tyhjänä tai yhteydessä
saattaa esiintyä virheitä.
Komponentti- (1080p asti) tai ääni-/kuvakaapelin (vain 480i) ja Scart-kaapelin käyttäminen
Käytettävissä olevat laitteet: Videonauhuri, DVD- tai Blu-Ray-soitin, kaapelisovitin, satelliittivastaanotin (STB)
✎Ulk.-tilassa DTV-lähtö tukee ainoastaan MPEG SD -kuvaa ja -ääntä.
✎Jotta kuvanlaatu olisi paras mahdollinen, suosittelemme komponenttiliitäntää A/V-liitännän sijaan.
R-AUDIO-L PR PB Y
AUDIO OUT
R-AUDIO-L PR PB Y
DVI OUT
R-AUDIO-L PR PB Y
HDMI OUT
Y
W R
WY WR W R B G
Punainen Valkoinen
DVD
R W R G B
R W R G
R W Y
R W Y B
R-AUDIO-L PR PB Y
COMPONENT OUT
R-AUDIO-L PR PB Y
AUDIO OUT
R-AUDIO-L PR PB Y
EXT
R-AUDIO-L PR PB Y
AUDIO OUT
R-AUDIO-L PR PB Y
VIDEO OUT
WY WR W R B G
KeltainenPunainen Valkoinen
WY WR W R B G
Punainen Sininen Vihreä
VCR Blu-Ray-soitin DVD
BN68-02588H-Fin.indb 7 2010-3-23 19:29:268 Suomi
Liitännät
Kytkeminen äänilaitteeseen
Optisen tai äänikaapeliliitännän käyttäminen
Käytettävissä olevat laitteet: Digitaalinen äänentoistolaitteisto, vahvistin, DVD-kotiteatteri
✎DIGITAL AUDIO OUT (OPTICAL)
x Kun digitaalinen äänentoistolaitteisto on kytketty DIGITAL AUDIO OUT (OPTICAL) -liittimeen, pienennä
sekä television että laitteiston äänenvoimakkuutta.
x 5.1-kanavainen ääni on käytettävissä, jos televisio on kytketty ulkoiseen 5.1-kanavaista ääntä tukevaan
laitteeseen.
x Kun vastaanotin (kotiteatteri) on päällä, ääni kuuluu television optisen liitännän kautta. Kun televisio
vastaanottaa DTV-signaalia, se lähettää kotiteatterivastaanottimeen 5.1-kanavaista ääntä. Kun lähteenä on
digitaalinen komponentti, kuten DVD- tai Blu-ray-soitin tai kaapelisovitin tai satelliittivastaanotin (STB), joka
on kytketty televisioon HDMI-liitännällä, kotiteatterivastaanottimesta kuuluu vain kaksikanavaista ääntä.
Jos haluat kuunnella ääntä 5.1-kanavaisena, kytke DVD-soittimen, Blu-ray-soittimen, kaapelisovittimen
tai satelliittivastaanottimen digitaalisen äänen lähtöliitin television sijasta suoraan vahvistimeen tai
kotiteatterijärjestelmään.
Kytkeminen tietokoneeseen
HDMI/DVI-kaapelin tai D-liitinkaapelin käyttäminen
R-AUDIO-L PR PB Y
OPTICAL
Digitaalinen
äänentoistolaitteisto
R-AUDIO-L PR PB Y
AUDIO OUT
R-AUDIO-L PR PB Y
AUDIO OUT
R-AUDIO-L PR PB Y
DVI OUT
R-AUDIO-L PR PB Y
PC OUT
BN68-02588H-Fin.indb 8 2010-3-23 19:29:29Suomi 9
02 Liitännät
LIITÄNNÄT: COMMON INTERFACE -korttipaikka
os haluat katsella maksullisia kanavia, sinun täytyy asettaa CI- tai
CI+-kortti sille varattuun paikkaan.
y Jos et aseta CI- tai CI+-korttia korttipaikkaan, joillakin kanavilla
näkyy viesti: ”Salattu signaali”.
y Yhdistämistiedot eli puhelinnumero, CI- tai CI+-kortin tunnus,
isäntälaitteen tunnus ja muita tietoja tulee näkyviin noin 2–3
minuutin kuluessa. Jos ruudulle tulee virheilmoitus, ota yhteyttä
palveluntarjoajaan.
y Kun kanavatietojen määritys on valmis, ruudulle ilmestyy viesti:
”Päivitys suoritettu”. Tämä tarkoittaa, että kanavaluettelo on
päivitetty.
✎HUOMAUTUS
x Sinun täytyy hankkia CI- tai CI+-kortti paikalliselta kaapeliyhtiöltä.
x Kun poistat CI- tai CI+-korttia, vedä se käsin varovasti ulos. CI- tai CI+-kortti voi vahingoittua, jos se putoaa.
x Aseta CI- tai CI+-kortti paikoilleen siihen merkityssä suunnassa.
x COMMON INTERFACE -korttipaikan sijainti voi vaihdella eri malleissa.
x CI- tai CI+-kortteja ei tueta joissakin maissa ja alueilla. Tarkista tiedot valtuutetulta jälleenmyyjältä.
x Jos ongelmia esiintyy, ota yhteyttä palveluntarjoajaan.
Näyttötilat (D-liitin- ja HDMI/DVI-tulo)
Optimaalinen tarkkuus on 1360 x 768 @ 60 Hz.
Tila Tarkkuus Vaakataajuus (kHz) Pystytaajuus (Hz) Pikselikellotaajuus (MHz)
Tahdistuksen
polaarisuus (H/V)
IBM
640 x 350 31.469 70.086 25.175 + / -
720 x 400 31.469 70.087 28.322 - / +
MAC
640 x 480 35.000 66.667 30.240 - / -
832 x 624 49.726 74.551 57.284 - / -
VESA DMT
640 x 480
31.469 59.940 25.175 - / -
37.861 72.809 31.500 - / -
37.500 75.000 31.500 - / -
800 x 600
37.879 60.317 40.000 + / +
48.077 72.188 50.000 + / +
46.875 75.000 49.500 + / +
1024 x 768
48.363 60.004 65.000 - / -
56.476 70.069 75.000 - / -
60.023 75.029 78.750 + / +
1280 x 720 45.000 60.000 74.250 + / +
1360 x 768 47.712 60.015 85.500 + / +
VESA CVT
720 x 576 35.910 59.950 32.750 - / +
1280 x 720 56.456 74.777 95.750 - / +
VESA GTF 1280 x 720 52.500 70.000 89.040 - / +
✎HUOMAUTUS
x Sinun täytyy käyttää HDMI (DVI) IN -liitintä HDMI / DVI-kaapeliliitännälle.
x Lomitustila ei ole käytössä.
x Televisio ei välttämättä toimi oikein, jos kuvamuodoksi valitaan jokin tavallisesta poikkeava muoto.
x Televisio tukee erillis- ja komposiittitiloja. SOGia (Sync On Green) ei tueta.
BN68-02588H-Fin.indb 9 2010-3-23 19:29:3110 Suomi
Liitännät
Tulolähteen muuttaminen
Lähdeluettelo
Valitse televisio tai jokin televisioon
kytkettävä ulkoinen kuvalähde, esim.
DVD- tai Blu-ray-soitin tai kaapelisovitin tai
satelliittivastaanotin (STB).
■ TV / Ulk. / AV / Komponentti / PC /
HDMI/DVI / USB
✎ Kytketyt laitteet näytetään
kohdassa ”Lähdeluettelo”
korostettuina.
✎ Ext. ovat aina aktiivisia.
Nimen muokkaus.
■ VCR / DVD / Cable STB / Satellite STB / PVR STB
/ AV Receiver / Game / Camcorder / PC / DVI PC /
DVI laitteet / TV / IPTV / Blu-ray / HD DVD / DMA:
Nimeä tuloliittimiin kytketyt laitteet, jotta kuvalähteen
valitseminen olisi helpompaa.
✎ When connecting an HDMI/DVI cable to the
HDMI (DVI) IN port, sinun täytyy ottaa käyttöön
joko DVI PC- tai DVI-laitteet-tila kohdassa Nimen
muokkaus.
Perusominaisuudet
3
MEDIA.P
A B C D
Valikoissa liikkuminen
Ennen kuin käytät televisiota, harjoittele valikon käyttöä sekä
toimintojen valitsemista ja säätämistä oheisten ohjeiden
mukaisesti.
1 MENU-painike: Näyttää päävalikon.
2 ENTERE / suuntapainike: Siirrä osoitinta ja valitse
valikoiden kohtia. Vahvista asetus.
3 RETURN-painike: Palaa edelliseen valikkoon.
4 EXIT-painike: Poistuu kuvaruutuvalikosta.
Kuvaruutuvalikon käyttäminen
Käytön vaiheet riippuvat valitusta valikosta.
1 MENU m
Päävalikon vaihtoehdot ilmestyvät
kuvaruudulle:
Kuva, Ääni, Kanava, Asetukset,
Tulo, Sovellus, Tuki.
2 ▲ / ▼
Valitse kuvake painamalla
▲- tai ▼-painiketta.
3 ENTERE Siirry alivalikkoon painamalla
ENTERE -painiketta.
4 ▲ / ▼
Valitse haluamasi alivalikko
painamalla ▲- tai ▼-painiketta.
5 ◄ / ►
Valitse kohdan asetus painamalla
◄- tai ►-painiketta. Valikon
asetukset riippuvat valitusta
valikosta.
6 ENTERE Viimeistele asetukset painamalla
ENTERE -painiketta.
7 EXIT e Paina EXIT.
4
1
2
P
POWER
MEDIA.P
FAV.CH
P.MODE
DUAL
MTS
BN68-02588H-Fin.indb 10 2010-3-23 19:29:32Suomi 11
03 Perusominaisuudet
INFO-painikkeen käyttäminen (Nykyinen ja seuraava -opas)
Näytöllä näkyy käytössä oleva kanava ja
joidenkin ääni- ja kuva-asetusten tila.
Nykyinen ja seuraava -oppaassa näkyvät
kaikkien kanavien päivittäiset televisioohjelmatiedot lähetysajan mukaisesti
järjestettynä.
y Tarkista kanavan katselun aikana
haluamasi ohjelman tiedot selaamalla
näyttöä ◄ ja ► -painikkeilla.
y Tarkastele jonkin toisen kanavan tietoja selaamalla
näyttöä ▲ ja▼ -painikkeilla. Jos haluat siirtyä parhaillaan
valittuna olevalle kanavalle, paina ENTERE -painiketta.
Katselun suunnittelu
Opas
Elektronisen ohjelmaoppaan (EPG:n)
tiedot saadaan TV-yhtiöiltä. TV-yhtiöiden
toimittamia ohjelmatietoja hyödyntämällä
voit etukäteen päättää, mitä ohjelmia
haluat katsoa ja voit määritellä kanavan
vaihtumaan tiettynä aikana automaattisesti
sille kanavalle, jolla haluamasi ohjelma
lähetetään. Kanavan tilasta riippuen
ohjelmatiedot saattavat joskus näkyä
tyhjinä tai ne voivat olla vanhentuneita. Kanavanäkymän
käyttäminen
Ajoitetun näkymän käyttäminen
1 Punainen (Katselun.): Näytä parhaillaan lähetettävien
tai tulevien ohjelmien luettelo.
2 Keltainen (+24 tuntia): Näytä seuraavien 24 tunnin
jälkeen lähetettävät ohjelmat.
3 Sininen (CH-tila): Valitse Kanavanäkymä-ikkunasta
niiden kanavien tyyppi, jotka haluat näyttää.
– Kanavatila on erilainen eri antennilähteille.
4 (Tiedot): Näyttää valitun ohjelman tarkat tiedot.
5 (Sivu): Siirtyy edelliselle tai seuraavalle sivulle.
6 ENTERE -painike
– Kun valitset parhaillaan lähetettävän ohjelman, voit
katsella valitsemaasi ohjelmaa.
– Kun valitset tulevan ohjelman, voit ajastaa valitsemaasi
ohjelman katselun. Jos haluat perua ajastuksen, paina
ENTERE -painiketta uudelleen ja valitse Peruuta
ajastukset.
P
POWER
MEDIA.P
FAV.CH
P.MODE
DUAL
MTS
P
POWER
MEDIA.P
FAV.CH
P.MODE
DUAL
MTS
DTV Air
15
abc1
18:00 ~ 6:00
18:11 Thu 6 Jan
Life On Venus Avenue
Unclassified
No Detaild Information
E Watch
' Tiedot
DTV Air 800 five
Family Affairs
18:00 - 18:30
Drama
Tanya confesses all to a stunned Babs. Conrad is anxious to hear...
18:30
19:15
Today
Today
)Family Affairs
)Dark Angel
800
800
five
five
800 five
Katselun. Tiedot E Peruuta
Opas 2:10 Tiistai 1 Jun
Ajoitettu näkymä
1 4 6
DTV Air 800 five
Home and Away
18:00 - 18:30
Drama
Dani is devastated when scott makes clear his views on marriage...
27
28
800
24
16
6
Discovery
DiscoveryH&L
five
price-drop.tv
QVC
R4DTT
American Chopper
Programmes resume at 06:00
Home and...
No Information
QVC Selection
No Information
Tine Team
Fiv...
Today 18:00 - 19:00 19:00 - 20:00
)Family Affairs )Dark Angel
800 five
Katselun. +24 Tuntia CH-tila Tiedot Sivu E Katso
Opas 2:10 Tiistai 1 Jun
Kanavanäkymä - TV
1 2 3 4 5 6
BN68-02588H-Fin.indb 11 2010-3-23 19:29:3412 Suomi
Perusominaisuudet
Kanavien hallinta
Poista tai aseta suosikkikanavia ja käytä digitaalisten
lähetysten ohjelmaopasta. Valitse kanava Kanavat,
Omat kanavat- tai Ajastettu-ikkunassa.
■ Kanavat: Näyttää kanavan tyypin mukaisen
kanavaluettelon.
■ * Omat kanavat: Näyttää kanavan ryhmän.
■ Ajastettu: Näyttää kaikki parhaillaan ajastettuina
olevat ohjelmat.
✎Väripainikkeiden käyttäminen Kanavien hallinnan
kanssa
x Punainen (Antenni): Valitse Antenni tai Kaapeli.
x B Vihreä (Zoom): Suurentaa tai pienentää
kanavanumeroa.
x Keltainen (Valitse): Jos haluat tehdä useiden
kanavien asetukset samanaikaisesti, valitse
haluamasi kanavat ja paina keltaista painiketta.
c-merkki ilmestyy valittujen kanavien vasemmalle
puolelle.
x (Sivu): Siirry edelliselle tai seuraavalle sivulle.
x T (Työkalut): Näyttää Kanavien hallinnan
asetusvalikot. (Valikot saattavat vaihdella tilanteen
mukaan.)
Kanavan tilakuvakkeet
Kuvakkeet Toiminnot
A Analoginen kanava.
c Valittu kanava.
* Suosikiksi asetettu kanava.
( Parhaillaan esitettävä ohjelma.
\ Lukittu kanava.
) Ajastettu ohjelma.
¦ Suosikkikanavien käyttäminen
* Omat kanavat
(Kanavien hallinnassa)
Näyttää kaikki suosikkikanavat.
■ Muokkaa omia kanavia t : Voit asettaa valitut
kanavat haluamaasi suosikkikanavien ryhmään.
✎Ruudulla näkyy ”*”-merkki ja kanava asetetaan omiin
kanaviisi.
1. Valitse kanava ja paina TOOLS-painiketta.
2. Lisää kanava haluamaasi omien kanavien ryhmään
1, 2, 3 ja 4 tai poista se siitä.
x Voit valita yhden tai useampia ryhmiä.
3. Kun olet muuttanut asetuksia, voit tarkastella
ryhmien kanavaluetteloita kohdassa Omat kanavat.
Kanavavalikko
¦ Kanavien virittäminen uudelleen
Antenni (Antenni / kaapeli)
Ennen kuin televisio voi aloittaa käytettävissä olevien
kanavien tallentamisen muistiin, sinun täytyy määritellä
televisioon kytketyn signaalilähteen tyyppi (antenni tai
kaapelijärjestelmä).
Maa
Ruudulle ilmestyy PIN-koodin syöttöikkuna. Syötä
nelinumeroinen PIN-koodi.
■ Digi-kanava: Muuta digitaalisten kanavien maa.
■ Analoginen kanava: Muuta analogisten kanavien maa.
c1 1futech
c 2 * 24ore.tv
15 abc1
3 BBC World
23 bid-up.tv
33 Boonerang
32 Cartoon Nwk
5 Class News
4 \ Coming Soon
27 Discovery
All
TV
Radio
Data/Other
Analogue
r
Antenni Antenni B Zoom Valitse Sivu T Työkalut
Kanavat
c1 1futech
c 2 * 24ore.tv
15 abc1
3 BBC World
23 bid-up.tv
33 Boonerang
32 Cartoon Nwk
5 Class News
4 \ Coming Soon
27 Discovery
All
TV
Radio
Data/Other
Analogue
r
Antenni Antenni B Zoom Valitse Sivu T Työkalut
Kanavat
Muokkaa omia kanavia
Lock
Poista
Poista valinnat
Val.kaikki
BN68-02588H-Fin.indb 12 2010-3-23 19:29:36Suomi 13
03 Perusominaisuudet
Autom. tallennus
Etsii kanavan automaattisesti ja tallentaa sen television
muistiin.
✎Automaattisesti tallennetut kanavanumerot
eivät välttämättä vastaa todellisia tai haluttuja
kanavanumeroita. Jos kanava on lukittu Lapsilukkotoiminnolla, PIN-koodin syöttöikkuna tulee näkyviin.
■ Antennilähde (Antenni / Kaapeli): Valitse tallennettava
antennilähde.
■ Kanavalähde (Digitaalinen ja analoginen /
Digitaalinen / Analoginen): Valitse tallennettava
kanavalähde.
Kun valitset Kaapeli → (Digitaalinen ja analoginen tai
Digitaalinen): Anna jokin arvo kaapelikanavahaulle.
Hakutapa (Full / Verkko / Nopea): Etsii kaikki
toiminnassa olevat kanavat ja tallentaa ne television
muistiin.
✎ Jos laitat asetukseksi Nopea, voit asettaa kohtien
Verkko, Verkkotunnus, Taajuus, Modulaatio,
Symbolinopeus tiedot manuaalisesti
kaukosäätimen painikkeilla.
Verkko (Auto / Man.): Valitsee kohdan Verkkotunnus
asetukseksi Auto tai Man.
Verkkotunnus: Jos kohdan Verkko asetuksena on
Man., voit tehdä kohdan Verkkotunnus asetukset
numeropainikkeilla.
Taajuus: Näyttää kanavan taajuuden. (Maakohtainen.)
Modulaatio: Näyttää käytettävissä olevat
modulaatioarvot.
Symbolinopeus: Näyttää käytettävissä olevat
symbolinopeudet.
Manuaalinen tallennus
Etsii kanavan manuaalisesti ja tallentaa sen television muistiin.
✎Jos kanava on lukittu Lapsilukko-toiminnolla, PINkoodin syöttöikkuna tulee näkyviin.
■ Digi-kanava: (Käytettävissä DTV-tilassa.) Kun haku on
päättynyt, kanavaluettelon kanavat päivitetään.
✎Jos valitset Antenni → Antenni: Kanava, Taajuus,
Kaistanleveys.
✎Jos valitset Antenni → Kaapeli: Taajuus, Modulaatio,
Symbolinopeus.
■ Analoginen kanava (Muistipaikka, Värijärjestelmä,
Äänijärjestelmä, Kanava, Haku): Jos ääni kuuluu
outona tai ei ollenkaan, valitse oikea äänistandardi.
✎Kanavatil
x P (muistipaikkatila): Kun viritys on päättynyt,
alueellasi lähetettäville kanaville on annettu
muistipaikkanumerot P0–P99. Tässä tilassa voit
valita kanavan syöttämällä sen muistipaikkanumeron.
x C (antennikanavatila) / S (kaapelikanavatila): Näissä
tiloissa voit valita kanavan syöttämällä haluamasi
lähetysaseman tai kaapelikanavan numeron.
¦ Kanavien muokkaaminen
Kanavien hallinnan asetusvalikko
(Kanavien hallinnassa)
1. Valitse kanava ja paina TOOLS-painiketta.
2. Muokkaa kanavan nimeä tai numeroa Muokkaa
kanavan nimeä- valikossa.
■ Muokkaa kanavan nimeä (vain analogisilla kanavilla):
Anna kanavalle haluamasi nimi.
BN68-02588H-Fin.indb 13 2010-3-23 19:29:3614 Suomi
Perusominaisuudet
¦ Muut ominaisuudet
Kanavien hallinnan asetusvalikko
(Kanavien hallinnassa)
Tee kanavien asetukset Kanavien hallinta -valikon
komennoilla (Lukko / Lukituksen poisto, Ajastettu kats.,
Lajittelu, Poista, Val.kaikki / Poista valinta kaikista).
Asetusvalikon kohdat saattavat vaihdella kanavan tilan
mukaan.
1. Valitse kanava ja paina TOOLS-painiketta.
2. Valitse toiminto ja muuta sen asetuksia.
■ Lukko / Lukituksen poisto: Voit lukita kanavan niin,
ettei sitä voi valita eikä katsoa.
✎HUOMAUTUS
x Tämä toiminto on käytettävissä vain silloin, kun
Lapsilukko on asetettu tilaan Käytössä.
x Ruudulle ilmestyy PIN-koodin syöttöikkuna. Syötä
nelinumeroinen PIN-koodi. Oletuskoodi on ”0-0-0-0”.
Muuta PIN-koodia kohdassa Vaihda PIN.
■ Ajastettu kats.: Voit asettaa haluamasi kanavan
näytettäväksi haluamanasi ajankohtana. Ennen kuin
käytät tätä toimintoa, aseta tämänhetkinen kellonaika.
✎ Kun valitset digitaalisen kanavan, voit tuoda
digitaalisen ohjelman tiedot näkyviin painamalla
►-painiketta.
■ Lajittelu (vain analogisilla kanavilla): Lajittelutoiminnolla
voit muuttaa tallennettujen kanavien
muistipaikkanumeroita. Tämä voi olla tarpeen, jos olet
käyttänyt automaattista tallennusta.
■ Poista: poistaa kanavia ja näyttää vain haluamasi
kanavat.
■ Val.kaikki / Poista valinta kaikista: Valitse kaikki
kanavat tai poista niiden valinta kanavien hallinnassa.
Ajastettu
(Kanavien hallinnassa)
Voit katsoa, muuttaa tai poistaa katseltavaksi ajastamasi
ohjelman.
■ Muuta tietoja: Muuta katseltavaksi ajastamaasi
ohjelmaa.
■ Peruuta ajastukset: Peruuta katseltavaksi ajastamasi
ohjelma.
■ Tiedot: Näytä katseltavaksi ajastamasi ohjelma.
(Voit myös muuttaa ajastustietoja).
■ Val.kaikki / Poista valinta kaikista: Valitse kaikki
ajastetut ohjelmat tai poista niiden valinta.
Kanavaluettelo
Voit näyttää kaikki haetut kanavat
Kanavaluettelon siirto
Tuo tai vie kanavakartan. Sinun tulee käyttää USBmuistilaitetta, jotta voisit käyttää tätä toimintoa.
✎Näytölle ilmestyy PIN-koodin syöttöruutu. Syötä
nelinumeroinen PIN-koodi.
✎Uuden television PIN-koodi on oletuksena
“0-0-0-0”.
■ Tuo USB-laitteesta: Tuo kanavaluettelo USB:ltä.
■ Vie USB-laitteeseen: Vie kanavaluettelo USB:lle.
Hienosäätö
(Vain analogisilla kanavilla.)
Jos signaali on heikko tai vääristynyt, voit hienosäätää
kanavan manuaalisesti.
✎Hienosäädetyt kanavat on merkitty tähdellä, ”*”.
✎Palauta hienosäätöasetukset valitsemalla Palauta.
Kuvavalikko
¦ Esiasetetun kuvatilan muuttaminen
Valitse haluamasi kuvatyyppi.
Tila t
■ Dynaaminen: Sopii kirkkaisiin tiloihin.
■ Vakio: Sopii tavalliseen katseluympäristöön.
■ Elokuva: Sopii elokuvien katseluun pimeässä
huoneessa.
¦ Kuva-asetusten muuttaminen
Taustavalo / Kontrasti / Kirkkaus /
erävyys / Väri / Sävy (V/P)
Voit muuttaa televisiosi kuvanlaatua useilla eri asetuksilla.
✎HUOMAUTUS
x Et voi käyttää toimintoa Sävy (V/P) PAL-järjestelmän
analogisissa tiloissa TV, Ulk., AV
x PC-tilassa voit säätää vain kohtien Taustavalo,
Kontrasti ja Kirkkaus asetuksia.
x Voit muuttaa ja tallentaa televisioon kytkettyjen
ulkoisten laitteiden asetuksia.
x Voit vähentää virrankulutusta pienentämällä kuvan
kirkkautta.
P
POWER
MEDIA.P
FAV.CH
P.MODE
DUAL
MTS
BN68-02588H-Fin.indb 14 2010-3-23 19:29:36Suomi 15
03 Perusominaisuudet
¦ Ekonomiset ratkaisut
ECO-ratkaisu
■ Energiansäästö (Pois / Pieni / Keskikoko / Suuri
/ Kuva pois / Automaattinen) t: Säätää
television kuvan kirkkautta ja vähentää virrankulutusta.
Jos valitset Kuva pois, näyttö sammutetaan, mutta
ääni on edelleen käytössä. Ota näyttö takaisin käyttöön
painamalla mitä tahansa paitsi äänenvoimakkuuden
painiketta.
■ Ei sign., v.tila (Pois / 15 min / 30 min / 60 min):
Ottaa valmiustilan käyttöön ennalta määrittelemäsi ajan
kuluttua, jos television tilana on ”Ei signaalia” tai ”Tarkista
signaalikaapeli”.
✎ Ei käytössä silloin, kun tietokone on
virransäästötilassa.
¦ Kuvavalintojen muuttaminen
Lisäasetukset
(Käytettävissä tiloissa Vakio / Elokuva)
Voit säätää näyttösi tarkempia asetuksia, esimerkiksi sen
väriä ja kontrastia.
✎PC-tilassa voit säätää vain kohtien Dynaaminen
kontrasti, Gamma ja Valkotasapaino asetuksia.
■ Mustan sävy (Pois / Tumma / Tummempi / Tummin):
Aseta kuvaruudun syvyys säätämällä mustatasapainoa.
■ Dynaaminen kontrasti (Pois / Pieni / Keskikoko /
Suuri): Säädä näytön kontrasti.
■ Varjotiedot (-2 – +2): Lisää tummien kuvien kirkkautta.
✎ Ei käytössä PC-tilassa.
■ Gamma: Säädä päävärin intensiteetti.
■ Vain RGB -tila (Pois / Punainen / Vihreä / Sininen):
Voit muuttaa kohtien Punainen, Vihreä ja Sininen Väri-
tai Sävy-asetuksia ulkoisesta laitteesta (DVD-soittimesta,
kotiteatterista jne.) tulevalle kuvalle.
■ Väriavaruus (Automaattinen / Alkuperäinen): Muuta
kuvan muodostamiseen käytettävä värivalikoimaa.
■ Valkotasapaino: Voit säätää värilämpötilaa
luonnollisemman kuvan saamiseksi.
P-siirtymä / V-siirtymä / S-siirtymä: Säädä värien
(punainen, vihreä, sininen) tummuutta.
R-Gain/G-Gain/B-Gain: Säädä värien (punainen, vihreä,
sininen) kirkkautta.
Palauta: Palauttaa Valkotasapainon oletusasetuksiinsa.
■ Ihonsävy: Korostaa vaaleanpunaista ”Ihonsävyä.”
■ Reunojen parannus (Pois / Käytössä): Korostaa
kohteiden ääriviivoja.
Kuvavalinnat
✎PC-tilassa voit muuttaa ainoastaan kohtien Värisävy,
Koko ja Autom. suojausaika asetuksia.
Kuvavalinnat
Värisävy : Normaali ►
Koko : 16:9
Näyttötila : 16:9
Dig. kohinansuodatin : Automaattinen
MPEG-koh.suodatin : Automaattinen
HDMI musta : Normaali
Elokuvatila : Pois
▼
U Siirrä E Hyväksy R Palaa
■ Värisävy (Viileä / Normaali / Lämmin1 / Lämmin2)
✎ Lämmin1 tai Lämmin2 otetaan pois käytöstä, kun
kuvatilana on Dynaaminen.
✎ Voit muuttaa ja tallentaa television tuloliitäntään
kytkettyjen ulkoisten laitteiden asetuksia.
Lisäasetukset
Mustan sävy : Pois ►
Dynaaminen kontrasti : Keskikoko
Varjotiedot : 0
Gamma : 0
RGB Only Mode : Pois
Väriavaruus : Alkuperäinen
Valkotasapaino
▼
U Siirrä E Hyväksy R Palaa
BN68-02588H-Fin.indb 15 2010-3-23 19:29:3716 Suomi
Perusominaisuudet
■ Koko: Kaapelisovittimelle ja
satelliittivastaanottimelle voi myös
olla omat kuvakoon vaihtoehtonsa.
Suosittelemme kuitenkin, että käytät
mahdollisimman usein asetusta 16:9.
Autom. leveys: Muuttaa kuvasuhteen
automaattisesti muotoon 16:9.
16:9 : Asettaa kuvakooksi 16:9, mikä sopii hyvin
DVD-elokuville tai laajakuvalähetyksille.
Leveä zoomaus: Suurentaa kuvakokoa kuvasuhteesta
4:3.
✎ Muuta sijaintia ▲ ja ▼-painikkeilla.
Zoom: Suurentaa laajakuvasuhteessa 16:9 näkyviä kuvia
pystysuunnassa kuvaruudun kokoiseksi.
✎ Muuta sijaintia tai kokoa ▲- ja ▼-painikkeilla.
4:3 : Tämä on elokuvan tai normaalin televisiolähetyksen
oletuskuvasuhde.
✎ Älä käytä 4:3-muotoa pitkään. Kuvaruudun
vasemmalla ja oikealla puolella tai keskellä näkyvät
reunat saattavat aiheuttaa jäännöskuvia
(kuvan palaminen kuvaruutuun) eikä takuu kata
tällaisia ongelmia.
Mukautettu Ruutu: Näyttää koko kuvan
typistämättömässä muodossa HDMI- (720p / 1080i
/ 1080p) tai komponenttisignaalia (1080i / 1080p)
vastaanotettaessa.
✎HUOMAUTUS
x Kun olet valinnut Mukautettu Ruutu HDMI- (720p /
1080i / 1080p) tai komponenttitilassa (1080i / 1080p),
sinun täytyy ehkä keskittää kuva:
1. Valitse paikka painamalla ◄ tai ► painiketta.
2. Paina ENTERE painiketta.
3. Siirrä kuvaa painamalla ▲, ▼, ◄ tai ► painiketta.
x Kuvakoon vaihtoehdot riippuvat kuvalähteestä.
x Käytettävissä olevat toiminnot riippuvat valitusta
tilasta.
x PC-tilassa voidaan asettaa vain kuvasuhteet 16:9 ja
4:3.
x Voit muuttaa ja tallentaa television tuloliitäntään
kytkettyjen ulkoisten laitteiden asetuksia.
x Jos käytät Mukautettu Ruutu -toimintoa HDMI
720p -lähteen kanssa, kuvaruutua leikkaa yksi juova
ylhäältä, alhaalta, vasemmalta ja oikealta samalla
tavoin kuin overscan-toiminnossa.
■ Näyttötila (16:9 / Leveä zoomaus / Zoom / 4:3):
Käytettävissä vain, kun kuvakooksi on asetettu Autom.
leveys. Voit määritellä kuvakooksi joko 4:3 WSS (Wide
Screen Service) tai alkuperäiskoon. Eri Euroopan maissa
käytetään eri kuvakokoja.
✎ Ei käytettävissä PC-, Komponentti- eikä HDMItilassa.
■ Dig. kohinansuodatin (Pois / Pieni / Keskikoko
/ Suuri / Automaattinen /Automaattinen näyttö):
Kun lähetyssignaali on heikko, ruudulla saattaa
näkyä pysähtyneitä kuvia tai haamukuvia. Valitse eri
vaihtoehtojen välillä, kunnes kuva on paras mahdollinen.
Automaattinen näyttö: Näyttää analogisia kanavia
vaihdettaessa signaalin voimakkuuden.
✎ Käytettävissä vain analogisilla kanavilla.
✎ Jos palkki on vihreä, vastaanotettavan signaalin
laatu on paras mahdollinen.
■ MPEG-koh.suodatin (Pois / Pieni / Keskikoko / Suuri
/ Automaattinen): Parantaa kuvan laatua vähentämällä
MPEG-kuvan kohinaa.
✎ Ei käytössä PC-tilassa.
■ HDMI musta (Normaali / Pieni): Säätää kuvan
syvyyden valitsemalla näytön mustasäädön tason.
✎ Käytettävissä vain HDMI-tilassa (RGB-signaaleille).
■ FElokuvatila (Pois / Auto1 / Auto2): Televisio voidaan
asettaa automaattisesti tunnistamaan ja käsittelemään
elokuvasignaaleja kaikista lähteistä sekä optimoimaan
kuvan laadun.
✎ Käytettävissä vain seuraavissa: TV, AV,
KOMPONENTTI (480i / 1080i) ja HDMI (480i /
1080i).
■ Autom. suojausaika (2 tuntia / 4 tuntia / 8 tuntia
/ 10 tuntia / Pois): Jos sama kuva pysyy näytöllä,
automaattinen kuvan palamisenesto otetaan käyttöön.
Kuvan palautus (OK / Peruuta)
Palauttaa käytössä olevan kuvatilan sen oletusasetuksiin.
P
POWER
MEDIA.P
FAV.CH
P.MODE
DUAL
MTS
BN68-02588H-Fin.indb 16 2010-3-23 19:29:37Suomi 17
03 Perusominaisuudet
¦ Television asetus tietokonekäyttöön
Asettaa tulolähteeksi tietokoneen.
Aseta taajuusasetukset sekä sijainti ja tee asetuksien
Automaattinen säätö t
hienosäädöt automaattisesti.
✎Ei käytettävissä, kun kytkentään käytetään HDMI/DVIkaapelia
Näyttö
■ Karkea / Hieno: Poistaa kuvan kohinan tai vähentää
sitä. Jos kohina ei poistu pelkällä hienosäädöllä, säädä
taajuus mahdollisimman hyväksi (Karkea) ja hienosäädä
kuvaa uudelleen. Kun olet onnistunut vähentämään
kohinaa, säädä kuvan paikkaa niin, että se on
kuvaruudun keskellä.
■ Sijainti: Muuta tietokoneen näytön sijaintia
suuntapainikkeilla (▲ / ▼ / ◄ / ►).
■ Kuvan palautus: Palauttaa kuvan oletusasetukset.
Television käyttäminen tietokoneen näyttönä
Tietokoneen asetusten määrittäminen (Windows XP)
Windowsin versiosta ja näytönohjaimesta riippuen
tietokoneesi näytöllä näkyvät ikkunat saattavat olla erilaisia,
mutta perusasetukset ovat lähes poikkeuksetta samat.
(Jos näin ei ole, ota yhteyttä tietokoneen valmistajaan tai
Samsung-jälleenmyyjään.)
1. Valitse Windowsin Käynnistä-valikosta ”Ohjauspaneeli”.
2. Valitse ”Ohjauspaneelista” ”Ulkonäkö ja teemat”, jolloin
näytölle ilmestyy valintaikkuna.
3. Valitse ”Näyttö”, jolloin näytölle ilmestyy valintaikkuna.
4. Valitse valintaikkunasta ”Asetukset”-välilehti.
y Näytön oikea kokoasetus (tarkkuus) [Optimi: 1360 x 768
kuvapistettä]
y Jos tässä valintaikkunassa on valittavissa pystytaajuus,
oikea arvo ”60” tai ”60 Hz.” Muussa tapauksessa sulje
ikkuna valitsemalla ”OK”.
Äänivalikko
¦ Esiasetetun äänitilan muuttaminen
Tila t
■ Vakio: Valitsee tavallisen äänitilan.
■ Musiikki: Korostaa musiikkia enemmän kuin muita
ääniä.
■ Elokuva: Käyttää parasta mahdollista ääntä elokuville.
■ Kirkas ääni: Korostaa puheääntä enemmän kuin muita
ääniä.
■ Vahvista: Lisää korkeataajuisten äänten voimakkuutta,
jotta kuulovammaisten olisi helpompi kuulla äänet.
¦ Ääniasetusten säätäminen
Taajuuskorjain
Asettaa äänitilan.
■ Balanssi V / O: Säätää tasapainoa oikean ja vasemman
kaiuttimen välillä.
■ 100 Hz / 300 Hz / 1kHz / 3 kHz / 10 kHz
(kaistanleveyden asetus): Säätää eri kaistataajuuksien
tasoa.
■ Palauta: Palauttaa kaikki taajuuskorjaimen asetukset
oletusarvoihin.
¦ Äänijärjestelmät jne.
Virtual Surround (Pois / Käytössä)
Tämän toiminnon avulla voit HRTF-teknologiaa
(Head-Related Transfer Function) käyttämällä kuunnella
virtuaalista, 5.1-kanavaista ääntä kaiuttimien tai kuulokkeiden
kautta.
✎Jos Valitse kaiutin on asetettu tilaan Ulkoinen kaiutin,
Virtual Surround ei ole käytettävissä.
Kesk. selkeys (Pois / Käytössä)
Tämän toiminnon avulla voit lisätä puheäänten voimakkuutta
suhteessa taustamusiikkiin tai äänitehosteisiin. Näin
puheäänet kuuluvat selkeämpinä ohjelman katselun aikana.
Äänen kieli
(Vain digitaalisilla kanavilla.)
Voit muuttaa äänen kielen oletusasetusta.
✎Käytettävissä olevat kielet saattavat vaihdella ohjelmien
mukaan.
Äänimuot (MPEG / Dolby Digital 5.1)
(Vain digitaalisilla kanavilla.)
Kun ääni kuuluu samanaikaisesti pääkaiuttimesta ja
äänivastaanottimesta, äänentoistossa voi esiintyä kaikua.
Tämä johtuu siitä, että pääkaiutin ja äänivastaanotin purkavat
vastaanotetut äänisignaalit eri nopeudella. Jos näin käy,
käytä televisiokaiutintoimintoa.
✎Äänimuoto-toiminto saattaa vaihdella ohjelmien
mukaan. 5.1-kanavainen digitaalinen Dolby-ääni
on käytettävissä vain silloin, kun televisio on liitetty
ulkoiseen kaiuttimeen optisella kaapelilla
BN68-02588H-Fin.indb 17 2010-3-23 19:29:3818 Suomi
Perusominaisuudet
Kuvailutulkkaus
(Ei käytettävissä kaikkialla. Vain digitaalisilla
kanavilla.)
Toiminto käsittelee kuvailutulkkauksen
äänivirtaa, jos televisioyhtiö lähettää sitä
varsinaisen ääniraidan ohella.
■ Kuvailutulkkaus (Pois / Käytössä):
Asettaa kuvailutulkkauksen päälle tai
pois päältä.
■ Äänenvoimakkuus: Säätää kuvailutulkkauksen
äänenvoimakkuutta.
Aut. voimak. (Pois / Normaali / Yö)
Jos haluat pitää äänenvoimakkuuden samalla tasolla kaikilla
kanavilla, käytä asetusta Normaali.
■ Yö: Tässä tilassa ääni on tilaan Normaali verrattuna
hiljaisempi. Se sopii yökäyttöön.
Valitse kaiutin
(Ulkoinen kaiutin / TV-kaiutin)
Äänentoistossa saattaa esiintyä kaikua, sillä pääkaiutin
ja äänivastaanotin purkavat vastaanotetut äänisignaalit
eri nopeudella. Jos näin käy, aseta televisio käyttämään
Ulkoista kaiutinta.
✎Kun kohdan Valitse kaiutin asetuksena on Ulkoinen
kaiutin, äänienvoimakkuus- ja MUTE-painikkeet eivät
toimi ja ääniasetukset toimivat rajoitetusti.
✎Kun kohdan Valitse kaiutin asetuksena on Ulkoinen
kaiutin, käytä seuraavia asetuksia:
x TV-kaiutin: Pois, Ulkoinen kaiutin: Käytössä
✎Kun kohdan Valitse kaiutin asetuksena on TV-kaiutin,
käytä seuraavia asetuksia:
x TV-kaiutin: Käytössä, Ulkoinen kaiutin: Käytössä
✎Jos kuvasignaalia ei ole, kummastakaan kaiuttimesta ei
kuulu ääntä.
Lisäasetus
(Vain digitaalisilla kanavilla.)
■ DTV-äänentaso (MPEG / HE-AAC): Tämän toiminnon
avulla voit alentaa (digitaalisen televisiolähetyksen aikana
vastaanotetun) äänisignaalin dispariteetin haluamallesi
tasolle.
✎ MPEG / HE-AAC voidaan asettaa arvoihin -
10 dB - 0 dB lähetyssignaalin tyypistä riippuen.
✎ Jos haluat pienentää tai lisätä äänenvoimakkuutta,
aseta haluamaasi arvoon välille 0 ja -10.
■ SPDIF-lähtö: SPDIF-yhteyskäytäntöä (Sony Philips
Digital InterFace) käytetään digitaalisen äänen
tuottamiseen ja se vähentää häiriöitä kaiuttimissa ja
muissa digitaalisissa laitteissa, esim. DVD-soittimessa.
Äänimuoto: Digitaalisen televisiolähetyksen aikana voit
valita digitaalisen äänen (SPDIF) muodon seuraavista
vaihtoehdoista: PCM tai Dolby Digital.
✎ Voit hyödyntää interaktiivista, kolmiulotteista ääntä
käyttämällä 5.1-kanavaisia kaiuttimia Dolby Digital
-ympäristössä.
Äänen viive: Korjaa äänen ja kuvan väliset viiveet
television tai videoiden katselun aikana tai sellaisia
ulkoisia laitteita kuin AV-vastaanotinta käytettäessä.
■ Dolby Digital Comp (Dolby Digital -p.) (Line / RF):
Tämän toiminnon avulla voit minimoida Dolby Digital
-signaalin ja äänisignaalin välisen dispariteetin
(MPEG-ääni, HE-AAC, ATV-ääni).
✎ Valitse Line, kun haluat dynaamisen äänen, ja RF,
kun haluat vähentää kovien ja hiljaisten äänten
välistä eroa yöaikaan.
Line: Aseta -31desibeliä (viite) voimakkaampien tai
heikompien signaalien äänenvoimakkuus tasolle -20 dB
tai -31 dB.
RF: Aseta -20 desibeliä (viite) voimakkaampien tai
heikompien signaalien äänenvoimakkuus tasolle -10 dB
tai -20 dB.
Äänen palautus (OK / Peruuta)
Palauta kaikki ääniasetukset oletusarvoihin.
P
POWER
MEDIA.P
FAV.CH
P.MODE
DUAL
MTS
BN68-02588H-Fin.indb 18 2010-3-23 19:29:38Suomi 19
03 Perusominaisuudet
Asetusvalikko
¦ Kellonajan asettaminen
Aika
■ Kello: Kelloaika asetetaan, jotta television eri
ajastintoimintoja voisi käyttää.
O Nykyinen kellonaika ilmestyy näkyviin aina
INFO-painiketta painettaessa.
✎ Kellonaika on asetettava uudelleen, jos virtajohto
kytketään irti.
Kellon tila (Automaattinen / Manuaalinen):
✎ Automaattiset aika-asetukset eivät välttämättä
mene oikein asemasta ja signaalista riippuen. Jos
näin käy, aseta aika manuaalisesti.
✎ Antennin tulee olla käytössä, jotta ajan voisi
asettaa automaattisesti.
Kellon asetus: Päivä, Kuukausi, Vuosi, Tunti ja
Minuutti manuaalisesti.
✎ Käytettävissä vain, kun Kellon tila on asetuksessa
Manuaalinen.
¦ Uniajastimen käyttäminen
■ Uniajastin t: Kytkee television automaattisesti
pois päältä, kun ennalta asetettu aikaraja on kulunut
umpeen. (30, 60, 90, 120, 150 ja 180 minuuttia).
✎ Jos haluat perua Uniajastin-toiminnon, valitse
“Pois”.
Käynnistysajan ja sammutusajan
asettaminen
■ Ajastin 1 / Ajastin 2 / Ajastin 3: Käytettävissä on kolme
erillistä käynnistys- ja sammutusajan asetusta.
Sinun täytyy asettaa kellonaika ensin
10 TV ATV 0
00 00
▲
▼
00 00
▲
▼
Ajastin 1
Käynnistysaika
Sammutusaika
Äänenv.
Inaktivoitu
Inaktivoitu
Su Ma Ti Ke To Pe La
Kun
Lähde Antenni Kanava
Toisto
L Siirrä U Säädä E Hyväksy R Palaa
Käynnistysaika / Sammutusaika: Aseta tunnit ja
minuutit ja ota toiminto käyttöön tai pois käytöstä.
(Ota ajastin käyttöön tekemilläsi asetuksilla valitsemalla
Aktivoi.)
Äänenvoimakkuus: Aseta haluamasi
äänenvoimakkuuden taso.
Lähde: Valitse TV tai USB, jos haluat toistaa television
tai USB-laitteen sisällön, kun televisio kytkeytyy
automaattisesti päälle. (Voit valita kohdan USB
ainoastaan silloin, kun televisioon on kytketty USB-laite.)
Antenni (kun Lähdeon tilassa TV): Valitse ATV tai DTV.
Kanava (kun Lähde on tilassa TV): Valitse haluamasi
kanava.
Sisältö (kun Lähde on tilassa USB): Valitse USBlaitteelta kuvia tai musiikkitiedostoja sisältävä
kansio toistettavaksi silloin, kun televisio kytkeytyy
automaattisesti päälle.
✎ Jos USB-laitteella ei ole musiikkitiedostoja tai niitä
sisältävää kansiota ei ole valittu, Timer (Ajastin)-
toiminto ei toimi oikein.
✎ Jos USB-laitteella on vain yksi kuva, diaesitys ei
toimi.
✎ Jos kansion nimi on liian pitkä, kansiota ei voi
valita.
✎ Jokaiselle käyttämällesi USB-laitteelle määritellään
oma kansionsa. Jos käytät useampaa kuin yhtä
samantyyppistä USB-laitetta, varmista, että
laitteille määritellyillä kansioilla on eri nimet.
Toisto: Valitse Kerran, Joka p., Ma-Pe, Ma-La, La-Su
tai Manuaalinen. Jos valitset Manuaalinen, voit valita
päivän, jona ajastin otetaan käyttöön.
✎ c-merkki tarkoittaa, että päivä on valittu.
✎Automaattinen virrankatkaisu (käytettävissä vain, kun
ajastin kytkee television päälle): Ylikuumenemisen
välttämiseksi televisio sammutetaan automaattisesti,
kun sitä ei ole käytetty kolmeen tuntiin.
¦ Ohjelmien lukitseminen
Suojaus
✎Ruudulle ilmestyy ennen asetusikkunaa PIN-koodin
syöttöikkuna.
✎Syötä nelinumeroinen PIN-koodi. Oletuskoodi on
”0-0-0-0”. Muuta PIN-koodia kohdassa Vaihda PIN.
■ Lapsilukko (Pois / Käytössä): Lukitse kanavia
Kanavien hallinta -valikossa, kun haluat estää joidenkin
ohjelmien luvattoman katselun esim. lapsilta.
✎ Käytettävissä vain, kun Tulo on tilassa TV.
■ Lapsilukitus (lapsiluokitukset): Estä ohjelmien luvaton
katselu esim. lapsilta käyttämällä itse määrittelemääsi
nelinumeroista PIN-koodia.
Salli kaikki: Vapauta kaikki television luokitukset.
✎ Kohdan Lapsilukitus asetukset ovat
maakohtaisia.
BN68-02588H-Fin.indb 19 2010-3-23 19:29:3920 Suomi
Perusominaisuudet
■ Vaihda PIN: Vaihda television asetusten tekemiseen
vaadittava salainen koodi.
✎ Jos unohdat PIN-koodin, voit palauttaa sen
oletusnumerosarjaksi ”0-0-0-0” painamalla
kaukosäätimen painikkeita seuraavassa
järjestyksessä: POWER (pois) → MUTE → 8 → 2
→ 4 → POWER (käytössä).
¦ Muut ominaisuudet
Kieli
■ Valikon kieli: Aseta valikkojen kieli.
■ Teksti-tv:N kieli: Aseta tekstitelevisiolle haluamasi kieli.
✎ Englanti on oletuskieli silloin, kun valittu kieli ei ole
käytettävissä lähetyksessä.
■ Valinta (Ensisijainen äänen kieli / Toissijainen äänen
kieli / Ensisij. tekstityskieli / Toissijainen tekstityskieli
/ Ensisij. teksti-tv:n kieli / Toissij. teksti-tv:n kieli):
Valitse se kieli, jota käytetään oletuskielenä, kun kanava
valitaan.
Tekstitys
Käytä tätä valikkoa ekstitys-tilan
asettamiseen.
✎Tekstitys ei toimi Komponentti- tai
HDMI-tiloissa.
■ Tekstitys (Pois / Käytössä): Ottaa
tekstityksen käyttöön tai pois käytöstä.
■ Tila (Normaali / Kuulovammaiset): Asettaa
tekstitystilan.
■ Tekstityskieli: Asettaa tekstityskielen.
✎ Jos katsomasi ohjelma ei tue Kuulovammaisettilaa, Normaali-tila aktivoituu automaattisesti,
vaikka tilaksi on valittu Kuulovammaiset.
✎ Englanti on oletuskieli silloin, kun valittu kieli ei ole
käytettävissä lähetyksessä.
Yleiset
■ Pelitila (Pois / Käytössä): Yhdistäessäsi pelikonsolin,
kuten PlayStationin™ tai Xboxin™, pelikokemuksestasi
tulee todentuntuisempi, kun valitset pelitilan.
✎HUOMAUTUS
x Pelitilaan liittyviä varotoimenpiteitä ja tilan rajoituksia
– Jos haluat kytkeä pelikonsolin irti ja kytkeä sen
tilalle jonkin muun ulkoisen laitteen, aseta Pelitila
Pois käytöstä asetusvalikossa.
– Jos tuot television valikon esiin Pelitilassa,
kuvaruutu värisee jonkin verran.
x Pelitila ei ole käytettävissä TV- ja PC-tiloissa.
x Kun olet kytkenyt pelikonsolin televisioon, aseta
Pelitila asetukseen Käytössä, jota kuvan laatu ei
heikkenisi.
x Jos Pelitila on Käytössä: Kuva-tilaksi asetetaan
Vakio ja Ääni-tilaksi Elokuva.
■ Valikon läpinäk. (Kirkas / Tumma): Aseta valikkojen
läpinäkyvyys.
■ Melodia (Pois / Pien / Keskikoko / Suuri): Aseta
televisiosta kuulumaan melodia, kun se kytketään päälle
tai pois päältä
Yl. liitäntä
■ CI-valikko: Tämän avulla voit valita CAM-moduulin
valikon. Valitse CI-valikko PC-kortin valikon mukaisesti.
■ Sovelluksen tiedot: Tarkastele CI-paikkaan asetetun
CAM-moduulin ja CAM-moduulin sisällä olevan CI- tai
CI+-kortin tietoja. Voit asentaa CAM-moduulin milloin
tahansa, olipa televisio sitten päällä tai pois päältä.
1. Hanki CI CAM -moduuli haluamaltasi jälleenmyyjältä joko
suoraan tai puhelimitse.
2. Aseta CI- tai CI+-kortti paikoilleen CAM-moduuliin nuolen
suuntaisesti.
3. Aseta CI- tai CI+-kortin sisältävä CAM-moduuli CIkorttipaikkaan nuolen suunnassa niin, että se on
samansuuntaisesti korttipaikan kanssa.
4. Tarkista, voitko katsella salattuja kanavia.
P
POWER
MEDIA.P
FAV.CH
P.MODE
DUAL
MTS
BN68-02588H-Fin.indb 20 2010-3-23 19:29:39Suomi 21
03 Perusominaisuudet
Tukivalikko
Itsediagnoosi
■ Kuvatesti (Kyllz / Ei): Käytä kuvaongelmien
selvittämiseen ja jos ongelma jatkuu, tarkista värikuvio.
■ Äänitesti (Kyllä / Ei): Käytä television sisäänrakennettua
melodiaa ääniongelmien selvittämiseen.
✎ Jollei television kaiuttimista kuulu lainkaan ääntä,
varmista ennen äänitestin tekemistä, että Äänivalikon kohdan Valitse kaiutin asetuksena on
TV-kaiutin.
✎ Äänitestin soittama melodia kuuluu joka
tapauksessa, vaikka kohdan Valitse kaiutin
asetuksena olisi Ulkoinen kaiutin tai ääni olisi
mykistetty painamalla MUTE-painiketta
■ Signaalitiedot: (Vain digitaalisilla kanavilla.) HDTVkanavan laatu on joko täydellinen tai kanavia ei ole
lainkaan käytettävissä. Paranna signaalin voimakkuutta
säätämällä antennia.
■ Vianhaku: Jos televisiossa tuntuisi olevan vikaa, tutustu
tämän kohdan kuvauksiin.
✎ Jos mistään vianhakukohdan vinkistä
ei ole apua, ota yhteyttä Samsungin
asiakaspalvelukeskukseen.
Ohjelm. päivitys
Ohjelmiston voi päivittää kohdassa Ohjelm. päivitys
television kautta tai lataamalla uusimman laiteohjelmiston
USB-muistiin osoitteesta samsung.com.
Nykyinen versio on televisiossa asennettuna oleva
ohjelmisto.
✎Ohjelmiston esitysmuoto on ”vuosi/kuukausi/päivä_
versio”.
Viimeisimmän version asentaminen
■ USB:lla: Aseta televisioon
USB-muisti, joka sisältää
sivustolta www.samsung.
com ladatun laiteohjelmistopäivitystiedoston. Älä
katkaise virtaa tai poista
USB-muistia, ennen kuin
päivitys on valmis. Television
virta katkaistaan ja televisioon
kytketään virta uudelleen
automaattisesti, kun
laiteohjelmiston päivitys on valmis. Kun ohjelmisto on
päivitetty, tekemäsi kuva- ja ääniasetukset palautuvat
oletusasetuksiin. Suosittelemme kirjoittamaan muistiin
omat asetukset, jotta niiden palauttaminen olisi helppoa
päivityksen jälkeen.
■ Kanavalta: Päivitä ohjelmisto lähetyssignaalia käyttäen.
✎ Jos tämä toiminto valitaan ohjelmiston
lähetysjakson aikana, toiminto etsii saatavilla
olevaa ohjelmistoa ja lataa sen.
✎ Ohjelmiston lataamiseen kuluva aika riippuu
signaalin tilasta.
■ Valmiustilan päivitys: Manuaalinen päivitys tehdään
automaattisesti valittuna aikana. Koska laitteen virta on
kytketty päälle sisäisesti, nestekidenäyttö saattaa olla
osittain päällä. Näin saattaa olla jopa tunnin ajan aina
siihen asti, kunnes ohjelmistopäivitys on valmis.
■ Vaihtoehtoinen ohjelmisto (varmuuskopio): Jos uuden
laiteohjelmiston kanssa ilmenee käyttöä haittaavia
ongelmia, voit vaihtaa ohjelmiston aiempaan versioon.
✎ Jos ohjelmisto vaihtui, käytössä oleva ohjelmisto
näytetään.
HD-liitäntäopas
Tutustu näihin tietoihin, kun haluat kytkeä ulkoisia laitteita
televisioon.
Samsung-yhteystiedot
Tutustu näihin tietoihin, jos televisiosi ei toimi kunnolla tai
jos haluat päivittää sen ohjelmiston. Löydät yrityksemme
teknisen tuen tiedot ja ohjeita eri tuotteiden ja ohjelmistojen
lataamiseen.
TV Rear Panel
USB-muist
Ohjelm. päivitys
Nykyinen versio 2010/01/18_000001
U Siirrä E Hyväksy R Palaa
USB:lla ►
Kanavalta
Valmiustilan päivitys Pois
Vaihtoehtoinen ohjelmisto ----/--/--/--_------
BN68-02588H-Fin.indb 21 2010-3-23 19:29:4022 Suomi
Lisäominaisuudet
Voit kuunnella ja katsella sellaisia valokuvia,
musiikkia ja/tai elokuvatiedostoja, jotka on
tallennettu USB Mass Storage Class -laitteelle
(MSC).
Media Play
¦ USB-laitteen kytkeminen
1. Kytke virta televisioosi.
2. Kytke valokuvia ja/tai musiikkia sisältävä USB-laite television sivussa olevaan USB
(HDD) liittimeen.
3. Kun USB-laite on kytketty televisioon, näytölle ilmestyy ikkuna. Tämän jälkeen voit
valita Media Play.
✎Se ei välttämättä toimi oikein lisensoimattomien multimediatiedostojen kanssa.
✎Luettelo niistä asioista, jotka on tiedettävä ennen Media Play -toiminnon käyttöä
x MTP:tä (Media Transfer Protocol) ei tueta.
x Tiedostojärjestelmä tukee muotoja FAT16, FAT32 ja NTFS.
x Tietyn tyyppiset USB-digitaalikamerat ja -äänilaitteet eivät ole yhteensopivia tämän television kanssa.
x Media Play tukee vain USB MSC -laitteita (Mass Storage Class). MSC on Mass Storage Class Bulk-Only Transport
-laite. Esimerkkejä MSC-laitteista ovat muistitikut ja flash-kortinlukijat ja USB-kiintolevyt (USB HUBia ei tueta). Laitteet
tulee kytkeä suoraan television USB-porttiin.
x Ennen kuin kytket laitteen televisioon, ota tiedostoistasi varmuuskopio tietojen vaurioitumisen tai katoamisen varalta.
SAMSUNG ei vastaa tiedostojen vaurioitumisesta tai tietojen katoamisesta.
x Älä irrota USB-laitetta lataamisen aikana.
x Mitä suurempi kuvan tarkkuus on, sitä kauemmin sen ilmestyminen näytölle kestää.
x Suurin tuettu JPEG-tarkkuus on 15360 x 8640 kuvapistettä.
x Jos tiedostoa ei tueta tai se on vaurioitunut, näytölle ilmestyy viesti: ”Tukematon tiedostomuoto.”
x Jos lajitteluperusteena on perusnäkymä, tiedostoja näytetään enintään 1 000 kansiota kohden.
x Maksullisilta sivustoilta ladattuja DRM-suojattuja MP3-tiedostoja ei voi toistaa. DRM (Digital Rights Management) on
teknologia, joka tukee sisällön luontia, jakelua ja hallintaa sulautetusti ja kattavasti. Siihen kuuluvat sisällöntuottajan
oikeuksien ja etujen suojaaminen, sisällön laittoman kopioimisen estäminen sekä laskutuksen ja maksujen hallinta.
x Jos enemmän kuin kaksi PTP-laitetta on kytkettynä, voit käyttää niistä vain yhtä kerrallaan.
x Jos useampi kuin yksi MSC-laite on kytkettynä, joitakin niistä ei välttämättä tunnisteta. Jos USB-laitteen virrankulutus
on suuri (yli 500 mA tai 5V), sitä ei välttämättä tueta.
x Jos ylivirtavaroitus näytetään USB-laitetta kytkettäessä, laitetta ei välttämättä tunnisteta tai se ei toimi oikein.
x Jos televisiota ei ole käytetty kohdassa Autom. suojausaika määriteltynä aikana, näytönsäästäjä käynnistyy.
x Jos käytät USB-jatkojohtoa, USB-laitetta ei välttämättä tunnisteta tai laitteella olevia tiedostoja ei voida lukea.
x Jos televisioon kytkettyä USB-laitetta ei tunnisteta tai laitteen tiedostoluettelossa olevat tiedostot ovat vahingoittuneet
tai jotakin luettelon tiedostoista ei voida toistaa, kytke USB-laite tietokoneeseen, alusta se ja tarkista yhteyden
toiminta.
x Jos jokin tietokoneelta poistettu tiedosto näkyy yhä Media Play -toimintoa käytettäessä, poista tiedosto pysyvästi
käyttämällä tietokoneen ”Tyhjennä roskakori” -toimintoa.
Laitteen nimi A Vaihda laite D LaitetilaEHyväksy R Palaa
MediaPlay
USB Drive
TV:n takapaneeli
P
POWER
MEDIA.P
FAV.CH
P.MODE
DUAL
MTS
BN68-02588H-Fin.indb 22 2010-3-23 19:29:42Suomi 23
04 Lisäominaisuudet
Musiikki
Musiikin toistaminen
1. Valitse ◄- tai ►-painikkeella Musiikki-valikko ja paina sen jälkeen
Media Play -valikossa ENTERE -painiketta.
2. Valitse haluamasi Musiikki tiedostoluettelosta
◄/►/▲/▼-painikkeella.
3. Paina ENTERE -painiketta.
– Voit tehdä musiikin toistamisen aikana hakuja ◄- tai
►-painikkeilla.
✎Tässä näkyvät vain MP3-päätteiset tiedostot. Muulla päätteellä
varustettuja tiedostoja ei näytetä, vaikka ne olisi tallennettu
samalle USB-laitteelle.
✎Jos ääni kuulostaa MP3-tiedostojen toiston aikana oudolta,
säädä Taajuuskorjain-kohtaa Ääni-valikossa. (Ylimoduloitu
MP3-tiedosto saattaa aiheuttaa ääniongelman.)
Only you
Jason
1st Album
Pop
2010
4.2MB
3/15
Only you
Jason
Music 1
No Singer
Music 2
No Singer
Music 3
No Singer
Music 4
No Singer
Music 5
No Singer
01:10 / 04:02
Playlist
Laitteen nimi ETauko LSiirry TTyökalut R Palaa
¦ Näyttö
Siirry haluamaasi tiedostoon käyttämällä ylös-/alas-/oikealle-/vasemmalle-painikkeita ja paina sen jälkeen ENTERE. Tiedosto
toistetaan.
✎Tukee Media Play -pääsivun tiloja Laitetila ja Sisältötila.
Tiedot:
Voit tarkistaa valitun tiedoston
nimen sekä tiedostojen ja
sivujen määrän.
Lajitteluluettelo:
Näyttää käytössä olevan
lajittelujärjestyksen.
✎ Lajittelujärjestys riippuu
sisällöstä.
Toiminto painike
A Punainen (Vaihda laite): Valitsee kytketyn laitteen.
B Vihreä (Valinta): Asettaa tiedostojen suosituimmuusjärjestyksen. (Ei tueta perusnäkymässä.)
C Keltainen (Valitse): Valitsee useita tiedostoja tiedostoluettelosta. Valitut tiedostot merkitään symbolilla
D Sininen (Lajittelu): Valitse lajitteluluettelo
TTyökalut: Näyttää asetusvalikon.
Tiedostoluettelo:
Voit tarkastella luokittain
järjestettyjä tiedostoja ja
ryhmiä.
Laitteen nimi A Vaihda laite
c
c
c
Music 01 2010
no singer other
Music 02 2010
no singer other
Music 03 2010
no singer other
Music 04 2010
no singer other
Music 05 2010
no singer other
Music 06 2010
no singer other
Music 07 2010
no singer other
Music 08 2010
no singer other
Music /Music 01.mp3 1/2
C Valitse D LajitteluT Työkalut
BN68-02588H-Fin.indb 23 2010-3-23 19:29:4324 Suomi
Lisäominaisuudet
Valokuvat
Valokuvien (tai diaesityksen) katsominen
1. Valitse ◄- tai ►-painikkeella Valokuvat-valikko ja paina sen jälkeen
Media Play -valikossa ENTERE -painiketta.
2. Valitse haluamasi valokuva tiedostoluettelosta
◄/►/▲/▼-painikkeella.
3. Paina ENTERE -painiketta.
– Diaesitys aloitetaan, jos valokuvaluetteloa näytettäessä painetaan
kaukosäätimen ENTERE -painiketta.
– Kaikkia tiedostoluettelossa olevia tiedostoja käytetään
diaesityksessä.
– Diaesityksessä tiedostot näytetään järjestyksessä parhaillaan
näkyvästä tiedostosta alkaen.
✎Diaesityksen aikana voi toistaa automaattisti musiikkitiedostoja, jos
Taustamusiikki on asetettu tilaan Käytössä.
✎Taustamusiikkitila-asetusta ei voi muuttaa ennen kuin
taustamusiikki on täysin ladattu.
Normal Image1024.jpg 1024x768 2010/2/1 3/15
Laitteen nimiETauko LEdellinen/Seur TTyökalut R Palaa
¦ Useiden musiikkitiedostojen toistaminen
Valittujen video-, musiikki- tai kuvatiedostojen toistaminen
1. Valitse haluamasi tiedosto tiedostoluettelosta keltaisella painikkeella.
2. Voit valita useita tiedostoja toistamalla edellä mainitut vaiheet.
✎ HUOMAUTUS
x (c)-merkki ilmestyy valittujen tiedostojen vasemmalle puolelle.
x Voit perua valinnan painamalla keltaista painiketta uudestaan.
x Voit poistaa valinnan kaikista valituista tiedostoista painamalla
TOOLS-painiketta ja valitsemalla Poista valinta kaikista.
3. Valitse TOOLS-painikkeella Oista valittu sisältö.
Video-, musiikki- tai kuvatiedostoryhmän toistaminen
1. Kun tiedostoluettelo on näkyvissä, siirry haluamassasi ryhmässä olevaan tiedostoon.
2. Valitse TOOLS-painikkeella Toista tämä ryhmä.
¦ Media Play n lisätoiminnot
Tiedostoluettelon lajittelut
Lajittele tiedostot painamalla sinistä painiketta tiedostoluettelossa.
Luokka Toiminnot Musiikki Valokuvat
Perusnäkymä Koko kansio näytetään. Voit katsella kuvia valitsemalla kansion. ✓ ✓
Nimi
Järjestää ja näyttää tiedostojen nimet symbolin, numeron, aakkosten tai erityistarpeen
mukaan.
✓ ✓
Valinta
Järjestää tiedostot mieltymystesi mukaan. Voit muuttaa tiedostojen suosituimmuusjärjestystä
tiedostoluettelossa painamalla vihreää painiketta.
✓ ✓
Viimeisin
päivämäärä
Järjestää ja näyttää tiedostot viimeisimmän päivämäärän mukaisesti. ✓
Aikaisin
päivämäärä
Järjestää ja näyttää tiedostot aikaisimman päivämäärän mukaisesti. ✓
Esittäjä Järjestää musiikkitiedostot esittäjän mukaiseen aakkosjärjestykseen. ✓
Albumi Järjestää musiikkitiedostot albumin mukaiseen aakkosjärjestykseen. ✓
Laji Järjestää musiikkitiedostot lajin mukaisesti. ✓
Tunnelma
Järjestää musiikkitiedostot tunnelman mukaiseen järjestykseen. Voit muuttaa musiikin
tunnelmaan liittyvät tiedot.
✓
Kuukausi Järjestää ja näyttää valokuvat kuukausittain. ✓
Laitteen nimi A Vaihda laite C Valitse D LajitteluT Työkalut
c
c
c
Music 01 2010
no singer other
Music 02 2010
no singer other
Music 03 2010
no singer other
Music 04 2010
no singer other
Music 05 2010
no singer other
Music 06 2010
no singer other
Music 07 2010
no singer other
Music 08 2010
no singer other
Music /Music 01.mp3 1/2
BN68-02588H-Fin.indb 24 2010-3-23 19:29:45Suomi 25
04 Lisäominaisuudet
Videoiden, musiikin ja valokuvien toistoasetusvalikko
Asetusvalikko Toiminnot Musiikki Valokuvat
Toistotila Voit asettaa elokuva- ja musiikkitiedostot toistumaan jatkuvasti. ✓
Kuva-asetus Voit säätää kuvan asetuksia. (s. 14, 15, 16) ✓
Ääniasetukset Voit säätää ääniasetuksia. (s. 17, 18) ✓ ✓
Pysäytä diaesitys /
Aloita diaesitys
Voit aloittaa tai lopettaa diaesityksen.
✓
Kuvaesitysnopeus Voit valita diaesityksen nopeuden esityksen aikana. ✓
Taustamusiikki Voit asettaa ja valita diaesityksen taustamusiikin. ✓
Zoom Voit lähentää kuvia kokonäyttötilassa. ✓
Käännä Voit kääntää kuvia eri asentoon kokonäyttötilassa. ✓
Tiedot Saat tarkempia tietoja toistettavasta tiedostosta. ✓ ✓
Asetukset
Asetusvalikon käyttö
■ Tiedot: Valitse, kun haluat tarkastella kytketyn laitteen tietoja.
BN68-02588H-Fin.indb 25 2010-3-23 19:29:4626 Suomi
Muut tiedot
Analogisten kanavien tekstitelevisio-ominaisuus
Tekstitelevision sisältösivulta löytyy palvelun käyttöön liittyviä ohjeita. Kanavan vastaanoton on oltava häiriötöntä, jotta
tekstitelevision tiedot näkyisivät näytössä oikein. Muutoin tietoja saattaa puuttua tai jotkin sivut eivät näy kuvaruudulla.
✎Voit vaihtaa tekstitelevision sivua painamalla kaukosäätimen numeropainikkeita.
Tekstitelevision sivut on jaettu kuuteen osaan:
Osa Sisältö Osa Sisältö
A Valittu sivunumero. D Päivämäärä ja kellonaika.
B Lähetysaseman tunnus. E Teksti.
C
Kuvaruudussa näkyvän sivun
numero tai hakutilanne.
F Tilatiedot. FASTEXT-tiedot.
1 /(Tekstitelevisio
käytössä / mix): Ota
tekstitelevisiotila käyttöön tällä
painikkeella, kun olet ensin
valinnut tekstitelevisiopalveluita
tarjoavan kanavan. Paina painiketta
kaksi kertaa, jos haluat katsella
tekstitelevisiota ja televisiolähetystä
samanaikaisesti.
2 8(tallennus): Tallenna
tekstitelevision sivuja.
3 4(koko): Näytä kaksi kertaa
suuremmat kirjaimet näytön
yläosassa. Paina painiketta
uudelleen, kun haluat nähdä
näytön alaosan. Paina painiketta
vielä kerran uudelleen, kun haluat
palata normaalinäyttöön.
4 9(pito): Tällä toiminnolla
pidetään tietty sivu näytöllä,
jos valitulla sivulla on useita
automaattisesti vaihtuvia alasivuja.
Jatka painamalla samaa painiketta
uudelleen.
5 0(tila): Valitse tekstitelevisiotila
(LIST/FLOF).
Jos painat tätä painiketta LISTtilassa, laite siirtyy luettelon
tallennustilaan. Luettelon
tallennustilassa voit tallentaa
tekstitelevision sivun luetteloon
painamalla 8 (tallenna) -painiketta
button.
6 1(alasivu): Tarkastele alasivuja.
2(sivu ylös): Näytä
tekstitelevision seuraava sivu..
7
3(sivu alas): Näytä
tekstitelevision edellinen sivu..
8
6(hakemisto): Näyttää
hakemistosivun (sisältösivun) milloin
tahansa tekstitelevision katselun
aikana.
9
5(näytä): Näyttää piilotetun
tekstin (esimerkiksi tietokilpailujen
vastaukset). Paina tätä painiketta
uudelleen, kun haluat palata
normaalinäyttöön.
0
7(peruuta): Näytä
televisiolähetys sivuhaun aikana.
!
Väripainikkeet (punainen /
vihreä / keltainen / sininen): Jos
televisioyhtiö käyttää FASTEXTjärjestelmää, tekstitelevision sivujen
eri aiheet on merkitty väreillä. Voit
valita aiheet painamalla värillisiä
painikkeita. Paina sivua vastaavaa
väripainiketta. Näytölle ilmestyy eri
väreillä merkittyä tietoa sisältävä
sivu. Näitä tietoja voi valita samalla
tavoin. Voit siirtyä edelliselle tai
seuraavalle sivulle painamalla
vastaavaa värillistä painiketta.
@
MEDIA.P
A B C D
1
3
4
2
5
8
7
0
!
@
6
9
BN68-02588H-Fin.indb 26 2010-3-23 19:29:47Suomi 27
05 Muut tiedot
¦ Seinäkiinnikkeen asentaminen
Voit kiinnittää television seinälle (erikseen myytävällä) seinäkiinnikkeellä.
Seinäkiinnikkeen tarkat asennusohjeet löytyvät sen mukana toimitetusta ohjeesta. Pyydä teknikkoa asentamaan seinäkiinnike.
Samsung Electronics ei vastaa tuotteiden vaurioista tai sinun tai muiden henkilöiden vammoista, jos asennat television itse.
¦ Seinäkiinnikkeen asennussarjan tiedot (VESA)
✎Seinäkiinnikkeen asennussarjaa ei tule tuotteen mukana, vaan se on myytävänä erikseen.
Asenna seinäkiinnike vankalle seinälle, joka on kohtisuorassa lattiaa kohti. Ota yhteyttä lähimpään jälleenmyyjään, jos kiinnike
asennetaan johonkin muuhun rakennusmateriaaliin. Jos kiinnike asennetaan kattoon tai kaltevalle seinälle, se saattaa pudota ja
aiheuttaa vakavia henkilövahinkoja.
✎HUOMAUTUS
x Samsung Electronics ei vastaa tuotteiden vaurioista tai sinun tai muiden henkilöiden vammoista, jos asennat
television itse.
x Seinäkiinnikkeiden vakiomitat esitetään alla olevassa taulukossa.
x Seinäkiinnikkeiden asennussarjat sisältävät yksityiskohtaisen asennusoppaan ja kaikki tarvittavat osat.
x Älä käytä vakioruuveja pidempiä ruuveja, sillä ne voivat vahingoittaa television sisäisiä osia.
x Jos asennettavassa seinäkiinnikkeessä ei käytetä VESA-standardin mukaisia ruuveja, kiinnitykseen käytettävät ruuvit
voivat poiketa tavallisista ruuveista.
x Älä käytä VESA:n ruuvistandardeista poikkeavia ruuveja.
x Älä kiristä ruuveja liian kireälle, sillä laite voi vahingoittua tai pudota ja aiheuttaa henkilövahinkoja. Samsung ei ole
vastuussa tämänkaltaisista vahingoista.
x Samsung ei ole vastuussa muiden kuin VESA-standardien mukaisten seinätelineiden käytöstä aiheutuvista
laitevaurioista tai henkilövahingoista, eikä vahingoista, jotka aiheutuvat asennusohjeiden noudattamatta jättämisestä.
x Älä asenna televisiota yli 15 asteen kaltevuuskulmaan.
Tuotesarja tuumaa VESA-standardi (A * B) Standardiruuvi Määrä
LCD-TV
19~22
75 X 75
100 X 100 M4
4
23~29 200 X 100
30~40 200 X 200 M6
46~55 400 X 400
M8
57~65 600 X 400
70~80 800 X 400
80~ 1400 X 800
Älä asenna seinäkiinnikettä, kun televisioon on kytketty virta. Tästä voi seurata sähköisku ja
henkilövahinkoja.
BN68-02588H-Fin.indb 27 2010-3-23 19:29:4728 Suomi
Muut tiedot
Kensington-varkaudenestolukko
Kensington-lukko on laite, jolla televisio voidaan lukita kiinni julkisilla
paikoilla. Eri valmistajien lukituslaitteet saattavat poiketa kuvassa
esitetystä lukosta. Tarkista oikeaoppinen käyttötapa Kensington-lukon
mukana tulevista ohjeista.
✎Paikallista television takaosasta ” ”-kuvake. ” ” -kuvakkeen
vierestä löydät Kensington-lukkopaikan.
1. Työnnä lukituslaite nestekidetelevision Kensington-lukkopaikkaan
1 ja käännä sitä lukitussuuntaan 2.
2. Kiinnitä Kensington-lukitusvaijeri 3.
3. Kiinnitä Kensington-lukko pöytään tai muuhun paikallaan
pysyvään, raskaaseen esineeseen.
✎Lukituslaite on ostettava erikseen.
✎Kensington-lukon sijainti voi vaihdella eri malleissa.
Television kiinnittäminen seinään
Varoitus: Television vetäminen, työntäminen tai siinä kiipeily saattavat aiheuttaa sen putoamisen. Varmista
erityisesti, etteivät lapset leiki televisiolla tai horjuta sen tasapainoa, sillä tämä voi aiheuttaa television kaatumisen
ja vakavan loukkaantumisen tai kuoleman. Noudata kaikkia mukana toimitetun turvaoppaan turvallisuusohjeita.
Turvallisuuden kannalta lisää vakautta saat asentamalla putoamisen estävän laitteen seuraavien ohjeiden
mukaisesti.
¦ Näin estät television putoamisen
✎Koska tarvittavat kiinnikkeet, ruuvit ja vaijeri tai ketju eivät kuulu
toimitukseen, hanki ne erikseen.
1. Aseta ruuvit kiinnikkeisiin ja kiristä ne kiinni seinään. Varmista, että
ruuvit ovat lujasti kiinni seinässä.
✎ Ruuvien tekniset tiedot
x 23–29 tuuman nestekidetelevisio: M4
x 30–40 tuuman nestekidetelevisio: M6
2. Irrota television takana keskellä olevat ruuvit. Aseta ruuvit
kiinnikkeisiin ja kiinnitä ruuvit takaisin televisioon.
3. Yhdistä televisioon ja seinään kiinnitetyt kiinnikkeet toisiinsa
kestävällä ketjulla tai vaijerilla ja sido vaijeri tiukasti kiinni.
✎Varmista, että kaikki kiinnitykset on tehty kunnolla. Tarkista
ajoittain, ettei kiinnityksissä ole merkkejä rapistumisesta, jotteivät
ne pettäisi. Jos sinulla on pienintäkään epäilystä kiinnitysten
turvallisuudesta, ota yhteyttä ammattitaitoiseen asentajaan.
✎Asenna televisio lähelle seinää, jotta se ei kaatuisi taaksepäin.
✎Ketjun tai vaijerin yhdistäminen on turvallista niin, että seinässä olevat kiinnikkeet ovat samalla tasolla tai alempana kuin
television kiinnikkeet.
✎Irrota ketju tai vaijeri ennen television siirtämistä.
Seinä
1
2
3
BN68-02588H-Fin.indb 28 2010-3-23 19:29:49Suomi 29
05 Muut tiedot
Vianetsintä
Jos sinulla on televisioon liittyviä kysymyksiä, tutustu ensin tähän luetteloon. Jos mikään näistä vianetsinnän vinkeistä ei auta,
käy osoitteessa ”www.samsung.com”, napsauta tukivalikkoa tai ota yhteyttä asiakaspalveluun, jonka yhteystiedot löytyvät
tämän oppaan viimeiseltä sivulta.
Ongelmat Ratkaisut ja kuvaukset
Kuvanlaatu Tee ensimmäisenä Kuvatesti jolla varmistat, että televisio näyttää testikuvan kunnolla.
(Siirry kohtaan MENU - Tuki - Itsediagnoosi - Kuvatesti) (s.21)
Jos testikuva näkyy oikein, huono kuvanlaatu saattaa johtua kuvan lähteestä tai signaalista.
TV-kuva ei näytä yhtä hyvältä kuin
myymälässä.
• Jos sinulla on analoginen kaapelivastaanotin, hanki digitaalinen vastaanotin. Käytä HDMI- tai
komponenttikaapeleita, jos haluat teräväpiirtokuvanlaadun.
• Kaapeli- tai satelliittiverkon käyttäjät: Kokeile kanavavalikoimasta löytyviä HD-lähetysasemia.
• Antenniyhteys: Käytä ensin automaattista tallennusta ja kokeile sen jälkeen HD-lähetysasemia.
✎ Monet HD-kanavat on skaalattu SD-ohjelmasisällöstä (vakiopiirto).
• Aseta kaapeli- tai digisovittimen kuvan tarkkuudeksi 1080i tai 720p.
• Varmista, että katselet televisiota näytettävän kuvan koosta ja määrityksistä riippuvalta suositellulta
minimietäisyydeltä.
Kuva on vääristynyt: makrolohkoja, pieniä
lohkoja, pisteitä, pikseloitumista
• Videotiedostojen pakkaaminen saattaa aiheuttaa kuvan vääristymistä erityisesti nopealiikkeisissä
kuvissa, esim. urheilussa ja toimintaelokuvissa.
• Signaalin alhainen taso tai huono laatu voivat aiheuttaa vääristymiä kuvassa. Tämä ongelma ei ole
television aiheuttama.
Värit ovat vääränlaiset tai niitä ei ole
lainkaan.
• Jos käytät komponenttikaapeleita, varmista, että ne on kytketty oikeisiin liittimiin. Väärät tai löysät
liitännät voivat aiheuttaa väriongelmia tai saada näytön näkymään tyhjänä.
Huono väri tai kirkkaus. • Säädä Kuva-asetukset television valikossa. (Siirry kohtaan Kuva tila / Väri / Kirkkaus / Terävyys)
• Säädä Energiansäästö-asetukset television valikossa. (Siirry kohtaan MENU - Kuva - Ekoratkaisu -
Energiansäästö)
• Palauta kaikki kuva-asetukset oletusarvoihin. (Siirry kohtaan MENU -Kuva - Kuvan palautus)
Kuvan reunassa on pisteviiva. • Jos kuvakooksi on asetettu Mukautettu ruutu, vaihda asetukseksi 16:9. (s. 16)
• Muuta kaapeli- tai digivastaanottimen tarkkuutta.
Kuva on mustavalkoinen • Jos käytät AV-komposiittituloa, yhdistä (keltainen) kuvakaapeli television komponenttitulon 1 vihreään
liitimeen.
Kuva pysähtyy tai vääristyy kanavaa
vaihdettaessa, tai kuvaan tulee viivettä.
• Jos käytössä on kaapelisovitin, nollaa sen asetukset. Irrota virtajohto pistorasiasta, kiinnitä se
uudelleen ja odota kaapelisovittimen käynnistymistä. Tämä saattaa kestää 20 minuuttia.
• Aseta kaapelisovittimen kuvan tarkkuudeksi 1080i tai 720p.
Äänenlaatu Tee ensimmäisenä Äänitesti, jolla varmistat, että television ääni toimii kunnolla.
(Siirry kohtaan MENU - Tuki - Itsediagnoosi - Äänitesti) (s.21)
Jos ääni toimii oikein, ääniongelma saattaa johtua äänen lähteestä tai signaalista.
Ei ääntä tai ääni on suurimmallakin
äänenvoimakkuudella liian hiljainen.
• Tarkista televisioon kytketyn ulkoisen laitteen äänenvoimakkuus.
Kuva on hyvä, mutta ääni puuttuu. • Aseta äänivalikon kohdan Valitse kaiutin asetukseksi TV-kaiutin. (s.18)
• Jos käytät ulkoista laitetta, varmista, että siitä tulevat äänikaapelit on kytketty television oikeisiin äänen
tuloliittimiin.
• Jos käytät ulkoista laitetta, tarkista sen äänilähtöasetukset (esim. sinun täytyy ehkä muuttaa
kaapelisovittimen äänivalinnaksi HDMI, jos sovitin on kytketty televisioon HDMI-kaapelilla).
• Jos käytössä on DVI-HDMI-kaapeli, sinun täytyy käyttää erillistä äänikaapelia.
• Jos televisiossasi on kuulokeliitäntä, varmista, ettei siihen ole kytketty kuulokkeita.
Kaiuttimista kuuluu outoa ääntä. • Tarkista kaapelien kytkennät. Varmista, että kuvakaapelia ei ole kytketty äänituloliitäntään.
• Jos käytössä on antenni- tai kaapeliverkko, tarkista signaalin voimakkuus. Matala signaalitaso saattaa
aiheuttaa äänen säröilyä.
BN68-02588H-Fin.indb 29 2010-3-23 19:29:5030 Suomi
Muut tiedot
Ongelmat Ratkaisut ja kuvaukset
Ei kuvaa, ei videota
Televisio ei käynnisty. • Varmista, että virtajohto on kunnolla kiinni pistorasiassa ja televisiossa.
• Varmista, että pistorasia toimii.
• Tarkista television POWER-painiketta painamalla, että kaukosäätimessä ei ole vikaa. Jos televisio
käynnistyy, katso alta löytyvää kohtaa kohtaa "Kaukosäädin ei toimi".
Televisio sammuu automaattisesti. • Varmista, että Uniajastin on asetettu tilaan Pois Asetukset-valikossa. (s.19)
• Jos televisio on kytkettynä tietokoneeseen, tarkista tietokoneen virrankäyttöasetukset.
• Varmista, että virtajohto on kunnolla kiinni pistorasiassa ja televisiossa.
• Kun katselet televisiota antenni- tai kaapeliverkon kautta eikä signaalia vastaanoteta, televisio sammuu
10–15 minuutin kuluessa.
Ei kuvaa/videota. • Tarkista kaapeliliitännät (irrota ja liitä kaikki television ja ulkoisten laitteiden kaapelit uudelleen).
• Aseta ulkoisten laitteiden (kaapeli- tai digisovitin, DVD, Blu-ray jne.) kuvalähtöliitännät vastaamaan
television tuloliitäntöjä. Jos esimerkiksi ulkoisen laitteen lähtöliitäntänä on HDMI, se täytyy kytkeä
television HDMI-tuloliitäntään.
• Varmista, että kytketyt laitteet ovat päällä.
• Valitse televisiosta oikea lähde painamalla kaukosäätimen SOURCE-painiketta.
RF (kaapeli/antenni) -liitäntä
Televisio ei vastaanota kaikkia kanavia. • Varmista, että antenninjohto on kiinnitetty oikein.
• Lisää saatavilla olevia kanavia kanavaluetteloon Plug & Play (alkuasetukset) -toiminnon avulla. Siirry
kohtaan MENU - Asetukset - Plug & Play (alkuasetukset) ja odota, että saatavilla olevat kanavat
tallennetaan.
• Varmista, että antenni on oikealla paikalla ja oikeassa asennossa.
Kuva on vääristynyt: makrolohkoja, pieniä
lohkoja, pisteitä, pikseloitumista
• Videotiedostojen pakkaaminen saattaa aiheuttaa kuvan vääristymistä erityisesti nopealiikkeisissä
kuvissa, esim. urheilussa ja toimintaelokuvissa.
• Huono signaali saattaa aiheuttaa kuvan vääristymistä. Tämä ongelma ei ole television aiheuttama.
Tietokoneliitäntä
Kuvaruudulle ilmestyy viesti "Tilaa ei tueta". • Aseta tietokoneen toistaman kuvan tarkkuus ja taajuus niin, että ne vastaavat television tukemia
tarkkuuksia. (s. 9)
Tietokone näkyy aina lähdeluettelossa,
vaikka se ei olisikaan kytkettynä.
• Tämä on normaalia. Tietokone näkyy aina lähdeluettelossa, olipa se sitten kytketty tai ei.
Kuva on hyvä, mutta ääni puuttuu. • Jos käytät HDMI-yhteyttä, tarkista tietokoneen äänen lähtöasetukset.
Muut
Kuva ei näy koko kuvaruudun kokoisena. • HD-kanavilla näkyy mustat palkit molemmilla reunoilla katsottaessa skaalattua SD-sisältöä (4:3).
• Ylä- ja alareunassa näkyvät mustat palkit, kun katsot elokuvia, joissa on erilainen kuvasuhde kuin
televisiossasi.
• Säädä kuvakoon asetukset ulkoisella laitteella tai televisiossa niin, että kuva täyttää kuvaruudun.
Kaukosäädin ei toimi. • Vaihda kaukosäätimen paristot ja aseta ne niin, että niiden napaisuudet (+/–) ovat oikein.
• Puhdista kaukosäätimen lähettimen ikkuna.
• Osoita kaukosäätimellä suoraan televisiota noin puolentoista metrin etäisyydeltä.
Kaapeli- tai digisovittimen kaukosäädin ei
käynnistä eikä sammuta televisiota eikä
säädä äänenvoimakkuutta.
• Ohjelmoi kaapeli- tai digisovittimen kaukosäädin niin, että sillä voi hallita televisiota. Tarkista
SAMSUNGin television koodi kaapeli- tai digisovittimen käyttöoppaasta.
Kuvaruudulle ilmestyy viesti "Tilaa ei tueta". • Tarkista television tukemat näyttötarkkuudet ja säädä ulkoisen laitteen ulostulotarkkuus vastaavaksi.
Löydät tarkkuusasetukset tämän käyttöoppaan sivulta 9.
Televisio tuoksuu muoville. • Tämä tuoksu on normaalia ja se poistuu ajan myötä.
Television Signaalitiedot eivät ole
käytettävissä itsetestausvalikossa.
• Tämä toiminto on käytettävissä vain antenni- / RF -/ koaksiaaliliitäntäisten digitaalisten kanavien
kanssa. (s. 21)
Televisio on kallellaan sivusuunnassa. • Irrota television jalusta ja asenna se uudelleen.
Jalustan asentaminen on hankalaa. • Varmista, että televisio on asetettu tasaiselle alustalle. Jos et saa ruuveja irti televisiosta, käytä
magneettista ruuvimeisseliä.
Kanavavalikko näkyy harmaana.
(Ei käytettävissä.)
• Kanava-valikko on käytettävissä vain, kun lähde on valittu televisiosta.
BN68-02588H-Fin.indb 30 2010-3-23 19:29:50Suomi 31
05 Muut tiedot
Ongelmat Ratkaisut ja kuvaukset
Asetukset katoavat 30 minuutin jälkeen tai
aina, kun televisio sammutetaan.
• Jos televisio on Myymälädemo-tilassa, sen ääni- ja kuva-asetukset palautetaan oletuksiin
30 minuutin välein. Vaihda Myymälädemo-tila Kotikäyttö-tilaan Plug & Play (alkuasetukset)
-toiminnossa. Paina SOURCE-painiketta ja valitse TV-tila. Siirry kohtaan MENU → Asetukset →
Plug & Play (alkuasetukset) → ENTERE.
Ääni tai kuva katkeilee. • Tarkista kaapelien kytkennät ja kytke ne uudelleen.
• Ääni tai kuva voi katkeilla, jos käytät liian jäykkiä tai paksuja kaapeleita. Varmista, että kaapelit ovat
riittävän joustavia pitkäaikaiseen käyttöön. Jos olet asentanut laitteen seinälle, suosittelemme, että
käytät sellaisia kaapeleita, joiden liittimet ovat 90 asteen kulmassa.
Näyttöä ympäröivän kehikon reunoilla voi
läheltä katsottuna näkyä pieniä hiukkasia.
• Tämä kuuluu osana tuotteen rakenteeseen eikä ole valmistusvirhe.
PIP-valikko ei ole käytettävissä. • PIP-toiminto on käytettävissä vain, kun kuvan lähteenä on HDMI, PC tai komponentti.
Kuvaruudulle ilmestyy viesti "Salattu
signaali" tai "Heikko signaali / Ei signaalia".
• Jos käytät CAM-korttia (CI / CI+), tarkista, että se on asennettu CI-korttipaikkaan.
• Jos ongelma jatkuu, ota CAM-kortti pois televisiosta ja aseta se takaisin sille varattuun paikkaan.
Sammutit television 45 minuuttia sitten ja
nyt se käynnistyi uudelleen.
• Tämä on normaalia. Televisio käyttää OTA-toimintoa (Over The Air) päivittäessään katselun aikana
ladattua laiteohjelmistoa.
Kuva- tai ääniongelmia esiintyy ajoittain. Tarkista ja vaihda signaali/kuvalähde. •
Joidenkin huonekalujen päällysteet ja
jalustan kumiset pehmusteet saattavat
reagoida toisiinsa.
• Voit estää tämän käyttämällä huopapehmusteita niillä television pinnoilla, jotka ovat suorassa
kontaktissa kyseisen huonekalun kanssa.
✎Tämä TFT LCD -paneeli koostuu alipikseleistä, joiden tuottaminen edellyttää pitkälle kehitettyä tekniikkaa. Näytöllä
saattaa kuitenkin näkyä muutamia kirkkaita tai tummia kuvapisteitä. Nämä kuvapisteet eivät vaikuta laitteen
suorituskykyyn
¦ Lisenssi
Manufactured under license from Dolby Laboratories.
Dolby and the double-D symbol are trademarks of Dolby Laboratories.
BN68-02588H-Fin_2.indd 31 2010-3-25 11:23:3032 Suomi
Muut tiedot
Tekniset tiedot
Paneelin tarkkuus 1360 x 768 @ 60 Hz
Käyttö- ja säilytysympäristö
Käyttölämpötila
Käyttötilan ilmankosteus
Säilytyslämpötila
Säilytystilan ilmankosteus
10–40 °C (50–104 °F)
10–80 %, tiivistymätön
-20–45 °C (-4–113 °F)
5–95 %, tiivistymätön
Televisiojärjestelmä Analoginen: Riippuu valitusta maasta.
Digitaalinen: DVB-T/DVB-C
Väri-/kuvajärjestelmä Analoginen: PAL, SECAM, NTSC-4.43, NTSC-3.58, PAL60
Digitaalinen: MPEG-2 MP@ML, MPEG-4, H.264/AVC MP@L3, MP@L4.0, HP@L4.0
Äänijärjestelmä BG. OK NICAM. MPEGl
HDMI IN Video: 1080/24p, 1080p, 1080i, 720p, 576p, 576i, 480p, 480i
Ääni: Kaksikanavainen, lineaarinen PCM 32,44 1, 48 kHz, 16/20/24bits
Analoginen äänituloliitäntä (vain HDMI IN)
PC-tulo
Käännettävä jalusta
(vasen / oikea) 0˚
Mallin nimi LE19C355 LE22C355
Kuvaruudun koko
(kulmasta kulmaan) 19 tuumaa 22 tuumaa
Ääni
Lähtö 3W X 2 3W X 2
Mitat (l x s x k)
Runko
Jalustan kanssa
461.2 x 59.5 x 322.2 mm
461.2 x 161 x 364 mm
535.3 x 82.2 x 365.8 mm
535.5 x 171.8 x 420.9 mm
Paino
Runko
Jalustan kanssa
3.9 kg
4.2 kg
3.9 kg
4.1 kg
✎Ulkoasua ja teknisiä tietoja voidaan muuttaa ilman ennakkoilmoitusta.
✎Virtalähteen ja virrankulutuksen tiedot on merkitty laitteeseen kiinnitettyyn tarraan.
BN68-02588H-Fin.indb 32 2010-3-23 19:29:50Suomi 33
05 Muut tiedot
Hakemisto
A
Ajastin 19
Ajoitetun näkymän käyttäminen 11
Antenni 12
Aut. voimak. 18
Automaattinen säätö 17
B
Balanssi 17
D
Diaesitys 24
Digital Audio Out 8
D-liitin 8
Dynaaminen 14
Dynaaminen kontrasti 15
E
Edit Name 10
Energiansäästö 15
EPG 11
Etusivun tausta 25
F
FElokuvatila 15
H
HDMI 7
Hienosäätö 14
I
Ihonsävy 15
Itsediagnoosi 21
K
Kanavanäkymän käyttäminen 11
Kanavien hallinta 12
Kanavien muokkaaminen 13
Kaukosäädin 5
Kello 19
Kieli 20
Kirkkaus 14
Komponentti 7
Kuvakoko 16
Kytkeminen tietokoneeseen 8
Kytkeminen äänilaitteeseen 8
L
Lisenssi 31
Lukko 14
Lähdeluettelo 10
M
Media Play 22
Melodia 20
Musiikki 23
Mustan sävy 15
N
Nimi 25
O
Ohjelm. päivitys 21
ON/OFF-painike 5
Optimaalinen tarkkuus 9
P
Paristojen 5
Perusnäkymä 25
Plug & Play 6
R
RGB 15
S
Seinäteline 27
Signaalitiedot 21
Suosikkikanava 12
Suosikkikanavien käyttäminen 12
Suosikkikanavien käyttäminen 10
T
Taajuus 12
Taajuuskorjain 17
Taustamusiikki 25
Tekniset tiedot 32
Tekstitys 20
Terävyys 14
Toistotila 25
TV-kaiutin 18
Työkalut 3
U
Ulkoista kaiutinta 18
Uniajastin 19
USB 21, 22
V
Vahvista 17
Vaihda PIN 20
Val.kaikki 14
Valikoissa 10
Valikon läpinäk. 20
Valitse kaiutin 18
Valkotasapaino 15
Valmiustila 4
Valokuvat 24
Verkkoasetukset 11
Vianmääritys 29
Virtavalo 4
Värisävy 15
Ä
Äänenvoimakkuus 4, 5
BN68-02588H-Fin.indb 33 2010-3-23 19:29:51Tämä sivu on jätetty
tarkoituksella tyhjäksi.
BN68-02588H-Fin.indb 34 2010-3-23 19:29:51
English -4
Connecting a AV device
R B G
R W
R W
R B G
HD connection
DVD / Blu-Ray player / Cable Box
/ Satellite receiver (STB)
Using a DVI Cable
AUDIO OUT DVI OUT
HD connection
DVD / Blu-Ray player / HD Cable
Box / HD Satellite receiver (STB)
Using an HDMI Cable
HDMI OUT
Component connection
DVD / Blu-Ray player / Cable
Box / Satellite receiver
Using a Component Cable
AUDIO OUT COMPONENT OUT
HDMI/DVI
PC/COMPONENT
EXT/VIDEO
Best Normal
VCR / DVD
Using a Scart Cable
EXT
BN68-02365B_00Eng.indd 1 2009-05-18 �� 2:19:15LCD TV
QUICK SETUP GUIDE
English - 1
The Supplied Accessoris
Remote Control & Batteries (AAA x 2) Power Cord Cover-Bottom
(M4 X L16)
Cleaning Cloth User Manual Stand Screw X 6
Installing Batteries in the Remote Control
BN68-02365B-00
BN68-02365B_00Eng.indd 2 2009-05-18 �� 2:19:16Installing the Stand
Preset: Place the Guide Stand and Cover Neck onto the stand and fasten it using the screws. Applicable to 32inch model only.
Step 1. Attach your LCD TV to the stand.
Two or more people should carry the TV.
Make sure to distinguish between the front and back of the stand when assembling them.
To make sure the TV is installed on the stand at a proper level, do not apply excess downward pressure to the upper left
of right sides of the TV.
Step 2. Fasten two screws at position 1 and then fasten two screw at position 2.
Stand the product up and fasten the screws. If you fasten the screws with the LCD TV placed down, it may lean to one
side.
Using the remote control buttons
MENU Button
Display the main on-screen menu.
ENTERE/ DIRECTION Button
Move the cursor and select an
item. Select the currently selected
item. Confirm the setting.
RETURN Button
Return to the previous menu.
EXIT
Exit the on-screen menu.
N
N
N
N
N
English - 2
Preset Step 1 Step 2
2
1
BN68-02365B_00Eng.indd 3 2009-05-18 �� 2:19:17English - 3
Plug & Play
When the TV is initially powered on, basic settings proceed automatically and subsequently.
If you want to reset this feature, press the MENU button to display menu.
You can set the Plug & Play by selecting Setup → Plug & Play.
On the screen, you can set as follows.
N The each step may vary depending on the Antenna source.
Step 1 Step 2
Plug & Play
Select the OSD Language.
Menu Language : English
U Move E Enter
▲
Nederlands
English
Eesti
▼
Plug & Play
Select 'Home Use' when installing this TV in your home.
L Move E Enter
Store Demo Home Use
Plug & Play
Select Country.
Country : English
U Move E Enter
▲
Switzerland
United Kingdom
CIS
▼
Plug & Play
Select the Antenna source to memorise.
U Move E Enter m Skip
Stert
Stert
Air
Cable
Plug & Play
Select the Channel source to memorise.
U Move E Enter m Skip
Stert
Stert
Stert
Digital & Analogue
Digital
Analogue
Plug & Play
Auto Store in progress.
Digital Channels : 5 Analogue Channels : 6
E Enter m Skip
Stop
Frequency 113 MHz
15%
Plug & Play
Set the Clock Mode.
Clock Mode : Auto
U Move E Enter m Skip
Auto
Manual
Plug & Play
How to get the best perfotmance from your new HDTV
Step 1. Connect the HD Source Unit to the TV using the Component video (Red, Green,
Blue) and audio (Red, White) cables or HDMI Cable.
Step 2. Press the Source button on the Remote Control to select HDMI or Component
Input.
Depending on your location, HD programs may also be viewd using an RF antenna.
For more detalls, please refer to HD Connections in the Owner Manual.
E Enter
HD Cable
Component Cable
▼ HD box ▼ TV rear view
Plug & Play
Enjoy your TV.
OK
Step 3
Step 4 Step 5 Step 6
Step 7 Step 8 Step 9
BN68-02365B_00Eng.indd 4 2009-05-18 �� 2:19:18
English - 1
¦ The Supplied Accessoris
y Remote Control & Batteries (AAA x 2)
y Owner’s Instructions
y Cleaning Cloth
See separate guide for installing the stand.
(M4 X L16)
y Stand (1EA) y Screws (2EA)
¦ Installing Batteries in the Remote Control
LCD TV
QUICK SETUP GUIDE
BN68-02681A-00
✎NOTE
Use the remote control within 23 feet from the
x
TV.
Bright light may affect the performance of the
x
remote control. Avoid using nearby special
fluorescent light or neon signs.
The colour and shape may vary depending on
x
the model.
BN68-02681A_00Eng_UK QSG.indd 1 2010-03-27 �� 12:56:13English - 2
¦ Installing the Stand
✎Make sure to distinguish between the front and back of the Stand and Guide Stand when assembling them.
✎Make sure that at least two persons lift and move the LCD TV.
✎Lay the product down, with the screen facing up and fasten the screws.
¦ Using the remote control buttons
Front
Rear
Step 1 Step 2
A B C D
A B C D
AD
DUAL
I-II
SUBT.
A B C D
I II
AD
DUAL
I-II
SUBT.
ENTERE / Direction Button
Move the cursor and select an item.
Select the currently selected item.
Confirm the setting.
EXIT Button
Exit the on-screen menu
MENU Button
Displays the favourites channel list.
RETURN Button
Returns to the previous menu
BN68-02681A_00Eng_UK QSG.indd 2 2010-03-27 �� 12:56:14English - 3
¦ Plug & Play
When the TV is initially powered on, basic settings proceed automatically and subsequently.
If you want to reset this feature, press the MENU button to display menu.
You can set the Plug & Play by selecting Setup → Plug & Play.
On the screen, you can set as follows.
✎The each step may vary depending on the Antenna source.
Plug & Play
Select the OSD Language.
E Enter
Menu Language : English ►
Step 1
Step 4
Step 3
Plug & Play
Select Country.
Previous E Enter
Country : United Kingdom ►
Step 2
Plug & Play
Store Demo Home USE
Previous L Move E Enter
Step 7
Step 5 Step 6
Step 8
HD Connection Guide Plug & Play
How to get the best performance from your new HDTV.
Step 1. Connect the HD Box to the TV using the HDMI or Component
cables.
HD box
TV rear view
1/2
Component Cable
Previous Skip r Next Page
HDMI Cable
Enjoy your TV.
Power Input
VHF/UHF Antenna
Cable
R-AUDIO-L PR PB Y
ANT OUT
Select the usage mode.
Plug & Play
Serch
Previous Skip U Move E Enter
Antenna Source : Air ►
Channel Source : Digital & Analogue
Plug & Play
Stop
E Enter
Auto Store in progress.
Digital
2
TV:2 Radio:0 Data/Other: 0
Analogue 0
Channels 7
3%
Plug & Play
Set the Clock Mode.
Previous Skip E Enter
Clock Mode : Auto ►
OK
or
BN68-02681A_00Eng_UK QSG.indd 3 2010-03-27 �� 12:56:15English - 4
¦ Connecting a AV device
R W R B G
R W R B G
W R
YW R
WY
W
HD connection
DVD / Blu-Ray player / Cable Box
/ Satellite receiver (STB)
Using a DVI Cable
DVI OUT AUDIO OUT
HD connection
DVD / Blu-Ray player / HD Cable Box
/ HD Satellite receiver (STB)
Using an HDMI Cable
HDMI OUT
Component connection
DVD / Blu-Ray player / Cable
Box / Satellite receiver
Using a Component Cable
AUDIO OUT COMPONENT OUT
VCR / DVD
Using a Scart Cable
EXT
HDMI/DVI
PC/COMPONENT
EXT/VIDEO
Best Normal
Audio/Video connection
VCR
Using an Audio/Video Cable
VIDEO OUT AUDIO OUT
BN68-02681A_00Eng_UK QSG.indd 4 2010-03-27 �� 12:56:17
English -4
¦ Connecting a AV device
HD connection
DVD / Blu-ray player
/ HD Cable Box / HD
STB (Set-Top-Box)
satellite receiver
Using an HDMI Cable
HDMI OUT
VCR / DVD
Using a Scart Cable
EXT
W R
Y
Y
W R
W R
G B R W R
G B R W R
HD connection
DVD /
Blu-ray player
Using an HDMI to DVI Cable
DVI OUT
AUDIO OUT
Component connection
DVD, Blu-ray
player, cable
box, STB satellite
receiver, VCR
Using a Component Cable
COMPONENT OUT AUDIO OUT
VIDEO OUT AUDIO OUT VCR
Using an Audio/Video Cable
W R
Y
Y
W R
W R
G B R W R
G B R W R
[QSG]BN68-02789A-01Eng.indd 1 2010-03-09 오후 4:55:51¦ The Supplied Accessories
y Remote Control & Batteries (AAA x 2)
y Owner’s Instructions
y Warranty Card / Safety Guide (Not available in some locations)
y Cleaning Cloth
y Power Cord
y Blanking Bracket y Ferrite Core (3EA)
(depending on the country)
See separate guide for installing the stand.
(M4 X L16)
y Stand (1EA) y Guide Stand (1EA) y Screws (10EA)
✎Ferrite Core: The ferrite cores are used to shield the cables from interference. When connecting a cable, open the ferrite core
and clip it around the cable near the plug as shown in the figure.
y Distance between the ferrite core and one end of the cord put into the TV set
A B
y A : below 50 mm
y B : below 20 mm
C D
y C : 100 ~ 150 mm
y D : below 15 mm
(Switzerland only)
Plasma TV
QUICK SETUP GUIDE
English - 1
BN68-02789A-01
[QSG]BN68-02789A-01Eng.indd 2 2010-03-09 오후 4:55:52¦ Installing the Stand
✎Preset: Place the Guide Stand and Cover Neck onto the stand and fasten it using the screws. Applicable to models
(Depending on the model)
Step 1. Attach your PDP TV to the stand.
✎ Two or more people should carry the TV.
✎ Make sure to distinguish between the front and back of the stand when assembling them.
✎ To make sure the TV is installed on the stand at a proper level, do not apply excess downward pressure to the upper
left of right sides of the TV.
Step 2. Fasten two screws at position 1 and then fasten two screw at position 2.
✎ Stand the product up and fasten the screws. If you fasten the screws with the PDP TV placed down, it may lean to
one side.
¦ Using the remote control buttons
¦ Installing Batteries in the Remote Control
English - 2
S.MODE
MEDIA.P HDMI
RETURN
ΕΧΙΤ
INFO
SLEEP DUAL
P.MODE P.SIZE E.SAVING
SOURCE
CH LIST
A B C D
TTX/MIX
2
RETURN Button3 4
Return to the previous menu.
ENTERE / DIRECTION Buttons
Move the cursor and select an
item. Select the currently selected
item. Confirm the setting.
EXIT
Exit the on-screen menu.
MENU Button
Display the main on-screen menu.
s
s
s
s
Preset Step 1 Step 2
Back
Front
Back
Front
s s
s s
[QSG]BN68-02789A-01Eng.indd 3 2010-03-09 오후 4:55:52English - 3
¦ Plug & Play
When the TV is initially powered on, basic settings proceed automatically and subsequently.
If you want to reset this feature, press the MENU button to display menu.
You can set the Plug & Play by selecting ‘Setup → Plug & Play’.
On the screen, you can set as follows.
✎The each step may vary depending on the Antenna source.
ANT OUT
VHF/UHF Antenna
or
Cable
Power Input
Step 1 Step 2 Step 3
Step 4 Step 5 Step 6
Step 7 Step 8
Plug & Play
Select the OSD Language.
Menu Language : : English
▲
Nederlands
English
Eesti
▼
U Move E Enter
Plug & Play
Select Country.
Country :
▲
Turkey
United Kingdom
Estonia
▼
U Move E Enter
Plug & Play
Enjoy your TV.
OK
Plug & Play
Select the usage mode.
Store Demo Home Use
Previous U Move E Enter
Plug & Play
Antenna Source : Air ►
Channel Source : Digital & Analogue
Previous Skip U Move E Enter
Serch
Plug & Play
Auto Store in progress.
Channels : 7
15%
Digital
2
TV:2 Radio:0 Data/Other: 0
Analogue 0
E Enter
Stop
Plug & Play
Set the Clock Mode.
Clock Mode : Manual ►
U Move E Enter
Auto
Manual
Plug & Play
How to get the best perfotmance from your new HDTV
1/2
Step 1. Connect the HD Box to the using HDMI or Component
cables.
TV rear view ►
HDMI Cable
HDMI Cable
Previous Skip ► Next
[QSG]BN68-02789A-01Eng.indd 4 2010-03-09 오후 4:55:53
imagine the possibilities
Plasma TV
user manual
Thank you for purchasing this Samsung product.
To receive more complete service, please register your
product at
www.samsung.com/global/register
Model Serial No.English - 2
© 2008 Samsung Electronics Co., Ltd. All rights reserved.
User Instructions
� Screen Image retention
Do not display a still image (such as on a video game or when hooking up a PC to this PDP) on the
plasma monitor panel for more than 2 hours as it can cause screen image retention. This image
retention is also known as “screen burn”. To avoid such image retention, reduce the degree of
brightness and contrast of the screen when displaying a still image.
� Height
The PDP can normally operate only under 2000m in height. It might abnormally function at a place
over 2000m in height so do not install and operate there.
� Heat on the top of the PDP TV
The top side of the product may be hot after long period of use as heat dissipates from the panel
through the vent hole in the upper part of the product. This is normal and does not indicate any defect
or operation failure of the product. However, children should be prevented from touching the upper
part of the product.
� The product is making a ‘cracking’ noise.
A ‘cracking’ noise may occur when the product contracts or expands due to a change of surrounding
environment such as temperature or humidity. This is normal and not a defect of the unit.
� Cell Defects
The PDP uses a panel consisting of 1,230,000(SD-level) to 3,150,000(HD-level) pixels which require
sophisticated technology to produce. However, there may be few bright or dark pixels on the screen.
These pixels will have no impact on the performance of the product.
� Avoid operating the TV at temperatures below 5°C(41°F)
� A still image displayed too long may cause permanent damage to the PDP Panel.
Watching the PDP TV in 4:3 format for a long period of time may leave traces
of borders displayed on the left, right and centre of the screen caused by the
difference of light emission on the screen. Playing a DVD or a game console
may cause similar effect to the screen. Damages caused by the above effect are
not covered by the Warranty.
� Afterimage on the Screen.
Displaying still images from Video games and PC for longer than a certain period of time may
produce partial afterimages. To prevent this effect, reduce the ‘brightness’ and ‘contrast’ when
displaying still images.
� Warranty
- Warranty does not cover any damage caused by image retention.
- Burn-in is not covered by the warranty.
� Installation
Be sure to contact an authorized service centre, when installing your set in a location with heavy
dust, high or low temperatures, high humidity, chemical substance and where it operates continually
such as the airport, the train station etc. Failure to do so may cause a serious damage to your set.
Any functions related to Digital TV (DVB) will only work in countries or areas where DVB-T (MPEG2)
digital terrestrial signals are broadcasted. Please confirm with your local dealer if you can receive
DVB-T signals. Although this TV set follows the DVB-T specification, maintaining compatibility with
the future coming DVB-T digital terrestrial broadcasts is not guaranteed. Several functions may not be
available in some countries.English - 3
Symbols � ¯
Press Important Note
Contents
General Information
� User Instructions ............................................. 2
� Checking Parts ................................................ 4
� Using the Stand-Base ..................................... 4
� Control Panel ................................................. 5
� Connection Panel ............................................ 6
� Viewing the Remote Control ........................... 8
Operation
� Switching Your Television On and Off ............. 9
� Viewing the Menus .......................................... 9
� Plug & Play Feature ...................................... 10
� Using the TOOLS Button .............................. 12
� Viewing External Signal Sources .................. 12
� Editing Device Names ................................... 13
Channel Control
� Storing Channels Automatically .................... 14
� Storing Channels Manually ........................... 15
� Viewing the EPG (Electronic Programme
Guide) Information ....................................... 16
� Viewing All Channels .................................... 17
� Erasing and Adding Channels ....................... 18
� Setting Your Favourite Channels .................. 19
� Reserving a Program (Time Viewing) ........... 20
� Confirming a Viewing Reservation ................ 21
� Assigning Names to Channels ...................... 22
� Sorting the Stored Channels - Analogue ....... 23
� Selecting and Deselecting All Channels ....... 24
� Storing Channels in Memory (Auto Store) .... 24
� Setting the Channel Mode ............................ 24
� Locking Channels ......................................... 25
� Fine Tuning Analogue Channels ................... 25
� Viewing Signal Information ........................... 26
� LNA (Low Noise Amplifier) ............................ 26
Picture Control
� Changing the Picture Standard ..................... 27
� Customizing the Picture Settings .................. 27
� Configuring Detailed Settings on the Picture 28
� Picture Options ............................................. 29
� Resetting the Picture Settings to the Factory
Defaults ......................................................... 31
Sound Control
� Sound Features ............................................ 32
� Selecting the Sound Mode
(depending on the model) ............................. 34
� Connecting Headphones (Sold separately) .. 34
Function Description
� Time Features ............................................... 35
� Language / Change PIN / Parental Lock /
Subtitle / Teletext Language / Preference /
Light Effect / Melody/ Entertainment /
Energy Saving / PIP ..................................... 36
� Upgrading the Software ................................ 39
� Common Interface ........................................ 40
PC Display
� Setting up Your PC Software
(Based on Windows XP) ............................... 41
� Input Mode (PC) ............................................ 42
� Setting the PC ............................................... 43
WISELINK
� Using the WISELINK Function ...................... 45
� Using the Photo List ...................................... 46
� Viewing a Photo or Slide Show ..................... 52
� Using the Music List ...................................... 56
� Playing a Music File ...................................... 61
� Using the Setup Menu .................................. 63
About Anynet+
� What is Anynet+? .......................................... 64
� Connecting Anynet+ Devices ........................ 64
� Setting Up Anynet+ ....................................... 65
� Scanning and Switching between
Anynet+ Devices ........................................... 65
� Recording ...................................................... 66
� Listening through a Receiver ........................ 67
� Check Points before Requesting Service ..... 67
Appendix
� Teletext Feature (depending on the model) .. 68
� Wall Mount Kit Specifications (VESA) ........... 70
� Auto Wall - mount adjustment
(Sold separately) ........................................... 71
� How to assemble the Stand-Base
(depending on the model) ............................. 72
� Securing the TV to the Wall .......................... 73
� Troubleshooting ............................................ 74
� Specifications ................................................ 75
EnglishEnglish - 4
Checking Parts
Owner’s Instructions Remote Control/
AAA Batteries
Power Cord Cloth-Clean Warranty Card/
Safety Guide Manual
(Not available in all
locations)
Cover-Bottom / Screws (2ea)
(Refer to page 71)
Ferrite Core for
Power Cord
Ferrite Core for
S-Video
Ferrite Core for
Component
Sold Separately
Antenna Cable Component Cables Audio Cables PC Cable
Scart Cable PC Audio Cable HDMI Cable HDMI/DVI Cable
¯ Ferrite Core (Power Cord, S-Video, Component)
The ferrite cores are used to shield the cables from interference.
When connecting a cable, open the ferrite core and clip it around
the cable near the plug.
Using the Stand-Base
¯� � Two or more people
should carry the PDP.
Never lay the PDP on the
floor because of possible
damage to the screen.
Always keep the PDP
upright.
� The PDP can rotate 20
degrees in right and left
directions.
-20° ~ 20°English - 5
Control Panel
1 SOURCE
Toggles between all the available input sources
(TV, Ext.1, Ext.2, AV, S-Video, Component, PC,
HDMI1, HDMI2/DVI, HDMI3, USB).
¯ In the on-screen menu, use this button as
you would use the ENTER button on the
remote control.
2 MENU
Press to see an on-screen menu of your TV’s
features.
3 – +
Press to increase or decrease the volume. In
the on-screen menu, use the – + buttons
as you would use the ◄ and ► buttons on the
remote control.
4
Press to change channels.
In the on-screen menu, use the
buttons as you would use the ▲ and ▼ buttons
on the remote control.
5 Power Indicator
Blinks and turns off when the power is on and
lights up in stand-by mode.
6 POWER
Press to turn the TV on and off.
7 Remote Control Sensor
Aim the remote control towards this spot on the
TV.
8 Speakers
¯ The product colour and shape may vary depending on the model.
Front Panel English - 6
Connection Panel
Continued...
� � Whenever you connect an audio or video system to your set, ensure that all elements are
switched off.
� When connecting an external device, match the colour of the connection terminal to the cable.
1 POWER IN
Connect the supplied power cord.
2 COMPONENT IN
Audio (AUDIO L/R) and video (Y/PB/PR) inputs
for Component.
3 PC IN(PC) / AUDIO
Connect to the video and audio output jack on
your PC.
4 EXT 1, EXT 2
Inputs or outputs for external devices, such as
VCR, DVD, video game device or video disc
players.
Input/Output Specification
Connector
Input Output
Video Audio(L/R) RGB Video + Audio(L/R)
EXT 1 � � �
Only TV or DTV
output is available.
EXT 2 � �
Output you can
choose.
5 DIGITAL AUDIO OUT (OPTICAL)
Connect to a Digital Audio Component.
6 AUDIO OUT(AUDIO R/L)
Connect RCA audio signals from the TV to an
external source, such as Audio equipment.
7 SERVICE
− Connector for service.
− Connect the serial jack between the
electro-motion wall mount bracket and your
TV when you want to adjust the TV viewing
angle using your remote control.
Rear Panel
¯ The product colour and shape may vary depending on the model.
Cable Television
Network
or
or
1
2 6 8 3 4 5
9
7English - 7
8 HDMI IN 1,2
- No additional Audio connection is needed
for an HDMI to HDMI connection.
- When using an HDMI/DVI cable connection,
you must use the HDMI IN 2 jack.
¯ What is HDMI?
- “High Definition Multimedia interface”
allows the transmission of high definition
digital video data and multiple channels
of digital audio.
- The HDMI/DVI terminal supports DVI
connection to an extended device with
the appropriate cable (not supplied). The
difference between HDMI and DVI is that
the HDMI device is smaller in size, has
the HDCP (High Bandwidth Digital Copy
Protection) coding feature installed, and
supports multi - channel digital audio.
DVI IN(HDMI2) AUDIO L/R
DVI audio outputs for external devices.
9 ANT IN
75Ω Coaxial connector for Aerial/Cable
Network.
Supported modes for HDMI/DVI and Component
480i 480p 576i 576p 720p 1080i 1080p
HDMI/DVI 50Hz X X X O O O O
HDMI/DVI 60Hz X O X X O O O
Component O O O O O O O
1 COMMON INTERFACE Slot
Insert CI (Common Interface) card into the slot.
(refer to page 40)
− When ‘CI Card’ isn’t inserted in some
channels, “Scramble Signal” is displayed on
the screen.
− The pairing information containing a
telephone number, CI CARD ID, Host
ID,and other information will be displayed
in about 2~3 minutes. If an error message
is displayed, please contact your service
provider.
− When the channel information configuration
has finished, the message “Updating
Completed” is displayed, indicating that the
channel list is now updated.
¯ Insert the CI-Card in the direction marked
on it.
2 HDMI IN 3
Connect to the HDMI jack of a device with
HDMI output.
3 WISELINK
Connect a USB mass storage device to view
photo files (JPEG) and play audio files (MP3).
4 S-VIDEO or VIDEO / AUDIO L/R
Video (S-Video or Video) and audio inputs
for external devices, such as a camcorder or
VCR.
5 HEADPHONES JACK
You can connect a set of headphones if you
wish to watch a television programme without
disturbing the other people in the room.
¯�Prolonged use of headphones at a high
volume may damage your hearing.
The product colour and shape may vary depending on the model.
Side Panel
or
5
2
4
1
3English - 8
Viewing the Remote Control
The performance of the remote control may be affected by bright light.
1 POWER button
(turns the TV on and off)
2 Selects the TV and DTV
mode directly
3 Number buttons for direct
channel access
4 One/Two-digit channel
selection
5 Temporary sound switch-off
6 Volume increase
Volume decrease
7 Electronic Program Guide
(EPG) display
8 Use to quickly select
frequently used functions.
9 Control the cursor in the
menu
0 Use to see information on
the current broadcast
! Use these buttons in the
Channel list and WISELINK,
etc.
# Press to select the optional
display and sound modes for
sports, cinema and games.
$ VCR/DVD Function (Rewind,
Stop, Play/Pause, Fast/
Forward)
% Available source selection
^ Previous channel
& Next channel
Previous channel
* Displays the main on-screen
menu
( This function enables you to
view and play photo (JPEG)
and audio files (MP3) from
an external device. (See
page 46 (JPEG), 56 (MP3))
) Returns to the previous
menu
a Exit the on-screen menu
b Picture size selection
c Use this when connecting
a SAMSUNG DMA (Digital
Media Adapter) device
through an HDMI interface
and switching to DMA
mode.(The DMA button is
optional.)
For more information on
the operating procedures,
refer to the user manual
of the DMA. This button
is available when
“Anynet+(HDMI-CEC)" is
“On” (see page 64)
d Digital subtitle display
e Channel control button
(Refer to page 18)
Teletext Functions
(Refer to page 68)
2 Exit from the teletext display
(depending on the model)
7 Teletext store
8 Teletext size
0 Teletext reveal
! Fastext topic selection
@ Teletext display/mix both
teletext information and the
normal broadcast
% Teletext mode selection
(LIST/FLOF)
^ Teletext sub page
& P :Teletext next page
P :Teletext previous page
* Teletext index
) Teletext hold
a Teletext cancel
Continued...
W.LINKEnglish - 9
Installing Batteries in the Remote Control
1 Lift the cover at the back of the remote control upward as
shown in the figure.
2 Install two AAA size batteries.
¯�� Make sure to match the “+” and “–” ends of the
batteries with the diagram inside the compartment.
� Do not mix battery types, i.e. alkaline and manganese.
3 Close the cover as shown in the figure.
¯�Remove the batteries and store them in a cool and dry
place if you won’t be using the remote control for a long
time. The remote control can be used up to about 23 feet
from the TV. (Assuming typical TV usage, the batteries last
for about one year.)
¯�
If the remote control doesn’t work! Check the following:
1. Is the TV power on?
2. Are the plus and minus ends of the batteries reversed?
3. Are the batteries drained?
4. Is there a power cut, or is the power cord unplugged?
5. Is there a special fluorescent light or a neon sign nearby?
Switching Your Television On and Off
The mains lead is attached to the rear of the television.
1 Plug the mains lead into an appropriate socket.
¯�The main voltage is indicated on the rear of the television and the frequency is 50 or 60Hz.
2 Press the (Power) button (On/Off) on the front of the television or press the POWER button on
the remote control to switch the television on. The channel that you were watching last is re-selected
automatically. If you have not yet stored any channels, no clear picture appears. Refer to “Storing
Channels Automatically” on page 14 or “Storing Channels Manually” on page 15.
¯�
If the television is initially powered on, several basic customer settings proceed automatically.
Refer to “Plug & Play Feature” on page 10.
3 To switch the television off, press the (Power) button (On/Off) on the front of the television or press
the POWER button on the remote control.
4 To switch the TV on, press the (Power) button (On/Off) on the front of the TV or press the POWER
button or number buttons on the remote control.
Viewing the Menus
1 Press the MENU button.
The main menu is displayed on the screen.
Its left side has six icons: Picture, Sound, Channel,
Setup, Input, and Application
2 Press the ▲ or ▼ button to select one of the icons.
Press the ENTER button to access the icon’s sub-menu.
3 Press the ▲ or ▼ button to move to items in the menu.
Press the ENTER button to enter items in the menu.
4 Press the ▲/▼/◄/► button to change the selected items.
Press the RETURN button to return to the previous menu.
5 Press the EXIT button to exit from the menu.
W.LINK
Mode : Standard
Cell Light : 7
Contrast : 95
Brightness : 45
Sharpness : 50
Colour : 50
Tint (G/R) : G50/R50
Detailed Settings
PictureEnglish - 10
Plug & Play Feature
When the television is initially powered on, several basic customer settings proceed automatically
and subsequently.The following settings are available.
�If you accidentally select the wrong country for your TV, the characters on the screen may be wrongly
displayed.
�Any functions related to Digital TV (DVB) will only work in countries or areas where DVB-T (MPEG2)
digital terrestrial signals are broadcasted. Please confirm with your local dealer if you can receive
DVB-T signals. Although this TV set follows the DVB-T specification, maintaining compatibility with
the future coming DVB-T digital terrestrial broadcasts is not guaranteed. Several functions may not
be available in some countries.
¯ The Screen Saver is activated if there is no remote control key input for longer than 1 minute while
Plug & Play is running.
1 If the television is in standby mode, press the POWER
button on the remote control. The message Les menus
Langue, Enr. démo, Canaux et Heure seront définis. is
displayed.
2 Press the ENTER button, Select the OSD Language
menu is automatically displayed. Press the ENTER
button.
3 Select the appropriate language by pressing the ▲ or ▼
button. Press the ENTER button to confirm your choice.
The message Select ‘Home Use’ when installing this
TV in your home. is displayed.
4 Press the ◄ or ► button to select Store Demo or Home
Use, then press the ENTER button. The message to
check the connected status of the antenna is displayed.
¯�The default selection is Home Use.
¯�We recommend setting the TV to Home Use mode
for the best picture in your home environment.
¯�Store Demo mode is only intended for use in retail
environments.
¯�
If the unit is accidentally set to Store Demo mode
and you want to return to Home Use (Standard):
Press the Volume button on the TV. When the
volume OSD is displayed, press and hold the MENU
button on the TV for 5 seconds.
5 Press the ▲ or ▼ button to select the channel source to
memorize. Press the ENTER button to select Start.
Digital & Analogue: “Digital” and “Analogue” channels.
Digital: “Digital” channels.
Analogue: “Analogue” channels.
The channel search will start and end automatically.
Press the ENTER button at any time to interrupt the
memorization process.
After all the available channels are stored, the message Set the Clock Mode is displayed.
Continued...
Plug & Play
Auto Store in progress. Channel 6
Digital Channels : 0
Analogue Channels : --
Stop
Enter Skip
1%
Plug & Play
Les menus Langue, Enr. démo, Canaux et Heure seront définis.
Entrer
OK
Plug & Play
Select the OSD Language
Enter
Menu Language : English
Move
▲
Nederlands
English
Soumi
▼
Plug & Play
Select the channel source to memorize.
Digital & Analogue
Digital
Analogue
Start
Start
Move Enter
Start
Skip
Plug & Play
Select 'Home Use' when installing this TV in your home.
Store Demo Home Use
Move EnterEnglish - 11
¯�To stop the search before it has finished, press the
ENTER button with stop selected.
Press the ◄ or ► button to select Yes, then press
the ENTER button. The Auto Store menu then
reappears. Press the ENTER button when channel
memorization is completed.
6 The message Set the Clock Mode is displayed. Press
the ENTER button. Press the ▲ or ▼ button to select
Manual for setting the current time manually, then press
the ENTER button. The message Set current date and
time. is displayed.
¯�
If you select Auto, the message Enjoy your viewing
is displayed. If you have received a digital signal, the
time will be set automatically.
7 Press the ◄ or ► button to move to Day, Month, Year,
Hour or Minute. Set the date and time you want by
pressing the ▲ or ▼ button, then press the ENTER
button.
¯�You can set the Day, Month, Year, Hour and Minute
directly by pressing the number buttons on the
remote control.
8 The message Enjoy your viewing. is displayed. When
you have finished, press the ENTER button.
¯�Even if the ENTER button is not pressed, the
message will automatically disappear after several
seconds.
If you want to reset this feature …
1 Press the MENU button to display the menu.
2 Press the ▲ or ▼ button to select Setup, then press the
ENTER button.
3 Press the ENTER button again to select Plug & Play.
4 Enter your 4 digit PIN number. The default PIN number of
a new TV set is “0-0-0-0”.
¯�For further details on setting up options, refer to the
pages 10-11.
¯�The Plug & Play feature is only available in the TV
mode.
Plug & Play
Auto Store is completed.
Digital channels: 20
Analogue channels: 36
OK
Enter
OK
Plug & Play
Enjoy your viewing.
Skip
Plug & Play ►
Language : English
Time
Change PIN
Parental Lock
Subtitle
Teletext Language : ----
Preference
Setup
Plug & Play
Set the Clock Mode.
Clock Mode : Auto
Auto
Manual
Move Enter Skip
Plug & Play
Set current date and time
0 1
Day
0 1
Month
2 0 0 8
Year
Hour
0 0
Minute
Move Adjust Enter Skip
0 0
Plug & Play
The Menu Language, Store Demo, Channels and Time will
be set.
0~9 Enter PIN ReturnEnglish - 12
Viewing External Signal Sources
You can switch between viewing signals from connected
equipment, such as a VCR, DVD, Set-Top Box, and the TV
source.
1 Press the MENU button to display the menu.
2 Press the ▲ or ▼ button to select Input, then press the
ENTER button.
3 Press the ENTER button again to select Source List.
4 Press the ▲ or ▼ button to select the signal source, then
press the ENTER button.
Available signal sources: TV,Ext1,Ext2, AV, S-Video,
Component, PC, HDMI1, HDMI2/DVI, HDMI3, USB
¯ You can choose only those external devices that are
connected to the TV.
¯ Using the Color buttons on the remote with the Source list.
¯ You can select these options simply by pressing the
SOURCE button on the remote control.
¯ To watch television programme again, press the TV/DTV
button and select the channel number required.
Using the TOOLS Button
You can use the TOOLS button to select your frequently used functions quickly and easily. The
“TOOLS” menu changes depending on which external input mode you are viewing.
1 Press the TOOLS button.
The Tools menu will appear.
2 Press the ▲ or ▼ button to select a menu, then press the
ENTER button.
3 Press the ▲/▼/◄/►/ENTER buttons to display, change, or
use the selected items.
For a more detailed description of each function, refer to
the corresponding page.
• Device List, see page 65
• Picture Mode, see page 27
• Sound Mode, see page 32
• Sleep Timer, see page 35
• SRS TS XT, see page 32
• Energy Saving, see page 38
• Dual I II, see page 34
• PIP, see page 38
• Red (Refresh): Refreshes the connecting external
devices.
• (Option): Displays the Edit Name and Information
menus.
Source List
Edit Name
Input
TV
Ext.1 ----
Ext.2 ----
AV ----
S-Video ----
Component ----
PC ----
Refresh Option
Tools
Device List
Picture Mode : Standard
Sound Mode : Standard
Sleep Timer : Off
SRS TS XT : Off
Energy Saving : Off
Dual I II : Mono
Move Enter ExitEnglish - 13
Editing Device Names
You can give a name to the external source.
1 Press the MENU button to display the menu.
2 Press the ▲ or ▼ button to select Input, then press the
ENTER button.
3 Press the ▲ or ▼ button to select Edit Name, then press
the ENTER button.
4 Press the ▲ or ▼ button to select the external source to
be edited, then press the ENTER button.
5 Select the required device by pressing ▲ or ▼, then press
the ENTER button.
Available device names: VCR, DVD, Cable STB, Satellite
STB, PVR STB, AV Receiver, Game, Camcorder, PC, TV,
IPTV, Blu-Ray, HD DVD, Digital Media Adapter.
6 Press the EXIT button to exit.
Input
Source List
Edit Name ►
Edit Name
Ext.1 : ---- ►
Ext.2 : ----
AV : ----
S-Video : ----
Component : ----
PC : ----
HDMI1 : ----
Move Enter Return
Edit Name
Ext 1 : ----
Ext 2 : ----
AV : ----
S-Video : ----
Component : ----
PC :
HDMI1 :
Move Enter Return
----
VCR
DVD
Cable STB
Satellite STB
PVR STBEnglish - 14
Storing Channels Automatically
You can scan for the frequency ranges available to you (availability depends on your country).
Automatically allocated programme numbers may not correspond to actual or desired programme
numbers. However you can sort numbers manually and clear any channels you do not wish to
watch.
1 Press the MENU button to display the menu.
2 Press the ▲ or ▼ button to select Channel, then press the
ENTER button.
3 Press the ▲ or ▼ button to select Auto Store, then press
the ENTER button.
4 Press the ▲ or ▼ button to select the channel source to
memorize. Press the ENTER button to select Start.
¯ Digital & Analogue: “Digital” and “Analogue”
channels. Digital: “Digital” channels.
Analogue: “Analogue” channels.
¯ Scans for all channels with active broadcast stations
and stores them in the TV’s memory.
¯ If you want to stop Auto Store, press the ENTER
button.
The Stop Auto Store? message will be displayed.
Select Yes by pressing the ◄ or ► button, then press
the ENTER button.
5 Press the EXIT button to exit.
¯ When there is a locked channel by Channel Lock
setting, PIN input screen appears. (refer to page 25)
Channel
Auto Store ►
Manual Store
Full Guide
Mini Guide
Default Guide : Mini Guide
Channel List
Channel Mode : Added Channels
Child Lock : On
Auto Store
Auto Store is progress. Channel 6
Digital Channels : 0
Analogue Channels : --
Stop
Enter
4%
Return
Auto Store
Select the channel source to memorize.
Digital & Analogue
Digital
Analogue
Start
Start
Move Enter
Start
Return
Plug & Play
Auto Store is incomplete.
Digital channels: 20
Analogue channels: 36
OK
Enter SkipEnglish - 15
Storing Channels Manually
You can store television channels, including those received via cable networks.
When storing channels manually, you can choose:
� Whether or not to store each of the channels found.
� The programme number of each stored channel which you wish to identify.
1 Press the MENU button to display the menu.
2 Press the ▲ or ▼ button to select Channel, then press the
ENTER button.
3 Press the ▲ or ▼ button to select Manual Store, then
press the ENTER button.
4 Select the required option by pressing the ▲ or ▼ button,
then press the ENTER button.
5 When you are satisfied with your setting, press the ENTER button.
6 Press the EXIT button to exit.
Digital Channel
� Channel
Press the ▲, ▼ or numeric buttons (0~9) to select a channel.
The available channels are 5~69. The corresponding
frequency for the selected channel is automatically set
� Frequency
You can specify the frequency (KHz) using the numeric buttons
(0~9). If you do not know the exact frequency, follow the above
step to select the frequency automatically using channel.
� Bandwidth
Press the ▲ or ▼ button to select a bandwidth. The
available bandwidths are 7 and 8 MHz.
Analogue Channel
� Programme (Programme number to be assigned to a
channel)
Press the ▲ or ▼ button until you find the correct number.
¯ You can also select the channel number directly by
pressing the numeric buttons (0~9).
� Colour System: Auto/PAL/SECAM/NTSC4.43
Press the ▲ or ▼ button to select the required colour standard.
� Sound System: BG/DK/I/L
Press the ▲ or ▼ button to select the required sound
standard.
� Channel (When you know the number of the channel to be stored)
Press the ▲ or ▼ button to select C (Air channel) or S
(Cable channel).
Press the ► button, then press the ▲ or ▼ button to select
the required number.
¯ You can also select the channel number directly by
pressing the numeric buttons (0~9).
¯ If there is abnormal sound or no sound, re-select the sound standard required.
� Search (When you do not know the channel numbers)
Press the ▲ or ▼ button to start the search.
The tuner scans the frequency range until the first channel or the channel that you selected is
received on the screen.
� Store (When you store the channel and associated programme number)
Set to OK by pressing the ENTER button.
¯ Channel mode
- P (Programme mode): When completing tuning, the broadcasting stations in your area have been
assigned to position numbers from P00 to P99. You can select a channel by entering the position
number in this mode.
- C (Air channel mode): You can select a channel by entering the assigned number to each air
broadcasting station in this mode.
- S (Cable channel mode): You can select a channel by entering the assigned number for each cable
channel in this mode.
Channel
Auto Store
Manual Store ►
Full Guide
Mini Guide
Default Guide : Mini Guide
Channel List
Channel Mode : Added Channels
Child Lock : On
Fine Tune
Manual Store
1 7 8 7 5 0 K H z
Frequency
8 M H z
Bandwidth
5
Channel
Move Adjust Search Return
Manual Store
Move Adjust Return
A U TO
Colour System
B G
Sound System
1
Programme
4 0 M H z
Search
?
Store
C --
Channel
Auto Store
Manual Store
Full Guide
Mini Guide
Default Guide : Mini Guide
Channel List
Channel Mode : Added Channels
Child Lock : On
Fine Tune
Channel
Digital Channel
Analogue ChannelEnglish - 16
Viewing the EPG (Electronic Programme Guide) Information
The EPG (Electronic Programme Guide) information is provided by the broadcasters. Programme
entries may appear blank or out of date as a result of the information broadcast on a given
channel. The display will dynamically update as soon as new information becomes available.
1 Press the MENU button to display the menu.
2 Press the ▲ or ▼ button to select Channel, then press the
ENTER button.
3 Press the ▲ or ▼ button to select Full Guide, Mini Guide or
Default Guide then press the ENTER button.
� Full Guide
For the six channels indicated in the left-hand column, displays
the Current programme and the Next programme information.
¯ One hours of programme information is displayed
which may be scrolled forwards or backwards in time.
� Mini Guide
The information of each program is displayed by each line
on the current channel Mini Guide screen from the current
program onwards according to the program starting time order.
▲/▼/◄/►,
(ENTER)
Select a programme by pressing the
▲/▼/◄/► button.
If the next progrmme is selected,
it is scheduled with the clock icon
displayed. If the ENTER button is
pressed again, press the ▲/▼/◄/►
button to select Cancel Schedules,
the scheduling is canceled with the
clock icon gone.
For details about scheduling
programmes, refer to the section.
RED
Toggle between the Mini Guide or
Full Guide.
GREEN
Full Guide: Scroll backwards quickly
(24 hours).
Mini Guide: Display next page quickly.
YELLOW
Full Guide: Scroll forwards quickly
(24 hours).
Mini Guide: Display previous page
quickly.
BLUE Exit the guide.
INFO
INFO button for the detailed
information. Channel Number,
Running Time, Status Bar, Parental
Level, Video Quality Information
(HD/SD), Sound Modes, Subtitle or
Teletext, languages of Subtitle or
Teletext and brief summary of the
highlighted programme are included
on the detailed information. “…” will
be appeared if the summary is long.
� Default Guide: Mini Guide/Full Guide
Press the ▲ or ▼ button to select Mini Guide or Full
Guide. Press the ENTER button. The selected guide menu
is displayed.
¯ You can also display the guide menu simply by
pressing the GUIDE button.
Channel
Auto Store
Manual Store
Full Guide
Mini Guide
Default Guide : Mini Guide
Channel List
Channel Mode : Added Channels
Child Lock : On
Fine Tune
Signal Information
Channel
Manual Store
Full Guide
Mini Guide
Default Guide : Mini Guide
Channel List
Channel Mode : Added Channels
Child Lock : On
Fine Tune
Signal Information
LNA : On
Full Guide
Watch Mini Guide Exit
DTV 805 BBCi
BBCi
18:00~0:00
BBCi-featuring news, sport, weather and TV..
18:08 Fri 5 Aug
Today 12:00 - 13:00 13:00 - 14:00
▲801 BBC NEWS 24 BBC Ne.. BBC News
802 BBC ONE BBC Ne.. Departure Lounge
803 BBC THREE This is BBC THREE The 7 O’..
804 BBC THREE This Weakest L.. Tsunami..
805 BBCi BBCi
▼806 Canal 7 No Information
INFO information +24 Hours
Full Guide Exit
Mini Guide DTV 801 BBC NEWS 24
18:00 BBC News
18:30 Sportsday
19:00 BBC News
Watch INFO information Next Page
Full Guide
Mini Guide
Default Guide: Mini GuideMini Guide
Channel List
Channel Mode : Added Channels
Child Lock : On
Fine Tune
Signal Information
LNA : On
Channel
Mini Guide
Full GuideEnglish - 17
Viewing All Channels
Show all currently available channels. To use the Channel List
function, first run Auto Program.
1 Press the MENU button.
Press the ▲ or ▼ button to select Channel, then press the
ENTER button.
Press the ▲ or ▼ button to select Channel List, then press
the ENTER button.
2 Press the ◄ button to select Added Channels.
3 Press the ▲ or ▼ button to select All Channels, then press
the ENTER button. Shows all currently available channels.
4 Press the ▲ or ▼ button to select a channel to view, then
press the ENTER button.
Press the CH LIST button on the remote control to bring up
the channel lists.
Using the Color buttons on the Remote with the Channel List
• Red (Channel Type): Toggle between your “TV”, “Radio”,
“Data/Other” and “All”.
• Green (Zoom): Enlarges or shrinks a channel number.
• Yellow (Select): Selects multiple channel lists.
• (Option): Displays the “Delete”(or “Add”), “Add to
Favourite”(or “Delete from Favourite”), “Lock”,
“Timer Viewing”, “Edit Channel Name”, “Sort”,
“Edit Channel Number”, “Select All”, “Deselect
All” or “Auto Store” menu. (The Options menus
may differ depending on the situation.)
¯ A gray-colored channel indicates the channel has been deleted. The Add menu only appears for
deleted channels.
¯A channel marked with ♥ mark means the channel has been set as a Favourite.
The Delete from Favourite menu only appears for channels with the ♥ mark.
Added Channels All Channels Channel
Mini Guide
Default Guide :Mini Guide
Channel List
Channel Mode : Added Channels
Child Lock : On
Fine Tune
Signal Information
LNA : Off
824 UKTV Gold
825 UKTV style
1 C --
2 C --
3 C --
4 C --
5 C --
6 C --
7 C --
8 C --
824 UKTV Gold
825 UKTV style
1 C --
2 C --
3 C --
4 C --
5 C --
6 C --
7 C --
8 C --
All Channel Type Zoom Select Option
All Channel Type Zoom Select Option English - 18
Erasing and Adding Channels
You can delete or add a channel to display the channels
you want.
1 Press the MENU button.
Press the ▲ or ▼ button to select Channel, then press the
ENTER button.
Press the ▲ or ▼ button to select Channel List, then
press the ENTER button.
2 Press the ◄ button to select Added Channels.
3 Press the ▲ or ▼ button to select All Channels.
Shows all currently available channels. Press the ENTER
button.
4 Press the ▲ or ▼ button to select a channel to delete, then
press the TOOLS button.
5 Press the ENTER button to select Delete.
All deleted channels will be shown on All Channels menu.
6 Press the EXIT button to exit.
¯�You can also add a channel to the All Channels menu
in the same manner.
¯�A channel must be deleted before it can be added
back to the Added Channels list.
¯�To Add (Restore) a channel back to the Added
Channel List, follow steps 1-3 above, press the ▲ or
▼ button to select a channel to add, the press the
TOOLS button. Press the ENTER button to select Add.
¯�Press the CH LIST button on the remote control to
bring up the channel lists.
Channel
Mini Guide
Default Guide : Mini Guide
Channel List
Channel Mode : Added Channels
Child Lock :On
Fine Tune
Signal Information
LNA : Off
824 UKTV Gold
825 UKTV style
1 C --
2 C --
3 C --
4 C --
5 C --
6 C --
7 C --
8 C --
Added Channels
824 UKTV Gold
825 UKTV style
1 C --
2 C --
3 C --
4 C --
5 C --
6 C --
7 C --
8 C --
All Channels
824 UKTV Gold
825 UKTV style
1 C --
2 C --
3 C --
4 C --
5 C --
6 C --
7 C --
8 C --
Added Channels
Delete
Add to Favourite
Timer Viewing
Edit Channel Name
Sort
Select All
▼
All Channel Type Zoom Select Option
All Channel Type Zoom Select Option
All Channel Type Zoom Select Option English - 19
Setting Your Favourite Channels
You can set channels you watch frequently as Favourite.
1 Press the MENU button.
Press the ▲ or ▼ button to select Channel, then press the
ENTER button.
Press the ▲ or ▼ button to select Channel List, then
press the ENTER button.
2 Press the ◄ button to select Added Channels.
3 Press the ▲ or ▼ button to select All Channels, then
press the ENTER button.
¯�Shows all currently available channels.
4 Press the ▲ or ▼ button to select a channel as a favourite
channel.
¯�Adding multiple channels to Favourite.
Press the ▲ or ▼ button to select the desired channel
in the channel list. Then press the yellow button.
Repeat the above operation to select multiple
channels. The � mark appears to the left of the
selected channels.
5 Press the TOOLS button.
6 Press the ▲ or ▼ button to select Add to Favourite, then
press the ENTER button.
The “♥” symbol will be displayed and the channel will be set
as a favourite.
7 To cancel your favourite channel selection, press the
TOOLS button when a favourite channel is selected. Press
the ▲ or ▼ button to select Delete from Favourite, then
press the ENTER button. The channel is deleted from
Favourites and the “♥” mark disappears.
Press the EXIT button to exit.
¯�You can also Add or Delete a channel from Favourite in the Added Channels menu in the same
manner.
¯�All favourite channels will be shown on Favourite menu.
¯�Press the CH LIST button on the remote control to bring up the channel lists.
824 UKTV Gold
825 UKTV style
1 C --
2 C --
3 C --
4 C --
5 C --
6 C --
7 C --
8 C --
All Channels
Delete
Add to Favourite
Timer Viewing
Edit Channel Name
Sort
Select All
▼
Channel
Mini Guide
Default Guide : Mini Guide
Channel List
Channel Mode : Added Channels
Child Lock : On
Fine Tune
Signal Information
LNA : Off
All Channel Type Zoom Select Option English - 20
Reserving a Program (Time Viewing)
If you reserve a program you want to watch, the channel is
automatically switched to the reserved channel in the Channel
List; even when you are watching another channel.
To reserve a program, set the current time fi rst. See pages 35.
Reserved chanels can only be set if they are in the Channel List
(See page 17).
1 Press the MENU button.
Press the ▲ or ▼ button to select Channel, then press the
ENTER button.
Press the ▲ or ▼ button to select Channel List, then
press the ENTER button.
2 Press the ▲ or ▼ button to select a channel, then press
the TOOLS button.
3 Press the ▲ or ▼ button to select Timer Viewing, then
press the ENTER button.
The Reserve a Program (Timer Viewing) screen appears.
4 Press the ▲/▼/◄/► buttons to reserve a program and
then press the ENTER button.
Reserving a program has been completed.
Press the EXIT button to exit.
¯ You can also reserve a program in the All Channels or
Favourites menus using the same procedures.
¯ For information on how to confirm a viewing
reservation, refer to page 21. Only memorized
channels can be reserved.
¯ You can set the channel, month, day, year, hour and
minute directly by pressing the number buttons on the
remote control.
Press the CH LIST button on the remote control to bring
up the channel lists.
Digital Program Guide and Viewing Reservation
When a digital channel is selected, and you press the ► button,
the Program Guide for the channel appears. You can reserve a
program according to the procedures described above.
: A program currently being broadcast.
: A reserved program.
Continued...
Channel
Mini Guide
Default Guide :Mini Guide
Channel List
Channel Mode : Added Channels
Child Lock : On
Fine Tune
Signal Information
LNA : Off
Timer Viewing
Antenna Channel Repeat
DTV 1 Once
Date
01-01-2008
Start Time
10:09
Move Adjust Enter Return
824 UKTV Gold
825 UKTV style
1 C --
2 C --
3 C --
4 C --
5 C --
6 C --
7 C --
8 C --
Added Channels
Air Channel Type Zoom Select Option
Delete
Delete from Favourite
Timer Viewing
Edit Channel Name
Sort
Select All
▼
824 UKTV Gold
825 UKTV style
1 C --
2 C --
3 C --
4 C --
5 C --
6 C --
7 C --
8 C --
Added Channels
Air Zoom
Option Watch
1/22/2008
12:47 2.0
3:54 HD 1 99
6:44 HD 1 100
7:49 HD
8:59 +
10:08
10:37 English - 21
Confirming a Viewing Reservation
You can view, modify or delete a reservation.
1 Press the MENU button.
Press the ▲ or ▼ button to select Channel, then press the
ENTER button.
Press the ▲ or ▼ button to select Channel List, then
press the ENTER button.
2 Press the ◄ button to select Added Channels.
3 Press the ▲ or ▼ button to select Programmed, then
press the ENTER button.
You can view the program reservations.
Modifying a viewing reservation
4 To select a reservation item to be modifi ed, press the ▲ or
▼ button and then press the TOOLS button.
5 Press the ENTER button to select Change Info.
6 Press the ▲/▼/◄/► buttons to change a reservation
setting and then press the ENTER button.
The reservation modifi cation is applied.
Canceling a reservation
4 To select a reservation item to be canceled, press the ▲ or
▼ button, and then press the TOOLS button.
5 Press the ▲ or ▼ button to select Cancel Schedules,
then press the ENTER button.
6 Press the ◄ or ► button to select OK, then press the
ENTER button.
The viewing reservation has been canceled.
Press the EXIT button to exit.
Programmed Menu
• Change Info: Select to change a viewing reservation.
• Cancel Schedules: Select to cancel a viewing reservation.
• Information: Select to view a viewing reservation.
• Select All / Deselect All: You can select(or Deselect) all channel in the channel list.
Press the CH LIST button on the remote control to
bring up the channel lists.
Continued...
Channel
Mini Guide
Default Guide :Mini Guide
Channel List
Channel Mode : Added Channels
Child Lock : On
Fine Tune
Signal Information
LNA : Off
2008/2/3
3:15 1 Air No Program Name
4:15 2 Air No Program Name
2008/2/4
2:14 3 Air No Program Name
2008/2/5
2:15 4 Air No Program Name
Programmed
Air Antenna Zoom Select Option Information
824 UKTV Gold
825 UKTV style
1 C --
2 C --
3 C --
4 C --
5 C --
6 C --
7 C --
8 C --
Added Channels
Air Channel Type Zoom Select Option
Programmed
2008/2/3
3:15 1 Air No Program Name
4:15 2 Air No Program Name
2008/2/4
2:14 3 Air No Program Name
2008/2/5
2:15 4 Air No Program Name
Change Info
Cancel Schedules
Information
Select All
Air Antenna Zoom Select Option InformationEnglish - 22
Assigning Names to Channels
Channel names will be assigned automatically when
channel information is broadcast. These names can be
changed, allowing you to assign new names.
Editing the Channel Name-Analogue
1 Press the MENU button to display the menu.
2 Press the ▲ or ▼ button to select Channel, then press the
ENTER button.
3 Press the ▲ or ▼ button to select Channel List, then
press the ENTER button.
4 Press the ▲ or ▼ button to select the channel to be
assigned to a new name, then press the TOOLS button.
5 Press the ▲ or ▼ button to select Edit Channel Name,
then press the ENTER button.
6 Press the ▲/▼/◄/► button to select a letter, a number, or
a symbol, then press the ENTER button.
• Number buttons: You can enter numbers.
• Red button: You can switch between English and Characters.
• Green button: You can delete an already entered character.
• Yellow button: You can enter a blank space.
• Blue button: Press this button to finish renaming a channel.
7 Repeat steps 5 to 6 for each channel to be assigned to a
new name.
8 Press the EXIT button to exit.
Editing the Channel Number-Digital
1 Press the MENU button.
Press the ▲ or ▼ button to select Channel, then press the
ENTER button.
Press the ▲ or ▼ button to select Channel List, then
press the ENTER button.
2 Select the channel number that you wish to edit by
pressing the ▲ or ▼ button repeatedly, then press the
TOOLS button.
3 Press the ▲ or ▼ button to select Edit Channel Number,
then press the ENTER button.
4 Then you can edit the Channel Number pressing the ▲ or
▼ button repeatedly. You can also edit the channel number
by pressing the number buttons on the remote control.
824 Television
825 UKTV style
826 UKTB style
2 C --
3 C --
4 C --
5 C --
6 C --
7 C --
8 C --
Added Channels
Delete
Add to Favourite
Timer Viewing
Edit Channel Number
Select All
Auto Store
All Channel Type Zoom Select Option TOOLS
Edit Channel Number
BBC Radio 1
Name
8 0 3
Channel
Move Enter Return
Channel
Mini Guide
Default Guide : Mini Guide
Channel List
Channel Mode : Added Channels
Child Lock : On
Fine Tune
Signal Information
LNA : Off
824 Television
825 UKTV style
1 C --
2 C --
3 C --
4 C --
5 C --
6 C --
7 C --
8 C --
Added Channels
Delete
Delete form Favourite
Timer Viewing
Edit Channel Name
Sort
Select All
▼
All Channel Type Zoom Select Option ►Next Program
Edit Channel Name
6
Number
Character
Delete
Blank
Done
Move Enter Return
_
A
VEnglish - 23
Sorting the Stored Channels - Analogue
This operation allows you to change the programme
numbers of the stored channels.
This operation may be necessary after using the auto
store.
1 Press the MENU button to display the menu.
2 Press the ▲ or ▼ button to select Channel, then press the
ENTER button.
3 Press the ▲ or ▼ button to select Channel List, then
press the ENTER button.
4 Press the TOOLS button.
5 Press the ▲ or ▼ button to select Sort, then press the
ENTER button.
6 Select the channel that you wish to move by pressing the
▲ or ▼ button, then press the ENTER button.
7 Select the number of the programme to which the channel
is to be moved by pressing the ▲ or ▼ button.
Press the ENTER button. The channel is moved to its new
position and all other channels are shifted accordingly.
8 Repeat steps 4 to 7 until you have moved all the channels
to the required programme numbers.
9 Press the EXIT button to exit.
Channel
Mini Guide
Default Guide : Mini Guide
Channel List
Channel Mode : Added Channels
Child Lock : On
Fine Tune
Signal Information
LNA : Off
824 Television
825 UKTV style
1 C --
2 C --
3 C --
4 C --
5 C --
6 C --
7 C --
8 C --
Added Channels
Delete
Delete form Favourite
Timer Viewing
Edit Channel Name
Sort
Select All
▼
All Channel Type Zoom Select Option
Enter Return
Sort
0 C--
1 C04
2 C05
3 C06
4 C08
5 C09 ▼
MoveEnglish - 24
Selecting and Deselecting All Channels
1 Press the MENU button.
Press the ▲ or ▼ button to select Channel, then press the
ENTER button.
Press the ▲ or ▼ button to select Channel List, then
press the ENTER button.
2 Press the ▲ or ▼ button to select the Channel to be
assigned a new name, then press the TOOLS button.
3 Press the ▲ or ▼ button to select Select All or Deselect
All, then press the ENTER button.
¯ You can select(or Deselect) all channel in the channel list.
¯ The �mark appears to the left of the selected channels.
824 Television
825 UKTV style
1 C --
2 C --
3 C --
4 C --
5 C --
6 C --
7 C --
8 C --
Added Channels
All Channel Type Zoom Select Option
▲
Add to Favourite
Timer Viewing
Edit Channel Name
Sort
Select All
Auto Store
Storing Channels in Memory (Auto Store)
1 Press the MENU button.
Press the ▲ or ▼ button to select Channel, then press the
ENTER button.
Press the ▲ or ▼ button to select Channel List, then press
the ENTER button.
2 Press the ▲ or ▼ button to select the channel to be
assigned a new name, then press the TOOLS button.
3 Press the ▲ or ▼ button to select Auto Store, then press
the ENTER button.
¯ For further details on setting up options, refer to page 14.
¯ When there is a locked channel by Channel Lock setting, PIN input screen appears.
(refer to page 25)
Setting the Channel Mode
You can display either the added channels list or the favourite
channels list when the CH LIST button on the remote control is
pressed.
1 Press the MENU button.
Press the ▲ or ▼ button to select Channel, then press the
ENTER button.
Press the ▲ or ▼ button to select Channel Mode, then
press the ENTER button.
2 Press the ▲ or ▼ button to select Added Channels or
Favourite Channels, then press the ENTER button.
3 Press the EXIT button to exit.
824 Television
825 UKTV style
1 C --
2 C --
3 C --
4 C --
5 C --
6 C --
7 C --
8 C --
Added Channels
All Channel Type Zoom Select Option
▲
Add to Favourite
Timer Viewing
Edit Channel Name
Sort
Select All
Auto Store
Channel
Default Guide : Mini Guide
Channel List
Channel Mode : Added Channels
Child Lock : On
Fine Tune
Signal Information
LNA : Off
Channel
Default Guide : Mini Guide
Channel List
Channel Mode : Added Channels
Child Lock : On
Fine Tune
Signal Information
LNA : Off
Added Channels
Favourite Channels
w
�
�English - 25
Locking Channels
This feature allows you to prevent unauthorized users, such as children, from watching unsuitable
programmes by muting out video and audio. Child Lock cannot be released using the buttons on
the side. Only the remote control can release the Child Lock setting, so keep the remote control
away from children.
� Locking channels
1 Press the MENU button to display the menu.
2 Press the ▲ or ▼ button to select Channel, then press the
ENTER button.
3 Press the ▲ or ▼ button to select Child Lock, then press
the ENTER button.
Enter your 4 digit PIN number.
¯ The default PIN number of a new TV set is “0-0-0-0”.
¯ If you want to change PIN number, refer to page 36.
4 Press the ▲ or ▼ button to select On, then press the
ENTER button.
5 Press the ▲ or ▼ button to select Channel List, then
press the ENTER button.
6 Press the ▲ or ▼ button to select a channel to be locked,
then press the TOOLS button.
¯ The symbol will be displayed and the channel will be
locked.
� Unlocking channels
7 Press the ▲ or ▼ button to select Unlock, then press the
ENTER button.
Enter your 4 digit PIN number.
¯ The channel is unlocked and the (lock icon) mark also
disappears.
¯ The default PIN number of a new TV set is “0-0-0-0”.
¯ If there is a locked channel by "Channel Lock" setting,
PIN input screen appears when you start "Auto Store" or "Plug&Play".(refer to page10)
Fine Tuning Analogue Channels
Use fine tuning to manually adjust a particular channel for optimal reception.
1 Press the MENU button to display the menu.
Press the ▲ or ▼ button to select Channel, then press the
ENTER button.
2 Press the ▲ or ▼ button to select Fine Tune, then press
the ENTER button.
3 Press the ◄ or ► button to adjust the fine tuning.
To store the fine tuning setting in the TV’s memory, press
the ENTER button.
¯ If you do not store the fine-tuned channel in memory,
adjustments are not saved.
4 To reset the fine tuning setting, press the ▼ button to
select Reset, then press the ENTER button.
Press the EXIT button to exit.
¯ Only Analogue TV channels can be fine tuned.
¯ “ * ” will appear next to the number of fine-tuned
channels.
Channel
Channel Mode : Added Channels
Child Lock : On
Fine Tune ►
Signal Information
LNA : Off
Fine Tune
ATV 6 * Fine Tuned
+5
Move Enter Return
Reset
Channel
Channel List
Channel Mode : Added Channels
Child Lock : On ►
Fine Tune
Signal Information
LNA : On
Child Lock
Enter PIN
* * * *
0~9 Enter PIN Return
824 UKTV Gold
825 UKTV style
1 C --
2 C --
3 C --
4 C --
5 C --
6 C --
7 C --
8 C --
All Channels
Delete
Add to Favourite
Lock
Timer Viewing
Edit Channel Name
Sort
▼
All Channel Type Zoom Select OptionEnglish - 26
LNA (Low Noise Amplifier)
This function is very useful in the situation that the TV is used in weak signal.
LNA amplifies the TV signal in the weak signal area, a low-noise preamplifier boosts the incoming
signal.
1 Press the MENU button to display the menu.
2 Press the ▲ or ▼ button to select Channel, then press the
ENTER button.
3 Press the ▲ or ▼ button to select LNA, then press the
ENTER button.
4 Select Off or On by pressing the ▲ or ▼ button, then
press the ENTER button.
5 Press the EXIT button to exit.
¯ While viewing an Analogue channel, this function can
be selected.
Viewing Signal Information
You can get information about the signal status.
1 Press the MENU button to display the menu. Press the ▲ or
▼ button to select Channel, then press the ENTER button.
2 Press the ▲ or ▼ button to select Signal Information ,
then press the ENTER button.
3 Press the EXIT button to exit.
¯ If the signal status is poor, the No Signal. message is
displayed.
¯ While viewing a Digital channel, this function can be
selected.
Off
On
Channel
Fine Tune
Signal Information
LNA
Signal Information
Service ID : 0403
Multiplex : (TSID 0004,ONID 20fa)
Network : (ID 20fa)
Bit error level 0
Signal Strength 82
Channel
Child Lock : On
Fine Tune
Signal Information ►
LNA : Off
OK
Enter ReturnEnglish - 27
Customizing the Picture Settings
Your television has several setting options that allow you
to control the picture quality.
1 Press the MENU button to display the menu.
2 Press the ENTER button to select Picture.
3 Press the ENTER button again to select Mode.
4 Select the required mode by pressing the ▲ or ▼ button,
then press the ENTER button.
Available modes: Dynamic, Standard, Movie
5 Select the required option by pressing the ▲ or ▼ button,
then press the ENTER button.
6 When you are satisfied with your setting, press the ENTER
button.
7 Press the EXIT button to exit.
� Cell Light – Contrast – Brightness – Sharpness – Colour – Tint(G/R)
¯�
In TV, Ext., AV, S-Video modes of the PAL system, you cannot use the Tint Function.
¯�
In PC mode, you can only make changes to Contrast and Brightness.
Press the ◄ or ► button until you reach the optimal setting.
Changing the Picture Standard
You can select the type of picture which best corresponds
to your viewing requirements.
1 Press the MENU button to display the menu.
2 Press the ENTER button to select Picture.
3 Press the ENTER button again to select Mode.
4 Select the required mode by pressing the ▲ or ▼ button,
then press the ENTER button.
Available modes: Dynamic, Standard, Movie
¯�The settings values may vary depending on the input
source.
5 Press the EXIT button to exit.
¯� � Choose Dynamic for viewing the TV during the day or
when there is bright light in the room.
� Choose Standard for general TV watching mode.
� Choose Movie when viewing the movie.
Easy Setting
1 Press the TOOLS button on the remote control.
2 Press the ▲ or ▼ button to select Picture Mode.
3 Press the ◄ or ► button to select the required option.
Picture
Mode : Standard ►
Cell Light :7
Contrast : 95
Brightness : 45
Sharpness : 50
Colour : 50
Tint (G/R) : G50/R50
Detailed Settings
Picture
Tools
Device List
Picture Mode ◄ Standard ►
Sound Mode : Standard
Sleep Timer : Off
SRS TS XT : Off
Energy Saving : Off
Dual I II : Mono
Move Adjust Exit
Mode :
Cell Light :7
Contrast : 80
Brightness : 45
Sharpness : 50
Colour : 50
Tint (G/R) : G50/R50
Detailed Settings
Dynamic
Standard
Movie
Mode : Standard
Cell Light :7 ►
Contrast : 95
Brightness : 45
Sharpness : 50
Colour : 50
Tint (G/R) : G50/R50
Detailed Settings
Picture Options
PictureEnglish - 28
Configuring Detailed Settings on the Picture
You can set detailed picture settings.
1 Press the MENU button to display the menu.
2 Press the ENTER button to select Picture.
3 Press the ▲ or ▼ button to select Detailed Settings, then
press the ENTER button.
4 Select the required option by pressing the ▲ or ▼ button,
then press the ENTER button.
Available options: Black Adjust, Dynamic Contrast,
Gamma, Colour Space, White Balance, Flesh Tone,
Edge Enhancement, xvYCC
5 When you are satisfied with your setting, press the ENTER
button.
6 Press the EXIT button to exit.
¯�Detailed Settings is available in Standard or Movie mode.
¯�
In PC mode, you can only make changes to Dynamic
Contrast, Gamma and White Balance from among the
Detailed Settings items.
� Black Adjust: Off/Low/Medium/High
You can directly select the black level on the screen to
adjust the screen depth.
� Dynamic Contrast: Off/Low/Medium/High
You can adjust the screen contrast so that the optimal
contrast is provided.
� Gamma: -3 ~ +3
You can adjust the middle brightness of pictures.
Press the ◄ or ► button until you reach the optimal setting.
� Colour Space : Auto/Native/Custom
Colour space is a colour matrix composed of red, green and blue colours.
Select your favourite colour space to experience the most natural colour.
− Auto: Auto Colour Space automatically adjusts to the most natural colour tone based on program
sources.
− Native: Native Colour Space offers deep and rich colour tone.
− Custom: Adjusts the colour range to suit your preference. (see “Customizing the Colour Space”)
Customizing the Colour Space
Colour: Red/Green/Blue/Yellow/Cyan/Magenta
Adjusts the Colour range to suit your preference.
Colour is available when Colour Space is set to Custom.
Press the ▲ or ▼ button to select Red, Green, Blue, Yellow, Cyan or Magenta.
Press the ENTER button.
− Red/Green/Blue: In Colour, you can adjust the RGB values for the selected colour.
Press the ▲ or ▼ button to select Red, Green or Blue to change it. Press the ENTER button.
Press the ◄ or ► button to decrease or increase the value of a particular item.
Press the ENTER button.
− Reset: Resets the colour space to the default values.
� White Balance: R-Offset/G-Offset/B-Offset/R-Gain/G-Gain/B-Gain/Reset
You can adjust the colour temperature for more natural picture colours.
R-Offset/G-Offset/B-Offset/R-Gain/G-Gain/B-Gain: Changing the adjustment value will refresh the
adjusted screen.
Select the required option by pressing the ▲ or ▼ button, then press the ENTER button.
Press the ◄ or ► button until you reach the optimal setting.
Reset: The previously adjusted white balance will be reset to the factory defaults.
Continued...
Colour : 50
Tint (G/R) : G50/R50
Detailed Settings ►
Picture Options
Picture Reset
Picture
Detailed Settings
Black Adjust : Off ►
Dynamic Contrast : Low
Gamma : 0
Colour Space : Native
White Balance
Flesh Tone : 0
Edge Enhancement : On
Move Enter ReturnEnglish - 29
Picture Options
You can set detailed picture settings.
1 Press the MENU button to display the menu.
2 Press the ENTER button to select Picture.
3 Press the ▲ or ▼ button to select Picture Options, then
press the ENTER button.
4 Select the required option by pressing the ▲ or ▼ button,
then press the ENTER button.
5 When you are satisfied with your setting, press the ENTER
button.
6 Press the EXIT button to exit.
¯�
In PC mode, you can only make changes to the Colour
Tone, Size and Screen Burn Protection from among the
items in Picture Options.
� Colour Tone: Cool2/Cool1/Normal/Warm1/Warm2
¯�When the picture mode is set to Dynamic or
Standard, Warm1 and Warm2 cannot be selected.
� Size: Auto Wide/16:9/Wide Zoom/Zoom/4:3/Just Scan
You can select the picture size which best corresponds to
your viewing requirements.
− Auto Wide: Expanding and pulling up the picture from
4:3 to 16:9 ratio.
¯�Auto Wide function is available only in TV, Ext.1,
Ext.2, AV and S-Video mode.
− 16:9: Sets the picture to 16:9 wide mode.
− Wide Zoom: Magnify the size of the picture more than 4:3.
Move the screen up/down using the ▲ or ▼ button after
selecting the Position by pressing the ► or ENTER button.
− Zoom: Magnify the size of the picture vertically on screen.
− 4:3: Sets the picture to 4:3 normal mode.
− Just Scan: Use this function to see the full image without any cutoff when HDMI(720p/1080i/
1080p), Component(1080i/1080p) or DTV(1080i) signals are input.
After selecting Just Scan in HDMI (1080i/1080p) or Component (1080i/1080p) mode: Press
the ◄ or ► button to select Position, then press the ENTER button. Press the ▲, ▼, ◄ or ►
button to move the picture.
Reset: Press the ◄ or ► button to select Reset, then press the ENTER button. You can initialize
the setting.
¯�With the HDMI Just Scan picture size, depending on the AV devices, the screen may be cut off
or a specific colour appears on the screen.
¯�For an HDMI (1080p) connection of 24, 25, 30, 50, and 60 Hz, and for a Component (1080p)
connection of 50 and 60Hz, only the input source is supported.
¯�You can change the picture size simply by pressing the P.SIZE button on the remote control.
¯�Depending on the input source, the picture size options may vary.
¯�The items available may differ depending on the selected mode.
¯�When Double ( , ) mode has been set in PIP, the Picture Size cannot be set.
¯�
In PC Mode, only "16:9" and "4:3" mode can be adjusted.
Continued...
� Flesh Tone:-15~+15
You can emphasize the pink tone in the picture.
Press the ◄ or ► button until you reach the optimal setting.
¯ Changing the adjustment value will refresh the adjusted screen.
� Edge Enhancement: Off/On
You can emphasize object boundaries.
� xvYCC: Off/On
Setting the xvYCC mode to On increases detail and colour space when watching movies from an
external device (ie. DVD player) connected to the HDMI or Component IN jacks. You must set the
Picture Mode to Movie to enjoy this feature.
¯ The xvYCC function works only in Component or HDMI mode
¯ If xvYCC function is active, PIP cannot be selected.
Picture
Tint (G/R) : G50/R50
Detailed Settings
Picture Options ►
Picture Reset
Enter Return
Picture Options
Colour Tone :
Size
Screen Mode :
Digital NR :
DNle : 2min
HDMI Black Level : 2min
Movie Plus :Off
Move
Cool2
Cool1
Normal
Warm1
Warm2English - 30
Positioning and Sizing the screen using Zoom
− Resizing the screen using the Zoom enables the positioning and sizing of the screen to up/down direction
using the ▲ or ▼ button as well as the screen size.
− Move the screen up/down using the ▲ or ▼ button after selecting the Position by pressing the ◄ or ► button.
− Resize the screen vertically using the ▲ or ▼ button after selecting the Size by pressing the ◄ or ► button.
� Screen Mode: 16:9/Wide Zoom/Zoom/4:3
When setting the picture size to Auto Wide in a 16:9 wide
TV, you can determine the picture size you want to see the
4:3 WSS (Wide Screen Service) image or nothing. Each
individual European country requires different picture size
so this function is intended for users to select it.
− 16:9: Sets the picture to 16:9 wide mode.
− Wide Zoom: Magnify the size of the picture more than
4:3.
− Zoom: Magnify the size of the picture vertically on
screen.
− 4:3: Sets the picture to 4:3 normal mode.
¯�This function is available in Auto Wide mode.
¯�This function is not available in PC,Component or HDMI mode.
� Digital NR: Off/Low/Medium/High/Auto
If the signal received by the television is weak, you can activate this feature to reduce any static and
ghosting that may appear on the screen.
¯�When the signal is weak, select one of the other options until the best picture is displayed.
� DNIe: Off/Demo/On
This TV includes the DNIe function so as to provide a high visual quality. If you set DNIe to on, you
can view the screen with the DNIe feature activated. If you set the DNIe to Demo, you can view the
applied DNIe and normal pictures on the screen, for demonstration purposes. Using this function, you
can view the difference in the visual quality.
¯�DNIe
TM
(Digital Natural Image engine)
This feature brings you more detailed image with 3D noise reduction, detail enhancement, contrast
enhancement and white enhancement. New image compensation Algorithm gives brighter, clearer, more
detailed image to you. DNIe
TM
technology will fit every signal into your eyes.
¯�This function is available only in Dynamic mode.
� HDMI Black Level: Normal/Low
Using this function, you can adjust the image quality when the screen burn (appearance of black
level, low contrast, low colour, etc.) is encountered by the HDMI input for RGB limited range (16 to
235).
¯�This function is active only when the external input connects to HDMI(RGB signals).
� Movie Plus: Off/Low/Medium/High/Demo
You can view more natural skin and clear text even in fast moving scenes.
¯�
It is not supported in HDMI 1080p/24Hz, 25Hz, 30Hz mode.
¯�This function is not available in “Wide Zoom” and “Zoom” modes.
¯�This function is not available when "PIP" is set to "On".
� Blue Only Mode: Off/On
This function is for AV device measurement experts. This function displays the blue signal only by
removing the red and green signals from the video signal so as to provide a Blue Filter effect that is
used to adjust the Colour and Tint of video equipment such as DVD players, Home Theaters, etc.
Using this function, you can adjust the Colour and Tint to preferred values appropriate to the signal
level of each video device using the Red/Green/Blue/ Cyan/Magenta/ Yellow Colour Bar Patterns,
without using an additional Blue Filter.
¯�Blue Only Mode is available when the picture mode is set to Movie or Standard.
Continued...
Enter Return
Picture Options
Colour Tone : Normal
Size
Screen Mode :
Digital NR :
DNle : 2min
HDMI Black Level : 2min
Movie Plus :Low
Move
16:9
Wide Zoom
Zoom
4:3English - 31
Resetting the Picture Settings to the Factory Defaults
1 To select the desired picture mode, follow the “Changing
the Picture Standard” instructions numbers 1 and 2.
(see page 26)
2 Press the ▲ or ▼ button to select Picture Reset, then
press the ENTER button.
3 Press the ▲ or ▼ button to select OK or Cancel then
press the ENTER button.
¯�Each mode can be reset.
� Screen Burn Protection
To reduce the possibility of screen burn, this unit is
equipped with screen burn prevention technology. This
technology enables you to set picture movement up/down
(Vertical Line) and side to side (Horizontal Dot). The Time
setting allows you to program the time between movement
of the picture in minutes.
− Pixel Shift: Using this function, you can minutely move
pixels on the PDP in horizontal or vertical direction to
minimize after image on the screen.
− Set Pixel Shift to On by pressing the ▲ or ▼
button, then press the ENTER button.
− Select the required option by pressing the ▲ or ▼
button, then press the ENTER button.
Available options: Horizontal Dot, Vertical Line,
Time
¯�Optimum condition for pixel shift;
PC
TV/Ext/AV/Component/
HDMI/DTV
Horizontal Dot 4 4
Vertical Line 4 4
Time (minute) 4 4 min
¯�The Pixel Shift value may differ depending on the monitor size (inches) and mode.
¯�This function is not available in the Just Scan mode.
− All White: This function helps remove after images on the screen by changing the colour of
pixels to white. Use this function when there are remaining after images or symbols on the screen
especially when you displayed a still image on the screen for a long time.
− Scrolling: This function helps remove after images on the screen by moving all the pixels on the
PDP according to a pattern. Use this function when there are remaining after images or symbols
on the screen especially when you displayed a still image on the screen for a long time.
− Side Gray: When you watch TV with the screen ratio of 4:3, the screen is prevented from any
damage by adjusting the white balance on both extreme left and right sides.
Dark: When you set the screen ratio to 4:3, it darkens the left and right sides.
Light: When you set the screen ratio to 4:3, it brightens the left and right sides.
¯�To remove after images on the screen, use either White or Scrolling function. Although both of
the two functions remove after images on the screen, Scrolling is more effective.
¯�The after image removal function has to be executed for a long time (approximately 1 hour) to
effectively remove after images on the screen. If after image is not improved after the execution
of the function, repeat the function again.
¯�Press any button on the remote control to cancel this feature.
Picture
Detailed Settings
Picture Options
Picture Reset
OK
Cancel
Enter Return
Screen Burn Protection
Pixel Shift ►
All White
Scrolling
Side Gray : Dark
Move
Enter Return
Pixel Shift
Pixel Shift : On ►
Horizontal Dot : 4
Vertical Line : 4
Time : 4 min
MoveEnglish - 32
Sound Features
1 Press the MENU button to display the menu.
2 Press the ▲ or ▼ button to select Sound, then press the
ENTER button.
3 Select the required option by pressing the ▲ or ▼ button,
then press the ENTER button.
Available options: Mode, Equalizer, SRS TruSurround
XT, Audio Language, Audio Format, Audio Description,
Auto Volume, TV Speaker, Sound Select, Sound Reset
4 When you are satisfied with your setting, press the ENTER button.
5 Press the EXIT button to exit.
� Mode: Standard/Music/Movie/Speech/Custom
You can select the type of special sound effect to be used
when watching a given broadcast.
Easy Setting
1 Press the TOOLS button on the remote control.
2 Press the ▲ or ▼ button to select Sound Mode.
3 Press the ◄ or ► button to select the required option.
4 Press the EXIT or TOOLS button to exit.
� Equalizer: Mode/Balance/100Hz/300Hz/1kHz/3kHz/
10kHz/Reset
You can select a sound mode to suit your personal preferences.
The television has several settings which allow you to
control the sound quality.
¯ The adjusted values are stored according to the
selected Sound mode.
- Reset : Resets the equalizer settings to the default values.
� SRS TruSurround XT: Off/On
TruSurround XT is a patented SRS technology that solves
the problem of playing 5.1 multichannel content over
two speakers. TruSurround delivers a compelling, virtual
surround sound experience through any two-speaker
playback system, including internal television speakers. It
is fully compatible with all multichannel formats.
Easy Setting
1 Press the TOOLS button on the remote control.
2 Press the ▲ or ▼ button to select SRS TS XT.
3 Press the ◄ or ► button to select Off or On.
4 Press the EXIT or TOOLS button to exit.
� Audio Language
You can change the default value for audio languages. Displays the language information for the
incoming stream.
¯ While viewing a Digital channel, this function can be selected.
¯ You can only select the language among the actual languages being broadcast.
� Audio Format: MPEG/Dolby Digital
When sound is emitted from both the main speaker and the audio receiver, a sound echo may occur
due to the decoding speed difference between the main speaker and the audio receiver. In this case,
use the TV Speaker function.
¯ While viewing a Digital channel, this function can be selected.
¯ You can only select the language among the actual languages being broadcast.
TruSurround XT, SRS and Symbol are trademarks of SRS Labs, Inc.
TruSurround XT technology is incorporated under license from SRS Labs, Inc.
Mode : Standard ►
Equalizer
SRS TruSurround XT : Off
Audio Language : ----
Audio Format : ----
Audio Description
Auto Volume : Off
TV Speaker : On
Sound
Tools
Device List
Picture Mode : Standard
Sound Mode ◄ Standard ►
Sleep Timer : Off
SRS TS XT : Off
Energy Saving : Off
Dual I II : Mono
Move Adjust Exit
Tools
Device List
Picture Mode : Standard
Sound Mode : Standard
Sleep Timer : Off
SRS TS XT ◄ Off ►
Energy Saving : Off
Dual I II : Mono
Move Adjust Exit
Manufactured under license from Dolby Laboratories.
Dolby and the double-D symbol are trademarks of Dolby Laboratories.English - 33
� Audio Description: Audio Description/ Volume
This is an auxiliary audio function that provides an additional audio track for visually challenged
persons. This function handles the Audio Stream for the Audio Description, when it is sent along
with the Main audio from the broadcaster. Users can turn the Audio Description On or Off and
control the volume.
− Audio Description : On/Off
− Volume : 0~100
¯�Volume is active when Audio Description is set to On.
¯�While viewing a Digital channel, this function can be selected.
� Auto Volume: Off/On
Each broadcasting station has its own signal conditions, and so it is not easy to adjust the volume
every time the channel is changed. This feature lets you automatically adjust the volume of the
desired channel by lowering the sound output when the modulation signal is high or by raising the
sound output when the modulation signal is low.
� TV Speaker: Off/On
If you want to hear the sound through separate speakers, cancel the internal amplifier.
¯�The – +, MUTE buttons do not operate when the TV Speaker is set to Off.
¯�When TV Speaker is set to Off, you can operate only Audio Language, Audio Format, Audio
Description, Sound Select(in PIP mode), Sound Reset(in digital TV mode) and Sound
Reset(in analogue TV mode) in Sound menu.
TV’s Internal Speakers Audio Out (Optical, L/R Out) to Sound System
TV AV, S-Video
Component, PC,
HDMI
TV AV, S-Video
Component,
PC, HDMI
TV Speaker On Speaker Output Speaker Output Speaker Output Speaker Output Speaker Output Speaker Output
TV Speaker Off Mute Mute Mute Speaker Output Speaker Output Speaker Output
Video No Signal Mute Mute Mute Mute Mute Mute
� Sound Select: Main/Sub
When the PIP feature is activated, you can listen to you can operate only Sound Select (in PIP mode)
in Sound menu.
− Main: Used to listen to the sound of the main picture.
− Sub: Used to listen to the sound of the sub picture.
� Sound Reset: Reset All/Reset Sound Mode/Cancel
You can restore the Sound settings to the factory defaults.
- Reset All: All the sound values return to default settings.
- Reset Sound Mode: Currently set values return to default settings.English - 34
Selecting the Sound Mode (depending on the model)
The DUAL I-II button displays/controls the processing and output of the audio signal. When power
is switched on, the mode is automatically preset to either “DUAL-I” or “Stereo”, depending on the
current transmission.
Easy Setting
1 Press the TOOLS button on the remote control.
2 Press the ▲ or ▼ button to select Dual I-II.
3 Press the ◄ or ► button to select the required option.
Type of broadcast On-screen indication
NICAM
Stereo
Regular broadcast
(Standard audio)
Mono (Normal use))
Regular + NICAM
Mono
NICAM
Mono
(Normal)
NICAM-Stereo
NICAM
Stereo
Mono
(Normal)
NICAM Dual-I/II
NICAM
Dual-1
NICAM
Dual-2
Mono
(Normal)
A2
Stereo
Regular broadcast
(Standard audio)
Mono (Normal use))
Zweisprachig oder
Dual-I/II
Dual I Dual II
Stereo Stereo
Mono
(Forced mono)
¯� � If the receiving conditions deteriorate, listening will be easier if the mode is set to Mono.
� If the stereo signal is weak and automatic switching occurs, switch to Mono.
� This function is only available in Analogue TV mode.
Connecting Headphones (Sold separately)
You can connect a set of headphones to your set if you wish to watch a TV program without
disturbing other people in the room.
¯ When you insert the head set jack into the corresponding
port, you can operate only
DTV : Audio Language,Audio Format, Audio Description,TV
Speaker,Sound Reset
ATV : TV Speaker, Sound Reset
PIP : Sound Select, Sound Reset in Sound menu.
¯ Prolonged use of headphones at a high volume may
damage your hearing.
¯ You will not hear sound from the speakers when you
connect headphones to the TV.
¯ The headphone volume and TV volume are adjusted
separately.
TV Side Panel
Tools
Device List
Picture Mode : Standard
Sound Mode : Standard
Sleep Timer : Off
SRS TS XT : Off
Energy Saving : Off
Dual I II ◄ Mono ►
Move Adjust Exit
15English - 35
Time Features
1 Press the MENU button to display the menu.
2 Press the ▲ or ▼ button to select Setup, then press the ENTER
button.
3 Press the ▲ or ▼ button to select Time, then press the ENTER
button.
4 Select the required option by pressing the ▲ or ▼ button, then
press the ENTER button.
Available options: Clock, Sleep Timer, Timer 1, Timer 2, Timer 3
5 When you are satisfied with your setting, press the ENTER button.
6 Press the EXIT button to exit.
� Clock
You can set the television clock so that the current time is displayed
when pressing the INFO button on the remote control. You must
also set the time if you wish to use the automatic on or off timers.
Option 1: Setting the Clock Manually
− Clock Mode
Press the ENTER button to select Clock Mode.
Press the ▲ or ▼ button to select Manual, then press the
ENTER button
− Clock Set
Press the ◄ or ► button to select Day, Month, Year, Hour,
Minute or am/pm. Set these by pressing the ▲ or ▼ button.
¯ You can set the Day, Month, Year, Hour, or Minute directly by
pressing the numeric buttons on the remote control.
Option 2: Setting the Clock Automatically
− Clock Mode
Press the ENTER button to select Clock Mode.
Press the ▲ or ▼ button to select Auto, then press the ENTER button.
� Sleep Timer
You can select a time period of between 30 and 180 minutes after
which the television automatically switches to standby mode.
− Select the preset time interval (Off, 30, 60, 90, 120, 150, or 180)
for staying on by pressing the ▲ or ▼ button.
Easy Setting
1 Press the TOOLS button on the remote control.
2 Press the ▲ or ▼ button to select Sleep Timer.
3 Press the ◄ or ► button to select the minute, then press the
ENTER button.
4 Press the EXIT or TOOLS button to exit.
� Timer 1 / Timer 2 / Timer 3
You can set the On/Off timers so that the television will switch on or
off automatically at the time you select.
� You must set the clock first.
− Press the ◄ or ► button to select the required item below.
Press the ▲ or ▼ button to adjust to the setting satisfied.
On Time : Select hour, minute, and Inactivate/Activate. (To
activate timer with the setting satisfied, set to Activate.)
Off Time : Select hour, minute, and Inactivate/Activate. (To activate timer with the setting satisfied, set to Activate.)
Contents: You can select the content to be played when the TV turns on automatically.
Volume : Select the required volume level.
Repeat : Select Once, Everyday, Mon~Fri, Mon~Sat, Sat~Sun or Manual.
¯ When Manual is selected, Press the ► button to select the desired day of the week. Press the ENTER
button over the desired day and the mark (V) will appear.
¯ You can set the hour, minute, directly by pressing the number buttons on the remote control.
� Auto Power Off
When you set the timer “On”, the TV will eventually turn off, if no controls are operated for 3 hours after the TV
was turned on by timer. This function is only available in timer “On” mode and prevents overheating, which may
occur if a TV is on for too long time.
Move Adjust Exit
Setup
Plug & Play
Language : English
Time ►
Change PIN
Parental Lock
Subtitle
Teletext Language : ----
Preference
Light Effect : Watching TV
Wall-Mount Adjustment
Time
Clock : 00:00 ►
Sleep Timer : Off
Timer 1 : Inactivated
Timer 2 : Inactivated
Timer 3 : Inactivated
Move Enter Return
Tools
Device List
Picture Mode : Standard
Sound Mode : Standard
Sleep Timer ◄ Off ►
SRS TS XT : Off
Energy Saving : Off
Dual I II : Mono
Move Adjust Exit
ATV 1
Timer 1
Move Adjust Enter Return
On Time
Off Time
Volume Contents
Once
Repeat Sun Mon Tue Wed The Fri Sat
00 00 Inactivate
12 00 Inactivate
10 TV ATV 1 English - 36
Language / Change PIN / Parental Lock / Subtitle / Teletext Language /
Preference / Light Effect / Melody / Entertainment / Energy Saving / PIP
1 Press the MENU button to display the menu.
2 Press the ▲ or ▼ button to select Setup, then press the
ENTER button.
3 Select the required option by pressing the ▲ or ▼ button,
then press the ENTER button.
Available options: Language, Change PIN, Parental
Lock, Subtitle, Teletext Language, Preference,Light
Effect, Melody, Entertainment, Energy Saving, PIP
4 When you are satisfied with your setting, press the ENTER button.
5 Press the EXIT button to exit.
� Language
It is variable depending on the model. When you start using the television for the first time, you must
select the language which will be used for displaying menus and indications.
� Change PIN
Press the ▲ or ▼ button to select Change PIN, then press the ENTER button. The Enter PIN is
displayed. Enter your current 4-digit PIN code by using the numeric buttons (0~9).
¯ The Enter New PIN and Confirm New PIN is displayed.
¯ If you forget the PIN code, press the remote control buttons in the following sequence, which
resets the PIN to 0-0-0-0:POWER (Off), MUTE, 8, 2, 4, POWER (On).
� Parental Lock
This feature allows you to prevent unauthorized users, such
as children, from watching unsuitable programmes by a
4-digit PIN (Personal Identification Number) code that is
defined by the user. The on-screen menu will instruct you to
assign a PIN code (you can change it later, if necessary).
1 Enter your 4-digit PIN by using the numeric buttons (0~9).
2 Press the ENTER button to select Parental Rating.
3 Press the ▲ or ▼ button to select an appropriate
restriction, then press the ENTER button.
The “ ” symbol is indicated.
¯ While “ ” is selected, press the ENTER button to
block or unblock the category.
¯ Allow All: Press to unlock all TV ratings.
Block All: Press to lock all TV ratings.
¯ The default PIN code for a new TV set is 0000.
� Subtitle
¯ Subtitle : On / Off
− You can select these options simply by pressing the
SUBT. button on the remote control.
While viewing a programme, the subtitle can be selected.
¯ Mode : Normal (basic subtitle) / Hard of hearing
(subtitle for a hearing-impaired person)
− If the programme you are watching does not support the
Hard of hearing function, Normal automatically activates
even though Hard of hearing mode is selected.
While viewing a programme, audio languages can be selected.
¯ Subtitle Language : You can change the default value for subtitle languages.
� Teletext Language
You can set the Teletext language by selecting the language type.
¯ English is the default in cases where the selected language is unavailable in the broadcast.
Continued...
Plug & Play ►
Language : English
Time
Change PIN
Parental Lock
Subtitle
Teletext Language : ----
Preference
Setup
Parental Lock
Enter Return
Parental Rating
Parental Rating
Move Enter Return
3
4
5
6
7
8
9
Allow All
Block All
Subtitle
Subtitle : On
Mode : Default
Subtitle Language
Move Enter Return
Off
OnEnglish - 37
� Preference
This menu consists of 6 sub-menus:
Primary Audio Language, Secondary Audio Language,
Primary Subtitle Language, Secondary Subtitle
Language, Primary Teletext Language, and Secondary
Teletext Language (depending on the Country).
Using this feature, users can select one of the languages
(English, German, Italian, Swedish, French, Welsh, Gaelic,
Irish, Danish, Finnish, Spanish, Dutch). The language
selected here is the default when the user selects a
channel.
¯� �Press the ▲ or ▼ button to select required menu
(Primary Audio Language, Secondary Audio
Language, Primary Subtitle Language, Secondary
Subtitle Language, Primary Teletext Language,
or Secondary Teletext Language), then press the
ENTER button.
The options of the selected menu are displayed.
¯ Press the ▲ or ▼ button to select required option
(Bulgarian, Croatian, Czech, Danish, Dutch, English,
Finnish, French,Gaelic, German,Greek,Hungarian,
Irish, Italian, Norwegian, Polish, Portuguese,
Romanian, Russian, Serbian, Spanish, Swedish,Turkish, Welsh), then press the ENTER button.
− If you change the language setting, the Audio Language, Subtitle Language, and the Teletext
Language of the Language menu are automatically changed to the selected language.
− The Audio Language, Subtitle Language, and the Teletext Language of the Language
menu show a list of languages supported by the current channel and the selection is
highlighted. If you change this language setting, the new selection is only valid for the current
channel. The changed setting does not change the setting of the Primary Audio Language,
Primary Subtitle Language, or the Primary Teletext Language of the Preference menu.
� Light Effect: Off/In Standby/Watching TV/Always
You can turn on/off the blue LED on the front of TV according to the situation. Use it for saving power
or when the LED dazzles your eyes.
− Off: The blue LED is always off.
− In Standby: The blue LED lights while in Standby mode and it turns off when your TV is turned on.
− Watching TV: The blue LED lights when watching TV and it turns off when your TV is turned off.
− Always: The blue LED always lights.
¯ Set the Light Effect to Off to reduce the power consumption.
� Melody: Off/Low/Medium/High
The TV power on/off melody sound can be adjusted.
¯ When the Melody does not play
¯ When no sound is output from the TV because the MUTE button has been pressed.
¯ When no sound is output from the TV because the – (Volume) button has been pressed.
¯ When the TV is turned off by Sleep Timer.
� Entertainment: Off/Sports/Cinema/Game
Entertainment mode enables you to select the optimal display and sound for sports, cinema and
games.
− Off: Switches the Entertainment function off.
− Sports: Provides the optimal picture and sound quality for sports.
− Cinema: Provides the optimal picture and sound quality for movie watching.
You can experience a richer picture and enhanced sound.
− Game: Provides the optimal picture and sound quality for games. This mode accelerates the
playing speed when using an external game console connected to the TV.
¯ If you set any of the three Entertainment modes to On, the settings will be locked and can not
be adjusted. If you want to make Picture and Sound mode adjustments, the Entertainment mode
must be turned off.
¯ The Entertainment settings are saved for each input source.
.Continued...
Sub title
Teletext Language : ----
Preference ►
Light Effect : Watching TV
Wall-Mount Adjustment
Melody : Off
Entertainment : Off
Energy Saving : Off
PIP
Software Upgrade
Setup
Preference
Primary Audio Language : French ►
Secondary Audio Language : French
Primary Subtitle Language : French
Secondary Subtitle Language : French
Primary Teletext Language : French
Secondary Teletext Language : French
Move Enter ReturnEnglish - 38
� Energy Saving: Off/Low/Medium/High
This feature adjusts the screen brightness depending on
the surrounding lighting conditions.
− Off: Switches off the Energy Saving mode.
− Low: Operates in standard mode regardless of the
surrounding illumination.
− Medium: Enters Medium power saving mode regardless
of the surrounding illumination.
− High: Enters maximum power saving mode regardless
of the surrounding illumination.
Easy Setting
1 Press the TOOLS button on the remote control.
2 Press the ▲ or ▼ button to select Energy Saving.
3 Press the ◄ or ► button to select the required option.
4 Press the EXIT or TOOLS button to exit.
� PIP (Picture in Picture):
You can display a sub picture within the main picture. In
this way you can watch TV programme or monitor the
video input from any connected devices.
− PIP: On/Off
You can activate or deactivate the PIP function.
Table of PIP Settings
Main Picture Sub Picture
Component
HDMI1, HDMI2/DVI, HDMI3
PC
TV, Ext1, Ext2, AV
− Source
You can select a source of the sub-picture.
− Size: / /
You can select a size of the sub-picture.
¯�
If main picture is in PC and Component mode, Size
is not available.
− Position: / / /
You can select a position of the sub-picture.
¯�
In Double( , ) mode, Position cannot be
selected.
− Channel
You can select a channel of the sub-picture only when
the Source is set to TV.
Easy Setting
1 Press the TOOLS button on the remote control.
2 Press the ▲ or ▼ button to select PIP, then press the
ENTER button.
Tools
Device List
Picture Mode : Standard
Sound Mode : Standard
Sleep Timer : Off
SRS TS XT : Off
Energy Saving ◄ Off ►
Dual I II : Mono
Move Adjust Exit
Melody : Off
Entertainment : Off
Energy Saving : Off ►
PIP
Software Upgrade
Common Interface
Setup
Entertainment : Off
Energy Saving : Off
PIP ►
Software Upgrade
Common Interface
Setup
Enter Return
PIP
PIP : Off
Source :
Size :
Position :
Channel : ATV 1
Move
Off
On
Tools
Device List
Picture Size : 16:9
Picture Mode : Standard
Sound Mode : Custom
Sleep Timer : Off
PIP
Energy Saving : Off
Auto Adjustment
Move Enter ExitEnglish - 39
Upgrading the Software
To keep your product up-to-date with new Digital Television features then software upgrades are
periodically broadcast as part of the normal Television signal. It will automatically detect these
signals and display the software upgrade banner. You are given the option to install the upgrade.
1 Insert a USB drive containing the firmware upgrade into
the USB Upgrade Port on the side of the TV.
2 Press the MENU button to display the menu.
Press the ▲ or ▼ button to select Setup, then press the
ENTER button.
3 Press the ▲ or ▼ button to select Software Upgrade,
then press the ENTER button.
4 Press the ▲ or ▼ button to select “BY USB”, “BY Channel”
or “Standby Mode Upgrade”. Press the ENTER button.
� BY USB :
− Preset : Insert a USB drive containing the firmware
upgrade into TV.
¯ Please be careful to not disconnect the power or
remove the USB drive while upgrades are being
applied. The TV will turn off and turn on automatically
after completing the firmware upgrade.
Please check the firmware version after the upgrades are complete. When software is upgraded,
video and audio settings you have made will return to their default (factory) settings.
We recommend you write down your settings so that you can easily reset them after the upgrade.
� BY Channel :
Upgrades the software using the broadcasting signal.
� Standby Mode Upgrade :
To continue software upgrade with master power on, Select On by pressing the ▲ or ▼ button.
45 minutes after entering standby mode, a manual upgrade is automatically conducted. Since the
power of the unit is turned on internally, the screen may be on slightly for the LCD product. This
phenomenon may continue for more than 1 hour until the software upgrade is completed.
� Alternative Software :
To display the software version information.
Energy Saving : Off
PIP
Software Upgrade ►
Common Interface
Setup
TV side Panel
USB Drive
Software Upgrade
Current Version 2008/01/01_000075
BY USB ►
BY Channel
Standby Mode Upgrade :On
Alternative Software --/--/--_--------
Move Return EnterEnglish - 40
Common Interface
This contains information on CAM inserted in the CI slot and displays it.
¯ You can install the CAM anytime whether the TV is ON or OFF.
� Installing the CI Card
a. Purchase the CI CAM module by visiting your nearest
dealer or by phone.
b. Insert the CI CARD into the CAM in the direction of the
arrow until it fits.
c. Insert the CAM with the CI CARD installed into the common
interface slot.
¯�
Insert the CAM in the direction of the arrow, right up to
the end so that it is parallel with the slot.
d. Check if you can see a picture on a scrambled signal
channel.
1 Press the MENU button to display the menu.
2 Press the ▲ or ▼ button to select Setup, then press the
ENTER button.
3 Select the Common Interface by pressing the ▲ or ▼
button, then press the ENTER button.
� CI Menu
This helps the user select an item from the CAM-supported
menu.
¯� �Press the ENTER button. The options of the selected
menu are displayed.
Press the ▲ or ▼ button to select the required option,
then press the ENTER button.
� Application Info.
This contains information on CAM inserted in the CI slot
and displays it.
¯� �Press the ENTER button to display the information for
your application.
¯ Select the CI Menu based on the PC Card menu.
PIP
Software Upgrade
Common Interface ►
Setup
Application Info
Type : CA
Manufacturer : Canal Plus
Info : Top Up TV
Exit
OK
Enter
CI Menu
Main menu
Module information
Smart card information
Language
Software Download
Press Ok to select, or Exit to quit
Move Enter Exit
Common Interface
CI Menu ►
Application Info.
Move Enter ExitEnglish - 41
Setting up Your PC Software (Based on Windows XP)
The Windows display-settings for a typical computer
are shown below. But the actual screens on your PC will
probably be different, depending upon your particular
version of Windows and your particular video card. But even
if your actual screens look different, the same, basic set-up
information will apply in almost all cases. (If not, contact your
computer manufacturer or Samsung Dealer.)
1 Right click the mouse on the Windows Desktop, then click on
Properties.
The Display Properties will be displayed.
2 Click on Settings tab, then set the Display Mode with
reference to the Display Modes Table. You do not need to
change the Colours settings.
3 Click on Advanced. A new settings dialog box will be displayed.
4 Click on the Monitor tab, then set the Screen refresh rate with reference to the Display Modes
Table. Set the Vertical Frequency and Horizontal Frequency individually if you can do so instead of
setting the Screen refresh rate.
5 Click on OK to close the window, then Click on OK button to the Display Properties window.
Automatic re-booting may commence at this moment.English - 42
Input Mode (PC)
Both screen position and size will vary depending on the type of PC monitor and its resolution.
The table below shows all of the display modes that are supported:
D-Sub Input
Mode Resolution
Horizontal
Frequency
(kHz)
Vertical
Frequency
(Hz)
Pixel Clock
Frequency
(MHz)
Sync Polarity
(H/V)
IBM
640 x 350
720 x 400
31.469
31.469
70.086
70.087
25.175
28.322
+ / -
- / +
VESA
640 x 480
640 x 480
640 x 480
800 x 600
800 x 600
800 x 600
1024 x 768
1024 x 768
1024 x 768
1280 x 1024
1280 x 1024
1360 x 768
1600 x 1200
31.469
37.861
37.500
37.879
48.077
46.875
48.363
56.476
60.023
63.981
79.976
47.712
75.000
59.940
72.809
75.000
60.317
72.188
75.000
60.004
70.069
75.029
60.020
75.025
60.015
60.000
25.175
31.500
31.500
40.000
50.000
49.500
65.000
75.000
78.750
108.000
135.000
85.500
162.000
- / -
- / -
- / -
+ / +
+ / +
+ / +
- / -
- / -
+ / +
+ / +
+ / +
+ / +
+ / +
CVT 1920 x 1080RB 66.587 59.934 138.500 + / -
HDMI/DVI Input
Mode Resolution
Horizontal
Frequency
(kHz)
Vertical
Frequency
(Hz)
Pixel Clock
Frequency
(MHz)
Sync Polarity
(H/V)
VESA
640 x 480
800 x 600
1024 x 768
1280 x 1024
1360 x 768
1600 x 1200
31.469
37.879
48.363
63.981
47.712
75.000
59.940
60.317
60.004
60.020
60.015
60.000
25.175
40.000
65.000
108.000
85.500
162.000
- / -
+ / +
- / -
+ / +
+ / +
+ / +
CEA 1920 x 1080p 67.500 60.000 148.500 + / +
� When using an HDMI/DVI cable connection, you must use the HDMI IN 2 jack.
� The interlace mode is not supported.
� The set might operate abnormally if a non-standard video format is selected.
� Separate and Composite modes are supported. SOG is not supported.English - 43
Setting the PC
¯ Preset to the PC mode by pressing the SOURCE button.
1 Press the MENU button to display the menu.
2 Press the ▲ or ▼ button to select Picture, then press the
ENTER button.
3 Select the required option by pressing the ▲ or ▼ button,
then press the ENTER button.
4 When you are satisfied with your setting, press the ENTER
button.
5 Press the EXIT button to exit.
� Auto Adjustment :
Auto adjustment allows the PC screen to self-adjust to the
incoming PC video signal.
The values of fine, coarse and position are adjusted
automatically.
Easy Setting
1 Press the TOOLS button on the remote control.
2 Press the ▲ or ▼ button to select Auto Adjustment,
then press the ENTER button.
Auto Adjustment in progress. Please Wait.
Mode : Standard ►
Cell Light :7
Contrast : 95
Brightness : 45
Sharpness : 20
Auto Adjustment
Screen Adjustment
Detailed Settings
Picture
Brightness : 45
Sharpness : 20
Auto Adjustment ►
Screen Adjustment
Detailed Settings
Picture Options
Picture Reset
Picture
Tools
Device List
Picture Mode : Standard
Sound Mode : Standard
Sleep Timer : Off
SRS TS XT : Off
PIP
Energy Saving : Off
Auto Adjustment
Move Enter ExitEnglish - 44
� Screen Adjustment: Coarse/Fine/Position/Image
Reset
- Coarse/Fine
The purpose of picture quality adjustment is to remove or
reduce picture noise.
If the noise is not removed by Fine-tuning alone, then
adjust the frequency as best as possible (coarse) and Finetune again.
After the noise has been reduced, re-adjust the picture so
that it is aligned on the center of screen.
1 Press the ▲ or ▼ button to select Coarse or Fine,
then press the ENTER button.
2 Press the ◄ or ► button to adjust the screen quality,
vertical stripes may appear or the picture may be
blurry. Press the ENTER button.
- Position
Adjust the PC’s screen positioning if it does not fit the TV
screen.
1 Adjust the position by pressing the ▲/▼/◄/► button.
2 Press the ENTER button.
- Image Reset
You can replace all image settings with the factory default
values.
Sharpness : 20
Auto Adjustment
Screen Adjustment ►
Detailed Settings
Picture Options
Picture Reset
Picture
Image Reset is completed.
Enter Return
Position
Adjust
Screen Adjustment
Move Enter Return
50
12
Coarse
Fine
Position
Image ResetEnglish - 45
Using the Remote Control Button in WISELINK Menu
Button Operations
Move the cursor and select an item.
Select the currently selected item. During a Slide Show or Music Play:
- Pressing the ENTER button during play pauses the play.
- Pressing the ENTER button during pause resumes the play.
Play or pause the Slide Show or Music file.
Return to the previous menu.
Run various functions from the Photo and Music menus.
Stop the current slide show or Music file.
Jump to previous group / Jump to next group.
Show file information.
W.LINK Exit WISELINK mode.
P
Stop WISELILNK mode and Returns to TV mode.
Stop the current function and return to the WISELINK main menu.
This function enables you to view and listen to photo (JPEG) and
audio files (MP3) saved on a USB Mass Storage Class (MSC)
device.
1 Press the POWER button on the remote control or front
panel. The TV is powered on.
2 Connect a USB device containing JPEG and/or MP3 files to
the WISELINK jack (USB jack) on the side of the TV.
If you enter the WISELINK mode with no USB device
connected the message “No external storage device
found. Check the connection status.” will appear. In this
case, insert the USB device, exit the screen by pressing
the W.LINK button on the remote control and enter the WISELINK screen again.
MTP (Media Transfer Protocol) is not supported.
The file system only supports FAT16/32 (The NTFS file system is not supported).
Certain types of USB Digital camera and audio devices may not be compatible with this TV.
Wiselink only supports USB Mass Storage Class devices (MSC). MSC is a Mass Storage Class Bulk-Only
Transport device. Examples of MSC are Thumb drives and Flash Card Readers (Both USB HDD and HUB
are not supported.)
Please connect directly to the USB port of your TV. If you are using a separate cable connection, there may
be a USB Compatibility problem.
Before connecting your device to the TV, please back up your files to prevent them from damage or loss of
data. SAMSUNG is not responsible for any data file damage or data loss.
Do not disconnect the USB device while it is loading.
MSC supports MP3 and JPEG files, while a PTP device supports JPEG files only.
The sequential jpeg format is supported.
Photo and audio files must be named in English, French or Spanish. If not, the files can not be played.
Change the file names to English, French or Spanish if necessary.
The higher the resolution of the image, the longer it takes to display on the screen.
The maximum supported JPEG resolution is 15360x8640 pixels.
For unsupported or corrupted files, the “Not Supported File Format” message is displayed.
¯
¯
¯
¯
¯
¯
¯
¯
¯
¯
¯
¯
¯
¯
Using the WISELINK Function
TV Side Panel
USB DriveEnglish - 46
Using the WISELINK Menu
1 Press the MENU button. Press the ▲ or ▼ button to
select Application, then press the ENTER button.
2 Press the ▲ or ▼ button to select WISELINK, then
press the ENTER button.
¯ The WISELINK menu is diplayed.
Press the W.LINK button on the remote control to
display the WISELINK menu.
Press the SOURCE button on the remote control
repeatedly to select USB, then press the ENTER
button.
3 Press the Red button, then press the ▲ or ▼ button
to select the corresponding USB Memory Device.
(i.e. WiseLink does not support the use of a usb hub.)
Press the ENTER button.
¯ This function differs depending on the USB Memory Device connected to TV.
¯ The selected USB device name appears at the bottom left of the screen.
4 Press the ◄ or ► button to select an icon (Photo, Music, Setup), then press the ENTER button.
¯ To exit WISELINK mode, press the W.LINK button on the remote control.
Using the Photo List
This menu shows Photo files saved on an USB memory device.
Photo List
1 Press the W.LINK button on the remote control to
display the WISELINK menu.
2 Press the ◄ or ► button to select Photo, then press
the ENTER button.
¯ This menu only shows files whose file extension is
jpg. Files of other formats such as bmp or tiff will
not be displayed.
¯ Photo files are displayed.
¯ Press the (Play)/ENTER button to start the Slide Show.
¯ When moving to a photo, loading may take a few
seconds. At this point, the loading icon will appear
at the screen.
¯ It takes some time to load photo files as
Thumbnail images.
¯ Photos without EXIF information may not be
displayed as thumbnail images in the PHOTO LIST
depending on the picture quality and resolution.
¯ To move to the previous / next group, press the
(REW) or (FF) button.
Continued...
WISELINK
Photo
USB Device Exit
Music Setup
PHOTO
USB
851.98MB/995.00MB Free
Photo
USB Device Favorites Setting Select ��Jump �������Option
image_1.jpg
Month : Jan
Date : Jan.01.2008
Color : Gray
Composition :
Folder : P-other
Favorite : )�)�)
Preference
Monthly
Timeline
Jan Nov
▲
WISELINK
Photo
USB Device Exit
Music Setup
PHOTO
USB
851.98MB/995.00MB Free
W.LINKEnglish - 47
Screen Display
1 Currently selected photo
Shows the currently selected
photo.
2 Photo Information Window
Shows information about the
currently selectedphoto.
You can change the Color,
Compositon, and Favorite.
3 Current Sort Standard
Press the ▲ or ▼ button
to change the standard for
sorting photos.
(Monthly, Timeline, Color, Composition, Folder, Preference)
The item that is selected as the sorting standing is highlighted in the Photo Information Window.
4 View Groups
Shows the sorting groups. The sorting group including the currently selected photo is highlighted.
5 Current Device
Shows the currently selected device name. Press the Red button to select a device.
6 Item Selection Information
Shows the number of photos that are selected by pressing the Yellow button.
7 Help Items
• Red(Device) button: Selects a connected device.
• Green(Favorites Setting) button: Changes the favorites setting for the selected photo.
Press this button repeatedly until the relevant value appears.
• Yellow(Select) button: Selects photos from the photo list. Selected photos are marked with
a symbol ( ) on the left.
• TOOLS(Option) button: Displays the Slide Show, Play Current Group, Delete, Change
Group info (in Color or Composition group),Information or Remove Safely menus.
• button: Jumps to the previous sorting group / Jumps to the next sorting group.
Continued...
Photo
USB Device Favorites Setting Select Jump Option
Preference
Monthly
Timeline
1File(s) Selected
5 7
3 4
1
2 6
Jan Nov
▲
image_1.jpg
Month : Jan
Date : Jan.01.2008
Color : Gray
Composition :
Folder : P-other
Favorite : )�)�)English - 48
Sorting Photo List
You can sort photos in the Photo List by a particular
standard.
1 Press the W.LINK button on the remote control to
display the WISELINK menu.
2 Press the ◄ or ► button to select Photo, then press
the ENTER button.
¯Photo files are displayed.
3 Press the ▲ or ▼ button to select a sorting standard.
(Monthly, Timeline, Color, Composition, Folder,
Preference)
4 Press Enter to start the Slide Show in the order
selected by the user.
¯���Wiselink identifies the color and composition
of images and groups them accordingly by
analyzing images on the USB device.
¯���The Composition and Color information extracted
from a photo file may be different from what you
selected.
¯���Photo information is automatically set. You can change the Color, Composition, and Favorite.
¯���Photos for which information cannot be displayed are set as Unclassified.
¯���PTP does not support folder sort mode.
Monthly
Sorts photos by month.
¯
It sorts and shows photos in the fi le by month. It
sorts only by month (from January to December)
regardless of year.
1 Select Monthly as the sorting standard in the Photo
List.
2 Press the ◄ or ► buttons to select from the sublist of
files grouped by Month.
¯ To move to the previous / next group, press the (REW) or (FF) button.
3 Press the TOOLS button. Press the ▲ or ▼ button to highlight Play Current Group.
4 Press ENTER button to play the the selected group of photo files from the sublist.
Timeline
Sorts photos by time.
¯
It sorts and shows photos by date. It sorts by year
and month from the earliest photo.
1 Select Timeline as the sorting standard in the Photo
List.
2 Press the ◄ or ► buttons to select from the sublist of
files grouped by Timeline.
¯ To move to the previous / next group, press the
(REW) or (FF) button.
3 Press the TOOLS button. Press the ▲ or ▼ button to highlight Play Current Group.
4 Press ENTER button to play the the selected group of photo files from the sublist.
WISELINK
Photo Music Setup
PHOTO
USB
851.98MB/995.00MB
USB Device Exit
Photo image_1.jpg
Month : Jan
Date : Jan.01.2008
Color : Gray
Composition :
Folder : P-other
Favorite : )�)�)
Preference
Monthly
Timeline
Jan Nov
▲
USB Device Favorites Setting Select Jump Option
Photo
USB Device Favorites Setting Select ��Jump Option
image_1.jpg
Month : Jan
Date : Jan.01.2008
Color : Gray
Composition :
Folder : P-other
Favorite : )�)�)
Preference
Monthly
Timeline
Jan Nov
▲
Slide Show
Play Current Group
Delete
Information
Slide Show
Play Current Group
Delete
Information
Photo
USB Device Favorites Setting Select ��Jump Option
image_1.jpg
Month : Jan
Date : Jan.01.2008
Color : Gray
Composition :
Folder : P-other
Favorite : )�)�)
Monthly
Timeline
Color
Jan Nov
▲
Slide Show
Play Current Group
Delete
InformationEnglish - 49
Color
Sorts photos by color.
You can change the photo color information.
1 Select Color as the sorting standard in the Photo List.
2 Press the ◄ or ► button to select from the sublist of
fi les grouped by color.
To move to the previous / next group, press the
(REW) or (FF) button.
3 Press the TOOLS button. Press the ▲ or ▼ button
to select Change Group.
4 Press ENTER to play the selected group of photo
fi les from the sublist.
Changing the color information
1 Select Color as the sorting standard in the Photo
List and press the ◄ or ► button to select a photo.
Changing the information of multiple fi les Press
the ◄ or ► button to select the desired photo in the
Photo list. Then press the yellow button.
Repeat the above operation to select multiple photos.
The mark appears to the left of the selected photo.
2 Press the TOOLS button.
3 Press the ▲ or ▼ button to select Change Group.
Press the ENTER button.
4 Press the ◄ or ► button to select the desired
option, then press the ENTER button.
The group information of the current fi le is updated and the fi le is moved to the new group.
Color options: Red, Yellow, Green, Blue, Magenta, Black, Gray, Unclassifi ed.
Composition
Sorts photos by composition.
You can change the compositional information of photos.
1 Select Composition as the sorting standard in the Photo List.
2 Press the ◄ or ► button to select from the sublist of
fi les grouped by compositon.
To move to the previous / next group, press the
(REW) or (FF) button.
3 Press the TOOLS button. Press the ▲ or ▼ button
to select Play Current Group.
4 Press ENTER to play the selected group of photo fi les
from the sublist.
Changing the composition information
1 Select Composition as the sorting standard in the Photo
List and press the ◄ or ► button to select a photo.
Changing the information of multiple fi les
Press the ◄ or ► button to select the desired photo
in the Photo list. Then press the yellow button.
Repeat the above operation to select multiple photos.
The mark appears to the left of the selected photo.
2 Press the TOOLS button.
3 Press the ▲ or ▼ button to select Change Group.
Press the ENTER button.
4 Press the ◄ or ► button to select the desired
option, then press the ENTER button.
The group information of the current fi le is updated and the fi le is moved to the new group.
Composition options: (horizontal), (vertical), (object), (perspective), (pattern),
Unclassifi ed.
¯
¯
¯
¯
¯
¯
¯
¯
¯
¯
Continued...
Photo
SUM � Device � Favorites Setting � Select ��Jump Option
image_1.jpg
Month : Jan
Date : Jan.01.2008
Color : Gray
Composition :
Folder : P-other
Favorite : )�)�)
Timeline
Color
Composition
▲
Photo
SUM � Device � Favorites Setting � Select ��Jump Option
image_1.jpg
Month : Jan
Date : Jan.01.2008
Color : Gray
Composition :
Folder : P-other
Favorite : )�)�)
Color
Composition
Folder
Unclassified
▲
Silde Show
Play Current Group
Delete
Change Group
▼
Photo
SUM � Device � Favorites Setting � Select ��Jump Option
image_1.jpg
Month : Jan
Date : Jan.01.2008
Color : Gray
Composition :
Folder : P-other
Favorite : )�)�)
Color
Composition
Folder
Unclassified
▲
Unclassified
Photo
SUM � Device � Favorites Setting � Select ��Jump Option
image_1.jpg
Month : Jan
Date : Jan.01.2008
Color : Gray
Composition :
Folder : P-other
Favorite : )�)�)
Timeline
Color
Composition
▲
Silde Show
Play Current Group
Delete
Change Group
▼English - 50
Folder
Sorts photos by folder.
If there are many folders in USB, the photos fi les are
shown in order in each folder. The photo fi le in the
Root folder is shown fi rst and the others are shown in
alphabetical order by name.
1 Select Folder as the sorting standard in the Photo List.
2 Press the ◄ or ► button to select from the sublist of
fi les grouped by folder.
To move to the previous / next group, press the
(REW) or (FF) button.
3 Press the TOOLS button. Press the ▲ or ▼ button to select Play Current Group.
4 Press ENTER to play the selected group of photo fi les from the sublist.
Preference
Sorts photos by preference. (Favorite)
¯� You can change the photo preferences.
1 Select Preference as the sorting standard in the Photo List.
2 Press the ◄ or ► button to select from the sublist of fi les grouped by preference.
To move to the previous / next group, press the (REW) or (FF) button.
3 Press the TOOLS button. Press the ▲ or ▼ button to select Play Current Group.
4 Press ENTER to play the selected group of photo fi les from the sublist.
Changing the Favorites setting
1 Press the ◄ or ► button to select the desired photo in
the Photo list.
Changing the information of multiple fi les
Press the ◄ or ► button to select the desired photo
in the Photo list. Then press the yellow button.
Repeat the above operation to select multiple photos.
The mark appears to the left of the selected photo.
2 Press the Green button repeatedly until the desired
setting appears.
Favorites settings change completed.
Favorite options: )�)�) , )�)�) , )�)�) , )�)�)
Users can select the number of stars (up to 3) according to their preference.
The stars in the Favorite options have no effect on priority. They are simply for grouping
purposes. For example, fi les stored in the 3 star option do not have priority over fi les saved in
the 1 star option.
¯
¯
¯
¯
¯
¯
¯
¯
Photo
SUM Device Favorites Setting Select Jump Option
image_1.jpg
Month : Jan
Date : Jan.01.2008
Color : Gray
Composition :
Folder : P-other
Favorite : )�)�)
Folder
Preference
Monthly
)�)�) )�)�) )�) ) )�)�)
▲
Photo
SUM Device Favorites Setting Select Jump Option
image_1.jpg
Month : Jan
Date : Jan.01.2008
Color : Gray
Composition :
Folder : P-other
Favorite : )�)�)
Composition
Folder
Preference
P-other Photo-1
▲
Silde Show
Play Current Group
Delete
Information
▼English - 51
Deleting Multiple Photos
1 Press the ◄ or ► button to select the desired photo
in the Photo list.
Then press the yellow button.
¯���Repeat the above operation to select multiple
photos.
¯���The ( ) mark appears to the left of the selected
photo.
2 Press the TOOLS button.
3 Press the ▲ or ▼ button to select Delete selected
File, then press the ENTER button.
¯ The Selected Files: image... 2 Files Delete the
selected files? message appear.
4 Press the ◄ or ► button to select OK, then press the
ENTER buttons.
¯���The selected photos are deleted.
¯ If you select Cancel, the deletion is cancelled.
5 To exit WISELINK mode, press the W.LINK button on
the remote control.
¯���You cannot remove the read-only files from the
selected ones.
¯���You cannot recover a deleted photo file.
Viewing the Photo Information
The photo file information including the order of the file in
the current directory,
the name, the size, the resolution, the date modified and
the path is displayed.
1 Press the ◄ or ► button to select the desired photo
in the Photo list.
2 Press the TOOLS button.
3 Press the ▲ or ▼ button to select Information, then
press the ENTER button.
¯���The information on the selected photo appears.
Press the INFO button to viewing the information.
Deleting the Photo files
1 Press the ◄ or ► button to select the desired photo
in the Photo list.
2 Press the TOOLS button.
3 Press the ▲ or ▼ button to select Delete, then press
the ENTER button.
¯���The Selected Files : Delete this file? message
appear.
4 Press the ◄ or ►button to select OK, then press the
ENTER button.
¯���The photo is deleted.
¯ When a read-only file is deleted, the “Read-only
file(s). Delete the files?” message appear.
¯���If you select Cancel, the deletion is cancelled.
5 To exit WISELINK mode, press the W.LINK button on
the remote control.
¯���You cannot remove the PTP-connected digital
camera picture files.
¯���While removing files, don’t remove the USB
memory device.
¯���You cannot recover a deleted photo file.
Photo
USB Device Favorites Setting Select Jump Option
image_1.jpg
Month : Jan
Date : Jan.01.2008
Color : Gray
Composition :
Folder : P-other
Favorite : )�)�)
Preference
Monthly
Timeline
Jan Nov
▲
1File(s) Selected
Silde Show
Delete selected File
Deselect All
Remove Safely
Name : image_1.JPG
Size : 865.3KB
Resolution : 3008x2000
Date : Jan.1.2008
Path : /Photo/
OK
Photo Info
Delete this file?
Delete
OK Cancel
Selected File(s) : image_1.jpg 1 File(s)
Delete the selected files?
Delete
OK Cancel
Selected File(s) : image_1.jpg 2 File(s)
Photo
USB Device Favorites Setting Select Jump Option
image_1.jpg
Month : Jan
Date : Jan.01.2008
Color : Gray
Composition :
Folder : P-other
Favorite : )�)�)
Preference
Monthly
Timeline
Jan Nov
▲
▲
Play Current Group
Delete
Information
Remove Sately
Photo
USB Device Favorites Setting Select Jump Option
image_1.jpg
Month : Jan
Date : Jan.01.2008
Color : Gray
Composition :
Folder : P-other
Favorite : )�)�)
Preference
Monthly
Timeline
Jan Nov
▲
Silde Show
Play Current Group
Delete
Information
▼English - 52
Viewing a Photo or Slide Show
To perform a SlideShow with only the selected files
1 Press the ◄ or ► button to select the desired photo in the Photo list.
Then press the yellow button. Repeat the above operation to select multiple photos.
¯ The mark appears to the left of the selected photo.
¯ If you select one file, the SlideShow will not be performed.
2 Press the (Play)/ ENTER button
¯ The selected files will be used for the Slide Show.
¯��If you have selected files, only the selected files will be used for the Slide Show.
Viewing a Slide Show
1 Press the W.LINK button on the remote control to
display the WISELINK menu.
2 Press the ◄ or ► button to move to Photo, then press
the ENTER button.
¯ Photo files are displayed.
3 Press the ◄ or ► button to select the desired photo in
the Photo list.
4 Press the TOOLS button.
5 Press the ▲ or ▼ button to select Slide Show, then
press the ENTER button.
¯� �All files in the photo list will be used for the Slide
Show.
¯ During the slide show, files are displayed in order
from the currently shown file.
¯ The Slide Show progresses in the order sorted in
the Photo list.
¯ Music files can be automatically played during the
Slide Show if the Background Music is set to On.
(Refer to page 54)
While a photo list is displayed, press the (Play)/
ENTER button on the remote control to start slide show.
Slide show function information icon (Displayed at the top left of the screen).
Icon Current OSD Function
(Photo) SlideShow Photo Slide Show is in progress.
Photo Pause
You can pause a SlideShow and Music by pressing the (pause) / ENTER button on the
remote control during a Slide Show.
To resume the SlideShow, press the (play) / ENTER button on the remote control again.
Continued...
Playing current group
1 Press the ▲ or ▼ button to select a sorting standard.
(“Monthly”, “Timeline”, “Color”, “Composition”, “Folder”, “Preference”)
2 Press the ◄ or ► button to select the desired photo in the
Photo list.
¯��To move to the previous / next group, press the
(REW) or (FF) button.
3 Press the TOOLS button.
4 Press the ▲ or ▼ button to select Play Current
Group, then press the ENTER button. Only the
photos in the sorting group including the selected files
will be used for the Slide Show.
5 To exit WISELINK mode, press the W.LINK button on the remote control.
Photo
USB Device Favorites Setting Select Jump Option
image_1.jpg
Month : Jan
Date : Jan.01.2008
Color : Gray
Composition :
Folder : P-other
Favorite : )�)�)
Preference
Monthly
Timeline
Jan Nov
▲
Silde Show
Play Current Group
Delete
Information
▼
USB Slide Show Previous Next Option Return
image_1.jpg 440x440 104.1KB 2008/1/1
Photo
USB Device Favorites Setting Select Jump Option
image_1.jpg
Month : Jan
Date :
Jan.01.2008
Color : Gray
Composition :
Folder : P-other
Favorite : )�)�)
Preference
Monthly
Timeline
Jan Nov
▲
Silde Show
Play Current Group
Delete
Information
▼English - 53
Using the option menu during a slide show (or Viewing a Photo)
1 During a slide show(or viewing a photo), Press the TOOLS button to set the option.
2 Press the ▲ or ▼ button to select the desired option. Then press the ENTER button.
Start Slide Show (Stop Slide Show)
You can start or stop a Slide Show.
Press the ▲ or ▼ button to select Start Slide Show
(or Stop Slide Show), then press the ENTER button.
Rotate
You can rotate images in full screen mode.
Press the ▲ or ▼ button to select Rotate, then press the
ENTER button. Press the ◄ or ► button repeatedly to
rotate the photo by the desired amount.
¯ Whenever you press the ◄ button, it rotates by 270˚,
180˚, 90˚, and 0˚.
¯ Whenever you press the ► button, it rotates by 90˚,
180˚, 270˚, and 0˚.
¯ If you have select Zoom, the Rotate function is deactivate
¯ The rotated file is not saved.
¯ The Rotating function information icon is displayed at the top right of the screen
Icon Current OSD Function
Rotating (0°) This rotates a photo to its original position
Rotating (90°) This rotates a photo by 90 degrees
Rotating (180°) This rotates a photo by 180 degrees
Rotating (270°) This rotates a photo by 270 degrees
0˚
90˚
180˚
270˚
Viewing a photo
1 Press the W.LINK button on the remote control to
display the WISELINK menu.
2 Press the ◄ or ► button to move to “Photo”, then press
the ENTER button.
¯ Photo files are displayed.
3 Press the ◄ or ► button to select the desired photo in
the Photo list.
Then Press the Yellow button to select only one file.
4 Press the ENTER button over a photo icon.
¯ The currently selected photo is displayed in full screen.
Continued...
90˚
Rotate
Tools
Start Slide Show
Rotate
Zoom
Slide Show Speed : Normal
Background Music : Off
Background Music Setting
Picture Mode : Standard
Sound Mode : Custom
Information
Remove Safely
Move Enter Exit
USB Slide Show Previous Next Option Return
image_1.jpg 440x440 104.1KB 2008/1/1English - 54
Zoom
You can zoom into images in full screen mode.
Press the ▲ or ▼ button to select Zoom, then press the
ENTER button.
Press the ◄ or ► button repeatedly to increase or decrease
the Zoom effect.
(x1 → x2 → x4)
To move the enlarged photo image, press the ENTER
button, then press the ▲/▼/◄/► buttons.
¯ Note that when the enlarged picture is smaller than
the original screen size, the location change function
doesn’t work.
¯ The enlarged file is not saved.
¯ If you have select Rotate, the Zoom function is
deactivate
¯ Zoom function information icon is displayed at the top
right of the screen.
Icon Current OSD Function
X1 Zoom (x 1)
Restore a photo to its original
size.
Zoom (x 2) Zoom-into a photo at 2x.
Zoom (x 4) Zoom-into a photo at 4x.
Pan Down
Pan down to view the lower
part of a zoomed-in photo.
Pan Up
Pan up to view the upper part
of a zoomedin photo.
Pan Right
Pan right to view the right
side of a zoomed-in photo.
Pan Left
Pan left to view the left side
of a zoomed-in photo.
Slide Show Speed
You can select the slide show speed.
Press the ▲ or ▼ button to select Slide Show Speed.
Press the ◄ or ► button to select the desired option.
(Normal → Fast → Slow)
¯ You can select the Slide Show speed only during a slide show.
Background Music
If you set Background Music On, the background music will
be played when viewing photos one by one or in a Slide
Show.
Press the ▲ or ▼ button to select Background Music.
Press the ◄ or ► button to select On or Off.
¯ If you set Background Music to On, a screen appears
immediately where you can set the Background
Music.
• On: When the background music is available, if you select On, the music is
played back. To use this feature, there must be music and photo files
stored on the USB device.
• Off: Background music is not played.
X2
X4
Continued...
X2
Zoom
X2
Move Enter Return
Tools
Stop Slide Show
Rotate
Zoom
Slide Show Speed ◄ Normal ►
Background Music : Off
Background Music Setting
Picture Mode : Standard
Sound Mode : Custom
Information
Move Adjust Exit
Tools
Stop Slide Show
Rotate
Zoom
Slide Show Speed : Normal
Background Music ◄ Off ►
Background Music Setting
Picture Mode : Standard
Sound Mode : Custom
Information
Move Adjust ExitEnglish - 55
Background Music Setting
You can set the background music.
Press the ▲ or ▼ button to select Background Music
Setting, then press the ENTER button.
¯ If you turn off the Background Music, even if the
Background Music Settings have been set up, the
background music will not be played.
¯ Loading music files is needed to change BGM Mode.
Play music files in music category to load.
¯ Background Music setting menu is displayed.
Press the ◄ or ► button to select the desired BGM
(Background music) mode. (Shuffle, Selected file, Mood)
• Shuffle: Plays music file in random order.
• Selected file: Plays a selected music file.
• Mood: Plays music file of a particular mood only.
¯ Selecting the background music file
Set BGM Mode to Selected file in the Background
Music Settings menu.
Press the ▲ or ▼ button to select Selected Music
File, then press the ENTER button.
Press the ▲ or ▼ button to select a music file, then
press the yellow button.
The ( ) mark appears to the left of the selected music.
Repeat the above operation to select multiple music files.
Press the ENTER button.
¯ Selecting the background music file mood
Press the ◄ or ► button to set BGM Mode to Mood.
Press the ▲ or ▼ button to select BGM Mood. Then
press ◄ or ► button to select the desired BGM
mood. Press the ENTER button.
BGM Mode option: Energetic, Rhythmical, Sad, Exc iting, Calm
¯ Wiselink identifies the mood of the music files and
groups them accordingly be analyzing the music
files on the USB device.
Picture Mode
You can set the Picture mode. (Refer to page 27)
Sound Mode
You can set the Sound mode. (Refer to page 32)
Information
The photo file information including the order of the file in
the current directory, the name, the size, the resolution, the
date modified and the path is displayed. (Refer to page 50)
Remove Safely
You can remove the device safely from the TV.
Press the ▲ or ▼ button to select Remove Safely, then
press the ENTER button.
The Safely removing USB device. message appears and
then the USB device can now be safely removed from TV. appears.
Remove the USB device from the TV.
Continued...
Tools
Stop Slide Show
Rotate
Zoom
Slide Show Speed : Normal
Background Music : Off
Background Music Setting
Picture Mode : Standard
Sound Mode : Custom
Information
Background Music Setting
BGM Mode ◄ Shuffle ►
BGM Mood : Calm
Select Music File
Move Adjust Enter Return
Background Music Setting
BGM Mode : Selected file
BGM Mood : Calm
Select Music File
Move Enter Return
Background Music Setting
Select Move Enter Return
../Music/ 2 File(s) Selected
Music
01-glen_hansard_and_marketa_irglova-fallin...
02-marketa_irglova_and_glen_hansard-if_yo...
05-glen_hansard-lies
▼
Background Music Setting
BGM Mode : Mood
BGM Mood ◄ Calm ►
Select Music File
Move Enter Return
Move Enter ExitEnglish - 56
1 Press the W.LINK button on the remote control to
display the WISELINK menu.
2 Press the ◄ or ► button to select Music, then press
the ENTER button.
¯ Music files are displayed.
¯ Press the (Play)/ ENTER button over a
music icon to play the music.
¯ To select a file on the previous / next group, press
the (REW) or (FF) button to move to the
previous / next group.
Screen Display
1 Currently selected music
Shows the currently selected
music.
2 Current Sort Standard
Press the ▲ or ▼ button to
change the standard for sorting
music files. (Title, Artist, Mood,
Genre, Folder, Preference)
3 View Groups
Shows the sorting groups. The
sorting group including the
currently selected music file is
highlighted.
4 Current Device
Shows the currently selected
device name.
Press the Red button to select a device.
Using the Music List
This menu shows MP3 files from among the files
saved on a USB memory device.
5 Item Selection Information
Shows the number of music files that are selected by pressing the Yellow button.
6 Help Items
• Red(Device) button: Selects a connected device.
• Green(Favorites Setting) button: Changes the favorites setting for the selected music. Press
this button repeatedly until the relevant value appears.
• Yellow(Select) button: Selects music files from the music list. Selected music files are marked
with a symbol ( ) on the left.
• button: Jumps to the previous sorting group / Jumps to the next sorting group.
• TOOLS(Option) button: Displays the Play Current Group, Delete, Change Group info(in
Mood group), Information or Remove Safely menus.
Continued...
Music
USB Device Favorites Setting Select Jump ���� Option
Preference
Title
Artist
Energetic )�)�)
Nickelback
All The Right Reas..
2005
Blues
If Everyone Cared
Sad )�)�)
Marketa lrgl...
Once Ost
2007
Soundtrack
If You Want Me
Calm )�)�)
Glen Hansard
Once Ost
2007
Soundtrack
Lies
F G H I J L P S T V
▲
WISELINK
Photo
USB Device Exit
Music Setup
MUSIC
USB
851.98MB/995.00MB Free
Music
USB Device Favorites Setting Select Jump Option
Preference
Title
Artist
Energetic )�)�)
Nickelback
All The Right Reas..
2005
Blues
If Everyone Cared
Sad )�)�)
Marketa lrgl...
Once Ost
2007
Soundtrack
If You Want Me
Calm )�)�)
Glen Hansard
Once Ost
2007
Soundtrack
Lies
G H I J L P S T V
▲
1File(s) Selected
1
6
4
5
2 3English - 57
Sorting Music List
You can sort music files in the Music List by a particular
standard.
1 Press the W.LINK button on the remote control to
display the WISELINK menu.
2 Press the ◄ or ► button to select Music, then press
the ENTER button.
¯ Music files are displayed.
3 Press the ▲ or ▼ button to select a sorting standard.
(Title, Artist, Mood, Genre, Folder, Preference)
¯ Music files are sorted according to the newly
selected sorting standard.
4 Press ENTER button to start playing music in the the
order selected.
¯ Music information is set automatically and you can
change the Favorite information.
¯ Music files for which information cannot be
displayed are set to “Unclassified”.
¯ If there is no title information for a music file, the
filename is displayed.
¯ If no information is available for the Genre, Artist,
Album, or Year, the corresponding item is displayed as blank.
Title
Sorts music fi les by the title.
¯ I t sorts the Music titles in alphabetical order, and shows
the music file.
1 Select Title as the sorting standard in the Music List.
2 Press the ◄ or ► buttons to select from the sublist of
files grouped in alphabetical order.
¯ To move a file on the previous / next group, press
the (REW) or (FF) button to move to the
previous / next group.
3 Press the TOOLS button.
4 Press the ▲ or ▼ buttons to select Play Current Group.
5 Press ENTER button to play the selected group of music files from the sublist.
Artist
Sorts music fi les by the artist.
¯ It sorts the music file by artist in alphabetical order.
1 Select Artist as the sorting standard in the Music List.
2 Press the ◄ or ► button to select from the sublist of
files grouped by artist.
¯ To move a file on the previous / next group, press
the (REW) or (FF) button to move to the
previous / next group.
3 Press the TOOLS button.
4 Press the ▲ or ▼ buttons to select Play Current
Group.
5 Press ENTER button to play the selected group of music files from the sublist.
WISELINK
Photo
USB Device Exit
Music Setup
MUSIC
USB
851.98MB/995.00MB Free
Music
USB Device Favorites Setting Select Jump Option
Preference
Title
Artist
Energetic )�)�)
Nickelback
All The Right Reas..
2005
Blues
If Everyone Cared
Sad )�)�)
Marketa lrgl...
Once Ost
2007
Soundtrack
If You Want Me
Calm )�)�)
Glen Hansard
Once Ost
2007
Soundtrack
Lies
F G H I J L P S T V
▲
Continued..
Music
USB Device Favorites Setting Select Jump Option
Title
Artist
Genre
Sad )�)�)
Interference
Once Ost
2007
Soundtrack
Gold
Sad )�)�)
Marketa lrgl...
Once Ost
2007
Soundtrack
If You Want Me
Exciting )�)�)
Jamiroquai
Synkronized
1999
Acid Jazz
Black Capricorn Day
...
▲
Play Current Group
Delete
Information
Remove Safely
Music
USB Device Favorites Setting Select Jump Option
Preference
Title
Artist
Energetic )�)�)
Nickelback
All The Right Reas..
2005
Blues
If Everyone Cared
Sad )�)�)
Marketa lrgl...
Once Ost
2007
Soundtrack
If You Want Me
Calm )�)�)
Glen Hansard
Once Ost
2007
Soundtrack
Lies
F G H I J L P S T V
▲
Play Current Group
Delete
Information
Remove SafelyEnglish - 58
Changing the Mood information
1 Select Mood as the sorting standard in the Music List
and press the
◄ or ► button to select a music file.
2 Press the TOOLS button.
3 Press the ▲ or ▼ button to select Change Group.
Press the ENTER button.
¯ Wiselink identifies the mood of the music files and
groups them accordingly by analyzing the music
files on the USB device.
� ¯ The Mood information extracted from a music file
may differ from what you selected.
4 Press the ◄ or ► button to select the desired option, then press the ENTER button.
¯ The group information of the current file is updated and the file is moved to the new group.
¯ Mood option: Energetic, Rhythmical, Sad, Exciting, Calm, Unclassified
Mood
Sorts music fi les by the mood.
¯ You can change the music mood information.
1 Select Mood as the sorting standard in the Music List.
2 Press the ◄ or ► buttons to select from the sublist of
files grouped in alphabetical order.
¯ To move a file on the previous / next group, press
the (REW) or (FF) button to move to the
previous / next group.
3 Press the TOOLS button.
4 Press the ▲ or ▼ buttons to select Play Current Group.
5 Press ENTER button to play the selected group of music files from the sublist.
Genre
Sorts music fi les by the genre.
1 Select Genre as the sorting standard in the Music List.
2 Press the ◄ or ► button to select from the sublist of
files grouped by genre.
� ¯ To move a file on the previous / next group, press
the (REW) or (FF) button to move to the
previous / next group.
3 Press the TOOLS button.
4 Press the ▲ or ▼ buttons to select Play Current Group
5 Press ENTER button to play the selected group of music files from the sublist.
Continued..
Music
USB Device Favorites Setting Select Jump Option
Artist
Mood
information
Sad )�)�)
Interference
Once Ost
2007
Soundtrack
Gold
Sad )�)�)
Marketa lrgl...
Once Ost
2007
Soundtrack
If You Want Me
Exciting )�)�)
Jamiroquai
Synkronized
1999
Acid Jazz
Black Capricorn Day
Rhythmical Sad Exciting Calm ...
▲
Play Current Group
Delete
Change Group
Information
▼
Music
USB Device Favorites Setting Select Jump Option
Artist
Genre
Mood
Sad )�)�)
Interference
Once Ost
2007
Soundtrack
Gold
Sad )�)�)
Marketa lrgl...
Once Ost
2007
Soundtrack
If You Want Me
Exciting )�)�)
Jamiroquai
Synkronized
1999
Acid Jazz
Black Capricorn Day
Blues ...
▲
Play Current Group
Delete
Information
Remove Safely
Music
USB Device Favorites Setting Select Jump Option
Artist
Mood
information
Sad )�)�)
Interference
Once Ost
2007
Soundtrack
Gold
Sad )�)�)
Marketa lrgl...
Once Ost
2007
Soundtrack
If You Want Me
Exciting )�)�)
Jamiroquai
Synkronized
1999
Acid Jazz
Black Capricorn Day
Rhythmical Sad Exciting Calm ...
▲
Play Current Group
Delete
Change Group
Information
▼English - 59
Changing the Favorites setting
1 Press the ◄ or ► button to select the desired music in
the Music List.
¯ Changing the information of multiple files
Press the ◄ or ► button to select the desired
music in the Music List.
Then press the yellow button.
Repeat the above operation to select multiple music.
The mark appears to the left of the selected music.
2 Press the Green button repeatedly until the desired
setting appears.
¯ Favorites settings change completed.
¯ Favorite option: )�)�) , )�)�) , ) )�) , )�)�)
¯ Users can select the number of stars (up to 3) according to their preference.
3 Press the ENTER button to start playing music.
¯ The stars in the Favorite options have no effect on priority. They are simply for grouping purposes.
For example, files stored in the 3 star option do not have priority over files saved in the 1 star
option.
Folder
Sorts music fi les by the folder.
¯ If there are many folders in USB, the fi les are shown
in order in each folder. The music fi le in the Root
folder is shown fi rst and the others are shown in
alphabetical order by name.
1 Select Folder as the sorting standard in the Music List.
2 Press the ◄ or ► button to select from the sublist of files
grouped by folder.
¯ To move a file on the previous / next group, press
the (REW) or (FF) button to move to the
previous / next group.
3 Press the TOOLS button.
4 Press the ▲ or ▼ buttons to select Play Current Group.
5 Press ENTER button to play the selected group of music files from the sublist.
Preference
Sorts music fi les by preference. (Favorite)
¯ You can change the music fi les preferences.
1 Select Preference as the sorting standard in the Music List.
2 Press the ◄ or ► button to select from the sublist of files grouped by folder.
¯ To move a file on the previous / next group, press the (REW) or (FF) button to move to
the previous / next group.
3 Press the TOOLS button.
4 Press the ▲ or ▼ buttons to select Play Current Group.
5 Press ENTER button to play the selected group of music files from the sublist.
Continued..
Music
USB Device Favorites Setting Select Jump Option
Mood
Folder
Preference
Sad )�)�)
Interference
Once Ost
2007
Soundtrack
Gold
Sad )�)�)
Marketa lrgl...
Once Ost
2007
Soundtrack
If You Want Me
Exciting )�)�)
Jamiroquai
Synkronized
1999
Acid Jazz
Black Capricorn Day
USB Trash.
▲
Play Current Group
Delete
Information
Remove Safely
Music
USB Device Favorites Setting Select Jump Option
Folder
Preference
Title
Sad )�)�)
Interference
Once Ost
2007
Soundtrack
Gold
Sad )�)�)
Marketa lrgl...
Once Ost
2007
Soundtrack
If You Want Me
Exciting )�)�)
Jamiroquai
Synkronized
1999
Acid Jazz
Black Capricorn Day
)�)�) )�)�) )) )))
▲
Play Current Group
Delete
Information
Remove SafelyEnglish - 60
Deleting the Music files
1 Press the ◄ or ► button to select the desired music in the
music list.
2 Press the TOOLS button.
3 Press the ▲ or ▼ button to select Delete, then press the
ENTER button.
¯��The (for example) Selected Files: Delete this file?
message appear.
4 Press the ◄ or ►button to select OK, then press the ENTER
button.
¯��The music is deleted.
¯When a read-only file is deleted, the Read-only files.
Delete the files? message appear.
¯��If you select Cancel, the deletion is cancelled.
5 To exit WISELINK mode, press the W.LINK button on the
remote control.
¯��While removing files, don’t remove the USB memory
device.
¯��You cannot recover a deleted music files.
Deleting Multiple Music files
1 Press the ◄ or ► button to select the desired music in the
music list. Then press the yellow button.
¯��Repeat the above operation to select multiple music
files.
¯��The ( ) mark appears to the left of the selected music
files.
2 Press the TOOLS button.
3 Press the ▲ or ▼ button to select Delete selected File,
then press the ENTER button.
¯��The (for example) Selected Files: Delete the
selected files? message appear.
4 Press the ◄ or ► button to select OK, then press the
ENTER button.
¯��The selected music files are deleted.
¯If you select Cancel, the deletion is cancelled.
5 To exit WISELINK mode, press the W.LINK button on the
remote control.
¯��You cannot remove the read-only files from the
selected ones.
¯��You cannot restore the deleted music files.
Viewing the Information
The music file information including the order of the file in the
current directory,
the name, the size, the date modified and the path is
displayed.
1 Press the ◄ or ► button to select the desired photo in the
Music list.
2 Press the TOOLS button.
3 Press the ▲ or ▼ button to select Information, then press
the ENTER button.
¯��The information on the selected file appears.
Press the INFO button to viewing the information.
Name : 014 Hey boy.mp3
Size : 5.2MB
Date : Jan.1.2008
Path : /Music/
OK
Music Info
Delete this file?
Delete
OK Cancel
Selected File(s) : If You Want Me.mp3... 1 File(s)
Delete the selected file(s)?
Delete
OK Cancel
Selected File(s) : If You Want Me.mp3... 2 File(s)
Continued..
Music
USB Device Favorites Setting Select Jump Option
Preference
Title
Artist
Energetic )�)�)
Nickelback
All The Right Reas..
2005
Blues
If Everyone Cared
Sad )�)�)
Marketa lrgl...
Once Ost
2007
Soundtrack
If You Want Me
Calm )�)�)
Glen Hansard
Once Ost
2007
Soundtrack
Lies
F G H I J L P S T V
▲
Play Current Group
Delete
Information
Remove Safely
Music
USB Device Favorites Setting Select Jump Option
Preference
Title
Artist
Energetic )�)�)
Nickelback
All The Right Reas..
2005
Blues
If Everyone Cared
Sad )�)�)
Marketa lrgl...
Once Ost
2007
Soundtrack
If You Want Me
Calm )�)�)
Glen Hansard
Once Ost
2007
Soundtrack
Lies
F G H I J L P S T V
▲
1File(s) Selected
Delete selected
FileDeselect All
Remove Safely
Music
USB Device Favorites Setting Select Jump Option
Preference
Title
Artist
Energetic )�)�)
Nickelback
All The Right Reas..
2005
Blues
If Everyone Cared
Sad )�)�)
Marketa lrgl...
Once Ost
2007
Soundtrack
If You Want Me
Calm )�)�)
Glen Hansard
Once Ost
2007
Soundtrack
Lies
F G H I J L P S T V
▲
Play Current Group
Delete
Information
Remove SafelyEnglish - 61
Playing a Music File
Playing a music file
1 Press the W.LINK button on the remote control to
display the WISELINK menu.
2 Press the ◄ or ► button to select Music, then press
the ENTER button.
¯��Music files are displayed.
3 Pressing the ◄ or ► button to select a music file to
be played, then press the ENTER button.
¯��This menu only shows files with the MP3 file
extension. Files with other file extensions are not
displayed, even if they are saved on the same
USB device.
¯��Press the (play) / ENTER button over a
music icon to play the music.
¯�� (REW) or (FF) buttons do not function
during play.
¯��Press the (pause) / ENTER button while
playing a MP3 file to pause the file. Press the
(stop) button to exit Play mode.
¯��The selected file is displayed at the top with its
playing time.
¯��To adjust the music volume, press the VOL
or VOL button on the remote control. To mute
the sound, press the MUTE button on the remote
control.
¯��The playing duration of a mp3 file may be
displayed as ‘00:00:00’ if its playing time
information is not found at the start of the file.
4 To exit WISELINK mode, press the W.LINK button on
the remote control.
Playing the music group
1 Press the W.LINK button on the remote control to display the WISELINK menu.
2 Press the ◄ or ► button to select Music, then press the ENTER button.
¯ To move a file on the previous / next group, press the (REW) or (FF) button to move to
the previous / next group.
3 Press the ◄ or ► button to select the desired music file.
4 Press the TOOLS button.
5 Press the ▲ or ▼ button to select Play Current Group, then press the ENTER button.
¯The music files in the sorting group including the selected file are played.
6 To exit WISELINK mode, press the W.LINK button on the remote control.
USB Pause Previous Next Option Return
7/14 00:01:15 00:05:41
If You Want Me
Music
USB Device Favorites Setting Select Jump Option
Preference
Title
Artist
Energetic )�)�)
Nickelback
All The Right Reas..
2005
Blues
If Everyone Cared
Sad )�)�)
Marketa lrgl...
Once Ost
2007
Soundtrack
If You Want Me
Calm )�)�)
Glen Hansard
Once Ost
2007
Soundtrack
Lies
F G H I J L P S T V
▲
Music
USB Device Favorites Setting Select Jump Option
Preference
Title
Artist
Energetic )�)�)
Nickelback
All The Right Reas..
2005
Blues
If Everyone Cared
Sad )�)�)
Marketa lrgl...
Once Ost
2007
Soundtrack
If You Want Me
Calm )�)�)
Glen Hansard
Once Ost
2007
Soundtrack
Lies
F G H I J L P S T V
▲
Play Current Group
Delete
Information
Remove Safely
Continued...English - 62
Playing the selected music files
1 Press the W.LINK button on the remote control to
display the WISELINK menu.
2 Press the ◄ or ► button to select Music, then press
the ENTER button.
3 Press the ◄ or ► button to select the desired music
file, then press the yellow button.
Repeat the above operation to select multiple music.
¯��The ( ) mark appears to the left of the selected
music files.
4 Press the (Play) / ENTER button.
¯ Only the selected file is played.
¯��Press the button while playing to stop the
current item and to return to the music list.
5 To exit WISELINK mode, press the W.LINK button on
Repeating Music Play
1 While a Music file is playing, press the TOOLS button.
2 Press the ▲ or ▼ button to select Repeat Mode.
3 Press the ◄ or ► button to select On or Off.
• On: Plays back all music files in the folder
(or the selected file) repeatedly.
• Off: Doesn’t play back repeatedly.
4 To exit WISELINK mode, press the W.LINK button on the remote control.
Music function information icon (Displayed at the top left of the screen).
Icon Current OSD Function
(Music) Repeat
When all music fi les in the folder(or the selected file) are repeated.
Repeat Mode is On.
(Music) One
When all music fi les in the folder(or the selected file) are played
once. Repeat Mode is Off.
(Music) Play/
Pause/Enter
When pressing the (play) / (pause) / (enter) button on
the remote control while music is playing.
Music
USB Device Favorites Setting Select Jump Option
Preference
Title
Artist
Energetic )�)�)
Nickelback
All The Right Reas..
2005
Blues
If Everyone Cared
Sad )�)�)
Marketa lrgl...
Once Ost
2007
Soundtrack
If You Want Me
Calm )�)�)
Glen Hansard
Once Ost
2007
Soundtrack
Lies
F G H I J L P S T V
▲
2File(s) Selected
USB Pause Previous Next Option Return
1/2 00:01:15 00:05:41
If Everyone Cared
Tools
Repeat Mode ◄ On ►
Picture Mode : Standard
Sound Mode : Custom
Information
Remove Safely
Move Adjust Exit
Continued...English - 63
Using the Setup Menu
Setup displays the user settings of the WISELINK menu.
1 Press the W.LINK button on the remote control to
display the WISELINK menu.
2 Press the ◄ or ► button to select Music, then
press the ENTER button.
3 Press the ▲ or ▼ button to select the desired
option.
(Slide Show Speed, Music Repeat Mode, Screen
Saver Run Time, Information, Remove Safely)
4 Press the ◄ or ► button to select the option, then
press the ENTER button.
Slide Show Speed
Select to control the slide show speed.
Press the ▲ or ▼ button to select Slide Show Speed.
Press the ◄ or ► button to select Fast, Normal or
Slow.
Music Repeat Mode
Select to repeatedly play music files.
Press the ▲ or ▼ button to select Music Repeat Mode.
Press the ◄ or ► button to select On or Off.
Screen Saver Run Time
Select to set the waiting time before the screen saver
appears.
Press the ▲ or ▼ button to select Screen Saver Run
Time.
Press the ◄ or ► button to select 1 min, 3 min or 5
min.
Information
Select to viewing the information of the connected
device.
Press the ▲ or ▼ button to select Information, then
press the ENTER button.
Remove Safely
You can remove the device safely from the TV. (Refer to
page 52)
To exit WISELINK mode, press the W.LINK button on
the remote control.
WISELINK
Photo
USB Device Exit
Music Setup
SETUP
USB
851.98MB/995.00MB Free
Setup
USB Device Move Adjust Return
Slide Show Speed ◄ Normal ►
Music Repeat Mode : On
Screen Saver Run Time : 5 min
Information
Remove Safely
Setup
USB Device Move Adjust Return
Slide Show Speed : Normal
Music Repeat Mode ◄ On ►
Screen Saver Run Time : 5 min
Information
Remove Safely
Setup
USB Device Move Adjust Return
Slide Show Speed : Normal
Music Repeat Mode : On
Screen Saver Run Time ◄ 5 min ►
Information
Remove Safely
Device Type : USB
Device : USB????
Available Memory : 852.90MB
Total Memory : 995.00MB
OK
Device InfoEnglish - 64
What is Anynet+?
Anynet+ is an AV network system that enables an easy-to-use AV interface for users by controlling
all connected AV devices through the Anynet+ menu when Samsung Electronics AV devices are
connected.
Connecting Anynet+ Devices
The Anynet+ system supports AV devices supporting Anynet+ only.
Check if there is an Anynet+ mark on the AV device to be connected to the TV.
To directly connect to TV
Connect the [HDMI 1], [HDMI
2] or [HDMI 3] jack on the TV
and the HDMI OUT jack of the
corresponding Anynet+ device
using the HDMI cable.
To connect to Home Theatre
1 Connect the [HDMI 1],
[HDMI 2] or [HDMI 3]
jack on the TV and the
HDMI OUT jack of the
corresponding Anynet+
device using the HDMI
cable.
2 Connect the HDMI IN jack
of the home theatre and
the HDMI OUT jack of the
corresponding Anynet+
device using the HDMI
cable.
¯�Connect only the optical cable between [Digital Audio Out (Optical)] on your TV and Digital Audio
Input on the receiver.
¯�Connect only one receiver.
¯�You can listen to 5.1 channel sound through the home theatre’s speakers. Otherwise, you can only
listen to 2 channel stereo sound in other cases. Make sure to connect the Digital Audio IN (Optical) of
the home theatre and the TV correctly to listen to TV sound through the home theatre. However, you
cannot listen to sound from the BD recorder that is sent to the home theatre via the TV in 5.1 channel
sound because the TV outputs only 2 channel stereo sound. Please see the manual for the home
theatre.
¯�You can connect an Anynet+ device using the HDMI cable. Some HDMI cables may not support
Anynet+ functions.
¯�Anynet+ works when the AV device supporting Anynet+ is in the Standby or On status.
¯�Anynet+ supports up to 8 AV devices in total.
Anynet+ Device 1 Anynet+ Device 2 Anynet+ Device 3
TV
HDMI Cable
HDMI Cable
HDMI Cable
TV
Anynet+ Device 1 Anynet+ Device 2
Anynet+ Device 3
HDMI Cable
HDMI Cable
HDMI Cable
HDMI Cable
Home Theatre
Optical CableEnglish - 65
Setting Up Anynet+
The following settings are to use Anynet+ functions.
Using the Anynet+ Function
1 Press the MENU button. Press the ▲ or ▼ button to select
Application, then press the ENTER button.
2 Press the ▲ or ▼ button to select Anynet+ (HDMI-CEC),
then press the ENTER button.
3 Press the ▲ or ▼ button to select On, then press the
ENTER button.
¯�The Anynet+ (HDMI-CEC) function is enabled.
¯�
If you select Off, Anynet+ (HDMI-CEC) is disabled.
¯�When the Anynet+ (HDMI-CEC) function is disabled, all
the Anynet+ related operations are deactivated.
Turning an Anynet+ Device Off Automatically when the TV
is Turned Off
2 Press the ▲ or ▼ button to select Auto Turn Off, then
press the ENTER button.
3 Press the ▲ or ▼ button to select Yes, then press the
ENTER button.
¯�The Auto Turn Off function is enabled.
¯�
If you select No, the Auto Turn Off function is
canceled. Press the EXIT button to exit.
¯�The active source on the TV remote must be set to TV to
use the Anynet+ function.
¯�
If you set Auto Turn Off to Yes, connected external
devices are also turned off when the TV is turned off.
If an external device is still recording, it may or may not
turn off.
Scanning and Switching between Anynet+ Devices
1 Press the TOOLS button.
¯�Anynet+ devices connected to the TV are listed.
If you cannot find a device you want, press the red
button to scan for devices.
2 Press the ▲ or ▼ button to select a particular device and
press the ENTER button. It is switched to the selected
device.
¯�Only when you set Anynet+ (HDMI-CEC) to On in the
Application menu, the Device List menu appears.
3 If you cannot find a device you want, press the ▲ or ▼ button to
select Searching Connections, then press the ENTER button.
The meassage Configuring Anynet+ connection... is displayed.
When searching devices completes, the connected devices are
listed in the Anynet+ menu.
¯�Switching to the selected devices may take up to 2 minutes. You cannot cancel the operation during the switching
operation.
¯� The time required to scan for devices is determined by the number of connected devices.
When the device scan is complete, the number of found devices is not displayed.
Although the TV automatically scans devices when it is turned on using the POWER button, devices connected
when the TV is on or under a specific circumstance are not displayed in the device list. Therefore select
Searching Connections menu to search devices.
¯�
If you have selected external input mode by pressing the SOURCE button, you cannot use the Anynet+ function.
Make sure to switch to an Anynet+ device by using the TOOLS button.
Continued...
WISELINK
Anynet+ (HDMI-CEC) ►
Application
Anynet+ (HDMI-CEC)
Anynet+ (HDMI-CEC) :
Auto Turn Off :
Move Enter Return
Off
On
Anynet+ (HDMI-CEC)
Anynet+ (HDMI-CEC) :
Auto Turn Off :
Move Enter Return
No
Yes
Tools
Move Enter
View TV
Device List
Recording : DVD
DVD Menu
DVD Menu
Picture Mode : Standard
Picture Mode : Standard
Sleep Timer : Off
▼
ExitEnglish - 66
Anynet+ Menu
The Anynet+ menu changes depending on the type and status of the Anynet+ devices connected
to the TV.
Anynet+ Menu Description
View TV Switches from Anynet+ to TV broadcast mode.
Select Device Your TV connects to the corresponding device.
Record Starts a recording. (This menu works only for a device supporting
recording.)
Menu on Device Shows the menu of the connected device.
Example. When a DVD Recorder is connected, the DVD Recorder’s
title menu appears.
Device Operation Shows the play control menu of the connected device.
Example. When a DVD Recorder is connected, the play control
menu of the DVD Recorder appears.
Receiver Sound is output through the receiver.
Setup You can set the environment for using Anynet+.
TV Remote Control Buttons Available in Anynet+ Mode
Device Type Operating Status Available Buttons
Anynet+ Device
After switching to the
device, when the menu of
the corresponding device is
displayed on the screen.
Numeric buttons
▲/▼/◄/►/ENTER buttons
Colour buttons
EXIT button
After switching to the device,
while playing a file
(Backward search)
(Forward search)
(Stop)
/ (Play/Pause)
Device with built-in Tuner
After switching to the device,
when you are watching a TV
programme
P / button
Audio Device When a Receiver is activated
/ button
MUTE button
¯�The Anynet+ function only works when the remote control is set to TV.
¯�The REC button works only while in the recordable state.
¯�You cannot control Anynet+ devices using the buttons on the side of the TV. You can control Anynet+
devices only using the TV remote control.
¯�The TV remote control may not work under certain conditions. In this case, reselect the Anynet+
device.
¯�The Anynet+ functions don’t operate for the products from other manufacturers.
¯�
In Anynet+ mode, the colour buttons may not work properly.
¯�The , operations may differ depending on the device.
Recording
You can make a recording of a TV programme using a recorder.
Press the REC button.
Recording begins. (Only when the Anynet+ enabled recording device is connected.)
¯�The current TV programme is recorded in the Watching TV status. If you are watching video from
another device, the video from the device is recorded.
¯�You can also record the source streams by selecting Record after pressing the TOOLS button.
¯�Before recording, check whether the antenna jack is properly connected to the recording device.
For the antenna connection to the recording device, refer to its user manual.English - 67
Listening through a Receiver
You can listen to sound through a receiver instead of the TV speaker.
1 Press the TOOLS button.
Press the ▲ or ▼ button to select Receiver, then press the ENTER button.
2 Press the ◄ or ► button to select to On, then press the ENTER button.
Now you can listen to sound through the receiver.
3 Press the EXIT button to exit.
¯ When the receiver (home theater) is set to On, you can hear sound
output from the TV’s Optical jack. When the TV is displaying a
DTV(air) signal, the TV will send out 5.1 channel sound to the
Home theater receiver. When the source is a digital component
such as a DVD and is connected to the TV via HDMI, only 2
channel sound will be heard from the Home Theater receiver.
¯ If your receiver supports audio only, it may not appear in the device list.
¯ The receiver will work when you have properly connected the Optical IN jack of the receiver to the
Optical Out jack of the TV.
¯ When listening through the receiver, there are restrictions for using the PIP and audio-related(MTS,
Preferred language) menus.
¯ If there is a power interruption to the TV when the Receiver is On (by disconnecting the power cord
or a power failure), the TV Speaker may be set to Off when you turn the TV on again.
Check Points before Requesting Service
Symptom Solution
Anynet+ does not work. ■ Check if the device is an Anynet+ device. The Anynet+ system supports
Anynet+ devices only.
■ Connect only one receiver.
■ Check if the Anynet+ device power cord is properly connected.
■ Check the Anynet+ device’s Video/Audio/HDMI cable connections.
■ Check whether Anynet+ (HDMI-CEC) is set to On in the Anynet+ setup
menu.
■ Check whether the TV remote control is in TV mode.
■ Check whether it is Anynet+ exclusive remote control.
■ Anynet+ doesn’t work at a certain condition. (Searching channels)
■ When connecting or removing the HDMI cable, please make sure to search
devices again or restart your TV.
■ Check if the Anynet+ Function of Anynet+ device is set on.
I want to start Anynet+. ■ Check if the Anynet+ device is properly connected to the TV and check if the
Anynet+ (HDMI-CEC) is set to On in the Anynet+ Setup menu.
■ Press the TV button on the TV remote control to switch to TV. Then press
the TOOLS button to show the Anynet+ menu and select a menu you want.
I want to exit Anynet+. ■ Select View TV in Anynet+ menu.
■ Press the SOURCE button on the TV remote control and select a device
other than Anynet+ devices.
■ Press any of CH, CH LIST, and PRE-CH to change to the
TV mode. (Note that the channel button operates only when a tunerembedded Anynet+ device is not connected.)
The message Connecting to
Anynet+ device… appears on the
screen.
■ You cannot use the remote control when you are configuring Anynet+ or
switching to a view mode.
■ Use the remote control when the Anynet+ setting or switching to view mode
is complete.
The Anynet+ device does not play. ■ You cannot use the play function when Plug & Play is in progress.
The connected device is not
displayed.
■ Check whether or not the device supports Anynet+ functions.
■ Check whether or not the HDMI cable is properly connected.
■ Check whether Anynet+ (HDMI-CEC) is set to On in the Anynet+ setup
menu.
■ Search Anynet+ devices again.
■ You can connect an Anynet+ device using the HDMI cable only. Some HDMI
cables may not support Anynet+ functions.
The TV programme cannot be
recorded.
■ Check whether the antenna jack on the recording device is properly
connected.
The TV sound is not output
through the receiver.
■ Connect the optical cable between TV and the receiver.
Tools
Move Enter
View TV
Device List
Recording : DVD
DVD Menu
DVD Menu
Picture Mode : Standard
Picture Mode : Standard
Sleep Timer : Off
▼
ExitEnglish - 68
Teletext Feature (depending on the model)
Most television stations provide written information services
via teletext. The index page of the teletext service gives you
information on how to use the service. In addition, you can select
various options to suit your requirements by using the remote
control buttons.
� For teletext information to be displayed correctly, channel reception
must be stable. Otherwise, information may be missing or some
pages may not be displayed.
1 (exit)
Exit from the teletext display (depending on the model)
2 (store)
Used to store the teletext pages.
3 (size)
Press to display the double-size letters in the upper half of the
screen. For lower half of the screen, press it again.
To display normal screen, press it once again.
4 (reveal)
Used to display the hidden text (answers to quiz games, for
example). To display normal screen, press it again.
5 Coloured buttons (red/green/yellow/blue)
If the FASTEXT system is used by a broadcasting company, the
different topics covered on a teletext page are colour-coded and
can be selected by pressing the coloured buttons. Press one of
them corresponding to the required. The page is displayed with
other coloured information that can be selected in the same way.
To display the previous or next page, press the corresponding
coloured button.
6 (teletext on/mix)
Press to activate teletext mode after selecting the channel
providing the teletext service. Press it twice to overlap the teletext
with the current broadcasting screen.
7 (mode)
Press to select the teletext mode (LIST/FLOF).
If you press it in the LIST mode, it switches into the List save
mode.
In the List save mode, you can save teletext page into list using the
(store) button.
8 (sub-page)
Used to display the available sub-page.
9 (page up)
Used to display the next teletext page.
0 (page down)
Used to display the previous teletext page.
! (index)
Used to display the index (contents) page at any time while you are viewing teletext.
@ (hold)
Used to hold the display on a given page if the selected page is
linked with several secondary pages
which follow on automatically. To resume, press it again.
# (cancel)
Used to display the broadcast when searching for a page.
¯ You can change teletext pages by pressing the numeric buttons
on the remote control.
Continued...
W.LINKEnglish - 69
The teletext pages are organized according to six categories:
Part Contents
A
B
C
D
E
F
Selected page number.
Broadcasting channel identity.
Current page number or search indications.
Date and time.
Text.
Status information.
FASTEXT information.
¯ Teletext information is often divided between several pages
displayed in sequence, which can be accessed by:
�Entering the page number
�Selecting a title in a list
�Selecting a coloured heading (FASTEXT system)
¯ Press the TV/DTV button to exit from the teletext display.English - 70
Wall Mount Kit Specifications (VESA)
Install your wall mount on a solid wall perpendicular to the floor.
When attaching to other building materials, please contact your nearest dealer.
If installed on a ceiling or slanted wall, it may fall and result in severe personal injury.
Product Family inch VESA Spec. (A * B) Standard Screw Quantity
LCD-TV
23 ~ 26 200
*
100 M4
4
32 ~ 40 200
*
200 M6
46 ~ 52
400 * 400
600 * 400
M8
57
700 * 400
(No VESA)
57 ~ 70 800 * 400
80 ~ 1400 * 800
PDP-TV
42 ~ 58
400 * 400
600 * 400
M8
4
63
676 * 407
(No VESA)
6
63 ~ 70 800 * 400 4
80 ~ 1400 * 800 4
¯�We provided the standard dimensions for wall mount kits as shown in the table above.
¯�When purchasing our wall mount kit, a detailed installation manual and all parts necessary for
assembly are provided.
¯�Do not use screws longer than the standard dimension, as they may cause damage to the inside of
the TV set.
¯�For wall mounts that do not comply with the VESA standard screw specifications, the length of the
screws may differ depending on their specifications.
¯�Do not use screws that do not comply with the VESA standard screw specifications.
Do not use fasten the screws too strongly, this may damage the product or cause the product to fall,
leading to personal injury. Samsung is not liable for these kinds of accidents.
¯�Samsung is not liable for product damage or personal injury when a non-VESA or non-specified wall
mount is used or the consumer fails to follow the product installation instructions.
¯�Our 57” and 63” models do not comply with VESA Specifications. Therefore, you should use our
dedicated wall mount kit for this model.
¯�Do not exceed 15 degrees tilt when mounting this TV.
��Do not install your Wall Mount Kit while your TV is turned on.
It may result in personal injury due to electric shock.English - 71
Serial Cable(1P to 1P)(Not supplied)
Rear Panel
Auto Wall-Mount
Auto Wall - mount adjustment (Sold separately)
Once the auto wall mount is installed, the position of your TV can be easily adjusted.
Entering the menu
1 Press the ▲, ▼, ◄ or ► button on your remote control.
¯ The Wall Mount Adjustment screen is displayed.
¯ If the Wall Mount Adjustment screen is not displayed
when clicking on a direction button while watching your
TV, use the menu to display that screen.
• Press the MENU button to display the menu. Press
the ▲ or ▼ button to select Setup, then press the
ENTER button.
• Press the ▲ or ▼ button to select Wall-Mount
Adjustment, then press the ENTER button.
Remembering the Position
2 Adjust to the desired position using the ▲, ▼, ◄, ► buttons.
¯ If you press an arrow button when no OSD is displayed
on the TV screen, the Adjustment screen appears.
¯ Press the INFO button to reset. Press the ◄ or ►
button to select Yes, then press the ENTER button. The
position is initialized to the default setting.
3 Press the blue button.
Press the ▲ and ▼ buttons to select a save mode from
either Position1, Position2 or Position3 in order to save the
current position.
¯ To not save the current position, press the RETURN
button.
¯ When selecting a save mode, you cannot use the Color
buttons.
4 Press the ENTER button to save.
¯ When Position1 is selected, the message Current
position saved as Position1 is displayed.
5 Press the ENTER button.
¯ The saved Position appears on the left side of the OSD.
Continued...
Plug & Play ►
Language : English
Time
Change PIN
Parental Lock
Subtitle
Teletext Language : ----
Preference
Setup
Save
Move Enter Return
Select a mode to Save.
Position 1
Position 3
Position 2
Wall-Mount Adjustment
Adjust Save Center
►
►
►
►
Position 1 2 3English - 72
How to assemble the Stand-Base (depending on the model)
Using the 6 screws for securing the stand base and the
monitor, firmly attach the monitor to the stand base.
(The exterior of the set may be different than the picture.)
In case of installing your TV on the wall,
close the cover (1) on the stand-base
connection part using two screws for
hiding.
Warning
Firmly secure the stand to the TV
before moving it, as the stand may
fall and could cause serious injury.
¯�Two or more people should carry
the TV. Never lay the TV on the
floor because of possible damage
to the screen.
Always store the TV upright.
Moving to the remembered position
1 Complete Step 1 of Entering the menu.
2 Pressing a Color (Red, Green, Yellow) button moves the auto wall
mount to the saved position.
¯ You can move the wall mount to one of the 3 pre-set positions
by pressing the Red (Position 1), Green (Position 2) or Yellow
(Position 3) buttons.
¯ If you adjust the positon after moving to a pre-set position, the
position display will disappear.
¯ For installation, refer to the Installation Manual provided with the wall
mount.
¯ For product installation and the installation and moving of the wall mount, make sure to consult a specialized
installation company.
¯ This installation manual is to be used when attaching the wall mount to a wall. When attaching to other building
materials, please contact your nearest dealer.
¯ The auto wall mount will not work when Anynet+ or WISELINK is operating.
¯ 42 inches model is not compatible with the older wall mount model (WMN5090A).
Wall-Mount Adjustment
Adjust Save Center
►
►
►
►
Position 1 2 3
Position 1English - 73
Securing the TV to the Wall
Pulling, pushing, or climbing on the TV may cause the TV to fall. In particular, ensure your
children do not hang over or destabilize the TV; doing so may cause the TV to tip over,
causing serious injuries or death. Follow all safety precautions provided on the included Safety
Flyer. For added stability, install the anti-fall device for safety purposes, as follows.
To avoid the TV from falling:
1. Put the screws into the clamps and firmly fasten them onto
the wall. Confirm that the screws have been firmly installed
onto the wall.
You may need additional material such as an anchor
depending on the type of wall.
Since the necessary clamps, screws, and string are not
supplied, please purchase these additionally.
2. Remove the screws from the center back of the TV, put the
screws into the clamps, and then fasten the screws onto the
TV again.
Screws may not be supplied with the product. In this
case, please purchase the screws of the following
specifications.
3. Connect the clamps fixed onto the TV and the clamps fixed
onto the wall with a strong string and then tie the string
tightly.
Install the TV near to the wall so that it does not fall
backwards.
It is safe to connect the string so that the clamps fixed on
the wall are equal to or lower than the clamps fixed on the
TV.
Untie the string before moving the TV.
4. Verify all connections are properly secured. Periodically
check connections for any sign of fatigue for failure.
If you have any doubt about the security of your
connections,contact a professional installer.
°
°
°
°
°
°
Wall
Wall
CautionEnglish - 74
Troubleshooting
Before contacting the Samsung after-sales service, perform the following simple checks.
If you cannot solve the problem using the instructions below, note the model and serial number of
the television and contact your local dealer.
No sound or picture
� Check that the mains lead has been connected to a wall socket.
� Check that you have pressed the (Power) button (On/Off) on the front panel or press the POWER
button on the remote control.
� Check the picture contrast and brightness settings.
� Check the volume.
� Check if TV Speaker is set to Off.
Normal picture but no sound
� Check the volume.
� Check whether the volume MUTE button on the remote control has been pressed.
No picture or black and white picture
� Adjust the colour settings.
� Check that the broadcast system selected is correct.
Sound and picture interference
� Try to identify the electrical appliance that is affecting the television, then move it further away.
� Plug the television into a different main socket.
Blurred or snowy picture, distorted sound
� Check the direction, location and connections of your aerial.
This interference often occurs due to the use of an indoor aerial.
Remote control malfunctions
� Replace the remote control batteries.
� Clean the upper edge of the remote control (transmission window).
� Check that the “+” and “–” ends of the batteries are inserted correctly.
� Check that the batteries are drained.
Screen is black and power indicator light blinks steadily
� On your computer check; Power, Signal Cable.
� The TV is using its power management system.
� Move the computer’s mouse or press any key on the keyboard.
� On your equipment check (STB, DVD, etc) ; Power, Signal Cable.
� The TV is using its power management system.
� Press the Source button on the panel or remote control.
� Turn the TV off and on.
The damaged picture appears in the corner of the screen.
� If Just Scan is selected in some external devices, the damaged picture may appear in the corner of
the screen. This symptom is caused by external devices, not TV.
The "Resets all settings to the default values" message appears.
� This appears when you press and hold the EXIT button for a while. The product settings are reset to
the factory defaults.English - 75
Specifications
The descriptions and characteristics in this booklet are given for information purposes only and
are subject to modification without notice.
Model Name PS50A556/PS50A567/PS50A568
Screen Size (Diagonal) 50 inch
PC Resolution (Optimum) 1920 x 1080 @ 60 Hz
Sound (Output) 10 W + 10 W
Dimension (WxHxD)
Body
With stand
1290 x 740 x 95 mm
1290 x 804 x 319 mm
Weight
Body
With stand
39 Kg
41 Kg
Environmental
Considerations
Operating Temperature
Operating Humidity
Storage Temperature
Storage Humidity
10 °C to 40 °C (50 °F to 104 °F)
10% to 80%, non-condensing
-20 °C to 45 °C (-4 °F to 113 °F)
5% to 95%, non-condensing
¯ �This device is a Class B digital apparatus.
�Design and specifications are subject to change without prior notice.
�For the power supply and Power Consumption, refer to the label attached to the product.This page is intentionally
left blank.Correct Disposal of This Product
(Waste Electrical & Electronic Equipment)
(Applicable in the European Union and other European countries with
separate collection systems)
This marking shown on the product or its literature, indicates that it
should not be disposed with other household wastes at the end of its
working life.
To prevent possible harm to the environment or human health from
uncontrolled waste disposal, please separate this from other types of
wastes and recycle it responsibly to promote the sustainable reuse of
material resources.
Household users should contact either the retailer where they
purchased this product, or their local government office, for details
of where and how they can take this item for environmentally safe
recycling.
Business users should contact their supplier and check the terms and
conditions of the purchase contract. This product should not be mixed
with other commercial wastes for disposal.Français - 2
Instructions d’utilisation
� Rémanence à l’écran
Ne figez pas d’images (telle qu’une image de jeu vidéo ou de PC branché à l’écran à plasma) sur
l’écran du moniteur à plasma pendant plus de deux heures car cela peut entraîner une rémanence
à l’écran. Cette rémanence est également appelée “brûlure d’écran”. Pour éviter la rémanence,
réduisez le niveau de contraste ou de luminosité de l’écran lorsque vous affichez une image figée.
� Hauteur
L’écran à plasma est normalement conçu pour être utilisé à une altitude inférieure à 2000 m. Il peut
fonctionner de façon anormale au-dessus de 2 000 m d’altitude. Ne l’installez pas et ne le faites donc
pas fonctionner dans ces conditions.
� Chaleur diffusée sur la partie supérieure du téléviseur à plasma
Le dessus de l’appareil peut chauffer en cas d’utilisation prolongée, car la chaleur s’échappe du
panneau par le trou d’aération situé dans la partie supérieure du produit. Ce phénomène est normal
et n’indique aucunement la présence d’un défaut ou d’un dysfonctionnement. Il convient cependant
d’empêcher les enfants de toucher à la partie supérieure de l’écran.
� Le produit fait un bruit de “claquement”.
Ce bruit de “claquement” risque d’être perceptible lorsque le produit se contracte ou s’étend suite à
un changement du milieu ambiant, tel que la température ou l’humidité. Ce phénomène est normal et
ne constitue pas un défaut.
� Défauts de cellule
L’écran à plasma utilise un panneau constitué de 1 230 000 (niveau SD) à 3 150 000 (niveau HD)
pixels dont la fabrication fait appel à une technologie avancée. Il se peut toutefois que des points
clairs ou sombres apparaissent à l’écran. Ils n’ont aucune incidence sur la performance du produit.
� Evitez d’utiliser le téléviseur à plasma à des températures inférieures à 5°C (41°F).
� Une image figée affichée pendant une période prolongée peut endommager définitivement
l’écran PDP.
Visionner pendant longtemps le téléviseur à plasma en format 4/3 risque de
laisser apparaître des traces de bordures sur la gauche, sur la droite et au
centre de l’écran. Ces traces sont dues à la différence de luminosité sur l’écran.
Lire un DVD ou un jeu vidéo sur console risque de provoquer un effet similaire
sur l’écran. Les dommages provoqués par l’effet susmentionné ne sont pas
couverts par la garantie.
� Rémanence de l’image à l’écran.
Une rémanence partielle de l’image peut éventuellement se produire si des images figées de jeux
vidéo et d’un PC restent affichées pendant un certain temps. Pour empêcher ce phénomène,
réduisez la luminosité et le contraste en cas d’affichage d’images figées.
� Garantie
- La garantie ne couvre pas les dommages causés par la rémanence.
- Les brûlures ne sont pas couvertes par la garantie.
� Installation
Contacter un centre de service agréé si le téléviseur est destiné à une installation dans des
endroits exposés à la poussière, à des températures faibles ou élevées, à une forte humidité,
à des substances chimiques et s’il a été prévu pour fonctionner en permanence, comme dans
des aéroports, des gares ferroviaires, etc. Le non-respect de ce qui précède peut gravement
endommager le téléviseur.
Toute fonction relative à la télévision numérique (DVB) ne peut fonctionner que dans un pays ou une région où
des signaux terrestres numériques de type DVB-T (MPEG2) sont diffusés. Consultez votre revendeur pour savoir
si vous pouvez recevoir des signaux DVB-T. Bien que ce téléviseur soit conforme à la norme DVB-T, il n’est pas
garanti qu’il soit compatible avec les futures émissions terrestres numériques DVB-T. Il se peut que certaines
fonctionnalités ne soient pas disponibles dans certains pays.
Contactez SAMSUNG WORLDWIDE
Pour tout commentaire ou toute question concernant un produit Samsung, contactez le service client de
SAMSUNG. (Voir la quatrième de couverture pour plus d'informations.)
© 2008 Samsung Electronics Co., Ltd. All rights reserved.
Spinel(P550) FRE BN68-01548A-00.2 2 2008-04-30 ¿ÀÈÄ 2:37:09Français - 3
Français
Sommaire
Informations générales
� Instructions d’utilisation ................................... 2
� Vérification des pièces .................................... 4
� Utilisation de la base-support ......................... 4
� Panneau de configuration ............................... 5
� Panneau de connexion ................................... 6
� Présentation de la télécommande ................. 8
Fonctionnement
� Mise en marche et arrêt de votre téléviseur .... 9
� Affichage des menus ...................................... 9
� Fonction Plug & Play ..................................... 10
� Utilisation du bouton TOOLS ........................ 12
� Visualisation d’une source de signal externe .... 12
� Modification du nom des périphériques ........ 13
Gestion des canaux
� Mémorisation automatique des Chaînes ...... 14
� Mémorisation manuelle des Chaînes ............ 15
� Voir les informations relatives au Guide de
programme électronique (GPE) .................... 16
� Gestion des Chaînes .................................... 17
� Suppression et ajout de Chaînes .................. 18
� Sélection de vos Chaînes favorites ............... 19
� Réservation d’un programme (Visionnage
minuteur) ....................................................... 20
� Vérification d’une réservation ........................ 21
� Attribution de noms aux Chaînes .................. 22
� Tri des chaînes mémorisées - analogique .... 23
� Sélection et désélection de toutes les
Chaînes ......................................................... 24
� Enregistrement des Chaînes dans la
mémoire (Mémorisation automatique) .......... 24
� Réglage du gestionnaire de Chaînes ............ 24
� Verrouillage de Chaînes ................................ 25
� Syntonisation précise des Chaînes
analogiques ................................................... 25
� Affichage des informations du signal ............ 26
� LNA (Amplificateur à faible bruit) .................. 26
Réglage de l’image
� Réglage du mode d’image ............................ 27
� Personnalisation des paramètres d’image .... 27
� Réglage des détails de l’image ..................... 28
� Options d’image ............................................ 29
� Restauration des paramètres d’image par
défaut ............................................................ 31
Réglage du son
� Fonctions audio ............................................. 32
� Sélection du mode Son (en fonction du
modèle) ......................................................... 34
� Branchement du casque (vendu séparément) .. 34
Description des fonctions
� Fonctions d’horloge ....................................... 35
� Langue / Modifier PIN / Verrouillage parental
/ Sous-titres / Langue Télétexte / Préférence
/ Effet lumineux / Mélodie / Divertissement /
Mode éco. / PIP............................................. 36
� Mise à niveau du logiciel... ............................ 39
� Interface commune ....................................... 40
Affichage PC
� Configuration de votre logiciel PC
(basée sur Windows XP) .............................. 41
� Mode d’entrée (PC) ....................................... 42
� Réglage du PC .............................................. 43
WISELINK
� Utilisation de la fonction WISELINK .............. 45
� Tri de la liste des photos ............................... 48
� Visualisation d’un diaporama ........................ 52
� Utilisation de la liste de musiques ................. 56
� Tri de la liste de musiques ............................ 57
� Lecture d’un fichier musical .......................... 61
� Utilisation du menu Configuration ................. 63
Anynet+
� Qu’est-ce que Anynet+?................................ 64
� Connexion d’appareils Anynet+ .................... 64
� Configuration d’Anynet+................................ 65
� Recherche d’appareils Anynet+ et
basculement entre des appareils .................. 65
� Enregistrement .............................................. 66
� Ecoute via un récepteur ................................ 67
� Vérifications avant de faire appel au
service d’assistance ...................................... 67
Annexe
� Fonction de télétexte
(en fonction du modèle) ................................ 68
� Caractéristiques du kit de fixation murale
(VESA) .......................................................... 70
� Ajustement du support mural
(vendu séparément) ...................................... 71
� Assemblage de la base-support
(en fonction du modèle) ................................ 72
� Montage mural du televiseur ......................... 73
� Dépannage ................................................... 74
� Caractéristiques ............................................ 75
Symboles
®
Appuyer Important Remarque
Spinel(P550) FRE BN68-01548A-00.3 3 2008-04-30 ¿ÀÈÄ 2:37:09Français - 4
Vérification des pièces
Manuel d’utilisation Télécommande/
piles AAA
Cordon d’
alimentation
Chiffon de
nettoyage
Carte de garantie/
Carte d’enregistrement/
Manuel de sécurité
Capot inférieur/
Vis (2ea)
(Reportez-vous à la
page 52)
Tore magnétique
pour cordon d’
alimentation
Tore magnétique
pour S-Vidéo
Tore magnétique
pour composants
Vendu séparément
Câble d’antenne Câbles composants Câbles audio Câble PC
Câble SCART Câble audio PC Câble HDMI Câble HDMI/DVI
®Tore magnétique (cordon d’alimentation, S-Vidéo, composants)
Le blindage magnétique sert à protéger les câbles des
interférences.
Lors de la connexion d’un câble, ouvrez le blindage
magnétique et rabattez-le autour du câble près de la prise.
Utilisation de la base-support
® � L’écran à plasma doit
être soulevé par plusieurs
personnes. Ne posez jamais
l’écran à plasma sur le sol, car
cela pourrait l’endommager.
Conservez toujours l’écran en
position verticale.
� Le PDP peut pivoter de 20
degrés vers la droite et la
gauche.
-20° ~ 20°
Spinel(P550) FRE BN68-01548A-00.4 4 2008-04-30 ¿ÀÈÄ 6:03:17
PDP TV
quick start guide
imagine the possibilities
Thank you for purchasing a Samsung product.
To receive a more complete service, please
register your product at
www.samsung.com/global/register
Spinel F59A_QSG(CMS)-Eng(France)1 1 2008-08-20 오전 10:34:31 1
connections
CONNECTING A DVD PLAYER OR CABLE BOX/SATELLITE
RECEIVER (SET-TOP BOX) VIA HDMI
● When connecting an external device, match the colour of the connection terminal to the cable.
Each Cable Box/Satellite receiver (Set-Top Box) has a different back panel confi guration.
1. Connect an HDMI Cable between the HDMI IN (1, 2 or 3) jack on the TV and the HDMI jack on the DVD Player
or Cable Box / Satellite receiver (Set-Top Box).
➢ No additional Audio connection is needed for an HDMI to HDMI connection.
Caution
DVD Player or Cable Box /
Satellite receiver (Set-Top Box)
1
HDMI Cable (Not supplied)
TV REAR PANEL
TV SIDE PANEL
Spinel F59A_QSG(CMS)-Eng(France)1 1 2008-08-20 오전 10:34:32 2
CONNECTING A DVD PLAYER OR CABLE BOX/SATELLITE
RECEIVER (SET-TOP BOX) VIA COMPONENT CABLES
1.Connect Component Cable between the COMPONENT IN [Y, PB, PR] jacks on the TV and the COMPONENT
[Y, PB, PR] jacks on the DVD Player or Cable Box / Satellite receiver(Set-Top Box).
2.Connect Audio Cables between the COMPONENT IN [R-AUDIO-L] jacks on the TV and the AUDIO OUT jacks
on the DVD Player or Cable Box / Satellite receiver (Set-Top Box).
Audio Cable (Not supplied)
Component Cable (Not supplied)
1 2
1.Connect a HDMI/DVI Cable or DVI-HDMI Adapter between the HDMI IN 2 jack on the TV and the DVI jack on
the DVD Player or Cable Box/Satellite receiver (Set-Top Box).
2.Connect Audio Cables between the DVI IN (HDMI 2) [R-AUDIO-L] jack on the TV and the DVD Player or Cable
Box / Satellite receiver (Set-Top Box).
➢ When using an HDMI / DVI cable connection, you must use the HDMI IN 2 jack.
CONNECTING A DVD PLAYER OR CABLE BOX/SATELLITE
RECEIVER (SET-TOP BOX) VIA DVI
DVD Player or Cable Box /
Satellite receiver (Set-Top Box)
TV REAR PANEL
2
1
Audio Cable (Not supplied)
HDMI/DVI Cable (Not supplied)
Spinel F59A_QSG(CMS)-Eng(France)2 2 2008-08-20 오전 10:34:34 �
Troubleshooting
Before contacting the Samsung after-sales service, perform the following simple checks.
If you cannot solve the problem using the instructions below, note the model and serial number of the television and contact your local dealer.
No sound or picture • Check that the mains lead has been connected to a wall socket.
• Check that you have pressed the (Power) button (On/Off) on the front panel or press the
POWER button on the remote control.
• Check the picture contrast and brightness settings.
• Check the volume.
• Check if TV Speaker is set to Off.
Normal picture but no sound • Check the volume.
• Check whether the volume MUTE button on the remote control has been pressed.
No picture or black and white
picture
• Adjust the colour settings.
• Check that the broadcast system selected is correct.
Sound and picture
interference
• Try to identify the electrical appliance that is affecting the television, then move it further away.
• Plug the television into a different main socket.
Blurred or snowy picture,
distorted sound
• Check the direction, location and connections of your aerial.
This interference often occurs due to the use of an indoor aerial.
Remote control malfunctions • Replace the remote control batteries.
• Clean the upper edge of the remote control (transmission window).
• Check that the “+” and “–” ends of the batteries are inserted correctly.
• Check that the batteries are drained.
Screen is black and power
indicator light blinks steadily
• On your computer check; Power, Signal Cable.
• The TV is using its power management system.
• Move the computer’s mouse or press any key on the keyboard.
• On your equipment check (STB, DVD, etc) ; Power, Signal Cable.
• The TV is using its power management system.
• Press the Source button on the panel or remote control.
• Turn the TV off and on.
The damaged picture appears
in the corner of the screen.
• If Just Scan is selected in some external devices, the damaged picture may appear in the
corner of the screen. This symptom is caused by external devices, not TV.
The “Resets all settings to
the default values” message
appears.
• This appears when you press and hold the EXIT button for a while. The product settings are
reset to the factory defaults.
Storing Channels Automatically
1 Press the MENU button to display the menu.
2 Press the ▲ or ▼ button to select Channel, then press the ENTER button.
� Press the ▲ or ▼ button to select Auto Store, then press the ENTER button.
4 Press the ▲ or ▼ button to select the channel source to memorize. Press the ENTER
button to select Start.
➢ Digital & Analogue: Digital and Analogue channels.
Digital: Digital channels.
Analogue: Analogue channels.
➢ Scans for all channels with active broadcast stations and stores them in the TV’s
memory.
➢ If you want to stop Auto Store, press the ENTER button.
The Stop Auto Store? message will be displayed. Select Yes by pressing
the ◄ or ► button, then press the ENTER button.
5 Press the EXIT button to exit.
➢ When there is a locked channel by Channel Lock setting, PIN input screen appears.
(Refer to page 25 of owner's manual)
Channel
Auto Store ►
Manual Store
Full Guide
Mini Guide
Default Guide : Mini Guide
Channel List
Channel Mode : Added Channels
Child Lock : On
Spinel F59A_QSG(CMS)-Eng(France)3 3 2008-08-20 오전 10:34:34Contact SAMSUNG WORLDWIDE
If you have any questions or comments relating to Samsung products,
please contact the SAMSUNG customer care centre.
Country Customer Care Center Web Site
AUSTRIA 0800-SAMSUNG(726-7864) www.samsung.com/at
BELGIUM 0032 (0)2 201 24 18 www.samsung.com/be
CZECH REPUBLIC
844 000 844 www.samsung.com/cz
Distributor pro Českou republiku:
Samsung Zrt., česka organizační složka Vyskočilova 4, 14000 Praha 4
DENMARK 70 70 19 70 www.samsung.com/dk
EIRE 0818 717 100 www.samsung.com/ie
ESTONIA 800-7267 www.samsung.ee
FINLAND 030-6227 515 www.samsung.com/fi
FRANCE
"3260 SAMSUNG (€ 0,15/Min)
08 25 08 65 65 (€ 0,15/Min)"
www.samsung.com
GERMANY 01805 - SAMSUNG(726-7864 € 0,14/Min) www.samsung.com
HUNGARY 06-80-SAMSUNG(726-7864) www.samsung.com
ITALIA 800-SAMSUNG(726-7864) www.samsung.com
KAZAKHSTAN 8-10-800-500-55-500 www.samsung.kz
KYRGYZSTAN 00-800-500-55-500 -
LATVIA 800-7267 www.samsung.com/lv
LITHUANIA 8-800-77777 www.samsung.lt
LUXEMBURG 0035 (0)2 261 03 710 www.samsung.com/be
NETHERLANDS 0900-SAMSUNG (726-7864 € 0,10/Min) www.samsung.com/nl
NORWAY 815-56 480 www.samsung.com/no
POLAND
"0 801 801 881
022-607-93-33"
www.samsung.com/pl
PORTUGAL 80820-SAMSUNG(726-7864) www.samsung.com/pt
RUSSIA 8-800-555-55-55 www.samsung.com
SLOVAKIA 0800-SAMSUNG(726-7864) www.samsung.com/sk
SPAIN 902 10 11 30 www.samsung.com
SWEDEN 0771-400 200 www.samsung.com/se
SWITZERLAND 0800-SAMSUNG(726-7864) www.samsung.com/ch
TURKEY 444 77 11 www.samsung.com
TADJIKISTAN 8-10-800-500-55-500 -
U.K 0845 SAMSUNG (7267864) www.samsung.com
UKRAINE 8-800-502-0000 www.samsung.com
UZBEKISTAN 8-10-800-500-55-500 www.samsung.uz
Spinel F59A_QSG(CMS)-Eng(France)4 4 2008-08-20 오전 10:34:35
Power consumption
Model On mode Power
consumption (W)
Standby mode
(W)
Annual Energy
Consumption (kWh)
Mecury
Content (mg)
Peak Luminance
Ratio
Presence
of Lead
LE19C45***H Hotel TV 30.0 0.60 47.5 20.0 65% Yes
LE22C45***H Hotel TV 40.0 0.60 60.6 20.0 65% Yes
LE26C45***H Hotel TV 60.0 0.60 89.8 20.0 65% Yes
LE32C45***H Hotel TV 80.0 0.60 116.8 20.0 65% Yes
English
This TV set may contain lead only in certain parts or components where no technology alternatives exist in accordance with
existing exemption clauses under the RoHS Directive.
� Annual energy consumption is calculated on the basis of the On-mode(Home, Standard-mode) power consumption, operating
4 hours a day and 365 days a year. (Measured according to IEC 62087 Ed.2)
� The power consumption of On-mode varies depending on setting the TV displays.
– To reduce the power consumption, adjust the brightness of the TV or set the Energy Saving option to High.
– It will reduce the overall running cost.
� Do not leave your TV in standby mode for long periods of time (when you are away on holiday, for example). A small amount
of electric power is still consumed even when switch is turned off. It is best to unplug the set from the mains and aerial.
Français
� La consommation d’énergie annuelle est calculée sur la base de la consommation en mode Marche (maison, mode
standard), à raison de 4 heures par jour, 365 jours par an. (Valeur mesurée conformément à la norme CEI 62087 éd.2)
� La consommation électrique en mode Marche varie en fonction du réglage du téléviseur.
– Pour réduire la consommation électrique, réglez la luminosité d
– Cela réduira le coût de fonctionnement général.
� Ne laissez pas le téléviseur en mode Veille pendant de longues périodes (lorsque vous êtes en vacances, par exemple).
L’appareil consomme toujours une petite quantité d’énergie, même s’il est en veille. Il est conseillé de débrancher le téléviseur
du secteur et de l’antenne.
Deutsch
� Der jährliche Energieverbrauch wird berechnet auf der Grundlage des Stromverbrauchs (bei Heim-, Standardbetrieb) in
angeschaltetem Zustand unter der Annahme von 4 Stunden Nutzung pro Tag an 365 Tagen pro Jahr. (Gemessen gemäß IEC
62087 Ed.2)
� Der Stromverbrauch in angeschaltetem Zustand variiert je nach den Einstellungen der Anzeige.
– Um den Stromverbrauch zu reduzieren, stellen Sie die Helligkeit des Fernsehers geringer oder die Option
Energiesparmod. auf Hoch ein.
– Damit senken Sie die allgemeinen Betriebskosten.
� Der Standby-Modus ist nicht für längere Phasen der Abwesenheit gedacht (z. B. wenn Sie verreist sind). Eine kleine Menge
Strom wird auch dann noch verbraucht, wenn das Gerät mit dem Netzschalter ausgeschaltet wurde. Ziehen Sie am besten
den Netzstecker und das Antennenkabel.
Nederlands
� Het jaarlijkse energieverbruik wordt berekend op basis van het energieverbruik in de modus Aan (thuis, modus Standaard)
gedurende 4 uur per dag en 365 dagen per jaar. (Gemeten overeenkomstig IEC 62087 Ed.2)
� Het energieverbruik in de modus Aan kan verschillen afhankelijk van de weergave-instellingen van de TV.
– Als u het energieverbruik wilt beperken, past u de helderheid van de TV aan of stelt u de optie Spaarstand in op Hoog.
– Zo kunt u besparen op de algemene verbruikskosten.
� Laat de TV niet gedurende langere tijd in de stand-bymodus staan (bijvoorbeeld wanneer u op vakantie bent). Zelfs wanneer
het apparaat is uitgeschakeld, wordt een kleine hoeveelheid stroom gebruikt. U kunt het beste de stekker uit het stopcontact
halen en de antenne loskoppelen.
Italiano
� Il consumo energetico annuo è calcolato in base alla modalità On-mode (uso domestico, standard), che prevede un consumo
energetico pari a 4 ore al giorno per 365 giorni all’anno. (La misurazione è conforme a IEC 62087 Ed.2)
� Il consumo energetico in modalità On-mode varia a seconda delle impostazioni del televisore.
– Per ridurre i consumi, regolare la luminosità del televisore oppure impostare la funzione Risp. energia su Alto.
– Ciò consentirà di ridurre i costi energetici.
� Non lasciare il televisore in modalità standby per un lungo periodo di tempo (quando si parte per le vacanze, ad esempio).
Anche quando il televisore è spento, l’apparecchio consuma una piccola quantità di energia elettrica. E’ consigliabile
scollegare il cavo di alimentazione e il cavo dell’antenna dalle prese a muro.
Español
� El consumo anual de energía se calcula de acuerdo con el consumo del modo activado (inicio, modo Estándar) y un
funcionamiento de 4 horas cada día, 365 días al año. (Medición de acuerdo con IEC 62087 Ed.2)
� .
–
– Así reducirá el coste total de funcionamiento.
� No deje el televisor en modo de espera durante períodos largos de tiempo (cuando está de vacaciones, por ejemplo).
Aunque esté apagado continúa consumiendo una pequeña cantidad de energía. Lo mejor es desenchufar el aparato de la
red eléctrica y de la antena.
Português
� O consumo de energia anual é calculado com base no consumo do modo Ligado (modo Standard, Home) em funcionamento
durante 4 horas por dia e 365 dias por ano. (Medido de acordo com a norma IEC 62087 Edição 2)
� .
–
– Reduz assim o custo geral de funcionamento.
� Não deixe o televisor em modo de espera durante longos períodos de tempo (por exemplo, quando vai de férias). Continua
a ser consumida uma pequena quantidade de energia mesmo que o televisor esteja desligado. Aconselha-se que desligue o
televisor da corrente eléctrica e da antena.
Slovenščina
� Letna poraba energije je izračunana za izdelek v načinu vklopa (način Doma, Standard), ki deluje 4 ure na dan, 365 dni v letu.
(Izmerjeno v skladu s standardom IEC 62087, 2. izdaja)
� Poraba energije v načinu vklopa se razlikuje glede na nastavitev televizijskega zaslona.
– Da zmanjšate porabo energije, prilagodite svetlost televizorja ali nastavite možnost Energy Saving na High.
– Tako boste znižali celotne tekoče stroške.
� Televizorja ne puščajte v stanju pripravljenosti dlje časa (na primer, ko greste na dopust). Tudi ko je stikalo izklopljeno, se
porablja majhna količina električne energije. Priporočamo, da izključite napajanje in anteno televizorja.
Türkçe
� Yıllık enerji tüketimi, günde 4 saat ve yılda 365 gün çalışan Açık moduna (Ev, Standart mod) dayanılarak hesaplanmıştır. (IEC
62087 Bas.2’ye göre ölçülmüştür)
� Açık modunun güç tüketimi TV görüntüsünün ayarına bağlı olarak değişir.
– Güç tüketimini azaltmak için, TV’nin parlaklığını ayarlayın veya Enrj. Tasarrufu seçeneğini Yüksek olarak ayarlayın.
– Bu, genel çalışma maliyetini azaltacaktır.
� TV’nizi uzun süre (örneğin, tatile gittiğinizde) bekleme modunda bırakmayın. Anahtar kapatıldığında bile çok az miktarda
elektrik gücü tüketilir. Cihazı elektrik şebekesinden ve anten bağlantılarından ayırmak en doğru işlemdir.
Magyar
� Az éves energiafogyasztás kiszámításának alapja a készülék bekapcsolt állapotának (Otthon, Normál üzemmód)
áramfogyasztása, évi 365 napos, napi 4 órás működés mellett. (A mérés az IEC 62087 Ed.2 alapján történt)
� A bekapcsolt állapot áramfogyasztása a TV képernyőjének beállításától függ.
– Az áramfogyasztás csökkentése érdekében állítsa be a TV fényerejét, vagy állítsa az Energiagazdálkodás opciót
Magas értékre.
– Ezzel lecsökkentheti az üzemeltetési költségeket.
� A televíziót ne hagyja hosszabb ideig (például amíg szabadságra utazik) készenléti állapotban. A TV még kikapcsolt
állapotban is fogyaszt némi áramot. Érdemes a televízió táp- és antennacsatlakoztatását is megszüntetnie.
Polski
� Roczne zużycie energii jest obliczane na podstawie zużycia prądu gdy telewizor jest włączony (tryb domowy, standardowy)
przez 4 godziny dziennie przez 365 dni w roku. (Pomiary zgodne z dyrektywą IEC 62087 Ed.2)
� Zżycie prądu po właczeniu telewizora jest zależne od ustawień wyświetlania.
– Aby zredukować zużycie prądy, dostosuj jasność telewizora lub ustaw tryb Oszcz. energii w pozycji Wysoka.
– Obniży to całkowity koszt funkcjonowania.
� Nie jest wskazane pozostawianie telewizora w trybie gotowości przez dłuższy czas (np. na czas wyjazdu na urlop). Niewielka
ilość energii elektrycznej jest wciąż pobierana, pomimo wyłączenia telewizora. Najlepiej jest odłączyć telewizor zarówno od
sieci elektrycznej jak i anteny.
Ελληνικά
� Η ετήσια κατανάλωση ενέργειας υπολογίζεται με βάση την κατανάλωση ρεύματος σε λειτουργία ενεργοποίησης (οικία, τρόπος
λειτουργίας Τυπική), με λειτουργία της συσκευής 4 ώρες την ημέρα και 365 ημέρες το χρόνο. (Μέτρηση σύμφωνα με το
πρότυπο IEC 62087 Ed.2)
� Η κατανάλωση ρεύματος σε λειτουργία ενεργοποίησης διαφέρει, ανάλογα με τις ρυθμίσεις της τηλεόρασης.
– Για να μειώσετε την κατανάλωση ρεύματος, προσαρμόστε τη φωτεινότητα της τηλεόρασης ή ρυθμίστε την επιλογή
Εξ/ση Ενέργειας στην τιμή Υψηλό.
– Με αυτόν τον τρόπο θα μειωθεί το συνολικό κόστος λειτουργίας.
� Μην αφήνετε την τηλεόρασή σας σε κατάσταση αναμονής για μεγάλα χρονικά διαστήματα (για παράδειγμα, όταν λείπετε σε
διακοπές). Μια μικρή ποσότητα ηλεκτρικού ρεύματος καταναλώνεται ακόμη και όταν είναι σβηστή. Καλύτερα να αποσυνδέσετε
την τηλεόραση από την πρίζα και την κεραία.
[2010] Power consumption 삽지-UC4000.indd 1 2010-04-26 오전 10:57:25
LE37C45***H Hotel TV 115.0 0.60 167.9 30.0 65% Yes
LE40C45***H Hotel TV 130.0 0.60 189.8 42.0 65% Yes
Contact SAMSUNG WORLDWIDE
If you have any questions or comments relating to Samsung products, please contact the SAMSUNG customer care centre.
Country Customer Care Centre Web Site
AUSTRIA 0800-SAMSUNG (726-7864) www.samsung.com/at
BELGIUM 0032 (0)2 201 24 18 www.samsung.com/be
CZECH REPUBLIC
844 000 844 www.samsung.com/cz
Distributor pro Českou republiku:
Samsung Zrt., česka organizační složka Vyskočilova 4, 14000 Praha 4
DENMARK 70 70 19 70 www.samsung.com/dk
EIRE 0818 717 100 www.samsung.com/ie
FINLAND 030-6227 515 www.samsung.com/fi
FRANCE
3260 SAMSUNG (€ 0,15/Min)
08 25 08 65 65 (€ 0,15/Min)
www.samsung.com
GERMANY 01805 - SAMSUNG (726-7864) (€ 0,14/Min) www.samsung.com
HUNGARY 06-80-SAMSUNG (726-7864) www.samsung.com
ITALIA 800-SAMSUNG (726-7864) www.samsung.com
LUXEMBURG 0035 (0)2 261 03 710 www.samsung.com/be
NETHERLANDS 0900-SAMSUNG (726-7864) (€ 0,10/Min) www.samsung.com/nl
NORWAY 815-56 480 www.samsung.com/no
POLAND
0 801 801 881
022-607-93-33
www.samsung.com/pl
PORTUGAL 80820-SAMSUNG (726-7864) www.samsung.com/pt
SLOVAKIA 0800-SAMSUNG (726-7864) www.samsung.com/sk
SPAIN 902 10 11 30 www.samsung.com
SWEDEN 0771-400 200 www.samsung.com/se
SWITZERLAND 0800-SAMSUNG (726-7864) www.samsung.com/ch
U.K 0845 SAMSUNG (7267864) www.samsung.com
TURKEY 444 77 11 www.samsung.com
ESTONIA 800-7267 www.samsung.ee
LATVIA 800-7267 www.samsung.com/lv
LITHUANIA 8-800-77777 www.samsung.lt
KAZAHSTAN 8-10-800-500-55-500 www.samsung.kz
KYRGYZSTAN 00-800-500-55-500 -
RUSSIA 8-800-555-55-55 www.samsung.ru
TADJIKISTAN 8-10-800-500-55-500 -
UKRAINE 8-800-502-0000 www.samsung.com
UZBEKISTAN 8-10-800-500-55-500 www.samsung.uz
LCD TV
user manual
imagine the possibilities
Thank you for purchasing this Samsung product.
To receive more complete service, please register
your product at
www.samsung.com/global/register
Model Serial No.
BN68-01409H-01
BN68-01409H-00ENG.indb 1 2008-04-28 �� 5:18:08Precautions When Displaying a Still Image
A still image may cause permanent damage to the TV screen
Do not display a still image on the LCD panel for more than 2 hours as it can cause screen image retention. This image
retention is also known as “screen burn”. To avoid such image retention, reduce the degree of brightness and contrast of the
screen when displaying a still image.
Watching the LCD TV in 4:3 format for a long period of time may leave traces of borders displayed on the left,
right and center of the screen caused by the difference of light emission on the screen.
Playing a DVD or a game console may cause a similar effect to the screen.
Damages caused by the above effect are not covered by the Warranty.
Displaying still images from Video games and PC for longer than a certain period of time may produce partial after-images.
To prevent this effect, reduce the ‘brightness’ and ‘contrast’ when displaying still images.
•
•
•
© 2008 Samsung Electronics Co., Ltd. All rights reserved.
Contact SAMSUNG WORLDWIDE
If you have any questions or comments relating to Samsung products, please contact the SAMSUNG customer care centre.
(See back cover for more informations.)
BN68-01409H-00ENG.indb 2 2008-04-28 �� 5:18:09Connecting and Preparing Your TV
List of Parts........................................................................2
Installing the Stand............................................................2
Installing the Wall Mount Kit ..............................................2
Viewing the Control Panel .................................................3
Viewing the Connection Panel...........................................4
Remote Control .................................................................7
Installing Batteries in the Remote Control .........................8
Switching On and Off.........................................................8
Placing Your Television in Standby Mode..........................8
Viewing the Menus ............................................................9
Using the TOOLS Button...................................................9
Plug & Play Feature...........................................................9
Channel Control
Storing Channels Automatically.......................................11
Storing Channels Manually..............................................11
Viewing the EPG (Electronic Programme Guide)
Information.......................................................................13
Setting the Default Guide ................................................14
Managing Channels.........................................................15
Setting the Channel Mode...............................................22
Activating the Child Lock .................................................22
Fine Tuning Analogue Channels......................................23
Checking the Digital-Signal Information ..........................23
LNA (Low Noise Amplifier)...............................................24
Picture Control
Changing the Picture Standard .......................................25
Customizing the Picture Settings.....................................25
Adjusting the Detailed Settings........................................26
Configuring Picture Options.............................................27
Resetting the Picture Settings to the Factory Defaults ....28
Viewing Picture-in-Picture ...............................................29
Sound Control
Changing the Sound Standard ........................................30
Selecting the Sound Mode ..............................................32
Connecting Headphones (Sold separately).....................32
Time Setting
Setting the Clock .............................................................33
Setting the Sleep Timer ...................................................34
Switching the Television On and Off Automatically..........35
■
■
■
■
■
■
■
■
■
■
■
■
■
■
■
■
■
■
■
■
■
■
■
■
■
■
■
■
■
■
■
■
■
■
Function Description
Selecting a Menu Language............................................36
Setting Up Your Personal ID Number (PIN).....................36
Setting up the Parental Lock ...........................................37
Setting the Subtitle ..........................................................38
Selecting a Teletext Language ........................................39
Selecting a Preference Language ...................................39
Setting the Light Effect (depending on the model) ..........39
Melody/Entertainment/Energy Saving .............................40
Upgrading the Software...................................................41
Viewing Common Interface .............................................42
Selecting the CI (Common Interface) Menu ....................42
To Select the Source .......................................................43
To Edit the Input Source Name........................................43
PC Display
Using Your TV as a Computer (PC) Display....................44
Display Modes .................................................................44
Setting up the TV with your PC .......................................45
WISELINK
Using the WISELINK Function ........................................46
Using the Photo List ........................................................47
Sorting Photo List ............................................................49
Viewing a Photo or Slide Show ......................................53
Using the Music List ........................................................57
Sorting Music List ............................................................58
Playing a Music File.........................................................62
Using the Setup Menu.....................................................64
About Anynet+
What is Anynet+?.............................................................65
Connecting Anynet+ Devices...........................................65
Setting Up Anynet+ .........................................................66
Scanning and Switching between Anynet+ Devices........66
Recording ........................................................................67
Listening through a Receiver (Home theater)..................68
Troubleshooting for Anynet+ ...........................................68
Recommendations for Use
Teletext Feature...............................................................69
Auto Wall-Mount Adjustment (Sold separately) ..............70
Using the Anti-Theft Kensington Lock (depending on the
model)..............................................................................72
Securing the TV to the Wall.............................................73
Troubleshooting: Before Contacting Service Personnel..74
Specifications ..................................................................75
■
■
■
■
■
■
■
■
■
■
■
■
■
■
■
■
■
■
■
■
■
■
■
■
■
■
■
■
■
■
■
■
■
■
■
■
■
English - 1
English
Contents
Symbol Press Note One-Touch Button
BN68-01409H-00ENG.indb 1 2008-04-28 �� 5:18:09English - �
List of Parts
Please make sure the following items are included with your LCD TV. If any items are missing, contact your dealer.
Remote Control &
Batteries (AAA x 2)
Power Cord Cover-Bottom
Stand Screw
(M4xL 16)
Stand Cleaning Cloth
• Owner’s Instructions • Warranty card • Safety Guide • Registration Cards
Warranty card / Safety Guide / Registration Cards (Not available in all locations)
The stand and stand screw may not be included depending on the model.
➣
➣
Connecting and Preparing Your TV
Installing the Stand
1. Connect your LCD TV and the stand.
Two or more people should carry the TV.
Make sure to distinguish between the front and back of the stand when assembling them.
2. Fasten two screws at position 1 and then fasten two screw at position 2.
Stand the product up and fasten the screws. If you fasten the screws with the LCD TV placed down, it may lean to
one side.
The stand is installed for models with the screen size of 37 inch and above.
➣
➣
➣
➣
Installing the Wall Mount Kit
Wall mount items (sold separately) allow you to mount the TV on the wall.
For detailed information on installing the wall mount, see the instructions
provided with the Wall Mount items. Contact a technician for assistance when
installing the wall mounted bracket.
Samsung Electronics is not responsible for any damage to the product or injury
to yourself or others if you elect to install the TV on your own.
Do not install your Wall Mount Kit while your TV is turned on. It may
result in personal injury due to electric shock.
Remove the stand and cover the bottom hole with a cap and fasten with
two screws.
➣
BN68-01409H-00ENG.indb 2 2008-04-28 �� 5:18:11English - �
Viewing the Control Panel
8 8
4
1
2
3
5
6
7
1
2
3
4
6
7
8 8 5
➣ The product colour and shape may vary depending on the model.
Front Panel buttons
Touch each button to
operate.
1 SOURCE
Toggles between all the available input sources
(TV, Ext.1, Ext.2, AV, S-Video, Component, PC, HDMI1,
HDMI2/DVI, HDMI3). In the on-screen menu, use this
button as you would use the ENTER button on the
remote control.
2 MENU
Press to see an on-screen menu of your TV’s features.
3 – +
Press to increase or decrease the volume.
In the on-screen menu, use the – + buttons as you
would use the ◄ and ► buttons on the remote control.
4 C/P.
Press to change channels. In the on-screen menu, use
the C/P. buttons as you would use the ▼ and ▲
buttons on the remote control.
5 POWER INDICATOR
Blinks and turns off when the power is on and lights up
in stand-by mode.
6 (Power)
Press to turn the TV on and off.
7 REMOTE CONTROL SENSOR
Aim the remote control towards this spot on the TV.
8 SPEAKERS
Side Panel Buttons
BN68-01409H-00ENG.indb 3 2008-04-28 �� 5:18:12English - 4
Viewing the Connection Panel
Whenever you connect an external device to your TV, make sure that power on the unit is turned off.
When connecting an external device, match the colour of the connection terminal to the cable.
1 PC IN [PC] / [AUDIO]
Connect to the video and audio output jack on your PC.
2 COMPONENT IN
- Connect component video cables (optional) to component connector (“PR”, “PB”, “Y”) on the rear of your set and the
other ends to corresponding component video out connectors on the DTV or DVD.
- If you wish to connect both the Set-Top Box and DTV (or DVD), you should connect the Set-Top Box to the DTV
(or DVD) and connect the DTV (or DVD) to component connector (“PR”, “PB”, “Y”) on your set.
- The PR, PB and Y connectors on your component devices (DTV or DVD) are sometimes labeled Y, B-Y and R-Y or Y,
Cb and Cr.
- Connect RCA audio cables (optional) to “R - AUDIO - L” on the rear of your set and the other ends to corresponding
audio out connectors on the DTV or DVD.
3 HDMI IN 1, HDMI IN �, HDMI IN �
- Supports connections between HDMI-connection-enabled AV devices (Set-Top Boxes, DVD players)
- No additional Audio connection is needed for an HDMI to HDMI connection.
- When using an HDMI/DVI cable connection, you must use the HDMI IN 2 jack.
➣
➣
1 2 3 4
# @ ! 0
5
6
3
7
8
9
[TV Rear Panel] [TV Side Panel]
➣ The product colour and shape may vary depending on the model.
Power Input
BN68-01409H-00ENG.indb 4 2008-04-28 �� 5:18:12English - �
What is HDMI?
- “High Definition Multimedia interface” allows the transmission of high definition digital video data and multiple channels
of digital audio.
- The HDMI/DVI terminal supports DVI connection to an extended device with the appropriate cable (not supplied).
The difference between HDMI and DVI is that the HDMI device is smaller in size, has the HDCP (High Bandwidth
Digital Copy Protection) coding feature installed, and supports multi - channel digital audio.
The TV may not output sound and pictures may be displayed with abnormal colour when DVD players/Cable Boxes/
Satellite receivers supporting HDMI versions older than 1.3 are connected. When connecting an older HDMI cable
and there is no sound, connect the HDMI cable to the HDMI IN 2 jack and the audio cables to the DVI IN (HDMI2)
[R-AUDIO-L] jacks on the back of the TV. If this happens, contact the company that provided the DVD player/Cable
Box/Satellite receiver to confirm the HDMI version, then request a firmware update. HDMI cables that are not 1.3 may
cause annoying flicker or no screen display.
DVI IN(HDMI�) [R-AUDIO-L]
- DVI audio outputs for external devices.
Supported modes for HDMI/DVI and Component.
480i 480p 576i 576p 720p 1080i 1080p
HDMI/DVI 50Hz X X X O O O O
HDMI/DVI 60Hz X O X X O O O
Component O O O O O O O
4 ANT IN
To view television channels correctly, a signal must be received by the set from one of the following sources:
- An outdoor aerial / A cable television network / A satellite network
5 SERVICE
- Connector for SERVICE only.
- Connect this to the jack on the optional wall mount bracket. This will allow you to adjust the TV viewing angle using
your remote control.
6 COMMON INTERFACE Slot
- When not inserting “CI CARD” in some channels,”Scrambled Signal” is displayed on the screen.
- The pairing information containing a telephone number, CI CARD ID, Host ID and other information will be displayed in
about 2~3 minutes. If an error message is displayed, please contact your service provider.
- When the channel information configuration has finished, the message “Updating Completed” is displayed, indicating
that the channel list is now updated.
You must obtain a CI CARD from a local cable service provider. Remove the CI
CARD by carefully pulling it out with your hands since dropping the CI CARD
may cause damage to it.
Insert the CI-Card in the direction marked on it.
The place of the COMMON INTERFACE Slot may be different depending on its
model.
7 WISELINK
Connect a USB mass storage device to view photo files (JPEG) and play audio files (MP3).
8 S-VIDEO or VIDEO / R-AUDIO-L
- Connect RCA or S-VIDEO cable to an appropriate external A/V device such as VCR, DVD or Camcorder.
- Connect RCA audio cables to “R-AUDIO-L” on your set and the other ends to corresponding audio out connectors on
the A/V device.
9 HEADPHONES jACK
Headphone may be connected to the headphone output on your set. While the head phone is connected, the sound
from the built-in speakers will be disabled.
0 AUDIO OUT [R-AUDIO-L]
Connect RCA audio cables to AUDIO OUT [R-AUDIO-L] on the rear of your set and the other ends to corresponding
audio in connectors on the Amplifier or DVD Home Theatre.
➣
➣
➣
➣
➣
➣
BN68-01409H-00ENG.indb 5 2008-04-28 �� 5:18:12English - 6
! DIGITAL AUDIO OUT (OPTICAL)
- Connects a set of external headphones for private listening.
When the HDMI IN jacks are connected, the DIGITAL AUDIO OUT (OPTICAL) jack on the TV outputs 2 channel
audio only. If you want to hear 5.1 channel audio, connect the Optical jack on the DVD player or Cable/Satellite Box
directly to an Amplifier or Home Theater, not the TV.
@ EXT 1, EXT �
Connector
Input Output
Video Audio (L/R) RGB Video + Audio (L/R)
EXT 1 O O O Only TV or DTV output is available.
EXT 2 O O Output you can choose.
- Inputs or outputs for external devices, such as VCR, DVD, video game device or video disc players.
# KENSINGTON LOCK (depending on the model)
- The Kensington Lock (optional) is a device used to physically fix the system when used in a public place.
- If you want to use a locking device, contact the dealer where you purchased the TV.
- The location of the Kensington Lock may be different depending on its model.
➣
BN68-01409H-00ENG.indb 6 2008-04-28 �� 5:18:13English - �
Remote Control
You can use the remote control up to a distance of about 23 feet from the TV.
1 Television Standby button
2 Selects the TV mode
directly
3 �umber buttons for direct umber buttons for direct
channel access
4 One/Two-digit channel
selection
5 +: Volume increase
-: Volume decrease
6 Temporary sound switch- Temporary sound switchoff
7 ��lectronic lectronic ��rogram rogram ��uide uide
(���) display
8 ��se to se to ��uic uic��ly select ly select
fre�uently used functions.
9 �se to see information on se to see information on
the current broadcast
0 �olour buttons : olour buttons :
�se these buttons in
the �hannel list and
WIS�LI�K, etc.
@ �ress to select the optional ress to select the optional
display and sound modes
for sports, cinema and
games.
# �se these buttons in the se these buttons in the
DMA, WIS�LI�K, and
Anynet+.
( : This remote can be
used to control recording
on Samsung recorders
with the Anynet+ feature)
$ Available source selection Available source selection
% �revious channel
^ P<: �ext channel
P>: �revious channel
& Displays the main on- Displays the main onscreen menu
* This function enables you This function enables you
to view and play photo
and music files from an
external device.
( �eturns to the previous eturns to the previous
menu
) �ontrol the cursor in the ontrol the cursor in the
menu
a �xit the on-screen menu xit the on-screen menu
b �se this when connecting
a SAMS��� DMA
(Digital Media Adapter)
device through an HDMI
interface and switching
to DMA mode. (The DMA
button is optional.) For
more information on the
operating procedures,
refer to the user manual
of the DMA. This button
is available when
“Anynet+(HDMI-���)" is
“On” (see page 66)
c �icture si icture si�e selectio e selectionn
d Digital subtitle display Digital subtitle display
e It display " It display "�hannel List" hannel List"
on the screen.
Teletext Functions
2 �xit from the teletext
display
7 Teletext store
8 Teletext si�e selection
9 Teletext reveal
0 Fastext topic selection
! Alternately select Teletext,
Double, or Mix.
$ Teletext mode selection
(LIST/FLOF)
% Teletext sub page
^ P<: Teletext next page
P>: Teletext previous
page
& Teletext index
( Teletext hold
a Teletext cancel
➣ The performance of the remote control may be affected by bright light.
1_BN68-01409H-Eng.indd 7 2008-04-29 �� 3:03:41English - 8
Installing Batteries in the Remote Control
1. Lift the cover at the back of the remote control upward as shown in the figure.
2. Install two AAA size batteries.
Make sure to match the “+” and “–” ends of the batteries with the diagram inside the
compartment.
3. Replace the cover.
Remove the batteries and store them in a cool, dry place if you won’t be using the remote
control for a long time.
If the remote control doesn’t work, check the following:
1. Is the TV power on?
2. Are the plus and minus ends of the batteries reversed?
3. Are the batteries drained?
4. Is there a power outage or is the power cord unplugged?
5. Is there a special fluorescent light or neon sign nearby?
➣
➣
➣
Switching On and Off
The mains lead is attached to the rear of your set.
1. Plug the mains lead into an appropriate socket.
The standby indicator lights up on your set.
2. Press the button on your set.
You also can press the POWER button or the TV/DTV button on the remote control to turn the TV on.
The programme that you were watching last is reselected automatically.
3. Press the numeric button (0~9) or channel up/down ( / ) button on the remote control or C/P. button on
your set.
When you switch the set on for the very first time, you will be asked to choose language in which the menus are to
be displayed.
4. To switch your set off, press the POWER button again.
Placing Your Television in Standby Mode
Your set can be placed in standby mode in order to reduce the power consumption. The standby mode can be useful when
you wish to interrupt viewing temporarily (during a meal, for example).
1. Press the POWER button on the remote control.
The screen is turned off and a red standby indicator appears on your set.
2. To switch your set back on, simply press the POWER , numeric buttons (0~9), TV/DTV button or channel up/down
( / ) button again.
Do not leave your set in standby mode for long periods of time (when you are away on holiday, for example). It is
best to unplug the set from the mains and aerial.
➣
➣
➣
➣
➣
➣
BN68-01409H-00ENG.indb 8 2008-04-28 �� 5:18:13English - 9
Viewing the Menus
1. With the power on, press the MENU button.
The main menu appears on the screen.
The menu’s left side has icons: Picture, Sound, Channel, Setup, Input,
Application.
2. Press the ▲ or ▼ button to select one of the icons.
Then press the ENTER button to access the icon’s sub-menu.
3. Press the EXIT button to exit.
➣ The on-screen menus disappear from the screen after about one minute.
Using the TOOLS Button
You can use the TOOLS button to select your frequently used functions quickly and easily. The “TOOLS” menu changes
depending on which external input mode you are viewing.
1. Press the TOOLS button.
The “Tools” menu will appear.
2. Press the ▲ or ▼ button to select a menu.
3. Press the ▲/▼/◄/►/ENTER buttons to display, change, or use the
selected items. For a more detailed description of each function, refer to the
corresponding page.
Device List: see page 66
Picture Mode: see page 25
Sound Mode: see page 30
Sleep Timer: see page 34
SRS TS XT: see page 30
Energy Saving: see page 40
Dual l ll: see page 32
PIP: see page 29
Auto Adjustment: see page 45
•
•
•
•
•
•
•
•
•
Plug & Play Feature
When the TV is initially powered on, basic settings proceed automatically and subsequently.
1. Press the POWER button on the remote control.
The message “Les menus Langue, Enr. démo, Canaux et Heure seront
définis.” is displayed.
2. Press the ENTER button, then “Sélectionnez la langue de l'OSD.” menu is
automatically displayed. Press the ENTER button.
3. Select the appropriate language by pressing the ▲ or ▼ button. Press the
ENTER button to confirm your choice.
Mode : Standard
Backlight : 7
Contrast : 95
Brightness : 45
Sharpness : 50
Colour : 50
Tint (G/R) : G50/R50
Detailed Settings
Picture
Tools
Device List
Picture Mode : Standard
Sound Mode : Custom
Sleep Timer : Off
SRS TS XT : Off
Energy Saving : Off
Dual l ll : Mono
Move Enter e Exit
Plug & Play
Les menus Langue, Enr. démo, Canaux et Heure seront définis.
Entrer
OK
Plug & Play
Sélectionnez la langue de l’OSD.
Langue : Français ►
Entrer
BN68-01409H-00ENG.indb 9 2008-04-28 �� 5:18:14English - 10
4. Press the ◄ or ► button to select “Store Demo” or “Home Use”, then the
ENTER button.
We recommend setting the TV to “Home Use” mode for the best picture in
your home environment.
“Store Demo” mode is only intended for use in retail environments.
If the unit is accidentally set to “Store Demo” mode and you want to return
to “Home Use” (Standard): Press the Volume button on the TV. When the
volume OSD is displayed, press and hold the MENU button on the TV for
5 seconds.
5. Press the ▲ or ▼ button to select the channel source to memorize. Press the
ENTER button to select “Start”.
Digital & Analogue: “Digital” and “Analogue” channels.
Digital: “Digital” channels.
Analogue: “Analogue” channels.
The channel search will start and end automatically.
Press the ENTER button at any time to interrupt the memorization
process.
After all the available channels are stored, the message “Set the Clock
Mode.” is displayed.
6. Press the ENTER button to select the “Clock Mode”.
Press the ▲ or ▼ button to select “Manual”, then Press the ENTER
button.
If you select “Auto”, The message “Enjoy your viewing” is displayed.
If you have received a digital signal, the time will be set automatically.
7. Select the “Day”, “Month”, “Year”, “Hour”, or “Minute” by pressing the ◄ or ►
button. Set the “Day”, “Month”, “Year”, “Hour”, or “Minute” by pressing the
▲ or ▼ button.
You can also set the “Month”, “Day”, “Year”, “Hour” and “Minute” by
pressing the number buttons on the remote control.
8. The message “Enjoy your viewing” is displayed.
When you have finished, press the ENTER button.
If you want to reset this feature...
1. Press the MENU button to display the menu.
Press the ▲ or ▼ button to select “Setup”, then press the ENTER button.
2. Press the ENTER button again to select “Plug & Play”.
3. Enter your 4 digit PIN number. The default PIN number of a new TV set is
“0-0-0-0”.
If you want to change PIN number, refer to 37 page.
For further details on setting up options, refer to the pages 9~10.
The “Plug & Play” feature is only available in the TV mode.
➣
➣
➣
➣
➣
➣
➣
➣
➣
➣
➣
➣
Setup
Plug & Play ►
Language : English
Time
Change PIN
Parental Lock
Subtitle
Teletext Language : ----
Preference
Plug & Play
Select ‘Home Use’ when installing this TV in your home.
Store Demo Home Use
Move Enter
Plug & Play
Auto Store is completed.
Digital Channels : 45
Analogue Channels : 32
OK
Enter Skip
Plug & Play
Auto Store in progress. Channel 69
Digital Channels: 29
Analogue Channels: 0
Stop
20%
Enter Skip
Plug & Play
Set the Clock Mode.
Clock Mode : Auto Auto
Manual
Move Enter Skip
Plug & Play
Enjoy your viewing
OK
Plug & Play
01
Day
01
Month
2008
Year
00
Hour
00
Minute
Move Adjust Enter Skip
Set current date and time
Plug & Play
Select the channel source to memorize.
Digital & Analogue
Digital
Analogue
Start
Move Enter Skip
Start
Start
Plug & Play
The Menu Language, Store Demo, Channels, and Time will
be set.
0~9 Enter PIN Return
BN68-01409H-00ENG.indb 10 2008-04-28 �� 5:18:15English - 11
Channel Control
Storing Channels Automatically
You can scan for the frequency ranges available to you (and availability depends on your country). Automatically allocated
programme numbers may not correspond to actual or desired programme numbers. However, you can sort numbers
manually and clear any channels you do not wish to watch.
1. Press the MENU button to display the menu.
Press the ▲ or ▼ button to select “Channel”, then press the ENTER
button.
2. Press the ▲ or ▼ button to select “Auto Store”, then press the ENTER
button.
3. Press the ▲ or ▼ button to select the channel source to memorize.
Press the ENTER button to select “Start”.
Digital & Analogue: “Digital” and “Analogue” channels.
Digital: “Digital” channels.
Analogue: “Analogue” channels.
Scans for all channels with active broadcast stations and stores them in
the TV’s memory.
If you want to stop Auto Store, press the ENTER button.
The “Stop Auto Store?” message will be displayed.
Select “Yes” by pressing the ◄ or ► button, then press the ENTER button.
4. Press the EXIT button to exit.
If a channel is locked using the “Child Lock” function, the PIN input window appears (refer to page 22).
Storing Channels Manually
You can store television channels, including those received via cable networks. When storing channels manually, you can
choose:
Whether or not to store each of the channels found.
The programme number of each stored channel which you wish to identify.
1. Press the MENU button to display the menu.
Press the ▲ or ▼ button to select “Channel”, then press the ENTER
button.
2. Press the ▲ or ▼ button to select “Manual Store”, then press the ENTER
button.
Digital Channel
3. Press the ▲ or ▼ button to select “Digital Channel”, then press the
ENTER button.
If a channel is locked using the “Child Lock” function, the PIN input
window appears (refer to page 22).
4. Press the ◄ or ► button to select the required option.
− Channel : Set the Channel number using the ▲, ▼ or number buttons.
− Frequency : Set the frequency using the number buttons.
− Bandwidth : Set the bandwidth using the ▲, ▼ or number buttons.
5. Press the ENTER button to start the scan for digital services.
When it has finished, channels are updated in the channel list.
6. When it has finished, the number of scanned services will be displayed.
7. Press the EXIT button to exit.
➣
➣
➣
➣
•
•
➣
➣
Channel
Auto Store ►
Manual Store
Full Guide
Mini Guide
Default Guide : Mini Guide
Channel List
Channel Mode : Added Ch.
Child Lock : On
Channel
Auto Store
Manual Store ►
Full Guide
Mini Guide
Default Guide : Mini Guide
Channel List
Channel Mode : Added Ch.
Child Lock : On
Fine Tune
Channel
Auto Store
Manual Store ►
Full Guide
Mini Guide
Default Guide : Mini Guide
Channel List
Channel Mode : Added Ch.
Child Lock : On
Fine Tune
Digital Channel
Analogue Channel
Manual Store
Move Adjust Search Return
31
Channel
554000 KHz
Frequency
8MHz
Bandwidth
BN68-01409H-00ENG.indb 11 2008-04-28 �� 5:18:15English - 1�
Analogue Channel
3. Press the ▲ or ▼ button to select “Analogue Channel”, then press the
ENTER button.
If a channel is locked using the “Child Lock” function, the PIN input
window appears (refer to page 22).
4. Press the ◄ or ► button to select the required item below.
Press the ▲ or ▼ button to adjust to the setting satisfied.
5. Press the EXIT button to exit.
Programme (Programme number to be assigned to a channel)
Press the ▲ or ▼ button until you find the correct number.
You can also select the channel number directly by pressing the numeric
buttons (0~9).
Colour System: Auto/PAL/SECAM/NTSC4.4�
Press the ▲ or ▼ button to select the required colour standard.
Sound System: BG/DK/I/L
Press the ▲ or ▼ button to select the required sound standard.
Channel (When you know the number of the channel to be stored)
Press the ▲ or ▼ button to select C (Air channel) or S (Cable channel).
Press the ► button, then press the ▲ or ▼ button to select the required
number.
You can also select the channel number directly by pressing the numeric
buttons (0~9).
If there is abnormal sound or no sound, reselect the sound standard
required.
Search (When you do not know the channel numbers)
Press the ▲ or ▼ button to start the search.
The tuner scans the frequency range until the first channel or the channel
that you selected is received on the screen.
Store (When you store the channel and associated programme number)
Set to OK by pressing the ENTER button.
Channel mode
- P (Programme mode): When completing tuning, the broadcasting stations
in your area have been assigned to position numbers from P00 to P99. You
can select a channel by entering the position number in this mode.
- C (Air channel mode): You can select a channel by entering the assigned
number to each air broadcasting station in this mode.
- S (Cable channel mode): You can select a channel by entering the assigned
number for each cable channel in this mode.
➣
➣
➣
➣
➣
Channel
Auto Store
Manual Store ►
Full Guide
Mini Guide
Default Guide : Mini Guide
Channel List
Channel Mode : Added Ch.
Child Lock : On
Fine Tune
Digital Channel
Analogue Channel
Manual Store
1
Programme
Auto
Colour System
BG
Sound System
Move Adjust Return
C --
Channel
62 MHz
Search
?
Store
BN68-01409H-00ENG.indb 12 2008-04-28 �� 5:18:15English - 1�
Viewing the EPG (Electronic Programme Guide) Information
The EPG (Electronic Programme Guide) information is provided by the broadcasters. Programme entries may appear blank
or out of date as a result of the information broadcast on a given channel. The display will dynamically update as soon as
new information becomes available.
1. Press the MENU button to display the menu.
2. Press the ▲ or ▼ button to select “Channel”, then press the ENTER
button.
3. Press the ▲ or ▼ button to select “Full Guide” or “Mini Guide” then press the
ENTER button.
Mini Guide
The information of each program is displayed by each line on the current
channel Mini Guide screen from the current program onwards according to
the program starting time order.
Full Guide
Displays the programme information as time ordered One hour segments.
Two hours of programme information is displayed which may be scrolled
forwards or backwards in time.
To... Then...
Watch a programme in the
EPG list
Select a programme by pressing the
▲, ▼, ◄, ► button.
Exit the guide Press the blue button
If the next program is selected, it is scheduled with the clock
icon displayed. If the ENTER button is pressed again, press
the ◄, ► button to select Cancel Schedules, the scheduling is
canceled with the clock icon gone. For details about scheduling
programmes, refer to the next page.
➣
View programme
information
Select a programme of your choice by
pressing the ▲, ▼, ◄, ► button.
Then press the INFO button when the
programme of your choice is highlighted.
The programme title is on the upper part
of the screen center.
•
•
•
Please click on INFO button for the detailed information. Channel
Number, Running Time, Status Bar, Parental Level, Video
Quality Information (HD/SD), Sound Modes, Subtitle or Teletext,
languages of Subtitle or Teletext and brief summary of the
highlighted programme are included on the detailed information.
“...” will be appeared if the summary is long.
➣
Toggle between the “Mini
Guide” or “Full Guide”
Press the red button repeatedly.
In Full Guide
Scrolls backwards
quickly (24 hours).
Scrolls forwards quickly
(24 hours).
•
•
Press the green button repeatedly.
Press the yellow button repeatedly.
•
•
In Mini Guide
Display next page
quickly.
Display previous page
quickly.
•
•
Press the green button.
Press the yellow button.
•
•
You can also display the guide menu simply by pressing the GUIDE button.
(To configure the “Default Guide”, refer to the descriptions on page 14.)
O
Channel
Auto Store
Manual Store
Full Guide
Mini Guide
Default Guide : Mini Guide
Channel List
Channel Mode : Added Ch.
Child Lock : On
Fine Tune
Signal Information
Channel
Manual Store
Full Guide
Mini Guide
Default Guide : Mini Guide
Channel List
Channel Mode : Added Ch.
Child Lock : On
Fine Tune
Signal Information
LNA : Off
Full Guide
DTV Cable 900 f tn 2:10 Tue 1 Jun
Freshmen On Campus
2:00 - 2:30
No Detailed Information
Today 2:00 - 3:00 3:00 - 4:00
Mint Extra
Loaded
Fresh 40 with Dynamite MC
The Distillery
Smash Hits! Sunday
900 f tn
901 ITV Play
902 Kerrang!
903 Kiss
903 oneword
▼ 903 Smash Hits!
Street Hypn..
Kisstory
No Information
No Information
No Information
Freshmen O..
Watch Information Mini Guide +24 Hours Exit
Mini Guide DTV Cable 900 f tn
Street Hypnosis
Booze Britain
2:00
2:30
▼ 5:00
Freshmen On Campus
Watch Information Full Guide Next Page Exit
BN68-01409H-00ENG.indb 13 2008-04-28 �� 5:18:16English - 14
Setting the Default Guide
You can decide whether to display either the “Mini Guide” or the “Full Guide” when the GUIDE button on the remote control
is pressed.
1. Press the MENU button to display the menu.
Press the ▲ or ▼ button to select “Channel”, then press the ENTER
button.
2. Press the ▲ or ▼ button to select “Default Guide”, then press the ENTER
button.
3. Select “Mini Guide” or “Full Guide” using the ▲ or ▼ button, and press the
ENTER button.
4. Press the EXIT button to exit.
You can select these options by simply pressing the GUIDE button on the
remote control.
O
Channel
Full Guide
Mini Guide
Default Guide : Mini Guide ►
Channel List
Channel Mode : Added Ch.
Child Lock : On
Fine Tune
Signal Information
LNA : Off
Channel
Full Guide
Mini Guide
Default Guide : Mini Guide ►
Channel List
Channel Mode : Added Ch.
Child Lock : On
Fine Tune
Signal Information
LNA : Off
Mini Guide
Full Guide
BN68-01409H-00ENG.indb 14 2008-04-28 �� 5:18:16English - 1�
Managing Channels
Using this menu, you can Add/Delete or set Favourite channels and use the program guide for digital broadcasts.
Viewing All Channels
Show all currently available channels.
To use the Channel List function, operate the “Auto Store” first.
1. Press the MENU button.
Press the ▲ or ▼ button to select “Channel”, then press the ENTER
button.
Press the ▲ or ▼ button to select “Channel List”, then press the ENTER
button.
2. Press the ◄ button to select “Added Ch.”.
3. Press the ▲ or ▼ button to select “All Channels”.
Shows all currently available channels.
Press the ENTER button.
4. Press the ▲ or ▼ button to select a channel to view, then press the
ENTER button. You can watch the selected channel.
Press the CH LIST button on the remote control to bring up the channel lists.
Using the Colour buttons on the Remote with the Channel List
Red (Channel Type): Toggle between your “TV”, “Radio”, “Data/Other” and
“All”.
Green (Zoom): Enlarges or shrinks a channel number.
Yellow (Select): Selects multiple channel lists.
TOOLS (Option): Displays the “Delete”(or “Add”), “Add to Favourite”(or
“Delete from Favourite”), “Lock”, “Timer Viewing”, “Edit Channel Name”,
“Sort”, “Edit Channel Number”, “Select All”, “Deselect All” or “Auto Store”
menu. (The Options menus may differ depending on the situation.)
•
•
•
•
A gray-coloured channel indicates the channel has been deleted.
The “Add” menu only appears for deleted channels.
A channel marked with the “♥” mark means the channel has been set as a Favourite.
The “Delete from Favourite” menu only appears for channels with the “♥” mark.
➣
O
➣
➣
824 UKTV Gold
825 UKTV style
A 1 C --
A 2 C --
A 3 ♥ C --
A 4 C --
A 5 C --
A 6 C --
A 7 C --
A 8 C --
All Channels
All Channel Type Zoom Select Option
Channel
Mini Guide
Default Guide : Mini Guide
Channel List
Channel Mode : Added Ch.
Child Lock : On
Fine Tune
Signal Information
LNA : Off
824 UKTV Gold
825 UKTV style
A 1 C --
A 2 C --
A 3 ♥ C --
A 4 C --
A 5 C --
A 6 C --
A 7 C --
A 8 C --
Added Ch.
All Channel Type Zoom Select Option
BN68-01409H-00ENG.indb 15 2008-04-28 �� 5:18:17English - 16
Erasing and Adding Channels
You can delete or add a channel to display the channels you want.
1. Press the MENU button.
Press the ▲ or ▼ button to select “Channel”, then press the ENTER
button. Press the ▲ or ▼ button to select “Channel List”, then press the
ENTER button.
2. Press the ◄ button to select “Added Ch.”.
3. Press the ▲ or ▼ button to select “All Channels”.
Shows all currently available channels.
Press the ENTER button.
4. Press the ▲ or ▼ button to select a channel to delete, then press the
TOOLS button.
5. Press the ENTER button to select “Delete”.
All deleted channels will be shown on “All Channels” menu.
6. Press the EXIT button to exit.
You can also add a channel to the “Added Ch.” menu in the same manner.
A channel must be deleted before it can be added back to the “Added Ch.”
list.
To Add (Restore) a channel back to the Added Channel List, follow steps
1-3 above, press the ▲ or ▼ button to select a channel to add, the press
the TOOLS button. Press the ENTER button to select Add.
Press the CH LIST button on the remote control to bring up the channel
lists.
➣
➣
➣
➣
➣
O
Setting Your Favourite Ch.
You can set channels you watch frequently as favorites.
1. Press the MENU button.
Press the ▲ or ▼ button to select “Channel”, then press the ENTER
button. Press the ▲ or ▼ button to select “Channel List”, then press the
ENTER button.
2. Press the ◄ button to select “Added Ch.”.
3. Press the ▲ or ▼ button to select “All Channels”.
Shows all currently available channels.
Press the ENTER button.
4. Press the ▲ or ▼ button to select a channel as a favorite channel.
Adding multiple channels to Favourites
Press the ▲ or ▼ button to select the desired channel in the channel
list. Then press the yellow button. Repeat the above operation to select
multiple channels. The mark appears to the left of the selected
channels.
5. Press the TOOLS button.
6. Press the ▲ or ▼ button to select “Add to Favourite”, then press the
ENTER button. The “♥” symbol will be displayed and the channel will be
set as a favorite.
7. To cancel your favorite channel selection, press the TOOLS button when a
favorite channel is selected.
Press the ▲ or ▼ button to select “Delete from Favourite”, then press the
ENTER button.
The channel is deleted from “Favourites” and the “♥” mark also disappears.
Press the EXIT button to exit.
You can also Add or Delete a channel from Favourites in the “Added Ch.”
menu in the same manner.
All favorite channels will be shown on “Favourite” menu.
Press the CH LIST button on the remote control to bring up the channel
lists.
➣
➣
➣
➣
O
Channel
Mini Guide
Default Guide : Mini Guide
Channel List
Channel Mode : Added Ch.
Child Lock : On
Fine Tune
Signal Information
LNA : Off
Channel
Mini Guide
Default Guide : Mini Guide
Channel List
Channel Mode : Added Ch.
Child Lock : On
Fine Tune
Signal Information
LNA : Off
824 UKTV Gold
825 UKTV style
A 1 C --
A 2 C --
A 3 C --
A 4 C --
A 5 C --
A 6 C --
A 7 C --
A 8 C --
All Channels
All Channel Type Zoom Select Option
Delete
Add to Favourite
Lock
Timer Viewing
Edit Channel Name
Sort
▼
824 UKTV Gold
825 UKTV style
A 1 C --
A 2 C --
A 3 ♥ C --
A 4 C --
A 5 C --
A 6 C --
A 7 C --
A 8 C --
All Channels
All Channel Type Zoom Select Option
Delete
Add to Favourite
Lock
Timer Viewing
Edit Channel Name
Sort
▼
BN68-01409H-00ENG.indb 16 2008-04-28 �� 5:18:17English - 1�
Locking and Unlocking Channels
This function is available only when the “Child Lock” is set to “on”. (see page22)
1. Press the MENU button.
Press the ▲ or ▼ button to select “Channel”, then press the ENTER
button.
Press the ▲ or ▼ button to select “Channel List”, then press the
ENTER button.
2. Press the ◄ button to select “Added Ch.”.
3. Press the ▲ or ▼ button to select “All Channels”.
Shows all currently available channels.
Press the ENTER button.
Locking channels
4. Press the ▲ or ▼ button to select the channels you want to lock, then
press the TOOLS button.
5. Press the ▲ or ▼ button to select “Lock”, then press the ENTER button.
6. Enter your 4 digit PIN number.
The “ ” symbol will be displayed and the channel will be locked.
The default PIN number of a new TV set is “0-0-0-0”.
If you want to change PIN number, refer to 36 page.
Unlocking channels
7. Press the ▲ or ▼ button to select the channels you want to Unlock, then
press the TOOLS button.
8. Press the ▲ or ▼ button to select “Unlock”, then press the ENTER
button.
9. Enter your 4 digit PIN number.
The channel is unlocked and the “ ” mark also disappears.
The default PIN number of a new TV set is “0-0-0-0”.
If you want to change PIN number, refer to 36 page.
10. Press the EXIT button to exit.
➣
➣
➣
➣
➣
➣
➣
Channel
Mini Guide
Default Guide : Mini Guide
Channel List
Channel Mode : Added Ch.
Child Lock : On
Fine Tune
Signal Information
LNA : Off
824 UKTV Gold
825 UKTV style
A 1 C --
A 2 C --
A 3 C --
A 4 C --
A 5 C --
A 6 C --
A 7 C --
A 8 C --
All Channels
All Channel Type Zoom Select Option
Delete
Add to Favourite
Lock
Timer Viewing
Edit Channel Name
Sort
▼
824 UKTV Gold
825 UKTV style
A 1 C --
A 2 C --
A 3 C --
A 4 C --
A 5 C --
A 6 C --
A 7 C --
A 8 C --
All Channels
All Channel Type Zoom Select Option
Delete
Add to Favourite
Unlock
Timer Viewing
Edit Channel Name
Sort
▼
BN68-01409H-00ENG.indb 17 2008-04-28 �� 5:18:18English - 18
Reserving a Program (Timer Viewing)
If you reserve a program you want to watch, the channel is automatically switched to the reserved channel in the Channel
List; even when you are watching another channel. To reserve a program, set the current time first. See pages 33~34.
1. Press the MENU button.
Press the ▲ or ▼ button to select “Channel”, then press the ENTER
button.
Press the ▲ or ▼ button to select “Channel List”, then press the ENTER
button.
2. Press the ▲ or ▼ button to select a channel, then press the TOOLS button.
3. Press the ▲ or ▼ button to select “Timer Viewing”, then press the ENTER
button. The Reserve a Program (Timer Viewing) screen appears.
4. Press the ▲/▼/◄/► buttons to reserve a program and then press the
ENTER button. Reserving a program has been completed.
Press the EXIT button to exit.
You can also reserve a program in the “All Channels” or “Favourite” menus
using the same procedures.
For information on how to confirm a viewing reservation, refer to page 19.
Only memorized channels can be reserved.
You can set the channel, month, day, year, hour and minute directly by
pressing the number buttons on the remote control.
Press the CH LIST button on the remote control to bring up the channel lists.
Digital Program Guide and Viewing Reservation
When a digital channel is selected, and you press the ► button, the Program
Guide for the channel appears. You can reserve a program according to the
procedures described above.
: A program currently being broadcast.
: A reserved program
➣
➣
➣
O
Timer Viewing
DTV
Antenna
800
Channel
Once
01 - 01 - �008
Date
Move Adjust Enter Return
10:00
Start Time
Repeat
Channel
Mini Guide
Default Guide : Mini Guide
Channel List
Channel Mode : Added Ch.
Child Lock : On
Fine Tune
Signal Information
LNA : Off
1/1/2008
1:59 LA ROSE DES ....
2:59 WS MUSIC
3:21 Gralness de stars
824
825
908
A 2 C --
A 3 ♥C --
A 4 C --
A 5 C --
A 6 C --
A 7 C --
A 8 C --
All Channel Type Zoom Option Watch
Added Ch.
All Channel Type Zoom Select Option
824 UKTV Gold
825 UKTV style
A 1 C --
A 2 C --
A 3 ♥ C --
A 4 C --
A 5 C --
A 6 C --
A 7 C --
A 8 C --
Added Ch.
Delete
Add to Favourite
Lock
Timer Viewing
Edit Channel Name
Sort
▼
BN68-01409H-00ENG.indb 18 2008-04-28 �� 5:18:18English - 19
Confirming a Viewing Reservation
You can view, modify or delete a reservation.
1. Press the MENU button.
Press the ▲ or ▼ button to select “Channel”, then press the ENTER
button. Press the ▲ or ▼ button to select “Channel List”, then press the
ENTER button.
2. Press the ◄ button to select “Added Ch.”.
3. Press the ▲ or ▼ button to select “Programmed”.
Shows all current reserved programs.
Press the ENTER button.
Modifying a viewing reservation
4. To select a reservation item to be modified, press the ▲ or ▼ button and
then press the TOOLS button.
5. Press the ENTER button to select “Change Info”.
6. Press the ▲/▼/◄/► buttons to change a reservation setting and then
press the ENTER button. The reservation modification is applied.
Canceling a reservation
4. To select a reservation item to be canceled, press the ▲ or ▼ button, and
then press the TOOLS button.
5. Press the ▲ or ▼ button to select “Cancel Schedules”, then press the
ENTER button.
6. Press the ◄ or ► button to select “OK”, then press the ENTER button.
The viewing reservation has been canceled.
Press the EXIT button to exit.
Programmed Option
Change Info: Select to change a viewing reservation.
Cancel Schedules: Select to cancel a viewing reservation.
Information: Select to view a viewing reservation.
Select All: Select all reserved programs.
•
•
•
•
Press the CH LIST button on the remote control to bring up the channel
lists.
➣
O
Programmed
1/1/2008
13:59 5 TV1 Quincy, M.E
18:59 2 TV3 The Equalizer
20:59 2 TV3 McMillan & Wife
21:59 2 TV3 M.Spillane’s mike Hammer
All Channel Type Zoom Select Option Information
Channel
Mini Guide
Default Guide : Mini Guide
Channel List
Channel Mode : Added Ch.
Child Lock : On
Fine Tune
Signal Information
LNA : Off
Programmed
1/1/2008
13:59 5 TV1 Quincy, M.E
18:59 2 TV3 The Equalizer
20:59 2 TV3 McMillan & Wife
21:59 2 TV3 M.Spillane’s mike Hammer
Change Info
Cancel Schedules
Information
Select All
All Channel Type Zoom Select Option Information
BN68-01409H-00ENG.indb 19 2008-04-28 �� 5:18:19English - �0
Edit Channel Name-Analogue
Channels can labeled so that their call letters appear whenever the channel is
selected.
1. Press the MENU button.
Press the ▲ or ▼ button to select “Channel”, then press the ENTER
button.
Press the ▲ or ▼ button to select “Channel List”, then press the ENTER
button.
2. Press the ▲ or ▼ button to select the channel to be assigned a new name,
then press the TOOLS button.
3. Press the ▲ or ▼ button to select “Edit Channel Name”, then press the
ENTER button.
4. Press the ▲/▼/◄/► button to select a letter, then press the ENTER
button.
Numeric buttons: You can enter numbers.
Red button: You can switch between English and Characters.
Green button: You can delete an already entered character.
Yellow button: You can enter a blank space.
Blue button: You can finish renaming a channel.
•
•
•
•
•
5. When you have finished, press the blue button to assign the new name.
Press the EXIT button to exit.
The names of digital broadcasting channels are automatically assigned
and cannot be labelled.
➣
Sorting the Stored Channels-Analogue
This operation allows you to change the programme numbers of the stored
channels. This operation may be necessary after using the auto store.
1. Press the MENU button.
Press the ▲ or ▼ button to select “Channel”, then press the ENTER
button.
Press the ▲ or ▼ button to select “Channel List”, then press the ENTER
button.
2. Press the ▲ or ▼ button to select a channel, then press the TOOLS button.
3. Press the ▲ or ▼ button to select “Sort”, then press the ENTER button.
4. Press the ▲ or ▼ button to move to the position in which you would like to
change and then press the ENTER button.
5. Repeat steps 2 to 4 for another channel to be sorted.
6. Press the EXIT button to exit.
Channel
Mini Guide
Default Guide : Mini Guide
Channel List
Channel Mode : Added Ch.
Child Lock : On
Fine Tune
Signal Information
LNA : Off
Sort
802 abc1
803 BBC Radio 1
804 BBC Radio 2
805 BBC Radio 3
806 BBC Radio 4
807 BBC World
▼
Move Enter Return
Channel
Mini Guide
Default Guide : Mini Guide
Channel List
Channel Mode : Added Ch.
Child Lock : On
Fine Tune
Signal Information
LNA : Off
803 _
Number
Character
Delete
Blank
Done
0~9
A B C D E F G
H I J K L M N
O P Q R S T U
V W X Y Z
Move Enter Return
Edit Channel Name
0~9
All Channel Type Zoom Select Option
824 UKTV Gold
825 UKTV style
A 1 C --
A 2 C --
A 3 ♥ C --
A 4 C --
A 5 C --
A 6 C --
A 7 C --
A 8 C --
Added Ch.
Delete
Add to Favourite
Lock
Timer Viewing
Edit Channel Name
Sort
▼
All Channel Type Zoom Select Option
824 UKTV Gold
825 UKTV style
A 1 C --
A 2 C --
A 3 ♥ C --
A 4 C --
A 5 C --
A 6 C --
A 7 C --
A 8 C --
Added Ch.
▲
Add to Favourite
Lock
Timer Viewing
Edit Channel Name
Sort
Select All
▼
BN68-01409H-00ENG.indb 20 2008-04-28 �� 5:18:20English - �1
Editing the Channel Number-Digital
1. Press the MENU button.
Press the ▲ or ▼ button to select “Channel”, then press the ENTER
button.
Press the ▲ or ▼ button to select “Channel List”, then press the ENTER
button.
2. Select the channel number that you wish to edit by pressing the ▲ or ▼
button repeatedly, then press the TOOLS button.
3. Press the ▲ or ▼ button to select “Edit Channel Number”, then press the
ENTER button.
4. Then you can edit the Channel Number pressing the ▲ or ▼ button
repeatedly. You can also edit the channel number by pressing the number
buttons on the remote control.
Selecting and Deselecting All Channels
1. Press the MENU button.
Press the ▲ or ▼ button to select “Channel”, then press the ENTER
button.
Press the ▲ or ▼ button to select “Channel List”, then press the ENTER
button.
2. Press the ▲ or ▼ button to select the channel, then press the TOOLS
button.
3. Press the ▲ or ▼ button to select “Select All” or “Deselect All”, then press
the ENTER button.
You can select(or Deselect) all channel in the channel list.
The mark appears to the left of the selected channels.
Storing Channels in Memory (Auto Store)
1. Press the MENU button.
Press the ▲ or ▼ button to select “Channel”, then press the ENTER
button.
Press the ▲ or ▼ button to select “Channel List”, then press the ENTER
button.
2. Press the ▲ or ▼ button to select the channel to be assigned a new name,
then press the TOOLS button.
3. Press the ▲ or ▼ button to select “Auto Store”, then press the ENTER
button.
For further details on setting up options, refer to page 11.
If a channel is locked using the “Child Lock” function, the PIN input window
appears (refer to page 22).
➣
➣
➣
➣
Edit Channel Number
Move Enter Return
Channel
803
Name
BBC Radio 1
All Channel Type Zoom Select Option
824 UKTV Gold
825 UKTV style
A 1 C --
A 2 C --
A 3 ♥ C --
A 4 C --
A 5 C --
A 6 C --
A 7 C --
A 8 C --
Added Ch.
▲
Lock
Timer Viewing
Edit Channel Name
Sort
Select All
Auto Store
All Channel Type Zoom Select Option
824 Television X
825 UKTV style
8�� UKTV style
A 2 C --
A 3 ♥ C --
A 4 C --
A 5 C --
A 6 C --
A 7 C --
A 8 C --
Added Ch.
Delete
Add to Favourite
Lock
Timer Viewing
Edit Channel Number
Select All
▼
All Channel Type Zoom Select Option
824 UKTV Gold
825 UKTV style
A 1 C --
A 2 C --
A 3 ♥ C --
A 4 C --
A 5 C --
A 6 C --
A 7 C --
A 8 C --
Added Ch.
Delete
Add to Favourite
Lock
Deselect All
Select All
Auto Store
BN68-01409H-00ENG.indb 21 2008-04-28 �� 5:18:20English - ��
Activating the Child Lock
This feature allows you to prevent unauthorized users, such as children, from watching unsuitable programmes by muting
out video and audio.
1. Press the MENU button to display the menu.
Press the ▲ or ▼ button to select “Channel”, then press the ENTER
button.
2. Press the ▲ or ▼ button to select “Child Lock”. Press the ENTER button.
3. Enter your 4 digit PIN number.
The default PIN number of a new TV set is “0-0-0-0”.
If you want to change PIN number, refer to 36 page.
4. Press the ▲ or ▼ button to select “On”. Press the ENTER button.
5. Press the EXIT button to exit.
You can lock some channels in Channel List. (refer to page 17)
“Child Lock” is available only in TV mode.
“Child Lock” is not available when PIP is set to on.
If a channel is locked using the “Child Lock” function, the PIN input
window appears when “Auto Store” or “Plug & Play” is selected.
➣
➣
➣
➣
➣
➣
Setting the Channel Mode
You can display either the added channels list or the favorite channels list when the CH LIST button on the remote control is
pressed.
1. Press the MENU button to display the menu.
Press the ▲ or ▼ button to select “Channel”, then press the ENTER
button.
2. Press the ▲ or ▼ button to select “Channel Mode”, then press the ENTER
button.
3. Press the ▲ or ▼ button to select “Added Ch.” or “Favourite Ch.” . Press the
ENTER button.
4. Press the EXIT button to exit.
Channel
Channel List
Channel Mode : Added Channel
Child Lock : On ►
Fine Tune
Signal Information
LNA : Off
Channel
Default Guide : Mini Guide
Channel List
Channel Mode : Added Ch. ►
Child Lock : On
Fine Tune
Signal Information
LNA : Off
Channel
Default Guide : Mini Guide
Channel List
Channel Mode : Favourite
Channels►
Child Lock : Off
Fine Tune
Signal Information
LNA : Off
Added Ch.
Favourite Ch.
Channel
Channel List
Channel Mode : Added Channel
Child Lock : Off ►
Fine Tune
Signal Information
LNA : Off
On
Off
Child Lock
* *
Enter PIN
*
0~9 Enter PIN Return
BN68-01409H-00ENG.indb 22 2008-04-28 �� 5:18:21English - ��
Fine Tuning Analogue Channels
1. Use the number buttons to directly select the channel that you want to fine
tune.
2. Press the MENU button to display the menu. Press the ▲ or ▼ button to
select “Channel”, then press the ENTER button.
3. Press the ▲ or ▼ button to select “Fine Tune”, then press the ENTER
button.
4. Press the ◄ or ► button to adjust the fine tuning. Press the ENTER
button.
5. Press the EXIT button to exit.
Fine tuned channels that have been saved are marked with an asterisk “*”
on the right-hand side of the channel number in the channel banner.
To reset the fine-tuning, select “Reset” by pressing the ▲ or ▼ button and
then press the ENTER button.
Only Analogue TV channels can be fine tuned.
➣
➣
➣
Checking the Digital-Signal Information
You can get information about the signal status.
1. Press the MENU button to display the menu.
Press the ▲ or ▼ button to select “Channel”, then press the ENTER
button.
2. Press the ▲ or ▼ button to select “Signal Information”, then press the
ENTER button.
3. Press the EXIT button to exit.
If the signal status is poor, the “No signal.” message is displayed.
While viewing a Digital channel, this function can be selected.
➣
➣
Channel
Channel Mode : Added Ch.
Child Lock : On
Fine Tune ►
Signal Information
LNA : Off
Channel
Child Lock : On
Fine Tune
Signal Information ►
LNA : Off
Signal Information
Service ID : 0401
Multiplex : (TSID 0004, ONID 20fa)
Network : (ID 20fa)
Bit error level 0
Signal Strength 88
Enter Return
OK
Fine Tune
ATV 6 * Fine Tuned
Reset
Move Adjust Save Return
+ 3
BN68-01409H-00ENG.indb 23 2008-04-28 �� 5:18:21English - �4
LNA (Low Noise Amplifier)
If the TV is operating in a weak-signal area, the LNA function can improve the reception (a low-noise preamplifier boosts the
incoming signal).
1. Press the MENU button to display the menu.
Press the ▲ or ▼ button to select “Channel”, then press the ENTER
button.
2. Press the ▲ or ▼ button to select “LNA”, then press the ENTER button.
3. Press the ▲ or ▼ button to select “Off” or “On”. Press the ENTER button.
4. Press the EXIT button to exit.
➣ While viewing an Analogue channel, this function can be selected.
Channel
Fine Tune
Signal Information
LNA : OnOff
►
On
Channel
Fine Tune
Signal Information
LNA : Off ►
BN68-01409H-00ENG.indb 24 2008-04-28 �� 5:18:21English - ��
Picture Control
Changing the Picture Standard
You can select the type of picture which best corresponds to your viewing
requirements.
1. Press the MENU button to display the menu.
Press the ENTER button to select “Picture”.
2. Press the ENTER button to select “Mode”. Press the ▲ or ▼ button to
select “Dynamic”, “Standard” or “Movie”. Press the ENTER button.
Dynamic: Selects the picture for high-definition in a bright room.
Standard: Selects the picture for the optimum display in a normal
environment.
Movie: Selects the picture for viewing movies in a dark room.
•
•
•
3. Press the EXIT button to exit.
Easy Setting
1. Press the TOOLS button on the remote control.
2. Press the ▲ or ▼ button to select “Picture Mode”.
3. Press the ◄ or ► button to select the required option.
4. Press the EXIT or TOOLS button to exit.
Customizing the Picture Settings
Your television has several setting options that allow you to control the picture quality.
1. To select the desired picture mode, follow the “Changing the Picture
Standard” instructions numbers 1 and 2.
2. Press the ▲ or ▼ button to select “Backlight”, “Contrast”, “Brightness”,
“Sharpness”, “Colour” or “Tint(G/R)”, then press the ENTER button.
3. Press the ◄ or ► button to decrease or increase the value of a particular
item. Press the ENTER button. Press the EXIT button to exit.
When you make changes to “Backlight”, “Contrast”, “Brightness”,
“Sharpness”, “Colour” or “Tint(G/R)”, the OSD will be adjusted accordingly.
In TV, Ext., AV, S-Video modes of the PAL system, you cannot use the
“Tint” Function.
In PC mode, you can only make changes to “Backlight”, “Contrast” and
“Brightness”.
Settings can be adjusted and stored for each external device you have
connected to an input of the TV.
The energy consumed during use can be significantly reduced if the level
of brightness of the picture is reduced, and that this will reduce the overall
running cost.
Backlight: Adjusts the brightness of LCD back light.
Contrast: Adjusts the contrast level of the picture.
Brightness: Adjusts the brightness level of the picture.
Sharpness: Adjusts the edge definition of the picture.
Colour: Adjusts colour saturation of the picture.
Tint(G/R): Adjusts the colour tint of the picture.
•
•
•
•
•
•
➣
➣
➣
➣
➣
Picture
Mode : Dynamic ►
Backlight : 7
Contrast : 95
Brightness : 45
Sharpness : 50
Colour : 50
Tint (G/R) : G50/R50
Detailed Settings
Dynamic
Standard
Movie
Mode : Standard
Backlight : � ►
Contrast : 95
Brightness : 45
Sharpness : 50
Colour : 50
Tint (G/R) : G50/R50
Detailed Settings
Picture Options
Picture
Backlight 7
Move Adjust Enter Return
Mode : Standard
Backlight : 7
Contrast : 95
Brightness : 45
Sharpness : 50
Colour : 50
Tint (G/R) : G50/R50
Detailed Settings
Picture
TOOLS
Device List
Picture Mode ◄ Standard ►
Sound Mode : Custom
Sleep Timer : Off
SRS TS XT : Off
Energy Saving : Off
Dual l ll : Mono
Move Adjust e Exit
BN68-01409H-00ENG.indb 25 2008-04-28 �� 5:18:22English - �6
Adjusting the Detailed Settings
Samsung’s new TVs allow you to make even more precise picture settings than previous models. See below to adjust
detailed picture settings.
Activating Detailed Settings
1. Press the MENU button to display the menu.
Press the ENTER button to select “Picture”.
2. Press the ENTER button to select “Mode”.
Press the ▲ or ▼ button to select “Standard” or “Movie”, then press the
ENTER button.
“Detailed Settings” is available in “Standard” or “Movie” mode.
3. Press the ▲ or ▼ button to select “Detailed Settings”, then press the
ENTER button.
In PC mode, you can only make changes to “Dynamic Contrast”,
“Gamma” and “White Balance” from among the “Detailed Settings” items.
Black adjust: Off/Low/Medium/High
You can select the black level on the screen to adjust the screen depth.
Dynamic Contrast: Off/Low/Medium/High
You can adjust the screen contrast so that the optimal contrast is provided.
Gamma: -� ~ +�
You can adjust the Primary Colour (Red, Green, Blue) Intensity.
Colour Space: Auto/Native/Custom
Colour Space is a colour matrix composed of red, green and blue colours.
Select your favorite Colour Space to experience the most natural colour.
Auto: Auto Colour Space automatically adjusts to the most natural colour tone based on programme sources.
Native: Native Colour Space offers deep and rich colour tone.
Custom: Adjusts the colour range to suit your preference.
•
•
•
Customizing the Colour Space
Colour: Red/Green/Blue/Yellow/Cyan/Magenta
Adjusts the Colour range to suit your preference. “Colour” is available when “Colour Space” is set to “Custom”.
Press the ▲ or ▼ button to select “Red”, “Green”, “Blue”, “Yellow”, “Cyan” or “Magenta”.
Press the ENTER button.
Red/Green/Blue: In “Colour”, you can adjust the RGB values for the selected colour.
Press the ▲ or ▼ button to select “Red”, “Green” or “Blue” to change it. Press the ENTER button.
Press the ◄ or ► button to decrease or increase the value of a particular item. Press the ENTER button.
Reset: Resets the colour space to the default values.
White Balance: R-Offset/G-Offset/B-Offset/R-Gain/G-Gain/B-Gain/Reset
You can adjust the colour temperature for more natural picture colours.
R-Offset/G-Offset/B-Offset/R-Gain/G-Gain/B-Gain: Changing the adjustment value will refresh the adjusted screen.
Select the required option by pressing the ▲ or ▼ button, then press the ENTER button.
Press the ◄ or ► button until you reach the optimal setting.
Reset: The previously adjusted white balance will be reset to the factory defaults.
Flesh Tone: -1� ~ +1�
You can emphasize the pink ‘flesh tone’ in the picture.
Press the ◄ or ► button until you reach the optimal setting.
Changing the adjustment value will refresh the adjusted screen.
Edge Enhancement: Off/On
You can emphasize object boundaries in the picture.
xvYCC: Off/On
Setting the xvYCC mode to On increases detail and colour space when watching movies from an external device (ie.
DVD player) connected to the HDMI or Component IN jacks. You must set the Picture Mode to Movie to enjoy this
feature.
“xvYCC” is available when the picture mode is set to “Movie”, and the external input is set to “HDMI” or
“Component” mode.
If xvYCC function is active, PIP cannot be selected.
➣
➣
➣
➣
➣
➣
Detailed Settings
Black Adjust : Off ►
Dynamic Contrast : Low
Gamma : 0
Colour Space : Native
White Balance
Flesh Tone : 0
Edge Enhancement : On
Move Enter Return
Mode : Standard
Backlight : 7
Contrast : 95
Brightness : 45
Sharpness : 50
Colour : 50
Tint (G/R) : G50/R50
Detailed Settings
Picture
BN68-01409H-00ENG.indb 26 2008-04-28 �� 5:18:22English - 27
Configuring Picture Options
Activating Picture Options
1. Press the MENU button to display the menu.
Press the ENTER button to select “Picture”.
2. Press the ▲ or ▼ button to select “Picture Options”, then press the
ENTER button.
Press the ▲ or ▼ button to select a particular item. Press the ENTER
button.
When you are satisfied with your setting, press the ENTER button.
In PC mode, you can only make changes to the “Colour Tone” and “Size”
from among the items in “Picture Options”.
Colour Tone: Cool2/Cool1/Normal/Warm1/Warm2
You can select the most comfortable colour tone to your eyes.
The adjusted values are stored according to the selected “Picture” mode.
“Warm1” or “Warm2” is only activated when the picture mode is “Movie”.
Size: Auto Wide/16:9/Wide Zoom/Zoom/4:3/Just Scan
You can select the picture size which best corresponds to your viewing
requirements.
Auto Wide: Automatically adjusts the picture size to the “16:9” aspect ratio.
16:9: Adjusts the picture size to 16:9 appropriate for DVDs or wide broadcasting.
Wide Zoom: Magnify the size of the picture more than 4:3.
Zoom: Magnifies the 16:9 wide picture (in the vertical direction) to fit the screen size.
4:3: This is the default setting for a video movie or normal broadcasting.
Just Scan: Use the function to see the full image without any cutoff when HDMI (720p/1080i/1080p) or Component
(1080i/1080p) signals are input.
•
•
•
•
•
•
“Auto Wide” function is available only in “TV”, “Ext.1”, “Ext.2”, “AV”, and “S-Video” mode.
In PC Mode, only “16:9” and “4:3” mode can be adjusted.
Settings can be adjusted and stored for each external device you have connected to an input of the TV.
Temporary image retention may occur when viewing a static image on the set for more than two hours.
“Wide Zoom”: Press the ► button to Select “Position”, then press the ENTER button. Press the ▲ or ▼ button
to move the screen up/down. Then press the ENTER button.
“Zoom”: Press the ► button to Select “Position”, then press the ENTER button. Press the ▲ or ▼ button to
move the picture up and down. Then press the ENTER button. Press the ► button to Select “Size”, then press
the ENTER button. Press the ▲ or ▼ button to magnify or reduce the picture size in the vertical direction. Then
press the ENTER button.
When Double ( , ) mode has been set in PIP, the Picture Size cannot be set.
After selecting “Just Scan” in HDMI (1080i/1080p) or Component (1080i/1080p) mode:
Select “Position” by pressing the ◄ or ►button. Use the ▲, ▼, ◄ or ► button to move the picture.
Reset: Press the ◄ or ► button to select “Reset”, then press the ENTER button. You can initialize the setting.
If you use the “Just Scan” function with HDMI 720p input, 1 line will be cut at the top, bottom, left and right as in the
overscan function.
You can select these options by simply pressing the P.SIZE button on the
remote control.
Screen Mode: 16:9/Wide Zoom/Zoom/4:3
When setting the picture size to “Auto Wide” in a 16:9 wide TV, you can determine the picture size you want to see the
4:3 WSS (Wide Screen Service) image or nothing. Each individual European country requires different picture size so
this function is intended for users to select it.
16:9: Sets the picture to 16:9 wide mode.
Wide Zoom: Magnify the size of the picture more than 4:3.
Zoom: Magnify the size of the picture vertically on screen.
4:3: Sets the picture to 4:3 normal mode.
•
•
•
•
This function is available in “Auto Wide” mode.
This function is not available in “PC”, “Component” or “HDMI” mode.
➣
➣
➣
➣
➣
➣
➣
➣
➣
➣
➣
➣
➣
➣
O
➣
➣
Tint (G/R) : G50/R50
Detailed Settings
Picture Options ►
Picture Reset
Picture
Picture Options
Colour Tone : Normal ►
Size :Auto Wide
Screen Mode : 16:9
Digital NR :Auto
DNle : Off
HDMI Black Level : Medium
Movie Plus : Low
▼
Move Enter Return
1_BN68-01409H-Eng.indd 27 2008-04-29 �� 3:51:17English - �8
Resetting the Picture Settings to the Factory Defaults
1. To select the desired picture mode, follow the “Changing the Picture
Standard” instructions numbers 1 and 2. (see page 25)
2. Press the ▲ or ▼ button to select “Picture Reset”, then press the
ENTER button.
3. Press the ▲ or ▼ button to select “OK” or “Cancel”, then press the
ENTER button.
Press the EXIT button to exit.
➣ Each mode can be reset.
Digital NR: Off/Low/Medium/High/Auto
If the broadcast signal received by your TV is weak, you can activate the Digital Noise Reduction feature to help
reduce any static and ghosting that may appear on the screen.
When the signal is weak, select one of the other options until the best picture is displayed.
DNIe: Off/Demo/On
This TV includes the DNIe function so as to provide a high visual quality. If you set DNIe to on, you can view the screen
with the DNIe feature activated. If you set the DNIe to Demo, you can view the applied DNIe and normal pictures on
the screen, for demonstration purposes. Using this function, you can view the difference in the visual quality.
DNIe™ (Digital Natural Image engine) DNIe™
This feature brings you more detailed image with 3D noise reduction, detail enhancement, contrast enhancement
and white enhancement. New image compensation Algorithm gives brighter, clearer, more detailed image to you.
DNIe™ technology will fit every signal into your eyes.
This function is not available in “Movie” and “Standard” mode.
HDMI Black Level: Normal/Low
You can directly select the black level on the screen to adjust the screen depth.
This function is active only when the external input connects to HDMI (RGB signals).
Movie Plus: Off/Low/Medium/High/Demo
You can view more natural skin and clear text even in fast moving scenes.
Use this function when watching movies.
This function is not available in “Wide Zoom” and “Zoom” modes.
This function is not available when “PIP” is set to “On”.
It is not supported in HDMI 1080p/24Hz, 25Hz, 30Hz mode.
Blue Only Mode: Off/On
This function is for AV device measurement experts. This function displays the blue signal only by removing the red
and green signals from the video signal so as to provide a Blue Filter effect that is used to adjust the Colour and Tint of
video equipment such as DVD players, Home Theaters, etc.
Using this function, you can adjust the Colour and Tint to preferred values appropriate to the signal level of each video
device using the Red/Green/Blue/ Cyan/Magenta/Yellow Colour Bar Patterns, without using an additional Blue Filter.
“Blue Only Mode” is available when the picture mode is set to “Movie” or “Standard”.
➣
➣
➣
➣
➣
➣
➣
➣
➣
Picture
Detailed Settings
Picture Options
Picture Reset OK ►
Cancel
BN68-01409H-00ENG.indb 28 2008-04-28 �� 5:18:23English - �9
Viewing Picture-in-Picture
You can display a sub picture within the main picture of set programme or video input. In this way, you can watch the picture
of set programme or video input from any connected equipment while watching the main picture.
1. Press the MENU button to display the menu.
Press the ▲ or ▼ button to select “Setup”, then press the ENTER button.
2. Press the ▲ or ▼ button to select “PIP”, then press the ENTER button.
3. Press the ENTER button.
Press the ▲ or ▼ button to select “On”, then press the ENTER button.
4. Select the required option by pressing the ▲ or ▼ button, then press the
ENTER button.
5. When you are satisfied with your setting, press the ENTER button.
6. Press the EXIT button to exit.
You may notice that the picture in the PIP window becomes slightly unnatural
when you use the main screen to view a game or karaoke.
PIP: On/Off
You can activate or deactivate the PIP function.
Main picture Sub picture
Component
HDMI 1, HDMI/DVI 2, HDMI 3
PC
TV, Ext.1, Ext.2, AV
Easy Setting
1. Press the TOOLS button on the remote control.
2. Press the ▲ or ▼ button to select “PIP”, then press the ENTER
button.
3. Press the ◄ or ► button to select “On”.
4. Press the ▲ or ▼ button to select a particular item.
5. Press the ◄ or ► button to select the required option.
6. Press the EXIT or TOOLS button to exit.
Source
You can select a source of the sub-picture.
Size: / /
You can select a size of the sub-picture.
If main picture is in “HDMI” mode, “Size” is available.
Position: / / /
You can select a position of the sub-picture.
In Double ( , ) mode, “Position” cannot be selected.
Channel
You can select a channel of the sub-picture only when the “Source” is set to “TV”.
➣
➣
➣
Setup
Entertainment : Off
Energy Saving : Off
PIP ►
Software Upgrade
Common Interface
PIP
PIP : On
Source : TV
Size :
Position :
Channel : ATV 11
Move Enter Return
PIP
PIP ◄ Off ►
Source : TV
Size :
Posion :
Channel : ATV 11
Adjust Return
TOOLS
Device List
Picture Mode : Standard
Sound Mode : Custom
Sleep Timer : Off
SRS TS XT : Off
PIP
Energy Saving : Off
Move Enter e Exit
BN68-01409H-00ENG.indb 29 2008-04-28 �� 5:18:23English - �0
Sound Control
Changing the Sound Standard
You can select the sound mode to best suit the programming you’re watching.
1. Press the MENU button to display the menu.
Press the ▲ or ▼ button to select “Sound”, then press the ENTER button.
2. Select the required option by pressing the ▲ or ▼ button, then press the
ENTER button.
3. When you are satisfied with your setting, press the ENTER button.
4. Press the EXIT button to exit.
Mode: Standard/Music/Movie/Speech/Custom
You can select the type of special sound effect to be used when watching a
given broadcast.
Easy Setting
1. Press the TOOLS button on the remote control.
2. Press the ▲ or ▼ button to select “Sound Mode”.
3. Press the ◄ or ► button to select the required option.
4. Press the EXIT or TOOLS button to exit.
Equalizer: Mode/Balance/100Hz/�00Hz/1kHz/�kHz/10kHz/Reset
The sound settings can be adjusted to suit your personal preferences.
The adjusted values are stored according to the selected “Sound” mode.
Reset: Resets the equalizer settings to the default values.
SRS TruSurround XT: Off/On
TruSurround XT is a patented SRS technology that solves the problem of
playing 5.1 multichannel content over two speakers. TruSurround delivers
a compelling, virtual surround sound experience through any two-speaker
playback system, including internal television speakers. It is fully compatible
with all multichannel formats.
Easy Setting
1. Press the TOOLS button on the remote control.
2. Press the ▲ or ▼ button to select “SRS TS XT”.
3. Press the ◄ or ► button to select the “Off” or “On”.
4. Press the EXIT or TOOLS button to exit.
TruSurround XT, SRS and Symbol are trademarks of SRS Labs, Inc.
TruSurround XT technology is incorporated under license from SRS Labs, Inc.
Audio Language
You can change the default value for audio languages. Displays the language information for the incoming stream.
While viewing a Digital channel, this function can be selected.
You can only select the language among the actual languages being broadcast.
➣
➣
➣
➣
Mode : Custom ►
Equalizer
SRS TruSurround XT : Off
Audio Language : ----
Audio Format : ----
Audio Description
Auto Volume : Off
TV Speaker : On
Sound
Enter Return
Equalizer
Mode : Custom
Balance L R
100Hz - +
300Hz - +
1kHz - +
3kHz - +
10kHz - +
▼
Move Adjust
TOOLS
Device List
Picture Mode : Standard
Sound Mode : Custom
Sleep Timer : Off
SRS TS XT ◄ Off ►
Energy Saving : Off
Dual l ll : Mono
Move Adjust e Exit
TOOLS
Device List
Picture Mode : Standard
Sound Mode ◄ Custom ►
Sleep Timer : Off
SRS TS XT : Off
Energy Saving : Off
Dual l ll : Mono
Move Adjust e Exit
BN68-01409H-00ENG.indb 30 2008-04-28 �� 5:18:24English - �1
Audio Format: MPEG/Dolby Digital
When sound is emitted from both the main speaker and the audio receiver, a around echo may occur due to the
decoding speed difference between the main speaker and the audio receiver. In this case, use the TV Speaker
function.
While viewing a Digital channel, this function can be selected.
You can only select the language among the actual languages being broadcast.
Manufactured under license from Dolby Laboratories. Dolby and the double-D symbol are
trademarks of Dolby Laboratories.
Audio Description
This is an auxiliary audio function that provides an additional audio track for visually challenged persons. This
function handles the Audio Stream for the AD (Audio Description), when it is sent along with the Main audio from the
broadcaster. Users can turn the Audio Description On or Off and control the volume.
− Audio Description : On/Off
− Volume : 0~100
“Volume” is active when “Audio Description” is set to “On”.
While viewing a Digital channel, this function can be selected.
Auto Volume: Off/On
Each broadcasting station has its own signal conditions, and so it is not easy to adjust the volume every time the
channel is changed. This feature lets you automatically adjust the volume of the desired channel by lowering the sound
output when the modulation signal is high or by raising the sound output when the modulation signal is low.
TV Speaker: Off/On
If you want to hear the sound through separate speakers, cancel the internal amplifier.
The +, – and MUTE buttons do not operate when the “TV Speaker” is set to “Off”.
When “TV Speaker” is set to “Off”, you can operate only “Sound Select” (in PIP mode) and “Sound Reset” in Sound
menu.
TV's Internal Speakers Audio Out (Optical, L/R Out) to Sound System
RF AV, S-Video Component, PC, HDMI RF AV, S-Video Component, PC, HDMI
TV Speaker On Speaker Output Speaker Output Speaker Output Sound Output Sound Output Sound Output
TV Speaker Off Mute Mute Mute Sound Output Sound Output Sound Output
Video No Signal Mute Mute Mute Mute Mute Mute
Sound Select: Main/Sub
When the PIP feature is activated, you can listen to the sound of the sub (PIP) picture.
− Main: Used to listen to the sound of the main picture.
− Sub: Used to listen to the sound of the sub picture.
Sound Reset: Reset All/Reset Sound Mode/Cancel
You can restore the Sound settings to the factory defaults.
➣
➣
➣
➣
➣
➣
BN68-01409H-00ENG.indb 31 2008-04-28 �� 5:18:24English - ��
Connecting Headphones (Sold separately)
You can connect a set of headphones to your set if you wish to watch a TV program without disturbing other people in the
room.
When you insert the headphone’s plug into the headphone jack, you can not
operate “Mode”, “Equalizer”, “SRS TruSurround XT” and “TV Speaker” in
Sound menu.
Prolonged use of headphones at a high volume may damage your hearing.
You will not hear sound from the speakers when you connect headphones to
the TV.
The headphone volume and TV volume are adjusted separately.
➣
➣
➣
➣
Selecting the Sound Mode
You can set the sound mode in the “Tools” menu. When you set to “Dual I II”, the current
sound mode is displayed on the screen.
1. Press the TOOLS button on the remote control.
2. Press the ▲ or ▼ button to select “Dual I II”.
3. Press the ◄ or ► button to select required option.
4. Press the ENTER button.
Audio Type Dual 1/� Default
A2 Stereo
Mono MONO
Automatic change
Stereo STEREO ↔ MONO
Dual DUAL 1 ↔ DUAL 2 DUAL 1
NICAM
Stereo
Mono MONO
Automatic change
Stereo MONO ↔ STEREO
Dual
MONO ↔ DUAL 1
DUAL 2
DUAL 1
If the stereo signal is weak and an automatic switching occurs, then switch to the Mono.
This function is only activated in stereo sound signal. It is deactivated in mono sound signal.
This function is only available in Analogue TV mode.
➣
➣
➣
TV Side Panel
15
TOOLS
Device List
Picture Mode : Standard
Sound Mode : Custom
Sleep Timer : Off
SRS TS XT : Off
Energy Saving : Off
Dual l ll ◄ Mono ►
Move Adjust e Exit
BN68-01409H-00ENG.indb 32 2008-04-28 �� 5:18:25English - ��
Setting the Clock
Setting the clock is necessary in order to use the various timer features of the TV. Also, you can check the time while
watching the TV. (Just press the INFO button.)
If you disconnect the power cord, you have to set the clock again.
Option 1: Setting the Clock Manually
1. Press the MENU button to display the menu.
Press the ▲ or ▼ button to select “Setup”, then press the ENTER button.
Press the ▲ or ▼ button to select “Time”, then press the ENTER button.
2. Press the ENTER button to select “Clock”.
3. Press the ENTER button to select “Clock Mode”.
Press the ▲ or ▼ button to select “Manual”, then press the ENTER
button.
4. Press the ▲ or ▼ button to select “Clock Set”, then press the ENTER
button.
5. Press the ◄ or ► button to move to “Day”, “Month”, “Year”, “Hour” or
“Minute”. Set the date and time you want by pressing the ▲ or ▼ button, then
press the ENTER button.
Press the EXIT button to exit.
The current time will appear every time you press the INFO button.
You can set the month, day, year, hour and minute directly by pressing the
number buttons on the remote control.
➣
➣
➣
Time Setting
Setup
Plug & Play
Language : English
Time ►
Change PIN
Parental Lock
Subtitle
Teletext Language : ----
Preference
Light Effect : In Watching TV
Wall-Mount Adjustment
Time
Clock : -- : -- ►
Sleep Timer : Off
Timer 1 : Inactivated
Timer 2 : Inactivated
Timer 3 : Inactivated
Move Enter Return
Clock
Clock Mode : Auto
Clock Set
Enter Return
Auto
Manual
Move
Clock
Clock Mode : Manual
Clock Set ►
Move Enter Return
Clock Set
01
Day
01
Month
2008
Year
00
Hour
00
Minute
Move Adjust Enter Return
BN68-01409H-00ENG.indb 33 2008-04-28 �� 5:18:25English - �4
Setting the Sleep Timer
You can select a time period of between 30 and 180 minutes after which the television automatically switches to standby
mode.
1. Press the MENU button to display the menu.
Press the ▲ or ▼ button to select “Setup”, then press the ENTER button.
2. Press the ▲ or ▼ button to select “Time”, then press the ENTER button.
3. Press the ▲ or ▼ button to select “Sleep Timer”, then press the ENTER
button.
4. Press the ▲ or ▼ button repeatedly until the desired time appears (Off, 30,
60, 90, 120, 150, 180). Press the ENTER button.
5. Press the EXIT button to exit.
The TV automatically switches to standby mode when the timer
reaches 0.
Easy Setting
1. Press the TOOLS button on the remote control.
2. Press the ▲ or ▼ button to select “Sleep Timer”.
3. Press the ◄ or ► button to select the minute.
4. Press the EXIT or TOOLS button to exit.
➣
Option �: Setting the Clock Automatically
The Clock can be set automatically if you are receiving a digital signal.
1. Press the MENU button to display the menu.
Press the ▲ or ▼ button to select “Setup”, then press the ENTER button.
Press the ▲ or ▼ button to select “Time”, then press the ENTER button.
2. Press the ENTER button to select “Clock”.
3. Press the ENTER button to select “Clock Mode”.
Press the ▲ or ▼ button to select “Auto”, then press the ENTER button.
4. Press the EXIT button to exit.
Setup
Plug & Play
Language : English
Time ►
Change PIN
Parental Lock
Subtitle
Teletext Language : ----
Preference
Light Effect : In Watching TV
Wall-Mount Adjustment
Time
Clock : -- : -- --
Sleep Timer : Off
Timer 1 : Inactivated
Timer 2 : Inactivated
Timer 3 : Inactivated
Off
30 min
60 min
90 min
120 min
150 min
▼
Move Enter Return
Clock
Clock Mode : Auto
Clock Set
Enter Return
Auto
Manual
Move
Time
Clock : 00 : 00 ►
Sleep Timer : Off
Timer 1 : Inactivated
Timer 2 : Inactivated
Timer 3 : Inactivated
Move Enter Return
Setup
Plug & Play
Language : English
Time ►
Change PIN
Parental Lock
Subtitle
Teletext Language : ----
Preference
Light Effect : In Watching TV
Wall-Mount Adjustment
TOOLS
Device List
Picture Mode : Standard
Sound Mode : Custom
Sleep Timer ◄ Off ►
SRS TS XT : Off
Energy Saving : Off
Dual l ll : Mono
Move Adjust e Exit
BN68-01409H-00ENG.indb 34 2008-04-28 �� 5:18:25English - ��
Switching the Television On and Off Automatically
1. Press the MENU button to display the menu.
Press the ▲ or ▼ button to select “Setup”, then press the ENTER button.
2. Press the ▲ or ▼ button to select “Time”, then press the ENTER button.
3. Press the ▲ or ▼ button to select “Timer 1”, “Timer 2”, “Timer 3”, then press
the ENTER button. Three different On/Off Timer Settings can be made.
You must set the clock first.
4. Press the ◄ or ► button to select the desired item below.
Press the ▲ or ▼ button to adjust to the setting satisfied.
On Time: Set the Hour, Minute, and Activate/Inactivate.
(To activate timer with the setting you’ve chosen, set to “Activate”.)
Off Time: Set the Hour, Minute, and Activate/Inactivate.
(To activate timer with the setting you’ve chosen, set to “Activate”.)
Volume: Set the required volume level.
Contents: When the “On Timer” is active, you can turn on a specific
channel or play back contents such as photo or audio files.
TV/USB: Select TV or USB. (Make sure that an USB device is
connected to your TV.)
Antenna: Select “ATV” or “DTV”.
Channel: Select the desired channel.
Music: Select the folder containing MP3 files on the USB device.
Photo: Select the folder containing JPEG files on the USB device.
Repeat: Select “Once”, “Everyday”, “Mon~Fri”, “Mon~Sat”, “Sat~Sun”,
or “Manual”.
When “Manual” is selected, press the ► button to select the
desired day of the week. Press the ENTER button over the
desired day and the mark will appear.
•
•
•
•
–
–
–
–
–
•
➣
Press the EXIT button to exit.
You can set the hour, minute and channel by pressing the number buttons
on the remote control.
Auto Power Off
When you set the timer On, the television will eventually turn off, if no
controls are operated for 3 hours after the TV was turned on by the timer.
This function is only available in timer On mode and prevents overheating,
which may occur if a TV is on for too long time.
➣
➣
➣
Contents
TV
TV/USB
am
Channel
None
Music
Move Adjust Enter Return
ATV
Antenna
�
Channel
None
Photo
Time
Clock : 10 : 00
Sleep Timer : Off
Timer 1 : Inactivated ►
Timer 2 : Inactivated
Timer 3 : Inactivated
Move Enter Return
Timer 1
00
00
00
00
Inactivate
Inactivate
On Time
Off Time
Once
Move Adjust Enter Return
Volume
10
Contents
Repeat Sun Mon Tue Wed Thu Fri Sat
TV ATV 3
Setup
Plug & Play
Language : English
Time ►
Change PIN
Parental Lock
Subtitle
Teletext Language : ----
Preference
Light Effect : In Watching TV
Wall-Mount Adjustment
BN68-01409H-00ENG.indb 35 2008-04-28 �� 5:18:26English - �6
Selecting a Menu Language
1. Press the MENU button to display the menu.
Press the ▲ or ▼ button to select “Setup”, then press the ENTER button.
Press the ▲ or ▼ button to select “Language”, then press the ENTER
button.
2. Select a particular language by pressing the ▲ or ▼ button repeatedly.
Press the ENTER button.
3. Press the EXIT button to exit.
Function Description
Setting Up Your Personal ID Number (PIN)
1. Press the MENU button to display the menu.
2. Press the ▲ or ▼ button to select “Setup”, then press the ENTER button.
3. Press the ▲ or ▼ button to select “Change PIN”, then press the ENTER
button. The “Enter PIN” is displayed.
4. Enter your current 4-digit PIN code by using the numeric buttons (0~9).
The “Enter New PIN” is displayed.
5. Enter your new PIN code by using the numeric buttons (0~9)
The “Confirm New PIN” is displayed.
6. Re-enter your new PIN code to confirm by using the numeric buttons (0~9).
The “PIN is changed successfully” message is displayed.
7. Press the EXIT button to exit.
If you forget the PIN code, press the remote control buttons in the
following sequence, which resets the PIN to 0-0-0-0: POWER (Off),
MUTE, 8, �, 4, POWER (On).
➣
➣
➣
➣
Setup
Plug & Play
Language : English ►
Time
Change PIN
Parental Lock
Subtitle
Teletext Language : ----
Preference
Light Effect : In Watching TV
Setup
Language : English
Time
Change PIN ►
Parental Lock
Subtitle
Teletext Language : ----
Preference
Light Effect : In Watching TV
Wall-Mount Adjustment
Melody : Off
Change PIN
* *
Enter PIN
*
0~9 Enter PIN Return
Change PIN
0~9 Enter PIN Return
Enter New PIN
Confirm New PIN
BN68-01409H-00ENG.indb 36 2008-04-28 �� 5:18:26English - ��
Setting up the Parental Lock
This feature allows you to prevent unauthorized users, such as children, from watching unsuitable programmes by a 4-digit
PIN (Personal Identification Number) code that is defined by the user.
1. Press the MENU button to display the menu.
2. Press the ▲ or ▼ button to select “Setup”, then press the ENTER button.
3. Press the ▲ or ▼ button to select “Parental Lock”, then press the
ENTER button.
The “Enter PIN” is displayed.
4. Enter your current 4-digit PIN code by using the numeric buttons (0~9).
The default PIN code for a new TV set is 0000. If you want to change PIN
number, refer to 36 page.
5. Press the ENTER button.
6. Press the ▲ or ▼ button to select the age rating you want to lock out. Press
the ENTER button.
The “ ” symbol will be displayed.
Allow All: Press to unlock all TV ratings.
Block All: Press to lock all TV ratings.
7. Press the EXIT button to exit.
➣
➣
➣
➣
Parental Lock
* *
Enter PIN
*
0~9 Enter PIN Return
Setup
Time
Change PIN
Parental Lock ►
Subtitle
Teletext Language : ----
Preference
Light Effect : In Watching TV
Wall-Mount Adjustment
Melody : Off
Entertainment : Off
Parental Rating
▼
�
4
�
6
�
8
9
Allow All
Block All
Move Enter Return
Parental Lock
Parental Rating ►
Enter Return
BN68-01409H-00ENG.indb 37 2008-04-28 �� 5:18:26English - �8
Setting the Subtitle
You can activate and deactivate the subtitles. Use this menu to set the Subtitle Mode. “Normal” under the menu is the basic
subtitle and “Hard of hearing” is the subtitle for a hearing-impaired person.
1. Press the MENU button to display the menu.
2. Press the ▲ or ▼ button to select “Setup”, then press the ENTER button.
3. Press the ▲ or ▼ button to select “Subtitle”, then press the ENTER
button.
4. Press the ENTER button again, then press the ▲ or ▼ button to select
“On”. Press the ENTER button.
5. Press the ▲ or ▼ button to select “Mode”, then press the ENTER button.
6. Press the ▲ or ▼ button to select “Normal” or “Hard of hearing”.
Press the ENTER button.
If the programme you are watching does not support the “Hard of hearing”
function, “Normal” automatically activates even though “Hard of hearing”
mode is selected.
7. Press the ▲ or ▼ button to select “Subtitle Language”, then press the
ENTER button.
8. Select the appropriate language by pressing the ▲ or ▼ button. Press the
ENTER button to confirm your choice.
English is the default in cases where the selected language is unavailable
in the broadcast.
9. Press the EXIT button to exit.
You can select these options simply by pressing the SUBT. button on the
remote control.
➣
➣
O
Setup
Change PIN
Parental Lock
Subtitle ►
Teletext Language : ----
Preference
Light Effect : In Watching TV
Wall-Mount Adjustment
Melody : Off
Entertainment : Off
Energy Saving : Off
Subtitle
Subtitle : Off ►
Mode : Normal
Subtitle Language : ----
Move Enter Return
BN68-01409H-00ENG.indb 38 2008-04-28 �� 5:18:26Selecting a Teletext Language
You can set the Teletext language by selecting the language type.
1. Press the MENU button to display the menu.
Press the ▲ or ▼ button to select “Setup”, then press the ENTER button.
2. Press the ▲ or ▼ button to select “Teletext Language”, then press the
ENTER button.
3. Select a particular language by pressing the ▲ or ▼ button repeatedly.
Press the ENTER button.
English is the default in cases where the selected language is unavailable
in the broadcast.
4. Press the EXIT button to exit.
➣
Selecting a Preference Language
This menu consists of 6 sub-menus: Primary Audio Language, Secondary Audio Language, Primary Subtitle Language,
Secondary Subtitle Language, Primary Teletext Language, Secondary Teletext Language.
Using this feature, users can select one of the languages. The language selected here is the default when the user selects
a channel.
1. Press the MENU button to display the menu.
Press the ▲ or ▼ button to select “Setup”, then press the ENTER button.
2. Press the ▲ or ▼ button to select “Preference”, then press the ENTER
button.
3. Press the ▲ or ▼ button to select required menu (Primary Audio Language,
Secondary Audio Language, Primary Subtitle Language, Secondary Subtitle
Language, Primary Teletext Language, Secondary Teletext Language).
Press the ENTER button.
4. Select the appropriate language by pressing the ▲ or ▼ button. Press the
ENTER button to confirm your choice.
5. Press the EXIT button to exit.
If you change the language setting, the Subtitle Language, Audio Language, and the Teletext Language of the
Language menu are automatically changed to the selected language.
The Subtitle Language, Audio Language, and the Teletext Language of the Language menu show a list of languages
supported by the current channel and the selection is highlighted. If you change this language setting, the new
selection is only valid for the current channel. The changed setting does not change the setting of the Primary Subtitle
Language, Primary Audio Language, or the Primary Teletext Language of the Preference menu.
➣
➣
English - �9
Setting the Light Effect (depending on the model)
You can turn on/off the LED on the front of TV according to the situation. Use it for saving power or when the LED dazzles
your eyes.
1. Press the MENU button to display the menu.
Press the ▲ or ▼ button to select “Setup”, then press the ENTER button.
2. Press the ▲ or ▼ button to select “Light Effect”, then press the ENTER
button.
3. Press the ▲ or ▼ button to select “Off”, “In Standby”, “In Watching TV” or
“Always”.
Press the ENTER button.
Off: LED will not come on.
In Standby: Turns the LED on in standby mode.
In Watching TV: Turns the LED on while watching TV.
Always: LED is always on.
•
•
•
•
Set the “Light Effect” to “Off” to reduce the power consumption.
4. Press the EXIT button to exit.
➣
Setup
Teletext Language : ----
Preference
Light Effect : In Watching TV ►
Wall-Mount Adjustment
Melody : Off
Entertainment : Off
Energy Saving : Off
PIP
Software Upgrade
Common Interface
Setup
Parental Lock
Subtitle
Teletext Language : ---- ►
Preference
Light Effect : In Watching TV
Wall-Mount Adjustment
Melody : Off
Entertainment : Off
Energy Saving : Off
PIP
Setup
Subtitle
Teletext Language : ----
Preference ►
Light Effect : In Watching TV
Wall-Mount Adjustment
Melody : Off
Entertainment : Off
Energy Saving : Off
PIP
Software Upgrade
LED
BN68-01409H-00ENG.indb 39 2008-04-28 �� 5:18:27English - 40
Melody/Entertainment/Energy Saving
1. Press the MENU button to display the menu.
Press the ▲ or ▼ button to select “Setup”, then press the ENTER button.
2. Select the required option by pressing the ▲ or ▼ button, then press the
ENTER button.
3. When you are satisfied with your setting, press the ENTER button.
4. Press the EXIT button to exit.
Melody: Off/Low/Medium/High
The TV power on/off melody sound can be adjusted.
The Melody does not play
− When no sound is output from the TV because the MUTE button has been pressed.
− When no sound is output from the TV because the – (Volume) button has been pressed.
− When the TV is turned off by Sleep Timer function.
Entertainment: Off/Sports/Cinema/Game
The “Entertainment” mode enables you to select the optimal display and sound for sports, cinema and games.
Off: Switches the “Entertainment” function off.
Sports: Provides the optimal picture and sound quality for sports.
Cinema: Provides the optimal picture and sound quality for movie watching. You can experience a richer picture
and enhanced sound.
Game: Provides the optimal picture and sound quality for games. This mode accelerates the playing speed when
using an external game console connected to the TV.
•
•
•
•
If you set any of the three “Entertainment” modes to On, the settings will be locked and can not be adjusted. If you
want to make Picture and Sound mode adjustments, the “Entertainment” mode must be turned off.
If you set any of the three “Entertainment” modes to On, “SRS TruSurround XT” function is not available.
The “Entertainment” settings are saved for each input source.
You can press the E.MODE button on the remote control repeatedly to
change the “Entertainment” setting.
Energy Saving: Off/Low/Medium/High/Auto
This feature adjusts the brightness of the TV in order to reduce power consumption. When watching TV at night, set
the “Energy Saving” mode option to “High” to reduce eye fatigue as well as power consumption.
Off: Turns off the energy saving function.
Low: Sets the TV to low energy saving mode.
Medium: Sets the TV to medium energy saving mode.
High: Sets the TV to high energy saving mode.
Auto: Automatically adjusts the brightness of the TV screen in accordance with the scenes.
•
•
•
•
•
Easy Setting
1. Press the TOOLS button on the remote control.
2. Press the ▲ or ▼ button to select “Energy Saving”.
3. Press the ◄ or ► button to select the “Off”, “Low”, “Medium”, “High”, “Auto” or
“On”.
4. Press the EXIT or TOOLS button to exit.
➣
➣
➣
➣
O
English - 40
Setup
Light Effect : In Watching TV
Wall-Mount Adjustment
Melody : Off ►
Entertainment : Off
Energy Saving : Off
PIP
Software Upgrade
Common Interface
TOOLS
Device List
Picture Mode : Standard
Sound Mode : Custom
Sleep Timer : Off
SRS TS XT : Off
Energy Saving ◄ Off ►
Dual l ll : Mono
Move Adjust e Exit
BN68-01409H-00ENG.indb 40 2008-04-28 �� 5:18:27English - 41
Upgrading the Software
To keep your product up-to-date with new Digital Television features then software upgrades are periodically broadcast as
part of the normal Television signal. It will automatically detect these signals and display the software upgrade banner. You
are given the option to install the upgrade.
1. Insert a USB drive containing the firmware upgrade into the WISELINK port
on the side of the TV.
2. Press the MENU button to display the menu.
Press the ▲ or ▼ button to select “Setup”, then press the ENTER button.
3. Press the ▲ or ▼ button to select “Software Upgrade”, then press the
ENTER button.
4. Press the ▲ or ▼ button to select “BY USB”, “BY Channel” or “Standby
Mode Upgrade”. Press the ENTER button.
BY USB :
- Preset : Insert a USB drive containing the firmware upgrade into TV.
Please be careful to not disconnect the power or remove the USB
drive while upgrades are being applied. The TV will turn off and turn on
automatically after completing the firmware upgrade. Please check the
firmware version after the upgrades are complete. When software is
upgraded, video and audio settings you have made will return to their
default (factory) settings. We recommend you write down your settings so
that you can easily reset them after the upgrade.
BY Channel :
Upgrades the software using the broadcasting signal.
Standby Mode Upgrade :
To continue software upgrade with master power on, Select On by pressing
the ▲ or ▼ button. 45 minutes after entering standby mode, a manual
upgrade is automatically conducted. Since the power of the unit is turned
on internally, the screen may be on slightly for the LCD product. This
phenomenon may continue for more than 1 hour until the software upgrade is
completed.
Alternative Software :
To display the software version information.
➣
Setup
Energy Saving : Off
PIP
Software Upgrade ►
Common Interface
HDMI IN3
TV Side Panel
USB Drive
Software Upgrade
Current Version 2008/01/01_000075
BY USB ►
BY Channel
Standby Mode Upgrade : On
Version Change ----/--/--_--------
Move Enter Return
BN68-01409H-00ENG.indb 41 2008-04-28 �� 5:18:27English - 4�
Viewing Common Interface
This contains information on CAM inserted in the CI slot and displays it.
1. Press the MENU button to display the menu.
Press the ▲ or ▼ button to select “Setup”, then press the ENTER button.
2. Press the ▲ or ▼ button to select “Common Interface”, then press the
ENTER button.
3. Press the ▲ or ▼ button to select “Application Info.”
Press the ENTER button to display the information for your application.
4. Press the EXIT button to exit.
The Application Info inserting is about the CI CARD. You can install the CAM
anytime whether the TV is ON or OFF.
1. Purchase the CI CAM module by visiting your nearest dealer or by phone.
2. Insert the CI CARD into the CAM in the direction of the arrow until it fits.
3. Insert the CAM with the CI CARD installed into the common interface slot.
(Insert the CAM in the direction of the arrow, right up to the end so that it is
parallel with the slot.)
4. Check if you can see a picture on a scrambled signal channel.
Selecting the CI (Common Interface) Menu
This enables the user to select from the CAM-provided menu.
1. Press the MENU button to display the menu.
Press the ▲ or ▼ button to select “Setup”, then press the ENTER button.
2. Press the ▲ or ▼ button to select “Common Interface”, then press the
ENTER button.
3. Press the ▲ or ▼ button to select “CI Menu”, then press the ENTER
button.
4. Press the ▲ or ▼ button to select the required option, then press the
ENTER button.
5. Press the EXIT button to exit.
Select the CI Menu based on the menu PC Card.
➣
➣
Setup
PIP
Software Upgrade
Common Interface ►
Common Interface
CI Menu ►
Application Info.
U Move EEnter e Exit
CI Menu
Main menu
Module information
Smart card information
Language
Software Download
Press Ok to select, or Exit to quit.
U Move EEnter e Exit
Setup
PIP
Software Upgrade
Common Interface ►
Common Interface
CI Menu ►
Application Info.
U Move EEnter e Exit
BN68-01409H-00ENG.indb 42 2008-04-28 �� 5:18:28English - 4�
To Select the Source
Use to select TV or other external input sources such as DVD players or Cable
Box/Satellite receivers (Set-Top Box) connected to the TV. Use to select the input
source of your choice.
1. Press the MENU button to display the menu.
Press the ▲ or ▼ button to select “Input”, then press the ENTER button.
2. Press the ENTER button to select “Source List”.
Press the ▲ or ▼ button to select signal source, then press the ENTER
button.
Available signal sources: TV, Ext.1, Ext.2, AV, S-Video, Component, PC,
HDMI1, HDMI2/DVI, HDMI3, USB.
You can choose only those external devices that are connected to the TV.
In the “Source List”, connected inputs will be highlighted and sorted to the
top. Inputs that are not connected will be sorted to the bottom.
Using the Colour buttons on the remote with the Source list
Red (Refresh): Refreshes the connecting external devices.
TOOLS (Option): Displays the “Edit Name” and “Information” menus.
•
•
Press the SOURCE button on the remote control to view an external signal
source. TV mode can be selected by pressing the TV/DTV button, number
buttons(0~9), and the P button on the remote control.
➣
➣
➣
O
To Edit the Input Source Name
Name the device connected to the input jacks to make your input source selection
easier.
1. Press the MENU button to display the menu.
Press the ▲ or ▼ button to select “Input”, then press the ENTER button.
Press the ▲ or ▼ button to select “Edit Name”, then press the ENTER
button.
2. Press the ▲ or ▼ button to select “Ext.1”, “Ext.2”, “AV”, “S-Video”,
“Component”, “PC”, “HDMI1”, “HDMI2/DVI” or “HDMI3” input jack, then press
the ENTER button.
3. Press the ▲ or ▼ button to select “VCR”, “DVD”, “Cable STB”,
“Satellite STB”, “PVR STB”, “AV Receiver”, “Game”, “Camcorder”, “PC”,
“TV”, “IPTV”, “Blu-Ray”, “HD DVD” or “Digital Media Adapter” input source,
then press the ENTER button.
Press the EXIT button to exit.
When a PC with a resolution of 1920 x 1080@60Hz is connected to the
HDMI IN 2 port, you should set the “HDMI2/DVI” mode to “PC” in the “Edit
Name” of the “Input” mode.
➣
Source List
Edit Name
Input
TV
Ext.1 ----
Ext.2 ----
AV ----
S-Video ----
Component ----
PC ----
Refresh Option
Source List
Edit Name ►
Input
Edit Name
Ext.1 : ---- ►
Ext.2 : ----
AV : ----
S-Video : ----
Component : ----
PC : ----
HDMI1 : ----
▼
Move Enter Return
Edit Name
Ext.1 : ----
Ext.2 : ----
AV : ----
S-Video : ----
Component : ----
PC : ----
HDMI1 : ----
----
VCR
DVD
Cable STB
Satellite STB
PVR STB
Move Enter Return
BN68-01409H-00ENG.indb 43 2008-04-28 �� 5:18:28English - 44
Using Your TV as a Computer (PC) Display
Setting Up Your PC Software (Based on Windows XP)
The Windows display-settings for a typical computer are shown below. The actual screens on your PC will probably be
different, depending upon your particular version of Windows and your particular video card. However, even if your actual
screens look different, the same basic set-up information will apply in almost all cases. (If not, contact your computer
manufacturer or Samsung Dealer.)
1. First, click on “Control Panel” on the Windows start menu.
2. When the control panel window appears, click on “Appearance and Themes” and
a display dialog-box will appear.
3. When the control panel window appears, click on “Display” and a display dialogbox will appear.
4. Navigate to the “Settings” tab on the display dialog-box.
The correct size setting (resolution)
Optimum: 1920 X 1080 pixels
If a vertical-frequency option exists on your display settings dialog box, the
correct value is “60” or “60 Hz”. Otherwise, just click “OK” and exit the dialog box.
PC Display
Display Modes
Both screen position and size will vary depending on the type of PC monitor and its resolution. The resolutions in the table
are recommended.
D-Sub Input
Mode Resolution
Horizontal
Frequency (kHz)
Vertical
Frequency (Hz)
Pixel Clock
Frequency (MHz)
Sync Polarity
(H/V)
IBM
640 x 350
720 x 400
31.469
31.469
70.086
70.087
25.175
28.322
+ / -
- / +
VESA
640 x 480
640 x 480
640 x 480
800 x 600
800 x 600
800 x 600
1024 x 768
1024 x 768
1024 x 768
1280 x 1024
1280 x 1024
1360 x 768
1600 x 1200
31.469
37.861
37.500
37.879
48.077
46.875
48.363
56.476
60.023
63.981
79.976
47.712
75.000
59.940
72.809
75.000
60.317
72.188
75.000
60.004
70.069
75.029
60.020
75.025
60.015
60.000
25.175
31.500
31.500
40.000
50.000
49.500
65.000
75.000
78.750
108.000
135.000
85.500
162.000
- / -
- / -
- / -
+ / +
+ / +
+ / +
- / -
- / -
+ / +
+ / +
+ / +
+ / +
+ / +
CVT 1920 x 1080RB 66.587 59.934 138.500 + / -
HDMI/DVI Input
Mode Resolution
Horizontal
Frequency (kHz)
Vertical
Frequency (Hz)
Pixel Clock
Frequency (MHz)
Sync Polarity
(H/V)
VESA
640 x 480
800 x 600
1024 x 768
1280 x 1024
1360 x 768
1600 x 1200
31.469
37.879
48.363
63.981
47.712
75.000
59.940
60.317
60.004
60.020
60.015
60.000
25.175
40.000
65.000
108.000
85.500
162.000
- / -
+ / +
- / -
+ / +
+ / +
+ / +
CEA 1920 x 1080p 67.500 60.000 148.500 + / +
When using an HDMI/DVI cable connection, you must use the HDMI IN 2 jack.
The interlace mode is not supported.
The set might operate abnormally if a non-standard video format is selected.
Separate and Composite modes are supported. SOG is not supported.
Too long or low quality VGA cable can cause picture noise at high resolution modes (1920x1080 or 1600x1200).
➣
➣
➣
➣
➣
BN68-01409H-00ENG.indb 44 2008-04-28 �� 5:18:29English - 4�
Setting up the TV with your PC
Preset: Press the SOURCE button to select PC mode.
1. Press the MENU button to display the menu.
Press the ▲ or ▼ button to select “Picture”, then press the ENTER
button.
2. Press the ▲ or ▼ button to select “Auto Adjustment” or “Screen Adjustment”,
then press the ENTER button.
3. When you are satisfied with your setting, press the ENTER button.
4. Press the EXIT button to exit.
How to Auto Adjust
Auto Adjustment allows the PC screen of set to self-adjust to the incoming PC
video signal. The values of fine, coarse and position are adjusted automatically.
This function does not work in DVI-HDMI mode.
Easy Setting
1. Press the TOOLS button on the remote control.
2. Press the ▲ or ▼ button to select “Auto Adjustment”, then press the ENTER
button.
Adjusting the Screen Quality
Coarse/Fine
The purpose of picture quality adjustment is to remove or reduce picture noise. If
the noise is not removed by Fine-tuning alone, then adjust the frequency as best
as possible (coarse) and Fine-tune again. After the noise has been reduced,
readjust the picture so that it is aligned on the center of screen.
Press the ▲ or ▼ button to select “Coarse” or “Fine”, then press the ENTER
button.
Press the ◄ or ► button to adjust the screen quality.
Press the ENTER button.
Position
Adjust the PC’s screen positioning if it does not fit the TV screen.
Press the ▲ or ▼ button to adjusting the Vertical-Position.
Press the ◄ or ► button to adjust the Horizontal-Position.
Press the ENTER button.
Image Reset
You can replace all image settings with the factory default values.
➣
➣
Brightness : 45
Sharpness : 50
Auto Adjustment ►
Screen Adjustment
Detailed Settings
Picture Options
Picture Reset
Picture
Auto Adjustment in progress. Please Wait.
Screen Adjustment
Coarse 52
Fine 24
Position
Image Reset
Move Enter Return
Screen Adjustment
Coarse 52
Fine 24
Position
Image Reset ►
Move Enter Return
Image Reset is completed.
TOOLS
Device List
Picture Mode : Standard
Sound Mode : Custom
Sleep Timer : Off
SRS TS XT : Off
PIP
Energy Saving : Off
Auto Adjustment
Move Enter e Exit
Position
Adjust Enter Return
BN68-01409H-00ENG.indb 45 2008-04-28 �� 5:18:29English - 46
WISELINK
Using the WISELINK Function
Connecting a USB Device
This function enables you to view and listen to photo (JPEG) and audio files (MP3)
saved on a USB Mass Storage Class (MSC) device.
1. Press the POWER button on the remote control or front panel.
The TV is powered on.
2. Connect a USB device containing JPEG and/or MP3 files to the WISELINK
jack (USB jack) on the side of the TV.
If you enter the WISELINK mode with no USB device connected the message “No external storage device found.
Check the connection status.” will appear. In this case, insert the USB device, exit the screen by pressing the W.LINK
button on the remote control and enter the WISELINK screen again.
MTP (Media Transfer Protocol) is not supported.
The file system only supports FAT16/32 (The NTFS file system is not supported).
Certain types of USB Digital camera and audio devices may not be compatible with this TV.
Wiselink only supports USB Mass Storage Class devices (MSC). MSC is a Mass Storage Class Bulk-Only Transport
device. Examples of MSC are Thumb drives and Flash Card Readers (Both USB HDD and HUB are not supported.)
Please connect directly to the USB port of your TV. If you are using a separate cable connection, there may be a USB
Compatibility problem.
Before connecting your device to the TV, please back up your files to prevent them from damage or loss of data.
SAMSUNG is not responsible for any data file damage or data loss.
Do not disconnect the USB device while it is loading.
MSC supports MP3 and JPEG files, while a PTP device supports JPEG files only.
The sequential jpeg format is supported.
Photo and audio files must be named in English, French or Spanish. If not, the files can not be played. Change the file
names to English, French or Spanish if necessary.
The higher the resolution of the image, the longer it takes to display on the screen.
The maximum supported JPEG resolution is 15360x8640 pixels.
For unsupported or corrupted files, the “Not Supported File Format” message is displayed.
Using the Remote Control Button in WISELINK Menu
Button Operations
(▲/▼/◄/►) Move the cursor and select an item.
ENTER
Select the currently selected item.
During a Slide Show or Music Play:
- Pressing the ENTER button during play pauses the play.
- Pressing the ENTER button during pause resumes the play.
/ Play or pause the Slide Show or Music file.
RETURN Return to the previous menu.
TOOLS Run various functions from the Photo and Music menus.
Pause the Slide Show / Stop the Playing Music file.
/ Jump to previous group / Jump to next group.
INFO Show file information.
W.LINK Exit WISELINK mode.
P >/<
PRE-CH
Stop WISELINK mode and Returns to TV mode.
EXIT Stop the current function and return to the WISELINK main menu.
➣
➣
➣
➣
➣
➣
➣
➣
➣
➣
➣
➣
➣
➣
➣
HDMI IN3
TV Side Panel
USB Drive
BN68-01409H-00ENG.indb 46 2008-04-28 �� 5:18:31English - 4�
Using the WISELINK Menu
1. Press the MENU button. Press the ▲ or ▼ button to select “Application”,
then press the ENTER button.
2. Press the ▲ or ▼ button to select “WISELINK”, then press the ENTER
button.
The “WISELINK” menu is displayed.
Press the W.LINK button on the remote control to display the “WISELINK”
menu.
Press the SOURCE button on the remote control repeatedly to select
“USB”, then press the ENTER button.
3. Press the Red button, then press the ▲ or ▼ button to select the corresponding USB Memory Device (i.e. if connected
through a hub). Press the ENTER button.
This function differs depending on the USB Memory Device connected to TV.
The selected USB device name appears at the bottom left of the screen.
4. Press the ◄ or ► button to select an icon (Photo, Music, Setup), then press the ENTER button.
To exit “WISELINK” mode, press the W.LINK button on the remote control.
➣
O
O
➣
➣
➣
Using the Photo List
This menu shows Photo files saved on an USB memory device.
Photo List
1. Press the W.LINK button on the remote control to display the “WISELINK”
menu.
2. Press the ◄ or ► button to select “Photo”, then press the ENTER
button.
Photo files are displayed.
This menu only shows files whose file extension is jpg. Files of other
formats such as bmp or tiff will not be displayed.
Press the (Play) / ENTER button to start the Slide Show.
To move to the previous / next group, press the (REW) or
(FF) button.
When moving to a photo, loading may take a few seconds. At this
point, the loading icon will appear at the screen.
It may take some time to load photo files as Thumbnail images.
Photos without EXIF information may not be displayed as thumbnail
images in the Photo List depending on the picture quality and
resolution.
➣
➣
➣
➣
➣
➣
➣
WISELINK
Photo
SUM Device Return
Music Setup
PHOTO
SUM
851.98MB/995.00MB Free
WISELINK
Photo
SUM Device e Exit
Music Setup
PHOTO
SUM
851.98MB/995.00MB Free
Photo
SUM Device Favorites Setting Select Jump Option
image_1.jpg
Month : Jan
Date : Jan.01.2008
Color : Gray
Composition :
Folder : P-other
Favorite : ★ ★ ★
Preference
Monthly
Timeline
Jan Nov
▲
BN68-01409H-00ENG.indb 47 2008-04-28 �� 5:18:32English - 48
Screen Display
Photo
SUM Device Favorites Setting Select Jump Option
image_1.jpg
Month : Jan
Date : Jan.01.2008
Color : Gray
Composition :
Folder : P-other
Favorite : ★ ★ ★
Preference
Monthly
Timeline
Jan Nov
▲
2 1File(s) Selected6
1
3 4
5 7
1 Currently selected photo
Shows the currently selected photo.
2 Photo Information Window
Shows information about the currently selected photo. You can change the “Color”, “Composition”, and “Favorite”.
3 Current Sort Standard
Press the ▲ or ▼ button to change the standard for sorting photos.
(“Monthly”, “Timeline”, “Color”, “Composition”, “Folder”, “Preference”)
The item that is selected as the sorting standing is highlighted in the Photo Information Window.
4 View Groups
Shows the sorting groups. The sorting group including the currently selected photo is highlighted.
5 Current Device
Shows the currently selected device name. Press the Red button to select a device.
6 Item Selection Information
Shows the number of photos that are selected by pressing the Yellow button.
7 Help Items
Red(Device) button: Selects a connected device.
Green(Favorites Setting) button: Changes the favorites setting for the selected photo. Press this button
repeatedly until the desired value appears. (Refer to page 51)
Yellow(Select) button: Selects photos from the photo list. Selected photos are marked with a symbol on the left.
(jump) button: Jumps to the previous sorting group / Jumps to the next sorting group.
TOOLS(Option) button: Displays the “Slide Show”, “Play Current Group”, “Delete”, “Change Group” (in “Color” or
“Composition” group), “Information” or “Remove Safely” menus.
•
•
•
•
•
BN68-01409H-00ENG.indb 48 2008-04-28 �� 5:18:32English - 49
Sorting Photo List
You can sort photos in the Photo List by a particular standard.
1. Press the W.LINK button on the remote control to display the
“WISELINK” menu.
2. Press the ◄ or ► button to select “Photo”, then press the ENTER
button.
Photo files are displayed.
3. Press the ▲ or ▼ button to select a sorting standard.
(“Monthly”, “Timeline”, “Color”, “Composition”, “Folder”, “Preference”)
The photos are sorted according to the newly selected sorting
standard.
4. Press the ENTER button to start the Slide Show in the order selected
by the user.
Wiselink identifies the color and composition of images and groups
them accordingly by analyzing the images on the USB device.
The “Composition” and “Color” information extracted from a photo file
may be different from what you selected.
Photo information is automatically set. You can change the “Color”,
“Composition”, and “Favorite”.
Photos for which information cannot be displayed are set as
“Unclassified”.
PTP does not support folder sort mode.
Monthly
Sorts photos by month.
It sorts and shows photos in the file by month. It sorts only by month
(from January to December) regardless of year.
1. Select “Monthly” as the sorting standard in the Photo List.
2. Press the ◄ or ► button to select from the sublist of files grouped by
Month.
To move to the previous / next group, press the (REW) or
(FF) button.
3. Press the TOOLS button. Press the ▲ or ▼ button to select “Play
Current Group”.
4. Press ENTER to play the selected group of photo files from the
sublist.
Timeline
Sorts photos by time.
It sorts and shows photos by date. It sorts by year and month from the
earliest photo.
1. Select “Timeline” as the sorting standard in the Photo List.
2. Press the ◄ or ► button to select from the sublist of files grouped by
Timeline.
To move to the previous / next group, press the (REW) or
(FF) button.
3. Press the TOOLS button. Press the ▲ or ▼ button to select “Play
Current Group”.
4. Press ENTER to play the selected group of photo files from the
sublist.
➣
➣
➣
➣
➣
➣
➣
➣
➣
➣
➣
Photo
SUM Device Favorites Setting Select Jump Option
image_1.jpg
Month : Jan
Date : Jan.01.2008
Color : Gray
Composition :
Folder : P-other
Favorite : ★ ★ ★
Monthly
Timeline
Color
Jan Nov
▲
Slide Show
Play Current Group
Delete
Information
▼
2008 2008
Photo
SUM Device Favorites Setting Select Jump Option
image_1.jpg
Month : Jan
Date : Jan.01.2008
Color : Gray
Composition :
Folder : P-other
Favorite : ★ ★ ★
Preference
Monthly
Timeline
Jan Nov
▲
Slide Show
Play Current Group
Delete
Information
▼
WISELINK
Photo
SUM Device e Exit
Music Setup
PHOTO
SUM
851.98MB/995.00MB Free
Photo
SUM Device Favorites Setting Select Jump Option
image_1.jpg
Month : Jan
Date : Jan.01.2008
Color : Gray
Composition :
Folder : P-other
Favorite : ★ ★ ★
Preference
Monthly
Timeline
Jan Nov
▲
BN68-01409H-00ENG.indb 49 2008-04-28 �� 5:18:34English - �0
Color
Sorts photos by color.
You can change the photo color information.
1. Select “Color” as the sorting standard in the Photo List.
2. Press the ◄ or ► button to select from the sublist of files grouped by
color.
To move to the previous / next group, press the (REW) or
(FF) button.
3. Press the TOOLS button. Press the ▲ or ▼ button to select “Play
Current Group”.
4. Press ENTER to play the selected group of photo files from the
sublist.
Changing the color information
1. Select “Color” as the sorting standard in the Photo List and press the
◄ or ► button to select a photo.
Changing the information of multiple files
Press the ◄ or ► button to select the desired photo in the Photo list.
Then press the yellow button.
Repeat the above operation to select multiple photos.
The mark appears to the left of the selected photo.
2. Press the TOOLS button.
3. Press the ▲ or ▼ button to select “Change Group”.
Press the ENTER button.
4. Press the ◄ or ► button to select the desired option, then press the
ENTER button.
The group information of the current file is updated and the file is
moved to the new group.
“Color” options: Red, Yellow, Green, Blue, Magenta, Black, Gray,
Unclassified.
Composition
Sorts photos by composition.
You can change the compositional information of photos.
1. Select “Composition” as the sorting standard in the Photo List.
2. Press the ◄ or ► button to select from the sublist of files grouped by
compositon.
To move to the previous / next group, press the (REW) or
(FF) button.
3. Press the TOOLS button. Press the ▲ or ▼ button to select “Play
Current Group”.
4. Press ENTER to play the selected group of photo files from the
sublist.
Changing the composition information
1. Select “Composition” as the sorting standard in the Photo List and press
the ◄ or ► button to select a photo.
Changing the information of multiple files
Press the ◄ or ► button to select the desired photo in the Photo list.
Then press the yellow button.
Repeat the above operation to select multiple photos.
The mark appears to the left of the selected photo.
2. Press the TOOLS button.
3. Press the ▲ or ▼ button to select “Change Group”.
Press the ENTER button.
4. Press the ◄ or ► button to select the desired option, then press the
ENTER button.
The group information of the current file is updated and the file is
moved to the new group.
“Composition” options: (horizontal), (vertical), (object),
(perspective), (pattern), Unclassified
➣
➣
➣
➣
➣
➣
➣
➣
➣
➣
Photo
SUM Device Favorites Setting Select Jump Option
image_1.jpg
Month : Jan
Date : Jan.01.2008
Color : Gray
Composition :
Folder : P-other
Favorite : ★ ★ ★
Timeline
Color
Composition
▲
Photo
SUM Device Favorites Setting Select Jump Option
image_1.jpg
Month : Jan
Date : Jan.01.2008
Color : Gray
Composition :
Folder : P-other
Favorite : ★ ★ ★
Color
Composition
Folder
Unclassified
▲
Slide Show
Play Current Group
Delete
Change Group
▼
Photo
SUM Device Favorites Setting Select Jump Option
image_1.jpg
Month : Jan
Date : Jan.01.2008
Color : Gray
Composition :
Folder : P-other
Favorite : ★ ★ ★
Color
Composition
Folder
Unclassified
▲
Unclassified
Photo
SUM Device Favorites Setting Select Jump Option
image_1.jpg
Month : Jan
Date : Jan.01.2008
Color : Gray
Composition :
Folder : P-other
Favorite : ★ ★ ★
Timeline
Color
Composition
▲
Slide Show
Play Current Group
Delete
Change Group
▼
BN68-01409H-00ENG.indb 50 2008-04-28 �� 5:18:35English - �1
Folder
Sorts photos by folder.
If there are many folders in USB, the photos files are shown in order
in each folder. The photo file in the Root folder is shown first and the
others are shown in alphabetical order by name.
1. Select “Folder” as the sorting standard in the Photo List.
2. Press the ◄ or ► button to select from the sublist of files grouped by
folder.
To move to the previous / next group, press the (REW) or
(FF) button.
3. Press the TOOLS button. Press the ▲ or ▼ button to select “Play
Current Group”.
4. Press ENTER to play the selected group of photo files from the
sublist.
Preference
Sorts photos by preference. (Favorite)
You can change the photo preferences.
1. Select “Preference” as the sorting standard in the Photo List.
2. Press the ◄ or ► button to select from the sublist of files grouped by
preference.
To move to the previous / next group, press the (REW) or
(FF) button.
3. Press the TOOLS button. Press the ▲ or ▼ button to select “Play
Current Group”.
4. Press ENTER to play the selected group of photo files from the
sublist.
Changing the Favorites setting
1. Press the ◄ or ► button to select the desired photo in the Photo list.
Changing the information of multiple files
Press the ◄ or ► button to select the desired photo in the Photo list.
Then press the yellow button.
Repeat the above operation to select multiple photos.
The mark appears to the left of the selected photo.
2. Press the Green button repeatedly until the desired setting appears.
Favorites settings change completed.
“Favorite” options: ★ ★ ★ , ★ ★ ★ , ★ ★ ★ , ★ ★ ★
Users can select the number of stars (up to 3) according to their
preference.
➣
➣
➣
➣
➣
➣
➣
➣
Photo
SUM Device Favorites Setting Select Jump Option
image_1.jpg
Month : Jan
Date : Jan.01.2008
Color : Gray
Composition :
Folder : P-other
Favorite : ★ ★ ★
Composition
Folder
Preference
P-other Photo-1
▲
Slide Show
Play Current Group
Delete
Information
▼
Photo
SUM Device Favorites Setting Select Jump Option
image_1.jpg
Month : Jan
Date : Jan.01.2008
Color : Gray
Composition :
Folder : P-other
Favorite : ★ ★ ★
Folder
Preference
Monthly
★ ★ ★ ★ ★ ★ ★ ★ ★ ★ ★ ★
▲
BN68-01409H-00ENG.indb 51 2008-04-28 �� 5:18:36English - ��
Deleting the Photo file
1. Press the ◄ or ► button to select the desired photo in the Photo list.
2. Press the TOOLS button.
3. Press the ▲ or ▼ button to select “Delete”, then press the ENTER
button.
The “Delete this file?” message appear.
4. Press the ◄ or ►button to select “OK”, then press the ENTER button.
The photo is deleted.
When a read-only file is deleted, the “This File is read-only file. Delete
it?” message appear.
If you select “Cancel”, the deletion is cancelled.
5. To exit “WISELINK” mode, press the W.LINK button on the remote
control.
You cannot remove the PTP-connected digital camera picture files.
While removing files, don’t remove the USB memory device.
You cannot recover a deleted photo file.
Deleting Multiple Photos
1. Press the ◄ or ► button to select the desired photo in the Photo list.
Then press the yellow button.
Repeat the above operation to select multiple photos.
The mark appears to the left of the selected photo.
2. Press the TOOLS button.
3. Press the ▲ or ▼ button to select “Delete selected File”, then press the
ENTER button.
The “Delete the selected files?” message appear.
4. Press the ◄ or ► button to select “OK”, then press the ENTER button.
The selected photos are deleted.
If you select “Cancel”, the deletion is cancelled.
5. To exit “WISELINK” mode, press the W.LINK button on the remote
control.
You cannot remove the read-only files from the selected ones.
You cannot recover a deleted photo file.
Viewing the Photo Information
The photo file information including the order of the file in the current directory,
the name, the size, the resolution, the date modified and the path is displayed.
1. Press the ◄ or ► button to select the desired photo in the Photo list.
2. Press the TOOLS button.
3. Press the ▲ or ▼ button to select “Information”, then press the ENTER
button.
The information on the selected photo appears.
Press the INFO button to viewing the information.
➣
➣
➣
➣
➣
➣
➣
➣
➣
➣
➣
➣
➣
➣
➣
O
Name : image_1.jpg
Size : 2.0MB
Resolution : 440x440
Date : Jan.1.2008
Path : /Photo/
OK
Photo Info
Photo
SUM Device Favorites Setting Select Jump Option
image_1.jpg
Month : Jan
Date : Jan.01.2008
Color : Gray
Composition :
Folder : P-other
Favorite : ★ ★ ★
Preference
Monthly
Timeline
Jan Nov
▲
Slide Show
Delete selected File
Deselect All
Remove Safely
2File(s) Selected
Delete
OK Cancel
Selected File(s) : image... 2 File(s)
Delete the selected files?
Photo
SUM Device Favorites Setting Select Jump Option
image_1.jpg
Month : Jan
Date : Jan.01.2008
Color : Gray
Composition :
Folder : P-other
Favorite : ★ ★ ★
Preference
Monthly
Timeline
Jan Nov
▲
Slide Show
Play Current Group
Delete
Information
▼
Delete
OK Cancel
Selected File(s) : image... 1 File(s)
Delete this file?
Photo
SUM Device Favorites Setting Select Jump Option
image_1.jpg
Month : Jan
Date : Jan.01.2008
Color : Gray
Composition :
Folder : P-other
Favorite : ★ ★ ★
Preference
Monthly
Timeline
Jan Nov
▲
▲
Play Current Group
Delete
Information
Remove Safely
BN68-01409H-00ENG.indb 52 2008-04-28 �� 5:18:38English - ��
Viewing a Photo or Slide Show
Viewing a Slide Show
1. Press the W.LINK button on the remote control to display the “WISELINK”
menu.
2. Press the ◄ or ► button to move to “Photo”, then press the ENTER
button.
Photo files are displayed.
3. Press the ◄ or ► button to select the desired photo in the Photo list.
4. Press the TOOLS button.
5. Press the ▲ or ▼ button to select “Slide Show”, then press the
ENTER button.
All files in the photo list will be used for the Slide Show.
During the slide show, files are displayed in order from the currently
shown file.
The Slide Show progresses in the order sorted in the Photo list.
Music files can be automatically played during the Slide Show if the
“Background Music” is set to “On”.
(Refer to page 55).
While a photo list is displayed, press the (Play) / ENTER
button on the remote control to start slide show.
To perform a SlideShow with only the selected files
1. Press the ◄ or ► button to select the desired photo in the Photo list.
Then press the yellow button. Repeat the above operation to select multiple photos.
The mark appears to the left of the selected photo.
If you select one file, the SlideShow will not be performed.
2. Press the (Play) / ENTER button.
The selected files will be used for the Slide Show.
If you have selected files, only the selected files will be used for the Slide Show.
Playing current group
1. Press the ▲ or ▼ button to select a sorting standard.
(“Monthly”, “Timeline”, “Color”, “Composition”, “Folder”, “Preference”)
2. Press the ◄ or ► button to select the desired photo in the Photo list.
To move to the previous / next group, press the (REW) or
(FF) button.
3. Press the TOOLS button.
4. Press the ▲ or ▼ button to select “Play Current Group”, then press the
ENTER button. Only the photos in the sorting group including the
selected files will be used for the Slide Show.
5. To exit “WISELINK” mode, press the W.LINK button on the remote control.
Slide show function information icon (Displayed at the top left of the screen)
Icon Current OSD Function
► (Photo) SlideShow Photo Slide Show is in progress.
❙❙ Photo Pause
You can pause a Slide Show by pressing the (Pause)/ENTER button
on the remote control during a Slide Show.
To resume the Slide Show, press the (Play)/ENTER button on the
remote control again.
➣
➣
➣
➣
➣
O
➣
➣
➣
➣
➣
Photo
SUM Device Favorites Setting Select Jump Option
image_1.jpg
Month : Jan
Date : Jan.01.2008
Color : Gray
Composition :
Folder : P-other
Favorite : ★ ★ ★
Preference
Monthly
Timeline
Jan Nov
▲
Slide Show
Play Current Group
Delete
Information
▼
Photo
SUM Device Favorites Setting Select Jump Option
image_1.jpg
Month : Jan
Date : Jan.01.2008
Color : Gray
Composition :
Folder : P-other
Favorite : ★ ★ ★
Preference
Monthly
Timeline
Jan Nov
▲
Slide Show
Play Current Group
Delete
Information
▼
SUM EPause Previous Next Option Return
► Normal 20/22 image_1.jpg 440x440 2.0KB 2008/1/1
BN68-01409H-00ENG.indb 53 2008-04-28 �� 5:18:39English - �4
Viewing a photo
1. Press the W.LINK button on the remote control to display the “WISELINK”
menu.
2. Press the ◄ or ► button to move to “Photo”, then press the ENTER
button.
Photo files are displayed.
3. Press the ◄ or ► button to select the desired photo in the Photo list.
Then Press the Yellow button to select only one file.
4. Press the ENTER button over a photo icon.
The currently selected photo is displayed in full screen.
Using the option menu during a slide show (or Viewing a Photo)
1. During a slide show(or viewing a photo), Press the TOOLS button to set the option.
2. Press the ▲ or ▼ button to select the desired option. Then press the ENTER button.
Start Slide Show (or Stop Slide Show)
You can start or stop a Slide Show.
Press the ▲ or ▼ button to select “Start Slide Show” (or “Stop Slide Show”),
then press the ENTER button.
You can select the SlideShow speed only during a slide show.
You can also change the speed of the Slide Show by pressing the
(REW) or (FF) button during the Slide Show.
Rotate
You can rotate images in full screen mode.
Press the ▲ or ▼ button to select “Rotate”, then press the ENTER button.
Press the ◄ or ► button repeatedly to rotate the photo by the desired amount.
Whenever you press the ◄ button, it rotates by 270˚, 180˚, 90˚, and 0˚.
Whenever you press the ► button, it rotates by 90˚, 180˚, 270˚, and 0˚.
If you have select “Zoom”, the “Rotate” deactivated.
The rotated file is not saved.
The Rotating function information icon is displayed at the top right of the
screen
Icon Current OSD Function
0˚ Rotating (0°)
This rotates a photo to its original
position
90˚ Rotating (90°) This rotates a photo by 90 degrees
180˚ Rotating (180°) This rotates a photo by 180 degrees
270˚ Rotating (270°) This rotates a photo by 270 degrees
➣
➣
➣
➣
➣
➣
➣
➣
➣
SUM ESlide Show Previous Next Option Return
20/22 image_1.jpg 440x440 2.0KB 2008/1/1
TOOLS
Stop Slide Show
Rotate
Zoom
Slide Show Speed : Normal
Background Music : Off
Background Music Setting
Picture Mode : Standard
Sound Mode : Custom
Information
Move Enter e Exit
Rotate
90˚
BN68-01409H-00ENG.indb 54 2008-04-28 �� 5:18:39English - ��
Zoom
You can zoom into images in full screen mode.
Press the ▲ or ▼ button to select “Zoom”, then press the ENTER button.
Press the ◄ or ► button repeatedly to increase or decrease the Zoom effect.
(x1 → x2 → x4)
To move the enlarged photo image, press the ENTER button, then press
the ▲/▼/◄/► buttons.
Note that when the enlarged picture is smaller than the original screen
size, the location change function doesn’t work.
The enlarged file is not saved.
If you have select “Zoom”, the “Rotate” deactivated.
Zoom function information icon is displayed at the top right of the screen.
Icon Current OSD Function
x2 Zoom (x 2) Zoom-into a photo at 2x.
x4 Zoom (x 4) Zoom-into a photo at 4x.
x1 Zoom (x 1) Restore a photo to its original size.
Pan Down
Pan down to view the lower part of a
zoomed-in photo.
Pan Up
Pan up to view the upper part of a
zoomed-in photo.
Pan Right
Pan right to view the right side of a
zoomed-in photo.
Pan Left
Pan left to view the left side of a
zoomed-in photo.
Slide Show Speed
You can select the slide show speed.
Press the ▲ or ▼ button to select “Slide Show Speed”.
Press the ◄ or ► button to select the desired option. (Fast → Slow → Normal)
You can select the SlideShow speed only during a slide show.
Background Music
If you set ”Background Music” to On, the background music will be played
when viewing photos one by one or in a Slide Show.
Press the ▲ or ▼ button to select “Background Music”.
Press the ◄ or ► button to select “On” or “Off”.
If you set ”Background Music” to On, a screen appears immediately where
you can set the Background Music.
On: When the background music is available, if you select On, the music
is played back. To use this feature, there must be music and photo files
stored on the USB device.
Off: Background music is not played.
•
•
➣
➣
➣
➣
➣
➣
TOOLS
Stop Slide Show
Rotate
Zoom
Slide Show Speed ◄ Normal ►
Background Music : Off
Background Music Setting
Picture Mode : Standard
Sound Mode : Custom
Information
Move Adjust e Exit
TOOLS
Stop Slide Show
Rotate
Zoom
Slide Show Speed : Normal
Background Music ◄ Off ►
Background Music Setting
Picture Mode : Standard
Sound Mode : Custom
Information
Move Adjust e Exit
nMove Enter Return
x2
Zoom
x2
BN68-01409H-00ENG.indb 55 2008-04-28 �� 5:18:40English - �6
Background Music Setting
You can set the background music.
Press the ▲ or ▼ button to select “Background Music Setting”, then press the
ENTER button.
If you turn off the “Background Music”, even if the “Background Music
Settings” have been set up, the background music will not be played.
Loading music files is needed to change BGM mode. Play music files in
music category to load.
“Background Music setting” menu is displayed.
Press the ◄ or ► button to select the desired BGM (Background music)
mode. (Shuffle, Selected file, Mood)
Shuffle: Plays music files in random order.
Selected file: Plays a selected music file.
Mood: Plays music files of a particular mood only.
•
•
•
Selectig the background music file
Press the ◄ or ► button to set “BGM Mode” to “Selected file”.
Press the ▲ or ▼ button to select “Select Music File”, then press the
ENTER button.
Press the ▲ or ▼ button to select a music file, then press the yellow
button.
The mark appears to the left of the selected music.
Repeat the above operation to select multiple music files.
Press the ENTER button.
Selecting the background music file mood
Press the ◄ or ► button to set “BGM Mode” to “Mood”.
Press the ▲ or ▼ button to select “BGM Mood”. Then press ◄ or ►
button to select the desired BGM mood. Press the ENTER button.
BGM mode option: Energetic, Rhythmical, Sad, Exciting, Calm
WISELINK identifies the mood of the music files and groups them
accordingly by analyzing the music files on the USB device.
Picture Mode
You can set the Picture mode. (Refer to page 25)
Sound Mode
You can set the Sound mode. (Refer to page 30)
Information
The photo file information including the order of the file in the current directory, the name, the size, the resolution, the date
modified and the path is displayed. (Refer to page 52)
Remove Safely
You can remove the device safely from the TV.
Press the ▲ or ▼ button to select “Remove Safely”, then press the ENTER button.
Remove the USB device from the TV.
➣
➣
➣
➣
➣
➣
Background Music setting
BGM Mode ◄ Shuffle ►
BGM Mood : Calm
Select Music File
Move Adjust Enter Return
Background Music setting
BGM Mode ◄ Selected file ►
BGM Mood : Calm
Select Music File
Move Enter Return
Background Music setting
Select Move Enter Return
../Music/ 2 File(s) Selected
Music
Thanks
I Love You
Better than yesterday
▼
Background Music setting
BGM Mode : Mood
BGM Mood ◄ Calm ►
Select Music File
Move Adjust Enter Return
TOOLS
Stop Slide Show
Rotate
Zoom
Slide Show Speed : Normal
Background Music : Off
Background Music Setting
Picture Mode : Standard
Sound Mode : Custom
Information
Move Enter e Exit
BN68-01409H-00ENG.indb 56 2008-04-28 �� 5:18:40English - ��
Using the Music List
This menu shows MP3 files from among the files saved on a USB memory device.
1. Press the W.LINK button on the remote control to display the “WISELINK”
menu.
2. Press the ◄ or ► button to select “Music”, then press the ENTER
button.
Music files are displayed.
Press the (Play) / ENTER button over a music icon to play
the music.
To move to the previous / next group, press the (REW) or
(FF) button.
Screen Display
Music
SUM Device Favorites Setting Select Jump Option
Preference
Title
Artist
Energetic ★ ★ ★
Jee
Album 1
2005
Blues
Thanks
Sad ★ ★ ★
Darby
Album 2
2005
Pop
I Love You
Calm ★ ★ ★
Catherine
Album 3
2005
Pop
Better than yesterday
G H I J L P S T V
▲
1File(s) Selected
4
5
2 3
1
6
1 Currently selected music
Shows the currently selected music.
2 Current Sort Standard
Press the ▲ or ▼ button to change the standard for sorting music files.
(“Title”, “Artist”, “Mood”, “Genre”, “Folder”, “Preference”)
3 View Groups
Shows the sorting groups. The sorting group including the currently selected music file is highlighted.
4 Current Device
Shows the currently selected device name. Press the Red button to select a device.
➣
➣
➣
WISELINK
Photo
SUM Device e Exit
Music Setup
MUSIC
SUM
851.98MB/995.00MB Free
Music
SUM Device Favorites Setting Select Jump Option
Preference
Title
Artist
Energetic ★ ★ ★
Jee
Album 1
2005
Pop
Thanks
Sad ★ ★ ★
Darby
Album 2
2005
Pop
I Love You
Calm ★ ★ ★
Catherine
Album 3
2005
Pop
Better than yesterday
F G H I J L P S T V
▲
BN68-01409H-00ENG.indb 57 2008-04-28 �� 5:18:41English - �8
Sorting Music List
You can sort music files in the Music List by a particular standard.
1. Press the W.LINK button on the remote control to display the WISELINK
menu.
2. Press the ◄ or ► button to select “Music”, then press the ENTER
button.
Music files are displayed.
3. Press the ▲ or ▼ button to select a sorting standard.
(“Title”, “Artist”, “Mood”, “Genre”, “Folder”, “Preference”)
Music files are sorted according to the newly selected sorting
standard.
4. Press the ENTER button to start playing music in the order selected by
the user.
Music information is set automatically and you can change the
Favorite information.
Music files for which information cannot be displayed are set to
“Unclassified”.
If there is no title information for a music file, the filename is displayed.
If no information is available for the Genre, Artist, Album, or Year, the
corresponding item is displayed as blank.
Title
Sorts music files by the title.
It sorts the Music titles in alphabetical order, and shows the music file.
1. Select “Title” as the sorting standard in the Music List.
2. Press the ◄ or ► button to select from the sublist of files grouped in
alphabetical order.
To move to the previous / next group, press the (REW) or
(FF) button.
3. Press the TOOLS button.
4. Press the ▲ or ▼ button to select “Play Current Group”.
5. Press ENTER to play the selected group of music files from the
sublist.
➣
➣
➣
➣
➣
➣
➣
➣
5 Item Selection Information
Shows the number of music files that are selected by pressing the Yellow button.
6 Help Items
Red(Device) button: Selects a connected device.
Green(Favorites Setting) button: Changes the favorites setting for the selected music. Press this button
repeatedly until the desired value appears. (Refer to page 60)
Yellow(Select) button: Selects music files from the music list. Selected music files are marked with a symbol on
the left.
(jump) button: Jumps to the previous sorting group / Jumps to the next sorting group.
TOOLS(Option) button: Displays the “Play Current Group”, “Delete”, “Change Group” (in “Mood” group),
“Information” or “Remove Safely” menus.
•
•
•
•
•
WISELINK
Photo
SUM Device e Exit
Music Setup
MUSIC
SUM
851.98MB/995.00MB Free
Music
SUM Device Favorites Setting Select Jump Option
Preference
Title
Artist
Energetic ★ ★ ★
Jee
Album 1
2005
Pop
Thanks
Sad ★ ★ ★
Darby
Album 2
2005
Pop
I Love You
Calm ★ ★ ★
Catherine
Album 3
2005
Pop
Better than yesterday
F G H I J L P S T V
▲
Music
SUM Device Favorites Setting Select Jump Option
Preference
Title
Artist
Energetic ★ ★ ★
Jee
Album 1
2005
Pop
Thanks
Sad ★ ★ ★
Darby
Album 2
2005
Pop
I Love You
Calm ★ ★ ★
Catherine
Album 3
2005
Pop
Better than yesterday
F G H I J L P S T V
▲
Play Current Group
Delete
Information
Remove Safely
BN68-01409H-00ENG.indb 58 2008-04-28 �� 5:18:41English - �9
Artist
Sorts music files by the artist.
It sorts the music file by artist in alphabetical order.
1. Select “Artist” as the sorting standard in the Music List.
2. Press the ◄ or ► button to select from the sublist of files grouped in
alphabetical order.
To move to the previous / next group, press the (REW) or
(FF) button.
3. Press the TOOLS button.
4. Press the ▲ or ▼ button to select “Play Current Group”.
5. Press ENTER to play the selected group of music files from the
sublist.
Mood
Sorts music files by the mood.
You can change the music mood information.
1. Select “Mood” as the sorting standard in the Music List.
2. Press the ◄ or ► button to select from the sublist of files grouped by
mood.
To move to the previous / next group, press the (REW) or
(FF) button.
3. Press the TOOLS button.
4. Press the ▲ or ▼ button to select “Play Current Group”.
5. Press ENTER to play the selected group of music files from the
sublist.
Changing the Mood information
1. Select “Mood” as the sorting standard in the Music List and press the
◄ or ► button to select a music file.
2. Press the TOOLS button.
3. Press the ▲ or ▼ button to select “Change Group”. Press the ENTER
button.
Wiselink identifies the mood of the music files and groups them
accordingly by analyzing the music files on the USB device.
“Mood” information extracted from a music file may not always match
the Mood option. For example, a file you think is “Energetic” may be
extracted to the “Exciting” mood option.
4. Press the ◄ or ► button to select the desired option, then press the
ENTER button.
The group information of the current file is updated and the file is
moved to the new group.
“Mood” options: Energetic, Rhythmical, Sad, Exciting, Calm,
Unclassified
➣
➣
➣
➣
➣
➣
➣
➣
Music
SUM Device Favorites Setting Select Jump Option
Energetic ★ ★ ★
Jee
Album 1
2005
Pop
Thanks
Sad ★ ★ ★
Darby
Album 2
2005
Pop
I Love You
Calm ★ ★ ★
Catherine
Album 3
2005
Pop
Better than yesterday
Title
Artist
Mood
Catherine Darby Darby Darby Darby Jee Jee
▲
Play Current Group
Delete
Information
Remove Safely
Music
SUM Device Favorites Setting Select Jump Option
Energetic ★ ★ ★
Jee
Album 1
2005
Pop
Thanks
Sad ★ ★ ★
Darby
Album 2
2005
Pop
I Love You
Calm ★ ★ ★
Catherine
Album 3
2005
Pop
Better than yesterday
Play Current Group
Delete
Change Group
Information
▼
Artist
Mood
Genre
Rhythmical Sad Exciting Calm ...
▲
Music
SUM Device Favorites Setting Select Jump Option
Energetic ★ ★ ★
Jee
Album 1
2005
Pop
Thanks
Sad ★ ★ ★
Darby
Album 2
2005
Pop
I Love You
Calm ★ ★ ★
Catherine
Album 3
2005
Pop
Better than yesterday
Artist
Mood
Genre
Rhythmical Sad Exciting Calm ...
▲
Energetic Rhythmical Sad Exciting Calm Unclassified
BN68-01409H-00ENG.indb 59 2008-04-28 �� 5:18:41English - 60
Genre
Sorts music files by the genre.
1. Select “Genre” as the sorting standard in the Music List.
2. Press the ◄ or ► button to select from the sublist of files grouped by
Genre.
To move to the previous / next group, press the (REW) or
(FF) button.
3. Press the TOOLS button.
4. Press the ▲ or ▼ button to select “Play Current Group”.
5. Press ENTER to play the selected group of music files from the
sublist.
Folder
Sorts music files by the folder.
If there are many folders in USB, the files are shown in order in each
folder. The music file in the Root folder is shown first and the others are
shown in alphabetical order by name.
1. Select “Folder” as the sorting standard in the Music List.
2. Press the ◄ or ► button to select from the sublist of files grouped by
Folder.
To move to the previous / next group, press the (REW) or
(FF) button.
3. Press the TOOLS button.
4. Press the ▲ or ▼ button to select “Play Current Group”.
5. Press ENTER to play the selected group of music files from the
sublist.
Preference
Sorts music files by preference. (Favorite)
You can change the music files preferences.
1. Select “Preference” as the sorting standard in the Music List.
2. Press the ◄ or ► button to select from the sublist of files grouped by
Preference.
To move to the previous / next group, press the (REW) or
(FF) button.
3. Press the TOOLS button.
4. Press the ▲ or ▼ button to select “Play Current Group”.
5. Press ENTER to play the selected group of music files from the
sublist.
Changing the Favorites setting
1. Press the ◄ or ► button to select the desired music in the music list.
Changing the information of multiple files
Press the ◄ or ► button to select the desired music in the music list.
Then press the yellow button.
Repeat the above operation to select multiple musics.
The mark appears to the left of the selected music.
2. Press the Green button repeatedly until the desired setting appears.
Favorites settings change completed.
“Favorite” options: ★ ★ ★ , ★ ★ ★ , ★ ★ ★ , ★ ★ ★
Users can select the number of stars (up to 3) according to their
preference.
3. Press the ENTER button to start playing music.
➣
➣
➣
➣
➣
➣
➣
➣
➣
Music
SUM Device Favorites Setting Select Jump Option
Energetic ★ ★ ★
Jee
Album 1
2005
Pop
Thanks
Sad ★ ★ ★
Darby
Album 2
2005
Pop
I Love You
Calm ★ ★ ★
Catherine
Album 3
2005
Pop
Better than yesterday
Play Current Group
Delete
Information
Remove Safely
Mood
Genre
Folder
Other Pop R&B Soundtr... Top 40 Acid Jazz Ball..
▲
Music
SUM Device Favorites Setting Select Jump Option
Energetic ★ ★ ★
Jee
Album 1
2005
Pop
Thanks
Sad ★ ★ ★
Darby
Album 2
2005
Pop
I Love You
Calm ★ ★ ★
Catherine
Album 3
2005
Pop
Better than yesterday
Play Current Group
Delete
Information
Remove Safely
Genre
Folder
Preference
Other Music Other2
▲
Music
SUM Device Favorites Setting Select Jump Option
Energetic ★ ★ ★
Jee
Album 1
2005
Pop
Thanks
Sad ★ ★ ★
Darby
Album 2
2005
Pop
I Love You
Calm ★ ★ ★
Catherine
Album 3
2005
Pop
Better than yesterday
Play Current Group
Delete
Information
Remove Safely
Folder
Preference
Title
★ ★ ★ ★ ★ ★ ★ ★ ★ ★ ★ ★
▲
BN68-01409H-00ENG.indb 60 2008-04-28 �� 5:18:42English - 61
Deleting the Music file
1. Press the ◄ or ► button to select the desired music file in the music list.
2. Press the TOOLS button.
3. Press the ▲ or ▼ button to select “Delete”, then press the ENTER
button.
The “Delete this file?” message appear.
4. Press the ◄ or ► button to select “OK”, then press the ENTER button.
The music is deleted.
When a read-only file is deleted, the “This File is read-only file. Delete
it?” message appear.
If you select “Cancel”, the deletion is cancelled.
5. To exit “WISELINK” mode, press the W.LINK button on the remote
control.
While removing files, don’t remove the USB memory device.
You cannot recover deleted music files.
Deleting Multiple Music files
1. Press the ◄ or ► button to select the desired music in the music list.
Then press the yellow button.
Repeat the above operation to select multiple music files.
The mark appears to the left of the selected music files.
2. Press the TOOLS button.
3. Press the ▲ or ▼ button to select “Delete selected File”, then press the
ENTER button.
The “Delete the selected files?” message appear.
4. Press the ◄ or ► button to select “OK”, then press the ENTER button.
The selected music files are deleted.
If you select “Cancel”, the deletion is cancelled.
5. To exit “WISELINK” mode, press the W.LINK button on the remote
control.
You cannot remove the read-only files from the selected ones.
You cannot restore the deleted music files.
Viewing the Information
The music file information including the order of the file in the current directory,
the name, the size, the date modified and the path is displayed.
1. Press the ◄ or ► button to select the desired music in the music list.
2. Press the TOOLS button.
3. Press the ▲ or ▼ button to select “Information”, then press the ENTER
button.
The information on the selected file appears.
Press the INFO button to viewing the information.
➣
➣
➣
➣
➣
➣
➣
➣
➣
➣
➣
➣
➣
➣
O
Name : I Love You.mp3
Size : 5.2MB
Date : Jan.1.2008
Path : /Music/
OK
Music Info
Delete
OK Cancel
Selected File(s) :I Love Y... 1 File(s)
Delete this file?
Delete
OK Cancel
Selected File(s) :I Love Y... 2 File(s)
Delete the selected files?
Music
SUM Device Favorites Setting Select Jump Option
Preference
Title
Artist
Energetic ★ ★ ★
Jee
Album 1
2005
Pop
Thanks
Sad ★ ★ ★
Darby
Album 2
2005
Pop
I Love You
Calm ★ ★ ★
Catherine
Album 3
2005
Pop
Better than yesterday
F G H I J L P S T V
▲
Play Current Group
Delete
Information
Remove Safely
Music
SUM Device Favorites Setting Select Jump Option
Preference
Title
Artist
Energetic ★ ★ ★
Jee
Album 1
2005
Pop
Thanks
Sad ★ ★ ★
Darby
Album 2
2005
Pop
I Love You
Calm ★ ★ ★
Catherine
Album 3
2005
Pop
Better than yesterday
F G H I J L P S T V
▲
Delete selected File
Deselect All
Remove Safely
2File(s) Selected
Music
SUM Device Favorites Setting Select Jump Option
Preference
Title
Artist
Energetic ★ ★ ★
Jee
Album 1
2005
Pop
Thanks
Sad ★ ★ ★
Darby
Album 2
2005
Pop
I Love You
Calm ★ ★ ★
Catherine
Album 3
2005
Pop
Better than yesterday
F G H I J L P S T V
▲
Play Current Group
Delete
Information
Remove Safely
BN68-01409H-00ENG.indb 61 2008-04-28 �� 5:18:43English - 6�
Playing a Music File
Playing a music file
1. Press the W.LINK button on the remote control to display the “WISELINK”
menu.
2. Press the ◄ or ► button to select “Music”, then press the ENTER
button.
Music files are displayed.
3. Pressing the ◄ or ► button to select a music file to be played, then press
the ENTER button.
This menu only shows files with the MP3 file extension. Files with
other file extensions are not displayed, even if they are saved on the
same USB device.
Press the (Play) / ENTER button over a music icon to play
the music.
(REW) or (FF) buttons do not function during play.
Press the (Pause) / ENTER button while playing a music file
to pause the file. Press the (Stop) button to exit Play mode.
The selected file is displayed at the top with its playing time.
To adjust the music volume, press the VOL – or VOL + button on the
remote control. To mute the sound, press the MUTE button on the
remote control.
The playing duration of a music file may be displayed as ‘00:00:00’ if
its playing time information is not found at the start of the file.
4. To exit “WISELINK” mode, press the W.LINK button on the remote control.
Playing the music group
1. Press the W.LINK button on the remote control to display the WISELINK
menu.
2. Press the ◄ or ► button to select “Music”, then press the ENTER
button.
To move to the previous / next group, press the (REW) or
(FF) button.
3. Press the ◄ or ► button to select the desired music file.
4. Press the TOOLS button.
5. Press the ▲ or ▼ button to select “Play Current Group”, then press the
ENTER button.
The music files in the sorting group including the selected file are played.
6. To exit “WISELINK” mode, press the W.LINK button on the remote control.
➣
➣
➣
➣
➣
➣
➣
➣
➣
➣
SUM Pause Previous Next Option Return
7/14 00:01:15 00:05:41
I Love You
Music
SUM Device Favorites Setting Select Jump Option
Preference
Title
Artist
Energetic ★ ★ ★
Jee
Album 1
2005
Pop
Thanks
Sad ★ ★ ★
Darby
Album 2
2005
Pop
I Love You
Calm ★ ★ ★
Catherine
Album 3
2005
Pop
Better than yesterday
F G H I J L P S T V
▲
Music
SUM Device Favorites Setting Select Jump Option
Preference
Title
Artist
Energetic ★ ★ ★
Jee
Album 1
2005
Pop
Thanks
Sad ★ ★ ★
Darby
Album 2
2005
Pop
I Love You
Calm ★ ★ ★
Catherine
Album 3
2005
Pop
Better than yesterday
F G H I J L P S T V
▲
Play Current Group
Delete
Information
Remove Safely
BN68-01409H-00ENG.indb 62 2008-04-28 �� 5:18:43English - 6�
Playing the selected music files
1. Press the W.LINK button on the remote control to display the WISELINK
menu.
2. Press the ◄ or ► button to select “Music”, then press the ENTER
button.
3. Press the ◄ or ► button to select the desired music file, then press the
yellow button. Repeat the above operation to select multiple music files.
The mark appears to the left of the selected music file.
4. Press the (Play) / ENTER button.
Only the selected file is played.
Press the (Stop) button while playing to stop the current item and
to return to the music list.
5. To exit “WISELINK” mode, press the W.LINK button on the remote
control.
Music function information icon (Displayed at the top left of the screen)
Icon Current OSD Function
(Music) Repeat
When all music files in the folder(or the selected file) are repeated.
“Repeat Mode” is “On”.
(Music) Once
When all music files in the folder(or the selected file) are played once.
“Repeat Mode” is “Off”.
► / ❙❙ (Music) Play/Pause When pressing the (Play)/ (Pause)/ENTER button on the
remote control while music is playing.
Repeating Music Play
1. While a Music file is playing, press the TOOLS button.
2. Press the ▲ or ▼ button to select “Repeat Mode”.
3. Press the ◄ or ► button to select “On” or “Off”.
On: Plays back all music files in the folder(or the selected file)
repeatedly.
Off: Doesn’t play back repeatedly.
•
•
4. To exit “WISELINK” mode, press the W.LINK button on the remote
control.
➣
➣
➣
TOOLS
Repeat Mode ◄ On ►
Picture Mode : Standard
Sound Mode : Custom
Information
Remove Safely
Move Adjust e Exit
SUM Pause Previous Next Option Return
7/14 00:01:15 00:05:41
I Love You
Music
SUM Device Favorites Setting Select Jump Option
Preference
Title
Artist
Energetic ★ ★ ★
Jee
Album 1
2005
Pop
Thanks
Sad ★ ★ ★
Darby
Album 2
2005
Pop
I Love You
Calm ★ ★ ★
Catherine
Album 3
2005
Pop
Better than yesterday
F G H I J L P S T V
▲
2File(s) Selected
BN68-01409H-00ENG.indb 63 2008-04-28 �� 5:18:44English - 64
Using the Setup Menu
Setup displays the user settings of the WISELINK menu.
1. Press the W.LINK button on the remote control to display the WISELINK
menu.
2. Press the ◄ or ► button to select “Setup”, then press the ENTER
button.
3. Press the ▲ or ▼ button to select the desired option.
(Slide Show Speed, Music Repeat Mode, Screen Saver Run Time,
Information, Remove Safely)
4. Press the ◄ or ► button to select the option, then press the ENTER
button.
Slide Show Speed
Select to control the slide show speed.
Press the ▲ or ▼ button to select “Slide Show Speed”.
Press the ◄ or ► button to select “Fast”, “Normal” or “Slow”.
Music Repeat Mode
Select to repeatedly play music files.
Press the ▲ or ▼ button to select “Music Repeat Mode”.
Press the ◄ or ► button to select “On” or “Off”.
Screen Saver Run Time
Select to set the waiting time before the screen saver appears.
Press the ▲ or ▼ button to select “Screen Saver Run Time”.
Press the ◄ or ► button to select “1 min”, “3 min” or “5 min”.
Information
Select to viewing the information of the connected device.
Press the ▲ or ▼ button to select “Information”, then press the ENTER
button.
Remove Safely
You can remove the device safely from the TV. (Refer to page 56)
To exit WISELINK mode, press the W.LINK button on the remote control.
WISELINK
Photo
SUM Device e Exit
Music Setup
SETUP
SUM
851.98MB/995.00MB Free
Setup
SUM Device Move Adjust Return
Slide Show Speed ◄ Normal ►
Music Repeat Mode : On
Screen Saver Run Time : 3 min
Information
Remove Safely
Setup
SUM Device Move Adjust Return
Slide Show Speed : Normal
Music Repeat Mode ◄ On ►
Screen Saver Run Time : 3 min
Information
Remove Safely
Setup
SUM Device Move Adjust Return
Slide Show Speed : Normal
Music Repeat Mode : On
Screen Saver Run Time ◄ 3 min ►
Information
Remove Safely
Device Type : USB
Device : SUM
Available Memory : 852.90MB
Total Memory : 995.00MB
OK
Device Info
BN68-01409H-00ENG.indb 64 2008-04-28 �� 5:18:44English - 6�
What is Anynet+?
Anynet+ is a function that enables you to control all connected Samsung devices that support Anynet+ with your Samsung
TV’s remote.
About Anynet+
Connecting Anynet+ Devices
The Anynet+ system can be used only with Samsung devices that have the Anynet+ feature. To be sure your Samsung
device has this feature, check if there is an Anynet+ logo on it.
To connect to a TV
TV
SER
Anynet+
Device 1
HDMI 1.�
Cable
Anynet+
Device �
Anynet+
Device �
HDMI 1.�
Cable HDMI 1.�
Cable
Connect the [HDMI 1],
[HDMI 2] or [HDMI 3]
jack on the TV and the
HDMI OUT jack of the
corresponding Anynet+
device using an HDMI
cable.
To connect to Home Theater
SER
TV
Optical Cable
Home Theater
HDMI 1.�
Cable
Anynet+ Device 1
HDMI 1.� Cable
Anynet+ Device �
HDMI 1.� Cable
Anynet+ Device �
HDMI 1.� Cable
1. Connect the
[HDMI 1], [HDMI
2] or [HDMI 3]
jack on the TV
and the HDMI
OUT jack of the
corresponding
Anynet+ device
using an HDMI
cable.
2. Connect the
HDMI IN jack of
the home theater
and the HDMI
OUT jack of the
corresponding
Anynet+ device
using an HDMI
cable.
Connect the Optical cable between the Digital Audio Out (Optical) jack on your TV and the Digital Audio Input on the
Home Theater.
When following the connection above, the Optical jack only outputs 2 channel audio. You will only hear sound from
the Home Theater’s Front Left and Right speakers and the subwoofer. If you want to hear 5.1 channel audio, connect
the Digital Audio Out (Optical) jack on the DVD player or Cable/Satellite Box (ie Anynet Device 1 or 2) directly to the
Amplifier or Home Theater, not the TV.
Connect only one Home Theater.
You can connect an Anynet+ device using the HDMI 1.3 cable. Some HDMI cables may not support Anynet+ functions.
Anynet+ works when the AV device supporting Anynet+ is in the Standby or On status.
Anynet+ supports up to 12 AV devices in total. Note that you can connect up to 3 devices of the same type.
➣
➣
➣
➣
➣
➣
BN68-01409H-00ENG.indb 65 2008-04-28 �� 5:18:45English - 66
Setting Up Anynet+
The following settings help set the Anynet+ functions.
To use the Anynet+ Function, Anynet+ (HDMI-CEC) must be set to On
1. Press the MENU button. Press the ▲ or ▼ button to select “Application”,
then press the ENTER button.
2. Press the ▲ or ▼ button to select “Anynet+ (HDMI-CEC)”, then press the
ENTER button.
3. Press the ENTER button to select “Anynet+ (HDMI-CEC)”.
4. Press the ▲ or ▼ button to select “On”, then press the ENTER button.
The “Anynet+ (HDMI-CEC)” function is enabled.
If you select Off, “Anynet+ (HDMI-CEC)” is disabled.
When the “Anynet+ (HDMI-CEC)” function is disabled, all the Anynet+
related operations are deactivated.
Setting an Anynet+ Device to turn Off Automatically when the TV is Turned Off
1. Press the ▲ or ▼ button to select “Auto Turn Off”, then press the ENTER
button.
2. Press the ▲ or ▼ button to select “Yes”, then press the ENTER button.
The “Auto Turn Off” function is enabled.
If you select “No”, the “Auto Turn Off” function is canceled.
Press the EXIT button to exit.
The active source on the TV remote must be set to TV to use the Anynet+
function.
If you set “Auto Turn Off” to “Yes”, connected external devices are also turned
off when the TV is turned off. If an external device is still recording, it may or
may not turn off.
➣
➣
➣
➣
➣
➣
➣
Scanning and Switching between Anynet+ Devices
1. Press the TOOLS button.
Press the ▲ or ▼ button to select “Device List”, then press the ENTER button.
Anynet+ devices connected to the TV are listed.
If you cannot find a device you want, press the red button to scan for devices.
2. Press the ▲ or ▼ button to select to a particular device and press the ENTER
button. It is switched to the selected device.
Only when you set “Anynet+ (HDMI-CEC)” to On in the “Application” menu, the
“Device List” menu appears.
Switching to the selected devices may take up to 2 minutes. You cannot cancel the operation during the switching
operation.
The time required to scan for devices is determined by the number of connected devices.
When the device scan is complete, the number of devices found are not displayed.
Although the TV automatically scans devices when it is turned on using the POWER button, devices connected when
the TV is already on are not displayed in the device list. In this case, select the Searching Connections menu to search
devices.
If you have selected external input mode by pressing the SOURCE button, you cannot use the Anynet+ function. Make
sure to switch to an Anynet+ device by using the TOOLS button.
➣
➣
➣
➣
➣
➣
➣
➣
Anynet+ (HDMI-CEC)
Anynet+ (HDMI-CEC) : ON
Auto Turn Off :
Off
On
Move Enter Return
Application
WISELINK
Anynet+ (HDMI-CEC) ►
Anynet+ (HDMI-CEC)
Anynet+ (HDMI-CEC) : On
Auto Turn Off :
No
Yes
Move Enter Return
TOOLS
Device List
Record
Timer Recording
Receiver : Off
Picture Mode : Standard
Sound Mode : Custom
Sleep Timer : Off
SRS TS XT : Off
▼
Move Enter e Exit
BN68-01409H-00ENG.indb 66 2008-04-28 �� 5:18:46English - 6�
Anynet+ Menu
The Anynet+ menu changes depending on the type and status of the Anynet+ devices connected to the TV.
Anynet+ Menu Description
View TV Switches from Anynet+ to TV broadcast mode.
Device List Displays the Anynet+ device list.
Record Starts a recording. (This menu works only for a device supporting recording.)
Menu on Device Shows the menu of the connected device.
Example: When a DVD Recorder is connected, the DVD Recorder’s title menu
appears.
Device Operation Shows the play control menu of the connected device.
Example: When a DVD Recorder is connected, the play control menu of the DVD
Recorder appears.
Timer Recording Allows reserving a recording. (This menu works only for a device supporting
recording reservations.)
Stop Recording Stops recording.
Receiver Sound is output through the receiver (home theater).
Setup You can set the Anynet+ (HDMI-CEC), auto turn off, and searching connections for
using Anynet+.
TV Remote Control Buttons Available in Anynet+ Mode
Device Type Operating Status Available Buttons
Anynet+ Device
After switching to the device, when the
menu of the corresponding device is
displayed on the screen.
Numeric buttons
▲/▼/◄/►/ENTER buttons
Colour buttons / EXIT button
After switching to the device, while
playing a file
(Backward search) / (Forward search)
(Stop) / (Play) / (Pause)
Device with built-in Tuner
After switching to the device, when you
are watching a TV program
P > / P > button
Audio Device When Receiver is activated – + / MUTE button
The Anynet+ function only works when the active source on the TV remote control is set to TV.
The button works only while in the recordable state.
You cannot control Anynet+ devices using the buttons on the TV. You can control Anynet+ devices only using the TV
remote control.
The TV remote control may not work under certain conditions. In this case, reselect the Anynet+ device.
The Anynet+ functions do not operate with other manufacturers’ products.
The , operations may differ depending on the device.
➣
➣
➣
➣
➣
➣
Recording
You can make a recording of a TV program using a Samsung recorder.
1. Press the TOOLS button.
2. Press the ▲ or ▼ button to select Recording Immediately and press the ENTER
button. Recording begins.
When there is more than one recording device
When multiple recording devices are connected, the recording devices are listed.
Press the ▲ or ▼ button to select a recording device and press the ENTER
button. Recording begins.
When the recording device is not displayed
Select “Device List” and press the red button to search devices.
Press the EXIT button to exit.
You can record the source streams by selecting “Record” after pressing the TOOLS button.
Pressing the button will record whatever you are currently watching. If you are watching video from another
device, the video from the device is recorded.
Before recording, check whether the antenna jack is properly connected to the recording device. To properly connect
an antenna to a recording device, refer to the recording device’s users manual.
➣
➣
➣
TOOLS
Device List
Record
Timer Recording
Receiver : Off
Picture Mode : Standard
Sound Mode : Custom
Sleep Timer : Off
SRS TS XT : Off
Move Enter e Exit
BN68-01409H-00ENG.indb 67 2008-04-28 �� 5:18:47English - 68
Listening through a Receiver (Home theater)
You can listen to sound through a receiver instead of the TV speaker.
1. Press the TOOLS button. Press the ▲ or ▼ button to select “Receiver”.
2. Press the ◄ or ► button to select to “On”.
Now you can listen to sound through the receiver.
3. Press the EXIT button to exit.
If your receiver supports audio only, it may not appear in the device list.
The receiver will work when you have properly connected the Optical IN jack of the
receiver to the Optical Out jack of the TV.
When the receiver (home theater) is set to On, you can hear sound output from the
TV’s Optical jack. When the TV is displaying a DTV(air) signal, the TV will send out 5.1
channel sound to the Home theater receiver. When the source is a digital component
such as a DVD and is connected to the TV via HDMI, only 2 channel sound will be
heard from the Home Theater receiver.
When using the WISELINK feature, sound may not output properly through the receiver.
When listening through the receiver, there are restrictions for using the PIP and audio-related (MTS, Preferred
language) menus.
If there is a power interruption to the TV when the “Receiver” is set to “On” (by disconnecting the power cord or a
power failure), the “TV Speaker” may be set to “Off” when you turn the TV on again. (see page 31)
➣
➣
➣
➣
➣
➣
Troubleshooting for Anynet+
Symptom Solution
Anynet+ does not work. Check if the device is an Anynet+ device. The Anynet+ system supports Anynet+
devices only.
Connect only one receiver (home theater).
Check if the Anynet+ device power cord is properly connected.
Check the Anynet+ device’s Video/Audio/HDMI 1.3 cable connections.
Check whether Anynet+ (HDMI-CEC) is set to On in the Anynet+ setup menu.
Check whether the TV remote control is in TV mode.
Check whether it is Anynet+ exclusive remote control.
Anynet+ doesn’t work in certain situations. (Searching channels, Operating
WISELINK, Plug & Play, etc.)
When connecting or removing the HDMI 1.3 cable, please make sure to search
devices again or turn your TV off and on again.
Check if the Anynet+ Function of Anynet+ device is set on.
•
•
•
•
•
•
•
•
•
•
I want to start Anynet+. Check if the Anynet+ device is properly connected to the TV and check if the
Anynet+ (HDMI-CEC) is set to On in the Anynet+ Setup menu.
Press the TV/DTV button on the TV remote control to switch to TV. Then press
the TOOLS button to show the Anynet+ menu and select a menu you want.
•
•
I want to exit Anynet+. Select View TV in the Anynet+ menu.
Press the SOURCE button on the TV remote control and select a device other
than Anynet+ devices.
Press P >/> and PRE-CH to change the TV mode.
(Note that the channel button operates only when a tuner-embedded Anynet+
device is not connected.)
•
•
•
The message Connecting to
Anynet+ device... appears on the
screen.
You cannot use the remote control when you are configuring Anynet+ or
switching to a view mode.
Use the remote control when the Anynet+ setting or switching to view mode is
complete.
•
•
The Anynet+ device does not play. You cannot use the play function when Plug & Play is in progress.
The connected device is not
displayed.
Check whether or not the device supports Anynet+ functions.
Check whether or not the HDMI 1.3 cable is properly connected.
Check whether Anynet+ (HDMI-CEC) is set to On in the Anynet+ setup menu.
Search Anynet+ devices again.
You can connect an Anynet+ device using the HDMI 1.3 cable only. Some HDMI
cables may not support Anynet+ functions.
If it is terminated by an abnormal situation such as disconnecting the HDMI cable
or power cord or a power failure, please repeat the device scan.
•
•
•
•
•
•
The TV program cannot be
recorded.
Check whether the antenna jack on the recording device is properly connected.
The TV sound is not output
through the receiver.
Connect the optical cable between TV and the receiver.
TOOLS
Device List
Record
Timer Recording
Receiver ◄ Off ►
Picture Mode : Standard
Sound Mode : Custom
Sleep Timer : Off
SRS TS XT : Off
▼
Move Adjust e Exit
BN68-01409H-00ENG.indb 68 2008-04-28 �� 5:18:47English - 69
Recommendations for Use
Teletext Feature
Most television stations provide written information services via Teletext. The index page of the teletext service gives you
information on how to use the service. In addition, you can select various options to suit your requirements by using the
remote control buttons.
For teletext information to be displayed correctly, channel reception must be stable. Otherwise, information may be
missing or some pages may not be displayed.
1 (exit)
Exit from the teletext display.
2 6 (index)
Used to display the index (contents) page at any time while you are viewing
teletext.
3 8 (store)
Used to store the teletext pages.
4 4 (size)
Press to display the double-size letters in the upper half of the screen. For
lower half of the screen, press it again. To display normal screen, press it once
again.
5 5 (reveal)
Used to display the hidden text (answers to quiz games, for example).
To display normal screen, press it again.
6 /(teletext on/mix)
Press to activate teletext mode after selecting the channel providing the
teletext service. Press it twice to overlap the teletext with the current
broadcasting screen.
7 0 (mode)
Press to select the teletext mode (LIST/FLOF). If you press it in the LIST
mode, it switches into the List save mode. In the List save mode, you can save
teletext page into list using the 8(store) button.
8 1 (sub-page)
Used to display the available sub-page.
9 2 (page up)
Used to display the next teletext page.
0 3 (page down)
Used to display the previous teletext page.
! 9 (hold)
Used to hold the display on a given page if the selected page is linked with
several secondary pages which follow on automatically. To resume, press it
again.
@ 7 (cancel)
Used to display the broadcast when searching for a page.
# Colour buttons (red/green/yellow/blue)
If the FASTEXT system is used by a broadcasting company, the different
topics covered on a teletext page are colour-coded and can be selected
by pressing the coloured buttons. Press one of them corresponding to the
required. The page is displayed with other coloured information that can be
selected in the same way. To display the previous or next page, press the
corresponding coloured button.
You can change teletext pages by pressing the numeric buttons on the
remote control.
➣
➣
1
3
4
5
6
7
8
9
0
!
@
#
2
BN68-01409H-00ENG.indb 69 2008-04-28 �� 5:18:47English - �0
Auto Wall-Mount Adjustment (Sold separately)
Once the auto wall mount is installed, your TV’s position can be easily adjusted.
Entering the menu
1. Press the ▲, ▼, ◄ or ► button on your remote control.
The Wall Mount Adjustment screen is displayed.
If the Auto Wall-Mount screen is not displayed when clicking on a direction
button while watching your TV, use the menu to display that screen.
Press the MENU button to display the menu. Press the ▲ or ▼ button to
select “Setup”, then press the ENTER button.
Press the ▲ or ▼ button to select “Wall-Mount Adjustment”, then press
the ENTER button.
➣
➣
•
•
TV Rear Panel Auto Wall-Mount
SERVICE Cable (Not supplied)
The teletext pages are organized according to six categories:
Part Contents
A Selected page number.
B Broadcasting channel identity.
C Current page number or search indications.
D Date and time.
E Text.
F Status information.
FASTEXT information.
Teletext information is often divided between several pages displayed
in sequence, which can be accessed by:
- Entering the page number
- Selecting a title in a list
- Selecting a coloured heading (FASTEXT system)
Press the TV/DTV button to exit from the teletext display.
➣
➣
Setup
Preference
Light Effect : In Watching TV
Wall-Mount Adjustment ►
Melody : Medium
Entertainment : Off
Energy Saving : Off
PIP
Software Upgrade
Common Interface
BN68-01409H-00ENG.indb 70 2008-04-28 �� 5:18:48English - �1
Remembering the Position
2. Adjust to the desired position using the ▲,▼,◄,► buttons.
If you press an arrow button when no OSD is displayed on the TV
screen, the Adjustment screen appears.
Press the INFO button to reset. Press the ◄ or ► button to select
“Yes”, then press the ENTER button. The position is initialized to
the default setting.
3. Press the blue button.
Press the ▲ and ▼ buttons to select a save mode from either Position 1,
Position 2 or Position 3 in order to save the current position.
To not save the current position, press the RETURN button.
When selecting a save mode, you cannot use the Colour buttons.
4. Press the ENTER button to save.
When Position1 is selected, the message “Current position saved as
Position1” is displayed.
5. Press the ENTER button.
The saved Position appears on the left side of the OSD.
Moving to the remembered position
1. Complete Step 1 of “Entering the menu”.
2. Pressing a Colour (Red, Green, Yellow) button moves the auto wall mount
to the saved position.
You can move the wall mount to one of the 3 pre-set positions by
pressing the Red (Position 1), Green (Position 2) or Yellow (Position
3) buttons.
If you adjust the Position after moving to a pre-set position, the
position display will disappear.
For installation, refer to the Installation Manual provided with the wall
mount.
For product installation and the installation and moving of the wall mount,
make sure to consult a specialized installation company.
This installation manual is to be used when attaching the wall mount to
a wall. When attaching to other building materials, please contact your
nearest dealer.
The auto wall mount will not work when Anynet+ or WISELINK is operating.
37, 40 and 46 models are not compatible with the older wall mount model
(WMN5090A).
➣
➣
➣
➣
➣
➣
➣
➣
➣
➣
➣
➣
➣
Wall-Mount Adjustment
Position 1 � �
Adjust Save Center
Save
Select a mode to save.
Move Enter Return
Position1
Position�
Position�
Wall-Mount Adjustment
Position 1 � �
Adjust Save Center
Position1
BN68-01409H-00ENG.indb 71 2008-04-28 �� 5:18:49English - ��
Using the Anti-Theft Kensington Lock (depending on the model)
The Kensington Lock is a device used to physically fix the system when using it in a public place. The appearance and
locking method may differ from the illustration depending on the manufacturer. Refer to the manual provided with the
Kensington Lock for proper use. The locking device has to be purchased separately.
Figure �
Figure 1
Cable
➣ The location of the Kensington Lock may be different depending on its model.
1. Insert the locking device into the Kensington slot on the LCD TV (Figure 1) and turn it in the locking direction (Figure 2).
2. Connect the Kensington Lock cable.
3. Fix the Kensington Lock to a desk or a heavy stationary object.
BN68-01409H-00ENG.indb 72 2008-04-28 �� 5:18:49English - ��
Securing the TV to the Wall
경고 주의
경고 주의
Caution: Pulling, pushing, or climbing on the TV may cause the TV to fall. In particular, ensure your children do
not hang over or destabilize the TV; doing so may cause the TV to tip over, causing serious injuries or death.
Follow all safety precautions provided on the included Safety Flyer. For added stability, install the anti-fall
device for safety purposes, as follows.
To avoid the TV from falling:
1. Put the screws into the clamps and firmly fasten them onto the wall. Confirm that the
screws have been firmly installed onto the wall.
You may need additional material such a s an anchor depending on the type of
wall.
Since the necessary clamps, screws, and string are not supplied, please
purchase these additionally.
2. Remove the screws from the center back of the TV, put the screws into the clamps,
and then fasten the screws onto the TV again.
Screws may not be supplied with the product. In this case, please purchase the
screws of the following specifications.
Screw Specifications
- For a 17 ~ 29 Inch LCD TV: M4 X 15
- For a 32 ~ 40 Inch LCD TV: M6 X 15
3. Connect the clamps fixed onto the TV and the clamps fixed onto the wall with a
strong string and then tie the string tightly.
Install the TV near to the wall so that it does not fall backwards.
It is safe to connect the string so that the clamps fixed on the wall are equal to
or lower than the clamps fixed on the TV.
Untie the string before moving the TV.
4. Verify all connections are properly secured. Periodically check connections for
any sign of fatigue for failure. If you have any doubt about the security of your
connections,contact a professional installer.
➣
➣
➣
➣
➣
➣
Wall
Wall
BN68-01409H-00ENG.indb 73 2008-04-28 �� 5:18:50English - �4
Troubleshooting: Before Contacting Service Personnel
No sound or picture Check that the mains lead has been connected to a wall socket.
Check that you have pressed the button on your set.
Check the picture contrast and brightness settings.
Check the volume.
•
•
•
•
Normal picture but no sound Check the volume.
Check whether the MUTE button has been pressed on the remote control.
Check if “TV Speaker” is on.
•
•
•
Screen is black and power indicator
light blinks steadily
On your computer check; Power, Signal Cable.
The TV is using its power management system.
Move the computer’s mouse or press any key on the keyboard.
•
•
•
No picture or black and white picture Adjust the colour settings.
Check that the broadcast system selected is correct.
•
•
Sound and picture interference Try to identify the electrical appliance that is affecting the set and move it
further away.
Plug your set into a different mains socket.
•
•
Blurred or snowy picture, distorted
sound
Check the direction, location and connections of your aerial.
This interference is often due to the use of an indoor aerial.
•
•
Remote control malfunctions Replace the remote control batteries.
Clean the upper edge of the remote control (transmission window).
Check the battery terminals.
•
•
•
‘Check signal cable.’ message is
displayed
Check that the signal cable is firmly connected to the PC or video sources.
Check that the PC or video sources are turned on.
•
•
On PC mode, ‘Not Supported Mode.’
message is displayed
Check the maximum resolution and the frequency of the video adaptor.
Compare these values with the data in the Display Modes.
•
•
The damaged picture appears in the
corner of the screen
If “Just Scan” is selected in some external devices, the damaged picture
may appear in the corner of the screen. This symptom is caused by external
devices, not TV.
The ‘Resets all settings to the default
values.’ message appears.
This appears when you press and hold the EXIT button for a while. The product
settings are reset to the factory defaults.
You may see small particles if you
look closely at the edge of the bezel
surrounding the TV screen.
This is part of the product’s design and is not a defect.
The TFT LCD panel uses a panel consisting of sub pixels (6 220 800) which require sophisticated technology to produce.
However, there may be few bright or dark pixels on the screen. These pixels will have no impact on the performance of
the product.
BN68-01409H-00ENG.indb 74 2008-04-28 �� 5:18:50English - ��
Specifications
Model Name LE��A�66 LE��A�66 LE40A�66
Screen Size
(Diagonal) 32 inches 37 inches 40 inches
PC Resolution
(Optimum)
1920 x 1080 @ 60 Hz 1920 x 1080 @ 60 Hz 1920 x 1080 @ 60 Hz
Sound
Output 10W x 2 10W x 2 10W x 2
Dimensions (WxDxH)
Body
With stand
865 x 79 x 500 mm
865 x 220 x 561 mm
984 x 87 x 572 mm
984 x 240 x 637 mm
1058 x 91 x 608 mm
1058 X 240 X 672 mm
Weight
With Stand 14 kg 18 kg 19 kg
Environmental
Considerations
Operating Temperature
Operating Humidity
Storage Temperature
Storage Humidity
10°C to 40°C (50°F to 104°F)
10% to 80%, non-condensing
-20°C to 45°C (-4°F to 113°F)
5% to 95%, non-condensing
Stand Swivel
(Left / Right) -20˚ ~ 20˚
Model Name LE46A�66 LE��A�66
Screen Size
(Diagonal) 46 inches 52 inches
PC Resolution
(Optimum)
1920 x 1080 @ 60 Hz 1920 x 1080 @ 60 Hz
Sound
Output 10W x 2 10W x 2
Dimensions (WxDxH)
Body
With stand
1186 x 111 x 686 mm
1186 X 260 X 749 mm
1330 x 120 x 779 mm
1330 X 291 X 842 mm
Weight
With Stand 27 kg 33 kg
Environmental
Considerations
Operating Temperature
Operating Humidity
Storage Temperature
Storage Humidity
10°C to 40°C (50°F to 104°F)
10% to 80%, non-condensing
-20°C to 45°C (-4°F to 113°F)
5% to 95%, non-condensing
Stand Swivel
(Left / Right) -20˚ ~ 20˚
BN68-01409H-00ENG.indb 75 2008-04-28 �� 5:18:50English - �6
Model Name LE��A��� LE��A��� LE40A���
Screen Size
(Diagonal) 32 inches 37 inches 40 inches
PC Resolution
(Optimum)
1920 x 1080 @ 60 Hz 1920 x 1080 @ 60 Hz 1920 x 1080 @ 60 Hz
Sound
Output 10W x 2 10W x 2 10W x 2
Dimensions (WxDxH)
Body
With stand
801 X 88 X 526 mm
801 X 252 X 574 mm
918 X 92 X 608 mm
918 X 300 X 650 mm
997 X 92 X 641 mm
997 X 300 X 686 mm
Weight
With Stand 13 kg 18 kg 21 kg
Environmental
Considerations
Operating Temperature
Operating Humidity
Storage Temperature
Storage Humidity
10°C to 40°C (50°F to 104°F)
10% to 80%, non-condensing
-20°C to 45°C (-4°F to 113°F)
5% to 95%, non-condensing
Stand Swivel
(Left / Right) -20˚ ~ 20˚
Model Name LE46A��� LE��A���
Screen Size
(Diagonal) 46 inches 52 inches
PC Resolution
(Optimum)
1920 x 1080 @ 60 Hz 1920 x 1080 @ 60 Hz
Sound
Output 10W x 2 10W x 2
Dimensions (WxDxH)
Body
With stand
1127 X 100 X 716 mm
1127 X 280 X 767 mm
1269 X 109 X 806 mm
1269 X 326 X 857 mm
Weight
With Stand 28 kg 32 kg
Environmental
Considerations
Operating Temperature
Operating Humidity
Storage Temperature
Storage Humidity
10°C to 40°C (50°F to 104°F)
10% to 80%, non-condensing
-20°C to 45°C (-4°F to 113°F)
5% to 95%, non-condensing
Stand Swivel
(Left / Right) -20˚ ~ 20˚
BN68-01409H-00ENG.indb 76 2008-04-28 �� 5:18:50English - ��
Model Name LE��A�68 LE��A�68 LE40A�68
Screen Size
(Diagonal) 32 inches 37 inches 40 inches
PC Resolution
(Optimum)
1920 x 1080 @ 60 Hz 1920 x 1080 @ 60 Hz 1920 x 1080 @ 60 Hz
Sound
Output 10W x 2 10W x 2 10W x 2
Dimensions (WxDxH)
Body
With stand
801 X 88 X 514 mm
801 X 252 X 574 mm
918 X 92 X 592 mm
918 X 300 X 650 mm
997 X 92 X 628 mm
997 X 300 X 686 mm
Weight
With Stand 13 kg 18 kg 21 kg
Environmental
Considerations
Operating Temperature
Operating Humidity
Storage Temperature
Storage Humidity
10°C to 40°C (50°F to 104°F)
10% to 80%, non-condensing
-20°C to 45°C (-4°F to 113°F)
5% to 95%, non-condensing
Stand Swivel
(Left / Right) -20˚ ~ 20˚
Model Name LE46A�68 LE��A�68
Screen Size
(Diagonal) 46 inches 52 inches
PC Resolution
(Optimum)
1920 x 1080 @ 60 Hz 1920 x 1080 @ 60 Hz
Sound
Output 10W x 2 10W x 2
Dimensions (WxDxH)
Body
With stand
1127 X 100 X 700 mm
1127 X 280 X 767 mm
1269 X 109 X 791 mm
1269 X 326 X 857 mm
Weight
With Stand 28 kg 32 kg
Environmental
Considerations
Operating Temperature
Operating Humidity
Storage Temperature
Storage Humidity
10°C to 40°C (50°F to 104°F)
10% to 80%, non-condensing
-20°C to 45°C (-4°F to 113°F)
5% to 95%, non-condensing
Stand Swivel
(Left / Right) -20˚ ~ 20˚
BN68-01409H-00ENG.indb 77 2008-04-28 �� 5:18:50English - �8
Model Name LE��A�69 LE��A�69 LE40A�69
Screen Size
(Diagonal) 32 inches 37 inches 40 inches
PC Resolution
(Optimum)
1920 x 1080 @ 60 Hz 1920 x 1080 @ 60 Hz 1920 x 1080 @ 60 Hz
Sound
Output 10W x 2 10W x 2 10W x 2
Dimensions (WxDxH)
Body
With stand
801 X 88 X 524 mm
801 X 252 X 574 mm
918 X 92 X 601 mm
918 X 300 X 650 mm
997 X 92 X 638 mm
997 X 300 X 686 mm
Weight
With Stand 13 kg 18 kg 21 kg
Environmental
Considerations
Operating Temperature
Operating Humidity
Storage Temperature
Storage Humidity
10°C to 40°C (50°F to 104°F)
10% to 80%, non-condensing
-20°C to 45°C (-4°F to 113°F)
5% to 95%, non-condensing
Stand Swivel
(Left / Right) -20˚ ~ 20˚
Model Name LE46A�69 LE��A�69
Screen Size
(Diagonal) 46 inches 52 inches
PC Resolution
(Optimum)
1920 x 1080 @ 60 Hz 1920 x 1080 @ 60 Hz
Sound
Output 10W x 2 10W x 2
Dimensions (WxDxH)
Body
With stand
1127 X 100 X 710 mm
1127 X 280 X 767 mm
1269 X 109 X 800 mm
1269 X 326 X 857 mm
Weight
With Stand 28 kg 32 kg
Environmental
Considerations
Operating Temperature
Operating Humidity
Storage Temperature
Storage Humidity
10°C to 40°C (50°F to 104°F)
10% to 80%, non-condensing
-20°C to 45°C (-4°F to 113°F)
5% to 95%, non-condensing
Stand Swivel
(Left / Right) -20˚ ~ 20˚
Design and specifications are subject to change without prior notice.
This device is a Class B digital apparatus.
For the power supply and Power Consumption, refer to the label attached to the product.
➣
➣
➣
BN68-01409H-00ENG.indb 78 2008-04-28 �� 5:18:50This page is intentionally
left blank.
BN68-01409H-00ENG.indb 79 2008-04-28 �� 5:18:50Précautions à prendre lors de l’affichage d’une image fixe
Une image fixe peut causer des dommages irrémédiables à l’écran du téléviseur.
N’affichez pas une image fixe sur l’écran LCD plus de 2 heures. Cela pourrait provoquer une rémanence de l’image à l’écran.
Cette rémanence de l’image est également appelée “brûlure de l’écran”. Pour éviter une telle rémanence de l’image à l’écran,
réduisez la luminosité et le contraste de l’écran lorsque vous laissez une image fixe affichée.
Regarder l’écran LCD du téléviseur en format 4:3 pendant une longue période peut laisser des traces de
bordures à gauche, à droite et au centre de l’écran, à cause de la différence d’émission de lumière sur
l’écran. La lecture d’un DVD ou l’utilisation d’une console de jeu peut avoir un effet similaire sur l’écran. Les
dommages provoqués par les effets qui précèdent ne sont pas couverts par la garantie.
L’affichage d’images fixes de jeux vidéo et d’ordinateurs pendant plus longtemps qu’une période spécifique peut provoquer
des rémanences. Pour éviter cela, réduisez la “luminosité” et le “contraste” lors de l’affichage d’images fixes.
•
•
•
© 2008 Samsung Electronics Co., Ltd. All rights reserved.
Comment contacter Samsung dans le monde
Si vous avez des suggestions ou des questions concernant les produits Samsung, veuillez contacter le Service
Consommateurs Samsung. (Voir la quatrième de couverture pour plus d’informations.)
BN68-01409H-Fre.indb 1 2008-04-28 �� 5:15:34Branchement et installation de votre televiseur
Liste des pièces.................................................................2
Installation du support .......................................................2
Installation du support mural .............................................2
Présentation du panneau de comman...............................3
Présentation du panneau de branchement .......................4
Télécommande..................................................................7
Insertion des piles dans la télécommande ........................8
Mise en marche et arrêt.....................................................8
Mise en mode veille de votre téléviseur ............................8
Affichage des menus .........................................................9
Utilisation du bouton TOOLS.............................................9
Fonction Plug & Play .........................................................9
Gestion des canaux
Mémorisation automatique des canaux...........................11
Mémorisation manuelle des canaux ................................11
Affichage des informations relatives au Guide de
programme électronique (GPE).......................................13
Configurer le Guide par défaut ........................................14
Gestion des chaînes........................................................15
Réglage du gestionnaire de chaînes ...............................22
Activation du Verrouillage Enfant.....................................22
Syntonisation fine des chaînes analogiques ...................23
Vérification des informations relatives au signal
numérique........................................................................23
LNA (Amplificateur à faible bruit).....................................24
Réglage de l’image
Changement de la norme Image.....................................25
Personnalisation des paramètres d’image ......................25
Réglage des paramètres détaillés ...................................26
Configuration des option d’image....................................27
Reinitialisation des paramètres d’image à leur valeur
par défaut. .......................................................................28
Visualisation d’une image dans l’image...........................29
Réglage du son
Changement de la norme Son.........................................30
Sélection du mode Son ...................................................32
Branchement du casque (vendu séparément) ................32
Réglage de l’heure
Réglage de l’horloge........................................................33
Réglage du minuteur de mise en veille ...........................34
Mises en marche et arrêt automatiques de votre
téléviseur .........................................................................35
■
■
■
■
■
■
■
■
■
■
■
■
■
■
■
■
■
■
■
■
■
■
■
■
■
■
■
■
■
■
■
■
■
■
Description des fonctions
Sélection d’une langue de menu .....................................36
Réglage de votre numéro d’identification personnel
(NIP) ................................................................................36
Configuration du contrôle parental ..................................37
Configuration des sous-titres...........................................38
Sélection d’une langue de télétexte.................................39
Sélection d’une langue de préférence............................39
Réglage de l’effet lumineux (en fonction du modèle) ......39
Mélodie/Divertissement/Mode éco. .................................40
Mise à jour du logiciel......................................................41
Visualisation de l’interface commune ..............................42
Sélection du Menu CI (Interface commune)....................42
Sélection de la source .....................................................43
Modification du nom de la source d’entrée......................43
Ecran du PC
Utilisation de votre télévision comme écran PC ..............44
Modes d’affichage ...........................................................44
Configuration du téléviseur avec le PC ...........................45
WISELINK
Utilisation de la fonction WISELINK ................................46
Utilisation de la liste de photos ........................................47
Tri de la liste des photos..................................................49
Visualisation d’un diaporama ..........................................53
Utilisation de la liste de musiques ...................................57
Tri de la liste de musiques...............................................58
Lecture d’un fichier musical.............................................62
Utilisation du menu Configuration ...................................64
Annexe
Qu’est-ce que Anynet+? ..................................................65
Connexion d’appareils Anynet+ ......................................65
Configuration d’Anynet+ .................................................66
Recherche d’appareils Anynet+ et basculement entre des
appareils ..........................................................................66
Enregistrement ................................................................67
Ecoute via un récepteur (Home cinéma).........................68
Dépannage d’Anynet+ ....................................................68
Recommendations for UseConseils d’utilisation
Fonction de télétexte .......................................................69
Ajustement fixation murale (vendu séparément) ............70
Utilisation du verrouillage Kensington antivol
(en fonction du modèle)...................................................72
Montage mural du téléviseur ...........................................73
Dépannage : Avant de contacter le personnel du
service d’assistance ........................................................74
Spécifications techniques et environnementa .................75
■
■
■
■
■
■
■
■
■
■
■
■
■
■
■
■
■
■
■
■
■
■
■
■
■
■
■
■
■
■
■
■
■
■
■
■
■
Français - �
Français
Sommaire
Symboles Appuyer Remarque Bouton d’accès rapide
BN68-01409H-Fre.indb 1 2008-04-28 �� 5:15:34Français - �
Branchement et installation de votre televiseur
Liste des pièces
Vérifiez que les éléments suivants sont inclus avec votre téléviseur LCD. S’il manque des éléments, contactez votre
revendeur.
Télécommande /
Piles (AAA x 2)
Cordon
d’alimentation
Bouchon
- Base
Vis de pied
(M4 x L16)
Support Chiffon de nettoyage
• Manuel d’utilisation • Carte de garantie • Manuel de sécurité • Cartes d’enregistrement
Carte de garantie/ Manuel de sécurité / Cartes d’enregistrement (Non disponibles dans tous les pays)
Selon le modèle, il se peut que le socle et les vis ne soient pas inclus.
➣
➣
Installation du support
1. Connectez votre téléviseur LCD et le support.
Le téléviseur doit être soulevé par plusieurs personnes.
Assurez-vous de distinguer la partie avant de la partie arrière du support lorsque vous les assemblez.
2. Fixez deux vis à l’emplacement 1 puis deux autres à l’emplacement 2.
Mettez le produit à la verticale et serrez les vis. Si vous serrez les vis alors que le téléviseur LCD est à l’horizontale,
il est possible qu’il penche d’un côté.
Le socle est installé pour les modèles dont la taille de l’écran est de 37 pouces ou plus.
➣
➣
➣
➣
Installation du support mural
Les élements du support mural (vendus séparément) permettent de fixer le
téléviseur au mur. Pour plus d’informations sur l’installation du support mural,
reportez-vous aux instructions fournies avec les élements du support mural.
Faites appel à un technicien pour installer la fixation murale.
Samsung Electronics ne saurait être tenu responsable de tout dommage sur le
produit ni de toute blessure subie par vous ou par d’autres personnes si vous
choisissez d’effectuer l’installation murale.
N’installez pas votre kit de montage mural lorsque votre téléviseur est
en fonctionnement. Une blessure par choc électrique pourrait en
résulter.
➣ Enlevez le support, bouchez l’orifice de la base et fermez à l’aide de deux vis.
BN68-01409H-Fre.indb 2 2008-04-28 �� 5:15:36Français - �
Présentation du panneau de comman
1 SOURCE
Affiche un menu de toutes les sources d’entrée
disponibles (TV, Ext.1, Ext.2, AV, S-Vidéo, Composant,
PC, HDMI1, HDMI2/DVI, HDMI3). Dans le menu à
l’écran, untilisez ce bouton de la même façon que le
bouton ENTER de votre télécommande.
2 MENU
Permet d’afficher le menu des fonctions de votre
téléviseur sur l’écran.
3 – +
Permet d’augmenter ou de baisser le volume.
Dans le menu à l’écran, utiliser les boutons
– + de la même façon que les boutons ◄ et ► de
la télécommande.
4 C/P.
Permet de changer de canal. Dans le menu à l’écran,
utiliser les boutons C/P. de la même façon que
les boutons ▼ et ▲ de la télécommande.
5 Témoin d’alimentation
Clignote et s’éteint lorsqu’il est sous tension et s’allume
en mode Veille.
6 (Alimentation)
Permet d’allumer et d’éteindre le téléviseur.
7 Capteur de la télécommande
Dirigez la télécommande vers ce point du téléviseur.
8 Haut-parleurs
8 8
4
1
2
3
5
6
7
1
2
3
4
6
7
8 8 5
➣ La couleur et la forme du produit peuvent varier en fonction du modèle.
Boutons en façade
Touchez les boutons
pour les actionner.
Boutons du
panneau latéral
BN68-01409H-Fre.indb 3 2008-04-28 �� 5:15:37Français - �
Présentation du panneau de branchement
Lorsque vous branchez un périphérique externe à votre téléviseur, assurez-vous que celui-ci est éteint.
Lorsque vous branchez un périphérique externe, faites correspondre les couleurs de la borne de connexion et du
câble.
1 PC IN [PC] / [AUDIO]
Pour raccorder la prise de sortie vidéo et audio de votre PC.
2 COMPONENT IN
- Branchez les câbles composants vidéo (en option) au connecteur de composant (“PR”, “PB”, “Y”) à l’arrière de votre
téléviseur et les autres extrémités aux connecteurs de sortie vidéo du composant correspondants sur le téléviseur
numérique ou le lecteur DVD.
- Si vous souhaitez brancher à la fois le boîtier décodeur et le téléviseur numérique (ou lecteur DVD), vous devez
brancher le boîtier décodeur au téléviseur numérique (ou lecteur DVD) et le téléviseur numérique (ou lecteur DVD) au
connecteur de composant (“PR”, “PB”, “Y”) de votre téléviseur.
- Les connecteurs PR, PB ou Y et de vos appareils composants (téléviseur numérique ou lecteur DVD) sont parfois
désignés par les lettres Y, B-Y et R-Y ou Y, Cb et Cr.
- Branchez les câbles audio RCA (en option) sur la prise “R - AUDIO - L” située à l’arrière du téléviseur et leurs autres
extrémités sur les prises de sortie audio correspondantes du téléviseur numérique ou du lecteur DVD.
3 HDMI IN 1, HDMI IN 2, HDMI IN 3
- Prend en charge les connexions entre des périphériques audio/vidéo compatibles HDMI (boîtiers décodeurs, lecteurs
DVD).
- Aucune connexion audio supplémentaire n’est nécessaire pour une connexion HDMI - HDMI.
- Lorsque vous utilisez une connexion avec câble HDMI/DVI, vous devez utiliser la borne HDMI IN 2.
➣
➣
1 2 3 4
# @ ! 0
5
6
3
7
8
9
[Panneau arrière du téléviseur] [Prises du panneau latéral]
➣ La couleur et la forme du produit peuvent varier en fonction du modèle.
Entrée de
l’alimentation
BN68-01409H-Fre.indb 4 2008-04-28 �� 5:15:37Français - �
Qu’est-ce que HDMI ?
- “High Definition Multimedia interface” permet la transmission de données vidéo numériques haute définition et
plusieurs canaux de son numérique.
- Le terminal HDMI/DVI prend en charge la connexion DVI vers un périphérique raccordé avec le câble adéquat (non
fourni). La différence entre HDMI et DVI est que le périphérique HDMI est plus petit, est équipé de la fonction de
codage HDCP (High Bandwidth Digital Copy Protection), et gère le son numérique multicanal.
Le téléviseur peut n’émettre aucun son et les images peuvent s’afficher avec une couleur anormale lorsque des
lecteurs DVD/décodeurs/récepteurs satellite avec des versions du mode HDMI antérieures à HDMI 1.3 sont branchés.
Lorsque vous branchez un câble HDMI doté d’une version antérieure et qu’aucun son n’est émis, branchez le câble
HDMI à la prise HDMI IN 2 et les câbles audio aux prises DVI IN (HDMI2) [R-AUDIO-L] situées à l’arrière du téléviseur.
Dans ce cas, contactez la société qui fournit le lecteur DVD/décodeur câble/récepteur satellite afin de confirmer votre
version HDMI, puis demandez une mise à jour du micrologiciel. Les câbles HDMI d’une version autre que 1.3 peuvent
provoquer des nuisances à l’écran ou une absence d’image.
DVI IN(HDMI2) [R-AUDIO-L]
- Sorties audio DVI pour périphériques externes.
Modes pris en charge pour HDMI/DVI et Composant
480i 480p 576i 576p 720p 1080i 1080p
HDMI/DVI 50Hz X X X O O O O
HDMI/DVI 60Hz X O X X O O O
Composant O O O O O O O
4 ANT IN
Afin de retransmettre correctement les canaux de télévision, le téléviseur doit recevoir un signal depuis l’une des
sources suivantes :
- une antenne extérieure / un réseau de télévision câblée / un réseau par satellite.
5 SERVICE
- Prise pour MAINTENANCE uniquement.
- Connectez-le à la prise du support de montage mural en option. Cette fonction vous permet d’ajuster l’angle de
visualisation du téléviseur à l’aide de la télécommande.
6 Emplacement pour COMMON INTERFACE
- Si vous n’insérez pas la carte d’interface commune dans certains canaux, “Signal brouillé” s’affiche sur l’écran.
- Les informations de pairage contenant un numéro de téléphone, l’ID de la CI CARD, l’ID de l’hôte et d’autres
informations s’afficheront dans 2 ou 3 minutes. Si un message d’erreur s’affiche, contactez votre prestataire de
service.
- Lorsque la configuration des informations sur les canaux est terminée, le message “Mise à jour terminée” s’affiche,
indiquant que la liste des chaînes est dorénavant mise à jour.
Vous devez obtenir une CI CARD provenant d’un fournisseur local de diffusion
par câble. Retirez la CI CARD en la tirant délicatement avec vos mains.
Sa chute pourrait l’endommager.
Insérez la carte d’interface commune (CI-Card) dans le sens indiqué sur
celle-ci.
L’emplacement du logement pour COMMON INTERFACE peut varier en
fonction du modèle.
7 WISELINK
Connectez un périphérique de stockage de masse USB pour afficher les fichiers photo (JPEG) et écouter des fichiers
audio (MP3).
8 S-VIDEO ou VIDEO / R-AUDIO-L
- Branchez un câble RCA ou S-VIDEO à un périphérique audio/vidéo externe approprié tel qu’un magnétoscope, un
lecteur DVD ou un Caméscope.
- Branchez les câbles audio RCA sur la prise “R - AUDIO – L” du téléviseur et leurs autres extrémités sur les prises de
sortie audio correspondantes du périphérique audio/vidéo.
9 PRISE CASqUE
Vous pouvez brancher un casque à la prise casque du téléviseur. Lorsque le casque est branché, les haut-parleurs
intégrés n’émettent plus de son.
0 AUDIO OUT [R-AUDIO-L]
Branchez les câbles audio RCA au connecteur AUDIO OUT [R-AUDIO-L] situé à l’arrière de votre poste et aux
connecteurs d’entrée audio correspondants sur l’amplificateur ou le système Home Cinema.
➣
➣
➣
➣
➣
➣
BN68-01409H-Fre.indb 5 2008-04-28 �� 5:15:38Français - �
! DIGITAL AUDIO OUT (OPTICAL)
- A connecter à un composant audio numérique.
Lorsque les prises HDMI IN sont branchées, la prise DIGITAL AUDIO OUT (OPTICAL) du téléviseur alimente
uniquement un périphérique audio 2 canaux. Pour écouter des chaînes audio 5.1, branchez la prise optique du
lecteur DVD ou du décodeur câble/récepteur satellite directement sur un amplificateur ou sur un système home
cinéma, et non sur le téléviseur.
@ EXT 1, EXT 2
Connecteur
Entrée Sortie
Vidéo Audio (L/R) RGB Vidéo + Audio (L/R)
EXT 1 O O O Seule la sortie TV ou DTV est disponible.
EXT 2 O O Sortie que vous pouvez sélectionner.
- Entrées ou sorties pour périphériques tels que des magnétoscopes, des lecteurs DVD, des consoles de jeux vidéo ou
des lecteurs de vidéodisques.
# VERROUILLAGE KENSINGTON (en fonction du modèle)
- Le verrouillage Kensington (en option) est un dispositif utilisé pour fixer physiquement le système dans le cas d’une
utilisation dans un endroit public.
- Si vous désirez utiliser un dispositif de verrouillage, contactez le revendeur où vous avez acheté le téléviseur.
- L’emplacement du verrou Kensington peut varier en fonction du modèle.
➣
BN68-01409H-Fre.indb 6 2008-04-28 �� 5:15:38Français - �
Télécommande
Vous pouvez utiliser la télécommande à une distance maximale du téléviseur d’environ 7 m.
1 Bouton de mise en veille
du téléviseur.
2 Permet de sélectionner
directement le mode TV.
3 Pavé numéri Pavé numéri�ue pour ue pour
l’accès direct aux canaux.
4 Sélection de canaux à 1
ou 2 chiffres.
5 +: Augmentation du volume.
-: Réduction du volume.
6 Arr Arr�t temporaire du son. t temporaire du son.
7 Affichage Affichage ��PP���� ������uide uide
électroni�ue des
programmes).
8 Permet de sélectionner Permet de sélectionner
rapidement les fonctions
fré�uemment utilisées.
9 Affiche les informations Affiche les informations
relatives au programme en
cours.
0 Boutons de couleur : Boutons de couleur :
utilisez ces boutons
dans la liste des canaux,
WIS�LINK, etc.
@ Permet de sélectionner Permet de sélectionner
l’affichage et les modes
son en option pour le
sport, le cinéma et les
jeux.
# �tilisez ces boutons en tilisez ces boutons en
mode DMA, WIS�LINK et
Anynet+.
� : cette télécommande
peut �tre utilisée pour
contrôler les enregistreurs
Samsung avec la fonction
Anynet+.)
$ Sélection de la source Sélection de la source
disponible.
% Chaîne précédente.
^ P<: chaîne suivante.
P>: chaîne précédente.
& Pour afficher le menu Pour afficher le menu
principal à l’écran.
* Cette fonction vous permet
de visualiser des photos
et d’écouter des fichiers
musicaux à partir d’un
périphéri�ue externe.
( Revient au menu Revient au menu
précédent.
) Permet de commander le Permet de commander le
curseur dans le menu.
a Permet de Permet de �uitter le menu uitter le menu
affiché à l’écran.
b �tilisez ce paramètre
lors�ue vous connectez
un appareil SAMS�N��
DMA �Digital Media
Adapter) via une interface
HDMI et basculez en
mode DMA. �Le bouton
DMA est en option.)
Pour plus d’informations
sur les procédures
de fonctionnement,
reportez-vous au manuel
d’utilisation de l’appareil
DMA. Ce bouton est
disponible si la fonction
“Anynet+ �HDMI-C�C)” est
“Marche” �voir page 56).
c Sélection de la taille de Sélection de la taille de
l’image.
d Affichage numéri Affichage numéri�ue des ue des
sous-titres.
e Affiche le menu “Channel Affiche le menu “Channel
List” à l’écran.
Fonctions télétexte
2 Quitte l’affichage télétexte.
7 Mémorisation télétexte.
8 Sélection de la taille du
télétexte.
9 Activation du télétexte.
0 Sélection des rubri�ues
Fastext.
! Choisissez Teletext,
Double, ou Mix.
$ Sélection du mode
télétexte. �LIST/FLOF)
% Page secondaire télétexte.
^ P<: page télétexte
suivante.
P>: page télétexte
précédente.
& Index télétexte.
( Pause télétexte.
a Annulation du télétexte.
➣ �ne lumière intense peut affecter le bon fonctionnement de la télécommande.
1_BN68-01409H-Fre.indd 7 2008-04-29 �� 3:12:42Français - �
Insertion des piles dans la télécommande
1. Soulevez le couvercle situé à l’arrière de la télécommande comme indiqué sur la figure.
2. Placez-y deux piles AAA.
Assurez-vous que les pôles “+” et “-” des piles correspondent au schéma situé à
l’intérieur du compartiment.
3. Remettez le couvercle en place.
Retirez les piles et stockez-les dans un endroit frais et sec si vous n’utilisez pas la
télécommande pendant longtemps.
Si la télécommande ne fonctionne pas :
1. Le téléviseur est-il sous tension ?
2. Les bornes + et - des piles ne sont-elles pas inversées ?
3. Les piles sont-elles déchargées ?
4. Le cordon d’alimentation est-il débranché ou y a-t-il une panne de courant ?
5. Une lampe fluorescente ou néon est-elle allumée à proximité ?
➣
➣
➣
Mise en marche et arrêt
Le câble relié au secteur est fixé à l’arrière du téléviseur/moniteur.
1. Branchez le cordon d’alimentation sur une prise secteur appropriée.
Le voyant de veille s’allume sur le téléviseur.
2. Appuyez sur le bouton de votre téléviseur.
Vous pouvez également appuyer sur le bouton POWER ou sur le bouton TV/DTV de votre télécommande pour
allumer le téléviseur.
Le dernier programme que vous avez regardé est automatiquement re-sélectionné.
3. Appuyez sur le bouton numérique (de 0 à 9) ou le bouton canal suivant/précédent ( / ) de la télécommande ou sur
le bouton C/P. de votre téléviseur.
Lorsque vous allumez le téléviseur pour la première fois, vous devrez choisir la langue dans laquelle vous
souhaitez que les menus s’affichent.
4. Pour éteindre votre téléviseur, appuyez de nouveau sur le bouton POWER .
Mise en mode veille de votre téléviseur
Vous pouvez mettre votre téléviseur en mode Veille afin de réduire la consommation électrique. Le mode veille peut être
utile si vous souhaitez éteindre votre téléviseur temporairement (pendant un repas par exemple).
1. Appuyez sur le bouton POWER de la télécommande.
L’écran s’éteint et un voyant de veille rouge apparaît sur votre téléviseur.
2. Pour rallumer le téléviseur, appuyez de nouveau sur le bouton POWER , les boutons numériques (de 0 à 9), le
bouton TV/DTV ou les boutons canal suivant/précédent ( / ).
Ne laissez pas le téléviseur en mode Veille pendant de longues périodes (lorsque vous êtes en vacances par
exemple). Il est conseillé de débrancher le téléviseur du secteur et de l’antenne.
➣
➣
➣
➣
➣
➣
BN68-01409H-Fre.indb 8 2008-04-28 �� 5:15:39Français - �
Affichage des menus
1. Une fois l’appareil allumé, appuyez sur le bouton MENU.
Le menu principal apparaît à l’écran.
Plusieurs icônes s’affichent sur le côté gauche du menu: Image, Son, Canal,
Configuration, Entrée, Application.
2. Appuyez sur le bouton ▲ ou ▼ pour sélectionner l’une des icônes.
Appuyez ensuite sur le bouton ENTER pour accéder au sous-menu de
l’icône.
3. Appuyez sur le bouton EXIT pour quitter le menu.
➣ Les menus disparaissent de l’écran après environ une minute.
Utilisation du bouton TOOLS
Vous pouvez utiliser le bouton TOOLS pour sélectionner simplement et rapidement les fonctions que vous utilisez le plus
souvent. Le menu “Outils” change en fonction du mode d’entrée externe affiché.
1. Utilisation du bouton TOOLS.
Le menu “Outils” s’affiche.
2. Appuyez sur le bouton ▲ ou ▼ pour sélectionner un menu.
3. Appuyez sur les boutons ▲/▼/◄/►/ENTER pour afficher, changer ou
utiliser les éléments sélectionnés. Pour une description plus détaillée de chaque
fonction, reportez-vous à la page correspondante.
Liste d’appareils: Reportez-vous aux pages 66
Mode Image: Reportez-vous aux pages 25
Mode Son: Reportez-vous aux pages 30
Veille: Reportez-vous aux pages 34
SRS TS XT: Reportez-vous aux pages 30
Mode éco.: Reportez-vous aux pages 40
Dual l ll: Reportez-vous aux pages 32
PIP: Reportez-vous aux pages 29
Réglage Automatique: Reportez-vous aux pages 45
•
•
•
•
•
•
•
•
•
Fonction Plug & Play
Lorsque vous allumez le téléviseur pour la première fois, des réglages de base s’effectuent l’un après l’autre de manière
automatique.
1. Appuyez sur le bouton POWER de la télécommande.
Le message “Les menus Langue, Enr. démo, Canaux et Heure seront
définis.” s’affiche.
2. Appuyez sur le bouton ENTER . Le menu “Sélectionnez la langue de
l’OSD.” s’affiche automatiquement.
Appuyer sur le bouton ENTER .
3. Sélectionnez la langue souhaitée en appuyant sur le bouton ▲ ou ▼.
Appuyez sur le bouton ENTER pour confirmer votre choix.
Plug & Play
Sélectionnez la langue de l’OSD.
Langue : Français ►
Entrer
Mode : Standard
Rétroéclairage : 7
Contraste : 95
Luminosité : 45
Netteté : 50
Couleur : 50
Teinte (V/R) : G50/R50
Réglages des détails
Image
Outils
Liste d’appareils
Mode Image : Standard
Mode Son : Personnalisé
Veille : Arrêt
SRS TS XT : Arrêt
Mode éco. : Arrêt
Dual l ll : Mono
Déplacer Entrer e Quitter
Plug & Play
Les menus Langue, Enr. démo, Canaux et Heure seront définis.
Entrer
OK
BN68-01409H-Fre.indb 9 2008-04-28 �� 5:15:39Français - �0
4. Appuyez sur les boutons ◄ ou ► pour sélectionner “Enr. démo” ou “Util.
domicile”, puis sur le bouton ENTER .
Nous vous recommandons de régler le téléviseur sur le mode “Util.
domicile” pour une meilleure qualité d’image dans votre environnement
personnel
Le mode “Enr. démo” n’est prévu que pour un usage en magasins.
Si l’unité est accidentellement définie sur le mode “Enr. démo” et que vous
souhaitez revenir au mode “Util. domicile” (Standard): Appuyez sur le
bouton Volume du téléviseur. Lorsque l’OSD du volume s’affiche, appuyez
pendant 5 secondes sur le bouton MENU du téléviseur.
5. Appuyez sur le bouton ▲ ou ▼ pour sélectionner la source de chaîne à
mémoriser. Appuyez sur le bouton ENTER pour sélectionner “Démarrer”.
Numérique & Analogique : Chaînes “Numérique” et “Analogique”.
Numérique: Chaînes “Numérique”.
Analogique: Chaînes “Analogique”.
La recherche de canaux démarrera et se terminera automatiquement.
Appuyez sur le bouton ENTER à tout moment pour interrompre la
mémorisation.
Une fois que tous les canaux disponibles sont mémorisés, le message
“Régler le mode horloge.” s’affiche.
6. Appuyez sur le bouton ENTER pour sélectionner “Mode Horloge”.
Appuyez sur le bouton ▲ ou ▼ pour sélectionner “Manuel”, puis appuyez sur
le bouton ENTER .
Si vous sélectionnez “Auto.”, le message “Profitez de votre visionnage”
s’affiche. Si vous avez reçu un signal numérique, l’heure sera
automatiquement réglée.
7. Sélectionnez “Date”, “Mois”, “Année”, “Heure”, ou “Minute” en appuyant sur
le bouton ◄ ou ►. Sélectionnez les “Date”, “Mois”, “Année”, “Heure”, ou
“Minute” en appuyant sur le bouton ▲ ou ▼.
Vous pouvez également définir les paramètres “Mois”, “Date”, “Année”,
“Heure” et “Minute” à l’aide du pavé numérique de la télécommande.
8. Le message “Profitez de votre visionnage” s’affiche.
Lorsque vous avez terminé, appuyez sur le bouton ENTER .
Si vous souhaitez réinitialiser cette fonction...
1. Appuyez sur le bouton MENU pour afficher le menu.
Appuyez sur le bouton ▲ ou ▼ pour sélectionner “Configuration”, puis
appuyez sur le bouton ENTER .
2. Appuyez de nouveau sur le bouton ENTER pour sélectionner le mode
“Plug & Play”.
3. Entrez votre code PIN à quatre chiffres. Le code PIN par défaut d’un
nouveau téléviseur est réglé sur “0-0-0-0”.
Si vous souhaitez changer ce code PIN, reportez-vous à la page 37.
Pour plus d’informations concernant le réglage des options, reportez-vous
aux pages 9 et 10.
La fonction “Plug & Play” est uniquement disponible en mode TV.
➣
➣
➣
➣
➣
➣
➣
➣
➣
➣
➣
➣
Plug & Play
Sélectionner “Util. domicile” pour installation à domicile.
Enr. démo Util. domicile
Déplacer Entrer
Plug & Play
Les menus Langue, Enr.démo, Canaux et Heure seront
définis.
0~9 Saisir le code PIN Retour
Plug & Play
Régler le mode horloge.
Mode Horloge : Auto. Auto.
Manuel
Déplacer Entrer Ignorer
Plug & Play
Profitez de votre visionnage
OK
Configuration
Plug & Play ►
Langue : Français
Horloge
Modifier PIN
Verrouillage parental
Sous-titres
Langue du télétexte : ----
Préférence
Plug & Play
01
Date
01
Mois
2008
Année
00
Heure
00
Minute
Déplacer Régler Entrer Skip
Régler la date et l'heure du jour.
Plug & Play
Sélectionnez le canal source à mémoriser.
Numérique & Analogique
Numérique
Analogique
Démarrer
Déplacer
Démarrer
Démarrer
Entrer Ignorer
Plug & Play
Enregistrement automatique terminé.
Chaîne numérique : 45
Chaîne analogique : 32
OK
Entrer Ignorer
Plug & Play
Ajustement automatique en cours. Canal 69
Chaîne numérique: 29
Chaîne analogique: 0
Arrêter
20%
Entrer Ignorer
BN68-01409H-Fre.indb 10 2008-04-28 �� 5:15:40Français - ��
Gestion des canaux
Mémorisation automatique des canaux
Vous pouvez chercher les plages de fréquence disponibles par balayage (leur disponibilité dépend de votre pays). Il est
possible que les numéros de programme attribués automatiquement ne correspondent pas aux numéros de programme
souhaités ou réels. Vous pouvez toutefois trier les numéros manuellement et supprimer les canaux que vous ne souhaitez
pas regarder.
1. Appuyez sur le bouton MENU pour afficher le menu.
Appuyez sur le bouton ▲ ou ▼ pour sélectionner “Canal”, puis appuyez sur
le bouton ENTER .
2. Appuyez sur le bouton ▲ ou ▼ pour sélectionner “Mémorisation Auto”, puis
appuyez sur le bouton ENTER .
3. Appuyez sur le bouton ▲ ou ▼ pour sélectionner la source de chaîne à
mémoriser. Appuyez sur le bouton ENTER pour sélectionner “Démarrer”.
Numérique & Analogique : Chaînes “Numérique” et “Analogique”.
Numérique: Chaînes “Numérique”.
Analogique: Chaînes “Analogique”.
Cherche toutes les chaînes avec des stations de diffusion active et les
enregistre dans la mémoire du téléviseur.
Si vous voulez arrêter la mémorisation automatique, appuyez sur le bouton ENTER . Le message “Arrêter le
programme automatique?” s’affiche. Sélectionnez “Oui” en appuyant sur le bouton ◄ ou ►, puis appuyez sur le
bouton ENTER .
4. Appuyez sur le bouton EXIT pour quitter le menu.
Si une chaîne est verrouillée par la fonction “Verrouillage Enfant”, la fenêtre de saisie du code PIN s’affiche (voir
page 22).
Mémorisation manuelle des canaux
Vous pouvez mémoriser les canaux de télévision, y compris ceux reçus via les réseaux câblés. Lors de la mémorisation
manuelle des canaux, vous pouvez choisir :
de mémoriser ou non chaque canal trouvé ;
le numéro du programme qui vous servira à identifier chaque canal mémorisé.
1. Appuyez sur le bouton MENU pour afficher le menu.
Appuyez sur le bouton ▲ ou ▼ pour sélectionner “Canal”, puis appuyez sur
le bouton ENTER .
2. Appuyez sur le bouton ▲ ou ▼ pour sélectionner “Mémorisation Manuelle”,
puis appuyez sur le bouton ENTER .
Chaîne numérique
3. Appuyez sur le bouton ▲ ou ▼ pour sélectionner “Chaîne numérique”, puis
appuyez sur le bouton ENTER .
Si une chaîne est verrouillée par la fonction “Verrouillage Enfant”, la
fenêtre de saisie du code PIN s’affiche (voir page 22).
4. Appuyez sur le bouton ◄ ou ► pour sélectionner l’option de votre choix.
− Canal : Sélectionnez le numéro de chaîne à l’aide des boutons ▲, ▼ ou
des chiffres.
− Fréquence : Sélectionnez la fréquence à l’aide des chiffres.
− Bande passante : Sélectionnez la bande passante à l’aide des boutons
▲, ▼ ou des chiffres.
5. Appuyez sur le bouton ENTER pour lancer la recherche de services
numériques.
Au terme de la recherche, les chaînes de la liste sont mises à jour.
6. Lorsque c’est terminé, le nombre de services balayés s’affiche.
7. Appuyez sur le bouton EXIT pour quitter le menu.
➣
➣
➣
➣
•
•
➣
➣
Canal
Mémorisation Auto ►
Mémorisation Manuelle
Guide Complet
Mini Guide
Par défaut : Mini Guide
Liste des chaînes
Mode Canal : Chaînes ajoutées
Verrouillage Enfant : Marche
Canal
Mémorisation Auto
Mémorisation Manuelle ►
Guide Complet
Mini Guide
Par défaut : Mini Guide
Liste des chaînes
Mode Canal : Chaînes ajoutées
Verrouillage Enfant : Marche
Réglage fin
Canal
Mémorisation Auto
Mémorisation Manuelle ►
Guide Complet
Mini Guide
Par défaut : Mini Guide
Liste des chaînes
Mode Canal : Chaînes ajoutées
Verrouillage Enfant : Marche
Réglage fin
Chaîne numérique
Chaîne analogique
Mémorisation Manuelle
Déplacer Régler Recherche Retour
31
Canal
554000 KHz
Fréquence
8MHz
Bande passante
BN68-01409H-Fre.indb 11 2008-04-28 �� 5:15:40Français - ��
Chaîne analogique
3. Appuyez sur le bouton ▲ ou ▼ pour sélectionner “Chaîne analogique”, puis
appuyez sur le bouton ENTER .
Si une chaîne est verrouillée par la fonction “Verrouillage Enfant”, la
fenêtre de saisie du code PIN s’affiche (voir page 22).
4. Appuyez sur le bouton ◄ ou ► pour sélectionner l’élément désiré cidessous.
Appuyez sur le bouton ▲ ou ▼ pour valider le réglage.
5. Appuyez sur le bouton EXIT pour quitter le menu.
Programme (numéro de programme à attribuer à une chaîne)
Appuyez sur le bouton ▲ ou ▼ jusqu’à ce que vous trouviez le numéro
correct.
Vous pouvez également sélectionner le numéro de canal directement en
appuyant sur le pavé numérique (0~9).
Système de Couleur: Auto./PAL/SECAM/NTSC4.43
− Appuyez sur le bouton ▲ ou ▼ pour sélectionner la norme de couleurs
désirée.
Système Sonore: BG/DK/I/L
Appuyez sur le bouton ▲ ou ▼ pour sélectionner la norme audio désirée.
Canal (si vous connaissez le numéro de la chaîne à mémoriser)
Appuyez sur le bouton ▲ ou ▼ pour sélectionner C (canal hertzien) ou
S (canal câblé).
Appuyez sur le bouton ►, puis sur le bouton ▲ ou ▼ pour sélectionner le
numéro de votre choix.
Vous pouvez également sélectionner le numéro de canal directement en
appuyant sur le pavé numérique (0~9).
S’il n’y a aucun son ou si le son est anormal, re-sélectionnez la norme
son désirée.
Recherche (lorsque vous ne connaissez pas les numéros de chaîne)
Appuyez sur le bouton ▲ ou ▼ pour démarrer la recherche.
Le syntoniseur balaie la plage de fréquences jusqu’à ce que vous receviez la
première chaîne ou la chaîne que vous avez sélectionnée à l’écran.
Mémoriser (permet de mémoriser la chaîne et le numéro de programme
correspondant)
Sélectionnez “OK” en appuyant sur le bouton ENTER .
Canal mode
- P (Mode Programme) : A la fin du réglage, des numéros de position compris
entre P00 et P99 sont attribués aux stations de radiodiffusion de votre
zone. Dans ce mode, vous pouvez sélectionner un canal en saisissant son
numéro de position.
- C (mode chaîne hertzienne) : dans ce mode, vous pouvez sélectionner
un canal en saisissant le numéro attribué à chacune des stations de
télédiffusion.
- S (mode chaîne câblée) : dans ce mode, vous pouvez sélectionner un canal
en saisissant le numéro attribué à chacun des canaux câblés.
➣
➣
➣
➣
➣
Canal
Mémorisation Auto
Mémorisation Manuelle ►
Guide Complet
Mini Guide
Par défaut : Mini Guide
Liste des chaînes
Mode Canal : Chaînes ajoutées
Verrouillage Enfant : Marche
Réglage fin
Chaîne numérique
Chaîne analogique
Mémorisation Manuelle
1
Programme
Auto.
Système de Couleur
BG
Système Sonore
Déplacer Régler Retour
C --
Canal
62 MHz
Recherche
?
Store
BN68-01409H-Fre.indb 12 2008-04-28 �� 5:15:41Français - ��
Affichage des informations relatives au Guide de programme électronique (GPE)
Les informations relatives au Guide de programme électronique (GPE) sont fournies par les émetteurs. Les entrées de
programmes peuvent apparaître en blanc ou ne pas être à jour en raison de l’information diffusée sur un canal donné.
L’affichage fera une mise à jour automatique dès qu’une nouvelle information sera disponible.
1. Appuyez sur le bouton MENU pour afficher le menu.
2. Appuyez sur le bouton ▲ ou ▼ pour sélectionner “Canal”, puis appuyez sur
le bouton ENTER .
3. Appuyez sur le bouton ▲ ou ▼ pour sélectionner “Guide Complet” ou “Mini
Guide”, puis appuyez sur le bouton ENTER .
Mini Guide
Les informations de chaque programme sont affichées ligne par ligne sur
l’écran Mini-guide de la chaîne actuelle, en commençant par le programme
en cours, dans l’ordre des heures de début des programmes.
Guide Complet
Affiche les informations relatives au programme toutes les heures. Des
informations sur deux heures de programme sont affichées et peuvent être
parcourues en avançant ou en remontant dans le temps.
Pour… Alors…
Regarder un programme
de la liste EPG
Sélectionnez un programme en appuyant
sur le bouton ▲, ▼, ◄, ►.
Quitter le guide Appuyez sur le bouton bleu.
Si le programme suivant est sélectionné, il est réglé avec
l’icône de l’horloge affiché. Si vous appuyez à nouveau sur le
bouton ENTER , puis sur ◄, ► pour sélectionner Annuler
les programmations, la programmation est annulée et l’icône de
l’horloge disparaît. Pour plus d’informations sur les programmes
réglés, voir page suivante.
➣
Voir les informations
relatives aux programmes
Sélectionnez un programme de votre
choix en appuyant sur le bouton ▲, ▼,
◄, ►.
Appuyez sur le bouton INFO lorsque le
programme souhaité est surligné.
Le titre du programme se trouve sur la
partie haute du centre de l’écran.
•
•
•
Appuyez sur le bouton INFO pour plus d’informations. Numéro
de canal, temps de fonctionnement du programme, barre d’état,
niveau de contrôle parental, informations sur la qualité vidéo
(HD/SD), modes sonores, sous-titres ou Teletext, Langue des
sous-titres ou du Teletext et bref résumé du programme surligné
font partie des informations supplémentaires. “...” apparaîtra si le
résumé est long.
➣
Choisissez entre “Mini
Guide” ou “Guide Complet”
Appuyez à plusieurs reprises sur le
bouton rouge.
Dans le Guide complet
Permet de reculer
rapidement (24 heures).
Permet d’avncer
rapidement (24 heures)
•
•
Appuyez à plusieurs reprises sur le
bouton vert.
Appuyez à plusieurs reprises sur le
bouton jaune.
•
•
Dans le Mini-guide
Afficher rapidement la
page suivante.
Afficher rapidement la
page précédente.
•
•
Appuyez à plusieurs reprises sur le
bouton vert.
Appuyez à plusieurs reprises sur le
bouton jaune.
•
•
Vous pouvez aussi afficher le guide en appuyant tout simplement sur le
bouton GUIDE. (Pour la configuration du guide par défaut, se reporter aux instructions à la page 14.)
O
Canal
Mémorisation Auto
Mémorisation Manuelle
Guide Complet
Mini Guide
Par défaut : Mini Guide
Liste des chaînes
Mode Canal : Chaînes ajoutées
Verrouillage Enfant : Marche
Réglage fin
Informations de signal
Canal
Mémorisation Manuelle
Guide Complet
Mini Guide
Par défaut : Mini Guide
Liste des chaînes
Mode Canal : Chaînes ajoutées
Verrouillage Enfant : Marche
Réglage fin
Informations de signal
LNA : Arrêt
Guide Complet
DTV Cable 900 f tn 2:10 Tue 1 Jun
Freshmen On Campus
2:00 - 2:30
No Detailed Information
Today 2:00 - 3:00 3:00 - 4:00
Mint Extra
Loaded
Fresh 40 with Dynamite MC
The Distillery
Smash Hits! Sunday
900 f tn
901 ITV Play
902 Kerrang!
903 Kiss
903 oneword
▼ 903 Smash Hits!
Street Hypn..
Kisstory
No Information
No Information
No Information
Freshmen O..
Voir Information Mini Guide +24Heures Quitter
Mini Guide DTV Cable 900 f tn
Street Hypnosis
Booze Britain
2:00
2:30
▼ 5:00
Freshmen On Campus
Voir Information Guide Complet Page suiv. Quitter
BN68-01409H-Fre.indb 13 2008-04-28 �� 5:15:41Français - ��
Configurer le Guide par défaut
Vous pouvez choisir d’afficher soit le “Mini Guide” soit le “Guide Complet” lorsque vous appuyez sur le bouton GUIDE de la
télécommande.
1. Appuyez sur le bouton MENU pour afficher le menu.
Appuyez sur le bouton ▲ ou ▼ pour sélectionner “Canal”, puis appuyez sur
le bouton ENTER .
2. Appuyez sur le bouton ▲ ou ▼ pour sélectionner “Par défaut”, puis appuyez
sur le bouton ENTER .
3. Sélectionnez “Mini Guide” ou “Guide Complet” à l’aide du bouton ▲ ou ▼,
puis sur le bouton ENTER .
4. Appuyez sur le bouton EXIT pour quitter le menu.
Vous pouvez sélectionner ces options en appuyant sur le bouton GUIDE de
votre télécommande.
O
Canal
Guide Complet
Mini Guide
Par défaut : Mini Guide ►
Liste des chaînes
Mode Canal : Chaînes ajoutées
Verrouillage Enfant : Marche
Réglage fin
Informations de signal
LNA : Arrêt
Canal
Guide Complet
Mini Guide
Par défaut : Mini Guide ►
Liste des chaînes
Mode Canal : Chaînes ajoutées
Verrouillage Enfant : Marche
Réglage fin
Informations de signal
LNA : Arrêt
Mini Guide
Guide Complet
BN68-01409H-Fre.indb 14 2008-04-28 �� 5:15:41Français - ��
Gestion des chaînes
Ce menu permet d’ajouter/supprimer ou définir des chaînes favorites et d’utiliser le guide des programmes pour les
émissions numériques.
Affichage de toutes les chaînes
Affiche toutes les chaînes actuellement disponibles.
Pour utiliser la fonction “Liste des chaînes”, effectuez d’abord une mémorisation
automatique des programmes (“Mémorisation Auto”).
1. Appuyez sur le bouton MENU.
Appuyez sur le bouton ▲ ou ▼ pour sélectionner “Canal”, puis appuyez sur
le bouton ENTER .
Appuyez sur le bouton ▲ ou ▼ pour sélectionner “Liste des chaînes”, puis
appuyez sur le bouton ENTER .
2. Appuyez sur le bouton ◄ pour sélectionner “Chaînes ajoutées”.
3. Appuyez sur le bouton ▲ ou ▼ pour sélectionner “Tous les canaux”.
Affiche toutes les chaînes actuellement disponibles.
Appuyez sur le bouton ENTER .
4. Appuyez sur le bouton ▲ ou ▼ pour sélectionner une chaîne à visualiser,
puis appuyez sur le bouton ENTER . Vous pouvez regarder la chaîne
sélectionnée.
Appuyez sur le bouton CH LIST de la télécommande pour afficher les listes
de chaînes.
Utilisation des boutons de couleur de la télécommande dans la liste des chaînes
Rouge (Type de canal): Permet de basculer entre “TV”, “Radio”, “Donn/
autre” et “Tous”.
Vert (Zoom): Agrandit ou réduit une chaîne.
Jaune (Sélection): Sélectionne des listes de chaînes.
TOOLS (Option): Affiche le menu “Supprimer”(ou “Ajouter”), “Ajouter aux
favoris”(ou “Supprimer des favoris”), “Verrouil.”, “Ecoute programmée”,
“Modifi. nom du chaîne”, “Tri des canaux”, “Modifi. numéro chaîne”,
“Sélectionner tout”, “Désélectionner tout” ou “Mémorisation Auto”.
(Les options de menus peuvent différer selon la situation.)
•
•
•
•
Une chaîne grisée est une chaîne qui a été supprimée.
Le menu “Ajouter” apparaît uniquement pour les chaînes supprimées.
Une chaîne marquée “♥” est une chaîne qui a été définie comme Favoris.
Le menu “Supprimer des favoris” apparaît uniquement pour les chaînes marquées “♥”.
➣
O
➣
➣
824 UKTV Gold
825 UKTV style
A � C --
A 2 C --
A 3 ♥ C --
A 4 C --
A 5 C --
A 6 C --
A 7 C --
A 8 C --
Tous les canaux
Tous Type de canal Zoom Sélection Option
Canal
Mini Guide
Par défaut : Mini Guide
Liste des chaînes
Mode Canal : Chaînes ajoutées
Verrouillage Enfant : Marche
Réglage fin
Informations de signal
LNA : Arrêt
824 UKTV Gold
825 UKTV style
A � C --
A 2 C --
A 3 ♥ C --
A 4 C --
A 5 C --
A 6 C --
A 7 C --
A 8 C --
Chaînes ajoutées
Tous Type de canal Zoom Sélection Option
BN68-01409H-Fre.indb 15 2008-04-28 �� 5:15:42Français - ��
Effacement et ajout de chaînes
Vous pouvez supprimer ou ajouter une chaîne afin d’afficher les chaînes de votre choix.
1. Appuyez sur le bouton MENU.
Appuyez sur le bouton ▲ ou ▼ pour sélectionner “Canal”, puis appuyez
sur le bouton ENTER . Appuyez sur le bouton ▲ ou ▼ pour sélectionner
“Liste des chaînes”, puis appuyez sur le bouton ENTER .
2. Appuyez sur le bouton ◄ pour sélectionner “Chaînes ajoutées”.
3. Appuyez sur le bouton ▲ ou ▼ pour sélectionner “Tous les canaux”.
Affiche toutes les chaînes actuellement disponibles.
Appuyez sur le bouton ENTER .
4. Appuyez sur le bouton ▲ ou ▼ pour sélectionner une chaîne à supprimer,
puis appuyez sur le bouton TOOLS.
5. Appuyez sur le bouton ENTER pour sélectionner “Supprimer”.
Toutes les chaînes supprimées apparaîtront dans le menu “Tous les
canaux”.
6. Appuyez sur le bouton EXIT pour quitter le menu.
De la même manière, vous pouvez également ajouter une chaîne au menu
“Chaînes ajoutées”.
Une chaîne doit être supprimée avant de pouvoir être rajoutée à la liste
“Chaînes ajoutées”.
Pour rajouter une chaîne à la liste Chaînes ajoutées, suivez les étapes 1 à
3 ci-dessus, appuyez sur le bouton ▲ ou ▼ pour sélectionner une chaîne à
ajouter, puis appuyez sur le bouton TOOLS. Appuyez sur le bouton
ENTER pour sélectionner Ajouter.
Appuyez sur le bouton CH LIST de la télécommande pour afficher les listes
de chaînes.
Sélection de vos chaînes favorites
Vous pouvez définir comme favorites les chaînes que vous regardez souvent.
1. Appuyez sur le bouton MENU.
Appuyez sur le bouton ▲ ou ▼ pour sélectionner “Canal”, puis appuyez
sur le bouton ENTER . Appuyez sur le bouton ▲ ou ▼ pour sélectionner
“Liste des chaînes”, puis appuyez sur le bouton ENTER .
2. Appuyez sur le bouton ◄ pour sélectionner “Chaînes ajoutées”.
3. Appuyez sur le bouton ▲ ou ▼ pour sélectionner “Tous les canaux”.
Affiche toutes les chaînes actuellement disponibles.
Appuyez sur le bouton ENTER .
4. Appuyez sur le bouton ▲ ou ▼ pour désigner une chaîne comme chaîne
favorite.
Ajout de plusieurs chaînes aux favoris
Appuyez sur le bouton ▲ ou ▼ pour sélectionner la chaîne voulue dans
la liste des chaînes. Appuyez ensuite sur le bouton jaune. Répétez
l’opération ci-dessus pour sélectionner plusieurs chaînes. La marque
s’affiche à gauche des chaînes sélectionnées.
5. Appuyez sur le bouton TOOLS.
6. Appuyez sur le bouton ▲ ou ▼ pour sélectionner “Ajouter aux favoris”, puis
appuyez sur le bouton ENTER . Le symbole “♥” s’affiche et la chaîne est
définie comme favorite.
7. Pour annuler la sélection d’une chaîne favorite, appuyez sur le bouton
TOOLS alors qu’une chaîne favorite est sélectionnée.
Appuyez sur le bouton ▲ ou ▼ pour sélectionner “Supprimer des favoris”, puis appuyez sur le bouton ENTER .
La chaîne est alors effacée de la liste “Favoris” et la marque “♥” correspondante disparaît.
Appuyez sur le bouton EXIT pour quitter le menu.
Vous pouvez également ajouter ou supprimer une chaîne de la liste Favorites de la même manière dans le menu
“Chaînes ajoutées”.
Toutes les chaînes favorites apparaîtront dans le menu “Favoris”.
Appuyez sur le bouton CH LIST de la télécommande pour afficher les listes
de chaînes.
➣
➣
➣
➣
➣
O
➣
➣
➣
➣
O
Canal
Mini Guide
Par défaut : Mini Guide
Liste des chaînes
Mode Canal : Chaînes ajoutées
Verrouillage Enfant : Marche
Réglage fin
Informations de signal
LNA : Arrêt
Canal
Mini Guide
Par défaut : Mini Guide
Liste des chaînes
Mode Canal : Chaînes ajoutées
Verrouillage Enfant : Marche
Réglage fin
Informations de signal
LNA : Arrêt
824 UKTV Gold
825 UKTV style
A � C --
A 2 C --
A 3 C --
A 4 C --
A 5 C --
A 6 C --
A 7 C --
A 8 C --
Tous les canaux
Tous Type de canal Zoom Sélection Option
Supprimer
Ajouter aux favoris
Verrouil.
Ecoute programmée
Modifi. nom du chaîne
Tri des canaux
▼
824 UKTV Gold
825 UKTV style
A � C --
A 2 C --
A 3 ♥ C --
A 4 C --
A 5 C --
A 6 C --
A 7 C --
A 8 C --
Tous les canaux
Tous Type de canal Zoom Sélection Option
Supprimer
Ajouter aux favoris
Verrouil.
Ecoute programmée
Modifi. nom du chaîne
Tri des canaux
▼
BN68-01409H-Fre.indb 16 2008-04-28 �� 5:15:43Français - ��
Verrouillage et déverrouillage de chaînes
Cette fonction n’est disponible que lorsque la fonction “Verrouillage Enfant” est à “Marche”. (Voir page 22)
1. Appuyez sur le bouton MENU.
Appuyez sur le bouton ▲ ou ▼ pour sélectionner “Canal”, puis appuyez sur
le bouton ENTER .
Appuyez sur le bouton ▲ ou ▼ pour sélectionner “Liste des chaînes”, puis
appuyez sur le bouton ENTER .
2. Appuyez sur le bouton ◄ pour sélectionner “Chaînes ajoutées”.
3. Appuyez sur le bouton ▲ ou ▼ pour sélectionner “Tous les canaux”.
Affiche toutes les chaînes actuellement disponibles.
Appuyez sur le bouton ENTER .
Verrouillage de chaînes
4. Appuyez sur le bouton ▲ ou ▼ pour sélectionner les chaînes à verrouiller, puis
appuyez sur le bouton TOOLS.
5. Appuyez sur le bouton ▲ ou ▼ pour sélectionner “Verrouil.”, puis appuyez sur
le bouton ENTER .
6. Entrez votre code PIN à quatre chiffres.
Le symbole “ ” s’affiche et la chaîne est verrouillée.
Le code PIN par défaut d’un nouveau téléviseur est réglé sur “0-0-0-0”.
Si vous souhaitez changer ce code PIN, reportez-vous à la page 36.
Déverrouillage de chaînes
7. Appuyez sur le bouton ▲ ou ▼ pour sélectionner les chaînes à déverrouiller,
puis appuyez sur le bouton TOOLS.
8. Appuyez sur le bouton ▲ ou ▼ pour sélectionner “Déverrouillé”, puis appuyez
sur le bouton ENTER .
9. Entrez votre code PIN à quatre chiffres.
La chaîne est alors déverrouillée et la marque “ ” correspondante
disparaît.
Le code PIN par défaut d’un nouveau téléviseur est réglé sur “0-0-0-0”.
Si vous souhaitez changer ce code PIN, reportez-vous à la page 36.
10. Appuyez sur le bouton EXIT pour quitter le menu.
➣
➣
➣
➣
➣
➣
➣
Canal
Mini Guide
Par défaut : Mini Guide
Liste des chaînes
Mode Canal : Chaînes ajoutées
Verrouillage Enfant : Marche
Réglage fin
Informations de signal
LNA : Arrêt
824 UKTV Gold
825 UKTV style
A � C --
A 2 C --
A 3 C --
A 4 C --
A 5 C --
A 6 C --
A 7 C --
A 8 C --
Tous les canaux
Tous Type de canal Zoom Sélection Option
Supprimer
Ajouter aux favoris
Verrouil.
Ecoute programmée
Modifi. nom du chaîne
Tri des canaux
▼
824 UKTV Gold
825 UKTV style
A � C --
A 2 C --
A 3 C --
A 4 C --
A 5 C --
A 6 C --
A 7 C --
A 8 C --
Tous les canaux
Tous Type de canal Zoom Sélection Option
Supprimer
Ajouter aux favoris
Déverrouillé
Ecoute programmée
Modifi. nom du chaîne
Tri des canaux
▼
BN68-01409H-Fre.indb 17 2008-04-28 �� 5:15:43Français - ��
Réservation d’un programme (Ecoute programmée)
Si vous réservez un programme que vous souhaitez regarder, la chaîne bascule automatiquement vers la chaîne réservée
dans la liste de chaînes, même lorsque vous êtes en train de regarder une autre chaîne. Pour réserver un programme,
réglez d’abord l’heure actuelle. (Voir pages 33~34)
1. Appuyez sur le bouton MENU.
Appuyez sur le bouton ▲ ou ▼ pour sélectionner “Canal”, puis appuyez sur
le bouton ENTER .
Appuyez sur le bouton ▲ ou ▼ pour sélectionner “Liste des chaînes”, puis
appuyez sur le bouton ENTER .
2. Appuyez sur le bouton ▲ ou ▼ pour sélectionner une chaîne, puis appuyez
sur le bouton TOOLS.
3. Appuyez sur le bouton ▲ ou ▼ pour sélectionner “Ecoute programmée”, puis
appuyez sur le bouton ENTER . L’écran de réservation d’un programme
(Ecoute programmée) apparaît.
4. Appuyez sur le bouton ▲/▼/◄/► pour réserver un programme, puis
appuyez sur le bouton ENTER . La réservation d’un programme est
terminée.
Appuyez sur le bouton EXIT pour quitter le menu.
Vous pouvez également réserver un programme dans les menus “Tous les
canaux” ou “Favoris” en suivant les mêmes procédures.
Pour des informations sur la façon de vérifier une réservation, reportez-vous
à la page 19. Seules des chaînes mémorisées peuvent être réservées.
Vous pouvez régler directement la chaîne, le mois, le jour, l’heure et les
minutes à l’aide du pavé numérique de la télécommande.
Appuyez sur le bouton CH LIST de la télécommande pour afficher les listes
de chaînes.
Guide des programmes numérique et affichage des réservations
Lorsqu’une chaîne numérique est sélectionnée et que vous appuyez sur le bouton
►, le Guide des programmes de la chaîne apparaît. Vous pouvez réserver un
programme en suivant les procédures décrites ci-dessus.
: Un programme en cours de diffusion.
: Un programme réservé.
➣
➣
➣
O
Ecoute programmée
DTV
Antenne
�00
Canal
Une fois
0� - 0� - �00�
Date
Déplacer Régler Entrer Retour
10:00
Heure démarrage
Répétition
Canal
Mini Guide
Par défaut : Mini Guide
Liste des chaînes
Mode Canal : Chaînes ajoutées
Verrouillage Enfant : Marche
Réglage fin
Informations de signal
LNA : Arrêt
1/1/2008
1:59 LA ROSE DES ....
2:59 WS MUSIC
3:21 Gralness de stars
824
825
�0�
A 2 C --
A 3 ♥C --
A 4 C --
A 5 C --
A 6 C --
A 7 C --
A 8 C --
Tous Type de canal Zoom Option Voir
Chaînes ajoutées
Tous Type de canal Zoom Sélection Option
824 UKTV Gold
825 UKTV style
A � C --
A 2 C --
A 3 ♥ C --
A 4 C --
A 5 C --
A 6 C --
A 7 C --
A 8 C --
Chaînes ajoutées
Supprimer
Ajouter aux favoris
Verrouil.
Ecoute programmée
Modifi. nom du chaîne
Tri des canaux
▼
BN68-01409H-Fre.indb 18 2008-04-28 �� 5:15:44Français - ��
Vérification d’une réservation
Vous pouvez voir, modifier ou supprimer une réservation.
1. Appuyez sur le bouton MENU.
Appuyez sur le bouton ▲ ou ▼ pour sélectionner “Canal”, puis appuyez sur
le bouton ENTER . Appuy ez sur le bouton ▲ ou ▼ pour sélectionner
“Liste des chaînes”, puis appuyez sur le bouton ENTER .
2. Appuyez sur le bouton ◄ pour sélectionner “Chaînes ajoutées”.
3. Appuyez sur le bouton ▲ ou ▼ pour sélectionner “Programmé”.
Affiche tous les programmes actuellement réservés.
Appuyez sur le bouton ENTER .
Modification d’une réservation
4. Appuyez sur le bouton ▲ ou ▼ pour sélectionner la réservation à modifier,
puis appuyez sur le bouton TOOLS.
5. Appuyez sur le bouton ENTER pour sélectionner “Infos sur les
modifications”.
6. Appuyez sur les boutons ▲/▼/◄/► pour modifier un paramètre de
réservation, puis appuyez sur le bouton ENTER . La réservation est
modifiée.
Annulation d’une réservation
4. Appuyez sur le bouton ▲ ou ▼ pour sélectionner la réservation à modifier,
puis appuyez sur le bouton TOOLS.
5. Appuyez sur le bouton ▲ ou ▼ pour sélectionner “Annuler les
programmations”, puis appuyez sur le bouton ENTER .
6. Appuyez sur le bouton ◄ ou ► pour sélectionner “OK”, puis appuyez sur le
bouton ENTER . La réservation de visionnage est annulée.
Appuyez sur le bouton EXIT pour quitter le menu.
Option programmée
Infos sur les modifications : Permet de modifier une réservation.
Annuler les programmations : Permet d’annuler une réservation.
Information : Permet de visualiser une réservation.
Sélectionner tout : Sélectionner tous les programmes réservés.
•
•
•
•
Appuyez sur le bouton CH LIST de la télécommande pour afficher les listes
de chaînes.
➣
O
Programmé
1/1/2008
13:59 5 TV1 Quincy, M.E
18:59 2 TV3 The Equalizer
20:59 2 TV3 McMillan & Wife
21:59 2 TV3 M.Spillane’s mike Hammer
Tous Type de canal Zoom Sélection Option Information
Canal
Mini Guide
Par défaut : Mini Guide
Liste des chaînes
Mode Canal : Chaînes ajoutées
Verrouillage Enfant : Marche
Réglage fin
Informations de signal
LNA : Arrêt
Programmé
1/1/2008
13:59 5 TV1 Quincy, M.E
18:59 2 TV3 The Equalizer
20:59 2 TV3 McMillan & Wife
21:59 2 TV3 M.Spillane’s mike Hammer
Infos sur les modifications
Annuler les programmations
Information
Sélectionner tout
Tous Type de canal Zoom Sélection Option Information
BN68-01409H-Fre.indb 19 2008-04-28 �� 5:15:44Français - �0
Modifier le nom d’une chaîne - Analogique
Les chaînes peuvent recevoir un libellé qui s’affichera chaque fois que la chaîne
est sélectionnée.
1. Appuyez sur le bouton MENU.
Appuyez sur le bouton ▲ ou ▼ pour sélectionner “Canal”, puis appuyez sur
le bouton ENTER .
Appuyez sur le bouton ▲ ou ▼ pour sélectionner “Liste des chaînes”, puis
appuyez sur le bouton ENTER .
2. Appuyez sur le bouton ▲ ou ▼ pour sélectionner la chaîne à laquelle vous
souhaitez attribuer un nouveau nom, puis appuyez sur le bouton TOOLS.
3. Appuyez sur le bouton ▲ ou ▼ pour sélectionner “Modifi. nom du chaîne”,
puis appuyez sur le bouton ENTER .
4. Appuyez sur le bouton ▲/▼/◄/► pour sélectionner une lettre, puis appuyez
sur le bouton ENTER .
Touches numériques : Permettent d’entrer des chiffres.
Bouton rouge : Permet de basculer entre English et Characters.
Bouton vert : Permet d’effacer un caractère déjà introduit.
Bouton jaune : Permet d’insérer un espace.
Bouton bleu : Valide le nouveau nom.
•
•
•
•
•
5. Lorsque vous avez terminé, appuyez sur le bouton bleu pour attribuer le
nouveau nom.
Appuyez sur le bouton EXIT pour quitter le menu.
Les chaînes numériques ont des noms qui leur sont automatiquement
attribués et ne peuvent pas être modifiés.
➣
Tri des chaînes mémorisées - Analogique
Cette opération vous permet de changer les numéros de programme des canaux
mémorisés. Cette opération peut s’avérer nécessaire après l’utilisation de la
mémorisation automatique.
1. Appuyez sur le bouton MENU.
Appuyez sur le bouton ▲ ou ▼ pour sélectionner “Canal”, puis appuyez sur
le bouton ENTER .
Appuyez sur le bouton ▲ ou ▼ pour sélectionner “Liste des chaînes”, puis
appuyez sur le bouton ENTER .
2. Appuyez sur le bouton ▲ ou ▼ pour sélectionner une chaîne, puis appuyez
sur le bouton TOOLS.
3. Appuyez sur le bouton ▲ ou ▼ pour sélectionner “Tri des canaux”, puis
appuyez sur le bouton ENTER .
4. Appuyez sur le bouton ▲ ou ▼ pour passer à la position que vous souhaitez
modifier puis appuyez sur le bouton ENTER .
5. Répétez les étapes 2 à 4 pour enregistrer un autre canal.
6. Appuyez sur le bouton EXIT pour quitter le menu.
Canal
Mini Guide
Par défaut : Mini Guide
Liste des chaînes
Mode Canal : Chaînes ajoutées
Verrouillage Enfant : Marche
Réglage fin
Informations de signal
LNA : Arrêt
Tri des canaux
802 abc1
803 BBC Radio 1
804 BBC Radio 2
805 BBC Radio 3
806 BBC Radio 4
807 BBC World
▼
Déplacer Entrer Retour
Canal
Mini Guide
Par défaut : Mini Guide
Liste des chaînes
Mode Canal : Chaînes ajoutées
Verrouillage Enfant : Marche
Réglage fin
Informations de signal
LNA : Arrêt
803 _
Number
Character
Supprimer
Blank
Done
0~9
A B C D E F G
H I J K L M N
O P Q R S T U
V W X Y Z
Déplacer Entrer Retour
Modifi. nom du chaîne
0~9
Tous Type de canal Zoom Sélection Option
824 UKTV Gold
825 UKTV style
A � C --
A 2 C --
A 3 ♥ C --
A 4 C --
A 5 C --
A 6 C --
A 7 C --
A 8 C --
Chaînes ajoutées
Supprimer
Ajouter aux favoris
Verrouil.
Ecoute programmée
Modifi. nom du chaîne
Tri des canaux
▼
Tous Type de canal Zoom Sélection Option
824 UKTV Gold
825 UKTV style
A � C --
A 2 C --
A 3 ♥ C --
A 4 C --
A 5 C --
A 6 C --
A 7 C --
A 8 C --
Chaînes ajoutées
▲
Ajouter aux favoris
Verrouil.
Ecoute programmée
Modifi. nom du chaîne
Tri des canaux
Sélectionner tout
▼
BN68-01409H-Fre.indb 20 2008-04-28 �� 5:15:45Français - ��
Modification d’un numéro de chaîne - Numérique
1. Appuyez sur le bouton MENU.
Appuyez sur le bouton ▲ ou ▼ pour sélectionner “Canal”, puis appuyez sur
le bouton ENTER .
Appuyez sur le bouton ▲ ou ▼ pour sélectionner “Liste des chaînes”, puis
appuyez sur le bouton ENTER .
2. Sélectionnez le numéro de chaîne à modifier en appuyant plusieurs fois sur
le bouton ▲ ou ▼, puis appuyez sur le bouton TOOLS.
3. Appuyez sur le bouton ▲ ou ▼ pour sélectionner “Modifi. numéro chaîne”,
puis appuyez sur le bouton ENTER .
4. Vous pouvez également modifier le numéro de chaîne en appuyant plusieurs
fois sur le bouton ▲ ou ▼. Vous pouvez également modifier le numéro de
chaîne à l’aide du pavé numérique de la télécommande.
Sélection et désélection de toutes les chaînes
1. Appuyez sur le bouton MENU.
Appuyez sur le bouton ▲ ou ▼ pour sélectionner “Canal”, puis appuyez sur
le bouton ENTER .
Appuyez sur le bouton ▲ ou ▼ pour sélectionner “Liste des chaînes”, puis
appuyez sur le bouton ENTER .
2. Appuyez sur le bouton ▲ ou ▼ pour sélectionner la chaîne, puis appuyez
sur le bouton TOOLS.
3. Appuyez sur le bouton ▲ ou ▼ pour sélectionner “Sélectionner tout” ou
“Désélectionner tout”, puis appuyez sur le bouton ENTER .
Vous pouvez sélectionner (ou désélectionner) toutes les chaînes de la liste
des chaînes.
La marque s’affiche à gauche des chaînes sélectionnées.
Enregistrement des chaînes dans la mémoire (Mémorisation automatique)
1. Appuyez sur le bouton MENU.
Appuyez sur le bouton ▲ ou ▼ pour sélectionner “Canal”, puis appuyez sur
le bouton ENTER .
Appuyez sur le bouton ▲ ou ▼ pour sélectionner “Liste des chaînes”, puis
appuyez sur le bouton ENTER .
2. Appuyez sur le bouton ▲ ou ▼ pour sélectionner la chaîne à laquelle vous
souhaitez attribuer un nouveau nom, puis appuyez sur le bouton TOOLS.
3. Appuyez sur le bouton ▲ ou ▼ pour sélectionner “Mémorisation Auto”, puis
appuyez sur le bouton ENTER .
Pour plus d’informations concernant le réglage des options, reportez-vous à
la page 11.
Si une chaîne est verrouillée par la fonction “Verrouillage Enfant”, la fenêtre
de saisie du code PIN s’affiche (voir page 22).
➣
➣
➣
➣
Modifi. numéro chaîne
Canal
803
Nom
BBC Radio 1
Déplacer Entrer Retour
Tous Type de canal Zoom Sélection Option
824 Television X
825 UKTV style
��� UKTV style
A 2 C --
A 3 ♥ C --
A 4 C --
A 5 C --
A 6 C --
A 7 C --
A 8 C --
Chaînes ajoutées
Supprimer
Ajouter aux favoris
Verrouil.
Ecoute programmée
Modifi. numéro chaîne
Sélectionner tout
▼
Tous Type de canal Zoom Sélection Option
824 UKTV Gold
825 UKTV style
A � C --
A 2 C --
A 3 ♥ C --
A 4 C --
A 5 C --
A 6 C --
A 7 C --
A 8 C --
Chaînes ajoutées
▲
Verrouil.
Ecoute programmée
Modifi. nom du chaîne
Tri des canaux
Sélectionner tout
Mémorisation Auto
Tous Type de canal Zoom Sélection Option
824 UKTV Gold
825 UKTV style
A � C --
A 2 C --
A 3 ♥ C --
A 4 C --
A 5 C --
A 6 C --
A 7 C --
A 8 C --
Chaînes ajoutées
Verrouil.
Supprimer
Ajouter aux favoris
Désélectionner tout
Sélectionner tout
Mémorisation Auto
BN68-01409H-Fre.indb 21 2008-04-28 �� 5:15:45Français - ��
Activation du Verrouillage Enfant
Cette fonction, qui bloque la vidéo et coupe le son, vous permet d’éviter toute utilisation non autorisée, par des enfants par
exemple, qui pourraient visionner des programmes ne leur étant pas destinés.
1. Appuyez sur le bouton MENU pour afficher le menu.
Appuyez sur le bouton ▲ ou ▼ pour sélectionner “Canal”, puis appuyez sur
le bouton ENTER .
2. Appuyez sur le bouton ▲ ou ▼ pour sélectionner “Verrouillage Enfant”.
Appuyez sur le bouton ENTER .
3. Entrez votre code PIN à quatre chiffres.
Le code PIN par défaut d’un nouveau téléviseur est réglé sur “0-0-0-0”.
Si vous souhaitez changer ce code PIN, reportez-vous à la page 36.
4. Appuyez sur le bouton ▲ ou ▼ pour sélectionner “Marche”.
Appuyez sur le bouton ENTER .
5. Appuyez sur le bouton EXIT pour quitter le menu.
Vous pouvez sélectionner les chaînes à verrouiller dans la liste des
chaînes (reportez-vous à la page 17).
“Verrouillage Enfant” est uniquement disponible en mode TV.
La fonction “Verrouillage Enfant” n’est pas disponible lorsque “PIP” est
activé.
Si une chaîne est verrouillée par la fonction “Verrouillage Enfant”, la
fenêtre de saisie du code PIN s’affiche lorsque “Mémorisation Auto” ou
“Plug & Play” est sélectionné.
➣
➣
➣
➣
➣
➣
Réglage du gestionnaire de chaînes
Vous pouvez afficher soit la liste des chaînes ajoutées, soit la liste des favoris lorsque vous appuyez sur le bouton CH LIST
de la télécommande.
1. Appuyez sur le bouton MENU pour afficher le menu.
Appuyez sur le bouton ▲ ou ▼ pour sélectionner “Canal”, puis appuyez sur
le bouton ENTER .
2. Appuyez sur le bouton ▲ ou ▼ pour sélectionner “Mode Canal”, puis
appuyez sur le bouton ENTER .
3. Appuyez sur le bouton ▲ ou ▼ pour sélectionner “Chaînes ajoutées” ou
“Favoris”. Appuyez sur le bouton ENTER .
4. Appuyez sur le bouton EXIT pour quitter le menu.
Canal
Liste des chaînes
Mode Canal : Chaînes ajoutées : Chaînes ajoutées
Verrouillage Enfant : Marche ►
Réglage fin
Informations de signal
LNA : Arrêt
Canal
Par défaut : Mini Guide
Liste des chaînes
Mode Canal : Chaînes ajoutées ►
Verrouillage Enfant : Marche
Réglage fin
Informations de signal
LNA : Arrêt
Canal
Par défaut : Mini Guide
Liste des chaînes
Mode Canal : Favorite Channels►
Verrouillage Enfant : Arrêt
Réglage fin
Informations de signal
LNA : Arrêt
Chaînes ajoutées
Favoris
Canal
Liste des chaînes
Mode Canal : Chaînes ajoutées
Verrouillage Enfant : Arrêt ►
Réglage fin
Informations de signal
LNA : Arrêt
Marche
Arrêt
Verrouillage Enfant
* *
Saisir le code PIN
*
0~9 Saisir le code PIN Retour
BN68-01409H-Fre.indb 22 2008-04-28 �� 5:15:46Français - ��
Syntonisation fine des chaînes analogiques
1. Utilisez le pavé numérique pour sélectionner directement le canal à régler.
2. Appuyez sur le bouton MENU pour afficher le menu. Appuyez sur le bouton
▲ ou ▼ pour sélectionner “Canal”, puis appuyez sur le bouton ENTER .
3. Appuyez sur le bouton ▲ ou ▼ pour sélectionner “Réglage fin”, puis appuyez
sur le bouton ENTER .
4. Appuyez sur le bouton ◄ ou ► pour effectuer une syntonisation précise.
Appuyez sur le bouton ENTER .
5. Appuyez sur le bouton EXIT pour quitter le menu.
Les canaux réglés et mémorisés sont repérés par un astérisque “*” placé
à droite de leur numéro dans la bannière des canaux.
Pour réinitialiser le réglage, sélectionnez “Réinitialiser” à l’aide du bouton
▲ ou ▼ puis appuyez sur le bouton ENTER .
La syntonisation fine est possible uniquement avec les chaînes
analogiques.
➣
➣
➣
Vérification des informations relatives au signal numérique
Vous pouvez obtenir des informations relatives à l’état du signal.
1. Appuyez sur le bouton MENU pour afficher le menu.
Appuyez sur le bouton ▲ ou ▼ pour sélectionner “Canal”, puis appuyez sur
le bouton ENTER .
2. Appuyez sur le bouton ▲ ou ▼ pour sélectionner “Informations de signal”,
puis appuyez sur le bouton ENTER .
3. Appuyez sur le bouton EXIT pour quitter le menu.
Si l’état du signal est faible, le message “Aucun signal” s’affiche.
Cette fonction peut être sélectionnée pendant que vous regardez une
chaîne numérique.
➣
➣
Canal
Mode Canal : Chaînes ajoutées
Verrouillage Enfant : Marche
Réglage fin ►
Informations de signal
LNA : Arrêt
Canal
Verrouillage Enfant : Marche
Réglage fin
Informations de signal ►
LNA : Arrêt
Informations de signal
Service ID : 0401
Multiplex : (TSID 0004, ONID 20fa)
Réseau : (ID 20fa)
Niv. d’erreur de bit 0
intensité du Signal 88
OK
Entrer Retour
Réglage fin
ATV 6 * Syntonisation fine
Réinitialiser
+ 3
Déplacer Régler Sauveg. Retour
BN68-01409H-Fre.indb 23 2008-04-28 �� 5:15:46Français - ��
LNA (Amplificateur à faible bruit)
Si le téléviseur fonctionne dans une zone où le signal est faible, la fonction LNA peut parfois améliorer la réception (un
préamplificateur à faible bruit augmente le signal d’arrivée).
1. Appuyez sur le bouton MENU pour afficher le menu.
Appuyez sur le bouton ▲ ou ▼ pour sélectionner “Canal”, puis appuyez sur
le bouton ENTER .
2. Appuyez sur le bouton ▲ ou ▼ pour sélectionner “LNA”, puis appuyez sur le
bouton ENTER .
3. Appuyez sur le bouton ▲ ou ▼ pour sélectionner “Arrêt” ou “Marche”.
Appuyez sur le bouton ENTER .
4. Appuyez sur le bouton EXIT pour quitter le menu.
Cette fonction peut être sélectionnée pendant que vous regardez une
chaîne analogique.
➣
Canal
Réglage fin
Informations de signal
LNA : Marche Arrêt ►
Marche
Canal
Réglage fin
Informations de signal
LNA : Arrêt ►
BN68-01409H-Fre.indb 24 2008-04-28 �� 5:15:46Français - ��
Réglage de l’image
Changement de la norme Image
Vous pouvez sélectionner le type d’image qui correspond le mieux à vos
exigences d’affichage.
1. Appuyez sur le bouton MENU pour afficher le menu.
Appuyez sur le bouton ENTER pour sélectionner “Image”.
2. Appuyez sur le bouton ENTER pour sélectionner “Mode”.
Appuyez sur le bouton ▲ ou ▼ pour sélectionner “Dynamique”, “Standard”
ou “Film”. Appuyez sur le bouton ENTER .
Dynamique: Sélectionnez l’image pour un affichage haute définition
dans une pièce claire.
Standard: Sélectionne l’image pour un affichage optimal dans un
environnement normal.
Film: Sélectionne l’image pour un affichage agréable de films dans une
pièce sombre.
•
•
•
3. Appuyez sur le bouton EXIT pour quitter le menu.
Réglage simple
1. Appuyez sur le bouton TOOLS de la télécommande.
2. Appuyez sur le bouton ▲ ou ▼ pour sélectionner “Mode Image”.
3. Appuyez sur le bouton ◄ ou ► pour sélectionner l’option de votre choix.
4. Appuyez sur le bouton EXIT ou TOOLS pour quitter le menu.
Personnalisation des paramètres d’image
Votre téléviseur dispose de plusieurs options qui vous permettent de régler la qualité de l’image.
1. Pour sélectionner le mode d’image requis, suivez les instructions 1 à 2 du
chapitre “Changement de la norme Image”.
2. Appuyez sur le bouton ▲ ou ▼ pour sélectionner “Rétroéclairage”,
“Contraste”, “Luminosité”, “Netteté”, “Couleur” ou “Teinte (V/R)”, puis appuyez
sur le bouton ENTER .
3. Appuyez sur le bouton ◄ ou ► pour augmenter ou diminuer la valeur d’un
élément spécifique. Appuyez sur le bouton ENTER .
Appuyez sur le bouton EXIT pour quitter le menu.
Lorsque vous modifiez les paramètres “Rétroéclairage”, “Contraste”,
“Luminosité”, “Netteté”, “Couleur” ou “Teinte (V/R)”, l’écran se modifie en
conséquence.
En mode TV, Ext., AV et S-Vidéo du système PAL, vous ne pouvez pas
utiliser la fonction “Teinte”.
En mode PC, vous ne pouvez modifier que les options “Rétroéclairage”,
“Contraste” et “Luminosité”.
Vous pouvez effectuer des réglages pour chaque appareil externe
connecté à une entrée du téléviseur et les enregistrer.
L’énergie consommée pendant le fonctionnement peut être sensiblement réduite en baissant le niveau de
luminosité de l’image. Cela réduira le coût de fonctionnement général.
Rétroéclairage : Règle la luminosité du rétroéclairage de l’écran.
Contraste : Règle le contraste de l’image.
Luminosité : Règle le niveau de luminosité de l’image.
Netteté : Règle la définition des bords de l’image.
Couleur : Règle la saturation de couleur de l’image.
Teinte (V/R) : Règle la teinte de couleur de l’image.
•
•
•
•
•
•
➣
➣
➣
➣
➣
Image
Mode : Dynamique ►
Rétroéclairage : 7
Contraste : 95
Luminosité : 45
Netteté : 50
Couleur : 50
Teinte (V/R) : G50/R50
Réglages des détails
Dynamique
Standard
Film
Mode : Standard
Rétroéclairage : 7 ►
Contraste : 95
Luminosité : 45
Netteté : 50
Couleur : 50
Teinte (V/R) : G50/R50
Réglages des détails
Options d’image
Image
Rétroéclairage 7
Déplacer Régler Entrer Retour
Mode : Standard
Rétroéclairage : 7
Contraste : 95
Luminosité : 45
Netteté : 50
Couleur : 50
Teinte (V/R) : G50/R50
Réglages des détails
Image
Outils
Liste d’appareils
Mode Image ◄ Standard ►
Mode Son : Personnalisé
Veille : Arrêt
SRS TS XT : Arrêt
Mode éco. : Arrêt
Dual l ll : Mono
Déplacer Régler e Quitter
BN68-01409H-Fre.indb 25 2008-04-28 �� 5:15:47Français - ��
Réglage des paramètres détaillés
Les nouveaux téléviseurs Samsung permettent d’effectuer des réglages d’image encore plus précis que les modèles
précédents. Ce qui suit explique comment régler les paramètres détaillés de l’image.
Activation des paramètres détaillés
1. Appuyez sur le bouton MENU pour afficher le menu.
Appuyez sur le bouton ENTER pour sélectionner “Image”.
2. Appuyez sur le bouton ENTER pour sélectionner “Mode”.
Appuyez sur le bouton ▲ ou ▼ pour sélectionner “Standard” ou “Film”, puis
appuyez sur le bouton ENTER .
La fonction “Réglages des détails” est disponible en mode “Standard” ou
“Film”.
3. Appuyez sur le bouton ▲ ou ▼ pour sélectionner “Réglages des détails”,
puis appuyez sur le bouton ENTER .
En mode PC, vous ne pouvez modifier que les options “Contraste Dynam.”,
“Gamma” et “Balance blancs” dans le menu “Réglages des détails”.
Réglage des noirs: Arrêt/Bas/Moyen/Elevé
Vous pouvez directement sélectionner le niveau de noir sur l’écran pour
régler la profondeur de l’écran.
Contraste Dynam.: Arrêt/Bas/Moyen/Elevé
Vous pouvez régler le contraste de l’écran pour obtenir un contraste optimal.
Gamma: -3 ~ +3
Vous pouvez régler l’intensité des couleurs primaires (rouge, vert, bleu).
Espace de couleur: Auto./Natif/Personnalisé
L’espace couleur est une matrice de couleurs composée de “Rouge”, de
“Vert” et de “Bleu”. Sélectionnez votre espace de couleur préféré et appréciez
la couleur la plus naturelle.
Auto.: La commande Auto de Espace couleur permet d’obtenir automatiquement les tons les plus naturels en
fonction des sources de programme.
Natif: La commande Standard de Espace couleur offre des tons riches.
Personnalisé: Règle la gamme des couleurs selon la préférence.
•
•
•
Personnalisation de l’espace de couleur
Couleur: Rouge/Vert/Bleu/Jaune/Cyan/Magenta
Permet de régler la gamme de couleurs en fonction de vos préférences “Couleur” est disponible lorsque l’option
“Espace de couleur” est définie sur “Personnalisé”. Appuyez sur le bouton ▲ ou ▼ pour sélectionner “Rouge”,
“Vert”, “Bleu”, “Jaune”, “Cyan” ou “Magenta”. Appuyez sur le bouton ENTER .
Rouge/Vert/Bleu: Dans “Couleur”, vous pouvez régler les valeurs RVB pour la couleur sélectionnée.
Appuyez sur le bouton ▲ ou ▼ pour sélectionner la couleur “Rouge”, “Vert” ou “Bleu” afin de la modifier.
Appuyez sur le bouton ENTER . Appuyez sur le bouton ◄ ou ► pour réduire ou augmenter la valeur d’un
élément spécifique. Appuyez sur le bouton ENTER .
Réinitialiser: Rétablit les valeurs par défaut de l’espace de couleur.
Balance blancs: Aj. Rouge/Aj. Vert/Aj. Bleu/Regl. Rouge/Regl. vert/Regl. bleu/Réinitialiser
Vous pouvez régler la température des couleurs pour que celles-ci soient plus naturelles.
Aj. Rouge/Aj. Vert/Aj. Bleu/Regl. Rouge/Regl. vert/Regl. bleu: La modification des valeurs de réglage permet
d’actualiser l’écran que vous venez de retoucher.
Sélectionnez l’option de votre choix en appuyant sur le bouton ▲ ou ▼ puis appuyez sur le bouton ENTER .
Appuyez sur le bouton ◄ ou ► pour obtenir le réglage qui convient.
Réinitialiser: La balance des blancs réglée précédemment est ramenée à sa valeur par défaut.
Carnation: -15 ~ +15
Vous pouvez accentuer le “Carnation” de l’image. Appuyez sur le bouton ◄ ou ► pour obtenir le réglage qui convient.
La modification des valeurs de réglage permet d’actualiser l’écran que vous venez de retoucher.
Amélioration bords: Arrêt/Marche
Vous pouvez faire ressortir la bordure des objets sur l’image.
xvYCC: Arrêt/Marche
L’activation du mode xvYCC augmente les détails et l’espace de couleur lorsque vous regardez des films depuis un
périphérique externe (p. ex. lecteur DVD) relié à l’entrée HDMI ou aux prises d’entrée de composant. Vous devez
définir le mode Image sur Cinéma pour bénéficier de cette fonction.
”xvYCC” est disponible lorsque le mode d’image est défini sur “Film” et la sortie externe sur mode “HDMI” ou
“Composant”.
Si la fonction xvYCC est active, la fonction PIP ne peut pas être sélectionnée.
➣
➣
➣
➣
➣
➣
Réglages des détails
Réglage des noirs : Arrêt ►
Contraste Dynam. : Bas
Gamma : 0
Espace de couleur : Natif
Balance blancs
Carnation : 0
Amélioration bords : Marche
Déplacer Entrer Retour
Mode : Standard
Rétroéclairage : 7
Contraste : 95
Luminosité : 45
Netteté : 50
Couleur : 50
Teinte (V/R) : G50/R50
Réglages des détails
Image
BN68-01409H-Fre.indb 26 2008-04-28 �� 5:15:47Français - ��
Configuration des option d’image
Activation des options d’image
1. Appuyez sur le bouton MENU pour afficher le menu.
Appuyez sur le bouton ENTER pour sélectionner “Image”.
2. Appuyez sur le bouton ▲ ou ▼ pour sélectionner “Options d’image”, puis
appuyez sur le bouton ENTER .
Appuyez sur le bouton ▲ ou ▼ pour sélectionner un élément spécifique.
Appuyez sur le bouton ENTER .
Lorsque vous êtes satisfait de la configuration, appuyez sur le bouton
ENTER .
En mode PC, vous ne pouvez modifier que les options “Nuance Coul.” et
“Taille” dans le menu “Options d’image”.
Nuance Coul.: Froide2/Froide1/Normal/Chaude1/Chaude2
Vous pouvez sélectionner la nuance de couleur la plus agréable au regard.
Les valeurs réglées sont mémorisées en fonction du mode “Image”
sélectionné.
“Chaude1” ou “Chaude2” est activé uniquement lorsque le mode d’image
est défini sur “Film”.
Taille: 16/9 auto/16:9/Zoom large/Zoom/4:3/Scan uniquement
Vous pouvez sélectionner la taille d’image qui correspond le mieux à vos
besoins d’affichage.
��/� auto: Règle automatiquement la taille de l’image au format “16:9”.
16:9: Règle la taille de l’image sur 16:9 de façon appropriée pour les DVD ou la diffusion au format cinémascope.
Zoom large: Donnez à l’image une taille supérieure à 4:3.
Zoom: Agrandit l’image en 16:9 (dans la direction verticale) pour l’adapter à la taille de l’écran.
4:3: C’est le paramètre par défaut pour un film cinéma ou de la diffusion normale.
Scan uniquement: Utilisez la fonction pour voir l’intégralité de l’image sans coupure lors de les signaux HDMI
(720p/1080i/1080p) ou Composant (1080i/1080p) sont entrés.
•
•
•
•
•
•
La fonction “16/9 auto” est uniquement disponible en mode “TV”, “Ext.1”, “Ext.2”, “AV”, et “S-Vidéo”.
En mode PC, seuls les modes“16:9” et “4:3” peuvent être sélectionnés.
Vous pouvez effectuer des réglages pour chaque appareil externe connecté à une entrée du téléviseur et les enregistrer.
Une rémanence temporaire peut se produire lorsque vous affichez une image statique pendant une ou deux heures
sur l’écran du téléviseur.
“Zoom large”: Appuyez sur le bouton ► pour sélectionner “Position”, puis appuyez sur le bouton ENTER .
Utilisez le bouton ▲ ou ▼ pour déplacer l’écran vers le haut ou le bas. Appuyez ensuite sur le bouton ENTER .
“Zoom”: Appuyez sur le bouton ► pour sélectionner “Position”, puis appuyez sur le bouton ENTER . Appuyez le
bouton ▲ ou ▼ pour déplacer l’image en haut et en bas. Appuyez ensuite sur le bouton ENTER . Appuyez sur
le bouton ► pour sélectionner “Taille”, puis appuyez sur le bouton ENTER . Appuyez sur le bouton ▲ ou ▼ pour
agrandir ou réduire la hauteur de l’image. Appuyez ensuite sur le bouton ENTER .
Lorsque le mode Double ( , ) a été défini sur PIP, le paramètre Taille de l’image ne peut pas être réglé.
Après avoir sélectionné l’option“Scan uniquement” en mode HDMI (1080i/1080p) ou Composant (1080i/1080p) :
Sélectionnez “Position” à l’aide du bouton ◄ ou ►. Utilisez le bouton ▲, ▼, ◄ ou ► pour déplacer l’image.
Réinitialiser: appuyez sur le bouto ◄ ou ► pour sélectionner “Réinitialiser”, puis sur le bouton ENTER .
Vous pouvez initialiser le réglage.
Vous pouvez sélectionner ces options simplement en appuyant sur le bouton
P.SIZE de votre télécommande.
Mode écran: 16:9/Zoom large/Zoom/4:3
Lorsque vous fixez la taille de l’image à 16/9 auto sur un téléviseur 16:9, vous pouvez déterminer la taille selon
laquelle vous voulez afficher une image 4:3 WSS (Wide Screen Service, service d’écran large) ou rien. Chaque pays
européen emploie une taille d’image ; cette fonction permet aux utilisateurs de sélectionner la leur.
16:9 : Pour régler l’image en mode 16:9 large.
Zoom large : Donnez à l’image une taille supérieure à 4:3.
Zoom : Agrandit la taille de l’image sur l’écran dans le sens vertical.
4:3 : Règle l’image en mode Normal, c’est-à-dire en 4:3.
•
•
•
•
Cette fonction est uniquement disponible en mode “16/9 auto”.
Cette fonction n’est pas disponible en mode “PC”, “Composant” ou “HDMI”.
➣
➣
➣
➣
➣
➣
➣
➣
➣
➣
➣
➣
➣
O
➣
➣
Teinte (V/R) : G50/R50
Réglages des détails
Options d’image ►
Réinitialisation de l’image
Image
Options d’image
Nuance Coul. : Normal ►
Taille : 16/9 auto
Mode écran : 16:9
NR numérique : Auto.
DNle : Arrêt
Niveau noir HDMI : Normal
Movie Plus : Bas
▼
Déplacer Entrer Retour
BN68-01409H-Fre.indb 27 2008-04-28 �� 5:15:47Français - ��
Reinitialisation des paramètres d’image à leur valeur par défaut.
1. Pour sélectionner le mode d’image requis, suivez les instructions 1 à 2 du
chapitre “Changement de la norme Image” (voir page 25).
2. Appuyez sur le bouton ▲ ou ▼ pour sélectionner “Réinitialisation de l’image”,
puis appuyez sur le bouton ENTER .
3. Appuyez sur le bouton ▲ ou ▼ pour sélectionner “OK” ou “Annuler”, puis
appuyez sur le bouton ENTER .
Appuyez sur le bouton EXIT pour quitter le menu.
➣ Chaque mode peut être réinitialisé.
NR numérique: Arrêt/Bas/Moyen/Elevé/Auto.
Si le signal de radiodiffusion reçu est faible, vous pouvez activer la fonction Digital Noise Reduction pour favoriser la
réduction d’images fantômes ou statiques qui peuvent apparaître à l’écran.
Lorsque le signal est faible, sélectionnez une autre option jusqu’à obtention de la meilleure image possible.
DNIe: Arrêt/Démo/Marche
Pour offrir une grande qualité d’image, ce téléviseur est doté de la fonction DNIe. Si vous activez l’option DNIe, la
fonction DNIe sera activée à l’écran. Lorsque vous activez le mode Démo de la fonction DNIe, une image normale
et une image avec la fonction DNIe appliquée s’affichent à l’écran à des fins de démonstration. Cette fonction vous
permet de constater la différence de qualité d’affichage.
DNIe™ (Digital Natural Image engine - Moteur d’images numériques d’aspect naturel) DNIe™
Cette fonction vous apporte une image plus détaillée tout en permettant une réduction de bruit 3D et une
amélioration des détails, des contrastes et des blancs. Le nouvel algorithme de compensation d’images vous offre
une image plus lumineuse, plus claire et plus détaillée. La technologie DNIe™ adaptera tous les signaux à votre
vue, quels qu’ils soient.
Cette fonction n’est pas disponible dans les modes “Film” et “Standard”.
Niveau noir HDMI: Normal/Bas
Vous pouvez directement choisir le niveau de noir sur l’écran pour régler la profondeur de l’écran.
Cette fonction n’est active que lorsque l’entrée externe se connecte à HDMI (signaux RVB).
Movie Plus: Arrêt/Bas/Moyen/Elevé/Démo
Vous pourrez apprécier des images plus naturelles et des textes plus nets et ce, même dans les scènes rapides.
Utilisez cette fonction lorsque vous regardez un film.
Cette fonction n’est pas disponible dans les modes “Zoom large” et “Zoom”.
Cette fonction n’est pas disponible lorsque “PIP” est défini sur “Marche”.
Cette élément n’est pas pris en charge en mode HDMI 1080p/24 Hz, 25 Hz, 30 Hz.
Mode bleu uniquement: Arrêt/Marche
Cette fonction est destinée aux spécialistes de mesure des appareils AV. Cette fonction affiche le signal bleu en
supprimant simplement les signaux rouge et vert du signal vidéo, de manière à fournir un effet Filtre bleu utilisé pour
régler la couleur et la teinte de l’équipement vidéo, tel que des lecteurs de DVD, systèmes de cinéma à domicile, etc.
Cette fonction permet de régler la couleur et la teinte sur des valeurs appropriées au niveau de signal de chaque
dispositif vidéo à l’aide des modèles de barres de couleurs Rouge/Vert/Bleu/Cyan/Magenta/Jaune, sans utiliser de
filtre bleu supplémentaire.
L’option “Mode bleu uniquement” n’est disponible que si le mode Image est défini sur “Film” ou “Standard”.
➣
➣
➣
➣
➣
➣
➣
➣
➣
Image
Réglages des détails
Options d’image
Réinitialisation de l’image OK ►
Annuler
BN68-01409H-Fre.indb 28 2008-04-28 �� 5:15:48Français - ��
Visualisation d’une image dans l’image
Vous pouvez afficher une image secondaire dans l’image principale du programme télévisé ou de l’entrée vidéo. De cette
manière, vous pouvez regarder ou surveiller le programme télévisé ou l’entrée vidéo depuis n’importe quel équipement
branché tout en regardant l’image principale.
1. Appuyez sur le bouton MENU pour afficher le menu.
Appuyez sur le bouton ▲ ou ▼ pour sélectionner “Configuration”, puis
appuyez sur le bouton ENTER .
2. Appuyez sur le bouton ▲ ou ▼ pour sélectionner “PIP”, puis appuyez sur le
bouton ENTER .
3. Appuyez sur le bouton ENTER .
Appuyez sur le bouton ▲ ou ▼ pour sélectionner “Marche”, puis appuyez sur
le bouton ENTER .
4. Sélectionnez l’option désirée en appuyant sur le bouton ▲ ou ▼, puis
appuyez sur le bouton ENTER .
5. Lorsque vous êtes satisfait du réglage, appuyez sur le bouton ENTER .
6. Appuyez sur le bouton EXIT pour quitter le menu.
Il est possible que l’image dans la fenêtre PIP devienne légèrement moins
naturelle lorsque vous utilisez l’écran principale pour un jeu ou un karaoké.
PIP: Marche/Arrêt
Vous pouvez activer ou désactiver la fonction PIP.
Image principale Image secondaire
Composant
HDMI 1, HDMI/DVI 2, HDMI 3
PC
TV, Ext.1, Ext.2, AV
Réglage simple
1. Appuyez sur le bouton TOOLS de la télécommande.
2. Appuyez sur le bouton ▲ ou ▼ pour sélectionner “PIP”, puis appuyez sur
le bouton ENTER .
3. Appuyez sur le bouton ◄ ou ► pour sélectionner “Marche”.
4. Appuyez sur le bouton ▲ ou ▼ pour sélectionner un élément spécifique.
5. Appuyez sur le bouton ◄ ou ► pour sélectionner l’option de votre choix.
6. Appuyez sur le bouton EXIT ou TOOLS pour quitter le menu.
Source
Vous pouvez sélectionner la source de l’image secondaire.
Taille: / /
Vous pouvez sélectionner la taille de l’image secondaire.
Si l’image principale est en mode “HDMI” l’option “Taille” est disponible.
Position: / / /
Vous pouvez sélectionner la position de l’image secondaire.
En mode Double ( , ) l’option “Position” ne peut pas être sélectionnée.
Canal
Vous ne pouvez sélectionner une chaîne de l’image secondaire que si la “Source” est définie sur “TV”.
➣
➣
➣
Configuration
Divertissement : Arrêt
Mode éco. : Arrêt
PIP ►
Mise à jour logicielle
Interface commune
PIP
PIP : Marche
Source : TV
Taille :
Position :
Canal : ATV 11
Déplacer Entrer Retour
PIP
PIP ◄ Arrêt ►
Source : TV
Taille :
Posion :
Canal : ATV 11
Régler Retour
Outils
Liste d’appareils
Mode Image : Standard
Mode Son : Personnalisé
Veille : Arrêt
SRS TS XT : Arrêt
PIP
Mode éco. : Arrêt
Déplacer Régler e Quitter
BN68-01409H-Fre.indb 29 2008-04-28 �� 5:15:48Français - �0
Réglage du son
Changement de la norme Son
Vous pouvez sélectionner le mode son qui convient le mieux au programme que
vous regardez.
1. Appuyez sur le bouton MENU pour afficher le menu.
Appuyez sur le bouton ▲ ou ▼ pour sélectionner “Son”, puis appuyez sur le
bouton ENTER .
2. Sélectionnez l’option désirée en appuyant sur le bouton ▲ ou ▼, puis
appuyez sur le bouton ENTER .
3. Lorsque vous êtes satisfait du réglage, appuyez sur le bouto ENTER .
4. Appuyez sur le bouton EXIT pour quitter le menu.
Mode: Standard/Musique/Film/Parole/Personnalisé/Divertissement
Vous pouvez sélectionner le type d’effet sonore souhaité lorsque vous
regardez un programme donné.
Réglage simple
1. Appuyez sur le bouton TOOLS de la télécommande.
2. Appuyez sur le bouton ▲ ou ▼ pour sélectionner “Mode Son”.
3. Appuyez sur le bouton ◄ ou ► pour sélectionner l’option de votre choix.
4. Appuyez sur le bouton EXIT ou TOOLS pour quitter le menu.
Egaliseur : Mode/Balance/100Hz/300Hz/1kHz/3kHz/10kHz/Réinitialiser
Le téléviseur dispose de plusieurs paramètres qui vous permettent de régler
la qualité du son.
Les valeurs réglées sont mémorisées en fonction du mode “Son”
sélectionné.
Réinitialiser: rétablit les valeurs par défaut de l’égaliseur.
SRS TruSurround XT : Arrêt/Marche
Le TruSurround XT est une technologie SRS brevetée qui remédie au
problème de la lecture du contenu d’un disque multicanal 5,1 sur deux
haut-parleurs. Le TurSurround produit un son surround virtuel fascinant au
moyen de n’importe quel système de lecture à deux haut-parleurs, dont
les hautparleurs internes du téléviseur. Il s’adapte parfaitement à tous les
formats multicanaux.
Réglage simple
1. Appuyez sur le bouton TOOLS de la télécommande.
2. Appuyez sur le bouton ▲ ou ▼ pour sélectionner “SRS TS XT”.
3. Appuyez sur le bouton ◄ ou ► pour sélectionner “Arrêt” ou “Marche”.
4. Appuyez sur le bouton EXIT ou TOOLS pour quitter le menu.
TruSurround XT, SRS et le symbole sont des marques déposées de SRS Labs, Inc.
La technologie TruSurround XT est protégée par la licence de SRS Labs, Inc.
Langue audio
Modification de la valeur par défaut des langues des sous-titres et audio. Affiche les informations relatives à la langue
pour le flot d’entrée.
Cette fonction peut être sélectionnée pendant que vous regardez une chaîne numérique.
Vous pouvez sélectionner la langue uniquement parmi les langues en cours de diffusion.
➣
➣
➣
➣
Mode : Personnalisé ►
Egaliseur
SRS TruSurround XT : Arrêt
Langue audio : ----
Format Audio : ----
Description audio
Volume auto : Arrêt
TV Speaker : Marche
Son
Entrer Retour
Egaliseur
Mode : Personnalisé
Balance L R
100Hz - +
300Hz - +
1kHz - +
3kHz - +
10kHz - +
▼
Déplacer Régler
Outils
Liste d’appareils
Mode Image : Standard
Mode Son : Personnalisé
Veille : Arrêt
SRS TS XT ◄ Arrêt ►
Mode éco. : Arrêt
Dual l ll : Mono
Déplacer Régler e Quitter
Outils
Liste d’appareils
Mode Image : Standard
Mode Son ◄ Personnalisé ►
Veille : Arrêt
SRS TS XT : Arrêt
Mode éco. : Arrêt
Dual l ll : Mono
Déplacer Régler e Quitter
BN68-01409H-Fre.indb 30 2008-04-28 �� 5:15:48Français - ��
Format Audio : MPEG/Dolby Digital
Lorsque le son est émis à la fois par le haut-parleur principal et le récepteur audio, un effet d’écho peut se produire
en raison de la différence de vitesse de décodage entre le haut-parleur principal et le récepteur audio. Dans ce cas,
utilisez la fonction TV Speaker (Haut-parleur du téléviseur).
Cette fonction peut être sélectionnée pendant que vous regardez une chaîne numérique.
Vous pouvez sélectionner la langue uniquement parmi les langues en cours de diffusion.
Fabriqué sous licence de Dolby Laboratories. Dolby et le symbole du double D sont des
marques déposées des laboratoires Dolby.
Description audio
Il s’agit d’une fonction audio auxiliaire qui fournit une piste audio supplémentaire à l’intention des personnes
malvoyantes. Cette fonction traite le flux audio relatif à la Description audio (AD) lorsqu’il est envoyé avec le son
principal par le radiodiffuseur. Les utilisateurs peuvent activer ou désactiver la description audio (Description audio) et
régler le volume.
− Description audio : Marche/Arrêt
− Volume : 0~100
“Volume” est actif lorsque la fonction “Description audio” est définie sur “Marche”.
Cette fonction peut être sélectionnée pendant que vous regardez une chaîne numérique.
Volume auto : Arrêt/Marche
Chaque station d’émission possède ses propres conditions de signal et il n’est donc pas facile de régler le volume
chaque fois que vous changez de chaîne. Cette fonction vous permet de régler automatiquement le volume du canal
désiré en réduisant la puissance sonore lorsque le signal de modulation est élevé ou en augmentant la puissance
sonore lorsque le signal de modulation est faible.
TV Speaker : Arrêt/Marche
Pour entendre le son par l’intermédiaire de haut-parleurs séparés, désactivez l’amplificateur interne.
Les boutons +, – et MUTE ne fonctionnent pas lorsque le paramètre “TV Speaker” est défini sur “Arrêt”.
Lorsque l’option “TV Speaker” est définie sur “Arrêt”, vous pouvez uniquement utiliser “Sélection du son” (en mode
PIP) et “Réinitialisation du son” dans le menu Son.
Haut-parleurs internes du téléviseur Sortie audio (Optique, Sortie G/D) vers système audio
RF AV, S-Vidéo Composant, PC, HDMI RF AV, S-Vidéo Composant, PC, HDMI
TV Speaker Marche Sortie enceinte Sortie enceinte Sortie enceinte Sortie son Sortie son Sortie son
TV Speaker Arrêt Silence Silence Silence Sortie son Sortie son Sortie son
Absence de signal vidéo Silence Silence Silence Silence Silence Silence
Sélection du son : Principal/Secondaire
Lorsque la fonction PIP est activée, vous pouvez écouter le son accompagnant l’image secondaire.
− Principal : Pour écouter le son accompagnant l’image principale.
− Secondaire : Pour écouter le son accompagnant l’image secondaire.
Réinitialisation du son : Réinitial. tout/Réinitial. mode son/Annuler
Vous pouvez ramener tous les réglages mémorisés à leur valeur par défaut.
➣
➣
➣
➣
➣
➣
BN68-01409H-Fre.indb 31 2008-04-28 �� 5:15:49Français - ��
Branchement du casque (vendu séparément)
Vous pouvez brancher un casque à votre téléviseur, si vous souhaitez regarder un programme sur votre téléviseur sans
déranger les autres personnes présentes dans la pièce.
Lorsque vous insérez la prise casque dans le port correspondant, vous ne
pouvez pas utiliser les options “Mode”, “Egaliseur”, “SRS TruSurround XT” et
“TV Speaker” dans le menu Son.
L’utilisation prolongée d’un casque à un niveau sonore élevé peut endommager
l’ouïe.
Aucun son n’est émis depuis les enceintes lorsque vous connectez le casque
à l’appareil.
Le volume du casque et celui du téléviseur sont réglés différemment.
➣
➣
➣
➣
Sélection du mode Son
Vous pouvez configurer le mode sonore dans le menu “Outils”. Lorsque vous réglez cette
option sur “Dual I II”, le mode sonore actuel est affiché à l’écran.
1. Appuyez sur le bouton TOOLS de la télécommande.
2. Appuyez sur le bouton ▲ ou ▼ pour sélectionner “Dual I II”.
3. Appuyez sur le bouton ◄ ou ► pour sélectionner l’option de votre choix.
4. Appuyez sur le bouton ENTER .
Type Audio Dual �/� Par défaut
Stéréo A2
Mono MONO
Changement automatique
Stéréo STEREO ↔ MONO
Dual DUAL 1 ↔ DUAL 2 DUAL 1
NICAM
Stéréo
Mono MONO
Changement automatique
Stéréo MONO ↔ STEREO
Dual
MONO ↔ DUAL 1
DUAL 2
DUAL 1
Si le signal stéréo est faible et qu’une permutation automatique se produit, passez alors en Mono.
Cette fonction n’est activée qu’en son stéréo. Elle est désactivée en mode mono.
Cette fonction est uniquement disponible en mode TV analogique.
➣
➣
➣
Panneau latéral du téléviseur
15
Outils
Liste d’appareils
Mode Image : Standard
Mode Son : Personnalisé
Veille : Arrêt
SRS TS XT : Arrêt
Mode éco. : Arrêt
Dual l ll ◄ Mono ►
Déplacer Régler e Quitter
BN68-01409H-Fre.indb 32 2008-04-28 �� 5:15:49Français - ��
Réglage de l’horloge
Le réglage de l’horloge est nécessaire pour utiliser les différentes fonctions de la minuterie de la télévision. Vous pouvez
aussi vérifier l’heure pendant que vous regardez la télévision. (Appuyez simplement sur le bouton INFO.)
Si vous débranchez le cordon d’alimentation, vous devrez régler à nouveau l’horloge.
Option 1 : Réglage manuel de l’horloge
1. Appuyez sur le bouton MENU pour afficher le menu.
Appuyez sur le bouton ▲ ou ▼ pour sélectionner “Configuration”, puis
appuyez sur le bouton ENTER .
Appuyez sur le bouton ▲ ou ▼ pour sélectionner “Horloge”, puis appuyez
sur le bouton ENTER .
2. Appuyez sur le bouton ENTER pour sélectionner “Horloge”.
3. Appuyez sur le bouton ENTER pour sélectionner “Mode Horloge”.
Appuyez sur le bouton ▲ ou ▼ pour sélectionner “Manuel”, puis appuyez sur
le bouton ENTER .
4. Appuyez sur le bouton ▲ ou ▼ pour sélectionner “Réglage Horloge”, puis
appuyez sur le bouton ENTER .
5. Appuyez sur le bouton ◄ ou ► pour sélectionner “Date”, “Mois”, “Année”,
“Heure” ou “Minute”. Réglez la date et l’heure en appuyant sur le bouton
▲ ou ▼, puis appuyez sur le bouton ENTER .
Appuyez sur le bouton EXIT pour quitter le menu.
L’heure actuelle s’affiche à chaque fois que vous appuyez sur le bouton
INFO.
Vous pouvez également définir l’année, les mois, la date, les heures et les
minutes en appuyant sur le pavé numérique de la télécommande.
➣
➣
➣
Réglage de l’heure
Configuration
Plug & Play
Langue : Français
Horloge ►
Modifier PIN
Verrouillage parental
Sous-titres
Langue du télétexte : ----
Préférence
Effet lumineux : LED act. marche
Ajustement fixation murale
Horloge
Horloge : -- : -- ►
Veille : Arrêt
Minuteur 1 : Désactiver
Minuteur 2 : Désactiver
Minuteur 3 : Désactiver
Déplacer Entrer Retour
Horloge
Mode Horloge : Auto
Réglage Horloge
Entrer Retour
Auto.
Manuel
Déplacer
Horloge
Mode Horloge : Manuel
Réglage Horloge ►
Déplacer Entrer Retour
Réglage Horloge
01
Date
01
Mois
2008
Année
00
Heure
00
Minute
Déplacer Régler Entrer Retour
BN68-01409H-Fre.indb 33 2008-04-28 �� 5:15:50Français - ��
Réglage du minuteur de mise en veille
Vous pouvez sélectionner une durée (entre 30 et 180 minutes) à l’issue de laquelle le téléviseur passe automatiquement en
mode veille.
1. Appuyez sur le bouton MENU pour afficher le menu.
Appuyez sur le bouton ▲ ou ▼ pour sélectionner “Configuration”, puis
appuyez sur le bouton ENTER .
2. Appuyez sur le bouton ▲ ou ▼ pour sélectionner “Horloge”, puis appuyez
sur le bouton ENTER .
3. Appuyez sur le bouton ▲ ou ▼ pour sélectionner “Veille”, puis appuyez sur
le bouton ENTER .
4. Appuyez à plusieurs reprises sur le bouton ▲ ou ▼ jusqu’à ce que l’heure
souhaitée apparaisse (Arrêt, 30, 60, 90, 120, 150, 180).
Appuyez sur le bouton ENTER .
5. Appuyez sur le bouton EXIT pour quitter le menu.
Le téléviseur passe automatiquement en mode veille lorsque le minuteur
atteint 0.
Réglage simple
1. Appuyez sur le bouton TOOLS de la télécommande.
2. Appuyez sur le bouton ▲ ou ▼ pour sélectionner “Veille”.
3. Appuyez sur le bouton ◄ ou ► pour sélectionner les minutes.
4. Appuyez sur le bouton EXIT ou TOOLS pour quitter le menu.
➣
Option 2 : Réglage automatique de l’horloge
L’horloge peut être automatiquement réglée si vous recevez un signal numérique.
1. Appuyez sur le bouton MENU pour afficher le menu.
Appuyez sur le bouton ▲ ou ▼ pour sélectionner “Configuration”, puis
appuyez sur le bouton ENTER .
Appuyez sur le bouton ▲ ou ▼ pour sélectionner “Horloge”, puis appuyez
sur le bouton ENTER .
2. Appuyez sur le bouton ENTER pour sélectionner “Horloge”.
3. Appuyez sur le bouton ENTER pour sélectionner “Mode Horloge”.
Appuyez sur le bouton ▲ ou ▼ pour sélectionner “Auto.”, puis appuyez sur le
bouton ENTER .
4. Appuyez sur le bouton EXIT pour quitter le menu.
Configuration
Plug & Play
Langue : Français
Horloge ►
Modifier PIN
Verrouillage parental
Sous-titres
Langue du télétexte : ----
Préférence
Effet lumineux : LED act. marche
Ajustement fixation murale
Horloge
Horloge : -- : -- --
Veille : Arrêt
Minuteur 1 : Désactiver
Minuteur 2 : Désactiver
Minuteur 3 : Désactiver
Arrêt
30 min
60 min
90 min
120 min
150 min
▼
Déplacer Entrer Retour
Horloge
Mode Horloge : Auto.
Réglage Horloge
Entrer Retour
Auto.
Manuel
Déplacer
Horloge
Horloge : 10 : 00 ►
Veille : Arrêt
Minuteur 1 : Désactiver
Minuteur 2 : Désactiver
Minuteur 3 : Désactiver
Déplacer Entrer Retour
Configuration
Plug & Play
Langue : Français
Horloge ►
Modifier PIN
Verrouillage parental
Sous-titres
Langue du télétexte : ----
Préférence
Effet lumineux : LED act. marche
Ajustement fixation murale
Outils
Liste d’appareils
Mode Image : Standard
Mode Son : Personnalisé
Veille ◄ Arrêt ►
SRS TS XT : Arrêt
Mode éco. : Arrêt
Dual l ll : Mono
Déplacer Régler e Quitter
BN68-01409H-Fre.indb 34 2008-04-28 �� 5:15:50Français - ��
Mises en marche et arrêt automatiques de votre téléviseur
1. Appuyez sur le bouton MENU pour afficher le menu.
Appuyez sur le bouton ▲ ou ▼ pour sélectionner “Configuration”, puis
appuyez sur le bouton ENTER .
2. Appuyez sur le bouton ▲ ou ▼ pour sélectionner “Horloge”, puis appuyez
sur le bouton ENTER .
3. Appuyez sur le bouton ▲ ou ▼ pour sélectionner “Minuteur 1”, “Minuteur 2”,
“Minuteur 3”, puis appuyez sur le bouton ENTER . Trois réglages différents
de la minuterie Marche/Arrêt peuvent être effectués.
Vous devez préalablement régler l’horloge.
4. Appuyez sur le bouton ◄ ou ► pour sélectionner l’élément désiré cidessous. Appuyez sur le bouton ▲ ou ▼ pour valider le réglage.
Minuterie ON : Sélectionnez les heures et les minutes ainsi que
“Activer”/“Désactiver”. (Pour activer le minuteur selon les réglages
définis, choisisse “Activer”.)
Minuterie OFF : Sélectionnez les heures et les minutes ainsi que
“Activer”/”Désactiver”. (Pour activer le minuteur selon les réglages
définis, choisissez “Activer”.)
Volume : Sélectionnez le niveau du volume désiré lorsque le téléviseur
s’allume.
Table des matières : Lorsque la fonction “Minuterie ON” est active,
vous pouvez activer un canal spécifique ou lire un contenu spécifique
tel qu’une photo ou des fichiers audio.
TV/USB : Sélectionnez TV ou USB.
(Assurez-vous que le périphérique USB est branché sur le
téléviseur.)
Antenne : Sélectionnez “ATV” ou “DTV”.
Canal : Sélectionnez la chaîne désirée.
Musique : Sélectionnez le dossier contenant des fichiers MP3 sur le
périphérique USB.
Photo : Sélectionnez le dossier contenant des fichiers JPEG sur le
périphérique USB.
Répétition : Choisissez “Une fois”, “Tous les jours”, “Lun-Ven”,
“Lun-Sam”, “Sam - Dim”, ou “Manuel”.
Lorsque “Manuel” est sélectionné, appuyez sur le bouton ►
pour sélectionner le jour de la semaine. Appuyez sur le bouton
ENTER sur le jour de votre choix. Le symbole apparaît.
•
•
•
•
–
–
–
–
–
•
➣
Appuyez sur le bouton EXIT pour quitter le menu.
Vous pouvez régler les heures et les minutes directement à l’aide du pavé
numérique de la télécommande.
Mise hors tension automatique
Lorsque vous réglez la minuterie sur Marche, le téléviseur s’éteint si
aucune commande n’est activée dans les 3 heures qui suivent sa mise
sous tension par la minuterie. Cette fonction est disponible uniquement
lorsque la minuterie est définie sur Marche; elle permet d’éviter toute
surchauffe occasionnée par une utilisation prolongée du téléviseur.
➣
➣
➣
Table des matières
TV
TV/USB
am
Canal
Aucun
Musique
Déplacer Régler Entrer Retour
ATV
Antenne
�
Canal
Aucun
Photo
Horloge
Horloge : 10 : 00
Veille : Arrêt
Minuteur 1 : Désactiver ►
Minuteur 2 : Désactiver
Minuteur 3 : Désactiver
Déplacer Entrer Retour
Minuteur 1
00
00
00
00
Désactiver
Désactiver
Minuterie ON
Minuterie OFF
Une fois
Déplacer Régler Entrer Retour
Volume
10
Table des matières
Répétition Dim Lun Mar Mer Jeu Ven Sam
TV ATV 3
Configuration
Plug & Play
Langue : Français
Horloge ►
Modifier PIN
Verrouillage parental
Sous-titres
Langue du télétexte : ----
Préférence
Effet lumineux : LED act. marche
Ajustement fixation murale
BN68-01409H-Fre.indb 35 2008-04-28 �� 5:15:51Français - ��
Sélection d’une langue de menu
1. Appuyez sur le bouton MENU pour afficher le menu.
Appuyez sur le bouton ▲ ou ▼ pour sélectionner “Configuration”, puis
appuyez sur le bouton ENTER .
Appuyez sur le bouton ▲ ou ▼ pour sélectionner “Langue”, puis appuyez sur
le bouton ENTER .
2. Sélectionnez la langue souhaitée en appuyant de façon répétée sur le bouton
▲ ou ▼. Appuyez sur le bouton ENTER .
3. Appuyez sur le bouton EXIT pour quitter le menu.
Description des fonctions
Réglage de votre numéro d’identification personnel (NIP)
1. Appuyez sur le bouton MENU pour afficher le menu.
2. Appuyez sur le bouton ▲ ou ▼ pour sélectionner “Configuration”, puis
appuyez sur le bouton ENTER .
3. Appuyez sur le bouton ▲ ou ▼ pour sélectionner “Modifier PIN”, puis
appuyez sur le bouton ENTER . Le message “Saisir le code PIN” s’affiche.
4. Entrez votre code NIP à quatre chiffres en utilisant les boutons numériques
(0 à 9).
“Entrer Nouveau Code PIN” s’affiche.
5. Entrez votre nouveau code PIN en utilisant les boutons numériques (0 à 9).
Le message “Confirmer Nouveau Code PIN” s’affiche.
6. Entrez à nouveau le nouveau code PIN pour confirmer en utilisant les
boutons numériques (0 à 9).
Le message “Code PIN modifié avec succès” s’affiche.
7. Appuyez sur le bouton EXIT pour quitter le menu.
Si vous avez oublié le code PIN, appuyez sur les boutons de la
télécommande dans l’ordre suivant, ce qui remet le code PIN à 0-0-0-0:
POWER (Arrêt), MUTE, �, �, �, POWER (Marche).
➣
➣
➣
➣
Configuration
Plug & Play
Langue : Français ►
Horloge
Modifier PIN
Verrouillage parental
Sous-titres
Langue du télétexte : ----
Préférence
Effet lumineux : LED act. marche
Configuration
Langue : Français
Horloge
Modifier PIN ►
Verrouillage parental
Sous-titres
Langue du télétexte : ----
Préférence
Effet lumineux : LED act. marche
Ajustement fixation murale
Mélodie : Arrêt
Modifier PIN
* *
Saisir le code PIN
*
0~9 Saisir le code PIN Retour
Modifier PIN
0~9 Saisir le code PIN Retour
Entrer Nouveau Code PIN
Confirmer Nouveau Code PIN
BN68-01409H-Fre.indb 36 2008-04-28 �� 5:15:51Français - ��
Configuration du contrôle parental
Cette fonction vous permet d’éviter toute utilisation non autorisée, par des enfants par exemple, qui pourraient visionner des
programmes ne leur étant pas destinés par un code PIN à chiffres (Code d’identification personnelle) défini par l’utilisateur.
1. Appuyez sur le bouton MENU pour afficher le menu.
2. Appuyez sur le bouton ▲ ou ▼ pour sélectionner “Configuration”, puis
appuyez sur le bouton ENTER .
3. Appuyez sur le bouton ▲ ou ▼ pour sélectionner “Verrouillage parental”, puis
appuyez sur le bouton ENTER .
Le message “Saisir le code PIN” s’affiche.
4. Entrez votre code NIP à quatre chiffres en utilisant les boutons numériques
(0 à 9).
Le code PIN par défaut d’un nouvel écran à plasma eszt “0000”.
Si vous souhaitez changer ce code PIN, reportez-vous à la page 36.
5. Appuyez sur le bouton ENTER .
6. Appuyez sur le bouton ▲ ou ▼ pour sélectionner l’âge auquel vous
souhaitez que le verrouillage s’active. Appuyez sur le bouton ENTER .
Le symbole “ ” s’affiche.
Perm. tout : appuyez sur ce bouton pour déverrouiller toutes les
évaluations TV.
Bloq. tout : appuyez sur ce bouton pour verrouiller toutes les évaluations
TV.
7. Appuyez sur le bouton EXIT pour quitter le menu.
➣
➣
➣
➣
Verrouillage parental
* *
Saisir le code PIN
*
0~9 Saisir le code PIN Retour
Configuration
Horloge
Modifier PIN
Verrouillage parental ►
Sous-titres
Langue du télétexte : ----
Préférence
Effet lumineux : LED act. marche
Ajustement fixation murale
Mélodie : Arrêt
Divertissement : Arrêt
Classement parental
▼
�
�
�
�
�
�
�
Perm. tout
Bloq. tout
Déplacer Entrer Retour
Verrouillage parental
Classement parental ►
Entrer Retour
BN68-01409H-Fre.indb 37 2008-04-28 �� 5:15:51Français - ��
Configuration des sous-titres
Vous pouvez activer ou désactiver la fonction sous-titres. Utilisez ce menu pour configurer le Mode sous-titres. Normal
s’affiche sous le menu pour les sous-titres de base et “Hard of hearing” sont les sous-titres pour les personnes
malentendantes.
1. Appuyez sur le bouton MENU pour afficher le menu.
2. Appuyez sur le bouton ▲ ou ▼ pour sélectionner “Configuration”, puis
appuyez sur le bouton ENTER .
3. Appuyez sur le bouton ▲ ou ▼ pour sélectionner “Sous-titres”, puis appuyez
sur le bouton ENTER .
4. Appuyez à nouveau sur le bouton ENTER , puis appuyez sur le bouton
▲ ou ▼ pour sélectionner “Marche”. Appuyez sur le bouton ENTER .
5. Appuyez sur le bouton ▲ ou ▼ pour sélectionner “Mode”, puis appuyez sur
le bouton ENTER .
6. Appuyez sur le bouton ▲ ou ▼ pour sélectionner “Normal” ou
“Malentendants”. Appuyez sur le bouton ENTER .
Si le programme que vous regardez ne prend pas en charge la fonction
“Malentendants”, la fonction “Normal” est activée automatiquement même
si le mode “Malentendants” est sélectionné.
7. Appuyez sur le bouton ▲ ou ▼ pour sélectionner “Langue des sous-titres”,
puis appuyez sur le bouton ENTER .
8. Sélectionnez la langue souhaitée en appuyant sur le bouton ▲ ou ▼.
Appuyez sur le bouton ENTER pour confirmer votre choix.
L’anglais est la langue par défaut si la langue sélectionnée n’est pas
disponible.
9. Appuyez sur le bouton EXIT pour quitter le menu.
Vous pouvez sélectionner ces options en appuyant sur le bouton SUBT. de la
télécommande.
➣
➣
O
Configuration
Modifier PIN
Verrouillage parental
Sous-titres ►
Langue du télétexte : ----
Préférence
Effet lumineux : LED act. marche
Ajustement fixation murale
Mélodie : Arrêt
Divertissement : Arrêt
Mode éco. : Arrêt
Sous-titres
Sous-titres : Marche ►
Mode : Normal
Langue des sous-titres : ----
Déplacer Entrer Retour
BN68-01409H-Fre.indb 38 2008-04-28 �� 5:15:51Français - ��
Sélection d’une langue de télétexte
Vous pouvez définir la langue du télétexte en sélectionnant le type de langue.
1. Appuyez sur le bouton MENU pour afficher le menu.
Appuyez sur le bouton ▲ ou ▼ pour sélectionner “Configuration”, puis
appuyez sur le bouton ENTER .
2. Appuyez sur le bouton ▲ ou ▼ pour sélectionner “Langue du télétexte”, puis
appuyez sur le bouton ENTER .
3. Sélectionnez la langue souhaitée en appuyant de façon répétée sur le
bouton ▲ ou ▼. Appuyez sur le bouton ENTER .
L’anglais est la langue par défaut si la langue sélectionnée n’est pas
disponible.
4. Appuyez sur le bouton EXIT pour quitter le menu.
➣
Sélection d’une langue de préférence
Ce menu compte 6 sous-menus : Première Langue Audio, Deuxième Langue Audio, Première Langue de Sous-titres,
Deuxième langue de Sous-titres, Première Langue Télétexte, Deuxième Langue Télétexte.
A l’aide de cette fonction, les utilisateurs peuvent sélectionner une de ces langues. La langue sélectionnée ici est la langue
par défaut lorsque l’utilisateur sélectionne un canal.
1. Appuyez sur le bouton MENU pour afficher le menu.
Appuyez sur le bouton ▲ ou ▼ pour sélectionner “Configuration”, puis
appuyez sur le bouton ENTER .
2. Appuyez sur le bouton ▲ ou ▼ pour sélectionner “Préférence”, puis appuyez
sur le bouton ENTER .
3. Appuyez sur le bouton ▲ ou ▼ pour sélectionner le menu souhaité.
(Première Langue Audio, Deuxième Langue Audio, Première Langue de
Sous-titres, Deuxième langue de Sous-titres, Première Langue Télétexte,
Deuxième Langue Télétexte).
Appuyez sur le bouton ENTER .
4. Sélectionnez la langue souhaitée en appuyant sur le bouton ▲ ou ▼.
Appuyez sur le bouton ENTER pour confirmer votre choix.
5. Appuyez sur le bouton EXIT pour quitter le menu.
Si vous changez le réglage de la langue, les options Langue de Sous-titres, Langue Audio et Langue Télétexte du
menu Langue s’adaptent automatiquement à la langue sélectionnée.
Langue des sous-titres, Langue audio et Langue du télétexte du menu affichent la liste des langues prises en charge
par le canal actuel et la sélection est surlignée. Si vous modifiez le réglage des langues, la nouvelle sélection n’est
valable que pour le canal actuel. Le nouveau réglage n’affecte pas la Première Langue de Sous-titres, la Première
Langue Audio ni la Première Langue Télétexte du menu Préférence.
➣
➣
Réglage de l’effet lumineux (en fonction du modèle)
Vous pouvez allumer/éteindre la LED à l’avant de votre téléviseur en fonction de la situation. Recourez à cette fonction pour
économiser de l’énergie ou lorsque la LED fatigue vos yeux.
1. Appuyez sur le bouton MENU pour afficher le menu.
Appuyez sur le bouton ▲ ou ▼ pour sélectionner “Configuration”, puis
appuyez sur le bouton ENTER .
2. Appuyez sur le bouton ▲ ou ▼ pour sélectionner “Effet lumineux”, puis
appuyez sur le bouton ENTER .
3. Appuyez sur le bouton ▲ ou ▼ pour sélectionner “Arrêt”, “LED act. veille”,
“LED act. marche” ou “Marche”.
Appuyez sur le bouton ENTER .
Arrêt: Le voyant LED ne s’allume pas.
LED act. veille: Permet d’allumer le voyant LED en mode veille.
LED act. marche: Allume le voyant LED pendant que le téléviseur
fonctionne.
Marche: La LED est allumée en permanence.
•
•
•
•
Réglez la fonction “Effet lumineux” sur “Arrêt” pour réduire la consommation
électrique.
4. Appuyez sur le bouton EXIT pour quitter le menu.
➣
LED
Configuration
Langue du télétexte : ----
Préférence
Effet lumineux : LED act. marche ►
Ajustement fixation murale
Mélodie : Arrêt
Divertissement : Arrêt
Energy Saving : Arrêt
PIP
Mise à jour logicielle
Interface commune
Configuration
Verrouillage parental
Sous-titres
Langue du télétexte : ---- ►
Préférence
Effet lumineux : LED act. marche
Ajustement fixation murale
Mélodie : Arrêt
Divertissement : Arrêt
Mode éco. : Arrêt
PIP
Configuration
Sous-titres
Langue du télétexte : ----
Préférence ►
Effet lumineux : LED act. marche
Ajustement fixation murale
Mélodie : Arrêt
Divertissement : Arrêt
Energy Saving : Arrêt
PIP
Mise à jour logicielle
BN68-01409H-Fre.indb 39 2008-04-28 �� 5:15:52Français - �0
Mélodie/Divertissement/Mode éco.
1. Appuyez sur le bouton MENU pour afficher le menu.
Appuyez sur le bouton ▲ ou ▼ pour sélectionner “Configuration”, puis
appuyez sur le bouton ENTER .
2. Sélectionnez l’option désirée en appuyant sur le bouton ▲ ou ▼, puis
appuyez sur le bouton ENTER .
3. Lorsque vous êtes satisfait du réglage, appuyez sur le bouto ENTER .
4. Appuyez sur le bouton EXIT pour quitter le menu.
Mélodie: Arrêt/Bas/Moyen/Elevé
La mélodie de mise sous/hors tension du téléviseur peut être ajustée.
Aucune mélodie n’est lue dans les cas suivants
− Aucun son n’est émis par le téléviseur car le bouton MUTE a été enfoncé.
− Aucun son n’est émis par le téléviseur car le bouton – (Volume) a été enfoncé.
− Lorsque la commande Mise en veille met le téléviseur hors tension.
Divertissement: Arrêt/Sports/Cinema/Jeu
Le mode “Divertissement” vous permet de sélectionner les valeurs d’affichage et de son optimales pour le sport, le
cinéma et les jeux.
Arrêt : désactive la fonction “Divertissement”.
Sports : fournit une qualité d’image et de son optimale pour le sport.
Cinema : Fournit une qualité d’image et de son optimale pour regarder un film. Vous pouvez profiter d’une image
plus belle et d’un son encore meilleur.
Jeu : fournit une qualité d’image et de son optimale pour les jeux. Ce mode accélère la vitesse de lecture
lorsqu’une console de jeu est reliée au téléviseur.
•
•
•
•
Si vous activez l’un des trois modes “Divertissement”, les paramètres seront verrouillés empêchant toute
modification. Si vous souhaitez régler les modes Image et Son, le mode “Divertissement” doit être désactivé.
Si on règle l’un des trois modes “Divertissement” à Marche, la fonction “SRS TruSurround XT” n’est pas disponible.
Les réglages du mode “Divertissement” sont enregistrés pour chaque source d’entrée.
Vous pouvez appuyer plusieurs fois sur le bouton E.MODE de la
télécommande pour modifier le paramètre “Divertissement”.
Mode éco.: Arrêt/Bas/Moyen/Elevé/Auto.
Cette fonction règle la luminosité en fonction des conditions d’éclairage. Lorsque vous regardez la télévision la nuit,
définissez l’option “Mode éco.” sur “Elevé” pour réduire la fatigue des yeux et la consommation d’énergie.
Arrêt : Désactive la fonction d’économie d’énergie.
Bas : Met le téléviseur en mode d’économie d’énergie basse.
Moyen : Met le téléviseur en mode d’économie d’énergie moyenne.
Elevé : Met le téléviseur en mode d’économie d’énergie élevée.
Auto. : Règle automatiquement la luminosité de l’écran du téléviseur en fonction de la scène.
•
•
•
•
•
Réglage simple
1. Appuyez sur le bouton TOOLS de la télécommande.
2. Appuyez sur le bouton ▲ ou ▼ pour sélectionner “Mode éco.”.
3. Appuyez sur le bouton ◄ ou ► pour sélectionner “Arrêt”, “Bas”, “Moyen”, “Elevé”,
“Auto.” ou “Marche”.
4. Appuyez sur le bouton EXIT ou TOOLS pour quitter le menu.
➣
➣
➣
➣
O
Configuration
Effet lumineux : LED act. marche
Ajustement fixation murale
Mélodie : Arrêt ►
Divertissement : Arrêt
Energy Saving : Arrêt
PIP
Mise à jour logicielle
Interface commune
Outils
Liste d’appareils
Mode Image : Standard
Mode Son : Personnalisé
Veille : Arrêt
SRS TS XT : Arrêt
Mode éco. ◄ Arrêt ►
Dual l ll : Mono
Déplacer Régler e Quitter
BN68-01409H-Fre.indb 40 2008-04-28 �� 5:15:52Français - ��
Mise à jour du logiciel
Pour garder le produit à jour avec les options Digital Television, les mises à jour logiciel sont régulièrement diffusées dans
le signal télévision normal. Le téléviseur détecte automatiquement ces signaux et affiche le bandeau de mise à jour logiciel.
Vous avez le choix d’installer ou non la mise à jour.
1. Insérez un lecteur USB contenant la mise à niveau du micrologiciel dans le
port WISELINK sur le côté du téléviseur.
2. Appuyez sur le bouton MENU pour afficher le menu.
Appuyez sur le bouton ▲ ou ▼ pour sélectionner “Configuration”, puis
appuyez sur le bouton ENTER .
3. Appuyez sur le bouton ▲ ou ▼ pour sélectionner “Mise à jour logicielle”, puis
appuyez sur le bouton ENTER .
4. Appuyez sur le bouton ▲ ou ▼ pour sélectionner “USB”, “Canal” ou “Mise à
jour du mode Veille”. Appuyez sur le bouton ENTER .
USB :
- Paramètre préréglé : Insérez dans le téléviseur un lecteur USB contenant
la mise à niveau du microprogramme.
Veillez à ne pas couper l’alimentation ni retirer le lecteur USB pendant
l’application des mises à niveau. Une fois la mise à niveau du
micrologiciel terminée, le téléviseur se met automatiquement hors puis
sous tension. Vérifiez la version du micrologiciel une fois les mises à
niveau terminées. Lorsque le logiciel est mis à niveau, les paramètres
vidéo et audio définis reprennent leur valeur par défaut (d’usine). Nous
vous recommandons de noter vos réglages pour les rétablir facilement
après la mise à niveau.
Canal :
Met à niveau le logiciel en utilisant le signal diffusé.
Mise à jour du mode Veille :
Pour poursuivre la mise à jour du logiciel en gardant le téléviseur sous
tension, sélectionnez On (Actif) en appuyant sur le bouton ▲ ou ▼. 45
minutes après que le mode veille a été activé, une mise à jour manuelle
est réalisée automatiquement. Etant donné que le courant est activé de
façon interne, l’écran peut s’allumer brièvement pour les produits LCD. Le
phénomène peut se poursuivre durant une heure jusqu’à ce que la mise à
jour logiciel soit terminée.
Autre logiciel :
Affiche des informations sur la version du logiciel.
➣
Configuration
Mode éco. : Arrêt
PIP
Mise à jour logicielle ►
Interface commune
Mise à jour logicielle
Current Version 2008/01/01_000075
USB ►
Canal
Mise à jour du mode Veille : Marche
Téléchargement par antenne ----/--/--_--------
Déplacer Entrer Retour
HDMI IN3
Panneau latéral du
téléviseur
Lecteur USB
BN68-01409H-Fre.indb 41 2008-04-28 �� 5:15:53Français - ��
Visualisation de l’interface commune
Contient des informations relatives à la CAM insérée dans la fente CI et les
affiche.
1. Appuyez sur le bouton MENU pour afficher le menu.
Appuyez sur le bouton ▲ ou ▼ pour sélectionner “Configuration”, puis
appuyez sur le bouton ENTER .
2. Appuyez sur le bouton ▲ ou ▼ pour sélectionner “Interface commune”, puis
appuyez sur le bouton ENTER .
3. Appuyez sur le bouton ▲ ou ▼ pour sélectionner “Infos sur l’application”
Appuyez sur le bouton ENTER pour pour afficher les informations
relatives à votre application.
4. Appuyez sur le bouton EXIT pour quitter le menu.
L’application “Insertion d’informations” concerne la CI CARD.Vous pouvez
installer la CAM que le téléviseur soit allumé ou éteint.
1. Achetez le module CI CAM en vous rendant chez le revendeur le plus
proche ou par téléphone.
2. Insérez la CI CARD dans la CAM dans la direction indiquée par la flèche
jusqu’à ce qu’elle soit emboîtée.
3. Insérez la CAM avec la CI CARD installée dans la fente de l’interface
commune. (Insérez la CAM dans la direction indiquée par la flèche, juste
au-dessus de l’extrémité pour qu’elle soit parallèle à la fente.)
4. Vérifiez si une image est visible sur un canal à signal brouillé.
Sélection du Menu CI (Interface commune)
Cela aide l’utilisateur à sélectionner un élément du menu pris en charge par CAM.
1. Appuyez sur le bouton MENU pour afficher le menu.
Appuyez sur le bouton ▲ ou ▼ pour sélectionner “Configuration”, puis
appuyez sur le bouton ENTER .
2. Appuyez sur le bouton ▲ ou ▼ pour sélectionner “Interface commune”, puis
appuyez sur le bouton ENTER .
2. Appuyez sur le bouton ▲ ou ▼ pour sélectionner “CI Menu”, puis appuyez
sur le bouton ENTER .
4. Appuyez sur le bouton ▲ ou ▼ pour sélectionner l’option souhaitée, puis
appuyez sur le bouton ENTER .
5. Appuyez sur le bouton EXIT pour quitter le menu.
Sélectionnez le Menu CI dans le menu PC Card.
➣
➣
Configuration
PIP
Mise à jour logicielle
Interface commune ►
Interface commune
CI Menu ►
Infos sur l’application
U Déplacer EEntrer e Quitter
Interface commune
CI Menu ►
Infos sur l’application
U Déplacer EEntrer e Quitter
Configuration
PIP
Mise à jour logicielle
Interface commune ►
CI Menu
Main menu
Module information
Smart card information
Language
Software Download
Press Ok to select, or Exit to quit.
U Déplacer EEntrer e Quitter
BN68-01409H-Fre.indb 42 2008-04-28 �� 5:15:53Français - ��
Sélection de la source
Permet de sélectionner le téléviseur ou d’autres sources d’entrée externes comme
les lecteurs DVD ou les décodeurs câble/récepteurs satellite (boîtiers décodeurs)
connectés au téléviseur. Permet de sélectionner la source d’entrée de votre choix.
1. Appuyez sur le bouton MENU pour afficher le menu.
Appuyez sur le bouton ▲ ou ▼ pour sélectionner “Entrée”, puis appuyez sur le
bouton ENTER .
2. Appuyez sur le bouton ENTER pour sélectionner “Liste Source”.
Appuyez sur le bouton ▲ ou ▼ pour sélectionner la source du signal, puis
appuyez sur le bouton ENTER .
Sources de signal disponibles : TV, Ext.1, Ext.2, AV, S-Vidéo, Composant,
PC, HDMI1, HDMI2/DVI, HDMI3, USB.
Vous ne pouvez sélectionner que les appareils externes connectés au
téléviseur. Dans “Liste Source”, les entrées connectées sont mises en
surbrillance et affichés en début de liste. Les entrées non connectées
apparaissent dans le bas de la liste.
Utilisation des boutons de couleur de la télécommande dans la liste
des sources
Rouge (Rafraîchir) : Actualise la liste des unités externes se
connectant.
TOOLS (Option) : Affiche les menus “Modif. Nom” et “Information”.
•
•
Appuyez sur le bouton SOURCE de la télécommande pour afficher une source
de signal externe. Le Mode TV peut être sélectionné en appuyant sur le bouton
TV/DTV, les boutons numériques (de 0 à 9) ou les boutons canal suivant/
précédent P de la télécommande.
➣
➣
➣
O
Modification du nom de la source d’entrée
Nommez le périphérique connecté aux prises d’entrée pour rendre la sélection
des sources d’entrée plus facile.
1. Appuyez sur le bouton MENU pour afficher le menu.
Appuyez sur le bouton ▲ ou ▼ pour sélectionner “Entrée”, puis appuyez sur
le bouton ENTER .
Appuyez sur le bouton ▲ ou ▼ pour sélectionner “Modif. Nom”, puis
appuyez sur le bouton ENTER .
2. Appuyez sur le bouton ▲ ou ▼ pour sélectionner la prise d’entrée “Ext.1”,
“Ext.2”, “AV”, “S-Vidéo”, “Composant”, “PC”, “HDMI1”, “HDMI2/DVI” ou
“HDMI3” puis appuyez sur le bouton ENTER .
3. Appuyez sur le bouton ▲ ou ▼ pour sélectionner la source d’entrée
“Magnétoscope”, “DVD”, “Décodeur Câble”, “Décodeur satellite”, “Décodeur
PVR”, “Récepteur AV”, “Jeu”, “Caméscope”, “PC”, “TV”, “IPTV”, “Blu-Ray”,
“HD DVD” ou “Digital Media Adapter”, puis appuyez sur le bouton ENTER
.
Appuyez sur le bouton EXIT pour quitter le menu.
Lorsqu’un PC d’une résolution de 1920 x 1080 à 60 Hz est branché sur
le port HDMI IN 2, vous devez régler le mode “HDMI2/DVI” sur “PC” dans
“Modif. Nom” du mode “Entrée”.
➣
Liste Source
Modif. Nom
Entrée
TV
Ext.1 ----
Ext.2 ----
AV ----
S-Vidéo ----
Composant ----
PC ----
Rafraîchir Option
Liste Source
Modif. Nom ►
Entrée
Modif. Nom
Ext.1 : ---- ►
Ext.2 : ----
AV : ----
S-Vidéo : ----
Composant : ----
PC : ----
HDMI1 : ----
▼
Déplacer Entrer Retour
Modif. Nom
Ext.1 : ----
Ext.2 : ----
AV : ----
S-Vidéo : ----
Composant : ----
PC : ----
HDMI1 : ----
----
Magnétoscope
DVD
Décodeur Câble
Décodeur satellite
Décodeur PVR
Déplacer Entrer Retour
BN68-01409H-Fre.indb 43 2008-04-28 �� 5:15:53Français - ��
Utilisation de votre télévision comme écran PC
Configuration de votre logiciel PC (basée sur Windows XP)
Les paramètres d’affichage Windows indiqués ci-dessous sont ceux d’un ordinateur type. Les écrans réels de votre PC
peuvent être différents, en fonction de votre propre version de Windows et de votre propre carte vidéo. Même si vos écrans
réels apparaissent différents, les mêmes informations de base s’appliquent dans la plupart des cas. (Dans le cas contraire,
contactez le fabricant de votre ordinateur ou votre revendeur Samsung.)
1. Cliquez sur ‘Panneau de configuration’ dans le menu Démarrer de Windows.
2. Lorsque vous êtes sur l’écran du Panneau de configuration, cliquez sur
‘Apparence et thèmes’ et une boîte de dialogue Propriétés de l’affichage apparaît.
3. Lorsque vous êtes sur l’écran du panneau de configuration, cliquez sur ‘Affichage’
et une boîte de dialogue Propriétés de l’affichage apparaît.
4. Allez sur l’onglet ‘Paramètres’ dans la boîte de dialogue Propriétés de l’affichage.
Réglage correct de la taille (résolution)
Optimum: 1920 X 1080 pixels
S’il existe une option de fréquence verticale sur votre boîte de dialogue des
paramètres d’affichage, la valeur correcte est ‘60’ ou ‘60Hz’. Sinon cliquez sur
‘OK’ et quittez la boîte de dialogue.
Ecran du PC
Modes d’affichage
La taille et la position de l’écran varient en fonction du type d’écran du PC et de sa résolution. Les résolutions du tableau
sont recommandées.
D-Sub Entrée
Mode Résolution
Horizontale
Fréquence (kHz)
Verticale
Fréquence (kHz)
Horloge pixels
Fréquence (MHz)
Polarité synchronisée
(H/V)
IBM
640 x 350
720 x 400
31,469
31,469
70,086
70,087
25,175
28,322
+ / -
- / +
VESA
640 x 480
640 x 480
640 x 480
800 x 600
800 x 600
800 x 600
1024 x 768
1024 x 768
1024 x 768
1280 x 1024
1280 x 1024
1360 x 768
1600 x 1200
31,469
37,861
37,500
37,879
48,077
46,875
48,363
56,476
60,023
63,981
79,976
47,712
75,000
59,940
72,809
75,000
60,317
72,188
75,000
60,004
70,069
75,029
60,020
75,025
60,015
60,000
25,175
31,500
31,500
40,000
50,000
49,500
65,000
75,000
78,750
108,000
135,000
85,500
162,000
- / -
- / -
- / -
+ / +
+ / +
+ / +
- / -
- / -
+ / +
+ / +
+ / +
+ / +
+ / +
CVT 1920 x 1080RB 66,587 59,934 138,500 + / -
HDMI/DVI Entrée
Mode Résolution
Horizontale
Fréquence (kHz)
Verticale
Fréquence (kHz)
Horloge pixels
Fréquence (MHz)
Polarité synchronisée
(H/V)
VESA
640 x 480
800 x 600
1024 x 768
1280 x 1024
1360 x 768
1600 x 1200
31,469
37,879
48,363
63,981
47,712
75,000
59,940
60,317
60,004
60,020
60,015
60,000
25,175
40,000
65,000
108,000
85,500
162,000
- / -
+ / +
- / -
+ / +
+ / +
+ / +
CEA 1920 x 1080p 67,500 60,000 148,500 + / +
Lorsque vous utilisez une connexion avec câble HDMI/DVI, vous devez utiliser la borne HDMI IN 2.
Le mode interface n’est pas pris en charge.
Le téléviseur peut fonctionner de façon anormale si un format vidéo non standard est sélectionné.
Des modes séparés et composites sont pris en charge. SVSV n’est pas pris en charge.
Un câble VGA trop long ou de qualité médiocre peut être source de parasites visuels dans les modes haute résolution
(1920 x 1080 ou 1600 x 1200).
➣
➣
➣
➣
➣
BN68-01409H-Fre.indb 44 2008-04-28 �� 5:15:54Français - ��
Configuration du téléviseur avec le PC
Appuyez sur le bouton SOURCE pour sélectionner le mode PC.
1. Appuyez sur le bouton MENU pour afficher le menu.
Appuyez sur le bouton ▲ ou ▼ pour sélectionner “Image”, puis appuyez sur
le bouton ENTER .
2. Appuyez sur le bouton ▲ ou ▼ pour sélectionner “Réglage Automatique ” ou
“Ecran ”, puis appuyez sur le bouton ENTER .
3. Lorsque vous êtes satisfait du réglage, appuyez sur le bouto ENTER .
4. Appuyez sur le bouton EXIT pour quitter le menu.
Réglage automatique
Le réglage automatique permet à l’écran PC affiché sur le téléviseur d’être
ajusté automatiquement en fonction du signal vidéo PC. Les valeurs des options
“Réglage Précis”, “Réglage de Base” et “Position” sont définies automatiquement.
Cette fonction ne s’applique pas en mode DVI-HDMI.
Réglage simple
1. Appuyez sur le bouton TOOLS de la télécommande.
2. Appuyez sur le bouton ▲ ou ▼ pour sélectionner “Réglage Automatique”,
puis appuyez sur le bouton ENTER .
Réglage de la qualité de l’écran
Réglage de Base/Réglage Précis
Lorsque vous réglez la qualité de l’image, l’objectif est d’éliminer ou de réduire
les parasites visuels. Si ces parasites ne sont pas éliminés uniquement avec une
syntonisation fine (Réglage précis), réglez la fréquence du mieux que vous pouvez
(Réglage de base), puis effectuez à nouveau une syntonisation plus fine. Une fois
les parasites réduits, effectuez un nouveau réglage de l’image pour l’aligner au
centre de l’écran.
Appuyez sur le bouton ▲ ou ▼ pour sélectionner “Réglage de Base” ou “Réglage
Précis”, puis appuyez sur le bouton ENTER .
Appuyez sur le bouton ◄ ou ► pour régler la qualité de l’écran.
Appuyez sur le bouton ENTER .
Position
Réglez la position de l’écran du PC si elle ne convient pas à l’écran du téléviseur.
Appuyez sur le bouton ▲ ou ▼ pour régler la position verticale.
Appuyez sur le bouton ◄ ou ► pour régler la position horizontale.
Appuyez sur le bouton ENTER .
Réinitialiser Image
Vous pouvez rétablir les valeurs par défaut de tous les réglages d’image.
➣
➣
Luminosité : 45
Netteté : 50
Réglage Automatique ►
Ecran
Réglages des détails
Options d’image
Réinitialisation de l’image
Image
Ajustement automatique en cours. Attendez, s’il vous plait.
Ecran
Réglage de Base 52
Réglage Précis 24
Position
Réinitialiser Image
Déplacer Entrer Retour
Rappel image effectué.
Outils
Liste d’appareils
Mode Image : Standard
Mode Son : Personnalisé
Veille : Arrêt
SRS TS XT : Arrêt
Mode éco. : Arrêt
Réglage Automatique
PIP
Déplacer Entrer e Quitter
Ecran
Réglage de Base 52
Réglage Précis 24
Position
Réinitialiser Image
Déplacer Entrer Retour
Position
Régler Entrer Retour
BN68-01409H-Fre.indb 45 2008-04-28 �� 5:15:55Français - ��
WISELINK
Utilisation de la fonction WISELINK
Connexion d’un périphérique USB
Cette fonction vous permet d’afficher des photos (JPEG) et d’écouter des fichiers audio
(MP3) enregistrés sur un périphérique de stockage de masse USB.
1. Appuyez sur le bouton POWER de la télécommande ou de la façade.
Le téléviseur est sous tension.
2. Connectez un périphérique USB contenant des fichiers JPEG et/ou MP3
dans la prise WISELINK (prise USB) située sur le côté du téléviseur.
Si vous entrez dans le mode WISELINK sans qu’un périphérique USB ne soit connecté, le message “Périphérique
de stockage externe introuvable. Vérifiez la connexion.” s’affiche. Dans ce cas, insérez le périphérique USB, quittez
l’écran en appuyant sur le bouton W.LINK de la télécommande et entrez de nouveau dans l’écran WISELINK.
Le protocole MTP (Media Transfer Protocol) n’est pas pris en charge.
Le système de fichiers ne prend en charge que le format FAT16/32 (le système de fichiers NTFS n’est pas pris en charge).
Il est possible que certains types d’appareils photo numériques et de périphériques audio USB ne soient pas
compatibles avec ce téléviseur.
Wiselink ne prend en charge que les périphériques de stockage de masse USB de la classe MSC. La classe de
stockage de masse MSC est dédiée aux périphériques de transport de masse uniquement. Il s’agit notamment de
lecteurs Thumb et de cartes flash (les disques durs USB et les concentrateurs ne sont pas pris en charge).
Connectez-vous directement au port USB de votre téléviseur. Si vous utilisez une connexion par câble distincte, un
problème de compatibilité USB risque de se poser.
Avant de connecter l’appareil au téléviseur, sauvegardez vos fichiers afin d’éviter qu’ils ne soient endommagés ou que
des données ne soient perdues. SAMSUNG ne saurait en aucun cas être tenu responsable de la perte de données ou
de l’endommagement d’un fichier de données.
Ne déconnectez pas le périphérique USB en cours de chargement.
MSC prend en charge les fichiers MP3 et JPEG, alors qu’un périphérique PTP prend uniquement en charge les
fichiers JPEG.
Le format jpeg séquentiel est pris en charge.
Les fichiers photo et audio doivent avoir un nom en anglais, français ou espagnol. Sinon, les fichiers ne peuvent pas
être lus. Au besoin, changez les noms de fichiers en anglais, français ou espagnol.
Plus la résolution de l’image est élevée, plus le temps d’affichage à l’écran sera long.
La résolution JPEG maximale prise en charge est 15360 x 8640 pixels.
Pour les fichiers non pris en charge ou endommagés, le message “Format de fichier inconnu” s’affiche.
Utilisation de la télécommande dans le menu WISELINK
Bouton Description
(▲/▼/◄/►) Déplace le curseur et sélectionne un élément.
ENTER
Valide l’élément actuellement sélectionné.
Durant un diaporama ou la lecture de musique :
- Le bouton ENTER pendant la lecture suspend celle-ci.
- Le bouton ENTER en mode de pause relance la lecture.
/ Lance la lecture d’un diaporama ou d’un fichier de musique, ou le met en pause.
RETURN Revient au menu précédent.
TOOLS Exécute diverses fonctions dans les menus Photo et Musique (Music).
Interrompt le diaporama / arrête la lecture du fichier musical.
/ Passe au groupe précédent / suivant.
INFO Affiche des informations sur le fichier.
W.LINK Quitte le mode WISELINK.
P >/<
PRE-CH
Arrête le mode WISELINK et retourne au mode TV.
EXIT Arrête la fonction en cours et renvoie au menu principal WISELINK.
➣
➣
➣
➣
➣
➣
➣
➣
➣
➣
➣
➣
➣
➣
➣
HDMI IN3
Panneau latéral du
téléviseur
Lecteur USB
BN68-01409H-Fre.indb 46 2008-04-28 �� 5:15:56Français - ��
Utilisation du menu WISELINK
1. Appuyez sur le bouton MENU. Appuyez sur le bouton ▲ ou ▼ pour
sélectionner “Application”, puis appuyez sur le bouton ENTER .
2. Appuyez sur le bouton ▲ ou ▼ pour sélectionner “WISELINK”, puis
appuyez sur le bouton ENTER .
Le menu “WISELINK” s’affiche.
Appuyez sur le bouton W.LINK de la télécommande pour afficher le menu
“WISELINK”.
Appuyez plusieurs fois sur le bouton SOURCE de la télécommande pour
sélectionner “USB”, puis appuyez sur le bouton ENTER .
3. Appuyez sur le bouton rouge, puis sur le bouton ▲ ou ▼ pour sélectionner l’unité de stockage USB correspondante
(si elle est connectée par le biais d’un concentrateur). Appuyez sur le bouton ENTER .
Cette fonction diffère selon l’unité de stockage USB connectée au téléviseur.
Le nom du périphérique USB sélectionné s’affiche en bas à gauche de l’écran.
4. Appuyez sur le bouton ◄ ou ► pour sélectionner une icône (Photo, Music, Setup), puis appuyez sur le bouton
ENTER .
Pour quitter le mode “WISELINK”, appuyez sur le bouton W.LINK de la télécommande.
➣
O
O
➣
➣
➣
Utilisation de la liste de photos
Ce menu présente les fichiers photo enregistrés sur une unité de stockage USB.
Liste des photos
1. Appuyez sur le bouton W.LINK de la télécommande pour afficher le menu
“WISELINK”.
2. Appuyez sur le bouton ◄ ou ► pour sélectionner “Photo”, puis appuyez
sur le bouton ENTER .
Les fichiers photo s’affichent.
Ce menu contient uniquement les fichiers dotés de l’extension jpg. Les
fichiers d’un autre format, tel que bmp ou tiff, ne seront pas affichés.
Appuyez sur le bouton (Lecture) / ENTER pour lancer le
diaporama.
Pour passer au groupe suivant/précédent, appuyez sur le bouton
(Retour arrière) ou (Avance rapide).
Si vous passez à une photo, son chargement peut prendre quelques
secondes. A ce stade, l’icône de chargement apparaît.
Le chargement de fichiers photo peut prendre un certain temps sous
la forme de miniatures.
Les photos ne contenant pas d’informations EXIF risquent de ne
pas s’afficher sous la forme de miniatures dans la liste de photos en
fonction de leur qualité et de leur résolution.
➣
➣
➣
➣
➣
➣
➣
WISELINK
Photo
SUM Périph. Retour
Music Setup
PHOTO
SUM
851.98MB/995.00MB Libre
WISELINK
Photo
SUM Périph. e Quitter
Music Setup
PHOTO
SUM
851.98MB/995.00MB Libre
Photo
SUM Périph. Favoris Sélection Passer Option
image_1.jpg
Mois : Jan
Date : Jan.01.2008
Couleur : Gris
Compo. :
Dossier : P-other
Favori : ★ ★ ★
Préf.
Mois
Date
Jan Nov
▲
BN68-01409H-Fre.indb 47 2008-04-28 �� 5:15:57Français - ��
Affichage
Photo
SUM Périph. Favoris Sélection Passer Option
image_1.jpg
Mois : Jan
Date : Jan.01.2008
Couleur : Gris
Compo. :
Dossier : P-other
Favori : ★ ★ ★
Préf.
Mois
Date
Jan Nov
▲
2 1Fich. sél. 6
1
3 4
5 7
