Consent Manager Tag v2.0 (for TCF 2.0) -->
Farnell PDF

 8-bit Atmel Microcontroller with 64K/128K/256K - Farnell Element 14
8-bit Atmel Microcontroller with 64K/128K/256K - Farnell Element 14
- Revenir à l'accueil


")

Farnell Element 14 :


See the trailer for the next exciting episode of The Ben Heck show. Check back on Friday to be among the first to see the exclusive full show on element…

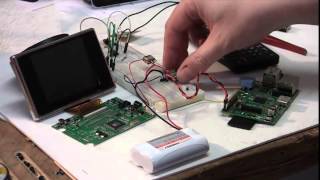
Connect your Raspberry Pi to a breadboard, download some code and create a push-button audio play project.


Puce électronique / Microchip :


Sans fil - Wireless :


Texas instrument :


Ordinateurs :


Logiciels :


Tutoriels :


Autres documentations :
![[TXT]](http://www.audentia-gestion.fr/icons/text.gif)
Farnell-CLRC632-NXP-..> 20-Dec-2014 10:22 2.6M
Farnell-7491181012-O..> 20-Dec-2014 10:22 2.6M
Farnell-LPC4350-30-2..> 20-Dec-2014 10:21 1.4M
Farnell-LPC178x-7x-N..> 20-Dec-2014 10:21 1.6M
Farnell-Data-Sheet-J..> 20-Dec-2014 10:21 1.0M
Farnell-LPC81xM-NXP-..> 20-Dec-2014 10:20 1.2M
Farnell-Data-Sheet-J..> 20-Dec-2014 10:20 1.2M
Farnell-SL3S1003_101..> 20-Dec-2014 10:06 2.0M
Farnell-NT3H1101-NT3..> 20-Dec-2014 10:06 2.3M
Farnell-LPC1769-68-6..> 20-Dec-2014 10:06 2.2M
Farnell-SL3S1203_121..> 20-Dec-2014 10:01 2.0M
Farnell-PN512-NXP-Se..> 20-Dec-2014 10:01 1.9M
Farnell-MMBZxVCL-MMB..> 20-Dec-2014 09:53 1.6M
Farnell-Datasheet-NX..> 20-Dec-2014 09:52 1.6M
Farnell-IP4251_52_53..> 20-Dec-2014 09:51 1.6M
Farnell-BC846DS2-NXP..> 20-Dec-2014 09:48 1.2M
Farnell-BAT54J-Schot..> 20-Dec-2014 09:47 1.1M
Farnell-PMEG3010EP-N..> 20-Dec-2014 09:47 1.1M
Farnell-AVR172-Senso..> 20-Dec-2014 09:47 1.2M
Farnell-PBSS5320X-NX..> 20-Dec-2014 09:47 1.6M
Farnell-ATtiny2313-A..> 20-Dec-2014 09:47 1.6M
Farnell-SG2525A-SG35..> 20-Dec-2014 09:39 1.0M
Farnell-PMBT3906-PNP..> 20-Dec-2014 09:39 1.0M
Farnell-PDTB123TT-NX..> 20-Dec-2014 09:39 1.0M
Farnell-PIC12F529T39..> 20-Dec-2014 09:39 1.0M
Farnell-PSMN011-80YS..> 20-Dec-2014 09:39 1.1M
Farnell-PESD5V0F1BL-..> 20-Dec-2014 09:39 1.1M
Farnell-MB85RS128B-F..> 20-Dec-2014 09:38 1.1M
Farnell-SMAJ-STMicro..> 13-Oct-2014 07:07 734K
Farnell-L6562-STMicr..> 13-Oct-2014 07:07 754K
Farnell-LM139-LM239-..> 13-Oct-2014 07:07 771K
Farnell-L4978-STMicr..> 13-Oct-2014 07:07 783K
Farnell-ST1S10PHR-ST..> 13-Oct-2014 07:06 820K
Farnell-TIP41C-TIP42..> 13-Oct-2014 07:06 829K
Farnell-MC34063ABD-T..> 13-Oct-2014 07:06 844K
Farnell-ESM6045DV-ST..> 13-Oct-2014 07:06 850K
Farnell-TIP102-TIP10..> 13-Oct-2014 07:06 853K
Farnell-ST3232B-ST32..> 13-Oct-2014 07:06 867K
Farnell-STM32F030x4-..> 13-Oct-2014 07:06 1.1M
Farnell-STM32F103x8-..> 13-Oct-2014 07:06 1.0M
Farnell-STM32F405xx-..> 13-Oct-2014 07:05 1.4M
Farnell-STM32F205xx-..> 13-Oct-2014 07:05 1.7M
Farnell-STP16NF06L-n..> 13-Oct-2014 07:05 1.7M
Farnell-STP80NF55L-0..> 13-Oct-2014 07:05 1.7M
Farnell-LM217-LM317-..> 13-Oct-2014 07:04 1.7M
Farnell-LM2904-LM290..> 13-Oct-2014 07:04 1.7M
Farnell-L78-Positive..> 13-Oct-2014 07:04 1.8M
Farnell-VND920P-E-ST..> 13-Oct-2014 07:04 1.8M
Farnell-LM350-STMicr..> 13-Oct-2014 07:03 1.8M
![[ ]](http://www.audentia-gestion.fr/icons/layout.gif)
Smart_street_lightin..> 13-Oct-2014 07:03 1.6M
Farnell-Smart-street..> 13-Oct-2014 07:02 1.8M
Farnell-ULN2001-ULN2..> 13-Oct-2014 07:02 1.9M
Farnell-ULQ2001-ULQ2..> 13-Oct-2014 07:02 1.9M
Farnell-L6384E-STMic..> 13-Oct-2014 07:02 1.9M
Farnell-AN2794-Appli..> 13-Oct-2014 07:01 1.0M
Farnell-STEVAL-TDR02..> 13-Oct-2014 07:01 960K
Farnell-TL084-TL084A..> 11-Oct-2014 15:54 1.7M
Farnell-TDA7296-STMi..> 11-Oct-2014 15:54 1.7M
Farnell-L78-STMicroe..> 11-Oct-2014 15:49 1.6M
Farnell-LM158-LM258-..> 11-Oct-2014 15:49 1.6M
Farnell-LF351-STMicr..> 11-Oct-2014 15:49 1.7M
Farnell-L293B-STMicr..> 11-Oct-2014 15:49 1.7M
Farnell-NE556-SA556-..> 11-Oct-2014 15:48 1.7M
Farnell-SO967460-PDF..> 11-Oct-2014 12:05 2.9M
Farnell-Everything-Y..> 11-Oct-2014 12:05 1.5M
![[ ]](http://www.audentia-gestion.fr/icons/unknown.gif)
cookiechoices.js 27-Sep-2014 12:40 6.0K
Farnell-ULN2803A-Rev..> 09-Sep-2014 19:26 2.9M
Analog-Devices-Convo..> 09-Sep-2014 08:26 2.1M
Analog-Devices-Convo..> 09-Sep-2014 08:25 2.2M
Analog-Devices-Convo..> 09-Sep-2014 08:25 2.2M
Analog-Devices-ADMC4..> 09-Sep-2014 08:23 2.3M
Analog-Devices-Wi-Fi..> 09-Sep-2014 08:23 2.3M
Analog-Devices-ADMC2..> 09-Sep-2014 08:21 2.4M
Analog-Devices-ADC-S..> 09-Sep-2014 08:21 2.4M
Analog-Devices-Visua..> 09-Sep-2014 08:18 2.5M
Analog-Devices-ANF32..> 09-Sep-2014 08:18 2.6M
Farnell-Compensating..> 09-Sep-2014 08:16 2.6M
Farnell-Compensating..> 09-Sep-2014 08:16 2.6M
Farnell-LM7805-Fairc..> 09-Sep-2014 08:13 2.7M
Farnell-AD620-Rev-H-..> 09-Sep-2014 08:13 2.6M
Farnell-Datasheet-FT..> 09-Sep-2014 08:10 2.8M
Farnell-MAX4661-MAX4..> 09-Sep-2014 08:10 2.8M
Farnell-OPA627-Texas..> 09-Sep-2014 08:08 2.8M
Farnell-REF19x-Serie..> 09-Sep-2014 08:08 2.8M
Farnell-Data-Sheet-M..> 09-Sep-2014 08:05 2.8M
Analog-Devices-Digit..> 08-Sep-2014 18:03 2.0M
Analog-Devices-Digit..> 08-Sep-2014 18:02 2.1M
Analog-Devices-Basic..> 08-Sep-2014 17:49 1.9M
Farnell-AD9833-Rev-E..> 08-Sep-2014 17:49 1.8M
Farnell-The-Discrete..> 08-Sep-2014 17:44 1.8M
Electronique-Basic-o..> 08-Sep-2014 17:43 1.8M
Analog-Devices-AN300..> 08-Sep-2014 17:42 2.0M
Analog-Devices-The-C..> 08-Sep-2014 17:41 1.9M
Analog-Devices-Intro..> 08-Sep-2014 17:39 1.9M
Analog-Devices-Compl..> 08-Sep-2014 17:38 2.0M
Analog-Devices-Gloss..> 08-Sep-2014 17:36 2.0M
Farnell-ADuM1300-ADu..> 08-Sep-2014 08:11 1.7M
Farnell-AD586BRZ-Ana..> 08-Sep-2014 08:09 1.6M
Farnell-ADuM1200-ADu..> 08-Sep-2014 08:09 1.6M
Farnell-NA555-NE555-..> 08-Sep-2014 07:51 1.5M
Farnell-AD9834-Rev-D..> 08-Sep-2014 07:32 1.2M
Farnell-MSP430F15x-M..> 08-Sep-2014 07:32 1.3M
Farnell-AD736-Rev-I-..> 08-Sep-2014 07:31 1.3M
Farnell-AD8307-Data-..> 08-Sep-2014 07:30 1.3M
Farnell-Single-Chip-..> 08-Sep-2014 07:30 1.5M
Farnell-Quadruple-2-..> 08-Sep-2014 07:29 1.5M
Farnell-ADE7758-Rev-..> 08-Sep-2014 07:28 1.7M
Farnell-MAX3221-Rev-..> 08-Sep-2014 07:28 1.8M
Farnell-USB-to-Seria..> 08-Sep-2014 07:27 2.0M
Farnell-AD8313-Analo..> 08-Sep-2014 07:26 2.0M
Farnell-SN54HC164-SN..> 08-Sep-2014 07:25 2.0M
Farnell-AD8310-Analo..> 08-Sep-2014 07:24 2.1M
Farnell-AD8361-Rev-D..> 08-Sep-2014 07:23 2.1M
Farnell-2N3906-Fairc..> 08-Sep-2014 07:22 2.1M
Farnell-AD584-Rev-C-..> 08-Sep-2014 07:20 2.2M
Farnell-ADE7753-Rev-..> 08-Sep-2014 07:20 2.3M
Farnell-TLV320AIC23B..> 08-Sep-2014 07:18 2.4M
Farnell-STM32F405xxS..> 27-Aug-2014 18:27 1.8M
Farnell-fx-3650P-fx-..> 29-Jul-2014 10:42 1.5M
Farnell-MSP430-Hardw..> 29-Jul-2014 10:36 1.1M
Farnell-LM324-Texas-..> 29-Jul-2014 10:32 1.5M
Farnell-LM386-Low-Vo..> 29-Jul-2014 10:32 1.5M
Farnell-NE5532-Texas..> 29-Jul-2014 10:32 1.5M
Farnell-Hex-Inverter..> 29-Jul-2014 10:31 875K
Farnell-AT90USBKey-H..> 29-Jul-2014 10:31 902K
Farnell-AT89C5131-Ha..> 29-Jul-2014 10:31 1.2M
Farnell-MSP-EXP430F5..> 29-Jul-2014 10:31 1.2M
Farnell-Explorer-16-..> 29-Jul-2014 10:31 1.3M
Farnell-TMP006EVM-Us..> 29-Jul-2014 10:30 1.3M
Farnell-Gertboard-Us..> 29-Jul-2014 10:30 1.4M
Farnell-LMP91051-Use..> 29-Jul-2014 10:30 1.4M
Farnell-Thermometre-..> 29-Jul-2014 10:30 1.4M
Farnell-user-manuel-..> 29-Jul-2014 10:29 1.5M
Farnell-TLV320AIC325..> 28-Jul-2014 17:45 2.9M
Farnell-2-GBPS-Diffe..> 28-Jul-2014 17:42 2.7M
Farnell-LMT88-2.4V-1..> 28-Jul-2014 17:42 2.8M
Farnell-Octal-Genera..> 28-Jul-2014 17:42 2.8M
Farnell-Dual-MOSFET-..> 28-Jul-2014 17:41 2.8M
Farnell-SN54LV4053A-..> 28-Jul-2014 17:20 5.9M
Farnell-TAS1020B-USB..> 28-Jul-2014 17:19 6.2M
Farnell-TPS40060-Wid..> 28-Jul-2014 17:19 6.3M
Farnell-TL082-Wide-B..> 28-Jul-2014 17:16 6.3M
Farnell-RF-short-tra..> 28-Jul-2014 17:16 6.3M
Farnell-maxim-integr..> 28-Jul-2014 17:14 6.4M
Farnell-TSV6390-TSV6..> 28-Jul-2014 17:14 6.4M
Farnell-Fast-Charge-..> 28-Jul-2014 17:12 6.4M
Farnell-NVE-datashee..> 28-Jul-2014 17:12 6.5M
Farnell-Excalibur-Hi..> 28-Jul-2014 17:10 2.4M
Farnell-Excalibur-Hi..> 28-Jul-2014 17:10 2.4M
Farnell-REF102-10V-P..> 28-Jul-2014 17:09 2.4M
Farnell-TMS320F28055..> 28-Jul-2014 17:09 2.7M
Farnell-ULINKpro-Deb..> 25-Jul-2014 12:35 5.9M
Farnell-WIRE-WRAP-50..> 25-Jul-2014 12:34 5.9M
Farnell-MICROCHIP-PI..> 25-Jul-2014 12:34 6.7M
Farnell-OMRON-INDUST..> 25-Jul-2014 12:32 6.9M
Farnell-OMRON-INDUST..> 25-Jul-2014 12:31 6.9M
Farnell-TYCO-ELECTRO..> 25-Jul-2014 12:30 6.9M
Farnell-Power-suppli..> 25-Jul-2014 12:29 7.0M
Farnell-Schroff-A108..> 25-Jul-2014 12:27 2.8M
Farnell-Schroff-Main..> 25-Jul-2014 12:26 2.9M
Farnell-Schroff-mult..> 25-Jul-2014 12:26 2.9M
Farnell-Quick-Start-..> 25-Jul-2014 12:25 3.0M
Farnell-PiFace-Digit..> 25-Jul-2014 12:25 3.0M
Farnell-PicoScope-se..> 25-Jul-2014 12:24 3.0M
Farnell-Trust-Digita..> 25-Jul-2014 12:24 3.0M
Farnell-Jeu-multi-la..> 25-Jul-2014 12:23 3.0M
Farnell-PicoScope-42..> 25-Jul-2014 12:23 3.0M
Farnell-LD-WSECO16-P..> 25-Jul-2014 12:22 3.1M
Farnell-Circuit-Impr..> 25-Jul-2014 12:22 3.1M
Farnell-MULTICOMP-Ra..> 22-Jul-2014 12:57 5.9M
Farnell-RASPBERRY-PI..> 22-Jul-2014 12:35 5.9M
Farnell-Dremel-Exper..> 22-Jul-2014 12:34 1.6M
Farnell-STM32F103x8-..> 22-Jul-2014 12:33 1.6M
Farnell-BD6xxx-PDF.htm 22-Jul-2014 12:33 1.6M
Farnell-L78S-STMicro..> 22-Jul-2014 12:32 1.6M
Farnell-RaspiCam-Doc..> 22-Jul-2014 12:32 1.6M
Farnell-SB520-SB5100..> 22-Jul-2014 12:32 1.6M
Farnell-iServer-Micr..> 22-Jul-2014 12:32 1.6M
Farnell-LUMINARY-MIC..> 22-Jul-2014 12:31 3.6M
Farnell-TEXAS-INSTRU..> 22-Jul-2014 12:31 2.4M
Farnell-TEXAS-INSTRU..> 22-Jul-2014 12:30 4.6M
Farnell-CLASS 1-or-2..> 22-Jul-2014 12:30 4.7M
Farnell-TEXAS-INSTRU..> 22-Jul-2014 12:29 4.8M
Farnell-Evaluating-t..> 22-Jul-2014 12:28 4.9M
Farnell-LM3S6952-Mic..> 22-Jul-2014 12:27 5.9M
Farnell-Keyboard-Mou..> 22-Jul-2014 12:27 5.9M
Farnell-0050375063-D..> 18-Jul-2014 17:03 2.5M
Farnell-Mini-Fit-Jr-..> 18-Jul-2014 17:03 2.5M
Farnell-43031-0002-M..> 18-Jul-2014 17:03 2.5M
Farnell-0433751001-D..> 18-Jul-2014 17:02 2.5M
Farnell-Cube-3D-Prin..> 18-Jul-2014 17:02 2.5M
Farnell-MTX-Compact-..> 18-Jul-2014 17:01 2.5M
Farnell-MTX-3250-MTX..> 18-Jul-2014 17:01 2.5M
Farnell-ATtiny26-L-A..> 18-Jul-2014 17:00 2.6M
Farnell-MCP3421-Micr..> 18-Jul-2014 17:00 1.2M
Farnell-LM19-Texas-I..> 18-Jul-2014 17:00 1.2M
Farnell-Data-Sheet-S..> 18-Jul-2014 17:00 1.2M
Farnell-LMH6518-Texa..> 18-Jul-2014 16:59 1.3M
Farnell-AD7719-Low-V..> 18-Jul-2014 16:59 1.4M
Farnell-DAC8143-Data..> 18-Jul-2014 16:59 1.5M
Farnell-BGA7124-400-..> 18-Jul-2014 16:59 1.5M
Farnell-SICK-OPTIC-E..> 18-Jul-2014 16:58 1.5M
Farnell-LT3757-Linea..> 18-Jul-2014 16:58 1.6M
Farnell-LT1961-Linea..> 18-Jul-2014 16:58 1.6M
Farnell-PIC18F2420-2..> 18-Jul-2014 16:57 2.5M
Farnell-DS3231-DS-PD..> 18-Jul-2014 16:57 2.5M
Farnell-RDS-80-PDF.htm 18-Jul-2014 16:57 1.3M
Farnell-AD8300-Data-..> 18-Jul-2014 16:56 1.3M
Farnell-LT6233-Linea..> 18-Jul-2014 16:56 1.3M
Farnell-MAX1365-MAX1..> 18-Jul-2014 16:56 1.4M
Farnell-XPSAF5130-PD..> 18-Jul-2014 16:56 1.4M
Farnell-DP83846A-DsP..> 18-Jul-2014 16:55 1.5M
Farnell-SL3ICS1002-1..> 16-Jul-2014 09:05 2.5M
Farnell-MCOC1-Farnel..> 16-Jul-2014 09:04 1.0M
Farnell-SL3S1203_121..> 16-Jul-2014 09:04 1.1M
Farnell-PN512-Full-N..> 16-Jul-2014 09:03 1.4M
Farnell-SL3S4011_402..> 16-Jul-2014 09:03 1.1M
Farnell-LPC408x-7x 3..> 16-Jul-2014 09:03 1.6M
Farnell-PCF8574-PCF8..> 16-Jul-2014 09:03 1.7M
Farnell-LPC81xM-32-b..> 16-Jul-2014 09:02 2.0M
Farnell-LPC1769-68-6..> 16-Jul-2014 09:02 1.9M
Farnell-Download-dat..> 16-Jul-2014 09:02 2.2M
Farnell-LPC3220-30-4..> 16-Jul-2014 09:02 2.2M
Farnell-LPC11U3x-32-..> 16-Jul-2014 09:01 2.4M
Farnell-Full-Datashe..> 15-Jul-2014 17:08 951K
Farnell-pmbta13_pmbt..> 15-Jul-2014 17:06 959K
Farnell-EE-SPX303N-4..> 15-Jul-2014 17:06 969K
Farnell-Datasheet-NX..> 15-Jul-2014 17:06 1.0M
Farnell-Datasheet-Fa..> 15-Jul-2014 17:05 1.0M
Farnell-MIDAS-un-tra..> 15-Jul-2014 17:05 1.0M
Farnell-SERIAL-TFT-M..> 15-Jul-2014 17:05 1.0M
Farnell-TMR-2-series..> 15-Jul-2014 16:48 787K
Farnell-DC-DC-Conver..> 15-Jul-2014 16:48 781K
Farnell-Full-Datashe..> 15-Jul-2014 16:47 803K
Farnell-TMLM-Series-..> 15-Jul-2014 16:47 810K
Farnell-TEL-5-Series..> 15-Jul-2014 16:47 814K
Farnell-TXL-series-t..> 15-Jul-2014 16:47 829K
Farnell-TEP-150WI-Se..> 15-Jul-2014 16:47 837K
Farnell-AC-DC-Power-..> 15-Jul-2014 16:47 845K
Farnell-TIS-Instruct..> 15-Jul-2014 16:47 845K
Farnell-TOS-tracopow..> 15-Jul-2014 16:47 852K
Farnell-TCL-DC-traco..> 15-Jul-2014 16:46 858K
Farnell-TIS-series-t..> 15-Jul-2014 16:46 875K
Farnell-TMR-2-Series..> 15-Jul-2014 16:46 897K
Farnell-TMR-3-WI-Ser..> 15-Jul-2014 16:46 939K
Farnell-TEN-8-WI-Ser..> 15-Jul-2014 16:46 939K
Farnell-SOURIAU-Cont..> 08-Jul-2014 19:04 3.0M
Farnell-T672-3000-Se..> 08-Jul-2014 18:59 2.0M
Farnell-tesa®pack63..> 08-Jul-2014 18:56 2.0M
Farnell-Encodeur-USB..> 08-Jul-2014 18:56 2.0M
Farnell-CC2530ZDK-Us..> 08-Jul-2014 18:55 2.1M
Farnell-2020-Manuel-..> 08-Jul-2014 18:55 2.1M
Farnell-Synchronous-..> 08-Jul-2014 18:54 2.1M
Farnell-Arithmetic-L..> 08-Jul-2014 18:54 2.1M
Farnell-NA555-NE555-..> 08-Jul-2014 18:53 2.2M
Farnell-4-Bit-Magnit..> 08-Jul-2014 18:53 2.2M
Farnell-LM555-Timer-..> 08-Jul-2014 18:53 2.2M
Farnell-L293d-Texas-..> 08-Jul-2014 18:53 2.2M
Farnell-SN54HC244-SN..> 08-Jul-2014 18:52 2.3M
Farnell-MAX232-MAX23..> 08-Jul-2014 18:52 2.3M
Farnell-High-precisi..> 08-Jul-2014 18:51 2.3M
Farnell-SMU-Instrume..> 08-Jul-2014 18:51 2.3M
Farnell-900-Series-B..> 08-Jul-2014 18:50 2.3M
Farnell-BA-Series-Oh..> 08-Jul-2014 18:50 2.3M
Farnell-UTS-Series-S..> 08-Jul-2014 18:49 2.5M
Farnell-270-Series-O..> 08-Jul-2014 18:49 2.3M
Farnell-UTS-Series-S..> 08-Jul-2014 18:49 2.8M
Farnell-Tiva-C-Serie..> 08-Jul-2014 18:49 2.6M
Farnell-UTO-Souriau-..> 08-Jul-2014 18:48 2.8M
Farnell-Clipper-Seri..> 08-Jul-2014 18:48 2.8M
Farnell-851-Series-P..> 08-Jul-2014 18:47 3.0M
Farnell-HIP4081A-Int..> 07-Jul-2014 19:47 1.0M
Farnell-ISL6251-ISL6..> 07-Jul-2014 19:47 1.1M
Farnell-DG411-DG412-..> 07-Jul-2014 19:47 1.0M
Farnell-3367-ARALDIT..> 07-Jul-2014 19:46 1.2M
Farnell-ICM7228-Inte..> 07-Jul-2014 19:46 1.1M
Farnell-Data-Sheet-K..> 07-Jul-2014 19:46 1.2M
Farnell-Silica-Gel-M..> 07-Jul-2014 19:46 1.2M
Farnell-TKC2-Dusters..> 07-Jul-2014 19:46 1.2M
Farnell-CRC-HANDCLEA..> 07-Jul-2014 19:46 1.2M
Farnell-760G-French-..> 07-Jul-2014 19:45 1.2M
Farnell-Decapant-KF-..> 07-Jul-2014 19:45 1.2M
Farnell-1734-ARALDIT..> 07-Jul-2014 19:45 1.2M
Farnell-Araldite-Fus..> 07-Jul-2014 19:45 1.2M
Farnell-fiche-de-don..> 07-Jul-2014 19:44 1.4M
Farnell-safety-data-..> 07-Jul-2014 19:44 1.4M
Farnell-A-4-Hardener..> 07-Jul-2014 19:44 1.4M
Farnell-CC-Debugger-..> 07-Jul-2014 19:44 1.5M
Farnell-SmartRF06-Ev..> 07-Jul-2014 19:43 1.6M
Farnell-CC2531-USB-H..> 07-Jul-2014 19:43 1.8M
Farnell-Alimentation..> 07-Jul-2014 19:43 1.8M
Farnell-BK889B-PONT-..> 07-Jul-2014 19:42 1.8M
Farnell-User-Guide-M..> 07-Jul-2014 19:41 2.0M
Farnell-SL59830-Inte..> 06-Jul-2014 10:11 1.0M
Farnell-ALF1210-PDF.htm 06-Jul-2014 10:06 4.0M
Farnell-AD7171-16-Bi..> 06-Jul-2014 10:06 1.0M
Farnell-Low-Noise-24..> 06-Jul-2014 10:05 1.0M
Farnell-ESCON-Featur..> 06-Jul-2014 10:05 938K
Farnell-74LCX573-Fai..> 06-Jul-2014 10:05 1.9M
Farnell-1N4148WS-Fai..> 06-Jul-2014 10:04 1.9M
Farnell-FAN6756-Fair..> 06-Jul-2014 10:04 850K
Farnell-Datasheet-Fa..> 06-Jul-2014 10:04 861K
Farnell-ES1F-ES1J-fi..> 06-Jul-2014 10:04 867K
Farnell-QRE1113-Fair..> 06-Jul-2014 10:03 879K
Farnell-2N7002DW-Fai..> 06-Jul-2014 10:03 886K
Farnell-FDC2512-Fair..> 06-Jul-2014 10:03 886K
Farnell-FDV301N-Digi..> 06-Jul-2014 10:03 886K
Farnell-S1A-Fairchil..> 06-Jul-2014 10:03 896K
Farnell-BAV99-Fairch..> 06-Jul-2014 10:03 896K
Farnell-74AC00-74ACT..> 06-Jul-2014 10:03 911K
Farnell-NaPiOn-Panas..> 06-Jul-2014 10:02 911K
Farnell-LQ-RELAYS-AL..> 06-Jul-2014 10:02 924K
Farnell-ev-relays-ae..> 06-Jul-2014 10:02 926K
Farnell-ESCON-Featur..> 06-Jul-2014 10:02 931K
Farnell-Amplifier-In..> 06-Jul-2014 10:02 940K
Farnell-Serial-File-..> 06-Jul-2014 10:02 941K
Farnell-Both-the-Del..> 06-Jul-2014 10:01 948K
Farnell-Videk-PDF.htm 06-Jul-2014 10:01 948K
Farnell-EPCOS-173438..> 04-Jul-2014 10:43 3.3M
Farnell-Sensorless-C..> 04-Jul-2014 10:42 3.3M
Farnell-197.31-KB-Te..> 04-Jul-2014 10:42 3.3M
Farnell-PIC12F609-61..> 04-Jul-2014 10:41 3.7M
Farnell-PADO-semi-au..> 04-Jul-2014 10:41 3.7M
Farnell-03-iec-runds..> 04-Jul-2014 10:40 3.7M
Farnell-ACC-Silicone..> 04-Jul-2014 10:40 3.7M
Farnell-Series-TDS10..> 04-Jul-2014 10:39 4.0M
Farnell-Q48-PDF.htm 23-Jun-2014 10:29 2.1M
Farnell-Panasonic-15..> 23-Jun-2014 10:29 2.1M
Farnell-BZX384-serie..> 23-Jun-2014 10:29 2.1M
Farnell-AN10361-Phil..> 23-Jun-2014 10:29 2.1M
Farnell-KSZ8851SNL-S..> 23-Jun-2014 10:28 2.1M
Farnell-BF545A-BF545..> 23-Jun-2014 10:28 2.1M
Farnell-PIC18F2455-2..> 23-Jun-2014 10:27 3.1M
Farnell-PMBT4403-PNP..> 23-Jun-2014 10:27 3.1M
Farnell-24AA024-24LC..> 23-Jun-2014 10:26 3.1M
Farnell-Leaded-Trans..> 23-Jun-2014 10:26 3.2M
Farnell-SSC7102-Micr..> 23-Jun-2014 10:25 3.2M
Farnell-Fastrack-Sup..> 23-Jun-2014 10:25 3.3M
Farnell-BC847DS-NXP-..> 23-Jun-2014 10:24 3.3M
Farnell-HI-70300-Sol..> 14-Jun-2014 18:27 2.4M
Farnell-Davum-TMC-PD..> 14-Jun-2014 18:27 2.4M
Farnell-Repartiteurs..> 14-Jun-2014 18:26 2.5M
Farnell-Documentatio..> 14-Jun-2014 18:26 2.5M
Farnell-Fiche-de-don..> 14-Jun-2014 18:26 2.5M
Farnell-SPLC780A1-16..> 14-Jun-2014 18:25 2.5M
Farnell-Construction..> 14-Jun-2014 18:25 2.5M
Farnell-Alimentation..> 14-Jun-2014 18:24 2.5M
Farnell-C.A-6150-C.A..> 14-Jun-2014 18:24 2.5M
Farnell-Fluke-1730-E..> 14-Jun-2014 18:23 2.5M
Farnell-Ponts-RLC-po..> 14-Jun-2014 18:23 3.3M
Farnell-Serie-Standa..> 14-Jun-2014 18:23 3.3M
Farnell-FDS-ITW-Spra..> 14-Jun-2014 18:22 3.3M
Farnell-HFE1600-Data..> 14-Jun-2014 18:22 3.3M
Farnell-TDK-Lambda-H..> 14-Jun-2014 18:21 3.3M
Farnell-HC49-4H-Crys..> 14-Jun-2014 18:20 3.3M
Farnell-Avvertenze-e..> 14-Jun-2014 18:20 3.3M
Farnell-Ceramic-tran..> 14-Jun-2014 18:19 3.4M
Farnell-ADL6507-PDF.htm 14-Jun-2014 18:19 3.4M
Farnell-PMEG4002EL-N..> 14-Jun-2014 18:18 3.4M
Farnell-Midas-Active..> 14-Jun-2014 18:17 3.4M
Farnell-Molex-83421-..> 14-Jun-2014 18:17 3.4M
Farnell-Molex-COMMER..> 14-Jun-2014 18:16 3.4M
Farnell-10TPB47M-End..> 14-Jun-2014 18:16 3.4M
Farnell-U2270B-PDF.htm 14-Jun-2014 18:15 3.4M
Farnell-SVPE-series-..> 14-Jun-2014 18:15 2.0M
Farnell-F28069-Picco..> 14-Jun-2014 18:14 2.0M
Farnell-Termometros-..> 14-Jun-2014 18:14 2.0M
Farnell-Cordless-dri..> 14-Jun-2014 18:13 2.0M
Farnell-Battery-GBA-..> 14-Jun-2014 18:13 2.0M
Farnell-CD4536B-Type..> 14-Jun-2014 18:13 2.0M
Farnell-0430300011-D..> 14-Jun-2014 18:13 2.0M
Farnell-Mistral-PDF.htm 14-Jun-2014 18:12 2.1M
Farnell-Connectors-N..> 14-Jun-2014 18:12 2.1M
Farnell-XPS-AC-Octop..> 14-Jun-2014 18:11 2.1M
Farnell-Midas-MCCOG4..> 14-Jun-2014 18:11 2.1M
Farnell-V4N-PDF.htm 14-Jun-2014 18:11 2.1M
Farnell-Signal-PCB-R..> 14-Jun-2014 18:11 2.1M
Farnell-PIC24FJ256GB..> 14-Jun-2014 09:51 2.4M
Farnell-DC-Fan-type-..> 14-Jun-2014 09:51 1.8M
Farnell-12mm-Size-In..> 14-Jun-2014 09:50 2.4M
Farnell-10BQ060-PDF.htm 14-Jun-2014 09:50 2.4M
Farnell-An-Improved-..> 14-Jun-2014 09:49 2.5M
Farnell-ATmega640-VA..> 14-Jun-2014 09:49 2.5M
Farnell-LME49725-Pow..> 14-Jun-2014 09:49 2.5M
Farnell-Produit-3430..> 14-Jun-2014 09:48 2.5M
Farnell-USB-Buccanee..> 14-Jun-2014 09:48 2.5M
Farnell-DC-Fan-type-..> 14-Jun-2014 09:48 2.5M
Farnell-Fiche-de-don..> 14-Jun-2014 09:47 2.5M
Farnell-Nilï¬-sk-E-..> 14-Jun-2014 09:47 2.5M
Farnell-MX670-MX675-..> 14-Jun-2014 09:46 2.5M
Farnell-Tektronix-AC..> 13-Jun-2014 18:44 1.5M
Farnell-PMBT3906-PNP..> 13-Jun-2014 18:44 1.5M
Farnell-PESD5V0F1BL-..> 13-Jun-2014 18:43 1.5M
Farnell-PMEG4010CEH-..> 13-Jun-2014 18:43 1.6M
Farnell-PESD9X5.0L-P..> 13-Jun-2014 18:43 1.6M
Farnell-BTA204-800C-..> 13-Jun-2014 18:42 1.6M
Farnell-BYV29F-600-N..> 13-Jun-2014 18:42 1.6M
Farnell-Low-cost-Enc..> 13-Jun-2014 18:42 1.7M
Farnell-BC846DS-NXP-..> 13-Jun-2014 18:42 1.6M
Farnell-IP4252CZ16-8..> 13-Jun-2014 18:41 1.7M
Farnell-BUJD203AX-NX..> 13-Jun-2014 18:41 1.7M
Farnell-Download-dat..> 13-Jun-2014 18:40 1.8M
Farnell-BT151-650R-N..> 13-Jun-2014 18:40 1.7M
Farnell-OXPCIE958-FB..> 13-Jun-2014 18:40 1.8M
Farnell-ATtiny26-L-A..> 13-Jun-2014 18:40 1.8M
Farnell-Microchip-MC..> 13-Jun-2014 18:27 1.8M
Farnell-Pompes-Charg..> 24-Apr-2014 20:23 3.3M
Farnell-Alimentation..> 01-Apr-2014 07:42 3.4M
Farnell-C.A 8332B-C...> 01-Apr-2014 07:40 3.4M
Farnell-ALF1225-12-V..> 01-Apr-2014 07:40 3.4M
Farnell-CS5532-34-BS..> 01-Apr-2014 07:39 3.5M
Farnell-ALF2412-24-V..> 01-Apr-2014 07:39 3.4M
Sefram-GUIDE_SIMPLIF..> 29-Mar-2014 11:46 422K
Sefram-CAT_ENREGISTR..> 29-Mar-2014 11:46 461K
Sefram-SP270.pdf-PDF..> 29-Mar-2014 11:46 464K
Sefram-7866HD.pdf-PD..> 29-Mar-2014 11:46 472K
Sefram-GUIDE_SIMPLIF..> 29-Mar-2014 11:46 481K
Sefram-CAT_MESUREURS..> 29-Mar-2014 11:46 435K
Sefram-GUIDE_SIMPLIF..> 29-Mar-2014 11:46 442K
Farnell-Portable-Ana..> 29-Mar-2014 11:16 2.8M
Farnell-CC2560-Bluet..> 29-Mar-2014 11:14 2.8M
Farnell-Ferric-Chlor..> 29-Mar-2014 11:14 2.8M
Farnell-MCF532x-7x-E..> 29-Mar-2014 11:14 2.8M
Farnell-A-True-Syste..> 29-Mar-2014 11:13 3.3M
Farnell-ELMA-PDF.htm 29-Mar-2014 11:13 3.3M
Farnell-SMBJ-Transil..> 29-Mar-2014 11:12 3.3M
Farnell-6517b-Electr..> 29-Mar-2014 11:12 3.3M
Farnell-Amplificateu..> 29-Mar-2014 11:11 3.3M
Farnell-ir1150s_fr.p..> 29-Mar-2014 11:11 3.3M
Farnell-De-la-puissa..> 29-Mar-2014 11:10 3.3M
Farnell-BK2650A-BK26..> 29-Mar-2014 11:10 3.3M
Farnell-Lubrifiant-a..> 26-Mar-2014 18:00 2.7M
Farnell-Circuit-Note..> 26-Mar-2014 18:00 2.8M
Farnell-Circuit-Note..> 26-Mar-2014 18:00 2.8M
Farnell-Current-Tran..> 26-Mar-2014 17:59 2.7M
Farnell-Current-Tran..> 26-Mar-2014 17:59 2.7M
Farnell-Current-Tran..> 26-Mar-2014 17:58 2.7M
Farnell-Current-Tran..> 26-Mar-2014 17:58 2.7M
Farnell-Supercapacit..> 26-Mar-2014 17:57 2.7M
Farnell-GALVA-MAT-Re..> 26-Mar-2014 17:57 2.7M
Farnell-GALVA-A-FROI..> 26-Mar-2014 17:56 2.7M
Farnell-1907-2006-PD..> 26-Mar-2014 17:56 2.7M
Farnell-ARALDITE-CW-..> 26-Mar-2014 17:56 2.7M
Farnell-06-6544-8-PD..> 26-Mar-2014 17:56 2.7M
Farnell-Miniature-Ci..> 26-Mar-2014 17:55 2.8M
Farnell-ARADUR-HY-13..> 26-Mar-2014 17:55 2.8M
Farnell-LOCTITE-3463..> 25-Mar-2014 08:19 3.0M
Farnell-LCW-CQ7P.CC-..> 25-Mar-2014 08:19 3.2M
Farnell-ATtiny20-PDF..> 25-Mar-2014 08:19 3.6M
Farnell-3M-VolitionT..> 25-Mar-2014 08:18 3.3M
Farnell-EMC1182-PDF.htm 25-Mar-2014 08:17 3.0M
Farnell-MC3510-PDF.htm 25-Mar-2014 08:17 3.0M
Farnell-Directive-re..> 25-Mar-2014 08:16 3.0M
Farnell-Loctite3455-..> 25-Mar-2014 08:16 3.0M
Farnell-LOCTITE-542-..> 25-Mar-2014 08:15 3.0M
Farnell-5910-PDF.htm 25-Mar-2014 08:15 3.0M
Farnell-china_rohs_o..> 21-Mar-2014 10:04 3.9M
Farnell-Cles-electro..> 21-Mar-2014 08:13 3.9M
Farnell-ARALDITE-201..> 21-Mar-2014 08:12 3.7M
Farnell-Premier-Farn..> 21-Mar-2014 08:11 3.8M
Farnell-celpac-SUL84..> 21-Mar-2014 08:11 3.8M
Farnell-S-TRI-SWT860..> 21-Mar-2014 08:11 3.8M
Farnell-3M-Polyimide..> 21-Mar-2014 08:09 3.9M
Farnell-Strangkuhlko..> 21-Mar-2014 08:09 3.9M
Farnell-Reglement-RE..> 21-Mar-2014 08:08 3.9M
Farnell-techfirst_se..> 21-Mar-2014 08:08 3.9M
Farnell-Septembre-20..> 20-Mar-2014 17:46 3.7M
Farnell-Telemetres-l..> 20-Mar-2014 17:46 3.7M
Farnell-Multi-Functi..> 20-Mar-2014 17:38 3.0M
Farnell-testo-470-Fo..> 20-Mar-2014 17:38 3.0M
Farnell-Novembre-201..> 20-Mar-2014 17:38 3.3M
Farnell-testo-205-20..> 20-Mar-2014 17:37 3.0M
Farnell-Panasonic-Ra..> 20-Mar-2014 17:37 2.6M
Farnell-Panasonic-Ne..> 20-Mar-2014 17:36 2.6M
Farnell-Panasonic-EC..> 20-Mar-2014 17:36 2.6M
Farnell-Panasonic-Id..> 20-Mar-2014 17:35 2.6M
Farnell-cree-Xlamp-X..> 20-Mar-2014 17:35 2.7M
Farnell-cree-Xlamp-X..> 20-Mar-2014 17:34 2.8M
Farnell-ADSP-21362-A..> 20-Mar-2014 17:34 2.8M
Farnell-AD524-PDF.htm 20-Mar-2014 17:33 2.8M
Farnell-MPXV7002-Rev..> 20-Mar-2014 17:33 2.8M
Farnell-cree-Xlamp-m..> 20-Mar-2014 17:32 2.9M
Farnell-cree-Xlamp-m..> 20-Mar-2014 17:32 2.9M
Farnell-50A-High-Pow..> 20-Mar-2014 17:31 2.9M
Farnell-cree-Xlamp-X..> 20-Mar-2014 17:31 2.9M
Farnell-Series-2600B..> 20-Mar-2014 17:30 3.0M
Farnell-ECO-Series-T..> 20-Mar-2014 08:14 2.5M
Farnell-PDTA143X-ser..> 20-Mar-2014 08:12 2.6M
Farnell-Panasonic-TS..> 20-Mar-2014 08:12 2.6M
Farnell-Radial-Lead-..> 20-Mar-2014 08:12 2.6M
Farnell-GN-RELAYS-AG..> 20-Mar-2014 08:11 2.6M
Farnell-Panasonic-Y3..> 20-Mar-2014 08:11 2.6M
Farnell-Panasonic-EZ..> 20-Mar-2014 08:10 2.6M
Farnell-ATMEL-8-bit-..> 19-Mar-2014 18:04 2.1M
Farnell-USB1T11A-PDF..> 19-Mar-2014 18:03 2.1M
Farnell-OSLON-SSL-Ce..> 19-Mar-2014 18:03 2.1M
Farnell-Atmel-ATmega..> 19-Mar-2014 18:03 2.2M
Farnell-PBSS5160T-60..> 19-Mar-2014 18:03 2.1M
Farnell-MICROCHIP-PI..> 19-Mar-2014 18:02 2.5M
Farnell-Ed.081002-DA..> 19-Mar-2014 18:02 2.5M
Farnell-Instructions..> 19-Mar-2014 18:01 2.5M
Farnell-Serie-PicoSc..> 19-Mar-2014 18:01 2.5M
Farnell-F42202-PDF.htm 19-Mar-2014 18:00 2.5M
Farnell-propose-plus..> 11-Mar-2014 08:19 2.8M
Farnell-Haute-vitess..> 11-Mar-2014 08:17 2.4M
Farnell-Controle-de-..> 11-Mar-2014 08:16 2.8M
Farnell-NXP-TEA1703T..> 11-Mar-2014 08:15 2.8M
Farnell-XPS-MC16-XPS..> 11-Mar-2014 08:15 2.8M
Farnell-MC21605-PDF.htm 11-Mar-2014 08:14 2.8M
Farnell-WetTantalum-..> 11-Mar-2014 08:14 2.8M
Farnell-ES2333-PDF.htm 11-Mar-2014 08:14 2.8M
Farnell-SB175-Connec..> 11-Mar-2014 08:14 2.8M
Farnell-Cannon-ZD-PD..> 11-Mar-2014 08:13 2.8M
Farnell-YAGEO-DATA-S..> 11-Mar-2014 08:13 2.8M
Farnell-ATMEL-8-bit-..> 11-Mar-2014 07:55 2.1M
Farnell-NXP-PCA9555 ..> 11-Mar-2014 07:54 2.2M
Farnell-MICREL-KSZ88..> 11-Mar-2014 07:54 2.2M
Farnell-Microship-PI..> 11-Mar-2014 07:53 2.2M
Farnell-EPCOS-Sample..> 11-Mar-2014 07:53 2.2M
Farnell-NXP-BT136-60..> 11-Mar-2014 07:52 2.3M
Farnell-NTE_SEMICOND..> 11-Mar-2014 07:52 2.3M
Farnell-L-efficacite..> 11-Mar-2014 07:52 2.3M
Farnell-LUXEON-Guide..> 11-Mar-2014 07:52 2.3M
Farnell-Realiser-un-..> 11-Mar-2014 07:51 2.3M
Farnell-SOT-23-Multi..> 11-Mar-2014 07:51 2.3M
Farnell-ZigBee-ou-le..> 11-Mar-2014 07:50 2.4M
Farnell-Les-derniers..> 11-Mar-2014 07:50 2.3M
Farnell-Conception-d..> 11-Mar-2014 07:49 2.4M
Farnell-Puissance-ut..> 11-Mar-2014 07:49 2.4M
Farnell-MOLEX-43160-..> 10-Mar-2014 17:21 1.9M
Farnell-MOLEX-87439-..> 10-Mar-2014 17:21 1.9M
Farnell-MOLEX-43020-..> 10-Mar-2014 17:21 1.9M
Farnell-NXP-PBSS9110..> 10-Mar-2014 17:21 1.9M
Farnell-TEKTRONIX-DP..> 10-Mar-2014 17:20 2.0M
Farnell-uC-OS-III-Br..> 10-Mar-2014 17:20 2.0M
Farnell-CIRRUS-LOGIC..> 10-Mar-2014 17:20 2.1M
Farnell-NXP-PSMN7R0-..> 10-Mar-2014 17:19 2.1M
Farnell-MOLEX-39-00-..> 10-Mar-2014 17:19 1.9M
Farnell-manual-bus-p..> 10-Mar-2014 16:29 1.9M
Farnell-Molex-Crimp-..> 10-Mar-2014 16:27 1.7M
Farnell-The-essentia..> 10-Mar-2014 16:27 1.7M
Farnell-OMRON-Master..> 10-Mar-2014 16:26 1.8M
Farnell-Proskit-SS-3..> 10-Mar-2014 16:26 1.8M
Farnell-BYV79E-serie..> 10-Mar-2014 16:19 1.6M
Farnell-NXP-74VHC126..> 10-Mar-2014 16:17 1.6M
Farnell-NXP-PSMN1R7-..> 10-Mar-2014 16:17 1.6M
Farnell-FICHE-DE-DON..> 10-Mar-2014 16:17 1.6M
Farnell-HUNTSMAN-Adv..> 10-Mar-2014 16:17 1.7M
Farnell-NXP-PMBFJ620..> 10-Mar-2014 16:16 1.7M
Farnell-Pico-Spox-Wi..> 10-Mar-2014 16:16 1.7M
Features
• High Performance, Low Power Atmel® AVR® 8-Bit Microcontroller
• Advanced RISC Architecture
– 135 Powerful Instructions – Most Single Clock Cycle Execution
– 32 × 8 General Purpose Working Registers
– Fully Static Operation
– Up to 16 MIPS Throughput at 16MHz
– On-Chip 2-cycle Multiplier
• High Endurance Non-volatile Memory Segments
– 64K/128K/256KBytes of In-System Self-Programmable Flash
– 4Kbytes EEPROM
– 8Kbytes Internal SRAM
– Write/Erase Cycles:10,000 Flash/100,000 EEPROM
– Data retention: 20 years at 85°C/ 100 years at 25°C
– Optional Boot Code Section with Independent Lock Bits
• In-System Programming by On-chip Boot Program
• True Read-While-Write Operation
– Programming Lock for Software Security
• Endurance: Up to 64Kbytes Optional External Memory Space
• Atmel® QTouch® library support
– Capacitive touch buttons, sliders and wheels
– QTouch and QMatrix® acquisition
– Up to 64 sense channels
• JTAG (IEEE std. 1149.1 compliant) Interface
– Boundary-scan Capabilities According to the JTAG Standard
– Extensive On-chip Debug Support
– Programming of Flash, EEPROM, Fuses, and Lock Bits through the JTAG Interface
• Peripheral Features
– Two 8-bit Timer/Counters with Separate Prescaler and Compare Mode
– Four 16-bit Timer/Counter with Separate Prescaler, Compare- and Capture Mode
– Real Time Counter with Separate Oscillator
– Four 8-bit PWM Channels
– Six/Twelve PWM Channels with Programmable Resolution from 2 to 16 Bits
(ATmega1281/2561, ATmega640/1280/2560)
– Output Compare Modulator
– 8/16-channel, 10-bit ADC (ATmega1281/2561, ATmega640/1280/2560)
– Two/Four Programmable Serial USART (ATmega1281/2561, ATmega640/1280/2560)
– Master/Slave SPI Serial Interface
– Byte Oriented 2-wire Serial Interface
– Programmable Watchdog Timer with Separate On-chip Oscillator
– On-chip Analog Comparator
– Interrupt and Wake-up on Pin Change
• Special Microcontroller Features
– Power-on Reset and Programmable Brown-out Detection
– Internal Calibrated Oscillator
– External and Internal Interrupt Sources
– Six Sleep Modes: Idle, ADC Noise Reduction, Power-save, Power-down, Standby,
and Extended Standby
• I/O and Packages
– 54/86 Programmable I/O Lines (ATmega1281/2561, ATmega640/1280/2560)
– 64-pad QFN/MLF, 64-lead TQFP (ATmega1281/2561)
– 100-lead TQFP, 100-ball CBGA (ATmega640/1280/2560)
– RoHS/Fully Green
• Temperature Range:
– -40°C to 85°C Industrial
• Ultra-Low Power Consumption
– Active Mode: 1MHz, 1.8V: 500µA
– Power-down Mode: 0.1µA at 1.8V
• Speed Grade:
– ATmega640V/ATmega1280V/ATmega1281V:
• 0 - 4MHz @ 1.8V - 5.5V, 0 - 8MHz @ 2.7V - 5.5V
– ATmega2560V/ATmega2561V:
• 0 - 2MHz @ 1.8V - 5.5V, 0 - 8MHz @ 2.7V - 5.5V
– ATmega640/ATmega1280/ATmega1281:
• 0 - 8MHz @ 2.7V - 5.5V, 0 - 16MHz @ 4.5V - 5.5V
– ATmega2560/ATmega2561:
• 0 - 16MHz @ 4.5V - 5.5V
8-bit Atmel
Microcontroller
with
64K/128K/256K
Bytes In-System
Programmable
Flash
ATmega640/V
ATmega1280/V
ATmega1281/V
ATmega2560/V
ATmega2561/V
2549P–AVR–10/20122
2549P–AVR–10/2012
ATmega640/1280/1281/2560/2561
1. Pin Configurations
Figure 1-1. TQFP-pinout ATmega640/1280/2560
GND
VCC
PA0 (AD0)
PA1 (AD1)
PA2 (AD2)
PA3 (AD3)
PA4 (AD4)
PA5 (AD5)
PA6 (AD6)
PA7 (AD7)
PG2 (ALE)
AVCC
GND
AREF
PF0 (ADC0)
PF1 (ADC1)
PF2 (ADC2)
PF3 (ADC3)
PF4 (ADC4/TCK)
PF5 (ADC5/TMS)
PF6 (ADC6/TDO)
PF7 (ADC7/TDI)
100 99 98 97 96 95 94 93 92 91 90 89 88 87 86 85 84 83 82 81 80 79 78 77 76
1
2
3
4
5
6
7
8
9
10
11
12
13
14
15
16
17
18
19
20
21
22
23
24
25
75
74
73
72
71
70
69
68
67
66
65
64
63
62
61
60
59
58
57
56
55
54
53
52
51
26 27 28 29 30 31 32 33 34 35 36 37 38 39 40 41 42 43 44 45 46 47 48 49 50 PK0 (ADC8/PCINT16) PK1 (ADC9/PCINT17) PK2 (ADC10/PCINT18) PK3 (ADC11/PCINT19) PK4 (ADC12/PCINT20) PK5 (ADC13/PCINT21) PK6 (ADC14/PCINT22) PK7 (ADC15/PCINT23)
(OC2B) PH6
(TOSC2) PG3
(TOSC1) PG4
(T4) PH7
RESET
(ICP4) PL0
VCC
GND
XTAL2
XTAL1
PL6
PL7
GND
VCC
(OC0B) PG5
VCC
GND
(RXD2) PH0
(TXD2) PH1
(XCK2) PH2
(OC4A) PH3
(OC4B) PH4
(OC4C) PH5
(RXD0/PCINT8) PE0
(TXD0) PE1
(XCK0/AIN0) PE2
(OC3A/AIN1) PE3
(OC3B/INT4) PE4
(OC3C/INT5) PE5
(T3/INT6) PE6
(CLKO/ICP3/INT7) PE7
(SS/PCINT0) PB0
(SCK/PCINT1) PB1
(MOSI/PCINT2) PB2
(MISO/PCINT3) PB3
(OC2A/PCINT4) PB4
(OC1A/PCINT5) PB5
(OC1B/PCINT6) PB6
(OC0A/OC1C/PCINT7) PB7
PC7 (A15)
PC6 (A14)
PC5 (A13)
PC4 (A12)
PC3 (A11)
PC2 (A10)
PC1 (A9)
PC0 (A8)
PG1 (RD)
PG0 (WR)
(TXD1/INT3) PD3
(ICP1) PD4
(XCK1) PD5
(T1) PD6
(T0) PD7
(SCL/INT0) PD0
(SDA/INT1) PD1
(RXD1/INT2) PD2
(ICP5) PL1
(T5) PL2
(OC5A) PL3
(OC5B) PL4
PJ6 (PCINT15)
PJ5 (PCINT14)
PJ4 (PCINT13)
PJ3 (PCINT12)
PJ2 (XCK3/PCINT11)
PJ1 (TXD3/PCINT10)
PJ0 (RXD3/PCINT9)
PJ7
(OC5C) PL5
INDEX CORNER3
2549P–AVR–10/2012
ATmega640/1280/1281/2560/2561
Figure 1-2. CBGA-pinout ATmega640/1280/2560
Note: The functions for each pin is the same as for the 100 pin packages shown in Figure 1-1 on page 2.
A
B
C
D
E
F
G
H
J
K
1 2 3 4 5 6 7 8 9 10
A
B
C
D
E
F
G
H
J
K
10 9 8 7 6 5 4 3 2 1
Top view Bottom view
Table 1-1. CBGA-pinout ATmega640/1280/2560
1 2 3 4 5 6 7 8 9 10
A GND AREF PF0 PF2 PF5 PK0 PK3 PK6 GND VCC
B AVCC PG5 PF1 PF3 PF6 PK1 PK4 PK7 PA0 PA2
C PE2 PE0 PE1 PF4 PF7 PK2 PK5 PJ7 PA1 PA3
D PE3 PE4 PE5 PE6 PH2 PA4 PA5 PA6 PA7 PG2
E PE7 PH0 PH1 PH3 PH5 PJ6 PJ5 PJ4 PJ3 PJ2
F VCC PH4 PH6 PB0 PL4 PD1 PJ1 PJ0 PC7 GND
G GND PB1 PB2 PB5 PL2 PD0 PD5 PC5 PC6 VCC
H PB3 PB4 RESET PL1 PL3 PL7 PD4 PC4 PC3 PC2
J PH7 PG3 PB6 PL0 XTAL2 PL6 PD3 PC1 PC0 PG1
K PB7 PG4 VCC GND XTAL1 PL5 PD2 PD6 PD7 PG04
2549P–AVR–10/2012
ATmega640/1280/1281/2560/2561
Figure 1-3. Pinout ATmega1281/2561
Note: The large center pad underneath the QFN/MLF package is made of metal and internally connected
to GND. It should be soldered or glued to the board to ensure good mechanical stability. If
the center pad is left unconnected, the package might loosen from the board.
(RXD0/PCINT8/PDI) PE0
(TXD0/PDO) PE1
(XCK0/AIN0) PE2
(OC3A/AIN1) PE3
(OC3B/INT4) PE4
(OC3C/INT5) PE5
(T3/INT6) PE6
(ICP3/CLKO/INT7) PE7
(SS/PCINT0) PB0
(OC0B) PG5
(SCK/PCINT1) PB1
(MOSI/PCINT2) PB2
(MISO/PCINT3) PB3
(OC2A/ PCINT4) PB4
(OC1A/PCINT5) PB5
(OC1B/PCINT6) PB6
(OC0A/OC1C/PCINT7) PB7
(TOSC2) PG3
(TOSC1) PG4
RESET
VCC
GND
XTAL2
XTAL1
(SCL/INT0) PD0
(SDA/INT1) PD1
(RXD1/INT2) PD2
(TXD1/INT3) PD3
(ICP1) PD4
(XCK1) PD5
PA3 (AD3)
PA4 (AD4)
PA5 (AD5)
PA6 (AD6)
PA7 (AD7)
PG2 (ALE)
PC7 (A15)
PC6 (A14)
PC5 (A13)
PC4 (A12)
PC3 (A11)
PC2 (A10)
PC1 (A9)
PC0 (A8)
PG1 (RD)
PG0 (WR)
AVCC
GND
AREF
PF0 (ADC0)
PF1 (ADC1)
PF2 (ADC2)
PF3 (ADC3)
PF4 (ADC4/TCK)
PF5 (ADC5/TMS)
PF6 (ADC6/TDO)
PF7 (ADC7/TDI)
GND
VCC
PA0 (AD0)
PA1 (AD1)
PA2 (AD2)
(T1) PD6
(T0) PD7
INDEX CORNER
1
2
3
4
5
6
7
8
9
10
11
12
13
14
15
16
64
63
62
61
60
59
58
57
56
55
54
53
52
51
50
49
48
47
46
45
44
43
42
41
40
39
38
37
36
35
34
33
17
18
19
20
21
22
23
24
25
26
27
28
29
30
31
325
2549P–AVR–10/2012
ATmega640/1280/1281/2560/2561
2. Overview
The ATmega640/1280/1281/2560/2561 is a low-power CMOS 8-bit microcontroller based on the
AVR enhanced RISC architecture. By executing powerful instructions in a single clock cycle, the
ATmega640/1280/1281/2560/2561 achieves throughputs approaching 1 MIPS per MHz allowing
the system designer to optimize power consumption versus processing speed.
2.1 Block Diagram
Figure 2-1. Block Diagram
CPU
GND
VCC
RESET
Power
Supervision
POR / BOD &
RESET
Watchdog
Oscillator
Watchdog
Timer
Oscillator
Circuits /
Clock
Generation
XTAL1
XTAL2
PC7..0 PORT C (8)
PA7..0 PORT A (8)
PORT D (8)
PD7..0
PORT B (8)
PB7..0
PORT E (8)
PE7..0
PORT F (8)
PF7..0
PORT J (8)
PJ7..0
PG5..0 PORT G (6)
PORT H (8)
PH7..0
PORT K (8)
PK7..0
PORT L (8)
PL7..0
XRAM
TWI SPI
EEPROM
JTAG
8 bit T/C 0 8 bit T/C 2
16 bit T/C 1
16 bit T/C 3
FLASH SRAM
16 bit T/C 4
16 bit T/C 5
USART 2
USART 1
USART 0
Internal
Bandgap reference
Analog
Comparator
A/D
Converter
USART 3
NOTE:
Shaded parts only available
in the 100-pin version.
Complete functionality for
the ADC, T/C4, and T/C5 only
available in the 100-pin version.6
2549P–AVR–10/2012
ATmega640/1280/1281/2560/2561
The Atmel® AVR® core combines a rich instruction set with 32 general purpose working registers.
All the 32 registers are directly connected to the Arithmetic Logic Unit (ALU), allowing two
independent registers to be accessed in one single instruction executed in one clock cycle. The
resulting architecture is more code efficient while achieving throughputs up to ten times faster
than conventional CISC microcontrollers.
The ATmega640/1280/1281/2560/2561 provides the following features: 64K/128K/256K bytes of
In-System Programmable Flash with Read-While-Write capabilities, 4Kbytes EEPROM, 8
Kbytes SRAM, 54/86 general purpose I/O lines, 32 general purpose working registers, Real
Time Counter (RTC), six flexible Timer/Counters with compare modes and PWM, 4 USARTs, a
byte oriented 2-wire Serial Interface, a 16-channel, 10-bit ADC with optional differential input
stage with programmable gain, programmable Watchdog Timer with Internal Oscillator, an SPI
serial port, IEEE® std. 1149.1 compliant JTAG test interface, also used for accessing the Onchip
Debug system and programming and six software selectable power saving modes. The Idle
mode stops the CPU while allowing the SRAM, Timer/Counters, SPI port, and interrupt system
to continue functioning. The Power-down mode saves the register contents but freezes the
Oscillator, disabling all other chip functions until the next interrupt or Hardware Reset. In Powersave
mode, the asynchronous timer continues to run, allowing the user to maintain a timer base
while the rest of the device is sleeping. The ADC Noise Reduction mode stops the CPU and all
I/O modules except Asynchronous Timer and ADC, to minimize switching noise during ADC
conversions. In Standby mode, the Crystal/Resonator Oscillator is running while the rest of the
device is sleeping. This allows very fast start-up combined with low power consumption. In
Extended Standby mode, both the main Oscillator and the Asynchronous Timer continue to run.
Atmel offers the QTouch® library for embedding capacitive touch buttons, sliders and wheelsfunctionality
into AVR microcontrollers. The patented charge-transfer signal acquisition
offersrobust sensing and includes fully debounced reporting of touch keys and includes Adjacent
KeySuppression® (AKS™) technology for unambiguous detection of key events. The easy-to-use
QTouch Suite toolchain allows you to explore, develop and debug your own touch applications.
The device is manufactured using Atmel’s high-density nonvolatile memory technology. The Onchip
ISP Flash allows the program memory to be reprogrammed in-system through an SPI serial
interface, by a conventional nonvolatile memory programmer, or by an On-chip Boot program
running on the AVR core. The boot program can use any interface to download the application
program in the application Flash memory. Software in the Boot Flash section will continue to run
while the Application Flash section is updated, providing true Read-While-Write operation. By
combining an 8-bit RISC CPU with In-System Self-Programmable Flash on a monolithic chip,
the Atmel ATmega640/1280/1281/2560/2561 is a powerful microcontroller that provides a highly
flexible and cost effective solution to many embedded control applications.
The ATmega640/1280/1281/2560/2561 AVR is supported with a full suite of program and system
development tools including: C compilers, macro assemblers, program
debugger/simulators, in-circuit emulators, and evaluation kits.7
2549P–AVR–10/2012
ATmega640/1280/1281/2560/2561
2.2 Comparison Between ATmega1281/2561 and ATmega640/1280/2560
Each device in the ATmega640/1280/1281/2560/2561 family differs only in memory size and
number of pins. Table 2-1 summarizes the different configurations for the six devices.
2.3 Pin Descriptions
2.3.1 VCC
Digital supply voltage.
2.3.2 GND
Ground.
2.3.3 Port A (PA7..PA0)
Port A is an 8-bit bi-directional I/O port with internal pull-up resistors (selected for each bit). The
Port A output buffers have symmetrical drive characteristics with both high sink and source
capability. As inputs, Port A pins that are externally pulled low will source current if the pull-up
resistors are activated. The Port A pins are tri-stated when a reset condition becomes active,
even if the clock is not running.
Port A also serves the functions of various special features of the
ATmega640/1280/1281/2560/2561 as listed on page 78.
2.3.4 Port B (PB7..PB0)
Port B is an 8-bit bi-directional I/O port with internal pull-up resistors (selected for each bit). The
Port B output buffers have symmetrical drive characteristics with both high sink and source
capability. As inputs, Port B pins that are externally pulled low will source current if the pull-up
resistors are activated. The Port B pins are tri-stated when a reset condition becomes active,
even if the clock is not running.
Port B has better driving capabilities than the other ports.
Port B also serves the functions of various special features of the
ATmega640/1280/1281/2560/2561 as listed on page 79.
2.3.5 Port C (PC7..PC0)
Port C is an 8-bit bi-directional I/O port with internal pull-up resistors (selected for each bit). The
Port C output buffers have symmetrical drive characteristics with both high sink and source
capability. As inputs, Port C pins that are externally pulled low will source current if the pull-up
Table 2-1. Configuration Summary
Device Flash EEPROM RAM
General
Purpose I/O pins
16 bits resolution
PWM channels
Serial
USARTs
ADC
Channels
ATmega640 64KB 4KB 8KB 86 12 4 16
ATmega1280 128KB 4KB 8KB 86 12 4 16
ATmega1281 128KB 4KB 8KB 54 6 2 8
ATmega2560 256KB 4KB 8KB 86 12 4 16
ATmega2561 256KB 4KB 8KB 54 6 2 88
2549P–AVR–10/2012
ATmega640/1280/1281/2560/2561
resistors are activated. The Port C pins are tri-stated when a reset condition becomes active,
even if the clock is not running.
Port C also serves the functions of special features of the ATmega640/1280/1281/2560/2561 as
listed on page 82.
2.3.6 Port D (PD7..PD0)
Port D is an 8-bit bi-directional I/O port with internal pull-up resistors (selected for each bit). The
Port D output buffers have symmetrical drive characteristics with both high sink and source
capability. As inputs, Port D pins that are externally pulled low will source current if the pull-up
resistors are activated. The Port D pins are tri-stated when a reset condition becomes active,
even if the clock is not running.
Port D also serves the functions of various special features of the
ATmega640/1280/1281/2560/2561 as listed on page 83.
2.3.7 Port E (PE7..PE0)
Port E is an 8-bit bi-directional I/O port with internal pull-up resistors (selected for each bit). The
Port E output buffers have symmetrical drive characteristics with both high sink and source
capability. As inputs, Port E pins that are externally pulled low will source current if the pull-up
resistors are activated. The Port E pins are tri-stated when a reset condition becomes active,
even if the clock is not running.
Port E also serves the functions of various special features of the
ATmega640/1280/1281/2560/2561 as listed on page 86.
2.3.8 Port F (PF7..PF0)
Port F serves as analog inputs to the A/D Converter.
Port F also serves as an 8-bit bi-directional I/O port, if the A/D Converter is not used. Port pins
can provide internal pull-up resistors (selected for each bit). The Port F output buffers have symmetrical
drive characteristics with both high sink and source capability. As inputs, Port F pins
that are externally pulled low will source current if the pull-up resistors are activated. The Port F
pins are tri-stated when a reset condition becomes active, even if the clock is not running. If the
JTAG interface is enabled, the pull-up resistors on pins PF7(TDI), PF5(TMS), and PF4(TCK) will
be activated even if a reset occurs.
Port F also serves the functions of the JTAG interface.
2.3.9 Port G (PG5..PG0)
Port G is a 6-bit I/O port with internal pull-up resistors (selected for each bit). The Port G output
buffers have symmetrical drive characteristics with both high sink and source capability. As
inputs, Port G pins that are externally pulled low will source current if the pull-up resistors are
activated. The Port G pins are tri-stated when a reset condition becomes active, even if the clock
is not running.
Port G also serves the functions of various special features of the
ATmega640/1280/1281/2560/2561 as listed on page 90.
2.3.10 Port H (PH7..PH0)
Port H is a 8-bit bi-directional I/O port with internal pull-up resistors (selected for each bit). The
Port H output buffers have symmetrical drive characteristics with both high sink and source
capability. As inputs, Port H pins that are externally pulled low will source current if the pull-up9
2549P–AVR–10/2012
ATmega640/1280/1281/2560/2561
resistors are activated. The Port H pins are tri-stated when a reset condition becomes active,
even if the clock is not running.
Port H also serves the functions of various special features of the ATmega640/1280/2560 as
listed on page 92.
2.3.11 Port J (PJ7..PJ0)
Port J is a 8-bit bi-directional I/O port with internal pull-up resistors (selected for each bit). The
Port J output buffers have symmetrical drive characteristics with both high sink and source capability.
As inputs, Port J pins that are externally pulled low will source current if the pull-up
resistors are activated. The Port J pins are tri-stated when a reset condition becomes active,
even if the clock is not running.
Port J also serves the functions of various special features of the ATmega640/1280/2560 as
listed on page 94.
2.3.12 Port K (PK7..PK0)
Port K serves as analog inputs to the A/D Converter.
Port K is a 8-bit bi-directional I/O port with internal pull-up resistors (selected for each bit). The
Port K output buffers have symmetrical drive characteristics with both high sink and source
capability. As inputs, Port K pins that are externally pulled low will source current if the pull-up
resistors are activated. The Port K pins are tri-stated when a reset condition becomes active,
even if the clock is not running.
Port K also serves the functions of various special features of the ATmega640/1280/2560 as
listed on page 96.
2.3.13 Port L (PL7..PL0)
Port L is a 8-bit bi-directional I/O port with internal pull-up resistors (selected for each bit). The
Port L output buffers have symmetrical drive characteristics with both high sink and source
capability. As inputs, Port L pins that are externally pulled low will source current if the pull-up
resistors are activated. The Port L pins are tri-stated when a reset condition becomes active,
even if the clock is not running.
Port L also serves the functions of various special features of the ATmega640/1280/2560 as
listed on page 98.
2.3.14 RESET
Reset input. A low level on this pin for longer than the minimum pulse length will generate a
reset, even if the clock is not running. The minimum pulse length is given in “System and Reset
Characteristics” on page 372. Shorter pulses are not guaranteed to generate a reset.
2.3.15 XTAL1
Input to the inverting Oscillator amplifier and input to the internal clock operating circuit.
2.3.16 XTAL2
Output from the inverting Oscillator amplifier.10
2549P–AVR–10/2012
ATmega640/1280/1281/2560/2561
2.3.17 AVCC
AVCC is the supply voltage pin for Port F and the A/D Converter. It should be externally connected
to VCC, even if the ADC is not used. If the ADC is used, it should be connected to VCC
through a low-pass filter.
2.3.18 AREF
This is the analog reference pin for the A/D Converter.11
2549P–AVR–10/2012
ATmega640/1280/1281/2560/2561
3. Resources
A comprehensive set of development tools and application notes, and datasheets are available
for download on http://www.atmel.com/avr.
4. About Code Examples
This documentation contains simple code examples that briefly show how to use various parts of
the device. Be aware that not all C compiler vendors include bit definitions in the header files
and interrupt handling in C is compiler dependent. Please confirm with the C compiler documentation
for more details.
These code examples assume that the part specific header file is included before compilation.
For I/O registers located in extended I/O map, "IN", "OUT", "SBIS", "SBIC", "CBI", and "SBI"
instructions must be replaced with instructions that allow access to extended I/O. Typically
"LDS" and "STS" combined with "SBRS", "SBRC", "SBR", and "CBR".
5. Data Retention
Reliability Qualification results show that the projected data retention failure rate is much less
than 1 ppm over 20 years at 85°C or 100 years at 25°C.
6. Capacitive touch sensing
The Atmel®QTouch® Library provides a simple to use solution to realize touch sensitive interfaces
on most Atmel AVR® microcontrollers. The QTouch Library includes support for the
QTouch and QMatrix® acquisition methods.
Touch sensing can be added to any application by linking the appropriate Atmel QTouch Library
for the AVR Microcontroller. This is done by using a simple set of APIs to define the touch channels
and sensors, and then calling the touch sensing API’s to retrieve the channel information
and determine the touch sensor states.
The QTouch Library is FREE and downloadable from the Atmel website at the following location:
www.atmel.com/qtouchlibrary. For implementation details and other information, refer to the
Atmel QTouch Library User Guide - also available for download from the Atmel website.12
2549P–AVR–10/2012
ATmega640/1280/1281/2560/2561
7. AVR CPU Core
7.1 Introduction
This section discusses the AVR core architecture in general. The main function of the CPU core
is to ensure correct program execution. The CPU must therefore be able to access memories,
perform calculations, control peripherals, and handle interrupts.
7.2 Architectural Overview
Figure 7-1. Block Diagram of the AVR Architecture
In order to maximize performance and parallelism, the AVR uses a Harvard architecture – with
separate memories and buses for program and data. Instructions in the program memory are
executed with a single level pipelining. While one instruction is being executed, the next instruction
is pre-fetched from the program memory. This concept enables instructions to be executed
in every clock cycle. The program memory is In-System Reprogrammable Flash memory.
Flash
Program
Memory
Instruction
Register
Instruction
Decoder
Program
Counter
Control Lines
32 x 8
General
Purpose
Registers
ALU
Status
and Control
I/O Lines
EEPROM
Data Bus 8-bit
Data
SRAM
Direct Addressing
Indirect Addressing
Interrupt
Unit
SPI
Unit
Watchdog
Timer
Analog
Comparator
I/O Module 2
I/O Module1
I/O Module n13
2549P–AVR–10/2012
ATmega640/1280/1281/2560/2561
The fast-access Register File contains 32 × 8-bit general purpose working registers with a single
clock cycle access time. This allows single-cycle Arithmetic Logic Unit (ALU) operation. In a typical
ALU operation, two operands are output from the Register File, the operation is executed,
and the result is stored back in the Register File – in one clock cycle.
Six of the 32 registers can be used as three 16-bit indirect address register pointers for Data
Space addressing – enabling efficient address calculations. One of the these address pointers
can also be used as an address pointer for look up tables in Flash program memory. These
added function registers are the 16-bit X-, Y-, and Z-register, described later in this section.
The ALU supports arithmetic and logic operations between registers or between a constant and
a register. Single register operations can also be executed in the ALU. After an arithmetic operation,
the Status Register is updated to reflect information about the result of the operation.
Program flow is provided by conditional and unconditional jump and call instructions, able to
directly address the whole address space. Most AVR instructions have a single 16-bit word format.
Every program memory address contains a 16-bit or 32-bit instruction.
Program Flash memory space is divided in two sections, the Boot Program section and the
Application Program section. Both sections have dedicated Lock bits for write and read/write
protection. The SPM instruction that writes into the Application Flash memory section must
reside in the Boot Program section.
During interrupts and subroutine calls, the return address Program Counter (PC) is stored on the
Stack. The Stack is effectively allocated in the general data SRAM, and consequently the Stack
size is only limited by the total SRAM size and the usage of the SRAM. All user programs must
initialize the SP in the Reset routine (before subroutines or interrupts are executed). The Stack
Pointer (SP) is read/write accessible in the I/O space. The data SRAM can easily be accessed
through the five different addressing modes supported in the AVR architecture.
The memory spaces in the AVR architecture are all linear and regular memory maps.
A flexible interrupt module has its control registers in the I/O space with an additional Global
Interrupt Enable bit in the Status Register. All interrupts have a separate Interrupt Vector in the
Interrupt Vector table. The interrupts have priority in accordance with their Interrupt Vector position.
The lower the Interrupt Vector address, the higher the priority.
The I/O memory space contains 64 addresses for CPU peripheral functions as Control Registers,
SPI, and other I/O functions. The I/O Memory can be accessed directly, or as the Data
Space locations following those of the Register File, 0x20 - 0x5F. In addition, the
ATmega640/1280/1281/2560/2561 has Extended I/O space from 0x60 - 0x1FF in SRAM where
only the ST/STS/STD and LD/LDS/LDD instructions can be used.
7.3 ALU – Arithmetic Logic Unit
The high-performance AVR ALU operates in direct connection with all the 32 general purpose
working registers. Within a single clock cycle, arithmetic operations between general purpose
registers or between a register and an immediate are executed. The ALU operations are divided
into three main categories – arithmetic, logical, and bit-functions. Some implementations of the
architecture also provide a powerful multiplier supporting both signed/unsigned multiplication
and fractional format. See the “Instruction Set Summary” on page 416 for a detailed description.14
2549P–AVR–10/2012
ATmega640/1280/1281/2560/2561
7.4 Status Register
The Status Register contains information about the result of the most recently executed arithmetic
instruction. This information can be used for altering program flow in order to perform
conditional operations. Note that the Status Register is updated after all ALU operations, as
specified in the “Instruction Set Summary” on page 416. This will in many cases remove the
need for using the dedicated compare instructions, resulting in faster and more compact code.
The Status Register is not automatically stored when entering an interrupt routine and restored
when returning from an interrupt. This must be handled by software.
7.4.1 SREG – AVR Status Register
The AVR Status Register – SREG – is defined as:
• Bit 7 – I: Global Interrupt Enable
The Global Interrupt Enable bit must be set for the interrupts to be enabled. The individual interrupt
enable control is then performed in separate control registers. If the Global Interrupt Enable
Register is cleared, none of the interrupts are enabled independent of the individual interrupt
enable settings. The I-bit is cleared by hardware after an interrupt has occurred, and is set by
the RETI instruction to enable subsequent interrupts. The I-bit can also be set and cleared by
the application with the SEI and CLI instructions, as described in the “Instruction Set Summary”
on page 416.
• Bit 6 – T: Bit Copy Storage
The Bit Copy instructions BLD (Bit LoaD) and BST (Bit STore) use the T-bit as source or destination
for the operated bit. A bit from a register in the Register File can be copied into T by the
BST instruction, and a bit in T can be copied into a bit in a register in the Register File by the
BLD instruction.
• Bit 5 – H: Half Carry Flag
The Half Carry Flag H indicates a Half Carry in some arithmetic operations. Half Carry Is useful
in BCD arithmetic. See the “Instruction Set Summary” on page 416 for detailed information.
• Bit 4 – S: Sign Bit, S = N ⊕ V
The S-bit is always an exclusive or between the Negative Flag N and the Two’s Complement
Overflow Flag V. See the “Instruction Set Summary” on page 416 for detailed information.
• Bit 3 – V: Two’s Complement Overflow Flag
The Two’s Complement Overflow Flag V supports two’s complement arithmetics. See the
“Instruction Set Summary” on page 416 for detailed information.
• Bit 2 – N: Negative Flag
The Negative Flag N indicates a negative result in an arithmetic or logic operation. See the
“Instruction Set Summary” on page 416 for detailed information.
Bit 7 6 5 4 3 2 1 0
0x3F (0x5F) I T H S V N Z C SREG
Read/Write R/W R/W R/W R/W R/W R/W R/W R/W
Initial Value 0 0 0 0 0 0 0 015
2549P–AVR–10/2012
ATmega640/1280/1281/2560/2561
• Bit 1 – Z: Zero Flag
The Zero Flag Z indicates a zero result in an arithmetic or logic operation. See the “Instruction
Set Summary” on page 416 for detailed information.
• Bit 0 – C: Carry Flag
The Carry Flag C indicates a carry in an arithmetic or logic operation. See the “Instruction Set
Summary” on page 416 for detailed information.
7.5 General Purpose Register File
The Register File is optimized for the AVR Enhanced RISC instruction set. In order to achieve
the required performance and flexibility, the following input/output schemes are supported by the
Register File:
• One 8-bit output operand and one 8-bit result input
• Two 8-bit output operands and one 8-bit result input
• Two 8-bit output operands and one 16-bit result input
• One 16-bit output operand and one 16-bit result input
Figure 7-2 shows the structure of the 32 general purpose working registers in the CPU.
Figure 7-2. AVR CPU General Purpose Working Registers
Most of the instructions operating on the Register File have direct access to all registers, and
most of them are single cycle instructions.
As shown in Figure 7-2, each register is also assigned a data memory address, mapping them
directly into the first 32 locations of the user Data Space. Although not being physically implemented
as SRAM locations, this memory organization provides great flexibility in access of the
registers, as the X-, Y- and Z-pointer registers can be set to index any register in the file.
7.5.1 The X-register, Y-register, and Z-register
The registers R26..R31 have some added functions to their general purpose usage. These registers
are 16-bit address pointers for indirect addressing of the data space. The three indirect
address registers X, Y, and Z are defined as described in Figure 7-3 on page 16.
7 0 Addr.
R0 0x00
R1 0x01
R2 0x02
…
R13 0x0D
General R14 0x0E
Purpose R15 0x0F
Working R16 0x10
Registers R17 0x11
…
R26 0x1A X-register Low Byte
R27 0x1B X-register High Byte
R28 0x1C Y-register Low Byte
R29 0x1D Y-register High Byte
R30 0x1E Z-register Low Byte
R31 0x1F Z-register High Byte16
2549P–AVR–10/2012
ATmega640/1280/1281/2560/2561
Figure 7-3. The X-, Y-, and Z-registers
In the different addressing modes these address registers have functions as fixed displacement,
automatic increment, and automatic decrement (see the “Instruction Set Summary” on page 416
for details).
7.6 Stack Pointer
The Stack is mainly used for storing temporary data, for storing local variables and for storing
return addresses after interrupts and subroutine calls. The Stack Pointer Register always points
to the top of the Stack. Note that the Stack is implemented as growing from higher memory locations
to lower memory locations. This implies that a Stack PUSH command decreases the Stack
Pointer.
The Stack Pointer points to the data SRAM Stack area where the Subroutine and Interrupt
Stacks are located. This Stack space in the data SRAM must be defined by the program before
any subroutine calls are executed or interrupts are enabled. The Stack Pointer must be set to
point above 0x0200. The initial value of the stack pointer is the last address of the internal
SRAM. The Stack Pointer is decremented by one when data is pushed onto the Stack with the
PUSH instruction, and it is decremented by two for ATmega640/1280/1281 and three for
ATmega2560/2561 when the return address is pushed onto the Stack with subroutine call or
interrupt. The Stack Pointer is incremented by one when data is popped from the Stack with the
POP instruction, and it is incremented by two for ATmega640/1280/1281 and three for
ATmega2560/2561 when data is popped from the Stack with return from subroutine RET or
return from interrupt RETI.
The AVR Stack Pointer is implemented as two 8-bit registers in the I/O space. The number of
bits actually used is implementation dependent. Note that the data space in some implementations
of the AVR architecture is so small that only SPL is needed. In this case, the SPH Register
will not be present.
15 XH XL 0
X-register 7 07 0
R27 (0x1B) R26 (0x1A)
15 YH YL 0
Y-register 7 07 0
R29 (0x1D) R28 (0x1C)
15 ZH ZL 0
Z-register 70 7 0
R31 (0x1F) R30 (0x1E)
Bit 15 14 13 12 11 10 9 8
0x3E (0x5E) SP15 SP14 SP13 SP12 SP11 SP10 SP9 SP8 SPH
0x3D (0x5D) SP7 SP6 SP5 SP4 SP3 SP2 SP1 SP0 SPL
76543210
Read/Write R/W R/W R/W R/W R/W R/W R/W R/W
R/W R/W R/W R/W R/W R/W R/W R/W
Initial Value 0 0 1 0 0 0 0 1
1111111117
2549P–AVR–10/2012
ATmega640/1280/1281/2560/2561
7.6.1 RAMPZ – Extended Z-pointer Register for ELPM/SPM
For ELPM/SPM instructions, the Z-pointer is a concatenation of RAMPZ, ZH, and ZL, as shown
in Figure 7-4. Note that LPM is not affected by the RAMPZ setting.
Figure 7-4. The Z-pointer used by ELPM and SPM
The actual number of bits is implementation dependent. Unused bits in an implementation will
always read as zero. For compatibility with future devices, be sure to write these bits to zero.
7.6.2 EIND – Extended Indirect Register
For EICALL/EIJMP instructions, the Indirect-pointer to the subroutine/routine is a concatenation
of EIND, ZH, and ZL, as shown in Figure 7-5. Note that ICALL and IJMP are not affected by the
EIND setting.
Figure 7-5. The Indirect-pointer used by EICALL and EIJMP
The actual number of bits is implementation dependent. Unused bits in an implementation will
always read as zero. For compatibility with future devices, be sure to write these bits to zero.
7.7 Instruction Execution Timing
This section describes the general access timing concepts for instruction execution. The AVR
CPU is driven by the CPU clock clkCPU, directly generated from the selected clock source for the
chip. No internal clock division is used.
Figure 7-6 on page 18 shows the parallel instruction fetches and instruction executions enabled
by the Harvard architecture and the fast-access Register File concept. This is the basic pipelining
concept to obtain up to 1 MIPS per MHz with the corresponding unique results for functions
per cost, functions per clocks, and functions per power-unit.
Bit 7 6 5 4 3 2 1 0
0x3B (0x5B) RAMPZ7 RAMPZ6 RAMPZ5 RAMPZ4 RAMPZ3 RAMPZ2 RAMPZ1 RAMPZ0 RAMPZ
Read/Write R/W R/W R/W R/W R/W R/W R/W R/W
Initial Value 0 0 0 0 0 0 0 0
Bit
(Individually)
7 0 7 07 0
RAMPZ ZH ZL
Bit (Z-pointer) 23 16 15 8 7 0
Bit 7 6 5 4 3 2 1 0
0x3C (0x5C) EIND7 EIND6 EIND5 EIND4 EIND3 EIND2 EIND1 EIND0 EIND
Read/Write R/W R/W R/W R/W R/W R/W R/W R/W
Initial Value 0 0 0 0 0 0 0 0
Bit
(Individually)
7 07 07 0
EIND ZH ZL
Bit (Indirectpointer)
23 16 15 8 7 018
2549P–AVR–10/2012
ATmega640/1280/1281/2560/2561
Figure 7-6. The Parallel Instruction Fetches and Instruction Executions
Figure 7-7 shows the internal timing concept for the Register File. In a single clock cycle an ALU
operation using two register operands is executed, and the result is stored back to the destination
register.
Figure 7-7. Single Cycle ALU Operation
7.8 Reset and Interrupt Handling
The AVR provides several different interrupt sources. These interrupts and the separate Reset
Vector each have a separate program vector in the program memory space. All interrupts are
assigned individual enable bits which must be written logic one together with the Global Interrupt
Enable bit in the Status Register in order to enable the interrupt. Depending on the Program
Counter value, interrupts may be automatically disabled when Boot Lock bits BLB02 or BLB12
are programmed. This feature improves software security. See the section “Memory Programming”
on page 335 for details.
The lowest addresses in the program memory space are by default defined as the Reset and
Interrupt Vectors. The complete list of vectors is shown in “Interrupts” on page 105. The list also
determines the priority levels of the different interrupts. The lower the address the higher is the
priority level. RESET has the highest priority, and next is INT0 – the External Interrupt Request
0. The Interrupt Vectors can be moved to the start of the Boot Flash section by setting the IVSEL
bit in the MCU Control Register (MCUCR). Refer to “Interrupts” on page 105 for more information.
The Reset Vector can also be moved to the start of the Boot Flash section by programming
the BOOTRST Fuse, see “Memory Programming” on page 335.
When an interrupt occurs, the Global Interrupt Enable I-bit is cleared and all interrupts are disabled.
The user software can write logic one to the I-bit to enable nested interrupts. All enabled
interrupts can then interrupt the current interrupt routine. The I-bit is automatically set when a
Return from Interrupt instruction – RETI – is executed.
clk
1st Instruction Fetch
1st Instruction Execute
2nd Instruction Fetch
2nd Instruction Execute
3rd Instruction Fetch
3rd Instruction Execute
4th Instruction Fetch
T1 T2 T3 T4
CPU
Total Execution Time
Register Operands Fetch
ALU Operation Execute
Result Write Back
T1 T2 T3 T4
clkCPU19
2549P–AVR–10/2012
ATmega640/1280/1281/2560/2561
There are basically two types of interrupts. The first type is triggered by an event that sets the
Interrupt Flag. For these interrupts, the Program Counter is vectored to the actual Interrupt Vector
in order to execute the interrupt handling routine, and hardware clears the corresponding
Interrupt Flag. Interrupt Flags can also be cleared by writing a logic one to the flag bit position(s)
to be cleared. If an interrupt condition occurs while the corresponding interrupt enable bit is
cleared, the Interrupt Flag will be set and remembered until the interrupt is enabled, or the flag is
cleared by software. Similarly, if one or more interrupt conditions occur while the Global Interrupt
Enable bit is cleared, the corresponding Interrupt Flag(s) will be set and remembered until the
Global Interrupt Enable bit is set, and will then be executed by order of priority.
The second type of interrupts will trigger as long as the interrupt condition is present. These
interrupts do not necessarily have Interrupt Flags. If the interrupt condition disappears before the
interrupt is enabled, the interrupt will not be triggered.
When the AVR exits from an interrupt, it will always return to the main program and execute one
more instruction before any pending interrupt is served.
Note that the Status Register is not automatically stored when entering an interrupt routine, nor
restored when returning from an interrupt routine. This must be handled by software.
When using the CLI instruction to disable interrupts, the interrupts will be immediately disabled.
No interrupt will be executed after the CLI instruction, even if it occurs simultaneously with the
CLI instruction. The following example shows how this can be used to avoid interrupts during the
timed EEPROM write sequence.
When using the SEI instruction to enable interrupts, the instruction following SEI will be executed
before any pending interrupts, as shown in this example.
Assembly Code Example
in r16, SREG ; store SREG value
cli ; disable interrupts during timed sequence
sbi EECR, EEMPE ; start EEPROM write
sbi EECR, EEPE
out SREG, r16 ; restore SREG value (I-bit)
C Code Example
char cSREG;
cSREG = SREG; /* store SREG value */
/* disable interrupts during timed sequence */
__disable_interrupt();
EECR |= (1< xxx
;
.org 0x1F002
0x1F002 jmp EXT_INT0 ; IRQ0 Handler
0x1F004 jmp EXT_INT1 ; IRQ1 Handler
... ... ... ;
0x1FO70 jmp USART3_TXC ; USART3 TX Complete Handler
0x0040 jmp TIM3_COMPA ; Timer3 CompareA Handler
0x0042 jmp TIM3_COMPB ; Timer3 CompareB Handler
0x0044 jmp TIM3_COMPC ; Timer3 CompareC Handler
0x0046 jmp TIM3_OVF ; Timer3 Overflow Handler
0x0048 jmp USART1_RXC ; USART1 RX Complete Handler
0x004A jmp USART1_UDRE ; USART1,UDR Empty Handler
0x004C jmp USART1_TXC ; USART1 TX Complete Handler
0x004E jmp TWI ; 2-wire Serial Handler
0x0050 jmp SPM_RDY ; SPM Ready Handler
0x0052 jmp TIM4_CAPT ; Timer4 Capture Handler
0x0054 jmp TIM4_COMPA ; Timer4 CompareA Handler
0x0056 jmp TIM4_COMPB ; Timer4 CompareB Handler
0x0058 jmp TIM4_COMPC ; Timer4 CompareC Handler
0x005A jmp TIM4_OVF ; Timer4 Overflow Handler
0x005C jmp TIM5_CAPT ; Timer5 Capture Handler
0x005E jmp TIM5_COMPA ; Timer5 CompareA Handler
0x0060 jmp TIM5_COMPB ; Timer5 CompareB Handler
0x0062 jmp TIM5_COMPC ; Timer5 CompareC Handler
0x0064 jmp TIM5_OVF ; Timer5 Overflow Handler
0x0066 jmp USART2_RXC ; USART2 RX Complete Handler
0x0068 jmp USART2_UDRE ; USART2,UDR Empty Handler
0x006A jmp USART2_TXC ; USART2 TX Complete Handler
0x006C jmp USART3_RXC ; USART3 RX Complete Handler
0x006E jmp USART3_UDRE ; USART3,UDR Empty Handler
0x0070 jmp USART3_TXC ; USART3 TX Complete Handler
;
0x0072 RESET: ldi r16, high(RAMEND) ; Main program start
0x0073 out SPH,r16 ; Set Stack Pointer to top of RAM
0x0074 ldi r16, low(RAMEND)
0x0075 out SPL,r16
0x0076 sei ; Enable interrupts
0x0077 xxx
... ... ... ...109
2549P–AVR–10/2012
ATmega640/1280/1281/2560/2561
When the BOOTRST Fuse is programmed and the Boot section size set to 8Kbytes, the most
typical and general program setup for the Reset and Interrupt Vector Addresses is:
Address Labels Code Comments
.org 0x0002
0x00002 jmp EXT_INT0 ; IRQ0 Handler
0x00004 jmp EXT_INT1 ; IRQ1 Handler
... ... ... ;
0x00070 jmp USART3_TXC ; USART3 TX Complete Handler
;
.org 0x1F000
0x1F000 RESET: ldi r16,high(RAMEND); Main program start
0x1F001 out SPH,r16 ; Set Stack Pointer to top of RAM
0x1F002 ldi r16,low(RAMEND)
0x1F003 out SPL,r16
0x1F004 sei ; Enable interrupts
0x1F005 xxx
When the BOOTRST Fuse is programmed, the Boot section size set to 8Kbytes and the IVSEL
bit in the MCUCR Register is set before any interrupts are enabled, the most typical and general
program setup for the Reset and Interrupt Vector Addresses is:
Address Labels Code Comments
;
.org 0x1F000
0x1F000 jmp RESET ; Reset handler
0x1F002 jmp EXT_INT0 ; IRQ0 Handler
0x1F004 jmp EXT_INT1 ; IRQ1 Handler
... ... ... ;
0x1F070 jmp USART3_TXC ; USART3 TX Complete Handler
;
0x1F072 RESET: ldi r16,high(RAMEND) ; Main program start
0x1F073 out SPH,r16 ; Set Stack Pointer to top of RAM
0x1F074 ldi r16,low(RAMEND)
0x1F075 out SPL,r16
0x1F076 sei ; Enable interrupts
0x1FO77 xxx
14.3 Moving Interrupts Between Application and Boot Section
The MCU Control Register controls the placement of the Interrupt Vector table, see Code Example
below. For more details, see “Reset and Interrupt Handling” on page 18.110
2549P–AVR–10/2012
ATmega640/1280/1281/2560/2561
14.4 Register Description
14.4.1 MCUCR – MCU Control Register
• Bit 1 – IVSEL: Interrupt Vector Select
When the IVSEL bit is cleared (zero), the Interrupt Vectors are placed at the start of the Flash
memory. When this bit is set (one), the Interrupt Vectors are moved to the beginning of the Boot
Loader section of the Flash. The actual address of the start of the Boot Flash Section is determined
by the BOOTSZ Fuses. Refer to the section “Memory Programming” on page 335 for
details. To avoid unintentional changes of Interrupt Vector tables, a special write procedure must
be followed to change the IVSEL bit (see “Moving Interrupts Between Application and Boot Section”
on page 109):
1. Write the Interrupt Vector Change Enable (IVCE) bit to one.
2. Within four cycles, write the desired value to IVSEL while writing a zero to IVCE.
Assembly Code Example
Move_interrupts:
; Get MCUCR
in r16, MCUCR
mov r17, r16
; Enable change of Interrupt Vectors
ori r16, (1< CSn2:0 > 1). The number of system clock cycles from
when the timer is enabled to the first count occurs can be from 1 to N+1 system clock cycles,
where N equals the prescaler divisor (8, 64, 256, or 1024).
It is possible to use the prescaler reset for synchronizing the Timer/Counter to program execution.
However, care must be taken if the other Timer/Counter that shares the same prescaler
also uses prescaling. A prescaler reset will affect the prescaler period for all Timer/Counters it is
connected to.
18.3 External Clock Source
An external clock source applied to the Tn pin can be used as Timer/Counter clock (clkTn). The
Tn pin is sampled once every system clock cycle by the pin synchronization logic. The synchronized
(sampled) signal is then passed through the edge detector. Figure 18-1 shows a functional
equivalent block diagram of the Tn synchronization and edge detector logic. The registers are
clocked at the positive edge of the internal system clock (clkI/O). The latch is transparent in the
high period of the internal system clock.
The edge detector generates one clkTn pulse for each positive (CSn2:0 = 7) or negative (CSn2:0
= 6) edge it detects.
Figure 18-1. Tn/T0 Pin Sampling
Tn_sync
(To Clock
Select Logic)
Synchronization Edge Detector
D Q D Q
LE
Tn D Q
clkI/O170
2549P–AVR–10/2012
ATmega640/1280/1281/2560/2561
The synchronization and edge detector logic introduces a delay of 2.5 to 3.5 system clock cycles
from an edge has been applied to the Tn pin to the counter is updated.
Enabling and disabling of the clock input must be done when Tn has been stable for at least one
system clock cycle, otherwise it is a risk that a false Timer/Counter clock pulse is generated.
Each half period of the external clock applied must be longer than one system clock cycle to
ensure correct sampling. The external clock must be guaranteed to have less than half the system
clock frequency (fExtClk < fclk_I/O/2) given a 50/50% duty cycle. Since the edge detector uses
sampling, the maximum frequency of an external clock it can detect is half the sampling frequency
(Nyquist sampling theorem). However, due to variation of the system clock frequency
and duty cycle caused by Oscillator source (crystal, resonator, and capacitors) tolerances, it is
recommended that maximum frequency of an external clock source is less than fclk_I/O/2.5.
An external clock source can not be prescaled.
Figure 18-2. Prescaler for synchronous Timer/Counters
18.4 Register Description
18.4.1 GTCCR – General Timer/Counter Control Register
• Bit 7 – TSM: Timer/Counter Synchronization Mode
Writing the TSM bit to one activates the Timer/Counter Synchronization mode. In this mode, the
value that is written to the PSRASY and PSRSYNC bits is kept, hence keeping the corresponding
prescaler reset signals asserted. This ensures that the corresponding Timer/Counters are
halted and can be configured to the same value without the risk of one of them advancing during
configuration. When the TSM bit is written to zero, the PSRASY and PSRSYNC bits are cleared
by hardware, and the Timer/Counters start counting simultaneously.
PSR10
Clear
Tn
Tn
clkI/O
Synchronization
Synchronization
TIMER/COUNTERn CLOCK SOURCE
clkTn
TIMER/COUNTERn CLOCK SOURCE
clkTn
CSn0
CSn1
CSn2
CSn0
CSn1
CSn2
Bit 7 6 5 4 3 2 1 0
0x23 (0x43) TSM – – – – – PSRASY PSRSYNC GTCCR
Read/Write R/W R R R R R R/W R/W
Initial Value 0 0 0 0 0 0 0 0171
2549P–AVR–10/2012
ATmega640/1280/1281/2560/2561
• Bit 0 – PSRSYNC: Prescaler Reset for Synchronous Timer/Counters
When this bit is one, Timer/Counter0, Timer/Counter1, Timer/Counter3, Timer/Counter4 and
Timer/Counter5 prescaler will be Reset. This bit is normally cleared immediately by hardware,
except if the TSM bit is set. Note that Timer/Counter0, Timer/Counter1, Timer/Counter3,
Timer/Counter4 and Timer/Counter5 share the same prescaler and a reset of this prescaler will
affect all timers.172
2549P–AVR–10/2012
ATmega640/1280/1281/2560/2561
19. Output Compare Modulator (OCM1C0A)
19.1 Overview
The Output Compare Modulator (OCM) allows generation of waveforms modulated with a carrier
frequency. The modulator uses the outputs from the Output Compare Unit C of the 16-bit
Timer/Counter1 and the Output Compare Unit of the 8-bit Timer/Counter0. For more details
about these Timer/Counters see “Timer/Counter 0, 1, 3, 4, and 5 Prescaler” on page 169 and “8-
bit Timer/Counter2 with PWM and Asynchronous Operation” on page 174.
Figure 19-1. Output Compare Modulator, Block Diagram
When the modulator is enabled, the two output compare channels are modulated together as
shown in the block diagram (see Figure 19-1).
19.2 Description
The Output Compare unit 1C and Output Compare unit 2 shares the PB7 port pin for output. The
outputs of the Output Compare units (OC1C and OC0A) overrides the normal PORTB7 Register
when one of them is enabled (that is, when COMnx1:0 is not equal to zero). When both OC1C
and OC0A are enabled at the same time, the modulator is automatically enabled.
The functional equivalent schematic of the modulator is shown on Figure 19-2. The schematic
includes part of the Timer/Counter units and the port B pin 7 output driver circuit.
Figure 19-2. Output Compare Modulator, Schematic
OC1C
Pin
OC1C /
OC0A / PB7
Timer/Counter 1
Timer/Counter 0 OC0A
PORTB7 DDRB7
D Q D Q
Pin
COMA01
COMA00
DATABUS
OC1C /
OC0A/ PB7
COM1C1
COM1C0
Modulator
1
0
OC1C
D Q
OC0A
D Q
( From Waveform Generator )
( From Waveform Generator )
0
1
Vcc173
2549P–AVR–10/2012
ATmega640/1280/1281/2560/2561
When the modulator is enabled the type of modulation (logical AND or OR) can be selected by
the PORTB7 Register. Note that the DDRB7 controls the direction of the port independent of the
COMnx1:0 bit setting.
19.2.1 Timing example
Figure 19-3 illustrates the modulator in action. In this example the Timer/Counter1 is set to operate
in fast PWM mode (non-inverted) and Timer/Counter0 uses CTC waveform mode with toggle
Compare Output mode (COMnx1:0 = 1).
Figure 19-3. Output Compare Modulator, Timing Diagram
In this example, Timer/Counter2 provides the carrier, while the modulating signal is generated
by the Output Compare unit C of the Timer/Counter1.
The resolution of the PWM signal (OC1C) is reduced by the modulation. The reduction factor is
equal to the number of system clock cycles of one period of the carrier (OC0A). In this example
the resolution is reduced by a factor of two. The reason for the reduction is illustrated in Figure
19-3 at the second and third period of the PB7 output when PORTB7 equals zero. The period 2
high time is one cycle longer than the period 3 high time, but the result on the PB7 output is
equal in both periods.
1 2
OC0A
(CTC Mode)
OC1C
(FPWM Mode)
PB7
(PORTB7 = 0)
PB7
(PORTB7 = 1)
(Period) 3
clk I/O174
2549P–AVR–10/2012
ATmega640/1280/1281/2560/2561
20. 8-bit Timer/Counter2 with PWM and Asynchronous Operation
Timer/Counter2 is a general purpose, single channel, 8-bit Timer/Counter module. The main
features are:
• Single Channel Counter
• Clear Timer on Compare Match (Auto Reload)
• Glitch-free, Phase Correct Pulse Width Modulator (PWM)
• Frequency Generator
• 10-bit Clock Prescaler
• Overflow and Compare Match Interrupt Sources (TOV2, OCF2A and OCF2B)
• Allows Clocking from External 32kHz Watch Crystal Independent of the I/O Clock
20.1 Overview
A simplified block diagram of the 8-bit Timer/Counter is shown in Figure 17-12. For the actual
placement of I/O pins, see “Pin Configurations” on page 2. CPU accessible I/O Registers, including
I/O bits and I/O pins, are shown in bold. The device-specific I/O Register and bit locations
are listed in the “Register Description” on page 187.
The Power Reduction Timer/Counter2 bit, PRTIM2, in “PRR0 – Power Reduction Register 0” on
page 56 must be written to zero to enable Timer/Counter2 module.
Figure 20-1. 8-bit Timer/Counter Block Diagram
Timer/Counter
DATA BUS
OCRnA
OCRnB
=
=
TCNTn
Waveform
Generation
Waveform
Generation
OCnA
OCnB
=
Fixed
TOP
Value
Control Logic
= 0
TOP BOTTOM
Count
Clear
Direction
TOVn
(Int.Req.)
OCnA
(Int.Req.)
OCnB
(Int.Req.)
TCCRnA TCCRnB
clkTn
ASSRn
Synchronization Unit
Prescaler
T/C Oscillator
clkI/O
clkASY
asynchronous mode
select (ASn)
Synchronized Status flags
TOSC1
TOSC2
Status flags
clkI/O175
2549P–AVR–10/2012
ATmega640/1280/1281/2560/2561
20.1.1 Registers
The Timer/Counter (TCNT2) and Output Compare Register (OCR2A and OCR2B) are 8-bit registers.
Interrupt request (abbreviated to Int.Req.) signals are all visible in the Timer Interrupt Flag
Register (TIFR2). All interrupts are individually masked with the Timer Interrupt Mask Register
(TIMSK2). TIFR2 and TIMSK2 are not shown in the figure.
The Timer/Counter can be clocked internally, via the prescaler, or asynchronously clocked from
the TOSC1/2 pins, as detailed later in this section. The asynchronous operation is controlled by
the Asynchronous Status Register (ASSR). The Clock Select logic block controls which clock
source the Timer/Counter uses to increment (or decrement) its value. The Timer/Counter is inactive
when no clock source is selected. The output from the Clock Select logic is referred to as the
timer clock (clkT2).
The double buffered Output Compare Register (OCR2A and OCR2B) are compared with the
Timer/Counter value at all times. The result of the compare can be used by the Waveform Generator
to generate a PWM or variable frequency output on the Output Compare pins (OC2A and
OC2B). See “Output Compare Unit” on page 180 for details. The compare match event will also
set the Compare Flag (OCF2A or OCF2B) which can be used to generate an Output Compare
interrupt request.
20.1.2 Definitions
Many register and bit references in this document are written in general form. A lower case “n”
replaces the Timer/Counter number, in this case 2. However, when using the register or bit
defines in a program, the precise form must be used, that is, TCNT2 for accessing
Timer/Counter2 counter value and so on.
The definitions in Table 20-1 are also used extensively throughout the section.
20.2 Timer/Counter Clock Sources
The Timer/Counter can be clocked by an internal synchronous or an external asynchronous
clock source. The clock source clkT2 is by default equal to the MCU clock, clkI/O. When the AS2
bit in the ASSR Register is written to logic one, the clock source is taken from the Timer/Counter
Oscillator connected to TOSC1 and TOSC2. For details on asynchronous operation, see “Asynchronous
Operation of Timer/Counter2” on page 184. For details on clock sources and
prescaler, see “Timer/Counter Prescaler” on page 186.
20.3 Counter Unit
The main part of the 8-bit Timer/Counter is the programmable bi-directional counter unit. Figure
20-2 on page 176 shows a block diagram of the counter and its surrounding environment.
Table 20-1. Definitions
BOTTOM The counter reaches the BOTTOM when it becomes zero (0x00)
MAX The counter reaches its MAXimum when it becomes 0xFF (decimal 255)
TOP The counter reaches the TOP when it becomes equal to the highest value in the count
sequence. The TOP value can be assigned to be the fixed value 0xFF (MAX) or the
value stored in the OCR2A Register. The assignment is dependent on the mode of
operation176
2549P–AVR–10/2012
ATmega640/1280/1281/2560/2561
Figure 20-2. Counter Unit Block Diagram
Signal description (internal signals):
count Increment or decrement TCNT2 by 1.
direction Selects between increment and decrement.
clear Clear TCNT2 (set all bits to zero).
clkTn Timer/Counter clock, referred to as clkT2 in the following.
top Signalizes that TCNT2 has reached maximum value.
bottom Signalizes that TCNT2 has reached minimum value (zero).
Depending on the mode of operation used, the counter is cleared, incremented, or decremented
at each timer clock (clkT2). clkT2 can be generated from an external or internal clock source,
selected by the Clock Select bits (CS22:0). When no clock source is selected (CS22:0 = 0) the
timer is stopped. However, the TCNT2 value can be accessed by the CPU, regardless of
whether clkT2 is present or not. A CPU write overrides (has priority over) all counter clear or
count operations.
The counting sequence is determined by the setting of the WGM21 and WGM20 bits located in
the Timer/Counter Control Register (TCCR2A) and the WGM22 located in the Timer/Counter
Control Register B (TCCR2B). There are close connections between how the counter behaves
(counts) and how waveforms are generated on the Output Compare outputs OC2A and OC2B.
For more details about advanced counting sequences and waveform generation, see “Modes of
Operation” on page 176.
The Timer/Counter Overflow Flag (TOV2) is set according to the mode of operation selected by
the WGM22:0 bits. TOV2 can be used for generating a CPU interrupt.
20.4 Modes of Operation
The mode of operation, that is, the behavior of the Timer/Counter and the Output Compare pins,
is defined by the combination of the Waveform Generation mode (WGM22:0) and Compare Output
mode (COM2x1:0) bits. The Compare Output mode bits do not affect the counting sequence,
while the Waveform Generation mode bits do. The COM2x1:0 bits control whether the PWM output
generated should be inverted or not (inverted or non-inverted PWM). For non-PWM modes
the COM2x1:0 bits control whether the output should be set, cleared, or toggled at a compare
match. See “Compare Match Output Unit” on page 182.
For detailed timing information refer to “Timer/Counter Timing Diagrams” on page 183.
DATA BUS
TCNTn Control Logic
count
TOVn
(Int.Req.)
bottom top
direction
clear
TOSC1
T/C
Oscillator
TOSC2
Prescaler
clkI/O
clk Tn177
2549P–AVR–10/2012
ATmega640/1280/1281/2560/2561
20.4.1 Normal Mode
The simplest mode of operation is the Normal mode (WGM22:0 = 0). In this mode the counting
direction is always up (incrementing), and no counter clear is performed. The counter simply
overruns when it passes its maximum 8-bit value (TOP = 0xFF) and then restarts from the bottom
(0x00). In normal operation the Timer/Counter Overflow Flag (TOV2) will be set in the same
timer clock cycle as the TCNT2 becomes zero. The TOV2 Flag in this case behaves like a ninth
bit, except that it is only set, not cleared. However, combined with the timer overflow interrupt
that automatically clears the TOV2 Flag, the timer resolution can be increased by software.
There are no special cases to consider in the Normal mode, a new counter value can be written
anytime.
The Output Compare unit can be used to generate interrupts at some given time. Using the Output
Compare to generate waveforms in Normal mode is not recommended, since this will
occupy too much of the CPU time.
20.4.2 Clear Timer on Compare Match (CTC) Mode
In Clear Timer on Compare or CTC mode (WGM22:0 = 2), the OCR2A Register is used to
manipulate the counter resolution. In CTC mode the counter is cleared to zero when the counter
value (TCNT2) matches the OCR2A. The OCR2A defines the top value for the counter, hence
also its resolution. This mode allows greater control of the compare match output frequency. It
also simplifies the operation of counting external events.
The timing diagram for the CTC mode is shown in Figure 20-3. The counter value (TCNT2)
increases until a compare match occurs between TCNT2 and OCR2A, and then counter
(TCNT2) is cleared.
Figure 20-3. CTC Mode, Timing Diagram
An interrupt can be generated each time the counter value reaches the TOP value by using the
OCF2A Flag. If the interrupt is enabled, the interrupt handler routine can be used for updating
the TOP value. However, changing TOP to a value close to BOTTOM when the counter is running
with none or a low prescaler value must be done with care since the CTC mode does not
have the double buffering feature. If the new value written to OCR2A is lower than the current
value of TCNT2, the counter will miss the compare match. The counter will then have to count to
its maximum value (0xFF) and wrap around starting at 0x00 before the compare match can
occur.
For generating a waveform output in CTC mode, the OC2A output can be set to toggle its logical
level on each compare match by setting the Compare Output mode bits to toggle mode
(COM2A1:0 = 1). The OC2A value will not be visible on the port pin unless the data direction for
TCNTn
OCnx
(Toggle)
OCnx Interrupt Flag Set
Period 1 2 3 4
(COMnx1:0 = 1)178
2549P–AVR–10/2012
ATmega640/1280/1281/2560/2561
the pin is set to output. The waveform generated will have a maximum frequency of fOC2A =
fclk_I/O/2 when OCR2A is set to zero (0x00). The waveform frequency is defined by the following
equation:
The N variable represents the prescale factor (1, 8, 32, 64, 128, 256, or 1024).
As for the Normal mode of operation, the TOV2 Flag is set in the same timer clock cycle that the
counter counts from MAX to 0x00.
20.4.3 Fast PWM Mode
Figure 20-4. Fast PWM Mode, Timing Diagram
The Timer/Counter Overflow Flag (TOV2) is set each time the counter reaches TOP. If the interrupt
is enabled, the interrupt handler routine can be used for updating the compare value.
In fast PWM mode, the compare unit allows generation of PWM waveforms on the OC2x pin.
Setting the COM2x1:0 bits to two will produce a non-inverted PWM and an inverted PWM output
can be generated by setting the COM2x1:0 to three. TOP is defined as 0xFF when WGM2:0 = 3,
and OCR2A when WGM2:0 = 7 (see Table 20-3 on page 187). The actual OC2x value will only
be visible on the port pin if the data direction for the port pin is set as output. The PWM waveform
is generated by setting (or clearing) the OC2x Register at the compare match between
OCR2x and TCNT2, and clearing (or setting) the OC2x Register at the timer clock cycle the
counter is cleared (changes from TOP to BOTTOM).
The PWM frequency for the output can be calculated by the following equation:
The N variable represents the prescale factor (1, 8, 32, 64, 128, 256, or 1024).
The extreme values for the OCR2A Register represent special cases when generating a PWM
waveform output in the fast PWM mode. If the OCR2A is set equal to BOTTOM, the output will
be a narrow spike for each MAX+1 timer clock cycle. Setting the OCR2A equal to MAX will result
f
OCnx
f
clk_I/O
2 ⋅ ⋅ N ( ) 1 + OCRnx = -------------------------------------------------
TCNTn
OCRnx Update and
TOVn Interrupt Flag Set
Period 1 2 3
OCnx
OCnx
(COMnx1:0 = 2)
(COMnx1:0 = 3)
OCRnx Interrupt Flag Set
4 5 6 7
f
OCnxPWM
f
clk_I/O
N ⋅ 256 = ------------------179
2549P–AVR–10/2012
ATmega640/1280/1281/2560/2561
in a constantly high or low output (depending on the polarity of the output set by the COM2A1:0
bits).
A frequency (with 50% duty cycle) waveform output in fast PWM mode can be achieved by setting
OC2x to toggle its logical level on each compare match (COM2x1:0 = 1). The waveform
generated will have a maximum frequency of foc2 = fclk_I/O/2 when OCR2A is set to zero. This feature
is similar to the OC2A toggle in CTC mode, except the double buffer feature of the Output
Compare unit is enabled in the fast PWM mode.
20.4.4 Phase Correct PWM Mode
The phase correct PWM mode (WGM22:0 = 1 or 5) provides a high resolution phase correct
PWM waveform generation option. The phase correct PWM mode is based on a dual-slope
operation. The counter counts repeatedly from BOTTOM to TOP and then from TOP to BOTTOM.
TOP is defined as 0xFF when WGM22:0 = 1, and OCR2A when MGM22:0 = 5. In noninverting
Compare Output mode, the Output Compare (OC2x) is cleared on the compare match
between TCNT2 and OCR2x while upcounting, and set on the compare match while downcounting.
In inverting Output Compare mode, the operation is inverted. The dual-slope operation has
lower maximum operation frequency than single slope operation. However, due to the symmetric
feature of the dual-slope PWM modes, these modes are preferred for motor control
applications.
In phase correct PWM mode the counter is incremented until the counter value matches TOP.
When the counter reaches TOP, it changes the count direction. The TCNT2 value will be equal
to TOP for one timer clock cycle. The timing diagram for the phase correct PWM mode is shown
on Figure 20-5. The TCNT2 value is in the timing diagram shown as a histogram for illustrating
the dual-slope operation. The diagram includes non-inverted and inverted PWM outputs. The
small horizontal line marks on the TCNT2 slopes represent compare matches between OCR2x
and TCNT2.
Figure 20-5. Phase Correct PWM Mode, Timing Diagram
TOVn Interrupt Flag Set
OCnx Interrupt Flag Set
1 2 3
TCNTn
Period
OCnx
OCnx
(COMnx1:0 = 2)
(COMnx1:0 = 3)
OCRnx Update180
2549P–AVR–10/2012
ATmega640/1280/1281/2560/2561
The Timer/Counter Overflow Flag (TOV2) is set each time the counter reaches BOTTOM. The
Interrupt Flag can be used to generate an interrupt each time the counter reaches the BOTTOM
value.
In phase correct PWM mode, the compare unit allows generation of PWM waveforms on the
OC2x pin. Setting the COM2x1:0 bits to two will produce a non-inverted PWM. An inverted PWM
output can be generated by setting the COM2x1:0 to three. TOP is defined as 0xFF when
WGM2:0 = 3, and OCR2A when MGM2:0 = 7 (see Table 20-4 on page 188). The actual OC2x
value will only be visible on the port pin if the data direction for the port pin is set as output. The
PWM waveform is generated by clearing (or setting) the OC2x Register at the compare match
between OCR2x and TCNT2 when the counter increments, and setting (or clearing) the OC2x
Register at compare match between OCR2x and TCNT2 when the counter decrements. The
PWM frequency for the output when using phase correct PWM can be calculated by the following
equation:
The N variable represents the prescale factor (1, 8, 32, 64, 128, 256, or 1024).
The extreme values for the OCR2A Register represent special cases when generating a PWM
waveform output in the phase correct PWM mode. If the OCR2A is set equal to BOTTOM, the
output will be continuously low and if set equal to MAX the output will be continuously high for
non-inverted PWM mode. For inverted PWM the output will have the opposite logic values.
At the very start of period 2 in Figure 20-5 on page 179 OCnx has a transition from high to low
even though there is no Compare Match. The point of this transition is to guarantee symmetry
around BOTTOM. There are two cases that give a transition without Compare Match.
• OCR2A changes its value from MAX, like in Figure 20-5 on page 179. When the OCR2A
value is MAX the OCn pin value is the same as the result of a down-counting compare
match. To ensure symmetry around BOTTOM the OCn value at MAX must correspond to the
result of an up-counting Compare Match.
• The timer starts counting from a value higher than the one in OCR2A, and for that reason
misses the Compare Match and hence the OCn change that would have happened on the
way up.
20.5 Output Compare Unit
The 8-bit comparator continuously compares TCNT2 with the Output Compare Register
(OCR2A and OCR2B). Whenever TCNT2 equals OCR2A or OCR2B, the comparator signals a
match. A match will set the Output Compare Flag (OCF2A or OCF2B) at the next timer clock
cycle. If the corresponding interrupt is enabled, the Output Compare Flag generates an Output
Compare interrupt. The Output Compare Flag is automatically cleared when the interrupt is executed.
Alternatively, the Output Compare Flag can be cleared by software by writing a logical
one to its I/O bit location. The Waveform Generator uses the match signal to generate an output
according to operating mode set by the WGM22:0 bits and Compare Output mode (COM2x1:0)
bits. The max and bottom signals are used by the Waveform Generator for handling the special
cases of the extreme values in some modes of operation (see “Modes of Operation” on page
176).
Figure 20-6 on page 181 shows a block diagram of the Output Compare unit.
f
OCnxPCPWM
f
clk_I/O
N ⋅ 510 = ------------------181
2549P–AVR–10/2012
ATmega640/1280/1281/2560/2561
Figure 20-6. Output Compare Unit, Block Diagram
The OCR2x Register is double buffered when using any of the Pulse Width Modulation (PWM)
modes. For the Normal and Clear Timer on Compare (CTC) modes of operation, the double
buffering is disabled. The double buffering synchronizes the update of the OCR2x Compare
Register to either top or bottom of the counting sequence. The synchronization prevents the
occurrence of odd-length, non-symmetrical PWM pulses, thereby making the output glitch-free.
The OCR2x Register access may seem complex, but this is not case. When the double buffering
is enabled, the CPU has access to the OCR2x Buffer Register, and if double buffering is disabled
the CPU will access the OCR2x directly.
20.5.1 Force Output Compare
In non-PWM waveform generation modes, the match output of the comparator can be forced by
writing a one to the Force Output Compare (FOC2x) bit. Forcing compare match will not set the
OCF2x Flag or reload/clear the timer, but the OC2x pin will be updated as if a real compare
match had occurred (the COM2x1:0 bits settings define whether the OC2x pin is set, cleared or
toggled).
20.5.2 Compare Match Blocking by TCNT2 Write
All CPU write operations to the TCNT2 Register will block any compare match that occurs in the
next timer clock cycle, even when the timer is stopped. This feature allows OCR2x to be initialized
to the same value as TCNT2 without triggering an interrupt when the Timer/Counter clock is
enabled.
20.5.3 Using the Output Compare Unit
Since writing TCNT2 in any mode of operation will block all compare matches for one timer clock
cycle, there are risks involved when changing TCNT2 when using the Output Compare channel,
independently of whether the Timer/Counter is running or not. If the value written to TCNT2
equals the OCR2x value, the compare match will be missed, resulting in incorrect waveform
generation. Similarly, do not write the TCNT2 value equal to BOTTOM when the counter is
downcounting.
OCFnx (Int.Req.)
= (8-bit Comparator )
OCRnx
OCnx
DATA BUS
TCNTn
WGMn1:0
Waveform Generator
top
FOCn
COMnX1:0
bottom182
2549P–AVR–10/2012
ATmega640/1280/1281/2560/2561
The setup of the OC2x should be performed before setting the Data Direction Register for the
port pin to output. The easiest way of setting the OC2x value is to use the Force Output Compare
(FOC2x) strobe bit in Normal mode. The OC2x Register keeps its value even when
changing between Waveform Generation modes.
Be aware that the COM2x1:0 bits are not double buffered together with the compare value.
Changing the COM2x1:0 bits will take effect immediately.
20.6 Compare Match Output Unit
The Compare Output mode (COM2x1:0) bits have two functions. The Waveform Generator uses
the COM2x1:0 bits for defining the Output Compare (OC2x) state at the next compare match.
Also, the COM2x1:0 bits control the OC2x pin output source. Figure 20-7 shows a simplified
schematic of the logic affected by the COM2x1:0 bit setting. The I/O Registers, I/O bits, and I/O
pins in the figure are shown in bold. Only the parts of the general I/O Port Control Registers
(DDR and PORT) that are affected by the COM2x1:0 bits are shown. When referring to the
OC2x state, the reference is for the internal OC2x Register, not the OC2x pin.
Figure 20-7. Compare Match Output Unit, Schematic
The general I/O port function is overridden by the Output Compare (OC2x) from the Waveform
Generator if either of the COM2x1:0 bits are set. However, the OC2x pin direction (input or output)
is still controlled by the Data Direction Register (DDR) for the port pin. The Data Direction
Register bit for the OC2x pin (DDR_OC2x) must be set as output before the OC2x value is visible
on the pin. The port override function is independent of the Waveform Generation mode.
The design of the Output Compare pin logic allows initialization of the OC2x state before the output
is enabled. Note that some COM2x1:0 bit settings are reserved for certain modes of
operation. See “Register Description” on page 187.
PORT
DDR
D Q
D Q
OCnx
OCnx Pin
D Q Waveform
Generator
COMnx1
COMnx0
0
1
DATA BU
S
FOCnx
clkI/O183
2549P–AVR–10/2012
ATmega640/1280/1281/2560/2561
20.6.1 Compare Output Mode and Waveform Generation
The Waveform Generator uses the COM2x1:0 bits differently in normal, CTC, and PWM modes.
For all modes, setting the COM2x1:0 = 0 tells the Waveform Generator that no action on the
OC2x Register is to be performed on the next compare match. For compare output actions in the
non-PWM modes refer to Table 20-5 on page 188. For fast PWM mode, refer to Table 20-6 on
page 188, and for phase correct PWM refer to Table 20-7 on page 189.
A change of the COM2x1:0 bits state will have effect at the first compare match after the bits are
written. For non-PWM modes, the action can be forced to have immediate effect by using the
FOC2x strobe bits.
20.7 Timer/Counter Timing Diagrams
The following figures show the Timer/Counter in synchronous mode, and the timer clock (clkT2)
is therefore shown as a clock enable signal. In asynchronous mode, clkI/O should be replaced by
the Timer/Counter Oscillator clock. The figures include information on when Interrupt Flags are
set. Figure 20-8 contains timing data for basic Timer/Counter operation. The figure shows the
count sequence close to the MAX value in all modes other than phase correct PWM mode.
Figure 20-8. Timer/Counter Timing Diagram, no Prescaling
Figure 20-9 shows the same timing data, but with the prescaler enabled.
Figure 20-9. Timer/Counter Timing Diagram, with Prescaler (fclk_I/O/8)
clkTn
(clkI/O/1)
TOVn
clkI/O
TCNTn MAX - 1 MAX BOTTOM BOTTOM + 1
TOVn
TCNTn MAX - 1 MAX BOTTOM BOTTOM + 1
clkI/O
clkTn
(clkI/O/8)184
2549P–AVR–10/2012
ATmega640/1280/1281/2560/2561
Figure 20-10 shows the setting of OCF2A in all modes except CTC mode.
Figure 20-10. Timer/Counter Timing Diagram, Setting of OCF2A, with Prescaler (fclk_I/O/8)
Figure 20-11 shows the setting of OCF2A and the clearing of TCNT2 in CTC mode.
Figure 20-11. Timer/Counter Timing Diagram, Clear Timer on Compare Match mode, with Prescaler
(fclk_I/O/8)
20.8 Asynchronous Operation of Timer/Counter2
When Timer/Counter2 operates asynchronously, some considerations must be taken.
• Warning: When switching between asynchronous and synchronous clocking of
Timer/Counter2, the Timer Registers TCNT2, OCR2x, and TCCR2x might be corrupted. A
safe procedure for switching clock source is:
1. Disable the Timer/Counter2 interrupts by clearing OCIE2x and TOIE2.
2. Select clock source by setting AS2 as appropriate.
3. Write new values to TCNT2, OCR2x, and TCCR2x.
4. To switch to asynchronous operation: Wait for TCN2UB, OCR2xUB, and TCR2xUB.
5. Clear the Timer/Counter2 Interrupt Flags.
6. Enable interrupts, if needed.
OCFnx
OCRnx
TCNTn
OCRnx Value
OCRnx - 1 OCRnx OCRnx + 1 OCRnx + 2
clkI/O
clkTn
(clkI/O/8)
OCFnx
OCRnx
TCNTn
(CTC)
TOP
TOP - 1 TOP BOTTOM BOTTOM + 1
clkI/O
clkTn
(clkI/O/8)185
2549P–AVR–10/2012
ATmega640/1280/1281/2560/2561
• The CPU main clock frequency must be more than four times the Oscillator frequency.
• When writing to one of the registers TCNT2, OCR2x, or TCCR2x, the value is transferred to
a temporary register, and latched after two positive edges on TOSC1. The user should not
write a new value before the contents of the temporary register have been transferred to its
destination. Each of the five mentioned registers have their individual temporary register,
which means that, for example, writing to TCNT2 does not disturb an OCR2x write in
progress. To detect that a transfer to the destination register has taken place, the
Asynchronous Status Register – ASSR has been implemented.
• When entering Power-save or ADC Noise Reduction mode after having written to TCNT2,
OCR2x, or TCCR2x, the user must wait until the written register has been updated if
Timer/Counter2 is used to wake up the device. Otherwise, the MCU will enter sleep mode
before the changes are effective. This is particularly important if any of the Output
Compare2 interrupt is used to wake up the device, since the Output Compare function is
disabled during writing to OCR2x or TCNT2. If the write cycle is not finished, and the MCU
enters sleep mode before the corresponding OCR2xUB bit returns to zero, the device will
never receive a compare match interrupt, and the MCU will not wake up.
• If Timer/Counter2 is used to wake the device up from Power-save or ADC Noise Reduction
mode, precautions must be taken if the user wants to re-enter one of these modes: The
interrupt logic needs one TOSC1 cycle to be reset. If the time between wake-up and reentering
sleep mode is less than one TOSC1 cycle, the interrupt will not occur, and the
device will fail to wake up. If the user is in doubt whether the time before re-entering Powersave
or ADC Noise Reduction mode is sufficient, the following algorithm can be used to
ensure that one TOSC1 cycle has elapsed:
1. Write a value to TCCR2x, TCNT2, or OCR2x.
2. Wait until the corresponding Update Busy Flag in ASSR returns to zero.
3. Enter Power-save or ADC Noise Reduction mode.
• When the asynchronous operation is selected, the 32.768kHz Oscillator for Timer/Counter2
is always running, except in Power-down and Standby modes. After a Power-up Reset or
wake-up from Power-down or Standby mode, the user should be aware of the fact that this
Oscillator might take as long as one second to stabilize. The user is advised to wait for at
least one second before using Timer/Counter2 after power-up or wake-up from Power-down
or Standby mode. The contents of all Timer/Counter2 Registers must be considered lost
after a wake-up from Power-down or Standby mode due to unstable clock signal upon startup,
no matter whether the Oscillator is in use or a clock signal is applied to the TOSC1 pin.
• Description of wake up from Power-save or ADC Noise Reduction mode when the timer is
clocked asynchronously: When the interrupt condition is met, the wake up process is started
on the following cycle of the timer clock, that is, the timer is always advanced by at least one
before the processor can read the counter value. After wake-up, the MCU is halted for four
cycles, it executes the interrupt routine, and resumes execution from the instruction
following SLEEP.
• Reading of the TCNT2 Register shortly after wake-up from Power-save may give an
incorrect result. Since TCNT2 is clocked on the asynchronous TOSC clock, reading TCNT2
must be done through a register synchronized to the internal I/O clock domain.
Synchronization takes place for every rising TOSC1 edge. When waking up from Powersave
mode, and the I/O clock (clkI/O) again becomes active, TCNT2 will read as the previous
value (before entering sleep) until the next rising TOSC1 edge. The phase of the TOSC
clock after waking up from Power-save mode is essentially unpredictable, as it depends on
the wake-up time. The recommended procedure for reading TCNT2 is thus as follows:
1. Write any value to either of the registers OCR2x or TCCR2x.
2. Wait for the corresponding Update Busy Flag to be cleared.
3. Read TCNT2.186
2549P–AVR–10/2012
ATmega640/1280/1281/2560/2561
• During asynchronous operation, the synchronization of the Interrupt Flags for the
asynchronous timer takes three processor cycles plus one timer cycle. The timer is therefore
advanced by at least one before the processor can read the timer value causing the setting
of the Interrupt Flag. The Output Compare pin is changed on the timer clock and is not
synchronized to the processor clock.
20.9 Timer/Counter Prescaler
Figure 20-12. Prescaler for Timer/Counter2
The clock source for Timer/Counter2 is named clkT2S. clkT2S is by default connected to the main
system I/O clock clkIO. By setting the AS2 bit in ASSR, Timer/Counter2 is asynchronously
clocked from the TOSC1 pin. This enables use of Timer/Counter2 as a Real Time Counter
(RTC). When AS2 is set, pins TOSC1 and TOSC2 are disconnected from Port C. A crystal can
then be connected between the TOSC1 and TOSC2 pins to serve as an independent clock
source for Timer/Counter2. The Oscillator is optimized for use with a 32.768kHz crystal. By setting
the EXCLK bit in the ASSR, a 32kHz external clock can be applied. See “ASSR –
Asynchronous Status Register” on page 192 for details.
For Timer/Counter2, the possible prescaled selections are: clkT2S/8, clkT2S/32, clkT2S/64,
clkT2S/128, clkT2S/256, and clkT2S/1024. Additionally, clkT2S as well as 0 (stop) may be selected.
Setting the PSRASY bit in GTCCR resets the prescaler. This allows the user to operate with a
predictable prescaler.
10-BIT T/C PRESCALER
TIMER/COUNTER2 CLOCK SOURCE
clkI/O clkT2S
TOSC1
AS2
CS20
CS21
CS22
clkT2S/8
clkT2S/64
clkT2S/128
clkT2S/1024
clkT2S/256
clkT2S/32
0 PSRASY
Clear
clkT2187
2549P–AVR–10/2012
ATmega640/1280/1281/2560/2561
20.10 Register Description
20.10.1 TCCR2A –Timer/Counter Control Register A
• Bits 7:6 – COM2A1:0: Compare Match Output A Mode
These bits control the Output Compare pin (OC2A) behavior. If one or both of the COM2A1:0
bits are set, the OC2A output overrides the normal port functionality of the I/O pin it is connected
to. However, note that the Data Direction Register (DDR) bit corresponding to the OC2A pin
must be set in order to enable the output driver.
When OC2A is connected to the pin, the function of the COM2A1:0 bits depends on the
WGM22:0 bit setting. Table 20-2 shows the COM2A1:0 bit functionality when the WGM22:0 bits
are set to a normal or CTC mode (non-PWM).
Table 20-3 shows the COM2A1:0 bit functionality when the WGM21:0 bits are set to fast PWM
mode.
Note: 1. A special case occurs when OCR2A equals TOP and COM2A1 is set. In this case, the Compare
Match is ignored, but the set or clear is done at BOTTOM. See “Fast PWM Mode” on
page 178 for more details.
Table 20-4 on page 188 shows the COM2A1:0 bit functionality when the WGM22:0 bits are set
to phase correct PWM mode.
Bit 7 6 5 4 3 2 1 0
(0xB0) COM2A1 COM2A0 COM2B1 COM2B0 – – WGM21 WGM20 TCCR2A
Read/Write R/W R/W R/W R/W R R R/W R/W
Initial Value 0 0 0 0 0 0 0 0
Table 20-2. Compare Output Mode, non-PWM Mode
COM2A1 COM2A0 Description
0 0 Normal port operation, OC2A disconnected
0 1 Toggle OC2A on Compare Match
1 0 Clear OC2A on Compare Match
1 1 Set OC2A on Compare Match
Table 20-3. Compare Output Mode, Fast PWM Mode(1)
COM2A1 COM2A0 Description
0 0 Normal port operation, OC2A disconnected
0 1 WGM22 = 0: Normal Port Operation, OC2A Disconnected
WGM22 = 1: Toggle OC2A on Compare Match
1 0 Clear OC2A on Compare Match, set OC2A at BOTTOM
(non-inverting mode)
1 1 Set OC2A on Compare Match, clear OC2A at BOTTOM
(inverting mode)188
2549P–AVR–10/2012
ATmega640/1280/1281/2560/2561
Note: 1. A special case occurs when OCR2A equals TOP and COM2A1 is set. In this case, the Compare
Match is ignored, but the set or clear is done at TOP. See “Phase Correct PWM Mode” on
page 179 for more details.
• Bits 5:4 – COM2B1:0: Compare Match Output B Mode
These bits control the Output Compare pin (OC2B) behavior. If one or both of the COM2B1:0
bits are set, the OC2B output overrides the normal port functionality of the I/O pin it is connected
to. However, note that the Data Direction Register (DDR) bit corresponding to the OC2B pin
must be set in order to enable the output driver.
When OC2B is connected to the pin, the function of the COM2B1:0 bits depends on the
WGM22:0 bit setting. Table 20-5 shows the COM2B1:0 bit functionality when the WGM22:0 bits
are set to a normal or CTC mode (non-PWM).
Table 20-6 shows the COM2B1:0 bit functionality when the WGM22:0 bits are set to fast PWM
mode.
Note: 1. A special case occurs when OCR2B equals TOP and COM2B1 is set. In this case, the Compare
Match is ignored, but the set or clear is done at BOTTOM. See “Fast PWM Mode” on
page 178 for more details.
Table 20-4. Compare Output Mode, Phase Correct PWM Mode(1)
COM2A1 COM2A0 Description
0 0 Normal port operation, OC2A disconnected
0 1 WGM22 = 0: Normal Port Operation, OC2A Disconnected
WGM22 = 1: Toggle OC2A on Compare Match
1 0 Clear OC2A on Compare Match when up-counting
Set OC2A on Compare Match when down-counting
1 1 Set OC2A on Compare Match when up-counting
Clear OC2A on Compare Match when down-counting
Table 20-5. Compare Output Mode, non-PWM Mode
COM2B1 COM2B0 Description
0 0 Normal port operation, OC2B disconnected
0 1 Toggle OC2B on Compare Match
1 0 Clear OC2B on Compare Match
1 1 Set OC2B on Compare Match
Table 20-6. Compare Output Mode, Fast PWM Mode(1)
COM2B1 COM2B0 Description
0 0 Normal port operation, OC2B disconnected
0 1 Reserved
1 0 Clear OC2B on Compare Match, set OC2B at BOTTOM
(non-inverting mode)
1 1 Set OC2B on Compare Match, clear OC2B at BOTTOM
(inverting mode)189
2549P–AVR–10/2012
ATmega640/1280/1281/2560/2561
Table 20-7 shows the COM2B1:0 bit functionality when the WGM22:0 bits are set to phase correct
PWM mode.
Note: 1. A special case occurs when OCR2B equals TOP and COM2B1 is set. In this case, the Compare
Match is ignored, but the set or clear is done at TOP. See “Phase Correct PWM Mode” on
page 179 for more details.
• Bits 3, 2 – Res: Reserved Bits
These bits are reserved bits and will always read as zero.
• Bits 1:0 – WGM21:0: Waveform Generation Mode
Combined with the WGM22 bit found in the TCCR2B Register, these bits control the counting
sequence of the counter, the source for maximum (TOP) counter value, and what type of waveform
generation to be used, see Table 20-8. Modes of operation supported by the Timer/Counter
unit are: Normal mode (counter), Clear Timer on Compare Match (CTC) mode, and two types of
Pulse Width Modulation (PWM) modes (see “Modes of Operation” on page 176).
Notes: 1. MAX = 0xFF.
2. BOTTOM = 0x00.
Table 20-7. Compare Output Mode, Phase Correct PWM Mode(1)
COM2B1 COM2B0 Description
0 0 Normal port operation, OC2B disconnected
0 1 Reserved
1 0 Clear OC2B on Compare Match when up-counting
Set OC2B on Compare Match when down-counting
1 1 Set OC2B on Compare Match when up-counting
Clear OC2B on Compare Match when down-counting
Table 20-8. Waveform Generation Mode Bit Description
Mode WGM2 WGM1 WGM0
Timer/Counter
Mode of
Operation TOP
Update of
OCRx at
TOV Flag
Set on(1)(2)
00 0 0 Normal 0xFF Immediate MAX
10 0 1 PWM, Phase
Correct 0xFF TOP BOTTOM
2 0 1 0 CTC OCRA Immediate MAX
3 0 1 1 Fast PWM 0xFF BOTTOM MAX
4 1 0 0 Reserved – – –
51 0 1 PWM, Phase
Correct OCRA TOP BOTTOM
6 1 1 0 Reserved – – –
7 1 1 1 Fast PWM OCRA BOTTOM TOP190
2549P–AVR–10/2012
ATmega640/1280/1281/2560/2561
20.10.2 TCCR2B – Timer/Counter Control Register B
• Bit 7 – FOC2A: Force Output Compare A
The FOC2A bit is only active when the WGM bits specify a non-PWM mode.
However, for ensuring compatibility with future devices, this bit must be set to zero when
TCCR2B is written when operating in PWM mode. When writing a logical one to the FOC2A bit,
an immediate Compare Match is forced on the Waveform Generation unit. The OC2A output is
changed according to its COM2A1:0 bits setting. Note that the FOC2A bit is implemented as a
strobe. Therefore it is the value present in the COM2A1:0 bits that determines the effect of the
forced compare.
A FOC2A strobe will not generate any interrupt, nor will it clear the timer in CTC mode using
OCR2A as TOP.
The FOC2A bit is always read as zero.
• Bit 6 – FOC2B: Force Output Compare B
The FOC2B bit is only active when the WGM bits specify a non-PWM mode.
However, for ensuring compatibility with future devices, this bit must be set to zero when
TCCR2B is written when operating in PWM mode. When writing a logical one to the FOC2B bit,
an immediate Compare Match is forced on the Waveform Generation unit. The OC2B output is
changed according to its COM2B1:0 bits setting. Note that the FOC2B bit is implemented as a
strobe. Therefore it is the value present in the COM2B1:0 bits that determines the effect of the
forced compare.
A FOC2B strobe will not generate any interrupt, nor will it clear the timer in CTC mode using
OCR2B as TOP.
The FOC2B bit is always read as zero.
• Bits 5:4 – Res: Reserved Bits
These bits are reserved bits and will always read as zero.
• Bit 3 – WGM22: Waveform Generation Mode
See the description in the “TCCR2A –Timer/Counter Control Register A” on page 187.
• Bit 2:0 – CS22:0: Clock Select
The three Clock Select bits select the clock source to be used by the Timer/Counter, see Table
20-9 on page 191.
Bit 7 6 5 4 3 2 1 0
(0xB1) FOC2A FOC2B – – WGM22 CS22 CS21 CS20 TCCR2B
Read/Write W W R R R/W R/W R/W R/W
Initial Value 0 0 0 0 0 0 0 0191
2549P–AVR–10/2012
ATmega640/1280/1281/2560/2561
If external pin modes are used for the Timer/Counter0, transitions on the T0 pin will clock the
counter even if the pin is configured as an output. This feature allows software control of the
counting.
20.10.3 TCNT2 – Timer/Counter Register
The Timer/Counter Register gives direct access, both for read and write operations, to the
Timer/Counter unit 8-bit counter. Writing to the TCNT2 Register blocks (removes) the Compare
Match on the following timer clock. Modifying the counter (TCNT2) while the counter is running,
introduces a risk of missing a Compare Match between TCNT2 and the OCR2x Registers.
20.10.4 OCR2A – Output Compare Register A
The Output Compare Register A contains an 8-bit value that is continuously compared with the
counter value (TCNT2). A match can be used to generate an Output Compare interrupt, or to
generate a waveform output on the OC2A pin.
20.10.5 OCR2B – Output Compare Register B
The Output Compare Register B contains an 8-bit value that is continuously compared with the
counter value (TCNT2). A match can be used to generate an Output Compare interrupt, or to
generate a waveform output on the OC2B pin.
Table 20-9. Clock Select Bit Description
CS22 CS21 CS20 Description
000 No clock source (Timer/Counter stopped)
0 0 1 clkT2S/(No prescaling)
0 1 0 clkT2S/8 (From prescaler)
0 1 1 clkT2S/32 (From prescaler)
1 0 0 clkT2S/64 (From prescaler)
1 0 1 clkT2S/128 (From prescaler)
1 1 0 clkT2S/256 (From prescaler)
1 1 1 clkT2S/1024 (From prescaler)
Bit 7 6 5 4 3 2 1 0
(0xB2) TCNT2[7:0] TCNT2
Read/Write R/W R/W R/W R/W R/W R/W R/W R/W
Initial Value 0 0 0 0 0 0 0 0
Bit 7 6 5 4 3 2 1 0
(0xB3) OCR2A[7:0] OCR2A
Read/Write R/W R/W R/W R/W R/W R/W R/W R/W
Initial Value 0 0 0 0 0 0 0 0
Bit 7 6 5 4 3 2 1 0
(0xB4) OCR2B[7:0] OCR2B
Read/Write R/W R/W R/W R/W R/W R/W R/W R/W
Initial Value 0 0 0 0 0 0 0 0192
2549P–AVR–10/2012
ATmega640/1280/1281/2560/2561
20.10.6 ASSR – Asynchronous Status Register
• Bit 6 – EXCLK: Enable External Clock Input
When EXCLK is written to one, and asynchronous clock is selected, the external clock input buffer
is enabled and an external clock can be input on Timer Oscillator 1 (TOSC1) pin instead of a
32kHz crystal. Writing to EXCLK should be done before asynchronous operation is selected.
Note that the crystal Oscillator will only run when this bit is zero.
• Bit 5 – AS2: Asynchronous Timer/Counter2
When AS2 is written to zero, Timer/Counter2 is clocked from the I/O clock, clkI/O. When AS2 is
written to one, Timer/Counter2 is clocked from a crystal Oscillator connected to the Timer Oscillator
1 (TOSC1) pin. When the value of AS2 is changed, the contents of TCNT2, OCR2A,
OCR2B, TCCR2A and TCCR2B might be corrupted.
• Bit 4 – TCN2UB: Timer/Counter2 Update Busy
When Timer/Counter2 operates asynchronously and TCNT2 is written, this bit becomes set.
When TCNT2 has been updated from the temporary storage register, this bit is cleared by hardware.
A logical zero in this bit indicates that TCNT2 is ready to be updated with a new value.
• Bit 3 – OCR2AUB: Output Compare Register2 Update Busy
When Timer/Counter2 operates asynchronously and OCR2A is written, this bit becomes set.
When OCR2A has been updated from the temporary storage register, this bit is cleared by hardware.
A logical zero in this bit indicates that OCR2A is ready to be updated with a new value.
• Bit 2 – OCR2BUB: Output Compare Register2 Update Busy
When Timer/Counter2 operates asynchronously and OCR2B is written, this bit becomes set.
When OCR2B has been updated from the temporary storage register, this bit is cleared by hardware.
A logical zero in this bit indicates that OCR2B is ready to be updated with a new value.
• Bit 1 – TCR2AUB: Timer/Counter Control Register2 Update Busy
When Timer/Counter2 operates asynchronously and TCCR2A is written, this bit becomes set.
When TCCR2A has been updated from the temporary storage register, this bit is cleared by
hardware. A logical zero in this bit indicates that TCCR2A is ready to be updated with a new
value.
• Bit 0 – TCR2BUB: Timer/Counter Control Register2 Update Busy
When Timer/Counter2 operates asynchronously and TCCR2B is written, this bit becomes set.
When TCCR2B has been updated from the temporary storage register, this bit is cleared by
hardware. A logical zero in this bit indicates that TCCR2B is ready to be updated with a new
value.
If a write is performed to any of the five Timer/Counter2 Registers while its update busy flag is
set, the updated value might get corrupted and cause an unintentional interrupt to occur.
Bit 7 6 5 4 3 2 1 0
(0xB6) – EXCLK AS2 TCN2UB OCR2AUB OCR2BUB TCR2AUB TCR2BUB ASSR
Read/Write R R/W R/W RR R R R
Initial Value 0 0 0 0 0 0 0 0193
2549P–AVR–10/2012
ATmega640/1280/1281/2560/2561
The mechanisms for reading TCNT2, OCR2A, OCR2B, TCCR2A and TCCR2B are different.
When reading TCNT2, the actual timer value is read. When reading OCR2A, OCR2B, TCCR2A
and TCCR2B the value in the temporary storage register is read.
20.10.7 TIMSK2 – Timer/Counter2 Interrupt Mask Register
• Bit 2 – OCIE2B: Timer/Counter2 Output Compare Match B Interrupt Enable
When the OCIE2B bit is written to one and the I-bit in the Status Register is set (one), the
Timer/Counter2 Compare Match B interrupt is enabled. The corresponding interrupt is executed
if a compare match in Timer/Counter2 occurs, that is, when the OCF2B bit is set in the
Timer/Counter 2 Interrupt Flag Register – TIFR2.
• Bit 1 – OCIE2A: Timer/Counter2 Output Compare Match A Interrupt Enable
When the OCIE2A bit is written to one and the I-bit in the Status Register is set (one), the
Timer/Counter2 Compare Match A interrupt is enabled. The corresponding interrupt is executed
if a compare match in Timer/Counter2 occurs, that is, when the OCF2A bit is set in the
Timer/Counter 2 Interrupt Flag Register – TIFR2.
• Bit 0 – TOIE2: Timer/Counter2 Overflow Interrupt Enable
When the TOIE2 bit is written to one and the I-bit in the Status Register is set (one), the
Timer/Counter2 Overflow interrupt is enabled. The corresponding interrupt is executed if an
overflow in Timer/Counter2 occurs, that is, when the TOV2 bit is set in the Timer/Counter2 Interrupt
Flag Register – TIFR2.
20.10.8 TIFR2 – Timer/Counter2 Interrupt Flag Register
• Bit 2 – OCF2B: Output Compare Flag 2 B
The OCF2B bit is set (one) when a compare match occurs between the Timer/Counter2 and the
data in OCR2B – Output Compare Register2. OCF2B is cleared by hardware when executing
the corresponding interrupt handling vector. Alternatively, OCF2B is cleared by writing a logic
one to the flag. When the I-bit in SREG, OCIE2B (Timer/Counter2 Compare match Interrupt
Enable), and OCF2B are set (one), the Timer/Counter2 Compare match Interrupt is executed.
• Bit 1 – OCF2A: Output Compare Flag 2 A
The OCF2A bit is set (one) when a compare match occurs between the Timer/Counter2 and the
data in OCR2A – Output Compare Register2. OCF2A is cleared by hardware when executing
the corresponding interrupt handling vector. Alternatively, OCF2A is cleared by writing a logic
one to the flag. When the I-bit in SREG, OCIE2A (Timer/Counter2 Compare match Interrupt
Enable), and OCF2A are set (one), the Timer/Counter2 Compare match Interrupt is executed.
Bit 7 6 5 4 3 2 1 0
(0x70) – – – – – OCIE2B OCIE2A TOIE2 TIMSK2
Read/Write R R R R R R/W R/W R/W
Initial Value 0 0 0 0 0 0 0 0
Bit 7 6 5 4 3 2 1 0
0x17 (0x37) – – – – – OCF2B OCF2A TOV2 TIFR2
Read/Write R R R R R R/W R/W R/W
Initial Value 0 0 0 0 0 0 0 0194
2549P–AVR–10/2012
ATmega640/1280/1281/2560/2561
• Bit 0 – TOV2: Timer/Counter2 Overflow Flag
The TOV2 bit is set (one) when an overflow occurs in Timer/Counter2. TOV2 is cleared by hardware
when executing the corresponding interrupt handling vector. Alternatively, TOV2 is cleared
by writing a logic one to the flag. When the SREG I-bit, TOIE2A (Timer/Counter2 Overflow Interrupt
Enable), and TOV2 are set (one), the Timer/Counter2 Overflow interrupt is executed. In
PWM mode, this bit is set when Timer/Counter2 changes counting direction at 0x00.
20.10.9 GTCCR – General Timer/Counter Control Register
• Bit 1 – PSRASY: Prescaler Reset Timer/Counter2
When this bit is one, the Timer/Counter2 prescaler will be reset. This bit is normally cleared
immediately by hardware. If the bit is written when Timer/Counter2 is operating in asynchronous
mode, the bit will remain one until the prescaler has been reset. The bit will not be cleared by
hardware if the TSM bit is set. Refer to the description of the “Bit 7 – TSM: Timer/Counter Synchronization
Mode” on page 170 for a description of the Timer/Counter Synchronization mode.
Bit 7 6 5 4 3 2 1 0
0x23 (0x43) TSM – – – – – PSRASY PSRSYNC GTCCR
Read/Write R/W R R R R R R/W R/W
Initial Value 0 0 0 0 0 0 0 0195
2549P–AVR–10/2012
ATmega640/1280/1281/2560/2561
21. SPI – Serial Peripheral Interface
The Serial Peripheral Interface (SPI) allows high-speed synchronous data transfer between the
ATmega640/1280/1281/2560/2561 and peripheral devices or between several AVR devices.
The ATmega640/1280/1281/2560/2561 SPI includes the following features:
• Full-duplex, Three-wire Synchronous Data Transfer
• Master or Slave Operation
• LSB First or MSB First Data Transfer
• Seven Programmable Bit Rates
• End of Transmission Interrupt Flag
• Write Collision Flag Protection
• Wake-up from Idle Mode
• Double Speed (CK/2) Master SPI Mode
USART can also be used in Master SPI mode, see “USART in SPI Mode” on page 232.
The Power Reduction SPI bit, PRSPI, in “PRR0 – Power Reduction Register 0” on page 56 on
page 50 must be written to zero to enable SPI module.
Figure 21-1. SPI Block Diagram(1)
Note: 1. Refer to Figure 1-1 on page 2, and Table 13-6 on page 79 for SPI pin placement.
The interconnection between Master and Slave CPUs with SPI is shown in Figure 21-2 on page
196. The system consists of two shift Registers, and a Master clock generator. The SPI Master
initiates the communication cycle when pulling low the Slave Select SS pin of the desired Slave. SPI2X SPI2X
DIVIDER
/2/4/8/16/32/64/128196
2549P–AVR–10/2012
ATmega640/1280/1281/2560/2561
Master and Slave prepare the data to be sent in their respective shift Registers, and the Master
generates the required clock pulses on the SCK line to interchange data. Data is always shifted
from Master to Slave on the Master Out – Slave In, MOSI, line, and from Slave to Master on the
Master In – Slave Out, MISO, line. After each data packet, the Master will synchronize the Slave
by pulling high the Slave Select, SS, line.
When configured as a Master, the SPI interface has no automatic control of the SS line. This
must be handled by user software before communication can start. When this is done, writing a
byte to the SPI Data Register starts the SPI clock generator, and the hardware shifts the eight
bits into the Slave. After shifting one byte, the SPI clock generator stops, setting the end of
Transmission Flag (SPIF). If the SPI Interrupt Enable bit (SPIE) in the SPCR Register is set, an
interrupt is requested. The Master may continue to shift the next byte by writing it into SPDR, or
signal the end of packet by pulling high the Slave Select, SS line. The last incoming byte will be
kept in the Buffer Register for later use.
When configured as a Slave, the SPI interface will remain sleeping with MISO tri-stated as long
as the SS pin is driven high. In this state, software may update the contents of the SPI Data
Register, SPDR, but the data will not be shifted out by incoming clock pulses on the SCK pin
until the SS pin is driven low. As one byte has been completely shifted, the end of Transmission
Flag, SPIF is set. If the SPI Interrupt Enable bit, SPIE, in the SPCR Register is set, an interrupt
is requested. The Slave may continue to place new data to be sent into SPDR before reading
the incoming data. The last incoming byte will be kept in the Buffer Register for later use.
Figure 21-2. SPI Master-slave Interconnection
The system is single buffered in the transmit direction and double buffered in the receive direction.
This means that bytes to be transmitted cannot be written to the SPI Data Register before
the entire shift cycle is completed. When receiving data, however, a received character must be
read from the SPI Data Register before the next character has been completely shifted in. Otherwise,
the first byte is lost.
In SPI Slave mode, the control logic will sample the incoming signal of the SCK pin. To ensure
correct sampling of the clock signal, the minimum low and high periods should be:
Low period: longer than 2 CPU clock cycles.
High period: longer than 2 CPU clock cycles.
When the SPI is enabled, the data direction of the MOSI, MISO, SCK, and SS pins is overridden
according to Table 21-1. For more details on automatic port overrides, refer to “Alternate Port
SHIFT
ENABLE197
2549P–AVR–10/2012
ATmega640/1280/1281/2560/2561
Functions” on page 75.
Note: 1. See “Alternate Functions of Port B” on page 79 for a detailed description of how to define the
direction of the user defined SPI pins.
The following code examples show how to initialize the SPI as a Master and how to perform a
simple transmission. DDR_SPI in the examples must be replaced by the actual Data Direction
Register controlling the SPI pins. DD_MOSI, DD_MISO and DD_SCK must be replaced by the
actual data direction bits for these pins. For example, if MOSI is placed on pin PB5, replace
DD_MOSI with DDB5 and DDR_SPI with DDRB.
Table 21-1. SPI Pin Overrides(1)
Pin Direction, Master SPI Direction, Slave SPI
MOSI User Defined Input
MISO Input User Defined
SCK User Defined Input
SS User Defined Input198
2549P–AVR–10/2012
ATmega640/1280/1281/2560/2561
Note: 1. See “About Code Examples” on page 11.
Assembly Code Example(1)
SPI_MasterInit:
; Set MOSI and SCK output, all others input
ldi r17,(1<>8);
UBRRL = (unsigned char)ubrr;
/* Enable receiver and transmitter */
UCSRB = (1<> 1) & 0x01;
return ((resh << 8) | resl);
}217
2549P–AVR–10/2012
ATmega640/1280/1281/2560/2561
buffer is empty (that is, does not contain any unread data). If the Receiver is disabled (RXENn =
0), the receive buffer will be flushed and consequently the RXCn bit will become zero.
When the Receive Complete Interrupt Enable (RXCIEn) in UCSRnB is set, the USART Receive
Complete interrupt will be executed as long as the RXCn Flag is set (provided that global interrupts
are enabled). When interrupt-driven data reception is used, the receive complete routine
must read the received data from UDRn in order to clear the RXCn Flag, otherwise a new interrupt
will occur once the interrupt routine terminates.
22.6.4 Receiver Error Flags
The USART Receiver has three Error Flags: Frame Error (FEn), Data OverRun (DORn) and
Parity Error (UPEn). All can be accessed by reading UCSRnA. Common for the Error Flags is
that they are located in the receive buffer together with the frame for which they indicate the
error status. Due to the buffering of the Error Flags, the UCSRnA must be read before the
receive buffer (UDRn), since reading the UDRn I/O location changes the buffer read location.
Another equality for the Error Flags is that they can not be altered by software doing a write to
the flag location. However, all flags must be set to zero when the UCSRnA is written for upward
compatibility of future USART implementations. None of the Error Flags can generate interrupts.
The Frame Error (FEn) Flag indicates the state of the first stop bit of the next readable frame
stored in the receive buffer. The FEn Flag is zero when the stop bit was correctly read (as one),
and the FEn Flag will be one when the stop bit was incorrect (zero). This flag can be used for
detecting out-of-sync conditions, detecting break conditions and protocol handling. The FEn
Flag is not affected by the setting of the USBSn bit in UCSRnC since the Receiver ignores all,
except for the first, stop bits. For compatibility with future devices, always set this bit to zero
when writing to UCSRnA.
The Data OverRun (DORn) Flag indicates data loss due to a receiver buffer full condition. A
Data OverRun occurs when the receive buffer is full (two characters), it is a new character waiting
in the Receive Shift Register, and a new start bit is detected. If the DORn Flag is set there
was one or more serial frame lost between the frame last read from UDRn, and the next frame
read from UDRn. For compatibility with future devices, always write this bit to zero when writing
to UCSRnA. The DORn Flag is cleared when the frame received was successfully moved from
the Shift Register to the receive buffer.
The Parity Error (UPEn) Flag indicates that the next frame in the receive buffer had a Parity
Error when received. If Parity Check is not enabled the UPEn bit will always be read zero. For
compatibility with future devices, always set this bit to zero when writing to UCSRnA. For more
details see “Parity Bit Calculation” on page 210 and “Parity Checker” on page 217.
22.6.5 Parity Checker
The Parity Checker is active when the high USART Parity mode (UPMn1) bit is set. Type of Parity
Check to be performed (odd or even) is selected by the UPMn0 bit. When enabled, the Parity
Checker calculates the parity of the data bits in incoming frames and compares the result with
the parity bit from the serial frame. The result of the check is stored in the receive buffer together
with the received data and stop bits. The Parity Error (UPEn) Flag can then be read by software
to check if the frame had a Parity Error.
The UPEn bit is set if the next character that can be read from the receive buffer had a Parity
Error when received and the Parity Checking was enabled at that point (UPMn1 = 1). This bit is
valid until the receive buffer (UDRn) is read.218
2549P–AVR–10/2012
ATmega640/1280/1281/2560/2561
22.6.6 Disabling the Receiver
In contrast to the Transmitter, disabling of the Receiver will be immediate. Data from ongoing
receptions will therefore be lost. When disabled (that is, the RXENn is set to zero) the Receiver
will no longer override the normal function of the RxDn port pin. The Receiver buffer FIFO will be
flushed when the Receiver is disabled. Remaining data in the buffer will be lost.
22.6.7 Flushing the Receive Buffer
The receiver buffer FIFO will be flushed when the Receiver is disabled, that is, the buffer will be
emptied of its contents. Unread data will be lost. If the buffer has to be flushed during normal
operation, due to for instance an error condition, read the UDRn I/O location until the RXCn Flag
is cleared. The following code example shows how to flush the receive buffer.
Note: 1. See “About Code Examples” on page 11.
22.7 Asynchronous Data Reception
The USART includes a clock recovery and a data recovery unit for handling asynchronous data
reception. The clock recovery logic is used for synchronizing the internally generated baud rate
clock to the incoming asynchronous serial frames at the RxDn pin. The data recovery logic samples
and low pass filters each incoming bit, thereby improving the noise immunity of the
Receiver. The asynchronous reception operational range depends on the accuracy of the internal
baud rate clock, the rate of the incoming frames, and the frame size in number of bits.
22.7.1 Asynchronous Clock Recovery
The clock recovery logic synchronizes internal clock to the incoming serial frames. Figure 22-5
on page 219 illustrates the sampling process of the start bit of an incoming frame. The sample
rate is 16 times the baud rate for Normal mode, and eight times the baud rate for Double Speed
mode. The horizontal arrows illustrate the synchronization variation due to the sampling process.
Note the larger time variation when using the Double Speed mode (U2Xn = 1) of
operation. Samples denoted zero are samples done when the RxDn line is idle (that is, no communication
activity).
Assembly Code Example(1)
USART_Flush:
sbis UCSRnA, RXCn
ret
in r16, UDRn
rjmp USART_Flush
C Code Example(1)
void USART_Flush( void )
{
unsigned char dummy;
while ( UCSRnA & (1< 2 CPU clock cycles for fck < 12MHz, 3 CPU clock cycles for fck >= 12MHz
High: > 2 CPU clock cycles for fck < 12MHz, 3 CPU clock cycles for fck >= 12MHz
30.8.2 Serial Programming Algorithm
When writing serial data to the ATmega640/1280/1281/2560/2561, data is clocked on the rising
edge of SCK.
When reading data from the ATmega640/1280/1281/2560/2561, data is clocked on the falling
edge of SCK. See Figure 30-12 on page 353 for timing details.
To program and verify the ATmega640/1280/1281/2560/2561 in the serial programming mode,
the following sequence is recommended (see four byte instruction formats in Table 30-17 on
Table 30-15. Pin Mapping Serial Programming
Symbol
Pins
(TQFP-100)
Pins
(TQFP-64) I/O Description
PDI PB2 PE0 I Serial Data in
PDO PB3 PE1 O Serial Data out
SCK PB1 PB1 I Serial Clock
VCC
GND
XT AL1
SCK
PDO
PDI
RESET
+1.8V - 5.5V
AVCC
+1.8V - 5.5V(2)351
2549P–AVR–10/2012
ATmega640/1280/1281/2560/2561
page 352):
1. Power-up sequence:
Apply power between VCC and GND while RESET and SCK are set to “0”. In some systems,
the programmer can not guarantee that SCK is held low during power-up. In this
case, RESET must be given a positive pulse of at least two CPU clock cycles duration
after SCK has been set to “0”.
2. Wait for at least 20ms and enable serial programming by sending the Programming
Enable serial instruction to pin PDI.
3. The serial programming instructions will not work if the communication is out of synchronization.
When in sync. the second byte (0x53), will echo back when issuing the third
byte of the Programming Enable instruction. Whether the echo is correct or not, all four
bytes of the instruction must be transmitted. If the 0x53 did not echo back, give RESET a
positive pulse and issue a new Programming Enable command.
4. The Flash is programmed one page at a time. The memory page is loaded one byte at a
time by supplying the 7 LSB of the address and data together with the Load Program
Memory Page instruction. To ensure correct loading of the page, the data low byte must
be loaded before data high byte is applied for a given address. The Program Memory
Page is stored by loading the Write Program Memory Page instruction with the address
lines 15:8. Before issuing this command, make sure the instruction Load Extended
Address Byte has been used to define the MSB of the address. The extended address
byte is stored until the command is re-issued, that is, the command needs only be issued
for the first page, and when crossing the 64KWord boundary. If polling (RDY/BSY) is not
used, the user must wait at least tWD_FLASH before issuing the next page (see Table 30-
16). Accessing the serial programming interface before the Flash write operation completes
can result in incorrect programming.
5. The EEPROM array is programmed one byte at a time by supplying the address and data
together with the appropriate Write instruction. An EEPROM memory location is first
automatically erased before new data is written. If polling is not used, the user must wait
at least tWD_EEPROM before issuing the next byte (see Table 30-16). In a chip erased
device, no 0xFFs in the data file(s) need to be programmed.
6. Any memory location can be verified by using the Read instruction which returns the content
at the selected address at serial output PDO. When reading the Flash memory, use
the instruction Load Extended Address Byte to define the upper address byte, which is
not included in the Read Program Memory instruction. The extended address byte is
stored until the command is re-issued, that is, the command needs only be issued for the
first page, and when crossing the 64KWord boundary.
7. At the end of the programming session, RESET can be set high to commence normal
operation.
8. Power-off sequence (if needed):
Set RESET to “1”.
Turn VCC power off.
Table 30-16. Minimum Wait Delay Before Writing the Next Flash or EEPROM Location
Symbol Minimum Wait Delay
tWD_FLASH 4.5ms
tWD_EEPROM 3.6ms
tWD_ERASE 9.0ms352
2549P–AVR–10/2012
ATmega640/1280/1281/2560/2561
30.8.3 Serial Programming Instruction set
Table 30-17 and Figure 30-11 on page 353 describes the Instruction set.
Notes: 1. Not all instructions are applicable for all parts.
2. a = address.
3. Bits are programmed ‘0’, unprogrammed ‘1’.
4. To ensure future compatibility, unused Fuses and Lock bits should be unprogrammed (‘1’).
5. Refer to the correspondig section for Fuse and Lock bits, Calibration and Signature bytes and
Page size.
6. See htt://www.atmel.com/avr for Application Notes regarding programming and programmers.
If the LSB in RDY/BSY data byte out is ‘1’, a programming operation is still pending. Wait until
this bit returns ‘0’ before the next instruction is carried out.
Table 30-17. Serial Programming Instruction Set
Instruction/Operation
Instruction Format
Byte 1 Byte 2 Byte 3 Byte 4
Programming Enable $AC $53 $00 $00
Chip Erase (Program Memory/EEPROM) $AC $80 $00 $00
Poll RDY/BSY $F0 $00 $00 data byte out
Load Instructions
Load Extended Address byte(1) $4D $00 Extended adr $00
Load Program Memory Page, High byte $48 $00 adr LSB high data byte in
Load Program Memory Page, Low byte $40 $00 adr LSB low data byte in
Load EEPROM Memory Page (page access) $C1 $00 0000 000aa data byte in
Read Instructions
Read Program Memory, High byte $28 adr MSB adr LSB high data byte out
Read Program Memory, Low byte $20 adr MSB adr LSB low data byte out
Read EEPROM Memory $A0 0000 aaaa aaaa aaaa data byte out
Read Lock bits $58 $00 $00 data byte out
Read Signature Byte $30 $00 0000 000aa data byte out
Read Fuse bits $50 $00 $00 data byte out
Read Fuse High bits $58 $08 $00 data byte out
Read Extended Fuse Bits $50 $08 $00 data byte out
Read Calibration Byte $38 $00 $00 data byte out
Write Instructions
Write Program Memory Page $4C adr MSB adr LSB $00
Write EEPROM Memory $C0 0000 aaaa aaaa aaaa data byte in
Write EEPROM Memory Page (page access) $C2 0000 aaaa aaaa 00 $00
Write Lock bits $AC $E0 $00 data byte in
Write Fuse bits $AC $A0 $00 data byte in
Write Fuse High bits $AC $A8 $00 data byte in
Write Extended Fuse Bits $AC $A4 $00 data byte in353
2549P–AVR–10/2012
ATmega640/1280/1281/2560/2561
Within the same page, the low data byte must be loaded prior to the high data byte.
After data is loaded to the page buffer, program the EEPROM page, see Figure 30-11.
Figure 30-11. Serial Programming Instruction example
30.8.4 Serial Programming Characteristics
For characteristics of the Serial Programming module, see “SPI Timing Characteristics” on page
375.
Figure 30-12. Serial Programming Waveforms
Byte 1 Byte 2 Byte 3 Byte 4
Adr LSB
Bit 15 B 0
Serial Programming Instruction
Program Memory/
EEPROM Memory
Page 0
Page 1
Page 2
Page N-1
Page Buffer
Write Program Memory Page/
Write EEPROM Memory Page
Load Program Memory Page (High/Low Byte)/
Load EEPROM Memory Page (page access)
Byte 1 Byte 2 Byte 3 Byte 4
Bit 15 B 0
Adr MSB
Page Offset
Page Number
Adr MSB Adr LSB
MSB
MSB
LSB
LSB
SERIAL CLOCK INPUT
(SCK)
SERIAL DATA INPUT
(MOSI)
(MISO)
SAMPLE
SERIAL DATA OUTPUT354
2549P–AVR–10/2012
ATmega640/1280/1281/2560/2561
30.9 Programming via the JTAG Interface
Programming through the JTAG interface requires control of the four JTAG specific pins: TCK,
TMS, TDI, and TDO. Control of the reset and clock pins is not required.
To be able to use the JTAG interface, the JTAGEN Fuse must be programmed. The device is
default shipped with the fuse programmed. In addition, the JTD bit in MCUCR must be cleared.
Alternatively, if the JTD bit is set, the external reset can be forced low. Then, the JTD bit will be
cleared after two chip clocks, and the JTAG pins are available for programming. This provides a
means of using the JTAG pins as normal port pins in Running mode while still allowing In-System
Programming via the JTAG interface. Note that this technique can not be used when using
the JTAG pins for Boundary-scan or On-chip Debug. In these cases the JTAG pins must be dedicated
for this purpose.
During programming the clock frequency of the TCK Input must be less than the maximum frequency
of the chip. The System Clock Prescaler can not be used to divide the TCK Clock Input
into a sufficiently low frequency.
As a definition in this datasheet, the LSB is shifted in and out first of all Shift Registers.
30.9.1 Programming Specific JTAG Instructions
The Instruction Register is 4-bit wide, supporting up to 16 instructions. The JTAG instructions
useful for programming are listed below.
The OPCODE for each instruction is shown behind the instruction name in hex format. The text
describes which Data Register is selected as path between TDI and TDO for each instruction.
The Run-Test/Idle state of the TAP controller is used to generate internal clocks. It can also be
used as an idle state between JTAG sequences. The state machine sequence for changing the
instruction word is shown in Figure 30-13 on page 355.355
2549P–AVR–10/2012
ATmega640/1280/1281/2560/2561
Figure 30-13. State Machine Sequence for Changing the Instruction Word
30.9.2 AVR_RESET (0xC)
The AVR specific public JTAG instruction for setting the AVR device in the Reset mode or taking
the device out from the Reset mode. The TAP controller is not reset by this instruction. The one
bit Reset Register is selected as Data Register. Note that the reset will be active as long as there
is a logic “one” in the Reset Chain. The output from this chain is not latched.
The active states are:
• Shift-DR: The Reset Register is shifted by the TCK input
30.9.3 PROG_ENABLE (0x4)
The AVR specific public JTAG instruction for enabling programming via the JTAG port. The 16-
bit Programming Enable Register is selected as Data Register. The active states are the
following:
• Shift-DR: The programming enable signature is shifted into the Data Register
• Update-DR: The programming enable signature is compared to the correct value, and
Programming mode is entered if the signature is valid
Test-Logic-Reset
Run-Test/Idle
Shift-DR
Exit1-DR
Pause-DR
Exit2-DR
Update-DR
Select-IR Scan
Capture-IR
Shift-IR
Exit1-IR
Pause-IR
Exit2-IR
Update-IR
Select-DR Scan
Capture-DR
0
1
0 11 1
0 0
0 0
1 1
1 0
1
1
0
1
0
0
1 0
1
1
0
1
0
0
0 0
1 1356
2549P–AVR–10/2012
ATmega640/1280/1281/2560/2561
30.9.4 PROG_COMMANDS (0x5)
The AVR specific public JTAG instruction for entering programming commands via the JTAG
port. The 15-bit Programming Command Register is selected as Data Register. The active
states are the following:
• Capture-DR: The result of the previous command is loaded into the Data Register
• Shift-DR: The Data Register is shifted by the TCK input, shifting out the result of the
previous command and shifting in the new command
• Update-DR: The programming command is applied to the Flash inputs
• Run-Test/Idle: One clock cycle is generated, executing the applied command
30.9.5 PROG_PAGELOAD (0x6)
The AVR specific public JTAG instruction to directly load the Flash data page via the JTAG port.
An 8-bit Flash Data Byte Register is selected as the Data Register. This is physically the 8 LSBs
of the Programming Command Register. The active states are the following:
• Shift-DR: The Flash Data Byte Register is shifted by the TCK input.
• Update-DR: The content of the Flash Data Byte Register is copied into a temporary register.
A write sequence is initiated that within 11 TCK cycles loads the content of the temporary
register into the Flash page buffer. The AVR automatically alternates between writing the low
and the high byte for each new Update-DR state, starting with the low byte for the first
Update-DR encountered after entering the PROG_PAGELOAD command. The Program
Counter is pre-incremented before writing the low byte, except for the first written byte. This
ensures that the first data is written to the address set up by PROG_COMMANDS, and
loading the last location in the page buffer does not make the program counter increment
into the next page.
30.9.6 PROG_PAGEREAD (0x7)
The AVR specific public JTAG instruction to directly capture the Flash content via the JTAG port.
An 8-bit Flash Data Byte Register is selected as the Data Register. This is physically the 8 LSBs
of the Programming Command Register. The active states are the following:
• Capture-DR: The content of the selected Flash byte is captured into the Flash Data Byte
Register. The AVR automatically alternates between reading the low and the high byte for
each new Capture-DR state, starting with the low byte for the first Capture-DR encountered
after entering the PROG_PAGEREAD command. The Program Counter is post-incremented
after reading each high byte, including the first read byte. This ensures that the first data is
captured from the first address set up by PROG_COMMANDS, and reading the last location
in the page makes the program counter increment into the next page.
• Shift-DR: The Flash Data Byte Register is shifted by the TCK input.
30.9.7 Data Registers
The Data Registers are selected by the JTAG instruction registers described in section “Programming
Specific JTAG Instructions” on page 354. The Data Registers relevant for
programming operations are:
• Reset Register
• Programming Enable Register
• Programming Command Register
• Flash Data Byte Register357
2549P–AVR–10/2012
ATmega640/1280/1281/2560/2561
30.9.8 Reset Register
The Reset Register is a Test Data Register used to reset the part during programming. It is
required to reset the part before entering Programming mode.
A high value in the Reset Register corresponds to pulling the external reset low. The part is reset
as long as there is a high value present in the Reset Register. Depending on the Fuse settings
for the clock options, the part will remain reset for a Reset Time-out period (refer to “Clock
Sources” on page 41) after releasing the Reset Register. The output from this Data Register is
not latched, so the reset will take place immediately, as shown in Figure 28-2 on page 304.
30.9.9 Programming Enable Register
The Programming Enable Register is a 16-bit register. The contents of this register is compared
to the programming enable signature, binary code 0b1010_0011_0111_0000. When the contents
of the register is equal to the programming enable signature, programming via the JTAG
port is enabled. The register is reset to 0 on Power-on Reset, and should always be reset when
leaving Programming mode.
Figure 30-14. Programming Enable Register
30.9.10 Programming Command Register
The Programming Command Register is a 15-bit register. This register is used to serially shift in
programming commands, and to serially shift out the result of the previous command, if any. The
JTAG Programming Instruction Set is shown in Table 30-18 on page 359. The state sequence
when shifting in the programming commands is illustrated in Figure 30-16 on page 362.
TDI
TDO
D
A
T
A
= D Q
ClockDR & PROG_ENABLE
Programming Enable
0xA370358
2549P–AVR–10/2012
ATmega640/1280/1281/2560/2561
Figure 30-15. Programming Command Register
TDI
TDO
S
T
R
O
B
E
S
A
D
D
R
E
S
S
/
D
A
T
A
Flash
EEPROM
Fuses
Lock Bits359
2549P–AVR–10/2012
ATmega640/1280/1281/2560/2561
Table 30-18. JTAG Programming Instruction
Set a = address high bits, b = address low bits, c = address extended bits, H = 0 - Low byte, 1 - High Byte, o = data out,
i = data in, x = don’t care
Instruction TDI Sequence TDO Sequence Notes
1a. Chip Erase
0100011_10000000
0110001_10000000
0110011_10000000
0110011_10000000
xxxxxxx_xxxxxxxx
xxxxxxx_xxxxxxxx
xxxxxxx_xxxxxxxx
xxxxxxx_xxxxxxxx
1b. Poll for Chip Erase Complete 0110011_10000000 xxxxxox_xxxxxxxx (2)
2a. Enter Flash Write 0100011_00010000 xxxxxxx_xxxxxxxx
2b. Load Address Extended High Byte 0001011_cccccccc xxxxxxx_xxxxxxxx (10)
2c. Load Address High Byte 0000111_aaaaaaaa xxxxxxx_xxxxxxxx
2d. Load Address Low Byte 0000011_bbbbbbbb xxxxxxx_xxxxxxxx
2e. Load Data Low Byte 0010011_iiiiiiii xxxxxxx_xxxxxxxx
2f. Load Data High Byte 0010111_iiiiiiii xxxxxxx_xxxxxxxx
2g. Latch Data
0110111_00000000
1110111_00000000
0110111_00000000
xxxxxxx_xxxxxxxx
xxxxxxx_xxxxxxxx
xxxxxxx_xxxxxxxx
(1)
2h. Write Flash Page
0110111_00000000
0110101_00000000
0110111_00000000
0110111_00000000
xxxxxxx_xxxxxxxx
xxxxxxx_xxxxxxxx
xxxxxxx_xxxxxxxx
xxxxxxx_xxxxxxxx
(1)
2i. Poll for Page Write Complete 0110111_00000000 xxxxxox_xxxxxxxx (2)
3a. Enter Flash Read 0100011_00000010 xxxxxxx_xxxxxxxx
3b. Load Address Extended High Byte 0001011_cccccccc xxxxxxx_xxxxxxxx (10)
3c. Load Address High Byte 0000111_aaaaaaaa xxxxxxx_xxxxxxxx
3d. Load Address Low Byte 0000011_bbbbbbbb xxxxxxx_xxxxxxxx
3e. Read Data Low and High Byte
0110010_00000000
0110110_00000000
0110111_00000000
xxxxxxx_xxxxxxxx
xxxxxxx_oooooooo
xxxxxxx_oooooooo
Low byte
High byte
4a. Enter EEPROM Write 0100011_00010001 xxxxxxx_xxxxxxxx
4b. Load Address High Byte 0000111_aaaaaaaa xxxxxxx_xxxxxxxx (10)
4c. Load Address Low Byte 0000011_bbbbbbbb xxxxxxx_xxxxxxxx
4d. Load Data Byte 0010011_iiiiiiii xxxxxxx_xxxxxxxx
4e. Latch Data
0110111_00000000
1110111_00000000
0110111_00000000
xxxxxxx_xxxxxxxx
xxxxxxx_xxxxxxxx
xxxxxxx_xxxxxxxx
(1)
4f. Write EEPROM Page
0110011_00000000
0110001_00000000
0110011_00000000
0110011_00000000
xxxxxxx_xxxxxxxx
xxxxxxx_xxxxxxxx
xxxxxxx_xxxxxxxx
xxxxxxx_xxxxxxxx
(1)360
2549P–AVR–10/2012
ATmega640/1280/1281/2560/2561
4g. Poll for Page Write Complete 0110011_00000000 xxxxxox_xxxxxxxx (2)
5a. Enter EEPROM Read 0100011_00000011 xxxxxxx_xxxxxxxx
5b. Load Address High Byte 0000111_aaaaaaaa xxxxxxx_xxxxxxxx (10)
5c. Load Address Low Byte 0000011_bbbbbbbb xxxxxxx_xxxxxxxx
5d. Read Data Byte
0110011_bbbbbbbb
0110010_00000000
0110011_00000000
xxxxxxx_xxxxxxxx
xxxxxxx_xxxxxxxx
xxxxxxx_oooooooo
6a. Enter Fuse Write 0100011_01000000 xxxxxxx_xxxxxxxx
6b. Load Data Low Byte(6) 0010011_iiiiiiii xxxxxxx_xxxxxxxx (3)
6c. Write Fuse Extended Byte
0111011_00000000
0111001_00000000
0111011_00000000
0111011_00000000
xxxxxxx_xxxxxxxx
xxxxxxx_xxxxxxxx
xxxxxxx_xxxxxxxx
xxxxxxx_xxxxxxxx
(1)
6d. Poll for Fuse Write Complete 0110111_00000000 xxxxxox_xxxxxxxx (2)
6e. Load Data Low Byte(7) 0010011_iiiiiiii xxxxxxx_xxxxxxxx (3)
6f. Write Fuse High Byte
0110111_00000000
0110101_00000000
0110111_00000000
0110111_00000000
xxxxxxx_xxxxxxxx
xxxxxxx_xxxxxxxx
xxxxxxx_xxxxxxxx
xxxxxxx_xxxxxxxx
(1)
6g. Poll for Fuse Write Complete 0110111_00000000 xxxxxox_xxxxxxxx (2)
6h. Load Data Low Byte(7) 0010011_iiiiiiii xxxxxxx_xxxxxxxx (3)
6i. Write Fuse Low Byte
0110011_00000000
0110001_00000000
0110011_00000000
0110011_00000000
xxxxxxx_xxxxxxxx
xxxxxxx_xxxxxxxx
xxxxxxx_xxxxxxxx
xxxxxxx_xxxxxxxx
(1)
6j. Poll for Fuse Write Complete 0110011_00000000 xxxxxox_xxxxxxxx (2)
7a. Enter Lock Bit Write 0100011_00100000 xxxxxxx_xxxxxxxx
7b. Load Data Byte(9) 0010011_11iiiiii xxxxxxx_xxxxxxxx (4)
7c. Write Lock Bits
0110011_00000000
0110001_00000000
0110011_00000000
0110011_00000000
xxxxxxx_xxxxxxxx
xxxxxxx_xxxxxxxx
xxxxxxx_xxxxxxxx
xxxxxxx_xxxxxxxx
(1)
7d. Poll for Lock Bit Write complete 0110011_00000000 xxxxxox_xxxxxxxx (2)
8a. Enter Fuse/Lock Bit Read 0100011_00000100 xxxxxxx_xxxxxxxx
8b. Read Extended Fuse Byte(6) 0111010_00000000
0111011_00000000
xxxxxxx_xxxxxxxx
xxxxxxx_oooooooo
8c. Read Fuse High Byte(7) 0111110_00000000
0111111_00000000
xxxxxxx_xxxxxxxx
xxxxxxx_oooooooo
Table 30-18. JTAG Programming Instruction (Continued)
Set (Continued) a = address high bits, b = address low bits, c = address extended bits, H = 0 - Low byte, 1 - High Byte,
o = data out, i = data in, x = don’t care
Instruction TDI Sequence TDO Sequence Notes361
2549P–AVR–10/2012
ATmega640/1280/1281/2560/2561
Notes: 1. This command sequence is not required if the seven MSB are correctly set by the previous command sequence (which is
normally the case).
2. Repeat until o = “1”.
3. Set bits to “0” to program the corresponding Fuse, “1” to unprogram the Fuse.
4. Set bits to “0” to program the corresponding Lock bit, “1” to leave the Lock bit unchanged.
5. “0” = programmed, “1” = unprogrammed.
6. The bit mapping for Fuses Extended byte is listed in Table 30-3 on page 336.
7. The bit mapping for Fuses High byte is listed in Table 30-4 on page 337.
8. The bit mapping for Fuses Low byte is listed in Table 30-5 on page 337.
9. The bit mapping for Lock bits byte is listed in Table 30-1 on page 335.
10. Address bits exceeding PCMSB and EEAMSB (Table 30-7 on page 338 and Table 30-8 on page 338) are don’t care.
11. All TDI and TDO sequences are represented by binary digits (0b...).
8d. Read Fuse Low Byte(8) 0110010_00000000
0110011_00000000
xxxxxxx_xxxxxxxx
xxxxxxx_oooooooo
8e. Read Lock Bits(9) 0110110_00000000
0110111_00000000
xxxxxxx_xxxxxxxx
xxxxxxx_xxoooooo (5)
8f. Read Fuses and Lock Bits
0111010_00000000
0111110_00000000
0110010_00000000
0110110_00000000
0110111_00000000
xxxxxxx_xxxxxxxx
xxxxxxx_oooooooo
xxxxxxx_oooooooo
xxxxxxx_oooooooo
xxxxxxx_oooooooo
(5)
Fuse Ext. byte
Fuse High byte
Fuse Low byte
Lock bits
9a. Enter Signature Byte Read 0100011_00001000 xxxxxxx_xxxxxxxx
9b. Load Address Byte 0000011_bbbbbbbb xxxxxxx_xxxxxxxx
9c. Read Signature Byte 0110010_00000000
0110011_00000000
xxxxxxx_xxxxxxxx
xxxxxxx_oooooooo
10a. Enter Calibration Byte Read 0100011_00001000 xxxxxxx_xxxxxxxx
10b. Load Address Byte 0000011_bbbbbbbb xxxxxxx_xxxxxxxx
10c. Read Calibration Byte 0110110_00000000
0110111_00000000
xxxxxxx_xxxxxxxx
xxxxxxx_oooooooo
11a. Load No Operation Command 0100011_00000000
0110011_00000000
xxxxxxx_xxxxxxxx
xxxxxxx_xxxxxxxx
Table 30-18. JTAG Programming Instruction (Continued)
Set (Continued) a = address high bits, b = address low bits, c = address extended bits, H = 0 - Low byte, 1 - High Byte,
o = data out, i = data in, x = don’t care
Instruction TDI Sequence TDO Sequence Notes362
2549P–AVR–10/2012
ATmega640/1280/1281/2560/2561
Figure 30-16. State Machine Sequence for Changing/Reading the Data Word
30.9.11 Flash Data Byte Register
The Flash Data Byte Register provides an efficient way to load the entire Flash page buffer
before executing Page Write, or to read out/verify the content of the Flash. A state machine sets
up the control signals to the Flash and senses the strobe signals from the Flash, thus only the
data words need to be shifted in/out.
The Flash Data Byte Register actually consists of the 8-bit scan chain and a 8-bit temporary register.
During page load, the Update-DR state copies the content of the scan chain over to the
temporary register and initiates a write sequence that within 11 TCK cycles loads the content of
the temporary register into the Flash page buffer. The AVR automatically alternates between
writing the low and the high byte for each new Update-DR state, starting with the low byte for the
first Update-DR encountered after entering the PROG_PAGELOAD command. The Program
Counter is pre-incremented before writing the low byte, except for the first written byte. This
ensures that the first data is written to the address set up by PROG_COMMANDS, and loading
the last location in the page buffer does not make the Program Counter increment into the next
page.
During Page Read, the content of the selected Flash byte is captured into the Flash Data Byte
Register during the Capture-DR state. The AVR automatically alternates between reading the
low and the high byte for each new Capture-DR state, starting with the low byte for the first CapTest-Logic-Reset
Run-Test/Idle
Shift-DR
Exit1-DR
Pause-DR
Exit2-DR
Update-DR
Select-IR Scan
Capture-IR
Shift-IR
Exit1-IR
Pause-IR
Exit2-IR
Update-IR
Select-DR Scan
Capture-DR
0
1
0 11 1
0 0
0 0
1 1
1 0
1
1
0
1
0
0
1 0
1
1
0
1
0
0
0 0
1 1363
2549P–AVR–10/2012
ATmega640/1280/1281/2560/2561
ture-DR encountered after entering the PROG_PAGEREAD command. The Program Counter is
post-incremented after reading each high byte, including the first read byte. This ensures that
the first data is captured from the first address set up by PROG_COMMANDS, and reading the
last location in the page makes the program counter increment into the next page.
Figure 30-17. Flash Data Byte Register
The state machine controlling the Flash Data Byte Register is clocked by TCK. During normal
operation in which eight bits are shifted for each Flash byte, the clock cycles needed to navigate
through the TAP controller automatically feeds the state machine for the Flash Data Byte Register
with sufficient number of clock pulses to complete its operation transparently for the user.
However, if too few bits are shifted between each Update-DR state during page load, the TAP
controller should stay in the Run-Test/Idle state for some TCK cycles to ensure that there are at
least 11 TCK cycles between each Update-DR state.
30.9.12 Programming Algorithm
All references below of type “1a”, “1b”, and so on, refer to Table 30-18 on page 359.
30.9.13 Entering Programming Mode
1. Enter JTAG instruction AVR_RESET and shift 1 in the Reset Register.
2. Enter instruction PROG_ENABLE and shift 0b1010_0011_0111_0000 in the Programming
Enable Register.
30.9.14 Leaving Programming Mode
1. Enter JTAG instruction PROG_COMMANDS.
2. Disable all programming instructions by using no operation instruction 11a.
3. Enter instruction PROG_ENABLE and shift 0b0000_0000_0000_0000 in the programming
Enable Register.
4. Enter JTAG instruction AVR_RESET and shift 0 in the Reset Register.
TDI
TDO
D
A
T
A
Flash
EEPROM
Fuses
Lock Bits
STROBES
ADDRESS
State
Machine364
2549P–AVR–10/2012
ATmega640/1280/1281/2560/2561
30.9.15 Performing Chip Erase
1. Enter JTAG instruction PROG_COMMANDS.
2. Start Chip Erase using programming instruction 1a.
3. Poll for Chip Erase complete using programming instruction 1b, or wait for tWLRH_CE (refer
to Table 30-14 on page 348).
30.9.16 Programming the Flash
Before programming the Flash a Chip Erase must be performed, see “Performing Chip Erase”
on page 364.
1. Enter JTAG instruction PROG_COMMANDS.
2. Enable Flash write using programming instruction 2a.
3. Load address Extended High byte using programming instruction 2b.
4. Load address High byte using programming instruction 2c.
5. Load address Low byte using programming instruction 2d.
6. Load data using programming instructions 2e, 2f and 2g.
7. Repeat steps 5 and 6 for all instruction words in the page.
8. Write the page using programming instruction 2h.
9. Poll for Flash write complete using programming instruction 2i, or wait for tWLRH (refer to
Table 30-14 on page 348).
10. Repeat steps 3 to 9 until all data have been programmed.
A more efficient data transfer can be achieved using the PROG_PAGELOAD instruction:
1. Enter JTAG instruction PROG_COMMANDS.
2. Enable Flash write using programming instruction 2a.
3. Load the page address using programming instructions 2b, 2c and 2d. PCWORD (refer
to Table 30-7 on page 338) is used to address within one page and must be written as 0.
4. Enter JTAG instruction PROG_PAGELOAD.
5. Load the entire page by shifting in all instruction words in the page byte-by-byte, starting
with the LSB of the first instruction in the page and ending with the MSB of the last
instruction in the page. Use Update-DR to copy the contents of the Flash Data Byte Register
into the Flash page location and to auto-increment the Program Counter before
each new word.
6. Enter JTAG instruction PROG_COMMANDS.
7. Write the page using programming instruction 2h.
8. Poll for Flash write complete using programming instruction 2i, or wait for tWLRH (refer to
Table 30-14 on page 348).
9. Repeat steps 3 to 8 until all data have been programmed.
30.9.17 Reading the Flash
1. Enter JTAG instruction PROG_COMMANDS.
2. Enable Flash read using programming instruction 3a.
3. Load address using programming instructions 3b, 3c and 3d.
4. Read data using programming instruction 3e.
5. Repeat steps 3 and 4 until all data have been read.365
2549P–AVR–10/2012
ATmega640/1280/1281/2560/2561
A more efficient data transfer can be achieved using the PROG_PAGEREAD instruction:
1. Enter JTAG instruction PROG_COMMANDS.
2. Enable Flash read using programming instruction 3a.
3. Load the page address using programming instructions 3b, 3c and 3d. PCWORD (refer
to Table 30-7 on page 338) is used to address within one page and must be written as 0.
4. Enter JTAG instruction PROG_PAGEREAD.
5. Read the entire page (or Flash) by shifting out all instruction words in the page (or Flash),
starting with the LSB of the first instruction in the page (Flash) and ending with the MSB
of the last instruction in the page (Flash). The Capture-DR state both captures the data
from the Flash, and also auto-increments the program counter after each word is read.
Note that Capture-DR comes before the shift-DR state. Hence, the first byte which is
shifted out contains valid data.
6. Enter JTAG instruction PROG_COMMANDS.
7. Repeat steps 3 to 6 until all data have been read.
30.9.18 Programming the EEPROM
Before programming the EEPROM a Chip Erase must be performed, see “Performing Chip
Erase” on page 364.
1. Enter JTAG instruction PROG_COMMANDS.
2. Enable EEPROM write using programming instruction 4a.
3. Load address High byte using programming instruction 4b.
4. Load address Low byte using programming instruction 4c.
5. Load data using programming instructions 4d and 4e.
6. Repeat steps 4 and 5 for all data bytes in the page.
7. Write the data using programming instruction 4f.
8. Poll for EEPROM write complete using programming instruction 4g, or wait for tWLRH
(refer to Table 30-14 on page 348).
9. Repeat steps 3 to 8 until all data have been programmed.
Note that the PROG_PAGELOAD instruction can not be used when programming the EEPROM.
30.9.19 Reading the EEPROM
1. Enter JTAG instruction PROG_COMMANDS.
2. Enable EEPROM read using programming instruction 5a.
3. Load address using programming instructions 5b and 5c.
4. Read data using programming instruction 5d.
5. Repeat steps 3 and 4 until all data have been read.
Note that the PROG_PAGEREAD instruction can not be used when reading the EEPROM.
30.9.20 Programming the Fuses
1. Enter JTAG instruction PROG_COMMANDS.
2. Enable Fuse write using programming instruction 6a.
3. Load data high byte using programming instructions 6b. A bit value of “0” will program the
corresponding fuse, a “1” will unprogram the fuse.
4. Write Fuse High byte using programming instruction 6c.366
2549P–AVR–10/2012
ATmega640/1280/1281/2560/2561
5. Poll for Fuse write complete using programming instruction 6d, or wait for tWLRH (refer to
Table 30-14 on page 348).
6. Load data low byte using programming instructions 6e. A “0” will program the fuse, a “1”
will unprogram the fuse.
7. Write Fuse low byte using programming instruction 6f.
8. Poll for Fuse write complete using programming instruction 6g, or wait for tWLRH (refer to
Table 30-14 on page 348).
30.9.21 Programming the Lock Bits
1. Enter JTAG instruction PROG_COMMANDS.
2. Enable Lock bit write using programming instruction 7a.
3. Load data using programming instructions 7b. A bit value of “0” will program the corresponding
lock bit, a “1” will leave the lock bit unchanged.
4. Write Lock bits using programming instruction 7c.
5. Poll for Lock bit write complete using programming instruction 7d, or wait for tWLRH (refer
to Table 30-14 on page 348).
30.9.22 Reading the Fuses and Lock Bits
1. Enter JTAG instruction PROG_COMMANDS.
2. Enable Fuse/Lock bit read using programming instruction 8a.
3. To read all Fuses and Lock bits, use programming instruction 8e.
To only read Fuse High byte, use programming instruction 8b.
To only read Fuse Low byte, use programming instruction 8c.
To only read Lock bits, use programming instruction 8d.
30.9.23 Reading the Signature Bytes
1. Enter JTAG instruction PROG_COMMANDS.
2. Enable Signature byte read using programming instruction 9a.
3. Load address 0x00 using programming instruction 9b.
4. Read first signature byte using programming instruction 9c.
5. Repeat steps 3 and 4 with address 0x01 and address 0x02 to read the second and third
signature bytes, respectively.
30.9.24 Reading the Calibration Byte
1. Enter JTAG instruction PROG_COMMANDS.
2. Enable Calibration byte read using programming instruction 10a.
3. Load address 0x00 using programming instruction 10b.
4. Read the calibration byte using programming instruction 10c.367
2549P–AVR–10/2012
ATmega640/1280/1281/2560/2561
31. Electrical Characteristics
Absolute Maximum Ratings*
31.1 DC Characteristics
Operating Temperature.................................. -55°C to +125°C *NOTICE: Stresses beyond those listed under “Absolute
Maximum Ratings” may cause permanent damage
to the device. This is a stress rating only and
functional operation of the device at these or
other conditions beyond those indicated in the
operational sections of this specification is not
implied. Exposure to absolute maximum rating
conditions for extended periods may affect
device reliability.
Storage Temperature ..................................... -65°C to +150°C
Voltage on any Pin except RESET
with respect to Ground ................................-0.5V to VCC+0.5V
Voltage on RESET with respect to Ground......-0.5V to +13.0V
Maximum Operating Voltage ............................................ 6.0V
DC Current per I/O Pin ................................................ 40.0mA
DC Current VCC and GND Pins................................. 200.0mA
TA = -40°C to 85°C, VCC = 1.8V to 5.5V (unless otherwise noted)
Symbol Parameter Condition Min. Typ. Max. Units
VIL
Input Low Voltage, Except
XTAL1 and Reset pin
VCC = 1.8V - 2.4V
VCC = 2.4V - 5.5V
-0.5
-0.5
0.2VCC(1)
0.3VCC(1)
V
VIL1
Input Low Voltage,
XTAL1 pin VCC = 1.8V - 5.5V -0.5 0.1VCC(1)
VIL2
Input Low Voltage,
RESET pin VCC = 1.8V - 5.5V -0.5 0.1VCC(1)
VIH
Input High Voltage,
Except XTAL1 and
RESET pins
VCC = 1.8V - 2.4V
VCC = 2.4V - 5.5V
0.7VCC(2)
0.6VCC(2)
VCC + 0.5
VCC + 0.5
VIH1
Input High Voltage,
XTAL1 pin
VCC = 1.8V - 2.4V
VCC = 2.4V - 5.5V
0.8VCC(2)
0.7VCC(2)
VCC + 0.5
VCC + 0.5
VIH2
Input High Voltage,
RESET pin VCC = 1.8V - 5.5V 0.9VCC(2) VCC + 0.5
VOL
Output Low Voltage(3),
Except RESET pin
I
OL = 20mA, VCC = 5V
IOL = 10mA, VCC = 3V
0.9
0.6
VOH
Output High Voltage(4),
Except RESET pin
IOH = -20mA, VCC = 5V
IOH = -10mA, VCC = 3V
4.2
2.3
I
IL
Input Leakage
Current I/O Pin
VCC = 5.5V, pin low
(absolute value) 1
µA
IIH
Input Leakage
Current I/O Pin
VCC = 5.5V, pin high
(absolute value) 1
RRST Reset Pull-up Resistor 30 60
kΩ
RPU I/O Pin Pull-up Resistor 20 50368
2549P–AVR–10/2012
ATmega640/1280/1281/2560/2561
Notes: 1. "Max" means the highest value where the pin is guaranteed to be read as low.
2. "Min" means the lowest value where the pin is guaranteed to be read as high.
3. Although each I/O port can sink more than the test conditions (20mA at VCC = 5V, 10mA at VCC = 3V) under steady state
conditions (non-transient), the following must be observed:
ATmega1281/2561:
1.)The sum of all IOL, for ports A0-A7, G2, C4-C7 should not exceed 100mA.
2.)The sum of all IOL, for ports C0-C3, G0-G1, D0-D7 should not exceed 100mA.
3.)The sum of all IOL, for ports G3-G5, B0-B7, E0-E7 should not exceed 100mA.
4.)The sum of all IOL, for ports F0-F7 should not exceed 100mA.
ATmega640/1280/2560:
1.)The sum of all IOL, for ports J0-J7, A0-A7, G2 should not exceed 200mA.
2.)The sum of all IOL, for ports C0-C7, G0-G1, D0-D7, L0-L7 should not exceed 200mA.
3.)The sum of all IOL, for ports G3-G4, B0-B7, H0-B7 should not exceed 200mA.
4.)The sum of all IOL, for ports E0-E7, G5 should not exceed 100mA.
5.)The sum of all IOL, for ports F0-F7, K0-K7 should not exceed 100mA.
If IOL exceeds the test condition, VOL may exceed the related specification. Pins are not guaranteed to sink current greater
than the listed test condition.
4. Although each I/O port can source more than the test conditions (20mA at VCC = 5V, 10mA at VCC = 3V) under steady
state conditions (non-transient), the following must be observed:
ATmega1281/2561:
1)The sum of all IOH, for ports A0-A7, G2, C4-C7 should not exceed 100mA.
2)The sum of all IOH, for ports C0-C3, G0-G1, D0-D7 should not exceed 100mA.
3)The sum of all IOH, for ports G3-G5, B0-B7, E0-E7 should not exceed 100mA.
4)The sum of all IOH, for ports F0-F7 should not exceed 100mA.
ATmega640/1280/2560:
1)The sum of all IOH, for ports J0-J7, G2, A0-A7 should not exceed 200mA.
2)The sum of all IOH, for ports C0-C7, G0-G1, D0-D7, L0-L7 should not exceed 200mA.
3)The sum of all IOH, for ports G3-G4, B0-B7, H0-H7 should not exceed 200mA.
4)The sum of all IOH, for ports E0-E7, G5 should not exceed 100mA.
ICC
Power Supply Current(5)
Active 1MHz, VCC = 2V
(ATmega640/1280/2560/1V) 0.5 0.8
mA
Active 4MHz, VCC = 3V
(ATmega640/1280/2560/1L) 3.2 5
Active 8MHz, VCC = 5V
(ATmega640/1280/1281/2560/2561) 10 14
Idle 1MHz, VCC = 2V
(ATmega640/1280/2560/1V) 0.14 0.22
Idle 4MHz, VCC = 3V
(ATmega640/1280/2560/1L) 0.7 1.1
Idle 8MHz, VCC = 5V
(ATmega640/1280/1281/2560/2561) 2.7 4
Power-down mode
WDT enabled, VCC = 3V <5 15
µA
WDT disabled, VCC = 3V <1 7.5
VACIO
Analog Comparator
Input Offset Voltage
VCC = 5V
Vin = VCC/2 <10 40 mV
I
ACLK
Analog Comparator
Input Leakage Current
VCC = 5V
Vin = VCC/2 -50 50 nA
t
ACID
Analog Comparator
Propagation Delay
VCC = 2.7V
VCC = 4.0V
750
500 ns
TA = -40°C to 85°C, VCC = 1.8V to 5.5V (unless otherwise noted) (Continued)
Symbol Parameter Condition Min. Typ. Max. Units369
2549P–AVR–10/2012
ATmega640/1280/1281/2560/2561
5)The sum of all IOH, for ports F0-F7, K0-K7 should not exceed 100mA.
If IOH exceeds the test condition, VOH may exceed the related specification. Pins are not guaranteed to source current
greater than the listed test condition.
5. Values with “PRR1 – Power Reduction Register 1” enabled (0xFF).
31.2 Speed Grades
Maximum frequency is depending on VCC. As shown in Figure 31-1 trough Figure 31-4 on page
370, the Maximum Frequency vs. VCC curve is linear between 1.8V < VCC < 2.7V and between
2.7V < VCC < 4.5V.
31.2.1 8MHz
Figure 31-1. Maximum Frequency vs. VCC, ATmega640V/1280V/1281V/2560V/2561V
Figure 31-2. Maximum Frequency vs. VCC when also No-Read-While-Write Section(1),
ATmega2560V/ATmega2561V, is used
Note: 1. When only using the Read-While-Write Section of the program memory, a higher speed can
be achieved at low voltage, see “Read-While-Write and No Read-While-Write Flash Sections”
on page 317 for addresses.
8 MHz
4 MHz
1.8V 2.7V 5.5V
Safe Operating Area
8 MHz
2 MHz
1.8V 2.7V 5.5V
Safe Operating Area370
2549P–AVR–10/2012
ATmega640/1280/1281/2560/2561
31.2.2 16 MHz
Figure 31-3. Maximum Frequency vs. VCC, ATmega640/ATmega1280/ATmega1281
Figure 31-4. Maximum Frequency vs. VCC, ATmega2560/ATmega2561
16 MHz
8 MHz
2.7V 4.5V 5.5V
Safe Operating Area
16 MHz
4.5V 5.5V
Safe Operating Area371
2549P–AVR–10/2012
ATmega640/1280/1281/2560/2561
31.3 Clock Characteristics
31.3.1 Calibrated Internal RC Oscillator Accuracy
Notes: 1. Voltage range for ATmega640V/1281V/1280V/2561V/2560V.
2. Voltage range for ATmega640/1281/1280/2561/2560.
31.3.2 External Clock Drive Waveforms
Figure 31-5. External Clock Drive Waveforms
31.4 External Clock Drive
Table 31-1. Calibration Accuracy of Internal RC Oscillator
Frequency VCC Temperature Calibration Accuracy
Factory Calibration 8.0MHz 3V 25°C ±10%
User Calibration 7.3MHz - 8.1MHz 1.8V - 5.5V(1)
2.7V - 5.5V(2) -40°C - 85°C ±1%
VIL1
VIH1
Table 31-2. External Clock Drive
Symbol Parameter
VCC = 1.8V - 5.5V VCC = 2.7V - 5.5V VCC = 4.5V - 5.5V
Min. Max. Min. Max. Min. Max. Units
1/tCLCL
Oscillator
Frequency 0 2 0 8 0 16 MHz
tCLCL Clock Period 500 125 62.5
tCHCX High Time 200 50 25 ns
t
CLCX Low Time 200 50 25
t
CLCH Rise Time 2.0 1.6 0.5
μs
tCHCL Fall Time 2.0 1.6 0.5
ΔtCLCL
Change in period
from one clock
cycle to the next
2 2 2%372
2549P–AVR–10/2012
ATmega640/1280/1281/2560/2561
31.5 System and Reset Characteristics
Note: 1. The Power-on Reset will not work unless the supply voltage has been below VPOT (falling).
31.5.1 Standard Power-On Reset
This implementation of power-on reset existed in early versions of
ATmega640/1280/1281/2560/2561. The table below describes the characteristics of this poweron
reset and it is valid for the following devices only:
• ATmega640: revision A
• ATmega1280: revision A
• ATmega1281: revision A
• ATmega2560: revision A to E
• ATmega2561: revision A to E
Table 31-4. Characteristics of Standard Power-On Reset. TA= -40 to +85°C.
Notes: 1. Values are guidelines only.
2. Threshold where device is released from reset when voltage is rising.
3. The power-on reset threshold voltage (falling) will not work unless the supply voltage has been
below VPOT.
Table 31-3. Reset, Brown-out and Internal voltage CharacteristicsCharacteristics
Symbol Parameter Condition Min Typ Max Units
VRST RESET Pin Threshold Voltage 0.2VCC 0.9VCC V
tRST Minimum pulse width on RESET Pin 2.5 µs
VHYST Brown-out Detector Hysteresis 50 mV
tBOD Min Pulse Width on Brown-out Reset 2 µs
VBG Bandgap reference voltage VCC=2.7V, TA= 25°C 1.0 1.1 1.2 V
t
BG Bandgap reference start-up time VCC=2.7V, TA= 25°C 40 70 µs
I
BG Bandgap reference current consumption VCC=2.7V, TA= 25°C 10 µA
Symbol Parameter Min.(1) Typ.(1) Max.(1) Units
VPOT
Power-on Reset Threshold Voltage (rising)(2) 0.7 1.0 1.4 V
Power-on Reset Threshold Voltage (falling)(3) 0.05 0.9 1.3 V
VPSR Power-on slope rate 0.01 4.5 V/ms373
2549P–AVR–10/2012
ATmega640/1280/1281/2560/2561
31.5.2 Enhanced Power-On Reset
This implementation of power-on reset exists in newer versions of
ATmega640/1280/1281/2560/2561. The table below describes the characteristics of this poweron
reset and it is valid for the following devices only:
• ATmega640: revision B and newer
• ATmega1280: revision B and newer
• ATmega1281: revision B and newer
• ATmega2560: revision F and newer
• ATmega2561: revision F and newer
Table 31-5. Characteristics of Enhanced Power-On Reset. TA= -40 to +85°C.
Notes: 1. Values are guidelines only.
2. Threshold where device is released from reset when voltage is rising.
3. The power-on reset threshold voltage (falling) will not work unless the supply voltage has been
below VPOT.
Note: 1. VBOT may be below nominal minimum operating voltage for some devices. For devices where this is the case, the device is
tested down to VCC = VBOT during the production test. This guarantees that a Brown-Out Reset will occur before VCC drops to
a voltage where correct operation of the microcontroller is no longer guaranteed. The test is performed using
BODLEVEL = 110 for 4MHz operation of ATmega640V/1280V/1281V/2560V/2561V, BODLEVEL = 101 for 8MHz operation
of ATmega640V/1280V/1281V/2560V/2561V and ATmega640/1280/1281, and BODLEVEL = 100 for 16MHz operation of
ATmega640/1280/1281/2560/2561.
31.6 2-wire Serial Interface Characteristics
Table 31-7 on page 374 describes the requirements for devices connected to the 2-wire Serial
Bus. The ATmega640/1280/1281/2560/2561 2-wire Serial Interface meets or exceeds these
requirements under the noted conditions.
Timing symbols refer to Figure 31-6 on page 375.
Symbol Parameter Min.(1) Typ.(1) Max.(1) Units
VPOT
Power-on Reset Threshold Voltage (rising)(2) 1.1 1.4 1.6 V
Power-on Reset Threshold Voltage (falling)(3) 0.6 1.3 1.6 V
VPSR Power-On Slope Rate 0.01 V/ms
Table 31-6. BODLEVEL Fuse Coding(1)
BODLEVEL 2:0 Fuses Min VBOT Typ VBOT Max VBOT Units
111 BOD Disabled
110 1.7 1.8 2.0
101 2.5 2.7 2.9 V
100 4.1 4.3 4.5
011
Reserved
010
001
000374
2549P–AVR–10/2012
ATmega640/1280/1281/2560/2561
Notes: 1. In ATmega640/1280/1281/2560/2561, this parameter is characterized and not 100% tested.
2. Required only for fSCL > 100kHz.
3. Cb = capacitance of one bus line in pF.
4. fCK = CPU clock frequency.
Table 31-7. 2-wire Serial Bus Requirements
Symbol Parameter Condition Min Max Units
VIL Input Low-voltage -0.5 0.3 VCC
V
VIH Input High-voltage 0.7 VCC VCC + 0.5
Vhys(1) Hysteresis of Schmitt Trigger Inputs 0.05 VCC(2) –
VOL(1) Output Low-voltage 3mA sink current 0 0.4
tr
(1) Rise Time for both SDA and SCL 20 +
0.1Cb
(3)(2) 300
ns tof
(1) Output Fall Time from VIHmin to VILmax 10pF < Cb < 400pF(3) 20 +
0.1Cb
(3)(2) 250
tSP(1) Spikes Suppressed by Input Filter 0 50(2)
Ii Input Current each I/O Pin 0.1VCC < Vi
< 0.9VCC -10 10 µA
Ci
(1) Capacitance for each I/O Pin – 10 pF
fSCL SCL Clock Frequency fCK(4) > max(16fSCL,
250kHz)(5) 0 400 kHz
Rp Value of Pull-up resistor
fSCL ≤ 100kHz
fSCL > 100kHz
tHD;STA Hold Time (repeated) START Condition
fSCL ≤ 100kHz 4.0 –
µs
fSCL > 100kHz 0.6 –
tLOW Low Period of the SCL Clock
fSCL ≤ 100kHz(6) 4.7 –
fSCL > 100kHz(7) 1.3 –
tHIGH High period of the SCL clock
fSCL ≤ 100kHz 4.0 –
fSCL > 100kHz 0.6 –
tSU;STA Set-up time for a repeated START condition
fSCL ≤ 100kHz 4.7 –
fSCL > 100kHz 0.6 –
tHD;DAT Data hold time
fSCL ≤ 100kHz 0 3.45
fSCL > 100kHz 0 0.9
tSU;DAT Data setup time
fSCL ≤ 100kHz 250 –
fSCL > 100kHz 100 –
tSU;STO Setup time for STOP condition
fSCL ≤ 100kHz 4.0 –
fSCL > 100kHz 0.6 –
tBUF
Bus free time between a STOP and START
condition
fSCL ≤ 100kHz 4.7 –
fSCL > 100kHz 1.3 –
VCC – 0.4V
3mA ---------------------------- 1000ns
Cb
-------------------
Ω
VCC – 0.4V
3mA ---------------------------- 300 ns
Cb
-----------------375
2549P–AVR–10/2012
ATmega640/1280/1281/2560/2561
5. This requirement applies to all ATmega640/1280/1281/2560/2561 2-wire Serial Interface operation. Other devices connected
to the 2-wire Serial Bus need only obey the general fSCL requirement.
6. The actual low period generated by the ATmega640/1280/1281/2560/2561 2-wire Serial Interface is (1/fSCL - 2/fCK), thus fCK
must be greater than 6MHz for the low time requirement to be strictly met at fSCL = 100kHz.
7. The actual low period generated by the ATmega640/1280/1281/2560/2561 2-wire Serial Interface is (1/fSCL - 2/fCK), thus the
low time requirement will not be strictly met for fSCL > 308kHz when fCK = 8MHz. Still, ATmega640/1280/1281/2560/2561
devices connected to the bus may communicate at full speed (400kHz) with other ATmega640/1280/1281/2560/2561
devices, as well as any other device with a proper tLOW acceptance margin.
Figure 31-6. 2-wire Serial Bus Timing
31.7 SPI Timing Characteristics
See Figure 31-7 on page 376 and Figure 31-8 on page 376 for details.
Note: 1. In SPI Programming mode the minimum SCK high/low period is:
- 2 tCLCL for fCK < 12MHz
- 3 tCLCL for fCK > 12MHz
t
SU;STA
t
LOW
t
HIGH
t
LOW
t
of
t
HD;STA t
HD;DAT t
SU;DAT t
SU;STO
t
BUF
SCL
SDA
t
r
Table 31-8. SPI Timing Parameters
Description Mode Min Typ Max
1 SCK period Master See Table 21-5 on
page 203
ns
2 SCK high/low Master 50% duty cycle
3 Rise/Fall time Master 3.6
4 Setup Master 10
5 Hold Master 10
6 Out to SCK Master 0.5 • tsck
7 SCK to out Master 10
8 SCK to out high Master 10
9 SS low to out Slave 15
10 SCK period Slave 4 • tck
11 SCK high/low(1) Slave 2 • tck
12 Rise/Fall time Slave 1600
13 Setup Slave 10
14 Hold Slave tck
15 SCK to out Slave 15
16 SCK to SS high Slave 20
17 SS high to tri-state Slave 10
18 SS low to SCK Slave 20376
2549P–AVR–10/2012
ATmega640/1280/1281/2560/2561
Figure 31-7. SPI Interface Timing Requirements (Master Mode)
Figure 31-8. SPI Interface Timing Requirements (Slave Mode)
MOSI
(Data Output)
SCK
(CPOL = 1)
MISO
(Data Input)
SCK
(CPOL = 0)
SS
MSB LSB
MSB LSB
...
...
6 1
2 2
4 5 3
7 8
MISO
(Data Output)
SCK
(CPOL = 1)
MOSI
(Data Input)
SCK
(CPOL = 0)
SS
MSB LSB
MSB LSB
...
...
10
11 11
13 14 12
15 17
9
X
16377
2549P–AVR–10/2012
ATmega640/1280/1281/2560/2561
31.8 ADC Characteristics – Preliminary Data
Note: 1. Values are guidelines only.
Table 31-9. ADC Characteristics, Singel Ended Channels
Symbol Parameter Condition Min(1) Typ(1) Max(1) Units
Resolution Single Ended Conversion 10 Bits
Absolute accuracy (Including
INL, DNL, quantization error,
gain and offset error)
Single Ended Conversion
VREF = 4V, VCC = 4V,
CLKADC= 200kHz
2.25 2.5
LSB
Single Ended Conversion
VREF = 4V, VCC = 4V,
CLKADC = 1MHz
3
Single Ended Conversion
VREF = 4V, VCC = 4V,
CLKADC = 200kHz
Noise Reduction Mode
2
Single Ended Conversion
VREF = 4V, VCC = 4V,
CLKADC = 1MHz
Noise Reduction Mode
3
Integral Non-Linearity (INL)
Single Ended Conversion
VREF = 4V, VCC = 4V,
CLKADC = 200kHz
1.25
Differential Non-Linearity (DNL)
Single Ended Conversion
VREF = 4V, VCC = 4V,
CLKADC = 200kHz
0.5
Gain Error
Single Ended Conversion
VREF = 4V, VCC = 4V,
CLKADC= 200kHz
2
Offset Error
Single Ended Conversion
VREF = 4V, VCC = 4V,
CLKADC = 200kHz
-2
Conversion Time Free Running Conversion 13 260 µs
Clock Frequency Single Ended Conversion 50 1000 kHz
AVCC Analog Supply Voltage VCC - 0.3 VCC + 0.3
VREF Reference Voltage 1.0 AVCC V
VIN Input Voltage GND VREF
Input Bandwidth 38,5 kHz
VINT1 Internal Voltage Reference 1.1V 1.0 1.1 1.2
V
VINT2 Internal Voltage Reference 2.56V 2.4 2.56 2.8
RREF Reference Input Resistance 32 kΩ
RAIN Analog Input Resistance 100 MΩ378
2549P–AVR–10/2012
ATmega640/1280/1281/2560/2561
Table 31-10. ADC Characteristics, Differential Channels
Symbol Parameter Condition Min(1) Typ(1) Max(1) Units
Resolution
Gain = 1× 8
Gain = 10× 8 Bits
Gain = 200× 7
Absolute Accuracy(Including INL, DNL,
Quantization Error, Gain and Offset Error)
Gain = 1×
VREF = 4V, VCC = 5V
CLKADC = 50 - 200kHz
18
LSB
Gain = 10×
VREF = 4V, VCC = 5V
CLKADC = 50 - 200kHz
17
Gain = 200×
VREF = 4V, VCC = 5V
CLKADC = 50 - 200kHz
9
Integral Non-Linearity (INL)
Gain = 1×
VREF = 4V, VCC = 5V
CLKADC = 50 - 200kHz
2.5
Gain = 10×
VREF = 4V, VCC = 5V
CLKADC = 50 - 200kHz
5
Gain = 200×
VREF = 4V, VCC = 5V
CLKADC = 50 - 200kHz
9
Differential Non-Linearity (DNL)
Gain = 1×
VREF = 4V, VCC = 5V
CLKADC = 50 - 200kHz
0.75
Gain = 10×
VREF = 4V, VCC = 5V
CLKADC = 50 - 200kHz
1.5
Gain = 200×
VREF = 4V, VCC = 5V
CLKADC = 50 - 200kHz
10
Gain Error
Gain = 1× 1.7
Gain = 10× 1.7 %
Gain = 200× 0.5
Offset Error
Gain = 1×
VREF = 4V, VCC = 5V
CLKADC = 50 - 200kHz
2
LSB
Gain = 10×
VREF = 4V, VCC = 5V
CLKADC = 50 - 200kHz
2
Gain = 200×
VREF = 4V, VCC = 5V
CLKADC = 50 - 200kHz
3
Clock Frequency 50 200 kHz
Conversion Time 65 260 µs379
2549P–AVR–10/2012
ATmega640/1280/1281/2560/2561
Note: Values are guidelines only.
31.9 External Data Memory Timing
Notes: 1. This assumes 50% clock duty cycle. The half period is actually the high time of the external clock, XTAL1.
2. This assumes 50% clock duty cycle. The half period is actually the low time of the external clock, XTAL1.
AVCC Analog Supply Voltage VCC - 0.3 VCC + 0.3
V
VREF Reference Voltage 2.7 AVCC - 0.5
VIN Input Voltage GND VCC
VDIFF Input Differential Voltage -VREF/Gain VREF/Gain
ADC Conversion Output -511 511 LSB
Input Bandwidth 4 kHz
VINT Internal Voltage Reference 2.3 2.56 2.8 V
RREF Reference Input Resistance 32 kΩ
RAIN Analog Input Resistance 100 MΩ
Table 31-11. External Data Memory Characteristics, 4.5 to 5.5 Volts, No Wait-state
Symbol Parameter
8MHz Oscillator Variable Oscillator
Min Max Min Max Unit
0 1/tCLCL Oscillator Frequency 0.0 16 MHz
1 tLHLL ALE Pulse Width 115 1.0tCLCL-10
ns
2 tAVLL Address Valid A to ALE Low 57.5 0.5tCLCL-5(1)
3a tLLAX_ST
Address Hold After ALE Low,
write access 5 5
3b tLLAX_LD
Address Hold after ALE Low,
read access 5 5
4 tAVLLC Address Valid C to ALE Low 57.5 0.5tCLCL-5(1)
5 tAVRL Address Valid to RD Low 115 1.0tCLCL-10
6 tAVWL Address Valid to WR Low 115 1.0tCLCL-10
7 tLLWL ALE Low to WR Low 47.5 67.5 0.5tCLCL-15(2) 0.5tCLCL+5(2)
8 tLLRL ALE Low to RD Low 47.5 67.5 0.5tCLCL-15(2) 0.5tCLCL+5(2)
9 tDVRH Data Setup to RD High 40 40
10 tRLDV Read Low to Data Valid 75 1.0tCLCL-50
11 tRHDX Data Hold After RD High 0 0
12 tRLRH RD Pulse Width 115 1.0tCLCL-10
13 tDVWL Data Setup to WR Low 42.5 0.5tCLCL-20(1)
14 tWHDX Data Hold After WR High 115 1.0tCLCL-10
15 tDVWH Data Valid to WR High 125 1.0tCLCL
16 tWLWH WR Pulse Width 115 1.0tCLCL-10
Table 31-10. ADC Characteristics, Differential Channels (Continued)
Symbol Parameter Condition Min(1) Typ(1) Max(1) Units380
2549P–AVR–10/2012
ATmega640/1280/1281/2560/2561
Table 31-12. External Data Memory Characteristics, 4.5 to 5.5 Volts, 1 Cycle Wait-state
Symbol Parameter
8MHz Oscillator Variable Oscillator
Min Max Min Max Unit
0 1/tCLCL Oscillator Frequency 0.0 16 MHz
10 tRLDV Read Low to Data Valid 200 2.0tCLCL-50
ns
12 tRLRH RD Pulse Width 240 2.0tCLCL-10
15 tDVWH Data Valid to WR High 240 2.0tCLCL
16 tWLWH WR Pulse Width 240 2.0tCLCL-10
Table 31-13. External Data Memory Characteristics, 4.5 to 5.5 Volts, SRWn1 = 1, SRWn0 = 0
Symbol Parameter
4MHz Oscillator Variable Oscillator
Min Max Min Max Unit
0 1/tCLCL Oscillator Frequency 0.0 16 MHz
10 tRLDV Read Low to Data Valid 325 3.0tCLCL-50
ns
12 tRLRH RD Pulse Width 365 3.0tCLCL-10
15 tDVWH Data Valid to WR High 375 3.0tCLCL
16 tWLWH WR Pulse Width 365 3.0tCLCL-10
Table 31-14. External Data Memory Characteristics, 4.5 to 5.5 Volts, SRWn1 = 1, SRWn0 = 1
Symbol Parameter
4MHz Oscillator Variable Oscillator
Min Max Min Max Unit
0 1/tCLCL Oscillator Frequency 0.0 16 MHz
10 tRLDV Read Low to Data Valid 325 3.0tCLCL-50
ns
12 tRLRH RD Pulse Width 365 3.0tCLCL-10
14 tWHDX Data Hold After WR High 240 2.0tCLCL-10
15 tDVWH Data Valid to WR High 375 3.0tCLCL
16 tWLWH WR Pulse Width 365 3.0tCLCL-10
Table 31-15. External Data Memory Characteristics, 2.7 to 5.5 Volts, No Wait-state
Symbol Parameter
4MHz Oscillator Variable Oscillator
Min Max Min Max Unit
0 1/tCLCL Oscillator Frequency 0.0 8 MHz381
2549P–AVR–10/2012
ATmega640/1280/1281/2560/2561
Notes: 1. This assumes 50% clock duty cycle. The half period is actually the high time of the external clock, XTAL1.
2. This assumes 50% clock duty cycle. The half period is actually the low time of the external clock, XTAL1.
1 tLHLL ALE Pulse Width 235 tCLCL-15
ns
2 tAVLL Address Valid A to ALE Low 115 0.5tCLCL-10(1)
3a tLLAX_ST
Address Hold After ALE Low,
write access 5 5
3b tLLAX_LD
Address Hold after ALE Low,
read access 5 5
4 tAVLLC Address Valid C to ALE Low 115 0.5tCLCL-10(1)
5 tAVRL Address Valid to RD Low 235 1.0tCLCL-15
6 tAVWL Address Valid to WR Low 235 1.0tCLCL-15
7 tLLWL ALE Low to WR Low 115 130 0.5tCLCL-10(2) 0.5tCLCL+5(2)
8 tLLRL ALE Low to RD Low 115 130 0.5tCLCL-10(2) 0.5tCLCL+5(2)
9 tDVRH Data Setup to RD High 45 45
10 tRLDV Read Low to Data Valid 190 1.0tCLCL-60
11 tRHDX Data Hold After RD High 0 0
12 tRLRH RD Pulse Width 235 1.0tCLCL-15
13 tDVWL Data Setup to WR Low 105 0.5tCLCL-20(1)
14 tWHDX Data Hold After WR High 235 1.0tCLCL-15
15 tDVWH Data Valid to WR High 250 1.0tCLCL
16 tWLWH WR Pulse Width 235 1.0tCLCL-15
Table 31-15. External Data Memory Characteristics, 2.7 to 5.5 Volts, No Wait-state (Continued)
Symbol Parameter
4MHz Oscillator Variable Oscillator
Min Max Min Max Unit
Table 31-16. External Data Memory Characteristics, 2.7 to 5.5 Volts, SRWn1 = 0, SRWn0 = 1
Symbol Parameter
4MHz Oscillator Variable Oscillator
Min Max Min Max Unit
0 1/tCLCL Oscillator Frequency 0.0 8 MHz
10 tRLDV Read Low to Data Valid 440 2.0tCLCL-60
ns
12 tRLRH RD Pulse Width 485 2.0tCLCL-15
15 tDVWH Data Valid to WR High 500 2.0tCLCL
16 tWLWH WR Pulse Width 485 2.0tCLCL-15382
2549P–AVR–10/2012
ATmega640/1280/1281/2560/2561
Figure 31-9. External Memory Timing (SRWn1 = 0, SRWn0 = 0
Table 31-17. External Data Memory Characteristics, 2.7 to 5.5 Volts, SRWn1 = 1, SRWn0 = 0
Symbol Parameter
4MHz Oscillator Variable Oscillator
Min Max Min Max Unit
0 1/tCLCL Oscillator Frequency 0.0 8 MHz
10 tRLDV Read Low to Data Valid 690 3.0tCLCL-60
ns
12 tRLRH RD Pulse Width 735 3.0tCLCL-15
15 tDVWH Data Valid to WR High 750 3.0tCLCL
16 tWLWH WR Pulse Width 735 3.0tCLCL-15
Table 31-18. External Data Memory Characteristics, 2.7 to 5.5 Volts, SRWn1 = 1, SRWn0 = 1
Symbol Parameter
4MHz Oscillator Variable Oscillator
Min Max Min Max Unit
0 1/tCLCL Oscillator Frequency 0.0 8 MHz
10 tRLDV Read Low to Data Valid 690 3.0tCLCL-60
ns
12 tRLRH RD Pulse Width 735 3.0tCLCL-15
14 tWHDX Data Hold After WR High 485 2.0tCLCL-15
15 tDVWH Data Valid to WR High 750 3.0tCLCL
16 tWLWH WR Pulse Width 735 3.0tCLCL-15
ALE
T1 T2 T3
Write Read
WR
T4
A15:8 Prev. addr. Address
DA7:0 Prev. data Address Data XX
RD
DA7:0 (XMBK = 0) Address Data
System Clock (CLKCPU)
1
4
2
7
6
3a
3b
5
8 12
16
13
10
11
14
15
9383
2549P–AVR–10/2012
ATmega640/1280/1281/2560/2561
Figure 31-10. External Memory Timing (SRWn1 = 0, SRWn0 = 1)
Figure 31-11. External Memory Timing (SRWn1 = 1, SRWn0 = 0)
ALE
T1 T2 T3
Write Read
WR
T5
A15:8 Prev. addr. Address
DA7:0 Prev. data Address XX Data
RD
DA7:0 (XMBK = 0) Address Data
System Clock (CLKCPU)
1
4
2
7
6
3a
3b
5
8 12
16
13
10
11
14
15
9
T4
ALE
T1 T2 T3
Write Read
WR
T6
A15:8 Prev. addr. Address
DA7:0 Prev. data Address Data XX
RD
DA7:0 (XMBK = 0) Address Data
System Clock (CLKCPU)
1
4
2
7
6
3a
3b
5
8 12
16
13
10
11
14
15
9
T4 T5384
2549P–AVR–10/2012
ATmega640/1280/1281/2560/2561
Figure 31-12. External Memory Timing (SRWn1 = 1, SRWn0 = 1)()
The ALE pulse in the last period (T4-T7) is only present if the next instruction accesses the RAM
(internal or external).
ALE
T1 T2 T3
Write Read
WR
T7
A15:8 Prev. addr. Address
DA7:0 Prev. data Address Data XX
RD
DA7:0 (XMBK = 0) Address Data
System Clock (CLKCPU)
1
4
2
7
6
3a
3b
5
8 12
16
13
10
11
14
15
9
T4 T5 T6385
2549P–AVR–10/2012
ATmega640/1280/1281/2560/2561
32. Typical Characteristics
The following charts show typical behavior. These figures are not tested during manufacturing.
All current consumption measurements are performed with all I/O pins configured as inputs and
with internal pull-ups enabled. A sine wave generator with rail-to-rail output is used as clock
source.
All Active- and Idle current consumption measurements are done with all bits in the PRR registers
set and thus, the corresponding I/O modules are turned off. Also the Analog Comparator is
disabled during these measurements. Table 32-1 on page 390 and Table 32-2 on page 391
show the additional current consumption compared to ICC Active and ICC Idle for every I/O module
controlled by the Power Reduction Register. See “Power Reduction Register” on page 54 for
details.
The power consumption in Power-down mode is independent of clock selection.
The current consumption is a function of several factors such as: operating voltage, operating
frequency, loading of I/O pins, switching rate of I/O pins, code executed and ambient temperature.
The dominating factors are operating voltage and frequency.
The current drawn from capacitive loaded pins may be estimated (for one pin) as CL × VCC × f
where CL = load capacitance, VCC = operating voltage and f = average switching frequency of I/O
pin.
The parts are characterized at frequencies higher than test limits. Parts are not guaranteed to
function properly at frequencies higher than the ordering code indicates.
The difference between current consumption in Power-down mode with Watchdog Timer
enabled and Power-down mode with Watchdog Timer disabled represents the differential current
drawn by the Watchdog Timer.
32.1 Active Supply Current
Figure 32-1. Active Supply Current vs. frequency (0.1MHz - 1.0MHz)
5.5V
5.0V
4.5V
4.0V
3.3V
2.7V
1.8V
0
0.5
1
1.5
2
2.5
0 0.1 0.2 0.3 0.4 0.5 0.6 0.7 0.8 0.9 1
Frequency (MHz)
ICC (m
A)386
2549P–AVR–10/2012
ATmega640/1280/1281/2560/2561
Figure 32-2. Active Supply Current vs. Frequency (1MHz - 16MHz)
Figure 32-3. Active Supply Current vs. VCC (Internal RC Oscillator, 8MHz)
5.5V
5.0V
4.5V
0
5
10
15
20
25
0246 8 10 12 14 16
Frequency (MHz)
ICC (m A)
4.0V
3.3V
2.7V
1.8V
85°C
25°C
-40°C
0
2
4
6
8
10
12
14
1.5 2 2.5 3 3.5 4 4.5 5 5.5
VCC (V)
ICC (mA)387
2549P–AVR–10/2012
ATmega640/1280/1281/2560/2561
Figure 32-4. Active Supply Current vs. VCC (Internal RC Oscillator, 1MHz)
Figure 32-5. Active Supply Current vs. VCC (Internal RC Oscillator, 128kHz)
85°C
25°C
-40°C
0
0.5
1
1.5
2
2.5
1.5 2 2.5 3 3.5 4 4.5 5 5.5
VCC (V)
ICC (mA)
85°C
25°C
-40°C
0
0.1
0.2
0.3
0.4
0.5
0.6
0.7
1.5 2 2.5 3 3.5 4 4.5 5 5.5
VCC (V)
ICC (mA)388
2549P–AVR–10/2012
ATmega640/1280/1281/2560/2561
32.2 Idle Supply Current
Figure 32-6. Idle Supply Current vs. Low Frequency (0.1MHz - 1.0MHz)
Figure 32-7. Idle Supply Current vs. Frequency (1MHz - 16MHz)
5.5V
5.0V
4.5V
4.0V
3.3V
2.7V
1.8V
0
0.1
0.2
0.3
0.4
0.5
0.6
0 0.1 0.2 0.3 0.4 0.5 0.6 0.7 0.8 0.9 1
Frequency (MHz)
ICC (mA)
5.5V
5.0V
4.5V
0
1
2
3
4
5
6
7
8
0246 8 10 12 14 16
Frequency (MHz)
ICC (mA)
4.0V
3.3V
2.7V
1.8V389
2549P–AVR–10/2012
ATmega640/1280/1281/2560/2561
Figure 32-8. Idle Supply Current vs. VCC (Internal RC Oscillator, 8MHz)
Figure 32-9. Idle Supply Current vs. VCC (Internal RC Oscillator, 1MHz)
85°C
25°C
-40°C
0
0.5
1
1.5
2
2.5
3
3.5
1.5 2 2.5 3 3.5 4 4.5 5 5.5
VCC (V)
ICC (mA)
85°C
25°C
-40°C
0
0.1
0.2
0.3
0.4
0.5
0.6
0.7
0.8
0.9
1.5 2 2.5 3 3.5 4 4.5 5 5.5
VCC (V)
ICC (mA)390
2549P–AVR–10/2012
ATmega640/1280/1281/2560/2561
Figure 32-10. Idle Supply Current vs. VCC (Internal RC Oscillator, 128kHz)I
32.2.1 Supply Current of IO modules
The tables and formulas below can be used to calculate the additional current consumption for
the different I/O modules in Active and Idle mode. The enabling or disabling of the I/O modules
are controlled by the Power Reduction Register. See “Power Reduction Register” on page 54 for
details.
85°C
25°C
-40°C
0
0.05
0.1
0.15
0.2
0.25
0.3
1.5 2 2.5 3 3.5 4 4.5 5 5.5
VCC (V)
ICC (m A )
Table 32-1. Additional Current Consumption for the different I/O modules (absolute values)
PRR bit Typical numbers
VCC = 2V, F = 1MHz VCC = 3V, F = 4MHz VCC = 5V, F = 8MHz
PRUSART3 8.0µA 51µA 220µA
PRUSART2 8.0µA 51µA 220µA
PRUSART1 8.0µA 51µA 220µA
PRUSART0 8.0µA 51µA 220µA
PRTWI 12µA 75µA 315µA
PRTIM5 6.0µA 39µA 150µA
PRTIM4 6.0µA 39µA 150µA
PRTIM3 6.0µA 39µA 150µA
PRTIM2 11µA 72µA 300µA
PRTIM1 6.0µA 39µA 150µA
PRTIM0 4.0µA 24µA 100µA
PRSPI 15µA 95µA 400µA
PRADC 12µA 75µA 315µA391
2549P–AVR–10/2012
ATmega640/1280/1281/2560/2561
It is possible to calculate the typical current consumption based on the numbers from Table 32-1
on page 390 for other VCC and frequency settings than listed in Table 32-2.
32.2.1.1 Example 1
Calculate the expected current consumption in idle mode with USART0, TIMER1, and TWI
enabled at VCC = 2.0V and F = 1MHz. From Table 32-2, third column, we see that we need to
add 17% for the USART0, 24% for the TWI, and 10% for the TIMER1 module. Reading from Figure
32-6 on page 388, we find that the idle current consumption is ~0.15mA at VCC = 2.0V and F
= 1MHz. The total current consumption in idle mode with USART0, TIMER1, and TWI enabled,
gives:
Table 32-2. Additional Current Consumption (percentage) in Active and Idle mode
PRR bit
Additional Current consumption
compared to Active with external clock
Additional Current consumption
compared to Idle with external clock
PRUSART3 3.0% 17%
PRUSART2 3.0% 17%
PRUSART1 3.0% 17%
PRUSART0 3.0% 17%
PRTWI 4.4% 24%
PRTIM5 1.8% 10%
PRTIM4 1.8% 10%
PRTIM3 1.8% 10%
PRTIM2 4.3% 23%
PRTIM1 1.8% 10%
PRTIM0 1.5% 8.0%
PRSPI 3.3% 18%
PRADC 4.5% 24%
ICCtotal ≈ ≈ 0.15mA • ( ) 1 0.17 0.24 0.10 +++ 0.227mA392
2549P–AVR–10/2012
ATmega640/1280/1281/2560/2561
32.3 Power-down Supply Current
Figure 32-11. Power-down Supply Current vs. VCC (Watchdog Timer Disabled)
Figure 32-12. Power-down Supply Current vs. VCC (Watchdog Timer Enabled)
85°C
25°C
-40°C
0
0.5
1
1.5
2
2.5
3
3.5
4
1.5 2 2.5 3 3.5 4 4.5 5 5.5
VCC (V)
ICC (µA)
25°C
-40°C
0
2
4
6
8
10
12
1.5 2 2.5 3 3.5 4 4.5 5 5.5
VCC (V)
ICC (µA)
85°C393
2549P–AVR–10/2012
ATmega640/1280/1281/2560/2561
32.4 Power-save Supply Current
Figure 32-13. Power-save Supply Current vs. VCC (Watchdog Timer Disabled)
Figure 32-14. Power-save Supply Current vs. VCC (Watchdog Timer Enabled)
25°C
4
5
6
7
8
9
10
11
1.5 2 2.5 3 3.5 4 4.5 5 5.5
VCC (V)
ICC(µA)
0
1
2
3
4
5
6
7
8
9
1.5 2 2.5 3 3.5 4 4.5 5 5.5
VCC (V)
ICC (µA)
25°C394
2549P–AVR–10/2012
ATmega640/1280/1281/2560/2561
32.5 Standby Supply Current
Figure 32-15. Standby Supply Current vs. VCC (Watchdog Timer Disabled)
32.6 Pin Pull-up
Figure 32-16. I/O Pin Pull-up Resistor Current vs. Input Voltage (VCC = 1.8V)
6MHz xtal
6MHz res
4MHz xtal
4MHz res
455kHz res
32kHz xtal
2MHz xtal
2MHz res
1MHz res
0
0.02
0.04
0.06
0.08
0.1
0.12
0.14
0.16
0.18
0.2
1.5 2 2.5 3 3.5 4 4.5 5 5.5
VCC (V)
ICC (mA)
85°C
25°C
-40°C 0
10
20
30
40
50
60
0 0.2 0.4 0.6 0.8 1 1.2 1.4 1.6 1.8 2
VOP (V)
IOP (µA)395
2549P–AVR–10/2012
ATmega640/1280/1281/2560/2561
Figure 32-17. I/O Pin Pull-up Resistor Current vs. Input Voltage (VCC = 2.7V)
Figure 32-18. I/O Pin Pull-up Resistor Current vs. Input Voltage (VCC = 5V)
85°C
25°C
0 -40°C
10
20
30
40
50
60
70
80
90
0 0.5 1 1.5 2 2.5 3
VOP (V)
IOP (µA)
85°C
25°C
0 -40°C
20
40
60
80
100
120
140
160
0123456
VOP (V)
IOP (µA)396
2549P–AVR–10/2012
ATmega640/1280/1281/2560/2561
Figure 32-19. Reset Pull-up Resistor Current vs. Reset Pin Voltage (VCC = 1.8V)
Figure 32-20. Reset pull-up Resistor Current vs. Reset Pin Voltage (VCC = 2.7V)
85°C
25°C
-40°C
0
5
10
15
20
25
30
35
40
0 0.2 0.4 0.6 0.8 1 1.2 1.4 1.6 1.8 2
VRESET (V)
IRESET (µA)
85°C
25°C
-40°C
0
10
20
30
40
50
60
70
0 0.5 1 1.5 2 2.5 3
VRESET (V)
IRESET (µA)397
2549P–AVR–10/2012
ATmega640/1280/1281/2560/2561
Figure 32-21. Reset Pull-up Resistor Current vs. Reset Pin Voltage (VCC = 5V)
32.7 Pin Driver Strength
Figure 32-22. I/O Pin output Voltage vs.Sink Current (VCC = 3V)
85°C
25°C
-40°C
0
20
40
60
80
100
120
0123 456
VRESET (V)
IRESET (µA)
85°C
25°C
-40°C
0
0.1
0.2
0.3
0.4
0.5
0.6
0.7
0.8
0.9
1
0 5 10 15 20 25
IOL (mA)
VOL (V)398
2549P–AVR–10/2012
ATmega640/1280/1281/2560/2561
Figure 32-23. I/O Pin Output Voltage vs. Sink Current (VCC = 5V)
Figure 32-24. I/O Pin Output Voltage vs. Source Current (VCC = 3V)
25°C
-40°C
0
0.1
0.2
0.3
0.4
0.5
0.6
0 5 10 15 20 25
IOL (mA)
VOL (V)
85°C
85°C
25°C
-40°C
0
0.5
1
1.5
2
2.5
3
3.5
0 5 10 15 20 25
IOH (mA)
VOH (V)399
2549P–AVR–10/2012
ATmega640/1280/1281/2560/2561
Figure 32-25. I/O Pin Output Voltage vs. Source Current (VCC = 5V)
32.8 Pin Threshold and Hysteresis
Figure 32-26. I/O Pin Input Threshold Voltage vs. VCC (VIH, IO Pin Read as “1“)
85°C
25°C
-40°C
4.3
4.4
4.5
4.6
4.7
4.8
4.9
5
5.1
0 5 10 15 20 25
IOH (mA)
VOH (V)
85°C
25°C
-40°C
0
0.5
1
1.5
2
2.5
3
3.5
1.5 2 2.5 3 3.5 4 4.5 5 5.5
VCC (V)
Threshold (V)400
2549P–AVR–10/2012
ATmega640/1280/1281/2560/2561
Figure 32-27. I/O Pin Input Threshold Voltage vs. VCC (VIL, IO Pin Read as “0“)
Figure 32-28. I/O Pin Input Hysteresis
85°C
25°C
-40°C
0
0.5
1
1.5
2
2.5
1.5 2 2.5 3 3.5 4 4.5 5 5.5
VCC (V)
Threshold (V)
85°C
25°C
-40°C
0
0.1
0.2
0.3
0.4
0.5
0.6
0.7
0.8
1.5 2 2.5 3 3.5 4 4.5 5 5.5
VCC (V)
Input Hysteresis (mV)401
2549P–AVR–10/2012
ATmega640/1280/1281/2560/2561
Figure 32-29. Reset Input Threshold Voltage vs. VCC (VIH, IO Pin Read as “1“)
Figure 32-30. Reset Input Threshold Voltage vs. VCC (VIL, IO Pin Read as “0“)
85°C
25°C
-40°C
0
0.5
1
1.5
2
2.5
1.5 2 2.5 3 3.5 4 4.5 5 5.5
VCC (V)
Threshold (V)
85°C
25°C
-40°C
0
0.5
1
1.5
2
2.5
1.5 2 2.5 3 3.5 4 4.5 5 5.5
VCC (V)
Threshold (V)402
2549P–AVR–10/2012
ATmega640/1280/1281/2560/2561
Figure 32-31. Reset Pin Input Hysteresis vs. VCC
32.9 BOD Threshold and Analog Comparator Offset
Figure 32-32. BOD Threshold vs. Temperature (BOD Level is 4.3V)
85°C
25°C
-40°C
0
0.1
0.2
0.3
0.4
0.5
0.6
0.7
1.5 2 2.5 3 3.5 4 4.5 5 5.5
VCC (V)
Input Hysteresis (mV)
Rising Vcc
Falling Vcc
4.2
4.25
4.3
4.35
4.4
-60 -40 -20 0 20 40 60 80 100
Temperature (°C)
Threshold (V)403
2549P–AVR–10/2012
ATmega640/1280/1281/2560/2561
Figure 32-33. BOD Threshold vs. Temperature (BOD Level is 2.7V)
Figure 32-34. BOD Threshold vs. Temperature (BOD Level is 1.8V)
Rising Vcc
Falling Vcc
2.6
2.65
2.7
2.75
2.8
-60 -40 -20 0 20 40 60 80 100
Temperature (°C)
Threshold (V)
Rising Vcc
Fallling Vcc
1.7
1.75
1.8
1.85
1.9
-60 -40 -20 0 20 40 60 80 100
Temperature (°C)
T hre shold (V )404
2549P–AVR–10/2012
ATmega640/1280/1281/2560/2561
32.10 Internal Oscillator Speed
Figure 32-35. Watchdog Oscillator Frequency vs. VCC
Figure 32-36. Watchdog Oscillator Frequency vs. Temperature
85°C
25°C
-40°C
114
116
118
120
122
124
126
128
2 2.5 3 3.5 4 4.5 5 5.5
VCC (V)
FRC (kHz)
5.5V
4.0V
3.3V
2.7V
2.1V
114
116
118
120
122
124
126
128
-60 -40 -20 0 20 40 60 80 100
Temperature (°C)
FRC (kHz)405
2549P–AVR–10/2012
ATmega640/1280/1281/2560/2561
Figure 32-37. Calibrated 8MHz RC Oscillator Frequency vs. VCC
Figure 32-38. Calibrated 8MHz RC Oscillator Frequency vs. Temperature
85°C
25°C
-40°C
7.6
7.7
7.8
7.9
8
8.1
8.2
8.3
1.5 2 2.5 3 3.5 4 4.5 5 5.5
VCC (V)
FRC (MHz)
5.0V
3.0V
7.9
8
8.1
8.2
8.3
8.4
8.5
-60 -40 -20 0 20 40 60 80 100
Temperature (°C)
FRC (MHz)406
2549P–AVR–10/2012
ATmega640/1280/1281/2560/2561
Figure 32-39. Calibrated 8MHz RC Oscillator Frequency vs. Osccal Value
32.11 Current Consumption of Peripheral Units
Figure 32-40. Brownout Detector Current vs. VCC
85°C
25°C
-40°C
0
2
4
6
8
10
12
14
16
0 16 32 48 64 80 96 112 128 144 160 176 192 208 224 240 256
OSCCAL (X1)
FRC (MHz)
85°C
25°C
-40°C
0
5
10
15
20
25
30
1.5 2 2.5 3 3.5 4 4.5 5 5.5
VCC (V)
ICC (µA)407
2549P–AVR–10/2012
ATmega640/1280/1281/2560/2561
Figure 32-41. ADC Current vs. VCC (AREF = AVCC)
Figure 32-42. AREF External Reference Current vs. VCC
85°C
25°C
-40°C
0
50
100
150
200
250
300
350
1.5 2 2.5 3 3.5 4 4.5 5 5.5
VCC (V)
ICC (µA)
85°C
25°C
-40°C
0
50
100
150
200
250
1.5 2 2.5 3 3.5 4 4.5 5 5.5
VCC (V)
ICC (µA)408
2549P–AVR–10/2012
ATmega640/1280/1281/2560/2561
Figure 32-43. Watchdog Timer Current vs. VCC
Figure 32-44. Analog Comparator Current vs. VCC
85°C
25°C
-40°C
0
1
2
3
4
5
6
7
8
9
1.5 2 2.5 3 3.5 4 4.5 5 5.5
VCC (V)
ICC (µA)
85°C
25°C
-40°C
0
10
20
30
40
50
60
70
80
90
100
1.5 2 2.5 3 3.5 4 4.5 5 5.5
VCC (V)
ICC (µA)409
2549P–AVR–10/2012
ATmega640/1280/1281/2560/2561
Figure 32-45. Programming Current vs. VCC
32.12 Current Consumption in Reset and Reset Pulsewidth
Figure 32-46. Reset Supply Current vs VCC (0.1MHz - 1.0MHz, Excluding Current Through The
Reset Pull-up)
85°C
25°C
-40°C
0
2
4
6
8
10
12
14
16
1.5 2 2.5 3 3.5 4 4.5 5 5.5
VCC (V)
ICC (mA)
5.5V
5.0V
4.5V
4.0V
3.3V
2.7V
1.8V
0
0.05
0.1
0.15
0.2
0.25
0.3
0.35
0 0.1 0.2 0.3 0.4 0.5 0.6 0.7 0.8 0.9 1
Frequency (MHz)
ICC (mA)410
2549P–AVR–10/2012
ATmega640/1280/1281/2560/2561
Figure 32-47. Reset Supply Current vs. VCC (1MHz - 16MHz, Excluding Current Through The
Reset Pull-up)
Figure 32-48. Minimum Reset Pulse Width vs. VCC
5.5V
5.0V
4.5V
0
0.5
1
1.5
2
2.5
3
3.5
4
0246 8 10 12 14 16
Frequency (MHz)
ICC (mA)
4.0V
3.3V
2.7V
1.8V
85°C
25°C
-40°C
0
500
1000
1500
2000
2500
1.5 2 2.5 3 3.5 4 4.5 5 5.5
VCC (V)
Pu lsewidth (ns)411
2549P–AVR–10/2012
ATmega640/1280/1281/2560/2561
33. Register Summary
Address Name Bit 7 Bit 6 Bit 5 Bit 4 Bit 3 Bit 2 Bit 1 Bit 0 Page
(0x1FF) Reserved - - - - - - - -
... Reserved - - - - - - - -
(0x13F) Reserved
(0x13E) Reserved
(0x13D) Reserved
(0x13C) Reserved
(0x13B) Reserved
(0x13A) Reserved
(0x139) Reserved
(0x138) Reserved
(0x137) Reserved
(0x136) UDR3 USART3 I/O Data Register 222
(0x135) UBRR3H - - - - USART3 Baud Rate Register High Byte 227
(0x134) UBRR3L USART3 Baud Rate Register Low Byte 227
(0x133) Reserved - - - - - - - -
(0x132) UCSR3C UMSEL31 UMSEL30 UPM31 UPM30 USBS3 UCSZ31 UCSZ30 UCPOL3 239
(0x131) UCSR3B RXCIE3 TXCIE3 UDRIE3 RXEN3 TXEN3 UCSZ32 RXB83 TXB83 238
(0x130) UCSR3A RXC3 TXC3 UDRE3 FE3 DOR3 UPE3 U2X3 MPCM3 238
(0x12F) Reserved - - - - - - - -
(0x12E) Reserved - - - - - - - -
(0x12D) OCR5CH Timer/Counter5 - Output Compare Register C High Byte 165
(0x12C) OCR5CL Timer/Counter5 - Output Compare Register C Low Byte 165
(0x12B) OCR5BH Timer/Counter5 - Output Compare Register B High Byte 165
(0x12A) OCR5BL Timer/Counter5 - Output Compare Register B Low Byte 165
(0x129) OCR5AH Timer/Counter5 - Output Compare Register A High Byte 164
(0x128) OCR5AL Timer/Counter5 - Output Compare Register A Low Byte 164
(0x127) ICR5H Timer/Counter5 - Input Capture Register High Byte 165
(0x126) ICR5L Timer/Counter5 - Input Capture Register Low Byte 165
(0x125) TCNT5H Timer/Counter5 - Counter Register High Byte 163
(0x124) TCNT5L Timer/Counter5 - Counter Register Low Byte 163
(0x123) Reserved - - - - - - - -
(0x122) TCCR5C FOC5A FOC5B FOC5C - - - - - 162
(0x121) TCCR5B ICNC5 ICES5 - WGM53 WGM52 CS52 CS51 CS50 160
(0x120) TCCR5A COM5A1 COM5A0 COM5B1 COM5B0 COM5C1 COM5C0 WGM51 WGM50 158
(0x11F) Reserved - - - - - - - -
(0x11E) Reserved - - - - - - - -
(0x11D) Reserved - - - - - - - -
(0x11C) Reserved - - - - - - - -
(0x11B) Reserved - - - - - - - -
(0x11A) Reserved - - - - - - - -
(0x119) Reserved - - - - - - - -
(0x118) Reserved - - - - - - - -
(0x117) Reserved - - - - - - - -
(0x116) Reserved - - - - - - - -
(0x115) Reserved - - - - - - - -
(0x114) Reserved - - - - - - - -
(0x113) Reserved - - - - - - - -
(0x112) Reserved - - - - - - - -
(0x111) Reserved - - - - - - - -
(0x110) Reserved - - - - - - - -
(0x10F) Reserved - - - - - - - -
(0x10E) Reserved - - - - - - - -
(0x10D) Reserved - - - - - - - -
(0x10C) Reserved - - - - - - - -
(0x10B) PORTL PORTL7 PORTL6 PORTL5 PORTL4 PORTL3 PORTL2 PORTL1 PORTL0 104
(0x10A) DDRL DDL7 DDL6 DDL5 DDL4 DDL3 DDL2 DDL1 DDL0 104
(0x109) PINL PINL7 PINL6 PINL5 PINL4 PINL3 PINL2 PINL1 PINL0 104
(0x108) PORTK PORTK7 PORTK6 PORTK5 PORTK4 PORTK3 PORTK2 PORTK1 PORTK0 103
(0x107) DDRK DDK7 DDK6 DDK5 DDK4 DDK3 DDK2 DDK1 DDK0 103
(0x106) PINK PINK7 PINK6 PINK5 PINK4 PINK3 PINK2 PINK1 PINK0 103
(0x105) PORTJ PORTJ7 PORTJ6 PORTJ5 PORTJ4 PORTJ3 PORTJ2 PORTJ1 PORTJ0 103
(0x104) DDRJ DDJ7 DDJ6 DDJ5 DDJ4 DDJ3 DDJ2 DDJ1 DDJ0 103
(0x103) PINJ PINJ7 PINJ6 PINJ5 PINJ4 PINJ3 PINJ2 PINJ1 PINJ0 103
(0x102) PORTH PORTH7 PORTH6 PORTH5 PORTH4 PORTH3 PORTH2 PORTH1 PORTH0 102
(0x101) DDRH DDH7 DDH6 DDH5 DDH4 DDH3 DDH2 DDH1 DDH0 103412
2549P–AVR–10/2012
ATmega640/1280/1281/2560/2561
(0x100) PINH PINH7 PINH6 PINH5 PINH4 PINH3 PINH2 PINH1 PINH0 103
(0xFF) Reserved - - - - - - - -
(0xFE) Reserved - - - - - - - -
(0xFD) Reserved - - - - - - - -
(0xFC) Reserved - - - - - - - -
(0xFB) Reserved - - - - - - - -
(0xFA) Reserved - - - - - - - -
(0xF9) Reserved - - - - - - - -
(0xF8) Reserved - - - - - - - -
(0xF7) Reserved - - - - - - - -
(0xF6) Reserved - - - - - - - -
(0xF5) Reserved - - - - - - - -
(0xF4) Reserved - - - - - - - -
(0xF3) Reserved - - - - - - - -
(0xF2) Reserved - - - - - - - -
(0xF1) Reserved - - - - - - - -
(0xF0) Reserved - - - - - - - -
(0xEF) Reserved - - - - - - - -
(0xEE) Reserved - - - - - - - -
(0xED) Reserved - - - - - - - -
(0xEC) Reserved - - - - - - - -
(0xEB) Reserved - - - - - - -
(0xEA) Reserved - - - - - - - -
(0xE9) Reserved - - - - - - - -
(0xE8) Reserved - - - - - - - -
(0xE7) Reserved - - - - - - -
(0xE6) Reserved - - - - - - - -
(0xE5) Reserved - - - - - - - -
(0xE4) Reserved - - - - - - - -
(0xE3) Reserved - - - - - - -
(0xE2) Reserved - - - - - - - -
(0xE1) Reserved - - - - - - -
(0xE0) Reserved - - - - - - -
(0xDF) Reserved - - - - - - - -
(0xDE) Reserved - - - - - - - -
(0xDD) Reserved - - - - - - -
(0xDC) Reserved - - - - - - - -
(0xDB) Reserved - - - - - - - -
(0xDA) Reserved - - - - - - - -
(0xD9) Reserved - - - - - - -
(0xD8) Reserved - - - - - - - -
(0xD7) Reserved - - - - - - - -
(0xD6) UDR2 USART2 I/O Data Register 222
(0xD5) UBRR2H - - - - USART2 Baud Rate Register High Byte 227
(0xD4) UBRR2L USART2 Baud Rate Register Low Byte 227
(0xD3) Reserved - - - - - - - -
(0xD2) UCSR2C UMSEL21 UMSEL20 UPM21 UPM20 USBS2 UCSZ21 UCSZ20 UCPOL2 239
(0xD1) UCSR2B RXCIE2 TXCIE2 UDRIE2 RXEN2 TXEN2 UCSZ22 RXB82 TXB82 238
(0xD0) UCSR2A RXC2 TXC2 UDRE2 FE2 DOR2 UPE2 U2X2 MPCM2 238
(0xCF) Reserved - - - - - - - -
(0xCE) UDR1 USART1 I/O Data Register 222
(0xCD) UBRR1H - - - - USART1 Baud Rate Register High Byte 227
(0xCC) UBRR1L USART1 Baud Rate Register Low Byte 227
(0xCB) Reserved - - - - - - - -
(0xCA) UCSR1C UMSEL11 UMSEL10 UPM11 UPM10 USBS1 UCSZ11 UCSZ10 UCPOL1 239
(0xC9) UCSR1B RXCIE1 TXCIE1 UDRIE1 RXEN1 TXEN1 UCSZ12 RXB81 TXB81 238
(0xC8) UCSR1A RXC1 TXC1 UDRE1 FE1 DOR1 UPE1 U2X1 MPCM1 238
(0xC7) Reserved - - - - - - - -
(0xC6) UDR0 USART0 I/O Data Register 222
(0xC5) UBRR0H - - - - USART0 Baud Rate Register High Byte 227
(0xC4) UBRR0L USART0 Baud Rate Register Low Byte 227
(0xC3) Reserved - - - - - - - -
(0xC2) UCSR0C UMSEL01 UMSEL00 UPM01 UPM00 USBS0 UCSZ01 UCSZ00 UCPOL0 239
(0xC1) UCSR0B RXCIE0 TXCIE0 UDRIE0 RXEN0 TXEN0 UCSZ02 RXB80 TXB80 238
(0xC0) UCSR0A RXC0 TXC0 UDRE0 FE0 DOR0 UPE0 U2X0 MPCM0 238
(0xBF) Reserved - - - - - - - -
Address Name Bit 7 Bit 6 Bit 5 Bit 4 Bit 3 Bit 2 Bit 1 Bit 0 Page413
2549P–AVR–10/2012
ATmega640/1280/1281/2560/2561
(0xBE) Reserved - - - - - - - -
(0xBD) TWAMR TWAM6 TWAM5 TWAM4 TWAM3 TWAM2 TWAM1 TWAM0 - 269
(0xBC) TWCR TWINT TWEA TWSTA TWSTO TWWC TWEN - TWIE 266
(0xBB) TWDR 2-wire Serial Interface Data Register 268
(0xBA) TWAR TWA6 TWA5 TWA4 TWA3 TWA2 TWA1 TWA0 TWGCE 269
(0xB9) TWSR TWS7 TWS6 TWS5 TWS4 TWS3 - TWPS1 TWPS0 268
(0xB8) TWBR 2-wire Serial Interface Bit Rate Register 266
(0xB7) Reserved - - - - - - - -
(0xB6) ASSR - EXCLK AS2 TCN2UB OCR2AUB OCR2BUB TCR2AUB TCR2BUB 184
(0xB5) Reserved - - - - - - - -
(0xB4) OCR2B Timer/Counter2 Output Compare Register B 191
(0xB3) OCR2A Timer/Counter2 Output Compare Register A 191
(0xB2) TCNT2 Timer/Counter2 (8 Bit) 191
(0xB1) TCCR2B FOC2A FOC2B - - WGM22 CS22 CS21 CS20 190
(0xB0) TCCR2A COM2A1 COM2A0 COM2B1 COM2B0 - - WGM21 WGM20 191
(0xAF) Reserved - - - - - - - -
(0xAE) Reserved - - - - - - - -
(0xAD) OCR4CH Timer/Counter4 - Output Compare Register C High Byte 164
(0xAC) OCR4CL Timer/Counter4 - Output Compare Register C Low Byte 164
(0xAB) OCR4BH Timer/Counter4 - Output Compare Register B High Byte 164
(0xAA) OCR4BL Timer/Counter4 - Output Compare Register B Low Byte 164
(0xA9) OCR4AH Timer/Counter4 - Output Compare Register A High Byte 164
(0xA8) OCR4AL Timer/Counter4 - Output Compare Register A Low Byte 164
(0xA7) ICR4H Timer/Counter4 - Input Capture Register High Byte 165
(0xA6) ICR4L Timer/Counter4 - Input Capture Register Low Byte 165
(0xA5) TCNT4H Timer/Counter4 - Counter Register High Byte 163
(0xA4) TCNT4L Timer/Counter4 - Counter Register Low Byte 163
(0xA3) Reserved - - - - - - - -
(0xA2) TCCR4C FOC4A FOC4B FOC4C - - - - - 162
(0xA1) TCCR4B ICNC4 ICES4 - WGM43 WGM42 CS42 CS41 CS40 160
(0xA0) TCCR4A COM4A1 COM4A0 COM4B1 COM4B0 COM4C1 COM4C0 WGM41 WGM40 158
(0x9F) Reserved - - - - - - - -
(0x9E) Reserved - - - - - - - -
(0x9D) OCR3CH Timer/Counter3 - Output Compare Register C High Byte 164
(0x9C) OCR3CL Timer/Counter3 - Output Compare Register C Low Byte 164
(0x9B) OCR3BH Timer/Counter3 - Output Compare Register B High Byte 164
(0x9A) OCR3BL Timer/Counter3 - Output Compare Register B Low Byte 164
(0x99) OCR3AH Timer/Counter3 - Output Compare Register A High Byte 163
(0x98) OCR3AL Timer/Counter3 - Output Compare Register A Low Byte 163
(0x97) ICR3H Timer/Counter3 - Input Capture Register High Byte 165
(0x96) ICR3L Timer/Counter3 - Input Capture Register Low Byte 165
(0x95) TCNT3H Timer/Counter3 - Counter Register High Byte 162
(0x94) TCNT3L Timer/Counter3 - Counter Register Low Byte 162
(0x93) Reserved - - - - - - - -
(0x92) TCCR3C FOC3A FOC3B FOC3C - - - - - 162
(0x91) TCCR3B ICNC3 ICES3 - WGM33 WGM32 CS32 CS31 CS30 160
(0x90) TCCR3A COM3A1 COM3A0 COM3B1 COM3B0 COM3C1 COM3C0 WGM31 WGM30 158
(0x8F) Reserved - - - - - - - -
(0x8E) Reserved - - - - - - - -
(0x8D) OCR1CH Timer/Counter1 - Output Compare Register C High Byte 163
(0x8C) OCR1CL Timer/Counter1 - Output Compare Register C Low Byte 163
(0x8B) OCR1BH Timer/Counter1 - Output Compare Register B High Byte 163
(0x8A) OCR1BL Timer/Counter1 - Output Compare Register B Low Byte 163
(0x89) OCR1AH Timer/Counter1 - Output Compare Register A High Byte 163
(0x88) OCR1AL Timer/Counter1 - Output Compare Register A Low Byte 163
(0x87) ICR1H Timer/Counter1 - Input Capture Register High Byte 165
(0x86) ICR1L Timer/Counter1 - Input Capture Register Low Byte 165
(0x85) TCNT1H Timer/Counter1 - Counter Register High Byte 162
(0x84) TCNT1L Timer/Counter1 - Counter Register Low Byte 162
(0x83) Reserved - - - - - - - -
(0x82) TCCR1C FOC1A FOC1B FOC1C - - - - - 161
(0x81) TCCR1B ICNC1 ICES1 - WGM13 WGM12 CS12 CS11 CS10 160
(0x80) TCCR1A COM1A1 COM1A0 COM1B1 COM1B0 COM1C1 COM1C0 WGM11 WGM10 158
(0x7F) DIDR1 - - - - - - AIN1D AIN0D 274
(0x7E) DIDR0 ADC7D ADC6D ADC5D ADC4D ADC3D ADC2D ADC1D ADC0D 295
(0x7D) DIDR2 ADC15D ADC14D ADC13D ADC12D ADC11D ADC10D ADC9D ADC8D 295
Address Name Bit 7 Bit 6 Bit 5 Bit 4 Bit 3 Bit 2 Bit 1 Bit 0 Page414
2549P–AVR–10/2012
ATmega640/1280/1281/2560/2561
(0x7C) ADMUX REFS1 REFS0 ADLAR MUX4 MUX3 MUX2 MUX1 MUX0 289
(0x7B) ADCSRB - ACME - - MUX5 ADTS2 ADTS1 ADTS0 272, 290, 294
(0x7A) ADCSRA ADEN ADSC ADATE ADIF ADIE ADPS2 ADPS1 ADPS0 292
(0x79) ADCH ADC Data Register High byte 294
(0x78) ADCL ADC Data Register Low byte 294
(0x77) Reserved - - - - - - - -
(0x76) Reserved - - - - - - - -
(0x75) XMCRB XMBK - - - - XMM2 XMM1 XMM0 38
(0x74) XMCRA SRE SRL2 SRL1 SRL0 SRW11 SRW10 SRW01 SRW00 37
(0x73) TIMSK5 - - ICIE5 - OCIE5C OCIE5B OCIE5A TOIE5 166
(0x72) TIMSK4 - - ICIE4 - OCIE4C OCIE4B OCIE4A TOIE4 166
(0x71) TIMSK3 - - ICIE3 - OCIE3C OCIE3B OCIE3A TOIE3 166
(0x70) TIMSK2 - - - - - OCIE2B OCIE2A TOIE2 193
(0x6F) TIMSK1 - - ICIE1 - OCIE1C OCIE1B OCIE1A TOIE1 166
(0x6E) TIMSK0 - - - - - OCIE0B OCIE0A TOIE0 134
(0x6D) PCMSK2 PCINT23 PCINT22 PCINT21 PCINT20 PCINT19 PCINT18 PCINT17 PCINT16 116
(0x6C) PCMSK1 PCINT15 PCINT14 PCINT13 PCINT12 PCINT11 PCINT10 PCINT9 PCINT8 116
(0x6B) PCMSK0 PCINT7 PCINT6 PCINT5 PCINT4 PCINT3 PCINT2 PCINT1 PCINT0 117
(0x6A) EICRB ISC71 ISC70 ISC61 ISC60 ISC51 ISC50 ISC41 ISC40 114
(0x69) EICRA ISC31 ISC30 ISC21 ISC20 ISC11 ISC10 ISC01 ISC00 113
(0x68) PCICR - - - - - PCIE2 PCIE1 PCIE0 115
(0x67) Reserved - - - - - - - -
(0x66) OSCCAL Oscillator Calibration Register 50
(0x65) PRR1 - - PRTIM5 PRTIM4 PRTIM3 PRUSART3 PRUSART2 PRUSART1 57
(0x64) PRR0 PRTWI PRTIM2 PRTIM0 - PRTIM1 PRSPI PRUSART0 PRADC 56
(0x63) Reserved - - - - - - - -
(0x62) Reserved - - - - - - - -
(0x61) CLKPR CLKPCE - - - CLKPS3 CLKPS2 CLKPS1 CLKPS0 50
(0x60) WDTCSR WDIF WDIE WDP3 WDCE WDE WDP2 WDP1 WDP0 67
0x3F (0x5F) SREG I T H S V N Z C 14
0x3E (0x5E) SPH SP15 SP14 SP13 SP12 SP11 SP10 SP9 SP8 16
0x3D (0x5D) SPL SP7 SP6 SP5 SP4 SP3 SP2 SP1 SP0 16
0x3C (0x5C) EIND - - - - - - - EIND0 17
0x3B (0x5B) RAMPZ - - - - - - RAMPZ1 RAMPZ0 17
0x3A (0x5A) Reserved - - - - - - - -
0x39 (0x59) Reserved - - - - - - - -
0x38 (0x58) Reserved - - - - - - - -
0x37 (0x57) SPMCSR SPMIE RWWSB SIGRD RWWSRE BLBSET PGWRT PGERS SPMEN 332
0x36 (0x56) Reserved - - - - - - - -
0x35 (0x55) MCUCR JTD - - PUD - - IVSEL IVCE 67, 110, 100, 308
0x34 (0x54) MCUSR - - - JTRF WDRF BORF EXTRF PORF 308
0x33 (0x53) SMCR - - - - SM2 SM1 SM0 SE 52
0x32 (0x52) Reserved - - - - - - - -
0x31 (0x51) OCDR OCDR7 OCDR6 OCDR5 OCDR4 OCDR3 OCDR2 OCDR1 OCDR0 301
0x30 (0x50) ACSR ACD ACBG ACO ACI ACIE ACIC ACIS1 ACIS0 272
0x2F (0x4F) Reserved - - - - - - - -
0x2E (0x4E) SPDR SPI Data Register 204
0x2D (0x4D) SPSR SPIF WCOL - - - - - SPI2X 203
0x2C (0x4C) SPCR SPIE SPE DORD MSTR CPOL CPHA SPR1 SPR0 202
0x2B (0x4B) GPIOR2 General Purpose I/O Register 2 37
0x2A (0x4A) GPIOR1 General Purpose I/O Register 1 37
0x29 (0x49) Reserved - - - - - - - -
0x28 (0x48) OCR0B Timer/Counter0 Output Compare Register B 133
0x27 (0x47) OCR0A Timer/Counter0 Output Compare Register A 133
0x26 (0x46) TCNT0 Timer/Counter0 (8 Bit) 133
0x25 (0x45) TCCR0B FOC0A FOC0B - - WGM02 CS02 CS01 CS00 132
0x24 (0x44) TCCR0A COM0A1 COM0A0 COM0B1 COM0B0 - - WGM01 WGM00 129
0x23 (0x43) GTCCR TSM - - - - - PSRASY PSRSYNC 170, 194
0x22 (0x42) EEARH - - - - EEPROM Address Register High Byte 35
0x21 (0x41) EEARL EEPROM Address Register Low Byte 35
0x20 (0x40) EEDR EEPROM Data Register 35
0x1F (0x3F) EECR - - EEPM1 EEPM0 EERIE EEMPE EEPE EERE 35
0x1E (0x3E) GPIOR0 General Purpose I/O Register 0 37
0x1D (0x3D) EIMSK INT7 INT6 INT5 INT4 INT3 INT2 INT1 INT0 115
0x1C (0x3C) EIFR INTF7 INTF6 INTF5 INTF4 INTF3 INTF2 INTF1 INTF0 115
0x1B (0x3B) PCIFR - - - - - PCIF2 PCIF1 PCIF0 116
Address Name Bit 7 Bit 6 Bit 5 Bit 4 Bit 3 Bit 2 Bit 1 Bit 0 Page415
2549P–AVR–10/2012
ATmega640/1280/1281/2560/2561
Notes: 1. For compatibility with future devices, reserved bits should be written to zero if accessed. Reserved I/O memory addresses
should never be written.
2. I/O registers within the address range $00 - $1F are directly bit-accessible using the SBI and CBI instructions. In these registers,
the value of single bits can be checked by using the SBIS and SBIC instructions.
3. Some of the status flags are cleared by writing a logical one to them. Note that the CBI and SBI instructions will operate on
all bits in the I/O register, writing a one back into any flag read as set, thus clearing the flag. The CBI and SBI instructions
work with registers 0x00 to 0x1F only.
4. When using the I/O specific commands IN and OUT, the I/O addresses $00 - $3F must be used. When addressing I/O registers
as data space using LD and ST instructions, $20 must be added to these addresses. The
ATmega640/1280/1281/2560/2561 is a complex microcontroller with more peripheral units than can be supported within the
64 location reserved in Opcode for the IN and OUT instructions. For the Extended I/O space from $60 - $1FF in SRAM, only
the ST/STS/STD and LD/LDS/LDD instructions can be used.
0x1A (0x3A) TIFR5 - - ICF5 - OCF5C OCF5B OCF5A TOV5 166
0x19 (0x39) TIFR4 - - ICF4 - OCF4C OCF4B OCF4A TOV4 167
0x18 (0x38) TIFR3 - - ICF3 - OCF3C OCF3B OCF3A TOV3 167
0x17 (0x37) TIFR2 - - - - - OCF2B OCF2A TOV2 193
0x16 (0x36) TIFR1 - - ICF1 - OCF1C OCF1B OCF1A TOV1 167
0x15 (0x35) TIFR0 - - - - - OCF0B OCF0A TOV0 134
0x14 (0x34) PORTG - - PORTG5 PORTG4 PORTG3 PORTG2 PORTG1 PORTG0 102
0x13 (0x33) DDRG - - DDG5 DDG4 DDG3 DDG2 DDG1 DDG0 102
0x12 (0x32) PING - - PING5 PING4 PING3 PING2 PING1 PING0 102
0x11 (0x31) PORTF PORTF7 PORTF6 PORTF5 PORTF4 PORTF3 PORTF2 PORTF1 PORTF0 101
0x10 (0x30) DDRF DDF7 DDF6 DDF5 DDF4 DDF3 DDF2 DDF1 DDF0 102
0x0F (0x2F) PINF PINF7 PINF6 PINF5 PINF4 PINF3 PINF2 PINF1 PINF0 102
0x0E (0x2E) PORTE PORTE7 PORTE6 PORTE5 PORTE4 PORTE3 PORTE2 PORTE1 PORTE0 101
0x0D (0x2D) DDRE DDE7 DDE6 DDE5 DDE4 DDE3 DDE2 DDE1 DDE0 101
0x0C (0x2C) PINE PINE7 PINE6 PINE5 PINE4 PINE3 PINE2 PINE1 PINE0 102
0x0B (0x2B) PORTD PORTD7 PORTD6 PORTD5 PORTD4 PORTD3 PORTD2 PORTD1 PORTD0 101
0x0A (0x2A) DDRD DDD7 DDD6 DDD5 DDD4 DDD3 DDD2 DDD1 DDD0 101
0x09 (0x29) PIND PIND7 PIND6 PIND5 PIND4 PIND3 PIND2 PIND1 PIND0 101
0x08 (0x28) PORTC PORTC7 PORTC6 PORTC5 PORTC4 PORTC3 PORTC2 PORTC1 PORTC0 101
0x07 (0x27) DDRC DDC7 DDC6 DDC5 DDC4 DDC3 DDC2 DDC1 DDC0 101
0x06 (0x26) PINC PINC7 PINC6 PINC5 PINC4 PINC3 PINC2 PINC1 PINC0 101
0x05 (0x25) PORTB PORTB7 PORTB6 PORTB5 PORTB4 PORTB3 PORTB2 PORTB1 PORTB0 100
0x04 (0x24) DDRB DDB7 DDB6 DDB5 DDB4 DDB3 DDB2 DDB1 DDB0 100
0x03 (0x23) PINB PINB7 PINB6 PINB5 PINB4 PINB3 PINB2 PINB1 PINB0 100
0x02 (0x22) PORTA PORTA7 PORTA6 PORTA5 PORTA4 PORTA3 PORTA2 PORTA1 PORTA0 100
0x01 (0x21) DDRA DDA7 DDA6 DDA5 DDA4 DDA3 DDA2 DDA1 DDA0 100
0x00 (0x20) PINA PINA7 PINA6 PINA5 PINA4 PINA3 PINA2 PINA1 PINA0 100
Address Name Bit 7 Bit 6 Bit 5 Bit 4 Bit 3 Bit 2 Bit 1 Bit 0 Page416
2549P–AVR–10/2012
ATmega640/1280/1281/2560/2561
34. Instruction Set Summary
Mnemonics Operands Description Operation Flags #Clocks
ARITHMETIC AND LOGIC INSTRUCTIONS
ADD Rd, Rr Add two Registers Rd ← Rd + Rr Z, C, N, V, H 1
ADC Rd, Rr Add with Carry two Registers Rd ← Rd + Rr + C Z, C, N, V, H 1
ADIW Rdl,K Add Immediate to Word Rdh:Rdl ← Rdh:Rdl + K Z, C, N, V, S 2
SUB Rd, Rr Subtract two Registers Rd ← Rd - Rr Z, C, N, V, H 1
SUBI Rd, K Subtract Constant from Register Rd ← Rd - K Z, C, N, V, H 1
SBC Rd, Rr Subtract with Carry two Registers Rd ← Rd - Rr - C Z, C, N, V, H 1
SBCI Rd, K Subtract with Carry Constant from Reg. Rd ← Rd - K - C Z, C, N, V, H 1
SBIW Rdl,K Subtract Immediate from Word Rdh:Rdl ← Rdh:Rdl - K Z, C, N, V, S 2
AND Rd, Rr Logical AND Registers Rd ← Rd • Rr Z, N, V 1
ANDI Rd, K Logical AND Register and Constant Rd ← Rd • K Z, N, V 1
OR Rd, Rr Logical OR Registers Rd ← Rd v Rr Z, N, V 1
ORI Rd, K Logical OR Register and Constant Rd ← Rd v K Z, N, V 1
EOR Rd, Rr Exclusive OR Registers Rd ← Rd ⊕ Rr Z, N, V 1
COM Rd One’s Complement Rd ← 0xFF − Rd Z, C, N, V 1
NEG Rd Two’s Complement Rd ← 0x00 − Rd Z, C, N, V, H 1
SBR Rd,K Set Bit(s) in Register Rd ← Rd v K Z, N, V 1
CBR Rd,K Clear Bit(s) in Register Rd ← Rd • (0xFF - K) Z, N, V 1
INC Rd Increment Rd ← Rd + 1 Z, N, V 1
DEC Rd Decrement Rd ← Rd − 1 Z, N, V 1
TST Rd Test for Zero or Minus Rd ← Rd • Rd Z, N, V 1
CLR Rd Clear Register Rd ← Rd ⊕ Rd Z, N, V 1
SER Rd Set Register Rd ← 0xFF None 1
MUL Rd, Rr Multiply Unsigned R1:R0 ← Rd x Rr Z, C 2
MULS Rd, Rr Multiply Signed R1:R0 ← Rd x Rr Z, C 2
MULSU Rd, Rr Multiply Signed with Unsigned R1:R0 ← Rd x Rr Z, C 2
FMUL Rd, Rr Fractional Multiply Unsigned R1:R0 ← (Rd x Rr) << 1 Z, C 2
FMULS Rd, Rr Fractional Multiply Signed R1:R0 ← (Rd x Rr) << 1 Z, C 2
FMULSU Rd, Rr Fractional Multiply Signed with Unsigned R1:R0 ← (Rd x Rr) << 1 Z, C 2
BRANCH INSTRUCTIONS
RJMP k Relative Jump PC ← PC + k + 1 None 2
IJMP Indirect Jump to (Z) PC ← Z None 2
EIJMP Extended Indirect Jump to (Z) PC ←(EIND:Z) None 2
JMP k Direct Jump PC ← k None 3
RCALL k Relative Subroutine Call PC ← PC + k + 1 None 4
ICALL Indirect Call to (Z) PC ← Z None 4
EICALL Extended Indirect Call to (Z) PC ←(EIND:Z) None 4
CALL k Direct Subroutine Call PC ← k None 5
RET Subroutine Return PC ← STACK None 5
RETI Interrupt Return PC ← STACK I 5
CPSE Rd,Rr Compare, Skip if Equal if (Rd = Rr) PC ← PC + 2 or 3 None 1/2/3
CP Rd,Rr Compare Rd − Rr Z, N, V, C, H 1
CPC Rd,Rr Compare with Carry Rd − Rr − C Z, N, V, C, H 1
CPI Rd,K Compare Register with Immediate Rd − K Z, N, V, C, H 1
SBRC Rr, b Skip if Bit in Register Cleared if (Rr(b)=0) PC ← PC + 2 or 3 None 1/2/3
SBRS Rr, b Skip if Bit in Register is Set if (Rr(b)=1) PC ← PC + 2 or 3 None 1/2/3
SBIC P, b Skip if Bit in I/O Register Cleared if (P(b)=0) PC ← PC + 2 or 3 None 1/2/3
SBIS P, b Skip if Bit in I/O Register is Set if (P(b)=1) PC ← PC + 2 or 3 None 1/2/3
BRBS s, k Branch if Status Flag Set if (SREG(s) = 1) then PC←PC+k + 1 None 1/2
BRBC s, k Branch if Status Flag Cleared if (SREG(s) = 0) then PC←PC+k + 1 None 1/2
BREQ k Branch if Equal if (Z = 1) then PC ← PC + k + 1 None 1/2
BRNE k Branch if Not Equal if (Z = 0) then PC ← PC + k + 1 None 1/2
BRCS k Branch if Carry Set if (C = 1) then PC ← PC + k + 1 None 1/2
BRCC k Branch if Carry Cleared if (C = 0) then PC ← PC + k + 1 None 1/2
BRSH k Branch if Same or Higher if (C = 0) then PC ← PC + k + 1 None 1/2
BRLO k Branch if Lower if (C = 1) then PC ← PC + k + 1 None 1/2
BRMI k Branch if Minus if (N = 1) then PC ← PC + k + 1 None 1/2
BRPL k Branch if Plus if (N = 0) then PC ← PC + k + 1 None 1/2
BRGE k Branch if Greater or Equal, Signed if (N ⊕ V= 0) then PC ← PC + k + 1 None 1/2
BRLT k Branch if Less Than Zero, Signed if (N ⊕ V= 1) then PC ← PC + k + 1 None 1/2
BRHS k Branch if Half Carry Flag Set if (H = 1) then PC ← PC + k + 1 None 1/2
BRHC k Branch if Half Carry Flag Cleared if (H = 0) then PC ← PC + k + 1 None 1/2
BRTS k Branch if T Flag Set if (T = 1) then PC ← PC + k + 1 None 1/2
BRTC k Branch if T Flag Cleared if (T = 0) then PC ← PC + k + 1 None 1/2417
2549P–AVR–10/2012
ATmega640/1280/1281/2560/2561
BRVS k Branch if Overflow Flag is Set if (V = 1) then PC ← PC + k + 1 None 1/2
BRVC k Branch if Overflow Flag is Cleared if (V = 0) then PC ← PC + k + 1 None 1/2
BRIE k Branch if Interrupt Enabled if ( I = 1) then PC ← PC + k + 1 None 1/2
BRID k Branch if Interrupt Disabled if ( I = 0) then PC ← PC + k + 1 None 1/2
BIT AND BIT-TEST INSTRUCTIONS
SBI P,b Set Bit in I/O Register I/O(P,b) ← 1 None 2
CBI P,b Clear Bit in I/O Register I/O(P,b) ← 0 None 2
LSL Rd Logical Shift Left Rd(n+1) ← Rd(n), Rd(0) ← 0 Z, C, N, V 1
LSR Rd Logical Shift Right Rd(n) ← Rd(n+1), Rd(7) ← 0 Z, C, N, V 1
ROL Rd Rotate Left Through Carry Rd(0)←C,Rd(n+1)← Rd(n),C←Rd(7) Z, C, N, V 1
ROR Rd Rotate Right Through Carry Rd(7)←C,Rd(n)← Rd(n+1),C←Rd(0) Z, C, N, V 1
ASR Rd Arithmetic Shift Right Rd(n) ← Rd(n+1), n=0..6 Z, C, N, V 1
SWAP Rd Swap Nibbles Rd(3..0)←Rd(7..4),Rd(7..4)←Rd(3..0) None 1
BSET s Flag Set SREG(s) ← 1 SREG(s) 1
BCLR s Flag Clear SREG(s) ← 0 SREG(s) 1
BST Rr, b Bit Store from Register to T T ← Rr(b) T 1
BLD Rd, b Bit load from T to Register Rd(b) ← T None 1
SEC Set Carry C ← 1 C1
CLC Clear Carry C ← 0 C 1
SEN Set Negative Flag N ← 1 N 1
CLN Clear Negative Flag N ← 0 N 1
SEZ Set Zero Flag Z ← 1 Z1
CLZ Clear Zero Flag Z ← 0 Z 1
SEI Global Interrupt Enable I ← 1 I1
CLI Global Interrupt Disable I ← 0 I 1
SES Set Signed Test Flag S ← 1 S1
CLS Clear Signed Test Flag S ← 0 S 1
SEV Set Twos Complement Overflow. V ← 1 V1
CLV Clear Twos Complement Overflow V ← 0 V 1
SET Set T in SREG T ← 1 T1
CLT Clear T in SREG T ← 0 T 1
SEH Set Half Carry Flag in SREG H ← 1 H1
CLH Clear Half Carry Flag in SREG H ← 0 H 1
DATA TRANSFER INSTRUCTIONS
MOV Rd, Rr Move Between Registers Rd ← Rr None 1
MOVW Rd, Rr Copy Register Word Rd+1:Rd ← Rr+1:Rr None 1
LDI Rd, K Load Immediate Rd ← K None 1
LD Rd, X Load Indirect Rd ← (X) None 2
LD Rd, X+ Load Indirect and Post-Inc. Rd ← (X), X ← X + 1 None 2
LD Rd, - X Load Indirect and Pre-Dec. X ← X - 1, Rd ← (X) None 2
LD Rd, Y Load Indirect Rd ← (Y) None 2
LD Rd, Y+ Load Indirect and Post-Inc. Rd ← (Y), Y ← Y + 1 None 2
LD Rd, - Y Load Indirect and Pre-Dec. Y ← Y - 1, Rd ← (Y) None 2
LDD Rd,Y+q Load Indirect with Displacement Rd ← (Y + q) None 2
LD Rd, Z Load Indirect Rd ← (Z) None 2
LD Rd, Z+ Load Indirect and Post-Inc. Rd ← (Z), Z ← Z+1 None 2
LD Rd, -Z Load Indirect and Pre-Dec. Z ← Z - 1, Rd ← (Z) None 2
LDD Rd, Z+q Load Indirect with Displacement Rd ← (Z + q) None 2
LDS Rd, k Load Direct from SRAM Rd ← (k) None 2
ST X, Rr Store Indirect (X) ← Rr None 2
ST X+, Rr Store Indirect and Post-Inc. (X) ← Rr, X ← X + 1 None 2
ST - X, Rr Store Indirect and Pre-Dec. X ← X - 1, (X) ← Rr None 2
ST Y, Rr Store Indirect (Y) ← Rr None 2
ST Y+, Rr Store Indirect and Post-Inc. (Y) ← Rr, Y ← Y + 1 None 2
ST - Y, Rr Store Indirect and Pre-Dec. Y ← Y - 1, (Y) ← Rr None 2
STD Y+q,Rr Store Indirect with Displacement (Y + q) ← Rr None 2
ST Z, Rr Store Indirect (Z) ← Rr None 2
ST Z+, Rr Store Indirect and Post-Inc. (Z) ← Rr, Z ← Z + 1 None 2
ST -Z, Rr Store Indirect and Pre-Dec. Z ← Z - 1, (Z) ← Rr None 2
STD Z+q,Rr Store Indirect with Displacement (Z + q) ← Rr None 2
STS k, Rr Store Direct to SRAM (k) ← Rr None 2
LPM Load Program Memory R0 ← (Z) None 3
LPM Rd, Z Load Program Memory Rd ← (Z) None 3
LPM Rd, Z+ Load Program Memory and Post-Inc Rd ← (Z), Z ← Z+1 None 3
ELPM Extended Load Program Memory R0 ← (RAMPZ:Z) None 3
ELPM Rd, Z Extended Load Program Memory Rd ← (RAMPZ:Z) None 3
Mnemonics Operands Description Operation Flags #Clocks418
2549P–AVR–10/2012
ATmega640/1280/1281/2560/2561
Note: EICALL and EIJMP do not exist in ATmega640/1280/1281.
ELPM does not exist in ATmega640.
ELPM Rd, Z+ Extended Load Program Memory Rd ← (RAMPZ:Z), RAMPZ:Z ←RAMPZ:Z+1 None 3
SPM Store Program Memory (Z) ← R1:R0 None -
IN Rd, P In Port Rd ← P None 1
OUT P, Rr Out Port P ← Rr None 1
PUSH Rr Push Register on Stack STACK ← Rr None 2
POP Rd Pop Register from Stack Rd ← STACK None 2
MCU CONTROL INSTRUCTIONS
NOP No Operation None 1
SLEEP Sleep (see specific descr. for Sleep function) None 1
WDR Watchdog Reset (see specific descr. for WDR/timer) None 1
BREAK Break For On-chip Debug Only None N/A
Mnemonics Operands Description Operation Flags #Clocks419
2549P–AVR–10/2012
ATmega640/1280/1281/2560/2561
35. Ordering Information
Notes: 1. This device can also be supplied in wafer form. Please contact your local Atmel sales office for detailed ordering information
and minimum quantities.
2. See “Speed Grades” on page 369.
3. Pb-free packaging, complies to the European Directive for Restriction of Hazardous Substances (RoHS directive). Also
Halide free and fully Green.
4. Tape & Reel.
35.1 ATmega640
Speed (MHz)(2) Power Supply Ordering Code Package(1)(3) Operation Range
8 1.8 - 5.5V
ATmega640V-8AU
ATmega640V-8AUR(4)
ATmega640V-8CU
ATmega640V-8CUR(4)
100A
100A
100C1
100C1
Industrial (-40°C to 85°C)
16 2.7 - 5.5V
ATmega640-16AU
ATmega640-16AUR(4)
ATmega640-16CU
ATmega640-16CUR(4)
100A
100A
100C1
100C1
Package Type
100A 100-lead, Thin (1.0mm) Plastic Gull Wing Quad Flat Package (TQFP)
100C1 100-ball, Chip Ball Grid Array (CBGA)420
2549P–AVR–10/2012
ATmega640/1280/1281/2560/2561
Notes: 1. This device can also be supplied in wafer form. Please contact your local Atmel sales office for detailed ordering information
and minimum quantities.
2. See “Speed Grades” on page 369.
3. Pb-free packaging, complies to the European Directive for Restriction of Hazardous Substances (RoHS directive). Also
Halide free and fully Green.
4. Tape & Reel.
35.2 ATmega1280
Speed (MHz)(2) Power Supply Ordering Code Package(1)(3) Operation Range
8 1.8V - 5.5V
ATmega1280V-8AU
ATmega1280V-8AUR(4)
ATmega1280V-8CU
ATmega1280V-8CUR(4)
100A
100A
100C1
100C1
Industrial (-40°C to 85°C)
16 2.7V - 5.5V
ATmega1280-16AU
ATmega1280-16AUR(4)
ATmega1280-16CU
ATmega1280-16CUR(4)
100A
100A
100C1
100C1
Package Type
100A 100-lead, Thin (1.0mm) Plastic Gull Wing Quad Flat Package (TQFP)
100C1 100-ball, Chip Ball Grid Array (CBGA)421
2549P–AVR–10/2012
ATmega640/1280/1281/2560/2561
Notes: 1. This device can also be supplied in wafer form. Please contact your local Atmel sales office for detailed ordering information
and minimum quantities.
2. See “Speed Grades” on page 369.
3. Pb-free packaging, complies to the European Directive for Restriction of Hazardous Substances (RoHS directive). Also
Halide free and fully Green.
4. Tape & Reel.
35.3 ATmega1281
Speed (MHz)(2) Power Supply Ordering Code Package(1)(3) Operation Range
8 1.8 - 5.5V
ATmega1281V-8AU
ATmega1281V-8AUR(4)
ATmega1281V-8MU
ATmega1281V-8MUR(4)
64A
64A
64M2
64M2 Industrial
(-40°C to 85°C)
16 2.7 - 5.5V
ATmega1281-16AU
ATmega1281-16AUR(4)
ATmega1281-16MU
ATmega1281-16MUR(4)
64A
64A
64M2
64M2
Package Type
64A 64-lead, Thin (1.0mm) Plastic Gull Wing Quad Flat Package (TQFP)
64M2 64-pad, 9mm × 9mm × 1.0mm Body, Quad Flat No-lead/Micro Lead Frame Package (QFN/MLF)422
2549P–AVR–10/2012
ATmega640/1280/1281/2560/2561
Notes: 1. This device can also be supplied in wafer form. Please contact your local Atmel sales office for detailed ordering information
and minimum quantities.
2. See “Speed Grades” on page 369.
3. Pb-free packaging, complies to the European Directive for Restriction of Hazardous Substances (RoHS directive). Also
Halide free and fully Green.
4. Tape & Reel.
35.4 ATmega2560
Speed (MHz)(2) Power Supply Ordering Code Package(1)(3) Operation Range
8 1.8V - 5.5V
ATmega2560V-8AU
ATmega2560V-8AUR(4)
ATmega2560V-8CU
ATmega2560V-8CUR(4)
100A
100A
100C1
100C1
Industrial (-40°C to 85°C)
16 4.5V - 5.5V
ATmega2560-16AU
ATmega2560-16AUR(4)
ATmega2560-16CU
ATmega2560-16CUR(4)
100A
100A
100C1
100C1
Package Type
100A 100-lead, Thin (1.0mm) Plastic Gull Wing Quad Flat Package (TQFP)
100C1 100-ball, Chip Ball Grid Array (CBGA)423
2549P–AVR–10/2012
ATmega640/1280/1281/2560/2561
Notes: 1. This device can also be supplied in wafer form. Please contact your local Atmel sales office for detailed ordering information
and minimum quantities.
2. See “Speed Grades” on page 369.
3. Pb-free packaging, complies to the European Directive for Restriction of Hazardous Substances (RoHS directive). Also
Halide free and fully Green.
4. Tape & Reel.
35.5 ATmega2561
Speed (MHz)(2) Power Supply Ordering Code Package(1)(3) Operation Range
8 1.8V - 5.5V
ATmega1281V-8AU
ATmega1281V-8AUR(4)
ATmega1281V-8MU
ATmega1281V-8MUR(4)
64A
64A
64M2
64M2 Industrial
(-40°C to 85°C)
16 4.5V - 5.5V
ATmega1281-16AU
ATmega1281-16AUR(4)
ATmega1281-16MU
ATmega1281-16MUR(4)
64A
64A
64M2
64M2
Package Type
64A 64-lead, Thin (1.0mm) Plastic Gull Wing Quad Flat Package (TQFP)
64M2 64-pad, 9mm × 9mm × 1.0mm Body, Quad Flat No-lead/Micro Lead Frame Package (QFN/MLF)424
2549P–AVR–10/2012
ATmega640/1280/1281/2560/2561
36. Packaging Information
36.1 100A
2325 Orchard Parkway
San Jose, CA 95131
TITLE DRAWING NO.
R
REV.
100A, 100-lead, 14 x 14mm Body Size, 1.0mm Body Thickness,
0.5mm Lead Pitch, Thin Profile Plastic Quad Flat Package (TQFP) 100A D
2010-10-20
PIN 1 IDENTIFIER
0°~7°
PIN 1
L
C
A1 A2 A
D1
D
e E1 E
B
A – – 1.20
A1 0.05 – 0.15
A2 0.95 1.00 1.05
D 15.75 16.00 16.25
D1 13.90 14.00 14.10 Note 2
E 15.75 16.00 16.25
E1 13.90 14.00 14.10 Note 2
B 0.17 – 0.27
C 0.09 – 0.20
L 0.45 – 0.75
e 0.50 TYP
Notes:
1. This package conforms to JEDEC reference MS-026, Variation AED.
2. Dimensions D1 and E1 do not include mold protrusion. Allowable
protrusion is 0.25mm per side. Dimensions D1 and E1 are maximum
plastic body size dimensions including mold mismatch.
3. Lead coplanarity is 0.08mm maximum.
COMMON DIMENSIONS
(Unit of Measure = mm)
SYMBOL MIN NOM MAX NOTE425
2549P–AVR–10/2012
ATmega640/1280/1281/2560/2561
36.2 100C1
2325 Orchard Parkway
San Jose, CA 95131
TITLE DRAWING NO.
R
REV.
100C1, 100-ball, 9 x 9 x 1.2 mm Body, Ball Pitch 0.80 mm
Chip Array BGA Package (CBGA) 100C1 A
5/25/06
TOP VIEW
SIDE VIEW
BOTTOM VIEW
COMMON DIMENSIONS
(Unit of Measure = mm)
SYMBOL MIN NOM MAX NOTE
A 1.10 – 1.20
A1 0.30 0.35 0.40
D 8.90 9.00 9.10
E 8.90 9.00 9.10
D1 7.10 7.20 7.30
E1 7.10 7.20 7.30
Øb 0.35 0.40 0.45
e 0.80 TYP
Marked A1 Identifier
8 7 6 5 4 3 2 1
A
B
C
D
E
9
F
G
H
I
J
10
0.90 TYP
0.90 TYP
A1 Corner
0.12 Z
E
D
e
e
Øb
A
A1
E1
D1426
2549P–AVR–10/2012
ATmega640/1280/1281/2560/2561
36.3 64A
2325 Orchard Parkway
San Jose, CA 95131
TITLE DRAWING NO.
R
REV.
64A, 64-lead, 14 x 14mm Body Size, 1.0mm Body Thickness,
0.8mm Lead Pitch, Thin Profile Plastic Quad Flat Package (TQFP) 64A C
2010-10-20
PIN 1 IDENTIFIER
0°~7°
PIN 1
L
C
A1 A2 A
D1
D
e
E1 E
B
COMMON DIMENSIONS
(Unit of measure = mm)
SYMBOL MIN NOM MAX NOTE
Notes:
1.This package conforms to JEDEC reference MS-026, Variation AEB.
2. Dimensions D1 and E1 do not include mold protrusion. Allowable
protrusion is 0.25mm per side. Dimensions D1 and E1 are maximum
plastic body size dimensions including mold mismatch.
3. Lead coplanarity is 0.10mm maximum.
A – – 1.20
A1 0.05 – 0.15
A2 0.95 1.00 1.05
D 15.75 16.00 16.25
D1 13.90 14.00 14.10 Note 2
E 15.75 16.00 16.25
E1 13.90 14.00 14.10 Note 2
B 0.30 – 0.45
C 0.09 – 0.20
L 0.45 – 0.75
e 0.80 TYP427
2549P–AVR–10/2012
ATmega640/1280/1281/2560/2561
36.4 64M2
2325 Orchard Parkway
San Jose, CA 95131
TITLE DRAWING NO.
R
REV.
64M2, 64-pad, 9 x 9 x 1.0mm Bod y, Lead Pitch 0.50mm , 64M2 E
2010-10-20
COMMON DIMENSIONS
(Unit of measure = mm)
SYMBOL MIN NOM MAX NOTE
A 0.80 0.90 1.00
A1 – 0.02 0.05
b 0.18 0.25 0.30
D
D2 7.50 7.65 7.80
8.90 9.00 9.10
E 8.90 9.00 9.10
E2 7.50 7.65 7.80
e
0.50 BSC
L 0.35 0.40 0.45
TOP VIEW
SIDE VIEW
BOTTOM VIEW
D
E
Marked pin# 1 ID
SEATING PLANE
A1
C
A
0.08 C
1
2
3
K 0.20 0.27 0.40
2. Dimension and tolerance conform to ASMEY14.5M-1994.
A3 0.20 REF
A3
E2
D2
b e
Pin #1 Corner L
Pin #1
Triangle
Pin #1
Chamfer
(C 0.30)
Option A
Option B
Pin #1
Notch
(0.20 R)
Option C
K
K
Notes: 1. JEDEC Standard MO-220, (SAW Singulation) fig . 1, VMMD.
7.65mm Exposed Pad, Micro Lead Frame Package (MLF) 428
2549P–AVR–10/2012
ATmega640/1280/1281/2560/2561
37. Errata
37.1 ATmega640 rev. B
• Inaccurate ADC conversion in differential mode with 200× gain
• High current consumption in sleep mode
1. Inaccurate ADC conversion in differential mode with 200× gain
With AVCC <3.6V, random conversions will be inaccurate. Typical absolute accuracy may
reach 64 LSB.
Problem Fix/Workaround
None.
2. High current consumption in sleep mode
If a pending interrupt cannot wake the part up from the selected sleep mode, the current
consumption will increase during sleep when executing the SLEEP instruction directly after
a SEI instruction.
Problem Fix/Workaround
Before entering sleep, interrupts not used to wake the part from the sleep mode should be
disabled.
37.2 ATmega640 rev. A • Inaccurate ADC conversion in differential mode with 200× gain
• High current consumption in sleep mode
1. Inaccurate ADC conversion in differential mode with 200× gain
With AVCC <3.6V, random conversions will be inaccurate. Typical absolute accuracy may
reach 64 LSB.
Problem Fix/Workaround
None.
2. High current consumption in sleep mode
If a pending interrupt cannot wake the part up from the selected sleep mode, the current
consumption will increase during sleep when executing the SLEEP instruction directly after
a SEI instruction.
Problem Fix/Workaround
Before entering sleep, interrupts not used to wake the part from the sleep mode should be
disabled.
37.3 ATmega1280 rev. B • Inaccurate ADC conversion in differential mode with 200× gain
• High current consumption in sleep mode
1. Inaccurate ADC conversion in differential mode with 200× gain
With AVCC <3.6V, random conversions will be inaccurate. Typical absolute accuracy may
reach 64 LSB.429
2549P–AVR–10/2012
ATmega640/1280/1281/2560/2561
Problem Fix/Workaround
None.
2. High current consumption in sleep mode
If a pending interrupt cannot wake the part up from the selected sleep mode, the current
consumption will increase during sleep when executing the SLEEP instruction directly after
a SEI instruction.
Problem Fix/Workaround
Before entering sleep, interrupts not used to wake the part from the sleep mode should be
disabled.
37.4 ATmega1280 rev. A
• Inaccurate ADC conversion in differential mode with 200× gain
• High current consumption in sleep mode
1. Inaccurate ADC conversion in differential mode with 200× gain
With AVCC <3.6V, random conversions will be inaccurate. Typical absolute accuracy may
reach 64 LSB.
Problem Fix/Workaround
None.
2. High current consumption in sleep mode
If a pending interrupt cannot wake the part up from the selected sleep mode, the current
consumption will increase during sleep when executing the SLEEP instruction directly after
a SEI instruction.
Problem Fix/Workaround
Before entering sleep, interrupts not used to wake the part from the sleep mode should be
disabled.
37.5 ATmega1281 rev. B
• Inaccurate ADC conversion in differential mode with 200× gain
• High current consumption in sleep mode
1. Inaccurate ADC conversion in differential mode with 200× gain
With AVCC <3.6V, random conversions will be inaccurate. Typical absolute accuracy may
reach 64 LSB.
Problem Fix/Workaround
None.
2. High current consumption in sleep mode
If a pending interrupt cannot wake the part up from the selected sleep mode, the current
consumption will increase during sleep when executing the SLEEP instruction directly after
a SEI instruction.
Problem Fix/Workaround
Before entering sleep, interrupts not used to wake the part from the sleep mode should be
disabled.430
2549P–AVR–10/2012
ATmega640/1280/1281/2560/2561
37.6 ATmega1281 rev. A
• Inaccurate ADC conversion in differential mode with 200× gain
• High current consumption in sleep mode
1. Inaccurate ADC conversion in differential mode with 200× gain
With AVCC <3.6V, random conversions will be inaccurate. Typical absolute accuracy may
reach 64 LSB.
Problem Fix/Workaround
None.
2. High current consumption in sleep mode
If a pending interrupt cannot wake the part up from the selected sleep mode, the current
consumption will increase during sleep when executing the SLEEP instruction directly after
a SEI instruction.
Problem Fix/Workaround
Before entering sleep, interrupts not used to wake the part from the sleep mode should be
disabled.
37.7 ATmega2560 rev. F
Not sampled.
37.8 ATmega2560 rev. E
No known errata.
37.9 ATmega2560 rev. D
Not sampled.
37.10 ATmega2560 rev. C
• High current consumption in sleep mode
1. High current consumption in sleep mode
If a pending interrupt cannot wake the part up from the selected sleep mode, the current
consumption will increase during sleep when executing the SLEEP instruction directly after
a SEI instruction.
Problem Fix/Workaround
Before entering sleep, interrupts not used to wake the part from the sleep mode should be
disabled.
37.11 ATmega2560 rev. B
Not sampled.431
2549P–AVR–10/2012
ATmega640/1280/1281/2560/2561
37.12 ATmega2560 rev. A
• Non-Read-While-Write area of flash not functional
• Part does not work under 2.4 volts
• Incorrect ADC reading in differential mode
• Internal ADC reference has too low value
• IN/OUT instructions may be executed twice when Stack is in external RAM
• EEPROM read from application code does not work in Lock Bit Mode 3
1. Non-Read-While-Write area of flash not functional
The Non-Read-While-Write area of the flash is not working as expected. The problem is
related to the speed of the part when reading the flash of this area.
Problem Fix/Workaround
- Only use the first 248K of the flash.
- If boot functionality is needed, run the code in the Non-Read-While-Write area at maximum
1/4th of the maximum frequency of the device at any given voltage. This is done by writing
the CLKPR register before entering the boot section of the code.
2. Part does not work under 2.4 volts
The part does not execute code correctly below 2.4 volts.
Problem Fix/Workaround
Do not use the part at voltages below 2.4 volts.
3. Incorrect ADC reading in differential mode
The ADC has high noise in differential mode. It can give up to 7 LSB error.
Problem Fix/Workaround
Use only the 7 MSB of the result when using the ADC in differential mode.
4. Internal ADC reference has too low value
The internal ADC reference has a value lower than specified.
Problem Fix/Workaround
- Use AVCC or external reference.
- The actual value of the reference can be measured by applying a known voltage to the
ADC when using the internal reference. The result when doing later conversions can then be
calibrated.
5. IN/OUT instructions may be executed twice when Stack is in external RAM
If either an IN or an OUT instruction is executed directly before an interrupt occurs and the
stack pointer is located in external ram, the instruction will be executed twice. In some cases
this will cause a problem, for example:
- If reading SREG it will appear that the I-flag is cleared.
- If writing to the PIN registers, the port will toggle twice.
- If reading registers with interrupt flags, the flags will appear to be cleared.432
2549P–AVR–10/2012
ATmega640/1280/1281/2560/2561
Problem Fix/Workaround
There are two application work-arounds, where selecting one of them, will be omitting the
issue:
- Replace IN and OUT with LD/LDS/LDD and ST/STS/STD instructions.
- Use internal RAM for stack pointer.
6. EEPROM read from application code does not work in Lock Bit Mode 3
When the Memory Lock Bits LB2 and LB1 are programmed to mode 3, EEPROM read does
not work from the application code.
Problem Fix/Workaround
Do not set Lock Bit Protection Mode 3 when the application code needs to read from
EEPROM.
37.13 ATmega2561 rev. F
Not sampled.
37.14 ATmega2561 rev. E
No known errata.
37.15 ATmega2561 rev. D
Not sampled.
37.16 ATmega2561 rev. C
• High current consumption in sleep mode.
1. High current consumption in sleep mode
If a pending interrupt cannot wake the part up from the selected sleep mode, the current
consumption will increase during sleep when executing the SLEEP instruction directly after
a SEI instruction.
Problem Fix/Workaround
Before entering sleep, interrupts not used to wake the part from the sleep mode should be
disabled.
37.17 ATmega2561 rev. B
Not sampled.
37.18 ATmega2561 rev. A
• Non-Read-While-Write area of flash not functional
• Part does not work under 2.4 Volts
• Incorrect ADC reading in differential mode
• Internal ADC reference has too low value
• IN/OUT instructions may be executed twice when Stack is in external RAM
• EEPROM read from application code does not work in Lock Bit Mode 3433
2549P–AVR–10/2012
ATmega640/1280/1281/2560/2561
1. Non-Read-While-Write area of flash not functional
The Non-Read-While-Write area of the flash is not working as expected. The problem is
related to the speed of the part when reading the flash of this area.
Problem Fix/Workaround
- Only use the first 248K of the flash.
- If boot functionality is needed, run the code in the Non-Read-While-Write area at maximum
1/4th of the maximum frequency of the device at any given voltage. This is done by writing
the CLKPR register before entering the boot section of the code.
2. Part does not work under 2.4 volts
The part does not execute code correctly below 2.4 volts.
Problem Fix/Workaround
Do not use the part at voltages below 2.4 volts.
3. Incorrect ADC reading in differential mode
The ADC has high noise in differential mode. It can give up to 7 LSB error.
Problem Fix/Workaround
Use only the 7 MSB of the result when using the ADC in differential mode.
4. Internal ADC reference has too low value
The internal ADC reference has a value lower than specified.
Problem Fix/Workaround
- Use AVCC or external reference.
- The actual value of the reference can be measured by applying a known voltage to the
ADC when using the internal reference. The result when doing later conversions can then be
calibrated.
5. IN/OUT instructions may be executed twice when Stack is in external RAM
If either an IN or an OUT instruction is executed directly before an interrupt occurs and the
stack pointer is located in external ram, the instruction will be executed twice. In some cases
this will cause a problem, for example:
- If reading SREG it will appear that the I-flag is cleared.
- If writing to the PIN registers, the port will toggle twice.
- If reading registers with interrupt flags, the flags will appear to be cleared.
Problem Fix/Workaround
There are two application workarounds, where selecting one of them, will be omitting the
issue:
- Replace IN and OUT with LD/LDS/LDD and ST/STS/STD instructions.
- Use internal RAM for stack pointer.
6. EEPROM read from application code does not work in Lock Bit Mode 3
When the Memory Lock Bits LB2 and LB1 are programmed to mode 3, EEPROM read does
not work from the application code.434
2549P–AVR–10/2012
ATmega640/1280/1281/2560/2561
Problem Fix/Workaround
Do not set Lock Bit Protection Mode 3 when the application code needs to read from
EEPROM.435
2549P–AVR–10/2012
ATmega640/1280/1281/2560/2561
38. Datasheet Revision History
Please note that the referring page numbers in this section are referring to this document.The
referring revision in this section are referring to the document revision.
38.1 Rev. 2549P-10/2012
38.2 Rev. 2549O-05/12
38.3 Rev. 2549N-05/11
38.4 Rev. 2549M-09/10
1. Replaced drawing in 36.4 “64M2” on page 427.
2. Former page 439 has been deleted as the content of this page did not belong there (same page
as the last page).
3. Some small correction made in the setup.
1. The datasheet changed status from Preliminary to Complete. Removed “Preliminary” from the
front page.
2. Replaced Figure 10-3 on page 46 by a new one.
3. Updated the last page to include the new address for Atmel Japan site.
1. Added Atmel QTouch Library Support and QTouch Sensing Capablity Features
2. Updated Cross-reference in “Bit 5, 2:0 - WDP3:0: Watchdog Timer Prescaler 3, 2, 1 and 0” on
page 68
3. Updated Assembly codes in section “USART Initialization” on page 210
4. Added “Standard Power-On Reset” on page 372.
5. Added “Enhanced Power-On Reset” on page 373.
6. Updated Figure 32-13 on page 393
7. Updated “Ordering Information” on page 419 to include Tape & Reel devices.
1. Updated typos in Figure 26-9 on page 285 and in Figure 26-10 on page 285.
2. Note is added below Table 1-1 on page 3.
3. The values for “typical characteristics” in Table 31-9 on page 377 and Table 31-10 on page 378,
has been rounded.
4. Units for tRST and tBOD in Table 31-3 on page 372 have been changed from “ns” to “µs”.
5. The figure text for Table 31-2 on page 371 has been changed.
6. Text in first column in Table 30-3 on page 336 has been changed from “Fuse Low Byte” to
“Extended Fuse Byte”.
7. The text in “Power Reduction Register” on page 54 has been changed.
8. The value of the inductor in Figure 26-9 on page 285 and Figure 26-10 on page 285 has been
changed to 10µH.
9. “Port A” has been changed into “Port K” in the first paragraph of “Features” on page 275.436
2549P–AVR–10/2012
ATmega640/1280/1281/2560/2561
38.5 Rev. 2549L-08/07
38.6 Rev. 2549K-01/07
38.7 Rev. 2549J-09/06
10. Minimum wait delay for tWD_EEPROM in Table 30-16 on page 351 has been changed from
9.0ms to 3.6ms
11. Dimension A3 is added in “64M2” on page 427.
12. Several cross-references are corrected.
13. “COM0A1:0” on page 130 is corrected to “COM0B1:0”.
14. Corrected some Figure and Table numbering.
15. Updated Section 10.6 “Low Frequency Crystal Oscillator” on page 45.
1. Updated note in Table 10-11 on page 47.
2. Updated Table 10-3 on page 43, Table 10-5 on page 44, Table 10-9 on page 47.
3. Updated typos in “DC Characteristics” on page 367
4. Updated “Clock Characteristics” on page 371
5. Updated “External Clock Drive” on page 371.
6. Added “System and Reset Characteristics” on page 372.
7. Updated “SPI Timing Characteristics” on page 375.
8. Updated “ADC Characteristics – Preliminary Data” on page 377.
9. Updated ordering code in “ATmega640” on page 419.
1. Updated Table 1-1 on page 3.
2. Updated “Pin Descriptions” on page 7.
3. Updated “Stack Pointer” on page 16.
4. Updated “Bit 1 – EEPE: EEPROM Programming Enable” on page 36.
5. Updated Assembly code example in “Thus, when the BOD is not enabled, after setting the ACBG
bit or enabling the ADC, the user must always allow the reference to start up before the output
from the Analog Comparator or ADC is used. To reduce power consumption in Power-down
mode, the user can avoid the three conditions above to ensure that the reference is turned off
before entering Power-down mode.” on page 63.
6: Updated “EIMSK – External Interrupt Mask Register” on page 115.
7. Updated Bit description in “PCIFR – Pin Change Interrupt Flag Register” on page 116.
8. Updated code example in “USART Initialization” on page 210.
9. Updated Figure 26-8 on page 284.
10. Updated “DC Characteristics” on page 367.
1. Updated “” on page 46.
2. Updated code example in “Moving Interrupts Between Application and Boot Section” on page
109.
3. Updated “Timer/Counter Prescaler” on page 186.
4. Updated “Device Identification Register” on page 303.
5. Updated “Signature Bytes” on page 338.
6. Updated “Instruction Set Summary” on page 416.437
2549P–AVR–10/2012
ATmega640/1280/1281/2560/2561
38.8 Rev. 2549I-07/06
38.9 Rev. 2549H-06/06
38.10 Rev. 2549G-06/06
38.11 Rev. 2549F-04/06
38.12 Rev. 2549E-04/06
1. Added “Data Retention” on page 11.
2. Updated Table 16-3 on page 129, Table 16-6 on page 130, Table 16-8 on page 131, Table 17-2
on page 148, Table 17-4 on page 159, Table 17-5 on page 160, Table 20-3 on page 187, Table
20-6 on page 188 and Table 20-8 on page 189.
3. Updated “Fast PWM Mode” on page 150.
1. Updated “” on page 46.
2. Updated “OSCCAL – Oscillator Calibration Register” on page 50.
3. Added Table 31-1 on page 371.
1. Updated “Features” on page 1.
2. Added Figure 1-2 on page 3, Table 1-1 on page 3.
3. Updated “” on page 46.
4. Updated “Power Management and Sleep Modes” on page 52.
5. Updated note for Table 12-1 on page 68.
6. Updated Figure 26-9 on page 285 and Figure 26-10 on page 285.
7. Updated “Setting the Boot Loader Lock Bits by SPM” on page 324.
8. Updated “Ordering Information” on page 419.
9. Added Package information “100C1” on page 425.
10. Updated “Errata” on page 428.
1. Updated Figure 9-3 on page 31, Figure 9-4 on page 31 and Figure 9-5 on page 32.
2. Updated Table 20-2 on page 187 and Table 20-3 on page 187.
3. Updated Features in “ADC – Analog to Digital Converter” on page 275.
4. Updated “Fuse Bits” on page 336.
1. Updated “Features” on page 1.
2. Updated Table 12-1 on page 62.
3. Updated note for Table 12-1 on page 62.
4. Updated “Bit 6 – ACBG: Analog Comparator Bandgap Select” on page 273.
5. Updated “Prescaling and Conversion Timing” on page 278.
5. Updated “Maximum speed vs. VCC” on page 373.
6. Updated “Ordering Information” on page 419.438
2549P–AVR–10/2012
ATmega640/1280/1281/2560/2561
38.13 Rev. 2549D-12/05
38.14 Rev. 2549C-09/05
38.15 Rev. 2549B-05/05
38.16 Rev. 2549A-03/05
1. Advanced Information Status changed to Preliminary.
2. Changed number of I/O Ports from 51 to 54.
3. Updatet typos in “TCCR0A – Timer/Counter Control Register A” on page 129.
4. Updated Features in “ADC – Analog to Digital Converter” on page 275.
5. Updated Operation in“ADC – Analog to Digital Converter” on page 275
6. Updated Stabilizing Time in “Changing Channel or Reference Selection” on page 282.
7. Updated Figure 26-1 on page 276, Figure 26-9 on page 285, Figure 26-10 on page 285.
8. Updated Text in “ADCSRB – ADC Control and Status Register B” on page 290.
9. Updated Note for Table 4 on page 43, Table 13-15 on page 86, Table 26-3 on page 289 and
Table 26-6 on page 295.
10. Updated Table 31-9 on page 377 and Table 31-10 on page 378.
11. Updated “Filling the Temporary Buffer (Page Loading)” on page 323.
12. Updated “Typical Characteristics” on page 385.
13. Updated “Packaging Information” on page 424.
14. Updated “Errata” on page 428.
1. Updated Speed Grade in section “Features” on page 1.
2. Added “Resources” on page 11.
3. Updated “SPI – Serial Peripheral Interface” on page 195. In Slave mode, low and high period SPI
clock must be larger than 2 CPU cycles.
4. Updated “Bit Rate Generator Unit” on page 247.
5. Updated “Maximum speed vs. VCC” on page 373.
6. Updated “Ordering Information” on page 419.
7. Updated “Packaging Information” on page 424. Package 64M1 replaced by 64M2.
8. Updated “Errata” on page 428.
1. JTAG ID/Signature for ATmega640 updated: 0x9608.
2. Updated Table 13-7 on page 81.
3. Updated “Serial Programming Instruction set” on page 352.
4. Updated “Errata” on page 428.
1. Initial version.i
2549P–AVR–10/2012
ATmega640/1280/1281/2560/2561
Table of Contents
Features ..................................................................................................... 1
1 Pin Configurations ................................................................................... 2
2 Overview ................................................................................................... 5
2.1 Block Diagram ...................................................................................................5
2.2 Comparison Between ATmega1281/2561 and ATmega640/1280/2560 ...........7
2.3 Pin Descriptions .................................................................................................7
3 Resources ............................................................................................... 11
4 About Code Examples ........................................................................... 11
5 Data Retention ........................................................................................ 11
6 Capacitive touch sensing ...................................................................... 11
7 AVR CPU Core ........................................................................................ 12
7.1 Introduction ......................................................................................................12
7.2 Architectural Overview .....................................................................................12
7.3 ALU – Arithmetic Logic Unit .............................................................................13
7.4 Status Register ................................................................................................14
7.5 General Purpose Register File ........................................................................15
7.6 Stack Pointer ...................................................................................................16
7.7 Instruction Execution Timing ...........................................................................17
7.8 Reset and Interrupt Handling ...........................................................................18
8 AVR Memories ........................................................................................ 21
8.1 In-System Reprogrammable Flash Program Memory .....................................21
8.2 SRAM Data Memory ........................................................................................21
8.3 EEPROM Data Memory ..................................................................................23
8.4 I/O Memory ......................................................................................................27
9 External Memory Interface .................................................................... 28
9.1 Overview ..........................................................................................................28
9.2 Register Description ........................................................................................35
9.3 General Purpose registers ...............................................................................37
9.4 External Memory registers ...............................................................................37
10 System Clock and Clock Options ......................................................... 40
10.1 Overview ..........................................................................................................40ii
2549P–AVR–10/2012
ATmega640/1280/1281/2560/2561
10.2 Clock Systems and their Distribution ...............................................................40
10.3 Clock Sources .................................................................................................41
10.4 Low Power Crystal Oscillator ...........................................................................42
10.5 Full Swing Crystal Oscillator ............................................................................44
10.6 Low Frequency Crystal Oscillator ....................................................................45
10.7 Calibrated Internal RC Oscillator .....................................................................47
10.8 128 kHz Internal Oscillator ..............................................................................47
10.9 External Clock .................................................................................................48
10.10 Clock Output Buffer .........................................................................................49
10.11 Timer/Counter Oscillator ..................................................................................49
10.12 System Clock Prescaler ..................................................................................49
10.13 Register Description ........................................................................................50
11 Power Management and Sleep Modes ................................................. 52
11.1 Sleep Modes ....................................................................................................52
11.2 Idle Mode .........................................................................................................52
11.3 ADC Noise Reduction Mode ............................................................................53
11.4 Power-down Mode ...........................................................................................53
11.5 Power-save Mode ............................................................................................53
11.6 Standby Mode .................................................................................................54
11.7 Extended Standby Mode .................................................................................54
11.8 Power Reduction Register ...............................................................................54
11.9 Minimizing Power Consumption ......................................................................54
11.10 Register Description ........................................................................................56
12 System Control and Reset .................................................................... 59
12.1 Resetting the AVR ...........................................................................................59
12.2 Reset Sources .................................................................................................59
12.3 Internal Voltage Reference ..............................................................................62
12.4 Watchdog Timer ..............................................................................................63
12.5 Register Description ........................................................................................67
13 I/O-Ports .................................................................................................. 70
13.1 Introduction ......................................................................................................70
13.2 Ports as General Digital I/O .............................................................................71
13.3 Alternate Port Functions ..................................................................................75
13.4 Register Description for I/O-Ports ..................................................................100
14 Interrupts .............................................................................................. 105iii
2549P–AVR–10/2012
ATmega640/1280/1281/2560/2561
14.1 Interrupt Vectors in ATmega640/1280/1281/2560/2561 ................................105
14.2 Reset and Interrupt Vector placement ...........................................................107
14.3 Moving Interrupts Between Application and Boot Section .............................109
14.4 Register Description ......................................................................................110
15 External Interrupts ............................................................................... 112
15.1 Pin Change Interrupt Timing ..........................................................................112
15.2 Register Description ......................................................................................113
16 8-bit Timer/Counter0 with PWM .......................................................... 118
16.1 Features ........................................................................................................118
16.2 Overview ........................................................................................................118
16.3 Timer/Counter Clock Sources .......................................................................119
16.4 Counter Unit ..................................................................................................119
16.5 Output Compare Unit .....................................................................................120
16.6 Compare Match Output Unit ..........................................................................122
16.7 Modes of Operation .......................................................................................123
16.8 Timer/Counter Timing Diagrams ...................................................................127
16.9 Register Description ......................................................................................129
17 16-bit Timer/Counter (Timer/Counter 1, 3, 4, and 5) .......................... 136
17.1 Features ........................................................................................................136
17.2 Overview ........................................................................................................136
17.3 Accessing 16-bit Registers ............................................................................138
17.4 Timer/Counter Clock Sources .......................................................................141
17.5 Counter Unit ..................................................................................................142
17.6 Input Capture Unit .........................................................................................143
17.7 Output Compare Units ...................................................................................145
17.8 Compare Match Output Unit ..........................................................................147
17.9 Modes of Operation .......................................................................................148
17.10 Timer/Counter Timing Diagrams ...................................................................156
17.11 Register Description ......................................................................................158
18 Timer/Counter 0, 1, 3, 4, and 5 Prescaler ........................................... 169
18.1 Internal Clock Source ....................................................................................169
18.2 Prescaler Reset .............................................................................................169
18.3 External Clock Source ...................................................................................169
18.4 Register Description ......................................................................................170iv
2549P–AVR–10/2012
ATmega640/1280/1281/2560/2561
19 Output Compare Modulator (OCM1C0A) ........................................... 172
19.1 Overview ........................................................................................................172
19.2 Description .....................................................................................................172
20 8-bit Timer/Counter2 with PWM and Asynchronous Operation ...... 174
20.1 Overview ........................................................................................................174
20.2 Timer/Counter Clock Sources .......................................................................175
20.3 Counter Unit ..................................................................................................175
20.4 Modes of Operation .......................................................................................176
20.5 Output Compare Unit .....................................................................................180
20.6 Compare Match Output Unit ..........................................................................182
20.7 Timer/Counter Timing Diagrams ...................................................................183
20.8 Asynchronous Operation of Timer/Counter2 .................................................184
20.9 Timer/Counter Prescaler ...............................................................................186
20.10 Register Description ......................................................................................187
21 SPI – Serial Peripheral Interface ......................................................... 195
21.1 SS Pin Functionality ......................................................................................200
21.2 Register Description ......................................................................................202
22 USART ................................................................................................... 205
22.1 Features ........................................................................................................205
22.2 Clock Generation ...........................................................................................206
22.3 Frame Formats ..............................................................................................209
22.4 USART Initialization .......................................................................................210
22.5 Data Transmission – The USART Transmitter ..............................................212
22.6 Data Reception – The USART Receiver .......................................................214
22.7 Asynchronous Data Reception ......................................................................218
22.8 Multi-processor Communication Mode ..........................................................221
22.9 Register Description ......................................................................................222
22.10 Examples of Baud Rate Setting .....................................................................227
23 USART in SPI Mode ............................................................................. 232
23.1 Overview ........................................................................................................232
23.2 USART MSPIM vs. SPI .................................................................................232
23.3 SPI Data Modes and Timing ..........................................................................233
23.4 Frame Formats ..............................................................................................234
23.5 Data Transfer .................................................................................................236
23.6 USART MSPIM Register Description ............................................................237v
2549P–AVR–10/2012
ATmega640/1280/1281/2560/2561
24 2-wire Serial Interface .......................................................................... 241
24.1 Features ........................................................................................................241
24.2 2-wire Serial Interface Bus Definition ............................................................241
24.3 Data Transfer and Frame Format ..................................................................242
24.4 Multi-master Bus Systems, Arbitration and Synchronization .........................245
24.5 Overview of the TWI Module .........................................................................246
24.6 Using the TWI ................................................................................................249
24.7 Transmission Modes .....................................................................................252
24.8 Multi-master Systems and Arbitration ............................................................265
24.9 Register Description ......................................................................................266
25 AC – Analog Comparator .................................................................... 271
25.1 Analog Comparator Multiplexed Input ...........................................................271
25.2 Register Description ......................................................................................272
26 ADC – Analog to Digital Converter ..................................................... 275
26.1 Features ........................................................................................................275
26.2 Operation .......................................................................................................276
26.3 Starting a Conversion ....................................................................................277
26.4 Prescaling and Conversion Timing ................................................................278
26.5 Changing Channel or Reference Selection ...................................................282
26.6 ADC Noise Canceler .....................................................................................283
26.7 ADC Conversion Result .................................................................................288
26.8 Register Description ......................................................................................289
27 JTAG Interface and On-chip Debug System ..................................... 296
27.1 Features ........................................................................................................296
27.2 Overview ........................................................................................................296
27.3 TAP - Test Access Port .................................................................................297
27.4 Using the Boundary-scan Chain ....................................................................299
27.5 Using the On-chip Debug System .................................................................299
27.6 On-chip Debug Specific JTAG Instructions ...................................................300
27.7 Using the JTAG Programming Capabilities ...................................................301
27.8 Bibliography ...................................................................................................301
27.9 On-chip Debug Related Register in I/O Memory ...........................................301
28 IEEE 1149.1 (JTAG) Boundary-scan ................................................... 302
28.1 Features ........................................................................................................302
28.2 System Overview ...........................................................................................302vi
2549P–AVR–10/2012
ATmega640/1280/1281/2560/2561
28.3 Data Registers ...............................................................................................302
28.4 Boundary-scan Specific JTAG Instructions ...................................................304
28.5 Boundary-scan Chain ....................................................................................305
28.6 Boundary-scan Related Register in I/O Memory ...........................................308
28.7 ATmega640/1280/1281/2560/2561 Boundary-scan Order ............................308
28.8 Boundary-scan Description Language Files ..................................................308
29 Boot Loader Support – Read-While-Write Self-Programming ......... 317
29.1 Features ........................................................................................................317
29.2 Application and Boot Loader Flash Sections .................................................317
29.3 Read-While-Write and No Read-While-Write Flash Sections ........................317
29.4 Boot Loader Lock Bits ...................................................................................320
29.5 Addressing the Flash During Self-Programming ...........................................322
29.6 Self-Programming the Flash ..........................................................................323
29.7 Register Description ......................................................................................332
30 Memory Programming ......................................................................... 335
30.1 Program And Data Memory Lock Bits ...........................................................335
30.2 Fuse Bits ........................................................................................................336
30.3 Signature Bytes .............................................................................................338
30.4 Calibration Byte .............................................................................................338
30.5 Page Size ......................................................................................................338
30.6 Parallel Programming Parameters, Pin Mapping, and Commands ...............338
30.7 Parallel Programming ....................................................................................341
30.8 Serial Downloading ........................................................................................349
30.9 Programming via the JTAG Interface ............................................................354
31 Electrical Characteristics .................................................................... 367
31.1 DC Characteristics .........................................................................................367
31.2 Speed Grades ...............................................................................................369
31.3 Clock Characteristics .....................................................................................371
31.4 External Clock Drive ......................................................................................371
31.5 System and Reset Characteristics ................................................................372
31.6 2-wire Serial Interface Characteristics ...........................................................373
31.7 SPI Timing Characteristics ............................................................................375
31.8 ADC Characteristics – Preliminary Data ........................................................377
31.9 External Data Memory Timing .......................................................................379
32 Typical Characteristics ........................................................................ 385vii
2549P–AVR–10/2012
ATmega640/1280/1281/2560/2561
32.1 Active Supply Current ....................................................................................385
32.2 Idle Supply Current ........................................................................................388
32.3 Power-down Supply Current ..........................................................................392
32.4 Power-save Supply Current ...........................................................................393
32.5 Standby Supply Current ................................................................................394
32.6 Pin Pull-up .....................................................................................................394
32.7 Pin Driver Strength ........................................................................................397
32.8 Pin Threshold and Hysteresis ........................................................................399
32.9 BOD Threshold and Analog Comparator Offset ............................................402
32.10 Internal Oscillator Speed ...............................................................................404
32.11 Current Consumption of Peripheral Units ......................................................406
32.12 Current Consumption in Reset and Reset Pulsewidth ..................................409
33 Register Summary ............................................................................... 411
34 Instruction Set Summary .................................................................... 416
35 Ordering Information ........................................................................... 419
35.1 ATmega640 ...................................................................................................419
35.2 ATmega1280 .................................................................................................420
35.3 ATmega1281 .................................................................................................421
35.4 ATmega2560 .................................................................................................422
35.5 ATmega2561 .................................................................................................423
36 Packaging Information ........................................................................ 424
36.1 100A ..............................................................................................................424
36.2 100C1 ............................................................................................................425
36.3 64A ................................................................................................................426
36.4 64M2 ..............................................................................................................427
37 Errata ..................................................................................................... 428
37.1 ATmega640 rev. B .........................................................................................428
37.2 ATmega640 rev. A .........................................................................................428
37.3 ATmega1280 rev. B .......................................................................................428
37.4 ATmega1280 rev. A .......................................................................................429
37.5 ATmega1281 rev. B .......................................................................................429
37.6 ATmega1281 rev. A .......................................................................................430
37.7 ATmega2560 rev. F .......................................................................................430
37.8 ATmega2560 rev. E .......................................................................................430viii
2549P–AVR–10/2012
ATmega640/1280/1281/2560/2561
37.9 ATmega2560 rev. D ......................................................................................430
37.10 ATmega2560 rev. C ......................................................................................430
37.11 ATmega2560 rev. B .......................................................................................430
37.12 ATmega2560 rev. A .......................................................................................431
37.13 ATmega2561 rev. F .......................................................................................432
37.14 ATmega2561 rev. E .......................................................................................432
37.15 ATmega2561 rev. D ......................................................................................432
37.16 ATmega2561 rev. C ......................................................................................432
37.17 ATmega2561 rev. B .......................................................................................432
37.18 ATmega2561 rev. A .......................................................................................432
38 Datasheet Revision History ................................................................ 435
38.1 Rev. 2549P-10/2012 ......................................................................................435
38.2 Rev. 2549O-05/12 .........................................................................................435
38.3 Rev. 2549N-05/11 .........................................................................................435
38.4 Rev. 2549M-09/10 .........................................................................................435
38.5 Rev. 2549L-08/07 ..........................................................................................436
38.6 Rev. 2549K-01/07 ..........................................................................................436
38.7 Rev. 2549J-09/06 ..........................................................................................436
38.8 Rev. 2549I-07/06 ...........................................................................................437
38.9 Rev. 2549H-06/06 .........................................................................................437
38.10 Rev. 2549G-06/06 .........................................................................................437
38.11 Rev. 2549F-04/06 ..........................................................................................437
38.12 Rev. 2549E-04/06 ..........................................................................................437
38.13 Rev. 2549D-12/05 .........................................................................................438
38.14 Rev. 2549C-09/05 .........................................................................................438
38.15 Rev. 2549B-05/05 ..........................................................................................438
38.16 Rev. 2549A-03/05 ..........................................................................................438
Table of Contents....................................................................................... i2549P–AVR–10/2012
Atmel Corporation
2325 Orchard Parkway
San Jose, CA 95131
USA
Tel: (+1)(408) 441-0311
Fax: (+1)(408) 487-2600
www.atmel.com
Atmel Asia Limited
Unit 1-5 & 16, 19/F
BEA Tower, Millennium City 5
418 Kwun Tong Road
Kwun Tong, Kowloon
HONG KONG
Tel: (+852) 2245-6100
Fax: (+852) 2722-1369
Atmel Munich GmbH
Business Campus
Parkring 4
D-85748 Garching b. Munich
GERMANY
Tel: (+49) 89-31970-0
Fax: (+49) 89-3194621
Atmel Japan
16F, Shin-Osaki Kangyo Bldg.
1-6-8 Osaki Shinagawa-ku
Tokyo 141-0032
JAPAN
Tel: (+81)(3) 6417-0300
Fax: (+81)(3) 6417-0370
© 2012 Atmel Corporation. All rights reserved.
Atmel®, Atmel logo and combinations thereof, AVR®, QTouch®, QMatrix®, AVR Studio® and others are registered trademarks or trademarks
of Atmel Corporation or its subsidiaries. Windows® and others are registered trademarks of Microsoft Corporation in U.S. and
other countries. Other terms and product names may be trademarks of others.
Disclaimer: The information in this document is provided in connection with Atmel products. No license, express or implied, by estoppel or otherwise, to
any intellectual property right is granted by this document or in connection with the sale of Atmel products. EXCEPT AS SET FORTH IN THE ATMEL
TERMS AND CONDITIONS OF SALES LOCATED ON THE ATMEL WEBSITE, ATMEL ASSUMES NO LIABILITY WHATSOEVER AND DISCLAIMS ANY
EXPRESS, IMPLIED OR STATUTORY WARRANTY RELATING TO ITS PRODUCTS INCLUDING, BUT NOT LIMITED TO, THE IMPLIED WARRANTY OF
MERCHANTABILITY, FITNESS FOR A PARTICULAR PURPOSE, OR NON-INFRINGEMENT. IN NO EVENT SHALL ATMEL BE LIABLE FOR ANY DIRECT,
INDIRECT, CONSEQUENTIAL, PUNITIVE, SPECIAL OR INCIDENTAL DAMAGES (INCLUDING, WITHOUT LIMITATION, DAMAGES FOR LOSS AND PROFITS,
BUSINESS INTERRUPTION, OR LOSS OF INFORMATION) ARISING OUT OF THE USE OR INABILITY TO USE THIS DOCUMENT, EVEN IF ATMEL
HAS BEEN ADVISED OF THE POSSIBILITY OF SUCH DAMAGES. Atmel makes no representations or warranties with respect to the accuracy or completeness
of the contents of this document and reserves the right to make changes to specifications and product descriptions at any time without notice.
Atmel does not make any commitment to update the information contained herein. Unless specifically provided otherwise, Atmel products are not suitable
for, and shall not be used in, automotive applications. Atmel products are not intended, authorized, or warranted for use as components in applications
intended to support or sustain life.
1. General description
The LPC81xM are an ARM Cortex-M0+ based, low-cost 32-bit MCU family operating at
CPU frequencies of up to 30 MHz. The LPC81xM support up to 16 kB of flash memory
and 4 kB of SRAM.
The peripheral complement of the LPC81xM includes a CRC engine, one I2C-bus
interface, up to three USARTs, up to two SPI interfaces, one multi-rate timer, self wake-up
timer, and state-configurable timer, one comparator, function-configurable I/O ports
through a switch matrix, an input pattern match engine, and up to 18 general-purpose I/O
pins.
2. Features and benefits
System:
ARM Cortex-M0+ processor, running at frequencies of up to 30 MHz with
single-cycle multiplier and fast single-cycle I/O port.
ARM Cortex-M0+ built-in Nested Vectored Interrupt Controller (NVIC).
System tick timer.
Serial Wire Debug (SWD) and JTAG boundary scan modes supported.
Micro Trace Buffer (MTB) supported.
Memory:
Up to 16 kB on-chip flash programming memory with 64 Byte page write and erase.
Up to 4 kB SRAM.
ROM API support:
Boot loader.
USART drivers.
I2C drivers.
Power profiles.
Flash In-Application Programming (IAP) and In-System Programming (ISP).
Digital peripherals:
High-speed GPIO interface connected to the ARM Cortex-M0+ IO bus with up to 18
General-Purpose I/O (GPIO) pins with configurable pull-up/pull-down resistors,
programmable open-drain mode, input inverter, and glitch filter.
High-current source output driver (20 mA) on four pins.
High-current sink driver (20 mA) on two true open-drain pins.
GPIO interrupt generation capability with boolean pattern-matching feature on eight
GPIO inputs.
Switch matrix for flexible configuration of each I/O pin function.
LPC81xM
32-bit ARM Cortex-M0+ microcontroller; up to 16 kB flash and
4 kB SRAM
Rev. 4.3 — 22 April 2014 Product data sheetLPC81XM All information provided in this document is subject to legal disclaimers. © NXP Semiconductors N.V. 2014. All rights reserved.
Product data sheet Rev. 4.3 — 22 April 2014 2 of 76
NXP Semiconductors LPC81xM
32-bit ARM Cortex-M0+ microcontroller
State Configurable Timer/PWM (SCTimer/PWM) with input and output functions
(including capture and match) assigned to pins through the switch matrix.
Multiple-channel multi-rate timer (MRT) for repetitive interrupt generation at up to
four programmable, fixed rates.
Self Wake-up Timer (WKT) clocked from either the IRC or a low-power,
low-frequency internal oscillator.
CRC engine.
Windowed Watchdog timer (WWDT).
Analog peripherals:
Comparator with internal and external voltage references with pin functions
assigned or enabled through the switch matrix.
Serial interfaces:
Three USART interfaces with pin functions assigned through the switch matrix.
Two SPI controllers with pin functions assigned through the switch matrix.
One I2C-bus interface with pin functions assigned through the switch matrix.
Clock generation:
12 MHz internal RC oscillator trimmed to 1.5 % accuracy that can optionally be
used as a system clock.
Crystal oscillator with an operating range of 1 MHz to 25 MHz.
Programmable watchdog oscillator with a frequency range of 9.4 kHz to 2.3 MHz.
10 kHz low-power oscillator for the WKT.
PLL allows CPU operation up to the maximum CPU rate without the need for a
high-frequency crystal. May be run from the system oscillator, the external clock
input CLKIN, or the internal RC oscillator.
Clock output function with divider that can reflect the crystal oscillator, the main
clock, the IRC, or the watchdog oscillator.
Power control:
Integrated PMU (Power Management Unit) to minimize power consumption.
Reduced power modes: Sleep mode, Deep-sleep mode, Power-down mode, and
Deep power-down mode.
Wake-up from Deep-sleep and Power-down modes on activity on USART, SPI, and
I2C peripherals.
Timer-controlled self wake-up from Deep power-down mode.
Power-On Reset (POR).
Brownout detect.
Unique device serial number for identification.
Single power supply.
Operating temperature range 40 °C to 105 °C except for the DIP8 package, which is
available for a temperature range of 40 °C to 85 °C.
Available as DIP8, TSSOP16, SO20, TSSOP20, and XSON16 package.
3. Applications
8/16-bit applications Lighting
Consumer Motor control
Climate control Fire and security applicationsLPC81XM All information provided in this document is subject to legal disclaimers. © NXP Semiconductors N.V. 2014. All rights reserved.
Product data sheet Rev. 4.3 — 22 April 2014 3 of 76
NXP Semiconductors LPC81xM
32-bit ARM Cortex-M0+ microcontroller
4. Ordering information
4.1 Ordering options
Table 1. Ordering information
Type number Package
Name Description Version
LPC810M021FN8 DIP8 plastic dual in-line package; 8 leads (300 mil) SOT097-2
LPC811M001JDH16 TSSOP16 plastic thin shrink small outline package; 16 leads; body width 4.4 mm SOT403-1
LPC812M101JDH16 TSSOP16 plastic thin shrink small outline package; 16 leads; body width 4.4 mm SOT403-1
LPC812M101JD20 SO20 plastic small outline package; 20 leads; body width 7.5 mm SOT163-1
LPC812M101JDH20 TSSOP20 plastic thin shrink small outline package; 20 leads; body width 4.4 mm SOT360-1
LPC812M101JTB16 XSON16 plastic extremely thin small outline package; no leads; 16 terminals;
body 2.5 3.2 0.5 mm
SOT1341-1
Table 2. Ordering options
Type number Flash/kB SRAM/kB USART I
2C-bus SPI Comparator GPIO Package
LPC810M021FN8 4 1 2 1 1 1 6 DIP8
LPC811M001JDH16 8 2 2 1 1 1 14 TSSOP16
LPC812M101JDH16 16 4 3 1 2 1 14 TSSOP16
LPC812M101JD20 16 4 2 1 1 1 18 SO20
LPC812M101JDH20 16 4 3 1 2 1 18 TSSOP20
LPC812M101JTB16 16 4 3 1 2 1 14 XSON16LPC81XM All information provided in this document is subject to legal disclaimers. © NXP Semiconductors N.V. 2014. All rights reserved.
Product data sheet Rev. 4.3 — 22 April 2014 4 of 76
NXP Semiconductors LPC81xM
32-bit ARM Cortex-M0+ microcontroller
5. Marking
The LPC81xM devices typically have the following top-side marking:
LPC81x
xxxxx
xxxxxxxx
xxYWWxR[x]
The last two letters in the last line (field ‘xR’) identify the boot code version and device
revision.
Field ‘Y’ states the year the device was manufactured. Field ‘WW’ states the week the
device was manufactured during that year.
Remark: On the TSSOP16 package, the last line includes only the date code xxYWW.
Table 3. Device revision table
Revision identifier (xR) Revision description
‘1A’ Initial device revision with boot code version 13.1
‘2A’ Device revision with boot code version 13.2
’4C’ Device revision with boot code version 13.4LPC81XM All information provided in this document is subject to legal disclaimers. © NXP Semiconductors N.V. 2014. All rights reserved.
Product data sheet Rev. 4.3 — 22 April 2014 5 of 76
NXP Semiconductors LPC81xM
32-bit ARM Cortex-M0+ microcontroller
6. Block diagram
Fig 1. LPC81xM block diagram
65$0
�����N%
$50
&257(;�0��
7(67�'(%8*
,17(5)$&(
)/$6+
������N%
+,*+�63(('
*3,2
$+%72$3%
%5,'*(
&/2&.
*(1(5$7,21�
32:(5&21752/�
6<67(0
)81&7,216
5(6(7�&/.,1
FORFNVDQG
FRQWUROV
/3&��[0
DDD�������
VODYH
VODYH VODYH
520
VODYH
&5&
VODYH
3,1,17(558376�
3$77(510$7&+
$+%�/,7(%86
,5&
:'2VF
%2'
325
63,�
86$57�
6'$
6&/
&7,1B>���@
&7287B>���@
��[
3,2�
��[
::'7
,2&21
308
6(/)
:$.(�837,0(5
08/7,�5$7(7,0(5
63,�
,
�&�%86
6&7,0(5�
3:0
6:,7&+
0$75,;
&203$5$725
;7$/,1
;7$/287
$&03B2
6<6&21
5;'�&76
7;'�576
$&03B,���
9''&03
6&.�66(/
0,62�026,
6&.�66(/
0,62�026,
$/:$<6�2132:(5'20$,1
;7$/
6&/.
86$57� 5;'�&76
7;'�576
6&/.
86$57� 5;'�&76
7;'�576
6&/.
&/.287
6:&/.�6:'
Data Sheet: JN5148-001
IEEE802.15.4 Wireless Microcontroller
© NXP Laboratories UK 2013 JN-DS-JN5148-001 1v9 1
Overview Features: Transceiver
• 2.4GHz IEEE802.15.4 compliant
• Time of Flight ranging engine
• 128-bit AES security processor
• MAC accelerator with packet
formatting, CRCs, address check,
auto-acks, timers
• 500 & 667kbps data rate modes
• Integrated sleep oscillator for low
power
• On chip power regulation for 2.0V
to 3.6V battery operation
• Deep sleep current 100nA
• Sleep current with active sleep
timer 1.25µA
• <$0.50 external component cost
• Rx current 17.5mA
• Tx current 15.0mA
• Receiver sensitivity -95dBm
• Transmit power 2.5dBm
Features: Microcontroller
• Low power 32-bit RISC CPU, 4 to
32MHz clock speed
• Variable instruction width for high
coding efficiency
• Multi-stage instruction pipeline
• 128kB ROM and 128kB RAM for
bootloaded program code & data
• JTAG debug interface
• 4-input 12-bit ADC, 2 12-bit
DACs, 2 comparators
• 3 application timer/counters,
• 2 UARTs
• SPI port with 5 selects
• 2-wire serial interface
• 4-wire digital audio interface
• Watchdog timer
• Low power pulse counters
• Up to 21 DIO
Industrial temp (-40°C to +85°C)
8x8mm 56-lead Punched QFN
Lead-free and RoHS compliant
The JN5148-001 is an ultra low power, high performance wireless
microcontroller targeted at JenNet and ZigBee PRO networking
applications. The device features an enhanced 32-bit RISC processor
offering high coding efficiency through variable width instructions, a multistage
instruction pipeline and low power operation with programmable clock
speeds. It also includes a 2.4GHz IEEE802.15.4 compliant transceiver,
128kB of ROM, 128kB of RAM, and a rich mix of analogue and digital
peripherals. The large memory footprint allows the device to run both a
network stack (e.g. ZigBee PRO) and an embedded application or in a coprocessor
mode. The operating current is below 18mA, allowing operation
direct from a coin cell.
Enhanced peripherals include low power pulse counters running in sleep
mode designed for pulse counting in AMR applications and a unique Time
of Flight ranging engine, allowing accurate location services to be
implemented on wireless sensor networks. It also includes a 4-wire I2
S
audio interface, to interface directly to mainstream audio CODECs, as well
as conventional MCU peripherals.
Block Diagram
32-bit
RISC CPU Timers
UAR Ts
12-bit ADC,
Comparators
12-bit DACs,
Temp Sensor
2-Wire Serial
RAM SPI 128kB
128-bit AES
Encryption
Accelerator
2.4GHz
Radio
ROM
128kB
Power
Management
XTAL
O-QPSK
Modem
IEEE802.15.4
MAC
Accelerator
32-byte
OTP eFuse
4-Wire Audio
Sleep Counters
Time of Flight
Engine
Watchdog
Timer
Benefits
• Single chip integrates
transceiver and
microcontroller for wireless
sensor networks
• Large memory footprint to
run ZigBee PRO or JenNet
together with an application
• Very low current solution for
long battery life
• Highly featured 32-bit RISC
CPU for high performance
and low power
• System BOM is low in
component count and cost
• Extensive user peripherals
Applications
• Robust and secure low power
wireless applications
• ZigBee PRO and JenNet
networks
• Smart metering
(e.g. AMR)
• Home and commercial building
automation
• Location Aware services – e.g.
Asset Tracking
• Industrial systems
• Telemetry
• Remote Control
• Toys and gaming peripherals2 JN-DS-JN5148-001 1v9 © NXP Laboratories UK 2013
Contents
1 Introduction 6
1.1 Wireless Transceiver 6
1.2 RISC CPU and Memory 6
1.3 Peripherals 7
1.4 Block Diagram 8
2 Pin Configurations 9
2.1 Pin Assignment 10
2.2 Pin Descriptions 12
2.2.1 Power Supplies 12
2.2.2 Reset 12
2.2.3 32MHz Oscillator 12
2.2.4 Radio 12
2.2.5 Analogue Peripherals 13
2.2.6 Digital Input/Output 13
3 CPU 15
4 Memory Organisation 16
4.1 ROM 16
4.2 RAM 17
4.3 OTP eFuse Memory 17
4.4 External Memory 17
4.4.1 External Memory Encryption 18
4.5 Peripherals 18
4.6 Unused Memory Addresses 18
5 System Clocks 19
5.1 16MHz System Clock 19
5.1.1 32MHz Oscillator 19
5.1.2 24MHz RC Oscillator 19
5.2 32kHz System Clock 20
5.2.1 32kHz RC Oscillator 20
5.2.2 32kHz Crystal Oscillator 20
5.2.3 32kHz External Clock 20
6 Reset 21
6.1 Internal Power-on Reset 21
6.2 External Reset 22
6.3 Software Reset 22
6.4 Brown-out Detect 23
6.5 Watchdog Timer 23
7 Interrupt System 24
7.1 System Calls 24
7.2 Processor Exceptions 24
7.2.1 Bus Error 24
7.2.2 Alignment 24
7.2.3 Illegal Instruction 24
7.2.4 Stack Overflow 24
7.3 Hardware Interrupts 25© NXP Laboratories UK 2013 JN-DS-JN5148-001 1v9 3
8 Wireless Transceiver 26
8.1 Radio 26
8.1.1 Radio External Components 27
8.1.2 Antenna Diversity 27
8.2 Modem 29
8.3 Baseband Processor 30
8.3.1 Transmit 30
8.3.2 Reception 30
8.3.3 Auto Acknowledge 31
8.3.4 Beacon Generation 31
8.3.5 Security 31
8.4 Security Coprocessor 31
8.5 Location Awareness 31
8.6 Higher Data Rates 32
9 Digital Input/Output 33
10 Serial Peripheral Interface 35
11 Timers 38
11.1 Peripheral Timer/Counters 38
11.1.1 Pulse Width Modulation Mode 39
11.1.2 Capture Mode 39
11.1.3 Counter/Timer Mode 40
11.1.4 Delta-Sigma Mode 40
11.1.5 Example Timer / Counter Application 41
11.2 Tick Timer 41
11.3 Wakeup Timers 42
11.3.1 RC Oscillator Calibration 43
12 Pulse Counters 44
13 Serial Communications 45
13.1 Interrupts 46
13.2 UART Application 46
14 JTAG Debug Interface 47
15 Two-Wire Serial Interface 48
15.1 Connecting Devices 48
15.2 Clock Stretching 49
15.3 Master Two-wire Serial Interface 49
15.4 Slave Two-wire Serial Interface 50
16 Four-Wire Digital Audio Interface 51
17 Random Number Generator 53
18 Sample FIFO 54
19 Intelligent Peripheral Interface 55
19.1 Data Transfer Format 55
19.2 JN5148 (Slave) Initiated Data Transfer 56
19.3 Remote (Master) Processor Initiated Data Transfer 564 JN-DS-JN5148-001 1v9 © NXP Laboratories UK 2013
20 Analogue Peripherals 58
20.1 Analogue to Digital Converter 59
20.1.1 Operation 59
20.1.2 Supply Monitor 60
20.1.3 Temperature Sensor 60
20.2 Digital to Analogue Converter 60
20.2.1 Operation 60
20.3 Comparators 61
21 Power Management and Sleep Modes 62
21.1 Operating Modes 62
21.1.1 Power Domains 62
21.2 Active Processing Mode 62
21.2.1 CPU Doze 62
21.3 Sleep Mode 62
21.3.1 Wakeup Timer Event 63
21.3.2 DIO Event 63
21.3.3 Comparator Event 63
21.3.4 Pulse Counter 63
21.4 Deep Sleep Mode 63
22 Electrical Characteristics 64
22.1 Maximum Ratings 64
22.2 DC Electrical Characteristics 64
22.2.1 Operating Conditions 64
22.2.2 DC Current Consumption 65
22.2.3 I/O Characteristics 66
22.3 AC Characteristics 66
22.3.1 Reset and Voltage Brown-Out 66
22.3.2 SPI MasterTiming 68
22.3.3 Intelligent Peripheral (SPI Slave) Timing 68
22.3.4 Two-wire Serial Interface 69
22.3.5 Four-Wire Digital Audio Interface 70
22.3.6 Wakeup and Boot Load Timings 70
22.3.7 Bandgap Reference 71
22.3.8 Analogue to Digital Converters 71
22.3.9 Digital to Analogue Converters 72
22.3.10 Comparators 73
22.3.11 32kHz RC Oscillator 73
22.3.12 32kHz Crystal Oscillator 74
22.3.13 32MHz Crystal Oscillator 74
22.3.14 24MHz RC Oscillator 75
22.3.15 Temperature Sensor 75
22.3.16 Radio Transceiver 76© NXP Laboratories UK 2013 JN-DS-JN5148-001 1v9 5
Appendix A Mechanical and Ordering Information 81
A.1 56-pin QFN Package Drawing 81
A.2 PCB Decal 82
A.3 Ordering Information 83
A.4 Device Package Marking 84
A.5 Tape and Reel Information 85
A.5.1 Tape Orientation and Dimensions 85
A.5.2 Reel Information: 180mm Reel 86
A.5.3 Reel Information: 330mm Reel 87
A.5.4 Dry Pack Requirement for Moisture Sensitive Material 87
Appendix B Development Support 88
B.1 Crystal Oscillators 88
B.1.1 Crystal Equivalent Circuit 88
B.1.2 Crystal Load Capacitance 88
B.1.3 Crystal ESR and Required Transconductance 89
B.2 32MHz Oscillator 90
B.3 32kHz Oscillator 92
B.4 JN5148 Module Reference Designs 94
B.4.1 Schematic Diagram 94
B.4.2 PCB Design and Reflow Profile 96
Related Documents 97
RoHS Compliance 97
Status Information 97
Disclaimers 98
Trademarks 98
Version Control 99
Contact Details 1006 JN-DS-JN5148-001 1v9 © NXP Laboratories UK 2013
1 Introduction
The JN5148-001 is an IEEE802.15.4 wireless microcontroller that provides a fully integrated solution for applications
using the IEEE802.15.4 standard in the 2.4 - 2.5GHz ISM frequency band [1], including JenNet and ZigBee PRO. It
includes all of the functionality required to meet the IEEE802.15.4, JenNet and ZigBee PRO specifications and has
additional processor capability to run a wide range of applications including, but not limited to Smart Energy,
Automatic Meter Reading, Remote Control, Home and Building Automation, Toys and Gaming.
Applications that transfer data wirelessly tend to be more complex than wired ones. Wireless protocols make
stringent demands on frequencies, data formats, timing of data transfers, security and other issues. Application
development must consider the requirements of the wireless network in addition to the product functionality and user
interfaces. To minimise this complexity, NXP provides a series of software libraries and interfaces that control the
transceiver and peripherals of the JN5148. These libraries and interfaces remove the need for the developer to
understand wireless protocols and greatly simplifies the programming complexities of power modes, interrupts and
hardware functionality.
In view of the above, the register details of the JN5148 are not provided in the datasheet.
The device includes a Wireless Transceiver, RISC CPU, on chip memory and an extensive range of peripherals.
Hereafter, the JN5148-001 will be referred to as JN5148.
1.1 Wireless Transceiver
The Wireless Transceiver comprises a 2.45GHz radio, a modem, a baseband controller and a security coprocessor.
In addition, the radio also provides an output to control transmit-receive switching of external devices such as power
amplifiers allowing applications that require increased transmit power to be realised very easily. Appendix B.4,
describes a complete reference design including Printed Circuit Board (PCB) design and Bill Of Materials (BOM).
The security coprocessor provides hardware-based 128-bit AES-CCM* modes as specified by the IEEE802.15.4
2006 standard. Specifically this includes encryption and authentication covered by the MIC –32/ -64/ -128, ENC and
ENC-MIC –32/ -64/ -128 modes of operation.
The transceiver elements (radio, modem and baseband) work together to provide IEEE802.15.4 Medium Access
Control (MAC) under the control of a protocol stack. Applications incorporating IEEE802.15.4 functionality can be
rapidly developed by combining user-developed application software with a protocol stack library.
1.2 RISC CPU and Memory
A 32-bit RISC CPU allows software to be run on chip, its processing power being shared between the IEEE802.15.4
MAC protocol, other higher layer protocols and the user application. The JN5148 has a unified memory architecture,
code memory, data memory, peripheral devices and I/O ports are organised within the same linear address space.
The device contains 128kbytes of ROM, 128kbytes of RAM and a 32-byte One Time Programmable (OTP) eFuse
memory. © NXP Laboratories UK 2013 JN-DS-JN5148-001 1v9 7
1.3 Peripherals
The following peripherals are available on chip:
• Master SPI port with five select outputs
• Two UARTs with support for hardware or software flow control
• Three programmable Timer/Counters – all three support Pulse Width Modulation (PWM) capability, two have
capture/compare facility
• Two programmable Sleep Timers and a Tick Timer
• Two-wire serial interface (compatible with SMbus and I2
C) supporting master and slave operation
• Four-wire digital audio interface (compatible with I²S)
• Slave SPI port for Intelligent peripheral mode (shared with digital I/O)
• Twenty-one digital I/O lines (multiplexed with peripherals such as timers and UARTs)
• Four channel, 12-bit, Analogue to Digital converter
• Two 12-bit Digital to Analogue converters
• Two programmable analogue comparators
• Internal temperature sensor and battery monitor
• Time Of Flight ranging engine
• Two low power pulse counters
• Random number generator
• Watchdog Timer and Voltage Brown-out
• Sample FIFO for digital audio interface or ADC/DAC
• JTAG hardware debug port
User applications access the peripherals using the Integrated Peripherals API. This allows applications to use a
tested and easily understood view of the peripherals allowing rapid system development. 8 JN-DS-JN5148-001 1v9 © NXP Laboratories UK 2013
1.4 Block Diagram
32-bit RISC CPU
Reset
SPI
Master
MUX
UART0
UART1
Wakeup
Timer1
Wakeup
Timer0
Security
Coprocessor
DIO6/TXD0/JTAG_TDO
DIO7/RXD0/JTAG_TDI
DIO4/CTS0/JTAG_TCK
DIO5/RTS0/JTAG_TMS
DIO19/TXD1/JTAG_TDO
DIO17/CTS1/IP_SEL/DAI_SCK/
JTAG_TCK
DIO18/RTS1/IP_INT/DAI_SDOUT/
JTAG_TMS
Digital
Baseband
Radio
Programmable
Interrupt
Controller
Timer0
2-wire
Interf ace
Timer1
SPICLK
DIO10/TIM0OUT/32KXTALOUT
SPIMOSI
SPIMISO
SPISEL0
DIO0/SPISEL1
DIO3/SPISEL4/RFTX
DIO2/SPISEL3/RFRX
DIO1/SPISEL2/PC0
DIO9/TIM0CAP/32KXTALIN/32KIN
DIO8/TIM0CK_GT/PC1
DIO13/TIM1OUT/ADE/DAI_SDIN
DIO11/TIM1CK_GT/TIM2OUT
DIO12/TIM1CAP/ADO/DAI_WS
DIO14/SIF_CLK/IP_CLK
DIO15/SIF_D/IP_DO
DIO16/RXD1/IP_DI/JTAG_TDI
From Peripherals
RESETN
Wireless
Transceiv er
32MHz Clock
Generator
XTAL_IN
XTAL_OUT
RF_IN
VCOTUNE
Tick Timer
Voltage
Regulators 1.8V VDD1
VDD2
Intelligent
Peripheral
IBAIS
VB_XX
Clock Divider
Multiplier
Timer2
SPISEL1
SPISEL2
SPISEL3
SPISEL4
TXD0
RXD0
RTS0
CTS0
TXD1
RXD1
RTS1
CTS1
TIM0CK_GT
TIM0CAP
TIM0OUT
TIM1CK_GT
TIM1CAP
TIM1OUT
TIM2OUT
SIF_D
SIF_CLK
IP_DO
IP_DI
IP_INT
IP_CLK
IP_SEL
4-wire
Digital
Audio
Interf ace
I2S_OUT
I2S_DIN
I2S_CLK
I2S_SYNC
Pulse
Counters
PC0
PC1
JTAG
Debug
JTAG_TDI
JTAG_TMS
JTAG_TCK
JTAG_TDO
RAM
128kB
ROM
128kB
OTP
eFuse
32kHz
RC
Osc
32kHz Clock
Select 32KIN
32kHz
Clock
Gen
32KXTALIN
32KXTALOUT
Antenna
Div ersity
ADO
ADE
Time
Of
Flight
Sample
FIFO
DIO20/RXD1/JTAG_TDI
24MHz
RC Osc
Comparator2 COMP2P
COMP2M
COMP1P/ Comparator1
EXT_PA_C
COMP1M/
EXT_PA_B
DAC1
DAC2
DAC1
DAC2
ADC
M
U ADC4 X
ADC1
ADC2
ADC3
Temperature
Sensor
Supply Monitor
CPU and 16MHz
System Clock
Watchdog
Timer
Brown-out
Detect
Figure 1: JN5148 Block Diagram
DIO 16/IP_DI© NXP Laboratories UK 2013 JN-DS-JN5148-001 1v9 9
2 Pin Configurations
DIO16/RXD 1/IP_DI/JTAG_TDI
DIO17/CTS1/IP_SEL/DAI_SC K/JTAG_TCK
VSS3
DIO18/RTS1/IP_INT/DAI_SDOUT/JTAG_TMS
DIO19/TXD1/JTAG_TDO
VSS2
VSSS
XTAL_OUT
XTAL_IN
VB_SYNTH
VCOTUNE
VB_VCO
VDD1
IBIAS
VREF
VB_RF2
RF_IN
VB_RF
COMP1M
COMP1P
ADC1
ADC2
ADC3
ADC4
COMP2M
COMP2P
VB_A
NC
DAC1
DAC2
DIO20/RXD 1/JTAG_TDI
VSS1
SPICLK
SPIMISO
VB_RAM
SPIMOSI
SPISEL0
DIO0/SPISEL1
RESETN
VB_DIG
DIO1/SPISEL2/PC0
DIO2/SPISEL3/RFRX
DIO15/SIF_D/IP_DO
DIO14/SIF_C LK/IP_CLK
DIO13/T IM1OUT/ADE/DAI_SDIN
DIO12/T IM1CAP/ADO/DAI_WS
DIO11/T IM1CK_GT /TIM2OUT
DIO10/T IM0OUT/32KXT ALOUT
DIO9/TIM0CAP/32KXT ALIN/32KIN
VDD2
DIO8/TIM0CK_GT/PC 1
DIO7/RXD0/JT AG_TDI
DIO6/TXD0/JTAG_TDO
DIO5/RTS0/JTAG_TMS
DIO4/CTS0/JTAG_TCK
DIO3/SPISEL4/RFTX
VSSA
(Paddl e)
1
2
3
4
5
6
7
8
9
10
11
12
13
14
15
16
17
18
19
20
21
22
23
24
25
26
27
28 29
30
31
32
33
34
35
36
37
38
39
40
41
42
56
55
54
53
52
51
50
49
48
47
46
45
44
43
Figure 2: 56-pin QFN Configuration (top view)
Note: Please refer to Appendix B.4 JN5148 Module Reference
Design for important applications information regarding the
connection of the PADDLE to the PCB.
DIO 16/IP_DI10 JN-DS-JN5148-001 1v9 © NXP Laboratories UK 2013
2.1 Pin Assignment
Pin No Power supplies Signal
Type
Description
10, 12, 16, 18, 27,
35, 40
VB_SYNTH, VB_VCO, VB_RF2, VB_RF, VB_A, VB_RAM,
VB_DIG
1.8V Regulated supply voltage
13, 49 VDD1, VDD2 3.3V Supplies: VDD1 for analogue,
VDD2 for digital
32, 6, 3, 7, Paddle VSS1, VSS2, VSS3, VSSS, VSSA 0V Grounds (see appendix A.2 for
paddle details)
28 NC No connect
General
39 RESETN CMOS Reset input
8, 9 XTAL_OUT, XTAL_IN 1.8V System crystal oscillator
Radio
11 VCOTUNE 1.8V VCO tuning RC network
14 IBIAS 1.8V Bias current control
17 RF_IN 1.8V RF antenna
Analogue Peripheral I/O
21, 22, 23, 24 ADC1, ADC2, ADC3, ADC4 3.3V ADC inputs
15 VREF 1.8V Analogue peripheral reference
voltage
29, 30 DAC1, DAC2 3.3V DAC outputs
19, 20 COMP1M/EXT_PA_B, COMP1P/EXT_PA_C 3.3V Comparator 1 inputs and
external PA control
25, 26 COMP2M, COMP2P 3.3V Comparator 2 inputs
Digital Peripheral I/O
Primary Alternate Functions
33 SPICLK CMOS SPI Clock Output
36 SPIMOSI CMOS SPI Master Out Slave In Output
34 SPIMISO CMOS SPI Master In Slave Out Input
37 SPISEL0 CMOS SPI Slave Select Output 0
38 DIO0 SPISEL1 CMOS DIO0 or SPI Slave Select Output
1
41 DIO1 SPISEL2 PC0 CMOS DIO1, SPI Slave Select Output 2
or Pulse Counter0 Input
42 DIO2 SPISEL3 RFRX CMOS DIO2, SPI Slave Select Output 3
or Radio Receive Control Output
43 DIO3 SPISEL4 RFTX CMOS DIO3, SPI Slave Select Output 4
or Radio Transmit Control Output
44 DIO4 CTS0 JTAG_TCK CMOS DIO4, UART 0 Clear To Send
Input or JTAG CLK
45 DIO5 RTS0 JTAG_TMS CMOS DIO5, UART 0 Request To Send
Output or JTAG Mode Select
46 DIO6 TXD0 JTAG_TDO CMOS DIO6, UART 0 Transmit Data
Output or JTAG Data Output
47 DIO7 RXD0 JTAG_TDI CMOS DIO7, UART 0 Receive Data
Input or JTAG Data Input
48 DIO8 TIM0CK_GT PC1 CMOS DIO8, Timer0 Clock/Gate Input
or Pulse Counter1 Input
50 DIO9 TIM0CAP 32KXTALIN 32KIN CMOS DIO9, Timer0 Capture Input, 32K
External Crystal Input or 32K
Clock Input© NXP Laboratories UK 2013 JN-DS-JN5148-001 1v9 11
Pin
No
Digital Peripheral I/O Signal
Type
Description
Primary Alternate Functions
51 DIO10 TIM0OUT 32KXTALOUT CMOS DIO10, Timer0 PWM Output or
32K External Crystal Output
52 DIO11 TIM1CK_GT TIM2OUT CMOS DIO11, Timer1 Clock/Gate
Input or Timer2 PWM Output
53 DIO12 TIM1CAP ADO DAI_WS CMOS DIO12, Timer1 Capture Input,
Antenna Diversity or Digital
Audio Word Select
54 DIO13 TIM1OUT ADE DAI_SDIN CMOS DIO13, Timer1 PWM Output,
Antenna Diversity or Digital
Audio Data Input
55 DIO14 SIF_CLK IP_CLK CMOS DIO14, Serial Interface Clock
or Intelligent Peripheral Clock
Input
56 DIO15 SIF_D IP_DO CMOS DIO15, Serial Interface Data or
Intelligent Peripheral Data Out
1 DIO16 IP_DI CMOS DIO16 or Intelligent Peripheral
Data In
2 DIO17 CTS1 IP_SEL DAI_SCK JTAG_TCK CMOS DIO17, UART 1 Clear To Send
Input, Intelligent Peripheral
Device Select Input or Digital
Audio Clock or JTAG CLK
4 DIO18 RTS1 IP_INT DAI_SDOUT JTAG_TMS CMOS DIO18, UART 1 Request To
Send Output, Intelligent
Peripheral Interrupt Output or
Digital Audio Data Output or
JTAG Mode Select
5 DIO19 TXD1 JTAG_TDO CMOS DIO19 or UART 1 Transmit
Data Output or JTAG Data Out
31 DIO 20 RXD1 JTAG_TDI CMOS DIO 20, UART 1 Receive Data
Input or JTAG data In
The PCB schematic and layout rules detailed in Appendix B.4
must be followed. Failure to do so will likely result in the
JN5148 failing to meet the performance specification detailed
herein and worst case may result in device not functioning in
the end application.12 JN-DS-JN5148-001 1v9 © NXP Laboratories UK 2013
2.2 Pin Descriptions
2.2.1 Power Supplies
The device is powered from the VDD1 and VDD2 pins, each being decoupled with a 100nF ceramic capacitor. VDD1
is the power supply to the analogue circuitry; it should be decoupled to ground. VDD2 is the power supply for the
digital circuitry; and should also be decoupled to ground. A 10uF tantalum capacitor is required. Decoupling pins for
the internal 1.8V regulators are provided which require a 100nF capacitor located as close to the device as practical.
VB_RF, VB_A and VB_SYNTH should be decoupled with an additional 47pF capacitor, while VB_RAM and VB_DIG
require only 100nF. VB_RF and VB_RF2 should be connected together as close to the device as practical, and only
require one 100nF capacitor and one 47pF capacitor. The pin VB_VCO requires a 10nF capacitor in parallel with a
47pF capacitor. Refer to B.4.1 for schematic diagram.
VSSA, VSSS, VSS1, VSS2, VSS3 are the ground pins.
Users are strongly discouraged from connecting their own circuits to the 1.8v regulated supply pins, as the regulators
have been optimised to supply only enough current for the internal circuits.
2.2.2 Reset
RESETN is a bi-directional active low reset pin that is connected to a 40kΩ internal pull-up resistor. It may be pulled
low by an external circuit, or can be driven low by the JN5148 if an internal reset is generated. Typically, it will be
used to provide a system reset signal. Refer to section 6.2, External Reset, for more details.
2.2.3 32MHz Oscillator
A crystal is connected between XTALIN and XTALOUT to form the reference oscillator, which drives the system
clock. A capacitor to analogue ground is required on each of these pins. Refer to section 5.1 16MHz System Clock
for more details. The 32MHz reference frequency is divided down to 16MHz and this is used as the system clock
throughout the device.
2.2.4 Radio
The radio is a single ended design, requiring a capacitor and just two inductors to match to 50Ω microstrip line to the
RF_IN pin.
An external resistor (43kΩ) is required between IBIAS and analogue ground to set various bias currents and
references within the radio.© NXP Laboratories UK 2013 JN-DS-JN5148-001 1v9 13
2.2.5 Analogue Peripherals
Several of the analogue peripherals require a reference voltage to use as part of their operations. They can use
either an internal reference voltage or an external reference connected to VREF. This voltage is referenced to
analogue ground and the performance of the analogue peripherals is dependant on the quality of this reference.
There are four ADC inputs, two pairs of comparator inputs and two DAC outputs. The analogue I/O pins on the
JN5148 can have signals applied up to 0.3v higher than VDD1. A schematic view of the analogue I/O cell is shown in
Figure 3: Analogue I/O Cell
In reset and deep sleep, the analogue peripherals are all off and the DAC outputs are in a high impedance state.
In sleep, the ADC and DACs are off, with the DAC outputs in high impedance state. The comparators may optionally
be used as a wakeup source.
Unused ADC and comparator inputs should be left unconnected.
VDD1
Analogue
I/O Pin
VSSA
Analogue
Peripheral
Figure 3: Analogue I/O Cell
2.2.6 Digital Input/Output
Digital I/O pins on the JN5148 can have signals applied up to 2V higher than VDD2 (with the exception of pins DIO9
and DIO10 that are 3V tolerant) and are therefore TTL-compatible with VDD2 > 3V. For other DC properties of these
pins see section 22.2.3 I/O Characteristics.
When used in their primary function all Digital Input/Output pins are bi-directional and are connected to weak internal
pull up resistors (40kΩ nominal) that can be disabled. When used in their secondary function (selected when the
appropriate peripheral block is enabled through software library calls) then their direction is fixed by the function. The
pull up resistor is enabled or disabled independently of the function and direction; the default state from reset is
enabled.
A schematic view of the digital I/O cell is in Figure 4: DIO Pin Equivalent Schematic.14 JN-DS-JN5148-001 1v9 © NXP Laboratories UK 2013
I
O
IE
VDD2
VSS
Pu
RPU
RPROT
OE
DIO[x] Pin
Figure 4: DIO Pin Equivalent Schematic
In reset, the digital peripherals are all off and the DIO pins are set as high-impedance inputs. During sleep and deep
sleep, the DIO pins retain both their input/output state and output level that was set as sleep commences. If the DIO
pins were enabled as inputs and the interrupts were enabled then these pins may be used to wake up the JN5148
from sleep.© NXP Laboratories UK 2013 JN-DS-JN5148-001 1v9 15
3 CPU
The CPU of the JN5148 is a 32-bit load and store RISC processor. It has been architected for three key
requirements:
• Low power consumption for battery powered applications
• High performance to implement a wireless protocol at the same time as complex applications
• Efficient coding of high-level languages such as C provided with the NXP Software Developer’s Kit
It features a linear 32-bit logical address space with unified memory architecture, accessing both code and data in the
same address space. Registers for peripheral units, such as the timers, UARTs and the baseband processor are
also mapped into this space.
The CPU has access to a block of 15 32-bit General-Purpose (GP) registers together with a small number of special
purpose registers which are used to store processor state and control interrupt handling. The contents of any GP
register can be loaded from or stored to memory, while arithmetic and logical operations, shift and rotate operations,
and signed and unsigned comparisons can be performed either between two registers and stored in a third, or
between registers and a constant carried in the instruction. Operations between general or special-purpose registers
execute in one cycle while those that access memory require a further cycle to allow the memory to respond.
The instruction set manipulates 8, 16 and 32-bit data; this means that programs can use objects of these sizes very
efficiently. Manipulation of 32-bit quantities is particularly useful for protocols and high-end applications allowing
algorithms to be implemented in fewer instructions than on smaller word-size processors, and to execute in fewer
clock cycles. In addition, the CPU supports hardware Multiply that can be used to efficiently implement algorithms
needed by Digital Signal Processing applications.
The instruction set is designed for the efficient implementation of high-level languages such as C. Access to fields in
complex data structures is very efficient due to the provision of several addressing modes, together with the ability to
be able to use any of the GP registers to contain the address of objects. Subroutine parameter passing is also made
more efficient by using GP registers rather than pushing objects onto the stack. The recommended programming
method for the JN5148 is by using C, which is supported by a software developer kit comprising a C compiler, linker
and debugger.
The CPU architecture also contains features that make the processor suitable for embedded, real-time applications.
In some applications, it may be necessary to use a real-time operating system to allow multiple tasks to run on the
processor. To provide protection for device-wide resources being altered by one task and affecting another, the
processor can run in either supervisor or user mode, the former allowing access to all processor registers, while the
latter only allows the GP registers to be manipulated. Supervisor mode is entered on reset or interrupt; tasks starting
up would normally run in user mode in a RTOS environment.
Embedded applications require efficient handling of external hardware events. When using JenOS, prioritised
interrupts are supported, with 15 priority levels, and can be configured as required by the application.
To improve power consumption a number of power-saving modes are implemented in the JN5148, described more
fully in section 21 - Power Management and Sleep Modes. One of these modes is the CPU doze mode; under
software control, the processor can be shut down and on an interrupt it will wake up to service the request.
Additionally, it is possible under software control, to set the speed of the CPU to 4, 8, 16 or 32MHz. This feature can
be used to trade-off processing power against current consumption.16 JN-DS-JN5148-001 1v9 © NXP Laboratories UK 2013
4 Memory Organisation
This section describes the different memories found within the JN5148. The device contains ROM, RAM, OTP eFuse
memory, the wireless transceiver and peripherals all within the same linear address space.
0x00000000
0x00020000
RAM
(128kB)
0xF0000000
0xFFFFFFFF
Unpopulated
ROM
(128kB)
0xF0020000
RAM Echo
0x04000000
Peripherals
0x02000000
Figure 5: JN5148 Memory Map
4.1 ROM
The ROM is 128k bytes in size, and can be accessed by the processor in a single CPU clock cycle. The ROM
contents include bootloader to allow external Flash memory contents to be bootloaded into RAM at runtime, a default
interrupt vector table, an interrupt manager, IEEE802.15.4 MAC and APIs for interfacing on-chip peripherals. The
operation of the boot loader is described in detail in Application Note [7]. The interrupt manager routes interrupt calls
to the application’s soft interrupt vector table contained within RAM. Section 7 contains further information regarding
the handling of interrupts. ROM contents are shown in Figure 6.
Interrupt Vectors
Interrupt Manager
Boot Loader
IEEE802.15.4
Stack
0x00000000
0x00020000
APIs
Spare
Figure 6: Typical ROM contents© NXP Laboratories UK 2013 JN-DS-JN5148-001 1v9 17
4.2 RAM
The JN5148 contains 128kBytes of high speed RAM. It can be used for both code and data storage and is accessed
by the CPU in a single clock cycle. At reset, a boot loader controls the loading of segments of code and data from an
external memory connected to the SPI port, into RAM. Software can control the power supply to the RAM allowing
the contents to be maintained during a sleep period when other parts of the device are un-powered. Typical RAM
contents are shown in Figure 7.
MAC Data
Interrupt Vector Table
Application
CPU Stack
(Grows Down)
0x04000000
0x04020000
MAC Address
Figure 7: Typical RAM Contents
4.3 OTP eFuse Memory
The JN5148 contains a total of 32bytes of eFuse memory; this is a One Time Programmable (OTP) memory that can
be used to support on chip 64-bit MAC ID and a 128-bit AES security key. A limited number of bits are available for
customer use for storage of configuration information; configuration of these is made through use of software APIs.
For further information on how to program and use the eFuse memory, please contact technical support via the online
tech-support system.
Alternatively, NXP can provide an eFuse programming service for customers that wish to use the eFuse but do not
wish to undertake this for themselves. For further details of this service, please contact your local NXP sales office.
4.4 External Memory
An external memory with an SPI interface may be used to provide storage for program code and data for the device
when external power is removed. The memory is connected to the SPI interface using select line SPISEL0; this
select line is dedicated to the external memory interface and is not available for use with other external devices. See
Figure 8 for connection details.
JN5148 Serial
Memory
SPISEL0
SPIMISO
SPIMOSI
SPICLK
SS
SDO
SDI
CLK
Figure 8: Connecting External Serial Memory18 JN-DS-JN5148-001 1v9 © NXP Laboratories UK 2013
At reset, the contents of this memory are copied into RAM by the software boot loader. The Flash memory devices
that are supported as standard through the JN5148 bootloader are given in Table 1. NXP recommends that where
possible one of these devices should be selected.
Manufacturer Device Number
SST (Silicon Storage Technology) 25VF010A (1Mbit device)
Numonyx M25P10-A (1Mbit device),
M25P40 (4Mbit device)
Table 1: Supported Flash Memories
Applications wishing to use an alternate Flash memory device should refer to application note [2] JN-AN-1038
Programming Flash devices not supported by the JN51xx ROM-based bootloader. This application note provides
guidance on developing an interface to an alternate device.
4.4.1 External Memory Encryption
The contents of the external serial memory may be encrypted. The AES security processor combined with a user
programmable 128-bit encryption key is used to encrypt the contents of the external memory. The encryption key is
stored in eFuse.
When bootloading program code from external serial memory, the JN5148 automatically accesses the encryption key
to execute the decryption process. User program code does not need to handle any of the decryption process; it is
transparent.
With encryption enabled, the time taken to boot code from external flash is increased.
4.5 Peripherals
All peripherals have their registers mapped into the memory space. Access to these registers requires 3 clock
cycles. Applications have access to the peripherals through the software libraries that present a high-level view of
the peripheral’s functions through a series of dedicated software routines. These routines provide both a tested
method for using the peripherals and allow bug-free application code to be developed more rapidly. For details, see
the JN51xx Integrated Peripherals API User Guide (JN-UG-3066)[5].
4.6 Unused Memory Addresses
Any attempt to access an unpopulated memory area will result in a bus error exception (interrupt) being generated.© NXP Laboratories UK 2013 JN-DS-JN5148-001 1v9 19
5 System Clocks
Two system clocks are used to provide timing references into the on-chip subsystems of the JN5148. A 16MHz clock,
generated by a crystal-controlled 32MHz oscillator, is used by the transceiver, processor, memory and digital and
analogue peripherals. A 32kHz clock is used by the sleep timer and during the startup phase of the chip.
5.1 16MHz System Clock
The 16MHz system clock is used by the digital and analogue peripherals and the transceiver. A scaled version
(4,8,16 or 32MHz) of this clock is also used by the processor and memories. For most operations it is necessary to
source this clock from the 32MHz oscillator.
Crystal oscillators are generally slow to start. Hence to provide a faster start-up following a sleep cycle a fast RC
oscillator is provided that can be used as the source for the 16MHz system clock. The oscillator starts very quickly
and is typically 24MHz causing the system clock to run at 12MHz. Using a clock of this speed scales down the speed
of the processor and any peripherals in use. For the SPI interface this causes no functional issues as the generated
SPI clock is slightly slower and is used to clock the external SPI slave. Use of the radio is not possible when using the
24MHz RC oscillator. Additionally, timers and UARTs should not be used as the exact frequency will not be known.
The JN5148 device can be configured to wake up from sleep using the fast RC oscillator and automatically switch
over to use the 32MHz xtal as the clock source, when it has started up. This could allow application code to be
downloaded from the flash before the xtal is ready, typically improving start-up time by 550usec. Alternatively, the
switch over can be controlled by software, or the system could always use the 32MHz oscillator as the clock source.
5.1.1 32MHz Oscillator
The JN5148 contains the necessary on chip components to build a 32MHz reference oscillator with the addition of an
external crystal resonator and two tuning capacitors. The schematic of these components are shown in Figure 9.
The two capacitors, C1 and C2, should typically be 15pF and use a COG dielectric. Due to the small size of these
capacitors, it is important to keep the traces to the external components as short as possible. The on chip
transconductance amplifier is compensated for temperature variation, and is self-biasing by means of the internal
resistor R1. The electrical specification of the oscillator can be found in section 22.3.13. Please refer to Appendix B
for development support with the crystal oscillator circuit.
XTALOUT
C1 C2
R1 XTALIN
JN5148
Figure 9: 32MHz Crystal Oscillator Connections
5.1.2 24MHz RC Oscillator
An on-chip 24MHz RC oscillator is provided. No external components are required for this oscillator. The electrical
specification of the oscillator can be found in section 22.3.14.20 JN-DS-JN5148-001 1v9 © NXP Laboratories UK 2013
5.2 32kHz System Clock
The 32kHz system clock is used for timing the length of a sleep period (see section 21 Power Management and
Sleep Modes) and also to generate the system clock used internally during reset. The clock can be selected from
one of three sources through the application software:
• 32kHz RC Oscillator
• 32kHz Crystal Oscillator
• 32kHz External Clock
Upon a chip reset or power-up the JN5148 defaults to using the internal 32kHz RC Oscillator. If another clock source
is selected then it will remain in use for all 32kHz timing until a chip reset is performed.
5.2.1 32kHz RC Oscillator
The internal 32kHz RC oscillator requires no external components. The internal timing components of the oscillator
have a wide tolerance due to manufacturing process variation and so the oscillator runs nominally at 32kHz ±30%. To
make this useful as a timing source for accurate wakeup from sleep, a frequency calibration factor derived from the
more accurate 16MHz clock may be applied. The calibration factor is derived through software, details can be found
in section 11.3.1. For detailed electrical specifications, see section 22.3.11.
5.2.2 32kHz Crystal Oscillator
In order to obtain more accurate sleep periods, the JN5148 contains the necessary on-chip components to build a
32kHz oscillator with the addition of an external 32.768kHz crystal and two tuning capacitors. The crystal should be
connected between 32KXTALIN and 32KXTALOUT (DIO9 and DIO10), with two equal capacitors to ground, one on
each pin. Due to the small size of the capacitors, it is important to keep the traces to the external components as
short as possible.
The electrical specification of the oscillator can be found in section 22.3.12. The oscillator cell is flexible and can
operate with a range of commonly available 32.768kHz crystals with load capacitances from 6 to 12.5pF. However,
the maximum ESR of the crystal and the supply current are both functions of the actual crystal used, see appendix
B.1 for more details.
32KXTALIN 32KXTALOUT
JN5148
Figure 10: 32kHz crystal oscillator connections
5.2.3 32kHz External Clock
An externally supplied 32kHz reference clock on the 32KIN input (DIO9) may be provided to the JN5148. This would
allow the 32kHz system clock to be sourced from a very stable external oscillator module, allowing more accurate
sleep cycle timings compared to the internal RC oscillator. (See section 22.2.3 I/O Characteristics, DIO9 is a 3V
tolerant input)© NXP Laboratories UK 2013 JN-DS-JN5148-001 1v9 21
6 Reset
A system reset initialises the device to a pre-defined state and forces the CPU to start program execution from the
reset vector. The reset process that the JN5148 goes through is as follows.
When power is applied, the 32kHz RC oscillator starts up and stabilises, which takes approximately 100µsec. At this
point, the 32MHz crystal oscillator is enabled and power is applied to the processor and peripheral logic. The logic
blocks are held in reset until the 32MHz crystal oscillator stabilises, typically this takes 0.75ms. Then the internal
reset is removed from the CPU and peripheral logic and the CPU starts to run code beginning at the reset vector,
consisting of initialisation code and the resident boot loader. [7] Section 22.3.1 provides detailed electrical data and
timing.
The JN5148 has five sources of reset:
• Internal Power-on Reset
• External Reset
• Software Reset
• Watchdog timer
• Brown-out detect
Note: When the device exits a reset condition, device operating
parameters (voltage, frequency, temperature, etc.) must be met to ensure
operation. If these conditions are not met, then the device must be held in
reset until the operating conditions are met. (See section 22.3)
6.1 Internal Power-on Reset
For the majority of applications the internal power-on reset is capable of generating the required reset signal. When
power is applied to the device, the power-on reset circuit monitors the rise of the VDD supply. When the VDD
reaches the specified threshold, the reset signal is generated and can be observed as a rising edge on the RESETN
pin. This signal is held internally until the power supply and oscillator stabilisation time has elapsed, when the internal
reset signal is then removed and the CPU is allowed to run.
RESETN Pin
Internal RESET
VDD
Figure 11: Internal Power-on Reset
When the supply drops below the power on reset ‘falling’ threshold, it will re-trigger the reset. Use of the external
reset circuit show in Figure 12 is suggested. 22 JN-DS-JN5148-001 1v9 © NXP Laboratories UK 2013
RESETN
C1
R1
JN5148
VDD
18k
470nF
Figure 12: External Reset Generation
The external resistor and capacitor provide a simple reset operation when connected to the RESETN pin.
6.2 External Reset
An external reset is generated by a low level on the RESETN pin. Reset pulses longer than the minimum pulse width
will generate a reset during active or sleep modes. Shorter pulses are not guaranteed to generate a reset. The
JN5148 is held in reset while the RESETN pin is low. When the applied signal reaches the Reset Threshold Voltage
(VRST) on its positive edge, the internal reset process starts.
Multiple devices may connect to the RESETN pin in an open-collector mode. The JN5148 has an internal pull-up
resistor connect to the RESETN pin. The pin is an input for an external reset, an output during the power-on reset
and may optionally be an output during a software reset. No devices should drive the RESETN pin high.
Internal Reset
RESETN pin
Reset
Figure 13: External Reset
6.3 Software Reset
A system reset can be triggered at any time through software control, causing a full chip reset and invalidating the
RAM contents. For example this can be executed within a user’s application upon detection of a system failure. When
performing the reset, the RESETN pin is driven low for 1µsec; depending on the external components this may or
may not be visible on the pin.
In addition, the RESETN line can be driven low by the JN5148 to provide a reset to other devices in the system (e.g.
external sensors) without resetting itself. When the RESETN line is not driven it will pull back high through either the
internal pull-up resistor or any external circuitry. It is essential to ensure that the RESETN line pulls back high within
100µsec after the JN5148 stops driving the line; otherwise a system reset will occur. Due to this, careful consideration
should be taken of any capacitance on this line. For instance, the RC values recommended in section 6.1 may need
to be replaced with a suitable reset IC© NXP Laboratories UK 2013 JN-DS-JN5148-001 1v9 23
6.4 Brown-out Detect
An internal brown-out detect module is used to monitor the supply voltage to the JN5148; this can be used whilst the
device is awake or is in CPU doze mode. Dips in the supply voltage below a variable threshold can be detected and
can be used to cause the JN5148 to perform a chip reset. Equally, dips in the supply voltage can be detected and
used to cause an interrupt to the processor, when the voltage either drops below the threshold or rises above it.
The brown-out detect is enabled by default from power-up and can extend the reset during power-up. This will keep
the CPU in reset until the voltage exceeds the brown-out threshold voltage. The threshold voltage is configurable to
2.0V, 2.3V, 2.7V and 3.0V and is controllable by software. From power-up the threshold is set by eFuse settings and
the default chip configuration is for the 2.3V threshold. It is recommended that the threshold is set so that, as a
minimum, the chip is held in reset until the voltage reaches the level required by the external memory device on the
SPI interface.
6.5 Watchdog Timer
A watchdog timer is provided to guard against software lockups. It operates by counting cycles of the 32kHz system
clock. A pre-scaler is provided to allow the expiry period to be set between typically 8ms and 16.4 seconds. Failure
to restart the watchdog timer within the pre-configured timer period will cause a chip reset to be performed. A status
bit is set if the watchdog was triggered so that the software can differentiate watchdog initiated resets from other
resets, and can perform any required recovery once it restarts. If the source of the 32kHz system clock is the 32kHz
RC oscillator then the watchdog expiry periods are subject to the variation in period of the RC oscillator.
After power up, reset, start from deep sleep or start from sleep, the watchdog is always enabled with the largest
timeout period and will commence counting as if it had just been restarted. Under software control the watchdog can
be disabled. If it is enabled, the user must regularly restart the watchdog timer to stop it from expiring and causing a
reset. The watchdog runs continuously, even during doze, however the watchdog does not operate during sleep or
deep sleep, or when the hardware debugger has taken control of the CPU. It will recommence automatically if
enabled once the debugger un-stalls the CPU. 24 JN-DS-JN5148-001 1v9 © NXP Laboratories UK 2013
7 Interrupt System
The interrupt system on the JN5148 is a hardware-vectored interrupt system. The JN5148 provides several interrupt
sources, some associated with CPU operations (CPU exceptions) and others which are used by hardware in the
device. When an interrupt occurs, the CPU stops executing the current program and loads its program counter with a
fixed hardware address specific to that interrupt. The interrupt handler or interrupt service routine is stored at this
location and is run on the next CPU cycle. Execution of interrupt service routines is always performed in supervisor
mode. Interrupt sources and their vector locations are listed in Table 2 below:
Interrupt Source Vector Location Interrupt Definition
Bus error 0x08 Typically cause by an attempt to access an invalid address or a
disabled peripheral
Tick timer 0x0e Tick timer interrupt asserted
Alignment error 0x14 Load/store address to non-naturally-aligned location
Illegal instruction 0x1a Attempt to execute an unrecognised instruction
Hardware interrupt 0x20 interrupt asserted
System call 0x26 System call initiated by b.sys instruction
Trap 0x2c caused by the b.trap instruction or the debug unit
Reset 0x38 Caused by software or hardware reset.
Stack Overflow 0x3e Stack overflow
Table 2: Interrupt Vectors
7.1 System Calls
The b.trap and b.sys instructions allow processor exceptions to be generated by software.
A system call exception will be generated when the b.sys instruction is executed. This exception can, for example, be
used to enable a task to switch the processor into supervisor mode when a real time operating system is in use. (See
section 3 for further details.)
The b.trap instruction is commonly used for trapping errors and for debugging.
7.2 Processor Exceptions
7.2.1 Bus Error
A bus error exception is generated when software attempts to access a memory address that does not exist, or is not
populated with memory or peripheral registers or when writing to ROM.
7.2.2 Alignment
Alignment exceptions are generated when software attempts to access objects that are not aligned to natural word
boundaries. 16-bit objects must be stored on even byte boundaries, while 32-bit objects must be stored on quad byte
boundaries. For instance, attempting to read a 16-bit object from address 0xFFF1 will trigger an alignment exception
as will a read of a 32-bit object from 0xFFF1, 0xFFF2 or 0xFFF3. Examples of legal 32-bit object addresses are
0xFFF0, 0xFFF4, 0xFFF8 etc.
7.2.3 Illegal Instruction
If the CPU reads an unrecognised instruction from memory as part of its instruction fetch, it will cause an illegal
instruction exception.
7.2.4 Stack Overflow
When enabled, a stack overflow exception occurs if the stack pointer reaches a programmable location.© NXP Laboratories UK 2013 JN-DS-JN5148-001 1v9 25
7.3 Hardware Interrupts
Hardware interrupts generated from the transceiver, analogue or digital peripherals and DIO pins are individually
masked using the Programmable Interrupt Controller (PIC). Management of interrupts is provided in the peripherals
library [5]. For details of the interrupts generated from each peripheral see the respective section in this datasheet.
Interrupts can be used to wake the JN5148 from sleep. The peripherals, baseband controller, security coprocessor
and PIC are powered down during sleep but the DIO interrupts and optionally the pulse counters, wake-up timers and
analogue comparator interrupts remain powered to bring the JN5148 out of sleep.
Prioritised external interrupt handling (i.e., interrupts from hardware peripherals) is provided to enable an application
to control an events priority to provide for deterministic program execution.
The priority Interrupt controller provides 15 levels of prioritised interrupts. The priority level of all interrupts can be set,
with value 0 being used to indicate that the source can never produce an external interrupt, 1 for the lowest priority
source(s) and 15 for the highest priority source(s). Note that multiple interrupt sources can be assigned the same
priority level if desired.
If while processing an interrupt, a new event occurs at the same or lower priority level, a new external interrupt will
not be triggered. However, if a new higher priority event occurs, the external interrupt will again be asserted,
interrupting the current interrupt service routine.
Once the interrupt service routine is complete, lower priority events can be serviced. 26 JN-DS-JN5148-001 1v9 © NXP Laboratories UK 2013
8 Wireless Transceiver
The wireless transceiver comprises a 2.45GHz radio, modem, a baseband processor, a security coprocessor and
PHY controller. These blocks, with protocol software provided as a library, implement an IEEE802.15.4 standardsbased
wireless transceiver that transmits and receives data over the air in the unlicensed 2.4GHz band.
8.1 Radio
Figure 14 shows the single ended radio architecture.
LNA
synth
PA
ADC Reference
& Bias
Switch
Radio
Calibration
Lim1
Lim2
Lim3
Lim4
sigma
delta
D-Type
Figure 14: Radio Architecture
The radio comprises a low-IF receive path and a direct modulation transmit path, which converge at the TX/RX
switch. The switch connects to the external single ended matching network, which consists of two inductors and a
capacitor, this arrangement creates a 50Ω port and removes the need for a balun. A 50Ω single ended antenna can
be connected directly to this port.
The 32MHz crystal oscillator feeds a divider, which provides the frequency synthesiser with a reference frequency.
The synthesiser contains programmable feedback dividers, phase detector, charge pump and internal Voltage
Controlled Oscillator (VCO). The VCO has no external components, and includes calibration circuitry to compensate
for differences in internal component values due to process and temperature variations. The VCO is controlled by a
Phase Locked Loop (PLL) that has an internal loop filter. A programmable charge pump is also used to tune the loop
characteristic.
The receiver chain starts with the low noise amplifier / mixer combination whose outputs are passed to a lowpass
filter, which provides the channel definition. The signal is then passed to a series of amplifier blocks forming a limiting
strip. The signal is converted to a digital signal before being passed to the Modem. The gain control for the RX path
is derived in the automatic gain control (AGC) block within the Modem, which samples the signal level at various
points down the RX chain. To improve the performance and reduce current consumption, automatic calibration is
applied to various blocks in the RX path.
In the transmit direction, the digital stream from the Modem is passed to a digital sigma-delta modulator which
controls the feedback dividers in the synthesiser, (dual point modulation). The VCO frequency now tracks the applied
modulation. The 2.4 GHz signal from the VCO is then passed to the RF Power Amplifier (PA), whose power control
can be selected from one of three settings. The output of the PA drives the antenna via the RX/TX switch© NXP Laboratories UK 2013 JN-DS-JN5148-001 1v9 27
8.1.1 Radio External Components
In order to realise the full performance of the radio it is essential that the reference PCB layout and BOM are carefully
followed. See Appendix B.4.
The radio is powered from a number of internal 1.8V regulators fed from the analogue supply VDD1, in order to
provide good noise isolation between the digital logic of the JN5148 and the analogue blocks. These regulators are
also controlled by the baseband controller and protocol software to minimise power consumption. Decoupling for
internal regulators is required as described in section 2.2.1, Power Supplies
For single ended antennas or connectors, a balun is not required, however a matching network is needed.
The RF matching network requires three external components and the IBIAS pin requires one external component as
shown in schematic in B.4.1. These components are critical and should be placed close to the JN5148 pins and
analogue ground as defined in Table 8: JN5148 Printed Antenna Reference Module Components and PCB Layout
Constraints. Specifically, the output of the network comprising L2, C1 and L1 is designed to present an accurate
match to a 50 ohm resistive network as well as provide a DC path to the final output stage or antenna. Users wishing
to match to other active devices such as amplifiers should design their networks to match to 50 ohms at the output of
L1
R1 43K
IBIAS
C20 100nF
L2 2.7nH
VB_RF
VREF
VB_RF2
RF_IN C12 47pF
C3 100nF
VB_RF1
C1 47pF L1 5.6nH
To Coaxial Socket
or Integrated Antenna
VB_RF
Figure 15 External Radio Components
8.1.2 Antenna Diversity
Support is provided for antenna diversity. Antenna diversity is a technique that maximises the performance of an
antenna system. It allows the radio to switch between two antennas that have very low correlation between their
received signals. Typically, this is achieved by spacing two antennas around 0.25 wavelengths apart or by using two
orthogonal polarisations. So, if a packet is transmitted and no acknowledgement is received, the radio system can
switch to the other antenna for the retry, with a different probability of success.
The JN5148 provides an output (ADO) on DIO12 that is asserted on odd numbered retries and optionally its
complement (ADE) on DIO13, that can be used to control an antenna switch; this enables antenna diversity to be
implemented easily (see Figure 16 and Figure 17).28 JN-DS-JN5148-001 1v9 © NXP Laboratories UK 2013
Antenna A Antenna B
A B
COM
SEL
SELB
ADO (DIO[12])
ADE (DIO[13])
Device RF Port
RF Switch: Single-Pole, Double-Throw (SPDT)
Figure 16 Simple Antenna Diversity Implementation using External RF Switch
ADO (DIO[12])
TX Active
RX Active
ADE (DIO[13])
1st TX-RX Cycle 2nd TX-RX Cycle (1st Retry)
Figure 17 Antenna Diversity ADO Signal for TX with Acknowledgement
If two DIO pins cannot be spared, DIO13 can be configured to be a normal DIO pin, and the inverse of ADO
generated with an inverter on the PCB. © NXP Laboratories UK 2013 JN-DS-JN5148-001 1v9 29
8.2 Modem
The modem performs all the necessary modulation and spreading functions required for digital transmission and
reception of data at 250kbps in the 2450MHz radio frequency band in compliance with the IEEE802.15.4 standard. It
also provides a high data rate modes at 500 and 667kbps.
AGC Demodulation
Symbol
Detection
(Despreading)
Modulation Spreading
TX
RX
TX Data
Interface
RX Data
Interface
VCO
Sigma-Delta
Modulator
IF Signal
Gain
Figure 18 Modem Architecture
Features provided to support network channel selection algorithms include Energy Detection (ED), Link Quality
Indication (LQI) and fully programmable Clear Channel Assessment (CCA).
The Modem provides a digital Receive Signal Strength Indication (RSSI) that facilitates the implementation of the
IEEE 802.15.4 ED function and LQI function.
The ED and LQI are both related to receiver power in the same way, as shown in Fig19. LQI is associated with a
received packet, whereas ED is an indication of signal power on air at a particular moment.
The CCA capability of the Modem supports all modes of operation defined in the IEEE 802.15.4 standard, namely
Energy above ED threshold, Carrier Sense and Carrier Sense and/or energy above ED threshold.
Figure 19 Energy Detect Value vs Receive Power Level30 JN-DS-JN5148-001 1v9 © NXP Laboratories UK 2013
8.3 Baseband Processor
The baseband processor provides all time-critical functions of the IEEE802.15.4 MAC layer. Dedicated hardware
guarantees air interface timing is precise. The MAC layer hardware/software partitioning, enables software to
implement the sequencing of events required by the protocol and to schedule timed events with millisecond
resolution, and the hardware to implement specific events with microsecond timing resolution. The protocol software
layer performs the higher-layer aspects of the protocol, sending management and data messages between endpoint
and coordinator nodes, using the services provided by the baseband processor.
Append
Checksum
Verify
Checksum
CSMA CCA Backoff
Control
Deserialiser
Serialiser
Tx/Rx
Frame
Buffer
Tx
Bitstream
Rx
Bitstream
Protocol Timing Engine
Supervisor
Radio
Status
Control
Processor
Bus
Protocol
Timers
Security Coprocessor
Decrypt
Port
Encrypt
Port
AES
Codec
Figure 20: Baseband Processor
8.3.1 Transmit
A transmission is performed by software writing the data to be transferred into the Tx/Rx Frame Buffer, together with
parameters such as the destination address and the number of retries allowed, and programming one of the protocol
timers to indicate the time at which the frame is to be sent. This time will be determined by the software tracking the
higher-layer aspects of the protocol such as superframe timing and slot boundaries. Once the packet is prepared and
protocol timer set, the supervisor block controls the transmission. When the scheduled time arrives, the supervisor
controls the sequencing of the radio and modem to perform the type of transmission required. It can perform all the
algorithms required by IEEE802.15.4 such as CSMA/CA, GTS without processor intervention including retries and
random backoffs.
When the transmission begins, the header of the frame is constructed from the parameters programmed by the
software and sent with the frame data through the serialiser to the Modem. At the same time, the radio is prepared
for transmission. During the passage of the bitstream to the modem, it passes through a CRC checksum generator
that calculates the checksum on-the-fly, and appends it to the end of the frame.
If using slotted access, it is possible for a transmission to overrun the time in its allocated slot; the Baseband
Processor handles this situation autonomously and notifies the protocol software via interrupt, rather than requiring it
to handle the overrun explicitly.
8.3.2 Reception
During reception, the radio is set to receive on a particular channel. On receipt of data from the modem, the frame is
directed into the Tx/Rx Frame Buffer where both header and frame data can be read by the protocol software. An
interrupt may be provided on receipt of the frame header. As the frame data is being received from the modem it is
passed through a checksum generator; at the end of the reception the checksum result is compared with the
checksum at the end of the message to ensure that the data has been received correctly. An interrupt may be © NXP Laboratories UK 2013 JN-DS-JN5148-001 1v9 31
provided to indicate successful packet reception. During reception, the modem determines the Link Quality, which is
made available at the end of the reception as part of the requirements of IEEE802.15.4.
8.3.3 Auto Acknowledge
Part of the protocol allows for transmitted frames to be acknowledged by the destination sending an acknowledge
packet within a very short window after the transmitted frame has been received. The JN5148 baseband processor
can automatically construct and send the acknowledgement packet without processor intervention and hence avoid
the protocol software being involved in time-critical processing within the acknowledge sequence. The JN5148
baseband processor can also request an acknowledge for packets being transmitted and handle the reception of
acknowledged packets without processor intervention.
8.3.4 Beacon Generation
In beaconing networks, the baseband processor can automatically generate and send beacon frames; the repetition
rate of the beacons is programmed by the CPU, and the baseband then constructs the beacon contents from data
delivered by the CPU. The baseband processor schedules the beacons and transmits them without CPU
intervention.
8.3.5 Security
The transmission and reception of secured frames using the Advanced Encryption Standard (AES) algorithm is
handled by the security coprocessor and the stack software. The application software must provide the appropriate
encrypt/decrypt keys for the transmission or reception. On transmission, the key can be programmed at the same
time as the rest of the frame data and setup information.
8.4 Security Coprocessor
The security coprocessor is available to the application software to perform encryption/decryption operations. A
hardware implementation of the encryption engine significantly speeds up the processing of the encrypted packets
over a pure software implementation. The AES library for the JN5148 provides operations that utilise the encryption
engine in the device and allow the contents of memory buffers to be transformed. Information such as the type of
security operation to be performed and the encrypt/decrypt key to be used must also be provided.
Processor
Interface
AES
Block
Encrpytion
Controller
AES Encoder
Key Generation
Figure 21: Security Coprocessor Architecture
8.5 Location Awareness
The JN5148 provides the ability for an application to obtain the Time Of Flight (TOF) between two network nodes.
The TOF information is an alternative metric to that of the existing Energy Detect value (RSSI) that has been typically
used for calculating the relative inter-nodal separation, for subsequent use in a location awareness system.
For short ranges RSSI will typically give a better accuracy than TOF, however for distances above 5 to 10 meters
TOF will offer significant improvements in accuracy compared to RSSI. In general, the RSSI error scales with
distance, such that if the distance doubles then the error doubles.32 JN-DS-JN5148-001 1v9 © NXP Laboratories UK 2013
8.6 Higher Data Rates
To support the demands of applications that require high data throughputs such as in audio or data streaming
applications, the JN5148 supports higher data rate modes that offer 500kbps or 667kbps on air transmission rates.
The switching between standard and higher data rates is controlled via software, When operating in a higher data
rate mode standard IEEE802.15.4 features, such as clear channel assessment, can still be used. This allows the
JN5148 in a higher data rate mode to co-exist in an IEEE802.15.4 based network (adhering to the correct bit rates
and frame timing etc.) whilst at the same time providing the benefit of the higher data rate where required.
When operating in a higher data rate mode, the receive sensitivity will be degraded by at least 3dB.© NXP Laboratories UK 2013 JN-DS-JN5148-001 1v9 33
9 Digital Input/Output
There are 21 Digital I/O (DIO) pins, which can be configured as either an input or an output, and each has a
selectable internal pull-up resistor. Most DIO pins are multiplexed with alternate peripheral features of the device,
see section 2.1. Once a peripheral is enabled it takes precedence over the device pins. Refer to the individual
module sections for a full description of the alternate peripherals functions. Following a reset (and whilst the reset
input is held low), all peripherals are off and the DIO pins are configured as inputs with the internals pull-ups turned
on.
When a peripheral is not enabled, the DIO pins associated with it can be used as digital inputs or outputs. Each pin
can be controlled individually by setting the direction and then reading or writing to the pin.
The individual pull-up resistors, RPU, can also be enabled or disabled as needed and the setting is held through sleep
cycles. The pull-ups are generally configured once after reset depending on the external components and
functionality. For instance, outputs should generally have the pull-ups disabled. An input that is always driven should
also have the pull-up disabled.
When configured as an input each pin can be used to generate an interrupt upon a change of state (selectable
transition either from low to high or high to low); the interrupt can be enabled or disabled. When the device is
sleeping, these interrupts become events that can be used to wake the device up. Equally the status of the interrupt
may be read. See section 21 Power Management and Sleep Modes for further details on sleep and wakeup.
The state of all DIO pins can be read, irrespective of whether the DIO is configured as an input or an output.
Throughout a sleep cycle the direction of the DIO, and the state of the outputs, is held. This is based on the resultant
of the GPIO Data/ Direction registers and the effect of any enabled peripherals at the point of entering sleep.
Following a wake-up these directions and output values are maintained under control of the GPIO data / direction
registers. Any peripherals enabled before the sleep cycle are not automatically re-enabled, this must be done through
software after the wake-up.
For example, if DIO0 is configured to be SPISEL1 then it becomes an output. The output value is controlled by the
SPI functional block. If the device then enters a sleep cycle, the DIO will remain an output and hold the value being
output when entering sleep. After wake-up the DIO will still be an output with the same value but controlled from the
GPIO Data/Direction registers. It can be altered with the software functions that adjust the DIO, or the application may
re-configure it to be SPISEL1.
Unused DIO pins are recommended to be set as inputs with the pull-up enabled.
Two DIO pins can optionally be used to provide control signals for RF circuitry (eg switches and PA) in high power
range extenders.
DIO3 / RFTX is asserted when the radio is in the transmit state and similarly, DIO2 / RFRX is asserted when the radio
is in the receiver state.34 JN-DS-JN5148-001 1v9 © NXP Laboratories UK 2013
4-wire
Digital Audio
Interface
Antenna
Diversity
JTAG
Debug
Pulse
Counters
Intelligent
Peripheral
MUX
2-wire
Interface
Timer2
Timer1
Timer0
UART1
UART0
SPI
Master SPISEL1
SPISEL2
SPISEL3
SPISEL4
TXD0
RXD0
RTS0
CTS0
TXD1
RXD1
RTS1
CTS1
TIM0CK_GT
TIM0OUT
TIM0CAP
TIM1CK_GT
TIM1OUT
TIM1CAP
TIM2OUT
SIF_D
SIF_CLK
IP_DO
IP_DI
IP_INT
IP_CLK
IP_SEL
PC0
PC1
JTAG_TDI
JTAG_TMS
JTAG_TCK
JTAG_TDO
ADO
ADE
I2S_OUT
I2S_DIN
I2S_CLK
I2S_SYNC
SPICLK
SPIMOSI
SPIMISO
SPISEL0
DIO0/SPISEL1
DIO1/SPISEL2/PC0
DIO2/SPISEL3/RFRX
DIO3/SPISEL4/RFTX
DIO4/CTS0/JTAG_TCK
DIO5/RTS0/JTAG_TMS
DIO6/TXD0/JTAG_TDO
DIO7/RXD0/JTAG_TDI
DIO8/TIM0CK_GT/PC1
DIO9/TIM0CAP/32KXTALIN/32KIN
DIO10/TIM0OUT/32KXTALOUT
DIO11/TIM1CK_GT/TIM2OUT
DIO12/TIM1CAP/ADO/DAI_WS
DIO13/TIM1OUT/ADE/DAI_SDN
DIO14/SIF_CLK/IP_CLK
DIO15/SIF_D/IP_DO
DIO16/IP_DI
DIO17/CTS1/IP_SEL/DAI_SCK/
JTAG_TCK
DIO18/RTS1/IP_INT/DAI_SDOUT/
JTAG_TMS
DIO19/TXD1/JTAG_TDO
DIO20/RXD1/JTAG_TDI
Figure 22 DIO Block Diagram© NXP Laboratories UK 2013 JN-DS-JN5148-001 1v9 35
10 Serial Peripheral Interface
The Serial Peripheral Interface (SPI) allows high-speed synchronous data transfer between the JN5148 and
peripheral devices. The JN5148 operates as a master on the SPI bus and all other devices connected to the SPI are
expected to be slave devices under the control of the JN5148 CPU. The SPI includes the following features:
• Full-duplex, three-wire synchronous data transfer
• Programmable bit rates (up to 16Mbit/s)
• Programmable transaction size up to 32-bits
• Standard SPI modes 0,1,2 and 3
• Manual or Automatic slave select generation (up to 5 slaves)
• Maskable transaction complete interrupt
• LSB First or MSB First Data Transfer
• Supports delayed read edges
Clock
Divider
SPI Bus
Cycle
Controller
Data Buffer
DIV
Clock Edge
Select
Data
CHAR_LEN
LSB
SPIMISO
SPIMOSI
SPICLK
Select
Latch
SPISEL [4..0]
16 MHz
Figure 23: SPI Block Diagram
The SPI bus employs a simple shift register data transfer scheme. Data is clocked out of and into the active devices
in a first-in, first-out fashion allowing SPI devices to transmit and receive data simultaneously.
There are three dedicated pins SPICLK, SPIMOSI, SPIMISO that are shared across all devices on the bus. MasterOut-Slave-In
or Master-In-Slave-Out data transfer is relative to the clock signal SPICLK generated by the JN5148.
The JN5148 provides five slave selects, SPISEL0 to SPISEL4 to allow five SPI peripherals on the bus. SPISEL0 is a
dedicated pin; this is generally connected to a serial Flash/ EEPROM memory holding application code that is
downloaded to internal RAM via software from reset. SPISEL1 to 4, are alternate functions of pins DIO0 to 3
respectively.
The interface can transfer from 1 to 32-bits without software intervention and can keep the slave select lines asserted
between transfers when required, to enable longer transfers to be performed.
When the device reset is active, the three outputs SPISEL, SPICLK and SPI_MOSI are tri-stated and SPI_MISO is
set to be an input. The pull-up resistors associated with all four pins will be active at this time. 36 JN-DS-JN5148-001 1v9 © NXP Laboratories UK 2013 SI
C
SO
SS
Slave 0
Flash/
EEPROM
Memory
JN5148
37
38
41
42
43
36
33
34
SI
C
SO
SS
Slave 1
User
Defined
SI
C
SO
SS
Slave 2
User
Defined
SI
C
SO
SS
Slave 3
User
Defined
SI
C
SO
SS
Slave 4
User
Defined
SPIMISO
SPIMOSI
SPICLK
SPISEL4
SPISEL2
SPISEL3
SPISEL1
SPISEL0
Figure 24: Typical JN5148 SPI Peripheral Connection
The data transfer rate on the SPI bus is determined by the SPICLK signal. The JN5148 supports transfers at
selectable data rates from 16MHz to 125kHz selected by a clock divider. Both SPICLK clock phase and polarity are
configurable. The clock phase determines which edge of SPICLK is used by the JN5148 to present new data on the
SPIMOSI line; the opposite edge will be used to read data from the SPIMISO line. The interface should be configured
appropriately for the SPI slave being accessed.
SPICLK
Mode Description
Polarity
(CPOL)
Phase
(CPHA)
0 0 0 SPICLK is low when idle – the first edge is positive.
Valid data is output on SPIMOSI before the first clock and changes every
negative edge. SPIMISO is sampled every positive edge.
0 1 1 SPICLK is low when idle – the first edge is positive.
Valid data is output on SPIMOSI every positive edge. SPIMISO is sampled every
negative edge.
1 0 2 SPICLK is high when idle – the first edge is negative.
Valid data is output on SPIMOSI before the first clock edge and is changed
every positive edge. SPIMISO is sampled every negative edge.
1 1 3 SPICLK is high when idle – the first edge is negative.
Valid data is output on SPIMOSI every negative edge. SPIMISO is sampled
every positive edge.
Table 3 SPI Configurations
If more than one SPISEL line is to be used in a system they must be used in numerical order starting from SPISEL0.
For instance if 3 SPI select lines are to be used, they must be SPISEL0, 1 and 2. A SPISEL line can be automatically
deasserted between transactions if required, or it may stay asserted over a number of transactions. For devices such
as memories where a large amount of data can be received by the master by continually providing SPICLK
transitions, the ability for the select line to stay asserted is an advantage since it keeps the slave enabled over the
whole of the transfer.
A transaction commences with the SPI bus being set to the correct configuration, and then the slave device is
selected. Upon commencement of transmission (1 to 32 bits) data is placed in the FIFO data buffer and clocked out,
at the same time generating the corresponding SPICLK transitions. Since the transfer is full-duplex, the same
number of data bits is being received from the slave as it transmits. The data that is received during this transmission
can be read (1 to 32 bits). If the master simply needs to provide a number of SPICLK transitions to allow data to be © NXP Laboratories UK 2013 JN-DS-JN5148-001 1v9 37
sent from a slave, it should perform transmit using dummy data. An interrupt can be generated when the transaction
has completed or alternatively the interface can be polled.
If a slave device wishes to signal the JN5148 indicating that it has data to provide, it may be connected to one of the
DIO pins that can be enabled as an interrupt.
Figure 25 shows a complex SPI transfer, reading data from a FLASH device, that can be achieved using the SPI
master interface. The slave select line must stay low for many separate SPI accesses, and therefore manual slave
select mode must be used. The required slave select can then be asserted (active low) at the start of the transfer. A
sequence 8 and 32 bit transfers can be used to issue the command and address to the FLASH device and then to
read data back. Finally, the slave select can be deselected to end the transaction.
0 1 2 3 4 5 6 7
Instruction (0x03)
23 22 21 3 2 1 0
8 9 10 28 29 30 31
24-bit Address
MSB
Instruction Transaction
7 6 5 4 3 2 1 0
MSB
0 1 2 3 4 5 7 8N-1
3 2 1 0
LSB
Read Data Bytes Transaction(s) 1-N
SPISEL
SPICLK
SPIMOSI
SPIMISO
SPISEL
SPICLK
SPIMOSI
SPIMISO
8 9 10
7 6 5
MSB
Byte 1 Byte 2 Byte N
value unused by peripherals
6
Figure 25: Example SPI Waveforms – Reading from FLASH device using Mode 038 JN-DS-JN5148-001 1v9 © NXP Laboratories UK 2013
11 Timers
11.1 Peripheral Timer/Counters
Three general-purpose timer/counter units are available that can be independently configured to operate in one of
five possible modes. Timer 0 and 1 support all 5 modes of operation and Timer 2 supports PWM and Delta-Sigma
modes only. The timers have the following:
• 5-bit prescaler, divides system clock by 2 prescale value as the clock to the timer (prescaler range is 0 to 16)
• Clocked from internal system clock (16MHz)
• 16-bit counter, 16-bit Rise and Fall (period) registers
• Timer: can generate interrupts off Rise and Fall counts. Can be gated by external signal
• Counter: counts number of transitions on external event signal. Can use low-high, high-low or both
transitions
• PWM/Single pulse: outputs repeating Pulse Width Modulation signal or a single pulse. Can set period and
mark-space ratio
• Capture: measures times between transitions of an applied signal
• Delta-Sigma: Return-To-Zero (RTZ) and Non-Return-to-Zero (NRZ) modes
• Timer usage of external IO can be controlled on a pin by pin basis
Interrupt
Generator
Rise
Fall
Delta-Sigma
Counter
Reset Generator
=
Prescaler
INT
Int Enable
SYSCLK
S/w
Reset
System
Reset
Single
Shot
=
S
R
OE
Gate
Gate
Edge
Select
Reset
PWM/DeltaSigma
Capture
Generator
Capture
Enable
PWM/∆−Σ
PWM/∆−Σ
TIMxCK_GT
TIMxOUT
TIMxCAP
Figure 26: Timer Unit Block Diagram© NXP Laboratories UK 2013 JN-DS-JN5148-001 1v9 39
The clock source for the timer unit is fed from the 16MHz system clock. This clock passes to a 5-bit prescaler where a
value of 0 leaves the clock unmodified and other values divide it by 2 prescale value. For example, a prescale value of
2 applied to the 16MHz system clock source results in a timer clock of 4MHz.
The counter is optionally gated by a signal on the clock/gate input (TIMxCK_GT). If the gate function is selected,
then the counter is frozen when the clock/gate input is high.
An interrupt can be generated whenever the counter is equal to the value in either of the High or Low registers.
The internal Output Enable (OE) signal enables or disables the timer output.
The Timer 0 signals CK_GT, CAP and OUT are alternate functions of pins DIO8, 9 and 10 respectively and Timer 1
signals CK_GT, CAP and OUT are alternate functions of pins DIO11, 12, and 13 respectively. Timer 2 OUT is an
alternate function of DIO11 If operating in timer mode it is not necessary to use any of the DIO pins, allowing the
standard DIO functionality to be available to the application.
Note, timer 0 may only be used as an internal timer or in counter mode (counting events) if an external 32kHz crystal
is used. If timer 2 is used in PWM or Delta-Sigma mode then timer 1 does not have access to its clock/gate pin.
Therefore, it can not operate in counter mode (counting events) or use the gate function.
11.1.1 Pulse Width Modulation Mode
Pulse Width Modulation (PWM) mode allows the user to specify an overall cycle time and pulse length within the
cycle. The pulse can be generated either as a single shot or as a train of pulses with a repetition rate determined by
the cycle time.
In this mode, the cycle time and low periods of the PWM output signal can be set by the values of two independent
16-bit registers (Fall and Rise). The counter increments and its output is compared to the 16-bit Rise and Fall
registers. When the counter is equal to the Rise register, the PWM output is set to high; when the counter reaches
the Fall value, the output returns to low. In continuous mode, when the counter reaches the Fall value, it will reset
and the cycle repeats. The PWM waveform is available on TIMxOUT when the output driver is enabled.
Rise
Fall
Figure 27: PWM Output Timings
11.1.2 Capture Mode
The capture mode can be used to measure the time between transitions of a signal applied to the capture input
(TIMxCAP). When the capture is started, on the next low-to-high transition of the captured signal, the count value is
stored in the Rise register, and on the following high-to-low transition, the counter value is stored in the Fall register.
The pulse width is the difference in counts in the two registers multiplied by the period of the prescaled clock. Upon
reading the capture registers the counter is stopped. The values in the High and Low registers will be updated
whenever there is a corresponding transition on the capture input, and the value stored will be relative to when the
mode was started. Therefore, if multiple pulses are seen on TIMxCAP before the counter is stopped only the last
pulse width will be stored.40 JN-DS-JN5148-001 1v9 © NXP Laboratories UK 2013
CLK
CAPT
x 9 3
x 14
t
RISE t
RISE
t
FALL t
FALL
Rise
Fall
9 5 3 4
7
Capture Mode Enabled
Figure 28: Capture Mode
11.1.3 Counter/Timer Mode
The counter/timer can be used to generate interrupts, based on the timers or event counting, for software to use. As
a timer the clock source is from the system clock, prescaled if required. The timer period is programmed into the Fall
register and the Fall register match interrupt enabled. The timer is started as either a single-shot or a repeating timer,
and generates an interrupt when the counter reaches the Fall register value.
When used to count external events on TIMxCK_GT the clock source is selected from the input pin and the number
of events programmed into the Fall register. The Fall register match interrupt is enabled and the counter started,
usually in single shot mode. An interrupt is generated when the programmed number of transitions is seen on the
input pin. The transitions counted can configured to be rising, falling or both rising and falling edges.
Edges on the event signal must be at least 100nsec apart, i.e. pulses must be wider than 100nsec.
11.1.4 Delta-Sigma Mode
A separate delta-sigma mode is available, allowing a low speed delta-sigma DAC to be implemented with up to 16-bit
resolution. This requires that a resistor-capacitor network is placed between the output DIO pin and digital ground. A
stream of pulses with digital voltage levels is generated which is integrated by the RC network to give an analogue
voltage. A conversion time is defined in terms of a number of clock cycles. The width of the pulses generated is the
period of a clock cycle. The number of pulses output in the cycle, together with the integrator RC values, will
determine the resulting analogue voltage. For example, generating approximately half the number of pulses that
make up a complete conversion period will produce a voltage on the RC output of VDD1/2, provided the RC time
constant is chosen correctly. During a conversion, the pulses will be pseudo-randomly dispersed throughout the
cycle in order to produce a steady voltage on the output of the RC network.
The output signal is asserted for the number of clock periods defined in the High register, with the total period being
216 cycles. For the same value in the High register, the pattern of pulses on subsequent cycles is different, due to the
pseudo-random distribution.
The delta-sigma convertor output can operate in a Return-To-Zero (RTZ) or a Non-Return-to-Zero (NRZ) mode. The
NRZ mode will allow several pulses to be output next to each other. The RTZ mode ensures that each pulse is
separated from the next by at least one period. This improves linearity if the rise and fall times of the output are
different to one another. Essentially, the output signal is low on every other output clock period, and the conversion
cycle time is twice the NRZ cycle time ie 217 clocks. The integrated output will only reach half VDD2 in RTZ mode,
since even at full scale only half the cycle contains pulses. Figure 29 and Figure 30 illustrate the difference between
RTZ and NRZ for the same programmed number of pulses.© NXP Laboratories UK 2013 JN-DS-JN5148-001 1v9 41
1 2 3 1 2 N
Conversion cycle 1
217
N
Conversion cycle 2
3
Figure 29: Return To Zero Mode in Operation
1 2 3 1 2 N
Conversion cycle 1
N 3
216 Conversion cycle 2
Figure 30: Non-Return to Zero Mode
11.1.5 Example Timer / Counter Application
Figure 31 shows an application of the JN5148 timers to provide closed loop speed control. Timer 0 is configured in
PWM mode to provide a variable mark-space ratio switching waveform to the gate of the NFET. This in turn controls
the power in the DC motor.
Timer 1 is configured to count the rising edge events on the clk/gate pin over a constant period. This converts the
tacho pulse stream output into a count proportional to the motor speed. This value is then used by the application
software executing the control algorithm.
If required for other functionality, then the unused IO associated with the timers could be used as general purpose
DIO.
JN5148
Timer 0
Timer 1
CLK/GATE
CLK/GATE
CAPTURE
CAPTURE
PWM
PWM
M Tacho
48
50
52
53
54
1N4007
+12V
IRF521 51
1 pulse/rev
Figure 31: Closed Loop PWM Speed Control Using JN5148 Timers
11.2 Tick Timer
The JN5148 contains a hardware timer that can be used for generating timing interrupts to software. It may be used
to implement regular events such as ticks for software timers or an operating system, as a high-precision timing
reference or can be used to implement system monitor timeouts as used in a watchdog timer. Features include:
• 32-bit counter42 JN-DS-JN5148-001 1v9 © NXP Laboratories UK 2013
• 28-bit match value
• Maskable timer interrupt
• Single-shot, Restartable or Continuous modes of operation
Match Value
Counter
=
Mode
Control
&
&
SysClk
Run
Match
Int
Enable
Tick Timer
Interrupt
Reset
Mode
Figure 32: Tick Timer
The Tick Timer is clocked from a continuous 16MHz clock, which is fed to a 32-bit wide resettable up-counter, gated
by a signal from the mode control block. A match register allows comparison between the counter and a
programmed value. The match value, measured in 16MHz clock cycles is programmed through software, in the
range 0 to 0x0FFFFFFF. The output of the comparison can be used to generate an interrupt if the interrupt is
enabled and used in controlling the counter in the different modes. Upon configuring the timer mode, the counter is
also reset.
If the mode is programmed as single shot, the counter begins to count from zero until the match value is reached.
The match signal will be generated which will cause an interrupt if enabled, and the counter will stop counting. The
counter is restarted by reprogramming the mode.
If the mode is programmed as restartable, the operation of the counter is the same as for the single shot mode,
except that when the match value is reached the counter is reset and begins counting from zero. An interrupt will be
generated when the match value is reached if it is enabled.
Continuous mode operation is similar to restartable, except that when the match value is reached, the counter is not
reset but continues to count. An interrupt will be generated when the match value is reached if enabled.
11.3 Wakeup Timers
Two 32-bit wakeup timers are available in the JN5148 driven from the 32kHz internal clock. They may run during
sleep periods when the majority of the rest of the device is powered down, to time sleep periods or other long period
timings that may be required by the application. The wakeup timers do not run during deep sleep and may optionally
be disabled in sleep mode through software control. When a wakeup timer expires it typically generates an interrupt,
if the device is asleep then the interrupt may be used as an event to end the sleep period. See Section 21 for further
details on how they are used during sleep periods. Features include:
• 35-bit down-counter
• Optionally runs during sleep periods
• Clocked by 32kHz system clock; either 32kHz RC oscillator, 32kHz XTAL oscillator or 32kHz clock input© NXP Laboratories UK 2013 JN-DS-JN5148-001 1v9 43
A wakeup timer consists of a 35-bit down counter clocked from the selected 32 kHz clock. An interrupt or wakeup
event can be generated when the counter reaches zero. On reaching zero the counter will continue to count down
until stopped, which allows the latency in responding to the interrupt to be measured. If an interrupt or wakeup event
is required, the timer interrupt should be enabled before loading the count value for the period. Once the count value
is loaded and counter started, the counter begins to count down; the counter can be stopped at any time through
software control. The counter will remain at the value it contained when the timer was stopped and no interrupt will
be generated. The status of the timers can be read to indicate if the timers are running and/or have expired; this is
useful when the timer interrupts are masked. This operation will reset any expired status flags.
11.3.1 RC Oscillator Calibration
The RC oscillator that can be used to time sleep periods is designed to require very little power to operate and be
self-contained, requiring no external timing components and hence is lower cost. As a consequence of using on-chip
resistors and capacitors, the inherent absolute accuracy and temperature coefficient is lower than that of a crystal
oscillator, but once calibrated the accuracy approaches that of a crystal oscillator. Sleep time periods should be as
close to the desired time as possible in order to allow the device to wake up in time for important events, for example
beacon transmissions in the IEEE802.15.4 protocol. If the sleep time is accurate, the device can be programmed to
wake up very close to the calculated time of the event and so keep current consumption to a minimum. If the sleep
time is less accurate, it will be necessary to wake up earlier in order to be certain the event will be captured. If the
device wakes earlier, it will be awake for longer and so reduce battery life.
In order to allow sleep time periods to be as close to the desired length as possible, the true frequency of the RC
oscillator needs to be determined to better than the initial 30% accuracy. The calibration factor can then be used to
calculate the true number of nominal 32kHz periods needed to make up a particular sleep time. A calibration
reference counter, clocked from the 16MHz system clock, is provided to allow comparisons to be made between the
32kHz RC clock and the 16MHz system clock when the JN5148 is awake.
Wakeup timer0 counts for a set number of 32kHz clock periods during which time the reference counter runs. When
the wakeup timer reaches zero the reference counter is stopped, allowing software to read the number of 16MHz
clock ticks generated during the time represented by the number of 32kHz ticks programmed in the wakeup timer.
The true period of the 32kHz clock can thus be determined and used when programming a wakeup timer to achieve a
better accuracy and hence more accurate sleep periods
For a RC oscillator running at exactly 32,000Hz the value returned by the calibration procedure should be 10000, for
a calibration period of twenty 32,000Hz clock periods. If the oscillator is running faster than 32,000Hz the count will
be less than 10000, if running slower the value will be higher. For a calibration count of 9000, indicating that the RC
oscillator period is running at approximately 35kHz, to time for a period of 2 seconds the timer should be loaded with
71,111 ((10000/9000) x (32000 x 2)) rather than 64000.44 JN-DS-JN5148-001 1v9 © NXP Laboratories UK 2013
12 Pulse Counters
Two 16-bit counters are provided that can increment during all modes of operation (including sleep), based on pulses
received on 2 dedicated DIO inputs; DIO1 and DIO8. The pulses can be de-bounced using the 32kHz clock to guard
against false counting on slow or noisy edges. Increments occur from a configurable rising or falling edge on the
respective DIO input.
Each counter has an associated 16-bit reference that is loaded by the user. An interrupt (and wakeup event if
asleep) may be generated when a counter reaches its pre-configured reference value. The two counters may
optionally be cascaded together to provide a single 32-bit counter, linked to DIO1. The counters do not saturate at
65535, but naturally roll-over to 0. Additionally, the pulse counting continues when the reference value is reached
without software interaction so that pulses are not missed even if there is a long delay before an interrupt is serviced
or during the wakeup process.
The system can work with signals up to 100kHz, with no debounce, or from 5.3kHz to 1.7kHz with debounce. When
using debounce the 32kHz clock must be active, so for minimum sleep currents the debounce mode should not be
used.© NXP Laboratories UK 2013 JN-DS-JN5148-001 1v9 45
13 Serial Communications
The JN5148 has two independent Universal Asynchronous Receiver/Transmitter (UART) serial communication
interfaces. These provide similar operating features to the industry standard 16550A device operating in FIFO mode.
Each interface performs serial-to-parallel conversion on incoming serial data and parallel-to-serial conversion on
outgoing data from the CPU to external devices. In both directions, a 16-byte deep FIFO buffer allows the CPU to
read and write multiple characters on each transaction. This means that the CPU is freed from handling data on a
character-by-character basis, with the associated high processor overhead. The UARTs have the following features:
• Emulates behaviour of industry standard NS16450 and NS16550A UARTs
• 16 byte transmit and receive FIFO buffers reduce interrupts to CPU, with direct access to fill levels of each
• Adds / deletes standard start, stop and parity communication bits to or from the serial data
• Independently controlled transmit, receive, status and data sent interrupts
• Optional modem flow control signals CTS and RTS
• Fully programmable data formats: baud rate, start, stop and parity settings
• False start bit detection, parity, framing and FIFO overrun error detect and break indication
• Internal diagnostic capabilities: loop-back controls for communications link fault isolation
• Flow control by software or automatically by hardware Processor Bus
Divisor
Latch
Registers
Line
Status
Register
Line
Control
Register
FIFO
Control
Register
Receiver FIFO
Transmitter FIFO
Baud Generator
Logic
Transmitter Shift
Register
Receiver Shift
Register
Transmitter
Logic
Receiver
Logic
RXD
TXD
Modem
Control
Register
Modem
Status
Register Modem
Signals
Logic
RTS
CTS
Interrupt
ID
Register
Interrupt
Enable
Register
Interrupt
Logic
Internal
Interrupt
Figure 33: UART Block Diagram
The serial interface contains programmable fields that can be used to set number of data bits (5, 6,7 or 8), even, odd,
set-at-1, set-at-0 or no-parity detection and generation of single or multiple stop bit, (for 5 bit data, multiple is 1.5 stop
bits; for 6, 7 or 8 data bits, multiple is 2 bits).
The baud rate is programmable up to 1Mbps, standard baud rates such as 4800, 9600, 19.2k, 38.4k etc. can be
configured.
For applications requiring hardware flow control, two control signals are provided: Clear-To-Send (CTS) and RequestTo-Send
(RTS). CTS is an indication sent by an external device to the UART that it is ready to receive data. RTS is
an indication sent by the UART to the external device that it is ready to receive data. RTS is controlled from software,
while the value of CTS can be read. Monitoring and control of CTS and RTS is a software activity, normally
performed as part of interrupt processing. The signals do not control parts of the UART hardware, but simply indicate
to software the state of the UART external interface. Alternatively, the Automatic Flow Control mode can be set 46 JN-DS-JN5148-001 1v9 © NXP Laboratories UK 2013
where the hardware controls the value of the generated RTS (negated if the receive FIFO fill level is greater than a
programmable threshold of 8, 11, 13 or 15 bytes), and only transmits data when the incoming CTS is asserted.
Software can read characters, one byte at a time, from the Receive FIFO and can also write to the Transmit FIFO,
one byte at a time. The Transmit and Receive FIFOs can be cleared and reset independently of each other. The
status of the transmitter can be checked to see if it is empty, and if there is a character being transmitted. The status
of the receiver can also be checked, indicating if conditions such as parity error, framing error or break indication
have occurred. It also shows if an overrun error occurred (receive buffer full and another character arrives) and if
there is data held in the receive FIFO.
UART 0 signals CTS, RTS, TXD and RXD are alternate functions of pins DIO4, 5, 6 and 7 respectively and UART 1
signals CTS, RTS, TXD and RXD are alternate functions of pins DIO17, 18, 19 and 20 respectively. If CTS and RTS
are not required on the devices external pins, then they may be disabled, this allows the DIOx function to be used for
other purposes.
Note: With the automatic flow control threshold set to 15, the hardware flow control within the UART block negates
RTS when the receive FIFO is about to become full. In some instances it has been observed that remote devices that
are transmitting data do not respond quickly enough to the de-asserted CTS and continue to transmit data. In these
instances the data will be lost in a receive FIFO overflow.
13.1 Interrupts
Interrupt generation can be controlled for the UART block, and is divided into four categories:
• Received Data Available: Is set when data in the Rx FIFO queue reaches a particular level (the trigger level can
be configured as 1, 4, 8 or 14) or if no character has been received for 4 character times.
• Transmit FIFO Empty: set when the last character from the Tx FIFO is read and starts to be transmitted.
• Receiver Line Status: set when one of the following occur (1) Parity Error - the character at the head of the
receive FIFO has been received with a parity error, (2) Overrun Error - the Rx FIFO is full and another character
has been received at the Receiver shift register, (3) Framing Error - the character at the head of the receive
FIFO does not have a valid stop bit and (4) Break Interrupt – occurs when the RxD line has been held low for an
entire character.
• Modem Status: Generated when the CTS (Clear To Send) input control line changes.
13.2 UART Application
The following example shows the UART connected to a 9-pin connector compatible with a PC. As the JN5148
device pins do not provide the RS232 line voltage, a level shifter is used.
JN5148
RTS
CTS
TXD
UART0 RXD
RS232
Lev el
Shif ter
1
2
3
4
5
6
7
8
9
CD
RD
TD
DTR
SG
DSR
RTS
CTS
RI
PC COM Port
1 5 Pin Signal
6 9
46
47
45
44
Figure 34: JN5148 Serial Communication Link© NXP Laboratories UK 2013 JN-DS-JN5148-001 1v9 47
14 JTAG Debug Interface
The JN5148 includes an IEEE1149.1 compliant JTAG port for the sole purpose of software code debug with NXP's
Software Developer’s Kit. The JTAG interface is disabled by default and is enabled under software control.
Therefore, debugging is only possible if enabled by the application. Once enabled, the application executes as
normal until the external debugger controller initiates debug activity.
The Debugger supports breakpoints and watchpoints based on four comparisons between any of program counter,
load/store effective address and load/store data. There is the ability to chain the comparisons together. There is also
the ability, under debugger control to perform the following commands: go, stop, reset, step over/into/out/next, run to
cursor and breakpoints. In addition, under control of the debugger, it is possible to:
• Read and write registers on the wishbone bus
• Read ROM and RAM, and write to RAM
• Read and write CPU internal registers
The Debugger interface is accessed, depending upon the configuration, through the pins used for UART0 or UART1.
This is enabled under software control and is dealt with in JN-AN-1118 JN5148 Application Debugging [4]. The
following table details which DIO are used for the JTAG interface depending upon the configuration.
Signal DIO Assignment
UART0 pins UART1 pins
clock (TCK) 4 17
control (TMS) 5 18
data out (TDO) 6 19
data in (TDI) 7 20
Table 4 Hardware Debugger IO
If doze mode is active when debugging is started, the processor will be woken and then respond to debugger
commands. It is not possible to wake the device from sleep using the debug interface and debugging is not available
while the device is sleeping.
When using the debug interface, program execution is halted, and control of the CPU is handed to the debugger. The
watchdog, tick timer and the three timers described in section 11 are stalled while the debugger is in control of the
CPU.
When control is handed from the CPU to the debugger or back a small number of CPU clock cycles are taken
flushing or reloading the CPU pipeline. Because of this, when a program is halted by the debugger and then restarted
again, a small number of tick timer cycles will elapse.
It is possible to prevent all hardware debugging by blowing the relevant Efuse bit.
The JTAG interface does not support boundary scan testing. It is recommended that the JN5148 is not connected as
part of the board scan chain.48 JN-DS-JN5148-001 1v9 © NXP Laboratories UK 2013
15 Two-Wire Serial Interface
The JN5148 includes industry standard two-wire synchronous Serial Interface operates as a Master (MSIF) or Slave
(SSIF) that provides a simple and efficient method of data exchange between devices. The system uses a serial data
line (SIF_D) and a serial clock line (SIF_CLK) to perform bi-directional data transfers and includes the following
features:
Common to both master and slave:
• Compatible with both I2
C and SMbus peripherals
• Support for 7 and 10-bit addressing modes
• Optional pulse suppression on signal inputs
Master only:
• Multi-master operation
• Software programmable clock frequency
• Clock stretching and wait state generation
• Software programmable acknowledge bit
• Interrupt or bit-polling driven byte-by-byte data-transfers
• Bus busy detection
Slave only:
• Programmable slave address
• Simple byte level transfer protocol
• Write data flow control with optional clock stretching or acknowledge mechanism
• Read data preloaded or provided as required
15.1 Connecting Devices
The clock and data lines, SIF_D and SIF_CLK, are alternate functions of DIO15 and DIO14 respectively. The serial
interface function of these pins is selected when the interface is enabled. They are both bi-directional lines,
connected internally to the positive supply voltage via weak (45kΩ) programmable pull-up resistors. However, it is
recommended that external 4.7kΩ pull-ups be used for reliable operation at high bus speeds, as shown in Figure 35.
When the bus is free, both lines are HIGH. The output stages of devices connected to the bus must have an opendrain
or open-collector in order to perform the wired-AND function. The number of devices connected to the bus is
solely dependent on the bus capacitance limit of 400pF.
SIF_CLK
SIF_D
VDD
D1_OUT
D1_IN CLK1_IN
CLK1_OUT
D2_IN CLK2_IN
CLK2_OUT
DEVICE 1 DEVICE 2
RP RP Pullup
Resistors
D2_OUT
JN5148
SIF
DIO14
DIO15
Figure 35: Connection Details© NXP Laboratories UK 2013 JN-DS-JN5148-001 1v9 49
15.2 Clock Stretching
Slave devices can use clock stretching to slow down the transfer bit rate. After the master has driven SIF_CLK low,
the slave can drive SIF_CLK low for the required period and then release it. If the slave’s SIF_CLK low period is
greater than the master’s low period the resulting SIF_CLK bus signal low period is stretched thus inserting wait
states.
SIF_CLK
SIF_CLK
SIF_CLK
Master SIF_CLK
Slave SIF_CLK
Wired-AND SIF_CLK
Clock held low
by Slave
Figure 36: Clock Stretching
15.3 Master Two-wire Serial Interface
When operating as a master device, it provides the clock signal and a prescale register determines the clock rate,
allowing operation up to 400kbit/s.
Data transfer is controlled from the processor bus interface at a byte level, with the processor responsible for
indicating when start, stop, read, write and acknowledge control should be generated. Write data written into a
transmit buffer will be written out across the two-wire interface when indicated, and read data received on the
interface is made available in a receive buffer. Indication of when a particular transfer has completed may be
indicated by means of an interrupt or by polling a status bit.
The first byte of data transferred by the device after a start bit is the slave address. The JN5148 supports both 7-bit
and 10-bit slave addresses by generating either one or two address transfers. Only the slave with a matching address
will respond by returning an acknowledge bit.
The master interface provides a true multi-master bus including collision detection and arbitration that prevents data
corruption. If two or more masters simultaneously try to control the bus, a clock synchronization procedure
determines the bus clock. Because of the wired-AND connection of the interface, a high-to-low transition on the bus
affects all connected devices. This means a high-to-low transition on the SIF_CLK line causes all concerned devices
to count off their low period. Once the clock input of a device has gone low, it will hold the SIF_CLK line in that state
until the clock high state is reached when it releases the SIF_CLK line. Due to the wired-AND connection, the
SIF_CLK line will therefore be held low by the device with the longest low period, and held high by the device with the
shortest high period.
SIF_CLK1
SIF_CLK2
SIF_CLK
Master1 SIF_CLK
Master2 SIF_CLK
Wired-AND SIF_CLK
Start counting
low period
Start counting
high period
Wait
State
Figure 37: Multi-Master Clock Synchronisation
After each transfer has completed, the status of the device must be checked to ensure that the data has been
acknowledged correctly, and that there has been no loss of arbitration. (N.B. Loss of arbitration may occur at any
point during the transfer, including data cycles). An interrupt will be generated when arbitration has been lost.50 JN-DS-JN5148-001 1v9 © NXP Laboratories UK 2013
15.4 Slave Two-wire Serial Interface
When operating as a slave device, the interface does not provide a clock signal, although it may drive the clock signal
low if it is required to apply clock stretching.
Only transfers whose address matches the value programmed into the interface’s address register are accepted. The
interface allows both 7 and 10 bit addresses to be programmed, but only responds with an acknowledge to a single
address. Addresses defined as “reserved” will not be responded to, and should not be programmed into the address
register. A list of reserved addresses is shown in Table 5.
Address Name Behaviour
0000 000 General Call/Start Byte Ignored
0000 001 CBUS address Ignored
0000 010 Reserved Ignored
0000 011 Reserved Ignored
0000 1XX Hs-mode master code Ignored
1111 1XX Reserved Ignored
1111 0XX 10-bit address Only responded to if 10 bit address
set in address register
Table 5 : List of two-wire serial interface reserved addresses
Data transfer is controlled from the processor bus interface at a byte level, with the processor responsible for taking
write data from a receive buffer and providing read data to a transmit buffer when indicated. A series of interrupt
status bits are provided to control the flow of data.
For writes, in to the slave interface, it is important that data is taken from the receive buffer by the processor before
the next byte of data arrives. To enable this, the interface may be configured to work in two possible backoff modes:
• Not Acknowledge mode – where the interface returns a Not Acknowledge (NACK) to the master if more data
is received before the previous data has been taken. This will lead to the termination of the current data
transfer.
• Clock Stretching mode – where the interface holds the clock line low until the previous data has been taken.
This will occur after transfer of the next data but before issuing an acknowledge
For reads, from the slave interface, the data may be preloaded into the transmit buffer when it is empty (i.e. at the
start of day, or when the last data has been read), or fetched each time a read transfer is requested. When using data
preload, read data in the buffer must be replenished following a data write, as the transmit and received data is
contained in a shared buffer. The interface will hold the bus using clock stretching when the transmit buffer is empty.
Interrupts may be triggered when:
• Data Buffer read data is required – a byte of data to be read should be provided to avoid the interface from
clock stretching
• Data Buffer read data has been taken – this indicates when the next data may be preloaded into the data
buffer
• Data Buffer write data is available – a byte of data should be taken from the data buffer to avoid data backoff
as defined above
• The last data in a transfer has completed – i.e. the end of a burst of data, when a Stop or Restart is seen
• A protocol error has been spotted on the interface© NXP Laboratories UK 2013 JN-DS-JN5148-001 1v9 51
16 Four-Wire Digital Audio Interface
The JN5148 includes a four-wire digital audio interface that can be used for interfacing to audio CODECs. The
following features are supported:
• Compatible with the industry standard I²S interface
• Option to support I²S, left justified and right justified modes
• Optional support for connection to mono sample FIFO with data transferred on the left or right channel
• Master only
• Transmit on falling edge and receive on rising edge
• Up to 8MHz maximum clock range
• Maximum system size of 32-bits, allowing up to 16-bits per channel (left or right channels)
• Option for pad bit insertion, allowing length of transfer per channel to be anything from 16 to 32 bits
• Data Transfer size range of 1 to 16-bits per channel
• Option to invert WS (normally 0 for left, but allow 1 for left instead)
• Continuous clock output option to support CODECs which use it as a clock source
• Separate input and output data lines
• Option to invert idle state of WS (to indicate left or right)
The Word Select (WS), Data In (SDIN), Clock (SCK) and Data Out (SDOUT) lines are alternate functions of DIO
lines 12,13,17 and 18 respectively.
Data transfer is always bidirectional. Data placed in the Data Buffer before a transfer command is issued will be
transmitted on SDOUT whilst the data received on SDIN will be placed in the Data Buffer at the end of the transfer.
Indication that a transfer has completed is by means of an interrupt or by polling a status bit.
Left channel data is always sent first, with MSB first on each channel. The interface will always transfer both left and
right channel data. For mono data transfer, the user should pad out the unused channel with 0’s, and ignore any data
returned on the unused channel.
The length of a data transfer is derived as follows:
• When padding is disabled – Data Transfer Length = 2 x Data Transfer Size
• When padding is enabled – Data Transfer Length = 2 x (16 + Extra Pad Length)
Timing of the 3 main modes is shown in Figure 38, Figure 39 and Figure 40. The Data Buffer shows how the data is
stored and how it will be transferred onto the interface. SD Max Size indicates how the maximum transfer size (16
with no additional padding) will transfer, whilst SD 3-bits indicates how 3 bits of data will be aligned when padding is
enabled. Received data in the Data Buffer will always be padded out with 0’s if the Data Transfer Size is less than 16-
bits, and any bits received beyond 16-bits when extra padding is used, will be discarded. In the examples, the polarity
of WS is shown with Left channel = 0, and the idle state is Right Channel. 52 JN-DS-JN5148-001 1v9 © NXP Laboratories UK 2013
Data Buffer Right R2 R1 R0 Left L2 L1 L0
SCK
WS
SD Max Size
SD 3-bits
MSB LSB MSB LSB
Left Right
L2 L1 L0 0 R2 R1 R0
MSB-1 MSB-2 MSB-1 MSB-2
0 0 0
Figure 38: I²S Mode
Data Buffer Right R2 R1 R0 Left L2 L1 L0
SCK
WS
SD Max Size
SD 3-bits
MSB LSB MSB LSB
Left Right
L2 L1 L0 0 R2 R1 R0
MSB-1 MSB-2 MSB-1 MSB-2
0 0 0
Figure 39: Left Justified Mode
Data Buffer Right R2 R1 R0 Left L2 L1 L0
SCK
WS
SD Max Size
SD 3-bits
MSB LSB MSB LSB
Left Right
0 L2 L1 L0 R2 R1 R0
MSB-1 MSB-1
0 0 0
Figure 40: Right Justified Mode© NXP Laboratories UK 2013 JN-DS-JN5148-001 1v9 53
17 Random Number Generator
A random number generator is provided which creates a 16-bit random number each time it is invoked. Consecutive
calls can be made to build up any length of random number required. Each call takes approximately 0.25msec to
complete. Alternatively, continuous generation mode can be used where a new number is generated approximately
every 0.25msec. In either mode of operation an interrupt can be generated to indicate when the number is available,
or a status bit can be polled.
The random bits are generated by sampling the state of the 32MHz clock every 32kHz system clock edge. As these
clocks are asynchronous to each other, each sampled bit is unpredictable and hence random.54 JN-DS-JN5148-001 1v9 © NXP Laboratories UK 2013
18 Sample FIFO
A 10 deep FIFO is provided to buffer data between the CPU and either the four-wire digital audio interface or the
DAC/ ADC. It supports single channel input and output data, up to 16 bits wide. When used it can reduce the rate at
which the processor has to generate/process data, and this may allow more efficient operation. Interrupts can be
generated based on fill levels and also FIFO empty and full conditions. Normal configuration of the digital audio
interface or the DAC/ ADC is still required when accessing the data via the FIFO.
When used with the DAC / ADC functions a timing signal is generated by the DAC/ ADC functions to control the
transfer of data to and from the FIFO and the analogue peripherals. The transfers will occur at the sample rate
configured within the DAC / ADC functions.
When the FIFO is linked to the four-wire digital audio interface, timer 2 must be used to generate an internal timing
signal to control the flow of data across the interface. The timer does not require any external pins to be enabled. The
timer should be set up to produce a PWM output with a rising edge generated every time a digital audio transfer is
required. The transfer rate is typically configured to be the audio sample rate, e.g. 8kHz. If the transfer rate is too fast
or slow data will be transferred correctly between the FIFO and the digital audio block.© NXP Laboratories UK 2013 JN-DS-JN5148-001 1v9 55
19 Intelligent Peripheral Interface
The Intelligent Peripheral (IP) Interface is provided for systems that are more complex, where there is a processor
that requires a wireless peripheral. As an example, the JN5148 may provide a complete JenNet or ZigBee PRO
wireless network interface to a phone, computer, PDA, set-top box or games console. No resources are required from
the main processor compared to a transceiver as the complete wireless protocol may be run on the internal JN5148
CPU. The wireless peripheral may be controlled via one of the UARTs but the IP interface is intended to provide a
high-speed, low-processor-overhead interface.
The intelligent peripheral interface is a SPI slave interface and uses pins shared with other DIO signals. The
interface is designed to allow message passing and data transfer. Data received and transmitted on the IP interface
is copied directly to and from a dedicated area of memory without intervention from the CPU. This memory area, the
intelligent peripheral memory block, contains 64 32-bit word receive and transmit buffers.
JN5148
Intelligent
Peripheral
Interface SPI
MASTER
System Processor
(e.g. in cellphone, computer)
CPU
IP_DO SPIMISO
IP_INT SPIINT
IP_DI SPIMOSI
IP_SEL SPISEL
IP_CLK SPICLK
Figure 41: Intelligent Peripheral Connection
The interface functions as a SPI slave. It is possible to select the clock edge of IP_CLK on which data on the IP_DIN
line of the interface is sampled, and the state of data output IP_DOUT is changed. The order of transmission is MSB
first. The IP_DO data output is tri-stated when the device is inactive, i.e. the device is not selected via IP_SEL. An
interrupt output line IP_INT is available so that the JN5148 can indicate to an external master that it has data to
transfer. The interface can be clocked at up to 8MHz
The IP interface signals IP_CLK, IP_DO, IP_DI, IP_SEL, IP_INT are alternate functions of pins DIO14 to 18
respectively.
19.1 Data Transfer Format
Transfers are started by the remote processor asserting the IP_SEL line and terminated by the remote processor deasserting
IP_SEL.
Data transfers are bi-directional and traffic in both directions has a format of status byte, data length byte (of the
number of 32-bit words to transfer) and data packet (from the receive and transmit buffers), as shown in Figure 42
The first byte transferred into the JN5148 is a status byte with the format shown in Table 6. This is followed by a
padding byte that should be set to zero. The first byte output by the JN5148 is a padding byte, that should be ignored,
followed by a status byte with the format shown in Table 6
Bit Field Description
7:2 RSVD Reserved, set to 0
1 TXQ 1: Data queued for transmission
0 RXRDY 1: Buffer ready to receive data
Table 6: IP Status Byte Format56 JN-DS-JN5148-001 1v9 © NXP Laboratories UK 2013
If data is queued for transmission and the recipient has indicated that they are ready for it (RXRDY in incoming status
byte was 1), the next byte to be transmitted is the data length in words (N). If either the JN5148 or the remote
processor has no data to transfer, then the data length should be set to zero. The transaction can be terminated by
the master after the status and padding bytes have been sent if it is not possible to send data in either direction. This
may be because neither party has data to send or because the receiver does not have a buffer available. If the data
length is non-zero, the data in the JN5148 transmit memory buffer is sent, beginning at the start of the buffer. At the
same time that data bytes are being sent from the transmit buffer, the JN5148 receive buffer is being filled with
incoming data, beginning from the start of the buffer.
The remote processor, acting as the master, must determine the larger of its incoming or outgoing data transfers and
deassert IP_SEL when all of the transmit and receive data has been transferred. The data is transferred into or out of
the buffers starting from the lowest address in the buffer, and each word is assembled with the MSB first on the serial
data lines. Following a transaction, IP_SEL must be high (deasserted) for at least 400nsec before a further
transaction can begin.
IP_SEL
IP_CLK
IP_DI Status (8-bit) N words of data
IP_DO
data length or 0s (8-bit)
padding (8-bit) Status (8-bit) data length or 0s (8-bit) N words of data
padding (8-bit)
Figure 42: Intelligent Peripheral Data Transfer Waveforms
The N words of data transferred on the interface are also formatted. The first three bytes, of the first word, must be
zero. These are followed by a one byte length field that must be one less than the data length shown in the data
length field in Figure 42, i.e. N-1. Following this are the (N-1) words of data.
The application running on the JN5148 has high level software functions for sending and receiving data on this
interface. The function of generating and interpreting the individual bytes on the interface is handled by hardware
within the device. The remote processor must generate, and interpret, the signals in the interface. For instance, this
may be done with a configurable SPI master interface.
19.2 JN5148 (Slave) Initiated Data Transfer
To send data, the data is written into either buffer 0 or 1 of the intelligent peripheral memory area. Then the buffer
number is written together with the data length. If the call is successful, the interrupt line IP_INT will signal to the
remote processor that there is a message ready to be sent from the JN5148. When a remote processor starts a
transfer to the JN5148 by deasserting IP_SEL, then IP_INT is deasserted. If the transfer is unsuccessful and the
data is not output then IP_INT is reasserted after the transfer to indicate that data is still waiting to be sent.
The interface can be configured to generate an internal interrupt whenever a transaction completes (for example
IP_SEL becomes inactive after a transfer starts). It is also possible to mask the interrupt. The end of the
transmission can be signalled by an interrupt, or the interface can be polled.
To receive data the interface must be firstly initialised and when this is done, the bit RXRDY sent in the status byte
from the IP block will show that data can be received by the JN5148. Successful data arrival can be indicated by an
interrupt, or the interface can be polled. IP_INT is asserted if the JN5148 is configured to be able to receive, and the
remote processor has previously attempted to send data but the RXRDY indicated that it could not be sent.
To send and receive at the same time, the transmit and receive buffers must be set to be different.
19.3 Remote (Master) Processor Initiated Data Transfer
The remote processor (master) must initiate a transfer to send data to the JN5148 (slave) by asserting the slave
select pin, IP_SEL, and generating its status byte on IP_DI with TXRDY set. After receiving the status byte from the
JN5148, the master should check that the JN5148 has a buffer ready by reading the RXRDY bit of the received
status byte. If the RXRDY bit is 0 indicating that the JN5148 cannot accept data, it must terminate the transfer by
deasserting IP_SEL unless it is receiving data from the JN5148. If the RXRDY bit is 1, indicating that the JN5148 can
accept data, then the master should generate a further 8 clocks on IP_CLK in order to transfer its own message
length on IP_DI. The master must continue clocking the interface until sufficient clocks have been generated to send © NXP Laboratories UK 2013 JN-DS-JN5148-001 1v9 57
all the data specified in the length field to the JN5148. The master must then deassert IP_SEL to show the transfer
is complete.
The master may initiate a transfer to read data from the JN5148 by asserting the slave select pin, IP_SEL, and
generating its status byte on IP_DI with RXRDY set. After receiving the status byte from the JN5148, it should check
that the JN5148 has a buffer ready by reading the TXRDY bit of the received status byte. If the TXRDY bit is 0,
indicating that the JN5148 does not have data to send, it must terminate the transfer by deasserting IP_SEL unless it
is transmitting data to the JN5148. If the TXRDY bit is 1, indicating that the JN5148 can send data, then the master
must generate a further 8 clocks on IP_CLK in order to receive the message length on IP_DO. The master must
continue clocking the interface until sufficient clocks have been generated to receive all the data specified in the
length field from the JN5148. The master should then deassert IP_SEL to show the transfer is complete.
Data can be sent in both directions at once and the master must ensure both transfers have completed before
deasserting IP_SEL.58 JN-DS-JN5148-001 1v9 © NXP Laboratories UK 2013
20 Analogue Peripherals
The JN5148 contains a number of analogue peripherals allowing the direct connection of a wide range of external
sensors, switches and actuators.
ADC
DAC1
DAC2
VREF
Chip
Boundary
Internal Reference
Processor Bus
Supply Voltage
(VDD1)
Vref select
Temp
Sensor
Comparator 2
Comparator 1
COMP2M
COMP1M
COMP1P
COMP2P
DAC1
DAC2
ADC1
ADC2
ADC3
ADC4
Vref
Figure 43: Analogue Peripherals
In order to provide good isolation from digital noise, the analogue peripherals are powered by a separate regulator,
supplied from the analogue supply VDD1 and referenced to analogue ground VSSA.
A common reference Vref for the ADC and DAC can be selected between an internal bandgap reference or an
external voltage reference supplied to the VREF pin. Gain settings for the ADC and DAC are independent of each
other.
The ADC and DAC are clocked from a common clock source derived from the 16MHz clock© NXP Laboratories UK 2013 JN-DS-JN5148-001 1v9 59
20.1 Analogue to Digital Converter
The 12-bit analogue to digital converter (ADC) uses a successive approximation design to perform high accuracy
conversions as typically required in wireless sensor network applications. It has six multiplexed single-ended input
channels: four available externally, one connected to an internal temperature sensor, and one connected to an
internal supply monitoring circuit.
20.1.1 Operation
The input range of the ADC can be set between 0V to either the reference voltage or twice the reference voltage.
The reference can be either taken from the internal voltage reference or from the external voltage applied to the
VREF pin. For example, an external reference of 1.2V supplied to VREF may be used to set the ADC range between
0V and 2.4V.
VREF Gain Setting Maximum Input Range Supply Voltage Range (VDD)
1.2V
1.6V
1.2V
1.6V
0
0
1
1
1.2V
1.6V
2.4V
3.2V
2.2V - 3.6V
2.2V - 3.6V
2.6V - 3.6V
3.4V - 3.6V
Table 7 ADC/DAC Maximum Input Range
The input clock to the ADC is 16MHz and can be divided down to 2MHz, 1MHz, 500kHz and 250kHz. During an ADC
conversion the selected input channel is sampled for a fixed period and then held. This sampling period is defined as
a number of ADC clock periods and can be programmed to 2, 4, 6 or 8. The conversion rate is ((3 x Sample period)
+ 14) clock periods. For example for 500kHz conversion with sample period of 2 will be (3 x 2) + 14 = 20 clock
periods, 40usecs or 25kHz. . The ADC can be operated in either a single conversion mode or alternatively a new
conversion can be started as soon as the previous one has completed, to give continuous conversions.
If the source resistance of the input voltage is 1kΩ or less, then the default sampling time of 2 clocks should be used.
The input to the ADC can be modelled as a resistor of 5kΩ(typ) and 10kΩ (max) to represent the on-resistance of the
switches and the sampling capacitor 8pF. The sampling time required can then be calculated, by adding the sensor
source resistance to the switch resistance, multiplying by the capacitance giving a time constant. Assuming normal
exponential RC charging, the number of time constants required to give an acceptable error can be calculated, 7 time
constants gives an error of 0.1%, so for 12-bit accuracy 10 time constants should be the target. For a source with
zero resistance, 10 time constants is 800 nsecs, hence the smallest sampling window of 2 clock periods can be used.
ADC
pin
5 K
8 pF
Sample
Switch
ADC
front
end
Figure 44 ADC Input Equivalent Circuit
The ADC sampling period, input range and mode (single shot or continuous) are controlled through software.
When the ADC conversion is complete, an interrupt is generated. Alternatively the conversion status can be polled.
When operating in continuous mode, it is recommended that the interrupt is used to signal the end of a conversion,
since conversion times may range from 10 to 152 µsecs. Polling over this period would be wasteful of processor
bandwidth.
To facilitate averaging of the ADC values, which is a common practice in microcontrollers, a dedicated accumulator
has been added, the user can define the accumulation to occur over 2,4,8 or 16 samples. The end of conversion 60 JN-DS-JN5148-001 1v9 © NXP Laboratories UK 2013
interrupt can be modified to occur at the end of the chosen accumulation period, alternatively polling can still be used.
Software can then be used to apply the appropriate rounding and shifting to generate the average value, as well as
setting up the accumulation function.
For detailed electrical specifications, see section 22.3.8.
20.1.2 Supply Monitor
The internal supply monitor allows the voltage on the analogue supply pin VDD1 to be measured. This is achieved
with a potential divider that reduces the voltage by a factor of 0.666, allowing it to fall inside the input range of the
ADC when set with an input range twice the internal voltage reference. The resistor chain that performs the voltage
reduction is disabled until the measurement is made to avoid a continuous drain on the supply.
20.1.3 Temperature Sensor
The on chip temperature sensor can be used either to provide an absolute measure of the device temperature or to
detect changes in the ambient temperature. In common with most on chip temperature sensors, it is not trimmed and
so the absolute accuracy variation is large; the user may wish to calibrate the sensor prior to use. The sensor forces
a constant current through a forward biased diode to provide a voltage output proportional to the chip die temperature
which can then be measured using the ADC. The measured voltage has a linear relationship to temperature as
described in section 22.3.15.
Because this sensor is on chip, any measurements taken must account for the thermal time constants. For example,
if the device just came out of sleep mode the user application should wait until the temperature has stabilised before
taking a measurement.
20.2 Digital to Analogue Converter
The Digital to Analogue Converter (DAC) provides two output channels and is capable of producing voltages of 0 to
Vref or 0 to 2Vref where Vref is selected between the internal reference and the VREF pin, with a resolution of 12-bits
and a minimum conversion time of 10µsecs (2MHz clock).
20.2.1 Operation
The output range of each DAC can be set independently to swing between 0V to either the reference voltage or twice
the reference voltage. The reference voltage is selected from the internal reference or the VREF pin. For example,
an external reference of 0.8V supplied to VREF may be used to set DAC1 maximum output of 0.8V and DAC2
maximum output of 1.6V.
The DAC output amplifier is capable of driving a capacitive load up to that specified in section 22.3.9
Programmable clock periods allow a trade-off between conversion speed and resolution. The full 12-bit resolution is
achieved with the 250kHz clock rate. See section 22.3.9 electrical characteristics, for more details.
The conversion period of the DACs are given by the same formula as the ADC conversion time and so can vary
between 10 and 152uS. The DAC values may be updated at the same time as the ADC is active.
The clock divider ratio, interrupt enable and reference voltage select are all controlled through software, options
common to both the ADC and DAC. The DAC output range and initial value can be set and the subsequent updates
provided by updating only the DAC value. Polling is available to determine if a DAC channel is busy performing a
conversion. The DAC can be disabled which will power down the DAC cell.
Simultaneous conversions with DAC1 and DAC2 are possible. To use both DACs at the same time it is only
necessary to enable them and supply the digital values via the software. The DACs should not be used in single shot
mode, but continuous conversion mode only, in order to maintain a steady output voltage. © NXP Laboratories UK 2013 JN-DS-JN5148-001 1v9 61
20.3 Comparators
The JN5148 contains two analogue comparators COMP1 and COMP2 that are designed to have true rail-to-rail
inputs and operate over the full voltage range of the analogue supply VDD1. The hysteresis level (common to both
comparators) can be set to a nominal value of 0mV, 10mV, 20mV or 40mV. In addition, the source of the negative
input signal for each comparator (COMP1M and COMP2M) can be set to the internal voltage reference, the output of
DAC1 or DAC2 (COMP1 or COMP2 respectively) or the appropriate external pin. The comparator outputs are routed
to internal registers and can be polled, or can be used to generate interrupts. The comparators can be disabled to
reduce power consumption.
The comparators have a low power mode where the response time of the comparator is slower than normal and is
specified in section 22.3.10. This mode may be used during non-sleep operation however it is particularly useful in
sleep mode to wake up the JN5148 from sleep where low current consumption is important. The wakeup action and
the configuration for which edge of the comparator output will be active are controlled through software. In sleep
mode the negative input signal source, must be configured to be driven from the external pins.62 JN-DS-JN5148-001 1v9 © NXP Laboratories UK 2013
21 Power Management and Sleep Modes
21.1 Operating Modes
Three operating modes are provided in the JN5148 that enable the system power consumption to be controlled
carefully to maximise battery life.
• Active Processing Mode
• Sleep Mode
• Deep Sleep Mode
The variation in power consumption of the three modes is a result of having a series of power domains within the chip
that may be controllably powered on or off.
21.1.1 Power Domains
The JN5148 has the following power domains:
• VDD Supply Domain: supplies the wake-up timers and controller, DIO blocks, Comparators, 32kHz RC and
crystal oscillators. This domain is driven from the external supply (battery) and is always powered. The wake-up
timers and controller, and the 32kHz RC and crystal oscillators may be powered on or off in sleep mode through
software control.
• Digital Logic Domain: supplies the digital peripherals, CPU, ROM, Baseband controller, Modem and Encryption
processor. It is powered off during sleep mode.
• Analogue Domain: supplies the ADC, DACs and the temperature sensor. It is powered off during sleep mode
and may be powered on or off in active processing mode through software control.
• RAM Domain: supplies the RAM during sleep mode to retain the memory contents. It may be powered on or off
for sleep mode through software control.
• Radio Domain: supplies the radio interface. It is powered during transmit and receive and controlled by the
baseband processor. It is powered off during sleep mode.
The current consumption figures for the different modes of operation of the device is given in section 22.2.2.
21.2 Active Processing Mode
Active processing mode in the JN5148 is where all of the application processing takes place. By default, the CPU will
execute at the selected clock speed executing application firmware. All of the peripherals are available to the
application, as are options to actively enable or disable them to control power consumption; see specific peripheral
sections for details.
Whilst in Active processing mode there is the option to doze the CPU but keep the rest of the chip active; this is
particularly useful for radio transmit and receive operations, where the CPU operation is not required therefore saving
power.
21.2.1 CPU Doze
Whilst in doze mode, CPU operation is stopped but the chip remains powered and the digital peripherals continue to
run. Doze mode is entered through software and is terminated by any interrupt request. Once the interrupt service
routine has been executed, normal program execution resumes. Doze mode uses more power than sleep and deep
sleep modes but requires less time to restart and can therefore be used as a low power alternative to an idle loop.
Whilst in CPU doze the current associated with the CPU is not consumed, therefore the basic device current is
reduced as shown in the figures in section 22.2.2.1.
21.3 Sleep Mode
The JN5148 enters sleep mode through software control. In this mode most of the internal chip functions are
shutdown to save power, however the state of DIO pins are retained, including the output values and pull-up enables, © NXP Laboratories UK 2013 JN-DS-JN5148-001 1v9 63
and this therefore preserves any interface to the outside world. The DAC outputs are placed into a high impedance
state.
When entering into sleep mode, there is an option to retain the RAM contents throughout the sleep period. If the
wakeup timers are not to be used for a wakeup event and the application does not require them to run continually,
then power can be saved by switching off the 32kHz oscillator if selected as the system clock through software
control. The oscillator will be restarted when a wakeup event occurs.
Whilst in sleep mode one of four possible events can cause a wakeup to occur: transitions on DIO inputs, expiry of
wakeup timers, pulse counters maturing or comparator events. If any of these events occur, and the relevant
interrupt is enabled, then an interrupt is generated that will cause a wakeup from sleep. It is possible for multiple
wakeup sources to trigger an event at the same instant and only one of them will be accountable for the wakeup
period. It is therefore necessary in software to remove all other pending wakeup events prior to requesting entry back
into sleep mode; otherwise, the device will re-awaken immediately.
When wakeup occurs, a similar sequence of events to the reset process described in section 6.1 happens, including
the checking of the supply voltage by the Brown Out Detector 6.4. The 32MHz oscillator is started up, once stable
the power to CPU system is enabled and the reset is removed. Software determines that this is a reset from sleep
and so commences with the wakeup process. If RAM contents were held through sleep, wakeup is quicker as the
application program does not have to be reloaded from Flash memory. See section 22.3.6 for wake-up timings.
21.3.1 Wakeup Timer Event
The JN5148 contains two 35-bit wakeup timers that are counters clocked from the 32kHz oscillator, and can be
programmed to generate a wake-up event. Following a wakeup event, the timers continue to run. These timers are
described in section 11.3.
Timer events can be generated from both of the two timers; one is intended for use by the 802.15.4 protocol, the
other being available for use by the Application running on the CPU. These timers are available to run at any time,
even during sleep mode.
21.3.2 DIO Event
Any DIO pin when used as an input has the capability, by detecting a transition, to generate a wake-up event. Once
this feature has been enabled the type of transition can be specified (rising or falling edge). Even when groups of
DIO lines are configured as alternative functions such as the UARTs or Timers etc, any input line in the group can still
be used to provide a wakeup event. This means that an external device communicating over the UART can wakeup
a sleeping device by asserting its RTS signal pin (which is the CTS input of the JN5148).
21.3.3 Comparator Event
The comparator can generate a wakeup interrupt when a change in the relative levels of the positive and negative
inputs occurs. The ability to wakeup when continuously monitoring analogue signals is useful in ultra-low power
applications. For example, the JN5148 can remain in sleep mode until the voltage drops below a threshold and then
be woken up to deal with the alarm condition.
21.3.4 Pulse Counter
The JN5148 contains two 16 bit pulse counters that can be programmed to generate a wake-up event. Following the
wakeup event the counters will continue to operate and therefore no pulse will be missed during the wake-up
process. These counters are described in section 12.
To minimise sleep current it is possible to disable the 32K RC oscillator and still use the pulse counters to cause a
wake-up event, provided debounce mode is not required.
21.4 Deep Sleep Mode
Deep sleep mode gives the lowest power consumption. All switchable power domains are off and certain functions in
the VDD supply power domain, including the 32kHz oscillator are stopped. This mode can be exited by a power
down, a hardware reset on the RESETN pin, or a DIO event. The DIO event in this mode causes a chip reset to
occur.64 JN-DS-JN5148-001 1v9 © NXP Laboratories UK 2013
22 Electrical Characteristics
22.1 Maximum Ratings
Exceeding these conditions may result in damage to the device.
Parameter Min Max
Device supply voltage VDD1, VDD2 -0.3V 3.6V
Supply voltage at voltage regulator bypass pins
VB_xxx
-0.3V 1.98V
Voltage on analogue pins XTALOUT, XTALIN,
VCOTUNE, RF_IN.
-0.3V VB_xxx + 0.3V
Voltage on analogue pins VREF, ADC1-4, DAC1-2,
COMP1M, COMP1P, COMP2M, COMP2P, IBIAS
-0.3V VDD1 + 0.3V
Voltage on 5v tolerant digital pins SPICLK,
SPIMOSI, SPIMISO, SPISEL0, DIO0-8 & DIO11-20,
RESETN
-0.3V Lower of (VDD2 + 2V)
and 5.5V
Voltage on 3v tolerant digital pins DIO9, DIO10 -0.3V VDD2 + 0.3V
Storage temperature -40ºC 150ºC
Reflow soldering temperature according to
IPC/JEDEC J-STD-020C
260ºC
ESD rating 4 Human Body Model 1 2.0kV
Charged Device Model 2 500V
1) Testing for Human Body Model discharge is performed as specified in JEDEC Standard JESD22-A114.
2) Testing for Charged Device Model discharge is performed as specified in JEDEC Standard JESD22-C101.
22.2 DC Electrical Characteristics
22.2.1 Operating Conditions
Supply Min Max
VDD1, VDD2 2.0V 3.6V
Ambient temperature range -40ºC 85ºC© NXP Laboratories UK 2013 JN-DS-JN5148-001 1v9 65
22.2.2 DC Current Consumption
VDD = 2.0 to 3.6V, -40 to +85º C
22.2.2.1 Active Processing
Mode: Min Typ Max Unit Notes
CPU processing
32,16,8 or 4MHz
1600 +
280/MHz
µA SPI, GPIOs enabled. When in
CPU doze the current related to
CPU speed is not consumed.
Radio transmit 15.0 mA CPU in software doze – radio
transmitting
Radio receive 17.5 mA CPU in software doze – radio in
receive mode
The following current figures should be added to those above if the feature is being used
ADC 655 µA Temperature sensor and battery
measurements require ADC
DAC 215 / 235 µA One / both
Comparator 73 / 0.8 µA Normal / low-power
UART 90 µA For each UART
Timer 30 µA For each Timer
2-wire serial interface 70 µA
22.2.2.2 Sleep Mode
Mode: Min Typ Max Unit Notes
Sleep mode with I/O wakeup 0.12 µA Waiting on I/O event
Sleep mode with I/O and RC
Oscillator timer wakeup –
measured at 25ºC
1.25 µA As above, but also waiting on timer
event. If both wakeup timers are
enabled then add another 0.05µA
32kHz crystal oscillator 1.5 µA As alternative sleep timer
The following current figures should be added to those above if the feature is being used
RAM retention– measured at
25ºC
2.2 µA For full 128kB retained
Comparator (low-power mode) 0.8 µA Reduced response time
22.2.2.3 Deep Sleep Mode
Mode: Min Typ Max Unit Notes
Deep sleep mode– measured
at 25ºC
100 nA Waiting on chip RESET or I/O
event66 JN-DS-JN5148-001 1v9 © NXP Laboratories UK 2013
22.2.3 I/O Characteristics
VDD = 2.0 to 3.6V, -40 to +85º C
Parameter Min Typ Max Unit Notes
Internal DIO pullup
resistors
22
24
31
35
34
40
56
63
53
63
92
104
kΩ VDD2 = 3.6V, 25C
VDD2 = 3.0V, 25C
VDD2 = 2.2V, 25C
VDD2 = 2.0V, 25C
Digital I/O High Input
(except DIO9, DIO10)
VDD2 x 0.7 Lower of (VDD2 + 2V)
and 5.5V
V 5V Tolerant I/O only
Digital I/O High Input
( DIO9, DIO10)
VDD2 x 0.7 VDD2 V
Digital I/O low Input -0.3 VDD2 x 0.27 V
Digital I/O input hysteresis 140 230 310 mV
DIO High O/P (2.7-3.6V) VDD2 x 0.8 VDD2 V With 4mA load
DIO Low O/P (2.7-3.6V) 0 0.4 V With 4mA load
DIO High O/P (2.2-2.7V) VDD2 x 0.8 VDD2 V With 3mA load
DIO Low O/P (2.2-2.7V) 0 0.4 V With 3mA load
DIO High O/P (2.0-2.2V) VDD2 x 0.8 VDD2 V With 2.5mA load
DIO Low O/P (2.0-2.2V) 0 0.4 V With 2.5mA load
Current sink/source
capability
4
3
2.5
mA VDD2 = 2.7V to 3.6V
VDD2 = 2.2V to 2.7V
VDD2 = 2.0V to 2.2V
IIL - Input Leakage Current 50 nA Vcc = 3.6V, pin low
IIH - Input Leakage Current 50 nA Vcc = 3.6V, pin high
22.3 AC Characteristics
22.3.1 Reset and Voltage Brown-Out
RESETN
Internal RESET
VDD
VPOT
t
STAB
Figure 45: Internal Power-on Reset without showing Brown-Out© NXP Laboratories UK 2013 JN-DS-JN5148-001 1v9 67
Internal RESET
RESETN VRST
t
STAB
t
RST
Figure 46: Externally Applied Reset
VDD = 2.0 to 3.6V, -40 to +85º C
Parameter Min Typ Max Unit Notes
External Reset pulse width
to initiate reset sequence
(tRST)
1 µs Assumes internal pullup
resistor value of 100K
worst case and ~5pF
external capacitance
External Reset threshold
voltage (VRST)
VDD2 x 0.7 V Minimum voltage to
avoid being reset
Internal Power-on Reset
threshold voltage (VPOT)
1.47
1.42
V Rising
Falling
Reset stabilisation time
(tSTAB)
0.84 ms Note 1
Brown-out Threshold
Voltage (VTH)
1.87
2.16
2.54
2.83
1.95
2.25
2.65
2.95
2.01
2.32
2.73
3.04
V Configurable threshold
with 4 levels
Brown-out Hysteresis
(VHYS)
45
60
85
100
mV Corresponding to the 4
threshold levels
1 Time from release of reset to start of executing ROM code. Loading program from Flash occurs in addition to this.
VTH + VHYS
VTH
DVDD
Internal POR
Internal BOReset
VPOT
Figure 47: Power on Reset followed by Brown-out Detect68 JN-DS-JN5148-001 1v9 © NXP Laboratories UK 2013
22.3.2 SPI MasterTiming
t t SSH SSS
t
CK
t
SI
t
HI
MOSI
(mode=1,3)
SS
MOSI
(mode=0,2)
MISO
(mode=0,2)
MISO
(mode=1,3)
t
VO
t
VO
CLK
(mode=0,1)
t
SI
t
HI
CLK
(mode=2,3)
Figure 48: SPI Timing (Master)
Parameter Symbol Min Max Unit
Clock period tCK 62.5 - ns
Data setup time tSI 16.7 @ 3.3V
18.2 @ 2.7V
21.0 @ 2.0V
- ns
Data hold time tHI 0 ns
Data invalid period tVO - 15 ns
Select set-up period tSSS 60 - ns
Select hold period tSSH 30 (SPICLK = 16MHz)
0 (SPICLK<16MHz, mode=0 or 2)
60 (SPICLK<16MHz, mode=1 or 3)
- ns
22.3.3 Intelligent Peripheral (SPI Slave) Timing
IP_SEL
IP_CLK
IP_DI
IP_DO
t
si t
hi
t
vo
t
sss
t t ssh ck
t
lz t
hz
Figure 49: Intelligent Peripheral (SPI Slave) Timing© NXP Laboratories UK 2013 JN-DS-JN5148-001 1v9 69
Parameter Symbol Min Max Unit
Clock period tck 125.0 - ns
Data setup time tsi 15 - ns
Data hold time thi 15 ns
Data invalid period tvo - 40 ns
Select set-up period tsss 15 - ns
Select hold period tssh 15 - ns
Select asserted to output data driven tlz 20 ns
Select negated to data output tri-stated thz 20 ns
22.3.4 Two-wire Serial Interface
t
BUF
S Sr P S
t
LOW
t
HD;STA
t
F t
R
t
HD;DAT
t
HIGH
t
SU;DAT
t
SU;STA
t
HD;STA
t
SU;STO
t
SP t
R
t
F
SIF_D
SIF_CLK
Figure 50: Two-wire Serial Interface Timing
Parameter Symbol
Standard Mode Fast Mode
Unit
Min Max Min Max
SIF_CLK clock frequency fSCL 0 100 0 400 kHz
Hold time (repeated) START condition.
After this period, the first clock pulse is
generated
tHD:STA 4 - 0.6 - µs
LOW period of the SIF_CLK clock tLOW 4.7 - 1.3 - µs
HIGH period of the SIF_CLK clock tHIGH 4 - 0.6 - µs
Set-up time for repeated START condition tSU:STA 4.7 - 0.6 - µs
Data setup time SIF_D tSU:DAT 0.25 - 0.1 - µs
Rise Time SIF_D and SIF_CLK tR - 1000 20+0.1Cb 300 ns
Fall Time SIF_D and SIF_CLK tF - 300 20+0.1Cb 300 ns
Set-up time for STOP condition tSU:STO 4 - 0.6 - µs
Bus free time between a STOP and START
condition
tBUF 4.7 - 1.3 - µs
Pulse width of spikes that will be
suppressed by input filters (Note 1)
tSP - 60 - 60 ns
Capacitive load for each bus line Cb - 400 - 400 pF
Noise margin at the LOW level for each
connected device (including hysteresis)
Vnl 0.1VDD - 0.1VDD - V
Noise margin at the HIGH level for each
connected device (including hysteresis)
Vnh 0.2VDD - 0.2VDD - V
Note 1: This figure indicates the pulse width that is guaranteed to be suppressed. Pulse with widths up to 125nsec
may alos get suppressed.70 JN-DS-JN5148-001 1v9 © NXP Laboratories UK 2013
22.3.5 Four-Wire Digital Audio Interface
SCK
WS/SDOUT
SDIN
t
ck
t
dtr
t
sr t
hr
t
hc t
lc
Parameter Symbol
Maximum
Frequency (8MHz) Generic
Unit
Min Max Min Max
DAI_SCK clock period tck 125 - 125 - ns
LOW period of the DAI_SCK clock tlc 43 - 0.35tck - ns
HIGH period of the DAI_SCK clock thc 43 - 0.35tck - ns
Transmit delay time tdtr - 50 - 0.4tck ns
Receive set-up time tsr 25 - 0.2tck - ns
Receive hold time thr 0 - 0 - ns
22.3.6 Wakeup and Boot Load Timings
Parameter Min Typ Max Unit Notes
Time for crystal to stabilise
ready for Boot Load
0.84 ms Reached oscillator
amplitude threshold
Time for crystal to stabilise
ready for radio activity
1.0 ms
Wake up from Deep Sleep
or from Sleep (memory not
held)
0.84 + 0.5*
program size in
kBytes
ms Assumes SPI clock to
external Flash is
16MHz
Wake up from Sleep
(memory held)
0.84 ms
Wake up from CPU Doze
mode
0.2 µs
Wake up from Sleep using
24MHz RC oscillator
(memory held)
0.29 ms© NXP Laboratories UK 2013 JN-DS-JN5148-001 1v9 71
22.3.7 Bandgap Reference
VDD = 2.0 to 3.6V, -40 to +85ºC
Parameter Min Typ Max Unit Notes
Voltage 1.156 1.192 1.216 V
DC power supply rejection 58 dB at 25ºC
Temperature coefficient -35
+30
ppm/ºC 20 to 85ºC
-40ºC to 20ºC
Point of inflexion +25 ºC
22.3.8 Analogue to Digital Converters
VDD = 3.0V, VREF = 1.2V, -40 to +85ºC
Parameter Min Typ Max Unit Notes
Resolution 12 bits 500kHz Clock
Current consumption 655 µA
Integral nonlinearity ± 5 LSB 0 to Vref range
Differential nonlinearity -1 +2 LSB Guaranteed monotonic
Offset error + 10 mV
Gain error - 20 mV
Internal clock 500 kHz 16MHz input clock, ÷32
No. internal clock periods
to sample input
2, 4, 6 or 8 Programmable
Conversion time 40 µs 500kHz Clock with
sample period of 2
Input voltage range 0.04 Vref
or 2*Vref
V Switchable. Refer to
20.1.1
Vref (Internal) See Section 22.3.7 Bandgap Reference
Vref (External) 1.15 1.2 1.6 V Allowable range into
VREF pin
Input capacitance 8 pF In series with 5K ohms72 JN-DS-JN5148-001 1v9 © NXP Laboratories UK 2013
22.3.9 Digital to Analogue Converters
VDD = 3.0V, VREF = 1.2V, -40 to +85ºC
Parameter Min Typ Max Unit Notes
Resolution 12 bits
Current consumption 215 (single)
235 (both)
µA
Integral nonlinearity ± 2 LSB
Differential nonlinearity -1 +1 LSB Guaranteed monotonic
Offset error ± 10 mV
Gain error ± 10 mV
Internal clock 2MHz,
1MHz,
500kHz,
250kHz
16MHz input clock,
programmable
prescaler
Output settling time to
0.5LSB
5 µs With 10k ohms & 20pF
load
Minimum Update time 10 µs 2MHz Clock with
sample period of 2
Output voltage swing 0 Lower of Vdd-1.2 and Vref V Output voltage swing
Gain =0
Output voltage swing 0 Lower of 2x(Vdd-1.2 ) and
Vdd-0.2 and 2xVref
V Output voltage swing
Gain =1
Vref (Internal) See Section 22.3.7 Bandgap Reference
VREF (External) 0.8 1.2 1.6 V Allowable range into
VREF pin
Resistive load 10 kΩ To ground
Capacitive load 20 pF
Digital input coding Binary© NXP Laboratories UK 2013 JN-DS-JN5148-001 1v9 73
22.3.10 Comparators
VDD = 2.0 to 3.6V -40 to +85ºC
Parameter Min Typ Max Unit Notes
Analogue response time
(normal)
80 125 ns +/- 250mV overdrive
10pF load
Total response time
(normal) including delay to
Interrupt controller
105 + 125 ns Digital delay can be
up to a max. of two
16MHz clock periods
Analogue response time
(low power)
2.4 µs +/- 250mV overdrive
No digital delay
Hysteresis 4
12
28
10
20
40
16
26
50
mV Programmable in 3
steps and zero
Vref (Internal) See Section 22.3.7 Bandgap Reference V
Common Mode input range 0 Vdd V
Current (normal mode) 54 73 102 µA
Current (low power mode) 0.8 µA
22.3.11 32kHz RC Oscillator
VDD = 2.0 to 3.6V, -40 to +85 ºC
Parameter Min Typ Max Unit Notes
Current consumption of cell
and counter logic
1.45
1.25
1.05
µA 3.6V
3.0V
2.0V
32kHz clock native
accuracy
-30% 32kHz +30% Typical is at 3.0V 25°C
Calibrated 32kHz accuracy ±250 ppm For a 1 second sleep
period calibrating over
20 x 32kHz clock
periods
Variation with temperature -0.010 %/°C
Variation with VDD2 -1.1 %/V74 JN-DS-JN5148-001 1v9 © NXP Laboratories UK 2013
22.3.12 32kHz Crystal Oscillator
VDD = 2.0 to 3.6V, -40 to +85ºC
Parameter Min Typ Max Unit Notes
Current consumption of cell
and counter logic
1.5 µA This is sensitive to the ESR
of the crystal,Vdd and total
capacitance at each pin
Start – up time 0.8 s Assuming xtal with ESR of
less than 40kohms and
CL= 9pF External caps =
15pF
(Vdd/2mV pk-pk) see
Appendix B
Input capacitance 1.4 pF Bondpad and package
Transconductance 17 uA/V
External Capacitors
(CL=9pF)
15 pF Total external capacitance
needs to be 2*CL, allowing
for stray capacitance from
chip, package and PCB
Amplitude at Xout Vdd-0.2 Vp-p
22.3.13 32MHz Crystal Oscillator
VDD = 2.0 to 3.6V, -40 to +85ºC
Parameter Min Typ Max Unit Notes
Current consumption 300 375 450 µA Excluding bandgap ref.
Start – up time 0.84 ms Assuming xtal with ESR of
less than 40ohms and CL=
9pF External caps = 15pF
see Appendix B
Input capacitance 1.4 pF Bondpad and package
Transconductance 3.65 4.30 5.16 mA/V
DC voltages, XTALIN /
XTALOUT
390/425 425/465 470/520 mV
External Capacitors
(CL=9pF)
15 pF Total external capacitance
needs to be 2*CL, allowing
for stray capacitance from
chip, package and PCB
Amplitude detect threshold 320 mVp-p Threshold detection
accessible via API© NXP Laboratories UK 2013 JN-DS-JN5148-001 1v9 75
22.3.14 24MHz RC Oscillator
VDD = 2.0 to 3.6V, -40 to +85ºC
Parameter Min Typ Max Unit Notes
Current consumption of cell 160 µA
Clock native accuracy -22% 24MHz +28%
Calibrated centre frequency
accuracy
-7% 24MHz +7%
Variation with temperature -0.015 %/°C
Variation with VDD2 0.15 %/V
Startup time 1 us
22.3.15 Temperature Sensor
VDD = 2.0 to 3.6V, -40 to +85ºC
Parameter Min Typ Max Unit Notes
Operating Range -40 - 85 °C
Sensor Gain -1.44 -1.55 -1.66 mV/°C
Accuracy - - ±10 °C
Non-linearity - - 2.5 °C
Output Voltage 630 855 mV Includes absolute variation
due to manufacturing & temp
Typical Voltage 745 mV Typical at 3.0V 25°C
Resolution 0.154 0.182 0.209 °C/LSB 0 to Vref ADC I/P Range76 JN-DS-JN5148-001 1v9 © NXP Laboratories UK 2013
22.3.16 Radio Transceiver
This JN5148 meets all the requirements of the IEEE802.15.4 standard over 2.0 - 3.6V and offers the following
improved RF characteristics. All RF characteristics are measured single ended.
This part also meets the following regulatory body approvals, when used with NXP’s Module Reference Designs.
Compliant with FCC part 15, rules, IC Canada, ETSI ETS 300-328 and Japan ARIB STD-T66
The PCB schematic and layout rules detailed in Appendix
B.4 must be followed. Failure to do so will likely result in the
JN5148 failing to meet the performance specification detailed
herein and worst case may result in device not functioning in the
end application.
Parameter Min Typical Max Notes
RF Port Characteristics
Type Single Ended
Impedance 1 50ohm 2.4-2.5GHz
Frequency range 2.400 GHz 2.485GHz
ESD levels (pin 17) TDB
1) With external matching inductors and assuming PCB layout as in Appendix B.4.© NXP Laboratories UK 2013 JN-DS-JN5148-001 1v9 77
Radio Parameters: 2.0-3.6V, +25ºC
Parameter Min Typical Max Unit Notes
Receiver Characteristics
Receive sensitivity -92 -95 dBm Nominal for 1% PER, as per
802.15.4 section 6.5.3.3
Maximum input signal +5 dBm For 1% PER, measured as
sensitivity
Adjacent channel
rejection (-1/+1 ch)
[CW Interferer]
19/34
[27/49]
dBc For 1% PER, with wanted signal
3dB, above sensitivity. (Note1,2)
(modulated interferer)
Alternate channel
rejection (-2 / +2 ch)
[CW Interferer]
40/45
[54/54]
dBc For 1% PER, with wanted signal
3dB, above sensitivity. (Note1,2)
(modulated interferer)
Other in band rejection
2.4 to 2.4835 GHz,
excluding adj channels
48 dBc For 1% PER with wanted signal
3dB above sensitivity. (Note1)
Out of band rejection 52 dBc For 1% PER with wanted signal
3dB above sensitivity. All
frequencies except wanted/2 which
is 8dB lower. (Note1)
Spurious emissions
(RX)
-61
<-70
-58
dBm Measured conducted into 50ohms
30MHz to 1GHz
1GHz to 12GHz
Intermodulation
protection
40 dB For 1% PER at with wanted signal
3dB above sensitivity. Modulated
Interferers at 2 & 4 channel
separation (Note1)
RSSI linearity -4 +4 dB -95 to -10dBm.
Available through Hardware API
Transmitter Characteristics
Transmit power +0.5 +2.5 dBm
Output power control
range
-35 dB In three 12dB steps (Note3)
Spurious emissions
(TX)
-40
<-70
<-70
dBm Measured conducted into 50ohms
30MHz to 1GHz,
1GHz to12.5GHz,
The following exceptions apply
1.8 to 1.9GHz & 5.15 to 5.3GHz
EVM [Offset] 10 [2.0] 15 % At maximum output power
Transmit Power
Spectral Density
-38 -20 dBc At greater than 3.5MHz offset, as
per 802.15.4, section 6.5.3.178 JN-DS-JN5148-001 1v9 © NXP Laboratories UK 2013
Radio Parameters: 2.0-3.6V, -40ºC
Parameter Min Typical Max Unit Notes
Receiver Characteristics
Receive sensitivity -93.5 -96.5 dBm Nominal for 1% PER, as per
802.15.4 section 6.5.3.3
Maximum input signal +9 dBm For 1% PER, measured as
sensitivity
Adjacent channel
rejection (-1/+1 ch)
[CW Interferer]
19/34
[TBC]
dBc For 1% PER, with wanted signal
3dB, above sensitivity. (Note1,2)
(modulated interferer)
Alternate channel
rejection (-2 / +2 ch)
[CW Interferer]
40/45
[TBC]
dBc For 1% PER, with wanted signal
3dB, above sensitivity. (Note1,2)
(modulated interferer)
Other in band rejection
2.4 to 2.4835 GHz,
excluding adj channels
47 dBc For 1% PER with wanted signal
3dB above sensitivity. (Note1)
Out of band rejection 49 dBc For 1% PER with wanted signal
3dB above sensitivity. All
frequencies except wanted/2 which
is 8dB lower. (Note1)
Spurious emissions
(RX)
-60
<-70
-57
dBm Measured conducted into 50ohms
30MHz to 1GHz
1GHz to 12GHz
Intermodulation
protection
39 dB For 1% PER at with wanted signal
3dB above sensitivity. Modulated
Interferers at 2 & 4 channel
separation (Note1)
RSSI linearity -4 +4 dB -95 to -10dBm.
Available through Hardware API
Transmitter Characteristics
Transmit power +0.75 +2.75 dBm
Output power control
range
-35 dB In three 12dB steps (Note3)
Spurious emissions
(TX)
-38
<-70
<-70
dBm Measured conducted into 50ohms
30MHz to 1GHz,
1GHz to12.5GHz,
The following exceptions apply
1.8 to 1.9GHz & 5.15 to 5.3GHz
EVM [Offset] 9 [2.0] 15 % At maximum output power
Transmit Power
Spectral Density
-38 -20 dBc At greater than 3.5MHz offset, as
per 802.15.4, section 6.5.3.1© NXP Laboratories UK 2013 JN-DS-JN5148-001 1v9 79
Radio Parameters: 2.0-3.6V, +85ºC
Parameter Min Typical Max Unit Notes
Receiver Characteristics
Receive sensitivity -90 -93 dBm Nominal for 1% PER, as per
802.15.4 section 6.5.3.3
Maximum input signal +3 dBm For 1% PER, measured as
sensitivity
Adjacent channel
rejection (-1/+1 ch)
[CW Interferer]
19/34
[TBC]
dBc For 1% PER, with wanted signal
3dB, above sensitivity. (Note1,2)
(modulated interferer)
Alternate channel
rejection (-2 / +2 ch)
[CW Interferer]
40/45
[TBC]
dBc For 1% PER, with wanted signal
3dB, above sensitivity. (Note1,2)
(modulated interferer)
Other in band rejection
2.4 to 2.4835 GHz,
excluding adj channels
49 dBc For 1% PER with wanted signal
3dB above sensitivity. (Note1)
Out of band rejection 53 dBc For 1% PER with wanted signal
3dB above sensitivity. All
frequencies except wanted/2 which
is 8dB lower. (Note1)
Spurious emissions
(RX)
-62
<-70
-59
dBm Measured conducted into 50ohms
30MHz to 1GHz
1GHz to 12GHz
Intermodulation
protection
41 dB For 1% PER at with wanted signal
3dB above sensitivity. Modulated
Interferers at 2 & 4 channel
separation (Note1)
RSSI linearity -4 +4 dB -95 to -10dBm.
Available through Hardware API
Transmitter Characteristics
Transmit power -0.2 +1.8 dBm
Output power control
range
-35 dB In three 12dB steps (Note3)
Spurious emissions
(TX)
-42
<-70
<-70
dBm Measured conducted into 50ohms
30MHz to 1GHz,
1GHz to12.5GHz,
The following exceptions apply
1.8 to 1.9GHz & 5.15 to 5.3GHz
EVM [Offset] 10 [2.0] 15 % At maximum output power
Transmit Power
Spectral Density
-38 -20 dBc At greater than 3.5MHz offset, as
per 802.15.4, section 6.5.3.180 JN-DS-JN5148-001 1v9 © NXP Laboratories UK 2013
Note1: Blocker rejection is defined as the value, when 1% PER is seen with the wanted signal 3dB above sensitivity,
as per 802.15.4 section 6.5.3.4
Note2: Channels 11,17,24 low/high values reversed.
Note3: Up to an extra 2.5dB of attenuation is available if required.© NXP Laboratories UK 2013 JN-DS-JN5148-001 1v9 81
Appendix A Mechanical and Ordering Information
A.1 56-pin QFN Package Drawing
Figure 51: 56-pin QFN Package Drawings
Controlling Dimension: mm
Symbol
millimetres
Min. Nom. Max.
A ------ ------ 0.9
A1 0.00 0.01 0.05
A2 ------ 0.65 0.7
A3 0.20 Ref.
b 0.2 0.25 0.3
D 8.00 bsc
D1 7.75 bsc
D2 6.20 6.40 6.60
E 8.00 bsc
E1 7.75 bsc
E2 6.20 6.40 6.60
L 0.30 0.40 0.50
e 0.50 bsc
υ1 0° ------ 12°
R 0.09 ------ ------
Tolerances of Form and Position
aaa 0.10
bbb 0.10
ccc 0.0582 JN-DS-JN5148-001 1v9 © NXP Laboratories UK 2013
A.2 PCB Decal
The following PCB decal is recommended; all dimensions are in millimetres (mm).
Figure 52: PCB Decal
The PCB schematic and layout rules detailed in Appendix B.4 must
be followed. Failure to do so will likely result in the JN5148 failing
to meet the performance specification detailed herein and worst
case may result in device not functioning in the end application.© NXP Laboratories UK 2013 JN-DS-JN5148-001 1v9 83
A.3 Ordering Information
The standard qualification for the JN5148 is Industrial temperature range: -40ºC to +85ºC, packaged in a 56-pin QFN
package.
Ordering Code Format:
JN5148/XXX
XXX: ROM Variant
001 Supports all available networking stacks
Ordering Codes:
Part Number Ordering Code Description
JN5148-001 JN5148/001 JN5148 microcontroller
The chip is available in three different reel quantities:
• 500 on 180mm reel
• 1000 on 180mm reel
• 2500 on 330mm reel
Where this Data Sheet is denoted as “Advanced” or “Preliminary”, devices will be either Engineering Samples or
Prototypes. Devices of this status are marked with an Rx suffix after the ROM identifier to identify the revision of
silicon during these product phases - for example JN5148-001R1-T.
The Standard Supply Multiple (SSM) for Engineering Samples or Prototypes is 50 units with a maximum of 250 units.
If the quantity of Engineering Samples or Prototypes ordered is less than a reel quantity, then these will be shipped in
tape form only, with no reel and will not be dry packaged in a moisture sensitive environment.
The SSM for Production status devices is one reel, all reels are dry packaged in a moisture sensitive bag see A.5.3.84 JN-DS-JN5148-001 1v9 © NXP Laboratories UK 2013
A.4 Device Package Marking
The diagram below shows the package markings for JN5148. The package on the left along with the legend
information below it, shows the general format of package marking. The package on the right shows the specific
markings for a JN5148-001 device, that came from assembly build number 1000135 and was manufactured week 12
of 2008.
Jennic
JNXXXX-SSS
FFFFFFF
YYWW
Jennic
JN5148-001
0812
1000135
Figure 53: Device Package Marking
Legend:
JN Jennic
XXXX 4 digit part number
SSS 3 digit software ROM identifier
FFFFFFF 7 digit assembly build number
YY 2 digit year number
WW 2 digit week number
Where this Data Sheet is denoted as “Advanced” or “Preliminary”, devices will be either Engineering Samples or
Prototypes. Devices of this status have an Rx suffix after the software ROM identifier, for example JN5148-001R1.© NXP Laboratories UK 2013 JN-DS-JN5148-001 1v9 85
A.5 Tape and Reel Information
A.5.1 Tape Orientation and Dimensions
The general orientation of the 56QFN package in the tape is as shown in Figure 54.
Figure 54: Tape and Reel Orientation
Figure 55 shows the detailed dimensions of the tape used for 8x8mm 56QFN devices.
ALL DIMENSIONS IN MILLIMETRES UNLESS OTHERWISE STATED
Reference Dimensions (mm)
Ao 8.30 ±0.10
Bo 8.30 ±0.10
Ko 1.10 ±0.10
F 7.50 ±0.10
P1 12.00 ±0.10
W 16.00 ±0.30
(I) Measured from centreline of sprocket hole to centreline of pocket
(II) Cumulative tolerance of 10 sprocket holes is ±0.20mm
(III) Measured from centreline of sprocket hole to centreline of pocket
(IV) Other material available
Figure 55: Tape Dimensions86 JN-DS-JN5148-001 1v9 © NXP Laboratories UK 2013
A.5.2 Reel Information: 180mm Reel
Surface Resistivity Between 10e9 – 10e11 Ohms Square
Material High Impact Polystyrene, environmentally friendly, recyclable
All dimensions and tolerances are fully compliant with EIA-481-B and are specified in millimetres.
6 window design with one window on each side blanked to allow adequate labelling space.
Figure 56: 180mm Reel Dimensions© NXP Laboratories UK 2013 JN-DS-JN5148-001 1v9 87
A.5.3 Reel Information: 330mm Reel
Surface Resistivity Between 10e9 – 10e11 Ohms Square
Material High Impact Polystyrene with Antistatic Additive
All dimensions and tolerances are fully compliant with EIA-481-B and are specified in millimetres.
3 window design to allow adequate labelling space.
Figure 57: 330mm Reel Dimensions
A.5.4 Dry Pack Requirement for Moisture Sensitive Material
Moisture sensitive material, as classified by JEDEC standard J-STD-033, must be dry packed. The 56 lead QFN
package is MSL2A/260°
C, and is dried before sealing in a moisture barrier bag (MBB) with desiccant bag weighing at
67.5 grams of activated clay and a humidity indicator card (HIC) meeting MIL-L-8835 specification. The MBB has a
moisture-sensitivity caution label to indicate the moisture-sensitive classification of the enclosed devices.88 JN-DS-JN5148-001 1v9 © NXP Laboratories UK 2013
Appendix B Development Support
B.1 Crystal Oscillators
This section covers some of the general background to crystal oscillators, to help the user make informed decisions
concerning the choice of crystal and the associated capacitors.
B.1.1 Crystal Equivalent Circuit
Cs
Lm Rm Cm
C1 C2
Where Cm is the motional capacitance
Lm is the motional inductance. This together with Cm defines the oscillation frequency (series)
Rm is the equivalent series resistance ( ESR ).
CS is the shunt or package capacitance and this is a parasitic
B.1.2 Crystal Load Capacitance
The crystal load capacitance is the total capacitance seen at the crystal pins, from all sources. As the load
capacitance (CL) affects the oscillation frequency by a process known as ‘pulling’, crystal manufacturers specify the
frequency for a given load capacitance only. A typical pulling coefficient is 15ppm/pF, to put this into context the
maximum frequency error in the IEEE802.15.4 specification is +/-40ppm for the transmitted signal. Therefore, it is
important for resonance at 32MHz exactly, that the specified load capacitance is provided.
The load capacitance can be calculated using:
CL =
1 2
1 2
T T
T T
C C
C C
+
×
Total capacitance CT1 = C1 + C1P + C1in
Where C1 is the capacitor component
C1P is the PCB parasitic capacitance. With the recommended layout this is about 1.6pF
C1in is the on-chip parasitic capacitance and is about 1.4pF typically.
Similarly for CT 2
Hence for a 9pF load capacitance, and a tight layout the external capacitors should be 15pF© NXP Laboratories UK 2013 JN-DS-JN5148-001 1v9 89
B.1.3 Crystal ESR and Required Transconductance
The resistor in the crystal equivalent circuit represents the energy lost. To maintain oscillation, power must be
supplied by the amplifier, but how much? Firstly, the Pi connected capacitors C1 and C2 with CS from the crystal,
apply an impedance transformation to Rm, when viewed from the amplifier. This new value is given by:
2
ˆ
+ = L
S L m m
C
C C R R
The amplifier is a transconductance amplifier, which takes a voltage and produces an output current. The amplifier
together with the capacitors C1 and C2, form a circuit, which provides a negative resistance, when viewed from the
crystal. The value of which is given by:
2
1× 2 ×ω = T T
m
NEG
C C
g R
Where gm is the transconductance
ω is the frequency in rad/s
Derivations of these formulas can be easily found in textbooks.
In order to give quick and reliable oscillator start-up, a common rule of thumb is to set the amplifier negative
resistance to be a minimum of 4 times the effective crystal resistance. This gives
2
T1× T 2 ×ω
m
C C
g ≥
2
4
+
L
S L m
C
C C R
This can be used to give an equation for the required transconductance.
1 2
2 1 2 1 2 2 4 [ ( ) ]
T T
m S T T T T m C C
R C C C C C
g ×
× + + × ≥ ω
Example: Using typical 32MHz crystal parameters of Rm =40Ω, CS =1pF and CT1 =CT 2 =18pF ( for a load
capacitance of 9pF), the equation above gives the required transconductance ( gm ) as 2.59mA/V. The JN5148 has a
typical value for transconductance of 4.3mA/V
The example and equation illustrate the trade-off that exists between the load capacitance and crystal ESR. For
example, a crystal with a higher load capacitance can be used, but the value of max. ESR that can be tolerated is
reduced. Also note, that the circuit sensitivity to external capacitance [ C1 , C2 ] is a square law.
Meeting the criteria for start-up is only one aspect of the way these parameters affect performance, they also affect
the time taken during start-up to reach a given, (or full), amplitude. Unfortunately, there is no simple mathematical
model for this, but the trend is the same. Therefore, both a larger load capacitance and larger crystal ESR will give a
longer start-up time, which has the disadvantages of reduced battery life and increased latency. 90 JN-DS-JN5148-001 1v9 © NXP Laboratories UK 2013
B.2 32MHz Oscillator
The JN5148 contains the necessary on-chip components to build a 32 MHz reference oscillator with the addition of
an external crystal resonator, two tuning capacitors. The schematic of these components are shown in Figure 58.
The two capacitors, C1 and C2, will typically be 15pF ±5% and use a COG dielectric. For a detailed specification of
the crystal required and factors affecting C1 and C2 see Appendix B.1. As with all crystal oscillators the PCB layout is
especially important, both to keep parasitic capacitors to a minimum and to reduce the possibility of PCB noise being
coupled into the oscillator.
XTALOUT
C1 C2
XTALIN R1
JN5148
Figure 58: Crystal oscillator connections
The clock generated by this oscillator provides the reference for most of the JN5148 subsystems, including the
transceiver, processor, memory and digital and analogue peripherals.
32MHz Crystal Requirements
Parameter Min Typ Max Notes
Crystal Frequency 32MHz
Crystal Tolerance 40ppm Including temperature
and ageing
Crystal ESR Range (Rm) 10Ω 60Ω See below for more
details
Crystal Load Capacitance
Range (CL) 6pF 9pF 12pF See below for more
details
Not all Combinations of Crystal Load Capacitance and ESR are Valid
Recommended Crystal Load Capacitance 9pF and max ESR 40 Ω
External Capacitors (C1 & C2)
For recommended Crystal
15pF CL = 9pF, total external
capacitance needs to be
2*CL. , allowing for stray
capacitance from chip,
package and PCB © NXP Laboratories UK 2013 JN-DS-JN5148-001 1v9 91
As is stated above, not all combinations of crystal load capacitance and ESR are valid, and as explained in Appendix
B.1.3 there is a trade-off that exists between the load capacitance and crystal ESR to achieve reliable performance.
For this reason, we recommend that for a 9pF load capacitance crystals be specified with a maximum ESR of 40
ohms. For lower load capacitances the recommended maximum ESR rises, for example, CL=7pF the max ESR is 61
ohms. For the lower cost crystals in the large HC49 package, a load capacitance of 9 or 10pF is widely available and
the max ESR of 30 ohms specified by many manufacturers is acceptable. Also available in this package style, are
crystals with a load capacitance of 12pF, but in this case the max ESR required is 25 ohms or better.
Below is measurement data showing the variation of the crystal oscillator amplifier transconductance with
temperature and supply voltage, notice how small the variation is. Circuit techniques have been used to apply
compensation, such that the user need only design for nominal conditions.
32MHz Crystal Oscillator
4.1
4.15
4.2
4.25
4.3
4.35
-40 -20 0 20 40 60 80 100
Temperature (C)
Transconductance (mA/V)
32MHz Crystal Oscillator
4.28
4.29
4.3
4.31
2 2.2 2.4 2.6 2.8 3 3.2 3.4 3.6
Supply Voltage (VDD)
Transconductance (mA/V)92 JN-DS-JN5148-001 1v9 © NXP Laboratories UK 2013
B.3 32kHz Oscillator
In order to obtain more accurate sleep periods, the JN5148 contains the necessary on-chip components to build an
optional 32kHz oscillator with the addition of an external 32.768kHz crystal and two tuning capacitors. The crystal
should be connected between XTAL32K_IN and XTAL32K_OUT (DIO9 and DIO10), with two equal capacitors to
ground, one on each pin. The schematic of these components are shown in Figure 59. The two capacitors, C1 and
C2, will typically be in the range 10 to 22pF ±5% and use a COG dielectric. As with all crystal oscillators the PCB
layout is especially important, both to keep parasitic capacitors to a minimum and to reduce the possibility of PCB
noise being coupled into the oscillator.
XTAL32K_IN XTAL32K_OUT
JN5148
Figure 59: 32kHz crystal oscillator connections
The electrical specification of the oscillator can be found in 22.3.12. The oscillator cell is flexible and can operate with
a range of commonly available 32kHz crystals with load capacitances from 6 to 12.5p, and ESR up to 80KΩ. It
achieves this by using automatic gain control (AGC), which senses the signal swing. As explained in Appendix B.1.3
there is a trade-off that exists between the load capacitance and crystal ESR to achieve reliable performance. The
use of an AGC function allows a wider range of crystal load capacitors and ESR’s to be accommodated than would
otherwise be possible. However, this benefit does mean the supply current varies with the supply voltage (VDD),
value of the total capacitance at each pin, and the crystal ESR. This is described in the table and graphs below.
32kHz Crystal Requirements
Parameter Min Typ Max Notes
Crystal Frequency 32kHz
Supply Current 1.6uA Vdd=3v, temp=25 C, load
cap =9pF, Rm=25K
Supply Current Temp. Coeff. 0.1%/ C Vdd=3v
Crystal ESR Range (Rm) 10KΩ 25KΩ 80KΩ See below for more details
Crystal Load Capacitance
Range (CL)
6pF 9pF 12.5pF See below for more details
Not all Combinations of Crystal Load Capacitance and ESR are Valid © NXP Laboratories UK 2013 JN-DS-JN5148-001 1v9 93
Three examples of typical crystals are given, each with the value of external capacitors to use, plus the likely supply
current and start-up time that can be expected. Also given is the maximum recommended ESR based on the start-up
criteria given in Appendix B.1.3. The values of the external capacitors can be calculated using the equation in
Appendix B.1.2 .
Load Capacitance Ext Capacitors Current Start-up Time Max ESR
9pF 15pF 1.6uA 0.8Sec 70KΩ
6pF 9pF 1.4uA 0.6sec 80KΩ
12.5pF 22pF 2.4uA 1.1sec 35KΩ
Below is measurement data showing the variation of the crystal oscillator supply current with voltage and with crystal
ESR, for two load capacitances.
32KHz Crystal Oscillator Current
0.6
0.8
1
1.2
1.4
1.6
2.2 2.4 2.6 2.8 3 3.2 3.4 3.6
Supply Voltage (VDD)
Normalised Current (IDD)
32KHz Crystal Oscillator Current
0.6
0.8
1
1.2
1.4
1.6
10 20 30 40 50 60 70 80
Crystal ESR (K ohm)
Normalised Current (IDD)
9pF
12.5pF94 JN-DS-JN5148-001 1v9 © NXP Laboratories UK 2013
B.4 JN5148 Module Reference Designs
For customers wishing to integrate the JN5148 device directly into their system, NXP provide a range of Module
Reference Designs, covering standard and high-power modules fitted with different Antennae
To ensure the correct performance, it is strongly recommended that where possible the design details provided by the
reference designs, are used in their exact form for all end designs, this includes component values, pad dimensions,
track layouts etc. In order to minimise all risks, it is recommended that the entire layout of the appropriate reference
module, if possible, be replicated in the end design.
For full details, consult the Standard Module Reference Design JN-RD-6015 [6].
B.4.1 Schematic Diagram
A schematic diagram of the JN5148 PCB antenna reference module is shown in Figure 60. Details of component
values and PCB layout constraints can be found in Table 8.
1
2
3
4
5
6
7
8
9
10
11
12
13
14
15 16 17 18 19 20 21 22 23 24 25 26 27 28
29
30
31
32
33
34
35
36
37
38
39
40
41
42
56 55 54 53 52 51 50 49 48 47 46 45 44 43
SPI Selects
Analogue IO
UART0/JTAG
Timers
Two Wire
Serial Port
RXD1
UART1/JTAG
DIO16
CTS1
VSS3
RTS1
TXD1
VSS2
VSSS
XTAL_OUT
XTAL_IN
VB_SYNTH
VCOTUNE (NC)
VB_VCOR1 43K
IBIAS
C16 100nF
VDD1
C14 100nF
VDD
C13 10uF
C24 47pF
C18 47pF
C2 10nF
C15 100nF
Y1
C11 15pF
C10 15pF
C20 100nF
L2 2.7nH
VB_RF
VREF
VB_RF2
RF_IN
VB_RF
C12 47pF
C3 100nF
VB_RF1
C1M
C1P
ADC1
ADC2
ADC3
ADC4
C2M
C2P
VB_A
C9 47pF
C8 100nF NC
VDD
VDD
RXD1
SPIMOSI
SPIMOSI
SPICLK SPICLK
C6 100nF
C7 100nF
SPISEL3
SPISEL2
VB_DIG
RESETN
SPISEL1
SPISEL0
VB_RAM
SPIMISO
VSS1
DAC2
DAC1
1
2
3
4
8
7
6
5
SS
SD0
WP
VSS SDI
CLK
HOLD
VCC
Serial
Flash
Memory
RXD0
TXD0
RTS0
CTS0
SPISEL4
VDD
SIF_D
SIF_CLK
TIM1OUT
TIM1CAP
TIM1CK_GT
TIM0OUT
TIM0CAP
VDD2
TIM0CK_GT
VSSA
JN5148
C1 47pF L1 5.6nH
To Coaxial Socket
Or Integrated Antenna
Figure 60: JN5148 Printed Antenna Reference Module Schematic Diagram© NXP Laboratories UK 2013 JN-DS-JN5148-001 1v9 95
Component
Designator
Value/Type Function PCB Layout Constraints
C13 10uF Power source decoupling
C14 100nF Analogue Power decoupling Adjacent to U1 pin 13
C16 100nF Digital power decoupling Adjacent to U1 pin 49
C15 100nF VB Synth decoupling Less than 5mm from U1 pin 10
C18 47pF VB Synth decoupling Less than 5mm from U1 pin 10
C2 10nF VB VCO decoupling Less than 5mm from U1 pin 12
C24 47pF VB VCO decoupling Less than 5mm from U1 pin 12
C3 100nF VB RF decoupling Less than 5mm from U1 pin 16 and U1 pin 18
C12 47pF VB RF decoupling Less than 5mm from U1 pin 16 and U1 pin 18
C8 100nF VB A decoupling Less than 5mm from U1 pin 27
C9 47pF VB A decoupling Less than 5mm from U1 pin 27
C6 100nF VB RAM decoupling Less than 5mm from U1 pin 35
C7 100nF VB Dig decoupling Less than 5mm from U1 pin 40
R1 43k I Bias Resistor Less than 5mm from U1 pin 14
C20 100nF Vref decoupling Less than 5mm from U1 pin 15
U2 4Mbit Serial Flash Memory (Numonyx M25P40)
Y1 32MHz Crystal (AEL X32M000000S025) (CL = 9pF, Max ESR 40R)
C10 15pF +/-5% COG Crystal Load Capacitor Adjacent to pin 8 and Y1 pin 1
C11 15pF +/-5% COG Crystal Load Capacitor Adjacent to pin 9 and Y1 pin 3
R2 Not fitted
C1 47pF AC Coupling
Phycomp 2238-869-15479
Must be copied directly from the reference design.
L1 5.6nH RF Matching Inductor
MuRata LQP15MN5N6B02
L2 2.7nH Load Inductor
MuRata LQP15MN2N7B02
Table 8: JN5148 Printed Antenna Reference Module Components and PCB Layout Constraints
The paddle should be connected directly to ground. Any pads that requiring connection to ground should do so by
connecting directly to the paddle.96 JN-DS-JN5148-001 1v9 © NXP Laboratories UK 2013
B.4.2 PCB Design and Reflow Profile
PCB and land pattern designs are key to the reliability of any electronic circuit design.
The Institute for Interconnecting and Packaging Electronic Circuits (IPC) defines a number of standards for electronic
devices. One of these is the "Surface Mount Design and Land Pattern Standard" IPC-SM-782 [3], commonly referred
to as “IPC782". This specification defines the physical packaging characteristics and land patterns for a range of
surface mounted devices. IPC782 is also a useful reference document for general surface mount design techniques,
containing sections on design requirements, reliability and testability. NXP strongly recommends that this be referred
to when designing the PCB.
The suggested reflow profile is shown in Figure 61. The specific paste manufacturers guidelines on peak flow
temperature, soak times, time above liquidus and ramp rates should also be referenced.
Figure 61: Recommended Reflow Profile for Lead-free Solder Paste or PPF lead frame© NXP Laboratories UK 2013 JN-DS-JN5148-001 1v9 97
Related Documents
[1] IEEE Std 802.15.4-2003 IEEE Standard for Information Technology – Part 15.4 Wireless Medium Access Control
(MAC) and Physical Layer (PHY) Specifications for Low-Rate Wireless Personal Area Networks (LR-WPANs).
[2] JN-AN-1038 Programming Flash devices not supported by the JN51xx ROM-based bootloader
[3] IPC-SM-782 Surface Mount Design and Land Pattern Standard
[4] JN-AN-1118 JN5148 Application Debugging
[5] JN-UG-3066 JN51xx Integrated Peripherals API User Guide
[6] JN-RD-6015 Standard Module Reference Design
[7] JN-AN-1003 Boot Loader Operation
RoHS Compliance
JN5148 devices meet the requirements of Directive 2002/95/EC of the European Parliament and of the Council on
the Restriction of Hazardous Substance (RoHS) and of the China RoHS (SJ/T11363 – 2006) requirements which
came into force on 1st March 2007.
Status Information
The status of this Data Sheet is. Production
NXP products progress according to the following format:
Advance
The Data Sheet shows the specification of a product in planning or in development.
The functionality and electrical performance specifications are target values of the design and may be used as a
guide to the final specification. Integrated circuits are identified with an Rx suffix, for example JN5148-001R1.
NXP reserves the right to make changes to the product specification at anytime without notice.
Preliminary
The Data Sheet shows the specification of a product that is commercially available, but is not yet fully qualified.
The functionality of the product is final. The electrical performance specifications are target values and may used as a
guide to the final specification. Integrated circuits are identified with an Rx suffix, for example JN5148-001R1.
NXP reserves the right to make changes to the product specification at anytime without notice.
Production
This is the production Data Sheet for the product.
All functional and electrical performance specifications, where included, including min and max values are derived
from detailed product characterization.
This Data Sheet supersedes all previous document versions.
NXP reserves the right to make changes to the product specification at anytime.98 JN-DS-JN5148-001 1v9 © NXP Laboratories UK 2013
Disclaimers
Limited warranty and liability — Information in this document is believed to be accurate and reliable. However, NXP Semiconductors does not give
any representations or warranties, expressed or implied, as to the accuracy or completeness of such information and shall have no liability for the
consequences of use of such information. NXP Semiconductors takes no responsibility for the content in this document if provided by an information
source outside of NXP Semiconductors.
In no event shall NXP Semiconductors be liable for any indirect, incidental, punitive, special or consequential damages (including - without limitation -
lost profits, lost savings, business interruption, costs related to the removal or replacement of any products or rework charges) whether or not such
damages are based on tort (including negligence), warranty, breach of contract or any other legal theory.
Notwithstanding any damages that customer might incur for any reason whatsoever, NXP Semiconductors’ aggregate and cumulative liability towards
customer for the products described herein shall be limited in accordance with the Terms and conditions of commercial sale of NXP Semiconductors.
Right to make changes — NXP Semiconductors reserves the right to make changes to information published in this document, including without
limitation specifications and product descriptions, at any time and without notice. This document supersedes and replaces all information supplied prior
to the publication hereof.
Suitability for use — NXP Semiconductors products are not designed, authorized or warranted to be suitable for use in life support, life-critical or
safety-critical systems or equipment, nor in applications where failure or malfunction of an NXP Semiconductors product can reasonably be expected to
result in personal injury, death or severe property or environmental damage. NXP Semiconductors and its suppliers accept no liability for inclusion
and/or use of NXP Semiconductors products in such equipment or applications and therefore such inclusion and/or use is at the customer’s own risk.
Applications — Applications that are described herein for any of these products are for illustrative purposes only. NXP Semiconductors makes no
representation or warranty that such applications will be suitable for the specified use without further testing or modification.
Customers are responsible for the design and operation of their applications and products using NXP Semiconductors products, and NXP
Semiconductors accepts no liability for any assistance with applications or customer product design. It is customer’s sole responsibility to determine
whether the NXP Semiconductors product is suitable and fit for the customer’s applications and products planned, as well as for the planned
application and use of customer’s third party customer(s). Customers should provide appropriate design and operating safeguards to minimize the risks
associated with their applications and products.
NXP Semiconductors does not accept any liability related to any default, damage, costs or problem which is based on any weakness or default in the
customer’s applications or products, or the application or use by customer’s third party customer(s). Customer is responsible for doing all necessary
testing for the customer’s applications and products using NXP Semiconductors products in order to avoid a default of the applications and the
products or of the application or use by customer’s third party customer(s). NXP does not accept any liability in this respect.
Export control — This document as well as the item(s) described herein may be subject to export control regulations. Export might require a prior
authorization from competent authorities.
Limiting values — Stress above one or more limiting values (as defined in the Absolute Maximum Ratings System of IEC 60134) will cause
permanent damage to the device. Limiting values are stress ratings only and (proper) operation of the device at these or any other conditions above
those given in the Operating Conditions section or the Electrical Characteristics sections of this document is not warranted. Constant or repeated
exposure to limiting values will permanently and irreversibly affect the quality and reliability of the device.
AEC unqualified products — This product has not been qualified to the appropriate Automotive Electronics Council (AEC) standard Q100 or Q101
and should not be used in automotive applications, including but not limited to applications where failure or malfunction of an NXP Semiconductors
product can reasonably be expected to result in personal injury, death or severe property or environmental damage. NXP Semiconductors accepts no
liability for inclusion and/or use of NXP Semiconductors products in such equipment or applications and therefore such inclusion and/or use is for the
customer’s own risk.
Product specification — The information and data provided in a Product data sheet shall define the specification of the product as agreed between
NXP Semiconductors and its customer, unless NXP Semiconductors and customer have explicitly agreed otherwise in writing. In no event however,
shall an agreement be valid in which the NXP Semiconductors product is deemed to offer functions and qualities beyond those described in the
Product data sheet
All products are sold subject to NXP Semiconductors’ terms and conditions of sale, supplied at the time of order acknowledgment and published at
http://www.nxp.com/profile/terms.
Trademarks
All trademarks are the property of their respective owners.© NXP Laboratories UK 2013 JN-DS-JN5148-001 1v9 99
Version Control
Version Notes
1.0 12th December 2008 – First issue, released as Advance Information
1.1 15th May 2009 – Major revision
1.2 15th July – Released as Preliminary and revised Electrical Parameters section
1.3 20th January 2010 – Revision to sections 1.1, 2.2.1 & 8.1 – 8.4 and figs 1,2,22 & 47. Also, the bill of
materials and reference design number have been updated.
1.4 2nd April 2010 – Released as Production with revised Electrical Parameters section
1.5 14th September 2010 – Logo updated and support for JenNet added
1.6 24th November 2010 – Ordering information changed
1.7 5th May 2011 – Tape and reel information updated
1.8 12th September 2012 – NXP branding applied
1.9 6th September 2013 – Modified description of interrupts within the CPU in Chapter 3100 JN-DS-JN5148-001 1v9 © NXP Laboratories UK 2013
Contact Details
NXP Laboratories UK Ltd
(Formerly Jennic Ltd)
Furnival Street
Sheffield
S1 4QT
United Kingdom
Tel: +44 (0)114 281 2655
Fax: +44 (0) 114 281 2951
For the contact details of your local NXP office or distributor, refer to the NXP web site:
www.nxp.com
Data Sheet: JN516x
IEEE802.15.4 Wireless Microcontroller
© NXP Laboratories UK 2013 JN-DS-JN516x v1.3 Production 1
Overview Features: Radio
• 2.4GHz IEEE802.15.4 compliant
• 128-bit AES security processor
• MAC accelerator with packet
formatting, CRCs, address check,
auto-acks, timers
• Integrated ultra low power sleep
oscillator – 0.6µA
• 2.0V to 3.6V battery operation
• Deep sleep current 0.12µA (Wake-up
from IO)
• <$0.15 external component cost
• RX current 17mA , TX 15mA
• Receiver sensitivity -95dBm
• Transmit power 2.5dBm
• Time of Flight engine for ranging
• Antenna Diversity (Auto RX)
Features: Microcontroller
• 32-bit RISC CPU, 1 to 32MHz clock
speed
• Variable instruction width for high
coding efficiency
• Multi-stage instruction pipeline
• JN5161: 64kB/8kB/4kB
• JN5164: 160kB/32kB/4kB
• JN5168: 256kB/32kB/4kB
(Flash/RAM/EEPROM)
• Data EEPROM with guaranteed 100k
write operations.
• RF4CE, JenNet-IP, ZigBee SE and
ZigBee Light Link stacks
• 2-wire I2C compatible serial interface.
Can operate as either master or slave
• 5xPWM (4x timer & 1 timer/counter)
• 2 low power sleep counters
• 2x UART
• SPI Master & Slave port, 3 selects
• Supply voltage monitor with 8
programmable thresholds
• 4-input 10-bit ADC, comparator
• Battery and temperature sensors
• Watchdog & Brown Out Reset
• Up to 20 Digital IO Pins (DIO)
• Infra-red remote control transmitter
Temp range (-40°C to +125°C)
6x6mm 40-lead
Lead-free and RoHS compliant
The JN516x series is a range of ultra low power, high performance wireless
microcontrollers supporting JenNet-IP, ZigBee PRO or RF4CE networking
stacks to facilitate the development of Home Automation, Smart Energy,
Light Link and Remote control applications. They feature an enhanced 32-
bit RISC processor with embedded Flash and EEPROM memory, offering
high coding efficiency through variable width instructions, a multi-stage
instruction pipeline and low power operation with programmable clock
speeds. They also include a 2.4GHz IEEE802.15.4 compliant transceiver
and a comprehensive mix of analogue and digital peripherals. Three
memory configurations are available to suit different applications. The best
in class operating current of 15mA, with a 0.6uA sleep timer mode, gives
excellent battery life allowing operation direct from a coin cell.
The peripherals support a wide range of applications. They include a 2-wire
I
2
C, and SPI ports which can operate as either master or slave, a four
channel ADC with battery and a temperature sensor. It can support a large
switch matrix of up to 100 elements, or alternatively a 20 key capacitive
touch pad.
Block Diagram
32-bit
RISC CPU 4xPWM + Timer
2xUART
10-bit ADC
Battery and
Temp Sensors
2-Wire Serial
(Master/Slave)
SPI
Master & Slave RAM
128-bit AES
Hardware
2.4GHz
Including
Diversity
Flash
Power
Management
XTAL
O-QPSK
Modem
4kB
EEPROM
20 DIO
Sleep Counter
Watchdog
Timer
Voltage Brownout
8/32K 64/160/256K
Radio
4-Channel
IEEE 802.15.4
Baseband
Processor
Encryption
Benefits
• Single chip device to run
stack and application
• Very low current solution for
long battery life – over 10 yrs
• Supports multiple network
stacks
• Highly featured 32-bit RISC
CPU for high performance
and low power
• System BOM is low in
component count and cost
• Flexible sensor interfacing
options
Applications
• Robust and secure low power
wireless applications
• RF4CE Remote Controls
• JenNet-IP networks
• ZigBee SE networks
• ZigBee Light Link networks
• Lighting & Home automation
• Toys and gaming peripherals
• Smart Energy
• Energy harvesting, for
example self powered light
switch2 JN-DS-JN516x v1.3 Production © NXP Laboratories UK 2013
Contents
Benefits 1
Applications 1
1 Introduction 6
1.1 Wireless Transceiver 6
1.2 RISC CPU and Memory 6
1.3 Peripherals 7
1.4 Block Diagram – JN516x 8
2 Pin Configurations 9
2.1 Pin Assignment 10
2.2 Pin Descriptions 12
2.2.1 Power Supplies 12
2.2.2 Reset 12
2.2.3 32MHz Oscillator 12
2.2.4 Radio 12
2.2.5 Analogue Peripherals 13
2.2.6 Digital Input/Output 13
3 CPU 15
4 Memory Organisation 16
4.1 FLASH 16
4.2 RAM 16
4.3 OTP Configuration Memory 16
4.4 EEPROM 17
4.5 External Memory 17
4.6 Peripherals 17
4.7 Unused Memory Addresses 17
5 System Clocks 18
5.1 High-Speed (32MHz) System Clock 18
5.1.1 32MHz Crystal Oscillator 18
5.1.2 High-Speed RC Oscillator 19
5.2 Low-speed (32kHz) System Clock 19
5.2.1 32kHz RC Oscillator 19
5.2.2 32kHz Crystal Oscillator 20
5.2.3 32kHz External Clock 20
6 Reset 21
6.1 Internal Power-On / Brown-out Reset (BOR) 21
6.2 External Reset 22
6.3 Software Reset 22
6.4 Supply Voltage Monitor (SVM) 22
6.5 Watchdog Timer 23
7 Interrupt System 24
7.1 System Calls 24
7.2 Processor Exceptions 24
7.2.1 Bus Error 24© NXP Laboratories UK 2013 JN-DS-JN516x v1.3 Production 3
7.2.2 Alignment 24
7.2.3 Illegal Instruction 24
7.2.4 Stack Overflow 24
7.3 Hardware Interrupts 25
8 Wireless Transceiver 26
8.1 Radio 26
8.1.1 Radio External Components 27
8.1.2 Antenna Diversity 27
8.2 Modem 29
8.3 Baseband Processor 30
8.3.1 Transmit 30
8.3.2 Reception 30
8.3.3 Auto Acknowledge 31
8.3.4 Beacon Generation 31
8.3.5 Security 31
8.4 Security Coprocessor 31
8.5 Time of Flight Engine 31
9 Digital Input/Output 32
10 Serial Peripheral Interface 34
10.1 Serial Peripheral Interface Master 34
10.2 Serial Peripheral Interface Slave 37
11 Timers 38
11.1 Peripheral Timer/Counters 38
11.1.1 Pulse Width Modulation Mode 39
11.1.2 Capture Mode 39
11.1.3 Counter/Timer Mode 40
11.1.4 Delta-Sigma Mode 40
11.1.5 Infra-Red Transmission Mode 41
11.1.6 Example Timer/Counter Application 41
11.2 Tick Timer 42
11.3 Wakeup Timers 42
11.3.1 32 KHZ RC Oscillator Calibration 43
12 Pulse Counters 44
13 Serial Communications 45
13.1 Interrupts 46
13.2 UART Application 46
14 JTAG Test Interface 48
15 Two-Wire Serial Interface (I2
C) 49
15.1 Connecting Devices 49
15.2 Clock Stretching 50
15.3 Master Two-wire Serial Interface 50
15.4 Slave Two-wire Serial Interface 52
16 Random Number Generator 534 JN-DS-JN516x v1.3 Production © NXP Laboratories UK 2013
17 Analogue Peripherals 54
17.1 Analogue to Digital Converter 54
17.1.1 Operation 55
17.1.2 Supply Monitor 56
17.1.3 Temperature Sensor 56
17.1.4 ADC Sample Buffer Mode 56
17.2 Comparator 56
18 Power Management and Sleep Modes 57
18.1 Operating Modes 57
18.1.1 Power Domains 57
18.2 Active Processing Mode 57
18.2.1 CPU Doze 57
18.3 Sleep Mode 57
18.3.1 Wakeup Timer Event 58
18.3.2 DIO Event 58
18.3.3 Comparator Event 58
18.3.4 Pulse Counter 58
18.4 Deep Sleep Mode 58
19 Electrical Characteristics 59
19.1 Maximum Ratings 59
19.2 DC Electrical Characteristics 59
19.2.1 Operating Conditions 59
19.2.2 DC Current Consumption 60
19.2.3 I/O Characteristics 61
19.3 AC Characteristics 61
19.3.1 Reset and Supply Voltage Monitor 61
19.3.2 SPI Master Timing 63
19.3.3 SPI Slave Timing 64
19.3.4 Two-wire Serial Interface 65
19.3.5 Wakeup Timings 65
19.3.6 Bandgap Reference 66
19.3.7 Analogue to Digital Converters 66
19.3.8 Comparator 67
19.3.9 32kHz RC Oscillator 67
19.3.10 32kHz Crystal Oscillator 68
19.3.11 32MHz Crystal Oscillator 68
19.3.12 High-Speed RC Oscillator 69
19.3.13 Temperature Sensor 69
19.3.14 Non-Volatile Memory 69
19.3.15 Radio Transceiver 70
Appendix A Mechanical and Ordering Information 76
A.1 SOT618-1 HVQFN40 40-pin QFN Package Drawing 76
A.2 Footprint Information 77
A.3 Ordering Information 78
A.4 Device Package Marking 79
A.5 Tape and Reel Information 80
A.5.1 Tape Orientation and Dimensions 80
A.5.2 Reel Information: 180mm Reel 81
A.5.3 Reel Information: 330mm Reel 82© NXP Laboratories UK 2013 JN-DS-JN516x v1.3 Production 5
A.5.4 Dry Pack Requirement for Moisture Sensitive Material 82
Appendix B Development Support 83
B.1 Crystal Oscillators 83
B.1.1 Crystal Equivalent Circuit 83
B.1.2 Crystal Load Capacitance 83
B.1.3 Crystal ESR and Required Transconductance 84
B.2 32MHz Oscillator 85
B.3 32kHz Oscillator 87
B.4 JN516x Module Reference Designs 89
B.4.1 Schematic Diagram 89
B.4.2 PCB Design and Reflow Profile 91
B.4.3 Moisture Sensitivity Level (MSL) 91
Related Documents 92
RoHS Compliance 92
Status Information 92
Disclaimers 93
Trademarks 93
Version Control 93
Contact Details 946 JN-DS-JN516x v1.3 Production © NXP Laboratories UK 2013
1 Introduction
The JN516x is an IEEE802.15.4 wireless microcontroller that provides a fully integrated solution for applications using
the IEEE802.15.4 standard in the 2.4 - 2.5GHz ISM frequency band [1], including Zigbee PRO, ZigBee Smart Energy,
ZigBee LightLink, RF4CE and JenNet-IP. There are 3 versions in the range, differing only by memory configuration
JN5161-001: 64kB Flash, 8kB RAM, 4 kB EEPROM, suitable for IEEE802.15.4 and RF4CE applications
JN5164-001: 160kB Flash, 32kB RAM, 4 kB EEPROM suitable for Jennet-IP, IEEE802.15.4 and RF4CE applications
JN5168-001: 256kB Flash, 32kB RAM, 4 kB EEPROM suitable for all applications
Applications that transfer data wirelessly tend to be more complex than wired ones. Wireless protocols make
stringent demands on frequencies, data formats, timing of data transfers, security and other issues. Application
development must consider the requirements of the wireless network in addition to the product functionality and user
interfaces. To minimise this complexity, NXP provides a series of software libraries and interfaces that control the
transceiver and peripherals of the JN516x. These libraries and interfaces remove the need for the developer to
understand wireless protocols and greatly simplifies the programming complexities of power modes, interrupts and
hardware functionality.
In view of the above, it is not necessary to provide the register details of the JN516x in the datasheet.
The device includes a Wireless Transceiver, RISC CPU, on chip memory and an extensive range of peripherals.
1.1 Wireless Transceiver
The Wireless Transceiver comprises a 2.45GHz radio, a modem, a baseband controller and a security coprocessor.
In addition, the radio also provides an output to control transmit-receive switching of external devices such as power
amplifiers allowing applications that require increased transmit power to be realised very easily. Appendix B.4,
describes a complete reference design including Printed Circuit Board (PCB) design and Bill Of Materials (BOM).
The security coprocessor provides hardware-based 128-bit AES-CCM* modes as specified by the IEEE802.15.4
2006 standard. Specifically this includes encryption and authentication covered by the MIC –32/-64/-128, ENC and
ENC-MIC –32/-64/-128 modes of operation.
The transceiver elements (radio, modem and baseband) work together to provide IEEE802.15.4 (2006) MAC and
PHY functionality under the control of a protocol stack. Applications incorporating IEEE802.15.4 functionality can be
developed rapidly by combining user-developed application software with a protocol stack library.
1.2 RISC CPU and Memory
A 32-bit RISC CPU allows software to be run on-chip, its processing power being shared between the IEEE802.15.4
MAC protocol, other higher layer protocols and the user application. The JN516x has a unified memory architecture,
code memory, data memory, peripheral devices and I/O ports are organised within the same linear address space.
The device contains up to 256kbytes of Flash, up to 32kbytes of RAM and 4kbytes EEPROM . © NXP Laboratories UK 2013 JN-DS-JN516x v1.3 Production 7
1.3 Peripherals
The following peripherals are available on chip:
• Master SPI port with three select outputs
• Slave SPI port
• Two UART’s, one capable of hardware flow control (4-wire, includes RTS/CTS), and the other just 2-wire
(RX/TX)
• One programmable Timer/Counter which supports Pulse Width Modulation (PWM) and capture/compare, plus
four PWM timers which support PWM and Timer modes only.
• Two programmable Sleep Timers and a Tick Timer
• Two-wire serial interface (compatible with SMbus and I2
C) supporting master and slave operation
• Twenty digital I/O lines (multiplexed with peripherals such as timers, SPI and UARTs)
• Two digital outputs (multiplexed with SPI port)
• 10-bit, Analogue to Digital converter with up to four input channels. Autonomous multi-channel sampling
• Programmable analogue comparator
• Internal temperature sensor and battery monitor
• Two low power pulse counters
• Random number generator
• Watchdog Timer and Supply Voltage Monitor
• JTAG hardware debug port
• Infra-red remote control transmitter, supported by one of the PWM timers
• Transmit and receive antenna diversity with automatic receive switching based on received energy detection
• Time of Flight engine for ranging
User applications access the peripherals using the Integrated Peripherals API. This allows applications to use a
tested and easily understood view of the peripherals allowing rapid system development. 8 JN-DS-JN516x v1.3 Production © NXP Laboratories UK 2013
1.4 Block Diagram – JN516x
Wireless
Transceiver
32-bit RISC CPU
MUX
Security
Processor
Digital Baseband
Radio
Programmable
Interrupt
Controller
From Peripherals
RF_IN
VCOTUNE
Tick Timer
Voltage
Regulators 1.8V VDD1
VDD2
IBIAS
VB_XX
EEPROM
4KB
CPU and 16MHz
System Clock
32MHz Xtal
Clock
Generator
XTAL_IN
XTAL_OUT
Clock
Source &
Rate
Select
Highspeed
RC
Osc
Watchdog
Timer
Supply Voltage
Monitor
Reset
Wakeup
Timer1
Wakeup Timer0
RESETN
32kHz Clock
Select 32KIN
Comparator1
COMP1P
COMP1M
ADC
M
U
ADC4 X
ADC1
VREF/ADC2
ADC3
Temperature
Sensor
Supply Monitor
32kHz
RC
Osc
32kHz
Xtal
Osc
32KXTALIN
32KXTALOUT
SPI Slave
DIO0
DIO1
DIO2
DIO3
DIO4
DIO5
DIO6
DIO7
DIO8
DIO9
DIO10
DIO11
DIO12
DIO13
DIO14
DIO15
DIO16
DIO17
DIO18
DIO19
DO0
DO1
TXD0
SPI
Master
UART0
UART1
RXD0
RTS0
CTS0
TxD1
RxD1
TIM0CK_GT
TIM0OUT
TIM0CAP
PWM1
PWM2
PWM3
PWM4
SIF_D
SIF_CLK
PC0
PC1
JTAG_TDI
JTAG_TMS
JTAG_TCK
JTAG_TDO
ADO
ADE
Timer0
PWMs
2-wire
Interface
Pulse
Counters
JTAG
Debug
Antenna
Diversity
SPICLK
SPIMOSI
SPIMISO
SPISEL0
SPICLK
SPIMOSI
SPIMISO
SPISEL0
SPISEL1
SPISEL2
FLASH
256/160/64KB
RAM
32/32/8KB
Figure 1: JN516x Block Diagram© NXP Laboratories UK 2013 JN-DS-JN516x v1.3 Production 9
2 Pin Configurations
1
40 39 38 37 36 35 34 33 32 31
VSSA
2
3
4
5
6
7
8
9
10
30
29
28
27
26
25
24
23
22
21
11 12 13 14 15 16 17 18 19 20
DIO16
DIO17
RESETN
XTAL_OUT
XTAL_IN
VB_SYNTH
VCOTUNE
VB_VCO
VDD1
IBIAS
VREF/ADC2
VB_RF2
RF_IN
VB_RF1
ADC1
DIO0
DIO1
DIO2
DIO3
DO0
VSS1
DO1
DIO18
DIO19
VB_RAM
DIO4
DIO5
DIO6
DIO7
VDD2
DIO15
VSS2
DIO14
DIO13
DIO12
VB_DIG
DIO11
DIO10
DIO9
DIO8
Figure 2: 40-pin QFN Configuration (top view)
Note: Please refer to Appendix B.4 JN516x Module Reference
Design for important applications information regarding the
connection of the PADDLE to the PCB. 10 JN-DS-JN516x v1.3 Production © NXP Laboratories UK 2013
2.1 Pin Assignment
Pin No Power supplies Signal
Type
Description
6, 8,
12, 14,
25, 35
VB_SYNTH, VB_VCO, VB_RF2, VB_RF1, VB_RAM, VB_DIG 1.8V Regulated supply voltage
9, 30 VDD1, VDD2 3.3V Supplies: VDD1 for
analogue, VDD2 for digital
21, 39,
Paddle
VSS1, VSS2, VSSA 0V Grounds (see appendix A.2
for paddle details)
General
3 RESETN CMOS Reset input
4,5 XTAL_OUT, XTAL_IN 1.8V System crystal oscillator
Radio
7 VCOTUNE 1.8V VCO tuning RC network
10 IBIAS 1.8V Bias current control
13 RF_IN 1.8V RF antenna
Analogue Peripheral I/O
15, 16,
17
ADC1, DIO0 (ADC3), DIO1 (ADC4) 3.3V ADC inputs
11 VREF/ADC2 1.8V Analogue peripheral
reference voltage or ADC
input 2
1, 2 DIO16 (COMP1P), DIO17 (COMP1M) 3.3V Comparator inputs
Digital Peripheral I/O
Primary Alternate Functions
16 DIO0 SPISEL1 ADC3 CMOS DIO0, SPI Master Select
Output 1 or ADC input 3
17 DIO1 SPISEL2 ADC4 PC0 CMOS DIO1, SPI Master Select
Output 2, ADC input 4 or
Pulse Counter 0 Input
18 DIO2 RFRX TIM0CK_GT CMOS DIO2, Radio Receive Control
Output or Timer0 Clock/Gate
Input
19 DIO3 RFTX TIM0CAP CMOS DIO3, Radio Transmit
Control Output or Timer0
Capture Input
26 DIO4 CTS0 JTAG_TCK TIM0OUT PC0 CMOS DIO4, UART 0 Clear To
Send Input, JTAG CLK Input,
Timer0 PWM Output, or
Pulse Counter 0 input
27 DIO5 RTS0 JTAG_TMS PWM1 PC1 CMOS DIO5, UART 0 Request To
Send Output, JTAG Mode
Select Input, PWM1 Output
or Pulse Counter 1 Input
28 DIO6 TXD0 JTAG_TDO PWM2 CMOS DIO6, UART 0 Transmit Data
Output, JTAG Data Output or
PWM2 Output
29 DIO7 RXD0 JTAG_TDI PWM3 CMOS DIO7, UART 0 Receive Data
Input, JTAG Data Input or
PWM 3 Output
31 DIO8 TIM0CK_GT PC1 PWM4 CMOS DIO8, Timer0 Clock/Gate
Input, Pulse Counter1 Input
or PWM 4 Output© NXP Laboratories UK 2013 JN-DS-JN516x v1.3 Production 11
32 DIO9 TIM0CAP 32KXTALIN RXD1 32KIN CMOS DIO9, Timer0 Capture Input,
32K External Crystal Input,
UART 1 Receive Data Input
or 32K external clock Input
33 DIO10 TIM0OUT 32KXTALOUT CMOS DIO10, Timer0 PWM Output
or 32K External Crystal
Output
34 DIO11 PWM1 TXD1 CMOS DIO11, PWM1 Output or
UART 1 Transmit Data
Output
36 DIO12 PWM2 CTS0 JTAG_TCK ADO SPISMO
SI
CMOS DIO12, PWM2 Output, UART
0 Clear To Send Input, JTAG
CLK Input, Antenna Diversity
Odd Output or SPI Slave
Master Out Slave In Input
37 DIO13 PWM3 RTS0 JTAG_TMS ADE SPISMI
SO
CMOS DIO13, PWM3 Output, UART
0 Request To Send Output,
JTAG Mode Select Input,
Antenna Diversity Even
output or SPI Slave Master In
Slave Out Output
38 DIO14 SIF_CLK TXD0 TXD1 JTAG_TDO SPISEL
1
SPISSE
L
CMOS DIO14, Serial Interface
Clock, UART 0 Transmit
Data Output, UART 1
Transmit Data Output, JTAG
Data Output, SPI Master
Select Output 1 or SPI Slave
Select Input
40 DIO15 SIF_D RXD0 RXD1 JTAG_TDI SPISEL
2
SPISCL
K
CMOS DIO15, Serial Interface Data,
UART 0 Receive Data Input,
UART 1 Receive Data Input,
JTAG Data Input, SPI Master
Select Output 2 or SPI Slave
Clock Input
1 DIO16 COMP1P SIF_CLK SPISMOSI CMOS DIO16, Comparator Positive
Input, Serial Interface clock
or SPI Slave Master Out
Slave In Input
2 DIO17 COMP1M SIF_D SPISMISO CMOS DIO17, Comparator Negative
Input, Serial Interface Data or
SPI Slave Master In Slave
Out Output
23 DIO18 SPIMOSI CMOS SPI Master Out Slave In
Output
24 DIO19 SPISEL0 CMOS SPI Master Select Output 0
20 DO0 SPICLK PWM2 CMOS SPI Master Clock Output or
PWM2 Output
22 DO1 SPIMISO PWM3 CMOS SPI Master In Slave Out
Input or PWM3 Output
The PCB schematic and layout rules detailed in Appendix B.4
must be followed. Failure to do so will likely result in the
JN516x failing to meet the performance specification detailed
herein and worst case may result in device not functioning in
the end application.12 JN-DS-JN516x v1.3 Production © NXP Laboratories UK 2013
2.2 Pin Descriptions
2.2.1 Power Supplies
The device is powered from the VDD1 and VDD2 pins, each being decoupled with a 100nF ceramic capacitor. VDD1
is the power supply to the analogue circuitry; it should be decoupled to ground. VDD2 is the power supply for the
digital circuitry; and should also be decoupled to ground. In addition, a common 10µF tantalum capacitor is required
for low frequencies. Decoupling pins for the internal 1.8V regulators are provided which each require a100nF
capacitor located as close to the device as practical. VB_SYNTH, VB_RAM and VB_DIG require only a 100nF
capacitor. VB_RF and VB_RF2 should be connected together as close to the device as practical, and require one
100nF capacitor and one 47pF capacitor. The pin VB_VCO requires a 10nF capacitor. Refer to B.4.1 for schematic
diagram.
VSSA (paddle), VSS1, VSS2 are the ground pins.
Users are strongly discouraged from connecting their own circuits to the 1.8v regulated supply pins, as the regulators
have been optimised to supply only enough current for the internal circuits.
2.2.2 Reset
RESETN is an active low reset input pin that is connected to a 500kΩ internal pull-up resistor. It may be pulled low
by an external circuit. Refer to Section 6.2 for more details.
2.2.3 32MHz Oscillator
A crystal is connected between XTAL_IN and XTAL_OUT to form the reference oscillator, which drives the system
clock. A capacitor to analogue ground is required on each of these pins. Refer to Section 5.1 for more details. The
32MHz reference frequency is divided down to 16MHz and this is used as the system clock throughout the device.
2.2.4 Radio
The radio is a single ended design, requiring a capacitor and just two inductors to match to 50Ω microstrip line to the
RF_IN pin.
An external resistor (43kΩ) is required between IBIAS and analogue ground (paddle) to set various bias currents and
references within the radio.© NXP Laboratories UK 2013 JN-DS-JN516x v1.3 Production 13
2.2.5 Analogue Peripherals
The ADC requires a reference voltage to use as part of its operation. It can use either an internal reference voltage
or an external reference connected to VREF. This voltage is referenced to analogue ground and the performance of
the analogue peripherals is dependent on the quality of this reference.
There are four ADC inputs and a pair of comparator inputs. ADC1 has a designated input pin but ADC2 uses the
same pin as VREF, invalidating its use as an ADC pin when an external reference voltage is required. The remaining
2 ADC channels are shared with the digital I/Os DIO0 and DIO1 and connect to pins 16 and 17. When these two
ADC channels are selected, the corresponding DIOs must be configured as Inputs with their pull-ups disabled.
Similarly, the comparator shares pins 1 and 2 with DIO16 and DIO17, so when the comparator is selected these pins
must be configured as Inputs with their pull-ups disabled. The analogue I/O pins on the JN516x can have signals
applied up to 0.3v higher than VDD1. A schematic view of the analogue I/O cell is shown in Figure 3. Figure 4
demonstrates a special case, where a digital I/O pin doubles as an input to analogue devices. This applies to ADC3,
ADC4, COMP1P and COMP1M.
In reset, sleep and deep sleep, the analogue peripherals are all off. In sleep, the comparator may optionally be used
as a wakeup source.
Unused ADC and comparator inputs should not be left unconnected, for example connected to analogue ground.
VDD1
Analogue
I/O Pin
VSSA
Analogue
Peripheral
Figure 3: Analogue I/O Cell
2.2.6 Digital Input/Output
For the DC properties of these pins see Section 19.2.3.
When used in their primary function all Digital Input/Output pins are bi-directional and are connected to weak internal
pull up resistors (50kΩ nominal) that can be disabled. When used in their secondary function (selected when the
appropriate peripheral block is enabled through software library calls), their direction is fixed by the function. The pull
up resistor is enabled or disabled independently of the function and direction; the default state from reset is enabled.
A schematic view of the digital I/O cell is in Figure 4. The dotted lines through resistor RESD represent a path that
exists only on DIO0, DIO1, DIO16 and DIO17 which are also inputs to the ADC (ADC3, ADC4) and Comparator
(COMP1P, COMP1M) respectively. To use these DIO pins for their analogue functions, the DIO must be set as an
Input with its pull-up resistor, RPU, disabled.14 JN-DS-JN516x v1.3 Production © NXP Laboratories UK 2013
O
VDD2
Pu
RPU
OE
DIO[x] Pin
RESD
ADC or
COMP1 Input
I
IE
RPROT
VSS VSS
Figure 4: DIO Pin Equivalent Schematic
In reset, the digital peripherals are all off and the DIO pins are set as high-impedance inputs. During sleep and deep
sleep, the DIO pins retain both their input/output state and output level that was set as sleep commences. If the DIO
pins were enabled as inputs and the interrupts were enabled then these pins may be used to wake up the JN516x
from sleep.© NXP Laboratories UK 2013 JN-DS-JN516x v1.3 Production 15
3 CPU
The CPU of the JN516x is a 32-bit load and store RISC processor. It has been architected for three key
requirements:
• Low power consumption for battery powered applications
• High performance to implement a wireless protocol at the same time as complex applications
• Efficient coding of high-level languages such as C provided with the Software Developers Kit
It features a linear 32-bit logical address space with unified memory architecture, accessing both code and data in the
same address space. Registers for peripheral units, such as the timers, UART and the baseband processor are also
mapped into this space.
The CPU has access to a block of 15 32-bit General-Purpose (GP) registers together with a small number of special
purpose registers which are used to store processor state and control interrupt handling. The contents of any GP
register can be loaded from or stored to memory, while arithmetic and logical operations, shift and rotate operations,
and signed and unsigned comparisons can be performed either between two registers and stored in a third, or
between registers and a constant carried in the instruction. Operations between general or special-purpose registers
execute in one cycle while those that access memory require a further cycle to allow the memory to respond.
The instruction set manipulates 8, 16 and 32-bit data; this means that programs can use objects of these sizes very
efficiently. Manipulation of 32-bit quantities is particularly useful for protocols and high-end applications allowing
algorithms to be implemented in fewer instructions than on smaller word-size processors, and to execute in fewer
clock cycles. In addition, the CPU supports hardware Multiply that can be used to efficiently implement algorithms
needed by Digital Signal Processing applications.
The instruction set is designed for the efficient implementation of high-level languages such as C. Access to fields in
complex data structures is very efficient due to the provision of several addressing modes, together with the ability to
be able to use any of the GP registers to contain the address of objects. Subroutine parameter passing is also made
more efficient by using GP registers rather than pushing objects onto the stack. The recommended programming
method for the JN516x is by using C, which is supported by a software developer kit comprising a C compiler, linker
and debugger.
The CPU architecture also contains features that make the processor suitable for embedded, real-time applications.
In some applications, it may be necessary to use a real-time operating system to allow multiple tasks to run on the
processor. To provide protection for device-wide resources being altered by one task and affecting another, the
processor can run in either supervisor or user mode, the former allowing access to all processor registers, while the
latter only allows the GP registers to be manipulated. Supervisor mode is entered on reset or interrupt; tasks starting
up would normally run in user mode in a RTOS environment.
Embedded applications require efficient handling of external hardware events. Exception processing (including reset
and interrupt handling) is enhanced by the inclusion of a number of special-purpose registers into which the PC and
status register contents are copied as part of the operation of the exception hardware. This means that the essential
registers for exception handling are stored in one cycle, rather than the slower method of pushing them onto the
processor stack. The PC is also loaded with the vector address for the exception that occurred, allowing the handler
to start executing in the next cycle.
To improve power consumption a number of power-saving modes are implemented in the JN516x, described more
fully in Section 18. One of these modes is the CPU doze mode; under software control, the processor can be shut
down and on an interrupt it will wake up to service the request. Additionally, it is possible under software control, to
set the speed of the CPU to 1, 2, 4, 8, 16 or 32MHz. This feature can be used to trade-off processing power against
current consumption.16 JN-DS-JN516x v1.3 Production © NXP Laboratories UK 2013
4 Memory Organisation
This section describes the different memories found within the JN516x. The device contains Flash, RAM, and
EEPROM memory, the wireless transceiver and peripherals all within the same linear address space.
0xFFFFFFFF
Unpopulated
0xF0008000
RAM
0x04000000
0x02000000
FLASH Boot Code 8K
0x000C0000
0x00000000
0x00080000
Flash & EEPROM Registers
0x01000000
Peripherals
FLASH
Applications
Code
(256KB)
Figure 5: JN5168 Memory Map
4.1 FLASH
The embedded Flash consists of 2 parts: an 8K region used for holding boot code, and a 256K region (JN5168) used
for application code. The sector size of the application code is always 32K, for any size of Flash memory. The
maximum number of write cycles or endurance is, 10k guaranteed and typically 100k, while the data retention is
guaranteed for at least 10 years. The boot code region is pre-programmed by NXP on supplied parts, and contains
code to handle reset, interrupts and other events (see section 7). It also contains a Flash Programming Interface to
allow interaction with the PC-based Flash Programming Utility which allows user code compiled using the supplied
SDK to be programmed into the Application space. For further information, refer to the Flash Programmer User
Guide.[9]. The memory can be erased by a single or multiple sectors and written to in units of 256 bytes, known as
pagewords.
4.2 RAM
The JN516x devices contain up to 32Kbytes of high speed RAM, which can be accessed by the CPU in a single clock
cycle. It is primarily used to hold the CPU Stack together with program variables and data. If necessary, the CPU can
execute code contained within the RAM (although it would normally just execute code directly from the embedded
Flash). Software can control the power supply to the RAM allowing the contents to be maintained during a sleep
period when other parts of the device are un-powered, allowing a quicker resumption of processing once woken.
4.3 OTP Configuration Memory
The JN516x devices contain a quantity of One Time Programmable (OTP) memory as part of the embedded Flash
(Index Sector). This can be used to securely hold such things as a user 64-bit MAC address and a 128-bit AES
security key. By default the 64-bit MAC address is pre-programmed by NXP on supplied parts; however customers © NXP Laboratories UK 2013 JN-DS-JN516x v1.3 Production 17
can use their own MAC address and override the default one. The user MAC address and other data can be written
to the OTP memory using the Flash programmer [9]. Details on how to obtain and install MAC addresses can be
found in the Flash Programmer User Guide. In addition 384bits are available, organised as three 128bit words, for
customer use for storage of configuration or other information.
4.4 EEPROM
The JN516x devices contain 4Kbytes of EEPROM. The maximum number of write cycles or endurance is, 100k
guaranteed and 1M typically while the data retention is guaranteed for at least 20 years. (The Persistent Data
Manager, includes a wear-levelling algorithm which can help to extend the endurance.) This non-volatile memory is
primarily used to hold persistent data generated from such things as the Network Stack software component (e.g.
network topology, routing tables). As the EEPROM holds its contents through sleep and reset events, this means
more stable operation and faster recovery is possible after outages. Access to the EEPROM is via registers mapped
into the Flash and EEPROM Registers region of the address map. The memory can be erased by a single or multiple
pages of 64 bytes. It can be written to in single or multiple bytes up to 64 bytes. The customer may use part of the
EEPROM to store its own data if desired by interfacing with the Persistent Data Manager. Optionally the PDM can
also store data in an external memory. For further information, please read - JenOS User Guide [12].
4.5 External Memory
An optional external serial non-volatile memory (eg Flash or EEPROM) with a SPI interface may be used to provide
additional storage for program code, such as a new code image or further data for the device when external power is
removed. The memory can be connected to the SPI Master interface using select line SPISEL0 (see fig 6 for details)
JN516x
Serial
Memory
SPISEL0
SPIMISO
SPIMOSI
SPICLK
SS
SDO
SDI
CLK
Figure 6: Connecting External Serial Memory
The contents of the external serial memory may be encrypted. The AES security processor combined with a user
programmable 128-bit encryption key is used to encrypt the contents of the external memory. The encryption key is
stored in the flash memory index section. When bootloading program code from external serial memory, the JN516x
automatically accesses the encryption key to execute the decryption process, user program code does not need to
handle any of the decryption process; it is transparent. For more details, including the how the program code encrypts
data for the external memory, see the application note Boot Loader Operation. [8]
4.6 Peripherals
All peripherals have their registers mapped into the memory space. Access to these registers requires 3 peripheral
clock cycles. Applications have access to the peripherals through the software libraries that present a high-level view
of the peripheral’s functions through a series of dedicated software routines. These routines provide both a tested
method for using the peripherals and allow bug-free application code to be developed more rapidly. For details, see
Peripherals API User Guide [4].
4.7 Unused Memory Addresses
Any attempt to access an unpopulated memory area will result in a bus error exception (interrupt) being generated.18 JN-DS-JN516x v1.3 Production © NXP Laboratories UK 2013
5 System Clocks
Two system clocks are used to drive the on-chip subsystems of the JN516x. The wake-up timers are driven from a
low frequency clock (notionally 32kHz). All other subsystems (transceiver, processor, memory and digital and
analogue peripherals) are driven by a high-speed clock (notionally 32MHz), or a divided-down version of it.
The high-speed clock is either generated by the accurate crystal-controlled oscillator (32MHz) or the less accurate
high-speed RC oscillator ( 27-32MHz calibrated). The low-speed clock is either generated by the accurate crystalcontrolled
oscillator (32.768kHz), the less accurate RC oscillator (centered on 32kHz) or can be supplied externally
5.1 High-Speed (32MHz) System Clock
The selected high-speed system clock is used directly by the radio subsystem, whereas a divided-by-two version is
used by the remainder of the transceiver and the digital and analogue peripherals. The direct or divided down version
of the clock is used to drive the processor and memories (32, 16, 8, 4, 2 or 1MHz).
High Speed
RC Oscillator
32MHz Crystal
Oscillator
Div by 1,2,4,8,16 or 32
Div by 2
PERIPHERAL SYSTEM CLOCK
CPU CLOCK
Figure 7 System and CPU Clocks
Crystal oscillators are generally slow to start. Hence to provide a fast start-up following a sleep cycle or reset, the fast
RC oscillator is always used as the initial source for the high-speed system clock. The oscillator starts very quickly
and will run at 25-32MHz (uncalibrated) or 32MHz +/-5% (calibrated). Although this means that the system clock will
be running at an undefined frequency (slightly slower or faster than nominal), this does not prevent the CPU and
Memory subsystems operating normally, so the program code can execute. However, it is not possible to use the
radio or UARTs, as even after calibration (initiated by the user software calling an API function) there is still a +/-5%
tolerance in the clock rate over voltage and temperature. Other digital peripherals can be used (eg SPI Master/Slave),
but care must be taken if using Timers due to the clock frequency inaccuracy.
Further details of the High-Speed RC Oscillator can be found in section 19.3.11.
On wake-up from sleep, the JN516x uses the Fast RC oscillator. It can then either:
• Automatically switch over to use the 32MHz clock source when it has started up.
• Continue to use the fast RC oscillator until software triggers the switch-over to the 32MHz clock source, for
example when the radio is required.
• Continue to use the RC oscillator until the device goes back into one of the sleep modes.
The use of the fast RC Oscillator at wake-up means there is no need to wait for the 32MHz crystal oscillator to
stabilise Consequently, the application code will start executing quickly using the clock from the high-speed RC
oscillator.
5.1.1 32MHz Crystal Oscillator
The JN516x contains the necessary on chip components to build a 32MHz reference oscillator with the addition of an
external crystal resonator and two tuning capacitors. The schematic of these components are shown in Figure 8.
The two capacitors, C1 and C2, should typically be 15pF and use a COG dielectric. Due to the small size of these
capacitors, it is important to keep the traces to the external components as short as possible. The on chip
transconductance amplifier is compensated for temperature variation, and is self-biasing by means of the internal
resistor R1. This oscillator provides the frequency reference for the radio and therefore it is essential that the
reference PCB layout and BOM are carefully followed. The electrical specification of the oscillator can be found in © NXP Laboratories UK 2013 JN-DS-JN516x v1.3 Production 19
Section 19.3.11. Please refer to Appendix B for development support with the crystal oscillator circuit. The oscillator
includes a function which flags when the amplitude of oscillation has reached a satisfactory level for full operation,
and this is checked before the source of the high-speed system clock is changed to the 32MHz crystal oscillator
XTALOUT
C1 C2
XTALIN R1
JN516x
Figure 8: 32MHz Crystal Oscillator Connections
For operation over the extended temperature range, 85 to 125 deg C, special care is required; this is because the
temperature characteristics of crystal resonators are generally in excess of +/-40ppm frequency tolerance defined by
the IEEE802.15.4 standard. The oscillator cell contains additional circuitry to compensate for the poor performance of
the crystal resonators above 100 deg C. Full details, including the software API function, can be found in the
application note JN516x Temperature-dependent Operating Guidelines [2]
5.1.2 High-Speed RC Oscillator
An on-chip High-Speed RC oscillator is provided in addition to the 32MHz crystal oscillator for two purposes, to allow
a fast start-up from reset or sleep and to provide a lower current alternative to the crystal oscillator for non-timing
critical applications. By default the oscillator will run at 27MHz typically with a wide tolerance. It can be calibrated,
using a software API function, which will result in a nominal frequency of 32MHz with a +/-1.6% tolerance at 3v and
25 deg C. However, it should be noted that over the full operating range of voltage and temperature this will increase
to +/-5%. The calibration information is retained through speed cycles and when the oscillator is disabled, so typically
the calibration function only needs to be called once. No external components are required for this oscillator. The
electrical specification of the oscillator can be found in Section 19.3.12.
5.2 Low-speed (32kHz) System Clock
The 32kHz system clock is used for timing the length of a sleep period (see Section 18). The clock can be selected
from one of three sources through the application software:
• 32kHz RC Oscillator
• 32kHz Crystal Oscillator
• 32kHz External Clock
Upon a chip reset or power-up the JN516x defaults to using the internal 32kHz RC Oscillator. If another clock source
is selected then it will remain in use for all 32kHz timing until a chip reset is performed.
5.2.1 32kHz RC Oscillator
The internal 32kHz RC oscillator requires no external components. The internal timing components of the oscillator
have a wide tolerance due to manufacturing process variation and so the oscillator runs nominally at 32kHz -10%
/+40%. To make this useful as a timing source for accurate wakeup from sleep, a frequency calibration factor derived
from the more accurate 16MHz clock may be applied. The calibration factor is derived through software, details can
be found in Section 11.3.1. Software must check that the 32kHz RC oscillator is running before using it. The oscillator
has a default current consumption of around 0.5uA, optionally this can be reduced to 0.375uA, however, the 20 JN-DS-JN516x v1.3 Production © NXP Laboratories UK 2013
calibrated accuracy and temperature coefficient will be worse as a consequence. For detailed electrical
specifications, see Section 19.3.9.
5.2.2 32kHz Crystal Oscillator
In order to obtain more accurate sleep periods, the JN516x contains the necessary on-chip components to build a
32kHz oscillator with the addition of an external 32.768kHz crystal and two tuning capacitors. The crystal should be
connected between 32KXTALIN and 32KXTALOUT (DIO9 and DIO10), with two equal capacitors to ground, one on
each pin. Due to the small size of the capacitors, it is important to keep the traces to the external components as
short as possible.
The electrical specification of the oscillator can be found in Section 19.3.10. The oscillator cell is flexible and can
operate with a range of commonly available 32.768kHz crystals with load capacitances from 6 to 12.5pF. However,
the maximum ESR of the crystal and the supply current are both functions of the actual crystal used, see Appendix
B.1 for more details.
32KXTALIN 32KXTALOUT
JN516x
Figure 9: 32kHz Crystal Oscillator Connections
5.2.3 32kHz External Clock
An externally supplied 32kHz reference clock on the 32KXTALIN input (DIO9) may be provided to the JN516x. This
would allow the 32kHz system clock to be sourced from a very stable external oscillator module, allowing more
accurate sleep cycle timings compared to the internal RC oscillator. (See Section 19.2.3)© NXP Laboratories UK 2013 JN-DS-JN516x v1.3 Production 21
6 Reset
A system reset initialises the device to a pre-defined state and forces the CPU to start program execution from the
reset vector. The reset process that the JN516x goes through is as follows.
When power is first applied or when the external reset is released, the High-Speed RC oscillator and 32MHz crystal
oscillator are activated. After a short wait period (13µsec approx) while the High-Speed RC starts up, and so long as
the supply voltage satisfies the default Supply Voltage Monitor (SVM) threshold (2.0V+0.045V hysteresis), the
internal 1.8V regulators are turned on to power the processor and peripheral logic. The regulators are allowed to
stabilise (about 15us) followed by a further wait (150usec approx) to allow the Flash and EEPROM bandgaps to
stabilise and allow their initialisation, including reading the user SVM threshold from the Flash. This is applied to the
SVM and, after a brief pause (approx 2.5usec), the SVM is checked again. If the supply is above the new SVM
threshold, the CPU and peripheral logic is released from reset and the CPU starts to run code beginning at the reset
vector. This runs the bootloader code contained within the flash, which looks for a valid application to run, first from
the internal flash and then from any connected external serial memory over the SPI Master interface. Once found,
required variables are initialised in RAM before the application is called at its AppColdStart entry point. More details
on the bootloader can be found in the application note - Boot Loader Operation. [8]
The JN516x has five sources of reset:
• Internal Power-on / Brown-out Reset (BOR)
• External Reset
• Software Reset
• Watchdog timer
• Supply Voltage detect
Note: When the device exits a reset condition, device operating
parameters (voltage, frequency, temperature, etc.) must be met to ensure
operation. If these conditions are not met, then the device must be held in
reset until the operating conditions are met. (See Section 19.3)
6.1 Internal Power-On / Brown-out Reset (BOR)
For the majority of applications the internal power-on reset is capable of generating the required reset signal. When
power is applied to the device, the power-on reset circuit monitors the rise of the VDD supply. When the VDD
reaches the specified threshold, the reset signal is generated. This signal is held internally until the power supply and
oscillator stabilisation time has elapsed, when the internal reset signal is then removed and the CPU is allowed to
run.
The BOR circuit has the ability to reject spikes on the VDD rail to avoid false triggering of the reset module. Typically
for a negative going square pulse of duration 1uS, the voltage must fall to 1.2v before a reset is generated. Similarly
for a triangular wave pulse of 10us width, the voltage must fall to 1.3v before causing a reset. The exact
characteristics are complex and these are only examples.
Internal RESET
VDD
Figure 10: Internal Power-on Reset
When the supply drops below the power on reset ‘falling’ threshold, it will re-trigger the reset. If necessary, use of the
external reset circuit show in Figure 11 is suggested. 22 JN-DS-JN516x v1.3 Production © NXP Laboratories UK 2013
RESETN
C1
R1
JN516x
VDD
18k
470nF
Figure 11: External Reset Generation
The external resistor and capacitor provide a simple reset operation when connected to the RESETN pin but are not
neccessary.
6.2 External Reset
An external reset is generated by a low level on the RESETN pin. Reset pulses longer than the minimum pulse width
will generate a reset during active or sleep modes. Shorter pulses are not guaranteed to generate a reset. The
JN516x is held in reset while the RESETN pin is low. When the applied signal reaches the Reset Threshold Voltage
(VRST) on its positive edge, the internal reset process starts.
The JN516x has an internal 500kΩ pull-up resistor connect to the RESETN pin. The pin is an input for an external
reset only. By holding the RESETN pin low, the JN516x is held in reset, resulting in a typical current of 6uA.
Internal Reset
RESETN pin
Reset
Figure 12: External Reset
6.3 Software Reset
A system reset can be triggered at any time through software control, causing a full chip reset and invalidating the
RAM contents. For example this can be executed within a user’s application upon detection of a system failure.
6.4 Supply Voltage Monitor (SVM)
An internal Supply Voltage Monitor (SVM) is used to monitor the supply voltage to the JN516x; this can be used
whilst the device is awake or is in CPU doze mode. Dips in the supply voltage below a variable threshold can be
detected and can be used to cause the JN516x to perform a chip reset. Equally, dips in the supply voltage can be © NXP Laboratories UK 2013 JN-DS-JN516x v1.3 Production 23
detected and used to cause an interrupt to the processor, when the voltage either drops below the threshold or rises
above it.
The supply voltage detect is enabled by default from power-up and can extend the reset during power-up. This will
keep the CPU in reset until the voltage exceeds the SVM threshold voltage. The threshold voltage is configurable to
1.95V, 2.0V, 2.1V, 2.2V, 2.3V, 2.4V, 2.7V and 3.0V and is controllable by software. From power-up the threshold is
set by a setting within the flash and the default chip configuration is for the 2.0V threshold. It is expected that the
threshold is set to the minimum needed by the system..
6.5 Watchdog Timer
A watchdog timer is provided to guard against software lockups. It operates by counting cycles of the high-speed RC
system clock. A pre-scaler is provided to allow the expiry period to be set between typically 8ms and 16.4 seconds
(dependent on high-speed RC accuracy: +30%, -15%). Failure to restart the watchdog timer within the pre-configured
timer period will cause a chip reset to be performed. A status bit is set if the watchdog was triggered so that the
software can differentiate watchdog initiated resets from other resets, and can perform any required recovery once it
restarts. Optionally, the watchdog can cause an exception rather than a reset, this preserves the state of the memory
and is useful for debugging.
After power up, reset, start from deep sleep or start from sleep, the watchdog is always enabled with the largest
timeout period and will commence counting as if it had just been restarted. Under software control the watchdog can
be disabled. If it is enabled, the user must regularly restart the watchdog timer to stop it from expiring and causing a
reset. The watchdog runs continuously, even during doze, however the watchdog does not operate during sleep or
deep sleep, or when the hardware debugger has taken control of the CPU. It will recommence automatically if
enabled once the debugger un-stalls the CPU. 24 JN-DS-JN516x v1.3 Production © NXP Laboratories UK 2013
7 Interrupt System
The interrupt system on the JN516x is a hardware-vectored interrupt system. The JN516x provides several interrupt
sources, some associated with CPU operations (CPU exceptions) and others which are used by hardware in the
device. When an interrupt occurs, the CPU stops executing the current program and loads its program counter with a
fixed hardware address specific to that interrupt. The interrupt handler or interrupt service routine is stored at this
location and is run on the next CPU cycle. Execution of interrupt service routines is always performed in supervisor
mode. Interrupt sources and their vector locations are listed in Table 1 below:
Interrupt Source Vector Location Interrupt Definition
Bus error 0x08 Typically cause by an attempt to access an invalid address or a
disabled peripheral
Tick timer 0x0e Tick timer interrupt asserted
Alignment error 0x14 Load/store address to non-naturally-aligned location
Illegal instruction 0x1a Attempt to execute an unrecognised instruction
Hardware interrupt 0x20 interrupt asserted
System call 0x26 System call initiated by b.sys instruction
Trap 0x2c caused by the b.trap instruction or the debug unit
Reset 0x38 Caused by software or hardware reset.
Stack Overflow 0x3e Stack overflow
Table 1: Interrupt Vectors
7.1 System Calls
The b.trap and b.sys instructions allow processor exceptions to be generated by software.
A system call exception will be generated when the b.sys instruction is executed. This exception can, for example, be
used to enable a task to switch the processor into supervisor mode when a real time operating system is in use. (See
Section 3 for further details.)
The b.trap instruction is commonly used for trapping errors and for debugging.
7.2 Processor Exceptions
7.2.1 Bus Error
A bus error exception is generated when software attempts to access a memory address that does not exist, or is not
populated with memory or peripheral registers.
7.2.2 Alignment
Alignment exceptions are generated when software attempts to access objects that are not aligned to natural word
boundaries. 16-bit objects must be stored on even byte boundaries, while 32-bit objects must be stored on quad byte
boundaries. For instance, attempting to read a 16-bit object from address 0xFFF1 will trigger an alignment exception
as will a read of a 32-bit object from 0xFFF1, 0xFFF2 or 0xFFF3. Examples of legal 32-bit object addresses are
0xFFF0, 0xFFF4, 0xFFF8 etc.
7.2.3 Illegal Instruction
If the CPU reads an unrecognised instruction from memory as part of its instruction fetch, it will cause an illegal
instruction exception.
7.2.4 Stack Overflow
When enabled, a stack overflow exception occurs if the stack pointer reaches a programmable location.© NXP Laboratories UK 2013 JN-DS-JN516x v1.3 Production 25
7.3 Hardware Interrupts
Hardware interrupts generated from the transceiver, analogue or digital peripherals and DIO pins are individually
masked using the Programmable Interrupt Controller (PIC). Management of interrupts is provided in the Peripherals
API User Guide [4]. For details of the interrupts generated from each peripheral see the respective section in this
datasheet.
Interrupts can be used to wake the JN516x from sleep. The peripherals, baseband controller, security coprocessor
and PIC are powered down during sleep but the DIO interrupts and optionally the pulse counters, wake-up timers and
analogue comparator interrupts remain powered to bring the JN516x out of sleep.
Prioritised external interrupt handling (i.e., interrupts from hardware peripherals) is provided to enable an application
to control an events priority to provide for deterministic program execution.
The priority Interrupt controller provides 15 levels of prioritised interrupts. The priority level of all interrupts can be set,
with value 0 being used to indicate that the source can never produce an external interrupt, 1 for the lowest priority
source(s) and 15 for the highest priority source(s). Note that multiple interrupt sources can be assigned the same
priority level if desired.
If while processing an interrupt, a new event occurs at the same or lower priority level, a new external interrupt will
not be triggered. However, if a new higher priority event occurs, the external interrupt will again be asserted,
interrupting the current interrupt service routine.
Once the interrupt service routine is complete, lower priority events can be serviced. 26 JN-DS-JN516x v1.3 Production © NXP Laboratories UK 2013
8 Wireless Transceiver
The wireless transceiver comprises a 2.45GHz radio, modem, a baseband processor, a security coprocessor and
PHY controller. These blocks, with protocol software provided as a library, implement an IEEE802.15.4 standardsbased
wireless transceiver that transmits and receives data over the air in the unlicensed 2.4GHz band.
8.1 Radio
Figure 13 shows the single ended radio architecture.
LNA
synth
PA
ADC Reference
& Bias
Switch
Radio
Calibration
Lim1
Lim2
Lim3
Lim4
sigma
delta
D-Type
Figure 13: Radio Architecture
The radio comprises a low-IF receive path and a direct modulation transmit path, which converge at the TX/RX
switch. The switch connects to the external single ended matching network, which consists of two inductors and a
capacitor, this arrangement creates a 50Ω port and removes the need for a balun. A 50Ω single ended antenna can
be connected directly to this port.
The 32MHz crystal oscillator feeds a divider, which provides the frequency synthesiser with a reference frequency.
The synthesiser contains programmable feedback dividers, phase detector, charge pump and internal Voltage
Controlled Oscillator (VCO). The VCO has no external components, and includes calibration circuitry to compensate
for differences in internal component values due to process and temperature variations. The VCO is controlled by a
Phase Locked Loop (PLL) that has an internal loop filter. A programmable charge pump is also used to tune the loop
characteristic.
The receiver chain starts with the low noise amplifier/mixer combination whose outputs are passed to a low pass
filter, which provides the channel definition. The signal is then passed to a series of amplifier blocks forming a limiting
strip. The signal is converted to a digital signal before being passed to the Modem. The gain control for the RX path
is derived in the automatic gain control (AGC) block within the Modem, which samples the signal level at various
points down the RX chain. To improve the performance and reduce current consumption, automatic calibration is
applied to various blocks in the RX path.
In the transmit direction, the digital stream from the Modem is passed to a digital sigma-delta modulator which
controls the feedback dividers in the synthesiser, (dual point modulation). The VCO frequency now tracks the applied
modulation. The 2.4 GHz signal from the VCO is then passed to the RF Power Amplifier (PA), whose power control
can be selected from one of three settings. The output of the PA drives the antenna via the RX/TX switch© NXP Laboratories UK 2013 JN-DS-JN516x v1.3 Production 27
The JN516x radio when enabled is automatically calibrated for optimum performance. In operating environments with
a significant variation in temperature (e.g. greater than 20 deg C) due to diurnal or ambient temperature variation, it is
recommended to recalibrate the radio to maintain performance. Recalibration is only required on Routers and End
Devices that never sleep. End Devices that sleep when idle are automatically recalibrated when they wake. An
Application Note JN516x Temperature-dependent Operating Guidelines [2] describes this in detail and includes a
software API function which can be used to test the temperature using the on-chip temperature sensor and trigger a
recalibration if there has been a significant temperature change since the previous calibration.
8.1.1 Radio External Components
In order to realise the full performance of the radio it is essential that the reference PCB layout and BOM are carefully
followed. See Appendix B.4.
The radio is powered from a number of internal 1.8V regulators fed from the analogue supply VDD1, in order to
provide good noise isolation between the digital logic of the JN516x and the analogue blocks. These regulators are
also controlled by the baseband controller and protocol software to minimise power consumption. Decoupling for
internal regulators is required as described in Section 2.2.1.
For single ended antennas or connectors, a balun is not required, however a matching network is needed.
The RF matching network requires three external components and the IBIAS pin requires one external component as
shown in schematic in B.4.1. These components are critical and should be placed close to the JN516x pins and
analogue ground as defined in Table 12. Specifically, the output of the network comprising L2, C1 and L1 is
designed to present an accurate match to a 50 ohm resistive network as well as provide a DC path to the final output
stage or antenna. Users wishing to match to other active devices such as amplifiers should design their networks to
match to 50 ohms at the output of L1
R1 43K
IBIAS
C20 100nF
L2 3.9nH
VB_RF
VREF
VB_RF2
RF_IN
C3 100nF
C12 47pF
VB_RF1
C1 47pF L1 5.1nH
To Coaxial Socket
or Integrated Antenna
VB_RF
Figure 14: External Radio Components
8.1.2 Antenna Diversity
Support is provided for antenna diversity. Antenna diversity is a technique that maximises the performance of an
antenna system. It allows the radio to switch between two antennas that have very low correlation between their
received signals. Typically, this is achieved by spacing two antennae around 0.25 wavelengths apart or by using two
orthogonal polarisations. So, if a packet is transmitted and no acknowledgement is received, the radio system can
switch to the other antenna for the retry, with a different probability of success.28 JN-DS-JN516x v1.3 Production © NXP Laboratories UK 2013
Additionally antenna diversity can be enabled whilst in receive mode waiting for a packet. The JN516x measures the
received energy in the relevant radio channel every 40μs and the measured energy level is compared with a pre-set
energy threshold, which can be set by the application program. The JN516x device will automatically switch the
antennae if the measurement is below this threshold, except if waiting for an acknowledgement from a previous
transmission or if the process of receiving a packet, when it will wait until this has finished. Also, it will not switch if a
preamble symbol having a signal quality above a minimum specified threshold has not been detected in the last 40μs
Both modes can be used at once and use the same ADO and ADE outputs to control the switch.
The JN516x provides an output (ADO) on DIO12 that is asserted on odd numbered retries and optionally its
complement (ADE) on DIO13, that can be used to control an antenna switch; this enables antenna diversity to be
implemented easily (see Figure 15 and Figure 16).
Antenna A Antenna B
A B
COM
SEL
SELB
ADO (DIO[12])
ADE (DIO[13])
Device RF Port
RF Switch: Single-Pole, Double-Throw (SPDT)
Figure 15: Simple Antenna Diversity Implementation using External RF Switch
ADO (DIO[12])
TX Active
RX Active
ADE (DIO[13])
1st TX-RX Cycle 2nd TX-RX Cycle (1st Retry)
Figure 16: Antenna Diversity ADO Signal for TX with Acknowledgement
If two DIO pins cannot be spared, DIO13 can be configured to be a normal DIO pin, and the inverse of ADO
generated with an inverter on the PCB. © NXP Laboratories UK 2013 JN-DS-JN516x v1.3 Production 29
8.2 Modem
The modem performs all the necessary modulation and spreading functions required for digital transmission and
reception of data at 250kbps in the 2450MHz radio frequency band in compliance with the IEEE802.15.4 standard.
AGC Demodulation
Symbol
Detection
(Despreading)
Modulation Spreading
TX
RX
TX Data
Interface
RX Data
Interface
VCO
Sigma-Delta
Modulator
IF Signal
Gain
Figure 17: Modem Architecture
Features provided to support network channel selection algorithms include Energy Detection (ED), Link Quality
Indication (LQI) and fully programmable Clear Channel Assessment (CCA).
The Modem provides a digital Receive Signal Strength Indication (RSSI) that facilitates the implementation of the
IEEE 802.15.4 ED function and LQI function.
The ED and LQI are both related to receiver power in the same way, as shown in Figure 18. LQI is associated with a
received packet, whereas ED is an indication of signal power on air at a particular moment.
The CCA capability of the Modem supports all modes of operation defined in the IEEE 802.15.4 standard, namely
Energy above ED threshold, Carrier Sense and Carrier Sense and/or energy above ED threshold.
Figure 18: Energy Detect Value vs Receive Power Level30 JN-DS-JN516x v1.3 Production © NXP Laboratories UK 2013
8.3 Baseband Processor
The baseband processor provides all time-critical functions of the IEEE802.15.4 MAC layer. Dedicated hardware
guarantees air interface timing is precise. The MAC layer hardware/software partitioning, enables software to
implement the sequencing of events required by the protocol and to schedule timed events with millisecond
resolution, and the hardware to implement specific events with microsecond timing resolution. The protocol software
layer performs the higher-layer aspects of the protocol, sending management and data messages between endpoint
and coordinator nodes, using the services provided by the baseband processor.
Supervisor
Append
Checksum Serialiser
DMA
Engine
TX
Stream
Radio
Protocol Timing Engine
CSMA CCA Backoff
Control
Control
RX
Stream Verify
Checksum Deserialiser
Protocol
Timers
Security Coprocessor
AES
Codec
Encrypt
Port
Decrypt
Port
Status
Processor
Bus
Figure 19: Baseband Processor
8.3.1 Transmit
A transmission is performed by software writing the data to be transferred into the Tx Frame Buffer in RAM, together
with parameters such as the destination address and the number of retries allowed, and programming one of the
protocol timers to indicate the time at which the frame is to be sent. This time will be determined by the software
tracking the higher-layer aspects of the protocol such as superframe timing and slot boundaries. Once the packet is
prepared and protocol timer set, the supervisor block controls the transmission. When the scheduled time arrives,
the supervisor controls the sequencing of the radio and modem to perform the type of transmission required, fetching
the packet data directly from RAM. It can perform all the algorithms required by IEEE802.15.4 such as CSMA/CA
without processor intervention including retries and random backoffs.
When the transmission begins, the header of the frame is constructed from the parameters programmed by the
software and sent with the frame data through the serialiser to the Modem. At the same time, the radio is prepared
for transmission. During the passage of the bitstream to the modem, it passes through a CRC checksum generator
that calculates the checksum on-the-fly, and appends it to the end of the frame.
8.3.2 Reception
During reception, the radio is set to receive on a particular channel. On receipt of data from the modem, the frame is
directed into the Rx Frame Buffer in RAM where both header and frame data can be read by the protocol software.
An interrupt may be provided on receipt of the frame header. As the frame data is being received from the modem it
is passed through a checksum generator; at the end of the reception the checksum result is compared with the
checksum at the end of the message to ensure that the data has been received correctly. An interrupt may be
provided to indicate successful packet reception. During reception, the modem determines the Link Quality, which is
made available at the end of the reception as part of the requirements of IEEE802.15.4.© NXP Laboratories UK 2013 JN-DS-JN516x v1.3 Production 31
8.3.3 Auto Acknowledge
Part of the protocol allows for transmitted frames to be acknowledged by the destination sending an acknowledge
packet within a very short window after the transmitted frame has been received. The JN516x baseband processor
can automatically construct and send the acknowledgement packet without processor intervention and hence avoid
the protocol software being involved in time-critical processing within the acknowledge sequence. The JN516x
baseband processor can also request an acknowledge for packets being transmitted and handle the reception of
acknowledged packets without processor intervention.
8.3.4 Beacon Generation
In beaconing networks, the baseband processor can automatically generate and send beacon frames; the repetition
rate of the beacons is programmed by the CPU, and the baseband then constructs the beacon contents from data
delivered by the CPU. The baseband processor schedules the beacons and transmits them without CPU
intervention.
8.3.5 Security
The transmission and reception of secured frames using the Advanced Encryption Standard (AES) algorithm is
handled by the security coprocessor and the stack software. The application software must provide the appropriate
encrypt/decrypt keys for the transmission or reception. On transmission, the key can be programmed at the same
time as the rest of the frame data and setup information.
8.4 Security Coprocessor
The security coprocessor is available to the application software to perform encryption/decryption operations. A
hardware implementation of the encryption engine significantly speeds up the processing of the encrypted packets
over a pure software implementation. The AES library for the JN516x provides operations that utilise the encryption
engine in the device and allow the contents of memory buffers to be transformed. Information such as the type of
security operation to be performed and the encrypt/decrypt key to be used must also be provided.
Processor
Interface
AES
Block
Encryption
Controller
AES
Encoder
Key Generation
Figure 20: Security Coprocessor Architecture
8.5 Time of Flight Engine
The JN516x family includes unique hardware functions to enable measurement of the distance between two nodes
using a “Time of Flight” (ToF) function. This function uses dedicated timers and interpolation of the timing of
correlation peaks in the demodulator to measure the delays introduced by the time taken for the radio signals to travel
between nodes. It is also possible to use the received signal strength (RSSI) to indicate the distance. Due to the
characteristics of the transmitted signal and the baseband circuitry, ToF offers a significant improvement in accuracy
for distance measurements above 10m compared with RSSI, while RSSI provides better ranging results below 10m.
Hence, ToF is best suited to long range distance measurement. The raw timing results are made available through
an API function, but the responsibility for converting these into location information lies with the user.
For more information, see the Time-of-flight API User Guide [10]32 JN-DS-JN516x v1.3 Production © NXP Laboratories UK 2013
9 Digital Input/Output
There are 20 Digital I/O (DIO) pins which when used as general-purpose pins can be configured as either an input or
an output, with each having a selectable internal pull-up resistor. In addition, there are 2 Digital Output (DO) pins.
Most DIO pins are shared with the digital and analogue peripherals of the device. When a peripheral is enabled, it
takes control over the device pins allocated to it. However, note that most peripherals have 2 alternative pin
allocations to alleviate clashes between uses, and many peripherals can disable the use of specific pins if not
required. Refer to Section 2.1 and the individual peripheral descriptions for full details of the available pinout
arrangements.
Following a reset (and whilst the RESETN input is held low), all peripherals are forced off and the DIO pins are
configured as inputs with the internal pull-ups turned on.When a peripheral is not enabled, the DIO pins associated
with it can be used as digital inputs or outputs. Each pin can be controlled individually by setting the direction and
then reading or writing to the pin.
The individual pull-up resistors, RPU, can also be enabled or disabled as needed and the setting is held through sleep
cycles. The pull-ups are generally configured once after reset depending on the external components and
functionality. For instance, outputs should generally have the pull-ups disabled. An input that is always driven should
also have the pull-up disabled.
When configured as an input each pin can be used to generate an interrupt upon a change of state (selectable
transition either from low to high or high to low); the interrupt can be enabled or disabled. When the device is
sleeping, these interrupts become events that can be used to wake the device up. Equally the status of the interrupt
may be read. See Section 18 for further details on sleep and wakeup.
The state of all DIO pins can be read, irrespective of whether the DIO is configured as an input or an output.
Throughout a sleep cycle the direction of the DIO, and the state of the outputs, is held. This is based on the resultant
of the GPIO Data/Direction registers and the effect of any enabled peripherals at the point of entering sleep.
Following a wake-up these directions and output values are maintained under control of the GPIO data/direction
registers. Any peripherals enabled before the sleep cycle are not automatically re-enabled, this must be done through
software after the wake-up.
For example, if DIO0 is configured to be SPISEL1 then it becomes an output. The output value is controlled by the
SPI functional block. If the device then enters a sleep cycle, the DIO will remain an output and hold the value being
output when entering sleep. After wake-up the DIO will still be an output with the same value but controlled from the
GPIO Data/Direction registers. It can be altered with the software functions that adjust the DIO, or the application may
re-configure it to be SPISEL1.
Unused DIO pins are recommended to be set as inputs with the pull-up enabled.
Two DIO pins can optionally be used to provide control signals for RF circuitry (e.g. switches and PA) in high power
range extenders.
DIO3/RFTX is asserted when the radio is in the transmit state and similarly, DIO2/RFRX is asserted when the radio is
in the receiver state.© NXP Laboratories UK 2013 JN-DS-JN516x v1.3 Production 33
MUX
SPI Slave
DIO0/SPISEL1/ADC3
DIO1/SPISEL2/ADC4/PC0
DIO2/RFRX/TIM0CK_GT
DIO3/RFTX/TIM0CAP
DIO4/CTS0/TIM0OUT/PC0
DIO5/RTS0/PWM1/PC1
DIO6/TXD0/PWM2
DIO7/RXD0/PWM3
DIO8/TIM0CK_GT/PC1/PWM4
DIO9/TIM0CAP/32KXTALIN/RXD1/32KIN
DIO10/TIM0OUT/32KXTALOUT
DIO11/PWM1/TXD1
DIO12/PWM2/CTS0/ADO/SPISMOSI
DIO13/PWM3/RTS0/ADE/SPISMISO
DIO14/SIF_CLK/TXD0/TXD1/SPISEL1/SPISSEL
DIO15/SIF_D/RXD0/RXD1/SPISEL2/SPISCLK
DIO16/COMP1P/SIF_CLK/SPISMOSI
DIO17/COMP1M/SIF_D/SPISMISO
DIO18/SPIMOSI
DIO19/SPISEL0
DO0/SPICLK/PWM2
DO1/SPIMISO/PWM3
TXD0
SPI
Master
UART0
UART1
RXD0
RTS0
CTS0
TxD1
RxD1
TIM0CK_GT
TIM0OUT
TIM0CAP
PWM1
PWM2
PWM3
PWM4
SIF_D
SIF_CLK
PC0
PC1
JTAG_TDI
JTAG_TMS
JTAG_TCK
JTAG_TDO
ADO
ADE
Timer0
PWMs
2-wire
Interface
Pulse
Counters
JTAG
Debug
Antenna
Diversity
SPICLK
SPIMOSI
SPIMISO
SPISEL0
SPICLK
SPIMOSI
SPIMISO
SPISEL0
SPISEL1
SPISEL2
Figure 21 DIO Block Diagram34 JN-DS-JN516x v1.3 Production © NXP Laboratories UK 2013
10 Serial Peripheral Interface
10.1 Serial Peripheral Interface Master
The Serial Peripheral Interface (SPI) allows high-speed synchronous data transfer between the JN516x and
peripheral devices. The JN516x operates as a master on the SPI bus and all other devices connected to the SPI are
expected to be slave devices under the control of the JN516x CPU. The SPI includes the following features:
• Full-duplex, three-wire synchronous data transfer
• Programmable bit rates (up to 16Mbit/s)
• Programmable transaction size up to 32-bits
• Standard SPI modes 0,1,2 and 3
• Manual or Automatic slave select generation (up to 3 slaves)
• Maskable transaction complete interrupt
• LSB First or MSB First Data Transfer
• Supports delayed read edges
Clock
Divider
SPI Bus
Cycle
Controller
Data Buffer
DIV
Clock Edge
Select
Data
CHAR_LEN
LSB
SPIMISO
SPIMOSI
SPICLK
Select
Latch
SPISEL [2..0]
16 MHz
Figure 22: SPI Master Block Diagram
The SPI bus employs a simple shift register data transfer scheme. Data is clocked out of and into the active devices
in a first-in, first-out fashion allowing SPI devices to transmit and receive data simultaneously. Master-Out-Slave-In or
Master-In-Slave-Out data transfer is relative to the clock signal SPICLK generated by the JN516x.
The JN516x provides three slave selects, SPISEL0 to SPISEL2 to allow three SPI peripherals on the bus. SPISEL0
is accessed on DI019. SPISEL1 is accessed, depending upon the configuration, on DIO0 or DIO14. SPISEL2 is
accessed on DIO1 or DIO15. This is enabled under software control. The following table details which DIO are used
for the SPISEL signals depending upon the configuration.
Signal DIO Assignment
Standard pins Alternative pins
SPISEL1 DIO0 DIO14
SPISEL2 DIO1 DIO15
SPICLK DO0
SPIMISO DO1
SPIMOSI DIO18
SPISEL0 DIO19
Table 2: SPI Master IO© NXP Laboratories UK 2013 JN-DS-JN516x v1.3 Production 35
The interface can transfer from 1 to 32-bits without software intervention and can keep the slave select lines asserted
between transfers when required, to enable longer transfers to be performed.
When the device reset is active, all the SPI Master pins are configured as inputs with their pull-up resistors active.
The pins stay in this state until the SPI Master block is enabled, or the pins are configured for some other use. SS
Slave 0
Flash/
EEPROM
Memory
JN5142 SPISE L0 SPISE L1
SPIMOSI
SPICLK
SPIMISO SS
Slave 1
User
Defined
SS
Slave 2
User
Defined
SPISE L2
SI
C
SO
SI
C
SO
SI
C
SO
JN516X
Figure 23: Typical JN516x SPI Peripheral Connection
The data transfer rate on the SPI bus is determined by the SPICLK signal. The JN516x supports transfers at
selectable data rates from 16MHz to 125kHz selected by a clock divider. Both SPICLK clock phase and polarity are
configurable. The clock phase determines which edge of SPICLK is used by the JN516x to present new data on the
SPIMOSI line; the opposite edge will be used to read data from the SPIMISO line. The interface should be configured
appropriately for the SPI slave being accessed.
SPICLK
Polarity Mode Description
(CPOL)
Phase
(CPHA)
0 0 0 SPICLK is low when idle – the first edge is positive.
Valid data is output on SPIMOSI before the first clock and changes every
negative edge. SPIMISO is sampled every positive edge.
0 1 1 SPICLK is low when idle – the first edge is positive.
Valid data is output on SPIMOSI every positive edge. SPIMISO is sampled every
negative edge.
1 0 2 SPICLK is high when idle – the first edge is negative.
Valid data is output on SPIMOSI before the first clock edge and is changed
every positive edge. SPIMISO is sampled every negative edge.
1 1 3 SPICLK is high when idle – the first edge is negative.
Valid data is output on SPIMOSI every negative edge. SPIMISO is sampled
every positive edge.
Table 3: SPI Configurations36 JN-DS-JN516x v1.3 Production © NXP Laboratories UK 2013
If more than one SPISEL line is to be used in a system they must be used in numerical order starting from SPISEL0.
A SPISEL line can be automatically de-asserted between transactions if required, or it may stay asserted over a
number of transactions. For devices such as memories where a large amount of data can be received by the master
by continually providing SPICLK transitions, the ability for the select line to stay asserted is an advantage since it
keeps the slave enabled over the whole of the transfer.
A transaction commences with the SPI bus being set to the correct configuration, and then the slave device is
selected. Upon commencement of transmission (1 to 32 bits) data is placed in the FIFO data buffer and clocked out,
at the same time generating the corresponding SPICLK transitions. Since the transfer is full-duplex, the same
number of data bits is being received from the slave as it transmits. The data that is received during this transmission
can be read (1 to 32 bits). If the master simply needs to provide a number of SPICLK transitions to allow data to be
sent from a slave, it should perform transmit using dummy data. An interrupt can be generated when the transaction
has completed or alternatively the interface can be polled.
If a slave device wishes to signal the JN516x indicating that it has data to provide, it may be connected to one of the
DIO pins that can be enabled as an interrupt.
Figure 24 shows a complex SPI transfer, reading data from a FLASH device that can be achieved using the SPI
master interface. The slave select line must stay low for many separate SPI accesses, and therefore manual slave
select mode must be used. The required slave select can then be asserted (active low) at the start of the transfer. A
sequence 8 and 32 bit transfers can be used to issue the command and address to the FLASH device and then to
read data back. Finally, the slave select can be deselected to end the transaction.
0 1 2 3 4 5 6 7
Instruction (0x03)
23 22 21 3 2 1 0
8 9 10 28 29 30 31
24-bit Address
MSB
Instruction Transaction
7 6 5 4 3 2 1 0
MSB
0 1 2 3 4 5 7 8N-1
3 2 1 0
LSB
Read Data Bytes Transaction(s) 1-N
SPISEL
SPICLK
SPIMOSI
SPIMISO
SPISEL
SPICLK
SPIMOSI
SPIMISO
8 9 10
7 6 5
MSB
Byte 1 Byte 2 Byte N
value unused by peripherals
6
Figure 24: Example SPI Waveforms – Reading from FLASH Device using Mode 0© NXP Laboratories UK 2013 JN-DS-JN516x v1.3 Production 37
10.2 Serial Peripheral Interface Slave
The Serial Peripheral Interface (SPI) Slave Interface allows high-speed synchronous data transfer between the
JN516x and a peripheral device. The JN516x operates as a slave on the SPI bus and an external device connected
to the SPI bus operates as the master. The pins are different from the SPI master interface and are shown in the
following table.
Signal DIO Assignment
Standard pins Alternative pins
SPISCLK DIO15
SPISMISO DIO13 DIO17
SPISMOSI DIO12 DIO16
SPISSEL DIO14
Table 4: SPI Slave IO
The SPI bus employs a simple shift register data transfer scheme, with SPISSEL acting as the active low select
control. Data is clocked out of and into the active devices in a first-in, first-out fashion allowing SPI devices to
transmit and receive data simultaneously. Master-Out-Slave-In or Master-In-Slave-Out data transfer is relative to the
clock signal SPISCLK generated by the external master.
The SPI slave includes the following features:
• Full-duplex synchronous data transfer
• Slaves to external clock up to 8MHz
• Supports 8 bit transfers (MSB or LSB first configurable), with SPISSEL deselected between each transfer
• Internal FIFO up to 255 bytes for transmit and receive
• Standard SPI mode 0, data is sampled on positive clock edge
• Maskable interrupts for receive FIFO not empty, transmit FIFO empty, receive FIFO fill level above
threshold, transmit FIFO fill level below threshold, transmit FIFO overflow, receive FIFO overflow, receive
FIFO underflow, transmit FIFO underflow, receive timeout
• Programmable receive timeout period allows an interrupt to be generated to prompt the receive FIFO to
be read if no further data arrives within the timeout period38 JN-DS-JN516x v1.3 Production © NXP Laboratories UK 2013
11 Timers
11.1 Peripheral Timer/Counters
A general-purpose timer/counter unit, Timer0, is available that can be configured to operate in one of five possible
modes. This has:
• Clocked from internal system clock (16MHz)
• 5-bit prescaler, divides system clock by 2 prescale value as the clock to the timer (prescaler range is 0 to 16)
• 16-bit counter, 16-bit Rise and Fall (period) registers
• Timer: can generate interrupts off Rise and Fall counts. Can be gated by external signal
• Counter: counts number of transitions on external event signal. Can use low-high, high-low or both
transitions
• PWM/Single pulse: outputs repeating Pulse Width Modulation signal or a single pulse. Can set period and
mark-space ratio
• Capture: measures times between transitions of an applied signal
• Delta-Sigma: Return-To-Zero (RTZ) and Non-Return-to-Zero (NRZ) modes
• Timer usage of external IO can be controlled on a pin by pin basis
Four further timers are also available that support the same functionality but have no Counter or Capture mode.
These are referred to as PWM timers. Additionally, is not possible to gate these four timers with an external signal.
>= D Q
Rise
=
<
Fall
Delta Sigma
Interrupt
Generator
Counter
Interrupt Enable
Capture
Generator
Prescaler SYSCLK
TIMxCK_GT
TIMxCAP
Interrupt
PWM/∆Σ
PWM/∆Σ
PWM/∆Σ
Reset
Generator
Edge
Select
EN
EN
TIMxOut
Sw
Reset
System
Reset
Single
Shot
-1
Figure 25: Timer Unit Block Diagram© NXP Laboratories UK 2013 JN-DS-JN516x v1.3 Production 39
The clock source for the Timer0 unit is fed from the 16MHz system clock. This clock passes to a 5-bit prescaler
where a value of 0 leaves the clock unmodified and other values divide it by 2 prescale value. For example, a prescale
value of 2 applied to the 16MHz system clock source results in a timer clock of 4MHz.
The counter is optionally gated by a signal on the clock/gate input (TIM0CK_GT). If the gate function is selected,
then the counter is frozen when the clock/gate input is high.
An interrupt can be generated whenever the counter is equal to the value in either of the High or Low registers.
The following table details which DIO are used for timer0 and the PWM depending upon the configuration.
Signal DIO Assignment
Standard pins Alternative pins
TIM0CK_GT DIO8 DIO2
TIM0CAP DIO9 DIO3
TIM0OUT DIO10 DIO4
PWM1 DIO11 DIO5
PWM2 DIO12 DIO6
PWM3 DIO13 DIO7
PWM4 DIO17 DIO8
Table 5: Timer and PWM IO
The alternative pin locations can be configured separately for each counter/timer under software control, without
affecting the operation or location of the others If operating in timer mode, it is not necessary to use any of the DIO
pins, allowing the standard DIO functionality to be available to the application.
11.1.1 Pulse Width Modulation Mode
Pulse Width Modulation (PWM) mode, as used by PWM timers 1,2 3 and 4 and optionally by Timer0, allows the user
to specify an overall cycle time and pulse length within the cycle. The pulse can be generated either as a single shot
or as a train of pulses with a repetition rate determined by the cycle time.
In this mode, the cycle time and low periods of the PWM output signal can be set by the values of two independent
16-bit registers (Fall and Rise). The counter increments and its output is compared to the 16-bit Rise and Fall
registers. When the counter is equal to the Rise register, the PWM output is set to high; when the counter reaches
the Fall value, the output returns to low. In continuous mode, when the counter reaches the Fall value, it will reset
and the cycle repeats. If either the cycle time or low periods are changed while in continuous mode, the new values
are not used until a full cycle has completed. The PWM waveform is available on PWM1,2,3,4 or TIM0OUT when the
output driver is enabled.
Rise
Fall
Figure 26 PWM Output Timings
11.1.2 Capture Mode
The capture mode can be used to measure the time between transitions of a signal applied to the capture input
(TIM0CAP). When the capture is started, on the next low-to-high transition of the captured signal, the count value is
stored in the Rise register, and on the following high-to-low transition, the counter value is stored in the Fall register.
The pulse width is the difference in counts in the two registers multiplied by the period of the prescaled clock. Upon
reading the capture registers the counter is stopped. The values in the High and Low registers will be updated
whenever there is a corresponding transition on the capture input, and the value stored will be relative to when the
mode was started. Therefore, if multiple pulses are seen on TIM0CAP before the counter is stopped only the last
pulse width will be stored. 40 JN-DS-JN516x v1.3 Production © NXP Laboratories UK 2013
CLK
CAPT
x 9 3
x 14
t
RISE t
RISE
t
FALL t
FALL
Rise
Fall
9 5 3 4
7
Capture Mode Enabled
Figure 27: Capture Mode
11.1.3 Counter/Timer Mode
The counter/timer can be used to generate interrupts, based on the timers or event counting, for software to use. As
a timer the clock source is from the system clock, prescaled if required. The timer period is programmed into the fall
register and the Fall register match interrupt enabled. The timer is started as either a single-shot or a repeating timer,
and generates an interrupt when the counter reaches the Fall register value.
When used to count external events on TIM0CK_GT the clock source is selected from the input pin and the number
of events programmed into the Fall register. The Fall register match interrupt is enabled and the counter started,
usually in single shot mode. An interrupt is generated when the programmed number of transitions is seen on the
input pin. The transitions counted can configured to be rising, falling or both rising and falling edges.
Edges on the event signal must be at least 100nsec apart, i.e. pulses must be wider than 100nsec.
11.1.4 Delta-Sigma Mode
A separate delta-sigma mode is available, allowing a low speed delta-sigma DAC to be implemented with up to 16-bit
resolution. This requires that a resistor-capacitor network is placed between the output DIO pin and digital ground. A
stream of pulses with digital voltage levels is generated which is integrated by the RC network to give an analogue
voltage. A conversion time is defined in terms of a number of clock cycles. The width of the pulses generated is the
period of a clock cycle. The number of pulses output in the cycle, together with the integrator RC values, will
determine the resulting analogue voltage. For example, generating approximately half the number of pulses that
make up a complete conversion period will produce a voltage on the RC output of VDD1/2, provided the RC time
constant is chosen correctly. During a conversion, the pulses will be pseudo-randomly dispersed throughout the
cycle in order to produce a steady voltage on the output of the RC network.
The output signal is asserted for the number of clock periods defined in the High register, with the total period being
216 cycles. For the same value in the High register, the pattern of pulses on subsequent cycles is different, due to the
pseudo-random distribution.
The delta-sigma converter output can operate in a Return-To-Zero (RTZ) or a Non-Return-to-Zero (NRZ) mode. The
NRZ mode will allow several pulses to be output next to each other. The RTZ mode ensures that each pulse is
separated from the next by at least one period. This improves linearity if the rise and fall times of the output are
different to one another. Essentially, the output signal is low on every other output clock period, and the conversion
cycle time is twice the NRZ cycle time i.e. 217 clocks. The integrated output will only reach half VDD2 in RTZ mode,
since even at full scale only half the cycle contains pulses. Figure 28 and Figure 29 illustrate the difference between
RTZ and NRZ for the same programmed number of pulses.© NXP Laboratories UK 2013 JN-DS-JN516x v1.3 Production 41
1 2 3 1 2 N
Conversion cycle 1
217
N
Conversion cycle 2
3
Figure 28: Return To Zero Mode in Operation
1 2 3 1 2 N
Conversion cycle 1
N 3
216 Conversion cycle 2
Figure 29: Non-Return to Zero Mode
11.1.5 Infra-Red Transmission Mode
Infra-red transmission mode is a special feature of Timer 2 that is used to facilitate the generation of waveforms for
infra-red remote control transmission. Remote control protocols, such as Philips RC-6, apply On-Off Key (OOK)
modulation to a carrier signal using an encoded bit stream. The infra-red transmission mode supports a variety of
remote control protocols that have different carrier frequency, carrier duty-cycle and data bit encoding requirements.
In this mode, Timer 2 is configured to produce a carrier waveform that is OOK modulated by a programmable bit
sequence of up to 4096 bits stored in RAM. The resultant waveform is output to the associated Timer 2 output pin.
The JN516x Integrated Peripherals API User Guide [4] includes some examples.
11.1.6 Example Timer/Counter Application
Figure 30 shows an application of the JN516x timers to provide closed loop speed control. PWM1 is configured in
PWM mode to provide a variable mark-space ratio switching waveform to the gate of the NFET. This in turn controls
the power in the DC motor.
Timer 0 is configured to count the rising edge events on the clk/gate pin over a constant period. This converts the
tacho pulse stream output into a count proportional to the motor speed. This value is then used by the application
software executing the control algorithm.
If required for other functionality, then the unused IO associated with the timers could be used as general purpose
DIO.
JN516x
PWM1
Timer0
CLK/GATE
CAPTURE
PWM
M Tacho 1N4007
+12V
IRF521
1 pulse/rev
Figure 30: Closed Loop PWM Speed Control Using JN516x Timers42 JN-DS-JN516x v1.3 Production © NXP Laboratories UK 2013
11.2 Tick Timer
The JN516x contains a hardware timer that can be used for generating timing interrupts to software. It may be used
to implement regular events such as ticks for software timers or an operating system, as a high-precision timing
reference or can be used to implement system monitor timeouts as used in a watchdog timer. Features include:
• 32-bit counter
• 28-bit match value
• Maskable timer interrupt
• Single-shot, Restartable or Continuous modes of operation
Match Value
Counter
=
Mode
Control
&
&
SysClk
Run
Match
Int
Enable
Tick Timer
Interrupt
Reset
Mode
Figure 31 Tick Timer
The Tick Timer is clocked from a continuous 16MHz clock, which is fed to a 32-bit wide resettable up-counter, gated
by a signal from the mode control block. A match register allows comparison between the counter and a
programmed value. The match value, measured in 16MHz clock cycles is programmed through software, in the
range 0 to 0x0FFFFFFF. The output of the comparison can be used to generate an interrupt if the interrupt is
enabled and used in controlling the counter in the different modes. Upon configuring the timer mode, the counter is
also reset.
If the mode is programmed as single shot, the counter begins to count from zero until the match value is reached.
The match signal will be generated which will cause an interrupt if enabled, and the counter will stop counting. The
counter is restarted by reprogramming the mode.
If the mode is programmed as restartable, the operation of the counter is the same as for the single shot mode,
except that when the match value is reached the counter is reset and begins counting from zero. An interrupt will be
generated when the match value is reached if it is enabled.
Continuous mode operation is similar to restartable, except that when the match value is reached, the counter is not
reset but continues to count. An interrupt will be generated when the match value is reached if enabled.
11.3 Wakeup Timers
Two -41 bit wakeup timers are available in the JN516x driven from the 32kHz internal clock. They may run during
sleep periods when the majority of the rest of the device is powered down, to time sleep periods or other long period
timings that may be required by the application. The wakeup timers do not run during deep sleep and may optionally © NXP Laboratories UK 2013 JN-DS-JN516x v1.3 Production 43
be disabled in sleep mode through software control. When a wakeup timer expires it typically generates an interrupt,
if the device is asleep then the interrupt may be used as an event to end the sleep period. See Section 18 for further
details on how they are used during sleep periods. Features include:
• 41-bit down-counter
• Optionally runs during sleep periods
• Clocked by 32kHz system clock; either 32kHz RC oscillator, 32kHz XTAL oscillator or 32kHz clock input
A wakeup timer consists of a 41-bit down counter clocked from the selected 32 kHz clock. An interrupt or wakeup
event can be generated when the counter reaches zero. On reaching zero the counter will continue to count down
until stopped, which allows the latency in responding to the interrupt to be measured. If an interrupt or wakeup event
is required, the timer interrupt should be enabled before loading the count value for the period. Once the count value
is loaded and counter started, the counter begins to count down; the counter can be stopped at any time through
software control. The counter will remain at the value it contained when the timer was stopped and no interrupt will
be generated. The status of the timers can be read to indicate if the timers are running and/or have expired; this is
useful when the timer interrupts are masked. This operation will reset any expired status flags.
11.3.1 32 KHZ RC Oscillator Calibration
The 32 KHZ RC oscillator that can be used to time sleep periods is designed to require very little power to operate
and be self-contained, requiring no external timing components and hence is lower cost. As a consequence of using
on-chip resistors and capacitors, the inherent absolute accuracy and temperature coefficient is lower than that of a
crystal oscillator, but once calibrated the accuracy approaches that of a crystal oscillator. Sleep time periods should
be as close to the desired time as possible in order to allow the device to wake up in time for important events, for
example beacon transmissions in the IEEE802.15.4 protocol. If the sleep time is accurate, the device can be
programmed to wake up very close to the calculated time of the event and so keep current consumption to a
minimum. If the sleep time is less accurate, it will be necessary to wake up earlier in order to be certain the event will
be captured. If the device wakes earlier, it will be awake for longer and so reduce battery life. Please note, that
oscillator has a default current consumption of around 0.5uA, optionally this can be reduced to 0.375uA, which can
improve battery life, however, the calibrated accuracy and temperature coefficient will be worse as a consequence.
For detailed electrical specifications, see Section 19.3.9.
In order to allow sleep time periods to be as close to the desired length as possible, the true frequency of the RC
oscillator needs to be determined to better than the initial 30% accuracy. The calibration factor can then be used to
calculate the true number of nominal 32kHz periods needed to make up a particular sleep time. A calibration
reference counter, clocked from the 16MHz system clock, is provided to allow comparisons to be made between the
32kHz RC clock and the 16MHz system clock when the JN516x is awake and running from the 32MHZ crystal.
Wakeup timer0 counts for a set number of 32kHz clock periods during which time the reference counter runs. When
the wakeup timer reaches zero the reference counter is stopped, allowing software to read the number of 16MHz
clock ticks generated during the time represented by the number of 32kHz ticks programmed in the wakeup timer.
The true period of the 32kHz clock can thus be determined and used when programming a wakeup timer to achieve a
better accuracy and hence more accurate sleep periods
For a RC oscillator running at exactly 32,000Hz the value returned by the calibration procedure should be 10000, for
a calibration period of twenty 32,000Hz clock periods. If the oscillator is running faster than 32,000Hz the count will
be less than 10000, if running slower the value will be higher. For a calibration count of 9000, indicating that the RC
oscillator period is running at approximately 35kHz, to time for a period of 2 seconds the timer should be loaded with
71,111 ((10000/9000) x (32000 x 2)) rather than 64000.44 JN-DS-JN516x v1.3 Production © NXP Laboratories UK 2013
12 Pulse Counters
Two 16-bit counters are provided that can increment during all modes of operation (including sleep). The first, PC0,
increments from pulses received on DIO1 or DIO4. The other pulse counter, PC1 operates from DIO5 or DIO8
depending upon the configuration. This is enabled under software control. The pulses can be de-bounced using the
32kHz clock to guard against false counting on slow or noisy edges. Increments occur from a configurable rising or
falling edge on the respective DIO input.
Each counter has an associated 16-bit reference that is loaded by the user. An interrupt (and wakeup event if
asleep) may be generated when a counter reaches its pre-configured reference value. The two counters may
optionally be cascaded together to provide a single 32-bit counter, linked to any of the four DIO’s. The counters do
not saturate at 65535, but naturally roll-over to 0. Additionally, the pulse counting continues when the reference value
is reached without software interaction so that pulses are not missed even if there is a long delay before an interrupt
is serviced or during the wakeup process.
The system can work with signals up to 100kHz, with no debounce, or from 5.3kHz to 1.7kHz with debounce. When
using debounce the 32kHz clock must be active, so for minimum sleep currents the debounce mode should not be
used.© NXP Laboratories UK 2013 JN-DS-JN516x v1.3 Production 45
13 Serial Communications
The JN516x has two Universal Asynchronous Receiver/Transmitter (UART) serial communication interfaces. These
provide similar operating features to the industry standard 16550A device operating in FIFO mode. The interfaces
perform serial-to-parallel conversion on incoming serial data and parallel-to-serial conversion on outgoing data from
the CPU to external devices. In both directions, a configurable FIFO buffer (with a default depth of 16-bytes) allows
the CPU to read and write multiple characters on each transaction. This means that the CPU is freed from handling
data on a character-by-character basis, with the associated high processor overhead. The UARTs have the following
features:
• Emulates behaviour of industry standard NS16450 and NS16550A UARTs
• Configurable transmit and receive FIFO buffers (with default depths of 16-bytes for each), with direct access
to fill levels of each. Adds/deletes standard start, stop and parity bits to or from the serial data
• Independently controlled transmit, receive, status and data sent interrupts
• Optional modem flow control signals CTS and RTS on UART0.
• Fully programmable data formats: baud rate, start, stop and parity settings
• False start bit detection, parity, framing and FIFO overrun error detect and break indication
• Internal diagnostic capabilities: loop-back controls for communications link fault isolation
• Flow control by software or automatically by hardware Processor Bus
Divisor
Latch
Registers
Line
Status
Register
Line
Control
Register
FIFO
Control
Register
Receiver FIFO
Transmitter FIFO
Baud Generator
Logic
Transmitter Shift
Register
Receiver Shift
Register
Transmitter
Logic
Receiver
Logic
RXD
TXD
Modem
Control
Register
Modem
Status
Register Modem
Signals
Logic
RTS
CTS
Interrupt
ID
Register
Interrupt
Enable
Register
Interrupt
Logic
Internal
Interrupt
Figure 32: UART Block Diagram
The serial interfaces contain programmable fields that can be used to set number of data bits (5, 6,7 or 8), even, odd,
set-at-1, set-at-0 or no-parity detection and generation of single or multiple stop bit, (for 5 bit data, multiple is 1.5 stop
bits; for 6, 7 or 8 data bits, multiple is 2 bits).
The baud rate is programmable up to 1Mbps, standard baud rates such as 4800, 9600, 19.2k, 38.4k etc. can be
configured.
For applications requiring hardware flow control, UART0 provides two control signals: Clear-To-Send (CTS) and
Request-To-Send (RTS). CTS is an indication sent by an external device to the UART that it is ready to receive data.
RTS is an indication sent by the UART to the external device that it is ready to receive data. RTS is controlled from
software, while the value of CTS can be read. Monitoring and control of CTS and RTS is a software activity, normally
performed as part of interrupt processing. The signals do not control parts of the UART hardware, but simply indicate
to software the state of the UART external interfaces. Alternatively, the Automatic Flow Control mode can be set 46 JN-DS-JN516x v1.3 Production © NXP Laboratories UK 2013
where the hardware controls the value of the generated RTS (negated if the receive FIFO fill level is greater than a
programmable threshold of 8, 11, 13 or 15 bytes), and only transmits data when the incoming CTS is asserted.
Software can read characters, one byte at a time, from the Receive FIFO and can also write to the Transmit FIFO,
one byte at a time. The Transmit and Receive FIFOs can be cleared and reset independently of each other. The
status of the Transmit FIFO can be checked to see if it is empty, and if there is a character being transmitted. The
status of the Receive FIFO can also be checked, indicating if conditions such as parity error, framing error or break
indication have occurred. It also shows if an overrun error occurred (receive buffer full and another character arrives)
and if there is data held in the receive FIFO.
UART0 and UART1 can both be configured to use standard or alternative DIO lines, as shown in Table 5.
Additionally, UART0 can be configured to be used in 2-wire mode (where CTS0 and RTS0 are not configured), and
UART1 can be configured in 1-wire mode (where RXD1 is not configured). These freed up DIO pins can then be used
for other purposes.
Signal DIO Assignment
Standard pins Alternative pins
CTS0 DIO4 DIO12
RTS0 DIO5 DIO13
TXD0 DIO6 DIO14
RXD0 DIO7 DIO15
TXD1 DIO14 DIO11
RXD1 DIO15 DIO9
Table 6: UART IO
.
Note: With the automatic flow control threshold set to 15, the hardware flow control within the UART’s block negates
RTS when they receive FIFO that is about to become full. In some instances it has been observed that remote
devices that are transmitting data do not respond quickly enough to the de-asserted CTS and continue to transmit
data. In these instances the data will be lost in a receive FIFO overflow.
13.1 Interrupts
Interrupt generation can be controlled for the UART’s block, and is divided into four categories:
• Received Data Available: Is set when data in the Rx FIFO queue reaches a particular level (the trigger level can
be configured as 1, 4, 8 or 14) or if no character has been received for 4 character times.
• Transmit FIFO Empty: set when the last character from the Tx FIFO is read and starts to be transmitted.
• Receiver Line Status: set when one of the following occur (1) Parity Error - the character at the head of the
receive FIFO has been received with a parity error, (2) Overrun Error - the Rx FIFO is full and another character
has been received at the Receiver shift register, (3) Framing Error - the character at the head of the receive
FIFO does not have a valid stop bit and (4) Break Interrupt – occurs when the RxD line has been held low for an
entire character.
• Modem Status: Generated when the CTS (Clear To Send) input control line changes.
13.2 UART Application
The following example shows the UART0 connected to a 9-pin connector compatible with a PC. As the JN516x
device pins do not provide the RS232 line voltage, a level shifter is used.© NXP Laboratories UK 2013 JN-DS-JN516x v1.3 Production 47
JN516x
RTS
CTS
TXD
RXD UART0
RS232
Level
Shifter
1
2
3
4
5
6
7
8
9
CD
RD
TD
DTR
SG
DSR
RTS
CTS
RI
PC COM
Port
1 5 Pin Signal
6 9
Figure 33: JN516x Serial Communication Link48 JN-DS-JN516x v1.3 Production © NXP Laboratories UK 2013
14 JTAG Test Interface
The JN516x includes an IEEE1149.1 compliant JTAG port for the purpose of manufacturing test. The software
debugger is not supported with this product.
The JTAG interface does not support boundary scan testing. It is recommended that the JN516x is not connected as
part of the board scan chain.© NXP Laboratories UK 2013 JN-DS-JN516x v1.3 Production 49
15 Two-Wire Serial Interface (I2
C)
The JN516x includes industry standard I
2
C two-wire synchronous Serial Interface operates as a Master (MSIF) or
Slave (SSIF) that provides a simple and efficient method of data exchange between devices. The system uses a
serial data line (SIF_D) and a serial clock line (SIF_CLK) to perform bi-directional data transfers and includes the
following features:
Common to both master and slave:
• Compatible with both I2
C and SMbus peripherals
• Support for 7 and 10-bit addressing modes
• Optional pulse suppression on signal inputs (60ns guaranteed, 125ns typical)
Master only:
• Multi-master operation
• Software programmable clock frequency
• Supports Slave clock stretching
• Software programmable acknowledge bit
• Interrupt or bit-polling driven byte-by-byte data-transfers
• Bus busy detection
Slave only:
• Programmable slave address
• Simple byte level transfer protocol
• Write data flow control using acknowledge mechanism
• Read data flow control using clock stretching
• Read data preloaded or provided as required
The Serial Interface is accessed, depending upon the configuration, DIO14 and DIO15 or DIO16 and DIO17. This is
enabled under software control. The following table details which DIO are used for the Serial Interface depending
upon the configuration.
Signal DIO Assignment
Standard pins Alternative pins
SIF_CLK DIO14 DIO16
SIF_D DIO15 DIO17
Table 7: Two-Wire Serial Interface IO
15.1 Connecting Devices
The clock and data lines, SIF_D and SIF_CLK, are alternate functions of DIO15 and DIO14 respectively. The serial
interface function of these pins is selected when the interface is enabled. They are both bi-directional lines,
connected internally to the positive supply voltage via weak (50kΩ) programmable pull-up resistors. However, it is
recommended that external 4.7kΩ pull-ups be used for reliable operation at high bus speeds, as shown in Figure 34.
When the bus is free, both lines are HIGH. The output stages of devices connected to the bus must have an opendrain
or open-collector in order to perform the wired-AND function. The number of devices connected to the bus is
solely dependent on the bus capacitance limit of 400pF.
As this is an optional interface with two alternate positions, the DIO cells have not been customised for I
2
C operation.
In particular, note that there are ESD diodes to the nominal 3 volt supply (VDD2) from the SIF_CLK and SIF_D pins.
Therefore, if the VDD supply is removed from the JN5168 and this then discharges to ground, a path would exist that
could pull down the bus lines (see 2.2.6).50 JN-DS-JN516x v1.3 Production © NXP Laboratories UK 2013
SIF_CLK
SIF_D
VDD
D1_OUT
D1_I
N
CLK1_I
N
CLK1_OUT
D2_I
N
CLK2_I
N
CLK2_OUT
DEVICE 1 DEVICE 2
RP RP Pullup
Resistors
D2_OUT
JN516x
SI
F
DIO14
DIO15
Figure 34: Connection Details
15.2 Clock Stretching
Slave devices can use clock stretching to slow down the read transfer bit rate. After the master has driven SIF_CLK
low, the slave can drive SIF_CLK low for the required period and then release it. If the slave’s SIF_CLK low period is
greater than the master’s low period the resulting SIF_CLK bus signal low period is stretched thus inserting wait
states – see section 15.4 for further details.
SIF_CLK
SIF_CLK
SIF_CLK
Master SIF_CLK
Slave SIF_CLK
Wired-AND SIF_CLK
Clock held low
by Slave
Figure 35: Clock Stretching
15.3 Master Two-wire Serial Interface
When operating as a master device, it provides the clock signal and a prescale register determines the clock rate,
allowing operation up to 400kbit/s.
Data transfer is controlled from the processor bus interface at a byte level, with the processor responsible for
indicating when start, stop, read, write and acknowledge control should be generated. Write data written into a
transmit buffer will be written out across the two-wire interface when indicated, and read data received on the
interface is made available in a receive buffer. Indication of when a particular transfer has completed may be
indicated by means of an interrupt or by polling a status bit.
The first byte of data transferred by the device after a start bit is the slave address. The JN516x supports both 7-bit
and 10-bit slave addresses by generating either one or two address transfers. Only the slave with a matching address
will respond by returning an acknowledge bit.
The master interface provides a true multi-master bus including collision detection and arbitration that prevents data
corruption. If two or more masters simultaneously try to control the bus, a clock synchronization procedure
determines the bus clock. Because of the wired-AND connection of the interface, a high-to-low transition on the bus
affects all connected devices. This means a high-to-low transition on the SIF_CLK line causes all concerned devices
to count off their low period. Once the clock input of a device has gone low, it will hold the SIF_CLK line in that state
until the clock high state is reached when it releases the SIF_CLK line. Due to the wired-AND connection, the
SIF_CLK line will therefore be held low by the device with the longest low period, and held high by the device with the
shortest high period.© NXP Laboratories UK 2013 JN-DS-JN516x v1.3 Production 51
SIF_CLK1
SIF_CLK2
SIF_CLK
Master1 SIF_CLK
Master2 SIF_CLK
Wired-AND SIF_CLK
Start counting
low period
Start counting
high period
Wait
State
Figure 36: Multi-Master Clock Synchronisation
After each transfer has completed, the status of the device must be checked to ensure that the data has been
acknowledged correctly, and that there has been no loss of arbitration. (N.B. Loss of arbitration may occur at any
point during the transfer, including data cycles). An interrupt will be generated when arbitration has been lost.52 JN-DS-JN516x v1.3 Production © NXP Laboratories UK 2013
15.4 Slave Two-wire Serial Interface
When operating as a slave device, the interface does not provide a clock signal, although it may drive the clock signal
low if it is required to apply clock stretching during read transfers.
Only transfers whose address matches the value programmed into the interface’s address register are accepted. The
interface allows both 7 and 10 bit addresses to be programmed, but only responds with an acknowledge to a single
address. Addresses defined as “reserved” will not be responded to, and should not be programmed into the address
register. A list of reserved addresses is shown in Table 8.
Address Name Behaviour
0000 000 General Call/Start Byte Ignored
0000 001 CBUS address Ignored
0000 010 Reserved Ignored
0000 011 Reserved Ignored
0000 1XX Hs-mode master code Ignored
1111 1XX Reserved Ignored
1111 0XX 10-bit address Only responded to if 10 bit address
set in address register
Table 8 : List of two-wire serial interface reserved addresses
Data transfer is controlled from the processor bus interface at a byte level, with the processor responsible for taking
write data from a receive buffer and providing read data to a transmit buffer when indicated. A series of interrupt
status bits are provided to control the flow of data.
For writes, in to the slave interface, it is important that data is taken from the receive buffer by the processor before
the next byte of data arrives. To enable this, the interface returns a Not Acknowledge (NACK) to the master if more
data is received before the previous data has been taken. This will lead to the termination of the current data transfer.
For reads, from the slave interface, the data may be preloaded into the transmit buffer when it is empty (i.e. at the
start of day, or when the last data has been read), or fetched each time a read transfer is requested. When using data
preload, read data in the buffer must be replenished following a data write, as the transmit and received data is
contained in a shared buffer. The interface will hold the bus using clock stretching when the transmit buffer is empty.
Interrupts may be triggered when:
• Data Buffer read data is required – a byte of data to be read should be provided to avoid the interface from
clock stretching
• Data Buffer read data has been taken – this indicates when the next data may be preloaded into the data
buffer
• Data Buffer write data is available – a byte of data should be taken from the data buffer to avoid data backoff
as defined above
• The last data in a transfer has completed – i.e. the end of a burst of data, when a Stop or Restart is seen
• A protocol error has been spotted on the interface© NXP Laboratories UK 2013 JN-DS-JN516x v1.3 Production 53
16 Random Number Generator
A random number generator is provided which creates a 16-bit random number each time it is invoked. Consecutive
calls can be made to build up any length of random number required. Each call takes approximately 0.25msec to
complete. Alternatively, continuous generation mode can be used where a new number is generated approximately
every 0.25msec. In either mode of operation an interrupt can be generated to indicate when the number is available,
or a status bit can be polled.
The random bits are generated by sampling the state of the 32MHz clock every 32kHz system clock edge. As these
clocks are asynchronous to each other, each sampled bit is unpredictable and hence random.54 JN-DS-JN516x v1.3 Production © NXP Laboratories UK 2013
17 Analogue Peripherals
The JN516x contains a number of analogue peripherals allowing the direct connection of a wide range of external
sensors and switches.
ADC
Supply Voltage
(VDD1)
COMP1M (DIO17) Comparator 1
COMP1P (DIO16)
ADC1
VREF/ADC2
ADC3 (DIO0)
ADC4 (DIO1)
Vref
Internal Reference
Vref Select
Chip Boundary
Temp
Sensor
Figure 37: Analogue Peripherals
In order to provide good isolation from digital noise, the analogue peripherals and radio are powered by the radio
regulator, which is supplied from the analogue supply VDD1 and referenced to analogue ground VSSA.
A reference signal Vref for the ADC can be selected between an internal bandgap reference or an external voltage
reference supplied to the VREF pin. ADC input 2 cannot be used if an external reference is required, as this uses the
same pin as VREF. Note also that ADC3 and ADC4 use the same pins as DIO0 and DIO1 respectively. These pins
can only be used for the ADC if they are not required for any of their alternative functions. Similarly, the comparator
inputs are shared with DIO16 and DIO17. If used for their analogue functions, these DIOs must be put into a passive
state by setting them to Inputs with their pull-ups disabled.
The ADC is clocked from a common clock source derived from the 16MHz clock.
17.1 Analogue to Digital Converter
The 10-bit analogue to digital converter (ADC) uses a successive approximation design to perform high accuracy
conversions as typically required in wireless sensor network applications. It has six multiplexed single-ended input
channels: four available externally, one connected to an internal temperature sensor, and one connected to an
internal supply monitoring circuit.© NXP Laboratories UK 2013 JN-DS-JN516x v1.3 Production 55
17.1.1 Operation
The input range of the ADC can be set between 0V to either the reference voltage or twice the reference voltage.
The reference can be either taken from the internal voltage reference or from the external voltage applied to the
VREF pin. For example, an external reference of 1.2V supplied to VREF may be used to set the ADC range between
0V and 2.4V.
VREF Gain Setting Maximum Input Range Supply Voltage Range (VDD)
1.2V
1.6V
1.2V
1.6V
0
0
1
1
1.2V
1.6V
2.4V
3.2V
2.2V - 3.6V
2.2V - 3.6V
2.6V - 3.6V
3.4V - 3.6V
Table 9: ADC Maximum Input Range
The input clock to the ADC is 16MHz and can be divided down to 2MHz, 1MHz, 500kHz and 250kHz. During an ADC
conversion the selected input channel is sampled for a fixed period and then held. This sampling period is defined as
a number of ADC clock periods and can be programmed to 2, 4, 6 or 8. The conversion rate is ((3 x Sample period)
+ 13) clock periods. For example for 500kHz conversion with sample period of 2 will be (3 x 2) + 13 = 19 clock
periods, 38µsecs or 26.32kHz. The ADC can be operated in either a single conversion mode or alternatively a new
conversion can be started as soon as the previous one has completed, to give continuous conversions.
If the source resistance of the input voltage is 1kΩ or less, then the default sampling time of 2 clocks should be used.
The input to the ADC can be modelled as a resistor of 5kΩ(typ) and 10kΩ (max) to represent the on-resistance of the
switches and the sampling capacitor 8pF. The sampling time required can then be calculated, by adding the sensor
source resistance to the switch resistance, multiplying by the capacitance giving a time constant. Assuming normal
exponential RC charging, the number of time constants required to give an acceptable error can be calculated, 7 time
constants gives an error of 0.091%, so for 10-bit accuracy 7 time constants should be the target. For a source with
zero resistance, 7 time constants is 640 nsecs, hence the smallest sampling window of 2 clock periods can be used.
ADC
pin
5 K
8 pF
Sample
Switch
ADC
front
end
Figure 38: ADC Input Equivalent Circuit
The ADC sampling period, input range and mode (single shot or continuous) are controlled through software.
When the ADC conversion is complete, an interrupt is generated. Alternatively the conversion status can be polled.
When operating in continuous mode, it is recommended that the interrupt is used to signal the end of a conversion,
since conversion times may range from 9.5 to 148 µsecs. Polling over this period would be wasteful of processor
bandwidth.
To facilitate averaging of the ADC values, which is a common practice in microcontrollers, a dedicated accumulator
has been added, the user can define the accumulation to occur over 2,4,8 or 16 samples. The end of conversion
interrupt can be modified to occur at the end of the chosen accumulation period, alternatively polling can still be used.
Software can then be used to apply the appropriate rounding and shifting to generate the average value, as well as
setting up the accumulation function.
For detailed electrical specifications, see Section 19.3.7.56 JN-DS-JN516x v1.3 Production © NXP Laboratories UK 2013
17.1.2 Supply Monitor
The internal supply monitor allows the voltage on the analogue supply pin VDD1 to be measured. This is achieved
with a potential divider that reduces the voltage by a factor of 0.666, allowing it to fall inside the input range of the
ADC when set with an input range twice the internal voltage reference. The resistor chain that performs the voltage
reduction is disabled until the measurement is made to avoid a continuous drain on the supply.
17.1.3 Temperature Sensor
The on chip temperature sensor can be used either to provide an absolute measure of the device temperature or to
detect changes in the ambient temperature. In common with most on chip temperature sensors, it is not trimmed and
so the absolute accuracy variation is large; the user may wish to calibrate the sensor prior to use. The sensor forces
a constant current through a forward biased diode to provide a voltage output proportional to the chip die temperature
which can then be measured using the ADC. The measured voltage has a linear relationship to temperature as
described in Section 19.3.13.
Because this sensor is on chip, any measurements taken must account for the thermal time constants. For example,
if the device just came out of sleep mode the user application should wait until the temperature has stabilised before
taking a measurement.
17.1.4 ADC Sample Buffer Mode
In this mode, the ADC operates in conjunction with a DMA (Direct Memory Access) engine as follows:
• ADC sampling is triggered at a configurable rate using one of the on-chip Timers (Timer 0, 1, 2, 3 or 4)
• ADC samples are automatically stored in a buffer located in RAM using a DMA mechanism
• ADC inputs may be multiplexed between different analogue sources
The 10-bit ADC data samples are transferred into the buffer in RAM as 16-bit words. The maximum number of 16-bit
words that may allocated in RAM for ADC sample storage is 2047.
The buffer may be configured to automatically wrap around to the start when full. Interrupts may be configured to
indicate when the buffer is half-full, full and has overflowed.
The CPU may perform other tasks while the data transfer and storage is being managed independently by the DMA
engine - the CPU only needs to configure the ADC sample buffer mode and deal with the stored samples in the buffer
when an interrupt occurs.
ADC sample buffer mode allows up to six analogue inputs to be multiplexed in combination. These inputs comprise
four external inputs (ADC1-4, corresponding to IO pins), an on-chip temperature sensor and an internal voltage
monitor. Samples from all the selected inputs will be produced on each timer trigger and stored in consecutive RAM
locations.
17.2 Comparator
The JN516x contains one analogue comparator, COMP1, that is designed to have true rail-to-rail inputs and operate
over the full voltage range of the analogue supply VDD1. The hysteresis level can be set to a nominal value of 0mV,
10mV, 20mV or 40mV. The source of the negative input signal for the comparator can be set to the internal voltage
reference, the negative external pin (COMP1M, which uses the same pin as DIO17) or the positive external pin
(COMP1P, on the same pin as DIO16). The source of the positive input signal can be COMP1P or COMP1M.
DIO16 and DIO17 cannot be used if the external comparator inputs are needed. The comparator output is routed to
an internal register and can be polled, or can be used to generate interrupts. The comparator can be disabled to
reduce power consumption. DIO16 and DIO17 should be set to inputs with pull-ups disabled, when using the
comparator.
The comparator also has a low power mode where the response time of the comparator is slower than the normal
mode, but the current required is greatly reduced. These figures are specified in Section 19.3.8. It is the only mode
that may be used during sleep, where a transition of the comparator output will wake the device. The wakeup action
and the configuration for which edge of the comparator output will be active are controlled through software. In sleep
mode the negative input signal source must be configured to be driven from the external pins.© NXP Laboratories UK 2013 JN-DS-JN516x v1.3 Production 57
18 Power Management and Sleep Modes
18.1 Operating Modes
Three operating modes are provided in the JN516x that enable the system power consumption to be controlled
carefully to maximise battery life.
• Active Processing Mode
• Sleep Mode
• Deep Sleep Mode
The variation in power consumption of the three modes is a result of having a series of power domains within the chip
that may be controllably powered on or off.
18.1.1 Power Domains
The JN516x has the following power domains:
• VDD Supply Domain: supplies the wake-up timers and controller, DIO blocks, Comparator, SVM and BOR plus
Fast RC, 32kHz RC and crystal oscillators. This domain is driven from the external supply (battery) and is
always powered. The wake-up timers and controller, and the 32kHz RC and crystal oscillators may be powered
on or off in sleep mode through software control.
• Digital Logic Domain: supplies the digital peripherals, CPU, Flash, RAM when in Active Processing Mode,
Baseband controller, Modem and Encryption processor. It is powered off during sleep mode.
• RAM Domain: supplies the RAM when in Active Processing Mode. Also supplies the Ram during sleep mode to
retain the memory contents. It may be powered on or off for sleep mode through software control.
• Radio Domain: supplies the radio interface, ADCs and temperature sensor. It is powered during transmit and
receive and when the analogue peripherals are enabled. It is controlled by the baseband processor and is
powered off during sleep mode.
The current consumption figures for the different modes of operation of the device is given in Section 19.2.2.
18.2 Active Processing Mode
Active processing mode in the JN516x is where all of the application processing takes place. By default, the CPU will
execute at the selected clock speed executing application firmware. All of the peripherals are available to the
application, as are options to actively enable or disable them to control power consumption; see specific peripheral
sections for details.
Whilst in Active processing mode there is the option to doze the CPU but keep the rest of the chip active; this is
particularly useful for radio transmit and receive operations, where the CPU operation is not required therefore saving
power.
18.2.1 CPU Doze
Whilst in doze mode, CPU operation is stopped but the chip remains powered and the digital peripherals continue to
run. Doze mode is entered through software and is terminated by any interrupt request. Once the interrupt service
routine has been executed, normal program execution resumes. Doze mode uses more power than sleep and deep
sleep modes but requires less time to restart and can therefore be used as a low power alternative to an idle loop.
Whilst in CPU doze the current associated with the CPU is not consumed, therefore the basic device current is
reduced as shown in the figures in Section 19.2.2.1.
18.3 Sleep Mode
The JN516x enters sleep mode through software control. In this mode most of the internal chip functions are
shutdown to save power, however the state of DIO pins are retained, including the output values and pull-up enables,
and this therefore preserves any interface to the outside world. 58 JN-DS-JN516x v1.3 Production © NXP Laboratories UK 2013
When entering into sleep mode, there is an option to retain the RAM contents throughout the sleep period. If the
wakeup timers are not to be used for a wakeup event and the application does not require them to run continually,
then power can be saved by switching off the 32kHz oscillator if selected as the 32kHz system clock through software
control. The oscillator will be restarted when a wakeup event occurs.
Whilst in sleep mode one of four possible events can cause a wakeup to occur: transitions on DIO inputs, expiry of
wakeup timers, pulse counters maturing or comparator events. If any of these events occur, and the relevant
interrupt is enabled, then an interrupt is generated that will cause a wakeup from sleep. It is possible for multiple
wakeup sources to trigger an event at the same instant and only one of them will be accountable for the wakeup
period. It is therefore necessary in software to remove all other pending wakeup events prior to requesting entry back
into sleep mode; otherwise, the device will re-awaken immediately.
When wakeup occurs, a similar sequence of events to the reset process described in Section 6.1 happens, including
the checking of the supply voltage by the Supply Voltage Monitor 6.4. The High-Speed RC oscillator is started up,
once stable the power to CPU system is enabled and the reset is removed. Software determines that this is a reset
from sleep and so commences with the wakeup process. If RAM contents were held through sleep, wakeup is quicker
as the software does not have to initialise RAM contents meaning the application can recommence more quickly. See
Section 19.3.5 for wake-up timings.
18.3.1 Wakeup Timer Event
The JN516x contains two 41-bit wakeup timers that are counters clocked from the 32kHz oscillator, and can be
programmed to generate a wake-up event. Following a wakeup event, the timers continue to run. These timers are
described in Section 11.3.
Timer events can be generated from both of the two timers; one is intended for use by the 802.15.4 protocol, the
other being available for use by the Application running on the CPU. These timers are available to run at any time,
even during sleep mode.
18.3.2 DIO Event
Any DIO pin when used as an input has the capability, by detecting a transition, to generate a wake-up event. Once
this feature has been enabled the type of transition can be specified (rising or falling edge). Even when groups of
DIO lines are configured as alternative functions such as the UARTs or Timers etc, any input line in the group can still
be used to provide a wakeup event. This means that an external device communicating over the UART can wakeup
a sleeping device by asserting its RTS signal pin (which is the CTS input of the JN516x).
18.3.3 Comparator Event
The comparator can generate a wakeup interrupt when a change in the relative levels of the positive and negative
inputs occurs. The ability to wakeup when continuously monitoring analogue signals is useful in ultra-low power
applications. For example, the JN516x can remain in sleep mode until the voltage drops below a threshold and then
be woken up to deal with the alarm condition and the comparator has a low current mode to facilitate this.
18.3.4 Pulse Counter
The JN516x contains two 16 bit pulse counters that can be programmed to generate a wake-up event. Following the
wakeup event the counters will continue to operate and therefore no pulse will be missed during the wake-up
process. These counters are described in Section 12.To minimize sleep current it is possible to disable the 32K RC
oscillator and still use the pulse counters to cause a wake-up event, provided debounce mode is not required.
18.4 Deep Sleep Mode
Deep sleep mode gives the lowest power consumption. All switchable power domains are off and most functions in
the VDD supply power domain are stopped, including the 32kHz RC oscillator. However, the Brown-Out Reset
remains active as well as all the DIO cells. This mode can be exited by a hardware reset on the RESETN pin, or an
enabled DIO or comparator wakeup event. In all cases, the wakeup sequence is equivalent to a power-up sequence,
with no knowledge retained from the previous time the device was awake.© NXP Laboratories UK 2013 JN-DS-JN516x v1.3 Production 59
19 Electrical Characteristics
19.1 Maximum Ratings
Exceeding these conditions may result in damage to the device.
Parameter Min Max
Device supply voltage VDD1, VDD2 -0.3V 3.6V
Supply voltage at voltage regulator bypass pins
VB_xxx
-0.3V 1.98V
Voltage on analogue pins XTALOUT, XTALIN,
VCOTUNE, RF_IN.
-0.3V VB_xxx + 0.3V
Voltage on analogue pins VREF, ADC1, IBIAS -0.3V VDD1 + 0.3V
Voltage on any digital pin -0.3V VDD2 + 0.3V
Storage temperature -40ºC 150ºC
Reflow soldering temperature according to
IPC/JEDEC J-STD-020C
260ºC
ESD rating Human Body Model 1 2.0kV
Charged Device Model 2 500V
1) Testing for Human Body Model discharge is performed as specified in JEDEC Standard JESD22-A114.
2) Testing for Charged Device Model discharge is performed as specified in JEDEC Standard JESD22-C101.
19.2 DC Electrical Characteristics
19.2.1 Operating Conditions
Supply Min Max
VDD1, VDD2 2.0V 3.6V
Standard Ambient temperature range -40ºC 85ºC
Extended Ambient temperature range -40ºC 125ºC
In the following sections typical is defined as 25ºC and VDD1,2 = 3V
Most parameter values cover the extended temperature range up to 125 ºC, where this is not the case, two values
are given, the value in italics type face is for standard temperature range up to 85ºC and the value in bold is for the
extended range.60 JN-DS-JN516x v1.3 Production © NXP Laboratories UK 2013
19.2.2 DC Current Consumption
VDD = 2.0 to 3.6V, -40 to +125º C
19.2.2.1 Active Processing
Mode: Min Typ Max Unit Notes
CPU processing
32,16,8,4,2 or 1MHz
1700 +
205/MHz
µA GPIOs enabled. When in CPU
doze the current related to CPU
speed is not consumed.
Radio transmit 15.3 mA CPU in software doze – radio
transmitting
Radio receive 17.0 mA CPU in software doze – radio in
receive mode
The following current figures should be added to those above if the feature is being used
ADC 550 µA Temperature sensor and battery
measurements require ADC
Comparator 73/0.8 µA Normal/low-power
UART 60 µA For each UART
Timer 21 µA For each Timer
2-wire serial interface (I2
C) 46 µA
19.2.2.2 Sleep Mode
Mode: Min Typ Max Unit Notes
Sleep mode with I/O wakeup 0.12 µA Waiting on I/O event
Sleep mode with I/O and RC
Oscillator timer wakeup –
measured at 25ºC
0.64 µA As above, but also waiting on timer
event. If both wakeup timers are
enabled then add another 0.05µA
32kHz crystal oscillator 1.4 µA As alternative sleep timer
The following current figures should be added to those above if the feature is being used
RAM retention– measured at
25ºC
0.9 µA
Comparator (low-power mode) 0.8 µA Reduced response time
19.2.2.3 Deep Sleep Mode
Mode: Min Typ Max Unit Notes
Deep sleep mode– measured
at 25ºC
100 nA Waiting on chip RESET or I/O
event© NXP Laboratories UK 2013 JN-DS-JN516x v1.3 Production 61
19.2.3 I/O Characteristics
VDD = 2.0 to 3.6V, -40 to +125º C, italic +85 ºC Bold +125 ºC
Parameter Min Typ Max Unit Notes
Internal DIO pullup
resistors 40 50 60 kΩ
Internal RESETN pullup
resistor
267
325
455
605
410
500
700
930
615. 636
750, 775
1050, 1085
1395, 1441
kΩ VDD2 = 3.6V
VDD2 = 3.0V
VDD2 = 2.2V
VDD2 = 2.0V
Digital I/O High Input VDD2 x 0.7 VDD2 V
Digital I/O low Input -0.3 VDD2 x 0.27 V
Digital I/O input hysteresis 200 310 400 mV
DIO High O/P (2.7-3.6V) VDD2 x 0.8 VDD2 V With 4mA load
DIO Low O/P (2.7-3.6V) 0 0.4 V With 4mA load
DIO High O/P (2.2-2.7V) VDD2 x 0.8 VDD2 V With 3mA load
DIO Low O/P (2.2-2.7V) 0 0.4 V With 3mA load
DIO High O/P (2.0-2.2V) VDD2 x 0.8 VDD2 V With 2.5mA load
DIO Low O/P (2.0-2.2V) 0 0.4 V With 2.5mA load
Current sink/source
capability
4
3
2.5
mA VDD2 = 2.7V to 3.6V
VDD2 = 2.2V to 2.7V
VDD2 = 2.0V to 2.2V
IIL - Input Leakage Current 20, 30 nA Vcc = 3.6V, pin low
IIH - Input Leakage Current 20, 60 nA Vcc = 3.6V, pin high
19.3 AC Characteristics
19.3.1 Reset and Supply Voltage Monitor
Internal RESET
VDD
VPOT
t
STAB
Figure 39: Internal Power-on Reset without Showing Brown-Out62 JN-DS-JN516x v1.3 Production © NXP Laboratories UK 2013
Internal RESET
RESETN VRST
t
STAB
t
RST
Figure 40: Externally Applied Reset
VDD = 2.0 to 3.6V, -40 to +125º C
Parameter Min Typ Max Unit Notes
External Reset pulse width
to initiate reset sequence
(tRST)
1 µs Assumes internal pullup
resistor value of 100K
worst case and ~5pF
external capacitance
External Reset threshold
voltage (VRST)
VDD2 x
0.7
V Minimum voltage to
avoid being reset
Internal Power-on Reset
threshold voltage (VPOT)
Rise/fall time > 10mS
1.44
1.41
V Rising
Falling
Spike Rejection
Square wave pulse 1us
Triangular wave pulse 10us
1.2
1.3
V Depth of pulse to trigger
reset
Reset stabilisation time
(tSTAB)
180 µs Note 1
Chip current when held in
reset (IRESET)
6 uA
Brown-Out Reset
Current Consumption
80 nA
Supply Voltage Monitor
Threshold Voltage (VTH)
1.86
1.92
2.02
2.11
2.21
2.30
2.59
2.88
1.94
2.00
2.10
2.20
2.30
2.40
2.70
3.00
2.00
2.06
2.16
2.27
2.37
2.47
2.78
3.09
V Configurable threshold
with 8 levels
Supply Voltage Monitor
Hysteresis (VHYS)
37
38
45
52
58
65
82
100
mV Corresponding to the 8
threshold levels
1 Time from release of reset to start of executing of bootloader code from internal flash. An extra 15us is incurred if
the BOR circuit has been activated (e.g., if the supply voltage has been ramped up from 0V)".© NXP Laboratories UK 2013 JN-DS-JN516x v1.3 Production 63
VTH + VHYS
VTH
DVDD
Internal BORest
Internal SVM
VPOT
Figure 41 Brown-out Reset Followed By Supply Voltage Montior trigger
19.3.2 SPI Master Timing
t t SSH SSS
t
CK
t
SI
t
HI
MOSI
(mode=1,3)
SS
MOSI
(mode=0,2)
MISO
(mode=0,2)
MISO
(mode=1,3)
t
VO
t
VO
CLK
(mode=0,1)
t
SI
t
HI
CLK
(mode=2,3)
Figure 42: SPI Master Timing
Parameter Symbol Min Max Unit
Clock period tCK 62.5 - ns
Data setup time tSI 16.7 @ 3.3V
18.2 @ 2.7V
21.0 @ 2.0V
- ns
Data hold time tHI 0 ns
Data invalid period tVO - 15 ns
Select set-up period tSSS 60 - ns
Select hold period tSSH 30 (SPICLK = 16MHz)
0 (SPICLK<16MHz, mode=0 or 2)
60 (SPICLK<16MHz, mode=1 or 3)
- ns64 JN-DS-JN516x v1.3 Production © NXP Laboratories UK 2013
19.3.3 SPI Slave Timing
Parameter Symbol Min Max Unit
Clock period tCK 125 - ns
Idle time tIDLE 125 - ns
Data input setup time tSI 10 - ns
Data input hold time tHI 10 - ns
Data output invalid period from SPISCLK falling edge tCKVO - 30 ns
Data output invalid period from SPISSEL falling edge tSELVO 30 ns
Delay from SPISSEL falling edge to SPISCLK rising edge tSELA 30 - ns
Delay from SPISCLK falling edge to SPISSEL rising edge tSELN 30 - ns
…
…
SPISCLK
SPISSEL
SPISMOSI
SPISMISO
…
…
t tSELN IDLE
tSI tHI
tSELA tCK
tSELVO tCKVO
Figure 43: SPI Slave Timing© NXP Laboratories UK 2013 JN-DS-JN516x v1.3 Production 65
19.3.4 Two-wire Serial Interface
t
BUF
S Sr P S
t
LOW
t
HD;STA
t
F t
R
t
HD;DAT
t
HIGH
t
SU;DAT
t
SU;STA
t
HD;STA
t
SU;STO
t
SP t
R
t
F
SIF_D
SIF_CLK
Figure 44: Two-wire Serial Interface Timing
Parameter Symbol
Standard Mode Fast Mode
Unit
Min Max Min Max
SIF_CLK clock frequency fSCL 0 100 0 400 kHz
Hold time (repeated) START condition.
After this period, the first clock pulse is
generated
tHD:STA 4 - 0.6 - µs
LOW period of the SIF_CLK clock tLOW 4.7 - 1.3 - µs
HIGH period of the SIF_CLK clock tHIGH 4 - 0.6 - µs
Set-up time for repeated START condition tSU:STA 4.7 - 0.6 - µs
Data setup time SIF_D tSU:DAT 0.25 - 0.1 - µs
Rise Time SIF_D and SIF_CLK tR - 1000 20+0.1Cb 300 ns
Fall Time SIF_D and SIF_CLK tF - 300 20+0.1Cb 300 ns
Set-up time for STOP condition tSU:STO 4 - 0.6 - µs
Bus free time between a STOP and START
condition
tBUF 4.7 - 1.3 - µs
Pulse width of spikes that will be
suppressed by input filters (Note 1)
tSP - 60 - 60 ns
Capacitive load for each bus line Cb - 400 - 400 pF
Noise margin at the LOW level for each
connected device (including hysteresis)
Vnl 0.1VDD - 0.1VDD - V
Noise margin at the HIGH level for each
connected device (including hysteresis)
Vnh 0.2VDD - 0.2VDD - V
Note 1: This figure indicates the pulse width that is guaranteed to be suppressed. Pulse with widths up to 125nsec
may also get suppressed.
19.3.5 Wakeup Timings
Parameter Min Typ Max Unit Notes
Time for crystal to stabilise
ready to run CPU
0.74 ms Reached oscillator amplitude
threshold. Default bias current
Time for crystal to stabilise
ready for radio activity
1.0 ms
Wake up from Deep Sleep
or from Sleep
170 µs Time to CPU release
Start-up time from reset
RESETN pin, BOR or
SVM
180 µs Time to CPU release
Wake up from CPU Doze
mode
0.2 µs 66 JN-DS-JN516x v1.3 Production © NXP Laboratories UK 2013
19.3.6 Bandgap Reference
VDD = 2.0 to 3.6V, -40 to +125ºC, italic +85 ºC Bold +125 ºC
Parameter Min Typ Max Unit Notes
Voltage 1.198 1.235 1.260 V
DC power supply rejection 58 dB at 25ºC
Temperature coefficient +40
+135
+65
+93
ppm/ºC 20 to 85ºC
-40ºC to 20ºC
20 to 125 ºC
-40ºC to 85ºC
Point of inflexion +80 ºC
19.3.7 Analogue to Digital Converters
VDD = 3.0V, VREF = 1.2V, -40 to +125ºC, italic +85 ºC Bold +125 ºC
Parameter Min Typ Max Unit Notes
Resolution 10 bits 500kHz Clock
Current consumption 550 µA
Integral nonlinearity ± 1.6, 1.8 LSB
Differential nonlinearity -0.5 +0.5 LSB Guaranteed monotonic
Offset error -10
-20
mV 0 to Vref range
0 to 2Vref range
Gain error +10
+20
mV 0 to Vref range
0 to 2Vref range
Internal clock 0.25,0.5 or
1.0
MHz 16MHz input clock,
÷16,32or 64
No. internal clock periods
to sample input
2, 4, 6 or 8 Programmable
Conversion time 9.5 148 µs Programmable
Input voltage range 0.04 Vref
or 2*Vref
V Switchable. Refer to
17.1.1
Vref (Internal) See Section 19.3.6
Vref (External) 1.15 1.2 1.6 V Allowable range into
VREF pin
Input capacitance 8 pF In series with 5K ohms© NXP Laboratories UK 2013 JN-DS-JN516x v1.3 Production 67
19.3.8 Comparator
VDD = 2.0 to 3.6V -40 to +125ºC, italic +85 ºC Bold +125 ºC
Parameter Min Typ Max Unit Notes
Analogue response time
(normal)
90 125,130 ns +/- 250mV overdrive
10pF load
Total response time
(normal) including delay to
Interrupt controller
125
+ 125,130
ns Digital delay can be
up to a max. of two
16MHz clock periods
Analogue response time
(low power)
2.2 2.8 µs +/- 250mV overdrive
No digital delay
Hysteresis 7
14
28
10
20
40
16, 17
28, 30
53, 57
mV Programmable in 3
steps and zero
Vref (Internal) See Section 19.3.6 V
Common Mode input range 0 Vdd V
Current (normal mode) 56 73 96, 100 µA
Current (low power mode) 0.8 1.0, 1.1 µA
19.3.9 32kHz RC Oscillator
VDD = 2.0 to 3.6V, -40 to +125 ºC, italic +85 ºC Bold +125 ºC
Parameter Min Typ Max Unit Notes
Current consumption of cell
and counter logic (default)
590
520
465
720, 800
660, 740
600, 650
nA 3.6V
3.0V
2.0V
Current consumption of cell
and counter logic (low power)
465
375
290
500,550
425,460
330,370
nA 3.6V
3.0V
2.0V
32kHz clock un-calibrated
accuracy
-10% 32kHz +40% Without temperature &
voltage variation (note1)
Calibrated 32kHz accuracy
(default)
Low power
±300
±600
ppm For a 1 second sleep
period calibrating over
20 x 32kHz clock
periods
Variation with temperature -0.010
-0.020
%/°C Default
Low power
Variation with VDD2 -3.0 %/V
Note1: Measured at 3v and 25 deg C 68 JN-DS-JN516x v1.3 Production © NXP Laboratories UK 2013
19.3.10 32kHz Crystal Oscillator
VDD = 2.0 to 3.6V, -40 to +125ºC, italic +85 ºC Bold +125 ºC
Parameter Min Typ Max Unit Notes
Current consumption of cell
and counter logic
1.4 1.75, 2.0 µA This is sensitive to the ESR
of the crystal, Vdd and total
capacitance at each pin
Start – up time 0.6 s Assuming xtal with ESR of
less than 40kohms and
CL= 9pF External caps =
15pF
(Vdd/2mV pk-pk) see
Appendix B
Input capacitance 1.4 pF Bondpad and package
Transconductance 18.5 µA/V
External Capacitors
(CL=9pF)
15 pF Total external capacitance
needs to be 2*CL, allowing
for stray capacitance from
chip, package and PCB
Amplitude at Xout Vdd-0.2 Vp-p
19.3.11 32MHz Crystal Oscillator
VDD = 2.0 to 3.6V, -40 to +125ºC, italic +85 ºC Bold +125 ºC
Parameter Min Typ Max Unit Notes
Current consumption 300 375 450, 500 µA Excluding bandgap ref.
Start – up time 0.74 ms Assuming xtal with ESR of
less than 40ohms and CL=
9pF External caps = 15pF
see Appendix B
Input capacitance 1.4 pF Bondpad and package
Transconductance 3.65, 3.55 4.30 5.16 mA/V
DC voltages,
XTALIN/XTALOUT
390/432
375/412
425/472 470/527 mV
External Capacitors
(CL=9pF)
15 pF Total external capacitance
needs to be 2*CL, allowing
for stray capacitance from
chip, package and PCB
Amplitude detect threshold 320 mVp-p Threshold detection
accessible via API© NXP Laboratories UK 2013 JN-DS-JN516x v1.3 Production 69
19.3.12 High-Speed RC Oscillator
VDD = 2.0 to 3.6V, -40 to +125ºC, italic +85 ºC Bold +125 ºC
Parameter Min Typ Max Unit Notes
Current consumption of cell 81 145 250, 275 µA
Clock native accuracy -16% +18%
Un-calibrated frequency 26.1 MHz
Calibrated centre frequency
accuracy
-1.6% 32.1 +1.6% MHz Without temperature &
voltage variation
Calibrated centre frequency
accuracy
-4% 32.1 +5% MHz Including temperature &
voltage variation
Variation with temperature -0.024, -0.015 +0.009,
+0.006
%/°C
Variation with VDD2 -0.25 +0.25 +0.5, +0.6 %/V
Startup time 2.4 us
19.3.13 Temperature Sensor
VDD = 2.0 to 3.6V, -40 to +125ºC, italic +85 ºC Bold +125 ºC
Parameter Min Typ Max Unit Notes
Operating Range -40 - 125 °C
Sensor Gain -1.56 -1.66 -1.76 mV/°C
Accuracy - - ±7 °C
Non-linearity - - 2.0, 3.0 °C
Output Voltage 610, 540 840 mV Includes absolute variation
due to manufacturing & temp
Typical Voltage 730 mV Typical at 3.0V 25°C
Resolution 0.666 0.706 0.751 °C/LSB 0 to Vref ADC I/P Range
19.3.14 Non-Volatile Memory
VDD = 2.0 to 3.6V, -40 to +125ºC, italic +85 ºC Bold +125 ºC
Parameter Min Typ Max Unit Notes
Flash endurance 10K 100/50K Cycle Program/erase
Flash erase time 100 ms One or more sectors
Flash programming time 1.0 ms 256 bytes
EEPROM endurance 100K 1M/500K °C Program/erase (see 4.4 )
EEPROM erase time 1.8 ms One 64 bytes page
EEPROM programming time 1.1 ms Between 1 & 64 bytes
Retention time powered
unpowered
10
20
Years Flash & EEPROM70 JN-DS-JN516x v1.3 Production © NXP Laboratories UK 2013
19.3.15 Radio Transceiver
This JN516x meets all the requirements of the IEEE802.15.4 standard over 2.0 - 3.6V and offers the following
improved RF characteristics. All RF characteristics are measured single ended.
This part also meets the following regulatory body approvals, when used with NXP’s Module Reference Designs.
Compliant with FCC part 15, rules, IC Canada, ETSI ETS 300-328 and Japan ARIB STD-T66
The PCB schematic and layout rules detailed in Appendix B.4
must be followed. Failure to do so will likely result in the JN516x
failing to meet the performance specification detailed herein and
worst case may result in device not functioning in the end
application.
Parameter Min Typical Max Notes
RF Port Characteristics
Type Single Ended
Impedance 1 50ohm 2.4-2.5GHz
Frequency range 2.400 GHz 2.485GHz
ESD levels (pin 17) 2KV (HBM)
500v (CDM)
1) With external matching inductors and assuming PCB layout as in Appendix B.4.© NXP Laboratories UK 2013 JN-DS-JN516x v1.3 Production 71
Radio Parameters: 2.0-3.6V, +25ºC
Parameter Min Typical Max Unit Notes
Receiver Characteristics
Receive sensitivity -92 -95 dBm Nominal for 1% PER, as per
802.15.4 Section 6.5.3.3
Maximum input signal +10 dBm For 1% PER, measured as
sensitivity
Adjacent channel
rejection (-1/+1 ch)
[CW Interferer]
19/34
[27/49]
dBc For 1% PER, with wanted signal
3dB, above sensitivity. (Note1,2)
(modulated interferer)
Alternate channel
rejection (-2/+2 ch)
[CW Interferer]
40/44
[54/54]
dBc For 1% PER, with wanted signal
3dB, above sensitivity. (Note1,2)
(modulated interferer)
Other in band rejection
2.4 to 2.4835 GHz,
excluding adj channels
48 dBc For 1% PER with wanted signal
3dB above sensitivity. (Note1)
Out of band rejection 52 dBc For 1% PER with wanted signal
3dB above sensitivity. All
frequencies except wanted/2 which
is 8dB lower. (Note1)
Spurious emissions
(RX)
-65
<-70
-60
dBm Measured conducted into 50ohms
30MHz to 1GHz
1GHz to 12GHz
Intermodulation
protection
40 dB For 1% PER at with wanted signal
3dB above sensitivity. Modulated
Interferers at 2 & 4 channel
separation (Note1)
RSSI linearity -4 +4 dB -95 to -10dBm.
Available through Hardware API
Transmitter Characteristics
Transmit power +0.5 +2.5 dBm
Output power control
range
-35 dB In three 12dB steps (Note3)
Spurious emissions
(TX)
-40
<-70
<-70
dBm Measured conducted into 50ohms
30MHz to 1GHz,
1GHz to12.5GHz,
The following exceptions apply
1.8 to 1.9GHz & 5.15 to 5.3GHz
EVM [Offset] 3.0 4.5 % At maximum output power
Transmit Power
Spectral Density
-38 -20 dBc At greater than 3.5MHz offset, as
per 802.15.4, Section 6.5.3.172 JN-DS-JN516x v1.3 Production © NXP Laboratories UK 2013
Radio Parameters: 2.0-3.6V, -40ºC
Parameter Min Typical Max Unit Notes
Receiver Characteristics
Receive sensitivity -93.0 -96.0 dBm Nominal for 1% PER, as per
802.15.4 Section 6.5.3.3
Maximum input signal +10 dBm For 1% PER, measured as
sensitivity
Adjacent channel
rejection (-1/+1 ch)
[CW Interferer]
19/34
[TBC]
dBc For 1% PER, with wanted signal
3dB, above sensitivity. (Note1,2)
(modulated interferer)
Alternate channel
rejection (-2/+2 ch)
[CW Interferer]
40/44
[TBC]
dBc For 1% PER, with wanted signal
3dB, above sensitivity. (Note1,2)
(modulated interferer)
Other in band rejection
2.4 to 2.4835 GHz,
excluding adj channels
47 dBc For 1% PER with wanted signal
3dB above sensitivity. (Note1)
Out of band rejection 49 dBc For 1% PER with wanted signal
3dB above sensitivity. All
frequencies except wanted/2 which
is 8dB lower. (Note1)
Spurious emissions
(RX)
-64
<-70
-60
dBm Measured conducted into 50ohms
30MHz to 1GHz
1GHz to 12GHz
Intermodulation
protection
39 dB For 1% PER at with wanted signal
3dB above sensitivity. Modulated
Interferers at 2 & 4 channel
separation (Note1)
RSSI linearity -4 +4 dB -95 to -10dBm.
Available through Hardware API
Transmitter Characteristics
Transmit power 0 +2.00 dBm
Output power control
range
-35 dB In three 12dB steps (Note3)
Spurious emissions
(TX)
-40
<-70
<-70
dBm Measured conducted into 50ohms
30MHz to 1GHz,
1GHz to12.5GHz,
The following exceptions apply
1.8 to 1.9GHz & 5.15 to 5.3GHz
EVM [Offset] 3.0 4.5 % At maximum output power
Transmit Power
Spectral Density
-38 -20 dBc At greater than 3.5MHz offset, as
per 802.15.4, Section 6.5.3.1© NXP Laboratories UK 2013 JN-DS-JN516x v1.3 Production 73
Radio Parameters: 2.0-3.6V, +85ºC
Parameter Min Typical Max Unit Notes
Receiver Characteristics
Receive sensitivity -90 -93 dBm Nominal for 1% PER, as per
802.15.4 Section 6.5.3.3
Maximum input signal +10 dBm For 1% PER, measured as
sensitivity
Adjacent channel
rejection (-1/+1 ch)
[CW Interferer]
19/34
[TBC]
dBc For 1% PER, with wanted signal
3dB, above sensitivity. (Note1,2)
(modulated interferer)
Alternate channel
rejection (-2/+2 ch)
[CW Interferer]
40/44
[TBC]
dBc For 1% PER, with wanted signal
3dB, above sensitivity. (Note1,2)
(modulated interferer)
Other in band rejection
2.4 to 2.4835 GHz,
excluding adj channels
49 dBc For 1% PER with wanted signal
3dB above sensitivity. (Note1)
Out of band rejection 53 dBc For 1% PER with wanted signal
3dB above sensitivity. All
frequencies except wanted/2 which
is 8dB lower. (Note1)
Spurious emissions
(RX)
-66
<-70
-61
dBm Measured conducted into 50ohms
30MHz to 1GHz
1GHz to 12GHz
Intermodulation
protection
41 dB For 1% PER at with wanted signal
3dB above sensitivity. Modulated
Interferers at 2 & 4 channel
separation (Note1)
RSSI linearity -4 +4 dB -95 to -10dBm.
Available through Hardware API
Transmitter Characteristics
Transmit power 0 +2.0 dBm
Output power control
range
-35 dB In three 12dB steps (Note3)
Spurious emissions
(TX)
-40
<-70
<-70
dBm Measured conducted into 50ohms
30MHz to 1GHz,
1GHz to12.5GHz,
The following exceptions apply
1.8 to 1.9GHz & 5.15 to 5.3GHz
EVM [Offset] 3.0 4.5 % At maximum output power
Transmit Power
Spectral Density
-38 -20 dBc At greater than 3.5MHz offset, as
per 802.15.4, Section 6.5.3.174 JN-DS-JN516x v1.3 Production © NXP Laboratories UK 2013
Radio Parameters: 2.0-3.6V, +125ºC
Parameter Min Typical Max Unit Notes
Receiver Characteristics
Receive sensitivity -89 -92 dBm Nominal for 1% PER, as per
802.15.4 Section 6.5.3.3
Maximum input signal +5 dBm For 1% PER, measured as
sensitivity
Adjacent channel
rejection (-1/+1 ch)
[CW Interferer]
20/34
[TBC]
dBc For 1% PER, with wanted signal
3dB, above sensitivity. (Note1,2)
(modulated interferer)
Alternate channel
rejection (-2/+2 ch)
[CW Interferer]
40/44
[TBC]
dBc For 1% PER, with wanted signal
3dB, above sensitivity. (Note1,2)
(modulated interferer)
Other in band rejection
2.4 to 2.4835 GHz,
excluding adj channels
49 dBc For 1% PER with wanted signal
3dB above sensitivity. (Note1)
Out of band rejection 53 dBc For 1% PER with wanted signal
3dB above sensitivity. All
frequencies except wanted/2 which
is 8dB lower. (Note1)
Spurious emissions
(RX)
-66
<-70
-61
dBm Measured conducted into 50ohms
30MHz to 1GHz
1GHz to 12GHz
Intermodulation
protection
41 dB For 1% PER at with wanted signal
3dB above sensitivity. Modulated
Interferers at 2 & 4 channel
separation (Note1)
RSSI linearity -4 +4 dB -95 to -10dBm.
Available through Hardware API
Transmitter Characteristics
Transmit power -0.5 +1.5 dBm
Output power control
range
-35 dB In three 12dB steps (Note3)
Spurious emissions
(TX)
-40
<-70
<-70
dBm Measured conducted into 50ohms
30MHz to 1GHz,
1GHz to12.5GHz,
The following exceptions apply
1.8 to 1.9GHz & 5.15 to 5.3GHz
EVM [Offset] 3.0 4.5 % At maximum output power
Transmit Power
Spectral Density
-38 -20 dBc At greater than 3.5MHz offset, as
per 802.15.4, Section 6.5.3.1© NXP Laboratories UK 2013 JN-DS-JN516x v1.3 Production 75
Note1: Blocker rejection is defined as the value, when 1% PER is seen with the wanted signal 3dB above sensitivity,
as per 802.15.4 Section 6.5.3.4
Note2: Channels 11,17,24 low/high values reversed.
Note3: Up to an extra 2.5dB of attenuation is available if required.76 JN-DS-JN516x v1.3 Production © NXP Laboratories UK 2013
Appendix A Mechanical and Ordering Information
A.1 SOT618-1 HVQFN40 40-pin QFN Package Drawing
Figure 45: 40-pin QFN Package Drawings
UNIT A
max.
A1 b c D Dh E Eh e e1 e2 L v w y y1
mm 1 0.05
0.00
0.30
0.18 0.2 6.1
5.9
4.75
4.45
6.1
5.9
4.75
4.45 0.5 4.5 4.5 0.5
0.3 0.1 0.05 0.05 0.1
Table 10: Package Dimensions
Plastic or metal protrusions of 0.075 mm maximum per side are
not included.© NXP Laboratories UK 2013 JN-DS-JN516x v1.3 Production 77
A.2 Footprint Information
Information for reflow soldering. All dimensions are given in the table underneath and are in millimeters
Solder land
Solder land plus solder paste
A
B
C
D
E
F
G
Figure 46: PCB Decal
The PCB schematic and layout rules detailed in Appendix B.4 must
be followed. Failure to do so will likely result in the JN516x failing
to meet the performance specification detailed herein and worst
case may result in device not functioning in the end application.
A B C D E F G
0.5 0.45 0.3 0.25 1.53x1.53 4.1x4.1 1.0x0.25
Table 11: Footprint Dimensions78 JN-DS-JN516x v1.3 Production © NXP Laboratories UK 2013
A.3 Ordering Information
The standard qualification for the JN516x is extended industrial temperature range: -40ºC to +125ºC, packaged in a
40-pin QFN package.
The device is available in two different reel quantities
• Tape mounted 4000 devices on a 330mm reel
• Tape mounted 1000 devices on a 180mm reel
Order Codes:
Part Number Ordering Code Description
JN5161-001 JN5161/001 JN5161 microcontroller
JN5164-001 JN5164/001 JN5164 microcontroller
JN5168-001 JN5168/001 JN5168 microcontroller
The Standard Supply Multiple (SSM) for Engineering Samples or Prototypes is 50 units with a maximum of 250 units.
If the quantity of Engineering Samples or Prototypes ordered is less than a reel quantity, then these will be shipped in
tape form only, with no reel and will not be dry packaged in a moisture sensitive environment.
The SSM for Production status devices is one reel, all reels are dry packaged in a moisture barrier bag see A.5.3.© NXP Laboratories UK 2013 JN-DS-JN516x v1.3 Production 79
A.4 Device Package Marking
The diagram below shows the package markings for JN516x. The package on the left along with the legend
information below it, shows the general format of package marking. The package on the right shows the specific
markings for a JN5168 device, that came from assembly build number 01 and was manufactured week 25 of 2011.
J N 5168 A
XXXXXX
XXXXFF
XXXYWWXX
J N 5168 A
RUL 280
0 0 Y U 0 1
qSD 125 -X
NXP
NXP
Figure 47: Device Package Marking
Legend:
JN Family part code
XXXX 4 digit part number
FF 2 digit assembly build number
Y 1 digit year number
WW 2 digit week number
Ordering Code Part Marking
JN5161/001 JN5161A
JN5164/001 JN5164A
JN5168/001 JN5168A80 JN-DS-JN516x v1.3 Production © NXP Laboratories UK 2013
A.5 Tape and Reel Information
A.5.1 Tape Orientation and Dimensions
The general orientation of the 40QFN package in the tape is as shown in Figure 48.
Figure 48: Tape and Reel Orientation
Figure 49 shows the detailed dimensions of the tape used for 6x6mm 40QFN devices.
Reference Dimensions (mm)
Ao 6.30 ±0.10
Bo 6.30 ±0.10
Ko 1.10 ±0.10
F 7.500 ±0.10
P1 12.0 ±0.10
W 16.00 +0.30/-0.3
(I) Measured from centreline of sprocket hole to centreline of pocket
(II) Cumulative tolerance of 10 sprocket holes is ±0.20mm
(III) Measured from centreline of sprocket hole to centreline of pocket
(IV) Other material available
Figure 49: Tape Dimensions© NXP Laboratories UK 2013 JN-DS-JN516x v1.3 Production 81
A.5.2 Reel Information: 180mm Reel
Surface Resistivity Between 1x10¹⁰ – 1x10¹² Ohms Square
Material High Impact Polystyrene, environmentally friendly, recyclable
All dimensions and tolerances are fully compliant with EIA-481-B and are specified in millimetres.
6 window design with one window on each side blanked to allow adequate labelling space.
Figure 50: Reel Dimensions82 JN-DS-JN516x v1.3 Production © NXP Laboratories UK 2013
A.5.3 Reel Information: 330mm Reel
Surface Resistivity Between 10e9 – 10e11 Ohms Square
Material High Impact Polystyrene with Antistatic Additive
All dimensions and tolerances are fully compliant with EIA-481-B and are specified in millimetres.
3 window design to allow adequate labelling space.
Figure 51: 330mm Reel Dimensions
A.5.4 Dry Pack Requirement for Moisture Sensitive Material
Moisture sensitive material, as classified by JEDEC standard J-STD-033, must be dry packed. The 40 lead QFN
package is MSL2A/260°
C, and is dried before sealing in a moisture barrier bag (MBB) with desiccant bag weighing at
67.5 grams of activated clay and a humidity indicator card (HIC) meeting MIL-L-8835 specification. The MBB has a
moisture-sensitivity caution label to indicate the moisture-sensitive classification of the enclosed devices.© NXP Laboratories UK 2013 JN-DS-JN516x v1.3 Production 83
Appendix B Development Support
B.1 Crystal Oscillators
This Section covers some of the general background to crystal oscillators, to help the user make informed decisions
concerning the choice of crystal and the associated capacitors.
B.1.1 Crystal Equivalent Circuit
Cs
Lm Rm Cm
C1 C2
Where Cm is the motional capacitance
Lm is the motional inductance. This together with Cm defines the oscillation frequency (series)
Rm is the equivalent series resistance ( ESR ).
CS is the shunt or package capacitance and this is a parasitic
B.1.2 Crystal Load Capacitance
The crystal load capacitance is the total capacitance seen at the crystal pins, from all sources. As the load
capacitance (CL) affects the oscillation frequency by a process known as ‘pulling’, crystal manufacturers specify the
frequency for a given load capacitance only. A typical pulling coefficient is 15ppm/pF, to put this into context the
maximum frequency error in the IEEE802.15.4 specification is +/-40ppm for the transmitted signal. Therefore, it is
important for resonance at 32MHz exactly, that the specified load capacitance is provided.
The load capacitance can be calculated using:
CL =
1 2
1 2
T T
T T
C C
C C
+
×
Total capacitance CT1 = C1 + C1P + C1in
Where C1 is the capacitor component
C1P is the PCB parasitic capacitance. With the recommended layout this is about 1.6pF
C1in is the on-chip parasitic capacitance and is about 1.4pF typically.
Similarly for CT 2
Hence for a 9pF load capacitance, and a tight layout the external capacitors should be 15pF84 JN-DS-JN516x v1.3 Production © NXP Laboratories UK 2013
B.1.3 Crystal ESR and Required Transconductance
The resistor in the crystal equivalent circuit represents the energy lost. To maintain oscillation, power must be
supplied by the amplifier, but how much? Firstly, the Pi connected capacitors C1 and C2 with CS from the crystal,
apply an impedance transformation to Rm, when viewed from the amplifier. This new value is given by:
2
ˆ
+ = L
S L m m
C
C C R R
The amplifier is a transconductance amplifier, which takes a voltage and produces an output current. The amplifier
together with the capacitors C1 and C2, form a circuit, which provides a negative resistance, when viewed from the
crystal. The value of which is given by:
2
1× 2 ×ω = T T
m
NEG
C C
g R
Where gm is the transconductance
ω is the frequency in rad/s
Derivations of these formulas can be easily found in textbooks.
In order to give quick and reliable oscillator start-up, a common rule of thumb is to set the amplifier negative
resistance to be a minimum of 4 times the effective crystal resistance. This gives
2
T1× T 2 ×ω
m
C C
g ≥
2
4
+
L
S L m
C
C C R
This can be used to give an equation for the required transconductance.
1 2
2 1 2 1 2 2 4 [ ( ) ]
T T
m S T T T T m C C
R C C C C C
g ×
× + + × ≥ ω
Example: Using typical 32MHz crystal parameters of Rm =40Ω, CS =1pF and CT1 =CT 2 =18pF ( for a load
capacitance of 9pF), the equation above gives the required transconductance ( gm ) as 2.59mA/V. The JN516x has a
typical value for transconductance of 4.4mA/V
The example and equation illustrate the trade-off that exists between the load capacitance and crystal ESR. For
example, a crystal with a higher load capacitance can be used, but the value of max. ESR that can be tolerated is
reduced. Also note, that the circuit sensitivity to external capacitance [ C1 , C2 ] is a square law.
Meeting the criteria for start-up is only one aspect of the way these parameters affect performance, they also affect
the time taken during start-up to reach a given, (or full), amplitude. Unfortunately, there is no simple mathematical
model for this, but the trend is the same. Therefore, both a larger load capacitance and larger crystal ESR will give a
longer start-up time, which has the disadvantages of reduced battery life and increased latency. © NXP Laboratories UK 2013 JN-DS-JN516x v1.3 Production 85
B.2 32MHz Oscillator
The JN516x contains the necessary on-chip components to build a 32 MHz reference oscillator with the addition of an
external crystal resonator, two tuning capacitors. The schematic of these components are shown in Figure 52. The
two capacitors, C1 and C2, will typically be 15pF ±5% and use a COG dielectric. For a detailed specification of the
crystal required and factors affecting C1 and C2 see Appendix B.1. As with all crystal oscillators the PCB layout is
especially important, both to keep parasitic capacitors to a minimum and to reduce the possibility of PCB noise being
coupled into the oscillator.
XTALOUT
C1 C2
XTALIN R1
JN516x
Figure 52: Crystal Oscillator Connections
The clock generated by this oscillator provides the reference for most of the JN516x subsystems, including the
transceiver, processor, memory and digital and analogue peripherals.
32MHz Crystal Requirements
Parameter Min Typ Max Notes
Crystal Frequency 32MHz
Crystal Tolerance 40ppm Including temperature
and ageing
Crystal ESR Range (Rm) 10Ω 60Ω See below for more
details
Crystal Load Capacitance
Range (CL) 6pF 9pF 12pF See below for more
details
Not all Combinations of Crystal Load Capacitance and ESR are Valid
Recommended Crystal Load Capacitance 9pF and max ESR 40 Ω
External Capacitors (C1 & C2)
For recommended Crystal
15pF CL = 9pF, total external
capacitance needs to be
2*CL. , allowing for stray
capacitance from chip,
package and PCB 86 JN-DS-JN516x v1.3 Production © NXP Laboratories UK 2013
As is stated above, not all combinations of crystal load capacitance and ESR are valid, and as explained in Appendix
B.1.3 there is a trade-off that exists between the load capacitance and crystal ESR to achieve reliable performance.
For this reason, we recommend that for a 9pF load capacitance crystals be specified with a maximum ESR of 40
ohms. For lower load capacitances the recommended maximum ESR rises, for example, CL=7pF the max ESR is 61
ohms. For the lower cost crystals in the large HC49 package, a load capacitance of 9 or 10pF is widely available and
the max ESR of 30 ohms specified by many manufacturers is acceptable. Also available in this package style, are
crystals with a load capacitance of 12pF, but in this case the max ESR required is 25 ohms or better.
Below is measurement data showing the variation of the crystal oscillator amplifier transconductance with
temperature and supply voltage, notice how small the variation is. Circuit techniques have been used to apply
compensation, such that the user need only design for nominal conditions.
4.15
4.20
4.25
4.30
4.35
-40 -20 0 20 40 60 80 100 120
Transconductance (mA/V)
Temperature (C)
32MHz Crystal Oscillator
4.27
4.28
4.29
4.3
4.31
4.32
4.33
4.34
4.35
2 2.2 2.4 2.6 2.8 3 3.2 3.4 3.6
Transconductance (mA/V)
Supply Voltage (VDD)
32MHz Crystal Oscillator © NXP Laboratories UK 2013 JN-DS-JN516x v1.3 Production 87
B.3 32kHz Oscillator
In order to obtain more accurate sleep periods, the JN516x contains the necessary on-chip components to build an
optional 32kHz oscillator with the addition of an external 32.768kHz crystal and two tuning capacitors. The crystal
should be connected between XTAL32K_IN and XTAL32K_OUT (DIO9 and DIO10), with two equal capacitors to
ground, one on each pin. The schematic of these components are shown in Figure 53. The two capacitors, C1 and
C2, will typically be in the range 10 to 22pF ±5% and use a COG dielectric. As with all crystal oscillators the PCB
layout is especially important, both to keep parasitic capacitors to a minimum and to reduce the possibility of PCB
noise being coupled into the oscillator.
32KXTALIN 32KXTALOUT
JN516x
Figure 53: 32kHz Crystal Oscillator Connections
The electrical specification of the oscillator can be found in 19.3.10. The oscillator cell is flexible and can operate with
a range of commonly available 32kHz crystals with load capacitances from 6 to 12.5p, and ESR up to 80KΩ. It
achieves this by using automatic gain control (AGC), which senses the signal swing. As explained in Appendix B.1.3
there is a trade-off that exists between the load capacitance and crystal ESR to achieve reliable performance. The
use of an AGC function allows a wider range of crystal load capacitors and ESR’s to be accommodated than would
otherwise be possible. However, this benefit does mean the supply current varies with the supply voltage (VDD),
value of the total capacitance at each pin, and the crystal ESR. This is described in the table and graphs below.
32kHz Crystal Requirements
Parameter Min Typ Max Notes
Crystal Frequency 32kHz
Supply Current 1.4µA Vdd=3v, temp=25 C, load
cap =9pF, Rm=25K
Supply Current Temp. Coeff. 0.1%/C Vdd=3v
Crystal ESR Range (Rm) 10KΩ 25KΩ 80KΩ See below for more details
Crystal Load Capacitance
Range (CL)
6pF 9pF 12.5pF See below for more details
Not all Combinations of Crystal Load Capacitance and ESR are Valid 88 JN-DS-JN516x v1.3 Production © NXP Laboratories UK 2013
Three examples of typical crystals are given, each with the value of external capacitors to use, plus the likely supply
current and start-up time that can be expected. Also given is the maximum recommended ESR based on the start-up
criteria given in Appendix B.1.3. The values of the external capacitors can be calculated using the equation in
Appendix B.1.2 .
Load Capacitance Ext Capacitors Current Start-up Time Max ESR
9pF 15pF 1.4µA 0.5sec 70KΩ
6pF 9pF 1.1µA 0.4sec 80KΩ
12.5pF 22pF 2.2µA 1.0sec 35KΩ
Below is measurement data showing the variation of the crystal oscillator supply current with voltage and with crystal
ESR, for two load capacitances.
1
1.1
1.2
1.3
1.4
1.5
1.6
1.7
1.8
2 2.2 2.4 2.6 2.8 3 3.2 3.4 3.6
Current (uA)
Supply Voltage (VDD)
32kHz Crystal Oscillator
0.6
0.8
1
1.2
1.4
1.6
10 20 30 40 50 60 70 80
Normalised Current (IDD)
Crystal ESR (K ohm)
32KHz Crystal Oscillator Current
9pF
12.5pF© NXP Laboratories UK 2013 JN-DS-JN516x v1.3 Production 89
B.4 JN516x Module Reference Designs
For customers wishing to integrate the JN516x device directly into their system, NXP provide a range of Module
Reference Designs, covering standard, medium and high-power modules fitted with different Antennae
To ensure the correct performance, it is strongly recommended that where possible the design details provided by the
reference designs, are used in their exact form for all end designs, this includes component values, pad dimensions,
track layouts etc. In order to minimise all risks, it is recommended that the entire layout of the appropriate reference
module, if possible, be replicated in the end design.
For full details, see [5]. Please contact technical support.
B.4.1 Schematic Diagram
A schematic diagram of the JN516x PCB antenna reference module is shown in figure 53. Details of component
values and PCB layout constraints can be found in Table 12.
1
40 39 38 37 36 35 34 33 32 31
VSSA
2
3
4
5
6
7
8
9
10
30
29
28
27
26
25
24
23
22
21
11 12 13 14 15 16 17 18 19 20
COMP1P
COMP1M
RESETN
XTAL_OUT
XTAL_IN
VB_SYNTH
VCOTUNE (NC)
VB_VCO
VDD1
IBIAS
VREF
VB_RF2
RF_IN
VB_RF
ADC1
SPISEL1
SPISEL2
DIO2
DIO3
DO0
VSS1
DO1
DIO18
DIO19
VB_RAM
CTS0
RTS0
TXD0
RXD0
VDD2
SIF_D
VSS2
SIF_CLK
DIO13
DIO12
VB_DIG
DIO11
TIM0OUT
TIM0CAP
TIM0CK_GT
C7: 100nF
2-wire Serial Port Timer0
C16: 100nF UART0/JTAG
C6: 100nF
SPI Select
Analogue IO
C1: 47pF C3: 100nF L1: 5.1nH
L2: 3.9nH
VB_RF
R1: 43kΩ
To coaxial socket
or integrated antenna
C20: 100nF
C13: 10µF C14: 100nF
VDD
C2: 10nF
C15: 100nF
C10: 15pF
C11: 15pF
Y1
Analogue IO
C4: 47pF
Figure 54 JN516x PCB Antenna Module Reference Design 90 JN-DS-JN516x v1.3 Production © NXP Laboratories UK 2013
Component
Designator Value/Type Function PCB Layout Constraints
C13 10µF Power source decoupling
C14 100nF Analogue Power decoupling Adjacent to U1 pin 9
C16 100nF Digital power decoupling Adjacent to U1 pin 30
C15 100nF VB Synth decoupling Less than 5mm from U1 pin 6
C2 10nF VB VCO decoupling Less than 5mm from U1 pin 8
C3 100nF VB RF decoupling Less than 5mm from U1 pin 12 and U1 pin 14
C4 47pF VB RF decoupling Less than 5mm from U1 pin 12 and U1 pin 14
C6 100nF VB RAM decoupling Less than 5mm from U1 pin 25
C7 100nF VB Dig decoupling Less than 5mm from U1 pin 35
R1 43k Current Bias Resistor Less than 5mm from U1 pin 10
C20 100nF Vref decoupling (optional) Less than 5mm from U1 pin 11
Y1 32MHz Crystal (AEL X32M000000S039 or Epson Toyocom X1E000021016700)
(CL = 9pF, Max ESR 40R)
C10 15pF +/-5% COG Crystal Load Capacitor Adjacent to pin 4 and Y1 pin 1
C11 15pF +/-5% COG Crystal Load Capacitor Adjacent to pin 5 and Y1 pin 3
C1 47pF AC Coupling
Phycomp 2238-869-15479
Must be copied directly from the reference design.
L1 5.1nH RF Matching Inductor
MuRata LQP15MN5N1B02
L2 3.9nH Load Inductor
MuRata LQP15MN3N9B02
Table 12: JN516x Printed Antenna Reference Module Components and PCB Layout Constraints
Note1: For extended temperature operation please contact technical support.
The paddle should be connected directly to ground. Any pads that require connection to ground should do so by
connecting directly to the paddle.© NXP Laboratories UK 2013 JN-DS-JN516x v1.3 Production 91
B.4.2 PCB Design and Reflow Profile
PCB and land pattern designs are key to the reliability of any electronic circuit design.
The Institute for Interconnecting and Packaging Electronic Circuits (IPC) defines a number of standards for electronic
devices. One of these is the "Surface Mount Design and Land Pattern Standard" IPC-SM-782 [3], commonly referred
to as “IPC782". This specification defines the physical packaging characteristics and land patterns for a range of
surface mounted devices. IPC782 is also a useful reference document for general surface mount design techniques,
containing sections on design requirements, reliability and testability. NXP strongly recommends that this be referred
to when designing the PCB.
NXP also provide application note AN10366, “HVQFN application information” [6], which describes the reflow
soldering process. The suggested reflow profile, from that application note, is shown in Figure 55. The specific paste
manufacturers guidelines on peak flow temperature, soak times, time above liquids and ramp rates should also be
referenced.
Figure 55: Recommended Reflow Profile for Lead-free Solder Paste (SNAgCu) or PPF Lead Frame
B.4.3 Moisture Sensitivity Level (MSL)
If there is moisture trapped inside a package, and the package is exposed to a reflow temperature profile, the
moisture may turn into steam, which expands rapidly. This may cause damage to the inside of the package
(delamination), and it may result in a cracked semiconductor package body (the popcorn effect). A package’s MSL
depends on the package characteristics and on the temperature it is exposed to during reflow soldering. This is
explained in more detail in [7].
Depending on the damage after this test, an MSL of 1 (not sensitive to moisture) to 6 (very sensitive to moisture) is
attached to the semiconductor package.92 JN-DS-JN516x v1.3 Production © NXP Laboratories UK 2013
Related Documents
[1] IEEE Std 802.15.4-2006 IEEE Standard for Information Technology – Part 15.4 Wireless Medium Access Control
(MAC) and Physical Layer (PHY) Specifications for Low-Rate Wireless Personal Area Networks (LR-WPANs).
[2] JN-AN-1186 JN516x Temperature Dependent Operating Guidelines
[3] IPC-SM-782 Surface Mount Design and Land Pattern Standard
[4] JN-UG-3087 JN516x Integrated Peripherals API User Guide
[5] JN-RD-6038 Module Reference Design
[6] http://ics.nxp.com/support/documents/logic/pdf/an10366.pdf
[7] http://www.nxp.com/documents/application_note/AN10365.pdf
[8] JN-AN-1003 Boot Loader Operation
[9] JN-UG-3007 Flash Programmer User Guide
[10] JN-UG-3068 Time-of-flight API User Guide
[11] JN-AN-1143 Time-of-flight
[12] JN-UG-3075-JenOS User Guide
RoHS Compliance
JN516x devices meet the requirements of Directive 2002/95/EC of the European Parliament and of the Council on
the Restriction of Hazardous Substance (RoHS) and of the China RoHS (SJ/T11363 – 2006) requirements which
came into force on 1st March 2007.
Status Information
The status of this Data Sheet is. Production
NXP Low Power RF products progress according to the following format:
Advance
The Data Sheet shows the specification of a product in planning or in development.
The functionality and electrical performance specifications are target values of the design and may be used as a
guide to the final specification.
NXP reserves the right to make changes to the product specification at anytime without notice.
Preliminary
The Data Sheet shows the specification of a product that is commercially available, but is not yet fully qualified.
The functionality of the product is final. The electrical performance specifications are target values and may used as a
guide to the final specification.
NXP reserves the right to make changes to the product specification at anytime without notice.
Production
This is the production Data Sheet for the product.
All functional and electrical performance specifications, where included, including min and max values are derived
from detailed product characterization. This Data Sheet supersedes all previous document versions.
NXP reserves the right to make changes to the product specification at anytime without notice.© NXP Laboratories UK 2013 JN-DS-JN516x v1.3 Production 93
Disclaimers
Limited warranty and liability — Information in this document is believed to be accurate and reliable. However, NXP Semiconductors does not give
any representations or warranties, expressed or implied, as to the accuracy or completeness of such information and shall have no liability for the
consequences of use of such information. NXP Semiconductors takes no responsibility for the content in this document if provided by an information
source outside of NXP Semiconductors.
In no event shall NXP Semiconductors be liable for any indirect, incidental, punitive, special or consequential damages (including - without limitation -
lost profits, lost savings, business interruption, costs related to the removal or replacement of any products or rework charges) whether or not such
damages are based on tort (including negligence), warranty, breach of contract or any other legal theory.
Notwithstanding any damages that customer might incur for any reason whatsoever, NXP Semiconductors’ aggregate and cumulative liability towards
customer for the products described herein shall be limited in accordance with the Terms and conditions of commercial sale of NXP Semiconductors.
Right to make changes — NXP Semiconductors reserves the right to make changes to information published in this document, including without
limitation specifications and product descriptions, at any time and without notice. This document supersedes and replaces all information supplied prior
to the publication hereof.
Suitability for use — NXP Semiconductors products are not designed, authorized or warranted to be suitable for use in life support, life-critical or
safety-critical systems or equipment, nor in applications where failure or malfunction of an NXP Semiconductors product can reasonably be expected to
result in personal injury, death or severe property or environmental damage. NXP Semiconductors and its suppliers accept no liability for inclusion
and/or use of NXP Semiconductors products in such equipment or applications and therefore such inclusion and/or use is at the customer’s own risk.
Applications — Applications that are described herein for any of these products are for illustrative purposes only. NXP Semiconductors makes no
representation or warranty that such applications will be suitable for the specified use without further testing or modification.
Customers are responsible for the design and operation of their applications and products using NXP Semiconductors products, and NXP
Semiconductors accepts no liability for any assistance with applications or customer product design. It is customer’s sole responsibility to determine
whether the NXP Semiconductors product is suitable and fit for the customer’s applications and products planned, as well as for the planned
application and use of customer’s third party customer(s). Customers should provide appropriate design and operating safeguards to minimize the risks
associated with their applications and products.
NXP Semiconductors does not accept any liability related to any default, damage, costs or problem which is based on any weakness or default in the
customer’s applications or products, or the application or use by customer’s third party customer(s). Customer is responsible for doing all necessary
testing for the customer’s applications and products using NXP Semiconductors products in order to avoid a default of the applications and the
products or of the application or use by customer’s third party customer(s). NXP does not accept any liability in this respect.
Export control — This document as well as the item(s) described herein may be subject to export control regulations. Export might require a prior
authorization from competent authorities.
Limiting values — Stress above one or more limiting values (as defined in the Absolute Maximum Ratings System of IEC 60134) will cause
permanent damage to the device. Limiting values are stress ratings only and (proper) operation of the device at these or any other conditions above
those given in the Operating Conditions section or the Electrical Characteristics sections of this document is not warranted. Constant or repeated
exposure to limiting values will permanently and irreversibly affect the quality and reliability of the device.
AEC unqualified products — This product has not been qualified to the appropriate Automotive Electronics Council (AEC) standard Q100 or Q101
and should not be used in automotive applications, including but not limited to applications where failure or malfunction of an NXP Semiconductors
product can reasonably be expected to result in personal injury, death or severe property or environmental damage. NXP Semiconductors accepts no
liability for inclusion and/or use of NXP Semiconductors products in such equipment or applications and therefore such inclusion and/or use is for the
customer’s own risk.
Product specification — The information and data provided in a Product data sheet shall define the specification of the product as agreed between
NXP Semiconductors and its customer, unless NXP Semiconductors and customer have explicitly agreed otherwise in writing. In no event however,
shall an agreement be valid in which the NXP Semiconductors product is deemed to offer functions and qualities beyond those described in the
Product data sheet
All products are sold subject to NXP Semiconductors’ terms and conditions of sale, supplied at the time of order acknowledgment and published at
http://www.nxp.com/profile/terms.
Trademarks
All trademarks are the property of their respective owners.
“JenNet” and “JenNet-IP” are trademarks of NXP B.V..
Version Control
Version Notes
1.0 07-01-13 First public version, released as Production
1.1 14-01-13 Minor corrections made
1.2 25-04-13 Additional features included and more information on non-volatile memory
1.3 12-06-13 Minor correction to front page and format of PCB decal diagram94 JN-DS-JN516x v1.3 Production © NXP Laboratories UK 2013
Contact Details
NXP Laboratories UK Ltd
Furnival Street
Sheffield
S1 4QT
United Kingdom
Tel: +44 (0)114 281 2655
Fax: +44 (0) 114 281 2951
For the contact details of your local NXP office or distributor, refer to the NXP web site:
www.nxp.com
1. General description
The LPC178x/7x is an ARM Cortex-M3 based microcontroller for embedded applications
requiring a high level of integration and low power dissipation.
The ARM Cortex-M3 is a next generation core that offers better performance than the
ARM7 at the same clock rate and other system enhancements such as modernized
debug features and a higher level of support block integration. The ARM Cortex-M3 CPU
incorporates a 3-stage pipeline and has a Harvard architecture with separate local
instruction and data buses, as well as a third bus with slightly lower performance for
peripherals. The ARM Cortex-M3 CPU also includes an internal prefetch unit that
supports speculative branches.
The LPC178x/7x adds a specialized flash memory accelerator to accomplish optimal
performance when executing code from flash. The LPC178x/7x operates at up to
120 MHz CPU frequency.
The peripheral complement of the LPC178x/7x includes up to 512 kB of flash program
memory, up to 96 kB of SRAM data memory, up to 4032 byte of EEPROM data memory,
External Memory Controller (EMC), LCD (LPC178x only), Ethernet, USB
Device/Host/OTG, a General Purpose DMA controller, five UARTs, three SSP controllers,
three I2C-bus interfaces, a Quadrature Encoder Interface, four general purpose timers,
two general purpose PWMs with six outputs each and one motor control PWM, an
ultra-low power RTC with separate battery supply and event recorder, a windowed
watchdog timer, a CRC calculation engine, up to 165 general purpose I/O pins, and more.
The analog peripherals include one eight-channel 12-bit ADC and a 10-bit DAC.
The pinout of LPC178x/7x is intended to allow pin function compatibility with the LPC24xx
and LPC23xx.
For additional documentation, see Section 18 “References”.
2. Features and benefits
Functional replacement for the LPC23xx and LPC24xx family devices.
System:
ARM Cortex-M3 processor, running at frequencies of up to 120 MHz. A Memory
Protection Unit (MPU) supporting eight regions is included.
ARM Cortex-M3 built-in Nested Vectored Interrupt Controller (NVIC).
LPC178x/7x
32-bit ARM Cortex-M3 microcontroller; up to 512 kB flash and
96 kB SRAM; USB Device/Host/OTG; Ethernet; LCD; EMC
Rev. 5 — 9 September 2014 Product data sheetLPC178X_7X All information provided in this document is subject to legal disclaimers. © NXP Semiconductors N.V. 2014. All rights reserved.
Product data sheet Rev. 5 — 9 September 2014 2 of 122
NXP Semiconductors LPC178x/7x
32-bit ARM Cortex-M3 microcontroller
Multilayer AHB matrix interconnect provides a separate bus for each AHB master.
AHB masters include the CPU, USB, Ethernet, and the General Purpose DMA
controller. This interconnect provides communication with no arbitration delays
unless two masters attempt to access the same slave at the same time.
Split APB bus allows for higher throughput with fewer stalls between the CPU and
DMA. A single level of write buffering allows the CPU to continue without waiting for
completion of APB writes if the APB was not already busy.
Cortex-M3 system tick timer, including an external clock input option.
Standard JTAG test/debug interface as well as Serial Wire Debug and Serial
WireTrace Port options.
Embedded Trace Macrocell (ETM) module supports real-time trace.
Boundary scan for simplified board testing.
Non-maskable Interrupt (NMI) input.
Memory:
Up to 512 kB on-chip flash program memory with In-System Programming (ISP)
and In-Application Programming (IAP) capabilities. The combination of an
enhanced flash memory accelerator and location of the flash memory on the CPU
local code/data bus provides high code performance from flash.
Up to 96 kB on-chip SRAM includes:
64 kB of main SRAM on the CPU with local code/data bus for high-performance
CPU access.
Two 16 kB peripheral SRAM blocks with separate access paths for higher
throughput. These SRAM blocks may be used for DMA memory as well as for
general purpose instruction and data storage.
Up to 4032 byte on-chip EEPROM.
LCD controller, supporting both Super-Twisted Nematic (STN) and Thin-Film
Transistors (TFT) displays.
Dedicated DMA controller.
Selectable display resolution (up to 1024 768 pixels).
Supports up to 24-bit true-color mode.
External Memory Controller (EMC) provides support for asynchronous static memory
devices such as RAM, ROM and flash, as well as dynamic memories such as single
data rate SDRAM with an SDRAM clock of up to 80 MHz.
Eight channel General Purpose DMA controller (GPDMA) on the AHB multilayer
matrix that can be used with the SSP, I2S, UART, CRC engine, Analog-to-Digital and
Digital-to-Analog converter peripherals, timer match signals, GPIO, and for
memory-to-memory transfers.
Serial interfaces:
Ethernet MAC with MII/RMII interface and associated DMA controller. These
functions reside on an independent AHB.
USB 2.0 full-speed dual-port device/host/OTG controller with on-chip PHY and
associated DMA controller.
Five UARTs with fractional baud rate generation, internal FIFO, DMA support, and
RS-485/EIA-485 support. One UART (UART1) has full modem control I/O, and one
UART (USART4) supports IrDA, synchronous mode, and a smart card mode
conforming to ISO7816-3.
Three SSP controllers with FIFO and multi-protocol capabilities. The SSP
controllers can be used with the GPDMA.LPC178X_7X All information provided in this document is subject to legal disclaimers. © NXP Semiconductors N.V. 2014. All rights reserved.
Product data sheet Rev. 5 — 9 September 2014 3 of 122
NXP Semiconductors LPC178x/7x
32-bit ARM Cortex-M3 microcontroller
Three enhanced I2C-bus interfaces, one with a true open-drain output supporting
the full I2C-bus specification and Fast-mode Plus with data rates of 1 Mbit/s, two
with standard port pins. Enhancements include multiple address recognition and
monitor mode.
I
2S-bus (Inter-IC Sound) interface for digital audio input or output. It can be used
with the GPDMA.
CAN controller with two channels.
Digital peripherals:
SD/MMC memory card interface.
Up to 165 General Purpose I/O (GPIO) pins depending on the packaging with
configurable pull-up/down resistors, open-drain mode, and repeater mode. All
GPIOs are located on an AHB bus for fast access and support Cortex-M3
bit-banding. GPIOs can be accessed by the General Purpose DMA Controller. Any
pin of ports 0 and 2 can be used to generate an interrupt.
Two external interrupt inputs configurable as edge/level sensitive. All pins on port 0
and port 2 can be used as edge sensitive interrupt sources.
Four general purpose timers/counters with a total of eight capture inputs and ten
compare outputs. Each timer block has an external count input. Specific timer
events can be selected to generate DMA requests.
Quadrature encoder interface that can monitor one external quadrature encoder.
Two standard PWM/timer blocks with external count input option.
One motor control PWM with support for three-phase motor control.
Real-Time Clock (RTC) with a separate power domain. The RTC is clocked by a
dedicated RTC oscillator. The RTC block includes 20 bytes of battery-powered
backup registers, allowing system status to be stored when the rest of the chip is
powered off. Battery power can be supplied from a standard 3 V lithium button cell.
The RTC will continue working when the battery voltage drops to as low as 2.1 V.
An RTC interrupt can wake up the CPU from any reduced power mode.
Event Recorder that can capture the clock value when an event occurs on any of
three inputs. The event identification and the time it occurred are stored in
registers. The Event Recorder is located in the RTC power domain and can
therefore operate as long as there is RTC power.
Windowed Watchdog Timer (WWDT). Windowed operation, dedicated internal
oscillator, watchdog warning interrupt, and safety features.
CRC Engine block can calculate a CRC on supplied data using one of three
standard polynomials. The CRC engine can be used in conjunction with the DMA
controller to generate a CRC without CPU involvement in the data transfer.
Analog peripherals:
12-bit Analog-to-Digital Converter (ADC) with input multiplexing among eight pins,
conversion rates up to 400 kHz, and multiple result registers. The 12-bit ADC can
be used with the GPDMA controller.
10-bit Digital-to-Analog Converter (DAC) with dedicated conversion timer and
GPDMA support.
Power control:
Four reduced power modes: Sleep, Deep-sleep, Power-down, and Deep
power-down.LPC178X_7X All information provided in this document is subject to legal disclaimers. © NXP Semiconductors N.V. 2014. All rights reserved.
Product data sheet Rev. 5 — 9 September 2014 4 of 122
NXP Semiconductors LPC178x/7x
32-bit ARM Cortex-M3 microcontroller
The Wake-up Interrupt Controller (WIC) allows the CPU to automatically wake up
from any priority interrupt that can occur while the clocks are stopped in
Deep-sleep, Power-down, and Deep power-down modes.
Processor wake-up from Power-down mode via any interrupt able to operate
during Power-down mode (includes external interrupts, RTC interrupt, PORT0/2
pin interrupt, and NMI).
Brownout detect with separate threshold for interrupt and forced reset.
On-chip Power-On Reset (POR).
Clock generation:
Clock output function that can reflect the main oscillator clock, IRC clock, RTC
clock, CPU clock, USB clock, or the watchdog timer clock.
On-chip crystal oscillator with an operating range of 1 MHz to 25 MHz.
12 MHz Internal RC oscillator (IRC) trimmed to 1% accuracy that can optionally be
used as a system clock.
An on-chip PLL allows CPU operation up to the maximum CPU rate without the
need for a high-frequency crystal. May be run from the main oscillator or the
internal RC oscillator.
A second, dedicated PLL may be used for USB interface in order to allow added
flexibility for the Main PLL settings.
Versatile pin function selection feature allows many possibilities for using on-chip
peripheral functions.
Unique device serial number for identification purposes.
Single 3.3 V power supply (2.4 V to 3.6 V). Temperature range of 40 C to 85 C.
Available as LQFP208, TFBGA208, TFBGA180, and LQFP144 package.
3. Applications
Communications:
Point-of-sale terminals, web servers, multi-protocol bridges
Industrial/Medical:
Automation controllers, application control, robotics control, HVAC, PLC, inverters,
circuit breakers, medical scanning, security monitoring, motor drive, video intercom
Consumer/Appliance:
Audio, MP3 decoders, alarm systems, displays, printers, scanners, small
appliances, fitness equipment
Automotive:
After-market, car alarms, GPS/fleet monitorsLPC178X_7X All information provided in this document is subject to legal disclaimers. © NXP Semiconductors N.V. 2014. All rights reserved.
Product data sheet Rev. 5 — 9 September 2014 5 of 122
NXP Semiconductors LPC178x/7x
32-bit ARM Cortex-M3 microcontroller
4. Ordering information
Table 1. Ordering information
Type number Package
Name Description Version
LPC1788
LPC1788FBD208 LQFP208 plastic low profile quad flat package; 208 leads; body 28 28 1.4 mm SOT459-1
LPC1788FET208 TFBGA208 plastic thin fine-pitch ball grid array package; 208 balls; body
15 ´ 15 ´ 0.7 mm
SOT950-1
LPC1788FET180 TFBGA180 thin fine-pitch ball grid array package; 180 balls; body 12 ´ 12 ´ 0.8 mm SOT570-3
LPC1788FBD144 LQFP144 plastic low profile quad flat package; 144 leads; body 20 20 1.4 mm SOT486-1
LPC1787
LPC1787FBD208 LQFP208 plastic low profile quad flat package; 208 leads; body 28 28 1.4 mm SOT459-1
LPC1786
LPC1786FBD208 LQFP208 plastic low profile quad flat package; 208 leads; body 28 28 1.4 mm SOT459-1
LPC1785
LPC1785FBD208 LQFP208 plastic low profile quad flat package; 208 leads; body 28 28 1.4 mm SOT459-1
LPC1778
LPC1778FBD208 LQFP208 plastic low profile quad flat package; 208 leads; body 28 28 1.4 mm SOT459-1
LPC1778FET208 TFBGA208 plastic thin fine-pitch ball grid array package; 208 balls; body
15 ´ 15 ´ 0.7 mm
SOT950-1
LPC1778FET180 TFBGA180 thin fine-pitch ball grid array package; 180 balls; body 12 ´ 12 ´ 0.8 mm SOT570-3
LPC1778FBD144 LQFP144 plastic low profile quad flat package; 144 leads; body 20 20 1.4 mm SOT486-1
LPC1777
LPC1777FBD208 LQFP208 plastic low profile quad flat package; 208 leads; body 28 28 1.4 mm SOT459-1
LPC1776
LPC1776FBD208 LQFP208 plastic low profile quad flat package; 208 leads; body 28 28 1.4 mm SOT459-1
LPC1776FET180 TFBGA180 thin fine-pitch ball grid array package; 180 balls; body 12 ´ 12 ´ 0.8 mm SOT570-3
LPC1774
LPC1774FBD208 LQFP208 plastic low profile quad flat package; 208 leads; body 28 28 1.4 mm SOT459-1
LPC1774FBD144 LQFP144 plastic low profile quad flat package; 144 leads; body 20 20 1.4 mm SOT486-1LPC178X_7X All information provided in this document is subject to legal disclaimers. © NXP Semiconductors N.V. 2014. All rights reserved.
Product data sheet Rev. 5 — 9 September 2014 6 of 122
NXP Semiconductors LPC178x/7x
32-bit ARM Cortex-M3 microcontroller
[1] Maximum data bus width of the External Memory Controller (EMC) depends on package size. Smaller widths may be used.
[2] USART4 not available.
Table 2. LPC178x/7x ordering options
All parts include two CAN channels, three SSP interfaces, three I2C interfaces, one I2S interface, DAC, and an 8-channel
12-bit ADC.
Type number Flash
(kB)
Main
SRAM
(kB)
Peripheral
SRAM
(kB)
Total
SRAM
(kB)
EEPROM
(byte)
Ethernet USB UART EMC
bus
width
(bit)
[1]
LCD QEI SD/
MMC
LPC178x
LPC1788FBD208 512 64 16 2 96 4032 Y H/O/D 5 32 Y Y Y
LPC1788FET208 512 64 16 2 96 4032 Y H/O/D 5 32 Y Y Y
LPC1788FET180 512 64 16 2 96 4032 Y H/O/D 5 16 Y Y Y
LPC1788FBD144 512 64 16 2 96 4032 Y H/O/D 5 8 Y Y Y
LPC1787FBD208 512 64 16 2 96 4032 N H/O/D 5 32 Y Y Y
LPC1786FBD208 256 64 16 80 4032 Y H/O/D 5 32 Y Y Y
LPC1785FBD208 256 64 16 80 4032 N H/O/D 5 32 Y N Y
LPC177x
LPC1778FBD208 512 64 16 2 96 4032 Y H/O/D 5 32 N Y Y
LPC1778FET208 512 64 16 2 96 4032 Y H/O/D 5 32 N Y Y
LPC1778FET180 512 64 16 2 96 4032 Y H/O/D 5 16 N Y Y
LPC1778FBD144 512 64 16 2 96 4032 Y H/O/D 5 8 N Y Y
LPC1777FBD208 512 64 16 2 96 4032 N H/O/D 5 32 N Y Y
LPC1776FBD208 256 64 16 80 4032 Y H/O/D 5 32 N Y Y
LPC1776FET180 256 64 16 80 4032 Y H/O/D 5 16 N Y Y
LPC1774FBD208 128 32 8 40 2048 N D 5 32 N N N
LPC1774FBD144 128 32 8 40 2048 N D 4[2] 8 N N NLPC178X_7X All information provided in this document is subject to legal disclaimers. © NXP Semiconductors N.V. 2014. All rights reserved.
Product data sheet Rev. 5 — 9 September 2014 7 of 122
NXP Semiconductors LPC178x/7x
32-bit ARM Cortex-M3 microcontroller
5. Block diagram
(1) Not available on all parts. See Table 2.
Fig 1. Block diagram
SRAM
96/80/40 kB
ARM
CORTEX-M3
TEST/DEBUG
INTERFACE
EMULATION
TRACE MODULE
FLASH
ACCELERATOR
FLASH
512/256/128/64 kB
GPDMA
CONTROLLER
I-code
bus
D-code
bus
system
bus
AHB TO
APB
BRIDGE 0
HIGH-SPEED
GPIO AHB TO
APB
BRIDGE 1
4032 B/
2048 B
EEPROM
CLOCK
GENERATION,
POWER CONTROL,
SYSTEM
FUNCTIONS
clocks and
controls
JTAG
interface
debug
port
SSP0/2
USART4(1)
UART2/3
SYSTEM CONTROL
SSP1
UART0/1
I
2C0/1
CAN 0/1
TIMER 0/1
WINDOWED WDT
12-bit ADC
PWM0/1
PIN CONNECT
GPIO INTERRUPT CONTROL
RTC
BACKUP REGISTERS
EVENT RECORDER
32 kHz
OSCILLATOR
APB slave group 1
APB slave group 0
RTC POWER DOMAIN
LPC178x/7x
master
ETHERNET(1)
master
USB
DEVICE/
HOST(1)/OTG(1)
master
002aaf528
slave slave
CRC
slave slave slave
slave
EMC ROM
slave slave
LCD(1)
slave
MULTILAYER AHB MATRIX
I
2C2
TIMER2/3
DAC
I
2S
QUADRATURE ENCODER(1)
MOTOR CONTROL PWM
MPU
SD/MMC(1)
= connected to GPDMALPC178X_7X All information provided in this document is subject to legal disclaimers. © NXP Semiconductors N.V. 2014. All rights reserved.
Product data sheet Rev. 5 — 9 September 2014 8 of 122
NXP Semiconductors LPC178x/7x
32-bit ARM Cortex-M3 microcontroller
6. Pinning information
6.1 Pinning
Fig 2. Pin configuration (LQFP208)
Fig 3. Pin configuration (TFBGA208)
LPC178x/7xFBD208
156
53
104
208
157
105
1
52
002aaf518
002aaf529
LPC178x/7x
Transparent top view
ball A1
index area
U
T
R
P
N
M
K
H
L
J
G
F
E
D
C
A
B
2 4 6 8 10 12
13
14
15 17
16
1 3 5 7 9 11LPC178X_7X All information provided in this document is subject to legal disclaimers. © NXP Semiconductors N.V. 2014. All rights reserved.
Product data sheet Rev. 5 — 9 September 2014 9 of 122
NXP Semiconductors LPC178x/7x
32-bit ARM Cortex-M3 microcontroller
6.2 Pin description
I/O pins on the LPC178x/7x are 5 V tolerant and have input hysteresis unless otherwise
indicated in the table below. Crystal pins, power pins, and reference voltage pins are not
5 V tolerant. In addition, when pins are selected to be ADC inputs, they are no longer 5 V
tolerant and the input voltage must be limited to the voltage at the ADC positive reference
pin (VREFP).
All port pins Pn[m] are multiplexed, and the multiplexed functions appear in Table 3 in the
order defined by the FUNC bits of the corresponding IOCON register up to the highest
used function number. Each port pin can support up to eight multiplexed functions.
IOCON register FUNC values which are reserved are noted as ‘R’ in the pin configuration
table.
Fig 4. Pin configuration (TFBGA180)
Fig 5. Pin configuration (LQFP144)
002aaf519
LPC178x/7x
1 3 5 7 9 11 2 4 6 8 10 12 13 14
ball A1
index area
P
N
M
L
K
J
G
E
H
F
D
C
B
A
Transparent top view
LPC178x/7x
108
37
72
144
109
73
1
36
002aaf520LPC178X_7X All information provided in this document is subject to legal disclaimers. © NXP Semiconductors N.V. 2014. All rights reserved.
Product data sheet Rev. 5 — 9 September 2014 10 of 122
NXP Semiconductors LPC178x/7x
32-bit ARM Cortex-M3 microcontroller
Table 3. Pin description
Not all functions are available on all parts. See Table 2 (Ethernet, USB, LCD, QEI, SD/MMC, DAC pins) and Table 7 (EMC
pins).
Symbol
Pin LQFP208
Ball TFBGA208
Ball TFBGA180
Pin LQFP144
Reset state[1]
Type[2]
Description
P0[0] to
P0[31]
I/O Port 0: Port 0 is a 32-bit I/O port with individual direction
controls for each bit. The operation of port 0 pins depends upon
the pin function selected via the pin connect block.
P0[0] 94 U15 M10 66 [3] I;
PU
I/O P0[0] — General purpose digital input/output pin.
I CAN_RD1 — CAN1 receiver input.
O U3_TXD — Transmitter output for UART3.
I/O I2C1_SDA — I
2C1 data input/output (this pin does not use a
specialized I2C pad).
O U0_TXD — Transmitter output for UART0.
P0[1] 96 T14 N11 67 [3] I;
PU
I/O P0[1] — General purpose digital input/output pin.
O CAN_TD1 — CAN1 transmitter output.
I U3_RXD — Receiver input for UART3.
I/O I2C1_SCL — I
2C1 clock input/output (this pin does not use a
specialized I2C pad).
I U0_RXD — Receiver input for UART0.
P0[2] 202 C4 D5 141 [3] I;
PU
I/O P0[2] — General purpose digital input/output pin.
O U0_TXD — Transmitter output for UART0.
O U3_TXD — Transmitter output for UART3.
P0[3] 204 D6 A3 142 [3] I;
PU
I/O P0[3] — General purpose digital input/output pin.
I U0_RXD — Receiver input for UART0.
I U3_RXD — Receiver input for UART3.
P0[4] 168 B12 A11 116 [3] I;
PU
I/O P0[4] — General purpose digital input/output pin.
I/O I2S_RX_SCK — I
2S Receive clock. It is driven by the master
and received by the slave. Corresponds to the signal SCK in the
I
2S-bus specification.
I CAN_RD2 — CAN2 receiver input.
I T2_CAP0 — Capture input for Timer 2, channel 0.
- R — Function reserved.
- R — Function reserved.
- R — Function reserved.
O LCD_VD[0] — LCD data.LPC178X_7X All information provided in this document is subject to legal disclaimers. © NXP Semiconductors N.V. 2014. All rights reserved.
Product data sheet Rev. 5 — 9 September 2014 11 of 122
NXP Semiconductors LPC178x/7x
32-bit ARM Cortex-M3 microcontroller
P0[5] 166 C12 B11 115 [3] I;
PU
I/O P0[5] — General purpose digital input/output pin.
I/O I2S_RX_WS — I
2S Receive word select. It is driven by the
master and received by the slave. Corresponds to the signal WS
in the I
2S-bus specification.
O CAN_TD2 — CAN2 transmitter output.
I T2_CAP1 — Capture input for Timer 2, channel 1.
- R — Function reserved.
- R — Function reserved.
- R — Function reserved.
O LCD_VD[1] — LCD data.
P0[6] 164 D13 D11 113 [3] I;
PU
I/O P0[6] — General purpose digital input/output pin.
I/O I2S_RX_SDA — I
2S Receive data. It is driven by the transmitter
and read by the receiver. Corresponds to the signal SD in the
I
2S-bus specification.
I/O SSP1_SSEL — Slave Select for SSP1.
O T2_MAT0 — Match output for Timer 2, channel 0.
O U1_RTS — Request to Send output for UART1. Can also be
configured to be an RS-485/EIA-485 output enable signal for
UART1.
- R — Function reserved.
- R — Function reserved.
O LCD_VD[8] — LCD data.
P0[7] 162 C13 B12 112 [4] I; IA I/O P0[7] — General purpose digital input/output pin.
I/O I2S_TX_SCK — I
2S transmit clock. It is driven by the master
and received by the slave. Corresponds to the signal SCK in the
I
2S-bus specification.
I/O SSP1_SCK — Serial Clock for SSP1.
O T2_MAT1 — Match output for Timer 2, channel 1.
I RTC_EV0 — Event input 0 to Event Monitor/Recorder.
- R — Function reserved.
- R — Function reserved.
O LCD_VD[9] — LCD data.
Table 3. Pin description …continued
Not all functions are available on all parts. See Table 2 (Ethernet, USB, LCD, QEI, SD/MMC, DAC pins) and Table 7 (EMC
pins).
Symbol
Pin LQFP208
Ball TFBGA208
Ball TFBGA180
Pin LQFP144
Reset state[1]
Type[2]
DescriptionLPC178X_7X All information provided in this document is subject to legal disclaimers. © NXP Semiconductors N.V. 2014. All rights reserved.
Product data sheet Rev. 5 — 9 September 2014 12 of 122
NXP Semiconductors LPC178x/7x
32-bit ARM Cortex-M3 microcontroller
P0[8] 160 A15 C12 111 [4] I; IA I/O P0[8] — General purpose digital input/output pin.
I/O I2S_TX_WS — I
2S Transmit word select. It is driven by the
master and received by the slave. Corresponds to the signal WS
in the I
2S-bus specification.
I/O SSP1_MISO — Master In Slave Out for SSP1.
O T2_MAT2 — Match output for Timer 2, channel 2.
I RTC_EV1 — Event input 1 to Event Monitor/Recorder.
- R — Function reserved.
- R — Function reserved.
O LCD_VD[16] — LCD data.
P0[9] 158 C14 A13 109 [4] I; IA I/O P0[9] — General purpose digital input/output pin.
I/O I2S_TX_SDA — I
2S transmit data. It is driven by the transmitter
and read by the receiver. Corresponds to the signal SD in the
I
2S-bus specification.
I/O SSP1_MOSI — Master Out Slave In for SSP1.
O T2_MAT3 — Match output for Timer 2, channel 3.
I RTC_EV2 — Event input 2 to Event Monitor/Recorder.
- R — Function reserved.
- R — Function reserved.
O LCD_VD[17] — LCD data.
P0[10] 98 T15 L10 69 [3] I;
PU
I/O P0[10] — General purpose digital input/output pin.
O U2_TXD — Transmitter output for UART2.
I/O I2C2_SDA — I
2C2 data input/output (this pin does not use a
specialized I2C pad).
O T3_MAT0 — Match output for Timer 3, channel 0.
P0[11] 100 R14 P12 70 [3] I;
PU
I/O P0[11] — General purpose digital input/output pin.
I U2_RXD — Receiver input for UART2.
I/O I2C2_SCL — I
2C2 clock input/output (this pin does not use a
specialized I2C pad).
O T3_MAT1 — Match output for Timer 3, channel 1.
P0[12] 41 R1 J4 29 [5] I;
PU
I/O P0[12] — General purpose digital input/output pin.
O USB_PPWR2 — Port Power enable signal for USB port 2.
I/O SSP1_MISO — Master In Slave Out for SSP1.
I ADC0_IN[6] — A/D converter 0, input 6. When configured as an
ADC input, the digital function of the pin must be disabled.
Table 3. Pin description …continued
Not all functions are available on all parts. See Table 2 (Ethernet, USB, LCD, QEI, SD/MMC, DAC pins) and Table 7 (EMC
pins).
Symbol
Pin LQFP208
Ball TFBGA208
Ball TFBGA180
Pin LQFP144
Reset state[1]
Type[2]
DescriptionLPC178X_7X All information provided in this document is subject to legal disclaimers. © NXP Semiconductors N.V. 2014. All rights reserved.
Product data sheet Rev. 5 — 9 September 2014 13 of 122
NXP Semiconductors LPC178x/7x
32-bit ARM Cortex-M3 microcontroller
P0[13] 45 R2 J5 32 [5] I;
PU
I/O P0[13] — General purpose digital input/output pin.
O USB_UP_LED2 — USB port 2 GoodLink LED indicator. It is
LOW when the device is configured (non-control endpoints
enabled), or when the host is enabled and has detected a
device on the bus. It is HIGH when the device is not configured,
or when host is enabled and has not detected a device on the
bus, or during global suspend. It transitions between LOW and
HIGH (flashes) when the host is enabled and detects activity on
the bus.
I/O SSP1_MOSI — Master Out Slave In for SSP1.
I ADC0_IN[7] — A/D converter 0, input 7. When configured as an
ADC input, the digital function of the pin must be disabled.
P0[14] 69 T7 M5 48 [3] I;
PU
I/O P0[14] — General purpose digital input/output pin.
O USB_HSTEN2 — Host Enabled status for USB port 2.
I/O SSP1_SSEL — Slave Select for SSP1.
O USB_CONNECT2 — SoftConnect control for USB port 2.
Signal used to switch an external 1.5 k resistor under software
control. Used with the SoftConnect USB feature.
P0[15] 128 J16 H13 89 [3] I;
PU
I/O P0[15] — General purpose digital input/output pin.
O U1_TXD — Transmitter output for UART1.
I/O SSP0_SCK — Serial clock for SSP0.
P0[16] 130 J14 H14 90 [3] I;
PU
I/O P0[16] — General purpose digital input/output pin.
I U1_RXD — Receiver input for UART1.
I/O SSP0_SSEL — Slave Select for SSP0.
P0[17] 126 K17 J12 87 [3] I;
PU
I/O P0[17] — General purpose digital input/output pin.
I U1_CTS — Clear to Send input for UART1.
I/O SSP0_MISO — Master In Slave Out for SSP0.
P0[18] 124 K15 J13 86 [3] I;
PU
I/O P0[18] — General purpose digital input/output pin.
I U1_DCD — Data Carrier Detect input for UART1.
I/O SSP0_MOSI — Master Out Slave In for SSP0.
P0[19] 122 L17 J10 85 [3] I;
PU
I/O P0[19] — General purpose digital input/output pin.
I U1_DSR — Data Set Ready input for UART1.
O SD_CLK — Clock output line for SD card interface.
I/O I2C1_SDA — I
2C1 data input/output (this pin does not use a
specialized I2C pad).
Table 3. Pin description …continued
Not all functions are available on all parts. See Table 2 (Ethernet, USB, LCD, QEI, SD/MMC, DAC pins) and Table 7 (EMC
pins).
Symbol
Pin LQFP208
Ball TFBGA208
Ball TFBGA180
Pin LQFP144
Reset state[1]
Type[2]
DescriptionLPC178X_7X All information provided in this document is subject to legal disclaimers. © NXP Semiconductors N.V. 2014. All rights reserved.
Product data sheet Rev. 5 — 9 September 2014 14 of 122
NXP Semiconductors LPC178x/7x
32-bit ARM Cortex-M3 microcontroller
P0[20] 120 M17 K14 83 [3] I;
PU
I/O P0[20] — General purpose digital input/output pin.
O U1_DTR — Data Terminal Ready output for UART1. Can also
be configured to be an RS-485/EIA-485 output enable signal for
UART1.
I/O SD_CMD — Command line for SD card interface.
I/O I2C1_SCL — I
2C1 clock input/output (this pin does not use a
specialized I2C pad).
P0[21] 118 M16 K11 82 [3] I;
PU
I/O P0[21] — General purpose digital input/output pin.
I U1_RI — Ring Indicator input for UART1.
O SD_PWR — Power Supply Enable for external SD card power
supply.
O U4_OE — RS-485/EIA-485 output enable signal for UART4.
I CAN_RD1 — CAN1 receiver input.
I/O U4_SCLK — USART 4 clock input or output in synchronous
mode.
P0[22] 116 N17 L14 80 [6] I;
PU
I/O P0[22] — General purpose digital input/output pin.
O U1_RTS — Request to Send output for UART1. Can also be
configured to be an RS-485/EIA-485 output enable signal for
UART1.
I/O SD_DAT[0] — Data line 0 for SD card interface.
O U4_TXD — Transmitter output for USART4 (input/output in
smart card mode).
O CAN_TD1 — CAN1 transmitter output.
P0[23] 18 H1 F5 13 [5] I;
PU
I/O P0[23] — General purpose digital input/output pin.
I ADC0_IN[0] — A/D converter 0, input 0. When configured as an
ADC input, the digital function of the pin must be disabled.
I/O I2S_RX_SCK — Receive Clock. It is driven by the master and
received by the slave. Corresponds to the signal SCK in the
I
2S-bus specification.
I T3_CAP0 — Capture input for Timer 3, channel 0.
P0[24] 16 G2 E1 11 [5] I;
PU
I/O P0[24] — General purpose digital input/output pin.
I ADC0_IN[1] — A/D converter 0, input 1. When configured as an
ADC input, the digital function of the pin must be disabled.
I/O I2S_RX_WS — Receive Word Select. It is driven by the master
and received by the slave. Corresponds to the signal WS in the
I
2S-bus specification.
I T3_CAP1 — Capture input for Timer 3, channel 1.
Table 3. Pin description …continued
Not all functions are available on all parts. See Table 2 (Ethernet, USB, LCD, QEI, SD/MMC, DAC pins) and Table 7 (EMC
pins).
Symbol
Pin LQFP208
Ball TFBGA208
Ball TFBGA180
Pin LQFP144
Reset state[1]
Type[2]
DescriptionLPC178X_7X All information provided in this document is subject to legal disclaimers. © NXP Semiconductors N.V. 2014. All rights reserved.
Product data sheet Rev. 5 — 9 September 2014 15 of 122
NXP Semiconductors LPC178x/7x
32-bit ARM Cortex-M3 microcontroller
P0[25] 14 F1 E4 10 [5] I;
PU
I/O P0[25] — General purpose digital input/output pin.
I ADC0_IN[2] — A/D converter 0, input 2. When configured as an
ADC input, the digital function of the pin must be disabled.
I/O I2S_RX_SDA — Receive data. It is driven by the transmitter
and read by the receiver. Corresponds to the signal SD in the
I
2S-bus specification.
O U3_TXD — Transmitter output for UART3.
P0[26] 12 E1 D1 8 [7] I;
PU
I/O P0[26] — General purpose digital input/output pin.
I ADC0_IN[3] — A/D converter 0, input 3. When configured as an
ADC input, the digital function of the pin must be disabled.
O DAC_OUT — D/A converter output. When configured as the
DAC output, the digital function of the pin must be disabled.
I U3_RXD — Receiver input for UART3.
P0[27] 50 T1 L3 35 [8] I I/O P0[27] — General purpose digital input/output pin.
I/O I2C0_SDA — I
2C0 data input/output (this pin uses a specialized
I2C pad).
I/O USB_SDA1 — I2C serial data for communication with an
external USB transceiver.
P0[28] 48 R3 M1 34 [8] I I/O P0[28] — General purpose digital input/output pin.
I/O I2C0_SCL — I
2C0 clock input/output (this pin uses a
specialized I2C pad).
I/O USB_SCL1 — I2C serial clock for communication with an
external USB transceiver.
P0[29] 61 U4 K5 42 [9] I I/O P0[29] — General purpose digital input/output pin.
I/O USB_D+1 — USB port 1 bidirectional D+ line.
I EINT0 — External interrupt 0 input.
P0[30] 62 R6 N4 43 [9] I I/O P0[30] — General purpose digital input/output pin.
I/O USB_D1 — USB port 1 bidirectional D line.
I EINT1 — External interrupt 1 input.
P0[31] 51 T2 N1 36 [9] I I/O P0[31] — General purpose digital input/output pin.
I/O USB_D+2 — USB port 2 bidirectional D+ line.
P1[0] to
P1[31]
I/O Port 1: Port 1 is a 32 bit I/O port with individual direction
controls for each bit. The operation of port 1 pins depends upon
the pin function selected via the pin connect block
P1[0] 196 A3 B5 136 [3] I;
PU
I/O P1[0] — General purpose digital input/output pin.
O ENET_TXD0 — Ethernet transmit data 0 (RMII/MII interface).
- R — Function reserved.
I T3_CAP1 — Capture input for Timer 3, channel 1.
I/O SSP2_SCK — Serial clock for SSP2.
Table 3. Pin description …continued
Not all functions are available on all parts. See Table 2 (Ethernet, USB, LCD, QEI, SD/MMC, DAC pins) and Table 7 (EMC
pins).
Symbol
Pin LQFP208
Ball TFBGA208
Ball TFBGA180
Pin LQFP144
Reset state[1]
Type[2]
DescriptionLPC178X_7X All information provided in this document is subject to legal disclaimers. © NXP Semiconductors N.V. 2014. All rights reserved.
Product data sheet Rev. 5 — 9 September 2014 16 of 122
NXP Semiconductors LPC178x/7x
32-bit ARM Cortex-M3 microcontroller
P1[1] 194 B5 A5 135 [3] I;
PU
I/O P1[1] — General purpose digital input/output pin.
O ENET_TXD1 — Ethernet transmit data 1 (RMII/MII interface).
- R — Function reserved.
O T3_MAT3 — Match output for Timer 3, channel 3.
I/O SSP2_MOSI — Master Out Slave In for SSP2.
P1[2] 185 D9 B7 - [3] I;
PU
I/O P1[2] — General purpose digital input/output pin.
O ENET_TXD2 — Ethernet transmit data 2 (MII interface).
O SD_CLK — Clock output line for SD card interface.
O PWM0[1] — Pulse Width Modulator 0, output 1.
P1[3] 177 A10 A9 - [3] I;
PU
I/O P1[3] — General purpose digital input/output pin.
O ENET_TXD3 — Ethernet transmit data 3 (MII interface).
I/O SD_CMD — Command line for SD card interface.
O PWM0[2] — Pulse Width Modulator 0, output 2.
P1[4] 192 A5 C6 133 [3] I;
PU
I/O P1[4] — General purpose digital input/output pin.
O ENET_TX_EN — Ethernet transmit data enable (RMII/MII
interface).
- R — Function reserved.
O T3_MAT2 — Match output for Timer 3, channel 2.
I/O SSP2_MISO — Master In Slave Out for SSP2.
P1[5] 156 A17 B13 - [3] I;
PU
I/O P1[5] — General purpose digital input/output pin.
O ENET_TX_ER — Ethernet Transmit Error (MII interface).
O SD_PWR — Power Supply Enable for external SD card power
supply.
O PWM0[3] — Pulse Width Modulator 0, output 3.
P1[6] 171 B11 B10 - [3] I;
PU
I/O P1[6] — General purpose digital input/output pin.
I ENET_TX_CLK — Ethernet Transmit Clock (MII interface).
I/O SD_DAT[0] — Data line 0 for SD card interface.
O PWM0[4] — Pulse Width Modulator 0, output 4.
P1[7] 153 D14 C13 - [3] I;
PU
I/O P1[7] — General purpose digital input/output pin.
I ENET_COL — Ethernet Collision detect (MII interface).
I/O SD_DAT[1] — Data line 1 for SD card interface.
O PWM0[5] — Pulse Width Modulator 0, output 5.
Table 3. Pin description …continued
Not all functions are available on all parts. See Table 2 (Ethernet, USB, LCD, QEI, SD/MMC, DAC pins) and Table 7 (EMC
pins).
Symbol
Pin LQFP208
Ball TFBGA208
Ball TFBGA180
Pin LQFP144
Reset state[1]
Type[2]
DescriptionLPC178X_7X All information provided in this document is subject to legal disclaimers. © NXP Semiconductors N.V. 2014. All rights reserved.
Product data sheet Rev. 5 — 9 September 2014 17 of 122
NXP Semiconductors LPC178x/7x
32-bit ARM Cortex-M3 microcontroller
P1[8] 190 C7 B6 132 [3] I;
PU
I/O P1[8] — General purpose digital input/output pin.
I ENET_CRS (ENET_CRS_DV) — Ethernet Carrier Sense (MII
interface) or Ethernet Carrier Sense/Data Valid (RMII interface).
- R — Function reserved.
O T3_MAT1 — Match output for Timer 3, channel 1.
I/O SSP2_SSEL — Slave Select for SSP2.
P1[9] 188 A6 D7 131 [3] I;
PU
I/O P1[9] — General purpose digital input/output pin.
I ENET_RXD0 — Ethernet receive data 0 (RMII/MII interface).
- R — Function reserved.
O T3_MAT0 — Match output for Timer 3, channel 0.
P1[10] 186 C8 A7 129 [3] I;
PU
I/O P1[10] — General purpose digital input/output pin.
I ENET_RXD1 — Ethernet receive data 1 (RMII/MII interface).
- R — Function reserved.
I T3_CAP0 — Capture input for Timer 3, channel 0.
P1[11] 163 A14 A12 - [3] I;
PU
I/O P1[11] — General purpose digital input/output pin.
I ENET_RXD2 — Ethernet Receive Data 2 (MII interface).
I/O SD_DAT[2] — Data line 2 for SD card interface.
O PWM0[6] — Pulse Width Modulator 0, output 6.
P1[12] 157 A16 A14 - [3] I;
PU
I/O P1[12] — General purpose digital input/output pin.
I ENET_RXD3 — Ethernet Receive Data (MII interface).
I/O SD_DAT[3] — Data line 3 for SD card interface.
I PWM0_CAP0 — Capture input for PWM0, channel 0.
P1[13] 147 D16 D14 - [3] I;
PU
I/O P1[13] — General purpose digital input/output pin.
I ENET_RX_DV — Ethernet Receive Data Valid (MII interface).
P1[14] 184 A7 D8 128 [3] I;
PU
I/O P1[14] — General purpose digital input/output pin.
I ENET_RX_ER — Ethernet receive error (RMII/MII interface).
- R — Function reserved.
I T2_CAP0 — Capture input for Timer 2, channel 0.
P1[15] 182 A8 A8 126 [3] I;
PU
I/O P1[15] — General purpose digital input/output pin.
I ENET_RX_CLK (ENET_REF_CLK) — Ethernet Receive Clock
(MII interface) or Ethernet Reference Clock (RMII interface).
- R — Function reserved.
I/O I2C2_SDA — I
2C2 data input/output (this pin does not use a
specialized I2C pad).
Table 3. Pin description …continued
Not all functions are available on all parts. See Table 2 (Ethernet, USB, LCD, QEI, SD/MMC, DAC pins) and Table 7 (EMC
pins).
Symbol
Pin LQFP208
Ball TFBGA208
Ball TFBGA180
Pin LQFP144
Reset state[1]
Type[2]
DescriptionLPC178X_7X All information provided in this document is subject to legal disclaimers. © NXP Semiconductors N.V. 2014. All rights reserved.
Product data sheet Rev. 5 — 9 September 2014 18 of 122
NXP Semiconductors LPC178x/7x
32-bit ARM Cortex-M3 microcontroller
P1[16] 180 D10 B8 125 [3] I;
PU
I/O P1[16] — General purpose digital input/output pin.
O ENET_MDC — Ethernet MIIM clock.
O I2S_TX_MCLK — I2S transmit master clock.
P1[17] 178 A9 C9 123 [3] I;
PU
I/O P1[17] — General purpose digital input/output pin.
I/O ENET_MDIO — Ethernet MIIM data input and output.
O I2S_RX_MCLK — I2S receive master clock.
P1[18] 66 P7 L5 46 [3] I;
PU
I/O P1[18] — General purpose digital input/output pin.
O USB_UP_LED1 — It is LOW when the device is configured
(non-control endpoints enabled), or when the host is enabled
and has detected a device on the bus. It is HIGH when the
device is not configured, or when host is enabled and has not
detected a device on the bus, or during global suspend. It
transitions between LOW and HIGH (flashes) when the host is
enabled and detects activity on the bus.
O PWM1[1] — Pulse Width Modulator 1, channel 1 output.
I T1_CAP0 — Capture input for Timer 1, channel 0.
- R — Function reserved.
I/O SSP1_MISO — Master In Slave Out for SSP1.
P1[19] 68 U6 P5 47 [3] I;
PU
I/O P1[19] — General purpose digital input/output pin.
O USB_TX_E1 — Transmit Enable signal for USB port 1 (OTG
transceiver).
O USB_PPWR1 — Port Power enable signal for USB port 1.
I T1_CAP1 — Capture input for Timer 1, channel 1.
O MC_0A — Motor control PWM channel 0, output A.
I/O SSP1_SCK — Serial clock for SSP1.
O U2_OE — RS-485/EIA-485 output enable signal for UART2.
P1[20] 70 U7 K6 49 [3] I;
PU
I/O P1[20] — General purpose digital input/output pin.
O USB_TX_DP1 — D+ transmit data for USB port 1 (OTG
transceiver).
O PWM1[2] — Pulse Width Modulator 1, channel 2 output.
I QEI_PHA — Quadrature Encoder Interface PHA input.
I MC_FB0 — Motor control PWM channel 0 feedback input.
I/O SSP0_SCK — Serial clock for SSP0.
O LCD_VD[6] — LCD data.
O LCD_VD[10] — LCD data.
Table 3. Pin description …continued
Not all functions are available on all parts. See Table 2 (Ethernet, USB, LCD, QEI, SD/MMC, DAC pins) and Table 7 (EMC
pins).
Symbol
Pin LQFP208
Ball TFBGA208
Ball TFBGA180
Pin LQFP144
Reset state[1]
Type[2]
DescriptionLPC178X_7X All information provided in this document is subject to legal disclaimers. © NXP Semiconductors N.V. 2014. All rights reserved.
Product data sheet Rev. 5 — 9 September 2014 19 of 122
NXP Semiconductors LPC178x/7x
32-bit ARM Cortex-M3 microcontroller
P1[21] 72 R8 N6 50 [3] I;
PU
I/O P1[21] — General purpose digital input/output pin.
O USB_TX_DM1 — D transmit data for USB port 1 (OTG
transceiver).
O PWM1[3] — Pulse Width Modulator 1, channel 3 output.
I/O SSP0_SSEL — Slave Select for SSP0.
I MC_ABORT — Motor control PWM, active low fast abort.
- R — Function reserved.
O LCD_VD[7] — LCD data.
O LCD_VD[11] — LCD data.
P1[22] 74 U8 M6 51 [3] I;
PU
I/O P1[22] — General purpose digital input/output pin.
I USB_RCV1 — Differential receive data for USB port 1 (OTG
transceiver).
I USB_PWRD1 — Power Status for USB port 1 (host power
switch).
O T1_MAT0 — Match output for Timer 1, channel 0.
O MC_0B — Motor control PWM channel 0, output B.
I/O SSP1_MOSI — Master Out Slave In for SSP1.
O LCD_VD[8] — LCD data.
O LCD_VD[12] — LCD data.
P1[23] 76 P9 N7 53 [3] I;
PU
I/O P1[23] — General purpose digital input/output pin.
I USB_RX_DP1 — D+ receive data for USB port 1 (OTG
transceiver).
O PWM1[4] — Pulse Width Modulator 1, channel 4 output.
I QEI_PHB — Quadrature Encoder Interface PHB input.
I MC_FB1 — Motor control PWM channel 1 feedback input.
I/O SSP0_MISO — Master In Slave Out for SSP0.
O LCD_VD[9] — LCD data.
O LCD_VD[13] — LCD data.
P1[24] 78 T9 P7 54 [3] I;
PU
I/O P1[24] — General purpose digital input/output pin.
I USB_RX_DM1 — D receive data for USB port 1 (OTG
transceiver).
O PWM1[5] — Pulse Width Modulator 1, channel 5 output.
I QEI_IDX — Quadrature Encoder Interface INDEX input.
I MC_FB2 — Motor control PWM channel 2 feedback input.
I/O SSP0_MOSI — Master Out Slave in for SSP0.
O LCD_VD[10] — LCD data.
O LCD_VD[14] — LCD data.
Table 3. Pin description …continued
Not all functions are available on all parts. See Table 2 (Ethernet, USB, LCD, QEI, SD/MMC, DAC pins) and Table 7 (EMC
pins).
Symbol
Pin LQFP208
Ball TFBGA208
Ball TFBGA180
Pin LQFP144
Reset state[1]
Type[2]
DescriptionLPC178X_7X All information provided in this document is subject to legal disclaimers. © NXP Semiconductors N.V. 2014. All rights reserved.
Product data sheet Rev. 5 — 9 September 2014 20 of 122
NXP Semiconductors LPC178x/7x
32-bit ARM Cortex-M3 microcontroller
P1[25] 80 T10 L7 56 [3] I;
PU
I/O P1[25] — General purpose digital input/output pin.
O USB_LS1 — Low Speed status for USB port 1 (OTG
transceiver).
O USB_HSTEN1 — Host Enabled status for USB port 1.
O T1_MAT1 — Match output for Timer 1, channel 1.
O MC_1A — Motor control PWM channel 1, output A.
O CLKOUT — Selectable clock output.
O LCD_VD[11] — LCD data.
O LCD_VD[15] — LCD data.
P1[26] 82 R10 P8 57 [3] I;
PU
I/O P1[26] — General purpose digital input/output pin.
O USB_SSPND1 — USB port 1 Bus Suspend status (OTG
transceiver).
O PWM1[6] — Pulse Width Modulator 1, channel 6 output.
I T0_CAP0 — Capture input for Timer 0, channel 0.
O MC_1B — Motor control PWM channel 1, output B.
I/O SSP1_SSEL — Slave Select for SSP1.
O LCD_VD[12] — LCD data.
O LCD_VD[20] — LCD data.
P1[27] 88 T12 M9 61 [3] I;
PU
I/O P1[27] — General purpose digital input/output pin.
I USB_INT1 — USB port 1 OTG transceiver interrupt (OTG
transceiver).
I USB_OVRCR1 — USB port 1 Over-Current status.
I T0_CAP1 — Capture input for Timer 0, channel 1.
O CLKOUT — Selectable clock output.
- R — Function reserved.
O LCD_VD[13] — LCD data.
O LCD_VD[21] — LCD data.
P1[28] 90 T13 P10 63 [3] I;
PU
I/O P1[28] — General purpose digital input/output pin.
I/O USB_SCL1 — USB port 1 I2C serial clock (OTG transceiver).
I PWM1_CAP0 — Capture input for PWM1, channel 0.
O T0_MAT0 — Match output for Timer 0, channel 0.
O MC_2A — Motor control PWM channel 2, output A.
I/O SSP0_SSEL — Slave Select for SSP0.
O LCD_VD[14] — LCD data.
O LCD_VD[22] — LCD data.
Table 3. Pin description …continued
Not all functions are available on all parts. See Table 2 (Ethernet, USB, LCD, QEI, SD/MMC, DAC pins) and Table 7 (EMC
pins).
Symbol
Pin LQFP208
Ball TFBGA208
Ball TFBGA180
Pin LQFP144
Reset state[1]
Type[2]
DescriptionLPC178X_7X All information provided in this document is subject to legal disclaimers. © NXP Semiconductors N.V. 2014. All rights reserved.
Product data sheet Rev. 5 — 9 September 2014 21 of 122
NXP Semiconductors LPC178x/7x
32-bit ARM Cortex-M3 microcontroller
P1[29] 92 U14 N10 64 [3] I;
PU
I/O P1[29] — General purpose digital input/output pin.
I/O USB_SDA1 — USB port 1 I2C serial data (OTG transceiver).
I PWM1_CAP1 — Capture input for PWM1, channel 1.
O T0_MAT1 — Match output for Timer 0, channel 1.
O MC_2B — Motor control PWM channel 2, output B.
O U4_TXD — Transmitter output for USART4 (input/output in
smart card mode).
O LCD_VD[15] — LCD data.
O LCD_VD[23] — LCD data.
P1[30] 42 P2 K3 30 [5] I;
PU
I/O P1[30] — General purpose digital input/output pin.
I USB_PWRD2 — Power Status for USB port 2.
I USB_VBUS — Monitors the presence of USB bus power.
This signal must be HIGH for USB reset to occur.
I ADC0_IN[4] — A/D converter 0, input 4. When configured as an
ADC input, the digital function of the pin must be disabled.
I/O I2C0_SDA — I
2C0 data input/output (this pin does not use a
specialized I2C pad).
O U3_OE — RS-485/EIA-485 output enable signal for UART3.
P1[31] 40 P1 K2 28 [5] I;
PU
I/O P1[31] — General purpose digital input/output pin.
I USB_OVRCR2 — Over-Current status for USB port 2.
I/O SSP1_SCK — Serial Clock for SSP1.
I ADC0_IN[5] — A/D converter 0, input 5. When configured as an
ADC input, the digital function of the pin must be disabled.
I/O I2C0_SCL — I
2C0 clock input/output (this pin does not use a
specialized I2C pad).
P2[0] to
P2[31]
I/O Port 2: Port 2 is a 32 bit I/O port with individual direction
controls for each bit. The operation of port 1 pins depends upon
the pin function selected via the pin connect block.
P2[0] 154 B17 D12 107 [3] I;
PU
I/O P2[0] — General purpose digital input/output pin.
O PWM1[1] — Pulse Width Modulator 1, channel 1 output.
O U1_TXD — Transmitter output for UART1.
- R — Function reserved.
- R — Function reserved.
- R — Function reserved.
- R — Function reserved.
O LCD_PWR — LCD panel power enable.
Table 3. Pin description …continued
Not all functions are available on all parts. See Table 2 (Ethernet, USB, LCD, QEI, SD/MMC, DAC pins) and Table 7 (EMC
pins).
Symbol
Pin LQFP208
Ball TFBGA208
Ball TFBGA180
Pin LQFP144
Reset state[1]
Type[2]
DescriptionLPC178X_7X All information provided in this document is subject to legal disclaimers. © NXP Semiconductors N.V. 2014. All rights reserved.
Product data sheet Rev. 5 — 9 September 2014 22 of 122
NXP Semiconductors LPC178x/7x
32-bit ARM Cortex-M3 microcontroller
P2[1] 152 E14 C14 106 [3] I;
PU
I/O P2[1] — General purpose digital input/output pin.
O PWM1[2] — Pulse Width Modulator 1, channel 2 output.
I U1_RXD — Receiver input for UART1.
- R — Function reserved.
- R — Function reserved.
- R — Function reserved.
- R — Function reserved.
O LCD_LE — Line end signal.
P2[2] 150 D15 E11 105 [3] I;
PU
I/O P2[2] — General purpose digital input/output pin.
O PWM1[3] — Pulse Width Modulator 1, channel 3 output.
I U1_CTS — Clear to Send input for UART1.
O T2_MAT3 — Match output for Timer 2, channel 3.
- R — Function reserved.
O TRACEDATA[3] — Trace data, bit 3.
- R — Function reserved.
O LCD_DCLK — LCD panel clock.
P2[3] 144 E16 E13 100 [3] I;
PU
I/O P2[3] — General purpose digital input/output pin.
O PWM1[4] — Pulse Width Modulator 1, channel 4 output.
I U1_DCD — Data Carrier Detect input for UART1.
O T2_MAT2 — Match output for Timer 2, channel 2.
- R — Function reserved.
O TRACEDATA[2] — Trace data, bit 2.
- R — Function reserved.
O LCD_FP — Frame pulse (STN). Vertical synchronization pulse
(TFT).
P2[4] 142 D17 E14 99 [3] I;
PU
I/O P2[4] — General purpose digital input/output pin.
O PWM1[5] — Pulse Width Modulator 1, channel 5 output.
I U1_DSR — Data Set Ready input for UART1.
O T2_MAT1 — Match output for Timer 2, channel 1.
- R — Function reserved.
O TRACEDATA[1] — Trace data, bit 1.
- R — Function reserved.
O LCD_ENAB_M — STN AC bias drive or TFT data enable
output.
Table 3. Pin description …continued
Not all functions are available on all parts. See Table 2 (Ethernet, USB, LCD, QEI, SD/MMC, DAC pins) and Table 7 (EMC
pins).
Symbol
Pin LQFP208
Ball TFBGA208
Ball TFBGA180
Pin LQFP144
Reset state[1]
Type[2]
DescriptionLPC178X_7X All information provided in this document is subject to legal disclaimers. © NXP Semiconductors N.V. 2014. All rights reserved.
Product data sheet Rev. 5 — 9 September 2014 23 of 122
NXP Semiconductors LPC178x/7x
32-bit ARM Cortex-M3 microcontroller
P2[5] 140 F16 F12 97 [3] I;
PU
I/O P2[5] — General purpose digital input/output pin.
O PWM1[6] — Pulse Width Modulator 1, channel 6 output.
O U1_DTR — Data Terminal Ready output for UART1. Can also
be configured to be an RS-485/EIA-485 output enable signal for
UART1.
O T2_MAT0 — Match output for Timer 2, channel 0.
- R — Function reserved.
O TRACEDATA[0] — Trace data, bit 0.
- R — Function reserved.
O LCD_LP — Line synchronization pulse (STN). Horizontal
synchronization pulse (TFT).
P2[6] 138 E17 F13 96 [3] I;
PU
I/O P2[6] — General purpose digital input/output pin.
I PWM1_CAP0 — Capture input for PWM1, channel 0.
I U1_RI — Ring Indicator input for UART1.
I T2_CAP0 — Capture input for Timer 2, channel 0.
O U2_OE — RS-485/EIA-485 output enable signal for UART2.
O TRACECLK — Trace clock.
O LCD_VD[0] — LCD data.
O LCD_VD[4] — LCD data.
P2[7] 136 G16 G11 95 [3] I;
PU
I/O P2[7] — General purpose digital input/output pin.
I CAN_RD2 — CAN2 receiver input.
O U1_RTS — Request to Send output for UART1. Can also be
configured to be an RS-485/EIA-485 output enable signal for
UART1.
- R — Function reserved.
- R — Function reserved.
- R — Function reserved.
O LCD_VD[1] — LCD data.
O LCD_VD[5] — LCD data.
P2[8] 134 H15 G14 93 [3] I;
PU
I/O P2[8] — General purpose digital input/output pin.
O CAN_TD2 — CAN2 transmitter output.
O U2_TXD — Transmitter output for UART2.
I U1_CTS — Clear to Send input for UART1.
O ENET_MDC — Ethernet MIIM clock.
- R — Function reserved.
O LCD_VD[2] — LCD data.
O LCD_VD[6] — LCD data.
Table 3. Pin description …continued
Not all functions are available on all parts. See Table 2 (Ethernet, USB, LCD, QEI, SD/MMC, DAC pins) and Table 7 (EMC
pins).
Symbol
Pin LQFP208
Ball TFBGA208
Ball TFBGA180
Pin LQFP144
Reset state[1]
Type[2]
DescriptionLPC178X_7X All information provided in this document is subject to legal disclaimers. © NXP Semiconductors N.V. 2014. All rights reserved.
Product data sheet Rev. 5 — 9 September 2014 24 of 122
NXP Semiconductors LPC178x/7x
32-bit ARM Cortex-M3 microcontroller
P2[9] 132 H16 H11 92 [3] I;
PU
I/O P2[9] — General purpose digital input/output pin.
O USB_CONNECT1 — USB1 SoftConnect control. Signal used to
switch an external 1.5 k resistor under the software control.
Used with the SoftConnect USB feature.
I U2_RXD — Receiver input for UART2.
I U4_RXD — Receiver input for USART4.
I/O ENET_MDIO — Ethernet MIIM data input and output.
- R — Function reserved.
I LCD_VD[3] — LCD data.
I LCD_VD[7] — LCD data.
P2[10] 110 N15 M13 76 [10] I;
PU
I/O P2[10] — General purpose digital input/output pin. This pin
includes a 10 ns input .
A LOW on this pin while RESET is LOW forces the on-chip boot
loader to take over control of the part after a reset and go into
ISP mode.
I EINT0 — External interrupt 0 input.
I NMI — Non-maskable interrupt input.
P2[11] 108 T17 M12 75 [10] I;
PU
I/O P2[11] — General purpose digital input/output pin. This pin
includes a 10 ns input glitch filter.
I EINT1 — External interrupt 1 input.
I/O SD_DAT[1] — Data line 1 for SD card interface.
I/O I2S_TX_SCK — Transmit Clock. It is driven by the master and
received by the slave. Corresponds to the signal SCK in the
I
2S-bus specification.
- R — Function reserved.
- R — Function reserved.
- R — Function reserved.
O LCD_CLKIN — LCD clock.
P2[12] 106 N14 N14 73 [10] I;
PU
I/O P2[12] — General purpose digital input/output pin. This pin
includes a 10 ns input glitch filter.
I EINT2 — External interrupt 2 input.
I/O SD_DAT[2] — Data line 2 for SD card interface.
I/O I2S_TX_WS — Transmit Word Select. It is driven by the master
and received by the slave. Corresponds to the signal WS in the
I
2S-bus specification.
O LCD_VD[4] — LCD data.
O LCD_VD[3] — LCD data.
O LCD_VD[8] — LCD data.
O LCD_VD[18] — LCD data.
Table 3. Pin description …continued
Not all functions are available on all parts. See Table 2 (Ethernet, USB, LCD, QEI, SD/MMC, DAC pins) and Table 7 (EMC
pins).
Symbol
Pin LQFP208
Ball TFBGA208
Ball TFBGA180
Pin LQFP144
Reset state[1]
Type[2]
DescriptionLPC178X_7X All information provided in this document is subject to legal disclaimers. © NXP Semiconductors N.V. 2014. All rights reserved.
Product data sheet Rev. 5 — 9 September 2014 25 of 122
NXP Semiconductors LPC178x/7x
32-bit ARM Cortex-M3 microcontroller
P2[13] 102 T16 M11 71 [10] I;
PU
I/O P2[13] — General purpose digital input/output pin. This pin
includes a 10 ns input glitch filter.
I EINT3 — External interrupt 3 input.
I/O SD_DAT[3] — Data line 3 for SD card interface.
I/O I2S_TX_SDA — Transmit data. It is driven by the transmitter
and read by the receiver. Corresponds to the signal SD in the
I
2S-bus specification.
- R — Function reserved.
O LCD_VD[5] — LCD data.
O LCD_VD[9] — LCD data.
O LCD_VD[19] — LCD data.
P2[14] 91 R12 - - [3] I;
PU
I/O P2[14] — General purpose digital input/output pin.
O EMC_CS2 — LOW active Chip Select 2 signal.
I/O I2C1_SDA — I
2C1 data input/output (this pin does not use a
specialized I2C pad).
I T2_CAP0 — Capture input for Timer 2, channel 0.
P2[15] 99 P13 - - [3] I;
PU
I/O P2[15] — General purpose digital input/output pin.
O EMC_CS3 — LOW active Chip Select 3 signal.
I/O I2C1_SCL — I
2C1 clock input/output (this pin does not use a
specialized I2C pad).
I T2_CAP1 — Capture input for Timer 2, channel 1.
P2[16] 87 R11 P9 - [3] I;
PU
I/O P2[16] — General purpose digital input/output pin.
O EMC_CAS — LOW active SDRAM Column Address Strobe.
P2[17] 95 R13 P11 - [3] I;
PU
I/O P2[17] — General purpose digital input/output pin.
O EMC_RAS — LOW active SDRAM Row Address Strobe.
P2[18] 59 U3 P3 - [6] I;
PU
I/O P2[18] — General purpose digital input/output pin.
O EMC_CLK[0] — SDRAM clock 0.
P2[19] 67 R7 N5 - [6] I;
PU
I/O P2[19] — General purpose digital input/output pin.
O EMC_CLK[1] — SDRAM clock 1.
P2[20] 73 T8 P6 - [3] I;
PU
I/O P2[20] — General purpose digital input/output pin.
O EMC_DYCS0 — SDRAM chip select 0.
P2[21] 81 U11 N8 - [3] I;
PU
I/O P2[21] — General purpose digital input/output pin.
O EMC_DYCS1 — SDRAM chip select 1.
P2[22] 85 U12 - - [3] I;
PU
I/O P2[22] — General purpose digital input/output pin.
O EMC_DYCS2 — SDRAM chip select 2.
I/O SSP0_SCK — Serial clock for SSP0.
I T3_CAP0 — Capture input for Timer 3, channel 0.
Table 3. Pin description …continued
Not all functions are available on all parts. See Table 2 (Ethernet, USB, LCD, QEI, SD/MMC, DAC pins) and Table 7 (EMC
pins).
Symbol
Pin LQFP208
Ball TFBGA208
Ball TFBGA180
Pin LQFP144
Reset state[1]
Type[2]
DescriptionLPC178X_7X All information provided in this document is subject to legal disclaimers. © NXP Semiconductors N.V. 2014. All rights reserved.
Product data sheet Rev. 5 — 9 September 2014 26 of 122
NXP Semiconductors LPC178x/7x
32-bit ARM Cortex-M3 microcontroller
P2[23] 64 U5 - - [3] I;
PU
I/O P2[23] — General purpose digital input/output pin.
O EMC_DYCS3 — SDRAM chip select 3.
I/O SSP0_SSEL — Slave Select for SSP0.
I T3_CAP1 — Capture input for Timer 3, channel 1.
P2[24] 53 P5 P1 - [3] I;
PU
I/O P2[24] — General purpose digital input/output pin.
O EMC_CKE0 — SDRAM clock enable 0.
P2[25] 54 R4 P2 - [3] I;
PU
I/O P2[25] — General purpose digital input/output pin.
O EMC_CKE1 — SDRAM clock enable 1.
P2[26] 57 T4 - - [3] I;
PU
I/O P2[26] — General purpose digital input/output pin.
O EMC_CKE2 — SDRAM clock enable 2.
I/O SSP0_MISO — Master In Slave Out for SSP0.
O T3_MAT0 — Match output for Timer 3, channel 0.
P2[27] 47 P3 - - [3] I;
PU
I/O P2[27] — General purpose digital input/output pin.
O EMC_CKE3 — SDRAM clock enable 3.
I/O SSP0_MOSI — Master Out Slave In for SSP0.
O T3_MAT1 — Match output for Timer 3, channel 1.
P2[28] 49 P4 M2 - [3] I;
PU
I/O P2[28] — General purpose digital input/output pin.
O EMC_DQM0 — Data mask 0 used with SDRAM and static
devices.
P2[29] 43 N3 L1 - [3] I;
PU
I/O P2[29] — General purpose digital input/output pin.
O EMC_DQM1 — Data mask 1 used with SDRAM and static
devices.
P2[30] 31 L4 - - [3] I;
PU
I/O P2[30] — General purpose digital input/output pin.
O EMC_DQM2 — Data mask 2 used with SDRAM and static
devices.
I/O I2C2_SDA — I
2C2 data input/output (this pin does not use a
specialized I2C pad).
O T3_MAT2 — Match output for Timer 3, channel 2.
P2[31] 39 N2 - - [3] I;
PU
I/O P2[31] — General purpose digital input/output pin.
O EMC_DQM3 — Data mask 3 used with SDRAM and static
devices.
I/O I2C2_SCL — I
2C2 clock input/output (this pin does not use a
specialized I2C pad).
O T3_MAT3 — Match output for Timer 3, channel 3.
P3[0] to
P3[31]
I/O Port 3: Port 3 is a 32-bit I/O port with individual direction
controls for each bit. The operation of port 3 pins depends upon
the pin function selected via the pin connect block.
Table 3. Pin description …continued
Not all functions are available on all parts. See Table 2 (Ethernet, USB, LCD, QEI, SD/MMC, DAC pins) and Table 7 (EMC
pins).
Symbol
Pin LQFP208
Ball TFBGA208
Ball TFBGA180
Pin LQFP144
Reset state[1]
Type[2]
DescriptionLPC178X_7X All information provided in this document is subject to legal disclaimers. © NXP Semiconductors N.V. 2014. All rights reserved.
Product data sheet Rev. 5 — 9 September 2014 27 of 122
NXP Semiconductors LPC178x/7x
32-bit ARM Cortex-M3 microcontroller
P3[0] 197 B4 D6 137 [3] I;
PU
I/O P3[0] — General purpose digital input/output pin.
I/O EMC_D[0] — External memory data line 0.
P3[1] 201 B3 E6 140 [3] I;
PU
I/O P3[1] — General purpose digital input/output pin.
I/O EMC_D[1] — External memory data line 1.
P3[2] 207 B1 A2 144 [3] I;
PU
I/O P3[2] — General purpose digital input/output pin.
I/O EMC_D[2] — External memory data line 2.
P3[3] 3 E4 G5 2 [3] I;
PU
I/O P3[3] — General purpose digital input/output pin.
I/O EMC_D[3] — External memory data line 3.
P3[4] 13 F2 D3 9 [3] I;
PU
I/O P3[4] — General purpose digital input/output pin.
I/O EMC_D[4] — External memory data line 4.
P3[5] 17 G1 E3 12 [3] I;
PU
I/O P3[5] — General purpose digital input/output pin.
I/O EMC_D[5] — External memory data line 5.
P3[6] 23 J1 F4 16 [3] I;
PU
I/O P3[6] — General purpose digital input/output pin.
I/O EMC_D[6] — External memory data line 6.
P3[7] 27 L1 G3 19 [3] I;
PU
I/O P3[7] — General purpose digital input/output pin.
I/O EMC_D[7] — External memory data line 7.
P3[8] 191 D8 A6 - [3] I;
PU
I/O P3[8] — General purpose digital input/output pin.
I/O EMC_D[8] — External memory data line 8.
P3[9] 199 C5 A4 - [3] I;
PU
I/O P3[9] — General purpose digital input/output pin.
I/O EMC_D[9] — External memory data line 9.
P3[10] 205 B2 B3 - [3] I;
PU
I/O P3[10] — General purpose digital input/output pin.
I/O EMC_D[10] — External memory data line 10.
P3[11] 208 D5 B2 - [3] I;
PU
I/O P3[11] — General purpose digital input/output pin.
I/O EMC_D[11] — External memory data line 11.
P3[12] 1 D4 A1 - [3] I;
PU
I/O P3[12] — General purpose digital input/output pin.
I/O EMC_D[12] — External memory data line 12.
P3[13] 7 C1 C1 - [3] I;
PU
I/O P3[13] — General purpose digital input/output pin.
I/O EMC_D[13] — External memory data line 13.
P3[14] 21 H2 F1 - [3] I;
PU
I/O P3[14] — General purpose digital input/output pin.
I/O EMC_D[14] — External memory data line 14.
P3[15] 28 M1 G4 - [3] I;
PU
I/O P3[15] — General purpose digital input/output pin.
I/O EMC_D[15] — External memory data line 15.
P3[16] 137 F17 - - [3] I;
PU
I/O P3[16] — General purpose digital input/output pin.
I/O EMC_D[16] — External memory data line 16.
O PWM0[1] — Pulse Width Modulator 0, output 1.
O U1_TXD — Transmitter output for UART1.
Table 3. Pin description …continued
Not all functions are available on all parts. See Table 2 (Ethernet, USB, LCD, QEI, SD/MMC, DAC pins) and Table 7 (EMC
pins).
Symbol
Pin LQFP208
Ball TFBGA208
Ball TFBGA180
Pin LQFP144
Reset state[1]
Type[2]
DescriptionLPC178X_7X All information provided in this document is subject to legal disclaimers. © NXP Semiconductors N.V. 2014. All rights reserved.
Product data sheet Rev. 5 — 9 September 2014 28 of 122
NXP Semiconductors LPC178x/7x
32-bit ARM Cortex-M3 microcontroller
P3[17] 143 F15 - - [3] I;
PU
I/O P3[17] — General purpose digital input/output pin.
I/O EMC_D[17] — External memory data line 17.
O PWM0[2] — Pulse Width Modulator 0, output 2.
I U1_RXD — Receiver input for UART1.
P3[18] 151 C15 - - [3] I;
PU
I/O P3[18] — General purpose digital input/output pin.
I/O EMC_D[18] — External memory data line 18.
O PWM0[3] — Pulse Width Modulator 0, output 3.
I U1_CTS — Clear to Send input for UART1.
P3[19] 161 B14 - - [3] I;
PU
I/O P3[19] — General purpose digital input/output pin.
I/O EMC_D[19] — External memory data line 19.
O PWM0[4] — Pulse Width Modulator 0, output 4.
I U1_DCD — Data Carrier Detect input for UART1.
P3[20] 167 A13 - - [3] I;
PU
I/O P3[20] — General purpose digital input/output pin.
I/O EMC_D[20] — External memory data line 20.
O PWM0[5] — Pulse Width Modulator 0, output 5.
I U1_DSR — Data Set Ready input for UART1.
P3[21] 175 C10 - - [3] I;
PU
I/O P3[21] — General purpose digital input/output pin.
I/O EMC_D[21] — External memory data line 21.
O PWM0[6] — Pulse Width Modulator 0, output 6.
O U1_DTR — Data Terminal Ready output for UART1. Can also
be configured to be an RS-485/EIA-485 output enable signal for
UART1.
P3[22] 195 C6 - - [3] I;
PU
I/O P3[22] — General purpose digital input/output pin.
I/O EMC_D[22] — External memory data line 22.
I PWM0_CAP0 — Capture input for PWM0, channel 0.
I U1_RI — Ring Indicator input for UART1.
P3[23] 65 T6 M4 45 [3] I;
PU
I/O P3[23] — General purpose digital input/output pin.
I/O EMC_D[23] — External memory data line 23.
I PWM1_CAP0 — Capture input for PWM1, channel 0.
I T0_CAP0 — Capture input for Timer 0, channel 0.
P3[24] 58 R5 N3 40 [3] I;
PU
I/O P3[24] — General purpose digital input/output pin.
I/O EMC_D[24] — External memory data line 24.
O PWM1[1] — Pulse Width Modulator 1, output 1.
I T0_CAP1 — Capture input for Timer 0, channel 1.
Table 3. Pin description …continued
Not all functions are available on all parts. See Table 2 (Ethernet, USB, LCD, QEI, SD/MMC, DAC pins) and Table 7 (EMC
pins).
Symbol
Pin LQFP208
Ball TFBGA208
Ball TFBGA180
Pin LQFP144
Reset state[1]
Type[2]
DescriptionLPC178X_7X All information provided in this document is subject to legal disclaimers. © NXP Semiconductors N.V. 2014. All rights reserved.
Product data sheet Rev. 5 — 9 September 2014 29 of 122
NXP Semiconductors LPC178x/7x
32-bit ARM Cortex-M3 microcontroller
P3[25] 56 U2 M3 39 [3] I;
PU
I/O P3[25] — General purpose digital input/output pin.
I/O EMC_D[25] — External memory data line 25.
O PWM1[2] — Pulse Width Modulator 1, output 2.
O T0_MAT0 — Match output for Timer 0, channel 0.
P3[26] 55 T3 K7 38 [3] I;
PU
I/O P3[26] — General purpose digital input/output pin.
I/O EMC_D[26] — External memory data line 26.
O PWM1[3] — Pulse Width Modulator 1, output 3.
O T0_MAT1 — Match output for Timer 0, channel 1.
I STCLK — System tick timer clock input. The maximum STCLK
frequency is 1/4 of the ARM processor clock frequency CCLK.
P3[27] 203 A1 - - [3] I;
PU
I/O P3[27] — General purpose digital input/output pin.
I/O EMC_D[27] — External memory data line 27.
O PWM1[4] — Pulse Width Modulator 1, output 4.
I T1_CAP0 — Capture input for Timer 1, channel 0.
P3[28] 5 D2 - - [3] I;
PU
I/O P3[28] — General purpose digital input/output pin.
I/O EMC_D[28] — External memory data line 28.
O PWM1[5] — Pulse Width Modulator 1, output 5.
I T1_CAP1 — Capture input for Timer 1, channel 1.
P3[29] 11 F3 - - [3] I;
PU
I/O P3[29] — General purpose digital input/output pin.
I/O EMC_D[29] — External memory data line 29.
O PWM1[6] — Pulse Width Modulator 1, output 6.
O T1_MAT0 — Match output for Timer 1, channel 0.
P3[30] 19 H3 - - [3] I;
PU
I/O P3[30] — General purpose digital input/output pin.
I/O EMC_D[30] — External memory data line 30.
O U1_RTS — Request to Send output for UART1. Can also be
configured to be an RS-485/EIA-485 output enable signal for
UART1.
O T1_MAT1 — Match output for Timer 1, channel 1.
P3[31] 25 J3 - - [3] I;
PU
I/O P3[31] — General purpose digital input/output pin.
I/O EMC_D[31] — External memory data line 31.
- R — Function reserved.
O T1_MAT2 — Match output for Timer 1, channel 2.
P4[0] to
P4[31]
I/O Port 4: Port 4 is a 32-bit I/O port with individual direction
controls for each bit. The operation of port 4 pins depends upon
the pin function selected via the pin connect block.
P4[0] 75 U9 L6 52 [3] I;
PU
I/O P4[0] — General purpose digital input/output pin.
I/O EMC_A[0] — External memory address line 0.
Table 3. Pin description …continued
Not all functions are available on all parts. See Table 2 (Ethernet, USB, LCD, QEI, SD/MMC, DAC pins) and Table 7 (EMC
pins).
Symbol
Pin LQFP208
Ball TFBGA208
Ball TFBGA180
Pin LQFP144
Reset state[1]
Type[2]
DescriptionLPC178X_7X All information provided in this document is subject to legal disclaimers. © NXP Semiconductors N.V. 2014. All rights reserved.
Product data sheet Rev. 5 — 9 September 2014 30 of 122
NXP Semiconductors LPC178x/7x
32-bit ARM Cortex-M3 microcontroller
P4[1] 79 U10 M7 55 [3] I;
PU
I/O P4[1] — General purpose digital input/output pin.
I/O EMC_A[1] — External memory address line 1.
P4[2] 83 T11 M8 58 [3] I;
PU
I/O P4[2] — General purpose digital input/output pin.
I/O EMC_A[2] — External memory address line 2.
P4[3] 97 U16 K9 68 [3] I;
PU
I/O P4[3] — General purpose digital input/output pin.
I/O EMC_A[3] — External memory address line 3.
P4[4] 103 R15 P13 72 [3] I;
PU
I/O P4[4] — General purpose digital input/output pin.
I/O EMC_A[4] — External memory address line 4.
P4[5] 107 R16 H10 74 [3] I;
PU
I/O P4[5] — General purpose digital input/output pin.
I/O EMC_A[5] — External memory address line 5.
P4[6] 113 M14 K10 78 [3] I;
PU
I/O P4[6] — General purpose digital input/output pin.
I/O EMC_A[6] — External memory address line 6.
P4[7] 121 L16 K12 84 [3] I;
PU
I/O P4[7] — General purpose digital input/output pin.
I/O EMC_A[7] — External memory address line 7.
P4[8] 127 J17 J11 88 [3] I;
PU
I/O P4[8] — General purpose digital input/output pin.
I/O EMC_A[8] — External memory address line 8.
P4[9] 131 H17 H12 91 [3] I;
PU
I/O P4[9] — General purpose digital input/output pin.
I/O EMC_A[9] — External memory address line 9.
P4[10] 135 G17 G12 94 [3] I;
PU
I/O P4[10] — General purpose digital input/output pin.
I/O EMC_A[10] — External memory address line 10.
P4[11] 145 F14 F11 101 [3] I;
PU
I/O P4[11] — General purpose digital input/output pin.
I/O EMC_A[11] — External memory address line 11.
P4[12] 149 C16 F10 104 [3] I;
PU
I/O P4[12] — General purpose digital input/output pin.
I/O EMC_A[12] — External memory address line 12.
P4[13] 155 B16 B14 108 [3] I;
PU
I/O P4[13] — General purpose digital input/output pin.
I/O EMC_A[13] — External memory address line 13.
P4[14] 159 B15 E8 110 [3] I;
PU
I/O P4[14] — General purpose digital input/output pin.
I/O EMC_A[14] — External memory address line 14.
P4[15] 173 A11 C10 120 [3] I;
PU
I/O P4[15] — General purpose digital input/output pin.
I/O EMC_A[15] — External memory address line 15.
P4[16] 101 U17 N12 - [3] I;
PU
I/O P4[16] — General purpose digital input/output pin.
I/O EMC_A[16] — External memory address line 16.
P4[17] 104 P14 N13 - [3] I;
PU
I/O P4[17] — General purpose digital input/output pin.
I/O EMC_A[17] — External memory address line 17.
P4[18] 105 P15 P14 - [3] I;
PU
I/O P4[18] — General purpose digital input/output pin.
I/O EMC_A[18] — External memory address line 18.
Table 3. Pin description …continued
Not all functions are available on all parts. See Table 2 (Ethernet, USB, LCD, QEI, SD/MMC, DAC pins) and Table 7 (EMC
pins).
Symbol
Pin LQFP208
Ball TFBGA208
Ball TFBGA180
Pin LQFP144
Reset state[1]
Type[2]
DescriptionLPC178X_7X All information provided in this document is subject to legal disclaimers. © NXP Semiconductors N.V. 2014. All rights reserved.
Product data sheet Rev. 5 — 9 September 2014 31 of 122
NXP Semiconductors LPC178x/7x
32-bit ARM Cortex-M3 microcontroller
P4[19] 111 P16 M14 - [3] I;
PU
I/O P4[19] — General purpose digital input/output pin.
I/O EMC_A[19] — External memory address line 19.
P4[20] 109 R17 - - [3] I;
PU
I/O P4[20] — General purpose digital input/output pin.
I/O EMC_A[20] — External memory address line 20.
I/O I2C2_SDA — I
2C2 data input/output (this pin does not use a
specialized I2C pad).
I/O SSP1_SCK — Serial Clock for SSP1.
P4[21] 115 M15 - - [3] I;
PU
I/O P4[21] — General purpose digital input/output pin.
I/O EMC_A[21] — External memory address line 21.
I/O I2C2_SCL — I
2C2 clock input/output (this pin does not use a
specialized I2C pad).
I/O SSP1_SSEL — Slave Select for SSP1.
P4[22] 123 K14 - - [3] I;
PU
I/O P4[22] — General purpose digital input/output pin.
I/O EMC_A[22] — External memory address line 22.
O U2_TXD — Transmitter output for UART2.
I/O SSP1_MISO — Master In Slave Out for SSP1.
P4[23] 129 J15 - - [3] I;
PU
I/O P4[23] — General purpose digital input/output pin.
I/O EMC_A[23] — External memory address line 23.
I U2_RXD — Receiver input for UART2.
I/O SSP1_MOSI — Master Out Slave In for SSP1.
P4[24] 183 B8 C8 127 [3] I;
PU
I/O P4[24] — General purpose digital input/output pin.
O EMC_OE — LOW active Output Enable signal.
P4[25] 179 B9 D9 124 [3] I;
PU
I/O P4[25] — General purpose digital input/output pin.
O EMC_WE — LOW active Write Enable signal.
P4[26] 119 L15 K13 - [3] I;
PU
I/O P4[26] — General purpose digital input/output pin.
O EMC_BLS0 — LOW active Byte Lane select signal 0.
P4[27] 139 G15 F14 - [3] I;
PU
I/O P4[27] — General purpose digital input/output pin.
O EMC_BLS1 — LOW active Byte Lane select signal 1.
P4[28] 170 C11 D10 118 [3] I;
PU
I/O P4[28] — General purpose digital input/output pin.
O EMC_BLS2 — LOW active Byte Lane select signal 2.
O U3_TXD — Transmitter output for UART3.
O T2_MAT0 — Match output for Timer 2, channel 0.
- R — Function reserved.
O LCD_VD[6] — LCD data.
O LCD_VD[10] — LCD data.
O LCD_VD[2] — LCD data.
Table 3. Pin description …continued
Not all functions are available on all parts. See Table 2 (Ethernet, USB, LCD, QEI, SD/MMC, DAC pins) and Table 7 (EMC
pins).
Symbol
Pin LQFP208
Ball TFBGA208
Ball TFBGA180
Pin LQFP144
Reset state[1]
Type[2]
DescriptionLPC178X_7X All information provided in this document is subject to legal disclaimers. © NXP Semiconductors N.V. 2014. All rights reserved.
Product data sheet Rev. 5 — 9 September 2014 32 of 122
NXP Semiconductors LPC178x/7x
32-bit ARM Cortex-M3 microcontroller
P4[29] 176 B10 B9 122 [3] I;
PU
I/O P4[29] — General purpose digital input/output pin.
O EMC_BLS3 — LOW active Byte Lane select signal 3.
I U3_RXD — Receiver input for UART3.
O T2_MAT1 — Match output for Timer 2, channel 1.
I/O I2C2_SCL — I
2C2 clock input/output (this pin does not use a
specialized I2C pad).
O LCD_VD[7] — LCD data.
O LCD_VD[11] — LCD data.
O LCD_VD[3] — LCD data.
P4[30] 187 B7 C7 130 [3] I;
PU
I/O P4[30] — General purpose digital input/output pin.
O EMC_CS0 — LOW active Chip Select 0 signal.
P4[31] 193 A4 E7 134 [3] I;
PU
I/O P4[31] — General purpose digital input/output pin.
O EMC_CS1 — LOW active Chip Select 1 signal.
P5[0] to P5[4] I/O Port 5: Port 5 is a 5-bit I/O port with individual direction controls
for each bit. The operation of port 5 pins depends upon the pin
function selected via the pin connect block.
P5[0] 9 F4 E5 6 [3] I;
PU
I/O P5[0] — General purpose digital input/output pin.
I/O EMC_A[24] — External memory address line 24.
I/O SSP2_MOSI — Master Out Slave In for SSP2.
O T2_MAT2 — Match output for Timer 2, channel 2.
P5[1] 30 J4 H1 21 [3] I;
PU
I/O P5[1] — General purpose digital input/output pin.
I/O EMC_A[25] — External memory address line 25.
I/O SSP2_MISO — Master In Slave Out for SSP2.
O T2_MAT3 — Match output for Timer 2, channel 3.
P5[2] 117 L14 L12 81 [11] I I/O P5[2] — General purpose digital input/output pin.
- R — Function reserved.
- R — Function reserved.
O T3_MAT2 — Match output for Timer 3, channel 2.
- R — Function reserved.
I/O I2C0_SDA — I
2C0 data input/output (this pin uses a specialized
I
2C pad that supports I2C Fast Mode Plus).
Table 3. Pin description …continued
Not all functions are available on all parts. See Table 2 (Ethernet, USB, LCD, QEI, SD/MMC, DAC pins) and Table 7 (EMC
pins).
Symbol
Pin LQFP208
Ball TFBGA208
Ball TFBGA180
Pin LQFP144
Reset state[1]
Type[2]
DescriptionLPC178X_7X All information provided in this document is subject to legal disclaimers. © NXP Semiconductors N.V. 2014. All rights reserved.
Product data sheet Rev. 5 — 9 September 2014 33 of 122
NXP Semiconductors LPC178x/7x
32-bit ARM Cortex-M3 microcontroller
P5[3] 141 G14 G10 98 [11] I I/O P5[3] — General purpose digital input/output pin.
- R — Function reserved.
- R — Function reserved.
- R — Function reserved.
I U4_RXD — Receiver input for USART4.
I/O I2C0_SCL — I
2C0 clock input/output (this pin uses a
specialized I2C pad that supports I2C Fast Mode Plus).
P5[4] 206 C3 C4 143 [3] I;
PU
I/O P5[4] — General purpose digital input/output pin.
O U0_OE — RS-485/EIA-485 output enable signal for UART0.
- R — Function reserved.
O T3_MAT3 — Match output for Timer 3, channel 3.
O U4_TXD — Transmitter output for USART4 (input/output in
smart card mode).
JTAG_TDO
(SWO)
2 D3 B1 1 [3] O O Test Data Out for JTAG interface. Also used as Serial wire trace
output.
JTAG_TDI 4 C2 C3 3 [3] I;
PU
I Test Data In for JTAG interface.
JTAG_TMS
(SWDIO)
6 E3 C2 4 [3] I;
PU
I Test Mode Select for JTAG interface. Also used as Serial wire
debug data input/output.
JTAG_TRST 8 D1 D4 5 [3] I;
PU
I Test Reset for JTAG interface.
JTAG_TCK
(SWDCLK)
10 E2 D2 7 [3] i I Test Clock for JTAG interface. This clock must be slower than
1/6 of the CPU clock (CCLK) for the JTAG interface to operate.
Also used as serial wire clock.
RESET 35 M2 J1 24 [12] I;
PU
I External reset input with 20 ns glitch filter. A LOW-going pulse
as short as 50 ns on this pin resets the device, causing I/O ports
and peripherals to take on their default states, and processor
execution to begin at address 0. This pin also serves as the
debug select input. LOW level selects the JTAG boundary scan.
HIGH level selects the ARM SWD debug mode.
RSTOUT 29 K3 H2 20 [3] OH O Reset status output. A LOW output on this pin indicates that the
device is in the reset state for any reason. This reflects the
RESET input pin and all internal reset sources.
RTC_ALARM 37 N1 H5 26 [13] OL O RTC controlled output. This pin has a low drive strength and is
powered by VBAT. It is driven HIGH when an RTC alarm is
generated.
RTCX1 34 K2 J2 23 [14]
[15]
- I Input to the RTC 32 kHz ultra-low power oscillator circuit.
RTCX2 36 L2 J3 25 [14]
[15]
- O Output from the RTC 32 kHz ultra-low power oscillator circuit.
USB_D2 52 U1 N2 37 [9] - I/O USB port 2 bidirectional D line.
Table 3. Pin description …continued
Not all functions are available on all parts. See Table 2 (Ethernet, USB, LCD, QEI, SD/MMC, DAC pins) and Table 7 (EMC
pins).
Symbol
Pin LQFP208
Ball TFBGA208
Ball TFBGA180
Pin LQFP144
Reset state[1]
Type[2]
DescriptionLPC178X_7X All information provided in this document is subject to legal disclaimers. © NXP Semiconductors N.V. 2014. All rights reserved.
Product data sheet Rev. 5 — 9 September 2014 34 of 122
NXP Semiconductors LPC178x/7x
32-bit ARM Cortex-M3 microcontroller
VBAT 38 M3 K1 27 - I RTC power supply: 3.0 V on this pin supplies power to the RTC.
VDD(REG)(3V3) 26,
86,
174
H4,
P11,
D11
G1,
N9,
E9
18,
60,
121
- S 3.3 V regulator supply voltage: This is the power supply for the
on-chip voltage regulator that supplies internal logic.
VDDA 20 G4 F2 14 - S Analog 3.3 V pad supply voltage: This can be connected to the
same supply as VDD(3V3) but should be isolated to minimize
noise and error. This voltage is used to power the ADC and
DAC. Note: This pin should be tied to 3.3 V if the ADC and
DAC are not used.
VDD(3V3) 15,
60,
71,
89,
112,
125,
146,
165,
181,
198
G3,
P6,
P8,
U13,
P17,
K16,
C17,
B13,
C9,
D7
E2,
L4,
K8,
L11,
J14,
E12,
E10,
C5
41,
62,
77,
102,
114,
138
- S 3.3 V supply voltage: This is the power supply voltage for I/O
other than pins in the VBAT domain.
VREFP 24 K1 G2 17 - S ADC positive reference voltage: This should be the same
voltage as VDDA, but should be isolated to minimize noise and
error. The voltage level on this pin is used as a reference for
ADC and DAC. Note: This pin should be tied to 3.3 V if the
ADC and DAC are not used.
VSS 33,
63,
77,
93,
114,
133,
148,
169,
189,
200
L3,
T5,
R9,
P12,
N16,
H14,
E15,
A12,
B6,
A2
H4,
P4,
L9,
L13,
G13,
D13,
C11,
B4
44,
65,
79,
103,
117,
139
- G Ground: 0 V reference for digital IO pins.
VSSREG 32,
84,
172
D12,
K4,
P10
H3,
L8,
A10
22,
59,
119
- G Ground: 0 V reference for internal logic.
VSSA 22 J2 F3 15 - G Analog ground: 0 V power supply and reference for the ADC
and DAC. This should be the same voltage as VSS, but should
be isolated to minimize noise and error.
XTAL1 44 M4 L2 31 [14]
[16]
- I Input to the oscillator circuit and internal clock generator circuits.
XTAL2 46 N4 K4 33 [14]
[16]
- O Output from the oscillator amplifier.
Table 3. Pin description …continued
Not all functions are available on all parts. See Table 2 (Ethernet, USB, LCD, QEI, SD/MMC, DAC pins) and Table 7 (EMC
pins).
Symbol
Pin LQFP208
Ball TFBGA208
Ball TFBGA180
Pin LQFP144
Reset state[1]
Type[2]
DescriptionLPC178X_7X All information provided in this document is subject to legal disclaimers. © NXP Semiconductors N.V. 2014. All rights reserved.
Product data sheet Rev. 5 — 9 September 2014 35 of 122
NXP Semiconductors LPC178x/7x
32-bit ARM Cortex-M3 microcontroller
[1] PU = internal pull-up enabled (for VDD(REG)(3V3) = 3.3 V, pulled up to 3.3 V); IA = inactive, no pull-up/down enabled; F = floating; floating
pins, if not used, should be tied to ground or power to minimize power consumption.
[2] I = Input; O = Output; OL = Output driving LOW; G = Ground; S = Supply.
[3] 5 V tolerant pad (5 V tolerant if VDD(3V3) present; if VDD(3V3) not present, do not exceed 3.6 V) providing digital I/O functions with TTL
levels and hysteresis.
[4] 5 V tolerant standard pad (5 V tolerant if VDD(3V3) present; if VDD(3V3) not present, do not exceed 3.6 V) providing digital I/O functions with
TTL levels and hysteresis. This pad can be powered by VBAT.
[5] 5 V tolerant pad (5 V tolerant if VDD(3V3) present; if VDD(3V3) not present or configured for an analog function, do not exceed 3.6 V)
providing digital I/O functions with TTL levels and hysteresis and analog input. When configured as a ADC input, digital section of the
pad is disabled.
[6] 5 V tolerant fast pad (5 V tolerant if VDD(3V3) present; if VDD(3V3) not present, do not exceed 3.6 V) providing digital I/O functions with TTL
levels and hysteresis.
[7] 5 V tolerant pad (5 V tolerant if VDD(3V3) present; if VDD(3V3) not present or configured for an analog function, do not exceed 3.6 V)
providing digital I/O with TTL levels and hysteresis and analog output function. When configured as the DAC output, digital section of the
pad is disabled.
[8] Open-drain 5 V tolerant digital I/O pad, compatible with I2C-bus 400 kHz specification. It requires an external pull-up to provide output
functionality. When power is switched off, this pin connected to the I2C-bus is floating and does not disturb the I2C lines. Open-drain
configuration applies to all functions on this pin.
[9] Not 5 V tolerant. Pad provides digital I/O and USB functions. It is designed in accordance with the USB specification, revision 2.0
(Full-speed and Low-speed mode only).
[10] 5 V tolerant pad (5 V tolerant if VDD(3V3) present; if VDD(3V3) not present, do not exceed 3.6 V) with 5 ns glitch filter providing digital I/O
functions with TTL levels and hysteresis.
[11] Open-drain 5 V tolerant digital I/O pad, compatible with I2C-bus 1 MHz specification. It requires an external pull-up to provide output
functionality. When power is switched off, this pin connected to the I2C-bus is floating and does not disturb the I2C lines. Open-drain
configuration applies to all functions on this pin.
[12] 5 V tolerant pad (5 V tolerant if VDD(3V3) present; if VDD(3V3) not present, do not exceed 3.6 V) with 20 ns glitch filter providing digital I/O
function with TTL levels and hysteresis.
[13] This pad can be powered from VBAT.
[14] Pad provides special analog functionality. A 32 kHz crystal oscillator must be used with the RTC. An external clock (32 kHz) can’t be
used to drive the RTCX1 pin.
[15] If the RTC is not used, these pins can be left floating.
[16] When the main oscillator is not used, connect XTAL1 and XTAL2 as follows: XTAL1 can be left floating or can be grounded (grounding
is preferred to reduce susceptibility to noise). XTAL2 should be left floating.
Table 4. Pin allocation table TFBGA208
Not all functions are available on all parts. See Table 2 and Table 7 (EMC pins).
Ball Symbol Ball Symbol Ball Symbol Ball Symbol
Row A
1 P3[27] 2 VSS 3 P1[0] 4 P4[31]
5 P1[4] 6 P1[9] 7 P1[14] 8 P1[15]
9 P1[17] 10 P1[3] 11 P4[15] 12 VSS
13 P3[20] 14 P1[11] 15 P0[8] 16 P1[12]
17 P1[5] - - -
Row B
1 P3[2] 2 P3[10] 3 P3[1] 4 P3[0]
5 P1[1] 6 VSS 7 P4[30] 8 P4[24]
9 P4[25] 10 P4[29] 11 P1[6] 12 P0[4]
13 VDD(3V3) 14 P3[19] 15 P4[14] 16 P4[13]
17 P2[0] - - -
Row CLPC178X_7X All information provided in this document is subject to legal disclaimers. © NXP Semiconductors N.V. 2014. All rights reserved.
Product data sheet Rev. 5 — 9 September 2014 36 of 122
NXP Semiconductors LPC178x/7x
32-bit ARM Cortex-M3 microcontroller
1 P3[13] 2 JTAG_TDI 3 P5[4] 4 P0[2]
5 P3[9] 6 P3[22] 7 P1[8] 8 P1[10]
9 VDD(3V3) 10 P3[21] 11 P4[28] 12 P0[5]
13 P0[7] 14 P0[9] 15 P3[18] 16 P4[12]
17 VDD(3V3)- - -
Row D
1 JTAG_TRST 2 P3[28] 3 JTAG_TDO (SWO) 4 P3[12]
5 P3[11] 6 P0[3] 7 VDD(3V3) 8 P3[8]
9 P1[2] 10 P1[16] 11 VDD(REG)(3V3) 12 VSSREG
13 P0[6] 14 P1[7] 15 P2[2] 16 P1[13]
17 P2[4] - - -
Row E
1 P0[26] 2 JTAG_TCK
(SWDCLK)
3 JTAG_TMS (SWDIO) 4 P3[3]
5 - 6- 7 - 8 -
9 - 10 - 11 - 12 -
13 - 14 P2[1] 15 VSS 16 P2[3]
17 P2[6] - - -
Row F
1 P0[25] 2 P3[4] 3 P3[29] 4 P5[0]
5 - 6- 7 - 8 -
9 - 10 - 11 - 12 -
13 - 14 P4[11] 15 P3[17] 16 P2[5]
17 P3[16] - - -
Row G
1 P3[5] 2 P0[24] 3 VDD(3V3) 4 VDDA
5 - 6 - 7 - 8 -
9 - 10 - 11 - 12 -
13 - 14 P5[3] 15 P4[27] 16 P2[7]
17 P4[10] - - -
Row H
1 P0[23] 2 P3[14] 3 P3[30] 4 VDD(REG)(3V3)
5 - 6 - 7 - 8 -
9 - 10 - 11 - 12 -
13 - 14 VSS 15 P2[8] 16 P2[9]
17 P4[9] - - -
Row J
1 P3[6] 2 VSSA 3 P3[31] 4 P5[1]
5 - 6 - 7 - 8 -
9 - 10 - 11 - 12 -
Table 4. Pin allocation table TFBGA208
Not all functions are available on all parts. See Table 2 and Table 7 (EMC pins).
Ball Symbol Ball Symbol Ball Symbol Ball SymbolLPC178X_7X All information provided in this document is subject to legal disclaimers. © NXP Semiconductors N.V. 2014. All rights reserved.
Product data sheet Rev. 5 — 9 September 2014 37 of 122
NXP Semiconductors LPC178x/7x
32-bit ARM Cortex-M3 microcontroller
13 14 P0[16] 15 P4[23] 16 P0[15]
17 P4[8] - - -
Row K
1 VREFP 2 RTCX1 3 RSTOUT 4 VSSREG
13 - 14 P4[22] 15 P0[18] 16 VDD(3V3)
17 P0[17] - - -
Row L
1 P3[7] 2 RTCX2 3 VSS 4 P2[30]
5 - 6- 7 - 8 -
9 - 10 - 11 - 12 -
13 - 14 P5[2] 15 P4[26] 16 P4[7]
17 P0[19] - - -
Row M
1 P3[15] 2 RESET 3 VBAT 4 XTAL1
5 - 6 - 7 - 8 -
9 - 10 - 11 - 12 -
13 - 14 P4[6] 15 P4[21] 16 P0[21]
17 P0[20] - - -
Row N
1 RTC_ALARM 2 P2[31] 3 P2[29] 4 XTAL2
5 - 6 - 7 - 8 -
9 - 10 - 11 - 12 -
13 - 14 P2[12 15 P2[10] 16 VSS
17 P0[22] - - -
Row P
1 P1[31] 2 P1[30] 3 P2[27] 4 P2[28]
5 P2[24] 6 VDD(3V3) 7 P1[18] 8 VDD(3V3)
9 P1[23] 10 VSSREG 11 VDD(REG)(3V3) 12 VSS
13 P2[15] 14 P4[17] 15 P4[18] 16 P4[19]
17 VDD(3V3) ---
Row R
1 P0[12] 2 P0[13] 3 P0[28] 4 P2[25]
5 P3[24] 6 P0[30] 7 P2[19] 8 P1[21]
9 VSS 10 P1[26] 11 P2[16] 12 P2[14]
13 P2[17] 14 P0[11] 15 P4[4] 16 P4[5]
17 P4[20] - - -
Row T
1 P0[27] 2 P0[31] 3 P3[26] 4 P2[26]
5 VSS 6 P3[23] 7 P0[14] 8 P2[20]
9 P1[24] 10 P1[25] 11 P4[2] 12 P1[27]
Table 4. Pin allocation table TFBGA208
Not all functions are available on all parts. See Table 2 and Table 7 (EMC pins).
Ball Symbol Ball Symbol Ball Symbol Ball SymbolLPC178X_7X All information provided in this document is subject to legal disclaimers. © NXP Semiconductors N.V. 2014. All rights reserved.
Product data sheet Rev. 5 — 9 September 2014 38 of 122
NXP Semiconductors LPC178x/7x
32-bit ARM Cortex-M3 microcontroller
13 P1[28] 14 P0[1] 15 P0[10] 16 P2[13]
17 P2[11] - - -
Row U
1 USB_D-2 2 P3[25] 3 P2[18] 4 P0[29]
5 P2[23] 6 P1[19] 7 P1[20] 8 P1[22]
9 P4[0] 10 P4[1] 11 P2[21] 12 P2[22]
13 VDD(3V3) 14 P1[29] 15 P0[0] 16 P4[3]
17 P4[16] - - -
Table 4. Pin allocation table TFBGA208
Not all functions are available on all parts. See Table 2 and Table 7 (EMC pins).
Ball Symbol Ball Symbol Ball Symbol Ball Symbol
Table 5. Pin allocation table TFBGA180
Not all functions are available on all parts. See Table 2 and Table 7 (EMC pins).
Ball Symbol Ball Symbol Ball Symbol Ball Symbol
Row A
5 P1[1] 6 P3[8] 7 P1[10] 8 P1[15]
9 P1[3] 10 VSSREG 11 P0[4] 12 P1[11]
13 P0[9] 14 P1[12] - -
Row B
1 JTAG_TDO (SWO) 2 P3[11] 3 P3[10] 4 VSS
5 P1[0] 6 P1[8] 7 P1[2] 8 P1[16]
9 P4[29] 10 P1[6] 11 P0[5] 12 P0[7]
13 P1[5] 14 P4[13] - -
Row C
1 P3[13] 2 JTAG_TMS (SWDIO) 3 JTAG_TDI 4 P5[4]
5 VDD(3V3) 6 P1[4] 7 P4[30] 8 P4[24]
9 P1[17] 10 P4[15] 11 VSS 12 P0[8]
13 P1[7] 14 P2[1] - -
Row D
1 P0[26] 2 JTAG_TCK
(SWDCLK)
3 P3[4] 4 JTAG_TRST
5 P0[2] 6 P3[0] 7 P1[9] 8 P1[14]
9 P4[25] 10 P4[28] 11 P0[6] 12 P2[0]
13 VSS 14 P1[13] - -
Row E
1 P0[24] 2 VDD(3V3) 3 P3[5] 4 P0[25]
5 P5[0] 6 P3[1] 7 P4[31] 8 P4[14]
9 VDD(REG)(3V3) 10 VDD(3V3) 11 P2[2] 12 VDD(3V3)
13 P2[3] 14 P2[4] - -
Row F
1 P3[14] 2 VDDA 3 VSSA 4 P3[6]
5 P0[23] 6 - 7 - 8 -
9 - 10 P4[12] 11 P4[11] 12 P2[5]LPC178X_7X All information provided in this document is subject to legal disclaimers. © NXP Semiconductors N.V. 2014. All rights reserved.
Product data sheet Rev. 5 — 9 September 2014 39 of 122
NXP Semiconductors LPC178x/7x
32-bit ARM Cortex-M3 microcontroller
13 P2[6] 14 P4[27] - -
Row G
1 VDD(REG)(3V3) 2 VREFP 3 P3[7] 4 P3[15]
5 P3[3] 6 - 7 - 8 -
9 - 10 P5[3] 11 P2[7] 12 P4[10]
13 VSS 14 P2[8] - -
Row H
1 P5[1] 2 RSTOUT 3 VSSREG 4 VSS
5 RTC_ALARM 6 - 7 - 8 -
9 - 10 P4[5] 11 P2[9] 12 P4[9]
13 P0[15] 14 P0[16] - -
Table 5. Pin allocation table TFBGA180
Not all functions are available on all parts. See Table 2 and Table 7 (EMC pins).
Ball Symbol Ball Symbol Ball Symbol Ball SymbolLPC178X_7X All information provided in this document is subject to legal disclaimers. © NXP Semiconductors N.V. 2014. All rights reserved.
Product data sheet Rev. 5 — 9 September 2014 40 of 122
NXP Semiconductors LPC178x/7x
32-bit ARM Cortex-M3 microcontroller
7. Functional description
7.1 Architectural overview
The ARM Cortex-M3 includes three AHB-Lite buses: the system bus, the I-code bus, and
the D-code bus. The I-code and D-code core buses are faster than the system bus and
are used similarly to Tightly Coupled Memory (TCM) interfaces: one bus dedicated for
instruction fetch (I-code) and one bus for data access (D-code). The use of two core
buses allows for simultaneous operations if concurrent operations target different devices.
Row J
1 RESET 2 RTCX1 3 RTCX2 4 P0[12]
5 P0[13] 6 - 7 - 8 -
9 - 10 P0[19] 11 P4[8] 12 P0[17]
13 P0[18] 14 VDD(3V3) - -
Row K
1 VBAT 2 P1[31] 3 P1[30] 4 XTAL2
5 P0[29] 6 P1[20] 7 P3[26] 8 VDD(3V3)
9 P4[3] 10 P4[6] 11 P0[21] 12 P4[7]
13 P4[26] 14 P0[20] - -
Row L
1 P2[29] 2 XTAL1 3 P0[27] 4 VDD(3V3)
5 P1[18] 6 P4[0] 7 P1[25] 8 VSSREG
9 VSS 10 P0[10] 11 VDD(3V3) 12 P5[2]
13 VSS 14 P0[22] - -
Row M
1 P0[28] 2 P2[28] 3 P3[25] 4 P3[23]
5 P0[14] 6 P1[22] 7 P4[1] 8 P4[2]
9 P1[27] 10 P0[0] 11 P2[13] 12 P2[11]
13 P2[10] 14 P4[19] - -
Row N
1 P0[31] 2 USB_D-2 3 P3[24] 4 P0[30]
5 P2[19] 6 P1[21] 7 P1[23] 8 P2[21]
9 VDD(REG)(3V3) 10 P1[29] 11 P0[1] 12 P4[16]
13 P4[17] 14 P2[12] - -
Row P
1 P2[24] 2 P2[25] 3 P2[18] 4 VSS
5 P1[19] 6 P2[20] 7 P1[24] 8 P1[26]
9 P2[16] 10 P1[28] 11 P2[17] 12 P0[11]
13 P4[4] 14 P4[18] - -
Table 5. Pin allocation table TFBGA180
Not all functions are available on all parts. See Table 2 and Table 7 (EMC pins).
Ball Symbol Ball Symbol Ball Symbol Ball SymbolLPC178X_7X All information provided in this document is subject to legal disclaimers. © NXP Semiconductors N.V. 2014. All rights reserved.
Product data sheet Rev. 5 — 9 September 2014 41 of 122
NXP Semiconductors LPC178x/7x
32-bit ARM Cortex-M3 microcontroller
The LPC178x/7x use a multi-layer AHB matrix to connect the ARM Cortex-M3 buses and
other bus masters to peripherals in a flexible manner that optimizes performance by
allowing peripherals that are on different slaves ports of the matrix to be accessed
simultaneously by different bus masters.
7.2 ARM Cortex-M3 processor
The ARM Cortex-M3 is a general purpose, 32-bit microprocessor, which offers high
performance and very low power consumption. The ARM Cortex-M3 offers many new
features, including a Thumb-2 instruction set, low interrupt latency, hardware division,
hardware single-cycle multiply, interruptable/continuable multiple load and store
instructions, automatic state save and restore for interrupts, tightly integrated interrupt
controller with wake-up interrupt controller, and multiple core buses capable of
simultaneous accesses.
Pipeline techniques are employed so that all parts of the processing and memory systems
can operate continuously. Typically, while one instruction is being executed, its successor
is being decoded, and a third instruction is being fetched from memory.
The ARM Cortex-M3 processor is described in detail in the Cortex-M3 Technical
Reference Manual that can be found on official ARM website.
7.3 On-chip flash program memory
The LPC178x/7x contain up to 512 kB of on-chip flash program memory. A new two-port
flash accelerator maximizes performance for use with the two fast AHB-Lite buses.
7.4 EEPROM
The LPC178x/7x contains up to 4032 byte of on-chip byte-erasable and
byte-programmable EEPROM data memory.
7.5 On-chip SRAM
The LPC178x/7x contain a total of up to 96 kB on-chip static RAM data memory. This
includes the main 64 kB SRAM, accessible by the CPU and DMA controller on a
higher-speed bus, and up to two additional 16 kB each SRAM blocks situated on a
separate slave port on the AHB multilayer matrix.
This architecture allows CPU and DMA accesses to be spread over three separate RAMs
that can be accessed simultaneously.
7.6 Memory Protection Unit (MPU)
The LPC178x/7x have a Memory Protection Unit (MPU) which can be used to improve the
reliability of an embedded system by protecting critical data within the user application.
The MPU allows separating processing tasks by disallowing access to each other's data,
disabling access to memory regions, allowing memory regions to be defined as read-only
and detecting unexpected memory accesses that could potentially break the system.LPC178X_7X All information provided in this document is subject to legal disclaimers. © NXP Semiconductors N.V. 2014. All rights reserved.
Product data sheet Rev. 5 — 9 September 2014 42 of 122
NXP Semiconductors LPC178x/7x
32-bit ARM Cortex-M3 microcontroller
The MPU separates the memory into distinct regions and implements protection by
preventing disallowed accesses. The MPU supports up to eight regions each of which can
be divided into eight subregions. Accesses to memory locations that are not defined in the
MPU regions, or not permitted by the region setting, will cause the Memory Management
Fault exception to take place.
7.7 Memory map
The LPC178x/7x incorporate several distinct memory regions, shown in the following
figures. Figure 6 shows the overall map of the entire address space from the user
program viewpoint following reset. The interrupt vector area supports address remapping.
The AHB peripheral area is 2 MB in size, and is divided to allow for up to 128 peripherals.
The APB peripheral area is 1 MB in size and is divided to allow for up to 64 peripherals.
Each peripheral of either type is allocated 16 kB of space. This allows simplifying the
address decoding for each peripheral.
Table 6. LPC178x/177x memory usage and details
Address range General Use Address range details and description
0x0000 0000 to
0x1FFF FFFF
On-chip non-volatile
memory
0x0000 0000 - 0x0007 FFFF For devices with 512 kB of flash memory.
0x0000 0000 - 0x0003 FFFF For devices with 256 kB of flash memory.
0x0000 0000 - 0x0001 FFFF For devices with 128 kB of flash memory.
0x0000 0000 - 0x0000 FFFF For devices with 64 kB of flash memory.
On-chip main SRAM 0x1000 0000 - 0x1000 FFFF For devices with 64 kB of main SRAM.
0x1000 0000 - 0x1000 7FFF For devices with 32 kB of main SRAM.
0x1000 0000 - 0x1000 3FFF For devices with 16 kB of main SRAM.
Boot ROM 0x1FFF 0000 - 0x1FFF 1FFF 8 kB Boot ROM with flash services.
0x2000 0000 to
0x3FFF FFFF
On-chip SRAM
(typically used for
peripheral data)
0x2000 0000 - 0x2000 1FFF Peripheral RAM - bank 0 (first 8 kB)
0x2000 2000 - 0x2000 3FFF Peripheral RAM - bank 0 (second 8 kB)
0x2000 4000 - 0x2000 7FFF Peripheral RAM - bank 1 (16 kB)
AHB peripherals 0x2008 0000 - 0x200B FFFF See Figure 6 for details
0x4000 0000 to
0x7FFF FFFF
APB Peripherals 0x4000 0000 - 0x4007 FFFF APB0 Peripherals, up to 32 peripheral blocks of
16 kB each.
0x4008 0000 - 0x400F FFFF APB1 Peripherals, up to 32 peripheral blocks of
16 kB each.
0x8000 0000 to
0xDFFF FFFF
Off-chip Memory via
the External Memory
Controller
Four static memory chip selects:
0x8000 0000 - 0x83FF FFFF Static memory chip select 0 (up to 64 MB)
0x9000 0000 - 0x93FF FFFF Static memory chip select 1 (up to 64 MB)
0x9800 0000 - 0x9BFF FFFF Static memory chip select 2 (up to 64 MB)
0x9C00 0000 - 0x9FFF FFFF Static memory chip select 3 (up to 64 MB)
Four dynamic memory chip selects:
0xA000 0000 - 0xAFFF FFFF Dynamic memory chip select 0 (up to 256MB)
0xB000 0000 - 0xBFFF FFFF Dynamic memory chip select 1 (up to 256MB)
0xC000 0000 - 0xCFFF FFFF Dynamic memory chip select 2 (up to 256MB)
0xD000 0000 - 0xDFFF FFFF Dynamic memory chip select 3 (up to 256MB)
0xE000 0000 to
0xE00F FFFF
Cortex-M3 Private
Peripheral Bus
0xE000 0000 - 0xE00F FFFF Cortex-M3 related functions, includes the NVIC
and System Tick Timer.xxxxxxxxxxxxxxxxxxxxx xxxxxxxxxxxxxxxxxxxxxxxxxx xxxxxxx x x x xxxxxxxxxxxxxxxxxxxxxxxxxxxxxx xxxxxxxxxxxxxxxxxxx xx xx xxxxx
xxxxxxxxxxxxxxxxxxxxxxxxxxx xxxxxxxxxxxxxxxxxxx xxxxxx xxxxxxxxxxxxxxxxxxxxxxxxxxxxxxxxxxx xxxxxxxxxxxx x x
xxxxxxxxxxxxxxxxxxxxx xxxxxxxxxxxxxxxxxxxxxxxxxxxxxx xxxxx xxxxxxxxxxxxxxxxxxxxxxxxxxxxxxxxxxxxxxxxxxxxxxxxxx xxxxxxxx
xxxxxxxxxxxxxxxxxxxxxxxxx xxxxxxxxxxxxxxxxxxxx xxx
LPC178X_7X All information provided in this document is subject to legal disclaimers. © NXP Semiconductors N.V. 2014. All rights reserved.
Product data sheet Rev. 5 — 9 September 2014 43 of 122
NXP Semiconductors LPC178x/7x
32-bit ARM Cortex-M3 microcontroller (1) Not available on all parts. See Table 2 and Table 6. Fig 6. LPC178x/7x memory map
0x4000 4000
0x4000 8000
0x4000 C000
0x4001 0000
0x4001 8000
0x4002 0000
0x4002 8000
0x4002 C000
0x4003 4000
0x4003 0000
0x4003 8000
0x4003 C000
0x4004 0000
0x4004 4000
0x4004 8000
0x4004 C000
0x4005 C000
0x4006 0000
0x4008 0000
0x4002 4000
0x4001 C000
0x4001 4000
0x4000 0000
APB1 peripherals
0x4008 0000
0x4008 8000
0x4008 C000
0x4009 0000
0x4009 4000
0x4009 8000
0x4009 C000
0x400A 0000
0x400A 4000
0x400A 8000
0x400A C000
0x400B 0000
0x400B 4000
0x400B 8000
0x400B C000
0x400C 0000
0x400F C000
0x4010 0000
SSP0
DAC
timer 2
timer 3
UART2
UART3
USART4(1)
I
2C2
1 - 0 reserved
2
3
4
5
6
7
8
9
10
SSP2
I
2S
11
12
reserved
motor control PWM
reserved
30 - 17 reserved
13
14
15
16
31 system control
reserved
reserved
64 kB main static RAM(1)
EMC 4 x static chip select(1)
EMC 4 x dynamic chip select(1)
reserved
private peripheral bus
0 GB 0x0000 0000
0.5 GB
4 GB
1 GB
0x1000 0000
0x1001 0000
0x1FFF 0000
0x2000 0000
0x2000 8000
0x2008 0000
0x2200 0000
0x200A 0000
0x2400 0000
0x2800 0000
0x4000 0000
0x4008 0000
0x4010 0000
0x4200 0000
0x4400 0000
0x8000 0000
0xA000 0000
0xE000 0000
0xE010 0000
0xFFFF FFFF
reserved
reserved
reserved
reserved
reserved
reserved
APB0 peripherals
0xE004 0000
AHB peripherals
APB1 peripherals
peripheral
SRAM bit-band alias addressing
peripheral bit-band alias addressing
16 kB peripheral SRAM1(1) 0x2000 4000
16 kB peripheral SRAM0(1)
LPC178x/7x
0x0008 0000
512 kB on-chip flash(1)
QEI(1)
SD/MMC(1)
APB0 peripherals
WWDT
timer 0
timer 1
UART0
UART1
reserved
reserved
CAN AF RAM
CAN common
CAN1
CAN2
CAN AF registers
PWM0
I
2C0
RTC/event recorder
+ backup registers
GPIO interrupts
pin connect
SSP1
ADC
22 - 19 reserved
I
2C1
31 - 24 reserved
0
1
2
3
4
5
6
7
8
9
10
11
12
13
14
15
16
17
18
23
PWM1
8 kB boot ROM
0x0000 0000
0x0000 0400
active interrupt vectors
+ 256 words
I-code/D-code
memory space
002aaf574
reserved 0x1FFF 2000
0x2900 0000 reserved
reserved
0x2008 0000
0x2008 4000
0x2008 8000
0x2008 C000
0x200A 0000
0x2009 C000
AHB peripherals
LCD(1)
USB(1)
Ethernet(1)
0 GPDMA controller
1
2
3
0x2009 0000 4 CRC engine
0x2009 4000 5
0x2009 8000 GPIO
EMC registers
6
7LPC178X_7X All information provided in this document is subject to legal disclaimers. © NXP Semiconductors N.V. 2014. All rights reserved.
Product data sheet Rev. 5 — 9 September 2014 44 of 122
NXP Semiconductors LPC178x/7x
32-bit ARM Cortex-M3 microcontroller
7.8 Nested Vectored Interrupt Controller (NVIC)
The NVIC is an integral part of the Cortex-M3. The tight coupling to the CPU allows for low
interrupt latency and efficient processing of late arriving interrupts.
7.8.1 Features
• Controls system exceptions and peripheral interrupts.
• On the LPC178x/7x, the NVIC supports 40 vectored interrupts.
• 32 programmable interrupt priority levels, with hardware priority level masking.
• Relocatable vector table.
• Non-Maskable Interrupt (NMI).
• Software interrupt generation.
7.8.2 Interrupt sources
Each peripheral device has one interrupt line connected to the NVIC but may have several
interrupt flags. Individual interrupt flags may also represent more than one interrupt
source.
Any pin on port 0 and port 2 regardless of the selected function can be programmed to
generate an interrupt on a rising edge, a falling edge, or both.
7.9 Pin connect block
The pin connect block allows selected pins of the microcontroller to have more than one
function. Configuration registers control the multiplexers to allow connection between the
pin and the on-chip peripherals.
Peripherals should be connected to the appropriate pins prior to being activated and prior
to any related interrupt(s) being enabled. Activity of any enabled peripheral function that is
not mapped to a related pin should be considered undefined.
Most pins can also be configured as open-drain outputs or to have a pull-up, pull-down, or
no resistor enabled.
7.10 External memory controller
Remark: Supported memory size and type and EMC bus width vary for different parts
(see Table 2). The EMC pin configuration for each part is shown in Table 7.LPC178X_7X All information provided in this document is subject to legal disclaimers. © NXP Semiconductors N.V. 2014. All rights reserved.
Product data sheet Rev. 5 — 9 September 2014 45 of 122
NXP Semiconductors LPC178x/7x
32-bit ARM Cortex-M3 microcontroller
Table 7. External memory controller pin configuration
Part Data bus pins Address bus
pins
Control pins
SRAM SDRAM
LPC1788FBD208 EMC_D[31:0] EMC_A[25:0] EMC_BLS[3:0],
EMC_CS[3:0],
EMC_OE, EMC_WE
EMC_RAS, EMC_CAS, EMC_DYCS[3:0],
EMC_CLK[1:0], EMC_CKE[3:0],
EMC_DQM[3:0]
LPC1788FET208 EMC_D[31:0] EMC_A[25:0] EMC_BLS[3:0],
EMC_CS[3:0],
EMC_OE, EMC_WE
EMC_RAS, EMC_CAS, EMC_DYCS[3:0],
EMC_CLK[1:0], EMC_CKE[3:0],
EMC_DQM[3:0]
LPC1788FET180 EMC_D[15:0] EMC_A[19:0] EMC_BLS[1:0],
EMC_CS[1:0],
EMC_OE, EMC_WE
EMC_RAS, EMC_CAS, EMC_DYCS[1:0],
EMC_CLK[1:0], EMC_CKE[1:0],
EMC_DQM[1:0]
LPC1788FBD144 EMC_D[7:0] EMC_A[15:0] EMC_BLS[3:2],
EMC_CS[1:0],
EMC_OE, EMC_WE
not available
LPC1787FBD208 EMC_D[31:0] EMC_A[25:0] EMC_BLS[3:0],
EMC_CS_[3:0],
EMC_OE, EMC_WE
EMC_RAS, EMC_CAS, EMC_DYCS[3:0],
EMC_CLK[1:0], EMC_CKE[3:0],
EMC_DQM[3:0]
LPC1786FBD208 EMC_D[31:0] EMC_A[25:0] EMC_BLS[3:0],
EMC_CS[3:0],
EMC_OE, EMC_WE
EMC_RAS, EMC_CAS, EMC_DYCS[3:0],
EMC_CLK[1:0], EMC_CKE[3:0],
EMC_DQM[3:0]
LPC1785FBD208 EMC_D[31:0] EMC_A[25:0] EMC_BLS[3:0],
EMC_CS[3:0],
EMC_OE, EMC_WE
EMC_RAS, EMC_CAS, EMC_DYCS[3:0],
EMC_CLK[1:0], EMC_CKE[3:0],
EMC_DQM[3:0]
LPC1778FBD208 EMC_D[31:0] EMC_A[25:0] EMC_BLS[3:0],
EMC_CS[3:0],
EMC_OE, EMC_WE
EMC_RAS, EMC_CAS, EMC_DYCS[3:0],
EMC_CLK[1:0], EMC_CKE[3:0],
EMC_DQM[3:0]
LPC1778FET208 EMC_D[31:0] EMC_A[25:0] EMC_BLS[3:0],
EMC_CS[3:0],
EMC_OE, EMC_WE
EMC_RAS, EMC_CAS, EMC_DYCS[3:0],
EMC_CLK[1:0], EMC_CKE[3:0],
EMC_DQM[3:0]
LPC1778FET180 EMC_D[15:0] EMC_A[19:0] EMC_BLS[1:0],
EMC_CS[1:0],
EMC_OE, EMC_WE
EMC_RAS, EMC_CAS, EMC_DYCS[1:0],
EMC_CLK[1:0], EMC_CKE[1:0],
EMC_DQM[1:0]
LPC1778FBD144 EMC_D[7:0] EMC_A[15:0] EMC_CS[1:0],
EMC_OE, EMC_WE
not available
LPC1777FBD208 EMC_D[31:0] EMC_A[25:0] EMC_BLS[3:0],
EMC_CS[3:0],
EMC_OE, EMC_WE
EMC_RAS, EMC_CAS, EMC_DYCS[3:0],
EMC_CLK[1:0], EMC_CKE[3:0],
EMC_DQM[3:0]
LPC1776FBD208 EMC_D[31:0] EMC_A[25:0] EMC_BLS[3:0],
EMC_CS[3:0],
EMC_OE, EMC_WE
EMC_RAS, EMC_CAS, EMC_DYCS[3:0],
EMC_CLK[1:0], EMC_CKE[3:0],
EMC_DQM[3:0]
LPC1776FET180 EMC_D[15:0] EMC_A[19:0] EMC_BLS[3:0],
EMC_CS[3:0],
EMC_OE, EMC_WE
EMC_RAS, EMC_CAS, EMC_DYCS[1:0],
EMC_CLK[1:0], EMC_CKE[1:0],
EMC_DQM[1:0]
LPC1774FBD208 EMC_D[31:0] EMC_A[25:0] EMC_BLS[3:0],
EMC_CS[3:0],
EMC_OE, EMC_WE
EMC_RAS, EMC_CAS, EMC_DYCS[3:0],
EMC_CLK[1:0], EMC_CKE[3:0],
EMC_DQM[3:0]
LPC1774FBD144 EMC_D[7:0] EMC_A[15:0] EMC_CS[1:0],
EMC_OE, EMC_WE
not availableLPC178X_7X All information provided in this document is subject to legal disclaimers. © NXP Semiconductors N.V. 2014. All rights reserved.
Product data sheet Rev. 5 — 9 September 2014 46 of 122
NXP Semiconductors LPC178x/7x
32-bit ARM Cortex-M3 microcontroller
The LPC178x/7x EMC is an ARM PrimeCell MultiPort Memory Controller peripheral
offering support for asynchronous static memory devices such as RAM, ROM, and flash.
In addition, it can be used as an interface with off-chip memory-mapped devices and
peripherals. The EMC is an Advanced Microcontroller Bus Architecture (AMBA) compliant
peripheral.
See Table 6 for EMC memory access.
7.10.1 Features
• Dynamic memory interface support including single data rate SDRAM.
• Asynchronous static memory device support including RAM, ROM, and flash, with or
without asynchronous page mode.
• Low transaction latency.
• Read and write buffers to reduce latency and to improve performance.
• 8/16/32 data and 16/20/26 address lines wide static memory support.
• 16 bit and 32 bit wide chip select SDRAM memory support.
• Static memory features include:
– Asynchronous page mode read.
– Programmable Wait States.
– Bus turnaround delay.
– Output enable and write enable delays.
– Extended wait.
• Four chip selects for synchronous memory and four chip selects for static memory
devices.
• Power-saving modes dynamically control EMC_CKE and EMC_CLK outputs to
SDRAMs.
• Dynamic memory self-refresh mode controlled by software.
• Controller supports 2048 (A0 to A10), 4096 (A0 to A11), and 8192 (A0 to A12) row
address synchronous memory parts. That is typical 512 MB, 256 MB, and 128 MB
parts, with 4, 8, 16, or 32 data bits per device.
• Separate reset domains allow the for auto-refresh through a chip reset if desired.
Note: Synchronous static memory devices (synchronous burst mode) are not supported.
7.11 General purpose DMA controller
The GPDMA is an AMBA AHB compliant peripheral allowing selected peripherals to have
DMA support.
The GPDMA enables peripheral-to-memory, memory-to-peripheral,
peripheral-to-peripheral, and memory-to-memory transactions. The source and
destination areas can each be either a memory region or a peripheral and can be
accessed through the AHB master. The GPDMA controller allows data transfers between
the various on-chip SRAM areas and supports the SD/MMC card interface, all SSPs, the
I
2S, all UARTs, the A/D Converter, and the D/A Converter peripherals. DMA can also be
triggered by selected timer match conditions. Memory-to-memory transfers and transfers
to or from GPIO are supported. LPC178X_7X All information provided in this document is subject to legal disclaimers. © NXP Semiconductors N.V. 2014. All rights reserved.
Product data sheet Rev. 5 — 9 September 2014 47 of 122
NXP Semiconductors LPC178x/7x
32-bit ARM Cortex-M3 microcontroller
7.11.1 Features
• Eight DMA channels. Each channel can support an unidirectional transfer.
• 16 DMA request lines.
• Single DMA and burst DMA request signals. Each peripheral connected to the DMA
Controller can assert either a burst DMA request or a single DMA request. The DMA
burst size is set by programming the DMA Controller.
• Memory-to-memory, memory-to-peripheral, peripheral-to-memory, and
peripheral-to-peripheral transfers are supported.
• Scatter or gather DMA is supported through the use of linked lists. This means that
the source and destination areas do not have to occupy contiguous areas of memory.
• Hardware DMA channel priority.
• AHB slave DMA programming interface. The DMA Controller is programmed by
writing to the DMA control registers over the AHB slave interface.
• One AHB bus master for transferring data. The interface transfers data when a DMA
request goes active.
• 32-bit AHB master bus width.
• Incrementing or non-incrementing addressing for source and destination.
• Programmable DMA burst size. The DMA burst size can be programmed to more
efficiently transfer data.
• Internal four-word FIFO per channel.
• Supports 8, 16, and 32-bit wide transactions.
• Big-endian and little-endian support. The DMA Controller defaults to little-endian
mode on reset.
• An interrupt to the processor can be generated on a DMA completion or when a DMA
error has occurred.
• Raw interrupt status. The DMA error and DMA count raw interrupt status can be read
prior to masking.
7.12 CRC engine
The Cyclic Redundancy Check (CRC) generator with programmable polynomial settings
supports several CRC standards commonly used. To save system power and bus
bandwidth, the CRC engine supports DMA transfers.
7.12.1 Features
• Supports three common polynomials CRC-CCITT, CRC-16, and CRC-32.
– CRC-CCITT: x16 + x12 + x5 + 1
– CRC-16: x16 + x15 + x2 + 1
– CRC-32: x32 + x26 + x23 + x22 + x16 + x12 + x11 + x10 + x8 + x7 + x5 + x4 + x2 + x + 1
• Bit order reverse and 1’s complement programmable setting for input data and CRC
sum.
• Programmable seed number setting.
• Supports CPU PIO or DMA back-to-back transfer.LPC178X_7X All information provided in this document is subject to legal disclaimers. © NXP Semiconductors N.V. 2014. All rights reserved.
Product data sheet Rev. 5 — 9 September 2014 48 of 122
NXP Semiconductors LPC178x/7x
32-bit ARM Cortex-M3 microcontroller
• Accept any size of data width per write: 8, 16 or 32-bit.
– 8-bit write: 1-cycle operation.
– 16-bit write: 2-cycle operation (8-bit x 2-cycle).
– 32-bit write: 4-cycle operation (8-bit x 4-cycle).
7.13 LCD controller
Remark: The LCD controller is available on parts LPC1788/87/86/85.
The LCD controller provides all of the necessary control signals to interface directly to a
variety of color and monochrome LCD panels. Both STN (single and dual panel) and TFT
panels can be operated. The display resolution is selectable and can be up to 1024 768
pixels. Several color modes are provided, up to a 24-bit true-color non-palettized mode.
An on-chip 512-byte color palette allows reducing bus utilization (i.e. memory size of the
displayed data) while still supporting a large number of colors.
The LCD interface includes its own DMA controller to allow it to operate independently of
the CPU and other system functions. A built-in FIFO acts as a buffer for display data,
providing flexibility for system timing. Hardware cursor support can further reduce the
amount of CPU time needed to operate the display.
7.13.1 Features
• AHB master interface to access frame buffer.
• Setup and control via a separate AHB slave interface.
• Dual 16-deep programmable 64-bit wide FIFOs for buffering incoming display data.
• Supports single and dual-panel monochrome Super Twisted Nematic (STN) displays
with 4-bit or 8-bit interfaces.
• Supports single and dual-panel color STN displays.
• Supports Thin Film Transistor (TFT) color displays.
• Programmable display resolution including, but not limited to: 320 200, 320 240,
640 200, 640 240, 640 480, 800 600, and 1024 768.
• Hardware cursor support for single-panel displays.
• 15 gray-level monochrome, 3375 color STN, and 32 K color palettized TFT support.
• 1, 2, or 4 bits-per-pixel (bpp) palettized displays for monochrome STN.
• 1, 2, 4, or 8 bpp palettized color displays for color STN and TFT.
• 16 bpp true-color non-palettized, for color STN and TFT.
• 24 bpp true-color non-palettized, for color TFT.
• Programmable timing for different display panels.
• 256 entry, 16-bit palette RAM, arranged as a 128 32-bit RAM.
• Frame, line, and pixel clock signals.
• AC bias signal for STN, data enable signal for TFT panels.
• Supports little and big-endian, and Windows CE data formats.
• LCD panel clock may be generated from the peripheral clock, or from a clock input
pin.LPC178X_7X All information provided in this document is subject to legal disclaimers. © NXP Semiconductors N.V. 2014. All rights reserved.
Product data sheet Rev. 5 — 9 September 2014 49 of 122
NXP Semiconductors LPC178x/7x
32-bit ARM Cortex-M3 microcontroller
7.14 Ethernet
Remark: The Ethernet block is available on parts LPC1788/86 and LPC1778/76.
The Ethernet block contains a full featured 10 Mbit/s or 100 Mbit/s Ethernet MAC
designed to provide optimized performance through the use of DMA hardware
acceleration. Features include a generous suite of control registers, half or full duplex
operation, flow control, control frames, hardware acceleration for transmit retry, receive
packet filtering and wake-up on LAN activity. Automatic frame transmission and reception
with scatter-gather DMA off-loads many operations from the CPU.
The Ethernet block and the CPU share the ARM Cortex-M3 D-code and system bus
through the AHB-multilayer matrix to access the various on-chip SRAM blocks for
Ethernet data, control, and status information.
The Ethernet block interfaces between an off-chip Ethernet PHY using the Media
Independent Interface (MII) or Reduced MII (RMII) protocol and the on-chip Media
Independent Interface Management (MIIM) serial bus.
7.14.1 Features
• Ethernet standards support:
– Supports 10 Mbit/s or 100 Mbit/s PHY devices including 10 Base-T, 100 Base-TX,
100 Base-FX, and 100 Base-T4.
– Fully compliant with IEEE standard 802.3.
– Fully compliant with 802.3x Full Duplex Flow Control and Half Duplex back
pressure.
– Flexible transmit and receive frame options.
– Virtual Local Area Network (VLAN) frame support
– .
• Memory management:
– Independent transmit and receive buffers memory mapped to shared SRAM.
– DMA managers with scatter/gather DMA and arrays of frame descriptors.
– Memory traffic optimized by buffering and pre-fetching.
• Enhanced Ethernet features:
– Receive filtering.
– Multicast and broadcast frame support for both transmit and receive.
– Optional automatic Frame Check Sequence (FCS) insertion with Circular
Redundancy Check (CRC) for transmit.
– Selectable automatic transmit frame padding.
– Over-length frame support for both transmit and receive allows any length frames.
– Promiscuous receive mode.
– Automatic collision back-off and frame retransmission.
– Includes power management by clock switching.
– Wake-on-LAN power management support allows system wake-up: using the
receive filters or a magic frame detection filter.LPC178X_7X All information provided in this document is subject to legal disclaimers. © NXP Semiconductors N.V. 2014. All rights reserved.
Product data sheet Rev. 5 — 9 September 2014 50 of 122
NXP Semiconductors LPC178x/7x
32-bit ARM Cortex-M3 microcontroller
• Physical interface:
– Attachment of external PHY chip through standard MII or RMII interface.
– PHY register access is available via the MIIM interface.
7.15 USB interface
Remark: The USB Device/Host/OTG controller is available on parts LPC1788/87/86/85
and LPC1778/77/76. The USB Device-only controller is available on parts LPC1774.
The Universal Serial Bus (USB) is a 4-wire bus that supports communication between a
host and one or more (up to 127) peripherals. The host controller allocates the USB
bandwidth to attached devices through a token-based protocol. The bus supports hot
plugging and dynamic configuration of the devices. All transactions are initiated by the
host controller.
Details on typical USB interfacing solutions can be found in Section 14.1.
7.15.1 USB device controller
The device controller enables 12 Mbit/s data exchange with a USB host controller. It
consists of a register interface, serial interface engine, endpoint buffer memory, and a
DMA controller. The serial interface engine decodes the USB data stream and writes data
to the appropriate endpoint buffer. The status of a completed USB transfer or error
condition is indicated via status registers. An interrupt is also generated if enabled. When
enabled, the DMA controller transfers data between the endpoint buffer and the USB
RAM.
7.15.1.1 Features
• Fully compliant with USB 2.0 Specification (full speed).
• Supports 32 physical (16 logical) endpoints with a 4 kB endpoint buffer RAM.
• Supports Control, Bulk, Interrupt and Isochronous endpoints.
• Scalable realization of endpoints at run time.
• Endpoint Maximum packet size selection (up to USB maximum specification) by
software at run time.
• Supports SoftConnect and GoodLink features.
• While USB is in the Suspend mode, the LPC178x/7x can enter one of the reduced
power modes and wake up on USB activity.
• Supports DMA transfers with all on-chip SRAM blocks on all non-control endpoints.
• Allows dynamic switching between CPU-controlled and DMA modes.
• Double buffer implementation for Bulk and Isochronous endpoints.
7.15.2 USB host controller
The host controller enables full- and low-speed data exchange with USB devices attached
to the bus. It consists of register interface, serial interface engine and DMA controller. The
register interface complies with the Open Host Controller Interface (OHCI) specification.
7.15.2.1 Features
• OHCI compliant.LPC178X_7X All information provided in this document is subject to legal disclaimers. © NXP Semiconductors N.V. 2014. All rights reserved.
Product data sheet Rev. 5 — 9 September 2014 51 of 122
NXP Semiconductors LPC178x/7x
32-bit ARM Cortex-M3 microcontroller
• Two downstream ports.
• Supports per-port power switching.
7.15.3 USB OTG controller
USB OTG is a supplement to the USB 2.0 Specification that augments the capability of
existing mobile devices and USB peripherals by adding host functionality for connection to
USB peripherals.
The OTG Controller integrates the host controller, device controller, and a master-only I2C
interface to implement OTG dual-role device functionality. The dedicated I2C interface
controls an external OTG transceiver.
7.15.3.1 Features
• Fully compliant with On-The-Go supplement to the USB 2.0 Specification, Revision
1.0a.
• Hardware support for Host Negotiation Protocol (HNP).
• Includes a programmable timer required for HNP and Session Request Protocol
(SRP).
• Supports any OTG transceiver compliant with the OTG Transceiver Specification
(CEA-2011), Rev. 1.0.
7.16 SD/MMC card interface
Remark: The SD/MMC card interface is available on parts LPC1788/87/86/85 and parts
LPC1778/77/76.
The Secure Digital and Multimedia Card Interface (MCI) allows access to external SD
memory cards. The SD card interface conforms to the SD Multimedia Card Specification
Version 2.11.
7.16.1 Features
• The MCI provides all functions specific to the SD/MMC memory card. These include
the clock generation unit, power management control, and command and data
transfer.
• Conforms to Multimedia Card Specification v2.11.
• Conforms to Secure Digital Memory Card Physical Layer Specification, v0.96.
• Can be used as a multimedia card bus or a secure digital memory card bus host. The
SD/MMC can be connected to several multimedia cards or a single secure digital
memory card.
• DMA supported through the GPDMA controller.
7.17 Fast general purpose parallel I/O
Device pins that are not connected to a specific peripheral function are controlled by the
GPIO registers. Pins may be dynamically configured as inputs or outputs. Separate
registers allow setting or clearing any number of outputs simultaneously. The value of the
output register may be read back as well as the current state of the port pins.
LPC178x/7x use accelerated GPIO functions:LPC178X_7X All information provided in this document is subject to legal disclaimers. © NXP Semiconductors N.V. 2014. All rights reserved.
Product data sheet Rev. 5 — 9 September 2014 52 of 122
NXP Semiconductors LPC178x/7x
32-bit ARM Cortex-M3 microcontroller
• GPIO registers are accessed through the AHB multilayer bus so that the fastest
possible I/O timing can be achieved.
• Mask registers allow treating sets of port bits as a group, leaving other bits
unchanged.
• All GPIO registers are byte and half-word addressable.
• Entire port value can be written in one instruction.
• Support for Cortex-M3 bit banding.
• Support for use with the GPDMA controller.
Additionally, any pin on Port 0 and Port 2 providing a digital function can be programmed
to generate an interrupt on a rising edge, a falling edge, or both. The edge detection is
asynchronous, so it may operate when clocks are not present such as during Power-down
mode. Each enabled interrupt can be used to wake up the chip from Power-down mode.
7.17.1 Features
• Bit level set and clear registers allow a single instruction to set or clear any number of
bits in one port.
• Direction control of individual bits.
• All I/O default to inputs after reset.
• Pull-up/pull-down resistor configuration and open-drain configuration can be
programmed through the pin connect block for each GPIO pin.
7.18 12-bit ADC
The LPC178x/7x contain one ADC. It is a single 12-bit successive approximation ADC
with eight channels and DMA support.
7.18.1 Features
• 12-bit successive approximation ADC.
• Input multiplexing among eight pins.
• Power-down mode.
• Measurement range VSS to VREFP.
• 12-bit conversion rate: up to 400 kHz.
• Individual channels can be selected for conversion.
• Burst conversion mode for single or multiple inputs.
• Optional conversion on transition of input pin or Timer Match signal.
• Individual result registers for each ADC channel to reduce interrupt overhead.
• DMA support.
7.19 10-bit DAC
The LPC178x/7x contain one DAC. The DAC allows to generate a variable analog output.
The maximum output value of the DAC is VREFP.LPC178X_7X All information provided in this document is subject to legal disclaimers. © NXP Semiconductors N.V. 2014. All rights reserved.
Product data sheet Rev. 5 — 9 September 2014 53 of 122
NXP Semiconductors LPC178x/7x
32-bit ARM Cortex-M3 microcontroller
7.19.1 Features
• 10-bit DAC.
• Resistor string architecture.
• Buffered output.
• Power-down mode.
• Selectable output drive.
• Dedicated conversion timer.
• DMA support.
7.20 UARTs
Remark: USART4 is not available on part LPC1774FBD144.
The LPC178x/7x contain five UARTs. In addition to standard transmit and receive data
lines, UART1 also provides a full modem control handshake interface and support for
RS-485/9-bit mode allowing both software address detection and automatic address
detection using 9-bit mode.
The UARTs include a fractional baud rate generator. Standard baud rates such as
115200 Bd can be achieved with any crystal frequency above 2 MHz.
7.20.1 Features
• Maximum UART data bit rate of 7.5 MBit/s.
• 16 B Receive and Transmit FIFOs.
• Register locations conform to 16C550 industry standard.
• Receiver FIFO trigger points at 1 B, 4 B, 8 B, and 14 B.
• Built-in fractional baud rate generator covering wide range of baud rates without a
need for external crystals of particular values.
• Auto-baud capability.
• Fractional divider for baud rate control, auto baud capabilities and FIFO control
mechanism that enables software flow control implementation.
• Support for RS-485/9-bit/EIA-485 mode and multiprocessor addressing.
• All UARTs have DMA support for both transmit and receive.
• UART1 equipped with standard modem interface signals. This module also provides
full support for hardware flow control (auto-CTS/RTS).
• USART4 includes an IrDA mode to support infrared communication.
• USART4 supports synchronous mode and a smart card mode conforming to
ISO7816-3.
7.21 SSP serial I/O controller
The LPC178x/7x contain three SSP controllers. The SSP controller is capable of
operation on a SPI, 4-wire SSI, or Microwire bus. It can interact with multiple masters and
slaves on the bus. Only a single master and a single slave can communicate on the bus LPC178X_7X All information provided in this document is subject to legal disclaimers. © NXP Semiconductors N.V. 2014. All rights reserved.
Product data sheet Rev. 5 — 9 September 2014 54 of 122
NXP Semiconductors LPC178x/7x
32-bit ARM Cortex-M3 microcontroller
during a given data transfer. The SSP supports full duplex transfers, with frames of 4 bits
to 16 bits of data flowing from the master to the slave and from the slave to the master. In
practice, often only one of these data flows carries meaningful data.
7.21.1 Features
• Maximum SSP speed of 33 Mbit/s (master) or 10 Mbit/s (slave).
• Compatible with Motorola SPI, 4-wire Texas Instruments SSI, and National
Semiconductor Microwire buses.
• Synchronous serial communication.
• Master or slave operation.
• 8-frame FIFOs for both transmit and receive.
• 4-bit to 16-bit frame.
• DMA transfers supported by GPDMA.
7.22 I2C-bus serial I/O controllers
The LPC178x/7x contain three I2C-bus controllers.
The I2C-bus is bidirectional for inter-IC control using only two wires: a Serial Clock Line
(SCL) and a Serial Data Line (SDA). Each device is recognized by a unique address and
can operate as either a receiver-only device (e.g., an LCD driver) or a transmitter with the
capability to both receive and send information (such as memory). Transmitters and/or
receivers can operate in either master or slave mode, depending on whether the chip has
to initiate a data transfer or is only addressed. The I2C is a multi-master bus and can be
controlled by more than one bus master connected to it.
7.22.1 Features
• All I2C-bus controllers can use standard GPIO pins with bit rates of up to 400 kbit/s
(Fast I2C-bus). The I2C0-bus interface uses special open-drain pins with bit rates of
up to 400 kbit/s.
• The I2C-bus interface supports Fast-mode Plus with bit rates up to 1 Mbit/s for I2C0
using pins P5[2] and P5[3].
• Easy to configure as master, slave, or master/slave.
• Programmable clocks allow versatile rate control.
• Bidirectional data transfer between masters and slaves.
• Multi-master bus (no central master).
• Arbitration between simultaneously transmitting masters without corruption of serial
data on the bus.
• Serial clock synchronization allows devices with different bit rates to communicate via
one serial bus.
• Serial clock synchronization can be used as a handshake mechanism to suspend and
resume serial transfer.
• The I2C-bus can be used for test and diagnostic purposes.
• Both I2C-bus controllers support multiple address recognition and a bus monitor
mode.LPC178X_7X All information provided in this document is subject to legal disclaimers. © NXP Semiconductors N.V. 2014. All rights reserved.
Product data sheet Rev. 5 — 9 September 2014 55 of 122
NXP Semiconductors LPC178x/7x
32-bit ARM Cortex-M3 microcontroller
7.23 I2S-bus serial I/O controllers
The LPC178x/7x contain one I2S-bus interface. The I2S-bus provides a standard
communication interface for digital audio applications.
The I2S-bus specification defines a 3-wire serial bus using one data line, one clock line,
and one word select signal. The basic I2S connection has one master, which is always the
master, and one slave. The I2S interface on the LPC178x/7x provides a separate transmit
and receive channel, each of which can operate as either a master or a slave.
7.23.1 Features
• The interface has separate input/output channels each of which can operate in master
or slave mode.
• Capable of handling 8-bit, 16-bit, and 32-bit word sizes.
• Mono and stereo audio data supported.
• The sampling frequency can range from 16 kHz to 48 kHz (16, 22.05, 32, 44.1,
48) kHz.
• Configurable word select period in master mode (separately for I2S input and output).
• Two 8 word FIFO data buffers are provided, one for transmit and one for receive.
• Generates interrupt requests when buffer levels cross a programmable boundary.
• Two DMA requests, controlled by programmable buffer levels. These are connected
to the GPDMA block.
• Controls include reset, stop and mute options separately for I2S input and I2S output.
7.24 CAN controller and acceptance filters
The LPC178x/7x contain one CAN controller with two channels.
The Controller Area Network (CAN) is a serial communications protocol which efficiently
supports distributed real-time control with a very high level of security. Its domain of
application ranges from high-speed networks to low cost multiplex wiring.
The CAN block is intended to support multiple CAN buses simultaneously, allowing the
device to be used as a gateway, switch, or router between two of CAN buses in industrial
or automotive applications.
Each CAN controller has a register structure similar to the NXP SJA1000 and the PeliCAN
Library block, but the 8-bit registers of those devices have been combined in 32-bit words
to allow simultaneous access in the ARM environment. The main operational difference is
that the recognition of received Identifiers, known in CAN terminology as Acceptance
Filtering, has been removed from the CAN controllers and centralized in a global
Acceptance Filter.
7.24.1 Features
• Two CAN controllers and buses.
• Data rates to 1 Mbit/s on each bus.
• 32-bit register and RAM access.
• Compatible with CAN specification 2.0B, ISO 11898-1.LPC178X_7X All information provided in this document is subject to legal disclaimers. © NXP Semiconductors N.V. 2014. All rights reserved.
Product data sheet Rev. 5 — 9 September 2014 56 of 122
NXP Semiconductors LPC178x/7x
32-bit ARM Cortex-M3 microcontroller
• Global Acceptance Filter recognizes 11-bit and 29-bit receive identifiers for all CAN
buses.
• Acceptance Filter can provide FullCAN-style automatic reception for selected
Standard Identifiers.
• FullCAN messages can generate interrupts.
7.25 General purpose 32-bit timers/external event counters
The LPC178x/7x include four 32-bit timer/counters.
The timer/counter is designed to count cycles of the system derived clock or an
externally-supplied clock. It can optionally generate interrupts, generate timed DMA
requests, or perform other actions at specified timer values, based on four match
registers. Each timer/counter also includes two capture inputs to trap the timer value when
an input signal transitions, optionally generating an interrupt.
7.25.1 Features
• A 32-bit timer/counter with a programmable 32-bit prescaler.
• Counter or timer operation.
• Two 32-bit capture channels per timer, that can take a snapshot of the timer value
when an input signal transitions. A capture event may also generate an interrupt.
• Four 32-bit match registers that allow:
– Continuous operation with optional interrupt generation on match.
– Stop timer on match with optional interrupt generation.
– Reset timer on match with optional interrupt generation.
• Up to four external outputs corresponding to match registers, with the following
capabilities:
– Set LOW on match.
– Set HIGH on match.
– Toggle on match.
– Do nothing on match.
• Up to two match registers can be used to generate timed DMA requests.
7.26 Pulse Width Modulator (PWM)
The LPC178x/7x contain two standard PWMs.
The PWM is based on the standard Timer block and inherits all of its features, although
only the PWM function is pinned out on the LPC178x/7x. The Timer is designed to count
cycles of the system derived clock and optionally switch pins, generate interrupts or
perform other actions when specified timer values occur, based on seven match registers.
The PWM function is in addition to these features, and is based on match register events.
The ability to separately control rising and falling edge locations allows the PWM to be
used for more applications. For instance, multi-phase motor control typically requires
three non-overlapping PWM outputs with individual control of all three pulse widths and
positions.LPC178X_7X All information provided in this document is subject to legal disclaimers. © NXP Semiconductors N.V. 2014. All rights reserved.
Product data sheet Rev. 5 — 9 September 2014 57 of 122
NXP Semiconductors LPC178x/7x
32-bit ARM Cortex-M3 microcontroller
Two match registers can be used to provide a single edge controlled PWM output. One
match register (PWMMR0) controls the PWM cycle rate, by resetting the count upon
match. The other match register controls the PWM edge position. Additional single edge
controlled PWM outputs require only one match register each, since the repetition rate is
the same for all PWM outputs. Multiple single edge controlled PWM outputs will all have a
rising edge at the beginning of each PWM cycle, when an PWMMR0 match occurs.
Three match registers can be used to provide a PWM output with both edges controlled.
Again, the PWMMR0 match register controls the PWM cycle rate. The other match
registers control the two PWM edge positions. Additional double edge controlled PWM
outputs require only two match registers each, since the repetition rate is the same for all
PWM outputs.
With double edge controlled PWM outputs, specific match registers control the rising and
falling edge of the output. This allows both positive going PWM pulses (when the rising
edge occurs prior to the falling edge), and negative going PWM pulses (when the falling
edge occurs prior to the rising edge).
7.26.1 Features
• LPC178x/7x has two PWM blocks with Counter or Timer operation (may use the
peripheral clock or one of the capture inputs as the clock source).
• Seven match registers allow up to 6 single edge controlled or 3 double edge
controlled PWM outputs, or a mix of both types. The match registers also allow:
– Continuous operation with optional interrupt generation on match.
– Stop timer on match with optional interrupt generation.
– Reset timer on match with optional interrupt generation.
• Supports single edge controlled and/or double edge controlled PWM outputs. Single
edge controlled PWM outputs all go high at the beginning of each cycle unless the
output is a constant low. Double edge controlled PWM outputs can have either edge
occur at any position within a cycle. This allows for both positive going and negative
going pulses.
• Pulse period and width can be any number of timer counts. This allows complete
flexibility in the trade-off between resolution and repetition rate. All PWM outputs will
occur at the same repetition rate.
• Double edge controlled PWM outputs can be programmed to be either positive going
or negative going pulses.
• Match register updates are synchronized with pulse outputs to prevent generation of
erroneous pulses. Software must ‘release’ new match values before they can become
effective.
• May be used as a standard 32-bit timer/counter with a programmable 32-bit prescaler
if the PWM mode is not enabled.
7.27 Motor control PWM
The LPC178x/7x contain one motor control PWM.
The motor control PWM is a specialized PWM supporting 3-phase motors and other
combinations. Feedback inputs are provided to automatically sense rotor position and use
that information to ramp speed up or down. An abort input is also provided that causes the LPC178X_7X All information provided in this document is subject to legal disclaimers. © NXP Semiconductors N.V. 2014. All rights reserved.
Product data sheet Rev. 5 — 9 September 2014 58 of 122
NXP Semiconductors LPC178x/7x
32-bit ARM Cortex-M3 microcontroller
PWM to immediately release all motor drive outputs. At the same time, the motor control
PWM is highly configurable for other generalized timing, counting, capture, and compare
applications.
The maximum PWM speed is determined by the PWM resolution (n) and the operating
frequency f: PWM speed = f/2n (see Table 8).
7.28 Quadrature Encoder Interface (QEI)
Remark: The QEI is available on parts LPC1788/87/86 and LPC1778/77/76
A quadrature encoder, also known as a 2-channel incremental encoder, converts angular
displacement into two pulse signals. By monitoring both the number of pulses and the
relative phase of the two signals, the user can track the position, direction of rotation, and
velocity. In addition, a third channel, or index signal, can be used to reset the position
counter. The quadrature encoder interface decodes the digital pulses from a quadrature
encoder wheel to integrate position over time and determine direction of rotation. In
addition, the QEI can capture the velocity of the encoder wheel.
7.28.1 Features
• Tracks encoder position.
• Increments/decrements depending on direction.
• Programmable for 2 or 4 position counting.
• Velocity capture using built-in timer.
• Velocity compare function with “less than” interrupt.
• Uses 32-bit registers for position and velocity.
• Three position compare registers with interrupts.
• Index counter for revolution counting.
• Index compare register with interrupts.
• Can combine index and position interrupts to produce an interrupt for whole and
partial revolution displacement.
• Digital filter with programmable delays for encoder input signals.
• Can accept decoded signal inputs (clk and direction).
• Connected to APB.
7.29 ARM Cortex-M3 system tick timer
The ARM Cortex-M3 includes a system tick timer (SYSTICK) that is intended to generate
a dedicated SYSTICK exception at a 10 ms interval. In the LPC178x/7x, this timer can be
clocked from the internal AHB clock or from a device pin.
Table 8. PWM speed at operating frequency 120 MHz
PWM resolution PWM speed
6 bit 1.875 MHz
8 bit 0.468 MHz
10 bit 0.117 MHzLPC178X_7X All information provided in this document is subject to legal disclaimers. © NXP Semiconductors N.V. 2014. All rights reserved.
Product data sheet Rev. 5 — 9 September 2014 59 of 122
NXP Semiconductors LPC178x/7x
32-bit ARM Cortex-M3 microcontroller
7.30 Windowed WatchDog Timer (WWDT)
The purpose of the watchdog is to reset the controller if software fails to periodically
service it within a programmable time window.
7.30.1 Features
• Internally resets chip if not periodically reloaded during the programmable time-out
period.
• Optional windowed operation requires reload to occur between a minimum and
maximum time period, both programmable.
• Optional warning interrupt can be generated at a programmable time prior to
watchdog time-out.
• Enabled by software but requires a hardware reset or a watchdog reset/interrupt to be
disabled.
• Incorrect feed sequence causes reset or interrupt if enabled.
• Flag to indicate watchdog reset.
• Programmable 24-bit timer with internal prescaler.
• Selectable time period from (Tcy(WDCLK) 256 4) to (Tcy(WDCLK) 224 4) in
multiples of Tcy(WDCLK) 4.
• The Watchdog Clock (WDCLK) source is a dedicated watchdog oscillator, which is
always running if the watchdog timer is enabled.
7.31 RTC and backup registers
The RTC is a set of counters for measuring time when system power is on, and optionally
when it is off. The RTC on the LPC178x/7x is designed to have very low power
consumption. The RTC will typically run from the main chip power supply conserving
battery power while the rest of the device is powered up. When operating from a battery,
the RTC will continue working down to 2.1 V. Battery power can be provided from a
standard 3 V lithium button cell.
An ultra-low power 32 kHz oscillator provides a 1 Hz clock to the time counting portion of
the RTC, moving most of the power consumption out of the time counting function.
The RTC includes a calibration mechanism to allow fine-tuning the count rate in a way
that will provide less than 1 second per day error when operated at a constant voltage and
temperature.
The RTC contains a small set of backup registers (20 bytes) for holding data while the
main part of the LPC178x/7x is powered off.
The RTC includes an alarm function that can wake up the LPC178x/7x from all reduced
power modes with a time resolution of 1 s.
7.31.1 Features
• Measures the passage of time to maintain a calendar and clock.
• Ultra low power design to support battery powered systems.
• Provides Seconds, Minutes, Hours, Day of Month, Month, Year, Day of Week, and
Day of Year.LPC178X_7X All information provided in this document is subject to legal disclaimers. © NXP Semiconductors N.V. 2014. All rights reserved.
Product data sheet Rev. 5 — 9 September 2014 60 of 122
NXP Semiconductors LPC178x/7x
32-bit ARM Cortex-M3 microcontroller
• Dedicated power supply pin can be connected to a battery or to the main 3.3 V.
• Periodic interrupts can be generated from increments of any field of the time registers.
• Backup registers (20 bytes) powered by VBAT.
• RTC power supply is isolated from the rest of the chip.
7.32 Event monitor/recorder
The event monitor/recorder allows recording of tampering events in sealed product
enclosures. Sensors report any attempt to open the enclosure, or to tamper with the
device in any other way. The event monitor/recorder stores records of such events when
the device is powered only by the backup battery.
7.32.1 Features
• Supports three digital event inputs in the VBAT power domain.
• An event is defined as a level change at the digital event inputs.
• For each event channel, two timestamps mark the first and the last occurrence of an
event. Each channel also has a dedicated counter tracking the total number of events.
Timestamp values are taken from the RTC.
• Runs in VBAT power domain, independent of system power supply. The
event/recorder/monitor can therefore operate in Deep power-down mode.
• Very low power consumption.
• Interrupt available if system is running.
• A qualified event can be used as a wake-up trigger.
• State of event interrupts accessible by software through GPIO.
7.33 Clocking and power control
7.33.1 Crystal oscillators
The LPC178x/7x include four independent oscillators. These are the main oscillator, the
IRC oscillator, the watchdog oscillator, and the RTC oscillator.
Following reset, the LPC178x/7x will operate from the Internal RC oscillator until switched
by software. This allows systems to operate without any external crystal and the boot
loader code to operate at a known frequency.
See Figure 7 for an overview of the LPC178x/7x clock generation.LPC178X_7X All information provided in this document is subject to legal disclaimers. © NXP Semiconductors N.V. 2014. All rights reserved.
Product data sheet Rev. 5 — 9 September 2014 61 of 122
NXP Semiconductors LPC178x/7x
32-bit ARM Cortex-M3 microcontroller
7.33.1.1 Internal RC oscillator
The IRC may be used as the clock that drives the PLL and subsequently the CPU. The
nominal IRC frequency is 12 MHz. The IRC is trimmed to 1 % accuracy over the entire
voltage and temperature range.
Upon power-up or any chip reset, the LPC178x/7x use the IRC as the clock source.
Software may later switch to one of the other available clock sources.
7.33.1.2 Main oscillator
The main oscillator can be used as the clock source for the CPU, with or without using the
PLL. The main oscillator also provides the clock source for the alternate PLL1.
The main oscillator operates at frequencies of 1 MHz to 25 MHz. This frequency can be
boosted to a higher frequency, up to the maximum CPU operating frequency, by the main
PLL. The clock selected as the PLL input is PLLCLKIN. The ARM processor clock
frequency is referred to as CCLK elsewhere in this document. The frequencies of
PLLCLKIN and CCLK are the same value unless the PLL is active and connected. The
clock frequency for each peripheral can be selected individually and is referred to as
PCLK. Refer to Section 7.33.2 for additional information.
Fig 7. LPC178x/7x clock generation block diagram
MAIN PLL0
IRC oscillator
main oscillator
(osc_clk)
CLKSRCSEL
(system clock select)
sysclk
pll_clk
CCLKSEL
(CPU clock select)
002aaf531
pll_clk
ALT PLL1
CPU CLOCK
DIVIDER
alt_pll_clk
cclk
PERIPHERAL
CLOCK DIVIDER pclk
EMC
CLOCK DIVIDER emc_clk
sysclk
alt_pll_clk
pll_clk
USBCLKSEL
(USB clock select)
USB
CLOCK DIVIDER usb_clk
sysclk
LPC178x/7xLPC178X_7X All information provided in this document is subject to legal disclaimers. © NXP Semiconductors N.V. 2014. All rights reserved.
Product data sheet Rev. 5 — 9 September 2014 62 of 122
NXP Semiconductors LPC178x/7x
32-bit ARM Cortex-M3 microcontroller
7.33.1.3 RTC oscillator
The RTC oscillator provides a 1 Hz clock to the RTC and a 32 kHz clock output that can
be output on the CLKOUT pin in order to allow trimming the RTC oscillator without
interference from a probe.
7.33.1.4 Watchdog oscillator
The Watchdog Timer has a dedicated watchdog oscillator that provides a 500 kHz clock to
the Watchdog Timer. The watchdog oscillator is always running if the Watchdog Timer is
enabled. The Watchdog oscillator clock can be output on the CLKOUT pin in order to
allow observe its frequency.
In order to allow Watchdog Timer operation with minimum power consumption, which can
be important in reduced power modes, the Watchdog oscillator frequency is not tightly
controlled. The Watchdog oscillator frequency will vary over temperature and power
supply within a particular part, and may vary by processing across different parts. This
variation should be taken into account when determining Watchdog reload values.
Within a particular part, temperature and power supply variations can produce up to a
17 % frequency variation. Frequency variation between devices under the same
operating conditions can be up to 30 %.
7.33.2 Main PLL (PLL0) and Alternate PLL (PLL1)
PLL0 (also called the Main PLL) and PLL1 (also called the Alternate PLL) are functionally
identical but have somewhat different input possibilities and output connections. These
possibilities are shown in Figure 7. The Main PLL can receive its input from either the IRC
or the main oscillator and can potentially be used to provide the clocks to nearly
everything on the device. The Alternate PLL receives its input only from the main oscillator
and is intended to be used as an alternate source of clocking to the USB. The USB has
timing needs that may not always be filled by the Main PLL.
Both PLLs are disabled and powered off on reset. If the Alternate PLL is left disabled, the
USB clock can be supplied by PLL0 if everything is set up to provide 48 MHz to the USB
clock through that route. The source for each clock must be selected via the CLKSEL
registers and can be further reduced by clock dividers as needed.
PLL0 accepts an input clock frequency from either the IRC or the main oscillator. If only
the Main PLL is used, then its output frequency must be an integer multiple of all other
clocks needed in the system. PLL1 takes its input only from the main oscillator, requiring
an external crystal in the range of 10 to 25 MHz. In each PLL, the Current Controlled
Oscillator (CCO) operates in the range of 156 MHz to 320 MHz, so there are additional
dividers to bring the output down to the desired frequencies. The minimum output divider
value is 2, insuring that the output of the PLLs have a 50 % duty cycle.
If the USB is used, the possibilities for the CPU clock and other clocks will be limited by
the requirements that the frequency be precise and very low jitter, and that the PLL0
output must be a multiple of 48 MHz. Even multiples of 48 MHz that are within the
operating range of the PLL are 192 MHz and 288 MHz. Also, only the main oscillator in
conjunction with the PLL can meet the precision and jitter specifications for USB. It is due
to these limitations that the Alternate PLL is provided.LPC178X_7X All information provided in this document is subject to legal disclaimers. © NXP Semiconductors N.V. 2014. All rights reserved.
Product data sheet Rev. 5 — 9 September 2014 63 of 122
NXP Semiconductors LPC178x/7x
32-bit ARM Cortex-M3 microcontroller
The alternate PLL accepts an input clock frequency from the main oscillator in the range
of 10 MHz to 25 MHz only. When used as the USB clock, the input frequency is multiplied
up to a multiple of 48 MHz (192 MHz or 288 MHz as described above).
7.33.3 Wake-up timer
The LPC178x/7x begin operation at power-up and when awakened from Power-down
mode by using the 12 MHz IRC oscillator as the clock source. This allows chip operation
to resume quickly. If the main oscillator or the PLL is needed by the application, software
will need to enable these features and wait for them to stabilize before they are used as a
clock source.
When the main oscillator is initially activated, the wake-up timer allows software to ensure
that the main oscillator is fully functional before the processor uses it as a clock source
and starts to execute instructions. This is important at power on, all types of reset, and
whenever any of the aforementioned functions are turned off for any reason. Since the
oscillator and other functions are turned off during Power-down mode, any wake-up of the
processor from Power-down mode makes use of the wake-up Timer.
The wake-up timer monitors the crystal oscillator to check whether it is safe to begin code
execution. When power is applied to the chip, or when some event caused the chip to exit
Power-down mode, some time is required for the oscillator to produce a signal of sufficient
amplitude to drive the clock logic. The amount of time depends on many factors, including
the rate of VDD(3V3) ramp (in the case of power on), the type of crystal and its electrical
characteristics (if a quartz crystal is used), as well as any other external circuitry (e.g.,
capacitors), and the characteristics of the oscillator itself under the existing ambient
conditions.
7.33.4 Power control
The LPC178x/7x support a variety of power control features. There are four special
modes of processor power reduction: Sleep mode, Deep-sleep mode, Power-down mode,
and Deep power-down mode. The CPU clock rate may also be controlled as needed by
changing clock sources, reconfiguring PLL values, and/or altering the CPU clock divider
value. This allows a trade-off of power versus processing speed based on application
requirements. In addition, the peripheral power control allows shutting down the clocks to
individual on-chip peripherals, allowing fine tuning of power consumption by eliminating all
dynamic power use in any peripherals that are not required for the application. Each of the
peripherals has its own clock divider which provides even better power control.
The integrated PMU (Power Management Unit) automatically adjusts internal regulators
to minimize power consumption during Sleep, Deep-sleep, Power-down, and Deep
power-down modes.
The LPC178x/7x also implement a separate power domain to allow turning off power to
the bulk of the device while maintaining operation of the RTC and a small set of registers
for storing data during any of the power-down modes.
7.33.4.1 Sleep mode
When Sleep mode is entered, the clock to the core is stopped. Resumption from the Sleep
mode does not need any special sequence other than re-enabling the clock to the ARM
core.LPC178X_7X All information provided in this document is subject to legal disclaimers. © NXP Semiconductors N.V. 2014. All rights reserved.
Product data sheet Rev. 5 — 9 September 2014 64 of 122
NXP Semiconductors LPC178x/7x
32-bit ARM Cortex-M3 microcontroller
In Sleep mode, execution of instructions is suspended until either a Reset or interrupt
occurs. Peripheral functions continue operation during Sleep mode and may generate
interrupts to cause the processor to resume execution. Sleep mode eliminates dynamic
power used by the processor itself, memory systems and related controllers, and internal
buses.
The DMA controller can continue to work in Sleep mode and has access to the peripheral
RAMs and all peripheral registers. The flash memory and the main SRAM are not
available in Sleep mode, they are disabled in order to save power.
Wake-up from Sleep mode will occur whenever any enabled interrupt occurs.
7.33.4.2 Deep-sleep mode
In Deep-sleep mode, the oscillator is shut down and the chip receives no internal clocks.
The processor state and registers, peripheral registers, and internal SRAM values are
preserved throughout Deep-sleep mode and the logic levels of chip pins remain static.
The output of the IRC is disabled but the IRC is not powered down to allow fast wake-up.
The RTC oscillator is not stopped because the RTC interrupts may be used as the
wake-up source. The PLL is automatically turned off and disconnected. The clock divider
registers are automatically reset to zero.
The Deep-sleep mode can be terminated and normal operation resumed by either a
Reset or certain specific interrupts that are able to function without clocks. Since all
dynamic operation of the chip is suspended, Deep-sleep mode reduces chip power
consumption to a very low value. Power to the flash memory is left on in Deep-sleep
mode, allowing a very quick wake-up.
Wake-up from Deep-sleep mode can initiated by the NMI, External Interrupts EINT0
through EINT3, GPIO interrupts, the Ethernet Wake-on-LAN interrupt, Brownout Detect,
an RTC Alarm interrupt, a USB input pin transition (USB activity interrupt), a CAN input
pin transition, or a Watchdog Timer time-out, when the related interrupt is enabled.
Wake-up will occur whenever any enabled interrupt occurs.
On wake-up from Deep-sleep mode, the code execution and peripherals activities will
resume after four cycles expire if the IRC was used before entering Deep-sleep mode. If
the main external oscillator was used, the code execution will resume when 4096 cycles
expire. PLL and clock dividers need to be reconfigured accordingly.
7.33.4.3 Power-down mode
Power-down mode does everything that Deep-sleep mode does but also turns off the
power to the IRC oscillator and the flash memory. This saves more power but requires
waiting for resumption of flash operation before execution of code or data access in the
flash memory can be accomplished.
When the chip enters Power-down mode, the IRC, the main oscillator, and all clocks are
stopped. The RTC remains running if it has been enabled and RTC interrupts may be
used to wake up the CPU. The flash is forced into Power-down mode. The PLLs are
automatically turned off and the clock selection multiplexers are set to use the system
clock sysclk (the reset state). The clock divider control registers are automatically reset to
zero. If the Watchdog timer is running, it will continue running in Power-down mode.LPC178X_7X All information provided in this document is subject to legal disclaimers. © NXP Semiconductors N.V. 2014. All rights reserved.
Product data sheet Rev. 5 — 9 September 2014 65 of 122
NXP Semiconductors LPC178x/7x
32-bit ARM Cortex-M3 microcontroller
On the wake-up of Power-down mode, if the IRC was used before entering Power-down
mode, it will take IRC 60 s to start-up. After this, four IRC cycles will expire before the
code execution can then be resumed if the code was running from SRAM. In the
meantime, the flash wake-up timer then counts 12 MHz IRC clock cycles to make the
100 s flash start-up time. When it times out, access to the flash will be allowed. Users
need to reconfigure the PLL and clock dividers accordingly.
7.33.4.4 Deep power-down mode
In Deep power-down mode, power is shut off to the entire chip with the exception of the
RTC module and the RESET pin.
To optimize power conservation, the user has the additional option of turning off or
retaining power to the 32 kHz oscillator. It is also possible to use external circuitry to turn
off power to the on-chip regulator via the VDD(REG)(3V3) pins and/or the I/O power via the
VDD(3V3) pins after entering Deep Power-down mode. Power must be restored before
device operation can be restarted.
The LPC178x/7x can wake up from Deep power-down mode via the RESET pin or an
alarm match event of the RTC.
7.33.4.5 Wake-up Interrupt Controller (WIC)
The WIC allows the CPU to automatically wake up from any enabled priority interrupt that
can occur while the clocks are stopped in Deep-sleep, Power-down, and Deep
power-down modes.
The WIC works in connection with the Nested Vectored Interrupt Controller (NVIC). When
the CPU enters Deep-sleep, Power-down, or Deep power-down mode, the NVIC sends a
mask of the current interrupt situation to the WIC.This mask includes all of the interrupts
that are both enabled and of sufficient priority to be serviced immediately. With this
information, the WIC simply notices when one of the interrupts has occurred and then it
wakes up the CPU.
The WIC eliminates the need to periodically wake up the CPU and poll the interrupts
resulting in additional power savings.
7.33.5 Peripheral power control
A power control for peripherals feature allows individual peripherals to be turned off if they
are not needed in the application, resulting in additional power savings.
7.33.6 Power domains
The LPC178x/7x provide two independent power domains that allow the bulk of the
device to have power removed while maintaining operation of the RTC and the backup
registers.
On the LPC178x/7x, I/O pads are powered by VDD(3V3), while VDD(REG)(3V3) powers the
on-chip voltage regulator which in turn provides power to the CPU and most of the
peripherals.
Depending on the LPC178x/7x application, a design can use two power options to
manage power consumption.LPC178X_7X All information provided in this document is subject to legal disclaimers. © NXP Semiconductors N.V. 2014. All rights reserved.
Product data sheet Rev. 5 — 9 September 2014 66 of 122
NXP Semiconductors LPC178x/7x
32-bit ARM Cortex-M3 microcontroller
The first option assumes that power consumption is not a concern and the design ties the
VDD(3V3) and VDD(REG)(3V3) pins together. This approach requires only one 3.3 V power
supply for both pads, the CPU, and peripherals. While this solution is simple, it does not
support powering down the I/O pad ring “on the fly” while keeping the CPU and
peripherals alive.
The second option uses two power supplies; a 3.3 V supply for the I/O pads (VDD(3V3)) and
a dedicated 3.3 V supply for the CPU (VDD(REG)(3V3)). Having the on-chip voltage regulator
powered independently from the I/O pad ring enables shutting down of the I/O pad power
supply “on the fly” while the CPU and peripherals stay active.
The VBAT pin supplies power only to the RTC domain. The RTC operates at very low
power, which can be supplied by an external battery. The device core power
(VDD(REG)(3V3)) is used to operate the RTC whenever VDD(REG)(3V3) is present. There is no
power drain from the RTC battery when VDD(REG)(3V3) is at nominal levels and
VDD(REG)(3V3) > VBAT.
Fig 8. Power distribution
REAL-TIME CLOCK
BACKUP REGISTERS
REGULATOR
32 kHz
OSCILLATOR
POWER
SELECTOR
ULTRA-LOW
POWER
REGULATOR
RTC POWER DOMAIN
MAIN POWER DOMAIN
002aaf530
RTCX1
VBAT
(typical 3.0 V)
VDD(REG)(3V3)
(typical 3.3 V)
RTCX2
VDD(3V3)
VSS
to memories,
peripherals,
oscillators,
PLLs
to core
to I/O pads
ADC
DAC
ADC POWER DOMAIN
VDDA
VREFP
VSSA
LPC178x/7xLPC178X_7X All information provided in this document is subject to legal disclaimers. © NXP Semiconductors N.V. 2014. All rights reserved.
Product data sheet Rev. 5 — 9 September 2014 67 of 122
NXP Semiconductors LPC178x/7x
32-bit ARM Cortex-M3 microcontroller
7.34 System control
7.34.1 Reset
Reset has four sources on the LPC178x/7x: the RESET pin, the Watchdog reset,
Power-On Reset (POR), and the BrownOut Detection (BOD) circuit. The RESET pin is a
Schmitt trigger input pin. Assertion of chip Reset by any source, once the operating
voltage attains a usable level, starts the Wake-up timer (see description in
Section 7.33.3), causing reset to remain asserted until the external Reset is de-asserted,
the oscillator is running, a fixed number of clocks have passed, and the flash controller
has completed its initialization.
When the internal Reset is removed, the processor begins executing at address 0, which
is initially the Reset vector mapped from the boot block. At that point, all of the processor
and peripheral registers have been initialized to predetermined values.
7.34.2 Brownout detection
The LPC178x/7x include 2-stage monitoring of the voltage on the VDD(REG)(3V3) pins. If this
voltage falls below 2.2 V (typical), the BOD asserts an interrupt signal to the Vectored
Interrupt Controller. This signal can be enabled for interrupt in the Interrupt Enable
Register in the NVIC in order to cause a CPU interrupt; if not, software can monitor the
signal by reading a dedicated status register.
The second stage of low-voltage detection asserts a reset to inactivate the LPC178x/7x
when the voltage on the VDD(REG)(3V3) pins falls below 1.85 V (typical). This reset prevents
alteration of the flash as operation of the various elements of the chip would otherwise
become unreliable due to low voltage. The BOD circuit maintains this reset down below
1 V, at which point the power-on reset circuitry maintains the overall reset.
Both the 2.2 V and 1.85 V thresholds include some hysteresis. In normal operation, this
hysteresis allows the 2.2 V detection to reliably interrupt, or a regularly executed event
loop to sense the condition.
7.34.3 Code security (Code Read Protection - CRP)
This feature of the LPC178x/7x allows user to enable different levels of security in the
system so that access to the on-chip flash and use of the JTAG and ISP can be restricted.
When needed, CRP is invoked by programming a specific pattern into a dedicated flash
location. IAP commands are not affected by the CRP.
There are three levels of the Code Read Protection.
CRP1 disables access to chip via the JTAG and allows partial flash update (excluding
flash sector 0) using a limited set of the ISP commands. This mode is useful when CRP is
required and flash field updates are needed but all sectors can not be erased.
CRP2 disables access to chip via the JTAG and only allows full flash erase and update
using a reduced set of the ISP commands.
Running an application with level CRP3 selected fully disables any access to chip via the
JTAG pins and the ISP. This mode effectively disables ISP override using P2[10] pin, too.
It is up to the user’s application to provide (if needed) flash update mechanism using IAP
calls or call reinvoke ISP command to enable flash update via UART0.LPC178X_7X All information provided in this document is subject to legal disclaimers. © NXP Semiconductors N.V. 2014. All rights reserved.
Product data sheet Rev. 5 — 9 September 2014 68 of 122
NXP Semiconductors LPC178x/7x
32-bit ARM Cortex-M3 microcontroller
7.34.4 APB interface
The APB peripherals are split into two separate APB buses in order to distribute the bus
bandwidth and thereby reducing stalls caused by contention between the CPU and the
GPDMA controller.
7.34.5 AHB multilayer matrix
The LPC178x/7x use an AHB multilayer matrix. This matrix connects the instruction
(I-code) and data (D-code) CPU buses of the ARM Cortex-M3 to the flash memory, the
main (64 kB) SRAM, and the Boot ROM. The GPDMA can also access all of these
memories. Additionally, the matrix connects the CPU system bus and all of the DMA
controllers to the various peripheral functions.
7.34.6 External interrupt inputs
The LPC178x/7x include up to 30 edge sensitive interrupt inputs combined with one level
sensitive external interrupt input as selectable pin function. The external interrupt input
can optionally be used to wake up the processor from Power-down mode.
7.34.7 Memory mapping control
The Cortex-M3 incorporates a mechanism that allows remapping the interrupt vector table
to alternate locations in the memory map. This is controlled via the Vector Table Offset
Register contained in the NVIC.
The vector table may be located anywhere within the bottom 1 GB of Cortex-M3 address
space. The vector table must be located on a 128 word (512 byte) boundary because the
NVIC on the LPC178x/7x is configured for 128 total interrupts.
7.35 Debug control
Debug and trace functions are integrated into the ARM Cortex-M3. Serial wire debug and
trace functions are supported in addition to a standard JTAG debug and parallel trace
functions. The ARM Cortex-M3 is configured to support up to eight breakpoints and four
watch points.
CAUTION
If level three Code Read Protection (CRP3) is selected, no future factory testing can be
performed on the device.LPC178X_7X All information provided in this document is subject to legal disclaimers. © NXP Semiconductors N.V. 2014. All rights reserved.
Product data sheet Rev. 5 — 9 September 2014 69 of 122
NXP Semiconductors LPC178x/7x
32-bit ARM Cortex-M3 microcontroller
8. Limiting values
[1] The following applies to the limiting values:
a) This product includes circuitry specifically designed for the protection of its internal devices from the damaging effects of excessive
static charge. Nonetheless, it is suggested that conventional precautions be taken to avoid applying greater than the rated
maximum.
b) Parameters are valid over operating temperature range unless otherwise specified. All voltages are with respect to VSS unless
otherwise noted.
[2] Including voltage on outputs in 3-state mode.
[3] Not to exceed 4.6 V.
[4] The maximum non-operating storage temperature is different than the temperature for required shelf life which should be determined
based on the required shelf lifetime. Please refer to the JEDEC spec for further details.
[5] Human body model: equivalent to discharging a 100 pF capacitor through a 1.5 k series resistor.
Table 9. Limiting values
In accordance with the Absolute Maximum Rating System (IEC 60134).[1]
Symbol Parameter Conditions Min Max Unit
VDD(3V3) supply voltage (3.3 V) external rail 2.4 3.6 V
VDD(REG)(3V3) regulator supply voltage (3.3 V) 2.4 3.6 V
VDDA analog 3.3 V pad supply voltage 0.5 +4.6 V
Vi(VBAT) input voltage on pin VBAT for the RTC 0.5 +4.6 V
Vi(VREFP) input voltage on pin VREFP 0.5 +4.6 V
VIA analog input voltage on ADC related
pins
0.5 +5.1 V
VI input voltage 5 V tolerant digital
I/O pins;
VDD(3V3) 2.4V
[2] 0.5 +5.5 V
VDD(3V3) 0 V 0.5 +3.6 V
other I/O pins [2][3] 0.5 VDD(3V3) +
0.5
V
IDD supply current per supply pin - 100 mA
ISS ground current per ground pin - 100 mA
Ilatch I/O latch-up current (0.5VDD(3V3)) < VI
< (1.5VDD(3V3));
Tj
< 125 C
- 100 mA
Tstg storage temperature non-operating [4] 65 +150 C
Ptot(pack) total power dissipation (per package) based on package
heat transfer, not
device power
consumption
- 1.5 W
VESD electrostatic discharge voltage human body
model; all pins
[5] - 4000 VLPC178X_7X All information provided in this document is subject to legal disclaimers. © NXP Semiconductors N.V. 2014. All rights reserved.
Product data sheet Rev. 5 — 9 September 2014 70 of 122
NXP Semiconductors LPC178x/7x
32-bit ARM Cortex-M3 microcontroller
9. Thermal characteristics
The average chip junction temperature, Tj (C), can be calculated using the following
equation:
(1)
• Tamb = ambient temperature (C),
• Rth(j-a) = the package junction-to-ambient thermal resistance (C/W)
• PD = sum of internal and I/O power dissipation
Table 10. Thermal characteristics
VDD = 3.0 V to 3.6 V; Tamb = 40 C to +85 C unless otherwise specified;
Symbol Parameter Min Typ Max Unit
Tj(max) maximum junction
temperature
- - 125 C
Table 11. Thermal resistance (LQFP packages)
Tamb = 40 C to +85 C unless otherwise specified.
Symbol Conditions Thermal resistance in C/W ±15 %
LQFP208 LQFP144
ja JEDEC (4.5 in 4 in)
0 m/s 27.4 31.5
1 m/s 25.7 28.1
2.5 m/s 24.4 26.2
Single-layer (4.5 in 3 in)
0 m/s 35.4 43.2
1 m/s 31.2 35.7
2.5 m/s 29.2 32.8
jc - 8.8 7.8
jb - 15.4 13.8
Table 12. Thermal resistance value (TFBGA packages)
Tamb = 40 C to +85 C unless otherwise specified.
Symbol Conditions Thermal resistance in C/W ±15 %
TFBGA208 TFBGA180
ja JEDEC (4.5 in 4 in)
0 m/s 41 45.5
1 m/s 35 38.3
2.5 m/s 31 33.8
8-layer (4.5 in 3 in)
0 m/s 34.9 38
1 m/s 30.9 33.5
2.5 m/s 28 29.8
jc - 8.3 8.9
jb - 13.6 12
Tj Tamb PD Rth j a – += LPC178X_7X All information provided in this document is subject to legal disclaimers. © NXP Semiconductors N.V. 2014. All rights reserved.
Product data sheet Rev. 5 — 9 September 2014 71 of 122
NXP Semiconductors LPC178x/7x
32-bit ARM Cortex-M3 microcontroller
10. Static characteristics
Table 13. Static characteristics
Tamb = 40 C to +85 C, unless otherwise specified.
Symbol Parameter Conditions Min Typ[1] Max Unit
Supply pins
VDD(3V3) supply voltage (3.3 V) external rail [2] 2.4 3.3 3.6 V
VDD(REG)(3V3) regulator supply voltage
(3.3 V)
2.4 3.3 3.6 V
VDDA analog 3.3 V pad supply
voltage
[3] 2.7 3.3 3.6 V
Vi(VBAT) input voltage on pin
VBAT
[4] 2.1 3.0 3.6 V
Vi(VREFP) input voltage on pin
VREFP
[3] 2.7 3.3 VDDA V
IDD(REG)(3V3) regulator supply current
(3.3 V)
active mode; code
while(1){}
executed from flash; all
peripherals disabled
PCLK = CCLK/4
CCLK = 12 MHz; PLL
disabled
[5][6] - 7- mA
CCLK = 120 MHz; PLL
enabled
[5][7] - 51- mA
active mode; code
while(1){}
executed from flash; all
peripherals enabled;
PCLK = CCLK/4
CCLK = 12 MHz; PLL
disabled
[5][6] 14
CCLK = 120 MHz; PLL
enabled
[5][7] 100 mA
Sleep mode [5][8] - 5- mA
Deep-sleep mode [5][9] - 550 - A
Power-down mode [5][9] - 280 - A
IBAT battery supply current RTC running;
part powered down;
VDD(REG)(3V3) =0 V;
Vi(VBAT) = 3.0 V;
VDD(3V3) = 0 V.
[10] -
1 - A
part powered;
VDD(REG)(3V3) = 3.3 V;
Vi(VBAT) = 3.0 V
[11] <10 nALPC178X_7X All information provided in this document is subject to legal disclaimers. © NXP Semiconductors N.V. 2014. All rights reserved.
Product data sheet Rev. 5 — 9 September 2014 72 of 122
NXP Semiconductors LPC178x/7x
32-bit ARM Cortex-M3 microcontroller
Standard port pins, RESET
IIL LOW-level input current VI = 0 V; on-chip pull-up
resistor disabled
- 0.5 10 nA
IIH HIGH-level input
current
VI = VDD(3V3); on-chip
pull-down resistor
disabled
- 0.5 10 nA
IOZ OFF-state output
current
VO = 0 V; VO = VDD(3V3);
on-chip pull-up/down
resistors disabled
- 0.5 10 nA
VI input voltage pin configured to provide
a digital function
[15][16]
[17]
0- 5.0 V
VO output voltage output active 0 - VDD(3V3) V
VIH HIGH-level input
voltage
0.7VDD(3V3) --V
VIL LOW-level input voltage - - 0.3VDD(3V3) V
Vhys hysteresis voltage 0.4 - - V
VOH HIGH-level output
voltage
IOH = 4 mA VDD(3V3)
0.4
--V
VOL LOW-level output
voltage
IOL = 4 mA --0.4 V
IOH HIGH-level output
current
VOH = VDD(3V3) 0.4 V 4 - - mA
IOL LOW-level output
current
VOL = 0.4 V 4- - mA
IOHS HIGH-level short-circuit
output current
VOH =0V [18] - - 45 mA
IOLS LOW-level short-circuit
output current
VOL = VDD(3V3) [18] --50 mA
Ipd pull-down current VI =5V 10 50 150 A
Ipu pull-up current VI =0V 15 50 85 A
VDD(3V3) < VI <5V 0 0 0 A
I
2C-bus pins (P0[27] and P0[28])
VIH HIGH-level input
voltage
0.7VDD(3V3) --V
VIL LOW-level input voltage - - 0.3VDD(3V3) V
Vhys hysteresis voltage - 0.05
VDD(3V3)
- V
VOL LOW-level output
voltage
IOLS = 3 mA --0.4 V
ILI input leakage current VI = VDD(3V3) [19] - 24 A
VI =5V - 10 22 A
USB pins
IOZ OFF-state output
current
0V>
NXP Semiconductors LPC178x/7x
32-bit ARM Cortex-M3 microcontroller
22. Contents
1 General description . . . . . . . . . . . . . . . . . . . . . . 1
2 Features and benefits . . . . . . . . . . . . . . . . . . . . 1
3 Applications . . . . . . . . . . . . . . . . . . . . . . . . . . . . 4
4 Ordering information. . . . . . . . . . . . . . . . . . . . . 5
5 Block diagram . . . . . . . . . . . . . . . . . . . . . . . . . . 7
6 Pinning information. . . . . . . . . . . . . . . . . . . . . . 8
6.1 Pinning . . . . . . . . . . . . . . . . . . . . . . . . . . . . . . . 8
6.2 Pin description . . . . . . . . . . . . . . . . . . . . . . . . . 9
7 Functional description . . . . . . . . . . . . . . . . . . 40
7.1 Architectural overview . . . . . . . . . . . . . . . . . . 40
7.2 ARM Cortex-M3 processor . . . . . . . . . . . . . . . 41
7.3 On-chip flash program memory . . . . . . . . . . . 41
7.4 EEPROM . . . . . . . . . . . . . . . . . . . . . . . . . . . . 41
7.5 On-chip SRAM . . . . . . . . . . . . . . . . . . . . . . . . 41
7.6 Memory Protection Unit (MPU). . . . . . . . . . . . 41
7.7 Memory map. . . . . . . . . . . . . . . . . . . . . . . . . . 42
7.8 Nested Vectored Interrupt Controller (NVIC) . 44
7.8.1 Features . . . . . . . . . . . . . . . . . . . . . . . . . . . . . 44
7.8.2 Interrupt sources. . . . . . . . . . . . . . . . . . . . . . . 44
7.9 Pin connect block . . . . . . . . . . . . . . . . . . . . . . 44
7.10 External memory controller. . . . . . . . . . . . . . . 44
7.10.1 Features . . . . . . . . . . . . . . . . . . . . . . . . . . . . . 46
7.11 General purpose DMA controller . . . . . . . . . . 46
7.11.1 Features . . . . . . . . . . . . . . . . . . . . . . . . . . . . . 47
7.12 CRC engine . . . . . . . . . . . . . . . . . . . . . . . . . . 47
7.12.1 Features . . . . . . . . . . . . . . . . . . . . . . . . . . . . . 47
7.13 LCD controller. . . . . . . . . . . . . . . . . . . . . . . . . 48
7.13.1 Features . . . . . . . . . . . . . . . . . . . . . . . . . . . . . 48
7.14 Ethernet . . . . . . . . . . . . . . . . . . . . . . . . . . . . . 49
7.14.1 Features . . . . . . . . . . . . . . . . . . . . . . . . . . . . . 49
7.15 USB interface . . . . . . . . . . . . . . . . . . . . . . . . . 50
7.15.1 USB device controller . . . . . . . . . . . . . . . . . . . 50
7.15.1.1 Features . . . . . . . . . . . . . . . . . . . . . . . . . . . . . 50
7.15.2 USB host controller. . . . . . . . . . . . . . . . . . . . . 50
7.15.2.1 Features . . . . . . . . . . . . . . . . . . . . . . . . . . . . . 50
7.15.3 USB OTG controller . . . . . . . . . . . . . . . . . . . . 51
7.15.3.1 Features . . . . . . . . . . . . . . . . . . . . . . . . . . . . . 51
7.16 SD/MMC card interface . . . . . . . . . . . . . . . . . 51
7.16.1 Features . . . . . . . . . . . . . . . . . . . . . . . . . . . . . 51
7.17 Fast general purpose parallel I/O . . . . . . . . . . 51
7.17.1 Features . . . . . . . . . . . . . . . . . . . . . . . . . . . . . 52
7.18 12-bit ADC . . . . . . . . . . . . . . . . . . . . . . . . . . . 52
7.18.1 Features . . . . . . . . . . . . . . . . . . . . . . . . . . . . . 52
7.19 10-bit DAC . . . . . . . . . . . . . . . . . . . . . . . . . . . 52
7.19.1 Features . . . . . . . . . . . . . . . . . . . . . . . . . . . . . 53
7.20 UARTs. . . . . . . . . . . . . . . . . . . . . . . . . . . . . . . 53
7.20.1 Features . . . . . . . . . . . . . . . . . . . . . . . . . . . . . 53
7.21 SSP serial I/O controller. . . . . . . . . . . . . . . . . 53
7.21.1 Features. . . . . . . . . . . . . . . . . . . . . . . . . . . . . 54
7.22 I2C-bus serial I/O controllers . . . . . . . . . . . . . 54
7.22.1 Features. . . . . . . . . . . . . . . . . . . . . . . . . . . . . 54
7.23 I2S-bus serial I/O controllers . . . . . . . . . . . . . 55
7.23.1 Features. . . . . . . . . . . . . . . . . . . . . . . . . . . . . 55
7.24 CAN controller and acceptance filters . . . . . . 55
7.24.1 Features. . . . . . . . . . . . . . . . . . . . . . . . . . . . . 55
7.25 General purpose 32-bit timers/external
event counters . . . . . . . . . . . . . . . . . . . . . . . . 56
7.25.1 Features. . . . . . . . . . . . . . . . . . . . . . . . . . . . . 56
7.26 Pulse Width Modulator (PWM). . . . . . . . . . . . 56
7.26.1 Features. . . . . . . . . . . . . . . . . . . . . . . . . . . . . 57
7.27 Motor control PWM . . . . . . . . . . . . . . . . . . . . 57
7.28 Quadrature Encoder Interface (QEI) . . . . . . . 58
7.28.1 Features. . . . . . . . . . . . . . . . . . . . . . . . . . . . . 58
7.29 ARM Cortex-M3 system tick timer . . . . . . . . . 58
7.30 Windowed WatchDog Timer (WWDT) . . . . . . 59
7.30.1 Features. . . . . . . . . . . . . . . . . . . . . . . . . . . . . 59
7.31 RTC and backup registers . . . . . . . . . . . . . . . 59
7.31.1 Features. . . . . . . . . . . . . . . . . . . . . . . . . . . . . 59
7.32 Event monitor/recorder . . . . . . . . . . . . . . . . . 60
7.32.1 Features. . . . . . . . . . . . . . . . . . . . . . . . . . . . . 60
7.33 Clocking and power control . . . . . . . . . . . . . . 60
7.33.1 Crystal oscillators. . . . . . . . . . . . . . . . . . . . . . 60
7.33.1.1 Internal RC oscillator . . . . . . . . . . . . . . . . . . . 61
7.33.1.2 Main oscillator . . . . . . . . . . . . . . . . . . . . . . . . 61
7.33.1.3 RTC oscillator . . . . . . . . . . . . . . . . . . . . . . . . 62
7.33.1.4 Watchdog oscillator . . . . . . . . . . . . . . . . . . . . 62
7.33.2 Main PLL (PLL0) and Alternate PLL (PLL1) . 62
7.33.3 Wake-up timer . . . . . . . . . . . . . . . . . . . . . . . . 63
7.33.4 Power control . . . . . . . . . . . . . . . . . . . . . . . . . 63
7.33.4.1 Sleep mode . . . . . . . . . . . . . . . . . . . . . . . . . . 63
7.33.4.2 Deep-sleep mode. . . . . . . . . . . . . . . . . . . . . . 64
7.33.4.3 Power-down mode . . . . . . . . . . . . . . . . . . . . . 64
7.33.4.4 Deep power-down mode . . . . . . . . . . . . . . . . 65
7.33.4.5 Wake-up Interrupt Controller (WIC) . . . . . . . . 65
7.33.5 Peripheral power control . . . . . . . . . . . . . . . . 65
7.33.6 Power domains . . . . . . . . . . . . . . . . . . . . . . . 65
7.34 System control . . . . . . . . . . . . . . . . . . . . . . . . 67
7.34.1 Reset . . . . . . . . . . . . . . . . . . . . . . . . . . . . . . . 67
7.34.2 Brownout detection . . . . . . . . . . . . . . . . . . . . 67
7.34.3 Code security (Code Read Protection - CRP) 67
7.34.4 APB interface . . . . . . . . . . . . . . . . . . . . . . . . . 68
7.34.5 AHB multilayer matrix . . . . . . . . . . . . . . . . . . 68
7.34.6 External interrupt inputs . . . . . . . . . . . . . . . . . 68
7.34.7 Memory mapping control . . . . . . . . . . . . . . . . 68
7.35 Debug control. . . . . . . . . . . . . . . . . . . . . . . . . 68NXP Semiconductors LPC178x/7x
32-bit ARM Cortex-M3 microcontroller
© NXP Semiconductors N.V. 2014. All rights reserved.
For more information, please visit: http://www.nxp.com
For sales office addresses, please send an email to: salesaddresses@nxp.com
Date of release: 9 September 2014
Document identifier: LPC178X_7X
Please be aware that important notices concerning this document and the product(s)
described herein, have been included in section ‘Legal information’.
8 Limiting values. . . . . . . . . . . . . . . . . . . . . . . . . 69
9 Thermal characteristics . . . . . . . . . . . . . . . . . 70
10 Static characteristics. . . . . . . . . . . . . . . . . . . . 71
10.1 Power consumption . . . . . . . . . . . . . . . . . . . . 74
10.2 Peripheral power consumption . . . . . . . . . . . . 76
10.3 Electrical pin characteristics . . . . . . . . . . . . . . 78
11 Dynamic characteristics . . . . . . . . . . . . . . . . . 80
11.1 Flash memory. . . . . . . . . . . . . . . . . . . . . . . . . 80
11.2 External memory interface . . . . . . . . . . . . . . . 81
11.3 External clock . . . . . . . . . . . . . . . . . . . . . . . . . 87
11.4 Internal oscillators. . . . . . . . . . . . . . . . . . . . . . 87
11.5 I/O pins . . . . . . . . . . . . . . . . . . . . . . . . . . . . . . 87
11.6 SSP interface . . . . . . . . . . . . . . . . . . . . . . . . . 88
11.7 I2C-bus . . . . . . . . . . . . . . . . . . . . . . . . . . . . . . 90
11.8 I2S-bus interface. . . . . . . . . . . . . . . . . . . . . . . 91
11.9 LCD . . . . . . . . . . . . . . . . . . . . . . . . . . . . . . . . 92
11.10 SD/MMC . . . . . . . . . . . . . . . . . . . . . . . . . . . . . 93
12 ADC electrical characteristics . . . . . . . . . . . . 94
13 DAC electrical characteristics . . . . . . . . . . . . 97
14 Application information. . . . . . . . . . . . . . . . . . 98
14.1 Suggested USB interface solutions . . . . . . . . 98
14.2 Crystal oscillator XTAL input and component
selection . . . . . . . . . . . . . . . . . . . . . . . . . . . . 102
14.3 XTAL Printed-Circuit Board (PCB) layout
guidelines . . . . . . . . . . . . . . . . . . . . . . . . . . . 104
14.4 Standard I/O pin configuration . . . . . . . . . . . 104
14.5 Reset pin configuration. . . . . . . . . . . . . . . . . 105
14.6 Reset pin configuration for RTC operation . . 105
15 Package outline . . . . . . . . . . . . . . . . . . . . . . . 107
16 Soldering . . . . . . . . . . . . . . . . . . . . . . . . . . . . 111
17 Abbreviations. . . . . . . . . . . . . . . . . . . . . . . . . 114
18 References . . . . . . . . . . . . . . . . . . . . . . . . . . . 115
19 Revision history. . . . . . . . . . . . . . . . . . . . . . . 116
20 Legal information. . . . . . . . . . . . . . . . . . . . . . 119
20.1 Data sheet status . . . . . . . . . . . . . . . . . . . . . 119
20.2 Definitions. . . . . . . . . . . . . . . . . . . . . . . . . . . 119
20.3 Disclaimers . . . . . . . . . . . . . . . . . . . . . . . . . . 119
20.4 Trademarks. . . . . . . . . . . . . . . . . . . . . . . . . . 120
21 Contact information. . . . . . . . . . . . . . . . . . . . 120
22 Contents . . . . . . . . . . . . . . . . . . . . . . . . . . . . . 121
1. General description
The LPC4350/30/20/10 are ARM Cortex-M4 based microcontrollers for embedded
applications which include an ARM Cortex-M0 coprocessor, up to 264 kB of SRAM,
advanced configurable peripherals such as the State Configurable Timer/PWM
(SCTimer/PWM) and the Serial General-Purpose I/O (SGPIO) interface, two High-speed
USB controllers, Ethernet, LCD, an external memory controller, and multiple digital and
analog peripherals. The LPC4350/30/20/10 operate at CPU frequencies of up to 204
MHz.
The ARM Cortex-M4 is a next generation 32-bit core that offers system enhancements
such as low power consumption, enhanced debug features, and a high level of support
block integration. The ARM Cortex-M4 CPU incorporates a 3-stage pipeline, uses a
Harvard architecture with separate local instruction and data buses as well as a third bus
for peripherals, and includes an internal prefetch unit that supports speculative branching.
The ARM Cortex-M4 supports single-cycle digital signal processing and SIMD
instructions. A hardware floating-point processor is integrated in the core.
The ARM Cortex-M0 coprocessor is an energy-efficient and easy-to-use 32-bit core which
is code- and tool-compatible with the Cortex-M4 core. The Cortex-M0 coprocessor offers
up to 204 MHz performance with a simple instruction set and reduced code size.
See Section 17 “References” for additional documentation.
2. Features and benefits
Cortex-M4 Processor core
ARM Cortex-M4 processor, running at frequencies of up to 204 MHz.
ARM Cortex-M4 built-in Memory Protection Unit (MPU) supporting eight regions.
ARM Cortex-M4 built-in Nested Vectored Interrupt Controller (NVIC).
Hardware floating-point unit.
Non-maskable Interrupt (NMI) input.
JTAG and Serial Wire Debug (SWD), serial trace, eight breakpoints, and four watch
points.
Enhanced Trace Module (ETM) and Enhanced Trace Buffer (ETB) support.
System tick timer.
Cortex-M0 Processor core
ARM Cortex-M0 co-processor capable of off-loading the main ARM Cortex-M4
application processor.
Running at frequencies of up to 204 MHz.
JTAG and built-in NVIC.
LPC4350/30/20/10
32-bit ARM Cortex-M4/M0 flashless MCU; up to 264 kB SRAM;
Ethernet; two HS USBs; advanced configurable peripherals
Rev. 4.2 — 18 August 2014 Product data sheetLPC4350_30_20_10 All information provided in this document is subject to legal disclaimers. © NXP Semiconductors N.V. 2014. All rights reserved.
Product data sheet Rev. 4.2 — 18 August 2014 2 of 155
NXP Semiconductors LPC4350/30/20/10
32-bit ARM Cortex-M4/M0 microcontroller
On-chip memory
Up to 264 kB SRAM for code and data use.
Multiple SRAM blocks with separate bus access. Two SRAM blocks can be
powered down individually.
64 kB ROM containing boot code and on-chip software drivers.
64 bit + 256 bit general-purpose One-Time Programmable (OTP) memory.
Clock generation unit
Crystal oscillator with an operating range of 1 MHz to 25 MHz.
12 MHz Internal RC (IRC) oscillator trimmed to 1.5 % accuracy over temperature
and voltage.
Ultra-low power Real-Time Clock (RTC) crystal oscillator.
Three PLLs allow CPU operation up to the maximum CPU rate without the need for
a high-frequency crystal. The second PLL is dedicated to the High-speed USB, the
third PLL can be used as audio PLL.
Clock output.
Configurable digital peripherals
Serial GPIO (SGPIO) interface.
State Configurable Timer (SCTimer/PWM) subsystem on AHB.
Global Input Multiplexer Array (GIMA) allows to cross-connect multiple inputs and
outputs to event driven peripherals like the timers, SCT, and ADC0/1.
Serial interfaces
Quad SPI Flash Interface (SPIFI) with 1-, 2-, or 4-bit data at rates of up to
52 MB per second.
10/100T Ethernet MAC with RMII and MII interfaces and DMA support for high
throughput at low CPU load. Support for IEEE 1588 time stamping/advanced time
stamping (IEEE 1588-2008 v2).
One High-speed USB 2.0 Host/Device/OTG interface with DMA support and
on-chip high-speed PHY (USB0).
One High-speed USB 2.0 Host/Device interface with DMA support, on-chip
full-speed PHY and ULPI interface to external high-speed PHY (USB1).
USB interface electrical test software included in ROM USB stack.
Four 550 UARTs with DMA support: one UART with full modem interface; one
UART with IrDA interface; three USARTs support UART synchronous mode and a
smart card interface conforming to ISO7816 specification.
Up to two C_CAN 2.0B controllers with one channel each. Use of C_CAN controller
excludes operation of all other peripherals connected to the same bus bridge. See
Figure 1 and Ref. 2.
Two SSP controllers with FIFO and multi-protocol support. Both SSPs with DMA
support.
One SPI controller.
One Fast-mode Plus I2C-bus interface with monitor mode and with open-drain I/O
pins conforming to the full I2C-bus specification. Supports data rates of up to
1 Mbit/s.
One standard I2C-bus interface with monitor mode and with standard I/O pins.
Two I2S interfaces, each with DMA support and with one input and one output.LPC4350_30_20_10 All information provided in this document is subject to legal disclaimers. © NXP Semiconductors N.V. 2014. All rights reserved.
Product data sheet Rev. 4.2 — 18 August 2014 3 of 155
NXP Semiconductors LPC4350/30/20/10
32-bit ARM Cortex-M4/M0 microcontroller
Digital peripherals
External Memory Controller (EMC) supporting external SRAM, ROM, NOR flash,
and SDRAM devices.
LCD controller with DMA support and a programmable display resolution of up to
1024 H 768 V. Supports monochrome and color STN panels and TFT color
panels; supports 1/2/4/8 bpp Color Look-Up Table (CLUT) and 16/24-bit direct pixel
mapping.
Secure Digital Input Output (SD/MMC) card interface.
Eight-channel General-Purpose DMA controller can access all memories on the
AHB and all DMA-capable AHB slaves.
Up to 164 General-Purpose Input/Output (GPIO) pins with configurable
pull-up/pull-down resistors.
GPIO registers are located on the AHB for fast access. GPIO ports have DMA
support.
Up to eight GPIO pins can be selected from all GPIO pins as edge and level
sensitive interrupt sources.
Two GPIO group interrupt modules enable an interrupt based on a programmable
pattern of input states of a group of GPIO pins.
Four general-purpose timer/counters with capture and match capabilities.
One motor control Pulse Width Modulator (PWM) for three-phase motor control.
One Quadrature Encoder Interface (QEI).
Repetitive Interrupt timer (RI timer).
Windowed watchdog timer (WWDT).
Ultra-low power Real-Time Clock (RTC) on separate power domain with 256 bytes
of battery powered backup registers.
Alarm timer; can be battery powered.
Analog peripherals
One 10-bit DAC with DMA support and a data conversion rate of 400 kSamples/s.
Two 10-bit ADCs with DMA support and a data conversion rate of 400 kSamples/s.
Up to eight input channels per ADC.
Unique ID for each device.
Power
Single 3.3 V (2.2 V to 3.6 V) power supply with on-chip internal voltage regulator for
the core supply and the RTC power domain.
RTC power domain can be powered separately by a 3 V battery supply.
Four reduced power modes: Sleep, Deep-sleep, Power-down, and Deep
power-down.
Processor wake-up from Sleep mode via wake-up interrupts from various
peripherals.
Wake-up from Deep-sleep, Power-down, and Deep power-down modes via
external interrupts and interrupts generated by battery powered blocks in the RTC
power domain.
Brownout detect with four separate thresholds for interrupt and forced reset.
Power-On Reset (POR).
Available as LBGA256, TFBGA180, and TFBGA100 packages and as LQFP144
package.LPC4350_30_20_10 All information provided in this document is subject to legal disclaimers. © NXP Semiconductors N.V. 2014. All rights reserved.
Product data sheet Rev. 4.2 — 18 August 2014 4 of 155
NXP Semiconductors LPC4350/30/20/10
32-bit ARM Cortex-M4/M0 microcontroller
3. Applications
Motor control Embedded audio applications
Power management Industrial automation
White goods e-metering
RFID readersLPC4350_30_20_10 All information provided in this document is subject to legal disclaimers. © NXP Semiconductors N.V. 2014. All rights reserved.
Product data sheet Rev. 4.2 — 18 August 2014 5 of 155
NXP Semiconductors LPC4350/30/20/10
32-bit ARM Cortex-M4/M0 microcontroller
4. Ordering information
4.1 Ordering options
Table 1. Ordering information
Type number Package
Name Description Version
LPC4350FET256 LBGA256 Plastic low profile ball grid array package; 256 balls; body 17 17 1 mm SOT740-2
LPC4350FET180 TFBGA180 Thin fine-pitch ball grid array package; 180 balls SOT570-3
LPC4330FET256 LBGA256 Plastic low profile ball grid array package; 256 balls; body 17 17 1 mm SOT740-2
LPC4330FET180 TFBGA180 Thin fine-pitch ball grid array package; 180 balls SOT570-3
LPC4330FET100 TFBGA100 Plastic thin fine-pitch ball grid array package; 100 balls; body 9 9 0.7 mm SOT926-1
LPC4330FBD144 LQFP144 Plastic low profile quad flat package; 144 leads; body 20 20 1.4 mm SOT486-1
LPC4320FET100 TFBGA100 Plastic thin fine-pitch ball grid array package; 100 balls; body 9 9 0.7 mm SOT926-1
LPC4320FBD144 LQFP144 Plastic low profile quad flat package; 144 leads; body 20 20 1.4 mm SOT486-1
LPC4310FET100 TFBGA100 Plastic thin fine-pitch ball grid array package; 100 balls; body 9 9 0.7 mm SOT926-1
LPC4310FBD144 LQFP144 Plastic low profile quad flat package; 144 leads; body 20 20 1.4 mm SOT486-1
Table 2. Ordering options
Type number Total
SRAM
LCD Ethernet USB0
(Host,
Device,
OTG)
USB1
(Host,
Device)/
ULPI
interface
ADC
channels
PWM QEI GPIO Package
LPC4350FET256 264 kB yes yes yes yes/yes 8 yes yes 164 LBGA256
LPC4350FET180 264 kB yes yes yes yes/yes 8 yes yes 118 TFBGA180
LPC4330FET256 264 kB no yes yes yes/yes 8 yes yes 164 LBGA256
LPC4330FET180 264 kB no yes yes yes/yes 8 yes yes 118 TFBGA180
LPC4330FET100 264 kB no yes yes yes/no 4 no no 49 TFBGA100
LPC4330FBD144 264 kB no yes yes yes/no 8 yes no 83 LQFP144
LPC4320FET100 200 kB no no yes no 4 no no 49 TFBGA100
LPC4320FBD144 200 kB no no yes no 8 yes no 83 LQFP144
LPC4310FET100 168 kB no no no no 4 no no 49 TFBGA100
LPC4310FBD144 168 kB no no no no 8 yes no 83 LQFP144LPC4350_30_20_10 All information provided in this document is subject to legal disclaimers. © NXP Semiconductors N.V. 2014. All rights reserved.
Product data sheet Rev. 4.2 — 18 August 2014 6 of 155
NXP Semiconductors LPC4350/30/20/10
32-bit ARM Cortex-M4/M0 microcontroller
5. Block diagram
(1) Not available on all parts (see Table 2).
Fig 1. LPC4350/30/20/10 Block diagram
ARM
CORTEX-M4
TEST/DEBUG
INTERFACE I-code bus D-code bus
system bus
DMA LCD(1) SD/
MMC
ETHERNET(1)
10/100
MAC
IEEE 1588
HIGH-SPEED
USB0(1)
HOST/
DEVICE/OTG
HIGH-SPEED
USB1(1)
HOST/DEVICE
EMC
HIGH-SPEED PHY
32 kB AHB SRAM
16 +16 kB AHB SRAM
SPIFI
AES ENCRYPTION/
DECRYPTION(2)
HS GPIO
SPI
SGPIO
SCT
64 kB ROM
I
2C0
I
2S0
I
2S1
C_CAN1
MOTOR
CONTROL
PWM(1)
TIMER3
TIMER2
USART2
USART3
SSP1
RI TIMER
QEI(1)
GIMA
BRIDGE 0 BRIDGE 1 BRIDGE 2 BRIDGE 3 BRIDGE
BRIDGE
AHB MULTILAYER MATRIX
LPC4350/30/20/20/10
128 kB LOCAL SRAM
72 kB LOCAL SRAM
10-bit ADC0
10-bit ADC1
C_CAN0
I
2C1
10-bit DAC
BRIDGE
RGU
CCU2
CGU
CCU1
ALARM TIMER
CONFIGURATION
REGISTERS
OTP MEMORY
EVENT ROUTER
POWER MODE CONTROL
12 MHz IRC
RTC POWER DOMAIN
BACKUP REGISTERS
RTC RTC OSC
002aaf772
slaves
slaves
masters
ARM
CORTEX-M0
TEST/DEBUG
INTERFACE
= connected to GPDMA
GPIO
INTERRUPTS
GPIO GROUP0
INTERRUPT
GPIO GROUP1
INTERRUPT
WWDT
USART0
UART1
SSP0
TIMER0
TIMER1
SCULPC4350_30_20_10 All information provided in this document is subject to legal disclaimers. © NXP Semiconductors N.V. 2014. All rights reserved.
Product data sheet Rev. 4.2 — 18 August 2014 7 of 155
NXP Semiconductors LPC4350/30/20/10
32-bit ARM Cortex-M4/M0 microcontroller
6. Pinning information
6.1 Pinning
6.2 Pin description
On the LPC4350/30/20/10, digital pins are grouped into 16 ports, named P0 to P9 and PA
to PF, with up to 20 pins used per port. Each digital pin can support up to eight different
digital functions, including General-Purpose I/O (GPIO), selectable through the System
Configuration Unit (SCU) registers. The pin name is not indicative of the GPIO port
assigned to it.
Fig 2. Pin configuration LBGA256 package Fig 3. Pin configuration TFBGA180 package
002aaf813
LPC4350/30FET256
Transparent top view
T
R
P
N
M
L
J
G
K
H
F
E
D
C
B
A
2 4 6 8 10 12
13
14
15
16
1 3 5 7 9 11
ball A1
index area
002aag374
LPC4350/30FET180
Transparent top view
N
L
P
M
K
J
H
G
F
D
B
E
C
A
2 4 6 8 10 12
13
14
1 3 5 7 9 11
ball A1
index area
Fig 4. Pin configuration TFBGA100 package Fig 5. Pin configuration LQFP144 package
002aag375
LPC4330/20/10FET100
Transparent top view
J
G
K
H
F
E
D
C
B
A
13579 2 4 6 8 10
ball A1
index area
LPC4330/20/10FBD144
72
1
36
108
73
37
109
144
002aag377LPC4350_30_20_10 All information provided in this document is subject to legal disclaimers. © NXP Semiconductors N.V. 2014. All rights reserved.
Product data sheet Rev. 4.2 — 18 August 2014 8 of 155
NXP Semiconductors LPC4350/30/20/10
32-bit ARM Cortex-M4/M0 microcontroller
Not all functions listed in Table 3 are available on all packages. See Table 2 for availability
of USB0, USB1, Ethernet, and LCD functions.
The parts contain two 10-bit ADCs (ADC0 and ADC1). The input channels of ADC0 and
ADC1 on dedicated pins and multiplexed pins are combined in such a way that all channel
0 inputs (named ADC0_0 and ADC1_0) are tied together and connected to both, channel
0 on ADC0 and channel 0 on ADC1, channel 1 inputs (named ADC0_1 and ADC1_1) are
tied together and connected to channel 1 on ADC0 and ADC1, and so forth. There are
eight ADC channels total for the two ADCs.LPC4350_30_20_10 All information provided in this document is subject to legal disclaimers. © NXP Semiconductors N.V. 2014. All rights reserved.
Product data sheet Rev. 4.2 — 18 August 2014 9 of 155
NXP Semiconductors LPC4350/30/20/10
32-bit ARM Cortex-M4/M0 microcontroller
Table 3. Pin description
LCD, Ethernet, USB0, and USB1 functions are not available on all parts. See Table 2.
Symbol
LBGA256
TFBGA180
TFBGA100
LQFP144
Reset state
[1]
Type
Description
Multiplexed digital pins
P0_0 L3 K3 G2 32 [2] N;
PU
I/O GPIO0[0] — General purpose digital input/output pin.
I/O SSP1_MISO — Master In Slave Out for SSP1.
I ENET_RXD1 — Ethernet receive data 1 (RMII/MII interface).
I/O SGPIO0 — General purpose digital input/output pin.
- R — Function reserved.
- R — Function reserved.
I/O I2S0_TX_WS — Transmit Word Select. It is driven by the
master and received by the slave. Corresponds to the signal
WS in the I
2S-bus specification.
I/O I2S1_TX_WS — Transmit Word Select. It is driven by the
master and received by the slave. Corresponds to the signal
WS in the I
2S-bus specification.
P0_1 M2 K2 G1 34 [2] N;
PU
I/O GPIO0[1] — General purpose digital input/output pin.
I/O SSP1_MOSI — Master Out Slave in for SSP1.
I ENET_COL — Ethernet Collision detect (MII interface).
I/O SGPIO1 — General purpose digital input/output pin.
- R — Function reserved.
- R — Function reserved.
ENET_TX_EN — Ethernet transmit enable (RMII/MII
interface).
I/O I2S1_TX_SDA — I2S1 transmit data. It is driven by the
transmitter and read by the receiver. Corresponds to the signal
SD in the I
2S-bus specification.
P1_0 P2 L1 H1 38 [2] N;
PU
I/O GPIO0[4] — General purpose digital input/output pin.
I CTIN_3 — SCTimer/PWM input 3. Capture input 1 of timer 1.
I/O EMC_A5 — External memory address line 5.
- R — Function reserved.
- R — Function reserved.
I/O SSP0_SSEL — Slave Select for SSP0.
I/O SGPIO7 — General purpose digital input/output pin.
- R — Function reserved.LPC4350_30_20_10 All information provided in this document is subject to legal disclaimers. © NXP Semiconductors N.V. 2014. All rights reserved.
Product data sheet Rev. 4.2 — 18 August 2014 10 of 155
NXP Semiconductors LPC4350/30/20/10
32-bit ARM Cortex-M4/M0 microcontroller
P1_1 R2 N1 K2 42 [2] N;
PU
I/O GPIO0[8] — General purpose digital input/output pin. Boot pin
(see Table 5).
O CTOUT_7 — SCTimer/PWM output 7. Match output 3 of timer
1.
I/O EMC_A6 — External memory address line 6.
I/O SGPIO8 — General purpose digital input/output pin.
- R — Function reserved.
I/O SSP0_MISO — Master In Slave Out for SSP0.
- R — Function reserved.
- R — Function reserved.
P1_2 R3 N2 K1 43 [2] N;
PU
I/O GPIO0[9] — General purpose digital input/output pin. Boot pin
(see Table 5).
O CTOUT_6 — SCTimer/PWM output 6. Match output 2 of timer
1.
I/O EMC_A7 — External memory address line 7.
I/O SGPIO9 — General purpose digital input/output pin.
- R — Function reserved.
I/O SSP0_MOSI — Master Out Slave in for SSP0.
- R — Function reserved.
- R — Function reserved.
P1_3 P5 M2 J1 44 [2] N;
PU
I/O GPIO0[10] — General purpose digital input/output pin.
O CTOUT_8 — SCTimer/PWM output 8. Match output 0 of timer
2.
I/O SGPIO10 — General purpose digital input/output pin.
O EMC_OE — LOW active Output Enable signal.
O USB0_IND1 — USB0 port indicator LED control
output 1.
I/O SSP1_MISO — Master In Slave Out for SSP1.
- R — Function reserved.
O SD_RST — SD/MMC reset signal for MMC4.4 card.
P1_4 T3 P2 J2 47 [2] N;
PU
I/O GPIO0[11] — General purpose digital input/output pin.
O CTOUT_9 — SCTimer/PWM output 9. Match output 3 of timer
3.
I/O SGPIO11 — General purpose digital input/output pin.
O EMC_BLS0 — LOW active Byte Lane select signal 0.
O USB0_IND0 — USB0 port indicator LED control output 0.
I/O SSP1_MOSI — Master Out Slave in for SSP1.
- R — Function reserved.
O SD_VOLT1 — SD/MMC bus voltage select output 1.
Table 3. Pin description …continued
LCD, Ethernet, USB0, and USB1 functions are not available on all parts. See Table 2.
Symbol
LBGA256
TFBGA180
TFBGA100
LQFP144
Reset state
[1]
Type
DescriptionLPC4350_30_20_10 All information provided in this document is subject to legal disclaimers. © NXP Semiconductors N.V. 2014. All rights reserved.
Product data sheet Rev. 4.2 — 18 August 2014 11 of 155
NXP Semiconductors LPC4350/30/20/10
32-bit ARM Cortex-M4/M0 microcontroller
P1_5 R5 N3 J4 48 [2] N;
PU
I/O GPIO1[8] — General purpose digital input/output pin.
O CTOUT_10 — SCTimer/PWM output 10. Match output 3 of
timer 3.
- R — Function reserved.
O EMC_CS0 — LOW active Chip Select 0 signal.
I USB0_PWR_FAULT — Port power fault signal indicating
overcurrent condition; this signal monitors over-current on the
USB bus (external circuitry required to detect over-current
condition).
I/O SSP1_SSEL — Slave Select for SSP1.
I/O SGPIO15 — General purpose digital input/output pin.
O SD_POW — SD/MMC power monitor output.
P1_6 T4 P3 K4 49 [2] N;
PU
I/O GPIO1[9] — General purpose digital input/output pin.
I CTIN_5 — SCTimer/PWM input 5. Capture input 2 of timer 2.
- R — Function reserved.
O EMC_WE — LOW active Write Enable signal.
- R — Function reserved.
- R — Function reserved.
I/O SGPIO14 — General purpose digital input/output pin.
I/O SD_CMD — SD/MMC command signal.
P1_7 T5 N4 G4 50 [2] N;
PU
I/O GPIO1[0] — General purpose digital input/output pin.
I U1_DSR — Data Set Ready input for UART1.
O CTOUT_13 — SCTimer/PWM output 13. Match output 3 of
timer 3.
I/O EMC_D0 — External memory data line 0.
O USB0_PPWR — VBUS drive signal (towards external charge
pump or power management unit); indicates that VBUS must
be driven (active HIGH).
Add a pull-down resistor to disable the power switch at reset.
This signal has opposite polarity compared to the USB_PPWR
used on other NXP LPC parts.
- R — Function reserved.
- R — Function reserved.
- R — Function reserved.
Table 3. Pin description …continued
LCD, Ethernet, USB0, and USB1 functions are not available on all parts. See Table 2.
Symbol
LBGA256
TFBGA180
TFBGA100
LQFP144
Reset state
[1]
Type
DescriptionLPC4350_30_20_10 All information provided in this document is subject to legal disclaimers. © NXP Semiconductors N.V. 2014. All rights reserved.
Product data sheet Rev. 4.2 — 18 August 2014 12 of 155
NXP Semiconductors LPC4350/30/20/10
32-bit ARM Cortex-M4/M0 microcontroller
P1_8 R7 M5 H5 51 [2] N;
PU
I/O GPIO1[1] — General purpose digital input/output pin.
O U1_DTR — Data Terminal Ready output for UART1.
O CTOUT_12 — SCTimer/PWM output 12. Match output 3 of
timer 3.
I/O EMC_D1 — External memory data line 1.
- R — Function reserved.
- R — Function reserved.
- R — Function reserved.
O SD_VOLT0 — SD/MMC bus voltage select output 0.
P1_9 T7 N5 J5 52 [2] N;
PU
I/O GPIO1[2] — General purpose digital input/output pin.
O U1_RTS — Request to Send output for UART1.
O CTOUT_11 — SCTimer/PWM output 11. Match output 3 of
timer 2.
I/O EMC_D2 — External memory data line 2.
- R — Function reserved.
- R — Function reserved.
- R — Function reserved.
I/O SD_DAT0 — SD/MMC data bus line 0.
P1_10 R8 N6 H6 53 [2] N;
PU
I/O GPIO1[3] — General purpose digital input/output pin.
I U1_RI — Ring Indicator input for UART1.
O CTOUT_14 — SCTimer/PWM output 14. Match output 2 of
timer 3.
I/O EMC_D3 — External memory data line 3.
- R — Function reserved.
- R — Function reserved.
- R — Function reserved.
I/O SD_DAT1 — SD/MMC data bus line 1.
P1_11 T9 P8 J7 55 [2] N;
PU
I/O GPIO1[4] — General purpose digital input/output pin.
I U1_CTS — Clear to Send input for UART1.
O CTOUT_15 — SCTimer/PWM output 15. Match output 3 of
timer 3.
I/O EMC_D4 — External memory data line 4.
- R — Function reserved.
- R — Function reserved.
- R — Function reserved.
I/O SD_DAT2 — SD/MMC data bus line 2.
Table 3. Pin description …continued
LCD, Ethernet, USB0, and USB1 functions are not available on all parts. See Table 2.
Symbol
LBGA256
TFBGA180
TFBGA100
LQFP144
Reset state
[1]
Type
DescriptionLPC4350_30_20_10 All information provided in this document is subject to legal disclaimers. © NXP Semiconductors N.V. 2014. All rights reserved.
Product data sheet Rev. 4.2 — 18 August 2014 13 of 155
NXP Semiconductors LPC4350/30/20/10
32-bit ARM Cortex-M4/M0 microcontroller
P1_12 R9 P7 K7 56 [2] N;
PU
I/O GPIO1[5] — General purpose digital input/output pin.
I U1_DCD — Data Carrier Detect input for UART1.
- R — Function reserved.
I/O EMC_D5 — External memory data line 5.
I T0_CAP1 — Capture input 1 of timer 0.
- R — Function reserved.
I/O SGPIO8 — General purpose digital input/output pin.
I/O SD_DAT3 — SD/MMC data bus line 3.
P1_13 R10 L8 H8 60 [2] N;
PU
I/O GPIO1[6] — General purpose digital input/output pin.
O U1_TXD — Transmitter output for UART1.
- R — Function reserved.
I/O EMC_D6 — External memory data line 6.
I T0_CAP0 — Capture input 0 of timer 0.
- R — Function reserved.
I/O SGPIO9 — General purpose digital input/output pin.
I SD_CD — SD/MMC card detect input.
P1_14 R11 K7 J8 61 [2] N;
PU
I/O GPIO1[7] — General purpose digital input/output pin.
I U1_RXD — Receiver input for UART1.
- R — Function reserved.
I/O EMC_D7 — External memory data line 7.
O T0_MAT2 — Match output 2 of timer 0.
- R — Function reserved.
I/O SGPIO10 — General purpose digital input/output pin.
- R — Function reserved.
P1_15 T12 P11 K8 62 [2] N;
PU
I/O GPIO0[2] — General purpose digital input/output pin.
O U2_TXD — Transmitter output for USART2.
I/O SGPIO2 — General purpose digital input/output pin.
I ENET_RXD0 — Ethernet receive data 0 (RMII/MII interface).
O T0_MAT1 — Match output 1 of timer 0.
- R — Function reserved.
- R — Function reserved.
- R — Function reserved.
Table 3. Pin description …continued
LCD, Ethernet, USB0, and USB1 functions are not available on all parts. See Table 2.
Symbol
LBGA256
TFBGA180
TFBGA100
LQFP144
Reset state
[1]
Type
DescriptionLPC4350_30_20_10 All information provided in this document is subject to legal disclaimers. © NXP Semiconductors N.V. 2014. All rights reserved.
Product data sheet Rev. 4.2 — 18 August 2014 14 of 155
NXP Semiconductors LPC4350/30/20/10
32-bit ARM Cortex-M4/M0 microcontroller
P1_16 M7 L5 H9 64 [2] N;
PU
I/O GPIO0[3] — General purpose digital input/output pin.
I U2_RXD — Receiver input for USART2.
I/O SGPIO3 — General purpose digital input/output pin.
I ENET_CRS — Ethernet Carrier Sense (MII interface).
O T0_MAT0 — Match output 0 of timer 0.
- R — Function reserved.
- R — Function reserved.
I ENET_RX_DV — Ethernet Receive Data Valid (RMII/MII
interface).
P1_17 M8 L6 H10 66 [3] N;
PU
I/O GPIO0[12] — General purpose digital input/output pin.
I/O U2_UCLK — Serial clock input/output for USART2 in
synchronous mode.
- R — Function reserved.
I/O ENET_MDIO — Ethernet MIIM data input and output.
I T0_CAP3 — Capture input 3 of timer 0.
O CAN1_TD — CAN1 transmitter output.
I/O SGPIO11 — General purpose digital input/output pin.
- R — Function reserved.
P1_18 N12 N10 J10 67 [2] N;
PU
I/O GPIO0[13] — General purpose digital input/output pin.
I/O U2_DIR — RS-485/EIA-485 output enable/direction control for
USART2.
- R — Function reserved.
O ENET_TXD0 — Ethernet transmit data 0 (RMII/MII interface).
O T0_MAT3 — Match output 3 of timer 0.
I CAN1_RD — CAN1 receiver input.
I/O SGPIO12 — General purpose digital input/output pin.
- R — Function reserved.
P1_19 M11 N9 K9 68 [2] N;
PU
I ENET_TX_CLK (ENET_REF_CLK) — Ethernet Transmit
Clock (MII interface) or Ethernet Reference Clock (RMII
interface).
I/O SSP1_SCK — Serial clock for SSP1.
- R — Function reserved.
- R — Function reserved.
O CLKOUT — Clock output pin.
- R — Function reserved.
O I2S0_RX_MCLK — I2S receive master clock.
I/O I2S1_TX_SCK — Transmit Clock. It is driven by the master
and received by the slave. Corresponds to the signal SCK in
the I2S-bus specification.
Table 3. Pin description …continued
LCD, Ethernet, USB0, and USB1 functions are not available on all parts. See Table 2.
Symbol
LBGA256
TFBGA180
TFBGA100
LQFP144
Reset state
[1]
Type
DescriptionLPC4350_30_20_10 All information provided in this document is subject to legal disclaimers. © NXP Semiconductors N.V. 2014. All rights reserved.
Product data sheet Rev. 4.2 — 18 August 2014 15 of 155
NXP Semiconductors LPC4350/30/20/10
32-bit ARM Cortex-M4/M0 microcontroller
P1_20 M10 J10 K10 70 [2] N;
PU
I/O GPIO0[15] — General purpose digital input/output pin.
I/O SSP1_SSEL — Slave Select for SSP1.
- R — Function reserved.
O ENET_TXD1 — Ethernet transmit data 1 (RMII/MII interface).
I T0_CAP2 — Capture input 2 of timer 0.
- R — Function reserved.
I/O SGPIO13 — General purpose digital input/output pin.
- R — Function reserved.
P2_0 T16 N14 G10 75 [2] N;
PU
I/O SGPIO4 — General purpose digital input/output pin.
O U0_TXD — Transmitter output for USART0.
I/O EMC_A13 — External memory address line 13.
O USB0_PPWR — VBUS drive signal (towards external charge
pump or power management unit); indicates that VBUS must
be driven (active HIGH).
Add a pull-down resistor to disable the power switch at reset.
This signal has opposite polarity compared to the USB_PPWR
used on other NXP LPC parts.
I/O GPIO5[0] — General purpose digital input/output pin.
- R — Function reserved.
I T3_CAP0 — Capture input 0 of timer 3.
O ENET_MDC — Ethernet MIIM clock.
P2_1 N15 M13 G7 81 [2] N;
PU
I/O SGPIO5 — General purpose digital input/output pin.
I U0_RXD — Receiver input for USART0.
I/O EMC_A12 — External memory address line 12.
I USB0_PWR_FAULT — Port power fault signal indicating
overcurrent condition; this signal monitors over-current on the
USB bus (external circuitry required to detect over-current
condition).
I/O GPIO5[1] — General purpose digital input/output pin.
- R — Function reserved.
I T3_CAP1 — Capture input 1 of timer 3.
- R — Function reserved.
Table 3. Pin description …continued
LCD, Ethernet, USB0, and USB1 functions are not available on all parts. See Table 2.
Symbol
LBGA256
TFBGA180
TFBGA100
LQFP144
Reset state
[1]
Type
DescriptionLPC4350_30_20_10 All information provided in this document is subject to legal disclaimers. © NXP Semiconductors N.V. 2014. All rights reserved.
Product data sheet Rev. 4.2 — 18 August 2014 16 of 155
NXP Semiconductors LPC4350/30/20/10
32-bit ARM Cortex-M4/M0 microcontroller
P2_2 M15 L13 F5 84 [2] N;
PU
I/O SGPIO6 — General purpose digital input/output pin.
I/O U0_UCLK — Serial clock input/output for USART0 in
synchronous mode.
I/O EMC_A11 — External memory address line 11.
O USB0_IND1 — USB0 port indicator LED control output 1.
I/O GPIO5[2] — General purpose digital input/output pin.
I CTIN_6 — SCTimer/PWM input 6. Capture input 1 of timer 3.
I T3_CAP2 — Capture input 2 of timer 3.
- R — Function reserved.
P2_3 J12 G11 D8 87 [3] N;
PU
I/O SGPIO12 — General purpose digital input/output pin.
I/O I2C1_SDA — I
2C1 data input/output (this pin does not use a
specialized I2C pad).
O U3_TXD — Transmitter output for USART3.
I CTIN_1 — SCTimer/PWM input 1. Capture input 1 of timer 0.
Capture input 1 of timer 2.
I/O GPIO5[3] — General purpose digital input/output pin.
- R — Function reserved.
O T3_MAT0 — Match output 0 of timer 3.
O USB0_PPWR — VBUS drive signal (towards external charge
pump or power management unit); indicates that VBUS must
be driven (active HIGH).
Add a pull-down resistor to disable the power switch at reset.
This signal has opposite polarity compared to the USB_PPWR
used on other NXP LPC parts.
P2_4 K11 L9 D9 88 [3] N;
PU
I/O SGPIO13 — General purpose digital input/output pin.
I/O I2C1_SCL — I
2C1 clock input/output (this pin does not use a
specialized I2C pad).
I U3_RXD — Receiver input for USART3.
I CTIN_0 — SCTimer/PWM input 0. Capture input 0 of timer 0,
1, 2, 3.
I/O GPIO5[4] — General purpose digital input/output pin.
- R — Function reserved.
O T3_MAT1 — Match output 1 of timer 3.
I USB0_PWR_FAULT — Port power fault signal indicating
overcurrent condition; this signal monitors over-current on the
USB bus (external circuitry required to detect over-current
condition).
Table 3. Pin description …continued
LCD, Ethernet, USB0, and USB1 functions are not available on all parts. See Table 2.
Symbol
LBGA256
TFBGA180
TFBGA100
LQFP144
Reset state
[1]
Type
DescriptionLPC4350_30_20_10 All information provided in this document is subject to legal disclaimers. © NXP Semiconductors N.V. 2014. All rights reserved.
Product data sheet Rev. 4.2 — 18 August 2014 17 of 155
NXP Semiconductors LPC4350/30/20/10
32-bit ARM Cortex-M4/M0 microcontroller
P2_5 K14 J12 D10 91 [3] N;
PU
I/O SGPIO14 — General purpose digital input/output pin.
I CTIN_2 — SCTimer/PWM input 2. Capture input 2 of timer 0.
I USB1_VBUS — Monitors the presence of USB1 bus power.
Note: This signal must be HIGH for USB reset to occur.
I ADCTRIG1 — ADC trigger input 1.
I/O GPIO5[5] — General purpose digital input/output pin.
- R — Function reserved.
O T3_MAT2 — Match output 2 of timer 3.
O USB0_IND0 — USB0 port indicator LED control output 0.
P2_6 K16 J14 G9 95 [2] N;
PU
I/O SGPIO7 — General purpose digital input/output pin.
I/O U0_DIR — RS-485/EIA-485 output enable/direction control for
USART0.
I/O EMC_A10 — External memory address line 10.
O USB0_IND0 — USB0 port indicator LED control
output 0.
I/O GPIO5[6] — General purpose digital input/output pin.
I CTIN_7 — SCTimer/PWM input 7.
I T3_CAP3 — Capture input 3 of timer 3.
- R — Function reserved.
P2_7 H14 G12 C10 96 [2] N;
PU
I/O GPIO0[7] — General purpose digital input/output pin. If this pin
is pulled LOW at reset, the part enters ISP mode using
USART0.
O CTOUT_1 — SCTimer/PWM output 1. Match output 3 of timer
3.
I/O U3_UCLK — Serial clock input/output for USART3 in
synchronous mode.
I/O EMC_A9 — External memory address line 9.
- R — Function reserved.
- R — Function reserved.
O T3_MAT3 — Match output 3 of timer 3.
- R — Function reserved.
Table 3. Pin description …continued
LCD, Ethernet, USB0, and USB1 functions are not available on all parts. See Table 2.
Symbol
LBGA256
TFBGA180
TFBGA100
LQFP144
Reset state
[1]
Type
DescriptionLPC4350_30_20_10 All information provided in this document is subject to legal disclaimers. © NXP Semiconductors N.V. 2014. All rights reserved.
Product data sheet Rev. 4.2 — 18 August 2014 18 of 155
NXP Semiconductors LPC4350/30/20/10
32-bit ARM Cortex-M4/M0 microcontroller
P2_8 J16 H14 C6 98 [2] N;
PU
I/O SGPIO15 — General purpose digital input/output pin. Boot pin
(see Table 5).
O CTOUT_0 — SCTimer/PWM output 0. Match output 0 of timer
0.
I/O U3_DIR — RS-485/EIA-485 output enable/direction control for
USART3.
I/O EMC_A8 — External memory address line 8.
I/O GPIO5[7] — General purpose digital input/output pin.
- R — Function reserved.
- R — Function reserved.
- R — Function reserved.
P2_9 H16 G14 B10 102 [2] N;
PU
I/O GPIO1[10] — General purpose digital input/output pin. Boot
pin (see Table 5.
O CTOUT_3 — SCTimer/PWM output 3. Match output 3 of timer
0.
I/O U3_BAUD — Baud pin for USART3.
I/O EMC_A0 — External memory address line 0.
- R — Function reserved.
- R — Function reserved.
- R — Function reserved.
- R — Function reserved.
P2_10 G16 F14 E8 104 [2] N;
PU
I/O GPIO0[14] — General purpose digital input/output pin.
O CTOUT_2 — SCTimer/PWM output 2. Match output 2 of timer
0.
O U2_TXD — Transmitter output for USART2.
I/O EMC_A1 — External memory address line 1.
- R — Function reserved.
- R — Function reserved.
- R — Function reserved.
- R — Function reserved.
P2_11 F16 E13 A9 105 [2] N;
PU
I/O GPIO1[11] — General purpose digital input/output pin.
O CTOUT_5 — SCTimer/PWM output 5. Match output 3 of timer
3.
I U2_RXD — Receiver input for USART2.
I/O EMC_A2 — External memory address line 2.
- R — Function reserved.
- R — Function reserved.
- R — Function reserved.
- R — Function reserved.
Table 3. Pin description …continued
LCD, Ethernet, USB0, and USB1 functions are not available on all parts. See Table 2.
Symbol
LBGA256
TFBGA180
TFBGA100
LQFP144
Reset state
[1]
Type
DescriptionLPC4350_30_20_10 All information provided in this document is subject to legal disclaimers. © NXP Semiconductors N.V. 2014. All rights reserved.
Product data sheet Rev. 4.2 — 18 August 2014 19 of 155
NXP Semiconductors LPC4350/30/20/10
32-bit ARM Cortex-M4/M0 microcontroller
P2_12 E15 D13 B9 106 [2] N;
PU
I/O GPIO1[12] — General purpose digital input/output pin.
O CTOUT_4 — SCTimer/PWM output 4. Match output 3 of timer
3.
- R — Function reserved.
I/O EMC_A3 — External memory address line 3.
- R — Function reserved.
- R — Function reserved.
- R — Function reserved.
I/O U2_UCLK — Serial clock input/output for USART2 in
synchronous mode.
P2_13 C16 E14 A10 108 [2] N;
PU
I/O GPIO1[13] — General purpose digital input/output pin.
I CTIN_4 — SCTimer/PWM input 4. Capture input 2 of timer 1.
- R — Function reserved.
I/O EMC_A4 — External memory address line 4.
- R — Function reserved.
- R — Function reserved.
- R — Function reserved.
I/O U2_DIR — RS-485/EIA-485 output enable/direction control for
USART2.
P3_0 F13 D12 A8 112 [2] N;
PU
I/O I2S0_RX_SCK — I2S receive clock. It is driven by the master
and received by the slave. Corresponds to the signal SCK in
the I
2S-bus specification.
O I2S0_RX_MCLK — I2S receive master clock.
I/O I2S0_TX_SCK — Transmit Clock. It is driven by the master
and received by the slave. Corresponds to the signal SCK in
the I2S-bus specification.
O I2S0_TX_MCLK — I2S transmit master clock.
I/O SSP0_SCK — Serial clock for SSP0.
- R — Function reserved.
- R — Function reserved.
- R — Function reserved.
Table 3. Pin description …continued
LCD, Ethernet, USB0, and USB1 functions are not available on all parts. See Table 2.
Symbol
LBGA256
TFBGA180
TFBGA100
LQFP144
Reset state
[1]
Type
DescriptionLPC4350_30_20_10 All information provided in this document is subject to legal disclaimers. © NXP Semiconductors N.V. 2014. All rights reserved.
Product data sheet Rev. 4.2 — 18 August 2014 20 of 155
NXP Semiconductors LPC4350/30/20/10
32-bit ARM Cortex-M4/M0 microcontroller
P3_1 G11 D10 F7 114 [2] N;
PU
I/O I2S0_TX_WS — Transmit Word Select. It is driven by the
master and received by the slave. Corresponds to the signal
WS in the I
2S-bus specification.
I/O I2S0_RX_WS — Receive Word Select. It is driven by the
master and received by the slave. Corresponds to the signal
WS in the I
2S-bus specification.
I CAN0_RD — CAN receiver input.
O USB1_IND1 — USB1 Port indicator LED control output 1.
I/O GPIO5[8] — General purpose digital input/output pin.
- R — Function reserved.
O LCD_VD15 — LCD data.
- R — Function reserved.
P3_2 F11 D9 G6 116 [2] OL;
PU
I/O I2S0_TX_SDA — I2S transmit data. It is driven by the
transmitter and read by the receiver. Corresponds to the signal
SD in the I
2S-bus specification.
I/O I2S0_RX_SDA — I2S Receive data. It is driven by the
transmitter and read by the receiver. Corresponds to the signal
SD in the I
2S-bus specification.
O CAN0_TD — CAN transmitter output.
O USB1_IND0 — USB1 Port indicator LED control output 0.
I/O GPIO5[9] — General purpose digital input/output pin.
- R — Function reserved.
O LCD_VD14 — LCD data.
- R — Function reserved.
P3_3 B14 B13 A7 118 [4] N;
PU
- R — Function reserved.
I/O SPI_SCK — Serial clock for SPI.
I/O SSP0_SCK — Serial clock for SSP0.
O SPIFI_SCK — Serial clock for SPIFI.
O CGU_OUT1 — CGU spare clock output 1.
- R — Function reserved.
O I2S0_TX_MCLK — I2S transmit master clock.
I/O I2S1_TX_SCK — Transmit Clock. It is driven by the master
and received by the slave. Corresponds to the signal SCK in
the I2S-bus specification.
Table 3. Pin description …continued
LCD, Ethernet, USB0, and USB1 functions are not available on all parts. See Table 2.
Symbol
LBGA256
TFBGA180
TFBGA100
LQFP144
Reset state
[1]
Type
DescriptionLPC4350_30_20_10 All information provided in this document is subject to legal disclaimers. © NXP Semiconductors N.V. 2014. All rights reserved.
Product data sheet Rev. 4.2 — 18 August 2014 21 of 155
NXP Semiconductors LPC4350/30/20/10
32-bit ARM Cortex-M4/M0 microcontroller
P3_4 A15 C14 B8 119 [2] N;
PU
I/O GPIO1[14] — General purpose digital input/output pin.
- R — Function reserved.
- R — Function reserved.
I/O SPIFI_SIO3 — I/O lane 3 for SPIFI.
O U1_TXD — Transmitter output for UART 1.
I/O I2S0_TX_WS — Transmit Word Select. It is driven by the
master and received by the slave. Corresponds to the signal
WS in the I
2S-bus specification.
I/O I2S1_RX_SDA — I2S1 Receive data. It is driven by the
transmitter and read by the receiver. Corresponds to the signal
SD in the I
2S-bus specification.
O LCD_VD13 — LCD data.
P3_5 C12 C11 B7 121 [2] N;
PU
I/O GPIO1[15] — General purpose digital input/output pin.
- R — Function reserved.
- R — Function reserved.
I/O SPIFI_SIO2 — I/O lane 2 for SPIFI.
I U1_RXD — Receiver input for UART 1.
I/O I2S0_TX_SDA — I2S transmit data. It is driven by the
transmitter and read by the receiver. Corresponds to the signal
SD in the I
2S-bus specification.
I/O I2S1_RX_WS — Receive Word Select. It is driven by the
master and received by the slave. Corresponds to the signal
WS in the I
2S-bus specification.
O LCD_VD12 — LCD data.
P3_6 B13 B12 C7 122 [2] N;
PU
I/O GPIO0[6] — General purpose digital input/output pin.
I/O SPI_MISO — Master In Slave Out for SPI.
I/O SSP0_SSEL — Slave Select for SSP0.
I/O SPIFI_MISO — Input 1 in SPIFI quad mode; SPIFI output IO1.
- R — Function reserved.
I/O SSP0_MISO — Master In Slave Out for SSP0.
- R — Function reserved.
- R — Function reserved.
P3_7 C11 C10 D7 123 [2] N;
PU
- R — Function reserved.
I/O SPI_MOSI — Master Out Slave In for SPI.
I/O SSP0_MISO — Master In Slave Out for SSP0.
I/O SPIFI_MOSI — Input I0 in SPIFI quad mode; SPIFI output IO0.
I/O GPIO5[10] — General purpose digital input/output pin.
I/O SSP0_MOSI — Master Out Slave in for SSP0.
- R — Function reserved.
- R — Function reserved.
Table 3. Pin description …continued
LCD, Ethernet, USB0, and USB1 functions are not available on all parts. See Table 2.
Symbol
LBGA256
TFBGA180
TFBGA100
LQFP144
Reset state
[1]
Type
DescriptionLPC4350_30_20_10 All information provided in this document is subject to legal disclaimers. © NXP Semiconductors N.V. 2014. All rights reserved.
Product data sheet Rev. 4.2 — 18 August 2014 22 of 155
NXP Semiconductors LPC4350/30/20/10
32-bit ARM Cortex-M4/M0 microcontroller
P3_8 C10 C9 E7 124 [2] N;
PU
- R — Function reserved.
I SPI_SSEL — Slave Select for SPI. Note that this pin in an
input pin only. The SPI in master mode cannot drive the CS
input on the slave. Any GPIO pin can be used for SPI chip
select in master mode.
I/O SSP0_MOSI — Master Out Slave in for SSP0.
I/O SPIFI_CS — SPIFI serial flash chip select.
I/O GPIO5[11] — General purpose digital input/output pin.
I/O SSP0_SSEL — Slave Select for SSP0.
- R — Function reserved.
- R — Function reserved.
P4_0 D5 D4 - 1 [2] N;
PU
I/O GPIO2[0] — General purpose digital input/output pin.
O MCOA0 — Motor control PWM channel 0, output A.
I NMI — External interrupt input to NMI.
- R — Function reserved.
- R — Function reserved.
O LCD_VD13 — LCD data.
I/O U3_UCLK — Serial clock input/output for USART3 in
synchronous mode.
- R — Function reserved.
P4_1 A1 D3 - 3 [5] N;
PU
I/O GPIO2[1] — General purpose digital input/output pin.
O CTOUT_1 — SCTimer/PWM output 1. Match output 3 of timer
3.
O LCD_VD0 — LCD data.
- R — Function reserved.
- R — Function reserved.
O LCD_VD19 — LCD data.
O U3_TXD — Transmitter output for USART3.
I ENET_COL — Ethernet Collision detect (MII interface).
AI ADC0_1 — ADC0 and ADC1, input channel 1. Configure the
pin as GPIO input and use the ADC function select register in
the SCU to select the ADC.
Table 3. Pin description …continued
LCD, Ethernet, USB0, and USB1 functions are not available on all parts. See Table 2.
Symbol
LBGA256
TFBGA180
TFBGA100
LQFP144
Reset state
[1]
Type
DescriptionLPC4350_30_20_10 All information provided in this document is subject to legal disclaimers. © NXP Semiconductors N.V. 2014. All rights reserved.
Product data sheet Rev. 4.2 — 18 August 2014 23 of 155
NXP Semiconductors LPC4350/30/20/10
32-bit ARM Cortex-M4/M0 microcontroller
P4_2 D3 A2 - 8 [2] N;
PU
I/O GPIO2[2] — General purpose digital input/output pin.
O CTOUT_0 — SCTimer/PWM output 0. Match output 0 of timer
0.
O LCD_VD3 — LCD data.
- R — Function reserved.
- R — Function reserved.
O LCD_VD12 — LCD data.
I U3_RXD — Receiver input for USART3.
I/O SGPIO8 — General purpose digital input/output pin.
P4_3 C2 B2 - 7 [5] N;
PU
I/O GPIO2[3] — General purpose digital input/output pin.
O CTOUT_3 — SCTimer/PWM output 3. Match output 3 of timer
0.
O LCD_VD2 — LCD data.
- R — Function reserved.
- R — Function reserved.
O LCD_VD21 — LCD data.
I/O U3_BAUD — Baud pin for USART3.
I/O SGPIO9 — General purpose digital input/output pin.
AI ADC0_0 — DAC output; ADC0 and ADC1, input channel 0.
Configure the pin as GPIO input and use the ADC function
select register in the SCU to select the ADC.
P4_4 B1 A1 - 9 [5] N;
PU
I/O GPIO2[4] — General purpose digital input/output pin.
O CTOUT_2 — SCTimer/PWM output 2. Match output 2 of timer
0.
O LCD_VD1 — LCD data.
- R — Function reserved.
- R — Function reserved.
O LCD_VD20 — LCD data.
I/O U3_DIR — RS-485/EIA-485 output enable/direction control for
USART3.
I/O SGPIO10 — General purpose digital input/output pin.
O DAC — DAC output. Shared between 10-bit ADC0/1 and
DAC.. Configure the pin as GPIO input and use the analog
function select register in the SCU to select the DAC.
Table 3. Pin description …continued
LCD, Ethernet, USB0, and USB1 functions are not available on all parts. See Table 2.
Symbol
LBGA256
TFBGA180
TFBGA100
LQFP144
Reset state
[1]
Type
DescriptionLPC4350_30_20_10 All information provided in this document is subject to legal disclaimers. © NXP Semiconductors N.V. 2014. All rights reserved.
Product data sheet Rev. 4.2 — 18 August 2014 24 of 155
NXP Semiconductors LPC4350/30/20/10
32-bit ARM Cortex-M4/M0 microcontroller
P4_5 D2 C2 - 10 [2] N;
PU
I/O GPIO2[5] — General purpose digital input/output pin.
O CTOUT_5 — SCTimer/PWM output 5. Match output 3 of timer
3.
O LCD_FP — Frame pulse (STN). Vertical synchronization pulse
(TFT).
- R — Function reserved.
- R — Function reserved.
- R — Function reserved.
- R — Function reserved.
I/O SGPIO11 — General purpose digital input/output pin.
P4_6 C1 B1 - 11 [2] N;
PU
I/O GPIO2[6] — General purpose digital input/output pin.
O CTOUT_4 — SCTimer/PWM output 4. Match output 3 of timer
3.
O LCD_ENAB/LCDM — STN AC bias drive or TFT data enable
input.
- R — Function reserved.
- R — Function reserved.
- R — Function reserved.
- R — Function reserved.
I/O SGPIO12 — General purpose digital input/output pin.
P4_7 H4 F4 - 14 [2] O;
PU
O LCD_DCLK — LCD panel clock.
I GP_CLKIN — General-purpose clock input to the CGU.
- R — Function reserved.
- R — Function reserved.
- R — Function reserved.
- R — Function reserved.
I/O I2S1_TX_SCK — Transmit Clock. It is driven by the master
and received by the slave. Corresponds to the signal SCK in
the I2S-bus specification.
I/O I2S0_TX_SCK — Transmit Clock. It is driven by the master
and received by the slave. Corresponds to the signal SCK in
the I2S-bus specification.
P4_8 E2 D2 - 15 [2] N;
PU
- R — Function reserved.
I CTIN_5 — SCTimer/PWM input 5. Capture input 2 of timer 2.
O LCD_VD9 — LCD data.
- R — Function reserved.
I/O GPIO5[12] — General purpose digital input/output pin.
O LCD_VD22 — LCD data.
O CAN1_TD — CAN1 transmitter output.
I/O SGPIO13 — General purpose digital input/output pin.
Table 3. Pin description …continued
LCD, Ethernet, USB0, and USB1 functions are not available on all parts. See Table 2.
Symbol
LBGA256
TFBGA180
TFBGA100
LQFP144
Reset state
[1]
Type
DescriptionLPC4350_30_20_10 All information provided in this document is subject to legal disclaimers. © NXP Semiconductors N.V. 2014. All rights reserved.
Product data sheet Rev. 4.2 — 18 August 2014 25 of 155
NXP Semiconductors LPC4350/30/20/10
32-bit ARM Cortex-M4/M0 microcontroller
P4_9 L2 J2 - 33 [2] N;
PU
- R — Function reserved.
I CTIN_6 — SCTimer/PWM input 6. Capture input 1 of timer 3.
O LCD_VD11 — LCD data.
- R — Function reserved.
I/O GPIO5[13] — General purpose digital input/output pin.
O LCD_VD15 — LCD data.
I CAN1_RD — CAN1 receiver input.
I/O SGPIO14 — General purpose digital input/output pin.
P4_10 M3 L3 - 35 [2] N;
PU
- R — Function reserved.
I CTIN_2 — SCTimer/PWM input 2. Capture input 2 of timer 0.
O LCD_VD10 — LCD data.
- R — Function reserved.
I/O GPIO5[14] — General purpose digital input/output pin.
O LCD_VD14 — LCD data.
- R — Function reserved.
I/O SGPIO15 — General purpose digital input/output pin.
P5_0 N3 L2 - 37 [2] N;
PU
I/O GPIO2[9] — General purpose digital input/output pin.
O MCOB2 — Motor control PWM channel 2, output B.
I/O EMC_D12 — External memory data line 12.
- R — Function reserved.
I U1_DSR — Data Set Ready input for UART 1.
I T1_CAP0 — Capture input 0 of timer 1.
- R — Function reserved.
- R — Function reserved.
P5_1 P3 M1 - 39 [2] N;
PU
I/O GPIO2[10] — General purpose digital input/output pin.
I MCI2 — Motor control PWM channel 2, input.
I/O EMC_D13 — External memory data line 13.
- R — Function reserved.
O U1_DTR — Data Terminal Ready output for UART 1. Can also
be configured to be an RS-485/EIA-485 output enable signal
for UART 1.
I T1_CAP1 — Capture input 1 of timer 1.
- R — Function reserved.
- R — Function reserved.
Table 3. Pin description …continued
LCD, Ethernet, USB0, and USB1 functions are not available on all parts. See Table 2.
Symbol
LBGA256
TFBGA180
TFBGA100
LQFP144
Reset state
[1]
Type
DescriptionLPC4350_30_20_10 All information provided in this document is subject to legal disclaimers. © NXP Semiconductors N.V. 2014. All rights reserved.
Product data sheet Rev. 4.2 — 18 August 2014 26 of 155
NXP Semiconductors LPC4350/30/20/10
32-bit ARM Cortex-M4/M0 microcontroller
P5_2 R4 M3 - 46 [2] N;
PU
I/O GPIO2[11] — General purpose digital input/output pin.
I MCI1 — Motor control PWM channel 1, input.
I/O EMC_D14 — External memory data line 14.
- R — Function reserved.
O U1_RTS — Request to Send output for UART 1. Can also be
configured to be an RS-485/EIA-485 output enable signal for
UART 1.
I T1_CAP2 — Capture input 2 of timer 1.
- R — Function reserved.
- R — Function reserved.
P5_3 T8 P6 - 54 [2] N;
PU
I/O GPIO2[12] — General purpose digital input/output pin.
I MCI0 — Motor control PWM channel 0, input.
I/O EMC_D15 — External memory data line 15.
- R — Function reserved.
I U1_RI — Ring Indicator input for UART 1.
I T1_CAP3 — Capture input 3 of timer 1.
- R — Function reserved.
- R — Function reserved.
P5_4 P9 N7 - 57 [2] N;
PU
I/O GPIO2[13] — General purpose digital input/output pin.
O MCOB0 — Motor control PWM channel 0, output B.
I/O EMC_D8 — External memory data line 8.
- R — Function reserved.
I U1_CTS — Clear to Send input for UART 1.
O T1_MAT0 — Match output 0 of timer 1.
- R — Function reserved.
- R — Function reserved.
P5_5 P10 N8 - 58 [2] N;
PU
I/O GPIO2[14] — General purpose digital input/output pin.
O MCOA1 — Motor control PWM channel 1, output A.
I/O EMC_D9 — External memory data line 9.
- R — Function reserved.
I U1_DCD — Data Carrier Detect input for UART 1.
O T1_MAT1 — Match output 1 of timer 1.
- R — Function reserved.
- R — Function reserved.
Table 3. Pin description …continued
LCD, Ethernet, USB0, and USB1 functions are not available on all parts. See Table 2.
Symbol
LBGA256
TFBGA180
TFBGA100
LQFP144
Reset state
[1]
Type
DescriptionLPC4350_30_20_10 All information provided in this document is subject to legal disclaimers. © NXP Semiconductors N.V. 2014. All rights reserved.
Product data sheet Rev. 4.2 — 18 August 2014 27 of 155
NXP Semiconductors LPC4350/30/20/10
32-bit ARM Cortex-M4/M0 microcontroller
P5_6 T13 M11 - 63 [2] N;
PU
I/O GPIO2[15] — General purpose digital input/output pin.
O MCOB1 — Motor control PWM channel 1, output B.
I/O EMC_D10 — External memory data line 10.
- R — Function reserved.
O U1_TXD — Transmitter output for UART 1.
O T1_MAT2 — Match output 2 of timer 1.
- R — Function reserved.
- R — Function reserved.
P5_7 R12 N11 - 65 [2] N;
PU
I/O GPIO2[7] — General purpose digital input/output pin.
O MCOA2 — Motor control PWM channel 2, output A.
I/O EMC_D11 — External memory data line 11.
- R — Function reserved.
I U1_RXD — Receiver input for UART 1.
O T1_MAT3 — Match output 3 of timer 1.
- R — Function reserved.
- R — Function reserved.
P6_0 M12 M10 H7 73 [2] N;
PU
- R — Function reserved.
O I2S0_RX_MCLK — I2S receive master clock.
- R — Function reserved.
- R — Function reserved.
I/O I2S0_RX_SCK — Receive Clock. It is driven by the master and
received by the slave. Corresponds to the signal SCK in the
I
2S-bus specification.
- R — Function reserved.
- R — Function reserved.
- R — Function reserved.
P6_1 R15 P14 G5 74 [2] N;
PU
I/O GPIO3[0] — General purpose digital input/output pin.
O EMC_DYCS1 — SDRAM chip select 1.
I/O U0_UCLK — Serial clock input/output for USART0 in
synchronous mode.
I/O I2S0_RX_WS — Receive Word Select. It is driven by the
master and received by the slave. Corresponds to the signal
WS in the I
2S-bus specification.
- R — Function reserved.
I T2_CAP0 — Capture input 2 of timer 2.
- R — Function reserved.
- R — Function reserved.
Table 3. Pin description …continued
LCD, Ethernet, USB0, and USB1 functions are not available on all parts. See Table 2.
Symbol
LBGA256
TFBGA180
TFBGA100
LQFP144
Reset state
[1]
Type
DescriptionLPC4350_30_20_10 All information provided in this document is subject to legal disclaimers. © NXP Semiconductors N.V. 2014. All rights reserved.
Product data sheet Rev. 4.2 — 18 August 2014 28 of 155
NXP Semiconductors LPC4350/30/20/10
32-bit ARM Cortex-M4/M0 microcontroller
P6_2 L13 K11 J9 78 [2] N;
PU
I/O GPIO3[1] — General purpose digital input/output pin.
O EMC_CKEOUT1 — SDRAM clock enable 1.
I/O U0_DIR — RS-485/EIA-485 output enable/direction control for
USART0.
I/O I2S0_RX_SDA — I2S Receive data. It is driven by the
transmitter and read by the receiver. Corresponds to the signal
SD in the I
2S-bus specification.
- R — Function reserved.
I T2_CAP1 — Capture input 1 of timer 2.
- R — Function reserved.
- R — Function reserved.
P6_3 P15 N13 - 79 [2] N;
PU
I/O GPIO3[2] — General purpose digital input/output pin.
O USB0_PPWR — VBUS drive signal (towards external charge
pump or power management unit); indicates that the VBUS
signal must be driven (active HIGH).
Add a pull-down resistor to disable the power switch at reset.
This signal has opposite polarity compared to the USB_PPWR
used on other NXP LPC parts.
I/O SGPIO4 — General purpose digital input/output pin.
O EMC_CS1 — LOW active Chip Select 1 signal.
- R — Function reserved.
I T2_CAP2 — Capture input 2 of timer 2.
- R — Function reserved.
- R — Function reserved.
P6_4 R16 M14 F6 80 [2] N;
PU
I/O GPIO3[3] — General purpose digital input/output pin.
I CTIN_6 — SCTimer/PWM input 6. Capture input 1 of timer 3.
O U0_TXD — Transmitter output for USART0.
O EMC_CAS — LOW active SDRAM Column Address Strobe.
- R — Function reserved.
- R — Function reserved.
- R — Function reserved.
- R — Function reserved.
Table 3. Pin description …continued
LCD, Ethernet, USB0, and USB1 functions are not available on all parts. See Table 2.
Symbol
LBGA256
TFBGA180
TFBGA100
LQFP144
Reset state
[1]
Type
DescriptionLPC4350_30_20_10 All information provided in this document is subject to legal disclaimers. © NXP Semiconductors N.V. 2014. All rights reserved.
Product data sheet Rev. 4.2 — 18 August 2014 29 of 155
NXP Semiconductors LPC4350/30/20/10
32-bit ARM Cortex-M4/M0 microcontroller
P6_5 P16 L14 F9 82 [2] N;
PU
I/O GPIO3[4] — General purpose digital input/output pin.
O CTOUT_6 — SCTimer/PWM output 6. Match output 2 of timer
1.
I U0_RXD — Receiver input for USART0.
O EMC_RAS — LOW active SDRAM Row Address Strobe.
- R — Function reserved.
- R — Function reserved.
- R — Function reserved.
- R — Function reserved.
P6_6 L14 K12 - 83 [2] N;
PU
I/O GPIO0[5] — General purpose digital input/output pin.
O EMC_BLS1 — LOW active Byte Lane select signal 1.
I/O SGPIO5 — General purpose digital input/output pin.
I USB0_PWR_FAULT — Port power fault signal indicating
overcurrent condition; this signal monitors over-current on the
USB bus (external circuitry required to detect over-current
condition).
- R — Function reserved.
I T2_CAP3 — Capture input 3 of timer 2.
- R — Function reserved.
- R — Function reserved.
P6_7 J13 H11 - 85 [2] N;
PU
- R — Function reserved.
I/O EMC_A15 — External memory address line 15.
I/O SGPIO6 — General purpose digital input/output pin.
O USB0_IND1 — USB0 port indicator LED control output 1.
I/O GPIO5[15] — General purpose digital input/output pin.
O T2_MAT0 — Match output 0 of timer 2.
- R — Function reserved.
- R — Function reserved.
P6_8 H13 F12 - 86 [2] N;
PU
- R — Function reserved.
I/O EMC_A14 — External memory address line 14.
I/O SGPIO7 — General purpose digital input/output pin.
O USB0_IND0 — USB0 port indicator LED control output 0.
I/O GPIO5[16] — General purpose digital input/output pin.
O T2_MAT1 — Match output 1 of timer 2.
- R — Function reserved.
- R — Function reserved.
Table 3. Pin description …continued
LCD, Ethernet, USB0, and USB1 functions are not available on all parts. See Table 2.
Symbol
LBGA256
TFBGA180
TFBGA100
LQFP144
Reset state
[1]
Type
DescriptionLPC4350_30_20_10 All information provided in this document is subject to legal disclaimers. © NXP Semiconductors N.V. 2014. All rights reserved.
Product data sheet Rev. 4.2 — 18 August 2014 30 of 155
NXP Semiconductors LPC4350/30/20/10
32-bit ARM Cortex-M4/M0 microcontroller
P6_9 J15 H13 F8 97 [2] N;
PU
I/O GPIO3[5] — General purpose digital input/output pin.
- R — Function reserved.
- R — Function reserved.
O EMC_DYCS0 — SDRAM chip select 0.
- R — Function reserved.
O T2_MAT2 — Match output 2 of timer 2.
- R — Function reserved.
- R — Function reserved.
P6_10 H15 G13 - 100 [2] N;
PU
I/O GPIO3[6] — General purpose digital input/output pin.
O MCABORT — Motor control PWM, LOW-active fast abort.
- R — Function reserved.
O EMC_DQMOUT1 — Data mask 1 used with SDRAM and static
devices.
- R — Function reserved.
- R — Function reserved.
- R — Function reserved.
- R — Function reserved.
P6_11 H12 F11 C9 101 [2] N;
PU
I/O GPIO3[7] — General purpose digital input/output pin.
- R — Function reserved.
- R — Function reserved.
O EMC_CKEOUT0 — SDRAM clock enable 0.
- R — Function reserved.
O T2_MAT3 — Match output 3 of timer 2.
- R — Function reserved.
- R — Function reserved.
P6_12 G15 F13 - 103 [2] N;
PU
I/O GPIO2[8] — General purpose digital input/output pin.
O CTOUT_7 — SCTimer/PWM output 7. Match output 3 of timer
1.
- R — Function reserved.
O EMC_DQMOUT0 — Data mask 0 used with SDRAM and static
devices.
- R — Function reserved.
- R — Function reserved.
- R — Function reserved.
- R — Function reserved.
Table 3. Pin description …continued
LCD, Ethernet, USB0, and USB1 functions are not available on all parts. See Table 2.
Symbol
LBGA256
TFBGA180
TFBGA100
LQFP144
Reset state
[1]
Type
DescriptionLPC4350_30_20_10 All information provided in this document is subject to legal disclaimers. © NXP Semiconductors N.V. 2014. All rights reserved.
Product data sheet Rev. 4.2 — 18 August 2014 31 of 155
NXP Semiconductors LPC4350/30/20/10
32-bit ARM Cortex-M4/M0 microcontroller
P7_0 B16 B14 - 110 [2] N;
PU
I/O GPIO3[8] — General purpose digital input/output pin.
O CTOUT_14 — SCTimer/PWM output 14. Match output 2 of
timer 3.
- R — Function reserved.
O LCD_LE — Line end signal.
- R — Function reserved.
- R — Function reserved.
- R — Function reserved.
I/O SGPIO4 — General purpose digital input/output pin.
P7_1 C14 C13 - 113 [2] N;
PU
I/O GPIO3[9] — General purpose digital input/output pin.
O CTOUT_15 — SCTimer/PWM output 15. Match output 3 of
timer 3.
I/O I2S0_TX_WS — Transmit Word Select. It is driven by the
master and received by the slave. Corresponds to the signal
WS in the I
2S-bus specification.
O LCD_VD19 — LCD data.
O LCD_VD7 — LCD data.
- R — Function reserved.
O U2_TXD — Transmitter output for USART2.
I/O SGPIO5 — General purpose digital input/output pin.
P7_2 A16 A14 - 115 [2] N;
PU
I/O GPIO3[10] — General purpose digital input/output pin.
I CTIN_4 — SCTimer/PWM input 4. Capture input 2 of timer 1.
I/O I2S0_TX_SDA — I2S transmit data. It is driven by the
transmitter and read by the receiver. Corresponds to the signal
SD in the I
2S-bus specification.
O LCD_VD18 — LCD data.
O LCD_VD6 — LCD data.
- R — Function reserved.
I U2_RXD — Receiver input for USART2.
I/O SGPIO6 — General purpose digital input/output pin.
P7_3 C13 C12 - 117 [2] N;
PU
I/O GPIO3[11] — General purpose digital input/output pin.
I CTIN_3 — SCTimer/PWM input 3. Capture input 1 of timer 1.
- R — Function reserved.
O LCD_VD17 — LCD data.
O LCD_VD5 — LCD data.
- R — Function reserved.
- R — Function reserved.
- R — Function reserved.
Table 3. Pin description …continued
LCD, Ethernet, USB0, and USB1 functions are not available on all parts. See Table 2.
Symbol
LBGA256
TFBGA180
TFBGA100
LQFP144
Reset state
[1]
Type
DescriptionLPC4350_30_20_10 All information provided in this document is subject to legal disclaimers. © NXP Semiconductors N.V. 2014. All rights reserved.
Product data sheet Rev. 4.2 — 18 August 2014 32 of 155
NXP Semiconductors LPC4350/30/20/10
32-bit ARM Cortex-M4/M0 microcontroller
P7_4 C8 C6 - 132 [5] N;
PU
I/O GPIO3[12] — General purpose digital input/output pin.
O CTOUT_13 — SCTimer/PWM output 13. Match output 3 of
timer 3.
- R — Function reserved.
O LCD_VD16 — LCD data.
O LCD_VD4 — LCD data.
O TRACEDATA[0] — Trace data, bit 0.
- R — Function reserved.
- R — Function reserved.
AI ADC0_4 — ADC0 and ADC1, input channel 4. Configure the
pin as GPIO input and use the ADC function select register in
the SCU to select the ADC.
P7_5 A7 A7 - 133 [5] N;
PU
I/O GPIO3[13] — General purpose digital input/output pin.
O CTOUT_12 — SCTimer/PWM output 12. Match output 3 of
timer 3.
- R — Function reserved.
O LCD_VD8 — LCD data.
O LCD_VD23 — LCD data.
O TRACEDATA[1] — Trace data, bit 1.
- R — Function reserved.
- R — Function reserved.
AI ADC0_3 — ADC0 and ADC1, input channel 3. Configure the
pin as GPIO input and use the ADC function select register in
the SCU to select the ADC.
P7_6 C7 F5 - 134 [2] N;
PU
I/O GPIO3[14] — General purpose digital input/output pin.
O CTOUT_11 — SCTimer/PWM output 1. Match output 3 of
timer 2.
- R — Function reserved.
O LCD_LP — Line synchronization pulse (STN). Horizontal
synchronization pulse (TFT).
- R — Function reserved.
O TRACEDATA[2] — Trace data, bit 2.
- R — Function reserved.
- R — Function reserved.
Table 3. Pin description …continued
LCD, Ethernet, USB0, and USB1 functions are not available on all parts. See Table 2.
Symbol
LBGA256
TFBGA180
TFBGA100
LQFP144
Reset state
[1]
Type
DescriptionLPC4350_30_20_10 All information provided in this document is subject to legal disclaimers. © NXP Semiconductors N.V. 2014. All rights reserved.
Product data sheet Rev. 4.2 — 18 August 2014 33 of 155
NXP Semiconductors LPC4350/30/20/10
32-bit ARM Cortex-M4/M0 microcontroller
P7_7 B6 D5 - 140 [5] N;
PU
I/O GPIO3[15] — General purpose digital input/output pin.
O CTOUT_8 — SCTimer/PWM output 8. Match output 0 of timer
2.
- R — Function reserved.
O LCD_PWR — LCD panel power enable.
- R — Function reserved.
O TRACEDATA[3] — Trace data, bit 3.
O ENET_MDC — Ethernet MIIM clock.
I/O SGPIO7 — General purpose digital input/output pin.
AI ADC1_6 — ADC1 and ADC0, input channel 6. Configure the
pin as GPIO input and use the ADC function select register in
the SCU to select the ADC.
P8_0 E5 E4 - - [3] N;
PU
I/O GPIO4[0] — General purpose digital input/output pin.
I USB0_PWR_FAULT — Port power fault signal indicating
overcurrent condition; this signal monitors over-current on the
USB bus (external circuitry required to detect over-current
condition).
- R — Function reserved.
I MCI2 — Motor control PWM channel 2, input.
I/O SGPIO8 — General purpose digital input/output pin.
- R — Function reserved.
- R — Function reserved.
O T0_MAT0 — Match output 0 of timer 0.
P8_1 H5 G4 - - [3] N;
PU
I/O GPIO4[1] — General purpose digital input/output pin.
O USB0_IND1 — USB0 port indicator LED control output 1.
- R — Function reserved.
I MCI1 — Motor control PWM channel 1, input.
I/O SGPIO9 — General purpose digital input/output pin.
- R — Function reserved.
- R — Function reserved.
O T0_MAT1 — Match output 1 of timer 0.
P8_2 K4 J4 - - [3] N;
PU
I/O GPIO4[2] — General purpose digital input/output pin.
O USB0_IND0 — USB0 port indicator LED control output 0.
- R — Function reserved.
I MCI0 — Motor control PWM channel 0, input.
I/O SGPIO10 — General purpose digital input/output pin.
- R — Function reserved.
- R — Function reserved.
O T0_MAT2 — Match output 2 of timer 0.
Table 3. Pin description …continued
LCD, Ethernet, USB0, and USB1 functions are not available on all parts. See Table 2.
Symbol
LBGA256
TFBGA180
TFBGA100
LQFP144
Reset state
[1]
Type
DescriptionLPC4350_30_20_10 All information provided in this document is subject to legal disclaimers. © NXP Semiconductors N.V. 2014. All rights reserved.
Product data sheet Rev. 4.2 — 18 August 2014 34 of 155
NXP Semiconductors LPC4350/30/20/10
32-bit ARM Cortex-M4/M0 microcontroller
P8_3 J3 H3 - - [2] N;
PU
I/O GPIO4[3] — General purpose digital input/output pin.
I/O USB1_ULPI_D2 — ULPI link bidirectional data line 2.
- R — Function reserved.
O LCD_VD12 — LCD data.
O LCD_VD19 — LCD data.
- R — Function reserved.
- R — Function reserved.
O T0_MAT3 — Match output 3 of timer 0.
P8_4 J2 H2 - - [2] N;
PU
I/O GPIO4[4] — General purpose digital input/output pin.
I/O USB1_ULPI_D1 — ULPI link bidirectional data line 1.
- R — Function reserved.
O LCD_VD7 — LCD data.
O LCD_VD16 — LCD data.
- R — Function reserved.
- R — Function reserved.
I T0_CAP0 — Capture input 0 of timer 0.
P8_5 J1 H1 - - [2] N;
PU
I/O GPIO4[5] — General purpose digital input/output pin.
I/O USB1_ULPI_D0 — ULPI link bidirectional data line 0.
- R — Function reserved.
O LCD_VD6 — LCD data.
O LCD_VD8 — LCD data.
- R — Function reserved.
- R — Function reserved.
I T0_CAP1 — Capture input 1 of timer 0.
P8_6 K3 J3 - - [2] N;
PU
I/O GPIO4[6] — General purpose digital input/output pin.
I USB1_ULPI_NXT — ULPI link NXT signal. Data flow control
signal from the PHY.
- R — Function reserved.
O LCD_VD5 — LCD data.
O LCD_LP — Line synchronization pulse (STN). Horizontal
synchronization pulse (TFT).
- R — Function reserved.
- R — Function reserved.
I T0_CAP2 — Capture input 2 of timer 0.
Table 3. Pin description …continued
LCD, Ethernet, USB0, and USB1 functions are not available on all parts. See Table 2.
Symbol
LBGA256
TFBGA180
TFBGA100
LQFP144
Reset state
[1]
Type
DescriptionLPC4350_30_20_10 All information provided in this document is subject to legal disclaimers. © NXP Semiconductors N.V. 2014. All rights reserved.
Product data sheet Rev. 4.2 — 18 August 2014 35 of 155
NXP Semiconductors LPC4350/30/20/10
32-bit ARM Cortex-M4/M0 microcontroller
P8_7 K1 J1 - - [2] N;
PU
I/O GPIO4[7] — General purpose digital input/output pin.
O USB1_ULPI_STP — ULPI link STP signal. Asserted to end or
interrupt transfers to the PHY.
- R — Function reserved.
O LCD_VD4 — LCD data.
O LCD_PWR — LCD panel power enable.
- R — Function reserved.
- R — Function reserved.
I T0_CAP3 — Capture input 3 of timer 0.
P8_8 L1 K1 - - [2] N;
PU
- R — Function reserved.
I USB1_ULPI_CLK — ULPI link CLK signal. 60 MHz clock
generated by the PHY.
- R — Function reserved.
- R — Function reserved.
- R — Function reserved.
- R — Function reserved.
O CGU_OUT0 — CGU spare clock output 0.
O I2S1_TX_MCLK — I2S1 transmit master clock.
P9_0 T1 P1 - - [2] N;
PU
I/O GPIO4[12] — General purpose digital input/output pin.
O MCABORT — Motor control PWM, LOW-active fast abort.
- R — Function reserved.
- R — Function reserved.
- R — Function reserved.
I ENET_CRS — Ethernet Carrier Sense (MII interface).
I/O SGPIO0 — General purpose digital input/output pin.
I/O SSP0_SSEL — Slave Select for SSP0.
P9_1 N6 P4 - - [2] N;
PU
I/O GPIO4[13] — General purpose digital input/output pin.
O MCOA2 — Motor control PWM channel 2, output A.
- R — Function reserved.
- R — Function reserved.
I/O I2S0_TX_WS — Transmit Word Select. It is driven by the
master and received by the slave. Corresponds to the signal
WS in the I
2S-bus specification.
I ENET_RX_ER — Ethernet receive error (MII interface).
I/O SGPIO1 — General purpose digital input/output pin.
I/O SSP0_MISO — Master In Slave Out for SSP0.
Table 3. Pin description …continued
LCD, Ethernet, USB0, and USB1 functions are not available on all parts. See Table 2.
Symbol
LBGA256
TFBGA180
TFBGA100
LQFP144
Reset state
[1]
Type
DescriptionLPC4350_30_20_10 All information provided in this document is subject to legal disclaimers. © NXP Semiconductors N.V. 2014. All rights reserved.
Product data sheet Rev. 4.2 — 18 August 2014 36 of 155
NXP Semiconductors LPC4350/30/20/10
32-bit ARM Cortex-M4/M0 microcontroller
P9_2 N8 M6 - - [2] N;
PU
I/O GPIO4[14] — General purpose digital input/output pin.
O MCOB2 — Motor control PWM channel 2, output B.
- R — Function reserved.
- R — Function reserved.
I/O I2S0_TX_SDA — I2S transmit data. It is driven by the
transmitter and read by the receiver. Corresponds to the signal
SD in the I
2S-bus specification.
I ENET_RXD3 — Ethernet receive data 3 (MII interface).
I/O SGPIO2 — General purpose digital input/output pin.
I/O SSP0_MOSI — Master Out Slave in for SSP0.
P9_3 M6 P5 - - [2] N;
PU
I/O GPIO4[15] — General purpose digital input/output pin.
O MCOA0 — Motor control PWM channel 0, output A.
O USB1_IND1 — USB1 Port indicator LED control output 1.
- R — Function reserved.
- R — Function reserved.
I ENET_RXD2 — Ethernet receive data 2 (MII interface).
I/O SGPIO9 — General purpose digital input/output pin.
O U3_TXD — Transmitter output for USART3.
P9_4 N10 M8 - - [2] N;
PU
- R — Function reserved.
O MCOB0 — Motor control PWM channel 0, output B.
O USB1_IND0 — USB1 Port indicator LED control output 0.
- R — Function reserved.
I/O GPIO5[17] — General purpose digital input/output pin.
O ENET_TXD2 — Ethernet transmit data 2 (MII interface).
I/O SGPIO4 — General purpose digital input/output pin.
I U3_RXD — Receiver input for USART3.
P9_5 M9 L7 - 69 [2] N;
PU
- R — Function reserved.
O MCOA1 — Motor control PWM channel 1, output A.
O USB1_PPWR — VBUS drive signal (towards external charge
pump or power management unit); indicates that VBUS must
be driven (active high).
Add a pull-down resistor to disable the power switch at reset.
This signal has opposite polarity compared to the USB_PPWR
used on other NXP LPC parts.
- R — Function reserved.
I/O GPIO5[18] — General purpose digital input/output pin.
O ENET_TXD3 — Ethernet transmit data 3 (MII interface).
I/O SGPIO3 — General purpose digital input/output pin.
O U0_TXD — Transmitter output for USART0.
Table 3. Pin description …continued
LCD, Ethernet, USB0, and USB1 functions are not available on all parts. See Table 2.
Symbol
LBGA256
TFBGA180
TFBGA100
LQFP144
Reset state
[1]
Type
DescriptionLPC4350_30_20_10 All information provided in this document is subject to legal disclaimers. © NXP Semiconductors N.V. 2014. All rights reserved.
Product data sheet Rev. 4.2 — 18 August 2014 37 of 155
NXP Semiconductors LPC4350/30/20/10
32-bit ARM Cortex-M4/M0 microcontroller
P9_6 L11 M9 - 72 [2] N;
PU
I/O GPIO4[11] — General purpose digital input/output pin.
O MCOB1 — Motor control PWM channel 1, output B.
I USB1_PWR_FAULT — USB1 Port power fault signal
indicating over-current condition; this signal monitors
over-current on the USB1 bus (external circuitry required to
detect over-current condition).
- R — Function reserved.
- R — Function reserved.
I ENET_COL — Ethernet Collision detect (MII interface).
I/O SGPIO8 — General purpose digital input/output pin.
I U0_RXD — Receiver input for USART0.
PA_0 L12 L10 - - [2] N;
PU
- R — Function reserved.
- R — Function reserved.
- R — Function reserved.
- R — Function reserved.
- R — Function reserved.
O I2S1_RX_MCLK — I2S1 receive master clock.
O CGU_OUT1 — CGU spare clock output 1.
- R — Function reserved.
PA_1 J14 H12 - - [3] N;
PU
I/O GPIO4[8] — General purpose digital input/output pin.
I QEI_IDX — Quadrature Encoder Interface INDEX input.
- R — Function reserved.
O U2_TXD — Transmitter output for USART2.
- R — Function reserved.
- R — Function reserved.
- R — Function reserved.
- R — Function reserved.
PA_2 K15 J13 - - [3] N;
PU
I/O GPIO4[9] — General purpose digital input/output pin.
I QEI_PHB — Quadrature Encoder Interface PHB input.
- R — Function reserved.
I U2_RXD — Receiver input for USART2.
- R — Function reserved.
- R — Function reserved.
- R — Function reserved.
- R — Function reserved.
Table 3. Pin description …continued
LCD, Ethernet, USB0, and USB1 functions are not available on all parts. See Table 2.
Symbol
LBGA256
TFBGA180
TFBGA100
LQFP144
Reset state
[1]
Type
DescriptionLPC4350_30_20_10 All information provided in this document is subject to legal disclaimers. © NXP Semiconductors N.V. 2014. All rights reserved.
Product data sheet Rev. 4.2 — 18 August 2014 38 of 155
NXP Semiconductors LPC4350/30/20/10
32-bit ARM Cortex-M4/M0 microcontroller
PA_3 H11 E10 - - [3] N;
PU
I/O GPIO4[10] — General purpose digital input/output pin.
I QEI_PHA — Quadrature Encoder Interface PHA input.
- R — Function reserved.
- R — Function reserved.
- R — Function reserved.
- R — Function reserved.
- R — Function reserved.
- R — Function reserved.
PA_4 G13 E12 - - [2] N;
PU
- R — Function reserved.
O CTOUT_9 — SCTimer/PWM output 9. Match output 3 of timer
3.
- R — Function reserved.
I/O EMC_A23 — External memory address line 23.
I/O GPIO5[19] — General purpose digital input/output pin.
- R — Function reserved.
- R — Function reserved.
- R — Function reserved.
PB_0 B15 D14 - - [2] N;
PU
- R — Function reserved.
O CTOUT_10 — SCTimer/PWM output 10. Match output 3 of
timer 3.
O LCD_VD23 — LCD data.
- R — Function reserved.
I/O GPIO5[20] — General purpose digital input/output pin.
- R — Function reserved.
- R — Function reserved.
- R — Function reserved.
PB_1 A14 A13 - - [2] N;
PU
- R — Function reserved.
I USB1_ULPI_DIR — ULPI link DIR signal. Controls the ULP
data line direction.
O LCD_VD22 — LCD data.
- R — Function reserved.
I/O GPIO5[21] — General purpose digital input/output pin.
O CTOUT_6 — SCTimer/PWM output 6. Match output 2 of timer
1.
- R — Function reserved.
- R — Function reserved.
Table 3. Pin description …continued
LCD, Ethernet, USB0, and USB1 functions are not available on all parts. See Table 2.
Symbol
LBGA256
TFBGA180
TFBGA100
LQFP144
Reset state
[1]
Type
DescriptionLPC4350_30_20_10 All information provided in this document is subject to legal disclaimers. © NXP Semiconductors N.V. 2014. All rights reserved.
Product data sheet Rev. 4.2 — 18 August 2014 39 of 155
NXP Semiconductors LPC4350/30/20/10
32-bit ARM Cortex-M4/M0 microcontroller
PB_2 B12 B11 - - [2] N;
PU
- R — Function reserved.
I/O USB1_ULPI_D7 — ULPI link bidirectional data line 7.
O LCD_VD21 — LCD data.
- R — Function reserved.
I/O GPIO5[22] — General purpose digital input/output pin.
O CTOUT_7 — SCTimer/PWM output 7. Match output 3 of timer
1.
- R — Function reserved.
- R — Function reserved.
PB_3 A13 A12 - - [2] N;
PU
- R — Function reserved.
I/O USB1_ULPI_D6 — ULPI link bidirectional data line 6.
O LCD_VD20 — LCD data.
- R — Function reserved.
I/O GPIO5[23] — General purpose digital input/output pin.
O CTOUT_8 — SCTimer/PWM output 8. Match output 0 of timer
2.
- R — Function reserved.
- R — Function reserved.
PB_4 B11 B10 - - [2] N;
PU
- R — Function reserved.
I/O USB1_ULPI_D5 — ULPI link bidirectional data line 5.
O LCD_VD15 — LCD data.
- R — Function reserved.
I/O GPIO5[24] — General purpose digital input/output pin.
I CTIN_5 — SCTimer/PWM input 5. Capture input 2 of timer 2.
- R — Function reserved.
- R — Function reserved.
PB_5 A12 A11 - - [2] N;
PU
- R — Function reserved.
I/O USB1_ULPI_D4 — ULPI link bidirectional data line 4.
O LCD_VD14 — LCD data.
- R — Function reserved.
I/O GPIO5[25] — General purpose digital input/output pin.
I CTIN_7 — SCTimer/PWM input 7.
O LCD_PWR — LCD panel power enable.
- R — Function reserved.
Table 3. Pin description …continued
LCD, Ethernet, USB0, and USB1 functions are not available on all parts. See Table 2.
Symbol
LBGA256
TFBGA180
TFBGA100
LQFP144
Reset state
[1]
Type
DescriptionLPC4350_30_20_10 All information provided in this document is subject to legal disclaimers. © NXP Semiconductors N.V. 2014. All rights reserved.
Product data sheet Rev. 4.2 — 18 August 2014 40 of 155
NXP Semiconductors LPC4350/30/20/10
32-bit ARM Cortex-M4/M0 microcontroller
PB_6 A6 C5 - - [5] N;
PU
- R — Function reserved.
I/O USB1_ULPI_D3 — ULPI link bidirectional data line 3.
O LCD_VD13 — LCD data.
- R — Function reserved.
I/O GPIO5[26] — General purpose digital input/output pin.
I CTIN_6 — SCTimer/PWM input 6. Capture input 1 of timer 3.
O LCD_VD19 — LCD data.
- R — Function reserved.
AI ADC0_6 — ADC0 and ADC1, input channel 6. Configure the
pin as GPIO input and use the ADC function select register in
the SCU to select the ADC.
PC_0 D4 - - - [5] N;
PU
- R — Function reserved.
I USB1_ULPI_CLK — ULPI link CLK signal. 60 MHz clock
generated by the PHY.
- R — Function reserved.
I/O ENET_RX_CLK — Ethernet Receive Clock (MII interface).
O LCD_DCLK — LCD panel clock.
- R — Function reserved.
- R — Function reserved.
I/O SD_CLK — SD/MMC card clock.
AI ADC1_1 — ADC1 and ADC0, input channel 1. Configure the
pin as input (USB_ULPI_CLK) and use the ADC function select
register in the SCU to select the ADC.
PC_1 E4 - - - [2] N;
PU
I/O USB1_ULPI_D7 — ULPI link bidirectional data line 7.
- R — Function reserved.
I U1_RI — Ring Indicator input for UART 1.
O ENET_MDC — Ethernet MIIM clock.
I/O GPIO6[0] — General purpose digital input/output pin.
- R — Function reserved.
I T3_CAP0 — Capture input 0 of timer 3.
O SD_VOLT0 — SD/MMC bus voltage select output 0.
PC_2 F6 - - - [2] N;
PU
I/O USB1_ULPI_D6 — ULPI link bidirectional data line 6.
- R — Function reserved.
I U1_CTS — Clear to Send input for UART 1.
O ENET_TXD2 — Ethernet transmit data 2 (MII interface).
I/O GPIO6[1] — General purpose digital input/output pin.
- R — Function reserved.
- R — Function reserved.
O SD_RST — SD/MMC reset signal for MMC4.4 card.
Table 3. Pin description …continued
LCD, Ethernet, USB0, and USB1 functions are not available on all parts. See Table 2.
Symbol
LBGA256
TFBGA180
TFBGA100
LQFP144
Reset state
[1]
Type
DescriptionLPC4350_30_20_10 All information provided in this document is subject to legal disclaimers. © NXP Semiconductors N.V. 2014. All rights reserved.
Product data sheet Rev. 4.2 — 18 August 2014 41 of 155
NXP Semiconductors LPC4350/30/20/10
32-bit ARM Cortex-M4/M0 microcontroller
PC_3 F5 - - - [5] N;
PU
I/O USB1_ULPI_D5 — ULPI link bidirectional data line 5.
- R — Function reserved.
O U1_RTS — Request to Send output for UART 1. Can also be
configured to be an RS-485/EIA-485 output enable signal for
UART 1.
O ENET_TXD3 — Ethernet transmit data 3 (MII interface).
I/O GPIO6[2] — General purpose digital input/output pin.
- R — Function reserved.
- R — Function reserved.
O SD_VOLT1 — SD/MMC bus voltage select output 1.
AI ADC1_0 — DAC output; ADC1 and ADC0, input channel 0.
Configure the pin as GPIO input and use the ADC function
select register in the SCU to select the ADC.
PC_4 F4 - - - [2] N;
PU
- R — Function reserved.
I/O USB1_ULPI_D4 — ULPI link bidirectional data line 4.
- R — Function reserved.
ENET_TX_EN — Ethernet transmit enable (RMII/MII
interface).
I/O GPIO6[3] — General purpose digital input/output pin.
- R — Function reserved.
I T3_CAP1 — Capture input 1 of timer 3.
I/O SD_DAT0 — SD/MMC data bus line 0.
PC_5 G4 - - - [2] N;
PU
- R — Function reserved.
I/O USB1_ULPI_D3 — ULPI link bidirectional data line 3.
- R — Function reserved.
O ENET_TX_ER — Ethernet Transmit Error (MII interface).
I/O GPIO6[4] — General purpose digital input/output pin.
- R — Function reserved.
I T3_CAP2 — Capture input 2 of timer 3.
I/O SD_DAT1 — SD/MMC data bus line 1.
PC_6 H6 - - - [2] N;
PU
- R — Function reserved.
I/O USB1_ULPI_D2 — ULPI link bidirectional data line 2.
- R — Function reserved.
I ENET_RXD2 — Ethernet receive data 2 (MII interface).
I/O GPIO6[5] — General purpose digital input/output pin.
- R — Function reserved.
I T3_CAP3 — Capture input 3 of timer 3.
I/O SD_DAT2 — SD/MMC data bus line 2.
Table 3. Pin description …continued
LCD, Ethernet, USB0, and USB1 functions are not available on all parts. See Table 2.
Symbol
LBGA256
TFBGA180
TFBGA100
LQFP144
Reset state
[1]
Type
DescriptionLPC4350_30_20_10 All information provided in this document is subject to legal disclaimers. © NXP Semiconductors N.V. 2014. All rights reserved.
Product data sheet Rev. 4.2 — 18 August 2014 42 of 155
NXP Semiconductors LPC4350/30/20/10
32-bit ARM Cortex-M4/M0 microcontroller
PC_7 G5 - - - [2] N;
PU
- R — Function reserved.
I/O USB1_ULPI_D1 — ULPI link bidirectional data line 1.
- R — Function reserved.
I ENET_RXD3 — Ethernet receive data 3 (MII interface).
I/O GPIO6[6] — General purpose digital input/output pin.
- R — Function reserved.
O T3_MAT0 — Match output 0 of timer 3.
I/O SD_DAT3 — SD/MMC data bus line 3.
PC_8 N4 - - - [2] N;
PU
- R — Function reserved.
I/O USB1_ULPI_D0 — ULPI link bidirectional data line 0.
- R — Function reserved.
I ENET_RX_DV — Ethernet Receive Data Valid (RMII/MII
interface).
I/O GPIO6[7] — General purpose digital input/output pin.
- R — Function reserved.
O T3_MAT1 — Match output 1 of timer 3.
I SD_CD — SD/MMC card detect input.
PC_9 K2 - - - [2] N;
PU
- R — Function reserved.
I USB1_ULPI_NXT — ULPI link NXT signal. Data flow control
signal from the PHY.
- R — Function reserved.
I ENET_RX_ER — Ethernet receive error (MII interface).
I/O GPIO6[8] — General purpose digital input/output pin.
- R — Function reserved.
O T3_MAT2 — Match output 2 of timer 3.
O SD_POW — SD/MMC power monitor output.
PC_10 M5 - - - [2] N;
PU
- R — Function reserved.
O USB1_ULPI_STP — ULPI link STP signal. Asserted to end or
interrupt transfers to the PHY.
I U1_DSR — Data Set Ready input for UART 1.
- R — Function reserved.
I/O GPIO6[9] — General purpose digital input/output pin.
- R — Function reserved.
O T3_MAT3 — Match output 3 of timer 3.
I/O SD_CMD — SD/MMC command signal.
Table 3. Pin description …continued
LCD, Ethernet, USB0, and USB1 functions are not available on all parts. See Table 2.
Symbol
LBGA256
TFBGA180
TFBGA100
LQFP144
Reset state
[1]
Type
DescriptionLPC4350_30_20_10 All information provided in this document is subject to legal disclaimers. © NXP Semiconductors N.V. 2014. All rights reserved.
Product data sheet Rev. 4.2 — 18 August 2014 43 of 155
NXP Semiconductors LPC4350/30/20/10
32-bit ARM Cortex-M4/M0 microcontroller
PC_11 L5 - - - [2] N;
PU
- R — Function reserved.
I USB1_ULPI_DIR — ULPI link DIR signal. Controls the ULPI
data line direction.
I U1_DCD — Data Carrier Detect input for UART 1.
- R — Function reserved.
I/O GPIO6[10] — General purpose digital input/output pin.
- R — Function reserved.
- R — Function reserved.
I/O SD_DAT4 — SD/MMC data bus line 4.
PC_12 L6 - - - [2] N;
PU
- R — Function reserved.
- R — Function reserved.
O U1_DTR — Data Terminal Ready output for UART 1. Can also
be configured to be an RS-485/EIA-485 output enable signal
for UART 1.
- R — Function reserved.
I/O GPIO6[11] — General purpose digital input/output pin.
I/O SGPIO11 — General purpose digital input/output pin.
I/O I2S0_TX_SDA — I2S transmit data. It is driven by the
transmitter and read by the receiver. Corresponds to the signal
SD in the I
2S-bus specification.
I/O SD_DAT5 — SD/MMC data bus line 5.
PC_13 M1 - - - [2] N;
PU
- R — Function reserved.
- R — Function reserved.
O U1_TXD — Transmitter output for UART 1.
- R — Function reserved.
I/O GPIO6[12] — General purpose digital input/output pin.
I/O SGPIO12 — General purpose digital input/output pin.
I/O I2S0_TX_WS — Transmit Word Select. It is driven by the
master and received by the slave. Corresponds to the signal
WS in the I
2S-bus specification.
I/O SD_DAT6 — SD/MMC data bus line 6.
PC_14 N1 - - - [2] N;
PU
- R — Function reserved.
- R — Function reserved.
I U1_RXD — Receiver input for UART 1.
- R — Function reserved.
I/O GPIO6[13] — General purpose digital input/output pin.
I/O SGPIO13 — General purpose digital input/output pin.
O ENET_TX_ER — Ethernet Transmit Error (MII interface).
I/O SD_DAT7 — SD/MMC data bus line 7.
Table 3. Pin description …continued
LCD, Ethernet, USB0, and USB1 functions are not available on all parts. See Table 2.
Symbol
LBGA256
TFBGA180
TFBGA100
LQFP144
Reset state
[1]
Type
DescriptionLPC4350_30_20_10 All information provided in this document is subject to legal disclaimers. © NXP Semiconductors N.V. 2014. All rights reserved.
Product data sheet Rev. 4.2 — 18 August 2014 44 of 155
NXP Semiconductors LPC4350/30/20/10
32-bit ARM Cortex-M4/M0 microcontroller
PD_0 N2 - - - [2] N;
PU
- R — Function reserved.
O CTOUT_15 — SCTimer/PWM output 15. Match output 3 of
timer 3.
O EMC_DQMOUT2 — Data mask 2 used with SDRAM and static
devices.
- R — Function reserved.
I/O GPIO6[14] — General purpose digital input/output pin.
- R — Function reserved.
- R — Function reserved.
I/O SGPIO4 — General purpose digital input/output pin.
PD_1 P1 - - - [2] N;
PU
- R — Function reserved.
- R — Function reserved.
O EMC_CKEOUT2 — SDRAM clock enable 2.
- R — Function reserved.
I/O GPIO6[15] — General purpose digital input/output pin.
O SD_POW — SD/MMC power monitor output.
- R — Function reserved.
I/O SGPIO5 — General purpose digital input/output pin.
PD_2 R1 - - - [2] N;
PU
- R — Function reserved.
O CTOUT_7 — SCTimer/PWM output 7. Match output 3 of timer
1.
I/O EMC_D16 — External memory data line 16.
- R — Function reserved.
I/O GPIO6[16] — General purpose digital input/output pin.
- R — Function reserved.
- R — Function reserved.
I/O SGPIO6 — General purpose digital input/output pin.
PD_3 P4 - - - [2] N;
PU
- R — Function reserved.
O CTOUT_6 — SCTimer/PWM output 7. Match output 2 of timer
1.
I/O EMC_D17 — External memory data line 17.
- R — Function reserved.
I/O GPIO6[17] — General purpose digital input/output pin.
- R — Function reserved.
- R — Function reserved.
I/O SGPIO7 — General purpose digital input/output pin.
Table 3. Pin description …continued
LCD, Ethernet, USB0, and USB1 functions are not available on all parts. See Table 2.
Symbol
LBGA256
TFBGA180
TFBGA100
LQFP144
Reset state
[1]
Type
DescriptionLPC4350_30_20_10 All information provided in this document is subject to legal disclaimers. © NXP Semiconductors N.V. 2014. All rights reserved.
Product data sheet Rev. 4.2 — 18 August 2014 45 of 155
NXP Semiconductors LPC4350/30/20/10
32-bit ARM Cortex-M4/M0 microcontroller
PD_4 T2 - - - [2] N;
PU
- R — Function reserved.
O CTOUT_8 — SCTimer/PWM output 8. Match output 0 of timer
2.
I/O EMC_D18 — External memory data line 18.
- R — Function reserved.
I/O GPIO6[18] — General purpose digital input/output pin.
- R — Function reserved.
- R — Function reserved.
I/O SGPIO8 — General purpose digital input/output pin.
PD_5 P6 - - - [2] N;
PU
- R — Function reserved.
O CTOUT_9 — SCTimer/PWM output 9. Match output 3 of timer
3.
I/O EMC_D19 — External memory data line 19.
- R — Function reserved.
I/O GPIO6[19] — General purpose digital input/output pin.
- R — Function reserved.
- R — Function reserved.
I/O SGPIO9 — General purpose digital input/output pin.
PD_6 R6 - - - [2] N;
PU
- R — Function reserved.
O CTOUT_10 — SCTimer/PWM output 10. Match output 3 of
timer 3.
I/O EMC_D20 — External memory data line 20.
- R — Function reserved.
I/O GPIO6[20] — General purpose digital input/output pin.
- R — Function reserved.
- R — Function reserved.
I/O SGPIO10 — General purpose digital input/output pin.
PD_7 T6 - - - [2] N;
PU
- R — Function reserved.
I CTIN_5 — SCTimer/PWM input 5. Capture input 2 of timer 2.
I/O EMC_D21 — External memory data line 21.
- R — Function reserved.
I/O GPIO6[21] — General purpose digital input/output pin.
- R — Function reserved.
- R — Function reserved.
I/O SGPIO11 — General purpose digital input/output pin.
Table 3. Pin description …continued
LCD, Ethernet, USB0, and USB1 functions are not available on all parts. See Table 2.
Symbol
LBGA256
TFBGA180
TFBGA100
LQFP144
Reset state
[1]
Type
DescriptionLPC4350_30_20_10 All information provided in this document is subject to legal disclaimers. © NXP Semiconductors N.V. 2014. All rights reserved.
Product data sheet Rev. 4.2 — 18 August 2014 46 of 155
NXP Semiconductors LPC4350/30/20/10
32-bit ARM Cortex-M4/M0 microcontroller
PD_8 P8 - - - [2] N;
PU
- R — Function reserved.
I CTIN_6 — SCTimer/PWM input 6. Capture input 1 of timer 3.
I/O EMC_D22 — External memory data line 22.
- R — Function reserved.
I/O GPIO6[22] — General purpose digital input/output pin.
- R — Function reserved.
- R — Function reserved.
I/O SGPIO12 — General purpose digital input/output pin.
PD_9 T11 - - - [2] N;
PU
- R — Function reserved.
O CTOUT_13 — SCTimer/PWM output 13. Match output 3 of
timer 3.
I/O EMC_D23 — External memory data line 23.
- R — Function reserved.
I/O GPIO6[23] — General purpose digital input/output pin.
- R — Function reserved.
- R — Function reserved.
I/O SGPIO13 — General purpose digital input/output pin.
PD_10 P11 - - - [2] N;
PU
- R — Function reserved.
I CTIN_1 — SCTimer/PWM input 1. Capture input 1 of timer 0.
Capture input 1 of timer 2.
O EMC_BLS3 — LOW active Byte Lane select signal 3.
- R — Function reserved.
I/O GPIO6[24] — General purpose digital input/output pin.
- R — Function reserved.
- R — Function reserved.
- R — Function reserved.
PD_11 N9 M7 - - [2] N;
PU
- R — Function reserved.
- R — Function reserved.
O EMC_CS3 — LOW active Chip Select 3 signal.
- R — Function reserved.
I/O GPIO6[25] — General purpose digital input/output pin.
I/O USB1_ULPI_D0 — ULPI link bidirectional data line 0.
O CTOUT_14 — SCTimer/PWM output 14. Match output 2 of
timer 3.
- R — Function reserved.
Table 3. Pin description …continued
LCD, Ethernet, USB0, and USB1 functions are not available on all parts. See Table 2.
Symbol
LBGA256
TFBGA180
TFBGA100
LQFP144
Reset state
[1]
Type
DescriptionLPC4350_30_20_10 All information provided in this document is subject to legal disclaimers. © NXP Semiconductors N.V. 2014. All rights reserved.
Product data sheet Rev. 4.2 — 18 August 2014 47 of 155
NXP Semiconductors LPC4350/30/20/10
32-bit ARM Cortex-M4/M0 microcontroller
PD_12 N11 P9 - - [2] N;
PU
- R — Function reserved.
- R — Function reserved.
O EMC_CS2 — LOW active Chip Select 2 signal.
- R — Function reserved.
I/O GPIO6[26] — General purpose digital input/output pin.
- R — Function reserved.
O CTOUT_10 — SCTimer/PWM output 10. Match output 3 of
timer 3.
- R — Function reserved.
PD_13 T14 - - - [2] N;
PU
- R — Function reserved.
I CTIN_0 — SCTimer/PWM input 0. Capture input 0 of timer 0,
1, 2, 3.
O EMC_BLS2 — LOW active Byte Lane select signal 2.
- R — Function reserved.
I/O GPIO6[27] — General purpose digital input/output pin.
- R — Function reserved.
O CTOUT_13 — SCTimer/PWM output 13. Match output 3 of
timer 3.
- R — Function reserved.
PD_14 R13 L11 - - [2] N;
PU
- R — Function reserved.
- R — Function reserved.
O EMC_DYCS2 — SDRAM chip select 2.
- R — Function reserved.
I/O GPIO6[28] — General purpose digital input/output pin.
- R — Function reserved.
O CTOUT_11 — SCTimer/PWM output 11. Match output 3 of
timer 2.
- R — Function reserved.
PD_15 T15 P13 - - [2] N;
PU
- R — Function reserved.
- R — Function reserved.
I/O EMC_A17 — External memory address line 17.
- R — Function reserved.
I/O GPIO6[29] — General purpose digital input/output pin.
I SD_WP — SD/MMC card write protect input.
O CTOUT_8 — SCTimer/PWM output 8. Match output 0 of timer
2.
- R — Function reserved.
Table 3. Pin description …continued
LCD, Ethernet, USB0, and USB1 functions are not available on all parts. See Table 2.
Symbol
LBGA256
TFBGA180
TFBGA100
LQFP144
Reset state
[1]
Type
DescriptionLPC4350_30_20_10 All information provided in this document is subject to legal disclaimers. © NXP Semiconductors N.V. 2014. All rights reserved.
Product data sheet Rev. 4.2 — 18 August 2014 48 of 155
NXP Semiconductors LPC4350/30/20/10
32-bit ARM Cortex-M4/M0 microcontroller
PD_16 R14 P12 - - [2] N;
PU
- R — Function reserved.
- R — Function reserved.
I/O EMC_A16 — External memory address line 16.
- R — Function reserved.
I/O GPIO6[30] — General purpose digital input/output pin.
O SD_VOLT2 — SD/MMC bus voltage select output 2.
O CTOUT_12 — SCTimer/PWM output 12. Match output 3 of
timer 3.
- R — Function reserved.
PE_0 P14 N12 - - [2] N;
PU
- R — Function reserved.
- R — Function reserved.
- R — Function reserved.
I/O EMC_A18 — External memory address line 18.
I/O GPIO7[0] — General purpose digital input/output pin.
O CAN1_TD — CAN1 transmitter output.
- R — Function reserved.
- R — Function reserved.
PE_1 N14 M12 - - [2] N;
PU
- R — Function reserved.
- R — Function reserved.
- R — Function reserved.
I/O EMC_A19 — External memory address line 19.
I/O GPIO7[1] — General purpose digital input/output pin.
I CAN1_RD — CAN1 receiver input.
- R — Function reserved.
- R — Function reserved.
PE_2 M14 L12 - - [2] N;
PU
I ADCTRIG0 — ADC trigger input 0.
I CAN0_RD — CAN receiver input.
- R — Function reserved.
I/O EMC_A20 — External memory address line 20.
I/O GPIO7[2] — General purpose digital input/output pin.
- R — Function reserved.
- R — Function reserved.
- R — Function reserved.
Table 3. Pin description …continued
LCD, Ethernet, USB0, and USB1 functions are not available on all parts. See Table 2.
Symbol
LBGA256
TFBGA180
TFBGA100
LQFP144
Reset state
[1]
Type
DescriptionLPC4350_30_20_10 All information provided in this document is subject to legal disclaimers. © NXP Semiconductors N.V. 2014. All rights reserved.
Product data sheet Rev. 4.2 — 18 August 2014 49 of 155
NXP Semiconductors LPC4350/30/20/10
32-bit ARM Cortex-M4/M0 microcontroller
PE_3 K12 K10 - - [2] N;
PU
- R — Function reserved.
O CAN0_TD — CAN transmitter output.
I ADCTRIG1 — ADC trigger input 1.
I/O EMC_A21 — External memory address line 21.
I/O GPIO7[3] — General purpose digital input/output pin.
- R — Function reserved.
- R — Function reserved.
- R — Function reserved.
PE_4 K13 J11 - - [2] N;
PU
- R — Function reserved.
I NMI — External interrupt input to NMI.
- R — Function reserved.
I/O EMC_A22 — External memory address line 22.
I/O GPIO7[4] — General purpose digital input/output pin.
- R — Function reserved.
- R — Function reserved.
- R — Function reserved.
PE_5 N16 - - - [2] N;
PU
- R — Function reserved.
O CTOUT_3 — SCTimer/PWM output 3. Match output 3 of timer
0.
O U1_RTS — Request to Send output for UART 1. Can also be
configured to be an RS-485/EIA-485 output enable signal for
UART 1.
I/O EMC_D24 — External memory data line 24.
I/O GPIO7[5] — General purpose digital input/output pin.
- R — Function reserved.
- R — Function reserved.
- R — Function reserved.
PE_6 M16 - - - [2] N;
PU
- R — Function reserved.
O CTOUT_2 — SCTimer/PWM output 2. Match output 2 of timer
0.
I U1_RI — Ring Indicator input for UART 1.
I/O EMC_D25 — External memory data line 25.
I/O GPIO7[6] — General purpose digital input/output pin.
- R — Function reserved.
- R — Function reserved.
- R — Function reserved.
Table 3. Pin description …continued
LCD, Ethernet, USB0, and USB1 functions are not available on all parts. See Table 2.
Symbol
LBGA256
TFBGA180
TFBGA100
LQFP144
Reset state
[1]
Type
DescriptionLPC4350_30_20_10 All information provided in this document is subject to legal disclaimers. © NXP Semiconductors N.V. 2014. All rights reserved.
Product data sheet Rev. 4.2 — 18 August 2014 50 of 155
NXP Semiconductors LPC4350/30/20/10
32-bit ARM Cortex-M4/M0 microcontroller
PE_7 F15 - - - [2] N;
PU
- R — Function reserved.
O CTOUT_5 — SCTimer/PWM output 5. Match output 3 of timer
3.
I U1_CTS — Clear to Send input for UART1.
I/O EMC_D26 — External memory data line 26.
I/O GPIO7[7] — General purpose digital input/output pin.
- R — Function reserved.
- R — Function reserved.
- R — Function reserved.
PE_8 F14 - - - [2] N;
PU
- R — Function reserved.
O CTOUT_4 — SCTimer/PWM output 4. Match output 3 of timer
3.
I U1_DSR — Data Set Ready input for UART 1.
I/O EMC_D27 — External memory data line 27.
I/O GPIO7[8] — General purpose digital input/output pin.
- R — Function reserved.
- R — Function reserved.
- R — Function reserved.
PE_9 E16 - - - [2] N;
PU
- R — Function reserved.
I CTIN_4 — SCTimer/PWM input 4. Capture input 2 of timer 1.
I U1_DCD — Data Carrier Detect input for UART 1.
I/O EMC_D28 — External memory data line 28.
I/O GPIO7[9] — General purpose digital input/output pin.
- R — Function reserved.
- R — Function reserved.
- R — Function reserved.
PE_10 E14 - - - [2] N;
PU
- R — Function reserved.
I CTIN_3 — SCTimer/PWM input 3. Capture input 1 of timer 1.
O U1_DTR — Data Terminal Ready output for UART 1. Can also
be configured to be an RS-485/EIA-485 output enable signal
for UART 1.
I/O EMC_D29 — External memory data line 29.
I/O GPIO7[10] — General purpose digital input/output pin.
- R — Function reserved.
- R — Function reserved.
- R — Function reserved.
Table 3. Pin description …continued
LCD, Ethernet, USB0, and USB1 functions are not available on all parts. See Table 2.
Symbol
LBGA256
TFBGA180
TFBGA100
LQFP144
Reset state
[1]
Type
DescriptionLPC4350_30_20_10 All information provided in this document is subject to legal disclaimers. © NXP Semiconductors N.V. 2014. All rights reserved.
Product data sheet Rev. 4.2 — 18 August 2014 51 of 155
NXP Semiconductors LPC4350/30/20/10
32-bit ARM Cortex-M4/M0 microcontroller
PE_11 D16 - - - [2] N;
PU
- R — Function reserved.
O CTOUT_12 — SCTimer/PWM output 12. Match output 3 of
timer 3.
O U1_TXD — Transmitter output for UART 1.
I/O EMC_D30 — External memory data line 30.
I/O GPIO7[11] — General purpose digital input/output pin.
- R — Function reserved.
- R — Function reserved.
- R — Function reserved.
PE_12 D15 - - - [2] N;
PU
- R — Function reserved.
O CTOUT_11 — SCTimer/PWM output 11. Match output 3 of
timer 2.
I U1_RXD — Receiver input for UART 1.
I/O EMC_D31 — External memory data line 31.
I/O GPIO7[12] — General purpose digital input/output pin.
- R — Function reserved.
- R — Function reserved.
- R — Function reserved.
PE_13 G14 - - - [2] N;
PU
- R — Function reserved.
O CTOUT_14 — SCTimer/PWM output 14. Match output 2 of
timer 3.
I/O I2C1_SDA — I
2C1 data input/output (this pin does not use a
specialized I2C pad).
O EMC_DQMOUT3 — Data mask 3 used with SDRAM and static
devices.
I/O GPIO7[13] — General purpose digital input/output pin.
- R — Function reserved.
- R — Function reserved.
- R — Function reserved.
PE_14 C15 - - - [2] N;
PU
- R — Function reserved.
- R — Function reserved.
- R — Function reserved.
O EMC_DYCS3 — SDRAM chip select 3.
I/O GPIO7[14] — General purpose digital input/output pin.
- R — Function reserved.
- R — Function reserved.
- R — Function reserved.
Table 3. Pin description …continued
LCD, Ethernet, USB0, and USB1 functions are not available on all parts. See Table 2.
Symbol
LBGA256
TFBGA180
TFBGA100
LQFP144
Reset state
[1]
Type
DescriptionLPC4350_30_20_10 All information provided in this document is subject to legal disclaimers. © NXP Semiconductors N.V. 2014. All rights reserved.
Product data sheet Rev. 4.2 — 18 August 2014 52 of 155
NXP Semiconductors LPC4350/30/20/10
32-bit ARM Cortex-M4/M0 microcontroller
PE_15 E13 - - - [2] N;
PU
- R — Function reserved.
O CTOUT_0 — SCTimer/PWM output 0. Match output 0 of timer
0.
I/O I2C1_SCL — I
2C1 clock input/output (this pin does not use a
specialized I2C pad).
O EMC_CKEOUT3 — SDRAM clock enable 3.
I/O GPIO7[15] — General purpose digital input/output pin.
- R — Function reserved.
- R — Function reserved.
- R — Function reserved.
PF_0 D12 - - - [2] O;
PU
I/O SSP0_SCK — Serial clock for SSP0.
I GP_CLKIN — General-purpose clock input to the CGU.
- R — Function reserved.
- R — Function reserved.
- R — Function reserved.
- R — Function reserved.
- R — Function reserved.
O I2S1_TX_MCLK — I2S1 transmit master clock.
PF_1 E11 - - - [2] N;
PU
- R — Function reserved.
- R — Function reserved.
I/O SSP0_SSEL — Slave Select for SSP0.
- R — Function reserved.
I/O GPIO7[16] — General purpose digital input/output pin.
- R — Function reserved.
I/O SGPIO0 — General purpose digital input/output pin.
- R — Function reserved.
PF_2 D11 - - - [2] N;
PU
- R — Function reserved.
O U3_TXD — Transmitter output for USART3.
I/O SSP0_MISO — Master In Slave Out for SSP0.
- R — Function reserved.
I/O GPIO7[17] — General purpose digital input/output pin.
- R — Function reserved.
I/O SGPIO1 — General purpose digital input/output pin.
- R — Function reserved.
Table 3. Pin description …continued
LCD, Ethernet, USB0, and USB1 functions are not available on all parts. See Table 2.
Symbol
LBGA256
TFBGA180
TFBGA100
LQFP144
Reset state
[1]
Type
DescriptionLPC4350_30_20_10 All information provided in this document is subject to legal disclaimers. © NXP Semiconductors N.V. 2014. All rights reserved.
Product data sheet Rev. 4.2 — 18 August 2014 53 of 155
NXP Semiconductors LPC4350/30/20/10
32-bit ARM Cortex-M4/M0 microcontroller
PF_3 E10 - - - [2] N;
PU
- R — Function reserved.
I U3_RXD — Receiver input for USART3.
I/O SSP0_MOSI — Master Out Slave in for SSP0.
- R — Function reserved.
I/O GPIO7[18] — General purpose digital input/output pin.
- R — Function reserved.
I/O SGPIO2 — General purpose digital input/output pin.
- R — Function reserved.
PF_4 D10 D6 H4 120 [2] O;
PU
I/O SSP1_SCK — Serial clock for SSP1.
I GP_CLKIN — General-purpose clock input to the CGU.
O TRACECLK — Trace clock.
- R — Function reserved.
- R — Function reserved.
- R — Function reserved.
O I2S0_TX_MCLK — I2S transmit master clock.
I/O I2S0_RX_SCK — I2S receive clock. It is driven by the master
and received by the slave. Corresponds to the signal SCK in
the I
2S-bus specification.
PF_5 E9 - - - [5] N;
PU
- R — Function reserved.
I/O U3_UCLK — Serial clock input/output for USART3 in
synchronous mode.
I/O SSP1_SSEL — Slave Select for SSP1.
O TRACEDATA[0] — Trace data, bit 0.
I/O GPIO7[19] — General purpose digital input/output pin.
- R — Function reserved.
I/O SGPIO4 — General purpose digital input/output pin.
- R — Function reserved.
AI ADC1_4 — ADC1 and ADC0, input channel 4. Configure the
pin as GPIO input and use the ADC function select register in
the SCU to select the ADC.
Table 3. Pin description …continued
LCD, Ethernet, USB0, and USB1 functions are not available on all parts. See Table 2.
Symbol
LBGA256
TFBGA180
TFBGA100
LQFP144
Reset state
[1]
Type
DescriptionLPC4350_30_20_10 All information provided in this document is subject to legal disclaimers. © NXP Semiconductors N.V. 2014. All rights reserved.
Product data sheet Rev. 4.2 — 18 August 2014 54 of 155
NXP Semiconductors LPC4350/30/20/10
32-bit ARM Cortex-M4/M0 microcontroller
PF_6 E7 - - - [5] N;
PU
- R — Function reserved.
I/O U3_DIR — RS-485/EIA-485 output enable/direction control for
USART3.
I/O SSP1_MISO — Master In Slave Out for SSP1.
O TRACEDATA[1] — Trace data, bit 1.
I/O GPIO7[20] — General purpose digital input/output pin.
- R — Function reserved.
I/O SGPIO5 — General purpose digital input/output pin.
I/O I2S1_TX_SDA — I2S1 transmit data. It is driven by the
transmitter and read by the receiver. Corresponds to the signal
SD in the I
2S-bus specification.
AI ADC1_3 — ADC1 and ADC0, input channel 3. Configure the
pin as GPIO input and use the ADC function select register in
the SCU to select the ADC.
PF_7 B7 - - - [5] N;
PU
- R — Function reserved.
I/O U3_BAUD — Baud pin for USART3.
I/O SSP1_MOSI — Master Out Slave in for SSP1.
O TRACEDATA[2] — Trace data, bit 2.
I/O GPIO7[21] — General purpose digital input/output pin.
- R — Function reserved.
I/O SGPIO6 — General purpose digital input/output pin.
I/O I2S1_TX_WS — Transmit Word Select. It is driven by the
master and received by the slave. Corresponds to the signal
WS in the I
2S-bus specification.
AI/
O
ADC1_7 — ADC1 and ADC0, input channel 7 or band gap
output. Configure the pin as GPIO input and use the ADC
function select register in the SCU to select the ADC.
PF_8 E6 - - - [5] N;
PU
- R — Function reserved.
I/O U0_UCLK — Serial clock input/output for USART0 in
synchronous mode.
I CTIN_2 — SCTimer/PWM input 2. Capture input 2 of timer 0.
O TRACEDATA[3] — Trace data, bit 3.
I/O GPIO7[22] — General purpose digital input/output pin.
- R — Function reserved.
I/O SGPIO7 — General purpose digital input/output pin.
- R — Function reserved.
AI ADC0_2 — ADC0 and ADC1, input channel 2. Configure the
pin as GPIO input and use the ADC function select register in
the SCU to select the ADC.
Table 3. Pin description …continued
LCD, Ethernet, USB0, and USB1 functions are not available on all parts. See Table 2.
Symbol
LBGA256
TFBGA180
TFBGA100
LQFP144
Reset state
[1]
Type
DescriptionLPC4350_30_20_10 All information provided in this document is subject to legal disclaimers. © NXP Semiconductors N.V. 2014. All rights reserved.
Product data sheet Rev. 4.2 — 18 August 2014 55 of 155
NXP Semiconductors LPC4350/30/20/10
32-bit ARM Cortex-M4/M0 microcontroller
PF_9 D6 - - - [5] N;
PU
- R — Function reserved.
I/O U0_DIR — RS-485/EIA-485 output enable/direction control for
USART0.
O CTOUT_1 — SCTimer/PWM output 1. Match output 3 of timer
3.
- R — Function reserved.
I/O GPIO7[23] — General purpose digital input/output pin.
- R — Function reserved.
I/O SGPIO3 — General purpose digital input/output pin.
- R — Function reserved.
AI ADC1_2 — ADC1 and ADC0, input channel 2. Configure the
pin as GPIO input and use the ADC function select register in
the SCU to select the ADC.
PF_10 A3 - - - [5] N;
PU
- R — Function reserved.
O U0_TXD — Transmitter output for USART0.
- R — Function reserved.
- R — Function reserved.
I/O GPIO7[24] — General purpose digital input/output pin.
- R — Function reserved.
I SD_WP — SD/MMC card write protect input.
- R — Function reserved.
AI ADC0_5 — ADC0 and ADC1, input channel 5. Configure the
pin as GPIO input and use the ADC function select register in
the SCU to select the ADC.
PF_11 A2 - - - [5] N;
PU
- R — Function reserved.
I U0_RXD — Receiver input for USART0.
- R — Function reserved.
- R — Function reserved.
I/O GPIO7[25] — General purpose digital input/output pin.
- R — Function reserved.
O SD_VOLT2 — SD/MMC bus voltage select output 2.
- R — Function reserved.
AI ADC1_5 — ADC1 and ADC0, input channel 5. Configure the
pin as GPIO input and use the ADC function select register in
the SCU to select the ADC.
Table 3. Pin description …continued
LCD, Ethernet, USB0, and USB1 functions are not available on all parts. See Table 2.
Symbol
LBGA256
TFBGA180
TFBGA100
LQFP144
Reset state
[1]
Type
DescriptionLPC4350_30_20_10 All information provided in this document is subject to legal disclaimers. © NXP Semiconductors N.V. 2014. All rights reserved.
Product data sheet Rev. 4.2 — 18 August 2014 56 of 155
NXP Semiconductors LPC4350/30/20/10
32-bit ARM Cortex-M4/M0 microcontroller
Clock pins
CLK0 N5 M4 K3 45 [4] O;
PU
O EMC_CLK0 — SDRAM clock 0.
O CLKOUT — Clock output pin.
- R — Function reserved.
- R — Function reserved.
I/O SD_CLK — SD/MMC card clock.
O EMC_CLK01 — SDRAM clock 0 and clock 1 combined.
I/O SSP1_SCK — Serial clock for SSP1.
I ENET_TX_CLK (ENET_REF_CLK) — Ethernet Transmit
Clock (MII interface) or Ethernet Reference Clock (RMII
interface).
CLK1 T10 - - - [4] O;
PU
O EMC_CLK1 — SDRAM clock 1.
O CLKOUT — Clock output pin.
- R — Function reserved.
- R — Function reserved.
- R — Function reserved.
O CGU_OUT0 — CGU spare clock output 0.
- R — Function reserved.
O I2S1_TX_MCLK — I2S1 transmit master clock.
CLK2 D14 P10 K6 99 [4] O;
PU
O EMC_CLK3 — SDRAM clock 3.
O CLKOUT — Clock output pin.
- R — Function reserved.
- R — Function reserved.
I/O SD_CLK — SD/MMC card clock.
O EMC_CLK23 — SDRAM clock 2 and clock 3 combined.
O I2S0_TX_MCLK — I2S transmit master clock.
I/O I2S1_RX_SCK — Receive Clock. It is driven by the master and
received by the slave. Corresponds to the signal SCK in the
I
2S-bus specification.
CLK3 P12 - - - [4] O;
PU
O EMC_CLK2 — SDRAM clock 2.
O CLKOUT — Clock output pin.
- R — Function reserved.
- R — Function reserved.
- R — Function reserved.
O CGU_OUT1 — CGU spare clock output 1.
- R — Function reserved.
I/O I2S1_RX_SCK — Receive Clock. It is driven by the master and
received by the slave. Corresponds to the signal SCK in the
I
2S-bus specification.
Table 3. Pin description …continued
LCD, Ethernet, USB0, and USB1 functions are not available on all parts. See Table 2.
Symbol
LBGA256
TFBGA180
TFBGA100
LQFP144
Reset state
[1]
Type
DescriptionLPC4350_30_20_10 All information provided in this document is subject to legal disclaimers. © NXP Semiconductors N.V. 2014. All rights reserved.
Product data sheet Rev. 4.2 — 18 August 2014 57 of 155
NXP Semiconductors LPC4350/30/20/10
32-bit ARM Cortex-M4/M0 microcontroller
Debug pins
DBGEN L4 K4 A6 28 [2] I; PU I JTAG interface control signal. Also used for boundary scan. To
use the part in functional mode, connect this pin in one of the
following ways:
• Leave DBGEN open. The DBGEN pin is pulled up
internally by a 50 kΩ resistor.
• Tie DBGEN to VDDIO.
• Pull DBGEN up to VDDIO with an external pull-up resistor.
TCK/SWDCLK J5 G5 H2 27 [2] I; F I Test Clock for JTAG interface (default) or Serial Wire (SW)
clock.
TRST M4 L4 B4 29 [2] I; PU I Test Reset for JTAG interface.
TMS/SWDIO K6 K5 C4 30 [2] I; PU I Test Mode Select for JTAG interface (default) or SW debug
data input/output.
TDO/SWO K5 J5 H3 31 [2] O O Test Data Out for JTAG interface (default) or SW trace output.
TDI J4 H4 G3 26 [2] I; PU I Test Data In for JTAG interface.
USB0 pins
USB0_DP F2 E2 E1 18 [6] - I/O USB0 bidirectional D+ line.
USB0_DM G2 F2 E2 20 [6] - I/O USB0 bidirectional D line.
USB0_VBUS F1 E1 E3 21 [6]
[7]
- I/O VBUS pin (power on USB cable). This pin includes an internal
pull-down resistor of 64 kΩ (typical) 16 kΩ.
USB0_ID H2 G2 F1 22 [8] - I Indicates to the transceiver whether connected as an A-device
(USB0_ID LOW) or B-device (USB0_ID HIGH). For OTG this
pin has an internal pull-up resistor.
USB0_RREF H1 G1 F3 24 [8] - 12.0 kΩ (accuracy 1 %) on-board resistor to ground for current
reference.
USB1 pins
USB1_DP F12 D11 E9 89 [9] - I/O USB1 bidirectional D+ line.
USB1_DM G12 E11 E10 90 [9] - I/O USB1 bidirectional D line.
I
2C-bus pins
I2C0_SCL L15 K13 D6 92 [10] I; F I/O I2C clock input/output. Open-drain output (for I2C-bus
compliance).
I2C0_SDA L16 K14 E6 93 [10] I; F I/O I2C data input/output. Open-drain output (for I2C-bus
compliance).
Reset and wake-up pins
RESET D9 C7 B6 128 [11] I; IA I External reset input: A LOW-going pulse as short as 50 ns on
this pin resets the device, causing I/O ports and peripherals to
take on their default states, and processor execution to begin
at address 0. This pin does not have an internal pull-up.
WAKEUP0 A9 A9 A4 130 [11] I; IA I External wake-up input; can raise an interrupt and can cause
wake-up from any of the low-power modes. A pulse with a
duration > 45 ns wakes up the part. This pin does not have an
internal pull-up.
Table 3. Pin description …continued
LCD, Ethernet, USB0, and USB1 functions are not available on all parts. See Table 2.
Symbol
LBGA256
TFBGA180
TFBGA100
LQFP144
Reset state
[1]
Type
DescriptionLPC4350_30_20_10 All information provided in this document is subject to legal disclaimers. © NXP Semiconductors N.V. 2014. All rights reserved.
Product data sheet Rev. 4.2 — 18 August 2014 58 of 155
NXP Semiconductors LPC4350/30/20/10
32-bit ARM Cortex-M4/M0 microcontroller
WAKEUP1 A10 C8 - - [11] I; IA I External wake-up input; can raise an interrupt and can cause
wake-up from any of the low-power modes. A pulse with a
duration > 45 ns wakes up the part. This pin does not have an
internal pull-up.
WAKEUP2 C9 E5 - - [11] I; IA I External wake-up input; can raise an interrupt and can cause
wake-up from any of the low-power modes. A pulse with a
duration > 45 ns wakes up the part. This pin does not have an
internal pull-up.
WAKEUP3 D8 - - - [11] I; IA I External wake-up input; can raise an interrupt and can cause
wake-up from any of the low-power modes. A pulse with a
duration > 45 ns wakes up the part. This pin does not have an
internal pull-up.
ADC pins
ADC0_0/
ADC1_0/DAC
E3 B6 A2 6 [8] I; IA I ADC input channel 0. Shared between 10-bit ADC0/1 and
DAC.
ADC0_1/
ADC1_1
C3 C4 A1 2 [8] I; IA I ADC input channel 1. Shared between 10-bit ADC0/1.
ADC0_2/
ADC1_2
A4 B3 B3 143 [8] I; IA I ADC input channel 2. Shared between 10-bit ADC0/1.
ADC0_3/
ADC1_3
B5 B4 A3 139 [8] I; IA I ADC input channel 3. Shared between 10-bit ADC0/1.
ADC0_4/
ADC1_4
C6 A5 - 138 [8] I; IA I ADC input channel 4. Shared between 10-bit ADC0/1.
ADC0_5/
ADC1_5
B3 C3 - 144 [8] I; IA I ADC input channel 5. Shared between 10-bit ADC0/1.
ADC0_6/
ADC1_6
A5 A4 - 142 [8] I; IA I ADC input channel 6. Shared between 10-bit ADC0/1.
ADC0_7/
ADC1_7
C5 B5 - 136 [8] I; IA I ADC input channel 7. Shared between 10-bit ADC0/1.
RTC
RTC_ALARM A11 A10 C3 129 [11] O O RTC controlled output. This pin has an internal pull-up. The
reset state of this pin is LOW after POR. For all other types of
reset, the reset state depends on the state of the RTC alarm
interrupt.
RTCX1 A8 A8 A5 125 [8] - I Input to the RTC 32 kHz ultra-low power oscillator circuit.
RTCX2 B8 B7 B5 126 [8] - O Output from the RTC 32 kHz ultra-low power oscillator circuit.
Crystal oscillator pins
XTAL1 D1 C1 B1 12 [8] - I Input to the oscillator circuit and internal clock generator
circuits.
XTAL2 E1 D1 C1 13 [8] - O Output from the oscillator amplifier.
Power and ground pins
USB0_VDDA
3V3_DRIVER
F3 E3 D1 16 - - Separate analog 3.3 V power supply for driver.
Table 3. Pin description …continued
LCD, Ethernet, USB0, and USB1 functions are not available on all parts. See Table 2.
Symbol
LBGA256
TFBGA180
TFBGA100
LQFP144
Reset state
[1]
Type
DescriptionLPC4350_30_20_10 All information provided in this document is subject to legal disclaimers. © NXP Semiconductors N.V. 2014. All rights reserved.
Product data sheet Rev. 4.2 — 18 August 2014 59 of 155
NXP Semiconductors LPC4350/30/20/10
32-bit ARM Cortex-M4/M0 microcontroller
USB0
_VDDA3V3
G3 F3 D2 17 - - USB 3.3 V separate power supply voltage.
USB0_VSSA
_TERM
H3 G3 D3 19 - - Dedicated analog ground for clean reference for termination
resistors.
USB0_VSSA
_REF
G1 F1 F2 23 - - Dedicated clean analog ground for generation of reference
currents and voltages.
VDDA B4 A6 B2 137 - - Analog power supply and ADC reference voltage.
VBAT B10 B9 C5 127 - - RTC power supply: 3.3 V on this pin supplies power to the
RTC.
VDDREG F10,
F9,
L8,
L7
D8,
E8
E4,
E5,
F4
94,
131,
59,
25
- Main regulator power supply. Tie the VDDREG and VDDIO
pins to a common power supply to ensure the same ramp-up
time for both supply voltages.
VPP E8 - - - [12] - - OTP programming voltage.
VDDIO D7,
E12,
F7,
F8,
G10,
H10,
J6,
J7,
K7,
L9,
L10,
N7,
N13
H5,
H10,
K8,
G10
F10,
K5
5,
36,
41,
71,
77,
107,
111,
141
[12] - - I/O power supply. Tie the VDDREG and VDDIO pins to a
common power supply to ensure the same ramp-up time for
both supply voltages.
VDD - - - - Power supply for main regulator, I/O, and OTP.
VSS G9,
H7,
J10,
J11,
K8
F10,
D7,
E6,
E7,
E9,
K6,
K9
- - [13]
[14]
- - Ground.
Table 3. Pin description …continued
LCD, Ethernet, USB0, and USB1 functions are not available on all parts. See Table 2.
Symbol
LBGA256
TFBGA180
TFBGA100
LQFP144
Reset state
[1]
Type
DescriptionLPC4350_30_20_10 All information provided in this document is subject to legal disclaimers. © NXP Semiconductors N.V. 2014. All rights reserved.
Product data sheet Rev. 4.2 — 18 August 2014 60 of 155
NXP Semiconductors LPC4350/30/20/10
32-bit ARM Cortex-M4/M0 microcontroller
[1] N = neutral, input buffer disabled; no extra VDDIO current consumption if the input is driven midway between supplies; set the EZI bit in
the SFS register to enable the input buffer; I = input; OL = output driving LOW; OH = output driving HIGH; AI/O = analog input/output; IA
= inactive; PU = pull-up enabled (weak pull-up resistor pulls up pin to VDDIO; F = floating. Reset state reflects the pin state at reset
without boot code operation.
[2] 5 V tolerant pad with 15 ns glitch filter (5 V tolerant if VDDIO present; if VDDIO not present, do not exceed 3.6 V); provides digital I/O
functions with TTL levels and hysteresis; normal drive strength.
[3] 5 V tolerant pad with 15 ns glitch filter (5 V tolerant if VDDIO present; if VDDIO not present, do not exceed 3.6 V); provides digital I/O
functions with TTL levels, and hysteresis; high drive strength.
[4] 5 V tolerant pad with 15 ns glitch filter (5 V tolerant if VDDIO present; if VDDIO not present, do not exceed 3.6 V); provides high-speed
digital I/O functions with TTL levels and hysteresis.
[5] 5 V tolerant pad providing digital I/O functions (with TTL levels and hysteresis) and analog input or output (5 V tolerant if VDDIO present;
if VDDIO not present, do not exceed 3.6 V). When configured as an ADC input or DAC output, the pin is not 5 V tolerant and the digital
section of the pad must be disabled by setting the pin to an input function and disabling the pull-up resistor through the pin’s SFSP
register.
[6] 5 V tolerant transparent analog pad.
[7] For maximum load CL = 6.5 μF and maximum pull-down resistance Rpd = 80 kΩ, the VBUS signal takes about 2 s to fall from VBUS =
5 V to VBUS = 0.2 V when it is no longer driven.
[8] Transparent analog pad. Not 5 V tolerant.
[9] Pad provides USB functions 5 V tolerant if VDDIO present; if VDDIO not present, do not exceed 3.6 V. It is designed in accordance with
the USB specification, revision 2.0 (Full-speed and Low-speed mode only).
[10] Open-drain 5 V tolerant digital I/O pad, compatible with I2C-bus Fast Mode Plus specification. This pad requires an external pull-up to
provide output functionality. When power is switched off, this pin connected to the I2C-bus is floating and does not disturb the I2C lines.
[11] 5 V tolerant pad with 20 ns glitch filter; provides digital I/O functions with open-drain output and hysteresis.
[12] On the TFBGA100 package, VPP is internally connected to VDDIO.
[13] On the LQFP144 package, VSSIO and VSS are connected to a common ground plane.
[14] On the TFBGA100 package, VSS is internally connected to VSSIO.
VSSIO C4,
D13,
G6,
G7,
G8,
H8,
H9,
J8,
J9,
K9,
K10,
M13,
P7,
P13
- C8,
D4,
D5,
G8,
J3,
J6
4,
40,
76,
109
[13]
[14]
- - Ground.
VSSA B2 A3 C2 135 - - Analog ground.
Not connected
- B9 B8 - - - - n.c.
Table 3. Pin description …continued
LCD, Ethernet, USB0, and USB1 functions are not available on all parts. See Table 2.
Symbol
LBGA256
TFBGA180
TFBGA100
LQFP144
Reset state
[1]
Type
DescriptionLPC4350_30_20_10 All information provided in this document is subject to legal disclaimers. © NXP Semiconductors N.V. 2014. All rights reserved.
Product data sheet Rev. 4.2 — 18 August 2014 61 of 155
NXP Semiconductors LPC4350/30/20/10
32-bit ARM Cortex-M4/M0 microcontroller
7. Functional description
7.1 Architectural overview
The ARM Cortex-M4 includes three AHB-Lite buses: the system bus, the I-CODE bus,
and the D-code bus. The I-CODE and D-code core buses allow for concurrent code and
data accesses from different slave ports.
The LPC4350/30/20/10 use a multi-layer AHB matrix to connect the ARM Cortex-M4
buses and other bus masters to peripherals in a flexible manner that optimizes
performance by allowing peripherals that are on different slaves ports of the matrix to be
accessed simultaneously by different bus masters.
An ARM Cortex-M0 co-processor is included in the LPC4350/30/20/10, capable of
off-loading the main ARM Cortex-M4 application processor. Most peripheral interrupts are
connected to both processors. The processors communicate with each other via an
interprocessor communication protocol.
7.2 ARM Cortex-M4 processor
The ARM Cortex-M4 CPU incorporates a 3-stage pipeline, uses a Harvard architecture
with separate local instruction and data buses as well as a third bus for peripherals, and
includes an internal prefetch unit that supports speculative branching. The ARM
Cortex-M4 supports single-cycle digital signal processing and SIMD instructions. A
hardware floating-point processor is integrated in the core. The processor includes an
NVIC with up to 53 interrupts.
7.3 ARM Cortex-M0 co-processor
The ARM Cortex-M0 is a general purpose, 32-bit microprocessor, which offers high
performance and very low-power consumption. The ARM Cortex-M0 co-processor uses a
3-stage pipeline von-Neumann architecture and a small but powerful instruction set
providing high-end processing hardware. The co-processor incorporates an NVIC with 32
interrupts.
7.4 Interprocessor communication
The ARM Cortex-M4 and ARM Cortex-M0 interprocessor communication is based on
using shared SRAM as mailbox and one processor raising an interrupt on the other
processor's NVIC, for example after it has delivered a new message in the mailbox. The
receiving processor can reply by raising an interrupt on the sending processor's NVIC to
acknowledge the message.LPC4350_30_20_10 All information provided in this document is subject to legal disclaimers. © NXP Semiconductors N.V. 2014. All rights reserved.
Product data sheet Rev. 4.2 — 18 August 2014 62 of 155
NXP Semiconductors LPC4350/30/20/10
32-bit ARM Cortex-M4/M0 microcontroller
7.5 AHB multilayer matrix
7.6 Nested Vectored Interrupt Controller (NVIC)
The NVIC is an integral part of the Cortex-M4. The tight coupling to the CPU allows for low
interrupt latency and efficient processing of late arriving interrupts.
The ARM Cortex-M0 co-processor has its own NVIC with 32 vectored interrupts. Most
peripheral interrupts are shared between the Cortex-M0 and Cortex-M4 NVICs.
Fig 6. AHB multilayer matrix master and slave connections
ARM
CORTEX-M4
TEST/DEBUG
INTERFACE
ARM
CORTEX-M0
TEST/DEBUG
INTERFACE
DMA ETHERNET USB0 USB1 LCD SD/
MMC
EXTERNAL
MEMORY
CONTROLLER
APB, RTC
DOMAIN
PERIPHERALS
16 kB + 16 kB
AHB SRAM
64 kB ROM
128 kB LOCAL SRAM
72 kB LOCAL SRAM
System
bus
I-
code
bus
D-
code
bus
masters
slaves
0 1
AHB MULTILAYER MATRIX
= master-slave connection
32 kB AHB SRAM
SPIFI
SGPIO
AHB PERIPHERALS
REGISTER
INTERFACES
002aaf873
HIGH-SPEED PHYLPC4350_30_20_10 All information provided in this document is subject to legal disclaimers. © NXP Semiconductors N.V. 2014. All rights reserved.
Product data sheet Rev. 4.2 — 18 August 2014 63 of 155
NXP Semiconductors LPC4350/30/20/10
32-bit ARM Cortex-M4/M0 microcontroller
7.6.1 Features
• Controls system exceptions and peripheral interrupts.
• The Cortex-M4 NVIC supports up to 53 vectored interrupts.
• Eight programmable interrupt priority levels with hardware priority level masking.
• Relocatable vector table.
• Non-Maskable Interrupt (NMI).
• Software interrupt generation.
7.6.2 Interrupt sources
Each peripheral device has one interrupt line connected to the NVIC but may have several
interrupt flags. Individual interrupt flags can represent more than one interrupt source.
7.7 System Tick timer (SysTick)
The ARM Cortex-M4 includes a system tick timer (SysTick) that is intended to generate a
dedicated SYSTICK exception at a 10 ms interval.
Remark: The SysTick is not included in the ARM Cortex-M0 core.
7.8 Event router
The event router combines various internal signals, interrupts, and the external interrupt
pins (WAKEUP[3:0]) to create an interrupt in the NVIC, if enabled. In addition, the event
router creates a wake-up signal to the ARM core and the CCU for waking up from Sleep,
Deep-sleep, Power-down, and Deep power-down modes. Individual events can be
configured as edge or level sensitive and can be enabled or disabled in the event router.
The event router can be battery powered.
The following events if enabled in the event router can create a wake-up signal from
sleep, deep-sleep, power-down, and deep power-down modes and/or create an interrupt:
• External pins WAKEUP0/1/2/3 and RESET
• Alarm timer, RTC (32 kHz oscillator running)
The following events if enabled in the event router can create a wake-up signal from sleep
mode only and/or create an interrupt:
• WWDT, BOD interrupts
• C_CAN0/1 and QEI interrupts
• Ethernet, USB0, USB1 signals
• Selected outputs of combined timers (SCTimer/PWM and timer0/1/3)
Remark: Any interrupt can wake up the ARM Cortex-M4 from sleep mode if enabled in
the NVIC.
7.9 Global Input Multiplexer Array (GIMA)
The GIMA routes signals to event-driven peripheral targets like the SCTimer/PWM,
timers, event router, or the ADCs.LPC4350_30_20_10 All information provided in this document is subject to legal disclaimers. © NXP Semiconductors N.V. 2014. All rights reserved.
Product data sheet Rev. 4.2 — 18 August 2014 64 of 155
NXP Semiconductors LPC4350/30/20/10
32-bit ARM Cortex-M4/M0 microcontroller
7.9.1 Features
• Single selection of a source.
• Signal inversion.
• Can capture a pulse if the input event source is faster than the target clock.
• Synchronization of input event and target clock.
• Single-cycle pulse generation for target.
7.10 On-chip static RAM
The LPC4350/30/20/10 support up to 200 kB local SRAM and an additional 64 kB AHB
SRAM with separate bus master access for higher throughput and individual power
control for low-power operation.
7.11 In-System Programming (ISP)
In-System Programming (ISP) means programming or reprogramming the on-chip SRAM
memory, using the boot loader software and the USART0 serial port. ISP can be
performed when the part resides in the end-user board. ISP loads data into on-chip SRAM
and execute code from on-chip SRAM.
7.12 Boot ROM
The internal ROM memory is used to store the boot code of the LPC4350/30/20/10. After
a reset, the ARM processor will start its code execution from this memory.
The boot ROM memory includes the following features:
• The ROM memory size is 64 kB.
• Supports booting from UART interfaces and external static memory such as NOR
flash, quad SPI flash, and USB0 and USB1.
• Includes API for OTP programming.
• Includes a flexible USB device stack that supports Human Interface Device (HID),
Mass Storage Class (MSC), and Device Firmware Upgrade (DFU) drivers.
Several boot modes are available depending on the values of the OTP bits BOOT_SRC. If
the OTP memory is not programmed or the BOOT_SRC bits are all zero, the boot mode is
determined by the states of the boot pins P2_9, P2_8, P1_2, and P1_1.
Table 4. Boot mode when OTP BOOT_SRC bits are programmed
Boot mode BOOT_SRC
bit 3
BOOT_SRC
bit 2
BOOT_SRC
bit 1
BOOT_SRC
bit 0
Description
Pin state 0 0 0 0 Boot source is defined by the reset state of P1_1,
P1_2, P2_8, and P2_9 pins. See Table 5.
USART0 0 0 0 1 Boot from device connected to USART0 using pins
P2_0 and P2_1.
SPIFI 0 0 1 0 Boot from Quad SPI flash connected to the SPIFI
interface using pins P3_3 to P3_8.
EMC 8-bit 0 0 1 1 Boot from external static memory (such as NOR
flash) using CS0 and an 8-bit data bus.LPC4350_30_20_10 All information provided in this document is subject to legal disclaimers. © NXP Semiconductors N.V. 2014. All rights reserved.
Product data sheet Rev. 4.2 — 18 August 2014 65 of 155
NXP Semiconductors LPC4350/30/20/10
32-bit ARM Cortex-M4/M0 microcontroller
[1] The boot loader programs the appropriate pin function at reset to boot using either SSP0 or SPIFI.
Remark: Pin functions for SPIFI and SSP0 boot are different.
[1] The boot loader programs the appropriate pin function at reset to boot using either SSP0 or SPIFI.
Remark: Pin functions for SPIFI and SSP0 boot are different.
7.13 Memory mapping
The memory map shown in Figure 7 and Figure 8 is global to both the Cortex-M4 and the
Cortex-M0 processors and all SRAM is shared between both processors. Each processor
uses its own ARM private bus memory map for the NVIC and other system functions.
EMC 16-bit 0 1 0 0 Boot from external static memory (such as NOR
flash) using CS0 and a 16-bit data bus.
EMC 32-bit 0 1 0 1 Boot from external static memory (such as NOR
flash) using CS0 and a 32-bit data bus.
USB00 1 1 0 Boot from USB0.
USB10 1 1 1 Boot from USB1.
SPI (SSP) 1 0 0 0 Boot from SPI flash connected to the SSP0
interface on P3_3 (function SSP0_SCK), P3_6
(function SSP0_SSEL), P3_7 (function
SSP0_MISO), and P3_8 (function SSP0_MOSI)[1].
USART3 1 0 0 1 Boot from device connected to USART3 using pins
P2_3 and P2_4.
Table 4. Boot mode when OTP BOOT_SRC bits are programmed …continued
Boot mode BOOT_SRC
bit 3
BOOT_SRC
bit 2
BOOT_SRC
bit 1
BOOT_SRC
bit 0
Description
Table 5. Boot mode when OPT BOOT_SRC bits are zero
Boot mode Pins Description
P2_9 P2_8 P1_2 P1_1
USART0 LOW LOW LOW LOW Boot from device connected to USART0 using pins
P2_0 and P2_1.
SPIFI LOW LOW LOW HIGH Boot from Quad SPI flash connected to the SPIFI
interface on P3_3 to P3_8[1].
EMC 8-bit LOW LOW HIGH LOW Boot from external static memory (such as NOR
flash) using CS0 and an 8-bit data bus.
EMC 16-bit LOW LOW HIGH HIGH Boot from external static memory (such as NOR
flash) using CS0 and a 16-bit data bus.
EMC 32-bit LOW HIGH LOW LOW Boot from external static memory (such as NOR
flash) using CS0 and a 32-bit data bus.
USB0 LOW HIGH LOW HIGH Boot from USB0
USB1 LOW HIGH HIGH LOW Boot from USB1.
SPI (SSP) LOW HIGH HIGH HIGH Boot from SPI flash connected to the SSP0
interface on P3_3 (function SSP0_SCK), P3_6
(function SSP0_SSEL), P3_7 (function
SSP0_MISO), and P3_8 (function SSP0_MOSI)[1].
USART3 HIGH LOW LOW LOW Boot from device connected to USART3 using pins
P2_3 and P2_4.LPC4350_30_20_10 All information provided in this document is subject to legal disclaimers. © NXP Semiconductors N.V. 2014. All rights reserved.
Product data sheet Rev. 4.2 — 18 August 2014 66 of 155
NXP Semiconductors LPC4350/30/20/10
32-bit ARM Cortex-M4/M0 microcontroller
Fig 7. LPC4350/30/20/10 Memory mapping (overview)
reserved
peripheral bit band alias region
reserved
reserved
high-speed GPIO
reserved
0 GB 0x0000 0000
1 GB
4 GB
0x2001 0000
0x2200 0000
0x2400 0000
0x2800 0000
0x1000 0000
0x3000 0000
0x4000 0000
0x4001 2000
0x4004 0000
0x4005 0000
0x4010 0000
0x4400 0000
0x6000 0000
AHB peripherals
APB peripherals #0
APB peripherals #1
reserved
reserved
reserved
RTC domain peripherals
0x4006 0000
0x4008 0000
0x4009 0000
0x400A 0000
0x400B 0000
0x400C 0000
0x400D 0000
0x400E 0000
0x400F 0000
0x400F 1000
0x400F 2000
0x400F 4000
0x400F 8000
clocking/reset peripherals
APB peripherals #2
APB peripherals #3
0x2000 8000
16 kB AHB SRAM (LPC4350/30)
16 kB AHB SRAM (LPC4350/30/20/10)
0x2000 C000
16 kB AHB SRAM (LPC4350/30)
16 kB AHB SRAM (LPC4350/30/20/10)
SGPIO
SPI
0x4010 1000
0x4010 2000
0x4200 0000
reserved
local SRAM/
external static memory banks
0x2000 0000
0x2000 4000
128 MB dynamic external memory DYCS0
256 MB dynamic external memory DYCS1
256 MB dynamic external memory DYCS2
256 MB dynamic external memory DYCS3 0x7000 0000
0x8000 0000
0x8800 0000
0xE000 0000
256 MB shadow area
LPC4350/30/20/10
0x1000 0000
0x1002 0000
0x1008 0000
0x1008 A000
0x1009 2000
0x1040 0000
0x1041 0000
0x1C00 0000
0x1D00 0000
reserved
reserved
32 MB AHB SRAM bit banding
reserved
reserved
reserved
0xE010 0000
0xFFFF FFFF
reserved
SPIFI data
ARM private bus
reserved
0x1001 8000 32 kB local SRAM (LPC4350/30/20)
96 kB local SRAM
(LPC4350/30/20/10)
32 kB + 8 kB local SRAM
(LPC4320/10)
64 kB + 8 kB local SRAM
(LPC4350/30)
reserved
reserved
reserved
reserved
64 kB ROM
0x1400 0000
0x1800 0000
SPIFI data
0x1E00 0000
0x1F00 0000
0x2000 0000
16 MB static external memory CS3
16 MB static external memory CS2
16 MB static external memory CS1
16 MB static external memory CS0
002aaf774xxxxxxxxxxxxxxxxxxxxx xxxxxxxxxxxxxxxxxxxxxxxxxx xxxxxxx x x x xxxxxxxxxxxxxxxxxxxxxxxxxxxxxx xxxxxxxxxxxxxxxxxxx xx xx xxxxx
xxxxxxxxxxxxxxxxxxxxxxxxxxx xxxxxxxxxxxxxxxxxxx xxxxxx xxxxxxxxxxxxxxxxxxxxxxxxxxxxxxxxxxx xxxxxxxxxxxx x x
xxxxxxxxxxxxxxxxxxxxx xxxxxxxxxxxxxxxxxxxxxxxxxxxxxx xxxxx xxxxxxxxxxxxxxxxxxxxxxxxxxxxxxxxxxxxxxxxxxxxxxxxxx xxxxxxxx
xxxxxxxxxxxxxxxxxxxxxxxxx xxxxxxxxxxxxxxxxxxxx xxx
LPC4350_30_20_10 All information provided in this document is subject to legal disclaimers. © NXP Semiconductors N.V. 2014. All rights reserved.
Product data sheet Rev. 4.2 — 18 August 2014 67 of 155
NXP Semiconductors LPC4350/30/20/10
32-bit ARM Cortex-M4/M0 microcontroller Fig 8. LPC4350/30/20/10 Memory mapping (peripherals)
reserved
peripheral bit band alias region
high-speed GPIO
reserved
reserved
reserved
reserved
0x4000 0000
0x0000 0000
0x4001 2000
0x4004 0000
0x4005 0000
0x4010 0000
0x4400 0000
0x6000 0000
0xFFFF FFFF
AHB peripherals
SRAM memories
external memory banks
APB0 peripherals
APB1 peripherals
reserved
reserved
reserved
RTC domain peripherals
0x4006 0000
0x4008 0000
0x4009 0000
0x400A 0000
0x400B 0000
0x400C 0000
0x400D 0000
0x400E 0000
0x400F 0000
0x400F 1000
0x400F 2000
0x400F 4000
0x400F 8000
clocking/reset peripherals
APB2 peripherals
APB3 peripherals
SGPIO
SPI
0x4010 1000
0x4010 2000
0x4200 0000
reserved
external memories and
ARM private bus
APB2
peripherals
0x400C 1000
0x400C 2000
0x400C 3000
0x400C 4000
0x400C 6000
0x400C 8000
0x400C 7000
0x400C 5000
0x400C 0000 RI timer
USART2
USART3
timer2
timer3
SSP1
QEI
APB1
peripherals
0x400A 1000
0x400A 2000
0x400A 3000
0x400A 4000
0x400A 5000
0x400B 0000
0x400A 0000 motor control PWM
I2C0
I2S0
I2S1
C_CAN1
reserved
AHB
peripherals
0x4000 1000
0x4000 0000 SCT
0x4000 2000
0x4000 3000
0x4000 4000
0x4000 6000
0x4000 8000
0x4001 0000
0x4001 2000
0x4000 9000
0x4000 7000
0x4000 5000
DMA
SD/MMC
EMC
USB1
LCD
USB0
reserved
SPIFI
ethernet
reserved
0x4008 1000
0x4008 0000 WWDT
0x4008 2000
0x4008 3000
0x4008 4000
0x4008 6000
0x4008 A000
0x4008 7000
0x4008 8000
0x4008 9000
0x4008 5000
UART1 w/ modem
SSP0
timer0
timer1
SCU
GPIO interrupts
GPIO GROUP0 interrupt
GPIO GROUP1 interrupt
USART0
RTC domain
peripherals
0x4004 1000
alarm timer 0x4004 0000
0x4004 2000
0x4004 3000
0x4004 4000
0x4004 6000
0x4004 7000
0x4004 5000
power mode control
CREG
event router
OTP controller
reserved
reserved
RTC
backup registers
clocking
reset control
peripherals
0x4005 1000
0x4005 0000 CGU
0x4005 2000
0x4005 3000
0x4005 4000
0x4006 0000
CCU2
RGU
CCU1
LPC4350/30/20/10
002aaf775
reserved
reserved
APB3
peripherals
0x400E 1000
0x400E 2000
0x400E 3000
0x400E 4000
0x400F 0000
0x400E 5000
0x400E 0000 I2C1
DAC
C_CAN0
ADC0
ADC1
reserved
GIMA
APB0
peripheralsLPC4350_30_20_10 All information provided in this document is subject to legal disclaimers. © NXP Semiconductors N.V. 2014. All rights reserved.
Product data sheet Rev. 4.2 — 18 August 2014 68 of 155
NXP Semiconductors LPC4350/30/20/10
32-bit ARM Cortex-M4/M0 microcontroller
7.14 One-Time Programmable (OTP) memory
The OTP provides 64 bit + 256 bit One-Time Programmable (OTP) memory for
general-purpose use.
7.15 General-Purpose I/O (GPIO)
The LPC4350/30/20/10 provide eight GPIO ports with up to 31 GPIO pins each.
Device pins that are not connected to a specific peripheral function are controlled by the
GPIO registers. Pins may be dynamically configured as inputs or outputs. Separate
registers allow setting or clearing any number of outputs simultaneously. The value of the
output register may be read back as well as the current state of the port pins.
All GPIO pins default to inputs with pull-up resistors enabled and input buffer disabled on
reset. The input buffer must be turned on in the system control block SFS register before
the GPIO input can be read.
7.15.1 Features
• Accelerated GPIO functions:
– GPIO registers are located on the AHB so that the fastest possible I/O timing can
be achieved.
– Mask registers allow treating sets of port bits as a group, leaving other bits
unchanged.
– All GPIO registers are byte and half-word addressable.
– Entire port value can be written in one instruction.
• Bit-level set and clear registers allow a single instruction set or clear of any number of
bits in one port.
• Direction control of individual bits.
• Up to eight GPIO pins can be selected from all GPIO pins to create an edge- or
level-sensitive GPIO interrupt request (GPIO interrupts).
• Two GPIO group interrupts can be triggered by any pin or pins in each port (GPIO
group0 and group1 interrupts).
7.16 Configurable digital peripherals
7.16.1 State Configurable Timer (SCTimer/PWM) subsystem
The SCTimer/PWM allows a wide variety of timing, counting, output modulation, and input
capture operations. The inputs and outputs of the SCTimer/PWM are shared with the
capture and match inputs/outputs of the 32-bit general-purpose counter/timers.
The SCTimer/PWM can be configured as two 16-bit counters or a unified 32-bit counter. In
the two-counter case, in addition to the counter value the following operational elements
are independent for each half:
• State variable
• Limit, halt, stop, and start conditions
• Values of Match/Capture registers, plus reload or capture control valuesLPC4350_30_20_10 All information provided in this document is subject to legal disclaimers. © NXP Semiconductors N.V. 2014. All rights reserved.
Product data sheet Rev. 4.2 — 18 August 2014 69 of 155
NXP Semiconductors LPC4350/30/20/10
32-bit ARM Cortex-M4/M0 microcontroller
In the two-counter case, the following operational elements are global to the
SCTimer/PWM, but the last three can use match conditions from either counter:
• Clock selection
• Inputs
• Events
• Outputs
• Interrupts
7.16.1.1 Features
• Two 16-bit counters or one 32-bit counter.
• Counters clocked by bus clock or selected input.
• Counters can be configured as up-counters or up-down counters.
• State variable allows sequencing across multiple counter cycles.
• Event combines input or output condition and/or counter match in a specified state.
• Events control outputs and interrupts.
• Selected events can limit, halt, start, or stop a counter.
• Supports:
– up to 8 inputs
– 16 outputs
– 16 match/capture registers
– 16 events
– 32 states
7.16.2 Serial GPIO (SGPIO)
The Serial GPIOs offer standard GPIO functionality enhanced with features to accelerate
serial stream processing.
7.16.2.1 Features
• Each SGPIO input/output slice can be used to perform a serial to parallel or parallel to
serial data conversion.
• 16 SGPIO input/output slices each with a 32-bit FIFO that can shift the input value
from a pin or an output value to a pin with every cycle of a shift clock.
• Each slice is double-buffered.
• Interrupt is generated on a full FIFO, shift clock, or pattern match.
• Slices can be concatenated to increase buffer size.
• Each slice has a 32-bit pattern match filter.LPC4350_30_20_10 All information provided in this document is subject to legal disclaimers. © NXP Semiconductors N.V. 2014. All rights reserved.
Product data sheet Rev. 4.2 — 18 August 2014 70 of 155
NXP Semiconductors LPC4350/30/20/10
32-bit ARM Cortex-M4/M0 microcontroller
7.17 AHB peripherals
7.17.1 General-Purpose DMA (GPDMA)
The DMA controller allows peripheral-to memory, memory-to-peripheral,
peripheral-to-peripheral, and memory-to-memory transactions. Each DMA stream
provides unidirectional serial DMA transfers for a single source and destination. For
example, a bidirectional port requires one stream for transmit and one for receives. The
source and destination areas can each be either a memory region or a peripheral for
master 1, but only memory for master 0.
7.17.1.1 Features
• Eight DMA channels. Each channel can support a unidirectional transfer.
• 16 DMA request lines.
• Single DMA and burst DMA request signals. Each peripheral connected to the DMA
Controller can assert either a burst DMA request or a single DMA request. The DMA
burst size is set by programming the DMA Controller.
• Memory-to-memory, memory-to-peripheral, peripheral-to-memory, and
peripheral-to-peripheral transfers are supported.
• Scatter or gather DMA is supported through the use of linked lists. This means that
the source and destination areas do not have to occupy contiguous areas of memory.
• Hardware DMA channel priority.
• AHB slave DMA programming interface. The DMA Controller is programmed by
writing to the DMA control registers over the AHB slave interface.
• Two AHB bus masters for transferring data. These interfaces transfer data when a
DMA request goes active. Master 1 can access memories and peripherals, master 0
can access memories only.
• 32-bit AHB master bus width.
• Incrementing or non-incrementing addressing for source and destination.
• Programmable DMA burst size. The DMA burst size can be programmed to more
efficiently transfer data.
• Internal four-word FIFO per channel.
• Supports 8, 16, and 32-bit wide transactions.
• Big-endian and little-endian support. The DMA Controller defaults to little-endian
mode on reset.
• An interrupt to the processor can be generated on a DMA completion or when a DMA
error has occurred.
• Raw interrupt status. The DMA error and DMA count raw interrupt status can be read
prior to masking.
7.17.2 SPI Flash Interface (SPIFI)
The SPI Flash Interface allows low-cost serial flash memories to be connected to the ARM
Cortex-M4 processor with little performance penalty compared to parallel flash devices
with higher pin count. LPC4350_30_20_10 All information provided in this document is subject to legal disclaimers. © NXP Semiconductors N.V. 2014. All rights reserved.
Product data sheet Rev. 4.2 — 18 August 2014 71 of 155
NXP Semiconductors LPC4350/30/20/10
32-bit ARM Cortex-M4/M0 microcontroller
After a few commands configure the interface at startup, the entire flash content is
accessible as normal memory using byte, halfword, and word accesses by the processor
and/or DMA channels. Simple sequences of commands handle erasing and
programming.
Many serial flash devices use a half-duplex command-driven SPI protocol for device setup
and initialization and then move to a half-duplex, command-driven 4-bit protocol for
normal operation. Different serial flash vendors and devices accept or require different
commands and command formats. SPIFI provides sufficient flexibility to be compatible
with common flash devices and includes extensions to help insure compatibility with future
devices.
7.17.2.1 Features
• Interfaces to serial flash memory in the main memory map.
• Supports classic and 4-bit bidirectional serial protocols.
• Half-duplex protocol compatible with various vendors and devices.
• Quad SPI Flash Interface (SPIFI) with 1-, 2-, or 4-bit data at rates of up to
52 MB per second.
• Supports DMA access.
7.17.3 SD/MMC card interface
The SD/MMC card interface supports the following modes to control:
• Secure Digital memory (SD version 3.0)
• Secure Digital I/O (SDIO version 2.0)
• Consumer Electronics Advanced Transport Architecture (CE-ATA version 1.1)
• MultiMedia Cards (MMC version 4.4)
7.17.4 External Memory Controller (EMC)
The LPC4350/30/20/10 EMC is a Memory Controller peripheral offering support for
asynchronous static memory devices such as RAM, ROM, and NOR flash. In addition, it
can be used as an interface with off-chip memory-mapped devices and peripherals.
7.17.4.1 Features
• Dynamic memory interface support including single data rate SDRAM.
• Asynchronous static memory device support including RAM, ROM, and NOR flash,
with or without asynchronous page mode.
• Low transaction latency.
• Read and write buffers to reduce latency and to improve performance.
• 8/16/32 data and 24 address lines-wide static memory support.
• 16 bit and 32 bit wide chip select SDRAM memory support.
• Static memory features include:
– Asynchronous page mode read
– Programmable Wait States
– Bus turnaround delayLPC4350_30_20_10 All information provided in this document is subject to legal disclaimers. © NXP Semiconductors N.V. 2014. All rights reserved.
Product data sheet Rev. 4.2 — 18 August 2014 72 of 155
NXP Semiconductors LPC4350/30/20/10
32-bit ARM Cortex-M4/M0 microcontroller
– Output enable and write enable delays
– Extended wait
• Four chip selects for synchronous memory and four chip selects for static memory
devices.
• Power-saving modes dynamically control EMC_CKEOUT and EMC_CLK signals to
SDRAMs.
• Dynamic memory self-refresh mode controlled by software.
• Controller supports 2048 (A0 to A10), 4096 (A0 to A11), and 8192 (A0 to A12) row
address synchronous memory parts. Those are typically 512 MB, 256 MB, and
128 MB parts, with 4, 8, 16, or 32 data bits per device.
• Separate reset domains allow auto-refresh through a chip reset if desired.
• SDRAM clock can run at full or half the Cortex-M4 core frequency.
Note: Synchronous static memory devices (synchronous burst mode) are not supported.
7.17.5 High-speed USB Host/Device/OTG interface (USB0)
Remark: The USB0 controller is available on parts LPC4350/30/20. See Table 2.
The USB OTG module allows the LPC4350/30/20/10 to connect directly to a USB Host
such as a PC (in device mode) or to a USB Device in host mode.
7.17.5.1 Features
• On-chip UTMI+ compliant high-speed transceiver (PHY).
• Complies with Universal Serial Bus specification 2.0.
• Complies with USB On-The-Go supplement.
• Complies with Enhanced Host Controller Interface Specification.
• Supports auto USB 2.0 mode discovery.
• Supports all high-speed USB-compliant peripherals.
• Supports all full-speed USB-compliant peripherals.
• Supports software Host Negotiation Protocol (HNP) and Session Request Protocol
(SRP) for OTG peripherals.
• Supports interrupts.
• This module has its own, integrated DMA engine.
• USB interface electrical test software included in ROM USB stack.
7.17.6 High-speed USB Host/Device interface with ULPI (USB1)
Remark: The USB1 controller is available on parts LPC4350/30. See Table 2.
The USB1 interface can operate as a full-speed USB Host/Device interface or can
connect to an external ULPI PHY for High-speed operation.
7.17.6.1 Features
• Complies with Universal Serial Bus specification 2.0.
• Complies with Enhanced Host Controller Interface Specification.LPC4350_30_20_10 All information provided in this document is subject to legal disclaimers. © NXP Semiconductors N.V. 2014. All rights reserved.
Product data sheet Rev. 4.2 — 18 August 2014 73 of 155
NXP Semiconductors LPC4350/30/20/10
32-bit ARM Cortex-M4/M0 microcontroller
• Supports auto USB 2.0 mode discovery.
• Supports all high-speed USB-compliant peripherals if connected to external ULPI
PHY.
• Supports all full-speed USB-compliant peripherals.
• Supports interrupts.
• This module has its own, integrated DMA engine.
• USB interface electrical test software included in ROM USB stack.
7.17.7 LCD controller
Remark: The LCD controller is available on LPC4350 only. See Table 2.
The LCD controller provides all of the necessary control signals to interface directly to
various color and monochrome LCD panels. Both STN (single and dual panel) and TFT
panels can be operated. The display resolution is selectable and can be up to 1024 768
pixels. Several color modes are provided, up to a 24-bit true-color non-palettized mode.
An on-chip 512 byte color palette allows reducing bus utilization (that is, memory size of
the displayed data) while still supporting many colors.
The LCD interface includes its own DMA controller to allow it to operate independently of
the CPU and other system functions. A built-in FIFO acts as a buffer for display data,
providing flexibility for system timing. Hardware cursor support can further reduce the
amount of CPU time required to operate the display.
7.17.7.1 Features
• AHB master interface to access frame buffer.
• Setup and control via a separate AHB slave interface.
• Dual 16-deep programmable 64-bit wide FIFOs for buffering incoming display data.
• Supports single and dual-panel monochrome Super Twisted Nematic (STN) displays
with 4-bit or 8-bit interfaces.
• Supports single and dual-panel color STN displays.
• Supports Thin Film Transistor (TFT) color displays.
• Programmable display resolution including, but not limited to: 320 200, 320 240,
640 200, 640 240, 640 480, 800 600, and 1024 768.
• Hardware cursor support for single-panel displays.
• 15 gray-level monochrome, 3375 color STN, and 32 K color palettized TFT support.
• 1, 2, or 4 bits-per-pixel (bpp) palettized displays for monochrome STN.
• 1, 2, 4, or 8 bpp palettized color displays for color STN and TFT.
• 16 bpp true-color non-palettized for color STN and TFT.
• 24 bpp true-color non-palettized for color TFT.
• Programmable timing for different display panels.
• 256 entry, 16-bit palette RAM, arranged as a 128 32-bit RAM.
• Frame, line, and pixel clock signals.
• AC bias signal for STN, data enable signal for TFT panels.
• Supports little and big-endian, and Windows CE data formats.LPC4350_30_20_10 All information provided in this document is subject to legal disclaimers. © NXP Semiconductors N.V. 2014. All rights reserved.
Product data sheet Rev. 4.2 — 18 August 2014 74 of 155
NXP Semiconductors LPC4350/30/20/10
32-bit ARM Cortex-M4/M0 microcontroller
• LCD panel clock may be generated from the peripheral clock, or from a clock input
pin.
7.17.8 Ethernet
Remark: The Ethernet peripheral is available on parts LPC4350/30. See Table 2.
7.17.8.1 Features
• 10/100 Mbit/s
• DMA support
• Power management remote wake-up frame and magic packet detection
• Supports both full-duplex and half-duplex operation
– Supports CSMA/CD Protocol for half-duplex operation.
– Supports IEEE 802.3x flow control for full-duplex operation.
– Optional forwarding of received pause control frames to the user application in
full-duplex operation.
– Back-pressure support for half-duplex operation.
– Automatic transmission of zero-quanta pause frame on deassertion of flow control
input in full-duplex operation.
• Supports IEEE1588 time stamping and IEEE 1588 advanced time stamping (IEEE
1588-2008 v2).
7.18 Digital serial peripherals
7.18.1 UART1
The LPC4350/30/20/10 contain one UART with standard transmit and receive data lines.
UART1 also provides a full modem control handshake interface and support for
RS-485/9-bit mode allowing both software address detection and automatic address
detection using 9-bit mode.
UART1 includes a fractional baud rate generator. Standard baud rates such as 115200 Bd
can be achieved with any crystal frequency above 2 MHz.
7.18.1.1 Features
• Maximum UART data bit rate of 8 MBit/s.
• 16 B Receive and Transmit FIFOs.
• Register locations conform to 16C550 industry standard.
• Receiver FIFO trigger points at 1 B, 4 B, 8 B, and 14 B.
• Built-in fractional baud rate generator covering wide range of baud rates without a
need for external crystals of particular values.
• Auto baud capabilities and FIFO control mechanism that enables software flow
control implementation.
• Equipped with standard modem interface signals. This module also provides full
support for hardware flow control.
• Support for RS-485/9-bit/EIA-485 mode (UART1).LPC4350_30_20_10 All information provided in this document is subject to legal disclaimers. © NXP Semiconductors N.V. 2014. All rights reserved.
Product data sheet Rev. 4.2 — 18 August 2014 75 of 155
NXP Semiconductors LPC4350/30/20/10
32-bit ARM Cortex-M4/M0 microcontroller
• DMA support.
7.18.2 USART0/2/3
The LPC4350/30/20/10 contain three USARTs. In addition to standard transmit and
receive data lines, the USARTs support a synchronous mode.
The USARTs include a fractional baud rate generator. Standard baud rates such as
115200 Bd can be achieved with any crystal frequency above 2 MHz.
7.18.2.1 Features
• Maximum UART data bit rate of 8 MBit/s.
• 16 B Receive and Transmit FIFOs.
• Register locations conform to 16C550 industry standard.
• Receiver FIFO trigger points at 1 B, 4 B, 8 B, and 14 B.
• Built-in fractional baud rate generator covering wide range of baud rates without a
need for external crystals of particular values.
• Auto baud capabilities and FIFO control mechanism that enables software flow
control implementation.
• Support for RS-485/9-bit/EIA-485 mode.
• USART3 includes an IrDA mode to support infrared communication.
• All USARTs have DMA support.
• Support for synchronous mode at a data bit rate of up to 8 Mbit/s.
• Smart card mode conforming to ISO7816 specification
7.18.3 SPI serial I/O controller
The LPC4350/30/20/10 contain one SPI controller. SPI is a full-duplex serial interface
designed to handle multiple masters and slaves connected to a given bus. Only a single
master and a single slave can communicate on the interface during a given data transfer.
During a data transfer the master always sends 8 bits to 16 bits of data to the slave, and
the slave always sends 8 bits to 16 bits of data to the master.
7.18.3.1 Features
• Maximum SPI data bit rate 25 Mbit/s.
• Compliant with SPI specification
• Synchronous, serial, full-duplex communication
• Combined SPI master and slave
• Maximum data bit rate of one eighth of the input clock rate
• 8 bits to 16 bits per transfer
7.18.4 SSP serial I/O controller
Remark: The LPC4350/30/20/10 contain two SSP controllers.
The SSP controller can operate on a SPI, 4-wire SSI, or Microwire bus. It can interact with
multiple masters and slaves on the bus. Only a single master and a single slave can
communicate on the bus during a given data transfer. The SSP supports full-duplex LPC4350_30_20_10 All information provided in this document is subject to legal disclaimers. © NXP Semiconductors N.V. 2014. All rights reserved.
Product data sheet Rev. 4.2 — 18 August 2014 76 of 155
NXP Semiconductors LPC4350/30/20/10
32-bit ARM Cortex-M4/M0 microcontroller
transfers, with frames of 4 bit to 16 bit of data flowing from the master to the slave and
from the slave to the master. In practice, often only one of these data flows carries
meaningful data.
7.18.4.1 Features
• Maximum SSP speed in full-duplex mode of 25 Mbit/s; for transmit only 50 Mbit/s
(master) and 17 Mbit/s (slave).
• Compatible with Motorola SPI, 4-wire Texas Instruments SSI, and National
Semiconductor Microwire buses
• Synchronous serial communication
• Master or slave operation
• 8-frame FIFOs for both transmit and receive
• 4-bit to 16-bit frame
• DMA transfers supported by GPDMA
7.18.5 I2C-bus interface
Remark: The LPC4350/30/20/10 contain two I2C-bus interfaces.
The I2C-bus is bidirectional for inter-IC control using only two wires: a Serial Clock line
(SCL) and a Serial Data line (SDA). Each device is recognized by a unique address and
can operate as either a receiver-only device (for example an LCD driver) or a transmitter
with the capability to both receive and send information (such as memory). Transmitters
and/or receivers can operate in either master or slave mode, depending on whether the
chip has to initiate a data transfer or is only addressed. The I2C is a multi-master bus and
can be controlled by more than one bus master connected to it.
7.18.5.1 Features
• I
2C0 is a standard I2C-compliant bus interface with open-drain pins. I2C0 also
supports Fast mode plus with bit rates up to 1 Mbit/s.
• I
2C1 uses standard I/O pins with bit rates of up to 400 kbit/s (Fast I2C-bus).
• Easy to configure as master, slave, or master/slave.
• Programmable clocks allow versatile rate control.
• Bidirectional data transfer between masters and slaves.
• Multi-master bus (no central master).
• Arbitration between simultaneously transmitting masters without corruption of serial
data on the bus.
• Serial clock synchronization allows devices with different bit rates to communicate via
one serial bus.
• Serial clock synchronization can be used as a handshake mechanism to suspend and
resume serial transfer.
• The I2C-bus can be used for test and diagnostic purposes.
• All I2C-bus controllers support multiple address recognition and a bus monitor mode.
7.18.6 I2S interface
Remark: The LPC4350/30/20/10 contain two I2S-bus interfaces.LPC4350_30_20_10 All information provided in this document is subject to legal disclaimers. © NXP Semiconductors N.V. 2014. All rights reserved.
Product data sheet Rev. 4.2 — 18 August 2014 77 of 155
NXP Semiconductors LPC4350/30/20/10
32-bit ARM Cortex-M4/M0 microcontroller
The I2S-bus provides a standard communication interface for digital audio applications.
The I
2S-bus specification defines a 3-wire serial bus using one data line, one clock line,
and one word select signal. The basic I2S-bus connection has one master, which is
always the master, and one slave. The I2S-bus interface provides a separate transmit and
receive channel, each of which can operate as either a master or a slave.
7.18.6.1 Features
• The I2S interface has separate input/output channels, each of which can operate in
master or slave mode.
• Capable of handling 8-bit, 16-bit, and 32-bit word sizes.
• Mono and stereo audio data supported.
• The sampling frequency can range from 16 kHz to 192 kHz (16, 22.05, 32, 44.1, 48,
96, 192) kHz.
• Support for an audio master clock.
• Configurable word select period in master mode (separately for I2S-bus input and
output).
• Two 8-word FIFO data buffers are provided, one for transmit and one for receive.
• Generates interrupt requests when buffer levels cross a programmable boundary.
• Two DMA requests controlled by programmable buffer levels. The DMA requests are
connected to the GPDMA block.
• Controls include reset, stop and mute options separately for I2S-bus input and I2S-bus
output.
7.18.7 C_CAN
Remark: The LPC4350/30/20/10 contain two C_CAN controllers.
Controller Area Network (CAN) is the definition of a high performance communication
protocol for serial data communication. The C_CAN controller is designed to provide a full
implementation of the CAN protocol according to the CAN Specification Version 2.0B. The
C_CAN controller can create powerful local networks with low-cost multiplex wiring by
supporting distributed real-time control with a high level of reliability.
7.18.7.1 Features
• Conforms to protocol version 2.0 parts A and B.
• Supports bit rate of up to 1 Mbit/s.
• Supports 32 Message Objects.
• Each Message Object has its own identifier mask.
• Provides programmable FIFO mode (concatenation of Message Objects).
• Provides maskable interrupts.
• Supports Disabled Automatic Retransmission (DAR) mode for time-triggered CAN
applications.
• Provides programmable loop-back mode for self-test operation.LPC4350_30_20_10 All information provided in this document is subject to legal disclaimers. © NXP Semiconductors N.V. 2014. All rights reserved.
Product data sheet Rev. 4.2 — 18 August 2014 78 of 155
NXP Semiconductors LPC4350/30/20/10
32-bit ARM Cortex-M4/M0 microcontroller
7.19 Counter/timers and motor control
7.19.1 General purpose 32-bit timers/external event counters
The LPC4350/30/20/10 include four 32-bit timer/counters. The timer/counter is designed
to count cycles of the system derived clock or an externally-supplied clock. It can
optionally generate interrupts, generate timed DMA requests, or perform other actions at
specified timer values, based on four match registers. Each timer/counter also includes
two capture inputs to trap the timer value when an input signal transitions, optionally
generating an interrupt.
7.19.1.1 Features
• A 32-bit timer/counter with a programmable 32-bit prescaler.
• Counter or timer operation.
• Two 32-bit capture channels per timer, that can take a snapshot of the timer value
when an input signal transitions. A capture event can also generate an interrupt.
• Four 32-bit match registers that allow:
– Continuous operation with optional interrupt generation on match.
– Stop timer on match with optional interrupt generation.
– Reset timer on match with optional interrupt generation.
• Up to four external outputs corresponding to match registers, with the following
capabilities:
– Set LOW on match.
– Set HIGH on match.
– Toggle on match.
– Do nothing on match.
• Up to two match registers can be used to generate timed DMA requests.
7.19.2 Motor control PWM
The motor control PWM is a specialized PWM supporting 3-phase motors and other
combinations. Feedback inputs are provided to automatically sense rotor position and use
that information to ramp speed up or down. An abort input causes the PWM to release all
motor drive outputs immediately . At the same time, the motor control PWM is highly
configurable for other generalized timing, counting, capture, and compare applications.
7.19.3 Quadrature Encoder Interface (QEI)
A quadrature encoder, also known as a 2-channel incremental encoder, converts angular
displacement into two pulse signals. By monitoring both the number of pulses and the
relative phase of the two signals, the user code can track the position, direction of rotation,
and velocity. In addition, a third channel, or index signal, can be used to reset the position
counter. The quadrature encoder interface decodes the digital pulses from a quadrature
encoder wheel to integrate position over time and determine direction of rotation. In
addition, the QEI can capture the velocity of the encoder wheel.
7.19.3.1 Features
• Tracks encoder position.LPC4350_30_20_10 All information provided in this document is subject to legal disclaimers. © NXP Semiconductors N.V. 2014. All rights reserved.
Product data sheet Rev. 4.2 — 18 August 2014 79 of 155
NXP Semiconductors LPC4350/30/20/10
32-bit ARM Cortex-M4/M0 microcontroller
• Increments/decrements depending on direction.
• Programmable for 2 or 4 position counting.
• Velocity capture using built-in timer.
• Velocity compare function with “less than” interrupt.
• Uses 32-bit registers for position and velocity.
• Three position-compare registers with interrupts.
• Index counter for revolution counting.
• Index compare register with interrupts.
• Can combine index and position interrupts to produce an interrupt for whole and
partial revolution displacement.
• Digital filter with programmable delays for encoder input signals.
• Can accept decoded signal inputs (clk and direction).
7.19.4 Repetitive Interrupt (RI) timer
The repetitive interrupt timer provides a free-running 32-bit counter which is compared to
a selectable value, generating an interrupt when a match occurs. Any bits of the
timer/compare function can be masked such that they do not contribute to the match
detection. The repetitive interrupt timer can be used to create an interrupt that repeats at
predetermined intervals.
7.19.4.1 Features
• 32-bit counter. Counter can be free-running or be reset by a generated interrupt.
• 32-bit compare value.
• 32-bit compare mask. An interrupt is generated when the counter value equals the
compare value, after masking. This mechanism allows for combinations not possible
with a simple compare.
7.19.5 Windowed WatchDog Timer (WWDT)
The purpose of the watchdog is to reset the controller if software fails to periodically
service it within a programmable time window.
7.19.5.1 Features
• Internally resets chip if not periodically reloaded during the programmable time-out
period.
• Optional windowed operation requires reload to occur between a minimum and
maximum time period, both programmable.
• Optional warning interrupt can be generated at a programmable time prior to
watchdog time-out.
• Enabled by software but requires a hardware reset or a watchdog reset/interrupt to be
disabled.
• Incorrect feed sequence causes reset or interrupt if enabled.
• Flag to indicate watchdog reset.
• Programmable 24-bit timer with internal prescaler.LPC4350_30_20_10 All information provided in this document is subject to legal disclaimers. © NXP Semiconductors N.V. 2014. All rights reserved.
Product data sheet Rev. 4.2 — 18 August 2014 80 of 155
NXP Semiconductors LPC4350/30/20/10
32-bit ARM Cortex-M4/M0 microcontroller
• Selectable time period from (Tcy(WDCLK) 256 4) to (Tcy(WDCLK) 224 4) in
multiples of Tcy(WDCLK) 4.
• The Watchdog Clock (WDCLK) uses the IRC as the clock source.
7.20 Analog peripherals
7.20.1 Analog-to-Digital Converter (ADC0/1)
7.20.1.1 Features
• 10-bit successive approximation analog to digital converter.
• Input multiplexing among 8 pins.
• Power-down mode.
• Measurement range 0 to VDDA.
• Sampling frequency up to 400 kSamples/s.
• Burst conversion mode for single or multiple inputs.
• Optional conversion on transition on ADCTRIG0 or ADCTRIG1 pins, combined timer
outputs 8 or 15, or the PWM output MCOA2.
• Individual result registers for each A/D channel to reduce interrupt overhead.
• DMA support.
7.20.2 Digital-to-Analog Converter (DAC)
7.20.2.1 Features
• 10-bit resolution
• Monotonic by design (resistor string architecture)
• Controllable conversion speed
• Low-power consumption
7.21 Peripherals in the RTC power domain
7.21.1 RTC
The Real-Time Clock (RTC) is a set of counters for measuring time when system power is
on, and optionally when it is off. It uses little power when the CPU does not access its
registers, especially in the reduced power modes. A separate 32 kHz oscillator clocks the
RTC. The oscillator produces a 1 Hz internal time reference and is powered by its own
power supply pin, VBAT.
7.21.1.1 Features
• Measures the passage of time to maintain a calendar and clock. Provides seconds,
minutes, hours, day of month, month, year, day of week, and day of year.
• Ultra-low power design to support battery powered systems. Uses power from the
CPU power supply when it is present.
• Dedicated battery power supply pin.
• RTC power supply is isolated from the rest of the chip.LPC4350_30_20_10 All information provided in this document is subject to legal disclaimers. © NXP Semiconductors N.V. 2014. All rights reserved.
Product data sheet Rev. 4.2 — 18 August 2014 81 of 155
NXP Semiconductors LPC4350/30/20/10
32-bit ARM Cortex-M4/M0 microcontroller
• Calibration counter allows adjustment to better than 1 sec/day with 1 sec resolution.
• Periodic interrupts can be generated from increments of any field of the time registers.
• Alarm interrupt can be generated for a specific date/time.
7.21.2 Alarm timer
The alarm timer is a 16-bit timer and counts down at 1 kHz from a preset value generating
alarms in intervals of up to 1 min. The counter triggers a status bit when it reaches 0x00
and asserts an interrupt if enabled.
The alarm timer is part of the RTC power domain and can be battery powered.
7.22 System control
7.22.1 Configuration registers (CREG)
The following settings are controlled in the configuration register block:
• BOD trip settings
• Oscillator output
• DMA-to-peripheral muxing
• Ethernet mode
• Memory mapping
• Timer/USART inputs
• Enabling the USB controllers
In addition, the CREG block contains the part identification and part configuration
information.
7.22.2 System Control Unit (SCU)
The system control unit determines the function and electrical mode of the digital pins. By
default function 0 is selected for all pins with pull-up enabled. For pins that support a
digital and analog function, the ADC function select registers in the SCU enable the
analog function.
A separate set of analog I/Os for the ADCs and the DAC as well as most USB pins are
located on separate pads and are not controlled through the SCU.
In addition, the clock delay register for the SDRAM EMC_CLK pins and the registers that
select the pin interrupts are located in the SCU.
7.22.3 Clock Generation Unit (CGU)
The Clock Generator Unit (CGU) generates several base clocks. The base clocks can be
unrelated in frequency and phase and can have different clock sources within the CGU.
One CGU base clock is routed to the CLKOUT pins. The base clock that generates the
CPU clock is referred to as CCLK.
Multiple branch clocks are derived from each base clock. The branch clocks offer flexible
control for power-management purposes. All branch clocks are outputs of one of two
Clock Control Units (CCUs) and can be controlled independently. Branch clocks derived
from the same base clock are synchronous in frequency and phase. LPC4350_30_20_10 All information provided in this document is subject to legal disclaimers. © NXP Semiconductors N.V. 2014. All rights reserved.
Product data sheet Rev. 4.2 — 18 August 2014 82 of 155
NXP Semiconductors LPC4350/30/20/10
32-bit ARM Cortex-M4/M0 microcontroller
7.22.4 Internal RC oscillator (IRC)
The IRC is used as the clock source for the WWDT and/or as the clock that drives the
PLLs and the CPU. The nominal IRC frequency is 12 MHz. The IRC is trimmed to 1.5 %
accuracy over the entire voltage and temperature range.
Upon power-up or any chip reset, the LPC4350/30/20/10 use the IRC as the clock source.
The boot loader then configures the PLL1 to provide a 96 MHz clock for the core and the
PLL0USB or PLL0AUDIO as needed if an external boot source is selected.
7.22.5 PLL0USB (for USB0)
PLL0 is a dedicated PLL for the USB0 High-speed controller.
PLL0 accepts an input clock frequency from an external oscillator in the range of 14 kHz
to 25 MHz. The input frequency is multiplied up to a high frequency with a Current
Controlled Oscillator (CCO). The CCO operates in the range of 4.3 MHz to 550 MHz.
7.22.6 PLL0AUDIO (for audio)
The audio PLL PLL0AUDIO is a general-purpose PLL with a small step size. This PLL
accepts an input clock frequency derived from an external oscillator or internal IRC. The
input frequency is multiplied up to a high frequency with a Current Controlled Oscillator
(CCO). A sigma-delta converter modulates the PLL divider ratios to obtain the desired
output frequency. The output frequency can be set as a multiple of the sampling frequency
fs to 32fs, 64fs, 128 fs, 256 fs, 384 fs, 512 fs and the sampling frequency fs can
range from 16 kHz to 192 kHz (16, 22.05, 32, 44.1, 48, 96,192) kHz. Many other
frequencies are possible as well using the integrated fractional divider.
7.22.7 System PLL1
The PLL1 accepts an input clock frequency from an external oscillator in the range of
1 MHz to 25 MHz. The input frequency is multiplied up to a high frequency with a Current
Controlled Oscillator (CCO). The multiplier can be an integer value from 1 to 32. The CCO
operates in the range of 156 MHz to 320 MHz. This range is possible through an
additional divider in the loop to keep the CCO within its frequency range while the PLL is
providing the desired output frequency. The output divider can be set to divide by 2, 4, 8,
or 16 to produce the output clock. Since the minimum output divider value is 2, it is
insured that the PLL output has a 50 % duty cycle. The PLL is turned off and bypassed
following a chip reset. After reset, software can enable the PLL. The program must
configure and activate the PLL, wait for the PLL to lock, and then connect to the PLL as a
clock source. The PLL settling time is 100 s.
7.22.8 Reset Generation Unit (RGU)
The RGU allows generation of independent reset signals for individual blocks and
peripherals on the LPC4350/30/20/10.
7.22.9 Power control
The LPC4350/30/20/10 feature several independent power domains to control power to
the core and the peripherals (see Figure 9). The RTC and its associated peripherals (the
alarm timer, the CREG block, the OTP controller, the back-up registers, and the event
router) are located in the RTC power-domain. The main regulator or a battery supply can
power the RTC. A power selector switch ensures that the RTC block is always powered
on.LPC4350_30_20_10 All information provided in this document is subject to legal disclaimers. © NXP Semiconductors N.V. 2014. All rights reserved.
Product data sheet Rev. 4.2 — 18 August 2014 83 of 155
NXP Semiconductors LPC4350/30/20/10
32-bit ARM Cortex-M4/M0 microcontroller
7.22.10 Power Management Controller (PMC)
The PMC controls the power to the cores, peripherals, and memories.
The LPC4350/30/20/10 support the following power modes in order from highest to lowest
power consumption:
1. Active mode
2. Sleep mode
3. Power-down modes:
a. Deep-sleep mode
b. Power-down mode
c. Deep power-down mode
Fig 9. Power domains
REAL-TIME CLOCK
BACKUP REGISTERS
RESET/WAKE-UP
CONTROL
REGULATOR
32 kHz
OSCILLATOR
ALWAYS-ON/RTC POWER DOMAIN
MAIN POWER DOMAIN
RTCX1
VBAT
VDDREG
RTCX2
VDDIO
VSS
to memories,
peripherals,
oscillators,
PLLs
to cores
to I/O pads
ADC
DAC
OTP
ADC POWER DOMAIN
OTP POWER DOMAIN
USB0 POWER DOMAIN
VDDA
VSSA
VPP
USB0 USB0_VDDA3V_DRIVER
USB0_VDDA3V3
LPC43xx
ULTRA LOW-POWER
REGULATOR
ALARM
RESET
WAKEUP0/1/2/3
to RTC
domain
peripherals
002aag378
to RTC I/O
pads (Vps)LPC4350_30_20_10 All information provided in this document is subject to legal disclaimers. © NXP Semiconductors N.V. 2014. All rights reserved.
Product data sheet Rev. 4.2 — 18 August 2014 84 of 155
NXP Semiconductors LPC4350/30/20/10
32-bit ARM Cortex-M4/M0 microcontroller
Active mode and sleep mode apply to the state of the core. In a dual-core system, either
core can be in active or sleep mode independently of the other core.
If the core is in Active mode, it is fully operational and can access peripherals and
memories as configured by software. If the core is in Sleep mode, it receives no clocks,
but peripherals and memories remain running.
Either core can enter sleep mode from active mode independently of the other core and
while the other core remains in active mode or is in sleep mode.
Power-down modes apply to the entire system. In the Power-down modes, both cores and
all peripherals except for peripherals in the always-on power domain are shut down.
Memories can remain powered for retaining memory contents as defined by the individual
power-down mode.
Either core in active mode can put the part into one of the three power down modes if the
core is enabled to do so. If both cores are enabled for putting the system into power-down,
then the system enters power-down only once both cores have received a WFI or WFE
instruction.
Wake-up from sleep mode is caused by an interrupt or event in the core’s NVIC. The
interrupt is captured in the NVIC and an event is captured in the Event router. Both cores
can wake up from sleep mode independently of each other.
Wake-up from the Power-down modes, Deep-sleep, Power-down, and Deep power-down,
is caused by an event on the WAKEUP pins or an event from the RTC or alarm timer.
When waking up from Deep power-down mode, the part resets and attempts to boot.
7.23 Serial Wire Debug/JTAG
Debug and trace functions are integrated into the ARM Cortex-M4. Serial wire debug and
trace functions are supported in addition to a standard JTAG debug and parallel trace
functions. The ARM Cortex-M4 is configured to support up to eight breakpoints and four
watch points.
Remark: Serial Wire Debug is supported for the ARM Cortex-M4 only,
The ARM Cortex-M0 coprocessor supports JTAG debug. A standard ARM
Cortex-compliant debugger can debug the ARM Cortex-M4 and the ARM Cortex-M0
cores separately or both cores simultaneously.
Remark: In order to debug the ARM Cortex-M0, release the M0 reset by software in the
RGU block.LPC4350_30_20_10 All information provided in this document is subject to legal disclaimers. © NXP Semiconductors N.V. 2014. All rights reserved.
Product data sheet Rev. 4.2 — 18 August 2014 85 of 155
NXP Semiconductors LPC4350/30/20/10
32-bit ARM Cortex-M4/M0 microcontroller
Fig 10. Dual-core debug configuration
002aah448
TCK ARM Cortex-M0 ARM Cortex-M4
DBGEN = HIGH
TMS
TRST
TDI TDO TDO
TDO
DBGEN
RESET RESET = HIGH
TCK
TMS
TRST
TDI
TCK
TMS
TRST
TDI
JTAG ID = 0x0BA0 1477 JTAG ID = 0x4BA0 0477
LPC43xxLPC4350_30_20_10 All information provided in this document is subject to legal disclaimers. © NXP Semiconductors N.V. 2014. All rights reserved.
Product data sheet Rev. 4.2 — 18 August 2014 86 of 155
NXP Semiconductors LPC4350/30/20/10
32-bit ARM Cortex-M4/M0 microcontroller
8. Limiting values
[1] The following applies to the limiting values:
a) This product includes circuitry designed for the protection of its internal devices from the damaging effects of excessive static
charge. Nonetheless, it is suggested that conventional precautions be taken to avoid applying greater than the rated maximum.
b) Parameters are valid over operating temperature range unless otherwise specified. All voltages are with respect to VSS unless
otherwise noted.
[2] Including voltage on outputs in 3-state mode.
[3] The peak current is limited to 25 times the corresponding maximum current.
[4] Dependent on package type.
[5] Human body model: equivalent to discharging a 100 pF capacitor through a 1.5 k series resistor.
Table 6. Limiting values
In accordance with the Absolute Maximum Rating System (IEC 60134).[1]
Symbol Parameter Conditions Min Max Unit
VDD(REG)(3V3) regulator supply voltage
(3.3 V)
on pin VDDREG 0.5 3.6 V
VDD(IO) input/output supply
voltage
on pin VDDIO 0.5 3.6 V
VDDA(3V3) analog supply voltage
(3.3 V)
on pin VDDA 0.5 3.6 V
VBAT battery supply voltage on pin VBAT 0.5 3.6 V
Vprog(pf) polyfuse programming
voltage
on pin VPP 0.5 3.6 V
VI input voltage only valid when VDD(IO) 2.2 V
5 V tolerant I/O pins
[2]
0.5 5.5 V
ADC/DAC pins and digital I/O
pins configured for an analog
function
0.5 VDDA(3V3) V
USB0 pins USB0_DP;
USB0_DM;USB0_VBUS
0.3 5.25 V
USB0 pins USB0_ID;
USB0_RREF
0.3 3.6 V
USB1 pins USB1_DP and
USB1_DM
0.3 5.25 V
IDD supply current per supply pin [3] - 100 mA
ISS ground current per ground pin [3] - 100 mA
Ilatch I/O latch-up current (0.5VDD(IO)) < VI < (1.5VDD(IO));
Tj
< 125 C
- 100 mA
Tstg storage temperature [4] 65 +150 C
Ptot(pack) total power dissipation
(per package)
based on package heat transfer,
not device power consumption
- 1.5 W
VESD electrostatic discharge
voltage
human body model; all pins [5] 2000 +2000 VLPC4350_30_20_10 All information provided in this document is subject to legal disclaimers. © NXP Semiconductors N.V. 2014. All rights reserved.
Product data sheet Rev. 4.2 — 18 August 2014 87 of 155
NXP Semiconductors LPC4350/30/20/10
32-bit ARM Cortex-M4/M0 microcontroller
9. Thermal characteristics
The average chip junction temperature, Tj (C), can be calculated using the following
equation:
(1)
• Tamb = ambient temperature (C),
• Rth(j-a) = the package junction-to-ambient thermal resistance (C/W)
• PD = sum of internal and I/O power dissipation
The internal power dissipation is the product of IDD and VDD. The I/O power dissipation of
the I/O pins is often small and many times can be negligible. However it can be significant
in some applications.
Tj Tamb PD Rth j a – +=
Table 7. Thermal characteristics
VDD = 2.2 V to 3.6 V; Tamb = 40 C to +85 C unless otherwise specified;
Symbol Parameter Conditions Min Typ Max Unit
Tj(max) maximum junction
temperature
- - 125 C
Table 8. Thermal resistance (LQFP packages)
Symbol Parameter Conditions Thermal resistance
in C/W ±15 %
LQFP144
Rth(j-a) thermal resistance from
junction to ambient
JEDEC (4.5 in 4 in); still air 38
Single-layer (4.5 in 3 in);
still air
50
Rth(j-c) thermal resistance from
junction to case
11
Table 9. Thermal resistance value (BGA packages)
Symbol Parameter Conditions Thermal resistance in C/W ±15 %
LBGA256 TFBGA180 TFBGA100
Rth(j-a) thermal resistance from
junction to ambient
JEDEC (4.5 in 4 in); still air 29 38 46
8-layer (4.5 in 3 in); still air 24 30 37
Rth(j-c) thermal resistance from
junction to case
14 11 11LPC4350_30_20_10 All information provided in this document is subject to legal disclaimers. © NXP Semiconductors N.V. 2014. All rights reserved.
Product data sheet Rev. 4.2 — 18 August 2014 88 of 155
NXP Semiconductors LPC4350/30/20/10
32-bit ARM Cortex-M4/M0 microcontroller
10. Static characteristics
Table 10. Static characteristics
Tamb = 40 C to +85 C, unless otherwise specified.
Symbol Parameter Conditions Min Typ[1] Max Unit
Supply pins
VDD(IO) input/output supply
voltage
2.2 - 3.6 V
VDD(REG)(3V3) regulator supply voltage
(3.3 V)
[2] 2.2 - 3.6 V
VDDA(3V3) analog supply voltage
(3.3 V)
on pin VDDA 2.2 - 3.6 V
on pins
USB0_VDDA3V3_
DRIVER and
USB0_VDDA3V3
3.0 3.3 3.6 V
VBAT battery supply voltage [2] 2.2 - 3.6 V
Vprog(pf) polyfuse programming
voltage
on pin VPP (for OTP) [3] 2.7 - 3.6 V
Iprog(pf) polyfuse programming
current
on pin VPP; OTP
programming time
1.6 ms
- - 30 mA
IDD(REG)(3V3) regulator supply current
(3.3 V)
Active mode; M0-core in
reset; code
while(1){}
executed from RAM; all
peripherals disabled;
PLL1 enabled
CCLK = 12 MHz [4] - 6.6- mA
CCLK = 60 MHz [4] 25.3 - mA
CCLK = 120 MHz [4] - 48.4- mA
CCLK = 180 MHz [4] - 72.0- mA
CCLK = 204 MHz [4] - 81.5- mA
IDD(REG)(3V3) regulator supply current
(3.3 V)
after WFE/WFI instruction
executed from RAM; all
peripherals disabled; M0
core in reset
sleep mode [4][5] - 5.0- mA
deep-sleep mode [4] - 30 - A
power-down mode [4] - 15 - A
deep power-down
mode
[4][6] - 0.03 - A
deep power-down
mode; VBAT floating
[4]-- 2 - A
IBAT battery supply current active mode; VBAT = 3.2 V;
VDD(REG)(3V3) = 3.6 V.
[7] - 0 -nALPC4350_30_20_10 All information provided in this document is subject to legal disclaimers. © NXP Semiconductors N.V. 2014. All rights reserved.
Product data sheet Rev. 4.2 — 18 August 2014 89 of 155
NXP Semiconductors LPC4350/30/20/10
32-bit ARM Cortex-M4/M0 microcontroller
IBAT battery supply current VDD(REG)(3V3) = 3.3 V;
VBAT = 3.6 V
deep-sleep mode
[8]
- 2- A
power-down mode [8] - 2- A
deep power-down
mode
[8]
- 2- A
IDD(IO) I/O supply current deep sleep mode - - 1 - A
power-down mode - - 1 - A
deep power-down mode [9] - 0.05 - A
IDDA Analog supply current on pin VDDA;
deep sleep mode
[11] - 0.4 -
A
power-down mode [11] - 0.4 - A
deep power-down
mode
[11] - 0.007 -
A
RESET,RTC_ALARM, WAKEUPn pins
VIH HIGH-level input
voltage
[10] 0.8 (Vps
0.35)
- 5.5 V
VIL LOW-level input voltage [10] 0 - 0.3 (Vps
0.1)
V
Vhys hysteresis voltage [10] 0.05 (Vps
0.35)
--V
Vo output voltage [10] - Vps - 0.2 - V
Standard I/O pins - normal drive strength
CI input capacitance - - 2 pF
ILL LOW-level leakage
current
VI = 0 V; on-chip pull-up
resistor disabled
- 3 - nA
ILH HIGH-level leakage
current
VI = VDD(IO); on-chip
pull-down resistor
disabled
- 3 - nA
VI = 5 V --20 nA
IOZ OFF-state output
current
VO = 0 V to VDD(IO);
on-chip pull-up/down
resistors disabled;
absolute value
- 3- nA
VI input voltage pin configured to provide
a digital function;
VDD(IO) 2.2 V
0 - 5.5 V
VDD(IO) = 0 V 0 - 3.6 V
VO output voltage output active 0 - VDD(IO) V
VIH HIGH-level input
voltage
0.7
VDD(IO)
- 5.5 V
VIL LOW-level input voltage 0 - 0.3
VDD(IO)
V
Vhys hysteresis voltage 0.1
VDD(IO)
--V
Table 10. Static characteristics …continued
Tamb = 40 C to +85 C, unless otherwise specified.
Symbol Parameter Conditions Min Typ[1] Max UnitLPC4350_30_20_10 All information provided in this document is subject to legal disclaimers. © NXP Semiconductors N.V. 2014. All rights reserved.
Product data sheet Rev. 4.2 — 18 August 2014 90 of 155
NXP Semiconductors LPC4350/30/20/10
32-bit ARM Cortex-M4/M0 microcontroller
VOH HIGH-level output
voltage
IOH = 6 mA VDD(IO)
0.4
--V
VOL LOW-level output
voltage
IOL = 6 mA --0.4 V
IOH HIGH-level output
current
VOH = VDD(IO) 0.4 V 6 - - mA
IOL LOW-level output
current
VOL = 0.4 V 6- - mA
IOHS HIGH-level short-circuit
output current
drive HIGH; connected to
ground
[12] --86.5 mA
IOLS LOW-level short-circuit
output current
drive LOW; connected to
VDD(IO)
[12] --76.5 mA
Ipd pull-down current VI = 5 V [14][15]
[16]
- 93 - A
Ipu pull-up current VI =0V [14][15]
[16]
- 62 - A
VDD(IO) < VI 5 V - 10 - A
Rs series resistance on I/O pins with analog
function; analog function
enabled
200
I/O pins - high drive strength
CI input capacitance - - 5.2 pF
ILL LOW-level leakage
current
VI = 0 V; on-chip pull-up
resistor disabled
- 3 - nA
ILH HIGH-level leakage
current
VI = VDD(IO); on-chip
pull-down resistor
disabled
- 3 - nA
VI = 5 V --20 nA
IOZ OFF-state output
current
VO = 0 V to VDD(IO);
on-chip pull-up/down
resistors disabled;
absolute value
- 3 - nA
VI input voltage pin configured to provide
a digital function;
VDD(IO) 2.2 V 0 - 5.5 V
VDD(IO) = 0 V 0 - 3.6 V
VO output voltage output active 0 - VDD(IO) V
VIH HIGH-level input
voltage
0.7
VDD(IO)
- 5.5 V
VIL LOW-level input voltage 0 - 0.3
VDD(IO)
V
Vhys hysteresis voltage 0.1
VDD(IO)
--V
Ipd pull-down current VI = VDD(IO) [14][15]
[16]
- 62 - A
Table 10. Static characteristics …continued
Tamb = 40 C to +85 C, unless otherwise specified.
Symbol Parameter Conditions Min Typ[1] Max UnitLPC4350_30_20_10 All information provided in this document is subject to legal disclaimers. © NXP Semiconductors N.V. 2014. All rights reserved.
Product data sheet Rev. 4.2 — 18 August 2014 91 of 155
NXP Semiconductors LPC4350/30/20/10
32-bit ARM Cortex-M4/M0 microcontroller
Ipu pull-up current VI =0V [14][15]
[16]
- 62 - A
VDD(IO) < VI 5 V - 10 - A
I/O pins - high drive strength: standard drive mode
IOH HIGH-level output
current
VOH = VDD(IO) 0.4 V 4 - - mA
IOL LOW-level output
current
VOL = 0.4 V 4- - mA
IOHS HIGH-level short-circuit
output current
drive HIGH; connected to
ground
[12] --32 mA
IOLS LOW-level short-circuit
output current
drive LOW; connected to
VDD(IO)
[12] --32 mA
I/O pins - high drive strength: medium drive mode
IOH HIGH-level output
current
VOH = VDD(IO) 0.4 V 8 - - mA
IOL LOW-level output
current
VOL = 0.4 V 8- - mA
IOHS HIGH-level short-circuit
output current
drive HIGH; connected to
ground
[12] --65 mA
IOLS LOW-level short-circuit
output current
drive LOW; connected to
VDD(IO)
[12] --63 mA
I/O pins - high drive strength: high drive mode
IOH HIGH-level output
current
VOH = VDD(IO) 0.4 V 14 - - mA
IOL LOW-level output
current
VOL = 0.4 V 14- - mA
IOHS HIGH-level short-circuit
output current
drive HIGH; connected to
ground
[12] --113 mA
IOLS LOW-level short-circuit
output current
drive LOW; connected to
VDD(IO)
[12] --110 mA
I/O pins - high drive strength: ultra-high drive mode
IOH HIGH-level output
current
VOH = VDD(IO) 0.4 V 20 - - mA
IOL LOW-level output
current
VOL = 0.4 V 20- - mA
IOHS HIGH-level short-circuit
output current
drive HIGH; connected to
ground
[12] --165 mA
IOLS LOW-level short-circuit
output current
drive LOW; connected to
VDD(IO)
[12] --156 mA
I/O pins - high-speed
CI input capacitance - - 2 pF
ILL LOW-level leakage
current
VI = 0 V; on-chip pull-up
resistor disabled
- 3 - nA
Table 10. Static characteristics …continued
Tamb = 40 C to +85 C, unless otherwise specified.
Symbol Parameter Conditions Min Typ[1] Max UnitLPC4350_30_20_10 All information provided in this document is subject to legal disclaimers. © NXP Semiconductors N.V. 2014. All rights reserved.
Product data sheet Rev. 4.2 — 18 August 2014 92 of 155
NXP Semiconductors LPC4350/30/20/10
32-bit ARM Cortex-M4/M0 microcontroller
ILH HIGH-level leakage
current
VI = VDD(IO); on-chip
pull-down resistor
disabled
- 3 - nA
VI = 5 V --20 nA
IOZ OFF-state output
current
VO = 0 V to VDD(IO);
on-chip pull-up/down
resistors disabled;
absolute value
- 3 - nA
VI input voltage pin configured to provide
a digital function;
VDD(IO) 2.2 V 0 - 5.5 V
VDD(IO) = 0 V 0 - 3.6 V
VO output voltage output active 0 - VDD(IO) V
VIH HIGH-level input
voltage
0.7
VDD(IO)
- 5.5 V
VIL LOW-level input voltage 0 - 0.3
VDD(IO)
V
Vhys hysteresis voltage 0.1
VDD(IO)
--V
VOH HIGH-level output
voltage
IOH = 8 mA VDD(IO)
0.4
--V
VOL LOW-level output
voltage
IOL = 8 mA --0.4 V
IOH HIGH-level output
current
VOH = VDD(IO) 0.4 V 8 - - mA
IOL LOW-level output
current
VOL = 0.4 V 8- - mA
IOHS HIGH-level short-circuit
output current
drive HIGH; connected to
ground
[12] --86 mA
IOLS LOW-level short-circuit
output current
drive LOW; connected to
VDD(IO)
[12] --76 mA
Ipd pull-down current VI = VDD(IO) [14][15]
[16]
- 62 - A
Ipu pull-up current VI =0V [14][15]
[16]
- 62 - A
VDD(IO) < VI 5V - 0 - A
Open-drain I2C0-bus pins
VIH HIGH-level input
voltage
0.7
VDD(IO)
--V
VIL LOW-level input voltage 0 0.14 0.3
VDD(IO)
V
Vhys hysteresis voltage 0.1
VDD(IO)
--V
VOL LOW-level output
voltage
IOLS = 3 mA --0.4 V
Table 10. Static characteristics …continued
Tamb = 40 C to +85 C, unless otherwise specified.
Symbol Parameter Conditions Min Typ[1] Max UnitLPC4350_30_20_10 All information provided in this document is subject to legal disclaimers. © NXP Semiconductors N.V. 2014. All rights reserved.
Product data sheet Rev. 4.2 — 18 August 2014 93 of 155
NXP Semiconductors LPC4350/30/20/10
32-bit ARM Cortex-M4/M0 microcontroller
[1] Typical ratings are not guaranteed. The values listed are at room temperature (25 C), nominal supply voltages.
[2] Dynamic characteristics for peripherals are provided for VDD(REG)(3V) 2.7 V.
ILI input leakage current VI = VDD(IO) [13] - 4.5 - A
VI = 5 V --10 A
Oscillator pins
Vi(XTAL1) input voltage on pin
XTAL1
0.5 - 1.2 V
Vo(XTAL2) output voltage on pin
XTAL2
0.5 - 1.2 V
Cio input/output
capacitance
[17] --0.8 pF
USB0 pins[18]
VI input voltage on pins USB0_DP;
USB0_DM; USB0_VBUS
VDD(IO) 2.2 V 0 - 5.25 V
VDD(IO) = 0 V 0 - 3.6 V
Rpd pull-down resistance on pin USB0_VBUS 48 64 80 k
VIC common-mode input
voltage
high-speed mode 50 200 500 mV
full-speed/low-speed
mode
800 - 2500 mV
chirp mode 50 - 600 mV
Vi(dif) differential input voltage 100 400 1100 mV
USB1 pins (USB1_DP/USB1_DM)[18]
IOZ OFF-state output
current
0V 0
EMC_DYCSn,
EMC_RAS,
EMC_CAS,
EMC_WE,
EMC_CKEOUTn,
EMC_A[22:0],
EMC_DQMOUTn
th(Q)
th(Q) - td
th(D) tsu(D)
th(D) tsu(D)
EMC_D[31:0]
write
EMC_D[31:0]
read; delay = 0
EMC_D[31:0]
read; delay > 0
th(x) - td td(xV) - td
td(QV) - td
td(QV)
th(x) td(xV)
EMC_CLKn delay td; programmable CLKn_DELAYLPC4350_30_20_10 All information provided in this document is subject to legal disclaimers. © NXP Semiconductors N.V. 2014. All rights reserved.
Product data sheet Rev. 4.2 — 18 August 2014 123 of 155
NXP Semiconductors LPC4350/30/20/10
32-bit ARM Cortex-M4/M0 microcontroller
11.15 USB interface
[1] Characterized but not implemented as production test. Guaranteed by design.
Table 28. Dynamic characteristics: USB0 and USB1 pins (full-speed)
CL = 50 pF; Rpu = 1.5 k on D+ to VDD(IO); 3.0 V VDD(IO) 3.6 V.
Symbol Parameter Conditions Min Typ Max Unit
tr rise time 10 % to 90 % 8.5 - 13.8 ns
tf fall time 10 % to 90 % 7.7 - 13.7 ns
tFRFM differential rise and fall time
matching
tr / tf - -109 %
VCRS output signal crossover voltage 1.3 - 2.0 V
tFEOPT source SE0 interval of EOP see Figure 36 160 - 175 ns
tFDEOP source jitter for differential transition
to SE0 transition
see Figure 36 2 - +5 ns
tJR1 receiver jitter to next transition 18.5 - +18.5 ns
tJR2 receiver jitter for paired transitions 10 % to 90 % 9 - +9 ns
tEOPR1 EOP width at receiver must reject as
EOP; see
Figure 36
[1] 40 - - ns
tEOPR2 EOP width at receiver must accept as
EOP; see
Figure 36
[1] 82 - - ns
Fig 36. Differential data-to-EOP transition skew and EOP width
002aab561
TPERIOD
differential
data lines
crossover point
source EOP width: tFEOPT
receiver EOP width: tEOPR1, tEOPR2
crossover point
extended
differential data to
SE0/EOP skew
n × TPERIOD + tFDEOPLPC4350_30_20_10 All information provided in this document is subject to legal disclaimers. © NXP Semiconductors N.V. 2014. All rights reserved.
Product data sheet Rev. 4.2 — 18 August 2014 124 of 155
NXP Semiconductors LPC4350/30/20/10
32-bit ARM Cortex-M4/M0 microcontroller
[1] Characterized but not implemented as production test.
[2] Total average power consumption.
[3] The driver is active only 20 % of the time.
11.16 Ethernet
Remark: The timing characteristics of the ENET_MDC and ENET_MDIO signals comply
with the IEEE standard 802.3.
Table 29. Static characteristics: USB0 PHY pins[1]
Symbol Parameter Conditions Min Typ Max Unit
High-speed mode
Pcons power consumption [2] - 68 - mW
IDDA(3V3) analog supply current (3.3 V) on pin USB0_VDDA3V3_DRIVER;
total supply current
[3]
- 18 - mA
during transmit - 31 - mA
during receive - 14 - mA
with driver tri-stated - 14 - mA
IDDD digital supply current - 7 - mA
Full-speed/low-speed mode
Pcons power consumption [2] - 15 - mW
IDDA(3V3) analog supply current (3.3 V) on pin USB0_VDDA3V3_DRIVER;
total supply current - 3.5 - mA
during transmit - 5 - mA
during receive - 3 - mA
with driver tri-stated - 3 - mA
IDDD digital supply current - 3 - mA
Suspend mode
IDDA(3V3) analog supply current (3.3 V) - 24 - A
with driver tri-stated - 24 - A
with OTG functionality enabled - 3 - mA
IDDD digital supply current - 30 - A
VBUS detector outputs
Vth threshold voltage for VBUS valid 4.4 - - V
for session end 0.2 - 0.8 V
for A valid 0.8 - 2 V
for B valid 2 - 4 V
Vhys hysteresis voltage for session end - 150 10 mV
A valid - 200 10 mV
B valid - 200 10 mVLPC4350_30_20_10 All information provided in this document is subject to legal disclaimers. © NXP Semiconductors N.V. 2014. All rights reserved.
Product data sheet Rev. 4.2 — 18 August 2014 125 of 155
NXP Semiconductors LPC4350/30/20/10
32-bit ARM Cortex-M4/M0 microcontroller
[1] Output drivers can drive a load 25 pF accommodating over 12 inch of PCB trace and the input
capacitance of the receiving device.
[2] Timing values are given from the point at which the clock signal waveform crosses 1.4 V to the valid input or
output level.
Table 30. Dynamic characteristics: Ethernet
Tamb = 40 C to 85 C; 2.2 V VDD(REG)(3V3) 3.6 V; 2.7 V VDD(IO) 3.6 V. Values guaranteed by
design.
Symbol Parameter Conditions Min Max Unit
RMII mode
fclk clock frequency for ENET_RX_CLK [1] - 50 MHz
clk clock duty cycle [1] 50 50 %
tsu set-up time for ENET_TXDn, ENET_TX_EN,
ENET_RXDn, ENET_RX_ER,
ENET_RX_DV
[1][2] 4 - ns
th hold time for ENET_TXDn, ENET_TX_EN,
ENET_RXDn, ENET_RX_ER,
ENET_RX_DV
[1][2] 2 - ns
MII mode
fclk clock frequency for ENET_TX_CLK [1] - 25 MHz
clk clock duty cycle [1] 50 50 %
tsu set-up time for ENET_TXDn, ENET_TX_EN,
ENET_TX_ER
[1][2] 4 - ns
th hold time for ENET_TXDn, ENET_TX_EN,
ENET_TX_ER
[1][2] 2 - ns
fclk clock frequency for ENET_RX_CLK [1] - 25 MHz
clk clock duty cycle [1] 50 50 %
tsu set-up time for ENET_RXDn, ENET_RX_ER,
ENET_RX_DV
[1][2] 4 - ns
th hold time for ENET_RXDn, ENET_RX_ER,
ENET_RX_DV
[1][2] 2 - ns
Fig 37. Ethernet timing
002aag210
th tsu
ENET_RX_CLK
ENET_TX_CLK
ENET_RXD[n]
ENET_RX_DV
ENET_RX_ER
ENET_TXD[n]
ENET_TX_EN
ENET_TX_ERLPC4350_30_20_10 All information provided in this document is subject to legal disclaimers. © NXP Semiconductors N.V. 2014. All rights reserved.
Product data sheet Rev. 4.2 — 18 August 2014 126 of 155
NXP Semiconductors LPC4350/30/20/10
32-bit ARM Cortex-M4/M0 microcontroller
11.17 SD/MMC
11.18 LCD
Table 31. Dynamic characteristics: SD/MMC
Tamb = 40 C to 85 C, 2.2 V VDD(REG)(3V3) 3.6 V; 2.7 V VDD(IO) 3.6 V, CL = 20 pF. Simulated
values. SAMPLE_DELAY = 0x8, DRV_DELAY = 0xF in the SDDELAY register (see the LPC43xx
user manual UM10430).
Symbol Parameter Conditions Min Max Unit
fclk clock frequency on pin SD_CLK; data transfer mode 52 MHz
tr rise time 0.5 2 ns
tf fall time 0.5 2 ns
tsu(D) data input set-up time on pins SD_DATn as inputs 6 - ns
on pins SD_CMD as inputs 7 - ns
th(D) data input hold time on pins SD_DATn as inputs -1 - ns
on pins SD_CMD as inputs 1 ns
td(QV) data output valid delay
time
on pins SD_DATn as outputs - 17 ns
on pins SD_CMD as outputs - 18 ns
th(Q) data output hold time on pins SD_DATn as outputs 4 - ns
on pins SD_CMD as outputs 4 - ns
Fig 38. SD/MMC timing
002aag204
SD_CLK
SD_DATn (O)
SD_DATn (I)
td(QV)
th(D) tsu(D)
Tcy(clk)
th(Q)
SD_CMD (O)
SD_CMD (I)
Table 32. Dynamic characteristics: LCD
Tamb = 40 C to +85 C; 2.2 V VDD(REG)(3V3) 3.6 V; 2.7 V VDD(IO) 3.6 V; CL = 20 pF.
Simulated values.
Symbol Parameter Conditions Min Typ Max Unit
fclk clock frequency on pin LCD_DCLK - 50 - MHz
td(QV) data output valid
delay time
- 17 ns
th(Q) data output hold time 8.5 - nsLPC4350_30_20_10 All information provided in this document is subject to legal disclaimers. © NXP Semiconductors N.V. 2014. All rights reserved.
Product data sheet Rev. 4.2 — 18 August 2014 127 of 155
NXP Semiconductors LPC4350/30/20/10
32-bit ARM Cortex-M4/M0 microcontroller
11.19 SPIFI
Table 33. Dynamic characteristics: SPIFI
Tamb = 40 C to 85 C; 2.2 V VDD(REG)(3V3) 3.6 V; 2.7 V VDD(IO) 3.6 V. CL = 10 pF. Simulated
values.
Symbol Parameter Min Max Unit
Tcy(clk) clock cycle time 9.6 - ns
tDS data set-up time 3.4 - ns
tDH data hold time 0 - ns
tv(Q) data output valid time - 3.2 ns
th(Q) data output hold time 0.2 - ns
Fig 39. SPIFI timing (Mode 0)
SPIFI_SCK
SPIFI data out
SPIFI data in
Tcy(clk)
tDS tDH
tv(Q)
DATA VALID DATA VALID
th(Q)
DATA VALID DATA VALID
002aah409LPC4350_30_20_10 All information provided in this document is subject to legal disclaimers. © NXP Semiconductors N.V. 2014. All rights reserved.
Product data sheet Rev. 4.2 — 18 August 2014 128 of 155
NXP Semiconductors LPC4350/30/20/10
32-bit ARM Cortex-M4/M0 microcontroller
12. ADC/DAC electrical characteristics
[1] The ADC is monotonic, there are no missing codes.
[2] The differential linearity error (ED) is the difference between the actual step width and the ideal step width. See Figure 40.
[3] The integral non-linearity (EL(adj)) is the peak difference between the center of the steps of the actual and the ideal transfer curve after
appropriate adjustment of gain and offset errors. See Figure 40.
[4] The offset error (EO) is the absolute difference between the straight line which fits the actual curve and the straight line which fits the
ideal curve. See Figure 40.
[5] The gain error (EG) is the relative difference in percent between the straight line fitting the actual transfer curve after removing offset
error, and the straight line which fits the ideal transfer curve. See Figure 40.
[6] The absolute error (ET) is the maximum difference between the center of the steps of the actual transfer curve of the non-calibrated
ADC and the ideal transfer curve. See Figure 40.
[7] Tamb = 25 C.
[8] Input resistance Ri
depends on the sampling frequency fs: Ri
= 2 k + 1 / (fs Cia).
Table 34. ADC characteristics
VDDA(3V3) over specified ranges; Tamb = 40 C to +85 C; unless otherwise specified.
Symbol Parameter Conditions Min Typ Max Unit
VIA analog input voltage 0 - VDDA(3V3) V
Cia analog input
capacitance
- - 2 pF
ED differential linearity error 2.7 V VDDA(3V3) 3.6 V [1][2] - 0.8 - LSB
2.2 V VDDA(3V3) < 2.7 V - 1.0 - LSB
EL(adj) integral non-linearity 2.7 V VDDA(3V3) 3.6 V [3] - 0.8 - LSB
2.2 V VDDA(3V3) < 2.7 V - 1.5 - LSB
EO offset error 2.7 V VDDA(3V3) 3.6 V [4] - 0.15 - LSB
2.2 V VDDA(3V3) < 2.7 V - 0.15 - LSB
EG gain error 2.7 V VDDA(3V3) 3.6 V [5] - 0.3 - %
2.2 V VDDA(3V3) < 2.7 V - 0.35 - %
ET absolute error 2.7 V VDDA(3V3) 3.6 V [6] - 3 - LSB
2.2 V VDDA(3V3) < 2.7 V - 4 - LSB
Rvsi voltage source interface
resistance
see Figure 41 - - 1/(7 fclk(ADC)
Cia)
k
Ri input resistance [7][8] - - 1.2 M
fclk(ADC) ADC clock frequency - - 4.5 MHz
fs sampling frequency 10-bit resolution; 11 clock
cycles
- - 400 kSamples/s
2-bit resolution; 3 clock
cycles
1.5 MSamples/sLPC4350_30_20_10 All information provided in this document is subject to legal disclaimers. © NXP Semiconductors N.V. 2014. All rights reserved.
Product data sheet Rev. 4.2 — 18 August 2014 129 of 155
NXP Semiconductors LPC4350/30/20/10
32-bit ARM Cortex-M4/M0 microcontroller
(1) Example of an actual transfer curve.
(2) The ideal transfer curve.
(3) Differential linearity error (ED).
(4) Integral non-linearity (EL(adj)).
(5) Center of a step of the actual transfer curve.
Fig 40. 10-bit ADC characteristics
002aaf959
1023
1022
1021
1020
1019
(2)
(1)
123456 7 1018 1019 1020 1021 1022 1023 1024
7
6
5
4
3
2
1
0
1018
(5)
(4)
(3)
1 LSB
(ideal)
code
out
VDDA(3V3) − VSSA
1024
offset
error
EO
gain
error
EG
offset error
EO
VIA (LSBideal)
1 LSB =LPC4350_30_20_10 All information provided in this document is subject to legal disclaimers. © NXP Semiconductors N.V. 2014. All rights reserved.
Product data sheet Rev. 4.2 — 18 August 2014 130 of 155
NXP Semiconductors LPC4350/30/20/10
32-bit ARM Cortex-M4/M0 microcontroller
[1] In the DAC CR register, bit BIAS = 0 (see the LPC43xx user manual).
[2] Settling time is calculated within 1/2 LSB of the final value.
Rs 1/((7 fclk(ADC) Cia) 2 k
Fig 41. ADC interface to pins
LPC43xx
ADC0_n/ADC1_n
Cia = 2 pF
Rvsi
Rs
VSS
VEXT
002aag704
ADC
COMPARATOR
2 kΩ (analog pin)
2.2 kΩ (multiplexed pin)
Table 35. DAC characteristics
VDDA(3V3) over specified ranges; Tamb = 40 C to +85 C; unless otherwise specified
Symbol Parameter Conditions Min Typ Max Unit
ED differential linearity error 2.7 V VDDA(3V3) 3.6 V [1] - 0.8 - LSB
2.2 V VDDA(3V3) < 2.7 V - 1.0 - LSB
EL(adj) integral non-linearity code = 0 to 975
2.7 V VDDA(3V3) 3.6 V
[1] - 1.0 - LSB
2.2 V VDDA(3V3) < 2.7 V - 1.5 - LSB
EO offset error 2.7 V VDDA(3V3) 3.6 V [1] - 0.8 - LSB
2.2 V VDDA(3V3) < 2.7 V - 1.0 - LSB
EG gain error 2.7 V VDDA(3V3) 3.6 V [1] - 0.3 - %
2.2 V VDDA(3V3) < 2.7 V - 1.0 - %
CL load capacitance - - 200 pF
RL load resistance 1 - - k
ts settling time [2] 0.4 LPC4350_30_20_10 All information provided in this document is subject to legal disclaimers. © NXP Semiconductors N.V. 2014. All rights reserved.
Product data sheet Rev. 4.2 — 18 August 2014 131 of 155
NXP Semiconductors LPC4350/30/20/10
32-bit ARM Cortex-M4/M0 microcontroller
13. Application information
13.1 LCD panel signal usage
Table 36. LCD panel connections for STN single panel mode
External pin 4-bit mono STN single panel 8-bit mono STN single panel Color STN single panel
LPC43xx pin
used
LCD function LPC43xx pin
used
LCD function LPC43xx pin
used
LCD function
LCD_VD[23:8] - - - - - -
LCD_VD7 - - P8_4 UD[7] P8_4 UD[7]
LCD_VD6 - - P8_5 UD[6] P8_5 UD[6]
LCD_VD5 - - P8_6 UD[5] P8_6 UD[5]
LCD_VD4 - - P8_7 UD[4] P8_7 UD[4]
LCD_VD3 P4_2 UD[3] P4_2 UD[3] P4_2 UD[3]
LCD_VD2 P4_3 UD[2] P4_3 UD[2] P4_3 UD[2]
LCD_VD1 P4_4 UD[1] P4_4 UD[1] P4_4 UD[1]
LCD_VD0 P4_1 UD[0] P4_1 UD[0] P4_1 UD[0]
LCD_LP P7_6 LCDLP P7_6 LCDLP P7_6 LCDLP
LCD_ENAB/
LCDM
P4_6 LCDENAB/
LCDM
P4_6 LCDENAB/
LCDM
P4_6 LCDENAB/
LCDM
LCD_FP P4_5 LCDFP P4_5 LCDFP P4_5 LCDFP
LCD_DCLK P4_7 LCDDCLK P4_7 LCDDCLK P4_7 LCDDCLK
LCD_LE P7_0 LCDLE P7_0 LCDLE P7_0 LCDLE
LCD_PWR P7_7 CDPWR P7_7 LCDPWR P7_7 LCDPWR
GP_CLKIN PF_4 LCDCLKIN PF_4 LCDCLKIN PF_4 LCDCLKIN
Table 37. LCD panel connections for STN dual panel mode
External pin 4-bit mono STN dual panel 8-bit mono STN dual panel Color STN dual panel
LPC43xx pin
used
LCD function LPC43xx pin
used
LCD function LPC43xx pin
used
LCD function
LCD_VD[23:16] - - - - - -
LCD_VD15 - - PB_4 LD[7] PB_4 LD[7]
LCD_VD14 - - PB_5 LD[6] PB_5 LD[6]
LCD_VD13 - - PB_6 LD[5] PB_6 LD[5]
LCD_VD12 - - P8_3 LD[4] P8_3 LD[4]
LCD_VD11 P4_9 LD[3] P4_9 LD[3] P4_9 LD[3]
LCD_VD10 P4_10 LD[2] P4_10 LD[2] P4_10 LD[2]
LCD_VD9 P4_8 LD[1] P4_8 LD[1] P4_8 LD[1]
LCD_VD8 P7_5 LD[0] P7_5 LD[0] P7_5 LD[0]
LCD_VD7 - - UD[7] P8_4 UD[7]
LCD_VD6 - - P8_5 UD[6] P8_5 UD[6]
LCD_VD5 - - P8_6 UD[5] P8_6 UD[5]
LCD_VD4 - - P8_7 UD[4] P8_7 UD[4]
LCD_VD3 P4_2 UD[3] P4_2 UD[3] P4_2 UD[3]LPC4350_30_20_10 All information provided in this document is subject to legal disclaimers. © NXP Semiconductors N.V. 2014. All rights reserved.
Product data sheet Rev. 4.2 — 18 August 2014 132 of 155
NXP Semiconductors LPC4350/30/20/10
32-bit ARM Cortex-M4/M0 microcontroller
LCD_VD2 P4_3 UD[2] P4_3 UD[2] P4_3 UD[2]
LCD_VD1 P4_4 UD[1] P4_4 UD[1] P4_4 UD[1]
LCD_VD0 P4_1 UD[0] P4_1 UD[0] P4_1 UD[0]
LCD_LP P7_6 LCDLP P7_6 LCDLP P7_6 LCDLP
LCD_ENAB/
LCDM
P4_6 LCDENAB/
LCDM
P4_6 LCDENAB/
LCDM
P4_6 LCDENAB/
LCDM
LCD_FP P4_5 LCDFP P4_5 LCDFP P4_5 LCDFP
LCD_DCLK P4_7 LCDDCLK P4_7 LCDDCLK P4_7 LCDDCLK
LCD_LE P7_0 LCDLE P7_0 LCDLE P7_0 LCDLE
LCD_PWR P7_7 LCDPWR P7_7 LCDPWR P7_7 LCDPWR
GP_CLKIN PF_4 LCDCLKIN PF_4 LCDCLKIN PF_4 LCDCLKIN
Table 37. LCD panel connections for STN dual panel mode …continued
External pin 4-bit mono STN dual panel 8-bit mono STN dual panel Color STN dual panel
LPC43xx pin
used
LCD function LPC43xx pin
used
LCD function LPC43xx pin
used
LCD function
Table 38. LCD panel connections for TFT panels
External
pin
TFT 12 bit (4:4:4
mode)
TFT 16 bit (5:6:5 mode) TFT 16 bit (1:5:5:5 mode) TFT 24 bit
LPC43xx
pin used
LCD
function
LPC43xx
pin used
LCD
function
LPC43xx pin
used
LCD
function
LPC43xx
pin used
LCD
function
LCD_VD23 PB_0 BLUE3 PB_0 BLUE4 PB_0 BLUE4 PB_0 BLUE7
LCD_VD22 PB_1 BLUE2 PB_1 BLUE3 PB_1 BLUE3 PB_1 BLUE6
LCD_VD21 PB_2 BLUE1 PB_2 BLUE2 PB_2 BLUE2 PB_2 BLUE5
LCD_VD20 PB_3 BLUE0 PB_3 BLUE1 PB_3 BLUE1 PB_3 BLUE4
LCD_VD19 - - P7_1 BLUE0 P7_1 BLUE0 P7_1 BLUE3
LCD_VD18 - - - - P7_2 intensity P7_2 BLUE2
LCD_VD17 - - - - - - P7_3 BLUE1
LCD_VD16 - - - - - - P7_4 BLUE0
LCD_VD15 PB_4 GREEN3 PB_4 GREEN5 PB_4 GREEN4 PB_4 GREEN7
LCD_VD14 PB_5 GREEN2 PB_5 GREEN4 PB_5 GREEN3 PB_5 GREEN6
LCD_VD13 PB_6 GREEN1 PB_6 GREEN3 PB_6 GREEN2 PB_6 GREEN5
LCD_VD12 P8_3 GREEN0 P8_3 GREEN2 P8_3 GREEN1 P8_3 GREEN4
LCD_VD11 - - P4_9 GREEN1 P4_9 GREEN0 P4_9 GREEN3
LCD_VD10 - - P4_10 GREEN0 P4_10 intensity P4_10 GREEN2
LCD_VD9 - - - - - - P4_8 GREEN1
LCD_VD8 - - - - - - P7_5 GREEN0
LCD_VD7 P8_4 RED3 P8_4 RED4 P8_4 RED4 P8_4 RED7
LCD_VD6 P8_5 RED2 P8_5 RED3 P8_5 RED3 P8_5 RED6
LCD_VD5 P8_6 RED1 P8_6 RED2 P8_6 RED2 P8_6 RED5
LCD_VD4 P8_7 RED0 P8_7 RED1 P8_7 RED1 P8_7 RED4
LCD_VD3 - - P4_2 RED0 P4_2 RED0 P4_2 RED3
LCD_VD2 - - - - P4_3 intensity P4_3 RED2
LCD_VD1 - - - - - - P4_4 RED1LPC4350_30_20_10 All information provided in this document is subject to legal disclaimers. © NXP Semiconductors N.V. 2014. All rights reserved.
Product data sheet Rev. 4.2 — 18 August 2014 133 of 155
NXP Semiconductors LPC4350/30/20/10
32-bit ARM Cortex-M4/M0 microcontroller
13.2 Crystal oscillator
The crystal oscillator is controlled by the XTAL_OSC_CTRL register in the CGU (see
LPC43xx user manual).
The crystal oscillator operates at frequencies of 1 MHz to 25 MHz. This frequency can be
boosted to a higher frequency, up to the maximum CPU operating frequency, by the PLL.
The oscillator can operate in one of two modes: slave mode and oscillation mode.
• In slave mode, couple the input clock signal with a capacitor of 100 pF (CC in
Figure 42), with an amplitude of at least 200 mV (RMS). The XTAL2 pin in this
configuration can be left unconnected.
• External components and models used in oscillation mode are shown in Figure 43,
and in Table 39 and Table 40. Since the feedback resistance is integrated on chip,
only a crystal and the capacitances CX1 and CX2 need to be connected externally in
case of fundamental mode oscillation L, CL and RS represent the fundamental
frequency). The capacitance CP in Figure 43 represents the parallel package
capacitance and must not be larger than 7 pF. Parameters FC, CL, RS and CP are
supplied by the crystal manufacturer.
LCD_VD0 - - - - - - P4_1 RED0
LCD_LP P7_6 LCDLP P7_6 LCDLP P7_6 LCDLP P7_6 LCDLP
LCD_ENAB
/LCDM
P4_6 LCDENAB/
LCDM
P4_6 LCDENAB/
LCDM
P4_6 LCDENAB/
LCDM
P4_6 LCDENAB/
LCDM
LCD_FP P4_5 LCDFP P4_5 LCDFP P4_5 LCDFP P4_5 LCDFP
LCD_DCLK P4_7 LCDDCLK P4_7 LCDDCLK P4_7 LCDDCLK P4_7 LCDDCLK
LCD_LE P7_0 LCDLE P7_0 LCDLE P7_0 LCDLE P7_0 LCDLE
LCD_PWR P7_7 LCDPWR P7_7 LCDPWR P7_7 LCDPWR P7_7 LCDPWR
GP_CLKIN PF_4 LCDCLKIN PF_4 LCDCLKIN PF_4 LCDCLKIN PF_4 LCDCLKIN
Table 38. LCD panel connections for TFT panels …continued
External
pin
TFT 12 bit (4:4:4
mode)
TFT 16 bit (5:6:5 mode) TFT 16 bit (1:5:5:5 mode) TFT 24 bit
LPC43xx
pin used
LCD
function
LPC43xx
pin used
LCD
function
LPC43xx pin
used
LCD
function
LPC43xx
pin used
LCD
function
Table 39. Recommended values for CX1/X2 in oscillation mode (crystal and external
components parameters) low frequency mode
Fundamental oscillation
frequency
Maximum crystal series
resistance RS
External load capacitors
CX1, CX2
2 MHz < 200 33 pF, 33 pF
< 200 39 pF, 39 pF
< 200 56 pF, 56 pF
4 MHz < 200 18 pF, 18 pF
< 200 39 pF, 39 pF
< 200 56 pF, 56 pF
8 MHz < 200 18 pF, 18 pF
< 200 39 pF, 39 pFLPC4350_30_20_10 All information provided in this document is subject to legal disclaimers. © NXP Semiconductors N.V. 2014. All rights reserved.
Product data sheet Rev. 4.2 — 18 August 2014 134 of 155
NXP Semiconductors LPC4350/30/20/10
32-bit ARM Cortex-M4/M0 microcontroller
12 MHz < 160 18 pF, 18 pF
< 160 39 pF, 39 pF
16 MHz < 120 18 pF, 18 pF
< 80 33 pF, 33 pF
20 MHz <100 18 pF, 18 pF
< 80 33 pF, 33 pF
Table 40. Recommended values for CX1/X2 in oscillation mode (crystal and external
components parameters) high frequency mode
Fundamental oscillation
frequency
Maximum crystal series
resistance RS
External load capacitors CX1,
Cx2
15 MHz < 80 18 pF, 18 pF
20 MHz < 80 39 pF, 39 pF
< 100 47 pF, 47 pF
Fig 42. Slave mode operation of the on-chip oscillator
Fig 43. Oscillator modes with external crystal model used for CX1/CX2 evaluation
Table 39. Recommended values for CX1/X2 in oscillation mode (crystal and external
components parameters) low frequency mode …continued
Fundamental oscillation
frequency
Maximum crystal series
resistance RS
External load capacitors
CX1, CX2
LPC43xx
XTAL1
Ci
100 pF
Cg
002aag379
002aag380
LPC43xx
XTAL1 XTAL2
CX1 CX2
XTAL
= CL CP
RS
LLPC4350_30_20_10 All information provided in this document is subject to legal disclaimers. © NXP Semiconductors N.V. 2014. All rights reserved.
Product data sheet Rev. 4.2 — 18 August 2014 135 of 155
NXP Semiconductors LPC4350/30/20/10
32-bit ARM Cortex-M4/M0 microcontroller
13.3 RTC oscillator
In the RTC oscillator circuit, only the crystal (XTAL) and the capacitances CRTCX1 and
CRTCX2 need to be connected externally. Typical capacitance values for CRTCX1 and
CRTCX2 are CRTCX1/2 = 20 (typical) 4 pF.
An external clock can be connected to RTCX1 if RTCX2 is left open. The recommended
amplitude of the clock signal is Vi(RMS) = 100 mV to 200 mV with a coupling capacitance of
5 pF to 10 pF. Vi(RMS) must be lower than 450 mV. See Figure 42 for a similar slave-mode
set-up that uses the crystal oscillator.
13.4 XTAL and RTCX Printed Circuit Board (PCB) layout guidelines
Connect the crystal on the PCB as close as possible to the oscillator input and output pins
of the chip. Take care that the load capacitors Cx1, Cx2, and Cx3 in case of third overtone
crystal usage have a common ground plane. Also connect the external components to the
ground plain. To keep the noise coupled in via the PCB as small as possible, make loops
and parasitics as small as possible. Choose smaller values of Cx1 and Cx2 if parasitics
increase in the PCB layout.
Ensure that no high-speed or high-drive signals are near the RTCX1/2 signals.
13.5 Standard I/O pin configuration
Figure 45 shows the possible pin modes for standard I/O pins with analog input function:
• Digital output driver enabled/disabled
• Digital input: Pull-up enabled/disabled
• Digital input: Pull-down enabled/disabled
• Digital input: Repeater mode enabled/disabled
• Digital input: Input buffer enabled/disabled
• Analog input
The default configuration for standard I/O pins is input buffer disabled and pull-up
enabled. The weak MOS devices provide a drive capability equivalent to pull-up and
pull-down resistors.
Fig 44. RTC 32 kHz oscillator circuit
002aah148
LPC43xx
RTCX1 RTCX2
CRTCX1 CRTCX2
XTALLPC4350_30_20_10 All information provided in this document is subject to legal disclaimers. © NXP Semiconductors N.V. 2014. All rights reserved.
Product data sheet Rev. 4.2 — 18 August 2014 136 of 155
NXP Semiconductors LPC4350/30/20/10
32-bit ARM Cortex-M4/M0 microcontroller
13.6 Reset pin configuration
13.7 Suggested USB interface solutions
The USB device can be connected to the USB as self-powered device (see Figure 47) or
bus-powered device (see Figure 48).
The glitch filter rejects pulses of typical 12 ns width.
Fig 45. Standard I/O pin configuration with analog input
slew rate bit EHS
pull-up enable bit EPUN
pull-down enable bit EPD
glitch
filter
analog I/O
ESD
ESD
PIN
VDDIO
VSSIO
input buffer enable bit EZI
filter select bit ZIF
data input to core
data output from core
enable output driver
002aah028
Fig 46. Reset pin configuration
VSS
reset
002aag702
Vps
Vps
Vps
Rpu ESD
ESD
20 ns RC
GLITCH FILTER PINLPC4350_30_20_10 All information provided in this document is subject to legal disclaimers. © NXP Semiconductors N.V. 2014. All rights reserved.
Product data sheet Rev. 4.2 — 18 August 2014 137 of 155
NXP Semiconductors LPC4350/30/20/10
32-bit ARM Cortex-M4/M0 microcontroller
On the LPC4350/30/20/10, USBn_VBUS pins are 5 V tolerant only when VDDIO is
applied and at operating voltage level. Therefore, if the USBn_VBUS function is
connected to the USB connector and the device is self-powered, the USBn_VBUS pins
must be protected for situations when VDDIO = 0 V.
If VDDIO is always at operating level while VBUS = 5 V, the USBn_VBUS pin can be
connected directly to the VBUS pin on the USB connector.
For systems where VDDIO can be 0 V and VBUS is directly applied to the USBn_VBUS
pins, precautions must be taken to reduce the voltage to below 3.6 V, which is the
maximum allowable voltage on the USBn_VBUS pins in this case.
One method is to use a voltage divider to connect the USBn_VBUS pins to VBUS on the
USB connector. The voltage divider ratio should be such that the USB_VBUS pin will be
greater than 0.7VDDIO to indicate a logic HIGH while below the 3.6 V allowable maximum
voltage.
For the following operating conditions
VBUSmax = 5.25 V
VDDIO = 3.6 V,
the voltage divider should provide a reduction of 3.6 V/5.25 V or ~0.686 V.
For bus-powered devices, a regulator powered by USB can provide 3.3 V to VDDIO
whenever bus power is present and ensure that power to the USBn_VBUS pins is always
present when the 5 V VBUS signal is applied. See Figure 48.
Remark: Applying 5 V to the USBn_VBUS pins for a short time while the regulator ramps
up might compromise the long-term reliability of the part but does not affect its function.
Fig 47. USB interface on a self-powered device where USBn_VBUS = 5 V
LPC43xx
VDDIO
USB-B
connector
USBn_VBUS VBUS
USB
R2
R3
aaa-013458LPC4350_30_20_10 All information provided in this document is subject to legal disclaimers. © NXP Semiconductors N.V. 2014. All rights reserved.
Product data sheet Rev. 4.2 — 18 August 2014 138 of 155
NXP Semiconductors LPC4350/30/20/10
32-bit ARM Cortex-M4/M0 microcontroller
Remark: If the VBUS function of the USB1 interface is not connected, configure the pin
function for GPIO using the function control bits in the SYSCON block.
Remark: In OTG mode, it is important to be able to detect the VBUS level and to charge
and discharge VBUS. This requires adding active devices that disconnect the link when
VDDIO is not present.
Fig 48. USB interface on a bus-powered device
Fig 49. USB interface for USB operating in OTG mode
REGULATOR
USBn_VBUS VBUS
LPC43xx
VDDIO
USB-B
connector USB
aaa-013459
USBn_VBUS VBUS
LPC43xx
VDDIO
USB-B
connector USB
aaa-013460
R1
R2
R3
T2
T1LPC4350_30_20_10 All information provided in this document is subject to legal disclaimers. © NXP Semiconductors N.V. 2014. All rights reserved.
Product data sheet Rev. 4.2 — 18 August 2014 139 of 155
NXP Semiconductors LPC4350/30/20/10
32-bit ARM Cortex-M4/M0 microcontroller
14. Package outline
Fig 50. Package outline LBGA256 package
OUTLINE REFERENCES
VERSION
EUROPEAN
PROJECTION ISSUE DATE
IEC JEDEC
MO-192
JEITA
SOT740-2 - - - - - -
SOT740-2
05-06-16
05-08-04
UNIT A
max
mm 1.55 0.45
0.35
1.1
0.9
0.55
0.45
17.2
16.8
17.2
16.8
A1
DIMENSIONS (mm are the original dimensions)
LBGA256: plastic low profile ball grid array package; 256 balls; body 17 x 17 x 1 mm
X
A2 b D E e
1
e1
15
e2
15
v
0.25
w
0.1
y
0.12
y1
0.35
1/2 e
1/2 e
A
A2
A1
detail X
D
E
B A
ball A1
index area
y1 C y
C
A B
A
B
C
D
E
F
H
K
G
J
L
M
N
P
R
T
2 4 6 8 10 12 14 16 1 3 5 7 9 11 13 15 ball A1
index area
e
e
e1
b
e2
C
C
∅ v M
∅ w M
0 5 10 mm
scaleLPC4350_30_20_10 All information provided in this document is subject to legal disclaimers. © NXP Semiconductors N.V. 2014. All rights reserved.
Product data sheet Rev. 4.2 — 18 August 2014 140 of 155
NXP Semiconductors LPC4350/30/20/10
32-bit ARM Cortex-M4/M0 microcontroller
Fig 51. Package outline of the TFBGA180 package
OUTLINE REFERENCES
VERSION
EUROPEAN
PROJECTION ISSUE DATE
IEC JEDEC JEITA
SOT570-3
SOT570-3
08-07-09
10-04-15
UNIT
mm
max
nom
min
1.20
1.06
0.95
0.40
0.35
0.30
0.50
0.45
0.40
12.1
12.0
11.9
12.1
12.0
11.9
0.8 10.4 0.15 0.12
A
DIMENSIONS (mm are the original dimensions)
TFBGA180: thin fine-pitch ball grid array package; 180 balls
0 5 10 mm
scale
A1 A2
0.80
0.71
0.65
b D E e e1
10.4
e2 v w
0.05
y y1
0.1
ball A1
index area
D B A
E
C
y1 C y
X
A
B
C
D
E
F
H
K
G
L
J
M
N
P
2 4 6 8 10 12 14 1 3 5 7 9 11 13
b
e2
e1
e
e
1/2 e
1/2 e ∅ v M AC B
∅ w M C
ball A1
index area
detail X
A
A2
A1LPC4350_30_20_10 All information provided in this document is subject to legal disclaimers. © NXP Semiconductors N.V. 2014. All rights reserved.
Product data sheet Rev. 4.2 — 18 August 2014 141 of 155
NXP Semiconductors LPC4350/30/20/10
32-bit ARM Cortex-M4/M0 microcontroller
Fig 52. Package outline of the TFBGA100 package
OUTLINE REFERENCES
VERSION
EUROPEAN
PROJECTION ISSUE DATE
IEC JEDEC JEITA
SOT926-1 - - - - - - - - -
SOT926-1
05-12-09
05-12-22
UNIT A
max
mm 1.2 0.4
0.3
0.8
0.65
0.5
0.4
9.1
8.9
9.1
8.9
A1
DIMENSIONS (mm are the original dimensions)
TFBGA100: plastic thin fine-pitch ball grid array package; 100 balls; body 9 x 9 x 0.7 mm
A2 b D E e2
7.2
e
0.8
e1
7.2
v
0.15
w
0.05
y
0.08
y1
0.1
0 2.5 5 mm
scale
b
e2
e1
e
e
1/2 e
1/2 e
∅ v M AC B
∅ w M C
ball A1
index area
A
B
C
D
E
F
H
K
G
J
13579 2 4 6 8 10
ball A1
index area
B A
E
D
C
y1 C y
X
detail X
A
A1
A2LPC4350_30_20_10 All information provided in this document is subject to legal disclaimers. © NXP Semiconductors N.V. 2014. All rights reserved.
Product data sheet Rev. 4.2 — 18 August 2014 142 of 155
NXP Semiconductors LPC4350/30/20/10
32-bit ARM Cortex-M4/M0 microcontroller
Fig 53. Package outline for the LQFP144 package
UNIT A1 A2 A3 bp c E(1) e HE L Lp ywv Z θ
OUTLINE REFERENCES
VERSION
EUROPEAN
PROJECTION ISSUE DATE
IEC JEDEC JEITA
mm 0.15
0.05
1.45
1.35 0.25 0.27
0.17
0.20
0.09
20.1
19.9 0.5 22.15
21.85
1.4
1.1
7
0
o
1 0.080.2 0.08 o
DIMENSIONS (mm are the original dimensions)
Note
1. Plastic or metal protrusions of 0.25 mm maximum per side are not included.
0.75
0.45
SOT486-1 136E23 MS-026 00-03-14
03-02-20
D(1) (1)(1)
20.1
19.9
HD
22.15
21.85
Z E
1.4
1.1
D
0 5 10 mm
scale
e bp
θ
E
A1
A
Lp
detail X
L
(A ) 3
B
c
bp
EH A2
DH v M B
D
ZD
A
ZE
e
v M A
X
y
w M
w M
A
max.
1.6
LQFP144: plastic low profile quad flat package; 144 leads; body 20 x 20 x 1.4 mm SOT486-1
108
109
pin 1 index
73
72
37
1
144
36LPC4350_30_20_10 All information provided in this document is subject to legal disclaimers. © NXP Semiconductors N.V. 2014. All rights reserved.
Product data sheet Rev. 4.2 — 18 August 2014 143 of 155
NXP Semiconductors LPC4350/30/20/10
32-bit ARM Cortex-M4/M0 microcontroller
15. Soldering
Fig 54. Reflow soldering of the LBGA256 package
DIMENSIONS in mm
P SL SP SR Hx Hy
Hx
Hy
SOT740-2
solder land plus solder paste
occupied area
Footprint information for reflow soldering of LBGA256 package
solder land
solder paste deposit
solder resist
P
P
SL
SP
SR
Generic footprint pattern
Refer to the package outline drawing for actual layout
detail X
see detail X
sot740-2_fr 1.00 0.450 0.450 0.600 17.500 17.500LPC4350_30_20_10 All information provided in this document is subject to legal disclaimers. © NXP Semiconductors N.V. 2014. All rights reserved.
Product data sheet Rev. 4.2 — 18 August 2014 144 of 155
NXP Semiconductors LPC4350/30/20/10
32-bit ARM Cortex-M4/M0 microcontroller
Fig 55. Reflow soldering of the TFBGA180 package
DIMENSIONS in mm
P SL SP SR Hx Hy
Hx
Hy
SOT570-3
solder land plus solder paste
occupied area
Footprint information for reflow soldering of TFBGA180 package
solder land
solder paste deposit
solder resist
P
P
SL
SP
SR
Generic footprint pattern
Refer to the package outline drawing for actual layout
detail X
see detail X
sot570-3_fr 0.80 0.400 0.400 0.550 12.575 12.575LPC4350_30_20_10 All information provided in this document is subject to legal disclaimers. © NXP Semiconductors N.V. 2014. All rights reserved.
Product data sheet Rev. 4.2 — 18 August 2014 145 of 155
NXP Semiconductors LPC4350/30/20/10
32-bit ARM Cortex-M4/M0 microcontroller
Fig 56. Reflow soldering of the LQFP144 package
SOT486-1
DIMENSIONS in mm
occupied area
Footprint information for reflow soldering of LQFP144 package
Ax
Bx
Gx
Hy Gy
Hx
AyBy
P2 P1
D2 (8×) D1
(0.125)
P1 P2 Ax Ay Bx By C D1 D2 Gx Gy Hx Hy
sot486-1_fr
solder land
C
Generic footprint pattern
Refer to the package outline drawing for actual layout
0.500 0.560 0.280 23.300 23.300 20.300 20.300 1.500 0.400 20.500 20.500 23.550 23.550LPC4350_30_20_10 All information provided in this document is subject to legal disclaimers. © NXP Semiconductors N.V. 2014. All rights reserved.
Product data sheet Rev. 4.2 — 18 August 2014 146 of 155
NXP Semiconductors LPC4350/30/20/10
32-bit ARM Cortex-M4/M0 microcontroller
Fig 57. Reflow soldering of the TFBGA100 package
DIMENSIONS in mm
P SL SP SR Hx Hy
Hx
Hy
SOT926-1
solder land plus solder paste
occupied area
Footprint information for reflow soldering of TFBGA100 package
solder land
solder paste deposit
solder resist
P
P
SL
SP
SR
Generic footprint pattern
Refer to the package outline drawing for actual layout
detail X
see detail X
sot926-1_fr 0.80 0.330 0.400 0.480 9.400 9.400LPC4350_30_20_10 All information provided in this document is subject to legal disclaimers. © NXP Semiconductors N.V. 2014. All rights reserved.
Product data sheet Rev. 4.2 — 18 August 2014 147 of 155
NXP Semiconductors LPC4350/30/20/10
32-bit ARM Cortex-M4/M0 microcontroller
16. Abbreviations
Table 41. Abbreviations
Acronym Description
ADC Analog-to-Digital Converter
AHB Advanced High-performance Bus
APB Advanced Peripheral Bus
API Application Programming Interface
BOD BrownOut Detection
CAN Controller Area Network
CMAC Cipher-based Message Authentication Code
CSMA/CD Carrier Sense Multiple Access with Collision Detection
DAC Digital-to-Analog Converter
DC-DC Direct Current-to-Direct Current
DMA Direct Memory Access
GPIO General-Purpose Input/Output
IRC Internal RC
IrDA Infrared Data Association
JTAG Joint Test Action Group
LCD Liquid Crystal Display
LSB Least Significant Bit
MAC Media Access Control
MCU MicroController Unit
MIIM Media Independent Interface Management
n.c. not connected
OHCI Open Host Controller Interface
OTG On-The-Go
PHY Physical Layer
PLL Phase-Locked Loop
PMC Power Mode Control
PWM Pulse Width Modulator
RIT Repetitive Interrupt Timer
RMII Reduced Media Independent Interface
SDRAM Synchronous Dynamic Random Access Memory
SIMD Single Instruction Multiple Data
SPI Serial Peripheral Interface
SSI Serial Synchronous Interface
SSP Synchronous Serial Port
UART Universal Asynchronous Receiver/Transmitter
ULPI UTMI+ Low Pin Interface
USART Universal Synchronous Asynchronous Receiver/Transmitter
USB Universal Serial Bus
UTMI USB2.0 Transceiver Macrocell InterfaceLPC4350_30_20_10 All information provided in this document is subject to legal disclaimers. © NXP Semiconductors N.V. 2014. All rights reserved.
Product data sheet Rev. 4.2 — 18 August 2014 148 of 155
NXP Semiconductors LPC4350/30/20/10
32-bit ARM Cortex-M4/M0 microcontroller
17. References
[1] LPC43xx User manual UM10503:
http://www.nxp.com/documents/user_manual/UM10503.pdf
[2] LPC43X0 Errata sheet:
http://www.nxp.com/documents/errata_sheet/ES_LPC43XX.pdfLPC4350_30_20_10 All information provided in this document is subject to legal disclaimers. © NXP Semiconductors N.V. 2014. All rights reserved.
Product data sheet Rev. 4.2 — 18 August 2014 149 of 155
NXP Semiconductors LPC4350/30/20/10
32-bit ARM Cortex-M4/M0 microcontroller
18. Revision history
Table 42. Revision history
Document ID Release date Data sheet status Change notice Supersedes
LPC4350_30_20_10 v.4.2 20140818 Product data sheet LPC4350_30_20_10 v.4.1
Modifications: • Parameter CI corrected for high-drive pins (changed from 2 pF to 5.2 pF). See
Table 10.
• Table 18 “Dynamic characteristic: I/O pins[1]” added.
• IRC accuracy changed from 1 % to 1.5 % over the full temperature range. See Table
16 “Dynamic characteristic: IRC oscillator”.
• Description of internal pull-up resistor configuration added for RESET, WAKEUPn,
and ALARM pins.See Table 3.
• Description of DEBUG pin updated.
• Input range for PLL1 corrected: 1 MHz to 25 MHz. See Section 7.22.7 “System PLL1”.
• Section 13.7 “Suggested USB interface solutions” added.
• SSP master mode timing diagram updated with SSEL timing parameters. See Figure
30 “SSP master mode timing (SPI mode)”.
• Parameters tlead, tlag, and td added in Table 22 “Dynamic characteristics: SSP pins in
SPI mode”.
• Reset state of the RTC alarm pin RTC_ALARM added. See Table 3.
• SRAM location for parts LPC4320 corrected in Figure 7.
• IEEE standard 802.3 compliance added to Section 11.16. Covers Ethernet dynamic
characteristics of ENET_MDIO and ENET_MDC signals.\
• Signal polarity of EMC_CKEOUT and EMC_DQMOUT corrected. Both signals are
active HIGH.
• SPIFI output timing parameters in Table 33 corrected to apply to Mode 0:
– tv(Q) changed to 3.2 ns.
– th(Q) changed to 0.2 ns,
• Parameter tCSLWEL with condition PB = 1 corrected: (WAITWEN + 1) Tcy(clk) added.
See Table 25 “Dynamic characteristics: Static asynchronous external memory
interface”.
• Parameter tCSLBLSL with condition PB = 0 corrected: (WAITWEN + 1) Tcy(clk) added.
See Table 25 “Dynamic characteristics: Static asynchronous external memory
interface”.
LPC4350_30_20_10 v.4.1 20131211 Product data sheet - LPC4350_30_20_10 v.4
Modifications: • Description of RESET pin updated in Table 3.
• Layout of local SRAM at address 0x1008 0000 clarified in Figure 7
“LPC4350/30/20/10 Memory mapping (overview)”.
• Maximum value for Vi(RMS) added in Section 13.3 “RTC oscillator”.
• VO for RTC_ALARM pin added in Table 10.
• RTC_ALARM and WAKEUPn pins added to Table 10.
• Table note 9 added in Table 10.
• Timing parameters in Table 31 “Dynamic characteristics: SD/MMC” corrected.
• Band gap characteristics removed.
• OTP memory size available for general purpose use corrected.
• Part LPC4350FBD208 removed.
LPC4350_30_20_10 v.4 20130326 Product data sheet - LPC4350_30_20_10 v.3.7LPC4350_30_20_10 All information provided in this document is subject to legal disclaimers. © NXP Semiconductors N.V. 2014. All rights reserved.
Product data sheet Rev. 4.2 — 18 August 2014 150 of 155
NXP Semiconductors LPC4350/30/20/10
32-bit ARM Cortex-M4/M0 microcontroller
• Parameter ILH (High-level leakage current) for condition VI = 5 V changed to 20 nA
(max). See Table 10.
• Parameter VDDA(3V3) added for pins USB0_VDDA3V3_DRIVER and
USB0_VDDA3V3 in Table 10.
• SPI timing data added. See Table 22.
• SGPIO timing data added. See Table 23.
• SPI and SGPIO peripheral power consumption added in Table 11.
• Data sheet status changed to Product data sheet.
• Corrected max voltage on pins USB0_DP, USB0_DM, USB0_VBUS, USB1_DP, and
USB1_DM in Table 6 and Table 10 to be consistent with USB specifications.
LPC4350_30_20_10 v.3.7 20130131 Preliminary data sheet - LPC4350_30_20_10 v.3.6
Modifications: • SGPIO and SPI location corrected in Figure 1.
• SGPIO-to-DMA connection corrected in Figure 7.
• Power consumption in active mode corrected. See parameter IDD(REG)(3V3) in Table 10
and graphs Figure 12, Figure 13, and Figure 14.
• Parameter name IDD(ADC) changed to IDDA in Table 10.
• Figure 21 “Band gap voltage for different temperatures and process conditions” and
Table 13 “Band gap characteristics” corrected.
• Added note to limit data in Table 24 “Dynamic characteristics: Static asynchronous
external memory interface” to single memory accesses.
• Value of parameter IDD(REG)(3V3) in deep power-down increased to 0.03 μA in
Table 10.
• Value of parameter IDD(IO) in deep power-down increased to 0.05 μA in Table 10.
LPC4350_30_20_10 v.3.6 20121119 Preliminary data sheet - LPC4350_30_20_10 v.3.5
Modifications: • Table 13 “Band gap characteristics” added.
• Power consumption for M0 core added in Table 11 “Peripheral power consumption”.
• Section 7.22.10 “Power Management Controller (PMC)” added.
• Table 10, added Table note 2: “Dynamic characteristics for peripherals are provided
for VDD(REG)(3V3) 2.7 V.”
• Description of ADC pins on digital/analog input pins changed. Each input to the ADC
is connected to ADC0 and ADC1. See Table 3.
• Use of C_CAN peripheral restricted in Section 2.
• ADC channels limited to a total of 8 channels shared between ADC0 and ADC1.
• Minimum value for parameter VIL changed to 0 V in Table 10 “Static characteristics”.
LPC4350_30_20_10 v.3.5 20121011 Preliminary data sheet - LPC4350_30_20_10 v.3.4
Table 42. Revision history …continued
Document ID Release date Data sheet status Change notice SupersedesLPC4350_30_20_10 All information provided in this document is subject to legal disclaimers. © NXP Semiconductors N.V. 2014. All rights reserved.
Product data sheet Rev. 4.2 — 18 August 2014 151 of 155
NXP Semiconductors LPC4350/30/20/10
32-bit ARM Cortex-M4/M0 microcontroller
Modifications: • Temperature range for simulated timing characteristics corrected to Tamb = 40 C to
+85 C in Section 11 “Dynamic characteristics”.
• SPIFI timing added. See Section 11.15.
• SPIFI maximum data rate changed to 52 MB per second.
• Editorial updates.
• Figure 25 and Figure 26 updated for full temperature range.
• Section 7.23 “Serial Wire Debug/JTAG” updated.
• The following changes were made on the TFBGA180 pinout in Table 3:
– P1_13 moved from ball D6 to L8.
– P7_5 moved from ball C7 to A7.
– PF_4 moved from ball L8 to D6.
– RESET moved from ball B7 to C7.
– RTCX2 moved from ball A7 to B7.
– Ball G10 changed from VSS to VDDIO.
LPC4350_30_20_10 v.3.4 20120904 Preliminary data sheet - LPC4350_30_20_10 v.3.3
Modifications: • SSP0 boot pin functions corrected in Table 5 and Table 4. Pin P3_3 = SSP0_SCK, pin
P3_6 = SSP0_SSEL, pin P3_7 = SSP0_MISO, pin P3_8 = SSP0_MOSI.
• Minimum value for all supply voltages changed to -0.5 V in Table 6.
LPC4350_30_20_10 v.3.3 20120821 Preliminary data sheet - LPC4350_30_20_10 v.3.2
Modifications: • Parameter twake updated in Table 13 for wake-up from deep power-down mode and
reset.
• Dynamic characteristics of the SD/MMC controller updated in Table 28.
• Dynamic characteristics of the LCD controller updated in Table 29.
• Dynamic characteristics of the SSP controller updated in Table 21.
• Minimum value of VI for conditions “USB0 pins USB0_DP; USB0_DM;
USB0_VBUS”,“USB0 pins USB0_ID; USB0_RREF”, and “USB1 pins USB1_DP and
USB1_DM” changed to 0.3 V in Table 6.
• Parameters IIL and IIH renamed to ILL and ILH in Table 10.
• AES removed. AES is available on parts LPC43Sxx only.
• Pin configuration diagrams corrected for LQFP packages (Figure 5 and Figure 6).
• Figure 10 updated.
• All power consumption data updated in Table 10 and Section 10.1 “Power
consumption”.
• BOD levels updated in Table 12.
• SWD debug option removed for Cortex-M0 core.
LPC4350_30_20_10 v.3.2 20120604 Preliminary data sheet - LPC4350_30_20_10 v.3.1
LPC4350_30_20_10 v.3.1 20120105 Objective data sheet - LPC4350_30_20_10 v.3
LPC4350_30_20_10 v.3 20111205 Objective data sheet - LPC4350_30_20_10 v.2.1
LPC4350_30_20_10 v.2.1 20110923 Objective data sheet - LPC4350_30_20_10 v.2
LPC4350_30_20_10 v.2 20110714 Objective data sheet - LPC4350_30_20_10 v.1
LPC4350_30_20_10 v.1 20101029 Objective data sheet - -
Table 42. Revision history …continued
Document ID Release date Data sheet status Change notice SupersedesLPC4350_30_20_10 All information provided in this document is subject to legal disclaimers. © NXP Semiconductors N.V. 2014. All rights reserved.
Product data sheet Rev. 4.2 — 18 August 2014 152 of 155
NXP Semiconductors LPC4350/30/20/10
32-bit ARM Cortex-M4/M0 microcontroller
19. Legal information
19.1 Data sheet status
[1] Please consult the most recently issued document before initiating or completing a design.
[2] The term ‘short data sheet’ is explained in section “Definitions”.
[3] The product status of device(s) described in this document may have changed since this document was published and may differ in case of multiple devices. The latest product status
information is available on the Internet at URL http://www.nxp.com.
19.2 Definitions
Draft — The document is a draft version only. The content is still under
internal review and subject to formal approval, which may result in
modifications or additions. NXP Semiconductors does not give any
representations or warranties as to the accuracy or completeness of
information included herein and shall have no liability for the consequences of
use of such information.
Short data sheet — A short data sheet is an extract from a full data sheet
with the same product type number(s) and title. A short data sheet is intended
for quick reference only and should not be relied upon to contain detailed and
full information. For detailed and full information see the relevant full data
sheet, which is available on request via the local NXP Semiconductors sales
office. In case of any inconsistency or conflict with the short data sheet, the
full data sheet shall prevail.
Product specification — The information and data provided in a Product
data sheet shall define the specification of the product as agreed between
NXP Semiconductors and its customer, unless NXP Semiconductors and
customer have explicitly agreed otherwise in writing. In no event however,
shall an agreement be valid in which the NXP Semiconductors product is
deemed to offer functions and qualities beyond those described in the
Product data sheet.
19.3 Disclaimers
Limited warranty and liability — Information in this document is believed to
be accurate and reliable. However, NXP Semiconductors does not give any
representations or warranties, expressed or implied, as to the accuracy or
completeness of such information and shall have no liability for the
consequences of use of such information. NXP Semiconductors takes no
responsibility for the content in this document if provided by an information
source outside of NXP Semiconductors.
In no event shall NXP Semiconductors be liable for any indirect, incidental,
punitive, special or consequential damages (including - without limitation - lost
profits, lost savings, business interruption, costs related to the removal or
replacement of any products or rework charges) whether or not such
damages are based on tort (including negligence), warranty, breach of
contract or any other legal theory.
Notwithstanding any damages that customer might incur for any reason
whatsoever, NXP Semiconductors’ aggregate and cumulative liability towards
customer for the products described herein shall be limited in accordance
with the Terms and conditions of commercial sale of NXP Semiconductors.
Right to make changes — NXP Semiconductors reserves the right to make
changes to information published in this document, including without
limitation specifications and product descriptions, at any time and without
notice. This document supersedes and replaces all information supplied prior
to the publication hereof.
Suitability for use — NXP Semiconductors products are not designed,
authorized or warranted to be suitable for use in life support, life-critical or
safety-critical systems or equipment, nor in applications where failure or
malfunction of an NXP Semiconductors product can reasonably be expected
to result in personal injury, death or severe property or environmental
damage. NXP Semiconductors and its suppliers accept no liability for
inclusion and/or use of NXP Semiconductors products in such equipment or
applications and therefore such inclusion and/or use is at the customer’s own
risk.
Applications — Applications that are described herein for any of these
products are for illustrative purposes only. NXP Semiconductors makes no
representation or warranty that such applications will be suitable for the
specified use without further testing or modification.
Customers are responsible for the design and operation of their applications
and products using NXP Semiconductors products, and NXP Semiconductors
accepts no liability for any assistance with applications or customer product
design. It is customer’s sole responsibility to determine whether the NXP
Semiconductors product is suitable and fit for the customer’s applications and
products planned, as well as for the planned application and use of
customer’s third party customer(s). Customers should provide appropriate
design and operating safeguards to minimize the risks associated with their
applications and products.
NXP Semiconductors does not accept any liability related to any default,
damage, costs or problem which is based on any weakness or default in the
customer’s applications or products, or the application or use by customer’s
third party customer(s). Customer is responsible for doing all necessary
testing for the customer’s applications and products using NXP
Semiconductors products in order to avoid a default of the applications and
the products or of the application or use by customer’s third party
customer(s). NXP does not accept any liability in this respect.
Limiting values — Stress above one or more limiting values (as defined in
the Absolute Maximum Ratings System of IEC 60134) will cause permanent
damage to the device. Limiting values are stress ratings only and (proper)
operation of the device at these or any other conditions above those given in
the Recommended operating conditions section (if present) or the
Characteristics sections of this document is not warranted. Constant or
repeated exposure to limiting values will permanently and irreversibly affect
the quality and reliability of the device.
Terms and conditions of commercial sale — NXP Semiconductors
products are sold subject to the general terms and conditions of commercial
sale, as published at http://www.nxp.com/profile/terms, unless otherwise
agreed in a valid written individual agreement. In case an individual
agreement is concluded only the terms and conditions of the respective
agreement shall apply. NXP Semiconductors hereby expressly objects to
applying the customer’s general terms and conditions with regard to the
purchase of NXP Semiconductors products by customer.
No offer to sell or license — Nothing in this document may be interpreted or
construed as an offer to sell products that is open for acceptance or the grant,
conveyance or implication of any license under any copyrights, patents or
other industrial or intellectual property rights.
Document status[1][2] Product status[3] Definition
Objective [short] data sheet Development This document contains data from the objective specification for product development.
Preliminary [short] data sheet Qualification This document contains data from the preliminary specification.
Product [short] data sheet Production This document contains the product specification. LPC4350_30_20_10 All information provided in this document is subject to legal disclaimers. © NXP Semiconductors N.V. 2014. All rights reserved.
Product data sheet Rev. 4.2 — 18 August 2014 153 of 155
NXP Semiconductors LPC4350/30/20/10
32-bit ARM Cortex-M4/M0 microcontroller
Export control — This document as well as the item(s) described herein
may be subject to export control regulations. Export might require a prior
authorization from competent authorities.
Non-automotive qualified products — Unless this data sheet expressly
states that this specific NXP Semiconductors product is automotive qualified,
the product is not suitable for automotive use. It is neither qualified nor tested
in accordance with automotive testing or application requirements. NXP
Semiconductors accepts no liability for inclusion and/or use of
non-automotive qualified products in automotive equipment or applications.
In the event that customer uses the product for design-in and use in
automotive applications to automotive specifications and standards, customer
(a) shall use the product without NXP Semiconductors’ warranty of the
product for such automotive applications, use and specifications, and (b)
whenever customer uses the product for automotive applications beyond
NXP Semiconductors’ specifications such use shall be solely at customer’s
own risk, and (c) customer fully indemnifies NXP Semiconductors for any
liability, damages or failed product claims resulting from customer design and
use of the product for automotive applications beyond NXP Semiconductors’
standard warranty and NXP Semiconductors’ product specifications.
19.4 Trademarks
Notice: All referenced brands, product names, service names and trademarks
are the property of their respective owners.
I
2C-bus — logo is a trademark of NXP Semiconductors N.V.
20. Contact information
For more information, please visit: http://www.nxp.com
For sales office addresses, please send an email to: salesaddresses@nxp.comLPC4350_30_20_10 All information provided in this document is subject to legal disclaimers. © NXP Semiconductors N.V. 2014. All rights reserved.
Product data sheet Rev. 4.2 — 18 August 2014 154 of 155
continued >>
NXP Semiconductors LPC4350/30/20/10
32-bit ARM Cortex-M4/M0 microcontroller
21. Contents
1 General description . . . . . . . . . . . . . . . . . . . . . . 1
2 Features and benefits . . . . . . . . . . . . . . . . . . . . 1
3 Applications . . . . . . . . . . . . . . . . . . . . . . . . . . . . 4
4 Ordering information. . . . . . . . . . . . . . . . . . . . . 5
4.1 Ordering options . . . . . . . . . . . . . . . . . . . . . . . . 5
5 Block diagram . . . . . . . . . . . . . . . . . . . . . . . . . . 6
6 Pinning information. . . . . . . . . . . . . . . . . . . . . . 7
6.1 Pinning . . . . . . . . . . . . . . . . . . . . . . . . . . . . . . . 7
6.2 Pin description . . . . . . . . . . . . . . . . . . . . . . . . . 7
7 Functional description . . . . . . . . . . . . . . . . . . 61
7.1 Architectural overview . . . . . . . . . . . . . . . . . . 61
7.2 ARM Cortex-M4 processor . . . . . . . . . . . . . . . 61
7.3 ARM Cortex-M0 co-processor . . . . . . . . . . . . 61
7.4 Interprocessor communication . . . . . . . . . . . . 61
7.5 AHB multilayer matrix . . . . . . . . . . . . . . . . . . . 62
7.6 Nested Vectored Interrupt Controller (NVIC) . 62
7.6.1 Features . . . . . . . . . . . . . . . . . . . . . . . . . . . . . 63
7.6.2 Interrupt sources. . . . . . . . . . . . . . . . . . . . . . . 63
7.7 System Tick timer (SysTick) . . . . . . . . . . . . . . 63
7.8 Event router . . . . . . . . . . . . . . . . . . . . . . . . . . 63
7.9 Global Input Multiplexer Array (GIMA) . . . . . . 63
7.9.1 Features . . . . . . . . . . . . . . . . . . . . . . . . . . . . . 64
7.10 On-chip static RAM. . . . . . . . . . . . . . . . . . . . . 64
7.11 In-System Programming (ISP) . . . . . . . . . . . . 64
7.12 Boot ROM. . . . . . . . . . . . . . . . . . . . . . . . . . . . 64
7.13 Memory mapping . . . . . . . . . . . . . . . . . . . . . . 65
7.14 One-Time Programmable (OTP) memory . . . 68
7.15 General-Purpose I/O (GPIO) . . . . . . . . . . . . . 68
7.15.1 Features . . . . . . . . . . . . . . . . . . . . . . . . . . . . . 68
7.16 Configurable digital peripherals . . . . . . . . . . . 68
7.16.1 State Configurable Timer (SCTimer/PWM)
subsystem . . . . . . . . . . . . . . . . . . . . . . . . . . . 68
7.16.1.1 Features . . . . . . . . . . . . . . . . . . . . . . . . . . . . . 69
7.16.2 Serial GPIO (SGPIO) . . . . . . . . . . . . . . . . . . . 69
7.16.2.1 Features . . . . . . . . . . . . . . . . . . . . . . . . . . . . . 69
7.17 AHB peripherals . . . . . . . . . . . . . . . . . . . . . . . 70
7.17.1 General-Purpose DMA (GPDMA). . . . . . . . . . 70
7.17.1.1 Features . . . . . . . . . . . . . . . . . . . . . . . . . . . . . 70
7.17.2 SPI Flash Interface (SPIFI). . . . . . . . . . . . . . . 70
7.17.2.1 Features . . . . . . . . . . . . . . . . . . . . . . . . . . . . . 71
7.17.3 SD/MMC card interface . . . . . . . . . . . . . . . . . 71
7.17.4 External Memory Controller (EMC). . . . . . . . . 71
7.17.4.1 Features . . . . . . . . . . . . . . . . . . . . . . . . . . . . . 71
7.17.5 High-speed USB Host/Device/OTG interface
(USB0) . . . . . . . . . . . . . . . . . . . . . . . . . . . . . . 72
7.17.5.1 Features . . . . . . . . . . . . . . . . . . . . . . . . . . . . . 72
7.17.6 High-speed USB Host/Device interface with
ULPI (USB1) . . . . . . . . . . . . . . . . . . . . . . . . . 72
7.17.6.1 Features. . . . . . . . . . . . . . . . . . . . . . . . . . . . . 72
7.17.7 LCD controller . . . . . . . . . . . . . . . . . . . . . . . . 73
7.17.7.1 Features. . . . . . . . . . . . . . . . . . . . . . . . . . . . . 73
7.17.8 Ethernet . . . . . . . . . . . . . . . . . . . . . . . . . . . . 74
7.17.8.1 Features. . . . . . . . . . . . . . . . . . . . . . . . . . . . . 74
7.18 Digital serial peripherals. . . . . . . . . . . . . . . . . 74
7.18.1 UART1 . . . . . . . . . . . . . . . . . . . . . . . . . . . . . . 74
7.18.1.1 Features. . . . . . . . . . . . . . . . . . . . . . . . . . . . . 74
7.18.2 USART0/2/3. . . . . . . . . . . . . . . . . . . . . . . . . . 75
7.18.2.1 Features. . . . . . . . . . . . . . . . . . . . . . . . . . . . . 75
7.18.3 SPI serial I/O controller . . . . . . . . . . . . . . . . . 75
7.18.3.1 Features. . . . . . . . . . . . . . . . . . . . . . . . . . . . . 75
7.18.4 SSP serial I/O controller. . . . . . . . . . . . . . . . . 75
7.18.4.1 Features. . . . . . . . . . . . . . . . . . . . . . . . . . . . . 76
7.18.5 I2C-bus interface . . . . . . . . . . . . . . . . . . . . . . 76
7.18.5.1 Features. . . . . . . . . . . . . . . . . . . . . . . . . . . . . 76
7.18.6 I2S interface . . . . . . . . . . . . . . . . . . . . . . . . . . 76
7.18.6.1 Features. . . . . . . . . . . . . . . . . . . . . . . . . . . . . 77
7.18.7 C_CAN. . . . . . . . . . . . . . . . . . . . . . . . . . . . . . 77
7.18.7.1 Features. . . . . . . . . . . . . . . . . . . . . . . . . . . . . 77
7.19 Counter/timers and motor control . . . . . . . . . 78
7.19.1 General purpose 32-bit timers/external event
counters . . . . . . . . . . . . . . . . . . . . . . . . . . . . . 78
7.19.1.1 Features. . . . . . . . . . . . . . . . . . . . . . . . . . . . . 78
7.19.2 Motor control PWM . . . . . . . . . . . . . . . . . . . . 78
7.19.3 Quadrature Encoder Interface (QEI) . . . . . . . 78
7.19.3.1 Features. . . . . . . . . . . . . . . . . . . . . . . . . . . . . 78
7.19.4 Repetitive Interrupt (RI) timer. . . . . . . . . . . . . 79
7.19.4.1 Features. . . . . . . . . . . . . . . . . . . . . . . . . . . . . 79
7.19.5 Windowed WatchDog Timer (WWDT) . . . . . . 79
7.19.5.1 Features. . . . . . . . . . . . . . . . . . . . . . . . . . . . . 79
7.20 Analog peripherals . . . . . . . . . . . . . . . . . . . . . 80
7.20.1 Analog-to-Digital Converter (ADC0/1) . . . . . . 80
7.20.1.1 Features. . . . . . . . . . . . . . . . . . . . . . . . . . . . . 80
7.20.2 Digital-to-Analog Converter (DAC). . . . . . . . . 80
7.20.2.1 Features. . . . . . . . . . . . . . . . . . . . . . . . . . . . . 80
7.21 Peripherals in the RTC power domain . . . . . . 80
7.21.1 RTC . . . . . . . . . . . . . . . . . . . . . . . . . . . . . . . . 80
7.21.1.1 Features. . . . . . . . . . . . . . . . . . . . . . . . . . . . . 80
7.21.2 Alarm timer. . . . . . . . . . . . . . . . . . . . . . . . . . . 81
7.22 System control . . . . . . . . . . . . . . . . . . . . . . . . 81
7.22.1 Configuration registers (CREG) . . . . . . . . . . . 81
7.22.2 System Control Unit (SCU) . . . . . . . . . . . . . . 81
7.22.3 Clock Generation Unit (CGU) . . . . . . . . . . . . 81
7.22.4 Internal RC oscillator (IRC) . . . . . . . . . . . . . . 82
7.22.5 PLL0USB (for USB0) . . . . . . . . . . . . . . . . . . . 82NXP Semiconductors LPC4350/30/20/10
32-bit ARM Cortex-M4/M0 microcontroller
© NXP Semiconductors N.V. 2014. All rights reserved.
For more information, please visit: http://www.nxp.com
For sales office addresses, please send an email to: salesaddresses@nxp.com
Date of release: 18 August 2014
Document identifier: LPC4350_30_20_10
Please be aware that important notices concerning this document and the product(s)
described herein, have been included in section ‘Legal information’.
7.22.6 PLL0AUDIO (for audio) . . . . . . . . . . . . . . . . . 82
7.22.7 System PLL1 . . . . . . . . . . . . . . . . . . . . . . . . . 82
7.22.8 Reset Generation Unit (RGU). . . . . . . . . . . . . 82
7.22.9 Power control . . . . . . . . . . . . . . . . . . . . . . . . . 82
7.22.10 Power Management Controller (PMC) . . . . . . 83
7.23 Serial Wire Debug/JTAG. . . . . . . . . . . . . . . . . 84
8 Limiting values. . . . . . . . . . . . . . . . . . . . . . . . . 86
9 Thermal characteristics . . . . . . . . . . . . . . . . . 87
10 Static characteristics. . . . . . . . . . . . . . . . . . . . 88
10.1 Power consumption . . . . . . . . . . . . . . . . . . . . 95
10.2 Peripheral power consumption . . . . . . . . . . . . 99
10.3 BOD . . . . . . . . . . . . . . . . . . . . . . . . . . . . . . . 101
10.4 Electrical pin characteristics . . . . . . . . . . . . . 102
11 Dynamic characteristics . . . . . . . . . . . . . . . . 106
11.1 Wake-up times . . . . . . . . . . . . . . . . . . . . . . . 106
11.2 External clock for oscillator in slave mode . . 106
11.3 Crystal oscillator . . . . . . . . . . . . . . . . . . . . . . 107
11.4 IRC oscillator . . . . . . . . . . . . . . . . . . . . . . . . 107
11.5 RTC oscillator . . . . . . . . . . . . . . . . . . . . . . . . 107
11.6 I/O pins . . . . . . . . . . . . . . . . . . . . . . . . . . . . . 108
11.7 I2C-bus . . . . . . . . . . . . . . . . . . . . . . . . . . . . . 109
11.8 I2S-bus interface. . . . . . . . . . . . . . . . . . . . . . 110
11.9 USART interface. . . . . . . . . . . . . . . . . . . . . . 111
11.10 SSP interface . . . . . . . . . . . . . . . . . . . . . . . . 112
11.11 SPI interface . . . . . . . . . . . . . . . . . . . . . . . . . 114
11.12 SSP/SPI timing diagrams . . . . . . . . . . . . . . . 115
11.13 SGPIO timing . . . . . . . . . . . . . . . . . . . . . . . . 116
11.14 External memory interface . . . . . . . . . . . . . . 118
11.15 USB interface . . . . . . . . . . . . . . . . . . . . . . . 123
11.16 Ethernet . . . . . . . . . . . . . . . . . . . . . . . . . . . . 124
11.17 SD/MMC . . . . . . . . . . . . . . . . . . . . . . . . . . . . 126
11.18 LCD . . . . . . . . . . . . . . . . . . . . . . . . . . . . . . . 126
11.19 SPIFI. . . . . . . . . . . . . . . . . . . . . . . . . . . . . . . 127
12 ADC/DAC electrical characteristics . . . . . . . 128
13 Application information. . . . . . . . . . . . . . . . . 131
13.1 LCD panel signal usage . . . . . . . . . . . . . . . . 131
13.2 Crystal oscillator . . . . . . . . . . . . . . . . . . . . . . 133
13.3 RTC oscillator . . . . . . . . . . . . . . . . . . . . . . . . 135
13.4 XTAL and RTCX Printed Circuit Board (PCB)
layout guidelines. . . . . . . . . . . . . . . . . . . . . . 135
13.5 Standard I/O pin configuration . . . . . . . . . . . 135
13.6 Reset pin configuration. . . . . . . . . . . . . . . . . 136
13.7 Suggested USB interface solutions . . . . . . . 136
14 Package outline . . . . . . . . . . . . . . . . . . . . . . . 139
15 Soldering . . . . . . . . . . . . . . . . . . . . . . . . . . . . 143
16 Abbreviations. . . . . . . . . . . . . . . . . . . . . . . . . 147
17 References . . . . . . . . . . . . . . . . . . . . . . . . . . . 148
18 Revision history. . . . . . . . . . . . . . . . . . . . . . . 149
19 Legal information . . . . . . . . . . . . . . . . . . . . . 152
19.1 Data sheet status . . . . . . . . . . . . . . . . . . . . . 152
19.2 Definitions . . . . . . . . . . . . . . . . . . . . . . . . . . 152
19.3 Disclaimers . . . . . . . . . . . . . . . . . . . . . . . . . 152
19.4 Trademarks . . . . . . . . . . . . . . . . . . . . . . . . . 153
20 Contact information . . . . . . . . . . . . . . . . . . . 153
21 Contents. . . . . . . . . . . . . . . . . . . . . . . . . . . . . 154
Your Electronic Engineering Resource
Legal Disclaimer: The content of the pages of this website is for your general information and use only. It is subject to change without notice. From time to time, this website may
also include links to other websites. These links are provided for your convenience to provide further information. They do not signify that we endorse the website(s). We have no
responsibility for the content of the linked website(s). Your use of any information or materials on this website is entirely at your own risk, for which we shall not be liable. It shall
be your own responsibility to ensure that any products, services or information available through this website meet your specific requirements.
7491181012: Off-line Transformer WE-UNIT
Product Description:
Würth Electronics, Inc. has a broad selection of power transformers
for the latest reference designs from some of the leading IC
manufacturers in the industry. The overall product offering contains
more than 50 transformers built for chipsets from NXP
Semiconductors, Linear Technology, ON Semiconductor, Power
Integrations, STMicroelectronics, and National Semiconductor.
Examples of these devices are a series of offline power transformers
designed for NXP's dimmable LED drivers and a full series of flyback
transformers for Linear Technology's isolated flyback converters.
They are Designed for Tiny Switch ICs from Power Integration and NCP101x or 105x of ON Semiconductor
Key Features:
Nominal input voltage: 125V DC to 375V DC Output power 3W and 9W
Operating temperature: -40°C to +125°C Clearance and creepage distance 6mm min.
Switching frequency: 132kHz Isolation voltage 4kVAC
Applications:
Designed for Tiny Switch ICs from Power
Integration and NCP101x or 105x of ON
Semiconductor
For SMPS with universal input from 85 VAC up to 265
VAC
Ordering Information:
Mfr Part # Farnell# Newark# Description
7491181012 Click Here Click Here Off-line transformer WE-UNIT
1. Introduction
This data sheet describes the functionality of the CLRC632 Integrated Circuit (IC). It
includes the functional and electrical specifications and from a system and hardware
viewpoint gives detailed information on how to design-in the device.
Remark: The CLRC632 supports all variants of the MIFARE Mini, MIFARE 1K,
MIFARE 4K and MIFARE Ultralight RF identification protocols. To aid readability
throughout this data sheet, the MIFARE Mini, MIFARE 1K, MIFARE 4K and
MIFARE Ultralight products and protocols have the generic name MIFARE.
2. General description
The CLRC632 is a highly integrated reader IC for contactless communication at
13.56 MHz. The CLRC632 reader IC provides:
• outstanding modulation and demodulation for passive contactless communication
• a wide range of methods and protocols
• a small, fully integrated package
• pin compatibility with the MFRC500, MFRC530, MFRC531 and SLRC400
All protocol layers of the ISO/IEC 14443 A and ISO/IEC 14443 B communication
standards are supported provided:
• additional components, such as the oscillator, power supply, coil etc. are correctly
applied.
• standardized protocols, such as ISO/IEC 14443-4 and/or ISO/IEC 14443 B
anticollision are correctly implemented
The CLRC632 supports contactless communication using MIFARE higher baud rates (see
Section 9.12 on page 40). The receiver module provides a robust and efficient
demodulation/decoding circuitry implementation for compatible transponder signals (see
Section 9.10 on page 34).
The digital module, manages the complete ISO/IEC 14443 standard framing and error
detection (parity and CRC). In addition, it supports the fast MIFARE security algorithm for
authenticating the MIFARE products (see Section 9.14 on page 42).
All layers of the I-CODE1 and ISO/IEC 15693 protocols are supported by the CLRC632.
The receiver module provides a robust and efficient demodulation/decoding circuitry
implementation for I-CODE1 and ISO/IEC 15693 compatible transponder signals. The
digital module handles I-CODE1 and ISO/IEC 15693 framing and error detection (CRC).
CLRC632
Standard multi-protocol reader solution
Rev. 3.7 — 27 February 2014
073937
Product data sheet
COMPANY PUBLICCLRC632 All information provided in this document is subject to legal disclaimers. © NXP Semiconductors N.V. 2014. All rights reserved.
Product data sheet
COMPANY PUBLIC
Rev. 3.7 — 27 February 2014
073937 2 of 127
NXP Semiconductors CLRC632
Standard multi-protocol reader solution
The internal transmitter module (Section 9.9 on page 31) can directly drive an antenna
designed for a proximity operating distance up to 100 mm without any additional active
circuitry.
A parallel interface can be directly connected to any 8-bit microprocessor to ensure
reader/terminal design flexibility. In addition, Serial Peripheral Interface (SPI) compatibility
is supported (see Section 9.1.4 on page 9).
3. Features and benefits
3.1 General
Highly integrated analog circuitry for demodulating and decoding card/label response
Buffered output drivers enable antenna connection using the minimum of external
components
Proximity operating distance up to 100 mm
Supports both ISO/IEC 14443 A and ISO/IEC 14443 B standards
Supports MIFARE dual-interface card ICs and the MIFARE Mini, MIFARE 1K,
MIFARE 4K protocols
Contactless communication at MIFARE higher baud rates (up to 424 kBd)
Supports both I-CODE1 and ISO/IEC 15693 protocols
Crypto1 and secure non-volatile internal key memory
Pin-compatible with the MFRC500, MFRC530, MFRC531 and the SLRC400
Parallel microprocessor interface with internal address latch and IRQ line
SPI compatibility
Flexible interrupt handling
Automatic detection of parallel microprocessor interface type
64-byte send and receive FIFO buffer
Hard reset with low power function
Software controlled Power-down mode
Programmable timer
Unique serial number
User programmable start-up configuration
Bit-oriented and byte oriented framing
Independent power supply pins for analog, digital and transmitter modules
Internal oscillator buffer optimized for low phase jitter enables 13.56 MHz quartz
connection
Clock frequency filtering
3.3 V to 5 V operation for transmitter in short range and proximity applications
3.3 V or 5 V operation for the digital module
4. Applications
Electronic payment systems
Identification systems
Access control systemsCLRC632 All information provided in this document is subject to legal disclaimers. © NXP Semiconductors N.V. 2014. All rights reserved.
Product data sheet
COMPANY PUBLIC
Rev. 3.7 — 27 February 2014
073937 3 of 127
NXP Semiconductors CLRC632
Standard multi-protocol reader solution
Subscriber services
Banking systems
Digital content systems
5. Quick reference data
6. Ordering information
Table 1. Quick reference data
Symbol Parameter Conditions Min Typ Max Unit
Tamb ambient temperature 40 - +150 C
Tstg storage temperature 40 - +150 C
VDDD digital supply voltage 0.5 5 6 V
VDDA analog supply voltage 0.5 5 6 V
VDD(TVDD) TVDD supply voltage 0.5 5 6 V
Vi
input voltage (absolute
value)
on any digital pin to DVSS 0.5 - VDDD + 0.5 V
on pin RX to AVSS 0.5 - VDDA + 0.5 V
ILI input leakage current 1.0 - 1.0 mA
IDD(TVDD) TVDD supply current continuous wave - - 150 mA
Table 2. Ordering information
Type number Package
Name Description Version
CLRC63201T/0FE SO32 plastic small outline package; 32 leads; body width 7.5 mm SOT287-1CLRC632 All information provided in this document is subject to legal disclaimers. © NXP Semiconductors N.V. 2014. All rights reserved.
Product data sheet
COMPANY PUBLIC
Rev. 3.7 — 27 February 2014
073937 4 of 127
NXP Semiconductors CLRC632
Standard multi-protocol reader solution
7. Block diagram
Fig 1. CLRC632 block diagram
001aaj629
FIFO CONTROL
64-BYTE FIFO
MASTER KEY BUFFER
CRYPTO1 UNIT
CONTROL REGISTER
BANK
NWR NRD NCS ALE A0 A1 A2
10 11 9 21 22 23 24 13 14 15 16 17 18 19 20
AD0 to AD7/D0 to D7
STATE MACHINE
COMMAND REGISTER
PROGRAMMABLE TIMER
INTERRUPT CONTROL
CRC16/CRC8
GENERATION AND CHECK
PARALLEL/SERIAL CONVERTER
BIT COUNTER
PARITY GENERATION AND CHECK
FRAME GENERATION AND CHECK
SERIAL DATA SWITCH
BIT DECODING BIT ENCODING
32 × 16-BYTE
EEPROM
EEPROM
ACCESS
CONTROL
32-BIT PSEUDO
RANDOM GENERATOR
AMPLITUDE
RATING
CLOCK
GENERATION,
FILTERING AND
DISTRIBUTION
OSCILLATOR
LEVEL SHIFTERS
CORRELATION
AND
REFERENCE BIT DECODING
VOLTAGE
Q-CHANNEL
AMPLIFIER
Q-CHANNEL
DEMODULATOR
I-CHANNEL
ANALOG AMPLIFIER
TEST
MULTIPLEXER I-CHANNEL
DEMODULATOR
PARALLEL INTERFACE CONTROL
(INCLUDING AUTOMATIC INTERFACE DETECTION AND SYNCHRONISATION)
VOLTAGE
MONITOR
AND
POWER ON
DETECT
DVDD
RSTPD
Q-CLOCK
GENERATION
TRANSMITTER CONTROL
GND
GND
VMID AUX RX TVSS TX1 TX2 TVDD
30 27 29 8 5 7 6
V
V
POWER ON
DETECT
OSCIN
AVDD
AVSS
OSCOUT
IRQ
MFIN
MFOUT
DVSS
25
31
1
26
28
32
2
3
4
12
RESET
CONTROL
POWER DOWN
CONTROLCLRC632 All information provided in this document is subject to legal disclaimers. © NXP Semiconductors N.V. 2014. All rights reserved.
Product data sheet
COMPANY PUBLIC
Rev. 3.7 — 27 February 2014
073937 5 of 127
NXP Semiconductors CLRC632
Standard multi-protocol reader solution
8. Pinning information
8.1 Pin description
Fig 2. CLRC632 pin configuration
CLRC632
OSCIN OSCOUT
IRQ RSTPD
MFIN VMID
MFOUT RX
TX1 AVSS
TVDD AUX
TX2 AVDD
TVSS DVDD
NCS A2/SCK
NWR/R/NW/nWrite A1
NRD/NDS/nDStrb A0/nWait/MOSI
DVSS ALE/AS/nAStrb/NSS
AD0/D0 D7/AD7
AD1/D1 D6/AD6
AD2/D2 D5/AD5
AD3/D3 D4/AD4
001aaj630
1
2
3
4
5
6
7
8
9
10
11
12
13
14
15
16
18
17
20
19
22
21
24
23
26
25
32
31
30
29
28
27
Table 3. Pin description
Pin Symbol Type[1] Description
1 OSCIN I oscillator/clock inputs:
crystal oscillator input to the oscillator’s inverting amplifier
externally generated clock input; fosc = 13.56 MHz
2 IRQ O interrupt request generates an output signaling an interrupt event
3 MFIN I ISO/IEC 14443 A MIFARE serial data interface input
4[2] MFOUT O interface outputs used as follows:
MIFARE: generates serial data ISO/IEC 14443 A
I-CODE: generates serial data based on I-CODE1 and ISO/IEC 15693
5 TX1 O transmitter 1 modulated carrier output; 13.56 MHz
6 TVDD P transmitter power supply for the TX1 and TX2 output stages
7 TX2 O transmitter 2 modulated carrier output; 13.56 MHz
8 TVSS G transmitter ground for the TX1 and TX2 output stages
9 NCS I not chip select input is used to select and activate the CLRC632’s microprocessor
interface
10[3] NWR I not write input generates the strobe signal for writing data to the CLRC632
registers when applied to pins D0 to D7
R/NW I read not write input is used to switch between read or write cycles
nWrite I not write input selects the read or write cycle to be performedCLRC632 All information provided in this document is subject to legal disclaimers. © NXP Semiconductors N.V. 2014. All rights reserved.
Product data sheet
COMPANY PUBLIC
Rev. 3.7 — 27 February 2014
073937 6 of 127
NXP Semiconductors CLRC632
Standard multi-protocol reader solution
[1] Pin types: I = Input, O = Output, I/O = Input/Output, P = Power and G = Ground.
[2] The SLRC400 uses pin name SIGOUT for pin MFOUT. The CLRC632 functionality includes test functions for the SLRC400 using pin
MFOUT.
[3] These pins provide different functionality depending on the selected microprocessor interface type (see Section 9.1 on page 7 for
detailed information).
11[3] NRD I not read input generates the strobe signal for reading data from the CLRC632
registers when applied to pins D0 to D7
NDS I not data strobe input generates the strobe signal for the read and write cycles
nDStrb I not data strobe input generates the strobe signal for the read and write cycles
12 DVSS G digital ground
13 D0 O SPI master in, slave out output
13 to 20[3] D0 to D7 I/O 8-bit bidirectional data bus input/output on pins D0 to D7
AD0 to AD7 I/O 8-bit bidirectional address and data bus input/output on pins AD0 to AD7
21[3] ALE I address latch enable input for pins AD0 to AD5; HIGH latches the internal address
AS I address strobe input for pins AD0 to AD5; HIGH latches the internal address
nAStrb I not address strobe input for pins AD0 to AD5; LOW latches the internal address
NSS I not slave select strobe input for SPI communication
22[3] A0 I address line 0 is the address register bit 0 input
nWait O not wait output:
LOW starts an access cycle
HIGH ends an access cycle
MOSI I SPI master out, slave in
23 A1 I address line 1 is the address register bit 1 input
24[3] A2 I address line 2 is the address register bit 2 input
SCK I SPI serial clock input
25 DVDD P digital power supply
26 AVDD P analog power supply for pins OSCIN, OSCOUT, RX, VMID and AUX
27 AUX O auxiliary output is used to generate analog test signals. The output signal is
selected using the TestAnaSelect register’s TestAnaOutSel[4:0] bits
28 AVSS G analog ground
29 RX I receiver input is used as the card response input. The carrier is load modulated at
13.56 MHz, drawn from the antenna circuit
30 VMID P internal reference voltage pin provides the internal reference voltage as a supply
Remark: It must be connected to a 100 nF block capacitor connected between pin
VMID and ground
31 RSTPD I reset and power-down input:
HIGH: the internal current sinks are switched off, the oscillator is inhibited and
the input pads are disconnected
LOW (negative edge): start internal reset phase
32 OSCOUT O crystal oscillator output for the oscillator’s inverting amplifier
Table 3. Pin description …continued
Pin Symbol Type[1] DescriptionCLRC632 All information provided in this document is subject to legal disclaimers. © NXP Semiconductors N.V. 2014. All rights reserved.
Product data sheet
COMPANY PUBLIC
Rev. 3.7 — 27 February 2014
073937 7 of 127
NXP Semiconductors CLRC632
Standard multi-protocol reader solution
9. Functional description
9.1 Digital interface
9.1.1 Overview of supported microprocessor interfaces
The CLRC632 supports direct interfacing to various 8-bit microprocessors. Alternatively,
the CLRC632 can be connected to a PC’s Enhanced Parallel Port (EPP). Table 4 shows
the parallel interface signals supported by the CLRC632.
9.1.2 Automatic microprocessor interface detection
After a Power-On or Hard reset, the CLRC632 resets parallel microprocessor interface
mode and detects the microprocessor interface type.
The CLRC632 identifies the microprocessor interface using the logic levels on the control
pins. This is performed using a combination of fixed pin connections and the dedicated
Initialization routine (see Section 9.7.4 on page 30).
Table 4. Supported microprocessor and EPP interface signals
Bus control signals Bus Separated address
and data bus
Multiplexed address and data bus
Separated read and
write strobes
control NRD, NWR, NCS NRD, NWR, NCS, ALE
address A0, A1, A2 AD0, AD1, AD2, AD3, AD4, AD5
data D0 to D7 AD0 to AD7
Common read and write
strobe
control R/NW, NDS, NCS R/NW, NDS, NCS, AS
address A0, A1, A2 AD0, AD1, AD2, AD3, AD4, AD5
data D0 to D7 AD0 to AD7
Common read and write
strobe with handshake
(EPP)
control - nWrite, nDStrb, nAStrb, nWait
address - AD0, AD1, AD2, AD3, AD4, AD5
data - AD0 to AD7CLRC632 All information provided in this document is subject to legal disclaimers. © NXP Semiconductors N.V. 2014. All rights reserved.
Product data sheet
COMPANY PUBLIC
Rev. 3.7 — 27 February 2014
073937 8 of 127
NXP Semiconductors CLRC632
Standard multi-protocol reader solution
9.1.3 Connection to different microprocessor types
The connection to various microprocessor types is shown in Table 5.
9.1.3.1 Separate read and write strobe
Refer to Section 13.4.1 on page 102 for timing specification.
Table 5. Connection scheme for detecting the parallel interface type
CLRC632
pins
Parallel interface type and signals
Separated read/write strobe Common read/write strobe
Dedicated
address bus
Multiplexed
address
bus
Dedicated
address bus
Multiplexed
address bus
Multiplexed
address bus with
handshake
ALE HIGH ALE HIGH AS nAStrb
A2 A2 LOW A2 LOW HIGH
A1 A1 HIGH A1 HIGH HIGH
A0 A0 HIGH A0 LOW nWait
NRD NRD NRD NDS NDS nDStrb
NWR NWR NWR R/NW R/NW nWrite
NCS NCS NCS NCS NCS LOW
D7 to D0 D7 to D0 AD7 to AD0 D7 to D0 AD7 to AD0 AD7 to AD0
Fig 3. Connection to microprocessor: separate read and write strobes
001aak607
address bus (A3 to An)
NCS
A0 to A2
address bus (A0 to A2)
D0 to D7
ALE
data bus (D0 to D7)
HIGH
NRD Read strobe (NRD)
NWR Write strobe (NWR)
DEVICE
ADDRESS
DECODER
non-multiplexed address
NCS
AD0 to AD7
ALE
multiplexed address/data (AD0 to AD7)
address latch enable (ALE)
NRD Read strobe (NRD)
NWR Write strobe (NWR)
A2 LOW
A1 HIGH
A0 HIGH
DEVICE
ADDRESS
DECODERCLRC632 All information provided in this document is subject to legal disclaimers. © NXP Semiconductors N.V. 2014. All rights reserved.
Product data sheet
COMPANY PUBLIC
Rev. 3.7 — 27 February 2014
073937 9 of 127
NXP Semiconductors CLRC632
Standard multi-protocol reader solution
9.1.3.2 Common read and write strobe
Refer to Section 13.4.2 on page 103 for timing specification.
9.1.3.3 Common read and write strobe: EPP with handshake
Refer to Section 13.4.3 on page 104 for timing specification.
Remark: In the EPP standard a chip select signal is not defined. To cover this situation,
the status of the NCS pin can be used to inhibit the nDStrb signal. If this inhibitor is not
used, it is mandatory that pin NCS is connected to pin DVSS.
Remark: After each Power-On or Hard reset, the nWait signal on pin A0 is
high-impedance. nWait is defined as the first negative edge applied to the nAStrb pin after
the reset phase. The CLRC632 does not support Read Address Cycle.
9.1.4 Serial Peripheral Interface
The CLRC632 provides compatibility with the 5-wire Serial Peripheral Interface (SPI)
standard and acts as a slave during the SPI communication. The SPI clock signal SCK
must be generated by the master. Data communication from the master to the slave uses
the MOSI line. The MISO line sends data from the CLRC632 to the master.
Fig 4. Connection to microprocessor: common read and write strobes
001aak608
address bus (A3 to An)
NCS
A0 to A2
address bus (A0 to A2)
D0 to D7
ALE
data bus (D0 to D7)
HIGH
NRD Data strobe (NDS)
NWR Read/Write (R/NW)
DEVICE
ADDRESS
DECODER
non-multiplexed address
NCS
AD0 to AD7
ALE
multiplexed address/data (AD0 to AD7)
Address strobe (AS)
NRD Data strobe (NDS)
NWR Read/Write (R/NW)
A2 LOW
A1 HIGH
A0 LOW
DEVICE
ADDRESS
DECODER
Fig 5. Connection to microprocessor: EPP common read/write strobes and handshake
001aak609
LOW NCS
AD0 to AD7
ALE
multiplexed address/data (AD0 to AD7)
Address strobe (nAStrb)
NRD Data strobe (nDStrb)
NWR Read/Write (nWrite)
A2 HIGH
A1 HIGH
A0 nWait
DEVICECLRC632 All information provided in this document is subject to legal disclaimers. © NXP Semiconductors N.V. 2014. All rights reserved.
Product data sheet
COMPANY PUBLIC
Rev. 3.7 — 27 February 2014
073937 10 of 127
NXP Semiconductors CLRC632
Standard multi-protocol reader solution
Figure 6 shows the microprocessor connection to the CLRC632 using SPI.
Remark: The SPI implementation for CLRC632 conforms to the SPI standard and
ensures that the CLRC632 can only be addressed as a slave.
9.1.4.1 SPI read data
The structure shown in Table 7 must be used to read data using SPI. It is possible to read
up to n-data bytes. The first byte sent defines both, the mode and the address.
The address byte must meet the following criteria:
• the Most Significant Bit (MSB) of the first byte sets the mode. To read data from the
CLRC632 the MSB is set to logic 1
• bits [6:1] define the address
• the Least Significant Bit (LSB) should be set to logic 0.
As shown in Table 8, all the bits of the last byte sent are set to logic 0.
Table 6. SPI compatibility
CLRC632 pins SPI pins
ALE NSS
A2 SCK
A1 LOW
A0 MOSI
NRD HIGH
NWR HIGH
NCS LOW
D7 to D1 do not connect
D0 MISO
Fig 6. Connection to microprocessor: SPI
001aak610
LOW NCS
D0
ALE
A2 SCK
A1 LOW
MOSI
NSS
A0
MISO
DEVICE
Table 7. SPI read data
Pin Byte 0 Byte 1 Byte 2 ... Byte n Byte n + 1
MOSI address 0 address 1 address 2 ... address n 00
MISO XX data 0 data 1 ... data n 1 data nCLRC632 All information provided in this document is subject to legal disclaimers. © NXP Semiconductors N.V. 2014. All rights reserved.
Product data sheet
COMPANY PUBLIC
Rev. 3.7 — 27 February 2014
073937 11 of 127
NXP Semiconductors CLRC632
Standard multi-protocol reader solution
[1] All reserved bits must be set to logic 0.
9.1.4.2 SPI write data
The structure shown in Table 9 must be used to write data using SPI. It is possible to write
up to n-data bytes. The first byte sent defines both the mode and the address.
The address byte must meet the following criteria:
• the MSB of the first byte sets the mode. To write data to the CLRC632, the MSB is set
to logic 0
• bits [6:1] define the address
• the LSB should be set to logic 0.
SPI write mode writes all data to the address defined in byte 0 enabling effective write
cycles to the FIFO buffer.
[1] All reserved bits must be set to logic 0.
Remark: The data bus pins D7 to D0 must be disconnected.
Refer to Section 13.4.4 on page 106 for the timing specification.
Table 8. SPI read address
Address
(MOSI)
Bit 7
(MSB)
Bit 6 Bit 5 Bit 4 Bit 3 Bit 2 Bit 1 Bit 0
(LSB)
byte 0 1 address address address address address address reserved
byte 1 to byte n reserved address address address address address address reserved
byte n + 1 0 0 0 0 0 0 0 0
Table 9. SPI write data
Byte 0 Byte 1 Byte 2 ... Byte n Byte n + 1
MOSI address data 0 data 1 ... data n 1 data n
MISO XX XX XX ... XX XX
Table 10. SPI write address
Address line
(MOSI)
Bit 7
(MSB)
Bit 6 Bit 5 Bit 4 Bit 3 Bit 2 Bit 1 Bit 0
(LSB)
byte 0 0 address address address address address address reserved
byte 1 to byte
n+1
data data data data data data data dataCLRC632 All information provided in this document is subject to legal disclaimers. © NXP Semiconductors N.V. 2014. All rights reserved.
Product data sheet
COMPANY PUBLIC
Rev. 3.7 — 27 February 2014
073937 12 of 127
NXP Semiconductors CLRC632
Standard multi-protocol reader solution
9.2 Memory organization of the EEPROM
Table 11. EEPROM memory organization diagram
Block Byte
address
Access Memory content Refer to
Position Address
0 0 00h to 0Fh R product
information field
Section 9.2.1 on page 13
1 1 10h to 1Fh R/W StartUp register
initialization file
Section 9.2.2.1 on page 14
2 2 20h to 2Fh R/W
3 3 30h to 3Fh R/W register
initialization file
user data or
second
initialization
Section 9.2.2.3 “Register
initialization file (read/write)”
on page 16
4 4 40h to 4Fh R/W
5 5 50h to 5Fh R/W
6 6 60h to 6Fh R/W
7 7 70h to 7Fh R/W
8 8 80h to 8Fh W keys for Crypto1 Section 9.2.3 on page 18
9 9 90h to 9Fh W
10 A A0h to AFh W
11 B B0h to BFh W
12 C C0h to CFh W
13 D D0h to DFh W
14 E E0h to EFh W
15 F F0h to FFh W
16 10 100h to 10Fh W
17 11 110h to 11Fh W
18 12 120h to 12Fh W
19 13 130h to 13Fh W
20 14 140h to 14Fh W
21 15 150h to 15Fh W
22 16 160h to 16Fh W
23 17 170h to 17Fh W
24 18 180h to 18Fh W
25 19 190h to 19Fh W
26 1A 1A0h to
1AFh
W
27 1B 1B0h to
1BFh
W
28 1C 1C0h to
1CFh
W
29 1D 1D0h to
1DFh
W
30 1E 1E0h to
1EFh
W
31 1F 1F0h to
1FFh
WCLRC632 All information provided in this document is subject to legal disclaimers. © NXP Semiconductors N.V. 2014. All rights reserved.
Product data sheet
COMPANY PUBLIC
Rev. 3.7 — 27 February 2014
073937 13 of 127
NXP Semiconductors CLRC632
Standard multi-protocol reader solution
9.2.1 Product information field (read only)
[1] Byte 4 contains the current version number.
9.2.2 Register initialization files (read/write)
Register initialization from address 10h to address 2Fh is performed automatically during
the initializing phase (see Section 9.7.3 on page 30) using the StartUp register
initialization file.
In addition, the CLRC632 registers can be initialized using values from the register
initialization file when the LoadConfig command is executed (see Section 11.5.1 on
page 95).
Table 12. Product information field
Byte Symbol Access Value Description
15 CRC R - the content of the product information field
is secured using a CRC byte which is
checked during start-up
14 RsMaxP R - maximum source resistance for the
p-channel driver transistor on pins TX1 and
TX2
The source resistance of the p-channel
driver transistors of pin TX1 and TX2 can be
adjusted using the value GsCfgCW[5:0] in
the CwConductance register (see
Section 9.9.3 on page 32). The mean value
of the maximum adjustable source
resistance for pins TX1 and TX2 is stored
as an integer value in in this byte. Typical
values for RsMaxP are between 60 to
140 . This value is denoted as maximum
adjustable source resistance RS(ref)maxP and
is measured by setting the CwConductance
register’s GsCfgCW[5:0] bits to 01h.
13 to 12 Internal R - two bytes for internal trimming parameters
11 to 8 Product Serial Number R - a unique four byte serial number for the
device
7 to 5 reserved R -
4 to 0 Product Type
Identification
R - the CLRC632 is a member of a new family
of highly integrated reader ICs. Each
member of the product family has a unique
product type identification. The value of the
product type identification is shown in
Table 13.
Table 13. Product type identification definition
Definition Product type identification bytes
Byte 0 1 2 3 4[1]
Value 30h FFh FFh 0Fh XXhCLRC632 All information provided in this document is subject to legal disclaimers. © NXP Semiconductors N.V. 2014. All rights reserved.
Product data sheet
COMPANY PUBLIC
Rev. 3.7 — 27 February 2014
073937 14 of 127
NXP Semiconductors CLRC632
Standard multi-protocol reader solution
Remark: The following points apply to initialization:
• the Page register (addressed using 10h, 18h, 20h, 28h) is skipped and not initialized.
• make sure that all PreSetxx registers are not changed.
• make sure that all register bits that are reserved are set to logic 0.
9.2.2.1 StartUp register initialization file (read/write)
The EEPROM memory block address 1 and 2 contents are used to automatically set the
register subaddresses 10h to 2Fh during the initialization phase. The default values stored
in the EEPROM during production are shown in Section 9.2.2.2 “Factory default StartUp
register initialization file”.
The byte assignment is shown in Table 14.
9.2.2.2 Factory default StartUp register initialization file
During the production tests, the StartUp register initialization file is initialized using the
default values shown in Table 15. During each power-up and initialization phase, these
values are written to the CLRC632’s registers.
Table 14. Byte assignment for register initialization at start-up
EEPROM byte address Register address Remark
10h (block 1, byte 0) 10h skipped
11h 11h copied
… ……
2Fh (block 2, byte 15) 2Fh copiedCLRC632 All information provided in this document is subject to legal disclaimers. © NXP Semiconductors N.V. 2014. All rights reserved.
Product data sheet
COMPANY PUBLIC
Rev. 3.7 — 27 February 2014
073937 15 of 127
NXP Semiconductors CLRC632
Standard multi-protocol reader solution
Remark: The CLRC632 default configuration supports the MIFARE and ISO/IEC 14443 A
communication scheme. Memory addresses 3 to 7 may be used for user-specific
initialization files such as I-CODE1, ISO/IEC 15693 or ISO/IEC 14443 B.
Table 15. Shipment content of StartUp configuration file
EEPROM
byte
address
Register
address
Value Symbol Description
10h 10h 00h Page free for user
11h 11h 58h TxControl transmitter pins TX1 and TX2 are switched off, bridge driver
configuration, modulator driven from internal digital circuitry
12h 12h 3Fh CwConductance source resistance of TX1 and TX2 is set to minimum
13h 13h 3Fh ModConductance defines the output conductance
14h 14h 19h CoderControl ISO/IEC 14443 A coding is set
15h 15h 13h ModWidth pulse width for Miller pulse coding is set to standard configuration
16h 16h 3Fh ModWidthSOF pulse width of Start Of Frame (SOF)
17h 17h 3Bh TypeFraming ISO/IEC 14443 A framing is set
18h 18h 00h Page free for user
19h 19h 73h RxControl1 ISO/IEC 14443 A is set and internal amplifier gain is maximum
1Ah 1Ah 08h DecoderControl bit-collisions always evaluate to HIGH in the data bit stream
1Bh 1Bh ADh BitPhase BitPhase[7:0] is set to standard configuration
1Ch 1Ch FFh RxThreshold MinLevel[3:0] and CollLevel[3:0] are set to maximum
1Dh 1Dh 1Eh BPSKDemControl ISO/IEC 14443 A is set
1Eh 1Eh 41h RxControl2 use Q-clock for the receiver, automatic receiver off is switched on,
decoder is driven from internal analog circuitry
1Fh 1Fh 00h ClockQControl automatic Q-clock calibration is switched on
20h 20h 00h Page free for user
21h 21h 06h RxWait frame guard time is set to six bit-clocks
22h 22h 03h ChannelRedundancy channel redundancy is set using ISO/IEC 14443 A
23h 23h 63h CRCPresetLSB CRC preset value is set using ISO/IEC 14443 A
24h 24h 63h CRCPresetMSB CRC preset value is set using ISO/IEC 14443 A
25h 25h 00h TimeSlotPeriod defines the time for the I-CODE1 time slots
26h 26h 00h MFOUTSelect pin MFOUT is set LOW
27h 27h 00h PreSet27 -
28h 28h 00h Page free for user
29h 29h 08h FIFOLevel WaterLevel[5:0] FIFO buffer warning level is set to standard
configuration
2Ah 2Ah 07h TimerClock TPreScaler[4:0] is set to standard configuration, timer unit restart
function is switched off
2Bh 2Bh 06h TimerControl Timer is started at the end of transmission, stopped at the beginning
of reception
2Ch 2Ch 0Ah TimerReload TReloadValue[7:0]: the timer unit preset value is set to standard
configuration
2Dh 2Dh 02h IRQPinConfig pin IRQ is set to high-impedance
2Eh 2Eh 00h PreSet2E -
2Fh 2Fh 00h PreSet2F -CLRC632 All information provided in this document is subject to legal disclaimers. © NXP Semiconductors N.V. 2014. All rights reserved.
Product data sheet
COMPANY PUBLIC
Rev. 3.7 — 27 February 2014
073937 16 of 127
NXP Semiconductors CLRC632
Standard multi-protocol reader solution
9.2.2.3 Register initialization file (read/write)
The EEPROM memory content from block address 3 to 7 can initialize register sub
addresses 10h to 2Fh when the LoadConfig command is executed (see Section 11.5.1 on
page 95). This command requires the EEPROM starting byte address as a two byte
argument for the initialization procedure.
The byte assignment is shown in Table 16.
The register initialization file is large enough to hold values for two initialization sets and
up to one block (16-byte) of user data. The startup configuration could be adapted to the
I-CODE1 StartUp configuration and stored in register block address 3 and 4, providing
additional flexibility.
Remark: The register initialization file can be read/written by users and these bytes can
be used to store other user data.
After each power-up, the default configuration enables the MIFARE and ISO/IEC 14443 A
protocol.
9.2.2.4 Content of I-CODE1 and ISO/IEC 15693 StartUp register values
Table 17 gives an overview of the StartUp values for I-CODE1 and ISO/IEC 15693
communication.
Table 16. Byte assignment for register initialization at startup
EEPROM byte address Register address Remark
EEPROM starting byte address 10h skipped
EEPROM + 1 starting byte address 11h copied
… …
EEPROM + 31 starting byte address 2Fh copiedCLRC632 All information provided in this document is subject to legal disclaimers. © NXP Semiconductors N.V. 2014. All rights reserved.
Product data sheet
COMPANY PUBLIC
Rev. 3.7 — 27 February 2014
073937 17 of 127
NXP Semiconductors CLRC632
Standard multi-protocol reader solution
Table 17. Content of I-CODE1 startup configuration
EEPROM
byte
address
Register
address
Value Symbol Description
30h 10h 00h Page free for user
31h 11h 58h TxControl transmitter pins TX1 and TX2 switched off, bridge driver
configuration, modulator driven from internal digital circuitry
32h 12h 3Fh CwConductance source resistance (RS) of TX1 and TX2 to minimum
33h 13h 05h ModGsCfgh source resistance (RS) of TX1 and TX2 at the time of
modulation, to determine the modulation index
34h 14h 2Ch CoderControl selects the bit coding mode and the framing during
transmission
35h 15h 3Fh ModWidth pulse width for code used (1 out of 256, NRZ or 1 out of 4)
pulse coding is set to standard configuration
36h 16h 3Fh ModWidthSOF pulse width of SOF
37h 17h 00h TypeBFraming -
38h 18h 00h Page free for user
39h 19h 8Bh RxControl1 amplifier gain is maximum
3Ah 1Ah 00h DecoderControl bit-collisions always evaluate to HIGH in the data bit stream
3Bh 1Bh 54h BitPhase BitPhase[7:0] is set to standard configuration
3Ch 1Ch 68h RxThreshold: MinLevel[3:0] and CollLevel[3:0] are set to maximum
3Dh 1Dh 00h BPSKDemControl -
3Eh 1Eh 41h RxControl2 use Q-clock for the receiver, automatic receiver off is
switched on, decoder is driven from internal analog circuitry
3Fh 1Fh 00h ClockQControl automatic Q-clock calibration is switched on
40h 20h 00h Page free for user
41h 21h 08h RxWait frame guard time is set to eight bit-clocks
42h 22h 0Ch ChannelRedundancy channel redundancy is set using I-CODE1
43h 23h FEh CRCPresetLSB CRC preset value is set using I-CODE1
44h 24h FFh CRCPresetMSB CRC preset value is set using I-CODE1
45h 25h 00h TimeSlot Period defines the time for the I-CODE1 time slots
46h 26h 00h MFOUTSelect pin MFOUT is set LOW
47h 27h 00h PreSet27 -
48h 28h 00h Page free for user
49h 29h 3Eh FIFOLevel WaterLevel[5:0] FIFO buffer warning level is set to standard
configuration
4Ah 2Ah 0Bh TimerClock TPreScaler[4:0] is set to standard configuration, timer unit
restart function is switched off
4Bh 2Bh 02h TimerControl Timer is started at the end of transmission, stopped at the
beginning of reception
4Ch 2Ch 00h TimerReload the timer unit preset value is set to standard configuration
4Dh 2Dh 02h IRQPinConfig pin IRQ is set to high-impedance
4Eh 2Eh 00h PreSet2E -
4Fh 2Fh 00h PreSet2F -CLRC632 All information provided in this document is subject to legal disclaimers. © NXP Semiconductors N.V. 2014. All rights reserved.
Product data sheet
COMPANY PUBLIC
Rev. 3.7 — 27 February 2014
073937 18 of 127
NXP Semiconductors CLRC632
Standard multi-protocol reader solution
9.2.3 Crypto1 keys (write only)
MIFARE security requires specific cryptographic keys to encrypt data stream
communication on the contactless interface. These keys are called Crypto1 keys.
9.2.3.1 Key format
Keys stored in the EEPROM are written in a specific format. Each key byte must be split
into lower four bits k0 to k3 (lower nibble) and the higher four bits k4 to k7 (higher nibble).
Each nibble is stored twice in one byte and one of the two nibbles is bit-wise inverted. This
format is a precondition for successful execution of the LoadKeyE2 (see Section 11.7.1 on
page 97) and LoadKey commands (see Section 11.7.2 on page 97).
Using this format, 12 bytes of EEPROM memory are needed to store a 6-byte key. This is
shown in Figure 7.
Example: The value for the key must be written to the EEPROM.
• If the key was: A0h A1h A2h A3h A4h A5h then
• 5Ah F0h 5Ah E1h 5Ah D2h 5Ah C3h 5Ah B4h 5Ah A5h would be written.
Remark: It is possible to load data for other key formats into the EEPROM key storage
location. However, it is not possible to validate card authentication with data which will
cause the LoadKeyE2 command (see Section 11.7.1 on page 97) to fail.
9.2.3.2 Storage of keys in the EEPROM
The CLRC632 reserves 384 bytes of memory in the EEPROM for the Crypto1 keys. No
memory segmentation is used to mirror the 12-byte structure of key storage. Thus, every
byte of the dedicated memory area can be the start of a key.
Example: If the key loading cycle starts at the last byte address of an EEPROM block, (for
example, key byte 0 is stored at 12Fh), the next bytes are stored in the next EEPROM
block, for example, key byte 1 is stored at 130h, byte 2 at 131h up to byte 11 at 13Ah.
Based on the 384 bytes of memory and a single key needing 12 bytes, then up to 32
different keys can be stored in the EEPROM.
Remark: It is not possible to load a key exceeding the EEPROM byte location 1FFh.
Fig 7. Key storage format
001aak640
Master key byte 0 (LSB)
Master key bits
EEPROM byte
address
Example
k7 k6 k5 k4 k7 k6 k5 k4
n
5Ah
k3 k2 k1 k0 k3 k2 k1 k0
n + 1
F0h
1
k7 k6 k5 k4 k7 k6 k5 k4
n + 2
5Ah
k3 k2 k1 k0 k3 k2 k1 k0
n + 3
E1h
5 (MSB)
k7 k6 k5 k4 k7 k6 k5 k4
n + 10
5Ah
k3 k2 k1 k0 k3 k2 k1 k0
n + 11
A5hCLRC632 All information provided in this document is subject to legal disclaimers. © NXP Semiconductors N.V. 2014. All rights reserved.
Product data sheet
COMPANY PUBLIC
Rev. 3.7 — 27 February 2014
073937 19 of 127
NXP Semiconductors CLRC632
Standard multi-protocol reader solution
9.3 FIFO buffer
An 8 64 bit FIFO buffer is used in the CLRC632 to act as a parallel-to-parallel converter.
It buffers both the input and output data streams between the microprocessor and the
internal circuitry of the CLRC632. This makes it possible to manage data streams up to 64
bytes long without needing to take timing constraints into account.
9.3.1 Accessing the FIFO buffer
9.3.1.1 Access rules
The FIFO buffer input and output data bus is connected to the FIFOData register. Writing
to this register stores one byte in the FIFO buffer and increments the FIFO buffer write
pointer. Reading from this register shows the FIFO buffer contents stored at the FIFO
buffer read pointer and increments the FIFO buffer read pointer. The distance between the
write and read pointer can be obtained by reading the FIFOLength register.
When the microprocessor starts a command, the CLRC632 can still access the FIFO
buffer while the command is running. Only one FIFO buffer has been implemented which
is used for input and output. Therefore, the microprocessor must ensure that there are no
inadvertent FIFO buffer accesses. Table 18 gives an overview of FIFO buffer access
during command processing.
9.3.2 Controlling the FIFO buffer
In addition to writing to and reading from the FIFO buffer, the FIFO buffer pointers can be
reset using the FlushFIFO bit. This changes the FIFOLength[6:0] value to zero, bit
FIFOOvfl is cleared and the stored bytes are no longer accessible. This enables the FIFO
buffer to be written with another 64 bytes of data.
Table 18. FIFO buffer access
Active
command
FIFO buffer Remark
p Write p Read
StartUp - -
Idle - -
Transmit yes -
Receive - yes
Transceive yes yes the microprocessor has to know the state of the
command (transmitting or receiving)
WriteE2 yes -
ReadE2 yes yes the microprocessor has to prepare the arguments,
afterwards only reading is allowed
LoadKeyE2 yes -
LoadKey yes -
Authent1 yes -
Authent2 - -
LoadConfig yes -
CalcCRC yes -CLRC632 All information provided in this document is subject to legal disclaimers. © NXP Semiconductors N.V. 2014. All rights reserved.
Product data sheet
COMPANY PUBLIC
Rev. 3.7 — 27 February 2014
073937 20 of 127
NXP Semiconductors CLRC632
Standard multi-protocol reader solution
9.3.3 FIFO buffer status information
The microprocessor can get the following FIFO buffer status data:
• the number of bytes stored in the FIFO buffer: bits FIFOLength[6:0]
• the FIFO buffer full warning: bit HiAlert
• the FIFO buffer empty warning: bit LoAlert
• the FIFO buffer overflow warning: bit FIFOOvfl.
Remark: Setting the FlushFIFO bit clears the FIFOOvfl bit.
The CLRC632 can generate an interrupt signal when:
• bit LoAlertIRq is set to logic 1 and bit LoAlert = logic 1, pin IRQ is activated.
• bit HiAlertIRq is set to logic 1 and bit HiAlert = logic 1, pin IRQ activated.
The HiAlert flag bit is set to logic 1 only when the WaterLevel[5:0] bits or less can be
stored in the FIFO buffer. The trigger is generated by Equation 1:
(1)
The LoAlert flag bit is set to logic 1 when the FIFOLevel register’s WaterLevel[5:0] bits or
less are stored in the FIFO buffer. The trigger is generated by Equation 2:
(2)
9.3.4 FIFO buffer registers and flags
Table 18 shows the related FIFO buffer flags in alphabetic order.
9.4 Interrupt request system
The CLRC632 indicates interrupt events by setting the PrimaryStatus register bit IRq (see
Section 10.5.1.4 “PrimaryStatus register” on page 51) and activating pin IRQ. The signal
on pin IRQ can be used to interrupt the microprocessor using its interrupt handling
capabilities ensuring efficient microprocessor software.
HiAlert 64 FIFOLength = – WaterLevel
LoAlert FIFOLength WaterLevel =
Table 19. Associated FIFO buffer registers and flags
Flags Register name Bit Register address
FIFOLength[6:0] FIFOLength 6 to 0 04h
FIFOOvfl ErrorFlag 4 0Ah
FlushFIFO Control 0 09h
HiAlert PrimaryStatus 1 03h
HiAlertIEn InterruptEn 1 06h
HiAlertIRq InterruptRq 1 07h
LoAlert PrimaryStatus 0 03h
LoAlertIEn InterruptEn 0 06h
LoAlertIRq InterruptRq 0 07h
WaterLevel[5:0] FIFOLevel 5 to 0 29hCLRC632 All information provided in this document is subject to legal disclaimers. © NXP Semiconductors N.V. 2014. All rights reserved.
Product data sheet
COMPANY PUBLIC
Rev. 3.7 — 27 February 2014
073937 21 of 127
NXP Semiconductors CLRC632
Standard multi-protocol reader solution
9.4.1 Interrupt sources overview
Table 20 shows the integrated interrupt flags, related source and setting condition. The
interrupt TimerIRq flag bit indicates an interrupt set by the timer unit. Bit TimerIRq is set
when the timer decrements from one down to zero (bit TAutoRestart disabled) or from one
to the TReLoadValue[7:0] with bit TAutoRestart enabled.
Bit TxIRq indicates interrupts from different sources and is set as follows:
• the transmitter automatically sets the bit TxIRq interrupt when it is active and its state
changes from sending data to transmitting the end of frame pattern
• the CRC coprocessor sets the bit TxIRq after all data from the FIFO buffer has been
processed indicated by bit CRCReady = logic 1
• when EEPROM programming is finished, the bit TxIRq is set and is indicated by bit
E2Ready = logic 1
The RxIRq flag bit indicates an interrupt when the end of the received data is detected.
The IdleIRq flag bit is set when a command finishes and the content of the Command
register changes to Idle.
When the FIFO buffer reaches the HIGH-level indicated by the WaterLevel[5:0] value (see
Section 9.3.3 on page 20) and bit HiAlert = logic 1, then the HiAlertIRq flag bit is set to
logic 1.
When the FIFO buffer reaches the LOW-level indicated by the WaterLevel[5:0] value (see
Section 9.3.3 on page 20) and bit LoAlert = logic 1, then LoAlertIRq flag bit is set to
logic 1.
9.4.2 Interrupt request handling
9.4.2.1 Controlling interrupts and getting their status
The CLRC632 informs the microprocessor about the interrupt request source by setting
the relevant bit in the InterruptRq register. The relevance of each interrupt request bit as
source for an interrupt can be masked by the InterruptEn register interrupt enable bits.
Table 20. Interrupt sources
Interrupt flag Interrupt source Trigger action
TimerIRq timer unit timer counts from 1 to 0
TxIRq transmitter a data stream, transmitted to the card, ends
CRC coprocessor all data from the FIFO buffer has been processed
EEPROM all data from the FIFO buffer has been
programmed
RxIRq receiver a data stream, received from the card, ends
IdleIRq Command register command execution finishes
HiAlertIRq FIFO buffer FIFO buffer is full
LoAlertIRq FIFO buffer FIFO buffer is empty
Table 21. Interrupt control registers
Register Bit 7 Bit 6 Bit 5 Bit 4 Bit 3 Bit 2 Bit 1 Bit 0
InterruptEn SetIEn reserved TimerIEn TxIEn RxIEn IdleIEn HiAlertIEn LoAlertIEn
InterruptRq SetIRq reserved TimerIRq TxIRq RxIRq IdleIRq HiAlertIRq LoAlertIRqCLRC632 All information provided in this document is subject to legal disclaimers. © NXP Semiconductors N.V. 2014. All rights reserved.
Product data sheet
COMPANY PUBLIC
Rev. 3.7 — 27 February 2014
073937 22 of 127
NXP Semiconductors CLRC632
Standard multi-protocol reader solution
If any interrupt request flag is set to logic 1 (showing that an interrupt request is pending)
and the corresponding interrupt enable flag is set, the PrimaryStatus register IRq flag bit is
set to logic 1. Different interrupt sources can activate simultaneously because all interrupt
request bits are OR’ed, coupled to the IRq flag and then forwarded to pin IRQ.
9.4.2.2 Accessing the interrupt registers
The interrupt request bits are automatically set by the CLRC632’s internal state machines.
In addition, the microprocessor can also set or clear the interrupt request bits as required.
A special implementation of the InterruptRq and InterruptEn registers enables changing
an individual bit status without influencing any other bits. If an interrupt register is set to
logic 1, bit SetIxx and the specific bit must both be set to logic 1 at the same time. Vice
versa, if a specific interrupt flag is cleared, zero must be written to the SetIxx and the
interrupt register address must be set to logic 1 at the same time.
If a content bit is not changed during the setting or clearing phase, zero must be written to
the specific bit location.
Example: Writing 3Fh to the InterruptRq register clears all bits. SetIRq is set to logic 0
while all other bits are set to logic 1. Writing 81h to the InterruptRq register sets LoAlertIRq
to logic 1 and leaves all other bits unchanged.
9.4.3 Configuration of pin IRQ
The logic level of the IRq flag bit is visible on pin IRQ. The signal on pin IRQ can also be
controlled using the following IRQPinConfig register bits.
• bit IRQInv: the signal on pin IRQ is equal to the logic level of bit IRq when this bit is set
to logic 0. When set to logic 1, the signal on pin IRQ is inverted with respect to bit IRq.
• bit IRQPushPull: when set to logic 1, pin IRQ has CMOS output characteristics. When
it is set to logic 0, it is an open-drain output which requires an external resistor to
achieve a HIGH-level at pin IRQ.
Remark: During the reset phase (see Section 9.7.2 on page 29) bit IRQInv is set to
logic 1 and bit IRQPushPull is set to logic 0. This results in a high-impedance on pin IRQ.CLRC632 All information provided in this document is subject to legal disclaimers. © NXP Semiconductors N.V. 2014. All rights reserved.
Product data sheet
COMPANY PUBLIC
Rev. 3.7 — 27 February 2014
073937 23 of 127
NXP Semiconductors CLRC632
Standard multi-protocol reader solution
9.4.4 Register overview interrupt request system
Table 22 shows the related interrupt request system flags in alphabetic order.
9.5 Timer unit
The timer derives its clock from the 13.56 MHz on-board chip clock. The microprocessor
can use this timer to manage timing-relevant tasks.
The timer unit may be used in one of the following configurations:
• Timeout counter
• WatchDog counter
• Stopwatch
• Programmable one shot
• Periodical trigger
The timer unit can be used to measure the time interval between two events or to indicate
that a specific timed event occurred. The timer is triggered by events but does not
influence any event (e.g. a time-out during data receiving does not automatically influence
the receiving process). Several timer related flags can be set and these flags can be used
to generate an interrupt.
Table 22. Associated Interrupt request system registers and flags
Flags Register name Bit Register address
HiAlertIEn InterruptEn 1 06h
HiAlertIRq InterruptRq 1 07h
IdleIEn InterruptEn 2 06h
IdleIRq InterruptRq 2 07h
IRq PrimaryStatus 3 03h
IRQInv IRQPinConfig 1 07h
IRQPushPull IRQPinConfig 0 07h
LoAlertIEn InterruptEn 0 06h
LoAlertIRq InterruptRq 0 07h
RxIEn InterruptEn 3 06h
RxIRq InterruptRq 3 07h
SetIEn InterruptEn 7 06h
SetIRq InterruptRq 7 07h
TimerIEn InterruptEn 5 06h
TimerIRq InterruptRq 5 07h
TxIEn InterruptEn 4 06h
TxIRq InterruptRq 4 07hCLRC632 All information provided in this document is subject to legal disclaimers. © NXP Semiconductors N.V. 2014. All rights reserved.
Product data sheet
COMPANY PUBLIC
Rev. 3.7 — 27 February 2014
073937 24 of 127
NXP Semiconductors CLRC632
Standard multi-protocol reader solution
9.5.1 Timer unit implementation
9.5.1.1 Timer unit block diagram
Figure 8 shows the block diagram of the timer module.
The timer unit is designed, so that events when combined with enabling flags start or stop
the counter. For example, setting bit TStartTxBegin = logic 1 enables control of received
data with the timer unit. In addition, the first received bit is indicated by the TxBegin event.
This combination starts the counter at the defined TReloadValue[7:0].
The timer stops automatically when the counter value is equal to zero or if a defined stop
event happens.
9.5.1.2 Controlling the timer unit
The main part of the timer unit is a down-counter. As long as the down-counter value is
not zero, it decrements its value with each timer clock cycle.
If the TAutoRestart flag is enabled, the timer does not decrement down to zero. On
reaching value 1, the timer reloads the next clock function with the TReloadValue[7:0].
Fig 8. Timer module block diagram
001aak611
TxEnd Event
TAutoRestart
TRunning
TStartTxEnd
TStartNow
S
RQ
START COUNTER/
PARALLEL LOAD
STOP COUNTER
TPreScaler[4:0]
TimerValue[7:0]
Counter = 0 ?
to interrupt logic: TimerIRq
PARALLEL OUT
PARALLEL IN
TReloadValue[7:0]
CLOCK
DIVIDER
COUNTER MODULE
(x ≤ x − 1)
TStopNow
TxBegin Event
TStartTxBegin
TStopRxEnd
RxEnd Event
TStopRxBegin
13.56 MHz
to parallel interface
RxBegin Event
QCLRC632 All information provided in this document is subject to legal disclaimers. © NXP Semiconductors N.V. 2014. All rights reserved.
Product data sheet
COMPANY PUBLIC
Rev. 3.7 — 27 February 2014
073937 25 of 127
NXP Semiconductors CLRC632
Standard multi-protocol reader solution
The timer is started immediately by loading a value from the TimerReload register into the
counter module.
This is activated by one of the following events:
• transmission of the first bit to the card (TxBegin event) with bit TStartTxBegin = logic 1
• transmission of the last bit to the card (TxEnd event) with bit TStartTxEnd = logic 1
• bit TStartNow is set to logic 1 by the microprocessor
Remark: Every start event reloads the timer from the TimerReload register. Thus, the
timer unit is re-triggered.
The timer can be configured to stop on one of the following events:
• receipt of the first valid bit from the card (RxBegin event) with bit
TStopRxBegin = logic 1
• receipt of the last bit from the card (RxEnd event) with bit TStopRxEnd = logic 1
• the counter module has decremented down to zero and bit TAutoRestart = logic 0
• bit TStopNow is set to logic 1 by the microprocessor.
Loading a new value, e.g. zero, into the TimerReload register or changing the timer unit
while it is counting will not immediately influence the counter. In both cases, this is
because this register only affects the counter content after a start event.
If the counter is stopped when bit TStopNow is set, no TimerIRq is flagged.
9.5.1.3 Timer unit clock and period
The timer unit clock is derived from the 13.56 MHz on-board chip clock using the
programmable divider. Clock selection is made using the TimerClock register
TPreScaler[4:0] bits based on Equation 3:
(3)
The values for the TPreScaler[4:0] bits are between 0 and 21 which results in a minimum
periodic time (TTimerClock) of between 74 ns and 150 ms.
The time period elapsed since the last start event is calculated using Equation 4:
(4)
This results in a minimum time period (tTimer) of between 74 ns and 40 s.
9.5.1.4 Timer unit status
The SecondaryStatus register’s TRunning bit shows the timer’s status. Configured start
events start the timer at the TReloadValue[7:0] and changes the status flag TRunning to
logic 1. Conversely, configured stop events stop the timer and sets the TRunning status
flag to logic 0. As long as status flag TRunning is set to logic 1, the TimerValue register
changes on the next timer unit clock cycle.
The TimerValue[7:0] bits can be read directly from the TimerValue register.
fTimerClock
1
TTimerClock
--------------------------- 2
TPreScaler
13.56 = = -------------------------- MHz
tTimer
TReLoadValue TimerValue –
fTimerClock
= ----------------------------------------------------------------------------- sCLRC632 All information provided in this document is subject to legal disclaimers. © NXP Semiconductors N.V. 2014. All rights reserved.
Product data sheet
COMPANY PUBLIC
Rev. 3.7 — 27 February 2014
073937 26 of 127
NXP Semiconductors CLRC632
Standard multi-protocol reader solution
9.5.1.5 TimeSlotPeriod
When sending I-CODE1 Quit frames, it is necessary to generate the exact chronological
relationship to the start of the command frame.
If at the end of command execution TimeSlotPeriod > 0, the TimeSlotPeriod starts. If the
FIFO buffer contains data when the end of TimeSlotPeriod is reached, the data is sent. If
the FIFO buffer is empty nothing happens. As long as the TimeSlotPeriod is > 0, the
TimeSlotPeriod counter automatically starts on reaching the end.
This forms the exact time relationship between the start and finish of the command frame
used to generate and send I-CODE1 Quit frames.
When the TimeSlotPeriod > 0, the next Frame starts with exactly the same interval
TimeSlotPeriod/CoderRate delayed after each previous send frame. CoderRate defines
the clock frequency of the encoder. If TimeSlotPeriod[7:0] = 0, the send function is not
automatically triggered.
The content of the TimeSlotPeriod register can be changed while it is running but the
change is only effective after the next TimeSlotPeriod restart.
Example:
• CoderRate = 0 0.5 (~52.97 kHz)
• The interval should be 8.458 ms for I-CODE1 standard mode
Remark: The TimeSlotPeriodMSB bit is contained in the MFOUTSelect register.
Remark: Set bit TxCRCEn to logic 0 before the Quit frame is sent. If TxCRCEn is not set
to logic 0, the Quit frame is sent with a calculated CRC value. Use the CRC8 algorithm to
calculate the Quit value.
Fig 9. TimeSlotPeriod
Table 23. TimeSlotPeriod
I-CODE1 mode TimeSlotPeriod for TSP1 TimeSlotPeriod for TSP2
standard mode BFh 1BFh
fast mode 5Fh 67h
TimeSlotPeriod CoderRate Interval = = 52.97 kHz 8.458 ms – 1 447 1BFh = =
001aak612
COMMAND
RESPONSE1 RESPONSE2
TSP1 TSP2
QUIT1 QUIT2CLRC632 All information provided in this document is subject to legal disclaimers. © NXP Semiconductors N.V. 2014. All rights reserved.
Product data sheet
COMPANY PUBLIC
Rev. 3.7 — 27 February 2014
073937 27 of 127
NXP Semiconductors CLRC632
Standard multi-protocol reader solution
9.5.2 Using the timer unit functions
9.5.2.1 Time-out and WatchDog counters
After starting the timer using TReloadValue[7:0], the timer unit decrements the TimerValue
register beginning with a given start event. If a given stop event occurs, such as a bit
being received from the card, the timer unit stops without generating an interrupt.
If a stop event does not occur, such as the card not answering within the expected time,
the timer unit decrements down to zero and generates a timer interrupt request. This
signals to the microprocessor the expected event has not occurred within the given time
(tTimer).
9.5.2.2 Stopwatch
The time (tTimer) between a start and stop event is measured by the microprocessor using
the timer unit. Setting the TReloadValue register triggers the timer which in turn, starts to
decrement. If the defined stop event occurs, the timer stops. The time between start and
stop is calculated by the microprocessor using Equation 5, when the timer does not
decrement down to zero.
(5)
9.5.2.3 Programmable one shot timer and periodic trigger
Programmable one shot timer: The microprocessor starts the timer unit and waits for
the timer interrupt. The interrupt occurs after the time specified by tTimer.
Periodic trigger: If the microprocessor sets the TAutoRestart bit, it generates an interrupt
request after every tTimer cycle.
9.5.3 Timer unit registers
Table 24 shows the related flags of the timer unit in alphabetical order.
t TReLoadvalue – TimerValue tTimer =
Table 24. Associated timer unit registers and flags
Flags Register name Bit Register address
TAutoRestart TimerClock 5 2Ah
TimerValue[7:0] TimerValue 7 to 0 0Ch
TReloadValue[7:0] TimerReload 7 to 0 2Ch
TPreScaler[4:0] TimerClock 4 to 0 2Ah
TRunning SecondaryStatus 7 05h
TStartNow Control 1 09h
TStartTxBegin TimerControl 0 2Bh
TStartTxEnd TimerControl 1 2Bh
TStopNow Control 2 09h
TStopRxBegin TimerControl 2 2Bh
TStopRxEnd TimerControl 3 2BhCLRC632 All information provided in this document is subject to legal disclaimers. © NXP Semiconductors N.V. 2014. All rights reserved.
Product data sheet
COMPANY PUBLIC
Rev. 3.7 — 27 February 2014
073937 28 of 127
NXP Semiconductors CLRC632
Standard multi-protocol reader solution
9.6 Power reduction modes
9.6.1 Hard power-down
Hard power-down is enabled when pin RSTPD is HIGH. This turns off all internal current
sinks including the oscillator. All digital input buffers are separated from the input pads and
defined internally (except pin RSTPD itself). The output pins are frozen at a given value.
The status of all pins during a hard power-down is shown in Table 25.
9.6.2 Soft power-down mode
Soft power-down mode is entered immediately using the Control register bit PowerDown.
All internal current sinks, including the oscillator buffer, are switched off. The digital input
buffers are not separated from the input pads and keep their functionality. In addition, the
digital output pins do not change their state.
After resetting the Control register bit PowerDown, the bit indicating Soft power-down
mode is only cleared after 512 clock cycles. Resetting it does not immediately clear it. The
PowerDown bit is automatically cleared when the Soft power-down mode is exited.
Remark: When the internal oscillator is used, time (tosc) is required for the oscillator to
become stable. This is because the internal oscillator is supplied by VDDA and any clock
cycles will not be detected by the internal logic until VDDA is stable.
Table 25. Signal on pins during Hard power-down
Symbol Pin Type Description
OSCIN 1 I not separated from input, pulled to AVSS
IRQ 2 O high-impedance
MFIN 3 I separated from input
MFOUT 4 O LOW
TX1 5 O HIGH, if bit TX1RFEn = logic 1
LOW, if bit TX1RFEn = logic 0
TX2 7 O HIGH, only if bit TX2RFEn = logic 1 and bit
TX2Inv = logic 0
otherwise LOW
NCS 9 I separated from input
NWR 10 I separated from input
NRD 11 I separated from input
D0 to D7 13 to 20 I/O separated from input
ALE 21 I separated from input
A0 22 I/O separated from input
A1 23 I separated from input
A2 24 I separated from input
AUX 27 O high-impedance
RX 29 I not changed
VMID 30 A pulled to VDDA
RSTPD 31 I not changed
OSCOUT 32 O HIGHCLRC632 All information provided in this document is subject to legal disclaimers. © NXP Semiconductors N.V. 2014. All rights reserved.
Product data sheet
COMPANY PUBLIC
Rev. 3.7 — 27 February 2014
073937 29 of 127
NXP Semiconductors CLRC632
Standard multi-protocol reader solution
9.6.3 Standby mode
The Standby mode is immediately entered when the Control register StandBy bit is set. All
internal current sinks, including the internal digital clock buffer are switched off. However,
the oscillator buffer is not switched off.
The digital input buffers are not separated by the input pads, keeping their functionality
and the digital output pins do not change their state. In addition, the oscillator does not
need time to wake-up.
After resetting the Control register StandBy bit, it takes four clock cycles on pin OSCIN for
Standby mode to exit. Resetting bit StandBy does not immediately clear it. It is
automatically cleared when the Standby mode is exited.
9.6.4 Automatic receiver power-down
It is a power saving feature to switch off the receiver circuit when it is not needed. Setting
bit RxAutoPD = logic 1, automatically powers down the receiver when it is not in use.
Setting bit RxAutoPD = logic 0, keeps the receiver continuously powered up.
9.7 StartUp phase
The events executed during the StartUp phase are shown in Figure 10.
9.7.1 Hard power-down phase
The hard power-down phase is active during the following cases:
• a Power-On Reset (POR) caused by power-up on pins DVDD or AVDD activated
when VDDD or VDDA is below the digital reset threshold.
• a HIGH-level on pin RSTPD which is active while pin RSTPD is HIGH. The HIGH level
period on pin RSTPD must be at least 100 s (tPD 100 s). Shorter phases will not
necessarily result in the reset phase (treset). The rising or falling edge slew rate on pin
RSTPD is not critical because pin RSTPD is a Schmitt trigger input.
9.7.2 Reset phase
The reset phase automatically follows the Hard power-down. Once the oscillator is
running stably, the reset phase takes 512 clock cycles. During the reset phase, some
register bits are preset by hardware. The respective reset values are given in the
description of each register (see Section 10.5 on page 50).
Remark: When the internal oscillator is used, time (tosc) is required for the oscillator to
become stable. This is because the internal oscillator is supplied by VDDA and any clock
cycles will not be detected by the internal logic until VDDA is stable.
Fig 10. The StartUp procedure
001aak613
StartUp phase
states
tRSTPD treset tinit
Hard powerdown
phase Reset phase Initialising
phase readyCLRC632 All information provided in this document is subject to legal disclaimers. © NXP Semiconductors N.V. 2014. All rights reserved.
Product data sheet
COMPANY PUBLIC
Rev. 3.7 — 27 February 2014
073937 30 of 127
NXP Semiconductors CLRC632
Standard multi-protocol reader solution
9.7.3 Initialization phase
The initialization phase automatically follows the reset phase and takes 128 clock cycles.
During the initializing phase the content of the EEPROM blocks 1 and 2 is copied into the
register subaddresses 10h to 2Fh (see Section 9.2.2 on page 13).
Remark: During the production test, the CLRC632 is initialized with default configuration
values. This reduces the microprocessor’s configuration time to a minimum.
9.7.4 Initializing the parallel interface type
A different initialization sequence is used for each microprocessor. This enables detection
of the correct microprocessor interface type and synchronization of the microprocessor’s
and the CLRC632’s start-up. See Section 9.1.3 on page 8 for detailed information on the
different connections for each microprocessor interface type.
During StartUp phase, the command value is set to 3Fh once the oscillator attains clock
frequency stability at an amplitude of > 90 % of the nominal 13.56 MHz clock frequency. At
the end of the initialization phase, the CLRC632 automatically switches to idle and the
command value changes to 00h.
To ensure correct detection of the microprocessor interface, the following sequence is
executed:
• the Command register is read until the 6-bit register value is 00h. On reading the 00h
value, the internal initialization phase is complete and the CLRC632 is ready to be
controlled
• write 80h to the Page register to initialize the microprocessor interface
• read the Command register. If it returns a value of 00h, the microprocessor interface
was successfully initialized
• write 00h to the Page registers to activate linear addressing mode.
9.8 Oscillator circuit
The clock applied to the CLRC632 acts as a time basis for the synchronous system
encoder and decoder. The stability of the clock frequency is an important factor for correct
operation. To obtain highest performance, clock jitter must be as small as possible. This is
best achieved by using the internal oscillator buffer with the recommended circuitry.
Fig 11. Quartz clock connection
001aak614
13.56 MHz
15 pF 15 pF
OSCOUT OSCIN
DEVICECLRC632 All information provided in this document is subject to legal disclaimers. © NXP Semiconductors N.V. 2014. All rights reserved.
Product data sheet
COMPANY PUBLIC
Rev. 3.7 — 27 February 2014
073937 31 of 127
NXP Semiconductors CLRC632
Standard multi-protocol reader solution
If an external clock source is used, the clock signal must be applied to pin OSCIN. In this
case, be very careful in optimizing clock duty cycle and clock jitter. Ensure the clock
quality has been verified. It must meet the specifications described in Section 13.4.5 on
page 106.
Remark: We do not recommend using an external clock source.
9.9 Transmitter pins TX1 and TX2
The signal on pins TX1 and TX2 is the 13.56 MHz energy carrier modulated by an
envelope signal. It can be used to drive an antenna directly, using minimal passive
components for matching and filtering (see Section 15.1 on page 107). To enable this, the
output circuitry is designed with a very low-impedance source resistance. The TxControl
register is used to control the TX1 and TX2 signals.
9.9.1 Configuring pins TX1 and TX2
TX1 pin configurations are described in Table 26.
TX2 pin configurations are described in Table 27.
Table 26. Pin TX1 configurations
TxControl register configuration Envelope TX1 signal
TX1RFEn FORCE100ASK
0 X X LOW (GND)
1 0 0 13.56 MHz carrier frequency modulated
1 0 1 13.56 MHz carrier frequency
1 1 0 LOW
1 1 1 13.56 MHz energy carrierCLRC632 All information provided in this document is subject to legal disclaimers. © NXP Semiconductors N.V. 2014. All rights reserved.
Product data sheet
COMPANY PUBLIC
Rev. 3.7 — 27 February 2014
073937 32 of 127
NXP Semiconductors CLRC632
Standard multi-protocol reader solution
9.9.2 Antenna operating distance versus power consumption
Using different antenna matching circuits (by varying the supply voltage on the antenna
driver supply pin TVDD), it is possible to find the trade-off between maximum effective
operating distance and power consumption. Different antenna matching circuits are
described in the Application note “MIFARE Design of MFRC500 Matching Circuit and
Antennas”.
9.9.3 Antenna driver output source resistance
The output source conductance of pins TX1 and TX2 can be adjusted between 1 and
100 using the CwConductance register GsCfgCW[5:0] bits.
The output source conductance of pins TX1 and TX2 during the modulation phase can be
adjusted between 1 and 100 using the ModConductance register GsCfgMod[5:0] bits.
The values are relative to the reference resistance (RS(ref)) which is measured during the
production test and stored in the CLRC632 EEPROM. It can be read from the product
information field (see Section 9.2.1 on page 13). The electrical specification can be found
in Section 13.3.3 on page 101.
Table 27. Pin TX2 configurations
TxControl register configuration Envelope TX2 signal
TX2RFEn FORCE100ASK TX2CW TX2Inv
0 X X X X LOW
1 0 0 0 0 13.56 MHz carrier frequency
modulated
1 0 0 0 1 13.56 MHz carrier frequency
1 0 0 1 0 13.56 MHz carrier frequency
modulated, 180 phase-shift
relative to TX1
1 0 0 1 1 13.56 MHz carrier frequency,
180 phase-shift relative to TX1
1 0 1 0 X 13.56 MHz carrier frequency
1 0 1 1 X 13.56 MHz carrier frequency,
180 phase-shift relative to TX1
1 1 0 0 0 LOW
1 1 0 0 1 13.56 MHz carrier frequency
1 1 0 1 0 HIGH
1 1 0 1 1 13.56 MHz carrier frequency,
180 phase-shift relative to TX1
1 1 1 0 X 13.56 MHz carrier frequency
1 1 1 1 X 13.56 MHz carrier frequency,
180 phase-shift relative to TX1CLRC632 All information provided in this document is subject to legal disclaimers. © NXP Semiconductors N.V. 2014. All rights reserved.
Product data sheet
COMPANY PUBLIC
Rev. 3.7 — 27 February 2014
073937 33 of 127
NXP Semiconductors CLRC632
Standard multi-protocol reader solution
9.9.3.1 Source resistance table
Table 28. TX1 and TX2 source resistance of n-channel driver transistor against GsCfgCW or GsCfgMod
MANT = Mantissa; EXP= Exponent.
GsCfgCW,
GsCfgMod
(decimal)
EXPGsCfgCW,
EXPGsCfgMod
(decimal)
MANTGsCfgCW,
MANTGsCfgMod
(decimal)
RS(ref)
()
GsCfgCW,
GsCfgMod
(decimal)
EXPGsCfgCW,
EXPGsCfgMod
(decimal)
MANTGsCfgCW,
MANTGsCfgMod
(decimal)
RS(ref)
()
0 0 0 - 24 1 8 0.0652
16 1 0 - 25 1 9 0.0580
32 2 0 - 37 2 5 0.0541
48 3 0 - 26 1 10 0.0522
1 0 1 1.0000 27 1 11 0.0474
17 1 1 0.5217 51 3 3 0.0467
2 0 2 0.5000 38 2 6 0.0450
3 0 3 0.3333 28 1 12 0.0435
33 2 1 0.2703 29 1 13 0.0401
18 1 2 0.2609 39 2 7 0.0386
4 0 4 0.2500 30 1 14 0.0373
5 0 5 0.2000 52 3 4 0.0350
19 1 3 0.1739 31 1 15 0.0348
6 0 6 0.1667 40 2 8 0.0338
7 0 7 0.1429 41 2 9 0.0300
49 3 1 0.1402 53 3 5 0.0280
34 2 2 0.1351 42 2 10 0.0270
20 1 4 0.1304 43 2 11 0.0246
8 0 8 0.1250 54 3 6 0.0234
9 0 9 0.1111 44 2 12 0.0225
21 1 5 0.1043 45 2 13 0.0208
10 0 10 0.1000 55 3 7 0.0200
11 0 11 0.0909 46 2 14 0.0193
35 2 3 0.0901 47 2 15 0.0180
22 1 6 0.0870 56 3 8 0.0175
12 0 12 0.0833 57 3 9 0.0156
13 0 13 0.0769 58 3 10 0.0140
23 1 7 0.0745 59 3 11 0.0127
14 0 14 0.0714 60 3 12 0.0117
50 3 2 0.0701 61 3 13 0.0108
36 2 4 0.0676 62 3 14 0.0100
15 0 15 0.0667 63 3 15 0.0093CLRC632 All information provided in this document is subject to legal disclaimers. © NXP Semiconductors N.V. 2014. All rights reserved.
Product data sheet
COMPANY PUBLIC
Rev. 3.7 — 27 February 2014
073937 34 of 127
NXP Semiconductors CLRC632
Standard multi-protocol reader solution
9.9.3.2 Calculating the relative source resistance
The reference source resistance RS(ref) can be calculated using Equation 6.
(6)
The reference source resistance (RS(ref)) during the modulation phase can be calculated
using ModConductance register’s GsCfgMod[5:0].
9.9.3.3 Calculating the effective source resistance
Wiring resistance (RS(wire)): Wiring and bonding add a constant offset to the driver
resistance that is relevant when pins TX1 and TX2 are switched to low-impedance. The
additional resistance for pin TX1 (RS(wire)TX1) can be set approximately as shown in
Equation 7.
(7)
Effective resistance (RSx): The source resistances of the driver transistors (RsMaxP
byte) read from the Product Information Field (see Section 9.2.1 on page 13) are
measured during the production test with CwConductance register’s
GsCfgCW[5:0] = 01h.
To calculate the driver resistance for a specific value set in GsCfgMod[5:0], use
Equation 8.
(8)
9.9.4 Pulse width
The envelope carries the data signal information that is transmitted to the card. It is an
encoded data signal based on the Miller code. In addition, each pause of the Miller
encoded signal is again encoded as a pulse of a fixed width. The width of the pulse is
adjusted using the ModWidth register. The pulse width (tw) is calculated using Equation 9
where the frequency constant (fclk) = 13.56 MHz.
(9)
9.10 Receiver circuitry
The CLRC632 uses an integrated quadrature demodulation circuit enabling it to detect an
ISO/IEC 14443 A or ISO/IEC 14443 B compliant subcarrier signal on pin RX.
• ISO/IEC 14443 A subcarrier signal: defined as a Manchester coded ASK modulated
signal
• ISO/IEC 14443 B subcarrier signal: defined as an NRZ-L coded BPSK modulated
ISO/IEC 14443 B subcarrier signal
RS ref
1
MANTGsCfgCW
77
40
----- EXPGsCfgCW
= --------------------------------------------------------------------------------
RS wire TX1 500 m
RSx RS ref maxP RS wire TX1 – RS rel RS wire TX1 = +
tw 2ModWidth 1 +
fc
= -------------------------------------CLRC632 All information provided in this document is subject to legal disclaimers. © NXP Semiconductors N.V. 2014. All rights reserved.
Product data sheet
COMPANY PUBLIC
Rev. 3.7 — 27 February 2014
073937 35 of 127
NXP Semiconductors CLRC632
Standard multi-protocol reader solution
The quadrature demodulator uses two different clocks (Q-clock and I-clock) with a
phase-shift of 90 between them. Both resulting subcarrier signals are amplified, filtered
and forwarded to the correlation circuitry. The correlation results are evaluated, digitized
and then passed to the digital circuitry. Various adjustments can be made to obtain
optimum performance for all processing units.
9.10.1 Receiver circuit block diagram
Figure 12 shows the block diagram of the receiver circuit. The receiving process can be
broken down in to several steps. Quadrature demodulation of the 13.56 MHz carrier signal
is performed. To achieve the optimum performance, automatic Q-clock calibration is
recommended (see Section 9.10.2.1 on page 35).
The demodulated signal is amplified by an adjustable amplifier. A correlation circuit
calculates the degree of similarity between the expected and the received signal. The
BitPhase register enables correlation interval position alignment with the received signal’s
bit grid. In the evaluation and digitizer circuitry, the valid bits are detected and the digital
results are sent to the FIFO buffer. Several tuning steps are possible for this circuit.
The signal can be observed on its way through the receiver as shown in Figure 12. One
signal at a time can be routed to pin AUX using the TestAnaSelect register as described in
Section 15.2.2 on page 112.
9.10.2 Receiver operation
In general, the default settings programmed in the StartUp initialization file are suitable for
use with the CLRC632 to MIFARE card data communication. However, in some
environments specific user settings will achieve better performance.
9.10.2.1 Automatic Q-clock calibration
The quadrature demodulation concept of the receiver generates a phase signal (I-clock)
and a 90 phase-shifted quadrature signal (Q-clock). To achieve the optimum
demodulator performance, the Q-clock and the I-clock must be phase-shifted by 90. After
the reset phase, a calibration procedure is automatically performed.
Fig 12. Receiver circuit block diagram
001aak615
ClkQDelay[4:0]
ClkQCalib
ClkQ180Deg
BitPhase[7:0]
CORRELATION
CIRCUITRY
EVALUATION
AND
DIGITIZER
CIRCUITRY
MinLevel[3:0]
CollLevel[3:0]
RxWait[7:0]
RcvClkSell
s_valid
s_data
s_coll
s_clock
Gain[1:0]
to
TestAnaOutSel
clock
I TO Q
CONVERSION
I-clock Q-clock
13.56 MHz
DEMODULATOR RX
VCorrDI
VCorrNI
VCorrDQ
VCorrNQ
VEvalR
VEvalL
VRxFollQ
VRxFollI VRxAmpI
VRxAmpQCLRC632 All information provided in this document is subject to legal disclaimers. © NXP Semiconductors N.V. 2014. All rights reserved.
Product data sheet
COMPANY PUBLIC
Rev. 3.7 — 27 February 2014
073937 36 of 127
NXP Semiconductors CLRC632
Standard multi-protocol reader solution
Automatic calibration can be set-up to execute at the end of each Transceive command if
bit ClkQCalib = logic 0. Setting bit ClkQCalib = logic 1 disables all automatic calibrations
except after the reset sequence. Automatic calibration can also be triggered by the
software when bit ClkQCalib has a logic 0 to logic 1 transition.
Remark: The duration of the automatic Q-clock calibration is 65 oscillator periods or
approximately 4.8 s.
The ClockQControl register’s ClkQDelay[4:0] value is proportional to the phase-shift
between the Q-clock and the I-clock. The ClkQ180Deg status flag bit is set when the
phase-shift between the Q-clock and the I-clock is greater than 180.
Remark:
• The StartUp configuration file enables automatic Q-clock calibration after a reset
• If bit ClkQCalib = logic 1, automatic calibration is not performed. Leaving this bit set to
logic 1 can be used to permanently disable automatic calibration.
• It is possible to write data to the ClkQDelay[4:0] bits using the microprocessor. The
aim could be to disable automatic calibration and set the delay using the software.
Configuring the delay value using the software requires bit ClkQCalib to have been
previously set to logic 1 and a time interval of at least 4.8 s has elapsed. Each delay
value must be written with bit ClkQCalib set to logic 1. If bit ClkQCalib is logic 0, the
configured delay value is overwritten by the next automatic calibration interval.
9.10.2.2 Amplifier
The demodulated signal must be amplified by the variable amplifier to achieve the best
performance. The gain of the amplifiers can be adjusted using the RxControl1 register
Gain[1:0] bits; see Table 29.
Fig 13. Automatic Q-clock calibration
001aak616
calibration impulse
from reset sequence a rising edge initiates
Q-clock calibration
ClkQCalib bit
calibration impulse
from end of
Transceive command
Table 29. Gain factors for the internal amplifier
See Table 86 “RxControl1 register bit descriptions” on page 64 for additional information.
Register setting Gain factor [dB]
(simulation results)
00 20
01 24
10 31
11 35CLRC632 All information provided in this document is subject to legal disclaimers. © NXP Semiconductors N.V. 2014. All rights reserved.
Product data sheet
COMPANY PUBLIC
Rev. 3.7 — 27 February 2014
073937 37 of 127
NXP Semiconductors CLRC632
Standard multi-protocol reader solution
9.10.2.3 Correlation circuitry
The correlation circuitry calculates the degree of matching between the received and an
expected signal. The output is a measure of the amplitude of the expected signal in the
received signal. This is done for both, the Q and I-channels. The correlator provides two
outputs for each of the two input channels, resulting in a total of four output signals.
The correlation circuitry needs the phase information for the incoming card signal for
optimum performance. This information is defined for the microprocessor using the
BitPhase register. This value defines the phase relationship between the transmitter and
receiver clock in multiples of the BitPhase time (tBitPhase) = 1 / 13.56 MHz.
9.10.2.4 Evaluation and digitizer circuitry
The correlation results are evaluated for each bit-half of the Manchester coded signal. The
evaluation and digitizer circuit decides from the signal strengths of both bit-halves, if the
current bit is valid
• If the bit is valid, its value is identified
• If the bit is not valid, it is checked to identify if it contains a bit-collision
Select the following levels for optimal using RxThreshold register bits:
• MinLevel[3:0]: defines the minimum signal strength of the stronger bit-halve’s signal
which is considered valid.
• CollLevel[3:0]: defines the minimum signal strength relative to the amplitude of the
stronger half-bit that has to be exceeded by the weaker half-bit of the Manchester
coded signal to generate a bit-collision. If the signal’s strength is below this value,
logic 1 and logic 0 can be determined unequivocally.
After data transmission, the card is not allowed to send its response before a preset time
period which is called the frame guard time in the ISO/IEC 14443 standard. The length of
this time period is set using the RxWait register’s RxWait[7:0] bits. The RxWait register
defines when the receiver is switched on after data transmission to the card in multiples of
one bit duration.
If bit RcvClkSelI is set to logic 1, the I-clock is used to clock the correlator and evaluation
circuits. If bit RcvClkSelI is set to logic 0, the Q-clock is used.
Remark: It is recommended to use the Q-clock.
9.11 Serial signal switch
The CLRC632 comprises two main blocks:
• digital circuitry: comprising the state machines, encoder and decoder logic etc.
• analog circuitry: comprising the modulator, antenna drivers, receiver and
amplification circuitry
The interface between these two blocks can be configured so that the interface signals
are routed to pins MFIN and MFOUT. This makes it possible to connect the analog part of
one CLRC632 to the digital part of another device.
The serial signal switch can be used to measure MIFARE and ISO/IEC 14443 A as well as
related I-CODE1 and ISO/IEC 15693 signals.CLRC632 All information provided in this document is subject to legal disclaimers. © NXP Semiconductors N.V. 2014. All rights reserved.
Product data sheet
COMPANY PUBLIC
Rev. 3.7 — 27 February 2014
073937 38 of 127
NXP Semiconductors CLRC632
Standard multi-protocol reader solution
Remark: Pin MFIN can only be accessed at 106 kBd based on ISO/IEC 14443 A. The
Manchester signal and the Manchester signal with subcarrier can only be accessed on pin
MFOUT at 106 kBd based on ISO/IEC 14443 A.
9.11.1 Serial signal switch block diagram
Figure 14 shows the serial signal switches. Three different switches are implemented in
the serial signal switch enabling the CLRC632 to be used in different configurations.
The serial signal switch can also be used to check the transmitted and received data
during the design-in phase or for test purposes. Section 15.2.1 on page 110 describes the
analog test signals and measurements at the serial signal switch.
Remark: The SLR400 uses pin name SIGOUT for pin MFOUT. The CLRC632
functionality includes the test modes for the SLRC400 using pin MFOUT.
Section 9.11.2, Section 9.11.2.1 and Section 9.11.2.2 describe the relevant registers and
settings used to configure and control the serial signal switch.
9.11.2 Serial signal switch registers
The RxControl2 register DecoderSource[1:0] bits define the input signal for the internal
Manchester decoder and are described in Table 30.
Fig 14. Serial signal switch block diagram
3
MFIN MFOUT 001aak617
MODULATOR DRIVER
(part of)
analog circuitry
SUBCARRIER
DEMODULATOR
TX1
TX2
RX CARRIER
DEMODULATOR
2
MILLER CODER
1 OUT OF 256
NRZ OR
1 OUT OF 4
MANCHESTER
DECODER
SERIAL SIGNAL SWITCH
(part of)
serial data processing
Decoder
Source[1:0]
2
Modulator
Source[1:0]
SUBCARRIER
DEMODULATOR
serial data out
0 0
1 internal
2 Manchester with subcarrier
3
0
1
2
3
4
5
6
0
1
envelope
MFIN
0
1
2
3
Manchester
Manchester out
serial data in
7
0
0 1
1
envelope
transmit NRZ
Manchester with subcarrier
Manchester
reserved
reserved
MFOUTSelect[2:0]
digital test signal
signal to MFOUTCLRC632 All information provided in this document is subject to legal disclaimers. © NXP Semiconductors N.V. 2014. All rights reserved.
Product data sheet
COMPANY PUBLIC
Rev. 3.7 — 27 February 2014
073937 39 of 127
NXP Semiconductors CLRC632
Standard multi-protocol reader solution
The TxControl register ModulatorSource[1:0] bits define the signal used to modulate the
transmitted 13.56 MHz energy carrier. The modulated signal drives pins TX1 and TX2.
The MFOUTSelect register MFOUTSelect[2:0] bits select the output signal which is to be
routed to pin MFOUT.
To use the MFOUTSelect[2:0] bits, the TestDigiSelect register SignalToMFOUT bit must
be logic 0.
9.11.2.1 Active antenna concept
The CLRC632 analog and digital circuitry is accessed using pins MFIN and MFOUT.
Table 33 lists the required settings.
Table 30. DecoderSource[1:0] values
See Table 96 on page 67 for additional information.
Number DecoderSource
[1:0]
Input signal to decoder
0 00 constant 0
1 01 output of the analog part. This is the default configuration
2 10 direct connection to pin MFIN; expects an 847.5 kHz subcarrier
signal modulated by a Manchester encoded signal
3 11 direct connection to pin MFIN; expects a Manchester encoded
signal
Table 31. ModulatorSource[1:0] values
See Table 96 on page 67 for additional information.
Number ModulatorSource
[1:0]
Input signal to modulator
0 00 constant 0 (energy carrier off on pins TX1 and TX2)
1 01 constant 1 (continuous energy carrier on pins TX1 and TX2)
2 10 modulation signal (envelope) from the internal encoder. This is the
default configuration.
3 11 direct connection to MFIN; expects a Miller pulse coded signal
Table 32. MFOUTSelect[2:0] values
See Table 110 on page 70 for additional information.
Number MFOUTSelect
[2:0]
Signal routed to pin MFOUT
0 000 constant LOW
1 001 constant HIGH
2 010 modulation signal (envelope) from the internal encoder
3 011 serial data stream to be transmitted; the same as for
MFOUTSelect[2:0] = 001 but not encoded by the selected pulse
encoder
4 100 output signal of the receiver circuit; card modulation signal
regenerated and delayed
5 101 output signal of the subcarrier demodulator; Manchester coded card
signal
6 110 reserved
7 111 reservedCLRC632 All information provided in this document is subject to legal disclaimers. © NXP Semiconductors N.V. 2014. All rights reserved.
Product data sheet
COMPANY PUBLIC
Rev. 3.7 — 27 February 2014
073937 40 of 127
NXP Semiconductors CLRC632
Standard multi-protocol reader solution
[1] The number column refers to the value in the number column of Table 30, Table 31 and Table 32.
Two CLRC632 devices configured as described in Table 33 can be connected to each
other using pins MFOUT and MFIN.
Remark: The active antenna concept can only be used at 106 kBd based on
ISO/IEC 14443 A.
9.11.2.2 Driving both RF parts
It is possible to connect both passive and active antennas to a single IC. The passive
antenna pins TX1, TX2 and RX are connected using the appropriate filter and matching
circuit. At the same time an active antenna is connected to pins MFOUT and MFIN. In this
configuration, two RF parts can be driven, one after another, by one microprocessor.
9.12 MIFARE higher baud rates
The MIFARE system is specified with a fixed baud rate of 106 kBd for communication on
the RF interface. The current version of ISO/IEC 14443 A also defines 106 kBd for the
initial phase of a communication between Proximity Integrated Circuit Cards (PICC) and
Proximity Coupling Devices (PCD).
To cover requirements of large data transmissions and to speed up terminal to card
communication, the CLRC632 supports communication at MIFARE higher baud rates in
combination with a microcontroller IC such as the MIFARE ProX.
The MIFARE higher baud rates concept is described in the application note: MIFARE
Implementation of Higher Baud rates Ref. 5. This application covers the integration of the
MIFARE higher baud rates communication concept in current applications.
Table 33. Register settings to enable use of the analog circuitry
Register Number[1] Signal CLRC632 pin
Analog circuitry settings
ModulatorSource 3 Miller pulse encoded MFIN
MFOUTSelect 4 Manchester encoded with subcarrier MFOUT
DecoderSource X - -
Digital circuitry settings
ModulatorSource X - -
MFOUTSelect 2 Miller pulse encoded MFOUT
DecoderSource 2 Manchester encoded with subcarrier MFIN
Table 34. MIFARE higher baud rates
Communication direction Baud rates (kBd)
CLRC632 based PCD microcontroller PICC supporting higher baud rates 106, 212, 424
Microcontroller PICC supporting higher baud rates CLRC632 based PCD 106, 212, 424CLRC632 All information provided in this document is subject to legal disclaimers. © NXP Semiconductors N.V. 2014. All rights reserved.
Product data sheet
COMPANY PUBLIC
Rev. 3.7 — 27 February 2014
073937 41 of 127
NXP Semiconductors CLRC632
Standard multi-protocol reader solution
9.13 ISO/IEC 14443 B communication scheme
The international standard ISO/IEC 14443 covers two communication schemes; ISO/IEC
14443 A and ISO/IEC 14443 B. The CLRC632 reader IC fully supports both ISO/IEC
14443 variants.
Table 35 describes the registers and flags covered by the ISO/IEC 14443 B
communication protocol.
As reference documentation, the international standard ISO/IEC 14443 Identification
cards - Contactless integrated circuit(s) cards - Proximity cards, part 1-4 (Ref. 4) can be
used.
Remark: NXP Semiconductors does not offer a basic function library to design-in the
ISO/IEC 14443 B protocol.
Table 35. ISO/IEC 14443 B registers and flags
Flag Register Bit Register address
CharSpacing[2:0] TypeBFraming 4 to 2 17h
CoderRate[2:0] CoderControl 5 to 3 14h
EOFWidth TypeBFraming 5 17h
FilterAmpDet BPSKDemControl 4 1Dh
Force100ASK TxControl 4 11h
GsCfgCW[5:0] CwConductance 5 to 0 12h
GsCfgMod[5:0] ModConductance 5 to 0 13h
MinLevel[3:0] RxThreshold 7 to 4 1Ch
NoTxEOF TypeBFraming 6 17h
NoTxSOF TypeBFraming 7 17h
NoRxEGT BPSKDemControl 6 1Dh
NoRxEOF BPSKDemControl 5 1Dh
NoRxSOF BPSKDemControl 7 1Dh
RxCoding DecoderControl 0 1Ah
RxFraming[1:0] DecoderControl 4 to 3 1Ah
SOFWidth[1:0] TypeBFraming 1 to 0 17h
SubCPulses[2:0] RxControl1 7 to 5 19h
TauB[1:0] BPSKDemControl 1 to 0 1Dh
TauD[1:0] BPSKDemControl 3 to 2 1Dh
TxCoding[2:0] CoderControl 2 to 0 14hCLRC632 All information provided in this document is subject to legal disclaimers. © NXP Semiconductors N.V. 2014. All rights reserved.
Product data sheet
COMPANY PUBLIC
Rev. 3.7 — 27 February 2014
073937 42 of 127
NXP Semiconductors CLRC632
Standard multi-protocol reader solution
9.14 MIFARE authentication and Crypto1
The security algorithm used in the MIFARE products is called Crypto1. It is based on a
proprietary stream cipher with a 48-bit key length. To access data on MIFARE cards,
knowledge of the key format is needed. The correct key must be available in the
CLRC632 to enable successful card authentication and access to the card’s data stored in
the EEPROM.
After a card is selected as defined in ISO/IEC 14443 A standard, the user can continue
with the MIFARE protocol. It is mandatory that card authentication is performed.
Crypto1 authentication is a 3-pass authentication which is automatically performed when
the Authent1 and Authent2 commands are executed (see Section 11.7.3 on page 98 and
Section 11.7.4 on page 98).
During the card authentication procedure, the security algorithm is initialized. After a
successful authentication, communication with the MIFARE card is encrypted.
9.14.1 Crypto1 key handling
On execution of the authentication command, the CLRC632 reads the key from the key
buffer. The key is always read from the key buffer and ensures Crypto1 authentication
commands do not require addressing of a key. The user must ensure the correct key is
prepared in the key buffer before triggering card authentication.
The key buffer can be loaded from:
• the EEPROM using the LoadKeyE2 command (see Section 11.7.1 on page 97)
• the microprocessor’s FIFO buffer using the LoadKey command (see Section 11.7.2
on page 97). This is shown in Figure 15.
Fig 15. Crypto1 key handling block diagram
001aak624
FIFO BUFFER
from the microcontroller
WriteE2
LoadKey
EEPROM
KEYS
KEY BUFFER
LoadKeyE2
during
Authent1
CRYPTO1
MODULE
serial data stream in serial data stream out
(plain) (encrypted)CLRC632 All information provided in this document is subject to legal disclaimers. © NXP Semiconductors N.V. 2014. All rights reserved.
Product data sheet
COMPANY PUBLIC
Rev. 3.7 — 27 February 2014
073937 43 of 127
NXP Semiconductors CLRC632
Standard multi-protocol reader solution
9.14.2 Authentication procedure
The Crypto1 security algorithm enables authentication of MIFARE cards. To obtain valid
authentication, the correct key has to be available in the key buffer of the CLRC632. This
can be ensured as follows:
1. Load the internal key buffer by using the LoadKeyE2 (see Section 11.7.1 on page 97)
or the LoadKey (see Section 11.7.2 on page 97) commands.
2. Start the Authent1 command (see Section 11.7.3 on page 98). When finished, check
the error flags to obtain the command execution status.
3. Start the Authent2 command (see Section 11.7.4 on page 98). When finished, check
the error flags and bit Crypto1On to obtain the command execution status.
10. CLRC632 registers
10.1 Register addressing modes
Three methods can be used to operate the CLRC632:
• initiating functions and controlling data by executing commands
• configuring the functional operation using a set of configuration bits
• monitoring the state of the CLRC632 by reading status flags
The commands, configuration bits and flags are accessed using the microprocessor
interface. The CLRC632 can internally address 64 registers using six address lines.
10.1.1 Page registers
The CLRC632 register set is segmented into eight pages contain eight registers each. A
Page register can always be addressed, irrespective of which page is currently selected.
10.1.2 Dedicated address bus
When using the CLRC632 with the dedicated address bus, the microprocessor defines
three address lines using address pins A0, A1 and A2. This enables addressing within a
page. To switch between registers in different pages a paging mechanism needs to be
used.
Table 36 shows how the register address is assembled.
10.1.3 Multiplexed address bus
The microprocessor may define all six address lines at once using the CLRC632 with a
multiplexed address bus. In this case either the paging mechanism or linear addressing
can be used.
Table 37 shows how the register address is assembled.
Table 36. Dedicated address bus: assembling the register address
Register bit: UsePageSelect Register address
1 PageSelect2 PageSelect1 PageSelect0 A2 A1 A0CLRC632 All information provided in this document is subject to legal disclaimers. © NXP Semiconductors N.V. 2014. All rights reserved.
Product data sheet
COMPANY PUBLIC
Rev. 3.7 — 27 February 2014
073937 44 of 127
NXP Semiconductors CLRC632
Standard multi-protocol reader solution
10.2 Register bit behavior
Bits and flags for different registers behave differently, depending on their functions. In
principle, bits with same behavior are grouped in common registers. Table 38 describes
the function of the Access column in the register tables.
Table 37. Multiplexed address bus: assembling the register address
Multiplexed
address bus
type
UsePage
Select
Register address
Paging mode 1 PageSelect2 PageSelect1 PageSelect0 AD2 AD1 AD0
Linear
addressing
0 AD5 AD4 AD3 AD2 AD1 AD0
Table 38. Behavior and designation of register bits
Abbreviation Behavior Description
R/W read and write These bits can be read and written by the microprocessor.
Since they are only used for control, their content is not
influenced by internal state machines.
Example: TimerReload register may be read and written by
the microprocessor. It will also be read by internal state
machines but never changed by them.
D dynamic These bits can be read and written by the microprocessor.
Nevertheless, they may also be written automatically by
internal state machines.
Example: the Command register changes its value
automatically after the execution of the command.
R read only These registers hold flags which have a value determined by
internal states only.
Example: the ErrorFlag register cannot be written externally
but shows internal states.
W write only These registers are used for control only. They may be written
by the microprocessor but cannot be read. Reading these
registers returns an undefined value.
Example: The TestAnaSelect register is used to determine the
signal on pin AUX however, it is not possible to read its
content.CLRC632 All information provided in this document is subject to legal disclaimers. © NXP Semiconductors N.V. 2014. All rights reserved.
Product data sheet
COMPANY PUBLIC
Rev. 3.7 — 27 February 2014
073937 45 of 127
NXP Semiconductors CLRC632
Standard multi-protocol reader solution
10.3 Register overview
Table 39. CLRC632 register overview
Sub
address
(Hex)
Register name Function Refer to
Page 0: Command and status
00h Page selects the page register Table 41 on page 50
01h Command starts and stops command execution Table 43 on page 50
02h FIFOData input and output of 64-byte FIFO buffer Table 45 on page 51
03h PrimaryStatus receiver and transmitter and FIFO buffer status flags Table 47 on page 51
04h FIFOLength number of bytes buffered in the FIFO buffer Table 49 on page 52
05h SecondaryStatus secondary status flags Table 51 on page 53
06h InterruptEn enable and disable interrupt request control bits Table 53 on page 53
07h InterruptRq interrupt request flags Table 55 on page 54
Page 1: Control and status
08h Page selects the page register Table 41 on page 50
09h Control control flags for timer unit, power saving etc Table 57 on page 55
0Ah ErrorFlag show the error status of the last command executed Table 59 on page 55
0Bh CollPos bit position of the first bit-collision detected on the RF interface Table 61 on page 56
0Ch TimerValue value of the timer Table 63 on page 57
0Dh CRCResultLSB LSB of the CRC coprocessor register Table 65 on page 57
0Eh CRCResultMSB MSB of the CRC coprocessor register Table 67 on page 57
0Fh BitFraming adjustments for bit oriented frames Table 69 on page 58
Page 2: Transmitter and coder control
10h Page selects the page register Table 41 on page 50
11h TxControl controls the operation of the antenna driver pins TX1 and TX2 Table 71 on page 59
12h CwConductance selects the conductance of the antenna driver pins TX1 and TX2 Table 73 on page 60
13h ModConductance defines the driver output conductance Table 75 on page 60
14h CoderControl sets the clock frequency and the encoding Table 77 on page 61
15h ModWidth selects the modulation pulse width Table 79 on page 62
16h ModWidthSOF selects the SOF pulse-width modulation (I-CODE1 fast mode) Table 81 on page 62
17h TypeBFraming defines the framing for ISO/IEC 14443 B communication Table 83 on page 63
Page 3: Receiver and decoder control
18 Page selects the page register Table 41 on page 50
19 RxControl1 controls receiver behavior Table 85 on page 64
1A DecoderControl controls decoder behavior Table 87 on page 65
1B BitPhase selects the bit-phase between transmitter and receiver clock Table 89 on page 65
1C RxThreshold selects thresholds for the bit decoder Table 91 on page 66
1D BPSKDemControl controls BPSK receiver behavior Table 93 on page 66
1Eh RxControl2 controls decoder and defines the receiver input source Table 95 on page 67
1Fh ClockQControl clock control for the 90 phase-shifted Q-channel clock Table 97 on page 67CLRC632 All information provided in this document is subject to legal disclaimers. © NXP Semiconductors N.V. 2014. All rights reserved.
Product data sheet
COMPANY PUBLIC
Rev. 3.7 — 27 February 2014
073937 46 of 127
NXP Semiconductors CLRC632
Standard multi-protocol reader solution
Page 4: RF Timing and channel redundancy
20h Page selects the page register Table 41 on page 50
21h RxWait selects the interval after transmission before the receiver starts Table 99 on page 68
22h ChannelRedundancy selects the method and mode used to check data integrity on
the RF channel
Table 101 on page 68
23h CRCPresetLSB preset LSB value for the CRC register Table 103 on page 69
24h CRCPresetMSB preset MSB value for the CRC register Table 105 on page 69
25h TimeSlotPeriod selects the time between automatically transmitted frames Table 107 on page 69
26h MFOUTSelect selects internal signal applied to pin MFOUT, includes the MSB
of value TimeSlotPeriod; see Table 107 on page 69
Table 109 on page 70
27h PreSet27 these values are not changed Table 111 on page 70
Page 5: FIFO, timer and IRQ pin configuration
28h Page selects the page register Table 41 on page 50
29h FIFOLevel defines the FIFO buffer overflow and underflow warning levels Table 49 on page 52
2Ah TimerClock selects the timer clock divider Table 114 on page 71
2Bh TimerControl selects the timer start and stop conditions Table 116 on page 72
2Ch TimerReload defines the timer preset value Table 118 on page 72
2Dh IRQPinConfig configures pin IRQ output stage Table 120 on page 73
2Eh PreSet2E these values are not changed Table 122 on page 73
2Fh PreSet2F these values are not changed Table 123 on page 73
Page 6: reserved registers
30h Page selects the page register Table 41 on page 50
31h reserved reserved Table 124 on page 73
32h reserved reserved
33h reserved reserved
34h reserved reserved
35h reserved reserved
36h reserved reserved
37h reserved reserved
Page 7: Test control
38h Page selects the page register Table 41 on page 50
39h reserved reserved Table 125 on page 74
3Ah TestAnaSelect selects analog test mode Table 126 on page 74
3Bh reserved reserved Table 128 on page 75
3Ch reserved reserved Table 129 on page 75
3Dh TestDigiSelect selects digital test mode Table 130 on page 75
3Eh reserved reserved Table 132 on page 76
3Fh reserved reserved
