Consent Manager Tag v2.0 (for TCF 2.0) -->
Farnell PDF

 ATtiny2313A/4313 Data Sheet - Atmel - Farnell Element 14
ATtiny2313A/4313 Data Sheet - Atmel - Farnell Element 14
- Revenir à l'accueil


")

Farnell Element 14 :


See the trailer for the next exciting episode of The Ben Heck show. Check back on Friday to be among the first to see the exclusive full show on element…

Connect your Raspberry Pi to a breadboard, download some code and create a push-button audio play project.


Puce électronique / Microchip :


Sans fil - Wireless :


Texas instrument :


Ordinateurs :


Logiciels :


Tutoriels :


Autres documentations :
![[TXT]](http://www.audentia-gestion.fr/icons/text.gif)
Farnell-CLRC632-NXP-..> 20-Dec-2014 10:22 2.6M
Farnell-7491181012-O..> 20-Dec-2014 10:22 2.6M
Farnell-LPC4350-30-2..> 20-Dec-2014 10:21 1.4M
Farnell-LPC178x-7x-N..> 20-Dec-2014 10:21 1.6M
Farnell-Data-Sheet-J..> 20-Dec-2014 10:21 1.0M
Farnell-LPC81xM-NXP-..> 20-Dec-2014 10:20 1.2M
Farnell-Data-Sheet-J..> 20-Dec-2014 10:20 1.2M
Farnell-SL3S1003_101..> 20-Dec-2014 10:06 2.0M
Farnell-NT3H1101-NT3..> 20-Dec-2014 10:06 2.3M
Farnell-LPC1769-68-6..> 20-Dec-2014 10:06 2.2M
Farnell-SL3S1203_121..> 20-Dec-2014 10:01 2.0M
Farnell-PN512-NXP-Se..> 20-Dec-2014 10:01 1.9M
Farnell-MMBZxVCL-MMB..> 20-Dec-2014 09:53 1.6M
Farnell-Datasheet-NX..> 20-Dec-2014 09:52 1.6M
Farnell-IP4251_52_53..> 20-Dec-2014 09:51 1.6M
Farnell-BC846DS2-NXP..> 20-Dec-2014 09:48 1.2M
Farnell-BAT54J-Schot..> 20-Dec-2014 09:47 1.1M
Farnell-PMEG3010EP-N..> 20-Dec-2014 09:47 1.1M
Farnell-AVR172-Senso..> 20-Dec-2014 09:47 1.2M
Farnell-PBSS5320X-NX..> 20-Dec-2014 09:47 1.6M
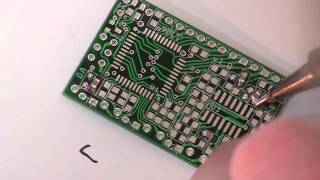
Farnell-ATtiny2313-A..> 20-Dec-2014 09:47 1.6M
Farnell-SG2525A-SG35..> 20-Dec-2014 09:39 1.0M
Farnell-PMBT3906-PNP..> 20-Dec-2014 09:39 1.0M
Farnell-PDTB123TT-NX..> 20-Dec-2014 09:39 1.0M
Farnell-PIC12F529T39..> 20-Dec-2014 09:39 1.0M
Farnell-PSMN011-80YS..> 20-Dec-2014 09:39 1.1M
Farnell-PESD5V0F1BL-..> 20-Dec-2014 09:39 1.1M
Farnell-MB85RS128B-F..> 20-Dec-2014 09:38 1.1M
Farnell-SMAJ-STMicro..> 13-Oct-2014 07:07 734K
Farnell-L6562-STMicr..> 13-Oct-2014 07:07 754K
Farnell-LM139-LM239-..> 13-Oct-2014 07:07 771K
Farnell-L4978-STMicr..> 13-Oct-2014 07:07 783K
Farnell-ST1S10PHR-ST..> 13-Oct-2014 07:06 820K
Farnell-TIP41C-TIP42..> 13-Oct-2014 07:06 829K
Farnell-MC34063ABD-T..> 13-Oct-2014 07:06 844K
Farnell-ESM6045DV-ST..> 13-Oct-2014 07:06 850K
Farnell-TIP102-TIP10..> 13-Oct-2014 07:06 853K
Farnell-ST3232B-ST32..> 13-Oct-2014 07:06 867K
Farnell-STM32F030x4-..> 13-Oct-2014 07:06 1.1M
Farnell-STM32F103x8-..> 13-Oct-2014 07:06 1.0M
Farnell-STM32F405xx-..> 13-Oct-2014 07:05 1.4M
Farnell-STM32F205xx-..> 13-Oct-2014 07:05 1.7M
Farnell-STP16NF06L-n..> 13-Oct-2014 07:05 1.7M
Farnell-STP80NF55L-0..> 13-Oct-2014 07:05 1.7M
Farnell-LM217-LM317-..> 13-Oct-2014 07:04 1.7M
Farnell-LM2904-LM290..> 13-Oct-2014 07:04 1.7M
Farnell-L78-Positive..> 13-Oct-2014 07:04 1.8M
Farnell-VND920P-E-ST..> 13-Oct-2014 07:04 1.8M
Farnell-LM350-STMicr..> 13-Oct-2014 07:03 1.8M
![[ ]](http://www.audentia-gestion.fr/icons/layout.gif)
Smart_street_lightin..> 13-Oct-2014 07:03 1.6M
Farnell-Smart-street..> 13-Oct-2014 07:02 1.8M
Farnell-ULN2001-ULN2..> 13-Oct-2014 07:02 1.9M
Farnell-ULQ2001-ULQ2..> 13-Oct-2014 07:02 1.9M
Farnell-L6384E-STMic..> 13-Oct-2014 07:02 1.9M
Farnell-AN2794-Appli..> 13-Oct-2014 07:01 1.0M
Farnell-STEVAL-TDR02..> 13-Oct-2014 07:01 960K
Farnell-TL084-TL084A..> 11-Oct-2014 15:54 1.7M
Farnell-TDA7296-STMi..> 11-Oct-2014 15:54 1.7M
Farnell-L78-STMicroe..> 11-Oct-2014 15:49 1.6M
Farnell-LM158-LM258-..> 11-Oct-2014 15:49 1.6M
Farnell-LF351-STMicr..> 11-Oct-2014 15:49 1.7M
Farnell-L293B-STMicr..> 11-Oct-2014 15:49 1.7M
Farnell-NE556-SA556-..> 11-Oct-2014 15:48 1.7M
Farnell-SO967460-PDF..> 11-Oct-2014 12:05 2.9M
Farnell-Everything-Y..> 11-Oct-2014 12:05 1.5M
![[ ]](http://www.audentia-gestion.fr/icons/unknown.gif)
cookiechoices.js 27-Sep-2014 12:40 6.0K
Farnell-ULN2803A-Rev..> 09-Sep-2014 19:26 2.9M
Analog-Devices-Convo..> 09-Sep-2014 08:26 2.1M
Analog-Devices-Convo..> 09-Sep-2014 08:25 2.2M
Analog-Devices-Convo..> 09-Sep-2014 08:25 2.2M
Analog-Devices-ADMC4..> 09-Sep-2014 08:23 2.3M
Analog-Devices-Wi-Fi..> 09-Sep-2014 08:23 2.3M
Analog-Devices-ADMC2..> 09-Sep-2014 08:21 2.4M
Analog-Devices-ADC-S..> 09-Sep-2014 08:21 2.4M
Analog-Devices-Visua..> 09-Sep-2014 08:18 2.5M
Analog-Devices-ANF32..> 09-Sep-2014 08:18 2.6M
Farnell-Compensating..> 09-Sep-2014 08:16 2.6M
Farnell-Compensating..> 09-Sep-2014 08:16 2.6M
Farnell-LM7805-Fairc..> 09-Sep-2014 08:13 2.7M
Farnell-AD620-Rev-H-..> 09-Sep-2014 08:13 2.6M
Farnell-Datasheet-FT..> 09-Sep-2014 08:10 2.8M
Farnell-MAX4661-MAX4..> 09-Sep-2014 08:10 2.8M
Farnell-OPA627-Texas..> 09-Sep-2014 08:08 2.8M
Farnell-REF19x-Serie..> 09-Sep-2014 08:08 2.8M
Farnell-Data-Sheet-M..> 09-Sep-2014 08:05 2.8M
Analog-Devices-Digit..> 08-Sep-2014 18:03 2.0M
Analog-Devices-Digit..> 08-Sep-2014 18:02 2.1M
Analog-Devices-Basic..> 08-Sep-2014 17:49 1.9M
Farnell-AD9833-Rev-E..> 08-Sep-2014 17:49 1.8M
Farnell-The-Discrete..> 08-Sep-2014 17:44 1.8M
Electronique-Basic-o..> 08-Sep-2014 17:43 1.8M
Analog-Devices-AN300..> 08-Sep-2014 17:42 2.0M
Analog-Devices-The-C..> 08-Sep-2014 17:41 1.9M
Analog-Devices-Intro..> 08-Sep-2014 17:39 1.9M
Analog-Devices-Compl..> 08-Sep-2014 17:38 2.0M
Analog-Devices-Gloss..> 08-Sep-2014 17:36 2.0M
Farnell-ADuM1300-ADu..> 08-Sep-2014 08:11 1.7M
Farnell-AD586BRZ-Ana..> 08-Sep-2014 08:09 1.6M
Farnell-ADuM1200-ADu..> 08-Sep-2014 08:09 1.6M
Farnell-NA555-NE555-..> 08-Sep-2014 07:51 1.5M
Farnell-AD9834-Rev-D..> 08-Sep-2014 07:32 1.2M
Farnell-MSP430F15x-M..> 08-Sep-2014 07:32 1.3M
Farnell-AD736-Rev-I-..> 08-Sep-2014 07:31 1.3M
Farnell-AD8307-Data-..> 08-Sep-2014 07:30 1.3M
Farnell-Single-Chip-..> 08-Sep-2014 07:30 1.5M
Farnell-Quadruple-2-..> 08-Sep-2014 07:29 1.5M
Farnell-ADE7758-Rev-..> 08-Sep-2014 07:28 1.7M
Farnell-MAX3221-Rev-..> 08-Sep-2014 07:28 1.8M
Farnell-USB-to-Seria..> 08-Sep-2014 07:27 2.0M
Farnell-AD8313-Analo..> 08-Sep-2014 07:26 2.0M
Farnell-SN54HC164-SN..> 08-Sep-2014 07:25 2.0M
Farnell-AD8310-Analo..> 08-Sep-2014 07:24 2.1M
Farnell-AD8361-Rev-D..> 08-Sep-2014 07:23 2.1M
Farnell-2N3906-Fairc..> 08-Sep-2014 07:22 2.1M
Farnell-AD584-Rev-C-..> 08-Sep-2014 07:20 2.2M
Farnell-ADE7753-Rev-..> 08-Sep-2014 07:20 2.3M
Farnell-TLV320AIC23B..> 08-Sep-2014 07:18 2.4M
Farnell-STM32F405xxS..> 27-Aug-2014 18:27 1.8M
Farnell-fx-3650P-fx-..> 29-Jul-2014 10:42 1.5M
Farnell-MSP430-Hardw..> 29-Jul-2014 10:36 1.1M
Farnell-LM324-Texas-..> 29-Jul-2014 10:32 1.5M
Farnell-LM386-Low-Vo..> 29-Jul-2014 10:32 1.5M
Farnell-NE5532-Texas..> 29-Jul-2014 10:32 1.5M
Farnell-Hex-Inverter..> 29-Jul-2014 10:31 875K
Farnell-AT90USBKey-H..> 29-Jul-2014 10:31 902K
Farnell-AT89C5131-Ha..> 29-Jul-2014 10:31 1.2M
Farnell-MSP-EXP430F5..> 29-Jul-2014 10:31 1.2M
Farnell-Explorer-16-..> 29-Jul-2014 10:31 1.3M
Farnell-TMP006EVM-Us..> 29-Jul-2014 10:30 1.3M
Farnell-Gertboard-Us..> 29-Jul-2014 10:30 1.4M
Farnell-LMP91051-Use..> 29-Jul-2014 10:30 1.4M
Farnell-Thermometre-..> 29-Jul-2014 10:30 1.4M
Farnell-user-manuel-..> 29-Jul-2014 10:29 1.5M
Farnell-TLV320AIC325..> 28-Jul-2014 17:45 2.9M
Farnell-2-GBPS-Diffe..> 28-Jul-2014 17:42 2.7M
Farnell-LMT88-2.4V-1..> 28-Jul-2014 17:42 2.8M
Farnell-Octal-Genera..> 28-Jul-2014 17:42 2.8M
Farnell-Dual-MOSFET-..> 28-Jul-2014 17:41 2.8M
Farnell-SN54LV4053A-..> 28-Jul-2014 17:20 5.9M
Farnell-TAS1020B-USB..> 28-Jul-2014 17:19 6.2M
Farnell-TPS40060-Wid..> 28-Jul-2014 17:19 6.3M
Farnell-TL082-Wide-B..> 28-Jul-2014 17:16 6.3M
Farnell-RF-short-tra..> 28-Jul-2014 17:16 6.3M
Farnell-maxim-integr..> 28-Jul-2014 17:14 6.4M
Farnell-TSV6390-TSV6..> 28-Jul-2014 17:14 6.4M
Farnell-Fast-Charge-..> 28-Jul-2014 17:12 6.4M
Farnell-NVE-datashee..> 28-Jul-2014 17:12 6.5M
Farnell-Excalibur-Hi..> 28-Jul-2014 17:10 2.4M
Farnell-Excalibur-Hi..> 28-Jul-2014 17:10 2.4M
Farnell-REF102-10V-P..> 28-Jul-2014 17:09 2.4M
Farnell-TMS320F28055..> 28-Jul-2014 17:09 2.7M
Farnell-ULINKpro-Deb..> 25-Jul-2014 12:35 5.9M
Farnell-WIRE-WRAP-50..> 25-Jul-2014 12:34 5.9M
Farnell-MICROCHIP-PI..> 25-Jul-2014 12:34 6.7M
Farnell-OMRON-INDUST..> 25-Jul-2014 12:32 6.9M
Farnell-OMRON-INDUST..> 25-Jul-2014 12:31 6.9M
Farnell-TYCO-ELECTRO..> 25-Jul-2014 12:30 6.9M
Farnell-Power-suppli..> 25-Jul-2014 12:29 7.0M
Farnell-Schroff-A108..> 25-Jul-2014 12:27 2.8M
Farnell-Schroff-Main..> 25-Jul-2014 12:26 2.9M
Farnell-Schroff-mult..> 25-Jul-2014 12:26 2.9M
Farnell-Quick-Start-..> 25-Jul-2014 12:25 3.0M
Farnell-PiFace-Digit..> 25-Jul-2014 12:25 3.0M
Farnell-PicoScope-se..> 25-Jul-2014 12:24 3.0M
Farnell-Trust-Digita..> 25-Jul-2014 12:24 3.0M
Farnell-Jeu-multi-la..> 25-Jul-2014 12:23 3.0M
Farnell-PicoScope-42..> 25-Jul-2014 12:23 3.0M
Farnell-LD-WSECO16-P..> 25-Jul-2014 12:22 3.1M
Farnell-Circuit-Impr..> 25-Jul-2014 12:22 3.1M
Farnell-MULTICOMP-Ra..> 22-Jul-2014 12:57 5.9M
Farnell-RASPBERRY-PI..> 22-Jul-2014 12:35 5.9M
Farnell-Dremel-Exper..> 22-Jul-2014 12:34 1.6M
Farnell-STM32F103x8-..> 22-Jul-2014 12:33 1.6M
Farnell-BD6xxx-PDF.htm 22-Jul-2014 12:33 1.6M
Farnell-L78S-STMicro..> 22-Jul-2014 12:32 1.6M
Farnell-RaspiCam-Doc..> 22-Jul-2014 12:32 1.6M
Farnell-SB520-SB5100..> 22-Jul-2014 12:32 1.6M
Farnell-iServer-Micr..> 22-Jul-2014 12:32 1.6M
Farnell-LUMINARY-MIC..> 22-Jul-2014 12:31 3.6M
Farnell-TEXAS-INSTRU..> 22-Jul-2014 12:31 2.4M
Farnell-TEXAS-INSTRU..> 22-Jul-2014 12:30 4.6M
Farnell-CLASS 1-or-2..> 22-Jul-2014 12:30 4.7M
Farnell-TEXAS-INSTRU..> 22-Jul-2014 12:29 4.8M
Farnell-Evaluating-t..> 22-Jul-2014 12:28 4.9M
Farnell-LM3S6952-Mic..> 22-Jul-2014 12:27 5.9M
Farnell-Keyboard-Mou..> 22-Jul-2014 12:27 5.9M
Farnell-0050375063-D..> 18-Jul-2014 17:03 2.5M
Farnell-Mini-Fit-Jr-..> 18-Jul-2014 17:03 2.5M
Farnell-43031-0002-M..> 18-Jul-2014 17:03 2.5M
Farnell-0433751001-D..> 18-Jul-2014 17:02 2.5M
Farnell-Cube-3D-Prin..> 18-Jul-2014 17:02 2.5M
Farnell-MTX-Compact-..> 18-Jul-2014 17:01 2.5M
Farnell-MTX-3250-MTX..> 18-Jul-2014 17:01 2.5M
Farnell-ATtiny26-L-A..> 18-Jul-2014 17:00 2.6M
Farnell-MCP3421-Micr..> 18-Jul-2014 17:00 1.2M
Farnell-LM19-Texas-I..> 18-Jul-2014 17:00 1.2M
Farnell-Data-Sheet-S..> 18-Jul-2014 17:00 1.2M
Farnell-LMH6518-Texa..> 18-Jul-2014 16:59 1.3M
Farnell-AD7719-Low-V..> 18-Jul-2014 16:59 1.4M
Farnell-DAC8143-Data..> 18-Jul-2014 16:59 1.5M
Farnell-BGA7124-400-..> 18-Jul-2014 16:59 1.5M
Farnell-SICK-OPTIC-E..> 18-Jul-2014 16:58 1.5M
Farnell-LT3757-Linea..> 18-Jul-2014 16:58 1.6M
Farnell-LT1961-Linea..> 18-Jul-2014 16:58 1.6M
Farnell-PIC18F2420-2..> 18-Jul-2014 16:57 2.5M
Farnell-DS3231-DS-PD..> 18-Jul-2014 16:57 2.5M
Farnell-RDS-80-PDF.htm 18-Jul-2014 16:57 1.3M
Farnell-AD8300-Data-..> 18-Jul-2014 16:56 1.3M
Farnell-LT6233-Linea..> 18-Jul-2014 16:56 1.3M
Farnell-MAX1365-MAX1..> 18-Jul-2014 16:56 1.4M
Farnell-XPSAF5130-PD..> 18-Jul-2014 16:56 1.4M
Farnell-DP83846A-DsP..> 18-Jul-2014 16:55 1.5M
Farnell-SL3ICS1002-1..> 16-Jul-2014 09:05 2.5M
Farnell-MCOC1-Farnel..> 16-Jul-2014 09:04 1.0M
Farnell-SL3S1203_121..> 16-Jul-2014 09:04 1.1M
Farnell-PN512-Full-N..> 16-Jul-2014 09:03 1.4M
Farnell-SL3S4011_402..> 16-Jul-2014 09:03 1.1M
Farnell-LPC408x-7x 3..> 16-Jul-2014 09:03 1.6M
Farnell-PCF8574-PCF8..> 16-Jul-2014 09:03 1.7M
Farnell-LPC81xM-32-b..> 16-Jul-2014 09:02 2.0M
Farnell-LPC1769-68-6..> 16-Jul-2014 09:02 1.9M
Farnell-Download-dat..> 16-Jul-2014 09:02 2.2M
Farnell-LPC3220-30-4..> 16-Jul-2014 09:02 2.2M
Farnell-LPC11U3x-32-..> 16-Jul-2014 09:01 2.4M
Farnell-Full-Datashe..> 15-Jul-2014 17:08 951K
Farnell-pmbta13_pmbt..> 15-Jul-2014 17:06 959K
Farnell-EE-SPX303N-4..> 15-Jul-2014 17:06 969K
Farnell-Datasheet-NX..> 15-Jul-2014 17:06 1.0M
Farnell-Datasheet-Fa..> 15-Jul-2014 17:05 1.0M
Farnell-MIDAS-un-tra..> 15-Jul-2014 17:05 1.0M
Farnell-SERIAL-TFT-M..> 15-Jul-2014 17:05 1.0M
Farnell-TMR-2-series..> 15-Jul-2014 16:48 787K
Farnell-DC-DC-Conver..> 15-Jul-2014 16:48 781K
Farnell-Full-Datashe..> 15-Jul-2014 16:47 803K
Farnell-TMLM-Series-..> 15-Jul-2014 16:47 810K
Farnell-TEL-5-Series..> 15-Jul-2014 16:47 814K
Farnell-TXL-series-t..> 15-Jul-2014 16:47 829K
Farnell-TEP-150WI-Se..> 15-Jul-2014 16:47 837K
Farnell-AC-DC-Power-..> 15-Jul-2014 16:47 845K
Farnell-TIS-Instruct..> 15-Jul-2014 16:47 845K
Farnell-TOS-tracopow..> 15-Jul-2014 16:47 852K
Farnell-TCL-DC-traco..> 15-Jul-2014 16:46 858K
Farnell-TIS-series-t..> 15-Jul-2014 16:46 875K
Farnell-TMR-2-Series..> 15-Jul-2014 16:46 897K
Farnell-TMR-3-WI-Ser..> 15-Jul-2014 16:46 939K
Farnell-TEN-8-WI-Ser..> 15-Jul-2014 16:46 939K
Farnell-SOURIAU-Cont..> 08-Jul-2014 19:04 3.0M
Farnell-T672-3000-Se..> 08-Jul-2014 18:59 2.0M
Farnell-tesa®pack63..> 08-Jul-2014 18:56 2.0M
Farnell-Encodeur-USB..> 08-Jul-2014 18:56 2.0M
Farnell-CC2530ZDK-Us..> 08-Jul-2014 18:55 2.1M
Farnell-2020-Manuel-..> 08-Jul-2014 18:55 2.1M
Farnell-Synchronous-..> 08-Jul-2014 18:54 2.1M
Farnell-Arithmetic-L..> 08-Jul-2014 18:54 2.1M
Farnell-NA555-NE555-..> 08-Jul-2014 18:53 2.2M
Farnell-4-Bit-Magnit..> 08-Jul-2014 18:53 2.2M
Farnell-LM555-Timer-..> 08-Jul-2014 18:53 2.2M
Farnell-L293d-Texas-..> 08-Jul-2014 18:53 2.2M
Farnell-SN54HC244-SN..> 08-Jul-2014 18:52 2.3M
Farnell-MAX232-MAX23..> 08-Jul-2014 18:52 2.3M
Farnell-High-precisi..> 08-Jul-2014 18:51 2.3M
Farnell-SMU-Instrume..> 08-Jul-2014 18:51 2.3M
Farnell-900-Series-B..> 08-Jul-2014 18:50 2.3M
Farnell-BA-Series-Oh..> 08-Jul-2014 18:50 2.3M
Farnell-UTS-Series-S..> 08-Jul-2014 18:49 2.5M
Farnell-270-Series-O..> 08-Jul-2014 18:49 2.3M
Farnell-UTS-Series-S..> 08-Jul-2014 18:49 2.8M
Farnell-Tiva-C-Serie..> 08-Jul-2014 18:49 2.6M
Farnell-UTO-Souriau-..> 08-Jul-2014 18:48 2.8M
Farnell-Clipper-Seri..> 08-Jul-2014 18:48 2.8M
Farnell-851-Series-P..> 08-Jul-2014 18:47 3.0M
Farnell-HIP4081A-Int..> 07-Jul-2014 19:47 1.0M
Farnell-ISL6251-ISL6..> 07-Jul-2014 19:47 1.1M
Farnell-DG411-DG412-..> 07-Jul-2014 19:47 1.0M
Farnell-3367-ARALDIT..> 07-Jul-2014 19:46 1.2M
Farnell-ICM7228-Inte..> 07-Jul-2014 19:46 1.1M
Farnell-Data-Sheet-K..> 07-Jul-2014 19:46 1.2M
Farnell-Silica-Gel-M..> 07-Jul-2014 19:46 1.2M
Farnell-TKC2-Dusters..> 07-Jul-2014 19:46 1.2M
Farnell-CRC-HANDCLEA..> 07-Jul-2014 19:46 1.2M
Farnell-760G-French-..> 07-Jul-2014 19:45 1.2M
Farnell-Decapant-KF-..> 07-Jul-2014 19:45 1.2M
Farnell-1734-ARALDIT..> 07-Jul-2014 19:45 1.2M
Farnell-Araldite-Fus..> 07-Jul-2014 19:45 1.2M
Farnell-fiche-de-don..> 07-Jul-2014 19:44 1.4M
Farnell-safety-data-..> 07-Jul-2014 19:44 1.4M
Farnell-A-4-Hardener..> 07-Jul-2014 19:44 1.4M
Farnell-CC-Debugger-..> 07-Jul-2014 19:44 1.5M
Farnell-SmartRF06-Ev..> 07-Jul-2014 19:43 1.6M
Farnell-CC2531-USB-H..> 07-Jul-2014 19:43 1.8M
Farnell-Alimentation..> 07-Jul-2014 19:43 1.8M
Farnell-BK889B-PONT-..> 07-Jul-2014 19:42 1.8M
Farnell-User-Guide-M..> 07-Jul-2014 19:41 2.0M
Farnell-SL59830-Inte..> 06-Jul-2014 10:11 1.0M
Farnell-ALF1210-PDF.htm 06-Jul-2014 10:06 4.0M
Farnell-AD7171-16-Bi..> 06-Jul-2014 10:06 1.0M
Farnell-Low-Noise-24..> 06-Jul-2014 10:05 1.0M
Farnell-ESCON-Featur..> 06-Jul-2014 10:05 938K
Farnell-74LCX573-Fai..> 06-Jul-2014 10:05 1.9M
Farnell-1N4148WS-Fai..> 06-Jul-2014 10:04 1.9M
Farnell-FAN6756-Fair..> 06-Jul-2014 10:04 850K
Farnell-Datasheet-Fa..> 06-Jul-2014 10:04 861K
Farnell-ES1F-ES1J-fi..> 06-Jul-2014 10:04 867K
Farnell-QRE1113-Fair..> 06-Jul-2014 10:03 879K
Farnell-2N7002DW-Fai..> 06-Jul-2014 10:03 886K
Farnell-FDC2512-Fair..> 06-Jul-2014 10:03 886K
Farnell-FDV301N-Digi..> 06-Jul-2014 10:03 886K
Farnell-S1A-Fairchil..> 06-Jul-2014 10:03 896K
Farnell-BAV99-Fairch..> 06-Jul-2014 10:03 896K
Farnell-74AC00-74ACT..> 06-Jul-2014 10:03 911K
Farnell-NaPiOn-Panas..> 06-Jul-2014 10:02 911K
Farnell-LQ-RELAYS-AL..> 06-Jul-2014 10:02 924K
Farnell-ev-relays-ae..> 06-Jul-2014 10:02 926K
Farnell-ESCON-Featur..> 06-Jul-2014 10:02 931K
Farnell-Amplifier-In..> 06-Jul-2014 10:02 940K
Farnell-Serial-File-..> 06-Jul-2014 10:02 941K
Farnell-Both-the-Del..> 06-Jul-2014 10:01 948K
Farnell-Videk-PDF.htm 06-Jul-2014 10:01 948K
Farnell-EPCOS-173438..> 04-Jul-2014 10:43 3.3M
Farnell-Sensorless-C..> 04-Jul-2014 10:42 3.3M
Farnell-197.31-KB-Te..> 04-Jul-2014 10:42 3.3M
Farnell-PIC12F609-61..> 04-Jul-2014 10:41 3.7M
Farnell-PADO-semi-au..> 04-Jul-2014 10:41 3.7M
Farnell-03-iec-runds..> 04-Jul-2014 10:40 3.7M
Farnell-ACC-Silicone..> 04-Jul-2014 10:40 3.7M
Farnell-Series-TDS10..> 04-Jul-2014 10:39 4.0M
Farnell-Q48-PDF.htm 23-Jun-2014 10:29 2.1M
Farnell-Panasonic-15..> 23-Jun-2014 10:29 2.1M
Farnell-BZX384-serie..> 23-Jun-2014 10:29 2.1M
Farnell-AN10361-Phil..> 23-Jun-2014 10:29 2.1M
Farnell-KSZ8851SNL-S..> 23-Jun-2014 10:28 2.1M
Farnell-BF545A-BF545..> 23-Jun-2014 10:28 2.1M
Farnell-PIC18F2455-2..> 23-Jun-2014 10:27 3.1M
Farnell-PMBT4403-PNP..> 23-Jun-2014 10:27 3.1M
Farnell-24AA024-24LC..> 23-Jun-2014 10:26 3.1M
Farnell-Leaded-Trans..> 23-Jun-2014 10:26 3.2M
Farnell-SSC7102-Micr..> 23-Jun-2014 10:25 3.2M
Farnell-Fastrack-Sup..> 23-Jun-2014 10:25 3.3M
Farnell-BC847DS-NXP-..> 23-Jun-2014 10:24 3.3M
Farnell-HI-70300-Sol..> 14-Jun-2014 18:27 2.4M
Farnell-Davum-TMC-PD..> 14-Jun-2014 18:27 2.4M
Farnell-Repartiteurs..> 14-Jun-2014 18:26 2.5M
Farnell-Documentatio..> 14-Jun-2014 18:26 2.5M
Farnell-Fiche-de-don..> 14-Jun-2014 18:26 2.5M
Farnell-SPLC780A1-16..> 14-Jun-2014 18:25 2.5M
Farnell-Construction..> 14-Jun-2014 18:25 2.5M
Farnell-Alimentation..> 14-Jun-2014 18:24 2.5M
Farnell-C.A-6150-C.A..> 14-Jun-2014 18:24 2.5M
Farnell-Fluke-1730-E..> 14-Jun-2014 18:23 2.5M
Farnell-Ponts-RLC-po..> 14-Jun-2014 18:23 3.3M
Farnell-Serie-Standa..> 14-Jun-2014 18:23 3.3M
Farnell-FDS-ITW-Spra..> 14-Jun-2014 18:22 3.3M
Farnell-HFE1600-Data..> 14-Jun-2014 18:22 3.3M
Farnell-TDK-Lambda-H..> 14-Jun-2014 18:21 3.3M
Farnell-HC49-4H-Crys..> 14-Jun-2014 18:20 3.3M
Farnell-Avvertenze-e..> 14-Jun-2014 18:20 3.3M
Farnell-Ceramic-tran..> 14-Jun-2014 18:19 3.4M
Farnell-ADL6507-PDF.htm 14-Jun-2014 18:19 3.4M
Farnell-PMEG4002EL-N..> 14-Jun-2014 18:18 3.4M
Farnell-Midas-Active..> 14-Jun-2014 18:17 3.4M
Farnell-Molex-83421-..> 14-Jun-2014 18:17 3.4M
Farnell-Molex-COMMER..> 14-Jun-2014 18:16 3.4M
Farnell-10TPB47M-End..> 14-Jun-2014 18:16 3.4M
Farnell-U2270B-PDF.htm 14-Jun-2014 18:15 3.4M
Farnell-SVPE-series-..> 14-Jun-2014 18:15 2.0M
Farnell-F28069-Picco..> 14-Jun-2014 18:14 2.0M
Farnell-Termometros-..> 14-Jun-2014 18:14 2.0M
Farnell-Cordless-dri..> 14-Jun-2014 18:13 2.0M
Farnell-Battery-GBA-..> 14-Jun-2014 18:13 2.0M
Farnell-CD4536B-Type..> 14-Jun-2014 18:13 2.0M
Farnell-0430300011-D..> 14-Jun-2014 18:13 2.0M
Farnell-Mistral-PDF.htm 14-Jun-2014 18:12 2.1M
Farnell-Connectors-N..> 14-Jun-2014 18:12 2.1M
Farnell-XPS-AC-Octop..> 14-Jun-2014 18:11 2.1M
Farnell-Midas-MCCOG4..> 14-Jun-2014 18:11 2.1M
Farnell-V4N-PDF.htm 14-Jun-2014 18:11 2.1M
Farnell-Signal-PCB-R..> 14-Jun-2014 18:11 2.1M
Farnell-PIC24FJ256GB..> 14-Jun-2014 09:51 2.4M
Farnell-DC-Fan-type-..> 14-Jun-2014 09:51 1.8M
Farnell-12mm-Size-In..> 14-Jun-2014 09:50 2.4M
Farnell-10BQ060-PDF.htm 14-Jun-2014 09:50 2.4M
Farnell-An-Improved-..> 14-Jun-2014 09:49 2.5M
Farnell-ATmega640-VA..> 14-Jun-2014 09:49 2.5M
Farnell-LME49725-Pow..> 14-Jun-2014 09:49 2.5M
Farnell-Produit-3430..> 14-Jun-2014 09:48 2.5M
Farnell-USB-Buccanee..> 14-Jun-2014 09:48 2.5M
Farnell-DC-Fan-type-..> 14-Jun-2014 09:48 2.5M
Farnell-Fiche-de-don..> 14-Jun-2014 09:47 2.5M
Farnell-Nilï¬-sk-E-..> 14-Jun-2014 09:47 2.5M
Farnell-MX670-MX675-..> 14-Jun-2014 09:46 2.5M
Farnell-Tektronix-AC..> 13-Jun-2014 18:44 1.5M
Farnell-PMBT3906-PNP..> 13-Jun-2014 18:44 1.5M
Farnell-PESD5V0F1BL-..> 13-Jun-2014 18:43 1.5M
Farnell-PMEG4010CEH-..> 13-Jun-2014 18:43 1.6M
Farnell-PESD9X5.0L-P..> 13-Jun-2014 18:43 1.6M
Farnell-BTA204-800C-..> 13-Jun-2014 18:42 1.6M
Farnell-BYV29F-600-N..> 13-Jun-2014 18:42 1.6M
Farnell-Low-cost-Enc..> 13-Jun-2014 18:42 1.7M
Farnell-BC846DS-NXP-..> 13-Jun-2014 18:42 1.6M
Farnell-IP4252CZ16-8..> 13-Jun-2014 18:41 1.7M
Farnell-BUJD203AX-NX..> 13-Jun-2014 18:41 1.7M
Farnell-Download-dat..> 13-Jun-2014 18:40 1.8M
Farnell-BT151-650R-N..> 13-Jun-2014 18:40 1.7M
Farnell-OXPCIE958-FB..> 13-Jun-2014 18:40 1.8M
Farnell-ATtiny26-L-A..> 13-Jun-2014 18:40 1.8M
Farnell-Microchip-MC..> 13-Jun-2014 18:27 1.8M
Farnell-Pompes-Charg..> 24-Apr-2014 20:23 3.3M
Farnell-Alimentation..> 01-Apr-2014 07:42 3.4M
Farnell-C.A 8332B-C...> 01-Apr-2014 07:40 3.4M
Farnell-ALF1225-12-V..> 01-Apr-2014 07:40 3.4M
Farnell-CS5532-34-BS..> 01-Apr-2014 07:39 3.5M
Farnell-ALF2412-24-V..> 01-Apr-2014 07:39 3.4M
Sefram-GUIDE_SIMPLIF..> 29-Mar-2014 11:46 422K
Sefram-CAT_ENREGISTR..> 29-Mar-2014 11:46 461K
Sefram-SP270.pdf-PDF..> 29-Mar-2014 11:46 464K
Sefram-7866HD.pdf-PD..> 29-Mar-2014 11:46 472K
Sefram-GUIDE_SIMPLIF..> 29-Mar-2014 11:46 481K
Sefram-CAT_MESUREURS..> 29-Mar-2014 11:46 435K
Sefram-GUIDE_SIMPLIF..> 29-Mar-2014 11:46 442K
Farnell-Portable-Ana..> 29-Mar-2014 11:16 2.8M
Farnell-CC2560-Bluet..> 29-Mar-2014 11:14 2.8M
Farnell-Ferric-Chlor..> 29-Mar-2014 11:14 2.8M
Farnell-MCF532x-7x-E..> 29-Mar-2014 11:14 2.8M
Farnell-A-True-Syste..> 29-Mar-2014 11:13 3.3M
Farnell-ELMA-PDF.htm 29-Mar-2014 11:13 3.3M
Farnell-SMBJ-Transil..> 29-Mar-2014 11:12 3.3M
Farnell-6517b-Electr..> 29-Mar-2014 11:12 3.3M
Farnell-Amplificateu..> 29-Mar-2014 11:11 3.3M
Farnell-ir1150s_fr.p..> 29-Mar-2014 11:11 3.3M
Farnell-De-la-puissa..> 29-Mar-2014 11:10 3.3M
Farnell-BK2650A-BK26..> 29-Mar-2014 11:10 3.3M
Farnell-Lubrifiant-a..> 26-Mar-2014 18:00 2.7M
Farnell-Circuit-Note..> 26-Mar-2014 18:00 2.8M
Farnell-Circuit-Note..> 26-Mar-2014 18:00 2.8M
Farnell-Current-Tran..> 26-Mar-2014 17:59 2.7M
Farnell-Current-Tran..> 26-Mar-2014 17:59 2.7M
Farnell-Current-Tran..> 26-Mar-2014 17:58 2.7M
Farnell-Current-Tran..> 26-Mar-2014 17:58 2.7M
Farnell-Supercapacit..> 26-Mar-2014 17:57 2.7M
Farnell-GALVA-MAT-Re..> 26-Mar-2014 17:57 2.7M
Farnell-GALVA-A-FROI..> 26-Mar-2014 17:56 2.7M
Farnell-1907-2006-PD..> 26-Mar-2014 17:56 2.7M
Farnell-ARALDITE-CW-..> 26-Mar-2014 17:56 2.7M
Farnell-06-6544-8-PD..> 26-Mar-2014 17:56 2.7M
Farnell-Miniature-Ci..> 26-Mar-2014 17:55 2.8M
Farnell-ARADUR-HY-13..> 26-Mar-2014 17:55 2.8M
Farnell-LOCTITE-3463..> 25-Mar-2014 08:19 3.0M
Farnell-LCW-CQ7P.CC-..> 25-Mar-2014 08:19 3.2M
Farnell-ATtiny20-PDF..> 25-Mar-2014 08:19 3.6M
Farnell-3M-VolitionT..> 25-Mar-2014 08:18 3.3M
Farnell-EMC1182-PDF.htm 25-Mar-2014 08:17 3.0M
Farnell-MC3510-PDF.htm 25-Mar-2014 08:17 3.0M
Farnell-Directive-re..> 25-Mar-2014 08:16 3.0M
Farnell-Loctite3455-..> 25-Mar-2014 08:16 3.0M
Farnell-LOCTITE-542-..> 25-Mar-2014 08:15 3.0M
Farnell-5910-PDF.htm 25-Mar-2014 08:15 3.0M
Farnell-china_rohs_o..> 21-Mar-2014 10:04 3.9M
Farnell-Cles-electro..> 21-Mar-2014 08:13 3.9M
Farnell-ARALDITE-201..> 21-Mar-2014 08:12 3.7M
Farnell-Premier-Farn..> 21-Mar-2014 08:11 3.8M
Farnell-celpac-SUL84..> 21-Mar-2014 08:11 3.8M
Farnell-S-TRI-SWT860..> 21-Mar-2014 08:11 3.8M
Farnell-3M-Polyimide..> 21-Mar-2014 08:09 3.9M
Farnell-Strangkuhlko..> 21-Mar-2014 08:09 3.9M
Farnell-Reglement-RE..> 21-Mar-2014 08:08 3.9M
Farnell-techfirst_se..> 21-Mar-2014 08:08 3.9M
Farnell-Septembre-20..> 20-Mar-2014 17:46 3.7M
Farnell-Telemetres-l..> 20-Mar-2014 17:46 3.7M
Farnell-Multi-Functi..> 20-Mar-2014 17:38 3.0M
Farnell-testo-470-Fo..> 20-Mar-2014 17:38 3.0M
Farnell-Novembre-201..> 20-Mar-2014 17:38 3.3M
Farnell-testo-205-20..> 20-Mar-2014 17:37 3.0M
Farnell-Panasonic-Ra..> 20-Mar-2014 17:37 2.6M
Farnell-Panasonic-Ne..> 20-Mar-2014 17:36 2.6M
Farnell-Panasonic-EC..> 20-Mar-2014 17:36 2.6M
Farnell-Panasonic-Id..> 20-Mar-2014 17:35 2.6M
Farnell-cree-Xlamp-X..> 20-Mar-2014 17:35 2.7M
Farnell-cree-Xlamp-X..> 20-Mar-2014 17:34 2.8M
Farnell-ADSP-21362-A..> 20-Mar-2014 17:34 2.8M
Farnell-AD524-PDF.htm 20-Mar-2014 17:33 2.8M
Farnell-MPXV7002-Rev..> 20-Mar-2014 17:33 2.8M
Farnell-cree-Xlamp-m..> 20-Mar-2014 17:32 2.9M
Farnell-cree-Xlamp-m..> 20-Mar-2014 17:32 2.9M
Farnell-50A-High-Pow..> 20-Mar-2014 17:31 2.9M
Farnell-cree-Xlamp-X..> 20-Mar-2014 17:31 2.9M
Farnell-Series-2600B..> 20-Mar-2014 17:30 3.0M
Farnell-ECO-Series-T..> 20-Mar-2014 08:14 2.5M
Farnell-PDTA143X-ser..> 20-Mar-2014 08:12 2.6M
Farnell-Panasonic-TS..> 20-Mar-2014 08:12 2.6M
Farnell-Radial-Lead-..> 20-Mar-2014 08:12 2.6M
Farnell-GN-RELAYS-AG..> 20-Mar-2014 08:11 2.6M
Farnell-Panasonic-Y3..> 20-Mar-2014 08:11 2.6M
Farnell-Panasonic-EZ..> 20-Mar-2014 08:10 2.6M
Farnell-ATMEL-8-bit-..> 19-Mar-2014 18:04 2.1M
Farnell-USB1T11A-PDF..> 19-Mar-2014 18:03 2.1M
Farnell-OSLON-SSL-Ce..> 19-Mar-2014 18:03 2.1M
Farnell-Atmel-ATmega..> 19-Mar-2014 18:03 2.2M
Farnell-PBSS5160T-60..> 19-Mar-2014 18:03 2.1M
Farnell-MICROCHIP-PI..> 19-Mar-2014 18:02 2.5M
Farnell-Ed.081002-DA..> 19-Mar-2014 18:02 2.5M
Farnell-Instructions..> 19-Mar-2014 18:01 2.5M
Farnell-Serie-PicoSc..> 19-Mar-2014 18:01 2.5M
Farnell-F42202-PDF.htm 19-Mar-2014 18:00 2.5M
Farnell-propose-plus..> 11-Mar-2014 08:19 2.8M
Farnell-Haute-vitess..> 11-Mar-2014 08:17 2.4M
Farnell-Controle-de-..> 11-Mar-2014 08:16 2.8M
Farnell-NXP-TEA1703T..> 11-Mar-2014 08:15 2.8M
Farnell-XPS-MC16-XPS..> 11-Mar-2014 08:15 2.8M
Farnell-MC21605-PDF.htm 11-Mar-2014 08:14 2.8M
Farnell-WetTantalum-..> 11-Mar-2014 08:14 2.8M
Farnell-ES2333-PDF.htm 11-Mar-2014 08:14 2.8M
Farnell-SB175-Connec..> 11-Mar-2014 08:14 2.8M
Farnell-Cannon-ZD-PD..> 11-Mar-2014 08:13 2.8M
Farnell-YAGEO-DATA-S..> 11-Mar-2014 08:13 2.8M
Farnell-ATMEL-8-bit-..> 11-Mar-2014 07:55 2.1M
Farnell-NXP-PCA9555 ..> 11-Mar-2014 07:54 2.2M
Farnell-MICREL-KSZ88..> 11-Mar-2014 07:54 2.2M
Farnell-Microship-PI..> 11-Mar-2014 07:53 2.2M
Farnell-EPCOS-Sample..> 11-Mar-2014 07:53 2.2M
Farnell-NXP-BT136-60..> 11-Mar-2014 07:52 2.3M
Farnell-NTE_SEMICOND..> 11-Mar-2014 07:52 2.3M
Farnell-L-efficacite..> 11-Mar-2014 07:52 2.3M
Farnell-LUXEON-Guide..> 11-Mar-2014 07:52 2.3M
Farnell-Realiser-un-..> 11-Mar-2014 07:51 2.3M
Farnell-SOT-23-Multi..> 11-Mar-2014 07:51 2.3M
Farnell-ZigBee-ou-le..> 11-Mar-2014 07:50 2.4M
Farnell-Les-derniers..> 11-Mar-2014 07:50 2.3M
Farnell-Conception-d..> 11-Mar-2014 07:49 2.4M
Farnell-Puissance-ut..> 11-Mar-2014 07:49 2.4M
Farnell-MOLEX-43160-..> 10-Mar-2014 17:21 1.9M
Farnell-MOLEX-87439-..> 10-Mar-2014 17:21 1.9M
Farnell-MOLEX-43020-..> 10-Mar-2014 17:21 1.9M
Farnell-NXP-PBSS9110..> 10-Mar-2014 17:21 1.9M
Farnell-TEKTRONIX-DP..> 10-Mar-2014 17:20 2.0M
Farnell-uC-OS-III-Br..> 10-Mar-2014 17:20 2.0M
Farnell-CIRRUS-LOGIC..> 10-Mar-2014 17:20 2.1M
Farnell-NXP-PSMN7R0-..> 10-Mar-2014 17:19 2.1M
Farnell-MOLEX-39-00-..> 10-Mar-2014 17:19 1.9M
Farnell-manual-bus-p..> 10-Mar-2014 16:29 1.9M
Farnell-Molex-Crimp-..> 10-Mar-2014 16:27 1.7M
Farnell-The-essentia..> 10-Mar-2014 16:27 1.7M
Farnell-OMRON-Master..> 10-Mar-2014 16:26 1.8M
Farnell-Proskit-SS-3..> 10-Mar-2014 16:26 1.8M
Farnell-BYV79E-serie..> 10-Mar-2014 16:19 1.6M
Farnell-NXP-74VHC126..> 10-Mar-2014 16:17 1.6M
Farnell-NXP-PSMN1R7-..> 10-Mar-2014 16:17 1.6M
Farnell-FICHE-DE-DON..> 10-Mar-2014 16:17 1.6M
Farnell-HUNTSMAN-Adv..> 10-Mar-2014 16:17 1.7M
Farnell-NXP-PMBFJ620..> 10-Mar-2014 16:16 1.7M
Farnell-Pico-Spox-Wi..> 10-Mar-2014 16:16 1.7M
Features
• High Performance, Low Power AVR® 8-Bit Microcontroller
• Advanced RISC Architecture
– 120 Powerful Instructions – Most Single Clock Cycle Execution
– 32 x 8 General Purpose Working Registers
– Fully Static Operation
– Up to 20 MIPS Throughput at 20 MHz
• Data and Non-volatile Program and Data Memories
– 2/4K Bytes of In-System Self Programmable Flash
• Endurance 10,000 Write/Erase Cycles
– 128/256 Bytes In-System Programmable EEPROM
• Endurance: 100,000 Write/Erase Cycles
– 128/256 Bytes Internal SRAM
– Programming Lock for Flash Program and EEPROM Data Security
• Peripheral Features
– One 8-bit Timer/Counter with Separate Prescaler and Compare Mode
– One 16-bit Timer/Counter with Separate Prescaler, Compare and Capture Modes
– Four PWM Channels
– On-chip Analog Comparator
– Programmable Watchdog Timer with On-chip Oscillator
– USI – Universal Serial Interface
– Full Duplex USART
• Special Microcontroller Features
– debugWIRE On-chip Debugging
– In-System Programmable via SPI Port
– External and Internal Interrupt Sources
– Low-power Idle, Power-down, and Standby Modes
– Enhanced Power-on Reset Circuit
– Programmable Brown-out Detection Circuit
– Internal Calibrated Oscillator
• I/O and Packages
– 18 Programmable I/O Lines
– 20-pin PDIP, 20-pin SOIC, 20-pad MLF/VQFN
• Operating Voltage
– 1.8 – 5.5V
• Speed Grades
– 0 – 4 MHz @ 1.8 – 5.5V
– 0 – 10 MHz @ 2.7 – 5.5V
– 0 – 20 MHz @ 4.5 – 5.5V
• Industrial Temperature Range: -40°C to +85°C
• Low Power Consumption
– Active Mode
• 190 µA at 1.8V and 1MHz
– Idle Mode
• 24 µA at 1.8V and 1MHz
– Power-down Mode
• 0.1 µA at 1.8V and +25°C
8-bit
Microcontroller
with 2/4K Bytes
In-System
Programmable
Flash
ATtiny2313A
ATtiny4313
Rev. 8246B–AVR–09/112
8246B–AVR–09/11
ATtiny2313A/4313
1. Pin Configurations
Figure 1-1. Pinout ATtiny2313A/4313
(PCINT10/RESET/dW) PA2
(PCINT11/RXD) PD0
(PCINT12/TXD) PD1
(PCINT9/XTAL2) PA1
(PCINT8/CLKI/XTAL1) PA0
(PCINT13/CKOUT/XCK/INT0) PD2
(PCINT14/INT1) PD3
(PCINT15/T0) PD4
(PCINT16/OC0B/T1) PD5
GND
20
19
18
17
16
15
14
13
12
11
1
2
3
4
5
6
7
8
9
10
VCC
PB7 (USCK/SCL/SCK/PCINT7)
PB6 (MISO/DO/PCINT6)
PB5 (MOSI/DI/SDA/PCINT5)
PB4 (OC1B/PCINT4)
PB3 (OC1A/PCINT3)
PB2 (OC0A/PCINT2)
PB1 (AIN1/PCINT1)
PB0 (AIN0/PCINT0)
PD6 (ICPI/PCINT17)
PDIP/SOIC
1
2
3
4
5
MLF/VQFN
15
14
13
12
11
20
19
18
17
16
6
7
8
9
10
(PCINT12/TXD) PD1
(PCINT9/XTAL2) PA1
(PCINT8/CLKI/XTAL1) PA0
(PCINT13/CKOUT/XCK/INT0) PD2
(PCINT14/INT1) PD3
(PCINT15/T0) PD4
(PCINT16/OC0B/T1) PD5
GND
(PCINT17/ICPI) PD6
(AIN0/PCINT0) PB0
PB5 (MOSI/DI/SDA/PCINT5)
PB4 (OC1B/PCINT4)
PB3 (OC1A/PCINT3)
PB2 (OC0A/PCINT2)
PB1 (AIN1/PCINT1)
PD0 (RXD/PCINT11)
PA2 (RESET/dW/PCINT10)
VCC
PB7 (USCK/SCL/SCK/PCINT7)
PB6 (MISO/DO/PCINT6)
NOTE: Bottom pad should be soldered to ground.3
8246B–AVR–09/11
ATtiny2313A/4313
1.1 Pin Descriptions
1.1.1 VCC
Digital supply voltage.
1.1.2 GND
Ground.
1.1.3 Port A (PA2..PA0)
Port A is a 3-bit bi-directional I/O port with internal pull-up resistors (selected for each bit). The
Port A output buffers have symmetrical drive characteristics with both high sink and source
capability, except PA2 which has the RESET capability. To use pin PA2 as I/O pin, instead of
RESET pin, program (“0”) RSTDISBL fuse. As inputs, Port A pins that are externally pulled low
will source current if the pull-up resistors are activated. The Port A pins are tri-stated when a
reset condition becomes active, even if the clock is not running.
Port A also serves the functions of various special features of the ATtiny2313A/4313 as listed on
page 62.
1.1.4 Port B (PB7..PB0)
Port B is an 8-bit bi-directional I/O port with internal pull-up resistors (selected for each bit). The
Port B output buffers have symmetrical drive characteristics with both high sink and source
capability. As inputs, Port B pins that are externally pulled low will source current if the pull-up
resistors are activated. The Port B pins are tri-stated when a reset condition becomes active,
even if the clock is not running.
Port B also serves the functions of various special features of the ATtiny2313A/4313 as listed on
page 63.
1.1.5 Port D (PD6..PD0)
Port D is a 7-bit bi-directional I/O port with internal pull-up resistors (selected for each bit). The
Port D output buffers have symmetrical drive characteristics with both high sink and source
capability. As inputs, Port D pins that are externally pulled low will source current if the pull-up
resistors are activated. The Port D pins are tri-stated when a reset condition becomes active,
even if the clock is not running.
Port D also serves the functions of various special features of the ATtiny2313A/4313 as listed on
page 67.
1.1.6 RESET
Reset input. A low level on this pin for longer than the minimum pulse length will generate a
reset, even if the clock is not running and provided that the reset pin has not been disabled. The
minimum pulse length is given in Table 22-3 on page 201. Shorter pulses are not guaranteed to
generate a reset. The Reset Input is an alternate function for PA2 and dW.
The reset pin can also be used as a (weak) I/O pin.
1.1.7 XTAL1
Input to the inverting Oscillator amplifier and input to the internal clock operating circuit. XTAL1
is an alternate function for PA0.4
8246B–AVR–09/11
ATtiny2313A/4313
1.1.8 XTAL2
Output from the inverting Oscillator amplifier. XTAL2 is an alternate function for PA1.5
8246B–AVR–09/11
ATtiny2313A/4313
2. Overview
The ATtiny2313A/4313 is a low-power CMOS 8-bit microcontroller based on the AVR enhanced
RISC architecture. By executing powerful instructions in a single clock cycle, the
ATtiny2313A/4313 achieves throughputs approaching 1 MIPS per MHz allowing the system
designer to optimize power consumption versus processing speed.
2.1 Block Diagram
Figure 2-1. Block Diagram
PROGRAM
COUNTER
PROGRAM
FLASH
INSTRUCTION
REGISTER
GND
VCC
INSTRUCTION
DECODER
CONTROL
LINES
STACK
POINTER
SRAM
GENERAL
PURPOSE
REGISTER
ALU
STATUS
REGISTER
PROGRAMMING
LOGIC SPI
8-BIT DATA BUS
XTAL1 XTAL2
RESET
INTERNAL
OSCILLATOR
OSCILLATOR
WATCHDOG
TIMER
TIMING AND
CONTROL
MCU CONTROL
REGISTER
MCU STATUS
REGISTER
TIMER/
COUNTERS
INTERRUPT
UNIT
EEPROM
USI
USART
ANALOG
COMPARATOR
DATA REGISTER
PORTB
DATA DIR.
REG. PORTB
DATA REGISTER
PORTA
DATA DIR.
REG. PORTA
PORTB DRIVERS
PB0 - PB7
PORTA DRIVERS
PA0 - PA2
DATA REGISTER
PORTD
DATA DIR.
REG. PORTD
PORTD DRIVERS
PD0 - PD6
ON-CHIP
DEBUGGER
INTERNAL
CALIBRATED
OSCILLATOR6
8246B–AVR–09/11
ATtiny2313A/4313
The AVR core combines a rich instruction set with 32 general purpose working registers. All the
32 registers are directly connected to the Arithmetic Logic Unit (ALU), allowing two independent
registers to be accessed in one single instruction executed in one clock cycle. The resulting
architecture is more code efficient while achieving throughputs up to ten times faster than conventional
CISC microcontrollers.
The ATtiny2313A/4313 provides the following features: 2/4K bytes of In-System Programmable
Flash, 128/256 bytes EEPROM, 128/256 bytes SRAM, 18 general purpose I/O lines, 32 general
purpose working registers, a single-wire Interface for On-chip Debugging, two flexible
Timer/Counters with compare modes, internal and external interrupts, a serial programmable
USART, Universal Serial Interface with Start Condition Detector, a programmable Watchdog
Timer with internal Oscillator, and three software selectable power saving modes. The Idle mode
stops the CPU while allowing the SRAM, Timer/Counters, and interrupt system to continue functioning.
The Power-down mode saves the register contents but freezes the Oscillator, disabling
all other chip functions until the next interrupt or hardware reset. In Standby mode, the crystal/resonator
Oscillator is running while the rest of the device is sleeping. This allows very fast
start-up combined with low-power consumption.
The device is manufactured using Atmel’s high density non-volatile memory technology. The
On-chip ISP Flash allows the program memory to be reprogrammed In-System through an SPI
serial interface, or by a conventional non-volatile memory programmer. By combining an 8-bit
RISC CPU with In-System Self-Programmable Flash on a monolithic chip, the Atmel
ATtiny2313A/4313 is a powerful microcontroller that provides a highly flexible and cost effective
solution to many embedded control applications.
The ATtiny2313A/4313 AVR is supported with a full suite of program and system development
tools including: C Compilers, Macro Assemblers, Program Debugger/Simulators, In-Circuit Emulators,
and Evaluation kits.
2.2 Comparison Between ATtiny2313A and ATtiny4313
The ATtiny2313A and ATtiny4313 differ only in memory sizes. Table 2-1 summarizes the different
memory sizes for the two devices.
Table 2-1. Memory Size Summary
Device Flash EEPROM RAM
ATtiny2313A 2K Bytes 128 Bytes 128 Bytes
ATtiny4313 4K Bytes 256 Bytes 256 Bytes7
8246B–AVR–09/11
ATtiny2313A/4313
3. About
3.1 Resources
A comprehensive set of drivers, application notes, data sheets and descriptions on development
tools are available for download at http://www.atmel.com/avr.
3.2 Code Examples
This documentation contains simple code examples that briefly show how to use various parts of
the device. These code examples assume that the part specific header file is included before
compilation. Be aware that not all C compiler vendors include bit definitions in the header files
and interrupt handling in C is compiler dependent. Please confirm with the C compiler documentation
for more details.
For I/O Registers located in the extended I/O map, “IN”, “OUT”, “SBIS”, “SBIC”, “CBI”, and “SBI”
instructions must be replaced with instructions that allow access to extended I/O. Typically, this
means “LDS” and “STS” combined with “SBRS”, “SBRC”, “SBR”, and “CBR”. Note that not all
AVR devices include an extended I/O map.
3.3 Data Retention
Reliability Qualification results show that the projected data retention failure rate is much less
than 1 PPM over 20 years at 85°C or 100 years at 25°C.8
8246B–AVR–09/11
ATtiny2313A/4313
4. CPU Core
This section discusses the AVR core architecture in general. The main function of the CPU core
is to ensure correct program execution. The CPU must therefore be able to access memories,
perform calculations, control peripherals, and handle interrupts.
4.1 Architectural Overview
Figure 4-1. Block Diagram of the AVR Architecture
In order to maximize performance and parallelism, the AVR uses a Harvard architecture – with
separate memories and buses for program and data. Instructions in the program memory are
executed with a single level pipelining. While one instruction is being executed, the next instruction
is pre-fetched from the program memory. This concept enables instructions to be executed
in every clock cycle. The program memory is In-System Reprogrammable Flash memory.
The fast-access Register File contains 32 x 8-bit general purpose working registers with a single
clock cycle access time. This allows single-cycle Arithmetic Logic Unit (ALU) operation. In a typical
ALU operation, two operands are output from the Register File, the operation is executed,
and the result is stored back in the Register File – in one clock cycle.
Flash
Program
Memory
Instruction
Register
Instruction
Decoder
Program
Counter
Control Lines
32 x 8
General
Purpose
Registrers
ALU
Status
and Control
I/O Lines
EEPROM
Data Bus 8-bit
Data
SRAM
Direct Addressing
Indirect Addressing
Interrupt
Unit
SPI
Unit
Watchdog
Timer
Analog
Comparator
I/O Module 2
I/O Module1
I/O Module n9
8246B–AVR–09/11
ATtiny2313A/4313
Six of the 32 registers can be used as three 16-bit indirect address register pointers for Data
Space addressing – enabling efficient address calculations. One of the these address pointers
can also be used as an address pointer for look up tables in Flash program memory. These
added function registers are the 16-bit X-, Y-, and Z-register, described later in this section.
The ALU supports arithmetic and logic operations between registers or between a constant and
a register. Single register operations can also be executed in the ALU. After an arithmetic operation,
the Status Register is updated to reflect information about the result of the operation.
Program flow is provided by conditional and unconditional jump and call instructions, able to
directly address the whole address space. Most AVR instructions have a single 16-bit word format.
Every program memory address contains a 16- or 32-bit instruction.
During interrupts and subroutine calls, the return address Program Counter (PC) is stored on the
Stack. The Stack is effectively allocated in the general data SRAM, and consequently the Stack
size is only limited by the total SRAM size and the usage of the SRAM. All user programs must
initialize the SP in the Reset routine (before subroutines or interrupts are executed). The Stack
Pointer (SP) is read/write accessible in the I/O space. The data SRAM can easily be accessed
through the five different addressing modes supported in the AVR architecture.
The memory spaces in the AVR architecture are all linear and regular memory maps.
A flexible interrupt module has its control registers in the I/O space with an additional Global
Interrupt Enable bit in the Status Register. All interrupts have a separate Interrupt Vector in the
Interrupt Vector table. The interrupts have priority in accordance with their Interrupt Vector position.
The lower the Interrupt Vector address, the higher the priority.
The I/O memory space contains 64 addresses for CPU peripheral functions as Control Registers,
and other I/O functions. The I/O Memory can be accessed directly, or as the Data Space
locations following those of the Register File, 0x20 - 0x5F.
4.2 ALU – Arithmetic Logic Unit
The high-performance AVR ALU operates in direct connection with all the 32 general purpose
working registers. Within a single clock cycle, arithmetic operations between general purpose
registers or between a register and an immediate are executed. The ALU operations are divided
into three main categories – arithmetic, logical, and bit-functions. Some implementations of the
architecture also provide a powerful multiplier supporting both signed/unsigned multiplication
and fractional format. See the “Instruction Set” section for a detailed description.
4.3 Status Register
The Status Register contains information about the result of the most recently executed arithmetic
instruction. This information can be used for altering program flow in order to perform
conditional operations. Note that the Status Register is updated after all ALU operations, as
specified in the Instruction Set Reference. This will in many cases remove the need for using the
dedicated compare instructions, resulting in faster and more compact code.
The Status Register is not automatically stored when entering an interrupt routine and restored
when returning from an interrupt. This must be handled by software.10
8246B–AVR–09/11
ATtiny2313A/4313
The AVR Status Register – SREG – is defined as:
• Bit 7 – I: Global Interrupt Enable
The Global Interrupt Enable bit must be set for the interrupts to be enabled. The individual interrupt
enable control is then performed in separate control registers. If the Global Interrupt Enable
Register is cleared, none of the interrupts are enabled independent of the individual interrupt
enable settings. The I-bit is cleared by hardware after an interrupt has occurred, and is set by
the RETI instruction to enable subsequent interrupts. The I-bit can also be set and cleared by
the application with the SEI and CLI instructions, as described in the instruction set reference.
• Bit 6 – T: Bit Copy Storage
The Bit Copy instructions BLD (Bit LoaD) and BST (Bit STore) use the T-bit as source or destination
for the operated bit. A bit from a register in the Register File can be copied into T by the
BST instruction, and a bit in T can be copied into a bit in a register in the Register File by the
BLD instruction.
• Bit 5 – H: Half Carry Flag
The Half Carry Flag H indicates a Half Carry in some arithmetic operations. Half Carry Is useful
in BCD arithmetic. See the “Instruction Set Description” for detailed information.
• Bit 4 – S: Sign Bit, S = N ⊕ V
The S-bit is always an exclusive or between the negative flag N and the Two’s Complement
Overflow Flag V. See the “Instruction Set Description” for detailed information.
• Bit 3 – V: Two’s Complement Overflow Flag
The Two’s Complement Overflow Flag V supports two’s complement arithmetics. See the
“Instruction Set Description” for detailed information.
• Bit 2 – N: Negative Flag
The Negative Flag N indicates a negative result in an arithmetic or logic operation. See the
“Instruction Set Description” for detailed information.
• Bit 1 – Z: Zero Flag
The Zero Flag Z indicates a zero result in an arithmetic or logic operation. See the “Instruction
Set Description” for detailed information.
• Bit 0 – C: Carry Flag
The Carry Flag C indicates a carry in an arithmetic or logic operation. See the “Instruction Set
Description” for detailed information.
Bit 7 6 5 4 3 2 1 0
0x3F (0x5F) I T H S V N Z C SREG
Read/Write R/W R/W R/W R/W R/W R/W R/W R/W
Initial Value 0 0 0 0 0 0 0 011
8246B–AVR–09/11
ATtiny2313A/4313
4.4 General Purpose Register File
The Register File is optimized for the AVR Enhanced RISC instruction set. In order to achieve
the required performance and flexibility, the following input/output schemes are supported by the
Register File:
• One 8-bit output operand and one 8-bit result input
• Two 8-bit output operands and one 8-bit result input
• Two 8-bit output operands and one 16-bit result input
• One 16-bit output operand and one 16-bit result input
Figure 4-2 shows the structure of the 32 general purpose working registers in the CPU.
Figure 4-2. AVR CPU General Purpose Working Registers
Most of the instructions operating on the Register File have direct access to all registers, and
most of them are single cycle instructions.
As shown in Figure 4-2, each register is also assigned a data memory address, mapping them
directly into the first 32 locations of the user Data Space. Although not being physically implemented
as SRAM locations, this memory organization provides great flexibility in access of the
registers, as the X-, Y- and Z-pointer registers can be set to index any register in the file.
4.4.1 The X-register, Y-register, and Z-register
The registers R26..R31 have some added functions to their general purpose usage. These registers
are 16-bit address pointers for indirect addressing of the data space. The three indirect
address registers X, Y, and Z are defined as described in Figure 4-3.
7 0 Addr.
R0 0x00
R1 0x01
R2 0x02
…
R13 0x0D
General R14 0x0E
Purpose R15 0x0F
Working R16 0x10
Registers R17 0x11
…
R26 0x1A X-register Low Byte
R27 0x1B X-register High Byte
R28 0x1C Y-register Low Byte
R29 0x1D Y-register High Byte
R30 0x1E Z-register Low Byte
R31 0x1F Z-register High Byte12
8246B–AVR–09/11
ATtiny2313A/4313
Figure 4-3. The X-, Y-, and Z-registers
In the different addressing modes these address registers have functions as fixed displacement,
automatic increment, and automatic decrement (see the instruction set reference for details).
4.5 Stack Pointer
The Stack is mainly used for storing temporary data, for storing local variables and for storing
return addresses after interrupts and subroutine calls. The Stack Pointer Register always points
to the top of the Stack. Note that the Stack is implemented as growing from higher memory locations
to lower memory locations. This implies that a Stack PUSH command decreases the Stack
Pointer.
The Stack Pointer points to the data SRAM Stack area where the Subroutine and Interrupt
Stacks are located. This Stack space in the data SRAM must be defined by the program before
any subroutine calls are executed or interrupts are enabled. The Stack Pointer must be set to
point above 0x60. The Stack Pointer is decremented by one when data is pushed onto the Stack
with the PUSH instruction, and it is decremented by two when the return address is pushed onto
the Stack with subroutine call or interrupt. The Stack Pointer is incremented by one when data is
popped from the Stack with the POP instruction, and it is incremented by two when data is
popped from the Stack with return from subroutine RET or return from interrupt RETI.
The Stack Pointer is implemented as one 8-bit register in the I/O space.
4.6 Instruction Execution Timing
This section describes the general access timing concepts for instruction execution. The AVR
CPU is driven by the CPU clock clkCPU, directly generated from the selected clock source for the
chip. No internal clock division is used.
Figure 4-4 shows the parallel instruction fetches and instruction executions enabled by the Harvard
architecture and the fast-access Register File concept. This is the basic pipelining concept
to obtain up to 1 MIPS per MHz with the corresponding unique results for functions per cost,
functions per clocks, and functions per power-unit.
15 XH XL 0
X-register 7 07 0
R27 (0x1B) R26 (0x1A)
15 YH YL 0
Y-register 7 07 0
R29 (0x1D) R28 (0x1C)
15 ZH ZL 0
Z-register 70 7 0
R31 (0x1F) R30 (0x1E)
Bit 7 6 5 4 3 2 1 0
0x3D (0x5D) SP7 SP6 SP5 SP4 SP3 SP2 SP1 SP0 SPL
Read/Write R/W R/W R/W R/W R/W R/W R/W R/W
Initial Value RAMEND RAMEND RAMEND RAMEND RAMEND RAMEND RAMEND RAMEND13
8246B–AVR–09/11
ATtiny2313A/4313
Figure 4-4. The Parallel Instruction Fetches and Instruction Executions
Figure 4-5 shows the internal timing concept for the Register File. In a single clock cycle an ALU
operation using two register operands is executed, and the result is stored back to the destination
register.
Figure 4-5. Single Cycle ALU Operation
4.7 Reset and Interrupt Handling
The AVR provides several different interrupt sources. These interrupts and the separate Reset
Vector each have a separate program vector in the program memory space. All interrupts are
assigned individual enable bits which must be written logic one together with the Global Interrupt
Enable bit in the Status Register in order to enable the interrupt.
The lowest addresses in the program memory space are by default defined as the Reset and
Interrupt Vectors. The complete list of vectors is shown in “Interrupts” on page 48. The list also
determines the priority levels of the different interrupts. The lower the address the higher is the
priority level. RESET has the highest priority, and next is INT0 – the External Interrupt Request
0. Refer to “Interrupts” on page 48 for more information.
When an interrupt occurs, the Global Interrupt Enable I-bit is cleared and all interrupts are disabled.
The user software can write logic one to the I-bit to enable nested interrupts. All enabled
interrupts can then interrupt the current interrupt routine. The I-bit is automatically set when a
Return from Interrupt instruction – RETI – is executed.
There are basically two types of interrupts. The first type is triggered by an event that sets the
interrupt flag. For these interrupts, the Program Counter is vectored to the actual Interrupt Vector
in order to execute the interrupt handling routine, and hardware clears the corresponding interrupt
flag. Interrupt flags can also be cleared by writing a logic one to the flag bit position(s) to be
clk
1st Instruction Fetch
1st Instruction Execute
2nd Instruction Fetch
2nd Instruction Execute
3rd Instruction Fetch
3rd Instruction Execute
4th Instruction Fetch
T1 T2 T3 T4
CPU
Total Execution Time
Register Operands Fetch
ALU Operation Execute
Result Write Back
T1 T2 T3 T4
clkCPU14
8246B–AVR–09/11
ATtiny2313A/4313
cleared. If an interrupt condition occurs while the corresponding interrupt enable bit is cleared,
the interrupt flag will be set and remembered until the interrupt is enabled, or the flag is cleared
by software. Similarly, if one or more interrupt conditions occur while the Global Interrupt Enable
bit is cleared, the corresponding interrupt flag(s) will be set and remembered until the Global
Interrupt Enable bit is set, and will then be executed by order of priority.
The second type of interrupts will trigger as long as the interrupt condition is present. These
interrupts do not necessarily have interrupt flags. If the interrupt condition disappears before the
interrupt is enabled, the interrupt will not be triggered.
When the AVR exits from an interrupt, it will always return to the main program and execute one
more instruction before any pending interrupt is served.
Note that the Status Register is not automatically stored when entering an interrupt routine, nor
restored when returning from an interrupt routine. This must be handled by software.
When using the CLI instruction to disable interrupts, the interrupts will be immediately disabled.
No interrupt will be executed after the CLI instruction, even if it occurs simultaneously with the
CLI instruction. The following example shows how this can be used to avoid interrupts during the
timed EEPROM write sequence..
When using the SEI instruction to enable interrupts, the instruction following SEI will be executed
before any pending interrupts, as shown in this example.
Assembly Code Example
in r16, SREG ; store SREG value
cli ; disable interrupts during timed sequence
sbi EECR, EEMPE ; start EEPROM write
sbi EECR, EEPE
out SREG, r16 ; restore SREG value (I-bit)
C Code Example
char cSREG;
cSREG = SREG; /* store SREG value */
/* disable interrupts during timed sequence */
__disable_interrupt();
EECR |= (1< xxx
... ... ... ...
9.2 External Interrupts
External Interrupts are triggered by the INT0 or INT1 pin or any of the PCINT17..0 pins. Observe
that, if enabled, the interrupts will trigger even if the INT0, INT1 or PCINT17..0 pins are configured
as outputs. This feature provides a way of generating a software interrupt. Pin change 0
interrupts PCI0 will trigger if any enabled PCINT7..0 pin toggles. Pin change 1 interrupts PCI1
will trigger if any enabled PCINT10..8 pin toggles. Pin change 2 interrupts PCI2 will trigger, if any
enabled PCINT17..11 pin toggles. The PCMSK0, PCMSK1, and PCMSK2 Registers control
which pins contribute to the pin change interrupts. Pin change interrupts on PCINT17..0 are
detected asynchronously, which means that these interrupts can be used for waking the part
also from sleep modes other than Idle mode.
The INT0 and INT1 interrupts can be triggered by a falling or rising edge or a low level. This is
set up as shown in “MCUCR – MCU Control Register” on page 51. When the INT0 or INT1 interrupt
is enabled and configured as level triggered, the interrupt will trigger as long as the pin is
held low. Note that recognition of falling or rising edge interrupts on INT0 or INT1 requires the
presence of an I/O clock, as described in “Clock Sources” on page 27.50
8246B–AVR–09/11
ATtiny2313A/4313
9.2.1 Low Level Interrupt
A low level interrupt on INT0 or INT1 is detected asynchronously. This means that the interrupt
source can be used for waking the part also from sleep modes other than Idle (the I/O clock is
halted in all sleep modes except Idle).
Note that if a level triggered interrupt is used for wake-up from Power-down, the required level
must be held long enough for the MCU to complete the wake-up to trigger the level interrupt. If
the level disappears before the end of the Start-up Time, the MCU will still wake up, but no interrupt
will be generated. The start-up time is defined by the SUT and CKSEL fuses, as described
in “Clock System” on page 26.
If the low level on the interrupt pin is removed before the device has woken up then program
execution will not be diverted to the interrupt service routine but continue from the instruction following
the SLEEP command.
9.2.2 Pin Change Interrupt Timing
A timing example of a pin change interrupt is shown in Figure 9-1.
Figure 9-1. Timing of pin change interrupts
clk
PCINT(0)
pin_lat
pin_sync
pcint_in_(0)
pcint_syn
pcint_setflag
PCIF
PCINT(0)
pin_sync
pcint_syn pin_lat D Q
LE
pcint_setflag
PCIF
clk
clk PCINT(0) in PCMSK(x)
pcint_in_(0) 0
x51
8246B–AVR–09/11
ATtiny2313A/4313
9.3 Register Description
9.3.1 MCUCR – MCU Control Register
The External Interrupt Control Register contains control bits for interrupt sense control.
• Bit 3, 2 – ISC11, ISC10: Interrupt Sense Control 1 Bit 1 and Bit 0
The External Interrupt 1 is activated by the external pin INT1 if the SREG I-flag and the corresponding
interrupt mask are set. The level and edges on the external INT1 pin that activate the
interrupt are defined in Table 9-2. The value on the INT1 pin is sampled before detecting edges.
If edge or toggle interrupt is selected, pulses that last longer than one clock period will generate
an interrupt. Shorter pulses are not guaranteed to generate an interrupt. If low level interrupt is
selected, the low level must be held until the completion of the currently executing instruction to
generate an interrupt
• Bits 1, 0 – ISC01, ISC00: Interrupt Sense Control 0 Bit 1 and Bit 0
The External Interrupt 0 is activated by the external pin INT0 if the SREG I-flag and the corresponding
interrupt mask are set. The level and edges on the external INT0 pin that activate the
interrupt are defined in Table 9-3. The value on the INT0 pin is sampled before detecting edges.
If edge or toggle interrupt is selected, pulses that last longer than one clock period will generate
an interrupt. Shorter pulses are not guaranteed to generate an interrupt. If low level interrupt is
selected, the low level must be held until the completion of the currently executing instruction to
generate an interrupt.
Bit 7 6 5 4 3 2 1 0
0x35 (0x55) PUD SM1 SE SM0 ISC11 ISC10 ISC01 ISC00 MCUCR
Read/Write R/W R/W R/W R/W R/W R/W R/W R/W
Initial Value 0 0 0 0 0 0 0 0
Table 9-2. Interrupt 1 Sense Control
ISC11 ISC10 Description
0 0 The low level of INT1 generates an interrupt request.
0 1 Any logical change on INT1 generates an interrupt request.
1 0 The falling edge of INT1 generates an interrupt request.
1 1 The rising edge of INT1 generates an interrupt request.
Table 9-3. Interrupt 0 Sense Control
ISC01 ISC00 Description
0 0 The low level of INT0 generates an interrupt request.
0 1 Any logical change on INT0 generates an interrupt request.
1 0 The falling edge of INT0 generates an interrupt request.
1 1 The rising edge of INT0 generates an interrupt request.52
8246B–AVR–09/11
ATtiny2313A/4313
9.3.2 GIMSK – General Interrupt Mask Register
• Bits 2..0 – Res: Reserved Bits
These bits are reserved and will always read as zero.
• Bit 7 – INT1: External Interrupt Request 1 Enable
When the INT1 bit is set (one) and the I-bit in the Status Register (SREG) is set (one), the external
pin interrupt is enabled. The Interrupt Sense Control bits (ISC11 and ISC10) in the External
Interrupt Control Register A (EICRA) define whether the external interrupt is activated on rising
and/or falling edge of the INT1 pin or level sensed. Activity on the pin will cause an interrupt
request even if INT1 is configured as an output. The corresponding interrupt of External Interrupt
Request 1 is executed from the INT1 Interrupt Vector.
• Bit 6 – INT0: External Interrupt Request 0 Enable
When the INT0 bit is set (one) and the I-bit in the Status Register (SREG) is set (one), the external
pin interrupt is enabled. The Interrupt Sense Control bits (ISC01 and ISC00) in the External
Interrupt Control Register A (EICRA) define whether the external interrupt is activated on rising
and/or falling edge of the INT0 pin or level sensed. Activity on the pin will cause an interrupt
request even if INT0 is configured as an output. The corresponding interrupt of External Interrupt
Request 0 is executed from the INT0 Interrupt Vector.
• Bit 5 – PCIE0: Pin Change Interrupt Enable 0
When the PCIE0 bit is set (one) and the I-bit in the Status Register (SREG) is set (one), pin
change interrupt 0 is enabled. Any change on any enabled PCINT7..0 pin will cause an interrupt.
The corresponding interrupt of Pin Change Interrupt Request is executed from the PCI0 Interrupt
Vector. PCINT7..0 pins are enabled individually by the PCMSK0 Register.
• Bit 4 – PCIE2: Pin Change Interrupt Enable 2
When the PCIE2 bit is set (one) and the I-bit in the Status Register (SREG) is set (one), pin
change interrupt 2 is enabled. Any change on any enabled PCINT17..11 pin will cause an interrupt.
The corresponding interrupt of Pin Change Interrupt Request is executed from the PCI2
Interrupt Vector. PCINT17..11 pins are enabled individually by the PCMSK2 Register.
• Bit 3 – PCIE1: Pin Change Interrupt Enable 1
When the PCIE1 bit is set (one) and the I-bit in the Status Register (SREG) is set (one), pin
change interrupt 1 is enabled. Any change on any enabled PCINT10..8 pin will cause an interrupt.
The corresponding interrupt of Pin Change Interrupt Request is executed from the PCI1
Interrupt Vector. PCINT10..8 pins are enabled individually by the PCMSK1 Register.
Bit 7 6 5 4 3 2 1 0
0x3B (0x5B) INT1 INT0 PCIE0 PCIE2 PCIE1 – – – GIMSK
Read/Write R/W R/W R/W R/W R/W R R R
Initial Value 0 0 0 0 0 0 0 053
8246B–AVR–09/11
ATtiny2313A/4313
9.3.3 GIFR – General Interrupt Flag Register
• Bits 2..0 – Res: Reserved Bits
These bits are reserved and will always read as zero.
• Bit 7 – INTF1: External Interrupt Flag 1
When an edge or logic change on the INT1 pin triggers an interrupt request, INTF1 becomes set
(one). If the I-bit in SREG and the INT1 bit in GIMSK are set (one), the MCU will jump to the corresponding
Interrupt Vector. The flag is cleared when the interrupt routine is executed.
Alternatively, the flag can be cleared by writing a logical one to it. This flag is always cleared
when INT1 is configured as a level interrupt.
• Bit 6 – INTF0: External Interrupt Flag 0
When an edge or logic change on the INT0 pin triggers an interrupt request, INTF0 becomes set
(one). If the I-bit in SREG and the INT0 bit in GIMSK are set (one), the MCU will jump to the corresponding
Interrupt Vector. The flag is cleared when the interrupt routine is executed.
Alternatively, the flag can be cleared by writing a logical one to it. This flag is always cleared
when INT0 is configured as a level interrupt.
• Bit 5 – PCIF0: Pin Change Interrupt Flag 0
When a logic change on any PCINT7..0 pin triggers an interrupt request, PCIF becomes set
(one). If the I-bit in SREG and the PCIE0 bit in GIMSK are set (one), the MCU will jump to the
corresponding Interrupt Vector. The flag is cleared when the interrupt routine is executed. Alternatively,
the flag can be cleared by writing a logical one to it.
• Bit 4 – PCIF2: Pin Change Interrupt Flag 2
When a logic change on any PCINT17..11 pin triggers an interrupt request, PCIF2 becomes set
(one). If the I-bit in SREG and the PCIE2 bit in GIMSK are set (one), the MCU will jump to the
corresponding Interrupt Vector. The flag is cleared when the interrupt routine is executed. Alternatively,
the flag can be cleared by writing a logical one to it.
• Bit 3 – PCIF1: Pin Change Interrupt Flag 1
When a logic change on any PCINT10..8 pin triggers an interrupt request, PCIF1 becomes set
(one). If the I-bit in SREG and the PCIE1 bit in GIMSK are set (one), the MCU will jump to the
corresponding Interrupt Vector. The flag is cleared when the interrupt routine is executed. Alternatively,
the flag can be cleared by writing a logical one to it.
9.3.4 PCMSK2 – Pin Change Mask Register 2
• Bit 7 – Res: Reserved Bit
These bits are reserved and will always read as zero.
Bit 7 6 5 4 3 2 1 0
0x3A (0x5A) INTF1 INTF0 PCIF0 PCIF2 PCIF1 – – – GIFR
Read/Write R/W R/W R/W R/W R/W R R R
Initial Value 0 0 0 0 0 0 0 0
Bit 7 6 5 4 3 2 1 0
0x05 (0x25) – PCINT17 PCINT16 PCINT15 PCINT14 PCINT13 PCINT12 PCINT11 PCMSK2
Read/Write R R/W R/W R/W R/W R/W R/W R/W
Initial Value 0 0 0 0 0 0 0 054
8246B–AVR–09/11
ATtiny2313A/4313
• Bits 6..0 – PCINT17..11: Pin Change Enable Mask 17..11
Each PCINT17..11 bit selects whether pin change interrupt is enabled on the corresponding I/O
pin. If PCINT17..11 is set and the PCIE1 bit in GIMSK is set, pin change interrupt is enabled on
the corresponding I/O pin. If PCINT17..11 is cleared, pin change interrupt on the corresponding
I/O pin is disabled.
9.3.5 PCMSK1 – Pin Change Mask Register 1
• Bits 7:3 – Res: Reserved Bits
These bits are reserved and will always read as zero.
• Bits 2..0 – PCINT10..8: Pin Change Enable Mask 10..8
Each PCINT10..8 bit selects whether pin change interrupt is enabled on the corresponding I/O
pin. If PCINT10..8 is set and the PCIE1 bit in GIMSK is set, pin change interrupt is enabled on
the corresponding I/O pin. If PCINT10..8 is cleared, pin change interrupt on the corresponding
I/O pin is disabled.
9.3.6 PCMSK0 – Pin Change Mask Register 0
• Bits 7..0 – PCINT7..0: Pin Change Enable Mask 7..0
Each PCINT7..0 bit selects whether pin change interrupt is enabled on the corresponding I/O
pin. If PCINT7..0 is set and the PCIE0 bit in GIMSK is set, pin change interrupt is enabled on the
corresponding I/O pin. If PCINT7..0 is cleared, pin change interrupt on the corresponding I/O pin
is disabled.
Bit 7 6 5 4 3 2 1 0
0x04 (0x24) – – – – – PCINT10 PCINT9 PCINT8 PCMSK1
Read/Write R R R R R R/W R/W R/W
Initial Value 0 0 0 0 0 0 0 0
Bit 7 6 5 4 3 2 1 0
0x20 (0x40) PCINT7 PCINT6 PCINT5 PCINT4 PCINT3 PCINT2 PCINT1 PCINT0 PCMSK0
Read/Write R/W R/W R/W R/W R/W R/W R/W R/W
Initial Value 0 0 0 0 0 0 0 055
8246B–AVR–09/11
ATtiny2313A/4313
10. I/O-Ports
All AVR ports have true Read-Modify-Write functionality when used as general digital I/O ports.
This means that the direction of one port pin can be changed without unintentionally changing
the direction of any other pin with the SBI and CBI instructions. The same applies when changing
drive value (if configured as output) or enabling/disabling of pull-up resistors (if configured as
input). Each output buffer has symmetrical drive characteristics with both high sink and source
capability. The pin driver is strong enough to drive LED displays directly. All port pins have individually
selectable pull-up resistors with a supply-voltage invariant resistance. All I/O pins have
protection diodes to both VCC and Ground as indicated in Figure 10-1 on page 55. See “Electrical
Characteristics” on page 198 for a complete list of parameters.
Figure 10-1. I/O Pin Equivalent Schematic
All registers and bit references in this section are written in general form. A lower case “x” represents
the numbering letter for the port, and a lower case “n” represents the bit number. However,
when using the register or bit defines in a program, the precise form must be used. For example,
PORTB3 for bit no. 3 in Port B, here documented generally as PORTxn. The physical I/O Registers
and bit locations are listed in “Register Description” on page 69.
Three I/O memory address locations are allocated for each port, one each for the Data Register
– PORTx, Data Direction Register – DDRx, and the Port Input Pins – PINx. The Port Input Pins
I/O location is read only, while the Data Register and the Data Direction Register are read/write.
However, writing a logic one to a bit in the PINx Register, will result in a toggle in the corresponding
bit in the Data Register. In addition, the Pull-up Disable – PUD bit in MCUCR disables the
pull-up function for all pins in all ports when set.
Using the I/O port as General Digital I/O is described in “Ports as General Digital I/O” on page
56. Most port pins are multiplexed with alternate functions for the peripheral features on the
device. How each alternate function interferes with the port pin is described in “Alternate Port
Functions” on page 60. Refer to the individual module sections for a full description of the alternate
functions.
Note that enabling the alternate function of some of the port pins does not affect the use of the
other pins in the port as general digital I/O.
Cpin
Logic
Rpu
See Figure
"General Digital I/O" for
Details
Pxn56
8246B–AVR–09/11
ATtiny2313A/4313
10.1 Ports as General Digital I/O
The ports are bi-directional I/O ports with optional internal pull-ups. Figure 10-2 shows a functional
description of one I/O-port pin, here generically called Pxn.
Figure 10-2. General Digital I/O(1)
Note: 1. WRx, WPx, WDx, RRx, RPx, and RDx are common to all pins within the same port. clkI/O,
SLEEP, and PUD are common to all ports.
10.1.1 Configuring the Pin
Each port pin consists of three register bits: DDxn, PORTxn, and PINxn. As shown in “Register
Description” on page 69, the DDxn bits are accessed at the DDRx I/O address, the PORTxn bits
at the PORTx I/O address, and the PINxn bits at the PINx I/O address.
The DDxn bit in the DDRx Register selects the direction of this pin. If DDxn is written logic one,
Pxn is configured as an output pin. If DDxn is written logic zero, Pxn is configured as an input
pin.
If PORTxn is written logic one when the pin is configured as an input pin, the pull-up resistor is
activated. To switch the pull-up resistor off, PORTxn has to be written logic zero or the pin has to
be configured as an output pin. The port pins are tri-stated when reset condition becomes active,
even if no clocks are running.
If PORTxn is written logic one when the pin is configured as an output pin, the port pin is driven
high (one). If PORTxn is written logic zero when the pin is configured as an output pin, the port
pin is driven low (zero).
clk
RPx
RRx
RDx
WDx
PUD
SYNCHRONIZER
WDx: WRITE DDRx
WRx: WRITE PORTx
RRx: READ PORTx REGISTER
RPx: READ PORTx PIN
PUD: PULLUP DISABLE
clkI/O: I/O CLOCK
RDx: READ DDRx
D
L
Q
Q
RESET
RESET
Q
D Q
Q
Q D
CLR
PORTxn
Q
Q D
CLR
DDxn
PINxn
DATA BUS
SLEEP
SLEEP: SLEEP CONTROL
Pxn
I/O
WPx
0
1
WRx
WPx: WRITE PINx REGISTER57
8246B–AVR–09/11
ATtiny2313A/4313
10.1.2 Toggling the Pin
Writing a logic one to PINxn toggles the value of PORTxn, independent on the value of DDRxn.
Note that the SBI instruction can be used to toggle one single bit in a port.
10.1.3 Switching Between Input and Output
When switching between tri-state ({DDxn, PORTxn} = 0b00) and output high ({DDxn, PORTxn}
= 0b11), an intermediate state with either pull-up enabled {DDxn, PORTxn} = 0b01) or output
low ({DDxn, PORTxn} = 0b10) must occur. Normally, the pull-up enabled state is fully acceptable,
as a high-impedant environment will not notice the difference between a strong high driver
and a pull-up. If this is not the case, the PUD bit in the MCUCR Register can be set to disable all
pull-ups in all ports.
Switching between input with pull-up and output low generates the same problem. The user
must use either the tri-state ({DDxn, PORTxn} = 0b00) or the output high state ({DDxn, PORTxn}
= 0b10) as an intermediate step.
Table 10-1 summarizes the control signals for the pin value.
10.1.4 Reading the Pin Value
Independent of the setting of Data Direction bit DDxn, the port pin can be read through the
PINxn Register bit. As shown in Figure 10-2 on page 56, the PINxn Register bit and the preceding
latch constitute a synchronizer. This is needed to avoid metastability if the physical pin
changes value near the edge of the internal clock, but it also introduces a delay. Figure 10-3
shows a timing diagram of the synchronization when reading an externally applied pin value.
The maximum and minimum propagation delays are denoted tpd,max and tpd,min respectively.
Figure 10-3. Synchronization when Reading an Externally Applied Pin value
Table 10-1. Port Pin Configurations
DDxn PORTxn
PUD
(in MCUCR) I/O Pull-up Comment
0 0 X Input No Tri-state (Hi-Z)
0 1 0 Input Yes Pxn will source current if ext. pulled low
0 1 1 Input No Tri-state (Hi-Z)
1 0 X Output No Output Low (Sink)
1 1 X Output No Output High (Source)
XXX in r17, PINx
0x00 0xFF
INSTRUCTIONS
SYNC LATCH
PINxn
r17
XXX
SYSTEM CLK
tpd, max
tpd, min58
8246B–AVR–09/11
ATtiny2313A/4313
Consider the clock period starting shortly after the first falling edge of the system clock. The latch
is closed when the clock is low, and goes transparent when the clock is high, as indicated by the
shaded region of the “SYNC LATCH” signal. The signal value is latched when the system clock
goes low. It is clocked into the PINxn Register at the succeeding positive clock edge. As indicated
by the two arrows tpd,max and tpd,min, a single signal transition on the pin will be delayed
between ½ and 1½ system clock period depending upon the time of assertion.
When reading back a software assigned pin value, a nop instruction must be inserted as indicated
in Figure 10-4 on page 58. The out instruction sets the “SYNC LATCH” signal at the
positive edge of the clock. In this case, the delay tpd through the synchronizer is one system
clock period.
Figure 10-4. Synchronization when Reading a Software Assigned Pin Value
10.1.5 Digital Input Enable and Sleep Modes
As shown in Figure 10-2 on page 56, the digital input signal can be clamped to ground at the
input of the schmitt-trigger. The signal denoted SLEEP in the figure, is set by the MCU Sleep
Controller in Power-down and Standby modes to avoid high power consumption if some input
signals are left floating, or have an analog signal level close to VCC/2.
SLEEP is overridden for port pins enabled as external interrupt pins. If the external interrupt
request is not enabled, SLEEP is active also for these pins. SLEEP is also overridden by various
other alternate functions as described in “Alternate Port Functions” on page 60.
If a logic high level (“one”) is present on an asynchronous external interrupt pin configured as
“Interrupt on Rising Edge, Falling Edge, or Any Logic Change on Pin” while the external interrupt
is not enabled, the corresponding External Interrupt Flag will be set when resuming from the
above mentioned Sleep mode, as the clamping in these sleep mode produces the requested
logic change.
10.1.6 Unconnected Pins
If some pins are unused, it is recommended to ensure that these pins have a defined level. Even
though most of the digital inputs are disabled in the deep sleep modes as described above, floating
inputs should be avoided to reduce current consumption in all other modes where the digital
inputs are enabled (Reset, Active mode and Idle mode).
The simplest method to ensure a defined level of an unused pin, is to enable the internal pull-up.
In this case, the pull-up will be disabled during reset. If low power consumption during reset is
out PORTx, r16 nop in r17, PINx
0xFF
0x00 0xFF
SYSTEM CLK
r16
INSTRUCTIONS
SYNC LATCH
PINxn
r17
t pd59
8246B–AVR–09/11
ATtiny2313A/4313
important, it is recommended to use an external pull-up or pulldown. Connecting unused pins
directly to VCC or GND is not recommended, since this may cause excessive currents if the pin is
accidentally configured as an output.
10.1.7 Program Examples
The following code example shows how to set port A pins 0 and 1 high, 2 and 3 low, and define
the port pins from 4 to 7 as input with a pull-up assigned to port pin 4. The resulting pin values
are read back again, but as previously discussed, a nop instruction is included to be able to read
back the value recently assigned to some of the pins.
Note: Two temporary registers are used to minimize the time from pull-ups are set on pins 0, 1 and 4,
until the direction bits are correctly set, defining bit 2 and 3 as low and redefining bits 0 and 1 as
strong high drivers.
Note: 1. See “Code Examples” on page 7.
Assembly Code Example
...
; Define pull-ups and set outputs high
; Define directions for port pins
ldi r16,(1< CSn2:0 > 1). The number of system clock
cycles from when the timer is enabled to the first count occurs can be from 1 to N+1 system
clock cycles, where N equals the prescaler divisor (8, 64, 256, or 1024).
It is possible to use the prescaler reset for synchronizing the Timer/Counter to program execution.
However, care must be taken if the other Timer/Counter that shares the same prescaler
also uses prescaling. A prescaler reset will affect the prescaler period for all Timer/Counters it is
connected to.
13.3 External Clock Source
An external clock source applied to the T1/T0 pin can be used as Timer/Counter clock
(clkT1/clkT0). The T1/T0 pin is sampled once every system clock cycle by the pin synchronization
logic. The synchronized (sampled) signal is then passed through the edge detector. Figure 13-1
shows a functional equivalent block diagram of the T1/T0 synchronization and edge detector
logic. The registers are clocked at the positive edge of the internal system clock (clkI/O). The latch
is transparent in the high period of the internal system clock.
The edge detector generates one clkT1/clkT0 pulse for each positive (CSn2:0 = 7) or negative
(CSn2:0 = 6) edge it detects.
Figure 13-1. T1/T0 Pin Sampling
The synchronization and edge detector logic introduces a delay of 2.5 to 3.5 system clock cycles
from an edge has been applied to the T1/T0 pin to the counter is updated.
Tn_sync
(To Clock
Select Logic)
Synchronization Edge Detector
D Q D Q
LE
Tn D Q
clkI/O119
8246B–AVR–09/11
ATtiny2313A/4313
Enabling and disabling of the clock input must be done when T1/T0 has been stable for at least
one system clock cycle, otherwise it is a risk that a false Timer/Counter clock pulse is generated.
Each half period of the external clock applied must be longer than one system clock cycle to
ensure correct sampling. The external clock must be guaranteed to have less than half the system
clock frequency (fExtClk < fclk_I/O/2) given a 50/50% duty cycle. Since the edge detector uses
sampling, the maximum frequency of an external clock it can detect is half the sampling frequency
(Nyquist sampling theorem). However, due to variation of the system clock frequency
and duty cycle caused by Oscillator source (crystal, resonator, and capacitors) tolerances, it is
recommended that maximum frequency of an external clock source is less than fclk_I/O/2.5.
An external clock source can not be prescaled.
Figure 13-2. Prescaler for Timer/Counter0 and Timer/Counter1(1)
Note: 1. The synchronization logic on the input pins (T1/T0) is shown in Figure 13-1 on page 118.
13.4 Register Description
13.4.1 GTCCR – General Timer/Counter Control Register
• Bits 7..1 – Res: Reserved Bits
These bits are reserved bits in the ATtiny2313A/4313 and will always read as zero.
• Bit 0 – PSR10: Prescaler Reset Timer/Counter1 and Timer/Counter0
When this bit is one, Timer/Counter1 and Timer/Counter0 prescaler will be Reset. This bit is normally
cleared immediately by hardware. Note that Timer/Counter1 and Timer/Counter0 share
the same prescaler and a reset of this prescaler will affect both timers.
PSR10
Clear
clkT1 clkT0
T1
T0
clkI/O
Synchronization
Synchronization
Bit 7 6 5 4 3 2 1 0
0x23 (0x43) — — — — — — — PSR10 GTCCR
Read/Write R R R R R R R R/W
Initial Value 0 0 0 0 0 0 0 0120
8246B–AVR–09/11
ATtiny2313A/4313
14. USART
14.1 Features
• Full Duplex Operation (Independent Serial Receive and Transmit Registers)
• Asynchronous or Synchronous Operation
• Master or Slave Clocked Synchronous Operation
• High Resolution Baud Rate Generator
• Supports Serial Frames with 5, 6, 7, 8, or 9 Data Bits and 1 or 2 Stop Bits
• Odd or Even Parity Generation and Parity Check Supported by Hardware
• Data OverRun Detection
• Framing Error Detection
• Noise Filtering Includes False Start Bit Detection and Digital Low Pass Filter
• Three Separate Interrupts on TX Complete, TX Data Register Empty and RX Complete
• Multi-processor Communication Mode
• Double Speed Asynchronous Communication Mode
14.2 Overview
The Universal Synchronous and Asynchronous serial Receiver and Transmitter (USART) is a
highly flexible serial communication device.
A simplified block diagram of the USART Transmitter is shown in Figure 14-1. CPU accessible
I/O Registers and I/O pins are shown in bold.
Figure 14-1. USART Block Diagram(1)
Note: 1. Refer to Figure 1-1 on page 2, Table 10-9 on page 68, and Table 10-6 on page 66 for USART
pin placement.
PARITY
GENERATOR
UBRR[H:L]
UDR (Transmit)
UCSRA UCSRB UCSRC
BAUD RATE GENERATOR
TRANSMIT SHIFT REGISTER
RECEIVE SHIFT REGISTER RxD
TxD PIN
CONTROL
UDR (Receive)
PIN
CONTROL
XCK
DATA
RECOVERY
CLOCK
RECOVERY
PIN
CONTROL
TX
CONTROL
RX
CONTROL
PARITY
CHECKER
DATA BUS
OSC
SYNC LOGIC
Clock Generator
Transmitter
Receiver121
8246B–AVR–09/11
ATtiny2313A/4313
The dashed boxes in the block diagram separate the three main parts of the USART (listed from
the top): Clock Generator, Transmitter and Receiver. Control registers are shared by all units.
The Clock Generation logic consists of synchronization logic for external clock input used by
synchronous slave operation, and the baud rate generator. The XCK (Transfer Clock) pin is only
used by synchronous transfer mode. The Transmitter consists of a single write buffer, a serial
Shift Register, Parity Generator and Control logic for handling different serial frame formats. The
write buffer allows a continuous transfer of data without any delay between frames. The
Receiver is the most complex part of the USART module due to its clock and data recovery
units. The recovery units are used for asynchronous data reception. In addition to the recovery
units, the Receiver includes a Parity Checker, Control logic, a Shift Register and a two level
receive buffer (UDR). The Receiver supports the same frame formats as the Transmitter, and
can detect Frame Error, Data OverRun and Parity Errors.
14.2.1 AVR USART vs. AVR UART – Compatibility
The USART is fully compatible with the AVR UART regarding:
• Bit locations inside all USART Registers.
• Baud Rate Generation.
• Transmitter Operation.
• Transmit Buffer Functionality.
• Receiver Operation.
However, the receive buffering has two improvements that will affect the compatibility in some
special cases:
• A second Buffer Register has been added. The two Buffer Registers operate as a circular
FIFO buffer. Therefore the UDR must only be read once for each incoming data! More
important is the fact that the error flags (FE and DOR) and the ninth data bit (RXB8) are
buffered with the data in the receive buffer. Therefore the status bits must always be read
before the UDR Register is read. Otherwise the error status will be lost since the buffer state
is lost.
• The Receiver Shift Register can now act as a third buffer level. This is done by allowing the
received data to remain in the serial Shift Register (see Figure 14-1) if the Buffer Registers
are full, until a new start bit is detected. The USART is therefore more resistant to Data
OverRun (DOR) error conditions.
The following control bits have changed name, but have same functionality and register location:
• CHR9 is changed to UCSZ2.
• OR is changed to DOR.
14.3 Clock Generation
The Clock Generation logic generates the base clock for the Transmitter and Receiver. The
USART supports four modes of clock operation: Normal asynchronous, Double Speed asynchronous,
Master synchronous and Slave synchronous mode. The UMSEL bit in USART
Control and Status Register C (UCSRC) selects between asynchronous and synchronous operation.
Double Speed (asynchronous mode only) is controlled by the U2X found in the UCSRA
Register. When using synchronous mode (UMSEL = 1), the Data Direction Register for the XCK122
8246B–AVR–09/11
ATtiny2313A/4313
pin (DDR_XCK) controls whether the clock source is internal (Master mode) or external (Slave
mode). The XCK pin is only active when using synchronous mode.
Figure 14-2 shows a block diagram of the clock generation logic.
Figure 14-2. Clock Generation Logic, Block Diagram
Signal description:
txclk Transmitter clock (Internal Signal).
rxclk Receiver base clock (Internal Signal).
xcki Input from XCK pin (internal Signal). Used for synchronous slave
operation.
xcko Clock output to XCK pin (Internal Signal). Used for synchronous master
operation.
fosc XTAL pin frequency (System Clock).
14.3.1 Internal Clock Generation – The Baud Rate Generator
Internal clock generation is used for the asynchronous and the synchronous master modes of
operation. The description in this section refers to Figure 14-2.
The USART Baud Rate Register (UBRR) and the down-counter connected to it function as a
programmable prescaler or baud rate generator. The down-counter, running at system clock
(fosc), is loaded with the UBRR value each time the counter has counted down to zero or when
the UBRRL Register is written. A clock is generated each time the counter reaches zero. This
clock is the baud rate generator clock output (= fosc/(UBRR+1)). The Transmitter divides the
baud rate generator clock output by 2, 8 or 16 depending on mode. The baud rate generator output
is used directly by the Receiver’s clock and data recovery units. However, the recovery units
use a state machine that uses 2, 8 or 16 states depending on mode set by the state of the
UMSEL, U2X and DDR_XCK bits.
Table 14-1 contains equations for calculating the baud rate (in bits per second) and for calculating
the UBRR value for each mode of operation using an internally generated clock source.
Prescaling
Down-Counter /2
UBRR
/4 /2
fosc
UBRR+1
Sync
Register
OSC
XCK
Pin
txclk
U2X
UMSEL
DDR_XCK
0
1
0
1
xcki
xcko
DDR_XCK rxclk 0
1
1
0
Edge
Detector
UCPOL123
8246B–AVR–09/11
ATtiny2313A/4313
Note: 1. The baud rate is defined to be the transfer rate in bit per second (bps)
BAUD Baud rate (in bits per second, bps)
fOSC System Oscillator clock frequency
UBRR Contents of the UBRRH and UBRRL Registers, (0-4095)
Some examples of UBRR values for some system clock frequencies are found in Table 14-9
(see page 142).
14.3.2 Double Speed Operation (U2X)
The transfer rate can be doubled by setting the U2X bit in UCSRA. Setting this bit only has effect
for the asynchronous operation. Set this bit to zero when using synchronous operation.
Setting this bit will reduce the divisor of the baud rate divider from 16 to 8, effectively doubling
the transfer rate for asynchronous communication. Note however that the Receiver will in this
case only use half the number of samples (reduced from 16 to 8) for data sampling and clock
recovery, and therefore a more accurate baud rate setting and system clock are required when
this mode is used. For the Transmitter, there are no downsides.
14.3.3 External Clock
External clocking is used by the synchronous slave modes of operation. The description in this
section refers to Figure 14-2 for details.
External clock input from the XCK pin is sampled by a synchronization register to minimize the
chance of meta-stability. The output from the synchronization register must then pass through
an edge detector before it can be used by the Transmitter and Receiver. This process introduces
a two CPU clock period delay and therefore the maximum external XCK clock frequency
is limited by the following equation:
Note that fosc depends on the stability of the system clock source. It is therefore recommended to
add some margin to avoid possible loss of data due to frequency variations.
Table 14-1. Equations for Calculating Baud Rate Register Setting
Operating Mode
Equation for Calculating
Baud Rate(1)
Equation for Calculating
UBRR Value
Asynchronous Normal
mode (U2X = 0)
Asynchronous Double
Speed mode (U2X = 1)
Synchronous Master
mode
BAUD f
OSC
16( ) UBRR + 1 = -------------------------------------- UBRR f
OSC
16BAUD = ------------------------ – 1
BAUD f
OSC
8( ) UBRR + 1 = ----------------------------------- UBRR f
OSC
8BAUD = -------------------- – 1
BAUD f
OSC
2( ) UBRR + 1 = ----------------------------------- UBRR f
OSC
2BAUD = -------------------- – 1
f
XCK
f
OSC
4 < -----------124
8246B–AVR–09/11
ATtiny2313A/4313
14.3.4 Synchronous Clock Operation
When synchronous mode is used (UMSEL = 1), the XCK pin will be used as either clock input
(Slave) or clock output (Master). The dependency between the clock edges and data sampling
or data change is the same. The basic principle is that data input (on RxD) is sampled at the
opposite XCK clock edge of the edge the data output (TxD) is changed.
Figure 14-3. Synchronous Mode XCK Timing.
The UCPOL bit UCRSC selects which XCK clock edge is used for data sampling and which is
used for data change. As Figure 14-3 shows, when UCPOL is zero the data will be changed at
rising XCK edge and sampled at falling XCK edge. If UCPOL is set, the data will be changed at
falling XCK edge and sampled at rising XCK edge.
14.4 Frame Formats
A serial frame is defined to be one character of data bits with synchronization bits (start and stop
bits), and optionally a parity bit for error checking. The USART accepts all 30 combinations of
the following as valid frame formats:
• 1 start bit
• 5, 6, 7, 8, or 9 data bits
• no, even or odd parity bit
• 1 or 2 stop bits
A frame starts with the start bit followed by the least significant data bit. Then the next data bits,
up to a total of nine, are succeeding, ending with the most significant bit. If enabled, the parity bit
is inserted after the data bits, before the stop bits. When a complete frame is transmitted, it can
be directly followed by a new frame, or the communication line can be set to an idle (high) state.
Figure 14-4 illustrates the possible combinations of the frame formats. Bits inside brackets are
optional.
Figure 14-4. Frame Formats
RxD / TxD
XCK
RxD / TxD
UCPOL = 0 XCK
UCPOL = 1
Sample
Sample
(IDLE) St Sp1 [Sp2] 0 2 3 4 [5] [6] [7] [8] [P] 1 (St / IDLE)
FRAME125
8246B–AVR–09/11
ATtiny2313A/4313
St Start bit, always low.
(n) Data bits (0 to 8).
P Parity bit. Can be odd or even.
Sp Stop bit, always high.
IDLE No transfers on the communication line (RxD or TxD). An IDLE line must
be high.
The frame format used by the USART is set by the UCSZ2:0, UPM1:0 and USBS bits in UCSRB
and UCSRC. The Receiver and Transmitter use the same setting. Note that changing the setting
of any of these bits will corrupt all ongoing communication for both the Receiver and Transmitter.
The USART Character SiZe (UCSZ2:0) bits select the number of data bits in the frame. The
USART Parity mode (UPM1:0) bits enable and set the type of parity bit. The selection between
one or two stop bits is done by the USART Stop Bit Select (USBS) bit. The Receiver ignores the
second stop bit. An FE (Frame Error) will therefore only be detected in the cases where the first
stop bit is zero.
14.4.1 Parity Bit Calculation
The parity bit is calculated by doing an exclusive-or of all the data bits. If odd parity is used, the
result of the exclusive or is inverted. The relation between the parity bit and data bits is as
follows:
Peven Parity bit using even parity
Podd Parity bit using odd parity
dn Data bit n of the character
If used, the parity bit is located between the last data bit and first stop bit of a serial frame.
14.5 USART Initialization
The USART has to be initialized before any communication can take place. The initialization process
normally consists of setting the baud rate, setting frame format and enabling the
Transmitter or the Receiver depending on the usage. For interrupt driven USART operation, the
Global Interrupt Flag should be cleared (and interrupts globally disabled) when doing the
initialization.
Before doing a re-initialization with changed baud rate or frame format, be sure that there are no
ongoing transmissions during the period the registers are changed. The TXC flag can be used to
check that the Transmitter has completed all transfers, and the RXC flag can be used to check
that there are no unread data in the receive buffer. Note that the TXC flag must be cleared
before each transmission (before UDR is written) if it is used for this purpose.
Peven dn – 1 … d3 d2 d1 d0 0
Podd
⊕⊕⊕⊕⊕⊕
dn – 1 … d3 d2 d1 d0 ⊕⊕⊕⊕⊕⊕ 1
=
=126
8246B–AVR–09/11
ATtiny2313A/4313
The following simple USART initialization code examples show one assembly and one C function
that are equal in functionality. The examples assume asynchronous operation using polling
(no interrupts enabled) and a fixed frame format. The baud rate is given as a function parameter.
For the assembly code, the baud rate parameter is assumed to be stored in the r17:r16
Registers.
Note: 1. See “Code Examples” on page 7.
More advanced initialization routines can be made that include frame format as parameters, disable
interrupts and so on. However, many applications use a fixed setting of the baud and
control registers, and for these types of applications the initialization code can be placed directly
in the main routine, or be combined with initialization code for other I/O modules.
14.6 Data Transmission – The USART Transmitter
The USART Transmitter is enabled by setting the Transmit Enable (TXEN) bit in the UCSRB
Register. When the Transmitter is enabled, the normal port operation of the TxD pin is overridden
by the USART and given the function as the Transmitter’s serial output. The baud rate,
mode of operation and frame format must be set up once before doing any transmissions. If synchronous
operation is used, the clock on the XCK pin will be overridden and used as
transmission clock.
Assembly Code Example(1)
USART_Init:
; Set baud rate
out UBRRH, r17
out UBRRL, r16
; Enable receiver and transmitter
ldi r16, (1<>8);
UBRRL = (unsigned char)baud;
/* Enable receiver and transmitter */
UCSRB = (1<> 1) & 0x01;
return ((resh << 8) | resl);
}132
8246B–AVR–09/11
ATtiny2313A/4313
The receive function example reads all the I/O Registers into the Register File before any computation
is done. This gives an optimal receive buffer utilization since the buffer location read will
be free to accept new data as early as possible.
14.7.3 Receive Compete Flag and Interrupt
The USART Receiver has one flag that indicates the Receiver state.
The Receive Complete (RXC) flag indicates if there are unread data present in the receive buffer.
This flag is one when unread data exist in the receive buffer, and zero when the receive
buffer is empty (i.e., does not contain any unread data). If the Receiver is disabled (RXEN = 0),
the receive buffer will be flushed and consequently the RXC bit will become zero.
When the Receive Complete Interrupt Enable (RXCIE) in UCSRB is set, the USART Receive
Complete interrupt will be executed as long as the RXC flag is set (provided that global interrupts
are enabled). When interrupt-driven data reception is used, the receive complete routine
must read the received data from UDR in order to clear the RXC flag, otherwise a new interrupt
will occur once the interrupt routine terminates.
14.7.4 Receiver Error Flags
The USART Receiver has three error flags: Frame Error (FE), Data OverRun (DOR) and Parity
Error (UPE). All can be accessed by reading UCSRA. Common for the error flags is that they are
located in the receive buffer together with the frame for which they indicate the error status. Due
to the buffering of the error flags, the UCSRA must be read before the receive buffer (UDR),
since reading the UDR I/O location changes the buffer read location. Another equality for the
error flags is that they can not be altered by software doing a write to the flag location. However,
all flags must be set to zero when the UCSRA is written for upward compatibility of future
USART implementations. None of the error flags can generate interrupts.
The Frame Error (FE) flag indicates the state of the first stop bit of the next readable frame
stored in the receive buffer. The FE flag is zero when the stop bit was correctly read (as one),
and the FE flag will be one when the stop bit was incorrect (zero). This flag can be used for
detecting out-of-sync conditions, detecting break conditions and protocol handling. The FE flag
is not affected by the setting of the USBS bit in UCSRC since the Receiver ignores all, except for
the first, stop bits. For compatibility with future devices, always set this bit to zero when writing to
UCSRA.
The Data OverRun (DOR) flag indicates data loss due to a receiver buffer full condition. A Data
OverRun occurs when the receive buffer is full (two characters), it is a new character waiting in
the Receive Shift Register, and a new start bit is detected. If the DOR flag is set there was one
or more serial frame lost between the frame last read from UDR, and the next frame read from
UDR. For compatibility with future devices, always write this bit to zero when writing to UCSRA.
The DOR flag is cleared when the frame received was successfully moved from the Shift Register
to the receive buffer.
The Parity Error (UPE) Flag indicates that the next frame in the receive buffer had a Parity Error
when received. If Parity Check is not enabled the UPE bit will always be read zero. For compatibility
with future devices, always set this bit to zero when writing to UCSRA. For more details see
“Parity Bit Calculation” on page 125 and “Parity Checker” on page 132.
14.7.5 Parity Checker
The Parity Checker is active when the high USART Parity mode (UPM1) bit is set. Type of Parity
Check to be performed (odd or even) is selected by the UPM0 bit. When enabled, the Parity133
8246B–AVR–09/11
ATtiny2313A/4313
Checker calculates the parity of the data bits in incoming frames and compares the result with
the parity bit from the serial frame. The result of the check is stored in the receive buffer together
with the received data and stop bits. The Parity Error (UPE) flag can then be read by software to
check if the frame had a Parity Error.
The UPE bit is set if the next character that can be read from the receive buffer had a Parity
Error when received and the Parity Checking was enabled at that point (UPM1 = 1). This bit is
valid until the receive buffer (UDR) is read.
14.7.6 Disabling the Receiver
In contrast to the Transmitter, disabling of the Receiver will be immediate. Data from ongoing
receptions will therefore be lost. When disabled (i.e., the RXEN is set to zero) the Receiver will
no longer override the normal function of the RxD port pin. The Receiver buffer FIFO will be
flushed when the Receiver is disabled. Remaining data in the buffer will be lost
14.7.7 Flushing the Receive Buffer
The receiver buffer FIFO will be flushed when the Receiver is disabled, i.e., the buffer will be
emptied of its contents. Unread data will be lost. If the buffer has to be flushed during normal
operation, due to for instance an error condition, read the UDR I/O location until the RXC flag is
cleared. The following code example shows how to flush the receive buffer.
Note: 1. See “Code Examples” on page 7.
14.8 Asynchronous Data Reception
The USART includes a clock recovery and a data recovery unit for handling asynchronous data
reception. The clock recovery logic is used for synchronizing the internally generated baud rate
clock to the incoming asynchronous serial frames at the RxD pin. The data recovery logic samples
and low pass filters each incoming bit, thereby improving the noise immunity of the
Receiver. The asynchronous reception operational range depends on the accuracy of the internal
baud rate clock, the rate of the incoming frames, and the frame size in number of bits.
14.8.1 Asynchronous Clock Recovery
The clock recovery logic synchronizes internal clock to the incoming serial frames. Figure 14-5
illustrates the sampling process of the start bit of an incoming frame. The sample rate is 16 times
Assembly Code Example(1)
USART_Flush:
sbis UCSRA, RXC
ret
in r16, UDR
rjmp USART_Flush
C Code Example(1)
void USART_Flush( void )
{
unsigned char dummy;
while ( UCSRA & (1<
MSB
MSB
6 5 4 3 2 1 LSB
1 2 3 4 5 6 7 8
6 5 4 3 2 1 LSB
USCK
USCK
DO
DI
A B C D E
CYCLE ( Reference )159
8246B–AVR–09/11
ATtiny2313A/4313
SPITransfer_loop:
out USICR,r17
in r16, USISR
sbrs r16, USIOIF
rjmp SPITransfer_loop
in r16,USIDR
ret
The code is size optimized using only eight instructions (plus return). The code example
assumes that the DO and USCK pins have been enabled as outputs in DDRA. The value stored
in register r16 prior to the function is called is transferred to the slave device, and when the
transfer is completed the data received from the slave is stored back into the register r16.
The second and third instructions clear the USI Counter Overflow Flag and the USI counter
value. The fourth and fifth instructions set three-wire mode, positive edge clock, count at USITC
strobe, and toggle USCK. The loop is repeated 16 times.
The following code demonstrates how to use the USI as an SPI master with maximum speed
(fSCK = fCK/2):
SPITransfer_Fast:
out USIDR,r16
ldi r16,(1< 2 CPU clock cycles
– When fck >= 12MHz: 3 CPU clock cycles
• Minimum high period of serial clock:
– When fck < 12MHz: > 2 CPU clock cycles
– When fck >= 12MHz: 3 CPU clock cycles
VCC
GND
XTAL1
SCK
MISO
MOSI
RESET
+1.8 - 5.5V195
8246B–AVR–09/11
ATtiny2313A/4313
21.3.1 Pin Mapping
The pin mapping is listed in Table 21-7. Note that not all parts use the SPI pins dedicated for the
internal SPI interface.
21.3.2 Programming Algorithm
When writing serial data to the ATtiny2313A/4313, data is clocked on the rising edge of SCK.
When reading data from the ATtiny2313A/4313, data is clocked on the falling edge of SCK. See
Figure 22-6 on page 205 and Figure 22-7 on page 205 for timing details.
To program and verify the ATtiny2313A/4313 in the serial programming mode, the following
sequence is recommended (See Table 21-8, “Serial Programming Instruction Set,” on
page 196):
1. Power-up sequence: apply power between VCC and GND while RESET and SCK are
set to “0”
– In some systems, the programmer can not guarantee that SCK is held low during
power-up. In this case, RESET must be given a positive pulse after SCK has been
set to '0'. The duration of the pulse must be at least tRST plus two CPU clock cycles.
See Table 22-3 on page 201 for definition of minimum pulse width on RESET pin,
tRST
2. Wait for at least 20 ms and then enable serial programming by sending the Programming
Enable serial instruction to the MOSI pin
3. The serial programming instructions will not work if the communication is out of synchronization.
When in sync, the second byte (0x53) will echo back when issuing the
third byte of the Programming Enable instruction
– Regardless if the echo is correct or not, all four bytes of the instruction must be
transmitted
– If the 0x53 did not echo back, give RESET a positive pulse and issue a new
Programming Enable command
4. The Flash is programmed one page at a time. The memory page is loaded one byte at
a time by supplying the 4 LSB of the address and data together with the Load Program
Memory Page instruction.
– To ensure correct loading of the page, the data low byte must be loaded before data
high byte is applied for a given address
– The Program Memory Page is stored by loading the Write Program Memory Page
instruction with the 6 MSB of the address
– If polling (RDY/BSY) is not used, the user must wait at least tWD_FLASH before issuing
the next page. (See Table 21-9 on page 197). Accessing the serial programming
interface before the Flash write operation completes can result in incorrect
programming.
5. The EEPROM can be programmed one byte or one page at a time.
Table 21-7. Pin Mapping Serial Programming
Symbol Pins I/O Description
MOSI PB5 I Serial Data in
MISO PB6 O Serial Data out
SCK PB7 I Serial Clock196
8246B–AVR–09/11
ATtiny2313A/4313
– A: Byte programming. The EEPROM array is programmed one byte at a time by
supplying the address and data together with the Write instruction. EEPROM
memory locations are automatically erased before new data is written. If polling
(RDY/BSY) is not used, the user must wait at least tWD_EEPROM before issuing the
next byte (See Table 21-9). In a chip erased device, no 0xFFs in the data file(s) need
to be programmed
– B: Page programming (the EEPROM array is programmed one page at a time). The
memory page is loaded one byte at a time by supplying the 6 LSB of the address
and data together with the Load EEPROM Memory Page instruction. The EEPROM
memory page is stored by loading the Write EEPROM Memory Page Instruction with
the 7 MSB of the address. When using EEPROM page access only byte locations
loaded with the Load EEPROM Memory Page instruction are altered and the
remaining locations remain unchanged. If polling (RDY/BSY) is not used, the user
must wait at least tWD_EEPROM before issuing the next byte (See Table 21-9). In a chip
erased device, no 0xFF in the data file(s) need to be programmed
6. Any memory location can be verified by using the Read instruction, which returns the
content at the selected address at the serial output pin (MISO)
7. At the end of the programming session, RESET can be set high to commence normal
operation
8. Power-off sequence (if required): set RESET to “1”, and turn VCC power off
21.3.3 Programming Instruction Set
The instruction set for serial programming is described in Table 21-8.
Table 21-8. Serial Programming Instruction Set
Instruction
Instruction Format
Byte 1 Byte 2 Byte 3 Byte4 Operation
Programming Enable 1010 1100 0101 0011 xxxx xxxx xxxx xxxx Enable Serial Programming after
RESET goes low.
Chip Erase 1010 1100 100x xxxx xxxx xxxx xxxx xxxx Chip Erase EEPROM and Flash.
Read Program Memory 0010 H000 0000 00aa bbbb bbbb oooo oooo Read H (high or low) data o from
Program memory at word address a:b.
Load Program Memory Page 0100 H000 000x xxxx xxxx bbbb iiii iiii
Write H (high or low) data i to Program
Memory page at word address b. Data
low byte must be loaded before Data
high byte is applied within the same
address.
Write Program Memory Page 0100 1100 0000 00aa bbbb xxxx xxxx xxxx Write Program Memory Page at
address a:b.
Read EEPROM Memory 1010 0000 000x xxxx xbbb bbbb oooo oooo Read data o from EEPROM memory at
address b.
Write EEPROM Memory 1100 0000 000x xxxx xbbb bbbb iiii iiii Write data i to EEPROM memory at
address b.
Load EEPROM Memory
Page (page access) 1100 0001 0000 0000 0000 00bb iiii iiii
Load data i to EEPROM memory page
buffer. After data is loaded, program
EEPROM page.197
8246B–AVR–09/11
ATtiny2313A/4313
Note: a = address high bits, b = address low bits, H = 0 - Low byte, 1 - High Byte, o = data out, i = data in, x = don’t care
If the LSB of RDY/BSY data byte out is ‘1’, a programming operation is still pending. Wait until
this bit returns ‘0’ before the next instruction is carried out.
Within the same page, the low data byte must be loaded prior to the high data byte.
After data is loaded to the page buffer, program the EEPROM page.
21.4 Programming Time for Flash and EEPROM
Flash and EEPROM wait times are listed in Table 21-9.
Write EEPROM Memory
Page (page access) 1100 0010 00xx xxxx xbbb bb00 xxxx xxxx Write EEPROM page at address b.
Read Lock bits 0101 1000 0000 0000 xxxx xxxx xxoo oooo
Read Lock bits. “0” = programmed, “1”
= unprogrammed. See Table 20-1 on
page 178 for details.
Write Lock bits 1010 1100 111x xxxx xxxx xxxx 11ii iiii
Write Lock bits. Set bits = “0” to
program Lock bits. See Table 20-1 on
page 178 for details.
Read Signature Byte 0011 0000 000x xxxx xxxx xxbb oooo oooo Read Signature Byte o at address b.
Write Fuse bits 1010 1100 1010 0000 xxxx xxxx iiii iiii Set bits = “0” to program, “1” to
unprogram.
Write Fuse High bits 1010 1100 1010 1000 xxxx xxxx iiii iiii Set bits = “0” to program, “1” to
unprogram.
Write Extended Fuse Bits 1010 1100 1010 0100 xxxx xxxx xxxx xxxi Set bits = “0” to program, “1” to
unprogram.
Read Fuse bits 0101 0000 0000 0000 xxxx xxxx oooo oooo Read Fuse bits. “0” = programmed, “1”
= unprogrammed.
Read Fuse High bits 0101 1000 0000 1000 xxxx xxxx oooo oooo Read Fuse High bits. “0” = programmed,
“1” = unprogrammed.
Read Extended Fuse Bits 0101 0000 0000 1000 xxxx xxxx oooo oooo Read Extended Fuse bits. “0” = programmed,
“1” = unprogrammed.
Read Calibration Byte 0011 1000 000x xxxx 0000 000b oooo oooo Read Calibration Byte at address b.
Poll RDY/BSY 1111 0000 0000 0000 xxxx xxxx xxxx xxxo
If o = “1”, a programming operation is
still busy. Wait until this bit returns to
“0” before applying another command.
Table 21-8. Serial Programming Instruction Set
Instruction
Instruction Format
Byte 1 Byte 2 Byte 3 Byte4 Operation
Table 21-9. Minimum Wait Delay Before Writing the Next Flash or EEPROM Location
Symbol Minimum Wait Delay
tWD_FLASH 4.5 ms
tWD_EEPROM 4.0 ms
tWD_ERASE 9.0 ms
tWD_FUSE 4.5 ms198
8246B–AVR–09/11
ATtiny2313A/4313
22. Electrical Characteristics
22.1 Absolute Maximum Ratings*
22.2 DC Characteristics
Operating Temperature.................................. -55°C to +125°C *NOTICE: Stresses beyond those listed under “Absolute
Maximum Ratings” may cause permanent damage
to the device. This is a stress rating only and
functional operation of the device at these or
other conditions beyond those indicated in the
operational sections of this specification is not
implied. Exposure to absolute maximum rating
conditions for extended periods may affect
device reliability.
Storage Temperature ..................................... -65°C to +150°C
Voltage on any Pin except RESET
with respect to Ground ................................-0.5V to VCC+0.5V
Voltage on RESET with respect to Ground......-0.5V to +13.0V
Maximum Operating Voltage ............................................ 6.0V
DC Current per I/O Pin ............................................... 40.0 mA
DC Current VCC and GND Pins................................ 200.0 mA
TA = -40°C to 85°C, VCC = 1.8V to 5.5V (unless otherwise noted)
Symbol Parameter Condition Min. Typ. Max. Units
VIL
Input Low Voltage except
XTAL1 and RESET pin
VCC = 1.8V - 2.4V
VCC = 2.4V - 5.5V -0.5 0.2VCC
0.3VCC
V
VIH
Input High-voltage except
XTAL1 and RESET pins
VCC = 1.8V - 2.4V
VCC = 2.4V - 5.5V
0.7VCC
(1)
0.6VCC
(1) VCC +0.5 (2) V
VIL1
Input Low Voltage
XTAL1 pin
VCC = 1.8V - 5.5V -0.5 0.1VCC V
VIH1
Input High-voltage
XTAL1 pin
VCC = 1.8V - 2.4V
VCC = 2.4V - 5.5V
0.8VCC
(1)
0.7VCC
(1) VCC +0.5 (2) V
VIL2
Input Low Voltage
RESET pin VCC = 1.8V - 5.5V -0.5 0.2VCC V
VIH2
Input High-voltage
RESET pin VCC = 1.8V - 5.5V 0.9VCC
(1) VCC +0.5 (2) V
VIL3
Input Low Voltage
RESET pin as I/O
VCC = 1.8V - 2.4V
VCC = 2.4V - 5.5V -0.5 0.2VCC
0.3VCC
V
VIH3
Input High-voltage
RESET pin as I/O
VCC = 1.8V - 2.4V
VCC = 2.4V - 5.5V
0.7VCC
(1)
0.6VCC
(1) VCC +0.5 (2) V
VOL
Output Low Voltage(3)
(Except Reset Pin)(5)
IOL = 20 mA, VCC = 5V
IOL = 10mA, VCC = 3V
0.8
0.6
V
V
VOH
Output High-voltage(4)
(Except Reset Pin)(5)
IOH = -20 mA, VCC = 5V
IOH = -10 mA, VCC = 3V
4.2
2.4
V
V
I
IL
Input Leakage
Current I/O Pin
VCC = 5.5V, pin low
(absolute value) 1(6) µA
IIH
Input Leakage
Current I/O Pin
VCC = 5.5V, pin high
(absolute value) 1(6) µA
RRST Reset Pull-up Resistor 30 60 kΩ
Rpu I/O Pin Pull-up Resistor 20 50 kΩ199
8246B–AVR–09/11
ATtiny2313A/4313
Notes: 1. “Min” means the lowest value where the pin is guaranteed to be read as high.
2. “Max” means the highest value where the pin is guaranteed to be read as low.
3. Although each I/O port can sink more than the test conditions (20 mA at VCC = 5V, 10 mA at VCC = 3V) under steady state
conditions (non-transient), the following must be observed:
1] The sum of all IOL, for all ports, should not exceed 60 mA.
If IOL exceeds the test condition, VOL may exceed the related specification. Pins are not guaranteed to sink current greater
than the listed test condition.
4. Although each I/O port can source more than the test conditions (20 mA at VCC = 5V, 10 mA at VCC = 3V) under steady state
conditions (non-transient), the following must be observed:
1] The sum of all IOH, for all ports, should not exceed 60 mA.
If IOH exceeds the test condition, VOH may exceed the related specification. Pins are not guaranteed to source current
greater than the listed test condition.
5. The RESET pin must tolerate high voltages when entering and operating in programming modes and, as a consequence,
has a weak drive strength as compared to regular I/O pins. See Figure 23-29 and Figure 23-30.
6. These are test limits, which account for leakage currents of the test environment. Actual device leakage currents are lower.
7. Values using methods described in “Minimizing Power Consumption” on page 36. Power Reduction is enabled (PRR =
0xFF), the external clock is selected (CKSEL = 0000), and there is no I/O drive.
8. BOD Disabled.
I
CC
Power Supply Current
Active 1MHz, VCC = 2V(7) 0.2 0.55 mA
Active 4MHz, VCC = 3V(7) 1.3 2.5 mA
Active 8MHz, VCC = 5V(7) 3.9 7 mA
Idle 1MHz, VCC = 2V(7) 0.03 0.15 mA
Idle 4MHz, VCC = 3V(7) 0.25 0.6 mA
Idle 8MHz, VCC = 5V(7) 1 2 mA
Power-down mode
WDT enabled, VCC = 3V(8) 4 10 µA
WDT disabled, VCC = 3V(8) < 0.15 2 µA
TA = -40°C to 85°C, VCC = 1.8V to 5.5V (unless otherwise noted) (Continued)
Symbol Parameter Condition Min. Typ. Max. Units200
8246B–AVR–09/11
ATtiny2313A/4313
22.3 Speed
The maximum operating frequency of the device is dependent on supply voltage, VCC . The relationship
between supply voltage and maximum operating frequency is piecewise linear, as
shown in Figure 22-1.
Figure 22-1. Maximum Frequency vs. VCC
22.4 Clock Characteristics
22.4.1 Calibrated Internal RC Oscillator Accuracy
It is possible to manually calibrate the internal oscillator to be more accurate than default factory
calibration. Note that the oscillator frequency depends on temperature and voltage. Voltage and
temperature characteristics can be found in Figure 23-46 on page 229, and Figure 23-47 on
page 230.
Notes: 1. Accuracy of oscillator frequency at calibration point (fixed temperature and fixed voltage).
4 MHz
1.8V 5.5V 4.5V
20 MHz
2.7V
10 MHz
Table 22-1. Calibration Accuracy of Internal RC Oscillator
Calibration
Method Target Frequency VCC Temperature
Accuracy at given Voltage
& Temperature(1)
Factory
Calibration 4.0 / 8.0MHz 3V 25°C ±10%
User
Calibration
Fixed frequency within:
3.1 – 4.7 MHz /
7.3 – 9.1MHz
Fixed voltage within:
1.8V – 5.5V
Fixed temperature
within:
-40°C – 85°C
±2%201
8246B–AVR–09/11
ATtiny2313A/4313
22.4.2 External Clock Drive
Figure 22-2. External Clock Drive Waveform
22.5 System and Reset Characteristics
Notes: 1. When RESET pin used as reset (not as I/O).
2. Not tested in production.
VIL1
VIH1
Table 22-2. External Clock Drive
Symbol Parameter
VCC = 1.8 - 5.5V VCC = 2.7 - 5.5V VCC = 4.5 - 5.5V
Min. Max. Min. Max. Min. Max. Units
1/tCLCL Clock Frequency 0 4 0 10 0 20 MHz
tCLCL Clock Period 250 100 50 ns
tCHCX High Time 100 40 20 ns
tCLCX Low Time 100 40 20 ns
tCLCH Rise Time 2.0 1.6 0.5 µs
tCHCL Fall Time 2.0 1.6 0.5 µs
ΔtCLCL Change in period from one clock cycle to the next 2 2 2 %
Table 22-3. Reset, Brown-out, and Internal Voltage Characteristics
Symbol Parameter Condition Min Typ Max Units
VRST
RESET Pin Threshold
Voltage 0.2 VCC 0.8VCC V
t
RST
Minimum pulse width on
RESET Pin (1)(2) VCC = 1.8 - 5.5V 2.5 µs
VHYST
Brown-out Detector
Hysteresis (2) 50 mV
tBOD
Min Pulse Width on
Brown-out Reset (2) 2 µs
VBG
Internal bandgap reference
voltage
VCC = 2.7V
TA = 25°C 1.0 1.1 1.2 V
tBG
Internal bandgap reference
start-up time (2)
VCC = 2.7V
TA = 25°C 40 70 µs
IBG
Internal bandgap reference
current consumption (2)
VCC = 2.7V
TA = 25°C 15 µA202
8246B–AVR–09/11
ATtiny2313A/4313
22.5.1 Enhanced Power-On Reset
Notes: 1. Values are guidelines, only.
2. Threshold where device is released from reset when voltage is rising.
3. The Power-on Reset will not work unless the supply voltage has been below VPOA.
22.5.2 Brown-Out Detection
Note: 1. VBOT may be below nominal minimum operating voltage for some devices. For devices where
this is the case, the device is tested down to VCC = VBOT during the production test. This guarantees
that a Brown-out Reset will occur before VCC drops to a voltage where correct
operation of the microcontroller is no longer guaranteed.
22.6 Analog Comparator Characteristics
Note: All parameters are based on simulation results and they are not tested in production
Table 22-4. Characteristics of Enhanced Power-On Reset. TA = -40 – 85°C
Symbol Parameter Min(1) Typ(1) Max(1) Units
VPOR Release threshold of power-on reset (2) 1.1 1.4 1.6 V
VPOA Activation threshold of power-on reset (3) 0.6 1.3 1.6 V
SRON Power-On Slope Rate 0.01 V/ms
Table 22-5. VBOT vs. BODLEVEL Fuse Coding
BODLEVEL [1:0] Fuses Min(1) Typ(1) Max(1) Units
11 BOD Disabled
10 1.7 1.8 2.0
01 2.5 2.7 2.9 V
00 4.1 4.3 4.5
Table 22-6. Analog Comparator Characteristics, TA = -40°C - 85°C
Symbol Parameter Condition Min Typ Max Units
VACIO Input Offset Voltage VCC = 5V, VIN = VCC / 2 < 10 40 mV
IACLK Input Leakage Current VCC = 5V, VIN = VCC / 2 -50 50 nA
tACPD
Analog Propagation Delay
(from saturation to slight overdrive)
VCC = 2.7V 750
ns
VCC = 4.0V 500
Analog Propagation Delay
(large step change)
VCC = 2.7V 100
VCC = 4.0V 75
tDPD Digital Propagation Delay VCC = 1.8V - 5.5 1 2 CLK203
8246B–AVR–09/11
ATtiny2313A/4313
22.7 Parallel Programming Characteristics
Notes: 1. tWLRH is valid for the Write Flash, Write EEPROM, Write Fuse bits and Write Lock bits
commands.
2. tWLRH_CE is valid for the Chip Erase command.
Table 22-7. Parallel Programming Characteristics, VCC = 5V ± 10%
Symbol Parameter Min Typ Max Units
VPP Programming Enable Voltage 11.5 12.5 V
I
PP Programming Enable Current 250 μA
t
DVXH Data and Control Valid before XTAL1 High 67 ns
tXLXH XTAL1 Low to XTAL1 High 200 ns
tXHXL XTAL1 Pulse Width High 150 ns
tXLDX Data and Control Hold after XTAL1 Low 67 ns
tXLWL XTAL1 Low to WR Low 0 ns
tXLPH XTAL1 Low to PAGEL high 0 ns
tPLXH PAGEL low to XTAL1 high 150 ns
tBVPH BS1 Valid before PAGEL High 67 ns
tPHPL PAGEL Pulse Width High 150 ns
tPLBX BS1 Hold after PAGEL Low 67 ns
tWLBX BS2/1 Hold after WR Low 67 ns
tPLWL PAGEL Low to WR Low 67 ns
tBVWL BS1 Valid to WR Low 67 ns
tWLWH WR Pulse Width Low 150 ns
tWLRL WR Low to RDY/BSY Low 0 1 μs
t
WLRH WR Low to RDY/BSY High(1) 3.7 4.5 ms
tWLRH_CE WR Low to RDY/BSY High for Chip Erase(2) 7.5 9 ms
tXLOL XTAL1 Low to OE Low 0 ns
tBVDV BS1 Valid to DATA valid 0 1000 ns
tOLDV OE Low to DATA Valid 1000 ns
t
OHDZ OE High to DATA Tri-stated 1000 ns204
8246B–AVR–09/11
ATtiny2313A/4313
Figure 22-3. Parallel Programming Timing, Including some General Timing Requirements
Figure 22-4. Parallel Programming Timing, Loading Sequence with Timing Requirements(1)
Note: 1. The timing requirements shown in Figure 22-3 (i.e., tDVXH, tXHXL, and tXLDX) also apply to loading
operation.
Figure 22-5. Parallel Programming Timing, Reading Sequence (within the Same Page) with
Timing Requirements(1)
Note: 1. The timing requirements shown in Figure 22-3 (i.e., tDVXH, tXHXL, and tXLDX) also apply to reading
operation.
Data & Contol
(DATA, XA0/1, BS1, BS2)
XTAL1 t
XHXL
t
WLWH
t
DVXH t
XLDX
t
PLWL
t
WLRH
WR
RDY/BSY
PAGEL t
PHPL
t
PLBX t
BVPH
t
XLWL
t
WLBX
tBVWL
WLRL
XTAL1
PAGEL
t XLXH PLXH t t
XLPH
DATA ADDR0 (Low Byte) DATA (Low Byte) DATA (High Byte) ADDR1 (Low Byte)
BS1
XA0
XA1
LOAD ADDRESS
(LOW BYTE)
LOAD DATA
(LOW BYTE)
LOAD DATA
(HIGH BYTE)
LOAD DATA LOAD ADDRESS
(LOW BYTE)
XTAL1
OE
DATA ADDR0 (Low Byte) DATA (Low Byte) DATA (High Byte) ADDR1 (Low Byte)
BS1
XA0
XA1
LOAD ADDRESS
(LOW BYTE)
READ DATA
(LOW BYTE)
READ DATA
(HIGH BYTE)
LOAD ADDRESS
(LOW BYTE)
t
BVDV
t
OLDV
t
XLOL
t
OHDZ205
8246B–AVR–09/11
ATtiny2313A/4313
22.8 Serial Programming Characteristics
Figure 22-6. Serial Programming Timing
Note: 2 tCLCL for fck < 12 MHz, 3 tCLCL for fck >= 12 MHz
Figure 22-7. Serial Programming Waveform
Table 22-8. Serial Programming Characteristics, TA = -40°C to 85°C, VCC = 1.8 - 5.5V (Unless
Otherwise Noted)
Symbol Parameter Min Typ Max Units
1/tCLCL Oscillator Frequency (ATtiny2313A/4313) 0 4 MHz
tCLCL Oscillator Period (ATtiny2313A/4313) 250 ns
1/tCLCL
Oscillator Frequency (ATtiny2313A/4313, VCC =
4.5V - 5.5V) 0 20 MHz
t
CLCL
Oscillator Period (ATtiny2313A/4313, VCC =
4.5V - 5.5V) 50 ns
tSHSL SCK Pulse Width High 2 tCLCL* ns
tSLSH SCK Pulse Width Low 2 tCLCL* ns
tOVSH MOSI Setup to SCK High tCLCL ns
t
SHOX MOSI Hold after SCK High 2 tCLCL ns
tSLIV SCK Low to MISO Valid 100 ns
MOSI
MISO
SCK
t
OVSH
t
SHSL
t t
SHOX SLSH
MSB
MSB
LSB
LSB
SERIAL CLOCK INPUT
(SCK)
SERIAL DATA INPUT
(MOSI)
(MISO)
SAMPLE
SERIAL DATA OUTPUT206
8246B–AVR–09/11
ATtiny2313A/4313
23. Typical Characteristics
The data contained in this section is largely based on simulations and characterization of similar
devices in the same process and design methods. Thus, the data should be treated as indications
of how the part will behave.
The following charts show typical behavior. These figures are not tested during manufacturing.
During characterisation devices are operated at frequencies higher than test limits but they are
not guaranteed to function properly at frequencies higher than the ordering code indicates.
All current consumption measurements are performed with all I/O pins configured as inputs and
with internal pull-ups enabled. Current consumption is a function of several factors such as operating
voltage, operating frequency, loading of I/O pins, switching rate of I/O pins, code executed
and ambient temperature. The dominating factors are operating voltage and frequency.
A sine wave generator with rail-to-rail output is used as clock source but current consumption in
Power-Down mode is independent of clock selection. The difference between current consumption
in Power-Down mode with Watchdog Timer enabled and Power-Down mode with Watchdog
Timer disabled represents the differential current drawn by the Watchdog Timer.
The current drawn from pins with a capacitive load may be estimated (for one pin) as follows:
where VCC = operating voltage, CL = load capacitance and fSW = average switching frequency of
I/O pin.
23.1 Effect of Power Reduction
Peripheral modules are enabled and disabled via control bits in the Power Reduction Register.
See “Power Reduction Register” on page 35 for details.
I
CP VCC CL × × f
SW ≈
Table 23-1. Additional Current Consumption (Absolute) for Peripherals of ATtiny2313A/4313
PRR bit
Typical numbers
VCC = 2V, f = 1MHz VCC = 3V, f = 4MHz VCC = 5V, f = 8MHz
PRTIM0 2 µA 11 µA 50 µA
PRTIM1 5 µA 30 µA 120 µA
PRUSI 2 µA 11 µA 50 µA
PRUSART 4 µA 22 µA 95 µA207
8246B–AVR–09/11
ATtiny2313A/4313
23.2 ATtiny2313A
23.2.1 Current Consumption in Active Mode
Figure 23-1. Active Supply Current vs. Low Frequency (0.1 - 1.0 MHz)
Figure 23-2. Active Supply Current vs. Frequency (1 - 20 MHz)
ACTIVE SUPPLY CURRENT vs. LOW FREQUENCY (ATtiny2313A)
(PRR=0xFF)
5.5 V
5.0 V
4.5 V
3.3 V
2.7 V
1.8 V
0
0,2
0,4
0,6
0,8
1
0 0,1 0,2 0,3 0,4 0,5 0,6 0,7 0,8 0,9 1
Frequency (MHz)
ICC (mA)
ACTIVE SUPPLY CURRENT vs. FREQUENCY (ATtiny2313A)
(PRR=0xFF)
0
2
4
6
8
10
0 2 4 6 8 10 12 14 16 18 20
Frequency (MHz)
ICC (mA)
1.8V
2.7V
3.3V
4.5V
5.0V
5.5V208
8246B–AVR–09/11
ATtiny2313A/4313
Figure 23-3. Active Supply Current vs. VCC (Internal RC Oscillator, 8 MHz)
Figure 23-4. Active Supply Current vs. VCC (Internal RC Oscillator, 1 MHz)
ACTIVE SUPPLY CURRENT vs. VCC (ATtiny2313A)
INTERNAL RC OSCILLATOR, 8 MHz
85 °C
25 °C
-40 °C
0
1
2
3
4
5
1,5 2 2,5 3 3,5 4 4,5 5 5,5
VCC (V)
ICC (mA)
ACTIVE SUPPLY CURRENT vs. VCC (ATtiny2313A)
INTERNAL RC OSCILLATOR, 1 MHz
85 °C
25 °C
-40 °C
0
0,2
0,4
0,6
0,8
1
1,2
1,5 2 2,5 3 3,5 4 4,5 5 5,5
VCC (V)
ICC (mA)209
8246B–AVR–09/11
ATtiny2313A/4313
Figure 23-5. Active Supply Current vs. VCC (Internal RC Oscillator, 128 KHz)
23.2.2 Current Consumption in Idle Mode
Figure 23-6. Idle Supply Current vs. Low Frequency (0.1 - 1.0 MHz)
ACTIVE SUPPLY CURRENT vs. VCC (ATtiny2313A)
INTERNAL RC OSCILLATOR, 128 KHz
85 °C
25 °C
-40 °C
0
0,02
0,04
0,06
0,08
0,1
0,12
1,5 2 2,5 3 3,5 4 4,5 5 5,5
VCC (V)
ICC (mA)
IDLE SUPPLY CURRENT vs. LOW FREQUENCY (ATtiny2313A)
(PRR=0xFF)
5.5 V
5.0 V
4.5 V
4.0 V
3.3 V
2.7 V
1.8 V
0
0,02
0,04
0,06
0,08
0,1
0,12
0,14
0,16
0 0,1 0,2 0,3 0,4 0,5 0,6 0,7 0,8 0,9 1
Frequency (MHz)
ICC (mA)210
8246B–AVR–09/11
ATtiny2313A/4313
Figure 23-7. Idle Supply Current vs. Frequency (1 - 20 MHz)
Figure 23-8. Idle Supply Current vs. VCC (Internal RC Oscillator, 8 MHz)
IDLE SUPPLY CURRENT vs. FREQUENCY (ATtiny2313A)
(PRR=0xFF)
5.5 V
5.0 V
4.5 V
4.0 V
3.3 V
2.7 V
1.8 V
0
0,5
1
1,5
2
2,5
3
0 2 4 6 8 10 12 14 16 18 20
Frequency (MHz)
ICC (mA)
IDLE SUPPLY CURRENT vs. VCC (ATtiny2313A)
INTERNAL RC OSCILLATOR, 8 MHz
85 °C
25 °C
-40 °C
0
0,2
0,4
0,6
0,8
1
1,2
1,4
1,6
1,5 2 2,5 3 3,5 4 4,5 5 5,5
VCC (V)
ICC (mA)211
8246B–AVR–09/11
ATtiny2313A/4313
Figure 23-9. Idle Supply Current vs. VCC (Internal RC Oscillator, 1 MHz)
Figure 23-10. Idle Supply Current vs. VCC (Internal RC Oscillator, 128 KHz)
IDLE SUPPLY CURRENT vs. VCC (ATtiny2313A)
INTERNAL RC OSCILLATOR, 1 MHz
85 °C
25 °C
-40 °C
0
0,05
0,1
0,15
0,2
0,25
0,3
1,5 2 2,5 3 3,5 4 4,5 5 5,5
VCC (V)
ICC (mA)
IDLE SUPPLY CURRENT vs. VCC (ATtiny2313A)
INTERNAL RC OSCILLATOR, 128 KHz
85 °C
25 °C
-40 °C
0
0,005
0,01
0,015
0,02
0,025
1,5 2 2,5 3 3,5 4 4,5 5 5,5
VCC (V)
ICC (mA)212
8246B–AVR–09/11
ATtiny2313A/4313
23.2.3 Current Consumption in Power-down Mode
Figure 23-11. Power-down Supply Current vs. VCC (Watchdog Timer Disabled)
Figure 23-12. Power-down Supply Current vs. VCC (Watchdog Timer Enabled)
POWER-DOWN SUPPLY CURRENT vs. VCC (ATtiny2313A)
WATCHDOG TIMER DISABLED
85 °C
25 °C
-40 °C
0
0,1
0,2
0,3
0,4
0,5
1,5 2 2,5 3 3,5 4 4,5 5 5,5
VCC (V)
ICC (uA)
POWER-DOWN SUPPLY CURRENT vs. VCC (ATtiny2313A)
WATCHDOG TIMER ENABLED
85 °C
25 °C
-40 °C
0
1
2
3
4
5
6
7
8
1,5 2 2,5 3 3,5 4 4,5 5 5,5
VCC (V)
ICC (uA)213
8246B–AVR–09/11
ATtiny2313A/4313
23.2.4 Current Consumption in Reset
Figure 23-13. Reset Supply Current vs. VCC (0.1 - 1.0 MHz, Excluding Current Through The
Reset Pull-up)
Figure 23-14. Reset Supply Current vs. VCC (1 - 20 MHz, Excluding Current Through The Reset
Pull-up)
RESET SUPPLY CURRENT vs. VCC (ATtiny2313A)
EXCLUDING CURRENT THROUGH THE RESET PULLUP
5.5 V
5.0 V
4.5 V
4.0 V
3.3 V
2.7 V
1.8 V
0
0,02
0,04
0,06
0,08
0,1
0,12
0,14
0 0,1 0,2 0,3 0,4 0,5 0,6 0,7 0,8 0,9 1
Frequency (MHz)
ICC (mA)
5.5 V
5.0 V
4.5 V
4.0 V
3.3 V
2.7 V
1.8 V
RESET SUPPLY CURRENT vs. VCC (ATtiny2313A)
EXCLUDING CURRENT THROUGH THE RESET PULLUP
0
0,2
0,4
0,6
0,8
1
1,2
1,4
1,6
1,8
2
2,2
0 2 4 6 8 10 12 14 16 18 20
Frequency (MHz)
ICC (mA)214
8246B–AVR–09/11
ATtiny2313A/4313
23.2.5 Current Consumption of Peripheral Units
Figure 23-15. Brownout Detector Current vs. VCC
Figure 23-16. Programming Current vs. VCC (ATtiny2313A)
Note: Above programming current based on simulation and characterisation of similar device
(ATtiny24A).
BROWNOUT DETECTOR CURRENT vs. VCC (ATtiny2313A)
BOD level = 1.8V
85 °C
25 °C
-40 °C
0
5
10
15
20
25
30
35
1,5 2 2,5 3 3,5 4 4,5 5 5,5
VCC (V)
ICC (uA)
PROGRAMMING CURRENT vs. VCC
85 °C
25 °C
-40 °C
0
1000
2000
3000
4000
5000
6000
7000
8000
9000
1,5 2 2,5 3 3,5 4 4,5 5 5,5
VCC (V)
ICC (uA)215
8246B–AVR–09/11
ATtiny2313A/4313
23.2.6 Pull-up Resistors
Figure 23-17. Pull-up Resistor Current vs. Input Voltage (I/O Pin, VCC = 1.8V)
Figure 23-18. Pull-up Resistor Current vs. Input Voltage (I/O Pin, VCC = 2.7V)
I/O PIN PULL-UP RESISTOR CURRENT vs. INPUT VOLTAGE (ATtiny2313A)
0
10
20
30
40
50
60
0 0,2 0,4 0,6 0,8 1 1,2 1,4 1,6 1,8 2
VOP (V)
IOP (uA)
85 °C
25 °C
-40 °C
85 °C
25 °C
-40 °C
I/O PIN PULL-UP RESISTOR CURRENT vs. INPUT VOLTAGE (ATtiny2313A)
0
10
20
30
40
50
60
70
80
90
0 0,5 1 1,5 2 2,5 3
VOP (V)
IOP (uA)216
8246B–AVR–09/11
ATtiny2313A/4313
Figure 23-19. Pull-up Resistor Current vs. Input Voltage (I/O Pin, VCC = 5V)
Figure 23-20. Reset Pull-up Resistor Current vs. Reset Pin Voltage (VCC = 1.8V)
85 °C
25 °C
-40 °C
I/O PIN PULL-UP RESISTOR CURRENT vs. INPUT VOLTAGE (ATtiny2313A)
0
20
40
60
80
100
120
140
160
0 1 2 3 4 5 6
VOP (V)
IOP (uA)
RESET PULL-UP RESISTOR CURRENT vs. RESET PIN VOLTAGE (ATtiny2313A)
-40 °C
25 °C
85 °C 0
5
10
15
20
25
30
35
40
0 0,2 0,4 0,6 0,8 1 1,2 1,4 1,6 1,8 2
VRESET (V)
IRESET (uA)217
8246B–AVR–09/11
ATtiny2313A/4313
Figure 23-21. Reset Pull-up Resistor Current vs. Reset Pin Voltage (VCC = 2.7V)
Figure 23-22. Reset Pull-up Resistor Current vs. Reset Pin Voltage (VCC = 5V)
-40 °C
25 °C
85 °C
RESET PULL-UP RESISTOR CURRENT vs. RESET PIN VOLTAGE (ATtiny2313A)
0
10
20
30
40
50
60
0 0,5 1 1,5 2 2,5 3
VRESET (V)
IRESET (uA)
-40 °C
25 °C
85 °C
RESET PULL-UP RESISTOR CURRENT vs. RESET PIN VOLTAGE (ATtiny2313A)
0
20
40
60
80
100
120
0 0,5 1 1,5 2 2,5 3 3,5 4 4,5 5
VRESET (V)
IRESET (uA)218
8246B–AVR–09/11
ATtiny2313A/4313
23.2.7 Output Driver Strength
Figure 23-23. VOL: Output Voltage vs. Sink Current (I/O Pin, VCC = 1.8V)
Figure 23-24. VOL: Output Voltage vs. Sink Current (I/O Pin, VCC = 3V)
I/O PIN OUTPUT VOLTAGE vs. SINK CURRENT (ATtiny2313A)
Vcc = 1.8V
85 °C
25 °C
-40 °C
0
0,05
0,1
0,15
0,2
0,25
0,3
0,35
0,4
0 0,5 1 1,5 2 2,5 3 3,5 4 4,5 5
IOL (mA)
VOL (V)
I/O PIN OUTPUT VOLTAGE vs. SINK CURRENT (ATtiny2313A)
Vcc = 3V
85 °C
25 °C
-40 °C
0
0,2
0,4
0,6
0 2 4 6 8 10
IOL (mA)
VOL (V)219
8246B–AVR–09/11
ATtiny2313A/4313
Figure 23-25. VOL: Output Voltage vs. Sink Current (I/O Pin, VCC = 5V)
Figure 23-26. VOH: Output Voltage vs. Source Current (I/O Pin, VCC = 1.8V)
I/O PIN OUTPUT VOLTAGE vs. SINK CURRENT (ATtiny2313A)
Vcc = 5V
85 °C
25 °C
-40 °C
0
0,1
0,2
0,3
0,4
0,5
0,6
0 2 4 6 8 10 12 14 16 18 20
IOL (mA)
VOL (V)
I/O PIN OUTPUT VOLTAGE vs. SOURCE CURRENT (ATtiny2313A)
Vcc = 1.8V
85 °C
25 °C
-40 °C
1,2
1,3
1,4
1,5
1,6
1,7
1,8
1,9
0 0,5 1 1,5 2 2,5 3 3,5 4 4,5 5
IOH (mA)
VOH (V)220
8246B–AVR–09/11
ATtiny2313A/4313
Figure 23-27. VOH: Output Voltage vs. Source Current (I/O Pin, VCC = 3V)
Figure 23-28. VOH: Output Voltage vs. Source Current (I/O Pin, VCC = 5V)
I/O PIN OUTPUT VOLTAGE vs. SOURCE CURRENT (ATtiny2313A)
Vcc = 3V
85 °C
25 °C
-40 °C
2,5
2,6
2,7
2,8
2,9
3
3,1
0 2 4 6 8 10
IOH (mA)
VOH (V)
I/O PIN OUTPUT VOLTAGE vs. SOURCE CURRENT (ATtiny2313A)
Vcc = 5V
85 °C
25 °C
-40 °C
4,3
4,5
4,7
4,9
5,1
0 5 10 15 20
IOH (mA)
VOH (V)221
8246B–AVR–09/11
ATtiny2313A/4313
Figure 23-29. VOL: Output Voltage vs. Sink Current (Reset Pin as I/O, T = 25°C)
Figure 23-30. VOH: Output Voltage vs. Source Current (Reset Pin as I/O, T = 25°C)
RESET AS I/O PIN OUTPUT VOLTAGE vs. SINK CURRENT (ATtiny2313A)
0
0,1
0,2
0,3
0,4
0,5
0,6
0,7
0,8
0,9
1
0 1 2 3 4
IOL (mA)
VOL (V)
5.0 V
1.8 V 3.0 V
RESET AS I/O PIN OUTPUT VOLTAGE vs. SOURCE CURRENT (ATtiny2313A)
5.0 V
3.0 V
1.8 V
0
1
2
3
4
5
0 0,2 0,4 0,6 0,8 1
IOH (mA)
VOH (V)222
8246B–AVR–09/11
ATtiny2313A/4313
23.2.8 Input Thresholds and Hysteresis (for I/O Ports)
Figure 23-31. VIH: Input Threshold Voltage vs. VCC (I/O Pin Read as ‘1’)
Figure 23-32. VIL: Input Threshold Voltage vs. VCC (I/O Pin, Read as ‘0’)
I/O PIN INPUT THRESHOLD VOLTAGE vs. VCC (ATtiny2313A)
VIH, IO PIN READ AS '1'
0
0,5
1
1,5
2
2,5
3
3,5
1,5 2 2,5 3 3,5 4 4,5 5 5,5
VCC (V)
Threshold (V)
85 °C
25 °C
-40 °C
I/O PIN INPUT THRESHOLD VOLTAGE vs. VCC (ATtiny2313A)
VIL, IO PIN READ AS '0'
0
0,5
1
1,5
2
2,5
1,5 2 2,5 3 3,5 4 4,5 5 5,5
VCC (V)
Threshold (V)
85 °C
25 °C
-40 °C223
8246B–AVR–09/11
ATtiny2313A/4313
Figure 23-33. VIH-VIL: Input Hysteresis vs. VCC (I/O Pin)
Figure 23-34. VIH: Input Threshold Voltage vs. VCC (Reset Pin as I/O, Read as ‘1’)
I/O PIN INPUT HYSTERESIS vs. VCC (ATtiny2313A)
85 °C
25 °C
-40 °C
0
0,1
0,2
0,3
0,4
0,5
0,6
1,5 2 2,5 3 3,5 4 4,5 5 5,5
VCC (V)
Input Hysteresis (V)
RESET PIN AS I/O THRESHOLD VOLTAGE vs. VCC (ATtiny2313A)
VIH, RESET READ AS '1'
85 °C
25 °C
-40 °C
0
0,5
1
1,5
2
2,5
3
1,5 2 2,5 3 3,5 4 4,5 5 5,5
VCC (V)
Threshold (V)224
8246B–AVR–09/11
ATtiny2313A/4313
Figure 23-35. VIL: Input Threshold Voltage vs. VCC (Reset Pin as I/O, Read as ‘0’)
Figure 23-36. VIH-VIL: Input Hysteresis vs. VCC (Reset Pin as I/O)
RESET PIN AS I/O THRESHOLD VOLTAGE vs. VCC (ATtiny2313A)
VIL, RESET READ AS '0'
0
0,5
1
1,5
2
2,5
1,5 2 2,5 3 3,5 4 4,5 5 5,5
VCC (V)
Threshold (V)
85 °C
25 °C
-40 °C
RESET PIN AS IO, INPUT HYSTERESIS vs. VCC (ATtiny2313A)
VIL, IO PIN READ AS "0"
85 °C
25 °C
-40 °C
0
0,1
0,2
0,3
0,4
0,5
0,6
0,7
0,8
0,9
1
1,5 2 2,5 3 3,5 4 4,5 5 5,5
VCC (V)
Input Hysteresis (V)225
8246B–AVR–09/11
ATtiny2313A/4313
23.2.9 BOD, Bandgap and Reset
Figure 23-37. BOD Thresholds vs. Temperature (BOD Level is 4.3V)
Figure 23-38. BOD Thresholds vs. Temperature (BOD Level is 2.7V)
BOD THRESHOLDS vs. TEMPERATURE (BOD Level set to 4.3V) (ATtiny2313A)
BODLEVEL = 4.3V
4,22
4,24
4,26
4,28
4,3
4,32
4,34
4,36
-40 -30 -20 -10 0 10 20 30 40 50 60 70 80 90 100
Temperature (C)
Threshold (V)
VCC RISING
VCC FALLING
BOD THRESHOLDS vs. TEMPERATURE (BOD Level set to 2.7V) (ATtiny2313A)
BODLEVEL = 2.7V
2,66
2,68
2,7
2,72
2,74
2,76
2,78
-40 -20 0 20 40 60 80 100
Temperature (C)
Threshold (V)
VCC RISING
VCC FALLING226
8246B–AVR–09/11
ATtiny2313A/4313
Figure 23-39. BOD Thresholds vs. Temperature (BOD Level is 1.8V)
Figure 23-40. Bandgap Voltage vs. Supply Voltage
BOD THRESHOLDS vs. TEMPERATURE (BOD Level set to 1.8V) (ATtiny2313A)
BODLEVEL = 1.8V
1,78
1,79
1,8
1,81
1,82
1,83
1,84
-40 -20 0 20 40 60 80 100
Temperature (C)
Threshold (V)
VCC RISING
VCC FALLING
BANDGAP VOLTAGE vs. VCC (ATtiny2313A)
CALIBRATED
0,95
1
1,05
1,1
1,15
1,2
1,5 2 2,5 3 3,5 4 4,5 5 5,5
Vcc (V)
Bandgap Voltage (V)227
8246B–AVR–09/11
ATtiny2313A/4313
Figure 23-41. Bandgap Voltage vs. Temperature
Figure 23-42. VIH: Input Threshold Voltage vs. VCC (Reset Pin, Read as ‘1’)
BANDGAP VOLTAGE vs. TEMP (ATtiny2313A)
(Vcc=5V)
CALIBRATED
1
1,02
1,04
1,06
1,08
1,1
1,12
1,14
1,16
-40 -20 0 20 40 60 80 100
Temperature
Bandgap Voltage (V)
RESET INPUT THRESHOLD VOLTAGE vs. VCC (ATtiny2313A)
VIH, IO PIN READ AS '1'
85 °C
25 °C
-40 °C
0
0,5
1
1,5
2
2,5
1,5 2 2,5 3 3,5 4 4,5 5 5,5
VCC (V)
Threshold (V)228
8246B–AVR–09/11
ATtiny2313A/4313
Figure 23-43. VIL: Input Threshold Voltage vs. VCC (Reset Pin, Read as ‘0’)
Figure 23-44. VIH-VIL: Input Hysteresis vs. VCC (Reset Pin)
RESET INPUT THRESHOLD VOLTAGE vs. VCC (ATtiny2313A)
VIL, IO PIN READ AS '0'
85 °C
25 °C
-40 °C
0
0,5
1
1,5
2
2,5
1,5 2 2,5 3 3,5 4 4,5 5 5,5
VCC (V)
Threshold (V)
RESET PIN INPUT HYSTERESIS vs. VCC (ATtiny2313A)
0
0,1
0,2
0,3
0,4
0,5
0,6
0,7
0,8
0,9
1
1,5 2 2,5 3 3,5 4 4,5 5 5,5
VCC (V)
Input Hysteresis (V)
85 °C
25 °C
-40 °C229
8246B–AVR–09/11
ATtiny2313A/4313
Figure 23-45. Minimum Reset Pulse Width vs. VCC
23.2.10 Internal Oscillator Speed
Figure 23-46. Calibrated 8 MHz RC Oscillator Frequency vs. VCC
MINIMUM RESET PULSE WIDTH vs. VCC (ATtiny2313A)
85 °C
25 °C
-40 °C
0
200
400
600
800
1000
1200
1400
1600
1800
2000
1,5 2 2,5 3 3,5 4 4,5 5 5,5
VCC (V)
Pulsewidth (ns)
CALIBRATED 8.0MHz RC OSCILLATOR FREQUENCY vs. OPERATING VOLTAGE (ATtiny2313A)
7
7,2
7,4
7,6
7,8
8
8,2
8,4
8,6
8,8
1,5 2 2,5 3 3,5 4 4,5 5 5,5
VCC (V)
FRC (MHz)
85 °C
25 °C
-40 °C230
8246B–AVR–09/11
ATtiny2313A/4313
Figure 23-47. Calibrated 8 MHz RC Oscillator Frequency vs. Temperature
Figure 23-48. Calibrated 8 MHz RC Oscillator Frequency vs. Osccal Value
CALIBRATED 8.0MHz RC OSCILLATOR FREQUENCY vs. TEMPERATURE (ATtiny2313A)
5.0 V
3.0 V
1.8 V
7
7,5
8
8,5
9
-40 -20 0 20 40 60 80 100
Temperature
FRC (MHz)
CALIBRATED 8.0MHz RC OSCILLATOR FREQUENCY vs. OSCCAL VALUE (ATtiny2313A)
(Vcc=3V)
85 °C
25 °C
-40 °C
0
2
4
6
8
10
12
14
0 16 32 48 64 80 96 112
OSCCAL (X1)
FRC (MHz)231
8246B–AVR–09/11
ATtiny2313A/4313
23.3 ATtiny4313
23.3.1 Current Consumption in Active Mode
Figure 23-49. Active Supply Current vs. Low Frequency (0.1 - 1.0 MHz)
Figure 23-50. Active Supply Current vs. Frequency (1 - 20 MHz)
ACTIVE SUPPLY CURRENT vs. LOW FREQUENCY (ATtiny4313)
(PRR=0xFF)
5.5 V
5.0 V
4.5 V
3.3 V
2.7 V
1.8 V
0
0,2
0,4
0,6
0,8
1
0 0,1 0,2 0,3 0,4 0,5 0,6 0,7 0,8 0,9 1
Frequency (MHz)
ICC (mA)
ACTIVE SUPPLY CURRENT vs. FREQUENCY (ATtiny4313)
(PRR=0xFF)
0
2
4
6
8
10
0 2 4 6 8 10 12 14 16 18 20
Frequency (MHz)
ICC (mA)
1.8V
2.7V
3.3V
4.5V
5.0V
5.5V232
8246B–AVR–09/11
ATtiny2313A/4313
Figure 23-51. Active Supply Current vs. VCC (Internal RC Oscillator, 8 MHz)
Figure 23-52. Active Supply Current vs. VCC (Internal RC Oscillator, 1 MHz)
ACTIVE SUPPLY CURRENT vs. VCC (ATtiny4313)
INTERNAL RC OSCILLATOR, 8 MHz
85 °C
25 °C
-40 °C
0
1
2
3
4
5
1,5 2 2,5 3 3,5 4 4,5 5 5,5
VCC (V)
ICC (mA)
ACTIVE SUPPLY CURRENT vs. VCC (ATtiny4313)
INTERNAL RC OSCILLATOR, 1 MHz
85 °C
25 °C
-40 °C
0
0,2
0,4
0,6
0,8
1
1,2
1,5 2 2,5 3 3,5 4 4,5 5 5,5
VCC (V)
ICC (mA)233
8246B–AVR–09/11
ATtiny2313A/4313
Figure 23-53. Active Supply Current vs. VCC (Internal RC Oscillator, 128 KHz)
23.3.2 Current Consumption in Idle Mode
Figure 23-54. Idle Supply Current vs. Low Frequency (0.1 - 1.0 MHz)
ACTIVE SUPPLY CURRENT vs. VCC (ATtiny4313)
INTERNAL RC OSCILLATOR, 128 KHz
85 °C
25 °C
-40 °C
0
0,02
0,04
0,06
0,08
0,1
0,12
1,5 2 2,5 3 3,5 4 4,5 5 5,5
VCC (V)
ICC (mA)
IDLE SUPPLY CURRENT vs. LOW FREQUENCY (ATtiny4313)
(PRR=0xFF)
5.5 V
5.0 V
4.5 V
4.0 V
3.3 V
2.7 V
1.8 V
0
0,02
0,04
0,06
0,08
0,1
0,12
0,14
0,16
0 0,1 0,2 0,3 0,4 0,5 0,6 0,7 0,8 0,9 1
Frequency (MHz)
ICC (mA)234
8246B–AVR–09/11
ATtiny2313A/4313
Figure 23-55. Idle Supply Current vs. Frequency (1 - 20 MHz)
Figure 23-56. Idle Supply Current vs. VCC (Internal RC Oscillator, 8 MHz)
IDLE SUPPLY CURRENT vs. FREQUENCY (ATtiny4313)
(PRR=0xFF)
0
0,5
1
1,5
2
2,5
3
0 2 4 6 8 10 12 14 16 18 20
Frequency (MHz)
ICC (mA)
5.5 V
5.0 V
4.5 V
4.0 V
3.3 V
2.7 V
1.8 V
IDLE SUPPLY CURRENT vs. VCC (ATtiny4313)
INTERNAL RC OSCILLATOR, 8 MHz
85 °C
25 °C
-40 °C
0
0,2
0,4
0,6
0,8
1
1,2
1,4
1,5 2 2,5 3 3,5 4 4,5 5 5,5
VCC (V)
ICC (mA)235
8246B–AVR–09/11
ATtiny2313A/4313
Figure 23-57. Idle Supply Current vs. VCC (Internal RC Oscillator, 1 MHz)
Figure 23-58. Idle Supply Current vs. VCC (Internal RC Oscillator, 128 KHz)
IDLE SUPPLY CURRENT vs. VCC (ATtiny4313)
INTERNAL RC OSCILLATOR, 1 MHz
85 °C
25 °C
-40 °C
0
0,1
0,2
0,3
0,4
1,5 2 2,5 3 3,5 4 4,5 5 5,5
VCC (V)
ICC (mA)
IDLE SUPPLY CURRENT vs. VCC (ATtiny4313)
INTERNAL RC OSCILLATOR, 128 KHz
85 °C
25 °C
-40 °C
0
0,005
0,01
0,015
0,02
0,025
1,5 2 2,5 3 3,5 4 4,5 5 5,5
VCC (V)
ICC (mA)236
8246B–AVR–09/11
ATtiny2313A/4313
23.3.3 Current Consumption in Power-down Mode
Figure 23-59. Power-down Supply Current vs. VCC (Watchdog Timer Disabled)
Figure 23-60. Power-down Supply Current vs. VCC (Watchdog Timer Enabled)
POWER-DOWN SUPPLY CURRENT vs. VCC (ATtiny4313)
WATCHDOG TIMER DISABLED
85 °C
25 °C
-40 °C
0
0,1
0,2
0,3
0,4
0,5
0,6
1,5 2 2,5 3 3,5 4 4,5 5 5,5
VCC (V)
ICC (uA)
POWER-DOWN SUPPLY CURRENT vs. VCC (ATtiny4313)
WATCHDOG TIMER ENABLED
85 °C
25 °C
-40 °C
0
1
2
3
4
5
6
7
8
1,5 2 2,5 3 3,5 4 4,5 5 5,5
VCC (V)
ICC (uA)237
8246B–AVR–09/11
ATtiny2313A/4313
23.3.4 Current Consumption in Reset
Figure 23-61. Reset Supply Current vs. VCC (0.1 - 1.0 MHz, Excluding Current Through The
Reset Pull-up)
Figure 23-62. Reset Supply Current vs. VCC (1 - 20 MHz, Excluding Current Through The Reset
Pull-up)
RESET SUPPLY CURRENT vs. VCC (ATtiny4313)
EXCLUDING CURRENT THROUGH THE RESET PULLUP
5.5 V
5.0 V
4.5 V
4.0 V
3.3 V
2.7 V
1.8 V
0
0,02
0,04
0,06
0,08
0,1
0,12
0 0,1 0,2 0,3 0,4 0,5 0,6 0,7 0,8 0,9 1
Frequency (MHz)
ICC (mA)
RESET SUPPLY CURRENT vs. VCC (ATtiny4313)
EXCLUDING CURRENT THROUGH THE RESET PULLUP
0
0,2
0,4
0,6
0,8
1
1,2
1,4
1,6
1,8
2
2,2
0 2 4 6 8 10 12 14 16 18 20
Frequency (MHz)
ICC (mA)
5.5 V
5.0 V
4.5 V
4.0 V
3.3 V
2.7 V
1.8 V238
8246B–AVR–09/11
ATtiny2313A/4313
23.3.5 Current Consumption of Peripheral Units
Figure 23-63. Brownout Detector Current vs. VCC
Figure 23-64. Programming Current vs. VCC (ATtiny4313)
Note: Above programming current based on simulation and characterisation of similar device
(ATtiny44A).
BROWNOUT DETECTOR CURRENT vs. VCC (ATtiny4313)
BOD level = 1.8V
85 °C
25 °C
-40 °C
0
5
10
15
20
25
30
35
1,5 2 2,5 3 3,5 4 4,5 5 5,5
VCC (V)
ICC (uA)
PROGRAMMING CURRENT vs. VCC
85 °C
25 °C
-40 °C
0
2000
4000
6000
8000
10000
12000
1,5 2 2,5 3 3,5 4 4,5 5 5,5
VCC (V)
ICC (uA)239
8246B–AVR–09/11
ATtiny2313A/4313
23.3.6 Pull-up Resistors
Figure 23-65. Pull-up Resistor Current vs. Input Voltage (I/O Pin, VCC = 1.8V)
Figure 23-66. Pull-up Resistor Current vs. Input Voltage (I/O Pin, VCC = 2.7V)
I/O PIN PULL-UP RESISTOR CURRENT vs. INPUT VOLTAGE (ATtiny4313)
0
10
20
30
40
50
60
0 0,2 0,4 0,6 0,8 1 1,2 1,4 1,6 1,8 2
VOP (V)
IOP (uA)
85 °C
25 °C
-40 °C
I/O PIN PULL-UP RESISTOR CURRENT vs. INPUT VOLTAGE (ATtiny4313)
0
10
20
30
40
50
60
70
80
0 0,5 1 1,5 2 2,5 3
VOP (V)
IOP (uA)
85 °C
25 °C
-40 °C240
8246B–AVR–09/11
ATtiny2313A/4313
Figure 23-67. Pull-up Resistor Current vs. Input Voltage (I/O Pin, VCC = 5V)
Figure 23-68. Reset Pull-up Resistor Current vs. Reset Pin Voltage (VCC = 1.8V)
I/O PIN PULL-UP RESISTOR CURRENT vs. INPUT VOLTAGE (ATtiny4313)
0
20
40
60
80
100
120
140
160
0 1 2 3 4 5 6
VOP (V)
IOP (uA)
85 °C
25 °C
-40 °C
RESET PULL-UP RESISTOR CURRENT vs. RESET PIN VOLTAGE (ATtiny4313)
0
5
10
15
20
25
30
35
40
0 0,2 0,4 0,6 0,8 1 1,2 1,4 1,6 1,8 2
VRESET (V)
IRESET (uA)
85 °C
25 °C
-40 °C241
8246B–AVR–09/11
ATtiny2313A/4313
Figure 23-69. Reset Pull-up Resistor Current vs. Reset Pin Voltage (VCC = 2.7V)
Figure 23-70. Reset Pull-up Resistor Current vs. Reset Pin Voltage (VCC = 5V)
RESET PULL-UP RESISTOR CURRENT vs. RESET PIN VOLTAGE (ATtiny4313)
0
10
20
30
40
50
60
0 0,5 1 1,5 2 2,5 3
VRESET (V)
IRESET (uA)
85 °C
25 °C
-40 °C
RESET PULL-UP RESISTOR CURRENT vs. RESET PIN VOLTAGE (ATtiny4313)
0
20
40
60
80
100
120
0 1 2 3 4 5 6
VRESET (V)
IRESET (uA)242
8246B–AVR–09/11
ATtiny2313A/4313
23.3.7 Output Driver Strength
Figure 23-71. VOL: Output Voltage vs. Sink Current (I/O Pin, VCC = 1.8V)
Figure 23-72. VOL: Output Voltage vs. Sink Current (I/O Pin, VCC = 3V)
I/O PIN OUTPUT VOLTAGE vs. SINK CURRENT (ATtiny4313)
0
0,05
0,1
0,15
0,2
0,25
0,3
0,35
0,4
0 0,5 1 1,5 2 2,5 3 3,5 4 4,5 5
IOL (mA)
VOL (V)
VCC = 1.8V
85 °C
25 °C
-40 °C
I/O PIN OUTPUT VOLTAGE vs. SINK CURRENT (ATtiny4313)
0
0,1
0,2
0,3
0,4
0,5
0,6
0 2 4 6 8 10
IOL (mA)
VOL (V)
VCC = 3V
85 °C
25 °C
-40 °C243
8246B–AVR–09/11
ATtiny2313A/4313
Figure 23-73. VOL: Output Voltage vs. Sink Current (I/O Pin, VCC = 5V)
Figure 23-74. VOH: Output Voltage vs. Source Current (I/O Pin, VCC = 1.8V)
I/O PIN OUTPUT VOLTAGE vs. SINK CURRENT (ATtiny4313)
85 °C
25 °C
-40 °C
0
0,1
0,2
0,3
0,4
0,5
0,6
0 2 4 6 8 10 12 14 16 18 20
IOL (mA)
VOL (V)
VCC = 5V
I/O PIN OUTPUT VOLTAGE vs. SOURCE CURRENT (ATtiny4313)
1
1,2
1,4
1,6
1,8
2
0 0,5 1 1,5 2 2,5 3 3,5 4 4,5 5
IOH (mA)
VOH (V)
VCC = 1.8V
85 °C
25 °C
-40 °C244
8246B–AVR–09/11
ATtiny2313A/4313
Figure 23-75. VOH: Output Voltage vs. Source Current (I/O Pin, VCC = 3V)
Figure 23-76. VOH: Output Voltage vs. Source Current (I/O Pin, VCC = 5V)
I/O PIN OUTPUT VOLTAGE vs. SOURCE CURRENT (ATtiny4313)
2,5
2,6
2,7
2,8
2,9
3
3,1
0 2 4 6 8 10
IOH (mA)
VOH (V)
VCC = 3V
85 °C
25 °C
-40 °C
I/O PIN OUTPUT VOLTAGE vs. SOURCE CURRENT (ATtiny4313)
85 °C
25 °C
-40 °C
4,3
4,5
4,7
4,9
5,1
0 5 10 15 20
IOH (mA)
VOH (V)
VCC = 5V245
8246B–AVR–09/11
ATtiny2313A/4313
Figure 23-77. VOL: Output Voltage vs. Sink Current (Reset Pin as I/O, T = 25°C)
Figure 23-78. VOH: Output Voltage vs. Source Current (Reset Pin as I/O, T = 25°C)
RESET AS I/O PIN OUTPUT VOLTAGE vs. SINK CURRENT (ATtiny4313)
0
0,1
0,2
0,3
0,4
0,5
0,6
0,7
0,8
0,9
1
0 1 2 3 4
IOL (mA)
VOL (V)
5.0 V
1.8 V 3.0 V
RESET AS I/O PIN OUTPUT VOLTAGE vs. SOURCE CURRENT (ATtiny4313)
0
1
2
3
4
5
0 0,2 0,4 0,6 0,8 1
IOH (mA)
VOH (V)
5.0V
3.0V
1.8V246
8246B–AVR–09/11
ATtiny2313A/4313
23.3.8 Input Thresholds and Hysteresis (for I/O Ports)
Figure 23-79. VIH: Input Threshold Voltage vs. VCC (I/O Pin Read as ‘1’)
Figure 23-80. VIL: Input Threshold Voltage vs. VCC (I/O Pin, Read as ‘0’)
I/O PIN INPUT THRESHOLD VOLTAGE vs. VCC (ATtiny4313)
VIH, IO PIN READ AS '1'
85 °C
25 °C
-40 °C
0
0,5
1
1,5
2
2,5
3
3,5
1,5 2 2,5 3 3,5 4 4,5 5 5,5
VCC (V)
Threshold (V)
I/O PIN INPUT THRESHOLD VOLTAGE vs. VCC (ATtiny4313)
VIL, IO PIN READ AS '0'
85 °C
25 °C
-40 °C
0
0,5
1
1,5
2
2,5
1,5 2 2,5 3 3,5 4 4,5 5 5,5
VCC (V)
Threshold (V)247
8246B–AVR–09/11
ATtiny2313A/4313
Figure 23-81. VIH-VIL: Input Hysteresis vs. VCC (I/O Pin)
Figure 23-82. VIH: Input Threshold Voltage vs. VCC (Reset Pin as I/O, Read as ‘1’)
I/O PIN INPUT HYSTERESIS vs. VCC (ATtiny4313)
85 °C
25 °C
-40 °C
0
0,1
0,2
0,3
0,4
0,5
0,6
1,5 2 2,5 3 3,5 4 4,5 5 5,5
VCC (V)
Input Hysteresis (V)
RESET PIN AS I/O THRESHOLD VOLTAGE vs. VCC (ATtiny4313)
VIH, RESET READ AS '1'
85 °C
25 °C
-40 °C
0
0,5
1
1,5
2
2,5
3
1,5 2 2,5 3 3,5 4 4,5 5 5,5
VCC (V)
Threshold (V)248
8246B–AVR–09/11
ATtiny2313A/4313
Figure 23-83. VIL: Input Threshold Voltage vs. VCC (Reset Pin as I/O, Read as ‘0’)
Figure 23-84. VIH-VIL: Input Hysteresis vs. VCC (Reset Pin as I/O)
RESET PIN AS I/O THRESHOLD VOLTAGE vs. VCC (ATtiny4313)
VIL, RESET READ AS '0'
85 °C
25 °C
-40 °C
0
0,5
1
1,5
2
2,5
1,5 2 2,5 3 3,5 4 4,5 5 5,5
VCC (V)
Threshold (V)
RESET PIN AS IO, INPUT HYSTERESIS vs. VCC (ATtiny4313)
VIL, IO PIN READ AS "0"
85 °C
25 °C
-40 °C
0
0,1
0,2
0,3
0,4
0,5
0,6
0,7
0,8
0,9
1
1,5 2 2,5 3 3,5 4 4,5 5 5,5
VCC (V)
Input Hysteresis (V)249
8246B–AVR–09/11
ATtiny2313A/4313
23.3.9 BOD, Bandgap and Reset
Figure 23-85. BOD Thresholds vs. Temperature (BOD Level is 4.3V)
Figure 23-86. BOD Thresholds vs. Temperature (BOD Level is 2.7V)
BOD THRESHOLDS vs. TEMPERATURE (BOD Level set to 4.3V) (ATtiny4313)
BOD Level = 4.3V
4,16
4,18
4,2
4,22
4,24
4,26
4,28
4,3
4,32
4,34
4,36
4,38
-40 -30 -20 -10 0 10 20 30 40 50 60 70 80 90 100
Temperature (C)
Threshold (V)
VCC RISING
VCC FALLING
BOD THRESHOLDS vs. TEMPERATURE (BOD Level set to 2.7V) (ATtiny4313)
BOD Level = 2.7V
2,62
2,64
2,66
2,68
2,7
2,72
2,74
2,76
2,78
-40 -20 0 20 40 60 80 100
Temperature (C)
Threshold (V)
VCC RISING
VCC FALLING250
8246B–AVR–09/11
ATtiny2313A/4313
Figure 23-87. BOD Thresholds vs. Temperature (BOD Level is 1.8V)
Figure 23-88. Bandgap Voltage vs. Supply Voltage
1,76
1,77
1,78
1,79
1,8
1,81
1,82
1,83
1,84
-40 -20 0 20 40 60 80 100
Temperature (C)
Threshold (V)
BOD THRESHOLDS vs. TEMPERATURE (BOD Level set to 1.8V) (ATtiny4313)
BOD Level = 1.8V
VCC RISING
VCC FALLING
BANDGAP VOLTAGE vs. VCC (ATtiny4313)
CALIBRATED
0,95
1
1,05
1,1
1,15
1,2
1,5 2 2,5 3 3,5 4 4,5 5 5,5
VCC (V)
Bandgap Voltage (V)251
8246B–AVR–09/11
ATtiny2313A/4313
Figure 23-89. Bandgap Voltage vs. Temperature
Figure 23-90. VIH: Input Threshold Voltage vs. VCC (Reset Pin, Read as ‘1’)
BANDGAP VOLTAGE vs. TEMP (ATtiny4313)
(Vcc=5V)
CALIBRATED
1
1,02
1,04
1,06
1,08
1,1
1,12
1,14
-40 -20 0 20 40 60 80 100
Temperature
Bandgap Voltage (V)
RESET INPUT THRESHOLD VOLTAGE vs. VCC (ATtiny4313)
VIH, IO PIN READ AS '1'
85 °C
25 °C
-40 °C
0
0,5
1
1,5
2
2,5
1,5 2 2,5 3 3,5 4 4,5 5 5,5
VCC (V)
Threshold (V)252
8246B–AVR–09/11
ATtiny2313A/4313
Figure 23-91. VIL: Input Threshold Voltage vs. VCC (Reset Pin, Read as ‘0’)
Figure 23-92. VIH-VIL: Input Hysteresis vs. VCC (Reset Pin)
RESET INPUT THRESHOLD VOLTAGE vs. VCC (ATtiny4313)
VIL, IO PIN READ AS '0'
85 °C
25 °C
-40 °C
0
0,5
1
1,5
2
2,5
1,5 2 2,5 3 3,5 4 4,5 5 5,5
VCC (V)
Threshold (V)
RESET PIN INPUT HYSTERESIS vs. VCC (ATtiny4313)
85 °C
25 °C
-40 °C
0
0,1
0,2
0,3
0,4
0,5
0,6
0,7
0,8
0,9
1
1,5 2 2,5 3 3,5 4 4,5 5 5,5
VCC (V)
Input Hysteresis (V)253
8246B–AVR–09/11
ATtiny2313A/4313
Figure 23-93. Minimum Reset Pulse Width vs. VCC
23.3.10 Internal Oscillator Speed
Figure 23-94. Calibrated 8 MHz RC Oscillator Frequency vs. VCC
MINIMUM RESET PULSE WIDTH vs. VCC (ATtiny4313)
85 °C
25 °C
-40 °C
0
200
400
600
800
1000
1200
1400
1600
1800
1,5 2 2,5 3 3,5 4 4,5 5 5,5
VCC (V)
Pulsewidth (ns)
CALIBRATED 8.0MHz RC OSCILLATOR FREQUENCY vs. OPERATING VOLTAGE (ATtiny4313)
7,2
7,4
7,6
7,8
8
8,2
8,4
8,6
1,5 2 2,5 3 3,5 4 4,5 5 5,5
VCC (V)
FRC (MHz)
85 °C
25 °C
-40 °C254
8246B–AVR–09/11
ATtiny2313A/4313
Figure 23-95. Calibrated 8 MHz RC Oscillator Frequency vs. Temperature
Figure 23-96. Calibrated 8 MHz RC Oscillator Frequency vs. Osccal Value
CALIBRATED 8.0MHz RC OSCILLATOR FREQUENCY vs. TEMPERATURE (ATtiny4313)
5.0 V
3.0 V
1.8 V
7,4
7,6
7,8
8
8,2
8,4
8,6
-40 -20 0 20 40 60 80 100
Temperature
FRC (MHz)
CALIBRATED 8.0MHz RC OSCILLATOR FREQUENCY vs. OSCCAL VALUE (ATtiny4313)
(Vcc=3V)
85 °C
25 °C
-40 °C
0
2
4
6
8
10
12
14
0 16 32 48 64 80 96 112
OSCCAL (X1)
FRC (MHz)255
8246B–AVR–09/11
ATtiny2313A/4313
24. Register Summary
Address Name Bit 7 Bit 6 Bit 5 Bit 4 Bit 3 Bit 2 Bit 1 Bit 0 Page
0x3F (0x5F) SREG I T H S V N Z C 9
0x3E (0x5E) Reserved – – – – – – – –
0x3D (0x5D) SPL SP7 SP6 SP5 SP4 SP3 SP2 SP1 SP0 12
0x3C (0x5C) OCR0B Timer/Counter0 – Compare Register B 86
0x3B (0x5B) GIMSK INT1 INT0 PCIE0 PCIE2 PCIE1 – – – 52
0x3A (0x5A) GIFR INTF1 INTF0 PCIF0 PCIF2 PCIF1 – – – 53
0x39 (0x59) TIMSK TOIE1 OCIE1A OCIE1B – ICIE1 OCIE0B TOIE0 OCIE0A 87, 116
0x38 (0x58) TIFR TOV1 OCF1A OCF1B – ICF1 OCF0B TOV0 OCF0A 87, 117
0x37 (0x57) SPMCSR – – RSIG CTPB RFLB PGWRT PGERS SPMEN 176
0x36 (0x56) OCR0A Timer/Counter0 – Compare Register A 86
0x35 (0x55) MCUCR PUD SM1 SE SM0 ISC11 ISC10 ISC01 ISC00 37, 51, 69
0x34 (0x54) MCUSR – – – – WDRF BORF EXTRF PORF 45
0x33 (0x53) TCCR0B FOC0A FOC0B – – WGM02 CS02 CS01 CS00 85
0x32 (0x52) TCNT0 Timer/Counter0 (8-bit) 86
0x31 (0x51) OSCCAL – CAL6 CAL5 CAL4 CAL3 CAL2 CAL1 CAL0 32
0x30 (0x50) TCCR0A COM0A1 COM0A0 COM0B1 COM0B0 – – WGM01 WGM00 82
0x2F (0x4F) TCCR1A COM1A1 COM1A0 COM1B1 COM1B0 – – WGM11 WGM10 111
0x2E (0x4E) TCCR1B ICNC1 ICES1 – WGM13 WGM12 CS12 CS11 CS10 113
0x2D (0x4D) TCNT1H Timer/Counter1 – Counter Register High Byte 115
0x2C (0x4C) TCNT1L Timer/Counter1 – Counter Register Low Byte 115
0x2B (0x4B) OCR1AH Timer/Counter1 – Compare Register A High Byte 115
0x2A (0x4A) OCR1AL Timer/Counter1 – Compare Register A Low Byte 115
0x29 (0x49) OCR1BH Timer/Counter1 – Compare Register B High Byte 115
0x28 (0x48) OCR1BL Timer/Counter1 – Compare Register B Low Byte 115
0x27 (0x47) Reserved – – – – – – – –
0x26 (0x46) CLKPR CLKPCE – – – CLKPS3 CLKPS2 CLKPS1 CLKPS0 32
0x25 (0x45) ICR1H Timer/Counter1 - Input Capture Register High Byte 116
0x24 (0x44) ICR1L Timer/Counter1 - Input Capture Register Low Byte 116
0x23 (0x43) GTCCR – – – – – – – PSR10 119
0x22 (ox42) TCCR1C FOC1A FOC1B – – – – – – 114
0x21 (0x41) WDTCSR WDIF WDIE WDP3 WDCE WDE WDP2 WDP1 WDP0 45
0x20 (0x40) PCMSK0 PCINT7 PCINT6 PCINT5 PCINT4 PCINT3 PCINT2 PCINT1 PCINT0 54
0x1F (0x3F) Reserved – – – – – – – –
0x1E (0x3E) EEAR – EEPROM Address Register 24
0x1D (0x3D) EEDR EEPROM Data Register 23
0x1C (0x3C) EECR – – EEPM1 EEPM0 EERIE EEMPE EEPE EERE 24
0x1B (0x3B) PORTA – – – – – PORTA2 PORTA1 PORTA0 69
0x1A (0x3A) DDRA – – – – – DDA2 DDA1 DDA0 69
0x19 (0x39) PINA – – – – – PINA2 PINA1 PINA0 70
0x18 (0x38) PORTB PORTB7 PORTB6 PORTB5 PORTB4 PORTB3 PORTB2 PORTB1 PORTB0 70
0x17 (0x37) DDRB DDB7 DDB6 DDB5 DDB4 DDB3 DDB2 DDB1 DDB0 70
0x16 (0x36) PINB PINB7 PINB6 PINB5 PINB4 PINB3 PINB2 PINB1 PINB0 70
0x15 (0x35) GPIOR2 General Purpose I/O Register 2 25
0x14 (0x34) GPIOR1 General Purpose I/O Register 1 25
0x13 (0x33) GPIOR0 General Purpose I/O Register 0 25
0x12 (0x32) PORTD – PORTD6 PORTD5 PORTD4 PORTD3 PORTD2 PORTD1 PORTD0 70
0x11 (0x31) DDRD – DDD6 DDD5 DDD4 DDD3 DDD2 DDD1 DDD0 70
0x10 (0x30) PIND – PIND6 PIND5 PIND4 PIND3 PIND2 PIND1 PIND0 70
0x0F (0x2F) USIDR USI Data Register 166
0x0E (0x2E) USISR USISIF USIOIF USIPF USIDC USICNT3 USICNT2 USICNT1 USICNT0 165
0x0D (0x2D) USICR USISIE USIOIE USIWM1 USIWM0 USICS1 USICS0 USICLK USITC 163
0x0C (0x2C) UDR UART Data Register (8-bit) 137
0x0B (0x2B) UCSRA RXC TXC UDRE FE DOR UPE U2X MPCM 138
0x0A (0x2A) UCSRB RXCIE TXCIE UDRIE RXEN TXEN UCSZ2 RXB8 TXB8 139
0x09 (0x29) UBRRL UBRRH[7:0] 141
0x08 (0x28) ACSR ACD ACBG ACO ACI ACIE ACIC ACIS1 ACIS0 168
0x07 (0x27) BODCR – – – – – – BODS BODSE 38
0x06 (0x26) PRR – – – – PRTIM1 PRTIM0 PRUSI PRUSART 37
0x05 (0x25) PCMSK2 – PCINT17 PCINT16 PCINT15 PCINT14 PCINT13 PCINT12 PCINT11 53
0x04 (0x24) PCMSK1 – – – – – PCINT10 PCINT9 PCINT8 54
0x03 (0x23) UCSRC UMSEL1 UMSEL0 UPM1 UPM0 USBS UCSZ1 UCSZ0 UCPOL 140
0x02 (0x22) UBRRH – – – – UBRRH[11:8] 141
0x01 (0x21) DIDR – – – – – – AIN1D AIN0D 169
0x00 (0x20) USIBR USI Buffer Register 167256
8246B–AVR–09/11
ATtiny2313A/4313
Notes: 1. For compatibility with future devices, reserved bits should be written to zero if accessed. Reserved I/O memory addresses
should never be written.
2. I/O Registers within the address range 0x00 - 0x1F are directly bit-accessible using the SBI and CBI instructions. In these
registers, the value of single bits can be checked by using the SBIS and SBIC instructions.
3. Some of the status flags are cleared by writing a logical one to them. Note that, unlike most other AVRs, the CBI and SBI
instructions will only operate on the specified bit, and can therefore be used on registers containing such status flags. The
CBI and SBI instructions work with registers 0x00 to 0x1F only.
4. When using the I/O specific commands IN and OUT, the I/O addresses 0x00 - 0x3F must be used. When addressing I/O
Registers as data space using LD and ST instructions, 0x20 must be added to these addresses. 257
8246B–AVR–09/11
ATtiny2313A/4313
25. Instruction Set Summary
Mnemonics Operands Description Operation Flags #Clocks
ARITHMETIC AND LOGIC INSTRUCTIONS
ADD Rd, Rr Add two Registers Rd ← Rd + Rr Z,C,N,V,H 1
ADC Rd, Rr Add with Carry two Registers Rd ← Rd + Rr + C Z,C,N,V,H 1
ADIW Rdl,K Add Immediate to Word Rdh:Rdl ← Rdh:Rdl + K Z,C,N,V,S 2
SUB Rd, Rr Subtract two Registers Rd ← Rd - Rr Z,C,N,V,H 1
SUBI Rd, K Subtract Constant from Register Rd ← Rd - K Z,C,N,V,H 1
SBC Rd, Rr Subtract with Carry two Registers Rd ← Rd - Rr - C Z,C,N,V,H 1
SBCI Rd, K Subtract with Carry Constant from Reg. Rd ← Rd - K - C Z,C,N,V,H 1
SBIW Rdl,K Subtract Immediate from Word Rdh:Rdl ← Rdh:Rdl - K Z,C,N,V,S 2
AND Rd, Rr Logical AND Registers Rd ← Rd • Rr Z,N,V 1
ANDI Rd, K Logical AND Register and Constant Rd ← Rd • K Z,N,V 1
OR Rd, Rr Logical OR Registers Rd ← Rd v Rr Z,N,V 1
ORI Rd, K Logical OR Register and Constant Rd ← Rd v K Z,N,V 1
EOR Rd, Rr Exclusive OR Registers Rd ← Rd ⊕ Rr Z,N,V 1
COM Rd One’s Complement Rd ← 0xFF − Rd Z,C,N,V 1
NEG Rd Two’s Complement Rd ← 0x00 − Rd Z,C,N,V,H 1
SBR Rd,K Set Bit(s) in Register Rd ← Rd v K Z,N,V 1
CBR Rd,K Clear Bit(s) in Register Rd ← Rd • (0xFF - K) Z,N,V 1
INC Rd Increment Rd ← Rd + 1 Z,N,V 1
DEC Rd Decrement Rd ← Rd − 1 Z,N,V 1
TST Rd Test for Zero or Minus Rd ← Rd • Rd Z,N,V 1
CLR Rd Clear Register Rd ← Rd ⊕ Rd Z,N,V 1
SER Rd Set Register Rd ← 0xFF None 1
BRANCH INSTRUCTIONS
RJMP k Relative Jump PC ← PC + k + 1 None 2
IJMP Indirect Jump to (Z) PC ← Z None 2
RCALL k Relative Subroutine Call PC ← PC + k + 1 None 3
ICALL Indirect Call to (Z) PC ← Z None 3
RET Subroutine Return PC ← STACK None 4
RETI Interrupt Return PC ← STACK I 4
CPSE Rd,Rr Compare, Skip if Equal if (Rd = Rr) PC ← PC + 2 or 3 None 1/2/3
CP Rd,Rr Compare Rd − Rr Z, N,V,C,H 1
CPC Rd,Rr Compare with Carry Rd − Rr − C Z, N,V,C,H 1
CPI Rd,K Compare Register with Immediate Rd − K Z, N,V,C,H 1
SBRC Rr, b Skip if Bit in Register Cleared if (Rr(b)=0) PC ← PC + 2 or 3 None 1/2/3
SBRS Rr, b Skip if Bit in Register is Set if (Rr(b)=1) PC ← PC + 2 or 3 None 1/2/3
SBIC P, b Skip if Bit in I/O Register Cleared if (P(b)=0) PC ← PC + 2 or 3 None 1/2/3
SBIS P, b Skip if Bit in I/O Register is Set if (P(b)=1) PC ← PC + 2 or 3 None 1/2/3
BRBS s, k Branch if Status Flag Set if (SREG(s) = 1) then PC←PC+k + 1 None 1/2
BRBC s, k Branch if Status Flag Cleared if (SREG(s) = 0) then PC←PC+k + 1 None 1/2
BREQ k Branch if Equal if (Z = 1) then PC ← PC + k + 1 None 1/2
BRNE k Branch if Not Equal if (Z = 0) then PC ← PC + k + 1 None 1/2
BRCS k Branch if Carry Set if (C = 1) then PC ← PC + k + 1 None 1/2
BRCC k Branch if Carry Cleared if (C = 0) then PC ← PC + k + 1 None 1/2
BRSH k Branch if Same or Higher if (C = 0) then PC ← PC + k + 1 None 1/2
BRLO k Branch if Lower if (C = 1) then PC ← PC + k + 1 None 1/2
BRMI k Branch if Minus if (N = 1) then PC ← PC + k + 1 None 1/2
BRPL k Branch if Plus if (N = 0) then PC ← PC + k + 1 None 1/2
BRGE k Branch if Greater or Equal, Signed if (N ⊕ V= 0) then PC ← PC + k + 1 None 1/2
BRLT k Branch if Less Than Zero, Signed if (N ⊕ V= 1) then PC ← PC + k + 1 None 1/2
BRHS k Branch if Half Carry Flag Set if (H = 1) then PC ← PC + k + 1 None 1/2
BRHC k Branch if Half Carry Flag Cleared if (H = 0) then PC ← PC + k + 1 None 1/2
BRTS k Branch if T Flag Set if (T = 1) then PC ← PC + k + 1 None 1/2
BRTC k Branch if T Flag Cleared if (T = 0) then PC ← PC + k + 1 None 1/2
BRVS k Branch if Overflow Flag is Set if (V = 1) then PC ← PC + k + 1 None 1/2
BRVC k Branch if Overflow Flag is Cleared if (V = 0) then PC ← PC + k + 1 None 1/2
BRIE k Branch if Interrupt Enabled if ( I = 1) then PC ← PC + k + 1 None 1/2
BRID k Branch if Interrupt Disabled if ( I = 0) then PC ← PC + k + 1 None 1/2
BIT AND BIT-TEST INSTRUCTIONS
SBI P,b Set Bit in I/O Register I/O(P,b) ← 1 None 2
CBI P,b Clear Bit in I/O Register I/O(P,b) ← 0 None 2
LSL Rd Logical Shift Left Rd(n+1) ← Rd(n), Rd(0) ← 0 Z,C,N,V 1
LSR Rd Logical Shift Right Rd(n) ← Rd(n+1), Rd(7) ← 0 Z,C,N,V 1
ROL Rd Rotate Left Through Carry Rd(0)←C,Rd(n+1)← Rd(n),C←Rd(7) Z,C,N,V 1258
8246B–AVR–09/11
ATtiny2313A/4313
ROR Rd Rotate Right Through Carry Rd(7)←C,Rd(n)← Rd(n+1),C←Rd(0) Z,C,N,V 1
ASR Rd Arithmetic Shift Right Rd(n) ← Rd(n+1), n=0..6 Z,C,N,V 1
SWAP Rd Swap Nibbles Rd(3..0)←Rd(7..4),Rd(7..4)←Rd(3..0) None 1
BSET s Flag Set SREG(s) ← 1 SREG(s) 1
BCLR s Flag Clear SREG(s) ← 0 SREG(s) 1
BST Rr, b Bit Store from Register to T T ← Rr(b) T 1
BLD Rd, b Bit load from T to Register Rd(b) ← T None 1
SEC Set Carry C ← 1 C1
CLC Clear Carry C ← 0 C 1
SEN Set Negative Flag N ← 1 N1
CLN Clear Negative Flag N ← 0 N 1
SEZ Set Zero Flag Z ← 1 Z1
CLZ Clear Zero Flag Z ← 0 Z 1
SEI Global Interrupt Enable I ← 1 I1
CLI Global Interrupt Disable I ← 0 I 1
SES Set Signed Test Flag S ← 1 S1
CLS Clear Signed Test Flag S ← 0 S 1
SEV Set Twos Complement Overflow. V ← 1 V1
CLV Clear Twos Complement Overflow V ← 0 V 1
SET Set T in SREG T ← 1 T1
CLT Clear T in SREG T ← 0 T 1
SEH Set Half Carry Flag in SREG H ← 1 H1
CLH Clear Half Carry Flag in SREG H ← 0 H 1
DATA TRANSFER INSTRUCTIONS
MOV Rd, Rr Move Between Registers Rd ← Rr None 1
MOVW Rd, Rr Copy Register Word Rd+1:Rd ← Rr+1:Rr None 1
LDI Rd, K Load Immediate Rd ← K None 1
LD Rd, X Load Indirect Rd ← (X) None 2
LD Rd, X+ Load Indirect and Post-Inc. Rd ← (X), X ← X + 1 None 2
LD Rd, - X Load Indirect and Pre-Dec. X ← X - 1, Rd ← (X) None 2
LD Rd, Y Load Indirect Rd ← (Y) None 2
LD Rd, Y+ Load Indirect and Post-Inc. Rd ← (Y), Y ← Y + 1 None 2
LD Rd, - Y Load Indirect and Pre-Dec. Y ← Y - 1, Rd ← (Y) None 2
LDD Rd,Y+q Load Indirect with Displacement Rd ← (Y + q) None 2
LD Rd, Z Load Indirect Rd ← (Z) None 2
LD Rd, Z+ Load Indirect and Post-Inc. Rd ← (Z), Z ← Z+1 None 2
LD Rd, -Z Load Indirect and Pre-Dec. Z ← Z - 1, Rd ← (Z) None 2
LDD Rd, Z+q Load Indirect with Displacement Rd ← (Z + q) None 2
LDS Rd, k Load Direct from SRAM Rd ← (k) None 2
ST X, Rr Store Indirect (X) ← Rr None 2
ST X+, Rr Store Indirect and Post-Inc. (X) ← Rr, X ← X + 1 None 2
ST - X, Rr Store Indirect and Pre-Dec. X ← X - 1, (X) ← Rr None 2
ST Y, Rr Store Indirect (Y) ← Rr None 2
ST Y+, Rr Store Indirect and Post-Inc. (Y) ← Rr, Y ← Y + 1 None 2
ST - Y, Rr Store Indirect and Pre-Dec. Y ← Y - 1, (Y) ← Rr None 2
STD Y+q,Rr Store Indirect with Displacement (Y + q) ← Rr None 2
ST Z, Rr Store Indirect (Z) ← Rr None 2
ST Z+, Rr Store Indirect and Post-Inc. (Z) ← Rr, Z ← Z + 1 None 2
ST -Z, Rr Store Indirect and Pre-Dec. Z ← Z - 1, (Z) ← Rr None 2
STD Z+q,Rr Store Indirect with Displacement (Z + q) ← Rr None 2
STS k, Rr Store Direct to SRAM (k) ← Rr None 2
LPM Load Program Memory R0 ← (Z) None 3
LPM Rd, Z Load Program Memory Rd ← (Z) None 3
LPM Rd, Z+ Load Program Memory and Post-Inc Rd ← (Z), Z ← Z+1 None 3
SPM Store Program Memory (Z) ← R1:R0 None -
IN Rd, P In Port Rd ← P None 1
OUT P, Rr Out Port P ← Rr None 1
PUSH Rr Push Register on Stack STACK ← Rr None 2
POP Rd Pop Register from Stack Rd ← STACK None 2
MCU CONTROL INSTRUCTIONS
NOP No Operation None 1
SLEEP Sleep (see specific descr. for Sleep function) None 1
WDR Watchdog Reset (see specific descr. for WDR/timer) None 1
BREAK Break For On-chip Debug Only None N/A
Mnemonics Operands Description Operation Flags #Clocks259
8246B–AVR–09/11
ATtiny2313A/4313
26. Ordering Information
Notes: 1. For speed vs. supply voltage, see section 22.3 “Speed” on page 200.
2. All packages are Pb-free, halide-free and fully green, and they comply with the European directive for Restriction of Hazardous
Substances (RoHS).
3. Code indicators:
– H: NiPdAu lead finish
– U or N: matte tin
– R: tape & reel
4. Can also be supplied in wafer form. Contact your local Atmel sales office for ordering information and minimum quantities.
5. NiPdAu finish
6. Topside markings :
– 1st Line: T2313
– 2nd Line: Axx
– 3rd Line: xxx
26.1 ATtiny2313A
Speed (MHz) (1) Supply Voltage (V) Temperature Range Package (2) Ordering Code (3)
20 1.8 – 5.5 Industrial
(-40°C to +85°C) (4)
20P3 ATtiny2313A-PU
20S
ATtiny2313A-SU
ATtiny2313A-SUR
20M1
ATtiny2313A-MU
ATtiny2313A-MUR
20M2 (5)(6) ATtiny2313A-MMH
ATtiny2313A-MMHR
Package Type
20P3 20-lead, 0.300" Wide, Plastic Dual Inline Package (PDIP)
20S 20-lead, 0.300" Wide, Plastic Gull Wing Small Outline Package (SOIC)
20M1 20-pad, 4 x 4 x 0.8 mm Body, Quad Flat No-Lead / Micro Lead Frame Package (MLF)
20M2 20-pad, 3 x 3 x 0.85 mm Body, Very Thin Quad Flat No Lead Package (VQFN)260
8246B–AVR–09/11
ATtiny2313A/4313
Notes: 1. For speed vs. supply voltage, see section 22.3 “Speed” on page 200.
2. All packages are Pb-free, halide-free and fully green, and they comply with the European directive for Restriction of Hazardous
Substances (RoHS).
3. Code indicators:
– H: NiPdAu lead finish
– U or N: matte tin
– R: tape & reel
4. Can also be supplied in wafer form. Contact your local Atmel sales office for ordering information and minimum quantities.
5. NiPdAu finish
6. Topside markings:
– 1st Line: T4313
– 2nd Line: Axx
– 3rd Line: xxx
26.2 ATtiny4313
Speed (MHz) (1) Supply Voltage (V) Temperature Range Package (2) Ordering Code (3)
20 1.8 – 5.5 Industrial
(-40°C to +85°C) (4)
20P3 ATtiny4313-PU
20S
ATtiny4313-SU
ATtiny4313-SUR
20M1
ATtiny4313-MU
ATtiny4313-MUR
20M2 (5)(6) ATtiny4313-MMH
ATtiny4313-MMHR
Package Type
20P3 20-lead, 0.300" Wide, Plastic Dual Inline Package (PDIP)
20S 20-lead, 0.300" Wide, Plastic Gull Wing Small Outline Package (SOIC)
20M1 20-pad, 4 x 4 x 0.8 mm Body, Quad Flat No-Lead/Micro Lead Frame Package (MLF)
20M2 20-pad, 3 x 3 x 0.85 mm Body, Very Thin Quad Flat No Lead Package (VQFN)261
8246B–AVR–09/11
ATtiny2313A/4313
27. Packaging Information
27.1 20P3
2325 Orchard Parkway
San Jose, CA 95131
TITLE DRAWING NO.
R
REV.
20P3, 20-lead (0.300"/7.62 mm Wide) Plastic Dual
Inline Package (PDIP) 20P3 D
2010-10-19
PIN
1
E1
A1
B
E
B1
C
L
SEATING PLANE
A
D
e
eB
eC
COMMON DIMENSIONS
(Unit of Measure = mm)
SYMBOL MIN NOM MAX NOTE
A – – 5.334
A1 0.381 – –
D 25.493 – 25.984 Note 2
E 7.620 – 8.255
E1 6.096 – 7.112 Note 2
B 0.356 – 0.559
B1 1.270 – 1.551
L 2.921 – 3.810
C 0.203 – 0.356
eB – – 10.922
eC 0.000 – 1.524
e 2.540 TYP
Notes:
1. This package conforms to JEDEC reference MS-001, Variation AD.
2. Dimensions D and E1 do not include mold Flash or Protrusion.
Mold Flash or Protrusion shall not exceed 0.25 mm (0.010"). 262
8246B–AVR–09/11
ATtiny2313A/4313
27.2 20S263
8246B–AVR–09/11
ATtiny2313A/4313
27.3 20M1
2325 Orchard Parkway
San Jose, CA 95131
TITLE DRAWING NO.
R
REV.
20M1, 20-pad, 4 x 4 x 0.8 mm Body, Lead Pitch 0.50 mm, 20M1 A
10/27/04
2.6 mm Exposed Pad, Micro Lead Frame Package (MLF)
A 0.70 0.75 0.80
A1 – 0.01 0.05
A2 0.20 REF
b 0.18 0.23 0.30
D 4.00 BSC
D2 2.45 2.60 2.75
E 4.00 BSC
E2 2.45 2.60 2.75
e 0.50 BSC
L 0.35 0.40 0.55
SIDE VIEW
Pin 1 ID
Pin #1
Notch
(0.20 R)
BOTTOM VIEW
TOP VIEW
Note: Reference JEDEC Standard MO-220, Fig. 1 (SAW Singulation) WGGD-5.
COMMON DIMENSIONS
(Unit of Measure = mm)
SYMBOL MIN NOM MAX NOTE
D
E
e
A2
A1
A
D2
E2
0.08 C
L
1
2
3
b
1
2
3264
8246B–AVR–09/11
ATtiny2313A/4313
27.4 20M2
TITLE GPC DRAWING NO. REV.
Package Drawing Contact:
packagedrawings@atmel.com ZFC B 20M2
20M2, 20-pad, 3 x 3 x 0.85 mm Body, Lead Pitch 0.45 mm,
1.55 x 1.55 mm Exposed Pad, Thermally Enhanced
Plastic Very Thin Quad Flat No Lead Package (VQFN)
10/24/08
15
14
13
12
11
1
2
3
4
5
16 17 18 19 20
10 9 8 7 6
D2
E2
e
b
L K
Pin #1 Chamfer
(C 0.3)
D
E SIDE VIEW
A1
y
Pin 1 ID
BOTTOM VIEW
TOP VIEW
A
C
C0.18 (8X)
0.3 Ref (4x)
COMMON DIMENSIONS
(Unit of Measure = mm)
SYMBOL MIN NOM MAX NOTE
A 0.75 0.80 0.85
A1 0.00 0.02 0.05
b 0.17 0.22 0.27
C 0.152
D 2.90 3.00 3.10
D2 1.40 1.55 1.70
E 2.90 3.00 3.10
E2 1.40 1.55 1.70
e – 0.45 –
L 0.35 0.40 0.45
K 0.20 – –
y 0.00 – 0.08 265
8246B–AVR–09/11
ATtiny2313A/4313
28. Errata
The revision letters in this section refer to the revision of the corresponding ATtiny2313A/4313
device.
28.1 ATtiny2313A
28.1.1 Rev. D
No known errata.
28.1.2 Rev. A – C
These device revisions were referred to as ATtiny2313/ATtiny2313V.
28.2 ATtiny4313
28.2.1 Rev. A
No known errata.266
8246B–AVR–09/11
ATtiny2313A/4313
29. Datasheet Revision History
29.1 Rev. 8246B – 10/11
1. Updated device status from Preliminary to Final.
2. Updated document template.
3. Added order codes for tape&reel devices, on page 259 and page 260
4. Updated figures:
– Figure 23-33 on page 223
– Figure 23-44 on page 228
– Figure 23-81 on page 247
– Figure 23-92 on page 252
5. Updated sections:
– Section 5. “Memories” on page 16
– Section 19. “Self-Programming” on page 173
– Section 20. “Lock Bits, Fuse Bits and Device Signature” on page 178
– Section 21. “External Programming” on page 184
– Section 26. “Ordering Information” on page 259
29.2 Rev. 8246A – 11/09
1. Initial revision. Created from document 2543_t2313.
2. Updated datasheet template.
3. Added VQFN in the Pinout Figure 1-1 on page 2.
4. Added Section 7.2 “Software BOD Disable” on page 35.
5. Added Section 7.3 “Power Reduction Register” on page 35.
6. Updated Table 7-2, “Sleep Mode Select,” on page 37.
7. Added Section 7.5.3 “BODCR – Brown-Out Detector Control Register” on page 38.
8. Added reset disable function in Figure 8-1 on page 39.
9. Added pin change interrupts PCINT1 and PCINT2 in Table 9-1 on page 48.
10. Added PCINT17..8 and PCMSK2..1 in Section 9.2 “External Interrupts” on page 49.
11. Added Section 9.3.4 “PCMSK2 – Pin Change Mask Register 2” on page 53.
12. Added Section 9.3.5 “PCMSK1 – Pin Change Mask Register 1” on page 54.
13. Updated Section 10.2.1 “Alternate Functions of Port A” on page 62.
14. Updated Section 10.2.2 “Alternate Functions of Port B” on page 63.
15. Updated Section 10.2.3 “Alternate Functions of Port D” on page 67.
16. Added UMSEL1 and UMSEL0 in Section 14.10.4 “UCSRC – USART Control and Status
Register C” on page 140.
17. Added Section 15. “USART in SPI Mode” on page 146.
18. Added USI Buffer Register (USIBR) in Section 16.2 “Overview” on page 156 and in Figure
16-1 on page 156.
19. Added Section 16.5.4 “USIBR – USI Buffer Register” on page 167.
20. Updated Section 19.6.3 “Reading Device Signature Imprint Table from Firmware” on
page 175.267
8246B–AVR–09/11
ATtiny2313A/4313
21. Updated Section 19.7.1 “SPMCSR – Store Program Memory Control and Status Register”
on page 176.
22. Added Section 20.3 “Device Signature Imprint Table” on page 180.
23. Updated Section 20.3.1 “Calibration Byte” on page 181.
24. Changed BS to BS1 in Section 20.6.13 “Reading the Signature Bytes” on page 189.
25. Updated Section 22.2 “DC Characteristics” on page 198.
26. Added Section 23.1 “Effect of Power Reduction” on page 206.
27. Updated characteristic plots in Section 23. “Typical Characteristics” for ATtiny2313A
(pages 207 - 230), and added plots for ATtiny4313 (pages 231 - 254).
28. Updated Section 24. “Register Summary” on page 255 .
29. Updated Section 26. “Ordering Information” on page 259, added the package type
20M2 and the ordering code -MMH (VQFN), and added the topside marking note.268
8246B–AVR–09/11
ATtiny2313A/4313i
8246B–AVR–09/11
ATtiny2313A/4313
Table of Contents
Features ..................................................................................................... 1
1 Pin Configurations ................................................................................... 2
1.1 Pin Descriptions .................................................................................................3
2 Overview ................................................................................................... 5
2.1 Block Diagram ...................................................................................................5
2.2 Comparison Between ATtiny2313A and ATtiny4313 ........................................6
3 About ......................................................................................................... 7
3.1 Resources .........................................................................................................7
3.2 Code Examples .................................................................................................7
3.3 Data Retention ...................................................................................................7
4 CPU Core .................................................................................................. 8
4.1 Architectural Overview .......................................................................................8
4.2 ALU – Arithmetic Logic Unit ...............................................................................9
4.3 Status Register ..................................................................................................9
4.4 General Purpose Register File ........................................................................10
4.5 Stack Pointer ...................................................................................................12
4.6 Instruction Execution Timing ...........................................................................12
4.7 Reset and Interrupt Handling ...........................................................................13
5 Memories ................................................................................................ 15
5.1 Program Memory (Flash) .................................................................................15
5.2 Data Memory (SRAM) and Register Files .......................................................16
5.3 Data Memory (EEPROM) ................................................................................17
5.4 Register Description ........................................................................................22
6 Clock System ......................................................................................... 25
6.1 Clock Subsystems ...........................................................................................25
6.2 Clock Sources .................................................................................................26
6.3 System Clock Prescaler ..................................................................................30
6.4 Clock Output Buffer .........................................................................................31
6.5 Register Description ........................................................................................31
7 Power Management and Sleep Modes ................................................. 33
7.1 Sleep Modes ....................................................................................................33
7.2 Software BOD Disable .....................................................................................34ii
8246B–AVR–09/11
ATtiny2313A/4313
7.3 Power Reduction Register ...............................................................................34
7.4 Minimizing Power Consumption ......................................................................35
7.5 Register Description ........................................................................................36
8 System Control and Reset .................................................................... 38
8.1 Resetting the AVR ...........................................................................................38
8.2 Reset Sources .................................................................................................39
8.3 Internal Voltage Reference ..............................................................................41
8.4 Watchdog Timer ..............................................................................................41
8.5 Register Description ........................................................................................44
9 Interrupts ................................................................................................ 47
9.1 Interrupt Vectors ..............................................................................................47
9.2 External Interrupts ...........................................................................................48
9.3 Register Description ........................................................................................50
10 I/O-Ports .................................................................................................. 54
10.1 Ports as General Digital I/O .............................................................................55
10.2 Alternate Port Functions ..................................................................................59
10.3 Register Description ........................................................................................68
11 8-bit Timer/Counter0 with PWM ............................................................ 70
11.1 Features ..........................................................................................................70
11.2 Overview ..........................................................................................................70
11.3 Clock Sources .................................................................................................71
11.4 Counter Unit ....................................................................................................71
11.5 Output Compare Unit .......................................................................................72
11.6 Compare Match Output Unit ............................................................................74
11.7 Modes of Operation .........................................................................................75
11.8 Timer/Counter Timing Diagrams .....................................................................79
11.9 Register Description ........................................................................................81
12 16-bit Timer/Counter1 ............................................................................ 88
12.1 Features ..........................................................................................................88
12.2 Overview ..........................................................................................................88
12.3 Timer/Counter Clock Sources .........................................................................90
12.4 Counter Unit ....................................................................................................90
12.5 Input Capture Unit ...........................................................................................91
12.6 Output Compare Units .....................................................................................93iii
8246B–AVR–09/11
ATtiny2313A/4313
12.7 Compare Match Output Unit ............................................................................95
12.8 Modes of Operation .........................................................................................96
12.9 Timer/Counter Timing Diagrams ...................................................................104
12.10 Accessing 16-bit Registers ............................................................................106
12.11 Register Description ......................................................................................110
13 Timer/Counter0 and Timer/Counter1 Prescalers .............................. 117
13.1 Internal Clock Source ....................................................................................117
13.2 Prescaler Reset .............................................................................................117
13.3 External Clock Source ...................................................................................117
13.4 Register Description ......................................................................................118
14 USART ................................................................................................... 119
14.1 Features ........................................................................................................119
14.2 Overview ........................................................................................................119
14.3 Clock Generation ...........................................................................................120
14.4 Frame Formats ..............................................................................................123
14.5 USART Initialization .......................................................................................124
14.6 Data Transmission – The USART Transmitter ..............................................125
14.7 Data Reception – The USART Receiver .......................................................129
14.8 Asynchronous Data Reception ......................................................................132
14.9 Multi-processor Communication Mode ..........................................................135
14.10 Register Description ......................................................................................136
14.11 Examples of Baud Rate Setting .....................................................................141
15 USART in SPI Mode ............................................................................. 145
15.1 Features ........................................................................................................145
15.2 Overview ........................................................................................................145
15.3 Clock Generation ...........................................................................................145
15.4 SPI Data Modes and Timing ..........................................................................146
15.5 Frame Formats ..............................................................................................147
15.6 Data Transfer .................................................................................................149
15.7 AVR USART MSPIM vs. AVR SPI ................................................................151
15.8 Register Description ......................................................................................152
16 USI – Universal Serial Interface .......................................................... 155
16.1 Features ........................................................................................................155
16.2 Overview ........................................................................................................155
16.3 Functional Descriptions .................................................................................156iv
8246B–AVR–09/11
ATtiny2313A/4313
16.4 Alternative USI Usage ...................................................................................162
16.5 Register Description ......................................................................................162
17 Analog Comparator ............................................................................. 167
17.1 Register Description ......................................................................................167
18 debugWIRE On-chip Debug System .................................................. 169
18.1 Features ........................................................................................................169
18.2 Overview ........................................................................................................169
18.3 Physical Interface ..........................................................................................169
18.4 Software Break Points ...................................................................................170
18.5 Limitations of debugWIRE .............................................................................170
18.6 Register Description ......................................................................................171
19 Self-Programming ................................................................................ 172
19.1 Features ........................................................................................................172
19.2 Overview ........................................................................................................172
19.3 Lock Bits ........................................................................................................172
19.4 Self-Programming the Flash ..........................................................................172
19.5 Preventing Flash Corruption ..........................................................................175
19.6 Programming Time for Flash when Using SPM ............................................175
19.7 Register Description ......................................................................................175
20 Lock Bits, Fuse Bits and Device Signature ....................................... 177
20.1 Lock Bits ........................................................................................................177
20.2 Fuse Bits ........................................................................................................178
20.3 Device Signature Imprint Table .....................................................................179
20.4 Reading Lock Bits, Fuse Bits and Signature Data from Software .................180
21 External Programming ........................................................................ 183
21.1 Memory Parametrics .....................................................................................183
21.2 Parallel Programming ....................................................................................183
21.3 Serial Programming .......................................................................................192
21.4 Programming Time for Flash and EEPROM .................................................196
22 Electrical Characteristics .................................................................... 198
22.1 Absolute Maximum Ratings* .........................................................................198
22.2 DC Characteristics .........................................................................................198
22.3 Speed ............................................................................................................199
22.4 Clock Characteristics .....................................................................................200v
8246B–AVR–09/11
ATtiny2313A/4313
22.5 System and Reset Characteristics ................................................................201
22.6 Analog Comparator Characteristics ...............................................................202
22.7 Parallel Programming Characteristics ...........................................................203
22.8 Serial Programming Characteristics ..............................................................205
23 Typical Characteristics ........................................................................ 206
23.1 Effect of Power Reduction .............................................................................206
23.2 ATtiny2313A ..................................................................................................207
23.3 ATtiny4313 ....................................................................................................231
24 Register Summary ............................................................................... 255
25 Instruction Set Summary .................................................................... 257
26 Ordering Information ........................................................................... 259
26.1 ATtiny2313A ..................................................................................................259
26.2 ATtiny4313 ....................................................................................................260
27 Packaging Information ........................................................................ 261
27.1 20P3 ..............................................................................................................261
27.2 20S ................................................................................................................262
27.3 20M1 ..............................................................................................................263
27.4 20M2 ..............................................................................................................264
28 Errata ..................................................................................................... 265
28.1 ATtiny2313A ..................................................................................................265
28.2 ATtiny4313 ....................................................................................................265
29 Datasheet Revision History ................................................................ 266
29.1 Rev. 8246B – 10/11 .......................................................................................266
29.2 Rev. 8246A – 11/09 .......................................................................................2668246B–AVR–09/11
Headquarters International
Atmel Corporation
2325 Orchard Parkway
San Jose, CA 95131
USA
Tel: 1(408) 441-0311
Fax: 1(408) 487-2600
Atmel Asia Limited
Unit 01-5 & 16, 19/F
BEA Tower, Millennium City 5
418 Kwun Tong Road
Kwun Tong, Kowloon
HONG KONG
Tel: (852) 2245-6100
Fax: (852) 2722-1369
Atmel Munich GmbH
Business Campus
Parkring 4
D-85748 Garching b. Munich
GERMANY
Tel: (+49) 89-31970-0
Fax: (+49) 89-3194621
Atmel Japan
9F, Tonetsu Shinkawa Bldg.
1-24-8 Shinkawa
Chuo-ku, Tokyo 104-0033
JAPAN
Tel: (81) 3-3523-3551
Fax: (81) 3-3523-7581
Product Contact
Web Site
www.atmel.com
Technical Support
avr@atmel.com
Sales Contact
www.atmel.com/contacts
Literature Requests
www.atmel.com/literature
Disclaimer: The information in this document is provided in connection with Atmel products. No license, express or implied, by estoppel or otherwise, to any
intellectual property right is granted by this document or in connection with the sale of Atmel products. EXCEPT AS SET FORTH IN ATMEL’S TERMS AND CONDITIONS
OF SALE LOCATED ON ATMEL’S WEB SITE, ATMEL ASSUMES NO LIABILITY WHATSOEVER AND DISCLAIMS ANY EXPRESS, IMPLIED OR STATUTORY
WARRANTY RELATING TO ITS PRODUCTS INCLUDING, BUT NOT LIMITED TO, THE IMPLIED WARRANTY OF MERCHANTABILITY, FITNESS FOR A PARTICULAR
PURPOSE, OR NON-INFRINGEMENT. IN NO EVENT SHALL ATMEL BE LIABLE FOR ANY DIRECT, INDIRECT, CONSEQUENTIAL, PUNITIVE, SPECIAL OR INCIDENTAL
DAMAGES (INCLUDING, WITHOUT LIMITATION, DAMAGES FOR LOSS OF PROFITS, BUSINESS INTERRUPTION, OR LOSS OF INFORMATION) ARISING OUT OF
THE USE OR INABILITY TO USE THIS DOCUMENT, EVEN IF ATMEL HAS BEEN ADVISED OF THE POSSIBILITY OF SUCH DAMAGES. Atmel makes no
representations or warranties with respect to the accuracy or completeness of the contents of this document and reserves the right to make changes to specifications
and product descriptions at any time without notice. Atmel does not make any commitment to update the information contained herein. Unless specifically provided
otherwise, Atmel products are not suitable for, and shall not be used in, automotive applications. Atmel’s products are not intended, authorized, or warranted for use
as components in applications intended to support or sustain life.
© 2011 Atmel Corporation. All rights reserved. Atmel®, logo and combinations thereof, AVR® and others are registered trademarks or trademarks
of Atmel Corporation or its subsidiaries. Other terms and product names may be trademarks of others.
Features
• High Performance, Low Power AVR® 8-bit Microcontroller
• Advanced RISC Architecture
– 120 Powerful Instructions – Most Single Clock Cycle Execution
– 32 x 8 General Purpose Working Registers
– Fully Static Operation
• High Endurance, Non-volatile Memory Segments
– 2K/4K/8K Bytes of In-System, Self-programmable Flash Program Memory
• Endurance: 10,000 Write/Erase Cycles
– 128/256/512 Bytes of In-System Programmable EEPROM
• Endurance: 100,000 Write/Erase Cycles
– 128/256/512 Bytes of Internal SRAM
– Data Retention: 20 years at 85°C / 100 years at 25°C
– Programming Lock for Self-programming Flash & EEPROM Data Security
• Peripheral Features
– One 8-bit and One 16-bit Timer/Counter with Two PWM Channels, Each
– 10-bit ADC
• 8 Single-ended Channels
• 12 Differential ADC Channel Pairs with Programmable Gain (1x / 20x)
– Programmable Watchdog Timer with Separate On-chip Oscillator
– On-chip Analog Comparator
– Universal Serial Interface
• Special Microcontroller Features
– debugWIRE On-chip Debug System
– In-System Programmable via SPI Port
– Internal and External Interrupt Sources
• Pin Change Interrupt on 12 Pins
– Low Power Idle, ADC Noise Reduction, Standby and Power-down Modes
– Enhanced Power-on Reset Circuit
– Programmable Brown-out Detection Circuit with Software Disable Function
– Internal Calibrated Oscillator
– On-chip Temperature Sensor
• I/O and Packages
– Available in 20-pin QFN/MLF/VQFN, 14-pin SOIC, 14-pin PDIP and 15-ball UFBGA
– Twelve Programmable I/O Lines
• Operating Voltage:
– 1.8 – 5.5V
• Speed Grade:
– 0 – 4 MHz @ 1.8 – 5.5V
– 0 – 10 MHz @ 2.7 – 5.5V
– 0 – 20 MHz @ 4.5 – 5.5V
• Industrial Temperature Range: -40°C to +85°C
• Low Power Consumption
– Active Mode:
• 210 µA at 1.8V and 1 MHz
– Idle Mode:
• 33 µA at 1.8V and 1 MHz
– Power-down Mode:
• 0.1 µA at 1.8V and 25°C
8-bit
Microcontroller
with 2K/4K/8K
Bytes In-System
Programmable
Flash
ATtiny24A
ATtiny44A
ATtiny84A
Rev. 8183F–AVR–06/122
8183F–AVR–06/12
ATtiny24A/44A/84A
1. Pin Configurations
Figure 1-1. Pinout of ATtiny24A/44A/84A
Table 1-1. UFBGA - Pinout ATtiny24A/44A/84A (top view)
1234
A PA5 PA6 PB2
B PA4 PA7 PB1 PB3
C PA3 PA2 PA1 PB0
D PA0 GND GND VCC
1
2
3
4
5
6
7
14
13
12
11
10
9
8
VCC
(PCINT8/XTAL1/CLKI) PB0
(PCINT9/XTAL2) PB1
(PCINT11/RESET/dW) PB3
(PCINT10/INT0/OC0A/CKOUT) PB2
(PCINT7/ICP/OC0B/ADC7) PA7
(PCINT6/OC1A/SDA/MOSI/DI/ADC6) PA6
GND
PA0 (ADC0/AREF/PCINT0)
PA1 (ADC1/AIN0/PCINT1)
PA2 (ADC2/AIN1/PCINT2)
PA3 (ADC3/T0/PCINT3)
PA4 (ADC4/USCK/SCL/T1/PCINT4)
PA5 (ADC5/DO/MISO/OC1B/PCINT5)
PDIP/SOIC
1
2
3
4
5
QFN/MLF/VQFN
15
14
13
12
11
20
19
18
17
16
6
7
8
9
10
NOTE
Bottom pad should be
soldered to ground.
DNC: Do Not Connect
DNC
DNC
GND
VCC
DNC
PA7 (PCINT7/ICP/OC0B/ADC7)
PB2 (PCINT10/INT0/OC0A/CKOUT)
PB3 (PCINT11/RESET/dW)
PB1 (PCINT9/XTAL2)
PB0 (PCINT8/XTAL1/CLKI)
PA5
DNC
DNC
DNC
PA6
Pin 16: PA6 (PCINT6/OC1A/SDA/MOSI/DI/ADC6)
Pin 20: PA5 (ADC5/DO/MISO/OC1B/PCINT5)
(ADC4/USCK/SCL/T1/PCINT4) PA4
(ADC3/T0/PCINT3) PA3
(ADC2/AIN1/PCINT2) PA2
(ADC1/AIN0/PCINT1) PA1
(ADC0/AREF/PCINT0) PA03
8183F–AVR–06/12
ATtiny24A/44A/84A
1.1 Pin Descriptions
1.1.1 VCC
Supply voltage.
1.1.2 GND
Ground.
1.1.3 Port B (PB3:PB0)
Port B is a 4-bit bi-directional I/O port with internal pull-up resistors (selected for each bit). The
Port B output buffers have symmetrical drive characteristics with both high sink and source
capability except PB3 which has the RESET capability. To use pin PB3 as an I/O pin, instead of
RESET pin, program (‘0’) RSTDISBL fuse. As inputs, Port B pins that are externally pulled low
will source current if the pull-up resistors are activated. The Port B pins are tri-stated when a
reset condition becomes active, even if the clock is not running.
Port B also serves the functions of various special features of the ATtiny24A/44A/84A as listed
in Section 10.2 “Alternate Port Functions” on page 58.
1.1.4 RESET
Reset input. A low level on this pin for longer than the minimum pulse length will generate a
reset, even if the clock is not running and provided the reset pin has not been disabled. The minimum
pulse length is given in Table 20-4 on page 176. Shorter pulses are not guaranteed to
generate a reset.
The reset pin can also be used as a (weak) I/O pin.
1.1.5 Port A (PA7:PA0)
Port A is a 8-bit bi-directional I/O port with internal pull-up resistors (selected for each bit). The
Port A output buffers have symmetrical drive characteristics with both high sink and source
capability. As inputs, Port A pins that are externally pulled low will source current if the pull-up
resistors are activated. The Port A pins are tri-stated when a reset condition becomes active,
even if the clock is not running.
Port A has alternate functions as analog inputs for the ADC, analog comparator, timer/counter,
SPI and pin change interrupt as described in “Alternate Port Functions” on page 58.4
8183F–AVR–06/12
ATtiny24A/44A/84A
2. Overview
ATtiny24A/44A/84A are low-power CMOS 8-bit microcontrollers based on the AVR enhanced
RISC architecture. By executing powerful instructions in a single clock cycle, the
ATtiny24A/44A/84A achieves throughputs approaching 1 MIPS per MHz allowing the system
designer to optimize power consumption versus processing speed.
Figure 2-1. Block Diagram
The AVR core combines a rich instruction set with 32 general purpose working registers. All 32
registers are directly connected to the Arithmetic Logic Unit (ALU), allowing two independent
registers to be accessed in one single instruction executed in one clock cycle. The resulting
architecture is more code efficient while achieving throughputs up to ten times faster than conventional
CISC microcontrollers.
WATCHDOG
TIMER
MCU CONTROL
REGISTER
TIMER/
COUNTER0
DATA DIR.
REG.PORT A
DATA REGISTER
PORT A
PROGRAMMING
LOGIC
TIMING AND
CONTROL
MCU STATUS
REGISTER
PORT A DRIVERS
PA[7:0]
VCC
GND
+
_
ANALOG
COMPARATOR
8-BIT DATABUS
ADC
ISP INTERFACE
INTERRUPT
UNIT
EEPROM
INTERNAL
OSCILLATOR
OSCILLATORS
CALIBRATED
OSCILLATOR
INTERNAL
DATA DIR.
REG.PORT B
DATA REGISTER
PORT B
PORT B DRIVERS
PB[3:0]
PROGRAM
COUNTER
STACK
POINTER
PROGRAM
FLASH SRAM
GENERAL
PURPOSE
REGISTERS
INSTRUCTION
REGISTER
INSTRUCTION
DECODER
STATUS
REGISTER
Z
Y
X
ALU CONTROL
LINES
TIMER/
COUNTER15
8183F–AVR–06/12
ATtiny24A/44A/84A
The ATtiny24A/44A/84A provides the following features: 2K/4K/8K byte of In-System Programmable
Flash, 128/256/512 bytes EEPROM, 128/256/512 bytes SRAM, 12 general purpose I/O
lines, 32 general purpose working registers, an 8-bit Timer/Counter with two PWM channels, a
16-bit timer/counter with two PWM channels, Internal and External Interrupts, a 8-channel 10-bit
ADC, programmable gain stage (1x, 20x) for 12 differential ADC channel pairs, a programmable
Watchdog Timer with internal oscillator, internal calibrated oscillator, and four software selectable
power saving modes. Idle mode stops the CPU while allowing the SRAM, Timer/Counter,
ADC, Analog Comparator, and Interrupt system to continue functioning. ADC Noise Reduction
mode minimizes switching noise during ADC conversions by stopping the CPU and all I/O modules
except the ADC. In Power-down mode registers keep their contents and all chip functions
are disbaled until the next interrupt or hardware reset. In Standby mode, the crystal/resonator
oscillator is running while the rest of the device is sleeping, allowing very fast start-up combined
with low power consumption.
The device is manufactured using Atmel’s high density non-volatile memory technology. The onchip
ISP Flash allows the Program memory to be re-programmed in-system through an SPI
serial interface, by a conventional non-volatile memory programmer or by an on-chip boot code
running on the AVR core.
The ATtiny24A/44A/84A AVR is supported with a full suite of program and system development
tools including: C Compilers, Macro Assemblers, Program Debugger/Simulators and Evaluation
kits.6
8183F–AVR–06/12
ATtiny24A/44A/84A
3. General Information
3.1 Resources
A comprehensive set of drivers, application notes, data sheets and descriptions on development
tools are available for download at http://www.atmel.com/avr.
3.2 Code Examples
This documentation contains simple code examples that briefly show how to use various parts of
the device. These code examples assume that the part specific header file is included before
compilation. Be aware that not all C compiler vendors include bit definitions in the header files
and interrupt handling in C is compiler dependent. Please confirm with the C compiler documentation
for more details.
For I/O Registers located in the extended I/O map, “IN”, “OUT”, “SBIS”, “SBIC”, “CBI”, and “SBI”
instructions must be replaced with instructions that allow access to extended I/O. Typically, this
means “LDS” and “STS” combined with “SBRS”, “SBRC”, “SBR”, and “CBR”. Note that not all
AVR devices include an extended I/O map.
3.3 Capacitive Touch Sensing
Atmel QTouch Library provides a simple to use solution for touch sensitive interfaces on Atmel
AVR microcontrollers. The QTouch Library includes support for QTouch® and QMatrix® acquisition
methods.
Touch sensing is easily added to any application by linking the QTouch Library and using the
Application Programming Interface (API) of the library to define the touch channels and sensors.
The application then calls the API to retrieve channel information and determine the state of the
touch sensor.
The QTouch Library is free and can be downloaded from the Atmel website. For more information
and details of implementation, refer to the QTouch Library User Guide – also available from
the Atmel website.
3.4 Data Retention
Reliability Qualification results show that the projected data retention failure rate is much less
than 1 PPM over 20 years at 85°C or 100 years at 25°C.
3.5 Disclaimer
Typical values contained in this datasheet are based on simulations and characterization of
other AVR microcontrollers manufactured on the same process technology. Min and Max values
will be available after the device has been characterized.7
8183F–AVR–06/12
ATtiny24A/44A/84A
4. CPU Core
This section discusses the AVR core architecture in general. The main function of the CPU core
is to ensure correct program execution. The CPU must therefore be able to access memories,
perform calculations, control peripherals, and handle interrupts.
4.1 Architectural Overview
Figure 4-1. Block Diagram of the AVR Architecture
In order to maximize performance and parallelism, the AVR uses a Harvard architecture – with
separate memories and buses for program and data. Instructions in the Program memory are
executed with a single level pipelining. While one instruction is being executed, the next instruction
is pre-fetched from the Program memory. This concept enables instructions to be executed
in every clock cycle. The Program memory is In-System Reprogrammable Flash memory.
Flash
Program
Memory
Instruction
Register
Instruction
Decoder
Program
Counter
Control Lines
32 x 8
General
Purpose
Registrers
ALU
Status
and Control
I/O Lines
EEPROM
Data Bus 8-bit
Data
SRAM
Direct Addressing
Indirect Addressing
Interrupt
Unit
Watchdog
Timer
Analog
Comparator
Timer/Counter 0
Timer/Counter 1
Universal
Serial Interface
ADC8
8183F–AVR–06/12
ATtiny24A/44A/84A
The fast-access Register File contains 32 x 8-bit general purpose working registers with a single
clock cycle access time. This allows single-cycle Arithmetic Logic Unit (ALU) operation. In a typical
ALU operation, two operands are output from the Register File, the operation is executed,
and the result is stored back in the Register File – in one clock cycle.
Six of the 32 registers can be used as three 16-bit indirect address register pointers for Data
Space addressing – enabling efficient address calculations. One of the these address pointers
can also be used as an address pointer for look up tables in Flash Program memory. These
added function registers are the 16-bit X-, Y-, and Z-register, described later in this section.
The ALU supports arithmetic and logic operations between registers or between a constant and
a register. Single register operations can also be executed in the ALU. After an arithmetic operation,
the Status Register is updated to reflect information about the result of the operation.
Program flow is provided by conditional and unconditional jump and call instructions, capable of
directly addressing the whole address space. Most AVR instructions have a single 16-bit word
format but 32-bit wide instructions also exist. The actual instruction set varies, as some devices
only implement a part of the instruction set.
During interrupts and subroutine calls, the return address Program Counter (PC) is stored on the
Stack. The Stack is effectively allocated in the general data SRAM, and consequently the Stack
size is only limited by the total SRAM size and the usage of the SRAM. All user programs must
initialize the SP in the Reset routine (before subroutines or interrupts are executed). The Stack
Pointer (SP) is read/write accessible in the I/O space. The data SRAM can easily be accessed
through the five different addressing modes supported in the AVR architecture.
The memory spaces in the AVR architecture are all linear and regular memory maps.
A flexible interrupt module has its control registers in the I/O space with an additional Global
Interrupt Enable bit in the Status Register. All interrupts have a separate Interrupt Vector in the
Interrupt Vector table. The interrupts have priority in accordance with their Interrupt Vector position.
The lower the Interrupt Vector address, the higher the priority.
The I/O memory space contains 64 addresses for CPU peripheral functions as Control Registers,
SPI, and other I/O functions. The I/O memory can be accessed directly, or as the Data
Space locations following those of the Register File, 0x20 - 0x5F.
4.2 ALU – Arithmetic Logic Unit
The high-performance AVR ALU operates in direct connection with all the 32 general purpose
working registers. Within a single clock cycle, arithmetic operations between general purpose
registers or between a register and an immediate are executed. The ALU operations are divided
into three main categories – arithmetic, logical, and bit-functions. Some implementations of the
architecture also provide a powerful multiplier supporting both signed/unsigned multiplication
and fractional format. See the “Instruction Set” section for a detailed description.
4.3 Status Register
The Status Register contains information about the result of the most recently executed arithmetic
instruction. This information can be used for altering program flow in order to perform
conditional operations. Note that the Status Register is updated after all ALU operations, as
specified in the Instruction Set Reference. This will in many cases remove the need for using the
dedicated compare instructions, resulting in faster and more compact code.9
8183F–AVR–06/12
ATtiny24A/44A/84A
The Status Register is neither automatically stored when entering an interrupt routine, nor
restored when returning from an interrupt. This must be handled by software.
4.4 General Purpose Register File
The Register File is optimized for the AVR Enhanced RISC instruction set. In order to achieve
the required performance and flexibility, the following input/output schemes are supported by the
Register File:
• One 8-bit output operand and one 8-bit result input
• Two 8-bit output operands and one 8-bit result input
• Two 8-bit output operands and one 16-bit result input
• One 16-bit output operand and one 16-bit result input
Figure 4-2 below shows the structure of the 32 general purpose working registers in the CPU.
Figure 4-2. AVR CPU General Purpose Working Registers
Most of the instructions operating on the Register File have direct access to all registers, and
most of them are single cycle instructions.
As shown in Figure 4-2, each register is also assigned a Data memory address, mapping them
directly into the first 32 locations of the user Data Space. Although not being physically implemented
as SRAM locations, this memory organization provides great flexibility in access of the
registers, as the X-, Y- and Z-pointer registers can be set to index any register in the file.
4.4.1 The X-register, Y-register, and Z-register
The registers R26..R31 have some added functions to their general purpose usage. These registers
are 16-bit address pointers for indirect addressing of the data space. The three indirect
address registers X, Y, and Z are defined as described in Figure 4-3 below.
Figure 4-3. The X-, Y-, and Z-registers
7 0 Addr.
R0 0x00
R1 0x01
R2 0x02
…
R13 0x0D
General R14 0x0E
Purpose R15 0x0F
Working R16 0x10
Registers R17 0x11
…
R26 0x1A X-register Low Byte
R27 0x1B X-register High Byte
R28 0x1C Y-register Low Byte
R29 0x1D Y-register High Byte
R30 0x1E Z-register Low Byte
R31 0x1F Z-register High Byte
15 XH XL 010
8183F–AVR–06/12
ATtiny24A/44A/84A
In the different addressing modes these address registers have functions as fixed displacement,
automatic increment, and automatic decrement (see the instruction set reference for details).
4.5 Stack Pointer
The Stack is mainly used for storing temporary data, for storing local variables and for storing
return addresses after interrupts and subroutine calls. The Stack Pointer Register always points
to the top of the Stack. Note that the Stack is implemented as growing from higher memory locations
to lower memory locations. This implies that a Stack PUSH command decreases the Stack
Pointer.
The Stack Pointer points to the data SRAM Stack area where the Subroutine and Interrupt
Stacks are located. This Stack space in the data SRAM must be defined by the program before
any subroutine calls are executed or interrupts are enabled. The Stack Pointer must be set to
point above 0x60. The Stack Pointer is decremented by one when data is pushed onto the Stack
with the PUSH instruction, and it is decremented by two when the return address is pushed onto
the Stack with subroutine call or interrupt. The Stack Pointer is incremented by one when data is
popped from the Stack with the POP instruction, and it is incremented by two when data is
popped from the Stack with return from subroutine RET or return from interrupt RETI.
The AVR Stack Pointer is implemented as two 8-bit registers in the I/O space. The number of
bits actually used is implementation dependent. Note that the data space in some implementations
of the AVR architecture is so small that only SPL is needed. In this case, the SPH Register
will not be present.
4.6 Instruction Execution Timing
This section describes the general access timing concepts for instruction execution. The AVR
CPU is driven by the CPU clock clkCPU, directly generated from the selected clock source for the
chip. No internal clock division is used.
Figure 4-4 shows the parallel instruction fetches and instruction executions enabled by the Harvard
architecture and the fast access Register File concept. This is the basic pipelining concept
to obtain up to 1 MIPS per MHz with the corresponding unique results for functions per cost,
functions per clocks, and functions per power-unit.
X-register 7 0 7 0
R27 (0x1B) R26 (0x1A)
15 YH YL 0
Y-register 7 0 7 0
R29 (0x1D) R28 (0x1C)
15 ZH ZL 0
Z-register 7 0 7 0
R31 (0x1F) R30 (0x1E)11
8183F–AVR–06/12
ATtiny24A/44A/84A
Figure 4-4. The Parallel Instruction Fetches and Instruction Executions
Figure 4-5 shows the internal timing concept for the Register File. In a single clock cycle an ALU
operation using two register operands is executed, and the result is stored back to the destination
register.
Figure 4-5. Single Cycle ALU Operation
4.7 Reset and Interrupt Handling
The AVR provides several different interrupt sources. These interrupts and the separate Reset
Vector each have a separate Program Vector in the Program memory space. All interrupts are
assigned individual enable bits which must be written logic one together with the Global Interrupt
Enable bit in the Status Register in order to enable the interrupt.
The lowest addresses in the Program memory space are by default defined as the Reset and
Interrupt Vectors. The complete list of vectors is shown in “Interrupts” on page 47. The list also
determines the priority levels of the different interrupts. The lower the address the higher is the
priority level. RESET has the highest priority, and next is INT0 – the External Interrupt
Request 0.
When an interrupt occurs, the Global Interrupt Enable I-bit is cleared and all interrupts are disabled.
The user software can write logic one to the I-bit to enable nested interrupts. All enabled
interrupts can then interrupt the current interrupt routine. The I-bit is automatically set when a
Return from Interrupt instruction – RETI – is executed.
There are basically two types of interrupts. The first type is triggered by an event that sets the
Interrupt Flag. For these interrupts, the Program Counter is vectored to the actual Interrupt Vector
in order to execute the interrupt handling routine, and hardware clears the corresponding
Interrupt Flag. Interrupt Flags can also be cleared by writing a logic one to the flag bit position(s)
clk
1st Instruction Fetch
1st Instruction Execute
2nd Instruction Fetch
2nd Instruction Execute
3rd Instruction Fetch
3rd Instruction Execute
4th Instruction Fetch
T1 T2 T3 T4
CPU
Total Execution Time
Register Operands Fetch
ALU Operation Execute
Result Write Back
T1 T2 T3 T4
clkCPU12
8183F–AVR–06/12
ATtiny24A/44A/84A
to be cleared. If an interrupt condition occurs while the corresponding interrupt enable bit is
cleared, the Interrupt Flag will be set and remembered until the interrupt is enabled, or the flag is
cleared by software. Similarly, if one or more interrupt conditions occur while the Global Interrupt
Enable bit is cleared, the corresponding Interrupt Flag(s) will be set and remembered until the
Global Interrupt Enable bit is set, and will then be executed by order of priority.
The second type of interrupts will trigger as long as the interrupt condition is present. These
interrupts do not necessarily have Interrupt Flags. If the interrupt condition disappears before the
interrupt is enabled, the interrupt will not be triggered.
When the AVR exits from an interrupt, it will always return to the main program and execute one
more instruction before any pending interrupt is served.
Note that the Status Register is not automatically stored when entering an interrupt routine, nor
restored when returning from an interrupt routine. This must be handled by software.
When using the CLI instruction to disable interrupts, the interrupts will be immediately disabled.
No interrupt will be executed after the CLI instruction, even if it occurs simultaneously with the
CLI instruction. The following example shows how this can be used to avoid interrupts during the
timed EEPROM write sequence.
Note: See “Code Examples” on page 6.
Assembly Code Example
in r16, SREG ; store SREG value
cli ; disable interrupts during timed sequence
sbi EECR, EEMPE ; start EEPROM write
sbi EECR, EEPE
out SREG, r16 ; restore SREG value (I-bit)
C Code Example
char cSREG;
cSREG = SREG; /* store SREG value */
/* disable interrupts during timed sequence */
_CLI();
EECR |= (1<
... ...
9.2 External Interrupts
External Interrupts are triggered by the INT0 pin or any of the PCINT[11:0] pins. Observe that, if
enabled, the interrupts will trigger even if the INT0 or PCINT[11:0] pins are configured as outputs.
This feature provides a way of generating a software interrupt. Pin change 0 interrupts
PCI0 will trigger if any enabled PCINT[7:0] pin toggles. Pin change 1 interrupts PCI1 will trigger
if any enabled PCINT[11:8] pin toggles. The PCMSK0 and PCMSK1 Registers control which
pins contribute to the pin change interrupts. Pin change interrupts on PCINT[11:0] are detected
asynchronously, which means that these interrupts can be used for waking the part also from
sleep modes other than Idle mode.
The INT0 interrupt can be triggered by a falling or rising edge or a low level. This is set up as
shown in “MCUCR – MCU Control Register” on page 50. When the INT0 interrupt is enabled
and configured as level triggered, the interrupt will trigger as long as the pin is held low. Note
that recognition of falling or rising edge interrupts on INT0 requires the presence of an I/O clock,
as described in “Clock Sources” on page 25.
9.2.1 Low Level Interrupt
A low level interrupt on INT0 is detected asynchronously. This means that the interrupt source
can be used for waking the part also from sleep modes other than Idle (the I/O clock is halted in
all sleep modes except Idle).49
8183F–AVR–06/12
ATtiny24A/44A/84A
Note that if a level triggered interrupt is used for wake-up from Power-down, the required level
must be held long enough for the MCU to complete the wake-up to trigger the level interrupt. If
the level disappears before the end of the Start-up Time, the MCU will still wake up, but no interrupt
will be generated. The start-up time is defined by the SUT and CKSEL fuses, as described
in “Clock System” on page 24.
If the low level on the interrupt pin is removed before the device has woken up then program
execution will not be diverted to the interrupt service routine but continue from the instruction following
the SLEEP command.
9.2.2 Pin Change Interrupt Timing
A timing example of a pin change interrupt is shown in Figure 9-1.
Figure 9-1. Timing of pin change interrupts
clk
PCINT(0)
pin_lat
pin_sync
pcint_in_(0)
pcint_syn
pcint_setflag
PCIF
PCINT(0)
pin_sync
pcint_syn pin_lat D Q
LE
pcint_setflag
PCIF
clk
clk PCINT(0) in PCMSK(x)
pcint_in_(0) 0
x50
8183F–AVR–06/12
ATtiny24A/44A/84A
9.3 Register Description
9.3.1 MCUCR – MCU Control Register
The External Interrupt Control Register A contains control bits for interrupt sense control.
• Bits 1:0 – ISC0[1:0]: Interrupt Sense Control 0 Bit 1 and Bit 0
The External Interrupt 0 is activated by the external pin INT0 if the SREG I-flag and the corresponding
interrupt mask are set. The level and edges on the external INT0 pin that activate the
interrupt are defined in Table 9-2. The value on the INT0 pin is sampled before detecting edges.
If edge or toggle interrupt is selected, pulses that last longer than one clock period will generate
an interrupt. Shorter pulses are not guaranteed to generate an interrupt. If low level interrupt is
selected, the low level must be held until the completion of the currently executing instruction to
generate an interrupt.
9.3.2 GIMSK – General Interrupt Mask Register
• Bits 7, 3:0 – Res: Reserved Bits
These bits are reserved in the ATtiny24A/44A and will always read as zero.
• Bit 6 – INT0: External Interrupt Request 0 Enable
When the INT0 bit is set (one) and the I-bit in the Status Register (SREG) is set (one), the external
pin interrupt is enabled. The Interrupt Sense Control bits (ISC01 and ISC00) in the External
Interrupt Control Register A (EICRA) define whether the external interrupt is activated on rising
and/or falling edge of the INT0 pin or level sensed. Activity on the pin will cause an interrupt
request even if INT0 is configured as an output. The corresponding interrupt of External Interrupt
Request 0 is executed from the INT0 Interrupt Vector.
• Bit 5 – PCIE1: Pin Change Interrupt Enable 1
When the PCIE1 bit is set (one) and the I-bit in the Status Register (SREG) is set (one), pin
change interrupt 1 is enabled. Any change on any enabled PCINT[11:8] pin will cause an interrupt.
The corresponding interrupt of Pin Change Interrupt Request is executed from the PCI1
Interrupt Vector. PCINT[11:8] pins are enabled individually by the PCMSK1 Register.
Bit 7 6 5 4 3 2 1 0
0x35 (0x55) BODS PUD SE SM1 SM0 BODSE ISC01 ISC00 MCUCR
Read/Write R/W R/W R/W R/W R/W R/W R/W R/W
Initial Value 0 0 0 0 0 0 0 0
Table 9-2. Interrupt 0 Sense Control
ISC01 ISC00 Description
0 0 The low level of INT0 generates an interrupt request.
0 1 Any logical change on INT0 generates an interrupt request.
1 0 The falling edge of INT0 generates an interrupt request.
1 1 The rising edge of INT0 generates an interrupt request.
Bit 7 6 5 4 3 2 1 0
0x3B (0x5B) – INT0 PCIE1 PCIE0 – – – – GIMSK
Read/Write R R/W R/W R/W1 R R R R
Initial Value 0 0 0 0 0 0 0 051
8183F–AVR–06/12
ATtiny24A/44A/84A
• Bit 4 – PCIE0: Pin Change Interrupt Enable 0
When the PCIE0 bit is set (one) and the I-bit in the Status Register (SREG) is set (one), pin
change interrupt 0 is enabled. Any change on any enabled PCINT[7:0] pin will cause an interrupt.
The corresponding interrupt of Pin Change Interrupt Request is executed from the PCI0
Interrupt Vector. PCINT[7:0] pins are enabled individually by the PCMSK0 Register.
9.3.3 GIFR – General Interrupt Flag Register
• Bits 7, 3:0 – Res: Reserved Bits
These bits are reserved in the ATtiny24A/44A and will always read as zero.
• Bit 6 – INTF0: External Interrupt Flag 0
When an edge or logic change on the INT0 pin triggers an interrupt request, INTF0 becomes set
(one). If the I-bit in SREG and the INT0 bit in GIMSK are set (one), the MCU will jump to the corresponding
Interrupt Vector. The flag is cleared when the interrupt routine is executed.
Alternatively, the flag can be cleared by writing a logical one to it. This flag is always cleared
when INT0 is configured as a level interrupt.
• Bit 5 – PCIF1: Pin Change Interrupt Flag 1
When a logic change on any PCINT[11:8] pin triggers an interrupt request, PCIF1 becomes set
(one). If the I-bit in SREG and the PCIE1 bit in GIMSK are set (one), the MCU will jump to the
corresponding Interrupt Vector. The flag is cleared when the interrupt routine is executed. Alternatively,
the flag can be cleared by writing a logical one to it.
• Bit 4 – PCIF0: Pin Change Interrupt Flag 0
When a logic change on any PCINT[7:0] pin triggers an interrupt request, PCIF becomes set
(one). If the I-bit in SREG and the PCIE0 bit in GIMSK are set (one), the MCU will jump to the
corresponding Interrupt Vector. The flag is cleared when the interrupt routine is executed. Alternatively,
the flag can be cleared by writing a logical one to it.
9.3.4 PCMSK1 – Pin Change Mask Register 1
• Bits 7:4 – Res: Reserved Bits
These bits are reserved in the ATtiny24A/44A and will always read as zero.
• Bits 3:0 – PCINT[11:8]: Pin Change Enable Mask 11:8
Each PCINT[11:8] bit selects whether pin change interrupt is enabled on the corresponding I/O
pin. If PCINT[11:8] is set and the PCIE1 bit in GIMSK is set, pin change interrupt is enabled on
the corresponding I/O pin. If PCINT[11:8] is cleared, pin change interrupt on the corresponding
I/O pin is disabled.
Bit 7 6 5 4 3 2 1 0
0x3A (0x5A) – INTF0 PCIF1 PCIF0 – – – – GIFR
Read/Write R R/W R/W R/W R R R R
Initial Value 0 0 0 0 0 0 0 0
Bit 7 6 5 4 3 2 1 0
0x20 (0x40) – – – – PCINT11 PCINT10 PCINT9 PCINT8 PCMSK1
Read/Write R R R R R/W R/W R/W R/W
Initial Value 0 0 0 0 0 0 0 052
8183F–AVR–06/12
ATtiny24A/44A/84A
9.3.5 PCMSK0 – Pin Change Mask Register 0
• Bits 7:0 – PCINT[7:0]: Pin Change Enable Mask 7:0
Each PCINT[7:0] bit selects whether pin change interrupt is enabled on the corresponding I/O
pin. If PCINT[7:0] is set and the PCIE0 bit in GIMSK is set, pin change interrupt is enabled on
the corresponding I/O pin. If PCINT[7:0] is cleared, pin change interrupt on the corresponding
I/O pin is disabled.
Bit 7 6 5 4 3 2 1 0
0x12 (0x32) PCINT7 PCINT6 PCINT5 PCINT4 PCINT3 PCINT2 PCINT1 PCINT0 PCMSK0
Read/Write R/W R/W R/W R/W R/W R/W R/W R/W
Initial Value 0 0 0 0 0 0 0 053
8183F–AVR–06/12
ATtiny24A/44A/84A
10. I/O Ports
All AVR ports have true Read-Modify-Write functionality when used as general digital I/O ports.
This means that the direction of one port pin can be changed without unintentionally changing
the direction of any other pin with the SBI and CBI instructions. The same applies when changing
drive value (if configured as output) or enabling/disabling of pull-up resistors (if configured as
input). Each output buffer has symmetrical drive characteristics with both high sink and source
capability. The pin driver is strong enough to drive LED displays directly. All port pins have individually
selectable pull-up resistors with a supply-voltage invariant resistance. All I/O pins have
protection diodes to both VCC and Ground as indicated in Figure 10-1 on page 53. See “Electrical
Characteristics” on page 173 for a complete list of parameters.
Figure 10-1. I/O Pin Equivalent Schematic
All registers and bit references in this section are written in general form. A lower case “x” represents
the numbering letter for the port, and a lower case “n” represents the bit number. However,
when using the register or bit defines in a program, the precise form must be used. For example,
PORTB3 for bit no. 3 in Port B, here documented generally as PORTxn. The physical I/O Registers
and bit locations are listed in “Register Description” on page 66.
Three I/O memory address locations are allocated for each port, one each for the Data Register
– PORTx, Data Direction Register – DDRx, and the Port Input Pins – PINx. The Port Input Pins
I/O location is read only, while the Data Register and the Data Direction Register are read/write.
However, writing a logic one to a bit in the PINx Register, will result in a toggle in the corresponding
bit in the Data Register. In addition, the Pull-up Disable – PUD bit in MCUCR disables the
pull-up function for all pins in all ports when set.
Using the I/O port as General Digital I/O is described in “Ports as General Digital I/O” on page
54. Most port pins are multiplexed with alternate functions for the peripheral features on the
device. How each alternate function interferes with the port pin is described in “Alternate Port
Functions” on page 58. Refer to the individual module sections for a full description of the alternate
functions.
Note that enabling the alternate function of some of the port pins does not affect the use of the
other pins in the port as general digital I/O.
Cpin
Logic
Rpu
See Figure
"General Digital I/O" for
Details
Pxn54
8183F–AVR–06/12
ATtiny24A/44A/84A
10.1 Ports as General Digital I/O
The ports are bi-directional I/O ports with optional internal pull-ups. Figure 10-2 shows a functional
description of one I/O-port pin, here generically called Pxn.
Figure 10-2. General Digital I/O(1)
Note: 1. WRx, WPx, WDx, RRx, RPx, and RDx are common to all pins within the same port. clkI/O,
SLEEP, and PUD are common to all ports.
10.1.1 Configuring the Pin
Each port pin consists of three register bits: DDxn, PORTxn, and PINxn. As shown in “Register
Description” on page 66, the DDxn bits are accessed at the DDRx I/O address, the PORTxn bits
at the PORTx I/O address, and the PINxn bits at the PINx I/O address.
The DDxn bit in the DDRx Register selects the direction of this pin. If DDxn is written logic one,
Pxn is configured as an output pin. If DDxn is written logic zero, Pxn is configured as an input
pin.
If PORTxn is written logic one when the pin is configured as an input pin, the pull-up resistor is
activated. To switch the pull-up resistor off, PORTxn has to be written logic zero or the pin has to
be configured as an output pin. The port pins are tri-stated when reset condition becomes active,
even if no clocks are running.
If PORTxn is written logic one when the pin is configured as an output pin, the port pin is driven
high (one). If PORTxn is written logic zero when the pin is configured as an output pin, the port
pin is driven low (zero).
clk
RPx
RRx
RDx
WDx
PUD
SYNCHRONIZER
WDx: WRITE DDRx
WRx: WRITE PORTx
RRx: READ PORTx REGISTER
RPx: READ PORTx PIN
PUD: PULLUP DISABLE
clkI/O: I/O CLOCK
RDx: READ DDRx
D
L
Q
Q
RESET
RESET
Q
D Q
Q
Q D
CLR
PORTxn
Q
Q D
CLR
DDxn
PINxn
DATA BU
S
SLEEP
SLEEP: SLEEP CONTROL
Pxn
I/O
WPx
0
1
WRx
WPx: WRITE PINx REGISTER55
8183F–AVR–06/12
ATtiny24A/44A/84A
10.1.2 Toggling the Pin
Writing a logic one to PINxn toggles the value of PORTxn, independent on the value of DDRxn.
Note that the SBI instruction can be used to toggle one single bit in a port.
10.1.3 Switching Between Input and Output
When switching between tri-state ({DDxn, PORTxn} = 0b00) and output high ({DDxn, PORTxn}
= 0b11), an intermediate state with either pull-up enabled {DDxn, PORTxn} = 0b01) or output
low ({DDxn, PORTxn} = 0b10) must occur. Normally, the pull-up enabled state is fully acceptable,
as a high-impedant environment will not notice the difference between a strong high driver
and a pull-up. If this is not the case, the PUD bit in the MCUCR Register can be set to disable all
pull-ups in all ports.
Switching between input with pull-up and output low generates the same problem. The user
must use either the tri-state ({DDxn, PORTxn} = 0b00) or the output high state ({DDxn, PORTxn}
= 0b10) as an intermediate step.
Table 10-1 summarizes the control signals for the pin value.
10.1.4 Reading the Pin Value
Independent of the setting of Data Direction bit DDxn, the port pin can be read through the
PINxn Register bit. As shown in Figure 10-2 on page 54, the PINxn Register bit and the preceding
latch constitute a synchronizer. This is needed to avoid metastability if the physical pin
changes value near the edge of the internal clock, but it also introduces a delay. Figure 10-3
shows a timing diagram of the synchronization when reading an externally applied pin value.
The maximum and minimum propagation delays are denoted tpd,max and tpd,min respectively.
Figure 10-3. Synchronization when Reading an Externally Applied Pin value
Table 10-1. Port Pin Configurations
DDxn PORTxn
PUD
(in MCUCR) I/O Pull-up Comment
0 0 X Input No Tri-state (Hi-Z)
0 1 0 Input Yes Pxn will source current if ext. pulled low
0 1 1 Input No Tri-state (Hi-Z)
1 0 X Output No Output Low (Sink)
1 1 X Output No Output High (Source)
XXX in r17, PINx
0x00 0xFF
INSTRUCTIONS
SYNC LATCH
PINxn
r17
XXX
SYSTEM CLK
tpd, max
tpd, min56
8183F–AVR–06/12
ATtiny24A/44A/84A
Consider the clock period starting shortly after the first falling edge of the system clock. The latch
is closed when the clock is low, and goes transparent when the clock is high, as indicated by the
shaded region of the “SYNC LATCH” signal. The signal value is latched when the system clock
goes low. It is clocked into the PINxn Register at the succeeding positive clock edge. As indicated
by the two arrows tpd,max and tpd,min, a single signal transition on the pin will be delayed
between ½ and 1½ system clock period depending upon the time of assertion.
When reading back a software assigned pin value, a nop instruction must be inserted as indicated
in Figure 10-4 on page 56. The out instruction sets the “SYNC LATCH” signal at the
positive edge of the clock. In this case, the delay tpd through the synchronizer is one system
clock period.
Figure 10-4. Synchronization when Reading a Software Assigned Pin Value
10.1.5 Digital Input Enable and Sleep Modes
As shown in Figure 10-2 on page 54, the digital input signal can be clamped to ground at the
input of the schmitt-trigger. The signal denoted SLEEP in the figure, is set by the MCU Sleep
Controller in Power-down and Standby modes to avoid high power consumption if some input
signals are left floating, or have an analog signal level close to VCC/2.
SLEEP is overridden for port pins enabled as external interrupt pins. If the external interrupt
request is not enabled, SLEEP is active also for these pins. SLEEP is also overridden by various
other alternate functions as described in “Alternate Port Functions” on page 58.
If a logic high level (“one”) is present on an asynchronous external interrupt pin configured as
“Interrupt on Rising Edge, Falling Edge, or Any Logic Change on Pin” while the external interrupt
is not enabled, the corresponding External Interrupt Flag will be set when resuming from the
above mentioned Sleep mode, as the clamping in these sleep mode produces the requested
logic change.
10.1.6 Unconnected Pins
If some pins are unused, it is recommended to ensure that these pins have a defined level. Even
though most of the digital inputs are disabled in the deep sleep modes as described above, floating
inputs should be avoided to reduce current consumption in all other modes where the digital
inputs are enabled (Reset, Active mode and Idle mode).
The simplest method to ensure a defined level of an unused pin, is to enable the internal pull-up.
In this case, the pull-up will be disabled during reset. If low power consumption during reset is
out PORTx, r16 nop in r17, PINx
0xFF
0x00 0xFF
SYSTEM CLK
r16
INSTRUCTIONS
SYNC LATCH
PINxn
r17
t pd57
8183F–AVR–06/12
ATtiny24A/44A/84A
important, it is recommended to use an external pull-up or pulldown. Connecting unused pins
directly to VCC or GND is not recommended, since this may cause excessive currents if the pin is
accidentally configured as an output.
10.1.7 Program Examples
The following code example shows how to set port A pins 0 and 1 high, 2 and 3 low, and define
the port pins from 4 to 5 as input with a pull-up assigned to port pin 4. The resulting pin values
are read back again, but as previously discussed, a nop instruction is included to be able to read
back the value recently assigned to some of the pins.
Note: Two temporary registers are used to minimize the time from pull-ups are set on pins 0, 1 and 4,
until the direction bits are correctly set, defining bit 2 and 3 as low and redefining bits 0 and 1 as
strong high drivers.
Note: See “Code Examples” on page 6.
Assembly Code Example
...
; Define pull-ups and set outputs high
; Define directions for port pins
ldi r16,(1<
MSB
MSB
6 5 4 3 2 1 LSB
1 2 3 4 5 6 7 8
6 5 4 3 2 1 LSB
USCK
USCK
DO
DI
A B C D E
CYCLE ( Reference )119
8183F–AVR–06/12
ATtiny24A/44A/84A
SPITransfer_loop:
out USICR,r17
in r16, USISR
sbrs r16, USIOIF
rjmp SPITransfer_loop
in r16,USIDR
ret
The code is size optimized using only eight instructions (plus return). The code example
assumes that the DO and USCK pins have been enabled as outputs in DDRA. The value stored
in register r16 prior to the function is called is transferred to the slave device, and when the
transfer is completed the data received from the slave is stored back into the register r16.
The second and third instructions clear the USI Counter Overflow Flag and the USI counter
value. The fourth and fifth instructions set three-wire mode, positive edge clock, count at USITC
strobe, and toggle USCK. The loop is repeated 16 times.
The following code demonstrates how to use the USI as an SPI master with maximum speed
(fSCK = fCK/2):
SPITransfer_Fast:
out USIDR,r16
ldi r16,(1< 2 CPU clock cycles for fck < 12 MHz, 3 CPU clock cycles for fck >= 12 MHz
• High:> 2 CPU clock cycles for fck < 12 MHz, 3 CPU clock cycles for fck >= 12 MHz
19.5.1 Serial Programming Algorithm
When writing serial data to the ATtiny24A/44A/84A, data is clocked on the rising edge of SCK.
When reading, data is clocked on the falling edge of SCK. See Figure 20-3 and Figure 20-4 for
timing details.
To program and verify the ATtiny24A/44A/84A in the Serial Programming mode, the following
sequence is recommended (see four byte instruction formats in Table 19-12):
1. Power-up sequence:
Apply power between VCC and GND while RESET and SCK are set to “0”. In some systems,
the programmer can not guarantee that SCK is held low during power-up. In this
case, RESET must be given a positive pulse after SCK has been set to '0'. The duration
of the pulse must be at least tRST (the minimum pulse width on RESET pin, see Table
20-4 on page 176) plus two CPU clock cycles.
2. Wait for at least 20 ms and enable serial programming by sending the Programming
Enable serial instruction to pin MOSI.
3. The serial programming instructions will not work if the communication is out of synchronization.
When in sync. the second byte (0x53), will echo back when issuing the
third byte of the Programming Enable instruction. Whether the echo is correct or not, all
four bytes of the instruction must be transmitted. If the 0x53 did not echo back, give
RESET a positive pulse and issue a new Programming Enable command.
4. The Flash is programmed one page at a time. The memory page is loaded one byte at
a time by supplying the 5 LSB of the address and data together with the Load Program
memory Page instruction. To ensure correct loading of the page, the data low byte must
be loaded before data high byte is applied for a given address. The Program memory
Page is stored by loading the Write Program memory Page instruction with the 3 MSB
of the address. If polling (RDY/BSY) is not used, the user must wait at least tWD_FLASH
before issuing the next page. (See Table 19-11 on page 164.) Accessing the serial programming
interface before the Flash write operation completes can result in incorrect
programming.
5. A: The EEPROM array is programmed one byte at a time by supplying the address and
data together with the appropriate Write instruction. An EEPROM memory location is
first automatically erased before new data is written. If polling (RDY/BSY) is not used,
the user must wait at least tWD_EEPROM before issuing the next byte. (See Table 19-11
on page 164.) In a chip erased device, no 0xFFs in the data file(s) need to be programmed.
B: The EEPROM array is programmed one page at a time. The Memory page is loaded
one byte at a time by supplying the 2 LSB of the address and data together with the
Load EEPROM Memory Page instruction. The EEPROM Memory Page is stored by
loading the Write EEPROM Memory Page Instruction with the 4 MSB of the address.
When using EEPROM page access only byte locations loaded with the Load EEPROM
Memory Page instruction is altered. The remaining locations remain unchanged. If polling
(RDY/BSY) is not used, the used must wait at least tWD_EEPROM before issuing the
next page (See Table 19-11 on page 164). In a chip erased device, no 0xFF in the data
file(s) need to be programmed.
6. Any memory location can be verified by using the Read instruction which returns the
content at the selected address at serial output MISO.164
8183F–AVR–06/12
ATtiny24A/44A/84A
7. At the end of the programming session, RESET can be set high to commence normal
operation.
8. Power-off sequence (if needed):
Set RESET to “1”.
Turn VCC power off.
19.5.2 Serial Programming Instruction set
The instruction set is described in Table 19-12 and Figure 19-2 on page 165.
Table 19-11. Minimum Wait Delay Before Writing the Next Flash or EEPROM Location
Symbol Minimum Wait Delay
tWD_FLASH 4.5 ms
tWD_EEPROM 4.0 ms
tWD_ERASE 9.0 ms
tWD_FUSE 4.5 ms
Table 19-12. Serial Programming Instruction Set
Instruction/Operation(1)
Instruction Format
Byte 1 Byte 2 Byte 3 Byte4
Programming Enable $AC $53 $00 $00
Chip Erase (Program Memory/EEPROM) $AC $80 $00 $00
Poll RDY/BSY $F0 $00 $00 data byte out
Load Instructions
Load Extended Address byte $4D $00 Extended adr $00
Load Program Memory Page, High byte $48 adr MSB adr LSB high data byte in
Load Program Memory Page, Low byte $40 adr MSB adr LSB low data byte in
Load EEPROM Memory Page (page access) $C1 $00 adr LSB data byte in
Read Instructions
Read Program Memory, High byte $28 adr MSB adr LSB high data byte out
Read Program Memory, Low byte $20 adr MSB adr LSB low data byte out
Read EEPROM Memory $A0 $00 adr LSB data byte out
Read Lock bits $58 $00 $00 data byte out
Read Signature Byte $30 $00 adr LSB data byte out
Read Fuse bits $50 $00 $00 data byte out
Read Fuse High bits $58 $08 $00 data byte out
Read Extended Fuse Bits $50 $08 $00 data byte out
Read Calibration Byte $38 $00 $00 data byte out
Write Instructions(6)
Write Program Memory Page $4C adr MSB adr LSB $00
Write EEPROM Memory $C0 $00 adr LSB data byte in
Write EEPROM Memory Page (page access) $C2 $00 adr LSB $00165
8183F–AVR–06/12
ATtiny24A/44A/84A
Notes: 1. Not all instructions are applicable for all parts.
2. a = address
3. Bits are programmed ‘0’, unprogrammed ‘1’.
4. To ensure future compatibility, unused Fuses and Lock bits should be unprogrammed (‘1’) .
5. Refer to the correspondig section for Fuse and Lock bits, Calibration and Signature bytes and Page size.
6. Instructions accessing program memory use a word address. This address may be random within the page range.
7. See http://www.atmel.com/avr for Application Notes regarding programming and programmers.
Figure 19-2. Serial Programming Instruction example
If the LSB in RDY/BSY data byte out is ‘1’, a programming operation is still pending. Wait until
this bit returns ‘0’ before the next instruction is carried out.
Within the same page, the low data byte must be loaded prior to the high data byte.
Write Lock bits $AC $E0 $00 data byte in
Write Fuse bits $AC $A0 $00 data byte in
Write Fuse High bits $AC $A8 $00 data byte in
Write Extended Fuse Bits $AC $A4 $00 data byte in
Table 19-12. Serial Programming Instruction Set (Continued)
Instruction/Operation(1)
Instruction Format
Byte 1 Byte 2 Byte 3 Byte4
Byte 1 Byte 2 Byte 3 Byte 4
Adr MSB Adr LSB
Bit 15 B 0
Serial Programming Instruction
Program Memory/
EEPROM Memory
Page 0
Page 1
Page 2
Page N-1
Page Buffer
Write Program Memory Page/
Write EEPROM Memory Page
Load Program Memory Page (High/Low Byte)/
Load EEPROM Memory Page (page access)
Byte 1 Byte 2 Byte 3 Byte 4
Bit 15 B 0
Adr MSB Adr LSB
Page Offset
Page Number
Adr MSB Adr LSB166
8183F–AVR–06/12
ATtiny24A/44A/84A
After data is loaded to the page buffer, program the EEPROM page, see Figure 19-2 on page
165.
19.6 High-voltage Serial Programming
This section describes how to program and verify Flash Program memory, EEPROM Data memory,
Lock bits and Fuse bits in the ATtiny24A/44A/84A.
Figure 19-3. High-voltage Serial Programming
The minimum period for the Serial Clock Input (SCI) during High-voltage Serial Programming is
220 ns.
19.7 High-Voltage Serial Programming Algorithm
To program and verify the ATtiny24A/44A/84A in the High-voltage Serial Programming mode,
the following sequence is recommended (See instruction formats in Table 19-16 on page 170):
Table 19-13. Pin Name Mapping
Signal Name in High-voltage
Serial Programming Mode Pin Name I/O Function
SDI PA6 I Serial Data Input
SII PA5 I Serial Instruction Input
SDO PA4 O Serial Data Output
SCI PB0 I Serial Clock Input (min. 220ns period)
Table 19-14. Pin Values Used to Enter Programming Mode
Pin Symbol Value
PA0 Prog_enable[0] 0
PA1 Prog_enable[1] 0
PA2 Prog_enable[2] 0
VCC
GND
SDO
SII
SDI
(RESET)
+4.5 - 5.5V
PA6
PA5
PA4
PB3
+11.5 - 12.5V
SCI PB0
PA2:0167
8183F–AVR–06/12
ATtiny24A/44A/84A
19.7.1 Enter High-voltage Serial Programming Mode
The following algorithm puts the device in High-voltage Serial Programming mode:
1. Set Prog_enable pins listed in Table 19-14 on page 166 to “000”, RESET pin and VCC
to 0V.
2. Apply 4.5 - 5.5V between VCC and GND. Ensure that VCC reaches at least 1.8V within
the next 20 µs.
3. Wait 20 - 60 µs, and apply 11.5 - 12.5V to RESET.
4. Keep the Prog_enable pins unchanged for at least 10 µs after the High-voltage has
been applied to ensure the Prog_enable Signature has been latched.
5. Release the Prog_enable[2] pin after tHVRST has elapsed.
6. Wait at least 300 µs before giving any serial instructions on SDI/SII.
7. Exit Programming mode by power the device down or by bringing RESET pin to 0V.
If the rise time of the VCC is unable to fulfill the requirements listed above, the following alternative
algorithm can be used:
1. Set Prog_enable pins listed in Table 19-14 on page 166 to “000”, RESET pin and VCC
to 0V.
2. Apply 4.5 - 5.5V between VCC and GND.
3. Monitor VCC, and as soon as VCC reaches 0.9 - 1.1V, apply 11.5 - 12.5V to RESET.
4. Keep the Prog_enable pins unchanged for at least 10 µs after the High-voltage has
been applied to ensure the Prog_enable Signature has been latched.
5. Release the Prog_enable[2] pin to avoid drive contention on the Prog_enable[2]/SDO
pin.
6. Wait until VCC actually reaches 4.5 - 5.5V before giving any serial instructions on
SDI/SII.
7. Exit Programming mode by power the device down or by bringing RESET pin to 0V.
Table 19-15. High-voltage Reset Characteristics
Supply Voltage RESET Pin High-voltage Threshold
Minimum High-voltage Period for
Latching Prog_enable
VCC VHVRST tHVRST
4.5V 11.5V 100 ns
5.5V 11.5V 100 ns168
8183F–AVR–06/12
ATtiny24A/44A/84A
19.7.2 Considerations for Efficient Programming
The loaded command and address are retained in the device during programming. For efficient
programming, the following should be considered.
• The command needs only be loaded once when writing or reading multiple memory
locations.
• Skip writing the data value 0xFF that is the contents of the entire EEPROM (unless the
EESAVE Fuse is programmed) and Flash after a Chip Erase.
• Address High byte needs only be loaded before programming or reading a new 256 word
window in Flash or 256 byte EEPROM. This consideration also applies to Signature bytes
reading.
19.7.3 Chip Erase
The Chip Erase will erase the Flash and EEPROM(1) memories plus Lock bits. The Lock bits are
not reset until the Program memory has been completely erased. The Fuse bits are not
changed. A Chip Erase must be performed before the Flash and/or EEPROM are reprogrammed.
1. Load command “Chip Erase” (see Table 19-16 on page 170).
2. Wait after Instr. 3 until SDO goes high for the “Chip Erase” cycle to finish.
3. Load Command “No Operation”.
Note: 1. The EEPROM memory is preserved during Chip Erase if the EESAVE Fuse is programmed.
19.7.4 Programming the Flash
The Flash is organized in pages, see “Page Size” on page 161. When programming the Flash,
the program data is latched into a page buffer. This allows one page of program data to be programmed
simultaneously. The following procedure describes how to program the entire Flash
memory:
1. Load Command “Write Flash” (see Table 19-16 on page 170).
2. Load Flash Page Buffer.
3. Load Flash High Address and Program Page. Wait after Instr. 3 until SDO goes high
for the “Page Programming” cycle to finish.
4. Repeat 2 through 3 until the entire Flash is programmed or until all data has been
programmed.
5. End Page Programming by Loading Command “No Operation”.
When writing or reading serial data to the ATtiny24A/44A/84A, data is clocked on the rising edge
of the serial clock, see Figure 20-5 on page 181, Figure 19-3 on page 166 and Table 20-12 on
page 181 for details.169
8183F–AVR–06/12
ATtiny24A/44A/84A
Figure 19-4. Addressing the Flash which is Organized in Pages
Figure 19-5. High-voltage Serial Programming Waveforms
19.7.5 Programming the EEPROM
The EEPROM is organized in pages, see Table 20-11 on page 180. When programming the
EEPROM, the data is latched into a page buffer. This allows one page of data to be programmed
simultaneously. The programming algorithm for the EEPROM Data memory is as
follows (refer to Table 19-16 on page 170):
1. Load Command “Write EEPROM”.
2. Load EEPROM Page Buffer.
3. Program EEPROM Page. Wait after Instr. 2 until SDO goes high for the “Page Programming”
cycle to finish.
4. Repeat 2 through 3 until the entire EEPROM is programmed or until all data has been
programmed.
5. End Page Programming by Loading Command “No Operation”.
PROGRAM MEMORY
WORD ADDRESS
WITHIN A PAGE
PAGE ADDRESS
WITHIN THE FLASH
INSTRUCTION WORD
PAGE PCWORD[PAGEMSB:0]:
00
01
02
PAGEEND
PAGE
PCPAGE PCWORD
PCMSB PAGEMSB
PROGRAM
COUNTER
MSB
MSB
MSB LSB
LSB
LSB
0 1 2 3 4 5 6 7 8 9 10
SDI
PA6
SII
PA5
SDO
PA4
SCI
PB0170
8183F–AVR–06/12
ATtiny24A/44A/84A
19.7.6 Reading the Flash
The algorithm for reading the Flash memory is as follows (refer to Table 19-16 on page 170):
1. Load Command "Read Flash".
2. Read Flash Low and High Bytes. The contents at the selected address are available at
serial output SDO.
19.7.7 Reading the EEPROM
The algorithm for reading the EEPROM memory is as follows (refer to Table 19-16 on page
170):
1. Load Command “Read EEPROM”.
2. Read EEPROM Byte. The contents at the selected address are available at serial output
SDO.
19.7.8 Programming and Reading the Fuse and Lock Bits
The algorithms for programming and reading the Fuse Low/High bits and Lock bits are shown in
Table 19-16 on page 170.
19.7.9 Reading the Signature Bytes and Calibration Byte
The algorithms for reading the Signature bytes and Calibration byte are shown in Table 19-16 on
page 170.
19.7.10 Power-off sequence
Set SCI to “0”. Set RESET to “1”. Turn VCC power off.
Table 19-16. High-voltage Serial Programming Instruction Set for ATtiny24A/44A/84A
Instruction
Instruction Format
Instr.1/5 Instr.2/6 Instr.3/7 Instr.4 Operation Remarks
Chip Erase
SDI
SII
SDO
0_1000_0000_00
0_0100_1100_00
x_xxxx_xxxx_xx
0_0000_0000_00
0_0110_0100_00
x_xxxx_xxxx_xx
0_0000_0000_00
0_0110_1100_00
x_xxxx_xxxx_xx
Wait after Instr.3 until SDO
goes high for the Chip Erase
cycle to finish.
Load “Write
Flash”
Command
SDI
SII
SDO
0_0001_0000_00
0_0100_1100_00
x_xxxx_xxxx_xx
Enter Flash Programming code.
Load Flash
Page Buffer
SDI
SII
SDO
0_ bbbb_bbbb _00
0_0000_1100_00
x_xxxx_xxxx_xx
0_eeee_eeee_00
0_0010_1100_00
x_xxxx_xxxx_xx
0_0000_0000_00
0_0110_1101_00
x_xxxx_xxxx_xx
0_0000_0000_00
0_0110_1100_00
x_xxxx_xxxx_xx
Repeat after Instr. 1 - 7until the
entire page buffer is filled or
until all data within the page is
filled.(2)
SDI
SII
SDO
0_dddd_dddd_00
0_0011_1100_00
x_xxxx_xxxx_xx
0_0000_0000_00
0_0111_1101_00
x_xxxx_xxxx_xx
0_0000_0000_00
0_0111_1100_00
x_xxxx_xxxx_xx
Instr 5-7.
Load Flash
High Address
and Program
Page
SDI
SII
SDO
0_0000_000a_00
0_0001_1100_00
x_xxxx_xxxx_xx
0_0000_0000_00
0_0110_0100_00
x_xxxx_xxxx_xx
0_0000_0000_00
0_0110_1100_00
x_xxxx_xxxx_xx
Wait after Instr 3 until SDO
goes high. Repeat Instr. 2 - 3
for each loaded Flash Page
until the entire Flash or all data
is programmed. Repeat Instr. 1
for a new 256 byte page.(2)171
8183F–AVR–06/12
ATtiny24A/44A/84A
Load “Read
Flash”
Command
SDI
SII
SDO
0_0000_0010_00
0_0100_1100_00
x_xxxx_xxxx_xx
Enter Flash Read mode.
Read Flash
Low and High
Bytes
SDI
SII
SDO
0_bbbb_bbbb_00
0_0000_1100_00
x_xxxx_xxxx_xx
0_0000_000a_00
0_0001_1100_00
x_xxxx_xxxx_xx
0_0000_0000_00
0_0110_1000_00
x_xxxx_xxxx_xx
0_0000_0000_00
0_0110_1100_00
q_qqqq_qqqx_xx
Repeat Instr. 1, 3 - 6 for each
new address. Repeat Instr. 2 for
a new 256 byte page.
SDI
SII
SDO
0_0000_0000_00
0_0111_1000_00
x_xxxx_xxxx_xx
0_0000_0000_00
0_0111_1100_00
p_pppp_pppx_xx
Instr 5 - 6.
Load “Write
EEPROM”
Command
SDI
SII
SDO
0_0001_0001_00
0_0100_1100_00
x_xxxx_xxxx_xx
Enter EEPROM Programming
mode.
Load
EEPROM
Page Buffer
SDI
SII
SDO
0_bbbb_bbbb_00
0_0000_1100_00
x_xxxx_xxxx_xx
0_aaaa_aaaa_00
0_0001_1100_00
x_xxxx_xxxx_xx
0_eeee_eeee_00
0_0010_1100_00
x_xxxx_xxxx_xx
0_0000_0000_00
0_0110_1101_00
x_xxxx_xxxx_xx
Repeat Instr. 1 - 5 until the
entire page buffer is filled or
until all data within the page is
filled.(3)
SDI
SII
SDO
0_0000_0000_00
0_0110_1100_00
x_xxxx_xxxx_xx
Program
EEPROM
Page
SDI
SII
SDO
0_0000_0000_00
0_0110_0100_00
x_xxxx_xxxx_xx
0_0000_0000_00
0_0110_1100_00
x_xxxx_xxxx_xx
Wait after Instr. 2 until SDO
goes high. Repeat Instr. 1 - 2
for each loaded EEPROM page
until the entire EEPROM or all
data is programmed.
Write
EEPROM
Byte
SDI
SII
SDO
0_bbbb_bbbb_00
0_0000_1100_00
x_xxxx_xxxx_xx
0_aaaa_aaaa_00
0_0001_1100_00
x_xxxx_xxxx_xx
0_eeee_eeee_00
0_0010_1100_00
x_xxxx_xxxx_xx
0_0000_0000_00
0_0110_1101_00
x_xxxx_xxxx_xx
Repeat Instr. 1 - 6 for each new
address. Wait after Instr. 6 until
SDO goes high.(4)
SDI
SII
SDO
0_0000_0000_00
0_0110_0100_00
x_xxxx_xxxx_xx
0_0000_0000_00
0_0110_1100_00
x_xxxx_xxxx_xx
Instr. 5-6
Load “Read
EEPROM”
Command
SDI
SII
SDO
0_0000_0011_00
0_0100_1100_00
x_xxxx_xxxx_xx
Enter EEPROM Read mode.
Read
EEPROM
Byte
SDI
SII
SDO
0_bbbb_bbbb_00
0_0000_1100_00
x_xxxx_xxxx_xx
0_aaaa_aaaa_00
0_0001_1100_00
x_xxxx_xxxx_xx
0_0000_0000_00
0_0110_1000_00
x_xxxx_xxxx_xx
0_0000_0000_00
0_0110_1100_00
q_qqqq_qqq0_00
Repeat Instr. 1, 3 - 4 for each
new address. Repeat Instr. 2 for
a new 256 byte page.
Write Fuse
Low Bits
SDI
SII
SDO
0_0100_0000_00
0_0100_1100_00
x_xxxx_xxxx_xx
0_A987_6543_00
0_0010_1100_00
x_xxxx_xxxx_xx
0_0000_0000_00
0_0110_0100_00
x_xxxx_xxxx_xx
0_0000_0000_00
0_0110_1100_00
x_xxxx_xxxx_xx
Wait after Instr. 4 until SDO
goes high. Write A - 3 = “0” to
program the Fuse bit.
Write Fuse
High Bits
SDI
SII
SDO
0_0100_0000_00
0_0100_1100_00
x_xxxx_xxxx_xx
0_IHGF_EDCB_00
0_0010_1100_00
x_xxxx_xxxx_xx
0_0000_0000_00
0_0111_0100_00
x_xxxx_xxxx_xx
0_0000_0000_00
0_0111_1100_00
x_xxxx_xxxx_xx
Wait after Instr. 4 until SDO
goes high. Write F - B = “0” to
program the Fuse bit.
Write Fuse
Extended Bits
SDI
SII
SDO
0_0100_0000_00
0_0100_1100_00
x_xxxx_xxxx_xx
0_0000_000J_00
0_0010_1100_00
x_xxxx_xxxx_xx
0_0000_0000_00
0_0110_0110_00
x_xxxx_xxxx_xx
0_0000_0000_00
0_0110_1110_00
x_xxxx_xxxx_xx
Wait after Instr. 4 until SDO
goes high. Write J = “0” to
program the Fuse bit.
Table 19-16. High-voltage Serial Programming Instruction Set for ATtiny24A/44A/84A (Continued)
Instruction
Instruction Format
Instr.1/5 Instr.2/6 Instr.3/7 Instr.4 Operation Remarks172
8183F–AVR–06/12
ATtiny24A/44A/84A
Notes: 1. a = address high bits, b = address low bits, d = data in high bits, e = data in low bits, p = data out high bits, q = data out low
bits, x = don’t care, 1 = Lock Bit1, 2 = Lock Bit2, 3 = CKSEL0 Fuse, 4 = CKSEL1 Fuse, 5 = CKSEL2 Fuse, 6 = CKSEL3
Fuse, 7 = SUT0 Fuse, 8 = SUT1 Fuse, 9 = CKOUT Fuse, A = CKDIV8 Fuse, B = BODLEVEL0 Fuse, C = BODLEVEL1
Fuse, D= BODLEVEL2 Fuse, E = EESAVE Fuse, F = WDTON Fuse, G = SPIEN Fuse, H = DWEN Fuse, I = RSTDISBL
Fuse, J = SELFPRGEN Fuse
2. For page sizes less than 256 words, parts of the address (bbbb_bbbb) will be parts of the page address.
3. For page sizes less than 256 bytes, parts of the address (bbbb_bbbb) will be parts of the page address.
4. The EEPROM is written page-wise. But only the bytes that are loaded into the page are actually written to the EEPROM.
Page-wise EEPROM access is more efficient when multiple bytes are to be written to the same page. Note that auto-erase
of EEPROM is not available in High-voltage Serial Programming, only in SPI Programming.
Write Lock
Bits
SDI
SII
SDO
0_0010_0000_00
0_0100_1100_00
x_xxxx_xxxx_xx
0_0000_0021_00
0_0010_1100_00
x_xxxx_xxxx_xx
0_0000_0000_00
0_0110_0100_00
x_xxxx_xxxx_xx
0_0000_0000_00
0_0110_1100_00
x_xxxx_xxxx_xx
Wait after Instr. 4 until SDO
goes high. Write 2 - 1 = “0” to
program the Lock Bit.
Read Fuse
Low Bits
SDI
SII
SDO
0_0000_0100_00
0_0100_1100_00
x_xxxx_xxxx_xx
0_0000_0000_00
0_0110_1000_00
x_xxxx_xxxx_xx
0_0000_0000_00
0_0110_1100_00
A_9876_543x_xx
Reading A - 3 = “0” means the
Fuse bit is programmed.
Read Fuse
High Bits
SDI
SII
SDO
0_0000_0100_00
0_0100_1100_00
x_xxxx_xxxx_xx
0_0000_0000_00
0_0111_1010_00
x_xxxx_xxxx_xx
0_0000_0000_00
0_0111_1100_00
I_HGFE_DCBx_xx
Reading F - B = “0” means the
Fuse bit is programmed.
Read Fuse
Extended Bits
SDI
SII
SDO
0_0000_0100_00
0_0100_1100_00
x_xxxx_xxxx_xx
0_0000_0000_00
0_0110_1010_00
x_xxxx_xxxx_xx
0_0000_0000_00
0_0110_1110_00
x_xxxx_xxJx_xx
Reading J = “0” means the
Fuse bit is programmed.
Read Lock
Bits
SDI
SII
SDO
0_0000_0100_00
0_0100_1100_00
x_xxxx_xxxx_xx
0_0000_0000_00
0_0111_1000_00
x_xxxx_xxxx_xx
0_0000_0000_00
0_0110_1100_00
x_xxxx_x21x_xx
Reading 2, 1 = “0” means the
Lock bit is programmed.
Read
Signature
Bytes
SDI
SII
SDO
0_0000_1000_00
0_0100_1100_00
x_xxxx_xxxx_xx
0_0000_00bb_00
0_0000_1100_00
x_xxxx_xxxx_xx
0_0000_0000_00
0_0110_1000_00
x_xxxx_xxxx_xx
0_0000_0000_00
0_0110_1100_00
q_qqqq_qqqx_xx
Repeats Instr 2 4 for each
signature byte address.
Read
Calibration
Byte
SDI
SII
SDO
0_0000_1000_00
0_0100_1100_00
x_xxxx_xxxx_xx
0_0000_0000_00
0_0000_1100_00
x_xxxx_xxxx_xx
0_0000_0000_00
0_0111_1000_00
x_xxxx_xxxx_xx
0_0000_0000_00
0_0111_1100_00
p_pppp_pppx_xx
Load “No
Operation”
Command
SDI
SII
SDO
0_0000_0000_00
0_0100_1100_00
x_xxxx_xxxx_xx
Table 19-16. High-voltage Serial Programming Instruction Set for ATtiny24A/44A/84A (Continued)
Instruction
Instruction Format
Instr.1/5 Instr.2/6 Instr.3/7 Instr.4 Operation Remarks173
8183F–AVR–06/12
ATtiny24A/44A/84A
20. Electrical Characteristics
20.1 Absolute Maximum Ratings*
20.2 DC Characteristics
Operating Temperature.................................. -55°C to +125°C *NOTICE: Stresses beyond those listed under “Absolute
Maximum Ratings” may cause permanent damage
to the device. This is a stress rating only and
functional operation of the device at these or
other conditions beyond those indicated in the
operational sections of this specification is not
implied. Exposure to absolute maximum rating
conditions for extended periods may affect
device reliability.
Storage Temperature ..................................... -65°C to +150°C
Voltage on any Pin except RESET
with respect to Ground ................................-0.5V to VCC+0.5V
Voltage on RESET with respect to Ground......-0.5V to +13.0V
Maximum Operating Voltage ............................................ 6.0V
DC Current per I/O Pin ............................................... 40.0 mA
DC Current VCC and GND Pins ................................ 200.0 mA
Table 20-1. DC Characteristics. TA = -40°C to +85°C
Symbol Parameter Condition Min Typ(1) Max Units
VIL
Input Low Voltage
VCC = 1.8V - 2.4V -0.5 0.2VCC(3) V
VCC = 2.4V - 5.5V -0.5 0.3VCC(3) V
Input Low Voltage,
RESET Pin as Reset (4) VCC = 1.8V - 5.5 -0.5 0.2VCC(3)
VIH
Input High-voltage
Except RESET pin
VCC = 1.8V - 2.4V 0.7VCC(2) VCC +0.5 V
VCC = 2.4V - 5.5V 0.6VCC(2) VCC +0.5 V
Input High-voltage
RESET pin as Reset (4) VCC = 1.8V to 5.5V 0.9VCC(2) VCC +0.5 V
VOL
Output Low Voltage (5)
Except RESET pin (7)
IOL = 10 mA, VCC = 5V 0.6 V
IOL = 5 mA, VCC = 3V 0.5 V
VOH
Output High-voltage (6)
Except RESET pin (7)
IOH = -10 mA, VCC = 5V 4.3 V
IOH = -5 mA, VCC = 3V 2.5 V
ILIL
Input Leakage
Current I/O Pin
VCC = 5.5V, pin low
(absolute value) < 0.05 1(8) µA
ILIH
Input Leakage
Current I/O Pin
VCC = 5.5V, pin high
(absolute value) < 0.05 1(8) µA
RPU
Pull-up Resistor, I/O Pin VCC = 5.5V, input low 20 50 kΩ
Pull-up Resistor, Reset Pin VCC = 5.5V, input low 30 60 kΩ174
8183F–AVR–06/12
ATtiny24A/44A/84A
Notes: 1. Typical values at 25°C.
2. “Min” means the lowest value where the pin is guaranteed to be read as high.
3. “Max” means the highest value where the pin is guaranteed to be read as low.
4. Not tested in production.
5. Although each I/O port can sink more than the test conditions (10 mA at VCC = 5V, 5 mA at VCC = 3V) under steady state
conditions (non-transient), the sum of all IOL (for all ports) should not exceed 60 mA. If IOL exceeds the test conditions, VOL
may exceed the related specification. Pins are not guaranteed to sink current greater than the listed test condition.
6. Although each I/O port can source more than the test conditions (10 mA at VCC = 5V, 5 mA at VCC = 3V) under steady state
conditions (non-transient), the sum of all IOH (for all ports) should not exceed 60 mA. If IOH exceeds the test condition, VOH
may exceed the related specification. Pins are not guaranteed to source current greater than the listed test condition.
7. The RESET pin must tolerate high voltages when entering and operating in programming modes and, as a consequence,
has a weak drive strength as compared to regular I/O pins. See Figure 21-87, Figure 21-88, Figure 21-89, and Figure 21-90
(starting on page 226).
8. These are test limits, which account for leakage currents of the test environment. Actual device leakage currents are lower.
9. Values are with external clock using methods described in “Minimizing Power Consumption” on page 35. Power Reduction
is enabled (PRR = 0xFF) and there is no I/O drive.
10. BOD Disabled.
20.3 Speed
The maximum operating frequency of the device depends on VCC. As shown in Figure 20-1, the
relationship between maximum frequency and VCC is linear in the region 1.8V < VCC < 4.5V.
Figure 20-1. Maximum Frequency vs. VCC
ICC
Supply Current,
Active Mode (9)
f = 1 MHz, VCC = 2V 0.25 0.5 mA
f = 4 MHz, VCC = 3V 1.2 2 mA
f = 8 MHz, VCC = 5V 4.4 7 mA
Supply Current,
Idle Mode (9)
f = 1 MHz, VCC = 2V 0.04 0.2 mA
f = 4 MHz, VCC = 3V 0.25 0.6 mA
f = 8 MHz, VCC = 5V 1.3 2 mA
Supply Current,
Power-Down Mode (10)
WDT enabled, VCC = 3V 4 10 µA
WDT disabled, VCC = 3V 0.13 2 µA
Table 20-1. DC Characteristics. TA = -40°C to +85°C (Continued)
Symbol Parameter Condition Min Typ(1) Max Units
4 MHz
1.8V 5.5V 4.5V
20 MHz175
8183F–AVR–06/12
ATtiny24A/44A/84A
20.4 Clock Characteristics
20.4.1 Accuracy of Calibrated Internal Oscillator
It is possible to manually calibrate the internal oscillator to be more accurate than default factory
calibration. Note that the oscillator frequency depends on temperature and voltage. Voltage and
temperature characteristics can be found in Figure 21-109 on page 237 and Figure 21-110 on
page 238.
Notes: 1. Accuracy of oscillator frequency at calibration point (fixed temperature and fixed voltage).
20.4.2 External Clock Drive
Figure 20-2. External Clock Drive Waveform
Table 20-2. Calibration Accuracy of Internal RC Oscillator
Calibration
Method Target Frequency VCC Temperature
Accuracy at given voltage
& temperature (1)
Factory
Calibration 8.0 MHz 3V 25°C ±10%
User
Calibration
Fixed frequency within:
7.3 – 8.1 MHz
Fixed voltage within:
1.8V – 5.5V
Fixed temperature
within:
-40°C to +85°C
±1%
VIL1
VIH1
Table 20-3. External Clock Drive Characteristics
Symbol Parameter
VCC = 1.8 - 5.5V VCC = 2.7 - 5.5V VCC = 4.5 - 5.5V
Min. Max. Min. Max. Min. Max. Units
1/tCLCL Clock Frequency 0 4 0 10 0 20 MHz
tCLCL Clock Period 250 100 50 ns
tCHCX High Time 100 40 20 ns
tCLCX Low Time 100 40 20 ns
tCLCH Rise Time 2.0 1.6 0.5 µs
tCHCL Fall Time 2.0 1.6 0.5 µs
ΔtCLCL Change in period from one clock cycle to the next 2 2 2 %176
8183F–AVR–06/12
ATtiny24A/44A/84A
20.5 System and Reset Characteristics
Note: 1. Values are guidelines, only
20.5.1 Power-On Reset
Note: 1. Values are guidelines, only
2. Threshold where device is released from reset when voltage is rising
3. The Power-on Reset will not work unless the supply voltage has been below VPOA
20.5.2 Brown-Out Detection
Note: 1. VBOT may be below nominal minimum operating voltage for some devices. For devices where
this is the case, the device is tested down to VCC = VBOT during the production test. This guarantees
that a Brown-out Reset will occur before VCC drops to a voltage where correct
operation of the microcontroller is no longer guaranteed.
Table 20-4. Reset, Brown-out, and Internal Voltage Characteristics
Symbol Parameter Condition Min(1) Typ(1) Max(1) Units
VRST RESET pin threshold voltage 0.2 VCC 0.9VCC V
tRST
Minimum pulse width on
RESET pin
VCC = 1.8V
VCC = 3V
VCC = 5V
2000
700
400
ns
VHYST Brown-out Detector hysteresis 50 mV
tBOD
Minimum pulse width on
Brown-out Reset 2 µs
VBG
Internal bandgap reference
voltage
VCC = 5V
TA = 25°C 1.0 1.1 1.2 V
tBG
Internal bandgap reference
start-up time
VCC = 5V
TA = 25°C 40 70 µs
IBG
Internal bandgap reference
current consumption
VCC = 5V
TA = 25°C 15 µA
Table 20-5. Characteristics of Enhanced Power-On Reset. TA = = -40°C to +85°C
Symbol Parameter Min(1) Typ(1) Max(1) Units
VPOR Release threshold of power-on reset (2) 1.1 1.4 1.6 V
VPOA Activation threshold of power-on reset (3) 0.6 1.3 1.6 V
SRON Power-On Slope Rate 0.01 V/ms
Table 20-6. VBOT vs. BODLEVEL Fuse Coding
BODLEVEL[2:0] Fuses Min(1) Typ(1) Max(1) Units
111 BOD Disabled
110 1.7 1.8 2.0
101 2.5 2.7 2.9 V
100 4.1 4.3 4.5
0XX Reserved177
8183F–AVR–06/12
ATtiny24A/44A/84A
20.6 ADC Characteristics
Table 20-7. ADC Characteristics, Single Ended Channels. T = -40°C to +85°C
Symbol Parameter Condition Min Typ Max Units
Resolution 10 Bits
Absolute accuracy
(Including INL, DNL, and
Quantization, Gain and Offset
Errors)
VREF = 4V, VCC = 4V,
ADC clock = 200 kHz 2.0 LSB
VREF = 4V, VCC = 4V,
ADC clock = 1 MHz 2.5 LSB
VREF = 4V, VCC = 4V,
ADC clock = 200 kHz
Noise Reduction Mode
1.5 LSB
VREF = 4V, VCC = 4V,
ADC clock = 1 MHz
Noise Reduction Mode
2.0 LSB
Integral Non-Linearity (INL)
(Accuracy after Offset and
Gain Calibration)
VREF = 4V, VCC = 4V,
ADC clock = 200 kHz 1.0 LSB
Differential Non-linearity
(DNL)
VREF = 4V, VCC = 4V,
ADC clock = 200 kHz 0.5 LSB
Gain Error VREF = 4V, VCC = 4V,
ADC clock = 200 kHz 2.0 LSB
Offset Error (Absolute) VREF = 4V, VCC = 4V,
ADC clock = 200 kHz 1.5 LSB
Conversion Time Free Running Conversion 14 280 µs
Clock Frequency 50 1000 kHz
VIN Input Voltage GND VREF V
Input Bandwidth 38.5 kHz
AREF External Voltage Reference 2.0 VCC V
VINT Internal Voltage Reference 1.0 1.1 1.2 V
RREF Reference Input Resistance 32 kΩ
RAIN Analog Input Resistance 100 MΩ
ADC Conversion Output 0 1023 LSB178
8183F–AVR–06/12
ATtiny24A/44A/84A
Table 20-8. ADC Characteristics, Differential Channels (Unipolar Mode), TA = -40°C to +85°C
Symbol Parameter Condition Min Typ Max Units
Resolution
Gain = 1x 10 Bits
Gain = 20x 10 Bits
Absolute accuracy
(Including INL, DNL, and Quantization, Gain
and Offset Errors)
Gain = 1x
VREF = 4V, VCC = 5V
ADC clock = 50 - 200 kHz
10 LSB
Gain = 20x
VREF = 4V, VCC = 5V
ADC clock = 50 - 200 kHz
15 LSB
Integral Non-Linearity (INL)
(Accuracy after Offset and Gain Calibration)
Gain = 1x
VREF = 4V, VCC = 5V
ADC clock = 50 - 200 kHz
4 LSB
Gain = 20x
VREF = 4V, VCC = 5V
ADC clock = 50 - 200 kHz
10 LSB
Gain Error
Gain = 1x 10 LSB
Gain = 20x 15 LSB
Offset Error
Gain = 1x
VREF = 4V, VCC = 5V
ADC clock = 50 - 200 kHz
3 LSB
Gain = 20x
VREF = 4V, VCC = 5V
ADC clock = 50 - 200 kHz
4 LSB
Conversion Time Free Running Conversion 70 280 µs
Clock Frequency 50 200 kHz
VIN Input Voltage GND VCC V
VDIFF Input Differential Voltage VREF/Gain V
Input Bandwidth 4 kHz
AREF External Reference Voltage 2.0 VCC - 1.0 V
VINT Internal Voltage Reference 1.0 1.1 1.2 V
RREF Reference Input Resistance 32 kΩ
RAIN Analog Input Resistance 100 MΩ
ADC Conversion Output 0 1023 LSB179
8183F–AVR–06/12
ATtiny24A/44A/84A
Table 20-9. ADC Characteristics, Differential Channels (Bipolar Mode), TA = -40°C to +85°C
Symbol Parameter Condition Min Typ Max Units
Resolution
Gain = 1x 10 Bits
Gain = 20x 10 Bits
Absolute accuracy
(Including INL, DNL, and Quantization, Gain
and Offset Errors)
Gain = 1x
VREF = 4V, VCC = 5V
ADC clock = 50 - 200 kHz
8 LSB
Gain = 20x
VREF = 4V, VCC = 5V
ADC clock = 50 - 200 kHz
8 LSB
Integral Non-Linearity (INL)
(Accuracy after Offset and Gain Calibration)
Gain = 1x
VREF = 4V, VCC = 5V
ADC clock = 50 - 200 kHz
4 LSB
Gain = 20x
VREF = 4V, VCC = 5V
ADC clock = 50 - 200 kHz
5 LSB
Gain Error
Gain = 1x 4 LSB
Gain = 20x 5 LSB
Offset Error
Gain = 1x
VREF = 4V, VCC = 5V
ADC clock = 50 - 200 kHz
3 LSB
Gain = 20x
VREF = 4V, VCC = 5V
ADC clock = 50 - 200 kHz
4 LSB
Conversion Time Free Running Conversion 70 280 µs
Clock Frequency 50 200 kHz
VIN Input Voltage GND VCC V
VDIFF Input Differential Voltage VREF/Gain V
Input Bandwidth 4 kHz
AREF External Reference Voltage 2.0 VCC - 1.0 V
VINT Internal Voltage Reference 1.0 1.1 1.2 V
RREF Reference Input Resistance 32 kΩ
RAIN Analog Input Resistance 100 MΩ
ADC Conversion Output -512 511 LSB180
8183F–AVR–06/12
ATtiny24A/44A/84A
20.7 Analog Comparator Characteristics
Note: All parameters are based on simulation results and are not tested in production
20.8 Serial Programming Characteristics
Figure 20-3. Serial Programming Timing
Figure 20-4. Serial Programming Waveform
Table 20-10. Analog Comparator Characteristics, TA = -40°C to +85°C
Symbol Parameter Condition Min Typ Max Units
VAIO Input Offset Voltage VCC = 5V, VIN = VCC / 2 < 10 40 mV
ILAC Input Leakage Current VCC = 5V, VIN = VCC / 2 -50 50 nA
tAPD
Analog Propagation Delay
(from saturation to slight overdrive)
VCC = 2.7V 750
ns
VCC = 4.0V 500
Analog Propagation Delay
(large step change)
VCC = 2.7V 100
VCC = 4.0V 75
tDPD Digital Propagation Delay VCC = 1.8V - 5.5 1 2 CLK
Table 20-11. Serial Programming Characteristics, TA = -40°C to +85°C, VCC = 1.8 - 5.5V
(Unless Otherwise Noted)
Symbol Parameter Min Typ Max Units
1/tCLCL Oscillator Frequency 0 4 MHz
tCLCL Oscillator Period 250 ns
1/tCLCL Oscillator Freq. (VCC = 4.5V - 5.5V) 0 20 MHz
MOSI
MISO
SCK
t
OVSH
t
SHSL
t t
SHOX SLSH
MSB
MSB
LSB
LSB
SERIAL CLOCK INPUT
(SCK)
SERIAL DATA INPUT
(MOSI)
(MISO)
SAMPLE
SERIAL DATA OUTPUT181
8183F–AVR–06/12
ATtiny24A/44A/84A
Note: 1. 2 tCLCL for fck < 12 MHz, 3 tCLCL for fck >= 12 MHz
20.9 High-Voltage Serial Programming Characteristics
Figure 20-5. High-voltage Serial Programming Timing
tCLCL Oscillator Period (VCC = 4.5V - 5.5V) 50 ns
tSHSL SCK Pulse Width High 2 tCLCL(1) ns
tSLSH SCK Pulse Width Low 2 tCLCL(1) ns
tOVSH MOSI Setup to SCK High tCLCL ns
tSHOX MOSI Hold after SCK High 2 tCLCL ns
Table 20-11. Serial Programming Characteristics, TA = -40°C to +85°C, VCC = 1.8 - 5.5V
(Unless Otherwise Noted)
Symbol Parameter Min Typ Max Units
Table 20-12. High-voltage Serial Programming Characteristics
TA = 25°C, VCC = 5V (Unless otherwise noted)
Symbol Parameter Min Typ Max Units
tSHSL SCI (PB0) Pulse Width High 125 ns
tSLSH SCI (PB0) Pulse Width Low 125 ns
tIVSH SDI (PA6), SII (PB1) Valid to SCI (PB0) High 50 ns
tSHIX SDI (PA6), SII (PB1) Hold after SCI (PB0) High 50 ns
tSHOV SCI (PB0) High to SDO (PA4) Valid 16 ns
tWLWH_PFB Wait after Instr. 3 for Write Fuse Bits 2.5 ms
SDI (PA6), SII (PA5)
SDO (PA4)
SCI (PB0)
t
IVSH
t
SHSL
t t
SHIX SLSH
t
SHOV182
8183F–AVR–06/12
ATtiny24A/44A/84A
21. Typical Characteristics
The data contained in this section is largely based on simulations and characterization of similar
devices in the same process and design methods. Thus, the data should be treated as indications
of how the part will behave.
The following charts show typical behavior. These figures are not tested during manufacturing.
During characterisation devices are operated at frequencies higher than test limits but they are
not guaranteed to function properly at frequencies higher than the ordering code indicates.
All current consumption measurements are performed with all I/O pins configured as inputs and
with internal pull-ups enabled. Current consumption is a function of several factors such as operating
voltage, operating frequency, loading of I/O pins, switching rate of I/O pins, code executed
and ambient temperature. The dominating factors are operating voltage and frequency.
A sine wave generator with rail-to-rail output is used as clock source but current consumption in
Power-Down mode is independent of clock selection. The difference between current consumption
in Power-Down mode with Watchdog Timer enabled and Power-Down mode with Watchdog
Timer disabled represents the differential current drawn by the Watchdog Timer.
The current drawn from pins with a capacitive load may be estimated (for one pin) as follows:
where VCC = operating voltage, CL = load capacitance and fSW = average switching frequency of
I/O pin.
21.1 Supply Current of I/O Modules
The tables and formulas below can be used to calculate the additional current consumption for
the different I/O modules in Active and Idle mode. The enabling or disabling of the I/O modules
is controlled by the Power Reduction Register. See “Power Reduction Register” on page 35 for
details.
Table 21-2 below can be used for calculating typical current consumption for other supply voltages
and frequencies than those mentioned in the Table 21-1 above.
I
CP VCC CL × × f
SW ≈
Table 21-1. Additional Current Consumption for the different I/O modules (absolute values)
PRR bit
Typical numbers
VCC = 2V, f = 1 MHz VCC = 3V, f = 4 MHz VCC = 5V, f = 8 MHz
PRTIM1 1.6 µA 11 µA 48 µA
PRTIM0 4.4 µA 29 µA 120 µA
PRUSI 1.6 µA 11 µA 48 µA
PRADC 8.0 µA 55 µA 240 µA183
8183F–AVR–06/12
ATtiny24A/44A/84A
21.1.1 Example
Calculate the expected current consumption in idle mode with USI, TIMER0, and ADC enabled
at VCC = 2.0V and f = 1 MHz. From Table 21-2 on page 183, third column, we see that we need
to add 5% for the USI, 10% for TIMER0, and 20% for the ADC. Reading from Figure 21-61 on
page 213, we find that current consumption in idle mode at 2V and 1 MHz is about 0.04 mA. The
total current consumption in idle mode with USI, TIMER0, and ADC enabled is therefore:
21.2 ATtiny24A
21.2.1 Current Consumption in Active Mode
Figure 21-1. Active Supply Current vs. Low Frequency
0.1 - 1.0 MHz, PRR = 0xFF
Table 21-2. Additional Current Consumption (percentage) in Active and Idle mode
PRR bit
Current consumption additional to
active mode with external clock
(see Figure 21-56 and Figure 21-57)
Current consumption additional to
idle mode with external clock
(see Figure 21-61 and Figure 21-62)
PRTIM1 1 % 5 %
PRTIM0 3 % 10 %
PRUSI 1 % 5 %
PRADC 5 % 20 %
ICCTOT ≈ ≈ 0,05mA × ( ) 1 0,05 0,10 0,20 +++ 0,06mA
5.5 V
5.0 V
4.5 V
4.0 V
3.3 V
2.7 V
1.8 V
0
0,2
0,4
0,6
0,8
1
0 0,1 0,2 0,3 0,4 0,5 0,6 0,7 0,8 0,9 1
Frequency (MHz)
ICC (mA)184
8183F–AVR–06/12
ATtiny24A/44A/84A
Figure 21-2. Active Supply Current vs. Frequency
1 - 20 MHz, PRR = 0xFF
Figure 21-3. Active Supply Current vs. VCC
Internal RC Oscillator, 8 MHz
0
2
4
6
8
10
12
0 2 4 6 8 10 12 14 16 18 20
Frequency (MHz)
ICC (mA)
5.5 V
5.0 V
4.5 V
4.0 V
3.3 V
2.7 V
1.8 V
85 °C
25 °C
-40 °C
0
1
2
3
4
5
6
1,5 2 2,5 3 3,5 4 4,5 5 5,5
VCC (V)
ICC (mA)185
8183F–AVR–06/12
ATtiny24A/44A/84A
Figure 21-4. Active Supply Current vs. VCC
Internal RC Oscillator, 1 MHz
Figure 21-5. Active Supply Current vs. VCC
Internal RC Oscillator, 128 kHz
85 °C
25 °C
-40 °C
0
0,2
0,4
0,6
0,8
1
1,2
1,5 2 2,5 3 3,5 4 4,5 5 5,5
VCC (V)
ICC (mA)
85 °C
25 °C
-40 °C
0
0,02
0,04
0,06
0,08
0,1
0,12
0,14
1,5 2 2,5 3 3,5 4 4,5 5 5,5
VCC (V)
ICC (mA)186
8183F–AVR–06/12
ATtiny24A/44A/84A
21.2.2 Current Consumption in Idle Mode
Figure 21-6. Idle Supply Current vs. Low Frequency
0.1 - 1.0 MHz, PRR = 0xFF
Figure 21-7. Idle Supply Current vs. Frequency
1 - 20 MHz, PRR = 0xFF
5.5 V
5.0 V
4.5 V
4.0 V
3.3 V
2.7 V
1.8 V
0
0,02
0,04
0,06
0,08
0,1
0,12
0,14
0 0,1 0,2 0,3 0,4 0,5 0,6 0,7 0,8 0,9 1
Frequency (MHz)
ICC (mA)
0
0,5
1
1,5
2
2,5
3
3,5
4
0 2 4 6 8 10 12 14 16 18 20
Frequency (MHz)
ICC (mA)
5.5 V
5.0 V
4.5 V
4.0 V
3.3 V
2.7 V
1.8 V187
8183F–AVR–06/12
ATtiny24A/44A/84A
Figure 21-8. Idle Supply Current vs. VCC
Internal RC Oscillator, 8 MHz
Figure 21-9. Idle Supply Current vs. VCC
Internal RC Oscillator, 1 MHz
85 °C
25 °C
-40 °C
0
0,2
0,4
0,6
0,8
1
1,2
1,4
1,6
1,8
2
1,5 2 2,5 3 3,5 4 4,5 5 5,5
VCC (V)
ICC (mA)
85 °C
25 °C
-40 °C
0
0,05
0,1
0,15
0,2
0,25
0,3
0,35
0,4
1,5 2 2,5 3 3,5 4 4,5 5 5,5
VCC (V)
ICC (mA)188
8183F–AVR–06/12
ATtiny24A/44A/84A
Figure 21-10. Idle Supply Current vs. VCC
Internal RC Oscillator, 128 kHz
21.2.3 Current Consumption in Power-down Mode
Figure 21-11. Power-down Supply Current vs. VCC
Watchdog Timer Disabled
85 °C
25 °C
-40 °C
0
0,005
0,01
0,015
0,02
0,025
0,03
1,5 2 2,5 3 3,5 4 4,5 5 5,5
VCC (V)
ICC (mA)
85 °C
25 °C
-40 °C
0
0,2
0,4
0,6
0,8
1,5 2 2,5 3 3,5 4 4,5 5 5,5
VCC (V)
ICC (uA)189
8183F–AVR–06/12
ATtiny24A/44A/84A
Figure 21-12. Power-down Supply Current vs. VCC
Watchdog Timer Enabled
21.2.4 Current Consumption in Reset
Figure 21-13. Reset Supply Current vs. VCC
0.1 - 1.0 MHz, Excluding Current through Reset Pull-up
85 °C
25 °C
-40 °C
0
2
4
6
8
10
1,5 2 2,5 3 3,5 4 4,5 5 5,5
VCC (V)
ICC (uA)
5.5 V
5.0 V
4.5 V
4.0 V
3.3 V
2.7 V
1.8 V
0
0,02
0,04
0,06
0,08
0,1
0,12
0,14
0,16
0 0,1 0,2 0,3 0,4 0,5 0,6 0,7 0,8 0,9 1
Frequency (MHz)
ICC (mA)190
8183F–AVR–06/12
ATtiny24A/44A/84A
Figure 21-14. Reset Supply Current vs. VCC
1 - 20 MHz, Excluding Current through Reset Pull-up
21.2.5 Current Consumption of Peripheral Units
Figure 21-15. ADC Current vs. VCC
4 MHz Frequency
0
0,5
1
1,5
2
2,5
3
0 2 4 6 8 10 12 14 16 18 20
Frequency (MHz)
ICC (mA)
5.5 V
5.0 V
4.5 V
4.0 V
3.3 V
2.7 V
1.8 V
0
100
200
300
400
500
600
1,5 2 2,5 3 3,5 4 4,5 5 5,5
VCC (V)
ICC (uA)191
8183F–AVR–06/12
ATtiny24A/44A/84A
Figure 21-16. AREF Pin Current vs. Pin Voltage
Figure 21-17. Analog Comparator Current vs. VCC
4 MHz Frequency
0
20
40
60
80
100
120
140
160
180
200
1,5 2 2,5 3 3,5 4 4,5 5 5,5
AREF (V)
AREF pin current (uA)
0
20
40
60
80
100
120
140
160
1,5 2 2,5 3 3,5 4 4,5 5 5,5
VCC (V)
ICC (uA)192
8183F–AVR–06/12
ATtiny24A/44A/84A
Figure 21-18. Programming Current vs. VCC
Figure 21-19. Brownout Detector Current vs. VCC
BOD Level = 1.8V
85 °C
25 °C
-40 °C
0
1000
2000
3000
4000
5000
6000
7000
8000
9000
10000
1,5 2,5 3,5 4,5 5,5
VCC (V)
ICC (uA)
85 °C
25 °C
-40 °C
0
5
10
15
20
25
30
35
40
45
1,5 2 2,5 3 3,5 4 4,5 5 5,5
VCC (V)
ICC (uA)193
8183F–AVR–06/12
ATtiny24A/44A/84A
Figure 21-20. Watchdog Timer Current vs. VCC
21.2.6 Pull-up Resistors
Figure 21-21. Pull-up Resistor Current vs. Input Voltage
I/O Pin, VCC = 1.8V
85 °C
25 °C
-40 °C
0
1
2
3
4
5
6
7
8
1,5 2 2,5 3 3,5 4 4,5 5 5,5
VCC (V)
ICC (uA)
85 °C
-40 °C
25 °C
0
10
20
30
40
50
60
0 0,2 0,4 0,6 0,8 1 1,2 1,4 1,6 1,8 2
VOP (V)
IOP (uA)194
8183F–AVR–06/12
ATtiny24A/44A/84A
Figure 21-22. Pull-up Resistor Current vs. Input Voltage
I/O Pin, VCC = 2.7V
Figure 21-23. Pull-up Resistor Current vs. Input Voltage
I/O Pin, VCC = 5V
0
10
20
30
40
50
60
70
80
0 0,5 1 1,5 2 2,5 3
VOP (V)
IOP (uA)
85 °C
-40 °C
25 °C
0
20
40
60
80
100
120
140
160
0 1 2 3 4 5 6
VOP (V)
IOP (uA)
85 °C
-40 °C
25 °C195
8183F–AVR–06/12
ATtiny24A/44A/84A
Figure 21-24. Reset Pull-up Resistor Current vs. Reset Pin Voltage
VCC = 1.8V
Figure 21-25. Reset Pull-up Resistor Current vs. Reset Pin Voltage
VCC = 2.7V
0
5
10
15
20
25
30
35
40
0 0,2 0,4 0,6 0,8 1 1,2 1,4 1,6 1,8 2
VRESET (V)
IRESET (uA)
85 °C
-40 °C
25 °C
0
10
20
30
40
50
60
0 0,5 1 1,5 2 2,5 3
VRESET (V)
IRESET (uA)
85 °C
-40 °C
25 °C196
8183F–AVR–06/12
ATtiny24A/44A/84A
Figure 21-26. Reset Pull-up Resistor Current vs. Reset Pin Voltage
VCC = 5V
21.2.7 Output Driver Strength
Figure 21-27. VOL: Output Voltage vs. Sink Current
I/O Pin, VCC = 3V
0
20
40
60
80
100
120
0 1 2 3 4 5 6
VRESET (V)
IRESET (uA)
85 °C
-40 °C
25 °C
85 °C
25 °C
-40 °C
0
0,2
0,4
0,6
0,8
1
1,2
0 5 10 15 20
IOL (mA)
VOL (V)197
8183F–AVR–06/12
ATtiny24A/44A/84A
Figure 21-28. VOL: Output Voltage vs. Sink Current
I/O Pin, VCC = 5V
Figure 21-29. VOH: Output Voltage vs. Source Current
I/O Pin, VCC = 3V
85 °C
25 °C
-40 °C
0
0,1
0,2
0,3
0,4
0,5
0,6
0 5 10 15 20
IOL (mA)
VOL (V)
85 °C
25 °C
-40 °C
1,8
2
2,2
2,4
2,6
2,8
3
3,2
0 5 10 15 20
IOH (mA)
VOH (V)198
8183F–AVR–06/12
ATtiny24A/44A/84A
Figure 21-30. VOH: Output Voltage vs. Source Current
I/O Pin, VCC = 5V
Figure 21-31. VOL: Output Voltage vs. Sink Current
Reset Pin as I/O, VCC = 3V
85 °C
25 °C
-40 °C
4,2
4,4
4,6
4,8
5
5,2
0 5 10 15 20
IOH (mA)
VOH (V)
85 °C
25 °C
-40 °C
0
0,2
0,4
0,6
0,8
1
1,2
1,4
0 0,5 1 1,5 2 2,5 3
IOL (mA)
VOL (V)199
8183F–AVR–06/12
ATtiny24A/44A/84A
Figure 21-32. VOL: Output Voltage vs. Sink Current
Reset Pin as I/O, VCC = 5V
Figure 21-33. VOH: Output Voltage vs. Source Current
Reset Pin as I/O, VCC = 3V
85 °C
25 °C
-40 °C
0
0,2
0,4
0,6
0,8
1
1,2
0 0,5 1 1,5 2 2,5 3 3,5 4 4,5 5
IOL (mA)
VOL (V)
85 °C
25 °C
-40 °C
0
0,5
1
1,5
2
2,5
3
0 0,2 0,4 0,6 0,8 1 1,2 1,4 1,6 1,8 2
IOH (mA)
VOH (V)200
8183F–AVR–06/12
ATtiny24A/44A/84A
Figure 21-34. VOH: Output Voltage vs. Source Current
Reset Pin as I/O, VCC = 5V
21.2.8 Input Threshold and Hysteresis (for I/O Ports)
Figure 21-35. VIH: Input Threshold Voltage vs. VCC
I/O Pin, Read as ‘1’
85 °C
25 °C
-40 °C
0
0,5
1
1,5
2
2,5
3
3,5
4
4,5
0 0,2 0,4 0,6 0,8 1 1,2 1,4 1,6 1,8 2
IOH (mA)
VOH (V)
85 °C
25 °C
-40 °C
0
0,5
1
1,5
2
2,5
3
3,5
1,5 2 2,5 3 3,5 4 4,5 5 5,5
VCC (V)
Threshold (V)201
8183F–AVR–06/12
ATtiny24A/44A/84A
Figure 21-36. VIL: Input Threshold Voltage vs. VCC
I/O Pin, Read as ‘0’
Figure 21-37. VIH-VIL: Input Hysteresis vs. VCC
I/O Pin
0
0,5
1
1,5
2
2,5
1,5 2 2,5 3 3,5 4 4,5 5 5,5
VCC (V)
Threshold (V)
85 °C
25 °C
-40 °C
85 °C
25 °C
-40 °C
0
0,1
0,2
0,3
0,4
0,5
0,6
0,7
0,8
1,5 2 2,5 3 3,5 4 4,5 5 5,5
VCC (V)
Input Hysteresis (V)202
8183F–AVR–06/12
ATtiny24A/44A/84A
Figure 21-38. VIH: Input Threshold Voltage vs. VCC
Reset Pin as I/O, Read as ‘1’
Figure 21-39. VIL: Input Threshold Voltage vs. VCC
Reset Pin as I/O, Read as ‘0’
85 °C
25 °C
-40 °C
0
0,5
1
1,5
2
2,5
3
1,5 2 2,5 3 3,5 4 4,5 5 5,5
VCC (V)
Threshold (V)
85 °C
25 °C
-40 °C
0
0,5
1
1,5
2
2,5
1,5 2 2,5 3 3,5 4 4,5 5 5,5
VCC (V)
Threshold (V)203
8183F–AVR–06/12
ATtiny24A/44A/84A
Figure 21-40. VIH-VIL: Input Hysteresis vs. VCC
Reset Pin as I/O
21.2.9 BOD, Bandgap and Reset
Figure 21-41. BOD Threshold vs. Temperature
BODLEVEL is 4.3V
85 °C
25 °C
-40 °C
0
0.1
0.2
0.3
0.4
0.5
0.6
0.7
0.8
0.9
1
1.5 2 2.5 3 3.5 4 4.5 5 5.5
VCC (V)
Input Hysteresis (V)
RISING VCC
FALLING VCC
4,26
4,28
4,3
4,32
4,34
4,36
4,38
4,4
-40 -30 -20 -10 0 10 20 30 40 50 60 70 80 90 100
Temperature (C)
Threshold (V)204
8183F–AVR–06/12
ATtiny24A/44A/84A
Figure 21-42. BOD Threshold vs. Temperature
BODLEVEL is 2.7V
Figure 21-43. BOD Threshold vs. Temperature
BODLEVEL is 1.8V
2,68
2,7
2,72
2,74
2,76
2,78
2,8
-40 -30 -20 -10 0 10 20 30 40 50 60 70 80 90 100
Temperature (C)
Threshold (V)
RISING VCC
FALLING VCC
RISING VCC
FALLING VCC
1,77
1,78
1,79
1,8
1,81
1,82
1,83
1,84
1,85
1,86
1,87
-40 -30 -20 -10 0 10 20 30 40 50 60 70 80 90 100
Temperature (C)
Threshold (V)205
8183F–AVR–06/12
ATtiny24A/44A/84A
Figure 21-44. Bandgap Voltage vs. Supply Voltage
Figure 21-45. Bandgap Voltage vs. Temperature
1
1,02
1,04
1,06
1,08
1,1
1,12
1,14
1,16
1,18
1,2
1,5 2 2,5 3 3,5 4 4,5 5 5,5
Vcc (V)
Bandgap Voltage (V)
1
1,02
1,04
1,06
1,08
1,1
1,12
1,14
1,16
1,18
1,2
-40 -20 0 20 40 60 80 100
Temperature (C)
Bandgap Voltage (V)206
8183F–AVR–06/12
ATtiny24A/44A/84A
Figure 21-46. VIH: Input Threshold Voltage vs. VCC
Reset Pin, Read as ‘1’
Figure 21-47. VIL: Input Threshold Voltage vs. VCC
Reset Pin, Read as ‘0’
85 °C
25 °C
-40 °C
0
0,5
1
1,5
2
2,5
1,5 2 2,5 3 3,5 4 4,5 5 5,5
VCC (V)
Threshold (V)
85 °C
25 °C
-40 °C
0
0,5
1
1,5
2
2,5
1,5 2 2,5 3 3,5 4 4,5 5 5,5
VCC (V)
Threshold (V)207
8183F–AVR–06/12
ATtiny24A/44A/84A
Figure 21-48. VIH-VIL: Input Hysteresis vs. VCC
Reset Pin
Figure 21-49. Minimum Reset Pulse Width vs. VCC
85 °C
25 °C
-40 °C
0
0,1
0,2
0,3
0,4
0,5
0,6
0,7
0,8
0,9
1
1 1,5 2 2,5 3 3,5 4 4,5 5 5,5
VCC (V)
Input Hysteresis (V)
85 °C
25 °C
-40 °C
0
200
400
600
800
1000
1200
1400
1600
1800
2000
1,5 2 2,5 3 3,5 4 4,5 5 5,5
VCC (V)
Pulsewidth (ns)208
8183F–AVR–06/12
ATtiny24A/44A/84A
21.2.10 Analog Comparator Offset
Figure 21-50. Analog Comparator Offset
VCC = 5V
21.2.11 Internal Oscillator Speed
Figure 21-51. Watchdog Oscillator Frequency vs. VCC
85
25
-40
-0.008
-0.006
-0.004
-0.002
0
0.002
0.004
0 0.5 1 1.5 2 2.5 3 3.5 4 4.5 5
VIN (V)
Offset (V)
85 °C
25 °C
-40 °C
112
114
116
118
120
122
124
1,5 2 2,5 3 3,5 4 4,5 5 5,5
VCC (V)
FRC (kHz)209
8183F–AVR–06/12
ATtiny24A/44A/84A
Figure 21-52. Watchdog Oscillator Frequency vs. Temperature
Figure 21-53. Calibrated 8 MHz RC Oscillator Frequency vs. VCC
5.5 V
3.0 V
1.8 V
112
114
116
118
120
122
124
-40 -20 0 20 40 60 80 100
Temperature (C)
FRC (kHz)
85 °C
25 °C
-40 °C
7,4
7,6
7,8
8
8,2
8,4
1,5 2 2,5 3 3,5 4 4,5 5 5,5
VCC (V)
FRC (MHz)210
8183F–AVR–06/12
ATtiny24A/44A/84A
Figure 21-54. Calibrated 8 MHz RC Oscillator Frequency vs. Temperature
Figure 21-55. Calibrated 8 MHz RC Oscillator Frequency vs. OSCCAL Value
VCC = 3V
5.5 V
3.0 V
1.8 V
7,5
7,6
7,7
7,8
7,9
8
8,1
8,2
8,3
8,4
-40 -20 0 20 40 60 80 100
Temperature (C)
FRC (MHz)
85 °C
25 °C
-40 °C
0
4
8
12
16
20
0 16 32 48 64 80 96 112 128 144 160 176 192 208 224 240
OSCCAL (X1)
FRC (MHz)211
8183F–AVR–06/12
ATtiny24A/44A/84A
21.3 ATtiny44A
21.3.1 Current Consumption in Active Mode
Figure 21-56. Active Supply Current vs. Low Frequency
0.1 - 1.0 MHz, PRR = 0xFF
Figure 21-57. Active Supply Current vs. frequency
1 - 20 MHz, PRR = 0xFF
5.5 V
5.0 V
4.5 V
4.0 V
3.3 V
2.7 V
1.8 V
0
0.2
0.4
0.6
0.8
1
0 0.1 0.2 0.3 0.4 0.5 0.6 0.7 0.8 0.9 1
Frequency (MHz)
ICC (mA)
5.5 V
5.0 V
4.5 V
4.0 V
3.3 V
2.7 V
1.8 V
0
2
4
6
8
10
12
0 2 4 6 8 10 12 14 16 18 20
Frequency (MHz)
ICC (mA)212
8183F–AVR–06/12
ATtiny24A/44A/84A
Figure 21-58. Active Supply Current vs. VCC
Internal RC Oscillator, 8 MHz
Figure 21-59. Active Supply Current vs. VCC
Internal RC Oscillator, 1 MHz
85 °C
25 °C
-40 °C
0
1
2
3
4
5
6
1.5 2 2.5 3 3.5 4 4.5 5 5.5
V CC (V)
ICC (mA)
85 °C
25 °C
-40 °C
0
0.2
0.4
0.6
0.8
1
1.2
1.5 2 2.5 3 3.5 4 4.5 5 5.5
V CC (V)
ICC (mA)213
8183F–AVR–06/12
ATtiny24A/44A/84A
Figure 21-60. Active Supply Current vs. VCC
Internal RC Oscillator, 128 kHz
21.3.2 Current Consumption in Idle Mode
Figure 21-61. Idle Supply Current vs. Low Frequency
0.1 - 1.0 MHz, PRR = 0xFF
85 °C
25 °C
-40 °C
0
0.02
0.04
0.06
0.08
0.1
0.12
0.14
1.5 2 2.5 3 3.5 4 4.5 5 5.5
V CC (V)
ICC (mA)
5.5 V
5.0 V
4.5 V
4.0 V
3.3 V
2.7 V
1.8 V
0
0.02
0.04
0.06
0.08
0.1
0.12
0.14
0.16
0.18
0.2
0 0.1 0.2 0.3 0.4 0.5 0.6 0.7 0.8 0.9 1
Frequency (MHz)
ICC (mA)214
8183F–AVR–06/12
ATtiny24A/44A/84A
Figure 21-62. Idle Supply Current vs. Frequency
1 - 20 MHz, PRR = 0xFF
Figure 21-63. Idle Supply Current vs. VCC
Internal RC Oscillator, 8 MHz
5.5 V
5.0 V
4.5 V
4.0 V
3.3 V
2.7 V
1.8 V 0
0.5
1
1.5
2
2.5
3
3.5
4
0 2 4 6 8 10 12 14 16 18 20
Frequency (MHz)
ICC (mA)
85 °C
25 °C
-40 °C
0
0.2
0.4
0.6
0.8
1
1.2
1.4
1.6
1.8
2
1.5 2 2.5 3 3.5 4 4.5 5 5.5
V CC (V)
ICC (mA)215
8183F–AVR–06/12
ATtiny24A/44A/84A
Figure 21-64. Idle Supply Current vs. VCC
Internal RC Oscillator, 1 MHz
Figure 21-65. Idle Supply Current vs. VCC
Internal RC Oscillator, 128 kHz
85 °C
25 °C
-40 °C
0
0.05
0.1
0.15
0.2
0.25
0.3
0.35
0.4
1.5 2 2.5 3 3.5 4 4.5 5 5.5
V CC (V)
ICC (mA)
85 °C
25 °C
-40 °C
0
0.005
0.01
0.015
0.02
0.025
0.03
1.5 2 2.5 3 3.5 4 4.5 5 5.5
V CC (V)
ICC (mA)216
8183F–AVR–06/12
ATtiny24A/44A/84A
21.3.3 Standby Supply Current
Figure 21-66. Standby Supply Current vs. VCC
4 MHz External Crystal, 22 pF External Capacitors, Watchdog Timer Disabled
21.3.4 Current Consumption in Power-down Mode
Figure 21-67. Power-down Supply Current vs. VCC
Watchdog Timer Disabled
85 °C
25 °C
-40 °C
0
0.02
0.04
0.06
0.08
0.1
1.5 2 2.5 3 3.5 4 4.5 5 5.5
V CC (V)
ICC (mA)
85 °C
25 °C
-40 °C
0
0.2
0.4
0.6
0.8
1
1.2
1.4
1.5 2 2.5 3 3.5 4 4.5 5 5.5
V CC (V)
ICC (uA)217
8183F–AVR–06/12
ATtiny24A/44A/84A
Figure 21-68. Power-down Supply Current vs. VCC
Watchdog Timer Enabled
21.3.5 Current Consumption in Reset
Figure 21-69. Reset Supply Current vs. VCC
0.1 - 1.0 MHz, Excluding Current through Reset Pull-up
85 °C
25 °C
-40 °C
0
2
4
6
8
10
1.5 2 2.5 3 3.5 4 4.5 5 5.5
V CC (V)
ICC (uA)
5.5 V
5.0 V
4.5 V
4.0 V
3.3 V
2.7 V
1.8 V
0
0.02
0.04
0.06
0.08
0.1
0.12
0.14
0.16
0 0.1 0.2 0.3 0.4 0.5 0.6 0.7 0.8 0.9 1
Frequency (MHz)
ICC (mA)218
8183F–AVR–06/12
ATtiny24A/44A/84A
Figure 21-70. Reset Supply Current vs. VCC
1 - 20 MHz, Excluding Current Through Reset Pull-up
21.3.6 Current Consumption of Peripheral Units
Figure 21-71. ADC Current vs. VCC
4 MHz Frequency
5.5 V
5.0 V
4.5 V
4.0 V
3.3 V
2.7 V
1.8 V
0
0.5
1
1.5
2
2.5
3
0 2 4 6 8 10 12 14 16 18 20
Frequency (MHz)
ICC (mA)
0
100
200
300
400
500
600
1.5 2 2.5 3 3.5 4 4.5 5 5.5
V CC (V)
ICC (uA)219
8183F–AVR–06/12
ATtiny24A/44A/84A
Figure 21-72. AREF Pin Current vs. Pin Voltage
Figure 21-73. Analog Comparator Current vs. VCC
4 MHz Frequency
0
20
40
60
80
100
120
140
160
180
1.5 2 2.5 3 3.5 4 4.5 5 5.5
AREF (V)
AREF pin current (uA)
0
20
40
60
80
100
120
140
160
1.5 2 2.5 3 3.5 4 4.5 5 5.5
V CC (V)
ICC (uA)220
8183F–AVR–06/12
ATtiny24A/44A/84A
Figure 21-74. Programming Current vs. VCC
Figure 21-75. Brownout Detector Current vs. VCC
BOD Level = 1.8V
85 °C
25 °C
-40 °C
0
2000
4000
6000
8000
10000
12000
1.5 2 2.5 3 3.5 4 4.5 5 5.5
V CC (V)
ICC (uA)
85 °C
25 °C
-40 °C
0
5
10
15
20
25
30
35
1.5 2 2.5 3 3.5 4 4.5 5 5.5
V CC (V)
ICC (uA)221
8183F–AVR–06/12
ATtiny24A/44A/84A
Figure 21-76. Watchdog Timer Current vs. VCC
21.3.7 Pull-up Resistors
Figure 21-77. Pull-up Resistor Current vs. Input Voltage
I/O Pin, VCC = 1.8V
85 °C
25 °C
-40 °C
0
0.001
0.002
0.003
0.004
0.005
0.006
0.007
0.008
1.5 2 2.5 3 3.5 4 4.5 5 5.5
V CC (V)
ICC (mA)
85 °C
25 °C
-40 °C 0
10
20
30
40
50
0 0.2 0.4 0.6 0.8 1 1.2 1.4 1.6 1.8 2
VOP (V)
IOP (uA)222
8183F–AVR–06/12
ATtiny24A/44A/84A
Figure 21-78. Pull-up Resistor Current vs. Input Voltage
I/O Pin, VCC = 2.7V
Figure 21-79. Pull-up Resistor Current vs. Input Voltage
I/O Pin, VCC = 5V
85 °C
25 °C
-40 °C 0
10
20
30
40
50
60
70
80
0 0.5 1 1.5 2 2.5 3
VOP (V)
IOP (uA)
85 °C
25 °C
-40 °C 0
20
40
60
80
100
120
140
160
012345
VOP (V)
IOP (uA)223
8183F–AVR–06/12
ATtiny24A/44A/84A
Figure 21-80. Reset Pull-up Resistor Current vs. Reset Pin Voltage
VCC = 1.8V
Figure 21-81. Reset Pull-up Resistor Current vs. Reset Pin Voltage
VCC = 2.7V
0
5
10
15
20
25
30
35
40
0 0.2 0.4 0.6 0.8 1 1.2 1.4 1.6 1.8 2
VRESET (V)
IRESET (uA)
85 °C
25 °C
-40 °C
85 °C
25 °C
0 -40 °C
10
20
30
40
50
60
0 0.5 1 1.5 2 2.5 3
VRESET (V)
IRESET (uA)224
8183F–AVR–06/12
ATtiny24A/44A/84A
Figure 21-82. Reset Pull-up Resistor Current vs. Reset Pin Voltage
VCC = 5V
21.3.8 Output Driver Strength
Figure 21-83. VOL: Output Voltage vs. Sink Current
I/O Pin, VCC = 3V
85 °C
25 °C
-40 °C 0
20
40
60
80
100
120
012345
VRESET (V)
IRESET (uA)
85 °C
25 °C
-40 °C
0
0.2
0.4
0.6
0.8
1
1.2
0 5 10 15 20
IOL (mA)
VOL (V)225
8183F–AVR–06/12
ATtiny24A/44A/84A
Figure 21-84. VOL: Output Voltage vs. Sink Current
I/O Pin, VCC = 5V
Figure 21-85. VOH: Output Voltage vs. Source Current
I/O Pin, VCC = 3V
85 °C
25 °C
-40 °C
0
0.1
0.2
0.3
0.4
0.5
0.6
0.7
0 5 10 15 20
IOL (mA)
VOL (V)
85 °C
25 °C
-40 °C
1.8
2
2.2
2.4
2.6
2.8
3
3.2
0 5 10 15 20
IOH (mA)
VOH (V)226
8183F–AVR–06/12
ATtiny24A/44A/84A
Figure 21-86. VOH: Output Voltage vs. Source Current
I/O Pin, VCC = 5V
Figure 21-87. VOL: Output Voltage vs. Sink Current
Reset Pin as I/O, VCC = 3V
85 °C
25 °C
-40 °C
4.2
4.4
4.6
4.8
5
5.2
0 5 10 15 20
IOH (mA)
VOH (V)
85 °C
25 °C
-40 °C
0
0.2
0.4
0.6
0.8
1
1.2
1.4
0 0.5 1 1.5 2 2.5 3
IOL (mA)
VOL (V)227
8183F–AVR–06/12
ATtiny24A/44A/84A
Figure 21-88. VOL: Output Voltage vs. Sink Current
Reset Pin as I/O, VCC = 5V
Figure 21-89. VOH: Output Voltage vs. Source Current
Reset Pin as I/O, VCC = 3V
85 °C
25 °C
-40 °C
0
0.2
0.4
0.6
0.8
1
1.2
1.4
1.6
1.8
2
012345678
IOL (mA)
VOL (V)
85 °C
25 °C
-40 °C
0
0.5
1
1.5
2
2.5
3
0 0.2 0.4 0.6 0.8 1 1.2 1.4 1.6 1.8 2
IOH (mA)
VOH (V)228
8183F–AVR–06/12
ATtiny24A/44A/84A
Figure 21-90. VOH: Output Voltage vs. Source Current
Reset Pin as I/O, VCC = 5V
21.3.9 Input Threshold and Hysteresis (for I/O Ports)
Figure 21-91. VIH: Input Threshold Voltage vs. VCC
IO Pin, Read as ‘1’
85 °C
25 °C
-40 °C
0
0.5
1
1.5
2
2.5
3
3.5
4
4.5
5
0 0.2 0.4 0.6 0.8 1 1.2 1.4 1.6 1.8 2
IOH (mA)
VOH (V)
85 °C
25 °C
-40 °C
0
0.5
1
1.5
2
2.5
3
3.5
1.5 2 2.5 3 3.5 4 4.5 5 5.5
V CC (V)
Threshold (V)229
8183F–AVR–06/12
ATtiny24A/44A/84A
Figure 21-92. VIL: Input Threshold Voltage vs. VCC
I/O Pin, Read as ‘0’
Figure 21-93. VIH-VIL: Input Hysteresis vs. VCC
I/O Pin
85 °C
25 °C
-40 °C
0
0.5
1
1.5
2
2.5
1.5 2 2.5 3 3.5 4 4.5 5 5.5
V CC (V)
Threshold (V)
85 °C
25 °C
-40 °C
0
0.1
0.2
0.3
0.4
0.5
0.6
0.7
0.8
1.5 2 2.5 3 3.5 4 4.5 5 5.5
V CC (V)
Input Hysteresis (V)230
8183F–AVR–06/12
ATtiny24A/44A/84A
Figure 21-94. VIH: Input Threshold Voltage vs. VCC
Reset Pin as I/O, Read as ‘1’
Figure 21-95. VIL: Input Threshold Voltage vs. VCC
Reset Pin as I/O, Read as ‘0’
85 °C
25 °C
-40 °C
0
0.5
1
1.5
2
2.5
3
1.5 2 2.5 3 3.5 4 4.5 5 5.5
V CC (V)
Threshold (V)
85 °C
25 °C
-40 °C
0
0.5
1
1.5
2
2.5
1.5 2 2.5 3 3.5 4 4.5 5 5.5
V CC (V)
Threshold (V)231
8183F–AVR–06/12
ATtiny24A/44A/84A
Figure 21-96. VIH-VIL: Input Hysteresis vs. VCC
Reset Pin as I/O
21.3.10 BOD, Bandgap and Reset
Figure 21-97. BOD Threshold vs. Temperature
BODLEVEL is 4.3V
85 °C
25 °C
-40 °C
0
0.1
0.2
0.3
0.4
0.5
0.6
0.7
0.8
0.9
1
1.5 2 2.5 3 3.5 4 4.5 5 5.5
V CC (V)
Input Hysteresis (V)
4.2
4.22
4.24
4.26
4.28
4.3
4.32
4.34
4.36
-40 -20 0 20 40 60 80 100
Temperature (C)
Threshold (V)
RISING VCC
FALLING VCC232
8183F–AVR–06/12
ATtiny24A/44A/84A
Figure 21-98. BOD Threshold vs. Temperature
BODLEVEL is 2.7V
Figure 21-99. BOD Threshold vs. Temperature
BODLEVEL is 1.8V
2.64
2.66
2.68
2.7
2.72
2.74
2.76
2.78
-40 -20 0 20 40 60 80 100
Temperature (C)
Threshold (V)
RISING VCC
FALLING VCC
RISING VCC
FALLING VCC
1.77
1.78
1.79
1.8
1.81
1.82
1.83
1.84
-40 -20 0 20 40 60 80 100
Temperature (C)
Threshold (V)233
8183F–AVR–06/12
ATtiny24A/44A/84A
Figure 21-100. Bandgap Voltage vs. Supply Voltage
Figure 21-101. Bandgap Voltage vs. Temperature
1
1.02
1.04
1.06
1.08
1.1
1.12
1.14
1.16
1.18
1.2
1.5 2 2.5 3 3.5 4 4.5 5 5.5
V CC (V)
Bandgap Voltage (V)
1
1.02
1.04
1.06
1.08
1.1
1.12
1.14
1.16
1.18
1.2
-40 -20 0 20 40 60 80 100
Temperature (C)
Bandgap Voltage (V)234
8183F–AVR–06/12
ATtiny24A/44A/84A
Figure 21-102. VIH: Input Threshold Voltage vs. VCC
Reset Pin, Read as ‘1’
Figure 21-103. VIL: Input Threshold Voltage vs. VCC
Reset Pin, Read as ‘0’
85 °C
25 °C
-40 °C
0
0,5
1
1,5
2
2,5
1,5 2 2,5 3 3,5 4 4,5 5 5,5
VCC (V)
Threshold (V)
85 °C
25 °C
-40 °C
0
0,5
1
1,5
2
2,5
1,5 2 2,5 3 3,5 4 4,5 5 5,5
VCC (V)
Threshold (V)235
8183F–AVR–06/12
ATtiny24A/44A/84A
Figure 21-104. VIH-VIL: Input Hysteresis vs. VCC
Reset Pin
Figure 21-105. Minimum Reset Pulse Width vs. VCC
85 °C
25 °C
-40 °C
0
0.1
0.2
0.3
0.4
0.5
0.6
0.7
0.8
0.9
1
1 1.5 2 2.5 3 3.5 4 4.5 5 5.5
V CC (V)
Input Hysteresis (V)
85 °C
25 °C
-40 °C
0
200
400
600
800
1000
1200
1400
1600
1800
2000
1.5 2 2.5 3 3.5 4 4.5 5 5.5
V CC (V)
Pulsewidth (ns)236
8183F–AVR–06/12
ATtiny24A/44A/84A
21.3.11 Analog Comparator Offset
Figure 21-106. Analog Comparator Offset
VCC = 5V
21.3.12 Internal Oscillator Speed
Figure 21-107. Watchdog Oscillator Frequency vs. VCC
85
25
-40
-0.007
-0.006
-0.005
-0.004
-0.003
-0.002
-0.001
0
0.001
0.002
0.003
0.004
0 0.5 1 1.5 2 2.5 3 3.5 4 4.5 5
VIN (V)
Offset (V)
85 °C
25 °C
-40 °C
0.108
0.11
0.112
0.114
0.116
0.118
0.12
1.5 2 2.5 3 3.5 4 4.5 5 5.5
V CC (V)
Frequency (MHz)237
8183F–AVR–06/12
ATtiny24A/44A/84A
Figure 21-108. Watchdog Oscillator Frequency vs. Temperature
Figure 21-109. Calibrated 8 MHz RC Oscillator Frequency vs. VCC
5.5 V
3.0 V
1.8 V
0.106
0.108
0.11
0.112
0.114
0.116
0.118
0.12
-40 -20 0 20 40 60 80 100
Temperature (C)
Frequency (MHz)
7.4
7.6
7.8
8
8.2
8.4
1.5 2 2.5 3 3.5 4 4.5 5 5.5
V CC (V)
Frequency (MHz)
85 °C
25 °C
-40 °C238
8183F–AVR–06/12
ATtiny24A/44A/84A
Figure 21-110. Calibrated 8 MHz RC oscillator Frequency vs. Temperature
Figure 21-111. Calibrated 8 MHz RC Oscillator Frequency vs. OSCCAL Value
VCC = 3V
5.0 V
3.0 V
1.8 V
7.5
7.6
7.7
7.8
7.9
8
8.1
8.2
-40 -20 0 20 40 60 80 100
Temperature (C)
Frequency (MHz)
85 °C
25 °C
-40 °C
0
2
4
6
8
10
12
14
16
0 16 32 48 64 80 96 112 128 144 160 176 192 208 224 240
OSCCAL (X1)
Frequency (MHz)239
8183F–AVR–06/12
ATtiny24A/44A/84A
21.4 ATtiny84A
21.4.1 Current Consumption in Active Mode
Figure 21-112. Active Supply Current vs. Low Frequency
0.1 - 1.0 MHz, PRR = 0xFF
Figure 21-113. Active Supply Current vs. Frequency
1 - 20 MHz, PRR = 0xFF
5.5 V
5.0 V
4.5 V
4.0 V
3.3 V
2.7 V
1.8 V
0
0,2
0,4
0,6
0,8
1
0 0,1 0,2 0,3 0,4 0,5 0,6 0,7 0,8 0,9 1
Frequency (MHz)
ICC (mA)
5.5 V
5.0 V
4.5 V
4.0 V
3.3 V
2.7 V
1.8 V
0
2
4
6
8
10
12
0 2 4 6 8 10 12 14 16 18 20
Frequency (MHz)
ICC (mA)240
8183F–AVR–06/12
ATtiny24A/44A/84A
Figure 21-114. Active Supply Current vs. VCC
Internal RC Oscillator, 8 MHz
Figure 21-115. Active Supply Current vs. VCC
Internal RC Oscillator, 1 MHz
85 °C
25 °C
-40 °C
0
0,5
1
1,5
2
2,5
3
3,5
4
4,5
5
1,5 2 2,5 3 3,5 4 4,5 5 5,5
VCC (V)
ICC (mA)
85 °C
25 °C
-40 °C
0
0,2
0,4
0,6
0,8
1
1,2
1,4
1,5 2 2,5 3 3,5 4 4,5 5 5,5
VCC (V)
ICC (mA)241
8183F–AVR–06/12
ATtiny24A/44A/84A
Figure 21-116. Active Supply Current vs. VCC
Internal RC Oscillator, 128 kHz
21.4.2 Current Consumption in Idle Mode
Figure 21-117. Idle Supply Current vs. Low Frequency
0.1 - 1.0 MHz, PRR = 0xFF
85 °C
25 °C
-40 °C
0
0,02
0,04
0,06
0,08
0,1
0,12
0,14
1,5 2 2,5 3 3,5 4 4,5 5 5,5
VCC (V)
ICC (mA)
5.5 V
5.0 V
4.5 V
4.0 V
3.3 V
2.7 V
1.8 V
0
0,02
0,04
0,06
0,08
0,1
0,12
0,14
0 0,1 0,2 0,3 0,4 0,5 0,6 0,7 0,8 0,9 1
Frequency (MHz)
ICC (mA)242
8183F–AVR–06/12
ATtiny24A/44A/84A
Figure 21-118. Idle Supply Current vs. Frequency
1 - 20 MHz, PRR = 0xFF
Figure 21-119. Idle Supply Current vs. VCC
Internal RC Oscillator, 8 MHz
5.5 V
5.0 V
4.5 V
4.0 V
3.3 V
2.7 V
1.8 V 0
0,5
1
1,5
2
2,5
3
3,5
4
0 2 4 6 8 10 12 14 16 18 20
Frequency (MHz)
ICC (mA)
0
0,2
0,4
0,6
0,8
1
1,2
1,4
1,6
1,8
2
1,5 2 2,5 3 3,5 4 4,5 5 5,5
VCC (V)
ICC (mA)
85 °C
25 °C
-40 °C243
8183F–AVR–06/12
ATtiny24A/44A/84A
Figure 21-120. Idle Supply Current vs. VCC
Internal RC Oscillator, 1 MHz
Figure 21-121. Idle Supply Current vs. VCC
Internal RC Oscillator, 128 kHz
85 °C
25 °C
-40 °C
0
0,05
0,1
0,15
0,2
0,25
0,3
0,35
0,4
1,5 2 2,5 3 3,5 4 4,5 5 5,5
VCC (V)
ICC (mA)
0
0,005
0,01
0,015
0,02
0,025
0,03
1,5 2 2,5 3 3,5 4 4,5 5 5,5
VCC (V)
ICC (mA)
85 °C
25 °C
-40 °C244
8183F–AVR–06/12
ATtiny24A/44A/84A
21.4.3 Current Consumption in Power-down Mode
Figure 21-122. Power-down Supply Current vs. VCC
Watchdog Timer Disabled
Figure 21-123. Power-down Supply Current vs. VCC
Watchdog Timer Enabled
0
0,2
0,4
0,6
0,8
1
1,2
1,4
1,6
1,5 2 2,5 3 3,5 4 4,5 5 5,5
VCC (V)
ICC (uA)
85 °C
25 °C
-40 °C
0
2
4
6
8
10
1,5 2 2,5 3 3,5 4 4,5 5 5,5
VCC (V)
ICC (uA)
85 °C
25 °C
-40 °C245
8183F–AVR–06/12
ATtiny24A/44A/84A
21.4.4 Current Consumption in Reset
Figure 21-124. Reset Supply Current vs. VCC
0.1 - 1.0 MHz, Excluding Current through Reset Pull-up
Figure 21-125. Reset Supply Current vs. VCC
1 - 20 MHz, Excluding Current through Reset Pull-up
5.5 V
5.0 V
4.5 V
4.0 V
3.3 V
2.7 V
1.8 V
0
0,02
0,04
0,06
0,08
0,1
0,12
0,14
0,16
0 0,1 0,2 0,3 0,4 0,5 0,6 0,7 0,8 0,9 1
Frequency (MHz)
ICC (mA)
5.5 V
5.0 V
4.5 V
4.0 V
3.3 V
2.7 V
1.8 V 0
0,5
1
1,5
2
2,5
3
0 2 4 6 8 10 12 14 16 18 20
Frequency (MHz)
ICC (mA)246
8183F–AVR–06/12
ATtiny24A/44A/84A
21.4.5 Current Consumption of Peripheral Units
Figure 21-126. ADC Current vs. VCC
4 MHz Frequency
Figure 21-127. AREF Pin Current vs. Pin Voltage
0
100
200
300
400
500
600
1,5 2 2,5 3 3,5 4 4,5 5 5,5
VCC (V)
ICC (uA)
0
20
40
60
80
100
120
140
160
1,5 2 2,5 3 3,5 4 4,5 5 5,5
AREF (V)
AREF pin current (uA)247
8183F–AVR–06/12
ATtiny24A/44A/84A
Figure 21-128. Analog Comparator Current vs. VCC
4 MHz Frequency
Figure 21-129. Programming Current vs. VCC
0
20
40
60
80
100
120
140
160
1,5 2 2,5 3 3,5 4 4,5 5 5,5
VCC (V)
ICC (uA)
85 °C
25 °C
-40 °C
0
1000
2000
3000
4000
5000
6000
7000
1,5 2 2,5 3 3,5 4 4,5 5 5,5
VCC (V)
ICC (uA)248
8183F–AVR–06/12
ATtiny24A/44A/84A
Figure 21-130. Brownout Detector Current vs. VCC
BOD Level = 1.8V
21.4.6 Pull-up Resistors
Figure 21-131. Pull-up Resistor Current vs. Input Voltage
I/O Pin, VCC = 1.8V
85 °C
25 °C
-40 °C
0
5
10
15
20
25
30
35
40
45
1,5 2 2,5 3 3,5 4 4,5 5 5,5
VCC (V)
ICC (uA)
85 °C
25 °C
-40 °C
0
10
20
30
40
50
60
0 0,2 0,4 0,6 0,8 1 1,2 1,4 1,6 1,8 2
VOP (V)
IOP (uA)249
8183F–AVR–06/12
ATtiny24A/44A/84A
Figure 21-132. Pull-up Resistor Current vs. Input Voltage
I/O Pin, VCC = 2.7V
Figure 21-133. Pull-up Resistor Current vs. Input Voltage
I/O Pin, VCC = 5V
85 °C
25 °C
-40 °C 0
10
20
30
40
50
60
70
80
0 0,5 1 1,5 2 2,5 3
VOP (V)
IOP (uA)
85 °C
25 °C
-40 °C 0
20
40
60
80
100
120
140
160
0 1 2 3 4 5 6
VOP (V)
IOP (uA)250
8183F–AVR–06/12
ATtiny24A/44A/84A
Figure 21-134. Reset Pull-up Resistor Current vs. Reset Pin Voltage
VCC = 1.8V
Figure 21-135. Reset Pull-up Resistor Current vs. Reset Pin Voltage
VCC = 2.7V
85 °C
25 °C
-40 °C
0
5
10
15
20
25
30
35
40
0 0,2 0,4 0,6 0,8 1 1,2 1,4 1,6 1,8 2
VRESET (V)
IRESET (uA)
85 °C
25 °C
-40 °C
0
10
20
30
40
50
60
0 0,5 1 1,5 2 2,5 3
VRESET (V)
IRESET (uA)251
8183F–AVR–06/12
ATtiny24A/44A/84A
Figure 21-136. Reset Pull-up Resistor Current vs. Reset Pin Voltage
VCC = 5V
21.4.7 Output Driver Strength
Figure 21-137. VOL: Output Voltage vs. Sink Current
I/O Pin, VCC = 3V
85 °C
25 °C
-40 °C
0
20
40
60
80
100
120
0 0,5 1 1,5 2 2,5 3 3,5 4 4,5 5
VRESET (V)
IRESET (uA)
85 °C
25 °C
-40 °C
0
0,2
0,4
0,6
0,8
1
1,2
0 2 4 6 8 10 12 14 16 18 20
IOL (mA)
VOL (V)252
8183F–AVR–06/12
ATtiny24A/44A/84A
Figure 21-138. VOL: Output Voltage vs. Sink Current
I/O Pin, VCC = 5V
Figure 21-139. VOH: Output Voltage vs. Source Current
I/O Pin, VCC = 3V
85 °C
25 °C
-40 °C
0
0,1
0,2
0,3
0,4
0,5
0,6
0,7
0 2 4 6 8 10 12 14 16 18 20
IOL (mA)
VOL (V)
85 °C
25 °C
-40 °C
1,8
2
2,2
2,4
2,6
2,8
3
3,2
0 2 4 6 8 10 12 14 16 18 20
IOH (mA)
VOH (V)253
8183F–AVR–06/12
ATtiny24A/44A/84A
Figure 21-140. VOH: Output Voltage vs. Source Current
I/O Pin, VCC = 5V
Figure 21-141. VOL: Output Voltage vs. Sink Current
Reset Pin as I/O, VCC = 3V
85 °C
25 °C
-40 °C
4,2
4,4
4,6
4,8
5
5,2
0 2 4 6 8 10 12 14 16 18 20
IOH (mA)
VOH (V)
0
0,2
0,4
0,6
0,8
1
1,2
1,4
0 0,5 1 1,5 2 2,5 3
IOL (mA)
VOL (V)
85 °C
25 °C
-40 °C254
8183F–AVR–06/12
ATtiny24A/44A/84A
Figure 21-142. VOL: Output Voltage vs. Sink Current
Reset Pin as I/O, VCC = 5V
Figure 21-143. VOH: Output Voltage vs. Source Current
Reset Pin as I/O, VCC = 3V
85 °C
25 °C
-40 °C
0
0,2
0,4
0,6
0,8
1
1,2
1,4
1,6
1,8
2
012345678
IOL (mA)
VOL (V)
0
0,5
1
1,5
2
2,5
3
0 0,2 0,4 0,6 0,8 1 1,2 1,4 1,6 1,8 2
IOH (mA)
VOH (V)
85 °C
25 °C
-40 °C255
8183F–AVR–06/12
ATtiny24A/44A/84A
Figure 21-144. VOH: Output Voltage vs. Source Current
Reset Pin as I/O, VCC = 5V
21.4.8 Input Threshold and Hysteresis (for I/O Ports)
Figure 21-145. VIH: Input Threshold Voltage vs. VCC
I/O Pin, Read as ‘1’
0
0,5
1
1,5
2
2,5
3
3,5
4
4,5
5
0 0,2 0,4 0,6 0,8 1 1,2 1,4 1,6 1,8 2
IOH (mA)
VOH (V)
85 °C
25 °C
-40 °C
0
0,5
1
1,5
2
2,5
3
3,5
1,5 2 2,5 3 3,5 4 4,5 5 5,5
VCC (V)
Threshold (V)
85 °C
25 °C
-40 °C256
8183F–AVR–06/12
ATtiny24A/44A/84A
Figure 21-146. VIL: Input Threshold Voltage vs. VCC
I/O Pin, Read as ‘0’
Figure 21-147. VIH-VIL: Input Hysteresis vs. VCC
I/O Pin
85 °C
25 °C
-40 °C
0
0,5
1
1,5
2
2,5
1,5 2 2,5 3 3,5 4 4,5 5 5,5
VCC (V)
Threshold (V)
0
0,1
0,2
0,3
0,4
0,5
0,6
1,5 2 2,5 3 3,5 4 4,5 5 5,5
VCC (V)
Input Hysteresis (V)
85 °C
25 °C
-40 °C257
8183F–AVR–06/12
ATtiny24A/44A/84A
Figure 21-148. VIH: Input Threshold Voltage vs. VCC
Reset Pin as I/O, Read as ‘1’
Figure 21-149. VIL: Input Threshold Voltage vs. VCC
Reset Pin as I/O, Read as ‘0’
0
0,5
1
1,5
2
2,5
3
1,5 2 2,5 3 3,5 4 4,5 5 5,5
VCC (V)
Threshold (V)
85 °C
25 °C
-40 °C
0
0,5
1
1,5
2
2,5
1,5 2 2,5 3 3,5 4 4,5 5 5,5
VCC (V)
Threshold (V)
85 °C
25 °C
-40 °C258
8183F–AVR–06/12
ATtiny24A/44A/84A
Figure 21-150. VIH-VIL: Input Hysteresis vs. VCC
Reset Pin as I/O
21.4.9 BOD, Bandgap and Reset
Figure 21-151. BOD Threshold vs. Temperature
BODLEVEL is 4.3V
85 °C
25 °C
-40 °C
0
0,1
0,2
0,3
0,4
0,5
0,6
0,7
0,8
0,9
1
1,5 2 2,5 3 3,5 4 4,5 5 5,5
VCC (V)
Input Hysteresis (V) 4,24
4,26
4,28
4,3
4,32
4,34
4,36
4,38
4,4
4,42
-40 -20 0 20 40 60 80 100
Temperature (C)
Threshold (V)
RISING VCC
FALLING VCC259
8183F–AVR–06/12
ATtiny24A/44A/84A
Figure 21-152. BOD Threshold vs. Temperature
BODLEVEL is 2.7V
Figure 21-153. Bandgap Voltage vs. Supply Voltage
2,66
2,68
2,7
2,72
2,74
2,76
2,78
2,8
2,82
-40 -20 0 20 40 60 80 100
Temperature (C)
Threshold (V)
RISING VCC
FALLING VCC
1
1,02
1,04
1,06
1,08
1,1
1,12
1,14
1,16
1,18
1,2
1,5 2 2,5 3 3,5 4 4,5 5 5,5
Vcc (V)
Bandgap Voltage (V)260
8183F–AVR–06/12
ATtiny24A/44A/84A
Figure 21-154. Bandgap Voltage vs. Temperature
Figure 21-155. VIH: Input Threshold Voltage vs. VCC
Reset Pin, Read as ‘1’
1
1,02
1,04
1,06
1,08
1,1
1,12
1,14
1,16
1,18
1,2
-40 -20 0 20 40 60 80 100
Temperature (C)
Bandgap Voltage (V)
0
0,5
1
1,5
2
2,5
1,5 2 2,5 3 3,5 4 4,5 5 5,5
VCC (V)
Threshold (V)
85 °C
25 °C
-40 °C261
8183F–AVR–06/12
ATtiny24A/44A/84A
Figure 21-156. VIL: Input Threshold Voltage vs. VCC
Reset Pin, Read as ‘0’
Figure 21-157. VIH-VIL: Input Hysteresis vs. VCC
Reset Pin
0
0,5
1
1,5
2
2,5
1,5 2 2,5 3 3,5 4 4,5 5 5,5
VCC (V)
Threshold (V)
85 °C
25 °C
-40 °C
0
0,1
0,2
0,3
0,4
0,5
0,6
0,7
0,8
0,9
1
1,5 2 2,5 3 3,5 4 4,5 5 5,5
VCC (V)
Input Hysteresis (V)
85 °C
25 °C
-40 °C262
8183F–AVR–06/12
ATtiny24A/44A/84A
Figure 21-158. Minimum Reset Pulse Width vs. VCC
21.4.10 Analog Comparator Offset
Figure 21-159. Analog Comparator Offset
VCC = 5V
0
200
400
600
800
1000
1200
1400
1600
1800
2000
1,5 2 2,5 3 3,5 4 4,5 5 5,5
VCC (V)
Pulsewidth (ns)
85 °C
25 °C
-40 °C
85
25
-40
-0.012
-0.01
-0.008
-0.006
-0.004
-0.002
0
0.002
0.004
0 0.5 1 1.5 2 2.5 3 3.5 4 4.5 5
Vin (V)
Offset (V)263
8183F–AVR–06/12
ATtiny24A/44A/84A
21.4.11 Internal Oscillator Speed
Figure 21-160. Watchdog Oscillator Frequency vs. VCC
Figure 21-161. Watchdog Oscillator Frequency vs. Temperature
108
110
112
114
116
118
120
1,5 2 2,5 3 3,5 4 4,5 5 5,5
VCC (V)
FRC (kHz)
85 °C
25 °C
-40 °C
5.5 V
3.0 V
1.8 V
106
108
110
112
114
116
118
120
-40 -20 0 20 40 60 80 100
Temperature (C)
FRC (kHz)264
8183F–AVR–06/12
ATtiny24A/44A/84A
Figure 21-162. Calibrated 8 MHz RC Oscillator Frequency vs. VCC
Figure 21-163. Calibrated 8 MHz RC Oscillator Frequency vs. Temperature
7,4
7,5
7,6
7,7
7,8
7,9
8
8,1
8,2
8,3
8,4
1,5 2 2,5 3 3,5 4 4,5 5 5,5
VCC (V)
FRC (MHz)
85 °C
25 °C
-40 °C
5.0 V
3.0 V
1.8 V
7,5
7,6
7,7
7,8
7,9
8
8,1
8,2
8,3
8,4
-40 -20 0 20 40 60 80 100
Temperature (C)
FRC (MHz)265
8183F–AVR–06/12
ATtiny24A/44A/84A
Figure 21-164. Calibrated 8 MHz RC Oscillator Frequency vs. OSCCAL Value
VCC = 3V
0
2
4
6
8
10
12
14
16
0 16 32 48 64 80 96 112 128 144 160 176 192 208 224 240
OSCCAL (X1)
FRC (MHz)
85 °C
25 °C
-40 °C266
8183F–AVR–06/12
ATtiny24A/44A/84A
22. Register Summary
Address Name Bit 7 Bit 6 Bit 5 Bit 4 Bit 3 Bit 2 Bit 1 Bit 0 Page
0x3F (0x5F) SREG I T H S V N Z C Page 14
0x3E (0x5E) SPH – – – – – – SP9 SP8 Page 13
0x3D (0x5D) SPL SP7 SP6 SP5 SP4 SP3 SP2 SP1 SP0 Page 13
0x3C (0x5C) OCR0B Timer/Counter0 – Output Compare Register B Page 83
0x3B (0x5B) GIMSK – INT0 PCIE1 PCIE0 – – – – Page 50
0x3A (0x5A) GIFR – INTF0 PCIF1 PCIF0 – – – – Page 51
0x39 (0x59) TIMSK0 – – – – – OCIE0B OCIE0A TOIE0 Page 83
0x38 (0x58) TIFR0 – – – – – OCF0B OCF0A TOV0 Page 84
0x37 (0x57) SPMCSR – – RSIG CTPB RFLB PGWRT PGERS SPMEN Page 156
0x36 (0x56) OCR0A Timer/Counter0 – Output Compare Register A Page 83
0x35 (0x55) MCUCR BODS PUD SE SM1 SM0 BODSE ISC01 ISC00 Pages 36, 50, 66
0x34 (0x54) MCUSR – – – – WDRF BORF EXTRF PORF Page 44
0x33 (0x53) TCCR0B FOC0A FOC0B – – WGM02 CS02 CS01 CS00 Page 82
0x32 (0x52) TCNT0 Timer/Counter0 Page 83
0x31 (0x51) OSCCAL CAL7 CAL6 CAL5 CAL4 CAL3 CAL2 CAL1 CAL0 Page 31
0x30 (0x50) TCCR0A COM0A1 COM0A0 COM0B1 COM0B0 – – WGM01 WGM00 Page 79
0x2F (0x4F) TCCR1A COM1A1 COM1A0 COM1B1 COM1B0 – – WGM11 WGM10 Page 106
0x2E (0x4E) TCCR1B ICNC1 ICES1 – WGM13 WGM12 CS12 CS11 CS10 Page 108
0x2D (0x4D) TCNT1H Timer/Counter1 – Counter Register High Byte Page 110
0x2C (0x4C) TCNT1L Timer/Counter1 – Counter Register Low Byte Page 110
0x2B (0x4B) OCR1AH Timer/Counter1 – Compare Register A High Byte Page 110
0x2A (0x4A) OCR1AL Timer/Counter1 – Compare Register A Low Byte Page 110
0x29 (0x49) OCR1BH Timer/Counter1 – Compare Register B High Byte Page 110
0x28 (0x48) OCR1BL Timer/Counter1 – Compare Register B Low Byte Page 110
0x27 (0x47) DWDR DWDR[7:0] Page 151
0x26 (0x46) CLKPR CLKPCE – – – CLKPS3 CLKPS2 CLKPS1 CLKPS0 Page 31
0x25 (0x45) ICR1H Timer/Counter1 - Input Capture Register High Byte Page 111
0x24 (0x44) ICR1L Timer/Counter1 - Input Capture Register Low Byte Page 111
0x23 (0x43) GTCCR TSM – – – – – – PSR10 Page 114
0x22 (0x42) TCCR1C FOC1A FOC1B – – – – – – Page 109
0x21 (0x41) WDTCSR WDIF WDIE WDP3 WDCE WDE WDP2 WDP1 WDP0 Page 44
0x20 (0x40) PCMSK1 – – – – PCINT11 PCINT10 PCINT9 PCINT8 Page 51
0x1F (0x3F) EEARH – – – – – – – EEAR8 Page 20
0x1E (0x3E) EEARL EEAR7 EEAR6 EEAR5 EEAR4 EEAR3 EEAR2 EEAR1 EEAR0 Page 21
0x1D (0x3D) EEDR EEPROM Data Register Page 21
0x1C (0x3C) EECR – – EEPM1 EEPM0 EERIE EEMPE EEPE EERE Page 23
0x1B (0x3B) PORTA PORTA7 PORTA6 PORTA5 PORTA4 PORTA3 PORTA2 PORTA1 PORTA0 Page 66
0x1A (0x3A) DDRA DDA7 DDA6 DDA5 DDA4 DDA3 DDA2 DDA1 DDA0 Page 66
0x19 (0x39) PINA PINA7 PINA6 PINA5 PINA4 PINA3 PINA2 PINA1 PINA0 Page 67
0x18 (0x38) PORTB – – – – PORTB3 PORTB2 PORTB1 PORTB0 Page 67
0x17 (0x37) DDRB – – – – DDB3 DDB2 DDB1 DDB0 Page 67
0x16 (0x36) PINB – – – – PINB3 PINB2 PINB1 PINB0 Page 67
0x15 (0x35) GPIOR2 General Purpose I/O Register 2 Page 22
0x14 (0x34) GPIOR1 General Purpose I/O Register 1 Page 23
0x13 (0x33) GPIOR0 General Purpose I/O Register 0 Page 23
0x12 (0x32) PCMSK0 PCINT7 PCINT6 PCINT5 PCINT4 PCINT3 PCINT2 PCINT1 PCINT0 Page 52
0x11 (0x31)) Reserved –
0x10 (0x30) USIBR USI Buffer Register Page 127
0x0F (0x2F) USIDR USI Data Register Page 126
0x0E (0x2E) USISR USISIF USIOIF USIPF USIDC USICNT3 USICNT2 USICNT1 USICNT0 Page 125
0x0D (0x2D) USICR USISIE USIOIE USIWM1 USIWM0 USICS1 USICS0 USICLK USITC Page 123
0x0C (0x2C) TIMSK1 – – ICIE1 – – OCIE1B OCIE1A TOIE1 Page 111
0x0B (0x2B) TIFR1 – – ICF1 – – OCF1B OCF1A TOV1 Page 112
0x0A (0x2A) Reserved –
0x09 (0x29) Reserved –
0x08 (0x28) ACSR ACD ACBG ACO ACI ACIE ACIC ACIS1 ACIS0 Page 129
0x07 (0x27) ADMUX REFS1 REFS0 MUX5 MUX4 MUX3 MUX2 MUX1 MUX0 Page 144
0x06 (0x26) ADCSRA ADEN ADSC ADATE ADIF ADIE ADPS2 ADPS1 ADPS0 Page 146
0x05 (0x25) ADCH ADC Data Register High Byte Page 148
0x04 (0x24) ADCL ADC Data Register Low Byte Page 148
0x03 (0x23) ADCSRB BIN ACME – ADLAR – ADTS2 ADTS1 ADTS0 Pages 130, 148
0x02 (0x22) Reserved –
0x01 (0x21) DIDR0 ADC7D ADC6D ADC5D ADC4D ADC3D ADC2D ADC1D ADC0D Pages 131, 149
0x00 (0x20) PRR – – – – PRTIM1 PRTIM0 PRUSI PRADC Page 37267
8183F–AVR–06/12
ATtiny24A/44A/84A
Note: 1. For compatibility with future devices, reserved bits should be written to zero if accessed. Reserved I/O memory addresses
should never be written.
2. I/O Registers within the address range 0x00 - 0x1F are directly bit-accessible using the SBI and CBI instructions. In these
registers, the value of single bits can be checked by using the SBIS and SBIC instructions.
3. Some of the Status Flags are cleared by writing a logical one to them. Note that, unlike most other AVRs, the CBI and SBI
instructions will only operation the specified bit, and can therefore be used on registers containing such Status Flags. The
CBI and SBI instructions work with registers 0x00 to 0x1F only.268
8183F–AVR–06/12
ATtiny24A/44A/84A
23. Instruction Set Summary
Mnemonics Operands Description Operation Flags #Clocks
ARITHMETIC AND LOGIC INSTRUCTIONS
ADD Rd, Rr Add two Registers Rd ← Rd + Rr Z,C,N,V,H 1
ADC Rd, Rr Add with Carry two Registers Rd ← Rd + Rr + C Z,C,N,V,H 1
ADIW Rdl,K Add Immediate to Word Rdh:Rdl ← Rdh:Rdl + K Z,C,N,V,S 2
SUB Rd, Rr Subtract two Registers Rd ← Rd - Rr Z,C,N,V,H 1
SUBI Rd, K Subtract Constant from Register Rd ← Rd - K Z,C,N,V,H 1
SBC Rd, Rr Subtract with Carry two Registers Rd ← Rd - Rr - C Z,C,N,V,H 1
SBCI Rd, K Subtract with Carry Constant from Reg. Rd ← Rd - K - C Z,C,N,V,H 1
SBIW Rdl,K Subtract Immediate from Word Rdh:Rdl ← Rdh:Rdl - K Z,C,N,V,S 2
AND Rd, Rr Logical AND Registers Rd ← Rd • Rr Z,N,V 1
ANDI Rd, K Logical AND Register and Constant Rd ← Rd • K Z,N,V 1
OR Rd, Rr Logical OR Registers Rd ← Rd v Rr Z,N,V 1
ORI Rd, K Logical OR Register and Constant Rd ← Rd v K Z,N,V 1
EOR Rd, Rr Exclusive OR Registers Rd ← Rd ⊕ Rr Z,N,V 1
COM Rd One’s Complement Rd ← 0xFF − Rd Z,C,N,V 1
NEG Rd Two’s Complement Rd ← 0x00 − Rd Z,C,N,V,H 1
SBR Rd,K Set Bit(s) in Register Rd ← Rd v K Z,N,V 1
CBR Rd,K Clear Bit(s) in Register Rd ← Rd • (0xFF - K) Z,N,V 1
INC Rd Increment Rd ← Rd + 1 Z,N,V 1
DEC Rd Decrement Rd ← Rd − 1 Z,N,V 1
TST Rd Test for Zero or Minus Rd ← Rd • Rd Z,N,V 1
CLR Rd Clear Register Rd ← Rd ⊕ Rd Z,N,V 1
SER Rd Set Register Rd ← 0xFF None 1
BRANCH INSTRUCTIONS
RJMP k Relative Jump PC ← PC + k + 1 None 2
IJMP Indirect Jump to (Z) PC ← Z None 2
RCALL k Relative Subroutine Call PC ← PC + k + 1 None 3
ICALL Indirect Call to (Z) PC ← Z None 3
RET Subroutine Return PC ← STACK None 4
RETI Interrupt Return PC ← STACK I 4
CPSE Rd,Rr Compare, Skip if Equal if (Rd = Rr) PC ← PC + 2 or 3 None 1/2/3
CP Rd,Rr Compare Rd − Rr Z, N,V,C,H 1
CPC Rd,Rr Compare with Carry Rd − Rr − C Z, N,V,C,H 1
CPI Rd,K Compare Register with Immediate Rd − K Z, N,V,C,H 1
SBRC Rr, b Skip if Bit in Register Cleared if (Rr(b)=0) PC ← PC + 2 or 3 None 1/2/3
SBRS Rr, b Skip if Bit in Register is Set if (Rr(b)=1) PC ← PC + 2 or 3 None 1/2/3
SBIC P, b Skip if Bit in I/O Register Cleared if (P(b)=0) PC ← PC + 2 or 3 None 1/2/3
SBIS P, b Skip if Bit in I/O Register is Set if (P(b)=1) PC ← PC + 2 or 3 None 1/2/3
BRBS s, k Branch if Status Flag Set if (SREG(s) = 1) then PC←PC+k + 1 None 1/2
BRBC s, k Branch if Status Flag Cleared if (SREG(s) = 0) then PC←PC+k + 1 None 1/2
BREQ k Branch if Equal if (Z = 1) then PC ← PC + k + 1 None 1/2
BRNE k Branch if Not Equal if (Z = 0) then PC ← PC + k + 1 None 1/2
BRCS k Branch if Carry Set if (C = 1) then PC ← PC + k + 1 None 1/2
BRCC k Branch if Carry Cleared if (C = 0) then PC ← PC + k + 1 None 1/2
BRSH k Branch if Same or Higher if (C = 0) then PC ← PC + k + 1 None 1/2
BRLO k Branch if Lower if (C = 1) then PC ← PC + k + 1 None 1/2
BRMI k Branch if Minus if (N = 1) then PC ← PC + k + 1 None 1/2
BRPL k Branch if Plus if (N = 0) then PC ← PC + k + 1 None 1/2
BRGE k Branch if Greater or Equal, Signed if (N ⊕ V= 0) then PC ← PC + k + 1 None 1/2
BRLT k Branch if Less Than Zero, Signed if (N ⊕ V= 1) then PC ← PC + k + 1 None 1/2
BRHS k Branch if Half Carry Flag Set if (H = 1) then PC ← PC + k + 1 None 1/2
BRHC k Branch if Half Carry Flag Cleared if (H = 0) then PC ← PC + k + 1 None 1/2
BRTS k Branch if T Flag Set if (T = 1) then PC ← PC + k + 1 None 1/2
BRTC k Branch if T Flag Cleared if (T = 0) then PC ← PC + k + 1 None 1/2
BRVS k Branch if Overflow Flag is Set if (V = 1) then PC ← PC + k + 1 None 1/2
BRVC k Branch if Overflow Flag is Cleared if (V = 0) then PC ← PC + k + 1 None 1/2
BRIE k Branch if Interrupt Enabled if ( I = 1) then PC ← PC + k + 1 None 1/2
BRID k Branch if Interrupt Disabled if ( I = 0) then PC ← PC + k + 1 None 1/2
BIT AND BIT-TEST INSTRUCTIONS
SBI P,b Set Bit in I/O Register I/O(P,b) ← 1 None 2
CBI P,b Clear Bit in I/O Register I/O(P,b) ← 0 None 2
LSL Rd Logical Shift Left Rd(n+1) ← Rd(n), Rd(0) ← 0 Z,C,N,V 1
LSR Rd Logical Shift Right Rd(n) ← Rd(n+1), Rd(7) ← 0 Z,C,N,V 1
ROL Rd Rotate Left Through Carry Rd(0)←C,Rd(n+1)← Rd(n),C←Rd(7) Z,C,N,V 1269
8183F–AVR–06/12
ATtiny24A/44A/84A
ROR Rd Rotate Right Through Carry Rd(7)←C,Rd(n)← Rd(n+1),C←Rd(0) Z,C,N,V 1
ASR Rd Arithmetic Shift Right Rd(n) ← Rd(n+1), n=0..6 Z,C,N,V 1
SWAP Rd Swap Nibbles Rd(3..0)←Rd(7..4),Rd(7..4)←Rd(3..0) None 1
BSET s Flag Set SREG(s) ← 1 SREG(s) 1
BCLR s Flag Clear SREG(s) ← 0 SREG(s) 1
BST Rr, b Bit Store from Register to T T ← Rr(b) T 1
BLD Rd, b Bit load from T to Register Rd(b) ← T None 1
SEC Set Carry C ← 1 C1
CLC Clear Carry C ← 0 C 1
SEN Set Negative Flag N ← 1 N1
CLN Clear Negative Flag N ← 0 N 1
SEZ Set Zero Flag Z ← 1 Z1
CLZ Clear Zero Flag Z ← 0 Z 1
SEI Global Interrupt Enable I ← 1 I1
CLI Global Interrupt Disable I ← 0 I 1
SES Set Signed Test Flag S ← 1 S1
CLS Clear Signed Test Flag S ← 0 S 1
SEV Set Twos Complement Overflow. V ← 1 V1
CLV Clear Twos Complement Overflow V ← 0 V 1
SET Set T in SREG T ← 1 T1
CLT Clear T in SREG T ← 0 T 1
SEH Set Half Carry Flag in SREG H ← 1 H1
CLH Clear Half Carry Flag in SREG H ← 0 H 1
DATA TRANSFER INSTRUCTIONS
MOV Rd, Rr Move Between Registers Rd ← Rr None 1
MOVW Rd, Rr Copy Register Word Rd+1:Rd ← Rr+1:Rr None 1
LDI Rd, K Load Immediate Rd ← K None 1
LD Rd, X Load Indirect Rd ← (X) None 2
LD Rd, X+ Load Indirect and Post-Inc. Rd ← (X), X ← X + 1 None 2
LD Rd, - X Load Indirect and Pre-Dec. X ← X - 1, Rd ← (X) None 2
LD Rd, Y Load Indirect Rd ← (Y) None 2
LD Rd, Y+ Load Indirect and Post-Inc. Rd ← (Y), Y ← Y + 1 None 2
LD Rd, - Y Load Indirect and Pre-Dec. Y ← Y - 1, Rd ← (Y) None 2
LDD Rd,Y+q Load Indirect with Displacement Rd ← (Y + q) None 2
LD Rd, Z Load Indirect Rd ← (Z) None 2
LD Rd, Z+ Load Indirect and Post-Inc. Rd ← (Z), Z ← Z+1 None 2
LD Rd, -Z Load Indirect and Pre-Dec. Z ← Z - 1, Rd ← (Z) None 2
LDD Rd, Z+q Load Indirect with Displacement Rd ← (Z + q) None 2
LDS Rd, k Load Direct from SRAM Rd ← (k) None 2
ST X, Rr Store Indirect (X) ← Rr None 2
ST X+, Rr Store Indirect and Post-Inc. (X) ← Rr, X ← X + 1 None 2
ST - X, Rr Store Indirect and Pre-Dec. X ← X - 1, (X) ← Rr None 2
ST Y, Rr Store Indirect (Y) ← Rr None 2
ST Y+, Rr Store Indirect and Post-Inc. (Y) ← Rr, Y ← Y + 1 None 2
ST - Y, Rr Store Indirect and Pre-Dec. Y ← Y - 1, (Y) ← Rr None 2
STD Y+q,Rr Store Indirect with Displacement (Y + q) ← Rr None 2
ST Z, Rr Store Indirect (Z) ← Rr None 2
ST Z+, Rr Store Indirect and Post-Inc. (Z) ← Rr, Z ← Z + 1 None 2
ST -Z, Rr Store Indirect and Pre-Dec. Z ← Z - 1, (Z) ← Rr None 2
STD Z+q,Rr Store Indirect with Displacement (Z + q) ← Rr None 2
STS k, Rr Store Direct to SRAM (k) ← Rr None 2
LPM Load Program Memory R0 ← (Z) None 3
LPM Rd, Z Load Program Memory Rd ← (Z) None 3
LPM Rd, Z+ Load Program Memory and Post-Inc Rd ← (Z), Z ← Z+1 None 3
SPM Store Program Memory (z) ← R1:R0 None
IN Rd, P In Port Rd ← P None 1
OUT P, Rr Out Port P ← Rr None 1
PUSH Rr Push Register on Stack STACK ← Rr None 2
POP Rd Pop Register from Stack Rd ← STACK None 2
MCU CONTROL INSTRUCTIONS
NOP No Operation None 1
SLEEP Sleep (see specific descr. for Sleep function) None 1
WDR Watchdog Reset (see specific descr. for WDR/Timer) None 1
BREAK Break For On-chip Debug Only None N/A
Mnemonics Operands Description Operation Flags #Clocks270
8183F–AVR–06/12
ATtiny24A/44A/84A
24. Ordering Information
Notes: 1. For speed vs. supply voltage, see section 20.3 “Speed” on page 174.
2. All packages are Pb-free, halide-free and fully green and they comply with the European directive for Restriction of Hazardous
Substances (RoHS)
3. Code indicators:
– H: NiPdAu lead finish
– F, N, U: matte tin
– R: tape & reel
4. Topside marking for ATtiny24A: T24 / Axx / manufacturing data
5. Also supplied in wafer form. Contact your local Atmel sales office for ordering information and minimum quantities.
6. For typical and electrical characteristics, see “Appendix A – ATtiny24A/44A Specification at 105°C”.
7. For typical and electrical characteristics, see “Appendix B – ATtiny24A/44A/84A Specification at 125°C”.
24.1 ATtiny24A
Speed (MHz) (1) Supply Voltage (V) Temperature Range Package (2) Ordering Code (3)
20 1.8 – 5.5V
Industrial
(-40°C to +85°C) (5)
14S1
ATtiny24A-SSU
ATtiny24A-SSUR
14P3 ATtiny24A-PU
15CC1
ATtiny24A-CCU
ATtiny24A-CCUR
20M1
ATtiny24A-MU
ATtiny24A-MUR
20M2
ATtiny24A-MMH (4)
ATtiny24A-MMHR (4)
Industrial
(-40°C to +105°C) (6) 14S1
ATtiny24A-SSN
ATtiny24A-SSNR
Industrial
(-40°C to +125°C) (7)
14S1
ATtiny24A-SSF
ATtiny24A-SSFR
20M1
ATtiny24A-MF
ATtiny24A-MFR
20M2
ATtiny24A-MM8
ATtiny24A-MM8R
Package Type
14S1 14-lead, 0.150" Wide Body, Plastic Gull Wing Small Outline Package (SOIC)
14P3 14-lead, 0.300" Wide, Plastic Dual Inline Package (PDIP)
15CC1 15-ball (4 x 4 Array), 0.65 mm Pitch, 3.0 x 3.0 x 0.6 mm, Ultra Thin, Fine-Pitch Ball Grid Array Package (UFBGA)
20M1 20-pad, 4 x 4 x 0.8 mm Body, Quad Flat No Lead / Micro Lead Frame Package (QFN/MLF)
20M2 20-pad, 3 x 3 x 0.85 mm Body, Very Thin Quad Flat No Lead Package (VQFN)271
8183F–AVR–06/12
ATtiny24A/44A/84A
Notes: 1. For speed vs. supply voltage, see section 20.3 “Speed” on page 174.
2. All packages are Pb-free, halide-free and fully green and they comply with the European directive for Restriction of Hazardous
Substances (RoHS).
3. Code indicators:
– H: NiPdAu lead finish
– F, N, U: matte tin
– R: tape & reel
4. Topside marking for ATtiny44A:
– 1st Line: T44
– 2nd Line: Axx
– 3rd Line: manufacturing data
5. These devices can also be supplied in wafer form. Please contact your local Atmel sales office for detailed ordering information
and minimum quantities.
6. For typical and electrical characteristics, see “Appendix A – ATtiny24A/44A Specification at 105°C”.
7. For typical and electrical characteristics, see “Appendix B – ATtiny24A/44A/84A Specification at 125°C”.
24.2 ATtiny44A
Speed (MHz) (1) Supply Voltage (V) Temperature Range Package (2) Ordering Code (3)
20 1.8 – 5.5V
Industrial
(-40°C to +85°C) (5)
14S1
ATtiny44A-SSU
ATtiny44A-SSUR
14P3 ATtiny44A-PU
15CC1
ATtiny44A-CCU
ATtiny44A-CCUR
20M1
ATtiny44A-MU
ATtiny44A-MUR
20M2
ATtiny44A-MMH (4)
ATtiny44A-MMHR (4)
Industrial
(-40°C to +105°C) (6) 14S1
ATtiny44A-SSN
ATtiny44A-SSNR
Industrial
(-40°C to +125°C) (7)
14S1
ATtiny44A-SSF
ATtiny44A-SSFR
20M1
ATtiny44A-MF
ATtiny44A-MFR
Package Type
14S1 14-lead, 0.150" Wide Body, Plastic Gull Wing Small Outline Package (SOIC)
14P3 14-lead, 0.300" Wide, Plastic Dual Inline Package (PDIP)
15CC1 15-ball (4 x 4 Array), 0.65 mm Pitch, 3.0 x 3.0 x 0.6 mm, Ultra Thin, Fine-Pitch Ball Grid Array Package (UFBGA)
20M1 20-pad, 4 x 4 x 0.8 mm Body, Quad Flat No Lead / Micro Lead Frame Package (QFN/MLF)
20M2 20-pad, 3 x 3 x 0.85 mm Body, Very Thin Quad Flat No Lead Package (VQFN)272
8183F–AVR–06/12
ATtiny24A/44A/84A
Notes: 1. For speed vs. supply voltage, see section 20.3 “Speed” on page 174.
2. All packages are Pb-free, halide-free and fully green and they comply with the European directive for Restriction of Hazardous
Substances (RoHS).
3. Code indicators:
– H: NiPdAu lead finish
– F, N, U: matte tin
– R: tape & reel
4. Topside marking for ATtiny84A:
– 1st Line: T84
– 2nd Line: Axx
– 3rd Line: manufacturing data
5. These devices can also be supplied in wafer form. Please contact your local Atmel sales office for detailed ordering information
and minimum quantities.
6. For typical and electrical characteristics, see “Appendix A – ATtiny24A/44A Specification at 105°C”.
7. For typical and electrical characteristics, see “Appendix B – ATtiny24A/44A/84A Specification at 125°C”.
24.3 ATtiny84A
Speed (MHz) (1) Supply Voltage (V) Temperature Range Package (2) Ordering Code (3)
20 1.8 – 5.5V
Industrial
(-40°C to +85°C) (5)
14S1
ATtiny84A-SSU
ATtiny84A-SSUR
14P3 ATtiny84A-PU
15CC1
ATtiny84A-CCU
ATtiny84A-CCUR
20M1
ATtiny84A-MU
ATtiny84A-MUR
20M2
ATtiny84A-MMH (4)
ATtiny84A-MMHR (4)
Industrial
(-40°C to +125°C) (7) 14S1
ATtiny84A-SSF
ATtiny84A-SSFR
Package Type
14S1 14-lead, 0.150" Wide Body, Plastic Gull Wing Small Outline Package (SOIC)
14P3 14-lead, 0.300" Wide, Plastic Dual Inline Package (PDIP)
15CC1 15-ball (4 x 4 Array), 0.65 mm Pitch, 3.0 x 3.0 x 0.6 mm, Ultra Thin, Fine-Pitch Ball Grid Array Package (UFBGA)
20M1 20-pad, 4 x 4 x 0.8 mm Body, Quad Flat No Lead / Micro Lead Frame Package (QFN/MLF)
20M2 20-pad, 3 x 3 x 0.85 mm Body, Very Thin Quad Flat No Lead Package (VQFN)273
8183F–AVR–06/12
ATtiny24A/44A/84A
25. Packaging Information
25.1 14S1
2325 Orchard Parkway
San Jose, CA 95131
TITLE DRAWING NO.
R
REV.
14S1, 14-lead, 0.150" Wide Body, Plastic Gull
Wing Small Outline Package (SOIC)
2/5/02
14S1 A
A1
E
L
Side View
Top View End View
E H
b
N
1
e
A
D
COMMON DIMENSIONS
(Unit of Measure = mm/inches)
SYMBOL MIN NOM MAX NOTE
Notes: 1. This drawing is for general information only; refer to JEDEC Drawing MS-012, Variation AB for additional information.
2. Dimension D does not include mold Flash, protrusions or gate burrs. Mold Flash, protrusion and gate burrs shall not
exceed 0.15 mm (0.006") per side.
3. Dimension E does not include inter-lead Flash or protrusion. Inter-lead flash and protrusions shall not exceed 0.25 mm
(0.010") per side.
4. L is the length of the terminal for soldering to a substrate.
5. The lead width B, as measured 0.36 mm (0.014") or greater above the seating plane, shall not exceed a maximum value
of 0.61 mm (0.024") per side.
A 1.35/0.0532 – 1.75/0.0688
A1 0.1/.0040 – 0.25/0.0098
b 0.33/0.0130 – 0.5/0.02005
D 8.55/0.3367 – 8.74/0.3444 2
E 3.8/0.1497 – 3.99/0.1574 3
H 5.8/0.2284 – 6.19/0.2440
L 0.41/0.0160 – 1.27/0.0500 4
e 1.27/0.050 BSC274
8183F–AVR–06/12
ATtiny24A/44A/84A
25.2 14P3
2325 Orchard Parkway
San Jose, CA 95131
TITLE DRAWING NO.
R
REV.
14P3, 14-lead (0.300"/7.62 mm Wide) Plastic Dual
Inline Package (PDIP) 14P3 B
2010-10-20
PIN
1
E1
A1
B
E
B1
C
L
SEATING PLANE
A
D
e
eB
eC
COMMON DIMENSIONS
(Unit of Measure = mm)
SYMBOL MIN NOM MAX NOTE
A – – 5.334
A1 0.381 – –
D 18.669 – 19.685 Note 2
E 7.620 – 8.255
E1 6.096 – 7.112 Note 2
B 0.356 – 0.559
B1 1.143 – 1.778
L 2.921 – 3.810
C 0.203 – 0.356
eB – – 10.922
eC 0.000 – 1.524
e 2.540 TYP
Notes: 1. This package conforms to JEDEC reference MS-001, Variation AA.
2. Dimensions D and E1 do not include mold Flash or Protrusion.
Mold Flash or Protrusion shall not exceed 0.25 mm (0.010"). 275
8183F–AVR–06/12
ATtiny24A/44A/84A
25.3 15CC1
TITLE GPC DRAWING NO. REV.
Package Drawing Contact:
R packagedrawings@atmel.com CBC C
15CC1, 15-ball (4 x 4 Array), 3.0 x 3.0 x 0.6 mm
package, ball pitch 0.65 mm,
Ultra thin, Fine-Pitch Ball Grid Array Package (UFBGA)
15CC1
07/06/10
A – – 0.60
A1 0.12 – –
A2 0.38 REF
b 0.25 0.30 0.35 1
b1 0.25 – – 2
D 2.90 3.00 3.10
D1 1.95 BSC
E 2.90 3.00 3.10
E1 1.95 BSC
e 0.65 BSC
COMMON DIMENSIONS
(Unit of Measure = mm)
SYMBOL MIN NOM MAX NOTE
TOP VIEW
123 4
A
B
C
D
E
D
15-Øb
D
C
B
A
Pin#1 ID
0.08
A1
A
D1
E1
A2
A1 BALL CORNER
e
123 4
SIDE VIEW
b1
BOTTOM VIEW
e
Note1: Dimension “b” is measured at the maximum ball dia. in a plane parallel
to the seating plane.
Note2: Dimension “b1” is the solderable surface defined by the opening of the
solder resist layer.276
8183F–AVR–06/12
ATtiny24A/44A/84A
25.4 20M1
2325 Orchard Parkway
San Jose, CA 95131
TITLE DRAWING NO.
R
REV.
20M1, 20-pad, 4 x 4 x 0.8 mm Body, Lead Pitch 0.50 mm, 20M1 B
10/27/04
2.6 mm Exposed Pad, Micro Lead Frame Package (MLF)
A 0.70 0.75 0.80
A1 – 0.01 0.05
A2 0.20 REF
b 0.18 0.23 0.30
D 4.00 BSC
D2 2.45 2.60 2.75
E 4.00 BSC
E2 2.45 2.60 2.75
e 0.50 BSC
L 0.35 0.40 0.55
SIDE VIEW
Pin 1 ID
Pin #1
Notch
(0.20 R)
BOTTOM VIEW
TOP VIEW
Note: Reference JEDEC Standard MO-220, Fig. 1 (SAW Singulation) WGGD-5.
COMMON DIMENSIONS
(Unit of Measure = mm)
SYMBOL MIN NOM MAX NOTE
D
E
e
A2
A1
A
D2
E2
0.08 C
L
1
2
3
b
1
2
3277
8183F–AVR–06/12
ATtiny24A/44A/84A
25.5 20M2
TITLE GPC DRAWING NO. REV.
Package Drawing Contact:
packagedrawings@atmel.com ZFC B 20M2
20M2, 20-pad, 3 x 3 x 0.85 mm Body, Lead Pitch 0.45 mm,
1.55 x 1.55 mm Exposed Pad, Thermally Enhanced
Plastic Very Thin Quad Flat No Lead Package (VQFN)
10/24/08
15
14
13
12
11
1
2
3
4
5
16 17 18 19 20
10 9 8 7 6
D2
E2
e
b
L K
Pin #1 Chamfer
(C 0.3)
D
E SIDE VIEW
A1
y
Pin 1 ID
BOTTOM VIEW
TOP VIEW
A
C
C0.18 (8X)
0.3 Ref (4x)
COMMON DIMENSIONS
(Unit of Measure = mm)
SYMBOL MIN NOM MAX NOTE
A 0.75 0.80 0.85
A1 0.00 0.02 0.05
b 0.17 0.22 0.27
C 0.152
D 2.90 3.00 3.10
D2 1.40 1.55 1.70
E 2.90 3.00 3.10
E2 1.40 1.55 1.70
e – 0.45 –
L 0.35 0.40 0.45
K 0.20 – –
y 0.00 – 0.08 278
8183F–AVR–06/12
ATtiny24A/44A/84A
26. Errata
The revision letters in this section refer to the revision of the corresponding ATtiny24A/44A/84A
device.
26.1 ATtiny24A
26.1.1 Rev. H
No known errata.
26.1.2 Rev. G
Not sampled.
26.1.3 Rev. F
Not sampled.
26.2 ATtiny44A
26.2.1 Rev. G
No known errata. Yield improvement.
26.2.2 Rev. F
No known errata.
26.2.3 Rev. E
Not sampled.
26.3 ATtiny84A
26.3.1 Rev. C
No known errata.279
8183F–AVR–06/12
ATtiny24A/44A/84A
27. Datasheet Revision History
27.1 Rev. 8183F – 06/12
1. Updated:
– Table 16-1 on page 138
– Figure 16-7 on page 137
– “Ordering Information” on page 270
27.2 Rev. 8183E – 01/12
1. Updated:
– Production status for ATtiny24A and ATtiny84A
– “Start Condition Detector” on page 122
– “Ordering Information” on page 270, 271, and 272
27.3 Rev. 8183D – 04/11
1. Added errata for ATtiny44A rev. G in Section 26. “Errata” on page 278
27.4 Rev. 8183C – 03/11
1. Added:
– ATtiny84A, including typical characteristics plots
– Section 3.3 “Capacitive Touch Sensing” on page 6
– Table 6-8, “Capacitance of Low-Frequency Crystal Oscillator,” on page 28
– Analog Comparator Offset plots for ATtiny24A (Figure 21.2.10 on page 208) and
ATtiny44A (Figure 21.3.11 on page 236)
– Extended temperature part numbers in Section 24. “Ordering Information” on page
270
2. Updated:
– Bit syntax throughout the datasheet, e.g. from CS02:0 to CS0[2:0]
– Section 6.4 “Clock Output Buffer” on page 30, changed CLKO to CKOUT
– Table 16-4, “Single-Ended Input channel Selections,” on page 145, added note for
Internal 1.1V Reference
– Table 19-16, “High-voltage Serial Programming Instruction Set for
ATtiny24A/44A/84A,” on page 170, adjusted notes
– Table 20-1, “DC Characteristics. TA = -40°C to +85°C,” on page 173, adjusted notes
27.5 Rev. 8183B – 03/10
1. Updated template.
2. Added UFBGA package (15CC1) in: “Features” on page 1, “Pin Configurations” on
page 2, Section 24. “Ordering Information” on page 270, and Section 25.3 “15CC1” on
page 275.
3. Separated typical characteristic plots, added Section 21.2 “ATtiny24A” on page 183.
4. Updated sections:
– Section 14.5.4 “USIBR – USI Buffer Register” on page 127, header updated280
8183F–AVR–06/12
ATtiny24A/44A/84A
– Section 24. “Ordering Information” on page 270, added tape & reel and topside
marking, updated notes
5. Updated Figures:
– Figure 4-1 “Block Diagram of the AVR Architecture” on page 7
– Figure 8-1 “Reset Logic” on page 38
– Figure 14-1 “Universal Serial Interface, Block Diagram” on page 116, USIDB ->
USIBR
– Figure 19-5 “High-voltage Serial Programming Waveforms” on page 169
6. Updated Tables:
– Table 19-11, “Minimum Wait Delay Before Writing the Next Flash or EEPROM
Location,” on page 164, updated value for tWD_ERASE
27.6 Rev. 8183A – 12/08
1. Initial revision. Created from document 8006H.
2. Updated "Ordering Information" on page 278 and page 278. Pb-plated packages are no
longer offered and there are no separate ordering codes for commercial operation
range, the only available option now is industrial. Also, updated some order codes to
reflect changes in leadframe composition and added VQFN package option.
3. Updated data sheet template.
4. Removed all references to 8K device.
5. Updated characteristic plots of section “Typical Characteristics”, starting on page 182.
6. Added characteristic plots:
– “Bandgap Voltage vs. Supply Voltage” on page 233
– “Bandgap Voltage vs. Temperature” on page 233
7. Updated sections:
– “Features” on page 1
– “Power Reduction Register” on page 35
– “Analog Comparator” on page 128
– “Features” on page 132
– “Operation” on page 133
– “Starting a Conversion” on page 134
– “ADC Voltage Reference” on page 139
– “Speed” on page 174
8. Updated Figures:
– “Program Memory Map” on page 15
– “Data Memory Map” on page 16
9. Update Tables:
– “Device Signature Bytes” on page 161
– “DC Characteristics. TA = -40°C to +85°C” on page 173
– “Additional Current Consumption for the different I/O modules (absolute values)” on
page 182
– “Additional Current Consumption (percentage) in Active and Idle mode” on page 183i
8183F–AVR–06/12
ATtiny24A/44A/84A
Table of Contents
Features ..................................................................................................... 1
1 Pin Configurations ................................................................................... 2
1.1 Pin Descriptions .................................................................................................3
2 Overview ................................................................................................... 4
3 General Information ................................................................................. 6
3.1 Resources .........................................................................................................6
3.2 Code Examples .................................................................................................6
3.3 Capacitive Touch Sensing .................................................................................6
3.4 Data Retention ...................................................................................................6
3.5 Disclaimer ..........................................................................................................6
4 CPU Core .................................................................................................. 7
4.1 Architectural Overview .......................................................................................7
4.2 ALU – Arithmetic Logic Unit ...............................................................................8
4.3 Status Register ..................................................................................................8
4.4 General Purpose Register File ..........................................................................9
4.5 Stack Pointer ...................................................................................................10
4.6 Instruction Execution Timing ...........................................................................10
4.7 Reset and Interrupt Handling ...........................................................................11
4.8 Register Description ........................................................................................13
5 Memories ................................................................................................ 15
5.1 In-System Re-programmable Flash Program Memory ....................................15
5.2 SRAM Data Memory ........................................................................................15
5.3 EEPROM Data Memory ..................................................................................16
5.4 I/O Memory ......................................................................................................20
5.5 Register Description ........................................................................................20
6 Clock System ......................................................................................... 24
6.1 Clock Subsystems ...........................................................................................24
6.2 Clock Sources .................................................................................................25
6.3 System Clock Prescaler ..................................................................................30
6.4 Clock Output Buffer .........................................................................................30
6.5 Register Description ........................................................................................31
7 Power Management and Sleep Modes ................................................. 33ii
8183F–AVR–06/12
ATtiny24A/44A/84A
7.1 Sleep Modes ....................................................................................................33
7.2 Software BOD Disable .....................................................................................34
7.3 Power Reduction Register ...............................................................................35
7.4 Minimizing Power Consumption ......................................................................35
7.5 Register Description ........................................................................................36
8 System Control and Reset .................................................................... 38
8.1 Resetting the AVR ...........................................................................................38
8.2 Reset Sources .................................................................................................39
8.3 Internal Voltage Reference ..............................................................................41
8.4 Watchdog Timer ..............................................................................................41
8.5 Register Description ........................................................................................44
9 Interrupts ................................................................................................ 47
9.1 Interrupt Vectors ..............................................................................................47
9.2 External Interrupts ...........................................................................................48
9.3 Register Description ........................................................................................50
10 I/O Ports .................................................................................................. 53
10.1 Ports as General Digital I/O .............................................................................54
10.2 Alternate Port Functions ..................................................................................58
10.3 Register Description ........................................................................................66
11 8-bit Timer/Counter0 with PWM ............................................................ 68
11.1 Features ..........................................................................................................68
11.2 Overview ..........................................................................................................68
11.3 Clock Sources .................................................................................................69
11.4 Counter Unit ....................................................................................................69
11.5 Output Compare Unit .......................................................................................70
11.6 Compare Match Output Unit ............................................................................72
11.7 Modes of Operation .........................................................................................73
11.8 Timer/Counter Timing Diagrams .....................................................................77
11.9 Register Description ........................................................................................79
12 16-bit Timer/Counter1 ............................................................................ 85
12.1 Features ..........................................................................................................85
12.2 Overview ..........................................................................................................85
12.3 Timer/Counter Clock Sources .........................................................................87
12.4 Counter Unit ....................................................................................................87iii
8183F–AVR–06/12
ATtiny24A/44A/84A
12.5 Input Capture Unit ...........................................................................................88
12.6 Output Compare Units .....................................................................................90
12.7 Compare Match Output Unit ............................................................................92
12.8 Modes of Operation .........................................................................................94
12.9 Timer/Counter Timing Diagrams ...................................................................101
12.10 Accessing 16-bit Registers ............................................................................103
12.11 Register Description ......................................................................................106
13 Timer/Counter Prescaler ..................................................................... 113
13.1 Prescaler Reset .............................................................................................113
13.2 External Clock Source ...................................................................................113
13.3 Register Description ......................................................................................114
14 USI – Universal Serial Interface .......................................................... 116
14.1 Features ........................................................................................................116
14.2 Overview ........................................................................................................116
14.3 Functional Descriptions .................................................................................117
14.4 Alternative USI Usage ...................................................................................123
14.5 Register Descriptions ....................................................................................123
15 Analog Comparator ............................................................................. 128
15.1 Analog Comparator Multiplexed Input ...........................................................128
15.2 Register Description ......................................................................................129
16 Analog to Digital Converter ................................................................ 132
16.1 Features ........................................................................................................132
16.2 Overview ........................................................................................................132
16.3 Operation .......................................................................................................133
16.4 Starting a Conversion ....................................................................................134
16.5 Prescaling and Conversion Timing ................................................................135
16.6 Changing Channel or Reference Selection ...................................................138
16.7 ADC Noise Canceler .....................................................................................139
16.8 Analog Input Circuitry ....................................................................................139
16.9 Noise Canceling Techniques .........................................................................140
16.10 ADC Accuracy Definitions .............................................................................140
16.11 ADC Conversion Result .................................................................................142
16.12 Temperature Measurement ...........................................................................143
16.13 Register Description ......................................................................................144iv
8183F–AVR–06/12
ATtiny24A/44A/84A
17 debugWIRE On-chip Debug System .................................................. 150
17.1 Features ........................................................................................................150
17.2 Overview ........................................................................................................150
17.3 Physical Interface ..........................................................................................150
17.4 Software Break Points ...................................................................................151
17.5 Limitations of debugWIRE .............................................................................151
17.6 Register Description ......................................................................................151
18 Self-Programming the Flash ............................................................... 152
18.1 Performing Page Erase by SPM ....................................................................152
18.2 Filling the Temporary Buffer (Page Loading) .................................................152
18.3 Performing a Page Write ...............................................................................153
18.4 Addressing the Flash During Self-Programming ...........................................153
18.5 EEPROM Write Prevents Writing to SPMCSR ..............................................154
18.6 Reading Lock, Fuse and Signature Data from Software ...............................154
18.7 Preventing Flash Corruption ..........................................................................156
18.8 Programming Time for Flash when Using SPM ............................................156
18.9 Register Description ......................................................................................156
19 Memory Programming ......................................................................... 158
19.1 Program And Data Memory Lock Bits ...........................................................158
19.2 Fuse Bytes .....................................................................................................159
19.3 Device Signature Imprint Table .....................................................................160
19.4 Page Size ......................................................................................................161
19.5 Serial Programming .......................................................................................162
19.6 High-voltage Serial Programming ..................................................................166
19.7 High-Voltage Serial Programming Algorithm .................................................166
20 Electrical Characteristics .................................................................... 173
20.1 Absolute Maximum Ratings* .........................................................................173
20.2 DC Characteristics .........................................................................................173
20.3 Speed ............................................................................................................174
20.4 Clock Characteristics .....................................................................................175
20.5 System and Reset Characteristics ................................................................176
20.6 ADC Characteristics ......................................................................................177
20.7 Analog Comparator Characteristics ...............................................................180
20.8 Serial Programming Characteristics ..............................................................180
20.9 High-Voltage Serial Programming Characteristics ........................................181v
8183F–AVR–06/12
ATtiny24A/44A/84A
21 Typical Characteristics ........................................................................ 182
21.1 Supply Current of I/O Modules ......................................................................182
21.2 ATtiny24A ......................................................................................................183
21.3 ATtiny44A ......................................................................................................211
21.4 ATtiny84A ......................................................................................................239
22 Register Summary ............................................................................... 266
23 Instruction Set Summary .................................................................... 268
24 Ordering Information ........................................................................... 270
24.1 ATtiny24A ......................................................................................................270
24.2 ATtiny44A ......................................................................................................271
24.3 ATtiny84A ......................................................................................................272
25 Packaging Information ........................................................................ 273
25.1 14S1 ..............................................................................................................273
25.2 14P3 ..............................................................................................................274
25.3 15CC1 ...........................................................................................................275
25.4 20M1 ..............................................................................................................276
25.5 20M2 ..............................................................................................................277
26 Errata ..................................................................................................... 278
26.1 ATtiny24A ......................................................................................................278
26.2 ATtiny44A ......................................................................................................278
26.3 ATtiny84A ......................................................................................................278
27 Datasheet Revision History ................................................................ 279
27.1 Rev. 8183F – 06/12 .......................................................................................279
27.2 Rev. 8183E – 01/12 .......................................................................................279
27.3 Rev. 8183D – 04/11 .......................................................................................279
27.4 Rev. 8183C – 03/11 .......................................................................................279
27.5 Rev. 8183B – 03/10 .......................................................................................279
27.6 Rev. 8183A – 12/08 .......................................................................................2808183F–AVR–06/12
Headquarters International
Atmel Corporation
2325 Orchard Parkway
San Jose, CA 95131
USA
Tel: (+1)(408) 441-0311
Fax: (+1)(408) 487-2600
Atmel Asia Limited
Unit 01-5 & 16, 19F
BEA Tower, Millennium City 5
418 Kwun Tong Road
Kwun Tong, Kowloon
HONG KONG
Tel: (+852) 2245-6100
Fax: (+852) 2722-1369
Atmel Munich GmbH
Business Campus
Parkring 4
D-85748 Garching b. Munich
GERMANY
Tel: (+49) 89-31970-0
Fax: (+49) 89-3194621
Atmel Japan
9F, Tonetsu Shinkawa Bldg.
1-24-8 Shinkawa
Chuo-ku, Tokyo 104-0033
JAPAN
Tel: (+81)(3) 3523-3551
Fax: (+81)(3) 3523-7581
Product Contact
Web Site
www.atmel.com
Technical Support
avr@atmel.com
Sales Contact
www.atmel.com/contacts
Literature Requests
www.atmel.com/literature
Disclaimer: The information in this document is provided in connection with Atmel products. No license, express or implied, by estoppel or otherwise, to any
intellectual property right is granted by this document or in connection with the sale of Atmel products. EXCEPT AS SET FORTH IN ATMEL’S TERMS AND CONDITIONS
OF SALE LOCATED ON ATMEL’S WEB SITE, ATMEL ASSUMES NO LIABILITY WHATSOEVER AND DISCLAIMS ANY EXPRESS, IMPLIED OR STATUTORY
WARRANTY RELATING TO ITS PRODUCTS INCLUDING, BUT NOT LIMITED TO, THE IMPLIED WARRANTY OF MERCHANTABILITY, FITNESS FOR A PARTICULAR
PURPOSE, OR NON-INFRINGEMENT. IN NO EVENT SHALL ATMEL BE LIABLE FOR ANY DIRECT, INDIRECT, CONSEQUENTIAL, PUNITIVE, SPECIAL OR INCIDENTAL
DAMAGES (INCLUDING, WITHOUT LIMITATION, DAMAGES FOR LOSS OF PROFITS, BUSINESS INTERRUPTION, OR LOSS OF INFORMATION) ARISING OUT
OF THE USE OR INABILITY TO USE THIS DOCUMENT, EVEN IF ATMEL HAS BEEN ADVISED OF THE POSSIBILITY OF SUCH DAMAGES. Atmel makes no
representations or warranties with respect to the accuracy or completeness of the contents of this document and reserves the right to make changes to specifications
and product descriptions at any time without notice. Atmel does not make any commitment to update the information contained herein. Unless specifically provided
otherwise, Atmel products are not suitable for, and shall not be used in, automotive applications. Atmel’s products are not intended, authorized, or warranted for use
as components in applications intended to support or sustain life.
© 2012 Atmel Corporation. All rights reserved.
Atmel®, logo and combinations thereof, and others are registered trademarks or trademarks of Atmel Corporation or its subsidiaries. Other terms
and product names may be trademarks of others.
Atmel Xplained Pro
Atmel® Xplained Pro kits provide a complete and easy to use low-cost development platform for evaluating and prototyping
your Atmel Flash-based microcontrollers (MCUs) designs.
The Xplained Pro kits offer expansion ports that allow you to connect extension boards to provide more system functionality
including OLED LCD displays, buttons, sensors and more, for fast application prototyping. You can purchase add-on boards
from Atmel, or build your own.
The new kits are part of Atmel’s complete MCU tools ecosystem, working seamlessly with Atmel Studio 6 IDP that includes
over 1600 example projects from Atmel Software Framework. When combined with Atmel Gallery, an online apps store
for development tools and embedded software, and Atmel Spaces, a cloud-based collaborative development work space,
the Xplained Pro kits further simplify your embedded MCU designs reducing your overall development time.
To learn more about Atmel Xplained Pro kits, visit http://www.atmel.com/XplainedPro
Atmel Xplained Pro kits are available from your Atmel distributor or at store.atmel.com.© 2013 Atmel Corporation. All rights reserved. / Rev.: Atmel-45024B-Xplained-Pro-Flyer_E_A5_0213
Atmel®, Atmel logo and combinations thereof, and others are registered trademarks or trademarks of Atmel Corporation or its subsidiaries. Other terms and product names may be trademarks of others.
Atmel Corporation 1600 Technology Drive, San Jose, CA 95110 USA T : (+1)(408) 441. 0311 F : (+1)(408) 436. 4200 | www.atmel.com
Evaluation Kit Contents SAP Code Price
SAM4L Xplained Pro Evaluation Kit SAM4L MCU Board ATSAM4L-XPRO $39
SAM4S Xplained Pro Evaluation Kit SAM4S MCU Board ATSAM4S-XPRO $39
ATmega256RFR2 Xplained Pro
Evaluation Kit ATmega256RFR2 MCU Board ATMEGA256RFR2-XPRO $39
SAM4L Xplained Pro Starter Kit SAM4L MCU Board
4 Extension Boards: Segment LCD, OLED Display, I/O, Prototyping ATSAM4L-XSTK $109
SAM4S Xplained Pro Starter Kit SAM4S MCU Board
3 Extension Boards: OLED Display, I/O, Prototyping ATSAM4S-XSTK $99
RFR2 Xplained Pro Starter Kit 3 Extension Boards: OLED Display, I/O, Prototyping ATMEGA256RFR2-XSTK $99
OLED Xplained Pro Extension Extension board with 128x32 OLED Display,
3 Buttons and 3 LEDs ATOLED1-XPRO $22
Segment LCD Xplained Pro Extension Extension Board with LCD Segment Display ATSLCD1-XPRO $22
I/O Xplained Pro Extension Extension Board with Light Sensor, Temperature Sensor,
Micro SD Card, UART Loopback ATIO1-XPRO $27
Prototyping Xplained Pro Extension Prototyping Extension Board with Bread-boarding Area ATPROTO1-XPRO $18
Not recommended for new designs - Use XMEGA A1U series 8067O–AVR–06/2013
Features
High-performance, low-power Atmel® AVR® XMEGA® 8/16-bit Microcontroller
Nonvolatile program and data memories
64K - 128KBytes of in-system self-programmable flash
4K - 8KBytes boot section
2 KBBytes EEPROM
4 KB - 8 KBBytes internal SRAM
External bus interface for up to 16Mbytes SRAM
External bus interface for up to 128Mbit SDRAM
Peripheral features
Four-channel DMA controller
Eight-channel event system
Eight 16-bit timer/counters
Four timer/counters with 4 output compare or input capture channels
Four timer/counters with 2 output compare or input capture channels
High resolution extension on all timer/counters
Advanced waveform extension (AWeX) on two timer/counters
Eight USARTs with IrDA support for one USART
Four two-wire interfaces with dual address match (I2
C and SMBus compatible)
Four serial peripheral interfaces (SPIs)
AES and DES crypto engine
16-bit real time counter (RTC) with separate oscillator
Two sixteen channel, 12-bit, 2msps Analog to Digital Converters
Two two-channel, 12-bit, 1msps Digital to Analog Converters
Four Analog Comparators (ACs) with window compare function, and current sources
External interrupts on all general purpose I/O pins
Programmable watchdog timer with separate on-chip ultra low power oscillator
QTouch® library support
Capacitive touch buttons, sliders and wheels
Special microcontroller features
Power-on reset and programmable brown-out detection
Internal and external clock options with PLL and prescaler
Programmable multilevel interrupt controller
Five sleep modes
Programming and debug interfaces
JTAG (IEEE 1149.1 compliant) interface, including boundary scan
PDI (Program and Debug Interface)
I/O and packages
78 Programmable I/O pins
100 lead TQFP
100 ball BGA
100 ball VFBGA
Operating voltage
1.6 – 3.6V
Operating frequency
0 – 12MHz from 1.6V
0 – 32MHz from 2.7V
8/16-bit XMEGA A1 Microcontroller
ATxmega128A1 / ATxmega64A1
Preliminary
8067O–AVR–06/2013
Not recommended for new designs -
Use XMEGA A1U series[Not recommended for new designs - Use XMEGA A1U series] XMEGA A1 [DATASHEET] 2
8067O–AVR–06/2013
‘
1. Ordering Information
Notes: 1. This device can also be supplied in wafer form. Please contact your local Atmel sales office for detailed ordering information.
2. Pb-free packaging, complies to the European Directive for Restriction of Hazardous Substances (RoHS directive). Also Halide free and fully Green.
3. For packaging information, see “Packaging information” on page 70.
Typical Applications
Ordering Code Flash (B) E2 SRAM Speed (MHz) Power Supply Package(1)(2)(3) Temp
ATxmega128A1-AU
128K + 8K 2 KB 8 KB
32 1.6 - 3.6V
100A
-40C - 85C
ATxmega128A1-AUR
ATxmega64A1-AU
64K + 4K 2 KB 4 KB
ATxmega64A1-AUR
ATxmega128A1-CU
128K + 8K 2 KB 8 KB
100C1
ATxmega128A1CUR
ATxmega64A1-CU
64K + 4K 2 KB 4 KB
ATxmega64A1-CUR
ATxmega128A1-C7U
128K + 8K 2 KB 8 KB
100C2
ATxmega128A1-C7UR
ATxmega64A1-C7U
64K + 4K 2 KB 4 KB
ATxmega64A1-C7UR
Package Type
100A 100-lead, 14 x 14 x 1.0mm, 0.5mm lead pitch, thin profile plastic quad flat package (TQFP)
100C1 100-ball, 9 x 9 x 1.2mm body, ball pitch 0.88mm, chip ball grid array (CBGA)
100C2 100-ball, 7 x 7 x 1.0mm body, ball pitch 0.65mm, very thin fine-pitch ball grid array (VFBGA)
Industrial control Climate control Low power battery applications
Factory automation RF and ZigBee® Power tools
Building control Sensor control HVAC
Board control Optical Utility metering
White goods Medical applications[Not recommended for new designs - Use XMEGA A1U series] XMEGA A1 [DATASHEET] 3
8067O–AVR–06/2013
2. Pinout/Block Diagram
Figure 2-1. Block diagram and pinout
Notes: 1. For full details on pinout and pin functions refer to “Pinout and Pin Functions” on page 55.
2. VCC/GND on pin 83/84 are swapped compared to other VCC/GND to allow easier routing of GND to 32kHz crystal.
INDEX CORNER
PA6
PA7
GND
AVCC
PB0
PB1
PB2
PB3
PB4
PB5
PB6
PB7
GND
VCC
PC0
PC1
PC2
PC3
PC4
PC5
PC6
PC7
GND
VCC
PD0
26
27
28
29
30
31
32
33
34
35
36
37
38
39
40
41
42
43
44
45
46
47
48
49
50
100
99
98
97
96
95
94
93
92
91
90
89
88
87
86
85
84
83
82
81
80
79
78
77
76
75
74
73
72
71
70
69
68
67
66
65
64
63
62
61
60
59
58
57
56
55
54
53
52
51
1
2
3
4
5
6
7
8
9
10
11
12
13
14
15
16
17
18
19
20
21
22
23
24
25
PD1
PD2
PD3
PD4
PD5
PD6
PD7
GND
VCC
PE0
PE1
PE2
PE3
PE4
PE5
PE6
PE7
GND
VCC
PF0
PF1
PF2
PF3
PF4
PF5
PK0
VCC
GND
PJ7
PJ6
PJ5
PJ4
PJ3
PJ2
PJ1
PJ0
VCC
GND
PH7
PH6
PH5
PH4
PH3
PH2
PH1
PH0
VCC
GND
PF7
PF6
PA5
PA4
PA3
PA2
PA1
PA0
AVCC
GND
PR1
PR0
RESET/PDI
PDI
PQ3
PQ2
PQ1
PQ0
GND
VCC
PK7
PK6
PK5
PK4
PK3
PK2
PK1
FLASH
RAM
E 2PROM DMA
Interrupt Controlle r
OCD
External Bus Interface
ADC A
ADC B
DAC B
DAC A
AC A0
AC A1
AC B0
AC B1
Port
A Port B
Event System ctrl
Port K
Port J
Port H
Port R Port Q
Power
Contro l
Reset
Contro l
Watchdog
OSC/CLK
Contro l BOD POR
RTC
EVENT ROUTING NETWORK
DATA BU S
DATA BU S
VREF
TEMP
Port C
CPU
T/C0:1
USART0:1
TWI
SPI
Port D Port E Port F
T/C0:1
USART0/1
TWI
SPI
T/C0:1
USART0:1
TWI
SPI
T/C0:1
USART0:1
TWI
SPI[Not recommended for new designs - Use XMEGA A1U series] XMEGA A1 [DATASHEET] 4
8067O–AVR–06/2013
Figure 2-2. CBGA-pinout
Table 2-1. CBGA-pinout.
1 2 3 4 5 6 7 8 9 10
A PK0 VCC GND PJ3 VCC GND PH1 GND VCC PF7
B PK3 PK2 PK1 PJ4 PH7 PH4 PH2 PH0 PF6 PF5
C VCC PK5 PK4 PJ5 PJ0 PH5 PH3 PF2 PF3 VCC
D GND PK6 PK7 PJ6 PJ1 PH6 PF0 PF1 PF4 GND
E PQ0 PQ1 PQ2 PJ7 PJ2 PE7 PE6 PE5 PE4 PE3
F PR1 PR0 RESET/
PDI PDI PQ3 PC2 PE2 PE1 PE0 VCC
G GND PA1 PA4 PB3 PB4 PC1 PC6 PD7 PD6 GND
H AVCC PA2 PA5 PB2 PB5 PC0 PC5 PD5 PD4 PD3
J PA0 PA3 PB0 PB1 PB6 PC3 PC4 PC7 PD2 PD1
K PA6 PA7 GND AVCC PB7 VCC GND VCC GND PD0
A
B
C
D
E
F
G
H
J
K
1 2 3 4 5 6 7 8 9 10
A
B
C
D
E
F
G
H
J
K
10 9 8 7 6 5 4 3 2 1
Top view Bottom view[Not recommended for new designs - Use XMEGA A1U series] XMEGA A1 [DATASHEET] 5
8067O–AVR–06/2013
3. Overview
The Atmel AVR XMEGA is a family of low power, high performance, and peripheral rich 8/16-bit microcontrollers based
on the AVR enhanced RISC architecture. By executing instructions in a single clock cycle, the AVR XMEGA devices
achieve CPU throughput approaching one million instructions per second (MIPS) per megahertz, allowing the system
designer to optimize power consumption versus processing speed.
The Atmel AVR CPU combines a rich instruction set with 32 general purpose working registers. All 32 registers are
directly connected to the arithmetic logic unit (ALU), allowing two independent registers to be accessed in a single
instruction, executed in one clock cycle. The resulting architecture is more code efficient while achieving throughputs
many times faster than conventional single-accumulator or CISC based microcontrollers.
The AVR XMEGA A1 devices provide the following features: in-system programmable flash with read-while-write
capabilities; internal EEPROM and SRAM; four-channel DMA controller, eight-channel event system and programmable
multilevel interrupt controller, 78 general purpose I/O lines, 16-bit real-time counter (RTC); eight flexible, 16-bit
timer/counters with compare and PWM channels, eight USARTs; four two-wire serial interfaces (TWIs); four serial
peripheral interfaces (SPIs); AES and DES cryptographic engine; two 16-channel, 12-bit ADCs with programmable gain;
two 2-channel, 12-bit DACs; four Analog Comparators (ACs) with window mode; programmable watchdog timer with
separate internal oscillator; accurate internal oscillators with PLL and prescaler; and programmable brown-out detection.
The program and debug interface (PDI), a fast, two-pin interface for programming and debugging, is available. The
devices also have an IEEE std. 1149.1 compliant JTAG interface, and this can also be used for boundary scan, on-chip
debug and programming.
The XMEGA A1 devices have five software selectable power saving modes. The idle mode stops the CPU while allowing
the SRAM, DMA controller, event system, interrupt controller, and all peripherals to continue functioning. The powerdown
mode saves the SRAM and register contents, but stops the oscillators, disabling all other functions until the next
TWI or pin-change interrupt, or reset. In power-save mode, the asynchronous real-time counter continues to run, allowing
the application to maintain a timer base while the rest of the device is sleeping. In standby mode, the external crystal
oscillator keeps running while the rest of the device is sleeping. This allows very fast startup from the external crystal,
combined with low power consumption. In extended standby mode, both the main oscillator and the asynchronous timer
continue to run. To further reduce power consumption, the peripheral clock to each individual peripheral can optionally be
stopped in active mode and idle sleep mode.
Atmel offers a free QTouch library for embedding capacitive touch buttons, sliders and wheels functionality into AVR
microcontrollers.
The device are manufactured using Atmel high-density, nonvolatile memory technology. The program flash memory can
be reprogrammed in-system through the PDI or JTAG interfaces. A boot loader running in the device can use any
interface to download the application program to the flash memory. The boot loader software in the boot flash section will
continue to run while the application flash section is updated, providing true read-while-write operation. By combining an
8/16-bit RISC CPU with in-system, self-programmable flash, the AVR XMEGA is a powerful microcontroller family that
provides a highly flexible and cost effective solution for many embedded applications.
All Atmel AVR XMEGA devices are supported with a full suite of program and system development tools, including C
compilers, macro assemblers, program debugger/simulators, programmers, and evaluation kits.[Not recommended for new designs - Use XMEGA A1U series] XMEGA A1 [DATASHEET] 6
8067O–AVR–06/2013
3.1 Block Diagram
Figure 3-1. XMEGA A1 Block Diagram
VBAT
Power
Supervision
Battery Backup
Controller
Real Time
Counter
32.768 kHz
XOSC
Power
Supervision
POR/BOD &
RESET PORT A (8)
PORT B (8)
EVENT ROUTING NETWORK
DMA
Controller
BUS
Matrix
SRAM
EBI
ADCA
DACA
ACA
DACB
ADCB
ACB
OCD
PORT K (8)
PORT J (8)
PORT H (8)
PDI
Watchdog
Timer
Watchdog
Oscillator
Interrupt
Controller
DATA BUS
Prog/Debug
Controller
PORT R (2)
Oscillator
Circuits/
Clock
Generation
Oscillator
Control
Real Time
Counter
Event System
Controller
JTAG
Sleep
Controller
DES
IRCOM
PORT G (8)
PORT L (8)
PORT Q (8)
PORT M (8)
PORT C (8) TCC0:1 USARTC0:1 SPIC
TWIC
PORT D (8) TCD0:1 USARTD0:1 SPID
TWID
TCF0:1
USARTF0:1
SPIF
TWIF
TCE0:1
USARTE0:1
SPIE
TWIE
PORT E (8) PORT F (8)
EVENT ROUTING NETWORK
AES
AREFA
AREFB
PORT N (8)
PORT P (8)
CPU
NVM Controller
Flash EEPROM
DATA BUS
Int. Refs.
Tempref
Digital function
Analog function
Bus masters / Programming / Debug
Oscillator / Crystal / Clock
General Purpose I/O
EBI[Not recommended for new designs - Use XMEGA A1U series] XMEGA A1 [DATASHEET] 7
8067O–AVR–06/2013
4. Resources
A comprehensive set of development tools, application notes and datasheets are available for download on
http://www.atmel.com/avr.
4.1 Recommended reading
XMEGA A Manual
XMEGA A Application Notes
This device data sheet only contains part specific information and a short description of each peripheral and module. The
XMEGA A Manual describes the modules and peripherals in depth. The XMEGA A application notes contain example
code and show applied use of the modules and peripherals.
The XMEGA A Manual and Application Notes are available from http://www.atmel.com/avr.
5. Capacitive touch sensing
The Atmel QTouch library provides a simple to use solution to realize touch sensitive interfaces on most Atmel AVR
microcontrollers. The patented charge-transfer signal acquisition offers robust sensing and includes fully debounced
reporting of touch keys and includes Adjacent Key Suppression® (AKS®) technology for unambiguous detection of key
events. The QTouch library includes support for the QTouch and QMatrix acquisition methods.
Touch sensing can be added to any application by linking the appropriate Atmel QTouch library for the AVR
microcontroller. This is done by using a simple set of APIs to define the touch channels and sensors, and then calling the
touch sensing API’s to retrieve the channel information and determine the touch sensor states.
The QTouch library is FREE and downloadable from the Atmel website at the following location:
www.atmel.com/qtouchlibrary. For implementation details and other information, refer to the QTouch library user guide -
also available for download from the Atmel website.
6. Disclaimer
For devices that are not available yet, typical values contained in this datasheet are based on simulations and
characterization of other AVR XMEGA microcontrollers manufactured on the same process technology. Min. and Max
values will be available after the device is characterized.[Not recommended for new designs - Use XMEGA A1U series] XMEGA A1 [DATASHEET] 8
8067O–AVR–06/2013
7. AVR CPU
7.1 Features
8/16-bit high performance AVR RISC Architecture
138 instructions
Hardware multiplier
32x8-bit registers directly connected to the ALU
Stack in SRAM
Stack Pointer accessible in I/O memory space
Direct addressing of up to 16M Bytes of program and data memory
True 16/24-bit access to 16/24-bit I/O registers
Support for 8-, 16- and 32-bit Arithmetic
Configuration Change Protection of system critical features
7.2 Overview
All Atmel AVR XMEGA devices use the 8/16-bit AVR CPU. The main function of the CPU is to execute the code and
perform all calculations. The CPU is able to access memories, perform calculations, control peripherals, and execute the
program in the flash memory. Interrupt handling is described in a separate section, refer to “Interrupts and Programmable
Multilevel Interrupt Controller” on page 29.
7.3 Architectural Overview
In order to maximize performance and parallelism, the AVR CPU uses a Harvard architecture with separate memories
and buses for program and data. Instructions in the program memory are executed with single-level pipelining. While one
instruction is being executed, the next instruction is pre-fetched from the program memory. This enables instructions to
be executed on every clock cycle. For details of all AVR instructions, refer to http://www.atmel.com/avr.[Not recommended for new designs - Use XMEGA A1U series] XMEGA A1 [DATASHEET] 9
8067O–AVR–06/2013
Figure 7-1. Block diagram of the AVR CPU architecture.
The arithmetic logic unit (ALU) supports arithmetic and logic operations between registers or between a constant and a
register. Single-register operations can also be executed in the ALU. After an arithmetic operation, the status register is
updated to reflect information about the result of the operation.
The ALU is directly connected to the fast-access register file. The 32 x 8-bit general purpose working registers all have
single clock cycle access time allowing single-cycle arithmetic logic unit (ALU) operation between registers or between a
register and an immediate. Six of the 32 registers can be used as three 16-bit address pointers for program and data
space addressing, enabling efficient address calculations.
The memory spaces are linear. The data memory space and the program memory space are two different memory
spaces.
The data memory space is divided into I/O registers, SRAM, and external RAM. In addition, the EEPROM can be
memory mapped in the data memory.
All I/O status and control registers reside in the lowest 4KB addresses of the data memory. This is referred to as the I/O
memory space. The lowest 64 addresses can be accessed directly, or as the data space locations from 0x00 to 0x3F.
The rest is the extended I/O memory space, ranging from 0x0040 to 0x0FFF. I/O registers here must be accessed as
data space locations using load (LD/LDS/LDD) and store (ST/STS/STD) instructions.
The SRAM holds data. Code execution from SRAM is not supported. It can easily be accessed through the five different
addressing modes supported in the AVR architecture. The first SRAM address is 0x2000.
Data addresses 0x1000 to 0x1FFF are reserved for memory mapping of EEPROM.
The program memory is divided in two sections, the application program section and the boot program section. Both
sections have dedicated lock bits for write and read/write protection. The SPM instruction that is used for selfprogramming
of the application flash memory must reside in the boot program section. The application section contains
an application table section with separate lock bits for write and read/write protection. The application table section can
be used for safe storing of nonvolatile data in the program memory.[Not recommended for new designs - Use XMEGA A1U series] XMEGA A1 [DATASHEET] 10
8067O–AVR–06/2013
7.4 ALU - Arithmetic Logic Unit
The arithmetic logic unit (ALU) supports arithmetic and logic operations between registers or between a constant and a
register. Single-register operations can also be executed. The ALU operates in direct connection with all 32 general
purpose registers. In a single clock cycle, arithmetic operations between general purpose registers or between a register
and an immediate are executed and the result is stored in the register file. After an arithmetic or logic operation, the
status register is updated to reflect information about the result of the operation.
ALU operations are divided into three main categories – arithmetic, logical, and bit functions. Both 8- and 16-bit
arithmetic is supported, and the instruction set allows for efficient implementation of 32-bit aritmetic. The hardware
multiplier supports signed and unsigned multiplication and fractional format.
7.4.1 Hardware Multiplier
The multiplier is capable of multiplying two 8-bit numbers into a 16-bit result. The hardware multiplier supports different
variations of signed and unsigned integer and fractional numbers:
Multiplication of unsigned integers
Multiplication of signed integers
Multiplication of a signed integer with an unsigned integer
Multiplication of unsigned fractional numbers
Multiplication of signed fractional numbers
Multiplication of a signed fractional number with an unsigned one
A multiplication takes two CPU clock cycles.
7.5 Program Flow
After reset, the CPU starts to execute instructions from the lowest address in the flash program memory ‘0.’ The program
counter (PC) addresses the next instruction to be fetched.
Program flow is provided by conditional and unconditional jump and call instructions capable of addressing the whole
address space directly. Most AVR instructions use a 16-bit word format, while a limited number use a 32-bit format.
During interrupts and subroutine calls, the return address PC is stored on the stack. The stack is allocated in the general
data SRAM, and consequently the stack size is only limited by the total SRAM size and the usage of the SRAM. After
reset, the stack pointer (SP) points to the highest address in the internal SRAM. The SP is read/write accessible in the
I/O memory space, enabling easy implementation of multiple stacks or stack areas. The data SRAM can easily be
accessed through the five different addressing modes supported in the AVR CPU.
7.6 Status Register
The status register (SREG) contains information about the result of the most recently executed arithmetic or logic
instruction. This information can be used for altering program flow in order to perform conditional operations. Note that
the status register is updated after all ALU operations, as specified in the instruction set reference. This will in many
cases remove the need for using the dedicated compare instructions, resulting in faster and more compact code.
The status register is not automatically stored when entering an interrupt routine nor restored when returning from an
interrupt. This must be handled by software.
The status register is accessible in the I/O memory space.
7.6.1 Stack and Stack Pointer
The stack is used for storing return addresses after interrupts and subroutine calls. It can also be used for storing
temporary data. The stack pointer (SP) register always points to the top of the stack. It is implemented as two 8-bit
registers that are accessible in the I/O memory space. Data are pushed and popped from the stack using the PUSH and
POP instructions. The stack grows from a higher memory location to a lower memory location. This implies that pushing
data onto the stack decreases the SP, and popping data off the stack increases the SP. The SP is automatically loaded [Not recommended for new designs - Use XMEGA A1U series] XMEGA A1 [DATASHEET] 11
8067O–AVR–06/2013
after reset, and the initial value is the highest address of the internal SRAM. If the SP is changed, it must be set to point
above address 0x2000, and it must be defined before any subroutine calls are executed or before interrupts are enabled.
During interrupts or subroutine calls, the return address is automatically pushed on the stack. The return address can be
two or three bytes, depending on program memory size of the device. For devices with 128KB or less of program
memory, the return address is two bytes, and hence the stack pointer is decremented/incremented by two. For devices
with more than 128KB of program memory, the return address is three bytes, and hence the SP is
decremented/incremented by three. The return address is popped off the stack when returning from interrupts using the
RETI instruction, and from subroutine calls using the RET instruction.
The SP is decremented by one when data are pushed on the stack with the PUSH instruction, and incremented by one
when data is popped off the stack using the POP instruction.
To prevent corruption when updating the stack pointer from software, a write to SPL will automatically disable interrupts
for up to four instructions or until the next I/O memory write.
After reset the stack pointer is initialized to the highest address of the SRAM. See Table 8-2 on page 15.
7.7 Register File
The register file consists of 32 x 8-bit general purpose working registers with single clock cycle access time. The register
file supports the following input/output schemes:
One 8-bit output operand and one 8-bit result input
Two 8-bit output operands and one 8-bit result input
Two 8-bit output operands and one 16-bit result input
One 16-bit output operand and one 16-bit result input
Six of the 32 registers can be used as three 16-bit address register pointers for data space addressing, enabling efficient
address calculations. One of these address pointers can also be used as an address pointer for lookup tables in flash
program memory.[Not recommended for new designs - Use XMEGA A1U series] XMEGA A1 [DATASHEET] 12
8067O–AVR–06/2013
8. Memories
8.1 Features
Flash Program Memory
One linear address space
In-System Programmable
Self-Programming and Bootloader support
Application Section for application code
Application Table Section for application code or data storage
Boot Section for application code or bootloader code
Separate lock bits and protection for all sections
Built in fast CRC check of a selectable flash program memory section
Data Memory
One linear address space
Single cycle access from CPU
SRAM
EEPROM
Byte and page accessible
Optional memory mapping for direct load and store
I/O Memory
Configuration and Status registers for all peripherals and modules
16 bit-accessible General Purpose Register for global variables or flags
External Memory support
SRAM
SDRAM
Memory mapped external hardware
Bus arbitration
Safe and deterministic handling of CPU and DMA Controller priority
Separate buses for SRAM, EEPROM, I/O Memory and External Memory access
Simultaneous bus access for CPU and DMA Controller
Production Signature Row Memory for factory programmed data
Device ID for each microcontroller device type
Serial number for each device
Oscillator calibration bytes
ADC, DAC and temperature sensor calibration data
User Signature Row
One flash page in size
Can be read and written from software
Content is kept after chip erase
8.2 Overview
The Atmel AVR architecture has two main memory spaces, the program memory and the data memory. Executable code
can reside only in the program memory, while data can be stored in the program memory and the data memory. The data
memory includes the internal SRAM, and EEPROM for nonvolatile data storage. All memory spaces are linear and
require no memory bank switching. Nonvolatile memory (NVM) spaces can be locked for further write and read/write
operations. This prevents unrestricted access to the application software.
A separate memory section contains the fuse bytes. These are used for configuring important system functions, and can
only be written by an external programmer.[Not recommended for new designs - Use XMEGA A1U series] XMEGA A1 [DATASHEET] 13
8067O–AVR–06/2013
The available memory size configurations are shown in “Ordering Information” on page 2. In addition each device has a
flash memory signature rows for calibration data, device identification, serial number etc.
8.3 In-System Programmable Flash Program Memory
he Atmel AVR XMEGA devices contain on-chip, in-system reprogrammable flash memory for program storage. The flash
memory can be accessed for read and write from an external programmer through the PDI or from application software
running in the device.
All AVR CPU instructions are 16 or 32 bits wide, and each flash location is 16 bits wide. The flash memory is organized
in two main sections, the application section and the boot loader section. The sizes of the different sections are fixed, but
device-dependent. These two sections have separate lock bits, and can have different levels of protection. The store
program memory (SPM) instruction, which is used to write to the flash from the application software, will only operate
when executed from the boot loader section.
The application section contains an application table section with separate lock settings. This enables safe storage of
nonvolatile data in the program memory.
Figure 8-1. Flash Program Memory (Hexadecimal address)
8.3.1 Application Section
The Application section is the section of the flash that is used for storing the executable application code. The protection
level for the application section can be selected by the boot lock bits for this section. The application section can not store
any boot loader code since the SPM instruction cannot be executed from the application section.
8.3.2 Application Table Section
The application table section is a part of the application section of the flash memory that can be used for storing data.
The size is identical to the boot loader section. The protection level for the application table section can be selected by
the boot lock bits for this section. The possibilities for different protection levels on the application section and the
application table section enable safe parameter storage in the program memory. If this section is not used for data,
application code can reside here.
8.3.3 Boot Loader Section
While the application section is used for storing the application code, the boot loader software must be located in the boot
loader section because the SPM instruction can only initiate programming when executing from this section. The SPM
instruction can access the entire flash, including the boot loader section itself. The protection level for the boot loader
section can be selected by the boot loader lock bits. If this section is not used for boot loader software, application code
can be stored here.
Word Address
ATxega128A1 ATxmega64A1
0 0 Application Section (Bytes)
(128K/64K)
...
EFFF / 77FF
F000 / 7800 Application Table Section (Bytes)
FFFF / 7FFF (8K/4K)
10000 / 8000 Boot Section (Bytes)
10FFF / 87FF (8K/4K)[Not recommended for new designs - Use XMEGA A1U series] XMEGA A1 [DATASHEET] 14
8067O–AVR–06/2013
8.3.4 Production Signature Row
The production signature row is a separate memory section for factory programmed data. It contains calibration data for
functions such as oscillators and analog modules. Some of the calibration values will be automatically loaded to the
corresponding module or peripheral unit during reset. Other values must be loaded from the signature row and written to
the corresponding peripheral registers from software. For details on calibration conditions, refer to “Electrical
Characteristics” on page 76.
The production signature row also contains an ID that identifies each microcontroller device type and a serial number for
each manufactured device. The serial number consists of the production lot number, wafer number, and wafer
coordinates for the device. The device ID for the available devices is shown in Table 8-1.
The production signature row cannot be written or erased, but it can be read from application software and external
programmers.
Table 8-1. Device ID bytes.
8.3.5 User Signature Row
The user signature row is a separate memory section that is fully accessible (read and write) from application software
and external programmers. It is one flash page in size, and is meant for static user parameter storage, such as calibration
data, custom serial number, identification numbers, random number seeds, etc. This section is not erased by chip erase
commands that erase the flash, and requires a dedicated erase command. This ensures parameter storage during
multiple program/erase operations and on-chip debug sessions.
8.4 Fuses and Lock bits
The fuses are used to configure important system functions, and can only be written from an external programmer. The
application software can read the fuses. The fuses are used to configure reset sources such as brownout detector and
watchdog, startup configuration, JTAG enable, and JTAG user ID.
The lock bits are used to set protection levels for the different flash sections (that is, if read and/or write access should be
blocked). Lock bits can be written by external programmers and application software, but only to stricter protection levels.
Chip erase is the only way to erase the lock bits. To ensure that flash contents are protected even during chip erase, the
lock bits are erased after the rest of the flash memory has been erased.
An unprogrammed fuse or lock bit will have the value one, while a programmed fuse or lock bit will have the value zero.
Both fuses and lock bits are reprogrammable like the flash program memory.
8.5 Data Memory
The data memory contains the I/O memory, internal SRAM, optionally memory mapped EEPROM, and external memory
if available. The data memory is organized as one continuous memory section, see Figure 8-2 on page 15. To simplify
development, I/O Memory, EEPROM and SRAM will always have the same start addresses for all Atmel AVR XMEGA
devices. The address space for External Memory will always start at the end of Internal SRAM and end at address
0xFFFFFF.
Device Device ID bytes
Byte 2 Byte 1 Byte 0
ATxmega64A1 4E 96 1E
ATxmega128A1 4C 97 1E[Not recommended for new designs - Use XMEGA A1U series] XMEGA A1 [DATASHEET] 15
8067O–AVR–06/2013
Figure 8-2. Data Memory Map (Hexadecimal address)
8.6 EEPROM
XMEGA AU devices have EEPROM for nonvolatile data storage. It is either addressable in a separate data space
(default) or memory mapped and accessed in normal data space. The EEPROM supports both byte and page access.
Memory mapped EEPROM allows highly efficient EEPROM reading and EEPROM buffer loading. When doing this,
EEPROM is accessible using load and store instructions. Memory mapped EEPROM will always start at hexadecimal
address 0x1000.
8.7 I/O Memory
The status and configuration registers for peripherals and modules, including the CPU, are addressable through I/O
memory locations. All I/O locations can be accessed by the load (LD/LDS/LDD) and store (ST/STS/STD) instructions,
which is used to transfer data between the 32 registers in the register file and the I/O memory. The IN and OUT
instructions can address I/O memory locations in the range 0x00 - 0x3F directly. In the address range 0x00 - 0x1F,
single- cycle instructions for manipulation and checking of individual bits are available.
The I/O memory address for all peripherals and modules in XMEGA A1U is shown in the “Peripheral Module Address
Map” on page 62.
8.7.1 General Purpose I/O Registers
The lowest 16 I/O memory addresses are reserved as general purpose I/O registers. These registers can be used for
storing global variables and flags, as they are directly bit-accessible using the SBI, CBI, SBIS, and SBIC instructions.
8.8 External Memory
Four ports can be used for external memory, supporting external SRAM, SDRAM, and memory mapped peripherals such
as LCD displays. Refer to “EBI – External Bus Interface” on page 47. The external memory address space will always
start at the end of internal SRAM.
8.9 Data Memory and Bus Arbitration
Since the data memory is organized as four separate sets of memories, the different bus masters (CPU, DMA controller
read and DMA controller write, etc.) can access different memory sections at the same time.
Byte Address ATxmega128A1 Byte Address ATxmega64A1
0 I/O Registers
(4 KB)
0 I/O Registers
FFF FFF (4 KB)
1000 EEPROM
(2 KB)
1000 EEPROM
17FF 17FF (2 KB)
RESERVED RESERVED
2000 Internal SRAM
(8 KB)
2000 Internal SRAM
3FFF 2FFF (4 KB)
4000 External Memory
(0 to 16 MB)
3000 External Memory
FFFFFF FFFFFF (0 to 16 MB)[Not recommended for new designs - Use XMEGA A1U series] XMEGA A1 [DATASHEET] 16
8067O–AVR–06/2013
8.10 Memory Timing
Read and write access to the I/O memory takes one CPU clock cycle. A write to SRAM takes one cycle, and a read from
SRAM takes two cycles. For burst read (DMA), new data are available every cycle. EEPROM page load (write) takes one
cycle, and three cycles are required for read. For burst read, new data are available every second cycle. External
memory has multi-cycle read and write. The number of cycles depends on the type of memory and configuration of the
external bus interface. Refer to the instruction summary for more details on instructions and instruction timing.
8.11 Device ID and Revision
Each device has a three-byte device ID. This ID identifies Atmel as the manufacturer of the device and the device type. A
separate register contains the revision number of the device.
8.12 I/O Memory Protection
Some features in the device are regarded as critical for safety in some applications. Due to this, it is possible to lock the
I/O register related to the clock system, the event system, and the advanced waveform extensions. As long as the lock is
enabled, all related I/O registers are locked and they can not be written from the application software. The lock registers
themselves are protected by the configuration change protection mechanism.
8.13 JTAG Disable
It is possible to disable the JTAG interface from the application software. This will prevent all external JTAG access to the
device until the next device reset or until JTAG is enabled again from the application software. As long as JTAG is
disabled, the I/O pins required for JTAG can be used as normal I/O pins.
8.14 Flash and EEPROM Page Size
The flash program memory and EEPROM data memory are organized in pages. The pages are word accessible for the
flash and byte accessible for the EEPROM.
Table 8-2 shows the Flash Program Memory organization. Flash write and erase operations are performed on one page
at a time, while reading the Flash is done one byte at a time. For Flash access the Z-pointer (Z[m:n]) is used for
addressing. The most significant bits in the address (FPAGE) gives the page number and the least significant address
bits (FWORD) gives the word in the page.
Table 8-2. Number of words and Pages in the Flash.
Table 8-3 shows EEPROM memory organization for the Atmel AVR XMEGA A1U devices. EEPROM write and erase
operations can be performed one page or one byte at a time, while reading the EEPROM is done one byte at a time. For
EEPROM access the NVM Address Register (ADDR[m:n]) is used for addressing. The most significant bits in the
address (E2PAGE) give the page number and the least significant address bits (E2BYTE) give the byte in the page.
Device PC size Flash
Page
Size FWORD FPAGE Application Boot
bits bytes words Size No of
pages
Size No of
pages
ATxmega64A1 16 64K + 4K 128 Z[7:1] Z[16:8] 64K 256 4K 16
ATxmega128A1 17 128K+ 8K 256 Z[8:1] Z[17:9] 128K 256 8K 16[Not recommended for new designs - Use XMEGA A1U series] XMEGA A1 [DATASHEET] 17
8067O–AVR–06/2013
Table 8-3. Number of Bytes and Pages in the EEPROM.
8.14.1 I/O Memory
All peripherals and modules are addressable through I/O memory locations in the data memory space. All I/O memory
locations can be accessed by the Load (LD/LDS/LDD) and Store (ST/STS/STD) instructions, transferring data between
the 32 general purpose registers in the CPU and the I/O Memory.
The IN and OUT instructions can address I/O memory locations in the range 0x00 - 0x3F directly.
I/O registers within the address range 0x00 - 0x1F are directly bit-accessible using the SBI and CBI instructions. The
value of single bits can be checked by using the SBIS and SBIC instructions on these registers.
The I/O memory address for all peripherals and modules in XMEGA A1 is shown in the “Peripheral Module Address Map”
on page 62.
Device EEPROM Page Size E2BYTE E2PAGE No of pages
Size bytes
ATxmega64A1 2 KB 32 ADDR[4:0] ADDR[10:5] 64
ATxmega128A1 2 KB 32 ADDR[4:0 ADDR[10:5] 64[Not recommended for new designs - Use XMEGA A1U series] XMEGA A1 [DATASHEET] 18
8067O–AVR–06/2013
9. DMAC - Direct Memory Access Controller
9.1 Features
Allows High-speed data transfer
From memory to peripheral
From memory to memory
From peripheral to memory
From peripheral to peripheral
4 Channels
From 1 byte and up to 16M bytes transfers in a single transaction
Multiple addressing modes for source and destination address
Increment
Decrement
Static
1, 2, 4, or 8 byte Burst Transfers
Programmable priority between channels
9.2 Overview
The four-channel direct memory access (DMA) controller can transfer data between memories and peripherals, and thus
offload these tasks from the CPU. It enables high data transfer rates with minimum CPU intervention, and frees up CPU
time. The four DMA channels enable up to four independent and parallel transfers.
The DMA controller can move data between SRAM and peripherals, between SRAM locations and directly between
peripheral registers. With access to all peripherals, the DMA controller can handle automatic transfer of data to/from
communication modules. The DMA controller can also read from memory mapped EEPROM.
Data transfers are done in continuous bursts of 1, 2, 4, or 8 bytes. They build block transfers of configurable size from 1
byte to 64KB. A repeat counter can be used to repeat each block transfer for single transactions up to 16MB. Source and
destination addressing can be static, incremental or decremental. Automatic reload of source and/or destination
addresses can be done after each burst or block transfer, or when a transaction is complete. Application software,
peripherals, and events can trigger DMA transfers.
The four DMA channels have individual configuration and control settings. This include source, destination, transfer
triggers, and transaction sizes. They have individual interrupt settings. Interrupt requests can be generated when a
transaction is complete or when the DMA controller detects an error on a DMA channel.
To allow for continuous transfers, two channels can be interlinked so that the second takes over the transfer when the
first is finished, and vice versa.[Not recommended for new designs - Use XMEGA A1U series] XMEGA A1 [DATASHEET] 19
8067O–AVR–06/2013
10. Event System
10.1 Features
Inter-peripheral communication and signalling with minimum latency
CPU and DMA independent operation
8 Event Channels allows for up to 8 signals to be routed at the same time
Events can be generated by
Timer/Counters (TCxn)
Real Time Counter (RTC)
Analog to Digital Converters (ADCx)
Analog Comparators (ACx)
Ports (PORTx)
System Clock (ClkSYS)
Software (CPU)
Events can be used by
Timer/Counters (TCxn)
Analog to Digital Converters (ADCx)
Digital to Analog Converters (DACx)
Ports (PORTx)
DMA Controller (DMAC)
IR Communication Module (IRCOM)
The same event can be used by multiple peripherals for synchronized timing
Advanced Features
Manual Event Generation from software (CPU)
Quadrature Decoding
Digital Filtering
Functions in Active and Idle mode
10.2 Overview
The Event System is a set of features for inter-peripheral communication. It enables the possibility for a change of state
in one peripheral to automatically trigger actions in one or more peripherals. These changes in a peripheral that will
trigger actions in other peripherals are configurable by software. It is a simple, but powerful system as it allows for
autonomous control of peripherals without any use of interrupts, CPU or DMA resources.
The indication of a change in a peripheral is referred to as an event, and is usually the same as the interrupt conditions
for that peripheral. Events are passed between peripherals using a dedicated routing network called the Event Routing
Network. Figure 10-1 on page 20 shows a basic block diagram of the Event System with the Event Routing Network and
the peripherals to which it is connected. This highly flexible system can be used for simple routing of signals, pin
functions or for sequencing of events.
The maximum latency is two CPU clock cycles from when an event is generated in one peripheral, until the actions are
triggered in one or more other peripherals.
The Event System is functional in both Active and Idle modes.[Not recommended for new designs - Use XMEGA A1U series] XMEGA A1 [DATASHEET] 20
8067O–AVR–06/2013
Figure 10-1. Event system block diagram.
he event routing network consists of eight software-configurable multiplexers that control how events are routed and
used. These are called event channels, and allow for up to eight parallel event routing configurations. The maximum
routing latency is two peripheral clock cycles. The event system works in both active mode and idle sleep mode.
DAC Timer /
Counters
ADC
Real Time
Counter
Port pins
CPU /
Software
DMA
Controller
IRCOM
Event Routing Network
Event
System
Controller
clkPER
Prescaler
AC[Not recommended for new designs - Use XMEGA A1U series] XMEGA A1 [DATASHEET] 21
8067O–AVR–06/2013
11. System Clock and Clock options
11.1 Features
Fast start-up time
Safe run-time clock switching
Internal Oscillators:
32 MHz run-time calibrated RC oscillator
2 MHz run-time calibrated RC oscillator
32.768 kHz calibrated RC oscillator
32 kHz Ultra Low Power (ULP) oscillator with 1 kHz ouput
External clock options
0.4 - 16 MHz Crystal Oscillator
32 kHz Crystal Oscillator
External clock
PLL with internal and external clock options with 1 to 31x multiplication
Clock Prescalers with 1x to 2048x division
Fast peripheral clock running at two and four times the CPU clock speed
Automatic Run-Time Calibration of internal oscillators
Crystal Oscillator failure detection
11.2 Overview
Atmel AVR XMEGA devices have a flexible clock system supporting a large number of clock sources. It incorporates
both accurate internal oscillators and external crystal oscillator and resonator support. A high-frequency phase locked
loop (PLL) and clock prescalers can be used to generate a wide range of clock frequencies. An oscillator failure monitor
can be enabled to issue a non-maskable interrupt and switch to the internal oscillator if the external oscillator or PLL fails.
When a reset occurs, all clock sources except the 32kHz ultra low power oscillator are disabled. After reset, the device
will always start up running from the 2MHz internal oscillator. During normal operation, the system clock source and
prescalers can be changed from software at any time.
Figure 11-1 on page 22 presents the principal clock system in the XMEGA A1U family devices. Not all of the clocks need
to be active at a given time. The clocks for the CPU and peripherals can be stopped using sleep modes and power
reduction registers as described in “Power Management and Sleep Modes” on page 24.[Not recommended for new designs - Use XMEGA A1U series] XMEGA A1 [DATASHEET] 22
8067O–AVR–06/2013
Figure 11-1. The clock system, clock sources and clock distribution
11.3 Clock Options
The clock sources are divided in two main groups: internal oscillators and external clock sources. Most of the clock
sources can be directly enabled and disabled from software, while others are automatically enabled or disabled,
depending on peripheral settings. After reset, the device starts up running from the 2MHz internal oscillator. The other
clock sources and PLL are turned off by default.
The internal oscillators do not require any external components to run. For details on characteristics and accuracy of the
internal oscillators, refer to the device datasheet.
11.3.1 32 kHz Ultra Low Power Internal Oscillator
This oscillator provides an approximate 32kHz clock. The 32kHz ultra low power (ULP) internal oscillator is a very low
power clock source, and it is not designed for high accuracy. The oscillator employs a built-in prescaler that provides a
1kHz output. The oscillator is automatically enabled/disabled when it is used as clock source for any part of the device.
This oscillator can be selected as the clock source for the RTC.
Real Time
Counter Peripherals RAM AVR CPU Non-Volatile
Memory
Watchdog
Timer
Brown-out
Detector
System Clock Prescalers
System Clock Multiplexer
(SCLKSEL)
PLLSRC
RTCSRC
DIV32
32 kHz
Int. ULP
32.768 kHz
Int. OSC
32.768 kHz
TOSC
2 MHz
Int. Osc
32 MHz
Int. Osc
0.4 – 16 MHz
XTAL
DIV32
DIV32
DIV4
XOSCSEL
PLL
TOSC1
TOSC2
XTAL1
XTAL2
clkSYS clkRTC
clkPER2
clkPER
clkCPU
clkPER4[Not recommended for new designs - Use XMEGA A1U series] XMEGA A1 [DATASHEET] 23
8067O–AVR–06/2013
11.3.2 32.768 kHz Calibrated Internal Oscillator
This oscillator provides an approximate 32.768kHz clock. It is calibrated during production to provide a default frequency
close to its nominal frequency. The calibration register can also be written from software for run-time calibration of the
oscillator frequency. The oscillator employs a built-in prescaler, which provides both a 32.768kHz output and a 1.024kHz
output.
11.3.3 32.768 kHz Crystal Oscillator
A 32.768kHz crystal oscillator can be connected between the 1 and 2 pins and enables a dedicated low frequency
oscillator input circuit. A low power mode with reduced voltage swing on 2 is available. This oscillator can be used as a
clock source for the system clock and RTC.
11.3.4 0.4 - 16 MHz Crystal Oscillator
This oscillator can operate in four different modes optimized for different frequency ranges, all within 0.4 - 16MHz.
11.3.5 2 MHz Run-time Calibrated Internal Oscillator
The 2MHz Run-time Calibrated Internal Oscillator is a high frequency oscillator. It is calibrated during production to
provide a default frequency which is close to its nominal frequency. The oscillator can use the 32kHz Calibrated Internal
Oscillator or the 32kHz Crystal Oscillator as a source for calibrating the frequency run-time to compensate for
temperature and voltage drift hereby optimizing the accuracy of the oscillator.
11.3.6 32 MHz Run-time Calibrated Internal Oscillator
The 32MHz Run-time Calibrated Internal Oscillator is a high frequency oscillator. It is calibrated during production to
provide a default frequency which is close to its nominal frequency. The oscillator can use the 32kHz Calibrated Internal
Oscillator or the 32kHz Crystal Oscillator as a source for calibrating the frequency run-time to compensate for
temperature and voltage drift hereby optimizing the accuracy of the oscillator.
11.3.7 External Clock input
The XTAL1 and XTAL2 pins can be used to drive an external oscillator, either a quartz crystal or a ceramic resonator.
XTAL1 can be used as input for an external clock signal. The 1 and 2 pins is dedicated to driving a 32.768kHz crystal
oscillator.
11.3.8 PLL with Multiplication factor 1 - 31x
The built-in phase locked loop (PLL) can be used to generate a high-frequency system clock. The PLL has a userselectable
multiplication factor of from 1 to 31. In combination with the prescalers, this gives a wide range of output
frequencies from all clock sources.[Not recommended for new designs - Use XMEGA A1U series] XMEGA A1 [DATASHEET] 24
8067O–AVR–06/2013
12. Power Management and Sleep Modes
12.1 Features
Power management for adjusting power consumption and functions
5 sleep modes
Idle
Power-down
Power-save
Standby
Extended standby
Power reduction register to disable clock and turn off unused peripherals in active and idle modes
12.2 Overview
Various sleep modes and clock gating are provided in order to tailor power consumption to application requirements.
This enables the Atmel AVR XMEGA microcontroller to stop unused modules to save power.
All sleep modes are available and can be entered from active mode. In active mode, the CPU is executing application
code. When the device enters sleep mode, program execution is stopped and interrupts or a reset is used to wake the
device again. The application code decides which sleep mode to enter and when. Interrupts from enabled peripherals
and all enabled reset sources can restore the microcontroller from sleep to active mode.
In addition, power reduction registers provide a method to stop the clock to individual peripherals from software. When
this is done, the current state of the peripheral is frozen, and there is no power consumption from that peripheral. This
reduces the power consumption in active mode and idle sleep modes and enables much more fine-tuned power
management than sleep modes alone.
12.3 Sleep Modes
Sleep modes are used to shut down modules and clock domains in the microcontroller in order to save power. XMEGA
microcontrollers have five different sleep modes tuned to match the typical functional stages during application
execution. A dedicated sleep instruction (SLEEP) is available to enter sleep mode. Interrupts are used to wake the
device from sleep, and the available interrupt wake-up sources are dependent on the configured sleep mode. When an
enabled interrupt occurs, the device will wake up and execute the interrupt service routine before continuing normal
program execution from the first instruction after the SLEEP instruction. If other, higher priority interrupts are pending
when the wake-up occurs, their interrupt service routines will be executed according to their priority before the interrupt
service routine for the wake-up interrupt is executed. After wake-up, the CPU is halted for four cycles before execution
starts.
The content of the register file, SRAM and registers are kept during sleep. If a reset occurs during sleep, the device will
reset, start up, and execute from the reset vector.
12.3.1 Idle Mode
In idle mode the CPU and nonvolatile memory are stopped (note that any ongoing programming will be completed), but
all peripherals, including the interrupt controller, event system and DMA controller are kept running. Any enabled
interrupt will wake the device.
12.3.2 Power-down Mode
In power-down mode, all clocks, including the real-time counter clock source, are stopped. This allows operation only of
asynchronous modules that do not require a running clock. The only interrupts that can wake up the MCU are the twowire
interface address match interrupt and asynchronous port interrupts, e.g pin change.[Not recommended for new designs - Use XMEGA A1U series] XMEGA A1 [DATASHEET] 25
8067O–AVR–06/2013
12.3.3 Power-save Mode
Power-save mode is identical to power down, with one exception. If the real-time counter (RTC) is enabled, it will keep
running during sleep, and the device can also wake up from either an RTC overflow or compare match interrupt.
12.3.4 Standby Mode
Standby mode is identical to power down, with the exception that the enabled system clock sources are kept running
while the CPU, peripheral, and RTC clocks are stopped. This reduces the wake-up time.
12.3.5 Extended Standby Mode
Extended standby mode is identical to power-save mode, with the exception that the enabled system clock sources are
kept running while the CPU and peripheral clocks are stopped. This reduces the wake-up time.[Not recommended for new designs - Use XMEGA A1U series] XMEGA A1 [DATASHEET] 26
8067O–AVR–06/2013
13. System Control and Reset
13.1 Features
Multiple reset sources for safe operation and device reset
Power-On Reset
External Reset
Watchdog Reset
Brown-Out Reset
PDI reset
Software reset
Asynchronous reset
No running clock in the device is required for reset
Reset status register
13.2 Overview
The reset system issues a microcontroller reset and sets the device to its initial state. This is for situations where
operation should not start or continue, such as when the microcontroller operates below its power supply rating. If a reset
source goes active, the device enters and is kept in reset until all reset sources have released their reset. The I/O pins
are immediately tri-stated. The program counter is set to the reset vector location, and all I/O registers are set to their
initial values. The SRAM content is kept. However, if the device accesses the SRAM when a reset occurs, the content of
the accessed location can not be guaranteed.
After reset is released from all reset sources, the default oscillator is started and calibrated before the device starts
running from the reset vector address. By default, this is the lowest program memory address, 0, but it is possible to
move the reset vector to the lowest address in the boot section.
The reset functionality is asynchronous, and so no running system clock is required to reset the device. The software
reset feature makes it possible to issue a controlled system reset from the user software.
The reset status register has individual status flags for each reset source. It is cleared at power-on reset, and shows
which sources have issued a reset since the last power-on.
13.3 Reset Sequence
A reset request from any reset source will immediately reset the device and keep it in reset as long as the request is
active. When all reset requests are released, the device will go through three stages before the device starts running
again:
Reset counter delay
Oscillator startup
Oscillator calibration
If another reset requests occurs during this process, the reset sequence will start over again.
13.4 Reset Sources
13.4.1 Power-On Reset
TA power-on reset (POR) is generated by an on-chip detection circuit. The POR is activated when the VCC rises and
reaches the POR threshold voltage (VPOT), and this will start the reset sequence.
The POR is also activated to power down the device properly when the VCC falls and drops below the VPOT level.
The VPOT level is higher for falling VCC than for rising VCC. Consult the datasheet for POR characteristics data.[Not recommended for new designs - Use XMEGA A1U series] XMEGA A1 [DATASHEET] 27
8067O–AVR–06/2013
13.4.2 Brownout Detection
The on-chip brownout detection (BOD) circuit monitors the VCC level during operation by comparing it to a fixed,
programmable level that is selected by the BODLEVEL fuses. If disabled, BOD is forced on at the lowest level during chip
erase and when the PDI is enabled.
13.4.3 External Reset
The external reset circuit is connected to the external RESET pin. The external reset will trigger when the RESET pin is
driven below the RESET pin threshold voltage, VRST, for longer than the minimum pulse period, tEXT. The reset will be
held as long as the pin is kept low. The RESET pin includes an internal pull-up resistor.
13.4.4 Watchdog Reset
The watchdog timer (WDT) is a system function for monitoring correct program operation. If the WDT is not reset from
the software within a programmable timeout period, a watchdog reset will be given. The watchdog reset is active for one
to two clock cycles of the 2MHz internal oscillator. For more details see “WDT - Watchdog Timer” on page 28.
13.4.5 Software reset
The software reset makes it possible to issue a system reset from software by writing to the software reset bit in the reset
control register.The reset will be issued within two CPU clock cycles after writing the bit. It is not possible to execute any
instruction from when a software reset is requested until it is issued.
13.4.6 Program and Debug Interface Reset
The program and debug interface reset contains a separate reset source that is used to reset the device during external
programming and debugging. This reset source is accessible only from external debuggers and programmers.[Not recommended for new designs - Use XMEGA A1U series] XMEGA A1 [DATASHEET] 28
8067O–AVR–06/2013
13.5 WDT - Watchdog Timer
13.5.1 Features
Issues a device reset if the timer is not reset before its timeout period
Asynchronous operation from dedicated oscillator
1kHz output of the 32kHz ultra low power oscillator
11 selectable timeout periods, from 8ms to 8s
Two operation modes:
Normal mode
Window mode
Configuration lock to prevent unwanted changes
13.6 Overview
The watchdog timer (WDT) is a system function for monitoring correct program operation. It makes it possible to recover
from error situations such as runaway or deadlocked code. The WDT is a timer, configured to a predefined timeout
period, and is constantly running when enabled. If the WDT is not reset within the timeout period, it will issue a
microcontroller reset. The WDT is reset by executing the WDR (watchdog timer reset) instruction from the application
code.
The window mode makes it possible to define a time slot or window inside the total timeout period during which WDT
must be reset. If the WDT is reset outside this window, either too early or too late, a system reset will be issued.
Compared to the normal mode, this can also catch situations where a code error causes constant WDR execution.
The WDT will run in active mode and all sleep modes, if enabled. It is asynchronous, runs from a CPU-independent clock
source, and will continue to operate to issue a system reset even if the main clocks fail.
The configuration change protection mechanism ensures that the WDT settings cannot be changed by accident. For
increased safety, a fuse for locking the WDT settings is also available.[Not recommended for new designs - Use XMEGA A1U series] XMEGA A1 [DATASHEET] 29
8067O–AVR–06/2013
14. Interrupts and Programmable Multilevel Interrupt Controller
14.1 Features
Short and predictable interrupt response time
Separate interrupt configuration and vector address for each interrupt
Programmable multilevel interrupt controller
Interrupt prioritizing according to level and vector address
Three selectable interrupt levels for all interrupts: low, medium and high
Selectable, round-robin priority scheme within low-level interrupts
Non-maskable interrupts for critical functions
Interrupt vectors optionally placed in the application section or the boot loader section
14.2 Overview
Interrupts signal a change of state in peripherals, and this can be used to alter program execution. Peripherals can have
one or more interrupts, and all are individually enabled and configured. When an interrupt is enabled and configured, it
will generate an interrupt request when the interrupt condition is present. The programmable multilevel interrupt
controller (PMIC) controls the handling and prioritizing of interrupt requests. When an interrupt request is acknowledged
by the PMIC, the program counter is set to point to the interrupt vector, and the interrupt handler can be executed.
All peripherals can select between three different priority levels for their interrupts: low, medium, and high. Interrupts are
prioritized according to their level and their interrupt vector address. Medium-level interrupts will interrupt low-level
interrupt handlers. High-level interrupts will interrupt both medium- and low-level interrupt handlers. Within each level, the
interrupt priority is decided from the interrupt vector address, where the lowest interrupt vector address has the highest
interrupt priority. Low-level interrupts have an optional round-robin scheduling scheme to ensure that all interrupts are
serviced within a certain amount of time.
Non-maskable interrupts (NMI) are also supported, and can be used for system critical functions.
14.3 Interrupt vectors
The interrupt vector is the sum of the peripheral’s base interrupt address and the offset address for specific interrupts in
each peripheral. The base addresses for the Atmel AVR XMEGA A1U devices are shown in Table 14-1. Offset
addresses for each interrupt available in the peripheral are described for each peripheral in the XMEGA AU manual. For
peripherals or modules that have only one interrupt, the interrupt vector is shown in Table 14-1. The program address is
the word address.
Table 14-1. Reset and Interrupt vectors
Program Address
(Base Address) Source Interrupt Description
0x000 RESET
0x002 OSCF_INT_vect Crystal Oscillator Failure Interrupt vector (NMI)
0x004 PORTC_INT_base Port C Interrupt base
0x008 PORTR_INT_base Port R Interrupt base
0x00C DMA_INT_base DMA Controller Interrupt base
0x014 RTC_INT_base Real Time Counter Interrupt base
0x018 TWIC_INT_base Two-Wire Interface on Port C Interrupt base[Not recommended for new designs - Use XMEGA A1U series] XMEGA A1 [DATASHEET] 30
8067O–AVR–06/2013
0x01C TCC0_INT_base Timer/Counter 0 on port C Interrupt base
0x028 TCC1_INT_base Timer/Counter 1 on port C Interrupt base
0x030 SPIC_INT_vect SPI on port C Interrupt vector
0x032 USARTC0_INT_base USART 0 on port C Interrupt base
0x038 USARTC1_INT_base USART 1 on port C Interrupt base
0x03E AES_INT_vect AES Interrupt vector
0x040 NVM_INT_base Non-Volatile Memory Interrupt base
0x044 PORTB_INT_base Port B Interrupt base
0x048 ACB_INT_base Analog Comparator on Port B Interrupt base
0x04E ADCB_INT_base Analog to Digital Converter on Port B Interrupt base
0x056 PORTE_INT_base Port E Interrupt base
0x05A TWIE_INT_base Two-Wire Interface on Port E Interrupt base
0x05E TCE0_INT_base Timer/Counter 0 on port E Interrupt base
0x06A TCE1_INT_base Timer/Counter 1 on port E Interrupt base
0x072 SPIE_INT_vect SPI on port E Interrupt vector
0x074 USARTE0_INT_base USART 0 on port E Interrupt base
0x07A USARTE1_INT_base USART 1 on port E Interrupt base
0x080 PORTD_INT_base Port D Interrupt base
0x084 PORTA_INT_base Port A Interrupt base
0x088 ACA_INT_base Analog Comparator on Port A Interrupt base
0x08E ADCA_INT_base Analog to Digital Converter on Port A Interrupt base
0x096 TWID_INT_base Two-Wire Interface on Port D Interrupt base
0x09A TCD0_INT_base Timer/Counter 0 on port D Interrupt base
0x0A6 TCD1_INT_base Timer/Counter 1 on port D Interrupt base
0x0AE SPID_INT_vector SPI on port D Interrupt vector
0x0B0 USARTD0_INT_base USART 0 on port D Interrupt base
0x0B6 USARTD1_INT_base USART 1 on port D Interrupt base
0x0BC PORTQ_INT_base Port Q INT base
0x0C0 PORTH_INT_base Port H INT base
0x0C4 PORTJ_INT_base Port J INT base
0x0C8 PORTK_INT_base Port K INT base
0x0D0 PORTF_INT_base Port F INT base
0x0D4 TWIF_INT_base Two-Wire Interface on Port F INT base
Program Address
(Base Address) Source Interrupt Description[Not recommended for new designs - Use XMEGA A1U series] XMEGA A1 [DATASHEET] 31
8067O–AVR–06/2013
0x0D8 TCF0_INT_base Timer/Counter 0 on port F Interrupt base
0x0E4 TCF1_INT_base Timer/Counter 1 on port F Interrupt base
0x0EC SPIF_INT_vector SPI ion port F Interrupt base
0x0EE USARTF0_INT_base USART 0 on port F Interrupt base
0x0F4 USARTF1_INT_base USART 1 on port F Interrupt base
Program Address
(Base Address) Source Interrupt Description[Not recommended for new designs - Use XMEGA A1U series] XMEGA A1 [DATASHEET] 32
8067O–AVR–06/2013
15. I/O Ports
15.1 Features
78 General purpose input and output pins with individual configuration
Output driver with configurable driver and pull settings:
Totem-pole
Wired-AND
Wired-OR
Bus-keeper
Inverted I/O
Input with synchronous and/or asynchronous sensing with interrupts and events
Sense both edges
Sense rising edges
Sense falling edges
Sense low level
Optional pull-up and pull-down resistor on input and Wired-OR/AND configurations
Optional slew rate control
Asynchronous pin change sensing that can wake the device from all sleep modes
Two port interrupts with pin masking per I/O port
Efficient and safe access to port pins
Hardware read-modify-write through dedicated toggle/clear/set registers
Configuration of multiple pins in a single operation
Mapping of port registers into bit-accessible I/O memory space
Peripheral clocks output on port pin
Real-time counter clock output to port pin
Event channels can be output on port pin
Remapping of digital peripheral pin functions
Selectable USART, SPI, and timer/counter input/output pin locations
15.2 Overview
One port consists of up to eight port pins: pin 0 to 7. Each port pin can be configured as input or output with configurable
driver and pull settings. They also implement synchronous and asynchronous input sensing with interrupts and events for
selectable pin change conditions. Asynchronous pin-change sensing means that a pin change can wake the device from
all sleep modes, included the modes where no clocks are running.
All functions are individual and configurable per pin, but several pins can be configured in a single operation. The pins
have hardware read-modify-write (RMW) functionality for safe and correct change of drive value and/or pull resistor
configuration. The direction of one port pin can be changed without unintentionally changing the direction of any other
pin.
The port pin configuration also controls input and output selection of other device functions. It is possible to have both the
peripheral clock and the real-time clock output to a port pin, and available for external use. The same applies to events
from the event system that can be used to synchronize and control external functions. Other digital peripherals, such as
USART, SPI, and timer/counters, can be remapped to selectable pin locations in order to optimize pin-out versus
application needs.
The notation of these ports are PORTA, PORTB, PORTC, PORTD, PORTE, PORTF, PORTH, PORTJ, PORTK, PORTQ
and PORTR.[Not recommended for new designs - Use XMEGA A1U series] XMEGA A1 [DATASHEET] 33
8067O–AVR–06/2013
15.3 Output Driver
All port pins (Pn) have programmable output configuration. The port pins also have configurable slew rate limitation to
reduce electromagnetic emission.
15.3.1 Push-pull
Figure 15-1. I/O configuration - Totem-pole
15.3.2 Pull-down
Figure 15-2. I/O configuration - Totem-pole with pull-down (on input)
15.3.3 Pull-up
Figure 15-3. I/O configuration - Totem-pole with pull-up (on input)
INn
OUTn
DIRn
Pn
INn
OUTn
DIRn
Pn
INn
OUTn
DIRn
Pn[Not recommended for new designs - Use XMEGA A1U series] XMEGA A1 [DATASHEET] 34
8067O–AVR–06/2013
15.3.4 Bus-keeper
The bus-keeper’s weak output produces the same logical level as the last output level. It acts as a pull-up if the last level
was ‘1’, and pull-down if the last level was ‘0’.
Figure 15-4. I/O configuration - Totem-pole with bus-keeper
15.3.5 Others
Figure 15-5. Output configuration - Wired-OR with optional pull-down
Figure 15-6. I/O configuration - Wired-AND with optional pull-up
INn
OUTn
DIRn
Pn
INn
OUTn
Pn
INn
OUTn
Pn[Not recommended for new designs - Use XMEGA A1U series] XMEGA A1 [DATASHEET] 35
8067O–AVR–06/2013
15.4 Input sensing
Input sensing is synchronous or asynchronous depending on the enabled clock for the ports, and the configuration is
shown in Figure 15-7 on page 35.
Figure 15-7. Input sensing system overview
When a pin is configured with inverted I/O the pin value is inverted before the input sensing.
15.5 Port Interrupt
Each ports have two interrupts with seperate priority and interrupt vector. All pins on the port can be individually selected
as source for each of the interrupts. The interrupts are then triggered according to the input sense configuration for each
pin configured as source for the interrupt.
15.6 Alternate Port Functions
In addition to the input/output functions on all port pins, most pins have alternate functions. This means that other
modules or peripherals connected to the port can use the port pins for their functions, such as communication or pulsewidth
modulation. “Pinout and Pin Functions” on page 55 shows which modules on peripherals that enables alternate
functions on a pin, and what alternate functions that is available on a pin.
INVERTED I/O
Interrupt
Control IREQ
Event
Pn
D Q
R
D Q
R
Synchronizer
INn
EDGE
DETECT
Asynchronous sensing
Synchronous sensing
EDGE
DETECT[Not recommended for new designs - Use XMEGA A1U series] XMEGA A1 [DATASHEET] 36
8067O–AVR–06/2013
16. T/C - 16-bit Timer/Counter
16.1 Features
Eight 16-bit Timer/Counters
Four Timer/Counters of type 0
Four Timer/Counters of type 1
Four Compare or Capture (CC) Channels in Timer/Counter 0
Two Compare or Capture (CC) Channels in Timer/Counter 1
Double Buffered Timer Period Setting
Double Buffered Compare or Capture Channels
Waveform Generation:
Single Slope Pulse Width Modulation
Dual Slope Pulse Width Modulation
Frequency Generation
Input Capture:
Input Capture with Noise Cancelling
Frequency capture
Pulse width capture
32-bit input capture
Event Counter with Direction Control
Timer Overflow and Timer Error Interrupts and Events
One Compare Match or Capture Interrupt and Event per CC Channel
Supports DMA Operation
Hi-Resolution Extension (Hi-Res)
Advanced Waveform Extension (AWEX)
16.2 Overview
Atmel AVR XMEGA devices have a set of eight flexible 16-bit timer/counters (TC). Their capabilities include accurate
program execution timing, frequency and waveform generation, and input capture with time and frequency measurement
of digital signals. Two timer/counters can be cascaded to create a 32-bit timer/counter with optional 32-bit capture.
A timer/counter consists of a base counter and a set of compare or capture (CC) channels. The base counter can be
used to count clock cycles or events. It has direction control and period setting that can be used for timing. The CC
channels can be used together with the base counter to do compare match control, frequency generation, and pulse
width waveform modulation, as well as various input capture operations. A timer/counter can be configured for either
capture or compare functions, but cannot perform both at the same time.
A timer/counter can be clocked and timed from the peripheral clock with optional prescaling or from the event system.
The event system can also be used for direction control and capture trigger or to synchronize operations.
There are two differences between timer/counter type 0 and type 1. Timer/counter 0 has four CC channels, and
timer/counter 1 has two CC channels. All information related to CC channels 3 and 4 is valid only for timer/counter 0.
Only Timer/Counter 0 has the split mode feature that split it into 2 8-bit Timer/Counters with four compare channels each.
Some timer/counters have extensions to enable more specialized waveform and frequency generation. The advanced
waveform extension (AWeX) is intended for motor control and other power control applications. It enables low- and highside
output with dead-time insertion, as well as fault protection for disabling and shutting down external drivers. It can
also generate a synchronized bit pattern across the port pins.
The advanced waveform extension can be enabled to provide extra and more advanced features for the Timer/Counter.
This is only available for Timer/Counter 0. See “AWeX - Advanced Waveform Extension” on page 38 for more details.[Not recommended for new designs - Use XMEGA A1U series] XMEGA A1 [DATASHEET] 37
8067O–AVR–06/2013
The high-resolution (hi-res) extension can be used to increase the waveform output resolution by four or eight times by
using an internal clock source running up to four times faster than the peripheral clock. See “Hi-Res - High Resolution
Extension” on page 39 for more details.
Figure 16-1. Overview of a Timer/Counter and closely related peripherals
PORTC, PORTD, PORTE and PORTF each has one Timer/Counter 0 and one Timer/Counter1. Notation of these
Timer/Counters are TCC0 (Time/Counter C0), TCC1, TCD0, TCD1, TCE0, TCE1, TCF0, and TCF1, respectively.
AWeX
Compare/Capture Channel D
Compare/Capture Channel C
Compare/Capture Channel B
Compare/Capture Channel A
Waveform
Generation Buffer
Comparator
Hi-Res
Fault
Protection
Capture
Control
Base Counter
Counter
Control Logic
Timer Period
Prescaler
DTI
Dead-Time
Insertion
Pattern
Generation
clkPER4
PORT
Event
System
clkPER
Timer/Counter[Not recommended for new designs - Use XMEGA A1U series] XMEGA A1 [DATASHEET] 38
8067O–AVR–06/2013
17. AWeX - Advanced Waveform Extension
17.1 Features
Output with complementary output from each Capture channel
Four Dead Time Insertion (DTI) Units, one for each Capture channel
8-bit DTI Resolution
Separate High and Low Side Dead-Time Setting
Double Buffered Dead-Time
Event Controlled Fault Protection
Single Channel Multiple Output Operation (for BLDC motor control)
Double Buffered Pattern Generation
17.2 Overview
The advanced waveform extension (AWeX) provides extra functions to the timer/counter in waveform generation (WG)
modes. It is primarily intended for use with different types of motor control and other power control applications. It
enables low- and high side output with dead-time insertion and fault protection for disabling and shutting down external
drivers. It can also generate a synchronized bit pattern across the port pins.
Each of the waveform generator outputs from the Timer/Counter 0 are split into a complimentary pair of outputs when
any AWeX features are enabled. These output pairs go through a dead-time insertion (DTI) unit that generates the noninverted
low side (LS) and inverted high side (HS) of the WG output with dead-time insertion between LS and HS
switching. The DTI output will override the normal port value according to the port override setting.
The pattern generation unit can be used to generate a synchronized bit pattern on the port it is connected to. In addition,
the WG output from compare channel A can be distributed to and override all the port pins. When the pattern generator
unit is enabled, the DTI unit is bypassed.
The fault protection unit is connected to the event system, enabling any event to trigger a fault condition that will disable
the AWeX output. The event system ensures predictable and instant fault reaction, and gives great flexibility in the
selection of fault triggers.
The AWeX is available for TCC0 and TCE0. The notation of these are AWEXC and AWEXE.[Not recommended for new designs - Use XMEGA A1U series] XMEGA A1 [DATASHEET] 39
8067O–AVR–06/2013
18. Hi-Res - High Resolution Extension
18.1 Features
Increases Waveform Generator resolution by 2-bits (4x)
Supports Frequency, single- and dual-slope PWM operation
Supports the AWeX when this is enabled and used for the same Timer/Counter
18.2 Overview
TThe high-resolution (hi-res) extension can be used to increase the resolution of the waveform generation output from a
timer/counter by four or eight. It can be used for a timer/counter doing frequency, single-slope PWM, or dual-slope PWM
generation. It can also be used with the AWeX if this is used for the same timer/counter.
The hi-res extension uses the peripheral 4x clock (ClkPER4). The system clock prescalers must be configured so the
peripheral 4x clock frequency is four times higher than the peripheral and CPU clock frequency when the hi-res extension
is enabled.
There are four hi-res extensions that each can be enabled for each timer/counters pair on PORTC, PORTD, PORTE and
PORTF. The notation of these peripherals are HIRESC, HIRESD, HIRESE and HIRESF, respectively.[Not recommended for new designs - Use XMEGA A1U series] XMEGA A1 [DATASHEET] 40
8067O–AVR–06/2013
19. RTC - 16-bit Real-Time Counter
19.1 Features
16-bit resolution
Selectable clock source
32.768kHz external crystal
External clock
32.768kHz internal oscillator
32kHz internal ULP oscillator
Programmable 10-bit clock prescaling
One compare register
One period register
Clear counter on period overflow
Optional interrupt/event on overflow and compare match
19.2 Overview
The 16-bit real-time counter (RTC) is a counter that typically runs continuously, including in low-power sleep modes, to
keep track of time. It can wake up the device from sleep modes and/or interrupt the device at regular intervals.
The reference clock is typically the 1.024kHz output from a high-accuracy crystal of 32.768kHz, and this is the
configuration most optimized for low power consumption. The faster 32.768kHz output can be selected if the RTC needs
a resolution higher than 1ms. The RTC can also be clocked from an external clock signal, the 32.768kHz internal
oscillator or the 32kHz internal ULP oscillator.
The RTC includes a 10-bit programmable prescaler that can scale down the reference clock before it reaches the
counter. A wide range of resolutions and time-out periods can be configured. With a 32.768kHz clock source, the
maximum resolution is 30.5µs, and time-out periods can range up to 2000 seconds. With a resolution of 1s, the
maximum timeout period is more than18 hours (65536 seconds). The RTC can give a compare interrupt and/or event
when the counter equals the compare register value, and an overflow interrupt and/or event when it equals the period
register value.
Figure 19-1. Real Time Counter overview
32.768kHz Crystal Osc
32.768kHz Int. Osc
TOSC1
TOSC2
External Clock
DIV32
DIV32
32kHz int ULP (DIV32)
RTCSRC
10-bit
prescaler
clkRTC
CNT
PER
COMP
=
=
”match”/
Compare
TOP/
Overflow[Not recommended for new designs - Use XMEGA A1U series] XMEGA A1 [DATASHEET] 41
8067O–AVR–06/2013
20. TWI - Two-Wire Interface
20.1 Features
Four identical two-wire interface peripherals
Bidirectional two-wire communication interface
Phillips I2C compatible
System Management Bus (SMBus) compatible
Bus master and slave operation supported
Slave operation
Single bus master operation
Bus master in multi-master bus environment
Multi-master arbitration
Flexible slave address match functions
7-bit and general call address recognition in hardware
10-bit addressing supported
Address mask register for dual address match or address range masking
Optional software address recognition for unlimited number of addresses
Slave can operate in all sleep modes, including power-down
Slave address match can wake device from all sleep modes, including power-down
100kHz and 400kHz bus frequency support
Slew-rate limited output drivers
Input filter for bus noise and spike suppression
Support arbitration between start repeated start and data bit (SMBus)
Slave arbitration allows support for address resolve protocol (ARP) (SMBus)
20.2 Overview
The two-wire interface (TWI) is a bidirectional, two-wire communication interface. It is I2C and System Management Bus
(SMBus) compatible. The only external hardware needed to implement the bus is one pull-up resistor on each bus line.
A device connected to the bus must act as a master or a slave. The master initiates a data transaction by addressing a
slave on the bus and telling whether it wants to transmit or receive data. One bus can have many slaves and one or
several masters that can take control of the bus. An arbitration process handles priority if more than one master tries to
transmit data at the same time. Mechanisms for resolving bus contention are inherent in the protocol.
The TWI module supports master and slave functionality. The master and slave functionality are separated from each
other, and can be enabled and configured separately. The master module supports multi-master bus operation and
arbitration. It contains the baud rate generator. Both 100kHz and 400kHz bus frequency is supported. Quick command
and smart mode can be enabled to auto-trigger operations and reduce software complexity.
The slave module implements 7-bit address match and general address call recognition in hardware. 10-bit addressing is
also supported. A dedicated address mask register can act as a second address match register or as a register for
address range masking. The slave continues to operate in all sleep modes, including power-down mode. This enables
the slave to wake up the device from all sleep modes on TWI address match. It is possible to disable the address
matching to let this be handled in software instead.
The TWI module will detect START and STOP conditions, bus collisions, and bus errors. Arbitration lost, errors, collision,
and clock hold on the bus are also detected and indicated in separate status flags available in both master and slave
modes. [Not recommended for new designs - Use XMEGA A1U series] XMEGA A1 [DATASHEET] 42
8067O–AVR–06/2013
It is possible to disable the TWI drivers in the device, and enable a four-wire digital interface for connecting to an external
TWI bus driver. This can be used for applications where the device operates from a different VCC voltage than used by
the TWI bus.
PORTC, PORTD, PORTE, and PORTF each has one TWI. Notation of these peripherals are TWIC, TWID, TWIE, and
TWIF.[Not recommended for new designs - Use XMEGA A1U series] XMEGA A1 [DATASHEET] 43
8067O–AVR–06/2013
21. SPI - Serial Peripheral Interface
21.1 Features
Four identical SPI peripherals
Full-duplex, three-wire synchronous data transfer
Master or slave operation
Lsb first or msb first data transfer
Eight programmable bit rates
Interrupt flag at the end of transmission
Write collision flag to indicate data collision
Wake up from idle sleep mode
Double speed master mode
21.2 Overview
The Serial Peripheral Interface (SPI) is a high-speed synchronous data transfer interface using three or four pins. It
allows fast communication between an Atmel AVR XMEGA device and peripheral devices or between several
microcontrollers. The SPI supports full-duplex communication.
A device connected to the bus must act as a master or slave. The master initiates and controls all data transactions.
PORTC, PORTD, PORTE, and PORTF each has one SPI. Notation of these peripherals are SPIC, SPID, SPIE, and
SPIF.[Not recommended for new designs - Use XMEGA A1U series] XMEGA A1 [DATASHEET] 44
8067O–AVR–06/2013
22. USART
22.1 Features
Eight identical USART peripherals
Full-duplex operation
Asynchronous or synchronous operation
Synchronous clock rates up to 1/2 of the device clock frequency
Asynchronous clock rates up to 1/8 of the device clock frequency
Supports serial frames with 5, 6, 7, 8, or 9 data bits and 1 or 2 stop bits
Fractional baud rate generator
Can generate desired baud rate from any system clock frequency
No need for external oscillator with certain frequencies
Built-in error detection and correction schemes
Odd or even parity generation and parity check
Data overrun and framing error detection
Noise filtering includes false start bit detection and digital low-pass filter
Separate interrupts for
Transmit complete
Transmit data register empty
Receive complete
Multiprocessor communication mode
Addressing scheme to address a specific devices on a multidevice bus
Enable unaddressed devices to automatically ignore all frames
Master SPI mode
Double buffered operation
Operation up to 1/2 of the peripheral clock frequency
IRCOM module for IrDA compliant pulse modulation/demodulation
22.2 Overview
The universal synchronous and asynchronous serial receiver and transmitter (USART) is a fast and flexible serial
communication module. The USART supports full-duplex communication and asynchronous and synchronous operation.
The USART can be configured to operate in SPI master mode and used for SPI communication.
Communication is frame based, and the frame format can be customized to support a wide range of standards. The
USART is buffered in both directions, enabling continued data transmission without any delay between frames. Separate
interrupts for receive and transmit complete enable fully interrupt driven communication. Frame error and buffer overflow
are detected in hardware and indicated with separate status flags. Even or odd parity generation and parity check can
also be enabled.
The clock generator includes a fractional baud rate generator that is able to generate a wide range of USART baud rates
from any system clock frequencies. This removes the need to use an external crystal oscillator with a specific frequency
to achieve a required baud rate. It also supports external clock input in synchronous slave operation.
When the USART is set in master SPI mode, all USART-specific logic is disabled, leaving the transmit and receive
buffers, shift registers, and baud rate generator enabled. Pin control and interrupt generation are identical in both modes.
The registers are used in both modes, but their functionality differs for some control settings.
An IRCOM module can be enabled for one USART to support IrDA 1.4 physical compliant pulse modulation and
demodulation for baud rates up to 115.2Kbps.
PORTC, PORTD, PORTE, and PORTF each has two USARTs. Notation of these peripherals are USARTC0, USARTC1,
USARTD0, USARTD1, USARTE0, USARTE1, USARTF0 and USARTF1.[Not recommended for new designs - Use XMEGA A1U series] XMEGA A1 [DATASHEET] 45
8067O–AVR–06/2013
23. IRCOM - IR Communication Module
23.1 Features
Pulse modulation/demodulation for infrared communication
IrDA compatible for baud rates up to 115.2Kbps
Selectable pulse modulation scheme
3/16 of the baud rate period
Fixed pulse period, 8-bit programmable
Pulse modulation disabled
Built-in filtering
Can be connected to and used by any USART
23.2 Overview
Atmel AVR XMEGA devices contain an infrared communication module (IRCOM) that is IrDA compatible for baud rates
up to 115.2Kbps. It can be connected to any USART to enable infrared pulse encoding/decoding for that USART.[Not recommended for new designs - Use XMEGA A1U series] XMEGA A1 [DATASHEET] 46
8067O–AVR–06/2013
24. AES and DES Crypto Engine
24.1 Features
Data Encryption Standard (DES) CPU instruction
Advanced Encryption Standard (AES) crypto module
DES Instruction
Encryption and decryption
DES supported
Encryption/decryption in 16 CPU clock cycles per 8-byte block
AES crypto module
Encryption and decryption
Supports 128-bit keys
Supports XOR data load mode to the state memory
Encryption/decryption in 375 clock cycles per 16-byte block
24.2 Overview
The Advanced Encryption Standard (AES) and Data Encryption Standard (DES) are two commonly used standards for
cryptography. These are supported through an AES peripheral module and a DES CPU instruction, and the
communication interfaces and the CPU can use these for fast, encrypted communication and secure data storage.
DES is supported by an instruction in the AVR CPU. The 8-byte key and 8-byte data blocks must be loaded into the
register file, and then the DES instruction must be executed 16 times to encrypt/decrypt the data block.
The AES crypto module encrypts and decrypts 128-bit data blocks with the use of a 128-bit key. The key and data must
be loaded into the key and state memory in the module before encryption/decryption is started. It takes 375 peripheral
clock cycles before the encryption/decryption is done. The encrypted/encrypted data can then be read out, and an
optional interrupt can be generated. The AES crypto module also has DMA support with transfer triggers when
encryption/decryption is done and optional auto-start of encryption/decryption when the state memory is fully loaded.[Not recommended for new designs - Use XMEGA A1U series] XMEGA A1 [DATASHEET] 47
8067O–AVR–06/2013
25. EBI – External Bus Interface
25.1 Features
Supports SRAM up to:
512KB using 3-port EBI configuration
16MB using 3-port EBI configuration
Supports SDRAM up to:
128Mb using 3-port EBI configuration
Four software configurable chip selects
Software configurable wait state insertion
Can run from the 2x peripheral clock frequency for fast access
25.2 Overview
The External Bus Interface (EBI) is used to connect external peripherals and memory for access through the data
memory space. When the EBI is enabled, data address space outside the internal SRAM becomes available using
dedicated EBI pins.
The EBI can interface external SRAM, SDRAM, and peripherals, such as LCD displays and other memory mapped
devices.
The address space for the external memory is selectable from 256 bytes (8-bit) up to 16MB (24-bit). Various multiplexing
modes for address and data lines can be selected for optimal use of pins when more or fewer pins are available for the
EBI. The complete memory will be mapped into one linear data address space continuing from the end of the internal
SRAM.
The EBI has four chip selects, each with separate configuration. Each can be configured for SRAM, SRAM low pin count
(LPC), or SDRAM.
The EBI is clocked from the fast, 2x peripheral clock, running up to two times faster than the CPU.
Four-bit and eight-bit SDRAM are supported, and SDRAM configurations, such as CAS latency and refresh rate, are
configurable in software.[Not recommended for new designs - Use XMEGA A1U series] XMEGA A1 [DATASHEET] 48
8067O–AVR–06/2013
26. ADC - 12-bit Analog to Digital Converter
26.1 Features
Two ADCs with 12-bit resolution
2Msps sample rate for each ADC
Signed and unsigned conversions
4 result registers with individual input channel control for each ADC
8 single ended inputs for each ADC
8x4 differential inputs for each ADC
4 internal inputs:
Integrated Temperature Sensor
DAC Output
VCC voltage divided by 10
Bandgap voltage
Software selectable gain of 2, 4, 8, 16, 32 or 64
Software selectable resolution of 8- or 12-bit.
Internal or External Reference selection
Event triggered conversion for accurate timing
DMA transfer of conversion results
Interrupt/Event on compare result
26.2 Overview
XMEGA A1 devices have two Analog to Digital Converters (ADC), see Figure 26-1 on page 49. The two ADC modules
can be operated simultaneously, individually or synchronized.
The ADC converts analog voltages to digital values. The ADC has 12-bit resolution and is capable of converting up to 2
million samples per second. The input selection is flexible, and both single-ended and differential measurements can be
done. For differential measurements an optional gain stage is available to increase the dynamic range. In addition
several internal signal inputs are available. The ADC can provide both signed and unsigned results.
This is a pipeline ADC. A pipeline ADC consists of several consecutive stages, where each stage convert one part of the
result. The pipeline design enables high sample rate at low clock speeds, and remove limitations on samples speed
versus propagation delay. This also means that a new analog voltage can be sampled and a new ADC measurement
started while other ADC measurements are ongoing.
ADC measurements can either be started by application software or an incoming event from another peripheral in the
device. Four different result registers with individual input selection (MUX selection) are provided to make it easier for the
application to keep track of the data. Each result register and MUX selection pair is referred to as an ADC Channel. It is
possible to use DMA to move ADC results directly to memory or peripherals when conversions are done.
Both internal and external analog reference voltages can be used. An accurate internal 1.0V reference is available.
An integrated temperature sensor is available and the output from this can be measured with the ADC. The output from
the DAC, VCC/10 and the Bandgap voltage can also be measured by the ADC.[Not recommended for new designs - Use XMEGA A1U series] XMEGA A1 [DATASHEET] 49
8067O–AVR–06/2013
Figure 26-1. ADC overview
Each ADC has four MUX selection registers with a corresponding result register. This means that four channels can be
sampled within 1.5 µs without any intervention by the application other than starting the conversion. The results will be
available in the result registers.
The ADC may be configured for 8- or 12-bit result, reducing the minimum conversion time (propagation delay) from 3.5
µs for 12-bit to 2.5 µs for 8-bit result.
ADC conversion results are provided left- or right adjusted with optional ‘1’ or ‘0’ padding. This eases calculation when
the result is represented as a signed integer (signed 16-bit number).
PORTA and PORTB each has one ADC. Notation of these peripherals are ADCA and ADCB, respectively.
CH1 Result
CH0 Result
CH2 Result
Compare
<
>
Threshold
(Int Req)
Internal 1.00V
Internal VCC/1.6V
AREFA
AREFB
VINP
VINN
Internal
signals
Internal
signals
CH3 Result
ADC0
ADC7
ADC4
ADC7
ADC0
ADC3
•
•
•
Int. signals
Int. signals
Reference
Voltage
1x - 64x •
•
•
•
•
•
ADC0
ADC7
•
•
•[Not recommended for new designs - Use XMEGA A1U series] XMEGA A1 [DATASHEET] 50
8067O–AVR–06/2013
27. DAC - 12-bit Digital to Analog Converter
27.1 Features
12-bit resolution
Two independent, continuous-drive output channels
Up to one million samples per second conversion rate
Built-in calibration that removes:
Offset error
Gain error
Multiple conversion trigger sources
On new available data
Events from the event system
High drive capabilities and support for
Resistive loads
Capacitive loads
Combined resistive and capacitive loads
Internal and external reference options
DAC output available as input to analog comparator and ADC
Low-power mode, with reduced drive strength
Optional DMA transfer of data
27.2 Overview
The XMEGA A1 devices features two 12-bit, 1 Msps DACs with built-in offset and gain calibration, see Figure 27-1 on
page 50.
A DAC converts a digital value into an analog signal. The DAC may use an internal 1.0 voltage as the upper limit for
conversion, but it is also possible to use the supply voltage or any applied voltage in-between. The external reference
input is shared with the ADC reference input.
Figure 27-1. DAC overview
CH1DATA
CH0DATA
Trigger
Internal 1.00V
AREFA
AREFB
AVCC
D
A
T
A
DAC CTRL
DAC CH0
REFSEL
Enable
12
12
ADC
DAC
DAC CH1
Output
Control and Driver[Not recommended for new designs - Use XMEGA A1U series] XMEGA A1 [DATASHEET] 51
8067O–AVR–06/2013
Each DAC has one continuous output with high drive capabilities for both resistive and capacitive loads. It is also
possible to split the continuous time channel into two Sample and Hold (S/H) channels, each with separate data
conversion registers.
A DAC conversion may be started from the application software by writing the data conversion registers. The DAC can
also be configured to do conversions triggered by the Event System to have regular timing, independent of the
application software. DMA may be used for transferring data from memory locations to DAC data registers.
The DAC has a built-in calibration system to reduce offset and gain error when loading with a calibration value from
software.
PORTA and PORTB each has one DAC. Notation of these peripherals are DACA and DACB. respectively.[Not recommended for new designs - Use XMEGA A1U series] XMEGA A1 [DATASHEET] 52
8067O–AVR–06/2013
28. AC - Analog Comparator
28.1 Features
Four Analog Comparators
Selectable propagation delay versus current consumption
Selectable hysteresis
No
Small
Large
Analog comparator output available on pin
Flexible input selection
All pins on the port
Output from the DAC
Bandgap reference voltage
A 64-level programmable voltage scaler of the internal VCC voltage
Interrupt and event generation on:
Rising edge
Falling edge
Toggle
Window function interrupt and event generation on:
Signal above window
Signal inside window
Signal below window
Constant current source with configurable output pin selection
28.2 Overview
The analog comparator (AC) compares the voltage levels on two inputs and gives a digital output based on this
comparison. The analog comparator may be configured to generate interrupt requests and/or events upon several
different combinations of input change.
Two important properties of the analog comparator’s dynamic behavior are: hysteresis and propagation delay. Both of
these parameters may be adjusted in order to achieve the optimal operation for each application.
The input selection includes analog port pins, several internal signals, and a 64-level programmable voltage scaler. The
analog comparator output state can also be output on a pin for use by external devices.
A constant current source can be enabled and output on a selectable pin. This can be used to replace, for example,
external resistors used to charge capacitors in capacitive touch sensing applications.
The analog comparators are always grouped in pairs on each port. These are called analog comparator 0 (AC0) and
analog comparator 1 (AC1). They have identical behavior, but separate control registers. Used as pair, they can be set in
window mode to compare a signal to a voltage range instead of a voltage level.
PORTA and PORTB each has one AC pair. Notations are ACA and ACB, respectively.[Not recommended for new designs - Use XMEGA A1U series] XMEGA A1 [DATASHEET] 53
8067O–AVR–06/2013
Figure 28-1. Analog comparator overview
The window function is realized by connecting the external inputs of the two analog comparators in a pair as shown in
Figure 28-2.
Figure 28-2. Analog comparator window function
ACnMUXCTRL ACnCTRL
Interrupt
Mode
Enable
Enable
Hysteresis
Hysteresis
AC1OUT
WINCTRL
Interrupt
Sensititivity
Control
&
Window
Function
Events
Interrupts
AC0OUT
Pin Input
Pin Input
Pin Input
Pin Input
Voltage
Scaler
DAC
Bandgap
+
-
+
-
AC0
+
-
AC1
+
-
Input signal
Upper limit of window
Lower limit of window
Interrupt
sensitivity
control
Interrupts
Events[Not recommended for new designs - Use XMEGA A1U series] XMEGA A1 [DATASHEET] 54
8067O–AVR–06/2013
29. Programming and Debugging
29.1 Features
Programming
External programming through PDI or JTAG interfaces
Minimal protocol overhead for fast operation
Built-in error detection and handling for reliable operation
Boot loader support for programming through any communication interface
Debugging
Nonintrusive, real-time, on-chip debug system
No software or hardware resources required from device except pin connection
Program flow control
Go, Stop, Reset, Step Into, Step Over, Step Out, Run-to-Cursor
Unlimited number of user program breakpoints
Unlimited number of user data breakpoints, break on:
Data location read, write, or both read and write
Data location content equal or not equal to a value
Data location content is greater or smaller than a value
Data location content is within or outside a range
No limitation on device clock frequency
Program and Debug Interface (PDI)
Two-pin interface for external programming and debugging
Uses the Reset pin and a dedicated pin
No I/O pins required during programming or debugging
JTAG interface
Four-pin, IEEE Std. 1149.1 compliant interface for programming and debugging
Boundary scan capabilities according to IEEE Std. 1149.1 (JTAG)
29.2 Overview
The Program and Debug Interface (PDI) is an Atmel proprietary interface for external programming and on-chip
debugging of a device.
The PDI supports fast programming of nonvolatile memory (NVM) spaces; flash, EEPOM, fuses, lock bits, and the user
signature row.
Debug is supported through an on-chip debug system that offers nonintrusive, real-time debug. It does not require any
software or hardware resources except for the device pin connection. Using the Atmel tool chain, it offers complete
program flow control and support for an unlimited number of program and complex data breakpoints. Application debug
can be done from a C or other high-level language source code level, as well as from an assembler and disassembler
level.
Programming and debugging can be done through two physical interfaces. The primary one is the PDI physical layer,
which is available on all devices. This is a two-pin interface that uses the Reset pin for the clock input (PDI_CLK) and one
other dedicated pin for data input and output (PDI_DATA). A JTAG interface is also available on most devices, and this
can be used for programming and debugging through the four-pin JTAG interface. The JTAG interface is IEEE Std.
1149.1 compliant, and supports boundary scan. Any external programmer or on-chip debugger/emulator can be directly
connected to either of these interfaces. Unless otherwise stated, all references to the PDI assume access through the
PDI physical layer.[Not recommended for new designs - Use XMEGA A1U series] XMEGA A1 [DATASHEET] 55
8067O–AVR–06/2013
30. Pinout and Pin Functions
The pinout of XMEGA A1 is shown in “Pinout/Block Diagram” on page 3. In addition to general I/O functionality, each pin
may have several functions. This will depend on which peripheral is enabled and connected to the actual pin. Only one of
the alternate pin functions can be used at time.
30.1 Alternate Pin Function Description
The tables below shows the notation for all pin functions available and describes its function.
30.1.1 Operation/Power Supply
30.1.2 Port Interrupt functions
30.1.3 Analog functions
30.1.4 EBI functions
VCC Digital supply voltage
AVCC Analog supply voltage
GND Ground
SYNC Port pin with full synchronous and limited asynchronous interrupt function
ASYNC Port pin with full synchronous and full asynchronous interrupt function
ACn Analog Comparator input pin n
AC0OUT Analog Comparator 0 Output
ADCn Analog to Digital Converter input pin n
DACn Digital to Analog Converter output pin n
AREF Analog Reference input pin
An Address line n
Dn Data line n
CSn Chip Select n
ALEn Address Latch Enable pin n (SRAM)
RE Read Enable (SRAM)
WE External Data Memory Write (SRAM /SDRAM)
BAn Bank Address (SDRAM)
CAS Column Access Strobe (SDRAM)
CKE SDRAM Clock Enable (SDRAM)[Not recommended for new designs - Use XMEGA A1U series] XMEGA A1 [DATASHEET] 56
8067O–AVR–06/2013
30.1.5 Timer/Counter and AWEX functions
30.1.6 Communication functions
30.1.7 Oscillators, Clock and Event
CLK SDRAM Clock (SDRAM)
DQM Data Mask Signal/Output Enable (SDRAM)
RAS Row Access Strobe (SDRAM)
2P 2 Port Interface
3P 3 Port Interface
OCnx Output Compare Channel x for Timer/Counter n
OCnx Inverted Output Compare Channel x for Timer/Counter n
OCnxLS Output Compare Channel x Low Side for Timer/Counter n
OCnxHS Output Compare Channel x High Side for Timer/Counter n
SCL Serial Clock for TWI
SDA Serial Data for TWI
SCLIN Serial Clock In for TWI when external driver interface is enabled
SCLOUT Serial Clock Out for TWI when external driver interface is enabled
SDAIN Serial Data In for TWI when external driver interface is enabled
SDAOUT Serial Data Out for TWI when external driver interface is enabled
XCKn Transfer Clock for USART n
RXDn Receiver Data for USART n
TXDn Transmitter Data for USART n
SS Slave Select for SPI
MOSI Master Out Slave In for SPI
MISO Master In Slave Out for SPI
SCK Serial Clock for SPI
n Timer Oscillator pin n
XTALn Input/Output for inverting Oscillator pin n
CLKOUT Peripheral Clock Output
EVOUT Event Channel 0 Output[Not recommended for new designs - Use XMEGA A1U series] XMEGA A1 [DATASHEET] 57
8067O–AVR–06/2013
30.1.8 Debug/System functions
RESET Reset pin
PDI_CLK Program and Debug Interface Clock pin
PDI_DATA Program and Debug Interface Data pin
TCK JTAG Test Clock
TDI JTAG Test Data In
TDO JTAG Test Data Out
TMS JTAG Test Mode Select[Not recommended for new designs - Use XMEGA A1U series] XMEGA A1 [DATASHEET] 58
8067O–AVR–06/2013
30.2 Alternate Pin Functions
The tables below show the primary/default function for each pin on a port in the first column, the pin number in the
second column, and then all alternate pin functions in the remaining columns. The head row shows what peripheral that
enable and use the alternate pin functions.
Table 30-1. Port A - Alternate functions.
Table 30-2. Port B - Alternate functions.
Table 30-3. Port C - Alternate functions.
PORT A PIN # INTERRUPT ADCA
POS
ADCA
NEG
ADCA
GAINPOS
ADCA
GAINNEG
ACA
POS
ACA
NEG
ACA
OUT
DACA REFA
GND 93
AVCC 94
PA0 95 SYNC ADC0 ADC0 ADC0 AC0 AC0 AREF
PA1 96 SYNC ADC1 ADC1 ADC1 AC1 AC1
PA2 97 SYNC/ASYNC ADC2 ADC2 ADC2 AC2 DAC0
PA3 98 SYNC ADC3 ADC3 ADC3 AC3 AC3 DAC1
PA4 99 SYNC ADC4 ADC4 ADC4 AC4
PA5 100 SYNC ADC5 ADC5 ADC5 AC5 AC5
PA6 1 SYNC ADC6 ADC6 ADC6 AC6
PA7 2 SYNC ADC7 ADC7 ADC7 AC7 AC0OUT
PORT B PIN # INTERRUPT ADCB
POS
ADCB
NEG
ADCB
GAINPOS
ADCB
GAINNEG
ACB
POS
ACB
NEG
ACB
OUT
DACB REFB JTAG
GND 3
AVCC 4
PB0 5 SYNC ADC0 ADC0 ADC0 AC0 AC0 AREF
PB1 6 SYNC ADC1 ADC1 ADC1 AC1 AC1
PB2 7 SYNC/ASYNC ADC2 ADC2 ADC2 AC2 DAC0
PB3 8 SYNC ADC3 ADC3 ADC3 AC3 AC3 DAC1
PB4 9 SYNC ADC4 ADC4 ADC4 AC4 TMS
PB5 10 SYNC ADC5 ADC5 ADC5 AC5 AC5 TDI
PB6 11 SYNC ADC6 ADC6 ADC6 AC6 TCK
PB7 12 SYNC ADC7 ADC7 ADC7 AC7 AC0OUT TDO
PORT C PIN # INTERRUPT TCC0 AWEXC TCC1 USARTC0 USARTC1 SPIC TWIC CLOCKOUT EVENTOUT
GND 13
VCC 14
PC0 15 SYNC OC0A OC0ALS SDA
PC1 16 SYNC OC0B OC0AHS XCK0 SCL
PC2 17 SYNC/ASYNC OC0C OC0BLS RXD0[Not recommended for new designs - Use XMEGA A1U series] XMEGA A1 [DATASHEET] 59
8067O–AVR–06/2013
Table 30-4. Port D - Alternate functions.
Table 30-5. Port E - Alternate functions.
Table 30-6. Port F - Alternate functions.
PC3 18 SYNC OC0D OC0BHS TXD0
PC4 19 SYNC OC0CLS OC1A SS
PC5 20 SYNC OC0CHS OC1B XCK1 MOSI
PC6 21 SYNC OC0DLS RXD1 MISO
PC7 22 SYNC OC0DHS TXD1 SCK CLKOUT EVOUT
PORT D PIN # INTERRUPT TCD0 TCD1 USARTD0 USARTD1 SPID TWID CLOCKOUT EVENTOUT
GND 23
VCC 24
PD0 25 SYNC OC0A SDA
PD1 26 SYNC OC0B XCK0 SCL
PD2 27 SYNC/ASYNC OC0C RXD0
PD3 28 SYNC OC0D TXD0
PD4 29 SYNC OC1A SS
PD5 30 SYNC OC1B XCK1 MOSI
PD6 31 SYNC RXD1 MISO
PD7 32 SYNC TXD1 SCK CLKOUT EVOUT
PORT E PIN # INTERRUPT TCE0 AWEXE TCE1 USARTE0 USARTE1 SPIE TWIE CLOCKOUT EVENTOUT
GND 33
VCC 34
PE0 35 SYNC OC0A OC0ALS SDA
PE1 36 SYNC OC0B OC0AHS XCK0 SCL
PE2 37 SYNC/ASYNC OC0C OC0BLS RXD0
PE3 38 SYNC OC0D OC0BHS TXD0
PE4 39 SYNC OC0CLS OC1A SS
PE5 40 SYNC OC0CHS OC1B XCK1 MOSI
PE6 41 SYNC OC0DLS RXD1 MISO
PE7 42 SYNC OC0DHS TXD1 SCK CLKOUT EVOUT
PORT F PIN # INTERRUPT TCF0 TCF1 USARTF0 USARTF1 SPIF TWIF
GND 43
VCC 44
PF0 45 SYNC OC0A SDA
PORT C PIN # INTERRUPT TCC0 AWEXC TCC1 USARTC0 USARTC1 SPIC TWIC CLOCKOUT EVENTOUT[Not recommended for new designs - Use XMEGA A1U series] XMEGA A1 [DATASHEET] 60
8067O–AVR–06/2013
Table 30-7. Port H - Alternate functions.
Table 30-8. Port J - Alternate functions.
PF1 46 SYNC OC0B XCK0 SCL
PF2 47 SYNC/ASYNC OC0C RXD0
PF3 48 SYNC OC0D TXD0
PF4 49 SYNC OC1A SS
PF5 50 SYNC OC1B XCK1 MOSI
PF6 51 SYNC RXD1 MISO
PF7 52 SYNC TXD1 SCK
PORT H PIN # INTERRUPT SDRAM 3P SRAM ALE1 3P SRAM ALE12 3P LPC ALE1 3P LPC ALE1 2P LPC ALE12 2P
GND 53
VCC 54
PH0 55 SYNC WE WE WE WE WE WE
PH1 56 SYNC CAS RE RE RE RE RE
PH2 57 SYNC/ASYNC RAS ALE1 ALE1 ALE1 ALE1 ALE1
PH3 58 SYNC DQM ALE2 ALE2
PH4 59 SYNC BA0 CS0/A16 CS0 CS0/A16 CS0 CS0/A16
PH5 60 SYNC BA1 CS1/A17 CS1 CS1/A17 CS1 CS1/A17
PH6 61 SYNC CKE CS2/A18 CS2 CS2/A18 CS2 CS2/A18
PH7 62 SYNC CLK CS3/A19 CS3 CS3/A19 CS3 CS3/A19
PORT J PIN # INTERRUPT SDRAM 3P SRAM ALE1 3P SRAM ALE12 3P LPC ALE1 3P LPC ALE1 2P LPC ALE12 2P
GND 63
VCC 64
PJ0 65 SYNC D0 D0 D0 D0/A0 D0/A0 D0/A0/A8
PJ1 66 SYNC D1 D1 D1 D1/A1 D1/A1 D1/A1/A9
PJ2 67 SYNC/ASYNC D2 D2 D2 D2/A2 D2/A2 D2/A2/A10
PJ3 68 SYNC D3 D3 D3 D3/A3 D3/A3 D3/A3/A11
PJ4 69 SYNC A8 D4 D4 D4/A4 D4/A4 D4/A4/A12
PJ5 70 SYNC A9 D5 D5 D5/A5 D5/A5 D5/A5/A13
PJ6 71 SYNC A10 D6 D6 D6/A6 D6/A6 D6/A6/A14
PJ7 72 SYNC A11 D7 D7 D7/A7 D7/A7 D7/A7/A15
PORT F PIN # INTERRUPT TCF0 TCF1 USARTF0 USARTF1 SPIF TWIF[Not recommended for new designs - Use XMEGA A1U series] XMEGA A1 [DATASHEET] 61
8067O–AVR–06/2013
Table 30-9. Port K - Alternate functions.
Table 30-10. Port Q - Alternate functions.
Table 30-11. Port R - Alternate functions.
PORT K PIN # INTERRUPT SDRAM 3P SRAM ALE1 3P SRAM ALE12 3P LPC ALE1 3P LPC ALE1 2P LPC ALE12 2P
GND 73
VCC 74
PK0 75 SYNC A0 A0/A8 A0/A8/A16 A8
PK1 76 SYNC A1 A1/A9 A1/A9/A17 A9
PK2 77 SYNC/ASYNC A2 A2/A10 A2/A10/A18 A10
PK3 78 SYNC A3 A3/A11 A3/A11/A19 A11
PK4 79 SYNC A4 A4/A12 A4/A12/A20 A12
PK5 80 SYNC A5 A5/A13 A5/A13/A21 A13
PK6 81 SYNC A6 A6/A14 A6/A14/A22 A14
PK7 82 SYNC A7 A7/A15 A7/A15/A23 A15
PORT Q PIN # INTERRUPT
VCC 83
GND 84
PQ0 85 SYNC TOSC1 (Input)
PQ1 86 SYNC TOSC2 (Output)
PQ2 87 SYNC/ASYNC
PQ3 88 SYNC
PORT R PIN # INTERRUPT PDI XTAL
PDI 89 PDI_DATA
RESET 90 PDI_CLOCK
PRO 91 SYNC XTAL2
PR1 92 SYNC XTAL1[Not recommended for new designs - Use XMEGA A1U series] XMEGA A1 [DATASHEET] 62
8067O–AVR–06/2013
31. Peripheral Module Address Map
The address maps show the base address for each peripheral and module in XMEGA A1. For complete register
description and summary for each peripheral module, refer to the XMEGA A Manual.
Table 31-1. Peripheral Module Address Map
Base Address Name Description
0x0000 GPIO General Purpose IO Registers
0x0010 VPORT0 Virtual Port 0
0x0014 VPORT1 Virtual Port 1
0x0018 VPORT2 Virtual Port 2
0x001C VPORT3 Virtual Port 3
0x0030 CPU CPU
0x0040 CLK Clock Control
0x0048 SLEEP Sleep Controller
0x0050 OSC Oscillator Control
0x0060 DFLLRC32M DFLL for the 32 MHz Internal RC Oscillator
0x0068 DFLLRC2M DFLL for the 2 MHz RC Oscillator
0x0070 PR Power Reduction
0x0078 RST Reset Controller
0x0080 WDT Watch-Dog Timer
0x0090 MCU MCU Control
0x00A0 PMIC Programmable Multilevel Interrupt Controller
0x00B0 PORTCFG Port Configuration
0x00C0 AES AES Module
0x0100 DMA DMA Controller
0x0180 EVSYS Event System
0x01C0 NVM Non Volatile Memory (NVM) Controller
0x0200 ADCA Analog to Digital Converter on port A
0x0240 ADCB Analog to Digital Converter on port B
0x0300 DACA Digital to Analog Converter on port A
0x0320 DACB Digital to Analog Converter on port B
0x0380 ACA Analog Comparator pair on port A
0x0390 ACB Analog Comparator pair on port B
0x0400 RTC Real Time Counter
0x0440 EBI External Bus Interface
0x0480 TWIC Two Wire Interface on port C
0x0490 TWID Two Wire Interface on port D[Not recommended for new designs - Use XMEGA A1U series] XMEGA A1 [DATASHEET] 63
8067O–AVR–06/2013
0x04A0 TWIE Two Wire Interface on port E
0x04B0 TWIF Two Wire Interface on port F
0x0600 PORTA Port A
0x0620 PORTB Port B
0x0640 PORTC Port C
0x0660 PORTD Port D
0x0680 PORTE Port E
0x06A0 PORTF Port F
0x06E0 PORTH Port H
0x0700 PORTJ Port J
0x0720 PORTK Port K
0x07C0 PORTQ Port Q
0x07E0 PORTR Port R
0x0800 TCC0 Timer/Counter 0 on port C
0x0840 TCC1 Timer/Counter 1 on port C
0x0880 AWEXC Advanced Waveform Extension on port C
0x0890 HIRESC High Resolution Extension on port C
0x08A0 USARTC0 USART 0 on port C
0x08B0 USARTC1 USART 1 on port C
0x08C0 SPIC Serial Peripheral Interface on port C
0x08F8 IRCOM Infrared Communication Module
0x0900 TCD0 Timer/Counter 0 on port D
0x0940 TCD1 Timer/Counter 1 on port D
0x0990 HIRESD High Resolution Extension on port D
0x09A0 USARTD0 USART 0 on port D
0x09B0 USARTD1 USART 1 on port D
0x09C0 SPID Serial Peripheral Interface on port D
0x0A00 TCE0 Timer/Counter 0 on port E
0x0A40 TCE1 Timer/Counter 1 on port E
0x0A80 AWEXE Advanced Waveform Extension on port E
0x0A90 HIRESE High Resolution Extension on port E
0x0AA0 USARTE0 USART 0 on port E
0x0AB0 USARTE1 USART 1 on port E
0x0AC0 SPIE Serial Peripheral Interface on port E
0x0B00 TCF0 Timer/Counter 0 on port F
Base Address Name Description[Not recommended for new designs - Use XMEGA A1U series] XMEGA A1 [DATASHEET] 64
8067O–AVR–06/2013
0x0B40 TCF1 Timer/Counter 1 on port F
0x0B90 HIRESF High Resolution Extension on port F
0x0BA0 USARTF0 USART 0 on port F
0x0BB0 USARTF1 USART 1 on port F
0x0BC0 SPIF Serial Peripheral Interface on port F
Base Address Name Description[Not recommended for new designs - Use XMEGA A1U series] XMEGA A1 [DATASHEET] 65
8067O–AVR–06/2013
32. Instruction Set Summary
Mnemonics Operands Description Operation Flags #Clocks
Arithmetic and Logic Instructions
ADD Rd, Rr Add without Carry Rd Rd + Rr Z,C,N,V,S,H 1
ADC Rd, Rr Add with Carry Rd Rd + Rr + C Z,C,N,V,S,H 1
ADIW Rd, K Add Immediate to Word Rd Rd + 1:Rd + K Z,C,N,V,S 2
SUB Rd, Rr Subtract without Carry Rd Rd - Rr Z,C,N,V,S,H 1
SUBI Rd, K Subtract Immediate Rd Rd - K Z,C,N,V,S,H 1
SBC Rd, Rr Subtract with Carry Rd Rd - Rr - C Z,C,N,V,S,H 1
SBCI Rd, K Subtract Immediate with Carry Rd Rd - K - C Z,C,N,V,S,H 1
SBIW Rd, K Subtract Immediate from Word Rd + 1:Rd Rd + 1:Rd - K Z,C,N,V,S 2
AND Rd, Rr Logical AND Rd Rd Rr Z,N,V,S 1
ANDI Rd, K Logical AND with Immediate Rd Rd K Z,N,V,S 1
OR Rd, Rr Logical OR Rd Rd v Rr Z,N,V,S 1
ORI Rd, K Logical OR with Immediate Rd Rd v K Z,N,V,S 1
EOR Rd, Rr Exclusive OR Rd Rd Rr Z,N,V,S 1
COM Rd One’s Complement Rd $FF - Rd Z,C,N,V,S 1
NEG Rd Two’s Complement Rd $00 - Rd Z,C,N,V,S,H 1
SBR Rd,K Set Bit(s) in Register Rd Rd v K Z,N,V,S 1
CBR Rd,K Clear Bit(s) in Register Rd Rd ($FFh - K) Z,N,V,S 1
INC Rd Increment Rd Rd + 1 Z,N,V,S 1
DEC Rd Decrement Rd Rd - 1 Z,N,V,S 1
TST Rd Test for Zero or Minus Rd Rd Rd Z,N,V,S 1
CLR Rd Clear Register Rd Rd Rd Z,N,V,S 1
SER Rd Set Register Rd $FF None 1
MUL Rd,Rr Multiply Unsigned R1:R0 Rd x Rr (UU) Z,C 2
MULS Rd,Rr Multiply Signed R1:R0 Rd x Rr (SS) Z,C 2
MULSU Rd,Rr Multiply Signed with Unsigned R1:R0 Rd x Rr (SU) Z,C 2
FMUL Rd,Rr Fractional Multiply Unsigned R1:R0 Rd x Rr<<1 (UU) Z,C 2
FMULS Rd,Rr Fractional Multiply Signed R1:R0 Rd x Rr<<1 (SS) Z,C 2
FMULSU Rd,Rr Fractional Multiply Signed with Unsigned R1:R0 Rd x Rr<<1 (SU) Z,C 2
DES K Data Encryption if (H = 0) then R15:R0
else if (H = 1) then R15:R0
Encrypt(R15:R0, K)
Decrypt(R15:R0, K)
1/2
Branch Instructions
RJMP k Relative Jump PC PC + k + 1 None 2
IJMP Indirect Jump to (Z) PC(15:0)
PC(21:16)
Z,
0
None 2
EIJMP Extended Indirect Jump to (Z) PC(15:0)
PC(21:16)
Z,
EIND
None 2
JMP k Jump PC k None 3[Not recommended for new designs - Use XMEGA A1U series] XMEGA A1 [DATASHEET] 66
8067O–AVR–06/2013
RCALL k Relative Call Subroutine PC PC + k + 1 None 2 / 3(1)
ICALL Indirect Call to (Z) PC(15:0)
PC(21:16)
Z,
0
None 2 / 3(1)
EICALL Extended Indirect Call to (Z) PC(15:0)
PC(21:16)
Z,
EIND
None 3(1)
CALL k call Subroutine PC k None 3 / 4(1)
RET Subroutine Return PC STACK None 4 / 5(1)
RETI Interrupt Return PC STACK I 4 / 5(1)
CPSE Rd,Rr Compare, Skip if Equal if (Rd = Rr) PC PC + 2 or 3 None 1 / 2 / 3
CP Rd,Rr Compare Rd - Rr Z,C,N,V,S,H 1
CPC Rd,Rr Compare with Carry Rd - Rr - C Z,C,N,V,S,H 1
CPI Rd,K Compare with Immediate Rd - K Z,C,N,V,S,H 1
SBRC Rr, b Skip if Bit in Register Cleared if (Rr(b) = 0) PC PC + 2 or 3 None 1 / 2 / 3
SBRS Rr, b Skip if Bit in Register Set if (Rr(b) = 1) PC PC + 2 or 3 None 1 / 2 / 3
SBIC A, b Skip if Bit in I/O Register Cleared if (I/O(A,b) = 0) PC PC + 2 or 3 None 2 / 3 / 4
SBIS A, b Skip if Bit in I/O Register Set If (I/O(A,b) =1) PC PC + 2 or 3 None 2 / 3 / 4
BRBS s, k Branch if Status Flag Set if (SREG(s) = 1) then PC PC + k + 1 None 1 / 2
BRBC s, k Branch if Status Flag Cleared if (SREG(s) = 0) then PC PC + k + 1 None 1 / 2
BREQ k Branch if Equal if (Z = 1) then PC PC + k + 1 None 1 / 2
BRNE k Branch if Not Equal if (Z = 0) then PC PC + k + 1 None 1 / 2
BRCS k Branch if Carry Set if (C = 1) then PC PC + k + 1 None 1 / 2
BRCC k Branch if Carry Cleared if (C = 0) then PC PC + k + 1 None 1 / 2
BRSH k Branch if Same or Higher if (C = 0) then PC PC + k + 1 None 1 / 2
BRLO k Branch if Lower if (C = 1) then PC PC + k + 1 None 1 / 2
BRMI k Branch if Minus if (N = 1) then PC PC + k + 1 None 1 / 2
BRPL k Branch if Plus if (N = 0) then PC PC + k + 1 None 1 / 2
BRGE k Branch if Greater or Equal, Signed if (N V= 0) then PC PC + k + 1 None 1 / 2
BRLT k Branch if Less Than, Signed if (N V= 1) then PC PC + k + 1 None 1 / 2
BRHS k Branch if Half Carry Flag Set if (H = 1) then PC PC + k + 1 None 1 / 2
BRHC k Branch if Half Carry Flag Cleared if (H = 0) then PC PC + k + 1 None 1 / 2
BRTS k Branch if T Flag Set if (T = 1) then PC PC + k + 1 None 1 / 2
BRTC k Branch if T Flag Cleared if (T = 0) then PC PC + k + 1 None 1 / 2
BRVS k Branch if Overflow Flag is Set if (V = 1) then PC PC + k + 1 None 1 / 2
BRVC k Branch if Overflow Flag is Cleared if (V = 0) then PC PC + k + 1 None 1 / 2
BRIE k Branch if Interrupt Enabled if (I = 1) then PC PC + k + 1 None 1 / 2
BRID k Branch if Interrupt Disabled if (I = 0) then PC PC + k + 1 None 1 / 2
Data Transfer Instructions
MOV Rd, Rr Copy Register Rd Rr None 1
MOVW Rd, Rr Copy Register Pair Rd+1:Rd Rr+1:Rr None 1
Mnemonics Operands Description Operation Flags #Clocks[Not recommended for new designs - Use XMEGA A1U series] XMEGA A1 [DATASHEET] 67
8067O–AVR–06/2013
LDI Rd, K Load Immediate Rd K None 1
LDS Rd, k Load Direct from data space Rd (k) None 2(1)(2)
LD Rd, X Load Indirect Rd (X) None 1(1)(2)
LD Rd, X+ Load Indirect and Post-Increment Rd
X
(X)
X + 1
None 1(1)(2)
LD Rd, -X Load Indirect and Pre-Decrement X X - 1,
Rd (X)
X - 1
(X)
None 2(1)(2)
LD Rd, Y Load Indirect Rd (Y) (Y) None 1(1)(2)
LD Rd, Y+ Load Indirect and Post-Increment Rd
Y
(Y)
Y + 1
None 1(1)(2)
LD Rd, -Y Load Indirect and Pre-Decrement Y
Rd
Y - 1
(Y)
None 2(1)(2)
LDD Rd, Y+q Load Indirect with Displacement Rd (Y + q) None 2(1)(2)
LD Rd, Z Load Indirect Rd (Z) None 1(1)(2)
LD Rd, Z+ Load Indirect and Post-Increment Rd
Z
(Z),
Z+1
None 1(1)(2)
LD Rd, -Z Load Indirect and Pre-Decrement Z
Rd
Z - 1,
(Z)
None 2(1)(2)
LDD Rd, Z+q Load Indirect with Displacement Rd (Z + q) None 2(1)(2)
STS k, Rr Store Direct to Data Space (k) Rd None 2(1)
ST X, Rr Store Indirect (X) Rr None 1(1)
ST X+, Rr Store Indirect and Post-Increment (X)
X
Rr,
X + 1
None 1(1)
ST -X, Rr Store Indirect and Pre-Decrement X
(X)
X - 1,
Rr
None 2(1)
ST Y, Rr Store Indirect (Y) Rr None 1(1)
ST Y+, Rr Store Indirect and Post-Increment (Y)
Y
Rr,
Y + 1
None 1(1)
ST -Y, Rr Store Indirect and Pre-Decrement Y
(Y)
Y - 1,
Rr
None 2(1)
STD Y+q, Rr Store Indirect with Displacement (Y + q) Rr None 2(1)
ST Z, Rr Store Indirect (Z) Rr None 1(1)
ST Z+, Rr Store Indirect and Post-Increment (Z)
Z
Rr
Z + 1
None 1(1)
ST -Z, Rr Store Indirect and Pre-Decrement Z Z - 1 None 2(1)
STD Z+q,Rr Store Indirect with Displacement (Z + q) Rr None 2(1)
LPM Load Program Memory R0 (Z) None 3
LPM Rd, Z Load Program Memory Rd (Z) None 3
LPM Rd, Z+ Load Program Memory and Post-Increment Rd
Z
(Z),
Z + 1
None 3
ELPM Extended Load Program Memory R0 (RAMPZ:Z) None 3
ELPM Rd, Z Extended Load Program Memory Rd (RAMPZ:Z) None 3
ELPM Rd, Z+ Extended Load Program Memory and PostIncrement
Rd
Z
(RAMPZ:Z),
Z + 1
None 3
SPM Store Program Memory (RAMPZ:Z) R1:R0 None -
Mnemonics Operands Description Operation Flags #Clocks[Not recommended for new designs - Use XMEGA A1U series] XMEGA A1 [DATASHEET] 68
8067O–AVR–06/2013
SPM Z+ Store Program Memory and Post-Increment
by 2
(RAMPZ:Z)
Z
R1:R0,
Z + 2
None -
IN Rd, A In From I/O Location Rd I/O(A) None 1
OUT A, Rr Out To I/O Location I/O(A) Rr None 1
PUSH Rr Push Register on Stack STACK Rr None 1(1)
POP Rd Pop Register from Stack Rd STACK None 2(1)
Bit and Bit-test Instructions
LSL Rd Logical Shift Left Rd(n+1)
Rd(0)
C
Rd(n),
0,
Rd(7)
Z,C,N,V,H 1
LSR Rd Logical Shift Right Rd(n)
Rd(7)
C
Rd(n+1),
0,
Rd(0)
Z,C,N,V 1
ROL Rd Rotate Left Through Carry Rd(0)
Rd(n+1)
C
C,
Rd(n),
Rd(7)
Z,C,N,V,H 1
ROR Rd Rotate Right Through Carry Rd(7)
Rd(n)
C
C,
Rd(n+1),
Rd(0)
Z,C,N,V 1
ASR Rd Arithmetic Shift Right Rd(n) Rd(n+1), n=0..6 Z,C,N,V 1
SWAP Rd Swap Nibbles Rd(3..0) Rd(7..4) None 1
BSET s Flag Set SREG(s) 1 SREG(s) 1
BCLR s Flag Clear SREG(s) 0 SREG(s) 1
SBI A, b Set Bit in I/O Register I/O(A, b) 1 None 1
CBI A, b Clear Bit in I/O Register I/O(A, b) 0 None 1
BST Rr, b Bit Store from Register to T T Rr(b) T 1
BLD Rd, b Bit load from T to Register Rd(b) T None 1
SEC Set Carry C 1 C 1
CLC Clear Carry C 0 C 1
SEN Set Negative Flag N 1 N 1
CLN Clear Negative Flag N 0 N 1
SEZ Set Zero Flag Z 1 Z 1
CLZ Clear Zero Flag Z 0 Z 1
SEI Global Interrupt Enable I 1 I 1
CLI Global Interrupt Disable I 0 I 1
SES Set Signed Test Flag S 1 S 1
CLS Clear Signed Test Flag S 0 S 1
SEV Set Two’s Complement Overflow V 1 V 1
CLV Clear Two’s Complement Overflow V 0 V 1
SET Set T in SREG T 1 T 1
CLT Clear T in SREG T 0 T 1
SEH Set Half Carry Flag in SREG H 1 H 1
CLH Clear Half Carry Flag in SREG H 0 H 1
Mnemonics Operands Description Operation Flags #Clocks[Not recommended for new designs - Use XMEGA A1U series] XMEGA A1 [DATASHEET] 69
8067O–AVR–06/2013
Notes: 1. Cycle times for Data memory accesses assume internal memory accesses, and are not valid for accesses via the external RAM interface.
2. One extra cycle must be added when accessing Internal SRAM.
MCU Control Instructions
BREAK Break (See specific descr. for BREAK) None 1
NOP No Operation None 1
SLEEP Sleep (see specific descr. for Sleep) None 1
WDR Watchdog Reset (see specific descr. for WDR) None 1
Mnemonics Operands Description Operation Flags #Clocks[Not recommended for new designs - Use XMEGA A1U series] XMEGA A1 [DATASHEET] 70
8067O–AVR–06/2013
33. Packaging information
33.1 100A
2325 Orchard Parkway
San Jose, CA 95131
TITLE DRAWING NO.
R
REV.
100A, 100-lead, 14 x 14 mm Body Size, 1.0 mm Body Thickness,
0.5 mm Lead Pitch, Thin Profile Plastic Quad Flat Package (TQFP) 100A D
2010-10-20
PIN 1 IDENTIFIER
0°~7°
PIN 1
L
C
A1 A2 A
D1
D
e E1 E
B
A – – 1.20
A1 0.05 – 0.15
A2 0.95 1.00 1.05
D 15.75 16.00 16.25
D1 13.90 14.00 14.10 Note 2
E 15.75 16.00 16.25
E1 13.90 14.00 14.10 Note 2
B 0.17 – 0.27
C 0.09 – 0.20
L 0.45 – 0.75
e 0.50 TYP
Notes:
1. This package conforms to JEDEC reference MS-026, Variation AED.
2. Dimensions D1 and E1 do not include mold protrusion. Allowable
protrusion is 0.25 mm per side. Dimensions D1 and E1 are maximum
plastic body size dimensions including mold mismatch.
3. Lead coplanarity is 0.08 mm maximum.
COMMON DIMENSIONS
(Unit of Measure = mm)
SYMBOL MIN NOM MAX NOTE[Not recommended for new designs - Use XMEGA A1U series] XMEGA A1 [DATASHEET] 71
8067O–AVR–06/2013
33.2 100C1
2325 Orchard Parkway
San Jose, CA 95131
TITLE DRAWING NO.
R
REV.
100C1, 100-ball, 9 x 9 x 1.2 mm Body, Ball Pitch 0.80 mm
Chip Array BGA Package (CBGA) 100C1 A
5/25/06
TOP VIEW
SIDE VIEW
BOTTOM VIEW
COMMON DIMENSIONS
(Unit of Measure = mm)
SYMBOL MIN NOM MAX NOTE
A 1.10 – 1.20
A1 0.30 0.35 0.40
D 8.90 9.00 9.10
E 8.90 9.00 9.10
D1 7.10 7.20 7.30
E1 7.10 7.20 7.30
Øb 0.35 0.40 0.45
e 0.80 TYP
Marked A1 Identifier
8 7 6 5 4 3 2 1
A
B
C
D
E
9
F
G
H
I
J
10
0.90 TYP
0.90 TYP
A1 Corner
0.12 Z
E
D
e
e
Øb
A
A1
E1
D1[Not recommended for new designs - Use XMEGA A1U series] XMEGA A1 [DATASHEET] 72
8067O–AVR–06/2013
33.3 100C2
TITLE GPC DRAWING NO. REV.
Package Drawing Contact:
packagedrawings@atmel.com CIF A 100C2
100C2, 100-ball (10 x 10 Array), 0.65 mm Pitch,
7.0 x 7.0 x 1.0 mm, Very Thin, Fine-Pitch
Ball Grid Array Package (VFBGA)
12/23/08
COMMON DIMENSIONS
(Unit of Measure = mm)
SYMBOL MIN NOM MAX NOTE
A – – 1.00
A1 0.20 – –
A2 0.65 – –
D 6.90 7.00 7.10
D1 5.85 BSC
E 6.90 7.00 7.10
E1 5.85 BSC
b 0.30 0.35 0.40
e 0.65 BSC
TOP VIEW
SIDE VIEW
A1 BALL ID
J
I
H
G
F
E
D
C
B
A
12 3 4 5 6 7 8 9 10
A
A1
A2
D
E
0.10
E1
D1
100 - Ø0.35 ± 0.05
e
A1 BALL CORNER
BOTTOM VIEW
b e[Not recommended for new designs - Use XMEGA A1U series] XMEGA A1 [DATASHEET] 73
8067O–AVR–06/2013
34. Electrical Characteristics
34.1 Absolute Maximum Ratings*
34.2 DC Characteristics
Table 34-1. Current consumption.
Operating Temperature . . . . . . . . . . . -55C to +125C *NOTICE: Stresses beyond those listed under “Absolute
Maximum Ratings” may cause permanent damage
to the device. This is a stress rating only
and functional operation of the device at these
or other conditions beyond those indicated in
the operational sections of this specification is
not implied. Exposure to absolute maximum rating
conditions for extended periods may affect
device reliability.
Storage Temperature . . . . . . . . . . . . . -65C to +150°C
Voltage on any Pin with respect to Ground-0.5V to VCC+0.5V
Maximum Operating Voltage . . . . . . . . . . . . . . . . 3.6V
DC Current per I/O Pin. . . . . . . . . . . . . . . . . . 20.0 mA
DC Current VCC and GND Pins . . . . . . . . . . 200.0 mA
Symbol Parameter Condition Min Typ Max Units
ICC
Active mode(1)
1 MHz, Ext. Clk
VCC = 1.8V 365
µA
VCC = 3.0V 790
2 MHz, Ext. Clk
VCC = 1.8V 690 800
VCC = 3.0V 1400 1600
32 MHz, Ext. Clk VCC = 3.0V 18.35 20 mA
Idle mode(1)
1 MHz, Ext. Clk
VCC = 1.8V 135
µA
VCC = 3.0V 255
2 MHz, Ext. Clk
VCC = 1.8V 270 380
VCC = 3.0V 510 650
32 MHz, Ext. Clk VCC = 3.0V 8.15 9.2 mA
Power-down mode
All Functions Disabled VCC = 3.0V 0.1
µA
All Functions Disabled, T = 85°C VCC = 3.0V 2 5
ULP, WDT, Sampled BOD
VCC = 1.8V 0.5
VCC = 3.0V 0.6
ULP, WDT, Sampled BOD, T=85°C VCC = 3.0V 3 10
Power-save mode
RTC 1 kHz from Low Power 32 kHz
VCC = 1.8V 0.52
VCC = 3.0V 0.55 µA
RTC from Low Power 32 kHz VCC = 3.0V 1.16[Not recommended for new designs - Use XMEGA A1U series] XMEGA A1 [DATASHEET] 74
8067O–AVR–06/2013
Note: 1. All Power Reduction Registers set. Typical numbers measured at T = 25°C if nothing else is specified.
2. with no prescaling
Module current consumption(2)
ICC
RC32M 395
µA
RC32M w/DFLL Internal 32.768 kHz oscillator as DFLL source TBD
RC2M 120
RC2M w/DFLL Internal 32.768 kHz oscillator as DFLL source 155
RC32K 30
PLL Multiplication factor = 10x 195
Watchdog normal mode TBD
BOD Continuous mode 120
BOD Sampled mode 1
Internal 1.00 V ref 85
Temperature reference 80
RTC with int. 32 kHz RC as
source No prescaling 30
RTC with ULP as source No prescaling 1
ADC 250 kS/s - Int. 1V Ref 3.6
DAC Normal Mode 1000 kS/s, Single channel, Int. 1V Ref 1.8 mA
DAC Low-Power Mode 1000 KS/s, Single channel, Int. 1V Ref 1
AC High-speed 220
µA
AC Low-power 110
USART Rx and Tx enabled, 9600 BAUD 7.5
DMA 180
Timer/Counter Prescaler DIV1 18
AES 195
Flash/EEPROM
Programming
Vcc = 2V 20
mA
Vcc = 3V 30
Symbol Parameter Condition Min Typ Max Units[Not recommended for new designs - Use XMEGA A1U series] XMEGA A1 [DATASHEET] 75
8067O–AVR–06/2013
34.3 Speed
Table 34-2. Operating voltage and frequency.
The maximum CPU clock frequency of the XMEGA A1 devices is depending on VCC. As shown in Figure 34-1 on page
75 the Frequency vs. VCC curve is linear between 1.8V < VCC < 2.7V.
Figure 34-1. Maximum Frequency vs. Vcc
Symbol Parameter Condition Min Typ Max Units
ClkCPU CPU clock frequency
VCC = 1.6V 0 12
MHz
VCC = 1.8V 0 12
VCC = 2.7V 0 32
VCC = 3.6V 0 32
1.8
12
32
MHz
1.6 2.7 3.6 V
Safe Operating Area[Not recommended for new designs - Use XMEGA A1U series] XMEGA A1 [DATASHEET] 76
8067O–AVR–06/2013
34.4 Flash and EEPROM Memory Characteristics
Table 34-3. Endurance and data retention.
Table 34-4. Programming time.
Notes: 1. Programming is timed from the internal 2 MHz oscillator.
2. EEPROM is not erased if the EESAVE fuse is programmed.
34.5 ADC Characteristics
Table 34-5. ADC characteristics
Symbol Parameter Condition Min Typ Max Units
Flash
Write/Erase cycles
25°C 10K
Cycle
85°C 10K
Data retention
25°C 100
Year
55°C 25
EEPROM
Write/Erase cycles
25°C 80K
Cycle
85°C 30K
Data retention
25°C 100
Year
55°C 25
Symbol Parameter Condition Min Typ(1) Max Units
Chip Erase Flash, EEPROM(2) and SRAM Erase 40
ms
Flash
Page Erase 4
Page Write 6
Page WriteAutomatic Page Erase and Write 12
EEPROM
Page Erase 4
Page Write 6
Page Write Automatic Page Erase and Write 12
Symbol Parameter Condition Min Typ Max Units
RES Resolution Programmable: 8/12 8 12 12 Bits
INL Integral Non-Linearity 500 kS/s -5 <±1 5 LSB
DNL Differential Non-Linearity 500 kS/s < ±0.75 LSB
Gain Error ±10 mV
Offset Error ±2 mV
ADCclk ADC Clock frequency Max is 1/4 of
Peripheral Clock
VCC2.0V 2000
kHz
VCC<2.0V 500[Not recommended for new designs - Use XMEGA A1U series] XMEGA A1 [DATASHEET] 77
8067O–AVR–06/2013
Table 34-6. ADC gain stage characteristics.
Conversion rate
VCC2.0V 2000
ksps
VCC<2.0V 500
Conversion time
(propagation delay)
(RES+2)/2+GAIN
RES = 8 or 12, GAIN = 0 or 1
5 7 8
ADCclk
cycles
Sampling Time 1/2 ADCclk cycle 0.25 µS
Conversion range 0 VREF V
AVCC Analog Supply Voltage Vcc-0.3 Vcc+0.3 V
VREF Reference voltage 1.0 Vcc-0.6 V
Input bandwidth
VCC2.0V 2000
kHz
VCC<2.0V 500
INT1V Internal 1.00V reference 1.00 V
INTVCC Internal VCC/1.6 VCC/1.6 V
SCALEDVCC Scaled internal VCC/10 input VCC/10 V
RAREF Reference input resistance >10 M
Start-up time 12 24
ADCclk
cycles
Internal input sampling speed Temp. sensor, VCC/10, Bandgap 100 ksps
Symbol Parameter Condition Min Typ Max Units
Gain error 1 to 64 gain < ±1 %
Offset error < ±1 mV
Vrms Noise level at input 64x gain
VREF = Int. 1V 0.12
mV
VREF = Ext. 2V 0.06
Clock rate Same as ADC 1000 kHz
Symbol Parameter Condition Min Typ Max Units[Not recommended for new designs - Use XMEGA A1U series] XMEGA A1 [DATASHEET] 78
8067O–AVR–06/2013
34.6 DAC Characteristics
Table 34-7. DAC characteristics.
34.7 Analog Comparator Characteristics
Table 34-8. Analog Comparator characteristics.
34.8 Bandgap Characteristics
Table 34-9. Bandgap voltage characteristics.
Symbol Parameter Condition Min Typ Max Units
INL Integral Non-Linearity VCC = 1.6-3.6V VREF = Ext. ref 5 LSB
DNL Differential Non-Linearity VCC = 1.6-3.6V
VREF = Ext. ref 0.6 <±1
LSB
VREF= AVCC 0.6
Fclk Conversion rate 1000 ksps
AREF External reference voltage 1.1 AVCC-0.6 V
Reference input impedance >10 M
Max output voltage Rload=100k AVCC*0.98 V
Min output voltage Rload=100k 0.01 V
Symbol Parameter Condition Min Typ Max Units
Voff Input Offset Voltage VCC = 1.6 - 3.6V <±5 mV
Ilk Input Leakage Current VCC = 1.6 - 3.6V < 1000 pA
Vhys1 Hysteresis, No VCC = 1.6 - 3.6V 0 mV
Vhys2 Hysteresis, Small VCC = 1.6 - 3.6V mode = HS 25 mV
Vhys3 Hysteresis, Large VCC = 1.6 - 3.6V mode = HS 50 mV
tdelay Propagation delay
VCC = 3.0V, T= 85°C mode = HS 100
V ns CC = 1.6 - 3.6V mode = HS 70
VCC = 1.6 - 3.6V mode = LP 140
Symbol Parameter Condition Min Typ Max Units
Bandgap startup time As reference for ADC or DAC 1 Clk_PER + 2.5µs µs
Bandgap voltage 1.1 V[Not recommended for new designs - Use XMEGA A1U series] XMEGA A1 [DATASHEET] 79
8067O–AVR–06/2013
34.9 Brownout Detection Characteristics
Table 34-10. Brownout Detection characteristics.
Note: 1. BOD is calibrated to BOD level 0 at 85°C, and BOD level 0 is the default level.
34.10 PAD Characteristics
Table 34-11. PAD characteristics.
ADC/DAC ref
T= 85°C, After calibration 0.99 1.01
V
1
Variation over voltage and temperature VCC = 1.6 - 3.6V, T = -40C to 85C ±5 %
Symbol Parameter Condition Min Typ Max Units
Symbol Parameter Condition Min Typ Max Units
BOD level 0 falling Vcc 1.6
V
BOD level 1 falling Vcc 1.9
BOD level 2 falling Vcc 2.1
BOD level 3 falling Vcc 2.4
BOD level 4 falling Vcc 2.6
BOD level 5 falling Vcc 2.9
BOD level 6 falling Vcc 3.2
BOD level 7 falling Vcc 3.4
Hysteresis BOD level 0-5 2 %
Symbol Parameter Condition Min Typ Max Units
VIH Input High Voltage
VCC = 2.4 - 3.6V 0.7*VCC VCC+0.5
V
VCC = 1.6 - 2.4V 0.8*VCC VCC+0.5
VIL Input Low Voltage
VCC = 2.4 - 3.6V -0.5 0.3*VCC
V
VCC = 1.6 - 2.4V -0.5 0.2*VCC
VOL Output Low Voltage GPIO
IOL = 15 mA, VCC = 3.3V 0.45 0.76
IOL = 10 mA, VCC = 3.0V 0.3 0.64 V
IOL= 5 mA, VCC = 1.8V 0.2 0.46[Not recommended for new designs - Use XMEGA A1U series] XMEGA A1 [DATASHEET] 80
8067O–AVR–06/2013
34.11 POR Characteristics
Table 34-12. Power-on Reset characteristics.
34.12 Reset Characteristics
Table 34-13. Reset characteristics.
34.13 Oscillator Characteristics
Table 34-14. Internal 32.768kHz oscillator characteristics.
VOH Output High Voltage GPIO
IOH = -8 mA, VCC = 3.3V 2.6 3
IOH = -6 mA, VCC = 3.0V 2.1 2.2 V
IOH = -2 mA, VCC = 1.8V 1.4 1.6
IIL Input Leakage Current I/O pin <0.001 1 µA
IIH Input Leakage Current I/O pin <0.001 1 µA
RP I/O pin Pull/Buss keeper Resistor 20 k
RRST Reset pin Pull-up Resistor 20 k
Input hysteresis 0.5 V
Symbol Parameter Condition Min Typ Max Units
Symbol Parameter Condition Min Typ Max Units
VPOT- POR threshold voltage falling Vcc 1 V
VPOT+ POR threshold voltage rising Vcc 1.4 V
Symbol Parameter Condition Min Typ Max Units
Minimum reset pulse width 90 ns
Reset threshold voltage
VCC = 2.7 - 3.6V 0.45*VCC
V
VCC = 1.6 - 2.7V 0.42*VCC
Symbol Parameter Condition Min Typ Max Units
Accuracy T = 85C, VCC = 3V,
After production calibration -0.5 0.5 %[Not recommended for new designs - Use XMEGA A1U series] XMEGA A1 [DATASHEET] 81
8067O–AVR–06/2013
Table 34-15. Internal 2MHz oscillator characteristics.
Table 34-16. Internal 32MHz oscillator characteristics.
Table 34-17. Internal 32kHz, ULP oscillator characteristics.
Table 34-18. Maximum load capacitance (CL) and ESR recommendation for 32.768kHz crystal.
Table 34-19. Device wake-up time from sleep.
Notes: 1. Non-prescaled System Clock source.
2. Time from pin change on external interrupt pin to first available clock cycle. Additional interrupt response time is minimum 5 system clock source cycles.
Symbol Parameter Condition Min Typ Max Units
Accuracy T = 85C, VCC = 3V,
After production calibration -1.5 1.5 %
DFLL Calibration step size T = 25C, VCC = 3V 0.175 %
Symbol Parameter Condition Min Typ Max Units
Accuracy T = 85C, VCC = 3V,
After production calibration -1.5 1.5 %
DFLL Calibration stepsize T = 25C, VCC = 3V 0.2 %
Symbol Parameter Condition Min Typ Max Units
Output frequency 32 kHz ULP OSC T = 85C, VCC = 3.0V 26 kHz
Crystal CL [pF] Max ESR [k]
6.5 60
9 35
Symbol Parameter Condition(1) Min Typ(2) Max Units
Idle Sleep, Standby and Extended
Standby sleep mode
Int. 32.768 kHz RC 130
µS
Int. 2 MHz RC 2
Ext. 2 MHz Clock 2
Int. 32 MHz RC 0.17
Power-save and Power-down
Sleep mode
Int. 32.768 kHz RC 320
Int. 2 MHz RC 10.3
Ext. 2 MHz Clock 4.5
Int. 32 MHz RC 5.8[Not recommended for new designs - Use XMEGA A1U series] XMEGA A1 [DATASHEET] 82
8067O–AVR–06/2013
35. Typical Characteristics
35.1 Active Supply Current
Figure 35-1. Active Supply Current vs. Frequency
fSYS = 1 - 32 MHz, T = 25°C
Figure 35-2. Active Supply Current vs. VCC
fSYS = 1.0 MHz
3.3V
3.0V
2.7V
0
5
10
15
20
25
0 4 8 12 16 20 24 28 32
Frequency [MHz]
Icc [mA]
1.8V
2.2V
85°C
25°C
-40°C
0
200
400
600
800
1000
1200
1.6 1.8 2 2.2 2.4 2.6 2.8 3 3.2 3.4 3.6
Vcc [V]
Icc [uA][Not recommended for new designs - Use XMEGA A1U series] XMEGA A1 [DATASHEET] 83
8067O–AVR–06/2013
35.2 Idle Supply Current
Figure 35-3. Idle Supply Current vs. Frequency
fSYS = 1 - 32 MHz, T = 25°C
Figure 35-4. Active Supply Current vs. VCC
fSYS = 1.0 MHz
,
3.3V
3.0V
2.7V
0
1
2
3
4
5
6
7
8
9
10
0 4 8 12 16 20 24 28 32
Frequency [MHz]
Icc [mA]
1.8V
2.2V
85°C
25°C
-40°C
0
50
100
150
200
250
300
350
400
1.6 1.8 2 2.2 2.4 2.6 2.8 3 3.2 3.4 3.6
Vcc [V]
Icc [uA][Not recommended for new designs - Use XMEGA A1U series] XMEGA A1 [DATASHEET] 84
8067O–AVR–06/2013
35.3 Power-down Supply Current
Figure 35-5. Power-down Supply Current vs. Temperature
35.4 Power-save Supply Current
Figure 35-6. Power-save Supply Current vs. Temperature
Sampled BOD, WDT, RTC from ULP enabled
3.3V
3.0V
2.7V
2.2V
1.8V
0
0.5
1
1.5
2
2.5
-40 -30 -20 -10 0 10 20 30 40 50 60 70 80 90
Temperature [°C]
Icc [uA]
3.3V
2.7V
2.2V
1.8V
0
0.5
1
1.5
2
2.5
3
3.5
-40 -30 -20 -10 0 10 20 30 40 50 60 70 80 90
Temperature [°C]
Icc [uA][Not recommended for new designs - Use XMEGA A1U series] XMEGA A1 [DATASHEET] 85
8067O–AVR–06/2013
35.5 Pin Pull-up
Figure 35-7. I/O Reset Pull-up Resistor Current vs. Reset Pin Voltage
VCC = 1.8V
Figure 35-8. I/O Reset Pull-up Resistor Current vs. Reset Pin Voltage
VCC = 3.0V
85 °C 25 °C
-40 °C
0
20
40
60
80
100
0 0.2 0.4 0.6 0.8 1 1.2 1.4
vreset [V]
Ireset [uA]
85 °C
25 °C
-40 °C
0
20
40
60
80
100
120
140
160
180
0 0.5 1 1.5 2 2.5
vreset [V]
Ireset [uA][Not recommended for new designs - Use XMEGA A1U series] XMEGA A1 [DATASHEET] 86
8067O–AVR–06/2013
Figure 35-9. I/O Reset Pull-up Resistor Current vs. Reset Pin Voltage
VCC = 3.3V
35.6 Pin Thresholds and Hysteresis
Figure 35-10.I/O Pin Input Threshold Voltage vs. VCC
VIH - I/O Pin Read as “1”
85 °C
25 °C
-40 °C
0
20
40
60
80
100
120
140
160
180
0 0.5 1 1.5 2 2.5 3
vreset [V]
Ireset [uA]
85 °C
25 °C
-40 °C
0
0.5
1
1.5
2
2.5
1.6 1.8 2 2.2 2.4 2.6 2.8 3 3.2 3.4 3.6
Vcc [V]
Vthreshold [V][Not recommended for new designs - Use XMEGA A1U series] XMEGA A1 [DATASHEET] 87
8067O–AVR–06/2013
Figure 35-11.I/O Pin Input Threshold Voltage vs. VCC
VIL - I/O Pin Read as “0”
Figure 35-12.I/O Pin Input Hysteresis vs. VCC.
85 °C
25 °C
-40 °C
0
0.2
0.4
0.6
0.8
1
1.2
1.4
1.6
1.8
1.6 1.8 2 2.2 2.4 2.6 2.8 3 3.2 3.4 3.6
Vcc [V]
Vthreshold [V]
85 °C
25 °C
-40 °C
0
0.2
0.4
0.6
0.8
1.6 1.8 2 2.2 2.4 2.6 2.8 3 3.2 3.4 3.6
Vcc [V]
Vthreshold [V][Not recommended for new designs - Use XMEGA A1U series] XMEGA A1 [DATASHEET] 88
8067O–AVR–06/2013
Figure 35-13.Reset Input Threshold Voltage vs. VCC
VIH - I/O Pin Read as “1”
Figure 35-14.Reset Input Threshold Voltage vs. VCC
VIL - I/O Pin Read as “0”
85 °C
25 °C
-40 °C
0
0.2
0.4
0.6
0.8
1
1.2
1.4
1.6
1.8
1.6 1.8 2 2.2 2.4 2.6 2.8 3 3.2 3.4 3.6
Vcc [V]
Vthreshold [V]
85 °C
25 °C
-40 °C
0
0.2
0.4
0.6
0.8
1
1.2
1.4
1.6
1.8
1.6 1.8 2 2.2 2.4 2.6 2.8 3 3.2 3.4 3.6
Vcc [V]
Vthreshold [V][Not recommended for new designs - Use XMEGA A1U series] XMEGA A1 [DATASHEET] 89
8067O–AVR–06/2013
35.7 Bod Thresholds
Figure 35-15.BOD Thresholds vs. Temperature
BOD Level = 1.6V
Figure 35-16.BOD Thresholds vs. Temperature
BOD Level = 2.9V
Rising Vcc
Falling Vcc
1.602
1.608
1.614
1.62
1.626
1.632
1.638
-40 -30 -20 -10 0 10 20 30 40 50 60 70 80 90
Temperature [°C]
VBOT [V]
Rising Vcc
Falling Vcc
2.905
2.92
2.935
2.95
2.965
2.98
2.995
3.01
-40 -30 -20 -10 0 10 20 30 40 50 60 70 80 90
Temperature [°C]
VBOT [V][Not recommended for new designs - Use XMEGA A1U series] XMEGA A1 [DATASHEET] 90
8067O–AVR–06/2013
35.8 Bandgap
Figure 35-17.Internal 1.00V Reference vs. Temperature.
35.9 Analog Comparator
Figure 35-18.Analog Comparator Hysteresis vs. VCC
High-speed, Small hysteresis
3.0V
1.8V
0.999
0.9995
1
1.0005
1.001
1.0015
1.002
1.0025
1.003
1.0035
1.004
-40 -30 -20 -10 0 10 20 30 40 50 60 70 80 90
Temperature [°C]
VREF [V]
25°C
0
5
10
15
20
25
30
1.6 1.8 2 2.2 2.4 2.6 2.8 3 3.2 3.4 3.6
Vcc [V]
Hysteresis [mV][Not recommended for new designs - Use XMEGA A1U series] XMEGA A1 [DATASHEET] 91
8067O–AVR–06/2013
Figure 35-19.Analog Comparator Hysteresis vs. VCC, High-speed
Large hysteresis
Figure 35-20.Analog Comparator Propagation Delay vs. VCC
High-speed
25°C
0
10
20
30
40
50
60
1.6 1.8 2 2.2 2.4 2.6 2.8 3 3.2 3.4 3.6
Vcc [V]
Hysteresis [mV]
25°C
0
20
40
60
80
100
120
1.6 1.8 2 2.2 2.4 2.6 2.8 3 3.2 3.4 3.6
Vcc [V]
Propagation Delay [ns][Not recommended for new designs - Use XMEGA A1U series] XMEGA A1 [DATASHEET] 92
8067O–AVR–06/2013
35.10 Oscillators and Wake-up Time
Figure 35-21.Internal 32.768 kHz Oscillator Frequency vs. Temperature
1.024 kHz output
Figure 35-22.Ultra Low-Power (ULP) Oscillator Frequency vs. Temperature
1 kHz output
p
3.0 V
1.8 V
0.99
0.995
1
1.005
1.01
1.015
1.02
1.025
1.03
-40 -30 -20 -10 0 10 20 30 40 50 60 70 80 90
T [°C]
f [kHz]
p
3.0 V
1.8 V
0.87
0.88
0.89
0.9
0.91
0.92
0.93
-40 -30 -20 -10 0 10 20 30 40 50 60 70 80 90
T [°C]
f1kHz output [kHz][Not recommended for new designs - Use XMEGA A1U series] XMEGA A1 [DATASHEET] 93
8067O–AVR–06/2013
Figure 35-23.Internal 2 MHz Oscillator CalA Calibration Step Size
T = -40 to 85C, VCC = 3V
Figure 35-24.Internal 2 MHz Oscillator CalB Calibration Step Size
T = -40 to 85C, VCC = 3V
0
0.001
0.002
0.003
0.004
0.005
0.006
0 20 40 60 80 100 120 140
CALA [LSB]
Step size: f [MHz]
0
0.005
0.01
0.015
0.02
0.025
0.03
0.035
0.04
0 10 20 30 40 50 60 70
CALB [LSB]
Step size: f [MHz][Not recommended for new designs - Use XMEGA A1U series] XMEGA A1 [DATASHEET] 94
8067O–AVR–06/2013
Figure 35-25.Internal 32 MHz Oscillator CalA Calibration Step Size
T = -40 to 85C, VCC = 3V
Figure 35-26.Internal 32 MHz Oscillator CalB Calibration Step Size
T = -40 to 85C, VCC = 3V
0
0.01
0.02
0.03
0.04
0.05
0.06
0.07
0.08
0.09
0 20 40 60 80 100 120 140
CALA
Step size: f [MHz]
0
0.1
0.2
0.3
0.4
0.5
0.6
0.7
0 10 20 30 40 50 60 70
CALB
Step size: f [MHz][Not recommended for new designs - Use XMEGA A1U series] XMEGA A1 [DATASHEET] 95
8067O–AVR–06/2013
35.11 PDI Speed
Figure 35-27.PDI Speed vs. VCC
25 °C
0
5
10
15
20
25
30
35
1.6 1.8 2 2.2 2.4 2.6 2.8 3 3.2 3.4 3.6
VCC [V]
fMAX [MHz][Not recommended for new designs - Use XMEGA A1U series] XMEGA A1 [DATASHEET] 96
8067O–AVR–06/2013
36. Errata
36.1 ATxmega64A1and ATxmega128A1 rev. H
Bandgap voltage input for the ACs can not be changed when used for both ACs simultaneously
VCC voltage scaler for AC is non-linear
The ADC has up to ±2 LSB inaccuracy
ADC gain stage output range is limited to 2.4 V
Sampling speed limited to 500 ksps for supply voltage below 2.0V
ADC Event on compare match non-functional
Bandgap measurement with the ADC is non-functional when VCC is below 2.7V
Accuracy lost on first three samples after switching input to ADC gain stage
The input difference between two succeeding ADC samples is limited by VREF
Increased noise when using internal 1.0V reference at low temperature
Configuration of PGM and CWCM not as described in XMEGA A Manual
PWM is not restarted properly after a fault in cycle-by-cycle mode
BOD will be enabled at any reset
BODACT fuse location is not correct
Sampled BOD in Active mode will cause noise when bandgap is used as reference
DAC has up to ±10 LSB noise in Sampled Mode
DAC is nonlinear and inaccurate when reference is above 2.4V or VCC - 0.6V
DAC refresh may be blocked in S/H mode
Conversion lost on DAC channel B in event triggered mode
Both DFLLs and both oscillators have to be enabled for one to work
Access error when multiple bus masters are accessing SDRAM
EEPROM page buffer always written when NVM DATA0 is written
Pending full asynchronous pin change interrupts will not wake the device
Pin configuration does not affect Analog Comparator Output
Low level interrupt triggered when pin input is disabled
JTAG enable does not override Analog Comparator B output
NMI Flag for Crystal Oscillator Failure automatically cleared
Flash Power Reduction Mode can not be enabled when entering sleep
Some NVM Commands are non-functional
Crystal start-up time required after power-save even if crystal is source for RTC
Setting PRHIRES bit makes PWM output unavailable
Accessing EBI address space with PREBI set will lock Bus Master
RTC Counter value not correctly read after sleep
Pending asynchronous RTC-interrupts will not wake up device
TWI, the minimum I2C SCL low time could be violated in Master Read mode
TWI address-mask feature is non-functional
TWI, a general address call will match independent of the R/W-bit value
TWI Transmit collision flag not cleared on repeated start
Clearing TWI Stop Interrupt Flag may lock the bus[Not recommended for new designs - Use XMEGA A1U series] XMEGA A1 [DATASHEET] 97
8067O–AVR–06/2013
TWI START condition at bus timeout will cause transaction to be dropped
TWI Data Interrupt Flag erroneously read as set
WDR instruction inside closed window will not issue reset
1. Bandgap voltage input for the ACs cannot be changed when used for both ACs simultaneously
If the Bandgap voltage is selected as input for one Analog Comparator (AC) and then selected/deselected as input
for another AC, the first comparator will be affected for up to 1 µs and could potentially give a wrong comparison
result.
Problem fix/Workaround
If the Bandgap is required for both ACs simultaneously, configure the input selection for both ACs before enabling
any of them.
2. VCC voltage scaler for AC is non-linear
The 6-bit VCC voltage scaler in the Analog Comparators is non-linear.
Figure 36-1. Analog Comparator Voltage Scaler vs. Scalefac
T = 25°C
Problem fix/Workaround
Use external voltage input for the analog comparator if accurate voltage levels are needed
3. The ADC has up to ±2 LSB inaccuracy
The ADC will have up to ±2 LSB inaccuracy, visible as a saw-tooth pattern on the input voltage/ output value transfer
function of the ADC. The inaccuracy increases with increasing voltage reference reaching ±2 LSB with 3V
reference.
3.3 V
2.7 V
1.8 V
0
0.5
1
1.5
2
2.5
3
3.5
0 5 10 15 20 25 30 35 40 45 50 55 60 65
SCALEFAC
VSCALE [V][Not recommended for new designs - Use XMEGA A1U series] XMEGA A1 [DATASHEET] 98
8067O–AVR–06/2013
Problem fix/Workaround
None, the actual ADC resolution will be reduced with up to ±2 LSB.
4. ADC gain stage output range is limited to 2.4 V
The amplified output of the ADC gain stage will never go above 2.4 V, hence the differential input will only give correct
output when below 2.4 V/gain. For the available gain settings, this gives a differential input range of:
Problem fix/Workaround
Keep the amplified voltage output from the ADC gain stage below 2.4 V in order to get a correct result, or keep
ADC voltage reference below 2.4 V.
5. Sampling speed limited to 500 ksps for supply voltage below 2.0V
The sampling frequency is limited to 500 ksps for supply voltage below 2.0V. At higher sampling rate the INL error
will be several hundred LSB.
Problem fix/Workaround
None.
6. ADC Event on compare match non-functional
ADC signalling event will be given at every conversion complete even if Interrupt mode (INTMODE) is set to
BELOW or ABOVE.
Problem fix/Workaround
Enable and use interrupt on compare match when using the compare function.
7. Bandgap measurement with the ADC is non-functional when VCC is below 2.7V
The ADC can not be used to do bandgap measurements when VCC is below 2.7V.
Problem fix/Workaround
– 1x gain: 2.4 V
– 2x gain: 1.2 V
– 4x gain: 0.6 V
– 8x gain: 300 mV
– 16x gain: 150 mV
– 32x gain: 75 mV
– 64x gain: 38 mV[Not recommended for new designs - Use XMEGA A1U series] XMEGA A1 [DATASHEET] 99
8067O–AVR–06/2013
None.
8. Accuracy lost on first three samples after switching input to ADC gain stage
Due to memory effect in the ADC gain stage, the first three samples after changing input channel must be disregarded
to achieve 12-bit accuracy.
Problem fix/Workaround
Run three ADC conversions and discard these results after changing input channels to ADC gain stage.
9. The input difference between two succeeding ADC samples is limited by VREF
If the difference in input between two samples changes more than the size of the reference, the ADC will not be
able to convert the data correctly. Two conversions will be required before the conversion is correct.
Problem fix/Workaround
Discard the first conversion if input is changed more than VREF, or ensure that the input never changes more then
VREF.
10. Increased noise when using internal 1.0V reference at low temperature
When operating at below 0C and using internal 1.0V reference the RMS noise will be up 4 LSB, Peak-to-peak
noise up to 25 LSB.
Problem fix/Workaround
Use averaging to remove noise.
11. Configuration of PGM and CWCM not as described in XMEGA A Manual
Enabling Common Waveform Channel Mode will enable Pattern generation mode (PGM), but not Common Waveform
Channel Mode.
Enabling Pattern Generation Mode (PGM) and not Common Waveform Channel Mode (CWCM) will enable both
Pattern Generation Mode and Common Waveform Channel Mode.
Problem fix/Workaround
12 PWM is not restarted properly after a fault in cycle-by-cycle mode
When the AWeX fault restore mode is set to cycle-by-cycle, the waveform output will not return to normal operation
at first update after fault condition is no longer present.
PGM CWCM Description
0 0 PGM and CWCM disabled
0 1 PGM enabled
1 0 PGM and CWCM enabled
1 1 PGM enabled[Not recommended for new designs - Use XMEGA A1U series] XMEGA A1 [DATASHEET] 100
8067O–AVR–06/2013
Problem fix/Workaround
Do a write to any AWeX I/O register to re-enable the output.
13. BOD will be enabled after any reset
If any reset source goes active, the BOD will be enabled and keep the device in reset if the VCC voltage is below
the programmed BOD level. During Power-On Reset, reset will not be released until VCC is above the programmed
BOD level even if the BOD is disabled.
Problem fix/Workaround
Do not set the BOD level higher than VCC even if the BOD is not used.
14. BODACT fuse location is not correct
The fuses for enabling BOD in active mode (BODACT) are located at FUSEBYTE2, bit 2 and 3 and not in FUSEBYTE
5 as described in the XMEGA A Manual.
Problem fix/Workaround
Access the fuses in FUSEBYTE2.
15. Sampled BOD in Active mode will cause noise when bandgap is used as reference
Using the BOD in sampled mode when the device is running in Active or Idle mode will add noise on the bandgap
reference for ADC, DAC and Analog Comparator.
Problem fix/Workaround
If the bandgap is used as reference for either the ADC, DAC or Analog Comparator, the BOD must not be set in
sampled mode.
16. DAC has up to ±10 LSB noise in Sampled Mode
The DAC has noise of up to ±10 LSB in Sampled Mode for entire operation range.
Problem fix/Workaround
Use the DAC in continuous mode.
17. DAC is nonlinear and inaccurate when reference is above 2.4V or VCC - 0.6V
Using the DAC with a reference voltage above 2.4V or VCC - 0.6V will give inaccurate output when converting
codes that give below 0.75V output:
±10 LSB for continuous mode
±200 LSB for Sample and Hold mode
Problem fix/Workaround
None.[Not recommended for new designs - Use XMEGA A1U series] XMEGA A1 [DATASHEET] 101
8067O–AVR–06/2013
18. DAC has up to ±10 LSB noise in Sampled Mode
If the DAC is running in Sample and Hold (S/H) mode and conversion for one channel is done at maximum rate
(i.e. the DAC is always busy doing conversion for this channel), this will block refresh signals to the second channel.
Problem fix/Workaround
When using the DAC in S/H mode, ensure that none of the channels is running at maximum conversion rate, or
ensure that the conversion rate of both channels is high enough to not require refresh.
19. Conversion lost on DAC channel B in event triggered mode
If during dual channel operation channel 1 is set in auto trigged conversion mode, channel 1 conversions are occasionally
lost. This means that not all data-values written to the Channel 1 data register are converted.
Problem fix/Workaround
Keep the DAC conversion interval in the range 000-001 (1 and 3 CLK), and limit the Peripheral clock frequency so
the conversion internal never is shorter than 1.5 µs.
20. Both DFLLs and both oscillators have to be enabled for one to work
In order to use the automatic runtime calibration for the 2 MHz or the 32 MHz internal oscillators, the DFLL for both
oscillators and both oscillators have to be enabled for one to work.
Problem fix/Workaround
Enable both DFLLs and both oscillators when using automatic runtime calibration for either of the internal
oscillators.
21. Access error when multiple bus masters are accessing SDRAM
If one bus master (CPU and DMA channels) is using the EBI to access an SDRAM in burst mode and another bus
master is accessing the same row number in a different BANK of the SDRAM in the cycle directly after the burst
access is complete, the access for the second bus master will fail.
Problem fix/Workaround
Do not put stack pointer in SDRAM and use DMA Controller in 1 byte burst mode if CPU and DMA Controller are
required to access SDRAM at the same time.
22. EEPROM page buffer always written when NVM DATA0 is written
If the EEPROM is memory mapped, writing to NVM DATA0 will corrupt data in the EEPROM page buffer.
Problem fix/Workaround
Before writing to NVM DATA0, for example when doing software CRC or flash page buffer write, check if EEPROM
page buffer active loading flag (EELOAD) is set. Do not write NVM DATA0 when EELOAD is set.
23. Pending full asynchronous pin change interrupts will not wake the device[Not recommended for new designs - Use XMEGA A1U series] XMEGA A1 [DATASHEET] 102
8067O–AVR–06/2013
Any full asynchronous pin-change Interrupt from pin 2, on any port, that is pending when the sleep instruction is
executed, will be ignored until the device is woken from another source or the source triggers again. This applies
when entering all sleep modes where the System Clock is stopped.
Problem fix/Workaround
None.
24. Pin configuration does not affect Analog Comparator Output
The Output/Pull and inverted pin configuration does not affect the Analog Comparator output function.
Problem fix/Workaround
None for Output/Pull configuration.
For inverted I/O, configure the Analog Comparator to give an inverted result (i.e. connect positive input to the negative
AC input and vice versa), or use and external inverter to change polarity of Analog Comparator output.
25. Low level interrupt triggered when pin input is disabled
If a pin input is disabled, but pin is configured to trigger on low level, interrupt request will be sent.
Problem fix/Workaround
Ensure that Interrupt mask for the disabled pin is cleared.
26. JTAG enable does not override Analog Comparator B output
When JTAG is enabled this will not override the Analog Comparator B (ACB) output, AC0OUT on pin 7 if this is
enabled.
Problem fix/Workaround
Use Analog Comparator output for ACA when JTAG is used, or use the PDI as debug interface.
27. NMI Flag for Crystal Oscillator Failure automatically cleared
NMI flag for Crystal Oscillator Failure (XOSCFDIF) will be automatically cleared when executing the NMI interrupt
handler.
Problem fix/Workaround
This device revision has only one NMI interrupt source, so checking the interrupt source in software is not
required.
28. Flash Power Reduction Mode can not be enabled when entering sleep
If Flash Power Reduction Mode is enabled when entering Power-save or Extended Standby sleep mode, the
device will only wake up on every fourth wake-up request. If Flash Power Reduction Mode is enabled when entering
Idle sleep mode, the wake-up time will vary with up to 16 CPU clock cycles.[Not recommended for new designs - Use XMEGA A1U series] XMEGA A1 [DATASHEET] 103
8067O–AVR–06/2013
Problem fix/Workaround
Disable Flash Power Reduction mode before entering sleep mode.
29. Some NVM Commands are non-functional
The following NVM commands are non-functional:
Problem fix/Workaround
None for Flash Range CRC
Use separate programming commands for accessing application and boot section.
30. Crystal start-up time required after power-save even if crystal is source for RTC
Even if 32.768 kHz crystal is used for RTC during sleep, the clock from the crystal will not be ready for the system
before the specified start-up time. See "XOSCSEL[3:0]: Crystal Oscillator Selection" in XMEGA A Manual. If BOD
is used in active mode, the BOD will be on during this period (0.5s).
Problem fix/Workaround
If faster start-up is required, go to sleep with internal oscillator as system clock.
31. Setting PRHIRES bit makes PWM output unavailable
Setting the HIRES Power Reduction (PR) bit for PORTx will make any Frequency or PWM output for the corresponding
Timer/Counters (TCx0 and TCx1) unavailable on the pin even if the Hi-Res is not used.
Problem fix/Workaround
Do not write the HIRES PR bit on PORTx when frequency or PWM output from TCx0/1 is used.
– 0x2B Erase Flash Page
– 0x2E Write Flash Page
– 0x2F Erase & Write Flash Page
– 0x3A Flash Range CRC
– 0x22 Erase Application Section Page
– 0x24 Write Application Section Page
– 0x25 Erase & Write Application Section Page
– 0x2A Erase Boot Loader Section Page
– 0x2C Write Boot Loader Section Page
– 0x2D Erase & Write Boot Loader Section Page[Not recommended for new designs - Use XMEGA A1U series] XMEGA A1 [DATASHEET] 104
8067O–AVR–06/2013
32. Accessing EBI address space with PREBI set will lock Bus Master
If EBI Power Reduction Bit is set while EBI is enabled, accessing external memory could result in bus hang-up,
blocking all further access to all data memory.
Problem fix/Workaround
Ensure that EBI is disabled before setting EBI Power Reduction bit.
33. RTC Counter value not correctly read after sleep
If the RTC is set to wake up the device on RTC Overflow and bit 0 of RTC CNT is identical to bit 0 of RTC PER as
the device is entering sleep, the value in the RTC count register can not be read correctly within the first prescaled
RTC clock cycle after wakeup. The value read will be the same as the value in the register when entering sleep.
The same applies if RTC Compare Match is used as wake-up source.
Problem fix/Workaround
Wait at least one prescaled RTC clock cycle before reading the RTC CNT value.
34. Pending asynchronous RTC-interrupts will not wake up device
Asynchronous Interrupts from the Real-Time-Counter that is pending when the sleep instruction is executed, will
be ignored until the device is woken from another source or the source triggers again.
Problem fix/Workaround
None.
35. TWI, the minimum I2
C SCL low time could be violated in Master Read mode
If the TWI is in Master Read mode and issues a Repeated Start on the bus, this will immediately release the SCL
line even if one complete SCL low period has not passed. This means that the minimum SCL low time in the I2C
specification could be violated.
Problem fix/Workaround
If this is a problem in the application, ensure in software that the Repeated Start is never issued before one SCL
low time has passed.
36. TWI address-mask feature is non-functional
The address-mask feature is non-functional, so the TWI can not perform hardware address match on more than
one address.
Problem fix/Workaround
If the TWI must respond to multiple addresses, enable Promiscuous Mode for the TWI to respond to all address
and implement the address-mask function in software.[Not recommended for new designs - Use XMEGA A1U series] XMEGA A1 [DATASHEET] 105
8067O–AVR–06/2013
37. TWI, a general address call will match independent of the R/W-bit value
When the TWI is in Slave mode and a general address call is issued on the bus, the TWI Slave will get an address
match regardless of the received R/W bit.
Problem fix/Workaround
Use software to check the R/W-bit on general call address match.
38. TWI Transmit collision flag not cleared on repeated start
The TWI transmit collision flag should be automatically cleared on start and repeated start, but is only cleared on
start.
Problem fix/Workaround
Clear the flag in software after address interrupt.
39. Clearing TWI Stop Interrupt Flag may lock the bus
If software clears the STOP Interrupt Flag (APIF) on the same Peripheral Clock cycle as the hardware sets this
flag due to a new address received, CLKHOLD is not cleared and the SCL line is not released. This will lock the
bus.
Problem fix/Workaround
Check if the bus state is IDLE. If this is the case, it is safe to clear APIF. If the bus state is not IDLE, wait for the
SCL pin to be low before clearing APIF.
Code:
/* Only clear the interrupt flag if within a "safe zone". */
while ( /* Bus not IDLE: */
((COMMS_TWI.MASTER.STATUS & TWI_MASTER_BUSSTATE_gm) !=
TWI_MASTER_BUSSTATE_IDLE_gc)) &&
/* SCL not held by slave: */
!(COMMS_TWI.SLAVE.STATUS & TWI_SLAVE_CLKHOLD_bm)
)
{
/* Ensure that the SCL line is low */
if ( !(COMMS_PORT.IN & PIN1_bm) )
if ( !(COMMS_PORT.IN & PIN1_bm) )
break;
}
/* Check for an pending address match interrupt */
if ( !(COMMS_TWI.SLAVE.STATUS & TWI_SLAVE_CLKHOLD_bm) )
{
/* Safely clear interrupt flag */
COMMS_TWI.SLAVE.STATUS |= (uint8_t)TWI_SLAVE_APIF_bm;
}[Not recommended for new designs - Use XMEGA A1U series] XMEGA A1 [DATASHEET] 106
8067O–AVR–06/2013
40. TWI START condition at bus timeout will cause transaction to be dropped
If Bus Timeout is enabled and a timeout occurs on the same Peripheral Clock cycle as a START is detected, the
transaction will be dropped.
Problem fix/Workaround
None.
41. TWI Data Interrupt Flag erroneously read as set
When issuing the TWI slave response command CMD=0b11, it takes 1 Peripheral Clock cycle to clear the data
interrupt flag (DIF). A read of DIF directly after issuing the command will show the DIF still set.
Problem fix/Workaround
Add one NOP instruction before checking DIF.
42. WDR instruction inside closed window will not issue reset
When a WDR instruction is execute within one ULP clock cycle after updating the window control register, the
counter can be cleared without giving a system reset.
Problem fix/Workaround
Wait at least one ULP clock cycle before executing a WDR instruction.[Not recommended for new designs - Use XMEGA A1U series] XMEGA A1 [DATASHEET] 107
8067O–AVR–06/2013
36.2 ATxmega64A1 and ATxmega128A1 rev. G
Bootloader Section in Flash is non-functional
Bandgap voltage input for the ACs cannot be changed when used for both ACs simultaneously
DAC is nonlinear and inaccurate when reference is above 2.4V
ADC gain stage output range is limited to 2.4 V
The ADC has up to ±2 LSB inaccuracy
TWI, a general address call will match independent of the R/W-bit value
TWI, the minimum I2
C SCL low time could be violated in Master Read mode
Setting HIRES PR bit makes PWM output unavailable
EEPROM erase and write does not work with all System Clock sources
BOD will be enabled after any reset
Propagation delay analog Comparator increasing to 2 ms at -40C
Sampled BOD in Active mode will cause noise when bandgap is used as reference
Default setting for SDRAM refresh period too low
Flash Power Reduction Mode can not be enabled when entering sleep mode
Enabling Analog Comparator B output will cause JTAG failure
JTAG enable does not override Analog Comparator B output
Bandgap measurement with the ADC is non-functional when VCC is below 2.7V
DAC refresh may be blocked in S/H mode
Inverted I/O enable does not affect Analog Comparator Output
Both DFLLs and both oscillators has to be enabled for one to work
1. Bootloader Section in Flash is non-functional
The Bootloader Section is non-functional, and bootloader or application code cannot reside in this part of the
Flash.
Problem fix/Workaround
None, do not use the Bootloader Section.
2. Bandgap voltage input for the ACs cannot be changed when used for both ACs simultaneously
If the Bandgap voltage is selected as input for one Analog Comparator (AC) and then selected/deselected as input
for the another AC, the first comparator will be affected for up to 1 us and could potentially give a wrong comparison
result.
Problem fix/Workaround
If the Bandgap is required for both ACs simultaneously, configure the input selection for both ACs before enabling
any of them.
3. DAC is nonlinear and inaccurate when reference is above 2.4V
Using the DAC with a reference voltage above 2.4V give inaccurate output when converting codes that give below
0.75V output:
±20 LSB for continuous mode[Not recommended for new designs - Use XMEGA A1U series] XMEGA A1 [DATASHEET] 108
8067O–AVR–06/2013
±200 LSB for Sample and Hold mode
Problem fix/Workaround
None, avoid using a voltage reference above 2.4V.
4. ADC gain stage output range is limited to 2.4 V
The amplified output of the ADC gain stage will never go above 2.4 V, hence the differential input will only give correct
output when below 2.4 V/gain. For the available gain settings, this gives a differential input range of:
Problem fix/Workaround
Keep the amplified voltage output from the ADC gain stage below 2.4 V in order to get a correct result, or keep
ADC voltage reference below 2.4 V.
5. The ADC has up to ±2 LSB inaccuracy
The ADC will have up to ±2 LSB inaccuracy, visible as a saw-tooth pattern on the input voltage/ output value transfer
function of the ADC. The inaccuracy increases with increasing voltage reference reaching ±2 LSB with 3V
reference.
Problem fix/Workaround
None, the actual ADC resolution will be reduced with up to ±2 LSB.
6. TWI, a general address call will match independent of the R/W-bit value
When the TWI is in Slave mode and a general address call is issued on the bus, the TWI Slave will get an address
match regardless of the R/W-bit (ADDR[0] bit) value in the Slave Address Register.
Problem fix/Workaround
Use software to check the R/W-bit on general call address match.
– 1x gain: 2.4 V
– 2x gain: 1.2 V
– 4x gain: 0.6 V
– 8x gain: 300 mV
– 16x gain: 150 mV
– 32x gain: 75 mV
– 64x gain: 38 mV[Not recommended for new designs - Use XMEGA A1U series] XMEGA A1 [DATASHEET] 109
8067O–AVR–06/2013
7. TWI, the minimum I2
C SCL low time could be violated in Master Read mode
When the TWI is in Master Read mode and issuing a Repeated Start on the bus, this will immediately release the
SCL line even if one complete SCL low period has not passed. This means that the minimum SCL low time in the
I
2
C specification could be violated.
Problem fix/Workaround
If this causes a potential problem in the application, software must ensure that the Repeated Start is never issued
before one SCL low time has passed.
8. Setting HIRES PR bit makes PWM output unavailable
Setting the HIRES Power Reduction (PR) bit for PORTx will make any Frequency or PWM output for the corresponding
Timer/Counters (TCx0 and TCx1) unavailable on the pin.
Problem fix/Workaround
Do not write the HIRES PR bit on PORTx when frequency or PWM output from TCx0/1 is used.
9. EEPROM erase and write does not work with all System Clock sources
When doing EEPROM erase or Write operations with other clock sources than the 2 MHz RCOSC, Flash will be
read wrongly for one or two clock cycles at the end of the EEPROM operation.
Problem fix/Workaround
Alt 1: Use the internal 2 MHz RCOSC when doing erase or write operations on EEPROM.
Alt 2: Ensure to be in sleep mode while completing erase or write on EEPROM. After starting erase or write operations
on EEPROM, other interrupts should be disabled and the device put to sleep.
10. BOD will be enabled after any reset
If any reset source goes active, the BOD will be enabled and keep the device in reset if the VCC voltage is below
the programmed BOD level. During Power-On Reset, reset will not be released until VCC is above the programmed
BOD level even if the BOD is disabled.
Problem fix/Workaround
Do not set the BOD level higher than VCC even if the BOD is not used.
11. Propagation delay analog Comparator increasing to 2 ms at -40 °C
When the analog comparator is used at temperatures reaching down to -40 °C, the propagation delay will increase
to ~2 ms.
Problem fix/Workaround
None[Not recommended for new designs - Use XMEGA A1U series] XMEGA A1 [DATASHEET] 110
8067O–AVR–06/2013
12. Sampled BOD in Active mode will cause noise when bandgap is used as reference
Using the BOD in sampled mode when the device is running in Active or Idle mode will add noise on the bandgap
reference for ADC and DAC.
Problem fix/Workaround
If the bandgap is used as reference for either the ADC or the DAC, the BOD must not be set in sampled mode.
13. Default setting for SDRAM refresh period too low
If the SDRAM refresh period is set to a value less then 0x20, the SDRAM content may be corrupted when accessing
through On-Chip Debug sessions.
Problem fix/Workaround
The SDRAM refresh period (REFRESHH/L) should not be set to a value less then 0x20.
14. Flash Power Reduction Mode can not be enabled when entering sleep mode
If Flash Power Reduction Mode is enabled when entering Power-save or Extended Standby sleep mode, the
device will only wake up on every fourth wake-up request.
If Flash Power Reduction Mode is enabled when entering Idle sleep mode, the wake-up time will vary with up to 16
CPU clock cycles.
Problem fix/Workaround
Disable Flash Power Reduction mode before entering sleep mode.
15. JTAG enable does not override Analog Comparator B output
When JTAG is enabled this will not override the Anlog Comparator B (ACB)ouput, AC0OUT on pin 7 if this is
enabled.
Problem fix/Workaround
AC0OUT for ACB should not be enabled when JTAG is used. Use only analog comparator output for ACA when
JTAG is used, or use the PDI as debug interface.
16. Bandgap measurement with the ADC is non-functional when VCC is below 2.7V
The ADC cannot be used to do bandgap measurements when VCC is below 2.7V.
Problem fix/Workaround
If internal voltages must be measured when VCC is below 2.7V, measure the internal 1.00V reference instead of
the bandgap.[Not recommended for new designs - Use XMEGA A1U series] XMEGA A1 [DATASHEET] 111
8067O–AVR–06/2013
17. DAC refresh may be blocked in S/H mode
If the DAC is running in Sample and Hold (S/H) mode and conversion for one channel is done at maximum rate
(i.e. the DAC is always busy doing conversion for this channel), this will block refresh signals to the second channel.
Problem fix/Workarund
When using the DAC in S/H mode, ensure that none of the channels is running at maximum conversion rate, or
ensure that the conversion rate of both channels is high enough to not require refresh.
18. Inverted I/O enable does not affect Analog Comparator Output
The inverted I/O pin function does not affect the Analog Comparator output function.
Problem fix/Workarund
Configure the analog comparator setup to give a inverted result (i.e. connect positive input to the negative AC input
and vice versa), or use and externel inverter to change polarity of Analog Comparator Output.
19. Both DFLLs and both oscillators has to be enabled for one to work
In order to use the automatic runtime calibration for the 2 MHz or the 32 MHz internal oscilla-tors, the DFLL for
both oscillators and both oscillators has to be enabled for one to work.
Problem fix/Workarund
Enabled both DFLLs and oscillators when using automatic runtime calibration for one of the internal oscillators. [Not recommended for new designs - Use XMEGA A1U series] XMEGA A1 [DATASHEET] 112
8067O–AVR–06/2013
37. Datasheet Revision History
Please note that the referring page numbers in this section are referred to this document. The referring revision in this
section are referring to the document revision.
37.1 8067O – 06/2013
37.2 8067N – 03/2013
37.3 8067M – 09/2010
37.4 8067L – 08/2010
1. Not recommended for new designs - Use XMEGA A1U series.
1. Removed all references to ATxmega192A1, ATxmega256A1 and ATxmega384A1.
2. Updated module description. Based on the XMEGA A1U device datasheet.
3. Updated analog comparator (AC) overview, Figure 28-1 on page 53.
4. Updated “ADC Characteristics” on page 76.
5 Updated page erase time in “Flash and EEPROM Memory Characteristics” on page 76.
6 Updated Output low voltage conditions from IOH to IOL in “PAD Characteristics” on page 79.
7. Removed TBDs from:
“DC Characteristics” on page 73.
“DAC Characteristics” on page 78.
“Bandgap Characteristics” on page 78.
8. Updated “Errata” on page 96 to be valid for both ATxmega64A1 and ATxmega128A1.
9. Removed Boundary Scan Order table.
1. Updated Errata “ATxmega64A1and ATxmega128A1 rev. H” on page 96
1. Removed Footnote 3 of Figure 2-1 on page 3
2. Updated “Features” on page 32. Event Channel 0 output on port pin 7
3. Updated “DC Characteristics” on page 73, by adding ICC for Flash/EEPROM Programming.
4. Added AVCC in “ADC Characteristics” on page 76.
5. Updated Start up time in “ADC Characteristics” on page 76. [Not recommended for new designs - Use XMEGA A1U series] XMEGA A1 [DATASHEET] 113
8067O–AVR–06/2013
37.5 8067K – 02/2010
37.6 8067J – 02/2010
37.7 8067I – 04/2009
37.8 8067H – 04/2009
6. Updated “DAC Characteristics” on page 78. Removed DC output impedance.
7. Fixed typo in “Packaging information” section.
8. Fixed typo in “Errata” section.
1. Added “PDI Speed vs. VCC” on page 95.
1. Removed JTAG Reset from the datasheet.
2. Updated “Timer/Counter and AWEX functions” on page 56.
3. Updated “Alternate Pin Functions” on page 58.
3. Updated all “Electrical Characteristics” on page 73.
4. Updated “PAD Characteristics” on page 79.
5. Changed Internal Oscillator Speed to “Oscillators and Wake-up Time” on page 92.
6. Updated “Errata” on page 96
1. Updated “Ordering Information” on page 2.
2. Updated “PAD Characteristics” on page 79.
1. Editorial updates.
2. Updated “Overview” on page 54.
3. Updated Table 29-9 on page 54.
4. Updated “Peripheral Module Address Map” on page 62. IRCOM has address map: 0x08F8.
5. Updated “Electrical Characteristics” on page 73.
6. Updated “PAD Characteristics” on page 79.
7. Updated “Typical Characteristics” on page 82.[Not recommended for new designs - Use XMEGA A1U series] XMEGA A1 [DATASHEET] 114
8067O–AVR–06/2013
37.9 8067G – 11/2008
37.10 8067F – 09/2008
37.11 8067E – 08/2008
37.12 8067D – 07/2008
1. Updated “Block Diagram” on page 6.
2. Updated feature list in “Memories” on page 12.
3. Updated “Programming and Debugging” on page 54.
4. Updated “Peripheral Module Address Map” on page 62. IRCOM has address 0x8F0.
5. Added “Electrical Characteristics” on page 73.
6. Added “Typical Characteristics” on page 82.
7. Added “ATxmega64A1and ATxmega128A1 rev. H” on page 96.
8. Updated “ATxmega64A1 and ATxmega128A1 rev. G” on page 107.
1. Updated “Features” on page 1
2. Updated “Ordering Information” on page 2
3. Updated Figure 7-1 on page 11 and Figure 7-2 on page 11.
4. Updated Table 7-2 on page 15.
5. Updated “Features” on page 48 and “Overview” on page 48.
6. Removed “Interrupt Vector Summary” section from datasheet.
1. Changed Figure 2-1’s title to “Block diagram and pinout” on page 3.
2. Updated Figure 2-2 on page 4.
3. Updated Table 29-2 on page 51 and Table 29-3 on page 52.
1. Updated “Ordering Information” on page 2.
2. Updated “Peripheral Module Address Map” on page 62.
3. Inserted “Interrupt Vector Summary” on page 56.[Not recommended for new designs - Use XMEGA A1U series] XMEGA A1 [DATASHEET] 115
8067O–AVR–06/2013
37.13 8067C – 06/2008
37.14 8067B – 05/2008
37.15 8067A – 02/2008
1. Updated the Front page and “Features” on page 1.
2. Updated the “DC Characteristics” on page 73.
3. Updated Figure 3-1 on page 6.
4. Added “Flash and EEPROM Page Size” on page 15.
5. Updated Table 33-6 on page 72 with new data: Gain Error, Offset Error and Signal -to-Noise
Ratio (SNR).
6. Updated Errata “ATxmega64A1 and ATxmega128A1 rev. G” on page 107.
1. Updated “Pinout/Block Diagram” on page 3 and “Pinout and Pin Functions” on page 55.
2. Added XMEGA A1 Block Diagram, Figure 3-1 on page 6.
3. Updated “Overview” on page 5 included the XMEGA A1 explanation text on page 6.
4. Updated AVR CPU “Features” on page 8.
5. Updated Event System block diagram, Figure 10-1 on page 20.
6. Updated “Interrupts and Programmable Multilevel Interrupt Controller” on page 29.
7. Updated “AC - Analog Comparator” on page 52.
8. Updated “Alternate Pin Function Description” on page 55.
9. Updated “Alternate Pin Functions” on page 58.
10. Updated “Typical Characteristics” on page 82.
11. Updated “Ordering Information” on page 2.
12. Updated “Overview” on page 5.
13. Updated Figure 6-1 on page 8.
14. Inserted a new Figure 16-1 on page 37.
15. Updated Speed grades in “Speed” on page 75.
16. Added a new ATxmega384A1 device in “Features” on page 1, updated “Ordering Information” on
page 2 and “Memories” on page 12.
17. Replaced the Figure 3-1 on page 6 by a new XMEGA A1 detailed block diagram.
18. Inserted Errata “ATxmega64A1 and ATxmega128A1 rev. G” on page 107.
1. Initial revision.[Not recommended for new designs - Use XMEGA A1U series] XMEGA A1 [DATASHEET] 116
8067O–AVR–06/2013[Not recommended for new designs - Use XMEGA A1U series] XMEGA A1 [DATASHEET] 1
8067O–AVR–06/2013
Table of Contents
Features . . . . . . . . . . . . . . . . . . . . . . . . . . . . . . . . . . . . . . . . . . . . . . . . . . 1
1. Ordering Information . . . . . . . . . . . . . . . . . . . . . . . . . . . . . . . . . . . . . 2
2. Pinout/Block Diagram . . . . . . . . . . . . . . . . . . . . . . . . . . . . . . . . . . . . 3
3. Overview . . . . . . . . . . . . . . . . . . . . . . . . . . . . . . . . . . . . . . . . . . . . . . 5
3.1 Block Diagram. . . . . . . . . . . . . . . . . . . . . . . . . . . . . . . . . . . . . . . . . . . . . . . . . . 6
4. Resources . . . . . . . . . . . . . . . . . . . . . . . . . . . . . . . . . . . . . . . . . . . . . 7
4.1 Recommended reading. . . . . . . . . . . . . . . . . . . . . . . . . . . . . . . . . . . . . . . . . . . 7
5. Capacitive touch sensing . . . . . . . . . . . . . . . . . . . . . . . . . . . . . . . . . . 7
6. Disclaimer . . . . . . . . . . . . . . . . . . . . . . . . . . . . . . . . . . . . . . . . . . . . . 7
7. AVR CPU . . . . . . . . . . . . . . . . . . . . . . . . . . . . . . . . . . . . . . . . . . . . . . 8
7.1 Features . . . . . . . . . . . . . . . . . . . . . . . . . . . . . . . . . . . . . . . . . . . . . . . . . . . . . . 8
7.2 Overview . . . . . . . . . . . . . . . . . . . . . . . . . . . . . . . . . . . . . . . . . . . . . . . . . . . . . . 8
7.3 Architectural Overview . . . . . . . . . . . . . . . . . . . . . . . . . . . . . . . . . . . . . . . . . . . 8
7.4 ALU - Arithmetic Logic Unit. . . . . . . . . . . . . . . . . . . . . . . . . . . . . . . . . . . . . . . 10
7.5 Program Flow . . . . . . . . . . . . . . . . . . . . . . . . . . . . . . . . . . . . . . . . . . . . . . . . . 10
7.6 Status Register . . . . . . . . . . . . . . . . . . . . . . . . . . . . . . . . . . . . . . . . . . . . . . . . 10
7.7 Register File . . . . . . . . . . . . . . . . . . . . . . . . . . . . . . . . . . . . . . . . . . . . . . . . . . 11
8. Memories . . . . . . . . . . . . . . . . . . . . . . . . . . . . . . . . . . . . . . . . . . . . . 12
8.1 Features . . . . . . . . . . . . . . . . . . . . . . . . . . . . . . . . . . . . . . . . . . . . . . . . . . . . . 12
8.2 Overview . . . . . . . . . . . . . . . . . . . . . . . . . . . . . . . . . . . . . . . . . . . . . . . . . . . . . 12
8.3 In-System Programmable Flash Program Memory. . . . . . . . . . . . . . . . . . . . . 13
8.4 Fuses and Lock bits . . . . . . . . . . . . . . . . . . . . . . . . . . . . . . . . . . . . . . . . . . . . 14
8.5 Data Memory . . . . . . . . . . . . . . . . . . . . . . . . . . . . . . . . . . . . . . . . . . . . . . . . . 14
8.6 EEPROM . . . . . . . . . . . . . . . . . . . . . . . . . . . . . . . . . . . . . . . . . . . . . . . . . . . . 15
8.7 I/O Memory . . . . . . . . . . . . . . . . . . . . . . . . . . . . . . . . . . . . . . . . . . . . . . . . . . . 15
8.8 External Memory. . . . . . . . . . . . . . . . . . . . . . . . . . . . . . . . . . . . . . . . . . . . . . . 15
8.9 Data Memory and Bus Arbitration. . . . . . . . . . . . . . . . . . . . . . . . . . . . . . . . . . 15
8.10 Memory Timing . . . . . . . . . . . . . . . . . . . . . . . . . . . . . . . . . . . . . . . . . . . . . . . . 16
8.11 Device ID and Revision. . . . . . . . . . . . . . . . . . . . . . . . . . . . . . . . . . . . . . . . . . 16
8.12 I/O Memory Protection . . . . . . . . . . . . . . . . . . . . . . . . . . . . . . . . . . . . . . . . . . 16
8.13 JTAG Disable . . . . . . . . . . . . . . . . . . . . . . . . . . . . . . . . . . . . . . . . . . . . . . . . . 16
8.14 Flash and EEPROM Page Size . . . . . . . . . . . . . . . . . . . . . . . . . . . . . . . . . . . 16
9. DMAC - Direct Memory Access Controller . . . . . . . . . . . . . . . . . . . . 18
9.1 Features . . . . . . . . . . . . . . . . . . . . . . . . . . . . . . . . . . . . . . . . . . . . . . . . . . . . . 18
9.2 Overview . . . . . . . . . . . . . . . . . . . . . . . . . . . . . . . . . . . . . . . . . . . . . . . . . . . . . 18
10. Event System . . . . . . . . . . . . . . . . . . . . . . . . . . . . . . . . . . . . . . . . . . 19
10.1 Features . . . . . . . . . . . . . . . . . . . . . . . . . . . . . . . . . . . . . . . . . . . . . . . . . . . . . 19
10.2 Overview . . . . . . . . . . . . . . . . . . . . . . . . . . . . . . . . . . . . . . . . . . . . . . . . . . . . . 19
11. System Clock and Clock options . . . . . . . . . . . . . . . . . . . . . . . . . . . 21
11.1 Features . . . . . . . . . . . . . . . . . . . . . . . . . . . . . . . . . . . . . . . . . . . . . . . . . . . . . 21
11.2 Overview . . . . . . . . . . . . . . . . . . . . . . . . . . . . . . . . . . . . . . . . . . . . . . . . . . . . . 21[Not recommended for new designs - Use XMEGA A1U series] XMEGA A1 [DATASHEET] 2
8067O–AVR–06/2013
11.3 Clock Options . . . . . . . . . . . . . . . . . . . . . . . . . . . . . . . . . . . . . . . . . . . . . . . . . 22
12. Power Management and Sleep Modes . . . . . . . . . . . . . . . . . . . . . . 24
12.1 Features . . . . . . . . . . . . . . . . . . . . . . . . . . . . . . . . . . . . . . . . . . . . . . . . . . . . . 24
12.2 Overview . . . . . . . . . . . . . . . . . . . . . . . . . . . . . . . . . . . . . . . . . . . . . . . . . . . . . 24
12.3 Sleep Modes . . . . . . . . . . . . . . . . . . . . . . . . . . . . . . . . . . . . . . . . . . . . . . . . . . 24
13. System Control and Reset . . . . . . . . . . . . . . . . . . . . . . . . . . . . . . . . 26
13.1 Features . . . . . . . . . . . . . . . . . . . . . . . . . . . . . . . . . . . . . . . . . . . . . . . . . . . . . 26
13.2 Overview . . . . . . . . . . . . . . . . . . . . . . . . . . . . . . . . . . . . . . . . . . . . . . . . . . . . . 26
13.3 Reset Sequence . . . . . . . . . . . . . . . . . . . . . . . . . . . . . . . . . . . . . . . . . . . . . . . 26
13.4 Reset Sources . . . . . . . . . . . . . . . . . . . . . . . . . . . . . . . . . . . . . . . . . . . . . . . . 26
13.5 WDT - Watchdog Timer . . . . . . . . . . . . . . . . . . . . . . . . . . . . . . . . . . . . . . . . . 28
13.6 Overview . . . . . . . . . . . . . . . . . . . . . . . . . . . . . . . . . . . . . . . . . . . . . . . . . . . . . 28
14. Interrupts and Programmable Multilevel Interrupt Controller . . . . . . 29
14.1 Features . . . . . . . . . . . . . . . . . . . . . . . . . . . . . . . . . . . . . . . . . . . . . . . . . . . . . 29
14.2 Overview . . . . . . . . . . . . . . . . . . . . . . . . . . . . . . . . . . . . . . . . . . . . . . . . . . . . . 29
14.3 Interrupt vectors . . . . . . . . . . . . . . . . . . . . . . . . . . . . . . . . . . . . . . . . . . . . . . . 29
15. I/O Ports . . . . . . . . . . . . . . . . . . . . . . . . . . . . . . . . . . . . . . . . . . . . . . 32
15.1 Features . . . . . . . . . . . . . . . . . . . . . . . . . . . . . . . . . . . . . . . . . . . . . . . . . . . . . 32
15.2 Overview . . . . . . . . . . . . . . . . . . . . . . . . . . . . . . . . . . . . . . . . . . . . . . . . . . . . . 32
15.3 Output Driver. . . . . . . . . . . . . . . . . . . . . . . . . . . . . . . . . . . . . . . . . . . . . . . . . . 33
15.4 Input sensing. . . . . . . . . . . . . . . . . . . . . . . . . . . . . . . . . . . . . . . . . . . . . . . . . . 35
15.5 Port Interrupt . . . . . . . . . . . . . . . . . . . . . . . . . . . . . . . . . . . . . . . . . . . . . . . . . . 35
15.6 Alternate Port Functions . . . . . . . . . . . . . . . . . . . . . . . . . . . . . . . . . . . . . . . . . 35
16. T/C - 16-bit Timer/Counter . . . . . . . . . . . . . . . . . . . . . . . . . . . . . . . . 36
16.1 Features . . . . . . . . . . . . . . . . . . . . . . . . . . . . . . . . . . . . . . . . . . . . . . . . . . . . . 36
16.2 Overview . . . . . . . . . . . . . . . . . . . . . . . . . . . . . . . . . . . . . . . . . . . . . . . . . . . . . 36
17. AWeX - Advanced Waveform Extension . . . . . . . . . . . . . . . . . . . . . 38
17.1 Features . . . . . . . . . . . . . . . . . . . . . . . . . . . . . . . . . . . . . . . . . . . . . . . . . . . . . 38
17.2 Overview . . . . . . . . . . . . . . . . . . . . . . . . . . . . . . . . . . . . . . . . . . . . . . . . . . . . . 38
18. Hi-Res - High Resolution Extension . . . . . . . . . . . . . . . . . . . . . . . . . 39
18.1 Features . . . . . . . . . . . . . . . . . . . . . . . . . . . . . . . . . . . . . . . . . . . . . . . . . . . . . 39
18.2 Overview . . . . . . . . . . . . . . . . . . . . . . . . . . . . . . . . . . . . . . . . . . . . . . . . . . . . . 39
19. RTC - 16-bit Real-Time Counter . . . . . . . . . . . . . . . . . . . . . . . . . . . 40
19.1 Features . . . . . . . . . . . . . . . . . . . . . . . . . . . . . . . . . . . . . . . . . . . . . . . . . . . . . 40
19.2 Overview . . . . . . . . . . . . . . . . . . . . . . . . . . . . . . . . . . . . . . . . . . . . . . . . . . . . . 40
20. TWI - Two-Wire Interface . . . . . . . . . . . . . . . . . . . . . . . . . . . . . . . . . 41
20.1 Features . . . . . . . . . . . . . . . . . . . . . . . . . . . . . . . . . . . . . . . . . . . . . . . . . . . . . 41
20.2 Overview . . . . . . . . . . . . . . . . . . . . . . . . . . . . . . . . . . . . . . . . . . . . . . . . . . . . . 41
21. SPI - Serial Peripheral Interface . . . . . . . . . . . . . . . . . . . . . . . . . . . 43
21.1 Features . . . . . . . . . . . . . . . . . . . . . . . . . . . . . . . . . . . . . . . . . . . . . . . . . . . . . 43
21.2 Overview . . . . . . . . . . . . . . . . . . . . . . . . . . . . . . . . . . . . . . . . . . . . . . . . . . . . . 43
22. USART . . . . . . . . . . . . . . . . . . . . . . . . . . . . . . . . . . . . . . . . . . . . . . . 44[Not recommended for new designs - Use XMEGA A1U series] XMEGA A1 [DATASHEET] 3
8067O–AVR–06/2013
22.1 Features . . . . . . . . . . . . . . . . . . . . . . . . . . . . . . . . . . . . . . . . . . . . . . . . . . . . . 44
22.2 Overview . . . . . . . . . . . . . . . . . . . . . . . . . . . . . . . . . . . . . . . . . . . . . . . . . . . . . 44
23. IRCOM - IR Communication Module . . . . . . . . . . . . . . . . . . . . . . . . 45
23.1 Features . . . . . . . . . . . . . . . . . . . . . . . . . . . . . . . . . . . . . . . . . . . . . . . . . . . . . 45
23.2 Overview . . . . . . . . . . . . . . . . . . . . . . . . . . . . . . . . . . . . . . . . . . . . . . . . . . . . . 45
24. AES and DES Crypto Engine . . . . . . . . . . . . . . . . . . . . . . . . . . . . . 46
24.1 Features . . . . . . . . . . . . . . . . . . . . . . . . . . . . . . . . . . . . . . . . . . . . . . . . . . . . . 46
24.2 Overview . . . . . . . . . . . . . . . . . . . . . . . . . . . . . . . . . . . . . . . . . . . . . . . . . . . . . 46
25. EBI – External Bus Interface . . . . . . . . . . . . . . . . . . . . . . . . . . . . . . 47
25.1 Features . . . . . . . . . . . . . . . . . . . . . . . . . . . . . . . . . . . . . . . . . . . . . . . . . . . . . 47
25.2 Overview . . . . . . . . . . . . . . . . . . . . . . . . . . . . . . . . . . . . . . . . . . . . . . . . . . . . . 47
26. ADC - 12-bit Analog to Digital Converter . . . . . . . . . . . . . . . . . . . . . 48
26.1 Features . . . . . . . . . . . . . . . . . . . . . . . . . . . . . . . . . . . . . . . . . . . . . . . . . . . . . 48
26.2 Overview . . . . . . . . . . . . . . . . . . . . . . . . . . . . . . . . . . . . . . . . . . . . . . . . . . . . . 48
27. DAC - 12-bit Digital to Analog Converter . . . . . . . . . . . . . . . . . . . . . 50
27.1 Features . . . . . . . . . . . . . . . . . . . . . . . . . . . . . . . . . . . . . . . . . . . . . . . . . . . . . 50
27.2 Overview . . . . . . . . . . . . . . . . . . . . . . . . . . . . . . . . . . . . . . . . . . . . . . . . . . . . . 50
28. AC - Analog Comparator . . . . . . . . . . . . . . . . . . . . . . . . . . . . . . . . . 52
28.1 Features . . . . . . . . . . . . . . . . . . . . . . . . . . . . . . . . . . . . . . . . . . . . . . . . . . . . . 52
28.2 Overview . . . . . . . . . . . . . . . . . . . . . . . . . . . . . . . . . . . . . . . . . . . . . . . . . . . . . 52
29. Programming and Debugging . . . . . . . . . . . . . . . . . . . . . . . . . . . . . 54
29.1 Features . . . . . . . . . . . . . . . . . . . . . . . . . . . . . . . . . . . . . . . . . . . . . . . . . . . . . 54
29.2 Overview . . . . . . . . . . . . . . . . . . . . . . . . . . . . . . . . . . . . . . . . . . . . . . . . . . . . . 54
30. Pinout and Pin Functions . . . . . . . . . . . . . . . . . . . . . . . . . . . . . . . . . 55
30.1 Alternate Pin Function Description . . . . . . . . . . . . . . . . . . . . . . . . . . . . . . . . . 55
30.2 Alternate Pin Functions. . . . . . . . . . . . . . . . . . . . . . . . . . . . . . . . . . . . . . . . . . 58
31. Peripheral Module Address Map . . . . . . . . . . . . . . . . . . . . . . . . . . . 62
32. Instruction Set Summary . . . . . . . . . . . . . . . . . . . . . . . . . . . . . . . . . 65
33. Packaging information . . . . . . . . . . . . . . . . . . . . . . . . . . . . . . . . . . . 70
33.1 100A . . . . . . . . . . . . . . . . . . . . . . . . . . . . . . . . . . . . . . . . . . . . . . . . . . . . . . . . 70
33.2 100C1 . . . . . . . . . . . . . . . . . . . . . . . . . . . . . . . . . . . . . . . . . . . . . . . . . . . . . . . 71
33.3 100C2 . . . . . . . . . . . . . . . . . . . . . . . . . . . . . . . . . . . . . . . . . . . . . . . . . . . . . . . 72
34. Electrical Characteristics . . . . . . . . . . . . . . . . . . . . . . . . . . . . . . . . . 73
34.1 Absolute Maximum Ratings*. . . . . . . . . . . . . . . . . . . . . . . . . . . . . . . . . . . . . . 73
34.2 DC Characteristics . . . . . . . . . . . . . . . . . . . . . . . . . . . . . . . . . . . . . . . . . . . . . 73
34.3 Speed . . . . . . . . . . . . . . . . . . . . . . . . . . . . . . . . . . . . . . . . . . . . . . . . . . . . . . . 75
34.4 Flash and EEPROM Memory Characteristics. . . . . . . . . . . . . . . . . . . . . . . . . 76
34.5 ADC Characteristics . . . . . . . . . . . . . . . . . . . . . . . . . . . . . . . . . . . . . . . . . . . . 76
34.6 DAC Characteristics . . . . . . . . . . . . . . . . . . . . . . . . . . . . . . . . . . . . . . . . . . . . 78
34.7 Analog Comparator Characteristics . . . . . . . . . . . . . . . . . . . . . . . . . . . . . . . . 78
34.8 Bandgap Characteristics. . . . . . . . . . . . . . . . . . . . . . . . . . . . . . . . . . . . . . . . . 78
34.9 Brownout Detection Characteristics . . . . . . . . . . . . . . . . . . . . . . . . . . . . . . . . 79[Not recommended for new designs - Use XMEGA A1U series] XMEGA A1 [DATASHEET] 4
8067O–AVR–06/2013
34.10 PAD Characteristics . . . . . . . . . . . . . . . . . . . . . . . . . . . . . . . . . . . . . . . . . . . . 79
34.11 POR Characteristics . . . . . . . . . . . . . . . . . . . . . . . . . . . . . . . . . . . . . . . . . . . . 80
34.12 Reset Characteristics . . . . . . . . . . . . . . . . . . . . . . . . . . . . . . . . . . . . . . . . . . . 80
34.13 Oscillator Characteristics . . . . . . . . . . . . . . . . . . . . . . . . . . . . . . . . . . . . . . . . 80
35. Typical Characteristics . . . . . . . . . . . . . . . . . . . . . . . . . . . . . . . . . . . 82
35.1 Active Supply Current . . . . . . . . . . . . . . . . . . . . . . . . . . . . . . . . . . . . . . . . . . . 82
35.2 Idle Supply Current . . . . . . . . . . . . . . . . . . . . . . . . . . . . . . . . . . . . . . . . . . . . . 83
35.3 Power-down Supply Current . . . . . . . . . . . . . . . . . . . . . . . . . . . . . . . . . . . . . . 84
35.4 Power-save Supply Current . . . . . . . . . . . . . . . . . . . . . . . . . . . . . . . . . . . . . . 84
35.5 Pin Pull-up. . . . . . . . . . . . . . . . . . . . . . . . . . . . . . . . . . . . . . . . . . . . . . . . . . . . 85
35.6 Pin Thresholds and Hysteresis . . . . . . . . . . . . . . . . . . . . . . . . . . . . . . . . . . . . 86
35.7 Bod Thresholds. . . . . . . . . . . . . . . . . . . . . . . . . . . . . . . . . . . . . . . . . . . . . . . . 89
35.8 Bandgap . . . . . . . . . . . . . . . . . . . . . . . . . . . . . . . . . . . . . . . . . . . . . . . . . . . . . 90
35.9 Analog Comparator. . . . . . . . . . . . . . . . . . . . . . . . . . . . . . . . . . . . . . . . . . . . . 90
35.10 Oscillators and Wake-up Time . . . . . . . . . . . . . . . . . . . . . . . . . . . . . . . . . . . . 92
35.11 PDI Speed. . . . . . . . . . . . . . . . . . . . . . . . . . . . . . . . . . . . . . . . . . . . . . . . . . . . 95
36. Errata . . . . . . . . . . . . . . . . . . . . . . . . . . . . . . . . . . . . . . . . . . . . . . . . 96
36.1 ATxmega64A1and ATxmega128A1 rev. H. . . . . . . . . . . . . . . . . . . . . . . . . . . 96
36.2 ATxmega64A1 and ATxmega128A1 rev. G . . . . . . . . . . . . . . . . . . . . . . . . . 107
37. Datasheet Revision History . . . . . . . . . . . . . . . . . . . . . . . . . . . . . . 112
37.1 8067O – 06/2013 . . . . . . . . . . . . . . . . . . . . . . . . . . . . . . . . . . . . . . . . . . . . . 112
37.2 8067N – 03/2013 . . . . . . . . . . . . . . . . . . . . . . . . . . . . . . . . . . . . . . . . . . . . . 112
37.3 8067M – 09/2010 . . . . . . . . . . . . . . . . . . . . . . . . . . . . . . . . . . . . . . . . . . . . . 112
37.4 8067L – 08/2010 . . . . . . . . . . . . . . . . . . . . . . . . . . . . . . . . . . . . . . . . . . . . . . 112
37.5 8067K – 02/2010. . . . . . . . . . . . . . . . . . . . . . . . . . . . . . . . . . . . . . . . . . . . . . 113
37.6 8067J – 02/2010 . . . . . . . . . . . . . . . . . . . . . . . . . . . . . . . . . . . . . . . . . . . . . . 113
37.7 8067I – 04/2009 . . . . . . . . . . . . . . . . . . . . . . . . . . . . . . . . . . . . . . . . . . . . . . 113
37.8 8067H – 04/2009 . . . . . . . . . . . . . . . . . . . . . . . . . . . . . . . . . . . . . . . . . . . . . 113
37.9 8067G – 11/2008 . . . . . . . . . . . . . . . . . . . . . . . . . . . . . . . . . . . . . . . . . . . . . 114
37.10 8067F – 09/2008. . . . . . . . . . . . . . . . . . . . . . . . . . . . . . . . . . . . . . . . . . . . . . 114
37.11 8067E – 08/2008. . . . . . . . . . . . . . . . . . . . . . . . . . . . . . . . . . . . . . . . . . . . . . 114
37.12 8067D – 07/2008 . . . . . . . . . . . . . . . . . . . . . . . . . . . . . . . . . . . . . . . . . . . . . 114
37.13 8067C – 06/2008 . . . . . . . . . . . . . . . . . . . . . . . . . . . . . . . . . . . . . . . . . . . . . 115
37.14 8067B – 05/2008. . . . . . . . . . . . . . . . . . . . . . . . . . . . . . . . . . . . . . . . . . . . . . 115
37.15 8067A – 02/2008. . . . . . . . . . . . . . . . . . . . . . . . . . . . . . . . . . . . . . . . . . . . . . 115
Table of Contents . . . . . . . . . . . . . . . . . . . . . . . . . . . . . . . . . . . . . . . . . . . 1[Not recommended for new designs - Use XMEGA A1U series] XMEGA A1 [DATASHEET] 5
8067O–AVR–06/2013Atmel Corporation
1600 Technology Drive
San Jose, CA 95110
USA
Tel: (+1) (408) 441-0311
Fax: (+1) (408) 487-2600
www.atmel.com
Atmel Asia Limited
Unit 01-5 & 16, 19F
BEA Tower, Millennium City 5
418 Kwun Tong Roa
Kwun Tong, Kowloon
HONG KONG
Tel: (+852) 2245-6100
Fax: (+852) 2722-1369
Atmel Munich GmbH
Business Campus
Parkring 4
D-85748 Garching b. Munich
GERMANY
Tel: (+49) 89-31970-0
Fax: (+49) 89-3194621
Atmel Japan G.K.
16F Shin-Osaki Kangyo Bldg
1-6-4 Osaki, Shinagawa-ku
Tokyo 141-0032
JAPAN
Tel: (+81) (3) 6417-0300
Fax: (+81) (3) 6417-0370
© 2013 Atmel Corporation. All rights reserved. / Rev.: 8067O–AVR–06/2013
Disclaimer: The information in this document is provided in connection with Atmel products. No license, express or implied, by estoppel or otherwise, to any intellectual property right is granted by this
document or in connection with the sale of Atmel products. EXCEPT AS SET FORTH IN THE ATMEL TERMS AND CONDITIONS OF SALES LOCATED ON THE ATMEL WEBSITE, ATMEL ASSUMES
NO LIABILITY WHATSOEVER AND DISCLAIMS ANY EXPRESS, IMPLIED OR STATUTORY WARRANTY RELATING TO ITS PRODUCTS INCLUDING, BUT NOT LIMITED TO, THE IMPLIED
WARRANTY OF MERCHANTABILITY, FITNESS FOR A PARTICULAR PURPOSE, OR NON-INFRINGEMENT. IN NO EVENT SHALL ATMEL BE LIABLE FOR ANY DIRECT, INDIRECT,
CONSEQUENTIAL, PUNITIVE, SPECIAL OR INCIDENTAL DAMAGES (INCLUDING, WITHOUT LIMITATION, DAMAGES FOR LOSS AND PROFITS, BUSINESS INTERRUPTION, OR LOSS OF
INFORMATION) ARISING OUT OF THE USE OR INABILITY TO USE THIS DOCUMENT, EVEN IF ATMEL HAS BEEN ADVISED OF THE POSSIBILITY OF SUCH DAMAGES. Atmel makes no
representations or warranties with respect to the accuracy or completeness of the contents of this document and reserves the right to make changes to specifications and products descriptions at any time
without notice. Atmel does not make any commitment to update the information contained herein. Unless specifically provided otherwise, Atmel products are not suitable for, and shall not be used in,
automotive applications. Atmel products are not intended, authorized, or warranted for use as components in applications intended to support or sustain life.
Atmel®, Atmel logo and combinations thereof, Enabling Unlimited Possibilities®, and others are registered trademarks or trademarks of Atmel Corporation or its
subsidiaries. Other terms and product names may be trademarks of others.
Atmel-42075B-MCU-Atmel SAM4S Xplained Pro-USER GUIDE-03/2013
USER GUIDE
Atmel SAM4S Xplained Pro
Preface
The Atmel® SAM4S Xplained Pro evaluation kit is a hardware platform to
evaluate the ATSAM4SD32C microcontroller.
Supported by the Atmel Studio integrated development platform, the kit provides
easy access to the features of the Atmel ATSAM4SD32C and explains how to
integrate the device in a custom design.
The Xplained Pro MCU series evaluation kits include an on-board Embedded
Debugger, and no external tools are necessary to program or debug the
ATSAM4SD32C.
The Xplained Pro extension series evaluation kits offers additional peripherals to
extend the features of the board and ease the development of custom designs.Atmel SAM4S Xplained Pro [USER GUIDE]
Atmel-42075B-MCU-Atmel SAM4S Xplained Pro-USER GUIDE-03/2013
2
Table of Contents
Preface .......................................................................................... 1
1. Introduction .............................................................................. 3
1.1. Features .............................................................................. 3
1.2. Kit overview ......................................................................... 3
2. Getting started ......................................................................... 5
2.1. Quick-start ........................................................................... 5
2.2. Connecting the kit ................................................................. 5
2.3. Design documentation and related links ..................................... 5
3. Xplained Pro ............................................................................ 6
3.1. Embedded Debugger ............................................................. 6
3.2. Hardware identification system ................................................. 6
3.3. Power supply ....................................................................... 7
3.3.1. Measuring SAM4S power consumption ......................... 7
3.4. Standard headers and connectors ............................................ 7
3.4.1. Xplained Pro extension header .................................... 7
3.4.2. Xplained Pro LCD connector ....................................... 8
3.4.3. Power header ......................................................... 10
4. Hardware user guide ............................................................ 11
4.1. Connectors ......................................................................... 11
4.1.1. I/O extension headers .............................................. 11
4.1.2. LCD extension connector .......................................... 12
4.1.3. Other headers ........................................................ 14
4.2. Peripherals ......................................................................... 14
4.2.1. NAND Flash ........................................................... 14
4.2.2. SD Card connector .................................................. 15
4.2.3. Crystals ................................................................. 15
4.2.4. Mechanical buttons .................................................. 16
4.2.5. LED ...................................................................... 16
4.2.6. Analog reference ..................................................... 16
4.3. Embedded Debugger implementation ...................................... 16
4.3.1. Serial Wire Debug ................................................... 16
4.3.2. Virtual COM port ..................................................... 16
4.3.3. Atmel Data Gateway Interface ................................... 17
5. Hardware revision history and known issues ........................ 18
5.1. Identifying product ID and revision .......................................... 18
5.2. Revision 5 .......................................................................... 18
5.3. Revision 4 .......................................................................... 18
6. Document revision history ..................................................... 19
7. Evaluation board/kit important notice .................................... 20Atmel SAM4S Xplained Pro [USER GUIDE]
Atmel-42075B-MCU-Atmel SAM4S Xplained Pro-USER GUIDE-03/2013
3
1. Introduction
1.1 Features
● Atmel ATSAM4SD32C microcontroller
● Embedded debugger (EDBG)
● USB interface
● Programming and debugging (target) through Serial Wire Debug (SWD)
● Virtual COM-port interface to target via UART
● Atmel Data Gateway Interface (DGI) to target via synchronous SPI or TWI
● Four GPIOs connected to target for code instrumentation
● Digital I/O
● Two mechanical buttons (user and reset button)
● One user LED
● Three extension headers
● LCD display header
● USB interface for host and device function (target)
● 2Gb NAND Flash for non-volatile storage
● SD card connector
● Adjustable analog reference
● Three possible power sources
● External power
● Embedded debugger USB
● Target USB
● 12MHz crystal
● 32kHz crystal
1.2 Kit overview
The Atmel SAM4S Xplained Pro evaluation kit is a hardware platform to evaluate the Atmel ATSAM4SD32C.
The kit offers a set of features that enables the ATSAM4SD32C user to get started using the ATSAM4SD32C
peripherals right away and to get an understanding of how to integrate the device in their own design.Atmel SAM4S Xplained Pro [USER GUIDE]
Atmel-42075B-MCU-Atmel SAM4S Xplained Pro-USER GUIDE-03/2013
4
Figure 1.1. SAM4S Xplained Pro evaluation kit overviewAtmel SAM4S Xplained Pro [USER GUIDE]
Atmel-42075B-MCU-Atmel SAM4S Xplained Pro-USER GUIDE-03/2013
5
2. Getting started
2.1 Quick-start
3 Steps to start exploring the Atmel Xplained Pro Platform
● Download and install Atmel Studio1
.
● Launch Atmel Studio.
● Connect an USB cable to the DEBUG USB port.
2.2 Connecting the kit
When connecting Atmel SAM4S Xplained Pro to your computer for the first time, the operating system will do a
driver software installation. The driver file supports both 32-bit and 64-bit versions of Microsoft® Windows® XP
and Windows 7.
Once connected the green power LED will be lit and Atmel Studio will autodetect which Xplained Pro
evaluation- and extension kit(s) that's connected. You'll be presented with relevant information like datasheets
and kit documentation. You also have the option to launch Atmel Software Framework (ASF) example
applications. The target device is programmed and debugged by the on-board Embedded Debugger and no
external programmer or debugger tool is needed. Please refer to the Atmel Studio user guide2
for information
regarding how to compile and program the kit.
2.3 Design documentation and related links
The following list contains links to the most relevant documents and software for SAM4S Xplained Pro.
1. Xplained Pro products 3
- Atmel Xplained Pro is a series of small-sized and easy-to-use evaluation kits
for 8- and 32-bit Atmel microcontrollers. It consists of a series of low cost MCU boards for evaluation and
demonstration of features and capabilities of different MCU families.
2. SAM4S Xplained Pro User Guide 4
- PDF version of this User Guide.
3. SAM4S Xplained Pro Design Documentation 5
- Package containing schematics, BOM, assembly
drawings, 3D plots, layer plots etc.
4. Atmel Studio 6
- Free Atmel IDE for development of C/C++ and assembler code for Atmel
microcontrollers.
5. IAR Embedded Workbench®
7
for ARM®. This is a commercial C/C++ compiler that is available for
ARM. There is a 30 day evaluation version as well as a code size limited kick-start version available from
their website. The code size limit is 16K for devices with M0, M0+ and M1 cores and 32K for devices with
other cores.
6. Atmel sample store 8
- Atmel sample store where you can order samples of devices.
1
http://www.atmel.com/atmelstudio
2
http://www.atmel.com/atmelstudio
3
http://www.atmel.com/XplainedPro
4
http://www.atmel.com/Images/Atmel-42075-SAM4S-Xplained-Pro_User-Guide.pdf
5
http://www.atmel.com/Images/Atmel-42075-SAM4S-Xplained-Pro_User-Guide.zip
6
http://www.atmel.com/atmelstudio
7
http://www.iar.com/en/Products/IAR-Embedded-Workbench/ARM/
8
http://www.atmel.com/system/samplesstoreAtmel SAM4S Xplained Pro [USER GUIDE]
Atmel-42075B-MCU-Atmel SAM4S Xplained Pro-USER GUIDE-03/2013
6
3. Xplained Pro
Xplained Pro is an evaluation platform that provides the full Atmel microcontroller experience. The platform
consists of a series of Microcontroller (MCU) boards and extension boards that are integrated with Atmel
Studio, have Atmel Software Framework (ASF) drivers and demo code, support data streaming and more.
Xplained Pro MCU boards support a wide range of Xplained Pro extension boards that are connected through
a set of standardized headers and connectors. Each extension board has an identification (ID) chip to uniquely
identify which boards are mounted on a Xplained Pro MCU board. This information is used to present relevant
user guides, application notes, datasheets and example code through Atmel Studio. Available Xplained Pro
MCU and extension boards can be purchased in the Atmel Web Store
1
.
3.1 Embedded Debugger
The SAM4S Xplained Pro contains the Atmel® Embedded Debugger (EDBG) for on-board debugging. The
EDBG is a composite USB device of 3 interfaces; a debugger, Virtual COM Port and Data Gateway Interface
(DGI).
In conjunction with Atmel Studio, the EDBG debugger interface can program and debug the ATSAM4SD32C.
On the SAM4S Xplained Pro, the SWD interface is connected between the EDBG and the ATSAM4SD32C.
The Virtual COM Port is connected to a UART port on the ATSAM4SD32C (see section “Embedded Debugger
implementation” on page 16 for pinout), and provides an easy way to communicate with the target
application through a simple terminal software. It offers variable baud rate, parity and stop bit settings. Note
that the settings on the target device UART must match the settings given in the terminal software.
The DGI consists of several physical data interfaces for communication with the host computer. Please,
see section “Embedded Debugger implementation” on page 16 for available interfaces and pinout.
Communication over the interfaces are bidirectional. It can be used to send events and values from the
ATSAM4SD32C, or as a generic printf-style data channel. Traffic over the interfaces can be timestamped on
the EDBG for more accurate tracing of events. Note that timestamping imposes an overhead that reduces
maximal throughput. The DGI uses a proprietary protocol, and is thus only compatible with Atmel Studio.
The EDBG controls two LEDs on SAM4S Xplained Pro, a power LED and a status LED. Table 3.1, “EDBG LED
control” shows how the LEDs are controlled in different operation modes.
Table 3.1. EDBG LED control
Operation mode Power LED Status LED
Normal operation Power LED is lit when power is
applied to the board.
Activity indicator, LED flashes
every time something happens on
the EDBG.
Bootloader mode (idle) The power LED and the status LED blinks simultaneously.
Bootloader mode (firmware
upgrade)
The power LED and the status LED blinks in an alternating pattern.
For further documentation on the EDBG, see the EDBG User Guide.
3.2 Hardware identification system
All Xplained Pro compatible extension boards have an Atmel ATSHA204 crypto authentication chip mounted.
This chip contains information that identifies the extension with its name and some extra data. When an
Xplained Pro extension board is connected to an Xplained Pro MCU board the information is read and sent
to Atmel Studio. The Atmel Kits extension, installed with Atmel Studio, will give relevant information, code
examples and links to relevant documents. Table 3.2, “Xplained Pro ID chip content” shows the data fields
stored in the ID chip with example content.
Table 3.2. Xplained Pro ID chip content
Data Field Data Type Example Content
Manufacturer ASCII string Atmel’\0’
Product Name ASCII string Segment LCD1 Xplained Pro’\0’
Product Revision ASCII string 02’\0’
Product Serial Number ASCII string 1774020200000010’\0’
Minimum Voltage [mV] uint16_t 3000
1
http://store.atmel.com/CBC.aspx?q=c:100113Atmel SAM4S Xplained Pro [USER GUIDE]
Atmel-42075B-MCU-Atmel SAM4S Xplained Pro-USER GUIDE-03/2013
7
Data Field Data Type Example Content
Maximum Voltage [mV] uint16_t 3600
Maximum Current [mA] uint16_t 30
3.3 Power supply
The SAM4S Xplained Pro kit can be powered either by USB or by an external power source through the 4-
pin power header, marked PWR. This connector is described in “Power header” on page 10. The available
power sources and specifications are listed in Table 3.3, “Power sources for SAM4S Xplained Pro”.
Table 3.3. Power sources for SAM4S Xplained Pro
Power input Voltage requirements Current requirements Connector marking
External power 5 V +/- 2 % (+/- 100 mV)
for USB host operation.
4.3 V to 5.5 V if USB
host operation is not
required
Recommended
minimum is 1A to be
able to provide enough
current for connected
USB devices and the
board itself.
Recommended
maximum is 2A due
to the input protection
maximum current
specification.
PWR
Embedded debugger
USB
4.4V to 5.25V
(according to USB spec)
500 mA (according to
USB spec)
DEBUG USB
Target USB 4.4V to 5.25V
(according to USB spec)
500 mA (according to
USB spec)
TARGET USB
The kit will automatically detect which power sources are available and choose which one to use according to
the following priority:
1. External power
2. Embedded debugger USB
3. Target USB
Note External power is required when the 500mA through the USB connector is not enough to power a
connected USB device in a USB host application.
3.3.1 Measuring SAM4S power consumption
As part of an evaluation of the SAM4S it can be of interest to measure its power consumption. Because the
device has a separate power plane (VCC_MCU_P3V3) on this board it is possible to measure the current
consumption by measuring the current that is flowing into this plane. The VCC_MCU_P3V3 plane is connected
via a jumper to the main power plane (VCC_TARGET_P3V3) and by replacing the jumper with an ampere
meter it is possible to determine the current consumption. To locate the current measurement header, please
refer to Figure 1.1, “SAM4S Xplained Pro evaluation kit overview”.
Warning Do not power the board without having the jumper or an ampere meter mounted. This can cause
the SAM4S to be powered through its I/O pins and cause undefined operation of the device.
3.4 Standard headers and connectors
3.4.1 Xplained Pro extension header
All Xplained Pro kits have one or more dual row, 20 pin, 100mil extension headers. Xplained Pro MCU boards
have male headers while Xplained Pro extensions have their female counterparts. Note that all pins are
not always connected. However, all the connected pins follow the defined pin-out described in Table 3.4,
“Xplained Pro extension header”. The extension headers can be used to connect a wide variety of Xplained ProAtmel SAM4S Xplained Pro [USER GUIDE]
Atmel-42075B-MCU-Atmel SAM4S Xplained Pro-USER GUIDE-03/2013
8
extensions to Xplained Pro MCU boards and to access the pins of the target MCU on Xplained Pro MCU board
directly.
Table 3.4. Xplained Pro extension header
Pin number Name Description
1 ID Communication line to the ID chip on extension board.
2 GND Ground
3 ADC(+) Analog to digital converter , alternatively positive part of differential
ADC
4 ADC(-) Analog to digital converter , alternatively negative part of
differential ADC
5 GPIO1 General purpose IO
6 GPIO2 General purpose IO
7 PWM(+) Pulse width modulation , alternatively positive part of differential
PWM
8 PWM(-) Pulse width modulation , alternatively positive part of differential
PWM
9 IRQ/GPIO Interrupt request line and/or general purpose IO.
10 SPI_SS_B/GPIO Slave select for SPI and/or general purpose IO.
11 TWI_SDA Data line for two wire interface. Always implemented, bus type.
12 TWI_SCL Clock line for two wire interface. Always implemented, bus type.
13 USART_RX Receiver line of Universal Synchronous and Asynchronous serial
Receiver and Transmitter
14 USART_TX Transmitter line of Universal Synchronous and Asynchronous
serial Receiver and Transmitter
15 SPI_SS_A Slave select for SPI. Should be unique if possible.
16 SPI_MOSI Master out slave in line of Serial peripheral interface. Always
implemented, bus type
17 SPI_MISO Master in slave out line of Serial peripheral interface. Always
implemented, bus type
18 SPI_SCK Clock for Serial peripheral interface. Always implemented, bus
type
19 GND Ground
20 VCC Power for extension board
3.4.2 Xplained Pro LCD connector
The LCD connector provides the ability to connect to display extensions that have a parallel interface. The
connector implements signals for a MCU parallel bus interface and a LCD controller interface as well as signals
for a touchcontroller. The connector pin-out definition is shown in Table 3.5, “Xplained Pro LCD connector”.
Note that usually only one display interface is implemented, either LCD controller or the MCU bus interface.
A FPC/FFC connector with 50 pins and 0.5mm pitch is used for the LCD connector. The connector
(XF2M-5015-1A) from Omron is used on several designs and can be used as a reference.
Table 3.5. Xplained Pro LCD connector
Pin number Name RGB interface
description
MCU interface
description
1 ID Communication line to ID chip on extension board.
2 GND Ground
3 D0 Data line
4 D1 Data line
5 D2 Data line
6 D3 Data lineAtmel SAM4S Xplained Pro [USER GUIDE]
Atmel-42075B-MCU-Atmel SAM4S Xplained Pro-USER GUIDE-03/2013
9
Pin number Name RGB interface
description
MCU interface
description
7 GND Ground
8 D4 Data line
9 D5 Data line
10 D6 Data line
11 D7 Data line
12 GND Ground
13 D8 Data line
14 D9 Data line
15 D10 Data line
16 D11 Data line
17 GND Ground
18 D12 Data line
19 D12 Data line
20 D14 Data line
21 D15 Data line
22 GND Ground
23 D16 Data line
24 D17 Data line
25 D18 Data line
26 D19 Data line
27 GND Ground
28 D20 Data line
29 D21 Data line
30 D22 Data line
31 D23 Data line
32 GND Ground
33 PCLK /
CMD_DATA_SEL
Pixel clock Command and data
select. One address line
of the MCU for displays
where it is possible to
select either the register
or the data interface.
34 VSYNC / CS Vertical synchronization Chip select
35 HSYNC / WE Horizontal
synchronization
Write enable signal
36 DATA ENABLE / RE Data enable signal Read enable signal
37 SPI SCK Clock for Serial peripheral interface
38 SPI MOSI Master out slave in line of Serial peripheral interface
39 SPI MISO Master in slave out line of Serial peripheral interface
40 SPI SS Slave select for SPI. Should be unique if possible
41 ENABLE Display enable signal
42 TWI SDA I2C data line (maxTouch)
43 TWI SCL I2C clock line (maxTouch)
44 IRQ1 maxTouch interrupt lineAtmel SAM4S Xplained Pro [USER GUIDE]
Atmel-42075B-MCU-Atmel SAM4S Xplained Pro-USER GUIDE-03/2013
10
Pin number Name RGB interface
description
MCU interface
description
45 IRQ2 Interrupt line for other I2C devices
46 PWM Backlight control
47 RESET Reset for both display and maxTouch
48 VCC 3.3V power supply for extension board
49 VCC 3.3V power supply for extension board
50 GND Ground
3.4.3 Power header
The power header can be used to connect external power to the SAM4S Xplained Pro kit. The kit will
automatically detect and switch to the external power if supplied. The power header can also be used as supply
for external peripherals or extension boards. Care must be taken not to exceed the total current limitation of the
on-board regulator for the 3.3V regulated output. To locate the current measurement header, please refer to
Figure 1.1, “SAM4S Xplained Pro evaluation kit overview”
Table 3.6. Power header PWR
Pin number PWR header Pin name Description
1 VEXT_P5V0 External 5V input
2 GND Ground
3 VCC_P5V0 Unregulated 5V (output, derived
from one of the input sources)
4 VCC_P3V3 Regulated 3.3V (output, used as
main power for the kit)
Note If the board is powered from a battery source it is recommended to use the PWR header. If there
is a power source connected to EDBG USB, the EDBG is activated and it will consume more
power.Atmel SAM4S Xplained Pro [USER GUIDE]
Atmel-42075B-MCU-Atmel SAM4S Xplained Pro-USER GUIDE-03/2013
11
4. Hardware user guide
4.1 Connectors
This chapter describes the implementation of the relevant connectors and headers on SAM4S Xplained Pro
and their connection to the ATSAM4SD32C. The tables of connections in this chapter also describes which
signals are shared between the headers and on-board functionality.
4.1.1 I/O extension headers
The SAM4S Xplained Pro headers EXT1, EXT2 and EXT3 offers access to the I/O of the microcontroller in
order to expand the board e.g. by connecting extensions to the board. These headers all comply with the
standard extension header specified in Xplained Pro Standard Extension Header. All headers have a pitch of
2.54 mm.
Table 4.1. Extension header EXT1
Pin on EXT1 SAM4S pin Function Shared functionality
1 - - Communication line to ID chip on
extension board.
2 - - GND
3 PA17 AD[0]
4 PA18 AD[1]
5 PA24 GPIO PIOD Interface Header
6 PA25 GPIO PIOD Interface Header
7 PA23 PWMH0 PIOD Interface Header
8 PA19 PWML0
9 PA1 WKUP1/GPIO
10 PA6 GPIO DGI_GPIO0 on EDBG
11 PA3 TWD0 EXT2 and EDBG
12 PA4 TWCK0 EXT2 and EDBG
13 PA21 USART1/RXD1 EXT2
14 PA22 USART1/TXD1 EXT2
15 PA11 SPI/NPCS[0]
16 PA13 SPI/MOSI EXT2, EXT3, LCD connector (EXT4) and
EDBG
17 PA12 SPI/MISO EXT2, EXT3, LCD connector (EXT4) and
EDBG
18 PA14 SPI/SPCK EXT2, EXT3, LCD connector (EXT4) and
EDBG
19 - - GND
20 - - VCC
Table 4.2. Extension header EXT2
Pin on EXT2 SAM4S pin Function Shared functionality
1 - - Communication line to ID chip on
extension board.
2 - - GND
3 PB0 AD[4]
4 PB1 AD[5]
5 PC24 GPIO DGI_GPIO2 on EDBG
6 PC25 GPIO DGI_GPIO3 on EDBG
7 PC19 PWMH1Atmel SAM4S Xplained Pro [USER GUIDE]
Atmel-42075B-MCU-Atmel SAM4S Xplained Pro-USER GUIDE-03/2013
12
Pin on EXT2 SAM4S pin Function Shared functionality
8 PA20 PWML1
9 PC26 GPIO
10 PC27 GPIO
11 PA3 TWD0 EXT1 and EDBG
12 PA4 TWCK0 EXT1 and EDBG
13 PA21 USART1/RXD1 EXT1
14 PA22 USART1/TXD1 EXT1
15 PA9 SPI/NPCS[1] LCD connector (EXT4)
16 PA13 SPI/MOSI EXT1, EXT3, LCD connector (EXT4) and
EDBG
17 PA12 SPI/MISO EXT1, EXT3, LCD connector (EXT4) and
EDBG
18 PA14 SPI/SPCK EXT1, EXT3, LCD connector (EXT4) and
EDBG
19 - - GND
20 - - VCC
Table 4.3. Extension header EXT3
Pin on EXT3 SAM4S pin Function Shared functionality
1 - - Communication line to ID chip on
extension board.
2 - - GND
3 PC29 AD[13]
4 PC30 AD[14]
5 PC21 GPIO
6 PC22 GPIO DGI_GPIO1 on EDBG
7 PC20 PWMH2
8 PA16 PWML2 PIOD Header
9 PA0 WKUP0/GPIO LCD connector (EXT4)
10 PC31 GPIO
11 PB4 TWD1 LCD connector (EXT4)
12 PB5 TWCK1 LCD connector (EXT4)
13 PB2 USART1/RXD1 CDC UART
14 PB3 USART1/TXD1 CDC UART
15 PA10 SPI/NPCS[2] LCD connector (EXT4)
16 PA13 SPI/MOSI EXT1, EXT2, LCD connector (EXT4) and
EDBG
17 PA12 SPI/MISO EXT1, EXT2, LCD connector (EXT4) and
EDBG
18 PA14 SPI/SPCK EXT1, EXT2, LCD connector (EXT4) and
EDBG
19 - - GND
20 - - VCC
4.1.2 LCD extension connector
Extension connector EXT4 is a special connector for LCD displays. The physical connector is an Omron
Electronics XF2M-5015-1A FPC connector.Atmel SAM4S Xplained Pro [USER GUIDE]
Atmel-42075B-MCU-Atmel SAM4S Xplained Pro-USER GUIDE-03/2013
13
Table 4.4. LCD display connector EXT4
Pin on EXT4 SAM4S pin Function Shared functionality
1 - - Communication line to ID chip on
extension board.
2 - - GND
3 PC0 D0 NAND Flash
4 PC1 D1 NAND Flash
5 PC2 D2 NAND Flash
6 PC3 D3 NAND Flash
7 - - GND
8 PC4 D4 NAND Flash
9 PC5 D5 NAND Flash
10 PC6 D6 NAND Flash
11 PC7 D7 NAND Flash
12 - - GND
13 - -
14 - -
15 - -
16 - -
17 - - GND
18 - -
19 - -
20 - -
21 - -
22 - - GND
23 - -
24 - -
25 - -
26 - -
27 - - GND
28 - -
29 - -
30 - -
31 - -
32 - - GND
33 PC18 A0
34 PC15 NPCS[1]
35 PC8 NWE
36 PC11 NRD
37
38
39
40
41 PB14 GPIO
42 PB4 TWD1/SDA EXT3Atmel SAM4S Xplained Pro [USER GUIDE]
Atmel-42075B-MCU-Atmel SAM4S Xplained Pro-USER GUIDE-03/2013
14
Pin on EXT4 SAM4S pin Function Shared functionality
43 PB5 TWCK1/SCL EXT3
44 PA0 WKUP0 EXT3
45 - -
46 PA15 PWML3 PIOD Interface header
47 PC28 GPIO
48 - VCC_P3V3
49 - VCC_P3V3 EXT2
50 - GND
4.1.3 Other headers
In addition to the “I/O extension headers” on page 11, SAM4S Xplained Pro has two additional headers
with spare signals that offers access to the I/O of the microcontroller which are otherwise not easily available
elsewhere or might be favourable to have collected toghether. All headers have a pitch of 2.54mm.
Table 4.5. SPARE SIGNALS header
Pin on header SAM4S pin Function Shared functionality
1 PA2 DATRG User button, SW0
2 PA9 PWMF10 EXT2
3 PA26 TI0A2 SD Card and PIOD Interface header
4 PA27 TI0B2 SD Card and PIOD Interface header
5 PA28 TCLK1 SD Card and PIOD Interface header
6 PA29 TCLK2 SD Card and PIOD Interface header
7 PA31 PCK2 SD Card and PIOD Interface header
8 PB0 RTCOUT0 EXT2
9 PB1 RTCOUT1 EXT2
10 PB13 DAC0
11 PB14 DAC1
12 - - GND
Table 4.6. PIOD INTERFACE header
Pin on header SAM4S pin Function Shared functionality
1 PA15 PIODCEN1 LCD connector
2 PA16 PIODCEN2 EXT3
3 PA23 PIODCCLK EXT1
4 PA24 PIODC0 EXT1
5 PA25 PIODC1 EXT1
6 PA26 PIODC2 SD Card and SPARE Signals header
7 PA27 PIODC3 SD Card and SPARE Signals header
8 PA28 PIODC4 SD Card and SPARE Signals header
9 PA29 PIODC5 SD Card and SPARE Signals header
10 PA30 PIODC6 SD Card
11 PA31 PIODC7 SD Card and SPARE Signals header
12 - - GND
4.2 Peripherals
4.2.1 NAND Flash
The SAM4S Xplained Pro kit has one 2Gb NAND Flash connected to the external bus interface of the SAM4S.Atmel SAM4S Xplained Pro [USER GUIDE]
Atmel-42075B-MCU-Atmel SAM4S Xplained Pro-USER GUIDE-03/2013
15
Table 4.7. NAND Flash connections
SAM4S pin Function NAND Flash
function
Shared functionality
PC0 D0 IO0 LCD connector
PC1 D1 IO1 LCD connector
PC2 D2 IO2 LCD connector
PC3 D3 IO3 LCD connector
PC4 D4 IO4 LCD connector
PC5 D5 IO5 LCD connector
PC6 D6 IO6 LCD connector
PC7 D7 IO7 LCD connector
PC9 NANDOE RE (active low)
PC10 NANDWE WE (active low)
PC13 GPIO R (active high)/ B
(active low)
PC14 NCS[0] CE (active low)
PC16 NANDALE ALE (active low)
PC17 NANDCLE CLE
4.2.2 SD Card connector
The SAM4S Xplained Pro kit has one SD card connector which is connected to High Speed Multimedia Card
Interface (HSMCI) of the SAM4S
Table 4.8. SD Card connections
SAM4S pin Function SD Card function Shared functionality
PA26 MCDA2 DAT2 SPARE Signal and PIOD Interface
headers
PA27 MCDA3 DAT3 SPARE Signal and PIOD Interface
headers
PA28 MCCDA CMD SPARE Signal and PIOD Interface
headers
PA29 MCCK CLK SPARE Signal and PIOD Interface
headers
PA30 MCDA0 DAT0 PIOD Interface header
PA31 MCDA1 DAT1 SPARE Signal and PIOD Interface
headers
PC12 GPIO Card Detect
4.2.3 Crystals
The SAM4S Xplained Pro kit contains two crystals that can be used as clock sources for the SAM4S device.
Each crystal has a cut-strap next to it that can be used to measure the oscillator safety factor. This is done by
cutting the strap and adding a resistor across the strap. More information about oscillator allowance and safety
factor can be found in appnote AVR4100
1
.
Table 4.9. External 32.768kHz crystals
Pin on SAM4S Function
PA49 XIN32
PA48 XOUT32
1
http://www.atmel.com/images/doc8333.pdfAtmel SAM4S Xplained Pro [USER GUIDE]
Atmel-42075B-MCU-Atmel SAM4S Xplained Pro-USER GUIDE-03/2013
16
Table 4.10. External 12MHz crystals
Pin on SAM4S Function
PB9 XIN0
PB8 XOUT0
4.2.4 Mechanical buttons
SAM4S Xplained Pro contains two mechanical buttons. One button is the RESET button connected to the
SAM4S reset line and the other is a generic user configurable button. When a button is pressed it will drive the
I/O line to GND.
Table 4.11. Mechanical buttons
Pin on SAM4S Silkscreen text
NRST RESET
PC24 SW0
4.2.5 LED
There is one yellow LED available on the SAM4S Xplained Pro board that can be turned on and off. The LED
can be activated by driving the connected I/O line to GND.
Table 4.12. LED connections
Pin on SAM4S LED
PC23 Yellow LED0
4.2.6 Analog reference
An adjustable voltage reference is implemented on the kit to have a reference for the ADC or DAC. The
reference can be adjusted with the on-board multiturn trimmer potentiometer. Next to the potentiometer, a 2-pin
header is available to measure the reference voltage for the AREF pin of the SAM4S. The voltage output range
for the reference is 0V - 3.36V.
4.3 Embedded Debugger implementation
SAM4S Xplained Pro contains an Embedded Debugger (EDBG) that can be used to program and debug the
ATSAM4SD32C using Serial Wire Debug (SWD). The Embedded Debugger also include a Virtual Com port
interface over UART, an Atmel Data Gateway Interface over SPI and TWI and it monitors four of the SAM4S
GPIOs. Atmel Studio can be used as a front end for the Embedded Debugger.
4.3.1 Serial Wire Debug
The Serial Wire Debug (SWD) use two pins to communicate with the target. For further information on how to
use the programming and debugging capabilities of the EDBG, see “Embedded Debugger” on page 6.
Table 4.13. SWD connections
Pin on SAM4S Function
PB7 SWD clock
PB6 SWD data
PB5 SWD trace output
PB12 Erase
4.3.2 Virtual COM port
The Embedded Debugger act as a Virtual Com Port gateway by using one of the ATSAM4SD32C UARTs. For
further information on how to use the Virtual COM port see “Embedded Debugger” on page 6.
Table 4.14. Virtual COM port connections
Pin on SAM4S Function
PB3 UART TXD (SAM4S TX line)Atmel SAM4S Xplained Pro [USER GUIDE]
Atmel-42075B-MCU-Atmel SAM4S Xplained Pro-USER GUIDE-03/2013
17
Pin on SAM4S Function
PB2 UART RXD (SAM4S RX line)
4.3.3 Atmel Data Gateway Interface
The Embedded Debugger features an Atmel Data Gateway Interface (DGI) by using either a SPI or TWI port.
The DGI can be used to send a variety of data from the SAM4S to the host PC. For further information on how
to use the DGI interface see “Embedded Debugger” on page 6.
Table 4.15. DGI interface connections when using SPI
Pin on SAM4S Function
PA5 Slave select (SAM4S is Master)
PA12 SPI MISO (Master In, Slave Out)
PA13 SPI MOSI (Master Out, Slave in)
PA14 SPI SCK (Clock Out)
Table 4.16. DGI interface connections when using TWI
Pin on SAM4S Function
PA3 SDA (Data line)
PA4 SCL (Clock line)
Four GPIO lines are connected to the Embedded Debugger. The EDBG can monitor these lines and time
stamp pin value changes. This makes it possible to accurately time stamp events in the SAM4S application
code. For further information on how to configure and use the GPIO monitoring features see “Embedded
Debugger” on page 6.
Table 4.17. GPIO lines connected to the EDBG
Pin on SAM4S Function
PA6 GPIO0
PA22 GPIO1
PA24 GPIO2
PA25 GPIO3Atmel SAM4S Xplained Pro [USER GUIDE]
Atmel-42075B-MCU-Atmel SAM4S Xplained Pro-USER GUIDE-03/2013
18
5. Hardware revision history and known issues
5.1 Identifying product ID and revision
The revision and product identifier of Xplained Pro boards can be found in two ways, through Atmel Studio or
by looking at the sticker on the bottom side of the PCB.
By connecting a Xplained Pro MCU board to a computer with Atmel Studio running, an information window will
pop up. The first 6 digits of the serial number, which is listed under kit details, contain the product identifier and
revision. Information about connected Xplained Pro extension boards will also appear in the Atmel Kits window.
The same information can be found on the sticker on the bottom side of the PCB. Most kits will print the
identifier and revision in plain text as A09-nnnn\rr where nnnn is the identifier and rr is the revision. Boards with
limited space have a sticker with only a QR-code which contains a serial number string.
The serial number string has the following format:
"nnnnrrssssssssss"
n = product identifier
r = revision
s = serial number
The kit identifier for SAM4S Xplained Pro is 1803.
5.2 Revision 5
On this revision, the SPI clock net is improved to reduce any issues that might be caused by reflections. The
SPI has been removed from the LCD (EXT4 connector) to reduce load on the clock net. The remaining clock
lines have been divided into four terminated nets for each SPI source (EXT1, EXT2, EXT3, and EDBG) and
routed in a star like layout. A series terminator resistor of 43ohm is placed on each clock net, close to the SPI
clock pin. This reduces any issues that might be caused by reflections comming back from unterminated/
unused clock lines. It also reduces the rise/fall time of the clock edges and that will also help to reduce any
reflection issues.
5.3 Revision 4
Known issues
● SAM4S has an on-die series termination of the SPI CLK which makes this signal not usable for a multi
drop clock distribution because all devices along the line will see a fraction of VCC until the signal is
reflected from the end of the transmission line. On the SAM4S Xplained Pro revision 4 this signal is
routed to each extension connector with EXT1 at the end of the line. That means extensions that are
connected along the transission line e.g. EXT3 header is likely to fail due to a non-monotinic edge caused
by relections and the fraction of VCC that is present for a short time until the reflection comes back from
the end of the line.
Workaround:
● By slowing down the clock rise time with a capacitor, and thus effectively increasing the line length at
which point it becomes a transmission line, it is possible to remove the clock issue. A 56pF capacitor
has been mounted on the bottom side of the board between the SPI clock and GND. This however
reduces the maximum SPI clock speed and it is recommended to not run this faster than 30MHz (this
also depends on how much additional capacitance is added by connected extensions and needs to
be checked case by case). The capacitor was added on revision 4 on the bottom side of the EXT3
header.Atmel SAM4S Xplained Pro [USER GUIDE]
Atmel-42075B-MCU-Atmel SAM4S Xplained Pro-USER GUIDE-03/2013
19
6. Document revision history
Doc. Rev. Date Comment
B 15/03/2013 Added information about changes done on rev 5
A 11/02/2013 First releaseAtmel SAM4S Xplained Pro [USER GUIDE]
Atmel-42075B-MCU-Atmel SAM4S Xplained Pro-USER GUIDE-03/2013
20
7. Evaluation board/kit important notice
This evaluation board/kit is intended for use for FURTHER ENGINEERING, DEVELOPMENT,
DEMONSTRATION, OR EVALUATION PURPOSES ONLY. It is not a finished product and may not (yet)
comply with some or any technical or legal requirements that are applicable to finished products, including,
without limitation, directives regarding electromagnetic compatibility, recycling (WEEE), FCC, CE or UL
(except as may be otherwise noted on the board/kit). Atmel supplied this board/kit "AS IS," without any
warranties, with all faults, at the buyer's and further users' sole risk. The user assumes all responsibility
and liability for proper and safe handling of the goods. Further, the user indemnifies Atmel from all claims
arising from the handling or use of the goods. Due to the open construction of the product, it is the user's
responsibility to take any and all appropriate precautions with regard to electrostatic discharge and any other
technical or legal concerns.
EXCEPT TO THE EXTENT OF THE INDEMNITY SET FORTH ABOVE, NEITHER USER NOR
ATMEL SHALL BE LIABLE TO EACH OTHER FOR ANY INDIRECT, SPECIAL, INCIDENTAL, OR
CONSEQUENTIAL DAMAGES.
No license is granted under any patent right or other intellectual property right of Atmel covering or relating
to any machine, process, or combination in which such Atmel products or services might be or are used.
Mailing Address: Atmel Corporation
1600 Technology Drive
San Jose, CA 95110
USAAtmel Corporation 1600 Technology Drive, San Jose, CA 95110 USA T: (+1)(408) 441.0311 F: (+1)(408) 436.4200 | www.atmel.com
© 2013 Atmel Corporation. All rights reserved. / Rev.: Atmel-42075B-MCU-Atmel SAM4S Xplained Pro-USER GUIDE-03/2013
Atmel®, Atmel logo and combinations thereof, AVR®, Enabling Unlimited Possibilities®, and others are registered trademarks or trademarks of Atmel
Corporation or its subsidiaries. Windows® is a registered trademark of Microsoft Corporation in U.S. and or other countries. ARM® is a registered
trademark of ARM Ltd. Other terms and product names may be trademarks of others.
Disclaimer: The information in this document is provided in connection with Atmel products. No license, express or implied, by estoppel or otherwise, to any intellectual property right is granted
by this document or in connection with the sale of Atmel products. EXCEPT AS SET FORTH IN THE ATMEL TERMS AND CONDITIONS OF SALES LOCATED ON THE ATMEL WEBSITE,
ATMEL ASSUMES NO LIABILITY WHATSOEVER AND DISCLAIMS ANY EXPRESS, IMPLIED OR STATUTORY WARRANTY RELATING TO ITS PRODUCTS INCLUDING, BUT NOT
LIMITED TO, THE IMPLIED WARRANTY OF MERCHANTABILITY, FITNESS FOR A PARTICULAR PURPOSE, OR NON-INFRINGEMENT. IN NO EVENT SHALL ATMEL BE LIABLE FOR
ANY DIRECT, INDIRECT, CONSEQUENTIAL, PUNITIVE, SPECIAL OR INCIDENTAL DAMAGES (INCLUDING, WITHOUT LIMITATION, DAMAGES FOR LOSS AND PROFITS, BUSINESS
INTERRUPTION, OR LOSS OF INFORMATION) ARISING OUT OF THE USE OR INABILITY TO USE THIS DOCUMENT, EVEN IF ATMEL HAS BEEN ADVISED OF THE POSSIBILITY OF
SUCH DAMAGES. Atmel makes no representations or warranties with respect to the accuracy or completeness of the contents of this document and reserves the right to make changes to
specifications and products descriptions at any time without notice. Atmel does not make any commitment to update the information contained herein. Unless specifically provided otherwise,
Atmel products are not suitable for, and shall not be used in, automotive applications. Atmel products are not intended, authorized, or warranted for use as components in applications intended
to support or sustain life.
APPLICATION NOTE
Atmel AVR600: STK600 Expansion, Routing and Socket
Boards
Atmel Microcontrollers
Introduction
This application note describes the process of developing new routing, socket and
expansion cards for the Atmel STK®
600. It also describes the physical parameters for
creating such cards.
The STK600 starter kit from Atmel has a sandwich design to match a specific part
package and pin out to the generic pin headers. It also features an expansion area
where most part pins are available.
While the variety of IC packages is relatively limited, the number of possible pinouts
increases rapidly with the number of pins. I.e. a 6-pin IC can have 720 (6!) different
pinouts!
The routing / socket card design provides a lowcost solution to support upcoming
devices as the socket is the cost driving factor.
STK600 users might also want to create their own routing cards to include
specialized hardware to prototype their own design.
Figure 1. STK600 router and socket card.
8170C−AVR−03/2013Atmel AVR600: STK600 Expansion, Routing and Socket Boards [APPLICATION NOTE] 8170C−AVR−03/2013
2
Table of Contents
1. Routing Cards ...................................................................................... 3
1.1 Connector footprints .......................................................................................... 3
1.2 Physical dimensions and component placement .............................................. 4
1.3 Atmel STK600 socket connectors pinout .......................................................... 5
1.3.1 Signal descriptions .............................................................................. 8
2. Socket Cards ..................................................................................... 10
2.1 Power design issues ....................................................................................... 10
2.2 Connector MPN ............................................................................................... 10
2.3 Physical dimensions and component placement ............................................ 10
3. Expansion Cards ................................................................................ 11
3.1 Connector MPN ............................................................................................... 11
3.2 Physical dimensions and component placement ............................................ 12
3.3 Atmel STK600 expansion connectors pinout .................................................. 13
4. ID System .......................................................................................... 17
4.1 Signal usage ................................................................................................... 17
4.2 ID functions ..................................................................................................... 18
4.3 Examples ........................................................................................................ 19
5. Design Example ................................................................................. 20
6. Revision History ................................................................................. 22Atmel AVR600: STK600 Expansion, Routing and Socket Boards [APPLICATION NOTE] 8170C−AVR−03/2013
3
1. Routing Cards
The routing cards sit between the generic socket card and the Atmel STK600. It has one pair of electric pads
underneath to mate with the STK600 spring loaded connector, and one pair of pads on top where the socket card
connector connects. A part specific card with the target IC soldered on can be viewed as a routing card without the top
pads.
1.1 Connector footprints
A routing card should have pads to mate with the following spring loaded connectors:
Table 1-1. Router card connectors.
Manufacturer and MPN Quantity Comment
SAMTEC, FSI-140-03-G-D-AD 2 80-pins to socket card (top)
SAMTEC, FSI-150-03-G-D-AD 2 100-pins to STK600 (bottom)
Figure 1-1. PCB land pattern for mating to FSI connectors. Atmel AVR600: STK600 Expansion, Routing and Socket Boards [APPLICATION NOTE] 8170C−AVR−03/2013
4
1.2 Physical dimensions and component placement
Figure 1-2. Routing card connector pad placement and dimensions.
Figure 1-3. Clip hole dimensions.
The board thickness should be 1.6mm to be compatible with the clips.
Note: Components on the main board might conflict with through hole mounted or secondary side mounted components.
Areas with such components are highlighted in Figure 1-4. Atmel AVR600: STK600 Expansion, Routing and Socket Boards [APPLICATION NOTE] 8170C−AVR−03/2013
5
Figure 1-4. Height restricted areas due to main board components.
1.3 Atmel STK600 socket connectors pinout
Figure 1-5 shows the pinout for the STK600 headers. This corresponds to the routing card connectors J1 and J2.
Figure 1-5. STK600 socket connectors’ pinout. Atmel AVR600: STK600 Expansion, Routing and Socket Boards [APPLICATION NOTE] 8170C−AVR−03/2013
6
Table 1-2. Atmel STK600 J201 left, routing card connector J1 pinout.
Signal name Pin number Signal name
VTG 2 1 GND
PA1 4 3 PA0
PA3 6 5 PA2
PA5 8 7 PA4
PA7 10 9 PA6
VTG 12 11 GND
PB1 14 13 PB0
PB3 16 15 PB2
PB5 18 17 PB4
PB7 20 19 PB6
VTG 22 21 GND
PC1 24 23 PC0
PC3 26 25 PC2
PC5 28 27 PC4
PC7 30 29 PC6
VTG 32 31 GND
PD1 34 33 PD0
PD3 36 35 PD2
PD5 38 37 PD4
PD7 40 39 PD6
VTG 42 41 GND
PE1 44 43 PE0
PE3 46 45 PE2
PE5 48 47 PE4
PE7 50 49 PE6
VTG 52 51 GND
PF1 54 53 PF0
PF3 56 55 PF2
PF5 58 57 PF4
PF7 60 59 PF6
VTG 62 61 GND
PG1 64 63 PG0
PG3 66 65 PG2
PG5 68 67 PG4
PG7 70 69 PG6
VTG 72 71 GND
PH1 74 73 PH0
PH3 76 75 PH2
PH5 78 77 PH4 Atmel AVR600: STK600 Expansion, Routing and Socket Boards [APPLICATION NOTE] 8170C−AVR−03/2013
7
PH7 80 79 PH6
VTG 82 81 GND
AREF0 84 83 XTAL1
AREF1 86 85 XTAL2
TGT_MOSI 88 87 GND
TGT_MISO 90 89 TOSC1
TGT_SCK 92 91 TOSC2
TDI 94 93 TGT_RESET
TDO 96 95 GND
TMS 98 97 Vext
TCK 100 99 Vcc
Table 1-3. Atmel STK600 J202 right, routing card connector J2 pinout.
Signal name Pin number Signal name
VTG 2 1 GND
PJ1 4 3 PJ0
PJ3 6 5 PJ2
PJ5 8 7 PJ4
PJ7 10 9 PJ6
VTG 12 11 GND
PK1 14 13 PK0
PK3 16 15 PK2
PK5 18 17 PK4
PK7 20 19 PK6
VTG 22 21 GND
PL1 24 23 PL0
PL3 26 25 PL2
PL5 28 27 PL4
PL7 30 29 PL6
VTG 32 31 GND
PM1 34 33 PM0
PM3 36 35 PM2
PM5 38 37 PM4
PM7 40 39 PM6
VTG 42 41 GND
PN1 44 43 PN0
PN3 46 45 PN2
PN5 48 47 PN4
PN7 50 49 PN6
VTG 52 51 GND
PP1 54 53 PP0 Atmel AVR600: STK600 Expansion, Routing and Socket Boards [APPLICATION NOTE] 8170C−AVR−03/2013
8
PP3 56 55 PP2
PP5 58 57 PP4
PP7 60 59 PP6
VTG 62 61 GND
PQ1 64 63 PQ0
PQ3 66 65 PQ2
PQ5 68 67 PQ4
PQ7 70 69 PQ6
VBUST 72 71 DP
UVCON 74 73 DN
Vcc 76 75 UID
Vext 78 77 GND
TGT_PDATA1 80 79 TGT_PDATA0
TGT_PDATA3 82 81 TGT_PDATA2
TGT_PDATA5 84 83 TGT_PDATA4
TGT_PDATA7 86 85 TGT_PDATA6
TGT_PCTRL1 88 87 TGT_PCTRL0
TGT_PCTRL3 90 89 TGT_PCTRL2
TGT_PCTRL5 92 91 TGT_PCTRL4
TGT_PCTRL7 94 93 TGT_PCTRL6
BOARD_ID1 96 95 BOARD_ID0
BOARD_ID3 98 97 BOARD_ID2
BOARD_ID5 100 99 BOARD_ID4
1.3.1 Signal descriptions
Table 1-4. Socket card connector pin description.
Atmel STK600 signal name MCU Comment
PAx, PBx etc PAx, PBx etc 1-to-1 MCU pin mapping
VTG Vcc Target supply rail controlled by Atmel AVR Studio®
/ STK600
GND GND
AREFx AREF Analog reference voltage, controlled by AVR Studio / STK600
XTALx XTALx Clock pins connected to oscillator on STK600
TGT_SCK, TGT_MISO, TGT_MOSI ISP pins ISP programming interface
TGT_TDI, TGT_TDO, TGT_TMS,
TGT_TCK JTAG pins JTAG programming interface
VBUST VBUS VBUS (sense) for USB
UID UID ID pin for USB OTG
UVCON UVCON
USB VBUS generation control for USB OTG. A low level on this
signal enables VBUS generation
DP, DN DP, DN USB differential pair
TGT_PDATA(0-7) (HV) data pins Data pins for high voltage (PP/HVSP) programming Atmel AVR600: STK600 Expansion, Routing and Socket Boards [APPLICATION NOTE] 8170C−AVR−03/2013
9
TGT_CTRL0 (HV) BS2
Control signals for High voltage Parallel Programming / Serial
Programming. Refer to AVR datasheet for further information.
On AVRs with common XA1/BS2, XA1 is used.
On AVRs with common BS1/PAGEL, BS1 is used.
TGT_CTRL1 (HV) Ready/Busy
TGT_CTRL2 (HV) /OE
TGT_CTRL3 (HV) /WR
TGT_CTRL4 (HV) BS1
TGT_CTRL5 (HV) XA0
TGT_CTRL6 (HV) XA1
TGT_CTRL7 (HV) PAGEL
BOARD_IDn none
ID system for router / socket / expansion cards, see Chapter 4 -
ID System
Notes: 1. Not all AVR will have every pin (ex. two aref pins, tosc or usb).
2. A MCU pin will fan-out to both Pnx pin and to the programming interface(s) located at that pin. Atmel AVR600: STK600 Expansion, Routing and Socket Boards [APPLICATION NOTE] 8170C−AVR−03/2013
10
2. Socket Cards
Socket cards route each pin from the IC socket to separate pins on the spring loaded connectors on the bottom side,
facing the routing card.
2.1 Power design issues
As all routing is handled by the routing card, even power lines and power decoupling is ignored at the socket card. This
produces less than ideal power design, which may lead to unwanted noise, ground bounce, and other effects. It should
therefore be expected that heavily loaded designs cannot run at full speed on the Atmel STK600. Likewise, such power
design is not recommended for custom designs.
2.2 Connector MPN
Table 2-1. Socket card connector.
Manufacturer and MPN Quantity Comment
SAMTEC, FSI-140-03-G-D-AD 2 Spring loaded 80-pin connector
2.3 Physical dimensions and component placement
Figure 2-1. Socket card connector placement and dimensions.
ST1
J1 J2
45°
Note!
105mm
94mm
66mm
7mm
The board thickness should be 1.6mm to be compatible with the clips. Atmel AVR600: STK600 Expansion, Routing and Socket Boards [APPLICATION NOTE] 8170C−AVR−03/2013
11
3. Expansion Cards
The Atmel STK600 features an expansion area where cards for custom peripherals like memory expansion, LCD etc
can be placed. STK600 routes all part pins and power to the expansion card connectors.
3.1 Connector MPN
Table 3-1. Expansion card connector.
Manufacturer and MPN Quantity Comment
FCI, 61082-101402LF 2 Atmel AVR600: STK600 Expansion, Routing and Socket Boards [APPLICATION NOTE] 8170C−AVR−03/2013
12
3.2 Physical dimensions and component placement
Figure 3-1. Expansion card connector placement and dimensions.
There is no requirement to board thickness. Atmel AVR600: STK600 Expansion, Routing and Socket Boards [APPLICATION NOTE] 8170C−AVR−03/2013
13
3.3 Atmel STK600 expansion connectors pinout
Figure 3-2. Pinout for expansion connectors.
Table 3-2. STK600 J301 “expand0” connector pinout.
Signal name Pin number Signal name
VTG 2 1 GND
PA1 4 3 PA0
PA3 6 5 PA2
PA5 8 7 PA4
PA7 10 9 PA6
VTG 12 11 GND
PB1 14 13 PB0
PB3 16 15 PB2
PB5 18 17 PB4
PB7 20 19 PB6
VTG 22 21 GND
PC1 24 23 PC0
PC3 26 25 PC2
PC5 28 27 PC4
PC7 30 29 PC6
VTG 32 31 GND
PD1 34 33 PD0 Atmel AVR600: STK600 Expansion, Routing and Socket Boards [APPLICATION NOTE] 8170C−AVR−03/2013
14
PD3 36 35 PD2
PD5 38 37 PD4
PD7 40 39 PD6
VTG 42 41 GND
PE1 44 43 PE0
PE3 46 45 PE2
PE5 48 47 PE4
PE7 50 49 PE6
VTG 52 51 GND
PF1 54 53 PF0
PF3 56 55 PF2
PF5 58 57 PF4
PF7 60 59 PF6
VTG 62 61 GND
PG1 64 63 PG0
PG3 66 65 PG2
PG5 68 67 PG4
PG7 70 69 PG6
VTG 72 71 GND
PH1 74 73 PH0
PH3 76 75 PH2
PH5 78 77 PH4
PH7 80 79 PH6
VTG 82 81 GND
AREF0 84 83 XTAL1
AREF1 86 85 XTAL2
TGT_MOSI 88 87 GND
TGT_MISO 90 89 TOSC1
TGT_SCK 92 91 TOSC2
TDI 94 93 TGT_RESET
TDO 96 95 Vcc6
TMS 98 97 GND
TCK 100 99 Vcc6
Table 3-3. Atmel STK600 J302 “expand1” connector pinout.
Signal name Pin number Signal name
VTG 2 1 GND
PJ1 4 3 PJ0
PJ3 6 5 PJ2
PJ5 8 7 PJ4
PJ7 10 9 PJ6 Atmel AVR600: STK600 Expansion, Routing and Socket Boards [APPLICATION NOTE] 8170C−AVR−03/2013
15
VTG 12 11 GND
PK1 14 13 PK0
PK3 16 15 PK2
PK5 18 17 PK4
PK7 20 19 PK6
VTG 22 21 GND
PL1 24 23 PL0
PL3 26 25 PL2
PL5 28 27 PL4
PL7 30 29 PL6
VTG 32 31 GND
PM1 34 33 PM0
PM3 36 35 PM2
PM5 38 37 PM4
PM7 40 39 PM6
VTG 42 41 GND
PN1 44 43 PN0
PN3 46 45 PN2
PN5 48 47 PN4
PN7 50 49 PN6
VTG 52 51 GND
PP1 54 53 PP0
PP3 56 55 PP2
PP5 58 57 PP4
PP7 60 59 PP6
VTG 62 61 GND
PQ1 64 63 PQ0
PQ3 66 65 PQ2
PQ5 68 67 PQ4
PQ7 70 69 PQ6
Vext 72 71 GND
Vext 74 73 GND
GND 76 75 Vcc
GND 78 77 Vcc
TGT_PDATA1 80 79 TGT_PDATA0
TGT_PDATA3 82 81 TGT_PDATA2
TGT_PDATA5 84 83 TGT_PDATA4
TGT_PDATA7 86 85 TGT_PDATA6
TGT_PCTRL1 88 87 TGT_PCTRL0
TGT_PCTRL3 90 89 TGT_PCTRL2
TGT_PCTRL5 92 91 TGT_PCTRL4 Atmel AVR600: STK600 Expansion, Routing and Socket Boards [APPLICATION NOTE] 8170C−AVR−03/2013
16
TGT_PCTRL7 94 93 TGT_PCTRL6
Vcc3 96 95 GND
BOARD_ID1 98 97 BOARD_ID0
BOARD_ID7 100 99 BOARD_ID6 Atmel AVR600: STK600 Expansion, Routing and Socket Boards [APPLICATION NOTE] 8170C−AVR−03/2013
17
4. ID System
The Atmel STK600 features an ID system to identify which routing, socket and expansion card is attached. The STK600
can impose voltage limitations based on the IDs, and Atmel AVR Studio will notify the user if the combination is
incorrect.
The ID system consists of two common output and two board unique input signals. Each input is one of sixteen possible
values based in the input signals – giving a total ID space of 256.
Three IDs are reserved for custom use and can be implemented without use of ICs.
Table 4-1. IDs reserved for custom use.
Type ID
Board limited to 1.8V 0xCA
Board limited to 3.3V 0xCC
No limit on voltage 0xCF
The ID 0xff indicates no board present.
4.1 Signal usage
Table 4-2. ID system signal usage.
Name Direction Function
BOARD_ID0 Output (A) Common output to functions
BOARD_ID1 Output (B) Common output to functions
BOARD_ID2 Input Input from routing card
BOARD_ID3 Input Input from routing card
BOARD_ID4 Input Input from socket card
BOARD_ID5 Input Input from socket card
BOARD_ID6 Input Input from expansion card
BOARD_ID7 Input Input from expansion card Atmel AVR600: STK600 Expansion, Routing and Socket Boards [APPLICATION NOTE] 8170C−AVR−03/2013
18
4.2 ID functions
The functions and their output according to input A and B:
B A 0 1 2 3 4 5 6 7 8 9 10 11 12 13 14 15
0 0 0 1 0 1 0 1 0 1 0 1 0 1 0 1 0 1
0 1 0 0 1 1 0 0 1 1 0 0 1 1 0 0 1 1
1 0 0 0 0 0 1 1 1 1 0 0 0 0 1 1 1 1
1 1 0 0 0 0 0 0 0 0 1 1 1 1 1 1 1 1
Functions as logic expressions:
Function Expression ID
0 0 0x0
1 A + B 0x1
2 AB 0x2
3 B 0x3
4 AB 0x4
5 A 0x5
6 ⊕ BA 0x6
7 AB 0x7
8 AB 0x8
9 ⊕ BA 0x9
10 A 0xA
11 B + AB 0xB
12 B 0xC
13 B A⋅+ B 0xD
14 A + B 0xE
15 1 0xF Atmel AVR600: STK600 Expansion, Routing and Socket Boards [APPLICATION NOTE] 8170C−AVR−03/2013
19
4.3 Examples
For a socket card to report the ID 0xCA:
Route BOARD_ID1 to BOARD_ID4 and BOARD_ID0 to BOARD_ID5
Figure 4-1. Socket card ID example.
For an expansion card to report the ID 0xCF:
Route BOARD_ID0 to BOARD_ID6 and VCC to BOARD_ID7
Figure 4-2. Expansion card ID example.
For a router card to report the ID 0xCC:
Route BOARD_ID1 to both BOARD_ID2 and BOARD_ID3.
Figure 4-3. Routing card ID example. Atmel AVR600: STK600 Expansion, Routing and Socket Boards [APPLICATION NOTE] 8170C−AVR−03/2013
20
5. Design Example
To support a new package type one would typically start with designing the socket card. The pinout between the socket
card and routing card is not defined and left to the designer. An example is given in Figure 5-1.
Next is the design of the routing card (Figure 5-3). The routing card’s role is to connect each pin from the socket card to
the corresponding pin on the Atmel STK600. In addition to decoupling etc, the routing card should also fan-out the
correct signals to programming headers.
Each card in the stack has its own board_id pins; the routing card is responsible for passing on the signal to the socket
card.
Figure 5-1. Schema capture of socket card.
Both the socket and routing card must also include the clip holes:
Figure 5-2. Clip holes included in schematic. Atmel AVR600: STK600 Expansion, Routing and Socket Boards [APPLICATION NOTE] 8170C−AVR−03/2013
21
Figure 5-3. Schema capture of routing card.
Copyright © 2008, Atmel Corporation Atmel AVR600: STK600 Expansion, Routing and Socket Boards [APPLICATION NOTE] 8170C−AVR−03/2013
22
6. Revision History
Doc. Rev. Date Comments
8170C 03/2013 Example schematics for the ID system are updated
8170B 12/2010
8170A 10/2008 Initial document release
Atmel Corporation
1600 Technology Drive
San Jose, CA 95110
USA
Tel: (+1)(408) 441-0311
Fax: (+1)(408) 487-2600
www.atmel.com
Atmel Asia Limited
Unit 01-5 & 16, 19F
BEA Tower, Millennium City 5
418 Kwun Tong Road
Kwun Tong, Kowloon
HONG KONG
Tel: (+852) 2245-6100
Fax: (+852) 2722-1369
Atmel Munich GmbH
Business Campus
Parkring 4
D-85748 Garching b. Munich
GERMANY
Tel: (+49) 89-31970-0
Fax: (+49) 89-3194621
Atmel Japan G.K.
16F Shin-Osaki Kangyo Building
1-6-4 Osaki, Shinagawa-ku
Tokyo 141-0032
JAPAN
Tel: (+81)(3) 6417-0300
Fax: (+81)(3) 6417-0370
© 2013 Atmel Corporation. All rights reserved. / Rev.: 8170C−AVR−03/2013
Atmel®, Atmel logo and combinations thereof, AVR®, AVR Studio®, Enabling Unlimited Possibilities®, STK®, and others are registered trademarks or trademarks of
Atmel Corporation or its subsidiaries. Other terms and product names may be trademarks of others.
Disclaimer: The information in this document is provided in connection with Atmel products. No license, express or implied, by estoppel or otherwise, to any intellectual property right is granted by this
document or in connection with the sale of Atmel products. EXCEPT AS SET FORTH IN THE ATMEL TERMS AND CONDITIONS OF SALES LOCATED ON THE ATMEL WEBSITE, ATMEL ASSUMES
NO LIABILITY WHATSOEVER AND DISCLAIMS ANY EXPRESS, IMPLIED OR STATUTORY WARRANTY RELATING TO ITS PRODUCTS INCLUDING, BUT NOT LIMITED TO, THE IMPLIED
WARRANTY OF MERCHANTABILITY, FITNESS FOR A PARTICULAR PURPOSE, OR NON-INFRINGEMENT. IN NO EVENT SHALL ATMEL BE LIABLE FOR ANY DIRECT, INDIRECT,
CONSEQUENTIAL, PUNITIVE, SPECIAL OR INCIDENTAL DAMAGES (INCLUDING, WITHOUT LIMITATION, DAMAGES FOR LOSS AND PROFITS, BUSINESS INTERRUPTION, OR LOSS OF
INFORMATION) ARISING OUT OF THE USE OR INABILITY TO USE THIS DOCUMENT, EVEN IF ATMEL HAS BEEN ADVISED OF THE POSSIBILITY OF SUCH DAMAGES. Atmel makes no
representations or warranties with respect to the accuracy or completeness of the contents of this document and reserves the right to make changes to specifications and products descriptions at any time
without notice. Atmel does not make any commitment to update the information contained herein. Unless specifically provided otherwise, Atmel products are not suitable for, and shall not be used in,
automotive applications. Atmel products are not intended, authorized, or warranted for use as components in applications intended to support or sustain life.
8159E–AVR–02/2013
Features
• High-performance, Low-power Atmel®AVR® 8-bit Microcontroller
• Advanced RISC Architecture
– 130 Powerful Instructions – Most Single-clock Cycle Execution
– 32 x 8 General Purpose Working Registers
– Fully Static Operation
– Up to 16MIPS Throughput at 16MHz
– On-chip 2-cycle Multiplier
• High Endurance Non-volatile Memory segments
– 8KBytes of In-System Self-programmable Flash program memory
– 512Bytes EEPROM
– 1KByte Internal SRAM
– Write/Erase Cycles: 10,000 Flash/100,000 EEPROM
– Data retention: 20 years at 85C/100 years at 25C(1)
– Optional Boot Code Section with Independent Lock Bits
• In-System Programming by On-chip Boot Program
• True Read-While-Write Operation
– Programming Lock for Software Security
• Atmel QTouch® library support
– Capacitive touch buttons, sliders and wheels
– Atmel QTouch and QMatrix acquisition
– Up to 64 sense channels
• Peripheral Features
– Two 8-bit Timer/Counters with Separate Prescaler, one Compare Mode
– One 16-bit Timer/Counter with Separate Prescaler, Compare Mode, and Capture Mode
– Real Time Counter with Separate Oscillator
– Three PWM Channels
– 8-channel ADC in TQFP and QFN/MLF package
• Eight Channels 10-bit Accuracy
– 6-channel ADC in PDIP package
• Six Channels 10-bit Accuracy
– Byte-oriented Two-wire Serial Interface
– Programmable Serial USART
– Master/Slave SPI Serial Interface
– Programmable Watchdog Timer with Separate On-chip Oscillator
– On-chip Analog Comparator
• Special Microcontroller Features
– Power-on Reset and Programmable Brown-out Detection
– Internal Calibrated RC Oscillator
– External and Internal Interrupt Sources
– Five Sleep Modes: Idle, ADC Noise Reduction, Power-save, Power-down, and Standby
• I/O and Packages
– 23 Programmable I/O Lines
– 28-lead PDIP, 32-lead TQFP, and 32-pad QFN/MLF
• Operating Voltages
– 2.7 - 5.5V
– 0 - 16MHz
• Power Consumption at 4MHz, 3V, 25C
– Active: 3.6mA
– Idle Mode: 1.0mA
– Power-down Mode: 0.5µA
8-bit Atmel Microcontroller with 8KB In-System Programmable Flash
ATmega8AATmega8A [DATASHEET] 2
8159E–AVR–02/2013
1. Pin Configurations
Figure 1-1. Pinout ATmega8A
1
2
3
4
5
6
7
8
24
23
22
21
20
19
18
17
(INT1) PD3
(XCK/T0) PD4
GND
VCC
GND
VCC
(XTAL1/TOSC1) PB6
(XTAL2/TOSC2) PB7
PC1 (ADC1)
PC0 (ADC0)
ADC7
GND
AREF
ADC6
AVCC
PB5 (SCK)
32
31
30
29
28
27
26
25
9
10
11
12
13
14
15
16
(T1) PD5
(AIN0) PD6
(AIN1) PD7
(ICP1) PB0
(OC1A) PB1
(SS/OC1B) PB2
(MOSI/OC2) PB3
(MISO) PB4
PD2 (INT0)
PD1 (TXD)
PD0 (RXD)
PC6 (RESET)
PC5 (ADC5/SCL)
PC4 (ADC4/SDA)
PC3 (ADC3)
PC2 (ADC2)
TQFP Top View
1
2
3
4
5
6
7
8
9
10
11
12
13
14
28
27
26
25
24
23
22
21
20
19
18
17
16
15
(RESET) PC6
(RXD) PD0
(TXD) PD1
(INT0) PD2
(INT1) PD3
(XCK/T0) PD4
VCC
GND
(XTAL1/TOSC1) PB6
(XTAL2/TOSC2) PB7
(T1) PD5
(AIN0) PD6
(AIN1) PD7
(ICP1) PB0
PC5 (ADC5/SCL)
PC4 (ADC4/SDA)
PC3 (ADC3)
PC2 (ADC2)
PC1 (ADC1)
PC0 (ADC0)
GND
AREF
AVCC
PB5 (SCK)
PB4 (MISO)
PB3 (MOSI/OC2)
PB2 (SS/OC1B)
PB1 (OC1A)
PDIP
1
2
3
4
5
6
7
8
24
23
22
21
20
19
18
17
32
31
30
29
28
27
26
25
9
10
11
12
13
14
15
16
MLF Top View
(INT1) PD3
(XCK/T0) PD4
GND
VCC
GND
VCC
(XTAL1/TOSC1) PB6
(XTAL2/TOSC2) PB7
PC1 (ADC1)
PC0 (ADC0)
ADC7
GND
AREF
ADC6
AVCC
PB5 (SCK)
(T1) PD5
(AIN0) PD6
(AIN1) PD7
(ICP1) PB0
(OC1A) PB1
(SS/OC1B) PB2
(MOSI/OC2) PB3
(MISO) PB4
PD2 (INT0)
PD1 (TXD)
PD0 (RXD)
PC6 (RESET)
PC5 (ADC5/SCL)
PC4 (ADC4/SDA)
PC3 (ADC3)
PC2 (ADC2)
NOTE:
The large center pad underneath the MLF
packages is made of metal and internally
connected to GND. It should be soldered
or glued to the PCB to ensure good
mechanical stability. If the center pad is
left unconneted, the package might
loosen from the PCB.ATmega8A [DATASHEET] 3
8159E–AVR–02/2013
2. Overview
The Atmel®AVR® ATmega8A is a low-power CMOS 8-bit microcontroller based on the AVR RISC architecture. By
executing powerful instructions in a single clock cycle, the ATmega8A achieves throughputs approaching 1 MIPS
per MHz, allowing the system designer to optimize power consumption versus processing speed.
2.1 Block Diagram
Figure 2-1. Block Diagram
INTERNAL
OSCILLATOR
OSCILLATOR
WATCHDOG
TIMER
MCU CTRL.
& TIMING
OSCILLATOR
TIMERS/
COUNTERS
INTERRUPT
UNIT
STACK
POINTER
EEPROM
SRAM
STATUS
REGISTER
USART
PROGRAM
COUNTER
PROGRAM
FLASH
INSTRUCTION
REGISTER
INSTRUCTION
DECODER
PROGRAMMING
LOGIC SPI
ADC
INTERFACE
COMP.
INTERFACE
PORTC DRIVERS/BUFFERS
PORTC DIGITAL INTERFACE
GENERAL
PURPOSE
REGISTERS
X
Y
Z
ALU
+
-
PORTB DRIVERS/BUFFERS
PORTB DIGITAL INTERFACE
PORTD DIGITAL INTERFACE
PORTD DRIVERS/BUFFERS
XTAL1
XTAL2
CONTROL
LINES
VCC
GND
MUX &
ADC
AGND
AREF
PC0 - PC6 PB0 - PB7
PD0 - PD7
AVR CPU
TWI
RESETATmega8A [DATASHEET] 4
8159E–AVR–02/2013
The Atmel®AVR® AVR core combines a rich instruction set with 32 general purpose working registers. All the 32
registers are directly connected to the Arithmetic Logic Unit (ALU), allowing two independent registers to be
accessed in one single instruction executed in one clock cycle. The resulting architecture is more code efficient
while achieving throughputs up to ten times faster than conventional CISC microcontrollers.
The ATmega8A provides the following features: 8K bytes of In-System Programmable Flash with Read-WhileWrite
capabilities, 512 bytes of EEPROM, 1K byte of SRAM, 23 general purpose I/O lines, 32 general purpose
working registers, three flexible Timer/Counters with compare modes, internal and external interrupts, a serial programmable
USART, a byte oriented Two-wire Serial Interface, a 6-channel ADC (eight channels in TQFP and
QFN/MLF packages) with 10-bit accuracy, a programmable Watchdog Timer with Internal Oscillator, an SPI serial
port, and five software selectable power saving modes. The Idle mode stops the CPU while allowing the SRAM,
Timer/Counters, SPI port, and interrupt system to continue functioning. The Power-down mode saves the register
contents but freezes the Oscillator, disabling all other chip functions until the next Interrupt or Hardware Reset. In
Power-save mode, the asynchronous timer continues to run, allowing the user to maintain a timer base while the
rest of the device is sleeping. The ADC Noise Reduction mode stops the CPU and all I/O modules except asynchronous
timer and ADC, to minimize switching noise during ADC conversions. In Standby mode, the
crystal/resonator Oscillator is running while the rest of the device is sleeping. This allows very fast start-up combined
with low-power consumption.
The device is manufactured using Atmel’s high density non-volatile memory technology. The Flash Program memory
can be reprogrammed In-System through an SPI serial interface, by a conventional non-volatile memory
programmer, or by an On-chip boot program running on the AVR core. The boot program can use any interface to
download the application program in the Application Flash memory. Software in the Boot Flash Section will continue
to run while the Application Flash Section is updated, providing true Read-While-Write operation. By
combining an 8-bit RISC CPU with In-System Self-Programmable Flash on a monolithic chip, the Atmel
ATmega8A is a powerful microcontroller that provides a highly-flexible and cost-effective solution to many embedded
control applications.
The Atmel AVR ATmega8A is supported with a full suite of program and system development tools, including C
compilers, macro assemblers, program simulators and evaluation kits.
2.2 Pin Descriptions
2.2.1 VCC
Digital supply voltage.
2.2.2 GND
Ground.
2.2.3 Port B (PB7:PB0) – XTAL1/XTAL2/TOSC1/TOSC2
Port B is an 8-bit bi-directional I/O port with internal pull-up resistors (selected for each bit). The Port B output buffers
have symmetrical drive characteristics with both high sink and source capability. As inputs, Port B pins that are
externally pulled low will source current if the pull-up resistors are activated. The Port B pins are tri-stated when a
reset condition becomes active, even if the clock is not running.
Depending on the clock selection fuse settings, PB6 can be used as input to the inverting Oscillator amplifier and
input to the internal clock operating circuit.
Depending on the clock selection fuse settings, PB7 can be used as output from the inverting Oscillator amplifier.
If the Internal Calibrated RC Oscillator is used as chip clock source, PB7:6 is used as TOSC2:1 input for the Asynchronous
Timer/Counter2 if the AS2 bit in ASSR is set.ATmega8A [DATASHEET] 5
8159E–AVR–02/2013
The various special features of Port B are elaborated in “Alternate Functions of Port B” on page 56 and “System
Clock and Clock Options” on page 24.
2.2.4 Port C (PC5:PC0)
Port C is an 7-bit bi-directional I/O port with internal pull-up resistors (selected for each bit). The Port C output buffers
have symmetrical drive characteristics with both high sink and source capability. As inputs, Port C pins that are
externally pulled low will source current if the pull-up resistors are activated. The Port C pins are tri-stated when a
reset condition becomes active, even if the clock is not running.
2.2.5 PC6/RESET
If the RSTDISBL Fuse is programmed, PC6 is used as an I/O pin. Note that the electrical characteristics of PC6 differ
from those of the other pins of Port C.
If the RSTDISBL Fuse is unprogrammed, PC6 is used as a Reset input. A low level on this pin for longer than the
minimum pulse length will generate a Reset, even if the clock is not running. The minimum pulse length is given in
Table 26-3 on page 228. Shorter pulses are not guaranteed to generate a Reset.
The various special features of Port C are elaborated on page 59.
2.2.6 Port D (PD7:PD0)
Port D is an 8-bit bi-directional I/O port with internal pull-up resistors (selected for each bit). The Port D output buffers
have symmetrical drive characteristics with both high sink and source capability. As inputs, Port D pins that are
externally pulled low will source current if the pull-up resistors are activated. The Port D pins are tri-stated when a
reset condition becomes active, even if the clock is not running.
Port D also serves the functions of various special features of the ATmega8A as listed on page 61.
2.2.7 RESET
Reset input. A low level on this pin for longer than the minimum pulse length will generate a reset, even if the clock
is not running. The minimum pulse length is given in Table 26-3 on page 228. Shorter pulses are not guaranteed to
generate a reset.
2.2.8 AVCC
AVCC is the supply voltage pin for the A/D Converter, Port C (3:0), and ADC (7:6). It should be externally connected
to VCC, even if the ADC is not used. If the ADC is used, it should be connected to VCC through a low-pass filter.
Note that Port C (5:4) use digital supply voltage, VCC.
2.2.9 AREF
AREF is the analog reference pin for the A/D Converter.
2.2.10 ADC7:6 (TQFP and QFN/MLF Package Only)
In the TQFP and QFN/MLF package, ADC7:6 serve as analog inputs to the A/D converter. These pins are powered
from the analog supply and serve as 10-bit ADC channels.ATmega8A [DATASHEET] 6
8159E–AVR–02/2013
3. Resources
A comprehensive set of development tools, application notes and datasheets are available for download on
http://www.atmel.com/avr.
Note: 1.
4. Data Retention
Reliability Qualification results show that the projected data retention failure rate is much less than 1 PPM over 20
years at 85°C or 100 years at 25°C.
5. About Code Examples
This datasheet contains simple code examples that briefly show how to use various parts of the device. These
code examples assume that the part specific header file is included before compilation. Be aware that not all C
compiler vendors include bit definitions in the header files and interrupt handling in C is compiler dependent.
Please confirm with the C compiler documentation for more details.
6. Capacitive touch sensing
The Atmel® QTouch® Library provides a simple to use solution to realize touch sensitive interfaces on most Atmel
AVR® microcontrollers. The QTouch Library includes support for the QTouch and QMatrix® acquisition methods.
Touch sensing can be added to any application by linking the appropriate Atmel QTouch Library for the AVR Microcontroller.
This is done by using a simple set of APIs to define the touch channels and sensors, and then calling the
touch sensing API’s to retrieve the channel information and determine the touch sensor states.
The QTouch Library is FREE and downloadable from the Atmel website at the following location:
www.atmel.com/qtouchlibrary. For implementation details and other information, refer to the Atmel QTouch Library
User Guide - also available for download from the Atmel website.ATmega8A [DATASHEET] 7
8159E–AVR–02/2013
7. AVR CPU Core
7.1 Overview
This section discusses the Atmel®AVR® core architecture in general. The main function of the CPU core is to
ensure correct program execution. The CPU must therefore be able to access memories, perform calculations,
control peripherals, and handle interrupts.
Figure 7-1. Block Diagram of the AVR MCU Architecture
In order to maximize performance and parallelism, the AVR uses a Harvard architecture – with separate memories
and buses for program and data. Instructions in the Program memory are executed with a single level pipelining.
While one instruction is being executed, the next instruction is pre-fetched from the Program memory. This concept
enables instructions to be executed in every clock cycle. The Program memory is In-System Reprogrammable
Flash memory.
The fast-access Register File contains 32 x 8-bit general purpose working registers with a single clock cycle
access time. This allows single-cycle Arithmetic Logic Unit (ALU) operation. In a typical ALU operation, two operands
are output from the Register File, the operation is executed, and the result is stored back in the Register File
– in one clock cycle.
Six of the 32 registers can be used as three 16-bit indirect address register pointers for Data Space addressing –
enabling efficient address calculations. One of the these address pointers can also be used as an address pointer
for look up tables in Flash Program memory. These added function registers are the 16-bit X-, Y-, and Z-register,
described later in this section.
Flash
Program
Memory
Instruction
Register
Instruction
Decoder
Program
Counter
Control Lines
32 x 8
General
Purpose
Registrers
ALU
Status
and Control
I/O Lines
EEPROM
Data Bus 8-bit
Data
SRAM
Direct Addressing
Indirect Addressing
Interrupt
Unit
SPI
Unit
Watchdog
Timer
Analog
Comparator
i/O Module 2
i/O Module1
i/O Module nATmega8A [DATASHEET] 8
8159E–AVR–02/2013
The ALU supports arithmetic and logic operations between registers or between a constant and a register. Single
register operations can also be executed in the ALU. After an arithmetic operation, the Status Register is updated
to reflect information about the result of the operation.
The Program flow is provided by conditional and unconditional jump and call instructions, able to directly address
the whole address space. Most AVR instructions have a single 16-bit word format. Every Program memory
address contains a 16- or 32-bit instruction.
Program Flash memory space is divided in two sections, the Boot program section and the Application program
section. Both sections have dedicated Lock Bits for write and read/write protection. The SPM instruction that writes
into the Application Flash memory section must reside in the Boot program section.
During interrupts and subroutine calls, the return address Program Counter (PC) is stored on the Stack. The Stack
is effectively allocated in the general data SRAM, and consequently the Stack size is only limited by the total
SRAM size and the usage of the SRAM. All user programs must initialize the SP in the reset routine (before subroutines
or interrupts are executed). The Stack Pointer SP is read/write accessible in the I/O space. The data
SRAM can easily be accessed through the five different addressing modes supported in the AVR architecture.
The memory spaces in the AVR architecture are all linear and regular memory maps.
A flexible interrupt module has its control registers in the I/O space with an additional global interrupt enable bit in
the Status Register. All interrupts have a separate Interrupt Vector in the Interrupt Vector table. The interrupts have
priority in accordance with their Interrupt Vector position. The lower the Interrupt Vector address, the higher the
priority.
The I/O memory space contains 64 addresses for CPU peripheral functions as Control Registers, SPI, and other
I/O functions. The I/O Memory can be accessed directly, or as the Data Space locations following those of the Register
File, 0x20 - 0x5F.
7.2 Arithmetic Logic Unit – ALU
The high-performance Atmel®AVR® ALU operates in direct connection with all the 32 general purpose working registers.
Within a single clock cycle, arithmetic operations between general purpose registers or between a register
and an immediate are executed. The ALU operations are divided into three main categories – arithmetic, logical,
and bit-functions. Some implementations of the architecture also provide a powerful multiplier supporting both
signed/unsigned multiplication and fractional format. See the “Instruction Set” section for a detailed description.
7.3 Status Register
The Status Register contains information about the result of the most recently executed arithmetic instruction. This
information can be used for altering program flow in order to perform conditional operations. Note that the Status
Register is updated after all ALU operations, as specified in the Instruction Set Reference. This will in many cases
remove the need for using the dedicated compare instructions, resulting in faster and more compact code.
The Status Register is not automatically stored when entering an interrupt routine and restored when returning
from an interrupt. This must be handled by software.
7.3.1 SREG – The AVR Status Register
Bit 7 6 5 4 3 2 1 0
I T H S V N Z C SREG
Read/Write R/W R/W R/W R/W R/W R/W R/W R/W
Initial Value 0 0 0 0 0 0 0 0ATmega8A [DATASHEET] 9
8159E–AVR–02/2013
• Bit 7 – I: Global Interrupt Enable
The Global Interrupt Enable bit must be set for the interrupts to be enabled. The individual interrupt enable control
is then performed in separate control registers. If the Global Interrupt Enable Register is cleared, none of the interrupts
are enabled independent of the individual interrupt enable settings. The I-bit is cleared by hardware after an
interrupt has occurred, and is set by the RETI instruction to enable subsequent interrupts. The I-bit can also be set
and cleared by the application with the SEI and CLI instructions, as described in the Instruction Set Reference.
• Bit 6 – T: Bit Copy Storage
The Bit Copy instructions BLD (Bit LoaD) and BST (Bit STore) use the T-bit as source or destination for the operated
bit. A bit from a register in the Register File can be copied into T by the BST instruction, and a bit in T can be
copied into a bit in a register in the Register File by the BLD instruction.
• Bit 5 – H: Half Carry Flag
The Half Carry Flag H indicates a Half Carry in some arithmetic operations. Half Carry is useful in BCD arithmetic.
See the “Instruction Set Description” for detailed information.
• Bit 4 – S: Sign Bit, S = N V
The S-bit is always an exclusive or between the Negative Flag N and the Two’s Complement Overflow Flag V. See
the “Instruction Set Description” for detailed information.
• Bit 3 – V: Two’s Complement Overflow Flag
The Two’s Complement Overflow Flag V supports two’s complement arithmetics. See the “Instruction Set Description”
for detailed information.
• Bit 2 – N: Negative Flag
The Negative Flag N indicates a negative result in an arithmetic or logic operation. See the “Instruction Set
Description” for detailed information.
• Bit 1 – Z: Zero Flag
The Zero Flag Z indicates a zero result in an arithmetic or logic operation. See the “Instruction Set Description” for
detailed information.
• Bit 0 – C: Carry Flag
The Carry Flag C indicates a Carry in an arithmetic or logic operation. See the “Instruction Set Description” for
detailed information.
7.4 General Purpose Register File
The Register File is optimized for the Atmel®AVR® Enhanced RISC instruction set. In order to achieve the required
performance and flexibility, the following input/output schemes are supported by the Register File:
• One 8-bit output operand and one 8-bit result input.
• Two 8-bit output operands and one 8-bit result input.
• Two 8-bit output operands and one 16-bit result input.
• One 16-bit output operand and one 16-bit result input.
Figure 7-2 shows the structure of the 32 general purpose working registers in the CPU.ATmega8A [DATASHEET] 10
8159E–AVR–02/2013
Figure 7-2. AVR CPU General Purpose Working Registers
Most of the instructions operating on the Register File have direct access to all registers, and most of them are single
cycle instructions.
As shown in Figure 7-2, each register is also assigned a Data memory address, mapping them directly into the first
32 locations of the user Data Space. Although not being physically implemented as SRAM locations, this memory
organization provides great flexibility in access of the registers, as the X-, Y-, and Z-pointer Registers can be set to
index any register in the file.
7.4.1 The X-register, Y-register and Z-register
The registers R26:R31 have some added functions to their general purpose usage. These registers are 16-bit
address pointers for indirect addressing of the Data Space. The three indirect address registers X, Y and Z are
defined as described in Figure 7-3.
Figure 7-3. The X-, Y- and Z-Registers
In the different addressing modes these address registers have functions as fixed displacement, automatic increment,
and automatic decrement (see the Instruction Set Reference for details).
7.5 Stack Pointer
The Stack is mainly used for storing temporary data, for storing local variables and for storing return addresses
after interrupts and subroutine calls. Note that the Stack is implemented as growing from higher to lower memory
7 0 Addr.
R0 0x00
R1 0x01
R2 0x02
…
R13 0x0D
General R14 0x0E
Purpose R15 0x0F
Working R16 0x10
Registers R17 0x11
…
R26 0x1A X-register Low Byte
R27 0x1B X-register High Byte
R28 0x1C Y-register Low Byte
R29 0x1D Y-register High Byte
R30 0x1E Z-register Low Byte
R31 0x1F Z-register High Byte
15 XH XL 0
X-register 7 0 7 0
R27 (0x1B) R26 (0x1A)
15 YH YL 0
Y-register 7 0 7 0
R29 (0x1D) R28 (0x1C)
15 ZH ZL 0
Z-register 7 0 7 0
R31 (0x1F) R30 (0x1E)ATmega8A [DATASHEET] 11
8159E–AVR–02/2013
locations. The Stack Pointer Register always points to the top of the Stack. The Stack Pointer points to the data
SRAM Stack area where the Subroutine and Interrupt Stacks are located. A Stack PUSH command will decrease
the Stack Pointer.
The Stack in the data SRAM must be defined by the program before any subroutine calls are executed or interrupts
are enabled. Initial Stack Pointer value equals the last address of the internal SRAM and the Stack Pointer must be
set to point above start of the SRAM, see Figure 8-2 on page 16.
See Table 7-1 for Stack Pointer details.
The Atmel®AVR® Stack Pointer is implemented as two 8-bit registers in the I/O space. The number of bits actually
used is implementation dependent. Note that the data space in some implementations of the AVR architecture is
so small that only SPL is needed. In this case, the SPH Register will not be present.
7.5.1 SPH and SPL – Stack Pointer High and Low Register
7.6 Instruction Execution Timing
This section describes the general access timing concepts for instruction execution. The Atmel®AVR®CPU is
driven by the CPU clock clkCPU, directly generated from the selected clock source for the chip. No internal clock
division is used.
Figure 7-4 shows the parallel instruction fetches and instruction executions enabled by the Harvard architecture
and the fast-access Register File concept. This is the basic pipelining concept to obtain up to 1 MIPS per MHz with
the corresponding unique results for functions per cost, functions per clocks, and functions per power-unit.
Table 7-1. Stack Pointer instructions
Instruction Stack pointer Description
PUSH Decremented by 1 Data is pushed onto the stack
CALL
ICALL
RCALL
Decremented by 2 Return address is pushed onto the stack with a subroutine call or
interrupt
POP Incremented by 1 Data is popped from the stack
RET
RETI
Incremented by 2 Return address is popped from the stack with return from
subroutine or return from interrupt
Bit 15 14 13 12 11 10 9 8
SP15 SP14 SP13 SP12 SP11 SP10 SP9 SP8 SPH
SP7 SP6 SP5 SP4 SP3 SP2 SP1 SP0 SPL
76543210
Read/Write R/W R/W R/W R/W R/W R/W R/W R/W
R/W R/W R/W R/W R/W R/W R/W R/W
Initial Value 0 0 0 0 0 0 0 0
00000000ATmega8A [DATASHEET] 12
8159E–AVR–02/2013
Figure 7-4. The Parallel Instruction Fetches and Instruction Executions
Figure 7-5 shows the internal timing concept for the Register File. In a single clock cycle an ALU operation using
two register operands is executed, and the result is stored back to the destination register.
Figure 7-5. Single Cycle ALU Operation
7.7 Reset and Interrupt Handling
The Atmel®AVR® provides several different interrupt sources. These interrupts and the separate Reset Vector
each have a separate Program Vector in the Program memory space. All interrupts are assigned individual enable
bits which must be written logic one together with the Global Interrupt Enable bit in the Status Register in order to
enable the interrupt. Depending on the Program Counter value, interrupts may be automatically disabled when
Boot Lock Bits BLB02 or BLB12 are programmed. This feature improves software security. See the section “Memory
Programming” on page 207 for details.
The lowest addresses in the Program memory space are by default defined as the Reset and Interrupt Vectors.
The complete list of Vectors is shown in “Interrupts” on page 44. The list also determines the priority levels of the
different interrupts. The lower the address the higher is the priority level. RESET has the highest priority, and next
is INT0 – the External Interrupt Request 0. The Interrupt Vectors can be moved to the start of the boot Flash section
by setting the Interrupt Vector Select (IVSEL) bit in the General Interrupt Control Register (GICR). Refer to
“Interrupts” on page 44 for more information. The Reset Vector can also be moved to the start of the boot Flash
section by programming the BOOTRST Fuse, see “Boot Loader Support – Read-While-Write Self-Programming”
on page 194.
When an interrupt occurs, the Global Interrupt Enable I-bit is cleared and all interrupts are disabled. The user software
can write logic one to the I-bit to enable nested interrupts. All enabled interrupts can then interrupt the current
interrupt routine. The I-bit is automatically set when a Return from Interrupt instruction – RETI – is executed.
There are basically two types of interrupts. The first type is triggered by an event that sets the Interrupt Flag. For
these interrupts, the Program Counter is vectored to the actual Interrupt Vector in order to execute the interrupt
clk
1st Instruction Fetch
1st Instruction Execute
2nd Instruction Fetch
2nd Instruction Execute
3rd Instruction Fetch
3rd Instruction Execute
4th Instruction Fetch
T1 T2 T3 T4
CPU
Total Execution Time
Register Operands Fetch
ALU Operation Execute
Result Write Back
T1 T2 T3 T4
clkCPUATmega8A [DATASHEET] 13
8159E–AVR–02/2013
handling routine, and hardware clears the corresponding Interrupt Flag. Interrupt Flags can also be cleared by writing
a logic one to the flag bit position(s) to be cleared. If an interrupt condition occurs while the corresponding
interrupt enable bit is cleared, the Interrupt Flag will be set and remembered until the interrupt is enabled, or the
flag is cleared by software. Similarly, if one or more interrupt conditions occur while the global interrupt enable bit is
cleared, the corresponding Interrupt Flag(s) will be set and remembered until the global interrupt enable bit is set,
and will then be executed by order of priority.
The second type of interrupts will trigger as long as the interrupt condition is present. These interrupts do not necessarily
have Interrupt Flags. If the interrupt condition disappears before the interrupt is enabled, the interrupt will
not be triggered.
When the AVR exits from an interrupt, it will always return to the main program and execute one more instruction
before any pending interrupt is served.
Note that the Status Register is not automatically stored when entering an interrupt routine, nor restored when
returning from an interrupt routine. This must be handled by software.
When using the CLI instruction to disable interrupts, the interrupts will be immediately disabled. No interrupt will be
executed after the CLI instruction, even if it occurs simultaneously with the CLI instruction. The following example
shows how this can be used to avoid interrupts during the timed EEPROM write sequence.
When using the SEI instruction to enable interrupts, the instruction following SEI will be executed before any pending
interrupts, as shown in the following example.
Assembly Code Example
in r16, SREG ; store SREG value
cli ; disable interrupts during timed sequence
sbi EECR, EEMWE ; start EEPROM write
sbi EECR, EEWE
out SREG, r16 ; restore SREG value (I-bit)
C Code Example
char cSREG;
cSREG = SREG; /* store SREG value */
/* disable interrupts during timed sequence */
_CLI();
EECR |= (1< xxx
:. :. :.
Table 12-2. Reset and Interrupt Vectors Placement
BOOTRST(1) IVSEL Reset Address Interrupt Vectors Start Address
1 0 0x000 0x001
1 1 0x000 Boot Reset Address + 0x001
0 0 Boot Reset Address 0x001
0 1 Boot Reset Address Boot Reset Address + 0x001ATmega8A [DATASHEET] 46
8159E–AVR–02/2013
When the BOOTRST Fuse is unprogrammed, the boot section size set to 2K bytes and the IVSEL bit in the GICR
Register is set before any interrupts are enabled, the most typical and general program setup for the Reset and
Interrupt Vector Addresses is:
AddressLabels Code Comments
$000 rjmp RESET ; Reset handler
;
$001 RESET:ldi r16,high(RAMEND); Main program start
$002 out SPH,r16 ; Set Stack Pointer to top of RAM
$003 ldi r16,low(RAMEND)
$004 out SPL,r16
$005 sei ; Enable interrupts
$006 xxx
;
.org $c01
$c01 rjmp EXT_INT0 ; IRQ0 Handler
$c02 rjmp EXT_INT1 ; IRQ1 Handler
:. :. :. ;
$c12 rjmp SPM_RDY ; Store Program Memory Ready Handler
When the BOOTRST Fuse is programmed and the boot section size set to 2K bytes, the most typical and general
program setup for the Reset and Interrupt Vector Addresses is:
AddressLabels Code Comments
.org $001
$001 rjmp EXT_INT0 ; IRQ0 Handler
$002 rjmp EXT_INT1 ; IRQ1 Handler
:. :. :. ;
$012 rjmp SPM_RDY ; Store Program Memory Ready Handler
;
.org $c00
$c00 rjmp RESET ; Reset handler
;
$c01 RESET:ldi r16,high(RAMEND); Main program start
$c02 out SPH,r16 ; Set Stack Pointer to top of RAM
$c03 ldi r16,low(RAMEND)
$c04 out SPL,r16
$c05 sei ; Enable interrupts
$c06 xxxATmega8A [DATASHEET] 47
8159E–AVR–02/2013
When the BOOTRST Fuse is programmed, the boot section size set to 2K bytes, and the IVSEL bit in the GICR
Register is set before any interrupts are enabled, the most typical and general program setup for the Reset and
Interrupt Vector Addresses is:
AddressLabels Code Comments
;
.org $c00
$c00 rjmp RESET ; Reset handler
$c01 rjmp EXT_INT0 ; IRQ0 Handler
$c02 rjmp EXT_INT1 ; IRQ1 Handler
:. :. :. ;
$c12 rjmp SPM_RDY ; Store Program Memory Ready Handler
$c13 RESET: ldi r16,high(RAMEND); Main program start
$c14 out SPH,r16 ; Set Stack Pointer to top of RAM
$c15 ldi r16,low(RAMEND)
$c16 out SPL,r16
$c17 sei ; Enable interrupts
$c18 xxx
12.1.1 Moving Interrupts Between Application and Boot Space
The General Interrupt Control Register controls the placement of the Interrupt Vector table.
12.2 Register Description
12.2.1 GICR – General Interrupt Control Register
• Bit 1 – IVSEL: Interrupt Vector Select
When the IVSEL bit is cleared (zero), the Interrupt Vectors are placed at the start of the Flash memory. When this
bit is set (one), the Interrupt Vectors are moved to the beginning of the Boot Loader section of the Flash. The actual
address of the start of the boot Flash section is determined by the BOOTSZ Fuses. Refer to the section “Boot
Loader Support – Read-While-Write Self-Programming” on page 194 for details. To avoid unintentional changes of
Interrupt Vector tables, a special write procedure must be followed to change the IVSEL bit:
1. Write the Interrupt Vector Change Enable (IVCE) bit to one.
2. Within four cycles, write the desired value to IVSEL while writing a zero to IVCE.
Interrupts will automatically be disabled while this sequence is executed. Interrupts are disabled in the cycle IVCE
is set, and they remain disabled until after the instruction following the write to IVSEL. If IVSEL is not written, interrupts
remain disabled for four cycles. The I-bit in the Status Register is unaffected by the automatic disabling.
Note: If Interrupt Vectors are placed in the Boot Loader section and Boot Lock bit BLB02 is programmed, interrupts
are disabled while executing from the Application section. If Interrupt Vectors are placed in the Application section
and Boot Lock bit BLB12 is programed, interrupts are disabled while executing from the Boot Loader section. Refer
to the section “Boot Loader Support – Read-While-Write Self-Programming” on page 194 for details on Boot Lock
Bits.
Bit 7 6 5 4 3 2 1 0
INT1 INT0 – – – – IVSEL IVCE GICR
Read/Write R/W R/W R R R R R/W R/W
Initial Value 0 0 0 0 0 0 0 0ATmega8A [DATASHEET] 48
8159E–AVR–02/2013
• Bit 0 – IVCE: Interrupt Vector Change Enable
The IVCE bit must be written to logic one to enable change of the IVSEL bit. IVCE is cleared by hardware four
cycles after it is written or when IVSEL is written. Setting the IVCE bit will disable interrupts, as explained in the
IVSEL description above. See Code Example below.
Assembly Code Example
Move_interrupts:
; Enable change of Interrupt Vectors
ldi r16, (1< CSn2:0 > 1). The number
of system clock cycles from when the timer is enabled to the first count occurs can be from 1 to N+1 system
clock cycles, where N equals the prescaler divisor (8, 64, 256, or 1024).
It is possible to use the prescaler reset for synchronizing the Timer/Counter to program execution. However, care
must be taken if the other Timer/Counter that shares the same prescaler also uses prescaling. A prescaler reset
will affect the prescaler period for all Timer/Counters it is connected to.
16.4 External Clock Source
An external clock source applied to the T1/T0 pin can be used as Timer/Counter clock (clkT1/clkT0). The T1/T0 pin
is sampled once every system clock cycle by the pin synchronization logic. The synchronized (sampled) signal is
then passed through the edge detector. Figure 16-1 shows a functional equivalent block diagram of the T1/T0 synchronization
and edge detector logic. The registers are clocked at the positive edge of the internal system clock
(clkI/O). The latch is transparent in the high period of the internal system clock.
The edge detector generates one clkT1/clkT0 pulse for each positive (CSn2:0 = 7) or negative (CSn2:0 = 6) edge it
detects.
Figure 16-1. T1/T0 Pin Sampling
The synchronization and edge detector logic introduces a delay of 2.5 to 3.5 system clock cycles from an edge has
been applied to the T1/T0 pin to the counter is updated.
Tn_sync
(To Clock
Select Logic)
Synchronization Edge Detector
D Q D Q
LE
Tn D Q
clkI/OATmega8A [DATASHEET] 72
8159E–AVR–02/2013
Enabling and disabling of the clock input must be done when T1/T0 has been stable for at least one system clock
cycle, otherwise it is a risk that a false Timer/Counter clock pulse is generated.
Each half period of the external clock applied must be longer than one system clock cycle to ensure correct sampling.
The external clock must be guaranteed to have less than half the system clock frequency (fExtClk < fclk_I/O/2)
given a 50/50% duty cycle. Since the edge detector uses sampling, the maximum frequency of an external clock it
can detect is half the sampling frequency (Nyquist sampling theorem). However, due to variation of the system
clock frequency and duty cycle caused by Oscillator source (crystal, resonator, and capacitors) tolerances, it is recommended
that maximum frequency of an external clock source is less than fclk_I/O/2.5.
An external clock source can not be prescaled.
Figure 16-2. Prescaler for Timer/Counter0 and Timer/Counter1(1)
Note: 1. The synchronization logic on the input pins (T1/T0) is shown in Figure 16-1.
16.5 Register Description
16.5.1 SFIOR – Special Function IO Register
• Bit 0 – PSR10: Prescaler Reset Timer/Counter1 and Timer/Counter0
When this bit is written to one, the Timer/Counter1 and Timer/Counter0 prescaler will be reset. The bit will be
cleared by hardware after the operation is performed. Writing a zero to this bit will have no effect. Note that
Timer/Counter1 and Timer/Counter0 share the same prescaler and a reset of this prescaler will affect both timers.
This bit will always be read as zero.
PSR10
Clear
clkT1 clkT0
T1
T0
clkI/O
Synchronization
Synchronization
Bit 7 6 5 4 3 2 1 0
– – – – ACME PUD PSR2 PSR10 SFIOR
Read/Write R R R R R/W R/W R/W R/W
Initial Value 0 0 0 0 0 0 0 0ATmega8A [DATASHEET] 73
8159E–AVR–02/2013
17. 16-bit Timer/Counter1
17.1 Features • True 16-bit Design (i.e., allows 16-bit PWM)
• Two Independent Output Compare Units
• Double Buffered Output Compare Registers
• One Input Capture Unit
• Input Capture Noise Canceler
• Clear Timer on Compare Match (Auto Reload)
• Glitch-free, Phase Correct Pulse Width Modulator (PWM)
• Variable PWM Period
• Frequency Generator
• External Event Counter
• Four Independent Interrupt Sources (TOV1, OCF1A, OCF1B, and ICF1)
17.2 Overview
The 16-bit Timer/Counter unit allows accurate program execution timing (event management), wave generation,
and signal timing measurement. Most register and bit references in this section are written in general form. A lower
case “n” replaces the Timer/Counter number, and a lower case “x” replaces the Output Compare unit channel.
However, when using the register or bit defines in a program, the precise form must be used i.e., TCNT1 for
accessing Timer/Counter1 counter value and so on.
A simplified block diagram of the 16-bit Timer/Counter is shown in Figure 17-1. For the actual placement of I/O
pins, refer to “Pin Configurations” on page 2. CPU accessible I/O Registers, including I/O bits and I/O pins, are
shown in bold. The device-specific I/O Register and bit locations are listed in the “Register Description” on page 92.ATmega8A [DATASHEET] 74
8159E–AVR–02/2013
Figure 17-1. 16-bit Timer/Counter Block Diagram(1)
Note: 1. Refer to “Pin Configurations” on page 2, Table 13-2 on page 56, and Table 13-8 on page 61 for Timer/Counter1 pin
placement and description.
17.2.1 Registers
The Timer/Counter (TCNT1), Output Compare Registers (OCR1A/B), and Input Capture Register (ICR1) are all
16-bit registers. Special procedures must be followed when accessing the 16-bit registers. These procedures are
described in the section “Accessing 16-bit Registers” on page 75. The Timer/Counter Control Registers
(TCCR1A/B) are 8-bit registers and have no CPU access restrictions. Interrupt requests (abbreviated to Int.Req. in
the figure) signals are all visible in the Timer Interrupt Flag Register (TIFR). All interrupts are individually masked
with the Timer Interrupt Mask Register (TIMSK). TIFR and TIMSK are not shown in the figure since these registers
are shared by other timer units.
The Timer/Counter can be clocked internally, via the prescaler, or by an external clock source on the T1 pin. The
Clock Select logic block controls which clock source and edge the Timer/Counter uses to increment (or decrement)
its value. The Timer/Counter is inactive when no clock source is selected. The output from the clock select logic is
referred to as the timer clock (clkT1).
The double buffered Output Compare Registers (OCR1A/B) are compared with the Timer/Counter value at all time.
The result of the compare can be used by the waveform generator to generate a PWM or variable frequency output
on the Output Compare Pin (OC1A/B). See “Output Compare Units” on page 81. The Compare Match event will
also set the Compare Match Flag (OCF1A/B) which can be used to generate an Output Compare interrupt request.
Clock Select
Timer/Counter
DATA BUS
OCRnA
OCRnB
ICRn
=
=
TCNTn
Waveform
Generation
Waveform
Generation
OCnA
OCnB
Noise
Canceler
ICPn
=
Fixed
TOP
Values
Edge
Detector
Control Logic
= 0
TOP BOTTOM
Count
Clear
Direction
TOVn
(Int. Req.)
OCFnA
(Int. Req.)
OCFnB
(Int.Req.)
ICFn (Int.Req.)
TCCRnA TCCRnB
( From Analog
Comparator Ouput )
Tn Edge
Detector
( From Prescaler )
clkTnATmega8A [DATASHEET] 75
8159E–AVR–02/2013
The Input Capture Register can capture the Timer/Counter value at a given external (edge triggered) event on
either the Input Capture Pin (ICP1) or on the Analog Comparator pins (see “Analog Comparator” on page 179).
The Input Capture unit includes a digital filtering unit (Noise Canceler) for reducing the chance of capturing noise
spikes.
The TOP value, or maximum Timer/Counter value, can in some modes of operation be defined by either the
OCR1A Register, the ICR1 Register, or by a set of fixed values. When using OCR1A as TOP value in a PWM
mode, the OCR1A Register can not be used for generating a PWM output. However, the TOP value will in this
case be double buffered allowing the TOP value to be changed in run time. If a fixed TOP value is required, the
ICR1 Register can be used as an alternative, freeing the OCR1A to be used as PWM output.
17.2.2 Definitions
The following definitions are used extensively throughout the document:
17.2.3 Compatibility
The 16-bit Timer/Counter has been updated and improved from previous versions of the 16-bit AVR Timer/Counter.
This 16-bit Timer/Counter is fully compatible with the earlier version regarding:
• All 16-bit Timer/Counter related I/O Register address locations, including Timer Interrupt Registers.
• Bit locations inside all 16-bit Timer/Counter Registers, including Timer Interrupt Registers.
• Interrupt Vectors.
• The following control bits have changed name, but have same functionality and register location:
• PWM10 is changed to WGM10.
• PWM11 is changed to WGM11.
• CTC1 is changed to WGM12.
The following bits are added to the 16-bit Timer/Counter Control Registers:
• FOC1A and FOC1B are added to TCCR1A.
• WGM13 is added to TCCR1B.
The 16-bit Timer/Counter has improvements that will affect the compatibility in some special cases.
17.3 Accessing 16-bit Registers
The TCNT1, OCR1A/B, and ICR1 are 16-bit registers that can be accessed by the AVR CPU via the 8-bit data bus.
The 16-bit register must be byte accessed using two read or write operations. The 16-bit timer has a single 8-bit
register for temporary storing of the High byte of the 16-bit access. The same temporary register is shared between
all 16-bit registers within the 16-bit timer. Accessing the Low byte triggers the 16-bit read or write operation. When
the Low byte of a 16-bit register is written by the CPU, the High byte stored in the temporary register, and the Low
byte written are both copied into the 16-bit register in the same clock cycle. When the Low byte of a 16-bit register
is read by the CPU, the High byte of the 16-bit register is copied into the temporary register in the same clock cycle
as the Low byte is read.
Table 17-1. Definitions
BOTTOM The counter reaches the BOTTOM when it becomes 0x0000.
MAX The counter reaches its MAXimum when it becomes 0xFFFF (decimal 65535).
TOP The counter reaches the TOP when it becomes equal to the highest value in the
count sequence. The TOP value can be assigned to be one of the fixed values:
0x00FF, 0x01FF, or 0x03FF, or to the value stored in the OCR1A or ICR1 Register.
The assignment is dependent of the mode of operation.ATmega8A [DATASHEET] 76
8159E–AVR–02/2013
Not all 16-bit accesses uses the temporary register for the High byte. Reading the OCR1A/B 16-bit registers does
not involve using the temporary register.
To do a 16-bit write, the High byte must be written before the Low byte. For a 16-bit read, the Low byte must be
read before the High byte.
The following code examples show how to access the 16-bit Timer Registers assuming that no interrupts updates
the temporary register. The same principle can be used directly for accessing the OCR1A/B and ICR1 Registers.
Note that when using “C”, the compiler handles the 16-bit access.
Note: 1. See “About Code Examples” on page 6.
The assembly code example returns the TCNT1 value in the r17:r16 Register pair.
It is important to notice that accessing 16-bit registers are atomic operations. If an interrupt occurs between the two
instructions accessing the 16-bit register, and the interrupt code updates the temporary register by accessing the
same or any other of the 16-bit Timer Registers, then the result of the access outside the interrupt will be corrupted.
Therefore, when both the main code and the interrupt code update the temporary register, the main code must disable
the interrupts during the 16-bit access.
Assembly Code Example(1)
:.
; Set TCNT1 to 0x01FF
ldi r17,0x01
ldi r16,0xFF
out TCNT1H,r17
out TCNT1L,r16
; Read TCNT1 into r17:r16
in r16,TCNT1L
in r17,TCNT1H
:.
C Code Example(1)
unsigned int i;
:.
/* Set TCNT1 to 0x01FF */
TCNT1 = 0x1FF;
/* Read TCNT1 into i */
i = TCNT1;
:.ATmega8A [DATASHEET] 77
8159E–AVR–02/2013
The following code examples show how to do an atomic read of the TCNT1 Register contents. Reading any of the
OCR1A/B or ICR1 Registers can be done by using the same principle.
Note: 1. See “About Code Examples” on page 6.
The assembly code example returns the TCNT1 value in the r17:r16 Register pair.
Assembly Code Example(1)
TIM16_ReadTCNT1:
; Save Global Interrupt Flag
in r18,SREG
; Disable interrupts
cli
; Read TCNT1 into r17:r16
in r16,TCNT1L
in r17,TCNT1H
; Restore Global Interrupt Flag
out SREG,r18
ret
C Code Example(1)
unsigned int TIM16_ReadTCNT1( void )
{
unsigned char sreg;
unsigned int i;
/* Save Global Interrupt Flag */
sreg = SREG;
/* Disable interrupts */
_CLI();
/* Read TCNT1 into i */
i = TCNT1;
/* Restore Global Interrupt Flag */
SREG = sreg;
return i;
}ATmega8A [DATASHEET] 78
8159E–AVR–02/2013
The following code examples show how to do an atomic write of the TCNT1 Register contents. Writing any of the
OCR1A/B or ICR1 Registers can be done by using the same principle.
Note: 1. See “About Code Examples” on page 6.
The assembly code example requires that the r17:r16 Register pair contains the value to be written to TCNT1.
17.3.1 Reusing the Temporary High Byte Register
If writing to more than one 16-bit register where the High byte is the same for all registers written, then the High
byte only needs to be written once. However, note that the same rule of atomic operation described previously also
applies in this case.
17.4 Timer/Counter Clock Sources
The Timer/Counter can be clocked by an internal or an external clock source. The clock source is selected by the
clock select logic which is controlled by the clock select (CS12:0) bits located in the Timer/Counter Control Register
B (TCCR1B). For details on clock sources and prescaler, see “Timer/Counter0 and Timer/Counter1 Prescalers”
on page 71.
17.5 Counter Unit
The main part of the 16-bit Timer/Counter is the programmable 16-bit bi-directional counter unit. Figure 17-2 shows
a block diagram of the counter and its surroundings.
Assembly Code Example(1)
TIM16_WriteTCNT1:
; Save Global Interrupt Flag
in r18,SREG
; Disable interrupts
cli
; Set TCNT1 to r17:r16
out TCNT1H,r17
out TCNT1L,r16
; Restore Global Interrupt Flag
out SREG,r18
ret
C Code Example(1)
void TIM16_WriteTCNT1( unsigned int i )
{
unsigned char sreg;
unsigned int i;
/* Save Global Interrupt Flag */
sreg = SREG;
/* Disable interrupts */
_CLI();
/* Set TCNT1 to i */
TCNT1 = i;
/* Restore Global Interrupt Flag */
SREG = sreg;
}ATmega8A [DATASHEET] 79
8159E–AVR–02/2013
Figure 17-2. Counter Unit Block Diagram
Signal description (internal signals):
count Increment or decrement TCNT1 by 1.
direction Select between increment and decrement.
clear Clear TCNT1 (set all bits to zero).
clkT1 Timer/Counter clock.
TOP Signalize that TCNT1 has reached maximum value.
BOTTOM Signalize that TCNT1 has reached minimum value (zero).
The 16-bit counter is mapped into two 8-bit I/O memory locations: counter high (TCNT1H) containing the upper
eight bits of the counter, and Counter Low (TCNT1L) containing the lower eight bits. The TCNT1H Register can
only be indirectly accessed by the CPU. When the CPU does an access to the TCNT1H I/O location, the CPU
accesses the High byte temporary register (TEMP). The temporary register is updated with the TCNT1H value
when the TCNT1L is read, and TCNT1H is updated with the temporary register value when TCNT1L is written. This
allows the CPU to read or write the entire 16-bit counter value within one clock cycle via the 8-bit data bus. It is
important to notice that there are special cases of writing to the TCNT1 Register when the counter is counting that
will give unpredictable results. The special cases are described in the sections where they are of importance.
Depending on the mode of operation used, the counter is cleared, incremented, or decremented at each timer
clock (clkT1). The clkT1 can be generated from an external or internal clock source, selected by the clock select bits
(CS12:0). When no clock source is selected (CS12:0 = 0) the timer is stopped. However, the TCNT1 value can be
accessed by the CPU, independent of whether clkT1 is present or not. A CPU write overrides (has priority over) all
counter clear or count operations.
The counting sequence is determined by the setting of the Waveform Generation mode bits (WGM13:0) located in
the Timer/Counter Control Registers A and B (TCCR1A and TCCR1B). There are close connections between how
the counter behaves (counts) and how waveforms are generated on the Output Compare Outputs OC1x. For more
details about advanced counting sequences and waveform generation, see “Modes of Operation” on page 84.
The Timer/Counter Overflow (TOV1) fLag is set according to the mode of operation selected by the WGM13:0 bits.
TOV1 can be used for generating a CPU interrupt.
17.6 Input Capture Unit
The Timer/Counter incorporates an Input Capture unit that can capture external events and give them a timestamp
indicating time of occurrence. The external signal indicating an event, or multiple events, can be applied via
the ICP1 pin or alternatively, via the Analog Comparator unit. The time-stamps can then be used to calculate freTEMP
(8-bit)
DATA BUS (8-bit)
TCNTn (16-bit Counter)
TCNTnH (8-bit) TCNTnL (8-bit) Control Logic
count
clear
direction
TOVn
(Int. Req.)
Clock Select
TOP BOTTOM
Tn Edge
Detector
( From Prescaler )
clkTnATmega8A [DATASHEET] 80
8159E–AVR–02/2013
quency, duty-cycle, and other features of the signal applied. Alternatively the time-stamps can be used for creating
a log of the events.
The Input Capture unit is illustrated by the block diagram shown in Figure 17-3. The elements of the block diagram
that are not directly a part of the Input Capture unit are gray shaded. The small “n” in register and bit names indicates
the Timer/Counter number.
Figure 17-3. Input Capture Unit Block Diagram
When a change of the logic level (an event) occurs on the Input Capture Pin (ICP1), alternatively on the Analog
Comparator Output (ACO), and this change confirms to the setting of the edge detector, a capture will be triggered.
When a capture is triggered, the 16-bit value of the counter (TCNT1) is written to the Input Capture Register
(ICR1). The Input Capture Flag (ICF1) is set at the same system clock as the TCNT1 value is copied into ICR1
Register. If enabled (TICIE1 = 1), the Input Capture Flag generates an Input Capture interrupt. The ICF1 Flag is
automatically cleared when the interrupt is executed. Alternatively the ICF1 Flag can be cleared by software by
writing a logical one to its I/O bit location.
Reading the 16-bit value in the Input Capture Register (ICR1) is done by first reading the Low byte (ICR1L) and
then the High byte (ICR1H). When the Low byte is read the High byte is copied into the High byte temporary register
(TEMP). When the CPU reads the ICR1H I/O location it will access the TEMP Register.
The ICR1 Register can only be written when using a Waveform Generation mode that utilizes the ICR1 Register for
defining the counter’s TOP value. In these cases the Waveform Generation mode (WGM13:0) bits must be set
before the TOP value can be written to the ICR1 Register. When writing the ICR1 Register the High byte must be
written to the ICR1H I/O location before the Low byte is written to ICR1L.
For more information on how to access the 16-bit registers refer to “Accessing 16-bit Registers” on page 75.
17.6.1 Input Capture Pin Source
The main trigger source for the Input Capture unit is the Input Capture Pin (ICP1). Timer/Counter 1 can alternatively
use the Analog Comparator Output as trigger source for the Input Capture unit. The Analog Comparator is
selected as trigger source by setting the Analog Comparator Input Capture (ACIC) bit in the Analog Comparator
ICFn (Int. Req.)
Analog
Comparator
WRITE ICRn (16-bit Register)
ICRnH (8-bit)
Noise
Canceler
ICPn
Edge
Detector
TEMP (8-bit)
DATA BUS (8-bit)
ICRnL (8-bit)
TCNTn (16-bit Counter)
TCNTnH (8-bit) TCNTnL (8-bit)
ACO* ACIC* ICNC ICESATmega8A [DATASHEET] 81
8159E–AVR–02/2013
Control and Status Register (ACSR). Be aware that changing trigger source can trigger a capture. The Input Capture
Flag must therefore be cleared after the change.
Both the Input Capture Pin (ICP1) and the Analog Comparator Output (ACO) inputs are sampled using the same
technique as for the T1 pin (Figure 16-1 on page 71). The edge detector is also identical. However, when the noise
canceler is enabled, additional logic is inserted before the edge detector, which increases the delay by four system
clock cycles. Note that the input of the noise canceler and edge detector is always enabled unless the Timer/Counter
is set in a Waveform Generation mode that uses ICR1 to define TOP.
An Input Capture can be triggered by software by controlling the port of the ICP1 pin.
17.6.2 Noise Canceler
The noise canceler improves noise immunity by using a simple digital filtering scheme. The noise canceler input is
monitored over four samples, and all four must be equal for changing the output that in turn is used by the edge
detector.
The noise canceler is enabled by setting the Input Capture Noise Canceler (ICNC1) bit in Timer/Counter Control
Register B (TCCR1B). When enabled the noise canceler introduces additional four system clock cycles of delay
from a change applied to the input, to the update of the ICR1 Register. The noise canceler uses the system clock
and is therefore not affected by the prescaler.
17.6.3 Using the Input Capture Unit
The main challenge when using the Input Capture unit is to assign enough processor capacity for handling the
incoming events. The time between two events is critical. If the processor has not read the captured value in the
ICR1 Register before the next event occurs, the ICR1 will be overwritten with a new value. In this case the result of
the capture will be incorrect.
When using the Input Capture interrupt, the ICR1 Register should be read as early in the interrupt handler routine
as possible. Even though the Input Capture interrupt has relatively high priority, the maximum interrupt response
time is dependent on the maximum number of clock cycles it takes to handle any of the other interrupt requests.
Using the Input Capture unit in any mode of operation when the TOP value (resolution) is actively changed during
operation, is not recommended.
Measurement of an external signal’s duty cycle requires that the trigger edge is changed after each capture.
Changing the edge sensing must be done as early as possible after the ICR1 Register has been read. After a
change of the edge, the Input Capture Flag (ICF1) must be cleared by software (writing a logical one to the I/O bit
location). For measuring frequency only, the clearing of the ICF1 Flag is not required (if an interrupt handler is
used).
17.7 Output Compare Units
The 16-bit comparator continuously compares TCNT1 with the Output Compare Register (OCR1x). If TCNT equals
OCR1x the comparator signals a match. A match will set the Output Compare Flag (OCF1x) at the next timer clock
cycle. If enabled (OCIE1x = 1), the Output Compare Flag generates an Output Compare interrupt. The OCF1x Flag
is automatically cleared when the interrupt is executed. Alternatively the OCF1x Flag can be cleared by software
by writing a logical one to its I/O bit location. The waveform generator uses the match signal to generate an output
according to operating mode set by the Waveform Generation mode (WGM13:0) bits and Compare Output mode
(COM1x1:0) bits. The TOP and BOTTOM signals are used by the waveform generator for handling the special
cases of the extreme values in some modes of operation (See “Modes of Operation” on page 84.)
A special feature of Output Compare unit A allows it to define the Timer/Counter TOP value (i.e. counter resolution).
In addition to the counter resolution, the TOP value defines the period time for waveforms generated by the
waveform generator.ATmega8A [DATASHEET] 82
8159E–AVR–02/2013
Figure 17-4 shows a block diagram of the Output Compare unit. The small “n” in the register and bit names indicates
the device number (n = 1 for Timer/Counter 1), and the “x” indicates Output Compare unit (A/B). The
elements of the block diagram that are not directly a part of the Output Compare unit are gray shaded.
Figure 17-4. Output Compare Unit, Block Diagram
The OCR1x Register is double buffered when using any of the twelve Pulse Width Modulation (PWM) modes. For
the normal and Clear Timer on Compare (CTC) modes of operation, the double buffering is disabled. The double
buffering synchronizes the update of the OCR1x Compare Register to either TOP or BOTTOM of the counting
sequence. The synchronization prevents the occurrence of odd-length, non-symmetrical PWM pulses, thereby
making the output glitch-free.
The OCR1x Register access may seem complex, but this is not case. When the double buffering is enabled, the
CPU has access to the OCR1x Buffer Register, and if double buffering is disabled the CPU will access the OCR1x
directly. The content of the OCR1x (Buffer or Compare) Register is only changed by a write operation (the
Timer/Counter does not update this register automatically as the TCNT1 and ICR1 Register). Therefore OCR1x is
not read via the High byte temporary register (TEMP). However, it is a good practice to read the Low byte first as
when accessing other 16-bit registers. Writing the OCR1x Registers must be done via the TEMP Register since the
compare of all 16-bit is done continuously. The High byte (OCR1xH) has to be written first. When the High byte I/O
location is written by the CPU, the TEMP Register will be updated by the value written. Then when the Low byte
(OCR1xL) is written to the lower eight bits, the High byte will be copied into the upper 8-bits of either the OCR1x
buffer or OCR1x Compare Register in the same system clock cycle.
For more information of how to access the 16-bit registers refer to “Accessing 16-bit Registers” on page 75.
17.7.1 Force Output Compare
In non-PWM Waveform Generation modes, the match output of the comparator can be forced by writing a one to
the Force Output Compare (FOC1x) bit. Forcing Compare Match will not set the OCF1x Flag or reload/clear the
timer, but the OC1x pin will be updated as if a real Compare Match had occurred (the COM1x1:0 bits settings
define whether the OC1x pin is set, cleared or toggled).
OCFnx (Int.Req.)
= (16-bit Comparator )
OCRnx Buffer (16-bit Register)
OCRnxH Buf. (8-bit)
OCnx
TEMP (8-bit)
DATA BUS (8-bit)
OCRnxL Buf. (8-bit)
TCNTn (16-bit Counter)
TCNTnH (8-bit) TCNTnL (8-bit)
WGMn3:0 COMnx1:0
OCRnx (16-bit Register)
OCRnxH (8-bit) OCRnxL (8-bit)
Waveform Generator
TOP
BOTTOMATmega8A [DATASHEET] 83
8159E–AVR–02/2013
17.7.2 Compare Match Blocking by TCNT1 Write
All CPU writes to the TCNT1 Register will block any Compare Match that occurs in the next timer clock cycle, even
when the timer is stopped. This feature allows OCR1x to be initialized to the same value as TCNT1 without triggering
an interrupt when the Timer/Counter clock is enabled.
17.7.3 Using the Output Compare Unit
Since writing TCNT1 in any mode of operation will block all compare matches for one timer clock cycle, there are
risks involved when changing TCNT1 when using any of the Output Compare channels, independent of whether
the Timer/Counter is running or not. If the value written to TCNT1 equals the OCR1x value, the Compare Match will
be missed, resulting in incorrect waveform generation. Do not write the TCNT1 equal to TOP in PWM modes with
variable TOP values. The Compare Match for the TOP will be ignored and the counter will continue to 0xFFFF.
Similarly, do not write the TCNT1 value equal to BOTTOM when the counter is downcounting.
The setup of the OC1x should be performed before setting the Data Direction Register for the port pin to output.
The easiest way of setting the OC1x value is to use the Force Output Compare (FOC1x) strobe bits in Normal
mode. The OC1x Register keeps its value even when changing between Waveform Generation modes.
Be aware that the COM1x1:0 bits are not double buffered together with the compare value. Changing the
COM1x1:0 bits will take effect immediately.
17.8 Compare Match Output Unit
The Compare Output mode (COM1x1:0) bits have two functions. The waveform generator uses the COM1x1:0 bits
for defining the Output Compare (OC1x) state at the next Compare Match. Secondly the COM1x1:0 bits control the
OC1x pin output source. Figure 17-5 shows a simplified schematic of the logic affected by the COM1x1:0 bit setting.
The I/O Registers, I/O bits, and I/O pins in the figure are shown in bold. Only the parts of the general I/O Port
Control Registers (DDR and PORT) that are affected by the COM1x1:0 bits are shown. When referring to the OC1x
state, the reference is for the internal OC1x Register, not the OC1x pin. If a System Reset occur, the OC1x Register
is reset to “0”.
Figure 17-5. Compare Match Output Unit, Schematic
PORT
DDR
D Q
D Q
OCnx
OCnx Pin
D Q Waveform
Generator
COMnx1
COMnx0
0
1
DATABUS
FOCnx
clkI/OATmega8A [DATASHEET] 84
8159E–AVR–02/2013
The general I/O port function is overridden by the Output Compare (OC1x) from the waveform generator if either of
the COM1x1:0 bits are set. However, the OC1x pin direction (input or output) is still controlled by the Data Direction
Register (DDR) for the port pin. The Data Direction Register bit for the OC1x pin (DDR_OC1x) must be set as output
before the OC1x value is visible on the pin. The port override function is generally independent of the
Waveform Generation mode, but there are some exceptions. Refer to Table 17-2, Table 17-3 and Table 17-4 for
details.
The design of the Output Compare Pin logic allows initialization of the OC1x state before the output is enabled.
Note that some COM1x1:0 bit settings are reserved for certain modes of operation. See “Register Description” on
page 92.
The COM1x1:0 bits have no effect on the Input Capture unit.
17.8.1 Compare Output Mode and Waveform Generation
The waveform generator uses the COM1x1:0 bits differently in normal, CTC, and PWM modes. For all modes, setting
the COM1x1:0 = 0 tells the waveform generator that no action on the OC1x Register is to be performed on the
next Compare Match. For compare output actions in the non-PWM modes refer to Table 17-2 on page 93. For fast
PWM mode refer to Table 17-3 on page 93, and for phase correct and phase and frequency correct PWM refer to
Table 17-4 on page 93.
A change of the COM1x1:0 bits state will have effect at the first Compare Match after the bits are written. For nonPWM
modes, the action can be forced to have immediate effect by using the FOC1x strobe bits.
17.9 Modes of Operation
The mode of operation (i.e., the behavior of the Timer/Counter and the Output Compare pins) is defined by the
combination of the Waveform Generation mode (WGM13:0) and Compare Output mode (COM1x1:0) bits. The
Compare Output mode bits do not affect the counting sequence, while the Waveform Generation mode bits do.
The COM1x1:0 bits control whether the PWM output generated should be inverted or not (inverted or non-inverted
PWM). For non-PWM modes the COM1x1:0 bits control whether the output should be set, cleared or toggle at a
Compare Match. See “Compare Match Output Unit” on page 83.
For detailed timing information refer to “Timer/Counter Timing Diagrams” on page 91.
17.9.1 Normal Mode
The simplest mode of operation is the Normal mode (WGM13:0 = 0). In this mode the counting direction is always
up (incrementing), and no counter clear is performed. The counter simply overruns when it passes its maximum
16-bit value (MAX = 0xFFFF) and then restarts from the BOTTOM (0x0000). In normal operation the Timer/Counter
Overflow Flag (TOV1) will be set in the same timer clock cycle as the TCNT1 becomes zero. The TOV1 Flag in
this case behaves like a 17th bit, except that it is only set, not cleared. However, combined with the timer overflow
interrupt that automatically clears the TOV1 Flag, the timer resolution can be increased by software. There are no
special cases to consider in the Normal mode, a new counter value can be written anytime.
The Input Capture unit is easy to use in Normal mode. However, observe that the maximum interval between the
external events must not exceed the resolution of the counter. If the interval between events are too long, the timer
overflow interrupt or the prescaler must be used to extend the resolution for the capture unit.
The Output Compare units can be used to generate interrupts at some given time. Using the Output Compare to
generate waveforms in Normal mode is not recommended, since this will occupy too much of the CPU time.
17.9.2 Clear Timer on Compare Match (CTC) Mode
In Clear Timer on Compare or CTC mode (WGM13:0 = 4 or 12), the OCR1A or ICR1 Register are used to manipulate
the counter resolution. In CTC mode the counter is cleared to zero when the counter value (TCNT1) matches
either the OCR1A (WGM13:0 = 4) or the ICR1 (WGM13:0 = 12). The OCR1A or ICR1 define the top value for theATmega8A [DATASHEET] 85
8159E–AVR–02/2013
counter, hence also its resolution. This mode allows greater control of the Compare Match output frequency. It also
simplifies the operation of counting external events.
The timing diagram for the CTC mode is shown in Figure 17-6. The counter value (TCNT1) increases until a Compare
Match occurs with either OCR1A or ICR1, and then counter (TCNT1) is cleared.
Figure 17-6. CTC Mode, Timing Diagram
An interrupt can be generated at each time the counter value reaches the TOP value by either using the OCF1A or
ICF1 Flag according to the register used to define the TOP value. If the interrupt is enabled, the interrupt handler
routine can be used for updating the TOP value. However, changing the TOP to a value close to BOTTOM when
the counter is running with none or a low prescaler value must be done with care since the CTC mode does not
have the double buffering feature. If the new value written to OCR1A or ICR1 is lower than the current value of
TCNT1, the counter will miss the Compare Match. The counter will then have to count to its maximum value
(0xFFFF) and wrap around starting at 0x0000 before the Compare Match can occur. In many cases this feature is
not desirable. An alternative will then be to use the fast PWM mode using OCR1A for defining TOP (WGM13:0 =
15) since the OCR1A then will be double buffered.
For generating a waveform output in CTC mode, the OC1A output can be set to toggle its logical level on each
Compare Match by setting the Compare Output mode bits to toggle mode (COM1A1:0 = 1). The OC1A value will
not be visible on the port pin unless the data direction for the pin is set to output (DDR_OC1A = 1). The waveform
generated will have a maximum frequency of fOC1A = fclk_I/O/2 when OCR1A is set to zero (0x0000). The waveform
frequency is defined by the following equation:
The N variable represents the prescaler factor (1, 8, 64, 256, or 1024).
As for the Normal mode of operation, the TOV1 Flag is set in the same timer clock cycle that the counter counts
from MAX to 0x0000.
17.9.3 Fast PWM Mode
The fast Pulse Width Modulation or fast PWM mode (WGM13:0 = 5, 6, 7, 14, or 15) provides a high frequency
PWM waveform generation option. The fast PWM differs from the other PWM options by its single-slope operation.
The counter counts from BOTTOM to TOP then restarts from BOTTOM. In non-inverting Compare Output mode,
the Output Compare (OC1x) is cleared on the Compare Match between TCNT1 and OCR1x, and set at BOTTOM.
In inverting Compare Output mode output is set on Compare Match and cleared at BOTTOM. Due to the singleslope
operation, the operating frequency of the fast PWM mode can be twice as high as the phase correct and
phase and frequency correct PWM modes that use dual-slope operation. This high frequency makes the fast PWM
TCNTn
OCnA
(Toggle)
OCnA Interrupt Flag Set
or ICFn Interrupt Flag Set
(Interrupt on TOP)
Period 1 2 3 4
(COMnA1:0 = 1)
f
OCnA
f
clk_I/O
2 N 1 + OCRnA = --------------------------------------------------ATmega8A [DATASHEET] 86
8159E–AVR–02/2013
mode well suited for power regulation, rectification, and DAC applications. High frequency allows physically small
sized external components (coils, capacitors), hence reduces total system cost.
The PWM resolution for fast PWM can be fixed to 8-, 9-, or 10-bit, or defined by either ICR1 or OCR1A. The minimum
resolution allowed is 2-bit (ICR1 or OCR1A set to 0x0003), and the maximum resolution is 16-bit (ICR1 or
OCR1A set to MAX). The PWM resolution in bits can be calculated by using the following equation:
In fast PWM mode the counter is incremented until the counter value matches either one of the fixed values
0x00FF, 0x01FF, or 0x03FF (WGM13:0 = 5, 6, or 7), the value in ICR1 (WGM13:0 = 14), or the value in OCR1A
(WGM13:0 = 15). The counter is then cleared at the following timer clock cycle. The timing diagram for the fast
PWM mode is shown in Figure 17-7. The figure shows fast PWM mode when OCR1A or ICR1 is used to define
TOP. The TCNT1 value is in the timing diagram shown as a histogram for illustrating the single-slope operation.
The diagram includes non-inverted and inverted PWM outputs. The small horizontal line marks on the TCNT1
slopes represent compare matches between OCR1x and TCNT1. The OC1x Interrupt Flag will be set when a
Compare Match occurs.
Figure 17-7. Fast PWM Mode, Timing Diagram
The Timer/Counter Overflow Flag (TOV1) is set each time the counter reaches TOP. In addition the OCF1A or
ICF1 Flag is set at the same timer clock cycle as TOV1 is set when either OCR1A or ICR1 is used for defining the
TOP value. If one of the interrupts are enabled, the interrupt handler routine can be used for updating the TOP and
compare values.
When changing the TOP value the program must ensure that the new TOP value is higher or equal to the value of
all of the Compare Registers. If the TOP value is lower than any of the Compare Registers, a Compare Match will
never occur between the TCNT1 and the OCR1x. Note that when using fixed TOP values the unused bits are
masked to zero when any of the OCR1x Registers are written.
The procedure for updating ICR1 differs from updating OCR1A when used for defining the TOP value. The ICR1
Register is not double buffered. This means that if ICR1 is changed to a low value when the counter is running with
none or a low prescaler value, there is a risk that the new ICR1 value written is lower than the current value of
TCNT1. The result will then be that the counter will miss the Compare Match at the TOP value. The counter will
then have to count to the MAX value (0xFFFF) and wrap around starting at 0x0000 before the Compare Match can
occur. The OCR1A Register, however, is double buffered. This feature allows the OCR1A I/O location to be written
anytime. When the OCR1A I/O location is written the value written will be put into the OCR1A Buffer Register. The
OCR1A Compare Register will then be updated with the value in the Buffer Register at the next timer clock cycle
RFPWM
log TOP + 1
log 2 = -----------------------------------
TCNTn
OCRnx / TOP Update
and TOVn Interrupt Flag
Set and OCnA Interrupt
Flag Set or ICFn
Interrupt Flag Set
(Interrupt on TOP)
Period 1 2 3 4 5 6 7 8
OCnx
OCnx
(COMnx1:0 = 2)
(COMnx1:0 = 3)ATmega8A [DATASHEET] 87
8159E–AVR–02/2013
the TCNT1 matches TOP. The update is done at the same timer clock cycle as the TCNT1 is cleared and the
TOV1 Flag is set.
Using the ICR1 Register for defining TOP works well when using fixed TOP values. By using ICR1, the OCR1A
Register is free to be used for generating a PWM output on OC1A. However, if the base PWM frequency is actively
changed (by changing the TOP value), using the OCR1A as TOP is clearly a better choice due to its double buffer
feature.
In fast PWM mode, the compare units allow generation of PWM waveforms on the OC1x pins. Setting the
COM1x1:0 bits to 2 will produce a non-inverted PWM and an inverted PWM output can be generated by setting the
COM1x1:0 to 3. See Table 17-3 on page 93. The actual OC1x value will only be visible on the port pin if the data
direction for the port pin is set as output (DDR_OC1x). The PWM waveform is generated by setting (or clearing)
the OC1x Register at the Compare Match between OCR1x and TCNT1, and clearing (or setting) the OC1x Register
at the timer clock cycle the counter is cleared (changes from TOP to BOTTOM).
The PWM frequency for the output can be calculated by the following equation:
The N variable represents the prescaler divider (1, 8, 64, 256, or 1024).
The extreme values for the OCR1x Register represents special cases when generating a PWM waveform output in
the fast PWM mode. If the OCR1x is set equal to BOTTOM (0x0000) the output will be a narrow spike for each
TOP+1 timer clock cycle. Setting the OCR1x equal to TOP will result in a constant high or low output (depending
on the polarity of the output set by the COM1x1:0 bits.)
A frequency (with 50% duty cycle) waveform output in fast PWM mode can be achieved by setting OC1A to toggle
its logical level on each Compare Match (COM1A1:0 = 1). This applies only if OCR1A is used to define the TOP
value (WGM13:0 = 15). The waveform generated will have a maximum frequency of fOC1A = fclk_I/O/2 when OCR1A
is set to zero (0x0000). This feature is similar to the OC1A toggle in CTC mode, except the double buffer feature of
the Output Compare unit is enabled in the fast PWM mode.
17.9.4 Phase Correct PWM Mode
The phase correct Pulse Width Modulation or phase correct PWM mode (WGM13:0 = 1, 2, 3, 10, or 11) provides a
high resolution phase correct PWM waveform generation option. The phase correct PWM mode is, like the phase
and frequency correct PWM mode, based on a dual-slope operation. The counter counts repeatedly from BOTTOM
(0x0000) to TOP and then from TOP to BOTTOM. In non-inverting Compare Output mode, the Output
Compare (OC1x) is cleared on the Compare Match between TCNT1 and OCR1x while upcounting, and set on the
Compare Match while downcounting. In inverting Output Compare mode, the operation is inverted. The dual-slope
operation has lower maximum operation frequency than single slope operation. However, due to the symmetric
feature of the dual-slope PWM modes, these modes are preferred for motor control applications.
The PWM resolution for the phase correct PWM mode can be fixed to 8-, 9-, or 10-bit, or defined by either ICR1 or
OCR1A. The minimum resolution allowed is 2-bit (ICR1 or OCR1A set to 0x0003), and the maximum resolution is
16-bit (ICR1 or OCR1A set to MAX). The PWM resolution in bits can be calculated by using the following equation:
In phase correct PWM mode the counter is incremented until the counter value matches either one of the fixed values
0x00FF, 0x01FF, or 0x03FF (WGM13:0 = 1, 2, or 3), the value in ICR1 (WGM13:0 = 10), or the value in
OCR1A (WGM13:0 = 11). The counter has then reached the TOP and changes the count direction. The TCNT1
value will be equal to TOP for one timer clock cycle. The timing diagram for the phase correct PWM mode is shown
on Figure 17-8. The figure shows phase correct PWM mode when OCR1A or ICR1 is used to define TOP. The
TCNT1 value is in the timing diagram shown as a histogram for illustrating the dual-slope operation. The diagram
includes non-inverted and inverted PWM outputs. The small horizontal line marks on the TCNT1 slopes represent
f
OCnxPWM
f
clk_I/O
N 1 + TOP = -----------------------------------
RPCPWM
log TOP + 1
log 2 = -----------------------------------ATmega8A [DATASHEET] 88
8159E–AVR–02/2013
compare matches between OCR1x and TCNT1. The OC1x Interrupt Flag will be set when a Compare Match
occurs.
Figure 17-8. Phase Correct PWM Mode, Timing Diagram
The Timer/Counter Overflow Flag (TOV1) is set each time the counter reaches BOTTOM. When either OCR1A or
ICR1 is used for defining the TOP value, the OC1A or ICF1 Flag is set accordingly at the same timer clock cycle as
the OCR1x Registers are updated with the double buffer value (at TOP). The Interrupt Flags can be used to generate
an interrupt each time the counter reaches the TOP or BOTTOM value.
When changing the TOP value the program must ensure that the new TOP value is higher or equal to the value of
all of the Compare Registers. If the TOP value is lower than any of the Compare Registers, a Compare Match will
never occur between the TCNT1 and the OCR1x. Note that when using fixed TOP values, the unused bits are
masked to zero when any of the OCR1x Registers are written. As the third period shown in Figure 17-8 illustrates,
changing the TOP actively while the Timer/Counter is running in the Phase Correct mode can result in an unsymmetrical
output. The reason for this can be found in the time of update of the OCR1x Register. Since the OCR1x
update occurs at TOP, the PWM period starts and ends at TOP. This implies that the length of the falling slope is
determined by the previous TOP value, while the length of the rising slope is determined by the new TOP value.
When these two values differ the two slopes of the period will differ in length. The difference in length gives the
unsymmetrical result on the output.
It is recommended to use the Phase and Frequency Correct mode instead of the Phase Correct mode when
changing the TOP value while the Timer/Counter is running. When using a static TOP value there are practically no
differences between the two modes of operation.
In phase correct PWM mode, the compare units allow generation of PWM waveforms on the OC1x pins. Setting
the COM1x1:0 bits to 2 will produce a non-inverted PWM and an inverted PWM output can be generated by setting
the COM1x1:0 to 3. See Table 17-4 on page 93. The actual OC1x value will only be visible on the port pin if the
data direction for the port pin is set as output (DDR_OC1x). The PWM waveform is generated by setting (or clearing)
the OC1x Register at the Compare Match between OCR1x and TCNT1 when the counter increments, and
clearing (or setting) the OC1x Register at Compare Match between OCR1x and TCNT1 when the counter decrements.
The PWM frequency for the output when using phase correct PWM can be calculated by the following
equation:
OCRnx / TOP Update and
OCnA Interrupt Flag Set
or ICFn Interrupt Flag Set
(Interrupt on TOP)
1 2 3 4
TOVn Interrupt Flag Set
(Interrupt on Bottom)
TCNTn
Period
OCnx
OCnx
(COMnx1:0 = 2)
(COMnx1:0 = 3)
f
OCnxPCPWM
f
clk_I/O
2 N TOP = ----------------------------ATmega8A [DATASHEET] 89
8159E–AVR–02/2013
The N variable represents the prescaler divider (1, 8, 64, 256, or 1024).
The extreme values for the OCR1x Register represent special cases when generating a PWM waveform output in
the phase correct PWM mode. If the OCR1x is set equal to BOTTOM the output will be continuously low and if set
equal to TOP the output will be continuously high for non-inverted PWM mode. For inverted PWM the output will
have the opposite logic values.
If OCR1A is used to define the TOP value (WMG13:0 = 11) and COM1A1:0 = 1, the OC1A output will toggle with a
50% duty cycle.
17.9.5 Phase and Frequency Correct PWM Mode
The phase and frequency correct Pulse Width Modulation, or phase and frequency correct PWM mode (WGM13:0
= 8 or 9) provides a high resolution phase and frequency correct PWM waveform generation option. The phase
and frequency correct PWM mode is, like the phase correct PWM mode, based on a dual-slope operation. The
counter counts repeatedly from BOTTOM (0x0000) to TOP and then from TOP to BOTTOM. In non-inverting Compare
Output mode, the Output Compare (OC1x) is cleared on the Compare Match between TCNT1 and OCR1x
while upcounting, and set on the Compare Match while downcounting. In inverting Compare Output mode, the
operation is inverted. The dual-slope operation gives a lower maximum operation frequency compared to the single-slope
operation. However, due to the symmetric feature of the dual-slope PWM modes, these modes are
preferred for motor control applications.
The main difference between the phase correct, and the phase and frequency correct PWM mode is the time the
OCR1x Register is updated by the OCR1x Buffer Register, (see Figure 17-8 and Figure 17-9).
The PWM resolution for the phase and frequency correct PWM mode can be defined by either ICR1 or OCR1A.
The minimum resolution allowed is 2-bit (ICR1 or OCR1A set to 0x0003), and the maximum resolution is 16-bit
(ICR1 or OCR1A set to MAX). The PWM resolution in bits can be calculated using the following equation:
In phase and frequency correct PWM mode the counter is incremented until the counter value matches either the
value in ICR1 (WGM13:0 = 8), or the value in OCR1A (WGM13:0 = 9). The counter has then reached the TOP and
changes the count direction. The TCNT1 value will be equal to TOP for one timer clock cycle. The timing diagram
for the phase correct and frequency correct PWM mode is shown on Figure 17-9. The figure shows phase and
frequency correct PWM mode when OCR1A or ICR1 is used to define TOP. The TCNT1 value is in the timing
diagram shown as a histogram for illustrating the dual-slope operation. The diagram includes non-inverted and
inverted PWM outputs. The small horizontal line marks on the TCNT1 slopes represent compare matches between
OCR1x and TCNT1. The OC1x Interrupt Flag will be set when a Compare Match occurs.
RPFCPWM
log TOP + 1
log 2 = -----------------------------------ATmega8A [DATASHEET] 90
8159E–AVR–02/2013
Figure 17-9. Phase and Frequency Correct PWM Mode, Timing Diagram
The Timer/Counter Overflow Flag (TOV1) is set at the same timer clock cycle as the OCR1x Registers are updated
with the double buffer value (at BOTTOM). When either OCR1A or ICR1 is used for defining the TOP value, the
OC1A or ICF1 Flag set when TCNT1 has reached TOP. The Interrupt Flags can then be used to generate an interrupt
each time the counter reaches the TOP or BOTTOM value.
When changing the TOP value the program must ensure that the new TOP value is higher or equal to the value of
all of the Compare Registers. If the TOP value is lower than any of the Compare Registers, a Compare Match will
never occur between the TCNT1 and the OCR1x.
As Figure 17-9 shows the output generated is, in contrast to the Phase Correct mode, symmetrical in all periods.
Since the OCR1x Registers are updated at BOTTOM, the length of the rising and the falling slopes will always be
equal. This gives symmetrical output pulses and is therefore frequency correct.
Using the ICR1 Register for defining TOP works well when using fixed TOP values. By using ICR1, the OCR1A
Register is free to be used for generating a PWM output on OC1A. However, if the base PWM frequency is actively
changed by changing the TOP value, using the OCR1A as TOP is clearly a better choice due to its double buffer
feature.
In phase and frequency correct PWM mode, the compare units allow generation of PWM waveforms on the OC1x
pins. Setting the COM1x1:0 bits to 2 will produce a non-inverted PWM and an inverted PWM output can be generated
by setting the COM1x1:0 to 3. See Table 17-4 on page 93. The actual OC1x value will only be visible on the
port pin if the data direction for the port pin is set as output (DDR_OC1x). The PWM waveform is generated by setting
(or clearing) the OC1x Register at the Compare Match between OCR1x and TCNT1 when the counter
increments, and clearing (or setting) the OC1x Register at Compare Match between OCR1x and TCNT1 when the
counter decrements. The PWM frequency for the output when using phase and frequency correct PWM can be calculated
by the following equation:
The N variable represents the prescaler divider (1, 8, 64, 256, or 1024).
The extreme values for the OCR1x Register represents special cases when generating a PWM waveform output in
the phase correct PWM mode. If the OCR1x is set equal to BOTTOM the output will be continuously low and if set
equal to TOP the output will be set to high for non-inverted PWM mode. For inverted PWM the output will have the
opposite logic values.
OCRnx / TOP Update and
TOVn Interrupt Flag Set
(Interrupt on Bottom)
OCnA Interrupt Flag Set or
ICFn Interrupt Flag Set
(Interrupt on TOP)
1 2 3 4
TCNTn
Period
OCnx
OCnx
(COMnx1:0 = 2)
(COMnx1:0 = 3)
f
OCnxPFCPWM
f
clk_I/O
2 N TOP = ----------------------------ATmega8A [DATASHEET] 91
8159E–AVR–02/2013
If OCR1A is used to define the TOP value (WGM13:0 = 9) and COM1A1:0 = 1, the OC1A output will toggle with a
50% duty cycle.
17.10 Timer/Counter Timing Diagrams
The Timer/Counter is a synchronous design and the timer clock (clkT1) is therefore shown as a clock enable signal
in the following figures. The figures include information on when Interrupt Flags are set, and when the OCR1x Register
is updated with the OCR1x buffer value (only for modes utilizing double buffering). Figure 17-10 shows a
timing diagram for the setting of OCF1x.
Figure 17-10. Timer/Counter Timing Diagram, Setting of OCF1x, no Prescaling
Figure 17-11 shows the same timing data, but with the prescaler enabled.
Figure 17-11. Timer/Counter Timing Diagram, Setting of OCF1x, with Prescaler (fclk_I/O/8)
Figure 17-12 shows the count sequence close to TOP in various modes. When using phase and frequency correct
PWM mode the OCR1x Register is updated at BOTTOM. The timing diagrams will be the same, but TOP should
be replaced by BOTTOM, TOP-1 by BOTTOM+1 and so on. The same renaming applies for modes that set the
TOV1 Flag at BOTTOM.
clkTn
(clkI/O/1)
OCFnx
clkI/O
OCRnx
TCNTn
OCRnx Value
OCRnx - 1 OCRnx OCRnx + 1 OCRnx + 2
OCFnx
OCRnx
TCNTn
OCRnx Value
OCRnx - 1 OCRnx OCRnx + 1 OCRnx + 2
clkI/O
clkTn
(clkI/O/8)ATmega8A [DATASHEET] 92
8159E–AVR–02/2013
Figure 17-12. Timer/Counter Timing Diagram, no Prescaling
Figure 17-13 shows the same timing data, but with the prescaler enabled.
Figure 17-13. Timer/Counter Timing Diagram, with Prescaler (fclk_I/O/8)
17.11 Register Description
17.11.1 TCCR1A – Timer/Counter 1 Control Register A
• Bit 7:6 – COM1A1:0: Compare Output Mode for channel A
• Bit 5:4 – COM1B1:0: Compare Output Mode for channel B
The COM1A1:0 and COM1B1:0 control the Output Compare Pins (OC1A and OC1B respectively) behavior. If one
or both of the COM1A1:0 bits are written to one, the OC1A output overrides the normal port functionality of the I/O
TOVn (FPWM)
and ICFn (if used
as TOP)
OCRnx
(Update at TOP)
TCNTn
(CTC and FPWM)
TCNTn
(PC and PFC PWM) TOP - 1 TOP TOP - 1 TOP - 2
Old OCRnx Value New OCRnx Value
TOP - 1 TOP BOTTOM BOTTOM + 1
clkTn
(clkI/O/1)
clkI/O
TOVn (FPWM)
and ICFn (if used
as TOP)
OCRnx
(Update at TOP)
TCNTn
(CTC and FPWM)
TCNTn
(PC and PFC PWM) TOP - 1 TOP TOP - 1 TOP - 2
Old OCRnx Value New OCRnx Value
TOP - 1 TOP BOTTOM BOTTOM + 1
clkI/O
clkTn
(clkI/O/8)
Bit 7 6 5 4 3 2 1 0
COM1A1 COM1A0 COM1B1 COM1B0 FOC1A FOC1B WGM11 WGM10 TCCR1A
Read/Write R/W R/W R/W R/W W W R/W R/W
Initial Value 0 0 0 0 0 0 0 0ATmega8A [DATASHEET] 93
8159E–AVR–02/2013
pin it is connected to. If one or both of the COM1B1:0 bit are written to one, the OC1B output overrides the normal
port functionality of the I/O pin it is connected to. However, note that the Data Direction Register (DDR) bit corresponding
to the OC1A or OC1B pin must be set in order to enable the output driver.
When the OC1A or OC1B is connected to the pin, the function of the COM1x1:0 bits is dependent of the WGM13:0
bits setting. Table 17-2 shows the COM1x1:0 bit functionality when the WGM13:0 bits are set to a normal or a CTC
mode (non-PWM).
Table 17-3 shows the COM1x1:0 bit functionality when the WGM13:0 bits are set to the fast PWM mode.
Note: 1. A special case occurs when OCR1A/OCR1B equals TOP and COM1A1/COM1B1 is set. In this case the Compare
Match is ignored, but the set or clear is done at BOTTOM. See “Fast PWM Mode” on page 85. for more details.
Table 17-4 shows the COM1x1:0 bit functionality when the WGM13:0 bits are set to the phase correct or the phase
and frequency correct, PWM mode.
Note: 1. A special case occurs when OCR1A/OCR1B equals TOP and COM1A1/COM1B1 is set. See “Phase Correct PWM
Mode” on page 87. for more details.
Table 17-2. Compare Output Mode, Non-PWM
COM1A1/
COM1B1
COM1A0/
COM1B0 Description
0 0 Normal port operation, OC1A/OC1B disconnected.
0 1 Toggle OC1A/OC1B on Compare Match
1 0 Clear OC1A/OC1B on Compare Match (Set output to low level)
1 1 Set OC1A/OC1B on Compare Match (Set output to high level)
Table 17-3. Compare Output Mode, Fast PWM(1)
COM1A1/
COM1B1
COM1A0/
COM1B0 Description
0 0 Normal port operation, OC1A/OC1B disconnected.
0 1 WGM13:0 = 15: Toggle OC1A on Compare Match, OC1B disconnected
(normal port operation). For all other WGM1 settings, normal port
operation, OC1A/OC1B disconnected.
1 0 Clear OC1A/OC1B on Compare Match, set OC1A/OC1B at BOTTOM,
(non-inverting mode)
1 1 Set OC1A/OC1B on Compare Match, clear OC1A/OC1B at BOTTOM,
(inverting mode)
Table 17-4. Compare Output Mode, Phase Correct and Phase and Frequency Correct PWM(1)
COM1A1/
COM1B1
COM1A0/
COM1B0 Description
0 0 Normal port operation, OC1A/OC1B disconnected.
0 1 WGM13:0 = 9 or 14: Toggle OC1A on Compare Match, OC1B
disconnected (normal port operation). For all other WGM1 settings,
normal port operation, OC1A/OC1B disconnected.
1 0 Clear OC1A/OC1B on Compare Match when up-counting. Set
OC1A/OC1B on Compare Match when downcounting.
1 1 Set OC1A/OC1B on Compare Match when up-counting. Clear
OC1A/OC1B on Compare Match when downcounting.ATmega8A [DATASHEET] 94
8159E–AVR–02/2013
• Bit 3 – FOC1A: Force Output Compare for channel A
• Bit 2 – FOC1B: Force Output Compare for channel B
The FOC1A/FOC1B bits are only active when the WGM13:0 bits specifies a non-PWM mode. However, for ensuring
compatibility with future devices, these bits must be set to zero when TCCR1A is written when operating in a
PWM mode. When writing a logical one to the FOC1A/FOC1B bit, an immediate Compare Match is forced on the
waveform generation unit. The OC1A/OC1B output is changed according to its COM1x1:0 bits setting. Note that
the FOC1A/FOC1B bits are implemented as strobes. Therefore it is the value present in the COM1x1:0 bits that
determine the effect of the forced compare.
A FOC1A/FOC1B strobe will not generate any interrupt nor will it clear the timer in Clear Timer on Compare Match
(CTC) mode using OCR1A as TOP.
The FOC1A/FOC1B bits are always read as zero.
• Bit 1:0 – WGM11:0: Waveform Generation Mode
Combined with the WGM13:2 bits found in the TCCR1B Register, these bits control the counting sequence of the
counter, the source for maximum (TOP) counter value, and what type of waveform generation to be used, see
Table 17-5. Modes of operation supported by the Timer/Counter unit are: Normal mode (counter), Clear Timer on
Compare Match (CTC) mode, and three types of Pulse Width Modulation (PWM) modes. (See “Modes of Operation”
on page 84.)
Note: 1. The CTC1 and PWM11:0 bit definition names are obsolete. Use the WGM12:0 definitions. However, the functionality and
location of these bits are compatible with previous versions of the timer.
Table 17-5. Waveform Generation Mode Bit Description
Mode WGM13
WGM12
(CTC1)
WGM11
(PWM11)
WGM10
(PWM10)
Timer/Counter Mode of
Operation(1) TOP
Update of
OCR1x
TOV1 Flag
Set on
0 0 0 0 0 Normal 0xFFFF Immediate MAX
1 0 0 0 1 PWM, Phase Correct, 8-bit 0x00FF TOP BOTTOM
2 0 0 1 0 PWM, Phase Correct, 9-bit 0x01FF TOP BOTTOM
3 0 0 1 1 PWM, Phase Correct, 10-bit 0x03FF TOP BOTTOM
4 0 1 0 0 CTC OCR1A Immediate MAX
5 0 1 0 1 Fast PWM, 8-bit 0x00FF BOTTOM TOP
6 0 1 1 0 Fast PWM, 9-bit 0x01FF BOTTOM TOP
7 0 1 1 1 Fast PWM, 10-bit 0x03FF BOTTOM TOP
8 1 0 0 0 PWM, Phase and Frequency Correct ICR1 BOTTOM BOTTOM
9 1 0 0 1 PWM, Phase and Frequency Correct OCR1A BOTTOM BOTTOM
10 1 0 1 0 PWM, Phase Correct ICR1 TOP BOTTOM
11 1 0 1 1 PWM, Phase Correct OCR1A TOP BOTTOM
12 1 1 0 0 CTC ICR1 Immediate MAX
13 1 1 0 1 (Reserved) – – –
14 1 1 1 0 Fast PWM ICR1 BOTTOM TOP
15 1 1 1 1 Fast PWM OCR1A BOTTOM TOPATmega8A [DATASHEET] 95
8159E–AVR–02/2013
17.11.2 TCCR1B – Timer/Counter 1 Control Register B
• Bit 7 – ICNC1: Input Capture Noise Canceler
Setting this bit (to one) activates the Input Capture Noise Canceler. When the noise canceler is activated, the input
from the Input Capture Pin (ICP1) is filtered. The filter function requires four successive equal valued samples of
the ICP1 pin for changing its output. The Input Capture is therefore delayed by four Oscillator cycles when the
noise canceler is enabled.
• Bit 6 – ICES1: Input Capture Edge Select
This bit selects which edge on the Input Capture Pin (ICP1) that is used to trigger a capture event. When the
ICES1 bit is written to zero, a falling (negative) edge is used as trigger, and when the ICES1 bit is written to one, a
rising (positive) edge will trigger the capture.
When a capture is triggered according to the ICES1 setting, the counter value is copied into the Input Capture Register
(ICR1). The event will also set the Input Capture Flag (ICF1), and this can be used to cause an Input Capture
Interrupt, if this interrupt is enabled.
When the ICR1 is used as TOP value (see description of the WGM13:0 bits located in the TCCR1A and the
TCCR1B Register), the ICP1 is disconnected and consequently the Input Capture function is disabled.
• Bit 5 – Reserved Bit
This bit is reserved for future use. For ensuring compatibility with future devices, this bit must be written to zero
when TCCR1B is written.
• Bit 4:3 – WGM13:2: Waveform Generation Mode
See TCCR1A Register description.
• Bit 2:0 – CS12:0: Clock Select
The three clock select bits select the clock source to be used by the Timer/Counter, see Figure 17-10 and Figure
17-11.
If external pin modes are used for the Timer/Counter1, transitions on the T1 pin will clock the counter even if the
pin is configured as an output. This feature allows software control of the counting.
Bit 7 6 5 4 3 2 1 0
ICNC1 ICES1 – WGM13 WGM12 CS12 CS11 CS10 TCCR1B
Read/Write R/W R/W R R/W R/W R/W R/W R/W
Initial Value 0 0 0 0 0 0 0 0
Table 17-6. Clock Select Bit Description
CS12 CS11 CS10 Description
0 0 0 No clock source. (Timer/Counter stopped)
0 0 1 clkI/O/1 (No prescaling)
0 1 0 clkI/O/8 (From prescaler)
0 1 1 clkI/O/64 (From prescaler)
1 0 0 clkI/O/256 (From prescaler)
1 0 1 clkI/O/1024 (From prescaler)
1 1 0 External clock source on T1 pin. Clock on falling edge.
1 1 1 External clock source on T1 pin. Clock on rising edge.ATmega8A [DATASHEET] 96
8159E–AVR–02/2013
17.11.3 TCNT1H and TCNT1L – Timer/Counter 1
The two Timer/Counter I/O locations (TCNT1H and TCNT1L, combined TCNT1) give direct access, both for read
and for write operations, to the Timer/Counter unit 16-bit counter. To ensure that both the high and Low bytes are
read and written simultaneously when the CPU accesses these registers, the access is performed using an 8-bit
temporary High byte Register (TEMP). This temporary register is shared by all the other 16-bit registers. See
“Accessing 16-bit Registers” on page 75.
Modifying the counter (TCNT1) while the counter is running introduces a risk of missing a Compare Match between
TCNT1 and one of the OCR1x Registers.
Writing to the TCNT1 Register blocks (removes) the Compare Match on the following timer clock for all compare
units.
17.11.4 OCR1AH and OCR1AL– Output Compare Register 1 A
17.11.5 OCR1BH and OCR1BL – Output Compare Register 1 B
The Output Compare Registers contain a 16-bit value that is continuously compared with the counter value
(TCNT1). A match can be used to generate an Output Compare Interrupt, or to generate a waveform output on the
OC1x pin.
The Output Compare Registers are 16-bit in size. To ensure that both the high and Low bytes are written simultaneously
when the CPU writes to these registers, the access is performed using an 8-bit temporary High byte
Register (TEMP). This temporary register is shared by all the other 16-bit registers. See “Accessing 16-bit Registers”
on page 75.
17.11.6 ICR1H and ICR1L – Input Capture Register 1
The Input Capture is updated with the counter (TCNT1) value each time an event occurs on the ICP1 pin (or
optionally on the Analog Comparator Output for Timer/Counter1). The Input Capture can be used for defining the
counter TOP value.
The Input Capture Register is 16-bit in size. To ensure that both the high and Low bytes are read simultaneously
when the CPU accesses these registers, the access is performed using an 8-bit temporary High byte Register
Bit 7 6 5 4 3 2 1 0
TCNT1[15:8] TCNT1H
TCNT1[7:0] TCNT1L
Read/Write R/W R/W R/W R/W R/W R/W R/W R/W
Initial Value 0 0 0 0 0 0 0 0
Bit 7 6 5 4 3 2 1 0
OCR1A[15:8] OCR1AH
OCR1A[7:0] OCR1AL
Read/Write R/W R/W R/W R/W R/W R/W R/W R/W
Initial Value 0 0 0 0 0 0 0 0
Bit 7 6 5 4 3 2 1 0
OCR1B[15:8] OCR1BH
OCR1B[7:0] OCR1BL
Read/Write R/W R/W R/W R/W R/W R/W R/W R/W
Initial Value 0 0 0 0 0 0 0 0
Bit 7 6 5 4 3 2 1 0
ICR1[15:8] ICR1H
ICR1[7:0] ICR1L
Read/Write R/W R/W R/W R/W R/W R/W R/W R/W
Initial Value 0 0 0 0 0 0 0 0ATmega8A [DATASHEET] 97
8159E–AVR–02/2013
(TEMP). This temporary register is shared by all the other 16-bit registers. See “Accessing 16-bit Registers” on
page 75.
17.11.7 TIMSK(1) – Timer/Counter Interrupt Mask Register
Note: 1. This register contains interrupt control bits for several Timer/Counters, but only Timer1 bits are described in this
section. The remaining bits are described in their respective timer sections.
• Bit 5 – TICIE1: Timer/Counter1, Input Capture Interrupt Enable
When this bit is written to one, and the I-flag in the Status Register is set (interrupts globally enabled), the
Timer/Counter1 Input Capture Interrupt is enabled. The corresponding Interrupt Vector (see “Interrupts” on page
44) is executed when the ICF1 Flag, located in TIFR, is set.
• Bit 4 – OCIE1A: Timer/Counter1, Output Compare A Match Interrupt Enable
When this bit is written to one, and the I-flag in the Status Register is set (interrupts globally enabled), the
Timer/Counter1 Output Compare A match interrupt is enabled. The corresponding Interrupt Vector (see “Interrupts”
on page 44) is executed when the OCF1A Flag, located in TIFR, is set.
• Bit 3 – OCIE1B: Timer/Counter1, Output Compare B Match Interrupt Enable
When this bit is written to one, and the I-flag in the Status Register is set (interrupts globally enabled), the
Timer/Counter1 Output Compare B match interrupt is enabled. The corresponding Interrupt Vector (see “Interrupts”
on page 44) is executed when the OCF1B Flag, located in TIFR, is set.
• Bit 2 – TOIE1: Timer/Counter1, Overflow Interrupt Enable
When this bit is written to one, and the I-flag in the Status Register is set (interrupts globally enabled), the
Timer/Counter1 Overflow Interrupt is enabled. The corresponding Interrupt Vector (see “Interrupts” on page 44) is
executed when the TOV1 Flag, located in TIFR, is set.
17.11.8 TIFR(1) – Timer/Counter Interrupt Flag Register
Note: 1. This register contains flag bits for several Timer/Counters, but only Timer1 bits are described in this section. The
remaining bits are described in their respective timer sections.
• Bit 5 – ICF1: Timer/Counter1, Input Capture Flag
This flag is set when a capture event occurs on the ICP1 pin. When the Input Capture Register (ICR1) is set by the
WGM13:0 to be used as the TOP value, the ICF1 Flag is set when the counter reaches the TOP value.
ICF1 is automatically cleared when the Input Capture Interrupt Vector is executed. Alternatively, ICF1 can be
cleared by writing a logic one to its bit location.
• Bit 4 – OCF1A: Timer/Counter1, Output Compare A Match Flag
This flag is set in the timer clock cycle after the counter (TCNT1) value matches the Output Compare Register A
(OCR1A).
Note that a Forced Output Compare (FOC1A) strobe will not set the OCF1A Flag.
Bit 7 6 5 4 3 2 1 0
OCIE2 TOIE2 TICIE1 OCIE1A OCIE1B TOIE1 – TOIE0 TIMSK
Read/Write R/W R/W R/W R/W R/W R/W R R/W
Initial Value 0 0 0 0 0 0 0 0
Bit 7 6 5 4 3 2 1 0
OCF2 TOV2 ICF1 OCF1A OCF1B TOV1 – TOV0 TIFR
Read/Write R/W R/W R/W R/W R/W R/W R R/W
Initial Value 0 0 0 0 0 0 0 0ATmega8A [DATASHEET] 98
8159E–AVR–02/2013
OCF1A is automatically cleared when the Output Compare Match A Interrupt Vector is executed. Alternatively,
OCF1A can be cleared by writing a logic one to its bit location.
• Bit 3 – OCF1B: Timer/Counter1, Output Compare B Match Flag
This flag is set in the timer clock cycle after the counter (TCNT1) value matches the Output Compare Register B
(OCR1B).
Note that a Forced Output Compare (FOC1B) strobe will not set the OCF1B Flag.
OCF1B is automatically cleared when the Output Compare Match B Interrupt Vector is executed. Alternatively,
OCF1B can be cleared by writing a logic one to its bit location.
• Bit 2 – TOV1: Timer/Counter1, Overflow Flag
The setting of this flag is dependent of the WGM13:0 bits setting. In normal and CTC modes, the TOV1 Flag is set
when the timer overflows. Refer to Table 17-5 on page 94 for the TOV1 Flag behavior when using another
WGM13:0 bit setting.
TOV1 is automatically cleared when the Timer/Counter1 Overflow Interrupt Vector is executed. Alternatively, TOV1
can be cleared by writing a logic one to its bit location.ATmega8A [DATASHEET] 99
8159E–AVR–02/2013
18. 8-bit Timer/Counter2 with PWM and Asynchronous Operation
18.1 Features • Single Channel Counter
• Clear Timer on Compare Match (Auto Reload)
• Glitch-free, phase Correct Pulse Width Modulator (PWM)
• Frequency Generator
• 10-bit Clock Prescaler
• Overflow and Compare Match Interrupt Sources (TOV2 and OCF2)
• Allows Clocking from External 32kHz Watch Crystal Independent of the I/O Clock
18.2 Overview
Timer/Counter2 is a general purpose, single channel, 8-bit Timer/Counter module. A simplified block diagram of
the 8-bit Timer/Counter is shown in Figure 18-1. For the actual placement of I/O pins, refer to “Pin Configurations”
on page 2. CPU accessible I/O Registers, including I/O bits and I/O pins, are shown in bold. The device-specific I/O
Register and bit locations are listed in the “Register Description” on page 112.
Figure 18-1. 8-bit Timer/Counter Block Diagram
Timer/Counter
DATA BUS
=
TCNTn
Waveform
Generation OCn
= 0
Control Logic
= 0xFF
BOTTOM TOP
count
clear
direction
TOVn
(Int. Req.)
OCn
(Int. Req.)
Synchronization Unit
OCRn
TCCRn
ASSRn
Status Flags
clkI/O
clkASY
Synchronized Status Flags
asynchronous Mode
Select (ASn)
TOSC1
T/C
Oscillator
TOSC2
Prescaler
clkTn
clkI/OATmega8A [DATASHEET] 100
8159E–AVR–02/2013
18.2.1 Registers
The Timer/Counter (TCNT2) and Output Compare Register (OCR2) are 8-bit registers. Interrupt request (shorten
as Int.Req.) signals are all visible in the Timer Interrupt Flag Register (TIFR). All interrupts are individually masked
with the Timer Interrupt Mask Register (TIMSK). TIFR and TIMSK are not shown in the figure since these registers
are shared by other timer units.
The Timer/Counter can be clocked internally, via the prescaler, or asynchronously clocked from the TOSC1/2 pins,
as detailed later in this section. The asynchronous operation is controlled by the Asynchronous Status Register
(ASSR). The Clock Select logic block controls which clock source the Timer/Counter uses to increment (or decrement)
its value. The Timer/Counter is inactive when no clock source is selected. The output from the clock select
logic is referred to as the timer clock (clkT2).
The double buffered Output Compare Register (OCR2) is compared with the Timer/Counter value at all times. The
result of the compare can be used by the waveform generator to generate a PWM or variable frequency output on
the Output Compare Pin (OC2). For details, see “Output Compare Unit” on page 101. The Compare Match event
will also set the Compare Flag (OCF2) which can be used to generate an Output Compare interrupt request.
18.2.2 Definitions
Many register and bit references in this document are written in general form. A lower case “n” replaces the
Timer/Counter number, in this case 2. However, when using the register or bit defines in a program, the precise
form must be used (i.e., TCNT2 for accessing Timer/Counter2 counter value and so on).
The definitions in Table 18-1 are also used extensively throughout the document.
18.3 Timer/Counter Clock Sources
The Timer/Counter can be clocked by an internal synchronous or an external asynchronous clock source. The
clock source clkT2 is by default equal to the MCU clock, clkI/O. When the AS2 bit in the ASSR Register is written to
logic one, the clock source is taken from the Timer/Counter Oscillator connected to TOSC1 and TOSC2. For
details on asynchronous operation, see “Asynchronous Operation of the Timer/Counter” on page 109. For details
on clock sources and prescaler, see “Timer/Counter0 and Timer/Counter1 Prescalers” on page 71.
18.4 Counter Unit
The main part of the 8-bit Timer/Counter is the programmable bi-directional counter unit. Figure 18-2 shows a
block diagram of the counter and its surrounding environment.
Table 18-1. Definitions
BOTTOM The counter reaches the BOTTOM when it becomes zero (0x00).
MAX The counter reaches its MAXimum when it becomes 0xFF (decimal 255).
TOP The counter reaches the TOP when it becomes equal to the highest value in the
count sequence. The TOP value can be assigned to be the fixed value 0xFF
(MAX) or the value stored in the OCR2 Register. The assignment is dependent
on the mode of operation.ATmega8A [DATASHEET] 101
8159E–AVR–02/2013
Figure 18-2. Counter Unit Block Diagram
Signal description (internal signals):
count Increment or decrement TCNT2 by 1.
direction Selects between increment and decrement.
clear Clear TCNT2 (set all bits to zero).
clkT2 Timer/Counter clock.
TOP Signalizes that TCNT2 has reached maximum value.
BOTTOM Signalizes that TCNT2 has reached minimum value (zero).
Depending on the mode of operation used, the counter is cleared, incremented, or decremented at each timer
clock (clkT2). clkT2 can be generated from an external or internal clock source, selected by the clock select bits
(CS22:0). When no clock source is selected (CS22:0 = 0) the timer is stopped. However, the TCNT2 value can be
accessed by the CPU, regardless of whether clkT2 is present or not. A CPU write overrides (has priority over) all
counter clear or count operations.
The counting sequence is determined by the setting of the WGM21 and WGM20 bits located in the Timer/Counter
Control Register (TCCR2). There are close connections between how the counter behaves (counts) and how
waveforms are generated on the Output Compare Output OC2. For more details about advanced counting
sequences and waveform generation, see “Modes of Operation” on page 104.
The Timer/Counter Overflow (TOV2) Flag is set according to the mode of operation selected by the WGM21:0 bits.
TOV2 can be used for generating a CPU interrupt.
18.5 Output Compare Unit
The 8-bit comparator continuously compares TCNT2 with the Output Compare Register (OCR2). Whenever
TCNT2 equals OCR2, the comparator signals a match. A match will set the Output Compare Flag (OCF2) at the
next timer clock cycle. If enabled (OCIE2 = 1), the Output Compare Flag generates an Output Compare interrupt.
The OCF2 Flag is automatically cleared when the interrupt is executed. Alternatively, the OCF2 Flag can be
cleared by software by writing a logical one to its I/O bit location. The waveform generator uses the match signal to
generate an output according to operating mode set by the WGM21:0 bits and Compare Output mode (COM21:0)
bits. The max and bottom signals are used by the waveform generator for handling the special cases of the
extreme values in some modes of operation (see “Modes of Operation” on page 104).
Figure 18-3 shows a block diagram of the Output Compare unit.
DATA BUS
TCNTn Control Logic
count
TOVn
(Int. Req.)
BOTTOM TOP
direction
clear
TOSC1
T/C
Oscillator
TOSC2
Prescaler
clkI/O
clk TnATmega8A [DATASHEET] 102
8159E–AVR–02/2013
Figure 18-3. Output Compare Unit, Block Diagram
The OCR2 Register is double buffered when using any of the Pulse Width Modulation (PWM) modes. For the normal
and Clear Timer on Compare (CTC) modes of operation, the double buffering is disabled. The double buffering
synchronizes the update of the OCR2 Compare Register to either top or bottom of the counting sequence. The
synchronization prevents the occurrence of odd-length, non-symmetrical PWM pulses, thereby making the output
glitch-free.
The OCR2 Register access may seem complex, but this is not case. When the double buffering is enabled, the
CPU has access to the OCR2 Buffer Register, and if double buffering is disabled the CPU will access the OCR2
directly.
18.5.1 Force Output Compare
In non-PWM Waveform Generation modes, the match output of the comparator can be forced by writing a one to
the Force Output Compare (FOC2) bit. Forcing Compare Match will not set the OCF2 Flag or reload/clear the
timer, but the OC2 pin will be updated as if a real Compare Match had occurred (the COM21:0 bits settings define
whether the OC2 pin is set, cleared or toggled).
18.5.2 Compare Match Blocking by TCNT2 Write
All CPU write operations to the TCNT2 Register will block any Compare Match that occurs in the next timer clock
cycle, even when the timer is stopped. This feature allows OCR2 to be initialized to the same value as TCNT2 without
triggering an interrupt when the Timer/Counter clock is enabled.
18.5.3 Using the Output Compare Unit
Since writing TCNT2 in any mode of operation will block all compare matches for one timer clock cycle, there are
risks involved when changing TCNT2 when using the Output Compare channel, independently of whether the
Timer/Counter is running or not. If the value written to TCNT2 equals the OCR2 value, the Compare Match will be
OCFn (Int. Req.)
= (8-bit Comparator )
OCRn
OCxy
DATA BUS
TCNTn
WGMn1:0
Waveform Generator
TOP
FOCn
COMn1:0
BOTTOMATmega8A [DATASHEET] 103
8159E–AVR–02/2013
missed, resulting in incorrect waveform generation. Similarly, do not write the TCNT2 value equal to BOTTOM
when the counter is downcounting.
The setup of the OC2 should be performed before setting the Data Direction Register for the port pin to output. The
easiest way of setting the OC2 value is to use the Force Output Compare (FOC2) strobe bit in Normal mode. The
OC2 Register keeps its value even when changing between waveform generation modes.
Be aware that the COM21:0 bits are not double buffered together with the compare value. Changing the COM21:0
bits will take effect immediately.
18.6 Compare Match Output Unit
The Compare Output mode (COM21:0) bits have two functions. The waveform generator uses the COM21:0 bits
for defining the Output Compare (OC2) state at the next Compare Match. Also, the COM21:0 bits control the OC2
pin output source. Figure 18-4 shows a simplified schematic of the logic affected by the COM21:0 bit setting. The
I/O Registers, I/O bits, and I/O pins in the figure are shown in bold. Only the parts of the general I/O Port Control
Registers (DDR and PORT) that are affected by the COM21:0 bits are shown. When referring to the OC2 state, the
reference is for the internal OC2 Register, not the OC2 pin.
Figure 18-4. Compare Match Output Unit, Schematic
The general I/O port function is overridden by the Output Compare (OC2) from the waveform generator if either of
the COM21:0 bits are set. However, the OC2 pin direction (input or output) is still controlled by the Data Direction
Register (DDR) for the port pin. The Data Direction Register bit for the OC2 pin (DDR_OC2) must be set as output
before the OC2 value is visible on the pin. The port override function is independent of the Waveform Generation
mode.
PORT
DDR
D Q
D Q
OCn
OCn Pin
D Q Waveform
Generator
COMn1
COMn0
0
1
DATABUS
FOCn
clkI/OATmega8A [DATASHEET] 104
8159E–AVR–02/2013
The design of the Output Compare Pin logic allows initialization of the OC2 state before the output is enabled. Note
that some COM21:0 bit settings are reserved for certain modes of operation. See “Register Description” on page
112.
18.6.1 Compare Output Mode and Waveform Generation
The Waveform Generator uses the COM21:0 bits differently in normal, CTC, and PWM modes. For all modes, setting
the COM21:0 = 0 tells the waveform generator that no action on the OC2 Register is to be performed on the
next Compare Match. For compare output actions in the non-PWM modes refer to Table 18-3 on page 112. For
fast PWM mode, refer to Table 18-4 on page 113, and for phase correct PWM refer to Table 18-5 on page 113.
A change of the COM21:0 bits state will have effect at the first Compare Match after the bits are written. For nonPWM
modes, the action can be forced to have immediate effect by using the FOC2 strobe bits.
18.7 Modes of Operation
The mode of operation (i.e., the behavior of the Timer/Counter and the Output Compare pins) is defined by the
combination of the Waveform Generation mode (WGM21:0) and Compare Output mode (COM21:0) bits. The
Compare Output mode bits do not affect the counting sequence, while the Waveform Generation mode bits do.
The COM21:0 bits control whether the PWM output generated should be inverted or not (inverted or non-inverted
PWM). For non-PWM modes the COM21:0 bits control whether the output should be set, cleared, or toggled at a
Compare Match (see “Compare Match Output Unit” on page 103).
For detailed timing information refer to “Timer/Counter Timing Diagrams” on page 108.
18.7.1 Normal Mode
The simplest mode of operation is the Normal mode (WGM21:0 = 0). In this mode the counting direction is always
up (incrementing), and no counter clear is performed. The counter simply overruns when it passes its maximum 8-
bit value (TOP = 0xFF) and then restarts from the bottom (0x00). In normal operation the Timer/Counter Overflow
Flag (TOV2) will be set in the same timer clock cycle as the TCNT2 becomes zero. The TOV2 Flag in this case
behaves like a ninth bit, except that it is only set, not cleared. However, combined with the timer overflow interrupt
that automatically clears the TOV2 Flag, the timer resolution can be increased by software. There are no special
cases to consider in the Normal mode, a new counter value can be written anytime.
The Output Compare unit can be used to generate interrupts at some given time. Using the Output Compare to
generate waveforms in Normal mode is not recommended, since this will occupy too much of the CPU time.
18.7.2 Clear Timer on Compare Match (CTC) Mode
In Clear Timer on Compare or CTC mode (WGM21:0 = 2), the OCR2 Register is used to manipulate the counter
resolution. In CTC mode the counter is cleared to zero when the counter value (TCNT2) matches the OCR2. The
OCR2 defines the top value for the counter, hence also its resolution. This mode allows greater control of the Compare
Match output frequency. It also simplifies the operation of counting external events.
The timing diagram for the CTC mode is shown in Figure 18-5. The counter value (TCNT2) increases until a Compare
Match occurs between TCNT2 and OCR2, and then counter (TCNT2) is cleared.ATmega8A [DATASHEET] 105
8159E–AVR–02/2013
Figure 18-5. CTC Mode, Timing Diagram
An interrupt can be generated each time the counter value reaches the TOP value by using the OCF2 Flag. If the
interrupt is enabled, the interrupt handler routine can be used for updating the TOP value. However, changing the
TOP to a value close to BOTTOM when the counter is running with none or a low prescaler value must be done
with care since the CTC mode does not have the double buffering feature. If the new value written to OCR2 is
lower than the current value of TCNT2, the counter will miss the Compare Match. The counter will then have to
count to its maximum value (0xFF) and wrap around starting at 0x00 before the Compare Match can occur.
For generating a waveform output in CTC mode, the OC2 output can be set to toggle its logical level on each Compare
Match by setting the Compare Output mode bits to toggle mode (COM21:0 = 1). The OC2 value will not be
visible on the port pin unless the data direction for the pin is set to output. The waveform generated will have a
maximum frequency of fOC2 = fclk_I/O/2 when OCR2 is set to zero (0x00). The waveform frequency is defined by the
following equation:
The N variable represents the prescaler factor (1, 8, 32, 64, 128, 256, or 1024).
As for the Normal mode of operation, the TOV2 Flag is set in the same timer clock cycle that the counter counts
from MAX to 0x00.
18.7.3 Fast PWM Mode
The fast Pulse Width Modulation or fast PWM mode (WGM21:0 = 3) provides a high frequency PWM waveform
generation option. The fast PWM differs from the other PWM option by its single-slope operation. The counter
counts from BOTTOM to MAX then restarts from BOTTOM. In non-inverting Compare Output mode, the Output
Compare (OC2) is cleared on the Compare Match between TCNT2 and OCR2, and set at BOTTOM. In inverting
Compare Output mode, the output is set on Compare Match and cleared at BOTTOM. Due to the single-slope
operation, the operating frequency of the fast PWM mode can be twice as high as the phase correct PWM mode
that uses dual-slope operation. This high frequency makes the fast PWM mode well suited for power regulation,
rectification, and DAC applications. High frequency allows physically small sized external components (coils,
capacitors), and therefore reduces total system cost.
In fast PWM mode, the counter is incremented until the counter value matches the MAX value. The counter is then
cleared at the following timer clock cycle. The timing diagram for the fast PWM mode is shown in Figure 18-6. The
TCNT2 value is in the timing diagram shown as a histogram for illustrating the single-slope operation. The diagram
includes non-inverted and inverted PWM outputs. The small horizontal line marks on the TCNT2 slopes represent
compare matches between OCR2 and TCNT2.
TCNTn
OCn
(Toggle)
OCn Interrupt Flag Set
Period 1 2 3 4
(COMn1:0 = 1)
f
OCn
f
clk_I/O
2 N 1 + OCRn = ----------------------------------------------ATmega8A [DATASHEET] 106
8159E–AVR–02/2013
Figure 18-6. Fast PWM Mode, Timing Diagram
The Timer/Counter Overflow Flag (TOV2) is set each time the counter reaches MAX. If the interrupt is enabled, the
interrupt handler routine can be used for updating the compare value.
In fast PWM mode, the compare unit allows generation of PWM waveforms on the OC2 pin. Setting the COM21:0
bits to 2 will produce a non-inverted PWM and an inverted PWM output can be generated by setting the COM21:0
to 3 (see Table 18-4 on page 113). The actual OC2 value will only be visible on the port pin if the data direction for
the port pin is set as output. The PWM waveform is generated by setting (or clearing) the OC2 Register at the
Compare Match between OCR2 and TCNT2, and clearing (or setting) the OC2 Register at the timer clock cycle the
counter is cleared (changes from MAX to BOTTOM).
The PWM frequency for the output can be calculated by the following equation:
The N variable represents the prescaler factor (1, 8, 32, 64, 128, 256, or 1024).
The extreme values for the OCR2 Register represent special cases when generating a PWM waveform output in
the fast PWM mode. If the OCR2 is set equal to BOTTOM, the output will be a narrow spike for each MAX+1 timer
clock cycle. Setting the OCR2 equal to MAX will result in a constantly high or low output (depending on the polarity
of the output set by the COM21:0 bits.)
A frequency (with 50% duty cycle) waveform output in fast PWM mode can be achieved by setting OC2 to toggle
its logical level on each Compare Match (COM21:0 = 1). The waveform generated will have a maximum frequency
of foc2 = fclk_I/O/2 when OCR2 is set to zero. This feature is similar to the OC2 toggle in CTC mode, except the double
buffer feature of the Output Compare unit is enabled in the fast PWM mode.
18.7.4 Phase Correct PWM Mode
The phase correct PWM mode (WGM21:0 = 1) provides a high resolution phase correct PWM waveform generation
option. The phase correct PWM mode is based on a dual-slope operation. The counter counts repeatedly from
BOTTOM to MAX and then from MAX to BOTTOM. In non-inverting Compare Output mode, the Output Compare
(OC2) is cleared on the Compare Match between TCNT2 and OCR2 while upcounting, and set on the Compare
Match while downcounting. In inverting Output Compare mode, the operation is inverted. The dual-slope operation
TCNTn
OCRn Update
and
TOVn Interrupt Flag Set
Period 1 2 3
OCn
OCn
(COMn1:0 = 2)
(COMn1:0 = 3)
OCRn Interrupt Flag Set
4 5 6 7
f
OCnPWM
f
clk_I/O
N 256 = ------------------ATmega8A [DATASHEET] 107
8159E–AVR–02/2013
has lower maximum operation frequency than single slope operation. However, due to the symmetric feature of the
dual-slope PWM modes, these modes are preferred for motor control applications.
The PWM resolution for the phase correct PWM mode is fixed to eight bits. In phase correct PWM mode the counter
is incremented until the counter value matches MAX. When the counter reaches MAX, it changes the count
direction. The TCNT2 value will be equal to MAX for one timer clock cycle. The timing diagram for the phase correct
PWM mode is shown on Figure 18-7. The TCNT2 value is in the timing diagram shown as a histogram for
illustrating the dual-slope operation. The diagram includes non-inverted and inverted PWM outputs. The small horizontal
line marks on the TCNT2 slopes represent compare matches between OCR2 and TCNT2.
Figure 18-7. Phase Correct PWM Mode, Timing Diagram
The Timer/Counter Overflow Flag (TOV2) is set each time the counter reaches BOTTOM. The Interrupt Flag can
be used to generate an interrupt each time the counter reaches the BOTTOM value.
In phase correct PWM mode, the compare unit allows generation of PWM waveforms on the OC2 pin. Setting the
COM21:0 bits to 2 will produce a non-inverted PWM. An inverted PWM output can be generated by setting the
COM21:0 to 3 (see Table 18-5 on page 113). The actual OC2 value will only be visible on the port pin if the data
direction for the port pin is set as output. The PWM waveform is generated by clearing (or setting) the OC2 Register
at the Compare Match between OCR2 and TCNT2 when the counter increments, and setting (or clearing) the
OC2 Register at Compare Match between OCR2 and TCNT2 when the counter decrements. The PWM frequency
for the output when using phase correct PWM can be calculated by the following equation:
The N variable represents the prescaler factor (1, 8, 32, 64, 128, 256, or 1024).
The extreme values for the OCR2 Register represent special cases when generating a PWM waveform output in
the phase correct PWM mode. If the OCR2 is set equal to BOTTOM, the output will be continuously low and if set
equal to MAX the output will be continuously high for non-inverted PWM mode. For inverted PWM the output will
have the opposite logic values.
TOVn Interrupt Flag Set
OCn Interrupt Flag Set
1 2 3
TCNTn
Period
OCn
OCn
(COMn1:0 = 2)
(COMn1:0 = 3)
OCRn Update
f
OCnPCPWM
f
clk_I/O
N 510 = ------------------ATmega8A [DATASHEET] 108
8159E–AVR–02/2013
At the very start of period 2 in Figure 18-7 OCn has a transition from high to low even though there is no Compare
Match. The point of this transition is to guarantee symmetry around BOTTOM. There are two cases that give a
transition without Compare Match:
• OCR2A changes its value from MAX, like in Figure 18-7. When the OCR2A value is MAX the OCn pin value is
the same as the result of a down-counting Compare Match. To ensure symmetry around BOTTOM the OCn
value at MAX must correspond to the result of an up-counting Compare Match.
• The timer starts counting from a value higher than the one in OCR2A, and for that reason misses the Compare
Match and hence the OCn change that would have happened on the way up.
18.8 Timer/Counter Timing Diagrams
The following figures show the Timer/Counter in Synchronous mode, and the timer clock (clkT2) is therefore shown
as a clock enable signal. In Asynchronous mode, clkI/O should be replaced by the Timer/Counter Oscillator clock.
The figures include information on when Interrupt Flags are set. Figure 18-8 contains timing data for basic
Timer/Counter operation. The figure shows the count sequence close to the MAX value in all modes other than
phase correct PWM mode.
Figure 18-8. Timer/Counter Timing Diagram, no Prescaling
Figure 18-9 shows the same timing data, but with the prescaler enabled.
Figure 18-9. Timer/Counter Timing Diagram, with Prescaler (fclk_I/O/8)
Figure 18-10 shows the setting of OCF2 in all modes except CTC mode.
clkTn
(clkI/O/1)
TOVn
clkI/O
TCNTn MAX - 1 MAX BOTTOM BOTTOM + 1
TOVn
TCNTn MAX - 1 MAX BOTTOM BOTTOM + 1
clkI/O
clkTn
(clkI/O/8)ATmega8A [DATASHEET] 109
8159E–AVR–02/2013
Figure 18-10. Timer/Counter Timing Diagram, Setting of OCF2, with Prescaler (fclk_I/O/8)
Figure 18-11 shows the setting of OCF2 and the clearing of TCNT2 in CTC mode.
Figure 18-11. Timer/Counter Timing Diagram, Clear Timer on Compare Match Mode, with Prescaler (fclk_I/O/8)
18.9 Asynchronous Operation of the Timer/Counter
18.9.1 Asynchronous Operation of Timer/Counter2
When Timer/Counter2 operates asynchronously, some considerations must be taken.
• Warning: When switching between asynchronous and synchronous clocking of Timer/Counter2, the Timer
Registers TCNT2, OCR2, and TCCR2 might be corrupted. A safe procedure for switching clock source is:
1. Disable the Timer/Counter2 interrupts by clearing OCIE2 and TOIE2.
2. Select clock source by setting AS2 as appropriate.
3. Write new values to TCNT2, OCR2, and TCCR2.
4. To switch to asynchronous operation: Wait for TCN2UB, OCR2UB, and TCR2UB.
5. Clear the Timer/Counter2 Interrupt Flags.
6. Enable interrupts, if needed.
OCFn
OCRn
TCNTn
OCRn Value
OCRn - 1 OCRn OCRn + 1 OCRn + 2
clkI/O
clkTn
(clkI/O/8)
OCFn
OCRn
TCNTn
(CTC)
TOP
TOP - 1 TOP BOTTOM BOTTOM + 1
clkI/O
clkTn
(clkI/O/8)ATmega8A [DATASHEET] 110
8159E–AVR–02/2013
• The Oscillator is optimized for use with a 32.768 kHz watch crystal. Applying an external clock to the TOSC1 pin
may result in incorrect Timer/Counter2 operation. The CPU main clock frequency must be more than four times
the Oscillator frequency.
• When writing to one of the registers TCNT2, OCR2, or TCCR2, the value is transferred to a temporary register,
and latched after two positive edges on TOSC1. The user should not write a new value before the contents of
the temporary register have been transferred to its destination. Each of the three mentioned registers have their
individual temporary register, which means that e.g. writing to TCNT2 does not disturb an OCR2 write in
progress. To detect that a transfer to the destination register has taken place, the Asynchronous Status Register
– ASSR has been implemented.
• When entering Power-save mode after having written to TCNT2, OCR2, or TCCR2, the user must wait until the
written register has been updated if Timer/Counter2 is used to wake up the device. Otherwise, the MCU will
enter sleep mode before the changes are effective. This is particularly important if the Output Compare2
interrupt is used to wake up the device, since the Output Compare function is disabled during writing to OCR2
or TCNT2. If the write cycle is not finished, and the MCU enters sleep mode before the OCR2UB bit returns to
zero, the device will never receive a Compare Match interrupt, and the MCU will not wake up.
• If Timer/Counter2 is used to wake the device up from Power-save mode, precautions must be taken if the user
wants to re-enter one of these modes: The interrupt logic needs one TOSC1 cycle to be reset. If the time
between wake-up and re-entering sleep mode is less than one TOSC1 cycle, the interrupt will not occur, and the
device will fail to wake up. If the user is in doubt whether the time before re-entering Power-save or Extended
Standby mode is sufficient, the following algorithm can be used to ensure that one TOSC1 cycle has elapsed:
1. Write a value to TCCR2, TCNT2, or OCR2.
2. Wait until the corresponding Update Busy Flag in ASSR returns to zero.
3. Enter Power-save or Extended Standby mode.
• When the asynchronous operation is selected, the 32.768kHz Oscillator for Timer/Counter2 is always running,
except in Power-down and Standby modes. After a Power-up Reset or Wake-up from Power-down or Standby
mode, the user should be aware of the fact that this Oscillator might take as long as one second to stabilize. The
user is advised to wait for at least one second before using Timer/Counter2 after Power-up or Wake-up from
Power-down or Standby mode. The contents of all Timer/Counter2 Registers must be considered lost after a
wake-up from Power-down or Standby mode due to unstable clock signal upon start-up, no matter whether the
Oscillator is in use or a clock signal is applied to the TOSC1 pin.
• Description of wake up from Power-save or Extended Standby mode when the timer is clocked asynchronously:
When the interrupt condition is met, the wake up process is started on the following cycle of the timer clock, that
is, the timer is always advanced by at least one before the processor can read the counter value. After wake-up,
the MCU is halted for four cycles, it executes the interrupt routine, and resumes execution from the instruction
following SLEEP.
• Reading of the TCNT2 Register shortly after wake-up from Power-save may give an incorrect result. Since
TCNT2 is clocked on the asynchronous TOSC clock, reading TCNT2 must be done through a register
synchronized to the internal I/O clock domain. Synchronization takes place for every rising TOSC1 edge. When
waking up from Power-save mode, and the I/O clock (clkI/O) again becomes active, TCNT2 will read as the
previous value (before entering sleep) until the next rising TOSC1 edge. The phase of the TOSC clock after
waking up from Power-save mode is essentially unpredictable, as it depends on the wake-up time. The
recommended procedure for reading TCNT2 is thus as follows:
1. Write any value to either of the registers OCR2 or TCCR2.
2. Wait for the corresponding Update Busy Flag to be cleared.
3. Read TCNT2.
• During asynchronous operation, the synchronization of the Interrupt Flags for the asynchronous timer takes
three processor cycles plus one timer cycle. The timer is therefore advanced by at least one before the ATmega8A [DATASHEET] 111
8159E–AVR–02/2013
processor can read the timer value causing the setting of the Interrupt Flag. The Output Compare Pin is
changed on the timer clock and is not synchronized to the processor clock.
18.10 Timer/Counter Prescaler
Figure 18-12. Prescaler for Timer/Counter2
The clock source for Timer/Counter2 is named clkT2S. clkT2S is by default connected to the main system I/O clock
clkI/O. By setting the AS2 bit in ASSR, Timer/Counter2 is asynchronously clocked from the TOSC1 pin. This
enables use of Timer/Counter2 as a Real Time Counter (RTC). When AS2 is set, pins TOSC1 and TOSC2 are disconnected
from Port B. A crystal can then be connected between the TOSC1 and TOSC2 pins to serve as an
independent clock source for Timer/Counter2. The Oscillator is optimized for use with a 32.768kHz crystal. Applying
an external clock source to TOSC1 is not recommended.
For Timer/Counter2, the possible prescaled selections are: clkT2S/8, clkT2S/32, clkT2S/64, clkT2S/128, clkT2S/256, and
clkT2S/1024. Additionally, clkT2S as well as 0 (stop) may be selected. Setting the PSR2 bit in SFIOR resets the prescaler.
This allows the user to operate with a predictable prescaler.
10-BIT T/C PRESCALER
TIMER/COUNTER2 CLOCK SOURCE
clkI/O clkT2S
TOSC1
AS2
CS20
CS21
CS22
clkT2S/8
clkT2S/64
clkT2S/128
clkT2S/1024
clkT2S/256
clkT2S/32
0 PSR2
Clear
clkT2ATmega8A [DATASHEET] 112
8159E–AVR–02/2013
18.11 Register Description
18.11.1 TCCR2 – Timer/Counter Control Register
• Bit 7 – FOC2: Force Output Compare
The FOC2 bit is only active when the WGM bits specify a non-PWM mode. However, for ensuring compatibility with
future devices, this bit must be set to zero when TCCR2 is written when operating in PWM mode. When writing a
logical one to the FOC2 bit, an immediate Compare Match is forced on the waveform generation unit. The OC2
output is changed according to its COM21:0 bits setting. Note that the FOC2 bit is implemented as a strobe. Therefore
it is the value present in the COM21:0 bits that determines the effect of the forced compare.
A FOC2 strobe will not generate any interrupt, nor will it clear the timer in CTC mode using OCR2 as TOP.
The FOC2 bit is always read as zero.
• Bit 6,3 – WGM21:0: Waveform Generation Mode
These bits control the counting sequence of the counter, the source for the maximum (TOP) counter value, and
what type of waveform generation to be used. Modes of operation supported by the Timer/Counter unit are: Normal
mode, Clear Timer on Compare Match (CTC) mode, and two types of Pulse Width Modulation (PWM) modes. See
Table 18-2 and “Modes of Operation” on page 104.
Note: 1. The CTC2 and PWM2 bit definition names are now obsolete. Use the WGM21:0 definitions. However, the functionality
and location of these bits are compatible with previous versions of the timer.
• Bit 5:4 – COM21:0: Compare Match Output Mode
These bits control the Output Compare Pin (OC2) behavior. If one or both of the COM21:0 bits are set, the OC2
output overrides the normal port functionality of the I/O pin it is connected to. However, note that the Data Direction
Register (DDR) bit corresponding to OC2 pin must be set in order to enable the output driver.
When OC2 is connected to the pin, the function of the COM21:0 bits depends on the WGM21:0 bit setting. Table
18-3 shows the COM21:0 bit functionality when the WGM21:0 bits are set to a normal or CTC mode (non-PWM).
Bit 7 6 5 4 3 2 1 0
FOC2 WGM20 COM21 COM20 WGM21 CS22 CS21 CS20 TCCR2
Read/Write W R/W R/W R/W R/W R/W R/W R/W
Initial Value 0 0 0 0 0 0 0 0
Table 18-2. Waveform Generation Mode Bit Description
Mode
WGM21
(CTC2)
WGM20
(PWM2)
Timer/Counter Mode of
Operation(1) TOP
Update of
OCR2
TOV2 Flag
Set
0 0 0 Normal 0xFF Immediate MAX
1 0 1 PWM, Phase Correct 0xFF TOP BOTTOM
2 1 0 CTC OCR2 Immediate MAX
3 1 1 Fast PWM 0xFF BOTTOM MAX
Table 18-3. Compare Output Mode, Non-PWM Mode
COM21 COM20 Description
0 0 Normal port operation, OC2 disconnected.
0 1 Toggle OC2 on Compare Match
1 0 Clear OC2 on Compare Match
1 1 Set OC2 on Compare MatchATmega8A [DATASHEET] 113
8159E–AVR–02/2013
Table 18-4 shows the COM21:0 bit functionality when the WGM21:0 bits are set to fast PWM mode.
Note: 1. A special case occurs when OCR2 equals TOP and COM21 is set. In this case, the Compare Match is ignored, but
the set or clear is done at BOTTOM. See “Fast PWM Mode” on page 105 for more details.
Table 18-5 shows the COM21:0 bit functionality when the WGM21:0 bits are set to phase correct PWM mode.
Note: 1. A special case occurs when OCR2 equals TOP and COM21 is set. In this case, the Compare Match is ignored, but
the set or clear is done at TOP. See “Phase Correct PWM Mode” on page 106 for more details.
• Bit 2:0 – CS22:0: Clock Select
The three clock select bits select the clock source to be used by the Timer/Counter, see Table 18-6.
18.11.2 TCNT2 – Timer/Counter Register
Table 18-4. Compare Output Mode, Fast PWM Mode(1)
COM21 COM20 Description
0 0 Normal port operation, OC2 disconnected.
0 1 Reserved
1 0 Clear OC2 on Compare Match, set OC2 at BOTTOM,
(non-inverting mode)
1 1 Set OC2 on Compare Match, clear OC2 at BOTTOM,
(inverting mode)
Table 18-5. Compare Output Mode, Phase Correct PWM Mode(1)
COM21 COM20 Description
0 0 Normal port operation, OC2 disconnected.
0 1 Reserved
1 0 Clear OC2 on Compare Match when up-counting. Set OC2 on Compare Match
when downcounting.
1 1 Set OC2 on Compare Match when up-counting. Clear OC2 on Compare Match
when downcounting.
Table 18-6. Clock Select Bit Description
CS22 CS21 CS20 Description
0 0 0 No clock source (Timer/Counter stopped).
0 0 1 clkT2S/(No prescaling)
0 1 0 clkT2S/8 (From prescaler)
0 1 1 clkT2S/32 (From prescaler)
1 0 0 clkT2S/64 (From prescaler)
1 0 1 clkT2S/128 (From prescaler)
1 1 0 clkT2S/256 (From prescaler)
1 1 1 clkT2S/1024 (From prescaler)
Bit 7 6 5 4 3 2 1 0
TCNT2[7:0] TCNT2
Read/Write R/W R/W R/W R/W R/W R/W R/W R/W
Initial Value 0 0 0 0 0 0 0 0ATmega8A [DATASHEET] 114
8159E–AVR–02/2013
The Timer/Counter Register gives direct access, both for read and write operations, to the Timer/Counter unit 8-bit
counter. Writing to the TCNT2 Register blocks (removes) the Compare Match on the following timer clock. Modifying
the counter (TCNT2) while the counter is running, introduces a risk of missing a Compare Match between
TCNT2 and the OCR2 Register.
18.11.3 OCR2 – Output Compare Register
The Output Compare Register contains an 8-bit value that is continuously compared with the counter value
(TCNT2). A match can be used to generate an Output Compare interrupt, or to generate a waveform output on the
OC2 pin.
18.11.4 ASSR – Asynchronous Status Register
• Bit 3 – AS2: Asynchronous Timer/Counter2
When AS2 is written to zero, Timer/Counter 2 is clocked from the I/O clock, clkI/O. When AS2 is written to one,
Timer/Counter 2 is clocked from a crystal Oscillator connected to the Timer Oscillator 1 (TOSC1) pin. When the
value of AS2 is changed, the contents of TCNT2, OCR2, and TCCR2 might be corrupted.
• Bit 2 – TCN2UB: Timer/Counter2 Update Busy
When Timer/Counter2 operates asynchronously and TCNT2 is written, this bit becomes set. When TCNT2 has
been updated from the temporary storage register, this bit is cleared by hardware. A logical zero in this bit indicates
that TCNT2 is ready to be updated with a new value.
• Bit 1 – OCR2UB: Output Compare Register2 Update Busy
When Timer/Counter2 operates asynchronously and OCR2 is written, this bit becomes set. When OCR2 has been
updated from the temporary storage register, this bit is cleared by hardware. A logical zero in this bit indicates that
OCR2 is ready to be updated with a new value.
• Bit 0 – TCR2UB: Timer/Counter Control Register2 Update Busy
When Timer/Counter2 operates asynchronously and TCCR2 is written, this bit becomes set. When TCCR2 has
been updated from the temporary storage register, this bit is cleared by hardware. A logical zero in this bit indicates
that TCCR2 is ready to be updated with a new value.
If a write is performed to any of the three Timer/Counter2 Registers while its update busy flag is set, the updated
value might get corrupted and cause an unintentional interrupt to occur.
The mechanisms for reading TCNT2, OCR2, and TCCR2 are different. When reading TCNT2, the actual timer
value is read. When reading OCR2 or TCCR2, the value in the temporary storage register is read.
Bit 7 6 5 4 3 2 1 0
OCR2[7:0] OCR2
Read/Write R/W R/W R/W R/W R/W R/W R/W R/W
Initial Value 0 0 0 0 0 0 0 0
Bit 7 6 5 4 3 2 1 0
– – – – AS2 TCN2UB OCR2UB TCR2UB ASSR
Read/Write R R R R R/W R R R
Initial Value 0 0 0 0 0 0 0 0ATmega8A [DATASHEET] 115
8159E–AVR–02/2013
18.11.5 TIMSK – Timer/Counter Interrupt Mask Register
• Bit 7 – OCIE2: Timer/Counter2 Output Compare Match Interrupt Enable
When the OCIE2 bit is written to one and the I-bit in the Status Register is set (one), the Timer/Counter2 Compare
Match interrupt is enabled. The corresponding interrupt is executed if a Compare Match in Timer/Counter2 occurs
(i.e., when the OCF2 bit is set in the Timer/Counter Interrupt Flag Register – TIFR).
• Bit 6 – TOIE2: Timer/Counter2 Overflow Interrupt Enable
When the TOIE2 bit is written to one and the I-bit in the Status Register is set (one), the Timer/Counter2 Overflow
interrupt is enabled. The corresponding interrupt is executed if an overflow in Timer/Counter2 occurs (i.e., when
the TOV2 bit is set in the Timer/Counter Interrupt Flag Register – TIFR).
18.11.6 TIFR – Timer/Counter Interrupt Flag Register
• Bit 7 – OCF2: Output Compare Flag 2
The OCF2 bit is set (one) when a Compare Match occurs between the Timer/Counter2 and the data in OCR2 –
Output Compare Register2. OCF2 is cleared by hardware when executing the corresponding interrupt Handling
Vector. Alternatively, OCF2 is cleared by writing a logic one to the flag. When the I-bit in SREG, OCIE2
(Timer/Counter2 Compare Match Interrupt Enable), and OCF2 are set (one), the Timer/Counter2 Compare Match
Interrupt is executed.
• Bit 6 – TOV2: Timer/Counter2 Overflow Flag
The TOV2 bit is set (one) when an overflow occurs in Timer/Counter2. TOV2 is cleared by hardware when executing
the corresponding interrupt Handling Vector. Alternatively, TOV2 is cleared by writing a logic one to the flag.
When the SREG I-bit, TOIE2 (Timer/Counter2 Overflow Interrupt Enable), and TOV2 are set (one), the
Timer/Counter2 Overflow interrupt is executed. In PWM mode, this bit is set when Timer/Counter2 changes counting
direction at 0x00.
18.11.7 SFIOR – Special Function IO Register
• Bit 1 – PSR2: Prescaler Reset Timer/Counter2
When this bit is written to one, the Timer/Counter2 prescaler will be reset. The bit will be cleared by hardware after
the operation is performed. Writing a zero to this bit will have no effect. This bit will always be read as zero if
Timer/Counter2 is clocked by the internal CPU clock. If this bit is written when Timer/Counter2 is operating in Asynchronous
mode, the bit will remain one until the prescaler has been reset.
Bit 7 6 5 4 3 2 1 0
OCIE2 TOIE2 TICIE1 OCIE1A OCIE1B TOIE1 – TOIE0 TIMSK
Read/Write R/W R/W R/W R/W R/W R/W R R/W
Initial Value 0 0 0 0 0 0 0 0
Bit 7 6 5 4 3 2 1 0
OCF2 TOV2 ICF1 OCF1A OCF1B TOV1 – TOV0 TIFR
Read/Write R/W R/W R/W R/W R/W R/W R R/W
Initial Value 0 0 0 0 0 0 0 0
Bit 7 6 5 4 3 2 1 0
– – – – ACME PUD PSR2 PSR10 SFIOR
Read/Write R R R R R/W R/W R/W R/W
Initial Value 0 0 0 0 0 0 0 0ATmega8A [DATASHEET] 116
8159E–AVR–02/2013
19. Serial Peripheral Interface – SPI
19.1 Features • Full-duplex, Three-wire Synchronous Data Transfer
• Master or Slave Operation
• LSB First or MSB First Data Transfer
• Seven Programmable Bit Rates
• End of Transmission Interrupt Flag
• Write Collision Flag Protection
• Wake-up from Idle Mode
• Double Speed (CK/2) Master SPI Mode
19.2 Overview
The Serial Peripheral Interface (SPI) allows high-speed synchronous data transfer between the ATmega8A and
peripheral devices or between several AVR devices.
Figure 19-1. SPI Block Diagram(1)
Note: 1. Refer to “Pin Configurations” on page 2, and Table 13-2 on page 56 for SPI pin placement.
The interconnection between Master and Slave CPUs with SPI is shown in Figure 19-2. The system consists of two
Shift Registers, and a Master clock generator. The SPI Master initiates the communication cycle when pulling low SPI2X SPI2X
DIVIDER
/2/4/8/16/32/64/128ATmega8A [DATASHEET] 117
8159E–AVR–02/2013
the Slave Select SS pin of the desired Slave. Master and Slave prepare the data to be sent in their respective Shift
Registers, and the Master generates the required clock pulses on the SCK line to interchange data. Data is always
shifted from Master to Slave on the Master Out – Slave In, MOSI, line, and from Slave to Master on the Master In –
Slave Out, MISO, line. After each data packet, the Master will synchronize the Slave by pulling high the Slave
Select, SS, line.
When configured as a Master, the SPI interface has no automatic control of the SS line. This must be handled by
user software before communication can start. When this is done, writing a byte to the SPI Data Register starts the
SPI clock generator, and the hardware shifts the eight bits into the Slave. After shifting one byte, the SPI clock generator
stops, setting the end of Transmission Flag (SPIF). If the SPI interrupt enable bit (SPIE) in the SPCR
Register is set, an interrupt is requested. The Master may continue to shift the next byte by writing it into SPDR, or
signal the end of packet by pulling high the Slave Select, SS line. The last incoming byte will be kept in the Buffer
Register for later use.
When configured as a Slave, the SPI interface will remain sleeping with MISO tri-stated as long as the SS pin is
driven high. In this state, software may update the contents of the SPI Data Register, SPDR, but the data will not
be shifted out by incoming clock pulses on the SCK pin until the SS pin is driven low. As one byte has been completely
shifted, the end of Transmission Flag, SPIF is set. If the SPI interrupt enable bit, SPIE, in the SPCR
Register is set, an interrupt is requested. The Slave may continue to place new data to be sent into SPDR before
reading the incoming data. The last incoming byte will be kept in the Buffer Register for later use.
Figure 19-2. SPI Master-Slave Interconnection
The system is single buffered in the transmit direction and double buffered in the receive direction. This means that
bytes to be transmitted cannot be written to the SPI Data Register before the entire shift cycle is completed. When
receiving data, however, a received character must be read from the SPI Data Register before the next character
has been completely shifted in. Otherwise, the first byte is lost.
In SPI Slave mode, the control logic will sample the incoming signal of the SCK pin. To ensure correct sampling of
the clock signal, the minimum low and high periods should be:
Low period: longer than 2 CPU clock cycles
High period: longer than 2 CPU clock cycles.
When the SPI is enabled, the data direction of the MOSI, MISO, SCK, and SS pins is overridden according to
Table 19-1. For more details on automatic port overrides, refer to “Alternate Port Functions” on page 54.
MSB MASTER LSB
8 BIT SHIFT REGISTER
MSB SLAVE LSB
8 BIT SHIFT REGISTER
MISO
MOSI
SPI
CLOCK GENERATOR
SCK
SS
MISO
MOSI
SCK
SS
VCC
SHIFT
ENABLEATmega8A [DATASHEET] 118
8159E–AVR–02/2013
Note: 1. See “Port B Pins Alternate Functions” on page 56 for a detailed description of how to define the direction of the
user defined SPI pins.
The following code examples show how to initialize the SPI as a Master and how to perform a simple transmission.
DDR_SPI in the examples must be replaced by the actual Data Direction Register controlling the SPI pins.
DD_MOSI, DD_MISO and DD_SCK must be replaced by the actual data direction bits for these pins. E.g. if MOSI
is placed on pin PB5, replace DD_MOSI with DDB5 and DDR_SPI with DDRB.
Table 19-1. SPI Pin Overrides(1)
Pin Direction, Master SPI Direction, Slave SPI
MOSI User Defined Input
MISO Input User Defined
SCK User Defined Input
SS User Defined InputATmega8A [DATASHEET] 119
8159E–AVR–02/2013
Note: 1. See “About Code Examples” on page 6.
Assembly Code Example(1)
SPI_MasterInit:
; Set MOSI and SCK output, all others input
ldi r17,(1<>8);
UBRRL = (unsigned char)ubrr;
/* Enable receiver and transmitter */
UCSRB = (1<> 1) & 0x01;
return ((resh << 8) | resl);
}ATmega8A [DATASHEET] 137
8159E–AVR–02/2013
20.6.9 Receive Compete Flag and Interrupt
The USART Receiver has one flag that indicates the Receiver state.
The Receive Complete (RXC) Flag indicates if there are unread data present in the receive buffer. This flag is one
when unread data exist in the receive buffer, and zero when the receive buffer is empty (i.e., does not contain any
unread data). If the Receiver is disabled (RXEN = 0), the receive buffer will be flushed and consequently the RXC
bit will become zero.
When the Receive Complete Interrupt Enable (RXCIE) in UCSRB is set, the USART Receive Complete Interrupt
will be executed as long as the RXC Flag is set (provided that global interrupts are enabled). When interrupt-driven
data reception is used, the receive complete routine must read the received data from UDR in order to clear the
RXC Flag, otherwise a new interrupt will occur once the interrupt routine terminates.
20.6.10 Receiver Error Flags
The USART Receiver has three error flags: Frame Error (FE), Data OverRun (DOR) and Parity Error (PE). All can
be accessed by reading UCSRA. Common for the error flags is that they are located in the receive buffer together
with the frame for which they indicate the error status. Due to the buffering of the error flags, the UCSRA must be
read before the receive buffer (UDR), since reading the UDR I/O location changes the buffer read location. Another
equality for the error flags is that they can not be altered by software doing a write to the flag location. However, all
flags must be set to zero when the UCSRA is written for upward compatibility of future USART implementations.
None of the error flags can generate interrupts.
The Frame Error (FE) Flag indicates the state of the first stop bit of the next readable frame stored in the receive
buffer. The FE Flag is zero when the stop bit was correctly read (as one), and the FE Flag will be one when the
stop bit was incorrect (zero). This flag can be used for detecting out-of-sync conditions, detecting break conditions
and protocol handling. The FE Flag is not affected by the setting of the USBS bit in UCSRC since the Receiver
ignores all, except for the first, stop bits. For compatibility with future devices, always set this bit to zero when writing
to UCSRA.
The Data OverRun (DOR) Flag indicates data loss due to a Receiver buffer full condition. A Data OverRun occurs
when the receive buffer is full (two characters), it is a new character waiting in the Receive Shift Register, and a
new start bit is detected. If the DOR Flag is set there was one or more serial frame lost between the frame last read
from UDR, and the next frame read from UDR. For compatibility with future devices, always write this bit to zero
when writing to UCSRA. The DOR Flag is cleared when the frame received was successfully moved from the Shift
Register to the receive buffer.
The Parity Error (PE) Flag indicates that the next frame in the receive buffer had a parity error when received. If
parity check is not enabled the PE bit will always be read zero. For compatibility with future devices, always set this
bit to zero when writing to UCSRA. For more details see “Parity Bit Calculation” on page 130 and “Parity Checker”
on page 137.
20.6.11 Parity Checker
The Parity Checker is active when the high USART Parity mode (UPM1) bit is set. Type of parity check to be performed
(odd or even) is selected by the UPM0 bit. When enabled, the Parity Checker calculates the parity of the
data bits in incoming frames and compares the result with the parity bit from the serial frame. The result of the
check is stored in the receive buffer together with the received data and stop bits. The Parity Error (PE) Flag can
then be read by software to check if the frame had a parity error.
The PE bit is set if the next character that can be read from the receive buffer had a parity error when received and
the parity checking was enabled at that point (UPM1 = 1). This bit is valid until the receive buffer (UDR) is read.
20.6.12 Disabling the Receiver
In contrast to the Transmitter, disabling of the Receiver will be immediate. Data from ongoing receptions will therefore
be lost. When disabled (i.e., the RXEN is set to zero) the Receiver will no longer override the normal functionATmega8A [DATASHEET] 138
8159E–AVR–02/2013
of the RxD port pin. The Receiver buffer FIFO will be flushed when the Receiver is disabled. Remaining data in the
buffer will be lost.
20.6.13 Flushing the Receive Buffer
The Receiver buffer FIFO will be flushed when the Receiver is disabled (i.e., the buffer will be emptied of its contents).
Unread data will be lost. If the buffer has to be flushed during normal operation, due to for instance an error
condition, read the UDR I/O location until the RXC Flag is cleared. The following code example shows how to flush
the receive buffer.
Note: 1. See “About Code Examples” on page 6.
20.7 Asynchronous Data Reception
The USART includes a clock recovery and a data recovery unit for handling asynchronous data reception. The
clock recovery logic is used for synchronizing the internally generated baud rate clock to the incoming asynchronous
serial frames at the RxD pin. The data recovery logic samples and low pass filters each incoming bit, thereby
improving the noise immunity of the Receiver. The asynchronous reception operational range depends on the
accuracy of the internal baud rate clock, the rate of the incoming frames, and the frame size in number of bits.
20.7.1 Asynchronous Clock Recovery
The clock recovery logic synchronizes internal clock to the incoming serial frames. Figure 20-5 illustrates the sampling
process of the start bit of an incoming frame. The sample rate is 16 times the baud rate for Normal mode, and
eight times the baud rate for Double Speed mode. The horizontal arrows illustrate the synchronization variation
due to the sampling process. Note the larger time variation when using the Double Speed mode (U2X = 1) of operation.
Samples denoted zero are samples done when the RxD line is idle (i.e., no communication activity).
Figure 20-5. Start Bit Sampling
When the clock recovery logic detects a high (idle) to low (start) transition on the RxD line, the start bit detection
sequence is initiated. Let sample 1 denote the first zero-sample as shown in the figure. The clock recovery logic
Assembly Code Example(1)
USART_Flush:
sbis UCSRA, RXC
ret
in r16, UDR
rjmp USART_Flush
C Code Example(1)
void USART_Flush( void )
{
unsigned char dummy;
while ( UCSRA & (1< 2 CPU clock cycles for fck < 12MHz, 3 CPU clock cycles for fck 12MHz
High: > 2 CPU clock cycles for fck < 12MHz, 3 CPU clock cycles for fck 12MHz
25.9.1 Serial Programming Algorithm
When writing serial data to the ATmega8A, data is clocked on the rising edge of SCK.
When reading data from the ATmega8A, data is clocked on the falling edge of SCK. See Figure 25-8 for timing
details.
Table 25-14. Pin Mapping Serial Programming
Symbol Pins I/O Description
MOSI PB3 I Serial data in
MISO PB4 O Serial data out
SCK PB5 I Serial clock
VCC
GND
XTAL1
SCK
MISO
MOSI
RESET
PB3
PB4
PB5
+2.7 - 5.5V
AVCC
+2.7 - 5.5V (2)ATmega8A [DATASHEET] 221
8159E–AVR–02/2013
To program and verify the ATmega8A in the Serial Programming mode, the following sequence is recommended
(See four byte instruction formats in Table 25-16):
1. Power-up sequence:
Apply power between VCC and GND while RESET and SCK are set to “0”. In some systems, the programmer
can not guarantee that SCK is held low during Power-up. In this case, RESET must be given a
positive pulse of at least two CPU clock cycles duration after SCK has been set to “0”.
2. Wait for at least 20 ms and enable Serial Programming by sending the Programming Enable serial instruction
to pin MOSI.
3. The Serial Programming instructions will not work if the communication is out of synchronization. When in
sync. the second byte (0x53), will echo back when issuing the third byte of the Programming Enable
instruction. Whether the echo is correct or not, all four bytes of the instruction must be transmitted. If the
0x53 did not echo back, give RESET a positive pulse and issue a new Programming Enable command.
4. The Flash is programmed one page at a time. The page size is found in Table 25-5 on page 210. The
memory page is loaded one byte at a time by supplying the 5LSB of the address and data together with
the Load Program memory Page instruction. To ensure correct loading of the page, the data Low byte
must be loaded before data High byte is applied for a given address. The Program memory Page is stored
by loading the Write Program memory Page instruction with the 7 MSB of the address. If polling is not
used, the user must wait at least tWD_FLASH before issuing the next page. (See Table 25-15).
5. Note: If other commands than polling (read) are applied before any write operation (FLASH, EEPROM,
Lock Bits, Fuses) is completed, it may result in incorrect programming.
6. The EEPROM array is programmed one byte at a time by supplying the address and data together with
the appropriate Write instruction. An EEPROM memory location is first automatically erased before new
data is written. If polling is not used, the user must wait at least tWD_EEPROM before issuing the next byte.
(See Table 25-15 on page 222). In a chip erased device, no 0xFFs in the data file(s) need to be
programmed.
7. Any memory location can be verified by using the Read instruction which returns the content at the
selected address at serial output MISO.
8. At the end of the programming session, RESET can be set high to commence normal operation.
9. Power-off sequence (if needed):
Set RESET to “1”.
Turn VCC power off
25.9.2 Data Polling Flash
When a page is being programmed into the Flash, reading an address location within the page being programmed
will give the value 0xFF. At the time the device is ready for a new page, the programmed value will read correctly.
This is used to determine when the next page can be written. Note that the entire page is written simultaneously
and any address within the page can be used for polling. Data polling of the Flash will not work for the value 0xFF,
so when programming this value, the user will have to wait for at least tWD_FLASH before programming the next
page. As a chip-erased device contains 0xFF in all locations, programming of addresses that are meant to contain
0xFF, can be skipped. See Table 97 for tWD_FLASH value.
25.9.3 Data Polling EEPROM
When a new byte has been written and is being programmed into EEPROM, reading the address location being
programmed will give the value 0xFF. At the time the device is ready for a new byte, the programmed value will
read correctly. This is used to determine when the next byte can be written. This will not work for the value 0xFF,
but the user should have the following in mind: As a chip-erased device contains 0xFF in all locations, programming
of addresses that are meant to contain 0xFF, can be skipped. This does not apply if the EEPROM is Re-ATmega8A [DATASHEET] 222
8159E–AVR–02/2013
programmed without chip-erasing the device. In this case, data polling cannot be used for the value 0xFF, and the
user will have to wait at least tWD_EEPROM before programming the next byte. See Table 25-15 for tWD_EEPROM value.
Figure 25-8. Serial Programming Waveforms
Table 25-15. Minimum Wait Delay Before Writing the Next Flash or EEPROM Location
Symbol Minimum Wait Delay
tWD_FUSE 4.5 ms
tWD_FLASH 4.5 ms
tWD_EEPROM 9.0 ms
tWD_ERASE 9.0 ms
MSB
MSB
LSB
LSB
SERIAL CLOCK INPUT
(SCK)
SERIAL DATA INPUT
(MOSI)
(MISO)
SAMPLE
SERIAL DATA OUTPUTATmega8A [DATASHEET] 223
8159E–AVR–02/2013
Note: a = address high bits
b = address low bits
H = 0 – Low byte, 1 – High byte
o = data out
i = data in
x = don’t care
Table 25-16. Serial Programming Instruction Set
Instruction
Instruction Format
Byte 1 Byte 2 Byte 3 Byte4 Operation
Programming Enable 1010 1100 0101 0011 xxxx xxxx xxxx xxxx Enable Serial Programming after
RESET goes low.
Chip Erase 1010 1100 100x xxxx xxxx xxxx xxxx xxxx Chip Erase EEPROM and Flash.
Read Program Memory 0010 H000 0000 aaaa bbbb bbbb oooo oooo Read H (high or low) data o from
Program memory at word address
a:b.
Load Program Memory
Page
0100 H000 0000 xxxx xxxb bbbb iiii iiii Write H (high or low) data i to
Program memory page at word
address b. Data Low byte must be
loaded before Data High byte is
applied within the same address.
Write Program Memory
Page
0100 1100 0000 aaaa bbbx xxxx xxxx xxxx Write Program memory Page at
address a:b.
Read EEPROM Memory 1010 0000 00xx xxxa bbbb bbbb oooo oooo Read data o from EEPROM
memory at address a:b.
Write EEPROM Memory 1100 0000 00xx xxxa bbbb bbbb iiii iiii Write data i to EEPROM memory
at address a:b.
Read Lock Bits 0101 1000 0000 0000 xxxx xxxx xxoo oooo Read Lock Bits. “0” = programmed,
“1” = unprogrammed. See Table
25-1 on page 207 for details.
Write Lock Bits 1010 1100 111x xxxx xxxx xxxx 11ii iiii Write Lock Bits. Set bits = “0” to
program Lock Bits. See Table 25-
1 on page 207 for details.
Read Signature Byte 0011 0000 00xx xxxx xxxx xxbb oooo oooo Read Signature Byte o at address
b.
Write Fuse Bits 1010 1100 1010 0000 xxxx xxxx iiii iiii Set bits = “0” to program, “1” to
unprogram. See Table 25-4 on
page 209 for details.
Write Fuse High Bits 1010 1100 1010 1000 xxxx xxxx iiii iiii Set bits = “0” to program, “1” to
unprogram. See Table 25-3 on
page 208 for details.
Read Fuse Bits 0101 0000 0000 0000 xxxx xxxx oooo oooo Read Fuse Bits. “0” = programmed,
“1” = unprogrammed. See Table
25-4 on page 209 for details.
Read Fuse High Bits 0101 1000 0000 1000 xxxx xxxx oooo oooo Read Fuse high bits. “0” = programmed,
“1” = unprogrammed.
See Table 25-3 on page 208 for
details.
Read Calibration Byte 0011 1000 00xx xxxx 0000 00bb oooo oooo Read Calibration ByteATmega8A [DATASHEET] 224
8159E–AVR–02/2013
25.9.4 SPI Serial Programming Characteristics
For characteristics of the SPI module, see “SPI Timing Characteristics” on page 230.ATmega8A [DATASHEET] 225
8159E–AVR–02/2013
26. Electrical Characteristics – TA = -40°C to 85°C
Note: Typical values contained in this datasheet are based on simulations and characterization of other AVR microcontrollers manufactured
on the same process technology. Min and Max values will be available after the device is characterized.
26.2 DC Characteristics
26.1 Absolute Maximum Ratings*
Operating Temperature.................................. -55C to +125C *NOTICE: Stresses beyond those listed under “Absolute
Maximum Ratings” may cause permanent damage
to the device. This is a stress rating only and
functional operation of the device at these or
other conditions beyond those indicated in the
operational sections of this specification is not
implied. Exposure to absolute maximum rating
conditions for extended periods may affect
device reliability.
Storage Temperature ..................................... -65°C to +150°C
Voltage on any Pin except RESET
with respect to Ground ................................-0.5V to VCC+0.5V
Voltage on RESET with respect to Ground......-0.5V to +13.0V
Maximum Operating Voltage ............................................ 6.0V
DC Current per I/O Pin ................................................ 40.0mA
DC Current VCC and GND Pins................................. 300.0mA
TA = -40C to 85C, VCC = 2.7V to 5.5V (unless otherwise noted)
Symbol Parameter Condition Min Typ Max Units
VIL
Input Low Voltage except
XTAL1 and RESET pins VCC = 2.7V - 5.5V -0.5 0.2 VCC(1) V
VIH
Input High Voltage except
XTAL1 and RESET pins VCC = 2.7V - 5.5V 0.6 VCC(2) VCC + 0.5 V
VIL1
Input Low Voltage
XTAL1 pin
VCC = 2.7V - 5.5V -0.5 0.1 VCC(1) V
VIH1
Input High Voltage
XTAL 1 pin
VCC = 2.7V - 5.5V 0.8 VCC(2) VCC + 0.5 V
VIL2
Input Low Voltage
RESET pin
VCC = 2.7V - 5.5V -0.5 0.2 VCC V
VIH2
Input High Voltage
RESET pin
VCC = 2.7V - 5.5V 0.9 VCC(2) VCC + 0.5 V
VIL3
Input Low Voltage
RESET pin as I/O VCC = 2.7V - 5.5V -0.5 0.2 VCC V
VIH3
Input High Voltage
RESET pin as I/O VCC = 2.7V - 5.5V 0.6 VCC(2)
0.7 VCC(2) VCC + 0.5 V
VOL
Output Low Voltage(3)
(Ports B,C,D)
I
OL = 20mA, VCC = 5V
IOL = 10mA, VCC = 3V
0.9
0.6
V
V
VOH
Output High Voltage(4)
(Ports B,C,D)
I
OH = -20mA, VCC = 5V
IOH = -10mA, VCC = 3V
4.2
2.2
V
V
IIL
Input Leakage
Current I/O Pin
Vcc = 5.5V, pin low
(absolute value) 1 µA
IIH
Input Leakage
Current I/O Pin
Vcc = 5.5V, pin high
(absolute value) 1 µAATmega8A [DATASHEET] 226
8159E–AVR–02/2013
Notes: 1. “Max” means the highest value where the pin is guaranteed to be read as low
2. “Min” means the lowest value where the pin is guaranteed to be read as high
3. Although each I/O port can sink more than the test conditions (20mA at Vcc = 5V, 10mA at Vcc = 3V) under steady state
conditions (non-transient), the following must be observed:
PDIP, TQFP, and QFN/MLF Package:
1] The sum of all IOL, for all ports, should not exceed 300mA.
2] The sum of all IOL, for ports C0 - C5 should not exceed 100mA.
3] The sum of all IOL, for ports B0 - B7, C6, D0 - D7 and XTAL2, should not exceed 200mA.
If IOL exceeds the test condition, VOL may exceed the related specification. Pins are not guaranteed to sink current greater
than the listed test condition.
4. Although each I/O port can source more than the test conditions (20mA at Vcc = 5V, 10mA at Vcc = 3V) under steady state
conditions (non-transient), the following must be observed:
PDIP, TQFP, and QFN/MLF Package:
1] The sum of all IOH, for all ports, should not exceed 300mA.
2] The sum of all IOH, for port C0 - C5, should not exceed 100mA.
3] The sum of all IOH, for ports B0 - B7, C6, D0 - D7 and XTAL2, should not exceed 200mA.
If IOH exceeds the test condition, VOH may exceed the related specification. Pins are not guaranteed to source current
greater than the listed test condition.
5. Minimum VCC for Power-down is 2.5V.
RRST Reset Pull-up Resistor 30 80 k
Rpu I/O Pin Pull-up Resistor 20 50 k
I
CC
Power Supply Current
Active 4MHz, VCC = 3V 2 5 mA
Active 8MHz, VCC = 5V 6 15 mA
Idle 4MHz, VCC = 3V 0.5 2 mA
Idle 8MHz, VCC = 5V 2.2 7 mA
Power-down mode(5) WDT enabled, VCC = 3V <10 28 µA
WDT disabled, VCC = 3V <1 3 µA
VACIO
Analog Comparator
Input Offset Voltage
VCC = 5V
Vin = VCC/2 40 mV
IACLK
Analog Comparator
Input Leakage Current
VCC = 5V
Vin = VCC/2 -50 50 nA
tACPD
Analog Comparator
Propagation Delay
VCC = 2.7V
VCC = 5.0V
750
500 ns
TA = -40C to 85C, VCC = 2.7V to 5.5V (unless otherwise noted) (Continued)
Symbol Parameter Condition Min Typ Max UnitsATmega8A [DATASHEET] 227
8159E–AVR–02/2013
26.3 Speed Grades
Figure 26-1. Maximum Frequency vs. Vcc
26.4 Clock Characteristics
26.4.1 External Clock Drive Waveforms
Figure 26-2. External Clock Drive Waveforms
26.4.2 External Clock Drive
2.7V 4.5V 5.5V
Safe Operating Area
16 MHz
8 MHz
VIL1
VIH1
Table 26-1. External Clock Drive
Symbol Parameter
VCC = 2.7V to 5.5V VCC = 4.5V to 5.5V
Min Max Min Max Units
1/tCLCL Oscillator Frequency 0 8 0 16 MHz
tCLCL Clock Period 125 62.5 ns
tCHCX High Time 50 25 ns
tCLCX Low Time 50 25 ns
tCLCH Rise Time 1.6 0.5 s
tCHCL Fall Time 1.6 0.5 s
tCLCL
Change in period from one
clock cycle to the next 2 2%ATmega8A [DATASHEET] 228
8159E–AVR–02/2013
Notes: 1. R should be in the range 3 k - 100 k, and C should be at least 20 pF. The C values given in the table includes pin
capacitance. This will vary with package type.
2. The frequency will vary with package type and board layout.
26.5 System and Reset Characteristics
Notes: 1. The Power-on Reset will not work unless the supply voltage has been below VPOT (falling).
2. VBOT may be below nominal minimum operating voltage for some devices. For devices where this is the case, the
device is tested down to VCC = VBOT during the production test. This guarantees that a Brown-out Reset will occur
before VCC drops to a voltage where correct operation of the microcontroller is no longer guaranteed. The test is
performed using BODLEVEL = 1 and BODLEVEL = 0 for ATmega8A.
Table 26-2. External RC Oscillator, Typical Frequencies
R [k]
(1) C [pF] f(2)
33 22 650kHz
10 22 2.0MHz
Table 26-3. Reset, Brown-out and Internal Voltage Reference Characteristics
Symbol Parameter Condition Min Typ Max Units
VPOT
Power-on Reset Threshold Voltage
(rising)(1) 1.4 2.3 V
Power-on Reset Threshold Voltage
(falling) 1.3 2.3 V
VRST RESET Pin Threshold Voltage 0.2 0.9 VCC
tRST Minimum pulse width on RESET Pin 1.5 µs
VBOT
Brown-out Reset Threshold Voltage(2) BODLEVEL = 1 2.40 2.60 2.90
V
BODLEVEL = 0 3.70 4.00 4.50
tBOD
Minimum low voltage period for Brownout
Detection
BODLEVEL = 1 2 µs
BODLEVEL = 0 2 µs
VHYST Brown-out Detector hysteresis 130 mV
VBG Bandgap reference voltage 1.15 1.23 1.35 V
tBG Bandgap reference start-up time 40 70 µs
IBG Bandgap reference current consumption 10 µsATmega8A [DATASHEET] 229
8159E–AVR–02/2013
26.6 Two-wire Serial Interface Characteristics
Table 26-4 describes the requirements for devices connected to the Two-wire Serial Bus. The ATmega8A Two-wire Serial
Interface meets or exceeds these requirements under the noted conditions.
Timing symbols refer to Figure 26-3.
Notes: 1. In ATmega8A, this parameter is characterized and not 100% tested.
2. Required only for fSCL > 100kHz.
Table 26-4. Two-wire Serial Bus Requirements
Symbol Parameter Condition Min Max Units
VIL Input Low-voltage -0.5 0.3 VCC V
VIH Input High-voltage 0.7 VCC VCC + 0.5 V
Vhys(1) Hysteresis of Schmitt Trigger Inputs 0.05 VCC(2) – V
VOL(1) Output Low-voltage 3mA sink current 0 0.4 V
tr
(1) Rise Time for both SDA and SCL 20 + 0.1Cb
(3)(2) 300 ns
tof
(1) Output Fall Time from VIHmin to VILmax 10 pF < Cb < 400 pF(3) 20 + 0.1Cb
(3)(2) 250 ns
tSP(1) Spikes Suppressed by Input Filter 0 50(2) ns
Ii Input Current each I/O Pin 0.1VCC < Vi
< 0.9VCC -10 10 µA
Ci
(1) Capacitance for each I/O Pin – 10 pF
fSCL SCL Clock Frequency fCK(4) > max(16fSCL, 250kHz)(5) 0 400 kHz
Rp Value of Pull-up resistor
fSCL 100kHz
fSCL > 100kHz
tHD;STA Hold Time (repeated) START Condition
fSCL 100kHz 4.0 – µs
fSCL > 100kHz 0.6 – µs
tLOW Low Period of the SCL Clock
fSCL 100kHz(6) 4.7 – µs
fSCL > 100kHz(7) 1.3 – µs
tHIGH High period of the SCL clock
fSCL 100kHz 4.0 – µs
fSCL > 100kHz 0.6 – µs
tSU;STA Set-up time for a repeated START condition
fSCL 100kHz 4.7 – µs
fSCL > 100kHz 0.6 – µs
tHD;DAT Data hold time
fSCL 100kHz 0 3.45 µs
fSCL > 100kHz 0 0.9 µs
tSU;DAT Data setup time
fSCL 100kHz 250 – ns
fSCL > 100kHz 100 – ns
tSU;STO Setup time for STOP condition
fSCL 100kHz 4.0 – µs
fSCL > 100kHz 0.6 – µs
tBUF
Bus free time between a STOP and START
condition
fSCL 100kHz 4.7 – µs
fSCL > 100kHz 1.3 – µs
VCC – 0,4V
3mA ---------------------------- 1000ns
Cb
-------------------
VCC – 0,4V
3mA ---------------------------- 300ns
Cb
---------------- ATmega8A [DATASHEET] 230
8159E–AVR–02/2013
3. Cb = capacitance of one bus line in pF.
4. fCK = CPU clock frequency
5. This requirement applies to all ATmega8A Two-wire Serial Interface operation. Other devices connected to the Two-wire
Serial Bus need only obey the general fSCL requirement.
6. The actual low period generated by the ATmega8A Two-wire Serial Interface is (1/fSCL - 2/fCK), thus fCK must be greater than
6MHz for the low time requirement to be strictly met at fSCL = 100kHz.
7. The actual low period generated by the ATmega8A Two-wire Serial Interface is (1/fSCL - 2/fCK), thus the low time requirement
will not be strictly met for fSCL > 308kHz when fCK = 8MHz. Still, ATmega8A devices connected to the bus may communicate
at full speed (400kHz) with other ATmega8A devices, as well as any other device with a proper tLOW acceptance margin.
Figure 26-3. Two-wire Serial Bus Timing
26.7 SPI Timing Characteristics
See Figure 26-4 and Figure 26-5 for details.
Note: 1. In SPI Programming mode the minimum SCK high/low period is:
- 2tCLCL for fCK < 12MHz
- 3tCLCL for fCK > 12MHz
t
SU;STA
t
LOW
t
HIGH
t
LOW
t
of
t
HD;STA t
HD;DAT t
SU;DAT t
SU;STO
t
BUF
SCL
SDA
t
r
Table 26-5. SPI Timing Parameters
Description Mode Min Typ Max
1 SCK period Master See Table 19-4
ns
2 SCK high/low Master 50% duty cycle
3 Rise/Fall time Master 3.6
4 Setup Master 10
5 Hold Master 10
6 Out to SCK Master 0.5 • tSCK
7 SCK to out Master 10
8 SCK to out high Master 10
9 SS low to out Slave 15
10 SCK period Slave 4 • tck
11 SCK high/low(1) Slave 2 • tck
12 Rise/Fall time Slave 1.6
13 Setup Slave 10
14 Hold Slave 10
15 SCK to out Slave 15
16 SCK to SS high Slave 20
17 SS high to tri-state Slave 10
18 SS low to SCK Salve 2 • tckATmega8A [DATASHEET] 231
8159E–AVR–02/2013
Figure 26-4. SPI interface timing requirements (Master Mode)
Figure 26-5. SPI interface timing requirements (Slave Mode)
MOSI
(Data Output)
SCK
(CPOL = 1)
MISO
(Data Input)
SCK
(CPOL = 0)
SS
MSB LSB
MSB LSB
...
...
6 1
2 2
4 5 3
7 8
MISO
(Data Output)
SCK
(CPOL = 1)
MOSI
(Data Input)
SCK
(CPOL = 0)
SS
MSB LSB
MSB LSB
...
...
10
11 11
13 14 12
15 17
9
X
16
18ATmega8A [DATASHEET] 232
8159E–AVR–02/2013
26.8 ADC Characteristics
Notes: 1. Values are guidelines only.
2. Minimum for AVCC is 2.7V.
3. Maximum for AVCC is 5.5V.
4. Maximum conversion time is 1/50kHz*25 = 0.5 ms.
Table 26-6. ADC Characteristics
Symbol Parameter Condition Min(1) Typ(1) Max(1) Units
Resolution Single Ended Conversion 10 Bits
Absolute accuracy
(Including INL, DNL,
Quantization Error, Gain,
and Offset Error)
Single Ended Conversion
VREF = 4V, VCC = 4V
ADC clock = 200kHz
1.75 LSB
Single Ended Conversion
VREF = 4V, VCC = 4V
ADC clock = 1MHz
3 LSB
Integral Non-linearity (INL)
Single Ended Conversion
VREF = 4V, VCC = 4V
ADC clock = 200kHz 0.75 LSB
Differential Non-linearity
(DNL)
Single Ended Conversion
VREF = 4V, VCC = 4V
ADC clock = 200kHz 0.5 LSB
Gain Error Single Ended Conversion
VREF = 4V, VCC = 4V
ADC clock = 200kHz
1 LSB
Offset Error Single Ended Conversion
VREF = 4V, VCC = 4V
ADC clock = 200kHz
1 LSB
Conversion Time(4) Free Running Conversion 13 260 µs
Clock Frequency 50 1000 kHz
AVCC Analog Supply Voltage VCC - 0.3(2) VCC + 0.3(3) V
VREF Reference Voltage 2.0 AVCC V
VIN Input voltage GND VREF V
Input bandwidth 38.5 kHz
VINT Internal Voltage Reference 2.3 2.56 2.8 V
RREF Reference Input Resistance 32 k
RAIN Analog Input Resistance 55 100 MATmega8A [DATASHEET] 233
8159E–AVR–02/2013
27. Electrical Characteristics – TA = -40°C to 105°C
Absolute Maximum Ratings*
27.1 DC Characteristics
Notes: 1. “Max” means the highest value where the pin is guaranteed to be read as low
Operating Temperature.................................. -55C to +125C *NOTICE: Stresses beyond those listed under “Absolute
Maximum Ratings” may cause permanent damage
to the device. This is a stress rating only and
functional operation of the device at these or
other conditions beyond those indicated in the
operational sections of this specification is not
implied. Exposure to absolute maximum rating
conditions for extended periods may affect
device reliability.
Storage Temperature ..................................... -65°C to +150°C
Voltage on any Pin except RESET
with respect to Ground ................................-0.5V to VCC+0.5V
Voltage on RESET with respect to Ground......-0.5V to +13.0V
Maximum Operating Voltage ............................................ 6.0V
DC Current per I/O Pin ............................................... 40.0 mA
DC Current VCC and GND Pins................................ 200.0 mA
TA = -40C to 105C, VCC = 2.7V to 5.5V (unless otherwise noted)
Symbol Parameter Condition Min. Typ. Max. Units
VIL
Input Low Voltage, Except
XTAL1 and RESET pin VCC = 2.7V - 5.5V -0.5 0.2VCC(1) V
VIL1
Input Low Voltage,
XTAL1 pin VCC = 2.7V - 5.5V -0.5 0.1VCC(1) V
VIL2
Input Low Voltage,
RESET pin VCC = 2.7V - 5.5V -0.5 0.1VCC(1) V
VIH
Input High Voltage,
Except XTAL1 and
RESET pins
VCC = 2.7V - 5.5V 0.6VCC(2) VCC + 0.5 V
VIH1
Input High Voltage,
XTAL1 pin VCC = 2.7V - 5.5V 0.8VCC(2) VCC + 0.5 V
VIH2
Input High Voltage,
RESET pin VCC = 2.7V - 5.5V 0.9VCC(2) VCC + 0.5 V
VOL
Output Low Voltage(3),
Port B (except RESET)
I
OL =20 mA, VCC = 5V
IOL =10 mA, VCC = 3V
0.8
0.6 V
VOH
Output High Voltage(4),
Port B (except RESET)
I
OH = -20 mA, VCC = 5V
IOH = -10 mA, VCC = 3V
4.0
2.2 V
IIL
Input Leakage
Current I/O Pin 3 µA
IIH
Input Leakage
Current I/O Pin 3 µA
RRST Reset Pull-up Resistor 30 80 k
RPU I/O Pin Pull-up Resistor 20 50 k
VACIO
Analog Comparator
Input Offset Voltage
VCC = 5V
Vin = VCC/2 20 mV
IACLK
Analog Comparator
Input Leakage Current
VCC = 5V
Vin = VCC/2 -50 50 nAATmega8A [DATASHEET] 234
8159E–AVR–02/2013
2. “Min” means the lowest value where the pin is guaranteed to be read as high
3. Although each I/O port can sink more than the test conditions (20mA at Vcc = 5V, 10mA at Vcc = 3V) under steady state
conditions (non-transient), the following must be observed:
PDIP, TQFP, and QFN/MLF Package:
1] The sum of all IOL, for all ports, should not exceed 300 mA.
2] The sum of all IOL, for ports C0 - C5 should not exceed 100 mA.
3] The sum of all IOL, for ports B0 - B7, C6, D0 - D7 and XTAL2, should not exceed 200 mA.
If IOL exceeds the test condition, VOL may exceed the related specification. Pins are not guaranteed to sink current greater
than the listed test condition.
4. Although each I/O port can source more than the test conditions (20 mA at Vcc = 5V, 10 mA at Vcc = 3V) under steady state
conditions (non-transient), the following must be observed:
PDIP, TQFP, and QFN/MLF Package:
1] The sum of all IOH, for all ports, should not exceed 300 mA.
2] The sum of all IOH, for port C0 - C5, should not exceed 100 mA.
3] The sum of all IOH, for ports B0 - B7, C6, D0 - D7 and XTAL2, should not exceed 200 mA.
If IOH exceeds the test condition, VOH may exceed the related specification. Pins are not guaranteed to source current
greater than the listed test condition.
Note: 1. The current consumption values include input leakage current.
27.1.1 ATmega8A DC Characteristics
Table 27-1. TA = -40C to 105C, VCC = 1.8V to 5.5V (unless otherwise noted)
Symbol Parameter Condition Min. Typ. Max. Units
ICC
Power Supply Current
Active 4 MHz, VCC = 3V 6 mA
Active 8 MHz, VCC = 5V 15 mA
Idle 4 MHz, VCC = 3V 3 mA
Idle 8 MHz, VCC = 5V 8 mA
Power-down mode(1) WDT enabled, VCC = 3V 35 µA
WDT disabled, VCC = 3V 6 µAATmega8A [DATASHEET] 235
8159E–AVR–02/2013
28. Typical Characteristics – TA = -40°C to 85°C
The following charts show typical behavior. These figures are not tested during manufacturing. All current consumption
measurements are performed with all I/O pins configured as inputs and with internal pull-ups enabled. A
sine wave generator with Rail-to-Rail output is used as clock source.
The power consumption in Power-down mode is independent of clock selection.
The current consumption is a function of several factors such as: operating voltage, operating frequency, loading of
I/O pins, switching rate of I/O pins, code executed and ambient temperature. The dominating factors are operating
voltage and frequency.
The current drawn from capacitive loaded pins may be estimated (for one pin) as CL*VCC*f where CL = load capacitance,
VCC = operating voltage and f = average switching frequency of I/O pin.
The parts are characterized at frequencies higher than test limits. Parts are not guaranteed to function properly at
frequencies higher than the ordering code indicates.
The difference between current consumption in Power-down mode with Watchdog Timer enabled and Power-down
mode with Watchdog Timer disabled represents the differential current drawn by the Watchdog Timer.
28.1 Active Supply Current
Figure 28-1. Active Supply Current vs. Frequency (0.1 - 1.0MHz)
5.5 V
5.0 V
4.5 V
4.0 V
3.6 V
3.3 V
2.7 V
0
0.2
0.4
0.6
0.8
1
1.2
1.4
1.6
1.8
0 0.1 0.2 0.3 0.4 0.5 0.6 0.7 0.8 0.9 1
Frequency (MHz)
ICC (mA)ATmega8A [DATASHEET] 236
8159E–AVR–02/2013
Figure 28-2. Active Supply Current vs. Frequency (1 - 16MHz)
Figure 28-3. Active Supply Current vs. VCC (Internal RC Oscillator, 8MHz)
0
2
4
6
8
10
12
14
0246 8 10 12 14 16
Frequency (MHz)
ICC (mA)
5.5 V
5.0 V
4.5 V
4.0 V
3.6 V
3.3 V
2.7 V
85 °C
25 °C
-40 °C
3
4
5
6
7
8
9
10
2.5 3 3.5 4 4.5 5 5.5
VCC (V)
ICC (mA)ATmega8A [DATASHEET] 237
8159E–AVR–02/2013
Figure 28-4. Active Supply Current vs. VCC (Internal RC Oscillator, 4MHz)
Figure 28-5. Active Supply Current vs. VCC (Internal RC Oscillator, 2MHz)
85 °C
25 °C
-40 °C
1.5
2
2.5
3
3.5
4
4.5
5
5.5
6
2.5 3 3.5 4 4.5 5 5.5
VCC (V)
ICC (mA)
85 °C
25 °C
-40 °C
1.2
1.6
2
2.4
2.8
3.2
3.6
2.5 3 3.5 4 4.5 5 5.5
VCC (V)
ICC (mA)ATmega8A [DATASHEET] 238
8159E–AVR–02/2013
Figure 28-6. Active Supply Current vs. VCC (Internal RC Oscillator, 1MHz)
Figure 28-7. Active Supply Current vs. VCC (32kHz External Oscillator)
85 °C
25 °C
-40 °C
1
1.1
1.2
1.3
1.4
1.5
1.6
1.7
1.8
1.9
2.5 3 3.5 4 4.5 5 5.5
VCC (V)
ICC (mA)
25 °C
40
45
50
55
60
65
70
2.5 3 3.5 4 4.5 5 5.5
VCC (V)
ICC (µA)ATmega8A [DATASHEET] 239
8159E–AVR–02/2013
28.2 Idle Supply Current
Figure 28-8. Idle Supply Current vs. Frequency (0.1 - 1.0MHz)
Figure 28-9. Idle Supply Current vs. Frequency (1 - 16MHz)
5.5 V
5.0 V
4.5 V
4.0 V
3.6 V
3.3 V
2.7 V
0
0.05
0.1
0.15
0.2
0.25
0.3
0.35
0 0.1 0.2 0.3 0.4 0.5 0.6 0.7 0.8 0.9 1
Frequency (MHz)
ICC (mA)
5.5 V
5.0 V
4.5 V
4.0 V
3.6 V
3.3 V
2.7 V
0
1
2
3
4
5
6
0246 8 10 12 14 16
Frequency (MHz)
ICC (mA)ATmega8A [DATASHEET] 240
8159E–AVR–02/2013
Figure 28-10. Idle Supply Current vs. VCC (Internal RC Oscillator, 8MHz)
Figure 28-11. Idle Supply Current vs. VCC (Internal RC Oscillator, 4MHz)
85 °C
25 °C
-40 °C
1
1.5
2
2.5
3
3.5
4
2.5 3 3.5 4 4.5 5 5.5
VCC (V)
ICC (mA)
85 °C
25 °C
-40 °C
0.6
0.8
1
1.2
1.4
1.6
1.8
2
2.5 3 3.5 4 4.5 5 5.5
VCC (V)
ICC (mA)ATmega8A [DATASHEET] 241
8159E–AVR–02/2013
Figure 28-12. Idle Supply Current vs. VCC (Internal RC Oscillator, 2MHz)
Figure 28-13. Idle Supply Current vs. VCC (Internal RC Oscillator, 1MHz)
85 °C
25 °C
-40 °C
0
0.2
0.4
0.6
0.8
1
2.5 3 3.5 4 4.5 5 5.5
VCC (V)
ICC (mA)
85 °C
25 °C
-40 °C
0
0.1
0.2
0.3
0.4
0.5
2.5 3 3.5 4 4.5 5 5.5
VCC (V)
ICC (mA)ATmega8A [DATASHEET] 242
8159E–AVR–02/2013
Figure 28-14. Idle Supply Current vs. VCC (32kHz External Oscillator)
28.3 Power-down Supply Current
Figure 28-15. Power-down Supply Current vs. VCC (Watchdog Timer Disabled)
25 °C
0
5
10
15
20
25
2.5 3 3.5 4 4.5 5 5.5
VCC (V)
ICC (uA)
85 °C
25 °C
-40 °C
0
0.5
1
1.5
2
2.5
2.5 3 3.5 4 4.5 5 5.5
VCC (V)
ICC (uA)ATmega8A [DATASHEET] 243
8159E–AVR–02/2013
Figure 28-16. Power-down Supply Current vs. VCC (Watchdog Timer Enabled)
28.4 Power-save Supply Current
Figure 28-17. Power-save Supply Current vs. VCC (Watchdog Timer Disabled)
85 °C
25 °C
-40 °C
0
5
10
15
20
25
2.5 3 3.5 4 4.5 5 5.5
VCC (V)
ICC (uA)
25 °C
2
4
6
8
10
2.5 3 3.5 4 4.5 5 5.5
VCC (V)
ICC (uA)ATmega8A [DATASHEET] 244
8159E–AVR–02/2013
28.5 Standby Supply Current
Figure 28-18. Standby Supply Current vs. VCC (455kHz Resonator, Watchdog Timer Disabled)
Figure 28-19. Standby Supply Current vs. VCC (1MHz Resonator, Watchdog Timer Disabled)
25 °C
0
10
20
30
40
50
60
2.5 3 3.5 4 4.5 5 5.5
VCC (V)
ICC (uA)
25 °C
0
10
20
30
40
50
60
2.5 3 3.5 4 4.5 5 5.5
VCC (V)
ICC (uA)ATmega8A [DATASHEET] 245
8159E–AVR–02/2013
Figure 28-20. Standby Supply Current vs. VCC (1MHz Xtal, Watchdog Timer Disabled)
Figure 28-21. Standby Supply Current vs. VCC (4MHz Resonator, Watchdog Timer Disabled)
25 °C
0
10
20
30
40
50
60
2.5 3 3.5 4 4.5 5 5.5
VCC (V)
ICC (uA)
25 °C
0
15
30
45
60
75
90
2.5 3 3.5 4 4.5 5 5.5
VCC (V)
ICC (uA)ATmega8A [DATASHEET] 246
8159E–AVR–02/2013
Figure 28-22. Standby Supply Current vs. VCC (4MHz Xtal, Watchdog Timer Disabled)
Figure 28-23. Standby Supply Current vs. VCC (6MHz Resonator, Watchdog Timer Disabled)
25 °C
0
10
20
30
40
50
60
70
80
2.5 3 3.5 4 4.5 5 5.5
VCC (V)
ICC (uA)
25 °C
0
20
40
60
80
100
2.5 3 3.5 4 4.5 5 5.5
VCC (V)
ICC (uA)ATmega8A [DATASHEET] 247
8159E–AVR–02/2013
Figure 28-24. Standby Supply Current vs. VCC (6MHz Xtal, Watchdog Timer Disabled)
28.6 Pin Pull-up
Figure 28-25. I/O Pin Pull-up Resistor Current vs. Input Voltage (VCC = 5V)
25 °C
0
20
40
60
80
100
120
2.5 3 3.5 4 4.5 5 5.5
VCC (V)
ICC (uA)
0
20
40
60
80
100
120
140
0123456
VOP (V)
IOP (uA)
85 °C
25 °C
-40 °CATmega8A [DATASHEET] 248
8159E–AVR–02/2013
Figure 28-26. I/O Pin Pull-up Resistor Current vs. Input Voltage (VCC = 2.7V)
Figure 28-27. Reset Pull-up Resistor Current vs. Reset Pin Voltage (VCC = 5V)
85 °C
25 °C
-40 °C
0
10
20
30
40
50
60
70
80
0 0.5 1 1.5 2 2.5 3
VOP (V)
IOP (uA)
85 °C
25 °C
-40 °C
0
20
40
60
80
100
120
012345
VRESET (V)
IRESET (uA)ATmega8A [DATASHEET] 249
8159E–AVR–02/2013
Figure 28-28. Reset Pull-up Resistor Current vs. Reset Pin Voltage (VCC = 2.7V)
28.7 Pin Driver Strength
Figure 28-29. I/O Pin Output Voltage vs. Source Current (VCC = 5.0V)
85 °C
25 °C
-40 °C
0
10
20
30
40
50
60
0 0.5 1 1.5 2 2.5 3
VRESET (V)
IRESET (uA)
85 °C
25 °C
-40 °C
4.3
4.4
4.5
4.6
4.7
4.8
4.9
5
0246 8 10 12 14 16 18 20
IOH (mA)
VOH (
V)ATmega8A [DATASHEET] 250
8159E–AVR–02/2013
Figure 28-30. I/O Pin Output Voltage vs. Source Current (VCC = 3.0V)
Figure 28-31. I/O Pin Output Voltage vs. Sink Current (VCC = 5.0V)
85 °C
25 °C
-40 °C
1
1.5
2
2.5
3
3.5
0 4 8 12 16 20
IOH (mA)
VOH (
V)
85 °C
25 °C
-40 °C
0
0.1
0.2
0.3
0.4
0.5
0.6
0 4 8 12 16 20
IOL (mA)
VOL (
V)ATmega8A [DATASHEET] 251
8159E–AVR–02/2013
Figure 28-32. I/O Pin Output Voltage vs. Sink Current (VCC = 3.0V)
Figure 28-33. Reset Pin as I/O - Pin Source Current vs. Output Voltage (VCC = 5.0V)
85 °C
25 °C
-40 °C
0
0.2
0.4
0.6
0.8
1
0246 8 10 12 14 16 18 20
IOL (mA)
VOL (
V)
0
1
2
3
4
5
2 2.5 3 3.5 4 4.5
VOH (V)
Current (mA)
85 °C
25 °C
-40 °CATmega8A [DATASHEET] 252
8159E–AVR–02/2013
Figure 28-34. Reset Pin as I/O - Pin Source Current vs. Output Voltage (VCC = 2.7V)
Figure 28-35. Reset Pin as I/O - Pin Sink Current vs. Output Voltage (VCC = 5.0V)
0
0.5
1
1.5
2
2.5
3
3.5
4
0 0.5 1 1.5 2 2.5
VOH (V)
Current (mA)
85 °C
25 °C
-40 °C
85 °C
25 °C
-40 °C
0
2
4
6
8
10
12
14
0 0.5 1 1.5 2
VOL (V)
Current (mA)ATmega8A [DATASHEET] 253
8159E–AVR–02/2013
Figure 28-36. Reset Pin as I/O - Pin Sink Current vs. Output Voltage (VCC = 2.7V)
28.8 Pin Thresholds and Hysteresis
Figure 28-37. I/O Pin Input Threshold Voltage vs. VCC (VIH, I/O Pin Read as “1”)
85 °C
25 °C
-40 °C
0
0.5
1
1.5
2
2.5
3
3.5
4
4.5
0 0.5 1 1.5 2
VOL (V)
Current (mA)
85 °C
25 °C
-40 °C
1
1.5
2
2.5
3
2.5 3 3.5 4 4.5 5 5.5
VCC (V)
Threshold (
V)ATmega8A [DATASHEET] 254
8159E–AVR–02/2013
Figure 28-38. I/O Pin Input Threshold Voltage vs. VCC (VIL, I/O Pin Read as “0”)
Figure 28-39. I/O Pin Input Hysteresis vs. VCC
85 °C
25 °C
-40 °C
0
0.5
1
1.5
2
2.5
2.5 3 3.5 4 4.5 5 5.5
VCC (V)
Threshold (
V)
85 °C
25 °C
-40 °C
0.2
0.25
0.3
0.35
0.4
0.45
0.5
2.5 3 3.5 4 4.5 5 5.5
VCC (V)
Input Hysteresis (m
V)ATmega8A [DATASHEET] 255
8159E–AVR–02/2013
Figure 28-40. Reset Pin as I/O - Input Threshold Voltage vs. VCC (VIH, Reset Pin Read as “1”)
Figure 28-41. Reset Pin as I/O - Input Threshold Voltage vs. VCC (VIL, Reset Pin Read as “0”)
85 °C
25 °C
-40 °C
0
0.5
1
1.5
2
2.5
3
2.5 3 3.5 4 4.5 5 5.5
VCC (V)
Threshold (
V)
85 °C
25 °C
-40 °C
0
0.5
1
1.5
2
2.5
2.5 3 3.5 4 4.5 5 5.5
VCC (V)
Threshold (
V)ATmega8A [DATASHEET] 256
8159E–AVR–02/2013
Figure 28-42. Reset Pin as I/O - Pin Hysteresis vs. VCC
Figure 28-43. Reset Input Threshold Voltage vs. VCC (VIH, Reset Pin Read as “1”)
85 °C
25 °C
-40 °C
0
0.1
0.2
0.3
0.4
0.5
2.5 3 3.5 4 4.5 5 5.5
VCC (V)
Input Hysteresis (m
V)
85 °C
25 °C
-40 °C
0
0.5
1
1.5
2
2.5
2.5 3 3.5 4 4.5 5 5.5
VCC (V)
Threshold (
V)ATmega8A [DATASHEET] 257
8159E–AVR–02/2013
Figure 28-44. Reset Input Threshold Voltage vs. VCC (VIL, Reset Pin Read as “0”)
Figure 28-45. Reset Input Pin Hysteresis vs. VCC
85 °C
25 °C
-40 °C
0
0.5
1
1.5
2
2.5
2.5 3 3.5 4 4.5 5 5.5
VCC (V)
Threshold (
V)
85 °C
25 °C
-40 °C
0
0.1
0.2
0.3
0.4
0.5
2.5 3 3.5 4 4.5 5 5.5
VCC (V)
Input Hysteresis (m
V)ATmega8A [DATASHEET] 258
8159E–AVR–02/2013
28.9 Bod Thresholds and Analog Comparator Offset
Figure 28-46. BOD Thresholds vs. Temperature (BOD Level is 4.0V)
Figure 28-47. BOD Thresholds vs. Temperature (BOD Level is 2.7v)
3.7
3.75
3.8
3.85
3.9
3.95
-40 -30 -20 -10 0 10 20 30 40 50 60 70 80 90
Threshold (
V)
Rising Vcc
Falling Vcc
Temperature (°C)
2.5
2.55
2.6
2.65
2.7
2.75
2.8
-40 -30 -20 -10 0 10 20 30 40 50 60 70 80 90
Temperature (°C)
Threshold (
V)
Rising Vcc
Falling VccATmega8A [DATASHEET] 259
8159E–AVR–02/2013
Figure 28-48. Bandgap Voltage vs. VCC
Figure 28-49. Analog Comparator Offset Voltage vs. Common Mode Voltage (VCC = 5V)
85 °C
25 °C
-40 °C
1.18
1.185
1.19
1.195
1.2
1.205
1.21
1.215
2.5 3 3.5 4 4.5 5 5.5
Vcc (V)
Bandgap
Voltage (
V) Comparator Offset Voltage (V)
0.5 1 1.5 2 2.5 3 3.5 4 4.5 5
Common Mode Voltage (V)
85 °C
25 °C
-40 °C
-0.004
-0.003
-0.002
-0.001
0
0.001
0.002
0.003ATmega8A [DATASHEET] 260
8159E–AVR–02/2013
Figure 28-50. Analog Comparator Offset Voltage vs. Common Mode Voltage (VCC = 2.8V)
28.10 Internal Oscillator Speed
Figure 28-51. Watchdog Oscillator Frequency vs. VCC
-0.004
-0.003
-0.002
-0.001
0
0.001
0.002
0.003
0.25 0.50 0.75 1.00 1.25 1.5 1.75 2.00 2.25 2.75
Common Mode Voltage (V)
2.50
Comparator Offset Voltage (V)
85 °C
25 °C
-40 °C
85 °C
25 °C
-40 °C
925
950
975
1000
1025
1050
2.5 3 3.5 4 4.5 5 5.5
VCC (V)
FRC (kHz)ATmega8A [DATASHEET] 261
8159E–AVR–02/2013
Figure 28-52. Calibrated 8MHz RC Oscillator Frequency vs. Temperature
Figure 28-53. Calibrated 8MHz RC Oscillator Frequency vs. VCC
5.5 V
4.0 V
2.7 V
6
6,5
7
7,5
8
8,5
-40 -20 0 20 40 60 80 100
Temperature (°C)
FRC (MHz)
85 °C
25 °C
-40 °C
6
6.5
7
7.5
8
8.5
2.5 3 3.5 4 4.5 5 5.5
VCC (V)
FRC (MHz)ATmega8A [DATASHEET] 262
8159E–AVR–02/2013
Figure 28-54. Calibrated 8MHz RC Oscillator Frequency vs. Osccal Value
Figure 28-55. Calibrated 4MHz RC Oscillator Frequency vs. Temperature
25 °C
2
4
6
8
10
12
14
0 16 32 48 64 80 96 112 128 144 160 176 192 208 224 240 256
OSCCAL VALUE
FRC (MHz)
5.5 V
4.0 V
2.7 V
3.5
3.6
3.7
3.8
3.9
4
4.1
-40 -20 0 20 40 60 80 100
FRC (MHz)
Temperature (°C)ATmega8A [DATASHEET] 263
8159E–AVR–02/2013
Figure 28-56. Calibrated 4MHz RC Oscillator Frequency vs. VCC
Figure 28-57. Calibrated 4MHz RC Oscillator Frequency vs. Osccal Value
85 °C
25 °C
-40 °C
3.5
3.6
3.7
3.8
3.9
4
4.1
2.5 3 3.5 4 4.5 5 5.5
VCC (V)
FRC (MHz)
25 °C
1
2
3
4
5
6
7
0 16 32 48 64 80 96 112 128 144 160 176 192 208 224 240 256
OSCCAL VALUE
FRC (MHz)ATmega8A [DATASHEET] 264
8159E–AVR–02/2013
Figure 28-58. Calibrated 2MHz RC Oscillator Frequency vs. Temperature
Figure 28-59. Calibrated 2MHz RC Oscillator Frequency vs. VCC
5.5 V
4.0 V
2.7 V
1.75
1.8
1.85
1.9
1.95
2
2.05
2.1
-40 -20 0 20 40 60 80 100
FRC (MHz)
Temperature (°C)
85 °C
25 °C
-40 °C
1.8
1.85
1.9
1.95
2
2.05
2.1
2.5 3 3.5 4 4.5 5 5.5
VCC (V)
FRC (MHz)ATmega8A [DATASHEET] 265
8159E–AVR–02/2013
Figure 28-60. Calibrated 2MHz RC Oscillator Frequency vs. Osccal Value
Figure 28-61. Calibrated 1MHz RC Oscillator Frequency vs. Temperature
25 °C
0.5
1
1.5
2
2.5
3
0 16 32 48 64 80 96 112 128 144 160 176 192 208 224 240 256
OSCCAL VALUE
FRC (MHz)
5.5 V
4.0 V
2.7 V
0.9
0.92
0.94
0.96
0.98
1
1.02
1.04
-40 -20 0 20 40 60 80 100
FRC (MHz)
Temperature (°C)ATmega8A [DATASHEET] 266
8159E–AVR–02/2013
Figure 28-62. Calibrated 1MHz RC Oscillator Frequency vs. VCC
Figure 28-63. Calibrated 1MHz RC Oscillator Frequency vs. Osccal Value
85 °C
25 °C
-40 °C
0,9
0.92
0.94
0.96
0.98
1
1.02
1.04
2.5 3 3.5 4 4.5 5 5.5
VCC (V)
FRC (MHz)
25 °C
0.2
0.4
0.6
0.8
1
1.2
1.4
1.6
0 16 32 48 64 80 96 112 128 144 160 176 192 208 224 240 256
OSCCAL VALUE
FRC (MHz)ATmega8A [DATASHEET] 267
8159E–AVR–02/2013
28.11 Current Consumption of Peripheral Units
Figure 28-64. Brown-out Detector Current vs. VCC
Figure 28-65. ADC Current vs. VCC (AREF = AVCC)
85 °C
25 °C
-40 °C
0
4
8
12
16
20
2.5 3 3.5 4 4.5 5 5.5
VCC (V)
ICC (uA)
85 °C
25 °C
-40 °C
100
125
150
175
200
225
250
275
300
2.5 3 3.5 4 4.5 5 5.5
VCC (V)
ICC (uA)ATmega8A [DATASHEET] 268
8159E–AVR–02/2013
Figure 28-66. AREF External Reference Current vs. VCC
Figure 28-67. 32kHz TOSC Current vs. VCC (Watchdog Timer Disabled)
85 °C
25 °C
-40 °C
40
60
80
100
120
140
160
2.5 3 3.5 4 4.5 5 5.5
VCC (V)
ICC (uA)
85 °C
25 °C
-40 °C
0
2
4
6
8
10
2.5 3 3.5 4 4.5 5 5.5
VCC (V)
ICC (uA)ATmega8A [DATASHEET] 269
8159E–AVR–02/2013
Figure 28-68. Watchdog Timer Current vs. VCC
Figure 28-69. Analog Comparator Current vs. VCC
85 °C
25 °C
-40 °C
0
4
8
12
16
20
2.5 3 3.5 4 4.5 5 5.5
VCC (V)
ICC (uA)
85 °C
25 °C
-40 °C
0
10
20
30
40
50
60
70
2.5 3 3.5 4 4.5 5 5.5
VCC (V)
ICC (uA)ATmega8A [DATASHEET] 270
8159E–AVR–02/2013
Figure 28-70. Programming Current vs. VCC
28.12 Current Consumption in Reset and Reset Pulsewidth
Figure 28-71. Reset Supply Current vs. VCC (0.1 - 1.0MHz, Excluding Current Through The Reset Pull-up)
85 °C
25 °C
-40 °C
0
1
2
3
4
5
6
2.5 3 3.5 4 4.5 5 5.5
VCC (V)
ICC (mA)
5.5 V
5.0 V
4.5 V
4.0 V
3.6 V
3.3 V
2.7 V
0
0.5
1
1.5
2
2.5
3
0 0.1 0.2 0.3 0.4 0.5 0.6 0.7 0.8 0.9 1
Frequency (MHz)
ICC (mA)ATmega8A [DATASHEET] 271
8159E–AVR–02/2013
Figure 28-72. Reset Supply Current vs. VCC (1 - 16MHz, Excluding Current Through The Reset Pull-up)
Figure 28-73. Reset Pulse Width vs. VCC
5.5 V
5.0 V
4.5 V
4.0 V
3.6 V
3.3 V
2.7 V
0
2
4
6
8
10
12
0246 8 10 12 14 16
Frequency (MHz)
ICC (mA)
85 °C
25 °C
-40 °C
0
150
300
450
600
750
2,5 3 3,5 4 4,5 5 5,5
V CC (V)
Pulsewidth (ns)ATmega8A [DATASHEET] 272
8159E–AVR–02/2013
29. Typical Characteristics – TA = -40°C to 105°C
The following charts show typical behavior. These figures are not tested during manufacturing. All current consumption
measurements are performed with all I/O pins configured as inputs and with internal pull-ups enabled. A
sine wave generator with rail-to-rail output is used as clock source.
All Active- and Idle current consumption measurements are done with all bits in the PRR registers set and thus, the
corresponding I/O modules are turned off. Also the Analog Comparator is disabled during these measurements.
The power consumption in Power-down mode is independent of clock selection.
The current consumption is a function of several factors such as: operating voltage, operating frequency, loading of
I/O pins, switching rate of I/O pins, code executed and ambient temperature. The dominating factors are operating
voltage and frequency.
The current drawn from capacitive loaded pins may be estimated (for one pin) as CL*VCC*f where CL = load capacitance,
VCC = operating voltage and f = average switching frequency of I/O pin.
The parts are characterized at frequencies higher than test limits. Parts are not guaranteed to function properly at
frequencies higher than the ordering code indicates.
The difference between current consumption in Power-down mode with Watchdog Timer enabled and Power-down
mode with Watchdog Timer disabled represents the differential current drawn by the Watchdog Timer.
29.1 ATmega8A Typical Characteristics
29.1.1 Active Supply Current
Figure 29-1. Active Supply Current vs. VCC (Internal RC Oscillator, 8 MHz)
105 °C
85 °C
25 °C
-40 °C
2.5
3.5
4.5
5.5
6.5
7.5
8.5
9.5
2.5 2.8 3.1 3.4 3.7 4 4.3 4.6 4.9 5.2 5.5
VCC (V)
ICC (mA)ATmega8A [DATASHEET] 273
8159E–AVR–02/2013
Figure 29-2. Active Supply Current vs. VCC (Internal RC Oscillator, 4 MHz)
Figure 29-3. Active Supply Current vs. VCC (Internal RC Oscillator, 2 MHz)
105 °C
85 °C
25 °C
-40 °C
1.5
2
2.5
3
3.5
4
4.5
5
5.5
2.5 2.8 3.1 3.4 3.7 4 4.3 4.6 4.9 5.2 5.5
VCC (V)
ICC (mA)
105 °C
85 °C
25 °C
-40 °C
1
1.25
1.5
1.75
2
2.25
2.5
2.75
3
3.25
3.5
2.5 2.8 3.1 3.4 3.7 4 4.3 4.6 4.9 5.2 5.5
VCC (V)
ICC (mA)ATmega8A [DATASHEET] 274
8159E–AVR–02/2013
Figure 29-4. Active Supply Current vs. VCC (Internal RC Oscillator, 1 MHz)
Figure 29-5. Active Supply Current vs. VCC (32 kHz External Oscillator)
105 °C
85 °C
25 °C
-40 °C
0.8
0.9
1
1.1
1.2
1.3
1.4
1.5
1.6
1.7
1.8
2.5 2.8 3.1 3.4 3.7 4 4.3 4.6 4.9 5.2 5.5
VCC (V)
ICC (mA)
105 °C
85 °C
25 °C
-40 °C
35
38
41
44
47
50
53
56
59
62
65
2.5 2.8 3.1 3.4 3.7 4 4.3 4.6 4.9 5.2 5.5
VCC (V)
ICC (uA)ATmega8A [DATASHEET] 275
8159E–AVR–02/2013
29.1.2 Idle Supply Current
Figure 29-6. Idle Supply Current vs. VCC (Internal RC Oscillator, 8 MHz)
Figure 29-7. Idle Supply Current vs. VCC (Internal RC Oscillator, 4 MHz)
105 °C
85 °C
25 °C
-40 °C
1.2
1.5
1.8
2.1
2.4
2.7
3
3.3
3.6
3.9
4.2
2.5 2.8 3.1 3.4 3.7 4 4.3 4.6 4.9 5.2 5.5
VCC (V)
ICC (mA)
105 °C
85 °C
25 °C
-40 °C
0.7
0.9
1.1
1.3
1.5
1.7
1.9
2.1
2.5 2.8 3.1 3.4 3.7 4 4.3 4.6 4.9 5.2 5.5
VCC (V)
ICC (mA)ATmega8A [DATASHEET] 276
8159E–AVR–02/2013
Figure 29-8. Idle Supply Current vs. VCC (Internal RC Oscillator, 2 MHz)
Figure 29-9. Idle Supply Current vs. VCC (Internal RC Oscillator, 1 MHz)
105 °C
85 °C
25 °C
-40 °C
0.2
0.3
0.4
0.5
0.6
0.7
0.8
0.9
2.5 2.8 3.1 3.4 3.7 4 4.3 4.6 4.9 5.2 5.5
VCC (V)
ICC (mA)
105 °C
85 °C
25 °C
-40 °C
0.1
0.15
0.2
0.25
0.3
0.35
0.4
0.45
0.5
2.5 2.8 3.1 3.4 3.7 4 4.3 4.6 4.9 5.2 5.5
VCC (V)
ICC (mA)ATmega8A [DATASHEET] 277
8159E–AVR–02/2013
Figure 29-10. Idle Supply Current vs. VCC (32 kHz External RC Oscillator)
29.1.3 Power-down Supply Current
Figure 29-11. Power-down Supply Current vs. VCC (Watchdog Timer Disabled)
105 °C
85 °C
25 °C
-40 °C
6.5
8.5
10.5
12.5
14.5
16.5
18.5
20.5
22.5
24.5
2.5 2.8 3.1 3.4 3.7 4 4.3 4.6 4.9 5.2 5.5
VCC (V)
ICC (uA)
105 °C
85 °C
25 °C
-40 °C
0
0.5
1
1.5
2
2.5
3
3.5
4
4.5
2.5 2.8 3.1 3.4 3.7 4 4.3 4.6 4.9 5.2 5.5
VCC (V)
ICC (uA)ATmega8A [DATASHEET] 278
8159E–AVR–02/2013
Figure 29-12. Power-down Supply Current vs. VCC (Watchdog Timer Enabled)
29.1.4 Power-save Supply Current
Figure 29-13. Power-save Supply Current vs. VCC (Watchdog Timer Disabled)
105 °C
85 °C
25 °C
-40 °C
3
6
9
12
15
18
21
24
2.5 2.8 3.1 3.4 3.7 4 4.3 4.6 4.9 5.2 5.5
VCC (V)
ICC (uA)
105 °C
85 °C
25 °C
-40 °C
4
5
6
7
8
9
10
11
12
13
14
15
2.5 2.8 3.1 3.4 3.7 4 4.3 4.6 4.9 5.2 5.5
VCC (V)
ICC (uA)ATmega8A [DATASHEET] 279
8159E–AVR–02/2013
29.1.5 Standby Supply Current
Figure 29-14. Standby Supply Current vs. VCC (32 kHz External RC Oscillator)
29.1.6 Pin Pull-up
Figure 29-15. I/O Pin Pull-up Resistor Current vs. Input Voltage (VCC = 5V)
105 °C
85 °C
25 °C
-40 °C
7
9
11
13
15
17
19
21
23
25
2.5 2.8 3.1 3.4 3.7 4 4.3 4.6 4.9 5.2 5.5
VCC (V)
ICC (uA)
0
20
40
60
80
100
120
140
0 0.5 1 1.5 2 2.5 3 3.5 4 4.5 5
VOP (V)
IOP (uA)
105 °C
85 °C
25 °C
-40 °CATmega8A [DATASHEET] 280
8159E–AVR–02/2013
Figure 29-16. I/O Pin Pull-up Resistor Current vs. Input Voltage (VCC = 2.7V)
Figure 29-17. Reset Pull-up Resistor Current vs. Reset Pin Voltage (VCC = 5V)
105 °C
85 °C
25 °C
-40 °C
0
10
20
30
40
50
60
70
80
0 0.3 0.6 0.9 1.2 1.5 1.8 2.1 2.4 2.7
VOP (V)
IOP (uA)
0
10
20
30
40
50
60
70
80
90
100
110
0 0.5 1 1.5 2 2.5 3 3.5 4 4.5 5
VRESET (V)
IRESET (uA)
105 °C
85 °C
25 °C
-40 °CATmega8A [DATASHEET] 281
8159E–AVR–02/2013
Figure 29-18. Reset Pull-up Resistor Current vs. Reset Pin Voltage (VCC = 2.7V)
29.1.7 Pin Driver Strength
Figure 29-19. I/O Pin Output Voltage vs. Source Current (VCC = 5V)
105 °C
85 °C
25 °C
-40 °C
0
10
20
30
40
50
60
0 0.3 0.6 0.9 1.2 1.5 1.8 2.1 2.4 2.7
VRESET (V)
IRESET (uA)
105 °C
85 °C
25 °C
-40 °C
4.3
4.4
4.5
4.6
4.7
4.8
4.9
5
5.1
0246 8 10 12 14 16 18 20
IOH (mA)
VOH (
V)ATmega8A [DATASHEET] 282
8159E–AVR–02/2013
Figure 29-20. I/O Pin Output Voltage vs. Source Current (VCC = 3V)
Figure 29-21. I/O Pin Output Voltage vs. Sink Current (VCC = 5V)
1.7
1.9
2.1
2.3
2.5
2.7
2.9
3.1
0246 8 10 12 14 16 18 20
IOH (mA)
VOH (
V)
105 °C
85 °C
25 °C
-40 °C
105 °C
85 °C
25 °C
-40 °C
0
0.1
0.2
0.3
0.4
0.5
0.6
0246 8 10 12 14 16 18 20
IOL (mA)
VOL (
V)ATmega8A [DATASHEET] 283
8159E–AVR–02/2013
Figure 29-22. I/O Pin Output Voltage vs. Sink Current (VCC = 3V)
29.1.8 Pin Threshold and Hysteresis
Figure 29-23. I/O Pin Input Threshold vs. VCC (VIH , I/O Pin Read as ‘1’)
105 °C
85 °C
25 °C
-40 °C
0
0.1
0.2
0.3
0.4
0.5
0.6
0.7
0.8
0.9
1
0246 8 10 12 14 16 18 20
IOL(mA)
VOL (
V)
105 °C
85 °C
25 °C
-40 °C
1.2
1.4
1.6
1.8
2
2.2
2.4
2.6
2.8
3
2.5 2.8 3.1 3.4 3.7 4 4.3 4.6 4.9 5.2 5.5
VCC (V)
Threshold (
V)ATmega8A [DATASHEET] 284
8159E–AVR–02/2013
Figure 29-24. I/O Pin Input Threshold vs. VCC (VIL, I/O Pin Read as ‘0’)
Figure 29-25. I/O Pin Input Hysteresis vs. VCC
105 °C
85 °C
25 °C
-40 °C
1
1.3
1.6
1.9
2.2
2.5
2.5 2.8 3.1 3.4 3.7 4 4.3 4.6 4.9 5.2 5.5
VCC (V)
Threshold (
V)
105 °C
85 °C
25 °C
-40 °C
0.25
0.3
0.35
0.4
0.45
0.5
2.5 2.8 3.1 3.4 3.7 4 4.3 4.6 4.9 5.2 5.5
VCC (V)
Input Hysteresis (m
V)ATmega8A [DATASHEET] 285
8159E–AVR–02/2013
Figure 29-26. Reset Pin as I/O - Input Threshold vs. VCC (VIH , I/O Pin Read as ‘1’)
Figure 29-27. Reset Pin as I/O - Input Threshold vs. VCC (VIL, I/O Pin Read as ‘0’)
105 °C
85 °C
25 °C
-40 °C
1.3
1.6
1.9
2.2
2.5
2.8
3.1
2.5 2.8 3.1 3.4 3.7 4 4.3 4.6 4.9 5.2 5.5
VCC (V)
Threshold (
V)
105 °C
85 °C
25 °C
-40 °C
0.9
1.1
1.3
1.5
1.7
1.9
2.1
2.3
2.5 2.8 3.1 3.4 3.7 4 4.3 4.6 4.9 5.2 5.5
VCC (V)
Threshold (
V)ATmega8A [DATASHEET] 286
8159E–AVR–02/2013
Figure 29-28. Reset Pin as I/O - Pin Hysteresis vs. VCC
Figure 29-29. Reset Input Threshold vs. VCC (VIH , Reset Pin Read as ‘1’)
105 °C
85 °C
25 °C
-40 °C
0.4
0.45
0.5
0.55
0.6
0.65
0.7
2.5 2.8 3.1 3.4 3.7 4 4.3 4.6 4.9 5.2 5.5
VCC (V)
Input Hysteresis (m
V)
105 °C
85 °C
25 °C
-40 °C
0.9
1.1
1.3
1.5
1.7
1.9
2.1
2.3
2.5
2.5 2.8 3.1 3.4 3.7 4 4.3 4.6 4.9 5.2 5.5
VCC (V)
Threshold (
V)ATmega8A [DATASHEET] 287
8159E–AVR–02/2013
Figure 29-30. Reset Input Threshold vs. VCC (VIL, Reset Pin Read as ‘0’)
Figure 29-31. Reset Pin Input Hysteresis vs. VCC
105 °C
85 °C
25 °C
-40 °C
1
1.2
1.4
1.6
1.8
2
2.2
2.4
2.5 2.8 3.1 3.4 3.7 4 4.3 4.6 4.9 5.2 5.5
VCC (V)
Threshold (
V)
105 °C
85 °C
25 °C
-40 °C
0
0.05
0.1
0.15
0.2
0.25
0.3
0.35
0.4
0.45
0.5
2.5 2.8 3.1 3.4 3.7 4 4.3 4.6 4.9 5.2 5.5
VCC (V)
Input Hysteresis (m
V)ATmega8A [DATASHEET] 288
8159E–AVR–02/2013
29.1.9 BOD Threshold
Figure 29-32. BOD Threshold vs. Temperature (VCC = 4.3V)
Figure 29-33. BOD Threshold vs. Temperature (VCC = 2.7V)
Rising Vcc
Falling Vcc
3.8
3.82
3.84
3.86
3.88
3.9
3.92
3.94
3.96
3.98
4
-40 -30 -20 -10 0 10 20 30 40 50 60 70 80 90 100 110
Temperature (°C)
Threshold (
V)
Rising Vcc
Falling Vcc
2.47
2.49
2.51
2.53
2.55
2.57
2.59
2.61
2.63
-40 -30 -20 -10 0 10 20 30 40 50 60 70 80 90 100 110
Temperature (°C)
Threshold (
V)ATmega8A [DATASHEET] 289
8159E–AVR–02/2013
Figure 29-34. Bandgap Voltage vs. Temperature
Figure 29-35. Bandgap Voltage vs. VCC
5.5V
5.0V
4.0V
3.3V
2.7V
1.8V
1.175
1.18
1.185
1.19
1.195
1.2
1.205
1.21
1.215
-40 -30 -20 -10 0 10 20 30 40 50 60 70 80 90 100 110
Temperature (°C)
Bandgap
Voltage (
V)
105 °C
85 °C
25 °C
-40 °C
1.175
1.18
1.185
1.19
1.195
1.2
1.205
1.21
1.215
1.5 2 2.5 3 3.5 4 4.5 5 5.5
VCC (V)
Bandgap
Voltage (
V)ATmega8A [DATASHEET] 290
8159E–AVR–02/2013
29.1.10 Internal Oscillator Speed
Figure 29-36. Watchdog Oscillator Frequency vs. VCC
Figure 29-37. Watchdog Oscillator Frequency vs. Temperature
105 °C
85 °C
25 °C
-40 °C
980
1000
1020
1040
1060
1080
1100
1120
2.5 2.8 3.1 3.4 3.7 4 4.3 4.6 4.9 5.2 5.5
VCC (V)
FRC (kHz)
5.5 V
5.0 V
4.5 V
4.0 V
3.6 V
2.7 V
970
990
1010
1030
1050
1070
1090
1110
1130
-40 -30 -20 -10 0 10 20 30 40 50 60 70 80 90 100 110
Temperature (°C)
FRC (kHz)ATmega8A [DATASHEET] 291
8159E–AVR–02/2013
Figure 29-38. Calibrated 8 MHz RC Oscillator vs. Temperature
Figure 29-39. Calibrated 8 MHz RC Oscillator vs. VCC
5.5 V
5.0 V
4.5 V
4.0 V
3.6 V
3.0 V
2.7 V
6.6
6.8
7
7.2
7.4
7.6
7.8
8
8.2
8.4
-40 -30 -20 -10 0 10 20 30 40 50 60 70 80 90 100 110
Temperature (°C)
FRC (MHz)
105 °C
85 °C
25 °C
-40 °C
6.6
6.8
7
7.2
7.4
7.6
7.8
8
8.2
8.4
2.5 2.8 3.1 3.4 3.7 4 4.3 4.6 4.9 5.2 5.5
VCC (V)
FRC (MHz)ATmega8A [DATASHEET] 292
8159E–AVR–02/2013
Figure 29-40. Calibrated 8 MHz RC Oscillator vs. OSCCAL Value
Figure 29-41. Calibrated 4 MHz RC Oscillator vs. Temperature
105 °C
85 °C
25 °C
-40 °C
2
4
6
8
10
12
14
0 16 32 48 64 80 96 112 128 144 160 176 192 208 224 240 256
OSCCAL (X1)
FRC (MHz)
5.5 V
5.0 V
4.5 V
4.0 V
3.6 V
3.0 V
2.7 V
3.55
3.65
3.75
3.85
3.95
4.05
4.15
-40 -30 -20 -10 0 10 20 30 40 50 60 70 80 90 100 110
Temperature (°C)
FRC (MHz)ATmega8A [DATASHEET] 293
8159E–AVR–02/2013
Figure 29-42. Calibrated 4 MHz RC Oscillator vs. VCC
Figure 29-43. Calibrated 4 MHz RC Oscillator vs. OSCCAL Value
105 °C
85 °C
25 °C
-40 °C
3.6
3.65
3.7
3.75
3.8
3.85
3.9
3.95
4
4.05
4.1
2.5 2.8 3.1 3.4 3.7 4 4.3 4.6 4.9 5.2 5.5
VCC (V)
FRC (MHz)
105 °C
85 °C
25 °C
-40 °C
1
2
3
4
5
6
7
8
0 16 32 48 64 80 96 112 128 144 160 176 192 208 224 240 256
OSCCAL (X1)
FRC (MHz)ATmega8A [DATASHEET] 294
8159E–AVR–02/2013
Figure 29-44. Calibrated 2 MHz RC Oscillator vs. Temperature
Figure 29-45. Calibrated 2 MHz RC Oscillator vs. VCC
5.5 V
5.0 V
4.5 V
4.0 V
3.6 V
3.0 V
2.7 V
1.78
1.81
1.84
1.87
1.9
1.93
1.96
1.99
2.02
2.05
-40 -30 -20 -10 0 10 20 30 40 50 60 70 80 90 100 110
Temperature (°C)
FRC (MHz)
105 °C
85 °C
25 °C
-40 °C
1.8
1.83
1.86
1.89
1.92
1.95
1.98
2.01
2.04
2.07
2.5 2.8 3.1 3.4 3.7 4 4.3 4.6 4.9 5.2 5.5
VCC (V)
FRC (MHz)ATmega8A [DATASHEET] 295
8159E–AVR–02/2013
Figure 29-46. Calibrated 2 MHz RC Oscillator vs. OSCCAL Value
Figure 29-47. Calibrated 1 MHz RC Oscillator vs. Temperature
105 °C
85 °C
25 °C
-40 °C
0.8
1.1
1.4
1.7
2
2.3
2.6
2.9
3.2
3.5
0 16 32 48 64 80 96 112 128 144 160 176 192 208 224 240 256
OSCCAL (X1)
FRC (MHz)
5.5 V
5.0 V
4.5 V
4.0 V
3.6 V
3.0 V
2.7 V
0.91
0.93
0.95
0.97
0.99
1.01
1.03
-40 -30 -20 -10 0 10 20 30 40 50 60 70 80 90 100 110
Temperature (°C)
FRC (MHz)ATmega8A [DATASHEET] 296
8159E–AVR–02/2013
Figure 29-48. Calibrated 1 MHz RC Oscillator vs. VCC
Figure 29-49. Calibrated 1 MHz RC Oscillator vs. OSCCAL Value
105 °C
85 °C
25 °C
-40 °C
0.9
0.92
0.94
0.96
0.98
1
1.02
1.04
2.5 2.8 3.1 3.4 3.7 4 4.3 4.6 4.9 5.2 5.5
VCC (V)
FRC (MHz)
105 °C
85 °C
25 °C
-40 °C
0.2
0.4
0.6
0.8
1
1.2
1.4
1.6
1.8
0 16 32 48 64 80 96 112 128 144 160 176 192 208 224 240 256
OSCCAL (X1)
FRC (MHz)ATmega8A [DATASHEET] 297
8159E–AVR–02/2013
29.1.11 Current Consumption of Peripheral Units
Figure 29-50. Brown-out Detector Current vs. VCC
Figure 29-51. ADC Current vs. VCC (AREF = AVCC)
105 °C
85 °C
25 °C
-40 °C
8
9
10
11
12
13
14
15
16
17
18
2.5 2.8 3.1 3.4 3.7 4 4.3 4.6 4.9 5.2 5.5
VCC (V)
ICC (uA)
105 °C
85 °C
25 °C
-40 °C
140
160
180
200
220
240
260
280
300
2.5 2.8 3.1 3.4 3.7 4 4.3 4.6 4.9 5.2 5.5
VCC (V)
ICC (uA)ATmega8A [DATASHEET] 298
8159E–AVR–02/2013
Figure 29-52. Watchdog Timer Current vs. VCC
Figure 29-53. Analog Comparator Current vs. VCC
4
6
8
10
12
14
16
18
20
2.5 2.8 3.1 3.4 3.7 4 4.3 4.6 4.9 5.2 5.5
VCC (V)
ICC (uA)
105 °C
85 °C
25 °C
-40 °C
32
36
40
44
48
52
56
60
64
68
72
2.5 2.8 3.1 3.4 3.7 4 4.3 4.6 4.9 5.2 5.5
VCC (V)
ICC (mA)
105 °C
85 °C
25 °C
-40 °CATmega8A [DATASHEET] 299
8159E–AVR–02/2013
Figure 29-54. Programming Current vs. VCC
29.1.12 Current Consumption in Reset and Reset Pulsewidth
Figure 29-55. Reset Supply Current vs. Vcc (0.1 - 1.0 MHz, Excluding Current Through the Reset Pull-up)
105 °C
85 °C
25 °C
-40 °C
0
1
2
3
4
5
6
2.5 2.8 3.1 3.4 3.7 4 4.3 4.6 4.9 5.2 5.5
VCC (V)
ICC (mA)
5.5 V
5.0 V
4.5 V
4.0 V
3.6 V
2.7 V
0
0.5
1
1.5
2
2.5
3
0 0.1 0.2 0.3 0.4 0.5 0.6 0.7 0.8 0.9 1
Frequency (MHz)
ICC (mA)ATmega8A [DATASHEET] 300
8159E–AVR–02/2013
Figure 29-56. Reset Supply Current vs. Vcc (1 - 16 MHz, Excluding Current Through the Reset Pull-up)
Figure 29-57. Minimum Reset Pulsewidth vs. Vcc
5.5 V
5.0 V
4.5 V
4.0 V
3.6 V
2.7 V
0
2
4
6
8
10
12
0246 8 10 12 14 16
Frequency (MHz)
ICC (mA)
105 °C
85 °C
25 °C
-40 °C
100
200
300
400
500
600
700
800
2.5 2.8 3.1 3.4 3.7 4 4.3 4.6 4.9 5.2 5.5
VCC (V)
Pulse
width (ns)ATmega8A [DATASHEET] 301
8159E–AVR–02/2013
30. Register Summary
Address Name Bit 7 Bit 6 Bit 5 Bit 4 Bit 3 Bit 2 Bit 1 Bit 0 Page
0x3F (0x5F) SREG I T H S V N Z C 8
0x3E (0x5E) SPH – – – – – SP10 SP9 SP8 10
0x3D (0x5D) SPL SP7 SP6 SP5 SP4 SP3 SP2 SP1 SP0 10
0x3C (0x5C) Reserved
0x3B (0x5B) GICR INT1 INT0 – – – – IVSEL IVCE 47, 65
0x3A (0x5A) GIFR INTF1 INTF0 – – – – – – 65
0x39 (0x59) TIMSK OCIE2 TOIE2 TICIE1 OCIE1A OCIE1B TOIE1 – TOIE0 69, 97, 115
0x38 (0x58) TIFR OCF2 TOV2 ICF1 OCF1A OCF1B TOV1 – TOV0 70, 97, 97
0x37 (0x57) SPMCR SPMIE RWWSB – RWWSRE BLBSET PGWRT PGERS SPMEN 205
0x36 (0x56) TWCR TWINT TWEA TWSTA TWSTO TWWC TWEN – TWIE 176
0x35 (0x55) MCUCR SE SM2 SM1 SM0 ISC11 ISC10 ISC01 ISC00 35, 64
0x34 (0x54) MCUCSR – – – – WDRF BORF EXTRF PORF 42
0x33 (0x53) TCCR0 – – – – – CS02 CS01 CS00 69
0x32 (0x52) TCNT0 Timer/Counter0 (8 Bits) 69
0x31 (0x51) OSCCAL Oscillator Calibration Register 31
0x30 (0x50) SFIOR – – – – ACME PUD PSR2 PSR10 55, 72, 115, 180
0x2F (0x4F) TCCR1A COM1A1 COM1A0 COM1B1 COM1B0 FOC1A FOC1B WGM11 WGM10 92
0x2E (0x4E) TCCR1B ICNC1 ICES1 – WGM13 WGM12 CS12 CS11 CS10 95
0x2D (0x4D) TCNT1H Timer/Counter1 – Counter Register High byte 96
0x2C (0x4C) TCNT1L Timer/Counter1 – Counter Register Low byte 96
0x2B (0x4B) OCR1AH Timer/Counter1 – Output Compare Register A High byte 96
0x2A (0x4A) OCR1AL Timer/Counter1 – Output Compare Register A Low byte 96
0x29 (0x49) OCR1BH Timer/Counter1 – Output Compare Register B High byte 96
0x28 (0x48) OCR1BL Timer/Counter1 – Output Compare Register B Low byte 96
0x27 (0x47) ICR1H Timer/Counter1 – Input Capture Register High byte 96
0x26 (0x46) ICR1L Timer/Counter1 – Input Capture Register Low byte 96
0x25 (0x45) TCCR2 FOC2 WGM20 COM21 COM20 WGM21 CS22 CS21 CS20 112
0x24 (0x44) TCNT2 Timer/Counter2 (8 Bits) 113
0x23 (0x43) OCR2 Timer/Counter2 Output Compare Register 114
0x22 (0x42) ASSR – – – – AS2 TCN2UB OCR2UB TCR2UB 114
0x21 (0x41) WDTCR – – – WDCE WDE WDP2 WDP1 WDP0 42
0x20(1) (0x40)(1) UBRRH URSEL – – – UBRR[11:8] 147
UCSRC URSEL UMSEL UPM1 UPM0 USBS UCSZ1 UCSZ0 UCPOL 145
0x1F (0x3F) EEARH – – – – – – – EEAR8 18
0x1E (0x3E) EEARL EEAR7 EEAR6 EEAR5 EEAR4 EEAR3 EEAR2 EEAR1 EEAR0 18
0x1D (0x3D) EEDR EEPROM Data Register 18
0x1C (0x3C) EECR – – – – EERIE EEMWE EEWE EERE 18
0x1B (0x3B) Reserved
0x1A (0x3A) Reserved
0x19 (0x39) Reserved
0x18 (0x38) PORTB PORTB7 PORTB6 PORTB5 PORTB4 PORTB3 PORTB2 PORTB1 PORTB0 62
0x17 (0x37) DDRB DDB7 DDB6 DDB5 DDB4 DDB3 DDB2 DDB1 DDB0 62
0x16 (0x36) PINB PINB7 PINB6 PINB5 PINB4 PINB3 PINB2 PINB1 PINB0 63
0x15 (0x35) PORTC – PORTC6 PORTC5 PORTC4 PORTC3 PORTC2 PORTC1 PORTC0 63
0x14 (0x34) DDRC – DDC6 DDC5 DDC4 DDC3 DDC2 DDC1 DDC0 63
0x13 (0x33) PINC – PINC6 PINC5 PINC4 PINC3 PINC2 PINC1 PINC0 63
0x12 (0x32) PORTD PORTD7 PORTD6 PORTD5 PORTD4 PORTD3 PORTD2 PORTD1 PORTD0 63
0x11 (0x31) DDRD DDD7 DDD6 DDD5 DDD4 DDD3 DDD2 DDD1 DDD0 63
0x10 (0x30) PIND PIND7 PIND6 PIND5 PIND4 PIND3 PIND2 PIND1 PIND0 63
0x0F (0x2F) SPDR SPI Data Register 124
0x0E (0x2E) SPSR SPIF WCOL – – – – – SPI2X 124
0x0D (0x2D) SPCR SPIE SPE DORD MSTR CPOL CPHA SPR1 SPR0 123
0x0C (0x2C) UDR USART I/O Data Register 143
0x0B (0x2B) UCSRA RXC TXC UDRE FE DOR PE U2X MPCM 144
0x0A (0x2A) UCSRB RXCIE TXCIE UDRIE RXEN TXEN UCSZ2 RXB8 TXB8 145
0x09 (0x29) UBRRL USART Baud Rate Register Low byte 147
0x08 (0x28) ACSR ACD ACBG ACO ACI ACIE ACIC ACIS1 ACIS0 180
0x07 (0x27) ADMUX REFS1 REFS0 ADLAR – MUX3 MUX2 MUX1 MUX0 190
0x06 (0x26) ADCSRA ADEN ADSC ADFR ADIF ADIE ADPS2 ADPS1 ADPS0 191
0x05 (0x25) ADCH ADC Data Register High byte 193
0x04 (0x24) ADCL ADC Data Register Low byte 193
0x03 (0x23) TWDR Two-wire Serial Interface Data Register 178
0x02 (0x22) TWAR TWA6 TWA5 TWA4 TWA3 TWA2 TWA1 TWA0 TWGCE 178
0x01 (0x21) TWSR TWS7 TWS6 TWS5 TWS4 TWS3 – TWPS1 TWPS0 177
0x00 (0x20) TWBR Two-wire Serial Interface Bit Rate Register 176ATmega8A [DATASHEET] 302
8159E–AVR–02/2013
Note: 1. Refer to the USART description for details on how to access UBRRH and UCSRC.
2. For compatibility with future devices, reserved bits should be written to zero if accessed. Reserved I/O memory addresses
should never be written.
3. Some of the Status Flags are cleared by writing a logical one to them. Note that the CBI and SBI instructions will operate on
all bits in the I/O Register, writing a one back into any flag read as set, thus clearing the flag. The CBI and SBI instructions
work with registers 0x00 to 0x1F only.ATmega8A [DATASHEET] 303
8159E–AVR–02/2013
31. Instruction Set Summary
Mnemonics Operands Description Operation Flags #Clocks
ARITHMETIC AND LOGIC INSTRUCTIONS
ADD Rd, Rr Add two Registers Rd Rd + Rr Z,C,N,V,H 1
ADC Rd, Rr Add with Carry two Registers Rd Rd + Rr + C Z,C,N,V,H 1
ADIW Rdl,K Add Immediate to Word Rdh:Rdl Rdh:Rdl + K Z,C,N,V,S 2
SUB Rd, Rr Subtract two Registers Rd Rd - Rr Z,C,N,V,H 1
SUBI Rd, K Subtract Constant from Register Rd Rd - K Z,C,N,V,H 1
SBC Rd, Rr Subtract with Carry two Registers Rd Rd - Rr - C Z,C,N,V,H 1
SBCI Rd, K Subtract with Carry Constant from Reg. Rd Rd - K - C Z,C,N,V,H 1
SBIW Rdl,K Subtract Immediate from Word Rdh:Rdl Rdh:Rdl - K Z,C,N,V,S 2
AND Rd, Rr Logical AND Registers Rd Rd Rr Z,N,V 1
ANDI Rd, K Logical AND Register and Constant Rd Rd K Z,N,V 1
OR Rd, Rr Logical OR Registers Rd Rd v Rr Z,N,V 1
ORI Rd, K Logical OR Register and Constant Rd Rd v K Z,N,V 1
EOR Rd, Rr Exclusive OR Registers Rd Rd Rr Z,N,V 1
COM Rd One’s Complement Rd 0xFF Rd Z,C,N,V 1
NEG Rd Two’s Complement Rd 0x00 Rd Z,C,N,V,H 1
SBR Rd,K Set Bit(s) in Register Rd Rd v K Z,N,V 1
CBR Rd,K Clear Bit(s) in Register Rd Rd (0xFF - K) Z,N,V 1
INC Rd Increment Rd Rd + 1 Z,N,V 1
DEC Rd Decrement Rd Rd 1 Z,N,V 1
TST Rd Test for Zero or Minus Rd Rd Rd Z,N,V 1
CLR Rd Clear Register Rd Rd Rd Z,N,V 1
SER Rd Set Register Rd 0xFF None 1
MUL Rd, Rr Multiply Unsigned R1:R0 Rd x Rr Z,C 2
MULS Rd, Rr Multiply Signed R1:R0 Rd x Rr Z,C 2
MULSU Rd, Rr Multiply Signed with Unsigned R1:R0 Rd x Rr Z,C 2
FMUL Rd, Rr Fractional Multiply Unsigned R1:R0 (Rd x Rr) << 1 Z,C 2
FMULS Rd, Rr Fractional Multiply Signed R1:R0 (Rd x Rr) << 1 Z,C 2
FMULSU Rd, Rr Fractional Multiply Signed with Unsigned R1:R0 (Rd x Rr) << 1 Z,C 2
BRANCH INSTRUCTIONS
RJMP k Relative Jump PC PC + k + 1 None 2
IJMP Indirect Jump to (Z) PC Z None 2
RCALL k Relative Subroutine Call PC PC + k + 1 None 3
ICALL Indirect Call to (Z) PC Z None 3
RET Subroutine Return PC STACK None 4
RETI Interrupt Return PC STACK I 4
CPSE Rd,Rr Compare, Skip if Equal if (Rd = Rr) PC PC + 2 or 3 None 1 / 2 / 3
CP Rd,Rr Compare Rd Rr Z, N,V,C,H 1
CPC Rd,Rr Compare with Carry Rd Rr C Z, N,V,C,H 1
CPI Rd,K Compare Register with Immediate Rd K Z, N,V,C,H 1
SBRC Rr, b Skip if Bit in Register Cleared if (Rr(b)=0) PC PC + 2 or 3 None 1 / 2 / 3
SBRS Rr, b Skip if Bit in Register is Set if (Rr(b)=1) PC PC + 2 or 3 None 1 / 2 / 3
SBIC P, b Skip if Bit in I/O Register Cleared if (P(b)=0) PC PC + 2 or 3 None 1 / 2 / 3
SBIS P, b Skip if Bit in I/O Register is Set if (P(b)=1) PC PC + 2 or 3 None 1 / 2 / 3
BRBS s, k Branch if Status Flag Set if (SREG(s) = 1) then PCPC+k + 1 None 1 / 2
BRBC s, k Branch if Status Flag Cleared if (SREG(s) = 0) then PCPC+k + 1 None 1 / 2
BREQ k Branch if Equal if (Z = 1) then PC PC + k + 1 None 1 / 2
BRNE k Branch if Not Equal if (Z = 0) then PC PC + k + 1 None 1 / 2
BRCS k Branch if Carry Set if (C = 1) then PC PC + k + 1 None 1 / 2
BRCC k Branch if Carry Cleared if (C = 0) then PC PC + k + 1 None 1 / 2
BRSH k Branch if Same or Higher if (C = 0) then PC PC + k + 1 None 1 / 2
BRLO k Branch if Lower if (C = 1) then PC PC + k + 1 None 1 / 2
BRMI k Branch if Minus if (N = 1) then PC PC + k + 1 None 1 / 2
BRPL k Branch if Plus if (N = 0) then PC PC + k + 1 None 1 / 2
BRGE k Branch if Greater or Equal, Signed if (N V= 0) then PC PC + k + 1 None 1 / 2
BRLT k Branch if Less Than Zero, Signed if (N V= 1) then PC PC + k + 1 None 1 / 2
BRHS k Branch if Half Carry Flag Set if (H = 1) then PC PC + k + 1 None 1 / 2
BRHC k Branch if Half Carry Flag Cleared if (H = 0) then PC PC + k + 1 None 1 / 2
BRTS k Branch if T Flag Set if (T = 1) then PC PC + k + 1 None 1 / 2
BRTC k Branch if T Flag Cleared if (T = 0) then PC PC + k + 1 None 1 / 2
BRVS k Branch if Overflow Flag is Set if (V = 1) then PC PC + k + 1 None 1 / 2
BRVC k Branch if Overflow Flag is Cleared if (V = 0) then PC PC + k + 1 None 1 / 2
Mnemonics Operands Description Operation Flags #Clocks
BRIE k Branch if Interrupt Enabled if ( I = 1) then PC PC + k + 1 None 1 / 2
BRID k Branch if Interrupt Disabled if ( I = 0) then PC PC + k + 1 None 1 / 2ATmega8A [DATASHEET] 304
8159E–AVR–02/2013
DATA TRANSFER INSTRUCTIONS
MOV Rd, Rr Move Between Registers Rd Rr None 1
MOVW Rd, Rr Copy Register Word Rd+1:Rd Rr+1:Rr None 1
LDI Rd, K Load Immediate Rd K None 1
LD Rd, X Load Indirect Rd (X) None 2
LD Rd, X+ Load Indirect and Post-Inc. Rd (X), X X + 1 None 2
LD Rd, - X Load Indirect and Pre-Dec. X X - 1, Rd (X) None 2
LD Rd, Y Load Indirect Rd (Y) None 2
LD Rd, Y+ Load Indirect and Post-Inc. Rd (Y), Y Y + 1 None 2
LD Rd, - Y Load Indirect and Pre-Dec. Y Y - 1, Rd (Y) None 2
LDD Rd,Y+q Load Indirect with Displacement Rd (Y + q) None 2
LD Rd, Z Load Indirect Rd (Z) None 2
LD Rd, Z+ Load Indirect and Post-Inc. Rd (Z), Z Z+1 None 2
LD Rd, -Z Load Indirect and Pre-Dec. Z Z - 1, Rd (Z) None 2
LDD Rd, Z+q Load Indirect with Displacement Rd (Z + q) None 2
LDS Rd, k Load Direct from SRAM Rd (k) None 2
ST X, Rr Store Indirect (X) Rr None 2
ST X+, Rr Store Indirect and Post-Inc. (X) Rr, X X + 1 None 2
ST - X, Rr Store Indirect and Pre-Dec. X X - 1, (X) Rr None 2
ST Y, Rr Store Indirect (Y) Rr None 2
ST Y+, Rr Store Indirect and Post-Inc. (Y) Rr, Y Y + 1 None 2
ST - Y, Rr Store Indirect and Pre-Dec. Y Y - 1, (Y) Rr None 2
STD Y+q,Rr Store Indirect with Displacement (Y + q) Rr None 2
ST Z, Rr Store Indirect (Z) Rr None 2
ST Z+, Rr Store Indirect and Post-Inc. (Z) Rr, Z Z + 1 None 2
ST -Z, Rr Store Indirect and Pre-Dec. Z Z - 1, (Z) Rr None 2
STD Z+q,Rr Store Indirect with Displacement (Z + q) Rr None 2
STS k, Rr Store Direct to SRAM (k) Rr None 2
LPM Load Program Memory R0 (Z) None 3
LPM Rd, Z Load Program Memory Rd (Z) None 3
LPM Rd, Z+ Load Program Memory and Post-Inc Rd (Z), Z Z+1 None 3
SPM Store Program Memory (Z) R1:R0 None -
IN Rd, P In Port Rd P None 1
OUT P, Rr Out Port P Rr None 1
PUSH Rr Push Register on Stack STACK Rr None 2
POP Rd Pop Register from Stack Rd STACK None 2
BIT AND BIT-TEST INSTRUCTIONS
SBI P,b Set Bit in I/O Register I/O(P,b) 1 None 2
CBI P,b Clear Bit in I/O Register I/O(P,b) 0 None 2
LSL Rd Logical Shift Left Rd(n+1) Rd(n), Rd(0) 0 Z,C,N,V 1
LSR Rd Logical Shift Right Rd(n) Rd(n+1), Rd(7) 0 Z,C,N,V 1
ROL Rd Rotate Left Through Carry Rd(0)C,Rd(n+1) Rd(n),CRd(7) Z,C,N,V 1
ROR Rd Rotate Right Through Carry Rd(7)C,Rd(n) Rd(n+1),CRd(0) Z,C,N,V 1
ASR Rd Arithmetic Shift Right Rd(n) Rd(n+1), n=0:6 Z,C,N,V 1
SWAP Rd Swap Nibbles Rd(3:0)Rd(7:4),Rd(7:4)Rd(3:0) None 1
BSET s Flag Set SREG(s) 1 SREG(s) 1
BCLR s Flag Clear SREG(s) 0 SREG(s) 1
BST Rr, b Bit Store from Register to T T Rr(b) T 1
BLD Rd, b Bit load from T to Register Rd(b) T None 1
SEC Set Carry C 1 C1
CLC Clear Carry C 0 C 1
SEN Set Negative Flag N 1 N1
CLN Clear Negative Flag N 0 N 1
SEZ Set Zero Flag Z 1 Z1
CLZ Clear Zero Flag Z 0 Z 1
SEI Global Interrupt Enable I 1 I1
CLI Global Interrupt Disable I 0 I 1
SES Set Signed Test Flag S 1 S1
CLS Clear Signed Test Flag S 0 S 1
SEV Set Twos Complement Overflow. V 1 V1
CLV Clear Twos Complement Overflow V 0 V 1
SET Set T in SREG T 1 T1
Mnemonics Operands Description Operation Flags #Clocks
CLT Clear T in SREG T 0 T 1
SEH Set Half Carry Flag in SREG H 1 H1
CLH Clear Half Carry Flag in SREG H 0 H 1
MCU CONTROL INSTRUCTIONS
31. Instruction Set Summary (Continued)ATmega8A [DATASHEET] 305
8159E–AVR–02/2013
NOP No Operation None 1
SLEEP Sleep (see specific descr. for Sleep function) None 1
WDR Watchdog Reset (see specific descr. for WDR/timer) None 1
31. Instruction Set Summary (Continued)ATmega8A [DATASHEET] 306
8159E–AVR–02/2013
32. Ordering Information
Notes: 1. This device can also be supplied in wafer form. Please contact your local Atmel sales office for detailed ordering information
and minimum quantities.
2. Pb-free packaging alternative, complies to the European Directive for Restriction of Hazardous Substances (RoHS directive).
Also Halide free and fully Green.
3. Tape & Reel
4. See characterization specifications at 105C
Speed (MHz) Power Supply (V) Ordering Code(2) Package(1) Operation Range
16 2.7 - 5.5
ATmega8A-AU
ATmega8A-AUR(3)
ATmega8A-PU
ATmega8A-MU
ATmega8A-MUR(3)
32A
32A
28P3
32M1-A
32M1-A
Industrial
(-40C to 85C)
ATmega8A-AN
ATmega8A-ANR(3)
ATmega8A-PN
ATmega8A-MN
ATmega8A-MNR(3)
32A
32A
28P3
32M1-A
32M1-A
Extended
(-40C to 105C)(4)
Package Type
32A 32-lead, Thin (1.0mm) Plastic Quad Flat Package (TQFP)
28P3 28-lead, 0.300” Wide, Plastic Dual Inline Package (PDIP)
32M1-A 32-pad, 5 x 5 x 1.0 body, Lead Pitch 0.50 mm Quad Flat No-Lead/Micro Lead Frame Package (QFN/MLF)ATmega8A [DATASHEET] 307
8159E–AVR–02/2013
33. Packaging Information
33.1 32A
TITLE DRAWING NO. REV.
32A, 32-lead, 7 x 7mm body size, 1.0mm body thickness,
0.8mm lead pitch, thin profile plastic quad flat package (TQFP) 32A C
2010-10-20
PIN 1 IDENTIFIER
0°~7°
PIN 1
L
C
A1 A2 A
D1
D
e E1 E
B
Notes:
1. This package conforms to JEDEC reference MS-026, Variation ABA.
2. Dimensions D1 and E1 do not include mold protrusion. Allowable
protrusion is 0.25mm per side. Dimensions D1 and E1 are maximum
plastic body size dimensions including mold mismatch.
3. Lead coplanarity is 0.10mm maximum.
A – – 1.20
A1 0.05 – 0.15
A2 0.95 1.00 1.05
D 8.75 9.00 9.25
D1 6.90 7.00 7.10 Note 2
E 8.75 9.00 9.25
E1 6.90 7.00 7.10 Note 2
B 0.30 – 0.45
C 0.09 – 0.20
L 0.45 – 0.75
e 0.80 TYP
COMMON DIMENSIONS
(Unit of measure = mm)
SYMBOL MIN NOM MAX NOTEATmega8A [DATASHEET] 308
8159E–AVR–02/2013
33.2 28P3
2325 Orchard Parkway
San Jose, CA 95131
TITLE DRAWING NO.
R
REV.
28P3, 28-lead (0.300"/7.62mm Wide) Plastic Dual
Inline Package (PDIP) 28P3 B
09/28/01
PIN
1
E1
A1
B
REF
E
B1
C
L
SEATING PLANE
A
0º ~ 15º
D
e
eB
B2
(4 PLACES)
COMMON DIMENSIONS
(Unit of Measure = mm)
SYMBOL MIN NOM MAX NOTE
A – – 4.5724
A1 0.508 – –
D 34.544 – 34.798 Note 1
E 7.620 – 8.255
E1 7.112 – 7.493 Note 1
B 0.381 – 0.533
B1 1.143 – 1.397
B2 0.762 – 1.143
L 3.175 – 3.429
C 0.203 – 0.356
eB – – 10.160
e 2.540 TYP
Note: 1. Dimensions D and E1 do not include mold Flash or Protrusion.
Mold Flash or Protrusion shall not exceed 0.25mm (0.010"). ATmega8A [DATASHEET] 309
8159E–AVR–02/2013
32M1-A
34. Errata
2325 Orchard Parkway
San Jose, CA 95131
TITLE DRAWING NO.
R
REV.
32M1-A, 32-pad, 5 x 5 x 1.0mm Body, Lead Pitch 0.50mm, 32M1-A E
5/25/06
3.10mm Exposed Pad, Micro Lead Frame Package (MLF)
COMMON DIMENSIONS
(Unit of Measure = mm)
SYMBOL MIN NOM MAX NOTE
D1
D
E1 E
b e
A3
A2
A1
A
D2
E2
0.08 C
L
1
2
3
P
P
0
1
2
3
A 0.80 0.90 1.00
A1 – 0.02 0.05
A2 – 0.65 1.00
A3 0.20 REF
b 0.18 0.23 0.30
D
D1
D2 2.95 3.10 3.25
4.90 5.00 5.10
4.70 4.75 4.80
4.70 4.75 4.80
4.90 5.00 5.10
E
E1
E2 2.95 3.10 3.25
e 0.50 BSC
L 0.30 0.40 0.50
P – – 0.60
– – 12o
Note: JEDEC Standard MO-220, Fig. 2 (Anvil Singulation), VHHD-2.
TOP VIEW
SIDE VIEW
BOTTOM VIEW
0
Pin 1 ID
Pin #1 Notch
(0.20 R)
K 0.20 – –
K
KATmega8A [DATASHEET] 310
8159E–AVR–02/2013
The revision letter in this section refers to the revision of the ATmega8A device.
34.1 ATmega8A, rev. L
• First Analog Comparator conversion may be delayed
• Interrupts may be lost when writing the timer registers in the asynchronous timer
• Signature may be Erased in Serial Programming Mode
• CKOPT Does not Enable Internal Capacitors on XTALn/TOSCn Pins when 32kHz Oscillator is Used to Clock the
Asynchronous Timer/Counter2
• Reading EEPROM by using ST or STS to set EERE bit triggers unexpected interrupt request
1. First Analog Comparator conversion may be delayed
If the device is powered by a slow rising VCC, the first Analog Comparator conversion will take longer than
expected on some devices.
Problem Fix / Workaround
When the device has been powered or reset, disable then enable theAnalog Comparator before the first
conversion.
2. Interrupts may be lost when writing the timer registers in the asynchronous timer
The interrupt will be lost if a timer register that is synchronous timer clock is written when the asynchronous
Timer/Counter register (TCNTx) is 0x00.
Problem Fix / Workaround
Always check that the asynchronous Timer/Counter register neither have the value 0xFF nor 0x00 before writing
to the asynchronous Timer Control Register (TCCRx), asynchronous Timer Counter Register (TCNTx), or
asynchronous Output Compare Register (OCRx).
3. Signature may be Erased in Serial Programming Mode
If the signature bytes are read before a chiperase command is completed, the signature may be erased causing
the device ID and calibration bytes to disappear. This is critical, especially, if the part is running on internal
RC oscillator.
Problem Fix / Workaround:
Ensure that the chiperase command has exceeded before applying the next command.
4. CKOPT Does not Enable Internal Capacitors on XTALn/TOSCn Pins when 32kHz Oscillator is Used to
Clock the Asynchronous Timer/Counter2
When the internal RC Oscillator is used as the main clock source, it is possible to run the Timer/Counter2
asynchronously by connecting a 32kHz Oscillator between XTAL1/TOSC1 and XTAL2/TOSC2. But when the
internal RC Oscillator is selected as the main clock source, the CKOPT Fuse does not control the internal
capacitors on XTAL1/TOSC1 and XTAL2/TOSC2. As long as there are no capacitors connected to
XTAL1/TOSC1 and XTAL2/TOSC2, safe operation of the Oscillator is not guaranteed.
Problem Fix / Workaround
Use external capacitors in the range of 20 - 36 pF on XTAL1/TOSC1 and XTAL2/TOSC2. This will be fixed in
ATmega8A Rev. G where the CKOPT Fuse will control internal capacitors also when internal RC Oscillator is
selected as main clock source. For ATmega8A Rev. G, CKOPT = 0 (programmed) will enable the internal
capacitors on XTAL1 and XTAL2. Customers who want compatibility between Rev. G and older revisions,
must ensure that CKOPT is unprogrammed (CKOPT = 1).ATmega8A [DATASHEET] 311
8159E–AVR–02/2013
5. Reading EEPROM by using ST or STS to set EERE bit triggers unexpected interrupt request.
Reading EEPROM by using the ST or STS command to set the EERE bit in the EECR register triggers an
unexpected EEPROM interrupt request.
Problem Fix / Workaround
Always use OUT or SBI to set EERE in EECR.ATmega8A [DATASHEET] 312
8159E–AVR–02/2013
35. Datasheet Revision History
Please note that the referring page numbers in this section are referred to this document. The referring revision in
this section refers to the document revision.
35.1 Rev.8159E – 02/2013
35.2 Rev.8159D – 02/11
35.3 Rev.8159C – 07/09
35.4 Rev.8159B – 05/09
1. Applied the Atmel new page layout for datasheets including new logo and last page.
2. Removed the reference to the debuggers and In-Circuit Emulators.
3. Added “Capacitive touch sensing” on page 6.
4. Added “Electrical Characteristics – TA = -40°C to 105°C” on page 233.
5. Added “Typical Characteristics – TA = -40°C to 105°C” on page 272.
1. Updated the datasheet according to the Atmel new Brand Style Guide.
2. Updated “Performing Page Erase by SPM” on page 200 by adding an extra note.
3. Updated “Ordering Information” on page 306 to include Tape & Reel.
1. Updated “Errata” on page 309.
1. Updated “System and Reset Characteristics” on page 228 with new BODLEVEL values
2. Updated “ADC Characteristics” on page 232 with new VINT values.
3. Updated “Typical Characteristics – TA = -40°C to 85°C” view.
4. Updated “Errata” on page 309. ATmega8A, rev L.
5. Created a new Table Of Contents.ATmega8A [DATASHEET] 313
8159E–AVR–02/2013
35.5 Rev.8159A – 08/08
1. Initial revision (Based on the ATmega8/L datasheet 2486T-AVR-05/08)
2. Changes done compared to ATmega8/L datasheet 2486T-AVR-05/08:
– All Electrical Characteristics are moved to “Electrical Characteristics – TA =
-40°C to 85°C” on page 225.
– Updated “DC Characteristics” on page 225 with new VOL Max (0.9V and
0.6V) and typical value for ICC.
– Added “Speed Grades” on page 227.
– Added a new sub section “System and Reset Characteristics” on page 228.
– Updated “System and Reset Characteristics” on page 228 with new VBOT
BODLEVEL = 0 (3.6V, 4.0V and 4.2V).
– Register descriptions are moved to sub section at the end of each chapter.
– New graphics in “Typical Characteristics – TA = -40°C to 85°C” on page
235.
– New “Ordering Information” on page 306.Enter Title of Manual [DATASHEET] i
8159E–AVR–02/2013
Table of Contents
Features .....................................................................................................1
1 Pin Configurations ...................................................................................2
2 Overview ...................................................................................................3
2.1 Block Diagram ...................................................................................................3
2.2 Pin Descriptions .................................................................................................4
3 Resources .................................................................................................6
4 Data Retention ..........................................................................................6
5 About Code Examples .............................................................................6
6 Capacitive touch sensing ........................................................................6
7 AVR CPU Core ..........................................................................................7
7.1 Overview ............................................................................................................7
7.2 Arithmetic Logic Unit – ALU ...............................................................................8
7.3 Status Register ..................................................................................................8
7.4 General Purpose Register File ..........................................................................9
7.5 Stack Pointer ...................................................................................................10
7.6 Instruction Execution Timing ...........................................................................11
7.7 Reset and Interrupt Handling ...........................................................................12
8 AVR Memories ........................................................................................15
8.1 Overview ..........................................................................................................15
8.2 In-System Reprogrammable Flash Program Memory .....................................15
8.3 SRAM Data Memory ........................................................................................16
8.4 EEPROM Data Memory ..................................................................................17
8.5 I/O Memory ......................................................................................................17
8.6 Register Description ........................................................................................18
9 System Clock and Clock Options .........................................................24
9.1 Clock Systems and their Distribution ...............................................................24
9.2 Clock Sources .................................................................................................25
9.3 Crystal Oscillator .............................................................................................25
9.4 Low-frequency Crystal Oscillator .....................................................................27
9.5 External RC Oscillator .....................................................................................27
9.6 Calibrated Internal RC Oscillator .....................................................................29
9.7 External Clock .................................................................................................30Enter Title of Manual [DATASHEET] ii
8159E–AVR–02/2013
9.8 Timer/Counter Oscillator ..................................................................................30
9.9 Register Description ........................................................................................31
10 Power Management and Sleep Modes .................................................32
10.1 Sleep Modes ....................................................................................................32
10.2 Idle Mode .........................................................................................................32
10.3 ADC Noise Reduction Mode ............................................................................33
10.4 Power-down Mode ...........................................................................................33
10.5 Power-save Mode ............................................................................................33
10.6 Standby Mode .................................................................................................34
10.7 Minimizing Power Consumption ......................................................................34
10.8 Register Description ........................................................................................35
11 System Control and Reset .....................................................................36
11.1 Resetting the AVR ...........................................................................................36
11.2 Reset Sources .................................................................................................36
11.3 Internal Voltage Reference ..............................................................................39
11.4 Watchdog Timer ..............................................................................................40
11.5 Timed Sequences for Changing the Configuration of the Watchdog Timer ....40
11.6 Register Description ........................................................................................42
12 Interrupts .................................................................................................44
12.1 Interrupt Vectors in ATmega8A .......................................................................44
12.2 Register Description ........................................................................................47
13 I/O Ports ..................................................................................................49
13.1 Overview ..........................................................................................................49
13.2 Ports as General Digital I/O .............................................................................50
13.3 Alternate Port Functions ..................................................................................54
13.4 Register Description ........................................................................................62
14 External Interrupts .................................................................................64
14.1 Register Description ........................................................................................64
15 8-bit Timer/Counter0 ..............................................................................66
15.1 Features ..........................................................................................................66
15.2 Overview ..........................................................................................................66
15.3 Timer/Counter Clock Sources .........................................................................67
15.4 Counter Unit ....................................................................................................67
15.5 Operation .........................................................................................................67
15.6 Timer/Counter Timing Diagrams ......................................................................68Enter Title of Manual [DATASHEET] iii
8159E–AVR–02/2013
15.7 Register Description ........................................................................................69
16 Timer/Counter0 and Timer/Counter1 Prescalers .................................71
16.1 Overview ..........................................................................................................71
16.2 Internal Clock Source ......................................................................................71
16.3 Prescaler Reset ...............................................................................................71
16.4 External Clock Source .....................................................................................71
16.5 Register Description ........................................................................................72
17 16-bit Timer/Counter1 ............................................................................73
17.1 Features ..........................................................................................................73
17.2 Overview ..........................................................................................................73
17.3 Accessing 16-bit Registers ..............................................................................75
17.4 Timer/Counter Clock Sources .........................................................................78
17.5 Counter Unit ....................................................................................................78
17.6 Input Capture Unit ...........................................................................................79
17.7 Output Compare Units .....................................................................................81
17.8 Compare Match Output Unit ............................................................................83
17.9 Modes of Operation .........................................................................................84
17.10 Timer/Counter Timing Diagrams ......................................................................91
17.11 Register Description ........................................................................................92
18 8-bit Timer/Counter2 with PWM and Asynchronous Operation .........99
18.1 Features ..........................................................................................................99
18.2 Overview ..........................................................................................................99
18.3 Timer/Counter Clock Sources .......................................................................100
18.4 Counter Unit ..................................................................................................100
18.5 Output Compare Unit .....................................................................................101
18.6 Compare Match Output Unit ..........................................................................103
18.7 Modes of Operation .......................................................................................104
18.8 Timer/Counter Timing Diagrams ....................................................................108
18.9 Asynchronous Operation of the Timer/Counter .............................................109
18.10 Timer/Counter Prescaler ...............................................................................111
18.11 Register Description ......................................................................................112
19 Serial Peripheral Interface – SPI .........................................................116
19.1 Features ........................................................................................................116
19.2 Overview ........................................................................................................116
19.3 SS Pin Functionality ......................................................................................121Enter Title of Manual [DATASHEET] iv
8159E–AVR–02/2013
19.4 Data Modes ...................................................................................................121
19.5 Register Description ......................................................................................123
20 USART ...................................................................................................125
20.1 Features ........................................................................................................125
20.2 Overview ........................................................................................................125
20.3 Clock Generation ...........................................................................................127
20.4 Frame Formats ..............................................................................................129
20.5 USART Initialization .......................................................................................130
20.6 Data Transmission – The USART Transmitter ..............................................131
20.7 Asynchronous Data Reception ......................................................................138
20.8 Multi-processor Communication Mode ..........................................................141
20.9 Accessing UBRRH/UCSRC Registers ...........................................................142
20.10 Register Description ......................................................................................143
20.11 Examples of Baud Rate Setting .....................................................................147
21 Two-wire Serial Interface .....................................................................152
21.1 Features ........................................................................................................152
21.2 Overview ........................................................................................................152
21.3 Two-wire Serial Interface Bus Definition ........................................................154
21.4 Data Transfer and Frame Format ..................................................................155
21.5 Multi-master Bus Systems, Arbitration and Synchronization .........................157
21.6 Using the TWI ................................................................................................159
21.7 Multi-master Systems and Arbitration ............................................................174
21.8 Register Description ......................................................................................176
22 Analog Comparator ..............................................................................179
22.1 Overview ........................................................................................................179
22.2 Analog Comparator Multiplexed Input ...........................................................179
22.3 Register Description ......................................................................................180
23 Analog-to-Digital Converter ................................................................182
23.1 Features ........................................................................................................182
23.2 Overview ........................................................................................................182
23.3 Starting a Conversion ....................................................................................184
23.4 Prescaling and Conversion Timing ................................................................184
23.5 Changing Channel or Reference Selection ...................................................186
23.6 ADC Noise Canceler .....................................................................................187
23.7 ADC Conversion Result .................................................................................190Enter Title of Manual [DATASHEET] v
8159E–AVR–02/2013
23.8 Register Description ......................................................................................190
24 Boot Loader Support – Read-While-Write Self-Programming .........194
24.1 Features ........................................................................................................194
24.2 Overview ........................................................................................................194
24.3 Application and Boot Loader Flash Sections .................................................194
24.4 Read-While-Write and No Read-While-Write Flash Sections ........................194
24.5 Boot Loader Lock Bits ...................................................................................197
24.6 Entering the Boot Loader Program ................................................................198
24.7 Addressing the Flash During Self-Programming ...........................................198
24.8 Self-Programming the Flash ..........................................................................199
24.9 Register Description ......................................................................................205
25 Memory Programming .........................................................................207
25.1 Program And Data Memory Lock Bits ...........................................................207
25.2 Fuse Bits ........................................................................................................208
25.3 Signature Bytes .............................................................................................209
25.4 Calibration Byte .............................................................................................209
25.5 Page Size ......................................................................................................210
25.6 Parallel Programming Parameters, Pin Mapping, and Commands ...............210
25.7 Parallel Programming ....................................................................................212
25.8 Serial Downloading ........................................................................................220
25.9 Serial Programming Pin Mapping ..................................................................220
26 Electrical Characteristics – TA = -40°C to 85°C .................................225
26.1 Absolute Maximum Ratings* .........................................................................225
26.2 DC Characteristics .........................................................................................225
26.3 Speed Grades ...............................................................................................227
26.4 Clock Characteristics .....................................................................................227
26.5 System and Reset Characteristics ................................................................228
26.6 Two-wire Serial Interface Characteristics ......................................................229
26.7 SPI Timing Characteristics ............................................................................230
26.8 ADC Characteristics ......................................................................................232
27 Electrical Characteristics – TA = -40°C to 105°C ...............................233
27.1 DC Characteristics .........................................................................................233
28 Typical Characteristics – TA = -40°C to 85°C ....................................235
28.1 Active Supply Current ....................................................................................235
28.2 Idle Supply Current ........................................................................................239Enter Title of Manual [DATASHEET] vi
8159E–AVR–02/2013
28.3 Power-down Supply Current ..........................................................................242
28.4 Power-save Supply Current ...........................................................................243
28.5 Standby Supply Current ................................................................................244
28.6 Pin Pull-up .....................................................................................................247
28.7 Pin Driver Strength ........................................................................................249
28.8 Pin Thresholds and Hysteresis ......................................................................253
28.9 Bod Thresholds and Analog Comparator Offset ............................................258
28.10 Internal Oscillator Speed ...............................................................................260
28.11 Current Consumption of Peripheral Units ......................................................267
28.12 Current Consumption in Reset and Reset Pulsewidth ...................................270
29 Typical Characteristics – TA = -40°C to 105°C ..................................272
29.1 ATmega8A Typical Characteristics ................................................................272
30 Register Summary ................................................................................301
31 Instruction Set Summary .....................................................................303
32 Ordering Information ...........................................................................306
33 Packaging Information .........................................................................307
33.1 32A ................................................................................................................307
33.2 28P3 ..............................................................................................................308
34 Errata .....................................................................................................309
34.1 ATmega8A, rev. L ..........................................................................................310
35 Datasheet Revision History .................................................................312
35.1 Rev.8159E – 02/2013 ....................................................................................312
35.2 Rev.8159D – 02/11 ........................................................................................312
35.3 Rev.8159C – 07/09 ........................................................................................312
35.4 Rev.8159B – 05/09 ........................................................................................312
35.5 Rev.8159A – 08/08 ........................................................................................313
Table of Contents.......................................................................................iAtmel Corporation
1600 Technology Drive
San Jose, CA 95110
USA
Tel: (+1) (408) 441-0311
Fax: (+1) (408) 487-2600
www.atmel.com
Atmel Asia Limited
Unit 01-5 & 16, 19F
BEA Tower, Millennium City 5
418 Kwun Tong Roa
Kwun Tong, Kowloon
HONG KONG
Tel: (+852) 2245-6100
Fax: (+852) 2722-1369
Atmel Munich GmbH
Business Campus
Parkring 4
D-85748 Garching b. Munich
GERMANY
Tel: (+49) 89-31970-0
Fax: (+49) 89-3194621
Atmel Japan G.K.
16F Shin-Osaki Kangyo Bldg
1-6-4 Osaki, Shinagawa-ku
Tokyo 141-0032
JAPAN
Tel: (+81) (3) 6417-0300
Fax: (+81) (3) 6417-0370
© 2013 Atmel Corporation. All rights reserved. / Rev.: 8159E–AVR–02/2013
Disclaimer: The information in this document is provided in connection with Atmel products. No license, express or implied, by estoppel or otherwise, to any intellectual property right is granted by this
document or in connection with the sale of Atmel products. EXCEPT AS SET FORTH IN THE ATMEL TERMS AND CONDITIONS OF SALES LOCATED ON THE ATMEL WEBSITE, ATMEL ASSUMES
NO LIABILITY WHATSOEVER AND DISCLAIMS ANY EXPRESS, IMPLIED OR STATUTORY WARRANTY RELATING TO ITS PRODUCTS INCLUDING, BUT NOT LIMITED TO, THE IMPLIED
WARRANTY OF MERCHANTABILITY, FITNESS FOR A PARTICULAR PURPOSE, OR NON-INFRINGEMENT. IN NO EVENT SHALL ATMEL BE LIABLE FOR ANY DIRECT, INDIRECT,
CONSEQUENTIAL, PUNITIVE, SPECIAL OR INCIDENTAL DAMAGES (INCLUDING, WITHOUT LIMITATION, DAMAGES FOR LOSS AND PROFITS, BUSINESS INTERRUPTION, OR LOSS OF
INFORMATION) ARISING OUT OF THE USE OR INABILITY TO USE THIS DOCUMENT, EVEN IF ATMEL HAS BEEN ADVISED OF THE POSSIBILITY OF SUCH DAMAGES. Atmel makes no
representations or warranties with respect to the accuracy or completeness of the contents of this document and reserves the right to make changes to specifications and products descriptions at any time
without notice. Atmel does not make any commitment to update the information contained herein. Unless specifically provided otherwise, Atmel products are not suitable for, and shall not be used in,
automotive applications. Atmel products are not intended, authorized, or warranted for use as components in applications intended to support or sustain life.
Atmel®, Atmel logo and combinations thereof, Enabling Unlimited Possibilities®, and others are registered trademarks or trademarks of Atmel Corporation or its
subsidiaries. Other terms and product names may be trademarks of others.
Atmel AVR1924: XMEGA-A1 Xplained Hardware
User's Guide
Features
• Atmel® ATxmega128A1 microcontroller
• External memory
- 8MB SDRAM
• Atmel AT32UC3B1256
- Communication gateway
- Programmer for Atmel AVR® XMEGA®
• Analog input (to ADC)
- Temperature sensor
- Light sensor
• Analog output (from DAC)
- Mono speaker via audio amplifier
• Digital I/O
- UART communication through USB gateway
- Eight mechanical button switches
- Eight LEDs
- Eight spare analog pins
- 24 spare digital pins
1 Introduction
The Atmel XMEGA-A1 Xplained evaluation kit is a hardware platform to evaluate
the Atmel ATxmega128A1 microcontroller.
The kit offers a larger range of features that enables the Atmel AVR XMEGA user
to get started using XMEGA peripherals right away and understand how to
integrate the XMEGA device in their own design.
Figure 1-1. XMEGA-A1 Xplained evaluation kit.
8-bit Atmel
Microcontrollers
Application Note
Preliminary
Rev. 8370C-AVR-12/11 2 Atmel AVR1924
8370C-AVR-12/11
2 Related items
Atmel FLIP (Flexible In-system Programmer)
http://www.atmel.com/dyn/products/tools_card.asp?tool_id=3886
Atmel AVR Studio® 4 (free Atmel IDE)
http://www.atmel.com/dyn/products/tools_card.asp?tool_id=2725
Atmel AVR JTAGICE mkII (on-chip programming and debugging tool)
http://www.atmel.com/dyn/products/tools_card.asp?tool_id=3353
Atmel AVR ONE! (on-chip programming and debugging tool)
http://www.atmel.com/dyn/products/tools_card.asp?tool_id=4279
3 General information
This document targets the Atmel XMEGA-A1 Xplained evaluation kit, revision 9. The
schematic, layout, and bill of materials can be found online in the zip files associated
with this application note at:
http://www.atmel.com/products/AVR/xplain.asp?family_id=607&source=redirect.
The XMEGA-A1 Xplained kit is intended to demonstrate the Atmel ATxmega128A1
microcontroller, and the hardware that relates to the Atmel AT32UC3B1256 is,
therefore, not covered in this document.
Figure 3-1. Overview of the XMEGA-A1 Xplained kit.
SDRAM
ATxmega128A1 JTAG and PDI
DataFlash footprint
XMEGA PORT A
USB (COM and PSU)
ATxmega128A1
Speaker
XMEGA PORT C
Audio amp.
XMEGA PORT F Power jumper XMEGA PORT D/R
Light sensor
Temp. sensor
AT32UC3B1256
3.1 Preprogrammed firmware
The Atmel ATxmega128A1 and AT32UC3B1256 that come with the Atmel XMEGAA1
Xplained kit are both preprogrammed.
The preprogrammed firmware in the XMEGA plays different sounds when the
mechanical button switches are pushed. Atmel AVR1924
3
8370C-AVR-12/11
The preprogrammed Atmel AT32UC3B1256 firmware offers features such as a boot
loader for self-programming and a UART-to-USB gateway.
3.2 Power supply
The kit is powered via the USB connector, which leaves two options to power it:
Connect the kit either to a PC through a USB cable, or to a 5V USB power supply
(AC/DC adapter).
3.3 Measuring the XMEGA power consumption
As part of an evaluation of the Atmel ATxmega128A1, it can be of interest to measure
its power consumption. The power jumper (J300) is connected between the 3.3V
regulated voltage from the regulator and the ATxmega128A1 supply. By replacing the
jumper with an ammeter, it is possible to measure the current consumption of the
ATxmega128A1. No other components are connected to the same supply as the
ATxmega128A1, and other components, therefore, do not affect the measurement of
the ATxmega128A1 current consumption (except the DC leakage in the decoupling
capacitors).
3.4 Programming the XMEGA through the UART-to-USB gateway
The ATxmega128A1 has a pre-programmed UART boot loader. How to program the
device through the UART-to-USB gateway is described in the Atmel application note
“AVR1927: XMEGA-A1 Xplained Getting started guide”.
3.5 Communication through the UART-to-USB gateway
The XMEGA UARTC0 is connected to a UART on the AT32UC3B1256. The
AT32UC3B1256 UART is communicating at 115200 baud, using one start bit, eight
data bits, one stop bit, and no parity.
When the AT32UC3B1256 device is enumerated (connected to a PC), the data
transmitted from the XMEGA is passed on to a (virtual) COM port. This means that it
is possible to use a terminal program to receive the transmitted data on a PC.
Similarly, data transmitted from the PC COM port is passed on to the XMEGA UART
through the gateway.
NOTE The AT32UC3B1256 is also connected to the shared SPI and TWI lines, and so it is
also possible to add TWI and SPI gateway functionality for these serial interfaces, if
desired. This gateway functionality is not available in the default firmware for the
AT32UC3B1256. Please refer to the schematics for more information about these
connections. 4 Atmel AVR1924
8370C-AVR-12/11
4 Connectors
The Atmel XMEGA-A1 Xplained kit has five 10-pin, 100mil headers. One header is
used for programming the Atmel ATxmega128A1, and the others are used to access
spare analog and digital pins on the XMEGA (expansion headers).
4.1 Programming headers
The XMEGA can be programmed and debugged by connecting an external
programming/debugging tool to the JTAG and PDI header (J201). The header has a
standard JTAG programmer pin-out (refer to online help in the Atmel AVR Studio),
and tools like the JTAGICE mkII or AVR ONE! can thus be connected directly to the
header. If it is desired to use PDI programming/debugging, an adapter must be used.
Due to physical differences of the JTAGICE mkII and AVR ONE! probes, the PCB has
an opening below the JTAG and PDI header. This is to make room for the orientation
tap on the JTAGICE mkII probe.
Because JTAG TDO and PDI DATA are connected on the PCB for this kit, JTAG
must be disabled on the device in order to use PDI. The reason for this is that when
JTAG is enabled it will enable a pull-up internally on TDO which interferes with the
PDI initialization sequence.
The connection of JTAG_TDO with PDI_DATA is also an issue when the application
on the device uses the JTAG_TDO pin e.g. by driving this pin actively or by using a
pull-up. This will interfere with ongoing PDI communication. Additionally, when JTAG
is disabled and the application is driving the JTAG_TDO pin it might even be not
possible to establish a PDI connection. A workaround for this is to add a ~1k resistor
from PDI_CLK/RESET to GND. This will keep the device in reset while PDI is
enabled. When a PDI connection is established the flash can be erased or JTAG can
be enabled in order to "unlock" the kit.
Table 4-1. XMEGA programming and debugging interface – JTAG and PDI.
J201 pin JTAG (1) PDI (2)
1 TCK -
2 GND GND (3)
3 TDO DATA
4 VCC VCC (3)
5 TMS -
6 nSRST CLK
7 - -
8 - -
9 TDI -
10 GND GND (3)
Notes: 1. Standard pin-out for JTAGICE mkII and other Atmel programming tools.
2. Requires adapter to connect a JTAGICE mkII (refer to AVR Studio help).
3. It is only required to connect on VCC/GND pin.
The Atmel AT32UC3B1256 can be programmed through its boot loader. The boot
loader is evoked by shorting the J600 jumper before applying power to the board. The Atmel AVR1924
5
8370C-AVR-12/11
programming is performed through the FLIP plug-in in AVR Studio (which can also be
started as a standalone application).
FLIP (Flexible In-system Programmer) is free Atmel proprietary software that runs on
Windows® 9x/Me/NT/2000/XP and Linux® x86. FLIP supports in-system programming
of flash devices through RS232, USB, or CAN.
Alternatively, the AT32UC3B1256 can be programmed by connecting a programming
tool, such as JTAGICE mkII, to test points TP600-607.
NOTE It is not recommended to program the AT32UC3B1256 using a programming tool, as
this will erase the boot loader.
4.2 I/O expansion headers
The XMEGA analog PORTA is available on the J2 header. This allows the user to
connect external signals to the analog-to-digital converter (ADC), digital-to-analog
converter (DAC), and analog comparators on PORTA.
The XMEGA digital PORTF and PORTC are available on the J1 and J4 headers,
respectively. These ports feature general-purpose I/O and various communication
modules (USART, SPI, and TWI). PORTD and PORTF are mixed on the J3 header.
NOTE The communication modules on PORTC and PORTF can be interconnected to test
various functions and features: The USART can loop back communication with a
jumper, or communicate between the two USARTs on the port. The native SPI and
the USART in SPI master mode can be connected, and the TWI module can be
enabled in both master and slave modes at the same time to get loop-back behavior.
(Pull-up resistors can be mounted on R101 and R102. These are not mounted from
the factory.) 6 Atmel AVR1924
8370C-AVR-12/11
5 Attached memories
The Atmel XMEGA-A1 Xplained kit demonstrates how to use the external bus
interface (EBI) module to connect a 4-bit SDRAM. An 8MB SDRAM (16Mb x 4) is
attached in three-port EBI mode (PORTH, PORTK, and PORTJ). Atmel AVR1924
7
8370C-AVR-12/11
6 Miscellaneous I/O
6.1 Mechanical button switches
Eight mechanical button switches are connected to XMEGA PORTD(PD0:PD5) and
PORTR(PR0:PR1). Internal pull-ups should be enabled to detect when the buttons
are pushed, as they short the respective line to GND.
NOTE Buttons share the pins with the J3 header: Pushing the buttons potentially affects
communication or other functionality on these pins.
6.2 LEDs
Eight yellow LEDs are connected to XMEGA PORTE. The LEDs are active low, and
thus light up when the respective lines are output low by the XMEGA.
One green and one red LED are inside the same package and therefore the colors
can be mixed to orange when both are activated. The red LED can be activated by
driving the connected I/O line to GND. The green LED is controlled via a FET and is
by default on when the board is powered. However this power indicator LED can also
be turned off by driving the gate of the FET to GND. Both LEDs are controlled by the
Atmel AT32UC3B1256. The default firmware will use the red LED to signal activity on
the UART to USB bridge by toggling the LED.
6.3 Analog I/O
An NTC temperature sensor and a light sensor are connected to PORTB on PB0 and
PB1, respectively. These analog references can be used as input to the ADC.
An audio amplifier (and mono speaker) is connected to PORTB on pin PB2. This pin
is connected to the XMEGA DAC, and thus offers a way to generate sound. 8 Atmel AVR1924
8370C-AVR-12/11
7 Included code example
The example application is based on the Atmel AVR Software Framework found
online at http://asf.atmel.no. For documentation, help, and examples on the drivers
used, please see the website.
For more information about the included code example, see the Atmel application
note “AVR1927: XMEGA-A1 Xplained Getting Started Guide”.
7.1 Compiling and running
The code examples to be found in ASF can be compiled by running make on the
makefile included in the project, or by opening the project in IAR™, and compiling the
project within IAR. Atmel AVR1924
9
8370C-AVR-12/11
8 Further code examples and drivers
Several Getting-Started trainings for the Atmel XMEGA-A1 Xplained kit can be
downloaded from the Atmel website. These trainings offer general introduction to
XMEGA peripherals. Please refer to AVR1500 through AVR1510.
Further information and drivers for XMEGA can be downloaded as application notes,
also distributed from the Atmel website. 10 Atmel AVR1924
8370C-AVR-12/11
9 Known issues
9.1 Light sensor
The output range of the light sensor is 0V – 3.3V. The ADC reference must therefore
be high enough to match the output range of the light sensor when performing
measurements.
9.2 USB test points
Touching the test points of the USB data lines on the reverse side of the board while
there is an ongoing communication, might interrupt the device and cause the device
to stop responding. The kit must be reconnected to start working properly again.
9.3 PDI initialization
Because JTAG_TDO and PDI_DATA are connected on the PCB for this kit, JTAG
must be disabled on the device in order to use PDI. The reason for this is that when
JTAG is enabled it will enable a pull-up internally on TDO which interferes with the
PDI initialization sequence.
The connection of JTAG_TDO with PDI_DATA is also an issue when the application
on the device uses the JTAG_TDO pin e.g. by driving this pin actively or by using a
pull-up. This will interfere with ongoing PDI communication. Additionally, when JTAG
is disabled and the application is driving the JTAG_TDO pin it might even not be
possible to establish a PDI connection. A workaround for this is to add a ~1k resistor
from PDI_CLK/RESET to GND. This will keep the device in reset while PDI is
enabled. When a PDI connection is established the flash can be erased or JTAG can
be enabled in order to "unlock" the kit. Atmel AVR1924
11
8370C-AVR-12/11
10 Revision history
The revision of the evaluation kit can be found on the sticker on the reverse side of
the PCB.
10.1 Revision 7
The Atmel XMEGA-A1 Xplained kit, revision 7, is the first released revision of the
XMEGA-A1 Xplained kit.
This kit replaces the Atmel Xplain evaluation kit. Information about the original Xplain
evaluation kit can be found in the Atmel application note AVR1907: Xplain Hardware
User’s Guide.
10.2 Revisions 1 to 6
Not released. 12 Atmel AVR1924
8370C-AVR-12/11
11 Table of contents
Features............................................................................................... 1
1 Introduction...................................................................................... 1
2 Related items.................................................................................... 2
3 General information......................................................................... 2
3.1 Preprogrammed firmware.................................................................................... 2
3.2 Power supply....................................................................................................... 3
3.3 Measuring the XMEGA power consumption ....................................................... 3
3.4 Programming the XMEGA through the UART-to-USB gateway ......................... 3
3.5 Communication through the UART-to-USB gateway.......................................... 3
4 Connectors....................................................................................... 4
4.1 Programming headers......................................................................................... 4
4.2 I/O expansion headers ........................................................................................ 5
5 Attached memories.......................................................................... 6
6 Miscellaneous I/O............................................................................. 7
6.1 Mechanical button switches ................................................................................ 7
6.2 LEDs.................................................................................................................... 7
6.3 Analog I/O............................................................................................................ 7
7 Included code example ................................................................... 8
7.1 Compiling and running ........................................................................................ 8
8 Further code examples and drivers ............................................... 9
9 Known issues................................................................................. 10
9.1 Light sensor....................................................................................................... 10
9.2 USB test points.................................................................................................. 10
9.3 PDI initialization................................................................................................. 10
10 Revision history ........................................................................... 11
10.1 Revision 7........................................................................................................ 11
10.2 Revisions 1 to 6............................................................................................... 11
11 Table of contents ......................................................................... 128370C-AVR-12/11
Atmel Corporation
2325 Orchard Parkway
San Jose, CA 95131
USA
Tel: (+1)(408) 441-0311
Fax: (+1)(408) 487-2600
www.atmel.com
Atmel Asia Limited
Unit 01-5 & 16, 19F
BEA Tower, Milennium City 5
418 Kwun Tong Road
Kwun Tong, Kowloon
HONG KONG
Tel: (+852) 2245-6100
Fax: (+852) 2722-1369
Atmel Munich GmbH
Business Campus
Parkring 4
D-85748 Garching b. Munich
GERMANY
Tel: (+49) 89-31970-0
Fax: (+49) 89-3194621
Atmel Japan
16F, Shin Osaki Kangyo Bldg.
1-6-4 Osaki Shinagawa-ku
Tokyo 104-0032
JAPAN
Tel: (+81) 3-6417-0300
Fax: (+81) 3-6417-0370
© 2011 Atmel Corporation. All rights reserved.
Atmel®
, Atmel logo and combinations thereof, AVR®
, AVR Logo®
, AVR Studio®
, XMEGA®
and others are registered trademarks or
trademarks of Atmel Corporation or its subsidiaries. Windows®
and others are registered trademarks of Microsoft Corporation in U.S.
and or other countries. Other terms and product names may be trademarks of others.
Disclaimer: The information in this document is provided in connection with Atmel products. No license, express or implied, by estoppel or otherwise, to
any intellectual property right is granted by this document or in connection with the sale of Atmel products. EXCEPT AS SET FORTH IN THE ATMEL
TERMS AND CONDITIONS OF SALES LOCATED ON THE ATMEL WEBSITE, ATMEL ASSUMES NO LIABILITY WHATSOEVER AND DISCLAIMS
ANY EXPRESS, IMPLIED OR STATUTORY WARRANTY RELATING TO ITS PRODUCTS INCLUDING, BUT NOT LIMITED TO, THE IMPLIED
WARRANTY OF MERCHANTABILITY, FITNESS FOR A PARTICULAR PURPOSE, OR NON-INFRINGEMENT. IN NO EVENT SHALL ATMEL BE
LIABLE FOR ANY DIRECT, INDIRECT, CONSEQUENTIAL, PUNITIVE, SPECIAL OR INCIDENTAL DAMAGES (INCLUDING, WITHOUT LIMITATION,
DAMAGES FOR LOSS AND PROFITS, BUSINESS INTERRUPTION, OR LOSS OF INFORMATION) ARISING OUT OF THE USE OR INABILITY TO
USE THIS DOCUMENT, EVEN IF ATMEL HAS BEEN ADVISED OF THE POSSIBILITY OF SUCH DAMAGES. Atmel makes no representations or
warranties with respect to the accuracy or completeness of the contents of this document and reserves the right to make changes to specifications and
product descriptions at any time without notice. Atmel does not make any commitment to update the information contained herein. Unless specifically
provided otherwise, Atmel products are not suitable for, and shall not be used in, automotive applications. Atmel products are not intended, authorized, or
warranted for use as components in applications intended to support or sustain life.
Features
• High-performance, Low-power Atmel®AVR® 8-bit Microcontroller
• Advanced RISC Architecture
– 130 Powerful Instructions – Most Single-clock Cycle Execution
– 32 × 8 General Purpose Working Registers
– Fully Static Operation
– Up to 16MIPS Throughput at 16MHz
– On-chip 2-cycle Multiplier
• High Endurance Non-volatile Memory segments
– 8Kbytes of In-System Self-programmable Flash program memory
– 512Bytes EEPROM
– 1Kbyte Internal SRAM
– Write/Erase Cycles: 10,000 Flash/100,000 EEPROM
– Data retention: 20 years at 85°C/100 years at 25°C(1)
– Optional Boot Code Section with Independent Lock Bits
In-System Programming by On-chip Boot Program
True Read-While-Write Operation
– Programming Lock for Software Security
• Peripheral Features
– Two 8-bit Timer/Counters with Separate Prescaler, one Compare Mode
– One 16-bit Timer/Counter with Separate Prescaler, Compare Mode, and Capture
Mode
– Real Time Counter with Separate Oscillator
– Three PWM Channels
– 8-channel ADC in TQFP and QFN/MLF package
Eight Channels 10-bit Accuracy
– 6-channel ADC in PDIP package
Six Channels 10-bit Accuracy
– Byte-oriented Two-wire Serial Interface
– Programmable Serial USART
– Master/Slave SPI Serial Interface
– Programmable Watchdog Timer with Separate On-chip Oscillator
– On-chip Analog Comparator
• Special Microcontroller Features
– Power-on Reset and Programmable Brown-out Detection
– Internal Calibrated RC Oscillator
– External and Internal Interrupt Sources
– Five Sleep Modes: Idle, ADC Noise Reduction, Power-save, Power-down, and
Standby
• I/O and Packages
– 23 Programmable I/O Lines
– 28-lead PDIP, 32-lead TQFP, and 32-pad QFN/MLF
• Operating Voltages
– 2.7V - 5.5V (ATmega8L)
– 4.5V - 5.5V (ATmega8)
• Speed Grades
– 0 - 8MHz (ATmega8L)
– 0 - 16MHz (ATmega8)
• Power Consumption at 4Mhz, 3V, 25C
– Active: 3.6mA
– Idle Mode: 1.0mA
– Power-down Mode: 0.5µA
8-bit Atmel with
8KBytes InSystem
Programmable
Flash
ATmega8
ATmega8L
Rev.2486AA–AVR–02/20132
2486AA–AVR–02/2013
ATmega8(L)
Pin
Configurations
1
2
3
4
5
6
7
8
24
23
22
21
20
19
18
17
(INT1) PD3
(XCK/T0) PD4
GND
VCC
GND
VCC
(XTAL1/TOSC1) PB6
(XTAL2/TOSC2) PB7
PC1 (ADC1)
PC0 (ADC0)
ADC7
GND
AREF
ADC6
AVCC
PB5 (SCK)
32
31
30
29
28
27
26
25
9
10
11
12
13
14
15
16
(T1) PD5
(AIN0) PD6
(AIN1) PD7
(ICP1) PB0
(OC1A) PB1
(SS/OC1B) PB2
(MOSI/OC2) PB3
(MISO) PB4
PD2 (INT0)
PD1 (TXD)
PD0 (RXD)
PC6 (RESET)
PC5 (ADC5/SCL)
PC4 (ADC4/SDA)
PC3 (ADC3)
PC2 (ADC2)
TQFP Top View
1
2
3
4
5
6
7
8
9
10
11
12
13
14
28
27
26
25
24
23
22
21
20
19
18
17
16
15
(RESET) PC6
(RXD) PD0
(TXD) PD1
(INT0) PD2
(INT1) PD3
(XCK/T0) PD4
VCC
GND
(XTAL1/TOSC1) PB6
(XTAL2/TOSC2) PB7
(T1) PD5
(AIN0) PD6
(AIN1) PD7
(ICP1) PB0
PC5 (ADC5/SCL)
PC4 (ADC4/SDA)
PC3 (ADC3)
PC2 (ADC2)
PC1 (ADC1)
PC0 (ADC0)
GND
AREF
AVCC
PB5 (SCK)
PB4 (MISO)
PB3 (MOSI/OC2)
PB2 (SS/OC1B)
PB1 (OC1A)
PDIP
1
2
3
4
5
6
7
8
24
23
22
21
20
19
18
17
32
31
30
29
28
27
26
25
9
10
11
12
13
14
15
16
MLF Top View
(INT1) PD3
(XCK/T0) PD4
GND
VCC
GND
VCC
(XTAL1/TOSC1) PB6
(XTAL2/TOSC2) PB7
PC1 (ADC1)
PC0 (ADC0)
ADC7
GND
AREF
ADC6
AVCC
PB5 (SCK)
(T1) PD5
(AIN0) PD6
(AIN1) PD7
(ICP1) PB0
(OC1A) PB1
(SS/OC1B) PB2
(MOSI/OC2) PB3
(MISO) PB4
PD2 (INT0)
PD1 (TXD)
PD0 (RXD)
PC6 (RESET)
PC5 (ADC5/SCL)
PC4 (ADC4/SDA)
PC3 (ADC3)
PC2 (ADC2)
NOTE:
The large center pad underneath the MLF
packages is made of metal and internally
connected to GND. It should be soldered
or glued to the PCB to ensure good
mechanical stability. If the center pad is
left unconneted, the package might
loosen from the PCB.3
2486AA–AVR–02/2013
ATmega8(L)
Overview The Atmel®AVR® ATmega8 is a low-power CMOS 8-bit microcontroller based on the AVR RISC
architecture. By executing powerful instructions in a single clock cycle, the ATmega8 achieves
throughputs approaching 1MIPS per MHz, allowing the system designer to optimize power consumption
versus processing speed.
Block Diagram Figure 1. Block Diagram
INTERNAL
OSCILLATOR
OSCILLATOR
WATCHDOG
TIMER
MCU CTRL.
& TIMING
OSCILLATOR
TIMERS/
COUNTERS
INTERRUPT
UNIT
STACK
POINTER
EEPROM
SRAM
STATUS
REGISTER
USART
PROGRAM
COUNTER
PROGRAM
FLASH
INSTRUCTION
REGISTER
INSTRUCTION
DECODER
PROGRAMMING
LOGIC SPI
ADC
INTERFACE
COMP.
INTERFACE
PORTC DRIVERS/BUFFERS
PORTC DIGITAL INTERFACE
GENERAL
PURPOSE
REGISTERS
X
Y
Z
ALU
+
-
PORTB DRIVERS/BUFFERS
PORTB DIGITAL INTERFACE
PORTD DIGITAL INTERFACE
PORTD DRIVERS/BUFFERS
XTAL1
XTAL2
CONTROL
LINES
VCC
GND
MUX &
ADC
AGND
AREF
PC0 - PC6 PB0 - PB7
PD0 - PD7
AVR CPU
TWI
RESET4
2486AA–AVR–02/2013
ATmega8(L)
The Atmel®AVR® core combines a rich instruction set with 32 general purpose working registers.
All the 32 registers are directly connected to the Arithmetic Logic Unit (ALU), allowing two independent
registers to be accessed in one single instruction executed in one clock cycle. The
resulting architecture is more code efficient while achieving throughputs up to ten times faster
than conventional CISC microcontrollers.
The ATmega8 provides the following features: 8 Kbytes of In-System Programmable Flash with
Read-While-Write capabilities, 512 bytes of EEPROM, 1 Kbyte of SRAM, 23 general purpose
I/O lines, 32 general purpose working registers, three flexible Timer/Counters with compare
modes, internal and external interrupts, a serial programmable USART, a byte oriented Twowire
Serial Interface, a 6-channel ADC (eight channels in TQFP and QFN/MLF packages) with
10-bit accuracy, a programmable Watchdog Timer with Internal Oscillator, an SPI serial port,
and five software selectable power saving modes. The Idle mode stops the CPU while allowing
the SRAM, Timer/Counters, SPI port, and interrupt system to continue functioning. The Powerdown
mode saves the register contents but freezes the Oscillator, disabling all other chip functions
until the next Interrupt or Hardware Reset. In Power-save mode, the asynchronous timer
continues to run, allowing the user to maintain a timer base while the rest of the device is sleeping.
The ADC Noise Reduction mode stops the CPU and all I/O modules except asynchronous
timer and ADC, to minimize switching noise during ADC conversions. In Standby mode, the
crystal/resonator Oscillator is running while the rest of the device is sleeping. This allows very
fast start-up combined with low-power consumption.
The device is manufactured using Atmel’s high density non-volatile memory technology. The
Flash Program memory can be reprogrammed In-System through an SPI serial interface, by a
conventional non-volatile memory programmer, or by an On-chip boot program running on the
AVR core. The boot program can use any interface to download the application program in the
Application Flash memory. Software in the Boot Flash Section will continue to run while the
Application Flash Section is updated, providing true Read-While-Write operation. By combining
an 8-bit RISC CPU with In-System Self-Programmable Flash on a monolithic chip, the Atmel
ATmega8 is a powerful microcontroller that provides a highly-flexible and cost-effective solution
to many embedded control applications.
The ATmega8 is supported with a full suite of program and system development tools, including
C compilers, macro assemblers, program simulators, and evaluation kits.
Disclaimer Typical values contained in this datasheet are based on simulations and characterization of
other AVR microcontrollers manufactured on the same process technology. Minimum and Maximum
values will be available after the device is characterized.5
2486AA–AVR–02/2013
ATmega8(L)
Pin Descriptions
VCC Digital supply voltage.
GND Ground.
Port B (PB7..PB0)
XTAL1/XTAL2/TOSC1/
TOSC2
Port B is an 8-bit bi-directional I/O port with internal pull-up resistors (selected for each bit). The
Port B output buffers have symmetrical drive characteristics with both high sink and source
capability. As inputs, Port B pins that are externally pulled low will source current if the pull-up
resistors are activated. The Port B pins are tri-stated when a reset condition becomes active,
even if the clock is not running.
Depending on the clock selection fuse settings, PB6 can be used as input to the inverting Oscillator
amplifier and input to the internal clock operating circuit.
Depending on the clock selection fuse settings, PB7 can be used as output from the inverting
Oscillator amplifier.
If the Internal Calibrated RC Oscillator is used as chip clock source, PB7..6 is used as TOSC2..1
input for the Asynchronous Timer/Counter2 if the AS2 bit in ASSR is set.
The various special features of Port B are elaborated in “Alternate Functions of Port B” on page
58 and “System Clock and Clock Options” on page 25.
Port C (PC5..PC0) Port C is an 7-bit bi-directional I/O port with internal pull-up resistors (selected for each bit). The
Port C output buffers have symmetrical drive characteristics with both high sink and source
capability. As inputs, Port C pins that are externally pulled low will source current if the pull-up
resistors are activated. The Port C pins are tri-stated when a reset condition becomes active,
even if the clock is not running.
PC6/RESET If the RSTDISBL Fuse is programmed, PC6 is used as an I/O pin. Note that the electrical characteristics
of PC6 differ from those of the other pins of Port C.
If the RSTDISBL Fuse is unprogrammed, PC6 is used as a Reset input. A low level on this pin
for longer than the minimum pulse length will generate a Reset, even if the clock is not running.
The minimum pulse length is given in Table 15 on page 38. Shorter pulses are not guaranteed to
generate a Reset.
The various special features of Port C are elaborated on page 61.
Port D (PD7..PD0) Port D is an 8-bit bi-directional I/O port with internal pull-up resistors (selected for each bit). The
Port D output buffers have symmetrical drive characteristics with both high sink and source
capability. As inputs, Port D pins that are externally pulled low will source current if the pull-up
resistors are activated. The Port D pins are tri-stated when a reset condition becomes active,
even if the clock is not running.
Port D also serves the functions of various special features of the ATmega8 as listed on page
63.
RESET Reset input. A low level on this pin for longer than the minimum pulse length will generate a
reset, even if the clock is not running. The minimum pulse length is given in Table 15 on page
38. Shorter pulses are not guaranteed to generate a reset.6
2486AA–AVR–02/2013
ATmega8(L)
AVCC AVCC is the supply voltage pin for the A/D Converter, Port C (3..0), and ADC (7..6). It should be
externally connected to VCC, even if the ADC is not used. If the ADC is used, it should be connected
to VCC through a low-pass filter. Note that Port C (5..4) use digital supply voltage, VCC.
AREF AREF is the analog reference pin for the A/D Converter.
ADC7..6 (TQFP and
QFN/MLF Package
Only)
In the TQFP and QFN/MLF package, ADC7..6 serve as analog inputs to the A/D converter.
These pins are powered from the analog supply and serve as 10-bit ADC channels.7
2486AA–AVR–02/2013
ATmega8(L)
Resources A comprehensive set of development tools, application notes and datasheets are available for
download on http://www.atmel.com/avr.
Note: 1.
Data Retention Reliability Qualification results show that the projected data retention failure rate is much less
than 1 PPM over 20 years at 85°C or 100 years at 25°C.8
2486AA–AVR–02/2013
ATmega8(L)
About Code
Examples
This datasheet contains simple code examples that briefly show how to use various parts of the
device. These code examples assume that the part specific header file is included before compilation.
Be aware that not all C compiler vendors include bit definitions in the header files and
interrupt handling in C is compiler dependent. Please confirm with the C compiler documentation
for more details.9
2486AA–AVR–02/2013
ATmega8(L)
Atmel AVR CPU
Core
Introduction This section discusses the Atmel®AVR® core architecture in general. The main function of the
CPU core is to ensure correct program execution. The CPU must therefore be able to access
memories, perform calculations, control peripherals, and handle interrupts.
Architectural
Overview
Figure 2. Block Diagram of the AVR MCU Architecture
In order to maximize performance and parallelism, the AVR uses a Harvard architecture – with
separate memories and buses for program and data. Instructions in the Program memory are
executed with a single level pipelining. While one instruction is being executed, the next instruction
is pre-fetched from the Program memory. This concept enables instructions to be executed
in every clock cycle. The Program memory is In-System Reprogrammable Flash memory.
The fast-access Register File contains 32 × 8-bit general purpose working registers with a single
clock cycle access time. This allows single-cycle Arithmetic Logic Unit (ALU) operation. In a typical
ALU operation, two operands are output from the Register File, the operation is executed,
and the result is stored back in the Register File – in one clock cycle.
Six of the 32 registers can be used as three 16-bit indirect address register pointers for Data
Space addressing – enabling efficient address calculations. One of the these address pointers
Flash
Program
Memory
Instruction
Register
Instruction
Decoder
Program
Counter
Control Lines
32 x 8
General
Purpose
Registrers
ALU
Status
and Control
I/O Lines
EEPROM
Data Bus 8-bit
Data
SRAM
Direct Addressing
Indirect Addressing
Interrupt
Unit
SPI
Unit
Watchdog
Timer
Analog
Comparator
i/O Module 2
i/O Module1
i/O Module n10
2486AA–AVR–02/2013
ATmega8(L)
can also be used as an address pointer for look up tables in Flash Program memory. These
added function registers are the 16-bit X-register, Y-register, and Z-register, described later in
this section.
The ALU supports arithmetic and logic operations between registers or between a constant and
a register. Single register operations can also be executed in the ALU. After an arithmetic operation,
the Status Register is updated to reflect information about the result of the operation.
The Program flow is provided by conditional and unconditional jump and call instructions, able to
directly address the whole address space. Most AVR instructions have a single 16-bit word format.
Every Program memory address contains a 16-bit or 32-bit instruction.
Program Flash memory space is divided in two sections, the Boot program section and the
Application program section. Both sections have dedicated Lock Bits for write and read/write
protection. The SPM instruction that writes into the Application Flash memory section must
reside in the Boot program section.
During interrupts and subroutine calls, the return address Program Counter (PC) is stored on the
Stack. The Stack is effectively allocated in the general data SRAM, and consequently the Stack
size is only limited by the total SRAM size and the usage of the SRAM. All user programs must
initialize the SP in the reset routine (before subroutines or interrupts are executed). The Stack
Pointer SP is read/write accessible in the I/O space. The data SRAM can easily be accessed
through the five different addressing modes supported in the AVR architecture.
The memory spaces in the AVR architecture are all linear and regular memory maps.
A flexible interrupt module has its control registers in the I/O space with an additional global
interrupt enable bit in the Status Register. All interrupts have a separate Interrupt Vector in the
Interrupt Vector table. The interrupts have priority in accordance with their Interrupt Vector position.
The lower the Interrupt Vector address, the higher the priority.
The I/O memory space contains 64 addresses for CPU peripheral functions as Control Registers,
SPI, and other I/O functions. The I/O Memory can be accessed directly, or as the Data
Space locations following those of the Register File, 0x20 - 0x5F.11
2486AA–AVR–02/2013
ATmega8(L)
Arithmetic Logic
Unit – ALU
The high-performance Atmel®AVR® ALU operates in direct connection with all the 32 general
purpose working registers. Within a single clock cycle, arithmetic operations between general
purpose registers or between a register and an immediate are executed. The ALU operations
are divided into three main categories – arithmetic, logical, and bit-functions. Some implementations
of the architecture also provide a powerful multiplier supporting both signed/unsigned
multiplication and fractional format. For a detailed description, see “Instruction Set Summary” on
page 311.
Status Register The Status Register contains information about the result of the most recently executed arithmetic
instruction. This information can be used for altering program flow in order to perform
conditional operations. Note that the Status Register is updated after all ALU operations, as
specified in the Instruction Set Reference. This will in many cases remove the need for using the
dedicated compare instructions, resulting in faster and more compact code.
The Status Register is not automatically stored when entering an interrupt routine and restored
when returning from an interrupt. This must be handled by software.
The AVR Status Register – SREG – is defined as:
• Bit 7 – I: Global Interrupt Enable
The Global Interrupt Enable bit must be set for the interrupts to be enabled. The individual interrupt
enable control is then performed in separate control registers. If the Global Interrupt Enable
Register is cleared, none of the interrupts are enabled independent of the individual interrupt
enable settings. The I-bit is cleared by hardware after an interrupt has occurred, and is set by
the RETI instruction to enable subsequent interrupts. The I-bit can also be set and cleared by
the application with the SEI and CLI instructions, as described in the Instruction Set Reference.
• Bit 6 – T: Bit Copy Storage
The Bit Copy instructions BLD (Bit LoaD) and BST (Bit STore) use the T-bit as source or destination
for the operated bit. A bit from a register in the Register File can be copied into T by the
BST instruction, and a bit in T can be copied into a bit in a register in the Register File by the
BLD instruction.
• Bit 5 – H: Half Carry Flag
The Half Carry Flag H indicates a Half Carry in some arithmetic operations. Half Carry is useful
in BCD arithmetic. See the “Instruction Set Description” for detailed information.
• Bit 4 – S: Sign Bit, S = N V
The S-bit is always an exclusive or between the Negative Flag N and the Two’s Complement
Overflow Flag V. See the “Instruction Set Description” for detailed information.
• Bit 3 – V: Two’s Complement Overflow Flag
The Two’s Complement Overflow Flag V supports two’s complement arithmetics. See the
“Instruction Set Description” for detailed information.
• Bit 2 – N: Negative Flag
The Negative Flag N indicates a negative result in an arithmetic or logic operation. See the
“Instruction Set Description” for detailed information.
Bit 7 6 5 4 3 2 1 0
I T H S V N Z C SREG
Read/Write R/W R/W R/W R/W R/W R/W R/W R/W
Initial Value 0 0 0 0 0 0 0 012
2486AA–AVR–02/2013
ATmega8(L)
• Bit 1 – Z: Zero Flag
The Zero Flag Z indicates a zero result in an arithmetic or logic operation. See the “Instruction
Set Description” for detailed information.
• Bit 0 – C: Carry Flag
The Carry Flag C indicates a Carry in an arithmetic or logic operation. See the “Instruction Set
Description” for detailed information.
General Purpose
Register File
The Register File is optimized for the AVR Enhanced RISC instruction set. In order to achieve
the required performance and flexibility, the following input/output schemes are supported by the
Register File:
• One 8-bit output operand and one 8-bit result input
• Two 8-bit output operands and one 8-bit result input
• Two 8-bit output operands and one 16-bit result input
• One 16-bit output operand and one 16-bit result input
Figure 3 shows the structure of the 32 general purpose working registers in the CPU.
Figure 3. AVR CPU General Purpose Working Registers
Most of the instructions operating on the Register File have direct access to all registers, and
most of them are single cycle instructions.
As shown in Figure 3, each register is also assigned a Data memory address, mapping them
directly into the first 32 locations of the user Data Space. Although not being physically implemented
as SRAM locations, this memory organization provides great flexibility in access of the
registers, as the X-pointer, Y-pointer, and Z-pointer Registers can be set to index any register in
the file.
7 0 Addr.
R0 0x00
R1 0x01
R2 0x02
…
R13 0x0D
General R14 0x0E
Purpose R15 0x0F
Working R16 0x10
Registers R17 0x11
…
R26 0x1A X-register Low Byte
R27 0x1B X-register High Byte
R28 0x1C Y-register Low Byte
R29 0x1D Y-register High Byte
R30 0x1E Z-register Low Byte
R31 0x1F Z-register High Byte13
2486AA–AVR–02/2013
ATmega8(L)
The X-register, Yregister
and Z-register
The registers R26..R31 have some added functions to their general purpose usage. These registers
are 16-bit address pointers for indirect addressing of the Data Space. The three indirect
address registers X, Y and Z are defined as described in Figure 4.
Figure 4. The X-register, Y-register and Z-Register
In the different addressing modes these address registers have functions as fixed displacement,
automatic increment, and automatic decrement (see the Instruction Set Reference for details).
Stack Pointer The Stack is mainly used for storing temporary data, for storing local variables and for storing
return addresses after interrupts and subroutine calls. The Stack Pointer Register always points
to the top of the Stack. Note that the Stack is implemented as growing from higher memory locations
to lower memory locations. This implies that a Stack PUSH command decreases the Stack
Pointer.
The Stack Pointer points to the data SRAM Stack area where the Subroutine and Interrupt
Stacks are located. This Stack space in the data SRAM must be defined by the program before
any subroutine calls are executed or interrupts are enabled. The Stack Pointer must be set to
point above 0x60. The Stack Pointer is decremented by one when data is pushed onto the Stack
with the PUSH instruction, and it is decremented by two when the return address is pushed onto
the Stack with subroutine call or interrupt. The Stack Pointer is incremented by one when data is
popped from the Stack with the POP instruction, and it is incremented by two when address is
popped from the Stack with return from subroutine RET or return from interrupt RETI.
The AVR Stack Pointer is implemented as two 8-bit registers in the I/O space. The number of
bits actually used is implementation dependent. Note that the data space in some implementations
of the AVR architecture is so small that only SPL is needed. In this case, the SPH Register
will not be present.
Instruction
Execution Timing
This section describes the general access timing concepts for instruction execution. The
Atmel®AVR® CPU is driven by the CPU clock clkCPU, directly generated from the selected clock
source for the chip. No internal clock division is used.
15 XH XL 0
X-register 7 0 7 0
R27 (0x1B) R26 (0x1A)
15 YH YL 0
Y-register 7 0 7 0
R29 (0x1D) R28 (0x1C)
15 ZH ZL 0
Z-register 7 0 7 0
R31 (0x1F) R30 (0x1E)
Bit 15 14 13 12 11 10 9 8
SP15 SP14 SP13 SP12 SP11 SP10 SP9 SP8 SPH
SP7 SP6 SP5 SP4 SP3 SP2 SP1 SP0 SPL
76543210
Read/Write R/W R/W R/W R/W R/W R/W R/W R/W
R/W R/W R/W R/W R/W R/W R/W R/W
Initial Value 0 0 0 0 0 0 0 0
0000000014
2486AA–AVR–02/2013
ATmega8(L)
Figure 5 shows the parallel instruction fetches and instruction executions enabled by the Harvard
architecture and the fast-access Register File concept. This is the basic pipelining concept
to obtain up to 1MIPS per MHz with the corresponding unique results for functions per cost,
functions per clocks, and functions per power-unit.
Figure 5. The Parallel Instruction Fetches and Instruction Executions
Figure 6 shows the internal timing concept for the Register File. In a single clock cycle an ALU
operation using two register operands is executed, and the result is stored back to the destination
register.
Figure 6. Single Cycle ALU Operation
Reset and
Interrupt Handling
The Atmel®AVR® provides several different interrupt sources. These interrupts and the separate
Reset Vector each have a separate Program Vector in the Program memory space. All interrupts
are assigned individual enable bits which must be written logic one together with the
Global Interrupt Enable bit in the Status Register in order to enable the interrupt. Depending on
the Program Counter value, interrupts may be automatically disabled when Boot Lock Bits
BLB02 or BLB12 are programmed. This feature improves software security. See the section
“Memory Programming” on page 215 for details.
The lowest addresses in the Program memory space are by default defined as the Reset and
Interrupt Vectors. The complete list of Vectors is shown in “Interrupts” on page 46. The list also
determines the priority levels of the different interrupts. The lower the address the higher is the
priority level. RESET has the highest priority, and next is INT0 – the External Interrupt Request
0. The Interrupt Vectors can be moved to the start of the boot Flash section by setting the Interrupt
Vector Select (IVSEL) bit in the General Interrupt Control Register (GICR). Refer to
“Interrupts” on page 46 for more information. The Reset Vector can also be moved to the start of
the boot Flash section by programming the BOOTRST Fuse, see “Boot Loader Support – ReadWhile-Write
Self-Programming” on page 202.
clk
1st Instruction Fetch
1st Instruction Execute
2nd Instruction Fetch
2nd Instruction Execute
3rd Instruction Fetch
3rd Instruction Execute
4th Instruction Fetch
T1 T2 T3 T4
CPU
Total Execution Time
Register Operands Fetch
ALU Operation Execute
Result Write Back
T1 T2 T3 T4
clkCPU15
2486AA–AVR–02/2013
ATmega8(L)
When an interrupt occurs, the Global Interrupt Enable I-bit is cleared and all interrupts are disabled.
The user software can write logic one to the I-bit to enable nested interrupts. All enabled
interrupts can then interrupt the current interrupt routine. The I-bit is automatically set when a
Return from Interrupt instruction – RETI – is executed.
There are basically two types of interrupts. The first type is triggered by an event that sets the
Interrupt Flag. For these interrupts, the Program Counter is vectored to the actual Interrupt Vector
in order to execute the interrupt handling routine, and hardware clears the corresponding
Interrupt Flag. Interrupt Flags can also be cleared by writing a logic one to the flag bit position(s)
to be cleared. If an interrupt condition occurs while the corresponding interrupt enable bit is
cleared, the Interrupt Flag will be set and remembered until the interrupt is enabled, or the flag is
cleared by software. Similarly, if one or more interrupt conditions occur while the global interrupt
enable bit is cleared, the corresponding Interrupt Flag(s) will be set and remembered until the
global interrupt enable bit is set, and will then be executed by order of priority.
The second type of interrupts will trigger as long as the interrupt condition is present. These
interrupts do not necessarily have Interrupt Flags. If the interrupt condition disappears before the
interrupt is enabled, the interrupt will not be triggered.
When the AVR exits from an interrupt, it will always return to the main program and execute one
more instruction before any pending interrupt is served.
Note that the Status Register is not automatically stored when entering an interrupt routine, nor
restored when returning from an interrupt routine. This must be handled by software.
When using the CLI instruction to disable interrupts, the interrupts will be immediately disabled.
No interrupt will be executed after the CLI instruction, even if it occurs simultaneously with the
CLI instruction. The following example shows how this can be used to avoid interrupts during the
timed EEPROM write sequence.
Assembly Code Example
in r16, SREG ; store SREG value
cli ; disable interrupts during timed sequence
sbi EECR, EEMWE ; start EEPROM write
sbi EECR, EEWE
out SREG, r16 ; restore SREG value (I-bit)
C Code Example
char cSREG;
cSREG = SREG; /* store SREG value */
/* disable interrupts during timed sequence */
_CLI();
EECR |= (1< xxx
... ... ...
Table 19. Reset and Interrupt Vectors Placement
BOOTRST(1) IVSEL Reset Address Interrupt Vectors Start Address
1 0 0x000 0x001
1 1 0x000 Boot Reset Address + 0x001
0 0 Boot Reset Address 0x001
0 1 Boot Reset Address Boot Reset Address + 0x00148
2486AA–AVR–02/2013
ATmega8(L)
When the BOOTRST Fuse is unprogrammed, the boot section size set to 2Kbytes and the
IVSEL bit in the GICR Register is set before any interrupts are enabled, the most typical and
general program setup for the Reset and Interrupt Vector Addresses is:
AddressLabels Code Comments
$000 rjmp RESET ; Reset handler
;
$001 RESET:ldi r16,high(RAMEND); Main program start
$002 out SPH,r16 ; Set Stack Pointer to top of RAM
$003 ldi r16,low(RAMEND)
$004 out SPL,r16
$005 sei ; Enable interrupts
$006 xxx
;
.org $c01
$c01 rjmp EXT_INT0 ; IRQ0 Handler
$c02 rjmp EXT_INT1 ; IRQ1 Handler
... ... ... ;
$c12 rjmp SPM_RDY ; Store Program Memory Ready Handler
When the BOOTRST Fuse is programmed and the boot section size set to 2Kbytes, the most
typical and general program setup for the Reset and Interrupt Vector Addresses is:
AddressLabels Code Comments
.org $001
$001 rjmp EXT_INT0 ; IRQ0 Handler
$002 rjmp EXT_INT1 ; IRQ1 Handler
... ... ... ;
$012 rjmp SPM_RDY ; Store Program Memory Ready Handler
;
.org $c00
$c00 rjmp RESET ; Reset handler
;
$c01 RESET:ldi r16,high(RAMEND); Main program start
$c02 out SPH,r16 ; Set Stack Pointer to top of RAM
$c03 ldi r16,low(RAMEND)
$c04 out SPL,r16
$c05 sei ; Enable interrupts
$c06 xxx49
2486AA–AVR–02/2013
ATmega8(L)
When the BOOTRST Fuse is programmed, the boot section size set to 2Kbytes, and the IVSEL
bit in the GICR Register is set before any interrupts are enabled, the most typical and general
program setup for the Reset and Interrupt Vector Addresses is:
AddressLabels Code Comments
;
.org $c00
$c00 rjmp RESET ; Reset handler
$c01 rjmp EXT_INT0 ; IRQ0 Handler
$c02 rjmp EXT_INT1 ; IRQ1 Handler
... ... ... ;
$c12 rjmp SPM_RDY ; Store Program Memory Ready Handler
$c13 RESET: ldi r16,high(RAMEND); Main program start
$c14 out SPH,r16 ; Set Stack Pointer to top of RAM
$c15 ldi r16,low(RAMEND)
$c16 out SPL,r16
$c17 sei ; Enable interrupts
$c18 xxx
Moving Interrupts
Between Application
and Boot Space
The General Interrupt Control Register controls the placement of the Interrupt Vector table.
General Interrupt
Control Register –
GICR
• Bit 1 – IVSEL: Interrupt Vector Select
When the IVSEL bit is cleared (zero), the Interrupt Vectors are placed at the start of the Flash
memory. When this bit is set (one), the Interrupt Vectors are moved to the beginning of the Boot
Loader section of the Flash. The actual address of the start of the boot Flash section is determined
by the BOOTSZ Fuses. Refer to the section “Boot Loader Support – Read-While-Write
Self-Programming” on page 202 for details. To avoid unintentional changes of Interrupt Vector
tables, a special write procedure must be followed to change the IVSEL bit:
1. Write the Interrupt Vector Change Enable (IVCE) bit to one
2. Within four cycles, write the desired value to IVSEL while writing a zero to IVCE
Interrupts will automatically be disabled while this sequence is executed. Interrupts are disabled
in the cycle IVCE is set, and they remain disabled until after the instruction following the write to
IVSEL. If IVSEL is not written, interrupts remain disabled for four cycles. The I-bit in the Status
Register is unaffected by the automatic disabling.
Note: If Interrupt Vectors are placed in the Boot Loader section and Boot Lock bit BLB02 is programmed,
interrupts are disabled while executing from the Application section. If Interrupt
Vectors are placed in the Application section and Boot Lock bit BLB12 is programed, interrupts
are disabled while executing from the Boot Loader section. Refer to the section “Boot Loader
Support – Read-While-Write Self-Programming” on page 202 for details on Boot Lock Bits.
Bit 7 6 5 4 3 2 1 0
INT1 INT0 – – – – IVSEL IVCE GICR
Read/Write R/W R/W R R R R R/W R/W
Initial Value 0 0 0 0 0 0 0 050
2486AA–AVR–02/2013
ATmega8(L)
• Bit 0 – IVCE: Interrupt Vector Change Enable
The IVCE bit must be written to logic one to enable change of the IVSEL bit. IVCE is cleared by
hardware four cycles after it is written or when IVSEL is written. Setting the IVCE bit will disable
interrupts, as explained in the IVSEL description above. See Code Example below.
Assembly Code Example
Move_interrupts:
; Enable change of Interrupt Vectors
ldi r16, (1< CSn2:0 > 1). The number of system clock
cycles from when the timer is enabled to the first count occurs can be from 1 to N+1 system
clock cycles, where N equals the prescaler divisor (8, 64, 256, or 1024).
It is possible to use the prescaler reset for synchronizing the Timer/Counter to program execution.
However, care must be taken if the other Timer/Counter that shares the same prescaler
also uses prescaling. A prescaler reset will affect the prescaler period for all Timer/Counters it is
connected to.
External Clock Source An external clock source applied to the T1/T0 pin can be used as Timer/Counter clock
(clkT1/clkT0). The T1/T0 pin is sampled once every system clock cycle by the pin synchronization
logic. The synchronized (sampled) signal is then passed through the edge detector. Figure 30
shows a functional equivalent block diagram of the T1/T0 synchronization and edge detector
logic. The registers are clocked at the positive edge of the internal system clock (clkI/O). The latch
is transparent in the high period of the internal system clock.
The edge detector generates one clkT1/clkT0 pulse for each positive (CSn2:0 = 7) or negative
(CSn2:0 = 6) edge it detects.
Figure 30. T1/T0 Pin Sampling
The synchronization and edge detector logic introduces a delay of 2.5 to 3.5 system clock cycles
from an edge has been applied to the T1/T0 pin to the counter is updated.
Enabling and disabling of the clock input must be done when T1/T0 has been stable for at least
one system clock cycle, otherwise it is a risk that a false Timer/Counter clock pulse is generated.
Each half period of the external clock applied must be longer than one system clock cycle to
ensure correct sampling. The external clock must be guaranteed to have less than half the system
clock frequency (fExtClk < fclk_I/O/2) given a 50/50% duty cycle. Since the edge detector uses
Tn_sync
(To Clock
Select Logic)
Synchronization Edge Detector
D Q D Q
LE
Tn D Q
clkI/O74
2486AA–AVR–02/2013
ATmega8(L)
sampling, the maximum frequency of an external clock it can detect is half the sampling frequency
(Nyquist sampling theorem). However, due to variation of the system clock frequency
and duty cycle caused by Oscillator source (crystal, resonator, and capacitors) tolerances, it is
recommended that maximum frequency of an external clock source is less than fclk_I/O/2.5.
An external clock source can not be prescaled.
Figure 31. Prescaler for Timer/Counter0 and Timer/Counter1(1)
Note: 1. The synchronization logic on the input pins (T1/T0) is shown in Figure 30 on page 73
Special Function IO
Register – SFIOR
• Bit 0 – PSR10: Prescaler Reset Timer/Counter1 and Timer/Counter0
When this bit is written to one, the Timer/Counter1 and Timer/Counter0 prescaler will be reset.
The bit will be cleared by hardware after the operation is performed. Writing a zero to this bit will
have no effect. Note that Timer/Counter1 and Timer/Counter0 share the same prescaler and a
reset of this prescaler will affect both timers. This bit will always be read as zero.
PSR10
Clear
clkT1 clkT0
T1
T0
clkI/O
Synchronization
Synchronization
Bit 7 6 5 4 3 2 1 0
– – – – ACME PUD PSR2 PSR10 SFIOR
Read/Write R R R R R/W R/W R/W R/W
Initial Value 0 0 0 0 0 0 0 075
2486AA–AVR–02/2013
ATmega8(L)
16-bit
Timer/Counter1
The 16-bit Timer/Counter unit allows accurate program execution timing (event management),
wave generation, and signal timing measurement. The main features are:
• True 16-bit Design (that is, allows 16-bit PWM)
• Two Independent Output Compare Units
• Double Buffered Output Compare Registers
• One Input Capture Unit
• Input Capture Noise Canceler
• Clear Timer on Compare Match (Auto Reload)
• Glitch-free, Phase Correct Pulse Width Modulator (PWM)
• Variable PWM Period
• Frequency Generator
• External Event Counter
• Four Independent Interrupt Sources (TOV1, OCF1A, OCF1B, and ICF1)
Overview Most register and bit references in this section are written in general form. A lower case “n”
replaces the Timer/Counter number, and a lower case “x” replaces the Output Compare unit
channel. However, when using the register or bit defines in a program, the precise form must be
used, that is, TCNT1 for accessing Timer/Counter1 counter value and so on.
A simplified block diagram of the 16-bit Timer/Counter is shown in Figure 32 on page 76. For the
actual placement of I/O pins, refer to “Pin Configurations” on page 2. CPU accessible I/O Registers,
including I/O bits and I/O pins, are shown in bold. The device-specific I/O Register and bit
locations are listed in the “16-bit Timer/Counter Register Description” on page 96.76
2486AA–AVR–02/2013
ATmega8(L)
Figure 32. 16-bit Timer/Counter Block Diagram(1)
Note: 1. Refer to “Pin Configurations” on page 2, Table 22 on page 58, and Table 28 on page 63 for
Timer/Counter1 pin placement and description
Registers The Timer/Counter (TCNT1), Output Compare Registers (OCR1A/B), and Input Capture Register
(ICR1) are all 16-bit registers. Special procedures must be followed when accessing the 16-
bit registers. These procedures are described in the section “Accessing 16-bit Registers” on
page 77. The Timer/Counter Control Registers (TCCR1A/B) are 8-bit registers and have no CPU
access restrictions. Interrupt requests (abbreviated to Int.Req. in the figure) signals are all visible
in the Timer Interrupt Flag Register (TIFR). All interrupts are individually masked with the Timer
Interrupt Mask Register (TIMSK). TIFR and TIMSK are not shown in the figure since these registers
are shared by other timer units.
The Timer/Counter can be clocked internally, via the prescaler, or by an external clock source on
the T1 pin. The Clock Select logic block controls which clock source and edge the Timer/Counter
uses to increment (or decrement) its value. The Timer/Counter is inactive when no clock source
is selected. The output from the clock select logic is referred to as the timer clock (clkT1).
The double buffered Output Compare Registers (OCR1A/B) are compared with the Timer/Counter
value at all time. The result of the compare can be used by the waveform generator to
generate a PWM or variable frequency output on the Output Compare Pin (OC1A/B). See “Output
Compare Units” on page 83. The Compare Match event will also set the Compare Match
Flag (OCF1A/B) which can be used to generate an Output Compare interrupt request.
Clock Select
Timer/Counter
DATA BUS
OCRnA
OCRnB
ICRn
=
=
TCNTn
Waveform
Generation
Waveform
Generation
OCnA
OCnB
Noise
Canceler
ICPn
=
Fixed
TOP
Values
Edge
Detector
Control Logic
= 0
TOP BOTTOM
Count
Clear
Direction
TOVn
(Int. Req.)
OCFnA
(Int. Req.)
OCFnB
(Int.Req.)
ICFn (Int.Req.)
TCCRnA TCCRnB
( From Analog
Comparator Ouput )
Tn Edge
Detector
( From Prescaler )
clkTn77
2486AA–AVR–02/2013
ATmega8(L)
The Input Capture Register can capture the Timer/Counter value at a given external (edge triggered)
event on either the Input Capture Pin (ICP1) or on the Analog Comparator pins (see
“Analog Comparator” on page 186). The Input Capture unit includes a digital filtering unit (Noise
Canceler) for reducing the chance of capturing noise spikes.
The TOP value, or maximum Timer/Counter value, can in some modes of operation be defined
by either the OCR1A Register, the ICR1 Register, or by a set of fixed values. When using
OCR1A as TOP value in a PWM mode, the OCR1A Register can not be used for generating a
PWM output. However, the TOP value will in this case be double buffered allowing the TOP
value to be changed in run time. If a fixed TOP value is required, the ICR1 Register can be used
as an alternative, freeing the OCR1A to be used as PWM output.
Definitions The following definitions are used extensively throughout the document:
Compatibility The 16-bit Timer/Counter has been updated and improved from previous versions of the 16-bit
AVR Timer/Counter. This 16-bit Timer/Counter is fully compatible with the earlier version
regarding:
• All 16-bit Timer/Counter related I/O Register address locations, including Timer Interrupt
Registers
• Bit locations inside all 16-bit Timer/Counter Registers, including Timer Interrupt Registers
• Interrupt Vectors
The following control bits have changed name, but have same functionality and register location:
• PWM10 is changed to WGM10
• PWM11 is changed to WGM11
• CTC1 is changed to WGM12
The following bits are added to the 16-bit Timer/Counter Control Registers:
• FOC1A and FOC1B are added to TCCR1A
• WGM13 is added to TCCR1B
The 16-bit Timer/Counter has improvements that will affect the compatibility in some special
cases.
Accessing 16-bit
Registers
The TCNT1, OCR1A/B, and ICR1 are 16-bit registers that can be accessed by the AVR CPU via
the 8-bit data bus. The 16-bit register must be byte accessed using two read or write operations.
The 16-bit timer has a single 8-bit register for temporary storing of the High byte of the 16-bit
access. The same temporary register is shared between all 16-bit registers within the 16-bit
timer. Accessing the Low byte triggers the 16-bit read or write operation. When the Low byte of a
16-bit register is written by the CPU, the High byte stored in the temporary register, and the Low
byte written are both copied into the 16-bit register in the same clock cycle. When the Low byte
Table 35. Definitions
BOTTOM The counter reaches the BOTTOM when it becomes 0x0000.
MAX The counter reaches its MAXimum when it becomes 0xFFFF (decimal
65535).
TOP The counter reaches the TOP when it becomes equal to the highest
value in the count sequence. The TOP value can be assigned to be one
of the fixed values: 0x00FF, 0x01FF, or 0x03FF, or to the value stored in
the OCR1A or ICR1 Register. The assignment is dependent of the mode
of operation.78
2486AA–AVR–02/2013
ATmega8(L)
of a 16-bit register is read by the CPU, the High byte of the 16-bit register is copied into the temporary
register in the same clock cycle as the Low byte is read.
Not all 16-bit accesses uses the temporary register for the High byte. Reading the OCR1A/B 16-
bit registers does not involve using the temporary register.
To do a 16-bit write, the High byte must be written before the Low byte. For a 16-bit read, the
Low byte must be read before the High byte.
The following code examples show how to access the 16-bit Timer Registers assuming that no
interrupts updates the temporary register. The same principle can be used directly for accessing
the OCR1A/B and ICR1 Registers. Note that when using “C”, the compiler handles the 16-bit
access.
Note: 1. See “About Code Examples” on page 8
The assembly code example returns the TCNT1 value in the r17:r16 Register pair.
It is important to notice that accessing 16-bit registers are atomic operations. If an interrupt
occurs between the two instructions accessing the 16-bit register, and the interrupt code
updates the temporary register by accessing the same or any other of the 16-bit Timer Registers,
then the result of the access outside the interrupt will be corrupted. Therefore, when both
the main code and the interrupt code update the temporary register, the main code must disable
the interrupts during the 16-bit access.
The following code examples show how to do an atomic read of the TCNT1 Register contents.
Reading any of the OCR1A/B or ICR1 Registers can be done by using the same principle.
Assembly Code Example(1)
...
; Set TCNT1 to 0x01FF
ldi r17,0x01
ldi r16,0xFF
out TCNT1H,r17
out TCNT1L,r16
; Read TCNT1 into r17:r16
in r16,TCNT1L
in r17,TCNT1H
...
C Code Example(1)
unsigned int i;
...
/* Set TCNT1 to 0x01FF */
TCNT1 = 0x1FF;
/* Read TCNT1 into i */
i = TCNT1;
...79
2486AA–AVR–02/2013
ATmega8(L)
Note: 1. See “About Code Examples” on page 8
The assembly code example returns the TCNT1 value in the r17:r16 Register pair.
Assembly Code Example(1)
TIM16_ReadTCNT1:
; Save Global Interrupt Flag
in r18,SREG
; Disable interrupts
cli
; Read TCNT1 into r17:r16
in r16,TCNT1L
in r17,TCNT1H
; Restore Global Interrupt Flag
out SREG,r18
ret
C Code Example(1)
unsigned int TIM16_ReadTCNT1( void )
{
unsigned char sreg;
unsigned int i;
/* Save Global Interrupt Flag */
sreg = SREG;
/* Disable interrupts */
_CLI();
/* Read TCNT1 into i */
i = TCNT1;
/* Restore Global Interrupt Flag */
SREG = sreg;
return i;
}80
2486AA–AVR–02/2013
ATmega8(L)
The following code examples show how to do an atomic write of the TCNT1 Register contents.
Writing any of the OCR1A/B or ICR1 Registers can be done by using the same principle.
Note: 1. See “About Code Examples” on page 8
The assembly code example requires that the r17:r16 Register pair contains the value to be written
to TCNT1.
Reusing the
Temporary High Byte
Register
If writing to more than one 16-bit register where the High byte is the same for all registers written,
then the High byte only needs to be written once. However, note that the same rule of
atomic operation described previously also applies in this case.
Timer/Counter
Clock Sources
The Timer/Counter can be clocked by an internal or an external clock source. The clock source
is selected by the clock select logic which is controlled by the clock select (CS12:0) bits located
in the Timer/Counter Control Register B (TCCR1B). For details on clock sources and prescaler,
see “Timer/Counter0 and Timer/Counter1 Prescalers” on page 73.
Counter Unit The main part of the 16-bit Timer/Counter is the programmable 16-bit bi-directional counter unit.
Figure 33 on page 81 shows a block diagram of the counter and its surroundings.
Assembly Code Example(1)
TIM16_WriteTCNT1:
; Save Global Interrupt Flag
in r18,SREG
; Disable interrupts
cli
; Set TCNT1 to r17:r16
out TCNT1H,r17
out TCNT1L,r16
; Restore Global Interrupt Flag
out SREG,r18
ret
C Code Example(1)
void TIM16_WriteTCNT1( unsigned int i )
{
unsigned char sreg;
unsigned int i;
/* Save Global Interrupt Flag */
sreg = SREG;
/* Disable interrupts */
_CLI();
/* Set TCNT1 to i */
TCNT1 = i;
/* Restore Global Interrupt Flag */
SREG = sreg;
}81
2486AA–AVR–02/2013
ATmega8(L)
Figure 33. Counter Unit Block Diagram
Signal description (internal signals):
count Increment or decrement TCNT1 by 1
direction Select between increment and decrement
clear Clear TCNT1 (set all bits to zero)
clkT1 Timer/Counter clock
TOP Signalize that TCNT1 has reached maximum value
BOTTOM Signalize that TCNT1 has reached minimum value (zero)
The 16-bit counter is mapped into two 8-bit I/O memory locations: counter high (TCNT1H) containing
the upper eight bits of the counter, and Counter Low (TCNT1L) containing the lower eight
bits. The TCNT1H Register can only be indirectly accessed by the CPU. When the CPU does an
access to the TCNT1H I/O location, the CPU accesses the High byte temporary register
(TEMP). The temporary register is updated with the TCNT1H value when the TCNT1L is read,
and TCNT1H is updated with the temporary register value when TCNT1L is written. This allows
the CPU to read or write the entire 16-bit counter value within one clock cycle via the 8-bit data
bus. It is important to notice that there are special cases of writing to the TCNT1 Register when
the counter is counting that will give unpredictable results. The special cases are described in
the sections where they are of importance.
Depending on the mode of operation used, the counter is cleared, incremented, or decremented
at each timer clock (clkT1). The clkT1 can be generated from an external or internal clock source,
selected by the clock select bits (CS12:0). When no clock source is selected (CS12:0 = 0) the
timer is stopped. However, the TCNT1 value can be accessed by the CPU, independent of
whether clkT1 is present or not. A CPU write overrides (has priority over) all counter clear or
count operations.
The counting sequence is determined by the setting of the Waveform Generation mode bits
(WGM13:0) located in the Timer/Counter Control Registers A and B (TCCR1A and TCCR1B).
There are close connections between how the counter behaves (counts) and how waveforms
are generated on the Output Compare Outputs OC1x. For more details about advanced counting
sequences and waveform generation, see “Modes of Operation” on page 87.
The Timer/Counter Overflow (TOV1) fLag is set according to the mode of operation selected by
the WGM13:0 bits. TOV1 can be used for generating a CPU interrupt.
Input Capture Unit The Timer/Counter incorporates an Input Capture unit that can capture external events and give
them a time-stamp indicating time of occurrence. The external signal indicating an event, or multiple
events, can be applied via the ICP1 pin or alternatively, via the Analog Comparator unit.
TEMP (8-bit)
DATA BUS (8-bit)
TCNTn (16-bit Counter)
TCNTnH (8-bit) TCNTnL (8-bit) Control Logic
count
clear
direction
TOVn
(Int. Req.)
Clock Select
TOP BOTTOM
Tn Edge
Detector
( From Prescaler )
clkTn82
2486AA–AVR–02/2013
ATmega8(L)
The time-stamps can then be used to calculate frequency, duty-cycle, and other features of the
signal applied. Alternatively the time-stamps can be used for creating a log of the events.
The Input Capture unit is illustrated by the block diagram shown in Figure 34. The elements of
the block diagram that are not directly a part of the Input Capture unit are gray shaded. The
small “n” in register and bit names indicates the Timer/Counter number.
Figure 34. Input Capture Unit Block Diagram
When a change of the logic level (an event) occurs on the Input Capture Pin (ICP1), alternatively
on the Analog Comparator Output (ACO), and this change confirms to the setting of the edge
detector, a capture will be triggered. When a capture is triggered, the 16-bit value of the counter
(TCNT1) is written to the Input Capture Register (ICR1). The Input Capture Flag (ICF1) is set at
the same system clock as the TCNT1 value is copied into ICR1 Register. If enabled (TICIE1 =
1), the Input Capture Flag generates an Input Capture interrupt. The ICF1 Flag is automatically
cleared when the interrupt is executed. Alternatively the ICF1 Flag can be cleared by software
by writing a logical one to its I/O bit location.
Reading the 16-bit value in the Input Capture Register (ICR1) is done by first reading the Low
byte (ICR1L) and then the High byte (ICR1H). When the Low byte is read the High byte is copied
into the High byte temporary register (TEMP). When the CPU reads the ICR1H I/O location it will
access the TEMP Register.
The ICR1 Register can only be written when using a Waveform Generation mode that utilizes
the ICR1 Register for defining the counter’s TOP value. In these cases the Waveform Generation
mode (WGM13:0) bits must be set before the TOP value can be written to the ICR1
Register. When writing the ICR1 Register the High byte must be written to the ICR1H I/O location
before the Low byte is written to ICR1L.
For more information on how to access the 16-bit registers refer to “Accessing 16-bit Registers”
on page 77.
Input Capture Pin
Source
The main trigger source for the Input Capture unit is the Input Capture Pin (ICP1). Timer/Counter
1 can alternatively use the Analog Comparator Output as trigger source for the Input Capture
ICFn (Int. Req.)
Analog
Comparator
WRITE ICRn (16-bit Register)
ICRnH (8-bit)
Noise
Canceler
ICPn
Edge
Detector
TEMP (8-bit)
DATA BUS (8-bit)
ICRnL (8-bit)
TCNTn (16-bit Counter)
TCNTnH (8-bit) TCNTnL (8-bit)
ACO* ACIC* ICNC ICES83
2486AA–AVR–02/2013
ATmega8(L)
unit. The Analog Comparator is selected as trigger source by setting the Analog Comparator
Input Capture (ACIC) bit in the Analog Comparator Control and Status Register (ACSR). Be
aware that changing trigger source can trigger a capture. The Input Capture Flag must therefore
be cleared after the change.
Both the Input Capture Pin (ICP1) and the Analog Comparator Output (ACO) inputs are sampled
using the same technique as for the T1 pin (Figure 30 on page 73). The edge detector is also
identical. However, when the noise canceler is enabled, additional logic is inserted before the
edge detector, which increases the delay by four system clock cycles. Note that the input of the
noise canceler and edge detector is always enabled unless the Timer/Counter is set in a Waveform
Generation mode that uses ICR1 to define TOP.
An Input Capture can be triggered by software by controlling the port of the ICP1 pin.
Noise Canceler The noise canceler improves noise immunity by using a simple digital filtering scheme. The
noise canceler input is monitored over four samples, and all four must be equal for changing the
output that in turn is used by the edge detector.
The noise canceler is enabled by setting the Input Capture Noise Canceler (ICNC1) bit in
Timer/Counter Control Register B (TCCR1B). When enabled the noise canceler introduces additional
four system clock cycles of delay from a change applied to the input, to the update of the
ICR1 Register. The noise canceler uses the system clock and is therefore not affected by the
prescaler.
Using the Input
Capture Unit
The main challenge when using the Input Capture unit is to assign enough processor capacity
for handling the incoming events. The time between two events is critical. If the processor has
not read the captured value in the ICR1 Register before the next event occurs, the ICR1 will be
overwritten with a new value. In this case the result of the capture will be incorrect.
When using the Input Capture interrupt, the ICR1 Register should be read as early in the interrupt
handler routine as possible. Even though the Input Capture interrupt has relatively high
priority, the maximum interrupt response time is dependent on the maximum number of clock
cycles it takes to handle any of the other interrupt requests.
Using the Input Capture unit in any mode of operation when the TOP value (resolution) is
actively changed during operation, is not recommended.
Measurement of an external signal’s duty cycle requires that the trigger edge is changed after
each capture. Changing the edge sensing must be done as early as possible after the ICR1
Register has been read. After a change of the edge, the Input Capture Flag (ICF1) must be
cleared by software (writing a logical one to the I/O bit location). For measuring frequency only,
the clearing of the ICF1 Flag is not required (if an interrupt handler is used).
Output Compare
Units
The 16-bit comparator continuously compares TCNT1 with the Output Compare Register
(OCR1x). If TCNT equals OCR1x the comparator signals a match. A match will set the Output
Compare Flag (OCF1x) at the next timer clock cycle. If enabled (OCIE1x = 1), the Output Compare
Flag generates an Output Compare interrupt. The OCF1x Flag is automatically cleared
when the interrupt is executed. Alternatively the OCF1x Flag can be cleared by software by writing
a logical one to its I/O bit location. The waveform generator uses the match signal to
generate an output according to operating mode set by the Waveform Generation mode
(WGM13:0) bits and Compare Output mode (COM1x1:0) bits. The TOP and BOTTOM signals
are used by the waveform generator for handling the special cases of the extreme values in
some modes of operation (see “Modes of Operation” on page 87).
A special feature of Output Compare unit A allows it to define the Timer/Counter TOP value (that
is counter resolution). In addition to the counter resolution, the TOP value defines the period
time for waveforms generated by the waveform generator.84
2486AA–AVR–02/2013
ATmega8(L)
Figure 35 shows a block diagram of the Output Compare unit. The small “n” in the register and
bit names indicates the device number (n = 1 for Timer/Counter 1), and the “x” indicates Output
Compare unit (A/B). The elements of the block diagram that are not directly a part of the Output
Compare unit are gray shaded.
Figure 35. Output Compare Unit, Block Diagram
The OCR1x Register is double buffered when using any of the twelve Pulse Width Modulation
(PWM) modes. For the normal and Clear Timer on Compare (CTC) modes of operation, the double
buffering is disabled. The double buffering synchronizes the update of the OCR1x Compare
Register to either TOP or BOTTOM of the counting sequence. The synchronization prevents the
occurrence of odd-length, non-symmetrical PWM pulses, thereby making the output glitch-free.
The OCR1x Register access may seem complex, but this is not case. When the double buffering
is enabled, the CPU has access to the OCR1x Buffer Register, and if double buffering is disabled
the CPU will access the OCR1x directly. The content of the OCR1x (Buffer or Compare)
Register is only changed by a write operation (the Timer/Counter does not update this register
automatically as the TCNT1 and ICR1 Register). Therefore OCR1x is not read via the High byte
temporary register (TEMP). However, it is a good practice to read the Low byte first as when
accessing other 16-bit registers. Writing the OCR1x Registers must be done via the TEMP Register
since the compare of all 16-bit is done continuously. The High byte (OCR1xH) has to be
written first. When the High byte I/O location is written by the CPU, the TEMP Register will be
updated by the value written. Then when the Low byte (OCR1xL) is written to the lower eight
bits, the High byte will be copied into the upper 8-bits of either the OCR1x buffer or OCR1x Compare
Register in the same system clock cycle.
For more information of how to access the 16-bit registers refer to “Accessing 16-bit Registers”
on page 77.
OCFnx (Int.Req.)
= (16-bit Comparator )
OCRnx Buffer (16-bit Register)
OCRnxH Buf. (8-bit)
OCnx
TEMP (8-bit)
DATA BUS (8-bit)
OCRnxL Buf. (8-bit)
TCNTn (16-bit Counter)
TCNTnH (8-bit) TCNTnL (8-bit)
WGMn3:0 COMnx1:0
OCRnx (16-bit Register)
OCRnxH (8-bit) OCRnxL (8-bit)
Waveform Generator
TOP
BOTTOM85
2486AA–AVR–02/2013
ATmega8(L)
Force Output
Compare
In non-PWM Waveform Generation modes, the match output of the comparator can be forced by
writing a one to the Force Output Compare (FOC1x) bit. Forcing Compare Match will not set the
OCF1x Flag or reload/clear the timer, but the OC1x pin will be updated as if a real Compare
Match had occurred (the COM1x1:0 bits settings define whether the OC1x pin is set, cleared or
toggled).
Compare Match
Blocking by TCNT1
Write
All CPU writes to the TCNT1 Register will block any Compare Match that occurs in the next timer
clock cycle, even when the timer is stopped. This feature allows OCR1x to be initialized to the
same value as TCNT1 without triggering an interrupt when the Timer/Counter clock is enabled.
Using the Output
Compare Unit
Since writing TCNT1 in any mode of operation will block all compare matches for one timer clock
cycle, there are risks involved when changing TCNT1 when using any of the Output Compare
channels, independent of whether the Timer/Counter is running or not. If the value written to
TCNT1 equals the OCR1x value, the Compare Match will be missed, resulting in incorrect waveform
generation. Do not write the TCNT1 equal to TOP in PWM modes with variable TOP
values. The Compare Match for the TOP will be ignored and the counter will continue to
0xFFFF. Similarly, do not write the TCNT1 value equal to BOTTOM when the counter is
downcounting.
The setup of the OC1x should be performed before setting the Data Direction Register for the
port pin to output. The easiest way of setting the OC1x value is to use the Force Output Compare
(FOC1x) strobe bits in Normal mode. The OC1x Register keeps its value even when
changing between Waveform Generation modes.
Be aware that the COM1x1:0 bits are not double buffered together with the compare value.
Changing the COM1x1:0 bits will take effect immediately.
Compare Match
Output Unit
The Compare Output mode (COM1x1:0) bits have two functions. The waveform generator uses
the COM1x1:0 bits for defining the Output Compare (OC1x) state at the next Compare Match.
Secondly the COM1x1:0 bits control the OC1x pin output source. Figure 36 on page 86 shows a
simplified schematic of the logic affected by the COM1x1:0 bit setting. The I/O Registers, I/O
bits, and I/O pins in the figure are shown in bold. Only the parts of the general I/O Port Control
Registers (DDR and PORT) that are affected by the COM1x1:0 bits are shown. When referring
to the OC1x state, the reference is for the internal OC1x Register, not the OC1x pin. If a System
Reset occur, the OC1x Register is reset to “0”.86
2486AA–AVR–02/2013
ATmega8(L)
Figure 36. Compare Match Output Unit, Schematic
The general I/O port function is overridden by the Output Compare (OC1x) from the waveform
generator if either of the COM1x1:0 bits are set. However, the OC1x pin direction (input or output)
is still controlled by the Data Direction Register (DDR) for the port pin. The Data Direction
Register bit for the OC1x pin (DDR_OC1x) must be set as output before the OC1x value is visible
on the pin. The port override function is generally independent of the Waveform Generation
mode, but there are some exceptions. Refer to Table 36 on page 96, Table 37 on page 96 and
Table 38 on page 97 for details.
The design of the Output Compare Pin logic allows initialization of the OC1x state before the
output is enabled. Note that some COM1x1:0 bit settings are reserved for certain modes of operation.
See “16-bit Timer/Counter Register Description” on page 96.
The COM1x1:0 bits have no effect on the Input Capture unit.
PORT
DDR
D Q
D Q
OCnx
OCnx Pin
D Q Waveform
Generator
COMnx1
COMnx0
0
1
DATABUS
FOCnx
clkI/O87
2486AA–AVR–02/2013
ATmega8(L)
Compare Output Mode
and Waveform
Generation
The waveform generator uses the COM1x1:0 bits differently in normal, CTC, and PWM modes.
For all modes, setting the COM1x1:0 = 0 tells the waveform generator that no action on the
OC1x Register is to be performed on the next Compare Match. For compare output actions in
the non-PWM modes refer to Table 36 on page 96. For fast PWM mode refer to Table 37 on
page 96, and for phase correct and phase and frequency correct PWM refer to Table 38 on page
97.
A change of the COM1x1:0 bits state will have effect at the first Compare Match after the bits are
written. For non-PWM modes, the action can be forced to have immediate effect by using the
FOC1x strobe bits.
Modes of
Operation
The mode of operation (that is, the behavior of the Timer/Counter and the Output Compare pins)
is defined by the combination of the Waveform Generation mode (WGM13:0) and Compare Output
mode (COM1x1:0) bits. The Compare Output mode bits do not affect the counting sequence,
while the Waveform Generation mode bits do. The COM1x1:0 bits control whether the PWM output
generated should be inverted or not (inverted or non-inverted PWM). For non-PWM modes
the COM1x1:0 bits control whether the output should be set, cleared or toggle at a Compare
Match. See “Compare Match Output Unit” on page 85.
For detailed timing information refer to “Timer/Counter Timing Diagrams” on page 94.
Normal Mode The simplest mode of operation is the Normal mode (WGM13:0 = 0). In this mode the counting
direction is always up (incrementing), and no counter clear is performed. The counter simply
overruns when it passes its maximum 16-bit value (MAX = 0xFFFF) and then restarts from the
BOTTOM (0x0000). In normal operation the Timer/Counter Overflow Flag (TOV1) will be set in
the same timer clock cycle as the TCNT1 becomes zero. The TOV1 Flag in this case behaves
like a 17th bit, except that it is only set, not cleared. However, combined with the timer overflow
interrupt that automatically clears the TOV1 Flag, the timer resolution can be increased by software.
There are no special cases to consider in the Normal mode, a new counter value can be
written anytime.
The Input Capture unit is easy to use in Normal mode. However, observe that the maximum
interval between the external events must not exceed the resolution of the counter. If the interval
between events are too long, the timer overflow interrupt or the prescaler must be used to
extend the resolution for the capture unit.
The Output Compare units can be used to generate interrupts at some given time. Using the
Output Compare to generate waveforms in Normal mode is not recommended, since this will
occupy too much of the CPU time.
Clear Timer on
Compare Match (CTC)
Mode
In Clear Timer on Compare or CTC mode (WGM13:0 = 4 or 12), the OCR1A or ICR1 Register
are used to manipulate the counter resolution. In CTC mode the counter is cleared to zero when
the counter value (TCNT1) matches either the OCR1A (WGM13:0 = 4) or the ICR1 (WGM13:0 =
12). The OCR1A or ICR1 define the top value for the counter, hence also its resolution. This
mode allows greater control of the Compare Match output frequency. It also simplifies the operation
of counting external events.
The timing diagram for the CTC mode is shown in Figure 37 on page 88. The counter value
(TCNT1) increases until a Compare Match occurs with either OCR1A or ICR1, and then counter
(TCNT1) is cleared.88
2486AA–AVR–02/2013
ATmega8(L)
Figure 37. CTC Mode, Timing Diagram
An interrupt can be generated at each time the counter value reaches the TOP value by either
using the OCF1A or ICF1 Flag according to the register used to define the TOP value. If the
interrupt is enabled, the interrupt handler routine can be used for updating the TOP value. However,
changing the TOP to a value close to BOTTOM when the counter is running with none or a
low prescaler value must be done with care since the CTC mode does not have the double buffering
feature. If the new value written to OCR1A or ICR1 is lower than the current value of
TCNT1, the counter will miss the Compare Match. The counter will then have to count to its maximum
value (0xFFFF) and wrap around starting at 0x0000 before the Compare Match can occur.
In many cases this feature is not desirable. An alternative will then be to use the fast PWM mode
using OCR1A for defining TOP (WGM13:0 = 15) since the OCR1A then will be double buffered.
For generating a waveform output in CTC mode, the OC1A output can be set to toggle its logical
level on each Compare Match by setting the Compare Output mode bits to toggle mode
(COM1A1:0 = 1). The OC1A value will not be visible on the port pin unless the data direction for
the pin is set to output (DDR_OC1A = 1). The waveform generated will have a maximum frequency
of fOC1A = fclk_I/O/2 when OCR1A is set to zero (0x0000). The waveform frequency is
defined by the following equation:
The N variable represents the prescaler factor (1, 8, 64, 256, or 1024).
As for the Normal mode of operation, the TOV1 Flag is set in the same timer clock cycle that the
counter counts from MAX to 0x0000.
Fast PWM Mode The fast Pulse Width Modulation or fast PWM mode (WGM13:0 = 5, 6, 7, 14, or 15) provides a
high frequency PWM waveform generation option. The fast PWM differs from the other PWM
options by its single-slope operation. The counter counts from BOTTOM to TOP then restarts
from BOTTOM. In non-inverting Compare Output mode, the Output Compare (OC1x) is cleared
on the Compare Match between TCNT1 and OCR1x, and set at BOTTOM. In inverting Compare
Output mode output is set on Compare Match and cleared at BOTTOM. Due to the single-slope
operation, the operating frequency of the fast PWM mode can be twice as high as the phase correct
and phase and frequency correct PWM modes that use dual-slope operation. This high
frequency makes the fast PWM mode well suited for power regulation, rectification, and DAC
applications. High frequency allows physically small sized external components (coils, capacitors),
hence reduces total system cost.
The PWM resolution for fast PWM can be fixed to 8-bit, 9-bit, or 10-bit, or defined by either ICR1
or OCR1A. The minimum resolution allowed is 2-bit (ICR1 or OCR1A set to 0x0003), and the
TCNTn
OCnA
(Toggle)
OCnA Interrupt Flag Set
or ICFn Interrupt Flag Set
(Interrupt on TOP)
Period 1 2 3 4
(COMnA1:0 = 1)
f
OCnA
f
clk_I/O
2 N 1 + OCRnA = --------------------------------------------------89
2486AA–AVR–02/2013
ATmega8(L)
maximum resolution is 16-bit (ICR1 or OCR1A set to MAX). The PWM resolution in bits can be
calculated by using the following equation:
In fast PWM mode the counter is incremented until the counter value matches either one of the
fixed values 0x00FF, 0x01FF, or 0x03FF (WGM13:0 = 5, 6, or 7), the value in ICR1 (WGM13:0 =
14), or the value in OCR1A (WGM13:0 = 15). The counter is then cleared at the following timer
clock cycle. The timing diagram for the fast PWM mode is shown in Figure 38. The figure shows
fast PWM mode when OCR1A or ICR1 is used to define TOP. The TCNT1 value is in the timing
diagram shown as a histogram for illustrating the single-slope operation. The diagram includes
non-inverted and inverted PWM outputs. The small horizontal line marks on the TCNT1 slopes
represent compare matches between OCR1x and TCNT1. The OC1x Interrupt Flag will be set
when a Compare Match occurs.
Figure 38. Fast PWM Mode, Timing Diagram
The Timer/Counter Overflow Flag (TOV1) is set each time the counter reaches TOP. In addition
the OCF1A or ICF1 Flag is set at the same timer clock cycle as TOV1 is set when either OCR1A
or ICR1 is used for defining the TOP value. If one of the interrupts are enabled, the interrupt handler
routine can be used for updating the TOP and compare values.
When changing the TOP value the program must ensure that the new TOP value is higher or
equal to the value of all of the Compare Registers. If the TOP value is lower than any of the
Compare Registers, a Compare Match will never occur between the TCNT1 and the OCR1x.
Note that when using fixed TOP values the unused bits are masked to zero when any of the
OCR1x Registers are written.
The procedure for updating ICR1 differs from updating OCR1A when used for defining the TOP
value. The ICR1 Register is not double buffered. This means that if ICR1 is changed to a low
value when the counter is running with none or a low prescaler value, there is a risk that the new
ICR1 value written is lower than the current value of TCNT1. The result will then be that the
counter will miss the Compare Match at the TOP value. The counter will then have to count to
the MAX value (0xFFFF) and wrap around starting at 0x0000 before the Compare Match can
occur. The OCR1A Register, however, is double buffered. This feature allows the OCR1A I/O
location to be written anytime. When the OCR1A I/O location is written the value written will be
put into the OCR1A Buffer Register. The OCR1A Compare Register will then be updated with
the value in the Buffer Register at the next timer clock cycle the TCNT1 matches TOP. The
update is done at the same timer clock cycle as the TCNT1 is cleared and the TOV1 Flag is set.
RFPWM
log TOP + 1
log 2 = -----------------------------------
TCNTn
OCRnx / TOP Update
and TOVn Interrupt Flag
Set and OCnA Interrupt
Flag Set or ICFn
Interrupt Flag Set
(Interrupt on TOP)
Period 1 2 3 4 5 6 7 8
OCnx
OCnx
(COMnx1:0 = 2)
(COMnx1:0 = 3)90
2486AA–AVR–02/2013
ATmega8(L)
Using the ICR1 Register for defining TOP works well when using fixed TOP values. By using
ICR1, the OCR1A Register is free to be used for generating a PWM output on OC1A. However,
if the base PWM frequency is actively changed (by changing the TOP value), using the OCR1A
as TOP is clearly a better choice due to its double buffer feature.
In fast PWM mode, the compare units allow generation of PWM waveforms on the OC1x pins.
Setting the COM1x1:0 bits to 2 will produce a non-inverted PWM and an inverted PWM output
can be generated by setting the COM1x1:0 to 3. See Table 37 on page 96. The actual OC1x
value will only be visible on the port pin if the data direction for the port pin is set as output
(DDR_OC1x). The PWM waveform is generated by setting (or clearing) the OC1x Register at
the Compare Match between OCR1x and TCNT1, and clearing (or setting) the OC1x Register at
the timer clock cycle the counter is cleared (changes from TOP to BOTTOM).
The PWM frequency for the output can be calculated by the following equation:
The N variable represents the prescaler divider (1, 8, 64, 256, or 1024).
The extreme values for the OCR1x Register represents special cases when generating a PWM
waveform output in the fast PWM mode. If the OCR1x is set equal to BOTTOM (0x0000) the output
will be a narrow spike for each TOP+1 timer clock cycle. Setting the OCR1x equal to TOP
will result in a constant high or low output (depending on the polarity of the output set by the
COM1x1:0 bits).
A frequency (with 50% duty cycle) waveform output in fast PWM mode can be achieved by setting
OC1A to toggle its logical level on each Compare Match (COM1A1:0 = 1). This applies only
if OCR1A is used to define the TOP value (WGM13:0 = 15). The waveform generated will have
a maximum frequency of fOC1A = fclk_I/O/2 when OCR1A is set to zero (0x0000). This feature is
similar to the OC1A toggle in CTC mode, except the double buffer feature of the Output Compare
unit is enabled in the fast PWM mode.
Phase Correct PWM
Mode
The phase correct Pulse Width Modulation or phase correct PWM mode (WGM13:0 = 1, 2, 3,
10, or 11) provides a high resolution phase correct PWM waveform generation option. The
phase correct PWM mode is, like the phase and frequency correct PWM mode, based on a dualslope
operation. The counter counts repeatedly from BOTTOM (0x0000) to TOP and then from
TOP to BOTTOM. In non-inverting Compare Output mode, the Output Compare (OC1x) is
cleared on the Compare Match between TCNT1 and OCR1x while upcounting, and set on the
Compare Match while downcounting. In inverting Output Compare mode, the operation is
inverted. The dual-slope operation has lower maximum operation frequency than single slope
operation. However, due to the symmetric feature of the dual-slope PWM modes, these modes
are preferred for motor control applications.
The PWM resolution for the phase correct PWM mode can be fixed to 8-bit, 9-bit, or 10-bit, or
defined by either ICR1 or OCR1A. The minimum resolution allowed is 2-bit (ICR1 or OCR1A set
to 0x0003), and the maximum resolution is 16-bit (ICR1 or OCR1A set to MAX). The PWM resolution
in bits can be calculated by using the following equation:
In phase correct PWM mode the counter is incremented until the counter value matches either
one of the fixed values 0x00FF, 0x01FF, or 0x03FF (WGM13:0 = 1, 2, or 3), the value in ICR1
(WGM13:0 = 10), or the value in OCR1A (WGM13:0 = 11). The counter has then reached the
TOP and changes the count direction. The TCNT1 value will be equal to TOP for one timer clock
cycle. The timing diagram for the phase correct PWM mode is shown on Figure 39 on page 91.
The figure shows phase correct PWM mode when OCR1A or ICR1 is used to define TOP. The
TCNT1 value is in the timing diagram shown as a histogram for illustrating the dual-slope operaf
OCnxPWM
f
clk_I/O
N 1 + TOP = -----------------------------------
RPCPWM
log TOP + 1
log 2 = -----------------------------------91
2486AA–AVR–02/2013
ATmega8(L)
tion. The diagram includes non-inverted and inverted PWM outputs. The small horizontal line
marks on the TCNT1 slopes represent compare matches between OCR1x and TCNT1. The
OC1x Interrupt Flag will be set when a Compare Match occurs.
Figure 39. Phase Correct PWM Mode, Timing Diagram
The Timer/Counter Overflow Flag (TOV1) is set each time the counter reaches BOTTOM. When
either OCR1A or ICR1 is used for defining the TOP value, the OC1A or ICF1 Flag is set accordingly
at the same timer clock cycle as the OCR1x Registers are updated with the double buffer
value (at TOP). The Interrupt Flags can be used to generate an interrupt each time the counter
reaches the TOP or BOTTOM value.
When changing the TOP value the program must ensure that the new TOP value is higher or
equal to the value of all of the Compare Registers. If the TOP value is lower than any of the
Compare Registers, a Compare Match will never occur between the TCNT1 and the OCR1x.
Note that when using fixed TOP values, the unused bits are masked to zero when any of the
OCR1x Registers are written. As the third period shown in Figure 39 illustrates, changing the
TOP actively while the Timer/Counter is running in the Phase Correct mode can result in an
unsymmetrical output. The reason for this can be found in the time of update of the OCR1x Register.
Since the OCR1x update occurs at TOP, the PWM period starts and ends at TOP. This
implies that the length of the falling slope is determined by the previous TOP value, while the
length of the rising slope is determined by the new TOP value. When these two values differ the
two slopes of the period will differ in length. The difference in length gives the unsymmetrical
result on the output.
It is recommended to use the Phase and Frequency Correct mode instead of the Phase Correct
mode when changing the TOP value while the Timer/Counter is running. When using a static
TOP value there are practically no differences between the two modes of operation.
In phase correct PWM mode, the compare units allow generation of PWM waveforms on the
OC1x pins. Setting the COM1x1:0 bits to 2 will produce a non-inverted PWM and an inverted
PWM output can be generated by setting the COM1x1:0 to 3. See Table 38 on page 97. The
actual OC1x value will only be visible on the port pin if the data direction for the port pin is set as
output (DDR_OC1x). The PWM waveform is generated by setting (or clearing) the OC1x Register
at the Compare Match between OCR1x and TCNT1 when the counter increments, and
clearing (or setting) the OC1x Register at Compare Match between OCR1x and TCNT1 when
OCRnx / TOP Update and
OCnA Interrupt Flag Set
or ICFn Interrupt Flag Set
(Interrupt on TOP)
1 2 3 4
TOVn Interrupt Flag Set
(Interrupt on Bottom)
TCNTn
Period
OCnx
OCnx
(COMnx1:0 = 2)
(COMnx1:0 = 3)92
2486AA–AVR–02/2013
ATmega8(L)
the counter decrements. The PWM frequency for the output when using phase correct PWM can
be calculated by the following equation:
The N variable represents the prescaler divider (1, 8, 64, 256, or 1024).
The extreme values for the OCR1x Register represent special cases when generating a PWM
waveform output in the phase correct PWM mode. If the OCR1x is set equal to BOTTOM the
output will be continuously low and if set equal to TOP the output will be continuously high for
non-inverted PWM mode. For inverted PWM the output will have the opposite logic values.
If OCR1A is used to define the TOP value (WMG13:0 = 11) and COM1A1:0 = 1, the OC1A output
will toggle with a 50% duty cycle.
Phase and Frequency
Correct PWM Mode
The phase and frequency correct Pulse Width Modulation, or phase and frequency correct PWM
mode (WGM13:0 = 8 or 9) provides a high resolution phase and frequency correct PWM waveform
generation option. The phase and frequency correct PWM mode is, like the phase correct
PWM mode, based on a dual-slope operation. The counter counts repeatedly from BOTTOM
(0x0000) to TOP and then from TOP to BOTTOM. In non-inverting Compare Output mode, the
Output Compare (OC1x) is cleared on the Compare Match between TCNT1 and OCR1x while
upcounting, and set on the Compare Match while downcounting. In inverting Compare Output
mode, the operation is inverted. The dual-slope operation gives a lower maximum operation frequency
compared to the single-slope operation. However, due to the symmetric feature of the
dual-slope PWM modes, these modes are preferred for motor control applications.
The main difference between the phase correct, and the phase and frequency correct PWM
mode is the time the OCR1x Register is updated by the OCR1x Buffer Register, (see Figure 39
on page 91 and Figure 40 on page 93).
The PWM resolution for the phase and frequency correct PWM mode can be defined by either
ICR1 or OCR1A. The minimum resolution allowed is 2-bit (ICR1 or OCR1A set to 0x0003), and
the maximum resolution is 16-bit (ICR1 or OCR1A set to MAX). The PWM resolution in bits can
be calculated using the following equation:
In phase and frequency correct PWM mode the counter is incremented until the counter value
matches either the value in ICR1 (WGM13:0 = 8), or the value in OCR1A (WGM13:0 = 9). The
counter has then reached the TOP and changes the count direction. The TCNT1 value will be
equal to TOP for one timer clock cycle. The timing diagram for the phase correct and frequency
correct PWM mode is shown on Figure 40 on page 93. The figure shows phase and frequency
correct PWM mode when OCR1A or ICR1 is used to define TOP. The TCNT1 value is in the
timing diagram shown as a histogram for illustrating the dual-slope operation. The diagram
includes non-inverted and inverted PWM outputs. The small horizontal line marks on the TCNT1
slopes represent compare matches between OCR1x and TCNT1. The OC1x Interrupt Flag will
be set when a Compare Match occurs.
f
OCnxPCPWM
f
clk_I/O
2 N TOP = ----------------------------
RPFCPWM
log TOP + 1
log 2 = -----------------------------------93
2486AA–AVR–02/2013
ATmega8(L)
Figure 40. Phase and Frequency Correct PWM Mode, Timing Diagram
The Timer/Counter Overflow Flag (TOV1) is set at the same timer clock cycle as the OCR1x
Registers are updated with the double buffer value (at BOTTOM). When either OCR1A or ICR1
is used for defining the TOP value, the OC1A or ICF1 Flag set when TCNT1 has reached TOP.
The Interrupt Flags can then be used to generate an interrupt each time the counter reaches the
TOP or BOTTOM value.
When changing the TOP value the program must ensure that the new TOP value is higher or
equal to the value of all of the Compare Registers. If the TOP value is lower than any of the
Compare Registers, a Compare Match will never occur between the TCNT1 and the OCR1x.
As Figure 40 shows the output generated is, in contrast to the Phase Correct mode, symmetrical
in all periods. Since the OCR1x Registers are updated at BOTTOM, the length of the rising and
the falling slopes will always be equal. This gives symmetrical output pulses and is therefore frequency
correct.
Using the ICR1 Register for defining TOP works well when using fixed TOP values. By using
ICR1, the OCR1A Register is free to be used for generating a PWM output on OC1A. However,
if the base PWM frequency is actively changed by changing the TOP value, using the OCR1A as
TOP is clearly a better choice due to its double buffer feature.
In phase and frequency correct PWM mode, the compare units allow generation of PWM waveforms
on the OC1x pins. Setting the COM1x1:0 bits to 2 will produce a non-inverted PWM and
an inverted PWM output can be generated by setting the COM1x1:0 to 3. See Table 38 on page
97. The actual OC1x value will only be visible on the port pin if the data direction for the port pin
is set as output (DDR_OC1x). The PWM waveform is generated by setting (or clearing) the
OC1x Register at the Compare Match between OCR1x and TCNT1 when the counter increments,
and clearing (or setting) the OC1x Register at Compare Match between OCR1x and
TCNT1 when the counter decrements. The PWM frequency for the output when using phase
and frequency correct PWM can be calculated by the following equation:
The N variable represents the prescaler divider (1, 8, 64, 256, or 1024).
The extreme values for the OCR1x Register represents special cases when generating a PWM
waveform output in the phase correct PWM mode. If the OCR1x is set equal to BOTTOM the
OCRnx / TOP Update and
TOVn Interrupt Flag Set
(Interrupt on Bottom)
OCnA Interrupt Flag Set or
ICFn Interrupt Flag Set
(Interrupt on TOP)
1 2 3 4
TCNTn
Period
OCnx
OCnx
(COMnx1:0 = 2)
(COMnx1:0 = 3)
f
OCnxPFCPWM
f
clk_I/O
2 N TOP = ----------------------------94
2486AA–AVR–02/2013
ATmega8(L)
output will be continuously low and if set equal to TOP the output will be set to high for noninverted
PWM mode. For inverted PWM the output will have the opposite logic values.
If OCR1A is used to define the TOP value (WGM13:0 = 9) and COM1A1:0 = 1, the OC1A output
will toggle with a 50% duty cycle.
Timer/Counter
Timing Diagrams
The Timer/Counter is a synchronous design and the timer clock (clkT1) is therefore shown as a
clock enable signal in the following figures. The figures include information on when Interrupt
Flags are set, and when the OCR1x Register is updated with the OCR1x buffer value (only for
modes utilizing double buffering). Figure 41 shows a timing diagram for the setting of OCF1x.
Figure 41. Timer/Counter Timing Diagram, Setting of OCF1x, no Prescaling
Figure 42 shows the same timing data, but with the prescaler enabled.
Figure 42. Timer/Counter Timing Diagram, Setting of OCF1x, with Prescaler (fclk_I/O/8)
Figure 43 on page 95 shows the count sequence close to TOP in various modes. When using
phase and frequency correct PWM mode the OCR1x Register is updated at BOTTOM. The timclkTn
(clkI/O/1)
OCFnx
clkI/O
OCRnx
TCNTn
OCRnx Value
OCRnx - 1 OCRnx OCRnx + 1 OCRnx + 2
OCFnx
OCRnx
TCNTn
OCRnx Value
OCRnx - 1 OCRnx OCRnx + 1 OCRnx + 2
clkI/O
clkTn
(clkI/O/8)95
2486AA–AVR–02/2013
ATmega8(L)
ing diagrams will be the same, but TOP should be replaced by BOTTOM, TOP-1 by BOTTOM+1
and so on. The same renaming applies for modes that set the TOV1 Flag at BOTTOM.
Figure 43. Timer/Counter Timing Diagram, no Prescaling
Figure 44 shows the same timing data, but with the prescaler enabled.
Figure 44. Timer/Counter Timing Diagram, with Prescaler (fclk_I/O/8)
TOVn (FPWM)
and ICFn (if used
as TOP)
OCRnx
(Update at TOP)
TCNTn
(CTC and FPWM)
TCNTn
(PC and PFC PWM) TOP - 1 TOP TOP - 1 TOP - 2
Old OCRnx Value New OCRnx Value
TOP - 1 TOP BOTTOM BOTTOM + 1
clkTn
(clkI/O/1)
clkI/O
TOVn (FPWM)
and ICFn (if used
as TOP)
OCRnx
(Update at TOP)
TCNTn
(CTC and FPWM)
TCNTn
(PC and PFC PWM) TOP - 1 TOP TOP - 1 TOP - 2
Old OCRnx Value New OCRnx Value
TOP - 1 TOP BOTTOM BOTTOM + 1
clkI/O
clkTn
(clkI/O/8)96
2486AA–AVR–02/2013
ATmega8(L)
16-bit
Timer/Counter
Register
Description
Timer/Counter 1
Control Register A –
TCCR1A
• Bit 7:6 – COM1A1:0: Compare Output Mode for channel A
• Bit 5:4 – COM1B1:0: Compare Output Mode for channel B
The COM1A1:0 and COM1B1:0 control the Output Compare Pins (OC1A and OC1B respectively)
behavior. If one or both of the COM1A1:0 bits are written to one, the OC1A output
overrides the normal port functionality of the I/O pin it is connected to. If one or both of the
COM1B1:0 bit are written to one, the OC1B output overrides the normal port functionality of the
I/O pin it is connected to. However, note that the Data Direction Register (DDR) bit corresponding
to the OC1A or OC1B pin must be set in order to enable the output driver.
When the OC1A or OC1B is connected to the pin, the function of the COM1x1:0 bits is dependent
of the WGM13:0 bits setting. Table 36 shows the COM1x1:0 bit functionality when the
WGM13:0 bits are set to a normal or a CTC mode (non-PWM).
Table 37 shows the COM1x1:0 bit functionality when the WGM13:0 bits are set to the fast PWM
mode.
Note: 1. A special case occurs when OCR1A/OCR1B equals TOP and COM1A1/COM1B1 is set. In
this case the Compare Match is ignored, but the set or clear is done at BOTTOM. See “Fast
PWM Mode” on page 88 for more details
Bit 7 6 5 4 3 2 1 0
COM1A1 COM1A0 COM1B1 COM1B0 FOC1A FOC1B WGM11 WGM10 TCCR1A
Read/Write R/W R/W R/W R/W W W R/W R/W
Initial Value 0 0 0 0 0 0 0 0
Table 36. Compare Output Mode, Non-PWM
COM1A1/
COM1B1
COM1A0/
COM1B0 Description
0 0 Normal port operation, OC1A/OC1B disconnected.
0 1 Toggle OC1A/OC1B on Compare Match
1 0 Clear OC1A/OC1B on Compare Match (Set output to low level)
1 1 Set OC1A/OC1B on Compare Match (Set output to high level)
Table 37. Compare Output Mode, Fast PWM(1)
COM1A1/
COM1B1
COM1A0/
COM1B0 Description
0 0 Normal port operation, OC1A/OC1B disconnected.
0 1 WGM13:0 = 15: Toggle OC1A on Compare Match, OC1B
disconnected (normal port operation). For all other WGM1
settings, normal port operation, OC1A/OC1B disconnected.
1 0 Clear OC1A/OC1B on Compare Match, set OC1A/OC1B at
BOTTOM, (non-inverting mode)
1 1 Set OC1A/OC1B on Compare Match, clear OC1A/OC1B at
BOTTOM, (inverting mode)97
2486AA–AVR–02/2013
ATmega8(L)
Table 38 shows the COM1x1:0 bit functionality when the WGM13:0 bits are set to the phase correct
or the phase and frequency correct, PWM mode.
Note: 1. A special case occurs when OCR1A/OCR1B equals TOP and COM1A1/COM1B1 is set. See
“Phase Correct PWM Mode” on page 90 for more details
• Bit 3 – FOC1A: Force Output Compare for channel A
• Bit 2 – FOC1B: Force Output Compare for channel B
The FOC1A/FOC1B bits are only active when the WGM13:0 bits specifies a non-PWM mode.
However, for ensuring compatibility with future devices, these bits must be set to zero when
TCCR1A is written when operating in a PWM mode. When writing a logical one to the
FOC1A/FOC1B bit, an immediate Compare Match is forced on the waveform generation unit.
The OC1A/OC1B output is changed according to its COM1x1:0 bits setting. Note that the
FOC1A/FOC1B bits are implemented as strobes. Therefore it is the value present in the
COM1x1:0 bits that determine the effect of the forced compare.
A FOC1A/FOC1B strobe will not generate any interrupt nor will it clear the timer in Clear Timer
on Compare Match (CTC) mode using OCR1A as TOP.
The FOC1A/FOC1B bits are always read as zero.
• Bit 1:0 – WGM11:0: Waveform Generation Mode
Combined with the WGM13:2 bits found in the TCCR1B Register, these bits control the counting
sequence of the counter, the source for maximum (TOP) counter value, and what type of waveform
generation to be used, see Table 39. Modes of operation supported by the Timer/Counter
unit are: Normal mode (counter), Clear Timer on Compare Match (CTC) mode, and three types
of Pulse Width Modulation (PWM) modes (see “Modes of Operation” on page 87).
Table 38. Compare Output Mode, Phase Correct and Phase and Frequency Correct PWM(1)
COM1A1/
COM1B1
COM1A0/
COM1B0 Description
0 0 Normal port operation, OC1A/OC1B disconnected.
0 1 WGM13:0 = 9 or 14: Toggle OC1A on Compare Match, OC1B
disconnected (normal port operation). For all other WGM1
settings, normal port operation, OC1A/OC1B disconnected.
1 0 Clear OC1A/OC1B on Compare Match when up-counting. Set
OC1A/OC1B on Compare Match when downcounting.
1 1 Set OC1A/OC1B on Compare Match when up-counting. Clear
OC1A/OC1B on Compare Match when downcounting.
Table 39. Waveform Generation Mode Bit Description
Mode WGM13
WGM12
(CTC1)
WGM11
(PWM11)
WGM10
(PWM10)
Timer/Counter Mode of
Operation(1) TOP
Update of
OCR1x
TOV1 Flag
Set on
0 0 0 0 0 Normal 0xFFFF Immediate MAX
1 0 0 0 1 PWM, Phase Correct, 8-bit 0x00FF TOP BOTTOM
2 0 0 1 0 PWM, Phase Correct, 9-bit 0x01FF TOP BOTTOM
3 0 0 1 1 PWM, Phase Correct, 10-bit 0x03FF TOP BOTTOM
4 0 1 0 0 CTC OCR1A Immediate MAX
5 0 1 0 1 Fast PWM, 8-bit 0x00FF BOTTOM TOP
6 0 1 1 0 Fast PWM, 9-bit 0x01FF BOTTOM TOP98
2486AA–AVR–02/2013
ATmega8(L)
Note: 1. The CTC1 and PWM11:0 bit definition names are obsolete. Use the WGM12:0 definitions. However, the functionality and
location of these bits are compatible with previous versions of the timer
Timer/Counter 1
Control Register B –
TCCR1B
• Bit 7 – ICNC1: Input Capture Noise Canceler
Setting this bit (to one) activates the Input Capture Noise Canceler. When the noise canceler is
activated, the input from the Input Capture Pin (ICP1) is filtered. The filter function requires four
successive equal valued samples of the ICP1 pin for changing its output. The Input Capture is
therefore delayed by four Oscillator cycles when the noise canceler is enabled.
• Bit 6 – ICES1: Input Capture Edge Select
This bit selects which edge on the Input Capture Pin (ICP1) that is used to trigger a capture
event. When the ICES1 bit is written to zero, a falling (negative) edge is used as trigger, and
when the ICES1 bit is written to one, a rising (positive) edge will trigger the capture.
When a capture is triggered according to the ICES1 setting, the counter value is copied into the
Input Capture Register (ICR1). The event will also set the Input Capture Flag (ICF1), and this
can be used to cause an Input Capture Interrupt, if this interrupt is enabled.
When the ICR1 is used as TOP value (see description of the WGM13:0 bits located in the
TCCR1A and the TCCR1B Register), the ICP1 is disconnected and consequently the Input Capture
function is disabled.
• Bit 5 – Reserved Bit
This bit is reserved for future use. For ensuring compatibility with future devices, this bit must be
written to zero when TCCR1B is written.
• Bit 4:3 – WGM13:2: Waveform Generation Mode
See TCCR1A Register description.
• Bit 2:0 – CS12:0: Clock Select
The three clock select bits select the clock source to be used by the Timer/Counter, see Figure
41 on page 94 and Figure 42 on page 94.
7 0 1 1 1 Fast PWM, 10-bit 0x03FF BOTTOM TOP
8 1 0 0 0 PWM, Phase and Frequency Correct ICR1 BOTTOM BOTTOM
9 1 0 0 1 PWM, Phase and Frequency Correct OCR1A BOTTOM BOTTOM
10 1 0 1 0 PWM, Phase Correct ICR1 TOP BOTTOM
11 1 0 1 1 PWM, Phase Correct OCR1A TOP BOTTOM
12 1 1 0 0 CTC ICR1 Immediate MAX
13 1 1 0 1 (Reserved) – – –
14 1 1 1 0 Fast PWM ICR1 BOTTOM TOP
15 1 1 1 1 Fast PWM OCR1A BOTTOM TOP
Table 39. Waveform Generation Mode Bit Description (Continued)
Mode WGM13
WGM12
(CTC1)
WGM11
(PWM11)
WGM10
(PWM10)
Timer/Counter Mode of
Operation(1) TOP
Update of
OCR1x
TOV1 Flag
Set on
Bit 7 6 5 4 3 2 1 0
ICNC1 ICES1 – WGM13 WGM12 CS12 CS11 CS10 TCCR1B
Read/Write R/W R/W R R/W R/W R/W R/W R/W
Initial Value 0 0 0 0 0 0 0 099
2486AA–AVR–02/2013
ATmega8(L)
If external pin modes are used for the Timer/Counter1, transitions on the T1 pin will clock the
counter even if the pin is configured as an output. This feature allows software control of the
counting.
Timer/Counter 1 –
TCNT1H and TCNT1L
The two Timer/Counter I/O locations (TCNT1H and TCNT1L, combined TCNT1) give direct
access, both for read and for write operations, to the Timer/Counter unit 16-bit counter. To
ensure that both the high and Low bytes are read and written simultaneously when the CPU
accesses these registers, the access is performed using an 8-bit temporary High byte Register
(TEMP). This temporary register is shared by all the other 16-bit registers. See “Accessing 16-bit
Registers” on page 77.
Modifying the counter (TCNT1) while the counter is running introduces a risk of missing a Compare
Match between TCNT1 and one of the OCR1x Registers.
Writing to the TCNT1 Register blocks (removes) the Compare Match on the following timer clock
for all compare units.
Output Compare
Register 1 A –
OCR1AH and OCR1AL
Output Compare
Register 1 B –
OCR1BH and OCR1BL
Table 40. Clock Select Bit Description
CS12 CS11 CS10 Description
0 0 0 No clock source. (Timer/Counter stopped)
0 0 1 clkI/O/1 (No prescaling)
0 1 0 clkI/O/8 (From prescaler)
0 1 1 clkI/O/64 (From prescaler)
1 0 0 clkI/O/256 (From prescaler)
1 0 1 clkI/O/1024 (From prescaler)
1 1 0 External clock source on T1 pin. Clock on falling edge
1 1 1 External clock source on T1 pin. Clock on rising edge
Bit 7 6 5 4 3 2 1 0
TCNT1[15:8] TCNT1H
TCNT1[7:0] TCNT1L
Read/Write R/W R/W R/W R/W R/W R/W R/W R/W
Initial Value 0 0 0 0 0 0 0 0
Bit 7 6 5 4 3 2 1 0
OCR1A[15:8] OCR1AH
OCR1A[7:0] OCR1AL
Read/Write R/W R/W R/W R/W R/W R/W R/W R/W
Initial Value 0 0 0 0 0 0 0 0
Bit 7 6 5 4 3 2 1 0
OCR1B[15:8] OCR1BH
OCR1B[7:0] OCR1BL
Read/Write R/W R/W R/W R/W R/W R/W R/W R/W
Initial Value 0 0 0 0 0 0 0 0100
2486AA–AVR–02/2013
ATmega8(L)
The Output Compare Registers contain a 16-bit value that is continuously compared with the
counter value (TCNT1). A match can be used to generate an Output Compare Interrupt, or to
generate a waveform output on the OC1x pin.
The Output Compare Registers are 16-bit in size. To ensure that both the high and Low bytes
are written simultaneously when the CPU writes to these registers, the access is performed
using an 8-bit temporary High byte Register (TEMP). This temporary register is shared by all the
other 16-bit registers. See “Accessing 16-bit Registers” on page 77.
Input Capture Register
1 – ICR1H and ICR1L
The Input Capture is updated with the counter (TCNT1) value each time an event occurs on the
ICP1 pin (or optionally on the Analog Comparator Output for Timer/Counter1). The Input Capture
can be used for defining the counter TOP value.
The Input Capture Register is 16-bit in size. To ensure that both the high and Low bytes are read
simultaneously when the CPU accesses these registers, the access is performed using an 8-bit
temporary High byte Register (TEMP). This temporary register is shared by all the other 16-bit
registers. See “Accessing 16-bit Registers” on page 77.
Timer/Counter
Interrupt Mask
Register – TIMSK(1)
Note: 1. This register contains interrupt control bits for several Timer/Counters, but only Timer1 bits are
described in this section. The remaining bits are described in their respective timer sections
• Bit 5 – TICIE1: Timer/Counter1, Input Capture Interrupt Enable
When this bit is written to one, and the I-flag in the Status Register is set (interrupts globally
enabled), the Timer/Counter1 Input Capture Interrupt is enabled. The corresponding Interrupt
Vector (see “Interrupts” on page 46) is executed when the ICF1 Flag, located in TIFR, is set.
• Bit 4 – OCIE1A: Timer/Counter1, Output Compare A Match Interrupt Enable
When this bit is written to one, and the I-flag in the Status Register is set (interrupts globally
enabled), the Timer/Counter1 Output Compare A match interrupt is enabled. The corresponding
Interrupt Vector (see “Interrupts” on page 46) is executed when the OCF1A Flag, located in
TIFR, is set.
• Bit 3 – OCIE1B: Timer/Counter1, Output Compare B Match Interrupt Enable
When this bit is written to one, and the I-flag in the Status Register is set (interrupts globally
enabled), the Timer/Counter1 Output Compare B match interrupt is enabled. The corresponding
Interrupt Vector (see “Interrupts” on page 46) is executed when the OCF1B Flag, located in
TIFR, is set.
• Bit 2 – TOIE1: Timer/Counter1, Overflow Interrupt Enable
When this bit is written to one, and the I-flag in the Status Register is set (interrupts globally
enabled), the Timer/Counter1 Overflow Interrupt is enabled. The corresponding Interrupt Vector
(see “Interrupts” on page 46) is executed when the TOV1 Flag, located in TIFR, is set.
Bit 7 6 5 4 3 2 1 0
ICR1[15:8] ICR1H
ICR1[7:0] ICR1L
Read/Write R/W R/W R/W R/W R/W R/W R/W R/W
Initial Value 0 0 0 0 0 0 0 0
Bit 7 6 5 4 3 2 1 0
OCIE2 TOIE2 TICIE1 OCIE1A OCIE1B TOIE1 – TOIE0 TIMSK
Read/Write R/W R/W R/W R/W R/W R/W R R/W
Initial Value 0 0 0 0 0 0 0 0101
2486AA–AVR–02/2013
ATmega8(L)
Timer/Counter
Interrupt Flag Register
– TIFR(1)
Note: 1. This register contains flag bits for several Timer/Counters, but only Timer1 bits are described
in this section. The remaining bits are described in their respective timer sections
• Bit 5 – ICF1: Timer/Counter1, Input Capture Flag
This flag is set when a capture event occurs on the ICP1 pin. When the Input Capture Register
(ICR1) is set by the WGM13:0 to be used as the TOP value, the ICF1 Flag is set when the counter
reaches the TOP value.
ICF1 is automatically cleared when the Input Capture Interrupt Vector is executed. Alternatively,
ICF1 can be cleared by writing a logic one to its bit location.
• Bit 4 – OCF1A: Timer/Counter1, Output Compare A Match Flag
This flag is set in the timer clock cycle after the counter (TCNT1) value matches the Output
Compare Register A (OCR1A).
Note that a Forced Output Compare (FOC1A) strobe will not set the OCF1A Flag.
OCF1A is automatically cleared when the Output Compare Match A Interrupt Vector is executed.
Alternatively, OCF1A can be cleared by writing a logic one to its bit location.
• Bit 3 – OCF1B: Timer/Counter1, Output Compare B Match Flag
This flag is set in the timer clock cycle after the counter (TCNT1) value matches the Output
Compare Register B (OCR1B).
Note that a Forced Output Compare (FOC1B) strobe will not set the OCF1B Flag.
OCF1B is automatically cleared when the Output Compare Match B Interrupt Vector is executed.
Alternatively, OCF1B can be cleared by writing a logic one to its bit location.
• Bit 2 – TOV1: Timer/Counter1, Overflow Flag
The setting of this flag is dependent of the WGM13:0 bits setting. In normal and CTC modes, the
TOV1 Flag is set when the timer overflows. Refer to Table 39 on page 97 for the TOV1 Flag
behavior when using another WGM13:0 bit setting.
TOV1 is automatically cleared when the Timer/Counter1 Overflow Interrupt Vector is executed.
Alternatively, TOV1 can be cleared by writing a logic one to its bit location.
Bit 7 6 5 4 3 2 1 0
OCF2 TOV2 ICF1 OCF1A OCF1B TOV1 – TOV0 TIFR
Read/Write R/W R/W R/W R/W R/W R/W R R/W
Initial Value 0 0 0 0 0 0 0 0102
2486AA–AVR–02/2013
ATmega8(L)
8-bit
Timer/Counter2
with PWM and
Asynchronous
Operation
Timer/Counter2 is a general purpose, single channel, 8-bit Timer/Counter module. The main
features are:
• Single Channel Counter
• Clear Timer on Compare Match (Auto Reload)
• Glitch-free, phase Correct Pulse Width Modulator (PWM)
• Frequency Generator
• 10-bit Clock Prescaler
• Overflow and Compare Match Interrupt Sources (TOV2 and OCF2)
• Allows Clocking from External 32kHz Watch Crystal Independent of the I/O Clock
Overview A simplified block diagram of the 8-bit Timer/Counter is shown in Figure 45. For the actual placement
of I/O pins, refer to “Pin Configurations” on page 2. CPU accessible I/O Registers,
including I/O bits and I/O pins, are shown in bold. The device-specific I/O Register and bit locations
are listed in the “8-bit Timer/Counter Register Description” on page 114.
Figure 45. 8-bit Timer/Counter Block Diagram
Timer/Counter
DATA BUS
=
TCNTn
Waveform
Generation OCn
= 0
Control Logic
= 0xFF
BOTTOM TOP
count
clear
direction
TOVn
(Int. Req.)
OCn
(Int. Req.)
Synchronization Unit
OCRn
TCCRn
ASSRn
Status Flags
clkI/O
clkASY
Synchronized Status Flags
asynchronous Mode
Select (ASn)
TOSC1
T/C
Oscillator
TOSC2
Prescaler
clkTn
clkI/O103
2486AA–AVR–02/2013
ATmega8(L)
Registers The Timer/Counter (TCNT2) and Output Compare Register (OCR2) are 8-bit registers. Interrupt
request (shorten as Int.Req.) signals are all visible in the Timer Interrupt Flag Register (TIFR).
All interrupts are individually masked with the Timer Interrupt Mask Register (TIMSK). TIFR and
TIMSK are not shown in the figure since these registers are shared by other timer units.
The Timer/Counter can be clocked internally, via the prescaler, or asynchronously clocked from
the TOSC1/2 pins, as detailed later in this section. The asynchronous operation is controlled by
the Asynchronous Status Register (ASSR). The Clock Select logic block controls which clock
source the Timer/Counter uses to increment (or decrement) its value. The Timer/Counter is inactive
when no clock source is selected. The output from the clock select logic is referred to as the
timer clock (clkT2).
The double buffered Output Compare Register (OCR2) is compared with the Timer/Counter
value at all times. The result of the compare can be used by the waveform generator to generate
a PWM or variable frequency output on the Output Compare Pin (OC2). For details, see “Output
Compare Unit” on page 105. The Compare Match event will also set the Compare Flag (OCF2)
which can be used to generate an Output Compare interrupt request.
Definitions Many register and bit references in this document are written in general form. A lower case “n”
replaces the Timer/Counter number, in this case 2. However, when using the register or bit
defines in a program, the precise form must be used (that is, TCNT2 for accessing
Timer/Counter2 counter value and so on).
The definitions in Table 41 are also used extensively throughout the document.
Timer/Counter
Clock Sources
The Timer/Counter can be clocked by an internal synchronous or an external asynchronous
clock source. The clock source clkT2 is by default equal to the MCU clock, clkI/O. When the AS2
bit in the ASSR Register is written to logic one, the clock source is taken from the Timer/Counter
Oscillator connected to TOSC1 and TOSC2. For details on asynchronous operation, see “Asynchronous
Status Register – ASSR” on page 117. For details on clock sources and prescaler, see
“Timer/Counter Prescaler” on page 120.
Table 41. Definitions
BOTTOM The counter reaches the BOTTOM when it becomes zero (0x00).
MAX The counter reaches its MAXimum when it becomes 0xFF (decimal 255).
TOP The counter reaches the TOP when it becomes equal to the highest value in the
count sequence. The TOP value can be assigned to be the fixed value 0xFF
(MAX) or the value stored in the OCR2 Register. The assignment is dependent
on the mode of operation.104
2486AA–AVR–02/2013
ATmega8(L)
Counter Unit The main part of the 8-bit Timer/Counter is the programmable bi-directional counter unit. Figure
46 shows a block diagram of the counter and its surrounding environment.
Figure 46. Counter Unit Block Diagram
Signal description (internal signals):
count Increment or decrement TCNT2 by 1
direction Selects between increment and decrement
clear Clear TCNT2 (set all bits to zero)
clkT2 Timer/Counter clock
TOP Signalizes that TCNT2 has reached maximum value
BOTTOM Signalizes that TCNT2 has reached minimum value (zero)
Depending on the mode of operation used, the counter is cleared, incremented, or decremented
at each timer clock (clkT2). clkT2 can be generated from an external or internal clock source,
selected by the clock select bits (CS22:0). When no clock source is selected (CS22:0 = 0) the
timer is stopped. However, the TCNT2 value can be accessed by the CPU, regardless of
whether clkT2 is present or not. A CPU write overrides (has priority over) all counter clear or
count operations.
The counting sequence is determined by the setting of the WGM21 and WGM20 bits located in
the Timer/Counter Control Register (TCCR2). There are close connections between how the
counter behaves (counts) and how waveforms are generated on the Output Compare Output
OC2. For more details about advanced counting sequences and waveform generation, see
“Modes of Operation” on page 108.
The Timer/Counter Overflow (TOV2) Flag is set according to the mode of operation selected by
the WGM21:0 bits. TOV2 can be used for generating a CPU interrupt.
DATA BUS
TCNTn Control Logic
count
TOVn
(Int. Req.)
BOTTOM TOP
direction
clear
TOSC1
T/C
Oscillator
TOSC2
Prescaler
clkI/O
clk Tn105
2486AA–AVR–02/2013
ATmega8(L)
Output Compare
Unit
The 8-bit comparator continuously compares TCNT2 with the Output Compare Register
(OCR2). Whenever TCNT2 equals OCR2, the comparator signals a match. A match will set the
Output Compare Flag (OCF2) at the next timer clock cycle. If enabled (OCIE2 = 1), the Output
Compare Flag generates an Output Compare interrupt. The OCF2 Flag is automatically cleared
when the interrupt is executed. Alternatively, the OCF2 Flag can be cleared by software by writing
a logical one to its I/O bit location. The waveform generator uses the match signal to
generate an output according to operating mode set by the WGM21:0 bits and Compare Output
mode (COM21:0) bits. The max and bottom signals are used by the waveform generator for handling
the special cases of the extreme values in some modes of operation (see “Modes of
Operation” on page 108).
Figure 47 shows a block diagram of the Output Compare unit.
Figure 47. Output Compare Unit, Block Diagram
The OCR2 Register is double buffered when using any of the Pulse Width Modulation (PWM)
modes. For the normal and Clear Timer on Compare (CTC) modes of operation, the double buffering
is disabled. The double buffering synchronizes the update of the OCR2 Compare Register
to either top or bottom of the counting sequence. The synchronization prevents the occurrence
of odd-length, non-symmetrical PWM pulses, thereby making the output glitch-free.
The OCR2 Register access may seem complex, but this is not case. When the double buffering
is enabled, the CPU has access to the OCR2 Buffer Register, and if double buffering is disabled
the CPU will access the OCR2 directly.
OCFn (Int. Req.)
= (8-bit Comparator )
OCRn
OCxy
DATA BUS
TCNTn
WGMn1:0
Waveform Generator
TOP
FOCn
COMn1:0
BOTTOM106
2486AA–AVR–02/2013
ATmega8(L)
Force Output
Compare
In non-PWM Waveform Generation modes, the match output of the comparator can be forced by
writing a one to the Force Output Compare (FOC2) bit. Forcing Compare Match will not set the
OCF2 Flag or reload/clear the timer, but the OC2 pin will be updated as if a real Compare Match
had occurred (the COM21:0 bits settings define whether the OC2 pin is set, cleared or toggled).
Compare Match
Blocking by TCNT2
Write
All CPU write operations to the TCNT2 Register will block any Compare Match that occurs in the
next timer clock cycle, even when the timer is stopped. This feature allows OCR2 to be initialized
to the same value as TCNT2 without triggering an interrupt when the Timer/Counter clock is
enabled.
Using the Output
Compare Unit
Since writing TCNT2 in any mode of operation will block all compare matches for one timer clock
cycle, there are risks involved when changing TCNT2 when using the Output Compare channel,
independently of whether the Timer/Counter is running or not. If the value written to TCNT2
equals the OCR2 value, the Compare Match will be missed, resulting in incorrect waveform generation.
Similarly, do not write the TCNT2 value equal to BOTTOM when the counter is
downcounting.
The setup of the OC2 should be performed before setting the Data Direction Register for the port
pin to output. The easiest way of setting the OC2 value is to use the Force Output Compare
(FOC2) strobe bit in Normal mode. The OC2 Register keeps its value even when changing
between waveform generation modes.
Be aware that the COM21:0 bits are not double buffered together with the compare value.
Changing the COM21:0 bits will take effect immediately.107
2486AA–AVR–02/2013
ATmega8(L)
Compare Match
Output Unit
The Compare Output mode (COM21:0) bits have two functions. The waveform generator uses
the COM21:0 bits for defining the Output Compare (OC2) state at the next Compare Match.
Also, the COM21:0 bits control the OC2 pin output source. Figure 48 shows a simplified schematic
of the logic affected by the COM21:0 bit setting. The I/O Registers, I/O bits, and I/O pins in
the figure are shown in bold. Only the parts of the general I/O Port Control Registers (DDR and
PORT) that are affected by the COM21:0 bits are shown. When referring to the OC2 state, the
reference is for the internal OC2 Register, not the OC2 pin.
Figure 48. Compare Match Output Unit, Schematic
The general I/O port function is overridden by the Output Compare (OC2) from the waveform
generator if either of the COM21:0 bits are set. However, the OC2 pin direction (input or output)
is still controlled by the Data Direction Register (DDR) for the port pin. The Data Direction Register
bit for the OC2 pin (DDR_OC2) must be set as output before the OC2 value is visible on the
pin. The port override function is independent of the Waveform Generation mode.
The design of the Output Compare Pin logic allows initialization of the OC2 state before the output
is enabled. Note that some COM21:0 bit settings are reserved for certain modes of
operation. See “8-bit Timer/Counter Register Description” on page 114.
PORT
DDR
D Q
D Q
OCn
OCn Pin
D Q Waveform
Generator
COMn1
COMn0
0
1
DATABUS
FOCn
clkI/O108
2486AA–AVR–02/2013
ATmega8(L)
Compare Output Mode
and Waveform
Generation
The Waveform Generator uses the COM21:0 bits differently in normal, CTC, and PWM modes.
For all modes, setting the COM21:0 = 0 tells the waveform generator that no action on the OC2
Register is to be performed on the next Compare Match. For compare output actions in the nonPWM
modes refer to Table 43 on page 115. For fast PWM mode, refer to Table 44 on page 115,
and for phase correct PWM refer to Table 45 on page 116.
A change of the COM21:0 bits state will have effect at the first Compare Match after the bits are
written. For non-PWM modes, the action can be forced to have immediate effect by using the
FOC2 strobe bits.
Modes of
Operation
The mode of operation (that is, the behavior of the Timer/Counter and the Output Compare pins)
is defined by the combination of the Waveform Generation mode (WGM21:0) and Compare Output
mode (COM21:0) bits. The Compare Output mode bits do not affect the counting sequence,
while the Waveform Generation mode bits do. The COM21:0 bits control whether the PWM output
generated should be inverted or not (inverted or non-inverted PWM). For non-PWM modes
the COM21:0 bits control whether the output should be set, cleared, or toggled at a Compare
Match (see “Compare Match Output Unit” on page 107).
For detailed timing information refer to “Timer/Counter Timing Diagrams” on page 112.
Normal Mode The simplest mode of operation is the Normal mode (WGM21:0 = 0). In this mode the counting
direction is always up (incrementing), and no counter clear is performed. The counter simply
overruns when it passes its maximum 8-bit value (TOP = 0xFF) and then restarts from the bottom
(0x00). In normal operation the Timer/Counter Overflow Flag (TOV2) will be set in the same
timer clock cycle as the TCNT2 becomes zero. The TOV2 Flag in this case behaves like a ninth
bit, except that it is only set, not cleared. However, combined with the timer overflow interrupt
that automatically clears the TOV2 Flag, the timer resolution can be increased by software.
There are no special cases to consider in the Normal mode, a new counter value can be written
anytime.
The Output Compare unit can be used to generate interrupts at some given time. Using the Output
Compare to generate waveforms in Normal mode is not recommended, since this will
occupy too much of the CPU time.109
2486AA–AVR–02/2013
ATmega8(L)
Clear Timer on
Compare Match (CTC)
Mode
In Clear Timer on Compare or CTC mode (WGM21:0 = 2), the OCR2 Register is used to manipulate
the counter resolution. In CTC mode the counter is cleared to zero when the counter value
(TCNT2) matches the OCR2. The OCR2 defines the top value for the counter, hence also its
resolution. This mode allows greater control of the Compare Match output frequency. It also simplifies
the operation of counting external events.
The timing diagram for the CTC mode is shown in Figure 49. The counter value (TCNT2)
increases until a Compare Match occurs between TCNT2 and OCR2, and then counter (TCNT2)
is cleared.
Figure 49. CTC Mode, Timing Diagram
An interrupt can be generated each time the counter value reaches the TOP value by using the
OCF2 Flag. If the interrupt is enabled, the interrupt handler routine can be used for updating the
TOP value. However, changing the TOP to a value close to BOTTOM when the counter is running
with none or a low prescaler value must be done with care since the CTC mode does not
have the double buffering feature. If the new value written to OCR2 is lower than the current
value of TCNT2, the counter will miss the Compare Match. The counter will then have to count to
its maximum value (0xFF) and wrap around starting at 0x00 before the Compare Match can
occur.
For generating a waveform output in CTC mode, the OC2 output can be set to toggle its logical
level on each Compare Match by setting the Compare Output mode bits to toggle mode
(COM21:0 = 1). The OC2 value will not be visible on the port pin unless the data direction for the
pin is set to output. The waveform generated will have a maximum frequency of fOC2 = fclk_I/O/2
when OCR2 is set to zero (0x00). The waveform frequency is defined by the following equation:
The N variable represents the prescale factor (1, 8, 32, 64, 128, 256, or 1024).
As for the Normal mode of operation, the TOV2 Flag is set in the same timer clock cycle that the
counter counts from MAX to 0x00.
TCNTn
OCn
(Toggle)
OCn Interrupt Flag Set
Period 1 2 3 4
(COMn1:0 = 1)
f
OCn
f
clk_I/O
2 N 1 + OCRn = ----------------------------------------------110
2486AA–AVR–02/2013
ATmega8(L)
Fast PWM Mode The fast Pulse Width Modulation or fast PWM mode (WGM21:0 = 3) provides a high frequency
PWM waveform generation option. The fast PWM differs from the other PWM option by its single-slope
operation. The counter counts from BOTTOM to MAX then restarts from BOTTOM. In
non-inverting Compare Output mode, the Output Compare (OC2) is cleared on the Compare
Match between TCNT2 and OCR2, and set at BOTTOM. In inverting Compare Output mode, the
output is set on Compare Match and cleared at BOTTOM. Due to the single-slope operation, the
operating frequency of the fast PWM mode can be twice as high as the phase correct PWM
mode that uses dual-slope operation. This high frequency makes the fast PWM mode well suited
for power regulation, rectification, and DAC applications. High frequency allows physically small
sized external components (coils, capacitors), and therefore reduces total system cost.
In fast PWM mode, the counter is incremented until the counter value matches the MAX value.
The counter is then cleared at the following timer clock cycle. The timing diagram for the fast
PWM mode is shown in Figure 50. The TCNT2 value is in the timing diagram shown as a histogram
for illustrating the single-slope operation. The diagram includes non-inverted and inverted
PWM outputs. The small horizontal line marks on the TCNT2 slopes represent compare
matches between OCR2 and TCNT2.
Figure 50. Fast PWM Mode, Timing Diagram
The Timer/Counter Overflow Flag (TOV2) is set each time the counter reaches MAX. If the interrupt
is enabled, the interrupt handler routine can be used for updating the compare value.
In fast PWM mode, the compare unit allows generation of PWM waveforms on the OC2 pin. Setting
the COM21:0 bits to 2 will produce a non-inverted PWM and an inverted PWM output can
be generated by setting the COM21:0 to 3 (see Table 44 on page 115). The actual OC2 value
will only be visible on the port pin if the data direction for the port pin is set as output. The PWM
waveform is generated by setting (or clearing) the OC2 Register at the Compare Match between
OCR2 and TCNT2, and clearing (or setting) the OC2 Register at the timer clock cycle the counter
is cleared (changes from MAX to BOTTOM).
The PWM frequency for the output can be calculated by the following equation:
The N variable represents the prescale factor (1, 8, 32, 64, 128, 256, or 1024).
TCNTn
OCRn Update
and
TOVn Interrupt Flag Set
Period 1 2 3
OCn
OCn
(COMn1:0 = 2)
(COMn1:0 = 3)
OCRn Interrupt Flag Set
4 5 6 7
f
OCnPWM
f
clk_I/O
N 256 = ------------------111
2486AA–AVR–02/2013
ATmega8(L)
The extreme values for the OCR2 Register represent special cases when generating a PWM
waveform output in the fast PWM mode. If the OCR2 is set equal to BOTTOM, the output will be
a narrow spike for each MAX+1 timer clock cycle. Setting the OCR2 equal to MAX will result in a
constantly high or low output (depending on the polarity of the output set by the COM21:0 bits.)
A frequency (with 50% duty cycle) waveform output in fast PWM mode can be achieved by setting
OC2 to toggle its logical level on each Compare Match (COM21:0 = 1). The waveform
generated will have a maximum frequency of foc2 = fclk_I/O/2 when OCR2 is set to zero. This feature
is similar to the OC2 toggle in CTC mode, except the double buffer feature of the Output
Compare unit is enabled in the fast PWM mode.
Phase Correct PWM
Mode
The phase correct PWM mode (WGM21:0 = 1) provides a high resolution phase correct PWM
waveform generation option. The phase correct PWM mode is based on a dual-slope operation.
The counter counts repeatedly from BOTTOM to MAX and then from MAX to BOTTOM. In noninverting
Compare Output mode, the Output Compare (OC2) is cleared on the Compare Match
between TCNT2 and OCR2 while upcounting, and set on the Compare Match while downcounting.
In inverting Output Compare mode, the operation is inverted. The dual-slope operation has
lower maximum operation frequency than single slope operation. However, due to the symmetric
feature of the dual-slope PWM modes, these modes are preferred for motor control
applications.
The PWM resolution for the phase correct PWM mode is fixed to eight bits. In phase correct
PWM mode the counter is incremented until the counter value matches MAX. When the counter
reaches MAX, it changes the count direction. The TCNT2 value will be equal to MAX for one
timer clock cycle. The timing diagram for the phase correct PWM mode is shown on Figure 51.
The TCNT2 value is in the timing diagram shown as a histogram for illustrating the dual-slope
operation. The diagram includes non-inverted and inverted PWM outputs. The small horizontal
line marks on the TCNT2 slopes represent compare matches between OCR2 and TCNT2.
Figure 51. Phase Correct PWM Mode, Timing Diagram
TOVn Interrupt Flag Set
OCn Interrupt Flag Set
1 2 3
TCNTn
Period
OCn
OCn
(COMn1:0 = 2)
(COMn1:0 = 3)
OCRn Update112
2486AA–AVR–02/2013
ATmega8(L)
The Timer/Counter Overflow Flag (TOV2) is set each time the counter reaches BOTTOM. The
Interrupt Flag can be used to generate an interrupt each time the counter reaches the BOTTOM
value.
In phase correct PWM mode, the compare unit allows generation of PWM waveforms on the
OC2 pin. Setting the COM21:0 bits to 2 will produce a non-inverted PWM. An inverted PWM output
can be generated by setting the COM21:0 to 3 (see Table 45 on page 116). The actual OC2
value will only be visible on the port pin if the data direction for the port pin is set as output. The
PWM waveform is generated by clearing (or setting) the OC2 Register at the Compare Match
between OCR2 and TCNT2 when the counter increments, and setting (or clearing) the OC2
Register at Compare Match between OCR2 and TCNT2 when the counter decrements. The
PWM frequency for the output when using phase correct PWM can be calculated by the following
equation:
The N variable represents the prescale factor (1, 8, 32, 64, 128, 256, or 1024).
The extreme values for the OCR2 Register represent special cases when generating a PWM
waveform output in the phase correct PWM mode. If the OCR2 is set equal to BOTTOM, the output
will be continuously low and if set equal to MAX the output will be continuously high for noninverted
PWM mode. For inverted PWM the output will have the opposite logic values.
At the very start of period 2 in Figure 51 on page 111 OCn has a transition from high to low even
though there is no Compare Match. The point of this transition is to guarantee symmetry around
BOTTOM. There are two cases that give a transition without Compare Match:
• OCR2A changes its value from MAX, like in Figure 51 on page 111. When the OCR2A value
is MAX the OCn pin value is the same as the result of a down-counting Compare Match. To
ensure symmetry around BOTTOM the OCn value at MAX must correspond to the result of
an up-counting Compare Match
• The timer starts counting from a value higher than the one in OCR2A, and for that reason
misses the Compare Match and hence the OCn change that would have happened on the
way up
Timer/Counter
Timing Diagrams
The following figures show the Timer/Counter in Synchronous mode, and the timer clock (clkT2)
is therefore shown as a clock enable signal. In Asynchronous mode, clkI/O should be replaced by
the Timer/Counter Oscillator clock. The figures include information on when Interrupt Flags are
set. Figure 52 contains timing data for basic Timer/Counter operation. The figure shows the
count sequence close to the MAX value in all modes other than phase correct PWM mode.
Figure 52. Timer/Counter Timing Diagram, no Prescaling
f
OCnPCPWM
f
clk_I/O
N 510 = ------------------
clkTn
(clkI/O/1)
TOVn
clkI/O
TCNTn MAX - 1 MAX BOTTOM BOTTOM + 1113
2486AA–AVR–02/2013
ATmega8(L)
Figure 53 shows the same timing data, but with the prescaler enabled.
Figure 53. Timer/Counter Timing Diagram, with Prescaler (fclk_I/O/8)
Figure 54 shows the setting of OCF2 in all modes except CTC mode.
Figure 54. Timer/Counter Timing Diagram, Setting of OCF2, with Prescaler (fclk_I/O/8)
TOVn
TCNTn MAX - 1 MAX BOTTOM BOTTOM + 1
clkI/O
clkTn
(clkI/O/8)
OCFn
OCRn
TCNTn
OCRn Value
OCRn - 1 OCRn OCRn + 1 OCRn + 2
clkI/O
clkTn
(clkI/O/8)114
2486AA–AVR–02/2013
ATmega8(L)
Figure 55 shows the setting of OCF2 and the clearing of TCNT2 in CTC mode.
Figure 55. Timer/Counter Timing Diagram, Clear Timer on Compare Match Mode, with Prescaler
(fclk_I/O/8)
8-bit
Timer/Counter
Register
Description
Timer/Counter Control
Register – TCCR2
• Bit 7 – FOC2: Force Output Compare
The FOC2 bit is only active when the WGM bits specify a non-PWM mode. However, for ensuring
compatibility with future devices, this bit must be set to zero when TCCR2 is written when
operating in PWM mode. When writing a logical one to the FOC2 bit, an immediate Compare
Match is forced on the waveform generation unit. The OC2 output is changed according to its
COM21:0 bits setting. Note that the FOC2 bit is implemented as a strobe. Therefore it is the
value present in the COM21:0 bits that determines the effect of the forced compare.
A FOC2 strobe will not generate any interrupt, nor will it clear the timer in CTC mode using
OCR2 as TOP.
The FOC2 bit is always read as zero.
• Bit 6:3 – WGM21:0: Waveform Generation Mode
These bits control the counting sequence of the counter, the source for the maximum (TOP)
counter value, and what type of waveform generation to be used. Modes of operation supported
by the Timer/Counter unit are: Normal mode, Clear Timer on Compare Match (CTC) mode, and
two types of Pulse Width Modulation (PWM) modes. See Table 42 on page 115 and “Modes of
Operation” on page 108.
OCFn
OCRn
TCNTn
(CTC)
TOP
TOP - 1 TOP BOTTOM BOTTOM + 1
clkI/O
clkTn
(clkI/O/8)
Bit 7 6 5 4 3 2 1 0
FOC2 WGM20 COM21 COM20 WGM21 CS22 CS21 CS20 TCCR2
Read/Write W R/W R/W R/W R/W R/W R/W R/W
Initial Value 0 0 0 0 0 0 0 0115
2486AA–AVR–02/2013
ATmega8(L)
Note: 1. The CTC2 and PWM2 bit definition names are now obsolete. Use the WGM21:0 definitions.
However, the functionality and location of these bits are compatible with previous versions of
the timer
• Bit 5:4 – COM21:0: Compare Match Output Mode
These bits control the Output Compare Pin (OC2) behavior. If one or both of the COM21:0 bits
are set, the OC2 output overrides the normal port functionality of the I/O pin it is connected to.
However, note that the Data Direction Register (DDR) bit corresponding to OC2 pin must be set
in order to enable the output driver.
When OC2 is connected to the pin, the function of the COM21:0 bits depends on the WGM21:0
bit setting.
Table 43 shows the COM21:0 bit functionality when the WGM21:0 bits are set to a normal or
CTC mode (non-PWM).
Table 44 shows the COM21:0 bit functionality when the WGM21:0 bits are set to fast PWM
mode.
Note: 1. A special case occurs when OCR2 equals TOP and COM21 is set. In this case, the Compare
Match is ignored, but the set or clear is done at BOTTOM. See “Fast PWM Mode” on page 110
for more details
Table 42. Waveform Generation Mode Bit Description
Mode
WGM21
(CTC2)
WGM20
(PWM2)
Timer/Counter Mode
of Operation(1) TOP
Update of
OCR2
TOV2 Flag
Set
0 0 0 Normal 0xFF Immediate MAX
1 0 1 PWM, Phase Correct 0xFF TOP BOTTOM
2 1 0 CTC OCR2 Immediate MAX
3 1 1 Fast PWM 0xFF BOTTOM MAX
Table 43. Compare Output Mode, Non-PWM Mode
COM21 COM20 Description
0 0 Normal port operation, OC2 disconnected
0 1 Toggle OC2 on Compare Match
1 0 Clear OC2 on Compare Match
1 1 Set OC2 on Compare Match
Table 44. Compare Output Mode, Fast PWM Mode(1)
COM21 COM20 Description
0 0 Normal port operation, OC2 disconnected
0 1 Reserved
1 0 Clear OC2 on Compare Match, set OC2 at BOTTOM,
(non-inverting mode)
1 1 Set OC2 on Compare Match, clear OC2 at BOTTOM,
(inverting mode)116
2486AA–AVR–02/2013
ATmega8(L)
Table 45 shows the COM21:0 bit functionality when the WGM21:0 bits are set to phase correct
PWM mode.
Note: 1. A special case occurs when OCR2 equals TOP and COM21 is set. In this case, the Compare
Match is ignored, but the set or clear is done at TOP. See “Phase Correct PWM Mode” on page
111 for more details
• Bit 2:0 – CS22:0: Clock Select
The three clock select bits select the clock source to be used by the Timer/Counter, see Table
46.
Timer/Counter
Register – TCNT2
The Timer/Counter Register gives direct access, both for read and write operations, to the
Timer/Counter unit 8-bit counter. Writing to the TCNT2 Register blocks (removes) the Compare
Match on the following timer clock. Modifying the counter (TCNT2) while the counter is running,
introduces a risk of missing a Compare Match between TCNT2 and the OCR2 Register.
Output Compare
Register – OCR2
The Output Compare Register contains an 8-bit value that is continuously compared with the
counter value (TCNT2). A match can be used to generate an Output Compare interrupt, or to
generate a waveform output on the OC2 pin.
Table 45. Compare Output Mode, Phase Correct PWM Mode(1)
COM21 COM20 Description
0 0 Normal port operation, OC2 disconnected
0 1 Reserved
1 0 Clear OC2 on Compare Match when up-counting. Set OC2 on Compare
Match when downcounting
1 1 Set OC2 on Compare Match when up-counting. Clear OC2 on Compare
Match when downcounting
Table 46. Clock Select Bit Description
CS22 CS21 CS20 Description
0 0 0 No clock source (Timer/Counter stopped)
0 0 1 clkT2S/(No prescaling)
0 1 0 clkT2S/8 (From prescaler)
0 1 1 clkT2S/32 (From prescaler)
1 0 0 clkT2S/64 (From prescaler)
1 0 1 clkT2S/128 (From prescaler)
1 1 0 clkT2S/256 (From prescaler)
1 1 1 clkT2S/1024 (From prescaler)
Bit 7 6 5 4 3 2 1 0
TCNT2[7:0] TCNT2
Read/Write R/W R/W R/W R/W R/W R/W R/W R/W
Initial Value 0 0 0 0 0 0 0 0
Bit 7 6 5 4 3 2 1 0
OCR2[7:0] OCR2
Read/Write R/W R/W R/W R/W R/W R/W R/W R/W
Initial Value 0 0 0 0 0 0 0 0117
2486AA–AVR–02/2013
ATmega8(L)
Asynchronous
Operation of the
Timer/Counter
Asynchronous Status
Register – ASSR
• Bit 3 – AS2: Asynchronous Timer/Counter2
When AS2 is written to zero, Timer/Counter 2 is clocked from the I/O clock, clkI/O. When AS2 is
written to one, Timer/Counter 2 is clocked from a crystal Oscillator connected to the Timer Oscillator
1 (TOSC1) pin. When the value of AS2 is changed, the contents of TCNT2, OCR2, and
TCCR2 might be corrupted.
• Bit 2 – TCN2UB: Timer/Counter2 Update Busy
When Timer/Counter2 operates asynchronously and TCNT2 is written, this bit becomes set.
When TCNT2 has been updated from the temporary storage register, this bit is cleared by hardware.
A logical zero in this bit indicates that TCNT2 is ready to be updated with a new value.
• Bit 1 – OCR2UB: Output Compare Register2 Update Busy
When Timer/Counter2 operates asynchronously and OCR2 is written, this bit becomes set.
When OCR2 has been updated from the temporary storage register, this bit is cleared by hardware.
A logical zero in this bit indicates that OCR2 is ready to be updated with a new value.
• Bit 0 – TCR2UB: Timer/Counter Control Register2 Update Busy
When Timer/Counter2 operates asynchronously and TCCR2 is written, this bit becomes set.
When TCCR2 has been updated from the temporary storage register, this bit is cleared by hardware.
A logical zero in this bit indicates that TCCR2 is ready to be updated with a new value.
If a write is performed to any of the three Timer/Counter2 Registers while its update busy flag is
set, the updated value might get corrupted and cause an unintentional interrupt to occur.
The mechanisms for reading TCNT2, OCR2, and TCCR2 are different. When reading TCNT2,
the actual timer value is read. When reading OCR2 or TCCR2, the value in the temporary storage
register is read.
Asynchronous
Operation of
Timer/Counter2
When Timer/Counter2 operates asynchronously, some considerations must be taken.
• Warning: When switching between asynchronous and synchronous clocking of
Timer/Counter2, the Timer Registers TCNT2, OCR2, and TCCR2 might be corrupted. A
safe procedure for switching clock source is:
1. Disable the Timer/Counter2 interrupts by clearing OCIE2 and TOIE2
2. Select clock source by setting AS2 as appropriate
3. Write new values to TCNT2, OCR2, and TCCR2
4. To switch to asynchronous operation: Wait for TCN2UB, OCR2UB, and TCR2UB
5. Clear the Timer/Counter2 Interrupt Flags
6. Enable interrupts, if needed
• The Oscillator is optimized for use with a 32.768kHz watch crystal. Applying an external
clock to the TOSC1 pin may result in incorrect Timer/Counter2 operation. The CPU main
clock frequency must be more than four times the Oscillator frequency
• When writing to one of the registers TCNT2, OCR2, or TCCR2, the value is transferred to a
temporary register, and latched after two positive edges on TOSC1. The user should not
Bit 7 6 5 4 3 2 1 0
– – – – AS2 TCN2UB OCR2UB TCR2UB ASSR
Read/Write R R R R R/W R R R
Initial Value 0 0 0 0 0 0 0 0118
2486AA–AVR–02/2013
ATmega8(L)
write a new value before the contents of the temporary register have been transferred to its
destination. Each of the three mentioned registers have their individual temporary register,
which means that, for example, writing to TCNT2 does not disturb an OCR2 write in
progress. To detect that a transfer to the destination register has taken place, the
Asynchronous Status Register – ASSR has been implemented
• When entering Power-save mode after having written to TCNT2, OCR2, or TCCR2, the user
must wait until the written register has been updated if Timer/Counter2 is used to wake up
the device. Otherwise, the MCU will enter sleep mode before the changes are effective. This
is particularly important if the Output Compare2 interrupt is used to wake up the device,
since the Output Compare function is disabled during writing to OCR2 or TCNT2. If the write
cycle is not finished, and the MCU enters sleep mode before the OCR2UB bit returns to
zero, the device will never receive a Compare Match interrupt, and the MCU will not wake up
• If Timer/Counter2 is used to wake the device up from Power-save mode, precautions must
be taken if the user wants to re-enter one of these modes: The interrupt logic needs one
TOSC1 cycle to be reset. If the time between wake-up and re-entering sleep mode is less
than one TOSC1 cycle, the interrupt will not occur, and the device will fail to wake up. If the
user is in doubt whether the time before re-entering Power-save or Extended Standby mode
is sufficient, the following algorithm can be used to ensure that one TOSC1 cycle has
elapsed:
1. Write a value to TCCR2, TCNT2, or OCR2
2. Wait until the corresponding Update Busy Flag in ASSR returns to zero
3. Enter Power-save or Extended Standby mode
• When the asynchronous operation is selected, the 32.768kHZ Oscillator for Timer/Counter2
is always running, except in Power-down and Standby modes. After a Power-up Reset or
Wake-up from Power-down or Standby mode, the user should be aware of the fact that this
Oscillator might take as long as one second to stabilize. The user is advised to wait for at
least one second before using Timer/Counter2 after Power-up or Wake-up from Power-down
or Standby mode. The contents of all Timer/Counter2 Registers must be considered lost
after a wake-up from Power-down or Standby mode due to unstable clock signal upon startup,
no matter whether the Oscillator is in use or a clock signal is applied to the TOSC1 pin
• Description of wake up from Power-save or Extended Standby mode when the timer is
clocked asynchronously: When the interrupt condition is met, the wake up process is started
on the following cycle of the timer clock, that is, the timer is always advanced by at least one
before the processor can read the counter value. After wake-up, the MCU is halted for four
cycles, it executes the interrupt routine, and resumes execution from the instruction
following SLEEP
• Reading of the TCNT2 Register shortly after wake-up from Power-save may give an
incorrect result. Since TCNT2 is clocked on the asynchronous TOSC clock, reading TCNT2
must be done through a register synchronized to the internal I/O clock domain.
Synchronization takes place for every rising TOSC1 edge. When waking up from Powersave
mode, and the I/O clock (clkI/O) again becomes active, TCNT2 will read as the previous
value (before entering sleep) until the next rising TOSC1 edge. The phase of the TOSC
clock after waking up from Power-save mode is essentially unpredictable, as it depends on
the wake-up time. The recommended procedure for reading TCNT2 is thus as follows:
1. Write any value to either of the registers OCR2 or TCCR2
2. Wait for the corresponding Update Busy Flag to be cleared
3. Read TCNT2119
2486AA–AVR–02/2013
ATmega8(L)
• During asynchronous operation, the synchronization of the Interrupt Flags for the
asynchronous timer takes three processor cycles plus one timer cycle. The timer is therefore
advanced by at least one before the processor can read the timer value causing the setting
of the Interrupt Flag. The Output Compare Pin is changed on the timer clock and is not
synchronized to the processor clock
Timer/Counter
Interrupt Mask
Register – TIMSK
• Bit 7 – OCIE2: Timer/Counter2 Output Compare Match Interrupt Enable
When the OCIE2 bit is written to one and the I-bit in the Status Register is set (one), the
Timer/Counter2 Compare Match interrupt is enabled. The corresponding interrupt is executed if
a Compare Match in Timer/Counter2 occurs (that is, when the OCF2 bit is set in the
Timer/Counter Interrupt Flag Register – TIFR).
• Bit 6 – TOIE2: Timer/Counter2 Overflow Interrupt Enable
When the TOIE2 bit is written to one and the I-bit in the Status Register is set (one), the
Timer/Counter2 Overflow interrupt is enabled. The corresponding interrupt is executed if an
overflow in Timer/Counter2 occurs (that is, when the TOV2 bit is set in the Timer/Counter Interrupt
Flag Register – TIFR).
Timer/Counter
Interrupt Flag Register
– TIFR
• Bit 7 – OCF2: Output Compare Flag 2
The OCF2 bit is set (one) when a Compare Match occurs between the Timer/Counter2 and the
data in OCR2 – Output Compare Register2. OCF2 is cleared by hardware when executing the
corresponding interrupt Handling Vector. Alternatively, OCF2 is cleared by writing a logic one to
the flag. When the I-bit in SREG, OCIE2 (Timer/Counter2 Compare Match Interrupt Enable), and
OCF2 are set (one), the Timer/Counter2 Compare Match Interrupt is executed.
• Bit 6 – TOV2: Timer/Counter2 Overflow Flag
The TOV2 bit is set (one) when an overflow occurs in Timer/Counter2. TOV2 is cleared by hardware
when executing the corresponding interrupt Handling Vector. Alternatively, TOV2 is
cleared by writing a logic one to the flag. When the SREG I-bit, TOIE2 (Timer/Counter2 Overflow
Interrupt Enable), and TOV2 are set (one), the Timer/Counter2 Overflow interrupt is executed. In
PWM mode, this bit is set when Timer/Counter2 changes counting direction at 0x00.
Bit 7 6 5 4 3 2 1 0
OCIE2 TOIE2 TICIE1 OCIE1A OCIE1B TOIE1 – TOIE0 TIMSK
Read/Write R/W R/W R/W R/W R/W R/W R R/W
Initial Value 0 0 0 0 0 0 0 0
Bit 7 6 5 4 3 2 1 0
OCF2 TOV2 ICF1 OCF1A OCF1B TOV1 – TOV0 TIFR
Read/Write R/W R/W R/W R/W R/W R/W R R/W
Initial Value 0 0 0 0 0 0 0 0120
2486AA–AVR–02/2013
ATmega8(L)
Timer/Counter
Prescaler
Figure 56. Prescaler for Timer/Counter2
The clock source for Timer/Counter2 is named clkT2S. clkT2S is by default connected to the main
system I/O clock clkI/O. By setting the AS2 bit in ASSR, Timer/Counter2 is asynchronously
clocked from the TOSC1 pin. This enables use of Timer/Counter2 as a Real Time Counter
(RTC). When AS2 is set, pins TOSC1 and TOSC2 are disconnected from Port B. A crystal can
then be connected between the TOSC1 and TOSC2 pins to serve as an independent clock
source for Timer/Counter2. The Oscillator is optimized for use with a 32.768kHz crystal. Applying
an external clock source to TOSC1 is not recommended.
For Timer/Counter2, the possible prescaled selections are: clkT2S/8, clkT2S/32, clkT2S/64,
clkT2S/128, clkT2S/256, and clkT2S/1024. Additionally, clkT2S as well as 0 (stop) may be selected.
Setting the PSR2 bit in SFIOR resets the prescaler. This allows the user to operate with a predictable
prescaler.
Special Function IO
Register – SFIOR
• Bit 1 – PSR2: Prescaler Reset Timer/Counter2
When this bit is written to one, the Timer/Counter2 prescaler will be reset. The bit will be cleared
by hardware after the operation is performed. Writing a zero to this bit will have no effect. This bit
will always be read as zero if Timer/Counter2 is clocked by the internal CPU clock. If this bit is
written when Timer/Counter2 is operating in Asynchronous mode, the bit will remain one until
the prescaler has been reset.
10-BIT T/C PRESCALER
TIMER/COUNTER2 CLOCK SOURCE
clkI/O clkT2S
TOSC1
AS2
CS20
CS21
CS22
clkT2S/8
clkT2S/64
clkT2S/128
clkT2S/1024
clkT2S/256
clkT2S/32
0 PSR2
Clear
clkT2
Bit 7 6 5 4 3 2 1 0
– – – – ACME PUD PSR2 PSR10 SFIOR
Read/Write R R R R R/W R/W R/W R/W
Initial Value 0 0 0 0 0 0 0 0121
2486AA–AVR–02/2013
ATmega8(L)
Serial
Peripheral
Interface – SPI
The Serial Peripheral Interface (SPI) allows high-speed synchronous data transfer between the
ATmega8 and peripheral devices or between several AVR devices. The ATmega8 SPI includes
the following features:
• Full-duplex, Three-wire Synchronous Data Transfer
• Master or Slave Operation
• LSB First or MSB First Data Transfer
• Seven Programmable Bit Rates
• End of Transmission Interrupt Flag
• Write Collision Flag Protection
• Wake-up from Idle Mode
• Double Speed (CK/2) Master SPI Mode
Figure 57. SPI Block Diagram(1)
Note: 1. Refer to “Pin Configurations” on page 2, and Table 22 on page 58 for SPI pin placement
The interconnection between Master and Slave CPUs with SPI is shown in Figure 58 on page
122. The system consists of two Shift Registers, and a Master clock generator. The SPI Master
initiates the communication cycle when pulling low the Slave Select SS pin of the desired Slave.
Master and Slave prepare the data to be sent in their respective Shift Registers, and the Master
generates the required clock pulses on the SCK line to interchange data. Data is always shifted
from Master to Slave on the Master Out – Slave In, MOSI, line, and from Slave to Master on the
Master In – Slave Out, MISO, line. After each data packet, the Master will synchronize the Slave
by pulling high the Slave Select, SS, line.
When configured as a Master, the SPI interface has no automatic control of the SS line. This
must be handled by user software before communication can start. When this is done, writing a SPI2X SPI2X
DIVIDER
/2/4/8/16/32/64/128122
2486AA–AVR–02/2013
ATmega8(L)
byte to the SPI Data Register starts the SPI clock generator, and the hardware shifts the eight
bits into the Slave. After shifting one byte, the SPI clock generator stops, setting the end of
Transmission Flag (SPIF). If the SPI interrupt enable bit (SPIE) in the SPCR Register is set, an
interrupt is requested. The Master may continue to shift the next byte by writing it into SPDR, or
signal the end of packet by pulling high the Slave Select, SS line. The last incoming byte will be
kept in the Buffer Register for later use.
When configured as a Slave, the SPI interface will remain sleeping with MISO tri-stated as long
as the SS pin is driven high. In this state, software may update the contents of the SPI Data
Register, SPDR, but the data will not be shifted out by incoming clock pulses on the SCK pin
until the SS pin is driven low. As one byte has been completely shifted, the end of Transmission
Flag, SPIF is set. If the SPI interrupt enable bit, SPIE, in the SPCR Register is set, an interrupt is
requested. The Slave may continue to place new data to be sent into SPDR before reading the
incoming data. The last incoming byte will be kept in the Buffer Register for later use.
Figure 58. SPI Master-Slave Interconnection
The system is single buffered in the transmit direction and double buffered in the receive direction.
This means that bytes to be transmitted cannot be written to the SPI Data Register before
the entire shift cycle is completed. When receiving data, however, a received character must be
read from the SPI Data Register before the next character has been completely shifted in. Otherwise,
the first byte is lost.
In SPI Slave mode, the control logic will sample the incoming signal of the SCK pin. To ensure
correct sampling of the clock signal, the minimum low and high periods should be:
Low period: longer than 2 CPU clock cycles
High period: longer than 2 CPU clock cycles
When the SPI is enabled, the data direction of the MOSI, MISO, SCK, and SS pins is overridden
according to Table 47. For more details on automatic port overrides, refer to “Alternate Port
Functions” on page 56.
Note: 1. See “Port B Pins Alternate Functions” on page 58 for a detailed description of how to define
the direction of the user defined SPI pins
Table 47. SPI Pin Overrides(1)
Pin Direction, Master SPI Direction, Slave SPI
MOSI User Defined Input
MISO Input User Defined
SCK User Defined Input
SS User Defined Input
MSB MASTER LSB
8 BIT SHIFT REGISTER
MSB SLAVE LSB
8 BIT SHIFT REGISTER
MISO
MOSI
SPI
CLOCK GENERATOR
SCK
SS
MISO
MOSI
SCK
SS
VCC
SHIFT
ENABLE123
2486AA–AVR–02/2013
ATmega8(L)
The following code examples show how to initialize the SPI as a Master and how to perform a
simple transmission. DDR_SPI in the examples must be replaced by the actual Data Direction
Register controlling the SPI pins. DD_MOSI, DD_MISO and DD_SCK must be replaced by the
actual data direction bits for these pins. For example if MOSI is placed on pin PB5, replace
DD_MOSI with DDB5 and DDR_SPI with DDRB.
Note: 1. See “About Code Examples” on page 8
Assembly Code Example(1)
SPI_MasterInit:
; Set MOSI and SCK output, all others input
ldi r17,(1<>8);
UBRRL = (unsigned char)ubrr;
/* Enable receiver and transmitter */
UCSRB = (1<> 1) & 0x01;
return ((resh << 8) | resl);
}141
2486AA–AVR–02/2013
ATmega8(L)
Receive Compete Flag
and Interrupt
The USART Receiver has one flag that indicates the Receiver state.
The Receive Complete (RXC) Flag indicates if there are unread data present in the receive buffer.
This flag is one when unread data exist in the receive buffer, and zero when the receive
buffer is empty (that is, does not contain any unread data). If the Receiver is disabled (RXEN =
0), the receive buffer will be flushed and consequently the RXC bit will become zero.
When the Receive Complete Interrupt Enable (RXCIE) in UCSRB is set, the USART Receive
Complete Interrupt will be executed as long as the RXC Flag is set (provided that global interrupts
are enabled). When interrupt-driven data reception is used, the receive complete routine
must read the received data from UDR in order to clear the RXC Flag, otherwise a new interrupt
will occur once the interrupt routine terminates.
Receiver Error Flags The USART Receiver has three error flags: Frame Error (FE), Data OverRun (DOR) and Parity
Error (PE). All can be accessed by reading UCSRA. Common for the error flags is that they are
located in the receive buffer together with the frame for which they indicate the error status. Due
to the buffering of the error flags, the UCSRA must be read before the receive buffer (UDR),
since reading the UDR I/O location changes the buffer read location. Another equality for the
error flags is that they can not be altered by software doing a write to the flag location. However,
all flags must be set to zero when the UCSRA is written for upward compatibility of future
USART implementations. None of the error flags can generate interrupts.
The Frame Error (FE) Flag indicates the state of the first stop bit of the next readable frame
stored in the receive buffer. The FE Flag is zero when the stop bit was correctly read (as one),
and the FE Flag will be one when the stop bit was incorrect (zero). This flag can be used for
detecting out-of-sync conditions, detecting break conditions and protocol handling. The FE Flag
is not affected by the setting of the USBS bit in UCSRC since the Receiver ignores all, except for
the first, stop bits. For compatibility with future devices, always set this bit to zero when writing to
UCSRA.
The Data OverRun (DOR) Flag indicates data loss due to a Receiver buffer full condition. A Data
OverRun occurs when the receive buffer is full (two characters), it is a new character waiting in
the Receive Shift Register, and a new start bit is detected. If the DOR Flag is set there was one
or more serial frame lost between the frame last read from UDR, and the next frame read from
UDR. For compatibility with future devices, always write this bit to zero when writing to UCSRA.
The DOR Flag is cleared when the frame received was successfully moved from the Shift Register
to the receive buffer.
The Parity Error (PE) Flag indicates that the next frame in the receive buffer had a parity error
when received. If parity check is not enabled the PE bit will always be read zero. For compatibility
with future devices, always set this bit to zero when writing to UCSRA. For more details see
“Parity Bit Calculation” on page 134 and “Parity Checker” .
Parity Checker The Parity Checker is active when the high USART Parity mode (UPM1) bit is set. Type of parity
check to be performed (odd or even) is selected by the UPM0 bit. When enabled, the Parity
Checker calculates the parity of the data bits in incoming frames and compares the result with
the parity bit from the serial frame. The result of the check is stored in the receive buffer together
with the received data and stop bits. The Parity Error (PE) Flag can then be read by software to
check if the frame had a parity error.
The PE bit is set if the next character that can be read from the receive buffer had a parity error
when received and the parity checking was enabled at that point (UPM1 = 1). This bit is valid
until the receive buffer (UDR) is read.142
2486AA–AVR–02/2013
ATmega8(L)
Disabling the Receiver In contrast to the Transmitter, disabling of the Receiver will be immediate. Data from ongoing
receptions will therefore be lost. When disabled (that is, the RXEN is set to zero) the Receiver
will no longer override the normal function of the RxD port pin. The Receiver buffer FIFO will be
flushed when the Receiver is disabled. Remaining data in the buffer will be lost
Flushing the Receive
Buffer
The Receiver buffer FIFO will be flushed when the Receiver is disabled (that is, the buffer will be
emptied of its contents). Unread data will be lost. If the buffer has to be flushed during normal
operation, due to for instance an error condition, read the UDR I/O location until the RXC Flag is
cleared. The following code example shows how to flush the receive buffer.
Note: 1. See “About Code Examples” on page 8
Asynchronous
Data Reception
The USART includes a clock recovery and a data recovery unit for handling asynchronous data
reception. The clock recovery logic is used for synchronizing the internally generated baud rate
clock to the incoming asynchronous serial frames at the RxD pin. The data recovery logic samples
and low pass filters each incoming bit, thereby improving the noise immunity of the
Receiver. The asynchronous reception operational range depends on the accuracy of the internal
baud rate clock, the rate of the incoming frames, and the frame size in number of bits.
Asynchronous Clock
Recovery
The clock recovery logic synchronizes internal clock to the incoming serial frames. Figure 65
illustrates the sampling process of the start bit of an incoming frame. The sample rate is 16 times
the baud rate for Normal mode, and eight times the baud rate for Double Speed mode. The horizontal
arrows illustrate the synchronization variation due to the sampling process. Note the
larger time variation when using the Double Speed mode (U2X = 1) of operation. Samples
denoted zero are samples done when the RxD line is idle (that is, no communication activity).
Figure 65. Start Bit Sampling
When the clock recovery logic detects a high (idle) to low (start) transition on the RxD line, the
start bit detection sequence is initiated. Let sample 1 denote the first zero-sample as shown in
Assembly Code Example(1)
USART_Flush:
sbis UCSRA, RXC
ret
in r16, UDR
rjmp USART_Flush
C Code Example(1)
void USART_Flush( void )
{
unsigned char dummy;
while ( UCSRA & (1< 2 CPU clock cycles for fck <12MHz, 3 CPU clock cycles for fck >=12MHz
High:> 2 CPU clock cycles for fck <12MHz, 3 CPU clock cycles for fck >=12MHz
Table 96. Pin Mapping Serial Programming
Symbol Pins I/O Description
MOSI PB3 I Serial data in
MISO PB4 O Serial data out
SCK PB5 I Serial clock
VCC
GND
XTAL1
SCK
MISO
MOSI
RESET
PB3
PB4
PB5
+2.7V - 5.5V
AVCC
+2.7V - 5.5V (2)231
2486AA–AVR–02/2013
ATmega8(L)
Serial Programming
Algorithm
When writing serial data to the ATmega8, data is clocked on the rising edge of SCK.
When reading data from the ATmega8, data is clocked on the falling edge of SCK. See Figure
113 on page 232 for timing details.
To program and verify the ATmega8 in the Serial Programming mode, the following sequence is
recommended (see four byte instruction formats in Table 98 on page 233):
1. Power-up sequence:
Apply power between VCC and GND while RESET and SCK are set to “0”. In some systems,
the programmer can not guarantee that SCK is held low during Power-up. In this
case, RESET must be given a positive pulse of at least two CPU clock cycles duration
after SCK has been set to “0”
2. Wait for at least 20ms and enable Serial Programming by sending the Programming
Enable serial instruction to pin MOSI
3. The Serial Programming instructions will not work if the communication is out of synchronization.
When in sync. the second byte (0x53), will echo back when issuing the third
byte of the Programming Enable instruction. Whether the echo is correct or not, all four
bytes of the instruction must be transmitted. If the 0x53 did not echo back, give RESET a
positive pulse and issue a new Programming Enable command
4. The Flash is programmed one page at a time. The page size is found in Table 89 on
page 218. The memory page is loaded one byte at a time by supplying the 5 LSB of the
address and data together with the Load Program memory Page instruction. To ensure
correct loading of the page, the data Low byte must be loaded before data High byte is
applied for a given address. The Program memory Page is stored by loading the Write
Program memory Page instruction with the 7MSB of the address. If polling is not used,
the user must wait at least tWD_FLASH before issuing the next page (see Table 97 on page
232).
Note: If other commands than polling (read) are applied before any write operation (FLASH,
EEPROM, Lock Bits, Fuses) is completed, it may result in incorrect programming
5. The EEPROM array is programmed one byte at a time by supplying the address and data
together with the appropriate Write instruction. An EEPROM memory location is first
automatically erased before new data is written. If polling is not used, the user must wait
at least tWD_EEPROM before issuing the next byte (see Table 97 on page 232). In a chip
erased device, no 0xFFs in the data file(s) need to be programmed
6. Any memory location can be verified by using the Read instruction which returns the content
at the selected address at serial output MISO
7. At the end of the programming session, RESET can be set high to commence normal
operation
8. Power-off sequence (if needed):
Set RESET to “1”
Turn VCC power off
Data Polling Flash When a page is being programmed into the Flash, reading an address location within the page
being programmed will give the value 0xFF. At the time the device is ready for a new page, the
programmed value will read correctly. This is used to determine when the next page can be written.
Note that the entire page is written simultaneously and any address within the page can be
used for polling. Data polling of the Flash will not work for the value 0xFF, so when programming
this value, the user will have to wait for at least tWD_FLASH before programming the next page. As
a chip-erased device contains 0xFF in all locations, programming of addresses that are meant to
contain 0xFF, can be skipped. See Table 97 on page 232 for tWD_FLASH value.232
2486AA–AVR–02/2013
ATmega8(L)
Data Polling EEPROM When a new byte has been written and is being programmed into EEPROM, reading the
address location being programmed will give the value 0xFF. At the time the device is ready for
a new byte, the programmed value will read correctly. This is used to determine when the next
byte can be written. This will not work for the value 0xFF, but the user should have the following
in mind: As a chip-erased device contains 0xFF in all locations, programming of addresses that
are meant to contain 0xFF, can be skipped. This does not apply if the EEPROM is Re-programmed
without chip-erasing the device. In this case, data polling cannot be used for the value
0xFF, and the user will have to wait at least tWD_EEPROM before programming the next byte. See
Table 97 for tWD_EEPROM value.
Figure 113. Serial Programming Waveforms
Table 97. Minimum Wait Delay Before Writing the Next Flash or EEPROM Location
Symbol Minimum Wait Delay
tWD_FUSE 4.5ms
tWD_FLASH 4.5ms
tWD_EEPROM 9.0ms
tWD_ERASE 9.0ms
MSB
MSB
LSB
LSB
SERIAL CLOCK INPUT
(SCK)
SERIAL DATA INPUT
(MOSI)
(MISO)
SAMPLE
SERIAL DATA OUTPUT233
2486AA–AVR–02/2013
ATmega8(L)
Note: a = address high bits
b = address low bits
H = 0 – Low byte, 1 – High byte
o = data out
i = data in
x = don’t care
Table 98. Serial Programming Instruction Set
Instruction
Instruction Format
Byte 1 Byte 2 Byte 3 Byte 4 Operation
Programming Enable 1010 1100 0101 0011 xxxx xxxx xxxx xxxx Enable Serial Programming after
RESET goes low
Chip Erase 1010 1100 100x xxxx xxxx xxxx xxxx xxxx Chip Erase EEPROM and Flash
Read Program Memory 0010 H000 0000 aaaa bbbb bbbb oooo oooo Read H (high or low) data o from
Program memory at word address
a:b
Load Program Memory
Page
0100 H000 0000 xxxx xxxb bbbb iiii iiii Write H (high or low) data i to
Program memory page at word
address b. Data Low byte must be
loaded before Data High byte is
applied within the same address
Write Program Memory
Page
0100 1100 0000 aaaa bbbx xxxx xxxx xxxx Write Program memory Page at
address a:b
Read EEPROM Memory 1010 0000 00xx xxxa bbbb bbbb oooo oooo Read data o from EEPROM
memory at address a:b
Write EEPROM Memory 1100 0000 00xx xxxa bbbb bbbb iiii iiii Write data i to EEPROM memory
at address a:b
Read Lock Bits 0101 1000 0000 0000 xxxx xxxx xxoo oooo Read Lock Bits. “0” = programmed,
“1” = unprogrammed. See Table
85 on page 215 for details
Write Lock Bits 1010 1100 111x xxxx xxxx xxxx 11ii iiii Write Lock Bits. Set bits = “0” to
program Lock Bits. See Table 85
on page 215 for details
Read Signature Byte 0011 0000 00xx xxxx xxxx xxbb oooo oooo Read Signature Byte o at address
b
Write Fuse Bits 1010 1100 1010 0000 xxxx xxxx iiii iiii Set bits = “0” to program, “1” to
unprogram. See Table 88 on
page 217 for details
Write Fuse High Bits 1010 1100 1010 1000 xxxx xxxx iiii iiii Set bits = “0” to program, “1” to
unprogram. See Table 87 on
page 216 for details
Read Fuse Bits 0101 0000 0000 0000 xxxx xxxx oooo oooo Read Fuse Bits. “0” = programmed,
“1” = unprogrammed. See Table
88 on page 217 for details
Read Fuse High Bits 0101 1000 0000 1000 xxxx xxxx oooo oooo Read Fuse high bits. “0” = programmed,
“1” = unprogrammed.
See Table 87 on page 216 for
details
Read Calibration Byte 0011 1000 00xx xxxx 0000 00bb oooo oooo Read Calibration Byte234
2486AA–AVR–02/2013
ATmega8(L)
SPI Serial
Programming
Characteristics
For characteristics of the SPI module, see “SPI Timing Characteristics” on page 239.235
2486AA–AVR–02/2013
ATmega8(L)
Electrical Characteristics – TA = -40°C to 85°C
Note: Typical values contained in this datasheet are based on simulations and characterization of other AVR microcontrollers manufactured
on the same process technology. Min and Max values will be available after the device is characterized.
DC Characteristics
Absolute Maximum Ratings*
Operating Temperature.................................. -55C to +125C *NOTICE: Stresses beyond those listed under “Absolute
Maximum Ratings” may cause permanent damage
to the device. This is a stress rating only and
functional operation of the device at these or
other conditions beyond those indicated in the
operational sections of this specification is not
implied. Exposure to absolute maximum rating
conditions for extended periods may affect
device reliability.
Storage Temperature ..................................... -65°C to +150°C
Voltage on any Pin except RESET
with respect to Ground ................................-0.5V to VCC+0.5V
Voltage on RESET with respect to Ground......-0.5V to +13.0V
Maximum Operating Voltage ............................................ 6.0V
DC Current per I/O Pin ................................................ 40.0mA
DC Current VCC and GND Pins................................. 300.0mA
TA = -40C to +85C, VCC = 2.7V to 5.5V (unless otherwise noted)
Symbol Parameter Condition Min Typ Max Units
VIL
Input Low Voltage except
XTAL1 and RESET pins VCC = 2.7V - 5.5V -0.5 0.2 VCC(1)
V
VIH
Input High Voltage except
XTAL1 and RESET pins VCC = 2.7V - 5.5V 0.6VCC(2) VCC + 0.5
VIL1
Input Low Voltage
XTAL1 pin
VCC = 2.7V - 5.5V -0.5 0.1VCC(1)
VIH1
Input High Voltage
XTAL 1 pin
VCC = 2.7V - 5.5V 0.8VCC(2) VCC + 0.5
VIL2
Input Low Voltage
RESET pin
VCC = 2.7V - 5.5V -0.5 0.2 VCC
VIH2
Input High Voltage
RESET pin
VCC = 2.7V - 5.5V 0.9VCC(2) VCC + 0.5
VIL3
Input Low Voltage
RESET pin as I/O VCC = 2.7V - 5.5V -0.5 0.2VCC
VIH3
Input High Voltage
RESET pin as I/O VCC = 2.7V - 5.5V 0.6VCC(2)
0.7VCC(2) VCC + 0.5
VOL
Output Low Voltage(3)
(Ports B,C,D)
I
OL = 20mA, VCC = 5V
IOL = 10mA, VCC = 3V
0.9
0.6
VOH
Output High Voltage(4)
(Ports B,C,D)
I
OH = -20mA, VCC = 5V
IOH = -10mA, VCC = 3V
4.2
2.2
IIL
Input Leakage
Current I/O Pin
Vcc = 5.5V, pin low
(absolute value) 1
µA
I
IH
Input Leakage
Current I/O Pin
Vcc = 5.5V, pin high
(absolute value) 1
RRST Reset Pull-up Resistor 30 80 k236
2486AA–AVR–02/2013
ATmega8(L)
Notes: 1. “Max” means the highest value where the pin is guaranteed to be read as low
2. “Min” means the lowest value where the pin is guaranteed to be read as high
3. Although each I/O port can sink more than the test conditions (20mA at Vcc = 5V, 10mA at Vcc = 3V) under steady state
conditions (non-transient), the following must be observed:
PDIP, TQFP, and QFN/MLF Package:
1] The sum of all IOL, for all ports, should not exceed 300mA.
2] The sum of all IOL, for ports C0 - C5 should not exceed 100mA.
3] The sum of all IOL, for ports B0 - B7, C6, D0 - D7 and XTAL2, should not exceed 200mA.
If IOL exceeds the test condition, VOL may exceed the related specification. Pins are not guaranteed to sink current greater
than the listed test condition
4. Although each I/O port can source more than the test conditions (20mA at Vcc = 5V, 10mA at Vcc = 3V) under steady state
conditions (non-transient), the following must be observed:
PDIP, TQFP, and QFN/MLF Package:
1] The sum of all IOH, for all ports, should not exceed 300mA.
2] The sum of all IOH, for port C0 - C5, should not exceed 100mA.
3] The sum of all IOH, for ports B0 - B7, C6, D0 - D7 and XTAL2, should not exceed 200mA.
If IOH exceeds the test condition, VOH may exceed the related specification. Pins are not guaranteed to source current
greater than the listed test condition
5. Minimum VCC for Power-down is 2.5V
Rpu I/O Pin Pull-up Resistor 20 50 k
ICC
Power Supply Current
Active 4MHz, VCC = 3V
(ATmega8L) 3 5
mA
Active 8MHz, VCC = 5V
(ATmega8) 11 15
Idle 4MHz, VCC = 3V
(ATmega8L) 1 2
Idle 8MHz, VCC = 5V
(ATmega8) 4.5 7
Power-down mode(5) WDT enabled, VCC = 3V < 22 28
µA
WDT disabled, VCC = 3V < 1 3
VACIO
Analog Comparator
Input Offset Voltage
VCC = 5V
Vin = VCC/2 40 mV
IACLK
Analog Comparator
Input Leakage Current
VCC = 5V
Vin = VCC/2 -50 50 nA
tACPD
Analog Comparator
Propagation Delay
VCC = 2.7V
VCC = 5.0V
750
500 ns
TA = -40C to +85C, VCC = 2.7V to 5.5V (unless otherwise noted) (Continued)
Symbol Parameter Condition Min Typ Max Units237
2486AA–AVR–02/2013
ATmega8(L)
External Clock
Drive Waveforms
Figure 114. External Clock Drive Waveforms
External Clock
Drive
Notes: 1. R should be in the range 3k - 100k, and C should be at least 20pF. The C values given in
the table includes pin capacitance. This will vary with package type
2. The frequency will vary with package type and board layout
VIL1
VIH1
Table 99. External Clock Drive
Symbol Parameter
VCC = 2.7V to 5.5V VCC = 4.5V to 5.5V
Min Max Min Max Units
1/tCLCL Oscillator Frequency 0 8 0 16 MHz
tCLCL Clock Period 125 62.5
tCHCX High Time 50 25 ns
tCLCX Low Time 50 25
tCLCH Rise Time 1.6 0.5
s
tCHCL Fall Time 1.6 0.5
tCLCL
Change in period from one
clock cycle to the next 2 2%
Table 100. External RC Oscillator, Typical Frequencies
R [k]
(1) C [pF] f(2)
33 22 650kHz
10 22 2.0MHz238
2486AA–AVR–02/2013
ATmega8(L)
Two-wire Serial Interface Characteristics
Table 101 describes the requirements for devices connected to the Two-wire Serial Bus. The ATmega8 Two-wire Serial
Interface meets or exceeds these requirements under the noted conditions.
Timing symbols refer to Figure 115 on page 239.
Notes: 1. In ATmega8, this parameter is characterized and not 100% tested
2. Required only for fSCL > 100kHz
3. Cb = capacitance of one bus line in pF
4. fCK = CPU clock frequency
Table 101. Two-wire Serial Bus Requirements
Symbol Parameter Condition Min Max Units
VIL Input Low-voltage -0.5 0.3VCC
V
VIH Input High-voltage 0.7VCC VCC + 0.5
Vhys(1) Hysteresis of Schmitt Trigger Inputs 0.05VCC(2) –
VOL(1) Output Low-voltage 3mA sink Current 0 0.4
tr
(1) Rise Time for both SDA and SCL 20 + 0.1Cb
(3)(2) 300
tof ns (1) Output Fall Time from VIHmin to VILmax 10pF < Cb < 400pF(3) 20 + 0.1Cb
(3)(2) 250
tSP(1) Spikes Suppressed by Input Filter 0 50(2)
Ii Input Current each I/O Pin 0.1VCC < Vi
< 0.9VCC -10 10 µA
Ci
(1) Capacitance for each I/O Pin – 10 pF
fSCL SCL Clock Frequency fCK(4) > max(16fSCL, 250kHz)(5) 0 400 kHz
Rp Value of Pull-up resistor
fSCL 100kHz
fSCL > 100kHz
tHD;STA Hold Time (repeated) START Condition
fSCL 100kHz 4.0 –
µs
fSCL > 100kHz 0.6 –
tLOW Low Period of the SCL Clock
fSCL 100kHz(6) 4.7 –
fSCL > 100kHz(7) 1.3 –
tHIGH High period of the SCL clock
fSCL 100kHz 4.0 –
fSCL > 100kHz 0.6 –
tSU;STA Set-up time for a repeated START condition
fSCL 100kHz 4.7 –
fSCL > 100kHz 0.6 –
tHD;DAT Data hold time
fSCL 100kHz 0 3.45
fSCL > 100kHz 0 0.9
tSU;DAT Data setup time
fSCL 100kHz 250 –
ns
fSCL > 100kHz 100 –
tSU;STO Setup time for STOP condition
fSCL 100kHz 4.0 –
µs
fSCL > 100kHz 0.6 –
tBUF
Bus free time between a STOP and START
condition
fSCL 100kHz 4.7 –
fSCL > 100kHz 1.3 –
VCC – 0.4V
3mA ---------------------------- 1000ns
Cb
-------------------
VCC – 0.4V
3mA ---------------------------- 300ns
Cb
----------------239
2486AA–AVR–02/2013
ATmega8(L)
5. This requirement applies to all ATmega8 Two-wire Serial Interface operation. Other devices connected to the Two-wire Serial
Bus need only obey the general fSCL requirement
6. The actual low period generated by the ATmega8 Two-wire Serial Interface is (1/fSCL - 2/fCK), thus fCK must be greater than
6MHz for the low time requirement to be strictly met at fSCL = 100kHz
7. The actual low period generated by the ATmega8 Two-wire Serial Interface is (1/fSCL - 2/fCK), thus the low time requirement
will not be strictly met for fSCL > 308kHz when fCK = 8MHz. Still, ATmega8 devices connected to the bus may communicate at
full speed (400kHz) with other ATmega8 devices, as well as any other device with a proper tLOW acceptance margin
Figure 115. Two-wire Serial Bus Timing
SPI Timing
Characteristics
See Figure 116 on page 240 and Figure 117 on page 240 for details.
Note: 1. In SPI Programming mode the minimum SCK high/low period is:
- 2tCLCL for fCK < 12MHz
- 3tCLCL for fCK > 12MHz
t
SU;STA
t
LOW
t
HIGH
t
LOW
t
of
t
HD;STA t
HD;DAT t
SU;DAT t
SU;STO
t
BUF
SCL
SDA
t
r
Table 102. SPI Timing Parameters
Description Mode Min Typ Max
1 SCK period Master See Table 50 on
page 126
ns
2 SCK high/low Master 50% duty cycle
3 Rise/Fall time Master 3.6
4 Setup Master 10
5 Hold Master 10
6 Out to SCK Master 0.5 • tSCK
7 SCK to out Master 10
8 SCK to out high Master 10
9 SS low to out Slave 15
10 SCK period Slave 4 • tck
11 SCK high/low(1) Slave 2 • tck
12 Rise/Fall time Slave 1600
13 Setup Slave 10
14 Hold Slave 10
15 SCK to out Slave 15
16 SCK to SS high Slave 20
17 SS high to tri-state Slave 10
18 SS low to SCK Salve 2 • tck240
2486AA–AVR–02/2013
ATmega8(L)
Figure 116. SPI interface timing requirements (Master Mode)
Figure 117. SPI interface timing requirements (Slave Mode)
MOSI
(Data Output)
SCK
(CPOL = 1)
MISO
(Data Input)
SCK
(CPOL = 0)
SS
MSB LSB
MSB LSB
...
...
6 1
2 2
4 5 3
7 8
MISO
(Data Output)
SCK
(CPOL = 1)
MOSI
(Data Input)
SCK
(CPOL = 0)
SS
MSB LSB
MSB LSB
...
...
10
11 11
13 14 12
15 17
9
X
16
18241
2486AA–AVR–02/2013
ATmega8(L)
ADC Characteristics
Notes: 1. Values are guidelines only
2. Minimum for AVCC is 2.7V
3. Maximum for AVCC is 5.5V
4. Maximum conversion time is 1/50kHz × 25 = 0.5ms
Table 103. ADC Characteristics
Symbol Parameter Condition Min(1) Typ(1) Max(1) Units
Resolution Single Ended Conversion 10 Bits
Absolute accuracy
(including INL, DNL,
Quantization Error, Gain,
and Offset Error)
Single Ended Conversion
VREF = 4V, VCC = 4V
ADC clock = 200kHz
1.75
LSB
Single Ended Conversion
VREF = 4V, VCC = 4V
ADC clock = 1MHz
3
Integral Non-linearity (INL)
Single Ended Conversion
VREF = 4V, VCC = 4V
ADC clock = 200kHz 0.75
Differential Non-linearity
(DNL)
Single Ended Conversion
VREF = 4V, VCC = 4V
ADC clock = 200kHz 0.5
Gain Error Single Ended Conversion
VREF = 4V, VCC = 4V
ADC clock = 200kHz
1
Offset Error Single Ended Conversion
VREF = 4V, VCC = 4V
ADC clock = 200kHz
1
Conversion Time(4) Free Running Conversion 13 260 µs
Clock Frequency 50 1000 kHz
AVCC Analog Supply Voltage VCC - 0.3(2) VCC + 0.3(3)
V
VREF Reference Voltage 2.0 AVCC
VIN Input voltage GND VREF
Input bandwidth 38.5 kHz
VINT Internal Voltage Reference 2.3 2.56 2.9 V
RREF Reference Input Resistance 32 k
RAIN Analog Input Resistance 55 100 M242
2486AA–AVR–02/2013
ATmega8(L)
Electrical Characteristics – TA = -40°C to 105°C
Note: Typical values contained in this data sheet are based on simulations and characterization of other AVR microcontrollers manufactured
on the same process technology. Min and Max values will be available after the device is characterized.
Absolute Maximum Ratings*
Operating Temperature.................................. -55C to +125C *NOTICE: Stresses beyond those listed under “Absolute
Maximum Ratings” may cause permanent damage
to the device. This is a stress rating only and
functional operation of the device at these or
other conditions beyond those indicated in the
operational sections of this specification is not
implied. Exposure to absolute maximum rating
conditions for extended periods may affect
device reliability.
Storage Temperature ..................................... -65°C to +150°C
Voltage on any Pin except RESET
with respect to Ground ................................-0.5V to VCC+0.5V
Voltage on RESET with respect to Ground......-0.5V to +13.0V
Maximum Operating Voltage ............................................ 6.0V
DC Current per I/O Pin ............................................... 40.0 mA
DC Current VCC and GND Pins................................ 200.0 mA
DC Characteristics
TA = -40C to 105C, VCC = 2.7V to 5.5V (unless otherwise noted)
Symbol Parameter Condition Min Typ Max Units
VIL Input Low Voltage Except XTAL1 pin -0.5 0.2 VCC(1) V
VIL1 Input Low Voltage XTAL1 pin, External Clock Selected -0.5 0.1 VCC(1) V
VIH Input High Voltage Except XTAL1 and RESET pins 0.6 VCC(2) VCC + 0.5 V
VIH1 Input High Voltage XTAL1 pin, External Clock Selected 0.8 VCC(2) VCC + 0.5 V
VIH2 Input High Voltage RESET pin 0.9 VCC(2) VCC + 0.5 V
VOL
Output Low Voltage(3)
(Ports A,B,C,D)
I
OL = 20 mA, VCC = 5V
IOL = 10 mA, VCC = 3V
0.8
0.6
V
V
VOH
Output High Voltage(4)
(Ports A,B,C,D)
IOH = -20 mA, VCC = 5V
IOH = -10 mA, VCC = 3V
4.0
2.2
V
V
IIL
Input Leakage
Current I/O Pin
Vcc = 5.5V, pin low
(absolute value) 3 µA
IIH
Input Leakage
Current I/O Pin
Vcc = 5.5V, pin high
(absolute value) 3 µA
RRST Reset Pull-up Resistor 30 80 k
Rpu I/O Pin Pull-up Resistor 20 50 k243
2486AA–AVR–02/2013
ATmega8(L)
Notes: 1. “Max” means the highest value where the pin is guaranteed to be read as low
2. “Min” means the lowest value where the pin is guaranteed to be read as high
3. Although each I/O port can sink more than the test conditions (20mA at Vcc = 5V, 10mA at Vcc = 3V) under steady state
conditions (non-transient), the following must be observed:
PDIP Package:
1] The sum of all IOL, for all ports, should not exceed 400 mA.
2] The sum of all IOL, for ports C0 - C5 should not exceed 200 mA.
3] The sum of all IOL, for ports B0 - B7, C6, D0 - D7 and XTAL2, should not exceed 100 mA.
TQFP and MLF Package:
1] The sum of all IOL, for all ports, should not exceed 400 mA.
2] The sum of all IOL, for ports C0 - C5, should not exceed 200 mA.
3] The sum of all IOL, for ports C6, D0 - D4, should not exceed 300 mA.
4] The sum of all IOL, for ports B0 - B7, D5 - D7, should not exceed 300 mA.
If IOL exceeds the test condition, VOL may exceed the related specification. Pins are not guaranteed to sink current greater
than the listed test condition.
4. Although each I/O port can source more than the test conditions (20mA at Vcc = 5V, 10mA at Vcc = 3V) under steady state
conditions (non-transient), the following must be observed:
PDIP Package:
1] The sum of all IOH, for all ports, should not exceed 400 mA.
2] The sum of all IOH, for port C0 - C5, should not exceed 100 mA.
3] The sum of all IOH, for ports B0 - B7, C6, D0 - D7 and XTAL2, should not exceed 100 mA.
TQFP and MLF Package:
1] The sum of all IOH, for all ports, should not exceed 400 mA.
2] The sum of all IOH, for ports C0 - C5, should not exceed 200 mA.
3] The sum of all IOH, for ports C6, D0 - D4, should not exceed 300 mA.
4] The sum of all IOH, for ports B0 - B7, D5 - D7, should not exceed 300 mA.
If IOH exceeds the test condition, VOH may exceed the related specification. Pins are not guaranteed to source current
greater than the listed test condition.
5. Minimum VCC for Power-down is 2.5V.
I
CC
Power Supply Current
Active 4 MHz, VCC = 3V
(ATmega8L) 6 mA
Active 8 MHz, VCC = 5V
(ATmega8) 15 mA
Idle 4 MHz, VCC = 3V
(ATmega8L) 3 mA
Idle 8 MHz, VCC = 5V
(ATmega8) 8 mA
Power-down mode(5) WDT enabled, VCC = 3V 35 µA
WDT disabled, VCC = 3V 6 µA
VACIO
Analog Comparator
Input Offset Voltage
VCC = 5V
Vin = VCC/2 20 mV
IACLK
Analog Comparator
Input Leakage Current
VCC = 5V
Vin = VCC/2 -50 50 nA
tACPD
Analog Comparator
Propagation Delay
VCC = 2.7V
VCC = 5.0V
750
500 ns
DC Characteristics
TA = -40C to 105C, VCC = 2.7V to 5.5V (unless otherwise noted) (Continued)
Symbol Parameter Condition Min Typ Max Units244
2486AA–AVR–02/2013
ATmega8(L)
ATmega8
Typical
Characteristics
– TA = -40°C to 85°C
The following charts show typical behavior. These figures are not tested during manufacturing.
All current consumption measurements are performed with all I/O pins configured as inputs and
with internal pull-ups enabled. A sine wave generator with Rail-to-Rail output is used as clock
source.
The power consumption in Power-down mode is independent of clock selection.
The current consumption is a function of several factors such as: operating voltage, operating
frequency, loading of I/O pins, switching rate of I/O pins, code executed and ambient temperature.
The dominating factors are operating voltage and frequency.
The current drawn from capacitive loaded pins may be estimated (for one pin) as:
CL × VCC × f
where CL = load capacitance, VCC = operating voltage and f = average switching frequency of I/O
pin.
The parts are characterized at frequencies higher than test limits. Parts are not guaranteed to
function properly at frequencies higher than the ordering code indicates.
The difference between current consumption in Power-down mode with Watchdog Timer
enabled and Power-down mode with Watchdog Timer disabled represents the differential current
drawn by the Watchdog Timer.
Active Supply Current Figure 118. Active Supply Current vs. Frequency (0.1MHz - 1.0MHz)
0
0.5
1
1.5
2
2.5
3
0 0.1 0.2 0.3 0.4 0.5 0.6 0.7 0.8 0.9 1
Frequency (MHz)
ICC (mA)
5.5V
5.0V
4.5V
3.3V
3.0V
2.7V
4.0V245
2486AA–AVR–02/2013
ATmega8(L)
Figure 119. Active Supply Current vs. Frequency (1MHz - 20MHz)
Figure 120. Active Supply Current vs. VCC (Internal RC Oscillator, 8MHz)
0
5
10
15
20
25
30
0246 8 10 12 14 16 18 20
Frequency (MHz)
ICC (mA)
5.5V
5.0V
4.5V
3.3V
2.7V
3.0V
0
2
4
6
8
10
12
14
16
18
2.5 3 3.5 4 4.5 5 5.5
VCC (V)
ICC (mA)
85°C
25°C
-40°C246
2486AA–AVR–02/2013
ATmega8(L)
Figure 121. Active Supply Current vs. VCC (Internal RC Oscillator, 4MHz)
Figure 122. Active Supply Current vs. VCC (Internal RC Oscillator, 2MHz)
0
2
4
6
8
10
12
2.5 3 3.5 4 4.5 5 5.5
VCC (V)
ICC (mA)
85°C
25°C
-40°C
0
1
2
3
4
5
6
2.5 3 3.5 4 4.5 5 5.5
VCC (V)
ICC (mA)
85°C
25°C
-40°C247
2486AA–AVR–02/2013
ATmega8(L)
Figure 123. Active Supply Current vs. VCC (Internal RC Oscillator, 1MHz)
Figure 124. Active Supply Current vs. VCC (32kHz External Oscillator)
0
0.5
1
1.5
2
2.5
3
3.5
2.5 3 3.5 4 4.5 5 5.5
VCC (V)
ICC (mA)
25°C 85°C
-40°C
0
20
40
60
80
100
120
2.5 3 3.5 4 4.5 5 5.5
VCC (V)
ICC (µA)
25°C248
2486AA–AVR–02/2013
ATmega8(L)
Idle Supply Current Figure 125. Idle Supply Current vs. Frequency (0.1MHz - 1.0MHz)
Figure 126. Idle Supply Current vs. Frequency (1MHz - 20MHz)
0
0.1
0.2
0.3
0.4
0.5
0.6
0.7
0 0.1 0.2 0.3 0.4 0.5 0.6 0.7 0.8 0.9 1
Frequency (MHz)
ICC (mA)
5.5V
4.5V
4.0V
3.3V
3.0V
2.7V
5.0V
0
2
4
6
8
10
12
14
0246 8 10 12 14 16 18 20
Frequency (MHz)
ICC (mA)
5.5V
4.5V
4.0V
3.3V
3.0V
2.7V
5.0V249
2486AA–AVR–02/2013
ATmega8(L)
Figure 127. Idle Supply Current vs. VCC (Internal RC Oscillator, 8MHz)
Figure 128. Idle Supply Current vs. VCC (Internal RC Oscillator, 4MHz)
0
1
2
3
4
5
6
7
8
2.5 3 3.5 4 4.5 5 5.5
VCC (V)
ICC (mA)
85°C
25°C
-40°C
0
0.5
1
1.5
2
2.5
3
3.5
4
2.5 3 3.5 4 4.5 5 5.5
VCC (V)
ICC (mA)
85°C
25°C
-40°C250
2486AA–AVR–02/2013
ATmega8(L)
Figure 129. Idle Supply Current vs. VCC (Internal RC Oscillator, 2MHz)
Figure 130. Idle Supply Current vs. VCC (Internal RC Oscillator, 1MHz)
0
0.2
0.4
0.6
0.8
1
1.2
1.4
1.6
1.8
2.5 3 3.5 4 4.5 5 5.5
VCC (V)
ICC (mA)
85°C
25°C
-40°C
0
0.1
0.2
0.3
0.4
0.5
0.6
0.7
0.8
0.9
1
2.5 3 3.5 4 4.5 5 5.5
VCC (V)
ICC (mA)
85°C
25°C
-40°C251
2486AA–AVR–02/2013
ATmega8(L)
Figure 131. Idle Supply Current vs. VCC (32kHz External Oscillator)
Power-down Supply
Current
Figure 132. Power-down Supply Current vs. VCC (Watchdog Timer Disabled)
0
5
10
15
20
25
30
35
40
2.5 3 3.5 4 4.5 5 5.5
VCC (V)
ICC (µA)
25°C
0
0.5
1
1.5
2
2.5
2.5 3 3.5 4 4.5 5 5.5
VCC (V)
ICC (µA)
85°C
25°C
-40°C252
2486AA–AVR–02/2013
ATmega8(L)
Figure 133. Power-down Supply Current vs. VCC (Watchdog Timer Enabled)
Power-save Supply
Current
Figure 134. Power-save Supply Current vs. VCC (Watchdog Timer Disabled)
0
10
20
30
40
50
60
70
80
2.5 3 3.5 4 4.5 5 5.5
VCC (V)
ICC (µA)
85°C
25°C
-40°C
0
5
10
15
20
25
2.5 3 3.5 4 4.5 5 5.5
VCC (V)
ICC (µA)
25°C253
2486AA–AVR–02/2013
ATmega8(L)
Standby Supply
Current
Figure 135. Standby Supply Current vs. VCC (455kHz Resonator, Watchdog Timer Disabled)
Figure 136. Standby Supply Current vs. VCC (1MHz Resonator, Watchdog Timer Disabled)
0
10
20
30
40
50
60
70
80
2.5 3 3.5 4 4.5 5 5.5
VCC (V)
ICC (µA)
0
10
20
30
40
50
60
70
2.5 3 3.5 4 4.5 5 5.5
VCC (V)
ICC (µA)254
2486AA–AVR–02/2013
ATmega8(L)
Figure 137. Standby Supply Current vs. VCC (2MHz Resonator, Watchdog Timer Disabled)
Figure 138. Standby Supply Current vs. VCC (2MHz Xtal, Watchdog Timer Disabled)
0
10
20
30
40
50
60
70
80
90
2.5 3 3.5 4 4.5 5 5.5
VCC (V)
ICC (µA)
0
10
20
30
40
50
60
70
80
90
2.5 3 3.5 4 4.5 5 5.5
VCC (V)
ICC (µA)255
2486AA–AVR–02/2013
ATmega8(L)
Figure 139. Standby Supply Current vs. VCC (4MHz Resonator, Watchdog Timer Disabled)
Figure 140. Standby Supply Current vs. VCC (4MHz Xtal, Watchdog Timer Disabled)
0
20
40
60
80
100
120
140
2.5 3 3.5 4 4.5 5 5.5
VCC (V)
ICC (µA)
0
20
40
60
80
100
120
140
2.5 3 3.5 4 4.5 5 5.5
VCC (V)
ICC (µA)256
2486AA–AVR–02/2013
ATmega8(L)
Figure 141. Standby Supply Current vs. VCC (6MHz Resonator, Watchdog Timer Disabled)
Figure 142. Standby Supply Current vs. VCC (6MHz Xtal, Watchdog Timer Disabled)
0
20
40
60
80
100
120
140
160
2.5 3 3.5 4 4.5 5 5.5
VCC (V)
ICC (µA)
0
20
40
60
80
100
120
140
160
180
200
2.5 3 3.5 4 4.5 5 5.5
VCC (V)
ICC (µA)257
2486AA–AVR–02/2013
ATmega8(L)
Pin Pull-up Figure 143. I/O Pin Pull-up Resistor Current vs. Input Voltage (VCC = 5V)
Figure 144. I/O Pin Pull-up Resistor Current vs. Input Voltage (VCC = 2.7V)
0
20
40
60
80
100
120
140
160
012 3 4 56
VOP (V)
IIO (µA)
85°C
25°C
-40°C
0
10
20
30
40
50
60
70
80
90
0 0.5 1 1.5 2 2.5 3
VOP (V)
IIO (µA)
85°C 25°C
-40°C258
2486AA–AVR–02/2013
ATmega8(L)
Figure 145. Reset Pull-up Resistor Current vs. Reset Pin Voltage (VCC = 5V)
Figure 146. Reset Pull-up Resistor Current vs. Reset Pin Voltage (VCC = 2.7V)
0
20
40
60
80
100
012
VRESET (V)
IRESET (µA)
85°C
25°C
- 40°C
0
5
10
15
20
25
30
35
40
45
0 0.5 1 1.5 2 2.5
VRESET (V)
IRESET (µA)
85°C
25°C
-40°C259
2486AA–AVR–02/2013
ATmega8(L)
Pin Driver Strength Figure 147. I/O Pin Source Current vs. Output Voltage (VCC = 5V)
Figure 148. I/O Pin Source Current vs. Output Voltage (VCC = 2.7V)
0
10
20
30
40
50
60
70
80
VOH (V)
IOH (mA)
85°C
25°C
-40°C
0
5
10
15
20
25
30
0 0.5 1 1.5 2 2.5 3
VOH (V)
IOH (mA)
85°C
25°C
-40°C260
2486AA–AVR–02/2013
ATmega8(L)
Figure 149. I/O Pin Sink Current vs. Output Voltage (VCC = 5V)
Figure 150. I/O Pin Sink Current vs. Output Voltage (VCC = 2.7V)
0
10
20
30
40
50
60
70
80
90
0 0.5 1 1.5 2 2.5
VOL (V)
IOL (mA)
85°C
25°C
-40°C
0
5
10
15
20
25
30
35
0 0.5 1 1.5 2 2.5
VOL (V)
IOL (mA)
85°C
25°C
-40°C261
2486AA–AVR–02/2013
ATmega8(L)
Figure 151. Reset Pin as I/O – Pin Source Current vs. Output Voltage (VCC = 5V)
Figure 152. Reset Pin as I/O – Pin Source Current vs. Output Voltage (VCC = 2.7V)
0
0.5
1
1.5
2
2.5
3
3.5
4
2 2.5 3 3.5 4 4.5
VOH (V)
Current (mA)
85°C
25°C
-40°C
0
0.5
1
1.5
2
2.5
3
3.5
4
4.5
5
0 0.5 1 1.5 2 2.5
VOH (V)
Current (mA)
85°C
25°C -40°C262
2486AA–AVR–02/2013
ATmega8(L)
Figure 153. Reset Pin as I/O – Pin Sink Current vs. Output Voltage (VCC = 5V)
Figure 154. Reset Pin as I/O – Pin Sink Current vs. Output Voltage (VCC = 2.7V)
0
2
4
6
8
10
12
14
0 0.5 1 1.5 2 2.5
VOL (V)
Current (mA)
85°C
25°C
-40°C
0
0.5
1
1.5
2
2.5
3
3.5
4
4.5
0 0.5 1 1.5 2 2.5
VOL (V)
Current (mA)
85°C
25°C
-40°C263
2486AA–AVR–02/2013
ATmega8(L)
Pin Thresholds and
Hysteresis
Figure 155. I/O Pin Input Threshold Voltage vs. VCC (VIH, I/O Pin Read as “1”)
Figure 156. I/O Pin Input Threshold Voltage vs. VCC (VIL, I/O Pin Read as “0”)
0
0.5
1
1.5
2
2.5
2.5 3 3.5 4 4.5 5 5.5
VCC (V)
Threshold (V)
85°C
25°C
-40°C
0
0.5
1
1.5
2
2.5 3 3.5 4 4.5 5 5.5
VCC (V)
Threshold (V)
85°C
25°C
-40°C264
2486AA–AVR–02/2013
ATmega8(L)
Figure 157. I/O Pin Input Hysteresis vs. VCC
Figure 158. Reset Pin as I/O – Input Threshold Voltage vs. VCC (VIH, I/O Pin Read as “1”)
0
0.1
0.2
0.3
0.4
0.5
0.6
0.7
2.5 3 3.5 4 4.5 5 5.5
VCC (V)
Input Hysteresis (V)
85°C
25°C
-40°C
0
0.5
1
1.5
2
2.5
3
3.5
4
2.5 3 3.5 4 4.5 5 5.5
VCC (V)
Threshold (V)
85°C
25°C
-40°C265
2486AA–AVR–02/2013
ATmega8(L)
Figure 159. Reset Pin as I/O – Input Threshold Voltage vs. VCC (VIL, I/O Pin Read as “0”)
Figure 160. Reset Pin as I/O – Pin Hysteresis vs. VCC
0
0.5
1
1.5
2
2.5
2.5 3 3.5 4 4.5 5 5.5
VCC (V)
Threshold (V)
85°C
25°C
-40°C
0
0.5
1
1.5
2
2.5 3 3.5 4 4.5 5 5.5
VCC (V)
Input Hysteresis (V)
85°C
25°C
-40°C266
2486AA–AVR–02/2013
ATmega8(L)
Figure 161. Reset Input Threshold Voltage vs. VCC (VIH, Reset Pin Read as “1”)
Figure 162. Reset Input Threshold Voltage vs. VCC (VIL, Reset Pin Read as “0”)
0
0.5
1
1.5
2
2.5
2.5 3 3.5 4 4.5 5 5.5
VCC (V)
Threshold (V)
85°C
25°C
-40°C
0
0.5
1
1.5
2
2.5
2.5 3 3.5 4 4.5 5 5.5
VCC (V)
Threshold (V)
85°C
25°C
-40°C267
2486AA–AVR–02/2013
ATmega8(L)
Figure 163. Reset Input Pin Hysteresis vs. VCC
Bod Thresholds and
Analog Comparator
Offset
Figure 164. BOD Thresholds vs. Temperature (BOD Level is 4.0V)
0
0.2
0.4
0.6
0.8
1
2 2.5 3 3.5 4 4.5 5 5.5
VCC (V)
Input Hysteresis (V)
85°C
25°C
-40°C
3.7
3.8
3.9
4
4.1
4.2
4.3
-50 -40 -30 -20 -10 0 10 20 30 40 50 60 70 80 90 100
Temperature (°C)
Threshold (V)
Rising VCC
Falling VCC268
2486AA–AVR–02/2013
ATmega8(L)
Figure 165. BOD Thresholds vs. Temperature (BOD Level is 2.7V)
Figure 166. Bandgap Voltage vs. VCC
2.4
2.5
2.6
2.7
2.8
-50 -40 -30 -20 -10 0 10 20 30 40 50 60 70 80 90 100
Temperature (°C)
Threshold (V)
Rising VCC
Falling VCC
1.29
1.295
1.3
1.305
1.31
1.315
2.5 3 3.5 4 4.5 5 5.5
Vcc (V)
Bandgap Voltage (V)
-40°C
25°C
85°C269
2486AA–AVR–02/2013
ATmega8(L)
Figure 167. Analog Comparator Offset Voltage vs. Common Mode Voltage (VCC = 5V)
Figure 168. Analog Comparator Offset Voltage vs. Common Mode Voltage (VCC = 2.7V)
-0.006
-0.005
-0.004
-0.003
-0.002
-0.001
0
0.001
0.002
0.003
0 0.5 1 1.5 2 2.5 3 3.5 4 4.5 5
Common Mode Voltage (V)
Comparator Offset Voltage (V)
85°C
25°C
-40°C
-0.005
-0.004
-0.003
-0.002
-0.001
0
0.001
0.002
0.003
0 0.5 1 1.5 2 2.5 3
Common Mode Voltage (V)
Comparator Offset Voltage (V)
85°C
25°C
-40°C270
2486AA–AVR–02/2013
ATmega8(L)
Internal Oscillator
Speed
Figure 169. Watchdog Oscillator Frequency vs. VCC
Figure 170. Calibrated 8MHz RC Oscillator Frequency vs. Temperature
1100
1120
1140
1160
1180
1200
1220
1240
1260
2.5 3 3.5 4 4.5 5 5.5
VCC (V)
FRC (kHz)
85°C
25°C
-40°C
6.5
6.7
6.9
7.1
7.3
7.5
7.7
7.9
8.1
8.3
8.5
-60 -40 -20 0 20 40 60 80 100
Temperature (°C)
FRC (MHz)
5.5V
2.7V
4.0V271
2486AA–AVR–02/2013
ATmega8(L)
Figure 171. Calibrated 8MHz RC Oscillator Frequency vs. VCC
Figure 172. Calibrated 8MHz RC Oscillator Frequency vs. Osccal Value
6.5
6.7
6.9
7.1
7.3
7.5
7.7
7.9
8.1
8.3
8.5
2.5 3 3.5 4 4.5 5 5.5
VCC (V)
FRC (MHz)
85°C
25°C
-40°C
4
6
8
10
12
14
16
0 16 32 48 64 80 96 112 128 144 160 176 192 208 224 240
OSCCAL VALUE
FRC (MHz)272
2486AA–AVR–02/2013
ATmega8(L)
Figure 173. Calibrated 4MHz RC Oscillator Frequency vs. Temperature
Figure 174. Calibrated 4MHz RC Oscillator Frequency vs. VCC
3.5
3.6
3.7
3.8
3.9
4
4.1
4.2
-60 -40 -20 0 20 40 60 80 100
Temperature (°C)
FRC (MHz)
5.5V
2.7V
4.0V
3.5
3.6
3.7
3.8
3.9
4
4.1
4.2
2.5 3 3.5 4 4.5 5 5.5
VCC (V)
FRC (MHz)
85°C
25°C
-40°C273
2486AA–AVR–02/2013
ATmega8(L)
Figure 175. Calibrated 4MHz RC Oscillator Frequency vs. Osccal Value
Figure 176. Calibrated 2MHz RC Oscillator Frequency vs. Temperature
2
3
4
5
6
7
8
0 16 32 48 64 80 96 112 128 144 160 176 192 208 224 240
OSCCAL VALUE
FRC (MHz)
1.8
1.85
1.9
1.95
2
2.05
2.1
-60 -40 -20 0 20 40 60 80 100
Temperature (°C)
FRC (MHz)
5.5V
2.7V
4.0V274
2486AA–AVR–02/2013
ATmega8(L)
Figure 177. Calibrated 2MHz RC Oscillator Frequency vs. VCC
Figure 178. Calibrated 2MHz RC Oscillator Frequency vs. Osccal Value
1.7
1.8
1.9
2
2.1
2.2
2.5 3 3.5 4 4.5 5 5.5
VCC (V)
FRC (MHz)
85°C
25°C
-40°C
0.8
1.3
1.8
2.3
2.8
3.3
3.8
0 16 32 48 64 80 96 112 128 144 160 176 192 208 224 240
OSCCAL VALUE
FRC (MHz)275
2486AA–AVR–02/2013
ATmega8(L)
Figure 179. Calibrated 1MHz RC Oscillator Frequency vs. Temperature
Figure 180. Calibrated 1MHz RC Oscillator Frequency vs. VCC
0.9
0.92
0.94
0.96
0.98
1
1.02
1.04
-60 -40 -20 0 20 40 60 80 100
Temperature (°C)
FRC (MHz)
5.5V
2.7V
4.0V
0.9
0.95
1
1.05
1.1
2.5 3 3.5 4 4.5 5 5.5
VCC (V)
FRC (MHz)
85°C
25°C
-40°C276
2486AA–AVR–02/2013
ATmega8(L)
Figure 181. Calibrated 1MHz RC Oscillator Frequency vs. Osccal Value
Current Consumption
of Peripheral Units
Figure 182. Brown-out Detector Current vs. VCC
0.5
0.7
0.9
1.1
1.3
1.5
1.7
1.9
0 16 32 48 64 80 96 112 128 144 160 176 192 208 224 240
OSCCAL VALUE
FRC (MHz)
0
5
10
15
20
25
30
2.5 3 3.5 4 4.5 5 5.5
VCC (V)
ICC (µA)
25°C
85°C
-40°C277
2486AA–AVR–02/2013
ATmega8(L)
Figure 183. ADC Current vs. VCC (AREF = AVCC)
Figure 184. AREF External Reference Current vs. VCC
0
50
100
150
200
250
300
350
400
450
2.5 3 3.5 4 4.5 5 5.5
VCC (V)
ICC (µA)
85°C
25°C
-40°C
0
50
100
150
200
250
2.5 3 3.5 4 4.5 5 5.5
VCC (V)
ICC (µA)
85°C
25°C
-40°C278
2486AA–AVR–02/2013
ATmega8(L)
Figure 185. 32kHz TOSC Current vs. VCC (Watchdog Timer Disabled)
Figure 186. Watchdog Timer Current vs. VCC
0
5
10
15
20
25
2.5 3 3.5 4 4.5 5 5.5
VCC (V)
ICC (µA)
25°C
0
10
20
30
40
50
60
70
80
2 2.5 3 3.5 4 4.5 5 5.5
VCC (V)
ICC (µA)
85°C
25°C
-40°C279
2486AA–AVR–02/2013
ATmega8(L)
Figure 187. Analog Comparator Current vs. VCC
Figure 188. Programming Current vs. VCC
0
10
20
30
40
50
60
70
80
90
100
2.5 3 3.5 4 4.5 5 5.5
VCC (V)
ICC (µA)
25°C
85°C
-40°C
0
1
2
3
4
5
6
7
2.5 3 3.5 4 4.5 5 5.5
VCC (V)
ICC (mA)
25°C
85°C
-40°C280
2486AA–AVR–02/2013
ATmega8(L)
Current Consumption
in Reset and Reset
Pulsewidth
Figure 189. Reset Supply Current vs. VCC (0.1MHz - 1.0MHz, Excluding Current Through The
Reset Pull-up)
Figure 190. Reset Supply Current vs. VCC (1MHz - 20MHz, Excluding Current Through The
Reset Pull-up)
0
0.5
1
1.5
2
2.5
3
3.5
4
0 0.1 0.2 0.3 0.4 0.5 0.6 0.7 0.8 0.9 1
Frequency (MHz)
ICC (mA)
5.5V
5.0V
4.5V
3.3V
3.0V
2.7V
4.0V
0
5
10
15
20
25
0246 8 10 12 14 16 18 20
Frequency (MHz)
ICC (mA)
5.5V
5.0V
4.5V
3.3V
3.0V
2.7V281
2486AA–AVR–02/2013
ATmega8(L)
Figure 191. Reset Pulse Width vs. VCC
0
200
400
600
800
1000
1200
1400
2.5 3 3.5 4 4.5 5 5.5
VCC (V)
Pulsewidth (ns)
85°C
25°C
-40°C282
2486AA–AVR–02/2013
ATmega8(L)
ATmega8
Typical
Characteristics
– TA = -40°C to 105°C
The following charts show typical behavior. These figures are not tested during manufacturing.
All current consumption measurements are performed with all I/O pins configured as inputs and
with internal pull-ups enabled. A sine wave generator with Rail-to-Rail output is used as clock
source.
The power consumption in Power-down mode is independent of clock selection.
The current consumption is a function of several factors such as: operating voltage, operating
frequency, loading of I/O pins, switching rate of I/O pins, code executed and ambient temperature.
The dominating factors are operating voltage and frequency.
The current drawn from capacitive loaded pins may be estimated (for one pin) as CL*VCC*f where
CL = load capacitance, VCC = operating voltage and f = average switching frequency of I/O pin.
The parts are characterized at frequencies higher than test limits. Parts are not guaranteed to
function properly at frequencies higher than the ordering code indicates.
The difference between current consumption in Power-down mode with Watchdog Timer
enabled and Power-down mode with Watchdog Timer disabled represents the differential current
drawn by the Watchdog Timer.
Active Supply Current
Figure 0-1. Active Supply Current vs. VCC (Internal RC Oscillator, 8 MHz)
ACTIVE SUPPLY CURRENT vs. VCC
INTERNAL RC OSCILLATOR, 8 MHz
0
2
4
6
8
10
12
14
16
18
2.5 3 3.5 4 4.5 5 5.5
VCC (V)
ICC (mA)
85°C
25°C
-40°C
105°C283
2486AA–AVR–02/2013
ATmega8(L)
Figure 0-2. Active Supply Current vs. VCC (Internal RC Oscillator, 4 MHz)
Figure 0-3. Active Supply Current vs. VCC (Internal RC Oscillator, 2 MHz)
ACTIVE SUPPLY CURRENT vs. VCC
INTERNAL RC OSCILLATOR, 4 MHz
0
2
4
6
8
10
12
2.5 3 3.5 4 4.5 5 5.5
VCC (V)
ICC (mA)
85°C
25°C
-40°C
105°C
ACTIVE SUPPLY CURRENT vs. VCC
INTERNAL RC OSCILLATOR, 2 MHz
0
1
2
3
4
5
6
2.5 3 3.5 4 4.5 5 5.5
VCC (V)
ICC (mA)
85°C
25°C
-40°C
105°C284
2486AA–AVR–02/2013
ATmega8(L)
Figure 0-4. Active Supply Current vs. VCC (Internal RC Oscillator, 1 MHz)
Idle Supply Current
Figure 0-5. Idle Supply Current vs. VCC (Internal RC Oscillator, 8 MHz)
ACTIVE SUPPLY CURRENT vs. VCC
INTERNAL RC OSCILLATOR, 1 MHz
0
0.5
1
1.5
2
2.5
3
3.5
2.5 3 3.5 4 4.5 5 5.5
VCC (V)
ICC (mA)
85°C
25°C
-40°C
105°C
IDLE SUPPLY CURRENT vs. VCC
INTERNAL RC OSCILLATOR, 8 MHz
0
1
2
3
4
5
6
7
8
2.5 3 3.5 4 4.5 5 5.5
VCC (V)
ICC (mA)
85°C
25°C
-40°C
105°C285
2486AA–AVR–02/2013
ATmega8(L)
Figure 0-6. Idle Supply Current vs. VCC (Internal RC Oscillator, 4 MHz)
Figure 0-7. Idle Supply Current vs. VCC (Internal RC Oscillator, 2 MHz)
IDLE SUPPLY CURRENT vs. VCC
INTERNAL RC OSCILLATOR, 4 MHz
0
0.5
1
1.5
2
2.5
3
3.5
4
2.5 3 3.5 4 4.5 5 5.5
VCC (V)
ICC (mA)
85°C
25°C
-40°C
105°C
IDLE SUPPLY CURRENT vs. VCC
INTERNAL RC OSCILLATOR, 2 MHz
0
0.2
0.4
0.6
0.8
1
1.2
1.4
1.6
1.8
2.5 3 3.5 4 4.5 5 5.5
VCC (V)
ICC (mA)
85°C
25°C
-40°C
105°C286
2486AA–AVR–02/2013
ATmega8(L)
Figure 0-8. Idle Supply Current vs. VCC (Internal RC Oscillator, 1 MHz)
Power-down Supply Current
Figure 0-9. Power-down Supply Current vs. VCC (Watchdog Timer Disabled)
IDLE SUPPLY CURRENT vs. VCC
INTERNAL RC OSCILLATOR, 1 MHz
0
0.1
0.2
0.3
0.4
0.5
0.6
0.7
0.8
0.9
1
2.5 3 3.5 4 4.5 5 5.5
VCC (V)
ICC (mA)
85°C
25°C
-40°C
105°C
POWER-DOWN SUPPLY CURRENT vs. VCC
WATCHDOG TIMER DISABLED
0
0.5
1
1.5
2
2.5
3
3.5
4
4.5
2.5 3 3.5 4 4.5 5 5.5
VCC (V)
ICC (uA)
105°C
25°C
-40°C
85°C287
2486AA–AVR–02/2013
ATmega8(L)
Figure 0-10. Power-down Supply Current vs. VCC (Watchdog Timer Enabled)
Pin Pull-up
Figure 0-11. I/O Pin Pull-up Resistor Current vs. Input Voltage (VCC = 5V)
POWER-DOWN SUPPLY CURRENT vs. VCC
WATCHDOG TIMER ENABLED
0
10
20
30
40
50
60
70
80
2.5 3 3.5 4 4.5 5 5.5
VCC (V)
ICC (uA)
85°C
25°C
-40°C
105°C
I/O PIN PULL-UP RESISTOR CURRENT vs. INPUT VOLTAGE
Vcc = 5V
0
20
40
60
80
100
120
140
160
0123
VOP (V)
IOP (uA)
85°C
25°C
-40°C
105°C288
2486AA–AVR–02/2013
ATmega8(L)
Figure 0-12. I/O Pin Pull-up Resistor Current vs. Input Voltage (VCC = 2.7V)
Figure 0-13. Reset Pull-up Resistor Current vs. Reset Pin Voltage (VCC = 5V)
I/O PIN PULL-UP RESISTOR CURRENT vs. INPUT VOLTAGE
Vcc = 2.7V
0
10
20
30
40
50
60
70
80
90
0 0.5 1 1.5 2 2.5 3
VOP (V)
IOP (uA)
85°C 25°C
-40°C
105°C
RESET PULL-UP RESISTOR CURRENT vs. RESET PIN VOLTAGE
Vcc = 5V
0
20
40
60
80
100
012
VRESET (V)
IRESET (uA)
85°C
25°C
105°C
-40°C289
2486AA–AVR–02/2013
ATmega8(L)
Figure 0-14. Reset Pull-up Resistor Current vs. Reset Pin Voltage (VCC = 2.7V)
Pin Driver Strength
Figure 0-15. I/O Pin Source Current vs. Output Voltage (VCC = 5V)
RESET PULL-UP RESISTOR CURRENT vs. RESET PIN VOLTAGE
Vcc = 2.7V
0
5
10
15
20
25
30
35
40
45
0 0.5 1 1.5 2 2.5
VRESET (V)
IRESET (uA)
85°C 25°C
-40°C
105°C
I/O PIN SOURCE CURRENT vs. OUTPUT VOLTAGE
Vcc = 5V
0
10
20
30
40
50
60
70
80
01234
VOH (V)
IOH (mA)
85°C
25°C
-40°C
105°C290
2486AA–AVR–02/2013
ATmega8(L)
Figure 0-16. I/O Pin Source Current vs. Output Voltage (VCC = 2.7V)
Figure 0-17. I/O Pin Sink Current vs. Output Voltage (VCC = 5V)
I/O PIN SOURCE CURRENT vs. OUTPUT VOLTAGE
Vcc = 2.7V
0
5
10
15
20
25
30
0 0.5 1 1.5 2 2.5 3
VOH (V)
IOH (mA)
85°C
25°C
-40°C
105°C
I/O PIN SINK CURRENT vs. OUTPUT VOLTAGE
Vcc = 5V
0
10
20
30
40
50
60
70
80
90
0 0.5 1 1.5 2 2.5
VOL (V)
IOL (mA)
85°C
25°C
-40°C
105°C291
2486AA–AVR–02/2013
ATmega8(L)
Figure 0-18. I/O Pin Sink Current vs. Output Voltage (VCC = 2.7V)
Figure 0-19. Reset Pin as I/O – Pin Source Current vs. Output Voltage (VCC = 5V)
I/O PIN SINK CURRENT vs. OUTPUT VOLTAGE
Vcc = 2.7V
0
5
10
15
20
25
30
35
0 0.5 1 1.5 2 2.5
VOL (V)
IOL (mA)
85°C
25°C
-40°C
105°C
RESET PIN AS I/O - SOURCE CURRENT vs. OUTPUT VOLTAGE
Vcc = 5V
0
0.5
1
1.5
2
2.5
3
3.5
4
2 2.5 3 3.5 4 4.5
VOH (V)
Current (mA)
85°C
25°C
-40°C
105°C292
2486AA–AVR–02/2013
ATmega8(L)
Figure 0-20. Reset Pin as I/O – Pin Source Current vs. Output Voltage (VCC = 2.7V)
Figure 0-21. Reset Pin as I/O – Pin Sink Current vs. Output Voltage (VCC = 5V)
RESET PIN AS I/O - SOURCE CURRENT vs. OUTPUT VOLTAGE
Vcc = 2.7V
0
0.5
1
1.5
2
2.5
3
3.5
4
4.5
5
0 0.5 1 1.5 2 2.5
VOH (V)
Current (mA)
85°C
25°C -40°C
105 °C
RESET PIN AS I/O - SINK CURRENT vs. OUTPUT VOLTAGE
Vcc = 5V
0
2
4
6
8
10
12
14
0 0.5 1 1.5 2 2.5
VOL (V)
Current (mA)
85°C
25°C
-40°C
105°C293
2486AA–AVR–02/2013
ATmega8(L)
Figure 0-22. Reset Pin as I/O – Pin Sink Current vs. Output Voltage (VCC = 2.7V)
Pin Thresholds and Hysteresis
Figure 0-23. I/O Pin Input Threshold Voltage vs. VCC (VIH, I/O Pin Read as “1”)
RESET PIN AS I/O - SINK CURRENT vs. OUTPUT VOLTAGE
Vcc = 2.7V
0
0.5
1
1.5
2
2.5
3
3.5
4
4.5
0 0.5 1 1.5 2 2.5
VOL (V)
Current (mA)
85°C
25°C
-40°C
105°C
I/O PIN INPUT THRESHOLD VOLTAGE vs. VCC
VIH, IO PIN READ AS '1'
0
0.5
1
1.5
2
2.5
2.5 3 3.5 4 4.5 5 5.5
VCC (V)
Threshold (V)
85°C
105°C
-40°C
25°C294
2486AA–AVR–02/2013
ATmega8(L)
Figure 0-24. I/O Pin Input Threshold Voltage vs. VCC (VIL, I/O Pin Read as “0”)
Figure 0-25. I/O Pin Input Hysteresis vs. VCC
I/O PIN INPUT THRESHOLD VOLTAGE vs. VCC
VIL, IO PIN READ AS '0'
0
0.5
1
1.5
2
2.5 3 3.5 4 4.5 5 5.5
VCC (V)
Threshold (V)
85°C
25°C
-40°C
105°C
I/O PIN INPUT HYSTERESIS vs. VCC
0
0.1
0.2
0.3
0.4
0.5
0.6
0.7
2.5 3 3.5 4 4.5 5 5.5
VCC (V)
Threshold (V)
85°C
25°C
-40°C
105°C295
2486AA–AVR–02/2013
ATmega8(L)
Figure 0-26. Reset Pin as I/O – Input Threshold Voltage vs. VCC (VIH,I/O Pin Read as “1”)
Figure 0-27. Reset Pin as I/O – Input Threshold Voltage vs. VCC (VIL, I/O Pin Read as “0”)
RESET PIN AS I/O - INPUT THRESHOLD VOLTAGE vs. VCC
VIH, RESET PIN READ AS '1'
0
0.5
1
1.5
2
2.5
3
3.5
4
2.5 3 3.5 4 4.5 5 5.5
VCC (V)
Threshold (V)
85°C
25°C
-40°C
105°C
RESET PIN AS I/O - INPUT THRESHOLD VOLTAGE vs. VCC
VIL, RESET PIN READ AS '0'
0
0.5
1
1.5
2
2.5
2.5 3 3.5 4 4.5 5 5.5
VCC (V)
Threshold (V)
85°C
25°C
-40°C
105°C296
2486AA–AVR–02/2013
ATmega8(L)
Figure 0-28. Reset Pin as I/O – Pin Hysteresis vs. VCC
Figure 0-29. Reset Input Threshold Voltage vs. VCC (VIH, Reset Pin Read as “1”)
RESET PIN AS I/O - PIN HYSTERESIS vs. VCC
0
0.5
1
1.5
2
2.5 3 3.5 4 4.5 5 5.5
VCC (V)
Threshold (V)
85°C
25°C
-40°C
105°C
RESET INPUT THRESHOLD VOLTAGE vs. VCC
VIH, RESET PIN READ AS '1'
0
0.5
1
1.5
2
2.5
2.5 3 3.5 4 4.5 5 5.5
VCC (V)
Threshold (V)
85°C
25°C
-40°C
105°C297
2486AA–AVR–02/2013
ATmega8(L)
Figure 0-30. Reset Input Threshold Voltage vs. VCC (VIL, Reset Pin Read as “0”)
Figure 0-31. Reset Input Pin Hysteresis vs. VCC
RESET INPUT THRESHOLD VOLTAGE vs. VCC
VIL, RESET PIN READ AS '0'
0
0.5
1
1.5
2
2.5
2.5 3 3.5 4 4.5 5 5.5
VCC (V)
Threshold (V)
85°C
25°C
-40°C
105°C
RESET INPUT PIN HYSTERESIS vs. VCC
0
0.2
0.4
0.6
0.8
1
2 2.5 3 3.5 4 4.5 5 5.5
VCC (V)
Threshold (V)
85°C
25°C
-40°C
105°C298
2486AA–AVR–02/2013
ATmega8(L)
Bod Thresholds and Analog Comparator Offset
Figure 0-32. BOD Thresholds vs. Temperature (BOD Level is 4.0V)
Figure 0-33. BOD Thresholds vs. Temperature (BOD Level is 2.7V)
BOD THRESHOLDS vs. TEMPERATURE
BODLEVEL IS 4.0V
3.8
3.9
4
4.1
4.2
4.3
-50 -40 -30 -20 -10 0 10 20 30 40 50 60 70 80 90 100 110 120
Temperature (˚C)
Threshold (V)
Rising VCC
Falling VCC
BOD THRESHOLDS vs. TEMPERATURE
BODLEVEL IS 2.7V
2.4
2.5
2.6
2.7
2.8
-50 -40 -30 -20 -10 0 10 20 30 40 50 60 70 80 90 100 110 120
Temperature (˚C)
Threshold (V)
Rising VCC
Falling VCC299
2486AA–AVR–02/2013
ATmega8(L)
Figure 0-34. Bandgap Voltage vs. VCC
Figure 0-35. Analog Comparator Offset Voltage vs. Common Mode Voltage (VCC = 5V)
BANDGAP VOLTAGE vs. VCC
1.29
1.295
1.3
1.305
1.31
1.315
2.5 3 3.5 4 4.5 5 5.5
Vcc (V)
Bandgap Voltage (V)
85°C
25°C
-40°C
105°C
ANALOG COMPARATOR OFFSET VOLTAGE vs. COMMON MODE VOLTAGE
VCC = 5V
-0.006
-0.005
-0.004
-0.003
-0.002
-0.001
0
0.001
0.002
0.003
0 0.5 1 1.5 2 2.5 3 3.5 4 4.5 5
Common Mode Voltage (V)
Comparator Offset Voltage (V)
85°C
25°C
-40°C
105°C300
2486AA–AVR–02/2013
ATmega8(L)
Figure 0-36. Analog Comparator Offset Voltage vs. Common Mode Voltage (VCC = 2.7V)
Internal Oscillator Speed
Figure 0-37. Watchdog Oscillator Frequency vs. VCC
ANALOG COMPARATOR OFFSET VOLTAGE vs. COMMON MODE VOLTAGE
VCC = 2.7V
-0.005
-0.004
-0.003
-0.002
-0.001
0
0.001
0.002
0.003
0 0.5 1 1.5 2 2.5 3
Common Mode Voltage (V)
Comparator Offset Voltage (V)
85°C
25°C
-40°C
105°C
WATCHDOG OSCILLATOR FREQUENCY vs. VCC
1080
1100
1120
1140
1160
1180
1200
1220
1240
1260
2.5 3 3.5 4 4.5 5 5.5
VCC (V)
FRC (kHz)
85°C
25°C
-40°C
105°C301
2486AA–AVR–02/2013
ATmega8(L)
Figure 0-38. Calibrated 8 MHz RC Oscillator Frequency vs. Temperature
Figure 0-39. Calibrated 8 MHz RC Oscillator Frequency vs. VCC
CALIBRATED 8MHz RC OSCILLATOR FREQUENCY vs. TEMPERATURE
6.5
6.7
6.9
7.1
7.3
7.5
7.7
7.9
8.1
8.3
8.5
-60 -40 -20 0 20 40 60 80 100 120
Temperature (˚C)
FRC (MHz)
5.5V
2.7V
4.0V
CALIBRATED 8MHz RC OSCILLATOR FREQUENCY vs. VCC
6.5
6.7
6.9
7.1
7.3
7.5
7.7
7.9
8.1
8.3
8.5
2.5 3 3.5 4 4.5 5 5.5
VCC (V)
FRC (MHz)
85°C
25°C
-40°C
105°C302
2486AA–AVR–02/2013
ATmega8(L)
Figure 0-40. Calibrated 4 MHz RC Oscillator Frequency vs. Temperature
Figure 0-41. Calibrated 4 MHz RC Oscillator Frequency vs. VCC
CALIBRATED 4MHz RC OSCILLATOR FREQUENCY vs. TEMPERATURE
3.5
3.6
3.7
3.8
3.9
4
4.1
4.2
-60 -40 -20 0 20 40 60 80 100 120
Temperature (˚C)
FRC (MHz)
5.5V
2.7V
4.0V
CALIBRATED 4MHz RC OSCILLATOR FREQUENCY vs. VCC
3.5
3.6
3.7
3.8
3.9
4
4.1
4.2
2.5 3 3.5 4 4.5 5 5.5
VCC (V)
FRC (MHz)
85°C
25°C
-40°C
105°C303
2486AA–AVR–02/2013
ATmega8(L)
Figure 0-42. Calibrated 2 MHz RC Oscillator Frequency vs. Temperature
Figure 0-43. Calibrated 2 MHz RC Oscillator Frequency vs. VCC
CALIBRATED 2MHz RC OSCILLATOR FREQUENCY vs. TEMPERATURE
1.75
1.8
1.85
1.9
1.95
2
2.05
2.1
-60 -40 -20 0 20 40 60 80 100 120
Temperature (˚C)
FRC (MHz)
5.5V
2.7V
4.0V
CALIBRATED 2MHz RC OSCILLATOR FREQUENCY vs. VCC
1.7
1.8
1.9
2
2.1
2.2
2.5 3 3.5 4 4.5 5 5.5
VCC (V)
FRC (MHz)
85°C
25°C
-40°C
105°C304
2486AA–AVR–02/2013
ATmega8(L)
Figure 0-44. Calibrated 1 MHz RC Oscillator Frequency vs. Temperature
Figure 0-45. Calibrated 1 MHz RC Oscillator Frequency vs. VCC
CALIBRATED 1MHz RC OSCILLATOR FREQUENCY vs. TEMPERATURE
0.9
0.92
0.94
0.96
0.98
1
1.02
1.04
-60 -40 -20 0 20 40 60 80 100 120
Temperature (˚C)
FRC (MHz)
5.5V
2.7V
4.0V
CALIBRATED 1MHz RC OSCILLATOR FREQUENCY vs. VCC
0.9
0.95
1
1.05
1.1
2.5 3 3.5 4 4.5 5 5.5
VCC (V)
FRC (MHz)
85°C
25°C
-40°C
105°C305
2486AA–AVR–02/2013
ATmega8(L)
Current Consumption of Peripheral Units
Figure 0-46. Brown-out Detector Current vs. VCC
Figure 0-47. ADC Current vs. VCC (AREF = AVCC)
BROWNOUT DETECTOR CURRENT vs. VCC
0
5
10
15
20
25
30
2.5 3 3.5 4 4.5 5 5.5
VCC (V)
ICC (uA)
25°C
85°C
-40°C
105°C
ADC CURRENT vs. VCC
AREF = AVCC
0
50
100
150
200
250
300
350
400
450
2.5 3 3.5 4 4.5 5 5.5
VCC (V)
ICC (uA)
85°C
25°C
-40°C
105°C306
2486AA–AVR–02/2013
ATmega8(L)
Figure 0-48. AREF External Reference Current vs. VCC
Figure 0-49. Watchdog Timer Current vs. VCC
AREF EXTERNAL REFERENCE CURRENT vs. VCC
0
50
100
150
200
250
2.5 3 3.5 4 4.5 5 5.5
VCC (V)
ICC (uA)
85°C
25°C -40°C
105°C
WATCHDOG TIMER CURRENT vs. VCC
0
0.01
0.02
0.03
0.04
0.05
0.06
0.07
2.5 3 3.5 4 4.5 5 5.5
VCC (V)
ICC (uA)
105°C
25°C
-40°C
85°C307
2486AA–AVR–02/2013
ATmega8(L)
Figure 0-50. Analog Comparator Current vs. VCC
Figure 0-51. Programming Current vs. VCC
ANALOG COMPARATOR CURRENT vs. VCC
0
20
40
60
80
100
120
2.5 3 3.5 4 4.5 5 5.5
VCC (V)
ICC (uA)
25°C
105°C
-40°C
85°C
PROGRAMMING CURRENT vs. VCC
0
1
2
3
4
5
6
7
2.5 3 3.5 4 4.5 5 5.5
VCC (V)
ICC (uA)
25°C
85°C
-40°C
105°C308
2486AA–AVR–02/2013
ATmega8(L)
Current Consumption in Reset and Reset Pulsewidth
Figure 0-52. Reset Pulse Width vs. VCC
RESET PULSE WIDTH vs. VCC
0
200
400
600
800
1000
1200
1400
2.5 3 3.5 4 4.5 5 5.5
VCC (V)
Pulsewidth (ns)
85°C
25°C
-40°C
105°C309
2486AA–AVR–02/2013
ATmega8(L)
Register Summary
Address Name Bit 7 Bit 6 Bit 5 Bit 4 Bit 3 Bit 2 Bit 1 Bit 0 Page
0x3F (0x5F) SREG I T H S V N Z C 11
0x3E (0x5E) SPH – – – – – SP10 SP9 SP8 13
0x3D (0x5D) SPL SP7 SP6 SP5 SP4 SP3 SP2 SP1 SP0 13
0x3C (0x5C) Reserved
0x3B (0x5B) GICR INT1 INT0 – – – – IVSEL IVCE 49, 67
0x3A (0x5A) GIFR INTF1 INTF0 – – – – – – 67
0x39 (0x59) TIMSK OCIE2 TOIE2 TICIE1 OCIE1A OCIE1B TOIE1 – TOIE0 72, 100, 119
0x38 (0x58) TIFR OCF2 TOV2 ICF1 OCF1A OCF1B TOV1 – TOV0 72, 101, 119
0x37 (0x57) SPMCR SPMIE RWWSB – RWWSRE BLBSET PGWRT PGERS SPMEN 206
0x36 (0x56) TWCR TWINT TWEA TWSTA TWSTO TWWC TWEN – TWIE 165
0x35 (0x55) MCUCR SE SM2 SM1 SM0 ISC11 ISC10 ISC01 ISC00 33, 66
0x34 (0x54) MCUCSR – – – – WDRF BORF EXTRF PORF 41
0x33 (0x53) TCCR0 – – – – – CS02 CS01 CS00 71
0x32 (0x52) TCNT0 Timer/Counter0 (8 Bits) 72
0x31 (0x51) OSCCAL Oscillator Calibration Register 31
0x30 (0x50) SFIOR – – – – ACME PUD PSR2 PSR10 58, 74, 120, 186
0x2F (0x4F) TCCR1A COM1A1 COM1A0 COM1B1 COM1B0 FOC1A FOC1B WGM11 WGM10 96
0x2E (0x4E) TCCR1B ICNC1 ICES1 – WGM13 WGM12 CS12 CS11 CS10 98
0x2D (0x4D) TCNT1H Timer/Counter1 – Counter Register High byte 99
0x2C (0x4C) TCNT1L Timer/Counter1 – Counter Register Low byte 99
0x2B (0x4B) OCR1AH Timer/Counter1 – Output Compare Register A High byte 99
0x2A (0x4A) OCR1AL Timer/Counter1 – Output Compare Register A Low byte 99
0x29 (0x49) OCR1BH Timer/Counter1 – Output Compare Register B High byte 99
0x28 (0x48) OCR1BL Timer/Counter1 – Output Compare Register B Low byte 99
0x27 (0x47) ICR1H Timer/Counter1 – Input Capture Register High byte 100
0x26 (0x46) ICR1L Timer/Counter1 – Input Capture Register Low byte 100
0x25 (0x45) TCCR2 FOC2 WGM20 COM21 COM20 WGM21 CS22 CS21 CS20 114
0x24 (0x44) TCNT2 Timer/Counter2 (8 Bits) 116
0x23 (0x43) OCR2 Timer/Counter2 Output Compare Register 116
0x22 (0x42) ASSR – – – – AS2 TCN2UB OCR2UB TCR2UB 117
0x21 (0x41) WDTCR – – – WDCE WDE WDP2 WDP1 WDP0 43
0x20(1) (0x40)(1) UBRRH URSEL – – – UBRR[11:8] 152
UCSRC URSEL UMSEL UPM1 UPM0 USBS UCSZ1 UCSZ0 UCPOL 150
0x1F (0x3F) EEARH – – – – – – – EEAR8 20
0x1E (0x3E) EEARL EEAR7 EEAR6 EEAR5 EEAR4 EEAR3 EEAR2 EEAR1 EEAR0 20
0x1D (0x3D) EEDR EEPROM Data Register 20
0x1C (0x3C) EECR – – – – EERIE EEMWE EEWE EERE 20
0x1B (0x3B) Reserved
0x1A (0x3A) Reserved
0x19 (0x39) Reserved
0x18 (0x38) PORTB PORTB7 PORTB6 PORTB5 PORTB4 PORTB3 PORTB2 PORTB1 PORTB0 65
0x17 (0x37) DDRB DDB7 DDB6 DDB5 DDB4 DDB3 DDB2 DDB1 DDB0 65
0x16 (0x36) PINB PINB7 PINB6 PINB5 PINB4 PINB3 PINB2 PINB1 PINB0 65
0x15 (0x35) PORTC – PORTC6 PORTC5 PORTC4 PORTC3 PORTC2 PORTC1 PORTC0 65
0x14 (0x34) DDRC – DDC6 DDC5 DDC4 DDC3 DDC2 DDC1 DDC0 65
0x13 (0x33) PINC – PINC6 PINC5 PINC4 PINC3 PINC2 PINC1 PINC0 65
0x12 (0x32) PORTD PORTD7 PORTD6 PORTD5 PORTD4 PORTD3 PORTD2 PORTD1 PORTD0 65
0x11 (0x31) DDRD DDD7 DDD6 DDD5 DDD4 DDD3 DDD2 DDD1 DDD0 65
0x10 (0x30) PIND PIND7 PIND6 PIND5 PIND4 PIND3 PIND2 PIND1 PIND0 65
0x0F (0x2F) SPDR SPI Data Register 127
0x0E (0x2E) SPSR SPIF WCOL – – – – – SPI2X 126
0x0D (0x2D) SPCR SPIE SPE DORD MSTR CPOL CPHA SPR1 SPR0 125
0x0C (0x2C) UDR USART I/O Data Register 148
0x0B (0x2B) UCSRA RXC TXC UDRE FE DOR PE U2X MPCM 148
0x0A (0x2A) UCSRB RXCIE TXCIE UDRIE RXEN TXEN UCSZ2 RXB8 TXB8 149
0x09 (0x29) UBRRL USART Baud Rate Register Low byte 152
0x08 (0x28) ACSR ACD ACBG ACO ACI ACIE ACIC ACIS1 ACIS0 186
0x07 (0x27) ADMUX REFS1 REFS0 ADLAR – MUX3 MUX2 MUX1 MUX0 199
0x06 (0x26) ADCSRA ADEN ADSC ADFR ADIF ADIE ADPS2 ADPS1 ADPS0 200
0x05 (0x25) ADCH ADC Data Register High byte 201
0x04 (0x24) ADCL ADC Data Register Low byte 201
0x03 (0x23) TWDR Two-wire Serial Interface Data Register 167
0x02 (0x22) TWAR TWA6 TWA5 TWA4 TWA3 TWA2 TWA1 TWA0 TWGCE 167310
2486AA–AVR–02/2013
ATmega8(L)
Notes: 1. Refer to the USART description (“USART” on page 129) for details on how to access UBRRH and UCSRC (“Accessing
UBRRH/UCSRC Registers” on page 146)
2. For compatibility with future devices, reserved bits should be written to zero if accessed. Reserved I/O memory addresses
should never be written
3. Some of the Status Flags are cleared by writing a logical one to them. Note that the CBI and SBI instructions will operate on
all bits in the I/O Register, writing a one back into any flag read as set, thus clearing the flag. The CBI and SBI instructions
work with registers 0x00 to 0x1F only
0x01 (0x21) TWSR TWS7 TWS6 TWS5 TWS4 TWS3 – TWPS1 TWPS0 166
0x00 (0x20) TWBR Two-wire Serial Interface Bit Rate Register 165
Register Summary (Continued)
Address Name Bit 7 Bit 6 Bit 5 Bit 4 Bit 3 Bit 2 Bit 1 Bit 0 Page311
2486AA–AVR–02/2013
ATmega8(L)
Instruction Set Summary
Mnemonics Operands Description Operation Flags #Clocks
ARITHMETIC AND LOGIC INSTRUCTIONS
ADD Rd, Rr Add two Registers Rd Rd + Rr Z, C, N, V, H 1
ADC Rd, Rr Add with Carry two Registers Rd Rd + Rr + C Z, C, N, V, H 1
ADIW Rdl,K Add Immediate to Word Rdh:Rdl Rdh:Rdl + K Z, C, N, V, S 2
SUB Rd, Rr Subtract two Registers Rd Rd - Rr Z, C, N, V, H 1
SUBI Rd, K Subtract Constant from Register Rd Rd - K Z, C, N, V, H 1
SBC Rd, Rr Subtract with Carry two Registers Rd Rd - Rr - C Z, C, N, V, H 1
SBCI Rd, K Subtract with Carry Constant from Reg. Rd Rd - K - C Z, C, N ,V, H 1
SBIW Rdl,K Subtract Immediate from Word Rdh:Rdl Rdh:Rdl - K Z, C, N, V, S 2
AND Rd, Rr Logical AND Registers Rd Rd Rr Z, N, V 1
ANDI Rd, K Logical AND Register and Constant Rd Rd K Z, N, V 1
OR Rd, Rr Logical OR Registers Rd Rd v Rr Z, N, V 1
ORI Rd, K Logical OR Register and Constant Rd Rd v K Z, N, V 1
EOR Rd, Rr Exclusive OR Registers Rd Rd Rr Z, N, V 1
COM Rd One’s Complement Rd 0xFF Rd Z, C, N, V 1
NEG Rd Two’s Complement Rd 0x00 Rd Z, C, N, V, H 1
SBR Rd,K Set Bit(s) in Register Rd Rd v K Z, N, V 1
CBR Rd,K Clear Bit(s) in Register Rd Rd (0xFF - K) Z, N, V 1
INC Rd Increment Rd Rd + 1 Z, N, V 1
DEC Rd Decrement Rd Rd 1 Z, N, V 1
TST Rd Test for Zero or Minus Rd Rd Rd Z, N, V 1
CLR Rd Clear Register Rd Rd Rd Z, N, V 1
SER Rd Set Register Rd 0xFF None 1
MUL Rd, Rr Multiply Unsigned R1:R0 Rd x Rr Z, C 2
MULS Rd, Rr Multiply Signed R1:R0 Rd x Rr Z, C 2
MULSU Rd, Rr Multiply Signed with Unsigned R1:R0 Rd x Rr Z, C 2
FMUL Rd, Rr Fractional Multiply Unsigned R1:R0 (Rd x Rr) << 1 Z, C 2
FMULS Rd, Rr Fractional Multiply Signed R1:R0 (Rd x Rr) << 1 Z, C 2
FMULSU Rd, Rr Fractional Multiply Signed with Unsigned R1:R0 (Rd x Rr) << 1 Z, C 2
BRANCH INSTRUCTIONS
RJMP k Relative Jump PC PC + k + 1 None 2
IJMP Indirect Jump to (Z) PC Z None 2
RCALL k Relative Subroutine Call PC PC + k + 1 None 3
ICALL Indirect Call to (Z) PC Z None 3
RET Subroutine Return PC STACK None 4
RETI Interrupt Return PC STACK I 4
CPSE Rd,Rr Compare, Skip if Equal if (Rd = Rr) PC PC + 2 or 3 None 1 / 2 / 3
CP Rd,Rr Compare Rd Rr Z, N, V, C, H 1
CPC Rd,Rr Compare with Carry Rd Rr C Z, N, V, C, H 1
CPI Rd,K Compare Register with Immediate Rd K Z, N, V, C, H 1
SBRC Rr, b Skip if Bit in Register Cleared if (Rr(b)=0) PC PC + 2 or 3 None 1 / 2 / 3
SBRS Rr, b Skip if Bit in Register is Set if (Rr(b)=1) PC PC + 2 or 3 None 1 / 2 / 3
SBIC P, b Skip if Bit in I/O Register Cleared if (P(b)=0) PC PC + 2 or 3 None 1 / 2 / 3
SBIS P, b Skip if Bit in I/O Register is Set if (P(b)=1) PC PC + 2 or 3 None 1 / 2 / 3
BRBS s, k Branch if Status Flag Set if (SREG(s) = 1) then PCPC+k + 1 None 1 / 2
BRBC s, k Branch if Status Flag Cleared if (SREG(s) = 0) then PCPC+k + 1 None 1 / 2
BREQ k Branch if Equal if (Z = 1) then PC PC + k + 1 None 1 / 2
BRNE k Branch if Not Equal if (Z = 0) then PC PC + k + 1 None 1 / 2
BRCS k Branch if Carry Set if (C = 1) then PC PC + k + 1 None 1 / 2
BRCC k Branch if Carry Cleared if (C = 0) then PC PC + k + 1 None 1 / 2
BRSH k Branch if Same or Higher if (C = 0) then PC PC + k + 1 None 1 / 2
BRLO k Branch if Lower if (C = 1) then PC PC + k + 1 None 1 / 2
BRMI k Branch if Minus if (N = 1) then PC PC + k + 1 None 1 / 2
BRPL k Branch if Plus if (N = 0) then PC PC + k + 1 None 1 / 2
BRGE k Branch if Greater or Equal, Signed if (N V= 0) then PC PC + k + 1 None 1 / 2
BRLT k Branch if Less Than Zero, Signed if (N V= 1) then PC PC + k + 1 None 1 / 2
BRHS k Branch if Half Carry Flag Set if (H = 1) then PC PC + k + 1 None 1 / 2
BRHC k Branch if Half Carry Flag Cleared if (H = 0) then PC PC + k + 1 None 1 / 2
BRTS k Branch if T Flag Set if (T = 1) then PC PC + k + 1 None 1 / 2
BRTC k Branch if T Flag Cleared if (T = 0) then PC PC + k + 1 None 1 / 2
BRVS k Branch if Overflow Flag is Set if (V = 1) then PC PC + k + 1 None 1 / 2
BRVC k Branch if Overflow Flag is Cleared if (V = 0) then PC PC + k + 1 None 1 / 2312
2486AA–AVR–02/2013
ATmega8(L)
Mnemonics Operands Description Operation Flags #Clocks
BRIE k Branch if Interrupt Enabled if ( I = 1) then PC PC + k + 1 None 1 / 2
BRID k Branch if Interrupt Disabled if ( I = 0) then PC PC + k + 1 None 1 / 2
DATA TRANSFER INSTRUCTIONS
MOV Rd, Rr Move Between Registers Rd Rr None 1
MOVW Rd, Rr Copy Register Word Rd+1:Rd Rr+1:Rr None 1
LDI Rd, K Load Immediate Rd K None 1
LD Rd, X Load Indirect Rd (X) None 2
LD Rd, X+ Load Indirect and Post-Inc. Rd (X), X X + 1 None 2
LD Rd, - X Load Indirect and Pre-Dec. X X - 1, Rd (X) None 2
LD Rd, Y Load Indirect Rd (Y) None 2
LD Rd, Y+ Load Indirect and Post-Inc. Rd (Y), Y Y + 1 None 2
LD Rd, - Y Load Indirect and Pre-Dec. Y Y - 1, Rd (Y) None 2
LDD Rd,Y+q Load Indirect with Displacement Rd (Y + q) None 2
LD Rd, Z Load Indirect Rd (Z) None 2
LD Rd, Z+ Load Indirect and Post-Inc. Rd (Z), Z Z+1 None 2
LD Rd, -Z Load Indirect and Pre-Dec. Z Z - 1, Rd (Z) None 2
LDD Rd, Z+q Load Indirect with Displacement Rd (Z + q) None 2
LDS Rd, k Load Direct from SRAM Rd (k) None 2
ST X, Rr Store Indirect (X) Rr None 2
ST X+, Rr Store Indirect and Post-Inc. (X) Rr, X X + 1 None 2
ST - X, Rr Store Indirect and Pre-Dec. X X - 1, (X) Rr None 2
ST Y, Rr Store Indirect (Y) Rr None 2
ST Y+, Rr Store Indirect and Post-Inc. (Y) Rr, Y Y + 1 None 2
ST - Y, Rr Store Indirect and Pre-Dec. Y Y - 1, (Y) Rr None 2
STD Y+q,Rr Store Indirect with Displacement (Y + q) Rr None 2
ST Z, Rr Store Indirect (Z) Rr None 2
ST Z+, Rr Store Indirect and Post-Inc. (Z) Rr, Z Z + 1 None 2
ST -Z, Rr Store Indirect and Pre-Dec. Z Z - 1, (Z) Rr None 2
STD Z+q,Rr Store Indirect with Displacement (Z + q) Rr None 2
STS k, Rr Store Direct to SRAM (k) Rr None 2
LPM Load Program Memory R0 (Z) None 3
LPM Rd, Z Load Program Memory Rd (Z) None 3
LPM Rd, Z+ Load Program Memory and Post-Inc Rd (Z), Z Z+1 None 3
SPM Store Program Memory (Z) R1:R0 None -
IN Rd, P In Port Rd P None 1
OUT P, Rr Out Port P Rr None 1
PUSH Rr Push Register on Stack STACK Rr None 2
POP Rd Pop Register from Stack Rd STACK None 2
BIT AND BIT-TEST INSTRUCTIONS
SBI P,b Set Bit in I/O Register I/O(P,b) 1 None 2
CBI P,b Clear Bit in I/O Register I/O(P,b) 0 None 2
LSL Rd Logical Shift Left Rd(n+1) Rd(n), Rd(0) 0 Z, C, N, V 1
LSR Rd Logical Shift Right Rd(n) Rd(n+1), Rd(7) 0 Z, C, N, V 1
ROL Rd Rotate Left Through Carry Rd(0)C,Rd(n+1) Rd(n),CRd(7) Z, C, N, V 1
ROR Rd Rotate Right Through Carry Rd(7)C,Rd(n) Rd(n+1),CRd(0) Z, C, N, V 1
ASR Rd Arithmetic Shift Right Rd(n) Rd(n+1), n=0..6 Z, C, N, V 1
SWAP Rd Swap Nibbles Rd(3..0)Rd(7..4),Rd(7..4)Rd(3..0) None 1
BSET s Flag Set SREG(s) 1 SREG(s) 1
BCLR s Flag Clear SREG(s) 0 SREG(s) 1
BST Rr, b Bit Store from Register to T T Rr(b) T 1
BLD Rd, b Bit load from T to Register Rd(b) T None 1
SEC Set Carry C 1 C1
CLC Clear Carry C 0 C 1
SEN Set Negative Flag N 1 N1
CLN Clear Negative Flag N 0 N 1
SEZ Set Zero Flag Z 1 Z1
CLZ Clear Zero Flag Z 0 Z 1
SEI Global Interrupt Enable I 1 I1
CLI Global Interrupt Disable I 0 I 1
SES Set Signed Test Flag S 1 S1
CLS Clear Signed Test Flag S 0 S 1
SEV Set Twos Complement Overflow. V 1 V1
CLV Clear Twos Complement Overflow V 0 V 1
SET Set T in SREG T 1 T1
Instruction Set Summary (Continued)313
2486AA–AVR–02/2013
ATmega8(L)
Mnemonics Operands Description Operation Flags #Clocks
CLT Clear T in SREG T 0 T 1
SEH Set Half Carry Flag in SREG H 1 H1
CLH Clear Half Carry Flag in SREG H 0 H 1
MCU CONTROL INSTRUCTIONS
NOP No Operation None 1
SLEEP Sleep (see specific descr. for Sleep function) None 1
WDR Watchdog Reset (see specific descr. for WDR/timer) None 1
Instruction Set Summary (Continued)314
2486AA–AVR–02/2013
ATmega8(L)
Ordering Information
Notes: 1. This device can also be supplied in wafer form. Please contact your local Atmel sales office for detailed ordering information
and minimum quantities
2. Pb-free packaging complies to the European Directive for Restriction of Hazardous Substances (RoHS directive). Also
Halide free and fully Green
3. Tape & Reel
4. See characterization specification at 105C
Speed (MHz) Power Supply (V) Ordering Code(2) Package(1) Operation Range
8 2.7 - 5.5
ATmega8L-8AU
ATmega8L-8AUR(3)
ATmega8L-8PU
ATmega8L-8MU
ATmega8L-8MUR(3)
32A
32A
28P3
32M1-A
32M1-A Industrial
(-40C to 85C)
16 4.5 - 5.5
ATmega8-16AU
ATmega8-16AUR(3)
ATmega8-16PU
ATmega8-16MU
ATmega8-16MUR(3)
32A
32A
28P3
32M1-A
32M1-A
8 2.7 - 5.5
ATmega8L-8AN
ATmega8L-8ANR(3)
ATmega8L-8PN
ATmega8L-8MN
ATmega8L-8MUR(3)
32A
32A
28P3
32M1-A
32M1-A Industrial
(-40C to 105C)
16 4.5 - 5.5
ATmega8-16AN
ATmega8-16ANR(3)
ATmega8-16PN
ATmega8-16MN
ATmega8-16MUR(3)
32A
32A
28P3
32M1-A
32M1-A
Package Type
32A 32-lead, Thin (1.0mm) Plastic Quad Flat Package (TQFP)
28P3 28-lead, 0.300” Wide, Plastic Dual Inline Package (PDIP)
32M1-A 32-pad, 5 × 5 × 1.0 body, Lead Pitch 0.50mm Quad Flat No-Lead/Micro Lead Frame Package (QFN/MLF)315
2486AA–AVR–02/2013
ATmega8(L)
Packaging Information
32A
TITLE DRAWING NO. REV.
32A, 32-lead, 7 x 7mm body size, 1.0mm body thickness,
0.8mm lead pitch, thin profile plastic quad flat package (TQFP) 32A C
2010-10-20
PIN 1 IDENTIFIER
0°~7°
PIN 1
L
C
A1 A2 A
D1
D
e E1 E
B
Notes:
1. This package conforms to JEDEC reference MS-026, Variation ABA.
2. Dimensions D1 and E1 do not include mold protrusion. Allowable
protrusion is 0.25mm per side. Dimensions D1 and E1 are maximum
plastic body size dimensions including mold mismatch.
3. Lead coplanarity is 0.10mm maximum.
A – – 1.20
A1 0.05 – 0.15
A2 0.95 1.00 1.05
D 8.75 9.00 9.25
D1 6.90 7.00 7.10 Note 2
E 8.75 9.00 9.25
E1 6.90 7.00 7.10 Note 2
B 0.30 – 0.45
C 0.09 – 0.20
L 0.45 – 0.75
e 0.80 TYP
COMMON DIMENSIONS
(Unit of measure = mm)
SYMBOL MIN NOM MAX NOTE316
2486AA–AVR–02/2013
ATmega8(L)
28P3
2325 Orchard Parkway
San Jose, CA 95131
TITLE DRAWING NO.
R
REV.
28P3, 28-lead (0.300"/7.62mm Wide) Plastic Dual
Inline Package (PDIP) 28P3 B
09/28/01
PIN
1
E1
A1
B
REF
E
B1
C
L
SEATING PLANE
A
0º ~ 15º
D
e
eB
B2
(4 PLACES)
COMMON DIMENSIONS
(Unit of Measure = mm)
SYMBOL MIN NOM MAX NOTE
A – – 4.5724
A1 0.508 – –
D 34.544 – 34.798 Note 1
E 7.620 – 8.255
E1 7.112 – 7.493 Note 1
B 0.381 – 0.533
B1 1.143 – 1.397
B2 0.762 – 1.143
L 3.175 – 3.429
C 0.203 – 0.356
eB – – 10.160
e 2.540 TYP
Note: 1. Dimensions D and E1 do not include mold Flash or Protrusion.
Mold Flash or Protrusion shall not exceed 0.25mm (0.010"). 317
2486AA–AVR–02/2013
ATmega8(L)
32M1-A
2325 Orchard Parkway
San Jose, CA 95131
TITLE DRAWING NO.
R
REV.
32M1-A, 32-pad, 5 x 5 x 1.0mm Body, Lead Pitch 0.50mm, 32M1-A E
5/25/06
3.10mm Exposed Pad, Micro Lead Frame Package (MLF)
COMMON DIMENSIONS
(Unit of Measure = mm)
SYMBOL MIN NOM MAX NOTE
D1
D
E1 E
b e
A3
A2
A1
A
D2
E2
0.08 C
L
1
2
3
P
P
0
1
2
3
A 0.80 0.90 1.00
A1 – 0.02 0.05
A2 – 0.65 1.00
A3 0.20 REF
b 0.18 0.23 0.30
D
D1
D2 2.95 3.10 3.25
4.90 5.00 5.10
4.70 4.75 4.80
4.70 4.75 4.80
4.90 5.00 5.10
E
E1
E2 2.95 3.10 3.25
e 0.50 BSC
L 0.30 0.40 0.50
P – – 0.60
– – 12o
Note: JEDEC Standard MO-220, Fig. 2 (Anvil Singulation), VHHD-2.
TOP VIEW
SIDE VIEW
BOTTOM VIEW
0
Pin 1 ID
Pin #1 Notch
(0.20 R)
K 0.20 – –
K
K318
2486AA–AVR–02/2013
ATmega8(L)
Errata The revision letter in this section refers to the revision of the ATmega8 device.
ATmega8
Rev. D to I, M
• First Analog Comparator conversion may be delayed
• Interrupts may be lost when writing the timer registers in the asynchronous timer
• Signature may be Erased in Serial Programming Mode
• CKOPT Does not Enable Internal Capacitors on XTALn/TOSCn Pins when 32KHz Oscillator is
Used to Clock the Asynchronous Timer/Counter2
• Reading EEPROM by using ST or STS to set EERE bit triggers unexpected interrupt request
1. First Analog Comparator conversion may be delayed
If the device is powered by a slow rising VCC, the first Analog Comparator conversion will
take longer than expected on some devices.
Problem Fix / Workaround
When the device has been powered or reset, disable then enable theAnalog Comparator
before the first conversion.
2. Interrupts may be lost when writing the timer registers in the asynchronous timer
The interrupt will be lost if a timer register that is synchronized to the asynchronous timer
clock is written when the asynchronous Timer/Counter register(TCNTx) is 0x00.
Problem Fix / Workaround
Always check that the asynchronous Timer/Counter register neither have the value 0xFF nor
0x00 before writing to the asynchronous Timer Control Register(TCCRx), asynchronous
Timer Counter Register(TCNTx), or asynchronous Output Compare Register(OCRx).
3. Signature may be Erased in Serial Programming Mode
If the signature bytes are read before a chiperase command is completed, the signature may
be erased causing the device ID and calibration bytes to disappear. This is critical, especially,
if the part is running on internal RC oscillator.
Problem Fix / Workaround:
Ensure that the chiperase command has exceeded before applying the next command.
4. CKOPT Does not Enable Internal Capacitors on XTALn/TOSCn Pins when 32KHz
Oscillator is Used to Clock the Asynchronous Timer/Counter2
When the internal RC Oscillator is used as the main clock source, it is possible to run the
Timer/Counter2 asynchronously by connecting a 32KHz Oscillator between XTAL1/TOSC1
and XTAL2/TOSC2. But when the internal RC Oscillator is selected as the main clock
source, the CKOPT Fuse does not control the internal capacitors on XTAL1/TOSC1 and
XTAL2/TOSC2. As long as there are no capacitors connected to XTAL1/TOSC1 and
XTAL2/TOSC2, safe operation of the Oscillator is not guaranteed.
Problem Fix / Workaround
Use external capacitors in the range of 20pF - 36pF on XTAL1/TOSC1 and XTAL2/TOSC2.
This will be fixed in ATmega8 Rev. G where the CKOPT Fuse will control internal capacitors
also when internal RC Oscillator is selected as main clock source. For ATmega8 Rev. G,
CKOPT = 0 (programmed) will enable the internal capacitors on XTAL1 and XTAL2. Customers
who want compatibility between Rev. G and older revisions, must ensure that
CKOPT is unprogrammed (CKOPT = 1).319
2486AA–AVR–02/2013
ATmega8(L)
5. Reading EEPROM by using ST or STS to set EERE bit triggers unexpected interrupt
request.
Reading EEPROM by using the ST or STS command to set the EERE bit in the EECR register
triggers an unexpected EEPROM interrupt request.
Problem Fix / Workaround
Always use OUT or SBI to set EERE in EECR.320
2486AA–AVR–02/2013
ATmega8(L)
Datasheet
Revision
History
Please note that the referring page numbers in this section are referred to this document. The
referring revision in this section are referring to the document revision.
Changes from Rev.
2486Z- 02/11 to
Rev. 2486AA- 02/2013
1. Updated the datasheet according to the Atmel new Brand Style Guide.
2.Removed the reference to “On-chip debugging” from the content.
3.Added “Electrical Characteristics – TA = -40°C to 105°C” on page 242.
4.Added “ATmega8 Typical Characteristics – TA = -40°C to 105°C” on page 282.
5.Updated “Ordering Information” on page 314.
Changes from Rev.
2486Y- 10/10 to
Rev. 2486Z- 02/11
1. Updated the datasheet according to the Atmel new Brand Style Guide.
2. Updated “Ordering Information” on page 314. Added Ordering Information for
“Tape & Reel” devices
Changes from Rev.
2486X- 06/10 to
Rev. 2486Y- 10/10
1. Max Rise/Fall time in Table 102 on page 239 has been corrected from 1.6ns to 1600ns.
2. Note is added to “Performing Page Erase by SPM” on page 209.
3. Updated/corrected several short-cuts and added some new ones.
4. Updated last page according to new standard.
Changes from Rev.
2486W- 02/10 to
Rev. 2486X- 06/10
1. Updated “DC Characteristics” on page 235 with new VOL maximum value (0.9V and
0.6V).
Changes from Rev.
2486V- 05/09 to
Rev. 2486W- 02/10
1. Updated “ADC Characteristics” on page 241 with VINT maximum value (2.9V).
Changes from Rev.
2486U- 08/08 to
Rev. 2486V- 05/09
1. Updated “Errata” on page 318.
2. Updated the last page with Atmel’s new adresses.
Changes from Rev.
2486T- 05/08 to
Rev. 2486U- 08/08
1. Updated “DC Characteristics” on page 235 with I
CC typical values.321
2486AA–AVR–02/2013
ATmega8(L)
Changes from Rev.
2486S- 08/07 to
Rev. 2486T- 05/08
1. Updated Table 98 on page 233.
2. Updated “Ordering Information” on page 314.
- Commercial Ordering Code removed.
- No Pb-free packaging option removed.
Changes from Rev.
2486R- 07/07 to
Rev. 2486S- 08/07
1. Updated “Features” on page 1.
2. Added “Data Retention” on page 7.
3. Updated “Errata” on page 318.
4. Updated “Slave Mode” on page 125.
Changes from Rev.
2486Q- 10/06 to
Rev. 2486R- 07/07
1. Added text to Table 81 on page 211.
2. Fixed typo in “Peripheral Features” on page 1.
3. Updated Table 16 on page 42.
4. Updated Table 75 on page 199.
5. Removed redundancy and updated typo in Notes section of “DC Characteristics” on
page 235.
Changes from Rev.
2486P- 02/06 to
Rev. 2486Q- 10/06
1. Updated “Timer/Counter Oscillator” on page 32.
2. Updated “Fast PWM Mode” on page 88.
3. Updated code example in “USART Initialization” on page 134.
4. Updated Table 37 on page 96, Table 39 on page 97, Table 42 on page 115, Table 44 on
page 115, and Table 98 on page 233.
5. Updated “Errata” on page 318.
Changes from Rev.
2486O-10/04 to
Rev. 2486P- 02/06
1. Added “Resources” on page 7.
2. Updated “External Clock” on page 32.
3. Updated “Serial Peripheral Interface – SPI” on page 121.
4. Updated Code Example in “USART Initialization” on page 134.
5. Updated Note in “Bit Rate Generator Unit” on page 164.
6. Updated Table 98 on page 233.
7. Updated Note in Table 103 on page 241.322
2486AA–AVR–02/2013
ATmega8(L)
8. Updated “Errata” on page 318.
Changes from Rev.
2486N-09/04 to
Rev. 2486O-10/04
1. Removed to instances of “analog ground”. Replaced by “ground”.
2. Updated Table 7 on page 29, Table 15 on page 38, and Table 100 on page 237.
3. Updated “Calibrated Internal RC Oscillator” on page 30 with the 1MHz default value.
4. Table 89 on page 218 and Table 90 on page 218 moved to new section “Page Size” on
page 218.
5. Updated descripton for bit 4 in “Store Program Memory Control Register – SPMCR”
on page 206.
6. Updated “Ordering Information” on page 314.
Changes from Rev.
2486M-12/03 to
Rev. 2486N-09/04
1. Added note to MLF package in “Pin Configurations” on page 2.
2. Updated “Internal Voltage Reference Characteristics” on page 42.
3. Updated “DC Characteristics” on page 235.
4. ADC4 and ADC5 support 10-bit accuracy. Document updated to reflect this.
Updated features in “Analog-to-Digital Converter” on page 189.
Updated “ADC Characteristics” on page 241.
5. Removed reference to “External RC Oscillator application note” from “External RC
Oscillator” on page 28.
Changes from Rev.
2486L-10/03 to
Rev. 2486M-12/03
1. Updated “Calibrated Internal RC Oscillator” on page 30.
Changes from Rev.
2486K-08/03 to
Rev. 2486L-10/03
1. Removed “Preliminary” and TBDs from the datasheet.
2. Renamed ICP to ICP1 in the datasheet.
3. Removed instructions CALL and JMP from the datasheet.
4. Updated tRST in Table 15 on page 38, VBG in Table 16 on page 42, Table 100 on page
237 and Table 102 on page 239.
5. Replaced text “XTAL1 and XTAL2 should be left unconnected (NC)” after Table 9 in
“Calibrated Internal RC Oscillator” on page 30. Added text regarding XTAL1/XTAL2
and CKOPT Fuse in “Timer/Counter Oscillator” on page 32.
6. Updated Watchdog Timer code examples in “Timed Sequences for Changing the
Configuration of the Watchdog Timer” on page 45.
7. Removed bit 4, ADHSM, from “Special Function IO Register – SFIOR” on page 58.
8. Added note 2 to Figure 103 on page 208.323
2486AA–AVR–02/2013
ATmega8(L)
9. Updated item 4 in the “Serial Programming Algorithm” on page 231.
10. Added tWD_FUSE to Table 97 on page 232 and updated Read Calibration Byte, Byte 3, in
Table 98 on page 233.
11. Updated Absolute Maximum Ratings* and DC Characteristics in “Electrical Characteristics
– TA = -40°C to 85°C” on page 235.
Changes from Rev.
2486J-02/03 to
Rev. 2486K-08/03
1. Updated VBOT values in Table 15 on page 38.
2. Updated “ADC Characteristics” on page 241.
3. Updated “ATmega8 Typical Characteristics – TA = -40°C to 85°C” on page 244.
4. Updated “Errata” on page 318.
Changes from Rev.
2486I-12/02 to Rev.
2486J-02/03
1. Improved the description of “Asynchronous Timer Clock – clkASY” on page 26.
2. Removed reference to the “Multipurpose Oscillator” application note and the “32kHz
Crystal Oscillator” application note, which do not exist.
3. Corrected OCn waveforms in Figure 38 on page 89.
4. Various minor Timer 1 corrections.
5. Various minor TWI corrections.
6. Added note under “Filling the Temporary Buffer (Page Loading)” on page 209 about
writing to the EEPROM during an SPM Page load.
7. Removed ADHSM completely.
8. Added section “EEPROM Write during Power-down Sleep Mode” on page 23.
9. Removed XTAL1 and XTAL2 description on page 5 because they were already
described as part of “Port B (PB7..PB0) XTAL1/XTAL2/TOSC1/TOSC2” on page 5.
10. Improved the table under “SPI Timing Characteristics” on page 239 and removed the
table under “SPI Serial Programming Characteristics” on page 234.
11. Corrected PC6 in “Alternate Functions of Port C” on page 61.
12. Corrected PB6 and PB7 in “Alternate Functions of Port B” on page 58.
13. Corrected 230.4 Mbps to 230.4 kbps under “Examples of Baud Rate Setting” on page
153.
14. Added information about PWM symmetry for Timer 2 in “Phase Correct PWM Mode”
on page 111.
15. Added thick lines around accessible registers in Figure 76 on page 163.324
2486AA–AVR–02/2013
ATmega8(L)
16. Changed “will be ignored” to “must be written to zero” for unused Z-pointer bits
under “Performing a Page Write” on page 209.
17. Added note for RSTDISBL Fuse in Table 87 on page 216.
18. Updated drawings in “Packaging Information” on page 315.
Changes from Rev.
2486H-09/02 to
Rev. 2486I-12/02
1. Added errata for Rev D, E, and F on page 318.
Changes from Rev.
2486G-09/02 to
Rev. 2486H-09/02
1. Changed the Endurance on the Flash to 10,000 Write/Erase Cycles.
Changes from Rev.
2486F-07/02 to
Rev. 2486G-09/02
1. Updated Table 103, “ADC Characteristics,” on page 241.
Changes from Rev.
2486E-06/02 to
Rev. 2486F-07/02
1. Changes in “Digital Input Enable and Sleep Modes” on page 55.
2. Addition of OCS2 in “MOSI/OC2 – Port B, Bit 3” on page 59.
3. The following tables have been updated:
Table 51, “CPOL and CPHA Functionality,” on page 127, Table 59, “UCPOL Bit Settings,”
on page 152, Table 72, “Analog Comparator Multiplexed Input(1),” on page 188, Table 73,
“ADC Conversion Time,” on page 193, Table 75, “Input Channel Selections,” on page 199,
and Table 84, “Explanation of Different Variables used in Figure 103 on page 208 and the
Mapping to the Z-pointer,” on page 214.
4. Changes in “Reading the Calibration Byte” on page 227.
5. Corrected Errors in Cross References.
Changes from Rev.
2486D-03/02 to
Rev. 2486E-06/02
1. Updated Some Preliminary Test Limits and Characterization Data
The following tables have been updated:
Table 15, “Reset Characteristics,” on page 38, Table 16, “Internal Voltage Reference Characteristics,”
on page 42, DC Characteristics on page 235, Table , “ADC Characteristics,” on
page 241.
2. Changes in External Clock Frequency
Added the description at the end of “External Clock” on page 32.
Added period changing data in Table 99, “External Clock Drive,” on page 237.
3. Updated TWI Chapter
More details regarding use of the TWI bit rate prescaler and a Table 65, “TWI Bit Rate Prescaler,”
on page 167.325
2486AA–AVR–02/2013
ATmega8(L)
Changes from Rev.
2486C-03/02 to
Rev. 2486D-03/02
1. Updated Typical Start-up Times.
The following tables has been updated:
Table 5, “Start-up Times for the Crystal Oscillator Clock Selection,” on page 28, Table 6,
“Start-up Times for the Low-frequency Crystal Oscillator Clock Selection,” on page 28,
Table 8, “Start-up Times for the External RC Oscillator Clock Selection,” on page 29, and
Table 12, “Start-up Times for the External Clock Selection,” on page 32.
2. Added “ATmega8 Typical Characteristics – TA = -40°C to 85°C” on page 244.
Changes from Rev.
2486B-12/01 to
Rev. 2486C-03/02
1. Updated TWI Chapter.
More details regarding use of the TWI Power-down operation and using the TWI as Master
with low TWBRR values are added into the datasheet.
Added the note at the end of the “Bit Rate Generator Unit” on page 164.
Added the description at the end of “Address Match Unit” on page 164.
2. Updated Description of OSCCAL Calibration Byte.
In the datasheet, it was not explained how to take advantage of the calibration bytes for 2, 4,
and 8MHz Oscillator selections. This is now added in the following sections:
Improved description of “Oscillator Calibration Register – OSCCAL” on page 31 and “Calibration
Byte” on page 218.
3. Added Some Preliminary Test Limits and Characterization Data.
Removed some of the TBD’s in the following tables and pages:
Table 3 on page 26, Table 15 on page 38, Table 16 on page 42, Table 17 on page 44, “TA =
-40°C to +85°C, VCC = 2.7V to 5.5V (unless otherwise noted)” on page 235, Table 99 on
page 237, and Table 102 on page 239.
4. Updated Programming Figures.
Figure 104 on page 219 and Figure 112 on page 230 are updated to also reflect that AVCC
must be connected during Programming mode.
5. Added a Description on how to Enter Parallel Programming Mode if RESET Pin is Disabled
or if External Oscillators are Selected.
Added a note in section “Enter Programming Mode” on page 221.1
2486AA–AVR–02/2013
ATmega8(L)
Table of Contents
Features 1
Pin Configurations 2
Overview 3
Block Diagram 3
Disclaimer 4
Pin Descriptions 5
Resources 7
Data Retention 7
About Code Examples 8
Atmel AVR CPU Core 9
Introduction 9
Architectural Overview 9
Arithmetic Logic Unit – ALU 11
Status Register 11
General Purpose Register File 12
Stack Pointer 13
Instruction Execution Timing 13
Reset and Interrupt Handling 14
AVR ATmega8 Memories 17
In-System Reprogrammable Flash Program Memory 17
SRAM Data Memory 18
Data Memory Access Times 19
EEPROM Data Memory 19
I/O Memory 24
System Clock and Clock Options 25
Clock Systems and their Distribution 25
Clock Sources 26
Crystal Oscillator 27
Low-frequency Crystal Oscillator 28
External RC Oscillator 28
Calibrated Internal RC Oscillator 30
External Clock 32
Timer/Counter Oscillator 32
Power Management and Sleep Modes 33
Idle Mode 342
2486AA–AVR–02/2013
ATmega8(L)
ADC Noise Reduction Mode 34
Power-down Mode 34
Power-save Mode 34
Standby Mode 35
Minimizing Power Consumption 35
System Control and Reset 37
Internal Voltage Reference 42
Watchdog Timer 43
Timed Sequences for Changing the Configuration of the Watchdog Timer 45
Interrupts 46
Interrupt Vectors in ATmega8 46
I/O Ports 51
Introduction 51
Ports as General Digital I/O 52
Alternate Port Functions 56
Register Description for I/O Ports 65
External Interrupts 66
8-bit Timer/Counter0 69
Overview 69
Timer/Counter Clock Sources 70
Counter Unit 70
Operation 70
Timer/Counter Timing Diagrams 70
8-bit Timer/Counter Register Description 71
Timer/Counter0 and Timer/Counter1 Prescalers 73
16-bit Timer/Counter1 75
Overview 75
Accessing 16-bit Registers 77
Timer/Counter Clock Sources 80
Counter Unit 80
Input Capture Unit 81
Output Compare Units 83
Compare Match Output Unit 85
Modes of Operation 87
Timer/Counter Timing Diagrams 94
16-bit Timer/Counter Register Description 96
8-bit Timer/Counter2 with PWM and Asynchronous Operation 102
Overview 1023
2486AA–AVR–02/2013
ATmega8(L)
Timer/Counter Clock Sources 103
Counter Unit 104
Output Compare Unit 105
Compare Match Output Unit 107
Modes of Operation 108
Timer/Counter Timing Diagrams 112
8-bit Timer/Counter Register Description 114
Asynchronous Operation of the Timer/Counter 117
Timer/Counter Prescaler 120
Serial Peripheral Interface – SPI 121
SS Pin Functionality 125
Data Modes 127
USART 129
Overview 129
Clock Generation 130
Frame Formats 133
USART Initialization 134
Data Transmission – The USART Transmitter 136
Data Reception – The USART Receiver 138
Asynchronous Data Reception 142
Multi-processor Communication Mode 145
Accessing UBRRH/UCSRC Registers 146
USART Register Description 148
Examples of Baud Rate Setting 153
Two-wire Serial Interface 157
Features 157
Two-wire Serial Interface Bus Definition 157
Data Transfer and Frame Format 158
Multi-master Bus Systems, Arbitration and Synchronization 161
Overview of the TWI Module 163
TWI Register Description 165
Using the TWI 168
Transmission Modes 171
Multi-master Systems and Arbitration 184
Analog Comparator 186
Analog Comparator Multiplexed Input 188
Analog-to-Digital Converter 189
Features 189
Starting a Conversion 191
Prescaling and Conversion Timing 191
Changing Channel or Reference Selection 1944
2486AA–AVR–02/2013
ATmega8(L)
ADC Noise Canceler 195
ADC Conversion Result 199
Boot Loader Support – Read-While-Write Self-Programming 202
Boot Loader Features 202
Application and Boot Loader Flash Sections 202
Read-While-Write and No Read-While-Write Flash Sections 202
Boot Loader Lock Bits 204
Entering the Boot Loader Program 205
Addressing the Flash During Self-Programming 207
Self-Programming the Flash 208
Memory Programming 215
Program And Data Memory Lock Bits 215
Fuse Bits 216
Signature Bytes 218
Calibration Byte 218
Page Size 218
Parallel Programming Parameters, Pin Mapping, and Commands 219
Parallel Programming 221
Serial Downloading 230
Serial Programming Pin Mapping 230
Electrical Characteristics – TA = -40°C to 85°C 235
Absolute Maximum Ratings* 235
DC Characteristics 235
External Clock Drive Waveforms 237
External Clock Drive 237
Two-wire Serial Interface Characteristics 238
SPI Timing Characteristics 239
ADC Characteristics 241
Electrical Characteristics – TA = -40°C to 105°C 242
Absolute Maximum Ratings* 242
DC Characteristics
TA = -40C to 105C, VCC = 2.7V to 5.5V (unless otherwise noted) 242
ATmega8 Typical Characteristics – TA = -40°C to 85°C 244
ATmega8 Typical Characteristics – TA = -40°C to 105°C 282
Active Supply Current 282
Idle Supply Current 284
Power-down Supply Current 286
Pin Pull-up 287
Pin Driver Strength 289
Pin Thresholds and Hysteresis 2935
2486AA–AVR–02/2013
ATmega8(L)
Bod Thresholds and Analog Comparator Offset 298
Internal Oscillator Speed 300
Current Consumption of Peripheral Units 305
Current Consumption in Reset and Reset Pulsewidth 308
Register Summary 309
Instruction Set Summary 311
Ordering Information 314
Packaging Information 315
32A 315
28P3 316
32M1-A 317
Errata 318
ATmega8
Rev. D to I, M 318
Datasheet Revision History 320
Changes from Rev. 2486Z- 02/11 to Rev. 2486AA- 02/2013 320
Changes from Rev. 2486Y- 10/10 to Rev. 2486Z- 02/11 320
Changes from Rev. 2486X- 06/10 to Rev. 2486Y- 10/10 320
Changes from Rev. 2486W- 02/10 to Rev. 2486X- 06/10 320
Changes from Rev. 2486V- 05/09 to Rev. 2486W- 02/10 320
Changes from Rev. 2486U- 08/08 to Rev. 2486V- 05/09 320
Changes from Rev. 2486T- 05/08 to Rev. 2486U- 08/08 320
Changes from Rev. 2486S- 08/07 to Rev. 2486T- 05/08 321
Changes from Rev. 2486R- 07/07 to Rev. 2486S- 08/07 321
Changes from Rev. 2486Q- 10/06 to Rev. 2486R- 07/07 321
Changes from Rev. 2486P- 02/06 to Rev. 2486Q- 10/06 321
Changes from Rev. 2486O-10/04 to Rev. 2486P- 02/06 321
Changes from Rev. 2486N-09/04 to Rev. 2486O-10/04 322
Changes from Rev. 2486M-12/03 to Rev. 2486N-09/04 322
Changes from Rev. 2486L-10/03 to Rev. 2486M-12/03 322
Changes from Rev. 2486K-08/03 to Rev. 2486L-10/03 322
Changes from Rev. 2486J-02/03 to Rev. 2486K-08/03 323
Changes from Rev. 2486I-12/02 to Rev. 2486J-02/03 323
Changes from Rev. 2486H-09/02 to Rev. 2486I-12/02 324
Changes from Rev. 2486G-09/02 to Rev. 2486H-09/02 324
Changes from Rev. 2486F-07/02 to Rev. 2486G-09/02 324
Changes from Rev. 2486E-06/02 to Rev. 2486F-07/02 324
Changes from Rev. 2486D-03/02 to Rev. 2486E-06/02 324
Changes from Rev. 2486C-03/02 to Rev. 2486D-03/02 325
Changes from Rev. 2486B-12/01 to Rev. 2486C-03/02 3252486AA–AVR–02/2013
Atmel Corporation
1600 Technology Drive
San Jose, CA 95110
USA
Tel: (+1) (408) 441-0311
Fax: (+1) (408) 487-2600
www.atmel.com
Atmel Asia Limited
Unit 01-5 & 16, 19F
BEA Tower, Millennium City 5
418 Kwun Tong Roa
Kwun Tong, Kowloon
HONG KONG
Tel: (+852) 2245-6100
Fax: (+852) 2722-1369
Atmel Munich GmbH
Business Campus
Parkring 4
D-85748 Garching b. Munich
GERMANY
Tel: (+49) 89-31970-0
Fax: (+49) 89-3194621
Atmel Japan G.K.
16F Shin-Osaki Kangyo Bldg
1-6-4 Osaki, Shinagawa-ku
Tokyo 141-0032
JAPAN
Tel: (+81) (3) 6417-0300
Fax: (+81) (3) 6417-0370
© 2013 Atmel Corporation. All rights reserved. / Rev.: 2486AA–AVR–02/2013
Atmel®, Atmel logo and combinations thereof, Enabling Unlimited Possibilities®, and others are registered trademarks or trademarks of Atmel Corporation or its
subsidiaries. Other terms and product names may be trademarks of others.
Disclaimer: The information in this document is provided in connection with Atmel products. No license, express or implied, by estoppel or otherwise, to any intellectual property right is granted by this
document or in connection with the sale of Atmel products. EXCEPT AS SET FORTH IN THE ATMEL TERMS AND CONDITIONS OF SALES LOCATED ON THE ATMEL WEBSITE, ATMEL ASSUMES
NO LIABILITY WHATSOEVER AND DISCLAIMS ANY EXPRESS, IMPLIED OR STATUTORY WARRANTY RELATING TO ITS PRODUCTS INCLUDING, BUT NOT LIMITED TO, THE IMPLIED
WARRANTY OF MERCHANTABILITY, FITNESS FOR A PARTICULAR PURPOSE, OR NON-INFRINGEMENT. IN NO EVENT SHALL ATMEL BE LIABLE FOR ANY DIRECT, INDIRECT,
CONSEQUENTIAL, PUNITIVE, SPECIAL OR INCIDENTAL DAMAGES (INCLUDING, WITHOUT LIMITATION, DAMAGES FOR LOSS AND PROFITS, BUSINESS INTERRUPTION, OR LOSS OF
INFORMATION) ARISING OUT OF THE USE OR INABILITY TO USE THIS DOCUMENT, EVEN IF ATMEL HAS BEEN ADVISED OF THE POSSIBILITY OF SUCH DAMAGES. Atmel makes no
representations or warranties with respect to the accuracy or completeness of the contents of this document and reserves the right to make changes to specifications and products descriptions at any time
without notice. Atmel does not make any commitment to update the information contained herein. Unless specifically provided otherwise, Atmel products are not suitable for, and shall not be used in,
automotive applications. Atmel products are not intended, authorized, or warranted for use as components in applications intended to support or sustain life.
Table of Contents 1
8127F–AVR–02/2013
Features
• High Performance, Low Power AVR® 8-Bit Microcontroller
• Advanced RISC Architecture
– 54 Powerful Instructions – Most Single Clock Cycle Execution
– 16 x 8 General Purpose Working Registers
– Fully Static Operation
– Up to 12 MIPS Throughput at 12 MHz
• Non-volatile Program and Data Memories
– 512/1024 Bytes of In-System Programmable Flash Program Memory
– 32 Bytes Internal SRAM
– Flash Write/Erase Cycles: 10,000
– Data Retention: 20 Years at 85oC / 100 Years at 25oC
• Peripheral Features
– QTouch® Library Support for Capacitive Touch Sensing (1 Channel)
– One 16-bit Timer/Counter with Prescaler and Two PWM Channels
– Programmable Watchdog Timer with Separate On-chip Oscillator
– 4-channel, 8-bit Analog to Digital Converter (ATtiny5/10, only)
– On-chip Analog Comparator
• Special Microcontroller Features
– In-System Programmable (at 5V, only)
– External and Internal Interrupt Sources
– Low Power Idle, ADC Noise Reduction, and Power-down Modes
– Enhanced Power-on Reset Circuit
– Programmable Supply Voltage Level Monitor with Interrupt and Reset
– Internal Calibrated Oscillator
• I/O and Packages
– Four Programmable I/O Lines
– 6-pin SOT and 8-pad UDFN
• Operating Voltage:
– 1.8 – 5.5V
• Programming Voltage:
– 5V
• Speed Grade
– 0 – 4 MHz @ 1.8 – 5.5V
– 0 – 8 MHz @ 2.7 – 5.5V
– 0 – 12 MHz @ 4.5 – 5.5V
• Industrial and Extended Temperature Ranges
• Low Power Consumption
– Active Mode:
• 200µA at 1MHz and 1.8V
– Idle Mode:
• 25µA at 1MHz and 1.8V
– Power-down Mode:
• < 0.1µA at 1.8V
Atmel 8-bit AVR Microcontroller with 512/1024
Bytes In-System Programmable Flash
ATtiny4 / ATtiny5 / ATtiny9 / ATtiny10
Rev. 8127F–AVR–02/2013ATtiny4/5/9/10 [DATASHEET] 2
8127F–AVR–02/2013
1. Pin Configurations
Figure 1-1. Pinout of ATtiny4/5/9/10
1.1 Pin Description
1.1.1 VCC
Supply voltage.
1.1.2 GND
Ground.
1.1.3 Port B (PB3..PB0)
This is a 4-bit, bi-directional I/O port with internal pull-up resistors, individually selectable for each bit. The output
buffers have symmetrical drive characteristics, with both high sink and source capability. As inputs, the port pins
that are externally pulled low will source current if pull-up resistors are activated. Port pins are tri-stated when a
reset condition becomes active, even if the clock is not running.
The port also serves the functions of various special features of the ATtiny4/5/9/10, as listed on page 36.
1.1.4 RESET
Reset input. A low level on this pin for longer than the minimum pulse length will generate a reset, even if the clock
is not running and provided the reset pin has not been disabled. The minimum pulse length is given in Table 16-4
on page 118. Shorter pulses are not guaranteed to generate a reset.
The reset pin can also be used as a (weak) I/O pin.
1
2
3
6
5
4
(PCINT0/TPIDATA/OC0A/ADC0/AIN0) PB0
GND
(PCINT1/TPICLK/CLKI/ICP0/OC0B/ADC1/AIN1) PB1
PB3 (RESET/PCINT3/ADC3)
VCC
PB2 (T0/CLKO/PCINT2/INT0/ADC2)
SOT-23
1
2
3
4
8
7
6
5
(PCINT1/TPICLK/CLKI/ICP0/OC0B/ADC1/AIN1) PB1
NC
NC
GND
PB2 (T0/CLKO/PCINT2/INT0/ADC2)
VCC
PB3 (RESET/PCINT3/ADC3)
PB0 (AIN0/ADC0/OC0A/TPIDATA/PCINT0)
UDFNATtiny4/5/9/10 [DATASHEET] 3
8127F–AVR–02/2013
2. Overview
ATtiny4/5/9/10 are low-power CMOS 8-bit microcontrollers based on the compact AVR enhanced RISC architecture.
By executing powerful instructions in a single clock cycle, the ATtiny4/5/9/10 achieve throughputs
approaching 1 MIPS per MHz, allowing the system designer to optimize power consumption versus processing
speed.
Figure 2-1. Block Diagram
The AVR core combines a rich instruction set with 16 general purpose working registers and system registers. All
registers are directly connected to the Arithmetic Logic Unit (ALU), allowing two independent registers to be
accessed in one single instruction executed in one clock cycle. The resulting architecture is compact and code efficient
while achieving throughputs up to ten times faster than conventional CISC microcontrollers.
The ATtiny4/5/9/10 provide the following features: 512/1024 byte of In-System Programmable Flash, 32 bytes of
SRAM, four general purpose I/O lines, 16 general purpose working registers, a 16-bit timer/counter with two PWM
STACK
POINTER
SRAM
PROGRAM
COUNTER
PROGRAMMING
LOGIC
ISP
INTERFACE
INTERNAL
OSCILLATOR
WATCHDOG
TIMER
RESET FLAG
REGISTER
MCU STATUS
REGISTER
TIMER/
COUNTER0
CALIBRATED
OSCILLATOR
TIMING AND
CONTROL
INTERRUPT
UNIT
ANALOG
COMPARATOR ADC
GENERAL
PURPOSE
REGISTERS
X
Y
Z
ALU
STATUS
REGISTER
PROGRAM
FLASH
INSTRUCTION
REGISTER
INSTRUCTION
DECODER
CONTROL
LINES
VCC RESET
DATA REGISTER
PORT B
DIRECTION
REG. PORT B
DRIVERS
PORT B
GND PB3:0
8-BIT DATA BUSATtiny4/5/9/10 [DATASHEET] 4
8127F–AVR–02/2013
channels, internal and external interrupts, a programmable watchdog timer with internal oscillator, an internal calibrated
oscillator, and four software selectable power saving modes. ATtiny5/10 are also equipped with a fourchannel,
8-bit Analog to Digital Converter (ADC).
Idle mode stops the CPU while allowing the SRAM, timer/counter, ADC (ATtiny5/10, only), analog comparator, and
interrupt system to continue functioning. ADC Noise Reduction mode minimizes switching noise during ADC conversions
by stopping the CPU and all I/O modules except the ADC. In Power-down mode registers keep their
contents and all chip functions are disabled until the next interrupt or hardware reset. In Standby mode, the oscillator
is running while the rest of the device is sleeping, allowing very fast start-up combined with low power
consumption.
The device is manufactured using Atmel’s high density non-volatile memory technology. The on-chip, in-system
programmable Flash allows program memory to be re-programmed in-system by a conventional, non-volatile
memory programmer.
The ATtiny4/5/9/10 AVR are supported by a suite of program and system development tools, including macro
assemblers and evaluation kits.
2.1 Comparison of ATtiny4, ATtiny5, ATtiny9 and ATtiny10
A comparison of the devices is shown in Table 2-1.
Table 2-1. Differences between ATtiny4, ATtiny5, ATtiny9 and ATtiny10
Device Flash ADC Signature
ATtiny4 512 bytes No 0x1E 0x8F 0x0A
ATtiny5 512 bytes Yes 0x1E 0x8F 0x09
ATtiny9 1024 bytes No 0x1E 0x90 0x08
ATtiny10 1024 bytes Yes 0x1E 0x90 0x03ATtiny4/5/9/10 [DATASHEET] 5
8127F–AVR–02/2013
3. General Information
3.1 Resources
A comprehensive set of drivers, application notes, data sheets and descriptions on development tools are available
for download at http://www.atmel.com/microcontroller/avr.
3.2 Code Examples
This documentation contains simple code examples that briefly show how to use various parts of the device. These
code examples assume that the part specific header file is included before compilation. Be aware that not all C
compiler vendors include bit definitions in the header files and interrupt handling in C is compiler dependent.
Please confirm with the C compiler documentation for more details.
3.3 Capacitive Touch Sensing
Atmel QTouch Library provides a simple to use solution for touch sensitive interfaces on Atmel AVR microcontrollers.
The QTouch Library includes support for QTouch® and QMatrix® acquisition methods.
Touch sensing is easily added to any application by linking the QTouch Library and using the Application Programming
Interface (API) of the library to define the touch channels and sensors. The application then calls the API to
retrieve channel information and determine the state of the touch sensor.
The QTouch Library is free and can be downloaded from the Atmel website. For more information and details of
implementation, refer to the QTouch Library User Guide – also available from the Atmel website.
3.4 Data Retention
Reliability Qualification results show that the projected data retention failure rate is much less than 1 PPM over 20
years at 85°C or 100 years at 25°C.ATtiny4/5/9/10 [DATASHEET] 6
8127F–AVR–02/2013
4. CPU Core
This section discusses the AVR core architecture in general. The main function of the CPU core is to ensure correct
program execution. The CPU must therefore be able to access memories, perform calculations, control
peripherals, and handle interrupts.
4.1 Architectural Overview
Figure 4-1. Block Diagram of the AVR Architecture
In order to maximize performance and parallelism, the AVR uses a Harvard architecture – with separate memories
and buses for program and data. Instructions in the program memory are executed with a single level pipelining.
While one instruction is being executed, the next instruction is pre-fetched from the program memory. This concept
enables instructions to be executed in every clock cycle. The program memory is In-System reprogrammable
Flash memory.
The fast-access Register File contains 16 x 8-bit general purpose working registers with a single clock cycle
access time. This allows single-cycle Arithmetic Logic Unit (ALU) operation. In a typical ALU operation, two operands
are output from the Register File, the operation is executed, and the result is stored back in the Register File
– in one clock cycle.
Flash
Program
Memory
Instruction
Register
Instruction
Decoder
Program
Counter
Control Lines
16 x 8
General
Purpose
Registrers
ALU
Status
and Control
I/O Lines
Data Bus 8-bit
Data
SRAM
Direct Addressing
Indirect Addressing
Interrupt
Unit
Watchdog
Timer
Analog
Comparator
Timer/Counter 0
ADCATtiny4/5/9/10 [DATASHEET] 7
8127F–AVR–02/2013
Six of the 16 registers can be used as three 16-bit indirect address register pointers for data space addressing –
enabling efficient address calculations. One of the these address pointers can also be used as an address pointer
for look up tables in Flash program memory. These added function registers are the 16-bit X-, Y-, and Z-register,
described later in this section.
The ALU supports arithmetic and logic operations between registers or between a constant and a register. Single
register operations can also be executed in the ALU. After an arithmetic operation, the Status Register is updated
to reflect information about the result of the operation.
Program flow is provided by conditional and unconditional jump and call instructions, capable of directly addressing
the whole address space. Most AVR instructions have a single 16-bit word format but 32-bit wide instructions also
exist. The actual instruction set varies, as some devices only implement a part of the instruction set.
During interrupts and subroutine calls, the return address Program Counter (PC) is stored on the Stack. The Stack
is effectively allocated in the general data SRAM, and consequently the Stack size is only limited by the SRAM size
and the usage of the SRAM. All user programs must initialize the SP in the Reset routine (before subroutines or
interrupts are executed). The Stack Pointer (SP) is read/write accessible in the I/O space. The data SRAM can
easily be accessed through the four different addressing modes supported in the AVR architecture.
The memory spaces in the AVR architecture are all linear and regular memory maps.
A flexible interrupt module has its control registers in the I/O space with an additional Global Interrupt Enable bit in
the Status Register. All interrupts have a separate Interrupt Vector in the Interrupt Vector table. The interrupts have
priority in accordance with their Interrupt Vector position. The lower the Interrupt Vector address, the higher the
priority.
The I/O memory space contains 64 addresses for CPU peripheral functions as Control Registers, SPI, and other
I/O functions. The I/O memory can be accessed as the data space locations, 0x0000 - 0x003F.
4.2 ALU – Arithmetic Logic Unit
The high-performance AVR ALU operates in direct connection with all the 16 general purpose working registers.
Within a single clock cycle, arithmetic operations between general purpose registers or between a register and an
immediate are executed. The ALU operations are divided into three main categories – arithmetic, logical, and bitfunctions.
Some implementations of the architecture also provide a powerful multiplier supporting both
signed/unsigned multiplication and fractional format. See document “AVR Instruction Set” and section “Instruction
Set Summary” on page 150 for a detailed description.
4.3 Status Register
The Status Register contains information about the result of the most recently executed arithmetic instruction. This
information can be used for altering program flow in order to perform conditional operations. Note that the Status
Register is updated after all ALU operations, as specified in document “AVR Instruction Set” and section “Instruction
Set Summary” on page 150. This will in many cases remove the need for using the dedicated compare
instructions, resulting in faster and more compact code.
The Status Register is not automatically stored when entering an interrupt routine and restored when returning
from an interrupt. This must be handled by software.
4.4 General Purpose Register File
The Register File is optimized for the AVR Enhanced RISC instruction set. In order to achieve the required performance
and flexibility, the following input/output schemes are supported by the Register File:
• One 8-bit output operand and one 8-bit result input
• Two 8-bit output operands and one 8-bit result input
• One 16-bit output operand and one 16-bit result inputATtiny4/5/9/10 [DATASHEET] 8
8127F–AVR–02/2013
Figure 4-2 below shows the structure of the 16 general purpose working registers in the CPU.
Figure 4-2. AVR CPU General Purpose Working Registers
Note: A typical implementation of the AVR register file includes 32 general prupose registers but ATtiny4/5/9/10 implement
only 16 registers. For reasons of compatibility the registers are numbered R16...R31, not R0...R15.
Most of the instructions operating on the Register File have direct access to all registers, and most of them are single
cycle instructions.
4.4.1 The X-register, Y-register, and Z-register
Registers R26..R31 have some added functions to their general purpose usage. These registers are 16-bit
address pointers for indirect addressing of the data space. The three indirect address registers X, Y, and Z are
defined as described in Figure 4-3.
Figure 4-3. The X-, Y-, and Z-registers
7 0
R16
R17
General R18
Purpose …
Working R26 X-register Low Byte
Registers R27 X-register High Byte
R28 Y-register Low Byte
R29 Y-register High Byte
R30 Z-register Low Byte
R31 Z-register High Byte
15 XH XL 0
X-register 7 07 0
R27 R26
15 YH YL 0
Y-register 7 07 0
R29 R28
15 ZH ZL 0
Z-register 7 07 0
R31 R30ATtiny4/5/9/10 [DATASHEET] 9
8127F–AVR–02/2013
In different addressing modes these address registers function as automatic increment and automatic decrement
(see document “AVR Instruction Set” and section “Instruction Set Summary” on page 150 for details).
4.5 Stack Pointer
The Stack is mainly used for storing temporary data, for storing local variables and for storing return addresses
after interrupts and subroutine calls. The Stack Pointer Register always points to the top of the Stack. Note that the
Stack is implemented as growing from higher memory locations to lower memory locations. This implies that a
Stack PUSH command decreases the Stack Pointer.
The Stack Pointer points to the data SRAM Stack area where the Subroutine and Interrupt Stacks are located. This
Stack space in the data SRAM must be defined by the program before any subroutine calls are executed or interrupts
are enabled. The Stack Pointer must be set to point above 0x40. The Stack Pointer is decremented by one
when data is pushed onto the Stack with the PUSH instruction, and it is decremented by two when the return
address is pushed onto the Stack with subroutine call or interrupt. The Stack Pointer is incremented by one when
data is popped from the Stack with the POP instruction, and it is incremented by two when data is popped from the
Stack with return from subroutine RET or return from interrupt RETI.
The AVR Stack Pointer is implemented as two 8-bit registers in the I/O space. The number of bits actually used is
implementation dependent. Note that the data space in some implementations of the AVR architecture is so small
that only SPL is needed. In this case, the SPH Register will not be present.
4.6 Instruction Execution Timing
This section describes the general access timing concepts for instruction execution. The AVR CPU is driven by the
CPU clock clkCPU, directly generated from the selected clock source for the chip. No internal clock division is used.
Figure 4-4. The Parallel Instruction Fetches and Instruction Executions
Figure 4-4 shows the parallel instruction fetches and instruction executions enabled by the Harvard architecture
and the fast access Register File concept. This is the basic pipelining concept to obtain up to 1 MIPS per MHz with
the corresponding unique results for functions per cost, functions per clocks, and functions per power-unit.
Figure 4-5 shows the internal timing concept for the Register File. In a single clock cycle an ALU operation using
two register operands is executed, and the result is stored back to the destination register.
clk
1st Instruction Fetch
1st Instruction Execute
2nd Instruction Fetch
2nd Instruction Execute
3rd Instruction Fetch
3rd Instruction Execute
4th Instruction Fetch
T1 T2 T3 T4
CPUATtiny4/5/9/10 [DATASHEET] 10
8127F–AVR–02/2013
Figure 4-5. Single Cycle ALU Operation
4.7 Reset and Interrupt Handling
The AVR provides several different interrupt sources. These interrupts and the separate Reset Vector each have a
separate Program Vector in the program memory space. All interrupts are assigned individual enable bits which
must be written logic one together with the Global Interrupt Enable bit in the Status Register in order to enable the
interrupt.
The lowest addresses in the program memory space are by default defined as the Reset and Interrupt Vectors.
The complete list of vectors is shown in “Interrupts” on page 35. The list also determines the priority levels of the
different interrupts. The lower the address the higher is the priority level. RESET has the highest priority, and next
is INT0 – the External Interrupt Request 0.
When an interrupt occurs, the Global Interrupt Enable I-bit is cleared and all interrupts are disabled. The user software
can write logic one to the I-bit to enable nested interrupts. All enabled interrupts can then interrupt the current
interrupt routine. The I-bit is automatically set when a Return from Interrupt instruction – RETI – is executed.
There are basically two types of interrupts. The first type is triggered by an event that sets the Interrupt Flag. For
these interrupts, the Program Counter is vectored to the actual Interrupt Vector in order to execute the interrupt
handling routine, and hardware clears the corresponding Interrupt Flag. Interrupt Flags can also be cleared by writing
a logic one to the flag bit position(s) to be cleared. If an interrupt condition occurs while the corresponding
interrupt enable bit is cleared, the Interrupt Flag will be set and remembered until the interrupt is enabled, or the
flag is cleared by software. Similarly, if one or more interrupt conditions occur while the Global Interrupt Enable bit
is cleared, the corresponding Interrupt Flag(s) will be set and remembered until the Global Interrupt Enable bit is
set, and will then be executed by order of priority.
The second type of interrupts will trigger as long as the interrupt condition is present. These interrupts do not necessarily
have Interrupt Flags. If the interrupt condition disappears before the interrupt is enabled, the interrupt will
not be triggered.
When the AVR exits from an interrupt, it will always return to the main program and execute one more instruction
before any pending interrupt is served.
Note that the Status Register is not automatically stored when entering an interrupt routine, nor restored when
returning from an interrupt routine. This must be handled by software.
When using the CLI instruction to disable interrupts, the interrupts will be immediately disabled. No interrupt will be
executed after the CLI instruction, even if it occurs simultaneously with the CLI instruction.
Total Execution Time
Register Operands Fetch
ALU Operation Execute
Result Write Back
T1 T2 T3 T4
clkCPUATtiny4/5/9/10 [DATASHEET] 11
8127F–AVR–02/2013
When using the SEI instruction to enable interrupts, the instruction following SEI will be executed before any pending
interrupts, as shown in the following example.
Note: See “Code Examples” on page 5.
4.7.1 Interrupt Response Time
The interrupt execution response for all the enabled AVR interrupts is four clock cycles minimum. After four clock
cycles the Program Vector address for the actual interrupt handling routine is executed. During this four clock cycle
period, the Program Counter is pushed onto the Stack. The vector is normally a jump to the interrupt routine, and
this jump takes three clock cycles. If an interrupt occurs during execution of a multi-cycle instruction, this instruction
is completed before the interrupt is served. If an interrupt occurs when the MCU is in sleep mode, the interrupt execution
response time is increased by four clock cycles. This increase comes in addition to the start-up time from the
selected sleep mode.
A return from an interrupt handling routine takes four clock cycles. During these four clock cycles, the Program
Counter (two bytes) is popped back from the Stack, the Stack Pointer is incremented by two, and the I-bit in SREG
is set.
4.8 Register Description
4.8.1 CCP – Configuration Change Protection Register
• Bits 7:0 – CCP[7:0] – Configuration Change Protection
In order to change the contents of a protected I/O register the CCP register must first be written with the correct
signature. After CCP is written the protected I/O registers may be written to during the next four CPU instruction
cycles. All interrupts are ignored during these cycles. After these cycles interrupts are automatically handled again
by the CPU, and any pending interrupts will be executed according to their priority.
When the protected I/O register signature is written, CCP[0] will read as one as long as the protected feature is
enabled, while CCP[7:1] will always read as zero.
Table 4-1 shows the signatures that are in recognised.
Assembly Code Example
sei ; set Global Interrupt Enable
sleep ; enter sleep, waiting for interrupt
; note: will enter sleep before any pending interrupt(s)
Bit 7 6 5 4 3 2 1 0
0x3C CCP[7:0] CCP
Read/Write W W W W W W W R/W
Initial Value 0 0 0 0 0 0 0 0
Table 4-1. Signatures Recognised by the Configuration Change Protection Register
Signature Group Description
0xD8 IOREG: CLKMSR, CLKPSR, WDTCSR Protected I/O registerATtiny4/5/9/10 [DATASHEET] 12
8127F–AVR–02/2013
4.8.2 SPH and SPL — Stack Pointer Register
4.8.3 SREG – Status Register
• Bit 7 – I: Global Interrupt Enable
The Global Interrupt Enable bit must be set for the interrupts to be enabled. The individual interrupt enable control
is then performed in separate control registers. If the Global Interrupt Enable Register is cleared, none of the interrupts
are enabled independent of the individual interrupt enable settings. The I-bit is cleared by hardware after an
interrupt has occurred, and is set by the RETI instruction to enable subsequent interrupts. The I-bit can also be set
and cleared by the application with the SEI and CLI instructions, as described in the document “AVR Instruction
Set” and “Instruction Set Summary” on page 150.
• Bit 6 – T: Bit Copy Storage
The Bit Copy instructions BLD (Bit LoaD) and BST (Bit STore) use the T-bit as source or destination for the operated
bit. A bit from a register in the Register File can be copied into T by the BST instruction, and a bit in T can be
copied into a bit in a register in the Register File by the BLD instruction.
• Bit 5 – H: Half Carry Flag
The Half Carry Flag H indicates a Half Carry in some arithmetic operations. Half Carry is useful in BCD arithmetic.
See document “AVR Instruction Set” and section “Instruction Set Summary” on page 150 for detailed information.
• Bit 4 – S: Sign Bit, S = N V
The S-bit is always an exclusive or between the Negative Flag N and the Two’s Complement Overflow Flag V. See
document “AVR Instruction Set” and section “Instruction Set Summary” on page 150 for detailed information.
• Bit 3 – V: Two’s Complement Overflow Flag
The Two’s Complement Overflow Flag V supports two’s complement arithmetics. See document “AVR Instruction
Set” and section “Instruction Set Summary” on page 150 for detailed information.
• Bit 2 – N: Negative Flag
The Negative Flag N indicates a negative result in an arithmetic or logic operation. See document “AVR Instruction
Set” and section “Instruction Set Summary” on page 150 for detailed information.
• Bit 1 – Z: Zero Flag
The Zero Flag Z indicates a zero result in an arithmetic or logic operation. See document “AVR Instruction Set” and
section “Instruction Set Summary” on page 150 for detailed information.
Bit 15 14 13 12 11 10 9 8
0x3E SP15 SP14 SP13 SP12 SP11 SP10 SP9 SP8 SPH
0x3D SP7 SP6 SP5 SP4 SP3 SP2 SP1 SP0 SPL
76543210
Read/Write R/W R/W R/W R/W R/W R/W R/W R/W
Read/Write R/W R/W R/W R/W R/W R/W R/W R/W
Initial Value RAMEND RAMEND RAMEND RAMEND RAMEND RAMEND RAMEND RAMEND
Initial Value RAMEND RAMEND RAMEND RAMEND RAMEND RAMEND RAMEND RAMEND
Bit 7 6 5 4 3 2 1 0
0x3F I T H S V N Z C SREG
Read/Write R/W R/W R/W R/W R/W R/W R/W R/W
Initial Value 0 0 0 0 0 0 0 0ATtiny4/5/9/10 [DATASHEET] 13
8127F–AVR–02/2013
• Bit 0 – C: Carry Flag
The Carry Flag C indicates a carry in an arithmetic or logic operation. See document “AVR Instruction Set” and
section “Instruction Set Summary” on page 150 for detailed information.ATtiny4/5/9/10 [DATASHEET] 14
8127F–AVR–02/2013
5. Memories
This section describes the different memories in the ATtiny4/5/9/10. Devices have two main memory areas, the
program memory space and the data memory space.
5.1 In-System Re-programmable Flash Program Memory
The ATtiny4/5/9/10 contain 512/1024 bytes of on-chip, in-system reprogrammable Flash memory for program storage.
Since all AVR instructions are 16 or 32 bits wide, the Flash is organized as 256/512 x 16.
The Flash memory has an endurance of at least 10,000 write/erase cycles. The ATtiny4/5/9/10 Program Counter
(PC) is 9 bits wide, thus capable of addressing the 256/512 program memory locations, starting at 0x000. “Memory
Programming” on page 106 contains a detailed description on Flash data serial downloading.
Constant tables can be allocated within the entire address space of program memory. Since program memory can
not be accessed directly, it has been mapped to the data memory. The mapped program memory begins at byte
address 0x4000 in data memory (see Figure 5-1 on page 15). Although programs are executed starting from
address 0x000 in program memory it must be addressed starting from 0x4000 when accessed via the data
memory.
Internal write operations to Flash program memory have been disabled and program memory therefore appears to
firmware as read-only. Flash memory can still be written to externally but internal write operations to the program
memory area will not be succesful.
Timing diagrams of instruction fetch and execution are presented in “Instruction Execution Timing” on page 9.
5.2 Data Memory
Data memory locations include the I/O memory, the internal SRAM memory, the non-volatile memory lock bits, and
the Flash memory. See Figure 5-1 on page 15 for an illustration on how the ATtiny4/5/9/10 memory space is
organized.
The first 64 locations are reserved for I/O memory, while the following 32 data memory locations address the internal
data SRAM.
The non-volatile memory lock bits and all the Flash memory sections are mapped to the data memory space.
These locations appear as read-only for device firmware.
The four different addressing modes for data memory are direct, indirect, indirect with pre-decrement, and indirect
with post-increment. In the register file, registers R26 to R31 function as pointer registers for indirect addressing.
The IN and OUT instructions can access all 64 locations of I/O memory. Direct addressing using the LDS and STS
instructions reaches the 128 locations between 0x0040 and 0x00BF.
The indirect addressing reaches the entire data memory space. When using indirect addressing modes with automatic
pre-decrement and post-increment, the address registers X, Y, and Z are decremented or incremented.ATtiny4/5/9/10 [DATASHEET] 15
8127F–AVR–02/2013
Figure 5-1. Data Memory Map (Byte Addressing)
5.2.1 Data Memory Access Times
This section describes the general access timing concepts for internal memory access. The internal data SRAM
access is performed in two clkCPU cycles as described in Figure 5-2.
Figure 5-2. On-chip Data SRAM Access Cycles
0x0000 ... 0x003F
0x0040 ... 0x005F
0x0060 ... 0x3EFF
0x3F00 ... 0x3F01
0x3F02 ... 0x3F3F
0x3F40 ... 0x3F41
0x3F42 ... 0x3F7F
0x3F80 ... 0x3F81
0x3F82 ... 0x3FBF
0x3FC0 ... 0x3FC3
0x3FC4 ... 0x3FFF
0x4000 ... 0x41FF/0x43FF
0x4400 ... 0xFFFF
I/O SPACE
SRAM DATA MEMORY
(reserved)
NVM LOCK BITS
(reserved)
CONFIGURATION BITS
(reserved)
CALIBRATION BITS
(reserved)
DEVICE ID BITS
(reserved)
FLASH PROGRAM MEMORY
(reserved)
clk
WR
RD
Data
Data
Address Address valid
T1 T2 T3
Compute Address
Read Write
CPU
Memory Access Instruction Next InstructionATtiny4/5/9/10 [DATASHEET] 16
8127F–AVR–02/2013
5.3 I/O Memory
The I/O space definition of the ATtiny4/5/9/10 is shown in “Register Summary” on page 148.
All ATtiny4/5/9/10 I/Os and peripherals are placed in the I/O space. All I/O locations may be accessed using the LD
and ST instructions, enabling data transfer between the 16 general purpose working registers and the I/O space.
I/O Registers within the address range 0x00 - 0x1F are directly bit-accessible using the SBI and CBI instructions. In
these registers, the value of single bits can be checked by using the SBIS and SBIC instructions. See document
“AVR Instruction Set” and section “Instruction Set Summary” on page 150 for more details. When using the I/O
specific commands IN and OUT, the I/O addresses 0x00 - 0x3F must be used.
For compatibility with future devices, reserved bits should be written to zero if accessed. Reserved I/O memory
addresses should never be written.
Some of the status flags are cleared by writing a logical one to them. Note that CBI and SBI instructions will only
operate on the specified bit, and can therefore be used on registers containing such status flags. The CBI and SBI
instructions work on registers in the address range 0x00 to 0x1F, only.
The I/O and Peripherals Control Registers are explained in later sections.ATtiny4/5/9/10 [DATASHEET] 17
8127F–AVR–02/2013
6. Clock System
Figure 6-1 presents the principal clock systems and their distribution in ATtiny4/5/9/10. All of the clocks need not
be active at a given time. In order to reduce power consumption, the clocks to modules not being used can be
halted by using different sleep modes and power reduction register bits, as described in “Power Management and
Sleep Modes” on page 23. The clock systems is detailed below.
Figure 6-1. Clock Distribution
6.1 Clock Subsystems
The clock subsystems are detailed in the sections below.
6.1.1 CPU Clock – clkCPU
The CPU clock is routed to parts of the system concerned with operation of the AVR Core. Examples of such modules
are the General Purpose Register File, the System Registers and the SRAM data memory. Halting the CPU
clock inhibits the core from performing general operations and calculations.
6.1.2 I/O Clock – clkI/O
The I/O clock is used by the majority of the I/O modules, like Timer/Counter. The I/O clock is also used by the
External Interrupt module, but note that some external interrupts are detected by asynchronous logic, allowing
such interrupts to be detected even if the I/O clock is halted.
6.1.3 NVM clock - clkNVM
The NVM clock controls operation of the Non-Volatile Memory Controller. The NVM clock is usually active simultaneously
with the CPU clock.
CLOCK CONTROL UNIT
GENERAL
I/O MODULES
ANALOG-TO-DIGITAL
CONVERTER
CPU
CORE
WATCHDOG
TIMER
RESET
LOGIC
CLOCK
PRESCALER
RAM
CLOCK
SWITCH
NVM
CALIBRATED
OSCILLATOR
clk ADC
SOURCE CLOCK
clk I/O
clk CPU
clk NVM
WATCHDOG
CLOCK
WATCHDOG
OSCILLATOR
EXTERNAL
CLOCKATtiny4/5/9/10 [DATASHEET] 18
8127F–AVR–02/2013
6.1.4 ADC Clock – clkADC
The ADC is provided with a dedicated clock domain. This allows halting the CPU and I/O clocks in order to reduce
noise generated by digital circuitry. This gives more accurate ADC conversion results.
The ADC is available in ATtiny5/10, only.
6.2 Clock Sources
All synchronous clock signals are derived from the main clock. The device has three alternative sources for the
main clock, as follows:
• Calibrated Internal 8 MHz Oscillator (see page 18)
• External Clock (see page 18)
• Internal 128 kHz Oscillator (see page 19)
See Table 6-3 on page 21 on how to select and change the active clock source.
6.2.1 Calibrated Internal 8 MHz Oscillator
The calibrated internal oscillator provides an approximately 8 MHz clock signal. Though voltage and temperature
dependent, this clock can be very accurately calibrated by the user. See Table 16-2 on page 117, Figure 17-39 on
page 141 and Figure 17-40 on page 141 for more details.
This clock may be selected as the main clock by setting the Clock Main Select bits CLKMS[1:0] in CLKMSR to
0b00. Once enabled, the oscillator will operate with no external components. During reset, hardware loads the calibration
byte into the OSCCAL register and thereby automatically calibrates the oscillator. The accuracy of this
calibration is shown as Factory calibration in Table 16-2 on page 117.
When this oscillator is used as the main clock, the watchdog oscillator will still be used for the watchdog timer and
reset time-out. For more information on the pre-programmed calibration value, see section “Calibration Section” on
page 109.
6.2.2 External Clock
To use the device with an external clock source, CLKI should be driven as shown in Figure 6-2. The external clock
is selected as the main clock by setting CLKMS[1:0] bits in CLKMSR to 0b10.
Figure 6-2. External Clock Drive Configuration
When applying an external clock, it is required to avoid sudden changes in the applied clock frequency to ensure
stable operation of the MCU. A variation in frequency of more than 2% from one clock cycle to the next can lead to
unpredictable behavior. It is required to ensure that the MCU is kept in reset during such changes in the clock
frequency.
EXTERNAL
CLOCK
SIGNAL
CLKI
GNDATtiny4/5/9/10 [DATASHEET] 19
8127F–AVR–02/2013
6.2.3 Internal 128 kHz Oscillator
The internal 128 kHz oscillator is a low power oscillator providing a clock of 128 kHz. The frequency depends on
supply voltage, temperature and batch variations. This clock may be select as the main clock by setting the
CLKMS[1:0] bits in CLKMSR to 0b01.
6.2.4 Switching Clock Source
The main clock source can be switched at run-time using the “CLKMSR – Clock Main Settings Register” on page
21. When switching between any clock sources, the clock system ensures that no glitch occurs in the main clock.
6.2.5 Default Clock Source
The calibrated internal 8 MHz oscillator is always selected as main clock when the device is powered up or has
been reset. The synchronous system clock is the main clock divided by 8, controlled by the System Clock Prescaler.
The Clock Prescaler Select Bits can be written later to change the system clock frequency. See “System
Clock Prescaler”.
6.3 System Clock Prescaler
The system clock is derived from the main clock via the System Clock Prescaler. The system clock can be divided
by setting the “CLKPSR – Clock Prescale Register” on page 22. The system clock prescaler can be used to
decrease power consumption at times when requirements for processing power is low or to bring the system clock
within limits of maximum frequency. The prescaler can be used with all main clock source options, and it will affect
the clock frequency of the CPU and all synchronous peripherals.
The System Clock Prescaler can be used to implement run-time changes of the internal clock frequency while still
ensuring stable operation.
6.3.1 Switching Prescaler Setting
When switching between prescaler settings, the system clock prescaler ensures that no glitch occurs in the system
clock and that no intermediate frequency is higher than neither the clock frequency corresponding the previous setting,
nor the clock frequency corresponding to the new setting.
The ripple counter that implements the prescaler runs at the frequency of the main clock, which may be faster than
the CPU's clock frequency. Hence, it is not possible to determine the state of the prescaler - even if it were readable,
and the exact time it takes to switch from one clock division to another cannot be exactly predicted.
From the time the CLKPS values are written, it takes between T1 + T2 and T1 + 2*T2 before the new clock frequency
is active. In this interval, two active clock edges are produced. Here, T1 is the previous clock period, and
T2 is the period corresponding to the new prescaler setting.ATtiny4/5/9/10 [DATASHEET] 20
8127F–AVR–02/2013
6.4 Starting
6.4.1 Starting from Reset
The internal reset is immediately asserted when a reset source goes active. The internal reset is kept asserted until
the reset source is released and the start-up sequence is completed. The start-up sequence includes three steps,
as follows.
1. The first step after the reset source has been released consists of the device counting the reset start-up
time. The purpose of this reset start-up time is to ensure that supply voltage has reached sufficient levels.
The reset start-up time is counted using the internal 128 kHz oscillator. See Table 6-1 for details of reset
start-up time.
Note that the actual supply voltage is not monitored by the start-up logic. The device will count until the
reset start-up time has elapsed even if the device has reached sufficient supply voltage levels earlier.
2. The second step is to count the oscillator start-up time, which ensures that the calibrated internal oscillator
has reached a stable state before it is used by the other parts of the system. The calibrated internal oscillator
needs to oscillate for a minimum number of cycles before it can be considered stable. See Table 6-1
for details of the oscillator start-up time.
3. The last step before releasing the internal reset is to load the calibration and the configuration values from
the Non-Volatile Memory to configure the device properly. The configuration time is listed in Table 6-1.
Notes: 1. After powering up the device or after a reset the system clock is automatically set to calibrated internal 8 MHz oscillator,
divided by 8
6.4.2 Starting from Power-Down Mode
When waking up from Power-Down sleep mode, the supply voltage is assumed to be at a sufficient level and only
the oscillator start-up time is counted to ensure the stable operation of the oscillator. The oscillator start-up time is
counted on the selected main clock, and the start-up time depends on the clock selected. See Table 6-2 for details.
Notes: 1. The start-up time is measured in main clock oscillator cycles.
6.4.3 Starting from Idle / ADC Noise Reduction / Standby Mode
When waking up from Idle, ADC Noise Reduction or Standby Mode, the oscillator is already running and no oscillator
start-up time is introduced.
The ADC is available in ATtiny5/10, only.
Table 6-1. Start-up Times when Using the Internal Calibrated Oscillator
Reset Oscillator Configuration Total start-up time
64 ms 6 cycles 21 cycles 64 ms + 6 oscillator cycles + 21 system clock cycles (1)
Table 6-2. Start-up Time from Power-Down Sleep Mode.
Oscillator start-up time Total start-up time
6 cycles 6 oscillator cycles (1)ATtiny4/5/9/10 [DATASHEET] 21
8127F–AVR–02/2013
6.5 Register Description
6.5.1 CLKMSR – Clock Main Settings Register
• Bit 7:2 – Res: Reserved Bits
These bits are reserved and always read zero.
• Bit 1:0 – CLKMS[1:0]: Clock Main Select Bits
These bits select the main clock source of the system. The bits can be written at run-time to switch the source of
the main clock. The clock system ensures glitch free switching of the main clock source.
The main clock alternatives are shown in Table 6-3.
To avoid unintentional switching of main clock source, a protected change sequence must be followed to change
the CLKMS bits, as follows:
1. Write the signature for change enable of protected I/O register to register CCP
2. Within four instruction cycles, write the CLKMS bits with the desired value
6.5.2 OSCCAL – Oscillator Calibration Register .
• Bits 7:0 – CAL[7:0]: Oscillator Calibration Value
The oscillator calibration register is used to trim the calibrated internal oscillator and remove process variations
from the oscillator frequency. A pre-programmed calibration value is automatically written to this register during
chip reset, giving the factory calibrated frequency as specified in Table 16-2, “Calibration Accuracy of Internal RC
Oscillator,” on page 117.
The application software can write this register to change the oscillator frequency. The oscillator can be calibrated
to frequencies as specified in Table 16-2, “Calibration Accuracy of Internal RC Oscillator,” on page 117. Calibration
outside the range given is not guaranteed.
The CAL[7:0] bits are used to tune the frequency of the oscillator. A setting of 0x00 gives the lowest frequency, and
a setting of 0xFF gives the highest frequency.
Bit 7 6 5 4 3 2 1 0
0x37 – – – – – – CLKMS1 CLKMS0 CLKMSR
Read/Write R R R R R R R/W R/W
Initial Value 0 0 0 0 0 0 0 0
Table 6-3. Selection of Main Clock
CLKM1 CLKM0 Main Clock Source
0 0 Calibrated Internal 8 MHzOscillator
0 1 Internal 128 kHz Oscillator (WDT Oscillator)
1 0 External clock
1 1 Reserved
Bit 7 6 5 4 3 2 1 0
0x39 CAL7 CAL6 CAL5 CAL4 CAL3 CAL2 CAL1 CAL0 OSCCAL
Read/Write R/W R/W R/W R/W R/W R/W R/W R/W
Initial Value X X X X X X X XATtiny4/5/9/10 [DATASHEET] 22
8127F–AVR–02/2013
6.5.3 CLKPSR – Clock Prescale Register
• Bits 7:4 – Res: Reserved Bits
These bits are reserved and will always read as zero.
• Bits 3:0 – CLKPS[3:0]: Clock Prescaler Select Bits 3 - 0
These bits define the division factor between the selected clock source and the internal system clock. These bits
can be written at run-time to vary the clock frequency and suit the application requirements. As the prescaler
divides the master clock input to the MCU, the speed of all synchronous peripherals is reduced accordingly. The
division factors are given in Table 6-4.
To avoid unintentional changes of clock frequency, a protected change sequence must be followed to change the
CLKPS bits:
1. Write the signature for change enable of protected I/O register to register CCP
2. Within four instruction cycles, write the desired value to CLKPS bits
At start-up, CLKPS bits are reset to 0b0011 to select the clock division factor of 8. If the selected clock source has
a frequency higher than the maximum allowed the application software must make sure a sufficient division factor
is used. To make sure the write procedure is not interrupted, interrupts must be disabled when changing prescaler
settings.
Bit 7 6 5 4 3 2 1 0
0x36 – – – – CLKPS3 CLKPS2 CLKPS1 CLKPS0 CLKPSR
Read/Write R R R R R/W R/W R/W R/W
Initial Value 0 0 0 0 0 0 1 1
Table 6-4. Clock Prescaler Select
CLKPS3 CLKPS2 CLKPS1 CLKPS0 Clock Division Factor
0000 1
0001 2
0010 4
0 0 1 1 8 (default)
0 1 0 0 16
0 1 0 1 32
0 1 1 0 64
0 1 1 1 128
1 0 0 0 256
1 0 0 1 Reserved
1 0 1 0 Reserved
1 0 1 1 Reserved
1 1 0 0 Reserved
1 1 0 1 Reserved
1 1 1 0 Reserved
1 1 1 1 ReservedATtiny4/5/9/10 [DATASHEET] 23
8127F–AVR–02/2013
7. Power Management and Sleep Modes
The high performance and industry leading code efficiency makes the AVR microcontrollers an ideal choise for low
power applications. In addition, sleep modes enable the application to shut down unused modules in the MCU,
thereby saving power. The AVR provides various sleep modes allowing the user to tailor the power consumption to
the application’s requirements.
7.1 Sleep Modes
Figure 6-1 on page 17 presents the different clock systems and their distribution in ATtiny4/5/9/10. The figure is
helpful in selecting an appropriate sleep mode. Table 7-1 shows the different sleep modes and their wake up
sources.
Note: 1. The ADC is available in ATtiny5/10, only
2. For INT0, only level interrupt.
To enter any of the four sleep modes, the SE bits in SMCR must be written to logic one and a SLEEP instruction
must be executed. The SM2:0 bits in the SMCR register select which sleep mode (Idle, ADC Noise Reduction,
Standby or Power-down) will be activated by the SLEEP instruction. See Table 7-2 for a summary.
If an enabled interrupt occurs while the MCU is in a sleep mode, the MCU wakes up. The MCU is then halted for
four cycles in addition to the start-up time, executes the interrupt routine, and resumes execution from the instruction
following SLEEP. The contents of the Register File and SRAM are unaltered when the device wakes up from
sleep. If a reset occurs during sleep mode, the MCU wakes up and executes from the Reset Vector.
Note that if a level triggered interrupt is used for wake-up the changed level must be held for some time to wake up
the MCU (and for the MCU to enter the interrupt service routine). See “External Interrupts” on page 36 for details.
7.1.1 Idle Mode
When bits SM2:0 are written to 000, the SLEEP instruction makes the MCU enter Idle mode, stopping the CPU but
allowing the analog comparator, timer/counter, watchdog, and the interrupt system to continue operating. This
sleep mode basically halts clkCPU and clkNVM, while allowing the other clocks to run.
Idle mode enables the MCU to wake up from external triggered interrupts as well as internal ones like the timer
overflow. If wake-up from the analog comparator interrupt is not required, the analog comparator can be powered
down by setting the ACD bit in “ACSR – Analog Comparator Control and Status Register” on page 80. This will
reduce power consumption in idle mode. If the ADC is enabled (ATtiny5/10, only), a conversion starts automatically
when this mode is entered.
Table 7-1. Active Clock Domains and Wake-up Sources in Different Sleep Modes
Sleep Mode
Active Clock Domains Oscillators Wake-up Sources clkCPU clkNVM clkIO clkADC (1) Main Clock Source Enabled INT0 and Pin Change ADC (1) Other I/O Watchdog Interrupt
VLM Interrupt
Idle X X X X X X X X
ADC Noise Reduction X X X (2) X XX
Standby X X (2) X
Power-down X (2) XATtiny4/5/9/10 [DATASHEET] 24
8127F–AVR–02/2013
7.1.2 ADC Noise Reduction Mode
When bits SM2:0 are written to 001, the SLEEP instruction makes the MCU enter ADC Noise Reduction mode,
stopping the CPU but allowing the ADC, the external interrupts, and the watchdog to continue operating (if
enabled). This sleep mode halts clkI/O, clkCPU, and clkNVM, while allowing the other clocks to run.
This mode improves the noise environment for the ADC, enabling higher resolution measurements. If the ADC is
enabled, a conversion starts automatically when this mode is entered.
This mode is available in all devices, although only ATtiny5/10 are equipped with an ADC.
7.1.3 Power-down Mode
When bits SM2:0 are written to 010, the SLEEP instruction makes the MCU enter Power-down mode. In this mode,
the oscillator is stopped, while the external interrupts, and the watchdog continue operating (if enabled). Only a
watchdog reset, an external level interrupt on INT0, or a pin change interrupt can wake up the MCU. This sleep
mode halts all generated clocks, allowing operation of asynchronous modules only.
7.1.4 Standby Mode
When bits SM2:0 are written to 100, the SLEEP instruction makes the MCU enter Standby mode. This mode is
identical to Power-down with the exception that the oscillator is kept running. This reduces wake-up time, because
the oscillator is already running and doesn't need to be started up.
7.2 Power Reduction Register
The Power Reduction Register (PRR), see “PRR – Power Reduction Register” on page 26, provides a method to
reduce power consumption by stopping the clock to individual peripherals. When the clock for a peripheral is
stopped then:
• The current state of the peripheral is frozen.
• The associated registers can not be read or written.
• Resources used by the peripheral will remain occupied.
The peripheral should in most cases be disabled before stopping the clock. Clearing the PRR bit wakes up the
peripheral and puts it in the same state as before shutdown.
Peripheral shutdown can be used in Idle mode and Active mode to significantly reduce the overall power consumption.
See “Supply Current of I/O Modules” on page 121 for examples. In all other sleep modes, the clock is already
stopped.
7.3 Minimizing Power Consumption
There are several issues to consider when trying to minimize the power consumption in an AVR Core controlled
system. In general, sleep modes should be used as much as possible, and the sleep mode should be selected so
that as few as possible of the device’s functions are operating. All functions not needed should be disabled. In particular,
the following modules may need special consideration when trying to achieve the lowest possible power
consumption.
7.3.1 Analog Comparator
When entering Idle mode, the analog comparator should be disabled if not used. In the power-down mode, the
analog comparator is automatically disabled. See “Analog Comparator” on page 80 for further details.ATtiny4/5/9/10 [DATASHEET] 25
8127F–AVR–02/2013
7.3.2 Analog to Digital Converter
If enabled, the ADC will be enabled in all sleep modes. To save power, the ADC should be disabled before entering
any sleep mode. When the ADC is turned off and on again, the next conversion will be an extended conversion.
See “Analog to Digital Converter” on page 82 for details on ADC operation.
The ADC is available in ATtiny5/10, only.
7.3.3 Watchdog Timer
If the Watchdog Timer is not needed in the application, this module should be turned off. If the Watchdog Timer is
enabled, it will be enabled in all sleep modes, and hence, always consume power. In the deeper sleep modes, this
will contribute significantly to the total current consumption. Refer to “Watchdog Timer” on page 30 for details on
how to configure the Watchdog Timer.
7.3.4 Port Pins
When entering a sleep mode, all port pins should be configured to use minimum power. The most important thing
is then to ensure that no pins drive resistive loads. In sleep modes where the I/O clock (clkI/O) is stopped, the input
buffers of the device will be disabled. This ensures that no power is consumed by the input logic when not needed.
In some cases, the input logic is needed for detecting wake-up conditions, and it will then be enabled. Refer to the
section “Digital Input Enable and Sleep Modes” on page 44 for details on which pins are enabled. If the input buffer
is enabled and the input signal is left floating or has an analog signal level close to VCC/2, the input buffer will use
excessive power.
For analog input pins, the digital input buffer should be disabled at all times. An analog signal level close to VCC/2
on an input pin can cause significant current even in active mode. Digital input buffers can be disabled by writing to
the Digital Input Disable Register (DIDR0). Refer to “DIDR0 – Digital Input Disable Register 0” on page 81 for
details.
7.4 Register Description
7.4.1 SMCR – Sleep Mode Control Register
The SMCR Control Register contains control bits for power management.
• Bits 7:4 – Res: Reserved Bits
These bits are reserved and will always read zero.
• Bits 3:1 – SM2..SM0: Sleep Mode Select Bits 2..0
These bits select between available sleep modes, as shown in Table 7-2.
Bit 7 6 5 4 3 2 1 0
0x3A – – – – SM2 SM1 SM0 SE SMCR
Read/Write R R R R R/W R/W R/W R/W
Initial Value 0 0 0 0 0 0 0 0
Table 7-2. Sleep Mode Select
SM2 SM1 SM0 Sleep Mode
0 0 0 Idle
0 0 1 ADC noise reduction (1)
0 1 0 Power-down
0 1 1 Reserved
1 0 0 StandbyATtiny4/5/9/10 [DATASHEET] 26
8127F–AVR–02/2013
Note: 1. This mode is available in all devices, although only ATtiny5/10 are equipped with an ADC
• Bit 0 – SE: Sleep Enable
The SE bit must be written to logic one to make the MCU enter the sleep mode when the SLEEP instruction is executed.
To avoid the MCU entering the sleep mode unless it is the programmer’s purpose, it is recommended to
write the Sleep Enable (SE) bit to one just before the execution of the SLEEP instruction and to clear it immediately
after waking up.
7.4.2 PRR – Power Reduction Register
• Bits 7:2 – Res: Reserved Bits
These bits are reserved and will always read zero.
• Bit 1 – PRADC: Power Reduction ADC
Writing a logic one to this bit shuts down the ADC. The ADC must be disabled before shut down. The analog comparator
cannot use the ADC input MUX when the ADC is shut down.
The ADC is available in ATtiny5/10, only.
• Bit 0 – PRTIM0: Power Reduction Timer/Counter0
Writing a logic one to this bit shuts down the Timer/Counter0 module. When the Timer/Counter0 is enabled, operation
will continue like before the shutdown.
1 0 1 Reserved
1 1 0 Reserved
1 1 1 Reserved
Table 7-2. Sleep Mode Select
SM2 SM1 SM0 Sleep Mode
Bit 7 6 5 4 3 2 1 0
0x35 – – – – – – PRADC PRTIM0 PRR
Read/Write R R R R R R R/W R/W
Initial Value 0 0 0 0 0 0 0 0ATtiny4/5/9/10 [DATASHEET] 27
8127F–AVR–02/2013
8. System Control and Reset
8.1 Resetting the AVR
During reset, all I/O registers are set to their initial values, and the program starts execution from the Reset Vector.
The instruction placed at the Reset Vector must be a RJMP – Relative Jump – instruction to the reset handling routine.
If the program never enables an interrupt source, the interrupt vectors are not used, and regular program code
can be placed at these locations. The circuit diagram in Figure 8-1 shows the reset logic. Electrical parameters of
the reset circuitry are defined in section “System and Reset Characteristics” on page 118.
Figure 8-1. Reset Logic
The I/O ports of the AVR are immediately reset to their initial state when a reset source goes active. This does not
require any clock source to be running.
After all reset sources have gone inactive, a delay counter is invoked, stretching the internal reset. This allows the
power to reach a stable level before normal operation starts. The start up sequence is described in “Starting from
Reset” on page 20.
8.2 Reset Sources
The ATtiny4/5/9/10 have three sources of reset:
• Power-on Reset. The MCU is reset when the supply voltage is below the Power-on Reset threshold (VPOT)
• External Reset. The MCU is reset when a low level is present on the RESET pin for longer than the minimum
pulse length
• Watchdog Reset. The MCU is reset when the Watchdog Timer period expires and the Watchdog is enabled
8.2.1 Power-on Reset
A Power-on Reset (POR) pulse is generated by an on-chip detection circuit. The detection level is defined in section
“System and Reset Characteristics” on page 118. The POR is activated whenever VCC is below the detection
level. The POR circuit can be used to trigger the Start-up Reset, as well as to detect a failure in supply voltage.
Reset Flag Register
(RSTFLR)
CK Delay Counters
TIMEOUT
WDRF
EXTRF
PORF
DATA BUS
Clock
Generator
SPIKE
FILTER
Pull-up Resistor
Watchdog
Oscillator
Power-on Reset
Circuit
VLMATtiny4/5/9/10 [DATASHEET] 28
8127F–AVR–02/2013
A Power-on Reset (POR) circuit ensures that the device is reset from Power-on. Reaching the Power-on Reset
threshold voltage invokes the delay counter, which determines how long the device is kept in reset after VCC rise.
The reset signal is activated again, without any delay, when VCC decreases below the detection level.
Figure 8-2. MCU Start-up, RESET Tied to VCC
Figure 8-3. MCU Start-up, RESET Extended Externally
8.2.2 VCC Level Monitoring
ATtiny4/5/9/10 have a VCC Level Monitoring (VLM) circuit that compares the voltage level at the VCC pin against
fixed trigger levels. The trigger levels are set with VLM2:0 bits, see “VLMCSR – VCC Level Monitoring Control and
Status register” on page 33.
The VLM circuit provides a status flag, VLMF, that indicates if voltage on the VCC pin is below the selected trigger
level. The flag can be read from VLMCSR, but it is also possible to have an interrupt generated when the VLMF
status flag is set. This interrupt is enabled by the VLMIE bit in the VLMCSR register. The flag can be cleared by
changing the trigger level or by writing it to zero. The flag is automatically cleared when the voltage at VCC rises
back above the selected trigger level.
The VLM can also be used to improve reset characteristics at falling supply. Without VLM, the Power-On Reset
(POR) does not activate before supply voltage has dropped to a level where the MCU is not necessarily functional
any more. With VLM, it is possible to generate a reset earlier.
When active, the VLM circuit consumes some power, as illustrated in Figure 17-48 on page 145. To save power
the VLM circuit can be turned off completely, or it can be switched on and off at regular intervals. However, detection
takes some time and it is therefore recommended to leave the circuitry on long enough for signals to settle.
See “VCC Level Monitor” on page 118.
V
TIME-OUT
RESET
RESET
TOUT
INTERNAL
t
VPOT
VRST
CC
V
TIME-OUT
TOUT
TOUT
INTERNAL
CC
t
VPOT
VRST
> t
RESET
RESETATtiny4/5/9/10 [DATASHEET] 29
8127F–AVR–02/2013
When VLM is active and voltage at VCC is above the selected trigger level operation will be as normal and the VLM
can be shut down for a short period of time. If voltage at VCC drops below the selected threshold the VLM will either
flag an interrupt or generate a reset, depending on the configuration.
When the VLM has been configured to generate a reset at low supply voltage it will keep the device in reset as long
as VCC is below the reset level. See Table 8-4 on page 34 for reset level details. If supply voltage rises above the
reset level the condition is removed and the MCU will come out of reset, and initiate the power-up start-up
sequence.
If supply voltage drops enough to trigger the POR then PORF is set after supply voltage has been restored.
8.2.3 External Reset
An External Reset is generated by a low level on the RESET pin if enabled. Reset pulses longer than the minimum
pulse width (see section “System and Reset Characteristics” on page 118) will generate a reset, even if the clock is
not running. Shorter pulses are not guaranteed to generate a reset. When the applied signal reaches the Reset
Threshold Voltage – VRST – on its positive edge, the delay counter starts the MCU after the time-out period – tTOUT
– has expired. External reset is ignored during Power-on start-up count. After Power-on reset the internal reset is
extended only if RESET pin is low when the initial Power-on delay count is complete. See Figure 8-2 and Figure 8-
3 on page 28.
Figure 8-4. External Reset During Operation
8.2.4 Watchdog Reset
When the Watchdog times out, it will generate a short reset pulse of one CK cycle duration. On the falling edge of
this pulse, the delay timer starts counting the time-out period tTOUT. See page 30 for details on operation of the
Watchdog Timer and Table 16-4 on page 118 for details on reset time-out.
CCATtiny4/5/9/10 [DATASHEET] 30
8127F–AVR–02/2013
Figure 8-5. Watchdog Reset During Operation
8.3 Watchdog Timer
The Watchdog Timer is clocked from an on-chip oscillator, which runs at 128 kHz. See Figure 8-6. By controlling
the Watchdog Timer prescaler, the Watchdog Reset interval can be adjusted as shown in Table 8-2 on page 32.
The WDR – Watchdog Reset – instruction resets the Watchdog Timer. The Watchdog Timer is also reset when it is
disabled and when a device reset occurs. Ten different clock cycle periods can be selected to determine the reset
period. If the reset period expires without another Watchdog Reset, the ATtiny4/5/9/10 resets and executes from
the Reset Vector. For timing details on the Watchdog Reset, refer to Table 8-3 on page 33.
Figure 8-6. Watchdog Timer
The Wathdog Timer can also be configured to generate an interrupt instead of a reset. This can be very helpful
when using the Watchdog to wake-up from Power-down.
To prevent unintentional disabling of the Watchdog or unintentional change of time-out period, two different safety
levels are selected by the fuse WDTON as shown in Table 8-1 on page 31. See “Procedure for Changing the
Watchdog Timer Configuration” on page 31 for details.
CK
CC
OSC/2K
OSC/4K
OSC/8K
OSC/16K
OSC/32K
OSC/64K
OSC/128K
OSC/256K
OSC/512K
OSC/1024K
MCU RESET
WATCHDOG
PRESCALER
128 kHz
OSCILLATOR
WATCHDOG
RESET
WDP0
WDP1
WDP2
WDP3
WDE
MUXATtiny4/5/9/10 [DATASHEET] 31
8127F–AVR–02/2013
8.3.1 Procedure for Changing the Watchdog Timer Configuration
The sequence for changing configuration differs between the two safety levels, as follows:
8.3.1.1 Safety Level 1
In this mode, the Watchdog Timer is initially disabled, but can be enabled by writing the WDE bit to one without any
restriction. A special sequence is needed when disabling an enabled Watchdog Timer. To disable an enabled
Watchdog Timer, the following procedure must be followed:
1. Write the signature for change enable of protected I/O registers to register CCP
2. Within four instruction cycles, in the same operation, write WDE and WDP bits
8.3.1.2 Safety Level 2
In this mode, the Watchdog Timer is always enabled, and the WDE bit will always read as one. A protected change
is needed when changing the Watchdog Time-out period. To change the Watchdog Time-out, the following procedure
must be followed:
1. Write the signature for change enable of protected I/O registers to register CCP
2. Within four instruction cycles, write the WDP bit. The value written to WDE is irrelevant
8.3.2 Code Examples
The following code example shows how to turn off the WDT. The example assumes that interrupts are controlled
(e.g., by disabling interrupts globally) so that no interrupts will occur during execution of these functions.
Note: See “Code Examples” on page 5.
Table 8-1. WDT Configuration as a Function of the Fuse Settings of WDTON
WDTON
Safety
Level
WDT
Initial State
How to
Disable the WDT
How to
Change Time-out
Unprogrammed 1 Disabled Protected change
sequence
No limitations
Programmed 2 Enabled Always enabled Protected change
sequence
Assembly Code Example
WDT_off:
wdr
; Clear WDRF in RSTFLR
in r16, RSTFLR
andi r16, ~(1<
Table 9-1. Reset and Interrupt Vectors
Vector No. Program Address Label Interrupt Source
1 0x0000 RESET External Pin, Power-on Reset,
VLM Reset, Watchdog Reset
2 0x0001 INT0 External Interrupt Request 0
3 0x0002 PCINT0 Pin Change Interrupt Request 0
4 0x0003 TIM0_CAPT Timer/Counter0 Input Capture
5 0x0004 TIM0_OVF Timer/Counter0 Overflow
6 0x0005 TIM0_COMPA Timer/Counter0 Compare Match A
7 0x0006 TIM0_COMPB Timer/Counter0 Compare Match B
8 0x0007 ANA_COMP Analog Comparator
9 0x0008 WDT Watchdog Time-out
10 0x0009 VLM VCC Voltage Level Monitor
11 0x000A ADC ADC Conversion Complete (1)ATtiny4/5/9/10 [DATASHEET] 36
8127F–AVR–02/2013
0x000B RESET: ldi r16, high(RAMEND); Main program start
0x000C out SPH,r16 ; Set Stack Pointer
0x000D ldi r16, low(RAMEND) ; to top of RAM
0x000E out SPL,r16
0x000F sei ; Enable interrupts
0x0010
... ...
9.2 External Interrupts
External Interrupts are triggered by the INT0 pin or any of the PCINT3..0 pins. Observe that, if enabled, the interrupts
will trigger even if the INT0 or PCINT3..0 pins are configured as outputs. This feature provides a way of
generating a software interrupt. Pin change 0 interrupts PCI0 will trigger if any enabled PCINT3..0 pin toggles. The
PCMSK Register controls which pins contribute to the pin change interrupts. Pin change interrupts on PCINT3..0
are detected asynchronously, which means that these interrupts can be used for waking the part also from sleep
modes other than Idle mode.
The INT0 interrupt can be triggered by a falling or rising edge or a low level. This is set up as shown in “EICRA –
External Interrupt Control Register A” on page 37. When the INT0 interrupt is enabled and configured as level triggered,
the interrupt will trigger as long as the pin is held low. Note that recognition of falling or rising edge interrupts
on INT0 requires the presence of an I/O clock, as described in “Clock System” on page 17.
9.2.1 Low Level Interrupt
A low level interrupt on INT0 is detected asynchronously. This means that the interrupt source can be used for
waking the part also from sleep modes other than Idle (the I/O clock is halted in all sleep modes except Idle).
Note that if a level triggered interrupt is used for wake-up from Power-down, the required level must be held long
enough for the MCU to complete the wake-up to trigger the level interrupt. If the level disappears before the end of
the Start-up Time, the MCU will still wake up, but no interrupt will be generated. The start-up time is defined as
described in “Clock System” on page 17.
If the low level on the interrupt pin is removed before the device has woken up then program execution will not be
diverted to the interrupt service routine but continue from the instruction following the SLEEP command.
9.2.2 Pin Change Interrupt Timing
A timing example of a pin change interrupt is shown in Figure 9-1.ATtiny4/5/9/10 [DATASHEET] 37
8127F–AVR–02/2013
Figure 9-1. Timing of pin change interrupts
9.3 Register Description
9.3.1 EICRA – External Interrupt Control Register A
The External Interrupt Control Register A contains control bits for interrupt sense control.
• Bits 7:2 – Res: Reserved Bits
These bits are reserved and will always read zero.
• Bits 1:0 – ISC01, ISC00: Interrupt Sense Control 0 Bit 1 and Bit 0
The External Interrupt 0 is activated by the external pin INT0 if the SREG I-flag and the corresponding interrupt
mask are set. The level and edges on the external INT0 pin that activate the interrupt are defined in Table 9-2. The
value on the INT0 pin is sampled before detecting edges. If edge or toggle interrupt is selected, pulses that last longer
than one clock period will generate an interrupt. Shorter pulses are not guaranteed to generate an interrupt. If
clk
PCINT(0)
pin_lat
pin_sync
pcint_in_(0)
pcint_syn
pcint_setflag
PCIF
PCINT(0)
pin_sync
pcint_syn pin_lat D Q
LE
pcint_setflag
PCIF
clk
clk PCINT(0) in PCMSK(x)
pcint_in_(0) 0
x
Bit 7 6 5 4 3 2 1 0
0x15 – – – – – – ISC01 ISC00 EICRA
Read/Write R R R R R R R/W R/W
Initial Value 0 0 0 0 0 0 0 0ATtiny4/5/9/10 [DATASHEET] 38
8127F–AVR–02/2013
low level interrupt is selected, the low level must be held until the completion of the currently executing instruction
to generate an interrupt.
9.3.2 EIMSK – External Interrupt Mask Register
• Bits 7:1 – Res: Reserved Bits
These bits are reserved and will always read zero.
• Bit 0 – INT0: External Interrupt Request 0 Enable
When the INT0 bit is set (one) and the I-bit in the Status Register (SREG) is set (one), the external pin interrupt is
enabled. The Interrupt Sense Control bits (ISC01 and ISC00) in the External Interrupt Control Register A (EICRA)
define whether the external interrupt is activated on rising and/or falling edge of the INT0 pin or level sensed. Activity
on the pin will cause an interrupt request even if INT0 is configured as an output. The corresponding interrupt of
External Interrupt Request 0 is executed from the INT0 Interrupt Vector.
9.3.3 EIFR – External Interrupt Flag Register
• Bits 7:1 – Res: Reserved Bits
These bits are reserved and will always read zero.
• Bit 0 – INTF0: External Interrupt Flag 0
When an edge or logic change on the INT0 pin triggers an interrupt request, INTF0 becomes set (one). If the I-bit in
SREG and the INT0 bit in EIMSK are set (one), the MCU will jump to the corresponding Interrupt Vector.
The flag is cleared when the interrupt routine is executed. Alternatively, the flag can be cleared by writing a logical
one to it.
This flag is constantly zero when INT0 is configured as a level interrupt.
Table 9-2. Interrupt 0 Sense Control
ISC01 ISC00 Description
0 0 The low level of INT0 generates an interrupt request.
0 1 Any logical change on INT0 generates an interrupt request.
1 0 The falling edge of INT0 generates an interrupt request.
1 1 The rising edge of INT0 generates an interrupt request.
Bit 7 6 5 4 3 2 1 0
0x13 – – – – – – – INTO EIMSK
Read/Write R R R R R R R R/W
Initial Value 0 0 0 0 0 0 0 0
Bit 7 6 5 4 3 2 1 0
0x14 – – – – – – – INTF0 EIFR
Read/Write R R R R R R R R/W
Initial Value 0 0 0 0 0 0 0 0ATtiny4/5/9/10 [DATASHEET] 39
8127F–AVR–02/2013
9.3.4 PCICR – Pin Change Interrupt Control Register
• Bits 7:1 – Res: Reserved Bits
These bits are reserved and will always read zero.
• Bit 0 – PCIE0: Pin Change Interrupt Enable 0
When the PCIE0 bit is set (one) and the I-bit in the Status Register (SREG) is set (one), pin change interrupt 0 is
enabled. Any change on any enabled PCINT3..0 pin will cause an interrupt. The corresponding interrupt of Pin
Change Interrupt Request is executed from the PCI0 Interrupt Vector. PCINT3..0 pins are enabled individually by
the PCMSK Register.
9.3.5 PCIFR – Pin Change Interrupt Flag Register
• Bits 7:1 – Res: Reserved Bits
These bits are reserved and will always read zero.
• Bit 0 – PCIF0: Pin Change Interrupt Flag 0
When a logic change on any PCINT3..0 pin triggers an interrupt request, PCIF0 becomes set (one). If the I-bit in
SREG and the PCIE0 bit in PCICR are set (one), the MCU will jump to the corresponding Interrupt Vector. The flag
is cleared when the interrupt routine is executed. Alternatively, the flag can be cleared by writing a logical one to it.
9.3.6 PCMSK – Pin Change Mask Register
• Bits 7:4 – Res: Reserved Bits
These bits are reserved and will always read zero.
• Bits 3:0 – PCINT3..0: Pin Change Enable Mask 3..0
Each PCINT3..0 bit selects whether pin change interrupt is enabled on the corresponding I/O pin. If PCINT3..0 is
set and the PCIE0 bit in PCICR is set, pin change interrupt is enabled on the corresponding I/O pin. If PCINT3..0 is
cleared, pin change interrupt on the corresponding I/O pin is disabled.
Bit 7 6 5 4 3 2 1 0
0x12 – – – – – – – PCIE0 PCICR
Read/Write R R R R R R R R/W
Initial Value 0 0 0 0 0 0 0 0
Bit 7 6 5 4 3 2 1 0
0x11 – – – – – – – PCIF0 PCIFR
Read/Write R R R R R R R R/W
Initial Value 0 0 0 0 0 0 0 0
Bit 7 6 5 4 3 2 1 0
0x10 – – – – PCINT3 PCINT2 PCINT1 PCINT0 PCMSK
Read/Write R R R R R/W R/W R/W R/W
Initial Value 0 0 0 0 0 0 0 0ATtiny4/5/9/10 [DATASHEET] 40
8127F–AVR–02/2013
10. I/O Ports
10.1 Overview
All AVR ports have true Read-Modify-Write functionality when used as general digital I/O ports. This means that
the direction of one port pin can be changed without unintentionally changing the direction of any other pin with the
SBI and CBI instructions. The same applies when changing drive value (if configured as output) or enabling/disabling
of pull-up resistors. Each output buffer has symmetrical drive characteristics with both high sink and source
capability. The pin driver is strong enough to drive LED displays directly. All port pins have individually selectable
pull-up resistors with a supply-voltage invariant resistance. All I/O pins have protection diodes to both VCC and
Ground as indicated in Figure 10-1 on page 40. See “Electrical Characteristics” on page 115 for a complete list of
parameters.
Figure 10-1. I/O Pin Equivalent Schematic
All registers and bit references in this section are written in general form. A lower case “x” represents the numbering
letter for the port, and a lower case “n” represents the bit number. However, when using the register or bit
defines in a program, the precise form must be used. For example, PORTB3 for bit no. 3 in Port B, here documented
generally as PORTxn. The physical I/O Registers and bit locations are listed in “Register Description” on
page 50.
Four I/O memory address locations are allocated for each port, one each for the Data Register – PORTx, Data
Direction Register – DDRx, Pull-up Enable Register – PUEx, and the Port Input Pins – PINx. The Port Input Pins
I/O location is read only, while the Data Register, the Data Direction Register, and the Pull-up Enable Register are
read/write. However, writing a logic one to a bit in the PINx Register, will result in a toggle in the corresponding bit
in the Data Register.
Using the I/O port as General Digital I/O is described in “Ports as General Digital I/O” on page 41. Most port pins
are multiplexed with alternate functions for the peripheral features on the device. How each alternate function interferes
with the port pin is described in “Alternate Port Functions” on page 45. Refer to the individual module sections
for a full description of the alternate functions.
Note that enabling the alternate function of some of the port pins does not affect the use of the other pins in the port
as general digital I/O.
Cpin
Logic
Rpu
See Figure
"General Digital I/O" for
Details
PxnATtiny4/5/9/10 [DATASHEET] 41
8127F–AVR–02/2013
10.2 Ports as General Digital I/O
The ports are bi-directional I/O ports with optional internal pull-ups. Figure 10-2 shows a functional description of
one I/O-port pin, here generically called Pxn.
Figure 10-2. General Digital I/O(1)
Note: 1. WEx, WRx, WPx, WDx, REx, RRx, RPx, and RDx are common to all pins within the same port. clkI/O, and SLEEP
are common to all ports.
10.2.1 Configuring the Pin
Each port pin consists of four register bits: DDxn, PORTxn, PUExn, and PINxn. As shown in “Register Description”
on page 50, the DDxn bits are accessed at the DDRx I/O address, the PORTxn bits at the PORTx I/O address, the
PUExn bits at the PUEx I/O address, and the PINxn bits at the PINx I/O address.
The DDxn bit in the DDRx Register selects the direction of this pin. If DDxn is written logic one, Pxn is configured
as an output pin. If DDxn is written logic zero, Pxn is configured as an input pin.
clk
RPx
RRx
RDx
WDx
WEx
SYNCHRONIZER
WDx: WRITE DDRx
WRx: WRITE PORTx
RRx: READ PORTx REGISTER
RPx: READ PORTx PIN
clkI/O: I/O CLOCK
RDx: READ DDRx
WEx: WRITE PUEx
REx: READ PUEx
D
L
Q
Q
REx
RESET
RESET
Q
D Q
Q
Q D
CLR
PORTxn
Q
Q D
CLR
DDxn
PINxn
DATA BUS
SLEEP
SLEEP: SLEEP CONTROL
Pxn
I/O
WPx
RESET
Q
Q D
CLR
PUExn
0
1
WRx
WPx: WRITE PINx REGISTERATtiny4/5/9/10 [DATASHEET] 42
8127F–AVR–02/2013
If PORTxn is written logic one when the pin is configured as an output pin, the port pin is driven high (one). If
PORTxn is written logic zero when the pin is configured as an output pin, the port pin is driven low (zero).
The pull-up resistor is activated, if the PUExn is written logic one. To switch the pull-up resistor off, PUExn has to
be written logic zero.
Table 10-1 summarizes the control signals for the pin value.
Port pins are tri-stated when a reset condition becomes active, even when no clocks are running.
10.2.2 Toggling the Pin
Writing a logic one to PINxn toggles the value of PORTxn, independent on the value of DDRxn. Note that the SBI
instruction can be used to toggle one single bit in a port.
10.2.3 Break-Before-Make Switching
In Break-Before-Make mode, switching the DDRxn bit from input to output introduces an immediate tri-state period
lasting one system clock cycle, as indicated in Figure 10-3. For example, if the system clock is 4 MHz and the
DDRxn is written to make an output, an immediate tri-state period of 250 ns is introduced before the value of
PORTxn is seen on the port pin.
To avoid glitches it is recommended that the maximum DDRxn toggle frequency is two system clock cycles. The
Break-Before-Make mode applies to the entire port and it is activated by the BBMx bit. For more details, see
“PORTCR – Port Control Register” on page 50.
When switching the DDRxn bit from output to input no immediate tri-state period is introduced.
Table 10-1. Port Pin Configurations
DDxn PORTxn PUExn I/O Pull-up Comment
0 X 0 Input No Tri-state (hi-Z)
0 X 1 Input Yes Sources current if pulled low externally
1 0 0 Output No Output low (sink)
1 0 1 Output Yes
NOT RECOMMENDED.
Output low (sink) and internal pull-up active.
Sources current through the internal pull-up
resistor and consumes power constantly
1 1 0 Output No Output high (source)
1 1 1 Output Yes Output high (source) and internal pull-up activeATtiny4/5/9/10 [DATASHEET] 43
8127F–AVR–02/2013
Figure 10-3. Switching Between Input and Output in Break-Before-Make-Mode
10.2.4 Reading the Pin Value
Independent of the setting of Data Direction bit DDxn, the port pin can be read through the PINxn Register bit. As
shown in Figure 10-2 on page 41, the PINxn Register bit and the preceding latch constitute a synchronizer. This is
needed to avoid metastability if the physical pin changes value near the edge of the internal clock, but it also introduces
a delay. Figure 10-4 shows a timing diagram of the synchronization when reading an externally applied pin
value. The maximum and minimum propagation delays are denoted tpd,max and tpd,min respectively.
Figure 10-4. Synchronization when Reading an Externally Applied Pin value
Consider the clock period starting shortly after the first falling edge of the system clock. The latch is closed when
the clock is low, and goes transparent when the clock is high, as indicated by the shaded region of the “SYNC
LATCH” signal. The signal value is latched when the system clock goes low. It is clocked into the PINxn Register at
the succeeding positive clock edge. As indicated by the two arrows tpd,max and tpd,min, a single signal transition
on the pin will be delayed between ½ and 1½ system clock period depending upon the time of assertion.
When reading back a software assigned pin value, a nop instruction must be inserted as indicated in Figure 10-5
on page 44. The out instruction sets the “SYNC LATCH” signal at the positive edge of the clock. In this case, the
delay tpd through the synchronizer is one system clock period.
out DDRx, r16 nop
0x02 0x01
SYSTEM CLK
INSTRUCTIONS
DDRx
intermediate tri-state cycle
out DDRx, r17
PORTx 0x55
0x01
intermediate tri-state cycle
Px0
Px1
tri-state
tri-state tri-state
r17 0x01
r16 0x02
XXX in r17, PINx
0x00 0xFF
INSTRUCTIONS
SYNC LATCH
PINxn
r17
XXX
SYSTEM CLK
tpd, max
tpd, minATtiny4/5/9/10 [DATASHEET] 44
8127F–AVR–02/2013
Figure 10-5. Synchronization when Reading a Software Assigned Pin Value
10.2.5 Digital Input Enable and Sleep Modes
As shown in Figure 10-2 on page 41, the digital input signal can be clamped to ground at the input of the schmitttrigger.
The signal denoted SLEEP in the figure, is set by the MCU Sleep Controller in Power-down and Standby
modes to avoid high power consumption if some input signals are left floating, or have an analog signal level close
to VCC/2.
SLEEP is overridden for port pins enabled as external interrupt pins. If the external interrupt request is not enabled,
SLEEP is active also for these pins. SLEEP is also overridden by various other alternate functions as described in
“Alternate Port Functions” on page 45.
If a logic high level (“one”) is present on an asynchronous external interrupt pin configured as “Interrupt on Rising
Edge, Falling Edge, or Any Logic Change on Pin” while the external interrupt is not enabled, the corresponding
External Interrupt Flag will be set when resuming from the above mentioned Sleep mode, as the clamping in these
sleep mode produces the requested logic change.
10.2.6 Unconnected Pins
If some pins are unused, it is recommended to ensure that these pins have a defined level. Even though most of
the digital inputs are disabled in the deep sleep modes as described above, floating inputs should be avoided to
reduce current consumption in all other modes where the digital inputs are enabled (Reset, Active mode and Idle
mode).
The simplest method to ensure a defined level of an unused pin, is to enable the internal pull-up. In this case, the
pull-up will be disabled during reset. If low power consumption during reset is important, it is recommended to use
an external pull-up or pulldown. Connecting unused pins directly to VCC or GND is not recommended, since this
may cause excessive currents if the pin is accidentally configured as an output.
out PORTx, r16 nop in r17, PINx
0xFF
0x00 0xFF
SYSTEM CLK
r16
INSTRUCTIONS
SYNC LATCH
PINxn
r17
t pdATtiny4/5/9/10 [DATASHEET] 45
8127F–AVR–02/2013
10.2.7 Program Example
The following code example shows how to set port B pin 0 high, pin 1 low, and define the port pins from 2 to 3 as
input with a pull-up assigned to port pin 2. The resulting pin values are read back again, but as previously discussed,
a nop instruction is included to be able to read back the value recently assigned to some of the pins.
Note: See “Code Examples” on page 5.
10.3 Alternate Port Functions
Most port pins have alternate functions in addition to being general digital I/Os. In Figure 10-6 below is shown how
the port pin control signals from the simplified Figure 10-2 on page 41 can be overridden by alternate functions.
Assembly Code Example
...
; Define pull-ups and set outputs high
; Define directions for port pins
ldi r16,(1<> Cx must be observed for proper operation; a typical load capacitance (Cx) ranges from
5 – 20 pF while Cs is usually about 2 – 50 nF.
Increasing amounts of Cx destroy gain, therefore it is important to limit the amount of stray capacitance on both SNS
terminals. This can be done, for example, by minimizing trace lengths and widths and keeping these traces away
from power or ground traces or copper pours.
The traces and any components associated with SNS and SNSK will become touch sensitive and should be treated
with caution to limit the touch area to the desired location.
A series resistor, Rs, should be placed in line with SNSK to the electrode to suppress ESD and EMC effects.
2.4 Sensitivity
2.4.1 Introduction
The sensitivity on the QT1010 is a function of things like the value of Cs, electrode size and capacitance, electrode
shape and orientation, the composition and aspect of the object to be sensed, the thickness and composition of any
overlaying panel material, and the degree of ground coupling of both sensor and object.
2.4.2 Increasing Sensitivity
In some cases it may be desirable to increase sensitivity; for example, when using the sensor with very thick panels
having a low dielectric constant, or when the device is used as a proximity sensor. Sensitivity can often be increased
by using a larger electrode or reducing panel thickness. Increasing electrode size can have diminishing returns, as
high values of Cx will reduce sensor gain. AT42QT1010 [DATASHEET] 6
9541I–AT42–05/2013
The value of Cs also has a dramatic effect on sensitivity, and this can be increased in value with the trade-off of
slower response time and more power. Increasing the electrode's surface area will not substantially increase touch
sensitivity if its diameter is already much larger in surface area than the object being detected. Panel material can
also be changed to one having a higher dielectric constant, which will better help to propagate the field.
In the case of proximity detection, usually the object being detected is on an approaching hand, so a larger surface
area can be effective.
Ground planes around and under the electrode and its SNSK trace will cause high Cx loading and destroy gain. The
possible signal-to-noise ratio benefits of ground area are more than negated by the decreased gain from the circuit,
and so ground areas around electrodes are discouraged. Metal areas near the electrode will reduce the field strength
and increase Cx loading and should be avoided, if possible. Keep ground away from the electrodes and traces.
2.4.3 Decreasing Sensitivity
In some cases the QT1010 may be too sensitive. In this case gain can be easily lowered further by decreasing Cs.
2.4.4 Proximity Sensing
By increasing the sensitivity, the QT1010 can be used as a very effective proximity sensor, allowing the presence of
a nearby object (typically a hand) to be detected.
In this scenario, as the object being sensed is typically a hand, very large electrode sizes can be used, which is
extremely effective in increasing the sensitivity of the detector. In this case, the value of Cs will also need to be
increased to ensure improved sensitivity, as mentioned in Section 2.4.2. Note that, although this affects the
responsiveness of the sensor, it is less of an issue in proximity sensing applications; in such applications it is
necessary to detect simply the presence of a large object, rather than a small, precise touch.AT42QT1010 [DATASHEET] 7 9541I–AT42–05/2013
3. Operation Specifics
3.1 Run Modes
3.1.1 Introduction
The QT1010 has three running modes which depend on the state of the SYNC pin (high or low).
3.1.2 Fast Mode
The QT1010 runs in Fast mode if the SYNC pin is permanently high. In this mode the QT1010 runs at maximum
speed at the expense of increased current consumption. Fast mode is useful when speed of response is the prime
design requirement. The delay between bursts in Fast mode is approximately 1 ms, as shown in Figure 3-1.
Figure 3-1. Fast Mode Bursts (SYNC Held High)
3.1.3 Low Power Mode
The QT1010 runs in Low Power (LP) mode if the SYNC pin is held low. In this mode it sleeps for approximately
80 ms at the end of each burst, saving power but slowing response. On detecting a possible key touch, it temporarily
switches to Fast mode until either the key touch is confirmed or found to be spurious (via the detect integration
process). It then returns to LP mode after the key touch is resolved, as shown in Figure 3-2.
Figure 3-2. Low Power Mode (SYNC Held Low)
SNSK
SYNC
~1 ms
sleep sleep
SYNC
SNSK sleep
fast detect
integrator
OUT
Key
~80 ms
touchAT42QT1010 [DATASHEET] 8
9541I–AT42–05/2013
3.1.4 SYNC Mode
It is possible to synchronize the device to an external clock source by placing an appropriate waveform on the SYNC
pin. SYNC mode can synchronize multiple QT1010 devices to each other to prevent cross-interference, or it can be
used to enhance noise immunity from low frequency sources such as 50Hz or 60Hz mains signals.
The SYNC pin is sampled at the end of each burst. If the device is in Fast mode and the SYNC pin is sampled high,
then the device continues to operate in Fast mode (Figure 3-1 on page 7). If SYNC is sampled low, then the device
goes to sleep. From then on, it will operate in SYNC mode (Figure 3-2). Therefore, to guarantee entry into SYNC
mode the low period of the SYNC signal should be longer than the burst length (Figure 3-3).
Figure 3-3. SYNC Mode (Triggered by SYNC Edges)
However, once SYNC mode has been entered, if the SYNC signal consists of a series of short pulses (>10 µs) then
a burst will only occur on the falling edge of each pulse (Figure 3-4) instead of on each change of SYNC signal, as
normal (Figure 3-3).
In SYNC mode, the device will sleep after each measurement burst (just as in LP mode) but will be awakened by a
change in the SYNC signal in either direction, resulting in a new measurement burst. If SYNC remains unchanged
for a period longer than the LP mode sleep period (about 80 ms), the device will resume operation in either Fast or
LP mode depending on the level of the SYNC pin (Figure 3-3).
There is no detect integrator (DI) in SYNC mode (each touch is a detection) but the Max On-duration will depend on
the time between SYNC pulses; see Section 3.3 and Section 3.4 on page 9. Recalibration timeout is a fixed number
of measurements so will vary with the SYNC period.
Figure 3-4. SYNC Mode (Short Pulses)
SYNC
SYNC
SNSK
SNSK
slow mode sleep period
sleep
sleep
sleep sleep
sleep sleep
Revert to Fast Mode
Revert to Slow Mode
slow mode sleep period
SNSK
SYNC
>10 sμ >10 sμ >10 sμAT42QT1010 [DATASHEET] 9 9541I–AT42–05/2013
3.2 Threshold
The internal signal threshold level is fixed at 10 counts of change with respect to the internal reference level, which in
turn adjusts itself slowly in accordance with the drift compensation mechanism.
The QT1010 employs a hysteresis dropout of two counts of the delta between the reference and threshold levels.
3.3 Max On-duration
If an object or material obstructs the sense pad the signal may rise enough to create a detection, preventing further
operation. To prevent this, the sensor includes a timer which monitors detections. If a detection exceeds the timer
setting the sensor performs a full recalibration. This is known as the Max On-duration feature and is set to ~60s (at
3V in LP mode). This will vary slightly with Cs and if SYNC mode is used. As the internal timebase for Max Onduration
is determined by the burst rate, the use of SYNC can cause dramatic changes in this parameter depending
on the SYNC pulse spacing. For example, at 60Hz SYNC mode the Max On-duration will be ~6s at 3V.
3.4 Detect Integrator
It is desirable to suppress detections generated by electrical noise or from quick brushes with an object. To
accomplish this, the QT1010 incorporates a detect integration (DI) counter that increments with each detection until
a limit is reached, after which the output is activated. If no detection is sensed prior to the final count, the counter is
reset immediately to zero. In the QT1010, the required count is four. In LP mode the device will switch to Fast mode
temporarily in order to resolve the detection more quickly; after a touch is either confirmed or denied the device will
revert back to normal LP mode operation automatically.
The DI can also be viewed as a “consensus filter” that requires four successive detections to create an output.
3.5 Forced Sensor Recalibration
The QT1010 has no recalibration pin; a forced recalibration is accomplished when the device is powered up or after
the recalibration timeout. However, supply drain is low so it is a simple matter to treat the entire IC as a controllable
load; driving the QT1010's Vdd pin directly from another logic gate or a microcontroller port will serve as both power
and “forced recalibration”. The source resistance of most CMOS gates and microcontrollers is low enough to provide
direct power without problem.
3.6 Drift Compensation
Signal drift can occur because of changes in Cx and Cs over time. It is crucial that drift be compensated for,
otherwise false detections, non-detections, and sensitivity shifts will follow.
Drift compensation (Figure 3-5) is performed by making the reference level track the raw signal at a slow rate, but
only while there is no detection in effect. The rate of adjustment must be performed slowly, otherwise legitimate
detections could be ignored. The QT1010 drift compensates using a slew-rate limited change to the reference level;
the threshold and hysteresis values are slaved to this reference.
Once an object is sensed, the drift compensation mechanism ceases since the signal is legitimately high, and
therefore should not cause the reference level to change.AT42QT1010 [DATASHEET] 10
9541I–AT42–05/2013
Figure 3-5. Drift Compensation
The QT1010 drift compensation is asymmetric; the reference level drift-compensates in one direction faster than it
does in the other. Specifically, it compensates faster for decreasing signals than for increasing signals. Increasing
signals should not be compensated for quickly, since an approaching finger could be compensated for partially or
entirely before even approaching the sense electrode. However, an obstruction over the sense pad, for which the
sensor has already made full allowance, could suddenly be removed leaving the sensor with an artificially elevated
reference level and thus become insensitive to touch. In this latter case, the sensor will compensate for the object's
removal very quickly, usually in only a few seconds.
With large values of Cs and small values of Cx, drift compensation will appear to operate more slowly than with the
converse. Note that the positive and negative drift compensation rates are different.
3.7 Response Time
The QT1010's response time is highly dependent on run mode and burst length, which in turn is dependent on Cs
and Cx. With increasing Cs, response time slows, while increasing levels of Cx reduce response time. The response
time will also be a lot slower in LP or SYNC mode due to a longer time between burst measurements.
3.8 Spread Spectrum
The QT1010 modulates its internal oscillator by ±7.5% during the measurement burst. This spreads the generated
noise over a wider band, reducing emission levels. This also reduces susceptibility since there is no longer a single
fundamental burst frequency.
3.9 Output Features
3.9.1 Output
The output of the QT1010 is active-high upon detection. The output will remain active-high for the duration of the
detection, or until the Max On-duration expires, whichever occurs first. If a Max On-duration timeout occurs first, the
sensor performs a full recalibration and the output becomes inactive (low) until the next detection.
3.9.2 HeartBeat Output
The QT1010 output has a HeartBeat “health” indicator superimposed on it in all modes. This operates by taking the
output pin into a three-state mode for 15 µs, once before every QT burst. This output state can be used to determine
that the sensor is operating properly, using one of several simple methods, or it can be ignored.
The HeartBeat indicator can be sampled by using a pull-up resistor on the OUT pin (Figure 3-6), and feeding the
resulting positive-going pulse into a counter, flip flop, one-shot, or other circuit. The pulses will only be visible when
the chip is not detecting a touch.
Threshold
Signal
Hysteresis
Reference
OutputAT42QT1010 [DATASHEET] 11 9541I–AT42–05/2013
Figure 3-6. Obtaining HeartBeat Pulses with a Pull-up Resistor (SOT23-6)
If the sensor is wired to a microcontroller as shown in Figure 3-7 on page 11, the microcontroller can reconfigure the
load resistor to either Vss or Vdd depending on the output state of the QT1010, so that the pulses are evident in
either state.
Figure 3-7. Using a Microcontroller to Obtain HeartBeat Pulses in Either Output State (SOT23-6)
Electromechanical devices like relays will usually ignore the short HeartBeat pulse. The pulse also has too low a duty
cycle to visibly affect LEDs. It can be filtered completely if desired, by adding an RC filter to the output, or if
interfacing directly and only to a high-impedance CMOS input, by doing nothing or at most adding a small noncritical
capacitor from OUT to Vss.
3.9.3 Output Drive
The OUT pin is active high and can sink or source up to 2 mA. When a large value of Cs (>20 nF) is used the OUT
current should be limited to <1 mA to prevent gain-shifting side effects, which happen when the load current creates
voltage drops on the die and bonding wires; these small shifts can materially influence the signal level to cause
detection instability.
OUT
VDD
SNSK
SNS
SYNC/MODE
VSS
2
6
4
1 3
5
VDD
HeartBeat" Pulse Ro
OUT SNSK
SNS
SYNC/MODE 6
4
1 3 Ro
Microcontroller
Port_M.x
Port_M.yAT42QT1010 [DATASHEET] 12
9541I–AT42–05/2013
4. Circuit Guidelines
4.1 More Information
Refer to Application Note QTAN0002, Secrets of a Successful QTouch Design and the Touch Sensors Design Guide
(both downloadable from the Atmel website), for more information on construction and design methods.
4.2 Sample Capacitor
Cs is the charge sensing sample capacitor. The required Cs value depends on the thickness of the panel and its
dielectric constant. Thicker panels require larger values of Cs. Typical values are 2 nF to 50 nF depending on the
sensitivity required; larger values of Cs demand higher stability and better dielectric to ensure reliable sensing.
The Cs capacitor should be a stable type, such as X7R ceramic or PPS film. For more consistent sensing from unit
to unit, 5% tolerance capacitors are recommended. X7R ceramic types can be obtained in 5% tolerance at little or no
extra cost. In applications where high sensitivity (long burst length) is required the use of PPS capacitors is
recommended.
For battery powered operation a higher value sample capacitor is recommended (typical value 8.2 nF).
4.3 UDFN/USON Package Restrictions
The central pad on the underside of the UDFN/USON chip is connected to ground. Do not run any tracks underneath
the body of the chip, only ground.
4.4 Power Supply and PCB Layout
See Section 5.2 on page 14 for the power supply range. At 3 V current drain averages less than 500 µA in Fast
mode.
If the power supply is shared with another electronic system, care should be taken to ensure that the supply is free of
digital spikes, sags, and surges which can adversely affect the QT1010. The QT1010 will track slow changes in Vdd,
but it can be badly affected by rapid voltage fluctuations. It is highly recommended that a separate voltage regulator
be used just for the QT1010 to isolate it from power supply shifts caused by other components.
If desired, the supply can be regulated using a Low Dropout (LDO) regulator, although such regulators often have
poor transient line and load stability. See Application Note QTAN0002, Secrets of a Successful QTouch™ Design for
further information.
Parts placement: The chip should be placed to minimize the SNSK trace length to reduce low frequency pickup,
and to reduce stray Cx which degrades gain. The Cs and Rs resistors (see Figure 1-1 on page 4) should be placed
as close to the body of the chip as possible so that the trace between Rs and the SNSK pin is very short, thereby
reducing the antenna-like ability of this trace to pick up high frequency signals and feed them directly into the chip. A
ground plane can be used under the chip and the associated discrete components, but the trace from the Rs resistor
and the electrode should not run near ground, to reduce loading.
For best EMC performance the circuit should be made entirely with SMT components.
Electrode trace routing: Keep the electrode trace (and the electrode itself) away from other signal, power, and
ground traces including over or next to ground planes. Adjacent switching signals can induce noise onto the sensing
signal; any adjacent trace or ground plane next to, or under, the electrode trace will cause an increase in Cx load and
desensitize the device.
Note: For proper operation a 100 nF (0.1 µF) ceramic bypass capacitor must be used directly between Vdd and
Vss, to prevent latch-up if there are substantial Vdd transients; for example, during an ESD event. The
bypass capacitor should be placed very close to the Vss and Vdd pins.AT42QT1010 [DATASHEET] 13 9541I–AT42–05/2013
4.5 Power On
On initial power up, the QT1010 requires approximately 100 ms to power on to allow power supplies to stabilize.
During this time the OUT pin state is not valid and should be ignored.AT42QT1010 [DATASHEET] 14
9541I–AT42–05/2013
5. Specifications
5.1 Absolute Maximum Specifications
5.2 Recommended Operating Conditions
5.3 AC Specifications
Operating temperature –40°C to +85°C
Storage temperature –55°C to +125°C
VDD 0 to +6.5 V
Max continuous pin current, any control or drive pin ±20 mA
Short circuit duration to Vss, any pin Infinite
Short circuit duration to Vdd, any pin Infinite
Voltage forced onto any pin –0.6V to (Vdd + 0.6) V
CAUTION: Stresses beyond those listed under Absolute Maximum Specifications may cause permanent damage to
the device. This is a stress rating only and functional operation of the device at these or other conditions beyond those
indicated in the operational sections of this specification is not implied. Exposure to absolute maximum specification
conditions for extended periods may affect device reliability
VDD +1.8 to 5.5 V
Short-term supply ripple + noise ±20 mV
Long-term supply stability ±100 mV
Cs value 2 to 50 nF
Cx value 5 to 50 pF
Vdd = 3.0 V, Cs = 4.7 nF, Cx = 5 pF, Ta = recommended range, unless otherwise noted
Parameter Description Min Typ Max Units Notes
TRC Recalibration time – 200 – ms Cs, Cx dependent
TPC Charge duration – 3.05 – µs ±7.5% spread spectrum variation
TPT Transfer duration – 9.0 – µs ±7.5% spread spectrum variation
TG1 Time between end of burst and
start of the next (Fast mode) – 1.2 – ms
TG2 Time between end of burst and
start of the next (LP mode) – 80 – ms Increases with decreasing VDD
See Figure 5-1 on page 15AT42QT1010 [DATASHEET] 15 9541I–AT42–05/2013
Figure 5-1. TG2 – Time Between Bursts (LP Mode)
Figure 5-2. TBL – Burst Length
TBL Burst length – 2.45 – ms
VDD, Cs and Cx dependent. See
Section 4.2 for capacitor
selection.
TR Response time – – 100 ms
THB HeartBeat pulse width – 15 – µs
Vdd = 3.0 V, Cs = 4.7 nF, Cx = 5 pF, Ta = recommended range, unless otherwise noted
Parameter Description Min Typ Max Units NotesAT42QT1010 [DATASHEET] 16
9541I–AT42–05/2013
5.4 Signal Processing
5.5 DC Specifications
Vdd = 3.0V, Cs = 4.7 nF, Cx = 5 pF, Ta = recommended range, unless otherwise noted
Description Min Typ Max Units Notes
Threshold differential 10 counts
Hysteresis 2 counts
Consensus filter length 4 samples
Max on-duration 60 seconds (At 3 V in LP mode) Will vary
in SYNC mode and with Vdd
Vdd = 3.0V, Cs = 4.7 nF, Cx = 5 pF, Ta = recommended range, unless otherwise noted
Parameter Description Min Typ Max Units Notes
VDD Supply voltage 1.8 5.5 V
IDD Supply current, Fast mode –
203.0
246.0
378.5
542.5
729.0
– µA
1.8 V
2.0 V
3.0 V
4.0 V
5.0 V
IDDI Supply current, LP mode –
16.5
19.5
34.0
51.5
73.5
– µA
1.8 V
2.0 V
3.0 V
4.0 V
5.0 V
VDDS Supply turn-on slope 10 – – V/s Required for proper start-up
VIL Low input logic level – – 0.2 × Vdd
0.3 × Vdd V Vdd = 1.8 V – 2.4 V
Vdd = 2.4 V – 5.5 V
VHL High input logic level 0.7 × Vdd
0.6 × Vdd – – V Vdd = 1.8 V – 2.4 V
Vdd = 2.4 V – 5.5 V
VOL Low output voltage – – 0.5 V OUT, 4 mA sink
VOH High output voltage 2.3 – – V OUT, 1 mA source
IIL Input leakage current – <0.05 1 µA
CX Load capacitance range 2 – 50 pF
AR Acquisition resolution – 9 14 bitsAT42QT1010 [DATASHEET] 17 9541I–AT42–05/2013
5.6 Mechanical Dimensions
5.6.1 6-pin SOT23-6
9524D–AT42–05/2013
Features
Number of QTouch® Keys:
Up to four
Discrete Outputs:
Four discrete outputs indicating individual key touch
Technology:
Patented spread-spectrum charge-transfer (direct mode)
Electrode Design:
Simple self-capacitance style (refer to the Touch Sensors Design Guide)
Electrode Materials:
Etched copper, silver, carbon, Indium Tin Oxide (ITO)
Electrode Substrates:
PCB, FPCB, plastic films, glass
Panel Materials:
Plastic, glass, composites, painted surfaces (low particle density metallic
paints possible)
Panel Thickness:
Up to 10 mm glass, 5 mm plastic (electrode size dependent)
Key Sensitivity:
Fixed key threshold, sensitivity adjusted via sample capacitor value
Adjacent Key Suppression
Patented Adjacent Key Suppression® (AKS®) technology to enable accurate
key detection
Interface:
Pin-per-key outputs, plus debug mode to observe sensor signals
Moisture Tolerance:
Increased moisture tolerance based on hardware design and firmware tuning
Signal Processing:
Self-calibration, auto drift compensation, noise filtering
Applications:
Mobile, consumer, white goods, toys, kiosks, POS, and so on
Power:
1.8 V – 5.5 V
Package:
20-pin 3 x 3 mm VQFN RoHS compliant
Atmel AT42QT1040
Four-key QTouch® Touch Sensor IC
DATASHEETAT42QT1040 [DATASHEET] 2
9524D–AT42–05/2013
1. Pinout and Schematic
1.1 Pinout Configuration
NC
NC
VSS
VDD
NC
SNS2
SNSK1
SNS1
SNSK0
SNS0 OUT0
OUT1
1
2
3
4
5 11
12
13
14
15
20 19 18 17 16
6 7 8 9 10
QT1040 OUT3
OUT2
SNSK3
SNSK2
NC
NC
NC
SNS3AT42QT1040 [DATASHEET] 3 9524D–AT42–05/2013
1.2 Pin Descriptions
I/O CMOS input and output OD CMOS open drain output P Ground or power
Table 1-1. Pin Listing
Pin Name Type Function Notes If Unused...
1 SNS2 I/O Sense pin To Cs2 Leave open
2 SNSK1 I/O Sense pin and option detect To Cs1 and option resistor +
key
Connect to option
resistor*
3 SNS1 I/O Sense pin To Cs1 Leave open
4 SNSK0 I/O Sense pin and option detect To Cs0 and option resistor +
key
Connect to option
resistor*
5 SNS0 I/O Sense pin To Cs0 Leave open
6 N/C – – –
7 N/C – – –
8 Vss P Supply ground –
9 Vdd P Power –
10 N/C – – –
11 OUT0 OD Out 0 Alternative function: Debug
CLK Leave open
12 OUT1 OD Out 1 Alternative function: Debug
DATA Leave open
13 OUT3 OD Out 3 Leave open
14 OUT2 OD Out 2 Leave open
15 SNSK3 I/O Sense pin To Cs3 + key Leave open
16 SNS3 I/O Sense pin To Cs3 Leave open
17 N/C – – –
18 N/C – – –
19 N/C – – –
20 SNSK2 I/O Sense pin To Cs2 + key Leave open
* Option resistor should always be fitted even if channel is unused and Cs capacitor is not fixed.AT42QT1040 [DATASHEET] 4
9524D–AT42–05/2013
1.3 Schematic
Figure 1-1. Typical Circuit
Suggested regulator manufacturers:
Torex (XC6215 series)
Seiko (S817 series)
BCDSemi (AP2121 series)
For component values in Figure 1-1 check the following sections:
Section 3.1 on page 7: Cs capacitors (Cs0 – Cs3)
Section 3.5 on page 7: Voltage levels
Section 3.3 on page 7: LED traces
SLOW
FAST
OFF
LED3
LED2
LED1
LED0
VDD
VDD
2
1
3
J2
VDD
2
1
3
J1
ON
2 2
5 5
4 4
3 3
1 1
J3
VDD 9 VSS 8
N/C 19
N/C 10
OUT2 14
SNSK3 15
SNSK2 20
SNSK1 2
SNSK0 4
N/C 18
N/C 7
N/C 17
OUT1 12
OUT0 11
SNS3 16
SNS1 3
N/C 6
OUT3 13 SNS0 5
SNS2 1
SPEED SELECT
AKS SELECT
NOTES:
1) The central pad on the underside of the VQFN chip is a Vss pin and should be connected
to ground. Do not put any other tracks underneath the body of the chip.
2) It is important to place all Cs and Rs components physically near to the chip.
Add a 100 nF capacitor close to pin 9.
QT1040
Creg Creg
VREG
Follow regulator manufacturer's
recommended values for input
and output bypass capacitors (Creg).
Key0
Key1
Key2
Key3
VUNREG
GND
Cs0
Cs1
Cs2
Cs3
RL0
RL1
RL2
RL3
RAKS
RFS
Rs0
Rs1
Rs2
Rs3
Example use of output pinsAT42QT1040 [DATASHEET] 5 9524D–AT42–05/2013
2. Overview of the AT42QT1040
2.1 Introduction
The AT42QT1040 (QT1040) is a digital burst mode charge-transfer (QT™) capacitive sensor driver designed for
touch-key applications. The device can sense from one to four keys; one to three keys can be disabled by not
installing their respective sense capacitors. Any of the four channels can be disabled in this way.
The device includes all signal processing functions necessary to provide stable sensing under a wide variety of
changing conditions, and the outputs are fully de-bounced. Only a few external parts are required for operation.
The QT1040 modulates its bursts in a spread-spectrum fashion in order to heavily suppress the effects of external
noise, and to suppress RF emissions.
2.2 Signal Processing
2.2.1 Detect Threshold
The internal signal threshold level is fixed at 10 counts of change with respect to the internal reference level. This in
turn adjusts itself slowly in accordance with the drift compensation mechanism. See Section 3.1 on page 7 for details
on how to adjust the sensitivity of each key.
When going out of detect there is a hysteresis element to the detection. The signal threshold must drop below 8
counts of change with respect to the internal reference level to register as un-touched.
2.2.2 Detection Integrator
The device features a detection integration mechanism, which acts to confirm a detection in a robust fashion. A perkey
counter is incremented each time the key has exceeded its threshold, and a key is only finally declared to be
touched when this counter reaches a fixed limit of 5. In other words, the device has to exceed its threshold, and stay
there for 5 acquisitions in succession without going below the threshold level, before the key is declared to be
touched.
2.2.3 Burst Length Limitations
Burst length is the number of times the charge transfer process is performed on a given channel; that is, the number
of pulses it takes to measure the key capacitance.
The maximum burst length is 2048 pulses. The recommended design is to use a capacitor that gives a signal of
<1000 pulses. Longer bursts take more time and use more power.
Note that the keys are independent of each other. It is therefore possible, for example, to have a signal of 100 on one
key and a signal of 1000 on another.
Refer to Application Note QTAN0002, Secrets of a Successful QTouch Design (downloadable from the Atmel
website), for more information on using a scope to measure the pulses and hence determine the burst length. Refer
also to the Touch Sensors Design Guide.
2.2.4 Adjacent Key Suppression Technology
The device includes the Atmel-patented Adjacent Key Suppression (AKS) technology, to allow the use of tightly
spaced keys on a keypad with no loss of selectability by the user.
There is one global AKS group, implemented so that only one key in the group may be reported as being touched at
any one time.
The use of AKS is selected by connecting a 1 M resistor between Vdd and the SNSK0 pin (see Section 4.1 on
page 9 for more information). When AKS is disabled, any combinations of keys can enter detect.AT42QT1040 [DATASHEET] 6
9524D–AT42–05/2013
2.2.5 Auto Drift Compensation
Signal drift can occur because of changes in Cx and Cs over time. It is crucial that drift be compensated for,
otherwise false detections, non-detections, and sensitivity shifts will follow.
Drift compensation is performed by making the reference level track the raw signal at a slow rate, but only while
there is no detection in effect. The rate of adjustment must be performed slowly otherwise legitimate detections could
be ignored.
Once an object is sensed and a key is in detect, the drift compensation mechanism ceases, since the signal is
legitimately high and should not therefore cause the reference level to change.
The QT1040 drift compensation is asymmetric, that is, the reference level drift-compensates in one direction faster
than it does in the other. Specifically, it compensates faster for decreasing (towards touch) signals than for
increasing (away from touch) signals. The reason for this difference in compensation rates is that increasing signals
should not be compensated for quickly, since a nearby finger could be compensated for partially or entirely before
even approaching the sense electrode. However, decreasing signals need to be compensated for more quickly. For
example, an obstruction over the sense pad (for which the sensor has already made full allowance) could suddenly
be removed, leaving the sensor with an artificially elevated reference level and thus become insensitive to touch. In
this latter case, the sensor will compensate for the object's removal very quickly, usually in only a few seconds.
Negative drift (that is, towards touch) occurs at a rate of ~3 seconds, while positive drift occurs at a rate of
~1 second.
Drifting only occurs when no keys are in detect state.
2.2.6 Response Time
The QT1040 response time is highly dependent on run mode and burst length, which in turn is dependent on Cs and
Cx. With increasing Cs, response time slows, while increasing levels of Cx reduce response time. The response time
will also be slower in slow mode due to a longer time between burst measurements. This mode offers an increased
detection latency in favor of reduced average current consumption.
2.2.7 Spread Spectrum
The QT1040 modulates its internal oscillator by ±7.5% during the measurement burst. This spreads the generated
noise over a wider band reducing emission levels. This also reduces susceptibility since there is no longer a single
fundamental burst frequency.
2.2.8 Max On-duration
If an object or material obstructs the sense pad, the signal may rise enough to create a detection, preventing further
operation. To prevent this, the sensor includes a timer known as the Max On-duration feature which monitors
detections. If a detection exceeds the timer setting, the sensor performs an automatic recalibration. Max On-duration
is set to ~30s.AT42QT1040 [DATASHEET] 7 9524D–AT42–05/2013
3. Wiring and Parts
3.1 Cs Sample Capacitors
Cs0 – Cs3 are the charge sensing sample capacitors; normally they are identical in nominal value. The optimal Cs
values depend on the corresponding keys electrode design, the thickness of the panel and its dielectric constant.
Thicker panels require larger values of Cs. Values can be in the range 2.2 nF (for faster operation) to 22 nF (for best
sensitivity); typical values are 4.7 nF to 10 nF.
The value of Cs should be chosen such that a light touch on a key mounted in a production unit or a prototype panel
causes a reliable detection. The chosen Cs value should never be so large that the key signals exceed ~1000, as
reported by the chip in the debug data.
The Cs capacitors must be X7R or PPS film type, for stability. For consistent sensitivity, they should have a 10%
tolerance. Twenty percent tolerance may cause small differences in sensitivity from key to key and unit to unit. If a
key is not used, the Cs capacitor may be omitted.
3.2 Rs Resistors
The series resistors Rs0 – Rs3 are in line with the electrode connections (close to the QT1040 chip) and are used to
limit electrostatic discharge (ESD) currents and to suppress radio frequency (RF) interference. A typical value is
4.7 k, but up to 20 k can be used if it is found to be of benefit.
Although these resistors may be omitted, the device may become susceptible to external noise or radio frequency
interference (RFI). For details on how to select these resistors refer to Application Note QTAN0002, Secrets of a
Successful QTouch Design, and the Touch Sensors Design Guide, both downloadable from the Touch Technology
area of the Atmel website, www.atmel.com.
3.3 LED Traces and Other Switching Signals
For advice on LEDs and nearby traces, refer to Application Note QTAN0002, Secrets of a Successful QTouch
Design, and the Touch Sensors Design Guide, both downloadable from the Touch Technology area of Atmel’s
website, www.atmel.com.
3.4 PCB Cleanliness
Modern no-clean flux is generally compatible with capacitive sensing circuits.
3.5 Power Supply
See Section 5.2 on page 15 for the power supply range. If the power supply fluctuates slowly with temperature, the
device tracks and compensates for these changes automatically with only minor changes in sensitivity. If the supply
voltage drifts or shifts quickly, the drift compensation mechanism is not able to keep up, causing sensitivity
anomalies or false detections.
The usual power supply considerations with QT parts apply to the device. The power should be clean and come from
a separate regulator if possible. However, this device is designed to minimize the effects of unstable power, and
except in extreme conditions should not require a separate Low Dropout (LDO) regulator.
CAUTION: If a PCB is reworked to correct soldering faults relating to the device, or
to any associated traces or components, be sure that you fully understand the
nature of the flux used during the rework process. Leakage currents from
hygroscopic ionic residues can stop capacitive sensors from functioning. If you
have any doubts, a thorough cleaning after rework may be the only safe option.AT42QT1040 [DATASHEET] 8
9524D–AT42–05/2013
See under Figure 1.3 on page 4 for suggested regulator manufacturers.
It is assumed that a larger bypass capacitor (for example, 1 µF) is somewhere else in the power circuit; for example,
near the regulator.
To assist with transient regulator stability problems, the QT1040 waits 500 µs any time it wakes up from a sleep state
(that is, in Sleep mode) before acquiring, to allow Vdd to fully stabilize.
3.6 VQFN Package Restrictions
The central pad on the underside of the VQFN chip should be connected to ground. Do not run any tracks
underneath the body of the chip, only ground. Figure 3-1 shows an example of good/bad tracking.
Figure 3-1. Examples of Good and Bad Tracking
Caution: A regulator IC shared with other logic can result in erratic operation and is
not advised.
A single ceramic 0.1 µF bypass capacitor, with short traces, should be placed very
close to the power pins of the IC. Failure to do so can result in device oscillation, high
current consumption, erratic operation, and so on.
Example of GOOD tracking Example of BAD trackingAT42QT1040 [DATASHEET] 9 9524D–AT42–05/2013
4. Detailed Operations
4.1 Adjacent Key Suppression
The use of AKS is selected by the connection of a 1 M resistor (RAKS resistor) between the SNSK0 pin and either
Vdd (AKS mode on) or Vss (AKS mode off).
Note: Changing the RAKS option will affect the sensitivity of the particular key. Always check that the sensitivity is
suitable after a change. Retune Cs0 if necessary.
4.2 Discrete Outputs
There are four discrete outputs (channels 0 to 3), located on pins OUT0 to OUT3. An output pin goes active when
the corresponding key is touched. The outputs are open-drain type and are active-low.
On the OUT2 pin there is a ~500 ns low pulse occurring approximately 20 ms after a power-up/reset (see Figure 4-1
for an example oscilloscope trace of this pulse at two zoom levels). This pulse may need to be considered from the
system design perspective.
The discrete outputs have sufficient current sinking capability to directly drive LEDs. Try to limit the sink current to
less than 5 mA per output and be cautious if connecting LEDs to a power supply other than Vdd; if the LED supply is
higher than Vdd it may cause erratic behavior of the QT1040 and back-power the QT1040 through its I/O pins.
Table 4-1. RAKS Resistor
RAKS Connected To... Mode
Vdd AKS on
Vss AKS off
The RAKS resistor should always be connected to either Vdd or Vss and should not be
changed during operation of the device.AT42QT1040 [DATASHEET] 10
9524D–AT42–05/2013
Figure 4-1. ~500 ns Pulse On OUT2 Pin
4.3 Speed Selection
Speed selection is determined by a 1 M resistor (RFS resistor) connected between SNSK1 and either Vdd (Fast
Mode) or Vss (Slow Mode).
In Fast Mode, the device sleeps for 16 ms between burst acquisitions. In Slow Mode, the device sleeps for 64 ms
between acquisitions. Hence, Slow Mode conserves more power but results in slightly less responsiveness.
Note: The RFS resistor should always be connected to either Vdd or Vss and not changed during operation of the
device. Changing the RFS option will affect the sensitivity of the particular key. Always check that the
sensitivity is suitable after a change. Retune Cs1 if necessary.
4.4 Moisture Tolerance
The presence of water (condensation, sweat, spilt water, and so on) on a sensor can alter the signal values
measured and thereby affect the performance of any capacitive device. The moisture tolerance of QTouch devices
can be improved by designing the hardware and fine-tuning the firmware following the recommendations in the
application note Atmel AVR3002: Moisture Tolerant QTouch Design (www.atmel.com/Images/doc42017.pdf).
Pulse on OUT2
SNS0K
OUT2
SNS0K
OUT2
Power-on/ ~20 ms
Reset
Table 4-2. RFS Resistor
RFS Connected To Mode
Vdd Fast mode
Vss Slow modeAT42QT1040 [DATASHEET] 11 9524D–AT42–05/2013
4.5 Calibration
Calibration is the process by which the sensor chip assesses the background capacitance on each channel. During
calibration, a number of samples are taken in quick succession to get a baseline for the channel reference value.
Calibration takes place ~50 ms after power is applied to the device. Calibration also occurs if the Max On-duration is
exceeded or a positive re-calibration occurs.
4.6 Debug Mode
An added feature to this device is a debug option whereby internal parameters from the IC can be clocked out and
monitored externally.
Debug mode is entered by shorting the CS3 capacitor (SNSK3 and SNS3 pins) on power-up and removing the short
within 5 seconds.
Note: If the short is not removed within 5 seconds, debug mode is still entered, but with Channel 3 unusable until
a re-calibration occurs. Note that as Channel 3 will show as being in detect, a recalibration will occur after
Max On-duration (~30 seconds).
Debug CLK pin (OUT0) and Debug Data pin (OUT1) float while debug data is not being output and are driven
outputs once debug output starts (that is, not open drain).
The serial data is clocked out at a rate of ~200 kHz, MSB first, as in Table 4-3.
Table 4-3. Serial Data Output
Byte Purpose Notes
0 Frame Number Framing index number 0-255
1 Chip Version Upper nibble: major revision
Lower nibble: minor revision
2 Reference 0 Low Byte
Unsigned 16-bit integer
3 Reference 0 High Byte
4 Reference 1 Low Byte
Unsigned 16-bit integer
5 Reference 1 High Byte
6 Reference 2 Low Byte
Unsigned 16-bit integer
7 Reference 2 High Byte
8 Reference 3 Low Byte
Unsigned 16-bit integer
9 Reference 3 High Byte
10 Signal 0 Low Byte
Unsigned 16-bit integer
11 Signal 0 High Byte
12 Signal 1 Low Byte
Unsigned 16-bit integer
13 Signal 1 High Byte
14 Signal 2 Low Byte
Unsigned 16-bit integer
15 Signal 2 High Byte
16 Signal 3 Low Byte
Unsigned 16-bit integer
17 Signal 3 High ByteAT42QT1040 [DATASHEET] 12
9524D–AT42–05/2013
Bit 7: This bit is set during calibration
Bits 4 – 6: Contains the number of keys active
Bits 0 – 3: Show the touch status of the corresponding keys
Figure 4-2 to Figure 4-5 show the usefulness of the debug data out feature. Channels can be monitored and tweaked
to the specific application with great accuracy.
18 Delta 0 Low Byte
Signed 16-bit integer
19 Delta 0 High Byte
20 Delta 1 Low Byte
Signed 16-bit integer
21 Delta 1 High Byte
22 Delta 2 Low Byte
Signed 16-bit integer
23 Delta 2 High Byte
24 Delta 3 Low Byte
Signed 16-bit integer
25 Delta 3 High Byte
26 Flags Various operational flags
27 Flags2 Unsigned bytes
28 Status Byte Unsigned byte. See Table 4-4
29 Frame Number Repeat of framing index number in
byte 0
Table 4-4. Status Byte (Byte 28)
Bit 7 Bit 6 Bit 5 Bit 4 Bit 3 Bit 2 Bit 1 Bit 0
CAL Number of Keys (2 – 4) Key 3 Key 2 Key 1 Key 0
Table 4-3. Serial Data Output (Continued)
Byte Purpose NotesAT42QT1040 [DATASHEET] 13 9524D–AT42–05/2013
Figure 4-2. Byte Clocked Out (~5 µs Period)
Figure 4-3. Byte Following Byte (~ 30 µs Period)
Figure 4-4. Full Debug Send (30 Bytes)AT42QT1040 [DATASHEET] 14
9524D–AT42–05/2013
Figure 4-5. Debug Lines Floating Between Debug Data Sends (30 Bytes, ~2 ms to Send)AT42QT1040 [DATASHEET] 15 9524D–AT42–05/2013
5. Specifications
5.1 Absolute Maximum Specifications
5.2 Recommended Operating Conditions
5.3 DC Specifications
Vdd –0.5 to +6.0 V
Max continuous pin current, any control or drive pin ±10 mA
Voltage forced onto any pin –0.5 V to (Vdd + 0.5) V
Operating temperature –40°C to +85°C
Storage temperature –55°C to +125°C
Vdd 1.8 V to 5.5 V
Supply ripple + noise ±20 mV maximum
Cx capacitance per key 2 to 20 pF
Vdd = 5.0 V, Cs = 4.7 nF, Ta = recommended range, unless otherwise noted
Parameter Description Min Typ Max Units Notes
Vil Low input logic level –0.5 – 0.3 V
Vih High input logic level 0.6 × Vdd Vdd Vdd + 0.5 V
Vol Low output voltage 0 – 0.7 V 10 mA sink current
Voh High output voltage 0.8 × Vdd – Vdd V 10 mA source current
Iil Input leakage current – <0.05 1 µA
Rrst Internal RST pull-up resistor 20 – 50 k
CAUTION: Stresses beyond those listed under Absolute Maximum Specifications may cause permanent damage
the device. This is a stress rating only and functional operation of the device at these or other conditions beyo
those indicated in the operational sections of this specification is not implied. Exposure to absolute maximu
specification conditions for extended periods may affect device reliabilityAT42QT1040 [DATASHEET] 16
9524D–AT42–05/2013
5.4 Timing Specifications
5.5 Power Consumption
Parameter Description Min Typ Max Units Notes
TBS Burst duration – 3.5 – ms Cx = 5 pF, Cs = 18 nF
Fc Burst center frequency – 119 – kHz
Fm Burst modulation, percentage –7.5 – +7.5 %
TPW Burst pulse width – 2 – µs
Vdd (V) AKS Mode (RAKS) Speed (RFS) Power Consumption (µA)
1.8
Off Slow 31
Off Fast 104
On Slow 36
On Fast 114
3.3
Off Slow 100
Off Fast 340
On Slow 117
On Fast 380
5.0
Off Slow 215
Off Fast 710
On Slow 245
On Fast 800AT42QT1040 [DATASHEET] 17 9524D–AT42–05/2013
5.6 Mechanical Dimensions
Features
• High performance, low power AVR® 8-bit Microcontroller
• Advanced RISC architecture
– 135 powerful instructions – most single clock cycle execution
– 32 × 8 general purpose working registers
– Fully static operation
– Up to 16MIPS throughput at 16MHz
– On-chip 2-cycle multiplier
• Non-volatile program and data memories
– 64/128Kbytes of in-system self-programmable flash
• Endurance: 100,000 write/erase cycles
– Optional Boot Code section with independent lock bits
• USB boot loader programmed by default in the factory
• In-system programming by on-chip boot program hardware activated after
reset
• True read-while-write operation
• All supplied parts are pre-programed with a default USB bootloader
– 2K/4K (64K/128K flash version) bytes EEPROM
• Endurance: 100,000 write/erase cycles
– 4K/8K (64K/128K flash version) bytes internal SRAM
– Up to 64Kbytes optional external memory space
– Programming lock for software security
• JTAG (IEEE std. 1149.1 compliant) interface
– Boundary-scan capabilities according to the JTAG standard
– Extensive on-chip debug support
– Programming of flash, EEPROM, fuses, and lock bits through the JTAG interface
• USB 2.0 full-speed/low-speed device and on-the-go module
– Complies fully with:
– Universal serial bus specification REV 2.0
– On-the-go supplement to the USB 2.0 specification rev 1.0
– Supports data transfer rates up to 12Mbit/s and 1.5Mbit/s
• USB full-speed/low speed device module with interrupt on transfer completion
– Endpoint 0 for control transfers: up to 64-bytes
– Six programmable endpoints with in or out directions and with bulk, interrupt or
isochronous transfers
– Configurable endpoints size up to 256bytes in double bank mode
– Fully independent 832bytes USB DPRAM for endpoint memory allocation
– Suspend/resume interrupts
– Power-on reset and USB bus reset
– 48MHz PLL for full-speed bus operation
– USB bus disconnection on microcontroller request
• USB OTG reduced host:
– Supports host negotiation protocol (HNP) and session request protocol (SRP) for
OTG dual-role devices
– Provide status and control signals for software implementation of HNP and SRP
– Provides programmable times required for HNP and SRP
• Peripheral features
– Two 8-bit timer/counters with separate prescaler and compare mode
– Two16-bit timer/counter with separate prescaler, compare- and capture mode
8-bit Atmel
Microcontroller
with
64/128Kbytes
of ISP Flash
and USB
Controller
AT90USB646
AT90USB647
AT90USB1286
AT90USB1287
7593L–AVR–09/122
7593L–AVR–09/12
AT90USB64/128
– Real time counter with separate oscillator
– Four 8-bit PWM channels
– Six PWM channels with programmable resolution from 2 to 16 bits
– Output compare modulator
– 8-channels, 10-bit ADC
– Programmable serial USART
– Master/slave SPI serial interface
– Byte oriented 2-wire serial interface
– Programmable watchdog timer with separate on-chip oscillator
– On-chip analog comparator
– Interrupt and wake-up on pin change
• Special microcontroller features
– Power-on reset and programmable brown-out detection
– Internal calibrated oscillator
– External and internal interrupt sources
– Six sleep modes: Idle, ADC Noise Reduction, Power-save, Power-down, Standby, and Extended Standby
• I/O and packages
– 48 programmable I/O lines
– 64-lead TQFP and 64-lead QFN
• Operating voltages
– 2.7 - 5.5V
• Operating temperature
– Industrial (-40°C to +85°C)
• Maximum frequency
– 8MHz at 2.7V - industrial range
– 16MHz at 4.5V - industrial range3
7593L–AVR–09/12
AT90USB64/128
1. Pin configurations
Figure 1-1. Pinout Atmel AT90USB64/128-TQFP.
AT90USB90128/64
TQFP64
(INT.7/AIN.1/UVcon) PE7
UVcc
D-
D+
UGnd
UCap
VBus
(IUID) PE3
(SS/PCINT0) PB0
(INT.6/AIN.0) PE6
(PCINT1/SCLK) PB1
(PDI/PCINT2/MOSI) PB2
(PDO/PCINT3/MISO) PB3
(PCINT4/OC.2A) PB4
(PCINT5/OC.1A) PB5
(PCINT6/OC.1B) PB6
(PCINT7/OC.0A/OC.1C) PB7
(INT4/TOSC1) PE4
(INT.5/TOSC2) PE5
RESET
VCC
GND
XTAL2
XTAL1
(OC0B/SCL/INT0) PD0
(OC2B/SDA/INT1) PD1
(RXD1/INT2) PD2
(TXD1/INT3) PD3
(ICP1) PD4
(XCK1) PD5
PA3 (AD3)
PA4 (AD4)
PA5 (AD5)
PA6 (AD6)
PA7 (AD7)
PE2 (ALE/HWB)
PC7 (A15/IC.3/CLKO)
PC6 (A14/OC.3A)
PC5 (A13/OC.3B)
PC4 (A12/OC.3C)
PC3 (A11/T.3)
PC2 (A10)
PC1 (A9)
PC0 (A8)
PE1 (RD)
PE0 (WR)
AVCC
GND
AREF
PF0 (ADC0)
PF1 (ADC1)
PF2 (ADC2)
PF3 (ADC3)
PF4 (ADC4/TCK)
PF5 (ADC5/TMS)
PF6 (ADC6/TDO)
PF7 (ADC7/TDI)
GND
VCC
PA0 (AD0)
PA1 (AD1)
PA2 (AD2)
(T1) PD6
(T0) PD7
INDEX CORNER
1
2
3
4
5
6
7
8
9
10
11
12
13
14
15
16
64
63
62
61
60
59
58
57
56
55
54
53
52
51
50
49
48
47
46
45
44
43
42
41
40
39
38
37
36
35
34
33
17
18
19
20
21
22
23
24
25
26
27
28
29
30
31
324
7593L–AVR–09/12
AT90USB64/128
Figure 1-2. Pinout Atmel AT90USB64/128-QFN.
Note: The large center pad underneath the MLF packages is made of metal and internally connected to
GND. It should be soldered or glued to the board to ensure good mechanical stability. If the center
pad is left unconnected, the package might loosen from the board.
2
3
1
4
5
6
7
8
9
10
11
12
13
14
16 33
15
47
46
48
45
44
43
42
41
40
39
38
37
36
35
34
17
18
19
20
21
22
23
24
25
26
27
28
29
30
31
32
64
63
62
61
60
59
58
57
56
55
54
53
52
51
50
49
AT90USB128/64
(64-lead QFN top view)
INDEX CORNER
AVCC
G
N
D
AREF
PF0 (ADC0)
PF1 (ADC1)
PF2 (ADC2)
PF3 (ADC3)
PF4 (ADC4/TCK)
PF5 (ADC5/TMS)
PF6 (ADC6/TDO)
PF7 (ADC7/TDI)
G
N
D
VCC
PA0 (AD0)
PA1 (AD1)
PA2 (AD2)
(INT.7/AIN.1/UVcon) PE7
UVcc
D-
D+
UGnd
UCap
VBus
(IUID) PE3
(SS/PCINT0) PB0
(INT.6/AIN.0) PE6
(PCINT1/SCLK) PB1
(PDI/PCINT2/MOSI) PB2
(PDO/PCINT3/MISO) PB3
(PCINT4/OC.2A) PB4
(PCINT5/OC.1A) PB5
(PCINT6/OC.1B) PB6
(PCI
NT7/OC.0A/OC.1C) PB7
(INT4/TOSC1) PE4
(INT.5/TOSC2) PE5
VCC
G
N
D
XTAL2
XTAL1
(OC0B/SCL/I
NT0) PD0
(OC2B/SDA/I
NT1) PD1
(RXD1/I
NT2) PD2
(TXD1/I
NT3) PD3
(ICP1) PD4
(XCK1) PD5
(T1) PD6
(T0) PD7
RESET
PA3 (AD3)
PA4 (AD4)
PA5 (AD5)
PA6 (AD6)
PA7 (AD7)
PE2 (ALE/HWB)
PC7 (A15/IC.3/CLKO)
PC6 (A14/OC.3A)
PC5 (A13/OC.3B)
PC4 (A12/OC.3C)
PC3 (A11/T.3)
PC2 (A10)
PC1 (A9)
PC0 (A8)
PE1 (RD)
PE0 (WR)5
7593L–AVR–09/12
AT90USB64/128
2. Overview
The Atmel® AVR® AT90USB64/128 is a low-power CMOS 8-bit microcontroller based on the
Atmel® AVR® enhanced RISC architecture. By executing powerful instructions in a single clock
cycle, the AT90USB64/128 achieves throughputs approaching 1MIPS per MHz allowing the system
designer to optimize power consumption versus processing speed.6
7593L–AVR–09/12
AT90USB64/128
2.1 Block diagram
Figure 2-1. Block diagram.
The AVR core combines a rich instruction set with 32 general purpose working registers. All the
32 registers are directly connected to the Arithmetic Logic Unit (ALU), allowing two independent
registers to be accessed in one single instruction executed in one clock cycle. The resulting
PROGRAM
COUNTER
ST ACK
POINTER
PROGRAM
FLASH
MCU CONTROL
REGISTER SRAM
GENERAL
PURPOSE
REGISTERS
INSTRUCTION
REGISTER
TIMER/
COUNTERS
INSTRUCTION
DECODER
DATA DIR.
REG. PORTB
DATA DIR.
REG. PORTE
DATA DIR.
REG. PORT A
DATA DIR.
REG. PORTD
DATA REGISTER
PORTB
DATA REGISTER
PORTE
DATA REGISTER
PORT A
DATA REGISTER
PORTD
INTERRUPT
UNIT
EEPROM
USART1 SPI
ST ATUS
REGISTER
Z
Y
X
ALU
POR TE DRIVERS POR TB DRIVERS
POR TF DRIVERS POR TA DRIVERS
POR TD DRIVERS
POR TC DRIVERS
PE7 - PE0 PB7 - PB0
PF7 - PF0 PA7 - P A0
RESET
VCC
AGND
GND
AREF
XT AL1
XT AL2
CONTROL
LINES
+
-
ANALOG
COMP ARATOR
PC7 - PC0
INTERNAL
OSCILLA TOR
WATCHDOG
TIMER
8-BIT DA TA BUS
AVCC
USB
TIMING AND
CONTROL
OSCILLA TOR
CALIB. OSC
DATA DIR.
REG. PORT C
DATA REGISTER
PORT C
ON-CHIP DEBUG
JTAG TAP
PROGRAMMING
LOGIC
BOUNDARYSCAN
DATA DIR.
REG. PORT F
DATA REGISTER
PORT F
ADC
POR - BOD
RESET
PD7 - PD0
TWO-WIRE SERIAL
INTERFACE
PLL7
7593L–AVR–09/12
AT90USB64/128
architecture is more code efficient while achieving throughputs up to ten times faster than conventional
CISC microcontrollers.
The Atmel AT90USB64/128 provides the following features: 64/128Kbytes of In-System Programmable
Flash with Read-While-Write capabilities, 2K/4Kbytes EEPROM, 4K/8K bytes
SRAM, 48 general purpose I/O lines, 32 general purpose working registers, Real Time Counter
(RTC), four flexible Timer/Counters with compare modes and PWM, one USART, a byte oriented
2-wire Serial Interface, a 8-channels, 10-bit ADC with optional differential input stage with
programmable gain, programmable Watchdog Timer with Internal Oscillator, an SPI serial port,
IEEE std. 1149.1 compliant JTAG test interface, also used for accessing the On-chip Debug system
and programming and six software selectable power saving modes. The Idle mode stops
the CPU while allowing the SRAM, Timer/Counters, SPI port, and interrupt system to continue
functioning. The Power-down mode saves the register contents but freezes the Oscillator, disabling
all other chip functions until the next interrupt or Hardware Reset. In Power-save mode,
the asynchronous timer continues to run, allowing the user to maintain a timer base while the
rest of the device is sleeping. The ADC Noise Reduction mode stops the CPU and all I/O modules
except Asynchronous Timer and ADC, to minimize switching noise during ADC
conversions. In Standby mode, the Crystal/Resonator Oscillator is running while the rest of the
device is sleeping. This allows very fast start-up combined with low power consumption. In
Extended Standby mode, both the main Oscillator and the Asynchronous Timer continue to run.
The device is manufactured using the Atmel high-density nonvolatile memory technology. The
On-chip ISP Flash allows the program memory to be reprogrammed in-system through an SPI
serial interface, by a conventional nonvolatile memory programmer, or by an On-chip Boot program
running on the AVR core. The boot program can use any interface to download the
application program in the application Flash memory. Software in the Boot Flash section will
continue to run while the Application Flash section is updated, providing true Read-While-Write
operation. By combining an 8-bit RISC CPU with In-System Self-Programmable Flash on a
monolithic chip, the AT90USB64/128 is a powerful microcontroller that provides a highly flexible
and cost effective solution to many embedded control applications.
The AT90USB64/128 AVR is supported with a full suite of program and system development
tools including: C compilers, macro assemblers, program debugger/simulators, in-circuit emulators,
and evaluation kits.8
7593L–AVR–09/12
AT90USB64/128
2.2 Pin descriptions
2.2.1 VCC
Digital supply voltage.
2.2.2 GND
Ground.
2.2.3 AVCC
Analog supply voltage.
2.2.4 Port A (PA7..PA0)
Port A is an 8-bit bidirectional I/O port with internal pull-up resistors (selected for each bit). The
Port A output buffers have symmetrical drive characteristics with both high sink and source
capability. As inputs, Port A pins that are externally pulled low will source current if the pull-up
resistors are activated. The Port A pins are tri-stated when a reset condition becomes active,
even if the clock is not running.
Port A also serves the functions of various special features of the Atmel AT90USB64/128 as
listed on page 78.
2.2.5 Port B (PB7..PB0)
Port B is an 8-bit bidirectional I/O port with internal pull-up resistors (selected for each bit). The
Port B output buffers have symmetrical drive characteristics with both high sink and source
capability. As inputs, Port B pins that are externally pulled low will source current if the pull-up
resistors are activated. The Port B pins are tri-stated when a reset condition becomes active,
even if the clock is not running.
Port B has better driving capabilities than the other ports.
Port B also serves the functions of various special features of the AT90USB64/128 as listed on
page 79.
2.2.6 Port C (PC7..PC0)
Port C is an 8-bit bidirectional I/O port with internal pull-up resistors (selected for each bit). The
Port C output buffers have symmetrical drive characteristics with both high sink and source
capability. As inputs, Port C pins that are externally pulled low will source current if the pull-up
resistors are activated. The Port C pins are tri-stated when a reset condition becomes active,
even if the clock is not running.
Port C also serves the functions of special features of the AT90USB64/128 as listed on page 82.
2.2.7 Port D (PD7..PD0)
Port D is an 8-bit bi-directional I/O port with internal pull-up resistors (selected for each bit). The
Port D output buffers have symmetrical drive characteristics with both high sink and source
capability. As inputs, Port D pins that are externally pulled low will source current if the pull-up
resistors are activated. The Port D pins are tri-stated when a reset condition becomes active,
even if the clock is not running.
Port D also serves the functions of various special features of the AT90USB64/128 as listed on
page 83. 9
7593L–AVR–09/12
AT90USB64/128
2.2.8 Port E (PE7..PE0)
Port E is an 8-bit bidirectional I/O port with internal pull-up resistors (selected for each bit). The
Port E output buffers have symmetrical drive characteristics with both high sink and source
capability. As inputs, Port E pins that are externally pulled low will source current if the pull-up
resistors are activated. The Port E pins are tri-stated when a reset condition becomes active,
even if the clock is not running.
Port E also serves the functions of various special features of the AT90USB64/128 as listed on
page 86.
2.2.9 Port F (PF7..PF0)
Port F serves as analog inputs to the A/D Converter.
Port F also serves as an 8-bit bidirectional I/O port, if the A/D Converter is not used. Port pins
can provide internal pull-up resistors (selected for each bit). The Port F output buffers have symmetrical
drive characteristics with both high sink and source capability. As inputs, Port F pins
that are externally pulled low will source current if the pull-up resistors are activated. The Port F
pins are tri-stated when a reset condition becomes active, even if the clock is not running. If the
JTAG interface is enabled, the pull-up resistors on pins PF7(TDI), PF5(TMS), and PF4(TCK) will
be activated even if a reset occurs.
Port F also serves the functions of the JTAG interface.
2.2.10 DUSB
Full speed / Low Speed Negative Data Upstream Port. Should be connected to the USB Dconnector
pin with a serial 22Ω resistor.
2.2.11 D+
USB Full speed / Low Speed Positive Data Upstream Port. Should be connected to the USB D+
connector pin with a serial 22Ω resistor.
2.2.12 UGND
USB Pads Ground.
2.2.13 UVCC
USB Pads Internal Regulator Input supply voltage.
2.2.14 UCAP
USB Pads Internal Regulator Output supply voltage. Should be connected to an external capacitor
(1µF).
2.2.15 VBUS
USB VBUS monitor and OTG negociations.
2.2.16 RESET
Reset input. A low level on this pin for longer than the minimum pulse length will generate a
reset, even if the clock is not running. The minimum pulse length is given in Table 9-1 on page
58. Shorter pulses are not guaranteed to generate a reset.
2.2.17 XTAL1
Input to the inverting Oscillator amplifier and input to the internal clock operating circuit.10
7593L–AVR–09/12
AT90USB64/128
2.2.18 XTAL2
Output from the inverting oscillator amplifier.
2.2.19 AVCC
AVCC is the supply voltage pin for Port F and the A/D Converter. It should be externally connected
to VCC, even if the ADC is not used. If the ADC is used, it should be connected to VCC
through a low-pass filter.
2.2.20 AREF
This is the analog reference pin for the A/D Converter.
3. Resources
A comprehensive set of development tools, application notes and datasheets are available for
download on http://www.atmel.com/avr.
4. About code examples
This documentation contains simple code examples that briefly show how to use various parts of
the device. Be aware that not all C compiler vendors include bit definitions in the header files
and interrupt handling in C is compiler dependent. Please confirm with the C compiler documentation
for more details.
These code examples assume that the part specific header file is included before compilation.
For I/O registers located in extended I/O map, "IN", "OUT", "SBIS", "SBIC", "CBI", and "SBI"
instructions must be replaced with instructions that allow access to extended I/O. Typically
"LDS" and "STS" combined with "SBRS", "SBRC", "SBR", and "CBR".11
7593L–AVR–09/12
AT90USB64/128
5. AVR CPU core
5.1 Introduction
This section discusses the AVR core architecture in general. The main function of the CPU core
is to ensure correct program execution. The CPU must therefore be able to access memories,
perform calculations, control peripherals, and handle interrupts.
5.2 Architectural overview
Figure 5-1. Block diagram of the AVR architecture.
In order to maximize performance and parallelism, the AVR uses a Harvard architecture – with
separate memories and buses for program and data. Instructions in the program memory are
executed with a single level pipelining. While one instruction is being executed, the next instruction
is pre-fetched from the program memory. This concept enables instructions to be executed
in every clock cycle. The program memory is In-System Re-programmable Flash memory.
Flash
program
memory
Instruction
register
Instruction
decoder
Program
counter
Control lines
32 x 8
general
purpose
registrers
ALU
Status
and control
I/O lines
EEPROM
Data bus 8-bit
Data
SRAM
Direct addressing
Indirect addressing
Interrupt
unit
SPI
unit
Watchdog
timer
Analog
comparator
I/O Module 2
I/O Module1
I/O Module n12
7593L–AVR–09/12
AT90USB64/128
The fast-access Register File contains 32 × 8-bit general purpose working registers with a single
clock cycle access time. This allows single-cycle Arithmetic Logic Unit (ALU) operation. In a typical
ALU operation, two operands are output from the Register File, the operation is executed,
and the result is stored back in the Register File – in one clock cycle.
Six of the 32 registers can be used as three 16-bit indirect address register pointers for Data
Space addressing – enabling efficient address calculations. One of the these address pointers
can also be used as an address pointer for look up tables in Flash program memory. These
added function registers are the 16-bit X-, Y-, and Z-register, described later in this section.
The ALU supports arithmetic and logic operations between registers or between a constant and
a register. Single register operations can also be executed in the ALU. After an arithmetic operation,
the Status Register is updated to reflect information about the result of the operation.
Program flow is provided by conditional and unconditional jump and call instructions, able to
directly address the whole address space. Most AVR instructions have a single 16-bit word format.
Every program memory address contains a 16- or 32-bit instruction.
Program Flash memory space is divided in two sections, the Boot Program section and the
Application Program section. Both sections have dedicated Lock bits for write and read/write
protection. The SPM instruction that writes into the Application Flash memory section must
reside in the Boot Program section.
During interrupts and subroutine calls, the return address Program Counter (PC) is stored on the
Stack. The Stack is effectively allocated in the general data SRAM, and consequently the Stack
size is only limited by the total SRAM size and the usage of the SRAM. All user programs must
initialize the SP in the Reset routine (before subroutines or interrupts are executed). The Stack
Pointer (SP) is read/write accessible in the I/O space. The data SRAM can easily be accessed
through the five different addressing modes supported in the AVR architecture.
The memory spaces in the AVR architecture are all linear and regular memory maps.
A flexible interrupt module has its control registers in the I/O space with an additional Global
Interrupt Enable bit in the Status Register. All interrupts have a separate Interrupt Vector in the
Interrupt Vector table. The interrupts have priority in accordance with their Interrupt Vector position.
The lower the Interrupt Vector address, the higher the priority.
The I/O memory space contains 64 addresses for CPU peripheral functions as Control Registers,
SPI, and other I/O functions. The I/O Memory can be accessed directly, or as the Data
Space locations following those of the Register File, 0x20 - 0x5F. In addition, the Atmel
AT90USB64/128 has Extended I/O space from 0x60 - 0xFF in SRAM where only the
ST/STS/STD and LD/LDS/LDD instructions can be used.
5.3 ALU – Arithmetic Logic Unit
The high-performance AVR ALU operates in direct connection with all the 32 general purpose
working registers. Within a single clock cycle, arithmetic operations between general purpose
registers or between a register and an immediate are executed. The ALU operations are divided
into three main categories – arithmetic, logical, and bit-functions. Some implementations of the
architecture also provide a powerful multiplier supporting both signed/unsigned multiplication
and fractional format. See the “Instruction set summary” on page 423 for a detailed description.13
7593L–AVR–09/12
AT90USB64/128
5.4 Status register
The status register contains information about the result of the most recently executed arithmetic
instruction. This information can be used for altering program flow in order to perform conditional
operations. Note that the status register is updated after all ALU operations, as specified in the
Instruction Set Reference. This will in many cases remove the need for using the dedicated compare
instructions, resulting in faster and more compact code.
The status register is not automatically stored when entering an interrupt routine and restored
when returning from an interrupt. This must be handled by software.
The AVR status register – SREG – is defined as:
• Bit 7 – I: Global Interrupt Enable
The Global Interrupt Enable bit must be set for the interrupts to be enabled. The individual interrupt
enable control is then performed in separate control registers. If the Global Interrupt Enable
Register is cleared, none of the interrupts are enabled independent of the individual interrupt
enable settings. The I-bit is cleared by hardware after an interrupt has occurred, and is set by
the RETI instruction to enable subsequent interrupts. The I-bit can also be set and cleared by
the application with the SEI and CLI instructions, as described in the instruction set reference.
• Bit 6 – T: Bit Copy Storage
The Bit Copy instructions BLD (Bit LoaD) and BST (Bit STore) use the T-bit as source or destination
for the operated bit. A bit from a register in the Register File can be copied into T by the
BST instruction, and a bit in T can be copied into a bit in a register in the Register File by the
BLD instruction.
• Bit 5 – H: Half Carry Flag
The Half Carry Flag H indicates a Half Carry in some arithmetic operations. Half Carry Is useful
in BCD arithmetic. See the “Instruction set summary” on page 423 for detailed information.
• Bit 4 – S: Sign Bit, S = N ⊕ V
The S-bit is always an exclusive or between the Negative Flag N and the Two’s Complement
Overflow Flag V. See the “Instruction set summary” on page 423 for detailed information.
• Bit 3 – V: Two’s Complement Overflow Flag
The Two’s Complement Overflow Flag V supports two’s complement arithmetics. See the
“Instruction set summary” on page 423 for detailed information.
• Bit 2 – N: Negative Flag
The Negative Flag N indicates a negative result in an arithmetic or logic operation. See the
“Instruction set summary” on page 423 for detailed information.
• Bit 1 – Z: Zero Flag
The Zero Flag Z indicates a zero result in an arithmetic or logic operation. See the “Instruction
set summary” on page 423 for detailed information.
Bit 7 6 5 4 3 2 1 0
I T H S V N Z C SREG
Read/write R/W R/W R/W R/W R/W R/W R/W R/W
Initial value 0 0 0 0 0 0 0 014
7593L–AVR–09/12
AT90USB64/128
• Bit 0 – C: Carry Flag
The Carry Flag C indicates a carry in an arithmetic or logic operation. See the “Instruction set
summary” on page 423 for detailed information.
5.5 General purpose register file
The register file is optimized for the AVR Enhanced RISC instruction set. In order to achieve the
required performance and flexibility, the following input/output schemes are supported by the
register file:
• One 8-bit output operand and one 8-bit result input
• Two 8-bit output operands and one 8-bit result input
• Two 8-bit output operands and one 16-bit result input
• One 16-bit output operand and one 16-bit result input
Figure 5-2 shows the structure of the 32 general purpose working registers in the CPU.
Figure 5-2. AVR CPU general purpose working registers.
Most of the instructions operating on the Register File have direct access to all registers, and
most of them are single cycle instructions.
As shown in Figure 5-2, each register is also assigned a data memory address, mapping them
directly into the first 32 locations of the user Data Space. Although not being physically implemented
as SRAM locations, this memory organization provides great flexibility in access of the
registers, as the X-, Y-, and Z-pointer registers can be set to index any register in the file.
5.5.1 The X-register, Y-register, and Z-register
The registers R26..R31 have some added functions to their general purpose usage. These registers
are 16-bit address pointers for indirect addressing of the data space. The three indirect
address registers X, Y, and Z are defined as described in Figure 5-3.
7 0 Addr.
R0 0x00
R1 0x01
R2 0x02
…
R13 0x0D
General R14 0x0E
purpose R15 0x0F
working R16 0x10
registers R17 0x11
…
R26 0x1A X-register Low byte
R27 0x1B X-register High byte
R28 0x1C Y-register Low byte
R29 0x1D Y-register High byte
R30 0x1E Z-register Low byte
R31 0x1F Z-register High byte15
7593L–AVR–09/12
AT90USB64/128
Figure 5-3. The X-, Y-, and Z-registers.
In the different addressing modes these address registers have functions as fixed displacement,
automatic increment, and automatic decrement (see the instruction set reference for details).
5.6 Stack pointer
The Stack is mainly used for storing temporary data, for storing local variables and for storing
return addresses after interrupts and subroutine calls. The Stack Pointer Register always points
to the top of the Stack. Note that the Stack is implemented as growing from higher memory locations
to lower memory locations. This implies that a Stack PUSH command decreases the Stack
Pointer.
The Stack Pointer points to the data SRAM Stack area where the Subroutine and Interrupt
Stacks are located. This Stack space in the data SRAM must be defined by the program before
any subroutine calls are executed or interrupts are enabled. The Stack Pointer must be set to
point above 0x0100. The initial value of the stack pointer is the last address of the internal
SRAM. The Stack Pointer is decremented by one when data is pushed onto the Stack with the
PUSH instruction, and it is decremented by three when the return address is pushed onto the
Stack with subroutine call or interrupt. The Stack Pointer is incremented by one when data is
popped from the Stack with the POP instruction, and it is incremented by three when data is
popped from the Stack with return from subroutine RET or return from interrupt RETI.
The AVR Stack Pointer is implemented as two 8-bit registers in the I/O space. The number of
bits actually used is implementation dependent. Note that the data space in some implementations
of the AVR architecture is so small that only SPL is needed. In this case, the SPH Register
will not be present.
15 XH XL 0
X-register 7 07 0
R27 (0x1B) R26 (0x1A)
15 YH YL 0
Y-register 7 07 0
R29 (0x1D) R28 (0x1C)
15 ZH ZL 0
Z-register 70 7 0
R31 (0x1F) R30 (0x1E)
Bit 15 14 13 12 11 10 9 8
SP15 SP14 SP13 SP12 SP11 SP10 SP9 SP8 SPH
SP7 SP6 SP5 SP4 SP3 SP2 SP1 SP0 SPL
76543210
Read/write R/W R/W R/W R/W R/W R/W R/W R/W
R/W R/W R/W R/W R/W R/W R/W R/W
Initial value 0 0 1 0 0 0 0 0
1111111116
7593L–AVR–09/12
AT90USB64/128
5.6.1 RAMPZ - Extended Z-pointer register for ELPM/SPM
For ELPM/SPM instructions, the Z-pointer is a concatenation of RAMPZ, ZH, and ZL, as shown
in Figure 5-4. Note that LPM is not affected by the RAMPZ setting.
Figure 5-4. The Z-pointer used by ELPM and SPM.
The actual number of bits is implementation dependent. Unused bits in an implementation will
always read as zero. For compatibility with future devices, be sure to write these bits to zero.
5.7 Instruction execution timing
This section describes the general access timing concepts for instruction execution. The AVR
CPU is driven by the CPU clock clkCPU, directly generated from the selected clock source for the
chip. No internal clock division is used.
Figure 5-5 shows the parallel instruction fetches and instruction executions enabled by the Harvard
architecture and the fast-access Register File concept. This is the basic pipelining concept
to obtain up to 1 MIPS per MHz with the corresponding unique results for functions per cost,
functions per clocks, and functions per power-unit.
Figure 5-5. The parallel instruction fetches and instruction executions.
Figure 5-6 shows the internal timing concept for the Register File. In a single clock cycle an ALU
operation using two register operands is executed, and the result is stored back to the destination
register.
Bit 7 6 5 4 3 2 1 0
RAMPZ7 RAMPZ6 RAMPZ5 RAMPZ4 RAMPZ3 RAMPZ2 RAMPZ1 RAMPZ0 RAMPZ
Read/write R/W R/W R/W R/W R/W R/W R/W R/W
Initial value 0 0 0 0 0 0 0 0
Bit (individually) 7 0 7 0 7 0
RAMPZ ZH ZL
Bit (Z-pointer) 23 16 15 8 7 0
clk
1st instruction fetch
1st instruction execute
2nd instruction fetch
2nd instruction execute
3rd instruction fetch
3rd instruction execute
4th instruction fetch
T1 T2 T3 T4
CPU17
7593L–AVR–09/12
AT90USB64/128
Figure 5-6. Single cycle ALU operation.
5.8 Reset and interrupt handling
The AVR provides several different interrupt sources. These interrupts and the separate Reset
Vector each have a separate program vector in the program memory space. All interrupts are
assigned individual enable bits which must be written logic one together with the Global Interrupt
Enable bit in the Status Register in order to enable the interrupt. Depending on the Program
Counter value, interrupts may be automatically disabled when Boot Lock bits BLB02 or BLB12
are programmed. This feature improves software security. See the section “Memory programming”
on page 359 for details.
The lowest addresses in the program memory space are by default defined as the Reset and
Interrupt Vectors. The complete list of vectors is shown in “Interrupts” on page 68. The list also
determines the priority levels of the different interrupts. The lower the address the higher is the
priority level. RESET has the highest priority, and next is INT0 – the External Interrupt Request
0. The Interrupt Vectors can be moved to the start of the Boot Flash section by setting the IVSEL
bit in the MCU Control Register (MCUCR). Refer to “Interrupts” on page 68 for more information.
The Reset Vector can also be moved to the start of the Boot Flash section by programming the
BOOTRST Fuse, see “Memory programming” on page 359.
When an interrupt occurs, the Global Interrupt Enable I-bit is cleared and all interrupts are disabled.
The user software can write logic one to the I-bit to enable nested interrupts. All enabled
interrupts can then interrupt the current interrupt routine. The I-bit is automatically set when a
Return from Interrupt instruction – RETI – is executed.
There are basically two types of interrupts. The first type is triggered by an event that sets the
Interrupt Flag. For these interrupts, the Program Counter is vectored to the actual Interrupt Vector
in order to execute the interrupt handling routine, and hardware clears the corresponding
Interrupt Flag. Interrupt Flags can also be cleared by writing a logic one to the flag bit position(s)
to be cleared. If an interrupt condition occurs while the corresponding interrupt enable bit is
cleared, the Interrupt Flag will be set and remembered until the interrupt is enabled, or the flag is
cleared by software. Similarly, if one or more interrupt conditions occur while the Global Interrupt
Enable bit is cleared, the corresponding Interrupt Flag(s) will be set and remembered until the
Global Interrupt Enable bit is set, and will then be executed by order of priority.
The second type of interrupts will trigger as long as the interrupt condition is present. These
interrupts do not necessarily have Interrupt Flags. If the interrupt condition disappears before the
interrupt is enabled, the interrupt will not be triggered.
When the AVR exits from an interrupt, it will always return to the main program and execute one
more instruction before any pending interrupt is served.
Total execution time
Register operands fetch
ALU operation execute
Result write back
T1 T2 T3 T4
clkCPU18
7593L–AVR–09/12
AT90USB64/128
Note that the Status Register is not automatically stored when entering an interrupt routine, nor
restored when returning from an interrupt routine. This must be handled by software.
When using the CLI instruction to disable interrupts, the interrupts will be immediately disabled.
No interrupt will be executed after the CLI instruction, even if it occurs simultaneously with the
CLI instruction. The following example shows how this can be used to avoid interrupts during the
timed EEPROM write sequence.
When using the SEI instruction to enable interrupts, the instruction following SEI will be executed
before any pending interrupts, as shown in this example.
Assembly code example
in r16, SREG ; store SREG value
cli ; disable interrupts during timed sequence
sbi EECR, EEMPE ; start EEPROM write
sbi EECR, EEPE
out SREG, r16 ; restore SREG value (I-bit)
C code example
char cSREG;
cSREG = SREG; /* store SREG value */
/* disable interrupts during timed sequence */
__disable_interrupt();
EECR |= (1< CSn2:0 > 1). The number of system clock cycles from
when the timer is enabled to the first count occurs can be from 1 to N+1 system clock cycles,
where N equals the prescaler divisor (8, 64, 256, or 1024).
It is possible to use the prescaler reset for synchronizing the Timer/Counter to program execution.
However, care must be taken if the other Timer/Counter that shares the same prescaler
also uses prescaling. A prescaler reset will affect the prescaler period for all Timer/Counters it is
connected to.
13.3 External clock source
An external clock source applied to the Tn pin can be used as Timer/Counter clock (clkTn). The
Tn pin is sampled once every system clock cycle by the pin synchronization logic. The synchronized
(sampled) signal is then passed through the edge detector. Figure 13-1 shows a functional
equivalent block diagram of the Tn synchronization and edge detector logic. The registers are
clocked at the positive edge of the internal system clock (clkI/O). The latch is transparent in the
high period of the internal system clock.
The edge detector generates one clkTn pulse for each positive (CSn2:0 = 7) or negative (CSn2:0
= 6) edge it detects.
Figure 13-1. Tn/T0 pin sampling.
The synchronization and edge detector logic introduces a delay of 2.5 to 3.5 system clock cycles
from an edge has been applied to the Tn pin to the counter is updated.
Enabling and disabling of the clock input must be done when Tn has been stable for at least one
system clock cycle, otherwise it is a risk that a false Timer/Counter clock pulse is generated.
Tn_sync
(To clock
select logic)
Synchronization Edge detector
D Q D Q
LE
Tn D Q
clkI/O97
7593L–AVR–09/12
AT90USB64/128
Each half period of the external clock applied must be longer than one system clock cycle to
ensure correct sampling. The external clock must be guaranteed to have less than half the system
clock frequency (fExtClk < fclk_I/O/2) given a 50/50% duty cycle. Since the edge detector uses
sampling, the maximum frequency of an external clock it can detect is half the sampling frequency
(Nyquist sampling theorem). However, due to variation of the system clock frequency
and duty cycle caused by Oscillator source (crystal, resonator, and capacitors) tolerances, it is
recommended that maximum frequency of an external clock source is less than fclk_I/O/2.5.
An external clock source can not be prescaled.
Figure 13-2. Prescaler for synchronous Timer/Counters
13.4 GTCCR – General Timer/Counter Control Register
• Bit 7 – TSM: Timer/Counter Synchronization Mode
Writing the TSM bit to one activates the Timer/Counter Synchronization mode. In this mode, the
value that is written to the PSRASY and PSRSYNC bits is kept, hence keeping the corresponding
prescaler reset signals asserted. This ensures that the corresponding Timer/Counters are
halted and can be configured to the same value without the risk of one of them advancing during
configuration. When the TSM bit is written to zero, the PSRASY and PSRSYNC bits are cleared
by hardware, and the Timer/Counters start counting simultaneously.
• Bit 0 – PSRSYNC: Prescaler Reset for Synchronous Timer/Counters
When this bit is one, Timer/Counter0 and Timer/Counter1 and Timer/Counter3 prescaler will be
Reset. This bit is normally cleared immediately by hardware, except if the TSM bit is set. Note
that Timer/Counter0, Timer/Counter1 and Timer/Counter3 share the same prescaler and a reset
of this prescaler will affect all timers.
PSR10
Clear
Tn
Tn
clkI/O
Synchronization
Synchronization
TIMER/COUNTERn CLOCK SOURCE
clkTn
TIMER/COUNTERn CLOCK SOURCE
clkTn
CSn0
CSn1
CSn2
CSn0
CSn1
CSn2
Bit 7 6 5 4 3 2 1 0
TSM – – – – – PSRASY PSRSYNC GTCCR
Read/write R/W R R R R R R/W R/W
Initial value 0 0 0 0 0 0 0 098
7593L–AVR–09/12
AT90USB64/128
14. 8-bit Timer/Counter0 with PWM
Timer/Counter0 is a general purpose 8-bit Timer/Counter module, with two independent Output
Compare Units, and with PWM support. It allows accurate program execution timing (event management)
and wave generation. The main features are:
• Two independent output compare units
• Double buffered output compare registers
• Clear timer on compare match (auto reload)
• Glitch free, phase correct pulse width modulator (PWM)
• Variable PWM period
• Frequency generator
• Three independent interrupt sources (TOV0, OCF0A, and OCF0B)
14.1 Overview
A simplified block diagram of the 8-bit Timer/Counter is shown in Figure 14-1. For the actual
placement of I/O pins, refer to “Pinout Atmel AT90USB64/128-TQFP.” on page 3. CPU accessible
I/O Registers, including I/O bits and I/O pins, are shown in bold. The device-specific I/O
Register and bit locations are listed in the “8-bit Timer/Counter register description” on page 108.
Figure 14-1. 8-bit Timer/Counter block diagram.
14.1.1 Registers
The Timer/Counter (TCNT0) and Output Compare Registers (OCR0A and OCR0B) are 8-bit
registers. Interrupt request (abbreviated to Int.Req. in the figure) signals are all visible in the
Timer Interrupt Flag Register (TIFR0). All interrupts are individually masked with the Timer Interrupt
Mask Register (TIMSK0). TIFR0 and TIMSK0 are not shown in the figure.
The Timer/Counter can be clocked internally, via the prescaler, or by an external clock source on
the T0 pin. The Clock Select logic block controls which clock source and edge the Timer/Counter
uses to increment (or decrement) its value. The Timer/Counter is inactive when no clock source
is selected. The output from the Clock Select logic is referred to as the timer clock (clkT0).
Clock select
Timer/Counter
DATA BUS
OCRnA
OCRnB
=
=
TCNTn
Waveform
generation
Waveform
generation
OCnA
OCnB
=
Fixed
TOP
value
Control logic
= 0
TOP BOTTOM
Count
Clear
Direction
TOVn
(int.req.)
OCnA
(int.req.)
OCnB
(Int.Req.)
TCCRnA TCCRnB
Tn Edge
detector
(From prescaler)
clkTn99
7593L–AVR–09/12
AT90USB64/128
The double buffered Output Compare Registers (OCR0A and OCR0B) are compared with the
Timer/Counter value at all times. The result of the compare can be used by the Waveform Generator
to generate a PWM or variable frequency output on the Output Compare pins (OC0A and
OC0B). See “Output compare unit” on page 100. for details. The Compare Match event will also
set the Compare Flag (OCF0A or OCF0B) which can be used to generate an Output Compare
interrupt request.
14.1.2 Definitions
Many register and bit references in this section are written in general form. A lower case “n”
replaces the Timer/Counter number, in this case 0. A lower case “x” replaces the Output Compare
Unit, in this case Compare Unit A or Compare Unit B. However, when using the register or
bit defines in a program, the precise form must be used, that is, TCNT0 for accessing
Timer/Counter0 counter value and so on.
The definitions in the table below are also used extensively throughout the document.
14.2 Timer/Counter clock sources
The Timer/Counter can be clocked by an internal or an external clock source. The clock source
is selected by the Clock Select logic which is controlled by the Clock Select (CS02:0) bits
located in the Timer/Counter Control Register (TCCR0B). For details on clock sources and prescaler,
see “Timer/Counter0, Timer/Counter1, and Timer/Counter3 prescalers” on page 96.
14.3 Counter unit
The main part of the 8-bit Timer/Counter is the programmable bi-directional counter unit. Figure
14-2 shows a block diagram of the counter and its surroundings.
Figure 14-2. Counter unit block diagram.
BOTTOM The counter reaches the BOTTOM when it becomes 0x00.
MAX The counter reaches its MAXimum when it becomes 0xFF (decimal 255).
TOP The counter reaches the TOP when it becomes equal to the highest value in the
count sequence. The TOP value can be assigned to be the fixed value 0xFF
(MAX) or the value stored in the OCR0A Register. The assignment is dependent
on the mode of operation.
DATA BUS
TCNTn Control logic
count
TOVn
(int.req.)
Clock select
top
Tn Edge
detector
(From prescaler)
clkTn
bottom
direction
clear100
7593L–AVR–09/12
AT90USB64/128
Signal description (internal signals):
count Increment or decrement TCNT0 by 1.
direction Select between increment and decrement.
clear Clear TCNT0 (set all bits to zero).
clkTn Timer/Counter clock, referred to as clkT0 in the following.
top Signalize that TCNT0 has reached maximum value.
bottom Signalize that TCNT0 has reached minimum value (zero).
Depending of the mode of operation used, the counter is cleared, incremented, or decremented
at each timer clock (clkT0). clkT0 can be generated from an external or internal clock source,
selected by the Clock Select bits (CS02:0). When no clock source is selected (CS02:0 = 0) the
timer is stopped. However, the TCNT0 value can be accessed by the CPU, regardless of
whether clkT0 is present or not. A CPU write overrides (has priority over) all counter clear or
count operations.
The counting sequence is determined by the setting of the WGM01 and WGM00 bits located in
the Timer/Counter Control Register (TCCR0A) and the WGM02 bit located in the Timer/Counter
Control Register B (TCCR0B). There are close connections between how the counter behaves
(counts) and how waveforms are generated on the Output Compare outputs OC0A and OC0B.
For more details about advanced counting sequences and waveform generation, see “Modes of
operation” on page 103.
The Timer/Counter Overflow Flag (TOV0) is set according to the mode of operation selected by
the WGM02:0 bits. TOV0 can be used for generating a CPU interrupt.
14.4 Output compare unit
The 8-bit comparator continuously compares TCNT0 with the Output Compare Registers
(OCR0A and OCR0B). Whenever TCNT0 equals OCR0A or OCR0B, the comparator signals a
match. A match will set the Output Compare Flag (OCF0A or OCF0B) at the next timer clock
cycle. If the corresponding interrupt is enabled, the Output Compare Flag generates an Output
Compare interrupt. The Output Compare Flag is automatically cleared when the interrupt is executed.
Alternatively, the flag can be cleared by software by writing a logical one to its I/O bit
location. The Waveform Generator uses the match signal to generate an output according to
operating mode set by the WGM02:0 bits and Compare Output mode (COM0x1:0) bits. The
maximum and bottom signals are used by the Waveform Generator for handling the special
cases of the extreme values in some modes of operation (“Modes of operation” on page 103).
Figure 14-3 on page 101 shows a block diagram of the Output Compare unit. 101
7593L–AVR–09/12
AT90USB64/128
Figure 14-3. Output Compare Unit, block diagram.
The OCR0x Registers are double buffered when using any of the Pulse Width Modulation
(PWM) modes. For the normal and Clear Timer on Compare (CTC) modes of operation, the double
buffering is disabled. The double buffering synchronizes the update of the OCR0x Compare
Registers to either top or bottom of the counting sequence. The synchronization prevents the
occurrence of odd-length, non-symmetrical PWM pulses, thereby making the output glitch-free.
The OCR0x Register access may seem complex, but this is not case. When the double buffering
is enabled, the CPU has access to the OCR0x Buffer Register, and if double buffering is disabled
the CPU will access the OCR0x directly.
14.4.1 Force output compare
In non-PWM waveform generation modes, the match output of the comparator can be forced by
writing a one to the Force Output Compare (FOC0x) bit. Forcing Compare Match will not set the
OCF0x Flag or reload/clear the timer, but the OC0x pin will be updated as if a real Compare
Match had occurred (the COM0x1:0 bits settings define whether the OC0x pin is set, cleared or
toggled).
14.4.2 Compare match blocking by TCNT0 write
All CPU write operations to the TCNT0 Register will block any Compare Match that occur in the
next timer clock cycle, even when the timer is stopped. This feature allows OCR0x to be initialized
to the same value as TCNT0 without triggering an interrupt when the Timer/Counter clock is
enabled.
14.4.3 Using the output compare unit
Since writing TCNT0 in any mode of operation will block all Compare Matches for one timer
clock cycle, there are risks involved when changing TCNT0 when using the Output Compare
Unit, independently of whether the Timer/Counter is running or not. If the value written to TCNT0
equals the OCR0x value, the Compare Match will be missed, resulting in incorrect waveform
generation. Similarly, do not write the TCNT0 value equal to BOTTOM when the counter is
down-counting.
OCFnx (int.req.)
= (8-bit comparator)
OCRnx
OCnx
DATA BUS
TCNTn
WGMn1:0
Waveform generator
top
FOCn
COMnX1:0
bottom102
7593L–AVR–09/12
AT90USB64/128
The setup of the OC0x should be performed before setting the Data Direction Register for the
port pin to output. The easiest way of setting the OC0x value is to use the Force Output Compare
(FOC0x) strobe bits in Normal mode. The OC0x Registers keep their values even when
changing between Waveform Generation modes.
Be aware that the COM0x1:0 bits are not double buffered together with the compare value.
Changing the COM0x1:0 bits will take effect immediately.
14.5 Compare Match Output Unit
The Compare Output mode (COM0x1:0) bits have two functions. The Waveform Generator uses
the COM0x1:0 bits for defining the Output Compare (OC0x) state at the next Compare Match.
Also, the COM0x1:0 bits control the OC0x pin output source. Figure 14-4 shows a simplified
schematic of the logic affected by the COM0x1:0 bit setting. The I/O Registers, I/O bits, and I/O
pins in the figure are shown in bold. Only the parts of the general I/O Port Control Registers
(DDR and PORT) that are affected by the COM0x1:0 bits are shown. When referring to the
OC0x state, the reference is for the internal OC0x Register, not the OC0x pin. If a system reset
occur, the OC0x Register is reset to “0”.
Figure 14-4. Compare Match Output Unit, schematic.
The general I/O port function is overridden by the Output Compare (OC0x) from the Waveform
Generator if either of the COM0x1:0 bits are set. However, the OC0x pin direction (input or output)
is still controlled by the Data Direction Register (DDR) for the port pin. The Data Direction
Register bit for the OC0x pin (DDR_OC0x) must be set as output before the OC0x value is visible
on the pin. The port override function is independent of the Waveform Generation mode.
The design of the Output Compare pin logic allows initialization of the OC0x state before the output
is enabled. Note that some COM0x1:0 bit settings are reserved for certain modes of
operation. See “8-bit Timer/Counter register description” on page 108.
14.5.1 Compare output mode and waveform generation
The Waveform Generator uses the COM0x1:0 bits differently in Normal, CTC, and PWM modes.
For all modes, setting the COM0x1:0 = 0 tells the Waveform Generator that no action on the
OC0x Register is to be performed on the next Compare Match. For compare output actions in
PORT
DDR
D Q
D Q
OCnx
OCnx Pin
D Q Waveform
generator
COMnx1
COMnx0
0
1
DATA BUS
FOCn
clkI/O103
7593L–AVR–09/12
AT90USB64/128
the non-PWM modes refer to Table 14-1 on page 109. For fast PWM mode, refer to Table 14-2
on page 109, and for phase correct PWM refer to Table 14-3 on page 109.
A change of the COM0x1:0 bits state will have effect at the first Compare Match after the bits are
written. For non-PWM modes, the action can be forced to have immediate effect by using the
FOC0x strobe bits.
14.6 Modes of operation
The mode of operation, that is, the behavior of the Timer/Counter and the Output Compare pins,
is defined by the combination of the Waveform Generation mode (WGM02:0) and Compare Output
mode (COM0x1:0) bits. The Compare Output mode bits do not affect the counting sequence,
while the Waveform Generation mode bits do. The COM0x1:0 bits control whether the PWM output
generated should be inverted or not (inverted or non-inverted PWM). For non-PWM modes
the COM0x1:0 bits control whether the output should be set, cleared, or toggled at a Compare
Match (See “Compare Match Output Unit” on page 102.).
For detailed timing information see “Timer/Counter timing diagrams” on page 107.
14.6.1 Normal mode
The simplest mode of operation is the Normal mode (WGM02:0 = 0). In this mode the counting
direction is always up (incrementing), and no counter clear is performed. The counter simply
overruns when it passes its maximum 8-bit value (TOP = 0xFF) and then restarts from the bottom
(0x00). In normal operation the Timer/Counter Overflow Flag (TOV0) will be set in the same
timer clock cycle as the TCNT0 becomes zero. The TOV0 Flag in this case behaves like a ninth
bit, except that it is only set, not cleared. However, combined with the timer overflow interrupt
that automatically clears the TOV0 Flag, the timer resolution can be increased by software.
There are no special cases to consider in the Normal mode, a new counter value can be written
anytime.
The Output Compare Unit can be used to generate interrupts at some given time. Using the Output
Compare to generate waveforms in Normal mode is not recommended, since this will
occupy too much of the CPU time.
14.6.2 Clear Timer on Compare Match (CTC) mode
In Clear Timer on Compare or CTC mode (WGM02:0 = 2), the OCR0A Register is used to
manipulate the counter resolution. In CTC mode the counter is cleared to zero when the counter
value (TCNT0) matches the OCR0A. The OCR0A defines the top value for the counter, hence
also its resolution. This mode allows greater control of the Compare Match output frequency. It
also simplifies the operation of counting external events.
The timing diagram for the CTC mode is shown in Figure 14-5 on page 104. The counter value
(TCNT0) increases until a Compare Match occurs between TCNT0 and OCR0A, and then counter
(TCNT0) is cleared.104
7593L–AVR–09/12
AT90USB64/128
Figure 14-5. CTC mode, timing diagram.
An interrupt can be generated each time the counter value reaches the TOP value by using the
OCF0A Flag. If the interrupt is enabled, the interrupt handler routine can be used for updating
the TOP value. However, changing TOP to a value close to BOTTOM when the counter is running
with none or a low prescaler value must be done with care since the CTC mode does not
have the double buffering feature. If the new value written to OCR0A is lower than the current
value of TCNT0, the counter will miss the Compare Match. The counter will then have to count to
its maximum value (0xFF) and wrap around starting at 0x00 before the Compare Match can
occur.
For generating a waveform output in CTC mode, the OC0A output can be set to toggle its logical
level on each Compare Match by setting the Compare Output mode bits to toggle mode
(COM0A1:0 = 1). The OC0A value will not be visible on the port pin unless the data direction for
the pin is set to output. The waveform generated will have a maximum frequency of fOC0 =
fclk_I/O/2 when OCR0A is set to zero (0x00). The waveform frequency is defined by the following
equation:
The N variable represents the prescale factor (1, 8, 64, 256, or 1024).
As for the Normal mode of operation, the TOV0 Flag is set in the same timer clock cycle that the
counter counts from MAX to 0x00.
14.6.3 Fast PWM mode
The fast Pulse Width Modulation or fast PWM mode (WGM02:0 = 3 or 7) provides a high frequency
PWM waveform generation option. The fast PWM differs from the other PWM option by
its single-slope operation. The counter counts from BOTTOM to TOP then restarts from BOTTOM.
TOP is defined as 0xFF when WGM2:0 = 3, and OCR0A when WGM2:0 = 7. In noninverting
Compare Output mode, the Output Compare (OC0x) is cleared on the Compare Match
between TCNT0 and OCR0x, and set at BOTTOM. In inverting Compare Output mode, the output
is set on Compare Match and cleared at BOTTOM. Due to the single-slope operation, the
operating frequency of the fast PWM mode can be twice as high as the phase correct PWM
mode that use dual-slope operation. This high frequency makes the fast PWM mode well suited
for power regulation, rectification, and DAC applications. High frequency allows physically small
sized external components (coils, capacitors), and therefore reduces total system cost.
In fast PWM mode, the counter is incremented until the counter value matches the TOP value.
The counter is then cleared at the following timer clock cycle. The timing diagram for the fast
TCNTn
OCn
(Toggle)
OCnx Interrupt Flag Set
Period 1 2 3 4
(COMnx1:0 = 1)
f
OCnx
f
clk_I/O
2 ⋅ ⋅ N ( ) 1 + OCRnx = -------------------------------------------------105
7593L–AVR–09/12
AT90USB64/128
PWM mode is shown in Figure 14-6. The TCNT0 value is in the timing diagram shown as a histogram
for illustrating the single-slope operation. The diagram includes non-inverted and
inverted PWM outputs. The small horizontal line marks on the TCNT0 slopes represent Compare
Matches between OCR0x and TCNT0.
Figure 14-6. Fast PWM mode, timing diagram.
The Timer/Counter Overflow Flag (TOV0) is set each time the counter reaches TOP. If the interrupt
is enabled, the interrupt handler routine can be used for updating the compare value.
In fast PWM mode, the compare unit allows generation of PWM waveforms on the OC0x pins.
Setting the COM0x1:0 bits to two will produce a non-inverted PWM and an inverted PWM output
can be generated by setting the COM0x1:0 to three: Setting the COM0A1:0 bits to one allows
the OC0A pin to toggle on Compare Matches if the WGM02 bit is set. This option is not available
for the OC0B pin (see Table 14-2 on page 109). The actual OC0x value will only be visible on
the port pin if the data direction for the port pin is set as output. The PWM waveform is generated
by setting (or clearing) the OC0x Register at the Compare Match between OCR0x and
TCNT0, and clearing (or setting) the OC0x Register at the timer clock cycle the counter is
cleared (changes from TOP to BOTTOM).
The PWM frequency for the output can be calculated by the following equation:
The N variable represents the prescale factor (1, 8, 64, 256, or 1024).
The extreme values for the OCR0A Register represents special cases when generating a PWM
waveform output in the fast PWM mode. If the OCR0A is set equal to BOTTOM, the output will
be a narrow spike for each MAX+1 timer clock cycle. Setting the OCR0A equal to MAX will result
in a constantly high or low output (depending on the polarity of the output set by the COM0A1:0
bits.)
A frequency (with 50% duty cycle) waveform output in fast PWM mode can be achieved by setting
OC0x to toggle its logical level on each Compare Match (COM0x1:0 = 1). The waveform
generated will have a maximum frequency of fOC0 = fclk_I/O/2 when OCR0A is set to zero. This
TCNTn
OCRnx update and
TOVn Interrupt Flag Set
Period 1 2 3
OCnx
OCnx
(COMnx1:0 = 2)
(COMnx1:0 = 3)
OCRnx Interrupt Flag Set
4 5 6 7
f
OCnxPWM
f
clk_I/O
N ⋅ 256 = ------------------106
7593L–AVR–09/12
AT90USB64/128
feature is similar to the OC0A toggle in CTC mode, except the double buffer feature of the Output
Compare unit is enabled in the fast PWM mode.
14.6.4 Phase correct PWM mode
The phase correct PWM mode (WGM02:0 = 1 or 5) provides a high resolution phase correct
PWM waveform generation option. The phase correct PWM mode is based on a dual-slope
operation. The counter counts repeatedly from BOTTOM to TOP and then from TOP to BOTTOM.
TOP is defined as 0xFF when WGM2:0 = 1, and OCR0A when WGM2:0 = 5. In noninverting
Compare Output mode, the Output Compare (OC0x) is cleared on the Compare Match
between TCNT0 and OCR0x while up-counting, and set on the Compare Match while downcounting.
In inverting Output Compare mode, the operation is inverted. The dual-slope operation
has lower maximum operation frequency than single slope operation. However, due to the symmetric
feature of the dual-slope PWM modes, these modes are preferred for motor control
applications.
In phase correct PWM mode the counter is incremented until the counter value matches TOP.
When the counter reaches TOP, it changes the count direction. The TCNT0 value will be equal
to TOP for one timer clock cycle. The timing diagram for the phase correct PWM mode is shown
on Figure 14-7. The TCNT0 value is in the timing diagram shown as a histogram for illustrating
the dual-slope operation. The diagram includes non-inverted and inverted PWM outputs. The
small horizontal line marks on the TCNT0 slopes represent Compare Matches between OCR0x
and TCNT0.
Figure 14-7. Phase correct PWM mode, timing diagram.
The Timer/Counter Overflow Flag (TOV0) is set each time the counter reaches BOTTOM. The
Interrupt Flag can be used to generate an interrupt each time the counter reaches the BOTTOM
value.
In phase correct PWM mode, the compare unit allows generation of PWM waveforms on the
OC0x pins. Setting the COM0x1:0 bits to two will produce a non-inverted PWM. An inverted
PWM output can be generated by setting the COM0x1:0 to three: Setting the COM0A0 bits to
TOVn Interrupt Flag Set
OCnx Interrupt Flag Set
1 2 3
TCNTn
Period
OCnx
OCnx
(COMnx1:0 = 2)
(COMnx1:0 = 3)
OCRnx update107
7593L–AVR–09/12
AT90USB64/128
one allows the OC0A pin to toggle on Compare Matches if the WGM02 bit is set. This option is
not available for the OC0B pin (see Table 14-3 on page 109). The actual OC0x value will only be
visible on the port pin if the data direction for the port pin is set as output. The PWM waveform is
generated by clearing (or setting) the OC0x Register at the Compare Match between OCR0x
and TCNT0 when the counter increments, and setting (or clearing) the OC0x Register at Compare
Match between OCR0x and TCNT0 when the counter decrements. The PWM frequency for
the output when using phase correct PWM can be calculated by the following equation:
The N variable represents the prescale factor (1, 8, 64, 256, or 1024).
The extreme values for the OCR0A Register represent special cases when generating a PWM
waveform output in the phase correct PWM mode. If the OCR0A is set equal to BOTTOM, the
output will be continuously low and if set equal to MAX the output will be continuously high for
non-inverted PWM mode. For inverted PWM the output will have the opposite logic values.
At the very start of period 2 in Figure 14-7 on page 106 OCnx has a transition from high to low
even though there is no Compare Match. The point of this transition is to guarantee symmetry
around BOTTOM. There are two cases that give a transition without Compare Match.
• OCR0A changes its value from MAX, like in Figure 14-7 on page 106. When the OCR0A
value is MAX the OCn pin value is the same as the result of a down-counting Compare
Match. To ensure symmetry around BOTTOM the OCn value at MAX must correspond to the
result of an up-counting Compare Match
• The timer starts counting from a value higher than the one in OCR0A, and for that reason
misses the Compare Match and hence the OCn change that would have happened on the
way up
14.7 Timer/Counter timing diagrams
The Timer/Counter is a synchronous design and the timer clock (clkT0) is therefore shown as a
clock enable signal in the following figures. The figures include information on when Interrupt
Flags are set. Figure 14-8 contains timing data for basic Timer/Counter operation. The figure
shows the count sequence close to the MAX value in all modes other than phase correct PWM
mode.
Figure 14-8. Timer/Counter timing diagram, no prescaling.
Figure 14-9 on page 108 shows the same timing data, but with the prescaler enabled.
f
OCnxPCPWM
f
clk_I/O
N ⋅ 510 = ------------------
clkTn
(clkI/O/1)
TOVn
clkI/O
TCNTn MAX - 1 MAX BOTTOM BOTTOM + 1108
7593L–AVR–09/12
AT90USB64/128
Figure 14-9. Timer/Counter timing diagram, with prescaler (fclk_I/O/8).
Figure 14-10 shows the setting of OCF0B in all modes and OCF0A in all modes except CTC
mode and PWM mode, where OCR0A is TOP.
Figure 14-10. Timer/Counter timing diagram, setting of OCF0x, with prescaler (fclk_I/O/8).
Figure 14-11 shows the setting of OCF0A and the clearing of TCNT0 in CTC mode and fast
PWM mode where OCR0A is TOP.
Figure 14-11. Timer/Counter timing diagram, clear timer on Compare Match mode, with prescaler
(fclk_I/O/8)
14.8 8-bit Timer/Counter register description
14.8.1 TCCR0A – Timer/Counter Control Register A
TOVn
TCNTn MAX - 1 MAX BOTTOM BOTTOM + 1
clkI/O
clkTn
(clkI/O/8)
OCFnx
OCRnx
TCNTn
OCRnx Value
OCRnx - 1 OCRnx OCRnx + 1 OCRnx + 2
clkI/O
clkTn
(clkI/O/8)
OCFnx
OCRnx
TCNTn
(CTC)
TOP
TOP - 1 TOP BOTTOM BOTTOM + 1
clkI/O
clkTn
(clkI/O/8)
Bit 7 6 5 4 3 2 1 0
COM0A1 COM0A0 COM0B1 COM0B0 – – WGM01 WGM00 TCCR0A
Read/write R/W R/W R/W R/W R R R/W R/W
Initial value 0 0 0 0 0 0 0 0109
7593L–AVR–09/12
AT90USB64/128
• Bits 7:6 – COM01A:0: Compare Match Output A Mode
These bits control the Output Compare pin (OC0A) behavior. If one or both of the COM0A1:0
bits are set, the OC0A output overrides the normal port functionality of the I/O pin it is connected
to. However, note that the Data Direction Register (DDR) bit corresponding to the OC0A pin
must be set in order to enable the output driver.
When OC0A is connected to the pin, the function of the COM0A1:0 bits depends on the
WGM02:0 bit setting. Table 14-1 shows the COM0A1:0 bit functionality when the WGM02:0 bits
are set to a normal or CTC mode (non-PWM).
Table 14-2 shows the COM0A1:0 bit functionality when the WGM01:0 bits are set to fast PWM
mode.
Note: 1. A special case occurs when OCR0A equals TOP and COM0A1 is set. In this case, the Compare
Match is ignored, but the set or clear is done at TOP. See “Fast PWM mode” on page 104
for more details.
Table 14-3 shows the COM0A1:0 bit functionality when the WGM02:0 bits are set to phase correct
PWM mode.
Note: 1. A special case occurs when OCR0A equals TOP and COM0A1 is set. In this case, the Compare
Match is ignored, but the set or clear is done at TOP. See “Phase correct PWM mode” on
page 106 for more details.
Table 14-1. Compare Output mode, non-PWM mode.
COM0A1 COM0A0 Description
0 0 Normal port operation, OC0A disconnected.
0 1 Toggle OC0A on Compare Match
1 0 Clear OC0A on Compare Match
1 1 Set OC0A on Compare Match
Table 14-2. Compare Output mode, Fast PWM mode (1).
COM0A1 COM0A0 Description
0 0 Normal port operation, OC0A disconnected.
0 1 WGM02 = 0: Normal Port Operation, OC0A Disconnected.
WGM02 = 1: Toggle OC0A on Compare Match.
1 0 Clear OC0A on Compare Match, set OC0A at TOP
1 1 Set OC0A on Compare Match, clear OC0A at TOP
Table 14-3. Compare Output mode, phase correct PWM mode (1).
COM0A1 COM0A0 Description
0 0 Normal port operation, OC0A disconnected.
0 1 WGM02 = 0: Normal Port Operation, OC0A Disconnected.
WGM02 = 1: Toggle OC0A on Compare Match.
1 0 Clear OC0A on Compare Match when up-counting. Set OC0A on Compare
Match when down-counting.
1 1 Set OC0A on Compare Match when up-counting. Clear OC0A on Compare
Match when down-counting.110
7593L–AVR–09/12
AT90USB64/128
• Bits 5:4 – COM0B1:0: Compare Match Output B mode
These bits control the Output Compare pin (OC0B) behavior. If one or both of the COM0B1:0
bits are set, the OC0B output overrides the normal port functionality of the I/O pin it is connected
to. However, note that the Data Direction Register (DDR) bit corresponding to the OC0B pin
must be set in order to enable the output driver.
When OC0B is connected to the pin, the function of the COM0B1:0 bits depends on the
WGM02:0 bit setting. Table 14-1 shows the COM0A1:0 bit functionality when the WGM02:0 bits
are set to a normal or CTC mode (non-PWM).
Table 14-2 shows the COM0B1:0 bit functionality when the WGM02:0 bits are set to fast PWM
mode.
Note: 1. A special case occurs when OCR0B equals TOP and COM0B1 is set. In this case, the Compare
Match is ignored, but the set or clear is done at TOP. See “Fast PWM mode” on page 104
for more details.
Table 14-3 shows the COM0B1:0 bit functionality when the WGM02:0 bits are set to phase correct
PWM mode.
Note: 1. A special case occurs when OCR0B equals TOP and COM0B1 is set. In this case, the Compare
Match is ignored, but the set or clear is done at TOP. See “Phase correct PWM mode” on
page 106 for more details.
• Bits 3, 2 – Res: Reserved bits
These bits are reserved bits in the Atmel AT90USB64/128 and will always read as zero.
Table 14-4. Compare Output mode, non-PWM mode.
COM01 COM00 Description
0 0 Normal port operation, OC0B disconnected.
0 1 Toggle OC0B on Compare Match
1 0 Clear OC0B on Compare Match
1 1 Set OC0B on Compare Match
Table 14-5. Compare Output mode, fast PWM mode (1).
COM01 COM00 Description
0 0 Normal port operation, OC0B disconnected.
0 1 Reserved.
1 0 Clear OC0B on Compare Match, set OC0B at TOP.
1 1 Set OC0B on Compare Match, clear OC0B at TOP.
Table 14-6. Compare Output mode, phase correct PWM mode (1).
COM0A1 COM0A0 Description
0 0 Normal port operation, OC0B disconnected.
0 1 Reserved.
1 0 Clear OC0B on Compare Match when up-counting. Set OC0B on Compare
Match when down-counting.
1 1 Set OC0B on Compare Match when up-counting. Clear OC0B on Compare
Match when down-counting.111
7593L–AVR–09/12
AT90USB64/128
• Bits 1:0 – WGM01:0: Waveform Generation Mode
Combined with the WGM02 bit found in the TCCR0B Register, these bits control the counting
sequence of the counter, the source for maximum (TOP) counter value, and what type of waveform
generation to be used, see Table 14-7. Modes of operation supported by the Timer/Counter
unit are: Normal mode (counter), Clear Timer on Compare Match (CTC) mode, and two types of
Pulse Width Modulation (PWM) modes (see “Modes of operation” on page 103).
Notes: 1. MAX = 0xFF
2. BOTTOM = 0x00
14.8.2 TCCR0B – Timer/Counter Control Register B
• Bit 7 – FOC0A: Force Output Compare A
The FOC0A bit is only active when the WGM bits specify a non-PWM mode.
However, for ensuring compatibility with future devices, this bit must be set to zero when
TCCR0B is written when operating in PWM mode. When writing a logical one to the FOC0A bit,
an immediate Compare Match is forced on the Waveform Generation unit. The OC0A output is
changed according to its COM0A1:0 bits setting. Note that the FOC0A bit is implemented as a
strobe. Therefore it is the value present in the COM0A1:0 bits that determines the effect of the
forced compare.
A FOC0A strobe will not generate any interrupt, nor will it clear the timer in CTC mode using
OCR0A as TOP.
The FOC0A bit is always read as zero.
• Bit 6 – FOC0B: Force Output Compare B
The FOC0B bit is only active when the WGM bits specify a non-PWM mode.
However, for ensuring compatibility with future devices, this bit must be set to zero when
TCCR0B is written when operating in PWM mode. When writing a logical one to the FOC0B bit,
an immediate Compare Match is forced on the Waveform Generation unit. The OC0B output is
changed according to its COM0B1:0 bits setting. Note that the FOC0B bit is implemented as a
Table 14-7. Waveform Generation Mode bit description.
Mode WGM2 WGM1 WGM0
Timer/Counter mode of
operation TOP
Update of
OCRx at
TOV flag
set on (1)(2)
0 0 0 0 Normal 0xFF Immediate MAX
1 0 0 1 PWM, phase correct 0xFF TOP BOTTOM
2 0 1 0 CTC OCRA Immediate MAX
3 0 1 1 Fast PWM 0xFF TOP MAX
4 1 0 0 Reserved – – –
5 1 0 1 PWM, phase correct OCRA TOP BOTTOM
6 1 1 0 Reserved – – –
7 1 1 1 Fast PWM OCRA TOP TOP
Bit 7 6 5 4 3 2 1 0
FOC0A FOC0B – – WGM02 CS02 CS01 CS00 TCCR0B
Read/write W W R R R/W R/W R/W R/W
Initial value 0 0 0 0 0 0 0 0112
7593L–AVR–09/12
AT90USB64/128
strobe. Therefore it is the value present in the COM0B1:0 bits that determines the effect of the
forced compare.
A FOC0B strobe will not generate any interrupt, nor will it clear the timer in CTC mode using
OCR0B as TOP.
The FOC0B bit is always read as zero.
• Bits 5:4 – Res: Reserved bits
These bits are reserved bits and will always read as zero.
• Bit 3 – WGM02: Waveform Generation Mode
See the description in the “TCCR0A – Timer/Counter Control Register A” on page 108.
• Bits 2:0 – CS02:0: Clock Select
The three Clock Select bits select the clock source to be used by the Timer/Counter.
If external pin modes are used for the Timer/Counter0, transitions on the T0 pin will clock the
counter even if the pin is configured as an output. This feature allows software control of the
counting.
14.8.3 TCNT0 – Timer/Counter Register
The Timer/Counter Register gives direct access, both for read and write operations, to the
Timer/Counter unit 8-bit counter. Writing to the TCNT0 Register blocks (removes) the Compare
Match on the following timer clock. Modifying the counter (TCNT0) while the counter is running,
introduces a risk of missing a Compare Match between TCNT0 and the OCR0x Registers.
14.8.4 OCR0A – Output Compare Register A
Table 14-8. Clock Select bit description.
CS02 CS01 CS00 Description
0 0 0 No clock source (Timer/Counter stopped)
0 0 1 clkI/O/(No prescaling)
0 1 0 clkI/O/8 (From prescaler)
0 1 1 clkI/O/64 (From prescaler)
1 0 0 clkI/O/256 (From prescaler)
1 0 1 clkI/O/1024 (From prescaler)
1 1 0 External clock source on T0 pin. Clock on falling edge.
1 1 1 External clock source on T0 pin. Clock on rising edge.
Bit 7 6 5 4 3 2 1 0
TCNT0[7:0] TCNT0
Read/write R/W R/W R/W R/W R/W R/W R/W R/W
Initial value 0 0 0 0 0 0 0 0
Bit 7 6 5 4 3 2 1 0
OCR0A[7:0] OCR0A
Read/write R/W R/W R/W R/W R/W R/W R/W R/W
Initial value 0 0 0 0 0 0 0 0113
7593L–AVR–09/12
AT90USB64/128
The Output Compare Register A contains an 8-bit value that is continuously compared with the
counter value (TCNT0). A match can be used to generate an Output Compare interrupt, or to
generate a waveform output on the OC0A pin.
14.8.5 OCR0B – Output Compare Register B
The Output Compare Register B contains an 8-bit value that is continuously compared with the
counter value (TCNT0). A match can be used to generate an Output Compare interrupt, or to
generate a waveform output on the OC0B pin.
14.8.6 TIMSK0 – Timer/Counter Interrupt Mask Register
• Bits 7..3, 0 – Res: Reserved bits
These bits are reserved bits and will always read as zero.
• Bit 2 – OCIE0B: Timer/Counter Output Compare Match B Interrupt Enable
When the OCIE0B bit is written to one, and the I-bit in the Status Register is set, the
Timer/Counter Compare Match B interrupt is enabled. The corresponding interrupt is executed if
a Compare Match in Timer/Counter occurs, that is, when the OCF0B bit is set in the
Timer/Counter Interrupt Flag Register – TIFR0.
• Bit 1 – OCIE0A: Timer/Counter0 Output Compare Match A Interrupt Enable
When the OCIE0A bit is written to one, and the I-bit in the Status Register is set, the
Timer/Counter0 Compare Match A interrupt is enabled. The corresponding interrupt is executed
if a Compare Match in Timer/Counter0 occurs, that is, when the OCF0A bit is set in the
Timer/Counter 0 Interrupt Flag Register – TIFR0.
• Bit 0 – TOIE0: Timer/Counter0 Overflow Interrupt Enable
When the TOIE0 bit is written to one, and the I-bit in the Status Register is set, the
Timer/Counter0 Overflow interrupt is enabled. The corresponding interrupt is executed if an
overflow in Timer/Counter0 occurs, that is, when the TOV0 bit is set in the Timer/Counter 0 Interrupt
Flag Register – TIFR0.
14.8.7 TIFR0 – Timer/Counter 0 Interrupt Flag Register
• Bits 7..3, 0 – Res: Reserved bits
These bits are reserved bits in the Atmel AT90USB64/128 and will always read as zero.
Bit 7 6 5 4 3 2 1 0
OCR0B[7:0] OCR0B
Read/write R/W R/W R/W R/W R/W R/W R/W R/W
Initial value 0 0 0 0 0 0 0 0
Bit 7 6 5 4 3 2 1 0
– – – – – OCIE0B OCIE0A TOIE0 TIMSK0
Read/write R R R R R R/W R/W R/W
Initial value 0 0 0 0 0 0 0 0
Bit 7 6 5 4 3 2 1 0
– – – – – OCF0B OCF0A TOV0 TIFR0
Read/write R R R R R R/W R/W R/W
Initial value 0 0 0 0 0 0 0 0114
7593L–AVR–09/12
AT90USB64/128
• Bit 2 – OCF0B: Timer/Counter 0 Output Compare B Match Flag
The OCF0B bit is set when a Compare Match occurs between the Timer/Counter and the data in
OCR0B – Output Compare Register0 B. OCF0B is cleared by hardware when executing the corresponding
interrupt handling vector. Alternatively, OCF0B is cleared by writing a logic one to
the flag. When the I-bit in SREG, OCIE0B (Timer/Counter Compare B Match Interrupt Enable),
and OCF0B are set, the Timer/Counter Compare Match Interrupt is executed.
• Bit 1 – OCF0A: Timer/Counter 0 Output Compare A Match Flag
The OCF0A bit is set when a Compare Match occurs between the Timer/Counter0 and the data
in OCR0A – Output Compare Register0. OCF0A is cleared by hardware when executing the corresponding
interrupt handling vector. Alternatively, OCF0A is cleared by writing a logic one to
the flag. When the I-bit in SREG, OCIE0A (Timer/Counter0 Compare Match Interrupt Enable),
and OCF0A are set, the Timer/Counter0 Compare Match Interrupt is executed.
• Bit 0 – TOV0: Timer/Counter0 Overflow Flag
The bit TOV0 is set when an overflow occurs in Timer/Counter0. TOV0 is cleared by hardware
when executing the corresponding interrupt handling vector. Alternatively, TOV0 is cleared by
writing a logic one to the flag. When the SREG I-bit, TOIE0 (Timer/Counter0 Overflow Interrupt
Enable), and TOV0 are set, the Timer/Counter0 Overflow interrupt is executed.
The setting of this flag is dependent of the WGM02:0 bit setting. Refer to Table 14-7, “Waveform
Generation Mode bit description.” on page 111.115
7593L–AVR–09/12
AT90USB64/128
15. 16-bit Timer/Counter (Timer/Counter1 and Timer/Counter3)
The 16-bit Timer/Counter unit allows accurate program execution timing (event management),
wave generation, and signal timing measurement. The main features are:
• True 16-bit design (that is, allows 16-bit PWM)
• Three independent output compare units
• Double buffered output compare registers
• One input capture unit
• Input capture noise canceler
• Clear timer on compare match (auto reload)
• Glitch-free, phase correct pulse width modulator (PWM)
• Variable PWM period
• Frequency generator
• External event counter
• Ten independent interrupt sources (TOV1, OCF1A, OCF1B, OCF1C, ICF1, TOV3, OCF3A, OCF3B,
OCF3C, and ICF3)
15.1 Overview
Most register and bit references in this section are written in general form. A lower case “n”
replaces the Timer/Counter number, and a lower case “x” replaces the Output Compare unit
channel. However, when using the register or bit defines in a program, the precise form must be
used, that is, TCNT1 for accessing Timer/Counter1 counter value and so on.
A simplified block diagram of the 16-bit Timer/Counter is shown in Figure 15-1 on page 116. For
the actual placement of I/O pins, see “Pinout Atmel AT90USB64/128-TQFP.” on page 3. CPU
accessible I/O Registers, including I/O bits and I/O pins, are shown in bold. The device-specific
I/O Register and bit locations are listed in the “16-bit Timer/Counter (Timer/Counter1 and
Timer/Counter3)” on page 115.
The Power Reduction Timer/Counter1 bit, PRTIM1, in “PRR0 – Power Reduction Register 0” on
page 54 must be written to zero to enable Timer/Counter1 module.
The Power Reduction Timer/Counter3 bit, PRTIM3, in “PRR1 – Power Reduction Register 1” on
page 55 must be written to zero to enable Timer/Counter3 module.116
7593L–AVR–09/12
AT90USB64/128
Figure 15-1. 16-bit Timer/Counter block diagram (1).
Note: 1. Refer to Figure 1-1 on page 3, Table 11-6 on page 79, and Table 11-9 on page 82 for
Timer/Counter1 and 3 and 3 pin placement and description.
15.1.1 Registers
The Timer/Counter (TCNTn), Output Compare Registers (OCRnA/B/C), and Input Capture Register
(ICRn) are all 16-bit registers. Special procedures must be followed when accessing the 16-
bit registers. These procedures are described in the section “Accessing 16-bit registers” on page
117. The Timer/Counter Control Registers (TCCRnA/B/C) are 8-bit registers and have no CPU
access restrictions. Interrupt requests (shorten as Int.Req.) signals are all visible in the Timer
Interrupt Flag Register (TIFRn). All interrupts are individually masked with the Timer Interrupt
Mask Register (TIMSKn). TIFRn and TIMSKn are not shown in the figure since these registers
are shared by other timer units.
The Timer/Counter can be clocked internally, via the prescaler, or by an external clock source on
the Tn pin. The Clock Select logic block controls which clock source and edge the Timer/Counter
uses to increment (or decrement) its value. The Timer/Counter is inactive when no clock source
is selected. The output from the clock select logic is referred to as the timer clock (clkTn).
The double buffered Output Compare Registers (OCRnA/B/C) are compared with the
Timer/Counter value at all time. The result of the compare can be used by the Waveform Generator
to generate a PWM or variable frequency output on the Output Compare pin (OCnA/B/C).
ICFn (Int.Req.)
TOVn
(int.req.)
Clock select
Timer/Counter
DATABUS
ICRn
=
=
=
TCNTn
Waveform
generation
Waveform
generation
Waveform
generation
OCnA
OCnB
OCnC
Noise
canceler
ICPn
=
Fixed
TOP
values
Edge
detector
Control logic
= 0
TOP BOTTOM
Count
Clear
Direction
OCFnA
(Int.Req.)
OCFnB
(Int.Req.)
OCFnC
(Int.Req.)
TCCRnA TCCRnB TCCRnC
( From Analog
Comparator Ouput )
Tn Edge
detector
(From prescaler)
TCLK
OCRnC
OCRnB
OCRnA117
7593L–AVR–09/12
AT90USB64/128
See “Output Compare units” on page 124.. The compare match event will also set the Compare
Match Flag (OCFnA/B/C) which can be used to generate an Output Compare interrupt request.
The Input Capture Register can capture the Timer/Counter value at a given external (edge triggered)
event on either the Input Capture pin (ICPn) or on the Analog Comparator pins (see
“Analog Comparator” on page 304) The Input Capture unit includes a digital filtering unit (Noise
Canceler) for reducing the chance of capturing noise spikes.
The TOP value, or maximum Timer/Counter value, can in some modes of operation be defined
by either the OCRnA Register, the ICRn Register, or by a set of fixed values. When using
OCRnA as TOP value in a PWM mode, the OCRnA Register can not be used for generating a
PWM output. However, the TOP value will in this case be double buffered allowing the TOP
value to be changed in run time. If a fixed TOP value is required, the ICRn Register can be used
as an alternative, freeing the OCRnA to be used as PWM output.
15.1.2 Definitions
The following definitions are used extensively throughout the document:
15.2 Accessing 16-bit registers
The TCNTn, OCRnA/B/C, and ICRn are 16-bit registers that can be accessed by the AVR CPU
via the 8-bit data bus. The 16-bit register must be byte accessed using two read or write operations.
Each 16-bit timer has a single 8-bit register for temporary storing of the high byte of the 16-
bit access. The same Temporary Register is shared between all 16-bit registers within each 16-
bit timer. Accessing the low byte triggers the 16-bit read or write operation. When the low byte of
a 16-bit register is written by the CPU, the high byte stored in the Temporary Register, and the
low byte written are both copied into the 16-bit register in the same clock cycle. When the low
byte of a 16-bit register is read by the CPU, the high byte of the 16-bit register is copied into the
Temporary Register in the same clock cycle as the low byte is read.
Not all 16-bit accesses uses the Temporary Register for the high byte. Reading the OCRnA/B/C
16-bit registers does not involve using the Temporary Register.
To do a 16-bit write, the high byte must be written before the low byte. For a 16-bit read, the low
byte must be read before the high byte.
The following code examples show how to access the 16-bit timer registers assuming that no
interrupts updates the temporary register. The same principle can be used directly for accessing
the OCRnA/B/C and ICRn Registers. Note that when using “C”, the compiler handles the 16-bit
access.
BOTTOM The counter reaches the BOTTOM when it becomes 0x0000.
MAX The counter reaches its MAXimum when it becomes 0xFFFF (decimal 65535).
TOP
The counter reaches the TOP when it becomes equal to the highest value in the
count sequence. The TOP value can be assigned to be one of the fixed values:
0x00FF, 0x01FF, or 0x03FF, or to the value stored in the OCRnA or ICRn
Register. The assignment is dependent of the mode of operation.118
7593L–AVR–09/12
AT90USB64/128
Note: 1. See “About code examples” on page 10.
The assembly code example returns the TCNTn value in the r17:r16 register pair.
It is important to notice that accessing 16-bit registers are atomic operations. If an interrupt
occurs between the two instructions accessing the 16-bit register, and the interrupt code
updates the temporary register by accessing the same or any other of the 16-bit Timer Registers,
then the result of the access outside the interrupt will be corrupted. Therefore, when both
the main code and the interrupt code update the temporary register, the main code must disable
the interrupts during the 16-bit access.
Assembly code examples (1)
...
; Set TCNTn to 0x01FF
ldi r17,0x01
ldi r16,0xFF
out TCNTnH,r17
out TCNTnL,r16
; Read TCNTn into r17:r16
in r16,TCNTnL
in r17,TCNTnH
...
C code examples (1)
unsigned int i;
...
/* Set TCNTn to 0x01FF */
TCNTn = 0x1FF;
/* Read TCNTn into i */
i = TCNTn;
...119
7593L–AVR–09/12
AT90USB64/128
The following code examples show how to do an atomic read of the TCNTn Register contents.
Reading any of the OCRnA/B/C or ICRn Registers can be done by using the same principle.
Note: 1. See “About code examples” on page 10.
The assembly code example returns the TCNTn value in the r17:r16 register pair.
Assembly code example (1)
TIM16_ReadTCNTn:
; Save global interrupt flag
in r18,SREG
; Disable interrupts
cli
; Read TCNTn into r17:r16
in r16,TCNTnL
in r17,TCNTnH
; Restore global interrupt flag
out SREG,r18
ret
C code example (1)
unsigned int TIM16_ReadTCNTn( void )
{
unsigned char sreg;
unsigned int i;
/* Save global interrupt flag */
sreg = SREG;
/* Disable interrupts */
__disable_interrupt();
/* Read TCNTn into i */
i = TCNTn;
/* Restore global interrupt flag */
SREG = sreg;
return i;
}120
7593L–AVR–09/12
AT90USB64/128
The following code examples show how to do an atomic write of the TCNTn Register contents.
Writing any of the OCRnA/B/C or ICRn Registers can be done by using the same principle.
Note: 1. See “About code examples” on page 10.
The assembly code example requires that the r17:r16 register pair contains the value to be written
to TCNTn.
15.2.1 Reusing the Temporary High Byte register
If writing to more than one 16-bit register where the high byte is the same for all registers written,
then the high byte only needs to be written once. However, note that the same rule of atomic
operation described previously also applies in this case.
15.3 Timer/Counter clock sources
The Timer/Counter can be clocked by an internal or an external clock source. The clock source
is selected by the Clock Select logic which is controlled by the Clock Select (CSn2:0) bits
located in the Timer/Counter control Register B (TCCRnB). For details on clock sources and
prescaler, see Section “Timer/Counter0, Timer/Counter1, and Timer/Counter3 prescalers” on
page 96.
Assembly code example (1)
TIM16_WriteTCNTn:
; Save global interrupt flag
in r18,SREG
; Disable interrupts
cli
; Set TCNTn to r17:r16
out TCNTnH,r17
out TCNTnL,r16
; Restore global interrupt flag
out SREG,r18
ret
C code example (1)
void TIM16_WriteTCNTn( unsigned int i )
{
unsigned char sreg;
unsigned int i;
/* Save global interrupt flag */
sreg = SREG;
/* Disable interrupts */
__disable_interrupt();
/* Set TCNTn to i */
TCNTn = i;
/* Restore global interrupt flag */
SREG = sreg;
}121
7593L–AVR–09/12
AT90USB64/128
15.4 Counter unit
The main part of the 16-bit Timer/Counter is the programmable 16-bit bi-directional counter unit.
Figure 15-2 shows a block diagram of the counter and its surroundings.
Figure 15-2. Counter unit block diagram.
Signal description (internal signals):
Count Increment or decrement TCNTn by 1.
Direction Select between increment and decrement.
Clear Clear TCNTn (set all bits to zero).
clkTn Timer/Counter clock.
TOP Signalize that TCNTn has reached maximum value.
BOTTOM Signalize that TCNTn has reached minimum value (zero).
The 16-bit counter is mapped into two 8-bit I/O memory locations: Counter High (TCNTnH) containing
the upper eight bits of the counter, and Counter Low (TCNTnL) containing the lower eight
bits. The TCNTnH Register can only be indirectly accessed by the CPU. When the CPU does an
access to the TCNTnH I/O location, the CPU accesses the high byte temporary register (TEMP).
The temporary register is updated with the TCNTnH value when the TCNTnL is read, and
TCNTnH is updated with the temporary register value when TCNTnL is written. This allows the
CPU to read or write the entire 16-bit counter value within one clock cycle via the 8-bit data bus.
It is important to notice that there are special cases of writing to the TCNTn Register when the
counter is counting that will give unpredictable results. The special cases are described in the
sections where they are of importance.
Depending on the mode of operation used, the counter is cleared, incremented, or decremented
at each timer clock (clkTn). The clkTn can be generated from an external or internal clock source,
selected by the Clock Select bits (CSn2:0). When no clock source is selected (CSn2:0 = 0) the
timer is stopped. However, the TCNTn value can be accessed by the CPU, independent of
whether clkTn is present or not. A CPU write overrides (has priority over) all counter clear or
count operations.
The counting sequence is determined by the setting of the Waveform Generation mode bits
(WGMn3:0) located in the Timer/Counter Control Registers A and B (TCCRnA and TCCRnB).
There are close connections between how the counter behaves (counts) and how waveforms
are generated on the Output Compare outputs OCnx. For more details about advanced counting
sequences and waveform generation, see Section “Modes of operation” on page 127.
TEMP (8-bit)
DATA BUS (8-bit)
TCNTn (16-bit counter)
TCNTnH (8-bit) TCNTnL (8-bit) Control logic
Count
Clear
Direction
TOVn
(Int.Req.)
Clock select
TOP BOTTOM
Tn Edge
detector
(From prescaler)
clkTn122
7593L–AVR–09/12
AT90USB64/128
The Timer/Counter Overflow Flag (TOVn) is set according to the mode of operation selected by
the WGMn3:0 bits. TOVn can be used for generating a CPU interrupt.
15.5 Input Capture unit
The Timer/Counter incorporates an Input Capture unit that can capture external events and give
them a time-stamp indicating time of occurrence. The external signal indicating an event, or multiple
events, can be applied via the ICPn pin or alternatively, for the Timer/Counter1 only, via the
Analog Comparator unit. The time-stamps can then be used to calculate frequency, duty-cycle,
and other features of the signal applied. Alternatively the time-stamps can be used for creating a
log of the events.
The Input Capture unit is illustrated by the block diagram shown in Figure 15-3. The elements of
the block diagram that are not directly a part of the input capture unit are gray shaded. The small
“n” in register and bit names indicates the Timer/Counter number.
Figure 15-3. Input Capture Unit block diagram.
Note: The Analog Comparator Output (ACO) can only trigger the Timer/Counter1 ICP – not
Timer/Counter3, 4, or 5.
When a change of the logic level (an event) occurs on the Input Capture Pin (ICPn), alternatively
on the analog Comparator output (ACO), and this change confirms to the setting of the edge
detector, a capture will be triggered. When a capture is triggered, the 16-bit value of the counter
(TCNTn) is written to the Input Capture Register (ICRn). The Input Capture Flag (ICFn) is set at
the same system clock as the TCNTn value is copied into ICRn Register. If enabled (TICIEn =
1), the input capture flag generates an input capture interrupt. The ICFn flag is automatically
cleared when the interrupt is executed. Alternatively the ICFn flag can be cleared by software by
writing a logical one to its I/O bit location.
ICFn (int.req.)
Analog
comparator
WRITE ICRn (16-bit register)
ICRnH (8-bit)
Noise
canceler
ICPn
Edge
detector
TEMP (8-bit)
DATA BUS (8-bit)
ICRnL (8-bit)
TCNTn (16-bit counter)
TCNTnH (8-bit) TCNTnL (8-bit)
ACO* ACIC* ICNC ICES123
7593L–AVR–09/12
AT90USB64/128
Reading the 16-bit value in the Input Capture Register (ICRn) is done by first reading the low
byte (ICRnL) and then the high byte (ICRnH). When the low byte is read the high byte is copied
into the high byte Temporary Register (TEMP). When the CPU reads the ICRnH I/O location it
will access the TEMP Register.
The ICRn Register can only be written when using a Waveform Generation mode that utilizes
the ICRn Register for defining the counter’s TOP value. In these cases the Waveform Generation
mode (WGMn3:0) bits must be set before the TOP value can be written to the ICRn
Register. When writing the ICRn Register the high byte must be written to the ICRnH I/O location
before the low byte is written to ICRnL.
For more information on how to access the 16-bit registers refer to Section “Accessing 16-bit
registers” on page 117.
15.5.1 Input Capture Trigger Source
The main trigger source for the input capture unit is the Input Capture Pin (ICPn).
Timer/Counter1 can alternatively use the analog comparator output as trigger source for the
input capture unit. The Analog Comparator is selected as trigger source by setting the analog
Comparator Input Capture (ACIC) bit in the Analog Comparator Control and Status Register
(ACSR). Be aware that changing trigger source can trigger a capture. The input capture flag
must therefore be cleared after the change.
Both the Input Capture Pin (ICPn) and the Analog Comparator output (ACO) inputs are sampled
using the same technique as for the Tn pin (Figure 13-1 on page 96). The edge detector is also
identical. However, when the noise canceler is enabled, additional logic is inserted before the
edge detector, which increases the delay by four system clock cycles. Note that the input of the
noise canceler and edge detector is always enabled unless the Timer/Counter is set in a Waveform
Generation mode that uses ICRn to define TOP.
An input capture can be triggered by software by controlling the port of the ICPn pin.
15.5.2 Noise Canceler
The Noise Canceler improves noise immunity by using a simple digital filtering scheme. The
noise canceler input is monitored over four samples, and all four must be equal for changing the
output that in turn is used by the edge detector.
The noise canceler is enabled by setting the Input Capture Noise Canceler (ICNCn) bit in
Timer/Counter Control Register B (TCCRnB). When enabled the noise canceler introduces additional
four system clock cycles of delay from a change applied to the input, to the update of the
ICRn Register. The noise canceler uses the system clock and is therefore not affected by the
prescaler.
15.5.3 Using the Input Capture unit
The main challenge when using the Input Capture unit is to assign enough processor capacity
for handling the incoming events. The time between two events is critical. If the processor has
not read the captured value in the ICRn Register before the next event occurs, the ICRn will be
overwritten with a new value. In this case the result of the capture will be incorrect.
When using the Input Capture interrupt, the ICRn Register should be read as early in the interrupt
handler routine as possible. Even though the Input Capture interrupt has relatively high
priority, the maximum interrupt response time is dependent on the maximum number of clock
cycles it takes to handle any of the other interrupt requests.124
7593L–AVR–09/12
AT90USB64/128
Using the Input Capture unit in any mode of operation when the TOP value (resolution) is
actively changed during operation, is not recommended.
Measurement of an external signal’s duty cycle requires that the trigger edge is changed after
each capture. Changing the edge sensing must be done as early as possible after the ICRn
Register has been read. After a change of the edge, the Input Capture Flag (ICFn) must be
cleared by software (writing a logical one to the I/O bit location). For measuring frequency only,
the clearing of the ICFn Flag is not required (if an interrupt handler is used).
15.6 Output Compare units
The 16-bit comparator continuously compares TCNTn with the Output Compare Register
(OCRnx). If TCNT equals OCRnx the comparator signals a match. A match will set the Output
Compare Flag (OCFnx) at the next timer clock cycle. If enabled (OCIEnx = 1), the Output Compare
Flag generates an Output Compare interrupt. The OCFnx Flag is automatically cleared
when the interrupt is executed. Alternatively the OCFnx Flag can be cleared by software by writing
a logical one to its I/O bit location. The Waveform Generator uses the match signal to
generate an output according to operating mode set by the Waveform Generation mode
(WGMn3:0) bits and Compare Output mode (COMnx1:0) bits. The TOP and BOTTOM signals
are used by the Waveform Generator for handling the special cases of the extreme values in
some modes of operation (see “Modes of operation” on page 127)
A special feature of Output Compare unit A allows it to define the Timer/Counter TOP value (that
is, counter resolution). In addition to the counter resolution, the TOP value defines the period
time for waveforms generated by the Waveform Generator.
Figure 15-4 shows a block diagram of the Output Compare unit. The small “n” in the register and
bit names indicates the device number (n = n for Timer/Counter n), and the “x” indicates Output
Compare unit (A/B/C). The elements of the block diagram that are not directly a part of the Output
Compare unit are gray shaded.
Figure 15-4. Output Compare Unit, block diagram.
OCFnx (int.req.)
= (16-bit comparator )
OCRnx buffer (16-bit register)
OCRnxH buf. (8-bit)
OCnx
TEMP (8-bit)
DATA BUS (8-bit)
OCRnxL buf. (8-bit)
TCNTn (16-bit counter)
TCNTnH (8-bit) TCNTnL (8-bit)
WGMn3:0 COMnx1:0
OCRnx (16-bit register)
OCRnxH (8-bit) OCRnxL (8-bit)
Waveform generator
TOP
BOTTOM125
7593L–AVR–09/12
AT90USB64/128
The OCRnx Register is double buffered when using any of the twelve Pulse Width Modulation
(PWM) modes. For the Normal and Clear Timer on Compare (CTC) modes of operation, the
double buffering is disabled. The double buffering synchronizes the update of the OCRnx Compare
Register to either TOP or BOTTOM of the counting sequence. The synchronization
prevents the occurrence of odd-length, non-symmetrical PWM pulses, thereby making the output
glitch-free.
The OCRnx Register access may seem complex, but this is not case. When the double buffering
is enabled, the CPU has access to the OCRnx Buffer Register, and if double buffering is disabled
the CPU will access the OCRnx directly. The content of the OCR1x (Buffer or Compare)
Register is only changed by a write operation (the Timer/Counter does not update this register
automatically as the TCNT1 and ICR1 Register). Therefore OCR1x is not read via the high byte
temporary register (TEMP). However, it is a good practice to read the low byte first as when
accessing other 16-bit registers. Writing the OCRnx Registers must be done via the TEMP Register
since the compare of all 16 bits is done continuously. The high byte (OCRnxH) has to be
written first. When the high byte I/O location is written by the CPU, the TEMP Register will be
updated by the value written. Then when the low byte (OCRnxL) is written to the lower eight bits,
the high byte will be copied into the upper 8-bits of either the OCRnx buffer or OCRnx Compare
Register in the same system clock cycle.
For more information of how to access the 16-bit registers refer to Section “Accessing 16-bit registers”
on page 117.
15.6.1 Force Output Compare
In non-PWM Waveform Generation modes, the match output of the comparator can be forced by
writing a one to the Force Output Compare (FOCnx) bit. Forcing compare match will not set the
OCFnx Flag or reload/clear the timer, but the OCnx pin will be updated as if a real compare
match had occurred (the COMn1:0 bits settings define whether the OCnx pin is set, cleared or
toggled).
15.6.2 Compare Match Blocking by TCNTn write
All CPU writes to the TCNTn Register will block any compare match that occurs in the next timer
clock cycle, even when the timer is stopped. This feature allows OCRnx to be initialized to the
same value as TCNTn without triggering an interrupt when the Timer/Counter clock is enabled.
15.6.3 Using the Output Compare unit
Since writing TCNTn in any mode of operation will block all compare matches for one timer clock
cycle, there are risks involved when changing TCNTn when using any of the Output Compare
channels, independent of whether the Timer/Counter is running or not. If the value written to
TCNTn equals the OCRnx value, the compare match will be missed, resulting in incorrect waveform
generation. Do not write the TCNTn equal to TOP in PWM modes with variable TOP
values. The compare match for the TOP will be ignored and the counter will continue to 0xFFFF.
Similarly, do not write the TCNTn value equal to BOTTOM when the counter is counting down.
The setup of the OCnx should be performed before setting the Data Direction Register for the
port pin to output. The easiest way of setting the OCnx value is to use the Force Output Compare
(FOCnx) strobe bits in Normal mode. The OCnx Register keeps its value even when
changing between Waveform Generation modes.
Be aware that the COMnx1:0 bits are not double buffered together with the compare value.
Changing the COMnx1:0 bits will take effect immediately.126
7593L–AVR–09/12
AT90USB64/128
15.7 Compare Match Output unit
The Compare Output mode (COMnx1:0) bits have two functions. The Waveform Generator uses
the COMnx1:0 bits for defining the Output Compare (OCnx) state at the next compare match.
Secondly the COMnx1:0 bits control the OCnx pin output source. Figure 15-5 shows a simplified
schematic of the logic affected by the COMnx1:0 bit setting. The I/O Registers, I/O bits, and I/O
pins in the figure are shown in bold. Only the parts of the general I/O Port Control Registers
(DDR and PORT) that are affected by the COMnx1:0 bits are shown. When referring to the
OCnx state, the reference is for the internal OCnx Register, not the OCnx pin. If a system reset
occur, the OCnx Register is reset to “0”.
Figure 15-5. Compare Match Output unit, schematic.
The general I/O port function is overridden by the Output Compare (OCnx) from the Waveform
Generator if either of the COMnx1:0 bits are set. However, the OCnx pin direction (input or output)
is still controlled by the Data Direction Register (DDR) for the port pin. The Data Direction
Register bit for the OCnx pin (DDR_OCnx) must be set as output before the OCnx value is visible
on the pin. The port override function is generally independent of the Waveform Generation
mode, but there are some exceptions. Refer to Table 15-1 on page 137, Table 15-2 on page
137, and Table 15-3 on page 138 for details.
The design of the Output Compare pin logic allows initialization of the OCnx state before the output
is enabled. Note that some COMnx1:0 bit settings are reserved for certain modes of
operation. See “16-bit Timer/Counter (Timer/Counter1 and Timer/Counter3)” on page 115.
The COMnx1:0 bits have no effect on the Input Capture unit.
15.7.1 Compare Output mode and Waveform generation
The Waveform Generator uses the COMnx1:0 bits differently in normal, CTC, and PWM modes.
For all modes, setting the COMnx1:0 = 0 tells the Waveform Generator that no action on the
OCnx Register is to be performed on the next compare match. For compare output actions in the
PORT
DDR
D Q
D Q
OCnx
OCnx pin
D Q Waveform
generator
COMnx1
COMnx0
0
1
DATA BUS
FOCnx
clkI/O127
7593L–AVR–09/12
AT90USB64/128
non-PWM modes refer to Table 15-1 on page 137. For fast PWM mode refer to Table 15-2 on
page 137, and for phase correct and phase and frequency correct PWM refer to Table 15-3 on
page 138.
A change of the COMnx1:0 bits state will have effect at the first compare match after the bits are
written. For non-PWM modes, the action can be forced to have immediate effect by using the
FOCnx strobe bits.
15.8 Modes of operation
The mode of operation, that is, the behavior of the Timer/Counter and the Output Compare pins,
is defined by the combination of the Waveform Generation mode (WGMn3:0) and Compare Output
mode (COMnx1:0) bits. The Compare Output mode bits do not affect the counting sequence,
while the Waveform Generation mode bits do. The COMnx1:0 bits control whether the PWM output
generated should be inverted or not (inverted or non-inverted PWM). For non-PWM modes
the COMnx1:0 bits control whether the output should be set, cleared or toggle at a compare
match (see “Compare Match Output unit” on page 126).
For detailed timing information refer to “Timer/Counter timing diagrams” on page 134.
15.8.1 Normal mode
The simplest mode of operation is the Normal mode (WGMn3:0 = 0). In this mode the counting
direction is always up (incrementing), and no counter clear is performed. The counter simply
overruns when it passes its maximum 16-bit value (MAX = 0xFFFF) and then restarts from the
BOTTOM (0x0000). In normal operation the Timer/Counter Overflow Flag (TOVn) will be set in
the same timer clock cycle as the TCNTn becomes zero. The TOVn Flag in this case behaves
like a 17th bit, except that it is only set, not cleared. However, combined with the timer overflow
interrupt that automatically clears the TOVn Flag, the timer resolution can be increased by software.
There are no special cases to consider in the Normal mode, a new counter value can be
written anytime.
The Input Capture unit is easy to use in Normal mode. However, observe that the maximum
interval between the external events must not exceed the resolution of the counter. If the interval
between events are too long, the timer overflow interrupt or the prescaler must be used to
extend the resolution for the capture unit.
The Output Compare units can be used to generate interrupts at some given time. Using the
Output Compare to generate waveforms in Normal mode is not recommended, since this will
occupy too much of the CPU time.
15.8.2 Clear Timer on Compare Match (CTC) mode
In Clear Timer on Compare or CTC mode (WGMn3:0 = 4 or 12), the OCRnA or ICRn Register
are used to manipulate the counter resolution. In CTC mode the counter is cleared to zero when
the counter value (TCNTn) matches either the OCRnA (WGMn3:0 = 4) or the ICRn (WGMn3:0 =
12). The OCRnA or ICRn define the top value for the counter, hence also its resolution. This
mode allows greater control of the compare match output frequency. It also simplifies the operation
of counting external events.
The timing diagram for the CTC mode is shown in Figure 15-6 on page 128. The counter value
(TCNTn) increases until a compare match occurs with either OCRnA or ICRn, and then counter
(TCNTn) is cleared.128
7593L–AVR–09/12
AT90USB64/128
Figure 15-6. CTC mode, timing diagram.
An interrupt can be generated at each time the counter value reaches the TOP value by either
using the OCFnA or ICFn Flag according to the register used to define the TOP value. If the
interrupt is enabled, the interrupt handler routine can be used for updating the TOP value. However,
changing the TOP to a value close to BOTTOM when the counter is running with none or a
low prescaler value must be done with care since the CTC mode does not have the double buffering
feature. If the new value written to OCRnA or ICRn is lower than the current value of
TCNTn, the counter will miss the compare match. The counter will then have to count to its maximum
value (0xFFFF) and wrap around starting at 0x0000 before the compare match can occur.
In many cases this feature is not desirable. An alternative will then be to use the fast PWM mode
using OCRnA for defining TOP (WGMn3:0 = 15) since the OCRnA then will be double buffered.
For generating a waveform output in CTC mode, the OCnA output can be set to toggle its logical
level on each compare match by setting the Compare Output mode bits to toggle mode
(COMnA1:0 = 1). The OCnA value will not be visible on the port pin unless the data direction for
the pin is set to output (DDR_OCnA = 1). The waveform generated will have a maximum frequency
of fOCnA = fclk_I/O/2 when OCRnA is set to zero (0x0000). The waveform frequency is
defined by the following equation:
The N variable represents the prescaler factor (1, 8, 64, 256, or 1024).
As for the Normal mode of operation, the TOVn Flag is set in the same timer clock cycle that the
counter counts from MAX to 0x0000.
15.8.3 Fast PWM mode
The fast Pulse Width Modulation or fast PWM mode (WGMn3:0 = 5, 6, 7, 14, or 15) provides a
high frequency PWM waveform generation option. The fast PWM differs from the other PWM
options by its single-slope operation. The counter counts from BOTTOM to TOP then restarts
from BOTTOM. In non-inverting Compare Output mode, the Output Compare (OCnx) is set on
the compare match between TCNTn and OCRnx, and cleared at TOP. In inverting Compare
Output mode output is cleared on compare match and set at TOP. Due to the single-slope operation,
the operating frequency of the fast PWM mode can be twice as high as the phase correct
and phase and frequency correct PWM modes that use dual-slope operation. This high frequency
makes the fast PWM mode well suited for power regulation, rectification, and DAC
applications. High frequency allows physically small sized external components (coils, capacitors),
hence reduces total system cost.
TCNTn
OCnA
(Toggle)
OCnA Interrupt Flag Set
or ICFn Interrupt Flag Set
(interrupt on TOP)
Period 1 2 3 4
(COMnA1:0 = 1)
f
OCnA
f
clk_I/O
2 ⋅ ⋅ N ( ) 1 + OCRnA = --------------------------------------------------129
7593L–AVR–09/12
AT90USB64/128
The PWM resolution for fast PWM can be fixed to 8-, 9-, or 10-bit, or defined by either ICRn or
OCRnA. The minimum resolution allowed is 2-bit (ICRn or OCRnA set to 0x0003), and the maximum
resolution is 16-bit (ICRn or OCRnA set to MAX). The PWM resolution in bits can be
calculated by using the following equation:
In fast PWM mode the counter is incremented until the counter value matches either one of the
fixed values 0x00FF, 0x01FF, or 0x03FF (WGMn3:0 = 5, 6, or 7), the value in ICRn (WGMn3:0 =
14), or the value in OCRnA (WGMn3:0 = 15). The counter is then cleared at the following timer
clock cycle. The timing diagram for the fast PWM mode is shown in Figure 15-7. The figure
shows fast PWM mode when OCRnA or ICRn is used to define TOP. The TCNTn value is in the
timing diagram shown as a histogram for illustrating the single-slope operation. The diagram
includes non-inverted and inverted PWM outputs. The small horizontal line marks on the TCNTn
slopes represent compare matches between OCRnx and TCNTn. The OCnx Interrupt Flag will
be set when a compare match occurs.
Figure 15-7. Fast PWM mode, timing diagram.
The Timer/Counter Overflow Flag (TOVn) is set each time the counter reaches TOP. In addition
the OCnA or ICFn Flag is set at the same timer clock cycle as TOVn is set when either OCRnA
or ICRn is used for defining the TOP value. If one of the interrupts are enabled, the interrupt handler
routine can be used for updating the TOP and compare values.
When changing the TOP value the program must ensure that the new TOP value is higher or
equal to the value of all of the Compare Registers. If the TOP value is lower than any of the
Compare Registers, a compare match will never occur between the TCNTn and the OCRnx.
Note that when using fixed TOP values the unused bits are masked to zero when any of the
OCRnx Registers are written.
The procedure for updating ICRn differs from updating OCRnA when used for defining the TOP
value. The ICRn Register is not double buffered. This means that if ICRn is changed to a low
value when the counter is running with none or a low prescaler value, there is a risk that the new
ICRn value written is lower than the current value of TCNTn. The result will then be that the
counter will miss the compare match at the TOP value. The counter will then have to count to the
MAX value (0xFFFF) and wrap around starting at 0x0000 before the compare match can occur.
The OCRnA Register however, is double buffered. This feature allows the OCRnA I/O location
RFPWM
log( ) TOP + 1
log( ) 2 = -----------------------------------
TCNTn
OCRnx / TOP Update
and TOVn Interrupt Flag
Set and OCnA Interrupt
Flag Set or ICFn
Interrupt Flag Set
(Interrupt on TOP)
Period 1 2 3 4 5 6 7 8
OCnx
OCnx
(COMnx1:0 = 2)
(COMnx1:0 = 3)130
7593L–AVR–09/12
AT90USB64/128
to be written anytime. When the OCRnA I/O location is written the value written will be put into
the OCRnA Buffer Register. The OCRnA Compare Register will then be updated with the value
in the Buffer Register at the next timer clock cycle the TCNTn matches TOP. The update is done
at the same timer clock cycle as the TCNTn is cleared and the TOVn Flag is set.
Using the ICRn Register for defining TOP works well when using fixed TOP values. By using
ICRn, the OCRnA Register is free to be used for generating a PWM output on OCnA. However,
if the base PWM frequency is actively changed (by changing the TOP value), using the OCRnA
as TOP is clearly a better choice due to its double buffer feature.
In fast PWM mode, the compare units allow generation of PWM waveforms on the OCnx pins.
Setting the COMnx1:0 bits to two will produce a non-inverted PWM and an inverted PWM output
can be generated by setting the COMnx1:0 to three (see Table on page 137). The actual OCnx
value will only be visible on the port pin if the data direction for the port pin is set as output
(DDR_OCnx). The PWM waveform is generated by setting (or clearing) the OCnx Register at
the compare match between OCRnx and TCNTn, and clearing (or setting) the OCnx Register at
the timer clock cycle the counter is cleared (changes from TOP to BOTTOM).
The PWM frequency for the output can be calculated by the following equation:
The N variable represents the prescaler divider (1, 8, 64, 256, or 1024).
The extreme values for the OCRnx Register represents special cases when generating a PWM
waveform output in the fast PWM mode. If the OCRnx is set equal to BOTTOM (0x0000) the output
will be a narrow spike for each TOP+1 timer clock cycle. Setting the OCRnx equal to TOP
will result in a constant high or low output (depending on the polarity of the output set by the
COMnx1:0 bits.)
A frequency (with 50% duty cycle) waveform output in fast PWM mode can be achieved by setting
OCnA to toggle its logical level on each compare match (COMnA1:0 = 1). This applies only
if OCR1A is used to define the TOP value (WGM13:0 = 15). The waveform generated will have
a maximum frequency of fOCnA = fclk_I/O/2 when OCRnA is set to zero (0x0000). This feature is
similar to the OCnA toggle in CTC mode, except the double buffer feature of the Output Compare
unit is enabled in the fast PWM mode.
15.8.4 Phase correct PWM mode
The phase correct Pulse Width Modulation or phase correct PWM mode (WGMn3:0 = 1, 2, 3,
10, or 11) provides a high resolution phase correct PWM waveform generation option. The
phase correct PWM mode is, like the phase and frequency correct PWM mode, based on a dualslope
operation. The counter counts repeatedly from BOTTOM (0x0000) to TOP and then from
TOP to BOTTOM. In non-inverting Compare Output mode, the Output Compare (OCnx) is
cleared on the compare match between TCNTn and OCRnx while upcounting, and set on the
compare match while downcounting. In inverting Output Compare mode, the operation is
inverted. The dual-slope operation has lower maximum operation frequency than single slope
operation. However, due to the symmetric feature of the dual-slope PWM modes, these modes
are preferred for motor control applications.
The PWM resolution for the phase correct PWM mode can be fixed to 8-, 9-, or 10-bit, or defined
by either ICRn or OCRnA. The minimum resolution allowed is 2-bit (ICRn or OCRnA set to
f
OCnxPWM
f
clk_I/O
N ⋅ ( ) 1 + TOP = -----------------------------------131
7593L–AVR–09/12
AT90USB64/128
0x0003), and the maximum resolution is 16-bit (ICRn or OCRnA set to MAX). The PWM resolution
in bits can be calculated by using the following equation:
In phase correct PWM mode the counter is incremented until the counter value matches either
one of the fixed values 0x00FF, 0x01FF, or 0x03FF (WGMn3:0 = 1, 2, or 3), the value in ICRn
(WGMn3:0 = 10), or the value in OCRnA (WGMn3:0 = 11). The counter has then reached the
TOP and changes the count direction. The TCNTn value will be equal to TOP for one timer clock
cycle. The timing diagram for the phase correct PWM mode is shown on Figure 15-8. The figure
shows phase correct PWM mode when OCRnA or ICRn is used to define TOP. The TCNTn
value is in the timing diagram shown as a histogram for illustrating the dual-slope operation. The
diagram includes non-inverted and inverted PWM outputs. The small horizontal line marks on
the TCNTn slopes represent compare matches between OCRnx and TCNTn. The OCnx Interrupt
Flag will be set when a compare match occurs.
Figure 15-8. Phase correct PWM mode, timing diagram.
The Timer/Counter Overflow Flag (TOVn) is set each time the counter reaches BOTTOM. When
either OCRnA or ICRn is used for defining the TOP value, the OCnA or ICFn Flag is set accordingly
at the same timer clock cycle as the OCRnx Registers are updated with the double buffer
value (at TOP). The Interrupt Flags can be used to generate an interrupt each time the counter
reaches the TOP or BOTTOM value.
When changing the TOP value the program must ensure that the new TOP value is higher or
equal to the value of all of the Compare Registers. If the TOP value is lower than any of the
Compare Registers, a compare match will never occur between the TCNTn and the OCRnx.
Note that when using fixed TOP values, the unused bits are masked to zero when any of the
OCRnx Registers are written. As the third period shown in Figure 15-8 illustrates, changing the
TOP actively while the Timer/Counter is running in the phase correct mode can result in an
unsymmetrical output. The reason for this can be found in the time of update of the OCRnx RegRPCPWM
log( ) TOP + 1
log( ) 2 = -----------------------------------
OCRnx/TOP Update and
OCnA Interrupt Flag Set
or ICFn Interrupt Flag Set
(interrupt on TOP)
1 2 3 4
TOVn Interrupt Flag Set
(interrupt on Bottom)
TCNTn
Period
OCnx
OCnx
(COMnx1:0 = 2)
(COMnx1:0 = 3)132
7593L–AVR–09/12
AT90USB64/128
ister. Since the OCRnx update occurs at TOP, the PWM period starts and ends at TOP. This
implies that the length of the falling slope is determined by the previous TOP value, while the
length of the rising slope is determined by the new TOP value. When these two values differ the
two slopes of the period will differ in length. The difference in length gives the unsymmetrical
result on the output.
It is recommended to use the phase and frequency correct mode instead of the phase correct
mode when changing the TOP value while the Timer/Counter is running. When using a static
TOP value there are practically no differences between the two modes of operation.
In phase correct PWM mode, the compare units allow generation of PWM waveforms on the
OCnx pins. Setting the COMnx1:0 bits to two will produce a non-inverted PWM and an inverted
PWM output can be generated by setting the COMnx1:0 to three (see Table 15-3 on page 138).
The actual OCnx value will only be visible on the port pin if the data direction for the port pin is
set as output (DDR_OCnx). The PWM waveform is generated by setting (or clearing) the OCnx
Register at the compare match between OCRnx and TCNTn when the counter increments, and
clearing (or setting) the OCnx Register at compare match between OCRnx and TCNTn when
the counter decrements. The PWM frequency for the output when using phase correct PWM can
be calculated by the following equation:
The N variable represents the prescaler divider (1, 8, 64, 256, or 1024).
The extreme values for the OCRnx Register represent special cases when generating a PWM
waveform output in the phase correct PWM mode. If the OCRnx is set equal to BOTTOM the
output will be continuously low and if set equal to TOP the output will be continuously high for
non-inverted PWM mode. For inverted PWM the output will have the opposite logic values. If
OCR1A is used to define the TOP value (WGM13:0 = 11) and COM1A1:0 = 1, the OC1A output
will toggle with a 50% duty cycle.
15.8.5 Phase and frequency correct PWM mode
The phase and frequency correct Pulse Width Modulation, or phase and frequency correct PWM
mode (WGMn3:0 = 8 or 9) provides a high resolution phase and frequency correct PWM waveform
generation option. The phase and frequency correct PWM mode is, like the phase correct
PWM mode, based on a dual-slope operation. The counter counts repeatedly from BOTTOM
(0x0000) to TOP and then from TOP to BOTTOM. In non-inverting Compare Output mode, the
Output Compare (OCnx) is cleared on the compare match between TCNTn and OCRnx while
upcounting, and set on the compare match while downcounting. In inverting Compare Output
mode, the operation is inverted. The dual-slope operation gives a lower maximum operation frequency
compared to the single-slope operation. However, due to the symmetric feature of the
dual-slope PWM modes, these modes are preferred for motor control applications.
The main difference between the phase correct, and the phase and frequency correct PWM
mode is the time the OCRnx Register is updated by the OCRnx Buffer Register, (see Figure 15-
8 on page 131 and Figure 15-9 on page 133).
The PWM resolution for the phase and frequency correct PWM mode can be defined by either
ICRn or OCRnA. The minimum resolution allowed is 2-bit (ICRn or OCRnA set to 0x0003), and
f
OCnxPCPWM
f
clk_I/O
2 ⋅ ⋅ N TOP = ----------------------------133
7593L–AVR–09/12
AT90USB64/128
the maximum resolution is 16-bit (ICRn or OCRnA set to MAX). The PWM resolution in bits can
be calculated using the following equation:
In phase and frequency correct PWM mode the counter is incremented until the counter value
matches either the value in ICRn (WGMn3:0 = 8), or the value in OCRnA (WGMn3:0 = 9). The
counter has then reached the TOP and changes the count direction. The TCNTn value will be
equal to TOP for one timer clock cycle. The timing diagram for the phase correct and frequency
correct PWM mode is shown on Figure 15-9. The figure shows phase and frequency correct
PWM mode when OCRnA or ICRn is used to define TOP. The TCNTn value is in the timing diagram
shown as a histogram for illustrating the dual-slope operation. The diagram includes noninverted
and inverted PWM outputs. The small horizontal line marks on the TCNTn slopes represent
compare matches between OCRnx and TCNTn. The OCnx Interrupt Flag will be set when a
compare match occurs.
Figure 15-9. Phase and frequency correct PWM mode, timing diagram.
The Timer/Counter Overflow Flag (TOVn) is set at the same timer clock cycle as the OCRnx
Registers are updated with the double buffer value (at BOTTOM). When either OCRnA or ICRn
is used for defining the TOP value, the OCnA or ICFn Flag set when TCNTn has reached TOP.
The Interrupt Flags can then be used to generate an interrupt each time the counter reaches the
TOP or BOTTOM value.
When changing the TOP value the program must ensure that the new TOP value is higher or
equal to the value of all of the Compare Registers. If the TOP value is lower than any of the
Compare Registers, a compare match will never occur between the TCNTn and the OCRnx.
As Figure 15-9 shows the output generated is, in contrast to the phase correct mode, symmetrical
in all periods. Since the OCRnx Registers are updated at BOTTOM, the length of the rising
and the falling slopes will always be equal. This gives symmetrical output pulses and is therefore
frequency correct.
RPFCPWM
log( ) TOP + 1
log( ) 2 = -----------------------------------
OCRnx/TOP Updateand
TOVn Interrupt Flag Set
(interrupt on Bottom)
OCnA Interrupt Flag Set
or ICFn Interrupt Flag Set
(interrupt on TOP)
1 2 3 4
TCNTn
Period
OCnx
OCnx
(COMnx1:0 = 2)
(COMnx1:0 = 3)134
7593L–AVR–09/12
AT90USB64/128
Using the ICRn Register for defining TOP works well when using fixed TOP values. By using
ICRn, the OCRnA Register is free to be used for generating a PWM output on OCnA. However,
if the base PWM frequency is actively changed by changing the TOP value, using the OCRnA as
TOP is clearly a better choice due to its double buffer feature.
In phase and frequency correct PWM mode, the compare units allow generation of PWM waveforms
on the OCnx pins. Setting the COMnx1:0 bits to two will produce a non-inverted PWM and
an inverted PWM output can be generated by setting the COMnx1:0 to three (see Table 15-3 on
page 138). The actual OCnx value will only be visible on the port pin if the data direction for the
port pin is set as output (DDR_OCnx). The PWM waveform is generated by setting (or clearing)
the OCnx Register at the compare match between OCRnx and TCNTn when the counter increments,
and clearing (or setting) the OCnx Register at compare match between OCRnx and
TCNTn when the counter decrements. The PWM frequency for the output when using phase
and frequency correct PWM can be calculated by the following equation:
The N variable represents the prescaler divider (1, 8, 64, 256, or 1024).
The extreme values for the OCRnx Register represents special cases when generating a PWM
waveform output in the phase correct PWM mode. If the OCRnx is set equal to BOTTOM the
output will be continuously low and if set equal to TOP the output will be set to high for noninverted
PWM mode. For inverted PWM the output will have the opposite logic values. If OCR1A
is used to define the TOP value (WGM13:0 = 9) and COM1A1:0 = 1, the OC1A output will toggle
with a 50% duty cycle.
15.9 Timer/Counter timing diagrams
The Timer/Counter is a synchronous design and the timer clock (clkTn) is therefore shown as a
clock enable signal in the following figures. The figures include information on when Interrupt
Flags are set, and when the OCRnx Register is updated with the OCRnx buffer value (only for
modes utilizing double buffering). Figure 15-10 shows a timing diagram for the setting of OCFnx.
Figure 15-10. Timer/Counter timing diagram, setting of OCFnx, no prescaling.
Figure 15-11 on page 135 shows the same timing data, but with the prescaler enabled.
f
OCnxPFCPWM
f
clk_I/O
2 ⋅ ⋅ N TOP = ----------------------------
clkTn
(clkI/O/1)
OCFnx
clkI/O
OCRnx
TCNTn
OCRnx value
OCRnx - 1 OCRnx OCRnx + 1 OCRnx + 2135
7593L–AVR–09/12
AT90USB64/128
Figure 15-11. Timer/Counter timing diagram, setting of OCFnx, with prescaler (fclk_I/O/8).
Figure 15-12 shows the count sequence close to TOP in various modes. When using phase and
frequency correct PWM mode the OCRnx Register is updated at BOTTOM. The timing diagrams
will be the same, but TOP should be replaced by BOTTOM, TOP-1 by BOTTOM+1 and so on.
The same renaming applies for modes that set the TOVn Flag at BOTTOM.
Figure 15-12. Timer/Counter timing diagram, no prescaling.
Figure 15-13 on page 136 shows the same timing data, but with the prescaler enabled.
OCFnx
OCRnx
TCNTn
OCRnx value
OCRnx - 1 OCRnx OCRnx + 1 OCRnx + 2
clkI/O
clkTn
(clkI/O/8)
TOVn (FPWM)
and ICFn (if used
as TOP)
OCRnx
(update at TOP)
TCNTn
(CTC and FPWM)
TCNTn
(PC and PFC PWM) TOP - 1 TOP TOP - 1 TOP - 2
Old OCRnx value New OCRnx value
TOP - 1 TOP BOTTOM BOTTOM + 1
clkTn
(clkI/O/1)
clkI/O136
7593L–AVR–09/12
AT90USB64/128
Figure 15-13. Timer/Counter timing diagram, with prescaler (fclk_I/O/8).
15.10 16-bit Timer/Counter register description
15.10.1 TCCR1A – Timer/Counter1 Control Register A
15.10.2 TCCR3A – Timer/Counter3 Control Register A
• Bit 7:6 – COMnA1:0: Compare Output Mode for Channel A
• Bit 5:4 – COMnB1:0: Compare Output Mode for Channel B
• Bit 3:2 – COMnC1:0: Compare Output Mode for Channel C
The COMnA1:0, COMnB1:0, and COMnC1:0 control the output compare pins (OCnA, OCnB,
and OCnC respectively) behavior. If one or both of the COMnA1:0 bits are written to one, the
OCnA output overrides the normal port functionality of the I/O pin it is connected to. If one or
both of the COMnB1:0 bits are written to one, the OCnB output overrides the normal port functionality
of the I/O pin it is connected to. If one or both of the COMnC1:0 bits are written to one,
the OCnC output overrides the normal port functionality of the I/O pin it is connected to. However,
note that the Data Direction Register (DDR) bit corresponding to the OCnA, OCnB or
OCnC pin must be set in order to enable the output driver.
TOVn (FPWM)
and ICFn (if used
as TOP)
OCRnx
(update at TOP)
TCNTn
(CTC and FPWM)
TCNTn
(PC and PFC PWM)
TOP - 1 TOP TOP - 1 TOP - 2
Old OCRnx value New OCRnx value
TOP - 1 TOP BOTTOM BOTTOM + 1
clkI/O
clk Tn
(clkI/O /8)
Bit 7 6 5 4 3 2 1 0
COM1A1 COM1A0 COM1B1 COM1B0 COM1C1 COM1C0 WGM11 WGM10 TCCR1A
Read/write R/W R/W R/W R/W R/W R/W R/W R/W
Initial value 0 0 0 0 0 0 0 0
Bit 7 6 5 4 3 2 1 0
COM3A1 COM3A0 COM3B1 COM3B0 COM3C1 COM3C0 WGM31 WGM30 TCCR3A
Read/write R/W R/W R/W R/W R/W R/W R/W R/W
Initial value 0 0 0 0 0 0 0 0137
7593L–AVR–09/12
AT90USB64/128
When the OCnA, OCnB or OCnC is connected to the pin, the function of the COMnx1:0 bits is
dependent of the WGMn3:0 bits setting. Table 15-1 shows the COMnx1:0 bit functionality when
the WGMn3:0 bits are set to a normal or a CTC mode (non-PWM).
Table 15-2 shows the COMnx1:0 bit functionality when the WGMn3:0 bits are set to the fast
PWM mode.
Note: A special case occurs when OCRnA/OCRnB/OCRnC equals TOP and
COMnA1/COMnB1/COMnC1 is set. In this case the compare match is ignored, but the set or clear
is done at TOP. See “Fast PWM mode” on page 104. for more details.
Table 15-3 on page 138 shows the COMnx1:0 bit functionality when the WGMn3:0 bits are set to
the phase correct and frequency correct PWM mode.
Table 15-1. Compare Output mode, non-PWM.
COMnA1/COMnB1/
COMnC1
COMnA0/COMnB0/
COMnC0 Description
0 0 Normal port operation, OCnA/OCnB/OCnC
disconnected.
0 1 Toggle OCnA/OCnB/OCnC on compare match.
1 0 Clear OCnA/OCnB/OCnC on compare match (set
output to low level).
1 1 Set OCnA/OCnB/OCnC on compare match (set
output to high level).
Table 15-2. Compare Output mode, fast PWM.
COMnA1/COMnB1/
COMnC0
COMnA0/COMnB0/
COMnC0 Description
0 0 Normal port operation, OCnA/OCnB/OCnC
disconnected.
0 1
WGM13:0 = 14 or 15: Toggle OC1A on Compare
Match, OC1B and OC1C disconnected (normal port
operation). For all other WGM1 settings, normal port
operation, OC1A/OC1B/OC1C disconnected.
1 0 Clear OCnA/OCnB/OCnC on compare match, set
OCnA/OCnB/OCnC at TOP
1 1 Set OCnA/OCnB/OCnC on compare match, clear
OCnA/OCnB/OCnC at TOP138
7593L–AVR–09/12
AT90USB64/128
Note: A special case occurs when OCRnA/OCRnB/OCRnC equals TOP and
COMnA1/COMnB1//COMnC1 is set. See “Phase correct PWM mode” on page 106. for more
details.
• Bit 1:0 – WGMn1:0: Waveform Generation mode
Combined with the WGMn3:2 bits found in the TCCRnB Register, these bits control the counting
sequence of the counter, the source for maximum (TOP) counter value, and what type of waveform
generation to be used, see Table 15-4 on page 138. Modes of operation supported by the
Timer/Counter unit are: Normal mode (counter), Clear Timer on Compare match (CTC) mode,
and three types of Pulse Width Modulation (PWM) modes. (See “Modes of operation” on page
103.).
Table 15-3. Compare Output mode, phase correct and phase and frequency correct PWM.
COMnA1/COMnB/
COMnC1
COMnA0/COMnB0/
COMnC0 Description
0 0 Normal port operation, OCnA/OCnB/OCnC
disconnected.
0 1
WGM13:0 = 8, 9 10 or 11: Toggle OC1A on
Compare Match, OC1B and OC1C
disconnected (normal port operation). For all
other WGM1 settings, normal port operation,
OC1A/OC1B/OC1C disconnected.
1 0
Clear OCnA/OCnB/OCnC on compare
match when up-counting. Set
OCnA/OCnB/OCnC on compare match
when counting down.
1 1
Set OCnA/OCnB/OCnC on compare match
when up-counting. Clear
OCnA/OCnB/OCnC on compare match
when counting down.
Table 15-4. Waveform Generation mode bit description (1).
Mode WGMn3
WGMn2
(CTCn)
WGMn1
(PWMn1)
WGMn0
(PWMn0)
Timer/Counter mode of
operation TOP
Update of
OCRnx at
TOVn flag
set on
0 0 0 0 0 Normal 0xFFFF Immediate MAX
1 0 0 0 1 PWM, phase correct, 8-bit 0x00FF TOP BOTTOM
2 0 0 1 0 PWM, phase correct, 9-bit 0x01FF TOP BOTTOM
3 0 0 1 1 PWM, phase correct, 10-bit 0x03FF TOP BOTTOM
4 0 1 0 0 CTC OCRnA Immediate MAX
5 0 1 0 1 Fast PWM, 8-bit 0x00FF TOP TOP
6 0 1 1 0 Fast PWM, 9-bit 0x01FF TOP TOP
7 0 1 1 1 Fast PWM, 10-bit 0x03FF TOP TOP
81 0 0 0 PWM, phase and frequency
Correct ICRn BOTTOM BOTTOM
91 0 0 1 PWM, phase and frequency
Correct OCRnA BOTTOM BOTTOM
10 1 0 1 0 PWM, phase correct ICRn TOP BOTTOM139
7593L–AVR–09/12
AT90USB64/128
Note: 1. The CTCn and PWMn1:0 bit definition names are obsolete. Use the WGMn2:0 definitions. However, the functionality and
location of these bits are compatible with previous versions of the timer.
15.10.3 TCCR1B – Timer/Counter1 Control Register B
15.10.4 TCCR3B – Timer/Counter3 Control Register B
• Bit 7 – ICNCn: Input Capture Noise Canceler
Setting this bit (to one) activates the Input Capture Noise Canceler. When the Noise Canceler is
activated, the input from the Input Capture Pin (ICPn) is filtered. The filter function requires four
successive equal valued samples of the ICPn pin for changing its output. The input capture is
therefore delayed by four Oscillator cycles when the noise canceler is enabled.
• Bit 6 – ICESn: Input Capture Edge Select
This bit selects which edge on the Input Capture Pin (ICPn) that is used to trigger a capture
event. When the ICESn bit is written to zero, a falling (negative) edge is used as trigger, and
when the ICESn bit is written to one, a rising (positive) edge will trigger the capture.
When a capture is triggered according to the ICESn setting, the counter value is copied into the
Input Capture Register (ICRn). The event will also set the Input Capture Flag (ICFn), and this
can be used to cause an Input Capture Interrupt, if this interrupt is enabled.
When the ICRn is used as TOP value (see description of the WGMn3:0 bits located in the
TCCRnA and the TCCRnB Register), the ICPn is disconnected and consequently the input capture
function is disabled.
• Bit 5 – Reserved bit
This bit is reserved for future use. For ensuring compatibility with future devices, this bit must be
written to zero when TCCRnB is written.
• Bit 4:3 – WGMn3:2: Waveform Generation mode
See TCCRnA Register description.
11 1 0 1 1 PWM, phase correct OCRnA TOP BOTTOM
12 1 1 0 0 CTC ICRn Immediate MAX
13 1 1 0 1 (Reserved) – – –
14 1 1 1 0 Fast PWM ICRn TOP TOP
15 1 1 1 1 Fast PWM OCRnA TOP TOP
Table 15-4. Waveform Generation mode bit description (1). (Continued)
Mode WGMn3
WGMn2
(CTCn)
WGMn1
(PWMn1)
WGMn0
(PWMn0)
Timer/Counter mode of
operation TOP
Update of
OCRnx at
TOVn flag
set on
Bit 7 6 5 4 3 2 1 0
ICNC1 ICES1 – WGM13 WGM12 CS12 CS11 CS10 TCCR1B
Read/write R/W R/W R R/W R/W R/W R/W R/W
Initial value 0 0 0 0 0 0 0 0
Bit 7 6 5 4 3 2 1 0
ICNC3 ICES3 – WGM33 WGM32 CS32 CS31 CS30 TCCR3B
Read/write R/W R/W R R/W R/W R/W R/W R/W
Initial value 0 0 0 0 0 0 0 0140
7593L–AVR–09/12
AT90USB64/128
• Bit 2:0 – CSn2:0: Clock Select
The three clock select bits select the clock source to be used by the Timer/Counter, see Figure
14-8 on page 107 and Figure 14-9 on page 108.
If external pin modes are used for the Timer/Countern, transitions on the Tn pin will clock the
counter even if the pin is configured as an output. This feature allows software control of the
counting.
15.10.5 TCCR1C – Timer/Counter1 Control Register C
15.10.6 TCCR3C – Timer/Counter3 Control Register C
• Bit 7 – FOCnA: Force Output Compare for Channel A
• Bit 6 – FOCnB: Force Output Compare for Channel B
• Bit 5 – FOCnC: Force Output Compare for Channel C
The FOCnA/FOCnB/FOCnC bits are only active when the WGMn3:0 bits specifies a non-PWM
mode. When writing a logical one to the FOCnA/FOCnB/FOCnC bit, an immediate compare
match is forced on the waveform generation unit. The OCnA/OCnB/OCnC output is changed
according to its COMnx1:0 bits setting. Note that the FOCnA/FOCnB/FOCnC bits are implemented
as strobes. Therefore it is the value present in the COMnx1:0 bits that determine the
effect of the forced compare.
A FOCnA/FOCnB/FOCnC strobe will not generate any interrupt nor will it clear the timer in Clear
Timer on Compare Match (CTC) mode using OCRnA as TOP.
The FOCnA/FOCnB/FOCnB bits are always read as zero.
• Bit 4:0 – Reserved bits
These bits are reserved for future use. For ensuring compatibility with future devices, these bits
must be written to zero when TCCRnC is written.
Table 15-5. Clock Select bit description.
CSn2 CSn1 CSn0 Description
0 0 0 No clock source. (Timer/Counter stopped)
0 0 1 clkI/O/1 (no prescaling
0 1 0 clkI/O/8 (from prescaler)
0 1 1 clkI/O/64 (from prescaler)
1 0 0 clkI/O/256 (from prescaler)
1 0 1 clkI/O/1024 (from prescaler)
1 1 0 External clock source on Tn pin. Clock on falling edge
1 1 1 External clock source on Tn pin. Clock on rising edge
Bit 7 6 5 4 3 2 1 0
FOC1A FOC1B FOC1C – – – – – TCCR1C
Read/write W W W R R R R R
Initial value 0 0 0 0 0 0 0 0
Bit 7 6 5 4 3 2 1 0
FOC3A FOC3B FOC3C – – – – – TCCR3C
Read/write W W W R R R R R
Initial value 0 0 0 0 0 0 0 0141
7593L–AVR–09/12
AT90USB64/128
15.10.7 TCNT1H and TCNT1L – Timer/Counter1
15.10.8 TCNT3H and TCNT3L – Timer/Counter3
The two Timer/Counter I/O locations (TCNTnH and TCNTnL, combined TCNTn) give direct
access, both for read and for write operations, to the Timer/Counter unit 16-bit counter. To
ensure that both the high and low bytes are read and written simultaneously when the CPU
accesses these registers, the access is performed using an 8-bit temporary High Byte Register
(TEMP). This temporary register is shared by all the other 16-bit registers. See “Accessing 16-bit
registers” on page 117.
Modifying the counter (TCNTn) while the counter is running introduces a risk of missing a compare
match between TCNTn and one of the OCRnx Registers.
Writing to the TCNTn Register blocks (removes) the compare match on the following timer clock
for all compare units.
15.10.9 OCR1AH and OCR1AL – Output Compare Register 1 A
15.10.10 OCR1BH and OCR1BL – Output Compare Register 1 B
15.10.11 OCR1CH and OCR1CL – Output Compare Register 1 C
Bit 7 6 5 4 3 2 1 0
TCNT1[15:8] TCNT1H
TCNT1[7:0] TCNT1L
Read/write R/W R/W R/W R/W R/W R/W R/W R/W
Initial value 0 0 0 0 0 0 0 0
Bit 7 6 5 4 3 2 1 0
TCNT3[15:8] TCNT3H
TCNT3[7:0] TCNT3L
Read/write R/W R/W R/W R/W R/W R/W R/W R/W
Initial value 0 0 0 0 0 0 0 0
Bit 7 6 5 4 3 2 1 0
OCR1A[15:8] OCR1AH
OCR1A[7:0] OCR1AL
Read/write R/W R/W R/W R/W R/W R/W R/W R/W
Initial value 0 0 0 0 0 0 0 0
Bit 7 6 5 4 3 2 1 0
OCR1B[15:8] OCR1BH
OCR1B[7:0] OCR1BL
Read/write R/W R/W R/W R/W R/W R/W R/W R/W
Initial value 0 0 0 0 0 0 0 0
Bit 7 6 5 4 3 2 1 0
OCR1C[15:8] OCR1CH
OCR1C[7:0] OCR1CL
Read/write R/W R/W R/W R/W R/W R/W R/W R/W
Initial value 0 0 0 0 0 0 0 0142
7593L–AVR–09/12
AT90USB64/128
15.10.12 OCR3AH and OCR3AL – Output Compare Register 3 A
15.10.13 OCR3BH and OCR3BL – Output Compare Register 3 B
15.10.14 OCR3CH and OCR3CL – Output Compare Register 3 C
The Output Compare Registers contain a 16-bit value that is continuously compared with the
counter value (TCNTn). A match can be used to generate an Output Compare interrupt, or to
generate a waveform output on the OCnx pin.
The Output Compare Registers are 16-bit in size. To ensure that both the high and low bytes are
written simultaneously when the CPU writes to these registers, the access is performed using an
8-bit temporary High Byte Register (TEMP). This temporary register is shared by all the other
16-bit registers. See “Accessing 16-bit registers” on page 117.
15.10.15 ICR1H and ICR1L – Input Capture Register 1
15.10.16 ICR3H and ICR3L – Input Capture Register 3
The Input Capture is updated with the counter (TCNTn) value each time an event occurs on the
ICPn pin (or optionally on the Analog Comparator output for Timer/Counter1). The Input Capture
can be used for defining the counter TOP value.
The Input Capture Register is 16-bit in size. To ensure that both the high and low bytes are read
simultaneously when the CPU accesses these registers, the access is performed using an 8-bit
temporary High Byte Register (TEMP). This temporary register is shared by all the other 16-bit
registers. See “Accessing 16-bit registers” on page 117.
Bit 7 6 5 4 3 2 1 0
OCR3A[15:8] OCR3AH
OCR3A[7:0] OCR3AL
Read/write R/W R/W R/W R/W R/W R/W R/W R/W
Initial value 0 0 0 0 0 0 0 0
Bit 7 6 5 4 3 2 1 0
OCR3B[15:8] OCR3BH
OCR3B[7:0] OCR3BL
Read/write R/W R/W R/W R/W R/W R/W R/W R/W
Initial value 0 0 0 0 0 0 0 0
Bit 7 6 5 4 3 2 1 0
OCR3C[15:8] OCR3CH
OCR3C[7:0] OCR3CL
Read/write R/W R/W R/W R/W R/W R/W R/W R/W
Initial value 0 0 0 0 0 0 0 0
Bit 7 6 5 4 3 2 1 0
ICR1[15:8] ICR1H
ICR1[7:0] ICR1L
Read/write R/W R/W R/W R/W R/W R/W R/W R/W
Initial value 0 0 0 0 0 0 0 0
Bit 7 6 5 4 3 2 1 0
ICR3[15:8] ICR3H
ICR3[7:0] ICR3L
Read/write R/W R/W R/W R/W R/W R/W R/W R/W
Initial value 0 0 0 0 0 0 0 0143
7593L–AVR–09/12
AT90USB64/128
15.10.17 TIMSK1 – Timer/Counter1 Interrupt Mask Register
15.10.18 TIMSK3 – Timer/Counter3 Interrupt Mask Register
• Bit 5 – ICIEn: Timer/Countern, Input Capture Interrupt Enable
When this bit is written to one, and the I-flag in the Status Register is set (interrupts globally
enabled), the Timer/Countern Input Capture interrupt is enabled. The corresponding Interrupt
Vector (see “Interrupts” on page 68) is executed when the ICFn Flag, located in TIFRn, is set.
• Bit 3 – OCIEnC: Timer/Countern, Output Compare C Match Interrupt Enable
When this bit is written to one, and the I-flag in the Status Register is set (interrupts globally
enabled), the Timer/Countern Output Compare C Match interrupt is enabled. The corresponding
Interrupt Vector (see “Interrupts” on page 68) is executed when the OCFnC Flag, located in
TIFRn, is set.
• Bit 2 – OCIEnB: Timer/Countern, Output Compare B Match Interrupt Enable
When this bit is written to one, and the I-flag in the Status Register is set (interrupts globally
enabled), the Timer/Countern Output Compare B Match interrupt is enabled. The corresponding
Interrupt Vector (see “Interrupts” on page 68) is executed when the OCFnB Flag, located in
TIFRn, is set.
• Bit 1 – OCIEnA: Timer/Countern, Output Compare A Match Interrupt Enable
When this bit is written to one, and the I-flag in the Status Register is set (interrupts globally
enabled), the Timer/Countern Output Compare A Match interrupt is enabled. The corresponding
Interrupt Vector (see “Interrupts” on page 68) is executed when the OCFnA Flag, located in
TIFRn, is set.
• Bit 0 – TOIEn: Timer/Countern, Overflow Interrupt Enable
When this bit is written to one, and the I-flag in the Status Register is set (interrupts globally
enabled), the Timer/Countern Overflow interrupt is enabled. The corresponding Interrupt Vector
(see “Interrupts” on page 68) is executed when the TOVn Flag, located in TIFRn, is set.
15.10.19 TIFR1 – Timer/Counter1 Interrupt Flag Register
15.10.20 TIFR3 – Timer/Counter3 Interrupt Flag Register
Bit 7 6 5 4 3 2 1 0
– – ICIE1 – OCIE1C OCIE1B OCIE1A TOIE1 TIMSK1
Read/write R R R/W R R/W R/W R/W R/W
Initial value 0 0 0 0 0 0 0 0
Bit 7 6 5 4 3 2 1 0
– – ICIE3 – OCIE3C OCIE3B OCIE3A TOIE3 TIMSK3
Read/write R R R/W R R/W R/W R/W R/W
Initial value 0 0 0 0 0 0 0 0
Bit 7 6 5 4 3 2 1 0
– – ICF1 – OCF1C OCF1B OCF1A TOV1 TIFR1
Read/write R R R/W R R/W R/W R/W R/W
Initial value 0 0 0 0 0 0 0 0
Bit 7 6 5 4 3 2 1 0
– – ICF3 – OCF3C OCF3B OCF3A TOV3 TIFR3
Read/write R R R/W R R/W R/W R/W R/W
Initial value 0 0 0 0 0 0 0 0144
7593L–AVR–09/12
AT90USB64/128
• Bit 5 – ICFn: Timer/Countern, Input Capture Flag
This flag is set when a capture event occurs on the ICPn pin. When the Input Capture Register
(ICRn) is set by the WGMn3:0 to be used as the TOP value, the ICFn Flag is set when the counter
reaches the TOP value.
ICFn is automatically cleared when the Input Capture Interrupt Vector is executed. Alternatively,
ICFn can be cleared by writing a logic one to its bit location.
• Bit 3– OCFnC: Timer/Countern, Output Compare C Match Flag
This flag is set in the timer clock cycle after the counter (TCNTn) value matches the Output
Compare Register C (OCRnC).
Note that a Forced Output Compare (FOCnC) strobe will not set the OCFnC Flag.
OCFnC is automatically cleared when the Output Compare Match C Interrupt Vector is executed.
Alternatively, OCFnC can be cleared by writing a logic one to its bit location.
• Bit 2 – OCFnB: Timer/Counter1, Output Compare B Match Flag
This flag is set in the timer clock cycle after the counter (TCNTn) value matches the Output
Compare Register B (OCRnB).
Note that a Forced Output Compare (FOCnB) strobe will not set the OCFnB Flag.
OCFnB is automatically cleared when the Output Compare Match B Interrupt Vector is executed.
Alternatively, OCFnB can be cleared by writing a logic one to its bit location.
• Bit 1 – OCF1A: Timer/Counter1, Output Compare A Match Flag
This flag is set in the timer clock cycle after the counter (TCNTn value matches the Output Compare
Register A (OCRnA).
Note that a Forced Output Compare (FOCnA) strobe will not set the OCFnA Flag.
OCFnA is automatically cleared when the Output Compare Match A Interrupt Vector is executed.
Alternatively, OCFnA can be cleared by writing a logic one to its bit location.
• Bit 0 – TOVn: Timer/Countern, Overflow Flag
The setting of this flag is dependent of the WGMn3:0 bits setting. In Normal and CTC modes,
the TOVn Flag is set when the timer overflows. Refer to Table 15-4 on page 138 for the TOVn
Flag behavior when using another WGMn3:0 bit setting.
TOVn is automatically cleared when the Timer/Countern Overflow Interrupt Vector is executed.
Alternatively, TOVn can be cleared by writing a logic one to its bit location.145
7593L–AVR–09/12
AT90USB64/128
16. 8-bit Timer/Counter2 with PWM and asynchronous operation
Timer/Counter2 is a general purpose, single channel, 8-bit Timer/Counter module. The main
features are:
• Single channel counter
• Clear timer on compare match (auto reload)
• Glitch-free, phase correct pulse width modulator (PWM)
• Frequency generator
• 10-bit clock prescaler
• Overflow and compare match interrupt sources (TOV2, OCF2A and OCF2B)
• Allows clocking from external 32kHz watch crystal independent of the I/O clock
16.1 Overview
A simplified block diagram of the 8-bit Timer/Counter is shown in Figure 16-1. For the actual
placement of I/O pins, see “Pin configurations” on page 3. CPU accessible I/O Registers, including
I/O bits and I/O pins, are shown in bold. The device-specific I/O Register and bit locations
are listed in the “8-bit Timer/Counter register description” on page 156.
The Power Reduction Timer/Counter2 bit, PRTIM2, in “PRR0 – Power Reduction Register 0” on
page 54 must be written to zero to enable Timer/Counter2 module.
Figure 16-1. 8-bit Timer/Counter, block diagram.
Timer/counter
DATA BUS
OCRnA
OCRnB
=
=
TCNTn
Waveform
generation
Waveform
generation
OCnA
OCnB
=
Fixed
TOP
value
Control logic
= 0
TOP BOTTOM
Count
Clear
Direction
TOVn
(int.req.)
OCnA
(int.req.)
OCnB
(int.req.)
TCCRnA TCCRnB
clkTn
ASSRn
Synchronization unit
Prescaler
T/C oscillator
clkI/O
clkASY
asynchronous mode
select (ASn)
Synchronized status flags
TOSC1
TOSC2
Status flags
clkI/O146
7593L–AVR–09/12
AT90USB64/128
16.1.1 Registers
The Timer/Counter (TCNT2) and Output Compare Register (OCR2A and OCR2B) are 8-bit registers.
Interrupt request (abbreviated to Int.Req.) signals are all visible in the Timer Interrupt Flag
Register (TIFR2). All interrupts are individually masked with the Timer Interrupt Mask Register
(TIMSK2). TIFR2 and TIMSK2 are not shown in the figure.
The Timer/Counter can be clocked internally, via the prescaler, or asynchronously clocked from
the TOSC1/2 pins, as detailed later in this section. The asynchronous operation is controlled by
the Asynchronous Status Register (ASSR). The Clock Select logic block controls which clock
source the Timer/Counter uses to increment (or decrement) its value. The Timer/Counter is inactive
when no clock source is selected. The output from the Clock Select logic is referred to as the
timer clock (clkT2).
The double buffered Output Compare Register (OCR2A and OCR2B) are compared with the
Timer/Counter value at all times. The result of the compare can be used by the Waveform Generator
to generate a PWM or variable frequency output on the Output Compare pins (OC2A and
OC2B). See “Output Compare unit” on page 147. for details. The compare match event will also
set the Compare Flag (OCF2A or OCF2B) which can be used to generate an Output Compare
interrupt request.
16.1.2 Definitions
Many register and bit references in this document are written in general form. A lower case “n”
replaces the Timer/Counter number, in this case 2. However, when using the register or bit
defines in a program, the precise form must be used, that is, TCNT2 for accessing
Timer/Counter2 counter value and so on.
The definitions in the table below are also used extensively throughout the section.
16.2 Timer/Counter clock sources
The Timer/Counter can be clocked by an internal synchronous or an external asynchronous
clock source. The clock source clkT2 is by default equal to the MCU clock, clkI/O. When the AS2
bit in the ASSR Register is written to logic one, the clock source is taken from the Timer/Counter
Oscillator connected to TOSC1 and TOSC2. For details on asynchronous operation, see “ASSR
– Asynchronous Status Register” on page 161. For details on clock sources and prescaler, see
“Timer/Counter prescaler” on page 164.
16.3 Counter unit
The main part of the 8-bit Timer/Counter is the programmable bi-directional counter unit. Figure
16-2 on page 147 shows a block diagram of the counter and its surrounding environment.
BOTTOM The counter reaches the BOTTOM when it becomes zero (0x00).
MAX The counter reaches its MAXimum when it becomes 0xFF (decimal 255).
TOP The counter reaches the TOP when it becomes equal to the highest value in the
count sequence. The TOP value can be assigned to be the fixed value 0xFF
(MAX) or the value stored in the OCR2A Register. The assignment is dependent
on the mode of operation.147
7593L–AVR–09/12
AT90USB64/128
Figure 16-2. Counter unit block diagram.
Signal description (internal signals):
count Increment or decrement TCNT2 by 1.
direction Selects between increment and decrement.
clear Clear TCNT2 (set all bits to zero).
clkTn Timer/Counter clock, referred to as clkT2 in the following.
top Signalizes that TCNT2 has reached maximum value.
bottom Signalizes that TCNT2 has reached minimum value (zero).
Depending on the mode of operation used, the counter is cleared, incremented, or decremented
at each timer clock (clkT2). clkT2 can be generated from an external or internal clock source,
selected by the Clock Select bits (CS22:0). When no clock source is selected (CS22:0 = 0) the
timer is stopped. However, the TCNT2 value can be accessed by the CPU, regardless of
whether clkT2 is present or not. A CPU write overrides (has priority over) all counter clear or
count operations.
The counting sequence is determined by the setting of the WGM21 and WGM20 bits located in
the Timer/Counter Control Register (TCCR2A) and the WGM22 located in the Timer/Counter
Control Register B (TCCR2B). There are close connections between how the counter behaves
(counts) and how waveforms are generated on the Output Compare outputs OC2A and OC2B.
For more details about advanced counting sequences and waveform generation, see “Modes of
operation” on page 150.
The Timer/Counter Overflow Flag (TOV2) is set according to the mode of operation selected by
the WGM22:0 bits. TOV2 can be used for generating a CPU interrupt.
16.4 Output Compare unit
The 8-bit comparator continuously compares TCNT2 with the Output Compare Register
(OCR2A and OCR2B). Whenever TCNT2 equals OCR2A or OCR2B, the comparator signals a
match. A match will set the Output Compare Flag (OCF2A or OCF2B) at the next timer clock
cycle. If the corresponding interrupt is enabled, the Output Compare Flag generates an Output
Compare interrupt. The Output Compare Flag is automatically cleared when the interrupt is executed.
Alternatively, the Output Compare Flag can be cleared by software by writing a logical
one to its I/O bit location. The Waveform Generator uses the match signal to generate an output
according to operating mode set by the WGM22:0 bits and Compare Output mode (COM2x1:0)
bits. The max and bottom signals are used by the Waveform Generator for handling the special
cases of the extreme values in some modes of operation (“Modes of operation” on page 150).
Figure 15-10 on page 134 shows a block diagram of the Output Compare unit.
DATA BUS
TCNTn Control logic
count
TOVn
(int.req.)
bottom top
direction
clear
TOSC1
T/C
oscillator
TOSC2
Prescaler
clkI/O
clk Tn148
7593L–AVR–09/12
AT90USB64/128
Figure 16-3. Output Compare unit, block diagram.
The OCR2x Register is double buffered when using any of the Pulse Width Modulation (PWM)
modes. For the Normal and Clear Timer on Compare (CTC) modes of operation, the double
buffering is disabled. The double buffering synchronizes the update of the OCR2x Compare
Register to either top or bottom of the counting sequence. The synchronization prevents the
occurrence of odd-length, non-symmetrical PWM pulses, thereby making the output glitch-free.
The OCR2x Register access may seem complex, but this is not case. When the double buffering
is enabled, the CPU has access to the OCR2x Buffer Register, and if double buffering is disabled
the CPU will access the OCR2x directly.
16.4.1 Force output compare
In non-PWM waveform generation modes, the match output of the comparator can be forced by
writing a one to the Force Output Compare (FOC2x) bit. Forcing compare match will not set the
OCF2x Flag or reload/clear the timer, but the OC2x pin will be updated as if a real compare
match had occurred (the COM2x1:0 bits settings define whether the OC2x pin is set, cleared or
toggled).
16.4.2 Compare Match Blocking by TCNT2 Write
All CPU write operations to the TCNT2 Register will block any compare match that occurs in the
next timer clock cycle, even when the timer is stopped. This feature allows OCR2x to be initialized
to the same value as TCNT2 without triggering an interrupt when the Timer/Counter clock is
enabled.
16.4.3 Using the Output Compare unit
Since writing TCNT2 in any mode of operation will block all compare matches for one timer clock
cycle, there are risks involved when changing TCNT2 when using the Output Compare channel,
independently of whether the Timer/Counter is running or not. If the value written to TCNT2
equals the OCR2x value, the compare match will be missed, resulting in incorrect waveform
generation. Similarly, do not write the TCNT2 value equal to BOTTOM when the counter is
downcounting.
OCFnx (int.req.)
= (8-bit comparator)
OCRnx
OCnx
DATA BUS
TCNTn
WGMn1:0
Waveform generator
top
FOCn
COMnX1:0
bottom149
7593L–AVR–09/12
AT90USB64/128
The setup of the OC2x should be performed before setting the Data Direction Register for the
port pin to output. The easiest way of setting the OC2x value is to use the Force Output Compare
(FOC2x) strobe bit in Normal mode. The OC2x Register keeps its value even when
changing between Waveform Generation modes.
Be aware that the COM2x1:0 bits are not double buffered together with the compare value.
Changing the COM2x1:0 bits will take effect immediately.
16.5 Compare Match Output unit
The Compare Output mode (COM2x1:0) bits have two functions. The Waveform Generator uses
the COM2x1:0 bits for defining the Output Compare (OC2x) state at the next compare match.
Also, the COM2x1:0 bits control the OC2x pin output source. Figure 16-4 shows a simplified
schematic of the logic affected by the COM2x1:0 bit setting. The I/O Registers, I/O bits, and I/O
pins in the figure are shown in bold. Only the parts of the general I/O Port Control Registers
(DDR and PORT) that are affected by the COM2x1:0 bits are shown. When referring to the
OC2x state, the reference is for the internal OC2x Register, not the OC2x pin.
Figure 16-4. Compare Match Output unit, schematic.
The general I/O port function is overridden by the Output Compare (OC2x) from the Waveform
Generator if either of the COM2x1:0 bits are set. However, the OC2x pin direction (input or output)
is still controlled by the Data Direction Register (DDR) for the port pin. The Data Direction
Register bit for the OC2x pin (DDR_OC2x) must be set as output before the OC2x value is visible
on the pin. The port override function is independent of the Waveform Generation mode.
The design of the Output Compare pin logic allows initialization of the OC2x state before the output
is enabled. Note that some COM2x1:0 bit settings are reserved for certain modes of
operation. See “8-bit Timer/Counter register description” on page 156.
PORT
DDR
D Q
D Q
OCnx
OCnx pin
D Q Waveform
generator
COMnx1
COMnx0
0
1
DATA BU
S
FOCnx
clkI/O150
7593L–AVR–09/12
AT90USB64/128
16.5.1 Compare Output mode and Waveform generating
The Waveform Generator uses the COM2x1:0 bits differently in normal, CTC, and PWM modes.
For all modes, setting the COM2x1:0 = 0 tells the Waveform Generator that no action on the
OC2x Register is to be performed on the next compare match. For compare output actions in the
non-PWM modes refer to Table 16-4 on page 157. For fast PWM mode, refer to Table 16-5 on
page 158, and for phase correct PWM refer to Table 16-6 on page 158.
A change of the COM2x1:0 bits state will have effect at the first compare match after the bits are
written. For non-PWM modes, the action can be forced to have immediate effect by using the
FOC2x strobe bits.
16.6 Modes of operation
The mode of operation, that is, the behavior of the Timer/Counter and the Output Compare pins,
is defined by the combination of the Waveform Generation mode (WGM22:0) and Compare Output
mode (COM2x1:0) bits. The Compare Output mode bits do not affect the counting sequence,
while the Waveform Generation mode bits do. The COM2x1:0 bits control whether the PWM output
generated should be inverted or not (inverted or non-inverted PWM). For non-PWM modes
the COM2x1:0 bits control whether the output should be set, cleared, or toggled at a compare
match (see “Compare Match Output unit” on page 149).
For detailed timing information refer to Section “Timer/Counter timing diagrams” on page 154.
16.6.1 Normal mode
The simplest mode of operation is the Normal mode (WGM22:0 = 0). In this mode the counting
direction is always up (incrementing), and no counter clear is performed. The counter simply
overruns when it passes its maximum 8-bit value (TOP = 0xFF) and then restarts from the bottom
(0x00). In normal operation the Timer/Counter Overflow Flag (TOV2) will be set in the same
timer clock cycle as the TCNT2 becomes zero. The TOV2 Flag in this case behaves like a ninth
bit, except that it is only set, not cleared. However, combined with the timer overflow interrupt
that automatically clears the TOV2 Flag, the timer resolution can be increased by software.
There are no special cases to consider in the Normal mode, a new counter value can be written
anytime.
The Output Compare unit can be used to generate interrupts at some given time. Using the Output
Compare to generate waveforms in Normal mode is not recommended, since this will
occupy too much of the CPU time.
16.6.2 Clear Timer on Compare Match (CTC) mode
In Clear Timer on Compare or CTC mode (WGM22:0 = 2), the OCR2A Register is used to
manipulate the counter resolution. In CTC mode the counter is cleared to zero when the counter
value (TCNT2) matches the OCR2A. The OCR2A defines the top value for the counter, hence
also its resolution. This mode allows greater control of the compare match output frequency. It
also simplifies the operation of counting external events.
The timing diagram for the CTC mode is shown in Table 16-5 on page 151. The counter value
(TCNT2) increases until a compare match occurs between TCNT2 and OCR2A, and then counter
(TCNT2) is cleared.151
7593L–AVR–09/12
AT90USB64/128
Figure 16-5. CTC mode, timing diagram.
An interrupt can be generated each time the counter value reaches the TOP value by using the
OCF2A Flag. If the interrupt is enabled, the interrupt handler routine can be used for updating
the TOP value. However, changing TOP to a value close to BOTTOM when the counter is running
with none or a low prescaler value must be done with care since the CTC mode does not
have the double buffering feature. If the new value written to OCR2A is lower than the current
value of TCNT2, the counter will miss the compare match. The counter will then have to count to
its maximum value (0xFF) and wrap around starting at 0x00 before the compare match can
occur.
For generating a waveform output in CTC mode, the OC2A output can be set to toggle its logical
level on each compare match by setting the Compare Output mode bits to toggle mode
(COM2A1:0 = 1). The OC2A value will not be visible on the port pin unless the data direction for
the pin is set to output. The waveform generated will have a maximum frequency of fOC2A =
fclk_I/O/2 when OCR2A is set to zero (0x00). The waveform frequency is defined by the following
equation:
The N variable represents the prescale factor (1, 8, 32, 64, 128, 256, or 1024).
As for the Normal mode of operation, the TOV2 Flag is set in the same timer clock cycle that the
counter counts from MAX to 0x00.
16.6.3 Fast PWM mode
The fast Pulse Width Modulation or fast PWM mode (WGM22:0 = 3 or 7) provides a high frequency
PWM waveform generation option. The fast PWM differs from the other PWM option by
its single-slope operation. The counter counts from BOTTOM to TOP then restarts from BOTTOM.
TOP is defined as 0xFF when WGM22:0 = 3, and OCR2A when MGM22:0 = 7. In noninverting
Compare Output mode, the Output Compare (OC2x) is cleared on the compare match
between TCNT2 and OCR2x, and set at BOTTOM. In inverting Compare Output mode, the output
is set on compare match and cleared at BOTTOM. Due to the single-slope operation, the
operating frequency of the fast PWM mode can be twice as high as the phase correct PWM
mode that uses dual-slope operation. This high frequency makes the fast PWM mode well suited
for power regulation, rectification, and DAC applications. High frequency allows physically small
sized external components (coils, capacitors), and therefore reduces total system cost.
TCNTn
OCnx
(Toggle)
OCnx Interrupt Flag Set
Period 1 2 3 4
(COMnx1:0 = 1)
f
OCnx
f
clk_I/O
2 ⋅ ⋅ N ( ) 1 + OCRnx = -------------------------------------------------152
7593L–AVR–09/12
AT90USB64/128
In fast PWM mode, the counter is incremented until the counter value matches the TOP value.
The counter is then cleared at the following timer clock cycle. The timing diagram for the fast
PWM mode is shown in Figure 16-6. The TCNT2 value is in the timing diagram shown as a histogram
for illustrating the single-slope operation. The diagram includes non-inverted and
inverted PWM outputs. The small horizontal line marks on the TCNT2 slopes represent compare
matches between OCR2x and TCNT2.
Figure 16-6. Fast PWM mode, timing diagram.
The Timer/Counter Overflow Flag (TOV2) is set each time the counter reaches TOP. If the interrupt
is enabled, the interrupt handler routine can be used for updating the compare value.
In fast PWM mode, the compare unit allows generation of PWM waveforms on the OC2x pin.
Setting the COM2x1:0 bits to two will produce a non-inverted PWM and an inverted PWM output
can be generated by setting the COM2x1:0 to three. TOP is defined as 0xFF when WGM2:0 = 3,
and OCR2A when WGM2:0 = 7 (See Table 16-2 on page 157). The actual OC2x value will only
be visible on the port pin if the data direction for the port pin is set as output. The PWM waveform
is generated by setting (or clearing) the OC2x Register at the compare match between
OCR2x and TCNT2, and clearing (or setting) the OC2x Register at the timer clock cycle the
counter is cleared (changes from TOP to BOTTOM).
The PWM frequency for the output can be calculated by the following equation:
The N variable represents the prescale factor (1, 8, 32, 64, 128, 256, or 1024).
The extreme values for the OCR2A Register represent special cases when generating a PWM
waveform output in the fast PWM mode. If the OCR2A is set equal to BOTTOM, the output will
be a narrow spike for each MAX+1 timer clock cycle. Setting the OCR2A equal to MAX will result
in a constantly high or low output (depending on the polarity of the output set by the COM2A1:0
bits.)
A frequency (with 50% duty cycle) waveform output in fast PWM mode can be achieved by setting
OC2x to toggle its logical level on each compare match (COM2x1:0 = 1). The waveform
TCNTn
OCRnx Update and
TOVn Interrupt Flag Set
Period 1 2 3
OCnx
OCnx
(COMnx1:0 = 2)
(COMnx1:0 = 3)
OCRnx Interrupt Flag Set
4 5 6 7
f
OCnxPWM
f
clk_I/O
N ⋅ 256 = ------------------153
7593L–AVR–09/12
AT90USB64/128
generated will have a maximum frequency of foc2 = fclk_I/O/2 when OCR2A is set to zero. This feature
is similar to the OC2A toggle in CTC mode, except the double buffer feature of the Output
Compare unit is enabled in the fast PWM mode.
16.6.4 Phase correct PWM mode
The phase correct PWM mode (WGM22:0 = 1 or 5) provides a high resolution phase correct
PWM waveform generation option. The phase correct PWM mode is based on a dual-slope
operation. The counter counts repeatedly from BOTTOM to TOP and then from TOP to BOTTOM.
TOP is defined as 0xFF when WGM22:0 = 1, and OCR2A when MGM22:0 = 5. In noninverting
Compare Output mode, the Output Compare (OC2x) is cleared on the compare match
between TCNT2 and OCR2x while upcounting, and set on the compare match while downcounting.
In inverting Output Compare mode, the operation is inverted. The dual-slope operation has
lower maximum operation frequency than single slope operation. However, due to the symmetric
feature of the dual-slope PWM modes, these modes are preferred for motor control
applications.
In phase correct PWM mode the counter is incremented until the counter value matches TOP.
When the counter reaches TOP, it changes the count direction. The TCNT2 value will be equal
to TOP for one timer clock cycle. The timing diagram for the phase correct PWM mode is shown
on Figure 16-7. The TCNT2 value is in the timing diagram shown as a histogram for illustrating
the dual-slope operation. The diagram includes non-inverted and inverted PWM outputs. The
small horizontal line marks on the TCNT2 slopes represent compare matches between OCR2x
and TCNT2.
Figure 16-7. Phase correct PWM mode, timing diagram.
The Timer/Counter Overflow Flag (TOV2) is set each time the counter reaches BOTTOM. The
Interrupt Flag can be used to generate an interrupt each time the counter reaches the BOTTOM
value.
In phase correct PWM mode, the compare unit allows generation of PWM waveforms on the
OC2x pin. Setting the COM2x1:0 bits to two will produce a non-inverted PWM. An inverted PWM
TOVn Interrupt Flag Set
OCnx Interrupt Flag Set
1 2 3
TCNTn
Period
OCnx
OCnx
(COMnx1:0 = 2)
(COMnx1:0 = 3)
OCRnx update154
7593L–AVR–09/12
AT90USB64/128
output can be generated by setting the COM2x1:0 to three. TOP is defined as 0xFF when
WGM2:0 = 3, and OCR2A when MGM2:0 = 7 (see Table 16-3 on page 157). The actual OC2x
value will only be visible on the port pin if the data direction for the port pin is set as output. The
PWM waveform is generated by clearing (or setting) the OC2x Register at the compare match
between OCR2x and TCNT2 when the counter increments, and setting (or clearing) the OC2x
Register at compare match between OCR2x and TCNT2 when the counter decrements. The
PWM frequency for the output when using phase correct PWM can be calculated by the following
equation:
The N variable represents the prescale factor (1, 8, 32, 64, 128, 256, or 1024).
The extreme values for the OCR2A Register represent special cases when generating a PWM
waveform output in the phase correct PWM mode. If the OCR2A is set equal to BOTTOM, the
output will be continuously low and if set equal to MAX the output will be continuously high for
non-inverted PWM mode. For inverted PWM the output will have the opposite logic values.
At the very start of period 2 in Figure 16-7 on page 153 OCnx has a transition from high to low
even though there is no Compare Match. The point of this transition is to guarantee symmetry
around BOTTOM. There are two cases that give a transition without Compare Match.
• OCR2A changes its value from MAX, like in Figure 16-7 on page 153. When the OCR2A
value is MAX the OCn pin value is the same as the result of a down-counting compare match.
To ensure symmetry around BOTTOM the OCn value at MAX must correspond to the result
of an up-counting Compare Match
• The timer starts counting from a value higher than the one in OCR2A, and for that reason
misses the Compare Match and hence the OCn change that would have happened on the
way up
16.7 Timer/Counter timing diagrams
The following figures show the Timer/Counter in synchronous mode, and the timer clock (clkT2)
is therefore shown as a clock enable signal. In asynchronous mode, clkI/O should be replaced by
the Timer/Counter Oscillator clock. The figures include information on when Interrupt Flags are
set. Figure 16-8 contains timing data for basic Timer/Counter operation. The figure shows the
count sequence close to the MAX value in all modes other than phase correct PWM mode.
Figure 16-8. Timer/Counter timing diagram, no prescaling.
f
OCnxPCPWM
f
clk_I/O
N ⋅ 510 = ------------------
clkTn
(clkI/O/1)
TOVn
clkI/O
TCNTn MAX - 1 MAX BOTTOM BOTTOM + 1155
7593L–AVR–09/12
AT90USB64/128
Figure 16-9 shows the same timing data, but with the prescaler enabled.
Figure 16-9. Timer/Counter timing diagram, with prescaler (fclk_I/O/8).
Figure 16-10 shows the setting of OCF2A in all modes except CTC mode.
Figure 16-10. Timer/Counter timing diagram, setting of OCF2A, with prescaler (fclk_I/O/8).
Figure 16-11 on page 156 shows the setting of OCF2A and the clearing of TCNT2 in CTC mode.
TOVn
TCNTn MAX - 1 MAX BOTTOM BOTTOM + 1
clkI/O
clkTn
(clkI/O/8)
OCFnx
OCRnx
TCNTn
OCRnx value
OCRnx - 1 OCRnx OCRnx + 1 OCRnx + 2
clkI/O
clkTn
(clkI/O/8)156
7593L–AVR–09/12
AT90USB64/128
Figure 16-11. Timer/Counter timing diagram, clear timer on compare match mode, with prescaler
(fclk_I/O/8).
16.8 8-bit Timer/Counter register description
16.8.1 TCCR2A – Timer/Counter Control Register A
• Bits 7:6 – COM2A1:0: Compare Match Output A mode
These bits control the Output Compare pin (OC2A) behavior. If one or both of the COM2A1:0
bits are set, the OC2A output overrides the normal port functionality of the I/O pin it is connected
to. However, note that the Data Direction Register (DDR) bit corresponding to the OC2A pin
must be set in order to enable the output driver.
When OC2A is connected to the pin, the function of the COM2A1:0 bits depends on the
WGM22:0 bit setting. Table 16-1 shows the COM2A1:0 bit functionality when the WGM22:0 bits
are set to a normal or CTC mode (non-PWM).
OCFnx
OCRnx
TCNTn
(CTC)
TOP
TOP - 1 TOP BOTTOM BOTTOM + 1
clkI/O
clkTn
(clkI/O/8)
Bit 7 6 5 4 3 2 1 0
COM2A1 COM2A0 COM2B1 COM2B0 – – WGM21 WGM20 TCCR2A
Read/write R/W R/W R/W R/W R R R/W R/W
Initial value 0 0 0 0 0 0 0 0
Table 16-1. Compare output mode, non-PWM mode.
COM2A1 COM2A0 Description
0 0 Normal port operation, OC2A disconnected
0 1 Toggle OC2A on Compare Match
1 0 Clear OC2A on Compare Match
1 1 Set OC2A on Compare Match157
7593L–AVR–09/12
AT90USB64/128
Table 16-2 shows the COM2A1:0 bit functionality when the WGM21:0 bits are set to fast PWM
mode.
Note: 1. A special case occurs when OCR2A equals TOP and COM2A1 is set. In this case, the Compare
Match is ignored, but the set or clear is done at TOP. See “Fast PWM mode” on page 151
for more details.
Table 16-3 shows the COM2A1:0 bit functionality when the WGM22:0 bits are set to phase correct
PWM mode.
Note: 1. A special case occurs when OCR2A equals TOP and COM2A1 is set. In this case, the Compare
Match is ignored, but the set or clear is done at TOP. See “Phase correct PWM mode” on
page 153 for more details.
• Bits 5:4 – COM2B1:0: Compare Match Output B mode
These bits control the Output Compare pin (OC2B) behavior. If one or both of the COM2B1:0
bits are set, the OC2B output overrides the normal port functionality of the I/O pin it is connected
to. However, note that the Data Direction Register (DDR) bit corresponding to the OC2B pin
must be set in order to enable the output driver.
When OC2B is connected to the pin, the function of the COM2B1:0 bits depends on the
WGM22:0 bit setting. Table 16-4 shows the COM2B1:0 bit functionality when the WGM22:0 bits
are set to a normal or CTC mode (non-PWM).
Table 16-2. Compare Output mode, fast PWM mode (1).
COM2A1 COM2A0 Description
0 0 Normal port operation, OC2A disconnected
0 1 WGM22 = 0: Normal Port Operation, OC0A Disconnected.
WGM22 = 1: Toggle OC2A on Compare Match.
1 0 Clear OC2A on Compare Match, set OC2A at TOP
1 1 Set OC2A on Compare Match, clear OC2A at TOP
Table 16-3. Compare Output mode, phase correct PWM mode (1).
COM2A1 COM2A0 Description
0 0 Normal port operation, OC2A disconnected
0 1 WGM22 = 0: Normal Port Operation, OC2A Disconnected.
WGM22 = 1: Toggle OC2A on Compare Match.
1 0 Clear OC2A on Compare Match when up-counting. Set OC2A on Compare
Match when down-counting.
1 1 Set OC2A on Compare Match when up-counting. Clear OC2A on Compare
Match when down-counting.
Table 16-4. Compare Output mode, non-PWM mode.
COM2B1 COM2B0 Description
0 0 Normal port operation, OC2B disconnected
0 1 Toggle OC2B on Compare Match
1 0 Clear OC2B on Compare Match
1 1 Set OC2B on Compare Match158
7593L–AVR–09/12
AT90USB64/128
Table 16-5 shows the COM2B1:0 bit functionality when the WGM22:0 bits are set to fast PWM
mode.
Note: 1. A special case occurs when OCR2B equals TOP and COM2B1 is set. In this case, the Compare
Match is ignored, but the set or clear is done at TOP. See “Fast PWM mode” on page 151
for more details.
Table 16-6 shows the COM2B1:0 bit functionality when the WGM22:0 bits are set to phase correct
PWM mode.
Note: 1. A special case occurs when OCR2B equals TOP and COM2B1 is set. In this case, the Compare
Match is ignored, but the set or clear is done at TOP. See “Phase correct PWM mode” on
page 153 for more details.
• Bits 3, 2 – Res: Reserved bits
These bits are reserved bits in the Atmel AT90USB64/128 and will always read as zero.
• Bits 1:0 – WGM21:0: Waveform Generation mode
Combined with the WGM22 bit found in the TCCR2B Register, these bits control the counting
sequence of the counter, the source for maximum (TOP) counter value, and what type of waveform
generation to be used, see Table 16-7. Modes of operation supported by the Timer/Counter
unit are: Normal mode (counter), Clear Timer on Compare Match (CTC) mode, and two types of
Pulse Width Modulation (PWM) modes (see “Modes of operation” on page 150).
Table 16-5. Compare Output mode, fast PWM mode (1).
COM2B1 COM2B0 Description
0 0 Normal port operation, OC2B disconnected.
0 1 Reserved
1 0 Clear OC2B on Compare Match, set OC2B at TOP
1 1 Set OC2B on Compare Match, clear OC2B at TOP
Table 16-6. Compare Output mode, phase correct PWM mode (1).
COM2B1 COM2B0 Description
0 0 Normal port operation, OC2B disconnected
0 1 Reserved
1 0 Clear OC2B on Compare Match when up-counting. Set OC2B on Compare
Match when down-counting
1 1 Set OC2B on Compare Match when up-counting. Clear OC2B on Compare
Match when down-counting
Table 16-7. Waveform Generation mode bit description.
Mode WGM2 WGM1 WGM0
Timer/Counter
mode of operation TOP
Update of
OCRx at
TOV flag
set on (1)(2)
0 0 0 0 Normal 0xFF Immediate MAX
1 0 0 1 PWM, phase correct 0xFF TOP BOTTOM
2 0 1 0 CTC OCRA Immediate MAX
3 0 1 1 Fast PWM 0xFF TOP MAX
4 1 0 0 Reserved – – –159
7593L–AVR–09/12
AT90USB64/128
Notes: 1. MAX= 0xFF
2. BOTTOM= 0x00
16.8.2 TCCR2B – Timer/Counter Control Register B
• Bit 7 – FOC2A: Force Output Compare A
The FOC2A bit is only active when the WGM bits specify a non-PWM mode.
However, for ensuring compatibility with future devices, this bit must be set to zero when
TCCR2B is written when operating in PWM mode. When writing a logical one to the FOC2A bit,
an immediate Compare Match is forced on the Waveform Generation unit. The OC2A output is
changed according to its COM2A1:0 bits setting. Note that the FOC2A bit is implemented as a
strobe. Therefore it is the value present in the COM2A1:0 bits that determines the effect of the
forced compare.
A FOC2A strobe will not generate any interrupt, nor will it clear the timer in CTC mode using
OCR2A as TOP.
The FOC2A bit is always read as zero.
• Bit 6 – FOC2B: Force Output Compare B
The FOC2B bit is only active when the WGM bits specify a non-PWM mode.
However, for ensuring compatibility with future devices, this bit must be set to zero when
TCCR2B is written when operating in PWM mode. When writing a logical one to the FOC2B bit,
an immediate Compare Match is forced on the Waveform Generation unit. The OC2B output is
changed according to its COM2B1:0 bits setting. Note that the FOC2B bit is implemented as a
strobe. Therefore it is the value present in the COM2B1:0 bits that determines the effect of the
forced compare.
A FOC2B strobe will not generate any interrupt, nor will it clear the timer in CTC mode using
OCR2B as TOP.
The FOC2B bit is always read as zero.
• Bits 5:4 – Res: Reserved bits
These bits are reserved bits in the AT90USB64/128 and will always read as zero.
• Bit 3 – WGM22: Waveform Generation mode
See the description in the “TCCR2A – Timer/Counter Control Register A” on page 156.
5 1 0 1 PWM, phase correct OCRA TOP BOTTOM
6 1 1 0 Reserved – – –
7 1 1 1 Fast PWM OCRA TOP TOP
Table 16-7. Waveform Generation mode bit description. (Continued)
Mode WGM2 WGM1 WGM0
Timer/Counter
mode of operation TOP
Update of
OCRx at
TOV flag
set on (1)(2)
Bit 7 6 5 4 3 2 1 0
FOC2A FOC2B – – WGM22 CS22 CS21 CS20 TCCR2B
Read/write W W R R R/W R/W R/W R/W
Initial value 0 0 0 0 0 0 0 0160
7593L–AVR–09/12
AT90USB64/128
• Bit 2:0 – CS22:0: Clock Select
The three Clock Select bits select the clock source to be used by the Timer/Counter, see Table
16-8.
16.8.3 TCNT2 – Timer/Counter Register
The Timer/Counter Register gives direct access, both for read and write operations, to the
Timer/Counter unit 8-bit counter. Writing to the TCNT2 Register blocks (removes) the Compare
Match on the following timer clock. Modifying the counter (TCNT2) while the counter is running,
introduces a risk of missing a Compare Match between TCNT2 and the OCR2x Registers.
16.8.4 OCR2A – Output Compare Register A
The Output Compare Register A contains an 8-bit value that is continuously compared with the
counter value (TCNT2). A match can be used to generate an Output Compare interrupt, or to
generate a waveform output on the OC2A pin.
16.8.5 OCR2B – Output Compare Register B
The Output Compare Register B contains an 8-bit value that is continuously compared with the
counter value (TCNT2). A match can be used to generate an Output Compare interrupt, or to
generate a waveform output on the OC2B pin.
Table 16-8. Clock Select bit description.
CS22 CS21 CS20 Description
0 0 0 No clock source (Timer/Counter stopped)
0 0 1 clkT2S/(no prescaling)
0 1 0 clkT2S/8 (from prescaler)
0 1 1 clkT2S/32 (from prescaler)
1 0 0 clkT2S/64 (from prescaler)
1 0 1 clkT2S/128 (from prescaler)
1 1 0 clkT2S/256 (from prescaler)
1 1 1 clkT2S/1024 (from prescaler)
Bit 7 6 5 4 3 2 1 0
TCNT2[7:0] TCNT2
Read/write R/W R/W R/W R/W R/W R/W R/W R/W
Initial value 0 0 0 0 0 0 0 0
Bit 7 6 5 4 3 2 1 0
OCR2A[7:0] OCR2A
Read/write R/W R/W R/W R/W R/W R/W R/W R/W
Initial value 0 0 0 0 0 0 0 0
Bit 7 6 5 4 3 2 1 0
OCR2B[7:0] OCR2B
Read/write R/W R/W R/W R/W R/W R/W R/W R/W
Initial value 0 0 0 0 0 0 0 0161
7593L–AVR–09/12
AT90USB64/128
16.9 Asynchronous operation of the Timer/Counter
16.9.1 ASSR – Asynchronous Status Register
• Bit 6 – EXCLK: Enable External Clock Input
When EXCLK is written to one, and asynchronous clock is selected, the external clock input buffer
is enabled and an external clock can be input on Timer Oscillator 1 (TOSC1) pin instead of a
32 kHz crystal. Writing to EXCLK should be done before asynchronous operation is selected.
Note that the crystal Oscillator will only run when this bit is zero.
• Bit 5 – AS2: Asynchronous Timer/Counter2
When AS2 is written to zero, Timer/Counter2 is clocked from the I/O clock, clkI/O. When AS2 is
written to one, Timer/Counter2 is clocked from a crystal Oscillator connected to the Timer Oscillator
1 (TOSC1) pin. When the value of AS2 is changed, the contents of TCNT2, OCR2A,
OCR2B, TCCR2A and TCCR2B might be corrupted.
• Bit 4 – TCN2UB: Timer/Counter2 Update Busy
When Timer/Counter2 operates asynchronously and TCNT2 is written, this bit becomes set.
When TCNT2 has been updated from the temporary storage register, this bit is cleared by hardware.
A logical zero in this bit indicates that TCNT2 is ready to be updated with a new value.
• Bit 3 – OCR2AUB: Output Compare Register2 Update Busy
When Timer/Counter2 operates asynchronously and OCR2A is written, this bit becomes set.
When OCR2A has been updated from the temporary storage register, this bit is cleared by hardware.
A logical zero in this bit indicates that OCR2A is ready to be updated with a new value.
• Bit 2 – OCR2BUB: Output Compare Register2 Update Busy
When Timer/Counter2 operates asynchronously and OCR2B is written, this bit becomes set.
When OCR2B has been updated from the temporary storage register, this bit is cleared by hardware.
A logical zero in this bit indicates that OCR2B is ready to be updated with a new value.
• Bit 1 – TCR2AUB: Timer/Counter Control Register2 Update Busy
When Timer/Counter2 operates asynchronously and TCCR2A is written, this bit becomes set.
When TCCR2A has been updated from the temporary storage register, this bit is cleared by
hardware. A logical zero in this bit indicates that TCCR2A is ready to be updated with a new
value.
• Bit 0 – TCR2BUB: Timer/Counter Control Register2 Update Busy
When Timer/Counter2 operates asynchronously and TCCR2B is written, this bit becomes set.
When TCCR2B has been updated from the temporary storage register, this bit is cleared by
hardware. A logical zero in this bit indicates that TCCR2B is ready to be updated with a new
value.
If a write is performed to any of the five Timer/Counter2 Registers while its update busy flag is
set, the updated value might get corrupted and cause an unintentional interrupt to occur.
Bit 7 6 5 4 3 2 1 0
– EXCLK AS2 TCN2UB OCR2AUB OCR2BUB TCR2AUB TCR2BUB ASSR
Read/write R R/W R/W R R R R R
Initial value 0 0 0 0 0 0 0 0162
7593L–AVR–09/12
AT90USB64/128
The mechanisms for reading TCNT2, OCR2A, OCR2B, TCCR2A and TCCR2B are different.
When reading TCNT2, the actual timer value is read. When reading OCR2A, OCR2B, TCCR2A
and TCCR2B the value in the temporary storage register is read.
16.9.2 Asynchronous operation of Timer/Counter2
When Timer/Counter2 operates asynchronously, some considerations must be taken.
• Warning: When switching between asynchronous and synchronous clocking of
Timer/Counter2, the Timer Registers TCNT2, OCR2x, and TCCR2x might be corrupted. A
safe procedure for switching clock source is:
a. Disable the Timer/Counter2 interrupts by clearing OCIE2x and TOIE2.
b. Select clock source by setting AS2 as appropriate.
c. Write new values to TCNT2, OCR2x, and TCCR2x.
d. To switch to asynchronous operation: Wait for TCN2UB, OCR2xUB, and TCR2xUB.
e. Clear the Timer/Counter2 Interrupt Flags.
f. Enable interrupts, if needed.
• The CPU main clock frequency must be more than four times the Oscillator frequency
• When writing to one of the registers TCNT2, OCR2x, or TCCR2x, the value is transferred to a
temporary register, and latched after two positive edges on TOSC1. The user should not
write a new value before the contents of the temporary register have been transferred to its
destination. Each of the five mentioned registers have their individual temporary register,
which means that, for example, writing to TCNT2 does not disturb an OCR2x write in
progress. To detect that a transfer to the destination register has taken place, the
Asynchronous Status Register – ASSR has been implemented
• When entering Power-save or ADC Noise Reduction mode after having written to TCNT2,
OCR2x, or TCCR2x, the user must wait until the written register has been updated if
Timer/Counter2 is used to wake up the device. Otherwise, the MCU will enter sleep mode
before the changes are effective. This is particularly important if any of the Output Compare2
interrupt is used to wake up the device, since the Output Compare function is disabled during
writing to OCR2x or TCNT2. If the write cycle is not finished, and the MCU enters sleep mode
before the corresponding OCR2xUB bit returns to zero, the device will never receive a
compare match interrupt, and the MCU will not wake up
• If Timer/Counter2 is used to wake the device up from Power-save or ADC Noise Reduction
mode, precautions must be taken if the user wants to re-enter one of these modes: The
interrupt logic needs one TOSC1 cycle to be reset. If the time between wake-up and reentering
sleep mode is less than one TOSC1 cycle, the interrupt will not occur, and the
device will fail to wake up. If the user is in doubt whether the time before re-entering Powersave
or ADC Noise Reduction mode is sufficient, the following algorithm can be used to
ensure that one TOSC1 cycle has elapsed:
a. Write a value to TCCR2x, TCNT2, or OCR2x.
b. Wait until the corresponding Update Busy Flag in ASSR returns to zero.
c. Enter Power-save or ADC Noise Reduction mode.
• When the asynchronous operation is selected, the 32.768kHz Oscillator for Timer/Counter2
is always running, except in Power-down and Standby modes. After a Power-up Reset or
wake-up from Power-down or Standby mode, the user should be aware of the fact that this
Oscillator might take as long as one second to stabilize. The user is advised to wait for at
least one second before using Timer/Counter2 after power-up or wake-up from Power-down
or Standby mode. The contents of all Timer/Counter2 Registers must be considered lost after 163
7593L–AVR–09/12
AT90USB64/128
a wake-up from Power-down or Standby mode due to unstable clock signal upon start-up, no
matter whether the Oscillator is in use or a clock signal is applied to the TOSC1 pin
• Description of wake up from Power-save or ADC Noise Reduction mode when the timer is
clocked asynchronously: When the interrupt condition is met, the wake up process is started
on the following cycle of the timer clock, that is, the timer is always advanced by at least one
before the processor can read the counter value. After wake-up, the MCU is halted for four
cycles, it executes the interrupt routine, and resumes execution from the instruction following
SLEEP
• Reading of the TCNT2 Register shortly after wake-up from Power-save may give an incorrect
result. Since TCNT2 is clocked on the asynchronous TOSC clock, reading TCNT2 must be
done through a register synchronized to the internal I/O clock domain. Synchronization takes
place for every rising TOSC1 edge. When waking up from Power-save mode, and the I/O
clock (clkI/O) again becomes active, TCNT2 will read as the previous value (before entering
sleep) until the next rising TOSC1 edge. The phase of the TOSC clock after waking up from
Power-save mode is essentially unpredictable, as it depends on the wake-up time. The
recommended procedure for reading TCNT2 is thus as follows:
a. Write any value to either of the registers OCR2x or TCCR2x.
b. Wait for the corresponding Update Busy Flag to be cleared.
c. Read TCNT2.
• During asynchronous operation, the synchronization of the Interrupt Flags for the
asynchronous timer takes 3 processor cycles plus one timer cycle. The timer is therefore
advanced by at least one before the processor can read the timer value causing the setting of
the Interrupt Flag. The Output Compare pin is changed on the timer clock and is not
synchronized to the processor clock
16.9.3 TIMSK2 – Timer/Counter2 Interrupt Mask Register
• Bit 2 – OCIE2B: Timer/Counter2 Output Compare Match B Interrupt Enable
When the OCIE2B bit is written to one and the I-bit in the Status Register is set (one), the
Timer/Counter2 Compare Match B interrupt is enabled. The corresponding interrupt is executed
if a compare match in Timer/Counter2 occurs, that is, when the OCF2B bit is set in the
Timer/Counter2 Interrupt Flag Register – TIFR2.
• Bit 1 – OCIE2A: Timer/Counter2 Output Compare Match A Interrupt Enable
When the OCIE2A bit is written to one and the I-bit in the Status Register is set (one), the
Timer/Counter2 Compare Match A interrupt is enabled. The corresponding interrupt is executed
if a compare match in Timer/Counter2 occurs, that is, when the OCF2A bit is set in the
Timer/Counter2 Interrupt Flag Register – TIFR2.
• Bit 0 – TOIE2: Timer/Counter2 Overflow Interrupt Enable
When the TOIE2 bit is written to one and the I-bit in the Status Register is set (one), the
Timer/Counter2 Overflow interrupt is enabled. The corresponding interrupt is executed if an
overflow in Timer/Counter2 occurs, that is, when the TOV2 bit is set in the Timer/Counter2 Interrupt
Flag Register – TIFR2.
Bit 7 6 5 4 3 2 1 0
– – – – – OCIE2B OCIE2A TOIE2 TIMSK2
Read/write R R R R R R/W R/W R/W
Initial value 0 0 0 0 0 0 0 0164
7593L–AVR–09/12
AT90USB64/128
16.9.4 TIFR2 – Timer/Counter2 Interrupt Flag Register
• Bit 2 – OCF2B: Output Compare Flag 2 B
The OCF2B bit is set (one) when a compare match occurs between the Timer/Counter2 and the
data in OCR2B – Output Compare Register2. OCF2B is cleared by hardware when executing
the corresponding interrupt handling vector. Alternatively, OCF2B is cleared by writing a logic
one to the flag. When the I-bit in SREG, OCIE2B (Timer/Counter2 Compare match Interrupt
Enable), and OCF2B are set (one), the Timer/Counter2 Compare match Interrupt is executed.
• Bit 1 – OCF2A: Output Compare Flag 2 A
The OCF2A bit is set (one) when a compare match occurs between the Timer/Counter2 and the
data in OCR2A – Output Compare Register2. OCF2A is cleared by hardware when executing
the corresponding interrupt handling vector. Alternatively, OCF2A is cleared by writing a logic
one to the flag. When the I-bit in SREG, OCIE2A (Timer/Counter2 Compare match Interrupt
Enable), and OCF2A are set (one), the Timer/Counter2 Compare match Interrupt is executed.
• Bit 0 – TOV2: Timer/Counter2 Overflow Flag
The TOV2 bit is set (one) when an overflow occurs in Timer/Counter2. TOV2 is cleared by hardware
when executing the corresponding interrupt handling vector. Alternatively, TOV2 is cleared
by writing a logic one to the flag. When the SREG I-bit, TOIE2A (Timer/Counter2 Overflow Interrupt
Enable), and TOV2 are set (one), the Timer/Counter2 Overflow interrupt is executed. In
PWM mode, this bit is set when Timer/Counter2 changes counting direction at 0x00.
16.10 Timer/Counter prescaler
Figure 16-12. Prescaler for Timer/Counter2.
Bit 7 6 5 4 3 2 1 0
– – – – – OCF2B OCF2A TOV2 TIFR2
Read/write R R R R R R/W R/W R/W
Initial value 0 0 0 0 0 0 0 0
10-BIT T/C PRESCALER
TIMER/COUNTER2 CLOCK SOURCE
clkI/O clkT2S
TOSC1
AS2
CS20
CS21
CS22
clkT2S/8
clkT2S/64
clkT2S/128
clkT2S/1024
clkT2S/256
clkT2S/32
0 PSRASY
Clear
clkT2165
7593L–AVR–09/12
AT90USB64/128
The clock source for Timer/Counter2 is named clkT2S. clkT2S is by default connected to the main
system I/O clock clkIO. By setting the AS2 bit in ASSR, Timer/Counter2 is asynchronously
clocked from the TOSC1 pin. This enables use of Timer/Counter2 as a Real Time Counter
(RTC). When AS2 is set, pins TOSC1 and TOSC2 are disconnected from Port C. A crystal can
then be connected between the TOSC1 and TOSC2 pins to serve as an independent clock
source for Timer/Counter2. The Oscillator is optimized for use with a 32.768kHz crystal. Applying
an external clock source to TOSC1 is not recommended.
For Timer/Counter2, the possible prescaled selections are: clkT2S/8, clkT2S/32, clkT2S/64,
clkT2S/128, clkT2S/256, and clkT2S/1024. Additionally, clkT2S as well as 0 (stop) may be selected.
Setting the PSRASY bit in GTCCR resets the prescaler. This allows the user to operate with a
predictable prescaler.
16.10.1 GTCCR – General Timer/Counter Control Register
• Bit 1 – PSRASY: Prescaler Reset Timer/Counter2
When this bit is one, the Timer/Counter2 prescaler will be reset. This bit is normally cleared
immediately by hardware. If the bit is written when Timer/Counter2 is operating in asynchronous
mode, the bit will remain one until the prescaler has been reset. The bit will not be cleared by
hardware if the TSM bit is set. Refer to the description of the Section “GTCCR – General
Timer/Counter Control Register” on page 97 for a description of the Timer/Counter Synchronization
mode.
Bit 7 6 5 4 3 2 1 0
TSM – – – – – PSRASY
PSRSY
NC
GTCCR
Read/write R/W R R R R R R/W R/W
Initial value 0 0 0 0 0 0 0 0166
7593L–AVR–09/12
AT90USB64/128
17. Output Compare Modulator (OCM1C0A)
17.1 Overview
The Output Compare Modulator (OCM) allows generation of waveforms modulated with a carrier
frequency. The modulator uses the outputs from the Output Compare Unit C of the 16-bit
Timer/Counter1 and the Output Compare Unit of the 8-bit Timer/Counter0. For more details
about these Timer/Counters see “Timer/Counter0, Timer/Counter1, and Timer/Counter3 prescalers”
on page 96 and “8-bit Timer/Counter2 with PWM and asynchronous operation” on page
145.
Figure 17-1. Output Compare Modulator, block diagram.
When the modulator is enabled, the two output compare channels are modulated together as
shown in the block diagram (Figure 17-1).
17.2 Description
The Output Compare unit 1C and Output Compare unit 2 shares the PB7 port pin for output. The
outputs of the Output Compare units (OC1C and OC0A) overrides the normal PORTB7 Register
when one of them is enabled (that is, when COMnx1:0 is not equal to zero). When both OC1C
and OC0A are enabled at the same time, the modulator is automatically enabled.
The functional equivalent schematic of the modulator is shown on Figure 17-2. The schematic
includes part of the Timer/Counter units and the port B pin 7 output driver circuit.
Figure 17-2. Output Compare Modulator, schematic.
OC1C
Pin
OC1C /
OC0A / PB7
Timer/Counter 1
Timer/Counter 0 OC0A
PORTB7 DDRB7
D Q D Q
Pin
COMA01
COMA00
DATABUS
OC1C /
OC0A/ PB7
COM1C1
COM1C0
Modulator
1
0
OC1C
D Q
OC0A
D Q
(From Waveform generator)
(From Waveform generator)
0
1
Vcc167
7593L–AVR–09/12
AT90USB64/128
When the modulator is enabled the type of modulation (logical AND or OR) can be selected by
the PORTB7 Register. Note that the DDRB7 controls the direction of the port independent of the
COMnx1:0 bit setting.
17.2.1 Timing example
Figure 17-3 illustrates the modulator in action. In this example the Timer/Counter1 is set to operate
in fast PWM mode (non-inverted) and Timer/Counter0 uses CTC waveform mode with toggle
Compare Output mode (COMnx1:0 = 1).
Figure 17-3. Output Compare Modulator, timing diagram.
In this example, Timer/Counter2 provides the carrier, while the modulating signal is generated
by the Output Compare unit C of the Timer/Counter1.
The resolution of the PWM signal (OC1C) is reduced by the modulation. The reduction factor is
equal to the number of system clock cycles of one period of the carrier (OC0A). In this example
the resolution is reduced by a factor of two. The reason for the reduction is illustrated in Figure
17-3 at the second and third period of the PB7 output when PORTB7 equals zero. The period 2
high time is one cycle longer than the period 3 high time, but the result on the PB7 output is
equal in both periods.
1 2
OC0A
(CTC mode)
OC1C
(FPWM mode)
PB7
(PORTB7 = 0)
PB7
(PORTB7 = 1)
(Period) 3
clk I/O168
7593L–AVR–09/12
AT90USB64/128
18. SPI – Serial Peripheral Interface
The Serial Peripheral Interface (SPI) allows high-speed synchronous data transfer between the
Atmel AT90USB64/128 and peripheral devices or between several AVR devices. The
AT90USB64/128 SPI includes the following features:
• Full-duplex, three-wire synchronous data transfer
• Master or slave operation
• LSB first or MSB first data transfer
• Seven programmable bit rates
• End of transmission interrupt flag
• Write collision flag protection
• Wake-up from Idle mode
• Double speed (CK/2) Master SPI mode
USART can also be used in Master SPI mode, see “USART in SPI mode” on page 202.
The Power Reduction SPI bit, PRSPI, in “PRR0 – Power Reduction Register 0” on page 54 must
be written to zero to enable SPI module.
Figure 18-1. SPI block diagram (1).
Note: 1. Refer to Figure 1-1 on page 3, and Table 11-6 on page 79 for SPI pin placement.
The interconnection between Master and Slave CPUs with SPI is shown in Figure 18-2 on page
169. The system consists of two shift Registers, and a Master clock generator. The SPI Master
initiates the communication cycle when pulling low the Slave Select SS pin of the desired Slave. SPI2X SPI2X
DIVIDER
/2/4/8/16/32/64/128169
7593L–AVR–09/12
AT90USB64/128
Master and Slave prepare the data to be sent in their respective shift Registers, and the Master
generates the required clock pulses on the SCK line to interchange data. Data is always shifted
from Master to Slave on the Master Out – Slave In, MOSI, line, and from Slave to Master on the
Master In – Slave Out, MISO, line. After each data packet, the Master will synchronize the Slave
by pulling high the Slave Select, SS, line.
When configured as a Master, the SPI interface has no automatic control of the SS line. This
must be handled by user software before communication can start. When this is done, writing a
byte to the SPI Data Register starts the SPI clock generator, and the hardware shifts the eight
bits into the Slave. After shifting one byte, the SPI clock generator stops, setting the end of
Transmission Flag (SPIF). If the SPI Interrupt Enable bit (SPIE) in the SPCR Register is set, an
interrupt is requested. The Master may continue to shift the next byte by writing it into SPDR, or
signal the end of packet by pulling high the Slave Select, SS line. The last incoming byte will be
kept in the Buffer Register for later use.
When configured as a Slave, the SPI interface will remain sleeping with MISO tri-stated as long
as the SS pin is driven high. In this state, software may update the contents of the SPI Data
Register, SPDR, but the data will not be shifted out by incoming clock pulses on the SCK pin
until the SS pin is driven low. As one byte has been completely shifted, the end of Transmission
Flag, SPIF is set. If the SPI Interrupt Enable bit, SPIE, in the SPCR Register is set, an interrupt
is requested. The Slave may continue to place new data to be sent into SPDR before reading
the incoming data. The last incoming byte will be kept in the Buffer Register for later use.
Figure 18-2. SPI Master-slave interconnection.
The system is single buffered in the transmit direction and double buffered in the receive direction.
This means that bytes to be transmitted cannot be written to the SPI Data Register before
the entire shift cycle is completed. When receiving data, however, a received character must be
read from the SPI Data Register before the next character has been completely shifted in. Otherwise,
the first byte is lost.
In SPI Slave mode, the control logic will sample the incoming signal of the SCK pin. To ensure
correct sampling of the clock signal, the frequency of the SPI clock should never exceed fosc/4.
When the SPI is enabled, the data direction of the MOSI, MISO, SCK, and SS pins is overridden
according to Table 18-1 on page 170. For more details on automatic port overrides, refer to
“Alternate port functions” on page 76.
SHIFT
ENABLE170
7593L–AVR–09/12
AT90USB64/128
Note: 1. See “Alternate functions of Port B” on page 79 for a detailed description of how to define the
direction of the user defined SPI pins.
The following code examples show how to initialize the SPI as a Master and how to perform a
simple transmission. DDR_SPI in the examples must be replaced by the actual Data Direction
Register controlling the SPI pins. DD_MOSI, DD_MISO and DD_SCK must be replaced by the
actual data direction bits for these pins. For example, if MOSI is placed on pin PB5, replace
DD_MOSI with DDB5 and DDR_SPI with DDRB.
Table 18-1. SPI pin overrides (1).
Pin Direction, master SPI Direction, slave SPI
MOSI User defined Input
MISO Input User defined
SCK User defined Input
SS User defined Input171
7593L–AVR–09/12
AT90USB64/128
Note: 1. See “About code examples” on page 10.
Assembly code example (1)
SPI_MasterInit:
; Set MOSI and SCK output, all others input
ldi r17,(1<>8);
UBRRLn = (unsigned char)baud;
/* Enable receiver and transmitter */
UCSRnB = (1<> 1) & 0x01;
return ((resh << 8) | resl);
}188
7593L–AVR–09/12
AT90USB64/128
The Receive Complete (RXCn) Flag indicates if there are unread data present in the receive buffer.
This flag is one when unread data exist in the receive buffer, and zero when the receive
buffer is empty (that is, does not contain any unread data). If the Receiver is disabled (RXENn =
0), the receive buffer will be flushed and consequently the RXCn bit will become zero.
When the Receive Complete Interrupt Enable (RXCIEn) in UCSRnB is set, the USART Receive
Complete interrupt will be executed as long as the RXCn Flag is set (provided that global interrupts
are enabled). When interrupt-driven data reception is used, the receive complete routine
must read the received data from UDRn in order to clear the RXCn Flag, otherwise a new interrupt
will occur once the interrupt routine terminates.
19.6.4 Receiver error flags
The USART Receiver has three error flags: Frame Error (FEn), Data OverRun (DORn) and Parity
Error (UPEn). All can be accessed by reading UCSRnA. Common for the Error Flags is that
they are located in the receive buffer together with the frame for which they indicate the error
status. Due to the buffering of the Error Flags, the UCSRnA must be read before the receive buffer
(UDRn), since reading the UDRn I/O location changes the buffer read location. Another
equality for the Error Flags is that they can not be altered by software doing a write to the flag
location. However, all flags must be set to zero when the UCSRnA is written for upward compatibility
of future USART implementations. None of the Error Flags can generate interrupts.
The Frame Error (FEn) Flag indicates the state of the first stop bit of the next readable frame
stored in the receive buffer. The FEn Flag is zero when the stop bit was correctly read (as one),
and the FEn Flag will be one when the stop bit was incorrect (zero). This flag can be used for
detecting out-of-sync conditions, detecting break conditions and protocol handling. The FEn
Flag is not affected by the setting of the USBSn bit in UCSRnC since the Receiver ignores all,
except for the first, stop bits. For compatibility with future devices, always set this bit to zero
when writing to UCSRnA.
The Data OverRun (DORn) Flag indicates data loss due to a receiver buffer full condition. A
Data OverRun occurs when the receive buffer is full (two characters), it is a new character waiting
in the Receive Shift Register, and a new start bit is detected. If the DORn Flag is set there
was one or more serial frame lost between the frame last read from UDRn, and the next frame
read from UDRn. For compatibility with future devices, always write this bit to zero when writing
to UCSRnA. The DORn Flag is cleared when the frame received was successfully moved from
the Shift Register to the receive buffer.
The Parity Error (UPEn) Flag indicates that the next frame in the receive buffer had a Parity
Error when received. If Parity Check is not enabled the UPEn bit will always be read zero. For
compatibility with future devices, always set this bit to zero when writing to UCSRnA. For more
details see “Parity bit calculation” on page 181 and “Parity Checker” on page 188.
19.6.5 Parity Checker
The Parity Checker is active when the high USART Parity mode (UPMn1) bit is set. Type of Parity
Check to be performed (odd or even) is selected by the UPMn0 bit. When enabled, the Parity
Checker calculates the parity of the data bits in incoming frames and compares the result with
the parity bit from the serial frame. The result of the check is stored in the receive buffer together
with the received data and stop bits. The Parity Error (UPEn) Flag can then be read by software
to check if the frame had a Parity Error.189
7593L–AVR–09/12
AT90USB64/128
The UPEn bit is set if the next character that can be read from the receive buffer had a Parity
Error when received and the Parity Checking was enabled at that point (UPMn1 = 1). This bit is
valid until the receive buffer (UDRn) is read.
19.6.6 Disabling the Receiver
In contrast to the Transmitter, disabling of the Receiver will be immediate. Data from ongoing
receptions will therefore be lost. When disabled (that is, the RXENn is set to zero) the Receiver
will no longer override the normal function of the RxDn port pin. The Receiver buffer FIFO will be
flushed when the Receiver is disabled. Remaining data in the buffer will be lost
19.6.7 Flushing the receive buffer
The receiver buffer FIFO will be flushed when the Receiver is disabled, that is, the buffer will be
emptied of its contents. Unread data will be lost. If the buffer has to be flushed during normal
operation, due to for instance an error condition, read the UDRn I/O location until the RXCn Flag
is cleared. The following code example shows how to flush the receive buffer.
Note: 1. See “About code examples” on page 10.
19.7 Asynchronous data reception
The USART includes a clock recovery and a data recovery unit for handling asynchronous data
reception. The clock recovery logic is used for synchronizing the internally generated baud rate
clock to the incoming asynchronous serial frames at the RxDn pin. The data recovery logic samples
and low pass filters each incoming bit, thereby improving the noise immunity of the
Receiver. The asynchronous reception operational range depends on the accuracy of the internal
baud rate clock, the rate of the incoming frames, and the frame size in number of bits.
19.7.1 Asynchronous clock recovery
The clock recovery logic synchronizes internal clock to the incoming serial frames. Figure 19-5
on page 190 illustrates the sampling process of the start bit of an incoming frame. The sample
rate is 16 times the baud rate for Normal mode, and eight times the baud rate for Double Speed
mode. The horizontal arrows illustrate the synchronization variation due to the sampling process.
Note the larger time variation when using the Double Speed mode (U2Xn = 1) of
operation. Samples denoted zero are samples done when the RxDn line is idle (that is, no communication
activity).
Assembly code example (1)
USART_Flush:
sbis UCSRnA, RXCn
ret
in r16, UDRn
rjmp USART_Flush
C code example (1)
void USART_Flush( void )
{
unsigned char dummy;
while ( UCSRnA & (1<
USBE=1
ID=1
Clock stopped
FRZCLK=1
Macro off
USBE=0
USBE=0
Host
USBE=0
HW
RESET
USBE=1
ID=0
AT90USB647/1287 only
AT90USB646/1286 forced mode247
7593L–AVR–09/12
AT90USB64/128
22.4.3 Interrupts
Two interrupts vectors are assigned to USB interface.
Figure 22-10. USB interrupt system.
See Section 23.17, page 272 and Section 24.15, page 291 for more details on the Host and
Device interrupts.
USB general
& OTG interrupt
USB device
interrupt
USB host
interrupt
USB general
interrupt vector
Endpoint
interrupt
Pipe
interrupt
USB endpoint/pipe
interrupt vector248
7593L–AVR–09/12
AT90USB64/128
Figure 22-11. USB general interrupt vector sources.
IDTE
USBCON.1
IDTI
USBINT.1
VBUSTI
USBINT.0 VBUSTE
USBCON.0
STOI
OTGINT.5 STOE
OTGIEN.5
HNPERRI
OTGINT.4 HNPERRE
OTGIEN.4
ROLEEXI
OTGINT.3 ROLEEXE
OTGIEN.3
BCERRI
OTGINT.2 BCERRE
OTGIEN.2
VBERRI
OTGINT.1 VBERRE
OTGIEN.1
SRPI
OTGINT.0 SRPE
OTGIEN.0
USB general
interrupt vector
UPRSMI
UDINT.6 UPRSME
UDIEN.6
EORSMI
UDINT.5 EORSME
UDIEN.5
WAKEUPI
UDINT.4 WAKEUPE
UDIEN.4
EORSTI
UDINT.3 EORSTE
UDIEN.3
SOFI
UDINT.2 SOFE
UDIEN.2
SUSPI
UDINT.0 SUSPE
UDIEN.0
HWUPE
UHIEN.6
HWUPI
UHINT.6
HSOFI
UHINT.5 HSOFE
UHIEN.5
RXRSMI
UHINT.4 RXRSME
UHIEN.4
RSMEDI
UHINT.3 RSMEDE
UHIEN.3
RSTI
UHINT.2 RSTE
UHIEN.2
DDISCI
UHINT.1 DDISCE
UHIEN.1
DCONNI
UHINT.0 DCONNE
UHIEN.0
USB device
interrupt
USB host
interrupt
USB general
interrupt vector
Asynchronous interrupt source
(allows the CPU to wake up from power down mode)249
7593L–AVR–09/12
AT90USB64/128
Figure 22-12. USB endpoint/pipe Interrupt vector sources.
FLERRE
UEIENX.7
OVERFI
UESTAX.6
UNDERFI
UESTAX.5
NAKINI
UEINTX.6 NAKINE
UEIENX.6
NAKOUTI
UEINTX.4 TXSTPE
UEIENX.4
RXSTPI
UEINTX.3 RXSTPE
UEIENX.3
RXOUTI
UEINTX.2 RXOUTE
UEIENX.2
STALLEDI
UEINTX.1 STALLEDE
UEIENX.1
EPINT
UEINT.X
Endpoint 0
Endpoint 1
Endpoint 2
Endpoint 3
Endpoint 4
Endpoint 5
Endpoint interrupt
TXINI
UEINTX.0 TXINE
UEIENX.0
FLERRE
UPIEN.7
UNDERFI
UPSTAX.5
OVERFI
UPSTAX.6
NAKEDI
UPINTX.6 NAKEDE
UPIEN.6
PERRI
UPINTX.4 PERRE
UPIEN.4
TXSTPI
UPINTX.3 TXSTPE
UPIEN.3
TXOUTI
UPINTX.2 TXOUTE
UPIEN.2
RXSTALLI
UPINTX.1 RXSTALLE
UPIEN.1
RXINI
UPINTX.0 RXINE
UPIEN.0
FLERRE
UPIEN.X
PIPE 0
PIPE 1
PIPE 2
PIPE 3
PIPE 4
PIPE 5
Pipe interrupt
USB endpoint/pipe
interrupt vector
Endpoint 6
PIPE 6250
7593L–AVR–09/12
AT90USB64/128
Figure 22-13. USB general and OTG controller interrupt system.
There are two kinds of interrupts: processing (that is, their generation are part of the normal processing)
and exception (errors).
Processing interrupts are generated when such events occur:
• USB ID Pad change detection (insert, remove)(IDTI)
• VBUS plug-in detection (insert, remove) (VBUSTI)
• SRP detected(SRPI)
• Role Exchanged(ROLEEXI)
Exception Interrupts are generated with the following events:
• Drop on VBus Detected(VBERRI)
• Error during the B-Connection(BCERRI)
• HNP Error(HNPERRI)
• Time-out detected during Suspend mode(STOII)
22.5 Power modes
22.5.1 Idle mode
In this mode, the CPU core is halted (CPU clock stopped). The Idle mode is taken wether the
USB controller is running or not. The CPU “wakes up” on any USB interrupts.
22.5.2 Power down
In this mode, the oscillator is stopped and halts all the clocks (CPU and peripherals). The USB
controller “wakes up” when:
• the WAKEUPI interrupt is triggered in the Peripheral mode (HOST cleared)
IDTE
USBCON.1
IDTI
USBINT.1
VBUSTI
USBINT.0 VBUSTE
USBCON.0
STOI
OTGINT.5 STOE
OTGIEN.5
HNPERRI
OTGINT.4 HNPERRE
OTGIEN.4
ROLEEXI
OTGINT.3 ROLEEXE
OTGIEN.3
BCERRI
OTGINT.2 BCERRE
OTGIEN.2
VBERRI
OTGINT.1 VBERRE
OTGIEN.1
SRPI
OTGINT.0 SRPE
OTGIEN.0
USB general & OTG
interrupt vector
Asynchronous interrupt source
(allows the CPU to wake up from power down mode251
7593L–AVR–09/12
AT90USB64/128
• the HWUPI interrupt is triggered in the Host mode (HOST set)
• the IDTI interrupt is triggered
• the VBUSTI interrupt is triggered
22.5.3 Freeze clock
The firmware has the ability to reduce the power consumption by setting the FRZCLK bit, which
freeze the clock of USB controller. When FRZCLK is set, it is still possible to access to the following
registers:
• USBCON, USBSTA, USBINT
• UDCON (detach, ...)
• UDINT
• UDIEN
• UHCON
• UHINT
• UHIEN
Moreover, when FRZCLK is set, only the following interrupts may be triggered:
• WAKEUPI
• IDTI
• VBUSTI
• HWUPI
22.6 Speed control
22.6.1 Device mode
When the USB interface is configured in device mode, the speed selection (Full Speed or Low
Speed) depends on the UDP/UDM pull-up. The LSM bit in UDCON register allows to select an
internal pull up on UDM (Low Speed mode) or UDP (Full Speed mode) data lines.
Figure 22-14. Device mode speed selection.
RPU
DETACH
UDCON.0
UDP
UDM
RPU
LSM
UDCON.2
UCAP USB
regulator252
7593L–AVR–09/12
AT90USB64/128
22.6.2 Host mode
When the USB interface is configured in host mode, internal Pull Down resistors are activated on
both UDP UDM lines and the interface detects the type of connected device.
22.7 Memory management
The controller does only support the following memory allocation management.
The reservation of a Pipe or an Endpoint can only be made in the increasing order (Pipe/Endpoint
0 to the last Pipe/Endpoint). The firmware shall thus configure them in the same order.
The reservation of a Pipe or an Endpoint “ki
” is done when its ALLOC bit is set. Then, the hardware
allocates the memory and inserts it between the Pipe/Endpoints “ki-1” and “ki+1”. The “ki+1”
Pipe/Endpoint memory “slides” up and its data is lost. Note that the “ki+2” and upper Pipe/Endpoint
memory does not slide.
Clearing a Pipe enable (PEN) or an Endpoint enable (EPEN) does not clear either its ALLOC bit,
or its configuration (EPSIZE/PSIZE, EPBK/PBK). To free its memory, the firmware should clear
ALLOC. Then, the “ki+1” Pipe/Endpoint memory automatically “slides” down. Note that the “ki+2”
and upper Pipe/Endpoint memory does not slide.
The following figure illustrates the allocation and reorganization of the USB memory in a typical
example:
Table 22-1. Allocation and reorganization USB memory flow.
• First, Pipe/Endpoint 0 to Pipe/Endpoint 5 are configured, in the growing order. The memory
of each is reserved in the DPRAM
• Then, the Pipe/Endpoint 3 is disabled (EPEN=0), but its memory reservation is internally kept
by the controller
• Its ALLOC bit is cleared: the Pipe/Endpoint 4 “slides” down, but the Pipe/Endpoint 5 does not
“slide”
• Finally, if the firmware chooses to reconfigure the Pipe/Endpoint 3, with a bigger size. The
controller reserved the memory after the endpoint 2 memory and automatically “slide” the
Pipe/Endpoint 4. The Pipe/Endpoint 5 does not move and a memory conflict appear, in that
Free memory
0
1
2
3
4
5
EPEN=1
ALLOC=1
Free memory
0
1
2
4
5
EPEN=0
(ALLOC=1)
Free memory
0
1
2
4
5
Pipe/Endpoints
activation
Pipe/Endpoint
Disable
Free its memory
(ALLOC=0)
Free memory
0
1
2
3 (bigger size)
5
Pipe/Endpoint
Activatation
Lost memory
4 Conflict253
7593L–AVR–09/12
AT90USB64/128
both Pipe/Endpoint 4 and 5 use a common area. The data of those endpoints are potentially
lost
Note that:
• the data of Pipe/Endpoint 0 are never lost whatever the activation or deactivation of the
higher Pipe/Endpoint. Its data is lost if it is deactivated
• Deactivate and reactivate the same Pipe/Endpoint with the same parameters does not lead
to a “slide” of the higher endpoints. For those endpoints, the data are preserved
• CFGOK is set by hardware even in the case where there is a “conflict” in the memory
allocation
22.8 PAD suspend
The next figures illustrates the pad behaviour:
• In the “idle” mode, the pad is put in low power consumption mode
• In the “active” mode, the pad is working
Figure 22-15. Pad behaviour.
The SUSPI flag indicated that a suspend state has been detected on the USB bus. This flag
automatically put the USB pad in Idle. The detection of a non-idle event sets the WAKEUPI flag
and wakes-up the USB pad.
Moreover, the pad can also be put in the “idle” mode if the DETACH bit is set. It come back in
the active mode when the DETACH bit is cleared.
Idle mode
Active mode
USBE=1
& DETACH=0
& suspend
USBE=0
| DETACH=1
| suspend
SUSPI Suspend detected = USB pad power down Clear suspend by software
Resume = USB pad wake-up
WAKEUPI Clear resume by software
PAD status
Active Power Down Active254
7593L–AVR–09/12
AT90USB64/128
22.9 OTG timers customizing
It is possible to refine some OTG timers thanks to the OTGTCON register that contains the
PAGE bits to select the timer and the VALUE bits to adjust the value. User should refer to lastest
releases of the OTG specification to select compliant timings.
• PAGE=00b: AWaitVrise time-out. [OTG]. In Host mode, once VBUSREQ has been set to “1”,
if no VBUS is detected on VBUS pin after this AWaitVrise delay then the VBERRI error flag is
set.
– VALUE=00bTime-out is set to 20ms
– VALUE=01bTime-out is set to 50ms
– VALUE=10bTime-out is set to 70ms
– VALUE=11bTime-out is set to 100ms
• PAGE=01b: VbBusPulsing. [OTG]. In Device mode, this delay corresponds to the pulse
duration on Vbus during a SRP.
– VALUE=00bTime-out is set to 15ms
– VALUE=01bTime-out is set to 23ms
– VALUE=10bTime-out is set to 31ms
– VALUE=11bTime-out is set to 40ms
• PAGE=10b: PdTmOutCnt. [OTG]. In Device mode, when a SRP has been requested to be
sent by the firmware, this delay is waited by the hardware after VBUS has gone below the
“session_valid” threshold voltage and before initiating the first pulse. This delay should be
considered as an approximation of USB lines discharge (pull-down resistors vs. line
capacitance) in order to wait that VBUS has gone below the “b_session_end” threshold
voltae, as defined in the OTG specification.
– VALUE=00bTime-out is set to 93ms
– VALUE=01bTime-out is set to 105ms
– VALUE=10bTime-out is set to 118ms
– VALUE=11bTime-out is set to 131ms
• PAGE=11b: SRPDetTmOut. [OTG]. In Host mode, this delay is the minimum pulse duration
required to detect and accept a valid SRP from a Device.
– VALUE=00bTime-out is set to 1µs
– VALUE=01bTime-out is set to 100µs
– VALUE=10bTime-out is set to 1ms
– VALUE=11bTime-out is set to 11ms255
7593L–AVR–09/12
AT90USB64/128
22.10 Plug-in detection
The USB connection is detected by the VBUS pad, thanks to the following architecture:
Figure 22-16. Plug-in detection input block diagram.
The control logic of the VBUS pad outputs a signal regarding the VBUS voltage level:
• The “Session_valid” signal is active high when the voltage on the VBUS pad is higher or
equal to 1.4V. If lower than 1.4V, the signal is not active
• The “Vbus_valid” signal is active high when the voltage on the VBUS pad is higher or equal to
4.4V. If lower than 4.4V, the signal is not active
• The VBUS status bit is set when VBUS is greater than “Vbus_valid”. The VBUS status bit is
cleared when VBUS falls below “Session_valid” (hysteresis behavior)
• The VBUSTI flag is set each time the VBUS bit state changes
22.10.1 Peripheral mode
The USB peripheral cannot attach to the bus while VBUS bit is not set.
22.10.2 Host mode
The Host must use the UVCON pin to drive an external power switch or regulator that powers
the Vbus line. The UVCON pin is automatically asserted and set high by hardware when
UVCONE and VBUSREQ bits are set by firmware.
If a device connects (pull-up on DP or DM) within 300ms of Vbus delivery, the DCONNI flag will
rise. But, once VBUSREQ bit has been set, if no peripheral connection is detected within 300ms,
the BCERRI flag (and interrupt) will rise and Vbus delivery will be stopped (UVCON cleared).
If that behavior represents a limitation for the Host application, the following work-around may be
used :
1. UVCONE and VBUSREQ must be cleared.
2. VBUSHWC must be set (to disable hardware control of UVCON pin).
3. PORTE,7 pin (alternate function of UVCON pin) must be set by firmware.
4. a device connection will be detected thanks to the SRPI flag (that may usually be used
to detect a DP/DM pulse sent by an OTG B-Device that requests a new session).
VBUSTI
USBINT.0
VBUS VBUS
USBSTA.0
VSS
VDD
Pad logic
Logic
Session_valid RPU RPU
VBus_pulsing
VBus_discharge
Vbus_valid256
7593L–AVR–09/12
AT90USB64/128
22.11 ID detection
The ID pin transition is detected thanks to the following architecture:
Figure 22-17. ID detection input block diagram.
The ID pin can be used to detect the USB mode (Peripheral or Host) or software selected. This
allows the UID pin to be used has general purpose I/O even when USB interface is enable.
When the UID pin is selected, by default, (no A-plug or B-plug), the macro is in the Peripheral
mode (internal pull-up). The IDTI interrupt is triggered when a A-plug (Host) is plugged or
unplugged. The interrupt is not triggered when a B-plug (Periph) is plugged or unplugged.
ID detection is independent of USB global interface enable.
22.12 Registers description
22.12.1 USB general registers
• 7 – UIMOD: USB Mode bit
This bit has no effect when the UIDE bit is set (external UID pin activated). Set to enable the
USB device mode. Clear to enable the USB host mode
• 6 – UIDE: UID pin Enable
Set to enable the USB mode selection (peripheral/host) through the UID pin. Clear to enable the
USB mode selection (peripheral/host) with UIMOD bit register.
UIDE should be modified only when the USB interface is disabled (USBE bit cleared).
• 5 – Reserved
The value read from this bit is always 0. Do not set this bit.
• 4 – UVCONE: UVCON pin Enable
Set to enable the UVCON pin control. Clear to disable the UVCON pin control. This bit should be
set only when the USB interface is enable.
RPU
UIMOD
UHWCON.7
UID
ID
USBSTA.1
Internal pull up
VDD
UIDE
UHWCON.6
1
0
Bit 7 6 5 4 3 2 1 0
UIMOD UIDE UVCONE UVREGE UHWCON
Read/write R/W R/W R R/W R R R R/W
Initial value 1 0 0 0 0 0 0 0257
7593L–AVR–09/12
AT90USB64/128
• 3-1 – Reserved
The value read from these bits is always 0. Do not set these bits.
• 0 – UVREGE: USB pad regulator Enable
Set to enable the USB pad regulator. Clear to disable the USB pad regulator.
• 7 – USBE: USB macro Enable bit
Set to enable the USB controller. Clear to disable and reset the USB controller, to disable the
USB transceiver and to disable the USB controller clock inputs.
• 6 – HOST: HOST bit
Set to enable the Host mode. Clear to enable the device mode.
• 5 – FRZCLK: Freeze USB Clock bit
Set to disable the clock inputs (the ”Resume Detection” is still active). This reduces the power
consumption. Clear to enable the clock inputs.
• 4 – OTGPADE: OTG Pad Enable
Set to enable the OTG pad. Clear to disable the OTG pad. The OTG pad is actually the VBUS
pad.
Note that this bit can be set/cleared even if USBE=0. That allows the VBUS detection even if the
USB macro is disabled. This pad must be enabled in both Host and Device modes in order to
allow USB operation (attaching, transmitting...).
• 3-2 – Reserved
The value read from these bits is always 0. Do not set these bits.
• 1 – IDTE: ID Transition Interrupt Enable bit
Set this bit to enable the ID Transition interrupt generation. Clear this bit to disable the ID Transition
interrupt generation.
• 0 – VBUSTE: VBUS Transition Interrupt Enable bit
Set this bit to enable the VBUS Transition interrupt generation.
Clear this bit to disable the VBUS Transition interrupt generation.
• 7-4 - Reserved
The value read from these bits is always 0. Do not set these bits.
Bit 7 6 5 4 3 2 1 0
USBE HOST FRZCLK OTGPADE - - IDTE VBUSTE USBCON
Read/write R/W R/W R/W R/W R R R/W R/W
Initial value 0 0 1 0 0 0 0 0
Bit 7 6 5 4 3 2 1 0
- - - - SPEED ID VBUS USBSTA
Read/write R R R R R R R R
Initial value 0 0 0 0 1 0 1 0258
7593L–AVR–09/12
AT90USB64/128
• 3 – SPEED: Speed Status Flag
This should be read only when the USB controller operates in host mode, in device mode the
value read from this bit is undeterminated.
Set by hardware when the controller is in FULL-SPEED mode. Cleared by hardware when the
controller is in LOW-SPEED mode.
• 2 – Reserved
The value read from this bit is always 0. Do not set this bit.
• 1 – ID: IUD pin flag
The value read from this bit indicates the state of the UID pin.
• 0 – VBUS: VBus flag
The value read from this bit indicates the state of the VBUS pin. This bit can be used in device
mode to monitor the USB bus connection state of the application. See Section 22.10, page 255
for more details.
7-2 - Reserved
The value read from these bits is always 0. Do not set these bits.
1 – IDTI: D Transition Interrupt flag
Set by hardware when a transition (high to low, low to high) has been detected on the UID pin.
Shall be cleared by software.
• 0 – VBUSTI: IVBUS Transition Interrupt flag
Set by hardware when a transition (high to low, low to high) has been detected on the VBUS
pad.
Shall be cleared by software.
• 7-6 - Reserved
The value read from these bits is always 0. Do not set these bits.
• 5 – HNPREQ: HNP Request bit
Set to initiate the HNP when the controller is in the Device mode (B). Set to accept the HNP
when the controller is in the Host mode (A).
Clear otherwise.
Bit 7 6 5 4 3 2 1 0
- - - - - - IDTI VBUSTI USBINT
Read/write R R R R R R R/W R/W
Initial value 0 0 0 0 0 0 0 0
Bit 7 6 5 4 3 2 1 0
- - HNPREQ SRPREQ SRPSEL VBUSHWC VBUSREQ VBUSRQC OTGCON
Read/write R R R/W R/W R/W R/W R/W R/W
Initial value 0 0 0 0 0 0 0 0259
7593L–AVR–09/12
AT90USB64/128
• 4 – SRPREQ: SRP Request bit
Set to initiate the SRP when the controller is in Device mode. Cleared by hardware when the
controller is initiating a SRP.
• 3 – SRPSEL: SRP Selection bit
Set to choose VBUS pulsing as SRP method.
Clear to choose data line pulsing as SRP method.
• 2 – VBUSHWC: VBus Hardware Control bit
Set to disable the hardware control over the UVCON pin.
Clear to enable the hardware control over the UVCON pin.
See for more details
• 1 – VBUSREQ: VBUS Request bit
Set to assert the UVCON pin in order to enable the VBUS power supply generation. This bit
shall be used when the controller is in the Host mode.
Cleared by hardware when VBUSRQC is set.
• 0 – VBUSRQC: VBUS Request Clear bit
Set to deassert the UVCON pin in order to enable the VBUS power supply generation. This bit
shall be used when the controller is in the Host mode.
Cleared by hardware immediately after the set.
• 7 – Reserved
This bit is reserved and always set.
• 6-5 – PAGE: Timer page access bit
Set/clear to access a special timer register. See Section 22.9, page 254 for more details.
• 4-3 - Reserved
The value read from these bits is always 0. Do not set these bits.
• 1-0 – VALUE: Value bit
Set to initialize the new value of the timer. See Section 22.9, page 254 for more details.
Bit 7 6 5 4 3 2 1 0
- PAGE - - - VALUE OTGTCON
Read/write R R/W R/W R R R/W R/W R/W
Initial value 1 0 0 0 0 0 0 0260
7593L–AVR–09/12
AT90USB64/128
• 7-6 - Reserved
The value read from these bits is always 0. Do not set these bits.
• 5 – STOE: Suspend Time-out Error Interrupt Enable bit
Set to enable the STOI interrupt. Clear to disable the STOI interrupt.
• 4 – HNPERRE: HNP Error Interrupt Enable bit
Set to enable the HNPERRI interrupt. Clear to disable the HNPERRI interrupt.
• 3 – ROLEEXE: Role Exchange Interrupt Enable bit
Set to enable the ROLEEXI interrupt. Clear to disable the ROLEEXI interrupt.
• 2 – BCERRE: B-Connection Error Interrupt Enable bit
Set to enable the BCERRI interrupt. Clear to disable the BCERRI interrupt.
• 1 – VBERRE: VBus Error Interrupt Enable bit
Set to enable the VBERRI interrupt. Clear to disable the VBERRI interrupt.
• 0 – SRPE: SRP Interrupt Enable bit
Set to enable the SRPI interrupt. Clear to disable the SRPI interrupt.
• 7-6 - Reserved
The value read from these bits is always 0. Do not set these bits.
• 5 – STOI: Suspend Time-out Error Interrupt flag
Set by hardware when a time-out error (more than 150ms) has been detected after a suspend.
Shall be cleared by software.
• 4 – HNPERRI: HNP Error Interrupt flag
Set by hardware when an error has been detected during the protocol. Shall be cleared by
software.
• 3 – ROLEEXI: Role Exchange Interrupt flag
Set by hardware when the USB controller has successfully swapped its mode, due to an HNP
negotiation: Host to Device or Device to Host. However the mode selection bit (Host/Device) is
unchanged and must be changed by firmware in order to reach the correct RAM locations and
events bits. Shall be cleared by software.
Bit 7 6 5 4 3 2 1 0
- - STOE HNPERRE ROLEEXE BCERRE VBERRE SRPE OTGIEN
Read/write R R R/W R/W R/W R/W R/W R/W
Initial value 0 0 0 0 0 0 0 0
Bit 7 6 5 4 3 2 1 0
- - STOI HNPERRI ROLEEXI BCERRI VBERRI SRPI OTGINT
Read/write R R R/W R/W R/W R/W R/W R/W
Initial value 0 0 0 0 0 0 0 0261
7593L–AVR–09/12
AT90USB64/128
• 2 – BCERRI: B-Connection Error Interrupt flag
Set by hardware when an error occur during the B-Connection (that is, if Peripheral has not connected
after 300ms of Vbus delivery request). Shall be cleared by software.
• 1 – VBERRI: V-Bus Error Interrupt flag
Set by hardware when a drop on VBus has been detected. Shall be cleared by software.
• 0 – SRPI: SRP Interrupt flag
Set by hardware when a SRP has been detected. Shall be used in the Host mode only. Shall be
cleared by software.
22.13 USB Software Operating modes
Depending on the USB operating mode, the software should perform some the following
operations:
Power On the USB interface
• Power-On USB pads regulator
• Configure PLL interface
• Enable PLL and wait PLL lock
• Enable USB interface
• Configure USB interface (USB speed, Endpoints configuration...)
• Wait for USB VBUS information connection
• Attach USB device
Power Off the USB interface
• Detach USB interface
• Disable USB interface
• Disable PLL
• Disable USB pad regulator
Suspending the USB interface
• Clear Suspend Bit
• Freeze USB clock
• Disable PLL
• Be sure to have interrupts enable to exit sleep mode
• Make the MCU enter sleep mode
Resuming the USB interface
• Enable PLL
• Wait PLL lock
• Unfreeze USB clock
• Clear Resume information262
7593L–AVR–09/12
AT90USB64/128
23. USB device operating modes
23.1 Introduction
The USB device controller supports full speed and low speed data transfers. In addition to the
default control endpoint, it provides six other endpoints, which can be configured in control, bulk,
interrupt or isochronous modes:
• Endpoint 0:programmable size FIFO up to 64 bytes, default control endpoint
• Endpoints 1 programmable size FIFO up to 256 bytes in ping-pong mode
• Endpoints 2 to 6: programmable size FIFO up to 64 bytes in ping-pong mode
The controller starts in the “idle” mode. In this mode, the pad consumption is reduced to the
minimum.
23.2 Power-on and reset
The next diagram explains the USB device controller main states on power-on:
Figure 23-1. USB device controller states after reset.
The reset state of the Device controller is:
• the macro clock is stopped in order to minimize the power consumption (FRZCLK set)
• the USB device controller internal state is reset (all the registers are reset to their default
value. Note that DETACH is set.)
• the endpoint banks are reset
• the D+ or D- pull up are not activated (mode Detach)
The D+ or D- pull-up will be activated as soon as the DETACH bit is cleared and VBUS is
present.
The macro is in the ‘Idle’ state after reset with a minimum power consumption and does not
need to have the PLL activated to enter in this state.
The USB device controller can at any time be reset by clearing USBE (disable USB interface).
23.3 Endpoint reset
An endpoint can be reset at any time by setting in the UERST register the bit corresponding to
the endpoint (EPRSTx). This resets:
• the internal state machine on that endpoint
• the Rx and Tx banks are cleared and their internal pointers are restored
Reset
Idle
HW
RESET
USBE=0
USBE=0
USBE=1
UID=1263
7593L–AVR–09/12
AT90USB64/128
• the UEINTX, UESTA0X and UESTA1X are restored to their reset value
The data toggle field remains unchanged.
The other registers remain unchanged.
The endpoint configuration remains active and the endpoint is still enabled.
The endpoint reset may be associated with a clear of the data toggle command (RSTDT bit) as
an answer to the CLEAR_FEATURE USB command.
23.4 USB reset
When an USB reset is detected on the USB line, the next operations are performed by the
controller:
• all the endpoints are disabled
• the default control endpoint remains configured (see Section 23.3, page 262 for more details)
23.5 Endpoint selection
Prior to any operation performed by the CPU, the endpoint must first be selected. This is done
by setting the EPNUM2:0 bits (UENUM register) with the endpoint number which will be managed
by the CPU.
The CPU can then access to the various endpoint registers and data.
23.6 Endpoint activation
The endpoint is maintained under reset as long as the EPEN bit is not set.
The following flow must be respected in order to activate an endpoint:264
7593L–AVR–09/12
AT90USB64/128
Figure 23-2. Endpoint activation flow.
As long as the endpoint is not correctly configured (CFGOK cleared), the hardware does not
acknowledge the packets sent by the host.
CFGOK is will not be sent if the Endpoint size parameter is bigger than the DPRAM size.
A clear of EPEN acts as an endpoint reset (see Section 23.3, page 262 for more details). It also
performs the next operation:
• The configuration of the endpoint is kept (EPSIZE, EPBK, ALLOC kept)
• It resets the data toggle field
• The DPRAM memory associated to the endpoint is still reserved
See Section 22.7, page 252 for more details about the memory allocation/reorganization.
23.7 Address setup
The USB device address is set up according to the USB protocol:
• the USB device, after power-up, responds at address 0
• the host sends a SETUP command (SET_ADDRESS(addr))
• the firmware records that address in UADD, but keep ADDEN cleared
• the USB device sends an IN command of 0 bytes (IN 0 Zero Length Packet)
• then, the firmware can enable the USB device address by setting ADDEN. The only accepted
address by the controller is the one stored in UADD
ADDEN and UADD shall not be written at the same time.
UADD contains the default address 00h after a power-up or USB reset.
Endpoint
Activation
CFGOK=1
ERROR
No
Yes
Endpoint activated
Activate the endpoint
Select the endpoint
EPEN=1
UENUM
EPNUM=x
Test the correct endpoint
configuration
UECFG1X ALLOC
EPSIZE
EPBK
Configure:
- the endpoint size
- the bank parametrization
Allocation and reorganization of
the memory is made on-the-fly
UECFG0X EPDIR
EPTYPE
...
Configure:
- the endpoint direction
- the endpoint type265
7593L–AVR–09/12
AT90USB64/128
ADDEN is cleared by hardware:
• after a power-up reset
• when an USB reset is received
• or when the macro is disabled (USBE cleared)
When this bit is cleared, the default device address 00h is used.
23.8 Suspend, wake-up and resume
After a period of 3ms during which the USB line was inactive, the controller switches to the fullspeed
mode and triggers (if enabled) the SUSPI (suspend) interrupt. The firmware may then set
the FRZCLK bit.
The CPU can also, depending on software architecture, enter in the idle mode to lower again the
power consumption.
There are two ways to recover from the “Suspend” mode:
• First one is to clear the FRZCLK bit. This is possible if the CPU is not in the Idle mode
• Second way, if the CPU is “idle”, is to enable the WAKEUPI interrupt (WAKEUPE set). Then,
as soon as an non-idle signal is seen by the controller, the WAKEUPI interrupt is triggered.
The firmware shall then clear the FRZCLK bit to restart the transfer
There are no relationship between the SUSPI interrupt and the WAKEUPI interrupt: the WAKEUPI
interrupt is triggered as soon as there are non-idle patterns on the data lines. Thus, the
WAKEUPI interrupt can occurs even if the controller is not in the “suspend” mode.
When the WAKEUPI interrupt is triggered, if the SUSPI interrupt bit was already set, it is cleared
by hardware.
When the SUSPI interrupt is triggered, if the WAKEUPI interrupt bit was already set, it is cleared
by hardware.
23.9 Detach
The reset value of the DETACH bit is 1.
It is possible to re-enumerate a device, simply by setting and clearing the DETACH bit.
• Setting DETACH will disconnect the pull-up on the D+ or D- pad (depending on full or low
speed mode selected). Then, clearing DETACH will connect the pull-up on the D+ or D- pad
Figure 23-3. Detach a device in full-speed.
EN=1
D +
UVREF
D -
Detach, then
Attach EN=1
D +
UVREF
D -266
7593L–AVR–09/12
AT90USB64/128
23.10 Remote Wake-up
The “Remote Wake-up” (or “upstream resume”) request is the only operation allowed to be sent
by the device on its own initiative. Anyway, to do that, the device should first have received a
DEVICE_REMOTE_WAKEUP request from the host.
• First, the USB controller must have detected the “suspend” state of the line: the remote wakeup
can only be sent when a SUSPI flag is set
• The firmware has then the ability to set RMWKUP to send the “upstream resume” stream.
This will automatically be done by the controller after 5ms of inactivity on the USB line
• When the controller starts to send the “upstream resume”, the UPRSMI interrupt is triggered
(if enabled). SUSPI is cleared by hardware
• RMWKUP is cleared by hardware at the end of the “upstream resume”
• If the controller detects a good “End Of Resume” signal from the host, an EORSMI interrupt
is triggered (if enabled)
23.11 STALL request
For each endpoint, the STALL management is performed using two bits:
– STALLRQ (enable stall request)
– STALLRQC (disable stall request)
– STALLEDI (stall sent interrupt)
To send a STALL handshake at the next request, the STALLRQ request bit has to be set. All following
requests will be handshak’ed with a STALL until the STALLRQC bit is set.
Setting STALLRQC automatically clears the STALLRQ bit. The STALLRQC bit is also immediately
cleared by hardware after being set by software. Thus, the firmware will never read this bit
as set.
Each time the STALL handshake is sent, the STALLEDI flag is set by the USB controller and the
EPINTx interrupt will be triggered (if enabled).
The incoming packets will be discarded (RXOUTI and RWAL will not be set).
The host will then send a command to reset the STALL: the firmware just has to set the STALLRQC
bit and to reset the endpoint.
23.11.1 Special consideration for control endpoints
A SETUP request is always ACK’ed.
If a STALL request is set for a Control Endpoint and if a SETUP request occurs, the SETUP
request has to be ACK’ed and the STALLRQ request and STALLEDI sent flags are automatically
reset (RXSETUPI set, TXIN cleared, STALLED cleared, TXINI cleared...).
This management simplifies the enumeration process management. If a command is not supported
or contains an error, the firmware set the STALL request flag and can return to the main
task, waiting for the next SETUP request.
This function is compliant with the Chapter 8 test that may send extra status for a
GET_DESCRIPTOR. The firmware sets the STALL request just after receiving the status. All
extra status will be automatically STALL’ed until the next SETUP request.267
7593L–AVR–09/12
AT90USB64/128
23.11.2 STALL handshake and retry mechanism
The Retry mechanism has priority over the STALL handshake. A STALL handshake is sent if the
STALLRQ request bit is set and if there is no retry required.
23.12 CONTROL endpoint management
A SETUP request is always ACK’ed. When a new setup packet is received, the RXSTPI interrupt
is triggered (if enabled). The RXOUTI interrupt is not triggered.
The FIFOCON and RWAL fields are irrelevant with CONTROL endpoints. The firmware shall
thus never use them on that endpoints. When read, their value is always 0.
CONTROL endpoints are managed by the following bits:
• RXSTPI is set when a new SETUP is received. It shall be cleared by firmware to
acknowledge the packet and to clear the endpoint bank
• RXOUTI is set when a new OUT data is received. It shall be cleared by firmware to
acknowledge the packet and to clear the endpoint bank
• TXINI is set when the bank is ready to accept a new IN packet. It shall be cleared by firmware
to send the packet and to clear the endpoint bank
23.12.1 Control write
Figure 23-4 shows a control write transaction. During the status stage, the controller will not necessary
send a NAK at the first IN token:
• If the firmware knows the exact number of descriptor bytes that must be read, it can then
anticipate on the status stage and send a ZLP for the next IN token
• or it can read the bytes and poll NAKINI, which tells that all the bytes have been sent by the
host, and the transaction is now in the status stage
Figure 23-4. Control write transaction.
23.12.2 Control read
Figure 23-5 on page 268 shows a control read transaction. The USB controller has to manage
the simultaneous write requests from the CPU and the USB host.
SETUP
RXSTPI
RXOUTI
TXINI
USB line
HW SW
OUT
HW SW
OUT
HW SW
IN IN
NAK
SW
SETUP STATUS DATA268
7593L–AVR–09/12
AT90USB64/128
Figure 23-5. Control read transaction.
A NAK handshake is always generated at the first status stage command.
When the controller detect the status stage, all the data writen by the CPU are erased, and
clearing TXINI has no effects.
The firmware checks if the transmission is complete or if the reception is complete.
The OUT retry is always ack’ed. This reception:
- set the RXOUTI flag (received OUT data)
- set the TXINI flag (data sent, ready to accept new data)
software algorithm:
set transmit ready
wait (transmit complete OR Receive complete)
if receive complete, clear flag and return
if transmit complete, continue
Once the OUT status stage has been received, the USB controller waits for a SETUP request.
The SETUP request have priority over any other request and has to be ACK’ed. This means that
any other flag should be cleared and the fifo reset when a SETUP is received.
WARNING: the byte counter is reset when the OUT Zero Length Packet is received. The firmware
has to take care of this.
23.13 OUT endpoint management
OUT packets are sent by the host. All the data can be read by the CPU, which acknowledges or
not the bank when it is empty.
23.13.1 Overview
The Endpoint must be configured first.
Each time the current bank is full, the RXOUTI and the FIFOCON bits are set. This triggers an
interrupt if the RXOUTE bit is set. The firmware can acknowledge the USB interrupt by clearing
the RXOUTI bit. The Firmware read the data and clear the FIFOCON bit in order to free the current
bank. If the OUT Endpoint is composed of multiple banks, clearing the FIFOCON bit will
switch to the next bank. The RXOUTI and FIFOCON bits are then updated by hardware in accordance
with the status of the new bank.
SETUP
RXSTPI
RXOUTI
TXINI
USB line
HW SW
IN
HW SW
IN OUT OUT
NAK
SW
SW
HW
Wr Enable
HOST
Wr Enable
CPU
SETUP STATUS DATA269
7593L–AVR–09/12
AT90USB64/128
RXOUTI shall always be cleared before clearing FIFOCON.
The RWAL bit always reflects the state of the current bank. This bit is set if the firmware can
read data from the bank, and cleared by hardware when the bank is empty.
Figure 23-6. Example with 1 and 2 OUT data bank.
23.13.2 Detailed description
The data are read by the CPU, following the next flow:
• When the bank is filled by the host, an endpoint interrupt (EPINTx) is triggered, if enabled
(RXOUTE set) and RXOUTI is set. The CPU can also poll RXOUTI or FIFOCON, depending
on the software architecture
• The CPU acknowledges the interrupt by clearing RXOUTI
• The CPU can read the number of byte (N) in the current bank (N=BYCT)
• The CPU can read the data from the current bank (“N” read of UEDATX)
• The CPU can free the bank by clearing FIFOCON when all the data is read, that is:
– after “N” read of UEDATX
– as soon as RWAL is cleared by hardware
If the endpoint uses two banks, the second one can be filled by the HOST while the current one
is being read by the CPU. Then, when the CPU clear FIFOCON, the next bank may be already
ready and RXOUTI is set immediately.
23.14 IN endpoint management
IN packets are sent by the USB device controller, upon an IN request from the host. All the data
can be written by the CPU, which acknowledge or not the bank when it is full.
OUT DATA
(to bank 0) ACK
RXOUTI
FIFOCON
HW
OUT DATA
(to bank 0) ACK
HW
SW
SW
SW
read data from CPU
BANK 0
OUT DATA
(to bank 0) ACK
RXOUTI
FIFOCON
HW
OUT DATA
(to bank 1) ACK
SW
SW
Example with 2 OUT data banks
read data from CPU
BANK 0
HW
SW
read data from CPU
BANK 0
read data from CPU
BANK 1
NAK270
7593L–AVR–09/12
AT90USB64/128
23.14.1 Overview
The Endpoint must be configured first.
The TXINI bit is set by hardware when the current bank becomes free. This triggers an interrupt
if the TXINE bit is set. The FIFOCON bit is set at the same time. The CPU writes into the FIFO
and clears the FIFOCON bit to allow the USB controller to send the data. If the IN Endpoint is
composed of multiple banks, this also switches to the next data bank. The TXINI and FIFOCON
bits are automatically updated by hardware regarding the status of the next bank.
TXINI shall always be cleared before clearing FIFOCON.
The RWAL bit always reflects the state of the current bank. This bit is set if the firmware can
write data to the bank, and cleared by hardware when the bank is full.
Figure 23-7. Example with 1 and 2 IN data bank.
23.14.2 Detailed description
The data are written by the CPU, following the next flow:
• When the bank is empty, an endpoint interrupt (EPINTx) is triggered, if enabled (TXINE set)
and TXINI is set. The CPU can also poll TXINI or FIFOCON, depending the software
architecture choice
• The CPU acknowledges the interrupt by clearing TXINI
• The CPU can write the data into the current bank (write in UEDATX)
• The CPU can free the bank by clearing FIFOCON when all the data are written, that is:
– after “N” write into UEDATX
– as soon as RWAL is cleared by hardware
IN DATA
(bank 0) ACK
TXINI
FIFOCON
HW
write data from CPU
BANK 0
Example with 2 IN data banks
SW
SW SW
SW
IN
IN DATA
(bank 0) ACK
TXINI
FIFOCON write data from CPU
BANK 0
SW
SW SW
SW
IN DATA
(bank 1) ACK
write data from CPU
BANK 0
write data from CPU
BANK 1
SW
HW
write data from CPU
BANK0
NAK271
7593L–AVR–09/12
AT90USB64/128
If the endpoint uses two banks, the second one can be read by the HOST while the current is
being written by the CPU. Then, when the CPU clears FIFOCON, the next bank may be already
ready (free) and TXINI is set immediately.
23.14.2.1 Abort
An “abort” stage can be produced by the host in some situations:
• In a control transaction: ZLP data OUT received during a IN stage
• In an isochronous IN transaction: ZLP data OUT received on the OUT endpoint during a IN
stage on the IN endpoint
• ...
The KILLBK bit is used to kill the last “written” bank. The best way to manage this abort is to perform
the following operations:
Table 23-1. Abort flow.
23.15 Isochronous mode
23.15.1 Underflow
An underflow can occur during IN stage if the host attempts to read a bank which is empty. In
this situation, the UNDERFI interrupt is triggered.
An underflow can also occur during OUT stage if the host send a packet while the banks are
already full. Typically, he CPU is not fast enough. The packet is lost.
It is not possible to have underflow error during OUT stage, in the CPU side, since the CPU
should read only if the bank is ready to give data (RXOUTI=1 or RWAL=1)
23.15.2 CRC error
A CRC error can occur during OUT stage if the USB controller detects a bad received packet. In
this situation, the STALLEDI interrupt is triggered. This does not prevent the RXOUTI interrupt
from being triggered.
Endpoint
Abort
Abort done
Abort is based on the fact
that no banks are busy,
meaning that nothing has to
be sent.
Disable the TXINI interrupt.
Endpoint
reset
NBUSYBK
=0
Yes
Clear
UEIENX.
TXINE
No
KILLBK=1
KILLBK=1 Yes
Kill the last written
bank.
Wait for the end of the
procedure.
No272
7593L–AVR–09/12
AT90USB64/128
23.16 Overflow
In Control, Isochronous, Bulk or Interrupt Endpoint, an overflow can occur during OUT stage, if
the host attempts to write in a bank that is too small for the packet. In this situation, the OVERFI
interrupt is triggered (if enabled). The packet is acknowledged and the RXOUTI interrupt is also
triggered (if enabled). The bank is filled with the first bytes of the packet.
It is not possible to have overflow error during IN stage, in the CPU side, since the CPU should
write only if the bank is ready to access data (TXINI=1 or RWAL=1).
23.17 Interrupts
Figure 23-8 shows all the interrupts sources.
Figure 23-8. USB device controller interrupt system.
There are two kinds of interrupts: processing (that is, their generation are part of the normal processing)
and exception (errors).
Processing interrupts are generated when:
• VBUS plug-in detection (insert, remove)(VBUSTI)
• Upstream resume(UPRSMI)
• End of resume(EORSMI)
• Wake up(WAKEUPI)
• End of reset (Speed Initialization)(EORSTI)
• Start of frame(SOFI, if FNCERR=0)
• Suspend detected after 3ms of inactivity(SUSPI)
Exception Interrupts are generated when:
• CRC error in frame number of SOF(SOFI, FNCERR=1)
UPRSMI
UDINT.6 UPRSME
UDIEN.6
EORSMI
UDINT.5 EORSME
UDIEN.5
WAKEUPI
UDINT.4 WAKEUPE
UDIEN.4
EORSTI
UDINT.3 EORSTE
UDIEN.3
SOFI
UDINT.2 SOFE
UDIEN.2
SUSPI
UDINT.0 SUSPE
UDIEN.0
USB device
interrupt273
7593L–AVR–09/12
AT90USB64/128
Figure 23-9. USB device controller endpoint interrupt system.
Processing interrupts are generated when:
• Ready to accept IN data(EPINTx, TXINI=1)
• Received OUT data(EPINTx, RXOUTI=1)
• Received SETUP(EPINTx, RXSTPI=1)
Exception Interrupts are generated when:
• Stalled packet(EPINTx, STALLEDI=1)
• CRC error on OUT in isochronous mode(EPINTx, STALLEDI=1)
• Overflow in isochronous mode(EPINTx, OVERFI=1)
• Underflow in isochronous mode(EPINTx, UNDERFI=1)
• NAK IN sent(EPINTx, NAKINI=1)
• NAK OUT sent(EPINTx, NAKOUTI=1)
23.18 Registers
23.18.1 USB device general registers
EPINT
UEINT.X
Endpoint 0
Endpoint 1
Endpoint 2
Endpoint 3
Endpoint 4
Endpoint 5
Endpoint interrupt
Endpoint 6
FLERRE
UEIENX.7
OVERFI
UESTAX.6
UNDERFI
UESTAX.5
NAKINI
UEINTX.6 NAKINE
UEIENX.6
NAKOUTI
UEINTX.4 TXSTPE
UEIENX.4
RXSTPI
UEINTX.3 TXOUTE
UEIENX.3
RXOUTI
UEINTX.2 RXOUTE
UEIENX.2
STALLEDI
UEINTX.1 STALLEDE
UEIENX.1
TXINI
UEINTX.0 TXINE
UEIENX.0
Bit 7 6 5 4 3 2 1 0
----- LSM RMWKUP DETACH UDCON
Read/write R R R R R R/W R/W R/W
Initial value 0 0 0 0 0 0 0 1274
7593L–AVR–09/12
AT90USB64/128
• 7-3 - Reserved
The value read from these bits is always 0. Do not set these bits.
• 2 - LSM - USB Device Low Speed Mode selection
When configured USB is configured in device mode, this bit allows to select the USB the USB
Low Speed or Full Speed Mod.
Clear to select full speed mode (D+ internal pull-up will be activate with the ATTACH bit will be
set) .
Set to select low speed mode (D- internal pull-up will be activate with the ATTACH bit will be
set). This bit has no effect when the USB interface is configured in HOST mode.
• 1- RMWKUP - Remote Wake-up bit
Set to send an “upstream-resume” to the host for a remote wake-up (the SUSPI bit must be set).
Cleared by hardware when signalling finished. Clearing by software has no effect.
See Section 23.10, page 266 for more details.
• 0 - DETACH - Detach bit
Set to physically detach de device (disconnect internal pull-up on D+ or D-).
Clear to reconnect the device. See Section 23.9, page 265 for more details.
• 7 - Reserved
The value read from this bits is always 0. Do not set this bit.
• 6 - UPRSMI - Upstream Resume Interrupt flag
Set by hardware when the USB controller is sending a resume signal called “Upstream
Resume”. This triggers an USB interrupt if UPRSME is set.
Shall be cleared by software (USB clocks must be enabled before). Setting by software has no
effect.
• 5 - EORSMI - End Of Resume Interrupt flag
Set by hardware when the USB controller detects a good “End Of Resume” signal initiated by
the host. This triggers an USB interrupt if EORSME is set.
Shall be cleared by software. Setting by software has no effect.
• 4 - WAKEUPI - Wake-up CPU Interrupt flag
Set by hardware when the USB controller is re-activated by a filtered non-idle signal from the
lines (not by an upstream resume). This triggers an interrupt if WAKEUPE is set. This interrupt
should be enable only to wake up the CPU core from power down mode.
Shall be cleared by software (USB clock inputs must be enabled before). Setting by software
has no effect.
See Section 23.8, page 265 for more details.
Bit 7 6 5 4 3 2 1 0
- UPRSMI EORSMI WAKEUPI EORSTI SOFI - SUSPI UDINT
Read/write
Initial value 0 0 0 0 0 0 0 0275
7593L–AVR–09/12
AT90USB64/128
• 3 - EORSTI - End Of Reset Interrupt flag
Set by hardware when an “End Of Reset” has been detected by the USB controller. This triggers
an USB interrupt if EORSTE is set.
Shall be cleared by software. Setting by software has no effect.
• 2 - SOFI - Start Of Frame Interrupt flag
Set by hardware when an USB “Start Of Frame” PID (SOF) has been detected (every 1ms). This
triggers an USB interrupt if SOFE is set.
• 1 - Reserved
The value read from this bits is always 0. Do not set this bit
• 0 - SUSPI - Suspend Interrupt flag
Set by hardware when an USB “Suspend” ‘idle bus for three frame periods: a J state for 3ms) is
detected. This triggers an USB interrupt if SUSPE is set.
Shall be cleared by software. Setting by software has no effect.
See Section 23.8, page 265 for more details.
The interrupt bits are set even if their corresponding ‘Enable’ bits is not set.
• 7 - Reserved
The value read from this bits is always 0. Do not set this bit.
• 6 - UPRSME - Upstream Resume Interrupt Enable bit
Set to enable the UPRSMI interrupt.
Clear to disable the UPRSMI interrupt.
• 5 - EORSME - End Of Resume Interrupt Enable bit
Set to enable the EORSMI interrupt.
Clear to disable the EORSMI interrupt.
• 4 - WAKEUPE - Wake-up CPU Interrupt Enable bit
Set to enable the WAKEUPI interrupt. For correct interrupt handle execution, this interrupt
should be enable only before entering power-down mode.
Clear to disable the WAKEUPI interrupt.
• 3 - EORSTE - End Of Reset Interrupt Enable bit
Set to enable the EORSTI interrupt. This bit is set after a reset.
Clear to disable the EORSTI interrupt.
• 2 - SOFE - Start Of Frame Interrupt Enable bit
Set to enable the SOFI interrupt.
Clear to disable the SOFI interrupt.
Bit 7 6 5 4 3 2 1 0
- UPRSME EORSME WAKEUPE EORSTE SOFE - SUSPE UDIEN
Read/write
Initial value 0 0 0 0 0 0 0 0276
7593L–AVR–09/12
AT90USB64/128
• 1 - Reserved
The value read from this bits is always 0. Do not set this bit
• 0 - SUSPE - Suspend Interrupt Enable Bit
Set to enable the SUSPI interrupt.
Clear to disable the SUSPI interrupt.
• 7 - ADDEN - Address Enable Bit
Set to activate the UADD (USB address).
Cleared by hardware. Clearing by software has no effect.
See Section 23.7, page 264 for more details.
• 6-0 - UADD6:0 - USB Address Bits
Load by software to configure the device address.
• 7-3 - Reserved
The value read from these bits is always 0. Do not set these bits.
• 2-0 - FNUM10:8 - Frame Number Upper Value
Set by hardware. These bits are the three MSB of the 11-bits Frame Number information. They
are provided in the last received SOF packet. FNUM is updated if a corrupted SOF is received.
• Frame Number Lower Value
Set by hardware. These bits are the eight LSB of the 11-bits Frame Number information.
• 7-5 - Reserved
The value read from these bits is always 0. Do not set these bits.
• 4 - FNCERR -Frame Number CRC Error flag
Set by hardware when a corrupted Frame Number in start of frame packet is received.
This bit and the SOFI interrupt are updated at the same time.
Bit 7 6 5 4 3 2 1 0
ADDEN UADD6:0 UDADDR
Read/write W R/W R/W R/W R/W R/W R/W R/W
Initial value 0 0 0 0 0 0 0 0
Bit 7 6 5 4 3 2 1 0
- - - - - FNUM10:8 UDFNUMH
Read/write R R R R R R R R
Initial value 0 0 0 0 0 0 0 0
Bit 7 6 5 4 3 2 1 0
FNUM7:0 UDFNUML
Read/write R R R R R R R R
Initial value 0 0 0 0 0 0 0 0
Bit 7 6 5 4 3 2 1 0
- - - FNCERR - - - - UDMFN
Read/write R
Initial value 0 0 0 0 0 0 0 0277
7593L–AVR–09/12
AT90USB64/128
• 3-0 - Reserved
The value read from these bits is always 0. Do not set these bits.
23.18.2 USB device endpoint registers
• 7-3 - Reserved
The value read from these bits is always 0. Do not set these bits.
• 2-0 - EPNUM2:0 Endpoint Number bits
Load by software to select the number of the endpoint which shall be accessed by the CPU. See
Section 23.5, page 263 for more details.
EPNUM = 111b is forbidden.
• 7 - Reserved
The value read from these bits is always 0. Do not set these bits.
• 6-0 - EPRST6:0 - Endpoint FIFO Reset bits
Set to reset the selected endpoint FIFO prior to any other operation, upon hardware reset or
when an USB bus reset has been received. See Section 23.3, page 262 for more information
Then, clear by software to complete the reset operation and start using the endpoint.
• 7-6 - Reserved
The value read from these bits is always 0. Do not set these bits.
• 5 - STALLRQ - STALL Request Handshake bit
Set to request a STALL answer to the host for the next handshake.
Cleared by hardware when a new SETUP is received. Clearing by software has no effect.
See Section 23.11, page 266 for more details.
• 4 - STALLRQC - STALL Request Clear Handshake bit
Set to disable the STALL handshake mechanism.
Cleared by hardware immediately after the set. Clearing by software has no effect.
See Section 23.11, page 266 for more details.
Bit 7 6 5 4 3 2 1 0
- - - - - EPNUM2:0 UENUM
Read/write R R R R R R/W R/W R/W
Initial value 0 0 0 0 0 0 0 0
Bit 7 6 5 4 3 2 1 0
- EPRST6 EPRST5 EPRST4 EPRST3 EPRST2 EPRST1 EPRST0 UERST
Read/write R R/W R/W R/W R/W R/W R/W R/W
Initial value 0 0 0 0 0 0 0 0
Bit 7 6 5 4 3 2 1 0
- - STALLRQ STALLRQC RSTDT - - EPEN UECONX
Read/write R R W W W R R R/W
Initial value 0 0 0 0 0 0 0 0278
7593L–AVR–09/12
AT90USB64/128
• RSTDT - Reset Data Toggle bit
Set to automatically clear the data toggle sequence:
For OUT endpoint: the next received packet will have the data toggle 0.
For IN endpoint: the next packet to be sent will have the data toggle 0.
Cleared by hardware instantaneously. The firmware does not have to wait that the bit is cleared.
Clearing by software has no effect.
• 2 - Reserved
The value read from these bits is always 0. Do not set these bits.
• 1 - Reserved
The value read from these bits is always 0. Do not set these bits.
• 0 - EPEN - Endpoint Enable bit
Set to enable the endpoint according to the device configuration. Endpoint 0 shall always be
enabled after a hardware or USB reset and participate in the device configuration.
Clear this bit to disable the endpoint. See Section 23.6, page 263 for more details.
• 7-6 - EPTYPE1:0 - Endpoint Type bits
Set this bit according to the endpoint configuration:
00b: Control10b: Bulk
01b: Isochronous11b: Interrupt
• 5-4 - Reserved
The value read from these bits is always 0. Do not set these bits.
• 3-2 - Reserved for test purpose
The value read from these bits is always 0. Do not set these bits.
• 1 - Reserved
The value read from this bits is always 0. Do not set this bit.
• 0 - EPDIR - Endpoint Direction bit
Set to configure an IN direction for bulk, interrupt or isochronous endpoints.
Clear to configure an OUT direction for bulk, interrupt, isochronous or control endpoints.
Bit 7 6 5 4 3 2 1 0
EPTYPE1:0 - - - - - EPDIR UECFG0X
Read/write R/W R/W R R R R R R/W
Initial value 0 0 0 0 0 0 0 0279
7593L–AVR–09/12
AT90USB64/128
• 7 - Reserved
The value read from these bits is always 0. Do not set these bits.
• 6-4 - EPSIZE2:0 - Endpoint Size bits
Set this bit according to the endpoint size:
000b: 8 bytes 100b: 128 bytes (only for endpoint 1)
001b: 16 bytes 101b: 256 bytes (only for endpoint 1)
010b: 32 bytes 110b: Reserved. Do not use this configuration
011b: 64 bytes 111b: Reserved. Do not use this configuration
• 3-2 - EPBK1:0 - Endpoint Bank bits
Set this field according to the endpoint size:
00b: One bank
01b: Double bank
1xb: Reserved. Do not use this configuration
• 1 - ALLOC - Endpoint Allocation bit
Set this bit to allocate the endpoint memory.
Clear to free the endpoint memory.
See Section 23.6, page 263 for more details.
• 0 - Reserved
The value read from these bits is always 0. Do not set these bits.
• 7 - CFGOK - Configuration Status flag
Set by hardware when the endpoint X size parameter (EPSIZE) and the bank parametrization
(EPBK) are correct compared to the max FIFO capacity and the max number of allowed bank.
This bit is updated when the bit ALLOC is set.
If this bit is cleared, the user should reprogram the UECFG1X register with correct EPSIZE and
EPBK values.
Bit 7 6 5 4 3 2 1 0
- EPSIZE2:0 EPBK1:0 ALLOC - UECFG1X
Read/write R R/W R/W R/W R/W R/W R/W R
Initial value 0 0 0 0 0 0 0 0
Bit 7 6 5 4 3 2 1 0
CFGOK OVERFI UNDERFI - DTSEQ1:0 NBUSYBK1:0 UESTA0X
Read/write R R/W R/W R/W R R R R
Initial value 0 0 0 0 0 0 0 0280
7593L–AVR–09/12
AT90USB64/128
• 6 - OVERFI - Overflow Error Interrupt flag
Set by hardware when an overflow error occurs in an isochronous endpoint. An interrupt
(EPINTx) is triggered (if enabled).
See Section 23.15, page 271 for more details.
Shall be cleared by software. Setting by software has no effect.
• 5 - UNDERFI - Flow Error Interrupt flag
Set by hardware when an underflow error occurs in an isochronous endpoint. An interrupt
(EPINTx) is triggered (if enabled).
See Section 23.15, page 271 for more details.
Shall be cleared by software. Setting by software has no effect.
• 4 - Reserved
The value read from these bits is always 0. Do not set these bits.
• 3-2 - DTSEQ1:0 - Data Toggle Sequencing flag
Set by hardware to indicate the PID data of the current bank:
00b Data0
01b Data1
1xb Reserved
For OUT transfer, this value indicates the last data toggle received on the current bank.
For IN transfer, it indicates the Toggle that will be used for the next packet to be sent. This is not
relative to the current bank.
• 1-0 - NBUSYBK1:0 - Busy Bank flag
Set by hardware to indicate the number of busy bank.
For IN endpoint, it indicates the number of busy bank(s), filled by the user, ready for IN transfer.
For OUT endpoint, it indicates the number of busy bank(s) filled by OUT transaction from the
host.
00b All banks are free
01b One busy bank
10b Two busy banks
11b Reserved
• 7-3 - Reserved
The value read from these bits is always 0. Do not set these bits.
Bit 7 6 5 4 3 2 1 0
- - - - - CTRLDIR CURRBK1:0 UESTA1X
Read/write R R R R R R R R
Initial value 0 0 0 0 0 0 0 0281
7593L–AVR–09/12
AT90USB64/128
• 2 - CTRLDIR - Control Direction (flag, and bit for debug purpose)
Set by hardware after a SETUP packet, and gives the direction of the following packet:
- 1 for IN endpoint
- 0 for OUT endpoint
Can not be set or cleared by software.
• 1-0 - CURRBK1:0 - Current Bank (all endpoints except Control endpoint) flag
Set by hardware to indicate the number of the current bank:
00b Bank0
01b Bank1
1xb Reserved
Can not be set or cleared by software.
• 7 - FIFOCON - FIFO Control bit
For OUT and SETUP Endpoint:
Set by hardware when a new OUT message is stored in the current bank, at the same time than
RXOUT or RXSTP.
Clear to free the current bank and to switch to the following bank. Setting by software has no
effect.
For IN Endpoint:
Set by hardware when the current bank is free, at the same time than TXIN.
Clear to send the FIFO data and to switch the bank. Setting by software has no effect.
• 6 - NAKINI - NAK IN Received Interrupt flag
Set by hardware when a NAK handshake has been sent in response of a IN request from the
host. This triggers an USB interrupt if NAKINE is sent.
Shall be cleared by software. Setting by software has no effect.
• 5 - RWAL - Read/Write Allowed flag
Set by hardware to signal:
- for an IN endpoint: the current bank is not full, that is, the firmware can push data into the FIFO,
- for an OUT endpoint: the current bank is not empty, that is, the firmware can read data from the
FIFO.
The bit is never set if STALLRQ is set, or in case of error.
Cleared by hardware otherwise.
This bit shall not be used for the control endpoint.
Bit 7 6 5 4 3 2 1 0
FIFOCON NAKINI RWAL NAKOUTI RXSTPI RXOUTI STALLEDI TXINI UEINTX
Read/write R/W R/W R/W R/W R/W R/W R/W R/W
Initial value 0 0 0 0 0 0 0 0282
7593L–AVR–09/12
AT90USB64/128
• 4 - NAKOUTI - NAK OUT Received Interrupt flag
Set by hardware when a NAK handshake has been sent in response of a OUT/PING request
from the host. This triggers an USB interrupt if NAKOUTE is sent.
Shall be cleared by software. Setting by software has no effect.
• 3 - RXSTPI - Received SETUP Interrupt flag
Set by hardware to signal that the current bank contains a new valid SETUP packet. An interrupt
(EPINTx) is triggered (if enabled).
Shall be cleared by software to handshake the interrupt. Setting by software has no effect.
This bit is inactive (cleared) if the endpoint is an IN endpoint.
• 2 - RXOUTI / KILLBK - Received OUT Data Interrupt flag
Set by hardware to signal that the current bank contains a new packet. An interrupt (EPINTx) is
triggered (if enabled).
Shall be cleared by software to handshake the interrupt. Setting by software has no effect.
Kill Bank IN bit
Set this bit to kill the last written bank.
Cleared by hardware when the bank is killed. Clearing by software has no effect.
See page 271 for more details on the Abort.
• 1 - STALLEDI - STALLEDI Interrupt flag
Set by hardware to signal that a STALL handshake has been sent, or that a CRC error has been
detected in a OUT isochronous endpoint.
Shall be cleared by software. Setting by software has no effect.
• 0 - TXINI - Transmitter Ready Interrupt flag
Set by hardware to signal that the current bank is free and can be filled. An interrupt (EPINTx) is
triggered (if enabled).
Shall be cleared by software to handshake the interrupt. Setting by software has no effect.
This bit is inactive (cleared) if the endpoint is an OUT endpoint.
• 7 - FLERRE - Flow Error Interrupt Enable flag
Set to enable an endpoint interrupt (EPINTx) when OVERFI or UNDERFI are sent.
Clear to disable an endpoint interrupt (EPINTx) when OVERFI or UNDERFI are sent.
• 6 - NAKINE - NAK IN Interrupt Enable bit
Set to enable an endpoint interrupt (EPINTx) when NAKINI is set.
Clear to disable an endpoint interrupt (EPINTx) when NAKINI is set.
Bit 7 6 5 4 3 2 1 0
FLERRE NAKINE - NAKOUTE RXSTPE RXOUTE STALLEDE TXINE UEIENX
Read/write R/W R/W R R/W R/W R/W R/W R/W
Initial value 0 0 0 0 0 0 0 0283
7593L–AVR–09/12
AT90USB64/128
• 5 - Reserved
The value read from these bits is always 0. Do not set these bits.
• 4 - NAKOUTE - NAK OUT Interrupt Enable bit
Set to enable an endpoint interrupt (EPINTx) when NAKOUTI is set.
Clear to disable an endpoint interrupt (EPINTx) when NAKOUTI is set.
• 3 - RXSTPE - Received SETUP Interrupt Enable flag
Set to enable an endpoint interrupt (EPINTx) when RXSTPI is sent.
Clear to disable an endpoint interrupt (EPINTx) when RXSTPI is sent.
• 2 - RXOUTE - Received OUT Data Interrupt Enable flag
Set to enable an endpoint interrupt (EPINTx) when RXOUTI is sent.
Clear to disable an endpoint interrupt (EPINTx) when RXOUTI is sent.
• 1 - STALLEDE - Stalled Interrupt Enable flag
Set to enable an endpoint interrupt (EPINTx) when STALLEDI is sent.
Clear to disable an endpoint interrupt (EPINTx) when STALLEDI is sent.
• 0 - TXINE - Transmitter Ready Interrupt Enable flag
Set to enable an endpoint interrupt (EPINTx) when TXINI is sent.
Clear to disable an endpoint interrupt (EPINTx) when TXINI is sent.
• 7-0 - DAT7:0 -Data bits
Set by the software to read/write a byte from/to the endpoint FIFO selected by EPNUM.
• 7-3 - Reserved
The value read from these bits is always 0. Do not set these bits.
• 2-0 - BYCT10:8 - Byte count (high) bits
Set by hardware. This field is the MSB of the byte count of the FIFO endpoint. The LSB part is
provided by the UEBCLX register.
Bit 7 6 5 4 3 2 1 0
DAT D7 DAT D6 DAT D5 DAT D4 DAT D3 DAT D2 DAT D1 DAT D0 UEDATX
Read/write R/W R/W R/W R/W R/W R/W R/W R/W
Initial value 0 0 0 0 0 0 0 0
Bit 7 6 5 4 3 2 1 0
- - - - - BYCT D10 BYCT D9 BYCT D8 UEBCHX
Read/write R R R R R R R R
Initial value 0 0 0 0 0 0 0 0284
7593L–AVR–09/12
AT90USB64/128
• 7-0 - BYCT7:0 - Byte Count (low) bits
Set by the hardware. BYCT10:0 is:
- (for IN endpoint) increased after each writing into the endpoint and decremented after each
byte sent,
- (for OUT endpoint) increased after each byte sent by the host, and decremented after each
byte read by the software.
• 7 - Reserved
The value read from these bits is always 0. Do not set these bits.
• 6-0 - EPINT6:0 - Endpoint Interrupts bits
Set by hardware when an interrupt is triggered by the UEINTX register and if the corresponding
endpoint interrupt enable bit is set.
Cleared by hardware when the interrupt source is served.
Bit 7 6 5 4 3 2 1 0
BYCT D7 BYCT D6 BYCT D5 BYCT D4 BYCT D3 BYCT D2 BYCT D1 BYCT D0 UEBCLX
Read/write R R R R R R R R
Initial value 0 0 0 0 0 0 0 0
Bit 7 6 5 4 3 2 1 0
- EPINT D6 EPINT D5 EPINT D4 EPINT D3 EPINT D2 EPINT D1 EPINT D0 UEINT
Read/write R R R R R R R R
Initial value 0 0 0 0 0 0 0 0285
7593L–AVR–09/12
AT90USB64/128
24. USB host operating modes
This mode is available only on Atmel AT90USB647/1287 products.
24.1 Pipe description
For the USB Host controller, the term of Pipe is used instead of Endpoint for the USB Device
controller. A Host Pipe corresponds to a Device Endpoint, as described in the USB specification.
Figure 24-1. Pipes and endpoints in a USB system.
In the USB Host controller, a Pipe will be associated to a Device Endpoint, considering the
Device Configuration Descriptors.
24.2 Detach
The reset value of the DETACH bit is 1. Thus, the firmware has the responsibility of clearing this
bit before switching to the Host mode (HOST set).
24.3 Power-on and reset
Figure 24-2 explains the USB host controller main states on power-on.
Figure 24-2. USB host controller states after reset.
Host
Ready
Host
Idle
Device
disconnection
Device
connection
Clock stopped
Macro off
Device
disconnection
Host
Suspend
SOFE=1
SOFE=0286
7593L–AVR–09/12
AT90USB64/128
USB host controller state after an hardware reset is ‘Reset’. When the USB controller is enabled
and the USB Host controller is selected, the USB controller is in ‘Idle’ state. In this state, the
USB Host controller waits for the Device connection, with a minimum power consumption.
The USB Pad should be in Idle mode. The macro does not need to have the PLL activated to
enter in ‘Host Ready’ state.
The Host controller enters in Suspend state when the USB bus is in Suspend state, that is, when
the Host controller doesn’t generate the Start of Frame. In this state, the USB consumption is
minimum. The Host controller exits to the Suspend state when starting to generate the SOF over
the USB line.
24.4 Device detection
A Device is detected by the USB controller when the USB bus if different from D+ and D- low. In
other words, when the USB Host Controller detects the Device pull-up on the D+ line. To enable
this detection, the Host Controller has to provide the Vbus power supply to the Device.
The Device Disconnection is detected by the USB Host controller when the USB Idle correspond
to D+ and D- low on the USB line.
24.5 Pipe selection
Prior to any operation performed by the CPU, the Pipe must first be selected. This is done by
setting PNUM2:0 bits (UPNUM register) with the Pipe number which will be managed by the
CPU.
The CPU can then access to the various Pipe registers and data.
24.6 Pipe configuration
The following flow (see Figure 24-3 on page 287) must be respected in order to activate a Pipe.287
7593L–AVR–09/12
AT90USB64/128
Figure 24-3. Pipe activation flow.
Once the Pipe is activated (EPEN set) and, the hardware is ready to send requests to the
Device.
When configured (CFGOK = 1), only the Pipe Token (PTOKEN) and the polling interval for Interrupt
pipe can be modified.
A Control type pipe supports only one bank. Any other value will lead to a configuration error
(CFGOK = 0).
A clear of PEN will reset the configuration of the Pipe. All the corresponding Pipe registers are
reset to there reset values. Please refer to “Memory management” on page 252 for more details.
Note: The firmware has to configure the Default Control Pipe with the following parameters:
• Type: Control
• Token: SETUP
• Data bank: 1
• Size: 64 Bytes
The firmware asks for eight bytes of the Device Descriptor sending a GET_DESCRIPTOR
request. These bytes contains the MaxPacketSize of the Device default control endpoint and the
firmware re-configures the size of the Default Control Pipe with this size parameter.
Pipe
Activ ation
UPCONX
PENABLE=1
UPCFG0X PTYPE
PTOKEN
PEPNUM
CFGOK=1
ERROR
No
Yes
UPCFG2X
INTFRQ
(interrupt only)
Pipe activ ated
and f reezed
UPCFG1X
PSIZE
PBK
CFGMEM
Enable the pipe
Select the Pipe type:
* Type (Control, Bulk, Interrupt)
* Token (IN, OUT, SETUP)
* Endpoint number
Configure the Pipe memory:
* Pipe size
* Number of banks
Configure the polling interval
for Interrupt pipe288
7593L–AVR–09/12
AT90USB64/128
24.7 USB reset
The USB controller sends a USB Reset when the firmware set the RESET bit. The RSTI bit is
set by hardware when the USB Reset has been sent. This triggers an interrupt if the RSTE has
been set.
When a USB Reset has been sent, all the Pipe configuration and the memory allocation are
reset. The General Host interrupt enable register is left unchanged.
If the bus was previously in suspend mode (SOFEN = 0), the USB controller automatically
switches to the resume mode (HWUPI is set) and the SOFEN bit is set by hardware in order to
generate SOF immediately after the USB Reset.
24.8 Address setup
Once the Device has answer to the first Host requests with the default address (0), the Host
assigns a new address to the device. The Host controller has to send a USB reset to the device
and perform a SET ADDRESS control request, with the new address to be used by the Device.
This control request ended, the firmware write the new address into the UHADDR register. All
following requests, on every Pipes, will be performed using this new address.
When the Host controller send a USB reset, the UHADDR register is reset by hardware and the
following Host requests will be performed using the default address (0).
24.9 Remote wake-up detection
The Host Controller enters in Suspend mode when clearing the SOFEN bit. No more Start Of
Frame is sent on the USB bus and the USB Device enters in Suspend mode 3ms later.
The Device awakes the Host Controller by sending an Upstream Resume (Remote Wake-Up
feature). The Host Controller detects a non-idle state on the USB bus and set the HWUPI bit. If
the non-Idle correspond to an Upstream Resume (K state), the RXRSMI bit is set by hardware.
The firmware has to generate a downstream resume within 1ms and for at least 20ms by setting
the RESUME bit.
Once the downstream Resume has been generated, the SOFEN bit is automatically set by hardware
in order to generate SOF immediately after the USB resume.
24.10 USB pipe reset
The firmware can reset a Pipe using the pipe reset register. The configuration of the pipe and
the data toggle remains unchanged. Only the bank management and the status bits are reset to
their initial values.
To completely reset a Pipe, the firmware has to disable and then enable the pipe.
24.11 Pipe data access
In order to read or to write into the Pipe Fifo, the CPU selects the Pipe number with the UPNUM
register and performs read or write action on the UPDATX register.
Host
Ready
Host
Suspend
SOFE=1
or HWUP=1
SOFE=0289
7593L–AVR–09/12
AT90USB64/128
24.12 Control pipe management
A Control transaction is composed of three phases:
• SETUP
• Data (IN or OUT)
• Status (OUT or IN)
The firmware has to change the Token for each phase.
The initial data toggle is set for the corresponding token (ONLY for Control Pipe):
• SETUP: Data0
• OUT: Data1
• IN: Data1 (expected data toggle)
24.13 OUT pipe management
The Pipe must be configured and not frozen first.
Note: if the firmware decides to switch to suspend mode (clear SOFEN) even if a bank is ready
to be sent, the USB controller will automatically exit from Suspend mode and the bank will be
sent.
The TXOUT bit is set by hardware when the current bank becomes free. This triggers an interrupt
if the TXOUTE bit is set. The FIFOCON bit is set at the same time. The CPU writes into the
FIFO and clears the FIFOCON bit to allow the USB controller to send the data.
If the OUT Pipe is composed of multiple banks, this also switches to the next data bank. The
TXOUT and FIFOCON bits are automatically updated by hardware regarding the status of the
next bank.290
7593L–AVR–09/12
AT90USB64/128
Figure 24-4. Example with OUT data banks.
24.14 IN Pipe management
The Pipe must be configured first.
When the Host requires data from the device, the firmware has to determine first the IN mode to
use using the INMODE bit:
• INMODE = 0. The INRQX register is taken in account. The Host controller will perform
(INRQX+1) IN requests on the selected Pipe before freezing the Pipe. This mode avoids to
have extra IN requests on a Pipe
• INMODE = 1. The USB controller will perform infinite IN request until the firmware freezes the
Pipe
The IN request generation will start when the firmware clear the PFREEZE bit.
Each time the current bank is full, the RXIN and the FIFOCON bits are set. This triggers an interrupt
if the RXINE bit is set. The firmware can acknowledge the USB interrupt by clearing the
RXIN bit. The Firmware read the data and clear the FIFOCON bit in order to free the current
OUT DATA
(bank 0) ACK
TXOUT
FIFOCON
HW
Example with 1 OUT data bank
write data from CPU
BANK 0
Example with 2 OUT data banks
SW
SW SW
SW
OUT
OUT DATA
(bank 0) ACK
TXOUT
FIFOCON
write data from CPU
BANK 0
SW
SW SW
SW
OUT DATA
(bank 1) ACK
write data from CPU
BANK 0
write data from CPU
BANK 1
SW
HW
write data from CPU
BANK0
Example with 2 OUT data banks
OUT DATA
(bank 0) ACK
TXOUT
FIFOCON
write data from CPU
BANK 0
SW
SW SW
write data from CPU SW
BANK 1
SW
HW
write data from CPU
BANK0
OUT DATA
(bank 1) ACK291
7593L–AVR–09/12
AT90USB64/128
bank. If the IN Pipe is composed of multiple banks, clearing the FIFOCON bit will switch to the
next bank. The RXIN and FIFOCON bits are then updated by hardware in accordance with the
status of the new bank.
Figure 24-5. Example with IN data banks.
24.14.1 CRC error (isochronous only)
A CRC error can occur during IN stage if the USB controller detects a bad received packet. In
this situation, the STALLEDI/CRCERRI interrupt is triggered. This does not prevent the RXINI
interrupt from being triggered.
24.15 Interrupt system
Figure 24-6. USB host controller interrupt system.
IN DATA
(to bank 0) ACK
RXIN
FIFOCON
HW
IN DATA
(to bank 0) ACK
HW
SW
SW
SW
Example with 1 IN data bank
read data from CPU
BANK 0
IN DATA
(to bank 0) ACK
RXIN
FIFOCON
HW
IN DATA
(to bank 1) ACK
SW
SW
Example with 2 IN data banks
read data from CPU
BANK 0
HW
SW
read data from CPU
BANK 0
read data from CPU
BANK 1
HWUPE
UHIEN.6
HWUPI
UHINT.6
HSOFI
UHINT.5 HSOFE
UHIEN.5
RXRSMI
UHINT.4 RXRSME
UHIEN.4
RSMEDI
UHINT.3 RSMEDE
UHIEN.3
RSTI
UHINT.2 RSTE
UHIEN.2
DDISCI
UHINT.1 DDISCE
UHIEN.1
DCONNI
UHINT.0 DCONNE
UHIEN.0
USB host
interrupt292
7593L–AVR–09/12
AT90USB64/128
Figure 24-7. USB device controller pipe interrupt system.
24.16 Registers
24.16.1 General USB host registers
• 7-3 - Reserved
The value read from these bits is always 0. Do not set these bits.
• 2 - RESUME - Send USB Resume
Set this bit to generate a USB Resume on the USB bus.
Cleared by hardware when the USB Resume has been sent. Clearing by software has no effect.
This bit should be set only when the start of frame generation is enable (SOFEN bit set).
• 1 - RESET - Send USB Reset
Set this bit to generate a USB Reset on the USB bus.
Cleared by hardware when the USB Reset has been sent. Clearing by software has no effect.
Refer to the USB reset section for more details.
• 0 - SOFEN - Start Of Frame Generation Enable
Set this bit to generate SOF on the USB bus in full speed mode and keep-alive in low speed
mode.
Clear this bit to disable the SOF generation and to leave the USB bus in Idle state.
FLERRE
UPIEN.7
UNDERFI
UPSTAX.5
OVERFI
UPSTAX.6
NAKEDI
UPINTX.6 NAKEDE
UPIEN.6
PERRI
UPINTX.4 PERRE
UPIEN.4
TXSTPI
UPINTX.3 TXSTPE
UPIEN.3
TXOUTI
UPINTX.2 TXOUTE
UPIEN.2
RXSTALLI
UPINTX.1 RXSTALLE
UPIEN.1
RXINI
UPINTX.0 RXINE
UPIEN.0
FLERRE
UPIEN.7
PIPE 0
PIPE 1
PIPE 2
PIPE 3
PIPE 4
PIPE 5
Pipe interrupt
PIPE 6
Bit 7 6 5 4 3 2 1 0
----- RESUME RESET SOFEN UHCON
Read/write R R R R R R/W R/W R/W
Initial value 0 0 0 0 0 0 0 0293
7593L–AVR–09/12
AT90USB64/128
• 7 - Reserved
The value read from these bits is always 0. Do not set these bits.
• 6 - HWUPI - Host Wake-Up Interrupt
Set by hardware when a non-idle state is detected on the USB bus.This interrupt should be
enable only to wake up the CPU core from power down mode.
Shall be clear by software to acknowledge the interrupt. Setting by software has no effect.
• 5 - HSOFI - Host Start Of Frame Interrupt
Set by hardware when a SOF is issued by the Host controller. This triggers a USB interrupt
when HSOFE is set. When using the host controller in low speed mode, this bit is also set when
a keep-alive is sent.
Shall be cleared by software to acknowledge the interrupt. Setting by software has no effect.
• 4 - RXRSMI - Upstream Resume Received Interrupt
Set by hardware when an Upstream Resume has been received from the Device.
Shall be cleared by software. Setting by software has no effect.
• 3 - RSMEDI - Downstream Resume Sent Interrupt
Set by hardware when a Downstream Resume has been sent to the Device.
Shall be cleared by software. Setting by software has no effect.
• 2 - RSTI - USB Reset Sent Interrupt
Set by hardware when a USB Reset has been sent to the Device.
Shall be cleared by software. Setting by software has no effect.
• 1 - DDISCI - Device Disconnection Interrupt
Set by hardware when the device has been removed from the USB bus.
Shall be cleared by software. Setting by software has no effect.
• 0 - DCONNI - Device Connection Interrupt
Set by hardware when a new device has been connected to the USB bus.
Shall be cleared by software. Setting by software has no effect.
• 7 - Reserved
The value read from these bits is always 0. Do not set these bits.
Bit 7 6 5 4 3 2 1 0
- HWUPI HSOFI RXRSMI RSMEDI RSTI DDISCI DCONNI UHINT
Read/write R R/W R/W R/W R/W R/W R/W R/W
Initial value 0 0 0 0 0 0 0 0
Bit 7 6 5 4 3 2 1 0
HWUPE HSOFE RXRSME RSMEDE RSTE DDISCE DCONNE UHIEN
Read/write R R/W R/W R/W R/W R/W R/W R/W
Initial value 0 0 0 0 0 0 0 0294
7593L–AVR–09/12
AT90USB64/128
• 6 - HWUPE - Host Wake-Up Interrupt Enable
Set this bit to enable HWUP interrupt.For correct interrupt handle execution, this interrupt should
be enable only before entering power-down mode.
Clear this bit to disable HWUP interrupt.
• 5 - HSOFE - Host Start Of frame Interrupt Enable
Set this bit to enable HSOF interrupt.
Clear this bit to disable HSOF interrupt.
• 4 - RXRSME -Upstream Resume Received Interrupt Enable
Set this bit to enable the RXRSMI interrupt.
Clear this bit to disable the RXRSMI interrupt.
• 3 - RSMEDE - Downstream Resume Sent Interrupt Enable
Set this bit to enable the RSMEDI interrupt.
Clear this bit to disable the RSMEDI interrupt.
• 2 - RSTE - USB Reset Sent Interrupt Enable
Set this bit to enable the RSTI interrupt.
Clear this bit to disable the RSTI interrupt.
• 1 - DDISCE - Device Disconnection Interrupt Enable
Set this bit to enable the DDISCI interrupt.
Clear this bit to disable the DDISCI interrupt.
• 0 - DCONNE - Device Connection Interrupt Enable
Set this bit to enable the DCONNI interrupt.
Clear this bit to disable the DCONNI interrupt.
• 7 - Reserved
The value read from these bits is always 0. Do not set these bits.
• 6-0 - HADDR6:0 - USB Host Address
These bits contain the address of the USB Device.
Bit 7 6 5 4 3 2 1 0
HADDR6 HADDR5 HADDR4 HADDR3 HADDR2 HADDR1 HADDR0 HADDR6 UHADDR
Read/write R/W R/W R/W R/W R/W R/W R/W R/W
Initial value 0 0 0 0 0 0 0 0295
7593L–AVR–09/12
AT90USB64/128
• 7-4 - Reserved
The value read from these bits is always 0. Do not set these bits.
• 3-0 - FNUM10:8 - Frame Number
The value contained in this register is the current SOF number.
This value can be modified by software.
• 7-0 - FNUM7:0 - Frame Number
The value contained in this register is the current SOF number.
This value can be modified by software.
• 7-0 - FLEN7:0 - Frame Length
The value contained the data frame length transmited.
24.16.2 USB Host Pipe registers
• 7-3 - Reserved
The value read from these bits is always 0. Do not set these bits.
• 2-0 - PNUM2:0 - Pipe Number
Select the pipe using this register. The USB Host registers ended by a X correspond then to this
number.
This number is used for the USB controller following the value of the PNUMD bit.
Bit 7 6 5 4 3 2 1 0
- - - - - FNUM10 FNUM9 FNUM8 UHFNUMH
Read/write R R R R R R R R
Initial value 0 0 0 0 0 0 0 0
Bit 7 6 5 4 3 2 1 0
FNUM7 FNUM6 FNUM5 FNUM4 FNUM3 FNUM2 FNUM1 FNUM0 UHFNUML
Read/write R R R R R R R R
Initial value 0 0 0 0 0 0 0 0
Bit 7 6 5 4 3 2 1 0
FLEN7 FLEN6 FLEN5 FLEN4 FLEN3 FLEN2 FLEN1 FLEN0 UHFLEN
Read/write R R R R R R R R
Initial value 0 0 0 0 0 0 0 0
Bit 7 6 5 4 3 2 1 0
PNUM2 PNUM1 PNUM0 UPNUM
Read/write RW RW RW
Initial value 0 0 0 0 0 0 0 0296
7593L–AVR–09/12
AT90USB64/128
• 7 - Reserved
The value read from these bits is always 0. Do not set these bits.
• 6 - P6RST - Pipe 6 Reset
Set this bit to 1 and reset this bit to 0 to reset the Pipe 6.
• 5 - P5RST - Pipe 5 Reset
Set this bit to 1 and reset this bit to 0 to reset the Pipe 5.
• 4 - P4RST - Pipe 4 Reset
Set this bit to 1 and reset this bit to 0 to reset the Pipe 4.
• 3 - P3RST - Pipe 3 Reset
Set this bit to 1 and reset this bit to 0 to reset the Pipe 3.
• 2 - P2RST - Pipe 2 Reset
Set this bit to 1 and reset this bit to 0 to reset the Pipe 2.
• 1 - P1RST - Pipe 1 Reset
Set this bit to 1 and reset this bit to 0 to reset the Pipe 1.
• 0 - P0RST - Pipe 0 Reset
Set this bit to 1 and reset this bit to 0 to reset the Pipe 0.
• 7 - Reserved
The value read from this bit is always 0. Do not set this bit.
• 6 - PFREEZE - Pipe Freeze
Set this bit to Freeze the Pipe requests generation.
Clear this bit to enable the Pipe request generation.
This bit is set by hardware when:
- the pipe is not configured
- a STALL handshake has been received on this Pipe
- An error occurs on the Pipe (UPINTX.PERRI = 1)
- (INRQ+1) In requests have been processed
This bit is set at 1 by hardware after a Pipe reset or a Pipe enable.
Bit 7 6 5 4 3 2 1 0
- P6RST P5RST P4RST P3RST P2RST P1RST P0RST UPRST
Read/write RW RW RW RW RW RW RW
Initial value 0 0 0 0 0 0 0 0
Bit 7 6 5 4 3 2 1 0
- PFREEZE INMODE - RSTDT - - PEN UPCONX
Read/write RW RW RW RW
Initial value 0 0 0 0 0 0 0 0297
7593L–AVR–09/12
AT90USB64/128
• 5 - INMODE - IN Request mode
Set this bit to allow the USB controller to perform infinite IN requests when the Pipe is not frozen.
Clear this bit to perform a pre-defined number of IN requests. This number is stored in the UINRQX
register.
• 4 - Reserved
The value read from this bit is always 0. Do not set this bit.
• 3 - RSTDT - Reset Data Toggle
Set this bit to reset the Data Toggle to its initial value for the current Pipe.
Cleared by hardware when proceed. Clearing by software has no effect.
• 2 - Reserved
The value read from these bits is always 0. Do not set these bits.
• 1 - Reserved
The value read from these bits is always 0. Do not set these bits.
• 0 - PEN - Pipe Enable
Set to enable the Pipe.
Clear to disable and set the pipe.
• 7-6 - PTYPE1:0 - Pipe Type
Select the type of the Pipe:
- 00: Control
- 01: Isochronous
- 10: Bulk
- 11: Interrupt
• 5-4 - PTOKEN1:0 - Pipe Token
Select the Token to associate to the Pipe
- 00: SETUP
- 01: IN
- 10: OUT
- 11: reserved
• 3-0 - PEPNUM3:0 - Pipe Endpoint Number
Set this field according to the Pipe configuration. Set the number of the Endpoint targeted by the
Pipe. This value is from 0 and 15.
Bit 7 6 5 4 3 2 1 0
PTYPE1 PTYPE0 PTOKEN1 PTOKEN0 PEPNUM3 PEPNUM2 PEPNUM1 PEPNUM0 UPCFG0X
Read/write RW RW RW RW RW RW RW RW
Initial value 0 0 0 0 0 0 0 0298
7593L–AVR–09/12
AT90USB64/128
• 7 - Reserved
The value read from these bits is always 0. Do not set these bits.
• 6-4 - PSIZE2:0 - Pipe Size
Select the size of the Pipe:
- 000: 8 - 100: 128 (only for endpoint 1)
- 001: 16 - 101: 256 (only for endpoint 1)
- 010: 32 - 110: Reserved. Do not use this configuration.
- 011: 64 - 111: Reserved. Do not use this configuration.
• 3-2 - PBK1:0 - Pipe Bank
Select the number of bank to declare for the current Pipe.
- 00: 1 bank
- 01: 2 banks
- 10: invalid
- 11: invalid
• ALLOC - Configure Pipe Memory
Set to configure the pipe memory with the characteristics.
Clear to update the memory allocation. Refer to the Memory Management chapter for more
details.
7 - Reserved
The value read from these bits is always 0. Do not set these bits.
• 7 - INTFRQ7:0 - Interrupt Pipe Request Frequency
These bits are the maximum value in millisecond of the polling period for an Interrupt Pipe.
This value has no effect for a non-Interrupt Pipe.
Bit 7 6 5 4 3 2 1 0
- PSIZE2:0 PBK1:0 ALLOC - UPCFG1X
Read/write R RW RW RW RW RW RW
Initial value 0 0 0 0 0 0 0 0
Bit 7 6 5 4 3 2 1 0
INTFRQ7 INTFRQ6 INTFRQ5 INTFRQ4 INTFRQ3 INTFRQ2 INTFRQ1 INTFRQ0 UPCFG2X
Read/write RW RW RW RW RW RW RW RW
Initial value 0 0 0 0 0 0 0 0299
7593L–AVR–09/12
AT90USB64/128
• 7 - CFGOK - Configure Pipe Memory OK
Set by hardware if the required memory configuration has been successfully performed.
Cleared by hardware when the pipe is disabled. The USB reset and the reset pipe have no effect
on the configuration of the pipe.
• 6 - OVERFI - Overflow
Set by hardware when a the current Pipe has received more data than the maximum length of
the current Pipe. An interrupt is triggered if the FLERRE bit is set.
Shall be cleared by software. Setting by software has no effect.
• 5 - UNDERFI - Underflow
Set by hardware when a transaction underflow occurs in the current isochronous or interrupt
Pipe. The Pipe can’t send the data flow required by the device. A ZLP will be sent instead. An
interrupt is triggered if the FLERRE bit is set.
Shall be cleared by software. Setting by software has no effect.
Note: the Host controller has to send a OUT packet, but the bank is empty. A ZLP will be sent
and the UNDERFI bit is set.
• 4 - Reserved
The value read from these bits is always 0. Do not set these bits.
• 3-2 - DTSEQ1:0 - Toggle Sequencing flag
Set by hardware to indicate the PID data of the current bank:
00b Data0
01b Data1
1xb Reserved.
For OUT Pipe, this value indicates the next data toggle that will be sent. This is not relative to the
current bank.
For IN Pipe, this value indicates the last data toggle received on the current bank.
• 1-0 - NBUSYBK1:0 - Busy Bank flag
Set by hardware to indicate the number of busy bank.
For OUT Pipe, it indicates the number of busy bank(s), filled by the user, ready for OUT transfer.
For IN Pipe, it indicates the number of busy bank(s) filled by IN transaction from the Device.
00b All banks are free
01b 1 busy bank
10b 2 busy banks
11b Reserved.
Bit 7 6 5 4 3 2 1 0
CFGOK OVERFI UNDERFI - DTSEQ1:0 NBUSYBK UPSTAX
Read/write R RW RW R R R R
Initial value 0 0 0 0 0 0 0 0300
7593L–AVR–09/12
AT90USB64/128
• 7-0 - INRQ7:0 - IN Request Number Before Freeze
Enter the number of IN transactions before the USB controller freezes the pipe. The USB controller
will perform (INRQ+1) IN requests before to freeze the Pipe. This counter is automatically
decreased by 1 each time a IN request has been successfully performed.
This register has no effect when the INMODE bit is set (infinite IN requests generation till the
pipe is not frozen).
• 7-6 - Reserved
The value read from these bits is always 0. Do not set these bits.
• 5 - COUNTER1:0 - Error counter
This counter is increased by the USB controller each time an error occurs on the Pipe. When this
value reaches 3, the Pipe is automatically frozen.
Clear these bits by software.
• 4 - CRC16 - CRC16 Error
Set by hardware when a CRC16 error has been detected.
Shall be cleared by software. Setting by software has no effect.
• 3 - TIMEOUT - Time-out Error
Set by hardware when a time-out error has been detected.
Shall be cleared by software. Setting by software has no effect.
• 2 - PID - PID Error
Set by hardware when a PID error has been detected.
Shall be cleared by software. Setting by software has no effect.
• 1 - DATAPID - Data PID Error
Set by hardware when a data PID error has been detected.
Shall be cleared by software. Setting by software has no effect.
• 0 - DATATGL - Bad Data Toggle
Set by hardware when a data toggle error has been detected.
Shall be cleared by software. Setting by software has no effect.
Bit 7 6 5 4 3 2 1 0
INRQ7 INRQ6 INRQ5 INRQ4 INRQ3 INRQ2 INRQ1 INRQ0 UPINRQX
Read/write RW RW RW RW RW RW RW RW
Initial value 0 0 0 0 0 0 0 0
Bit 7 6 5 4 3 2 1 0
- COUNTER1:0 CRC16 TIMEOUT PID DATAPID DATATGL UPERRX
Read/write RW RW RW RW RW RW RW
Initial value 0 0 0 0 0 0 0 0301
7593L–AVR–09/12
AT90USB64/128
• 7 - FIFOCON - FIFO Control
For OUT and SETUP Pipe:
Set by hardware when the current bank is free, at the same time than TXOUT or TXSTP.
Clear to send the FIFO data and to switch the bank. Setting by software has no effect.
For IN Pipe:
Set by hardware when a new IN message is stored in the current bank, at the same time than
RXIN.
Clear to free the current bank and to switch to the following bank. Setting by software has no
effect.
• 6 - NAKEDI - NAK Handshake received
Set by hardware when a NAK has been received on the current bank of the Pipe. This triggers
an interrupt if the NAKEDE bit is set in the UPIENX register.
Shall be clear to handshake the interrupt. Setting by software has no effect.
• 5 - RWAL - Read/Write Allowed
OUT Pipe:
Set by hardware when the firmware can write a new data into the Pipe FIFO.
Cleared by hardware when the current Pipe FIFO is full.
IN Pipe:
Set by hardware when the firmware can read a new data into the Pipe FIFO.
Cleared by hardware when the current Pipe FIFO is empty.
This bit is also cleared by hardware when the RXSTALL or the PERR bit is set
• 4 - PERRI -PIPE Error
Set by hardware when an error occurs on the current bank of the Pipe. This triggers an interrupt
if the PERRE bit is set in the UPIENX register. Refers to the UPERRX register to determine the
source of the error.
Automatically cleared by hardware when the error source bit is cleared.
• 3 - TXSTPI - SETUP Bank ready
Set by hardware when the current SETUP bank is free and can be filled. This triggers an interrupt
if the TXSTPE bit is set in the UPIENX register.
Shall be cleared to handshake the interrupt. Setting by software has no effect.
• 2 - TXOUTI -OUT Bank ready
Set by hardware when the current OUT bank is free and can be filled. This triggers an interrupt if
the TXOUTE bit is set in the UPIENX register.
Shall be cleared to handshake the interrupt. Setting by software has no effect.
Bit 7 6 5 4 3 2 1 0
FIFOCON NAKEDI RWAL PERRI TXSTPI TXOUTI RXSTALLI RXINI UPINTX
Read/write RW RW RW RW RW RW RW RW
Initial value 0 0 0 0 0 0 0 0302
7593L–AVR–09/12
AT90USB64/128
• 1 - RXSTALLI / CRCERR - STALL Received / Isochronous CRC Error
Set by hardware when a STALL handshake has been received on the current bank of the Pipe.
The Pipe is automatically frozen. This triggers an interrupt if the RXSTALLE bit is set in the UPIENX
register.
Shall be cleared to handshake the interrupt. Setting by software has no effect.
For Isochronous Pipe:
Set by hardware when a CRC error occurs on the current bank of the Pipe. This triggers an interrupt
if the TXSTPE bit is set in the UPIENX register.
Shall be cleared to handshake the interrupt. Setting by software has no effect.
• 0 - RXINI - IN Data received
Set by hardware when a new USB message is stored in the current bank of the Pipe. This triggers
an interrupt if the RXINE bit is set in the UPIENX register.
Shall be cleared to handshake the interrupt. Setting by software has no effect.
• 7 - FLERRE - Flow Error Interrupt enable
Set to enable the OVERFI and UNDERFI interrupts.
Clear to disable the OVERFI and UNDERFI interrupts.
• 6 - NAKEDE -NAK Handshake Received Interrupt Enable
Set to enable the NAKEDI interrupt.
Clear to disable the NAKEDI interrupt.
• 5 - Reserved
The value read from these bits is always 0. Do not set these bits.
• 4 - PERRE -PIPE Error Interrupt Enable
Set to enable the PERRI interrupt.
Clear to disable the PERRI interrupt.
• 3 - TXSTPE - SETUP Bank ready Interrupt Enable
Set to enable the TXSTPI interrupt.
Clear to disable the TXSTPI interrupt.
• 2 - TXOUTE - OUT Bank ready Interrupt Enable
Set to enable the TXOUTI interrupt.
Clear to disable the TXOUTI interrupt.
• 1 - RXSTALLE - STALL Received Interrupt Enable
Set to enable the RXSTALLI interrupt.
Clear to disable the RXSTALLI interrupt.
Bit 7 6 5 4 3 2 1 0
FLERRE NAKEDE - PERRE TXSTPE TXOUTE RXSTALLE RXINE UPIENX
Read/write RW RW RW RW RW RW RW
Initial value 0 0 0 0 0 0 0 0303
7593L–AVR–09/12
AT90USB64/128
• 0 - RXINE - IN Data received Interrupt Enable
Set to enable the RXINI interrupt.
Clear to disable the RXINI interrupt.
• 7-0 - PDAT7:0 - Pipe Data bits
Set by the software to read/write a byte from/to the Pipe FIFO selected by PNUM.
• 7-3 - Reserved
The value read from these bits is always 0. Do not set these bits.
• 2-0 - PBYCT10:8 - Byte count (high) bits
Set by hardware. This field is the MSB of the byte count of the FIFO endpoint. The LSB part is
provided by the UPBCLX register.
• 7-0 - PBYCT7:0 - Byte Count (low) bits
Set by the hardware. PBYCT10:0 is:
- (for OUT Pipe) increased after each writing into the Pipe and decremented after each byte
sent,
- (for IN Pipe) increased after each byte received by the host, and decremented after each byte
read by the software.
• 7 - Reserved
The value read from these bits is always 0. Do not set these bits.
• 6-0 - PINT6:0 - Pipe Interrupts bits
Set by hardware when an interrupt is triggered by the UPINTX register and if the corresponding
endpoint interrupt enable bit is set.
Cleared by hardware when the interrupt source is served.
Bit 7 6 5 4 3 2 1 0
PDAT7 PDAT6 PDAT5 PDAT4 PDAT3 PDAT2 PDAT1 PDAT0 UPDATX
Read/write RW RW RW RW RW RW RW RW
Initial value 0 0 0 0 0 0 0 0
Bit 7 6 5 4 3 2 1 0
- - - - - PBYCT10 PBYCT9 PBYCT8 UPBCHX
Read/write R R R
Initial value 0 0 0 0 0 0 0 0
Bit 7 6 5 4 3 2 1 0
PBYCT7 PBYCT6 PBYCT5 PBYCT4 PBYCT3 PBYCT2 PBYCT1 PBYCT0 UPBCLX
Read/write R R R R R R R R
Initial value 0 0 0 0 0 0 0 0
Bit 7 6 5 4 3 2 1 0
- PINT6 PINT5 PINT4 PINT3 PINT2 PINT1 PINT0 UPINT
Read/write
Initial value 0 0 0 0 0 0 0 0304
7593L–AVR–09/12
AT90USB64/128
25. Analog Comparator
The Analog Comparator compares the input values on the positive pin AIN0 and negative pin
AIN1. When the voltage on the positive pin AIN0 is higher than the voltage on the negative pin
AIN1, the Analog Comparator output, ACO, is set. The comparator’s output can be set to trigger
the Timer/Counter1 Input Capture function. In addition, the comparator can trigger a separate
interrupt, exclusive to the Analog Comparator. The user can select Interrupt triggering on comparator
output rise, fall or toggle. A block diagram of the comparator and its surrounding logic is
shown in Figure 25-1.
The Power Reduction ADC bit, PRADC, in “PRR0 – Power Reduction Register 0” on page 54
must be disabled by writing a logical zero to be able to use the ADC input MUX.
Figure 25-1. Analog Comparator block diagram (2).
Notes: 1. See Table 25-2 on page 306.
2. Refer to Figure 1-1 on page 3 and Table 11-6 on page 79 for Analog Comparator pin
placement.
25.0.1 ADCSRB – ADC Control and Status Register B
• Bit 6 – ACME: Analog Comparator Multiplexer Enable
When this bit is written logic one and the ADC is switched off (ADEN in ADCSRA is zero), the
ADC multiplexer selects the negative input to the Analog Comparator. When this bit is written
logic zero, AIN1 is applied to the negative input of the Analog Comparator. For a detailed
description of this bit, see “Analog Comparator multiplexed input” on page 306.
25.0.2 ACSR – Analog Comparator Control and Status Register
ACBG
BANDGAP
REFERENCE
ADC MULTIPLEXER
OUTPUT
ACME
ADEN
(1)
Bit 7 6 5 4 3 2 1 0
– ACME – – - ADTS2 ADTS1 ADTS0 ADCSRB
Read/write R R/W R R R R/W R/W R/W
Initial value 0 0 0 0 0 0 0 0
Bit 7 6 5 4 3 2 1 0
ACD ACBG ACO ACI ACIE ACIC ACIS1 ACIS0 ACSR
Read/write R/W R/W R R/W R/W R/W R/W R/W
Initial value 0 0 N/A 0 0 0 0 0305
7593L–AVR–09/12
AT90USB64/128
• Bit 7 – ACD: Analog Comparator Disable
When this bit is written logic one, the power to the Analog Comparator is switched off. This bit
can be set at any time to turn off the Analog Comparator. This will reduce power consumption in
Active and Idle mode. When changing the ACD bit, the Analog Comparator Interrupt must be
disabled by clearing the ACIE bit in ACSR. Otherwise an interrupt can occur when the bit is
changed.
• Bit 6 – ACBG: Analog Comparator Bandgap Select
When this bit is set, a fixed bandgap reference voltage replaces the positive input to the Analog
Comparator. When this bit is cleared, AIN0 is applied to the positive input of the Analog Comparator.
See “Internal voltage reference” on page 62.
• Bit 5 – ACO: Analog Comparator Output
The output of the Analog Comparator is synchronized and then directly connected to ACO. The
synchronization introduces a delay of 1 - 2 clock cycles.
• Bit 4 – ACI: Analog Comparator Interrupt Flag
This bit is set by hardware when a comparator output event triggers the interrupt mode defined
by ACIS1 and ACIS0. The Analog Comparator interrupt routine is executed if the ACIE bit is set
and the I-bit in SREG is set. ACI is cleared by hardware when executing the corresponding interrupt
handling vector. Alternatively, ACI is cleared by writing a logic one to the flag.
• Bit 3 – ACIE: Analog Comparator Interrupt Enable
When the ACIE bit is written logic one and the I-bit in the Status Register is set, the Analog Comparator
interrupt is activated. When written logic zero, the interrupt is disabled.
• Bit 2 – ACIC: Analog Comparator Input Capture Enable
When written logic one, this bit enables the input capture function in Timer/Counter1 to be triggered
by the Analog Comparator. The comparator output is in this case directly connected to the
input capture front-end logic, making the comparator utilize the noise canceler and edge select
features of the Timer/Counter1 Input Capture interrupt. When written logic zero, no connection
between the Analog Comparator and the input capture function exists. To make the comparator
trigger the Timer/Counter1 Input Capture interrupt, the ICIE1 bit in the Timer Interrupt Mask
Register (TIMSK1) must be set.
• Bits 1, 0 – ACIS1, ACIS0: Analog Comparator Interrupt Mode Select
These bits determine which comparator events that trigger the Analog Comparator interrupt. The
different settings are shown in Table 25-1.
When changing the ACIS1/ACIS0 bits, the Analog Comparator Interrupt must be disabled by
clearing its Interrupt Enable bit in the ACSR Register. Otherwise an interrupt can occur when the
bits are changed.
Table 25-1. ACIS1/ACIS0 settings.
ACIS1 ACIS0 Interrupt mode
0 0 Comparator Interrupt on Output Toggle
0 1 Reserved
1 0 Comparator Interrupt on Falling Output Edge
1 1 Comparator Interrupt on Rising Output Edge306
7593L–AVR–09/12
AT90USB64/128
25.1 Analog Comparator multiplexed input
It is possible to select any of the ADC7..0 pins to replace the negative input to the Analog Comparator.
The ADC multiplexer is used to select this input, and consequently, the ADC must be
switched off to utilize this feature. If the Analog Comparator Multiplexer Enable bit (ACME in
ADCSRB) is set and the ADC is switched off (ADEN in ADCSRA is zero), and MUX2..0 in
ADMUX select the input pin to replace the negative input to the Analog Comparator, as shown in
Table 25-2. If ACME is cleared or ADEN is set, AIN1 is applied to the negative input to the Analog
Comparator.
25.1.1 DIDR1 – Digital Input Disable Register 1
• Bit 1, 0 – AIN1D, AIN0D: AIN1, AIN0 Digital Input Disable
When this bit is written logic one, the digital input buffer on the AIN1/0 pin is disabled. The corresponding
PIN Register bit will always read as zero when this bit is set. When an analog signal is
applied to the AIN1/0 pin and the digital input from this pin is not needed, this bit should be written
logic one to reduce power consumption in the digital input buffer.
Table 25-2. Analog Comparator multiplexed input.
ACME ADEN MUX2..0 Analog Comparator negative input
0 x xxx AIN1
1 1 xxx AIN1
1 0 000 ADC0
1 0 001 ADC1
1 0 010 ADC2
1 0 011 ADC3
1 0 100 ADC4
1 0 101 ADC5
1 0 110 ADC6
1 0 111 ADC7
Bit 7 6 5 4 3 2 1 0
– – – – – – AIN1D AIN0D DIDR1
Read/write R R R R R R R/W R/W
Initial value 0 0 0 0 0 0 0 0307
7593L–AVR–09/12
AT90USB64/128
26. ADC – Analog to Digital Converter
26.1 Features
• 10-bit resolution
• 0.5 LSB integral non-linearity
• ±2 LSB absolute accuracy
• 65 - 260µs conversion time
• Up to 15ksps at maximum resolution
• Eight multiplexed single ended input channels
• Seven differential input channels
• Optional left adjustment for ADC result readout
• 0 - VCC ADC input voltage range
• Selectable 2.56V ADC reference voltage
• Free running or single conversion mode
• ADC start conversion by auto triggering on interrupt sources
• Interrupt on ADC conversion complete
• Sleep mode noise canceler
26.2 Overview
The Atmel AT90USB64/128 features a 10-bit successive approximation ADC. The ADC is connected
to an 8-channel Analog Multiplexer which allows eight single-ended voltage inputs
constructed from the pins of Port F. The single-ended voltage inputs refer to 0V (GND).
The device also supports 16 differential voltage input combinations. Two of the differential inputs
(ADC1, ADC0 and ADC3, ADC2) are equipped with a programmable gain stage, providing
amplification steps of 0 dB (1×), 20 dB (10×), or 46 dB (200×) on the differential input voltage
before the A/D conversion. Seven differential analog input channels share a common negative
terminal (ADC1), while any other ADC input can be selected as the positive input terminal. If 1×
or 10× gain is used, 8-bit resolution can be expected. If 200× gain is used, 7-bit resolution can
be expected.
The ADC contains a Sample and Hold circuit which ensures that the input voltage to the ADC is
held at a constant level during conversion. A block diagram of the ADC is shown in Figure 26-1
on page 308.
The ADC has a separate analog supply voltage pin, AVCC. AVCC must not differ more than ±0.3V
from VCC. See the paragraph “ADC noise canceler” on page 314 on how to connect this pin.
Internal reference voltages of nominally 2.56V or AVCC are provided on-chip. The voltage reference
may be externally decoupled at the AREF pin by a capacitor for better noise performance.308
7593L–AVR–09/12
AT90USB64/128
Figure 26-1. Analog to digital converter block schematic.
ADC CONVERSION
COMPLETE IRQ
8-BIT DATA BUS
15 0
ADC MULTIPLEXER
SELECT (ADMUX)
ADC CTRL. & STATUS
REGISTER (ADCSRA)
ADC DATA REGISTER
(ADCH/ADCL)
MUX2
ADIE
ADATE
ADEN
ADSC
ADIF ADIF
MUX1
MUX0
ADPS2
ADPS1
ADPS0
MUX3
CONVERSION LOGIC
10-BIT DAC
+
-
SAMPLE & HOLD
COMPARATOR
INTERNAL
REFERENCE
MUX DECODER MUX4
AVCC
ADC7
ADC6
ADC5
ADC4
ADC3
ADC2
ADC1
ADC0
REFS1
REFS0
ADLAR
+
-
CHANNEL SELECTION
GAIN SELECTION
ADC[9:0]
ADC MULTIPLEXER
OUTPUT
DIFFERENTIAL
AMPLIFIER
AREF
BANDGAP
REFERENCE
PRESCALER
SINGLE ENDED / DIFFERENTIAL SELECTION
GND
POS.
INPUT
MUX
NEG.
INPUT
MUX
TRIGGER
SELECT
ADTS[2:0]
INTERRUPT
FLAGS
ADHSM
START309
7593L–AVR–09/12
AT90USB64/128
26.3 Operation
The ADC converts an analog input voltage to a 10-bit digital value through successive approximation.
The minimum value represents GND and the maximum value represents the voltage on
the AREF pin minus 1 LSB. Optionally, AVCC or an internal 2.56V reference voltage may be connected
to the AREF pin by writing to the REFSn bits in the ADMUX Register. The internal
voltage reference may thus be decoupled by an external capacitor at the AREF pin to improve
noise immunity.
The analog input channel and differential gain are selected by writing to the MUX bits in
ADMUX. Any of the ADC input pins, as well as GND and a fixed bandgap voltage reference, can
be selected as single ended inputs to the ADC. A selection of ADC input pins can be selected as
positive and negative inputs to the differential amplifier.
The ADC is enabled by setting the ADC Enable bit, ADEN in ADCSRA. Voltage reference and
input channel selections will not go into effect until ADEN is set. The ADC does not consume
power when ADEN is cleared, so it is recommended to switch off the ADC before entering power
saving sleep modes.
The ADC generates a 10-bit result which is presented in the ADC Data Registers, ADCH and
ADCL. By default, the result is presented right adjusted, but can optionally be presented left
adjusted by setting the ADLAR bit in ADMUX.
If the result is left adjusted and no more than 8-bit precision is required, it is sufficient to read
ADCH. Otherwise, ADCL must be read first, then ADCH, to ensure that the content of the Data
Registers belongs to the same conversion. Once ADCL is read, ADC access to Data Registers
is blocked. This means that if ADCL has been read, and a conversion completes before ADCH is
read, neither register is updated and the result from the conversion is lost. When ADCH is read,
ADC access to the ADCH and ADCL Registers is re-enabled.
The ADC has its own interrupt which can be triggered when a conversion completes. The ADC
access to the Data Registers is prohibited between reading of ADCH and ADCL, the interrupt
will trigger even if the result is lost.
26.4 Starting a conversion
A single conversion is started by writing a logical one to the ADC Start Conversion bit, ADSC.
This bit stays high as long as the conversion is in progress and will be cleared by hardware
when the conversion is completed. If a different data channel is selected while a conversion is in
progress, the ADC will finish the current conversion before performing the channel change.
Alternatively, a conversion can be triggered automatically by various sources. Auto Triggering is
enabled by setting the ADC Auto Trigger Enable bit, ADATE in ADCSRA. The trigger source is
selected by setting the ADC Trigger Select bits, ADTS in ADCSRB (See description of the ADTS
bits for a list of the trigger sources). When a positive edge occurs on the selected trigger signal,
the ADC prescaler is reset and a conversion is started. This provides a method of starting conversions
at fixed intervals. If the trigger signal is still set when the conversion completes, a new
conversion will not be started. If another positive edge occurs on the trigger signal during conversion,
the edge will be ignored. Note that an interrupt flag will be set even if the specific
interrupt is disabled or the Global Interrupt Enable bit in SREG is cleared. A conversion can thus
be triggered without causing an interrupt. However, the interrupt flag must be cleared in order to
trigger a new conversion at the next interrupt event. 310
7593L–AVR–09/12
AT90USB64/128
Figure 26-2. ADC auto trigger logic.
Using the ADC Interrupt Flag as a trigger source makes the ADC start a new conversion as soon
as the ongoing conversion has finished. The ADC then operates in Free Running mode, constantly
sampling and updating the ADC Data Register. The first conversion must be started by
writing a logical one to the ADSC bit in ADCSRA. In this mode the ADC will perform successive
conversions independently of whether the ADC Interrupt Flag, ADIF is cleared or not.
If Auto Triggering is enabled, single conversions can be started by writing ADSC in ADCSRA to
one. ADSC can also be used to determine if a conversion is in progress. The ADSC bit will be
read as one during a conversion, independently of how the conversion was started.
26.5 Prescaling and conversion timing
Figure 26-3. ADC prescaler.
By default, the successive approximation circuitry requires an input clock frequency between
50kHz and 200kHz to get maximum resolution. If a lower resolution than 10 bits is needed, the
input clock frequency to the ADC can be higher than 200kHz to get a higher sample rate. Alternatively,
setting the ADHSM bit in ADCSRB allows an increased ADC clock frequency at the
expense of higher power consumption.
The ADC module contains a prescaler, which generates an acceptable ADC clock frequency
from any CPU frequency above 100kHz. The prescaling is set by the ADPS bits in ADCSRA.
The prescaler starts counting from the moment the ADC is switched on by setting the ADEN bit
ADSC
ADIF
SOURCE 1
SOURCE n
ADTS[2:0]
CONVERSION
LOGIC
PRESCALER
START CLKADC
.
.
.
. EDGE
DETECTOR
ADATE
7-BIT ADC PRESCALER
ADC CLOCK SOURCE
CK
ADPS0
ADPS1
ADPS2
CK/128
CK/2
CK/4
CK/8
CK/16
CK/32
CK/64
Reset
ADEN
START311
7593L–AVR–09/12
AT90USB64/128
in ADCSRA. The prescaler keeps running for as long as the ADEN bit is set, and is continuously
reset when ADEN is low.
When initiating a single ended conversion by setting the ADSC bit in ADCSRA, the conversion
starts at the following rising edge of the ADC clock cycle. See “Differential channels” on page
312 for details on differential conversion timing.
A normal conversion takes 13 ADC clock cycles. The first conversion after the ADC is switched
on (ADEN in ADCSRA is set) takes 25 ADC clock cycles in order to initialize the analog circuitry.
The actual sample-and-hold takes place 1.5 ADC clock cycles after the start of a normal conversion
and 13.5 ADC clock cycles after the start of an first conversion. When a conversion is
complete, the result is written to the ADC Data Registers, and ADIF is set. In Single Conversion
mode, ADSC is cleared simultaneously. The software may then set ADSC again, and a new
conversion will be initiated on the first rising ADC clock edge.
When Auto Triggering is used, the prescaler is reset when the trigger event occurs. This assures
a fixed delay from the trigger event to the start of conversion. In this mode, the sample-and-hold
takes place two ADC clock cycles after the rising edge on the trigger source signal. Three additional
CPU clock cycles are used for synchronization logic.
In Free Running mode, a new conversion will be started immediately after the conversion completes,
while ADSC remains high. For a summary of conversion times, see Table 26-1 on page
312.
Figure 26-4. ADC timing diagram, first conversion (single conversion mode).
Figure 26-5. ADC timing diagram, single conversion.
Sign and MSB of result
LSB of result
ADC clock
ADSC
Sample & hold
ADIF
ADCH
ADCL
Cycle number
ADEN
1 2 12 13 14 15 16 17 18 19 20 21 22 23 24 25 1 2
First conversion Next
conversion
3
MUX and REFS
update
MUX
and REFS
update
Conversion
complete
1 2 3 4 5 6 7 8 9 10 11 12 13
Sign and MSB of result
LSB of result
ADC clock
ADSC
ADIF
ADCH
ADCL
Cycle number 1 2
One conversion Next conversion
3
Sample & hold
MUX and REFS
update
Conversion
complete MUX and REFS
update312
7593L–AVR–09/12
AT90USB64/128
Figure 26-6. ADC timing diagram, auto triggered conversion.
Figure 26-7. ADC timing diagram, free running conversion.
26.5.1 Differential channels
When using differential channels, certain aspects of the conversion need to be taken into
consideration.
Differential conversions are synchronized to the internal clock CKADC2 equal to half the ADC
clock frequency. This synchronization is done automatically by the ADC interface in such a way
that the sample-and-hold occurs at a specific phase of CKADC2. A conversion initiated by the
user (that is, all single conversions, and the first free running conversion) when CKADC2 is low will
take the same amount of time as a single ended conversion (13 ADC clock cycles from the next
prescaled clock cycle). A conversion initiated by the user when CKADC2 is high will take 14 ADC
clock cycles due to the synchronization mechanism. In Free Running mode, a new conversion is
initiated immediately after the previous conversion completes, and since CKADC2 is high at this
time, all automatically started (that is, all but the first) Free Running conversions will take 14
ADC clock cycles.
Table 26-1. ADC conversion time.
Condition First conversion
Normal conversion,
single ended
Auto triggered
conversion
Sample & Hold
(Cycles from Start of Conversion) 14.5 1.5 2
Conversion Time
(Cycles) 25 13 13.5
1 2 3 4 5 6 7 8 9 10 11 12 13
Sign and MSB of result
LSB of result
ADC clock
Trigger
Source
ADIF
ADCH
ADCL
Cycle number 1 2
One conversion Next conversion
Conversion
complete Prescaler
reset
ADATE
Prescaler
reset
Sample &
hold
MUX and REFS
update
11 12 13
Sign and MSB of result
LSB of result
ADC clock
ADSC
ADIF
ADCH
ADCL
Cycle number 1 2
One conversion Next conversion
3 4
Conversion
complete
Sample & hold
MUX and REFS
update313
7593L–AVR–09/12
AT90USB64/128
If differential channels are used and conversions are started by Auto Triggering, the ADC must
be switched off between conversions. When Auto Triggering is used, the ADC prescaler is reset
before the conversion is started. Since the stage is dependent of a stable ADC clock prior to the
conversion, this conversion will not be valid. By disabling and then re-enabling the ADC between
each conversion (writing ADEN in ADCSRA to “0” then to “1”), only extended conversions are
performed. The result from the extended conversions will be valid. See “Prescaling and conversion
timing” on page 310 for timing details.
The gain stage is optimized for a bandwidth of 4kHz at all gain settings. Higher frequencies may
be subjected to non-linear amplification. An external low-pass filter should be used if the input
signal contains higher frequency components than the gain stage bandwidth. Note that the ADC
clock frequency is independent of the gain stage bandwidth limitation. For example, the ADC
clock period may be 6µs, allowing a channel to be sampled at 12ksps, regardless of the bandwidth
of this channel.
26.6 Changing channel or reference selection
The MUXn and REFS1:0 bits in the ADMUX Register are single buffered through a temporary
register to which the CPU has random access. This ensures that the channels and reference
selection only takes place at a safe point during the conversion. The channel and reference
selection is continuously updated until a conversion is started. Once the conversion starts, the
channel and reference selection is locked to ensure a sufficient sampling time for the ADC. Continuous
updating resumes in the last ADC clock cycle before the conversion completes (ADIF in
ADCSRA is set). Note that the conversion starts on the following rising ADC clock edge after
ADSC is written. The user is thus advised not to write new channel or reference selection values
to ADMUX until one ADC clock cycle after ADSC is written.
If Auto Triggering is used, the exact time of the triggering event can be indeterministic. Special
care must be taken when updating the ADMUX Register, in order to control which conversion
will be affected by the new settings.
If both ADATE and ADEN is written to one, an interrupt event can occur at any time. If the
ADMUX Register is changed in this period, the user cannot tell if the next conversion is based
on the old or the new settings. ADMUX can be safely updated in the following ways:
a. When ADATE or ADEN is cleared.
b. During conversion, minimum one ADC clock cycle after the trigger event.
c. After a conversion, before the interrupt flag used as trigger source is cleared.
When updating ADMUX in one of these conditions, the new settings will affect the next ADC
conversion.
Special care should be taken when changing differential channels. Once a differential channel
has been selected, the stage may take as much as 125µs to stabilize to the new value. Thus
conversions should not be started within the first 125µs after selecting a new differential channel.
Alternatively, conversion results obtained within this period should be discarded.
The same settling time should be observed for the first differential conversion after changing
ADC reference (by changing the REFS1:0 bits in ADMUX).
The settling time and gain stage bandwidth is independent of the ADHSM bit setting.314
7593L–AVR–09/12
AT90USB64/128
26.6.1 ADC input channels
When changing channel selections, the user should observe the following guidelines to ensure
that the correct channel is selected:
• In Single Conversion mode, always select the channel before starting the conversion. The
channel selection may be changed one ADC clock cycle after writing one to ADSC. However,
the simplest method is to wait for the conversion to complete before changing the channel
selection
• In Free Running mode, always select the channel before starting the first conversion. The
channel selection may be changed one ADC clock cycle after writing one to ADSC. However,
the simplest method is to wait for the first conversion to complete, and then change the
channel selection. Since the next conversion has already started automatically, the next
result will reflect the previous channel selection. Subsequent conversions will reflect the new
channel selection
When switching to a differential gain channel, the first conversion result may have a poor accuracy
due to the required settling time for the automatic offset cancellation circuitry. The user
should preferably disregard the first conversion result.
26.6.2 ADC voltage reference
The reference voltage for the ADC (VREF) indicates the conversion range for the ADC. Single
ended channels that exceed VREF will result in codes close to 0x3FF. VREF can be selected as
either AVCC, internal 2.56V reference, or external AREF pin.
AVCC is connected to the ADC through a passive switch. The internal 2.56V reference is generated
from the internal bandgap reference (VBG) through an internal amplifier. In either case, the
external AREF pin is directly connected to the ADC, and the reference voltage can be made
more immune to noise by connecting a capacitor between the AREF pin and ground. VREF can
also be measured at the AREF pin with a high impedant voltmeter. Note that VREF is a high
impedant source, and only a capacitive load should be connected in a system.
If the user has a fixed voltage source connected to the AREF pin, the user may not use the other
reference voltage options in the application, as they will be shorted to the external voltage. If no
external voltage is applied to the AREF pin, the user may switch between AVCC and 2.56V as
reference selection. The first ADC conversion result after switching reference voltage source
may be inaccurate, and the user is advised to discard this result.
If differential channels are used, the selected reference should not be closer to AVCC than indicated
in Table 31-5 on page 397.
26.7 ADC noise canceler
The ADC features a noise canceler that enables conversion during sleep mode to reduce noise
induced from the CPU core and other I/O peripherals. The noise canceler can be used with ADC
Noise Reduction and Idle mode. To make use of this feature, the following procedure should be
used:315
7593L–AVR–09/12
AT90USB64/128
a. Make sure that the ADC is enabled and is not busy converting. Single Conversion
mode must be selected and the ADC conversion complete interrupt must be
enabled.
b. Enter ADC Noise Reduction mode (or Idle mode). The ADC will start a conversion
once the CPU has been halted.
c. If no other interrupts occur before the ADC conversion completes, the ADC interrupt
will wake up the CPU and execute the ADC Conversion Complete interrupt
routine. If another interrupt wakes up the CPU before the ADC conversion is complete,
that interrupt will be executed, and an ADC Conversion Complete interrupt
request will be generated when the ADC conversion completes. The CPU will
remain in active mode until a new sleep command is executed.
Note that the ADC will not be automatically turned off when entering other sleep modes than Idle
mode and ADC Noise Reduction mode. The user is advised to write zero to ADEN before entering
such sleep modes to avoid excessive power consumption.
If the ADC is enabled in such sleep modes and the user wants to perform differential conversions,
the user is advised to switch the ADC off and on after waking up from sleep to prompt an
extended conversion to get a valid result.
26.7.1 Analog input circuitry
The analog input circuitry for single ended channels is illustrated in Figure 26-8. An analog
source applied to ADCn is subjected to the pin capacitance and input leakage of that pin, regardless
of whether that channel is selected as input for the ADC. When the channel is selected, the
source must drive the S/H capacitor through the series resistance (combined resistance in the
input path).
The ADC is optimized for analog signals with an output impedance of approximately 10kΩ or
less. If such a source is used, the sampling time will be negligible. If a source with higher impedance
is used, the sampling time will depend on how long time the source needs to charge the
S/H capacitor, with can vary widely. The user is recommended to only use low impedant sources
with slowly varying signals, since this minimizes the required charge transfer to the S/H
capacitor.
If differential gain channels are used, the input circuitry looks somewhat different, although
source impedances of a few hundred kΩ or less is recommended.
Signal components higher than the Nyquist frequency (fADC/2) should not be present for either
kind of channels, to avoid distortion from unpredictable signal convolution. The user is advised
to remove high frequency components with a low-pass filter before applying the signals as
inputs to the ADC.
Figure 26-8. Analog input circuitry.
ADCn
I
IH
1..100kΩ
CS/H= 14pF
VCC/2
I
IL316
7593L–AVR–09/12
AT90USB64/128
26.7.2 Analog noise canceling techniques
Digital circuitry inside and outside the device generates EMI which might affect the accuracy of
analog measurements. If conversion accuracy is critical, the noise level can be reduced by
applying the following techniques:
a. Keep analog signal paths as short as possible. Make sure analog tracks run over
the analog ground plane, and keep them well away from high-speed switching digital
tracks.
b. The AVCC pin on the device should be connected to the digital VCC supply voltage
via an LC network as shown in Figure 26-9.
c. Use the ADC noise canceler function to reduce induced noise from the CPU.
d. If any ADC port pins are used as digital outputs, it is essential that these do not
switch while a conversion is in progress.
Figure 26-9. ADC power connections.
26.7.3 Offset compensation schemes
The gain stage has a built-in offset cancellation circuitry that nulls the offset of differential measurements
as much as possible. The remaining offset in the analog path can be measured
directly by selecting the same channel for both differential inputs. This offset residue can be then
subtracted in software from the measurement results. Using this kind of software based offset
correction, offset on any channel can be reduced below one LSB.
26.7.4 ADC accuracy definitions
An n-bit single-ended ADC converts a voltage linearly between GND and VREF in 2n steps
(LSBs). The lowest code is read as 0, and the highest code is read as 2n
-1.
Several parameters describe the deviation from the ideal behavior:
VCC
GND
100nF
Analog ground plane
(ADC0) PF0
(ADC7) PF7
(ADC1) PF1
(ADC2) PF2
(ADC3) PF3
(ADC4) PF4
(ADC5) PF5
(ADC6) PF6
AREF
GND
AVCC
52
53
54
55
56
57
58
59
60
61
62
63
64
1
51
NC
(AD0) PA0
10μH317
7593L–AVR–09/12
AT90USB64/128
• Offset: The deviation of the first transition (0x000 to 0x001) compared to the ideal transition
(at 0.5 LSB). Ideal value: 0 LSB
Figure 26-10. Offset error.
• Gain Error: After adjusting for offset, the Gain Error is found as the deviation of the last
transition (0x3FE to 0x3FF) compared to the ideal transition (at 1.5 LSB below maximum).
Ideal value: 0 LSB
Figure 26-11. Gain error.
• Integral non-linearity (INL): After adjusting for offset and gain error, the INL is the maximum
deviation of an actual transition compared to an ideal transition for any code. Ideal value: 0
LSB
Output code
VREF Input voltage
Ideal ADC
Actual ADC
Offset
error
Output code
VREF Input voltage
Ideal ADC
Actual ADC
Gain
error318
7593L–AVR–09/12
AT90USB64/128
Figure 26-12. Integral non-linearity (INL).
• Differential Non-linearity (DNL): The maximum deviation of the actual code width (the interval
between two adjacent transitions) from the ideal code width (1 LSB). Ideal value: 0 LSB
Figure 26-13. Differential non-linearity (DNL).
• Quantization Error: Due to the quantization of the input voltage into a finite number of codes,
a range of input voltages (1 LSB wide) will code to the same value. Always ±0.5 LSB.
• Absolute Accuracy: The maximum deviation of an actual (unadjusted) transition compared to
an ideal transition for any code. This is the compound effect of offset, gain error, differential
error, non-linearity, and quantization error. Ideal value: ±0.5 LSB.
26.8 ADC conversion result
After the conversion is complete (ADIF is high), the conversion result can be found in the ADC
Result Registers (ADCL, ADCH).
Output code
VREF Input voltage
Ideal ADC
Actual ADC
INL
Output code
0x3FF
0x000
0 VREF Input voltage
DNL
1 LSB319
7593L–AVR–09/12
AT90USB64/128
For single ended conversion, the result is:
where VIN is the voltage on the selected input pin and VREF the selected voltage reference (see
Table 26-3 on page 322 and Table 26-4 on page 322). 0x000 represents analog ground, and
0x3FF represents the selected reference voltage minus one LSB.
If differential channels are used, the result is:
where VPOS is the voltage on the positive input pin, VNEG the voltage on the negative input pin,
GAIN the selected gain factor and VREF the selected voltage reference. The result is presented
in two’s complement form, from 0x200 (-512d) through 0x1FF (+511d). Note that if the user
wants to perform a quick polarity check of the result, it is sufficient to read the MSB of the result
(ADC9 in ADCH). If the bit is one, the result is negative, and if this bit is zero, the result is positive.
Figure 26-14 shows the decoding of the differential input range.
Table 82 shows the resulting output codes if the differential input channel pair (ADCn - ADCm) is
selected with a reference voltage of VREF.
ADC
VIN ⋅ 1024
VREF
= --------------------------
ADC
VPOS VNEG ( ) – ⋅ ⋅ GAIN 512
VREF
= ------------------------------------------------------------------------320
7593L–AVR–09/12
AT90USB64/128
Figure 26-14. Differential measurement range.
0
Output code
0x1FF
0x000
VREF Differential input
voltage (volts)
0x3FF
0x200
- VREF321
7593L–AVR–09/12
AT90USB64/128
Example 1:
– ADMUX = 0xED (ADC3 - ADC2, 10× gain, 2.56V reference, left adjusted result)
– Voltage on ADC3 is 300mV, voltage on ADC2 is 500mV.
– ADCR = 512 × 10 × (300 - 500) / 2560 = -400 = 0x270
– ADCL will thus read 0x00, and ADCH will read 0x9C.
Writing zero to ADLAR right adjusts the result: ADCL = 0x70, ADCH = 0x02.
Example 2:
– ADMUX = 0xFB (ADC3 - ADC2, 1× gain, 2.56V reference, left adjusted result)
– Voltage on ADC3 is 300mV, voltage on ADC2 is 500mV.
– ADCR = 512 × 1 × (300 - 500) / 2560 = -41 = 0x029.
– ADCL will thus read 0x40, and ADCH will read 0x0A.
Writing zero to ADLAR right adjusts the result: ADCL = 0x00, ADCH = 0x29.
26.9 ADC register description
26.9.1 ADMUX – ADC Multiplexer Selection Register
• Bit 7:6 – REFS1:0: Reference Selection bits
These bits select the voltage reference for the ADC, as shown in Table 26-3 on page 322. If
these bits are changed during a conversion, the change will not go in effect until this conversion
Table 26-2. Correlation between input voltage and output codes.
VADCn Read code Corresponding decimal value
VADCm + VREF /GAIN 0x1FF 511
VADCm + 0.999 VREF /GAIN 0x1FF 511
VADCm + 0.998 VREF /GAIN 0x1FE 510
... ... ...
VADCm + 0.001 VREF /GAIN 0x001 1
VADCm 0x000 0
VADCm - 0.001 VREF /GAIN 0x3FF -1
... ... ...
VADCm - 0.999 VREF /GAIN 0x201 -511
VADCm - VREF /GAIN 0x200 -512
Bit 7 6 5 4 3 2 1 0
REFS1 REFS0 ADLAR MUX4 MUX3 MUX2 MUX1 MUX0 ADMUX
Read/write R/W R/W R/W R/W R/W R/W R/W R/W
Initial value 0 0 0 0 0 0 0 0322
7593L–AVR–09/12
AT90USB64/128
is complete (ADIF in ADCSRA is set). The internal voltage reference options may not be used if
an external reference voltage is being applied to the AREF pin.
• Bit 5 – ADLAR: ADC Left Adjust Result
The ADLAR bit affects the presentation of the ADC conversion result in the ADC Data Register.
Write one to ADLAR to left adjust the result. Otherwise, the result is right adjusted. Changing the
ADLAR bit will affect the ADC Data Register immediately, regardless of any ongoing conversions.
For a complete description of this bit, see “ADCL and ADCH – The ADC data register” on
page 324.
• Bits 4:0 – MUX4:0: Analog Channel Selection bits
The value of these bits selects which combination of analog inputs are connected to the ADC.
These bits also select the gain for the differential channels. See Table 26-4 for details. If these
bits are changed during a conversion, the change will not go in effect until this conversion is
complete (ADIF in ADCSRA is set).
Table 26-3. Voltage reference selections for ADC.
REFS1 REFS0 Voltage reference selection
0 0 AREF, internal VREF turned off
0 1 AVCC with external capacitor on AREF pin
1 0 Reserved
1 1 Internal 2.56V Voltage Reference with external capacitor on AREF pin
Table 26-4. Input channel and gain selections.
MUX4..0 Single ended input Positive differential input Negative differential input Gain
00000 ADC0
N/A
00001 ADC1
00010 ADC2
00011 ADC3
00100 ADC4
00101 ADC5
00110 ADC6
00111 ADC7323
7593L–AVR–09/12
AT90USB64/128
26.9.2 ADCSRA – ADC Control and Status Register A
• Bit 7 – ADEN: ADC Enable
Writing this bit to one enables the ADC. By writing it to zero, the ADC is turned off. Turning the
ADC off while a conversion is in progress, will terminate this conversion.
• Bit 6 – ADSC: ADC Start Conversion
In Single Conversion mode, write this bit to one to start each conversion. In Free Running mode,
write this bit to one to start the first conversion. The first conversion after ADSC has been written
after the ADC has been enabled, or if ADSC is written at the same time as the ADC is enabled,
01000
N/A
(ADC0 / ADC0 / 10x)
01001 ADC1 ADC0 10×
01010 (ADC0 / ADC0 / 200x)
01011 ADC1 ADC0 200×
01100 (Reserved - ADC2 / ADC2 / 10x)
01101 ADC3 ADC2 10×
01110 (ADC2 / ADC2 / 200x)
01111 ADC3 ADC2 200×
10000 ADC0 ADC1 1×
10001 (ADC1 / ADC1 / 1x)
10010 ADC2 ADC1 1×
10011 ADC3 ADC1 1×
10100 ADC4 ADC1 1×
10101 ADC5 ADC1 1×
10110 ADC6 ADC1 1×
10111 ADC7 ADC1 1×
11000 ADC0 ADC2 1×
11001 ADC1 ADC2 1×
11010 (ADC2 / ADC2 / 1x)
11011 ADC3 ADC2 1×
11100 ADC4 ADC2 1×
11101 ADC5 ADC2 1×
11110 1.1V (VBand Gap) N/A
11111 0V (GND)
Table 26-4. Input channel and gain selections. (Continued)
MUX4..0 Single ended input Positive differential input Negative differential input Gain
Bit 7 6 5 4 3 2 1 0
ADEN ADSC ADATE ADIF ADIE ADPS2 ADPS1 ADPS0 ADCSRA
Read/write R/W R/W R/W R/W R/W R/W R/W R/W
Initial value 0 0 0 0 0 0 0 0324
7593L–AVR–09/12
AT90USB64/128
will take 25 ADC clock cycles instead of the normal 13. This first conversion performs initialization
of the ADC.
ADSC will read as one as long as a conversion is in progress. When the conversion is complete,
it returns to zero. Writing zero to this bit has no effect.
• Bit 5 – ADATE: ADC Auto Trigger Enable
When this bit is written to one, Auto Triggering of the ADC is enabled. The ADC will start a conversion
on a positive edge of the selected trigger signal. The trigger source is selected by setting
the ADC Trigger Select bits, ADTS in ADCSRB.
• Bit 4 – ADIF: ADC Interrupt Flag
This bit is set when an ADC conversion completes and the Data Registers are updated. The
ADC Conversion Complete Interrupt is executed if the ADIE bit and the I-bit in SREG are set.
ADIF is cleared by hardware when executing the corresponding interrupt handling vector. Alternatively,
ADIF is cleared by writing a logical one to the flag. Beware that if doing a Read-ModifyWrite
on ADCSRA, a pending interrupt can be disabled. This also applies if the SBI and CBI
instructions are used.
• Bit 3 – ADIE: ADC Interrupt Enable
When this bit is written to one and the I-bit in SREG is set, the ADC Conversion Complete Interrupt
is activated.
• Bits 2:0 – ADPS2:0: ADC Prescaler Select Bits
These bits determine the division factor between the XTAL frequency and the input clock to the
ADC.
26.9.3 ADCL and ADCH – The ADC data register
26.9.3.1 ADLAR = 0
Table 26-5. ADC prescaler selections.
ADPS2 ADPS1 ADPS0 Division factor
000 2
001 2
010 4
011 8
1 0 0 16
1 0 1 32
1 1 0 64
1 1 1 128
Bit 15 14 13 12 11 10 9 8
– – – – – – ADC9 ADC8 ADCH
ADC7 ADC6 ADC5 ADC4 ADC3 ADC2 ADC1 ADC0 ADCL
Bit 7 6 5 4 3 2 1 0
Read/write R R R R R R R R
RRRRRRRR
Initial value 0 0 0 0 0 0 0 0
00000000325
7593L–AVR–09/12
AT90USB64/128
26.9.3.2 ADLAR = 1
When an ADC conversion is complete, the result is found in these two registers. If differential
channels are used, the result is presented in two’s complement form.
When ADCL is read, the ADC Data Register is not updated until ADCH is read. Consequently, if
the result is left adjusted and no more than 8-bit precision (7 bit + sign bit for differential input
channels) is required, it is sufficient to read ADCH. Otherwise, ADCL must be read first, then
ADCH.
The ADLAR bit in ADMUX, and the MUXn bits in ADMUX affect the way the result is read from
the registers. If ADLAR is set, the result is left adjusted. If ADLAR is cleared (default), the result
is right adjusted.
• ADC9:0: ADC Conversion Result
These bits represent the result from the conversion, as detailed in “ADC conversion result” on
page 318.
26.9.4 ADCSRB – ADC Control and Status Register B
• Bit 7 – ADHSM: ADC High Speed Mode
Writing this bit to one enables the ADC High Speed mode. This mode enables higher conversion
rate at the expense of higher power consumption.
• Bit 2:0 – ADTS2:0: ADC Auto Trigger Source
If ADATE in ADCSRA is written to one, the value of these bits selects which source will trigger
an ADC conversion. If ADATE is cleared, the ADTS2:0 settings will have no effect. A conversion
will be triggered by the rising edge of the selected interrupt flag. Note that switching from a trigger
source that is cleared to a trigger source that is set, will generate a positive edge on the
trigger signal. If ADEN in ADCSRA is set, this will start a conversion. Switching to Free Running
mode (ADTS[2:0]=0) will not cause a trigger event, even if the ADC Interrupt Flag is set.
Bit 15 14 13 12 11 10 9 8
ADC9 ADC8 ADC7 ADC6 ADC5 ADC4 ADC3 ADC2 ADCH
ADC1 ADC0 – ––––– ADCL
Bit 7 6 5 4 3 2 1 0
Read/write R R R R R R R R
RRRRRRRR
Initial value 0 0 0 0 0 0 0 0
00000000
Bit 7 6 5 4 3 2 1 0
ADHSM ACME – – – ADTS2 ADTS1 ADTS0 ADCSRB
Read/write R/W R/W R R R R/W R/W R/W
Initial value 0 0 0 0 0 0 0 0
Table 26-6. ADC auto trigger source selections.
ADTS2 ADTS1 ADTS0 Trigger source
0 0 0 Free running mode
0 0 1 Analog comparator
0 1 0 External interrupt request 0
0 1 1 Timer/Counter0 compare match326
7593L–AVR–09/12
AT90USB64/128
26.9.5 DIDR0 – Digital Input Disable Register 0
• Bit 7:0 – ADC7D..ADC0D: ADC7:0 Digital Input Disable
When this bit is written logic one, the digital input buffer on the corresponding ADC pin is disabled.
The corresponding PIN Register bit will always read as zero when this bit is set. When an
analog signal is applied to the ADC7..0 pin and the digital input from this pin is not needed, this
bit should be written logic one to reduce power consumption in the digital input buffer.
1 0 0 Timer/Counter0 overflow
1 0 1 Timer/Counter1 compare match B
1 1 0 Timer/Counter1 overflow
1 1 1 Timer/Counter1 capture event
Table 26-6. ADC auto trigger source selections. (Continued)
ADTS2 ADTS1 ADTS0 Trigger source
Bit 7 6 5 4 3 2 1 0
ADC7D ADC6D ADC5D ADC4D ADC3D ADC2D ADC1D ADC0D DIDR0
Read/write R/W R/W R/W R/W R/W R/W R/W R/W
Initial value 0 0 0 0 0 0 0 0327
7593L–AVR–09/12
AT90USB64/128
27. JTAG interface and on-chip debug system
27.0.1 Features
• JTAG (IEEE std. 1149.1 compliant) interface
• Boundary-scan capabilities according to the IEEE std. 1149.1 (JTAG) standard
• Debugger access to:
– All internal peripheral units
– Internal and external RAM
– The internal register file
– Program counter
– EEPROM and flash memories
• Extensive on-chip debug support for break conditions, including
– AVR break instruction
– Break on change of program memory flow
– Single step break
– Program memory break points on single address or address range
– Data memory break points on single address or address range
• Programming of flash, EEPROM, fuses, and lock bits through the JTAG interface
• On-chip debugging supported by Atmel AVR Studio®
27.1 Overview
The AVR IEEE std. 1149.1 compliant JTAG interface can be used for
• Testing PCBs by using the JTAG Boundary-scan capability
• Programming the non-volatile memories, Fuses and Lock bits
• On-chip debugging
A brief description is given in the following sections. Detailed descriptions for Programming via
the JTAG interface, and using the Boundary-scan Chain can be found in the sections “Programming
via the JTAG interface” on page 377 and “IEEE 1149.1 (JTAG) boundary-scan” on page
333, respectively. The On-chip Debug support is considered being private JTAG instructions,
and distributed within Atmel and to selected third party vendors only.
Figure 27-1 on page 328 shows a block diagram of the JTAG interface and the On-chip Debug
system. The TAP Controller is a state machine controlled by the TCK and TMS signals. The TAP
Controller selects either the JTAG Instruction Register or one of several Data Registers as the
scan chain (Shift Register) between the TDI – input and TDO – output. The Instruction Register
holds JTAG instructions controlling the behavior of a Data Register.
The ID-Register, Bypass Register, and the Boundary-scan Chain are the Data Registers used
for board-level testing. The JTAG Programming Interface (actually consisting of several physical
and virtual Data Registers) is used for serial programming via the JTAG interface. The Internal
Scan Chain and Break Point Scan Chain are used for On-chip debugging only.
27.2 TAP – Test Access Port
The JTAG interface is accessed through four of the AVR’s pins. In JTAG terminology, these pins
constitute the Test Access Port – TAP. These pins are:
• TMS: Test mode select. This pin is used for navigating through the TAP-controller state
machine
• TCK: Test Clock. JTAG operation is synchronous to TCK328
7593L–AVR–09/12
AT90USB64/128
• TDI: Test Data In. Serial input data to be shifted in to the Instruction Register or Data Register
(Scan Chains)
• TDO: Test Data Out. Serial output data from Instruction Register or Data Register
The IEEE std. 1149.1 also specifies an optional TAP signal; TRST – Test ReSeT – which is not
provided.
When the JTAGEN Fuse is unprogrammed, these four TAP pins are normal port pins, and the
TAP controller is in reset. When programmed, the input TAP signals are internally pulled high
and the JTAG is enabled for Boundary-scan and programming. The device is shipped with this
fuse programmed.
For the On-chip Debug system, in addition to the JTAG interface pins, the RESET pin is monitored
by the debugger to be able to detect external reset sources. The debugger can also pull
the RESET pin low to reset the whole system, assuming only open collectors on the reset line
are used in the application.
Figure 27-1. Block diagram.
TAP
CONTROLLER
TDI
TDO
TCK
TMS
FLASH
MEMORY
AVR CPU
DIGITAL
PERIPHERAL
UNITS
JTAG / AVR CORE
COMMUNICATION
INTERFACE
BREAKPOINT
UNIT FLOW CONTROL
UNIT
OCD STATUS
AND CONTROL
INTERNAL
SCAN
CHAIN
M
U
X
INSTRUCTION
REGISTER
ID
REGISTER
BYPASS
REGISTER
JTAG PROGRAMMING
INTERFACE
PC
Instruction
Address
Data
BREAKPOINT
SCAN CHAIN
ADDRESS
DECODER
ANALOG
PERIPHERIAL
UNITS
I/O PORT 0
I/O PORT n
BOUNDARY SCAN CHAIN
Analog inputs
Control & clock lines
DEVICE BOUNDARY329
7593L–AVR–09/12
AT90USB64/128
Figure 27-2. TAP controller state diagram.
27.3 TAP Controller
The TAP Controller is a 16-state finite state machine that controls the operation of the Boundaryscan
circuitry, JTAG programming circuitry, or On-chip Debug system. The state transitions
depicted in Figure 27-2 depend on the signal present on TMS (shown adjacent to each state
transition) at the time of the rising edge at TCK. The initial state after a Power-on Reset is TestLogic-Reset.
As a definition in this document, the LSB is shifted in and out first for all Shift Registers.
Assuming Run-Test/Idle is the present state, a typical scenario for using the JTAG interface is:
• At the TMS input, apply the sequence 1, 1, 0, 0 at the rising edges of TCK to enter the Shift
Instruction Register – Shift-IR state. While in this state, shift the four bits of the JTAG
instructions into the JTAG Instruction Register from the TDI input at the rising edge of TCK.
The TMS input must be held low during input of the three LSBs in order to remain in the ShiftIR
state. The MSB of the instruction is shifted in when this state is left by setting TMS high.
While the instruction is shifted in from the TDI pin, the captured IR-state 0x01 is shifted out on
the TDO pin. The JTAG Instruction selects a particular Data Register as path between TDI
and TDO and controls the circuitry surrounding the selected Data Register
Test-logic-reset
Run-test/idle
Shift-DR
Exit1-DR
Pause-DR
Exit2-DR
Update-DR
Select-IR scan
Capture-IR
Shift-IR
Exit1-IR
Pause-IR
Exit2-IR
Update-IR
Select-DR scan
Capture-DR
0
1
0 11 1
0 0
0 0
1 1
1 0
1
1
0
1
0
0
1 0
1
1
0
1
0
0
0 0
1 1330
7593L–AVR–09/12
AT90USB64/128
• Apply the TMS sequence 1, 1, 0 to re-enter the Run-Test/Idle state. The instruction is latched
onto the parallel output from the Shift Register path in the Update-IR state. The Exit-IR,
Pause-IR, and Exit2-IR states are only used for navigating the state machine
• At the TMS input, apply the sequence 1, 0, 0 at the rising edges of TCK to enter the Shift
Data Register – Shift-DR state. While in this state, upload the selected Data Register
(selected by the present JTAG instruction in the JTAG Instruction Register) from the TDI input
at the rising edge of TCK. In order to remain in the Shift-DR state, the TMS input must be
held low during input of all bits except the MSB. The MSB of the data is shifted in when this
state is left by setting TMS high. While the Data Register is shifted in from the TDI pin, the
parallel inputs to the Data Register captured in the Capture-DR state is shifted out on the
TDO pin
• Apply the TMS sequence 1, 1, 0 to re-enter the Run-Test/Idle state. If the selected Data
Register has a latched parallel-output, the latching takes place in the Update-DR state. The
Exit-DR, Pause-DR, and Exit2-DR states are only used for navigating the state machine
As shown in the state diagram, the Run-Test/Idle state need not be entered between selecting
JTAG instruction and using Data Registers, and some JTAG instructions may select certain
functions to be performed in the Run-Test/Idle, making it unsuitable as an Idle state.
Note: Independent of the initial state of the TAP Controller, the Test-Logic-Reset state can always be
entered by holding TMS high for five TCK clock periods.
For detailed information on the JTAG specification, refer to the literature listed in “Bibliography”
on page 332.
27.4 Using the Boundary-scan chain
A complete description of the Boundary-scan capabilities are given in the section “IEEE 1149.1
(JTAG) boundary-scan” on page 333.
27.5 Using the on-chip debug system
As shown in Figure 27-1 on page 328, the hardware support for on-chip debugging consists
mainly of
• A scan chain on the interface between the internal AVR CPU and the internal peripheral units
• Break Point unit
• Communication interface between the CPU and JTAG system
All read or modify/write operations needed for implementing the Debugger are done by applying
AVR instructions via the internal AVR CPU Scan Chain. The CPU sends the result to an I/O
memory mapped location which is part of the communication interface between the CPU and the
JTAG system.
The Break Point Unit implements Break on Change of Program Flow, Single Step Break, two
Program Memory Break Points, and two combined Break Points. Together, the four Break
Points can be configured as either:
• Four single program memory break points
• Three single program memory break point + one single data memory break point
• Two single program memory break points + two single data memory break points
• Two single program memory break points + one program memory break point with mask
(“range Break Point”)331
7593L–AVR–09/12
AT90USB64/128
• Two single program memory break points + one data memory break point with mask (“range
Break Point”)
A debugger, like the Atmel AVR Studio, may however use one or more of these resources for its
internal purpose, leaving less flexibility to the end-user.
A list of the On-chip Debug specific JTAG instructions is given in “On-chip debug specific JTAG
instructions” on page 331.
The JTAGEN Fuse must be programmed to enable the JTAG Test Access Port. In addition, the
OCDEN Fuse must be programmed and no Lock bits must be set for the On-chip debug system
to work. As a security feature, the On-chip debug system is disabled when either of the LB1 or
LB2 Lock bits are set. Otherwise, the On-chip debug system would have provided a back-door
into a secured device.
The AVR Studio enables the user to fully control execution of programs on an AVR device with
On-chip Debug capability, AVR In-Circuit Emulator, or the built-in AVR Instruction Set Simulator.
AVR Studio supports source level execution of Assembly programs assembled with Atmel Corporation’s
AVR Assembler and C programs compiled with third party vendors’ compilers.
AVR Studio runs under Microsoft® Windows® 95/98/2000 and Microsoft Windows NT.
For a full description of the Atmel AVR Studio, please refer to the AVR Studio User Guide. Only
highlights are presented in this document.
All necessary execution commands are available in AVR Studio, both on source level and on
disassembly level. The user can execute the program, single step through the code either by
tracing into or stepping over functions, step out of functions, place the cursor on a statement and
execute until the statement is reached, stop the execution, and reset the execution target. In
addition, the user can have an unlimited number of code Break Points (using the BREAK
instruction) and up to two data memory Break Points, alternatively combined as a mask (range)
Break Point.
27.6 On-chip debug specific JTAG instructions
The On-chip debug support is considered being private JTAG instructions, and distributed within
ATMEL and to selected third party vendors only. Instruction opcodes are listed for reference.
27.6.1 PRIVATE0; 0x8
Private JTAG instruction for accessing On-chip debug system.
27.6.2 PRIVATE1; 0x9
Private JTAG instruction for accessing On-chip debug system.
27.6.3 PRIVATE2; 0xA
Private JTAG instruction for accessing On-chip debug system.
27.6.4 PRIVATE3; 0xB
Private JTAG instruction for accessing On-chip debug system.332
7593L–AVR–09/12
AT90USB64/128
27.7 On-chip Debug related Register in I/O memory
27.7.1 OCDR – On-chip Debug Register
The OCDR Register provides a communication channel from the running program in the microcontroller
to the debugger. The CPU can transfer a byte to the debugger by writing to this
location. At the same time, an internal flag; I/O Debug Register Dirty – IDRD – is set to indicate
to the debugger that the register has been written. When the CPU reads the OCDR Register the
seven LSB will be from the OCDR Register, while the MSB is the IDRD bit. The debugger clears
the IDRD bit when it has read the information.
In some AVR devices, this register is shared with a standard I/O location. In this case, the OCDR
Register can only be accessed if the OCDEN Fuse is programmed, and the debugger enables
access to the OCDR Register. In all other cases, the standard I/O location is accessed.
Refer to the debugger documentation for further information on how to use this register.
27.8 Using the JTAG programming capabilities
Programming of AVR parts via JTAG is performed via the 4-pin JTAG port, TCK, TMS, TDI, and
TDO. These are the only pins that need to be controlled/observed to perform JTAG programming
(in addition to power pins). It is not required to apply 12V externally. The JTAGEN Fuse
must be programmed and the JTD bit in the MCUCR Register must be cleared to enable the
JTAG Test Access Port.
The JTAG programming capability supports:
• Flash programming and verifying
• EEPROM programming and verifying
• Fuse programming and verifying
• Lock bit programming and verifying
The Lock bit security is exactly as in parallel programming mode. If the Lock bits LB1 or LB2 are
programmed, the OCDEN Fuse cannot be programmed unless first doing a chip erase. This is a
security feature that ensures no back-door exists for reading out the content of a secured
device.
The details on programming through the JTAG interface and programming specific JTAG
instructions are given in the section “Programming via the JTAG interface” on page 377.
27.9 Bibliography
For more information about general Boundary-scan, the following literature can be consulted:
• IEEE: IEEE Std. 1149.1-1990. IEEE Standard Test Access Port and Boundary-scan
Architecture, IEEE, 1993.
• Colin Maunder: The Board Designers Guide to Testable Logic Circuits, Addison-Wesley,
1992.
Bit 7 6 5 4 3 2 1 0
MSB/IDRD LSB OCDR
Read/write R/W R/W R/W R/W R/W R/W R/W R/W
Initial value 0 0 0 0 0 0 0 0333
7593L–AVR–09/12
AT90USB64/128
28. IEEE 1149.1 (JTAG) boundary-scan
28.1 Features
• JTAG (IEEE std. 1149.1 compliant) interface
• Boundary-scan capabilities according to the JTAG standard
• Full scan of all port functions as well as analog circuitry having off-chip connections
• Supports the optional IDCODE instruction
• Additional public AVR_RESET instruction to reset the AVR
28.2 System overview
The Boundary-scan chain has the capability of driving and observing the logic levels on the digital
I/O pins, as well as the boundary between digital and analog logic for analog circuitry having
off-chip connections. At system level, all ICs having JTAG capabilities are connected serially by
the TDI/TDO signals to form a long Shift Register. An external controller sets up the devices to
drive values at their output pins, and observe the input values received from other devices. The
controller compares the received data with the expected result. In this way, Boundary-scan provides
a mechanism for testing interconnections and integrity of components on Printed Circuits
Boards by using the four TAP signals only.
The four IEEE 1149.1 defined mandatory JTAG instructions IDCODE, BYPASS, SAMPLE/PRELOAD,
and EXTEST, as well as the AVR specific public JTAG instruction AVR_RESET can be
used for testing the Printed Circuit Board. Initial scanning of the Data Register path will show the
ID-Code of the device, since IDCODE is the default JTAG instruction. It may be desirable to
have the AVR device in reset during test mode. If not reset, inputs to the device may be determined
by the scan operations, and the internal software may be in an undetermined state when
exiting the test mode. Entering reset, the outputs of any port pin will instantly enter the high
impedance state, making the HIGHZ instruction redundant. If needed, the BYPASS instruction
can be issued to make the shortest possible scan chain through the device. The device can be
set in the reset state either by pulling the external RESET pin low, or issuing the AVR_RESET
instruction with appropriate setting of the Reset Data Register.
The EXTEST instruction is used for sampling external pins and loading output pins with data.
The data from the output latch will be driven out on the pins as soon as the EXTEST instruction
is loaded into the JTAG IR-Register. Therefore, the SAMPLE/PRELOAD should also be used for
setting initial values to the scan ring, to avoid damaging the board when issuing the EXTEST
instruction for the first time. SAMPLE/PRELOAD can also be used for taking a snapshot of the
external pins during normal operation of the part.
The JTAGEN Fuse must be programmed and the JTD bit in the I/O Register MCUCR must be
cleared to enable the JTAG Test Access Port.
When using the JTAG interface for Boundary-scan, using a JTAG TCK clock frequency higher
than the internal chip frequency is possible. The chip clock is not required to run.
28.3 Data registers
The Data Registers relevant for Boundary-scan operations are:
• Bypass Register
• Device Identification Register
• Reset Register
• Boundary-scan Chain334
7593L–AVR–09/12
AT90USB64/128
28.3.1 Bypass register
The Bypass register consists of a single Shift register stage. When the Bypass register is
selected as path between TDI and TDO, the register is reset to 0 when leaving the Capture-DR
controller state. The Bypass register can be used to shorten the scan chain on a system when
the other devices are to be tested.
28.3.2 Device Identification register
Figure 28-1 shows the structure of the Device Identification register.
Figure 28-1. The Format of the Device Identification register.
28.3.2.1 Version
Version is a 4-bit number identifying the revision of the component. The JTAG version number
follows the revision of the device. Revision A is 0x0, revision B is 0x1 and so on.
28.3.2.2 Part number
The part number is a 16-bit code identifying the component. The JTAG Part Number for Atmel
AT90USB64/128 is listed in Table 28-1.
28.3.2.3 Manufacturer ID
The Manufacturer ID is a 11-bit code identifying the manufacturer. The JTAG manufacturer ID
for ATMEL is listed in Table 28-2.
28.3.3 Reset register
The Reset Register is a test Data Register used to reset the part. Since the AVR tri-states Port
Pins when reset, the Reset Register can also replace the function of the un-implemented
optional JTAG instruction HIGHZ.
A high value in the Reset Register corresponds to pulling the external Reset low. The part is
reset as long as there is a high value present in the Reset Register. Depending on the fuse settings
for the clock options, the part will remain reset for a reset time-out period (refer to “Clock
sources” on page 41) after releasing the Reset Register. The output from this Data Register is
not latched, so the reset will take place immediately, as shown in Figure 28-2 on page 335.
MSB LSB
Bit 31 28 27 12 11 1 0
Device ID Version Part number Manufacturer ID 1
4 bits 16 bits 11 bits 1-bit
Table 28-1. AVR JTAG part number.
Part number JTAG part number (hex)
AVR USB 0x9782
Table 28-2. Manufacturer ID.
Manufacturer JTAG manufacturer ID (hex)
ATMEL 0x01F335
7593L–AVR–09/12
AT90USB64/128
Figure 28-2. Reset register.
28.3.4 Boundary-scan Chain
The Boundary-scan Chain has the capability of driving and observing the logic levels on the digital
I/O pins, as well as the boundary between digital and analog logic for analog circuitry having
off-chip connections.
See “Boundary-scan chain” on page 337 for a complete description.
28.4 Boundary-scan specific JTAG instructions
The Instruction Register is 4-bit wide, supporting up to 16 instructions. Listed below are the
JTAG instructions useful for Boundary-scan operation. Note that the optional HIGHZ instruction
is not implemented, but all outputs with tri-state capability can be set in high-impedant state by
using the AVR_RESET instruction, since the initial state for all port pins is tri-state.
As a definition in this datasheet, the LSB is shifted in and out first for all Shift Registers.
The OPCODE for each instruction is shown behind the instruction name in hex format. The text
describes which Data Register is selected as path between TDI and TDO for each instruction.
28.4.1 EXTEST; 0x0
Mandatory JTAG instruction for selecting the Boundary-scan Chain as Data Register for testing
circuitry external to the AVR package. For port-pins, Pull-up Disable, Output Control, Output
Data, and Input Data are all accessible in the scan chain. For Analog circuits having off-chip
connections, the interface between the analog and the digital logic is in the scan chain. The contents
of the latched outputs of the Boundary-scan chain is driven out as soon as the JTAG IRRegister
is loaded with the EXTEST instruction.
The active states are:
• Capture-DR: Data on the external pins are sampled into the Boundary-scan Chain
• Shift-DR: The Internal Scan Chain is shifted by the TCK input
• Update-DR: Data from the scan chain is applied to output pins
28.4.2 IDCODE; 0x1
Optional JTAG instruction selecting the 32-bit ID-Register as Data Register. The ID-Register
consists of a version number, a device number and the manufacturer code chosen by JEDEC.
This is the default instruction after power-up.
D Q From
TDI
ClockDR · AVR_RESET
To
TDO
From other internal and
external reset sources
Internal reset336
7593L–AVR–09/12
AT90USB64/128
The active states are:
• Capture-DR: Data in the IDCODE Register is sampled into the Boundary-scan Chain
• Shift-DR: The IDCODE scan chain is shifted by the TCK input
28.4.3 SAMPLE_PRELOAD; 0x2
Mandatory JTAG instruction for pre-loading the output latches and taking a snap-shot of the
input/output pins without affecting the system operation. However, the output latches are not
connected to the pins. The Boundary-scan Chain is selected as Data Register.
The active states are:
• Capture-DR: Data on the external pins are sampled into the Boundary-scan Chain
• Shift-DR: The Boundary-scan Chain is shifted by the TCK input
• Update-DR: Data from the Boundary-scan chain is applied to the output latches. However,
the output latches are not connected to the pins
28.4.4 AVR_RESET; 0xC
The AVR specific public JTAG instruction for forcing the AVR device into the Reset mode or
releasing the JTAG reset source. The TAP controller is not reset by this instruction. The one bit
Reset Register is selected as Data Register. Note that the reset will be active as long as there is
a logic “one” in the Reset Chain. The output from this chain is not latched.
The active states are:
• Shift-DR: The Reset Register is shifted by the TCK input
28.4.5 BYPASS; 0xF
Mandatory JTAG instruction selecting the Bypass Register for Data Register.
The active states are:
• Capture-DR: Loads a logic “0” into the Bypass Register
• Shift-DR: The Bypass Register cell between TDI and TDO is shifted
28.5 Boundary-scan Related Register in I/O memory
28.5.1 MCUCR – MCU Control Register
The MCU Control Register contains control bits for general MCU functions.
• Bits 7 – JTD: JTAG Interface Disable
When this bit is zero, the JTAG interface is enabled if the JTAGEN Fuse is programmed. If this
bit is one, the JTAG interface is disabled. In order to avoid unintentional disabling or enabling of
the JTAG interface, a timed sequence must be followed when changing this bit: The application
software must write this bit to the desired value twice within four cycles to change its value. Note
that this bit must not be altered when using the On-chip Debug system.
Bit 7 6 5 4 3 2 1 0
JTD – – PUD – – IVSEL IVCE MCUCR
Read/write R/W R R R/W R R R/W R/W
Initial value 0 0 0 0 0 0 0 0337
7593L–AVR–09/12
AT90USB64/128
28.5.2 MCUSR – MCU Status Register
The MCU Status Register provides information on which reset source caused an MCU reset.
• Bit 4 – JTRF: JTAG Reset Flag
This bit is set if a reset is being caused by a logic one in the JTAG Reset Register selected by
the JTAG instruction AVR_RESET. This bit is reset by a Power-on Reset, or by writing a logic
zero to the flag.
28.6 Boundary-scan chain
The Boundary-scan chain has the capability of driving and observing the logic levels on the digital
I/O pins, as well as the boundary between digital and analog logic for analog circuitry having
off-chip connection.
28.6.1 Scanning the digital port pins
Figure 28-3 on page 338 shows the Boundary-scan Cell for a bi-directional port pin. The pull-up
function is disabled during Boundary-scan when the JTAG IC contains EXTEST or
SAMPLE_PRELOAD. The cell consists of a bi-directional pin cell that combines the three signals
Output Control - OCxn, Output Data - ODxn, and Input Data - IDxn, into only a two-stage
Shift Register. The port and pin indexes are not used in the following description
The Boundary-scan logic is not included in the figures in the datasheet. Figure 28-4 on page 339
shows a simple digital port pin as described in the section “I/O-ports” on page 71. The Boundaryscan
details from Figure 28-3 on page 338 replaces the dashed box in Figure 28-4 on page 339.
When no alternate port function is present, the Input Data - ID - corresponds to the PINxn Register
value (but ID has no synchronizer), Output Data corresponds to the PORT Register, Output
Control corresponds to the Data Direction - DD Register, and the Pull-up Enable - PUExn - corresponds
to logic expression PUD · DDxn · PORTxn.
Digital alternate port functions are connected outside the dotted box in Figure 28-4 on page 339
to make the scan chain read the actual pin value. For analog function, there is a direct connection
from the external pin to the analog circuit. There is no scan chain on the interface between
the digital and the analog circuitry, but some digital control signal to analog circuitry are turned
off to avoid driving contention on the pads.
When JTAG IR contains EXTEST or SAMPLE_PRELOAD the clock is not sent out on the port
pins even if the CKOUT fuse is programmed. Even though the clock is output when the JTAG IR
contains SAMPLE_PRELOAD, the clock is not sampled by the boundary scan.
Bit 7 6 5 4 3 2 1 0
– – – JTRF WDRF BORF EXTRF PORF MCUSR
Read/write R R R R/W R/W R/W R/W R/W
Initial value 0 0 0 See bit description338
7593L–AVR–09/12
AT90USB64/128
Figure 28-3. Boundary-scan cell for bi-directional port pin with pull-up function.
D Q D Q
G
0
1 0
1
D Q D Q
G
0
1 0
1
0
1
Port Pin (PXn)
ShiftDR To next cell EXTEST Vcc
Output control (OC)
Output data (OD)
Input data (ID)
From last cell ClockDR UpdateDR
FF1 LD1
FF0 LD0
0
1
Pull-up enable (PUE)339
7593L–AVR–09/12
AT90USB64/128
Figure 28-4. General port pin schematic diagram.
28.6.2 Scanning the RESET pin
The RESET pin accepts 5V active low logic for standard reset operation, and 12V active high
logic for High Voltage Parallel programming. An observe-only cell as shown in Figure 28-5 is
inserted for the 5V reset signal.
Figure 28-5. Observe-only cell.
CLK
RPx
RRx
WRx
RDx
WDx
PUD
SYNCHRONIZER
WDx: WRITE DDRx
WRx: WRITE PORTx
RRx: READ PORTx REGISTER
RPx: READ PORTx PIN
PUD: PULLUP DISABLE
CLK : I/O CLOCK
RDx: READ DDRx
D
L
Q
Q
RESET
RESET
Q
D Q
Q
Q D
CLR
PORTxn
Q
Q D
CLR
DDxn
PINxn
DATA BUS
SLEEP
SLEEP: SLEEP CONTROL
Pxn
I/O
I/O
See Boundary-scan
description for details!
PUExn
OCxn
ODxn
IDxn
PUExn: PULLUP ENABLE for pin Pxn
OCxn: OUTPUT CONTROL for pin Pxn
ODxn: OUTPUT DATA to pin Pxn
IDxn: INPUT DATA from pin Pxn
0
1
D Q
From
previous
cell
ClockDR
ShiftDR
To
next
cell
From system pin To system logic
FF1340
7593L–AVR–09/12
AT90USB64/128
28.7 Atmel AT90USB64/128 Boundary-scan order
Table 28-3 shows the Scan order between TDI and TDO when the Boundary-scan chain is
selected as data path. Bit 0 is the LSB; the first bit scanned in, and the first bit scanned out. The
scan order follows the pin-out order as far as possible. Therefore, the bits of Port A and Port Fis
scanned in the opposite bit order of the other ports. Exceptions from the rules are the Scan
chains for the analog circuits, which constitute the most significant bits of the scan chain regardless
of which physical pin they are connected to. In Figure 28-3 on page 338, PXn. Data
corresponds to FF0, PXn. Control corresponds to FF1, PXn. Bit 4, 5, 6 and 7 of Port F is not in
the scan chain, since these pins constitute the TAP pins when the JTAG is enabled. The USB
pads are not included in the boundary-scan.
Table 28-3. AT90USB64/128 Boundary-scan order.
Bit number Signal name Module
88 PE6.Data
Port E
87 PE6.Control
86 PE7.Data
85 PE7.Control
84 PE3.Data
83 PE3.Control
82 PB0.Data
Port B
81 PB0.Control
80 PB1.Data
79 PB1.Control
78 PB2.Data
77 PB2.Control
76 PB3.Data
75 PB3.Control
74 PB4.Data
73 PB4.Control
72 PB5.Data
71 PB5.Control
70 PB6.Data
69 PB6.Control
68 PB7.Data
67 PB7.Control
66 PE4.Data
PORTE
65 PE4.Control
64 PE5.Data
63 PE5.Control
62 RSTT Reset Logic (observe only)341
7593L–AVR–09/12
AT90USB64/128
61 PD0.Data
Port D
60 PD0.Control
59 PD1.Data
58 PD1.Control
57 PD2.Data
56 PD2.Control
55 PD3.Data
54 PD3.Control
53 PD4.Data
52 PD4.Control
51 PD5.Data
50 PD5.Control
49 PD6.Data
48 PD6.Control
47 PD7.Data
46 PD7.Control
45 PE0.Data
Port E
44 PE0.Control
43 PE1.Data
42 PE1.Control
41 PC0.Data
Port C
40 PC0.Control
39 PC1.Data
38 PC1.Control
37 PC2.Data
36 PC2.Control
35 PC3.Data
34 PC3.Control
33 PC4.Data
32 PC4.Control
31 PC5.Data
30 PC5.Control
29 PC6.Data
28 PC6.Control
27 PC7.Data
26 PC7.Control
Table 28-3. AT90USB64/128 Boundary-scan order. (Continued)
Bit number Signal name Module342
7593L–AVR–09/12
AT90USB64/128
28.8 Boundary-scan description language files
Boundary-scan Description Language (BSDL) files describe Boundary-scan capable devices in
a standard format used by automated test-generation software. The order and function of bits in
the Boundary-scan Data Register are included in this description. BSDL files are available for
Atmel AT90USB64/128.
25 PE2.Data
Port E
24 PE2.Control
23 PA7.Data
Port A
22 PA7.Control
21 PA6.Data
20 PA6.Control
19 PA5.Data
18 PA5.Control
17 PA4.Data
16 PA4.Control
15 PA3.Data
14 PA3.Control
13 PA2.Data
12 PA2.Control
11 PA1.Data
10 PA1.Control
9 PA0.Data
8 PA0.Control
7 PF3.Data
Port F
6 PF3.Control
5 PF2.Data
4 PF2.Control
3 PF1.Data
2 PF1.Control
1 PF0.Data
0 PF0.Control
Table 28-3. AT90USB64/128 Boundary-scan order. (Continued)
Bit number Signal name Module343
7593L–AVR–09/12
AT90USB64/128
29. Boot Loader support – read-while-write self-programming
The Boot Loader Support provides a real Read-While-Write Self-Programming mechanism for
downloading and uploading program code by the MCU itself. This feature allows flexible application
software updates controlled by the MCU using a Flash-resident Boot Loader program. The
Boot Loader program can use any available data interface and associated protocol to read code
and write (program) that code into the Flash memory, or read the code from the program memory.
The program code within the Boot Loader section has the capability to write into the entire
Flash, including the Boot Loader memory. The Boot Loader can thus even modify itself, and it
can also erase itself from the code if the feature is not needed anymore. The size of the Boot
Loader memory is configurable with fuses and the Boot Loader has two separate sets of Boot
Lock bits which can be set independently. This gives the user a unique flexibility to select different
levels of protection. General information on SPM and ELPM is provided in See “AVR CPU
core” on page 11.
29.1 Boot Loader features
• Read-while-write self-programming
• Flexible boot memory size
• High security (separate boot lock bits for a flexible protection)
• Separate fuse to select reset vector
• Optimized page (1) size
• Code efficient algorithm
• Efficient read-modify-write support
Note: 1. A page is a section in the Flash consisting of several bytes (see Table 30-11 on page 364)
used during programming. The page organization does not affect normal operation.
29.2 Application and Boot Loader flash sections
The Flash memory is organized in two main sections, the Application section and the Boot
Loader section (see Figure 29-2 on page 346). The size of the different sections is configured by
the BOOTSZ Fuses as shown in Table 29-8 on page 357 and Figure 29-2 on page 346. These
two sections can have different level of protection since they have different sets of Lock bits.
29.2.1 Application section
The Application section is the section of the Flash that is used for storing the application code.
The protection level for the Application section can be selected by the application Boot Lock bits
(Boot Lock bits 0), see Table 29-2 on page 347. The Application section can never store any
Boot Loader code since the SPM instruction is disabled when executed from the Application
section.
29.2.2 BLS – Boot Loader section
While the Application section is used for storing the application code, the The Boot Loader software
must be located in the BLS since the SPM instruction can initiate a programming when
executing from the BLS only. The SPM instruction can access the entire Flash, including the
BLS itself. The protection level for the Boot Loader section can be selected by the Boot Loader
Lock bits (Boot Lock bits 1), see Table 29-3 on page 347.
29.3 Read-while-write and no read-while-write flash sections
Whether the CPU supports Read-While-Write or if the CPU is halted during a Boot Loader software
update is dependent on which address that is being programmed. In addition to the two344
7593L–AVR–09/12
AT90USB64/128
sections that are configurable by the BOOTSZ Fuses as described above, the Flash is also
divided into two fixed sections, the Read-While-Write (RWW) section and the No Read-WhileWrite
(NRWW) section. The limit between the RWW- and NRWW sections is given in Table 29-
1 and Figure 29-1 on page 345. The main difference between the two sections is:
• When erasing or writing a page located inside the RWW section, the NRWW section can be
read during the operation
• When erasing or writing a page located inside the NRWW section, the CPU is halted during
the entire operation
Note that the user software can never read any code that is located inside the RWW section during
a Boot Loader software operation. The syntax “Read-While-Write section” refers to which
section that is being programmed (erased or written), not which section that actually is being
read during a Boot Loader software update.
29.3.1 RWW – Read-While-Write section
If a Boot Loader software update is programming a page inside the RWW section, it is possible
to read code from the Flash, but only code that is located in the NRWW section. During an ongoing
programming, the software must ensure that the RWW section never is being read. If the
user software is trying to read code that is located inside the RWW section (i.e., by load program
memory, call, or jump instructions or an interrupt) during programming, the software might end
up in an unknown state. To avoid this, the interrupts should either be disabled or moved to the
Boot Loader section. The Boot Loader section is always located in the NRWW section. The
RWW Section Busy bit (RWWSB) in the Store Program Memory Control and Status Register
(SPMCSR) will be read as logical one as long as the RWW section is blocked for reading. After
a programming is completed, the RWWSB must be cleared by software before reading code
located in the RWW section. See “SPMCSR – Store Program Memory Control and Status Register”
on page 349. for details on how to clear RWWSB.
29.3.2 NRWW – No Read-While-Write section
The code located in the NRWW section can be read when the Boot Loader software is updating
a page in the RWW section. When the Boot Loader code updates the NRWW section, the CPU
is halted during the entire Page Erase or Page Write operation.
Table 29-1. Read-While-Write features.
Which section does the Zpointer
address during the
programming?
Which section can
be read during
programming?
Is the CPU
halted?
Read-While-Write
supported?
RWW section NRWW section No Yes
NRWW section None Yes No345
7593L–AVR–09/12
AT90USB64/128
Figure 29-1. Read-While-Write vs. no Read-While-Write.
Read-While-Write
(RWW) section
No Read-While-Write
(NRWW) section
Z-pointer
Addresses RWW
section
Z-pointer
addresses NRWW
section
CPU is halted
during the operation
Code located in
NRWW section.
Can be read during
the operation346
7593L–AVR–09/12
AT90USB64/128
Figure 29-2. Memory sections.
Note: 1. The parameters in the figure above are given in Table 29-8 on page 357.
29.4 Boot Loader lock bits
If no Boot Loader capability is needed, the entire Flash is available for application code. The
Boot Loader has two separate sets of Boot Lock bits which can be set independently. This gives
the user a unique flexibility to select different levels of protection.
The user can select:
• To protect the entire Flash from a software update by the MCU
• To protect only the Boot Loader Flash section from a software update by the MCU
• To protect only the Application Flash section from a software update by the MCU
• Allow software update in the entire Flash
See Table 29-2 on page 347 and Table 29-3 on page 347 for further details. The Boot Lock bits
can be set by software and in Serial or in Parallel Programming mode. They can only be cleared
by a Chip Erase command only. The general Write Lock (Lock Bit mode 2) does not control the
programming of the Flash memory by SPM instruction. Similarly, the general Read/Write Lock
(Lock Bit mode 1) does not control reading nor writing by (E)LPM/SPM, if it is attempted.
0x0000
Flashend
Program memory
BOOTSZ = '11'
Application flash section
Boot loader flash section Flashend
Program memory
BOOTSZ = '10'
0x0000
Program memory
BOOTSZ = '01'
Program memory
BOOTSZ = '00'
Application flash section
Boot loader flash section
0x0000
Flashend
Application flash section
Flashend
End RWW
Start NRWW
Application flash section
Boot loader flash section
Boot loader flash section
End RWW
Start NRWW
End RWW
Start NRWW
0x0000
End RWW, end application
Start NRWW, start boot loader
Application flash section Application flash section
Application flash section
Read-While-Write section No Read-While-Write section Read-While-Write section No Read-While-Write section
Read-While-Write section No Read-While-Write section Read-While-Write section No Read-While-Write section
End application
Start boot loader
End application
Start boot loader
End application
Start boot loader347
7593L–AVR–09/12
AT90USB64/128
Note: 1. “1” means unprogrammed, “0” means programmed.
Note: 1. “1” means unprogrammed, “0” means programmed.
29.5 Entering the Boot Loader program
The boot loader can be executed with three different conditions:
29.5.1 Regular application conditions.
A jump or call from the application program. This may be initiated by a trigger such as a command
received via USART, SPI or USB.
29.5.2 Boot Reset fuse
The Boot Reset Fuse (BOOTRST) can be programmed so that the Reset Vector is pointing to
the Boot Flash start address after a reset. In this case, the Boot Loader is started after a reset.
After the application code is loaded, the program can start executing the application code. Note
that the fuses cannot be changed by the MCU itself. This means that once the Boot Reset Fuse
is programmed, the Reset Vector will always point to the Boot Loader Reset and the fuse can
only be changed through the serial or parallel programming interface.
Table 29-2. Boot Lock Bit0 protection modes (application section) (1).
BLB0 Mode BLB02 BLB01 Protection
1 11 No restrictions for SPM or (E)LPM accessing the
Application section.
2 1 0 SPM is not allowed to write to the Application section.
3 00
SPM is not allowed to write to the Application section, and
(E)LPM executing from the Boot Loader section is not
allowed to read from the Application section. If Interrupt
Vectors are placed in the Boot Loader section, interrupts
are disabled while executing from the Application section.
4 01
(E)LPM executing from the Boot Loader section is not
allowed to read from the Application section. If Interrupt
Vectors are placed in the Boot Loader section, interrupts
are disabled while executing from the Application section.
Table 29-3. Boot Lock Bit1 protection modes (boot loader section) (1).
BLB1 Mode BLB12 BLB11 Protection
1 11 No restrictions for SPM or (E)LPM accessing the Boot
Loader section.
2 1 0 SPM is not allowed to write to the Boot Loader section.
3 00
SPM is not allowed to write to the Boot Loader section,
and (E)LPM executing from the Application section is not
allowed to read from the Boot Loader section. If Interrupt
Vectors are placed in the Application section, interrupts
are disabled while executing from the Boot Loader section.
4 01
(E)LPM executing from the Application section is not
allowed to read from the Boot Loader section. If Interrupt
Vectors are placed in the Application section, interrupts
are disabled while executing from the Boot Loader section.348
7593L–AVR–09/12
AT90USB64/128
Note: 1. “1” means unprogrammed, “0” means programmed.
29.5.3 External hardware conditions
The Hardware Boot Enable Fuse (HWBE) can be programmed (see Table 29-5) so that upon
special hardware conditions under reset, the boot loader execution is forced after reset.
Note: 1. “1” means unprogrammed, “0” means programmed.
When the HWBE fuse is enable the ALE/HWB pin is configured as input during reset and sampled
during reset rising edge. When ALE/HWB pin is ‘0’ during reset rising edge, the reset vector
will be set as the Boot Loader Reset address and the Boot Loader will be executed (see Figure
29-3).
Figure 29-3. Boot process description.
Table 29-4. Boot reset fuse (1).
BOOTRST Reset address
1 Reset Vector = Application reset (address 0x0000)
0 Reset Vector = Boot loader reset (see Table 29-8 on page 357)
Table 29-5. Hardware boot enable fuse (1).
HWBE Reset address
1 ALE/HWB pin can not be used to force boot loader execution after reset
0 ALE/HWB pin is used during reset to force boot loader execution after reset
HWBE
BOOTRST ?
Ext. hardware
conditions ?
Reset vector = Application reset Reset vector = Boot loader reset
?
RESET
ALE/HWB
t
SHRH t
HHRH349
7593L–AVR–09/12
AT90USB64/128
29.5.4 SPMCSR – Store Program Memory Control and Status Register
The Store Program Memory Control and Status Register contains the control bits needed to control
the Boot Loader operations.
• Bit 7 – SPMIE: SPM Interrupt Enable
When the SPMIE bit is written to one, and the I-bit in the Status Register is set (one), the SPM
ready interrupt will be enabled. The SPM ready Interrupt will be executed as long as the SPMEN
bit in the SPMCSR Register is cleared.
• Bit 6 – RWWSB: Read-While-Write Section Busy
When a Self-Programming (Page Erase or Page Write) operation to the RWW section is initiated,
the RWWSB will be set (one) by hardware. When the RWWSB bit is set, the RWW section
cannot be accessed. The RWWSB bit will be cleared if the RWWSRE bit is written to one after a
Self-Programming operation is completed. Alternatively the RWWSB bit will automatically be
cleared if a page load operation is initiated.
• Bit 5 – SIGRD: Signature Row Read
If this bit is written to one at the same time as SPMEN, the next LPM instruction within three
clock cycles will read a byte from the signature row into the destination register. see “Reading
the Signature Row from software” on page 354 for details. An SPM instruction within four cycles
after SIGRD and SPMEN are set will have no effect. This operation is reserved for future use
and should not be used.
• Bit 4 – RWWSRE: Read-While-Write Section Read Enable
When programming (Page Erase or Page Write) to the RWW section, the RWW section is
blocked for reading (the RWWSB will be set by hardware). To re-enable the RWW section, the
user software must wait until the programming is completed (SPMEN will be cleared). Then, if
the RWWSRE bit is written to one at the same time as SPMEN, the next SPM instruction within
four clock cycles re-enables the RWW section. The RWW section cannot be re-enabled while
the Flash is busy with a Page Erase or a Page Write (SPMEN is set). If the RWWSRE bit is written
while the Flash is being loaded, the Flash load operation will abort and the data loaded will
be lost.
• Bit 3 – BLBSET: Boot Lock Bit Set
If this bit is written to one at the same time as SPMEN, the next SPM instruction within four clock
cycles sets Boot Lock bits, according to the data in R0. The data in R1 and the address in the Zpointer
are ignored. The BLBSET bit will automatically be cleared upon completion of the Lock
bit set, or if no SPM instruction is executed within four clock cycles.
An (E)LPM instruction within three cycles after BLBSET and SPMEN are set in the SPMCSR
Register, will read either the Lock bits or the Fuse bits (depending on Z0 in the Z-pointer) into the
destination register. See “Reading the Fuse and Lock bits from software” on page 353 for
details.
Bit 7 6 5 4 3 2 1 0
SPMIE RWWSB SIGRD RWWSRE BLBSET PGWRT PGERS SPMEN SPMCSR
Read/write R/W R R/W R/W R/W R/W R/W R/W
Initial value 0 0 0 0 0 0 0 0350
7593L–AVR–09/12
AT90USB64/128
• Bit 2 – PGWRT: Page Write
If this bit is written to one at the same time as SPMEN, the next SPM instruction within four clock
cycles executes Page Write, with the data stored in the temporary buffer. The page address is
taken from the high part of the Z-pointer. The data in R1 and R0 are ignored. The PGWRT bit
will auto-clear upon completion of a Page Write, or if no SPM instruction is executed within four
clock cycles. The CPU is halted during the entire Page Write operation if the NRWW section is
addressed.
• Bit 1 – PGERS: Page Erase
If this bit is written to one at the same time as SPMEN, the next SPM instruction within four clock
cycles executes Page Erase. The page address is taken from the high part of the Z-pointer. The
data in R1 and R0 are ignored. The PGERS bit will auto-clear upon completion of a Page Erase,
or if no SPM instruction is executed within four clock cycles. The CPU is halted during the entire
Page Write operation if the NRWW section is addressed.
• Bit 0 – SPMEN: Store Program Memory Enable
This bit enables the SPM instruction for the next four clock cycles. If written to one together with
either RWWSRE, BLBSET, PGWRT’ or PGERS, the following SPM instruction will have a special
meaning, see description above. If only SPMEN is written, the following SPM instruction will
store the value in R1:R0 in the temporary page buffer addressed by the Z-pointer. The LSB of
the Z-pointer is ignored. The SPMEN bit will auto-clear upon completion of an SPM instruction,
or if no SPM instruction is executed within four clock cycles. During Page Erase and Page Write,
the SPMEN bit remains high until the operation is completed.
Writing any other combination than “10001”, “01001”, “00101”, “00011” or “00001” in the lower
five bits will have no effect.
Note: Only one SPM instruction should be active at any time.
29.6 Addressing the flash during self-programming
The Z-pointer is used to address the SPM commands. The Z pointer consists of the Z-registers
ZL and ZH in the register file, and RAMPZ in the I/O space. The number of bits actually used is
implementation dependent. Note that the RAMPZ register is only implemented when the program
space is larger than 64kBytes.
Since the Flash is organized in pages (see Table 30-11 on page 364), the Program Counter can
be treated as having two different sections. One section, consisting of the least significant bits, is
addressing the words within a page, while the most significant bits are addressing the pages.
This is shown in Figure 29-4 on page 351. Note that the Page Erase and Page Write operations
are addressed independently. Therefore it is of major importance that the Boot Loader software
addresses the same page in both the Page Erase and Page Write operation. Once a programming
operation is initiated, the address is latched and the Z-pointer can be used for other
operations.
The (E)LPM instruction use the Z-pointer to store the address. Since this instruction addresses
the Flash byte-by-byte, also bit Z0 of the Z-pointer is used.
Bit 23 22 21 20 19 18 17 16
15 14 13 12 11 10 9 8
RAMPZ RAMPZ7 RAMPZ6 RAMPZ5 RAMPZ4 RAMPZ3 RAMPZ2 RAMPZ1 RAMPZ0
ZH (R31) Z15 Z14 Z13 Z12 Z11 Z10 Z9 Z8
ZL (R30) Z7 Z6 Z5 Z4 Z3 Z2 Z1 Z0
76543210351
7593L–AVR–09/12
AT90USB64/128
Figure 29-4. Addressing the flash during SPM (1).
Note: 1. The different variables used in Figure 29-4 are listed in Table 29-10 on page 358.
29.7 Self-programming the flash
The program memory is updated in a page by page fashion. Before programming a page with
the data stored in the temporary page buffer, the page must be erased. The temporary page buffer
is filled one word at a time using SPM and the buffer can be filled either before the Page
Erase command or between a Page Erase and a Page Write operation:
Alternative 1, fill the buffer before a Page Erase
• Fill temporary page buffer
• Perform a Page Erase
• Perform a Page Write
Alternative 2, fill the buffer after Page Erase
• Perform a Page Erase
• Fill temporary page buffer
• Perform a Page Write
If only a part of the page needs to be changed, the rest of the page must be stored (for example
in the temporary page buffer) before the erase, and then be rewritten. When using alternative 1,
the Boot Loader provides an effective Read-Modify-Write feature which allows the user software
to first read the page, do the necessary changes, and then write back the modified data. If alternative
2 is used, it is not possible to read the old data while loading since the page is already
erased. The temporary page buffer can be accessed in a random sequence. It is essential that
the page address used in both the Page Erase and Page Write operation is addressing the same
PROGRAM MEMORY
23 1 0
Z - POINTER
BIT
0
ZPAGEMSB
WORD ADDRESS
WITHIN A PAGE
PAGE ADDRESS
WITHIN THE FLASH
ZPCMSB
INSTRUCTION WORD
PAGE PCWORD[PAGEMSB:0]:
00
01
02
PAGEEND
PAGE
PCPAGE PCWORD
PCMSB PAGEMSB
PROGRAM COUNTER352
7593L–AVR–09/12
AT90USB64/128
page. See “Simple Assembly Code example for a Boot Loader” on page 355 for an assembly
code example.
29.7.1 Performing page erase by SPM
To execute Page Erase, set up the address in the Z-pointer, write “X0000011” to SPMCSR and
execute SPM within four clock cycles after writing SPMCSR. The data in R1 and R0 is ignored.
The page address must be written to PCPAGE in the Z-register. Other bits in the Z-pointer will
be ignored during this operation.
• Page Erase to the RWW section: The NRWW section can be read during the Page Erase
• Page Erase to the NRWW section: The CPU is halted during the operation
29.7.2 Filling the Temporary Buffer (page loading)
To write an instruction word, set up the address in the Z-pointer and data in R1:R0, write
“00000001” to SPMCSR and execute SPM within four clock cycles after writing SPMCSR. The
content of PCWORD in the Z-register is used to address the data in the temporary buffer. The
temporary buffer will auto-erase after a Page Write operation or by writing the RWWSRE bit in
SPMCSR. It is also erased after a system reset. Note that it is not possible to write more than
one time to each address without erasing the temporary buffer.
If the EEPROM is written in the middle of an SPM Page Load operation, all data loaded will be
lost.
29.7.3 Performing a Page Write
To execute Page Write, set up the address in the Z-pointer, write “X0000101” to SPMCSR and
execute SPM within four clock cycles after writing SPMCSR. The data in R1 and R0 is ignored.
The page address must be written to PCPAGE. Other bits in the Z-pointer must be written to
zero during this operation.
• Page Write to the RWW section: The NRWW section can be read during the Page Write
• Page Write to the NRWW section: The CPU is halted during the operation
29.7.4 Using the SPM interrupt
If the SPM interrupt is enabled, the SPM interrupt will generate a constant interrupt when the
SPMEN bit in SPMCSR is cleared. This means that the interrupt can be used instead of polling
the SPMCSR Register in software. When using the SPM interrupt, the Interrupt Vectors should
be moved to the BLS section to avoid that an interrupt is accessing the RWW section when it is
blocked for reading. How to move the interrupts is described in “Interrupts” on page 68.
29.7.5 Consideration while updating BLS
Special care must be taken if the user allows the Boot Loader section to be updated by leaving
Boot Lock bit11 unprogrammed. An accidental write to the Boot Loader itself can corrupt the
entire Boot Loader, and further software updates might be impossible. If it is not necessary to
change the Boot Loader software itself, it is recommended to program the Boot Lock bit11 to
protect the Boot Loader software from any internal software changes.
29.7.6 Prevent reading the RWW section during self-programming
During Self-Programming (either Page Erase or Page Write), the RWW section is always
blocked for reading. The user software itself must prevent that this section is addressed during
the self programming operation. The RWWSB in the SPMCSR will be set as long as the RWW
section is busy. During Self-Programming the Interrupt Vector table should be moved to the BLS353
7593L–AVR–09/12
AT90USB64/128
as described in “Interrupts” on page 68, or the interrupts must be disabled. Before addressing
the RWW section after the programming is completed, the user software must clear the
RWWSB by writing the RWWSRE. See “Simple Assembly Code example for a Boot Loader” on
page 355 for an example.
29.7.7 Setting the Boot Loader Lock bits by SPM
To set the Boot Loader Lock bits, write the desired data to R0, write “X0001001” to SPMCSR
and execute SPM within four clock cycles after writing SPMCSR. The only accessible Lock bits
are the Boot Lock bits that may prevent the Application and Boot Loader section from any software
update by the MCU.
See Table 29-2 on page 347 and Table 29-3 on page 347 for how the different settings of the
Boot Loader bits affect the Flash access.
If bits 5..2 in R0 are cleared (zero), the corresponding Boot Lock bit will be programmed if an
SPM instruction is executed within four cycles after BLBSET and SPMEN are set in SPMCSR.
The Z-pointer is don’t care during this operation, but for future compatibility it is recommended to
load the Z-pointer with 0x0001 (same as used for reading the lOck bits). For future compatibility it
is also recommended to set bits 7, 6, 1, and 0 in R0 to “1” when writing the Lock bits. When programming
the Lock bits the entire Flash can be read during the operation.
29.7.8 EEPROM Write prevents writing to SPMCSR
Note that an EEPROM write operation will block all software programming to Flash. Reading the
Fuses and Lock bits from software will also be prevented during the EEPROM write operation. It
is recommended that the user checks the status bit (EEPE) in the EECR Register and verifies
that the bit is cleared before writing to the SPMCSR Register.
29.7.9 Reading the Fuse and Lock bits from software
It is possible to read both the Fuse and Lock bits from software. To read the Lock bits, load the
Z-pointer with 0x0001 and set the BLBSET and SPMEN bits in SPMCSR. When an (E)LPM
instruction is executed within three CPU cycles after the BLBSET and SPMEN bits are set in
SPMCSR, the value of the Lock bits will be loaded in the destination register. The BLBSET and
SPMEN bits will auto-clear upon completion of reading the Lock bits or if no (E)LPM instruction
is executed within three CPU cycles or no SPM instruction is executed within four CPU cycles.
When BLBSET and SPMEN are cleared, (E)LPM will work as described in the Instruction set
Manual.
The algorithm for reading the Fuse Low byte is similar to the one described above for reading
the Lock bits. To read the Fuse Low byte, load the Z-pointer with 0x0000 and set the BLBSET
and SPMEN bits in SPMCSR. When an (E)LPM instruction is executed within three cycles after
the BLBSET and SPMEN bits are set in the SPMCSR, the value of the Fuse Low byte (FLB) will
be loaded in the destination register as shown below. Refer to Table 30-5 on page 361 for a
detailed description and mapping of the Fuse Low byte.
Bit 7 6 5 4 3 2 1 0
R0 1 1 BLB12 BLB11 BLB02 BLB01 1 1
Bit 7 6 5 4 3 2 1 0
Rd – – BLB12 BLB11 BLB02 BLB01 LB2 LB1
Bit 7 6 5 4 3 2 1 0
Rd FLB7 FLB6 FLB5 FLB4 FLB3 FLB2 FLB1 FLB0354
7593L–AVR–09/12
AT90USB64/128
Similarly, when reading the Fuse High byte, load 0x0003 in the Z-pointer. When an (E)LPM
instruction is executed within three cycles after the BLBSET and SPMEN bits are set in the
SPMCSR, the value of the Fuse High byte (FHB) will be loaded in the destination register as
shown below. Refer to Table 30-4 on page 361 for detailed description and mapping of the Fuse
High byte.
When reading the Extended Fuse byte, load 0x0002 in the Z-pointer. When an (E)LPM instruction
is executed within three cycles after the BLBSET and SPMEN bits are set in the SPMCSR,
the value of the Extended Fuse byte (EFB) will be loaded in the destination register as shown
below. Refer to Table 30-3 on page 360 for detailed description and mapping of the Extended
Fuse byte.
Fuse and Lock bits that are programmed, will be read as zero. Fuse and Lock bits that are
unprogrammed, will be read as one.
29.7.10 Reading the Signature Row from software
To read the Signature Row from software, load the Z-pointer with the signature byte address
given in Table 29-6 on page 354 and set the SIGRD and SPMEN bits in SPMCSR. When an
LPM instruction is executed within three CPU cycles after the SIGRD and SPMEN bits are set in
SPMCSR, the signature byte value will be loaded in the destination register. The SIGRD and
SPMEN bits will auto-clear upon completion of reading the Signature Row Lock bits or if no LPM
instruction is executed within three CPU cycles. When SIGRD and SPMEN are cleared, LPM will
work as described in the Instruction set Manual.
AT90USB64/128 includes a unique 10-bytes serial number located in the signature row. This
unique serial number can be used as a USB serial number in the device enumeration process.
The pointer addresses to access this unique serial number are given in Table 29-6 on page 354.
Note: All other addresses are reserved for future use.
29.7.11 Preventing flash corruption
During periods of low VCC, the Flash program can be corrupted because the supply voltage is
too low for the CPU and the Flash to operate properly. These issues are the same as for board
level systems using the Flash, and the same design solutions should be applied.
A Flash program corruption can be caused by two situations when the voltage is too low. First, a
regular write sequence to the Flash requires a minimum voltage to operate correctly. Secondly,
Bit 7 6 5 4 3 2 1 0
Rd FHB7 FHB6 FHB5 FHB4 FHB3 FHB2 FHB1 FHB0
Bit 7 6 5 4 3 2 1 0
Rd – – – – – EFB2 EFB1 EFB0
Table 29-6. Signature Row addressing.
Signature byte Z-pointer address
Device Signature Byte 1 0x0000
Device Signature Byte 2 0x0002
Device Signature Byte 3 0x0004
RC Oscillator Calibration Byte 0x0001
Unique Serial Number From 0x000E to 0x0018355
7593L–AVR–09/12
AT90USB64/128
the CPU itself can execute instructions incorrectly, if the supply voltage for executing instructions
is too low.
Flash corruption can easily be avoided by following these design recommendations (one is
sufficient):
1. If there is no need for a Boot Loader update in the system, program the Boot Loader
Lock bits to prevent any Boot Loader software updates.
2. Keep the AVR RESET active (low) during periods of insufficient power supply voltage.
This can be done by enabling the internal Brown-out Detector (BOD) if the operating
voltage matches the detection level. If not, an external low VCC reset protection circuit
can be used. If a reset occurs while a write operation is in progress, the write operation
will be completed provided that the power supply voltage is sufficient.
3. Keep the AVR core in Power-down sleep mode during periods of low VCC. This will prevent
the CPU from attempting to decode and execute instructions, effectively protecting
the SPMCSR Register and thus the Flash from unintentional writes.
29.7.12 Programming time for flash when using SPM
The calibrated RC Oscillator is used to time Flash accesses. Table 29-7 shows the typical programming
time for Flash accesses from the CPU.
29.7.13 Simple Assembly Code example for a Boot Loader
;- the routine writes one page of data from RAM to Flash
; the first data location in RAM is pointed to by the Y-pointer
; the first data location in Flash is pointed to by the Z-pointer
;- error handling is not included
;- the routine must be placed inside the Boot space
; (at least the Do_spm sub routine). Only code inside NRWW section can
; be read during Self-Programming (Page Erase and Page Write).
;- registers used: r0, r1, temp1 (r16), temp2 (r17), looplo (r24),
; loophi (r25), spmcsrval (r20)
; storing and restoring of registers is not included in the routine
; register usage can be optimized at the expense of code size
;- it is assumed that either the interrupt table is moved to the Boot
; loader section or that the interrupts are disabled.
.equ PAGESIZEB = PAGESIZE*2 ;PAGESIZEB is page size in BYTES, not words
.org SMALLBOOTSTART
Write_page:
; Page Erase
ldi spmcsrval, (1< 2 CPU clock cycles for fck < 12MHz, 3 CPU clock cycles for fck >= 12MHz
High: > 2 CPU clock cycles for fck < 12MHz, 3 CPU clock cycles for fck >= 12MHz
30.8.1 Serial programming algorithm
When writing serial data to the Atmel AT90USB64/128, data is clocked on the rising edge of
SCK. When reading data from the AT90USB64/128, data is clocked on the falling edge of SCK.
See Figure 30-11 on page 375 for timing details.
To program and verify the AT90USB64/128 in the serial programming mode, the following
sequence is recommended (See four byte instruction formats in Table 30-16 on page 376):
1. Power-up sequence:
Apply power between VCC and GND while RESET and SCK are set to “0”. In some systems,
the programmer can not guarantee that SCK is held low during power-up. In this
case, RESET must be given a positive pulse of at least two CPU clock cycles duration
after SCK has been set to “0”.
2. Wait for at least 20ms and enable serial programming by sending the Programming
Enable serial instruction to pin PDI.
Table 30-14. Pin mapping serial programming.
Symbol Pins (TQFP-64) I/O Description
PDI PB2 I Serial Data in
PDO PB3 O Serial Data out
SCK PB1 I Serial Clock
VCC
GND
XTAL1
SCK
PDO
PDI
RESET
+1.8 - 5.5V
AVCC
+1.8 - 5.5V(2)375
7593L–AVR–09/12
AT90USB64/128
3. The serial programming instructions will not work if the communication is out of synchronization.
When in sync. the second byte (0x53), will echo back when issuing the
third byte of the Programming Enable instruction. Whether the echo is correct or not, all
four bytes of the instruction must be transmitted. If the 0x53 did not echo back, give
RESET a positive pulse and issue a new Programming Enable command.
4. The Flash is programmed one page at a time. The memory page is loaded one byte at
a time by supplying the 7 LSB of the address and data together with the Load Program
Memory Page instruction. To ensure correct loading of the page, the data low byte must
be loaded before data high byte is applied for a given address. The Program Memory
Page is stored by loading the Write Program Memory Page instruction with the address
lines 15..8. Before issuing this command, make sure the instruction Load Extended
Address Byte has been used to define the MSB of the address. The extended address
byte is stored until the command is re-issued, i.e., the command needs only be issued
for the first page, and when crossing the 64KWord boundary. If polling (RDY/BSY) is not
used, the user must wait at least tWD_FLASH before issuing the next page. (See Table 30-
15.) Accessing the serial programming interface before the Flash write operation completes
can result in incorrect programming.
5. The EEPROM array is programmed one byte at a time by supplying the address and
data together with the appropriate Write instruction. An EEPROM memory location is
first automatically erased before new data is written. If polling is not used, the user must
wait at least tWD_EEPROM before issuing the next byte. (See Table 30-15.) In a chip
erased device, no 0xFFs in the data file(s) need to be programmed.
6. Any memory location can be verified by using the Read instruction which returns the
content at the selected address at serial output PDO. When reading the Flash memory,
use the instruction Load Extended Address Byte to define the upper address byte,
which is not included in the Read Program Memory instruction. The extended address
byte is stored until the command is re-issued, that is, the command needs only be
issued for the first page, and when crossing the 64KWord boundary.
7. At the end of the programming session, RESET can be set high to commence normal
operation.
8. Power-off sequence (if needed):
Set RESET to “1”.
Turn VCC power off.
Figure 30-11. Serial programming waveforms.
Table 30-15. Minimum wait delay before writing the next Flash or EEPROM location.
Symbol Minimum wait delay
tWD_FLASH 4.5ms
tWD_EEPROM 9.0ms
tWD_ERASE 9.0ms
MSB
MSB
LSB
LSB
SERIAL CLOCK INPUT
(SCK)
SERIAL DATA INPUT
(MOSI)
(MISO)
SAMPLE
SERIAL DATA OUTPUT376
7593L–AVR–09/12
AT90USB64/128
Table 30-16. Serial programming instruction set.
Instruction
Instruction format
Byte 1 Byte 2 Byte 3 Byte 4 Operation
Programming Enable 1010 1100 0101 0011 xxxx xxxx xxxx xxxx Enable Serial Programming after
RESET goes low.
Chip Erase 1010 1100 100x xxxx xxxx xxxx xxxx xxxx Chip Erase EEPROM and Flash.
Load Extended Address Byte
0100 1101 0000 0000 cccc cccc xxxx xxxx Defines Extended Address Byte for
Read Program Memory and Write
Program Memory Page.
Read Program Memory
0010 H000 aaaa aaaa bbbb bbbb oooo oooo Read H (high or low) data o from
Program memory at word address
c:a:b.
Load Program Memory Page
0100 H000 xxxx xxxx xxbb bbbb iiii iiii Write H (high or low) data i to Program
Memory page at word address b. Data
low byte must be loaded before Data
high byte is applied within the same
address.
Write Program Memory Page 0100 1100 aaaa aaaa bbxx xxxx xxxx xxxx Write Program Memory Page at
address c:a:b.
Read EEPROM Memory 1010 0000 0000 aaaa bbbb bbbb oooo oooo Read data o from EEPROM memory at
address a:b.
Write EEPROM Memory 1100 0000 0000 aaaa bbbb bbbb iiii iiii Write data i to EEPROM memory at
address a:b.
Load EEPROM Memory
Page (page access)
1100 0001 0000 0000 0000 00bb iiii iiii Load data i to EEPROM memory page
buffer. After data is loaded, program
EEPROM page.
Write EEPROM Memory
Page (page access)
1100 0010 0000 aaaa bbbb bb00 xxxx xxxx Write EEPROM page at address a:b.
Read Lock bits
0101 1000 0000 0000 xxxx xxxx xxoo oooo Read Lock bits. “0” = programmed, “1”
= unprogrammed. See Table 30-1 on
page 359 for details.
Write Lock bits
1010 1100 111x xxxx xxxx xxxx 11ii iiii Write Lock bits. Set bits = “0” to
program Lock bits. See Table 30-1 on
page 359 for details.
Read Signature Byte 0011 0000 000x xxxx xxxx xxbb oooo oooo Read Signature Byte o at address b.
Write Fuse bits 1010 1100 1010 0000 xxxx xxxx iiii iiii Set bits = “0” to program, “1” to
unprogram.
Write Fuse High bits 1010 1100 1010 1000 xxxx xxxx iiii iiii Set bits = “0” to program, “1” to
unprogram.
Write Extended Fuse Bits
1010 1100 1010 0100 xxxx xxxx iiii iiii Set bits = “0” to program, “1” to
unprogram. See Table 30-3 on page
360 for details.
Read Fuse bits 0101 0000 0000 0000 xxxx xxxx oooo oooo Read Fuse bits. “0” = programmed, “1”
= unprogrammed.
Read Fuse High bits 0101 1000 0000 1000 xxxx xxxx oooo oooo Read Fuse High bits. “0” = programmed,
“1” = unprogrammed. 377
7593L–AVR–09/12
AT90USB64/128
Note: a = address high bits, b = address low bits, c = address extended bits, H = 0 - Low byte, 1 - High Byte, o = data out, i = data in,
x = don’t care.
30.8.2 Serial programming characteristics
For characteristics of the Serial Programming module see “SPI timing characteristics” on page
395.
30.9 Programming via the JTAG interface
Programming through the JTAG interface requires control of the four JTAG specific pins: TCK,
TMS, TDI, and TDO. Control of the reset and clock pins is not required.
To be able to use the JTAG interface, the JTAGEN Fuse must be programmed. The device is
default shipped with the fuse programmed. In addition, the JTD bit in MCUCR must be cleared.
Alternatively, if the JTD bit is set, the external reset can be forced low. Then, the JTD bit will be
cleared after two chip clocks, and the JTAG pins are available for programming. This provides a
means of using the JTAG pins as normal port pins in Running mode while still allowing In-System
Programming via the JTAG interface. Note that this technique can not be used when using
the JTAG pins for Boundary-scan or On-chip Debug. In these cases the JTAG pins must be dedicated
for this purpose.
During programming the clock frequency of the TCK Input must be less than the maximum frequency
of the chip. The System Clock Prescaler can not be used to divide the TCK Clock Input
into a sufficiently low frequency.
As a definition in this datasheet, the LSB is shifted in and out first of all Shift Registers.
30.9.1 Programming specific JTAG instructions
The Instruction Register is 4-bit wide, supporting up to 16 instructions. The JTAG instructions
useful for programming are listed below.
The OPCODE for each instruction is shown behind the instruction name in hex format. The text
describes which Data Register is selected as path between TDI and TDO for each instruction.
The Run-Test/Idle state of the TAP controller is used to generate internal clocks. It can also be
used as an idle state between JTAG sequences. The state machine sequence for changing the
instruction word is shown in Figure 30-12 on page 378.
Read Extended Fuse Bits
0101 0000 0000 1000 xxxx xxxx oooo oooo Read Extended Fuse bits. “0” = programmed,
“1” = unprogrammed. See
Table 30-3 on page 360 for details.
Read Calibration Byte 0011 1000 000x xxxx 0000 0000 oooo oooo Read Calibration Byte
Poll RDY/BSY
1111 0000 0000 0000 xxxx xxxx xxxx xxxo If o = “1”, a programming operation is
still busy. Wait until this bit returns to
“0” before applying another command.
Table 30-16. Serial programming instruction set. (Continued)
Instruction
Instruction format
Byte 1 Byte 2 Byte 3 Byte 4 Operation378
7593L–AVR–09/12
AT90USB64/128
Figure 30-12. State machine sequence for changing the instruction word.
30.9.2 AVR_RESET (0xC)
The AVR specific public JTAG instruction for setting the AVR device in the Reset mode or taking
the device out from the Reset mode. The TAP controller is not reset by this instruction. The one
bit Reset Register is selected as Data Register. Note that the reset will be active as long as there
is a logic “one” in the Reset Chain. The output from this chain is not latched.
The active states are:
• Shift-DR: The Reset Register is shifted by the TCK input
30.9.3 PROG_ENABLE (0x4)
The AVR specific public JTAG instruction for enabling programming via the JTAG port. The 16-
bit Programming Enable Register is selected as Data Register. The active states are the
following:
• Shift-DR: The programming enable signature is shifted into the Data Register
• Update-DR: The programming enable signature is compared to the correct value, and
Programming mode is entered if the signature is valid
Test-logic-reset
Run-test/idle
Shift-DR
Exit1-DR
Pause-DR
Exit2-DR
Update-DR
Select-IR scan
Capture-IR
Shift-IR
Exit1-IR
Pause-IR
Exit2-IR
Update-IR
Select-DR scan
Capture-DR
0
1
0 11 1
0 0
0 0
1 1
1 0
1
1
0
1
0
0
1 0
1
1
0
1
0
0
0 0
1 1379
7593L–AVR–09/12
AT90USB64/128
30.9.4 PROG_COMMANDS (0x5)
The AVR specific public JTAG instruction for entering programming commands via the JTAG
port. The 15-bit Programming Command Register is selected as Data Register. The active
states are the following:
• Capture-DR: The result of the previous command is loaded into the Data Register
• Shift-DR: The Data Register is shifted by the TCK input, shifting out the result of the previous
command and shifting in the new command
• Update-DR: The programming command is applied to the Flash inputs
• Run-Test/Idle: One clock cycle is generated, executing the applied command
30.9.5 PROG_PAGELOAD (0x6)
The AVR specific public JTAG instruction to directly load the Flash data page via the JTAG port.
An 8-bit Flash Data Byte Register is selected as the Data Register. This is physically the eight
LSBs of the Programming Command Register. The active states are the following:
• Shift-DR: The Flash Data Byte Register is shifted by the TCK input
• Update-DR: The content of the Flash Data Byte Register is copied into a temporary register.
A write sequence is initiated that within 11 TCK cycles loads the content of the temporary
register into the Flash page buffer. The AVR automatically alternates between writing the low
and the high byte for each new Update-DR state, starting with the low byte for the first
Update-DR encountered after entering the PROG_PAGELOAD command. The Program
Counter is pre-incriminated before writing the low byte, except for the first written byte. This
ensures that the first data is written to the address set up by PROG_COMMANDS, and
loading the last location in the page buffer does not make the program counter increment into
the next page
30.9.6 PROG_PAGEREAD (0x7)
The AVR specific public JTAG instruction to directly capture the Flash content via the JTAG port.
An 8-bit Flash Data Byte Register is selected as the Data Register. This is physically the 8 LSBs
of the Programming Command Register. The active states are the following:
• Capture-DR: The content of the selected Flash byte is captured into the Flash Data Byte
Register. The AVR automatically alternates between reading the low and the high byte for
each new Capture-DR state, starting with the low byte for the first Capture-DR encountered
after entering the PROG_PAGEREAD command. The Program Counter is post-incremented
after reading each high byte, including the first read byte. This ensures that the first data is
captured from the first address set up by PROG_COMMANDS, and reading the last location
in the page makes the program counter increment into the next page
• Shift-DR: The Flash Data Byte Register is shifted by the TCK input
30.9.7 Data Registers
The Data Registers are selected by the JTAG instruction registers described in section “Programming
specific JTAG instructions” on page 377. The Data Registers relevant for
programming operations are:
• Reset Register
• Programming Enable Register
• Programming Command Register
• Flash Data Byte Register380
7593L–AVR–09/12
AT90USB64/128
30.9.8 Reset Register
The Reset Register is a Test Data Register used to reset the part during programming. It is
required to reset the part before entering Programming mode.
A high value in the Reset Register corresponds to pulling the external reset low. The part is reset
as long as there is a high value present in the Reset Register. Depending on the Fuse settings
for the clock options, the part will remain reset for a Reset Time-out period (refer to “Clock
sources” on page 41) after releasing the Reset Register. The output from this Data Register is
not latched, so the reset will take place immediately, as shown in Figure 9-1 on page 58.
30.9.9 Programming Enable Register
The Programming Enable Register is a 16-bit register. The contents of this register is compared
to the programming enable signature, binary code 0b1010_0011_0111_0000. When the contents
of the register is equal to the programming enable signature, programming via the JTAG
port is enabled. The register is reset to 0 on Power-on Reset, and should always be reset when
leaving Programming mode.
Figure 30-13. Programming enable register.
30.9.10 Programming Command Register
The Programming Command Register is a 15-bit register. This register is used to serially shift in
programming commands, and to serially shift out the result of the previous command, if any. The
JTAG Programming Instruction Set is shown in Table 30-17 on page 382. The state sequence
when shifting in the programming commands is illustrated in Figure 30-15 on page 385.
TDI
TDO
D
A
T
A
= D Q
ClockDR & PROG_ENABLE
Programming enable
0xA370381
7593L–AVR–09/12
AT90USB64/128
Figure 30-14. Programming Command register.
TDI
TDO
S
T
R
O
B
E
S
A
D
D
R
E
S
S
/
D
A
T
A
Flash
EEPROM
fuses
lock bits382
7593L–AVR–09/12
AT90USB64/128
Table 30-17. JTAG programming instruction set.
a = address high bits, b = address low bits, c = address extended bits, H = 0 - Low byte, 1 - High Byte, o = data out, i =
data in, x = don’t care.
Instruction TDI sequence TDO sequence Notes
1a. Chip Erase
0100011_10000000
0110001_10000000
0110011_10000000
0110011_10000000
xxxxxxx_xxxxxxxx
xxxxxxx_xxxxxxxx
xxxxxxx_xxxxxxxx
xxxxxxx_xxxxxxxx
1b. Poll for Chip Erase Complete 0110011_10000000 xxxxxox_xxxxxxxx (2)
2a. Enter Flash Write 0100011_00010000 xxxxxxx_xxxxxxxx
2b. Load Address Extended High Byte 0001011_cccccccc xxxxxxx_xxxxxxxx (10)
2c. Load Address High Byte 0000111_aaaaaaaa xxxxxxx_xxxxxxxx
2d. Load Address Low Byte 0000011_bbbbbbbb xxxxxxx_xxxxxxxx
2e. Load Data Low Byte 0010011_iiiiiiii xxxxxxx_xxxxxxxx
2f. Load Data High Byte 0010111_iiiiiiii xxxxxxx_xxxxxxxx
2g. Latch Data
0110111_00000000
1110111_00000000
0110111_00000000
xxxxxxx_xxxxxxxx
xxxxxxx_xxxxxxxx
xxxxxxx_xxxxxxxx
(1)
2h. Write Flash Page
0110111_00000000
0110101_00000000
0110111_00000000
0110111_00000000
xxxxxxx_xxxxxxxx
xxxxxxx_xxxxxxxx
xxxxxxx_xxxxxxxx
xxxxxxx_xxxxxxxx
(1)
2i. Poll for Page Write Complete 0110111_00000000 xxxxxox_xxxxxxxx (2)
3a. Enter Flash Read 0100011_00000010 xxxxxxx_xxxxxxxx
3b. Load Address Extended High Byte 0001011_cccccccc xxxxxxx_xxxxxxxx (10)
3c. Load Address High Byte 0000111_aaaaaaaa xxxxxxx_xxxxxxxx
3d. Load Address Low Byte 0000011_bbbbbbbb xxxxxxx_xxxxxxxx
3e. Read Data Low and High Byte
0110010_00000000
0110110_00000000
0110111_00000000
xxxxxxx_xxxxxxxx
xxxxxxx_oooooooo
xxxxxxx_oooooooo
Low byte
High byte
4a. Enter EEPROM Write 0100011_00010001 xxxxxxx_xxxxxxxx
4b. Load Address High Byte 0000111_aaaaaaaa xxxxxxx_xxxxxxxx (10)
4c. Load Address Low Byte 0000011_bbbbbbbb xxxxxxx_xxxxxxxx
4d. Load Data Byte 0010011_iiiiiiii xxxxxxx_xxxxxxxx
4e. Latch Data
0110111_00000000
1110111_00000000
0110111_00000000
xxxxxxx_xxxxxxxx
xxxxxxx_xxxxxxxx
xxxxxxx_xxxxxxxx
(1)
4f. Write EEPROM Page
0110011_00000000
0110001_00000000
0110011_00000000
0110011_00000000
xxxxxxx_xxxxxxxx
xxxxxxx_xxxxxxxx
xxxxxxx_xxxxxxxx
xxxxxxx_xxxxxxxx
(1)383
7593L–AVR–09/12
AT90USB64/128
4g. Poll for Page Write Complete 0110011_00000000 xxxxxox_xxxxxxxx (2)
5a. Enter EEPROM Read 0100011_00000011 xxxxxxx_xxxxxxxx
5b. Load Address High Byte 0000111_aaaaaaaa xxxxxxx_xxxxxxxx (10)
5c. Load Address Low Byte 0000011_bbbbbbbb xxxxxxx_xxxxxxxx
5d. Read Data Byte
0110011_bbbbbbbb
0110010_00000000
0110011_00000000
xxxxxxx_xxxxxxxx
xxxxxxx_xxxxxxxx
xxxxxxx_oooooooo
6a. Enter Fuse Write 0100011_01000000 xxxxxxx_xxxxxxxx
6b. Load Data Low Byte (6) 0010011_iiiiiiii xxxxxxx_xxxxxxxx (3)
6c. Write Fuse Extended Byte
0111011_00000000
0111001_00000000
0111011_00000000
0111011_00000000
xxxxxxx_xxxxxxxx
xxxxxxx_xxxxxxxx
xxxxxxx_xxxxxxxx
xxxxxxx_xxxxxxxx
(1)
6d. Poll for Fuse Write Complete 0110111_00000000 xxxxxox_xxxxxxxx (2)
6e. Load Data Low Byte (7) 0010011_iiiiiiii xxxxxxx_xxxxxxxx (3)
6f. Write Fuse High Byte
0110111_00000000
0110101_00000000
0110111_00000000
0110111_00000000
xxxxxxx_xxxxxxxx
xxxxxxx_xxxxxxxx
xxxxxxx_xxxxxxxx
xxxxxxx_xxxxxxxx
(1)
6g. Poll for Fuse Write Complete 0110111_00000000 xxxxxox_xxxxxxxx (2)
6h. Load Data Low Byte (7) 0010011_iiiiiiii xxxxxxx_xxxxxxxx (3)
6i. Write Fuse Low Byte
0110011_00000000
0110001_00000000
0110011_00000000
0110011_00000000
xxxxxxx_xxxxxxxx
xxxxxxx_xxxxxxxx
xxxxxxx_xxxxxxxx
xxxxxxx_xxxxxxxx
(1)
6j. Poll for Fuse Write Complete 0110011_00000000 xxxxxox_xxxxxxxx (2)
7a. Enter Lock Bit Write 0100011_00100000 xxxxxxx_xxxxxxxx
7b. Load Data Byte (9) 0010011_11iiiiii xxxxxxx_xxxxxxxx (4)
7c. Write Lock Bits
0110011_00000000
0110001_00000000
0110011_00000000
0110011_00000000
xxxxxxx_xxxxxxxx
xxxxxxx_xxxxxxxx
xxxxxxx_xxxxxxxx
xxxxxxx_xxxxxxxx
(1)
7d. Poll for Lock Bit Write complete 0110011_00000000 xxxxxox_xxxxxxxx (2)
8a. Enter Fuse/Lock Bit Read 0100011_00000100 xxxxxxx_xxxxxxxx
8b. Read Extended Fuse Byte (6) 0111010_00000000
0111011_00000000
xxxxxxx_xxxxxxxx
xxxxxxx_oooooooo
8c. Read Fuse High Byte (7) 0111110_00000000
0111111_00000000
xxxxxxx_xxxxxxxx
xxxxxxx_oooooooo
Table 30-17. JTAG programming instruction set. (Continued)
a = address high bits, b = address low bits, c = address extended bits, H = 0 - Low byte, 1 - High Byte, o = data out, i =
data in, x = don’t care.
Instruction TDI sequence TDO sequence Notes384
7593L–AVR–09/12
AT90USB64/128
Notes: 1. This command sequence is not required if the seven MSB are correctly set by the previous command sequence (which is
normally the case).
2. Repeat until o = “1”.
3. Set bits to “0” to program the corresponding Fuse, “1” to un-program the Fuse.
4. Set bits to “0” to program the corresponding Lock bit, “1” to leave the Lock bit unchanged.
5. “0” = programmed, “1” = un-programmed.
6. The bit mapping for Fuses Extended byte is listed in Table 30-3 on page 360.
7. The bit mapping for Fuses High byte is listed in Table 30-4 on page 361.
8. The bit mapping for Fuses Low byte is listed in Table 30-5 on page 361.
9. The bit mapping for Lock bits byte is listed in Table 30-1 on page 359.
10. Address bits exceeding PCMSB and EEAMSB (Table 30-11 on page 364 and Table 30-12 on page 365) are don’t care.
11. All TDI and TDO sequences are represented by binary digits (0b...).
8d. Read Fuse Low Byte (8) 0110010_00000000
0110011_00000000
xxxxxxx_xxxxxxxx
xxxxxxx_oooooooo
8e. Read Lock Bits (9) 0110110_00000000
0110111_00000000
xxxxxxx_xxxxxxxx
xxxxxxx_xxoooooo (5)
8f. Read Fuses and Lock Bits
0111010_00000000
0111110_00000000
0110010_00000000
0110110_00000000
0110111_00000000
xxxxxxx_xxxxxxxx
xxxxxxx_oooooooo
xxxxxxx_oooooooo
xxxxxxx_oooooooo
xxxxxxx_oooooooo
(5)
Fuse Ext. byte
Fuse High byte
Fuse Low byte
Lock bits
9a. Enter Signature Byte Read 0100011_00001000 xxxxxxx_xxxxxxxx
9b. Load Address Byte 0000011_bbbbbbbb xxxxxxx_xxxxxxxx
9c. Read Signature Byte 0110010_00000000
0110011_00000000
xxxxxxx_xxxxxxxx
xxxxxxx_oooooooo
10a. Enter Calibration Byte Read 0100011_00001000 xxxxxxx_xxxxxxxx
10b. Load Address Byte 0000011_bbbbbbbb xxxxxxx_xxxxxxxx
10c. Read Calibration Byte 0110110_00000000
0110111_00000000
xxxxxxx_xxxxxxxx
xxxxxxx_oooooooo
11a. Load No Operation Command 0100011_00000000
0110011_00000000
xxxxxxx_xxxxxxxx
xxxxxxx_xxxxxxxx
Table 30-17. JTAG programming instruction set. (Continued)
a = address high bits, b = address low bits, c = address extended bits, H = 0 - Low byte, 1 - High Byte, o = data out, i =
data in, x = don’t care.
Instruction TDI sequence TDO sequence Notes385
7593L–AVR–09/12
AT90USB64/128
Figure 30-15. State machine sequence for changing/reading the data word.
30.9.11 Flash Data Byte Register
The Flash Data Byte Register provides an efficient way to load the entire Flash page buffer
before executing Page Write, or to read out/verify the content of the Flash. A state machine sets
up the control signals to the Flash and senses the strobe signals from the Flash, thus only the
data words need to be shifted in/out.
The Flash Data Byte Register actually consists of the 8-bit scan chain and a 8-bit temporary register.
During page load, the Update-DR state copies the content of the scan chain over to the
temporary register and initiates a write sequence that within 11 TCK cycles loads the content of
the temporary register into the Flash page buffer. The AVR automatically alternates between
writing the low and the high byte for each new Update-DR state, starting with the low byte for the
first Update-DR encountered after entering the PROG_PAGELOAD command. The Program
Counter is pre-incremented before writing the low byte, except for the first written byte. This
ensures that the first data is written to the address set up by PROG_COMMANDS, and loading
the last location in the page buffer does not make the Program Counter increment into the next
page.
During Page Read, the content of the selected Flash byte is captured into the Flash Data Byte
Register during the Capture-DR state. The AVR automatically alternates between reading the
low and the high byte for each new Capture-DR state, starting with the low byte for the first CapTest-logic-reset
Run-test/idle
Shift-DR
Exit1-DR
Pause-DR
Exit2-DR
Update-DR
Select-IR scan
Capture-IR
Shift-IR
Exit1-IR
Pause-IR
Exit2-IR
Update-IR
Select-DR scan
Capture-DR
0
1
0 11 1
0 0
0 0
1 1
1 0
1
1
0
1
0
0
1 0
1
1
0
1
0
0
0 0
1 1386
7593L–AVR–09/12
AT90USB64/128
ture-DR encountered after entering the PROG_PAGEREAD command. The Program Counter is
post-incremented after reading each high byte, including the first read byte. This ensures that
the first data is captured from the first address set up by PROG_COMMANDS, and reading the
last location in the page makes the program counter increment into the next page.
Figure 30-16. Flash Data Byte Register.
The state machine controlling the Flash Data Byte Register is clocked by TCK. During normal
operation in which eight bits are shifted for each Flash byte, the clock cycles needed to navigate
through the TAP controller automatically feeds the state machine for the Flash Data Byte Register
with sufficient number of clock pulses to complete its operation transparently for the user.
However, if too few bits are shifted between each Update-DR state during page load, the TAP
controller should stay in the Run-Test/Idle state for some TCK cycles to ensure that there are at
least 11 TCK cycles between each Update-DR state.
30.9.12 Programming algorithm
All references below of type “1a”, “1b”, and so on, refer to Table 30-17 on page 382.
30.9.13 Entering Programming mode
1. Enter JTAG instruction AVR_RESET and shift 1 in the Reset Register.
2. Enter instruction PROG_ENABLE and shift 0b1010_0011_0111_0000 in the Programming
Enable Register.
30.9.14 Leaving Programming mode
1. Enter JTAG instruction PROG_COMMANDS.
2. Disable all programming instructions by using no operation instruction 11a.
3. Enter instruction PROG_ENABLE and shift 0b0000_0000_0000_0000 in the programming
Enable Register.
4. Enter JTAG instruction AVR_RESET and shift 0 in the Reset Register.
TDI
TDO
D
A
T
A
Flash
EEPROM
fuses
lock bits
STROBES
ADDRESS
State
machine387
7593L–AVR–09/12
AT90USB64/128
30.9.15 Performing Chip Erase
1. Enter JTAG instruction PROG_COMMANDS.
2. Start Chip Erase using programming instruction 1a.
3. Poll for Chip Erase complete using programming instruction 1b, or wait for tWLRH_CE
(refer to Table 30-13 on page 373).
30.9.16 Programming the Flash
Before programming the Flash a Chip Erase must be performed, see “Performing Chip Erase”
on page 387.
1. Enter JTAG instruction PROG_COMMANDS.
2. Enable Flash write using programming instruction 2a.
3. Load address Extended High byte using programming instruction 2b.
4. Load address High byte using programming instruction 2c.
5. Load address Low byte using programming instruction 2d.
6. Load data using programming instructions 2e, 2f and 2g.
7. Repeat steps 5 and 6 for all instruction words in the page.
8. Write the page using programming instruction 2h.
9. Poll for Flash write complete using programming instruction 2i, or wait for tWLRH (refer to
Table 30-13 on page 373).
10. Repeat steps 3 to 9 until all data have been programmed.
A more efficient data transfer can be achieved using the PROG_PAGELOAD instruction:
1. Enter JTAG instruction PROG_COMMANDS.
2. Enable Flash write using programming instruction 2a.
3. Load the page address using programming instructions 2b, 2c and 2d. PCWORD (refer
to Table 30-11 on page 364) is used to address within one page and must be written as
0.
4. Enter JTAG instruction PROG_PAGELOAD.
5. Load the entire page by shifting in all instruction words in the page byte-by-byte, starting
with the LSB of the first instruction in the page and ending with the MSB of the last
instruction in the page. Use Update-DR to copy the contents of the Flash Data Byte
Register into the Flash page location and to auto-increment the Program Counter
before each new word.
6. Enter JTAG instruction PROG_COMMANDS.
7. Write the page using programming instruction 2h.
8. Poll for Flash write complete using programming instruction 2i, or wait for tWLRH (refer to
Table 30-13 on page 373).
9. Repeat steps 3 to 8 until all data have been programmed.
30.9.17 Reading the Flash
1. Enter JTAG instruction PROG_COMMANDS.
2. Enable Flash read using programming instruction 3a.
3. Load address using programming instructions 3b, 3c and 3d.
4. Read data using programming instruction 3e.
5. Repeat steps 3 and 4 until all data have been read.
A more efficient data transfer can be achieved using the PROG_PAGEREAD instruction:388
7593L–AVR–09/12
AT90USB64/128
1. Enter JTAG instruction PROG_COMMANDS.
2. Enable Flash read using programming instruction 3a.
3. Load the page address using programming instructions 3b, 3c and 3d. PCWORD (refer
to Table 30-11 on page 364) is used to address within one page and must be written as
0.
4. Enter JTAG instruction PROG_PAGEREAD.
5. Read the entire page (or Flash) by shifting out all instruction words in the page (or
Flash), starting with the LSB of the first instruction in the page (Flash) and ending with
the MSB of the last instruction in the page (Flash). The Capture-DR state both captures
the data from the Flash, and also auto-increments the program counter after each word
is read. Note that Capture-DR comes before the shift-DR state. Hence, the first byte
which is shifted out contains valid data.
6. Enter JTAG instruction PROG_COMMANDS.
7. Repeat steps 3 to 6 until all data have been read.
30.9.18 Programming the EEPROM
Before programming the EEPROM a Chip Erase must be performed, see “Performing Chip
Erase” on page 387.
1. Enter JTAG instruction PROG_COMMANDS.
2. Enable EEPROM write using programming instruction 4a.
3. Load address High byte using programming instruction 4b.
4. Load address Low byte using programming instruction 4c.
5. Load data using programming instructions 4d and 4e.
6. Repeat steps 4 and 5 for all data bytes in the page.
7. Write the data using programming instruction 4f.
8. Poll for EEPROM write complete using programming instruction 4g, or wait for tWLRH
(refer to Table 30-13 on page 373).
9. Repeat steps 3 to 8 until all data have been programmed.
Note that the PROG_PAGELOAD instruction can not be used when programming the EEPROM.
30.9.19 Reading the EEPROM
1. Enter JTAG instruction PROG_COMMANDS.
2. Enable EEPROM read using programming instruction 5a.
3. Load address using programming instructions 5b and 5c.
4. Read data using programming instruction 5d.
5. Repeat steps 3 and 4 until all data have been read.
Note that the PROG_PAGEREAD instruction can not be used when reading the EEPROM.
30.9.20 Programming the Fuses
1. Enter JTAG instruction PROG_COMMANDS.
2. Enable Fuse write using programming instruction 6a.
3. Load data high byte using programming instructions 6b. A bit value of “0” will program
the corresponding fuse, a “1” will un-program the fuse.
4. Write Fuse High byte using programming instruction 6c.
5. Poll for Fuse write complete using programming instruction 6d, or wait for tWLRH (refer to
Table 30-13 on page 373).389
7593L–AVR–09/12
AT90USB64/128
6. Load data low byte using programming instructions 6e. A “0” will program the fuse, a “1”
will unprogram the fuse.
7. Write Fuse low byte using programming instruction 6f.
8. Poll for Fuse write complete using programming instruction 6g, or wait for tWLRH (refer to
Table 30-13 on page 373).
30.9.21 Programming the Lock Bits
1. Enter JTAG instruction PROG_COMMANDS.
2. Enable Lock bit write using programming instruction 7a.
3. Load data using programming instructions 7b. A bit value of “0” will program the corresponding
lock bit, a “1” will leave the lock bit unchanged.
4. Write Lock bits using programming instruction 7c.
5. Poll for Lock bit write complete using programming instruction 7d, or wait for tWLRH (refer
to Table 30-13 on page 373).
30.9.22 Reading the Fuses and Lock Bits
1. Enter JTAG instruction PROG_COMMANDS.
2. Enable Fuse/Lock bit read using programming instruction 8a.
3. To read all Fuses and Lock bits, use programming instruction 8e.
To only read Fuse High byte, use programming instruction 8b.
To only read Fuse Low byte, use programming instruction 8c.
To only read Lock bits, use programming instruction 8d.
30.9.23 Reading the Signature Bytes
1. Enter JTAG instruction PROG_COMMANDS.
2. Enable Signature byte read using programming instruction 9a.
3. Load address 0x00 using programming instruction 9b.
4. Read first signature byte using programming instruction 9c.
5. Repeat steps 3 and 4 with address 0x01 and address 0x02 to read the second and third
signature bytes, respectively.
30.9.24 Reading the Calibration Byte
1. Enter JTAG instruction PROG_COMMANDS.
2. Enable Calibration byte read using programming instruction 10a.
3. Load address 0x00 using programming instruction 10b.
4. Read the calibration byte using programming instruction 10c.390
7593L–AVR–09/12
AT90USB64/128
31. Electrical characteristics for Atmel AT90USB64/128
31.1 Absolute maximum ratings*
31.2 DC characteristics
Operating temperature..................................... -40°C to +85°C *NOTICE: Stresses beyond those listed under “Absolute
maximum ratings” may cause permanent damage
to the device. This is a stress rating only and
functional operation of the device at these or
other conditions beyond those indicated in the
operational sections of this specification is not
implied. Exposure to absolute maximum rating
conditions for extended periods may affect
device reliability.
Storage temperature...................................... -65°C to +150°C
Voltage on any pin except RESET and VBUS
with respect to ground (7) .............................-0.5V to VCC+0.5V
Voltage on RESET with respect to ground ......-0.5V to +13.0V
Voltage on VBUS with respect to ground...........-0.5V to +6.0V
Maximum operating voltage............................................ +6.0V
DC current per I/O pin.................................................. 40.0mA
DC current VCC and GND pins .................................. 200.0mA
TA = -40°C to 85°C, VCC = 2.7V to 5.5V (unless otherwise noted).
Symbol Parameter Condition Min. (5) Typ. Max. (5) Units
VIL
Input Low Voltage,Except
XTAL1 and Reset pin VCC = 2.7V - 5.5V -0.5 0.2VCC (1)
V
VIL1
Input Low Voltage,
XTAL1 pin VCC = 2.7V - 5.5V -0.5 0.1VCC (1)
VIL2
Input Low Voltage,
RESET pin VCC = 2.7V - 5.5V -0.5 0.1VCC (1)
VIH
Input High Voltage,
Except XTAL1 and
RESET pins
VCC = 2.7V - 5.5V 0.6VCC (2) VCC + 0.5
VIH1
Input High Voltage,
XTAL1 pin VCC = 2.7V - 5.5V 0.7VCC (2) VCC + 0.5
VIH2
Input High Voltage,
RESET pin VCC = 2.7V - 5.5V 0.9VCC (2) VCC + 0.5
VOL Output Low Voltage (3) IOL = 10mA, VCC = 5V
IOL = 5mA, VCC = 3V
0.3
0.2
0.7
0.5
VOH Output High Voltage (4) IOH = -20mA, VCC = 5V
IOH = -10mA, VCC = 3V
4.2
2.3
4.5
2.6
IIL
Input Leakage
Current I/O Pin
VCC = 5.5V, pin low
(absolute value) 1
µA
IIH
Input Leakage
Current I/O Pin
VCC = 5.5V, pin high
(absolute value) 1
RRST Reset Pull-up Resistor 30 60
kΩ
RPU I/O Pin Pull-up Resistor 20 50391
7593L–AVR–09/12
AT90USB64/128
Note: 1. "Max" means the highest value where the pin is guaranteed to be read as low
2. "Min" means the lowest value where the pin is guaranteed to be read as high
3. Although each I/O port can sink more than the test conditions (20mA at VCC = 5V, 10mA at VCC = 3V) under steady state
conditions (non-transient), the following must be observed:
Atmel AT90USB64/128:
1.)The sum of all IOL, for ports A0-A7, G2, C4-C7 should not exceed 100mA.
2.)The sum of all IOL, for ports C0-C3, G0-G1, D0-D7 should not exceed 100mA.
3.)The sum of all IOL, for ports G3-G5, B0-B7, E0-E7 should not exceed 100mA.
4.)The sum of all IOL, for ports F0-F7 should not exceed 100mA.
If IOL exceeds the test condition, VOL may exceed the related specification. Pins are not guaranteed to sink current greater
than the listed test condition.
4. Although each I/O port can source more than the test conditions (20mA at VCC = 5V, 10mA at VCC = 3V) under steady state
conditions (non-transient), the following must be observed:
AT90USB64/128:
1)The sum of all IOH, for ports A0-A7, G2, C4-C7 should not exceed 100mA.
2)The sum of all IOH, for ports C0-C3, G0-G1, D0-D7 should not exceed 100mA.
3)The sum of all IOH, for ports G3-G5, B0-B7, E0-E7 should not exceed 100mA.
4)The sum of all IOH, for ports F0-F7 should not exceed 100mA.
5. All DC Characteristics contained in this datasheet are based on simulation and characterization of other AVR microcontrollers
manufactured in the same process technology. These values are preliminary values representing design targets, and
will be updated after characterization of actual silicon
6. Values with “PRR1 – Power Reduction Register 1” disabled (0x00).
ICC Power Supply Current (6)
Active 4MHz, VCC = 3V
(AT90USB64/128) 2.5 5
mA
Active 8MHz, VCC = 3V
(AT90USB64/128) 5 10
Active 8MHz, VCC = 5V
(AT90USB64/128) 10 18
Active 16MHz, VCC = 5V
(AT90USB64/128) 19 30
Icc Power-down mode
WDT enabled, BOD
enabled, VCC = 3V, 25°C 30
µA WDT enabled, BOD
disabled, VCC = 3V, 25°C 10
WDT disabled, BOD
disabled, VCC = 3V, 25°C 2
VACIO
Analog Comparator
Input Offset Voltage
VCC = 5V
Vin = VCC/2 10 40 mV
IACLK
Analog Comparator
Input Leakage Current
VCC = 5V
Vin = VCC/2 -50 50 nA
tACID
Analog Comparator
Propagation Delay
VCC = 2.7V
VCC = 4.0V
750
500 ns
Iq USB Regulator Quiescent
Current UVCC >3.6V, I = 0mA 10 30 µA
Vusb USB Regulator Output
Voltage (Ucap) UVCC >3.6V, I = 40mA (8) 3.0 3.3 3.5 V
TA = -40°C to 85°C, VCC = 2.7V to 5.5V (unless otherwise noted). (Continued)
Symbol Parameter Condition Min. (5) Typ. Max. (5) Units392
7593L–AVR–09/12
AT90USB64/128
7. As specified on the USB Electrical chapter of USB Specifications 2.0, the D+/D- pads can withstand voltages down to -1V
applied through a 39Ω resistor
8. USB Peripheral consumes up to 50mA from the regulator or UVCC pin when USB is used at full-load
31.3 External clock drive waveforms
Figure 31-1. External clock drive waveforms.
31.4 External clock drive
Note: All DC characteristics contained in this datasheet are based on simulation and characterization of
other AVR microcontrollers manufactured in the same process technology. These values are preliminary
values representing design targets, and will be updated after characterization of actual
silicon.
31.5 Maximum speed vs. VCC
Maximum frequency is depending on VCC. As shown in Figure 31-2 on page 393, the maximum
frequency vs. VCC curve is linear between 2.7V < VCC < 5.5V.
VIL1
VIH1
Table 31-1. External clock drive.
Symbol Parameter
VCC=1.8-5.5V VCC=2.7-5.5V VCC=4.5-5.5V
Min. Max. Min. Max. Min. Max. Units
1/tCLCL
Oscillator
Frequency 0 2 0 8 0 16 MHz
tCLCL Clock Period 500 125 62.5
tCHCX High Time 200 50 25 ns
t
CLCX Low Time 200 50 25
tCLCH Rise Time 2.0 1.6 0.5
μs
tCHCL Fall Time 2.0 1.6 0.5
ΔtCLCL
Change in period
from one clock
cycle to the next
2 2 2%393
7593L–AVR–09/12
AT90USB64/128
Figure 31-2. Maximum frequency vs. VCC, Atmel AT90USB64/128.
31.6 2-wire serial interface characteristics
Table 31-2 describes the requirements for devices connected to the 2-wire Serial Bus. The AT90USB64/128 2-wire Serial
Interface meets or exceeds these requirements under the noted conditions.
Timing symbols refer to Figure 31-3 on page 394.
16MHz
8MHz
Table 31-2. 2-wire serial bus requirements.
Symbol Parameter Condition Min Max Units
VIL Input Low-voltage -0.5 0.3 VCC
V VIH Input High-voltage 0.7 VCC VCC + 0.5
Vhys
(1) Hysteresis of Schmitt Trigger Inputs 0.05 VCC (2) –
VOL (1) Output Low-voltage 3mA sink current 0 0.4
tr
(1) Rise Time for both SDA and SCL 20 + 0.1Cb
(3)(2) 300
tof ns (1) Output Fall Time from VIHmin to VILmax 10pF < Cb < 400pF (3) 20 + 0.1Cb
(3)(2) 250
tSP (1) Spikes Suppressed by Input Filter 0 50 (2)
Ii Input Current each I/O Pin 0.1VCC < Vi
< 0.9VCC -10 10 µA
Ci
(1) Capacitance for each I/O Pin – 10 pF
fSCL SCL Clock Frequency fCK (4) > max(16fSCL, 250kHz) (5) 0 400 kHz
Rp Value of Pull-up resistor
fSCL ≤ 100kHz
fSCL > 100kHz
VCC – 0.4V
3mA ---------------------------- 1000ns
Cb
-------------------
Ω
VCC – 0.4V
3mA ---------------------------- 300ns
Cb
----------------394
7593L–AVR–09/12
AT90USB64/128
Notes: 1. In Atmel AT90USB64/128, this parameter is characterized and not 100% tested.
2. Required only for fSCL >100kHz.
3. Cb = capacitance of one bus line in pF.
4. fCK = CPU clock frequency
5. This requirement applies to all AT90USB64/128 2-wire Serial Interface operation. Other devices connected to the 2-wire
Serial Bus need only obey the general fSCL requirement.
6. The actual low period generated by the AT90USB64/128 2-wire Serial Interface is (1/fSCL - 2/fCK), thus fCK must be greater
than 6MHz for the low time requirement to be strictly met at fSCL = 100kHz.
7. The actual low period generated by the AT90USB64/128 2-wire Serial Interface is (1/fSCL - 2/fCK), thus the low time requirement
will not be strictly met for fSCL > 308kHz when fCK = 8MHz. Still, AT90USB64/128 devices connected to the bus may
communicate at full speed (400kHz) with other AT90USB64/128 devices, as well as any other device with a proper tLOW
acceptance margin.
Figure 31-3. 2-wire serial bus timing.
tHD;STA Hold Time (repeated) START Condition
fSCL ≤ 100kHz 4.0 –
µs
fSCL > 100kHz 0.6 –
tLOW Low Period of the SCL Clock
fSCL ≤ 100kHz (6) 4.7 –
fSCL > 100kHz (7) 1.3 –
tHIGH High period of the SCL clock
fSCL ≤ 100kHz 4.0 –
fSCL > 100kHz 0.6 –
tSU;STA
Set-up time for a repeated START
condition
fSCL ≤ 100kHz 4.7 –
fSCL > 100kHz 0.6 –
tHD;DAT Data hold time
fSCL ≤ 100kHz 0 3.45
fSCL > 100kHz 0 0.9
tSU;DAT Data setup time
fSCL ≤ 100kHz 250 –
ns
fSCL > 100kHz 100 –
tSU;STO Setup time for STOP condition
fSCL ≤ 100kHz 4.0 –
µs
fSCL > 100kHz 0.6 –
tBUF
Bus free time between a STOP and
START condition
fSCL ≤ 100kHz 4.7 –
fSCL > 100kHz 1.3 –
Table 31-2. 2-wire serial bus requirements. (Continued)
Symbol Parameter Condition Min Max Units
t
SU;STA
t
LOW
t
HIGH
t
LOW
t
of
t
HD;STA t
HD;DAT t
SU;DAT t
SU;STO
t
BUF
SCL
SDA
t
r395
7593L–AVR–09/12
AT90USB64/128
31.7 SPI timing characteristics
See Figure 31-4 and Figure 31-5 on page 396 for details.
Note: 1. In SPI Programming mode the minimum SCK high/low period is:
- 2 tCLCL for fCK <12MHz
- 3 tCLCL for fCK >12MHz
Figure 31-4. SPI interface timing requirements (master mode).
Table 31-3. SPI timing parameters.
Description Mode Min. Typ. Max.
1 SCK period Master See Table 18-4 on
page 174
ns
2 SCK high/low Master 50% duty cycle
3 Rise/Fall time Master 3.6
4 Setup Master 10
5 Hold Master 10
6 Out to SCK Master 0.5 × tsck
7 SCK to out Master 10
8 SCK to out high Master 10
9 SS low to out Slave 15
10 SCK period Slave 4 × tck
11 SCK high/low (1) Slave 2 × tck
12 Rise/Fall time Slave 1.6 µs
13 Setup Slave 10
ns
14 Hold Slave tck
15 SCK to out Slave 15
16 SCK to SS high Slave 20
17 SS high to tri-state Slave 10
18 SS low to SCK Slave 20
MOSI
(Data output)
SCK
(CPOL = 1)
MISO
(Data input)
SCK
(CPOL = 0)
SS
MSB LSB
MSB LSB
...
...
6 1
2 2
4 5 3
7 8396
7593L–AVR–09/12
AT90USB64/128
Figure 31-5. SPI interface timing requirements (slave mode).
31.8 Hardware boot entrance timing characteristics
Figure 31-6. Hardware boot timing requirements.
MISO
(Data output)
SCK
(CPOL = 1)
MOSI
(Data input)
SCK
(CPOL = 0)
SS
MSB LSB
MSB LSB
...
...
10
11 11
13 14 12
15 17
9
X
16
Table 31-4. Hardware boot timings.
Symbol Parameter Min. Max.
tSHRH HWB low Setup before Reset High 0
tHHRH HWB low Hold after Reset High
StartUpTime (SUT)
+
Time Out Delay (TOUT)
RESET
ALE/HWB
t
SHRH t
HHRH397
7593L–AVR–09/12
AT90USB64/128
31.9 ADC characteristics
Table 31-5. ADC characteristics.
Symbol Parameter Condition Min. Typ. Max. Units
Resolution
Single Ended Conversion 10
Bits
Differential Conversion
Gain = 1× or 10× 8
Differential Conversion
Gain = 200× 7
Absolute accuracy (Including
INL, DNL, quantization error,
gain and offset error)
Single Ended Conversion
VREF = 4V, VCC = 4V,
ADC clock = 200kHz
1.5
LSB
Single Ended Conversion
VREF = 4V, VCC = 4V,
ADC clock = 1MHz
Single Ended Conversion
VREF = 4V, VCC = 4V,
ADC clock = 200kHz
Noise Reduction Mode
1.5
Single Ended Conversion
VREF = 4V, VCC = 4V,
ADC clock = 1MHz
Noise Reduction Mode
Absolute accuracy
Gain = 1×, 10×, 200×
VREF = 4V, VCC = 5V
ADC Clock = 50 - 200kHz
1
Integral Non-Linearity (INL)
Single Ended Conversion
VREF = 4V, VCC = 4V,
ADC clock = 200kHz
0.5 1
Integral Non-Linearity (INL)
(Accuracy after calibration for
offset and gain error)
Gain = 1×, 10×, 200×
VREF = 4V, VCC = 5V
ADC Clock = 50 - 200kHz
0.5 1
Differential Non-Linearity (DNL)
Single Ended Conversion
VREF = 4V, VCC = 4V,
ADC clock = 200kHz
0.3 1
Gain Error
Single Ended Conversion
VREF = 4V, VCC = 4V,
ADC clock = 200kHz
-2 0 +2
Gain = 1×, 10×, 200× -2 0 +2
Offset Error
Single Ended Conversion
VREF = 4V, VCC = 4V,
ADC clock = 200kHz
-2 1 +2
Gain = 1×, 10×, 200×
VREF = 4V, VCC = 5V
ADC Clock = 50 - 200kHz
-1 0 +1
Conversion Time Free Running Conversion 65 260 µs
Clock Frequency Single Ended Conversion 50 1000 kHz398
7593L–AVR–09/12
AT90USB64/128
AVCC Analog Supply Voltage VCC - 0.3 VCC + 0.3
V
VREF Reference Voltage Single Ended Conversion 2.0 AVCC
Differential Conversion 2.0 AVCC - 0.5
VIN Input Voltage
Single ended channels 0 VREF
Differential Conversion 0 AVCC
Input Bandwidth
Single Ended Channels 38,5
kHz
Differential Channels 4
VINT1 Internal Voltage Reference 1.1V 1.0 1.1 1.2
V
VINT2 Internal Voltage Reference 2.56V 2.4 2.56 2.8
RREF Reference Input Resistance 32 kΩ
RAIN Analog Input Resistance 100 MΩ
Table 31-5. ADC characteristics. (Continued)
Symbol Parameter Condition Min. Typ. Max. Units399
7593L–AVR–09/12
AT90USB64/128
31.10 External data memory timing
Notes: 1. This assumes 50% clock duty cycle. The half period is actually the high time of the external clock, XTAL1.
2. This assumes 50% clock duty cycle. The half period is actually the low time of the external clock, XTAL1.
Table 31-6. External data memory characteristics, 4.5 - 5.5 Volts, no wait-state.
Symbol Parameter
8MHz oscillator Variable oscillator
Min. Max. Min. Max. Unit
0 1/tCLCL Oscillator Frequency 0.0 16 MHz
1 tLHLL ALE Pulse Width 115 1.0tCLCL-10
ns
2 tAVLL Address Valid A to ALE Low 57.5 0.5tCLCL-5 (1)
3a tLLAX_ST
Address Hold After ALE Low,
write access 5 5
3b tLLAX_LD
Address Hold after ALE Low,
read access 5 5
4 tAVLLC Address Valid C to ALE Low 57.5 0.5tCLCL-5 (1)
5 tAVRL Address Valid to RD Low 115 1.0tCLCL-10
6 tAVWL Address Valid to WR Low 115 1.0tCLCL-10
7 tLLWL ALE Low to WR Low 47.5 67.5 0.5tCLCL-15 (2) 0.5tCLCL+5 (2)
8 tLLRL ALE Low to RD Low 47.5 67.5 0.5tCLCL-15 (2) 0.5tCLCL+5 (2)
9 tDVRH Data Setup to RD High 40 40
10 tRLDV Read Low to Data Valid 75 1.0tCLCL-50
11 tRHDX Data Hold After RD High 0 0
12 tRLRH RD Pulse Width 115 1.0tCLCL-10
13 tDVWL Data Setup to WR Low 42.5 0.5tCLCL-20 (1)
14 tWHDX Data Hold After WR High 115 1.0tCLCL-10
15 tDVWH Data Valid to WR High 125 1.0tCLCL
16 tWLWH WR Pulse Width 115 1.0tCLCL-10
Table 31-7. External data memory characteristics, 4.5 - 5.5 Volts, 1 cycle wait-state.
Symbol Parameter
8MHz oscillator Variable oscillator
Min. Max. Min. Max. Unit
0 1/tCLCL Oscillator Frequency 0.0 16 MHz
10 tRLDV Read Low to Data Valid 200 2.0tCLCL-50
ns
12 tRLRH RD Pulse Width 240 2.0tCLCL-10
15 tDVWH Data Valid to WR High 240 2.0tCLCL
16 tWLWH WR Pulse Width 240 2.0tCLCL-10400
7593L–AVR–09/12
AT90USB64/128
Table 31-8. External data memory characteristics, 4.5 - 5.5 Volts, SRWn1 = 1, SRWn0 = 0.
Symbol Parameter
4MHz oscillator Variable oscillator
Min. Max. Min. Max. Unit
0 1/tCLCL Oscillator Frequency 0.0 16 MHz
10 tRLDV Read Low to Data Valid 325 3.0tCLCL-50
ns
12 tRLRH RD Pulse Width 365 3.0tCLCL-10
15 tDVWH Data Valid to WR High 375 3.0tCLCL
16 tWLWH WR Pulse Width 365 3.0tCLCL-10
Table 31-9. External data memory characteristics, 4.5 - 5.5 Volts, SRWn1 = 1, SRWn0 = 1.
Symbol Parameter
4MHz oscillator Variable oscillator
Min. Max. Min. Max. Unit
0 1/tCLCL Oscillator Frequency 0.0 16 MHz
10 tRLDV Read Low to Data Valid 325 3.0tCLCL-50
ns
12 tRLRH RD Pulse Width 365 3.0tCLCL-10
14 tWHDX Data Hold After WR High 240 2.0tCLCL-10
15 tDVWH Data Valid to WR High 375 3.0tCLCL
16 tWLWH WR Pulse Width 365 3.0tCLCL-10
Table 31-10. External data memory characteristics, 2.7 - 5.5 Volts, no wait-state.
Symbol Parameter
4MHz oscillator Variable oscillator
Min. Max. Min. Max. Unit
0 1/tCLCL Oscillator Frequency 0.0 8 MHz
1 tLHLL ALE Pulse Width 235 tCLCL-15
ns
2 tAVLL Address Valid A to ALE Low 115 0.5tCLCL-10 (1)
3a tLLAX_ST
Address Hold After ALE Low,
write access 5 5
3b tLLAX_LD
Address Hold after ALE Low,
read access 5 5
4 tAVLLC Address Valid C to ALE Low 115 0.5tCLCL-10 (1)
5 tAVRL Address Valid to RD Low 235 1.0tCLCL-15
6 tAVWL Address Valid to WR Low 235 1.0tCLCL-15
7 tLLWL ALE Low to WR Low 115 130 0.5tCLCL-10 (2) 0.5tCLCL+5 (2)
8 tLLRL ALE Low to RD Low 115 130 0.5tCLCL-10 (2) 0.5tCLCL+5 (2)
9 tDVRH Data Setup to RD High 45 45
10 tRLDV Read Low to Data Valid 190 1.0tCLCL-60
11 tRHDX Data Hold After RD High 0 0401
7593L–AVR–09/12
AT90USB64/128
Notes: 1. This assumes 50% clock duty cycle. The half period is actually the high time of the external clock, XTAL1.
2. This assumes 50% clock duty cycle. The half period is actually the low time of the external clock, XTAL1.
12 tRLRH RD Pulse Width 235 1.0tCLCL-15
ns
13 tDVWL Data Setup to WR Low 105 0.5tCLCL-20 (1)
14 tWHDX Data Hold After WR High 235 1.0tCLCL-15
15 tDVWH Data Valid to WR High 250 1.0tCLCL
16 tWLWH WR Pulse Width 235 1.0tCLCL-15
Table 31-10. External data memory characteristics, 2.7 - 5.5 Volts, no wait-state. (Continued)
Symbol Parameter
4MHz oscillator Variable oscillator
Min. Max. Min. Max. Unit
Table 31-11. External data memory characteristics, 2.7 - 5.5 Volts, SRWn1 = 0, SRWn0 = 1.
Symbol Parameter
4MHz oscillator Variable oscillator
Min. Max. Min. Max. Unit
0 1/tCLCL Oscillator Frequency 0.0 8 MHz
10 tRLDV Read Low to Data Valid 440 2.0tCLCL-60
ns
12 tRLRH RD Pulse Width 485 2.0tCLCL-15
15 tDVWH Data Valid to WR High 500 2.0tCLCL
16 tWLWH WR Pulse Width 485 2.0tCLCL-15
Table 31-12. External data memory characteristics, 2.7 - 5.5 Volts, SRWn1 = 1, SRWn0 = 0.
Symbol Parameter
4MHz oscillator Variable oscillator
Min. Max. Min. Max. Unit
0 1/tCLCL Oscillator Frequency 0.0 8 MHz
10 tRLDV Read Low to Data Valid 690 3.0tCLCL-60
ns
12 tRLRH RD Pulse Width 735 3.0tCLCL-15
15 tDVWH Data Valid to WR High 750 3.0tCLCL
16 tWLWH WR Pulse Width 735 3.0tCLCL-15
Table 31-13. External data memory characteristics, 2.7 - 5.5 Volts, SRWn1 = 1, SRWn0 = 1.
Symbol Parameter
4MHz oscillator Variable oscillator
Min. Max. Min. Max. Unit
0 1/tCLCL Oscillator Frequency 0.0 8 MHz
10 tRLDV Read Low to Data Valid 690 3.0tCLCL-60
ns
12 tRLRH RD Pulse Width 735 3.0tCLCL-15
14 tWHDX Data Hold After WR High 485 2.0tCLCL-15
15 tDVWH Data Valid to WR High 750 3.0tCLCL
16 tWLWH WR Pulse Width 735 3.0tCLCL-15402
7593L–AVR–09/12
AT90USB64/128
Figure 31-7. External memory timing (SRWn1 = 0, SRWn0 = 0.
Figure 31-8. External memory timing (SRWn1 = 0, SRWn0 = 1).
ALE
T1 T2 T3
Write Read
WR
T4
A15:8 Prev. addr. Address
DA7:0 Prev. data Address XX Data
RD
DA7:0 (XMBK = 0) Address Data
System clock (CLK CPU)
1
4
2
7
6
3a
3b
5
8 12
16
13
10
11
14
15
9
ALE
T1 T2 T3
Write Read
WR
T5
A15:8 Prev. addr. Address
DA7:0 Prev. data Address XX Data
RD
DA7:0 (XMBK = 0) Address Data
System clock (CLK CPU)
1
4
2
7
6
3a
3b
5
8 12
16
13
10
11
14
15
9
T4403
7593L–AVR–09/12
AT90USB64/128
Figure 31-9. External memory timing (SRWn1 = 1, SRWn0 = 0).
Figure 31-10. External memory timing (SRWn1 = 1, SRWn0 = 1).
The ALE pulse in the last period (T4-T7) is only present if the next instruction accesses the RAM (internal
or external).
ALE
T1 T2 T3
Write Read
WR
T6
A15:8 Prev. addr. Address
DA7:0 Prev. data Address XX Data
RD
DA7:0 (XMBK = 0) Address Data
System clock (CLK CPU)
1
4
2
7
6
3a
3b
5
8 12
16
13
10
11
14
15
9
T4 T5
ALE
T1 T2 T3
Write Read
WR
T7
A15:8 Prev. addr. Address
DA7:0 Prev. data Address XX Data
RD
DA7:0 (XMBK = 0) Address Data
System clock (CLK CPU)
1
4
2
7
6
3a
3b
5
8 12
16
13
10
11
14
15
9
T4 T5 T6404
7593L–AVR–09/12
AT90USB64/128
32. Atmel AT90USB64/128 typical characteristics
The following charts show typical behavior. These figures are not tested during manufacturing.
All current consumption measurements are performed with all I/O pins configured as inputs and
with internal pull-ups enabled. A sine wave generator with rail-to-rail output is used as clock
source.
All Active- and Idle current consumption measurements are done with all bits in the PRR registers
set and thus, the corresponding I/O modules are turned off. Also the Analog Comparator is
disabled during these measurements.
The power consumption in Power-down mode is independent of clock selection.
The current consumption is a function of several factors such as: operating voltage, operating
frequency, loading of I/O pins, switching rate of I/O pins, code executed and ambient temperature.
The dominating factors are operating voltage and frequency.
The current drawn from capacitive loaded pins may be estimated (for one pin) as CL×VCC×f
where CL = load capacitance, VCC = operating voltage and f = average switching frequency of I/O
pin.
The parts are characterized at frequencies higher than test limits. Parts are not guaranteed to
function properly at frequencies higher than the ordering code indicates.
The difference between current consumption in Power-down mode with Watchdog Timer
enabled and Power-down mode with Watchdog Timer disabled represents the differential current
drawn by the Watchdog Timer.405
7593L–AVR–09/12
AT90USB64/128
32.1 Input voltage levels
Figure 32-1. Input low voltage vs. VCC, all I/Os excluding DP/DM, XTAL1 and reset.
Figure 32-2. Input high voltage vs. VCC, all I/Os excluding DP/DM, XTAL1 and reset.
0.50
0.75
1.00
1.25
1.50
1.75
2.5 3.0 3.5 4.0 4.5 5.0 5.5
VCC (V)
Thres hold (V)
85
25
-40
0.50
0.75
1.00
1.25
1.50
1.75
2.5 3.0 3.5 4.0 4.5 5.0 5.5
VCC (V)
Thres hold (V)
85
25
-40406
7593L–AVR–09/12
AT90USB64/128
32.2 Output voltage levels
Figure 32-3. Output low voltage vs. output current, all I/Os excluding DP/DM, VCC = 3V.
Figure 32-4. Output low voltage vs. output current, all I/Os excluding DP/DM, VCC = 5V.
0
0.2
0.4
0.6
0.8
1.0
1.2
0 5 10 15 20
I
OL (mA)
VOL (V)
85
25
-40
0
0.1
0.2
0.3
0.4
0.5
0.6
0.7
0 5 10 15 20
I
OL (mA)
VOL (V)
85
25
-40407
7593L–AVR–09/12
AT90USB64/128
Figure 32-5. Output high voltage vs. output current, all I/Os excluding DP/DM, VCC = 3V.
Figure 32-6. Output high voltage vs. output current, all I/Os excluding DP/DM, VCC = 5V.
1.8
2.0
2.2
2.4
2.6
2.8
3.0
0 5 10 15 20
I
OH (mA)
VOH (V)
85
25
-40
4.2
4.4
4.6
4.8
5.0
0 5 10 15 20
I
OH (mA)
VOH (V)
85
25
-40408
7593L–AVR–09/12
AT90USB64/128
32.3 Power-down supply current
Figure 32-7. Power-down supply current vs. VCC, with BOD disabled, WDT disabled, T = 25°C.
Figure 32-8. Power-down supply current vs. VCC, with BOD disabled, WDT enabled, T = 25°C.
0
0.5
1.0
1.5
2.0
2.5
3.0
2.5 3.0 3.5 4.0 4.5 5.0 5.5
VCC (V)
ICC (µA)
0
2
4
6
8
10
12
14
16
2.5 3.0 3.5 4.0 4.5 5.0 5.5
VCC (V)
ICC (µA)409
7593L–AVR–09/12
AT90USB64/128
Figure 32-9. Power-down supply current vs. VCC, with BOD enabled, WDT enabled, T = 25°C.
32.4 Power-save supply current
Figure 32-10. Power-save supply current vs. VCC, with BOD & WDT disabled, T = 25°C.
0
10
20
30
40
50
60
2.5 3.0 3.5 4.0 4.5 5.0 5.5
VCC (V)
ICC (µA)
0
1
2
3
4
5
6
7
8
2.5 3.0 3.5 4.0 4.5 5.0 5.5
VCC (V)
ICC (µA)410
7593L–AVR–09/12
AT90USB64/128
32.5 Idle supply current
Figure 32-11. Idle supply current vs. frequency, T = 25°C.
32.6 Active supply current
Figure 32-12. Active supply current vs. frequency, T = 25°C.
0
5
10
15
20
246 8 10 12 14 16
Frequency (MHz)
ICC (mA)
5.5
5.0
4.5
3.3
2.7
0
5
10
15
20
25
246 8 10 12 14 16
Frequency (MHz)
ICC (mA)
5.5
5.0
4.5
3.3
2.7411
7593L–AVR–09/12
AT90USB64/128
32.7 Reset supply current
Figure 32-13. Reset supply current vs. frequency.
32.8 I/O pull-up current
Figure 32-14. I/O pull-up current vs. pin voltage, VCC = 5V.
0
2
4
6
8
10
12
4 6 8 10 12 14 16
Frequency (MHz)
ICC (mA)
5.5
5.0
4.5
3.3
2.7
-20
0
20
40
60
80
100
120
140
012345
VOP (V)
IOP (uA)
85
25
-40412
7593L–AVR–09/12
AT90USB64/128
Figure 32-15. Reset pull-up current vs. pin voltage, VCC = 5V.
32.9 Bandgap voltage
Figure 32-16. Bandgap voltage vs. temperature.
0
20
40
60
80
100
120
012345
VRESET (V)
IRESET (µA)
85
25
-40
1.080
1.085
1.090
1.095
1.100
1.105
1.110
1.115
-40 -30 -20 -10 0 10 20 30 40 50 60 70 80
Temperature (°C)
Bandgap voltage (V)
5.5
5.0
4.5
4.0
3.6
2.7413
7593L–AVR–09/12
AT90USB64/128
32.10 Internal ARef voltage
Figure 32-17. Internal ARef reference voltage vs. temperature, VCC = 2.7-5.5V.
32.11 USB regulator
Figure 32-18. USB regulator quiescent current vs. input voltage, no load.
2.54
2.56
2.58
2.60
2.62
2.64
-40 -20 0 20 40 60 80
Temperature (°C)
Tens ion Vref Inter (V)
0
10
20
30
40
50
60
70
80
90
100
3.0 3.5 4.0 4.5 5.0 5.5 6.0
Voltage (V)
ICC (µA)414
7593L–AVR–09/12
AT90USB64/128
Figure 32-19. USB regulator output voltage vs. input voltage, load = 75Ω.
Note: The 75Ω load is equivalent to the maximum average consumption of the USB peripheral in operation
(full bus load).
32.12 BOD levels
Figure 32-20. BOD voltage (2.4V level) vs. temperature.
2.6
2.8
3.0
3.2
3.4
3.0 3.5 4.0 4.5 5.0 5.5
Input Voltage (V)
Output voltage (V)
85
25
-40
2.42
2.44
2.46
2.48
2.50
2.52
2.54
-40 -30 -20 -10 0 10 20 30 40 50 60 70 80
Temperature (°C)
Thres hold (V)
Rising Vcc
Falling Vcc415
7593L–AVR–09/12
AT90USB64/128
Figure 32-21. BOD voltage (3.4V level) vs. temperature.
Figure 32-22. BOD voltage (4.3V level) vs. temperature.
3.42
3.44
3.46
3.48
3.50
3.52
3.54
3.56
-40 -30 -20 -10 0 10 20 30 40 50 60 70 80
Temperature (°C)
Thres hold (V)
Rising Vcc
Falling Vcc
4.34
4.36
4.38
4.40
4.42
4.44
4.46
4.48
4.50
-40 -30 -20 -10 0 10 20 30 40 50 60 70 80
Temperature (°C)
Thres hold (V)
Rising Vcc
Falling Vcc416
7593L–AVR–09/12
AT90USB64/128
32.13 Watchdog timer frequency
Figure 32-23. WDT oscillator frequency vs. VCC.
32.14 Internal RC oscillator frequency
Figure 32-24. RC oscillator frequency vs. OSCCAL, T = 25°C.
108
110
112
114
116
118
120
122
124
2.0 2.5 3.0 3.5 4.0 4.5 5.0 5.5
VCC (V)
FRC (kHz)
85
25
-40
2
4
6
8
10
12
14
16
-1 15 31 47 63 79 95 111 127 143 159 175 191 207 223 239 255
OSCCAL (X1)
FRC (MHz)417
7593L–AVR–09/12
AT90USB64/128
Figure 32-25. RC oscillator frequency vs. VCC.
Figure 32-26. RC oscillator frequency vs. temperature.
7.8
7.9
8.0
8.1
8.2
8.3
8.4
8.5
8.6
8.7
8.8
2.5 3.0 3.5 4.0 4.5 5.0 5.5
VCC (V)
FRC (MHz)
85
25
-40
7.8
8.0
8.2
8.4
8.6
8.8
-40 -30 -20 -10 0 10 20 30 40 50 60 70 80
Temperature (°C)
FRC (MHz)
5.5
4.0
3.3
3.0
2.7418
7593L–AVR–09/12
AT90USB64/128
32.15 Power-on reset
Figure 32-27. Power-on reset level vs. temperature.
1.0
1.1
1.2
1.3
1.4
1.5
1.6
1.7
-40 -30 -20 -10 0 10 20 30 40 50 60 70 80
Temperature (°C)
POR Voltage (V)419
7593L–AVR–09/12
AT90USB64/128
33. Register summary
Address Name Bit 7 Bit 6 Bit 5 Bit 4 Bit 3 Bit 2 Bit 1 Bit 0 Page
(0xFF) Reserved - - - - - - - -
(0xFE) Reserved - - - - - - - -
(0xFD) Reserved - - - - - - - -
(0xFC) Reserved - - - - - - - -
(0xFB) Reserved - - - - - - - -
(0xFA) Reserved - - - - - - - -
(0xF9) OTGTCON PAGE VALUE
(0xF8) UPINT PINT7:0
(0xF7) UPBCHX - - - - - PBYCT10:8
(0xF6) UPBCLX PBYCT7:0
(0xF5) UPERRX - COUNTER1:0 CRC16 TIMEOUT PID DATAPID DATATGL
(0xF4) UEINT EPINT6:0
(0xF3) UEBCHX - - - - - BYCT10:8
(0xF2) UEBCLX BYCT7:0
(0xF1) UEDATX DAT7:0
(0xF0) UEIENX FLERRE NAKINE - NAKOUTE RXSTPE RXOUTE STALLEDE TXINE
(0xEF) UESTA1X - - - - - CTRLDIR CURRBK1:0
(0xEE) UESTA0X CFGOK OVERFI UNDERFI - DTSEQ1:0 NBUSYBK1:0
(0xED) UECFG1X EPSIZE2:0 EPBK1:0 ALLOC
(0xEC) UECFG0X EPTYPE1:0 - - EPDIR
(0xEB) UECONX STALLRQ STALLRQC RSTDT EPEN
(0xEA) UERST EPRST6:0
(0xE9) UENUM EPNUM2:0
(0xE8) UEINTX FIFOCON NAKINI RWAL NAKOUTI RXSTPI RXOUTI STALLEDI TXINI
(0xE7) Reserved - - - -
(0xE6) UDMFN FNCERR
(0xE5) UDFNUMH FNUM10:8
(0xE4) UDFNUML FNUM7:0
(0xE3) UDADDR ADDEN UADD6:0
(0xE2) UDIEN UPRSME EORSME WAKEUPE EORSTE SOFE SUSPE
(0xE1) UDINT UPRSMI EORSMI WAKEUPI EORSTI SOFI SUSPI
(0xE0) UDCON LSM RMWKUP DETACH
(0xDF) OTGINT STOI HNPERRI ROLEEXI BCERRI VBERRI SRPI
(0xDE) OTGIEN STOE HNPERRE ROLEEXE BCERRE VBERRE SRPE
(0xDD) OTGCON HNPREQ SRPREQ SRPSEL VBUSHWC VBUSREQ VBUSRQC
(0xDC) Reserved
(0xDB) Reserved
(0xDA) USBINT IDTI VBUSTI
(0xD9) USBSTA SPEED ID VBUS
(0xD8) USBCON USBE HOST FRZCLK OTGPADE IDTE VBUSTE
(0xD7) UHWCON UIMOD UIDE UVCONE UVREGE
(0xD6) Reserved
(0xD5) Reserved
(0xD4) Reserved
(0xD3) Reserved
(0xD2) Reserved - - - - - - - -
(0xD1) Reserved - - - - - - - -
(0xD0) Reserved - - - - - - - -
(0xCF) Reserved - - - - - - - -
(0xCE) UDR1 USART1 I/O Data Register
(0xCD) UBRR1H - - - - USART1 Baud Rate Register High Byte
(0xCC) UBRR1L USART1 Baud Rate Register Low Byte
(0xCB) Reserved - - - - - - - -
(0xCA) UCSR1C UMSEL11 UMSEL10 UPM11 UPM10 USBS1 UCSZ11 UCSZ10 UCPOL1
(0xC9) UCSR1B RXCIE1 TXCIE1 UDRIE1 RXEN1 TXEN1 UCSZ12 RXB81 TXB81
(0xC8) UCSR1A RXC1 TXC1 UDRE1 FE1 DOR1 PE1 U2X1 MPCM1
(0xC7) Reserved - - - - - - - -
(0xC6) Reserved - - - - - - - -
(0xC5) Reserved - - - - - - - -
(0xC4) Reserved - - - - - - - -
(0xC3) Reserved - - - - - - - -
(0xC2) Reserved - - - - - - - -
(0xC1) Reserved - - - - - - - -
(0xC0) Reserved - - - - - - - -
(0xBF) Reserved - - - - - - - -420
7593L–AVR–09/12
AT90USB64/128
(0xBE) Reserved - - - - - - - -
(0xBD) TWAMR TWAM6 TWAM5 TWAM4 TWAM3 TWAM2 TWAM1 TWAM0 -
(0xBC) TWCR TWINT TWEA TWSTA TWSTO TWWC TWEN - TWIE
(0xBB) TWDR 2-wire Serial Interface Data Register
(0xBA) TWAR TWA6 TWA5 TWA4 TWA3 TWA2 TWA1 TWA0 TWGCE
(0xB9) TWSR TWS7 TWS6 TWS5 TWS4 TWS3 - TWPS1 TWPS0
(0xB8) TWBR 2-wire Serial Interface Bit Rate Register
(0xB7) Reserved - - - - - - - -
(0xB6) ASSR - EXCLK AS2 TCN2UB OCR2AUB OCR2BUB TCR2AUB TCR2BUB
(0xB5) Reserved - - - - - - - -
(0xB4) OCR2B Timer/Counter2 Output Compare Register B
(0xB3) OCR2A Timer/Counter2 Output Compare Register A
(0xB2) TCNT2 Timer/Counter2 (8 Bit)
(0xB1) TCCR2B FOC2A FOC2B - - WGM22 CS22 CS21 CS20
(0xB0) TCCR2A COM2A1 COM2A0 COM2B1 COM2B0 - - WGM21 WGM20
(0xAF) UPDATX PDAT7:0
(0xAE) UPIENX FLERRE NAKEDE - PERRE TXSTPE TXOUTE RXSTALLE RXINE
(0xAD) UPCFG2X INTFRQ7:0
(0xAC) UPSTAX CFGOK OVERFI UNDERFI DTSEQ1:0 NBUSYBK1:0
(0xAB) UPCFG1X PSIZE2:0 PBK1:0 ALLOC
(0xAA) UPCFG0X PTYPE1:0 PTOKEN1:0 PEPNUM3:0
(0xA9) UPCONX PFREEZE INMODE RSTDT PEN
(0xA8) UPRST PRST6:0
(0xA7) UPNUM PNUM2:0
(0xA6) UPINTX FIFOCON NAKEDI RWAL PERRI TXSTPI TXOUTI RXSTALLI RXINI
(0xA5) UPINRQX INRQ7:0
(0xA4) UHFLEN FLEN7:0
(0xA3) UHFNUMH FNUM10:8
(0xA2) UHFNUML FNUM7:0
(0xA1) UHADDR HADD6:0
(0xA0) UHIEN HWUPE HSOFE RXRSME RSMEDE RSTE DDISCE DCONNE
(0x9F) UHINT HWUPI HSOFI RXRSMI RSMEDI RSTI DDISCI DCONNI
(0x9E) UHCON RESUME RESET SOFEN
(0x9D) OCR3CH Timer/Counter3 - Output Compare Register C High Byte
(0x9C) OCR3CL Timer/Counter3 - Output Compare Register C Low Byte
(0x9B) OCR3BH Timer/Counter3 - Output Compare Register B High Byte
(0x9A) OCR3BL Timer/Counter3 - Output Compare Register B Low Byte
(0x99) OCR3AH Timer/Counter3 - Output Compare Register A High Byte
(0x98) OCR3AL Timer/Counter3 - Output Compare Register A Low Byte
(0x97) ICR3H Timer/Counter3 - Input Capture Register High Byte
(0x96) ICR3L Timer/Counter3 - Input Capture Register Low Byte
(0x95) TCNT3H Timer/Counter3 - Counter Register High Byte
(0x94) TCNT3L Timer/Counter3 - Counter Register Low Byte
(0x93) Reserved - - - - - - - -
(0x92) TCCR3C FOC3A FOC3B FOC3C - - - - -
(0x91) TCCR3B ICNC3 ICES3 - WGM33 WGM32 CS32 CS31 CS30
(0x90) TCCR3A COM3A1 COM3A0 COM3B1 COM3B0 COM3C1 COM3C0 WGM31 WGM30
(0x8F) Reserved - - - - - - - -
(0x8E) Reserved - - - - - - - -
(0x8D) OCR1CH Timer/Counter1 - Output Compare Register C High Byte
(0x8C) OCR1CL Timer/Counter1 - Output Compare Register C Low Byte
(0x8B) OCR1BH Timer/Counter1 - Output Compare Register B High Byte
(0x8A) OCR1BL Timer/Counter1 - Output Compare Register B Low Byte
(0x89) OCR1AH Timer/Counter1 - Output Compare Register A High Byte
(0x88) OCR1AL Timer/Counter1 - Output Compare Register A Low Byte
(0x87) ICR1H Timer/Counter1 - Input Capture Register High Byte
(0x86) ICR1L Timer/Counter1 - Input Capture Register Low Byte
(0x85) TCNT1H Timer/Counter1 - Counter Register High Byte
(0x84) TCNT1L Timer/Counter1 - Counter Register Low Byte
(0x83) Reserved - - - - - - - -
(0x82) TCCR1C FOC1A FOC1B FOC1C - - - - -
(0x81) TCCR1B ICNC1 ICES1 - WGM13 WGM12 CS12 CS11 CS10
(0x80) TCCR1A COM1A1 COM1A0 COM1B1 COM1B0 COM1C1 COM1C0 WGM11 WGM10
(0x7F) DIDR1 - - - - - - AIN1D AIN0D
(0x7E) DIDR0 ADC7D ADC6D ADC5D ADC4D ADC3D ADC2D ADC1D ADC0D
(0x7D) - - - - - - - - -
Address Name Bit 7 Bit 6 Bit 5 Bit 4 Bit 3 Bit 2 Bit 1 Bit 0 Page421
7593L–AVR–09/12
AT90USB64/128
(0x7C) ADMUX REFS1 REFS0 ADLAR MUX4 MUX3 MUX2 MUX1 MUX0
(0x7B) ADCSRB ADHSM ACME - - - ADTS2 ADTS1 ADTS0
(0x7A) ADCSRA ADEN ADSC ADATE ADIF ADIE ADPS2 ADPS1 ADPS0
(0x79) ADCH ADC Data Register High byte
(0x78) ADCL ADC Data Register Low byte
(0x77) Reserved - - - - - - - -
(0x76) Reserved - - - - - - - -
(0x75) XMCRB XMBK - - - - XMM2 XMM1 XMM0
(0x74) XMCRA SRE SRL2 SRL1 SRL0 SRW11 SRW10 SRW01 SRW00
(0x73) Reserved - - - - - - - -
(0x72) Reserved - - - - - - - -
(0x71) TIMSK3 - - ICIE3 - OCIE3C OCIE3B OCIE3A TOIE3
(0x70) TIMSK2 - - - - - OCIE2B OCIE2A TOIE2
(0x6F) TIMSK1 - - ICIE1 - OCIE1C OCIE1B OCIE1A TOIE1
(0x6E) TIMSK0 - - - - - OCIE0B OCIE0A TOIE0
(0x6D) Reserved - - - - - - - -
(0x6C) Reserved - - - - - - - -
(0x6B) PCMSK0 PCINT7 PCINT6 PCINT5 PCINT4 PCINT3 PCINT2 PCINT1 PCINT0
(0x6A) EICRB ISC71 ISC70 ISC61 ISC60 ISC51 ISC50 ISC41 ISC40
(0x69) EICRA ISC31 ISC30 ISC21 ISC20 ISC11 ISC10 ISC01 ISC00
(0x68) PCICR - - - - - - - PCIE0
(0x67) Reserved - - - - - - - -
(0x66) OSCCAL Oscillator Calibration Register
(0x65) PRR1 PRUSB - - - PRTIM3 - - PRUSART1
(0x64) PRR0 PRTWI PRTIM2 PRTIM0 - PRTIM1 PRSPI - PRADC
(0x63) Reserved - - - - - - - -
(0x62) Reserved - - - - - - - -
(0x61) CLKPR CLKPCE - - - CLKPS3 CLKPS2 CLKPS1 CLKPS0
(0x60) WDTCSR WDIF WDIE WDP3 WDCE WDE WDP2 WDP1 WDP0
0x3F (0x5F) SREG I T H S V N Z C
0x3E (0x5E) SPH SP15 SP14 SP13 SP12 SP11 SP10 SP9 SP8
0x3D (0x5D) SPL SP7 SP6 SP5 SP4 SP3 SP2 SP1 SP0
0x3C (0x5C) Reserved - - - - - - - -
0x3B (0x5B) RAMPZ - - - - - - RAMPZ1 RAMPZ0
0x3A (0x5A) Reserved - - - - - - - -
0x39 (0x59) Reserved - - - - - - - -
0x38 (0x58) Reserved - - - - - - - -
0x37 (0x57) SPMCSR SPMIE RWWSB SIGRD RWWSRE BLBSET PGWRT PGERS SPMEN
0x36 (0x56) Reserved - - - - - - - -
0x35 (0x55) MCUCR JTD - - PUD - - IVSEL IVCE
0x34 (0x54) MCUSR - - - JTRF WDRF BORF EXTRF PORF
0x33 (0x53) SMCR - - - - SM2 SM1 SM0 SE
0x32 (0x52) Reserved - - - - - - - -
0x31 (0x51) OCDR/
MONDR
OCDR7 OCDR6 OCDR5 OCDR4 OCDR3 OCDR2 OCDR1 OCDR0
Monitor Data Register
0x30 (0x50) ACSR ACD ACBG ACO ACI ACIE ACIC ACIS1 ACIS0
0x2F (0x4F) Reserved - - - - - - - -
0x2E (0x4E) SPDR SPI Data Register
0x2D (0x4D) SPSR SPIF WCOL - - - - - SPI2X
0x2C (0x4C) SPCR SPIE SPE DORD MSTR CPOL CPHA SPR1 SPR0
0x2B (0x4B) GPIOR2 General Purpose I/O Register 2
0x2A (0x4A) GPIOR1 General Purpose I/O Register 1
0x29 (0x49) PLLCSR - - - PLLP2 PLLP1 PLLP0 PLLE PLOCK
0x28 (0x48) OCR0B Timer/Counter0 Output Compare Register B
0x27 (0x47) OCR0A Timer/Counter0 Output Compare Register A
0x26 (0x46) TCNT0 Timer/Counter0 (8 Bit)
0x25 (0x45) TCCR0B FOC0A FOC0B - - WGM02 CS02 CS01 CS00
0x24 (0x44) TCCR0A COM0A1 COM0A0 COM0B1 COM0B0 - - WGM01 WGM00
0x23 (0x43) GTCCR TSM - - - - - PSRASY PSRSYNC
0x22 (0x42) EEARH - - - - EEPROM Address Register High Byte
0x21 (0x41) EEARL EEPROM Address Register Low Byte
0x20 (0x40) EEDR EEPROM Data Register
0x1F (0x3F) EECR - - EEPM1 EEPM0 EERIE EEMPE EEPE EERE
0x1E (0x3E) GPIOR0 General Purpose I/O Register 0
0x1D (0x3D) EIMSK INT7 INT6 INT5 INT4 INT3 INT2 INT1 INT0
0x1C (0x3C) EIFR INTF7 INTF6 INTF5 INTF4 INTF3 INTF2 INTF1 INTF0
Address Name Bit 7 Bit 6 Bit 5 Bit 4 Bit 3 Bit 2 Bit 1 Bit 0 Page422
7593L–AVR–09/12
AT90USB64/128
Note: 1. For compatibility with future devices, reserved bits should be written to zero if accessed. Reserved I/O memory addresses
should never be written.
2. I/O registers within the address range $00 - $1F are directly bit-accessible using the SBI and CBI instructions. In these registers,
the value of single bits can be checked by using the SBIS and SBIC instructions.
3. Some of the status flags are cleared by writing a logical one to them. Note that the CBI and SBI instructions will operate on
all bits in the I/O register, writing a one back into any flag read as set, thus clearing the flag. The CBI and SBI instructions
work with registers 0x00 to 0x1F only.
4. When using the I/O specific commands IN and OUT, the I/O addresses $00 - $3F must be used. When addressing I/O registers
as data space using LD and ST instructions, $20 must be added to these addresses. The Atmel AT90USB64/128 is a
complex microcontroller with more peripheral units than can be supported within the 64 location reserved in Opcode for the
IN and OUT instructions. For the Extended I/O space from $60 - $1FF in SRAM, only the ST/STS/STD and LD/LDS/LDD
instructions can be used.
0x1B (0x3B) PCIFR - - - - - - - PCIF0
0x1A (0x3A) Reserved - - - - - - - -
0x19 (0x39) Reserved - - - - - - - -
0x18 (0x38) TIFR3 - - ICF3 - OCF3C OCF3B OCF3A TOV3
0x17 (0x37) TIFR2 - - - - - OCF2B OCF2A TOV2
0x16 (0x36) TIFR1 - - ICF1 - OCF1C OCF1B OCF1A TOV1
0x15 (0x35) TIFR0 - - - - - OCF0B OCF0A TOV0
0x14 (0x34) Reserved - - - - - - - -
0x13 (0x33) Reserved - - - - - - - -
0x12 (0x32) Reserved - - - - - - - -
0x11 (0x31) PORTF PORTF7 PORTF6 PORTF5 PORTF4 PORTF3 PORTF2 PORTF1 PORTF0
0x10 (0x30) DDRF DDF7 DDF6 DDF5 DDF4 DDF3 DDF2 DDF1 DDF0
0x0F (0x2F) PINF PINF7 PINF6 PINF5 PINF4 PINF3 PINF2 PINF1 PINF0
0x0E (0x2E) PORTE PORTE7 PORTE6 PORTE5 PORTE4 PORTE3 PORTE2 PORTE1 PORTE0
0x0D (0x2D) DDRE DDE7 DDE6 DDE5 DDE4 DDE3 DDE2 DDE1 DDE0
0x0C (0x2C) PINE PINE7 PINE6 PINE5 PINE4 PINE3 PINE2 PINE1 PINE0
0x0B (0x2B) PORTD PORTD7 PORTD6 PORTD5 PORTD4 PORTD3 PORTD2 PORTD1 PORTD0
0x0A (0x2A) DDRD DDD7 DDD6 DDD5 DDD4 DDD3 DDD2 DDD1 DDD0
0x09 (0x29) PIND PIND7 PIND6 PIND5 PIND4 PIND3 PIND2 PIND1 PIND0
0x08 (0x28) PORTC PORTC7 PORTC6 PORTC5 PORTC4 PORTC3 PORTC2 PORTC1 PORTC0
0x07 (0x27) DDRC DDC7 DDC6 DDC5 DDC4 DDC3 DDC2 DDC1 DDC0
0x06 (0x26) PINC PINC7 PINC6 PINC5 PINC4 PINC3 PINC2 PINC1 PINC0
0x05 (0x25) PORTB PORTB7 PORTB6 PORTB5 PORTB4 PORTB3 PORTB2 PORTB1 PORTB0
0x04 (0x24) DDRB DDB7 DDB6 DDB5 DDB4 DDB3 DDB2 DDB1 DDB0
0x03 (0x23) PINB PINB7 PINB6 PINB5 PINB4 PINB3 PINB2 PINB1 PINB0
0x02 (0x22) PORTA PORTA7 PORTA6 PORTA5 PORTA4 PORTA3 PORTA2 PORTA1 PORTA0
0x01 (0x21) DDRA DDA7 DDA6 DDA5 DDA4 DDA3 DDA2 DDA1 DDA0
0x00 (0x20) PINA PINA7 PINA6 PINA5 PINA4 PINA3 PINA2 PINA1 PINA0
Address Name Bit 7 Bit 6 Bit 5 Bit 4 Bit 3 Bit 2 Bit 1 Bit 0 Page423
7593L–AVR–09/12
AT90USB64/128
34. Instruction set summary
Mnemonics Operands Description Operation Flags #Clocks
ARITHMETIC AND LOGIC INSTRUCTIONS
ADD Rd, Rr Add two Registers Rd ← Rd + Rr Z,C,N,V,H 1
ADC Rd, Rr Add with Carry two Registers Rd ← Rd + Rr + C Z,C,N,V,H 1
ADIW Rdl,K Add Immediate to Word Rdh:Rdl ← Rdh:Rdl + K Z,C,N,V,S 2
SUB Rd, Rr Subtract two Registers Rd ← Rd - Rr Z,C,N,V,H 1
SUBI Rd, K Subtract Constant from Register Rd ← Rd - K Z,C,N,V,H 1
SBC Rd, Rr Subtract with Carry two Registers Rd ← Rd - Rr - C Z,C,N,V,H 1
SBCI Rd, K Subtract with Carry Constant from Reg. Rd ← Rd - K - C Z,C,N,V,H 1
SBIW Rdl,K Subtract Immediate from Word Rdh:Rdl ← Rdh:Rdl - K Z,C,N,V,S 2
AND Rd, Rr Logical AND Registers Rd ← Rd • Rr Z,N,V 1
ANDI Rd, K Logical AND Register and Constant Rd ← Rd • K Z,N,V 1
OR Rd, Rr Logical OR Registers Rd ← Rd v Rr Z,N,V 1
ORI Rd, K Logical OR Register and Constant Rd ← Rd v K Z,N,V 1
EOR Rd, Rr Exclusive OR Registers Rd ← Rd ⊕ Rr Z,N,V 1
COM Rd One’s Complement Rd ← 0xFF − Rd Z,C,N,V 1
NEG Rd Two’s Complement Rd ← 0x00 − Rd Z,C,N,V,H 1
SBR Rd,K Set Bit(s) in Register Rd ← Rd v K Z,N,V 1
CBR Rd,K Clear Bit(s) in Register Rd ← Rd • (0xFF - K) Z,N,V 1
INC Rd Increment Rd ← Rd + 1 Z,N,V 1
DEC Rd Decrement Rd ← Rd − 1 Z,N,V 1
TST Rd Test for Zero or Minus Rd ← Rd • Rd Z,N,V 1
CLR Rd Clear Register Rd ← Rd ⊕ Rd Z,N,V 1
SER Rd Set Register Rd ← 0xFF None 1
MUL Rd, Rr Multiply Unsigned R1:R0 ← Rd x Rr Z,C 2
MULS Rd, Rr Multiply Signed R1:R0 ← Rd x Rr Z,C 2
MULSU Rd, Rr Multiply Signed with Unsigned R1:R0 ← Rd x Rr Z,C 2
FMUL Rd, Rr Fractional Multiply Unsigned R1:R0 ← (Rd x Rr) << 1 Z,C 2
FMULS Rd, Rr Fractional Multiply Signed R1:R0 ← (Rd x Rr) << 1 Z,C 2
FMULSU Rd, Rr Fractional Multiply Signed with Unsigned R1:R0 ← (Rd x Rr) << 1 Z,C 2
BRANCH INSTRUCTIONS
RJMP k Relative Jump PC ← PC + k + 1 None 2
IJMP Indirect Jump to (Z) PC ← Z None 2
EIJMP Extended Indirect Jump to (Z) PC ←(EIND:Z) None 2
JMP k Direct Jump PC ← k None 3
RCALL k Relative Subroutine Call PC ← PC + k + 1 None 4
ICALL Indirect Call to (Z) PC ← Z None 4
EICALL Extended Indirect Call to (Z) PC ←(EIND:Z) None 4
CALL k Direct Subroutine Call PC ← k None 5
RET Subroutine Return PC ← STACK None 5
RETI Interrupt Return PC ← STACK I 5
CPSE Rd,Rr Compare, Skip if Equal if (Rd = Rr) PC ← PC + 2 or 3 None 1/2/3
CP Rd,Rr Compare Rd − Rr Z, N,V,C,H 1
CPC Rd,Rr Compare with Carry Rd − Rr − C Z, N,V,C,H 1
CPI Rd,K Compare Register with Immediate Rd − K Z, N,V,C,H 1
SBRC Rr, b Skip if Bit in Register Cleared if (Rr(b)=0) PC ← PC + 2 or 3 None 1/2/3
SBRS Rr, b Skip if Bit in Register is Set if (Rr(b)=1) PC ← PC + 2 or 3 None 1/2/3
SBIC P, b Skip if Bit in I/O Register Cleared if (P(b)=0) PC ← PC + 2 or 3 None 1/2/3
SBIS P, b Skip if Bit in I/O Register is Set if (P(b)=1) PC ← PC + 2 or 3 None 1/2/3
BRBS s, k Branch if Status Flag Set if (SREG(s) = 1) then PC←PC+k + 1 None 1/2
BRBC s, k Branch if Status Flag Cleared if (SREG(s) = 0) then PC←PC+k + 1 None 1/2
BREQ k Branch if Equal if (Z = 1) then PC ← PC + k + 1 None 1/2
BRNE k Branch if Not Equal if (Z = 0) then PC ← PC + k + 1 None 1/2
BRCS k Branch if Carry Set if (C = 1) then PC ← PC + k + 1 None 1/2
BRCC k Branch if Carry Cleared if (C = 0) then PC ← PC + k + 1 None 1/2
BRSH k Branch if Same or Higher if (C = 0) then PC ← PC + k + 1 None 1/2
BRLO k Branch if Lower if (C = 1) then PC ← PC + k + 1 None 1/2
BRMI k Branch if Minus if (N = 1) then PC ← PC + k + 1 None 1/2
BRPL k Branch if Plus if (N = 0) then PC ← PC + k + 1 None 1/2
BRGE k Branch if Greater or Equal, Signed if (N ⊕ V= 0) then PC ← PC + k + 1 None 1/2
BRLT k Branch if Less Than Zero, Signed if (N ⊕ V= 1) then PC ← PC + k + 1 None 1/2
BRHS k Branch if Half Carry Flag Set if (H = 1) then PC ← PC + k + 1 None 1/2
BRHC k Branch if Half Carry Flag Cleared if (H = 0) then PC ← PC + k + 1 None 1/2
BRTS k Branch if T Flag Set if (T = 1) then PC ← PC + k + 1 None 1/2
BRTC k Branch if T Flag Cleared if (T = 0) then PC ← PC + k + 1 None 1/2
BRVS k Branch if Overflow Flag is Set if (V = 1) then PC ← PC + k + 1 None 1/2424
7593L–AVR–09/12
AT90USB64/128
BRVC k Branch if Overflow Flag is Cleared if (V = 0) then PC ← PC + k + 1 None 1/2
BRIE k Branch if Interrupt Enabled if ( I = 1) then PC ← PC + k + 1 None 1/2
BRID k Branch if Interrupt Disabled if ( I = 0) then PC ← PC + k + 1 None 1/2
BIT AND BIT-TEST INSTRUCTIONS
SBI P,b Set Bit in I/O Register I/O(P,b) ← 1 None 2
CBI P,b Clear Bit in I/O Register I/O(P,b) ← 0 None 2
LSL Rd Logical Shift Left Rd(n+1) ← Rd(n), Rd(0) ← 0 Z,C,N,V 1
LSR Rd Logical Shift Right Rd(n) ← Rd(n+1), Rd(7) ← 0 Z,C,N,V 1
ROL Rd Rotate Left Through Carry Rd(0)←C,Rd(n+1)← Rd(n),C←Rd(7) Z,C,N,V 1
ROR Rd Rotate Right Through Carry Rd(7)←C,Rd(n)← Rd(n+1),C←Rd(0) Z,C,N,V 1
ASR Rd Arithmetic Shift Right Rd(n) ← Rd(n+1), n=0..6 Z,C,N,V 1
SWAP Rd Swap Nibbles Rd(3..0)←Rd(7..4),Rd(7..4)←Rd(3..0) None 1
BSET s Flag Set SREG(s) ← 1 SREG(s) 1
BCLR s Flag Clear SREG(s) ← 0 SREG(s) 1
BST Rr, b Bit Store from Register to T T ← Rr(b) T 1
BLD Rd, b Bit load from T to Register Rd(b) ← T None 1
SEC Set Carry C ← 1 C1
CLC Clear Carry C ← 0 C 1
SEN Set Negative Flag N ← 1 N1
CLN Clear Negative Flag N ← 0 N 1
SEZ Set Zero Flag Z ← 1 Z1
CLZ Clear Zero Flag Z ← 0 Z 1
SEI Global Interrupt Enable I ← 1 I1
CLI Global Interrupt Disable I ← 0 I 1
SES Set Signed Test Flag S ← 1 S1
CLS Clear Signed Test Flag S ← 0 S 1
SEV Set Twos Complement Overflow. V ← 1 V1
CLV Clear Twos Complement Overflow V ← 0 V 1
SET Set T in SREG T ← 1 T1
CLT Clear T in SREG T ← 0 T 1
SEH Set Half Carry Flag in SREG H ← 1 H1
CLH Clear Half Carry Flag in SREG H ← 0 H 1
DATA TRANSFER INSTRUCTIONS
MOV Rd, Rr Move Between Registers Rd ← Rr None 1
MOVW Rd, Rr Copy Register Word Rd+1:Rd ← Rr+1:Rr None 1
LDI Rd, K Load Immediate Rd ← K None 1
LD Rd, X Load Indirect Rd ← (X) None 2
LD Rd, X+ Load Indirect and Post-Inc. Rd ← (X), X ← X + 1 None 2
LD Rd, - X Load Indirect and Pre-Dec. X ← X - 1, Rd ← (X) None 2
LD Rd, Y Load Indirect Rd ← (Y) None 2
LD Rd, Y+ Load Indirect and Post-Inc. Rd ← (Y), Y ← Y + 1 None 2
LD Rd, - Y Load Indirect and Pre-Dec. Y ← Y - 1, Rd ← (Y) None 2
LDD Rd,Y+q Load Indirect with Displacement Rd ← (Y + q) None 2
LD Rd, Z Load Indirect Rd ← (Z) None 2
LD Rd, Z+ Load Indirect and Post-Inc. Rd ← (Z), Z ← Z+1 None 2
LD Rd, -Z Load Indirect and Pre-Dec. Z ← Z - 1, Rd ← (Z) None 2
LDD Rd, Z+q Load Indirect with Displacement Rd ← (Z + q) None 2
LDS Rd, k Load Direct from SRAM Rd ← (k) None 2
ST X, Rr Store Indirect (X) ← Rr None 2
ST X+, Rr Store Indirect and Post-Inc. (X) ← Rr, X ← X + 1 None 2
ST - X, Rr Store Indirect and Pre-Dec. X ← X - 1, (X) ← Rr None 2
ST Y, Rr Store Indirect (Y) ← Rr None 2
ST Y+, Rr Store Indirect and Post-Inc. (Y) ← Rr, Y ← Y + 1 None 2
ST - Y, Rr Store Indirect and Pre-Dec. Y ← Y - 1, (Y) ← Rr None 2
STD Y+q,Rr Store Indirect with Displacement (Y + q) ← Rr None 2
ST Z, Rr Store Indirect (Z) ← Rr None 2
ST Z+, Rr Store Indirect and Post-Inc. (Z) ← Rr, Z ← Z + 1 None 2
ST -Z, Rr Store Indirect and Pre-Dec. Z ← Z - 1, (Z) ← Rr None 2
STD Z+q,Rr Store Indirect with Displacement (Z + q) ← Rr None 2
STS k, Rr Store Direct to SRAM (k) ← Rr None 2
LPM Load Program Memory R0 ← (Z) None 3
LPM Rd, Z Load Program Memory Rd ← (Z) None 3
LPM Rd, Z+ Load Program Memory and Post-Inc Rd ← (Z), Z ← Z+1 None 3
ELPM Extended Load Program Memory R0 ← (RAMPZ:Z) None 3
ELPM Rd, Z Extended Load Program Memory Rd ← (Z) None 3
ELPM Rd, Z+ Extended Load Program Memory Rd ← (RAMPZ:Z), RAMPZ:Z ←RAMPZ:Z+1 None 3
Mnemonics Operands Description Operation Flags #Clocks425
7593L–AVR–09/12
AT90USB64/128
SPM Store Program Memory (Z) ← R1:R0 None -
IN Rd, P In Port Rd ← P None 1
OUT P, Rr Out Port P ← Rr None 1
PUSH Rr Push Register on Stack STACK ← Rr None 2
POP Rd Pop Register from Stack Rd ← STACK None 2
MCU CONTROL INSTRUCTIONS
NOP No Operation None 1
SLEEP Sleep (see specific descr. for Sleep function) None 1
WDR Watchdog Reset (see specific descr. for WDR/timer) None 1
BREAK Break For On-chip Debug Only None N/A
Mnemonics Operands Description Operation Flags #Clocks426
7593L–AVR–09/12
AT90USB64/128
35. Ordering information
35.1 Atmel AT90USB646
Notes: 1. This device can also be supplied in wafer form. Please contact your local Atmel sales office for detailed ordering information
and minimum quantities.
2. Pb-free packaging complies to the European directive for Restriction of Hazardous Substances (RoHS directive). Also
Halide free and fully green.
3. See “Maximum speed vs. VCC” on page 392.
Speed [MHz] Power supply [V] Ordering code (2) USB interface Package (1) Operating range
16 (3) 2.7-5.5
AT90USB646-AU
AT90USB646-MU Device
MD
PS
Industrial
(-40° to +85°C)
MD
64 - lead, 14 × 14mm body size, 1.0mm body thickness
0.8mm lead pitch, thin profile plastic quad flat package (TQFP)
PS
64 - lead, 9 × 9mm body size, 0.50mm pitch
Quad flat no lead package (QFN)427
7593L–AVR–09/12
AT90USB64/128
35.2 Atmel AT90USB647
Notes: 1. This device can also be supplied in wafer form. Please contact your local Atmel sales office for detailed ordering information
and minimum quantities.
2. Pb-free packaging complies to the European directive for Restriction of Hazardous Substances (RoHS directive). Also
Halide free and fully green.
3. See “Maximum speed vs. VCC” on page 392.
Speed [MHz] Power supply [V] Ordering code (2) USB interface Package (1) Operating range
16 (3) 2.7-5.5
AT90USB647-AU
AT90USB647-MU USB OTG MD
PS
Industrial
(-40° to +85°C)
MD
64 - lead, 14 × 14mm body size, 1.0mm body thickness
0.8mm lead pitch, thin profile plastic quad flat package (TQFP)
PS
64 - lead, 9 × 9mm body size, 0.50mm pitch
Quad flat no lead package (QFN)428
7593L–AVR–09/12
AT90USB64/128
35.3 Atmel AT90USB1286
Notes: 1. This device can also be supplied in wafer form. Please contact your local Atmel sales office for detailed ordering information
and minimum quantities.
2. Pb-free packaging complies to the European directive for Restriction of Hazardous Substances (RoHS directive). Also
Halide free and fully green.
3. See “Maximum speed vs. VCC” on page 392.
Speed [MHz] Power supply [V] Ordering code (2) USB interface Package (1) Operating range
16 (3) 2.7-5.5
AT90USB1286-AU
AT90USB1286-MU Device
MD
PS
Industrial
(-40° to +85°C)
MD
64 - lead, 14 × 14mm body size, 1.0mm body thickness
0.8mm lead pitch, thin profile plastic quad flat package (TQFP)
PS
64 - lead, 9 × 9mm body size, 0.50mm pitch
Quad flat no lead package (QFN)429
7593L–AVR–09/12
AT90USB64/128
35.4 Atmel AT90USB1287
Notes: 1. This device can also be supplied in wafer form. Please contact your local Atmel sales office for detailed ordering information
and minimum quantities.
2. Pb-free packaging complies to the European directive for Restriction of Hazardous Substances (RoHS directive). Also
Halide free and fully green.
3. See “Maximum speed vs. VCC” on page 392.
Speed [MHz] Power supply [V] Ordering code (2) USB interface Package (1) Operating range
16 (3) 2.7-5.5
AT90USB1287-AU
AT90USB1287-MU Host (OTG) MD
PS
Industrial
(-40° to +85°C)
MD
64 - lead, 14 × 14mm body size, 1.0mm body thickness
0.8mm lead pitch, thin profile plastic quad flat package (TQFP)
PS
64 - lead, 9 × 9mm body size, 0.50mm pitch
Quad flat no lead package (QFN)430
7593L–AVR–09/12
AT90USB64/128
36. Packaging information
36.1 TQFP64431
7593L–AVR–09/12
AT90USB64/128432
7593L–AVR–09/12
AT90USB64/128
36.2 QFN64433
7593L–AVR–09/12
AT90USB64/128434
7593L–AVR–09/12
AT90USB64/128
37. Errata
37.1 Atmel AT90USB1287/6 errata
37.1.1 AT90USB1287/6 errata history
Notes: 1. A blank or any alphanumeric string.
37.1.2 AT90USB1287/6 first release
• Incorrect CPU behavior for VBUSTI and IDTI interrupts routines
• USB Eye Diagram violation in low-speed mode
• Transient perturbation in USB suspend mode generates over consumption
• VBUS Session valid threshold voltage
• USB signal rate
• VBUS residual level
• Spike on TWI pins when TWI is enabled
• High current consumption in sleep mode
• Async timer interrupt wake up from sleep generate multiple interrupts
9. Incorrect CPU behavior for VBUSTI and IDTI interrupts routines
The CPU core may incorrectly execute the interrupt vector related to the VBUSTI and IDTI
interrupt flags.
Problem fix/workaround
Do not enable these interrupts, firmware must process these USB events by polling VBUSTI
and IDTI flags.
8. USB Eye Diagram violation in low-speed mode
The low to high transition of D- violates the USB eye diagram specification when transmitting
with low-speed signaling.
Problem fix/workaround
None.
7. Transient perturbation in USB suspend mode generates overconsumption
In device mode and when the USB is suspended, transient perturbation received on the
USB lines generates a wake up state. However the idle state following the perturbation does
Silicon Release 90USB1286-16MU 90USB1287-16AU 90USB1287-16MU
First Release Date Code up to 0648 Date Code up to 0714
and lots 0735 6H2726 (1) Date Code up to 0701
Second Release Date Code from 0709 to 0801
except lots 0801 7H5103 (1)
from Date Code 0722 to 0806
except lots 0735 6H2726 (1)
Date Code from 0714 to 0810
except lots 0748 7H5103 (1)
Third Release Lots 0801 7H5103 (1) and
Date Code from 0814 Date Code from 0814 Lots 0748 7H5103 (1) and
Date Code from 0814
Fourth Release TBD TBD TBD435
7593L–AVR–09/12
AT90USB64/128
not set the SUSPI bit anymore. The internal USB engine remains in suspend mode but the
USB differential receiver is still enabled and generates a typical 300µA extra-power consumption.
Detection of the suspend state after the transient perturbation should be
performed by software (instead of reading the SUSPI bit).
Problem fix/workaround
USB waiver allows bus powered devices to consume up to 2.5mA in suspend state.
6. VBUS session valid threshold voltage
The VSession valid threshold voltage is internally connected to VBus_Valid (4.4V approx.).
That causes the device to attach to the bus only when Vbus is greater than VBusValid
instead of V_Session Valid. Thus if VBUS is lower than 4.4V, the device is detached.
Problem fix/workaround
According to the USB power drop budget, this may require connecting the device toa root
hub or a self-powered hub.
5. UBS signal rate
The average USB signal rate may sometime be measured out of the USB specifications
(12MHz ±30kHz) with short frames. When measured on a long period, the average signal
rate value complies with the specifications. This bit rate deviation does not generates communication
or functional errors.
Problem fix/workaround
None.
4. VBUS residual level
In USB device and host mode, once a 5V level has been detected to the VBUS pad, a residual
level (about 3V) can be measured on the VBUS pin.
Problem fix/workaround
None.
3. Spike on TWI pins when TWI is enabled
100ns negative spike occurs on SDA and SCL pins when TWI is enabled.
Problem fix/workaround
No known workaround, enable Atmel AT90USB64/128 TWI first versus the others nodes of
the TWI network.
2. High current consumption in sleep mode
If a pending interrupt cannot wake the part up from the selected mode, the current consumption
will increase during sleep when executing the SLEEP instruction directly after a SEI
instruction.
Problem fix/workaround
Before entering sleep, interrupts not used to wake up the part from the sleep mode should
be disabled.436
7593L–AVR–09/12
AT90USB64/128
1. Asynchronous timer interrupt wake up from sleep generates multiple interrupts
If the CPU core is in sleep and wakes-up from an asynchronous timer interrupt and then go
back in sleep again it may wake up multiple times.
Problem fix/workaround
A software workaround is to wait with performing the sleep instruction until
TCNT2>OCR2+1.437
7593L–AVR–09/12
AT90USB64/128
37.1.3 Atmel AT90USB1287/6 second release
• Incorrect CPU behavior for VBUSTI and IDTI interrupts routines
• USB Eye Diagram violation in low-speed mode
• Transient perturbation in USB suspend mode generates over consumption
• VBUS Session valid threshold voltage
• Spike on TWI pins when TWI is enabled
• High current consumption in sleep mode
• Async timer interrupt wake up from sleep generate multiple interrupts
7. Incorrect CPU behavior for VBUSTI and IDTI interrupts routines
The CPU core may incorrectly execute the interrupt vector related to the VBUSTI and IDTI
interrupt flags.
Problem fix/workaround
Do not enable these interrupts, firmware must process these USB events by polling VBUSTI
and IDTI flags.
6. USB Eye Diagram violation in low-speed mode
The low to high transition of D- violates the USB eye diagram specification when transmitting
with low-speed signaling.
Problem fix/workaround
None.
5. Transient perturbation in USB suspend mode generates overconsumption
In device mode and when the USB is suspended, transient perturbation received on the
USB lines generates a wake up state. However the idle state following the perturbation does
not set the SUSPI bit anymore. The internal USB engine remains in suspend mode but the
USB differential receiver is still enabled and generates a typical 300µA extra-power consumption.
Detection of the suspend state after the transient perturbation should be
performed by software (instead of reading the SUSPI bit).
Problem fix/workaround
USB waiver allows bus powered devices to consume up to 2.5mA in suspend state.
4. VBUS session valid threshold voltage
The VSession valid threshold voltage is internally connected to VBus_Valid (4.4V approx.).
That causes the device to attach to the bus only when Vbus is greater than VBusValid
instead of V_Session Valid. Thus if VBUS is lower than 4.4V, the device is detached.
Problem fix/workaround
According to the USB power drop budget, this may require connecting the device toa root
hub or a self-powered hub.
3. Spike on TWI pins when TWI is enabled
100ns negative spike occurs on SDA and SCL pins when TWI is enabled.438
7593L–AVR–09/12
AT90USB64/128
Problem fix/workaround
No known workaround, enable Atmel AT90USB64/128 TWI first versus the others nodes of
the TWI network.
2. High current consumption in sleep mode
If a pending interrupt cannot wake the part up from the selected mode, the current consumption
will increase during sleep when executing the SLEEP instruction directly after a SEI
instruction.
Problem fix/workaround
Before entering sleep, interrupts not used to wake up the part from the sleep mode should
be disabled.
1. Asynchronous timer interrupt wake up from sleep generates multiple interrupts
If the CPU core is in sleep and wakes-up from an asynchronous timer interrupt and then go
back in sleep again it may wake up multiple times.
Problem fix/workaround
A software workaround is to wait with performing the sleep instruction until
TCNT2>OCR2+1.439
7593L–AVR–09/12
AT90USB64/128
37.1.4 Atmel AT90USB1287/6 Third Release
• Incorrect CPU behavior for VBUSTI and IDTI interrupts routines
• Transient perturbation in USB suspend mode generates over consumption
• Spike on TWI pins when TWI is enabled
• High current consumption in sleep mode
• Async timer interrupt wake up from sleep generate multiple interrupts
5. Incorrect CPU behavior for VBUSTI and IDTI interrupts routines
The CPU core may incorrectly execute the interrupt vector related to the VBUSTI and IDTI
interrupt flags.
Problem fix/workaround
Do not enable these interrupts, firmware must process these USB events by polling VBUSTI
and IDTI flags.
4. Transient perturbation in USB suspend mode generates overconsumption
In device mode and when the USB is suspended, transient perturbation received on the
USB lines generates a wake up state. However the idle state following the perturbation does
not set the SUSPI bit. The internal USB engine remains in suspend mode but the USB differential
receiver is still enabled and generates a typical 300µA extra-power consumption.
Detection of the suspend state after the transient perturbation should be performed by software
(instead of reading the SUSPI bit).
Problem fix/workaround
USB waiver allows bus powered devices to consume up to 2.5mA in suspend state.
3. Spike on TWI pins when TWI is enabled
100ns negative spike occurs on SDA and SCL pins when TWI is enabled.
Problem fix/workaround
No known workaround, enable AT90USB64/128 TWI first, before the others nodes of the
TWI network.
2. High current consumption in sleep mode
If a pending interrupt cannot wake the part up from the selected mode, the current consumption
will increase during sleep when executing the SLEEP instruction directly after a SEI
instruction.
Problem fix/workaround
Before entering sleep, interrupts not used to wake up the part from sleep mode should be
disabled.
1. Asynchronous timer interrupt wake up from sleep generates multiple interrupts
If the CPU core is in sleep mode and wakes-up from an asynchronous timer interrupt and
then goes back into sleep mode, it may wake up multiple times.440
7593L–AVR–09/12
AT90USB64/128
Problem fix/workaround
A software workaround is to wait before performing the sleep instruction: until
TCNT2>OCR2+1.441
7593L–AVR–09/12
AT90USB64/128
37.1.5 Atmel AT90USB1287/6 Fourth Release
• Transient perturbation in USB suspend mode generates over consumption
• Spike on TWI pins when TWI is enabled
• High current consumption in sleep mode
• Async timer interrupt wake up from sleep generate multiple interrupts
4. Transient perturbation in USB suspend mode generates overconsumption
In device mode and when the USB is suspended, transient perturbation received on the
USB lines generates a wake up state. However the idle state following the perturbation does
not set the SUSPI bit. The internal USB engine remains in suspend mode but the USB differential
receiver is still enabled and generates a typical 300µA extra-power consumption.
Detection of the suspend state after the transient perturbation should be performed by software
(instead of reading the SUSPI bit).
Problem fix/workaround
USB waiver allows bus powered devices to consume up to 2.5mA in suspend state.
3. Spike on TWI pins when TWI is enabled
100ns negative spike occurs on SDA and SCL pins when TWI is enabled.
Problem fix/workaround
No known workaround, enable Atmel AT90USB64/128 TWI first, before the others nodes of
the TWI network.
2. High current consumption in sleep mode
If a pending interrupt cannot wake the part up from the selected mode, the current consumption
will increase during sleep when executing the SLEEP instruction directly after a SEI
instruction.
Problem fix/workaround
Before entering sleep, interrupts not used to wake up the part from sleep mode should be
disabled.
1. Asynchronous timer interrupt wake up from sleep generates multiple interrupts
If the CPU core is in sleep mode and wakes-up from an asynchronous timer interrupt and
then goes back into sleep mode, it may wake up multiple times.
Problem fix/workaround
A software workaround is to wait before performing the sleep instruction: until
TCNT2>OCR2+1.442
7593L–AVR–09/12
AT90USB64/128
37.2 Atmel AT90USB646/7 errata
37.2.1 AT90USB646/7 errata history TBD
Note ‘*’ means a blank or any alphanumeric string.
37.2.2 AT90USB646/7 first release.
• Incorrect interrupt routine execution for VBUSTI, IDTI interrupts flags
• USB Eye Diagram violation in low-speed mode
• Transient perturbation in USB suspend mode generates over consumption
• Spike on TWI pins when TWI is enabled
• High current consumption in sleep mode
• Async timer interrupt wake up from sleep generate multiple interrupts
6. Incorrect CPU behavior for VBUSTI and IDTI interrupts routines
The CPU core may incorrectly execute the interrupt vector related to the VBUSTI and IDTI
interrupt flags.
Problem fix/workaround
Do not enable these interrupts, firmware must process these USB events by polling VBUSTI
and IDTI flags.
5. USB Eye Diagram violation in low-speed mode
The low to high transition of D- violates the USB eye diagram specification when transmitting
with low-speed signaling.
Problem fix/workaround
None.
4. Transient perturbation in USB suspend mode generates overconsumption
In device mode and when the USB is suspended, transient perturbation received on the
USB lines generates a wake up state. However the idle state following the perturbation does
not set the SUSPI bit anymore. The internal USB engine remains in suspend mode but the
USB differential receiver is still enabled and generates a typical 300µA extra-power consumption.
Detection of the suspend state after the transient perturbation should be
performed by software (instead of reading the SUSPI bit).
Problem fix/workaround
USB waiver allows bus powered devices to consume up to 2.5mA in suspend state.
3. Spike on TWI pins when TWI is enabled
100ns negative spike occurs on SDA and SCL pins when TWI is enabled.
Silicon Release 90USB646-16MU 90USB647-16AU 90USB647-16MU
First Release
Second Release443
7593L–AVR–09/12
AT90USB64/128
Problem fix/workaround
No known workaround, enable Atmel AT90USB64/128 TWI first versus the others nodes of
the TWI network.
2. High current consumption in sleep mode
If a pending interrupt cannot wake the part up from the selected mode, the current consumption
will increase during sleep when executing the SLEEP instruction directly after a SEI
instruction.
Problem fix/workaround
Before entering sleep, interrupts not used to wake up the part from the sleep mode should
be disabled.
1. Asynchronous timer interrupt wake up from sleep generates multiple interrupts
If the CPU core is in sleep and wakes-up from an asynchronous timer interrupt and then go
back in sleep mode again it may wake up several times.
Problem fix/workaround
A software workaround is to wait with performing the sleep instruction until
TCNT2>OCR2+1.444
7593L–AVR–09/12
AT90USB64/128
37.2.3 Atmel AT90USB646/7 Second Release.
• USB Eye Diagram violation in low-speed mode
• Transient perturbation in USB suspend mode generates over consumption
• Spike on TWI pins when TWI is enabled
• High current consumption in sleep mode
• Async timer interrupt wake up from sleep generate multiple interrupts
5. USB Eye Diagram violation in low-speed mode
The low to high transition of D- violates the USB eye diagram specification when transmitting
with low-speed signaling.
Problem fix/workaround
None.
4. Transient perturbation in USB suspend mode generates overconsumption
In device mode and when the USB is suspended, transient perturbation received on the
USB lines generates a wake up state. However the idle state following the perturbation does
not set the SUSPI bit anymore. The internal USB engine remains in suspend mode but the
USB differential receiver is still enabled and generates a typical 300µA extra-power consumption.
Detection of the suspend state after the transient perturbation should be
performed by software (instead of reading the SUSPI bit).
Problem fix/workaround
USB waiver allows bus powered devices to consume up to 2.5mA in suspend state.
3. Spike on TWI pins when TWI is enabled
100ns negative spike occurs on SDA and SCL pins when TWI is enabled.
Problem fix/workaround
No known workaround, enable Atmel AT90USB64/128 TWI first versus the others nodes of
the TWI network.
2. High current consumption in sleep mode
If a pending interrupt cannot wake the part up from the selected mode, the current consumption
will increase during sleep when executing the SLEEP instruction directly after a SEI
instruction.
Problem fix/workaround
Before entering sleep, interrupts not used to wake up the part from the sleep mode should
be disabled.
1. Asynchronous timer interrupt wake up from sleep generates multiple interrupts
If the CPU core is in sleep and wakes-up from an asynchronous timer interrupt and then go
back in sleep mode again it may wake up several times.
Problem fix/workaround
A software workaround is to wait with performing the sleep instruction until
TCNT2>OCR2+1.445
7593L–AVR–09/12
AT90USB64/128
38. Datasheet revision history for Atmel AT90USB64/128
Please note that the referring page numbers in this section are referred to this document. The
referring revision in this section are referring to the document revision.
38.1 Changes from 7593A to 7593B
1. Changed default configuration for fuse bytes and security byte.
2. Suppression of timer 4,5 registers which does not exist.
3. Updated typical application schematics in USB section
38.2 Changes from 7593B to 7593C
1. Update to package drawings, MQFP64 and TQFP64.
38.3 Changes from 7593C to 7593D
1. For further product compatibility, changed USB PLL possible prescaler configurations.
Only 8MHz and 16MHz crystal frequencies allows USB operation (see Table 7-11 on
page 50).
38.4 Changes from 7593D to 7593E
1. Updated PLL Prescaler table: configuration words are different between AT90USB64x
and AT90USB128x to enable the PLL with a 16MHz source.
2. Cleaned up some bits from USB registers, and updated information about OTG timers,
remote wake-up, reset and connection timings.
3. Updated clock distribution tree diagram (USB prescaler source and configuration
register).
4. Cleaned up register summary.
5. Suppressed PCINT23:8 that do not exist from External Interrupts.
6. Updated Electrical Characteristics.
7. Added Typical Characteristics.
8. Update Errata section.
38.5 Changes from 7593E to 7593F
1. Removed ’Preliminary’ from document status.
2. Clarification in Stand by mode regarding USB.
38.6 Changes from 7593F to 7593G
1. Updated Errata section.
38.7 Changes from 7593G to 7593H
1. Added Signature information for 64K devices.
2. Fixed figure for typical bus powered application
3. Added min/max values for BOD levels
4. Added ATmega32U6 product
5. Update Errata section
6. Modified descriptions for HWUPE and WAKEUPE interrupts enable (these interrupts
should be enabled only to wake up the CPU core from power down mode).446
7593L–AVR–09/12
AT90USB64/128
7. Added description to access unique serial number located in Signature Row see
“Reading the Signature Row from software” on page 354.
38.8 Changes from 7593H to 7593I
1. Updated Table 9-2 in “Brown-out detection” on page 60. Unused BOD levels removed.
38.9 Changes from 7593I to 7593J
1. Updated Table 9-2 in “Brown-out detection” on page 60. BOD level 100 removed.
2. Updated “Ordering information” on page 426.
3. Removed ATmega32U6 errata section.
38.10 Changes from 7593J to 7593K
1. Corrected Figure 6-7 on page 34, Figure 6-8 on page 34 and Figure 6-9 on page 35.
2. Corrected ordering information for Section 35.3 ”Atmel AT90USB1286” on page 428,
Section 35.4 ”Atmel AT90USB1287” on page 429 andSection 35.2 ”Atmel
AT90USB647” on page 427.
3. Removed the ATmega32U6 device and updated the datasheet accordingly.
4. Updated Assembly Code Example in “Watchdog reset” on page 61.
38.11 Changes from 7593K to 7593L
1. Updated the “Ordering information” on page 426. Changed the speed from 20MHz to
16MHz.
2. Replaced ATmegaAT90USBxxxx by AT90USBxxxx through the datasheet.
3. Updated the first paragraph of “Overview” on page 307. Port A replaced by Port F.
4. Updated ADC equation in “ADC conversion result” on page 318. The equation has
1024 instead of 1023.
5. Created “Packaging Information” chapter.
6. Replaced the “QFN64” Packaging by an updated QFN64 Packaging drawing.
7. Updated “Errata” on page 434. AT90USB1286/7 has a fourth release, while
AT90USB646/7 updated with a second release.
8. In Section “Overview” on page 307, “Port A” has been replaced by “Port F” in the first
section.
9. In Section “Atmel AT90USB647” on page 427 the USB interface has been changed to
USB OTG.
10. In Section “Atmel AT90USB1286” on page 428 the USB interface has been changed to
Device.
11. In Section “Atmel AT90USB1287” on page 429 the USB interface has been changed to
Host OTG.
12. General update according to new template.i
7593L–AVR–09/12
AT90USB64X/128X
Table of contents
Features ..................................................................................................... 1
1 Pin configurations ................................................................................... 3
2 Overview ................................................................................................... 5
2.1 Block diagram ..........................................................................................................6
2.2 Pin descriptions .......................................................................................................8
3 Resources ............................................................................................... 10
4 About code examples ............................................................................ 10
5 AVR CPU core ........................................................................................ 11
5.1 Introduction ............................................................................................................11
5.2 Architectural overview ...........................................................................................11
5.3 ALU – Arithmetic Logic Unit ..................................................................................12
5.4 Status register .......................................................................................................13
5.5 General purpose register file .................................................................................14
5.6 Stack pointer .........................................................................................................15
5.7 Instruction execution timing ...................................................................................16
5.8 Reset and interrupt handling .................................................................................17
6 Atmel AVR AT90USB64/128 memories ................................................ 20
6.1 In-system re-programmable flash program memory .............................................20
6.2 SRAM data memory ..............................................................................................21
6.3 EEPROM data memory .........................................................................................24
6.4 I/O memory ............................................................................................................30
6.5 External memory interface ....................................................................................31
7 System clock and clock options .......................................................... 40
7.1 Clock systems and their distribution ......................................................................40
7.2 Clock sources ........................................................................................................41
7.3 Low power crystal oscillator ..................................................................................42
7.4 Low frequency crystal oscillator ............................................................................44
7.5 Calibrated internal RC oscillator ............................................................................45
7.6 External clock ........................................................................................................46
7.7 Clock output buffer ................................................................................................47
7.8 Timer/counter oscillator .........................................................................................47
7.9 System clock prescaler .........................................................................................47ii
7593L–AVR–09/12
AT90USB64X/128X
7.10 PLL ......................................................................................................................49
8 Power management and sleep modes ................................................. 51
8.1 Idle mode ...............................................................................................................52
8.2 ADC noise reduction mode ...................................................................................52
8.3 Power-down mode ................................................................................................52
8.4 Power-save mode .................................................................................................52
8.5 Standby mode .......................................................................................................53
8.6 Extended Standby mode .......................................................................................53
8.7 Power Reduction Register .....................................................................................54
8.8 Minimizing power consumption .............................................................................55
9 System control and reset ...................................................................... 57
9.1 Resetting the AVR .................................................................................................57
9.2 Reset sources .......................................................................................................57
9.3 Power-on reset ......................................................................................................58
9.4 External reset ........................................................................................................59
9.5 Brown-out detection ..............................................................................................60
9.6 Watchdog reset .....................................................................................................61
9.7 Internal voltage reference ......................................................................................62
9.8 Watchdog timer .....................................................................................................63
10 Interrupts ................................................................................................ 68
10.1 Interrupt vectors in AT90USB64/128 ...................................................................68
11 I/O-ports .................................................................................................. 71
11.1 Introduction ..........................................................................................................71
11.2 Ports as general digital I/O ..................................................................................72
11.3 Alternate port functions .......................................................................................76
11.4 Register description for I/O-ports ........................................................................89
12 External interrupts ................................................................................. 92
13 Timer/Counter0, Timer/Counter1, and Timer/Counter3 prescalers ... 96
13.1 Internal clock source ...........................................................................................96
13.2 Prescaler reset ....................................................................................................96
13.3 External clock source ..........................................................................................96
13.4 GTCCR – General Timer/Counter Control Register ............................................97
14 8-bit Timer/Counter0 with PWM ............................................................ 98
14.1 Overview .............................................................................................................98iii
7593L–AVR–09/12
AT90USB64X/128X
14.2 Timer/Counter clock sources ...............................................................................99
14.3 Counter unit .........................................................................................................99
14.4 Output compare unit ..........................................................................................100
14.5 Compare Match Output Unit ..............................................................................102
14.6 Modes of operation ............................................................................................103
14.7 Timer/Counter timing diagrams .........................................................................107
14.8 8-bit Timer/Counter register description ............................................................108
15 16-bit Timer/Counter (Timer/Counter1 and Timer/Counter3) ........... 115
15.1 Overview ...........................................................................................................115
15.2 Accessing 16-bit registers .................................................................................117
15.3 Timer/Counter clock sources .............................................................................120
15.4 Counter unit .......................................................................................................121
15.5 Input Capture unit ..............................................................................................122
15.6 Output Compare units .......................................................................................124
15.7 Compare Match Output unit ..............................................................................126
15.8 Modes of operation ............................................................................................127
15.9 Timer/Counter timing diagrams .........................................................................134
15.10 16-bit Timer/Counter register description ........................................................136
16 8-bit Timer/Counter2 with PWM and asynchronous operation ........ 145
16.1 Overview ...........................................................................................................145
16.2 Timer/Counter clock sources .............................................................................146
16.3 Counter unit .......................................................................................................146
16.4 Output Compare unit .........................................................................................147
16.5 Compare Match Output unit ..............................................................................149
16.6 Modes of operation ............................................................................................150
16.7 Timer/Counter timing diagrams .........................................................................154
16.8 8-bit Timer/Counter register description ............................................................156
16.9 Asynchronous operation of the Timer/Counter ..................................................161
16.10 Timer/Counter prescaler ..................................................................................164
17 Output Compare Modulator (OCM1C0A) ........................................... 166
17.1 Overview ...........................................................................................................166
17.2 Description ........................................................................................................166
18 SPI – Serial Peripheral Interface ......................................................... 168
18.1 SS Pin Functionality ..........................................................................................172
18.2 Data modes .......................................................................................................175iv
7593L–AVR–09/12
AT90USB64X/128X
19 USART ................................................................................................... 177
19.1 Overview ...........................................................................................................177
19.2 Clock generation ...............................................................................................178
19.3 Frame formats ...................................................................................................180
19.4 USART initialization ...........................................................................................181
19.5 Data transmission – The USART transmitter ....................................................182
19.6 Data reception – The USART receiver ..............................................................185
19.7 Asynchronous data reception ............................................................................189
19.8 Multi-processor Communication mode ..............................................................192
19.9 USART register description ...............................................................................193
19.10 Examples of baud rate setting .........................................................................198
20 USART in SPI mode ............................................................................. 202
20.1 Overview ...........................................................................................................202
20.2 Clock generation ...............................................................................................202
20.3 SPI data modes and timing ...............................................................................203
20.4 Frame formats ...................................................................................................203
20.5 Data transfer ......................................................................................................205
20.6 USART MSPIM register description ..................................................................207
20.7 AVR USART MSPIM vs. AVR SPI ....................................................................209
21 2-wire serial interface .......................................................................... 211
21.1 Features ............................................................................................................211
21.2 2-wire Serial Interface bus definition .................................................................211
21.3 Data transfer and frame format .........................................................................212
21.4 Multi-master bus systems, arbitration and synchronization ...............................215
21.5 Overview of the TWI module .............................................................................216
21.6 TWI register description ....................................................................................219
21.7 Using the TWI ....................................................................................................222
21.8 Transmission modes .........................................................................................225
21.9 Multi-master systems and arbitration .................................................................239
22 USB controller ...................................................................................... 241
22.1 Features ............................................................................................................241
22.2 Block diagram ....................................................................................................241
22.3 Typical application implementation ...................................................................242
22.4 General operating modes ..................................................................................246
22.5 Power modes ....................................................................................................250v
7593L–AVR–09/12
AT90USB64X/128X
22.6 Speed control ....................................................................................................251
22.7 Memory management .......................................................................................252
22.8 PAD suspend ....................................................................................................253
22.9 OTG timers customizing ....................................................................................254
22.10 Plug-in detection ..............................................................................................255
22.11 ID detection .....................................................................................................256
22.12 Registers description .......................................................................................256
22.13 USB Software Operating modes .....................................................................261
23 USB device operating modes ............................................................. 262
23.1 Introduction ........................................................................................................262
23.2 Power-on and reset ...........................................................................................262
23.3 Endpoint reset ...................................................................................................262
23.4 USB reset ..........................................................................................................263
23.5 Endpoint selection .............................................................................................263
23.6 Endpoint activation ............................................................................................263
23.7 Address setup ...................................................................................................264
23.8 Suspend, wake-up and resume .........................................................................265
23.9 Detach ...............................................................................................................265
23.10 Remote Wake-up ............................................................................................266
23.11 STALL request ................................................................................................266
23.12 CONTROL endpoint management ..................................................................267
23.13 OUT endpoint management ............................................................................268
23.14 IN endpoint management ................................................................................269
23.15 Isochronous mode ...........................................................................................271
23.16 Overflow ..........................................................................................................272
23.17 Interrupts .........................................................................................................272
23.18 Registers .........................................................................................................273
24 USB host operating modes ................................................................. 285
24.1 Pipe description .................................................................................................285
24.2 Detach ...............................................................................................................285
24.3 Power-on and reset ...........................................................................................285
24.4 Device detection ................................................................................................286
24.5 Pipe selection ....................................................................................................286
24.6 Pipe configuration ..............................................................................................286
24.7 USB reset ..........................................................................................................288vi
7593L–AVR–09/12
AT90USB64X/128X
24.8 Address setup ...................................................................................................288
24.9 Remote wake-up detection ................................................................................288
24.10 USB pipe reset ................................................................................................288
24.11 Pipe data access .............................................................................................288
24.12 Control pipe management ...............................................................................289
24.13 OUT pipe management ...................................................................................289
24.14 IN Pipe management .......................................................................................290
24.15 Interrupt system ...............................................................................................291
24.16 Registers .........................................................................................................292
25 Analog Comparator ............................................................................. 304
25.1 Analog Comparator multiplexed input ...............................................................306
26 ADC – Analog to Digital Converter ..................................................... 307
26.1 Features ............................................................................................................307
26.2 Overview ...........................................................................................................307
26.3 Operation ...........................................................................................................309
26.4 Starting a conversion .........................................................................................309
26.5 Prescaling and conversion timing ......................................................................310
26.6 Changing channel or reference selection ..........................................................313
26.7 ADC noise canceler ...........................................................................................314
26.8 ADC conversion result .......................................................................................318
26.9 ADC register description ...................................................................................321
27 JTAG interface and on-chip debug system ....................................... 327
27.1 Overview ...........................................................................................................327
27.2 TAP – Test Access Port ....................................................................................327
27.3 TAP Controller ...................................................................................................329
27.4 Using the Boundary-scan chain ........................................................................330
27.5 Using the on-chip debug system .......................................................................330
27.6 On-chip debug specific JTAG instructions .........................................................331
27.7 On-chip Debug related Register in I/O memory ................................................332
27.8 Using the JTAG programming capabilities ........................................................332
27.9 Bibliography .......................................................................................................332
28 IEEE 1149.1 (JTAG) boundary-scan ................................................... 333
28.1 Features ............................................................................................................333
28.2 System overview ...............................................................................................333
28.3 Data registers ....................................................................................................333vii
7593L–AVR–09/12
AT90USB64X/128X
28.4 Boundary-scan specific JTAG instructions ........................................................335
28.5 Boundary-scan Related Register in I/O memory ...............................................336
28.6 Boundary-scan chain .........................................................................................337
28.7 Atmel AT90USB64/128 Boundary-scan order ...................................................340
28.8 Boundary-scan description language files .........................................................342
29 Boot Loader support – read-while-write self-programming ............. 343
29.1 Boot Loader features .........................................................................................343
29.2 Application and Boot Loader flash sections ......................................................343
29.3 Read-while-write and no read-while-write flash sections ...................................343
29.4 Boot Loader lock bits .........................................................................................346
29.5 Entering the Boot Loader program ....................................................................347
29.6 Addressing the flash during self-programming ..................................................350
29.7 Self-programming the flash ...............................................................................351
30 Memory programming ......................................................................... 359
30.1 Program and data memory lock bits ..................................................................359
30.2 Fuse bits ............................................................................................................360
30.3 Signature bytes .................................................................................................362
30.4 Calibration byte .................................................................................................362
30.5 Parallel programming parameters, pin mapping, and commands .....................362
30.6 Parallel programming ........................................................................................365
30.7 Serial downloading ............................................................................................373
30.8 Serial programming pin mapping ......................................................................374
30.9 Programming via the JTAG interface ................................................................377
31 Electrical characteristics for Atmel AT90USB64/128 ....................... 390
31.1 Absolute maximum ratings* ...............................................................................390
31.2 DC characteristics .............................................................................................390
31.3 External clock drive waveforms .........................................................................392
31.4 External clock drive ...........................................................................................392
31.5 Maximum speed vs. VCC ...........................................................................................................................392
31.6 2-wire serial interface characteristics ................................................................393
31.7 SPI timing characteristics ..................................................................................395
31.8 Hardware boot entrance timing characteristics .................................................396
31.9 ADC characteristics ...........................................................................................397
31.10 External data memory timing ...........................................................................399
32 Atmel AT90USB64/128 typical characteristics ................................. 404viii
7593L–AVR–09/12
AT90USB64X/128X
32.1 Input voltage levels ............................................................................................405
32.2 Output voltage levels .........................................................................................406
32.3 Power-down supply current ...............................................................................408
32.4 Power-save supply current ................................................................................409
32.5 Idle supply current .............................................................................................410
32.6 Active supply current .........................................................................................410
32.7 Reset supply current .........................................................................................411
32.8 I/O pull-up current ..............................................................................................411
32.9 Bandgap voltage ...............................................................................................412
32.10 Internal ARef voltage .......................................................................................413
32.11 USB regulator ..................................................................................................413
32.12 BOD levels ......................................................................................................414
32.13 Watchdog timer frequency ..............................................................................416
32.14 Internal RC oscillator frequency ......................................................................416
32.15 Power-on reset ................................................................................................418
33 Register summary ................................................................................ 419
34 Instruction set summary ..................................................................... 423
35 Ordering information ........................................................................... 426
35.1 Atmel AT90USB646 ..........................................................................................426
35.2 Atmel AT90USB647 ..........................................................................................427
35.3 Atmel AT90USB1286 ........................................................................................428
35.4 Atmel AT90USB1287 ........................................................................................429
36 Packaging information ........................................................................ 430
36.1 TQFP64 .............................................................................................................430
36.2 QFN64 ...............................................................................................................432
37 Errata ..................................................................................................... 434
37.1 Atmel AT90USB1287/6 errata ...........................................................................434
37.2 Atmel AT90USB646/7 errata .............................................................................442
38 Datasheet revision history for Atmel AT90USB64/128 ..................... 445
38.1 Changes from 7593A to 7593B .........................................................................445
38.2 Changes from 7593B to 7593C .........................................................................445
38.3 Changes from 7593C to 7593D .........................................................................445
38.4 Changes from 7593D to 7593E .........................................................................445
38.5 Changes from 7593E to 7593F .........................................................................445ix
7593L–AVR–09/12
AT90USB64X/128X
38.6 Changes from 7593F to 7593G .........................................................................445
38.7 Changes from 7593G to 7593H ........................................................................445
38.8 Changes from 7593H to 7593I ..........................................................................446
38.9 Changes from 7593I to 7593J ...........................................................................446
38.10 Changes from 7593J to 7593K ........................................................................446
38.11 Changes from 7593K to 7593L .......................................................................446
Table of contents ....................................................................................... i7593L–AVR–09/12
Atmel Corporation
2325 Orchard Parkway
San Jose, CA 95131
USA
Tel: (+1)(408) 441-0311
Fax: (+1)(408) 487-2600
www.atmel.com
Atmel Asia Limited
Unit 1-5 & 16, 19/F
BEA Tower, Millennium City 5
418 Kwun Tong Road
Kwun Tong, Kowloon
HONG KONG
Tel: (+852) 2245-6100
Fax: (+852) 2722-1369
Atmel Munich GmbH
Business Campus
Parkring 4
D-85748 Garching b. Munich
GERMANY
Tel: (+49) 89-31970-0
Fax: (+49) 89-3194621
Atmel Japan
16F, Shin Osaki Kangyo Bldg.
1-6-4 Osaki Shinagawa-ku
Tokyo 104-0032
JAPAN
Tel: (+81) 3-6417-0300
Fax: (+81) 3-6417-0370
© 2012 Atmel Corporation. All rights reserved.
Atmel®, Atmel logo and combinations thereof, AVR®, AVR Studio®, and others are registered trademarks or trademarks of Atmel Corporation
or its subsidiaries. Windows® is a registered trademark of Microsoft Corporation in U.S. and or other countries. Other terms
and product names may be trademarks of others.
Disclaimer: The information in this document is provided in connection with Atmel products. No license, express or implied, by estoppel or otherwise, to
any intellectual property right is granted by this document or in connection with the sale of Atmel products. EXCEPT AS SET FORTH IN THE ATMEL
TERMS AND CONDITIONS OF SALES LOCATED ON THE ATMEL WEBSITE, ATMEL ASSUMES NO LIABILITY WHATSOEVER AND DISCLAIMS ANY
EXPRESS, IMPLIED OR STATUTORY WARRANTY RELATING TO ITS PRODUCTS INCLUDING, BUT NOT LIMITED TO, THE IMPLIED WARRANTY OF
MERCHANTABILITY, FITNESS FOR A PARTICULAR PURPOSE, OR NON-INFRINGEMENT. IN NO EVENT SHALL ATMEL BE LIABLE FOR ANY DIRECT,
INDIRECT, CONSEQUENTIAL, PUNITIVE, SPECIAL OR INCIDENTAL DAMAGES (INCLUDING, WITHOUT LIMITATION, DAMAGES FOR LOSS AND PROFITS,
BUSINESS INTERRUPTION, OR LOSS OF INFORMATION) ARISING OUT OF THE USE OR INABILITY TO USE THIS DOCUMENT, EVEN IF ATMEL
HAS BEEN ADVISED OF THE POSSIBILITY OF SUCH DAMAGES. Atmel makes no representations or warranties with respect to the accuracy or completeness
of the contents of this document and reserves the right to make changes to specifications and product descriptions at any time without notice.
Atmel does not make any commitment to update the information contained herein. Unless specifically provided otherwise, Atmel products are not suitable
for, and shall not be used in, automotive applications. Atmel products are not intended, authorized, or warranted for use as components in applications
intended to support or sustain life.
Features
• High performance, low power Atmel® AVR® 8-bit microcontroller
• Advanced RISC architecture
– 131 powerful instructions – most single clock cycle execution
– 32 × 8 general purpose working registers
– Fully static operation
– Up to 20 MIPS throughput at 20MHz
– On-chip 2-cycle multiplier
• High endurance non-volatile memory segments
– 4/8/16 Kbytes of in-system self-programmable flash program memory
– 256/512/512 bytes EEPROM
– 512/1K/1Kbytes internal SRAM
– Write/erase cyles: 10,000 flash/100,000 EEPROM
– Data retention: 20 years at 85°C/100 years at 25°C()
– Optional boot code section with independent lock bits
In-system programming by on-chip boot program
True read-while-write operation
– Programming lock for software security
• QTouch® library support
– Capacitive touch buttons, sliders and wheels
– QTouch and QMatrix acquisition
– Up to 64 sense channels
• Peripheral features
– Two 8-bit timer/counters with separate prescaler and compare mode
– One 16-bit timer/counter with separate prescaler, compare mode, and capture mode
– Real time counter with separate oscillator
– Six PWM channels
– 8-channel 10-bit ADC in TQFP and QFN/MLF package
– 6-channel 10-bit ADC in PDIP Package
– Programmable serial USART
– Master/slave SPI serial interface
– Byte-oriented 2-wire serial interface (Philips I2
C compatible)
– Programmable watchdog timer with separate on-chip oscillator
– On-chip analog comparator
– Interrupt and wake-up on pin change
• Special microcontroller features
– DebugWIRE on-chip debug system
– Power-on reset and programmable brown-out detection
– Internal calibrated oscillator
– External and internal interrupt sources
– Five sleep modes: Idle, ADC noise reduction, power-save, power-down, and standby
• I/O and packages
– 23 programmable I/O lines
– 28-pin PDIP, 32-lead TQFP, 28-pad QFN/MLF and 32-pad QFN/MLF
• Operating voltage:
– 1.8V - 5.5V for Atmel ATmega48V/88V/168V
– 2.7V - 5.5V for Atmel ATmega48/88/168
• Temperature range:
– -40°C to 85°C
• Speed grade:
– ATmega48V/88V/168V: 0 - 4MHz @ 1.8V - 5.5V, 0 - 10MHz @ 2.7V - 5.5V
– ATmega48/88/168: 0 - 10MHz @ 2.7V - 5.5V, 0 - 20MHz @ 4.5V - 5.5V
• Low power consumption
– Active mode:
250µA at 1MHz, 1.8V
15µA at 32kHz, 1.8V (including oscillator)
– Power-down mode:
0.1µA at 1.8V
Note: 1. See “Data retention” on page 8 for details.
8-bit Atmel
Microcontroller
with 4/8/16K
Bytes In-System
Programmable
Flash
ATmega48/V
ATmega88/V
ATmega168/V
Rev. 2545T–AVR–05/112
2545T–AVR–05/11
ATmega48/88/168
1. Pin configurations
Figure 1-1. Pinout Atmel ATmega48/88/168.
1
2
3
4
5
6
7
8
24
23
22
21
20
19
18
17
(PCINT19/OC2B/INT1) PD3
(PCINT20/XCK/T0) PD4
GND
VCC
GND
VCC
(PCINT6/XTAL1/TOSC1) PB6
(PCINT7/XTAL2/TOSC2) PB7
PC1 (ADC1/PCINT9)
PC0 (ADC0/PCINT8)
ADC7
GND
AREF
ADC6
AVCC
PB5 (SCK/PCINT5)
32
31
30
29
28
27
26
25
9
10
11
12
13
14
15
16
(PCINT21/OC0B/T1) PD5
(PCINT22/OC0A/AIN0) PD6
(PCINT23/AIN1) PD7
(PCINT0/CLKO/ICP1) PB0
(PCINT1/OC1A) PB1
(PCINT2/SS/OC1B) PB2
(PCINT3/OC2A/MOSI) PB3
(PCINT4/MISO) PB4
PD2 (INT0/PCINT18)
PD1 (TXD/PCINT17)
PD0 (RXD/PCINT16)
PC6 (RESET/PCINT14)
PC5 (ADC5/SCL/PCINT13)
PC4 (ADC4/SDA/PCINT12)
PC3 (ADC3/PCINT11)
PC2 (ADC2/PCINT10)
TQFP Top View
1
2
3
4
5
6
7
8
9
10
11
12
13
14
28
27
26
25
24
23
22
21
20
19
18
17
16
15
(PCINT14/RESET) PC6
(PCINT16/RXD) PD0
(PCINT17/TXD) PD1
(PCINT18/INT0) PD2
(PCINT19/OC2B/INT1) PD3
(PCINT20/XCK/T0) PD4
VCC
GND
(PCINT6/XTAL1/TOSC1) PB6
(PCINT7/XTAL2/TOSC2) PB7
(PCINT21/OC0B/T1) PD5
(PCINT22/OC0A/AIN0) PD6
(PCINT23/AIN1) PD7
(PCINT0/CLKO/ICP1) PB0
PC5 (ADC5/SCL/PCINT13)
PC4 (ADC4/SDA/PCINT12)
PC3 (ADC3/PCINT11)
PC2 (ADC2/PCINT10)
PC1 (ADC1/PCINT9)
PC0 (ADC0/PCINT8)
GND
AREF
AVCC
PB5 (SCK/PCINT5)
PB4 (MISO/PCINT4)
PB3 (MOSI/OC2A/PCINT3)
PB2 (SS/OC1B/PCINT2)
PB1 (OC1A/PCINT1)
PDIP
1
2
3
4
5
6
7
8
24
23
22
21
20
19
18
17
32
31
30
29
28
27
26
25
9
10
11
12
13
14
15
16
32 MLF Top View
(PCINT19/OC2B/INT1) PD3
(PCINT20/XCK/T0) PD4
GND
VCC
GND
VCC
(PCINT6/XTAL1/TOSC1) PB6
(PCINT7/XTAL2/TOSC2) PB7
PC1 (ADC1/PCINT9)
PC0 (ADC0/PCINT8)
ADC7
GND
AREF
ADC6
AVCC
PB5 (SCK/PCINT5)
(PCINT21/OC0B/T1) PD5
(PCINT22/OC0A/AIN0) PD6
(PCINT23/AIN1) PD7
(PCINT0/CLKO/ICP1) PB0
(PCINT1/OC1A) PB1
(PCINT2/SS/OC1B) PB2
(PCINT3/OC2A/MOSI) PB3
(PCINT4/MISO) PB4
PD2 (INT0/PCINT18)
PD1 (TXD/PCINT17)
PD0 (RXD/PCINT16)
PC6 (RESET/PCINT14)
PC5 (ADC5/SCL/PCINT13)
PC4 (ADC4/SDA/PCINT12)
PC3 (ADC3/PCINT11)
PC2 (ADC2/PCINT10)
NOTE: Bottom pad should be soldered to ground.
1
2
3
4
5
6
7
21
20
19
18
17
16
15
28
27
26
25
24
23
22
8
9
10
11
12
13
14
28 MLF Top View
(PCINT19/OC2B/INT1) PD3
(PCINT20/XCK/T0) PD4
VCC
GND
(PCINT6/XTAL1/TOSC1) PB6
(PCINT7/XTAL2/TOSC2) PB7
(PCINT21/OC0B/T1) PD5
(PCINT22/OC0A/AIN0) PD6
(PCINT23/AIN1) PD7
(PCINT0/CLKO/ICP1) PB0
(PCINT1/OC1A) PB1
(PCINT2/SS/OC1B) PB2
(PCINT3/OC2A/MOSI) PB3
(PCINT4/MISO) PB4
PD2 (INT0/PCINT18)
PD1 (TXD/PCINT17)
PD0 (RXD/PCINT16)
PC6 (RESET/PCINT14)
PC5 (ADC5/SCL/PCINT13)
PC4 (ADC4/SDA/PCINT12)
PC3 (ADC3/PCINT11)
PC2 (ADC2/PCINT10)
PC1 (ADC1/PCINT9)
PC0 (ADC0/PCINT8)
GND
AREF
AVCC
PB5 (SCK/PCINT5)
NOTE: Bottom pad should be soldered to ground.3
2545T–AVR–05/11
ATmega48/88/168
1.1 Pin descriptions
1.1.1 VCC
Digital supply voltage.
1.1.2 GND
Ground.
1.1.3 Port B (PB7:0) XTAL1/XTAL2/TOSC1/TOSC2
Port B is an 8-bit bi-directional I/O port with internal pull-up resistors (selected for each bit). The
Port B output buffers have symmetrical drive characteristics with both high sink and source
capability. As inputs, Port B pins that are externally pulled low will source current if the pull-up
resistors are activated. The Port B pins are tri-stated when a reset condition becomes active,
even if the clock is not running.
Depending on the clock selection fuse settings, PB6 can be used as input to the inverting Oscillator
amplifier and input to the internal clock operating circuit.
Depending on the clock selection fuse settings, PB7 can be used as output from the inverting
Oscillator amplifier.
If the Internal Calibrated RC Oscillator is used as chip clock source, PB7..6 is used as TOSC2..1
input for the Asynchronous Timer/Counter2 if the AS2 bit in ASSR is set.
The various special features of Port B are elaborated in “Alternate functions of port B” on page
78 and “System clock and clock options” on page 27.
1.1.4 Port C (PC5:0)
Port C is a 7-bit bi-directional I/O port with internal pull-up resistors (selected for each bit). The
PC5..0 output buffers have symmetrical drive characteristics with both high sink and source
capability. As inputs, Port C pins that are externally pulled low will source current if the pull-up
resistors are activated. The Port C pins are tri-stated when a reset condition becomes active,
even if the clock is not running.
1.1.5 PC6/RESET
If the RSTDISBL Fuse is programmed, PC6 is used as an I/O pin. Note that the electrical characteristics
of PC6 differ from those of the other pins of Port C.
If the RSTDISBL Fuse is unprogrammed, PC6 is used as a Reset input. A low level on this pin
for longer than the minimum pulse length will generate a Reset, even if the clock is not running.
The minimum pulse length is given in Table 29-3 on page 307. Shorter pulses are not guaranteed
to generate a Reset.
The various special features of Port C are elaborated in “Alternate functions of port C” on page
81.
1.1.6 Port D (PD7:0)
Port D is an 8-bit bi-directional I/O port with internal pull-up resistors (selected for each bit). The
Port D output buffers have symmetrical drive characteristics with both high sink and source
capability. As inputs, Port D pins that are externally pulled low will source current if the pull-up4
2545T–AVR–05/11
ATmega48/88/168
resistors are activated. The Port D pins are tri-stated when a reset condition becomes active,
even if the clock is not running.
The various special features of Port D are elaborated in “Alternate functions of port D” on page
84.
1.1.7 AVCC
AVCC is the supply voltage pin for the A/D Converter, PC3:0, and ADC7:6. It should be externally
connected to VCC, even if the ADC is not used. If the ADC is used, it should be connected to VCC
through a low-pass filter. Note that PC6..4 use digital supply voltage, VCC.
1.1.8 AREF
AREF is the analog reference pin for the A/D Converter.
1.1.9 ADC7:6 (TQFP and QFN/MLF package only)
In the TQFP and QFN/MLF package, ADC7:6 serve as analog inputs to the A/D converter.
These pins are powered from the analog supply and serve as 10-bit ADC channels.5
2545T–AVR–05/11
ATmega48/88/168
2. Overview
The Atmel ATmega48/88/168 is a low-power CMOS 8-bit microcontroller based on the AVR
enhanced RISC architecture. By executing powerful instructions in a single clock cycle, the
ATmega48/88/168 achieves throughputs approaching 1 MIPS per MHz allowing the system
designer to optimize power consumption versus processing speed.
2.1 Block diagram
Figure 2-1. Block diagram.
The AVR core combines a rich instruction set with 32 general purpose working registers. All the
32 registers are directly connected to the Arithmetic Logic Unit (ALU), allowing two independent
registers to be accessed in one single instruction executed in one clock cycle. The resulting
PORT D (8) PORT B (8) PORT C (7)
USART 0
8bit T/C 2
8bit T/C 0 16bit T/C 1 A/D conv.
Internal
bandgap
Analog
comp.
SPI TWI
Flash SRAM
EEPROM
Watchdog
oscillator
Watchdog
timer
Oscillator
circuits /
clock
generation
Power
supervision
POR / BOD &
RESET
GND
VCC
PROGRAM
LOGIC
debugWIRE
2
GND
AREF
AVCC
DATABUS
PD[0..7] PB[0..7] PC[0..6] ADC[6..7]
6
RESET
XTAL[1..2]
CPU6
2545T–AVR–05/11
ATmega48/88/168
architecture is more code efficient while achieving throughputs up to ten times faster than conventional
CISC microcontrollers.
The Atmel ATmega48/88/168 provides the following features: 4K/8K/16K bytes of In-System
Programmable Flash with Read-While-Write capabilities, 256/512/512 bytes EEPROM,
512/1K/1K bytes SRAM, 23 general purpose I/O lines, 32 general purpose working registers,
three flexible Timer/Counters with compare modes, internal and external interrupts, a serial programmable
USART, a byte-oriented 2-wire Serial Interface, an SPI serial port, a 6-channel 10-bit
ADC (8 channels in TQFP and QFN/MLF packages), a programmable Watchdog Timer with
internal Oscillator, and five software selectable power saving modes. The Idle mode stops the
CPU while allowing the SRAM, Timer/Counters, USART, 2-wire Serial Interface, SPI port, and
interrupt system to continue functioning. The Power-down mode saves the register contents but
freezes the Oscillator, disabling all other chip functions until the next interrupt or hardware reset.
In Power-save mode, the asynchronous timer continues to run, allowing the user to maintain a
timer base while the rest of the device is sleeping. The ADC Noise Reduction mode stops the
CPU and all I/O modules except asynchronous timer and ADC, to minimize switching noise during
ADC conversions. In Standby mode, the crystal/resonator Oscillator is running while the rest
of the device is sleeping. This allows very fast start-up combined with low power consumption.
Atmel offers the QTouch Library for embedding capacitive touch buttons, sliders and wheels
functionality into AVR microcontrollers. The patented charge-transfer signal acquisition offers
robust sensing and includes fully debounced reporting of touch keys and includes Adjacent Key
Suppression® (AKS®) technology for unambigiuous detection of key events. The easy-to-use
QTouch Suite toolchain allows you to explore, develop and debug your own touch applications.
The device is manufactured using the Atmel high density non-volatile memory technology. The
On-chip ISP Flash allows the program memory to be reprogrammed In-System through an SPI
serial interface, by a conventional non-volatile memory programmer, or by an On-chip Boot program
running on the AVR core. The Boot program can use any interface to download the
application program in the Application Flash memory. Software in the Boot Flash section will
continue to run while the Application Flash section is updated, providing true Read-While-Write
operation. By combining an 8-bit RISC CPU with In-System Self-Programmable Flash on a
monolithic chip, the Atmel ATmega48/88/168 is a powerful microcontroller that provides a highly
flexible and cost effective solution to many embedded control applications.
The ATmega48/88/168 AVR is supported with a full suite of program and system development
tools including: C Compilers, Macro Assemblers, Program Debugger/Simulators, In-Circuit Emulators,
and Evaluation kits.
2.2 Comparison between Atmel ATmega48, Atmel ATmega88, and Atmel ATmega168
The ATmega48, ATmega88 and ATmega168 differ only in memory sizes, boot loader support,
and interrupt vector sizes. Table 2-1 summarizes the different memory and interrupt vector sizes
for the three devices.
Table 2-1. Memory size summary.
Device Flash EEPROM RAM Interrupt vector size
ATmega48 4Kbytes 256Bytes 512Bytes 1 instruction word/vector
ATmega88 8Kbytes 512Bytes 1Kbytes 1 instruction word/vector
ATmega168 16Kbytes 512Bytes 1Kbytes 2 instruction words/vector7
2545T–AVR–05/11
ATmega48/88/168
ATmega88 and ATmega168 support a real Read-While-Write Self-Programming mechanism.
There is a separate Boot Loader Section, and the SPM instruction can only execute from there.
In ATmega48, there is no Read-While-Write support and no separate Boot Loader Section. The
SPM instruction can execute from the entire Flash.8
2545T–AVR–05/11
ATmega48/88/168
3. Resources
A comprehensive set of development tools, application notes and datasheets are available for
download on http://www.atmel.com/avr.
4. Data retention
Reliability Qualification results show that the projected data retention failure rate is much less
than 1 PPM over 20 years at 85°C or 100 years at 25°C.
5. About code examples
This documentation contains simple code examples that briefly show how to use various parts of
the device. These code examples assume that the part specific header file is included before
compilation. Be aware that not all C compiler vendors include bit definitions in the header files
and interrupt handling in C is compiler dependent. Please confirm with the C compiler documentation
for more details.
For I/O Registers located in extended I/O map, “IN”, “OUT”, “SBIS”, “SBIC”, “CBI”, and “SBI”
instructions must be replaced with instructions that allow access to extended I/O. Typically
“LDS” and “STS” combined with “SBRS”, “SBRC”, “SBR”, and “CBR”.
6. Capacitive touch sensing
The Atmel QTouch Library provides a simple to use solution to realize touch sensitive interfaces
on most Atmel AVR microcontrollers. The QTouch Library includes support for the QTouch and
QMatrix acquisition methods.
Touch sensing can be added to any application by linking the appropriate Atmel QTouch Library
for the AVR Microcontroller. This is done by using a simple set of APIs to define the touch channels
and sensors, and then calling the touch sensing API’s to retrieve the channel information
and determine the touch sensor states.
The QTouch Library is FREE and downloadable from the Atmel website at the following location:
www.atmel.com/qtouchlibrary. For implementation details and other information, refer to the
Atmel QTouch Library User Guide - also available for download from the Atmel website.9
2545T–AVR–05/11
ATmega48/88/168
7. AVR CPU core
7.1 Overview
This section discusses the AVR core architecture in general. The main function of the CPU core
is to ensure correct program execution. The CPU must therefore be able to access memories,
perform calculations, control peripherals, and handle interrupts.
7.2 Architectural overview
Figure 7-1. Block diagram of the AVR architecture.
In order to maximize performance and parallelism, the AVR uses a Harvard architecture – with
separate memories and buses for program and data. Instructions in the program memory are
executed with a single level pipelining. While one instruction is being executed, the next instruction
is pre-fetched from the program memory. This concept enables instructions to be executed
in every clock cycle. The program memory is In-System Reprogrammable Flash memory.
Flash
program
memory
Instruction
register
Instruction
decoder
Program
counter
Control lines
32 x 8
general
purpose
registrers
ALU
Status
and control
I/O lines
EEPROM
Data bus 8-bit
Data
SRAM
Direct addressing
Indirect addressing
Interrupt
unit
SPI
unit
Watchdog
timer
Analog
comparator
I/O module 2
I/O module 1
I/O module n10
2545T–AVR–05/11
ATmega48/88/168
The fast-access Register File contains 32 × 8-bit general purpose working registers with a single
clock cycle access time. This allows single-cycle Arithmetic Logic Unit (ALU) operation. In a typical
ALU operation, two operands are output from the Register File, the operation is executed,
and the result is stored back in the Register File – in one clock cycle.
Six of the 32 registers can be used as three 16-bit indirect address register pointers for Data
Space addressing – enabling efficient address calculations. One of the these address pointers
can also be used as an address pointer for look up tables in Flash program memory. These
added function registers are the 16-bit X-register, Y-register, and Z-register, described later in
this section.
The ALU supports arithmetic and logic operations between registers or between a constant and
a register. Single register operations can also be executed in the ALU. After an arithmetic operation,
the Status Register is updated to reflect information about the result of the operation.
Program flow is provided by conditional and unconditional jump and call instructions, able to
directly address the whole address space. Most AVR instructions have a single 16-bit word format.
Every program memory address contains a 16-bit or 32-bit instruction.
Program Flash memory space is divided in two sections, the Boot Program section and the
Application Program section. Both sections have dedicated Lock bits for write and read/write
protection. The SPM instruction that writes into the Application Flash memory section must
reside in the Boot Program section.
During interrupts and subroutine calls, the return address Program Counter (PC) is stored on the
Stack. The Stack is effectively allocated in the general data SRAM, and consequently the Stack
size is only limited by the total SRAM size and the usage of the SRAM. All user programs must
initialize the SP in the Reset routine (before subroutines or interrupts are executed). The Stack
Pointer (SP) is read/write accessible in the I/O space. The data SRAM can easily be accessed
through the five different addressing modes supported in the AVR architecture.
The memory spaces in the AVR architecture are all linear and regular memory maps.
A flexible interrupt module has its control registers in the I/O space with an additional Global
Interrupt Enable bit in the Status Register. All interrupts have a separate Interrupt Vector in the
Interrupt Vector table. The interrupts have priority in accordance with their Interrupt Vector position.
The lower the Interrupt Vector address, the higher the priority.
The I/O memory space contains 64 addresses for CPU peripheral functions as Control Registers,
SPI, and other I/O functions. The I/O Memory can be accessed directly, or as the Data
Space locations following those of the Register File, 0x20 - 0x5F. In addition, the
ATmega48/88/168 has Extended I/O space from 0x60 - 0xFF in SRAM where only the
ST/STS/STD and LD/LDS/LDD instructions can be used.
7.3 ALU – Arithmetic Logic Unit
The high-performance AVR ALU operates in direct connection with all the 32 general purpose
working registers. Within a single clock cycle, arithmetic operations between general purpose
registers or between a register and an immediate are executed. The ALU operations are divided
into three main categories – arithmetic, logical, and bit-functions. Some implementations of the
architecture also provide a powerful multiplier supporting both signed/unsigned multiplication
and fractional format. See “Instruction set summary” on page 347 for a detailed description.11
2545T–AVR–05/11
ATmega48/88/168
7.4 Status register
The Status Register contains information about the result of the most recently executed arithmetic
instruction. This information can be used for altering program flow in order to perform
conditional operations. Note that the Status Register is updated after all ALU operations, as
specified in the Instruction Set Reference. This will in many cases remove the need for using the
dedicated compare instructions, resulting in faster and more compact code.
The Status Register is not automatically stored when entering an interrupt routine and restored
when returning from an interrupt. This must be handled by software.
7.4.1 SREG – AVR Status Register
The AVR Status Register – SREG – is defined as:
• Bit 7 – I: Global interrupt enable
The Global Interrupt Enable bit must be set for the interrupts to be enabled. The individual interrupt
enable control is then performed in separate control registers. If the Global Interrupt Enable
Register is cleared, none of the interrupts are enabled independent of the individual interrupt
enable settings. The I-bit is cleared by hardware after an interrupt has occurred, and is set by
the RETI instruction to enable subsequent interrupts. The I-bit can also be set and cleared by
the application with the SEI and CLI instructions, as described in the instruction set reference.
• Bit 6 – T: Bit copy storage
The Bit Copy instructions BLD (Bit LoaD) and BST (Bit STore) use the T-bit as source or destination
for the operated bit. A bit from a register in the Register File can be copied into T by the
BST instruction, and a bit in T can be copied into a bit in a register in the Register File by the
BLD instruction.
• Bit 5 – H: Half carry flag
The Half Carry Flag H indicates a Half Carry in some arithmetic operations. Half Carry Is useful
in BCD arithmetic. See the “Instruction Set Description” for detailed information.
• Bit 4 – S: Sign bit, S = N ⊕ V
The S-bit is always an exclusive or between the Negative Flag N and the Two’s Complement
Overflow Flag V. See the “Instruction Set Description” for detailed information.
• Bit 3 – V: Two’s complement overflow flag
The Two’s Complement Overflow Flag V supports two’s complement arithmetics. See the
“Instruction Set Description” for detailed information.
• Bit 2 – N: Negative flag
The Negative Flag N indicates a negative result in an arithmetic or logic operation. See the
“Instruction Set Description” for detailed information.
• Bit 1 – Z: Zero flag
The Zero Flag Z indicates a zero result in an arithmetic or logic operation. See the “Instruction
Set Description” for detailed information.
Bit 7 6 5 4 3 2 1 0
0x3F (0x5F) I T H S V N Z C SREG
Read/write R/W R/W R/W R/W R/W R/W R/W R/W
Initial value 0 0 0 0 0 0 0 012
2545T–AVR–05/11
ATmega48/88/168
• Bit 0 – C: Carry flag
The Carry Flag C indicates a carry in an arithmetic or logic operation. See the “Instruction Set
Description” for detailed information.
7.5 General purpose register file
The register file is optimized for the AVR enhanced RISC instruction set. In order to achieve the
required performance and flexibility, the following input/output schemes are supported by the
register file:
• One 8-bit output operand and one 8-bit result input
• Two 8-bit output operands and one 8-bit result input
• Two 8-bit output operands and one 16-bit result input
• One 16-bit output operand and one 16-bit result input
Figure 7-2 shows the structure of the 32 general purpose working registers in the CPU.
Figure 7-2. AVR CPU general purpose working registers.
Most of the instructions operating on the register file have direct access to all registers, and most
of them are single cycle instructions.
As shown in Figure 7-2, each register is also assigned a data memory address, mapping them
directly into the first 32 locations of the user Data Space. Although not being physically implemented
as SRAM locations, this memory organization provides great flexibility in access of the
registers, as the X-, Y- and Z-pointer registers can be set to index any register in the file.
7 0 Addr.
R0 0x00
R1 0x01
R2 0x02
…
R13 0x0D
General R14 0x0E
purpose R15 0x0F
working R16 0x10
registers R17 0x11
…
R26 0x1A X-register low byte
R27 0x1B X-register high byte
R28 0x1C Y-register low byte
R29 0x1D Y-register high byte
R30 0x1E Z-register low byte
R31 0x1F Z-register high byte13
2545T–AVR–05/11
ATmega48/88/168
7.5.1 The X-register, Y-register, and Z-register
The registers R26..R31 have some added functions to their general purpose usage. These registers
are 16-bit address pointers for indirect addressing of the data space. The three indirect
address registers X, Y, and Z are defined as described in Figure 7-3.
Figure 7-3. The X-, Y-, and Z-registers.
In the different addressing modes these address registers have functions as fixed displacement,
automatic increment, and automatic decrement (see the instruction set reference for details).
7.6 Stack pointer
The Stack is mainly used for storing temporary data, for storing local variables and for storing
return addresses after interrupts and subroutine calls. The Stack Pointer Register always points
to the top of the Stack. Note that the Stack is implemented as growing from higher memory locations
to lower memory locations. This implies that a Stack PUSH command decreases the Stack
Pointer.
The Stack Pointer points to the data SRAM Stack area where the Subroutine and Interrupt
Stacks are located. This Stack space in the data SRAM must be defined by the program before
any subroutine calls are executed or interrupts are enabled. The Stack Pointer must be set to
point above 0x0100, preferably RAMEND. The Stack Pointer is decremented by one when data
is pushed onto the Stack with the PUSH instruction, and it is decremented by two when the
return address is pushed onto the Stack with subroutine call or interrupt. The Stack Pointer is
incremented by one when data is popped from the Stack with the POP instruction, and it is incremented
by two when data is popped from the Stack with return from subroutine RET or return
from interrupt RETI.
The AVR Stack Pointer is implemented as two 8-bit registers in the I/O space. The number of
bits actually used is implementation dependent. Note that the data space in some implementations
of the AVR architecture is so small that only SPL is needed. In this case, the SPH Register
will not be present.
15 XH XL 0
X-register 7 07 0
R27 (0x1B) R26 (0x1A)
15 YH YL 0
Y-register 7 07 0
R29 (0x1D) R28 (0x1C)
15 ZH ZL 0
Z-register 70 7 0
R31 (0x1F) R30 (0x1E)14
2545T–AVR–05/11
ATmega48/88/168
7.6.1 SPH and SPL – Stack pointer high and stack pointer low register
7.7 Instruction execution timing
This section describes the general access timing concepts for instruction execution. The AVR
CPU is driven by the CPU clock clkCPU, directly generated from the selected clock source for the
chip. No internal clock division is used.
Figure 7-4 shows the parallel instruction fetches and instruction executions enabled by the Harvard
architecture and the fast-access Register File concept. This is the basic pipelining concept
to obtain up to 1 MIPS per MHz with the corresponding unique results for functions per cost,
functions per clocks, and functions per power-unit.
Figure 7-4. The parallel instruction fetches and instruction executions.
Figure 7-5 shows the internal timing concept for the Register File. In a single clock cycle an ALU
operation using two register operands is executed, and the result is stored back to the destination
register.
Figure 7-5. Single cycle ALU operation.
Bit 15 14 13 12 11 10 9 8
0x3E (0x5E) SP15 SP14 SP13 SP12 SP11 SP10 SP9 SP8 SPH
0x3D (0x5D) SP7 SP6 SP5 SP4 SP3 SP2 SP1 SP0 SPL
76543210
Read/write R/W R/W R/W R/W R/W R/W R/W R/W
R/W R/W R/W R/W R/W R/W R/W R/W
Initial value RAMEND RAMEND RAMEND RAMEND RAMEND RAMEND RAMEND RAMEND
RAMEND RAMEND RAMEND RAMEND RAMEND RAMEND RAMEND RAMEND
clk
1st instruction fetch
1st instruction execute
2nd instruction fetch
2nd instruction execute
3rd instruction fetch
3rd instruction execute
4th instruction fetch
T1 T2 T3 T4
CPU
Total execution time
Register operands fetch
ALU operation execute
Result write back
T1 T2 T3 T4
clkCPU15
2545T–AVR–05/11
ATmega48/88/168
7.8 Reset and interrupt handling
The AVR provides several different interrupt sources. These interrupts and the separate Reset
Vector each have a separate program vector in the program memory space. All interrupts are
assigned individual enable bits which must be written logic one together with the Global Interrupt
Enable bit in the Status Register in order to enable the interrupt. Depending on the Program
Counter value, interrupts may be automatically disabled when Boot Lock bits BLB02 or BLB12
are programmed. This feature improves software security. See the section “Memory programming”
on page 285 for details.
The lowest addresses in the program memory space are by default defined as the Reset and
Interrupt Vectors. The complete list of vectors is shown in “Interrupts” on page 56. The list also
determines the priority levels of the different interrupts. The lower the address the higher is the
priority level. RESET has the highest priority, and next is INT0 – the External Interrupt Request
0. The Interrupt Vectors can be moved to the start of the Boot Flash section by setting the IVSEL
bit in the MCU Control Register (MCUCR). Refer to “Interrupts” on page 56 for more information.
The Reset Vector can also be moved to the start of the Boot Flash section by programming the
BOOTRST Fuse, see “Boot loader support – Read-while-write self-programming, Atmel
ATmega88 and Atmel ATmega168” on page 269.
When an interrupt occurs, the Global Interrupt Enable I-bit is cleared and all interrupts are disabled.
The user software can write logic one to the I-bit to enable nested interrupts. All enabled
interrupts can then interrupt the current interrupt routine. The I-bit is automatically set when a
Return from Interrupt instruction – RETI – is executed.
There are basically two types of interrupts. The first type is triggered by an event that sets the
Interrupt Flag. For these interrupts, the Program Counter is vectored to the actual Interrupt Vector
in order to execute the interrupt handling routine, and hardware clears the corresponding
Interrupt Flag. Interrupt Flags can also be cleared by writing a logic one to the flag bit position(s)
to be cleared. If an interrupt condition occurs while the corresponding interrupt enable bit is
cleared, the Interrupt Flag will be set and remembered until the interrupt is enabled, or the flag is
cleared by software. Similarly, if one or more interrupt conditions occur while the Global Interrupt
Enable bit is cleared, the corresponding Interrupt Flag(s) will be set and remembered until the
Global Interrupt Enable bit is set, and will then be executed by order of priority.
The second type of interrupts will trigger as long as the interrupt condition is present. These
interrupts do not necessarily have Interrupt Flags. If the interrupt condition disappears before the
interrupt is enabled, the interrupt will not be triggered.
When the AVR exits from an interrupt, it will always return to the main program and execute one
more instruction before any pending interrupt is served.
Note that the Status Register is not automatically stored when entering an interrupt routine, nor
restored when returning from an interrupt routine. This must be handled by software.
When using the CLI instruction to disable interrupts, the interrupts will be immediately disabled.
No interrupt will be executed after the CLI instruction, even if it occurs simultaneously with the
CLI instruction. The following example shows how this can be used to avoid interrupts during the
timed EEPROM write sequence.16
2545T–AVR–05/11
ATmega48/88/168
When using the SEI instruction to enable interrupts, the instruction following SEI will be executed
before any pending interrupts, as shown in this example.
7.8.1 Interrupt response time
The interrupt execution response for all the enabled AVR interrupts is four clock cycles minimum.
After four clock cycles the program vector address for the actual interrupt handling routine
is executed. During this four clock cycle period, the Program Counter is pushed onto the Stack.
The vector is normally a jump to the interrupt routine, and this jump takes three clock cycles. If
an interrupt occurs during execution of a multi-cycle instruction, this instruction is completed
before the interrupt is served. If an interrupt occurs when the MCU is in sleep mode, the interrupt
execution response time is increased by four clock cycles. This increase comes in addition to the
start-up time from the selected sleep mode.
A return from an interrupt handling routine takes four clock cycles. During these four clock
cycles, the Program Counter (two bytes) is popped back from the Stack, the Stack Pointer is
incremented by two, and the I-bit in SREG is set.
Assembly code example
in r16, SREG ; store SREG value
cli ; disable interrupts during timed sequence
sbi EECR, EEMPE ; start EEPROM write
sbi EECR, EEPE
out SREG, r16 ; restore SREG value (I-bit)
C code example
char cSREG;
cSREG = SREG; /* store SREG value */
/* disable interrupts during timed sequence */
_CLI();
EECR |= (1< xxx
... ... ... ...
22 0x015 ADC ADC conversion complete
23 0x016 EE READY EEPROM ready
24 0x017 ANALOG COMP Analog comparator
25 0x018 TWI 2-wire serial interface
26 0x019 SPM READY Store program memory ready
Table 12-1. Reset and interrupt vectors in ATmega48. (Continued)
Vector no. Program address Source Interrupt definition58
2545T–AVR–05/11
ATmega48/88/168
12.3 Interrupt vectors in Atmel ATmega88
Notes: 1. When the BOOTRST fuse is programmed, the device will jump to the boot loader address at
reset, see “Boot loader support – Read-while-write self-programming, Atmel ATmega88 and
Atmel ATmega168” on page 269.
2. When the IVSEL bit in MCUCR is set, interrupt vectors will be moved to the start of the boot
flash section. The address of each Interrupt Vector will then be the address in this table added
to the start address of the boot flash section.
Table 12-3 on page 59 shows reset and interrupt vectors placement for the various combinations
of BOOTRST and IVSEL settings. If the program never enables an interrupt source, the
Interrupt Vectors are not used, and regular program code can be placed at these locations. This
is also the case if the reset vector is in the application section while the interrupt vectors are in
the boot section or vice versa.
Table 12-2. Reset and interrupt vectors in ATmega88.
Vector no.
Program
address(2) Source Interrupt definition
1 0x000(1) RESET External pin, power-on reset, brown-out reset and watchdog system reset
2 0x001 INT0 External interrupt request 0
3 0x002 INT1 External interrupt request 1
4 0x003 PCINT0 Pin change interrupt request 0
5 0x004 PCINT1 Pin change interrupt request 1
6 0x005 PCINT2 Pin change interrupt request 2
7 0x006 WDT Watchdog time-out interrupt
8 0x007 TIMER2 COMPA Timer/Counter2 compare match A
9 0x008 TIMER2 COMPB Timer/Counter2 compare match B
10 0x009 TIMER2 OVF Timer/Counter2 overflow
11 0x00A TIMER1 CAPT Timer/Counter1 capture event
12 0x00B TIMER1 COMPA Timer/Counter1 compare match A
13 0x00C TIMER1 COMPB Timer/Coutner1 compare match B
14 0x00D TIMER1 OVF Timer/Counter1 overflow
15 0x00E TIMER0 COMPA Timer/Counter0 compare match A
16 0x00F TIMER0 COMPB Timer/Counter0 compare match B
17 0x010 TIMER0 OVF Timer/Counter0 overflow
18 0x011 SPI, STC SPI serial transfer complete
19 0x012 USART, RX USART Rx complete
20 0x013 USART, UDRE USART, data register empty
21 0x014 USART, TX USART, Tx complete
22 0x015 ADC ADC conversion complete
23 0x016 EE READY EEPROM ready
24 0x017 ANALOG COMP Analog comparator
25 0x018 TWI 2-wire serial interface
26 0x019 SPM READY Store program memory ready59
2545T–AVR–05/11
ATmega48/88/168
Note: 1. The boot reset address is shown in Table 27-6 on page 281. For the BOOTRST Fuse “1”
means unprogrammed while “0” means programmed.
The most typical and general program setup for the reset and interrupt vector addresses in
ATmega88 is:
Address Labels Code Comments
0x000 rjmp RESET ; Reset Handler
0x001 rjmp EXT_INT0 ; IRQ0 Handler
0x002 rjmp EXT_INT1 ; IRQ1 Handler
0x003 rjmp PCINT0 ; PCINT0 Handler
0x004 rjmp PCINT1 ; PCINT1 Handler
0x005 rjmp PCINT2 ; PCINT2 Handler
0x006 rjmp WDT ; Watchdog Timer Handler
0x007 rjmp TIM2_COMPA ; Timer2 Compare A Handler
0X008 rjmp TIM2_COMPB ; Timer2 Compare B Handler
0x009 rjmp TIM2_OVF ; Timer2 Overflow Handler
0x00A rjmp TIM1_CAPT ; Timer1 Capture Handler
0x00B rjmp TIM1_COMPA ; Timer1 Compare A Handler
0x00C rjmp TIM1_COMPB ; Timer1 Compare B Handler
0x00D rjmp TIM1_OVF ; Timer1 Overflow Handler
0x00E rjmp TIM0_COMPA ; Timer0 Compare A Handler
0x00F rjmp TIM0_COMPB ; Timer0 Compare B Handler
0x010 rjmp TIM0_OVF ; Timer0 Overflow Handler
0x011 rjmp SPI_STC ; SPI Transfer Complete Handler
0x012 rjmp USART_RXC ; USART, RX Complete Handler
0x013 rjmp USART_UDRE ; USART, UDR Empty Handler
0x014 rjmp USART_TXC ; USART, TX Complete Handler
0x015 rjmp ADC ; ADC Conversion Complete Handler
0x016 rjmp EE_RDY ; EEPROM Ready Handler
0x017 rjmp ANA_COMP ; Analog Comparator Handler
0x018 rjmp TWI ; 2-wire Serial Interface Handler
0x019 rjmp SPM_RDY ; Store Program Memory Ready Handler
;
0x01ARESET: ldi r16, high(RAMEND); Main program start
0x01B out SPH,r16 ; Set Stack Pointer to top of RAM
0x01C ldi r16, low(RAMEND)
0x01D out SPL,r16
0x01E sei ; Enable interrupts
0x01F xxx
Table 12-3. Reset and interrupt vectors placement in Atmel ATmega88(1).
BOOTRST IVSEL Reset address Interrupt vectors start address
1 0 0x000 0x001
1 1 0x000 Boot reset address + 0x001
0 0 Boot reset address 0x001
0 1 Boot reset address Boot reset address + 0x00160
2545T–AVR–05/11
ATmega48/88/168
When the BOOTRST fuse is unprogrammed, the boot section size set to 2Kbytes and the IVSEL
bit in the MCUCR register is set before any interrupts are enabled, the most typical and general
program setup for the reset and interrupt vector addresses in Atmel ATmega88 is:
Address Labels Code Comments
0x000 RESET: ldi r16,high(RAMEND); Main program start
0x001 out SPH,r16 ; Set Stack Pointer to top of RAM
0x002 ldi r16,low(RAMEND)
0x003 out SPL,r16
0x004 sei ; Enable interrupts
0x005 xxx
;
.org 0xC01
0xC01 rjmp EXT_INT0 ; IRQ0 Handler
0xC02 rjmp EXT_INT1 ; IRQ1 Handler
... ... ... ;
0xC19 rjmp SPM_RDY ; Store Program Memory Ready Handler
When the BOOTRST fuse is programmed and the boot section size set to 2Kbytes, the most
typical and general program setup for the reset and interrupt vector addresses in ATmega88 is:
Address Labels Code Comments
.org 0x001
0x001 rjmp EXT_INT0 ; IRQ0 Handler
0x002 rjmp EXT_INT1 ; IRQ1 Handler
... ... ... ;
0x019 rjmp SPM_RDY ; Store Program Memory Ready Handler
;
.org 0xC00
0xC00 RESET: ldi r16,high(RAMEND); Main program start
0xC01 out SPH,r16 ; Set Stack Pointer to top of RAM
0xC02 ldi r16,low(RAMEND)
0xC03 out SPL,r16
0xC04 sei ; Enable interrupts
0xC05 xxx
When the BOOTRST fuse is programmed, the boot section size set to 2Kbytes and the IVSEL
bit in the MCUCR register is set before any interrupts are enabled, the most typical and general
program setup for the reset and interrupt vector addresses in ATmega88 is:
Address Labels Code Comments
;
.org 0xC00
0xC00 rjmp RESET ; Reset handler
0xC01 rjmp EXT_INT0 ; IRQ0 Handler
0xC02 rjmp EXT_INT1 ; IRQ1 Handler
... ... ... ;
0xC19 rjmp SPM_RDY ; Store Program Memory Ready Handler
;
0xC1A RESET: ldi r16,high(RAMEND); Main program start
0xC1B out SPH,r16 ; Set Stack Pointer to top of RAM61
2545T–AVR–05/11
ATmega48/88/168
0xC1C ldi r16,low(RAMEND)
0xC1D out SPL,r16
0xC1E sei ; Enable interrupts
0xC1F xxx
12.4 Interrupt vectors in Atmel ATmega168
Notes: 1. When the BOOTRST fuse is programmed, the device will jump to the boot loader address at
reset, see “Boot loader support – Read-while-write self-programming, Atmel ATmega88 and
Atmel ATmega168” on page 269.
2. When the IVSEL bit in MCUCR is set, interrupt vectors will be moved to the start of the boot
flash section. The address of each Interrupt Vector will then be the address in this table added
to the start address of the boot flash section.
Table 12-4. Reset and interrupt vectors in ATmega168.
Vector no.
Program
address(2) Source Interrupt definition
1 0x0000(1) RESET External pin, power-on reset, brown-out reset and watchdog system reset
2 0x0002 INT0 External interrupt request 0
3 0x0004 INT1 External interrupt request 1
4 0x0006 PCINT0 Pin change interrupt request 0
5 0x0008 PCINT1 Pin change interrupt request 1
6 0x000A PCINT2 Pin change interrupt request 2
7 0x000C WDT Watchdog time-out interrupt
8 0x000E TIMER2 COMPA Timer/Counter2 compare match A
9 0x0010 TIMER2 COMPB Timer/Counter2 compare match B
10 0x0012 TIMER2 OVF Timer/Counter2 overflow
11 0x0014 TIMER1 CAPT Timer/Counter1 capture event
12 0x0016 TIMER1 COMPA Timer/Counter1 compare match A
13 0x0018 TIMER1 COMPB Timer/Coutner1 compare match B
14 0x001A TIMER1 OVF Timer/Counter1 overflow
15 0x001C TIMER0 COMPA Timer/Counter0 compare match A
16 0x001E TIMER0 COMPB Timer/Counter0 compare match B
17 0x0020 TIMER0 OVF Timer/Counter0 overflow
18 0x0022 SPI, STC SPI serial transfer complete
19 0x0024 USART, RX USART Rx complete
20 0x0026 USART, UDRE USART, data register empty
21 0x0028 USART, TX USART, Tx complete
22 0x002A ADC ADC conversion complete
23 0x002C EE READY EEPROM ready
24 0x002E ANALOG COMP Analog comparator
25 0x0030 TWI 2-wire serial interface
26 0x0032 SPM READY Store program memory ready62
2545T–AVR–05/11
ATmega48/88/168
Table 12-5 shows reset and interrupt vectors placement for the various combinations of
BOOTRST and IVSEL settings. If the program never enables an interrupt source, the interrupt
vectors are not used, and regular program code can be placed at these locations. This is also
the case if the reset vector is in the application section while the interrupt vectors are in the boot
section or vice versa.
Note: 1. The boot reset address is shown in Table 27-6 on page 281. For the BOOTRST fuse “1”
means unprogrammed while “0” means programmed.
The most typical and general program setup for the reset and interrupt vector addresses in
ATmega168 is:
Address Labels Code Comments
0x0000 jmp RESET ; Reset Handler
0x0002 jmp EXT_INT0 ; IRQ0 Handler
0x0004 jmp EXT_INT1 ; IRQ1 Handler
0x0006 jmp PCINT0 ; PCINT0 Handler
0x0008 jmp PCINT1 ; PCINT1 Handler
0x000A jmp PCINT2 ; PCINT2 Handler
0x000C jmp WDT ; Watchdog Timer Handler
0x000E jmp TIM2_COMPA ; Timer2 Compare A Handler
0x0010 jmp TIM2_COMPB ; Timer2 Compare B Handler
0x0012 jmp TIM2_OVF ; Timer2 Overflow Handler
0x0014 jmp TIM1_CAPT ; Timer1 Capture Handler
0x0016 jmp TIM1_COMPA ; Timer1 Compare A Handler
0x0018 jmp TIM1_COMPB ; Timer1 Compare B Handler
0x001A jmp TIM1_OVF ; Timer1 Overflow Handler
0x001C jmp TIM0_COMPA ; Timer0 Compare A Handler
0x001E jmp TIM0_COMPB ; Timer0 Compare B Handler
0x0020 jmp TIM0_OVF ; Timer0 Overflow Handler
0x0022 jmp SPI_STC ; SPI Transfer Complete Handler
0x0024 jmp USART_RXC ; USART, RX Complete Handler
0x0026 jmp USART_UDRE ; USART, UDR Empty Handler
0x0028 jmp USART_TXC ; USART, TX Complete Handler
0x002A jmp ADC ; ADC Conversion Complete Handler
0x002C jmp EE_RDY ; EEPROM Ready Handler
0x002E jmp ANA_COMP ; Analog Comparator Handler
0x0030 jmp TWI ; 2-wire Serial Interface Handler
0x0032 jmp SPM_RDY ; Store Program Memory Ready Handler
;
0x0033RESET: ldi r16, high(RAMEND); Main program start
Table 12-5. Reset and interrupt vectors placement in Atmel ATmega168(1).
BOOTRST IVSEL Reset address Interrupt vectors start address
1 0 0x000 0x001
1 1 0x000 Boot reset address + 0x0002
0 0 Boot reset address 0x001
0 1 Boot reset address Boot reset address + 0x000263
2545T–AVR–05/11
ATmega48/88/168
0x0034 out SPH,r16 ; Set Stack Pointer to top of RAM
0x0035 ldi r16, low(RAMEND)
0x0036 out SPL,r16
0x0037 sei ; Enable interrupts
0x0038 xxx
... ... ... ...
When the BOOTRST fuse is unprogrammed, the boot section size set to 2Kbytes and the IVSEL
bit in the MCUCR Register is set before any interrupts are enabled, the most typical and general
program setup for the reset and interrupt vector addresses in Atmel ATmega168 is:
Address Labels Code Comments
0x0000 RESET: ldi r16,high(RAMEND); Main program start
0x0001 out SPH,r16 ; Set Stack Pointer to top of RAM
0x0002 ldi r16,low(RAMEND)
0x0003 out SPL,r16
0x0004 sei ; Enable interrupts
0x0005 xxx
;
.org 0xC02
0x1C02 jmp EXT_INT0 ; IRQ0 Handler
0x1C04 jmp EXT_INT1 ; IRQ1 Handler
... ... ... ;
0x1C32 jmp SPM_RDY ; Store Program Memory Ready Handler
When the BOOTRST fuse is programmed and the boot section size set to 2Kbytes, the most
typical and general program setup for the reset and interrupt vector addresses in ATmega168 is:
Address Labels Code Comments
.org 0x0002
0x0002 jmp EXT_INT0 ; IRQ0 Handler
0x0004 jmp EXT_INT1 ; IRQ1 Handler
... ... ... ;
0x0032 jmp SPM_RDY ; Store Program Memory Ready Handler
;
.org 0x1C00
0x1C00 RESET: ldi r16,high(RAMEND); Main program start
0x1C01 out SPH,r16 ; Set Stack Pointer to top of RAM
0x1C02 ldi r16,low(RAMEND)
0x1C03 out SPL,r16
0x1C04 sei ; Enable interrupts
0x1C05 xxx
When the BOOTRST fuse is programmed, the boot section size set to 2Kbytes and the IVSEL
bit in the MCUCR register is set before any interrupts are enabled, the most typical and general
program setup for the reset and interrupt vector addresses in ATmega168 is:64
2545T–AVR–05/11
ATmega48/88/168
Address Labels Code Comments
;
.org 0x1C00
0x1C00 jmp RESET ; Reset handler
0x1C02 jmp EXT_INT0 ; IRQ0 Handler
0x1C04 jmp EXT_INT1 ; IRQ1 Handler
... ... ... ;
0x1C32 jmp SPM_RDY ; Store Program Memory Ready Handler
;
0x1C33 RESET: ldi r16,high(RAMEND); Main program start
0x1C34 out SPH,r16 ; Set Stack Pointer to top of RAM
0x1C35 ldi r16,low(RAMEND)
0x1C36 out SPL,r16
0x1C37 sei ; Enable interrupts
0x1C38 xxx
12.4.1 Moving interrupts between application and boot space, Atmel ATmega88 and Atmel ATmega168
The MCU control register controls the placement of the interrupt vector table.
12.5 Register description
12.5.1 MCUCR – MCU control register
• Bit 1 – IVSEL: Interrupt vector select
When the IVSEL bit is cleared (zero), the interrupt vectors are placed at the start of the flash
memory. When this bit is set (one), the interrupt vectors are moved to the beginning of the boot
loader section of the flash. The actual address of the start of the boot flash section is determined
by the BOOTSZ fuses. Refer to the section “Boot loader support – Read-while-write self-programming,
Atmel ATmega88 and Atmel ATmega168” on page 269 for details. To avoid
unintentional changes of interrupt vector tables, a special write procedure must be followed to
change the IVSEL bit:
a. Write the interrupt vector change enable (IVCE) bit to one.
b. Within four cycles, write the desired value to IVSEL while writing a zero to IVCE.
Interrupts will automatically be disabled while this sequence is executed. Interrupts are disabled
in the cycle IVCE is set, and they remain disabled until after the instruction following the write to
IVSEL. If IVSEL is not written, interrupts remain disabled for four cycles. The I-bit in the status
register is unaffected by the automatic disabling.
Note: If interrupt vectors are placed in the boot loader section and boot lock bit BLB02 is programmed,
interrupts are disabled while executing from the Application section. If interrupt vectors are placed
in the Application section and boot lock bit BLB12 is programmed, interrupts are disabled while
executing from the Boot Loader section. Refer to the section “Boot loader support – Read-whilewrite
self-programming, Atmel ATmega88 and Atmel ATmega168” on page 269 for details on
Boot Lock bits.
This bit is not available in Atmel ATmega48.
Bit 7 6 5 4 3 2 1 0
0x35 (0x55) – – – PUD – – IVSEL IVCE MCUCR
Read/write R R R R/W R R R/W R/W
Initial value 0 0 0 0 0 0 0 065
2545T–AVR–05/11
ATmega48/88/168
• Bit 0 – IVCE: Interrupt vector change enable
The IVCE bit must be written to logic one to enable change of the IVSEL bit. IVCE is cleared by
hardware four cycles after it is written or when IVSEL is written. Setting the IVCE bit will disable
interrupts, as explained in the IVSEL description above. See code example below.
This bit is not available in Atmel ATmega48.
Assembly code example
Move_interrupts:
; Get MCUCR
in r16, MCUCR
mov r17, r16
; Enable change of Interrupt Vectors
ori r16, (1< CSn2:0 > 1). The number of system clock
cycles from when the timer is enabled to the first count occurs can be from 1 to N+1 system
clock cycles, where N equals the prescaler divisor (8, 64, 256, or 1024).
It is possible to use the prescaler reset for synchronizing the Timer/Counter to program execution.
However, care must be taken if the other Timer/Counter that shares the same prescaler
also uses prescaling. A prescaler reset will affect the prescaler period for all Timer/Counters it is
connected to.
17.0.3 External clock source
An external clock source applied to the T1/T0 pin can be used as Timer/Counter clock
(clkT1/clkT0). The T1/T0 pin is sampled once every system clock cycle by the pin synchronization
logic. The synchronized (sampled) signal is then passed through the edge detector. Figure 17-1
shows a functional equivalent block diagram of the T1/T0 synchronization and edge detector
logic. The registers are clocked at the positive edge of the internal system clock (clkI/O). The latch
is transparent in the high period of the internal system clock.
The edge detector generates one clkT1/clkT0 pulse for each positive (CSn2:0 = 7) or negative
(CSn2:0 = 6) edge it detects.
Figure 17-1. T1/T0 pin sampling.
The synchronization and edge detector logic introduces a delay of 2.5 to 3.5 system clock cycles
from an edge has been applied to the T1/T0 pin to the counter is updated.
Tn_sync
(to clock
select logic)
Synchronization Edge detector
D Q D Q
LE
Tn D Q
clkI/O138
2545T–AVR–05/11
ATmega48/88/168
Enabling and disabling of the clock input must be done when T1/T0 has been stable for at least
one system clock cycle, otherwise it is a risk that a false Timer/Counter clock pulse is generated.
Each half period of the external clock applied must be longer than one system clock cycle to
ensure correct sampling. The external clock must be guaranteed to have less than half the system
clock frequency (fExtClk < fclk_I/O/2) given a 50/50% duty cycle. Since the edge detector uses
sampling, the maximum frequency of an external clock it can detect is half the sampling frequency
(Nyquist sampling theorem). However, due to variation of the system clock frequency
and duty cycle caused by Oscillator source (crystal, resonator, and capacitors) tolerances, it is
recommended that maximum frequency of an external clock source is less than fclk_I/O/2.5.
An external clock source can not be prescaled.
Figure 17-2. Prescaler for timer/counter0 and timer/counter1(1).
Note: 1. The synchronization logic on the input pins (T1/T0) is shown in Figure 17-1 on page 137.
PSRSYNC
Clear
clkT1 clkT0
T1
T0
clkI/O
Synchronization
Synchronization139
2545T–AVR–05/11
ATmega48/88/168
17.1 Register description
17.1.1 GTCCR – General timer/counter control register
• Bit 7 – TSM: Timer/counter synchronization mode
Writing the TSM bit to one activates the Timer/Counter Synchronization mode. In this mode, the
value that is written to the PSRASY and PSRSYNC bits is kept, hence keeping the corresponding
prescaler reset signals asserted. This ensures that the corresponding Timer/Counters are
halted and can be configured to the same value without the risk of one of them advancing during
configuration. When the TSM bit is written to zero, the PSRASY and PSRSYNC bits are cleared
by hardware, and the Timer/Counters start counting simultaneously.
• Bit 0 – PSRSYNC: Prescaler reset
When this bit is one, Timer/Counter1 and Timer/Counter0 prescaler will be Reset. This bit is normally
cleared immediately by hardware, except if the TSM bit is set. Note that Timer/Counter1
and Timer/Counter0 share the same prescaler and a reset of this prescaler will affect both
timers.
Bit 7 6 5 4 3 2 1 0
0x23 (0x43) TSM – – – – – PSRASY PSRSYNC GTCCR
Read/write R/W R R R R R R/W R/W
Initial value 0 0 0 0 0 0 0 0140
2545T–AVR–05/11
ATmega48/88/168
18. 8-bit Timer/Counter2 with PWM and asynchronous operation
18.1 Features • Single channel counter
• Clear timer on compare match (auto reload)
• Glitch-free, phase correct pulse width modulator (PWM)
• Frequency generator
• 10-bit clock prescaler
• Overflow and compare match interrupt sources (TOV2, OCF2A and OCF2B)
• Allows clocking from external 32kHz watch crystal independent of the I/O clock
18.2 Overview
Timer/Counter2 is a general purpose, single channel, 8-bit Timer/Counter module. A simplified
block diagram of the 8-bit Timer/Counter is shown in Figure 18-1. For the actual placement of
I/O pins, refer to “Pinout Atmel ATmega48/88/168.” on page 2. CPU accessible I/O Registers,
including I/O bits and I/O pins, are shown in bold. The device-specific I/O Register and bit locations
are listed in the “Register description” on page 153.
The PRTIM2 bit in “Minimizing power consumption” on page 41 must be written to zero to enable
Timer/Counter2 module.
Figure 18-1. 8-bit timer/counter block diagram.
Clock select
Timer/counter
DATA BUS
OCRnA
OCRnB
=
=
TCNTn
Waveform
generation
Waveform
generation
OCnA
OCnB
=
Fixed
TOP
value
Control logic
= 0
TOP BOTTOM
Count
Clear
Direction
TOVn
(Int.req.)
OCnA
(Int.req.)
OCnB
(Int.req.)
TCCRnA TCCRnB
Tn Edge
detector
(From prescaler)
clkTn141
2545T–AVR–05/11
ATmega48/88/168
18.2.1 Registers
The Timer/Counter (TCNT2) and Output Compare Register (OCR2A and OCR2B) are 8-bit registers.
Interrupt request (shorten as Int.Req.) signals are all visible in the Timer Interrupt Flag
Register (TIFR2). All interrupts are individually masked with the Timer Interrupt Mask Register
(TIMSK2). TIFR2 and TIMSK2 are not shown in the figure.
The Timer/Counter can be clocked internally, via the prescaler, or asynchronously clocked from
the TOSC1/2 pins, as detailed later in this section. The asynchronous operation is controlled by
the Asynchronous Status Register (ASSR). The Clock Select logic block controls which clock
source he Timer/Counter uses to increment (or decrement) its value. The Timer/Counter is inactive
when no clock source is selected. The output from the Clock Select logic is referred to as the
timer clock (clkT2).
The double buffered Output Compare Register (OCR2A and OCR2B) are compared with the
Timer/Counter value at all times. The result of the compare can be used by the Waveform Generator
to generate a PWM or variable frequency output on the Output Compare pins (OC2A and
OC2B). See “Output compare unit” on page 142. for details. The compare match event will also
set the Compare Flag (OCF2A or OCF2B) which can be used to generate an Output Compare
interrupt request.
18.2.2 Definitions
Many register and bit references in this document are written in general form. A lower case “n”
replaces the Timer/Counter number, in this case 2. However, when using the register or bit
defines in a program, the precise form must be used, that is, TCNT2 for accessing
Timer/Counter2 counter value and so on.
The definitions in Table 18-1 are also used extensively throughout the section.
18.3 Timer/counter clock sources
The Timer/Counter can be clocked by an internal synchronous or an external asynchronous
clock source. The clock source clkT2 is by default equal to the MCU clock, clkI/O. When the AS2
bit in the ASSR Register is written to logic one, the clock source is taken from the Timer/Counter
Oscillator connected to TOSC1 and TOSC2. For details on asynchronous operation, see “ASSR
– Asynchronous status register” on page 159. For details on clock sources and prescaler, see
“Timer/counter prescaler” on page 152.
18.4 Counter unit
The main part of the 8-bit Timer/Counter is the programmable bi-directional counter unit. Figure
18-2 on page 142 shows a block diagram of the counter and its surrounding environment.
Table 18-1. Definitions.
BOTTOM The counter reaches the BOTTOM when it becomes zero (0x00).
MAX The counter reaches its MAXimum when it becomes 0xFF (decimal 255).
TOP The counter reaches the TOP when it becomes equal to the highest value in the
count sequence. The TOP value can be assigned to be the fixed value 0xFF
(MAX) or the value stored in the OCR2A Register. The assignment is dependent
on the mode of operation.142
2545T–AVR–05/11
ATmega48/88/168
Figure 18-2. Counter unit block diagram.
Signal description (internal signals):
count Increment or decrement TCNT2 by 1.
direction Selects between increment and decrement.
clear Clear TCNT2 (set all bits to zero).
clkTn Timer/Counter clock, referred to as clkT2 in the following.
top Signalizes that TCNT2 has reached maximum value.
bottom Signalizes that TCNT2 has reached minimum value (zero).
Depending on the mode of operation used, the counter is cleared, incremented, or decremented
at each timer clock (clkT2). clkT2 can be generated from an external or internal clock source,
selected by the Clock Select bits (CS22:0). When no clock source is selected (CS22:0 = 0) the
timer is stopped. However, the TCNT2 value can be accessed by the CPU, regardless of
whether clkT2 is present or not. A CPU write overrides (has priority over) all counter clear or
count operations.
The counting sequence is determined by the setting of the WGM21 and WGM20 bits located in
the Timer/Counter Control Register (TCCR2A) and the WGM22 located in the Timer/Counter
Control Register B (TCCR2B). There are close connections between how the counter behaves
(counts) and how waveforms are generated on the Output Compare outputs OC2A and OC2B.
For more details about advanced counting sequences and waveform generation, see “Modes of
operation” on page 145.
The Timer/Counter Overflow Flag (TOV2) is set according to the mode of operation selected by
the WGM22:0 bits. TOV2 can be used for generating a CPU interrupt.
18.5 Output compare unit
The 8-bit comparator continuously compares TCNT2 with the Output Compare Register
(OCR2A and OCR2B). Whenever TCNT2 equals OCR2A or OCR2B, the comparator signals a
match. A match will set the Output Compare Flag (OCF2A or OCF2B) at the next timer clock
cycle. If the corresponding interrupt is enabled, the Output Compare Flag generates an Output
Compare interrupt. The Output Compare Flag is automatically cleared when the interrupt is executed.
Alternatively, the Output Compare Flag can be cleared by software by writing a logical
one to its I/O bit location. The Waveform Generator uses the match signal to generate an output
according to operating mode set by the WGM22:0 bits and Compare Output mode (COM2x1:0)
bits. The max and bottom signals are used by the Waveform Generator for handling the special
cases of the extreme values in some modes of operation (“Modes of operation” on page 145).
Figure 18-3 on page 143 shows a block diagram of the Output Compare unit.
DATA BUS
TCNTn Control logic
count
TOVn
(Int.req.)
bottom top
direction
clear
TOSC1
T/C
oscillator
TOSC2
Prescaler
clkI/O
clk Tn143
2545T–AVR–05/11
ATmega48/88/168
Figure 18-3. Output compare unit, block diagram.
The OCR2x Register is double buffered when using any of the Pulse Width Modulation (PWM)
modes. For the Normal and Clear Timer on Compare (CTC) modes of operation, the double
buffering is disabled. The double buffering synchronizes the update of the OCR2x Compare
Register to either top or bottom of the counting sequence. The synchronization prevents the
occurrence of odd-length, non-symmetrical PWM pulses, thereby making the output glitch-free.
The OCR2x Register access may seem complex, but this is not case. When the double buffering
is enabled, the CPU has access to the OCR2x Buffer Register, and if double buffering is disabled
the CPU will access the OCR2x directly.
18.5.1 Force output compare
In non-PWM waveform generation modes, the match output of the comparator can be forced by
writing a one to the Force Output Compare (FOC2x) bit. Forcing compare match will not set the
OCF2x Flag or reload/clear the timer, but the OC2x pin will be updated as if a real compare
match had occurred (the COM2x1:0 bits settings define whether the OC2x pin is set, cleared or
toggled).
18.5.2 Compare match blocking by TCNT2 write
All CPU write operations to the TCNT2 Register will block any compare match that occurs in the
next timer clock cycle, even when the timer is stopped. This feature allows OCR2x to be initialized
to the same value as TCNT2 without triggering an interrupt when the Timer/Counter clock is
enabled.
18.5.3 Using the output compare unit
Since writing TCNT2 in any mode of operation will block all compare matches for one timer clock
cycle, there are risks involved when changing TCNT2 when using the Output Compare channel,
independently of whether the Timer/Counter is running or not. If the value written to TCNT2
equals the OCR2x value, the compare match will be missed, resulting in incorrect waveform
generation. Similarly, do not write the TCNT2 value equal to BOTTOM when the counter is
downcounting.
OCFnx (int.req.)
= (8-bit comparator)
OCRnx
OCnx
DATA BUS
TCNTn
WGMn1:0
Waveform generator
top
FOCn
COMnX1:0
bottom144
2545T–AVR–05/11
ATmega48/88/168
The setup of the OC2x should be performed before setting the Data Direction Register for the
port pin to output. The easiest way of setting the OC2x value is to use the Force Output Compare
(FOC2x) strobe bit in Normal mode. The OC2x Register keeps its value even when
changing between Waveform Generation modes.
Be aware that the COM2x1:0 bits are not double buffered together with the compare value.
Changing the COM2x1:0 bits will take effect immediately.
18.6 Compare match output unit
The Compare Output mode (COM2x1:0) bits have two functions. The Waveform Generator uses
the COM2x1:0 bits for defining the Output Compare (OC2x) state at the next compare match.
Also, the COM2x1:0 bits control the OC2x pin output source. Figure 18-4 shows a simplified
schematic of the logic affected by the COM2x1:0 bit setting. The I/O Registers, I/O bits, and I/O
pins in the figure are shown in bold. Only the parts of the general I/O Port Control Registers
(DDR and PORT) that are affected by the COM2x1:0 bits are shown. When referring to the
OC2x state, the reference is for the internal OC2x Register, not the OC2x pin.
Figure 18-4. Compare match output unit, schematic.
The general I/O port function is overridden by the Output Compare (OC2x) from the Waveform
Generator if either of the COM2x1:0 bits are set. However, the OC2x pin direction (input or output)
is still controlled by the Data Direction Register (DDR) for the port pin. The Data Direction
Register bit for the OC2x pin (DDR_OC2x) must be set as output before the OC2x value is visible
on the pin. The port override function is independent of the Waveform Generation mode.
The design of the Output Compare pin logic allows initialization of the OC2x state before the output
is enabled. Note that some COM2x1:0 bit settings are reserved for certain modes of
operation. See “Register description” on page 153.
PORT
DDR
D Q
D Q
OCnx
OCnx pin
D Q Waveform
generator
COMnx1
COMnx0
0
1
DATA BUS
FOCnx
clkI/O145
2545T–AVR–05/11
ATmega48/88/168
18.6.1 Compare output mode and waveform generation
The Waveform Generator uses the COM2x1:0 bits differently in normal, CTC, and PWM modes.
For all modes, setting the COM2x1:0 = 0 tells the Waveform Generator that no action on the
OC2x Register is to be performed on the next compare match. For compare output actions in the
non-PWM modes refer to Table 18-5 on page 154. For fast PWM mode, refer to Table 18-6 on
page 155, and for phase correct PWM refer to Table 18-7 on page 155.
A change of the COM2x1:0 bits state will have effect at the first compare match after the bits are
written. For non-PWM modes, the action can be forced to have immediate effect by using the
FOC2x strobe bits.
18.7 Modes of operation
The mode of operation, that is, the behavior of the Timer/Counter and the Output Compare pins,
is defined by the combination of the Waveform Generation mode (WGM22:0) and Compare Output
mode (COM2x1:0) bits. The Compare Output mode bits do not affect the counting sequence,
while the Waveform Generation mode bits do. The COM2x1:0 bits control whether the PWM output
generated should be inverted or not (inverted or non-inverted PWM). For non-PWM modes
the COM2x1:0 bits control whether the output should be set, cleared, or toggled at a compare
match (See “Compare match output unit” on page 144.).
For detailed timing information refer to “Timer/counter timing diagrams” on page 149.
18.7.1 Normal mode
The simplest mode of operation is the Normal mode (WGM22:0 = 0). In this mode the counting
direction is always up (incrementing), and no counter clear is performed. The counter simply
overruns when it passes its maximum 8-bit value (TOP = 0xFF) and then restarts from the bottom
(0x00). In normal operation the Timer/Counter Overflow Flag (TOV2) will be set in the same
timer clock cycle as the TCNT2 becomes zero. The TOV2 Flag in this case behaves like a ninth
bit, except that it is only set, not cleared. However, combined with the timer overflow interrupt
that automatically clears the TOV2 Flag, the timer resolution can be increased by software.
There are no special cases to consider in the Normal mode, a new counter value can be written
anytime.
The Output Compare unit can be used to generate interrupts at some given time. Using the Output
Compare to generate waveforms in Normal mode is not recommended, since this will
occupy too much of the CPU time.
18.7.2 Clear timer on compare match (CTC) mode
In Clear Timer on Compare or CTC mode (WGM22:0 = 2), the OCR2A Register is used to
manipulate the counter resolution. In CTC mode the counter is cleared to zero when the counter
value (TCNT2) matches the OCR2A. The OCR2A defines the top value for the counter, hence
also its resolution. This mode allows greater control of the compare match output frequency. It
also simplifies the operation of counting external events.
The timing diagram for the CTC mode is shown in Figure 18-5 on page 146. The counter value
(TCNT2) increases until a compare match occurs between TCNT2 and OCR2A, and then counter
(TCNT2) is cleared.146
2545T–AVR–05/11
ATmega48/88/168
Figure 18-5. CTC mode, timing diagram.
An interrupt can be generated each time the counter value reaches the TOP value by using the
OCF2A Flag. If the interrupt is enabled, the interrupt handler routine can be used for updating
the TOP value. However, changing TOP to a value close to BOTTOM when the counter is running
with none or a low prescaler value must be done with care since the CTC mode does not
have the double buffering feature. If the new value written to OCR2A is lower than the current
value of TCNT2, the counter will miss the compare match. The counter will then have to count to
its maximum value (0xFF) and wrap around starting at 0x00 before the compare match can
occur.
For generating a waveform output in CTC mode, the OC2A output can be set to toggle its logical
level on each compare match by setting the Compare Output mode bits to toggle mode
(COM2A1:0 = 1). The OC2A value will not be visible on the port pin unless the data direction for
the pin is set to output. The waveform generated will have a maximum frequency of fOC2A =
fclk_I/O/2 when OCR2A is set to zero (0x00). The waveform frequency is defined by the following
equation:
The N variable represents the prescale factor (1, 8, 32, 64, 128, 256, or 1024).
As for the normal mode of operation, the TOV2 Flag is set in the same timer clock cycle that the
counter counts from MAX to 0x00.
18.7.3 Fast PWM mode
The fast Pulse Width Modulation or fast PWM mode (WGM22:0 = 3 or 7) provides a high frequency
PWM waveform generation option. The fast PWM differs from the other PWM option by
its single-slope operation. The counter counts from BOTTOM to TOP then restarts from BOTTOM.
TOP is defined as 0xFF when WGM2:0 = 3, and OCR2A when MGM2:0 = 7. In noninverting
Compare Output mode, the Output Compare (OC2x) is cleared on the compare match
between TCNT2 and OCR2x, and set at BOTTOM. In inverting Compare Output mode, the output
is set on compare match and cleared at BOTTOM. Due to the single-slope operation, the
operating frequency of the fast PWM mode can be twice as high as the phase correct PWM
mode that uses dual-slope operation. This high frequency makes the fast PWM mode well suited
for power regulation, rectification, and DAC applications. High frequency allows physically small
sized external components (coils, capacitors), and therefore reduces total system cost.
TCNTn
OCnx
(toggle)
OCnx interrupt flag set
Period 1 2 3 4
(COMnx1:0 = 1)
f
OCnx
f
clk_I/O
2 ⋅ ⋅ N ( ) 1 + OCRnx = -------------------------------------------------147
2545T–AVR–05/11
ATmega48/88/168
In fast PWM mode, the counter is incremented until the counter value matches the TOP value.
The counter is then cleared at the following timer clock cycle. The timing diagram for the fast
PWM mode is shown in Figure 18-6. The TCNT2 value is in the timing diagram shown as a histogram
for illustrating the single-slope operation. The diagram includes non-inverted and
inverted PWM outputs. The small horizontal line marks on the TCNT2 slopes represent compare
matches between OCR2x and TCNT2.
Figure 18-6. Fast PWM mode, timing diagram.
The Timer/Counter Overflow Flag (TOV2) is set each time the counter reaches TOP. If the interrupt
is enabled, the interrupt handler routine can be used for updating the compare value.
In fast PWM mode, the compare unit allows generation of PWM waveforms on the OC2x pin.
Setting the COM2x1:0 bits to two will produce a non-inverted PWM and an inverted PWM output
can be generated by setting the COM2x1:0 to three. TOP is defined as 0xFF when WGM2:0 = 3,
and OCR2A when MGM2:0 = 7. (See Table 18-3 on page 154). The actual OC2x value will only
be visible on the port pin if the data direction for the port pin is set as output. The PWM waveform
is generated by setting (or clearing) the OC2x Register at the compare match between
OCR2x and TCNT2, and clearing (or setting) the OC2x Register at the timer clock cycle the
counter is cleared (changes from TOP to BOTTOM).
The PWM frequency for the output can be calculated by the following equation:
The N variable represents the prescale factor (1, 8, 32, 64, 128, 256, or 1024).
The extreme values for the OCR2A Register represent special cases when generating a PWM
waveform output in the fast PWM mode. If the OCR2A is set equal to BOTTOM, the output will
be a narrow spike for each MAX+1 timer clock cycle. Setting the OCR2A equal to MAX will result
in a constantly high or low output (depending on the polarity of the output set by the COM2A1:0
bits.)
A frequency (with 50% duty cycle) waveform output in fast PWM mode can be achieved by setting
OC2x to toggle its logical level on each compare match (COM2x1:0 = 1). The waveform
TCNTn
OCRnx update and
TOVn interrupt flag set
Period 1 2 3
OCnx
OCnx
(COMnx1:0 = 2)
(COMnx1:0 = 3)
OCRnx interrupt flag set
4 5 6 7
f
OCnxPWM
f
clk_I/O
N ⋅ 256 = ------------------148
2545T–AVR–05/11
ATmega48/88/168
generated will have a maximum frequency of foc2 = fclk_I/O/2 when OCR2A is set to zero. This feature
is similar to the OC2A toggle in CTC mode, except the double buffer feature of the Output
Compare unit is enabled in the fast PWM mode.
18.7.4 Phase correct PWM mode
The phase correct PWM mode (WGM22:0 = 1 or 5) provides a high resolution phase correct
PWM waveform generation option. The phase correct PWM mode is based on a dual-slope
operation. The counter counts repeatedly from BOTTOM to TOP and then from TOP to BOTTOM.
TOP is defined as 0xFF when WGM2:0 = 3, and OCR2A when MGM2:0 = 7. In noninverting
Compare Output mode, the Output Compare (OC2x) is cleared on the compare match
between TCNT2 and OCR2x while upcounting, and set on the compare match while downcounting.
In inverting Output Compare mode, the operation is inverted. The dual-slope operation has
lower maximum operation frequency than single slope operation. However, due to the symmetric
feature of the dual-slope PWM modes, these modes are preferred for motor control
applications.
In phase correct PWM mode the counter is incremented until the counter value matches TOP.
When the counter reaches TOP, it changes the count direction. The TCNT2 value will be equal
to TOP for one timer clock cycle. The timing diagram for the phase correct PWM mode is shown
on Figure 18-7. The TCNT2 value is in the timing diagram shown as a histogram for illustrating
the dual-slope operation. The diagram includes non-inverted and inverted PWM outputs. The
small horizontal line marks on the TCNT2 slopes represent compare matches between OCR2x
and TCNT2.
Figure 18-7. Phase correct PWM mode, timing diagram.
The Timer/Counter Overflow Flag (TOV2) is set each time the counter reaches BOTTOM. The
Interrupt Flag can be used to generate an interrupt each time the counter reaches the BOTTOM
value.
In phase correct PWM mode, the compare unit allows generation of PWM waveforms on the
OC2x pin. Setting the COM2x1:0 bits to two will produce a non-inverted PWM. An inverted PWM
TOVn interrupt flag set
OCnx interrupt flag set
1 2 3
TCNTn
Period
OCnx
OCnx
(COMnx1:0 = 2)
(COMnx1:0 = 3)
OCRnx update149
2545T–AVR–05/11
ATmega48/88/168
output can be generated by setting the COM2x1:0 to three. TOP is defined as 0xFF when
WGM2:0 = 3, and OCR2A when MGM2:0 = 7 (See Table 18-4 on page 154). The actual OC2x
value will only be visible on the port pin if the data direction for the port pin is set as output. The
PWM waveform is generated by clearing (or setting) the OC2x Register at the compare match
between OCR2x and TCNT2 when the counter increments, and setting (or clearing) the OC2x
Register at compare match between OCR2x and TCNT2 when the counter decrements. The
PWM frequency for the output when using phase correct PWM can be calculated by the following
equation:
The N variable represents the prescale factor (1, 8, 32, 64, 128, 256, or 1024).
The extreme values for the OCR2A Register represent special cases when generating a PWM
waveform output in the phase correct PWM mode. If the OCR2A is set equal to BOTTOM, the
output will be continuously low and if set equal to MAX the output will be continuously high for
non-inverted PWM mode. For inverted PWM the output will have the opposite logic values.
At the very start of period 2 in Figure 18-7 on page 148 OCnx has a transition from high to low
even though there is no Compare Match. The point of this transition is to guarantee symmetry
around BOTTOM. There are two cases that give a transition without Compare Match.
• OCR2A changes its value from MAX, like in Figure 18-7 on page 148. When the OCR2A value
is MAX the OCn pin value is the same as the result of a down-counting compare match. To
ensure symmetry around BOTTOM the OCn value at MAX must correspond to the result of an
up-counting Compare Match
• The timer starts counting from a value higher than the one in OCR2A, and for that reason
misses the Compare Match and hence the OCn change that would have happened on the way
up
18.8 Timer/counter timing diagrams
The following figures show the Timer/Counter in synchronous mode, and the timer clock (clkT2)
is therefore shown as a clock enable signal. In asynchronous mode, clkI/O should be replaced by
the Timer/Counter Oscillator clock. The figures include information on when Interrupt Flags are
set. Figure 18-8 contains timing data for basic Timer/Counter operation. The figure shows the
count sequence close to the MAX value in all modes other than phase correct PWM mode.
Figure 18-8. Timer/counter timing diagram, no prescaling.
Figure 18-9 on page 150 shows the same timing data, but with the prescaler enabled.
f
OCnxPCPWM
f
clk_I/O
N ⋅ 510 = ------------------
clkTn
(clkI/O/1)
TOVn
clkI/O
TCNTn MAX - 1 MAX BOTTOM BOTTOM + 1150
2545T–AVR–05/11
ATmega48/88/168
Figure 18-9. Timer/counter timing diagram, with prescaler (fclk_I/O/8).
Figure 18-10 shows the setting of OCF2A in all modes except CTC mode.
Figure 18-10. Timer/counter timing diagram, setting of OCF2A, with prescaler (fclk_I/O/8).
Figure 18-11 shows the setting of OCF2A and the clearing of TCNT2 in CTC mode.
Figure 18-11. Timer/counter timing diagram, clear timer on compare match mode, with prescaler
(fclk_I/O/8).
TOVn
TCNTn MAX - 1 MAX BOTTOM BOTTOM + 1
clkI/O
clkTn
(clkI/O/8)
OCFnx
OCRnx
TCNTn
OCRnx value
OCRnx - 1 OCRnx OCRnx + 1 OCRnx + 2
clkI/O
clkTn
(clkI/O/8)
OCFnx
OCRnx
TCNTn
(CTC)
TOP
TOP - 1 TOP BOTTOM BOTTOM + 1
clkI/O
clkTn
(clkI/O/8)151
2545T–AVR–05/11
ATmega48/88/168
18.9 Asynchronous operation of Timer/Counter2
When Timer/Counter2 operates asynchronously, some considerations must be taken.
• Warning: When switching between asynchronous and synchronous clocking of
Timer/Counter2, the Timer Registers TCNT2, OCR2x, and TCCR2x might be corrupted. A safe
procedure for switching clock source is:
a. Disable the Timer/Counter2 interrupts by clearing OCIE2x and TOIE2.
b. Select clock source by setting AS2 as appropriate.
c. Write new values to TCNT2, OCR2x, and TCCR2x.
d. To switch to asynchronous operation: Wait for TCN2xUB, OCR2xUB, and TCR2xUB.
e. Clear the Timer/Counter2 Interrupt Flags.
f. Enable interrupts, if needed.
• The CPU main clock frequency must be more than four times the Oscillator frequency
• When writing to one of the registers TCNT2, OCR2x, or TCCR2x, the value is transferred to a
temporary register, and latched after two positive edges on TOSC1. The user should not write
a new value before the contents of the temporary register have been transferred to its
destination. Each of the five mentioned registers have their individual temporary register, which
means that, for example, writing to TCNT2 does not disturb an OCR2x write in progress. To
detect that a transfer to the destination register has taken place, the Asynchronous Status
Register – ASSR has been implemented
• When entering Power-save or ADC Noise Reduction mode after having written to TCNT2,
OCR2x, or TCCR2x, the user must wait until the written register has been updated if
Timer/Counter2 is used to wake up the device. Otherwise, the MCU will enter sleep mode
before the changes are effective. This is particularly important if any of the Output Compare2
interrupt is used to wake up the device, since the Output Compare function is disabled during
writing to OCR2x or TCNT2. If the write cycle is not finished, and the MCU enters sleep mode
before the corresponding OCR2xUB bit returns to zero, the device will never receive a
compare match interrupt, and the MCU will not wake up
• If Timer/Counter2 is used to wake the device up from Power-save or ADC Noise Reduction
mode, precautions must be taken if the user wants to re-enter one of these modes: If reentering
sleep mode within the TOSC1 cycle, the interrupt will immidiately occur and the
device wake up again. The result is multiple interrupts and wake-ups within one TOSC1 cycle
from the first interrupt. If the user is in doubt whether the time before re-entering Power-save or
ADC Noise Reduction mode is sufficient, the following algorithm can be used to ensure that
one TOSC1 cycle has elapsed:
a. Write a value to TCCR2x, TCNT2, or OCR2x.
b. Wait until the corresponding Update Busy Flag in ASSR returns to zero.
c. Enter Power-save or ADC Noise Reduction mode.
• When the asynchronous operation is selected, the 32.768kHz Oscillator for Timer/Counter2 is
always running, except in Power-down and Standby modes. After a Power-up Reset or wakeup
from Power-down or Standby mode, the user should be aware of the fact that this Oscillator
might take as long as one second to stabilize. The user is advised to wait for at least one
second before using Timer/Counter2 after power-up or wake-up from Power-down or Standby
mode. The contents of all Timer/Counter2 Registers must be considered lost after a wake-up
from Power-down or Standby mode due to unstable clock signal upon start-up, no matter
whether the Oscillator is in use or a clock signal is applied to the TOSC1 pin152
2545T–AVR–05/11
ATmega48/88/168
• Description of wake up from Power-save or ADC Noise Reduction mode when the timer is
clocked asynchronously: When the interrupt condition is met, the wake up process is started
on the following cycle of the timer clock, that is, the timer is always advanced by at least one
before the processor can read the counter value. After wake-up, the MCU is halted for four
cycles, it executes the interrupt routine, and resumes execution from the instruction following
SLEEP
• Reading of the TCNT2 Register shortly after wake-up from Power-save may give an incorrect
result. Since TCNT2 is clocked on the asynchronous TOSC clock, reading TCNT2 must be
done through a register synchronized to the internal I/O clock domain. Synchronization takes
place for every rising TOSC1 edge. When waking up from Power-save mode, and the I/O clock
(clkI/O) again becomes active, TCNT2 will read as the previous value (before entering sleep)
until the next rising TOSC1 edge. The phase of the TOSC clock after waking up from Powersave
mode is essentially unpredictable, as it depends on the wake-up time. The recommended
procedure for reading TCNT2 is thus as follows:
a. Write any value to either of the registers OCR2x or TCCR2x.
b. Wait for the corresponding Update Busy Flag to be cleared.
c. Read TCNT2.
During asynchronous operation, the synchronization of the Interrupt Flags for the asynchronous
timer takes 3 processor cycles plus one timer cycle. The timer is therefore advanced by at least
one before the processor can read the timer value causing the setting of the Interrupt Flag. The
Output Compare pin is changed on the timer clock and is not synchronized to the processor
clock.
18.10 Timer/counter prescaler
Figure 18-12. Prescaler for Timer/Counter2.
10-BIT T/C PRESCALER
TIMER/COUNTER2 CLOCK SOURCE
clkI/O clkT2S
TOSC1
AS2
CS20
CS21
CS22
clkT2S/8
clkT2S/64
clkT2S/128
clkT2S/1024
clkT2S/256
clkT2S/32
PSRASY 0
Clear
clkT2153
2545T–AVR–05/11
ATmega48/88/168
The clock source for Timer/Counter2 is named clkT2S. clkT2S is by default connected to the main
system I/O clock clkIO. By setting the AS2 bit in ASSR, Timer/Counter2 is asynchronously
clocked from the TOSC1 pin. This enables use of Timer/Counter2 as a Real Time Counter
(RTC). When AS2 is set, pins TOSC1 and TOSC2 are disconnected from Port C. A crystal can
then be connected between the TOSC1 and TOSC2 pins to serve as an independent clock
source for Timer/Counter2. The Oscillator is optimized for use with a 32.768kHz crystal.
For Timer/Counter2, the possible prescaled selections are: clkT2S/8, clkT2S/32, clkT2S/64,
clkT2S/128, clkT2S/256, and clkT2S/1024. Additionally, clkT2S as well as 0 (stop) may be selected.
Setting the PSRASY bit in GTCCR resets the prescaler. This allows the user to operate with a
predictable prescaler.
18.11 Register description
18.11.1 TCCR2A – Timer/counter control register A
• Bits 7:6 – COM2A1:0: Compare match output A mode
These bits control the Output Compare pin (OC2A) behavior. If one or both of the COM2A1:0
bits are set, the OC2A output overrides the normal port functionality of the I/O pin it is connected
to. However, note that the Data Direction Register (DDR) bit corresponding to the OC2A pin
must be set in order to enable the output driver.
When OC2A is connected to the pin, the function of the COM2A1:0 bits depends on the
WGM22:0 bit setting. Table 18-2 shows the COM2A1:0 bit functionality when the WGM22:0 bits
are set to a normal or CTC mode (non-PWM).
Table 18-3 on page 154 shows the COM2A1:0 bit functionality when the WGM21:0 bits are set
to fast PWM mode.
Bit 7 6 5 4 3 2 1 0
(0xB0) COM2A1 COM2A0 COM2B1 COM2B0 – – WGM21 WGM20 TCCR2A
Read/write R/W R/W R/W R/W R R R/W R/W
Initial value 0 0 0 0 0 0 0 0
Table 18-2. Compare output mode, non-PWM mode.
COM2A1 COM2A0 Description
0 0 Normal port operation, OC2A disconnected
0 1 Toggle OC2A on compare match
1 0 Clear OC2A on compare match
1 1 Set OC2A on compare match154
2545T–AVR–05/11
ATmega48/88/168
Note: 1. A special case occurs when OCR2A equals TOP and COM2A1 is set. In this case, the Compare
Match is ignored, but the set or clear is done at TOP. See “Fast PWM mode” on page 146
for more details.
Table 18-4 shows the COM2A1:0 bit functionality when the WGM22:0 bits are set to phase correct
PWM mode.
Note: 1. A special case occurs when OCR2A equals TOP and COM2A1 is set. In this case, the Compare
Match is ignored, but the set or clear is done at TOP. See “Phase correct PWM mode” on
page 148 for more details.
• Bits 5:4 – COM2B1:0: Compare match output B mode
These bits control the Output Compare pin (OC2B) behavior. If one or both of the COM2B1:0
bits are set, the OC2B output overrides the normal port functionality of the I/O pin it is connected
to. However, note that the Data Direction Register (DDR) bit corresponding to the OC2B pin
must be set in order to enable the output driver.
When OC2B is connected to the pin, the function of the COM2B1:0 bits depends on the
WGM22:0 bit setting. Table 18-5 shows the COM2B1:0 bit functionality when the WGM22:0 bits
are set to a normal or CTC mode (non-PWM).
Table 18-3. Compare output mode, fast PWM mode(1).
COM2A1 COM2A0 Description
0 0 Normal port operation, OC2A disconnected
0 1 WGM22 = 0: Normal port operation, OC0A disconnected
WGM22 = 1: Toggle OC2A on compare match
1 0 Clear OC2A on compare match, set OC2A at BOTTOM,
(non-inverting mode)
1 1 Set OC2A on compare match, clear OC2A at BOTTOM,
(inverting mode)
Table 18-4. Compare output mode, phase correct PWM Mode(1).
COM2A1 COM2A0 Description
0 0 Normal port operation, OC2A disconnected
0 1 WGM22 = 0: Normal port operation, OC2A disconnected
WGM22 = 1: Toggle OC2A on compare match
1 0 Clear OC2A on compare match when up-counting
Set OC2A on compare match when down-counting
1 1 Set OC2A on compare match when up-counting
Clear OC2A on compare match when down-counting
Table 18-5. Compare output mode, non-PWM mode.
COM2B1 COM2B0 Description
0 0 Normal port operation, OC2B disconnected
0 1 Toggle OC2B on compare match
1 0 Clear OC2B on compare match
1 1 Set OC2B on compare match155
2545T–AVR–05/11
ATmega48/88/168
Table 18-6 shows the COM2B1:0 bit functionality when the WGM22:0 bits are set to fast PWM
mode.
Note: 1. A special case occurs when OCR2B equals TOP and COM2B1 is set. In this case, the Compare
Match is ignored, but the set or clear is done at TOP. See “Phase correct PWM mode” on
page 148 for more details.
Table 18-7 shows the COM2B1:0 bit functionality when the WGM22:0 bits are set to phase correct
PWM mode.
Note: 1. A special case occurs when OCR2B equals TOP and COM2B1 is set. In this case, the Compare
Match is ignored, but the set or clear is done at TOP. See “Phase correct PWM mode” on
page 148 for more details.
• Bits 3, 2 – Res: Reserved bits
These bits are reserved bits in the Atmel ATmega48/88/168 and will always read as zero.
• Bits 1:0 – WGM21:0: Waveform generation mode
Combined with the WGM22 bit found in the TCCR2B Register, these bits control the counting
sequence of the counter, the source for maximum (TOP) counter value, and what type of waveform
generation to be used, see Table 18-8 on page 156. Modes of operation supported by the
Timer/Counter unit are: Normal mode (counter), Clear Timer on Compare Match (CTC) mode,
and two types of Pulse Width Modulation (PWM) modes (see “Modes of operation” on page
145).
Table 18-6. Compare output mode, fast PWM mode(1).
COM2B1 COM2B0 Description
0 0 Normal port operation, OC2B disconnected
0 1 Reserved
1 0 Clear OC2B on compare match, set OC2B at BOTTOM,
(non-inverting mode)
1 1 Set OC2B on compare match, clear OC2B at BOTTOM,
(invertiing mode)
Table 18-7. Compare output mode, phase correct PWM mode(1).
COM2B1 COM2B0 Description
0 0 Normal port operation, OC2B disconnected
0 1 Reserved
1 0 Clear OC2B on compare match when up-counting
Set OC2B on compare match when down-counting
1 1 Set OC2B on compare match when up-counting
Clear OC2B on compare match when down-counting156
2545T–AVR–05/11
ATmega48/88/168
Notes: 1. MAX= 0xFF
2. BOTTOM= 0x00
18.11.2 TCCR2B – Timer/counter control register B
• Bit 7 – FOC2A: Force output compare A
The FOC2A bit is only active when the WGM bits specify a non-PWM mode.
However, for ensuring compatibility with future devices, this bit must be set to zero when
TCCR2B is written when operating in PWM mode. When writing a logical one to the FOC2A bit,
an immediate Compare Match is forced on the Waveform Generation unit. The OC2A output is
changed according to its COM2A1:0 bits setting. Note that the FOC2A bit is implemented as a
strobe. Therefore it is the value present in the COM2A1:0 bits that determines the effect of the
forced compare.
A FOC2A strobe will not generate any interrupt, nor will it clear the timer in CTC mode using
OCR2A as TOP.
The FOC2A bit is always read as zero.
• Bit 6 – FOC2B: Force output compare B
The FOC2B bit is only active when the WGM bits specify a non-PWM mode.
However, for ensuring compatibility with future devices, this bit must be set to zero when
TCCR2B is written when operating in PWM mode. When writing a logical one to the FOC2B bit,
an immediate Compare Match is forced on the Waveform Generation unit. The OC2B output is
changed according to its COM2B1:0 bits setting. Note that the FOC2B bit is implemented as a
strobe. Therefore it is the value present in the COM2B1:0 bits that determines the effect of the
forced compare.
Table 18-8. Waveform generation mode bit description.
Mode WGM2 WGM1 WGM0
Timer/counter
mode of
operation TOP
Update of
OCRx at
TOV flag
set on(1)(2)
0 0 0 0 Normal 0xFF Immediate MAX
10 0 1 PWM,
phase correct 0xFF TOP BOTTOM
2 0 1 0 CTC OCRA Immediate MAX
3 0 1 1 Fast PWM 0xFF BOTTOM MAX
4 1 0 0 Reserved – – –
51 0 1 PWM,
phase correct OCRA TOP BOTTOM
6 1 1 0 Reserved – – –
7 1 1 1 Fast PWM OCRA BOTTOM TOP
Bit 7 6 5 4 3 2 1 0
(0xB1) FOC2A FOC2B – – WGM22 CS22 CS21 CS20 TCCR2B
Read/write W W R R R R R/W R/W
Initial value 0 0 0 0 0 0 0 0157
2545T–AVR–05/11
ATmega48/88/168
A FOC2B strobe will not generate any interrupt, nor will it clear the timer in CTC mode using
OCR2B as TOP.
The FOC2B bit is always read as zero.
• Bits 5:4 – Res: Reserved bits
These bits are reserved bits in the Atmel ATmega48/88/168 and will always read as zero.
• Bit 3 – WGM22: Waveform generation mode
See the description in the “TCCR2A – Timer/counter control register A” on page 153.
• Bit 2:0 – CS22:0: Clock select
The three Clock Select bits select the clock source to be used by the Timer/Counter, see Table
18-9.
If external pin modes are used for the Timer/Counter0, transitions on the T0 pin will clock the
counter even if the pin is configured as an output. This feature allows software control of the
counting.
18.11.3 TCNT2 – Timer/counter register
The Timer/Counter Register gives direct access, both for read and write operations, to the
Timer/Counter unit 8-bit counter. Writing to the TCNT2 Register blocks (removes) the Compare
Match on the following timer clock. Modifying the counter (TCNT2) while the counter is running,
introduces a risk of missing a Compare Match between TCNT2 and the OCR2x Registers.
18.11.4 OCR2A – Output compare register A
Table 18-9. Clock select bit description.
CS22 CS21 CS20 Description
0 0 0 No clock source (timer/counter stopped)
0 0 1 clkT2S/(no prescaling)
0 1 0 clkT2S/8 (from prescaler)
0 1 1 clkT2S/32 (from prescaler)
1 0 0 clkT2S/64 (from prescaler)
1 0 1 clkT2S/128 (from prescaler)
1 1 0 clkT2S/256 (from prescaler)
1 1 1 clkT2S/1024 (from prescaler)
Bit 7 6 5 4 3 2 1 0
(0xB2) TCNT2[7:0] TCNT2
Read/write R/W R/W R/W R/W R/W R/W R/W R/W
Initial value 0 0 0 0 0 0 0 0
Bit 7 6 5 4 3 2 1 0
(0xB3) OCR2A[7:0] OCR2A
Read/write R/W R/W R/W R/W R/W R/W R/W R/W
Initial value 0 0 0 0 0 0 0 0158
2545T–AVR–05/11
ATmega48/88/168
The Output Compare Register A contains an 8-bit value that is continuously compared with the
counter value (TCNT2). A match can be used to generate an Output Compare interrupt, or to
generate a waveform output on the OC2A pin.
18.11.5 OCR2B – Output compare register B
The Output Compare Register B contains an 8-bit value that is continuously compared with the
counter value (TCNT2). A match can be used to generate an Output Compare interrupt, or to
generate a waveform output on the OC2B pin.
18.11.6 TIMSK2 – Timer/Counter2 interrupt mask register
• Bit 2 – OCIE2B: Timer/Counter2 output compare match B interrupt enable
When the OCIE2B bit is written to one and the I-bit in the Status Register is set (one), the
Timer/Counter2 Compare Match B interrupt is enabled. The corresponding interrupt is executed
if a compare match in Timer/Counter2 occurs, that is, when the OCF2B bit is set in the
Timer/Counter 2 Interrupt Flag Register – TIFR2.
• Bit 1 – OCIE2A: Timer/Counter2 output compare match A interrupt enable
When the OCIE2A bit is written to one and the I-bit in the Status Register is set (one), the
Timer/Counter2 Compare Match A interrupt is enabled. The corresponding interrupt is executed
if a compare match in Timer/Counter2 occurs, that is, when the OCF2A bit is set in the
Timer/Counter 2 Interrupt Flag Register – TIFR2.
• Bit 0 – TOIE2: Timer/Counter2 overflow interrupt enable
When the TOIE2 bit is written to one and the I-bit in the Status Register is set (one), the
Timer/Counter2 Overflow interrupt is enabled. The corresponding interrupt is executed if an
overflow in Timer/Counter2 occurs, that is, when the TOV2 bit is set in the Timer/Counter2 Interrupt
Flag Register – TIFR2.
18.11.7 TIFR2 – Timer/Counter2 interrupt flag register
• Bit 2 – OCF2B: Output compare flag 2 B
The OCF2B bit is set (one) when a compare match occurs between the Timer/Counter2 and the
data in OCR2B – Output Compare Register2. OCF2B is cleared by hardware when executing
the corresponding interrupt handling vector. Alternatively, OCF2B is cleared by writing a logic
one to the flag. When the I-bit in SREG, OCIE2B (Timer/Counter2 Compare match Interrupt
Enable), and OCF2B are set (one), the Timer/Counter2 Compare match Interrupt is executed.
Bit 7 6 5 4 3 2 1 0
(0xB4) OCR2B[7:0] OCR2B
Read/write R/W R/W R/W R/W R/W R/W R/W R/W
Initial value 0 0 0 0 0 0 0 0
Bit 7 6 5 4 3 2 1 0
(0x70) – – – – – OCIE2B OCIE2A TOIE2 TIMSK2
Read/write R R R R R R/W R/W R/W
Initial value 0 0 0 0 0 0 0 0
Bit 7 6 5 4 3 2 1 0
0x17 (0x37) – – – – – OCF2B OCF2A TOV2 TIFR2
Read/write R R R R R R/W R/W R/W
Initial value 0 0 0 0 0 0 0 0159
2545T–AVR–05/11
ATmega48/88/168
• Bit 1 – OCF2A: Output compare flag 2 A
The OCF2A bit is set (one) when a compare match occurs between the Timer/Counter2 and the
data in OCR2A – Output Compare Register2. OCF2A is cleared by hardware when executing
the corresponding interrupt handling vector. Alternatively, OCF2A is cleared by writing a logic
one to the flag. When the I-bit in SREG, OCIE2A (Timer/Counter2 Compare match Interrupt
Enable), and OCF2A are set (one), the Timer/Counter2 Compare match Interrupt is executed.
• Bit 0 – TOV2: Timer/Counter2 overflow flag
The TOV2 bit is set (one) when an overflow occurs in Timer/Counter2. TOV2 is cleared by hardware
when executing the corresponding interrupt handling vector. Alternatively, TOV2 is cleared
by writing a logic one to the flag. When the SREG I-bit, TOIE2A (Timer/Counter2 Overflow Interrupt
Enable), and TOV2 are set (one), the Timer/Counter2 Overflow interrupt is executed. In
PWM mode, this bit is set when Timer/Counter2 changes counting direction at 0x00.
18.11.8 ASSR – Asynchronous status register
• Bit 7 – RES: Reserved bit
This bit is reserved and will always read as zero.
• Bit 6 – EXCLK: Enable external clock input
When EXCLK is written to one, and asynchronous clock is selected, the external clock input buffer
is enabled and an external clock can be input on Timer Oscillator 1 (TOSC1) pin instead of a
32kHz crystal. Writing to EXCLK should be done before asynchronous operation is selected.
Note that the crystal Oscillator will only run when this bit is zero.
• Bit 5 – AS2: Asynchronous Timer/Counter2
When AS2 is written to zero, Timer/Counter2 is clocked from the I/O clock, clkI/O. When AS2 is
written to one, Timer/Counter2 is clocked from a crystal Oscillator connected to the Timer Oscillator
1 (TOSC1) pin. When the value of AS2 is changed, the contents of TCNT2, OCR2A,
OCR2B, TCCR2A and TCCR2B might be corrupted.
• Bit 4 – TCN2UB: Timer/Counter2 update busy
When Timer/Counter2 operates asynchronously and TCNT2 is written, this bit becomes set.
When TCNT2 has been updated from the temporary storage register, this bit is cleared by hardware.
A logical zero in this bit indicates that TCNT2 is ready to be updated with a new value.
• Bit 3 – OCR2AUB: Output compare Register2 update busy
When Timer/Counter2 operates asynchronously and OCR2A is written, this bit becomes set.
When OCR2A has been updated from the temporary storage register, this bit is cleared by hardware.
A logical zero in this bit indicates that OCR2A is ready to be updated with a new value.
• Bit 2 – OCR2BUB: Output compare Register2 update busy
When Timer/Counter2 operates asynchronously and OCR2B is written, this bit becomes set.
When OCR2B has been updated from the temporary storage register, this bit is cleared by hardware.
A logical zero in this bit indicates that OCR2B is ready to be updated with a new value.
Bit 7 6 5 4 3 2 1 0
(0xB6) – EXCLK AS2 TCN2UB OCR2AUB OCR2BUB TCR2AUB TCR2BUB ASSR
Read/write R R/W R/W R R R R R
Initial value 0 0 0 0 0 0 0 0160
2545T–AVR–05/11
ATmega48/88/168
• Bit 1 – TCR2AUB: Timer/counter control Register2 update busy
When Timer/Counter2 operates asynchronously and TCCR2A is written, this bit becomes set.
When TCCR2A has been updated from the temporary storage register, this bit is cleared by
hardware. A logical zero in this bit indicates that TCCR2A is ready to be updated with a new
value.
• Bit 0 – TCR2BUB: Timer/counter control Register2 update busy
When Timer/Counter2 operates asynchronously and TCCR2B is written, this bit becomes set.
When TCCR2B has been updated from the temporary storage register, this bit is cleared by
hardware. A logical zero in this bit indicates that TCCR2B is ready to be updated with a new
value.
If a write is performed to any of the five Timer/Counter2 Registers while its update busy flag is
set, the updated value might get corrupted and cause an unintentional interrupt to occur.
The mechanisms for reading TCNT2, OCR2A, OCR2B, TCCR2A and TCCR2B are different.
When reading TCNT2, the actual timer value is read. When reading OCR2A, OCR2B, TCCR2A
and TCCR2B the value in the temporary storage register is read.
18.11.9 GTCCR – General timer/counter control register
• Bit 1 – PSRASY: Prescaler reset Timer/Counter2
When this bit is one, the Timer/Counter2 prescaler will be reset. This bit is normally cleared
immediately by hardware. If the bit is written when Timer/Counter2 is operating in asynchronous
mode, the bit will remain one until the prescaler has been reset. The bit will not be cleared by
hardware if the TSM bit is set. Refer to the description of the “Bit 7 – TSM: Timer/counter synchronization
mode” on page 139 for a description of the Timer/Counter Synchronization mode.
Bit 7 6 5 4 3 2 1 0
0x23 (0x43) TSM – – – – – PSRASY PSRSYNC GTCCR
Read/write R/W R R R R R R/W R/W
Initial value 0 0 0 0 0 0 0 0161
2545T–AVR–05/11
ATmega48/88/168
19. SPI – Serial peripheral interface
19.1 Features • Full-duplex, three-wire synchronous data transfer
• Master or slave operation
• LSB first or MSB first data transfer
• Seven programmable bit rates
• End of transmission interrupt flag
• Write collision flag protection
• Wake-up from idle mode
• Double speed (CK/2) master SPI mode
19.2 Overview
The Serial Peripheral Interface (SPI) allows high-speed synchronous data transfer between the
Atmel ATmega48/88/168 and peripheral devices or between several AVR devices.
The USART can also be used in Master SPI mode, see “USART in SPI mode” on page 199. The
PRSPI bit in “Minimizing power consumption” on page 41 must be written to zero to enable SPI
module.162
2545T–AVR–05/11
ATmega48/88/168
Figure 19-1. SPI block diagram(1).
Note: 1. Refer to Figure 1-1 on page 2, and Table 14-3 on page 78 for SPI pin placement.
The interconnection between Master and Slave CPUs with SPI is shown in Figure 19-2 on page
163. The system consists of two shift Registers, and a Master clock generator. The SPI Master
initiates the communication cycle when pulling low the Slave Select SS pin of the desired Slave.
Master and Slave prepare the data to be sent in their respective shift Registers, and the Master
generates the required clock pulses on the SCK line to interchange data. Data is always shifted
from Master to Slave on the Master Out – Slave In, MOSI, line, and from Slave to Master on the
Master In – Slave Out, MISO, line. After each data packet, the Master will synchronize the Slave
by pulling high the Slave Select, SS, line.
When configured as a Master, the SPI interface has no automatic control of the SS line. This
must be handled by user software before communication can start. When this is done, writing a
byte to the SPI Data Register starts the SPI clock generator, and the hardware shifts the eight
bits into the Slave. After shifting one byte, the SPI clock generator stops, setting the end of
Transmission Flag (SPIF). If the SPI Interrupt Enable bit (SPIE) in the SPCR Register is set, an
interrupt is requested. The Master may continue to shift the next byte by writing it into SPDR, or
signal the end of packet by pulling high the Slave Select, SS line. The last incoming byte will be
kept in the Buffer Register for later use.
When configured as a Slave, the SPI interface will remain sleeping with MISO tri-stated as long
as the SS pin is driven high. In this state, software may update the contents of the SPI Data
Register, SPDR, but the data will not be shifted out by incoming clock pulses on the SCK pin
until the SS pin is driven low. As one byte has been completely shifted, the end of Transmission SPI2X SPI2X
DIVIDER
/2/4/8/16/32/64/128163
2545T–AVR–05/11
ATmega48/88/168
Flag, SPIF is set. If the SPI Interrupt Enable bit, SPIE, in the SPCR Register is set, an interrupt
is requested. The Slave may continue to place new data to be sent into SPDR before reading
the incoming data. The last incoming byte will be kept in the Buffer Register for later use.
Figure 19-2. SPI master-slave interconnection.
The system is single buffered in the transmit direction and double buffered in the receive direction.
This means that bytes to be transmitted cannot be written to the SPI Data Register before
the entire shift cycle is completed. When receiving data, however, a received character must be
read from the SPI Data Register before the next character has been completely shifted in. Otherwise,
the first byte is lost.
In SPI Slave mode, the control logic will sample the incoming signal of the SCK pin. To ensure
correct sampling of the clock signal, the minimum low and high periods should be:
Low periods: Longer than 2 CPU clock cycles.
High periods: Longer than 2 CPU clock cycles.
When the SPI is enabled, the data direction of the MOSI, MISO, SCK, and SS pins is overridden
according to Table 19-1. For more details on automatic port overrides, refer to “Alternate port
functions” on page 76.
Note: See “Alternate functions of port B” on page 78 for a detailed description of how to define the direction
of the user defined SPI pins.
The following code examples show how to initialize the SPI as a Master and how to perform a
simple transmission. DDR_SPI in the examples must be replaced by the actual Data Direction
Register controlling the SPI pins. DD_MOSI, DD_MISO and DD_SCK must be replaced by the
actual data direction bits for these pins. For example if MOSI is placed on pin PB3, replace
DD_MOSI with DDB3 and DDR_SPI with DDRB.
Table 19-1. SPI pin overrides(Note:).
Pin Direction, master SPI Direction, slave SPI
MOSI User defined Input
MISO Input User defined
SCK User defined Input
SS User defined Input
SHIFT
ENABLE164
2545T–AVR–05/11
ATmega48/88/168
Note: 1. See ”About code examples” on page 8.
Assembly code example(1)
SPI_MasterInit:
; Set MOSI and SCK output, all others input
ldi r17,(1<>8);
UBRR0L = (unsigned char)ubrr;
Enable receiver and transmitter */
UCSR0B = (1<> 1) & 0x01;
return ((resh << 8) | resl);
}184
2545T–AVR–05/11
ATmega48/88/168
20.7.3 Receive complete flag and interrupt
The USART Receiver has one flag that indicates the Receiver state.
The Receive Complete (RXCn) Flag indicates if there are unread data present in the receive buffer.
This flag is one when unread data exist in the receive buffer, and zero when the receive
buffer is empty (that is, does not contain any unread data). If the Receiver is disabled (RXENn =
0), the receive buffer will be flushed and consequently the RXCn bit will become zero.
When the Receive Complete Interrupt Enable (RXCIEn) in UCSRnB is set, the USART Receive
Complete interrupt will be executed as long as the RXCn Flag is set (provided that global interrupts
are enabled). When interrupt-driven data reception is used, the receive complete routine
must read the received data from UDRn in order to clear the RXCn Flag, otherwise a new interrupt
will occur once the interrupt routine terminates.
20.7.4 Receiver error flags
The USART Receiver has three Error Flags: Frame Error (FEn), Data OverRun (DORn) and
Parity Error (UPEn). All can be accessed by reading UCSRnA. Common for the Error Flags is
that they are located in the receive buffer together with the frame for which they indicate the
error status. Due to the buffering of the Error Flags, the UCSRnA must be read before the
receive buffer (UDRn), since reading the UDRn I/O location changes the buffer read location.
Another equality for the Error Flags is that they can not be altered by software doing a write to
the flag location. However, all flags must be set to zero when the UCSRnA is written for upward
compatibility of future USART implementations. None of the Error Flags can generate interrupts.
The Frame Error (FEn) Flag indicates the state of the first stop bit of the next readable frame
stored in the receive buffer. The FEn Flag is zero when the stop bit was correctly read (as one),
and the FEn Flag will be one when the stop bit was incorrect (zero). This flag can be used for
detecting out-of-sync conditions, detecting break conditions and protocol handling. The FEn
Flag is not affected by the setting of the USBSn bit in UCSRnC since the Receiver ignores all,
except for the first, stop bits. For compatibility with future devices, always set this bit to zero
when writing to UCSRnA.
The Data OverRun (DORn) Flag indicates data loss due to a receiver buffer full condition. A
Data OverRun occurs when the receive buffer is full (two characters), it is a new character waiting
in the Receive Shift Register, and a new start bit is detected. If the DORn Flag is set there
was one or more serial frame lost between the frame last read from UDRn, and the next frame
read from UDRn. For compatibility with future devices, always write this bit to zero when writing
to UCSRnA. The DORn Flag is cleared when the frame received was successfully moved from
the Shift Register to the receive buffer.
The Parity Error (UPEn) Flag indicates that the next frame in the receive buffer had a Parity
Error when received. If Parity Check is not enabled the UPEn bit will always be read zero. For
compatibility with future devices, always set this bit to zero when writing to UCSRnA. For more
details see “Parity bit calculation” on page 176 and “Parity checker” on page 184.
20.7.5 Parity checker
The Parity Checker is active when the high USART Parity mode (UPMn1) bit is set. Type of Parity
Check to be performed (odd or even) is selected by the UPMn0 bit. When enabled, the Parity
Checker calculates the parity of the data bits in incoming frames and compares the result with
the parity bit from the serial frame. The result of the check is stored in the receive buffer together
with the received data and stop bits. The Parity Error (UPEn) Flag can then be read by software
to check if the frame had a Parity Error.185
2545T–AVR–05/11
ATmega48/88/168
The UPEn bit is set if the next character that can be read from the receive buffer had a Parity
Error when received and the Parity Checking was enabled at that point (UPMn1 = 1). This bit is
valid until the receive buffer (UDRn) is read.
20.7.6 Disabling the receiver
In contrast to the Transmitter, disabling of the Receiver will be immediate. Data from ongoing
receptions will therefore be lost. When disabled (that is, the RXENn is set to zero) the Receiver
will no longer override the normal function of the RxDn port pin. The Receiver buffer FIFO will be
flushed when the Receiver is disabled. Remaining data in the buffer will be lost
20.7.7 Flushing the receive buffer
The receiver buffer FIFO will be flushed when the Receiver is disabled, that is, the buffer will be
emptied of its contents. Unread data will be lost. If the buffer has to be flushed during normal
operation, due to for instance an error condition, read the UDRn I/O location until the RXCn Flag
is cleared. The following code example shows how to flush the receive buffer.
Note: 1. See ”About code examples” on page 8.
20.8 Asynchronous data reception
The USART includes a clock recovery and a data recovery unit for handling asynchronous data
reception. The clock recovery logic is used for synchronizing the internally generated baud rate
clock to the incoming asynchronous serial frames at the RxDn pin. The data recovery logic samples
and low pass filters each incoming bit, thereby improving the noise immunity of the
Receiver. The asynchronous reception operational range depends on the accuracy of the internal
baud rate clock, the rate of the incoming frames, and the frame size in number of bits.
20.8.1 Asynchronous clock recovery
The clock recovery logic synchronizes internal clock to the incoming serial frames. Figure 20-5
on page 186 illustrates the sampling process of the start bit of an incoming frame. The sample
rate is 16 times the baud rate for Normal mode, and eight times the baud rate for Double Speed
mode. The horizontal arrows illustrate the synchronization variation due to the sampling process.
Note the larger time variation when using the Double Speed mode (U2Xn = 1) of
operation. Samples denoted zero are samples done when the RxDn line is idle (that is, no communication
activity).
Assembly code example(1)
USART_Flush:
sbis UCSRnA, RXCn
ret
in r16, UDRn
rjmp USART_Flush
C code example(1)
void USART_Flush( void )
{
unsigned char dummy;
while ( UCSRnA & (1< 2 CPU clock cycles for fck < 12MHz, 3 CPU clock cycles for fck >= 12MHz
High: > 2 CPU clock cycles for fck < 12MHz, 3 CPU clock cycles for fck >= 12MHz
VCC
GND
XTAL1
SCK
MISO
MOSI
RESET
+1.8V - 5.5V
AVCC
+1.8V - 5.5V(2)299
2545T–AVR–05/11
ATmega48/88/168
28.8.1 Serial programming pin mapping
28.8.2 Serial programming algorithm
When writing serial data to the Atmel ATmega48/88/168, data is clocked on the rising edge of
SCK.
When reading data from the ATmega48/88/168, data is clocked on the falling edge of SCK. See
Figure 28-9 on page 302 for timing details.
To program and verify the ATmega48/88/168 in the serial programming mode, the following
sequence is recommended (See Serial Programming Instruction set in Table 28-17 on page
300):
1. Power-up sequence:
Apply power between VCC and GND while RESET and SCK are set to “0”. In some systems,
the programmer can not guarantee that SCK is held low during power-up. In this
case, RESET must be given a positive pulse of at least two CPU clock cycles duration
after SCK has been set to “0”.
2. Wait for at least 20ms and enable serial programming by sending the Programming
Enable serial instruction to pin MOSI.
3. The serial programming instructions will not work if the communication is out of synchronization.
When in sync. the second byte (0x53), will echo back when issuing the third
byte of the Programming Enable instruction. Whether the echo is correct or not, all four
bytes of the instruction must be transmitted. If the 0x53 did not echo back, give RESET a
positive pulse and issue a new Programming Enable command.
4. The Flash is programmed one page at a time. The memory page is loaded one byte at a
time by supplying the 6 LSB of the address and data together with the Load Program
Memory Page instruction. To ensure correct loading of the page, the data low byte must
be loaded before data high byte is applied for a given address. The Program Memory
Page is stored by loading the Write Program Memory Page instruction with the 7 MSB of
the address. If polling (RDY/BSY) is not used, the user must wait at least tWD_FLASH before
issuing the next page (see Table 28-16 on page 300). Accessing the serial programming
interface before the Flash write operation completes can result in incorrect programming.
5. A: The EEPROM array is programmed one byte at a time by supplying the address and
data together with the appropriate Write instruction. An EEPROM memory location is first
automatically erased before new data is written. If polling (RDY/BSY) is not used, the
user must wait at least tWD_EEPROM before issuing the next byte (see Table 28-16 on page
300). In a chip erased device, no 0xFFs in the data file(s) need to be programmed.
B: The EEPROM array is programmed one page at a time. The Memory page is loaded
one byte at a time by supplying the 6 LSB of the address and data together with the Load
EEPROM Memory Page instruction. The EEPROM Memory Page is stored by loading
the Write EEPROM Memory Page Instruction with the 7 MSB of the address. When using
EEPROM page access only byte locations loaded with the Load EEPROM Memory Page
instruction is altered. The remaining locations remain unchanged. If polling (RDY/BSY) is
not used, the used must wait at least tWD_EEPROM before issuing the next byte (See Table
Table 28-15. Pin mapping serial programming.
Symbol Pins I/O Description
MOSI PB3 I Serial Data in
MISO PB4 O Serial Data out
SCK PB5 I Serial Clock300
2545T–AVR–05/11
ATmega48/88/168
28-16 on page 300). In a chip erased device, no 0xFF in the data file(s) need to be
programmed.
6. Any memory location can be verified by using the Read instruction which returns the content
at the selected address at serial output MISO.
7. At the end of the programming session, RESET can be set high to commence normal
operation.
8. Power-off sequence (if needed):
Set RESET to “1”.
Turn VCC power off.
28.8.3 Serial programming instruction set
Table 28-17 and Figure 28-8 on page 302 describes the instruction set.
Table 28-16. Typical wait delay before writing the next flash or EEPROM location.
Symbol Minimum wait delay
tWD_FLASH 4.5ms
tWD_EEPROM 3.6ms
tWD_ERASE 9.0ms
Table 28-17. Serial programming instruction set (hexadecimal values).
Instruction/operation
Instruction format
Byte 1 Byte 2 Byte 3 Byte 4
Programming enable $AC $53 $00 $00
Chip erase (program memory/EEPROM) $AC $80 $00 $00
Poll RDY/BSY $F0 $00 $00 data byte out
Load instructions
Load extended address byte(1) $4D $00 Extended adr $00
Load program memory page, high byte $48 $00 adr LSB high data byte in
Load program memory page, low byte $40 $00 adr LSB low data byte in
Load EEPROM memory page (page access) $C1 $00 0000 000aa data byte in
Read instructions
Read program memory, high byte $28 adr MSB adr LSB high data byte out
Read program memory, low byte $20 adr MSB adr LSB low data byte out
Read EEPROM memory $A0 0000 00aa aaaa aaaa data byte out
Read lock bits $58 $00 $00 data byte out
Read signature byte $30 $00 0000 000aa data byte out
Read fuse bits $50 $00 $00 data byte out
Read fuse high bits $58 $08 $00 data byte out
Read extended fuse bits $50 $08 $00 data byte out
Read calibration byte $38 $00 $00 data byte out301
2545T–AVR–05/11
ATmega48/88/168
Notes: 1. Not all instructions are applicable for all parts.
2. a = address.
3. Bits are programmed ‘0’, unprogrammed ‘1’.
4. To ensure future compatibility, unused fuses and lock bits should be unprogrammed (‘1’).
5. Refer to the correspondig section for fuse and lock bits, calibration and signature bytes and page size.
6. Instructions accessing program memory use a word address. This word may be random within the page range.
7. See htt://www.atmel.com/avr for application notes regarding programming and programmers.
If the LSB in RDY/BSY data byte out is ‘1’, a programming operation is still pending. Wait until
this bit returns ‘0’ before the next instruction is carried out.
Within the same page, the low data byte must be loaded prior to the high data byte.
After data is loaded to the page buffer, program the EEPROM page, see Figure 28-8.
Write instructions(6)
Write program memory page $4C adr MSB adr LSB $00
Write EEPROM memory $C0 0000 00aa aaaa aaaa data byte in
Write EEPROM memory page (page access) $C2 0000 00aa aaaa aa00 $00
Write lock bits $AC $E0 $00 data byte in
Write fuse bits $AC $A0 $00 data byte in
Write fuse high bits $AC $A8 $00 data byte in
Write extended fuse bits $AC $A4 $00 data byte in
Table 28-17. Serial programming instruction set (hexadecimal values). (Continued)
Instruction/operation
Instruction format
Byte 1 Byte 2 Byte 3 Byte 4302
2545T–AVR–05/11
ATmega48/88/168
Figure 28-8. Serial programming instruction example.
28.8.4 SPI serial programming characteristics
Figure 28-9. Serial programming waveforms.
For characteristics of the SPI module see “SPI timing characteristics” on page 309.
Byte 1 Byte 2 Byte 3 Byte 4
Adr MSB Adr LSB
Bit 15 B 0
Serial programming instruction
Program memory/
EEPROM memory
Page 0
Page 1
Page 2
Page N-1
Page buffer
Write program memory page/
Write EEPROM memory page
Load program memory page (high/low byte)/
Load EEPROM memory page (page access)
Byte 1 Byte 2 Byte 3 Byte 4
Bit 15 B 0
Adr MSB Adr LSB
Page offset
Page number
Adr MSB Adr LSB
MSB
MSB
LSB
LSB
SERIAL CLOCK INPUT
(SCK)
SERIAL DATA INPUT
(MOSI)
(MISO)
SAMPLE
SERIAL DATA OUTPUT303
2545T–AVR–05/11
ATmega48/88/168
29. Electrical characteristics
29.1 Absolute maximum ratings*
29.2 DC characteristics
Operating temperature................................... -55°C to +125°C *NOTICE: Stresses beyond those listed under “Absolute
Maximum Ratings” may cause permanent damage
to the device. This is a stress rating only and
functional operation of the device at these or
other conditions beyond those indicated in the
operational sections of this specification is not
implied. Exposure to absolute maximum rating
conditions for extended periods may affect
device reliability.
Storage temperature...................................... -65°C to +150°C
Voltage on any pin except RESET
with respect to ground .................................-0.5V to VCC+0.5V
Voltage on RESET with respect to ground ......-0.5V to +13.0V
Maximum operating voltage.............................................. 6.0V
DC current per I/O pin.................................................. 40.0mA
DC current VCC and GND pins .................................. 200.0mA
TA = -40°C to 85°C, VCC = 1.8V to 5.5V (unless otherwise noted).
Symbol Parameter Condition Minimum Typical Maximum Units
VIL
Input low voltage, except
XTAL1 and RESET pin
VCC = 1.8V - 2.4V
VCC = 2.4V - 5.5V
-0.5
-0.5
0.2VCC(1)
0.3VCC(1)
V
VIH
Input high voltage, except
XTAL1 and RESET pins
VCC = 1.8V - 2.4V
VCC = 2.4V - 5.5V
0.7VCC(2)
0.6VCC(2)
VCC + 0.5
VCC + 0.5
VIL1
Input low voltage,
XTAL1 pin VCC = 1.8V - 5.5V -0.5 0.1VCC(1)
VIH1
Input high voltage,
XTAL1 pin
VCC = 1.8V - 2.4V
VCC = 2.4V - 5.5V
0.8VCC(2)
0.7VCC(2)
VCC + 0.5
VCC + 0.5
VIL2
Input low voltage,
RESET pin VCC = 1.8V - 5.5V -0.5 0.2VCC(1)
VIH2
Input high voltage,
RESET pin VCC = 1.8V - 5.5V 0.9VCC(2) VCC + 0.5
VIL3
Input low voltage,
RESET pin as I/O
VCC = 1.8V - 2.4V
VCC = 2.4V - 5.5V
-0.5
-0.5
0.2VCC(1)
0.3VCC(1)
VIH3
Input high voltage,
RESET pin as I/O
VCC = 1.8V - 2.4V
VCC = 2.4V - 5.5V
0.7VCC(2)
0.6VCC(2)
VCC + 0.5
VCC + 0.5
VOL
Output low voltage(3),
RESET pin as I/O
I
OL = 20mA, VCC = 5V
IOL = 6mA, VCC = 3V
0.7
0.5
VOH
Output high voltage(4),
RESET pin as I/O
I
OH = -20mA, VCC = 5V
I
OH = -10mA, VCC = 3V
4.2
2.3
IIL
Input leakage
current I/O pin
VCC = 5.5V, pin low
(absolute value) 1
µA
I
IH
Input leakage
current I/O pin
VCC = 5.5V, pin high
(absolute value) 1
RRST Reset pull-up resistor 30 60
kΩ
RPU I/O pin pull-up resistor 20 50304
2545T–AVR–05/11
ATmega48/88/168
Notes: 1. “Max” means the highest value where the pin is guaranteed to be read as low
2. “Min” means the lowest value where the pin is guaranteed to be read as high
3. Although each I/O port can sink more than the test conditions (20mA at VCC = 5V, 10mA at VCC = 3V) under steady state
conditions (non-transient), the following must be observed:
ATmega48/88/168:
1] The sum of all IOL, for ports C0 - C5, ADC7, ADC6 should not exceed 100mA.
2] The sum of all IOL, for ports B0 - B5, D5 - D7, XTAL1, XTAL2 should not exceed 100mA.
3] The sum of all IOL, for ports D0 - D4, RESET should not exceed 100mA.
If IOL exceeds the test condition, VOL may exceed the related specification. Pins are not guaranteed to sink current greater
than the listed test condition.
4. Although each I/O port can source more than the test conditions (20mA at VCC = 5V, 10mA at VCC = 3V) under steady state
conditions (non-transient), the following must be observed:
ATmega48/88/168:
1] The sum of all IOH, for ports C0 - C5, D0- D4, ADC7, RESET should not exceed 150mA.
2] The sum of all IOH, for ports B0 - B5, D5 - D7, ADC6, XTAL1, XTAL2 should not exceed 150mA.
If IIOH exceeds the test condition, VOH may exceed the related specification. Pins are not guaranteed to source current
greater than the listed test condition.
5. Values with “Minimizing power consumption” on page 41 enabled (0xFF).
ICC
Power supply current(5)
Active 1MHz, VCC = 2V
(Atmel ATmega48/88/168V) 0.55
mA
Active 4MHz, VCC = 3V
(Atmel ATmega48/88/168L) 3.5
Active 8MHz, VCC = 5V
(Atmel ATmega48/88/168) 12
Idle 1MHz, VCC = 2V
(ATmega48/88/168V) 0.25 0.5
Idle 4MHz, VCC = 3V
(ATmega48/88/168L) 1.5
Idle 8MHz, VCC = 5V
(ATmega48/88/168) 5.5
Power-down mode
WDT enabled, VCC = 3V 8 15
µA
WDT disabled, VCC = 3V 1 2
VACIO
Analog comparator
input offset voltage
VCC = 5V
Vin = VCC/2 10 40 mV
IACLK
Analog comparator
input leakage current
VCC = 5V
Vin = VCC/2 -50 50 nA
t
ACID
Analog comparator
propagation delay
VCC = 2.7V
VCC = 4.0V
750
500 ns
TA = -40°C to 85°C, VCC = 1.8V to 5.5V (unless otherwise noted). (Continued)
Symbol Parameter Condition Minimum Typical Maximum Units305
2545T–AVR–05/11
ATmega48/88/168
29.3 Speed grades
Maximum frequency is dependent on VCC. As shown in Figure 29-1 and Figure 29-2, the Maximum
Frequency vs. VCC curve is linear between 1.8V < VCC < 2.7V and between 2.7V < VCC <
4.5V.
Figure 29-1. Maximum frequency vs. VCC, Atmel ATmega48V/88V/168V.
Figure 29-2. Maximum frequency vs. VCC, ATmega48/88/168.
10MHz
4MHz
1.8V 2.7V 5.5V
Safe operating area
20MHz
10MHz
2.7V 4.5V 5.5V
Safe operating area306
2545T–AVR–05/11
ATmega48/88/168
29.4 Clock characteristics
29.4.1 Calibrated internal RC oscillator accuracy
Notes: 1. Voltage range for Atmel ATmega48V/88V/168V.
2. Voltage range for Atmel ATmega48/88/168.
29.4.2 External clock drive waveforms
Figure 29-3. External clock drive waveforms.
29.4.3 External clock drive
Table 29-1. Calibration accuracy of internal RC oscillator.
Frequency VCC Temperature Calibration accuracy
Factory calibration 8.0MHz 3V 25°C ±10%
User calibration 7.3MHz - 8.1MHz 1.8V - 5.5V(1)
2.7V - 5.5V(2) -40°C - 85°C ±1%
VIL1
VIH1
Table 29-2. External clock drive.
Symbol Parameter
VCC = 1.8V - 5.5V VCC = 2.7V - 5.5V VCC = 4.5V - 5.5V
Min. Max. Min. Max. Min. Max. Units
1/tCLCL
Oscillator
frequency 0 4 0 10 0 20 MHz
tCLCL Clock period 250 100 50
tCHCX High time 100 40 20 ns
tCLCX Low time 100 40 20
tCLCH Rise time 2.0 1.6 0.5
μs
tCHCL Fall time 2.0 1.6 0.5
ΔtCLCL
Change in period
from one clock
cycle to the next
2 2 2%307
2545T–AVR–05/11
ATmega48/88/168
29.5 System and reset characteristics
Note: 1. The power-on reset will not work unless the supply voltage has been below VPOT (falling).
Notes: 1. VBOT may be below nominal minimum operating voltage for some devices. For devices where this is the case, the device is
tested down to VCC = VBOT during the production test. This guarantees that a brown-out reset will occur before VCC drops to
a voltage where correct operation of the microcontroller is no longer guaranteed. The test is performed using
BODLEVEL = 110 and BODLEVEL = 101 for Atmel ATmega48V/88V/168V, and BODLEVEL = 101 and BODLEVEL = 100
for Atmel ATmega48/88/168.
Table 29-3. Reset, brown-out and internal voltage characteristics.
Symbol Parameter Condition Min. Typ. Max. Units
VPOT
Power-on reset threshold voltage (rising) 0.7 1.0 1.4
V
Power-on reset threshold voltage (falling)(1) 0.05 0.9 1.3
VPONSR Power-on slope rate 0.01 4.5 V/ms
VRST RESET pin threshold voltage 0.2VCC 0.9VCC V
tRST Minimum pulse width on RESET pin 2.5 µs
VHYST Brown-out detector hysteresis 50 mV
tBOD Min pulse width on brown-out reset 2 µs
VBG Bandgap reference voltage VCC = 2.7
TA = 25°C 1.0 1.1 1.2 V
t
BG Bandgap reference start-up time VCC = 2.7
TA = 25°C 40 70 µs
I
BG Bandgap reference current consumption VCC = 2.7
TA = 25°C 10 µA
Table 29-4. BODLEVEL fuse coding(1).
BODLEVEL 2:0 Fuses Min. VBOT Typ. VBOT Max. VBOT Units
111 BOD disabled
110 1.7 1.8 2.0
101 2.5 2.7 2.9 V
100 4.1 4.3 4.5
011
Reserved
010
001
000308
2545T–AVR–05/11
ATmega48/88/168
29.6 2-wire serial interface characteristics
Table 29-5 describes the requirements for devices connected to the 2-wire Serial Bus. The Atmel ATmega48/88/168 2-wire
Serial Interface meets or exceeds these requirements under the noted conditions.
Timing symbols refer to Figure 29-4 on page 309.
Notes: 1. In ATmega48/88/168, this parameter is characterized and not 100% tested.
2. Required only for fSCL > 100kHz.
Table 29-5. 2-wire serial bus requirements.
Symbol Parameter Condition Min. Max. Units
VIL Input low-voltage -0.5 0.3VCC
V
VIH Input high-voltage 0.7VCC VCC + 0.5
Vhys(1) Hysteresis of schmitt trigger inputs 0.05VCC(2) –
VOL(1) Output low-voltage 3mA sink current 0 0.4
tr
(1) Rise time for both SDA and SCL 20 + 0.1Cb
(3)(2) 300
tof ns (1) Output fall time from VIHmin to VILmax 10pF < Cb < 400pF(3) 20 + 0.1Cb
(3)(2) 250
tSP(1) Spikes suppressed by input filter 0 50(2)
Ii Input current each I/O pin 0.1VCC < Vi
< 0.9VCC -10 10 µA
Ci
(1) Capacitance for each I/O pin – 10 pF
fSCL SCL clock frequency fCK(4) > max(16fSCL, 250kHz)(5) 0 400 kHz
Rp Value of pull-up resistor
fSCL ≤ 100kHz
fSCL > 100kHz
tHD;STA Hold time (repeated) START condition
fSCL ≤ 100kHz 4.0 –
µs
fSCL > 100kHz 0.6 –
tLOW Low period of the SCL clock
fSCL ≤ 100kHz 4.7 –
fSCL > 100kHz 1.3 –
tHIGH High period of the SCL clock
fSCL ≤ 100kHz 4.0 –
fSCL > 100kHz 0.6 –
tSU;STA Setup time for a repeated START condition
fSCL ≤ 100kHz 4.7 –
fSCL > 100kHz 0.6 –
tHD;DAT Data hold time
fSCL ≤ 100kHz 0 3.45
fSCL > 100kHz 0 0.9
tSU;DAT Data setup time
fSCL ≤ 100kHz 250 –
ns
fSCL > 100kHz 100 –
tSU;STO Setup time for STOP condition
fSCL ≤ 100kHz 4.0 –
µs
fSCL > 100kHz 0.6 –
tBUF
Bus free time between a STOP and START
condition
fSCL ≤ 100kHz 4.7 –
fSCL > 100kHz 1.3 –
VCC – 0.4V
3mA ---------------------------- 1000ns
Cb
-----------------
Ω
VCC – 0.4V
3mA ---------------------------- 300ns
Cb
--------------309
2545T–AVR–05/11
ATmega48/88/168
3. Cb = capacitance of one bus line in pF.
4. fCK = CPU clock frequency.
5. This requirement applies to all Atmel ATmega48/88/168 2-wire Serial Interface operation. Other devices connected to the 2-
wire Serial Bus need only obey the general fSCL requirement.
Figure 29-4. 2-wire serial bus timing.
29.7 SPI timing characteristics
See Figure 29-5 on page 310 and Figure 29-6 on page 310 for details.
Note: 1. In SPI programming mode the minimum SCK high/low period is:
- 2 tCLCL for fCK < 12MHz
- 3 tCLCL for fCK > 12MHz
t
SU;STA
t
LOW
t
HIGH
t
LOW
t
of
t
HD;STA t
HD;DAT t
SU;DAT t
SU;STO
t
BUF
SCL
SDA
t
r
Table 29-6. SPI timing parameters.
Description Mode Minimum Typical Maximum
1 SCK period Master See Table 19-5
on page 169
ns
2 SCK high/low Master 50% duty cycle
3 Rise/fall time Master 3.6
4 Setup Master 10
5 Hold Master 10
6 Out to SCK Master 0.5 • tsck
7 SCK to out Master 10
8 SCK to out high Master 10
9 SS low to out Slave 15
10 SCK period Slave 4 • tck
11 SCK high/low(1) Slave 2 • tck
12 Rise/fall time Slave 1600
13 Setup Slave 10
14 Hold Slave tck
15 SCK to out Slave 15
16 SCK to SS high Slave 20
17 SS high to tri-state Slave 10
18 SS low to SCK Slave 20310
2545T–AVR–05/11
ATmega48/88/168
Figure 29-5. SPI interface timing requirements (master mode).
Figure 29-6. SPI interface timing requirements (slave mode).
MOSI
(Data output)
SCK
(CPOL = 1)
MISO
(Data input)
SCK
(CPOL = 0)
SS
MSB LSB
MSB LSB
...
...
6 1
2 2
4 5 3
7 8
MISO
(Data output)
SCK
(CPOL = 1)
MOSI
(Data input)
SCK
(CPOL = 0)
SS
MSB LSB
MSB LSB
...
...
10
11 11
13 14 12
15 17
9
X
16311
2545T–AVR–05/11
ATmega48/88/168
29.8 ADC characteristics
Note: 1. AVCC absolute min./max.: 1.8V/5.5V
Table 29-7. ADC characteristics.
Symbol Parameter Condition Minimum Typical Maximum Units
Resolution 10 Bits
Absolute accuracy (Including
INL, DNL, quantization error,
gain and offset error)
VREF = 4V, VCC = 4V,
ADC clock = 200kHz 2
LSB
VREF = 4V, VCC = 4V,
ADC clock = 1MHz 4.5
VREF = 4V, VCC = 4V,
ADC clock = 200kHz
Noise reduction mode
2
VREF = 4V, VCC = 4V,
ADC clock = 1MHz
Noise reduction mode
4.5
Integral non-linearity (INL) VREF = 4V, VCC = 4V,
ADC clock = 200kHz 0.5
Differential non-linearity (DNL) VREF = 4V, VCC = 4V,
ADC clock = 200kHz 0.25
Gain error VREF = 4V, VCC = 4V,
ADC clock = 200kHz 2
Offset error VREF = 4V, VCC = 4V,
ADC clock = 200kHz 2
Conversion time Free running conversion 13 260 µs
Clock frequency 50 1000 kHz
AVCC(1) Analog supply voltage VCC - 0.3 VCC + 0.3
VREF Reference voltage 1.0 AVCC V
VIN Input voltage GND VREF
Input bandwidth 38.5 kHz
VINT Internal voltage reference 1.0 1.1 1.2 V
RREF Reference input resistance 32 kΩ
RAIN Analog input resistance 100 MΩ312
2545T–AVR–05/11
ATmega48/88/168
29.9 Parallel programming characteristics
Figure 29-7. Parallel programming timing, including some general timing requirements.
Figure 29-8. Parallel programming timing, loading sequence with timing requirements(1).
Note: 1. The timing requirements shown in Figure 29-7 (that is, tDVXH, tXHXL, and tXLDX) also apply to
loading operation.
Data & contol
(DATA, XA0/1, BS1, BS2)
XTAL1 t
XHXL
t
WLWH
t
DVXH t
XLDX
t
PLWL
t
WLRH
WR
RDY/BSY
PAGEL t
PHPL
t
PLBX t
BVPH
t
XLWL
t
WLBX
tBVWL
WLRL
XTAL1
PAGEL
t XLXH PLXH t t
XLPH
DATA ADDR0 (low byte) DATA (low byte) DATA (high byte) ADDR1 (low byte)
BS1
XA0
XA1
LOAD ADDRESS
(LOW BYTE)
LOAD DATA
(LOW BYTE)
LOAD DATA
(HIGH BYTE)
LOAD DATA LOAD ADDRESS
(LOW BYTE)313
2545T–AVR–05/11
ATmega48/88/168
Figure 29-9. Parallel programming timing, reading sequence (within the same page) with timing
requirements(1).
Note: 1. The timing requirements shown in Figure 29-7 on page 312 (that is, tDVXH, tXHXL, and tXLDX)
also apply to reading operation.
Table 29-8. Parallel programming characteristics, VCC = 5V ±10%.
Symbol Parameter Min. Typ. Max. Units
VPP Programming enable voltage 11.5 12.5 V
IPP Programming enable current 250 µA
tDVXH Data and control valid before XTAL1 high 67
ns
tXLXH XTAL1 low to XTAL1 high 200
tXHXL XTAL1 pulse width high 150
tXLDX Data and control hold after XTAL1 low 67
tXLWL XTAL1 low to WR low 0
tXLPH XTAL1 low to PAGEL high 0
tPLXH PAGEL low to XTAL1 high 150
tBVPH BS1 valid before PAGEL high 67
tPHPL PAGEL pulse width high 150
tPLBX BS1 hold after PAGEL low 67
tWLBX BS2/1 hold after WR low 67
tPLWL PAGEL low to WR low 67
tBVWL BS1 valid to WR low 67
tWLWH WR pulse width low 150
tWLRL WR low to RDY/BSY low 0 1 µs
tWLRH WR low to RDY/BSY high(1) 3.7 4.5
ms
tWLRH_CE WR low to RDY/BSY high for chip erase(2) 7.5 9
XTAL1
OE
DATA ADDR0 (low byte) DATA (low byte) DATA (high byte) ADDR1 (low byte)
BS1
XA0
XA1
LOAD ADDRESS
(LOW BYTE)
READ DATA
(LOW BYTE)
READ DATA
(HIGH BYTE)
LOAD ADDRESS
(LOW BYTE)
t
BVDV
t
OLDV
t
XLOL
t
OHDZ314
2545T–AVR–05/11
ATmega48/88/168
Notes: 1. tWLRH is valid for the write flash, write EEPROM, write fuse bits and write lock bits commands.
2. tWLRH_CE is valid for the chip erase command.
t
XLOL XTAL1 low to OE low 0
ns
t
BVDV BS1 valid to DATA valid 0 250
tOLDV OE low to DATA valid 250
t
OHDZ OE high to DATA tri-stated 250
Table 29-8. Parallel programming characteristics, VCC = 5V ±10%. (Continued)
Symbol Parameter Min. Typ. Max. Units315
2545T–AVR–05/11
ATmega48/88/168
30. Typical characteristics
The following charts show typical behavior. These figures are not tested during manufacturing.
All current consumption measurements are performed with all I/O pins configured as inputs and
with internal pull-ups enabled. A square wave generator with rail-to-rail output is used as clock
source.
All Active- and Idle current consumption measurements are done with all bits in the PRR register
set and thus, the corresponding I/O modules are turned off. Also the Analog Comparator is disabled
during these measurements. Table 30-1 on page 321 and Table 30-2 on page 321 show
the additional current consumption compared to ICC Active and ICC Idle for every I/O module controlled
by the Power Reduction Register. See “Power reduction register” on page 41 for details.
The power consumption in Power-down mode is independent of clock selection.
The current consumption is a function of several factors such as: operating voltage, operating
frequency, loading of I/O pins, switching rate of I/O pins, code executed and ambient temperature.
The dominating factors are operating voltage and frequency.
The current drawn from capacitive loaded pins may be estimated (for one pin) as CL*VCC*f where
CL = load capacitance, VCC = operating voltage and f = average switching frequency of I/O pin.
The parts are characterized at frequencies higher than test limits. Parts are not guaranteed to
function properly at frequencies higher than the ordering code indicates.
The difference between current consumption in Power-down mode with Watchdog Timer
enabled and Power-down mode with Watchdog Timer disabled represents the differential current
drawn by the Watchdog Timer.
30.1 Active supply current
Figure 30-1. Active supply current vs. frequency (0.1MHz - 1.0MHz).
5.5V
5.0V
4.5V
4.0V
3.3V
2.7V
1.8V
0
0.2
0.4
0.6
0.8
1
1.2
0 0.1 0.2 0.3 0.4 0.5 0.6 0.7 0.8 0.9 1
Frequency (MHz)
ICC (mA)316
2545T–AVR–05/11
ATmega48/88/168
Figure 30-2. Active supply current vs. frequency (1MHz - 24MHz).
Figure 30-3. Active supply current vs. VCC (internal RC oscillator, 128kHz).
0
2
4
6
8
10
12
14
16
18
0 4 8 12 16 20 24
Frequency (MHz)
ICC (mA)
2.7V
1.8V
3.3V
4.0V
4.5V
5.0V
5.5V
,
85°C
25°C
-40°C
0
0.02
0.04
0.06
0.08
0.1
0.12
0.14
1.5 2 2.5 3 3.5 4 4.5 5 5.5
VCC (V)
ICC (mA)317
2545T–AVR–05/11
ATmega48/88/168
Figure 30-4. Active supply current vs. VCC (internal RC oscillator, 1MHz).
Figure 30-5. Active supply current vs. VCC (internal RC oscillator, 8MHz).
,
85°C
25°C
-40°C
0
0.2
0.4
0.6
0.8
1
1.2
1.4
1.5 2 2.5 3 3.5 4 4.5 5 5.5
VCC (V)
ICC (mA)
,
85°C
25°C
-40°C
0
1
2
3
4
5
6
7
1.5 2 2.5 3 3.5 4 4.5 5 5.5
VCC (V)
ICC (mA)318
2545T–AVR–05/11
ATmega48/88/168
Figure 30-6. Active supply current vs. VCC (32kHz external oscillator).
30.2 Idle supply current
Figure 30-7. Idle supply current vs. frequency (0.1MHz - 1.0MHz).
25°C
0
10
20
30
40
50
60
1.5 2 2.5 3 3.5 4 4.5 5 5.5
VCC (V)
ICC (µA)
5.5V
5.0V
4.5V
4.0V
3.3V
2.7V
1.8V
0
0.02
0.04
0.06
0.08
0.1
0.12
0.14
0.16
0.18
0 0.1 0.2 0.3 0.4 0.5 0.6 0.7 0.8 0.9 1
Frequency (MHz)
ICC (mA)319
2545T–AVR–05/11
ATmega48/88/168
Figure 30-8. Idle supply current vs. frequency (1MHz - 24MHz).
Figure 30-9. Idle supply current vs. VCC (internal RC oscillator, 128kHz).
0
0.5
1
1.5
2
2.5
3
3.5
4
4.5
0 4 8 12 16 20 24
Frequency (MHz)
ICC (mA)
2.7V
1.8V
3.3V
4.0V
4.5V
5.0V
5.5V
85°C
25°C
-40°C
0
0.005
0.01
0.015
0.02
0.025
0.03
1.5 2 2.5 3 3.5 4 4.5 5 5.5
VCC (V)
ICC (mA)320
2545T–AVR–05/11
ATmega48/88/168
Figure 30-10. Idle supply current vs. VCC (internal RC oscillator, 1MHz).
Figure 30-11. Idle supply current vs. VCC (internal RC oscillator, 8MHz).
,
85°C
25°C
-40°C
0
0.05
0.1
0.15
0.2
0.25
0.3
0.35
1.5 2 2.5 3 3.5 4 4.5 5 5.5
VCC (V)
ICC (mA)
,
85°C
25°C
-40°C
0
0.2
0.4
0.6
0.8
1
1.2
1.4
1.6
1.5 2 2.5 3 3.5 4 4.5 5 5.5
VCC (V)
ICC (mA)321
2545T–AVR–05/11
ATmega48/88/168
Figure 30-12. Idle supply current vs. VCC (32kHz external oscillator).
30.3 Supply current of I/O modules
The tables and formulas below can be used to calculate the additional current consumption for
the different I/O modules in Active and Idle mode. The enabling or disabling of the I/O modules
are controlled by the Power Reduction Register. See “Power reduction register” on page 41 for
details.
25°C
0
5
10
15
20
25
30
1.5 2 2.5 3 3.5 4 4.5 5 5.5
VCC (V)
ICC (µA)
Table 30-1. Additional current consumption for the different I/O modules (absolute values).
PRR bit Typical numbers
VCC = 2V, F = 1MHz VCC = 3V, F = 4MHz VCC = 5V, F = 8MHz
PRUSART0 8.0µA 51µA 220µA
PRTWI 12µA 75µA 315µA
PRTIM2 11µA 72µA 300µA
PRTIM1 5.0µA 32µA 130µA
PRTIM0 4.0µA 24µA 100µA
PRSPI 15µA 95µA 400µA
PRADC 12µA 75µA 315µA
Table 30-2. Additional current consumption (percentage) in active and idle mode.
PRR bit
Additional current consumption
compared to active with external clock
(see Figure 30-1 on page 315 and
Figure 30-2 on page 316)
Additional current consumption
compared to Idle with external clock
(see Figure 30-7 on page 318 and
Figure 30-8 on page 319)
PRUSART0 3.3% 18%
PRTWI 4.8% 26%
PRTIM2 4.7% 25%322
2545T–AVR–05/11
ATmega48/88/168
It is possible to calculate the typical current consumption based on the numbers from Table 30-2
on page 321 for other VCC and frequency settings than listed in Table 30-1 on page 321.
30.3.0.1 Example 1
Calculate the expected current consumption in idle mode with USART0, TIMER1, and TWI
enabled at VCC = 3.0V and F = 1MHz. From Table 30-2 on page 321, third column, we see that
we need to add 18% for the USART0, 26% for the TWI, and 11% for the TIMER1 module. Reading
from Figure 30-7 on page 318, we find that the idle current consumption is ~0.075mA at VCC
= 3.0V and F = 1MHz. The total current consumption in idle mode with USART0, TIMER1, and
TWI enabled, gives:
30.3.0.2 Example 2
Same conditions as in example 1, but in active mode instead. From Table 30-2 on page 321,
second column we see that we need to add 3.3% for the USART0, 4.8% for the TWI, and 2.0%
for the TIMER1 module. Reading from Figure 30-1 on page 315, we find that the active current
consumption is ~0.42mA at VCC = 3.0V and F = 1MHz. The total current consumption in idle
mode with USART0, TIMER1, and TWI enabled, gives:
30.3.0.3 Example 3
All I/O modules should be enabled. Calculate the expected current consumption in active mode
at VCC = 3.6V and F = 10MHz. We find the active current consumption without the I/O modules
to be ~ 4.0mA (from Figure 30-2 on page 316). Then, by using the numbers from Table 30-2 on
page 321 - second column, we find the total current consumption:
PRTIM1 2.0% 11%
PRTIM0 1.6% 8.5%
PRSPI 6.1% 33%
PRADC 4.9% 26%
Table 30-2. Additional current consumption (percentage) in active and idle mode. (Continued)
PRR bit
Additional current consumption
compared to active with external clock
(see Figure 30-1 on page 315 and
Figure 30-2 on page 316)
Additional current consumption
compared to Idle with external clock
(see Figure 30-7 on page 318 and
Figure 30-8 on page 319)
ICCtotal ≈ ≈ 0.075mA • ( ) 1 0.18 0.26 0.11 +++ 0.116mA
ICCtotal ≈ ≈ 0.42mA • ( ) 1 0.033 0.048 0.02 +++ 0.46mA
ICCtotal ≈ ≈ 4.0mA • ( ) 1 0.033 0.048 0.047 0.02 0.016 0.061 0.049 + + + ++ + + 5.1mA323
2545T–AVR–05/11
ATmega48/88/168
30.4 Power-down supply current
Figure 30-13. Power-down supply current vs. VCC (watchdog timer disabled).
Figure 30-14. Power-down supply current vs. VCC (watchdog timer enabled).
85°C
25°C
-40°C
0
0.5
1
1.5
2
2.5
1.5 2 2.5 3 3.5 4 4.5 5 5.5
VCC (V)
ICC (µA)
85°C
25°C
-40°C
0
2
4
6
8
10
12
1.5 2 2.5 3 3.5 4 4.5 5 5.5
VCC (V)
ICC (µA)324
2545T–AVR–05/11
ATmega48/88/168
30.5 Power-save supply current
Figure 30-15. Power-save supply current vs. VCC (watchdog timer disabled).
30.6 Standby supply current
Figure 30-16. Standby supply current vs. VCC (low power crystal oscillator).
25°C
0
2
4
6
8
10
12
1.5 2 2.5 3 3.5 4 4.5 5 5.5
VCC (V)
ICC (µA)
6MHz Xtal
6MHz Res.
4MHz Xtal
4MHz Res.
455kHz Res.
32kHz Xtal
2MHz Xtal
2MHz Res.
1MHz Res.
0
20
40
60
80
100
120
140
160
180
1.5 2 2.5 3 3.5 4 4.5 5 5.5
VCC (V)
ICC (µA)325
2545T–AVR–05/11
ATmega48/88/168
Figure 30-17. Standby supply current vs. VCC (full swing crystal oscillator).
30.7 Pin pull-up
Figure 30-18. I/O pin pull-up resistor current vs. input voltage (VCC = 5V).
6MHz Xtal
(ckopt)
4MHz Xtal
(ckopt)
2MHz Xtal
(ckopt)
16MHz Xtal
12MHz Xtal
0
50
100
150
200
250
300
350
400
450
500
1.5 2 2.5 3 3.5 4 4.5 5 5.5
VCC (V)
ICC (µA)
85°C 25°C
-40°C
0
20
40
60
80
100
120
140
160
0123456
VOP (V)
IOP (µA)326
2545T–AVR–05/11
ATmega48/88/168
Figure 30-19. I/O pin pull-up resistor current vs. input voltage (VCC = 2.7V).
Figure 30-20. Reset pull-up resistor current vs. reset pin voltage (VCC = 5V).
85°C 25°C
-40°C
0
10
20
30
40
50
60
70
80
90
0 0.5 1 1.5 2 2.5 3
VOP (V)
IOP (µA)
0
20
40
60
80
100
120
0123456
VRESET (V)
IRESET (µA)
-40°C 25°C
85°C327
2545T–AVR–05/11
ATmega48/88/168
Figure 30-21. Reset pull-up resistor current vs. reset pin voltage (VCC = 2.7V).
30.8 Pin driver strength
Figure 30-22. I/O pin source current vs. output voltage (VCC = 5V).
-40°C
0
10
20
30
40
50
60
70
0 0.5 1 1.5 2 2.5 3
VRESET (V)
IRESET (µA)
25°C
85°C
85°C
25°C
-40°C
0
10
20
30
40
50
60
70
80
90
0123456
VOH (V)
IOH (mA)328
2545T–AVR–05/11
ATmega48/88/168
Figure 30-23. I/O pin source current vs. output voltage (VCC = 2.7V).
Figure 30-24. I/O pin source current vs. output voltage (VCC = 1.8V).
85°C
25°C
-40°C
0
5
10
15
20
25
30
35
0 0.5 1 1.5 2 2.5 3
VOH (V)
IOH (mA)
85°C
25°C -40°C
0
1
2
3
4
5
6
7
8
9
0 0.2 0.4 0.6 0.8 1 1.2 1.4 1.6 1.8 2
VOH (V)
IOH (mA)329
2545T–AVR–05/11
ATmega48/88/168
Figure 30-25. I/O pin sink current vs. output voltage (VCC = 5V).
Figure 30-26. I/O pin sink current vs. output voltage (VCC = 2.7V).
85°C
25°C
0
10
20
30
40
50
60
70
80
0 0.5 1 1.5 2 2.5
VOL (V)
IOL (mA)
85°C
25°C
-40°C
0
5
10
15
20
25
30
35
40
0 0.5 1 1.5 2 2.5
VOL (V)
IOL (mA)330
2545T–AVR–05/11
ATmega48/88/168
Figure 30-27. I/O pin sink current vs. output voltage (VCC = 1.8V).
30.9 Pin thresholds and hysteresis
Figure 30-28. I/O pin input threshold voltage vs. VCC (VIH, I/O pin read as '1').
85°C
25°C
-40°C
0
2
4
6
8
10
12
14
0 0.2 0.4 0.6 0.8 1 1.2 1.4 1.6 1.8 2
VOL (V)
IOL (mA)
85°C
25°C
-40°C
0
0.5
1
1.5
2
2.5
3
1.5 2 2.5 3 3.5 4 4.5 5 5.5
VCC (V)
Threshold (V)331
2545T–AVR–05/11
ATmega48/88/168
Figure 30-29. I/O pin input threshold voltage vs. VCC (VIL, I/O pin read as '0').
Figure 30-30. I/O pin input hystreresis vs. Vcc.
85°C
25°C
-40°C
0
0.5
1
1.5
2
2.5
3
1.5 2 2.5 3 3.5 4 4.5 5 5.5
VCC (V)
Threshold (V)
85°C
25°C
-40°C
0
0.1
0.2
0.3
0.4
0.5
0.6
1.5 2 2.5 3 3.5 4 4.5 5 5.5
VCC (V)
Input hysteresis (V)332
2545T–AVR–05/11
ATmega48/88/168
Figure 30-31. Reset input threshold voltage vs. VCC (VIH, reset pin read as '1').
Figure 30-32. Reset input threshold voltage vs. VCC (VIL, reset pin read as '0').
85°C
25°C
-40°C
0
0.5
1
1.5
2
2.5
3
1.5 2 2.5 3 3.5 4 4.5 5 5.5
VCC (V)
Threshold (V)
85°C
25°C
-40°C
0
0.5
1
1.5
2
2.5
3
1.5 2 2.5 3 3.5 4 4.5 5 5.5
VCC (V)
Threshold (V)333
2545T–AVR–05/11
ATmega48/88/168
Figure 30-33. Reset input pin hysteresis vs. VCC.
30.10 BOD thresholds and analog comparator offset
Figure 30-34. BOD thresholds vs. temperature (BODLEVEL is 4.3V).
VIL
0
100
200
300
400
500
600
2 2.5 3 3.5 4 4.5 5 5.5
VCC (V)
Input hysteresis (mV)
4.2
4.25
4.3
4.35
4.4
4.45
4.5
-50 -40 -30 -20 -10 0 10 20 30 40 50 60 70 80 90 100
Temperature (°C)
Threshold (V)
Rising Vcc
Falling Vcc334
2545T–AVR–05/11
ATmega48/88/168
Figure 30-35. BOD thresholds vs. temperature (BODLEVEL is 2.7V).
Figure 30-36. BOD thresholds vs. temperature (BODLEVEL is 1.8V).
2.6
2.65
2.7
2.75
2.8
2.85
2.9
-50 -40 -30 -20 -10 0 10 20 30 40 50 60 70 80 90 100
Temperature (°C)
Threshold (V)
Rising Vcc
Falling Vcc
1.76
1.78
1.8
1.82
1.84
1.86
-50 -40 -30 -20 -10 0 10 20 30 40 50 60 70 80 90 100
Temperature (°C)
Threshold (V)
Rising Vcc
Falling Vcc335
2545T–AVR–05/11
ATmega48/88/168
Figure 30-37. Bandgap voltage vs. VCC.
Figure 30-38. Analog comparator offset voltage vs. common mode voltage (VCC = 5V).
-40°C
85°C
1.08
1.085
1.09
1.095
1.1
1.5 2 2.5 3 3.5 4 4.5 5 5.5 6
VCC (V)
Bandgap voltage (V)
-40°C
85°C
0
0.001
0.002
0.003
0.004
0.005
0.006
0.007
0.008
0.009
0 0.5 1 1.5 2 2.5 3 3.5 4 4.5 5
Common Mode Voltage (V)
Analog comparator offset voltage (V)336
2545T–AVR–05/11
ATmega48/88/168
Figure 30-39. Analog comparator offset voltage vs. common mode voltage (VCC = 2.7V).
30.11 Internal oscillator speed
Figure 30-40. Watchdog oscillator frequency vs. VCC.
-40°C
85°C
0
0.5
1
1.5
2
2.5
3
3.5
4
0 0.5 1 1.5 2 2.5
Common Mode Voltage (V)
Analog comparator offset voltage
(mV)
85°C
25°C
-40°C
95
100
105
110
115
120
1.5 2 2.5 3 3.5 4 4.5 5 5.5
VCC (V)
FRC (kHz)337
2545T–AVR–05/11
ATmega48/88/168
Figure 30-41. Calibrated 8MHz RC oscillator frequency vs. temperature.
Figure 30-42. Calibrated 8MHz RC oscillator frequency vs. VCC.
5.0V
2.7V
1.8V
7.4
7.5
7.6
7.7
7.8
7.9
8
8.1
8.2
8.3
8.4
-50 -40 -30 -20 -10 0 10 20 30 40 50 60 70 80 90 100
Temperature (°C)
FRC (MHz)
85°C
25°C
-40°C
7.4
7.6
7.8
8
8.2
8.4
8.6
1.5 2 2.5 3 3.5 4 4.5 5 5.5
VCC (V)
FRC (MHz)338
2545T–AVR–05/11
ATmega48/88/168
Figure 30-43. Calibrated 8MHz RC oscillator frequency vs. osccal value.
30.12 Current consumption of peripheral units
Figure 30-44. Brownout detector current vs. VCC.
85°C
25°C
-40°C
3.5
5.5
7.5
9.5
11.5
13.5
0 16 32 48 64 80 96 112 128 144 160 176 192 208 224 240
OSCCAL VALUE
FRC (MHz)
85°C
25°C
-40°C
18
20
22
24
26
28
30
32
1.5 2 2.5 3 3.5 4 4.5 5 5.5
VCC (V)
ICC (µA)339
2545T–AVR–05/11
ATmega48/88/168
Figure 30-45. ADC current vs. VCC (AREF = AVCC).
Figure 30-46. AREF external reference current vs. VCC.
85°C
25°C
-40°C
150
200
250
300
350
400
450
500
1.5 2 2.5 3 3.5 4 4.5 5 5.5
VCC (V)
ICC (µA)
85°C
25°C
-40°C
0
20
40
60
80
100
120
140
160
180
1.5 2 2.5 3 3.5 4 4.5 5 5.5
VCC (V)
ICC (µA)340
2545T–AVR–05/11
ATmega48/88/168
Figure 30-47. Analog comparator current vs. VCC.
Figure 30-48. Programming current vs. VCC.
85°C
25°C
-40°C
0
20
40
60
80
100
120
140
1.5 2 2.5 3 3.5 4 4.5 5 5.5
VCC (V)
ICC (µA)
85°C
25°C
-40°C
0
2
4
6
8
10
12
14
1.5 2 2.5 3 3.5 4 4.5 5 5.5
VCC (V)
ICC (mA)
85°C
25°C
-40°C
0
2
4
6
8
10
12
14
1.5 2 2.5 3 3.5 4 4.5 5 5.5
VCC (V)
ICC (mA)341
2545T–AVR–05/11
ATmega48/88/168
30.13 Current consumption in reset and reset pulse width
Figure 30-49. Reset supply current vs. VCC (0.1MHz - 1.0MHz, excluding current through the
reset pull-up).
Figure 30-50. Reset supply current vs. VCC (1MHz - 24MHz, excluding current through the reset
pull-up).
5.5V
5.0V
4.5V
4.0V
3.3V
2.7V
1.8V
0
0.02
0.04
0.06
0.08
0.1
0.12
0.14
0.16
0.18
0 0.1 0.2 0.3 0.4 0.5 0.6 0.7 0.8 0.9 1
Frequency (MHz)
ICC (mA)
,
0
0.5
1
1.5
2
2.5
3
3.5
4
4.5
0 4 8 12 16 20 24
Frequency (MHz)
ICC (mA)
2.7V
1.8V
3.3V
4.0V
4.5V
5.0V
5.5V342
2545T–AVR–05/11
ATmega48/88/168
Figure 30-51. Reset pulse width vs. VCC.
85°C
25°C
-40°C
0
500
1000
1500
2000
2500
1.5 2 2.5 3 3.5 4 4.5 5 5.5
VCC (V)
Pulsewidth (ns)343
2545T–AVR–05/11
ATmega48/88/168
31. Register summary
Address Name Bit 7 Bit 6 Bit 5 Bit 4 Bit 3 Bit 2 Bit 1 Bit 0 Page
(0xFF) Reserved – – – – – – – –
(0xFE) Reserved – – – – – – – –
(0xFD) Reserved – – – – – – – –
(0xFC) Reserved – – – – – – – –
(0xFB) Reserved – – – – – – – –
(0xFA) Reserved – – – – – – – –
(0xF9) Reserved – – – – – – – –
(0xF8) Reserved – – – – – – – –
(0xF7) Reserved – – – – – – – –
(0xF6) Reserved – – – – – – – –
(0xF5) Reserved – – – – – – – –
(0xF4) Reserved – – – – – – – –
(0xF3) Reserved – – – – – – – –
(0xF2) Reserved – – – – – – – –
(0xF1) Reserved – – – – – – – –
(0xF0) Reserved – – – – – – – –
(0xEF) Reserved – – – – – – – –
(0xEE) Reserved – – – – – – – –
(0xED) Reserved – – – – – – – –
(0xEC) Reserved – – – – – – – –
(0xEB) Reserved – – – – – – – –
(0xEA) Reserved – – – – – – – –
(0xE9) Reserved – – – – – – – –
(0xE8) Reserved – – – – – – – –
(0xE7) Reserved – – – – – – – –
(0xE6) Reserved – – – – – – – –
(0xE5) Reserved – – – – – – – –
(0xE4) Reserved – – – – – – – –
(0xE3) Reserved – – – – – – – –
(0xE2) Reserved – – – – – – – –
(0xE1) Reserved – – – – – – – –
(0xE0) Reserved – – – – – – – –
(0xDF) Reserved – – – – – – – –
(0xDE) Reserved – – – – – – – –
(0xDD) Reserved – – – – – – – –
(0xDC) Reserved – – – – – – – –
(0xDB) Reserved – – – – – – – –
(0xDA) Reserved – – – – – – – –
(0xD9) Reserved – – – – – – – –
(0xD8) Reserved – – – – – – – –
(0xD7) Reserved – – – – – – – –
(0xD6) Reserved – – – – – – – –
(0xD5) Reserved – – – – – – – –
(0xD4) Reserved – – – – – – – –
(0xD3) Reserved – – – – – – – –
(0xD2) Reserved – – – – – – – –
(0xD1) Reserved – – – – – – – –
(0xD0) Reserved – – – – – – – –
(0xCF) Reserved – – – – – – – –
(0xCE) Reserved – – – – – – – –
(0xCD) Reserved – – – – – – – –
(0xCC) Reserved – – – – – – – –
(0xCB) Reserved – – – – – – – –
(0xCA) Reserved – – – – – – – –
(0xC9) Reserved – – – – – – – –
(0xC8) Reserved – – – – – – – –
(0xC7) Reserved – – – – – – – –
(0xC6) UDR0 USART I/O data register 190
(0xC5) UBRR0H USART baud rate register high 194
(0xC4) UBRR0L USART baud rate register low 194
(0xC3) Reserved – – – – – – – –
(0xC2) UCSR0C UMSEL01 UMSEL00 UPM01 UPM00 USBS0 UCSZ01 /UDORD0 UCSZ00 / UCPHA0 UCPOL0 192/207
(0xC1) UCSR0B RXCIE0 TXCIE0 UDRIE0 RXEN0 TXEN0 UCSZ02 RXB80 TXB80 191
(0xC0) UCSR0A RXC0 TXC0 UDRE0 FE0 DOR0 UPE0 U2X0 MPCM0 190344
2545T–AVR–05/11
ATmega48/88/168
(0xBF) Reserved – – – – – – – –
(0xBE) Reserved – – – – – – – –
(0xBD) TWAMR TWAM6 TWAM5 TWAM4 TWAM3 TWAM2 TWAM1 TWAM0 – 239
(0xBC) TWCR TWINT TWEA TWSTA TWSTO TWWC TWEN – TWIE 236
(0xBB) TWDR 2-wire serial interface data register 238
(0xBA) TWAR TWA6 TWA5 TWA4 TWA3 TWA2 TWA1 TWA0 TWGCE 239
(0xB9) TWSR TWS7 TWS6 TWS5 TWS4 TWS3 – TWPS1 TWPS0 238
(0xB8) TWBR 2-wire serial interface bit rate register 236
(0xB7) Reserved – – – – – – –
(0xB6) ASSR – EXCLK AS2 TCN2UB OCR2AUB OCR2BUB TCR2AUB TCR2BUB 159
(0xB5) Reserved – – – – – – – –
(0xB4) OCR2B Timer/Counter2 output compare register B 158
(0xB3) OCR2A Timer/Counter2 output compare register A 157
(0xB2) TCNT2 Timer/Counter2 (8-bit) 157
(0xB1) TCCR2B FOC2A FOC2B – – WGM22 CS22 CS21 CS20 156
(0xB0) TCCR2A COM2A1 COM2A0 COM2B1 COM2B0 – – WGM21 WGM20 153
(0xAF) Reserved – – – – – – – –
(0xAE) Reserved – – – – – – – –
(0xAD) Reserved – – – – – – – –
(0xAC) Reserved – – – – – – – –
(0xAB) Reserved – – – – – – – –
(0xAA) Reserved – – – – – – – –
(0xA9) Reserved – – – – – – – –
(0xA8) Reserved – – – – – – – –
(0xA7) Reserved – – – – – – – –
(0xA6) Reserved – – – – – – – –
(0xA5) Reserved – – – – – – – –
(0xA4) Reserved – – – – – – – –
(0xA3) Reserved – – – – – – – –
(0xA2) Reserved – – – – – – – –
(0xA1) Reserved – – – – – – – –
(0xA0) Reserved – – – – – – – –
(0x9F) Reserved – – – – – – – –
(0x9E) Reserved – – – – – – – –
(0x9D) Reserved – – – – – – – –
(0x9C) Reserved – – – – – – – –
(0x9B) Reserved – – – – – – – –
(0x9A) Reserved – – – – – – – –
(0x99) Reserved – – – – – – – –
(0x98) Reserved – – – – – – – –
(0x97) Reserved – – – – – – – –
(0x96) Reserved – – – – – – – –
(0x95) Reserved – – – – – – – –
(0x94) Reserved – – – – – – – –
(0x93) Reserved – – – – – – – –
(0x92) Reserved – – – – – – – –
(0x91) Reserved – – – – – – – –
(0x90) Reserved – – – – – – – –
(0x8F) Reserved – – – – – – – –
(0x8E) Reserved – – – – – – – –
(0x8D) Reserved – – – – – – – –
(0x8C) Reserved – – – – – – – –
(0x8B) OCR1BH Timer/Counter1 - output compare register B high byte 134
(0x8A) OCR1BL Timer/Counter1 - output compare register B low byte 134
(0x89) OCR1AH Timer/Counter1 - output compare register A high byte 134
(0x88) OCR1AL Timer/Counter1 - output compare register A low byte 134
(0x87) ICR1H Timer/Counter1 - input capture register high byte 135
(0x86) ICR1L Timer/Counter1 - input capture register low byte 135
(0x85) TCNT1H Timer/Counter1 - counter register high byte 134
(0x84) TCNT1L Timer/Counter1 - counter register low byte 134
(0x83) Reserved – – – – – – – –
(0x82) TCCR1C FOC1A FOC1B – – – – – – 133
(0x81) TCCR1B ICNC1 ICES1 – WGM13 WGM12 CS12 CS11 CS10 132
(0x80) TCCR1A COM1A1 COM1A0 COM1B1 COM1B0 – – WGM11 WGM10 130
(0x7F) DIDR1 – – – – – – AIN1D AIN0D 243
(0x7E) DIDR0 – – ADC5D ADC4D ADC3D ADC2D ADC1D ADC0D 259
Address Name Bit 7 Bit 6 Bit 5 Bit 4 Bit 3 Bit 2 Bit 1 Bit 0 Page345
2545T–AVR–05/11
ATmega48/88/168
(0x7D) Reserved – – – – – – – –
(0x7C) ADMUX REFS1 REFS0 ADLAR – MUX3 MUX2 MUX1 MUX0 255
(0x7B) ADCSRB – ACME – – – ADTS2 ADTS1 ADTS0 258
(0x7A) ADCSRA ADEN ADSC ADATE ADIF ADIE ADPS2 ADPS1 ADPS0 256
(0x79) ADCH ADC data register high byte 258
(0x78) ADCL ADC data register low byte 258
(0x77) Reserved – – – – – – – –
(0x76) Reserved – – – – – – – –
(0x75) Reserved – – – – – – – –
(0x74) Reserved – – – – – – – –
(0x73) Reserved – – – – – – – –
(0x72) Reserved – – – – – – – –
(0x71) Reserved – – – – – – – –
(0x70) TIMSK2 – – – – – OCIE2B OCIE2A TOIE2 158
(0x6F) TIMSK1 – – ICIE1 – – OCIE1B OCIE1A TOIE1 135
(0x6E) TIMSK0 – – – – – OCIE0B OCIE0A TOIE0 106
(0x6D) PCMSK2 PCINT23 PCINT22 PCINT21 PCINT20 PCINT19 PCINT18 PCINT17 PCINT16 70
(0x6C) PCMSK1 – PCINT14 PCINT13 PCINT12 PCINT11 PCINT10 PCINT9 PCINT8 70
(0x6B) PCMSK0 PCINT7 PCINT6 PCINT5 PCINT4 PCINT3 PCINT2 PCINT1 PCINT0 70
(0x6A) Reserved – – – – – – – –
(0x69) EICRA – – – – ISC11 ISC10 ISC01 ISC00 67
(0x68) PCICR – – – – – PCIE2 PCIE1 PCIE0
(0x67) Reserved – – – – – – – –
(0x66) OSCCAL Oscillator calibration register 37
(0x65) Reserved – – – – – – – –
(0x64) PRR PRTWI PRTIM2 PRTIM0 – PRTIM1 PRSPI PRUSART0 PRADC 41
(0x63) Reserved – – – – – – – –
(0x62) Reserved – – – – – – – –
(0x61) CLKPR CLKPCE – – – CLKPS3 CLKPS2 CLKPS1 CLKPS0 37
(0x60) WDTCSR WDIF WDIE WDP3 WDCE WDE WDP2 WDP1 WDP0 53
0x3F (0x5F) SREG I T H S V N Z C 11
0x3E (0x5E) SPH – – – – – (SP10) 5. SP9 SP8 13
0x3D (0x5D) SPL SP7 SP6 SP5 SP4 SP3 SP2 SP1 SP0 13
0x3C (0x5C) Reserved – – – – – – – –
0x3B (0x5B) Reserved – – – – – – – –
0x3A (0x5A) Reserved – – – – – – – –
0x39 (0x59) Reserved – – – – – – – –
0x38 (0x58) Reserved – – – – – – – –
0x37 (0x57) SPMCSR SPMIE (RWWSB)5. – (RWWSRE)5. BLBSET PGWRT PGERS SELFPRGEN 283
0x36 (0x56) Reserved – – – – – – – –
0x35 (0x55) MCUCR – – – PUD – – IVSEL IVCE
0x34 (0x54) MCUSR – – – – WDRF BORF EXTRF PORF
0x33 (0x53) SMCR – – – – SM2 SM1 SM0 SE 39
0x32 (0x52) Reserved – – – – – – – –
0x31 (0x51) Reserved – – – – – – – –
0x30 (0x50) ACSR ACD ACBG ACO ACI ACIE ACIC ACIS1 ACIS0 242
0x2F (0x4F) Reserved – – – – – – – –
0x2E (0x4E) SPDR SPI data register 170
0x2D (0x4D) SPSR SPIF WCOL – – – – – SPI2X 169
0x2C (0x4C) SPCR SPIE SPE DORD MSTR CPOL CPHA SPR1 SPR0 168
0x2B (0x4B) GPIOR2 General purpose I/O register 2 26
0x2A (0x4A) GPIOR1 General purpose I/O register 1 26
0x29 (0x49) Reserved – – – – – – – –
0x28 (0x48) OCR0B Timer/Counter0 output compare register B
0x27 (0x47) OCR0A Timer/Counter0 output compare register A
0x26 (0x46) TCNT0 Timer/Counter0 (8-bit)
0x25 (0x45) TCCR0B FOC0A FOC0B – – WGM02 CS02 CS01 CS00
0x24 (0x44) TCCR0A COM0A1 COM0A0 COM0B1 COM0B0 – – WGM01 WGM00
0x23 (0x43) GTCCR TSM – – – – – PSRASY PSRSYNC 139/160
0x22 (0x42) EEARH (EEPROM address register high byte) 5. 22
0x21 (0x41) EEARL EEPROM address register low byte 22
0x20 (0x40) EEDR EEPROM data register 22
0x1F (0x3F) EECR – – EEPM1 EEPM0 EERIE EEMPE EEPE EERE 22
0x1E (0x3E) GPIOR0 General purpose I/O register 0 26
0x1D (0x3D) EIMSK – – – – – – INT1 INT0 68
0x1C (0x3C) EIFR – – – – – – INTF1 INTF0 68
Address Name Bit 7 Bit 6 Bit 5 Bit 4 Bit 3 Bit 2 Bit 1 Bit 0 Page346
2545T–AVR–05/11
ATmega48/88/168
Note: 1. For compatibility with future devices, reserved bits should be written to zero if accessed. Reserved I/O memory addresses
should never be written.
2. I/O Registers within the address range 0x00 - 0x1F are directly bit-accessible using the SBI and CBI instructions. In these
registers, the value of single bits can be checked by using the SBIS and SBIC instructions.
3. Some of the Status Flags are cleared by writing a logical one to them. Note that, unlike most other AVRs, the CBI and SBI
instructions will only operate on the specified bit, and can therefore be used on registers containing such Status Flags. The
CBI and SBI instructions work with registers 0x00 to 0x1F only.
4. When using the I/O specific commands IN and OUT, the I/O addresses 0x00 - 0x3F must be used. When addressing I/O
Registers as data space using LD and ST instructions, 0x20 must be added to these addresses. The Atmel
ATmega48/88/168 is a complex microcontroller with more peripheral units than can be supported within the 64 location
reserved in Opcode for the IN and OUT instructions. For the Extended I/O space from 0x60 - 0xFF in SRAM, only the
ST/STS/STD and LD/LDS/LDD instructions can be used.
5. Only valid for ATmega88/168
0x1B (0x3B) PCIFR – – – – – PCIF2 PCIF1 PCIF0
0x1A (0x3A) Reserved – – – – – – – –
0x19 (0x39) Reserved – – – – – – – –
0x18 (0x38) Reserved – – – – – – – –
0x17 (0x37) TIFR2 – – – – – OCF2B OCF2A TOV2 158
0x16 (0x36) TIFR1 – – ICF1 – – OCF1B OCF1A TOV1 136
0x15 (0x35) TIFR0 – – – – – OCF0B OCF0A TOV0
0x14 (0x34) Reserved – – – – – – – –
0x13 (0x33) Reserved – – – – – – – –
0x12 (0x32) Reserved – – – – – – – –
0x11 (0x31) Reserved – – – – – – – –
0x10 (0x30) Reserved – – – – – – – –
0x0F (0x2F) Reserved – – – – – – – –
0x0E (0x2E) Reserved – – – – – – – –
0x0D (0x2D) Reserved – – – – – – – –
0x0C (0x2C) Reserved – – – – – – – –
0x0B (0x2B) PORTD PORTD7 PORTD6 PORTD5 PORTD4 PORTD3 PORTD2 PORTD1 PORTD0 88
0x0A (0x2A) DDRD DDD7 DDD6 DDD5 DDD4 DDD3 DDD2 DDD1 DDD0 88
0x09 (0x29) PIND PIND7 PIND6 PIND5 PIND4 PIND3 PIND2 PIND1 PIND0 88
0x08 (0x28) PORTC – PORTC6 PORTC5 PORTC4 PORTC3 PORTC2 PORTC1 PORTC0 87
0x07 (0x27) DDRC – DDC6 DDC5 DDC4 DDC3 DDC2 DDC1 DDC0 87
0x06 (0x26) PINC – PINC6 PINC5 PINC4 PINC3 PINC2 PINC1 PINC0 87
0x05 (0x25) PORTB PORTB7 PORTB6 PORTB5 PORTB4 PORTB3 PORTB2 PORTB1 PORTB0 87
0x04 (0x24) DDRB DDB7 DDB6 DDB5 DDB4 DDB3 DDB2 DDB1 DDB0 87
0x03 (0x23) PINB PINB7 PINB6 PINB5 PINB4 PINB3 PINB2 PINB1 PINB0 87
0x02 (0x22) Reserved – – – – – – – –
0x01 (0x21) Reserved – – – – – – – –
0x0 (0x20) Reserved – – – – – – – –
Address Name Bit 7 Bit 6 Bit 5 Bit 4 Bit 3 Bit 2 Bit 1 Bit 0 Page347
2545T–AVR–05/11
ATmega48/88/168
32. Instruction set summary
Mnemonics Operands Description Operation Flags #Clocks
ARITHMETIC AND LOGIC INSTRUCTIONS
ADD Rd, Rr Add two registers Rd ← Rd + Rr Z, C, N, V, H 1
ADC Rd, Rr Add with carry two registers Rd ← Rd + Rr + C Z, C, N, V, H 1
ADIW Rdl,K Add immediate to word Rdh:Rdl ← Rdh:Rdl + K Z, C, N, V, S 2
SUB Rd, Rr Subtract two registers Rd ← Rd - Rr Z, C, N, V, H 1
SUBI Rd, K Subtract constant from register Rd ← Rd - K Z, C, N, V, H 1
SBC Rd, Rr Subtract with carry two registers Rd ← Rd - Rr - C Z, C, N, V, H 1
SBCI Rd, K Subtract with carry constant from reg. Rd ← Rd - K - C Z, C, N, V, H 1
SBIW Rdl,K Subtract immediate from Word Rdh:Rdl ← Rdh:Rdl - K Z, C, N, V, S 2
AND Rd, Rr Logical AND registers Rd ← Rd • Rr Z, N, V 1
ANDI Rd, K Logical AND register and constant Rd ← Rd • K Z, N, V 1
OR Rd, Rr Logical OR registers Rd ← Rd v Rr Z, N, V 1
ORI Rd, K Logical OR register and constant Rd ← Rd v K Z, N, V 1
EOR Rd, Rr Exclusive OR registers Rd ← Rd ⊕ Rr Z, N, V 1
COM Rd One’s complement Rd ← 0xFF − Rd Z, C, N, V 1
NEG Rd Two’s complement Rd ← 0x00 − Rd Z, C, N, V, H 1
SBR Rd,K Set bit(s) in register Rd ← Rd v K Z, N, V 1
CBR Rd,K Clear bit(s) in register Rd ← Rd • (0xFF - K) Z, N, V 1
INC Rd Increment Rd ← Rd + 1 Z, N, V 1
DEC Rd Decrement Rd ← Rd − 1 Z, N, V 1
TST Rd Test for zero or minus Rd ← Rd • Rd Z, N, V 1
CLR Rd Clear register Rd ← Rd ⊕ Rd Z, N, V 1
SER Rd Set register Rd ← 0xFF None 1
MUL Rd, Rr Multiply unsigned R1:R0 ← Rd x Rr Z, C 2
MULS Rd, Rr Multiply signed R1:R0 ← Rd x Rr Z, C 2
MULSU Rd, Rr Multiply signed with unsigned R1:R0 ← Rd x Rr Z, C 2
FMUL Rd, Rr Fractional multiply unsigned R1:R0 ← (Rd x Rr) << 1 Z, C 2
FMULS Rd, Rr Fractional multiply signed R1:R0 ← (Rd x Rr) << 1 Z, C 2
FMULSU Rd, Rr Fractional multiply signed with unsigned R1:R0 ← (Rd x Rr) << 1 Z, C 2
BRANCH INSTRUCTIONS
RJMP k Relative jump PC ← PC + k + 1 None 2
IJMP Indirect jump to (Z) PC ← Z None 2
JMP(1) k Direct jump PC ← k None 3
RCALL k Relative subroutine call PC ← PC + k + 1 None 3
ICALL Indirect call to (Z) PC ← Z None 3
CALL(1) k Direct subroutine call PC ← k None 4
RET Subroutine return PC ← STACK None 4
RETI Interrupt return PC ← STACK I 4
CPSE Rd,Rr Compare, skip if equal if (Rd = Rr) PC ← PC + 2 or 3 None 1/2/3
CP Rd,Rr Compare Rd − Rr Z, N, V, C, H 1
CPC Rd,Rr Compare with carry Rd − Rr − C Z, N, V, C, H 1
CPI Rd,K Compare register with immediate Rd − K Z, N, V, C, H 1
SBRC Rr, b Skip if bit in register cleared if (Rr(b)=0) PC ← PC + 2 or 3 None 1/2/3
SBRS Rr, b Skip if bit in register is set if (Rr(b)=1) PC ← PC + 2 or 3 None 1/2/3
SBIC P, b Skip if bit in I/O register cleared if (P(b)=0) PC ← PC + 2 or 3 None 1/2/3
SBIS P, b Skip if bit in I/O register is set if (P(b)=1) PC ← PC + 2 or 3 None 1/2/3
BRBS s, k Branch if status flag set if (SREG(s) = 1) then PC←PC+k + 1 None 1/2
BRBC s, k Branch if status flag cleared if (SREG(s) = 0) then PC←PC+k + 1 None 1/2
BREQ k Branch if equal if (Z = 1) then PC ← PC + k + 1 None 1/2
BRNE k Branch if not equal if (Z = 0) then PC ← PC + k + 1 None 1/2
BRCS k Branch if carry set if (C = 1) then PC ← PC + k + 1 None 1/2
BRCC k Branch if carry cleared if (C = 0) then PC ← PC + k + 1 None 1/2
BRSH k Branch if same or higher if (C = 0) then PC ← PC + k + 1 None 1/2
BRLO k Branch if lower if (C = 1) then PC ← PC + k + 1 None 1/2
BRMI k Branch if minus if (N = 1) then PC ← PC + k + 1 None 1/2
BRPL k Branch if plus if (N = 0) then PC ← PC + k + 1 None 1/2
BRGE k Branch if greater or equal, signed if (N ⊕ V= 0) then PC ← PC + k + 1 None 1/2
BRLT k Branch if less than zero, signed if (N ⊕ V= 1) then PC ← PC + k + 1 None 1/2
BRHS k Branch if half carry flag set if (H = 1) then PC ← PC + k + 1 None 1/2
BRHC k Branch if half carry flag cleared if (H = 0) then PC ← PC + k + 1 None 1/2
BRTS k Branch if T flag set if (T = 1) then PC ← PC + k + 1 None 1/2
BRTC k Branch if T flag cleared if (T = 0) then PC ← PC + k + 1 None 1/2
BRVS k Branch if overflow flag is set if (V = 1) then PC ← PC + k + 1 None 1/2
BRVC k Branch if overflow flag is cleared if (V = 0) then PC ← PC + k + 1 None 1/2348
2545T–AVR–05/11
ATmega48/88/168
BRIE k Branch if interrupt enabled if ( I = 1) then PC ← PC + k + 1 None 1/2
BRID k Branch if interrupt disabled if ( I = 0) then PC ← PC + k + 1 None 1/2
BIT AND BIT-TEST INSTRUCTIONS
SBI P,b Set bit in I/O register I/O(P,b) ← 1 None 2
CBI P,b Clear bit in I/O register I/O(P,b) ← 0 None 2
LSL Rd Logical shift left Rd(n+1) ← Rd(n), Rd(0) ← 0 Z, C, N, V 1
LSR Rd Logical shift right Rd(n) ← Rd(n+1), Rd(7) ← 0 Z, C, N, V 1
ROL Rd Rotate left through carry Rd(0)←C,Rd(n+1)← Rd(n),C←Rd(7) Z, C, N, V 1
ROR Rd Rotate right through carry Rd(7)←C,Rd(n)← Rd(n+1),C←Rd(0) Z, C, N, V 1
ASR Rd Arithmetic shift right Rd(n) ← Rd(n+1), n=0..6 Z, C, N, V 1
SWAP Rd Swap nibbles Rd(3..0)←Rd(7..4),Rd(7..4)←Rd(3..0) None 1
BSET s Flag set SREG(s) ← 1 SREG(s) 1
BCLR s Flag clear SREG(s) ← 0 SREG(s) 1
BST Rr, b Bit store from register to T T ← Rr(b) T 1
BLD Rd, b Bit load from T to register Rd(b) ← T None 1
SEC Set carry C ← 1 C1
CLC Clear carry C ← 0 C 1
SEN Set negative flag N ← 1 N1
CLN Clear negative flag N ← 0 N 1
SEZ Set zero flag Z ← 1 Z1
CLZ Clear zero flag Z ← 0 Z 1
SEI Global interrupt enable I ← 1 I1
CLI Global interrupt disable I ← 0 I 1
SES Set signed test flag S ← 1 S1
CLS Clear signed test flag S ← 0 S 1
SEV Set Twos complement overflow V ← 1 V1
CLV Clear Twos complement overflow V ← 0 V 1
SET Set T in SREG T ← 1 T1
CLT Clear T in SREG T ← 0 T 1
SEH Set half carry flag in SREG H ← 1 H1
CLH Clear half carry flag in SREG H ← 0 H 1
DATA TRANSFER INSTRUCTIONS
MOV Rd, Rr Move between registers Rd ← Rr None 1
MOVW Rd, Rr Copy register Word Rd+1:Rd ← Rr+1:Rr None 1
LDI Rd, K Load immediate Rd ← K None 1
LD Rd, X Load indirect Rd ← (X) None 2
LD Rd, X+ Load indirect and post-inc. Rd ← (X), X ← X + 1 None 2
LD Rd, - X Load indirect and pre-dec. X ← X - 1, Rd ← (X) None 2
LD Rd, Y Load indirect Rd ← (Y) None 2
LD Rd, Y+ Load indirect and post-inc. Rd ← (Y), Y ← Y + 1 None 2
LD Rd, - Y Load indirect and pre-dec. Y ← Y - 1, Rd ← (Y) None 2
LDD Rd,Y+q Load indirect with displacement Rd ← (Y + q) None 2
LD Rd, Z Load indirect Rd ← (Z) None 2
LD Rd, Z+ Load indirect and post-inc. Rd ← (Z), Z ← Z+1 None 2
LD Rd, -Z Load indirect and pre-dec. Z ← Z - 1, Rd ← (Z) None 2
LDD Rd, Z+q Load indirect with displacement Rd ← (Z + q) None 2
LDS Rd, k Load direct from SRAM Rd ← (k) None 2
ST X, Rr Store indirect (X) ← Rr None 2
ST X+, Rr Store indirect and post-inc. (X) ← Rr, X ← X + 1 None 2
ST - X, Rr Store indirect and pre-dec. X ← X - 1, (X) ← Rr None 2
ST Y, Rr Store indirect (Y) ← Rr None 2
ST Y+, Rr Store indirect and post-inc. (Y) ← Rr, Y ← Y + 1 None 2
ST - Y, Rr Store indirect and pre-dec. Y ← Y - 1, (Y) ← Rr None 2
STD Y+q,Rr Store indirect with displacement (Y + q) ← Rr None 2
ST Z, Rr Store indirect (Z) ← Rr None 2
ST Z+, Rr Store indirect and post-inc. (Z) ← Rr, Z ← Z + 1 None 2
ST -Z, Rr Store indirect and pre-dec. Z ← Z - 1, (Z) ← Rr None 2
STD Z+q,Rr Store indirect with displacement (Z + q) ← Rr None 2
STS k, Rr Store direct to SRAM (k) ← Rr None 2
LPM Load program memory R0 ← (Z) None 3
LPM Rd, Z Load program memory Rd ← (Z) None 3
LPM Rd, Z+ Load program memory and post-inc Rd ← (Z), Z ← Z+1 None 3
SPM Store program memory (Z) ← R1:R0 None -
IN Rd, P In port Rd ← P None 1
OUT P, Rr Out port P ← Rr None 1
PUSH Rr Push register on stack STACK ← Rr None 2
Mnemonics Operands Description Operation Flags #Clocks349
2545T–AVR–05/11
ATmega48/88/168
Note: 1. These instructions are only available in Atmel ATmega168.
POP Rd Pop register from stack Rd ← STACK None 2
MCU CONTROL INSTRUCTIONS
NOP No operation None 1
SLEEP Sleep (See specific descr. for sleep function) None 1
WDR Watchdog reset (See specific descr. for WDR/timer) None 1
BREAK Break For on-chip debug only None N/A
Mnemonics Operands Description Operation Flags #Clocks350
2545T–AVR–05/11
ATmega48/88/168
33. Ordering information
33.1 Atmel ATmega48
Note: 1. This device can also be supplied in wafer form. Please contact your local Atmel sales office for detailed ordering information
and minimum quantities.
2. Pb-free packaging alternative, complies to the European Directive for Restriction of Hazardous Substances (RoHS directive).
Also Halide free and fully Green.
3. See Figure 29-1 on page 305 and Figure 29-2 on page 305.
4. NiPdAu lead finish.
5. Tape & Reel.
Speed (MHz) Power supply Ordering code(2) Package(1) Operational range
10(3) 1.8V - 5.5V
ATmega48V-10AUR(5)
ATmega48V-10MUR(5)
ATmega48V-10AU
ATmega48V-10MMU
ATmega48V-10MMUR(5)
ATmega48V-10MMH(4)
ATmega48V-10MMHR(4)(5)
ATmega48V-10MU
ATmega48V-10PU
